Printable Version of Topic
Click here to view this topic in its original format
914World.com _ 914World Garage _ Another 6 Emerging from the Black Hole Slowly coming back to Earth
Posted by: rick 918-S Sep 8 2021, 07:33 PM
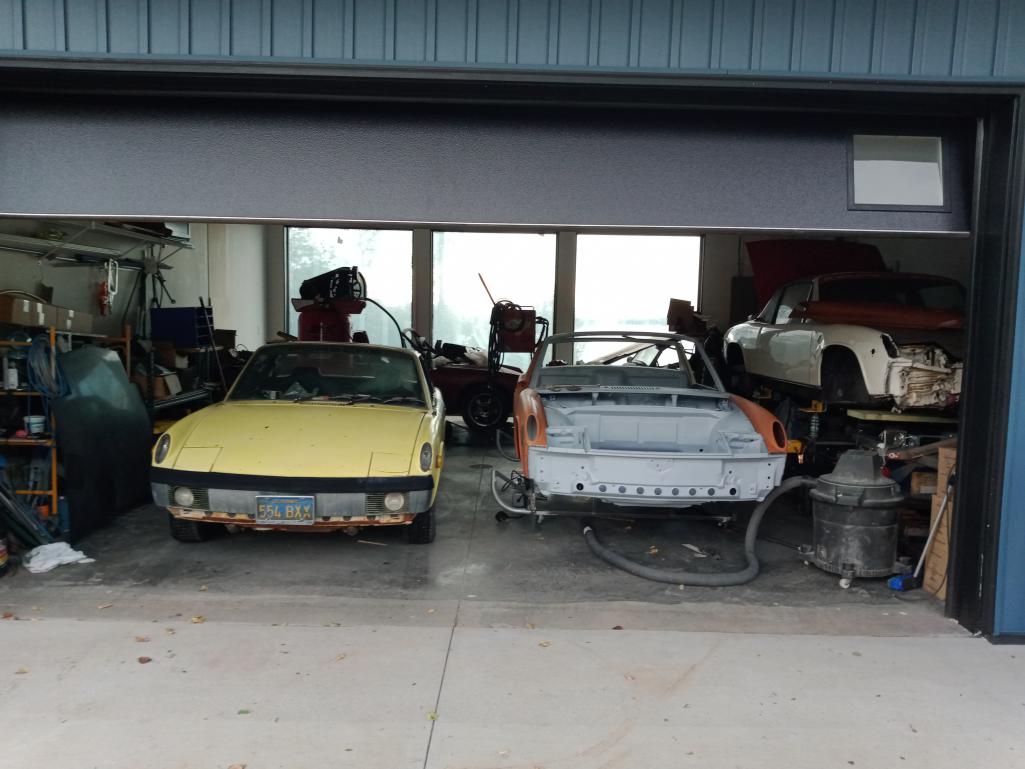
This factory 6 managed to escape the forces pulling it into a black hole never to be seen again. It was not without every ounce of thrust it could muster and it was not without suffering a considerable amount of damage. The crew patched it back together the best they could with primitive tools and scrap they found floating in space. fortunately they crash landed in easy reach of the secret facility known as Area51Werks. The owner is someone you may or may not know. Juergen Lives in Washington. The car will eventually end up on the other side of the pond. But for now it is on it's way to the final stages of completion. It was not like this in the beginning....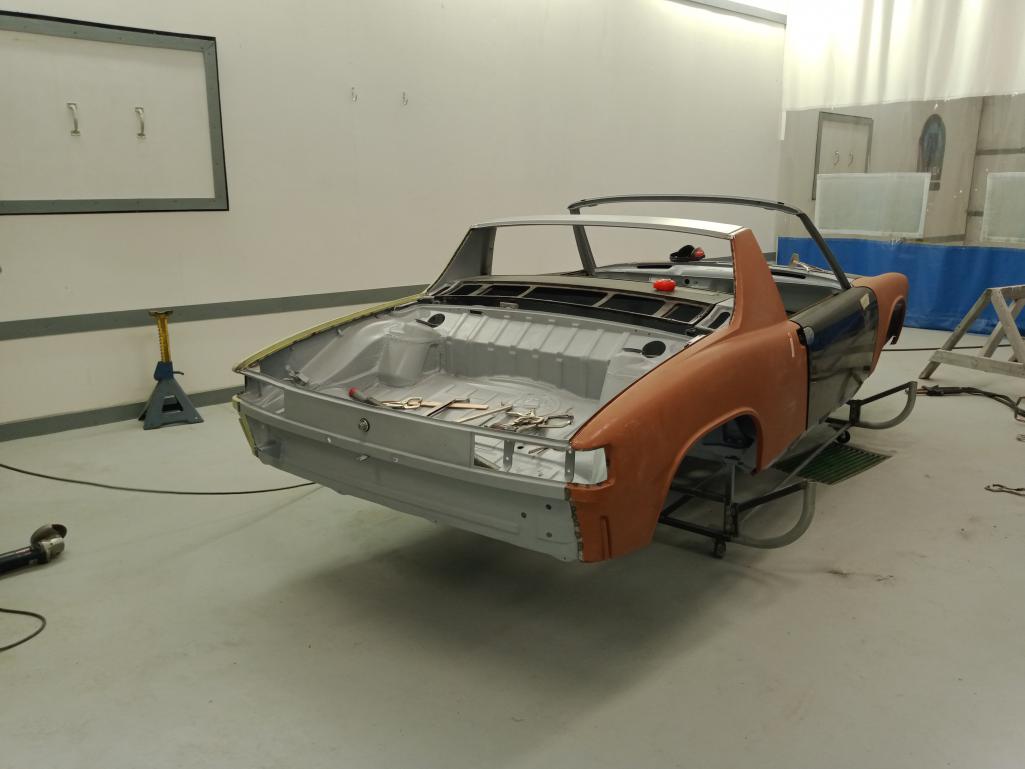
Posted by: rick 918-S Sep 8 2021, 07:35 PM
Posted by: rick 918-S Sep 8 2021, 07:37 PM
Posted by: bigkensteele Sep 8 2021, 07:39 PM

Digging the new shop Rick! Looking forward to many updates on all the residents of the Area!
Posted by: rick 918-S Sep 8 2021, 07:45 PM
The location pictured is 50 miles from the base in a remote rural town called Kelsey MN. Hidden among the farming fields is a dream shop owned by a life long friend. He is the guy dressed like a little green man with a jet powered blaster cleaning the chassis to the bones.
Posted by: rick 918-S Sep 8 2021, 07:49 PM

Digging the new shop Rick! Looking forward to many updates on all the residents of the Area!
Alas this appears to be the last one Area51Werks will save.
 The new hobby shop is too small to take on big projects anymore. My back issue is not getting any better these days and I need to pace myself.
Posted by: rick 918-S Sep 8 2021, 07:52 PM
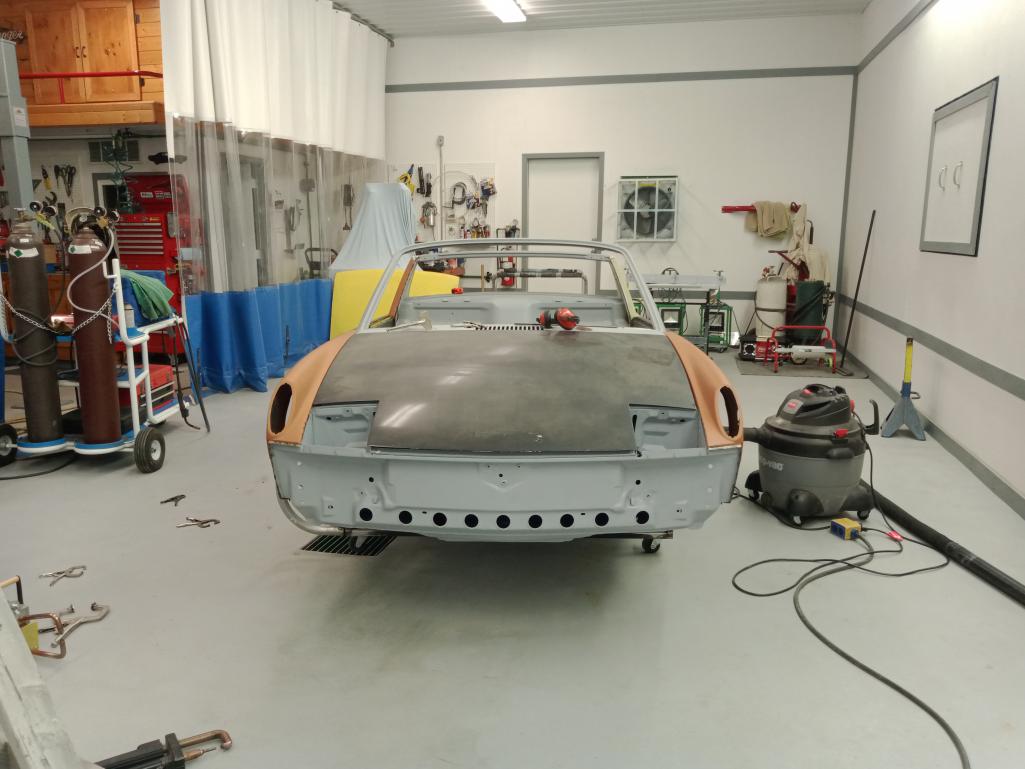
Now some scenes from the wreckage.
Never say Never. We can save her. We can make her better than new.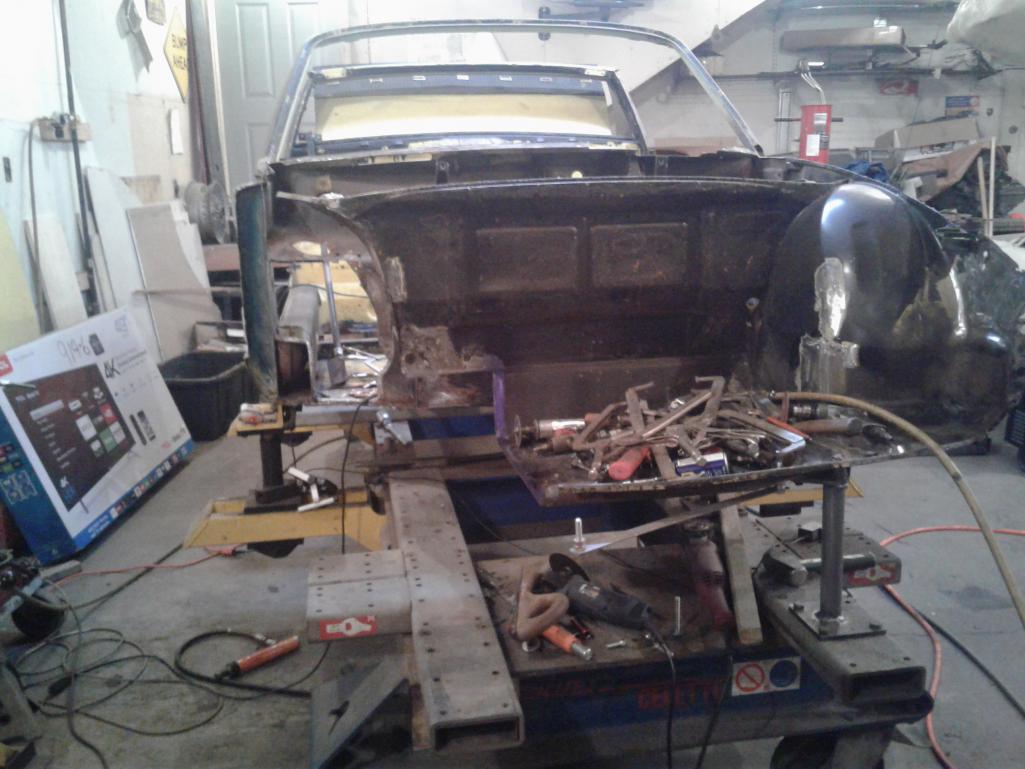
Posted by: rick 918-S Sep 8 2021, 07:53 PM
Posted by: rick 918-S Sep 8 2021, 07:55 PM
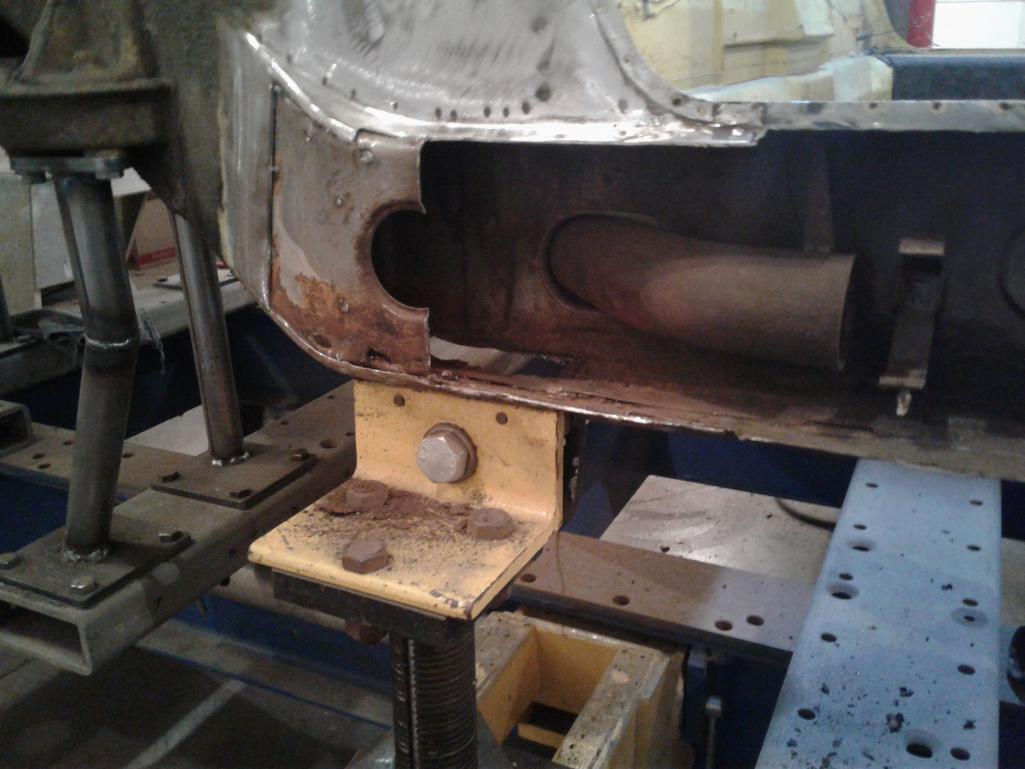
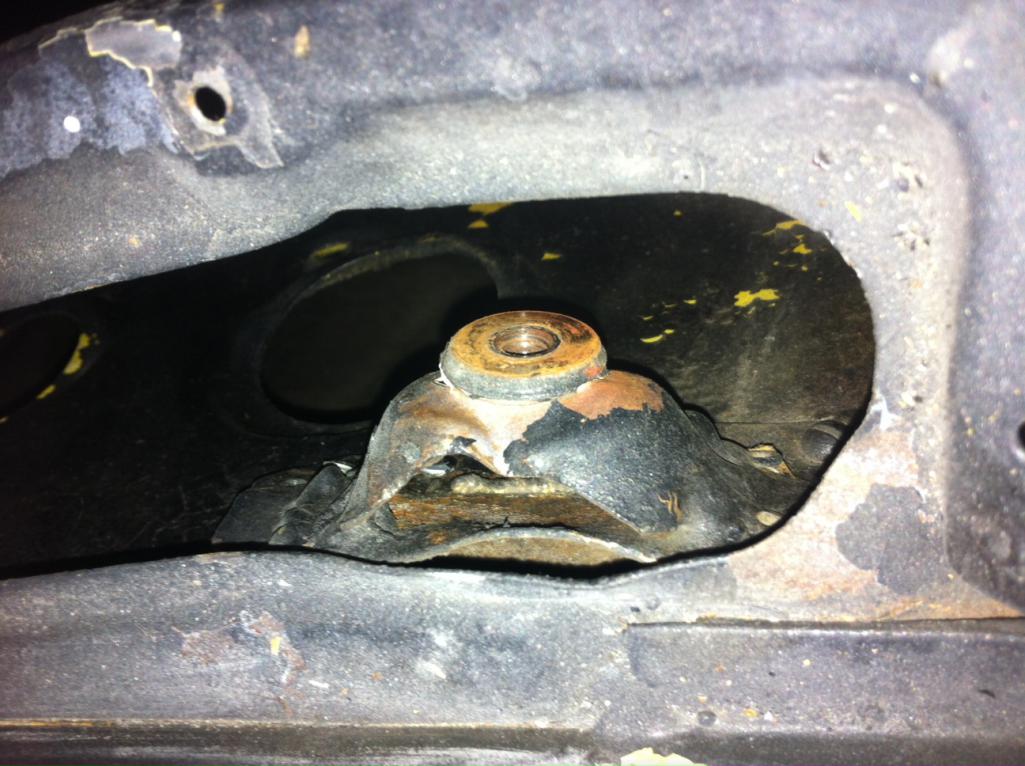
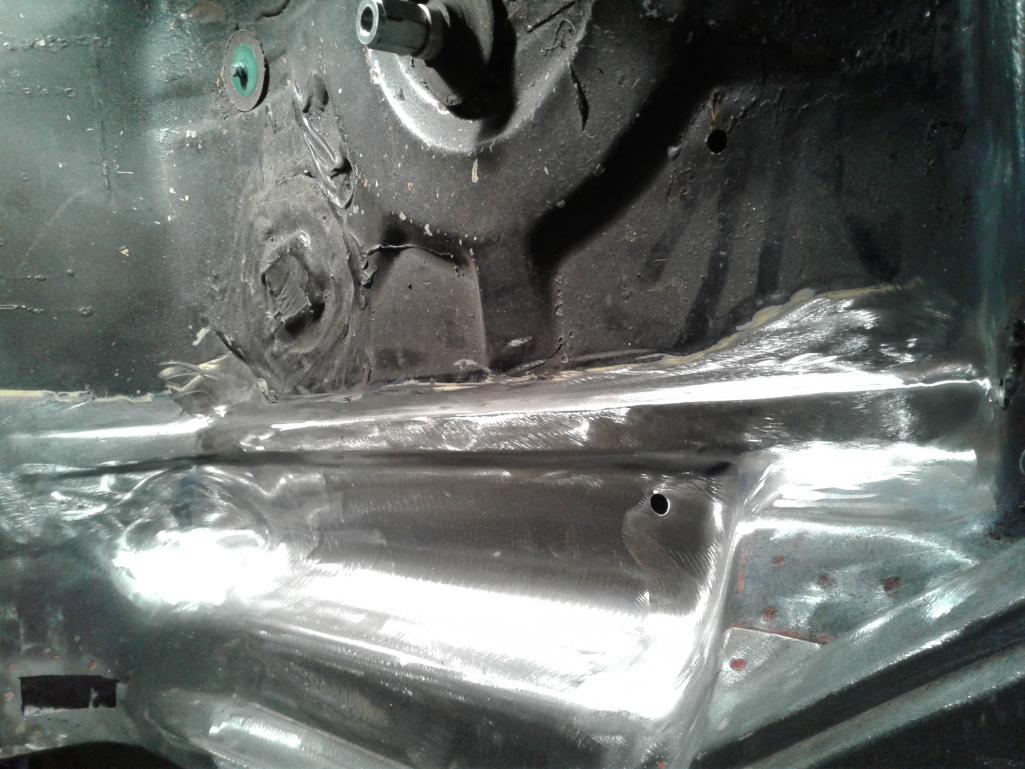
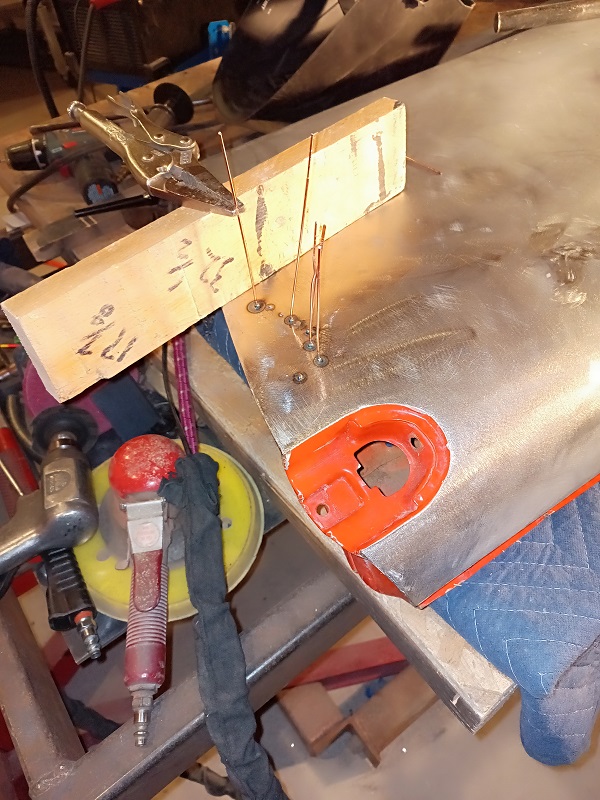
Some work from space where the early crews patch work was hidden under a layer of roofing tar. Or was it some nasty secretion from some unknown species. 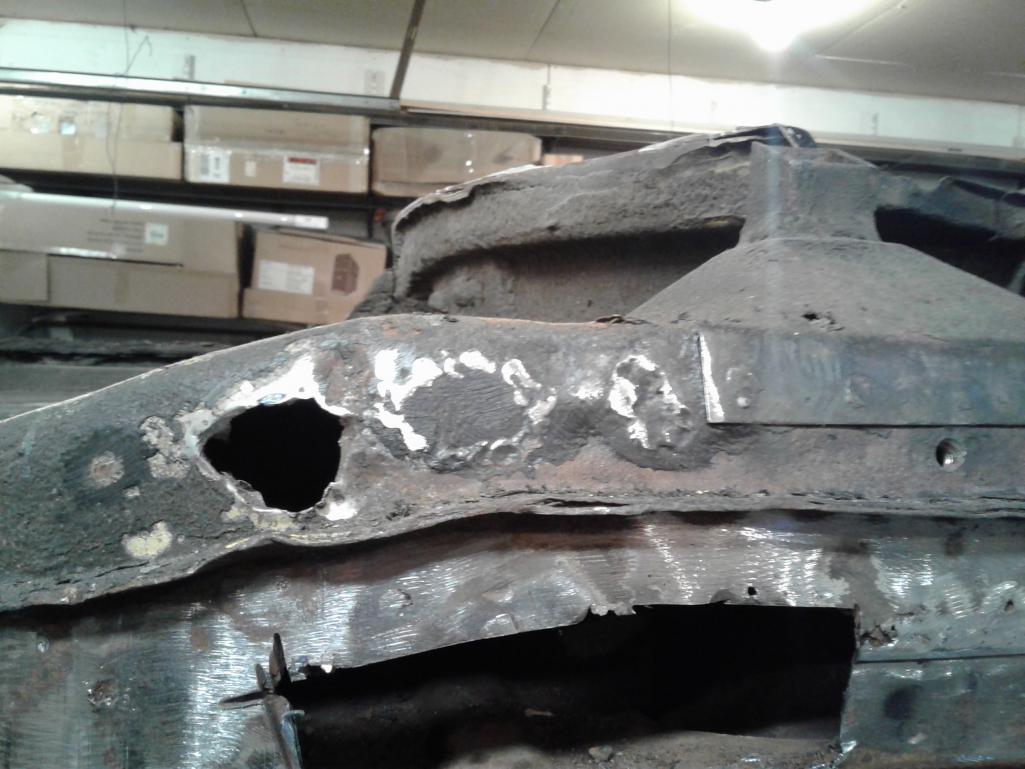
Posted by: rick 918-S Sep 8 2021, 07:58 PM
These do not belong on a 914. they were fashioned from scraps off the USS Enterprise. Her debris was found just outside the Milky Way.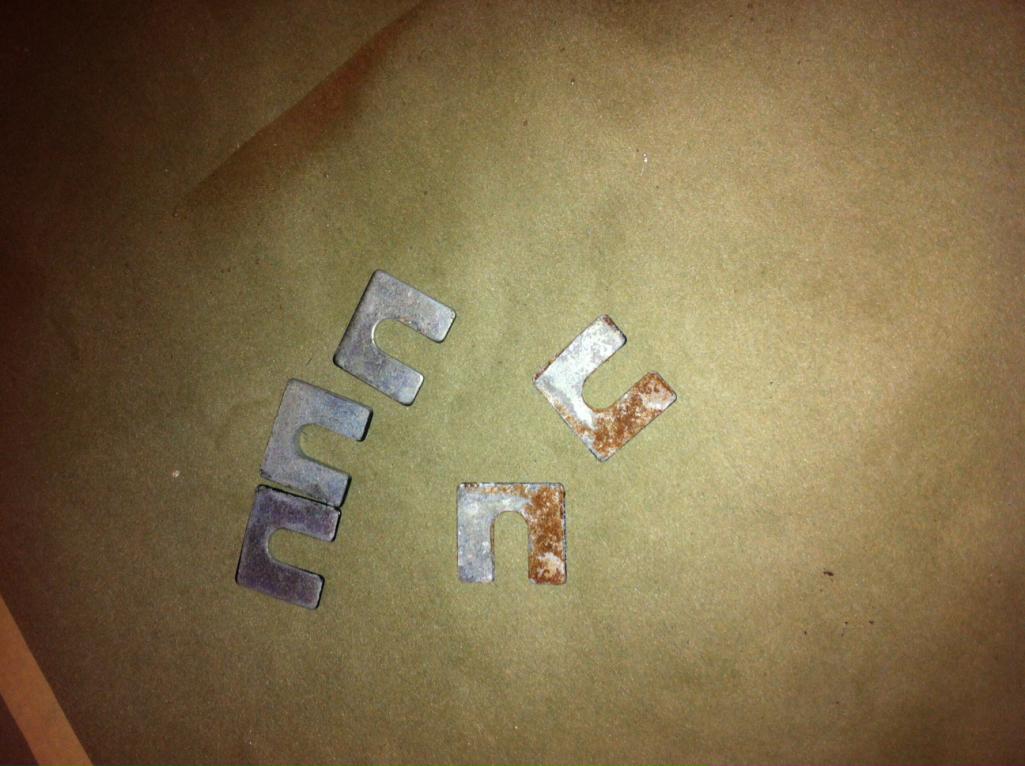
Posted by: rick 918-S Sep 8 2021, 08:06 PM
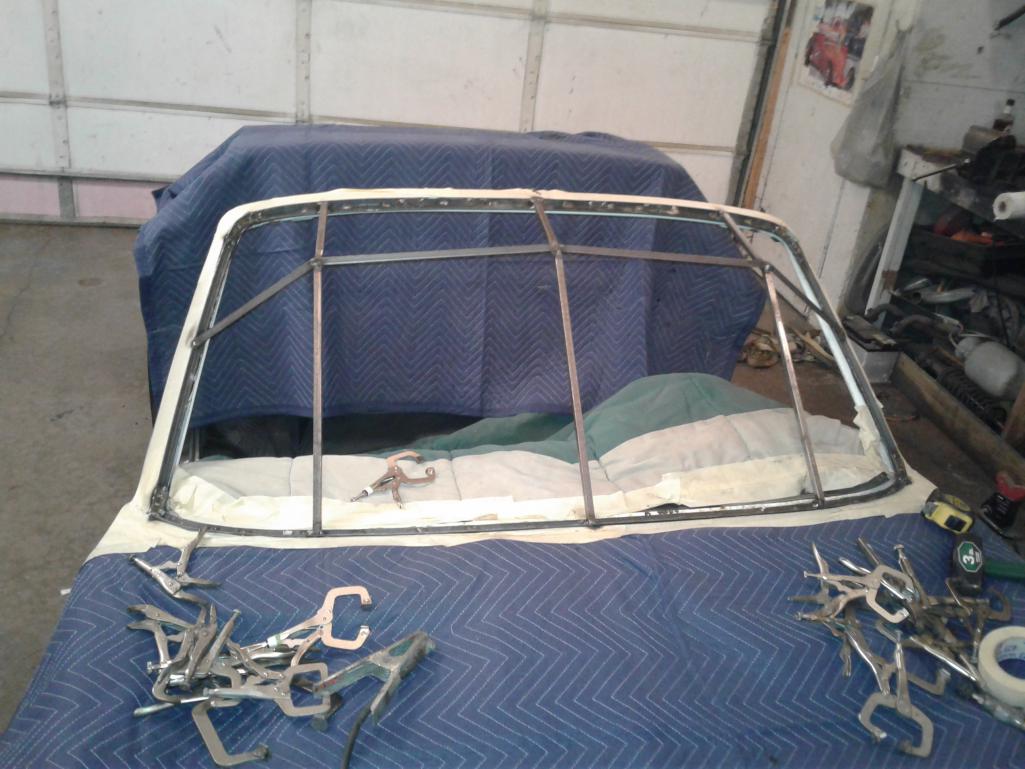
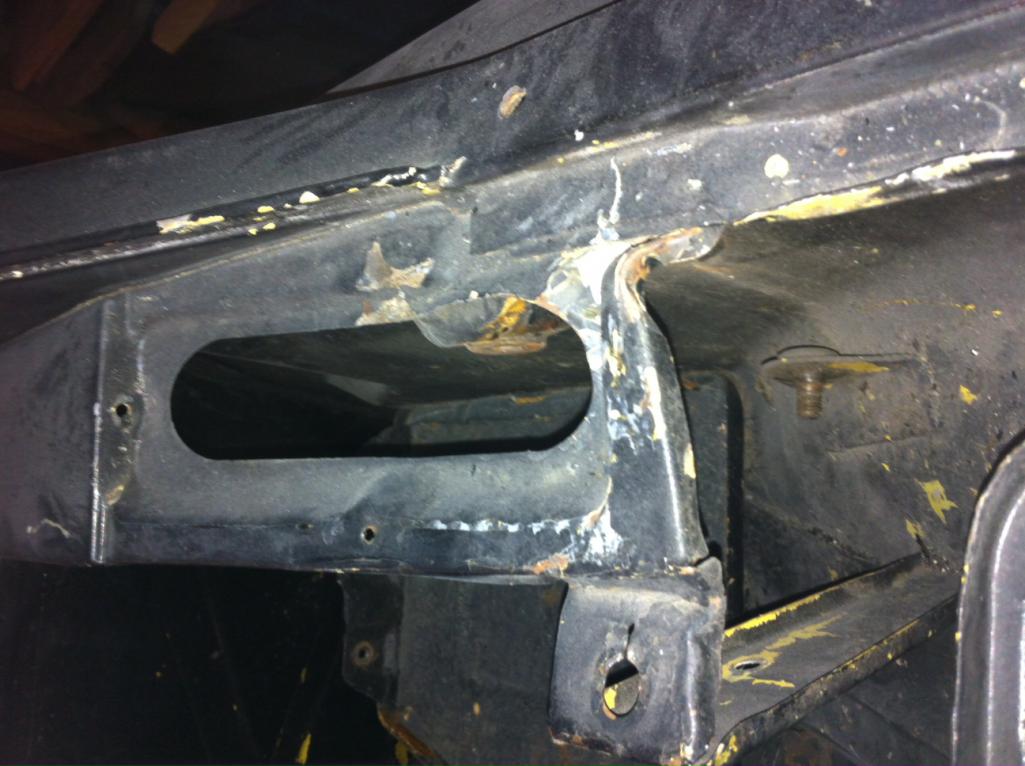
The Alien offered her windshield opening to fashion a fixture as the car from the black hole suffered some serious cowl top damage. 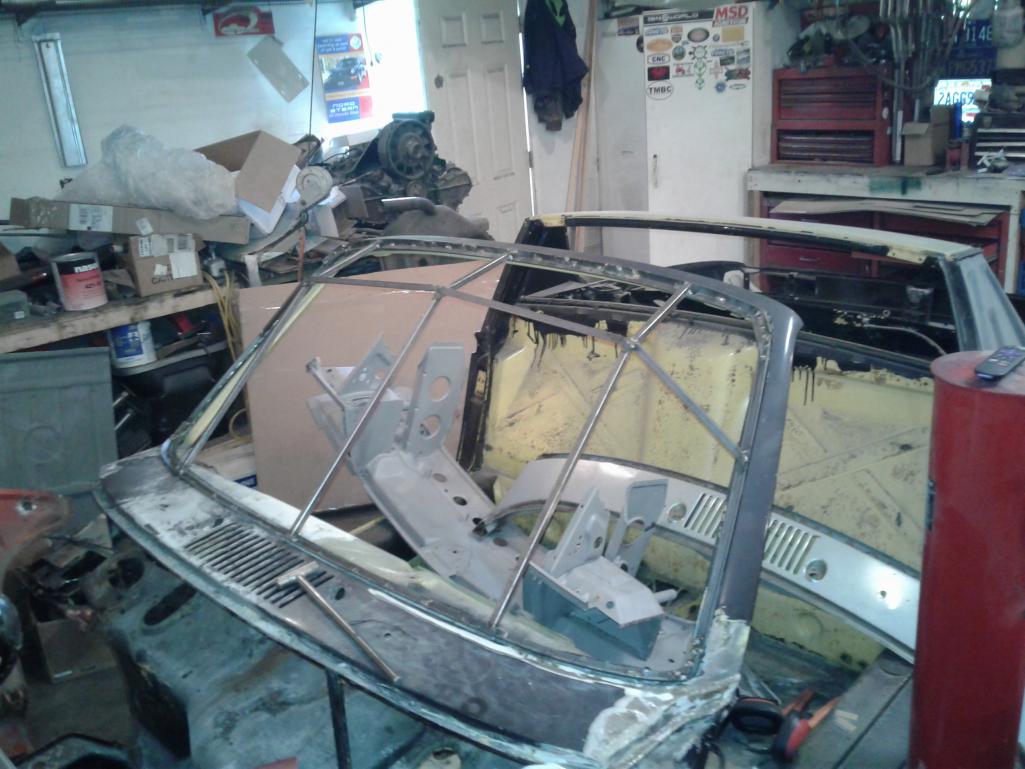
Posted by: rick 918-S Sep 8 2021, 08:08 PM
The Alien 
Posted by: rick 918-S Sep 8 2021, 08:09 PM

Posted by: sixnotfour Sep 8 2021, 08:10 PM

 I gotta get busy...
Posted by: rick 918-S Sep 8 2021, 08:17 PM
Hard to take it apart this far without fixtures. I owe a special debt of gratitude to McMark who fashioned a set of fixtures using his set as a way of the holding a straight car in his shop while building these for me. Mark is one awesome guy with loads of talent. 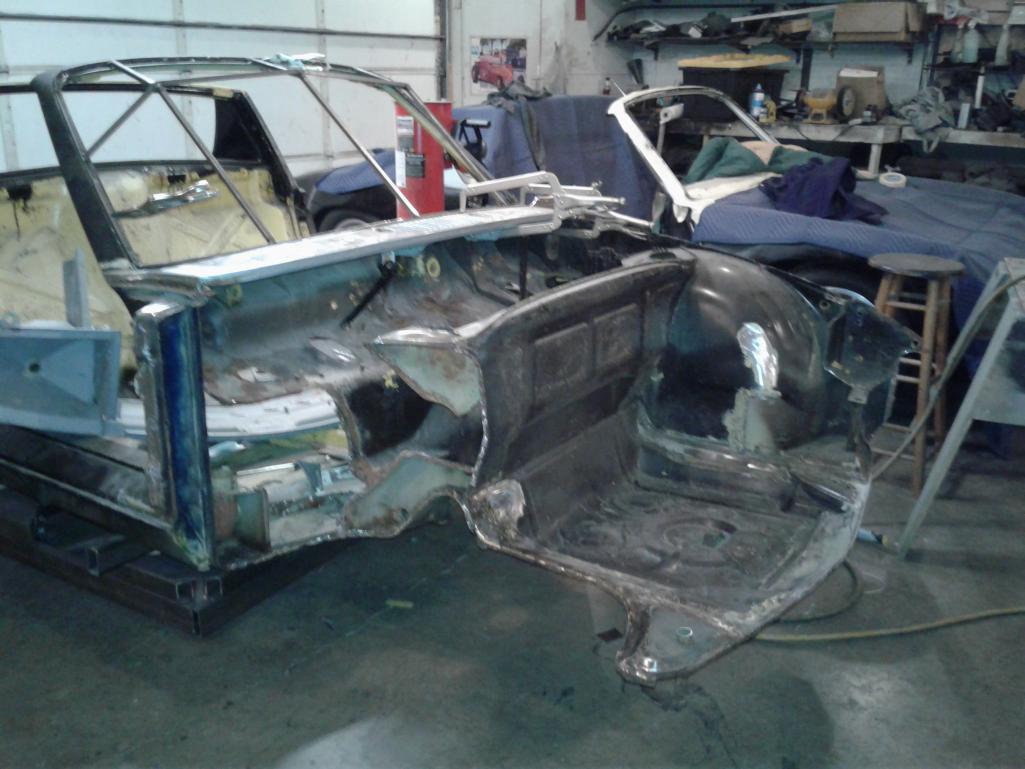
Posted by: rick 918-S Sep 8 2021, 08:21 PM
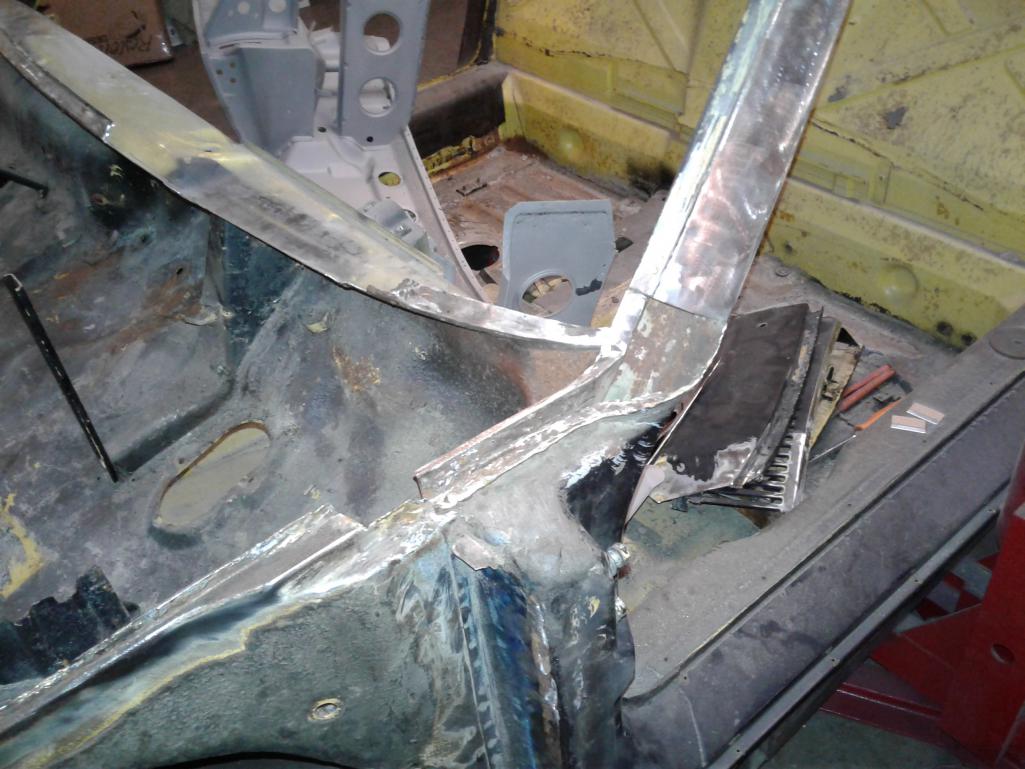
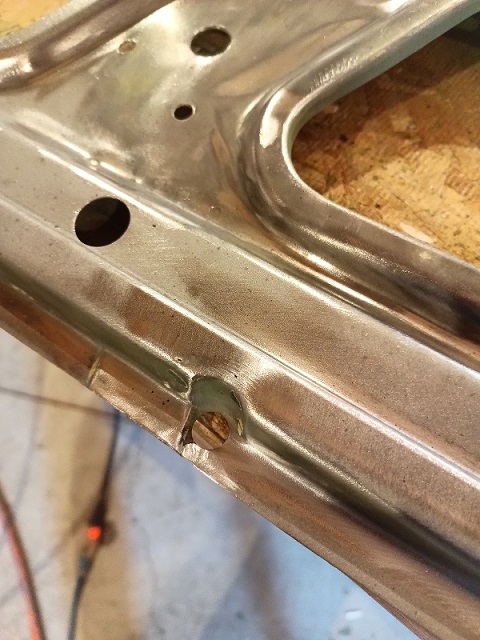
Starting to go back together. This right section was damaged and brazed all along the attachment flange. No other way to get rid of the mess without sectioning in a new part. 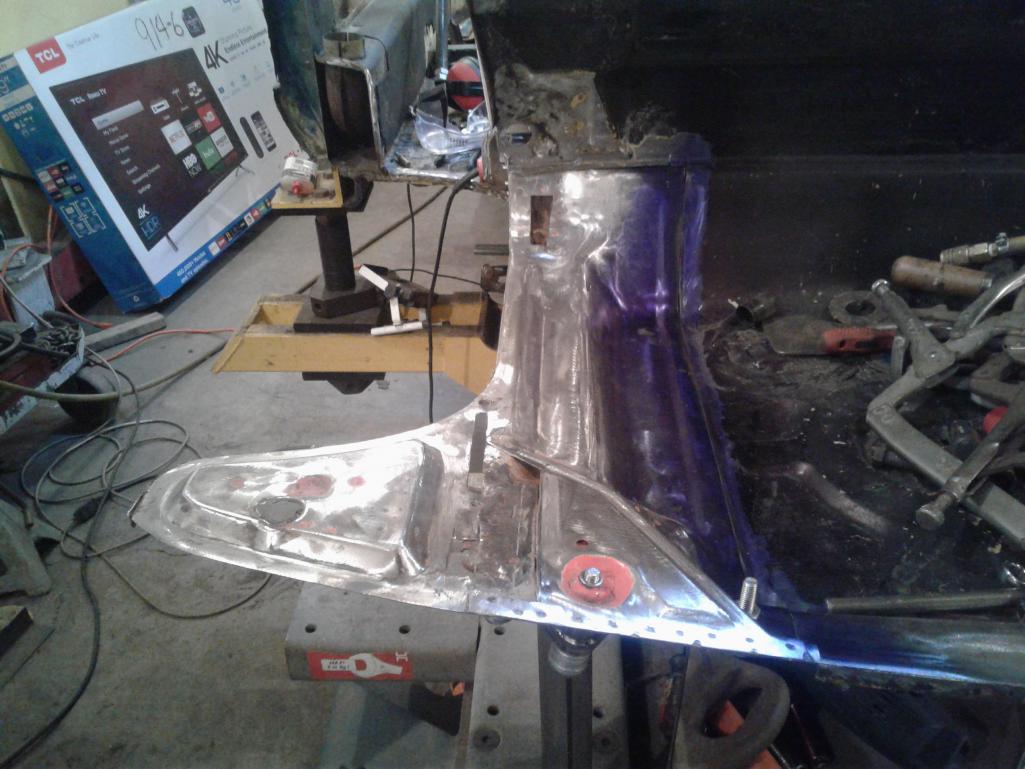
Posted by: rick 918-S Sep 8 2021, 08:24 PM
Sectioned Tig welded and metal finished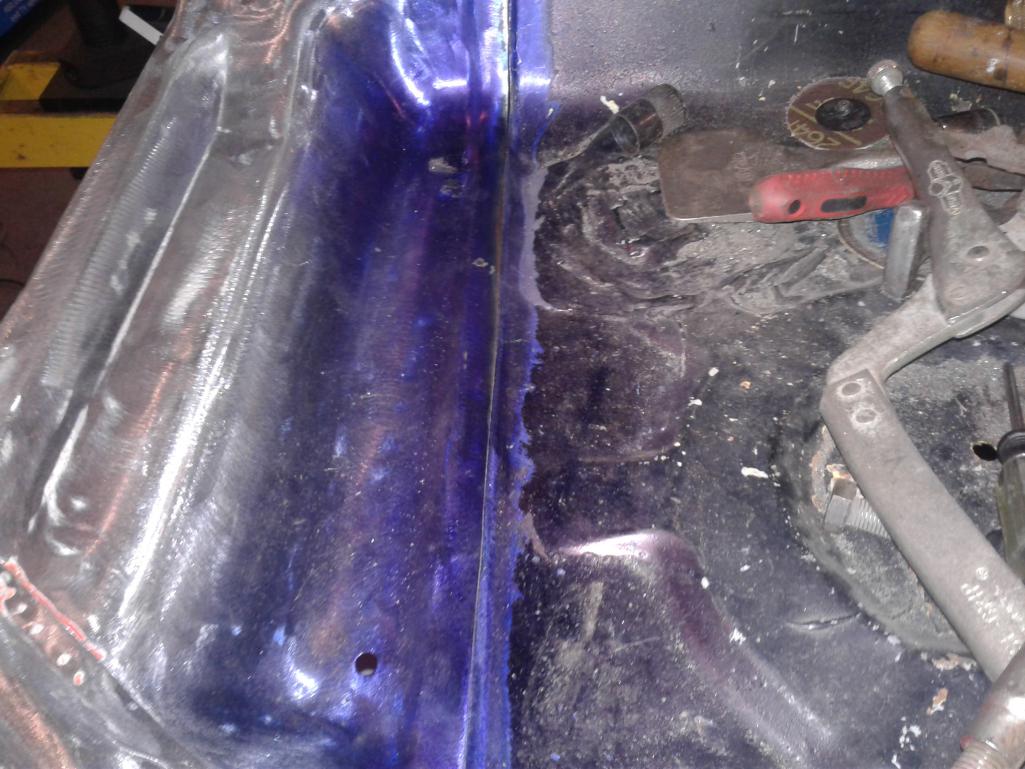
Posted by: rick 918-S Sep 8 2021, 08:29 PM
The Crew did their best with what they had. Hard to locate the correct length bolts in space. 
Posted by: rick 918-S Sep 8 2021, 08:36 PM
While on the way to Area51Werks the car encounters turbulence. the rear lid flew open while being shuttled backwards. The end result was not pretty. The rear lid did not make the eventual repair list and was relegated to the trash stream somewhere in Orion's Belt.
Posted by: rick 918-S Sep 8 2021, 08:45 PM
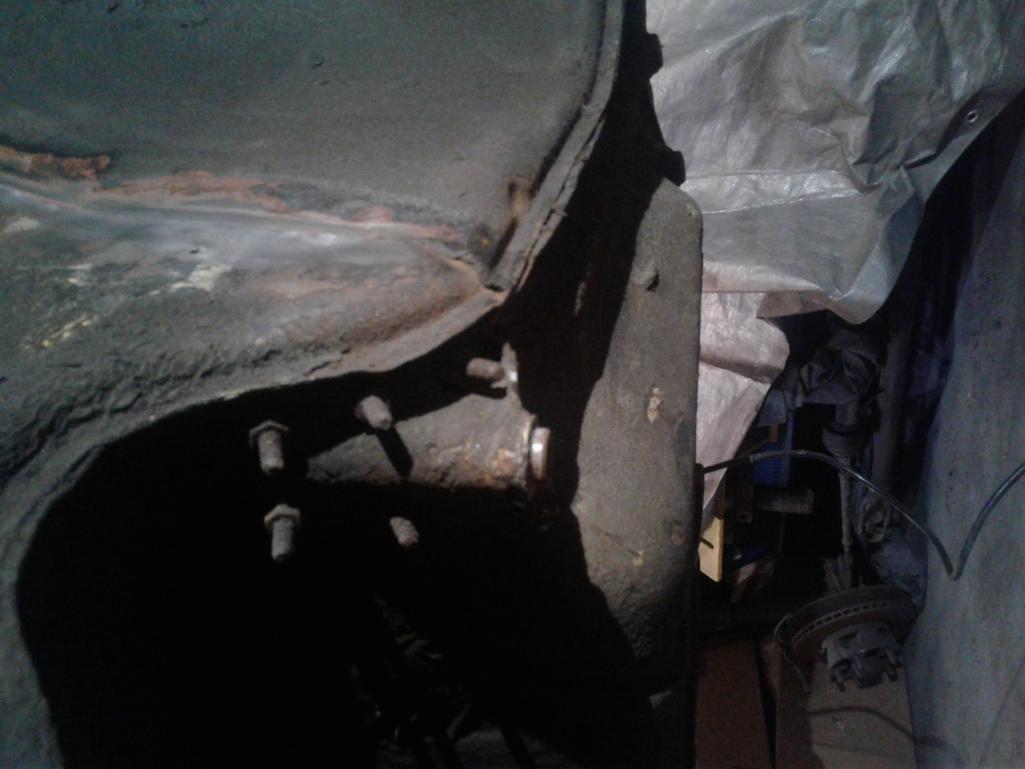
Attacked by space mice. they bored into every opening they could find. 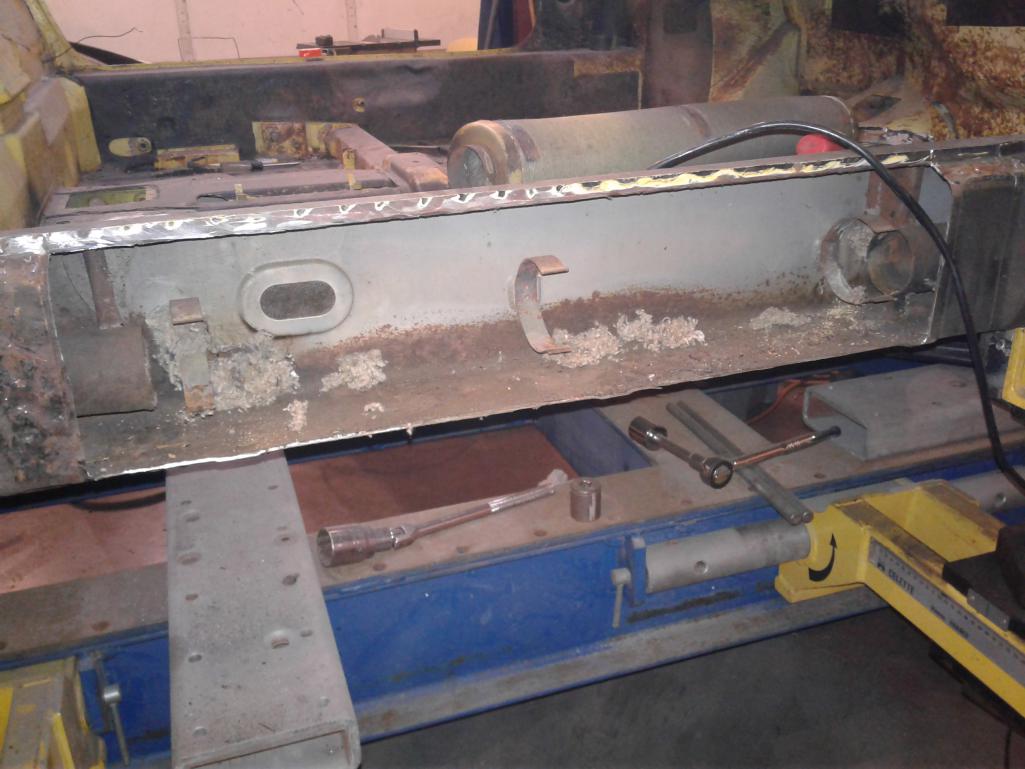
Posted by: rick 918-S Sep 8 2021, 08:51 PM
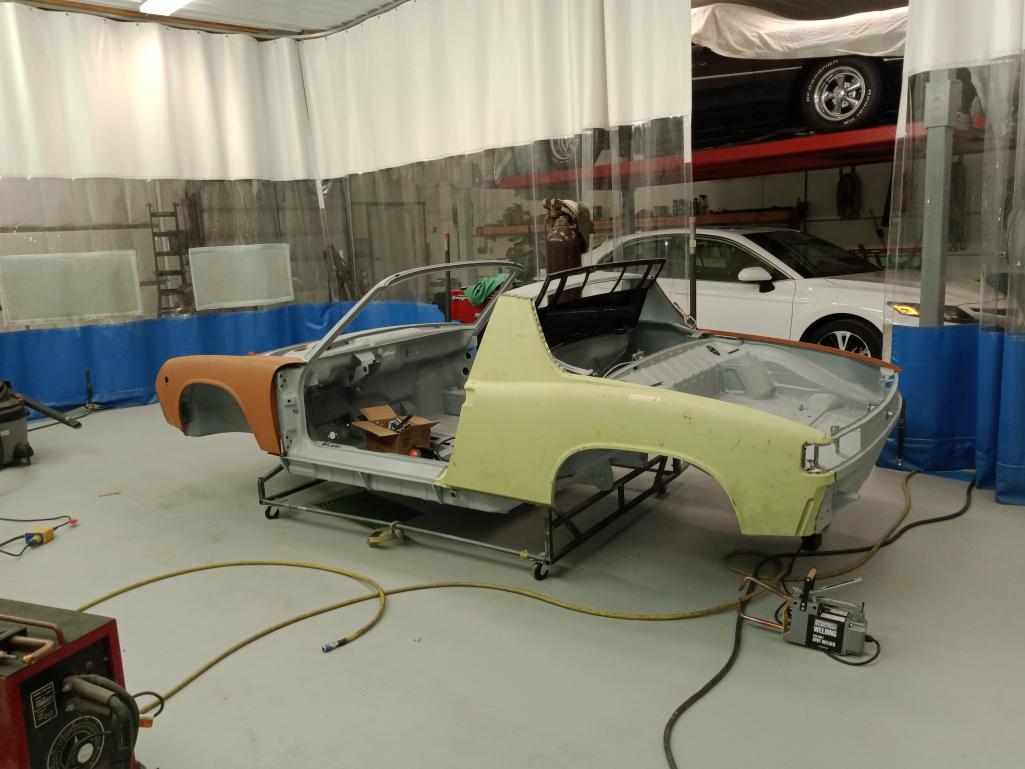
Painstaking repairs were underway. It is hard to show every aspect of the amount of work that went into making a seamless repair. This section went all the way to the footwell.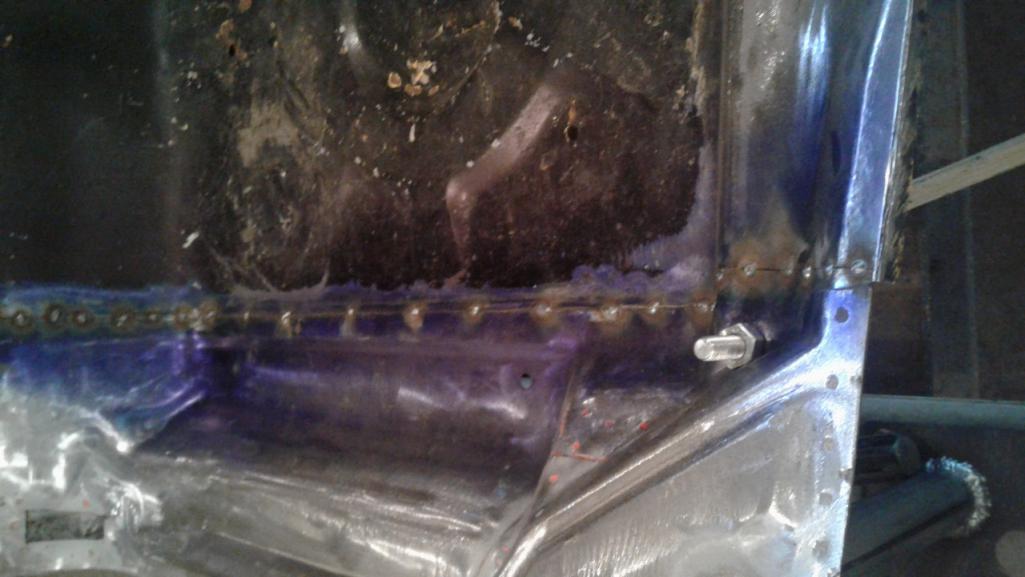
Posted by: rick 918-S Sep 8 2021, 08:58 PM
I made a fixture to locate the part as it passed under the fuel cell. I split the floor and sectioned the part using the fixtures to align everything.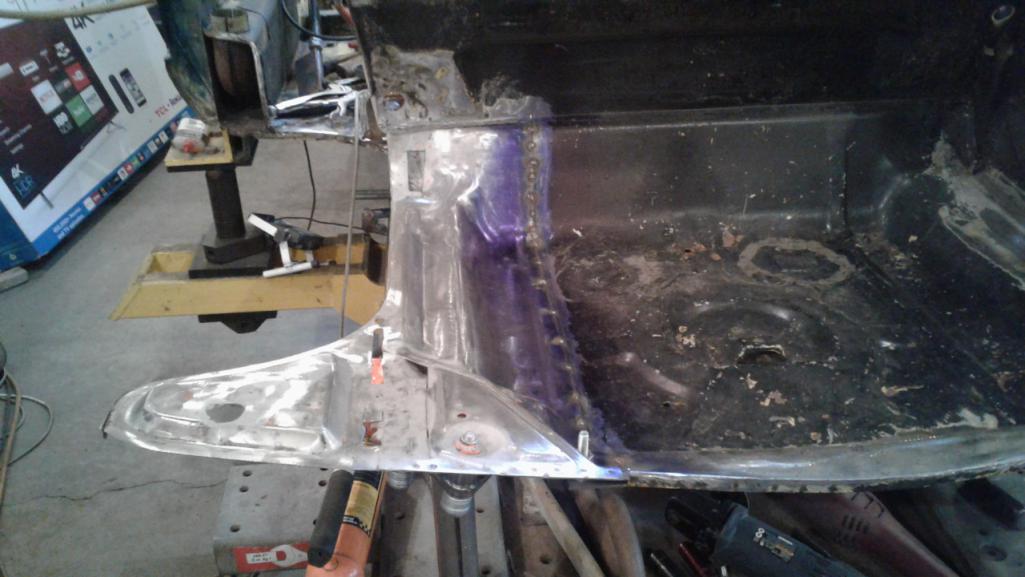

Posted by: rick 918-S Sep 8 2021, 09:05 PM
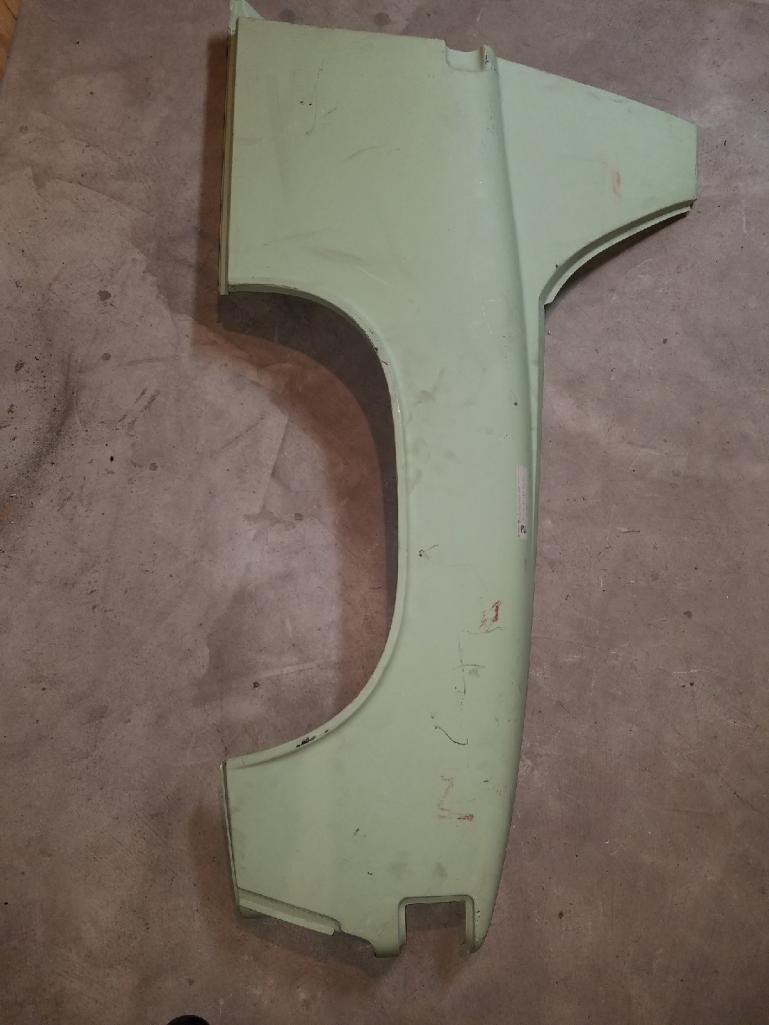
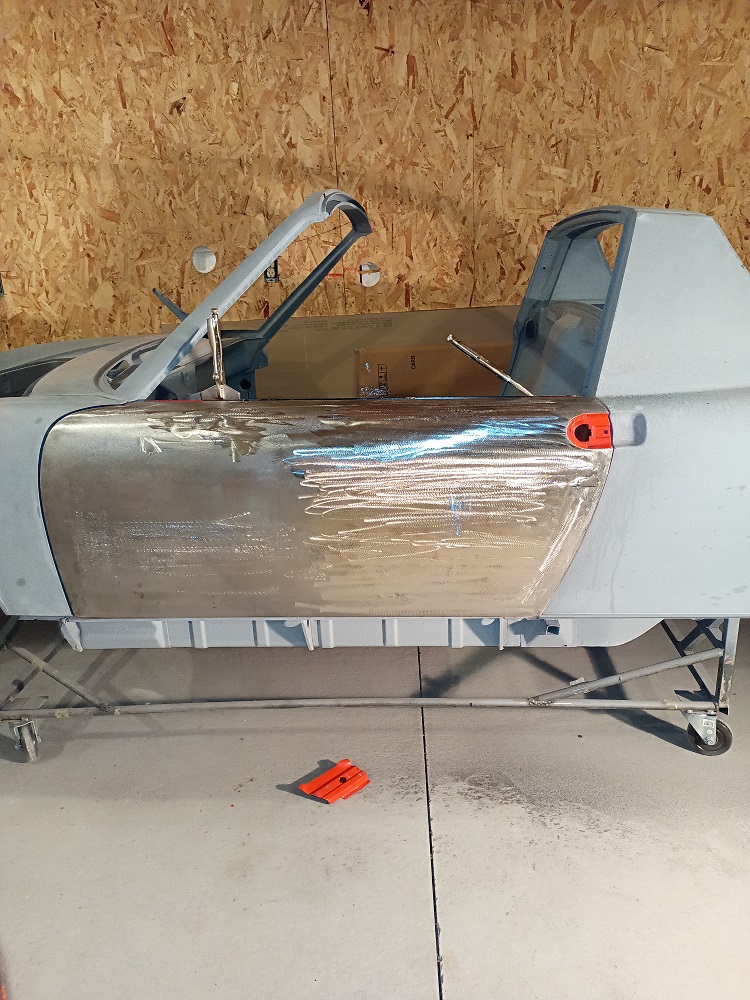
Without the generosity and passion for these cars the project would have been stalled while hunting down suitable used donor parts. Thanks to Glenn Stazak and Peter at Restoration Design this car received all new NOS fenders and quarter panels. All the panels were spot welded like the factory.
Posted by: rick 918-S Sep 8 2021, 09:07 PM
Stay tuned as this space wrecked factory 6 goes into the finishing stages.
Posted by: SirAndy Sep 8 2021, 09:30 PM
Stay tuned as this space wrecked factory 6 goes into the finishing stages.

Posted by: wonkipop Sep 9 2021, 04:16 AM
fark
beam me up scotty
Posted by: Cairo94507 Sep 9 2021, 07:07 AM
Absolutely stunning work. That is going to be one beautiful 6. Looking forward to watching this come together. ![popcorn[1].gif](style_emoticons/default/popcorn[1].gif)
Posted by: Chris H. Sep 9 2021, 08:01 AM
 yeah that one was really crunched up front...looks great Rick!
Posted by: Luke M Sep 9 2021, 08:35 AM
Dang it all Rick, slow it down would you. You're at warp speed cpt. and she can't take it anymore.... 
Seriously the work looks great. I need to get back to my 6 repairs now that I see your thread. Keep up the great work and keep the pics coming.
Posted by: rhodyguy Sep 9 2021, 08:36 AM
Deep on that one. Long trip home. East or west.
Posted by: Root_Werks Sep 9 2021, 09:14 AM
Can't wait to see some updates!
Posted by: rick 918-S Sep 9 2021, 09:22 AM
Deep on that one. Long trip home. East or west.
West in your direction.

Posted by: Daiberl Sep 9 2021, 10:14 AM
Rick did absolutely amazing work, can't wait to get her back!
Posted by: Montreal914 Sep 9 2021, 07:46 PM
Amazing work!
Thank you for sharing. Just wished I had 1% of the talent. 
Posted by: watsonrx13 Sep 10 2021, 09:16 AM
Fantastic work Rick. Looking forward to following this thread.
Posted by: Dave_Darling Sep 11 2021, 07:30 PM
Is this the car that Andy had out here a number of years ago?
--DD
Posted by: rick 918-S Sep 11 2021, 07:40 PM
Is this the car that Andy had out here a number of years ago?
--DD
No McMark has his 6.
Posted by: KELTY360 Sep 11 2021, 10:04 PM
Nice work Rick. I remember Juergen's car when it was prowling the PNW. I hesitate to ask what happened to that -6 you got in SoCal after it was centered on a post.
Posted by: rick 918-S Sep 12 2021, 05:49 AM
Nice work Rick. I remember Juergen's car when it was prowling the PNW. I hesitate to ask what happened to that -6 you got in SoCal after it was centered on a post.
I have it. Sourcing parts. It's on the Celette.
Posted by: euro911 Sep 12 2021, 12:58 PM
I need to find someone out here in So Cal, or possibly the PHX area who has a Celette bench that 'HOWARD' can schedule a session on 
Any recommendations? 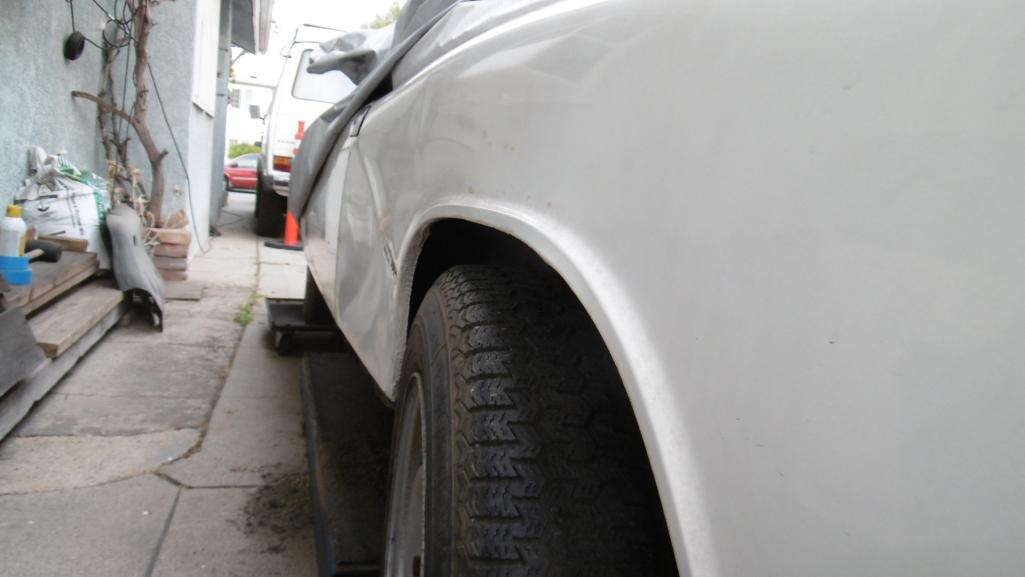
Posted by: Cairo94507 Sep 12 2021, 07:16 PM
Well, not in SoCal but in Oakland there is a Celette bench at Moal Coach builders. They just had a 914-6 on it. Just a thought- it's 6 hours north of you and maybe an option.
Posted by: KELTY360 Sep 12 2021, 08:53 PM
Nice work Rick. I remember Juergen's car when it was prowling the PNW. I hesitate to ask what happened to that -6 you got in SoCal after it was centered on a post.
I have it. Sourcing parts. It's on the Celette.
Good to hear it’s still in the queue. Interesting car that deserved to be saved.
Posted by: rick 918-S Sep 14 2022, 06:31 AM
Photo for 914 day. If all goes as planned paint very soon... 

Posted by: rgalla9146 Sep 14 2022, 06:42 AM
Beautiful !
Great work.
Posted by: Cairo94507 Sep 14 2022, 06:42 AM
Terrific work. Can't wait to see it in color.
Posted by: ConeDodger Sep 14 2022, 07:26 AM
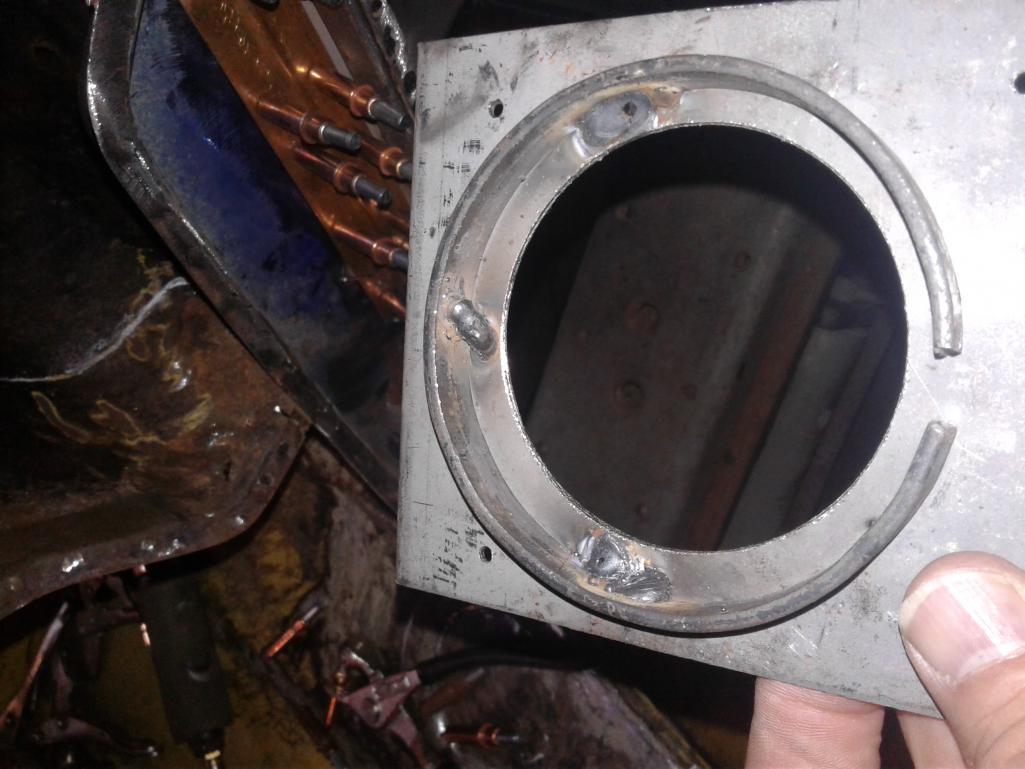
These do not belong on a 914. they were fashioned from scraps off the USS Enterprise. Her debris was found just outside the Milky Way.
They look like rear trailing arm alignment shims.
Posted by: rick 918-S Sep 14 2022, 09:05 AM
These do not belong on a 914. they were fashioned from scraps off the USS Enterprise. Her debris was found just outside the Milky Way.
They look like rear trailing arm alignment shims.
Fender shims for Merican Cars
Posted by: Root_Werks Sep 14 2022, 09:25 AM
Dang that's a lot of work to this point. Cool update pic on 9-14!
Posted by: rick 918-S Feb 4 2023, 09:18 AM
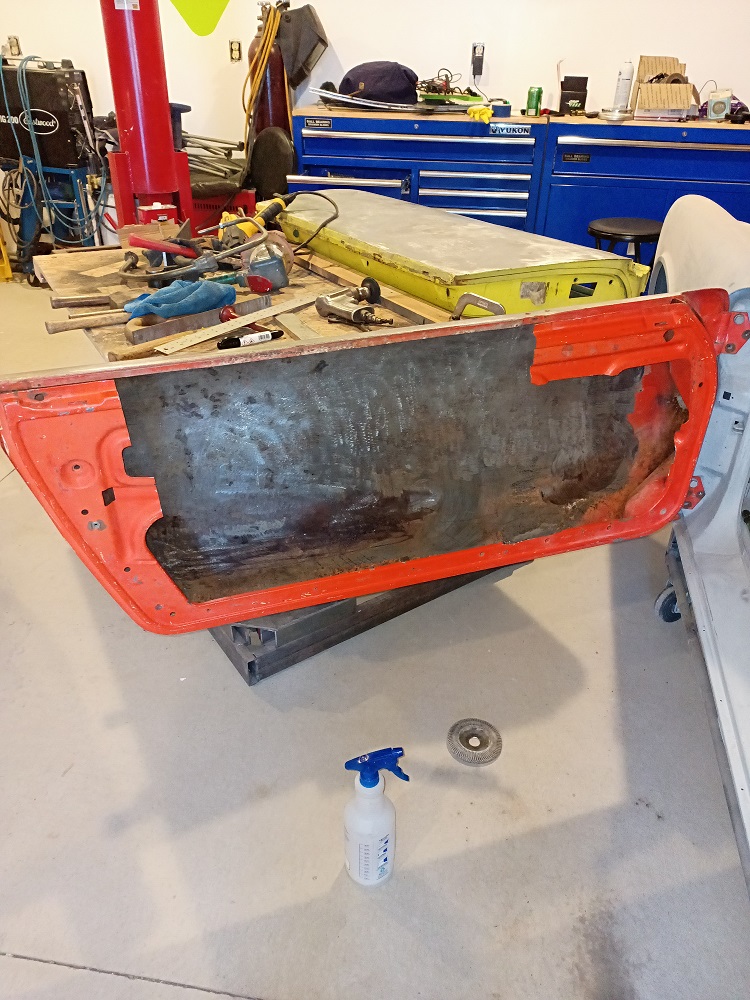
I received a door that was delivered from the tail of a comet. Early observations sent streaming thru to me by email showed promise. Bill Brunner was very helpful in getting this candidate to Area 51 Werks. The door was as stated and shown in the photos and the price was fair. Once it arrived it hit the operating table. Here is the process of preping for a new life.
Several layers of foriegn matter were removed to expose what was suspected had occurred at the hands of early space pioneers with skills and abliity to pilot a ship but no working knowledge of repairing astroid damage. 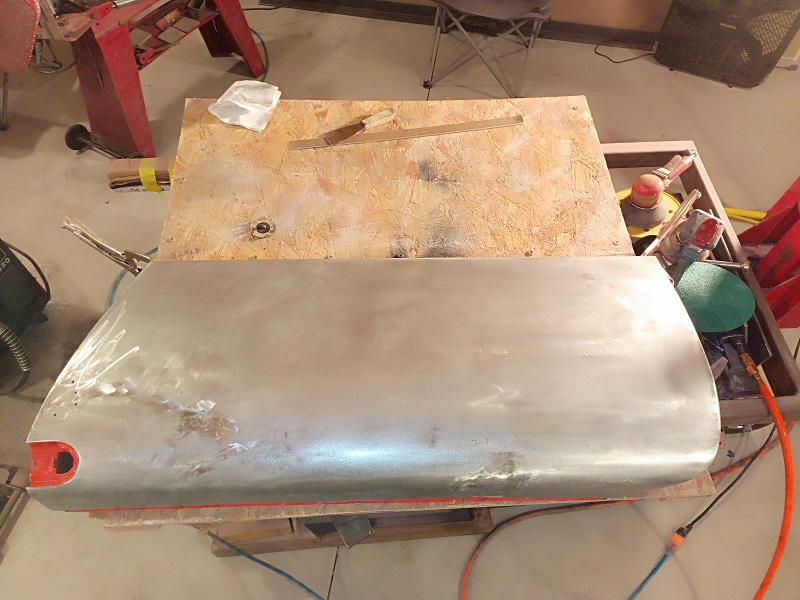
The California Rivets hanging through the back side of the skin were exposed and welded closed. The dent was pulled by tacking tig rod to the surface and using light pressure while tapping on the surface to lift the dents. 
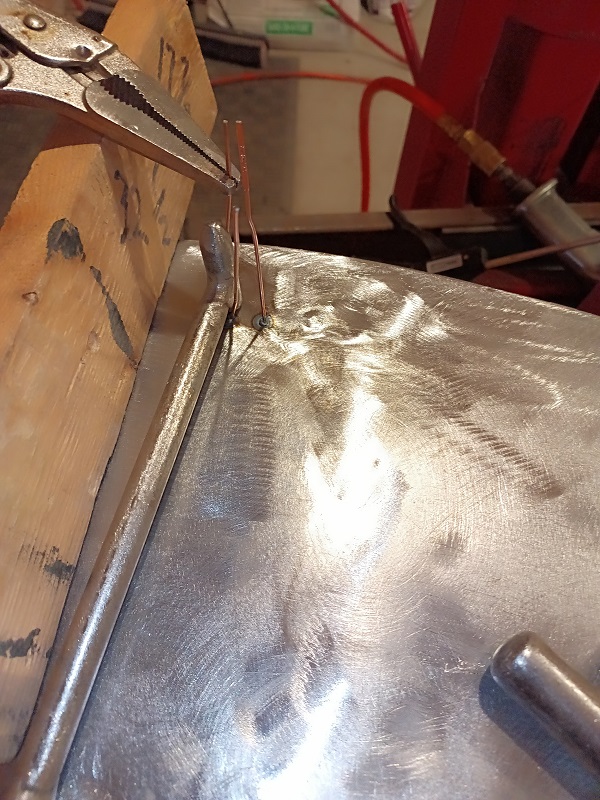
Several hours were spent with a shrinking disc and other tools to work out the damage. The horizontal marks are low spots and the vertical marks are high spots.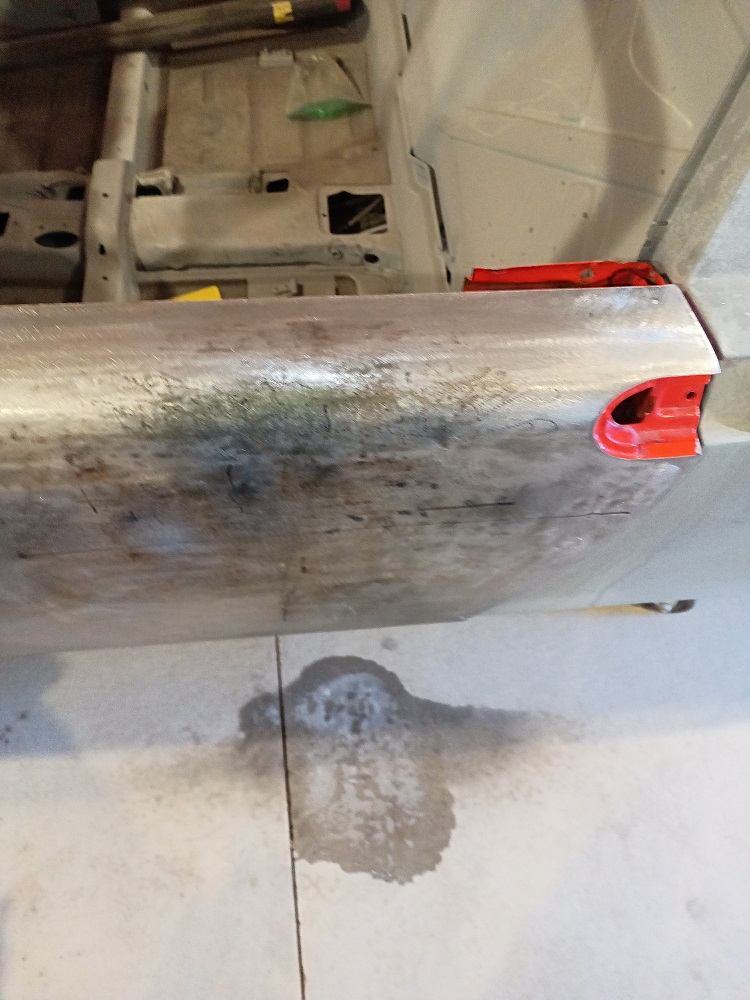
There were a couple reasons the inner frame was removed. As you can see there was a big chunk hacked out of the door for some strange addition for the reproduction of sound as well as cracks from metal fatigue. Once this section was removed access to the outer skin repair were made much easier.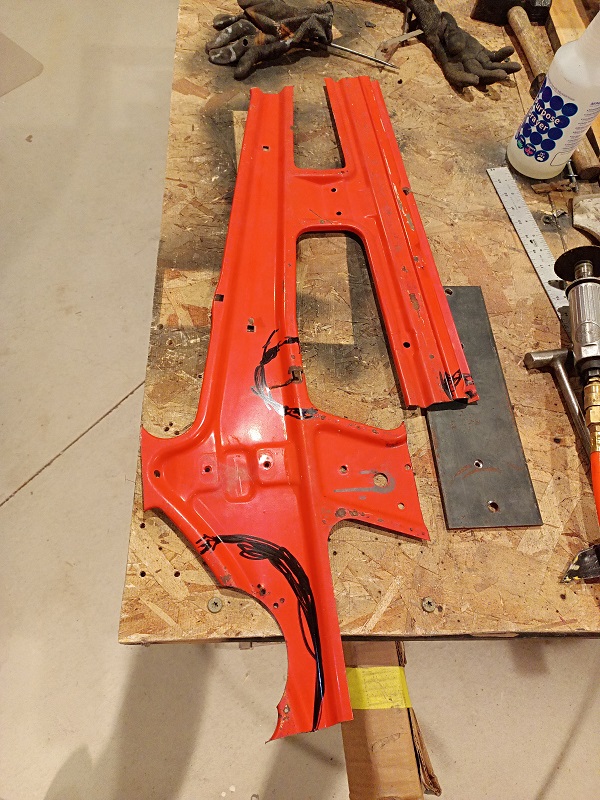
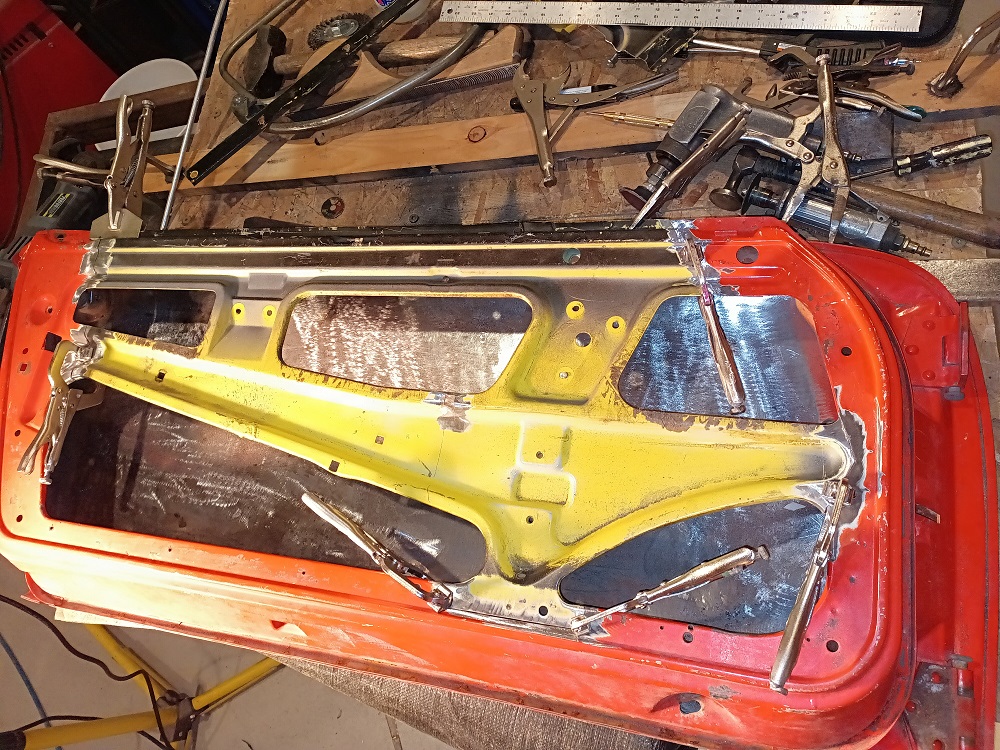
This repair section came from the original door that came with the car. 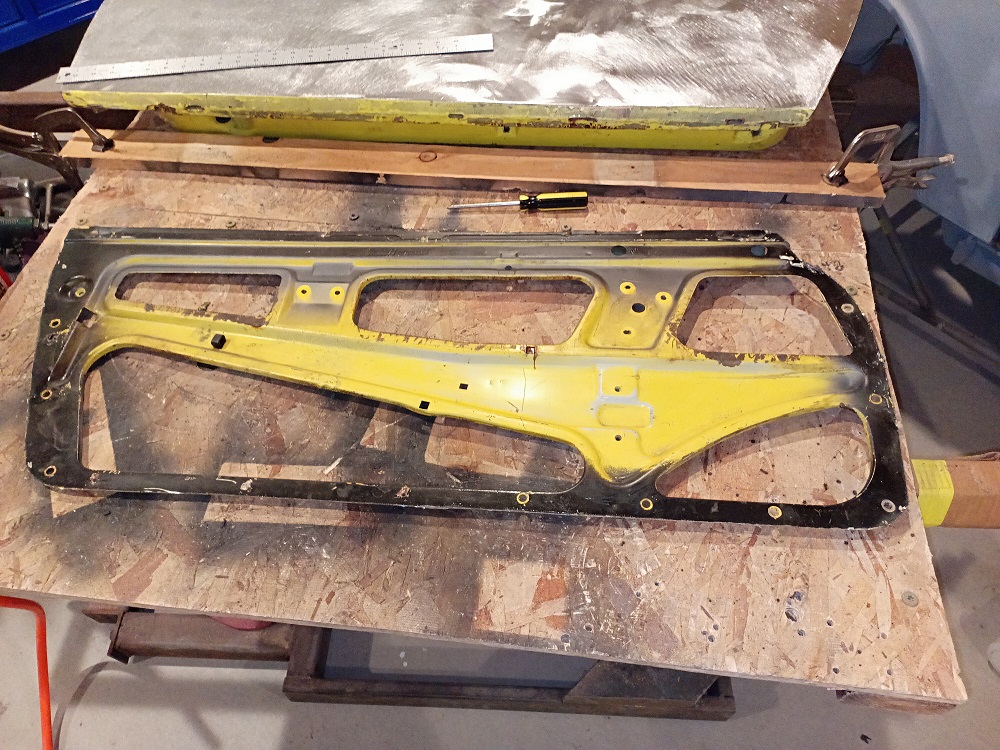
This is the test fit and trim ready to tig back in. There is still work to be completed to clean up the inside of the door to accept epoxy but were are finally nearing the end. 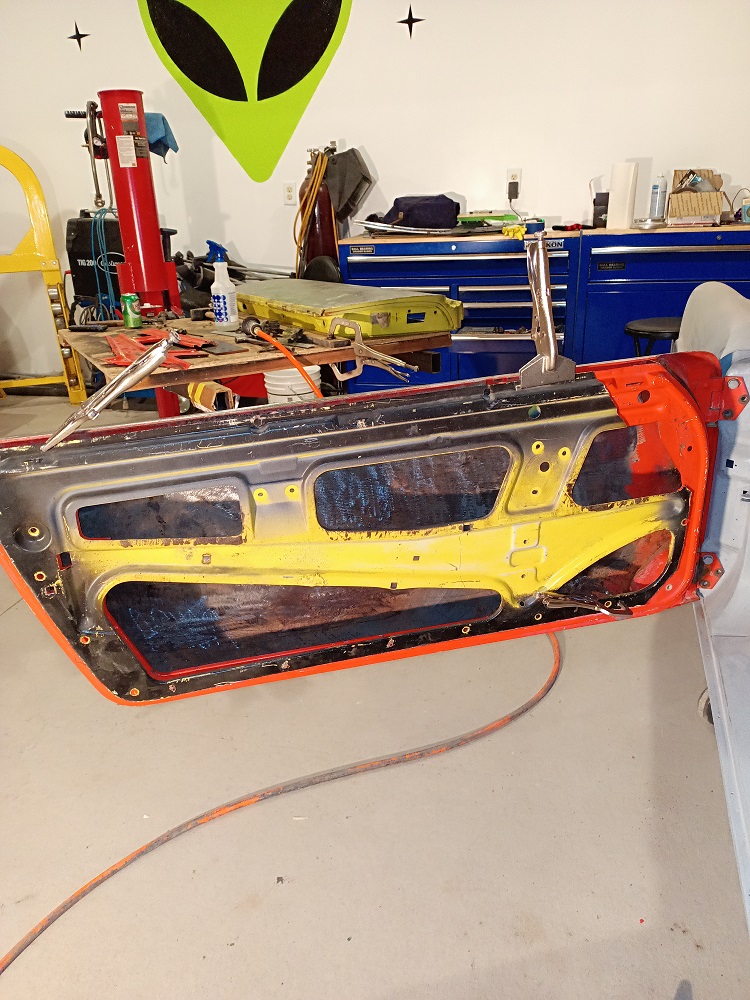
I have 5 left doors here and this is the best one.
Posted by: Cairo94507 Feb 4 2023, 09:22 AM
Outstanding workmanship and a great door for the project now.
Posted by: rick 918-S Feb 4 2023, 09:30 AM
Outstanding workmanship and a great door for the project now.
Yes thanks to Bill for offering it up. It is very rust free.
Posted by: 76-914 Feb 4 2023, 10:03 AM
Very nice work Metal Master. Was the advantage of welding TIG rods to the skin as opposed to using standard spot weld studs about more control when pulling and massaging the metal? I'd love to see a video from you using a shrink disc.
Posted by: rick 918-S Feb 4 2023, 10:20 AM
Very nice work Metal Master. Was the advantage of welding TIG rods to the skin as opposed to using standard spot weld studs about more control when pulling and massaging the metal?
I'd love to see a video from you using a shrink disc. I have a stud gun but never use it. The tip is spring loaded which requires you to use down force to set the pin. Often the pin creates a crater and sinks the panel. Also you see guys using a slide hammer to jerk the damage out. This to me, is counter productive. I just use a lever (visegrip and verious blocks) an tap the outer edge of the damage to raise the low metal.
Posted by: 930cabman Feb 4 2023, 10:35 AM
Very nice work Metal Master. Was the advantage of welding TIG rods to the skin as opposed to using standard spot weld studs about more control when pulling and massaging the metal?
I'd love to see a video from you using a shrink disc. I have a stud gun but never use it. The tip is spring loaded which requires you to use down force to set the pin. Often the pin creates a crater and sinks the panel. Also you see guys using a slide hammer to jerk the damage out. This to me, is counter productive. I just use a lever (visegrip and verious blocks) an tap the outer edge of the damage to raise the low metal.
Doesn't matter how/what it's called, the technique you are using is working great. Thank you for the tip. Moving metal is an art, much of the old arts are going, going, ....
Posted by: mb911 Feb 4 2023, 03:25 PM
That’s a great tip. Never ever thought of that. A great idea.
Posted by: Daiberl Feb 6 2023, 02:15 PM
Outstanding work and I can't wait to get the car back and to start putting everything back together!
Posted by: Front yard mechanic Feb 6 2023, 08:03 PM
Top notch work
Posted by: KELTY360 Feb 6 2023, 08:14 PM
Outstanding work and I can't wait to get the car back and to start putting everything back together!
Hi Juergen

You've put your car in great hands. Bet you're glad to see the progress.
Posted by: rick 918-S Feb 18 2023, 02:42 PM
Blasted the shell. Treated the inner shell with rust disolver three times. Used an encapsulator primer on the inner as well as the seal channel made sure the encapsulator coated the reinforcement where I was unable to clean. You know that place these doors rust from the inside out.
Welded up the places where the inner structure cracks over time. 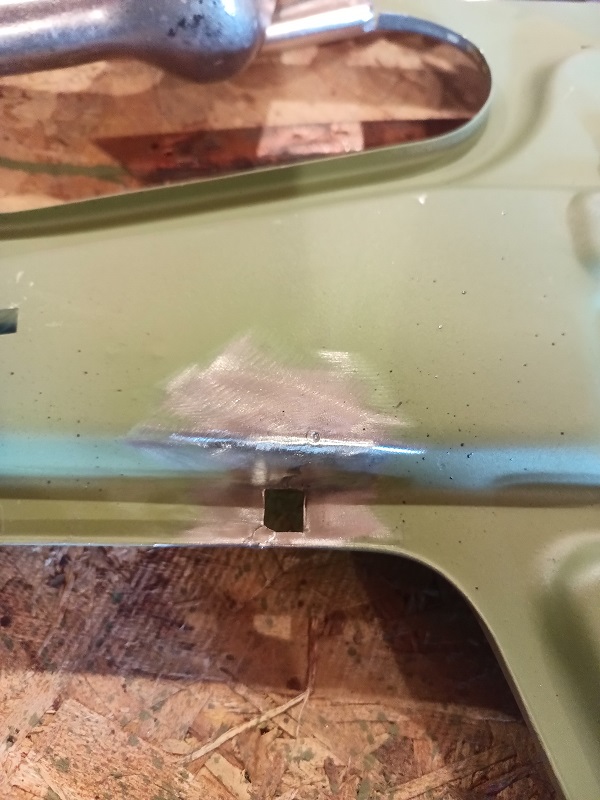
Welded the inner structure back in. 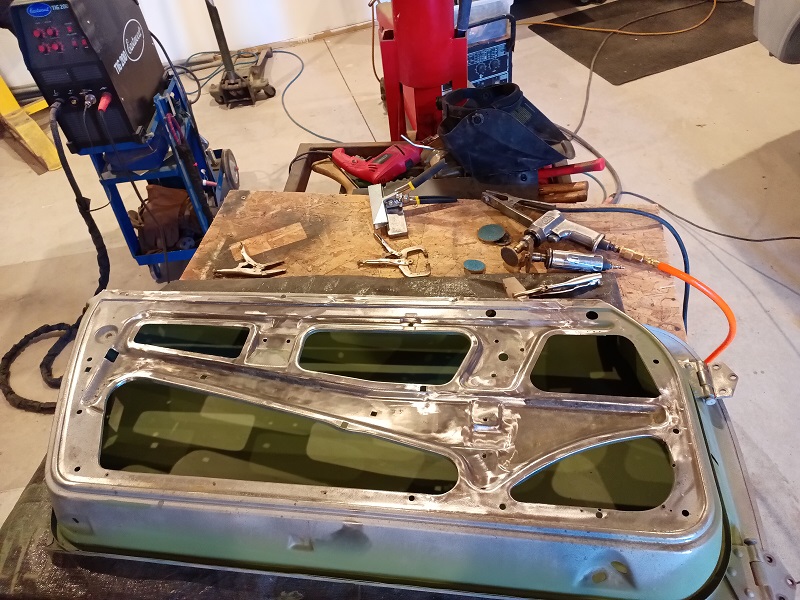
Attached image(s)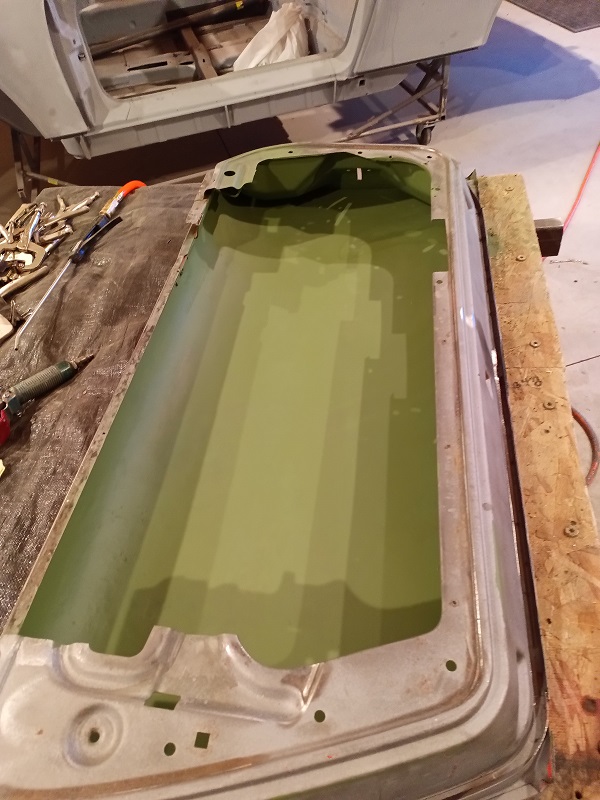
Posted by: rhodyguy Feb 18 2023, 10:51 PM
WOW!
Posted by: Krieger Feb 18 2023, 11:18 PM
Your amazing!
Posted by: flyer86d Feb 19 2023, 06:17 AM
Outstanding craftsmanship! This is proof that almost anything can be restored.
Charlie
Posted by: rick 918-S Mar 12 2023, 11:37 AM
This is the last panel undergoing the long journey back from many years hidden in a black hole somewhere in Southern Minnesota in a long state of stasis. This panel was well preserved with the exception of a very large palm dent or impact from space junk. Jule and I are not really sure. But with a bit of bumping and shrinking it is ready to get a new lease on life as part of a 914-6.
Here is the process:
Stripped off the finish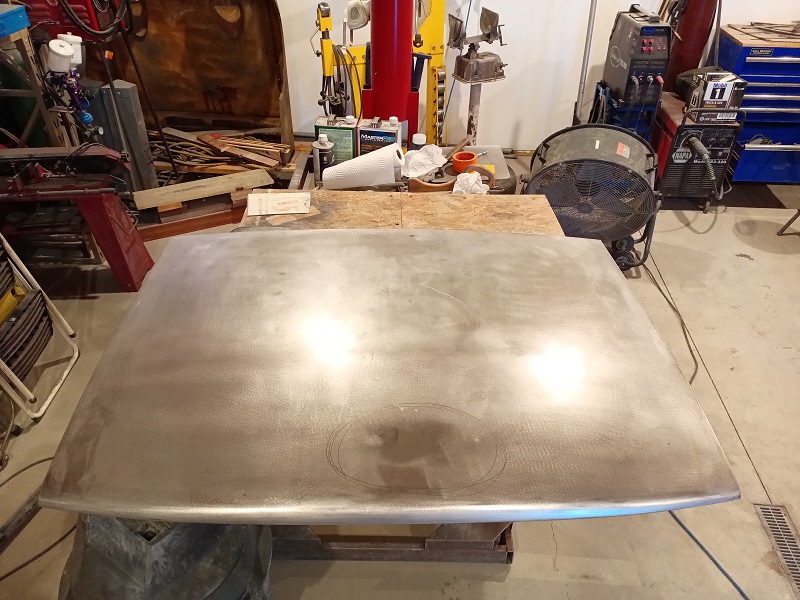
Exposed the area of damage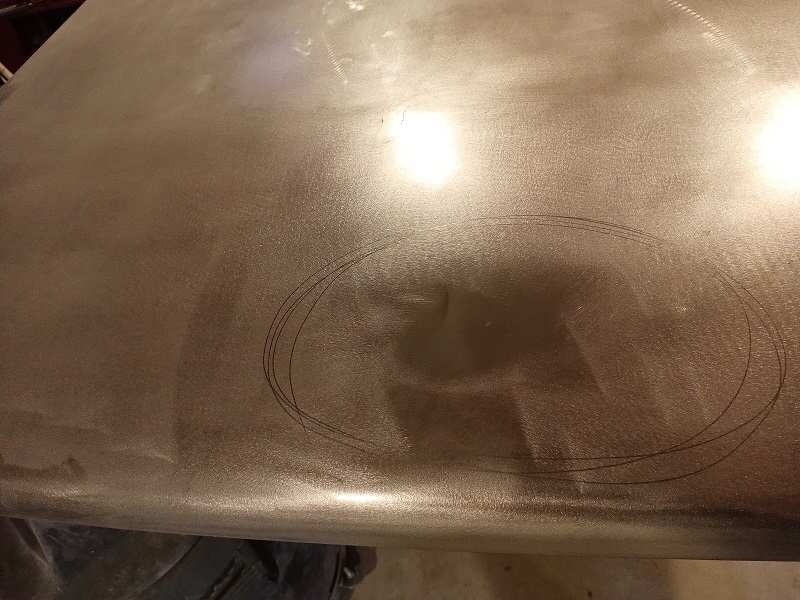
Prep for surgery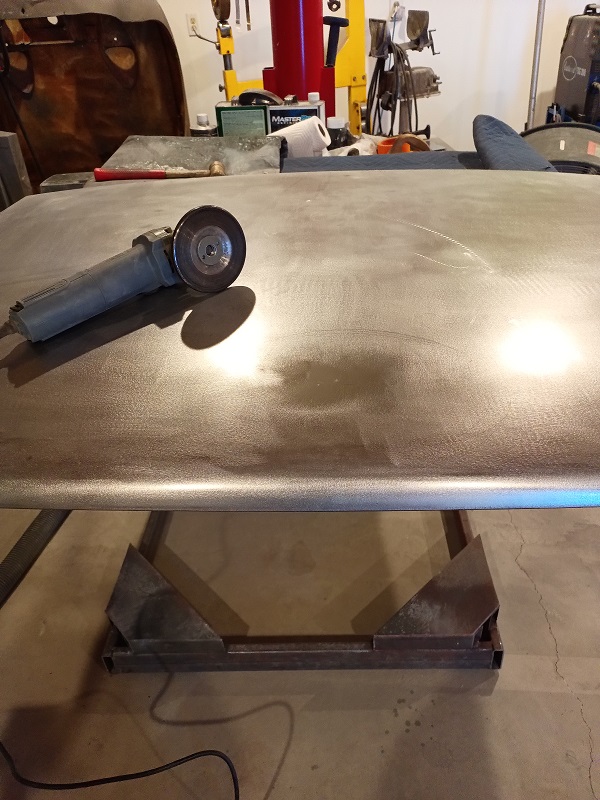
Note I used a assortment of tools including a piece of 16ga. Sheet Metal with a similar contour as the lid. I used this on the under side and struck the sheet metal not the lid itself. Once I started the reshaping from the underside a pressure ridge formed on the back side on the depression. I started to shrink it as I brought the depression back out. 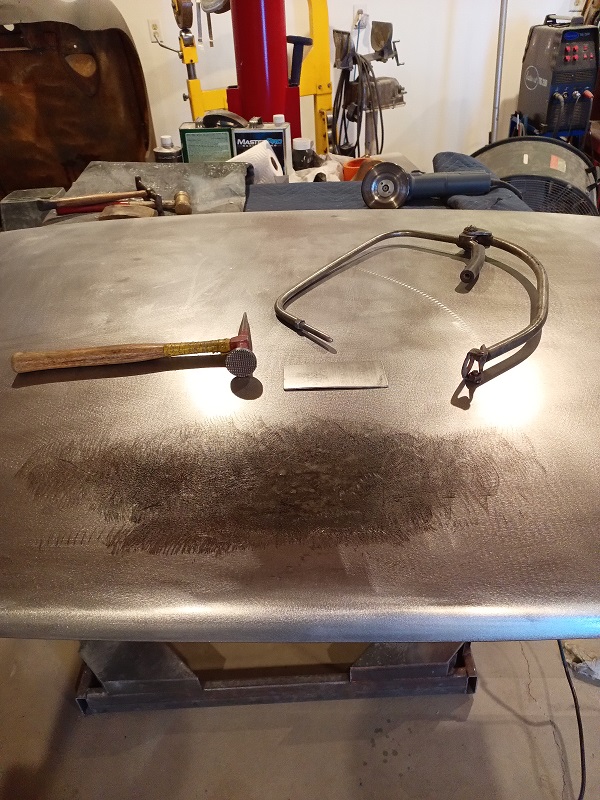
This is the result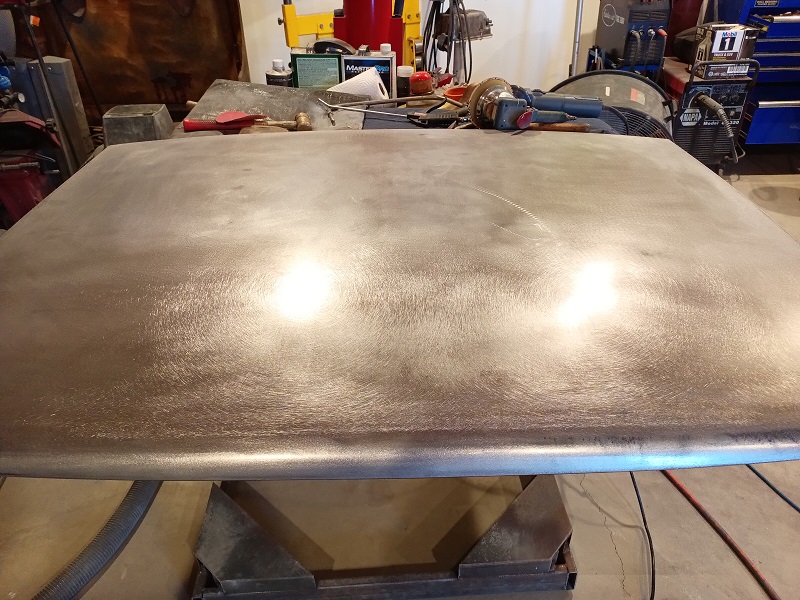
The goal is to remove the oil can effect from the depression. Once the depression is raised and the pressure ridge is shrunk the tension will be back in the panel.
Posted by: rick 918-S Mar 12 2023, 09:14 PM
Posted by: altitude411 Mar 12 2023, 09:44 PM
 super nice...
Posted by: gereed75 Mar 13 2023, 06:31 AM
Wow. Learning a lot from this thread. Thanks. I
Posted by: 76-914 Mar 13 2023, 09:56 AM
Top Notch work Rick.
Posted by: Root_Werks Mar 13 2023, 10:16 AM
Coming along nicely!
Posted by: TROJANMAN Mar 13 2023, 10:48 AM
Six Million Dollar Man on TV?

Great Work!
Posted by: rick 918-S Mar 13 2023, 12:11 PM
Six Million Dollar Man on TV?
Great Work!
Nope, Paul Newman - Lemans
Posted by: rick 918-S Mar 15 2023, 11:26 AM
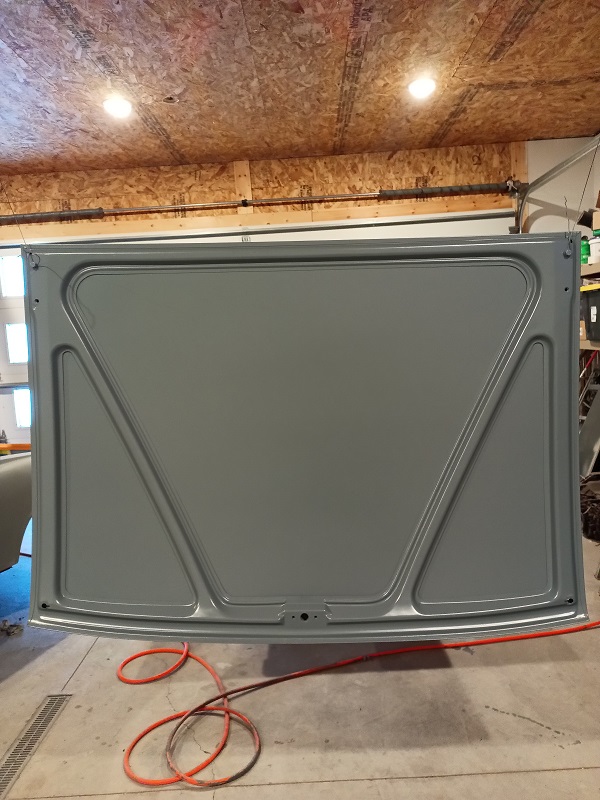
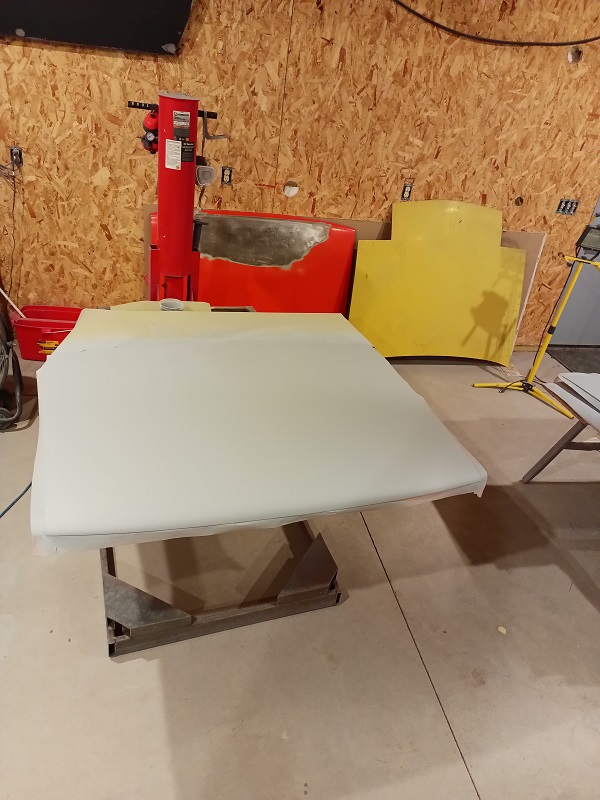
Front lid is ready for block sanding. Picked the best one of the 3 I have here. 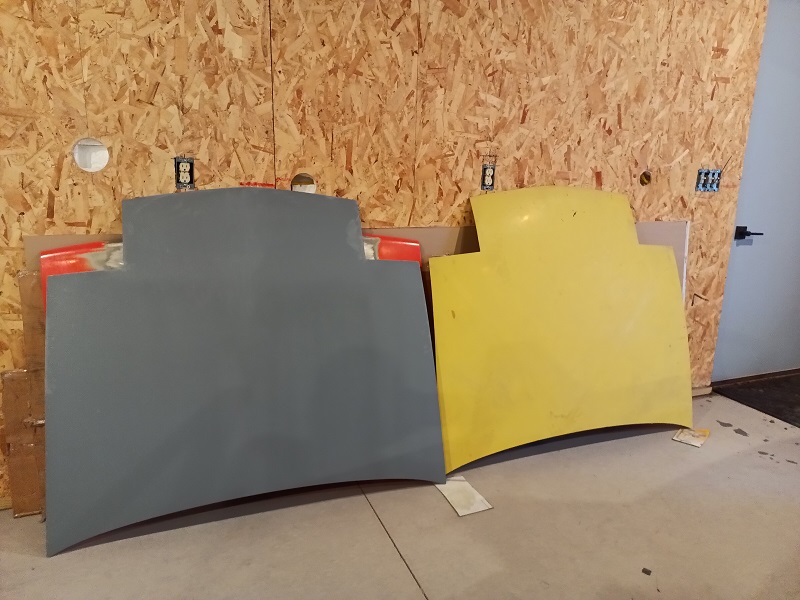
Posted by: Daiberl Mar 15 2023, 11:47 AM
Incredible work, can't wait to get started to put everything back together!
Posted by: Root_Werks Mar 15 2023, 03:08 PM
Restorations that go this deep produce a better than new car. Love this thread!
Posted by: TRS63 Mar 16 2023, 04:45 AM
Top notch work as usual 
Antoine
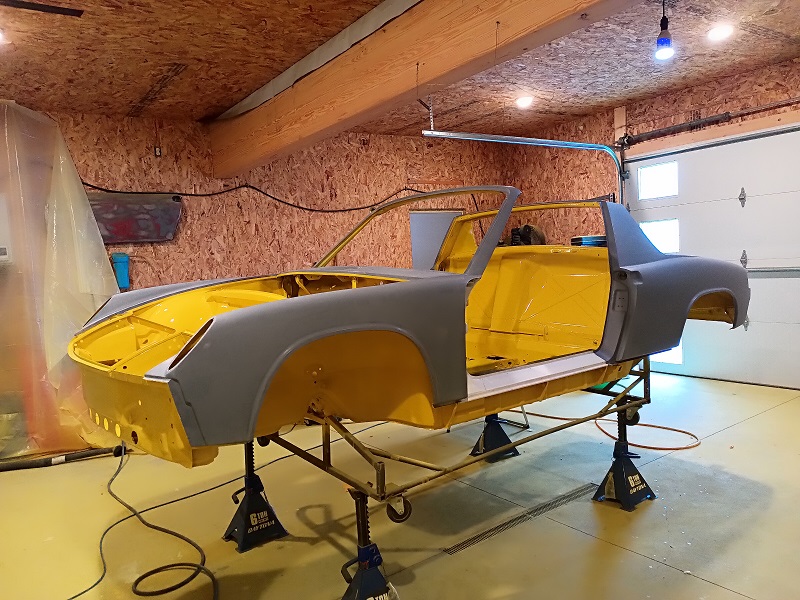
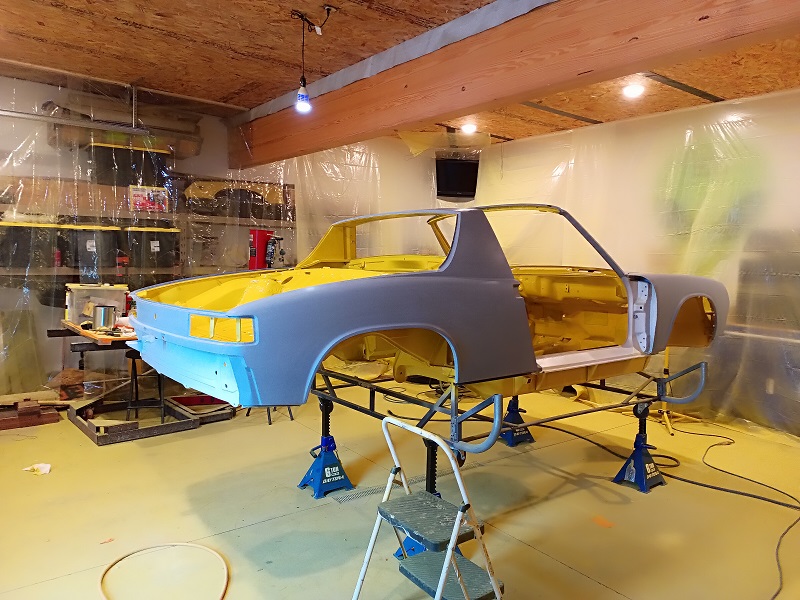
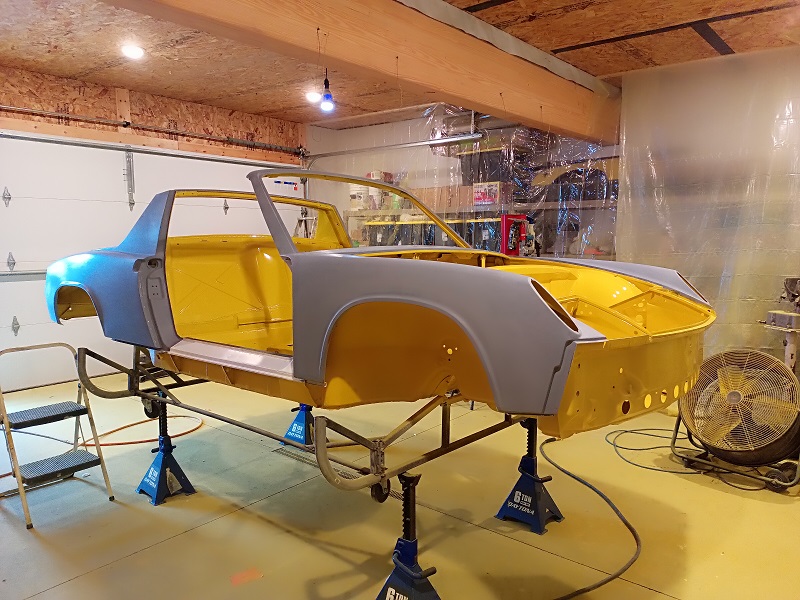
Posted by: rick 918-S Mar 27 2023, 10:19 AM
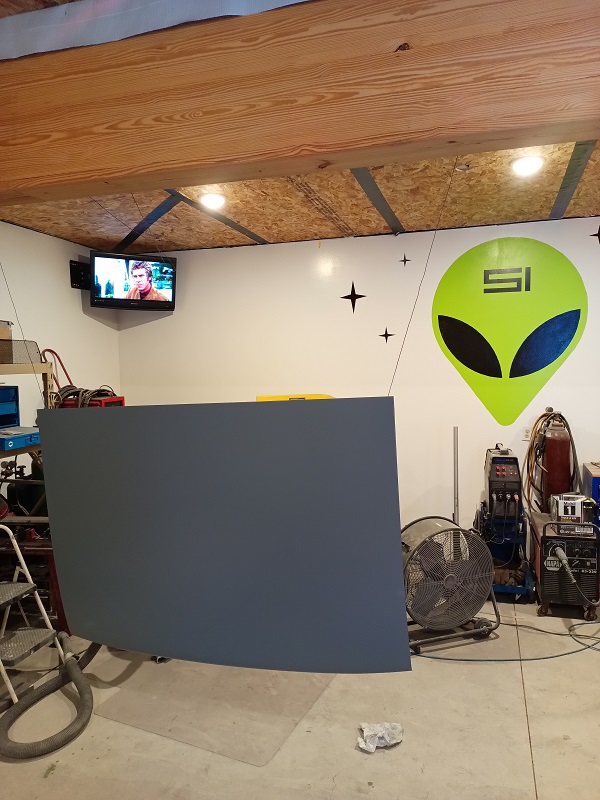
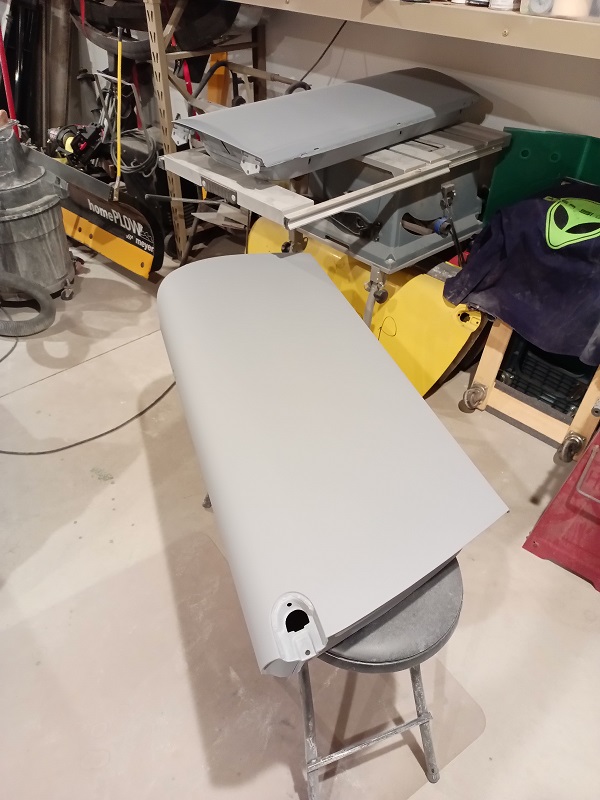
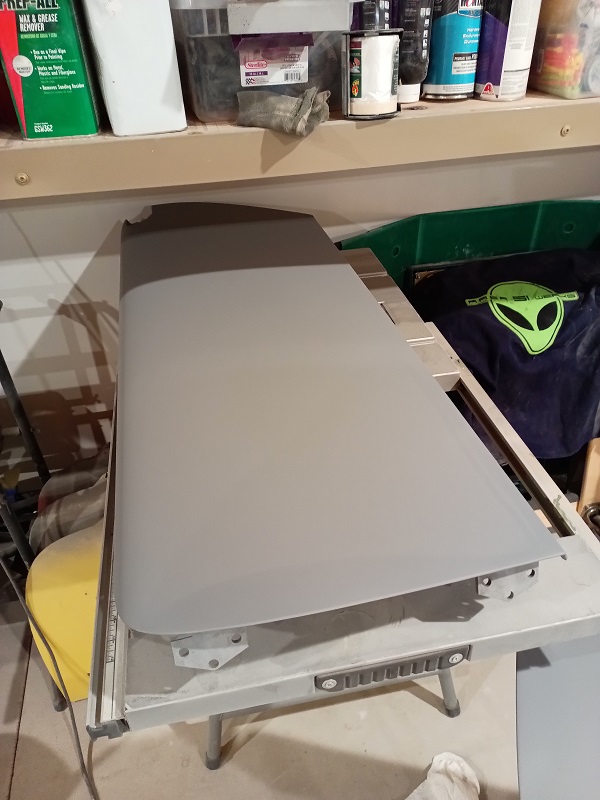
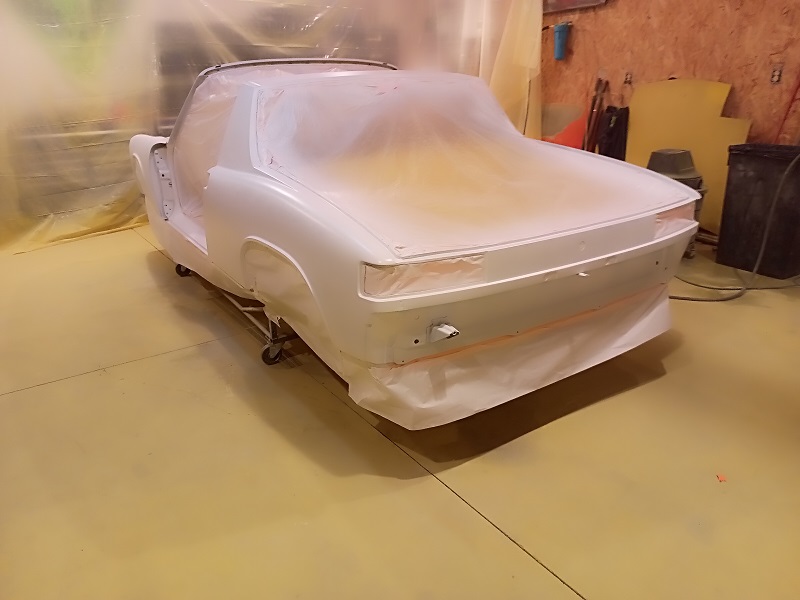
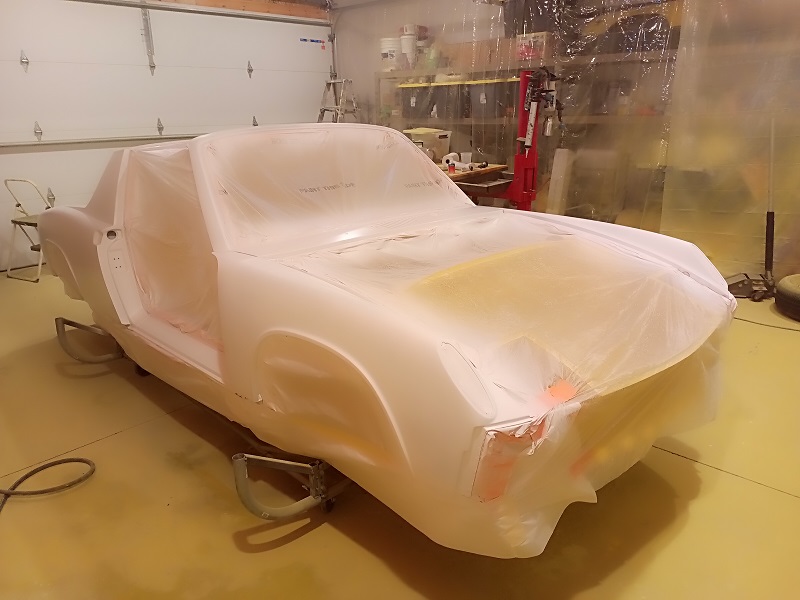
The panels are blocked out and in what I believe will be final primer before paint. Shot out some of the color from a pint I purchased to check the color. I have a hood from a 1970 that is supposed to be the same color. I need to polish a section to see how close it is before investing a boat load of cash on a large volume of paint. 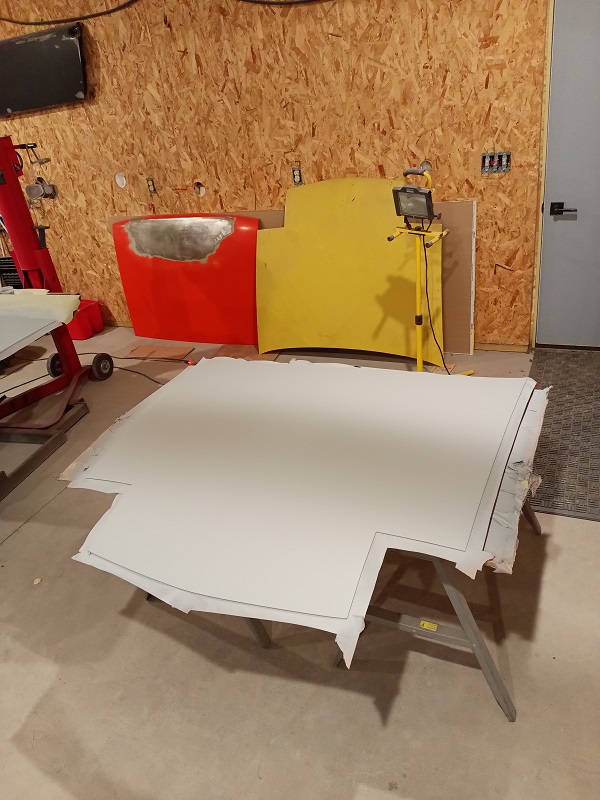
Posted by: rick 918-S May 10 2023, 03:43 AM
Epoxy
White Sealer as a base under the color
Color 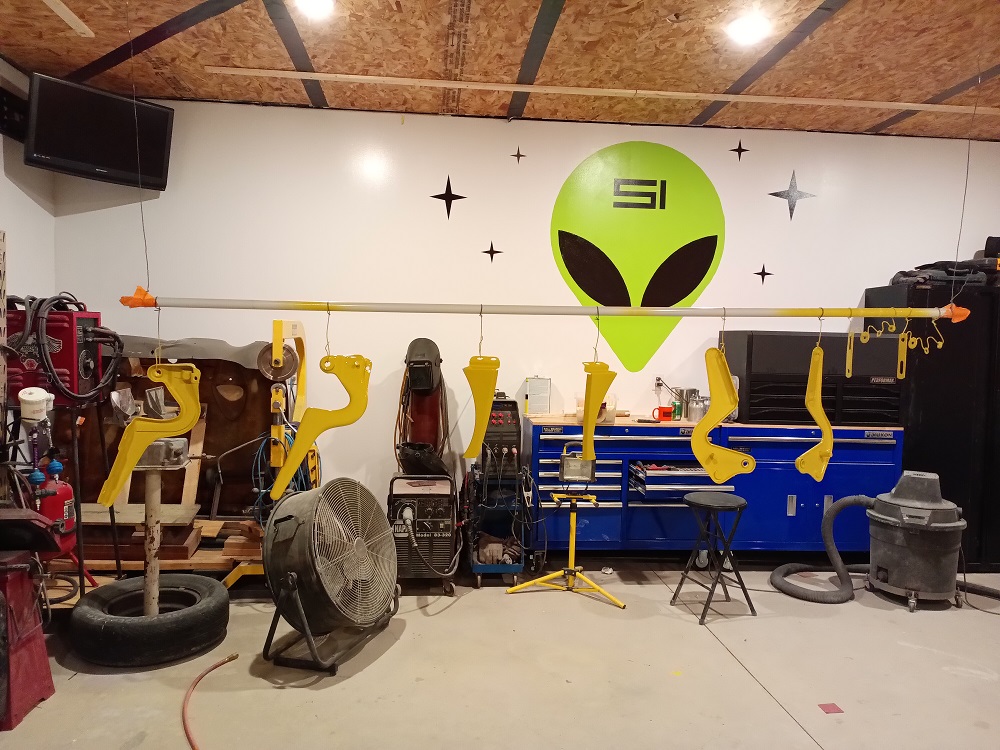
And so it begins.....
Posted by: altitude411 May 10 2023, 08:14 AM
Posted by: Root_Werks May 10 2023, 10:17 AM
Having all the smaller parts painted makes for such a clean final assemble.
I may have missed it, resto as best to stock as possible or resto-mod?
Posted by: gms May 10 2023, 10:29 AM
Can't wait to see this one finished!
Posted by: Front yard mechanic May 10 2023, 05:42 PM
I really like your shrinking tool is that vintage ?
Posted by: rudedude May 10 2023, 07:54 PM
Rick,
That is just beautiful, glad the decklid worked out for the project. Someday I'm going to need your expertise with a fender replacement. Sure would like to watch you work the shrinking disc. I know its not easy.
Jule
Posted by: rick 918-S May 10 2023, 08:44 PM
Rick,
That is just beautiful, glad the decklid worked out for the project. Someday I'm going to need your expertise with a fender replacement. Sure would like to watch you work the shrinking disc. I know its not easy.
Jule
You know I owe you one. I will check with you after I get Juergen's car finished and see if you want me to come down. We can tag team the quarter on your 6 for fun.


Posted by: rick 918-S May 10 2023, 08:51 PM
I really like your shrinking tool is that vintage ?
Are you referring to photo 4 post 63? That's a bumping tool I purchased around 1990 from Ron Fournier. Check him out. He is an awesome metal shaper. I have 3 sizes. I made some custom hammer ends for it. The one in the photo has a swivel target I added to it.
The design has changed over the years but this is where I purchased the tool.
https://www.fournierenterprises.com/m3/FPA5533--15-reach-bullseye-pick-w-blunt-tip-fpa5533.html
Posted by: rick 918-S May 13 2023, 06:25 PM

Posted by: rick 918-S Jun 16 2023, 06:43 AM

Posted by: BillJ Jun 16 2023, 08:19 AM
Super satisfying part of the resto
Posted by: rhodyguy Jun 16 2023, 08:21 AM
About ready to head west?
Posted by: Daiberl Jun 16 2023, 10:06 AM
About ready to head west?
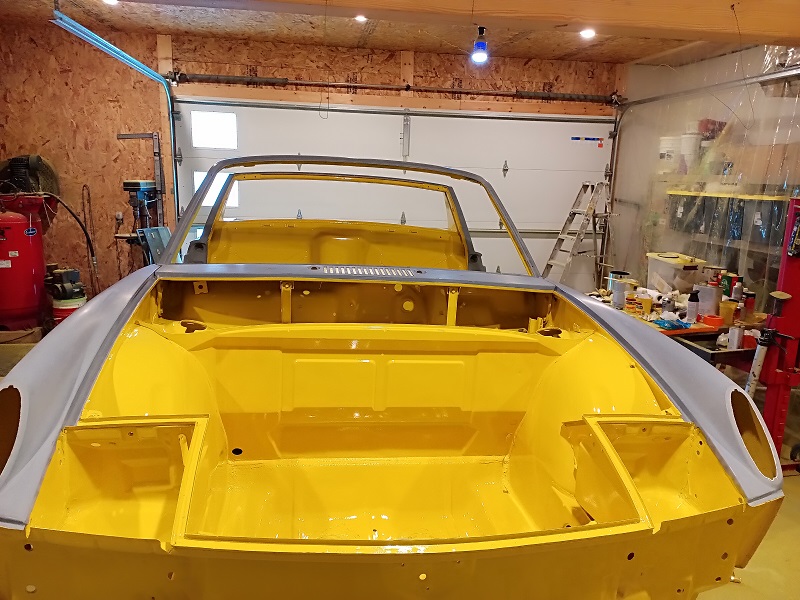
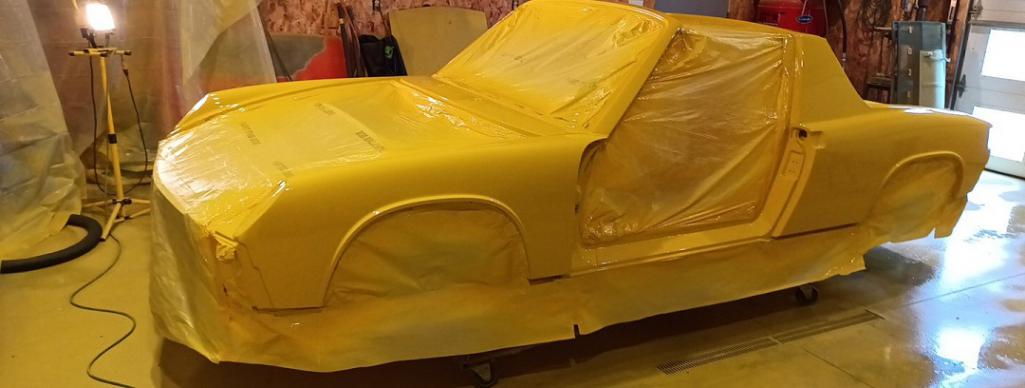
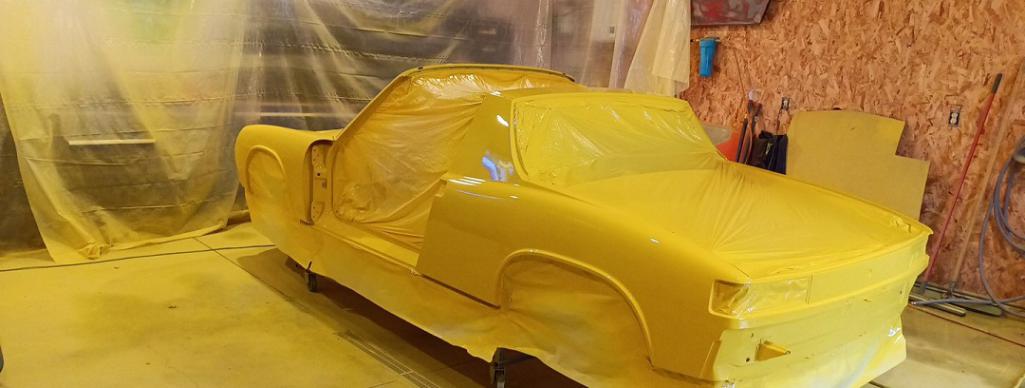
Car will head east now, moving back to Europe (Spain) and the restoration will continue there, the color looks absolutely amazing!
Posted by: Root_Werks Jun 16 2023, 10:33 AM
Color! Looking great Rick!
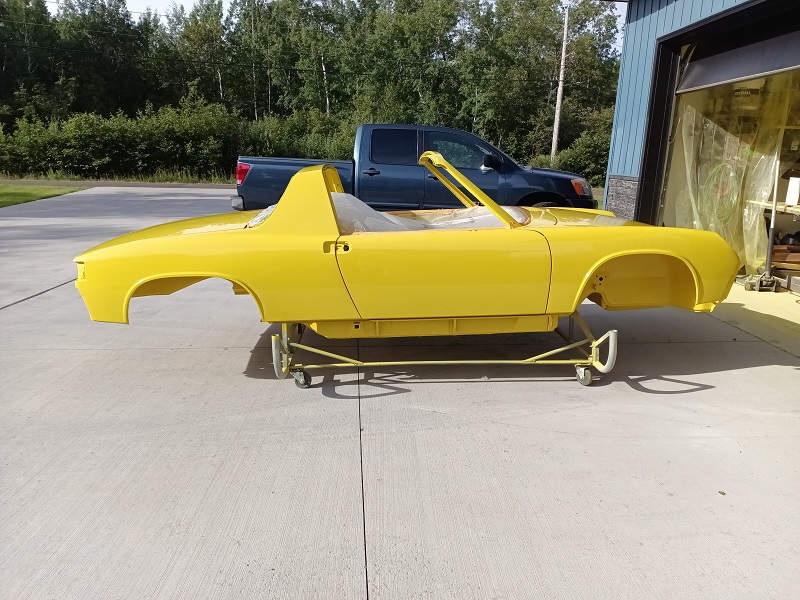
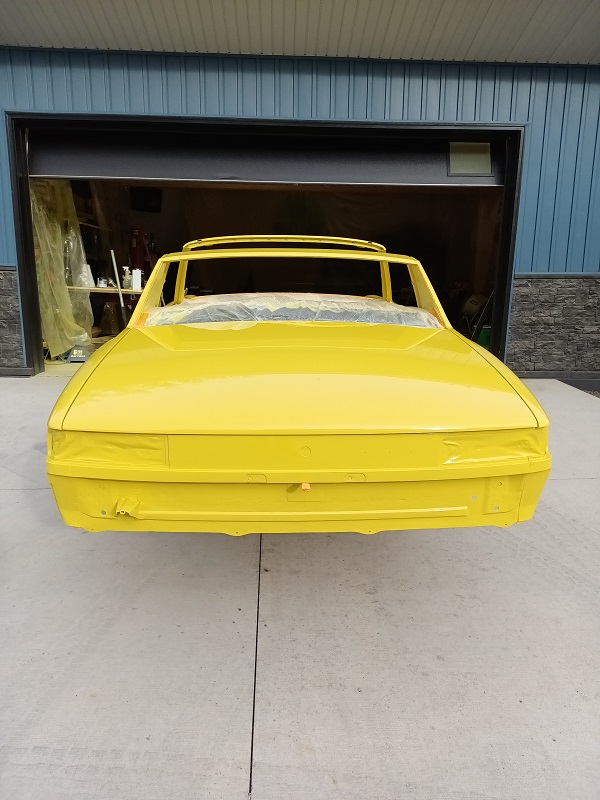
Posted by: rick 918-S Jun 16 2023, 12:22 PM
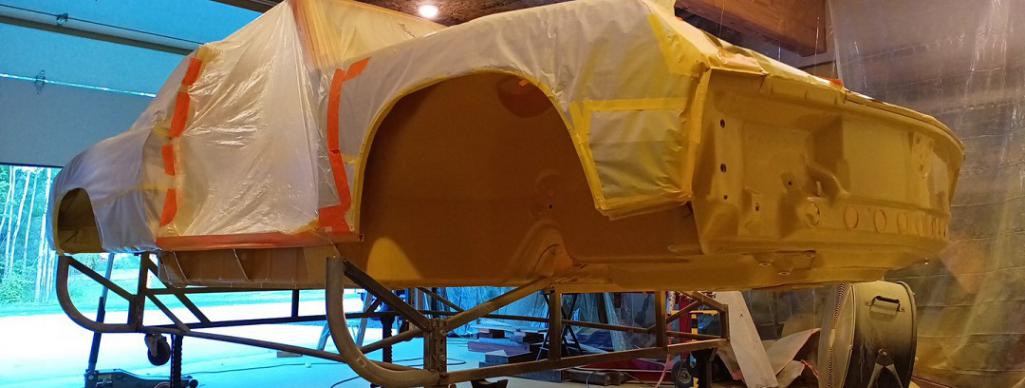
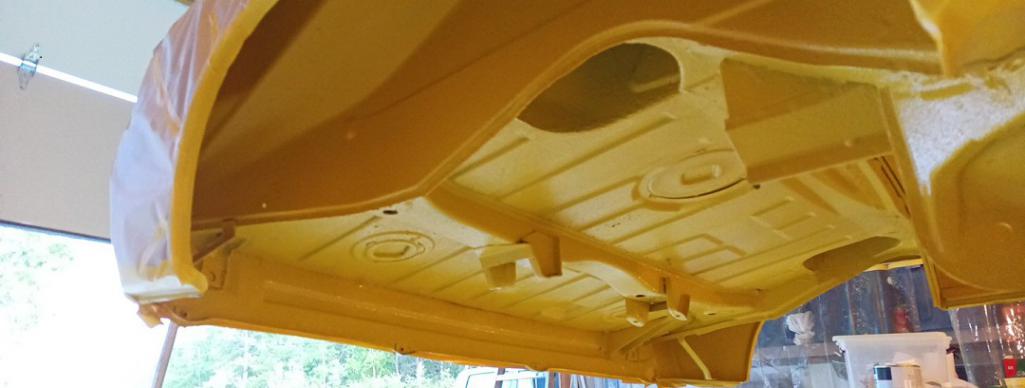
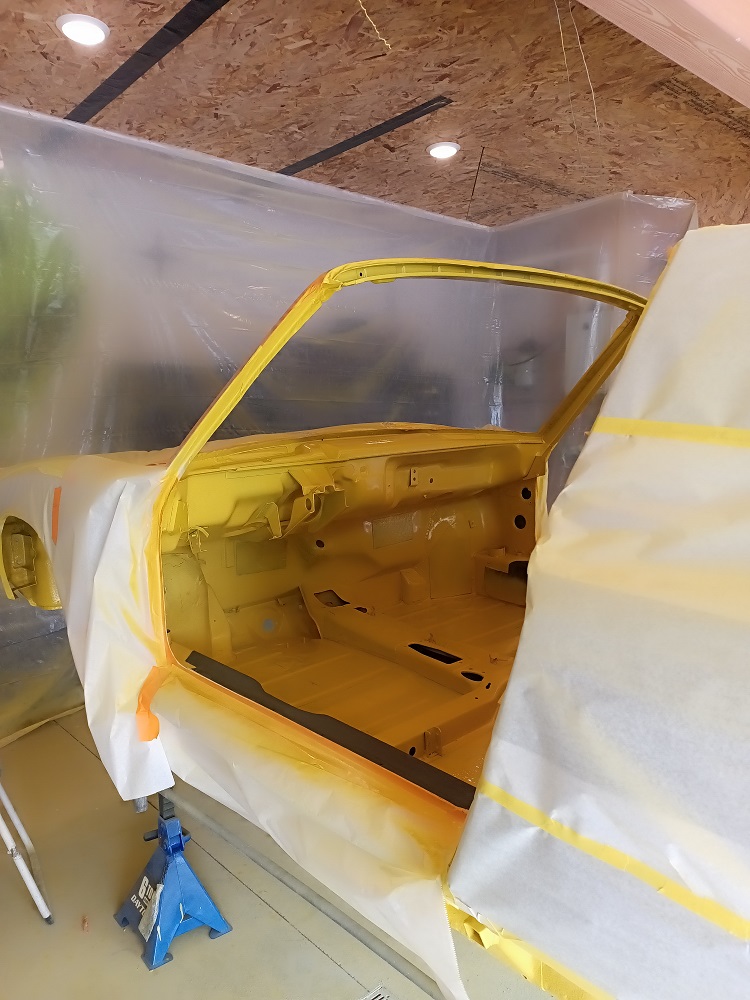
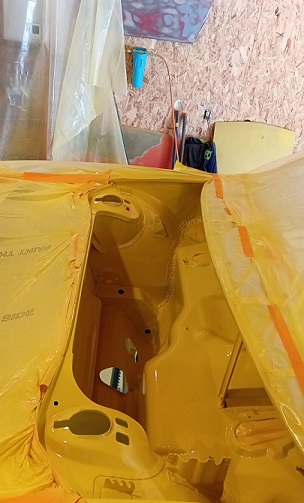
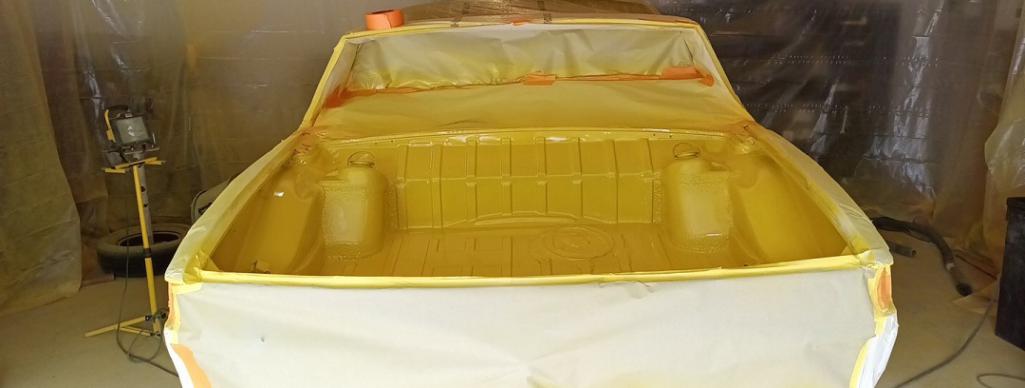
Need to paint the gas tank well, the interior and both trunks. Then onto the exterior of the body shell yet. For ayone that hasn't done this it is a marathon process over several weeks.
Posted by: flyer86d Jun 16 2023, 02:32 PM
Very nice Rick and I like the color. Oh wait, that is the same as my -6!
Charlie
Posted by: Bullethead Jun 16 2023, 04:27 PM
Truly impressive work! Just found this thread... subscribed.
Posted by: rgalla9146 Jun 17 2023, 05:24 AM
Six Million Dollar Man on TV?
Great Work!
Nope, Paul Newman - Lemans
Wouldn't that be Steve McQueen, LeMans ?
Posted by: Cairo94507 Jun 17 2023, 06:10 AM
Truly amazing work Rick.
Posted by: rick 918-S Jun 17 2023, 07:25 AM
Six Million Dollar Man on TV?
Great Work!
Nope, Paul Newman - Lemans
Wouldn't that be Steve McQueen, LeMans ?
Duh
 you are right sir.
Posted by: rick 918-S Jun 17 2023, 04:44 PM
Posted by: sixnotfour Jun 17 2023, 09:47 PM
Rick"s a Winner... 
Posted by: rick 918-S Jun 18 2023, 02:53 PM
Posted by: East coaster Jun 18 2023, 07:12 PM
Nice!
Isn’t masking fun (not)! I’m painting mine currently and have grown weary of masking……
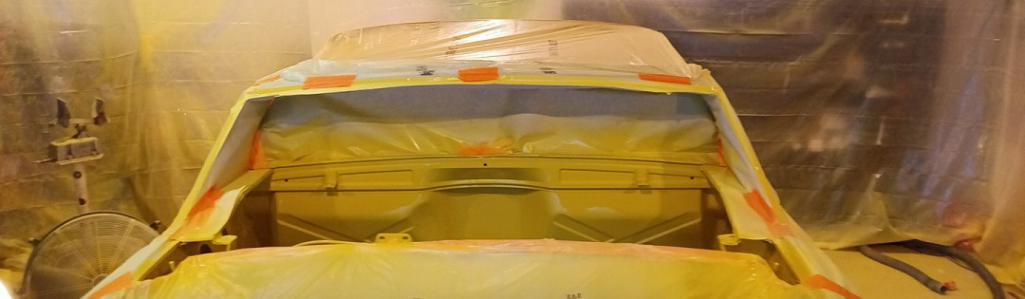
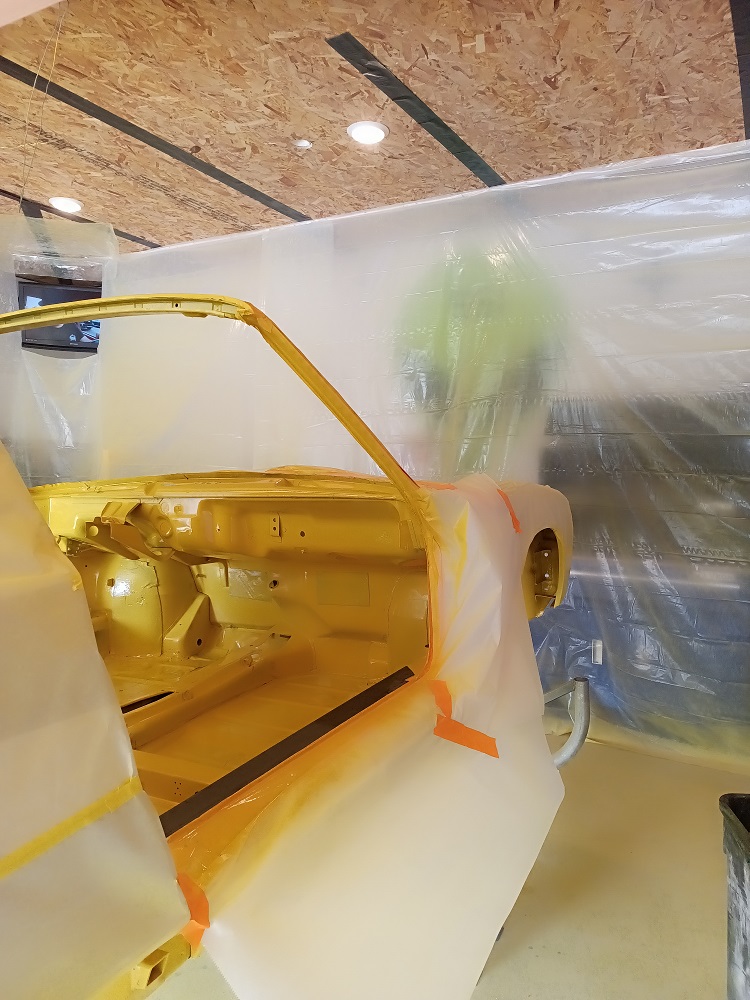
Posted by: rick 918-S Jun 18 2023, 08:43 PM
Nice!
Isn’t masking fun (not)! I’m painting mine currently and have grown weary of masking……
Yes. Just have to zone out and do it.
Posted by: rick 918-S Jun 21 2023, 11:35 AM
Posted by: rick 918-S Jun 21 2023, 11:39 AM
Posted by: 930cabman Jun 21 2023, 01:04 PM
Lookin great, approaching quickly. I'm sure many of us are envious, I know one at least
Posted by: Root_Werks Jun 21 2023, 02:41 PM
Damn that looks good!
Posted by: rick 918-S Jun 23 2023, 04:39 AM
Posted by: rick 918-S Jun 24 2023, 06:26 PM

Posted by: rhodyguy Jun 24 2023, 07:04 PM
What will it sit on in the container?
Posted by: rick 918-S Jun 24 2023, 07:23 PM
What will it sit on in the container?
I am leaving on the rolling frame. I plan to add more bracing and tie down Loops. If a complete moron doesnt mess up the way it will be designed to be mounted it will make it just fine.
Posted by: bkrantz Jun 24 2023, 08:43 PM
Gotta like yellow 914s.
Posted by: Cairo94507 Jun 25 2023, 07:43 AM
Stunningly beautiful work.
Posted by: rick 918-S Jun 25 2023, 10:06 AM
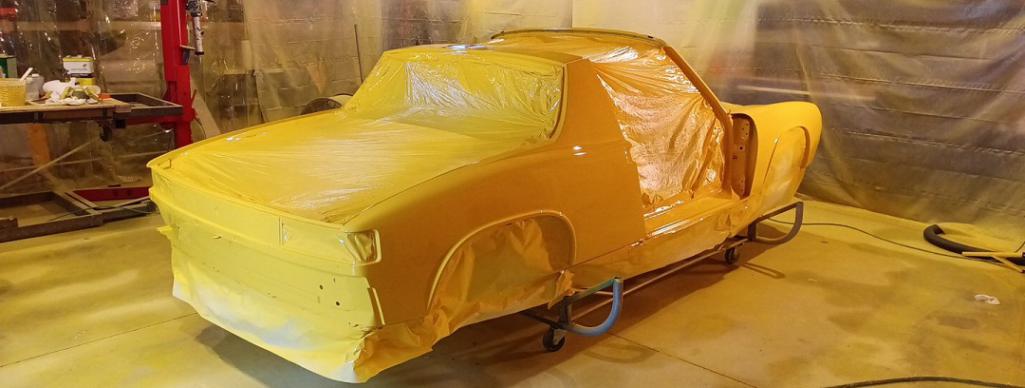
I tried to rent a booth from 3 bodyshop owners I know but they were backed up. Besides with all the parts and pieces, inside, under the car etc. it would have taken alot of production time from their businesses. So I spent like 60k on this garage and it is now yellow. The exterior of my overhead door is yellow, the concrete outside the overhead door is yellow. But the car is in paint the and polishing process starts over the next 2 weeks. Once I am done I will rent one of those big floor scrubbers and clean off what I can then paint the floor gray. I think if I am careful with thinner I can wipe the overspray off the overhead door. It's all part of keeping a promise. If I didn't enjoy the journey I would have bailed long ago.
This car had a very hard life. Neither Juergen nor I could have forseen the extent of hidden damage the car suffered. This has been a great project on a car that most would not have been able to tackle. It just kept getting more and mor complex as it progressed.
I have some members her to thank for stepping up when a new challenge arose.
Really one big one was McMark and Sir Andy as well. When we found out Celette scrapped the fixtures for the 914 Sir Andy laid out some serious cash and purchased the new design towers and fixtures for the car Mark is building for him. Mark inturn built me some check fixtures to be sure the car I had here was first square and allowed me to get the right front floor/suspension mounting section in place.
Can't forget about John Miller. I gave him a a late model front panel for his car. He ended up not needing it. The front clip donor I had here needed the right and left sides replaced at the bumper mounting and fender mounting . He sent the part back to me and I sectioned the ends on the front panel.
Glen Stazak for the NOS fenders and Quarter panels Big part of the build!
Garold Shafer for the cowl top panel. Big part of the build.
The Alien for donating her windsheild opening for he fixture I needed to build to align the cowl top panel during installation.
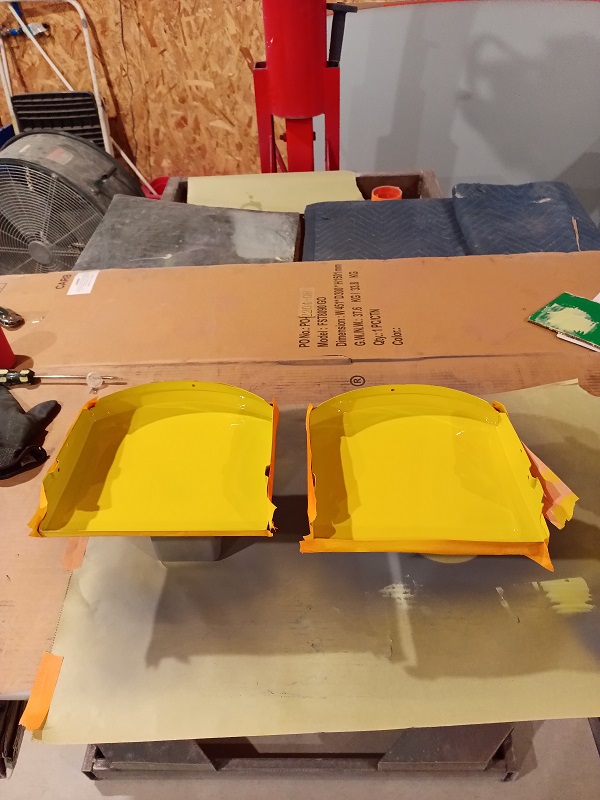
Kevin Oshea for the simplest of parts. The triangle in the corner of the headlight bucket for the hood bump stop.
914 Rubber. I ordered the bump stops and other misc. rubber parts to prevent panel tp panel contact during shipping.
Restoration Design for multiple reproduction parts as well as one NOS fender to add to my choice of parts to add to the repair.
Carlo for offering to sent the door limiting straps. The cal did not come with them installed.
Oh!and my friend Gary for sand blasting and allowing me to invade his space to get the shell in epoxy.
Hope I did not forget anyone. It has been a long journey.
Mostly Juergen and the patience he had along the process. This is my hobby not my job. I work 12 hours a day on my daily job then put as much on other things at night. I really sleep 4 to 5 hours a night. I had a back surgery, and built a house and garage during the process which slowed the progress for about a year and a half. We are in the home stretch now and this is my last car. I think...
Posted by: rhodyguy Jun 25 2023, 11:40 AM
Rick, if you know who manufactured your door, you might contact them directly about the overspray removal. The car turned out beautiful.
Posted by: Daiberl Jun 25 2023, 12:00 PM
A huge THANKS to Rick for the amazing work and for taking on the project in the first place. The car looks beautiful and as Rick points out we didn't know the extend of some of the damage the car suffered in the last 45 years on the street and the crazy "fixes" from the previous owners. THANKS also to anyone who helped with guidance, parts, providing place to sandblast and much more.
We decided this year to move back to Europe (Valencia in Spain) so the body will be shipped to Spain in a container and the project will continue probably in the fall when the car is in Valencia in my shop.
Posted by: rick 918-S Aug 14 2023, 06:55 AM
Coming down the the wire. The car leaves on the 17th destined for Spain. Working on the final details. The car has made a long journey from Space Junk to a new life well beyond the Cosmos. 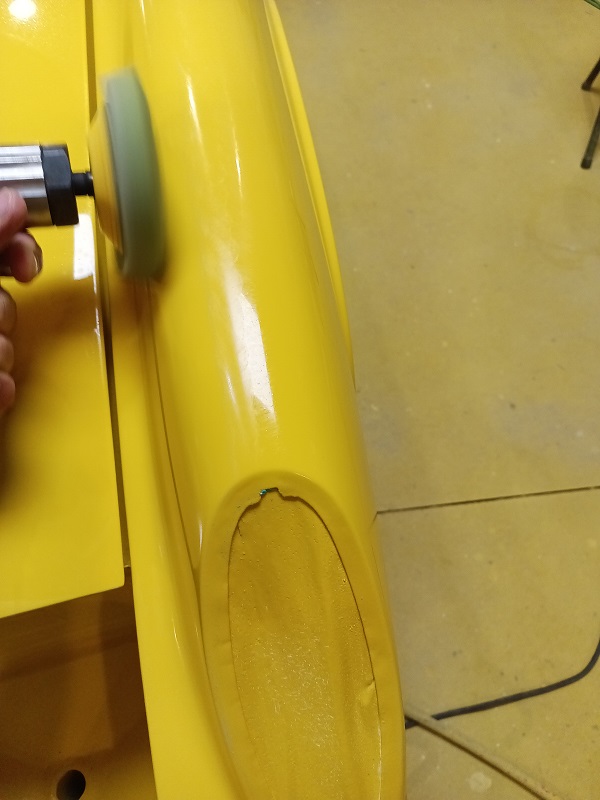
Posted by: Cairo94507 Aug 14 2023, 07:30 AM
Absolutely amazing and stunningly beautiful work. That chassis looks better than it ever did by far when it left the factory new. That is one lucky 914-6.
Posted by: MikeK Aug 14 2023, 07:56 AM
Very nice work! Can you share some details on your rolling cart? I’m see the loops on the sides. Does it allow you to turn the car on its side?
Posted by: jd74914 Aug 14 2023, 08:55 AM
Wow, that looks awesome!! Great color too!
Posted by: 76-914 Aug 14 2023, 09:01 AM
Wow Rick! Stellar work and what an accomplishment. I missed the June-july postings and just now caught up. Is this the 6 shell that you picked up from Ethan? Thx for posting the great pics. Kent
Posted by: Shivers Aug 14 2023, 09:26 AM
Great work, color really pops. Just fyi, there are peelable liquid masking products like peel-kote you spray or brush on.
Posted by: Root_Werks Aug 14 2023, 09:47 AM
That turned out amazing!
Bubble wrap that 914 when it's shipped! 
Posted by: Maltese Falcon Aug 14 2023, 10:01 AM
Love it Great work Rick ,
Posted by: rick 918-S Aug 15 2023, 06:13 AM
Very nice work! Can you share some details on your rolling cart? I’m see the loops on the sides. Does it allow you to turn the car on its side?
I was able to put it on its side but it was very difficult. There are way better Ideas out there but it worked. A rotiserie was not an option as I had 1/2 the front clip removed.
Posted by: rhodyguy Aug 15 2023, 10:24 AM
Post #15. YIKES!
Posted by: rick 918-S Aug 16 2023, 07:42 PM
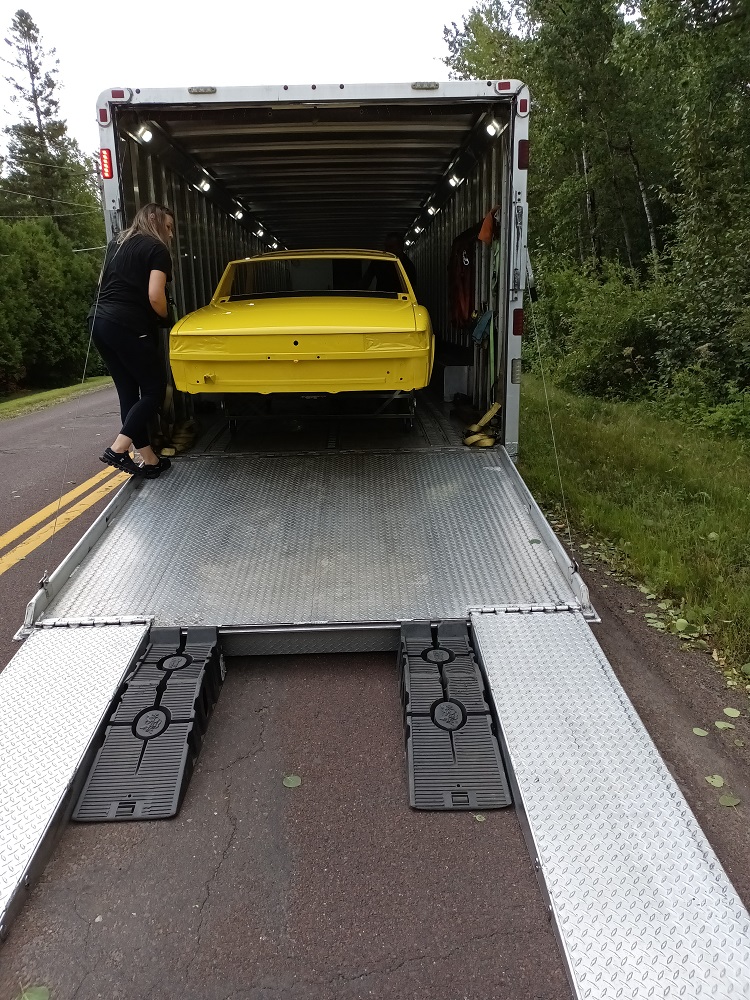
A very nice Polish Couple arrived today to pick up this reserrected 914-6 from space wreckage to the Canary it should be. They told me they will be transferring the car from the trailer to the container. That was comforting to here. It has started the long journey to Spain. Safe travels! 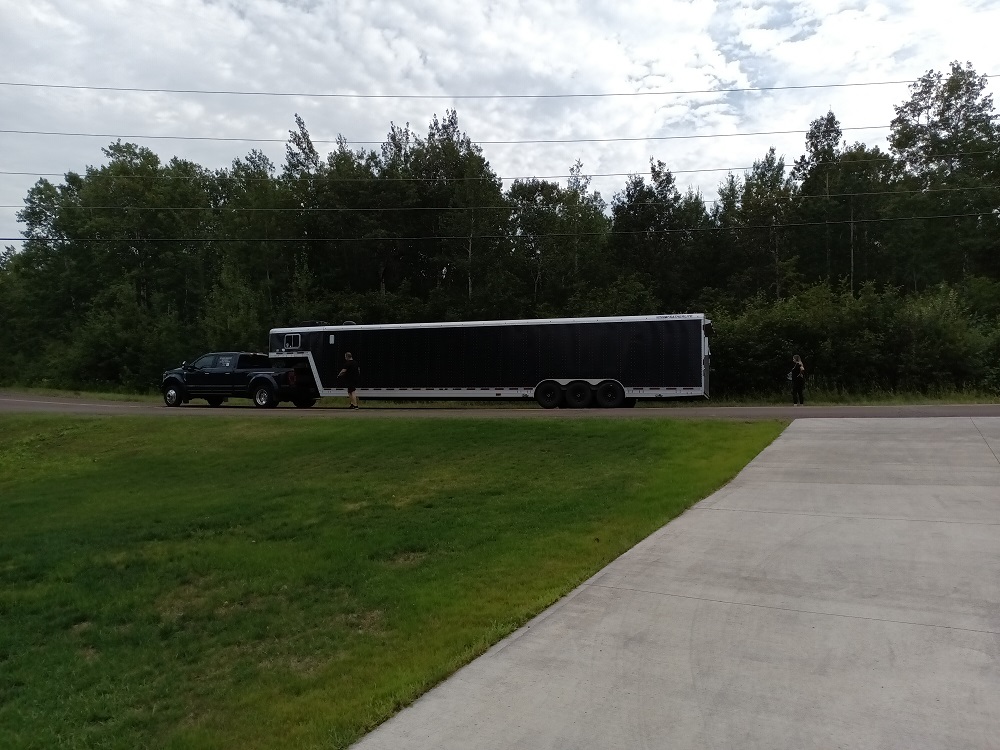
Posted by: rick 918-S Aug 16 2023, 08:11 PM
I put the headlight covers and eye brows in a plastic bin in the gas tank well for the trip.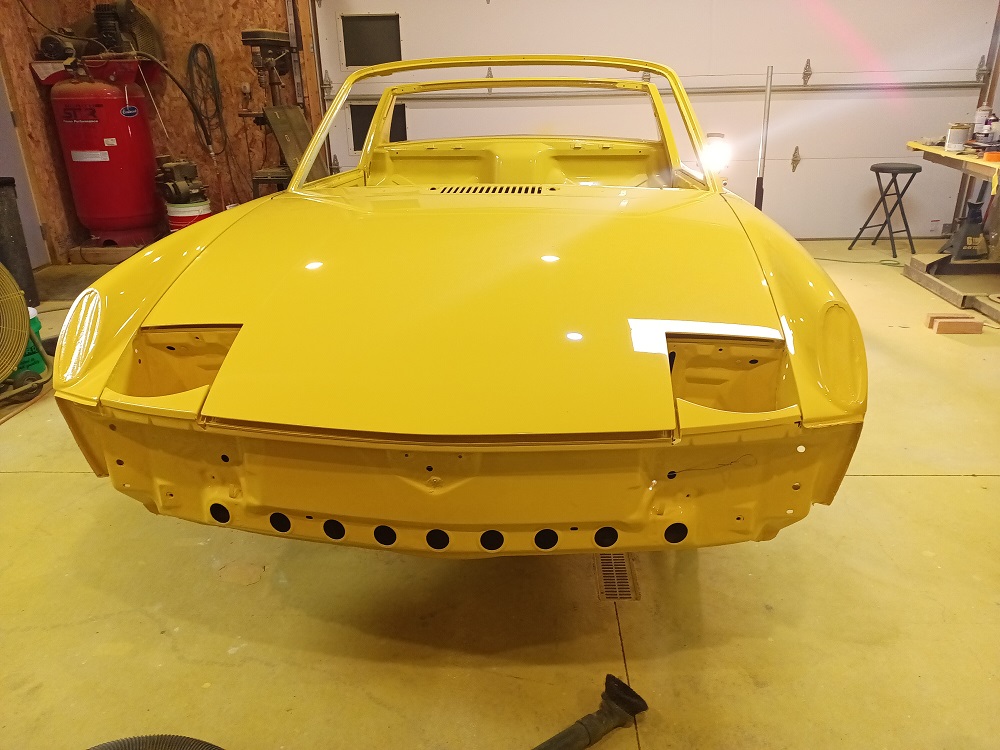
Posted by: Freezin 914 Aug 16 2023, 08:37 PM
Excellent! A job well done!!
Posted by: Bullethead Aug 17 2023, 07:26 AM


This thread documents an inspirational journey... kudos! Amazing work.
Posted by: gms Aug 17 2023, 09:07 PM
outstanding job Rick!
Posted by: rick 918-S Dec 9 2023, 12:14 PM
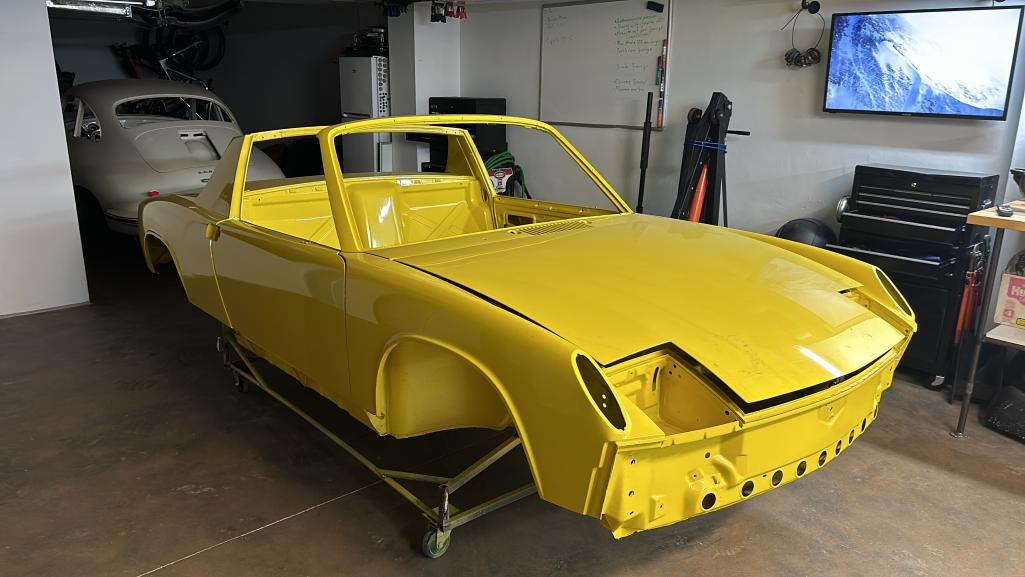
I was very excited and relieved to get this picture today! The car made it to Spain safely. Glad to see it!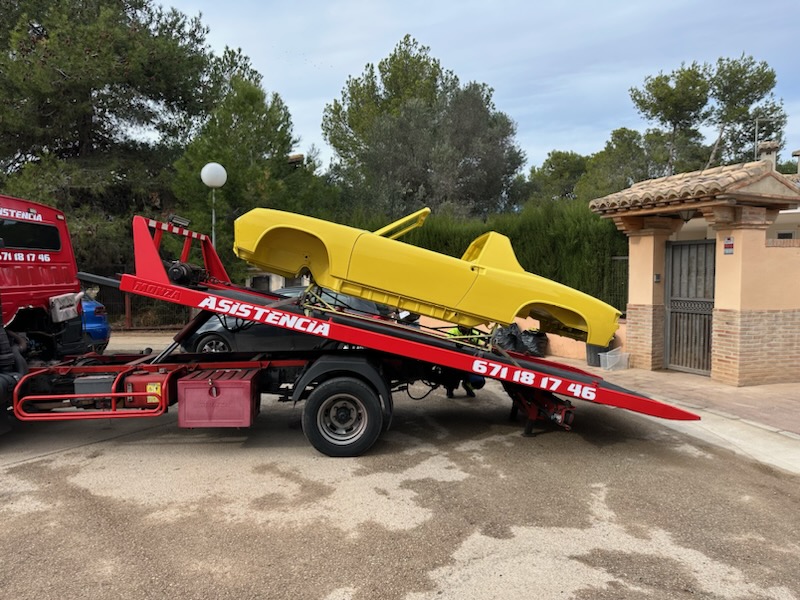
Posted by: 914 Dec 9 2023, 02:40 PM
Rick,
Wow you are very Talented..
Hope all is well..Say Hi to Sandy..
914/Alan
Posted by: Cairo94507 Dec 9 2023, 03:15 PM
What a stunning result for that beautiful 6.
Posted by: Chris H. Dec 11 2023, 09:43 AM
Wow the gaps are perfect. Very nice work Rick.
Posted by: KELTY360 Dec 11 2023, 07:23 PM
Juergen must be very pleased.
Posted by: Maltese Falcon Dec 11 2023, 07:49 PM
Perfection
Posted by: GTSandberg Dec 12 2023, 07:38 AM
Really nice work
Posted by: Front yard mechanic Dec 12 2023, 07:16 PM
Bueatiful ready for the Rain in Spain. I’m a poet and don’t know it
Posted by: infraredcalvin Dec 13 2023, 12:26 AM
Just found this, absolutely beautiful work! Congrats on getting another out the door!
Posted by: Daiberl Dec 14 2023, 04:36 PM
Rick did an amazing job with the car and I can't wait to get going and to put everything back together. For the moment I have to get settled here in Spain and do a few other projects but hope to have the -6 ready for the Spanish roads by 2025. Here are two more pictures, it's in good company!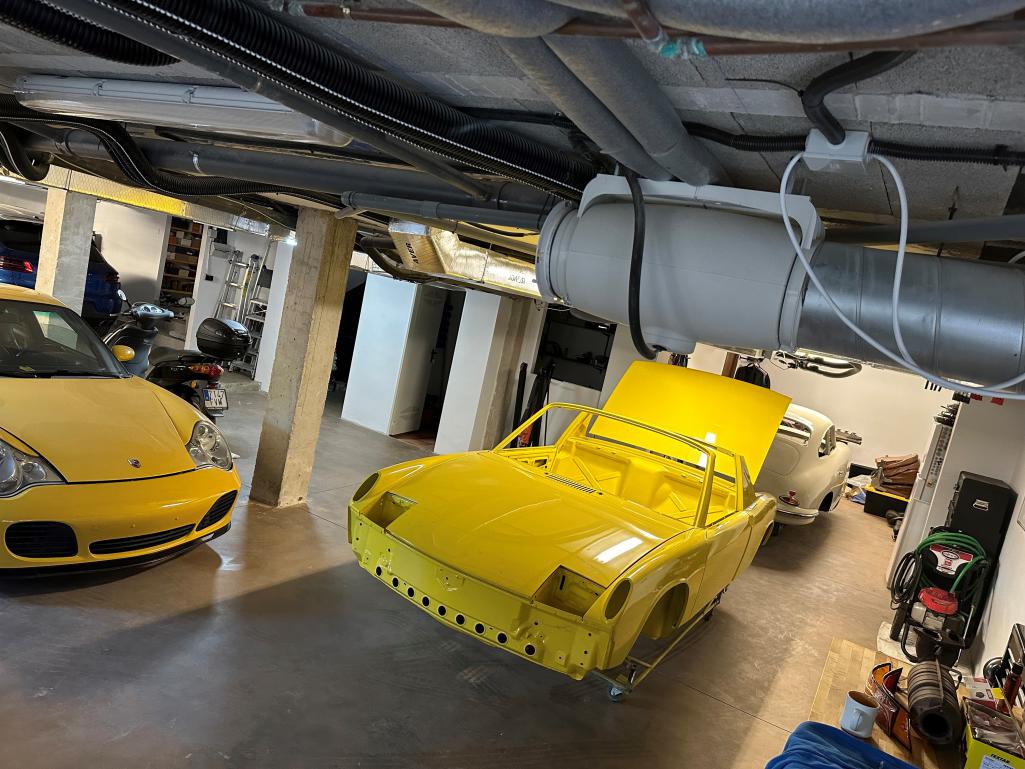
Posted by: rick 918-S Dec 15 2023, 05:33 AM
It was quite the journey. I will be looking forward to the up dates. Thank you for sticking with me.
Posted by: Craigers17 Dec 15 2023, 06:00 AM
Thing of beauty! ....and yellow! So clean with the warts removed.
Posted by: burton73 Dec 15 2023, 09:18 AM
Rick, @http://www.914world.com/bbs2/index.php?showuser=8358 918-S
The work is fantastic. Canary yellow color really pops. I hope that your back is hanging in there.
Best Bob B
Powered by Invision Power Board (http://www.invisionboard.com)
© Invision Power Services (http://www.invisionpower.com)