Printable Version of Topic
Click here to view this topic in its original format
914World.com _ 914World Garage _ Firewall tips
Posted by: obscurity Jan 2 2022, 05:08 PM
I am in the process of cutting out the rear fire wall for replacement as it was rusting along the bottom edge and and in poor condition at the bottom of the cluster of tube and cable holes. What is the best approach to removing the metal around the tubes? Do folks generally replace the tubes or try to save them. The portion in the tunnel that I can see looks ok but I have not yet taken the floor off so they could be bad further up.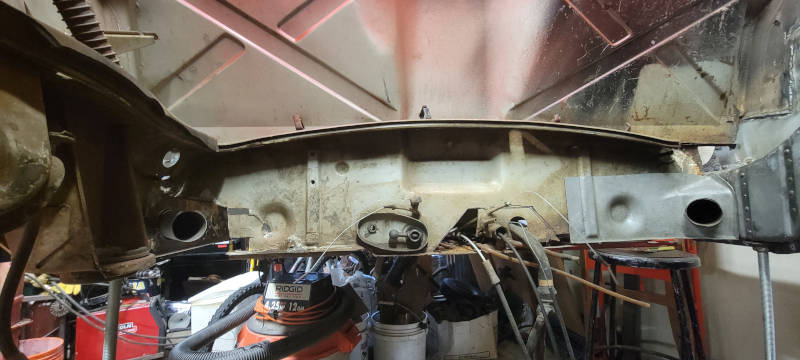
Thanks,
John
Posted by: Superhawk996 Jan 3 2022, 10:17 AM
Photo is a bit vague.
You should be able to keep the tubes assuming they aren't rotted.
Looks like you bought a patch panel but for some reason already cut it to exclude the tubes?
I'd just use that section of the new panel and "key" the holes so that you can get sections of the panel around the flared tubes.
Tubes are brazed. Do not weld them or you risk having weld penetration into the ID of the tube.
Posted by: obscurity Jan 3 2022, 12:13 PM

Photo is a bit vague.
You should be able to keep the tubes assuming they aren't rotted.
Looks like you bought a patch panel but for some reason already cut it to exclude the tubes?
I'd just use that section of the new panel and "key" the holes so that you can get sections of the panel around the flared tubes.
Tubes are brazed. Do not weld them or you risk having weld penetration into the ID of the tube.
Thanks, I did cut the panel so I could get it on both heater tubes. The photo does not show it well but the bottom edge of the panel is not in great shape as it is heavily pitted form the back so there is a lot less metal then it appears. I will try fishing the tubes through as you suggest. Good info on the brazing though and would probably explain the yellow metal I keep finding. I have never brazed... I guess I get to learn a new skill
Powered by Invision Power Board (http://www.invisionboard.com)
© Invision Power Services (http://www.invisionpower.com)