Printable Version of Topic
Click here to view this topic in its original format
914World.com _ 914World Garage _ Drex 914
Posted by: Drex Dec 22 2022, 04:30 PM
Hello Everyone
My name is Dave and middle name Rex...thus D Rex
A nickname my office girls gave to me as a play on 'T Rex'
It was quite a process to get signed up on this forum
But it appears I finally on
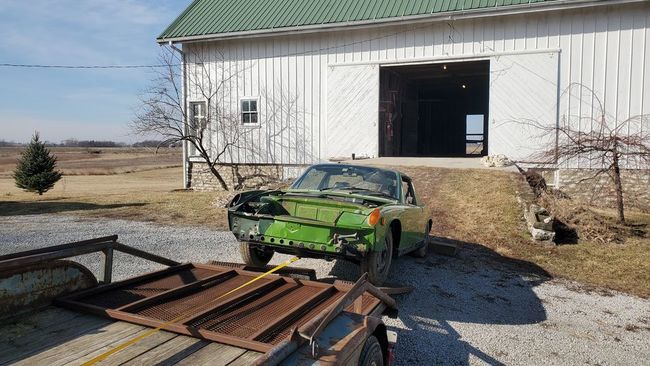
I'm in the process of buying a 1971 914
It was hit in the R front fender and now
Sat for > 40 years in a barn but was covered up
(see pic)
I own a '62 VW Beatle and had a '71 911 at one time
So am familiar with air cooled engines
Before the accident, it was apparently a running car
I know its hard to tell without a thorough inspection
But assuming it does not have much rust
How much should I be offering for it?
Thanks for all your expect advise
Drex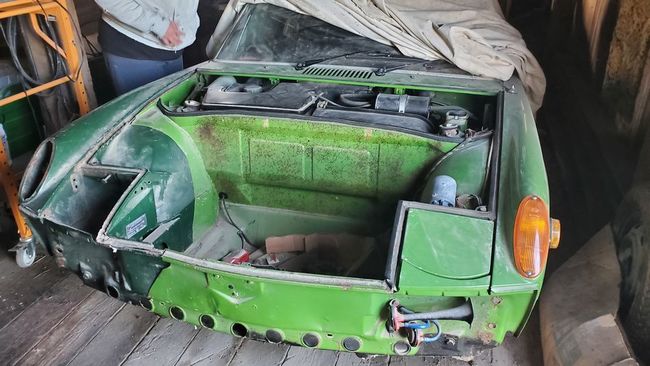
Posted by: rjames Dec 22 2022, 04:49 PM
Given it's been in an accident, have you verified that the frame is straight?
Posted by: Drex Dec 22 2022, 05:39 PM
Hi Robert
No, I cannot verify if it has a straight frame
I figure this would make a big difference
It's a 914-4
I need to look at it again
But the temp outside is -10 F right now
So may be a few weeks
I'm just looking for ballpark values
I know that it depends on condition
Searching this forum here's what I've come up with:
30,000 if in excellent shape
15,000 if in fair shape and runs good
7,500 if in poor shape but running
3,500 if in poor shape and not running
Are these accurate prices?
thanks for your help
Drex
Posted by: krazykonrad Dec 22 2022, 05:52 PM
 You've come to the right place.
Posted by: infraredcalvin Dec 22 2022, 07:12 PM
First of all welcome! You’ll get all kinds of interesting answers, starting with, more pics!
Without many more pictures or info I’d say free up to your 3500 range, no more, and I’m being nice…
Between welding and paint you’ll be underwater on that car when done. Due to the damage, unless you can really make it invisible, that will never be a top tier car.
Unless the aluminum vin tag was swapped to the original, you’ll already have two vins with different numbers… easily fixed, but will raise questions…
Posted by: JamesJ Dec 22 2022, 07:24 PM
Right front damage
Sitting for 40+ years in a barn(with critters, no doubt)
Honestly, I would find another car.
Posted by: bkrantz Dec 22 2022, 08:33 PM
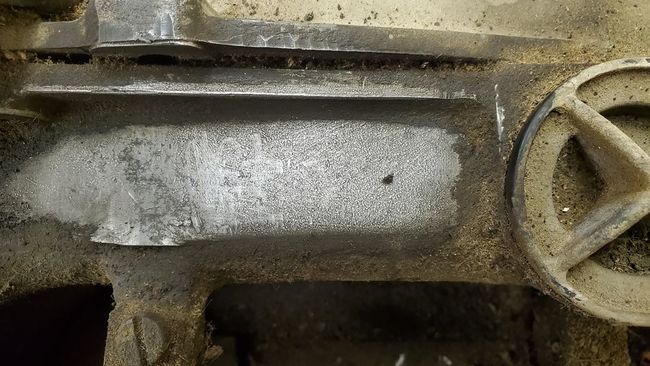
Depending on the amount of rust, especially in the longs, I would keep evaluating it. How do the front suspension settings (strut tops) look? Same on both sides? Either one pushed to the extreme (left/right or front/rear)? Can you see any damage or even wrinkling in the frunk floor pan?
Posted by: Superhawk996 Dec 22 2022, 09:54 PM

First of all welcome! You’ll get all kinds of interesting answers, starting with, more pics!
Without many more pictures or info I’d say free up to your 3500 range, no more, and I’m being nice…
Between welding and paint you’ll be underwater on that car when done. Due to the damage, unless you can really make it invisible, that will never be a top tier car.
Unless the aluminum vin tag was swapped to the original, you’ll already have two vins with different numbers… easily fixed, but will raise questions…

If there is rust in the hell hole or longs that would be a deal breaker unless it were virtually free.
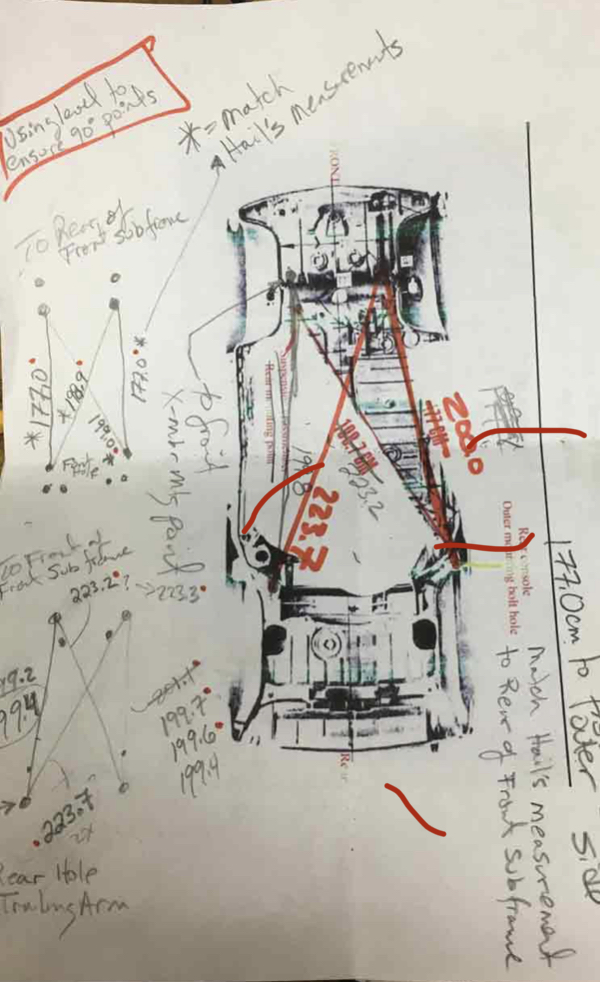
You can find underbody reference dimensions in a couple places:
http://www.914world.com/specs/underdims.php
Or look at Jeff Hails thread - lots of info buried in there somewhere around pages 9-11
http://www.914world.com/bbs2/index.php?showtopic=76791
You want to find the graphic like this one. I used Jeff’s measurements as reference and they matched my chassis within a couple mm here and there (disregard my chicken scratch) you just want his clean graphic as reference since OEM measurements reference an imaginary center line that isn’t easily measured to.
Posted by: Drex Dec 23 2022, 05:41 AM
thanks for all your help
i know it is a questionable car
but it was a friend's who died suddenly in October
so it is special to me and especially to his family
and we both would like to see it restored
i'm not much of a Concours restoration guy
my specialty is WW II Jeeps
and most of the Jeeps that win prizes are 'over restored'
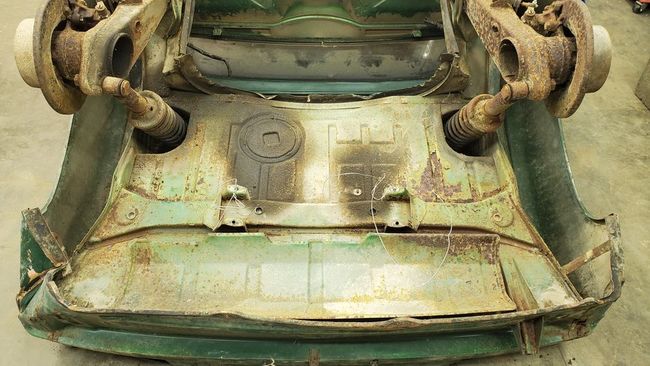
here is a picture of the rear trunk area
again, it probably doesn't tell one much
it is -7 F here in central Iowa with winds up to 45 mph
so not good weather to be inspecting an old car
thanks again

Drex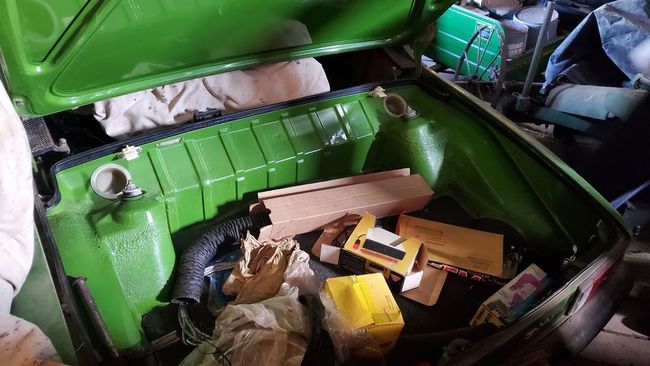
Posted by: Craigers17 Dec 23 2022, 06:51 AM
So since you know the family, has it been in their ownership the entire life of the car? If so, can you then verify the original mileage and the story of it having been in dry storage for 40 years? This would make a difference to me. Given the answers to those questions, it is likely to be a very low mileage car with minimal rust.
I would ask to remove the rockers(you might need to drill out the pop rivets on the top...you might also need some PB Blaster and an impact driver on the bottom screws). As previously mentioned you need to check out the hell hole, floor pans, and areas behind seats. In a perfect world, they would allow you to remove the seats and back pad to check out those areas.
Does it still have factory FI? That along with the fact that it looks like Willow Green would also go a long way with me. Also, does it run? Does it turn over? Does it spin freely? I personally think you might have a diamond in the rough here....especially knowing up front that it's gonna take some time & money to get it back to the way you want it. Bonus: you helped bring an old friend's car back to its former glory.
Posted by: Drex Dec 23 2022, 07:14 AM
yes,
1st chance i get, i plan to go see it again
it's about a 4 hr drive away
i think my friend bought it in '74
and was in accident in '79
he had several cars
so maybe didn't drive this one much
i'll check this all out next trip
hopefully it will warm up some
thanks
Drex
Posted by: mepstein Dec 23 2022, 07:17 AM
Based on what you’ve shown and written, it’s a $1-2k project car.
Running when parked 40 years ago doesn’t mean anything.
Repair looks fitted but not complete.
Rust is unknown
Parts may be missing.
Interior could be mouse infested, moldy or missing.
People have done more with less and achieved stunning results but that’s up to you.
Posted by: mb911 Dec 23 2022, 07:26 AM
I am the crazy guy that would love a project like that. Probably a couple grand is the value as of now.
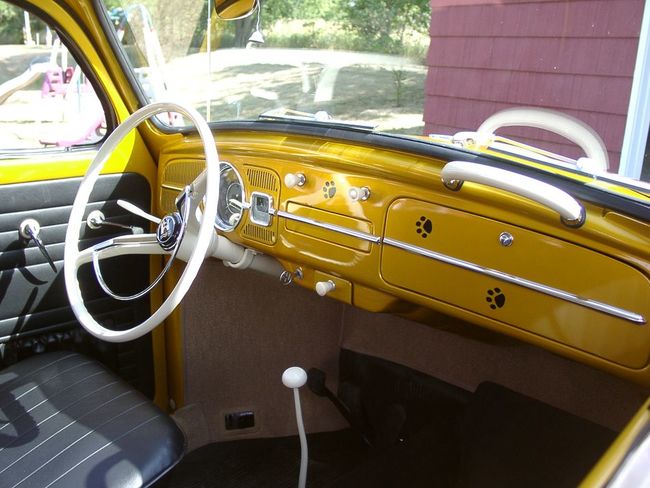
Posted by: Drex Dec 23 2022, 07:29 AM
wen i went and saw it
it was 5 F
so didn't send much time inspecting
are advantages of living in warm climates
but i've lived in Iowa my whole life
and kinda like it here
will update when i get down there
here's the panel
Drex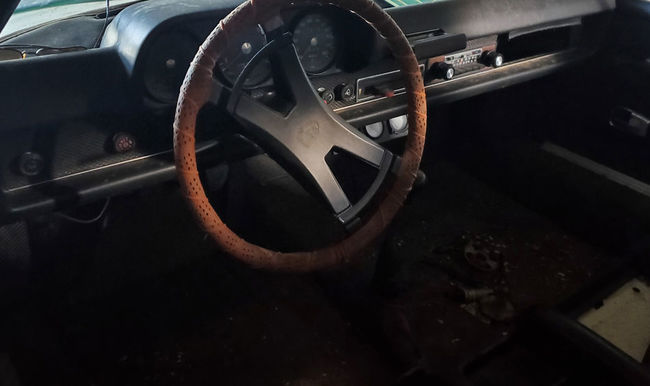
Posted by: Freezin 914 Dec 23 2022, 07:32 AM
With Craigers17 .
I would like to start with I mean no offense. Just an opinion.
I find it a little amusing people are quick to say walk away from certain cars. While you look at all the builds here, half of them are cars that had issues. Some major.
To be clear, I completely understand bodywork, rust issues will get either time consuming, and/or expensive. In most cases both. But if everyone just looked for another car, 5% of these cars would be resurrected, the rest would be parts cars or scrap. Very, very few of these cars don’t have some sort of rust issue. The major questions are how much, and how bad is it really.
Nobody wants to be upside down on a build. Unfortunately, with most project cars, hard to be on the upside, really depends on your particular skill set, budget, time available.
I agree further inspection would be important to understand the amount of money and effort will be needed to get the car to a level you will be happy with.
Good luck on whatever you decide. Try to save it! Just be honest with yourself about it’s condition what it will need.
Looks like it could very well be a prime candidate to build and let the family see it it get on the road again. It could be a very rewarding project. Willow Green! Yes please!
Just my opinion.
Posted by: mepstein Dec 23 2022, 07:53 AM
I agree, it could be a diamond. Based on what’s shown, it’s still coal but there could be more to the story. Just gotta check things out when the weather is acceptable.
A couple years back, we got a call about a rusty Porsche, under a tarp, under a carport. Owner wanted it gone. A well known restoration shop didn’t bother showing up when promised so the owner sold it cheap to my buddy. It was a ‘64 911.
Posted by: mb911 Dec 23 2022, 08:02 AM
With Craigers17 .I would like to start with I mean no offense. Just an opinion.
I find it a little amusing people are quick to say walk away from certain cars. While you look at all the builds here, half of them are cars that had issues. Some major.
To be clear, I completely understand bodywork, rust issues will get either time consuming, and/or expensive. In most cases both. But if everyone just looked for another car, 5% of these cars would be resurrected, the rest would be parts cars or scrap. Very, very few of these cars don’t have some sort of rust issue. The major questions are how much, and how bad is it really.
Nobody wants to be upside down on a build. Unfortunately, with most project cars, hard to be on the upside, really depends on your particular skill set, budget, time available.
I agree further inspection would be important to understand the amount of money and effort will be needed to get the car to a level you will be happy with.
Good luck on whatever you decide. Try to save it! Just be honest with yourself about it’s condition what it will need.
Looks like it could very well be a prime candidate to build and let the family see it it get on the road again. It could be a very rewarding project. Willow Green! Yes please!
Just my opinion.
The problem is you and I are from the same part of the country and see the same rust buckets brought back from the dead just like in my build thread
Posted by: Front yard mechanic Dec 23 2022, 08:30 AM
Buy it it’s green ! The color of money
Posted by: Cairo94507 Dec 23 2022, 08:41 AM
Welcome Drex. That looks like Willow Green to me and is a great color. These cars can be expensive to bring back after sitting for >40 years. This one needs the right front correctly repaired so it is straight and true. Then you can begin looking for other rust compromised areas. Just because it was indoors and covered does not mean rust was not busy working away on the car. I understand the connection to the car and that is admirable and cool. I would discuss all of the work needed to get her back on the road with the family and offer them $1,500 with a promise to get her running, driving and then take them for a ride when done. 
Posted by: rick 918-S Dec 23 2022, 08:42 AM
First of all.
and B: did anyone mention the car is Willow? Very cool color. Always wanted a Willow car.
Another thing. Is the original front section still there someplace it the garage? If you notice the bright colored aluminum tag on the reinforcement belongs to the donor car not the Willow car. You need that tag to be reinstalled when the car is repaired as it has the VIN# on it.
and lastly I hope you have a good shop space and are really devoted to the restoration. If not post it in the classifieds so I can buy it. LOL! Otherwise be prepared to put on your man pants and get busy. 
http://www.914world.com/bbs2/index.php?showtopic=355608&hl=Juergen
http://www.914world.com/bbs2/index.php?showtopic=104128&hl=
Posted by: SKL1 Dec 23 2022, 10:39 AM
As Hawkeye now living in AZ (and who actually used to work at your hospital, with another doc who had, or still has a nice WWII jeep) welcome to 914 world.
Trying to figure out from that one picture what the deal is with those horns on the front panel "coming" from the LF wheelwell?????? Don't think it came from the Karmann factory looking like that!
I know all about sentimentality relating to cars and families, etc so it would be neat to restore it if the rust isn't too bad...
Posted by: 930cabman Dec 23 2022, 10:46 AM
Is it an option to restore? Might be just what the doctor ordered. Have you ever driven one? Mucho fun, and if you are a car guy and have a heated shop, go for it. As far as value how she sits, I would guess a couple grand tops. GLWS if you decide to go that route
Posted by: FlacaProductions Dec 23 2022, 10:48 AM
As another former Iowawegian - welcome. I saw those horns, too - someone's been in there!
I was THIS close to retrieving the 914 I had growing up in Eastern Iowa and completely understand the sentimental side of things. No real price tag on that. I say go for it....many have done more with much less...
Posted by: Root_Werks Dec 23 2022, 11:47 AM
This looks like it could be a fun project. Hopefully the weather warms up a bit so you can get a better look at it.
If the 914 has history, that alone speaks to ensuring it's brought back to life.
-Dan
Posted by: vintagethunder Dec 23 2022, 01:52 PM
Yet another Iowegian here! Sounds like potentially a great find.
40 years stored means it was on the road for about 10 years. It has suffered some ravages but escaped others. You will have dried shrunken, rotted rubber, and seals. Fluids will have disintegrated and become varnish/gunk.
Minimum: You will want to go through the engine. It will need new body rubber, which is quite extensive on this car (but available as a kit for savings). It will need all new high pressure fuel lines, including stainless steel from the front to the fuel pump (4 pieces).
Paying shop rates to people who aren’t experienced in special cars usually ends disaster. Whether its economically viable will likely depend on your skill, ambition, and willingness to learn. Many have gone before you. I did quite a bit of tinkering on a Beetle and a 356C back in the day and I’m not finding it difficult, although being mid engined, it is more cumbersome. YouTube, 914World, Jack Raby engine building DVDs, personal web sites, and a lot of great people and vendors are out there for you. Spend this cold winter looking through previous built threads.
Many reproduction parts, plus paint and sealers are of much better quality than the original.
You can tow one home behind many mini-vans and pick-ups with a Uhaul Car Dolly. Do not attempt to back up though. The pushing the rope analogy comes into play.
Posted by: Jett Dec 23 2022, 02:07 PM
Love the color!
We bought a 914 locally many years ago that looked much worse, and because of the sentimentality we restored it to new condition. We love the car.
Attached image(s)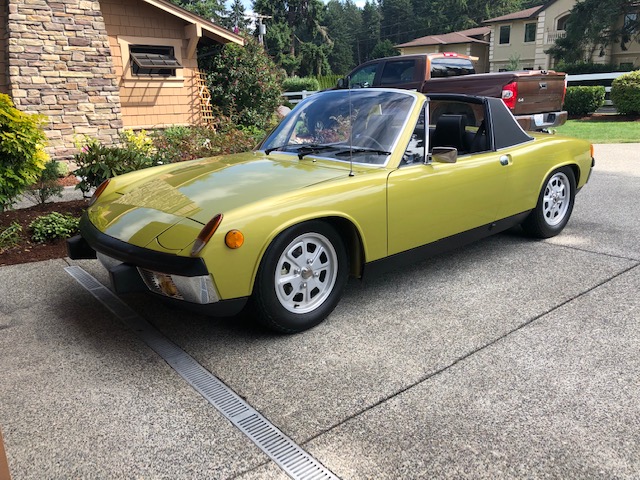
Posted by: burton73 Dec 24 2022, 02:54 PM
Welcome to the 914World, Sorry for the loss of your friend. The good news is you have time to work this out as it was a friend. Take your time and clean it up just a little and take lots of pictures. Everyone wants to help you out and at the same time we love being a detective on cars. Clean out the front and rear trunks and really take a lot of pictures.
with the pictures of the front end, can't tell if it has been welded back together it just looks like they’re butted up to each other with no welding yet with maybe some welding near the cowl. The stamped body Vin looks to be intact and even if you can't find the original aluminum one there are reproductions made. The horns where favorites of lots of guys because Weeany cars need loud horns. That is no Biggy.
The color on this car is one of the favorites of everybody.
Take your time if the family is not forced to clean out the garage because of a situation.
Good luck welcome to world.
Bob B
Posted by: Drex Dec 24 2022, 02:58 PM
thanks for all your welcomes and kind replies
i have a heated garage and to date have restored
'62 VW beatle
'42 GPW WW II ford jeep
'42 MB 'Slat Grill' WW II willys jeep
'44 WLA HD motorcycle
'42 L4 Piper airplane
so am not afraid of taking on a 914
the only thing is i had planned to do another willys jeep
and also have a '53 MG to do
weather is looking up this coming week
so may take another look this coming wed or thursday
thanks again for all your help
Drex
Posted by: Jack Standz Dec 24 2022, 03:37 PM
Willow green is a most awesome color, although I'm a little biased as my '72 is willow green (auf Deutsch: weidengrün). As far as I know, it was only offered for the 914 in 1971 & 1972.
However, please listen to the commenters. The damaged front right with a potentially sketchy fix & rust should be carefully assessed along with potential mechanical problems.
If issues look significant, it might be best to pass on this one and look for another one. It took us almost 7 years to find the right 968 cab. So, free advice: take your time and be careful. First glances look like this one can be potentially saved, but that doesn't mean it has to be by you.
Best wishes & welcome to the World!
Posted by: rick 918-S Dec 25 2022, 06:27 AM
Willow green is a most awesome color, although I'm a little biased as my '72 is willow green (auf Deutsch: weidengrün). As far as I know, it was only offered for the 914 in 1971 & 1972.
However, please listen to the commenters. The damaged front right with a potentially sketchy fix & rust should be carefully assessed along with potential mechanical problems.
If issues look significant, it might be best to pass on this one and look for another one. It took us almost 7 years to find the right 968 cab. So, free advice: take your time and be careful. First glances look like this one can be potentially saved, but that doesn't mean it has to be by you.
Best wishes & welcome to the World!
Willow

Posted by: jhynesrockmtn Dec 27 2022, 09:23 AM
Welcome. Others with more experience have already commented. Sorry for the loss of your friend. Original color does make a difference. A color like willow, if original, will add to the value later. That one pic makes it look like the interior is in very good shape possibly. That adds to the value as it sits if the vinyl parts are crack free, carpet in good shape, etc. What options does the car have? What wheels? It looks like you have all of the experience to tackle this. Best of luck!
Posted by: Drex Dec 28 2022, 07:41 AM
hello
haven't been back to see car yet
maybe tomorrow or Friday
to take a few more pictures
here is a picture of the left front wheel
turns out that my friend had no will
so the family will have to take my offer before a judge
to have the sell approved
this will happen after the 1st of the year
no telling how long this will take
or how the judge will want to handle my friend's assets
will let you all know how it turns out
Drex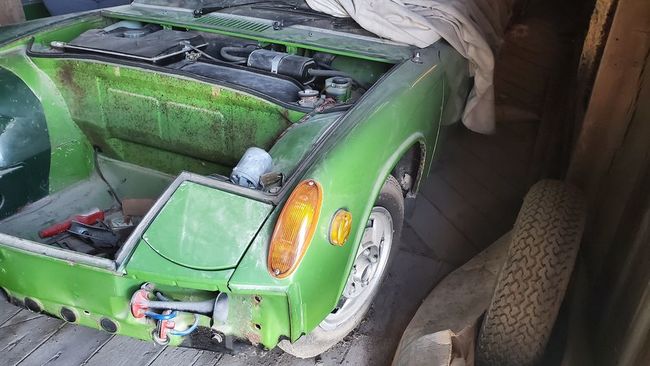
Posted by: rhodyguy Dec 28 2022, 10:06 AM
You need to make a deep, DEEP, assessment of this car before you leap. Fixing items will have 3 0s, not 2, most of the time. I imagine everything could change when the estate goes to probate. Someone will think that Porsche has great value. They would be mistaken.
Posted by: Drex Dec 30 2022, 07:33 AM
looked at this 914 again yesterday
wow...temp was 63 F
big change from the below zero we've had lately here in Iowa
my friend's sister was a big help
we found the original VIN plate for the L front fender area!
here is picture of the 'Hellhole'
looks like the battery tray is toast
but i think the area under it isn't too bad
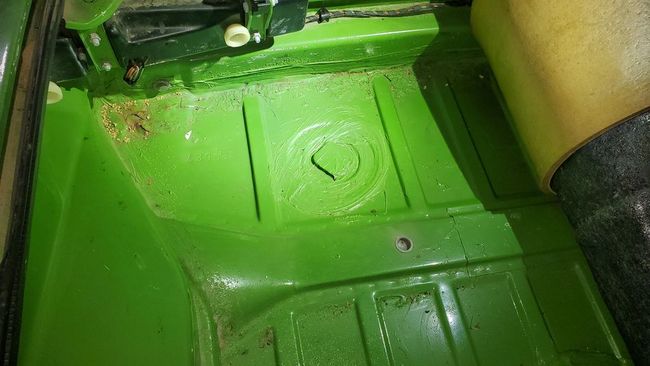
also, a picture of the rear trunk floor
looks pretty good
i did push up on the under the body
it had been undercoated
but unfortunately, felt a little spongy in places
old man rust may have invaded
but...
if the judge permits
i'm still going to buy it
thanks for all your help
Drex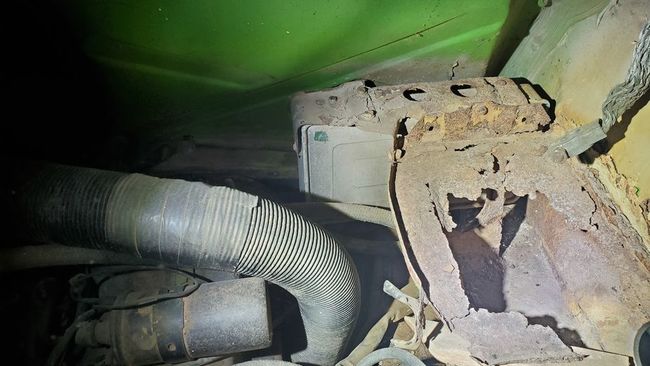
Posted by: Superhawk996 Dec 30 2022, 12:48 PM
but...
if the judge permits
i'm still going to buy it
I know this car has some sentimental value to you and that’s OK.
That battery tray is just the tip of the iceberg. By the time they are that rusted, there is significant damage to the wheelhouse inner, and the hell hole below that you can’t even see with the ECU in place. All that acid that caused the battery tray corrosion is also down in the passenger side longitudinal eating away at metal 25/7 for the last 40 years.
Don’t let a judge con you into paying much more and a couple thousand dollars for this car. As stated previously, he will likely only see PORSCHE and think it’s worth big $$
This car is will be a time and money pit - you’ll be doing the family a favour by fixing it!
Posted by: 930cabman Dec 30 2022, 01:02 PM
but...
if the judge permits
i'm still going to buy it
I know this car has some sentimental value to you and that’s OK.
That battery tray is just the tip of the iceberg. By the time they are that rusted, there is significant damage to the wheelhouse inner, and the hell hole below that you can’t even see with the ECU in place. All that acid that caused the battery tray corrosion is also down in the passenger side longitudinal eating away at metal 25/7 for the last 40 years.
Don’t let a judge con you into paying much more and a couple thousand dollars for this car. As stated previously, he will likely only see PORSCHE and think it’s worth big $$
This car is will be a time and money pit - you’ll be doing the family a favour by fixing it!
Most likely true, true and true. The repair tag or your hours will not be a cheap date.
Posted by: Drex Dec 31 2022, 09:06 AM
hello
here are two pictures of my VW
it was a basket case
but was my very 1st car
so i saved it
i plan to do the same thing to my friend's 914
today is new year's eve
have a good one!!
Drex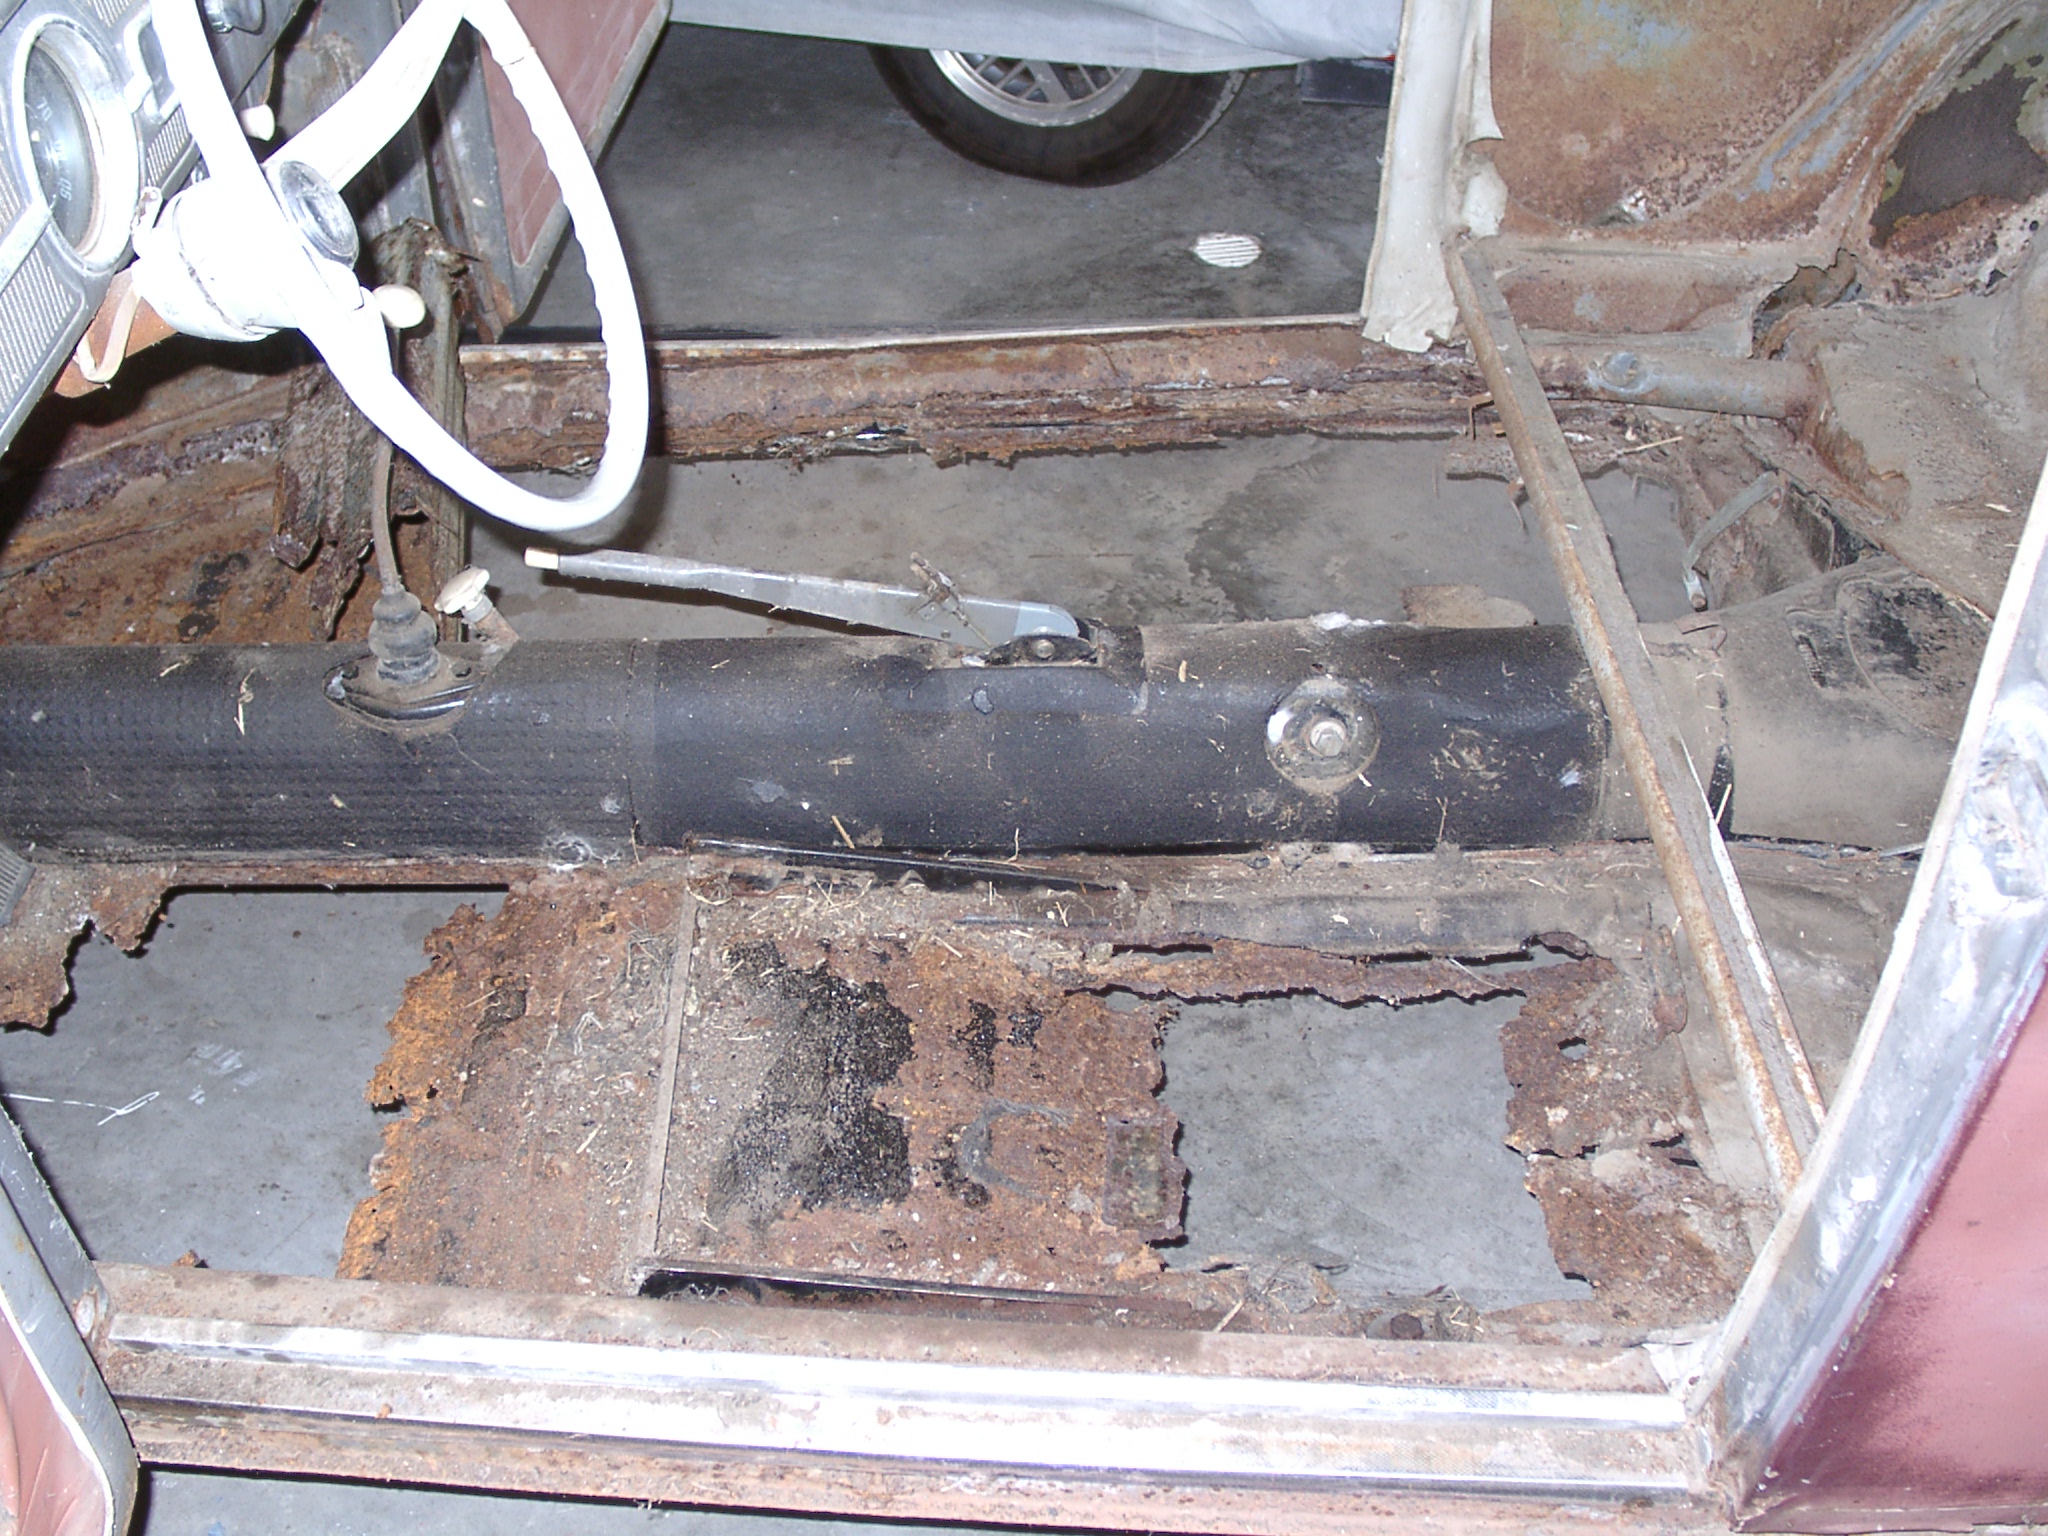

Posted by: Drex Dec 31 2022, 09:16 AM
sorry
i'd like to edit the above post
to insert smaller pictures
how do i do this?
Posted by: Cairo94507 Dec 31 2022, 09:49 AM
Go to "edit" and then go to Full edit.
Posted by: Superhawk996 Dec 31 2022, 12:51 PM
hello
here are two pictures of my VW
it was a basket case
but was my very 1st car
so i saved it
i plan to do the same thing to my friend's 914
today is new year's eve
have a good one!!
Drex
Perfect! So you know what you’re getting into !
I love seeing the rust buckets saved having done one myself. Have at it. Just don’t overpay for the privilege.
Posted by: Drex Dec 31 2022, 05:23 PM
there is no "edit'
under this post
but it is on my later posts?
Drex
Posted by: Drex Dec 31 2022, 05:30 PM

Posted by: 930cabman Dec 31 2022, 05:55 PM
Very nice early '60's bug.
Posted by: Puebloswatcop Dec 31 2022, 06:38 PM
Drex, I sure hope you can get this car and bring it back to its glory, obviously from your pics of your prior resto's you have the skills to do it.
Posted by: emerygt350 Dec 31 2022, 08:08 PM
Don't let these people scare you away. In my 30 years of mucking with old cars I have never met a group of eyores as bad as the 914 folk. But don't worry, as soon as you start tearing it apart they will all be on your side willing to help in any way they can and rooting you on.
Posted by: Drex Jan 2 2023, 07:12 AM
i'm neither worried or deterred
if it works out, i'm ready to go
if not, i'll restore another 1941 wwii slat grill jeep
you all were right about 914 costs
i took a look parts prices...WOW
my goal would be a nice looking
running 914
we'll see what this new year brings
thanks again for all your help
Drex
Posted by: vintagethunder Jan 2 2023, 08:43 PM
You can do it! Looking forward to seeing your journey.
I'm back to central Iowa quite a bit. In the spring I'll get my buddy and we'll come over in his 914 and visit!
Shop around for parts, as prices on some bits vary quite a bit. Lots of used/like new parts out there in the forums. Lots of awesome vendors.
Posted by: aharder Jan 2 2023, 09:22 PM
Based on what I saw on you Bug, Buy the car, It needs your help to put it back right!
This place will be tons of help !!
Posted by: SKL1 Jan 2 2023, 09:44 PM
You can do it! Looking forward to seeing your journey.
I'm back to central Iowa quite a bit. In the spring I'll get my buddy and we'll come over in his 914 and visit!
Shop around for parts, as prices on some bits vary quite a bit. Lots of used/like new parts out there in the forums. Lots of awesome vendors.
Take Tom up on his offer. If I was still back in IA I'd tag along with he and Ted (the mutual friend who now has a 914 back in his garage in Des Moines after many years) and check out your project, assuming the judge doesn't throw a wrench in the works... I know from experience there are some good 914 roads around Guthrie Center.
(as an aside, I'll never forget actually working at the Guthrie County Hospital the morning of 9/11 and watching the planes hit the towers...)
Posted by: Drex Jan 3 2023, 06:42 PM
my son bought me the 914-4 Haynes Repair Manual for Christmas
been looking through it
is there a single best reference book on 914 restorations?
Drex
Posted by: DRPHIL914 Jan 4 2023, 10:03 AM
my son bought me the 914-4 Haynes Repair Manual for Christmas
been looking through it
is there a single best reference book on 914 restorations?
Drex
several, here is one: Restorers guide to authenticity
https://www.amazon.com/914-6-Porsche-Restorers-Guide-Authenticity/dp/0929758293
Good Luck! -
also a former Iowa resident, born and raised in southern Mn spent a lot of time growing up around Clear Lake and Okaboji, spent 4 years in Davenport in grad school and lived in Red Oak for 3 years before moving to SC 30 years ago. I miss the hunting and fishing but not the snow/cold!.
Looking forward to seeing you get this project and return it to the road.
Phil
Posted by: SKL1 Jan 4 2023, 11:04 AM
Always good to get a 914 back on the road!
And nice to see some decent ones (and some not so decent) on BAT lately... fun to follow them and listen to some of the comments, though nothing beats 914world!
Posted by: Drex Jan 4 2023, 02:50 PM
I will be trailering it back
Will probably just use regular tie down straps
What is the best way to attach these to the 914
Thanks
Drex
Posted by: Drex Jan 8 2023, 03:22 PM
Hello
Figured out how to add an avatar
It is a smaller version of this picture
of me by my two WW II jeeps
Haven't heard about the 914 yet
hope to in the near future
Will keep you updated
Drex
Posted by: SKL1 Jan 9 2023, 08:54 PM
Well, well Drex. PM sent.
We actually know each other from "way" back. Hope you can get the car. I'm sure you can bring it back to life!
Posted by: Drex Feb 5 2023, 03:48 PM
We're making progress in buying the 914!
Judge to make decision in the near future.
BTW
Is there a good article or You Tube video
on converting a FI to Carb?
Thanks
Drex
Posted by: SKL1 Feb 5 2023, 04:23 PM
Oh boy Dave, you opened up a can of worms there!! I have Webers on both my 914's though there is a WIDE difference of opinion here about FI and carbs.
Do a search here and you should find many threads on the subject.
If I was doing it over I'd consider one of the new kits that does FI with throttle bodies that give the look of carbs with the advantage of FI...
Good luck!!!
Posted by: r_towle Feb 5 2023, 07:10 PM
1st book
Attached thumbnail(s)
Posted by: r_towle Feb 5 2023, 07:10 PM
2nd book
Attached thumbnail(s)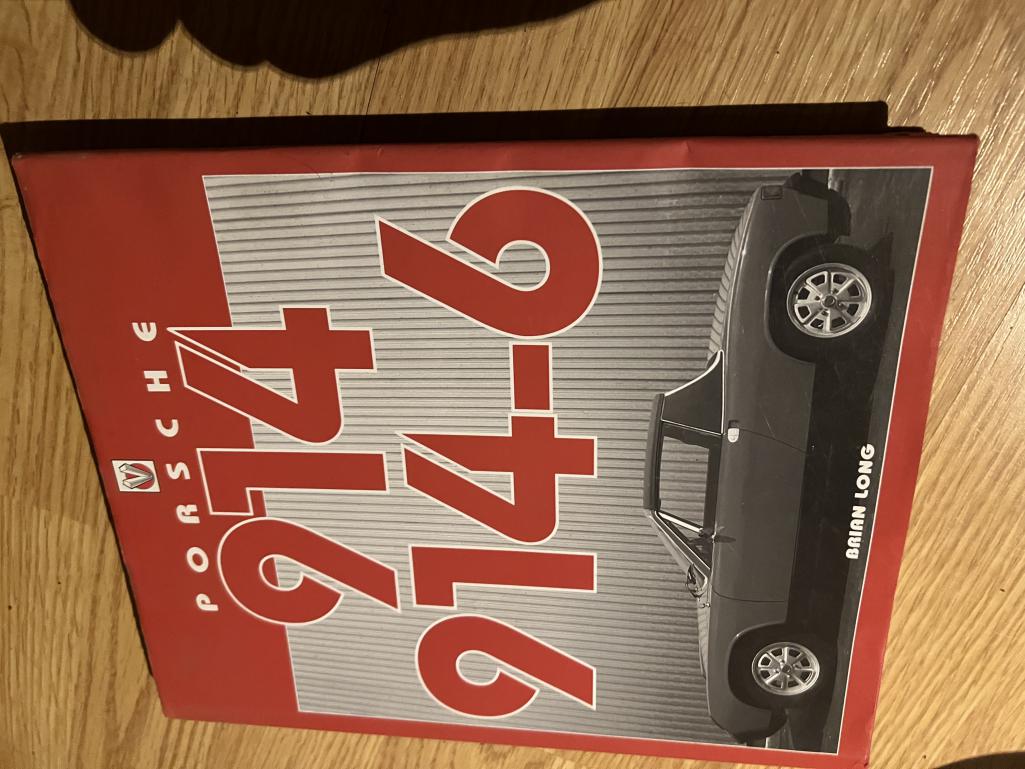
Posted by: r_towle Feb 5 2023, 07:11 PM
3rd book
Attached thumbnail(s)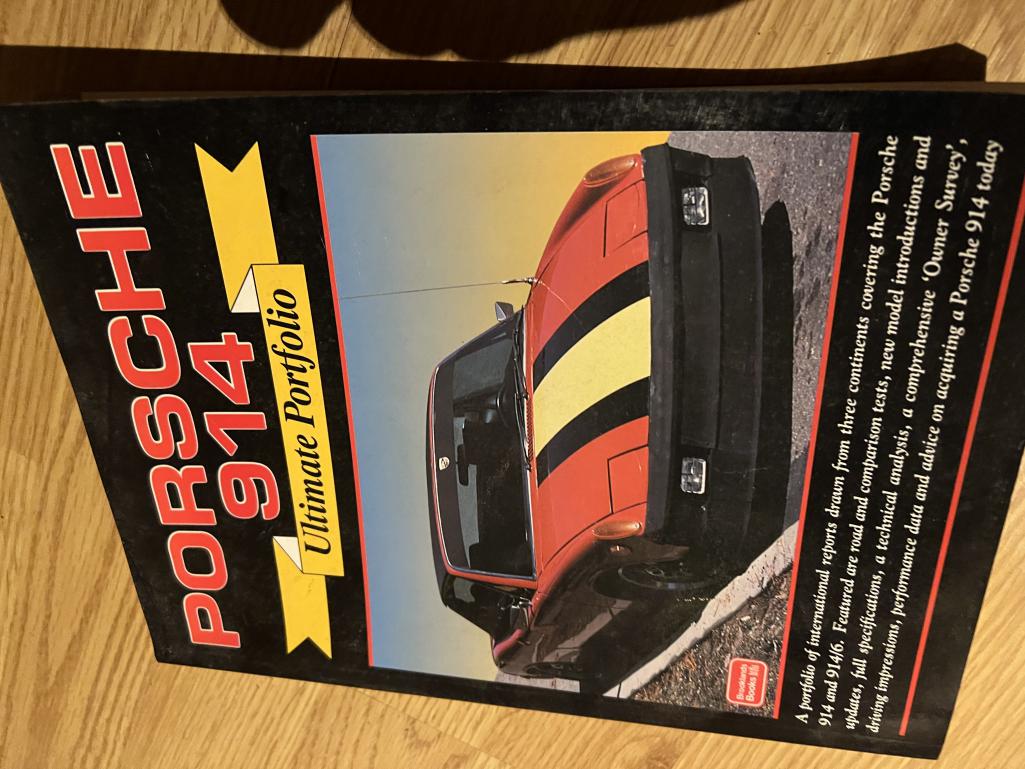
Posted by: r_towle Feb 5 2023, 07:15 PM
If you are new to aircooled you might also benefit from some VW books on the type 4.
Also, “how to keep your vw alive” is sort of mandatory old school reading, humor added.
If you have a six, lean on the /6 aircooled books on pelican parts.
Also, fir your adventure there are many vendors in the member-vendors forum.
You can buy almost 85% of the parts you need from these vendors.
The rest of the things you might need is why we all have at least two 914s
Posted by: rick 918-S Feb 5 2023, 07:50 PM
We're making progress in buying the 914!
Judge to make decision in the near future.
BTW
Is there a good article or You Tube video
on converting a FI to Carb?
Thanks
Drex
ya don't do it. The cam is designed for FI. Unless you split the case and change out the cam you will be challenged attempting to run lean enough at idle and low RPM's and rich enough at Rev to keep from dropping valve seats from combustion heat. This is not a Beetle designed to run on a single flush of the toilet. Some have had limited success but I would advise against it.
Posted by: Drex Feb 6 2023, 04:02 PM
I'd like to leave original i.e FI
are parts readily available if i went this route?
Drex
Posted by: PanelBilly Feb 6 2023, 07:30 PM
If the car will need extensive work, think about making a hot rod. There are so many options. Suby power or LS with Boxster trans. If it’s never going to be a perfect show car again, then open your mind to make it your own creation.
Posted by: Drex Feb 10 2023, 03:03 PM
thanks for the book titles
if it comes with FI
I'll probably leave it so
and hope it works okay
have been busy reading
all the technical articles
here's a picture of my 911 with my dad circa 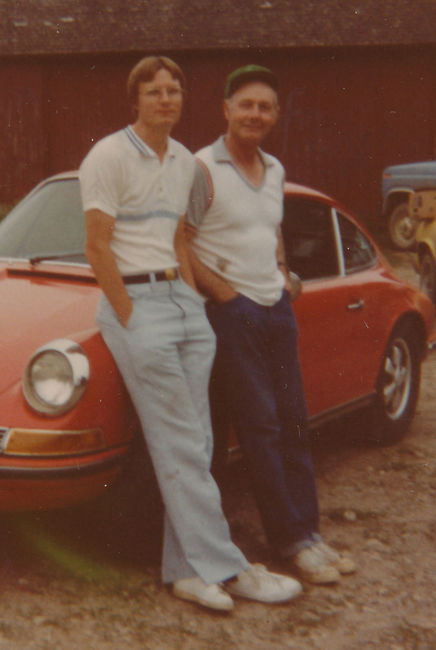
Posted by: JeffBowlsby Feb 10 2023, 05:21 PM
I'd like to leave original i.e FI
are parts readily available if i went this route?
Drex
Yes. Everything is available.
Posted by: Drex Feb 23 2023, 11:28 AM
Good News!
(Not sure my wife thinks so)
but the judge approved my offer!
Plan to pick up the 914 this coming Sunday
We received 1/4" of ice last night
and the temperature was about 5 F this am
but Sunday is supposed to be 51 F and nice.
Will have to make 2 trips as a parts car
come with it.
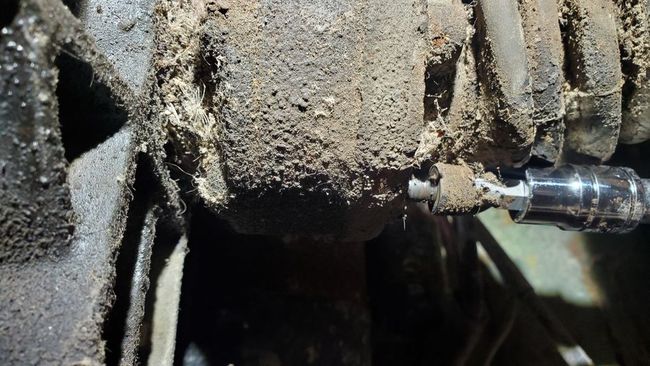
I've read the threads on endoscopes
to inspect the cylinders.
Seems the consensus is to buy
a cheap unit that attaches to one's cell phone.
But this wouldn't be able to see the valves, or would it?
Thanks for all your help
Will post pictures I.N.F.
Drex
Posted by: SKL1 Feb 23 2023, 10:32 PM
Congrats Dave- will be watching the progress.
Shoulda kept the 911!!!
Posted by: Drex Feb 27 2023, 05:37 AM
Picked up 914 yesterday
Made it home okay
Serial Number 4712902617
Serial Number of parts car is 4712915293
More pics later
Drex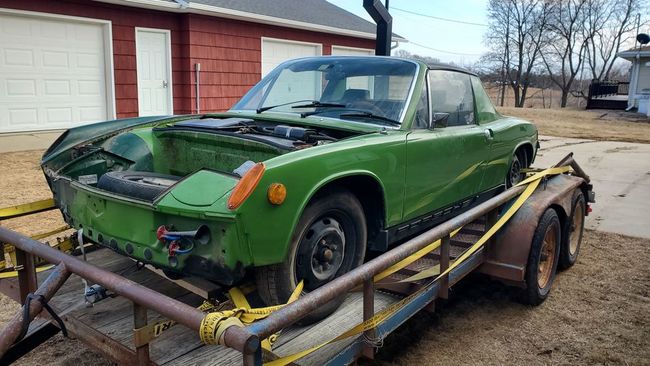
Posted by: Drex Feb 27 2023, 05:41 AM
In garage
the rear end sits very low to the ground
is this due to deflated shocks?
Drex
Posted by: rick 918-S Feb 27 2023, 06:04 AM
Did I mention that car is Willow.
Posted by: SKL1 Feb 27 2023, 11:22 AM
Sagging rear end pretty common- weak rear springs. Easily fixed- add it to the list!
Posted by: vintagethunder Feb 27 2023, 11:29 AM
Don't buy KYB shocks!
Posted by: Root_Werks Feb 27 2023, 11:33 AM
Love the color! Keep us posted on the progress.
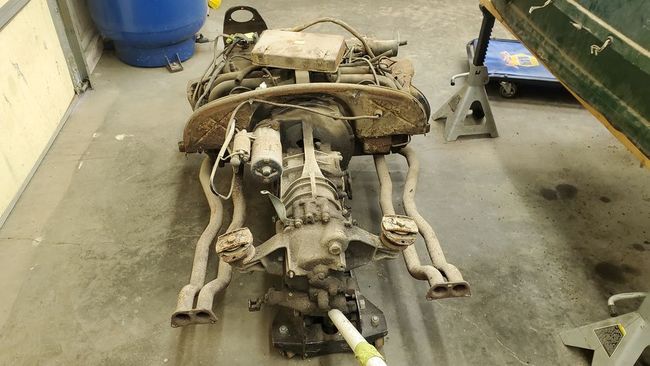
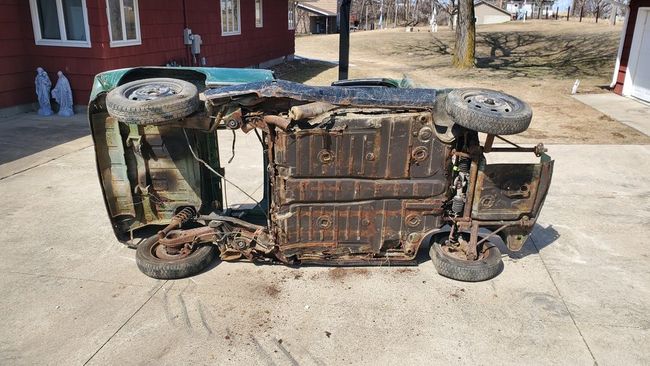
Posted by: Drex Feb 28 2023, 05:44 PM
Leave tomorrow morning
to pickup the parts car
Plan to completely tear it apart for parts
and sell the ones I don't need
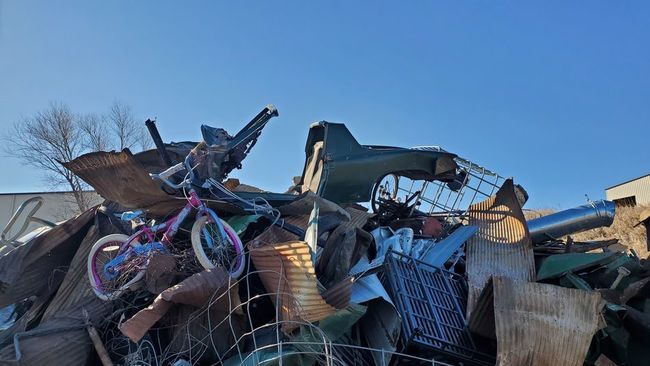
Here is a picture of it
Other than the engine
what are the major things
worth saving?
Again, appreciate all your expertise
Drex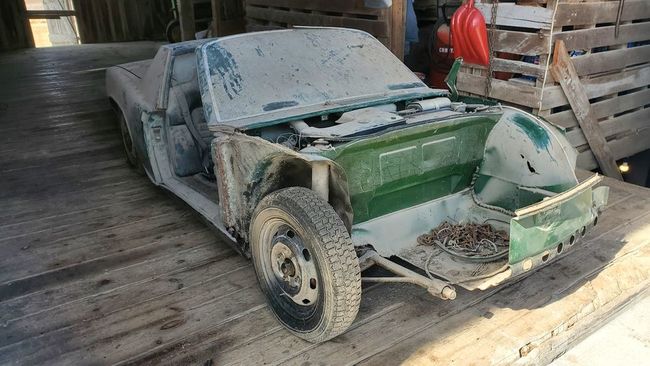
Posted by: SKL1 Feb 28 2023, 09:28 PM
Might be able to save the gas tank and some of the suspension pieces, and the wheels/tires to use at some point to help move the chassis if re-doing the wheels you're going to actually use.
Doubt much more as that looks like it is about to fold in half...
Posted by: DRPHIL914 Mar 1 2023, 07:49 AM
Leave tomorrow morning
to pickup the parts car
Plan to completely tear it apart for parts
and sell the ones I don't need
Here is a picture of it
Other than the engine
what are the major things
worth saving?
Again, appreciate all your expertise
Drex
lots of stuff to take out, the rear glass and the front windshield, suspension parts,
brake calipers a-arms and rear control arms usually worth saving can be cleaned up and re-powder coated and made new, interior if the back pad foam is in good condition it can be recovered, they dont make that foam anymore. maybe the headlight buckets, rear trunk lid hood lid, dash frame interior , gauge cluster, etc etc
Posted by: Drex Mar 1 2023, 12:58 PM
Ran into a little glitch this morning...
My F350 broke down heading down to the car!!
Had to leave my truck and trailer at a Ford Dealership
and bring a loner car home!
F350 symptoms
Sudden loss of power
Check engine light on
Idle terrible
Sounds like it is running on 2 or 3 cylinders
If I shut engine off
It restarts fine and runs fine for a few seconds
Any ideas?
Any rate
Hopefully they will fix my truck
and i'll drive back, pickup truck n trailer
and then pickup car
Drex
Posted by: Drex Mar 3 2023, 06:21 PM
Well
an exhaust temperature sensor
replacement did no good to fix my F350
Now their replacing the electronics
that attach to the valve cover gasket!
Supposed to be done Monday afternoon
so am planning to pick up parts car
Wednesday
Drex
Posted by: 930cabman Mar 4 2023, 06:10 AM
Well
an exhaust temperature sensor
replacement did no good to fix my F350
Now their replacing the electronics
that attach to the valve cover gasket!
Supposed to be done Monday afternoon
so am planning to pick up parts car
Wednesday
Drex
It doesn't stop, being in the world of 914's adds to the confusion, but it's often fun
Posted by: Drex Mar 8 2023, 07:00 PM
Finally got my F350 fixed
Required two valve cover gaskets being replaced
Houston....we have a problem!!!!!
with the parts car that is
Had a heck of a time getting it off the trailer
being's the bottom had dropped out
....but with jacks and two by fours and my
trusty winch...we got it off and into my garage
Drex
Posted by: krazykonrad Mar 8 2023, 07:45 PM
That’ll buff right out!
Posted by: 930cabman Mar 9 2023, 06:12 AM
That’ll buff right out!
No it won't, don't get the poor guys hopes up too much
Posted by: Dion Mar 9 2023, 06:35 AM
Best of luck with the project Dave, love the Willow Green…. Liking those WWII Jeeps as well!
Posted by: Drex Mar 10 2023, 10:24 AM
Do you all recommend use the
Special tangerine racing plate
to remove the engine?
or is there an easier way
which doesn't cost $135?
Thanks
Drex
Posted by: krazykonrad Mar 10 2023, 10:51 AM
There is, but I'm willing to bet that your next thought after the engine and transmission rolls off the jack and on to you or your friend isn't going to be "I'm still glad I saved that $135."
Posted by: vintagethunder Mar 10 2023, 03:19 PM
There are two thoughts on dropping the engine. One is to disconnect all but the last four bolts, jack it up high, secure with jack stands, add a 4x4 or 6x6 to the top of your jack (or the Tangerine plate), remove last four bolts then very carefully wiggle and lower the engine/transaxle.
The other way is to disconnect everything but the last four bolts, take the rear wheels off, drop the car down low until the engine is on a furniture dolly (small size, $10 at Harbor freight), take out the last four bolts, then raise the car. Put blocks in appropriate places so the chassis will not be allowed to drop too far. Two floor jacks and a buddy are helpful.
Both require you to check clearance of multiple parts multiple times. I seem to recall the injectors are one of them.
I have only used the second method. Like many mechanical things, the first time is the hardest. Next time will probably take 1/4th the time.
Note: if you are using a Quickjack hydraulic device, it will not lift a car from the extreme down (wheels off) position, even a relatively light 914 without engine and transaxle without some help from a jack.
There is a great 914 engine removal checklist somewhere out there on the internets was was extremely helpful for this first timer. Take lots of pics and sketch out and label the vacuum and fuel lines, and electrical connections. There are diagrams out there for the first two.
Good luck! Let us know how it goes!
Posted by: Superhawk996 Mar 10 2023, 03:54 PM
Do you all recommend use the
Special tangerine racing plate
to remove the engine?
or is there an easier way
which doesn't cost $135?
Thanks
Drex
Best $135 I ever spent and I’ve dropped the engine lots of times without one. Once you have one you don’t regret it. They always sell quickly on the classifieds when listed.
Use as needed - get most of your money back when done with it. Win - win.
Posted by: Drex Mar 10 2023, 04:22 PM
have car all jacked up to remove engine
followed the 914OWorld technical article
to prepare this to be done.
car kinda looks like the sinking titanic!
i did order the tangerine plate tool
i think i could have done it with the floor jack
and built up blocks on both sides of the engine
while i wait for the tool to arrive
i'll continue to remove parts in the front trunk area
Drex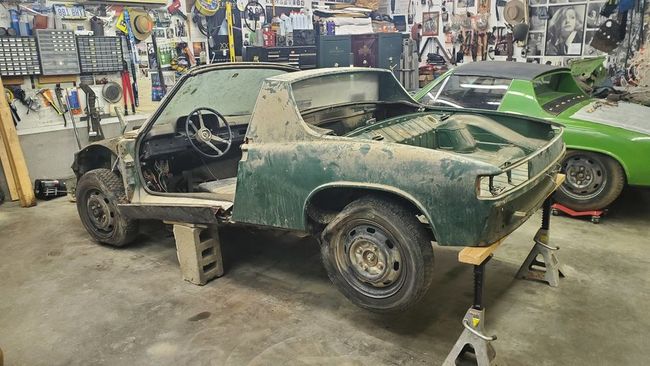
Posted by: 930cabman Mar 10 2023, 04:33 PM
You may consider cutting the car in half and working from there. Nothing connecting the front and rear can be salvageable anyway
Posted by: seanpaulmc Mar 10 2023, 08:07 PM
I’d be in for that frunk floor if you don’t need it and it’s in salvageable condition.
Thanks,
Sean
Leave tomorrow morning
to pickup the parts car
Plan to completely tear it apart for parts
and sell the ones I don't need
Here is a picture of it
Other than the engine
what are the major things
worth saving?
Again, appreciate all your expertise
Drex
Posted by: Drex Mar 11 2023, 09:37 AM
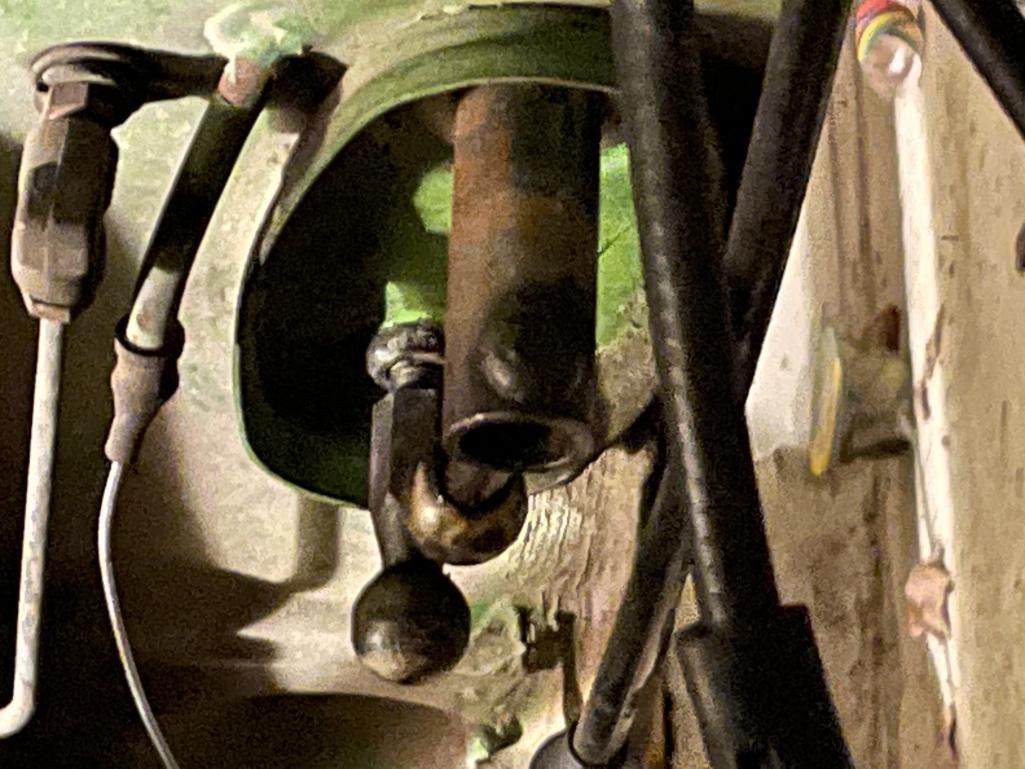
i'm having a little trouble figuring out how to
disconnect the shifting linkage just in front of the engine
the how article shows a later model 914
Drex
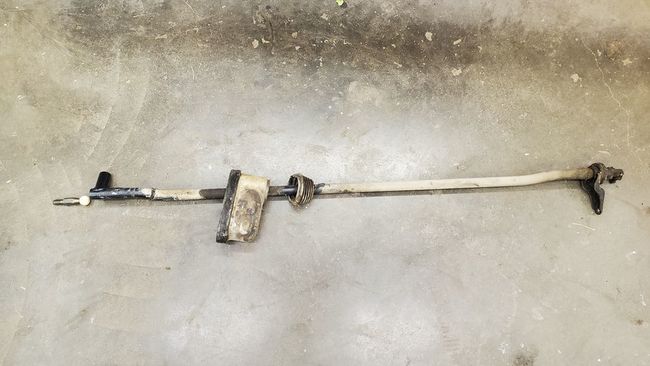
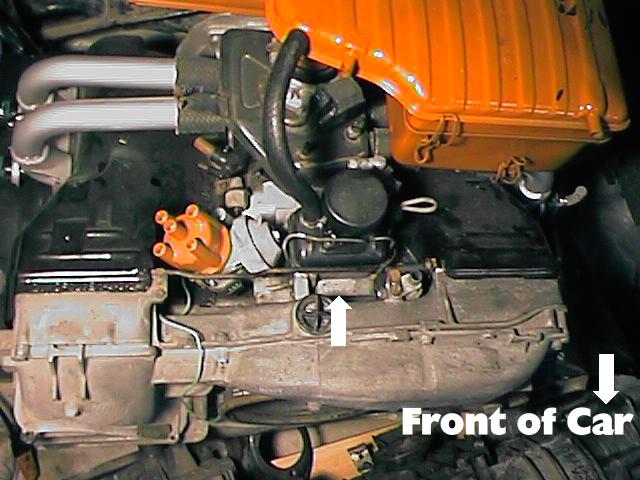
Posted by: Drex Mar 11 2023, 04:12 PM
i found this picture at:
https://zyyz.com/motorsport/project_914_02_24.htm
thank you for whoever posted it
the credit is your's, not mine
i think it illustrates the shift linkage that is in my parts car
that i'm taking apart
i'm just not sure how to go about it
it needs to be removed before I drop the engine
where does the other end of the short piece go that's at the very bottom go?
anxiously awaiting my tangerine plate tool
thanks for any input
Drex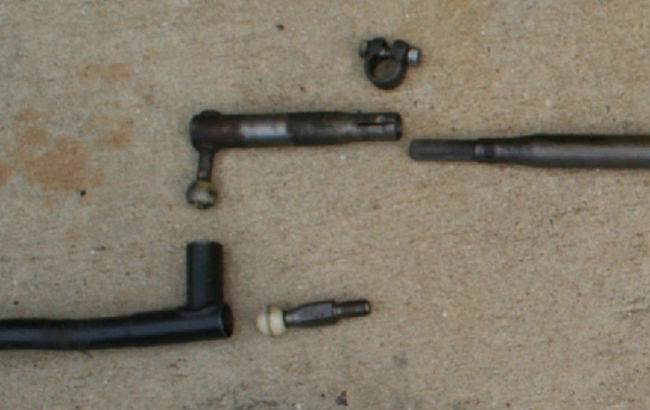
Posted by: Drex Mar 12 2023, 08:18 AM
Figured out shift linkage removal
Was pretty simple
Haven't tackled the gear shift lever linkage yet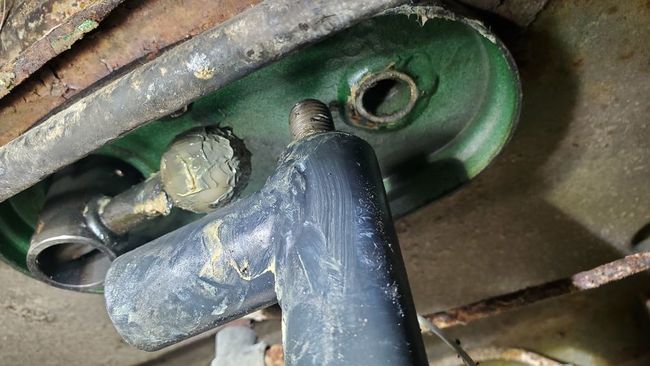
Posted by: krazykonrad Mar 13 2023, 08:36 PM
The gear shift linkage can stay in the car until the engine is out. It’s a lot easier to remove once the engine is out. And, if it’s in good working order, no need to risk dislodging the clutch tube by pulling it out.
Posted by: Drex Mar 14 2023, 03:49 AM
Krazy
i'm not quite following you on this
are you saying that i could have detached
the linkage at the firewall and then lowered the engine?
i'm waiting for the lift plate and the M8 triple square bit
Drex
Posted by: krazykonrad Mar 14 2023, 08:50 AM
Krazy
i'm not quite following you on this
are you saying that i could have detached
the linkage at the firewall and then lowered the engine?
i'm waiting for the lift plate and the M8 triple square bit
Drex
Tell you what, let me take a look at mine when I get home so I don't tell you wrong.
Posted by: krazykonrad Mar 14 2023, 05:00 PM
Tell you what, let me take a look at mine when I get home so I don't tell you wrong.
Yes, my shift rod is still in the car.
Posted by: krazykonrad Mar 14 2023, 05:01 PM
Sorry. Sideways
Posted by: JeffBowlsby Mar 14 2023, 05:24 PM
There is another way to drop the drivetrain that is safe, a bit slower than the Tangerine plate. 2 floor jacks reduce the time needed, and jackstands.
Pull rear wheels, lower the car, locating and resting the drivetrain over a furniture dolly. Chassis is supported on lowered jack stands.
Unbolt the front engine bar (2 bolts), and two rear trans supports (4 bolts)
Use 2 all-thread rods about 18 in long, with washers/wing nuts, one at each front engine bar attachment point.
DISCONNECT THE TRANNY GROUND STRAP
Raise the chassis off the drivetrain.
Posted by: Drex Mar 14 2023, 06:33 PM
interesting method Jeff
i think i'll stick to the engine plate method tho
but to be extra safe,
i'm going to place wood blocks under the engine and tranny
while i loosen the engine and tranny bolts
just in case the floor jack would fail
then remove the blocks one by one as i lower the engine/tranny
according to this forum and the plate manufactures
the engine/tranny should be balanced on the lift plate
Drex
Posted by: Drex Mar 18 2023, 04:32 AM

received the two important tools i'll
need to drop the engine
plan to do this today or tomorrow
it is 10 F in iowa this morning!
Drex
Posted by: 930cabman Mar 18 2023, 05:50 AM
Good day to recharge your battery and plan the attack
Posted by: Drex Mar 18 2023, 05:30 PM
Took out these 8 bolts
What is the best way to separate
the axles from the transmission?
Thanks
Drex
Posted by: 930cabman Mar 19 2023, 07:45 AM
Took out these 8 bolts
What is the best way to separate
the axles from the transmission?
Thanks
Drex
Give the hub a few gentle taps to seperate. There is a gasket in there, often the PO has applied some sealant in there making it "seal better". Remove the large (36mm) nut at the wheel side and remove the axle shaft.
Posted by: Drex Mar 19 2023, 12:30 PM
Engine is out of the parts car!!
Used a flat screwdriver with masking tape
and gently tapped around the CV/transmission joint
until it slowly split apart
Took a lot of patience
Had to use a grinding wheel on three of the four transmission mounting bolts
The top nuts were completely inaccessible
Also, the engine mounting bolts consisted of
recessed Allen bolts with a large nut on top
I was able to get a 17 mm socket on the top nut
and an Allen wrench, with a long extension, below
One came right off, the other broke the bolt off
If the Allen head would have stripped out
I'd would have had to cut the mounting bracket
Fortunately, this wasn't necessary
Drex
Posted by: Drex Mar 19 2023, 12:36 PM
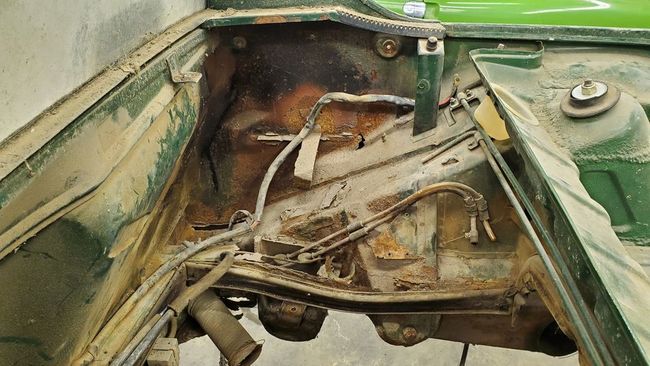
The HELL HOLE
My plan is to completely strip this parts car
and see if anyone would want to buy the body
for sheetmetal
Drex
Posted by: Drex Mar 19 2023, 12:45 PM
Drex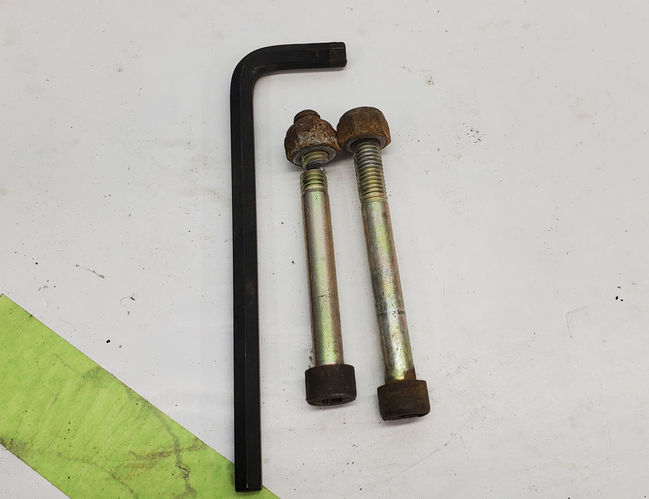
Allen engine mounting bolts
Drex
Posted by: Superhawk996 Mar 19 2023, 12:51 PM
So having done this - would you agree the Tangerine engine cradle is worth it? If answer is no, try putting it back in without. That might give an alternate view. 
Hopefully you don’t regret it. I love mine and I’m just ashamed I didn’t invent it.
Posted by: Drex Mar 19 2023, 01:07 PM

Hello Superhawk!
Yes, I was glad I spent the $ for the tangerine engine lift plate
The tough part of dropping the engine were the mounting bolts
I was extremely nervous about safety
some used wood blocks under the engine
while removing the engine mounting bolts
But the plate worked like a charm and the
engine came right down
Drex
Posted by: Drex Mar 21 2023, 05:47 AM
The main WWII jeep site is
https://forums.g503.com/
They have a Web site for pictures
to transfer into your threads
http://www.surfacezero.com/g503/index.php
Does 914World have a similar web site?
Or which site do most of you use?
thanks
Drex
Posted by: krazykonrad Mar 21 2023, 07:33 PM
You can also upload photos straight from your photos folder. It is a little confusing, but if yo look just below the emojis, there is a "file attachments" button that will let you upload from the photos folder on your computer of phone.
Posted by: Drex Mar 22 2023, 04:46 AM
Hi Krazy
I tried to do this
but apparently there is not
enough file space
The photos are greater than the global limit
Drex
Posted by: Drex Mar 22 2023, 04:51 AM
When I loaded up the 914
Was in Stockport, IA
The Clark barn was featured in
the Iowa most beautiful Barn contest
Drex
Posted by: Drex Mar 26 2023, 08:36 AM
Am currently removing the pedal cluster from the parts 914
There appears to be 4 bolts holding the mounting bracket.
The back to bolts are straight forward
But how are the front two bolts attached to the frame?
Thanks
Drex
Posted by: 930cabman Mar 26 2023, 08:57 AM
Am currently removing the pedal cluster from the parts 914
There appears to be 4 bolts holding the mounting bracket.
The back to bolts are straight forward
But how are the front two bolts attached to the frame?
Thanks
Drex
There are 2 nuts accessed from the underside also holding the master cylinder.
Do you have a Haynes or Clymer manual. very informative
Posted by: Drex Mar 26 2023, 09:52 AM
yes, i have both
there appears to be a very heavy plate
underneath the car that covers up access to these nuts
i have a 1973 Clymer manual
but could not find anywhere how to remove the pedal assb as a whole
Drex
Posted by: Drex Mar 26 2023, 10:08 AM
well...I think i figured it out...
remove the bottom access panel
this exposes the master brake cylinder
and think the bolts that hold it on
are the same two bolts that hold down
the front of the pedal assb mount
does this sound right?
thanks
Drex
Posted by: 930cabman Mar 26 2023, 11:27 AM
well...I think i figured it out...
remove the bottom access panel
this exposes the master brake cylinder
and think the bolts that hold it on
are the same two bolts that hold down
the front of the pedal assb mount
does this sound right?
thanks
Drex
Exactly, and you saw the plate is lightweight 18 or 20 gauge like everywhere. I first thought this access panel was a skid plate.

Posted by: Drex Mar 26 2023, 12:51 PM
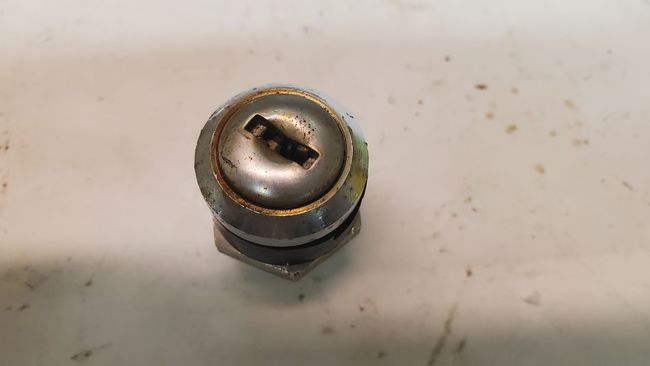
This was just left of the glove box on the panel
What was it used for?
Drex
Posted by: 930cabman Mar 26 2023, 01:54 PM
1975 Ford Pinto, rear door
Posted by: Drex Mar 26 2023, 03:32 PM
whoo...
i'm not following you?
Drex
Posted by: FlacaProductions Mar 26 2023, 03:34 PM
This was just left of the glove box on the panel
What was it used for?
Drex
Glovebox lock.
I think you would be well served to get a Haynes manual.
Posted by: Drex Mar 26 2023, 05:09 PM
That makes sense
I have a lot of pictures of 1971 interiors
and none of them had this lock
I also tried to search for 'dash lock'
and could not find a specific answer
I did get hits on a few threads
but they were double digits long
I almost have the parts car disassembled
so will see about getting the 'better' 914 running
....I'll try not to ask dumb questions
Drex
Posted by: 930cabman Mar 26 2023, 05:44 PM
All of us were beginner's at some point and there are no dumb questions, the members here have been very helpful to me and will continue to assist as we are able. What decent parts are salvageable from the parts car?
Posted by: krazykonrad Mar 27 2023, 11:05 AM
Here are the parts manual from Porsche:
https://www.google.com/url?sa=i&rct=j&q=&esrc=s&source=web&cd=&cad=rja&uact=8&ved=0CDUQw7AJahcKEwiI_un6yvz9AhUAAAAAHQAAAAAQAg&url=https%3A%2F%2Fwww.porsche.com%2Fall%2Fmedia%2Fpdf%2Foriginalparts%2Fen%2FE_914_KATALOG.pdf&psig=AOvVaw2IHOiguBd9QWtTKz0y4RIe&ust=1680022836752246
Here is the service manual:
http://p914-6info.net/Manuals.htm
Posted by: Drex Mar 29 2023, 03:02 PM
Pretty much done topside
so pulled parts car outside with my bobcat
flipped it over and pushed it back into the garage
Does anyone see anything, other than the rims,
that would be salvageable?
Am about ready to take the remaining body to the dump
Thanks
Drex
Posted by: Jamie Mar 29 2023, 03:24 PM
Pretty much done topside
so pulled parts car outside with my bobcat
flipped it over and pushed it back into the garage
Does anyone see anything, other than the rims,
that would be salvageable?
Am about ready to take the remaining body to the dump
Thanks
Drex
Those appear to be original steel wheels that might have some service left if they are in salvageable condition.
Posted by: Dion Mar 29 2023, 03:28 PM
Trailing arms, steering rack out? Some might need them.
Posted by: rick 918-S Mar 29 2023, 04:55 PM
Brake Caliper cores
Posted by: seanpaulmc Mar 29 2023, 05:26 PM
Frunk floor.
Posted by: Drex Mar 29 2023, 06:55 PM
The rear trunk floor pan was pretty rusty on the rear edges
I don't think it can be saved
The car is just about ready to break in half!!
I have a lot of parts I have taken off.
Do I dare post a picture of them on this thread
or would this inappropriate?
Thanks
Drex
Posted by: SKL1 Mar 29 2023, 08:54 PM
Mention the parts Dave, and then list them on the classified section.
Boy, there is NO snow left is there?
Assume that car lived it's life in Iowa and paid the price!
Posted by: friethmiller Mar 30 2023, 01:19 PM
Can you make sure to add your parts car to the VIN database? Alive or dead, we track them here.
http://www.914world.com/bbs2/index.php?act=membervins
Posted by: Drex Mar 30 2023, 04:28 PM
Will do
Haven't located the engine number yet
Drex
Posted by: seanpaulmc Mar 30 2023, 06:35 PM
The rear trunk floor pan was pretty rusty on the rear edges
I don't think it can be saved
The car is just about ready to break in half!!
I have a lot of parts I have taken off.
Do I dare post a picture of them on this thread
or would this inappropriate?
Thanks
Drex
Rear trunks typically see rust from water damage.
Posts #75 and #127 show, from here, that the floor of the front trunk, also called “frunk”, looks to be in one piece. Many are chopped up from having A/C systems installed or lumpy from floor jack usage. The metal may not be perfect but looks salvageable, again from this perspective. New is available but if this one is going to the scrap yard someone here
 may be able to use it.
 I might have another piece in mind if you are going to cut it up. LMK.
Regards,
Sean
Posted by: rick 918-S Mar 31 2023, 05:59 AM
Sent you a PM. Glad you found that parts car.
Posted by: krazykonrad Mar 31 2023, 10:41 AM
Will do
Haven't located the engine number yet
Posted by: Drex Mar 31 2023, 06:55 PM
Is this where the SN is supposed to located?
Is it there but I can't see it?
I think I saw somewhere
where it is located on the flat where the spark plugs are
Drex
Posted by: JeffBowlsby Mar 31 2023, 09:02 PM
Did you pull the main chassis harness out and did it come out in one piece?
Posted by: Drex Apr 1 2023, 05:21 AM
I have not saved the harness yet
Are they worth saving?
Also, here is the rear trunk floor
Look good enough to save?
The trailing arms look awful rusty
Is this just appearance and would
they sand blast and powder coat ok?
Finally, I'm having a heck of a time
getting to, and removing the rear
brake calipers
thanks
Drex
Posted by: JeffBowlsby Apr 1 2023, 08:19 AM
If the harness wiring is not cut or hardened it can be reused. Even if it has a few cut wires it can be repaired. If you remove, no need to cut anything especially where pulling it through the engine bay firewall, that cut destroys the harness. You will need to just remove the plastic connector housings at the relay board 14 pin connector, fuel pump connector and headlight connectors. Pretty simple, just compress the wire terminal tangs and pull the terminals out of the housings.
You have a 71 - which version of the chassis harness do you have early or late? The difference is best seen at the steering column connector - is it 12 pin or 14 pin?
Posted by: Drex Apr 1 2023, 02:31 PM
On parts car:
window SN is 41712915293
front door jam is 2899508
paint code is L 60 E (so Irish Green)
rear door jam is 07/71 4712915293 very hard to read (I suspect it is the same as the window SN)
engine number not found yet
Drex
Posted by: SKL1 Apr 1 2023, 02:34 PM
Unless they're bent the rear trailing arms would probably clean up ok with blasting etc. With new bushings and bearing I'd bet they would be usable.
Posted by: Drex Apr 1 2023, 03:28 PM
Jeff, is this the pin connector your talking about
I only count 13 pins
Drex
Posted by: JeffBowlsby Apr 1 2023, 06:52 PM
Thanks Drex! You have the late-1971 chassis harness, lucky you! The connector is a 14 pin connector but it correctly has only 13 pins. Willl PM you.
Posted by: krazykonrad Apr 2 2023, 10:43 AM
Is this where the SN is supposed to located?
Is it there but I can't see it?
I think I saw somewhere
where it is located on the flat where the spark plugs are
Drex
The engine number should be just in front of the oil fill "tower." Its on the flat, horizontal lip at the front of the "tower's" base.
Posted by: Montreal914 Apr 2 2023, 10:50 AM
Maybe:
- Muffler heat shield that we see in your upside down picture if in salvageable state.
- Center section of the firewall might be useful to someone with a six conversion to make an access panel.
Edit:
I know I could use this fender bracket 

Posted by: Drex Apr 3 2023, 06:51 PM
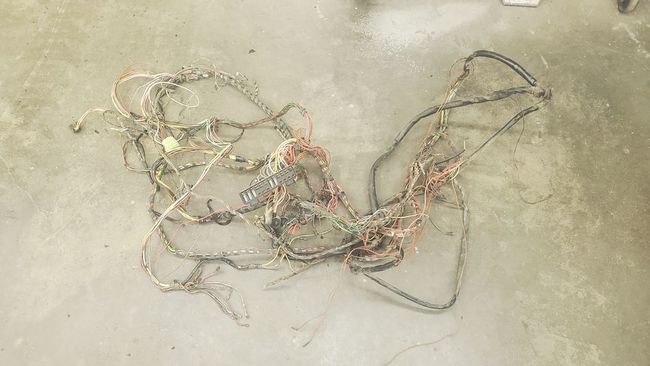
Removed the complete harness today
It's a little beat up in areas
but mostly intact
Pushed a lot of wires thru tiny holes!!
Drex
Posted by: Drex Apr 6 2023, 10:42 AM
Well...
The remaining carcass of my parts 914
Went to the dump today
400 lbs
Ready to start in on the real project
Drex
Posted by: Drex Apr 10 2023, 09:23 PM
I have several parts for sell
but as a newbie
have no clue what to ask for them
What's the best way to research
and find out what a specific part is worth?
Thanks
Drex
Posted by: r_towle Apr 10 2023, 11:05 PM
Lol,
I’m so lazy and this thread has 16 pages
1st thread….look I bought a project car
Last page, I’m cutting up the chassis and scrapping it out.
We have all done this.
Keep all the good parts for the next one.
Posted by: Montreal914 Apr 11 2023, 08:44 AM
That is a really sad picture to see these days...

------
As for part prices, I would check the classified. Or even simpler, google : "Connecting rods for sale 914World" and old adds will pop up.
I typically go cheap so the past move fast. GLWTS!
Posted by: Drex Apr 11 2023, 06:52 PM
Believe me, I agonized long and hard over scrapping this 914 parts car
As a WWII Jeep restorer
I have gone to great lengths to save basket cases as they are so rare;
they say there are only about 25,000 - 30,000 left in the world.
All these jeeps were loaded on aircraft carriers and dumped into ocean!!
Posted by: Superhawk996 Apr 11 2023, 06:55 PM
All these jeeps were loaded on aircraft carriers and dumped into ocean!!
It was the environmentally conscious thing to do. Providing homes for the fishies and essentially making an artificial reef.


Posted by: Drex Apr 26 2023, 01:56 PM
Will be replacing all fuel lines I.N.F.
Is it a good idea to buy the complete set from Tangerine
which includes a fuel pump?
or buy stock SS and hose, bend and cut it to length on my own?
which pump would you recommend, 2 or 3 port?
and where to locate it, up front? I live in Iowa
so, not too hot here
thanks all for advise
trying to avoid dumb Q's
still deciding where I'll put
the lock for the '75 rear door Pinto
Drex
Posted by: vintagethunder Apr 27 2023, 10:36 AM
Before there were ready made SS lines, people did bend their own. There are some articles out there on the web. Someone mentioned they bent their own and got the swelled part on the ends done at a hydraulics shop.
When I was looking last year, Pelican were the only place not selling them as a full set. But after I ordered they didn't actually have the engine compartment set, and hinted they may never get them again.
As for fuel pumps, I don't recall reading either being more resistant to vapor lock. I can tell you friends in Iowa back in the day did battle it. The 2 port that is popular is available relatively cheaply. I'm going to use my three port pump as long as it works.
As for the flexible line, there are diagrams that show how long each piece should be and where they go. Use SAE 30R9 rated fuel hose and correct FI hose clamps. 5/16" works for 8mm.
To avoid vapor lock most move the fuel pump and filter to the front, under the fuel tank by the steering rack, but some cured it simply by moving it from the right side to the firewall away from the most intense heat, and tied the long flexible fuel line up top so it didn't lay across the engine. That is what I'm going to do.
Posted by: SKL1 Apr 27 2023, 03:59 PM
Dave, I would mount the fuel pump up front. I lived in Iowa for over 65 years, a lot of that with at least one of my 914's and I can tell you I had fuel pump issues in the original location!
Posted by: Drex Apr 30 2023, 04:27 AM
I'm planning to have the fuel tank boiled out
Will this effect the original paint?
I read on one thread that the paint can be duplicated with
Rust-Oleum Flat Black paint code 7776
Drex
Posted by: FlacaProductions Apr 30 2023, 07:27 AM
Dave, I would mount the fuel pump up front. I lived in Iowa for over 65 years, a lot of that with at least one of my 914's and I can tell you I had fuel pump issues in the original location!
I would echo this - I lived in Iowa with a 914 for 10 years and the only real probably I had was involving vapor lock in the summers....
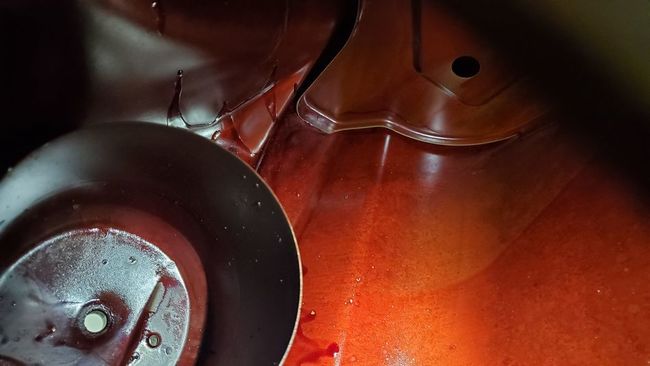
Posted by: Drex May 1 2023, 05:46 PM
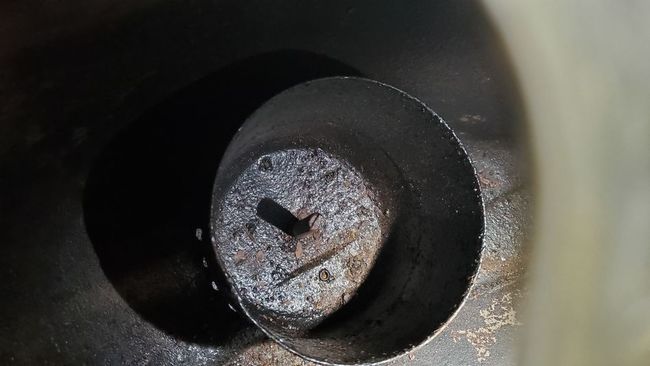
working on the restoration now
fuel tank out (there were no rubber buffers to support tank!!)
here is pic inside tank
is this where the bottom fuel lines enter the tank
and where is the strainer located?
thanks
Drex
Posted by: 930cabman May 2 2023, 06:01 AM
Not the best lookin innards, might have her "boiled out". The brass (very fragile) sock is whats protruding. About 3/8" x 3" tall.
Posted by: Drex May 2 2023, 07:48 AM
Called Tangerine Racing today
They recommend the SS kit with late market 2 way fuel pump
with mounting on the firewall
To test an old fuel pump
Does one simply apply 12v to the terminals?
and see if it spins ok?
Drex
Posted by: rjames May 2 2023, 09:23 AM
working on the restoration now
fuel tank out (there were no rubber buffers to support tank!!)
here is pic inside tank
is this where the bottom fuel lines enter the tank
and where is the strainer located?
thanks
Drex
The search function is your friend. The built-in search function on the site is effective but can be a bit challenging to use, but you can also just use google and preface your search string with '914world'.
http://www.914world.com/bbs2/index.php?showtopic=95677
And yes, boiling the tank will strip the paint, too, as well as leave it unprotected from rust. You'll want to treat the surface (both inside and out) fairly quickly afterwards to keep it from flash rusting. I think you can use denatured alcohol for that. I used Por15's Metal Prep product.
Posted by: Jamie May 2 2023, 12:23 PM
working on the restoration now
fuel tank out (there were no rubber buffers to support tank!!)
here is pic inside tank
is this where the bottom fuel lines enter the tank
and where is the strainer located?
thanks
Drex
Skip attempting to boil out the tank and replace with new replacement. I discovered too late that a new tank cost less than what I paid for boiling out and painting several years ago. I also skipped replacing the internal sock filter by installing an external filter in line before new pump installation near the steering rack up front, eliminating the vapor lock problem from original pump location in engine bay.

Posted by: Drex May 2 2023, 01:06 PM
JamieD
did you use a stock 3 port pump up front?
thanks
dave
Posted by: Jamie May 2 2023, 02:04 PM
JamieD
did you use a stock 3 port pump up front?
thanks
dave
I installed a new 2 port pump, believe the brand was Airtex recommended by Clay, don't remember the exact model number. It has worked like a champ for several years.
Posted by: rjames May 2 2023, 07:52 PM
If your tank is solid, why throw it out? I think I paid ~$40 to have my tank boiled. Even if prices have doubled since then, it's still a lot less than a new tank at ~$200 + shipping.
Posted by: ThinAir May 2 2023, 10:48 PM
Just discovered this thread. So glad you took on this project.
I'll be wandering through Iowa this summer. Expect a PM to come by and visit!
Posted by: Drex May 3 2023, 05:39 AM
Think I will go with boiling out original tank
and have them prep it as well
(yet to find a place to do this around my area)
Also, am planning to go with
The a fuel line package with the 2 port pump
and locate it up front.
Which one is the best?
Thanks
Drex
Posted by: Drex May 3 2023, 09:50 AM
having a heck of a time removing the hard lines
out of the bottom of the fuel tank
it almost looks like the inside of the flanges
were sodered to the threaded part of the tank
is this right
or, is the fuel line tube just really frozen in there?
thanks
Drex
Posted by: Drex May 3 2023, 05:02 PM
there was no soder
applied a little heat
and it twisted right out
tanks going to radiator shop in Story City, Iowa tomorrow
yep, its gonna cost about what a new tank would cost 
he does a lot of classic car fuel tank restorations out of Des Moines
apparently he will get to it in two weeks
it'll give me time to install the SS lines thru tunnel etc.
and also the pump, filter, up front
is there a diagram showing the exact location of where
best to install these parts?
BTW, will have an extra original fuel tank!
thanks
Drex
Posted by: Drex May 3 2023, 05:06 PM
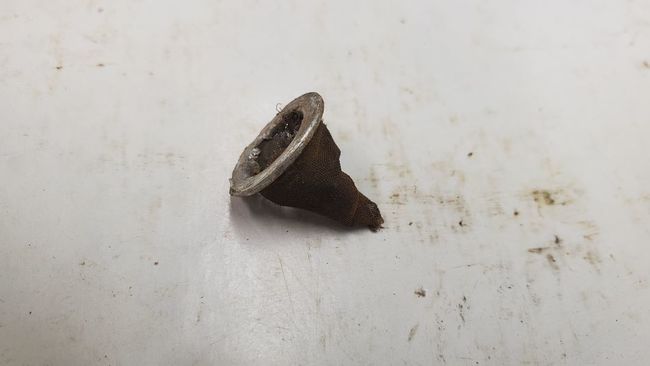
what's left of the tank filter
Drex
Posted by: 930cabman May 3 2023, 05:17 PM
what's left of the tank filter
Drex
Typical, after a 1/2 century and being soo fragile the socks get weak
Posted by: SKL1 May 3 2023, 07:09 PM
Dave, I used a place in Knoxville a few years ago to do the tank on my '73- not sure they're still around, but it was called Gas Tank Renu and number was 641 8422822. Good luck.
Posted by: Jamie May 3 2023, 07:30 PM
what's left of the tank filter
Drex
Don't bother replacing the in tank sock filter, I damaged 2 trying to install and decided on external in line filters that can be serviced much more easily and are better filters.
 .
.
Posted by: Drex May 4 2023, 03:50 PM
just got back from Story City
they'll call when it is done
my tank strainer was intact
but was destroyed by the time I extracted it out
i'll probably try to put a new one in
but like the idea of an extra filter inline
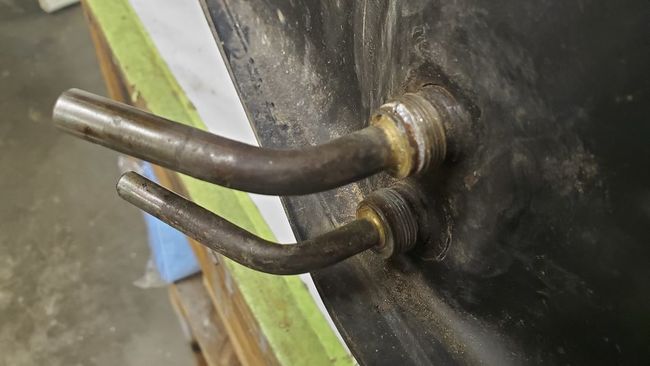
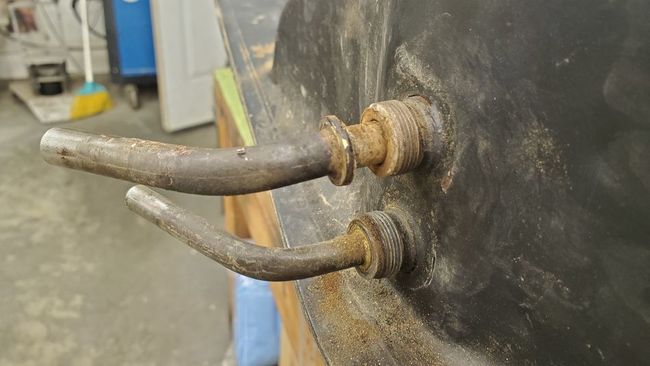
took this picture to see angle of bottom fuel lines
Posted by: Drex May 10 2023, 04:08 PM
picked up my cleaned and treated fuel tank today!
still waiting on my SS fuel lines
Drex
Posted by: 930cabman May 10 2023, 04:27 PM
After 1/2 century the sock gets tired, it's very fine brass wire. I would assume new one's are available, but have been able to salvage a couple recently. Will you be running FI or carbs?
Posted by: Drex May 10 2023, 04:29 PM
from reading past threads on the EGR system
i gather that it is kept in place
but the actual charcoal cannister in not restored
is this right, or is there a way to do this?
thanks
Drex
Posted by: Drex May 10 2023, 04:30 PM
cabman
will be running FI
dave
Posted by: Drex May 13 2023, 06:18 PM
while the fuel tank is out
what other things to I need to do
before i reinstall it?
ie
replace the defroster hoses
what else?
thanks
Drex
Posted by: JeffBowlsby May 13 2023, 06:55 PM
Hi Dave, EGR and the charcoal filter at different systems, different functions.
Your early car does not have EGR.
Early cars with the metal case charcoal filters are not restorable, but find a 74 and later and those plastic cases are openable, and the charcoal can be replaced.
Posted by: Drex May 13 2023, 09:39 PM
seems like i read somewhere
where s.o. cut the metal cannister open
replaced the charcoal and rewelded
i think
i may be wrong
dave
Posted by: JeffBowlsby May 13 2023, 10:14 PM
Not saying thd metal cans cannot be done, but the plastic cans are simple to replace the carbon. One end easily snaps off and on.
Posted by: Drex May 19 2023, 01:53 PM
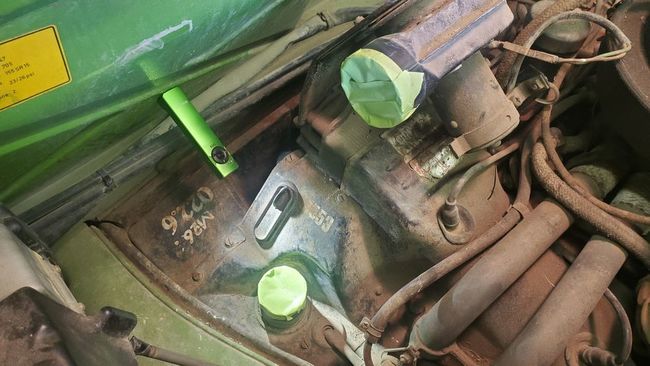
making some progress on 914
waiting for the SS fuel line kit from Tangerine
they assure me that it is on its way
cleaning up engine area while I wait
really not in too bad of shape
here is the L blower hose off and taped shut
what is the lettering on the L front of the engine?
BTW, O lights are great when working in tight spaces
Drex
Posted by: JeffBowlsby May 19 2023, 02:39 PM
Find those codes here about 2/3 down the page:
https://bowlsby.net/914/Classic/PLM.htm
Well most of them any way, the list is not 100% complete.
Your marking are code for "1971 1.7L engine".
Posted by: Root_Werks May 19 2023, 02:40 PM
Been a while since I've caught up on this thread. Nice maint going on!
You'll really like the SS fuel lines. There's a couple of really good how to install threads. Read them first if you can. I did mine solo install, it wasn't bad at all.
Posted by: Drex May 20 2023, 11:21 AM
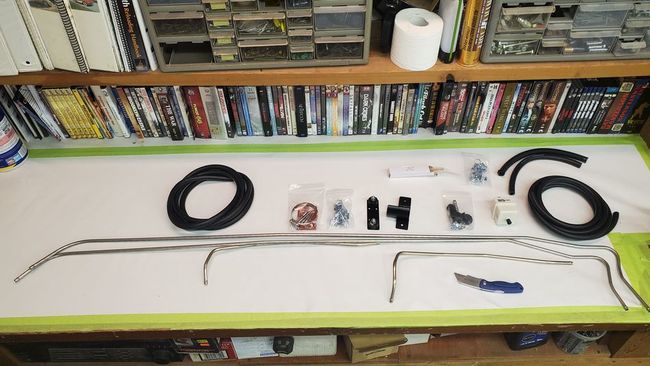
received fuel line kit today!
i see the SS ends that goes up front to fuel tank
have a bend in them!
how does this go thru the tunnel?
will it go thru as it is, or,
does one have to straighten these curves out a bit
to allow them passage thru the tiny tunnel? 
thanks
Drex
Posted by: 914sgofast2 May 20 2023, 11:32 AM
If you have the gas tank out, now is the time to test the windshield defroster fan to see if it works or not. If it doesn't work, take out the heater/defroster box and fix/clean the fan and replace the defroster box's rubber seals with new ones from 914Rubber. Also clean out all the leaves and debris that is sitting in the bottom of the box after 50+ years and plugging up the 2 drain hoses. I was surprised how bad it was in my 1970 Porsche 914, and it had been parked inside of a barn for 25 years when I got it.
Posted by: 914sgofast2 May 20 2023, 11:36 AM
The fuel pipes are inserted into the tunnel from below the engine side. You need to twist them around a bit, but I did not have to straighten any of the bends to make them fit. It 's a time consuming job made much easier if someone can help you guides the pipes thru the tunnel from inside the cabin. I had to take off the rear inspection plate between the seats, as well as remove the gear shift lever mechanism when I put the new fuel pipes in my car in order to get enough room to fish the pipes through the center tunnel.
Posted by: 914043 May 20 2023, 12:18 PM
in my experience I found it quite helpful to be able to manipulate the lines by taking the passenger side rear tire off. also be sure to remove the rubber line holders in the frunk..
If nothings been changed in the tunnel you should have no problem succeeding.
Posted by: 930cabman May 20 2023, 01:14 PM
I purchased the same kit from Tangerine a couple years ago and could not see how the install could be as easy as everyone says. Well after sitting on the shelf and continuing to run the plastic lines, one day I went for it and easy peasy. If I recall correctly I used only the small tube (carbs with no return) and oriented the bend in the rear section towards the drivers side. A bit of lube also on the new ss line and the grommet helps
Posted by: JeffBowlsby May 20 2023, 03:28 PM
Check out Ian Karr's youtube for the install.
https://www.youtube.com/watch?v=IDFsZoI_W3g
Posted by: krazykonrad May 20 2023, 06:51 PM
@http://www.914world.com/bbs2/index.php?showuser=24231
Check out the tinware writing on our friend Drex's '71
Posted by: wonkipop May 20 2023, 07:10 PM
making some progress on 914
waiting for the SS fuel line kit from Tangerine
they assure me that it is on its way
cleaning up engine area while I wait
really not in too bad of shape
here is the L blower hose off and taped shut
what is the lettering on the L front of the engine?
BTW, O lights are great when working in tight spaces
Drex
painted stencil number code discussed here.
codes have been collected for various model years.
http://www.914world.com/bbs2/index.php?showtopic=356668&st=120
that particular coding is found on the 70-72 MY engines.
in short 022.6 means
022. = type 4 engine.
model # .6 is a particular model in the type 4 line up (model #6 = 914) thats what .6 means. 022.6 = type 4 engine for a 914. the 4 cylinder 914 was originally going to be a type 4 karmann ghia before everything got rearranged into the VW/porsche idea.
3, 4, 5 etc were used for other type 4 VWs - ie VW 411, sedan fastback or variant.
the M code numbers identify the option code or set up package.
in the case of the 914 engines identify them as north american emissions package.
the reason the code is there is the engines were built at the hanover vw factory and then shipped out to various assembly plants where different model type 4 production lines were. the stamps identify the engine to match the build sheet for a car on the assembly line.
in 73 vw changed the engine code identification number codes and went to three letter numbering system. the codes are still there in the same places on the engine tin but not as complex. usually just three numbers, generally (but with exceptions).
its good that the code is still on the engine after 50 years.
means the tin is all still original and unmeddled with.
as mr. b notes he has an extensive collection of those codes listed on his website.
marvellous research on his part.
a few more of the codes were uncovered a couple of years back during research on the 74 L jet cars that have been added to mr. b's long list. can be found on link above to originality section of this website.
Posted by: Drex May 21 2023, 08:08 AM
lots of great info!
is there an online source where one
can download diagrams of the various
914 systems where each part is numbered with description?
or
are they only in manuals?
thanks
Drex
Posted by: JeffBowlsby May 21 2023, 08:51 AM
lots of great info!
is there an online source where one
can download diagrams of the various
914 systems where each part is numbered with description?
or
are they only in manuals?
thanks
Drex
Go to AutoAtlanta.com and reference their online catalog. It has all the diagrams and part numbers.
Or download PET (attached)
Attached File(s)
 Porsche_914_Part_Numbers.pdf ( 3.81mb )
Number of downloads: 63
Porsche_914_Part_Numbers.pdf ( 3.81mb )
Number of downloads: 63Posted by: Drex May 29 2023, 01:16 PM
the 3 sisters gave me several books and manuals
when i bought this 914
this Drake manual for 70-72 has a lot of great diagrams
also, what do you all think about me
pouring Magic Miracle Oil in all the cylinders?
will this help clean them up,
and does this oil eventually seep thru the rings
and down into the oil pan?
i do plan on boroscoping the cylinders 1st
iowa
Posted by: 930cabman May 29 2023, 05:07 PM
the 3 sisters gave me several books and manuals
when i bought this 914
this Drake manual for 70-72 has a lot of great diagrams
also, what do you all think about me
pouring Magic Miracle Oil in all the cylinders?
will this help clean them up,
and does this oil eventually seep thru the rings
and down into the oil pan?
i do plan on boroscoping the cylinders 1st
iowa
Do you have any idea the last time she was run?
My conservative side says to open her up and inspect the whole kit/kabodle. Otherwise you will be running on borrowed time
Posted by: Drex May 31 2023, 10:11 AM
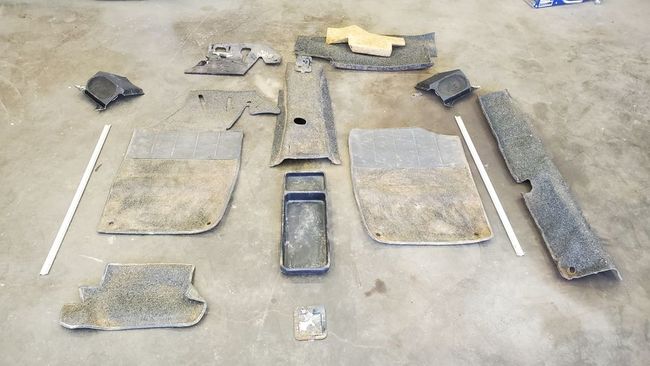
took out interior
couple of Q's
how does one remove the knob for the engine lid latch?
are the seat backs removed 1st?
do the SS fuel lines go thru the big part of the tunnel?
there was a little tag w/a half ring held on by a screw
on the R speaker
was it used to pull the speaker off?
will post picture if needed
thanks
D rex
Posted by: 914sgofast2 May 31 2023, 10:26 AM
To answer some of your questions:
1) The knob on the engine lid latch is screwed onto the end of the release cable. Just turn the knob counter-clockwise and it should unscrew.
2) Seats don't have to be removed before unscrewing the knob.
3) The new SS fuel lines go thru the big center tunnel. Take off the front and rear inspection/cover plates, as well as take out the shift lever to get plenty of access to guide the new lines through the tunnel.
4). As to the tag on the right speaker, don't know the answer. My speakers just unscrewed from the backside of the plastic kick panels.
Posted by: JeffBowlsby May 31 2023, 02:07 PM
A couple of details.
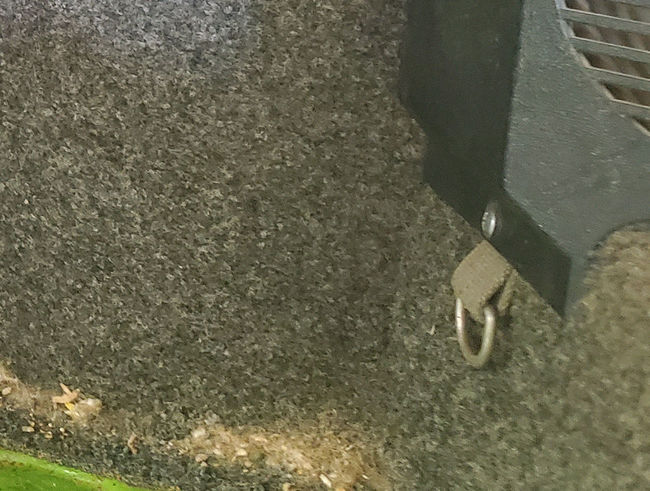
* the Dring on your early car was for a tether to a portable footrest. Both probably long gone.
* really important. The back pad removes unintuitively. At the top edge by the glass are zoggle cleats on the back pad that slide into u-brackets mounted to the chassis to hold the back pad in place. To remove the back pad, remove the 4 screws at the bottom of the pad near the floor, and pull the bottom edge away from the back firewall and slide the pad downwards, to disengage the zoggle cleats above. If you try to pull the top edge of the pad you will only destroy the cleats and cause damage to the structural fiber shell of the back pad.
Posted by: Drex May 31 2023, 02:39 PM
danke
alles is klar!
(since we're dealing w/German car's)
here is a picture of the 'D ring'
thanks again for all your help
D rex
Posted by: East coaster May 31 2023, 06:33 PM
danke
alles is klar!
(since we're dealing w/German car's)
here is a picture of the 'D ring'
thanks again for all your help
D rex
Passenger foot board (dog bone) has a small strap that clips to that to keep it from going too far away.
Posted by: Drex Jun 1 2023, 12:04 PM
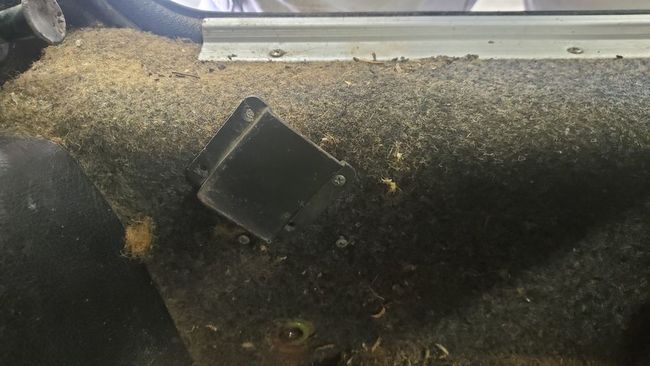
this is by handbrake
what is it?
Drex
Posted by: burton73 Jun 1 2023, 12:51 PM
That is to hold your seatbelt on 70 and 71 cars when not in use
Bob B
Posted by: Drex Jun 1 2023, 02:11 PM
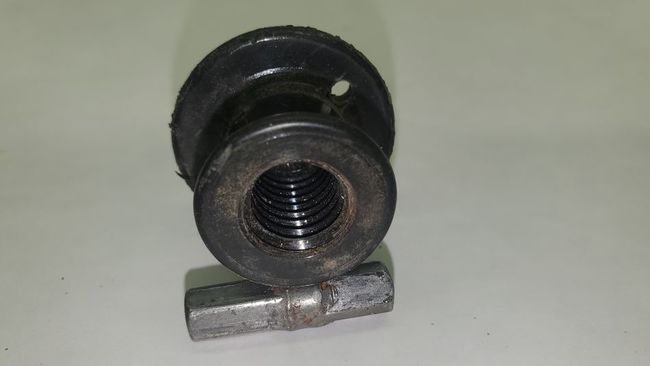
i discovered this plastic part
is also part of the engine lid knob assb
the seat back wouldn't come off w/o it removed
does anyone have a picture of the tool
used to remove it?
Drex
Posted by: Drex Jun 1 2023, 02:43 PM
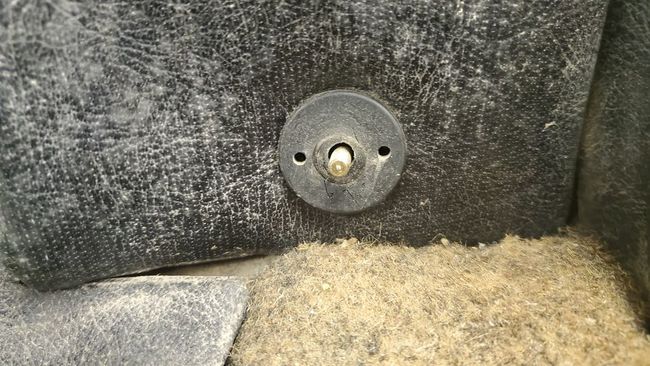
another view
Drex
Posted by: JeffBowlsby Jun 1 2023, 07:38 PM
You might be able to remove it by hand. CCW rotation to remove. Otherwise try snap ring pliers with 90 degree angle pins.
Posted by: 930cabman Jun 2 2023, 04:52 AM
Some cool touches on this 914 of Drex
Posted by: Drex Jun 2 2023, 09:27 AM
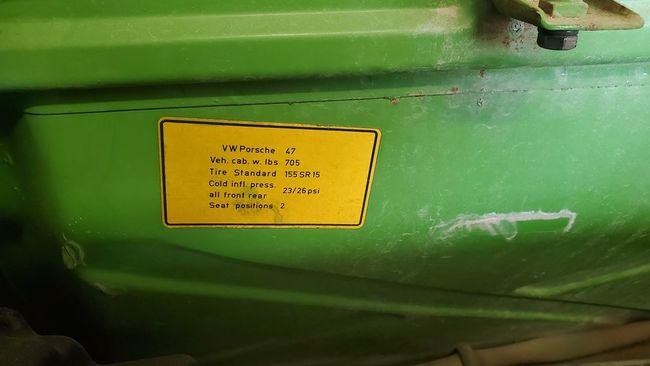
Posted by: Drex Jun 2 2023, 04:12 PM
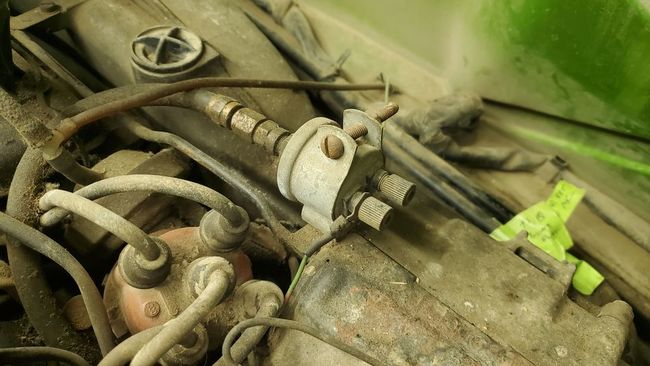
pretty well figured out what everything is in and around the engine
but don't know what this thing attached to the R front of the engine is for sure
thanks
Drex
Posted by: 930cabman Jun 2 2023, 05:43 PM
pretty well figured out what everything is in and around the engine
but don't know what this thing attached to the R front of the engine is for sure
thanks
Drex
Is the hose leading into the oil pressure sender area?
Posted by: FlacaProductions Jun 3 2023, 09:40 AM
If so...it's a dual pressure sender - one lead to a the idiot light, one to the gauge. This setup will usually cause the light to come on early. The best way is to split off the hose and use the OEM idiot light sender and a single-pole sender for the gauge.
Posted by: wonkipop Jun 3 2023, 03:21 PM
Some cool touches on this 914 of Drex
sure are.
very intact car with all its original detail bits and pieces.
enjoying this thread as Deee REX finds more bits and photographs them.
Posted by: Drex Jun 3 2023, 09:23 PM

Posted by: Drex Jun 3 2023, 09:39 PM

Posted by: wonkipop Jun 4 2023, 12:53 AM
keep on posting the jurassic park selfies.
Posted by: FlacaProductions Jun 4 2023, 11:25 AM
https://ottumwapost.com/tony-clark-p6180-225.htm
Posted by: Drex Jun 4 2023, 01:55 PM

yes, that was Tony's obituary
here he is at one of my birthday parties in his younger days
i found the above certificate under the foot (or is it pedal?) board!!
one can see that it is signed 2/27/74
so he owned this car for 48 years!!
i'm cleaning up the engine (in car) at the moment
and am drawing a diagram of all the engine hoses and wires
i'll post it when completed
is there a basic drawing of just the electrical wiring of just the engine area?
thanks
Drex
Posted by: Drex Jun 6 2023, 05:27 PM
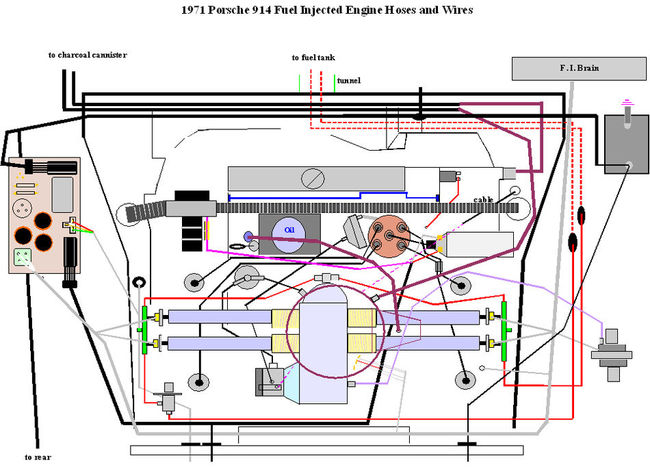
this is just a test run
for a drawing i made
as i could not find any
similar drawing on the internet
feel free to critique it
i also have it on PDF
but don't know how
to upload the file
oh, i did figure it out
and, the PDF file is much
clearer than the photo
i still have some refinments
to make, so will update
this post when done
thanks
Drex
914_engine_area_diagram_2.pdf ( 34.35k )
Number of downloads: 87
Posted by: SKL1 Jun 6 2023, 07:17 PM
Love the Gruber Porsche + Audi card- both my cars came from that dealership which is long gone... originally on Center Point Road in Cedar Rapids, IA. The owner, Ken Gruber passed away many years ago...
I've got a Gruber key fob but have been looking for YEARS for a Gruber license plate frame with no luck.
Posted by: Drex Jun 7 2023, 04:11 AM
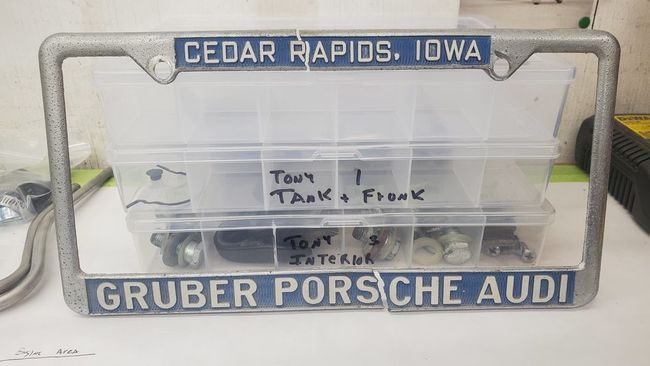
like this one!
unfortunately, it was broken when i bought the car
But...it is repairable
and i plan to have it restored and use it
Drex
Posted by: SKL1 Jun 7 2023, 03:08 PM
like this one!
unfortunately, it was broken when i bought the car
But...it is repairable
and i plan to have it restored and use it
Drex
Yes Dave, that is the one! Guard it with your life!!!
(wish there was a way to make copies)
Posted by: Drex Jun 9 2023, 01:18 PM
i've been reading about the brake pressure regulator
is it necessary that they are functioning
or could one just install new brake lines to them
and the brakes would function fine
even if the regulator was bad?
i will be purchasing a new brake line kit
master cylinder etc.
where is the best place to get them?
Drex
Posted by: 930cabman Jun 9 2023, 01:25 PM
From what I understand the regulator is required to lower the braking pressure to the rear wheels. I have used Stoddard for new brake lines, custom bent and work well
Posted by: Drex Jun 9 2023, 02:34 PM
i'm just curious as most of my vehicles are old
and do not have this feature.
i've braked hard only on rare occasions
even locking the brakes up, but without serious consequences
on my newer vehicles
it seems when i need to brake hard
which is also rare
i would never get stopped fast enough
to avoid an accident
it seems like a paradox to me
Drex
Posted by: SKL1 Jun 9 2023, 02:55 PM
From what I remember it decreased pressure to the rear brakes as the car is mid-engined, and you didn't want to swap ends if the rear brakes locked up before the fronts. I would think this would be even more obvious with a rear-engined 911 but I remember this being commented on more with the 914.
I have an adjustable one on my '71 but I've had it so long I can't even remember where I got it.
Posted by: Drex Jun 10 2023, 09:46 AM
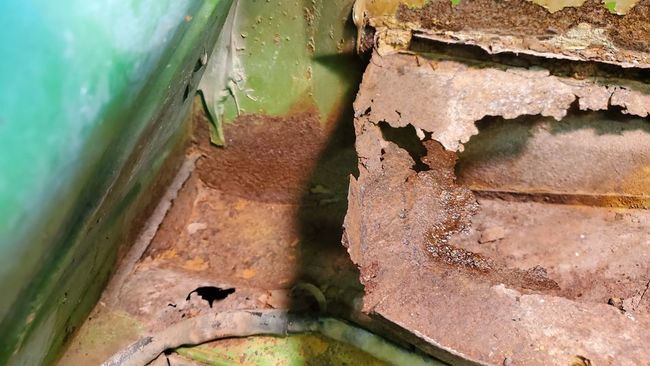
hell hole
some damage but not as bad as i thot it would be
Drex
Posted by: 930cabman Jun 10 2023, 11:03 AM
hell hole
some damage but not as bad as i thot it would be
Drex
We have seen much worse, as in non existent metal in the "hole"
How are the long's?
Posted by: Drex Jun 10 2023, 02:13 PM
i'll check them out this weekend
D rex
Posted by: Drex Jun 11 2023, 11:40 AM
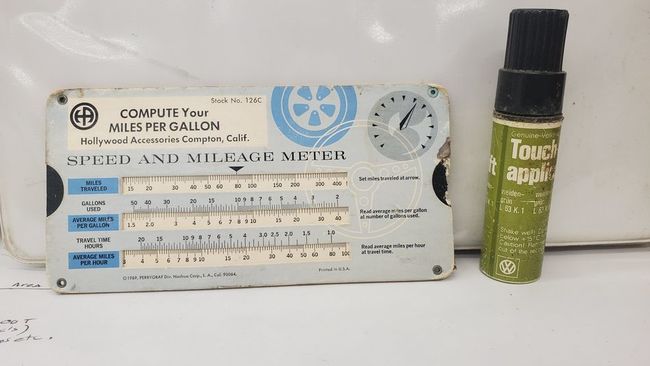
couple of items i discovered in the driver's pouch
D Rex
Posted by: Drex Jun 11 2023, 04:30 PM
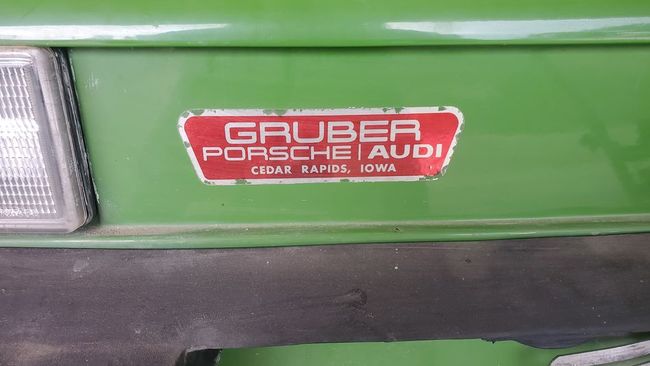
Posted by: 930cabman Jun 11 2023, 04:44 PM
couple of items i discovered in the driver's pouch
D Rex
Very cool and old school to boot. I brought a 1970 Dodge power wagon home several years ago, had one of these mileage calculators and some other goodies including every service record from day 1.
Not many of these time capsule examples around anymore.
Posted by: Superhawk996 Jun 11 2023, 05:21 PM
i'm just curious as most of my vehicles are old
and do not have this feature.
i've braked hard only on rare occasions
even locking the brakes up, but without serious consequences
on my newer vehicles
it seems when i need to brake hard
which is also rare
i would never get stopped fast enough
to avoid an accident
it seems like a paradox to me
Drex
Former brake engineer.
Going into the way back Time Machine, it used to be thought that locking up the rear brakes was OK so if you’re talking about 30s or 40s vintage you might not have dealt with proportioning valves. Later into the 50s and early 60s we started to get more cars with properly sized brakes trying to control front/rear bias based on physically different brake sizes and increasing use of proportioning valves as cars migrated to front disc rear drum systems. The problem was lots of these early vintage systems were drum front, drum rear systems. Unfortunately drum brakes are hard to modulate and you still could end up with rear skid pretty easily.
The problem is locked rear brakes result in an unstable vehicle.
So yea, fix the proportioning valve. It definitely serves an important purpose.
While you might find it easy to save a front engine, rear drive, vintage car locking up the rear brakes, you will find it to be way trickier on a mid engine vehicle with a centralized driveline mass (low moment of inertia). 914s “spin” much quicker than any other vehicle you’ve probably experienced.
As to the answer to your paradox, braking distances are largely determined by the friction of the tires. Hard rubber, high mileage tires with poor grip put onto the best braking system in the world will result in poor braking distances.
I’m not saying you’re buying cheap tires or using ancient tires.
What I’m suggesting is lots of modern cars have prioritized fuel economy above all else. This results in low rolling resistance tires on new vehicles. Low rolling resistance is fundamentally at odds with high grip and short stopping distances. It’s all a trade off and many cars / OEM’s are biased toward fuel economy. Just the way the automotive world is. There are vehicles out there with ultra short, sub 100 foot, 60-0 stopping distances. None of them are on tires biased toward fuel economy.
Posted by: Superhawk996 Jun 11 2023, 05:56 PM
I’m torn on dealer stickers like this.
Sort of cool from a vintage standpoint.
Personally, I’m baffled that people let a dealer place their free advertising (including license plate frames) on a new car that they just paid for. I have yet to encounter a dealer that is my friend and looking out for my best interest

Used to be more commonly accepted but I still see plenty of it on modern cars.

Posted by: 930cabman Jun 12 2023, 07:14 AM
I’m torn on dealer stickers like this.
Sort of cool from a vintage standpoint.
Personally, I’m baffled that people let a dealer place their free advertising (including license plate frames) on a new car that they just paid for. I have yet to encounter a dealer that is my friend and looking out for my best interest
Used to be more commonly accepted but I still see plenty of it on modern cars.
We let them continue this practice, "free advertising" for them.
Posted by: Rpiccola Jun 12 2023, 10:12 AM
I’m torn on dealer stickers like this.
Sort of cool from a vintage standpoint.
Personally, I’m baffled that people let a dealer place their free advertising (including license plate frames) on a new car that they just paid for. I have yet to encounter a dealer that is my friend and looking out for my best interest
Used to be more commonly accepted but I still see plenty of it on modern cars.
That is exactly my feelings on the license plate frames advertising the dealer. Remember in the old days some dealers had metal name tags riveted or screwed on to the trunk lids?
Posted by: Drex Jun 12 2023, 01:59 PM
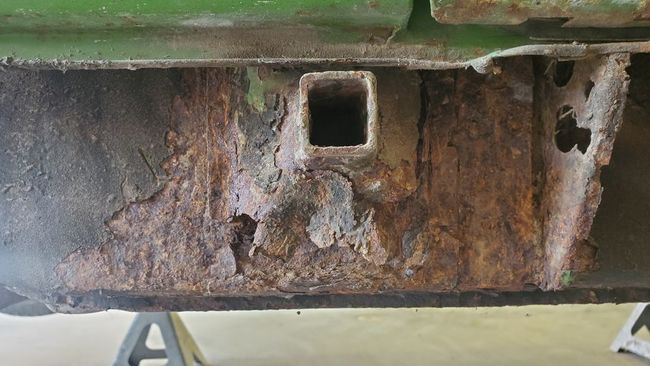
Superhawk996
You've convinced me with your excellent braking dissertation!!
I kinda like the dealer stickers
They remind me where my old friend/accountant bought this car
and that my son and I play golf at the National Airport Golf course near Cedar Rapids
Of course, if I have the car repainted, they'll be gone
Just curious though, are points subtracted off in judging contests with these stickers?
Not that I would ever be foolish enough to enter one of these.
Picture is of the right rocker panel
Most, except for the Jack Plate Support, is pretty solid
The left Jack Plate Support is in better condition
I did insert a rod and gently lifted...then used a jack
They both were very solid
I'll probably weld in new replacements anyway
Should I order new ones, or fabricate my own as they will be hidden?
The very bottom of the Hell hole is pretty solid as well
so will probably replace the metal with holes
and install a new battery mount
Thanks for all your 914 advice
D Rex
Posted by: Superhawk996 Jun 12 2023, 02:31 PM
As a general rule - don’t fabricate what you can easily buy. Your time will be better spent fixing and fabricating the things that aren’t easy to purchase.
Jacking pyramids are readily available and cheap.
I sort of like that dealer sticker if only because it’s from Iowa which has to be pretty rare in the Porsche world.
If you really like it, you might take some really good photos that are perfectly square to it and which the pictures can easily be scaled. Carbone could probably duplicate it if you’re in love with it and want to replace it after paint.
I have no idea how concours would judge it but what really matters is if it makes you smile and honors your buddy.
Posted by: Drex Jun 14 2023, 07:00 AM
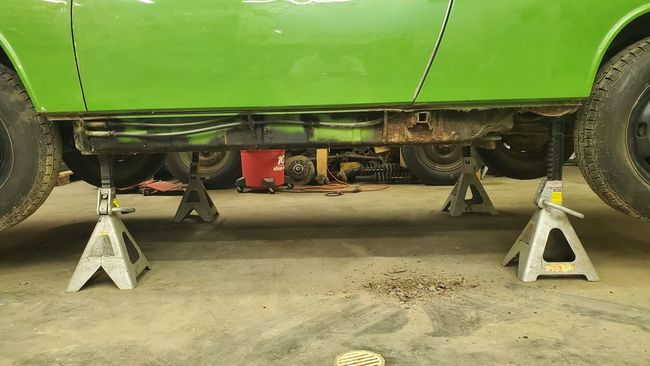
the L rocker area
once i have cleaned the old jack plate out
i may need to reinforce the rocker area behind it
just curious
is the jack support plate welded at the top?
it looks a little dicey to get at
D Rex
Posted by: Superhawk996 Jun 14 2023, 05:55 PM
just curious
is the jack support plate welded at the top?
it looks a little dicey to get at
D Rex
It’s do-able without cutting the rear quarter
See my thread, page 26, post 510
http://www.914world.com/bbs2/index.php?showtopic=335209&st=500
Posted by: Drex Jun 14 2023, 06:26 PM
Great pictures Superhawk!
big help
thanks
dave
Posted by: Drex Jun 15 2023, 02:09 PM
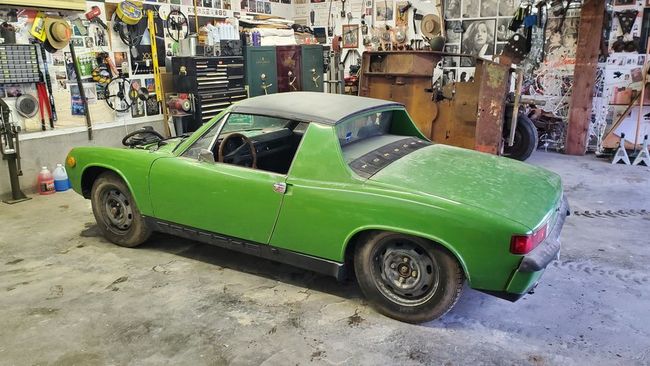
were these plastic rocker panel covers
with the PORSCHE name
an option or aftermarket item?
thanks
D Rex
Posted by: FlacaProductions Jun 15 2023, 04:33 PM
Aftermarket for sure.
Posted by: SKL1 Jun 15 2023, 05:08 PM
And they were (are) way too flimsy to use without the real metal ones underneath! Never liked them IMHO...
Posted by: Drex Jun 16 2023, 01:57 PM
are there any current magazines
specifically about 914 porsches?
is the 'VW Porsche' magazine still in print?
thanks
D Rex
Posted by: rick 918-S Jun 16 2023, 03:02 PM
are there any current magazines
specifically about 914 porsches?
is the 'VW Porsche' magazine still in print?
thanks
D Rex
A couple haave been tried but didn't make it. This site is the best source
Posted by: 914werke Jun 16 2023, 07:32 PM
are there any current magazines
specifically about 914 porsches?
is the 'VW Porsche' magazine still in print?
thanks
D Rex
You are dating yourself.

VW/Porsche became "European Car" then turned far too glossy & less Hot rod.
Posted by: Drex Jun 16 2023, 07:43 PM
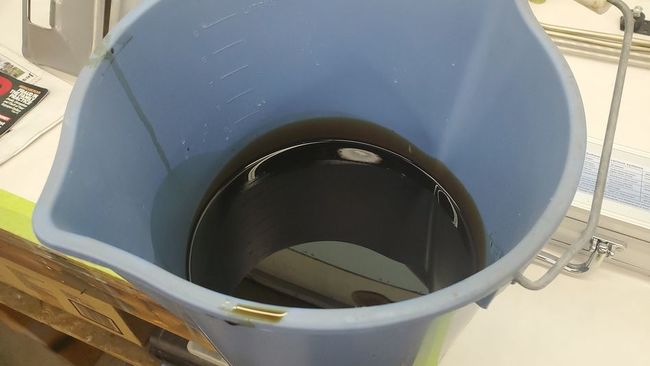
yes, probably
i remember when i was restoring my '63 (actually a '62) VW beatle in the early 2000's
i had subscribed to a couple of VW magazines then
i drained the oil today
no metal or other debris
really looks pretty clean after 40 years
i also boroscoped cylinder # 4
i need to practice at it
and will post some pictures when better
thanks
D Rex
Posted by: bbrock Jun 17 2023, 06:59 PM
i'm just curious as most of my vehicles are old
and do not have this feature.
i've braked hard only on rare occasions
even locking the brakes up, but without serious consequences
on my newer vehicles
it seems when i need to brake hard
which is also rare
i would never get stopped fast enough
to avoid an accident
it seems like a paradox to me
Drex
I say this only to get under @http://www.914world.com/bbs2/index.php?showuser=22428 's skin, but the brake regulator was an early ABS system
You might also be interested to read what Eric Shea (the 914 brake expert) has to say about the regulator and whether you need it: https://pmbperformance.com/products/porsche-914-early-brake-pressure-regulator-restoration-vin-47429-15752
Posted by: wonkipop Jun 17 2023, 07:30 PM
i'm just curious as most of my vehicles are old
and do not have this feature.
i've braked hard only on rare occasions
even locking the brakes up, but without serious consequences
on my newer vehicles
it seems when i need to brake hard
which is also rare
i would never get stopped fast enough
to avoid an accident
it seems like a paradox to me
Drex
I say this only to get under @http://www.914world.com/bbs2/index.php?showuser=22428 's skin, but the brake regulator was an early ABS system
You might also be interested to read what Eric Shea (the 914 brake expert) has to say about the regulator and whether you need it: https://pmbperformance.com/products/porsche-914-early-brake-pressure-regulator-restoration-vin-47429-15752
as was the anti-dive factory front suspension settings.

Posted by: Superhawk996 Jun 17 2023, 09:02 PM
i'm just curious as most of my vehicles are old
and do not have this feature.
i've braked hard only on rare occasions
even locking the brakes up, but without serious consequences
on my newer vehicles
it seems when i need to brake hard
which is also rare
i would never get stopped fast enough
to avoid an accident
it seems like a paradox to me
Drex
I say this only to get under @http://www.914world.com/bbs2/index.php?showuser=22428 's skin, but the brake regulator was an early ABS system
You might also be interested to read what Eric Shea (the 914 brake expert) has to say about the regulator and whether you need it: https://pmbperformance.com/products/porsche-914-early-brake-pressure-regulator-restoration-vin-47429-15752
@http://www.914world.com/bbs2/index.php?showuser=20845


Posted by: Drex Jun 18 2023, 06:42 AM

this is # 2 cylinder
i used DW-40 to spark plug overnight
as it was very tight
what do you all think?
thanks
D Rex
Posted by: Drex Jun 18 2023, 06:45 AM
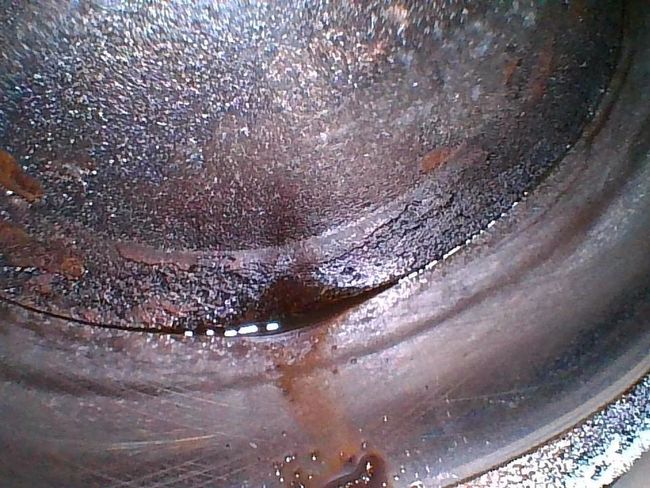
# 4 cylinder
again spark plug with WD-40 overnight
so the fluid in cylinder is the leftover WD that
dripped into the cylinder when i removed the plug
D Rex
Posted by: Superhawk996 Jun 18 2023, 09:35 AM
You can start and run engine but it is unlikely to be 100%
Boxer engines don’t store well being prone to condensation and rust pitting in the bottom of the cylinders.
Set aside funds for the eventual rebuild
Posted by: 930cabman Jun 18 2023, 09:53 AM
You can start and run engine but it is unlikely to be 100%
Boxer engines don’t store well being prone to condensation and rust pitting in the bottom of the cylinders.
Set aside funds for the eventual rebuild
It's a coin toss, she may or may not run decent. But a rebuild is in order at some point. Is the rest of the hulk somewhat road worthy? You just might get some seat time this season
Posted by: Drex Jun 18 2023, 10:22 AM
think i need to check and make sure there are no nests
under the engine tin or between the cylinders
if there is...i'll drop the engine and clean everything up
is it possible to remove the engine tin with engine in car?
probably will just fill all the cylinders with WD-40
and let them sit for several weeks
then suck out all the remaining debris
all this while
fixing the 'Hell Hole'
installing the new SS fuel lines
new brakes and line
etc.
seat time this season?
have my doubts
D Rex
Posted by: Superhawk996 Jun 18 2023, 10:30 AM
think i need to check and make sure there are no nests
under the engine tin or between the cylinders
D Rex
Excellent plan - would be well served to ensure oil cooler isn’t gunked up. If it were me I’d put new oil cooler seals in while tin is off and engine is out.
Might as well do the crank seals
And then the pushrod tube seals
Doh
And that’s how the madness goes before you know it you might as well build a freshie
I admire the restraint
Posted by: Drex Jun 30 2023, 06:44 PM
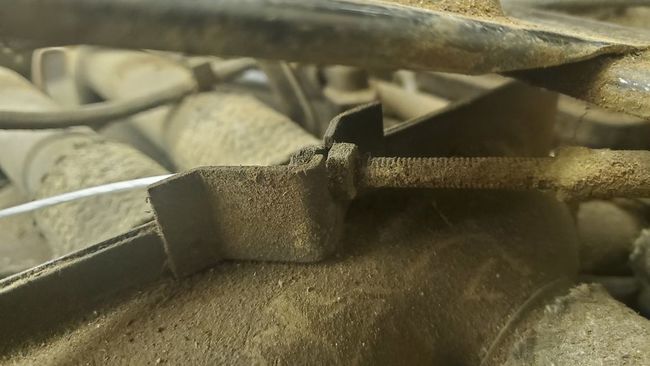
here is a picture of how the throttle cable attaches to the plenum
en route to the throttle body
just two nuts on either side of a slot in the plenum
tho i was trying to avoid it
i've decided to drop the engine to facilitate:
hell hole repair
new battery mount installation
SS fuel line installation
and to inspect, clean, and replace parts on the engine
will need to repaint the hell hole
where is a good source for the L63K willow green paint?
(is there a way to create the umlaut u on these posts?)
is this willow green a different color than the 43 paint
for the 914-6 and the later models of the 914?
thanks
D Rex
Posted by: 930cabman Jul 1 2023, 05:30 AM
Good call to drop the engine, it will make everything much easier. As far as I know the original paint was synthol enamel, currently NLA. There is some acrylic enamel around, but I am unsure of matching Willow green
Posted by: rick 918-S Jul 1 2023, 06:09 AM
Is the engine lid paint finish in good condition? Take to your locate auto body supply store with the paint code info from the car. They can research the code and mix a pint. Then check it against the lid. Likely single stage urethane now.
Posted by: Drex Jul 20 2023, 12:41 PM
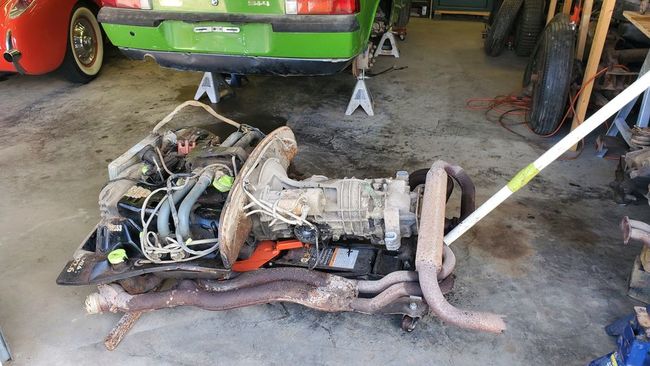
No
I did not fall off the earth
My daughter is getting married in two days
So been working on this project
But...
Engine is out
Now for that hell hole work
Drex
Posted by: 930cabman Jul 20 2023, 01:18 PM
Congratulations on your upcoming wedding
now, hell hole is another story
Posted by: SKL1 Jul 20 2023, 08:49 PM
As noted, congrats on the wedding.
And go enjoy that Corvette too! Assume you still have the WW2 jeep???
Posted by: Drex Jul 23 2023, 05:25 PM
yep
holding off on the 1941 willys
to do this 914
D Rex
Posted by: Drex Jul 28 2023, 10:35 AM
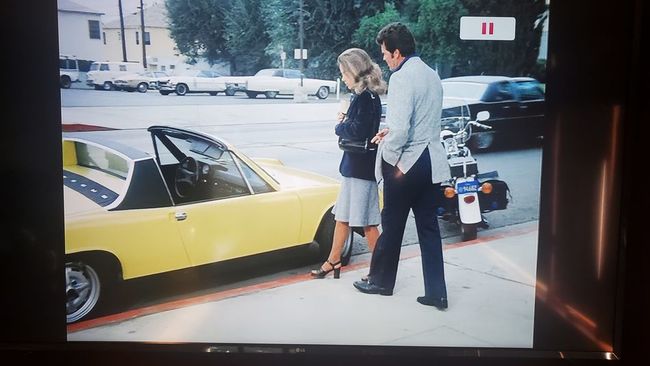
Saw this car on 'Rockford Files'
The episode is 'The Countess'
Looking for a way to raise up the engine and transmission together
Any ideas?
Where are the attach points if I use an engine lift?
D Rex
Posted by: JeffBowlsby Jul 28 2023, 11:34 AM
Looking for a way to raise up the engine and transmission together
Any ideas?
Where are the attach points if I use an engine lift?
D Rex
I use a couple of threaded rods at the front engine bar ends and lift the trans end with a floor jack. Its a slow but safe method.
Posted by: Drex Jul 28 2023, 12:07 PM
would you happen to have a pic of this set up?
i'd be nice to set it up on some kind of rotisserie
to work at any position
thanks
d
Posted by: JeffBowlsby Jul 28 2023, 12:25 PM
would you happen to have a pic of this set up?
i'd be nice to set it up on some kind of rotisserie
to work at any position
thanks
d
I dont have a photo of this, but I had understood that the question was how to raise the engine/trans assembly as one unit into the car. Are you wanting to mount it to an engine stand?
Posted by: Geezer914 Jul 28 2023, 01:40 PM
Remove the trans, clutch and flywheel. Bolt the yoke on the motor and call your strong neighbor over to lift the engine and slide the yoke into the stand.
Posted by: Drex Jul 29 2023, 12:12 PM
I was thinking about putting
the entire engine/tranny
on some sort of rotisserie
This would enable me to
clean up everything with ease
Has anyone ever attempted this?
Or is this just a plain crazy idea?
D rex
Posted by: krazykonrad Jul 29 2023, 06:22 PM
The correct yoke on an engine stand should let you rotate the engine 360 degrees. I've never seen the transmission bolted to the engine on a stand. I would have some concerns about the torque it would put on the engine stand bolts.
By itself, the transmission is pretty maneuverable by hand.
Konrad
Posted by: Drex Jul 30 2023, 07:26 AM
i don't plan to tear engine apart
just want to clean it up
assemble it on a rotisserie
trial start it
and then reinstall in car
i'd have another engine stand
on the transmission end
D Rex
Posted by: 930cabman Jul 30 2023, 07:33 AM
I would set up the assembly on a sturdy bench to test/run the engine. I have never seen a rotisserie for the engine/trans assembly. Have you seen/heard the engine running?
Posted by: Drex Jul 30 2023, 03:11 PM
yes
our accountant brought it to our office
a few times
then the crash in Des Moines, IA
and sat ever since
so, it ran well at that time
i'm confident it will again
it only has 60k miles on it
D Rex
Posted by: 930cabman Jul 30 2023, 04:56 PM
yes
our accountant brought it to our office
a few times
then the crash in Des Moines, IA
and sat ever since
so, it ran well at that time
i'm confident it will again
it only has 60k miles on it
D Rex
How many years ago was "the crash"
I would pull the spark plugs and get a compression reading of each cylinder first. Often times either an exhaust or intake valve has been open for a time with resulting oxidation on the valve, seat or cylinder wall.
Vette is running well?
Posted by: Drex Jul 31 2023, 02:21 PM
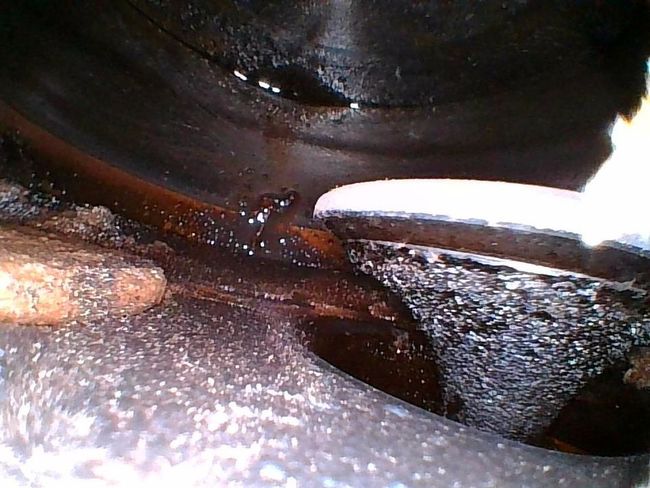
here is a typical view of the valves
crash was in 1974
car sat in an old barn during that time
i suppose at the least
i should pull the heads
and have the valves redone
new pistons and rings
thot i could just run it for awhile
and the valves would seat alright
probably wishful thinking
wife and i take a cruise in the vette
almost every night
D Rex
Posted by: 930cabman Jul 31 2023, 02:56 PM
She has sat for 1/2 century, her butt must be quite sore to say the least
It may run, but may not. what do you have to lose
To tear the engine down and do a complete rebuild is best, but .........
Is your intention to get some seat time this year?
How bad is the hell hole?
Do the doors open and close properly?
Posted by: Drex Aug 3 2023, 08:28 AM
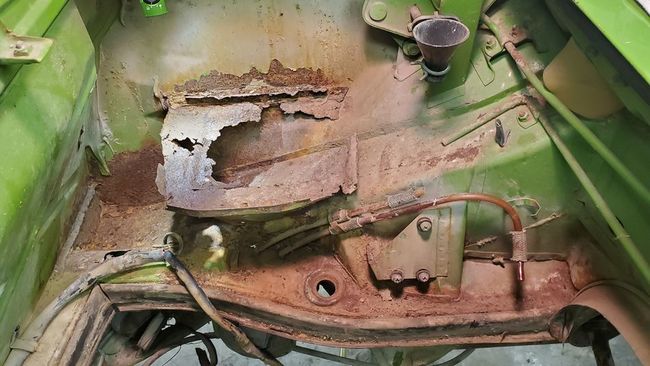
hell hole is rusty with a few holes
but very bottom is solid
of course the battery tray will have to be replaced
D Rex
Posted by: krazykonrad Aug 4 2023, 01:00 PM
Actually, that's not bad at all. Check the suspension ear underneath to be sure.
Posted by: 930cabman Aug 4 2023, 01:23 PM
She's been parked since 1974
Posted by: rjames Aug 4 2023, 01:41 PM
Wirewheel the brown away and see what's left. Doesn't look too bad from here.
Posted by: 930cabman Aug 4 2023, 04:27 PM
Wirewheel the brown away and see what's left. Doesn't look too bad from here.
Or Ospho
Posted by: rjames Aug 4 2023, 11:16 PM
Wirewheel the brown away and see what's left. Doesn't look too bad from here.
Or Ospho
Just putting Ospho on the rust isn’t going to tell you if there’s solid metal underneath. Given how easy it is to access the area, there’s no reason to not do it right.
Posted by: wonkipop Aug 5 2023, 12:38 AM
hell hole is rusty with a few holes
but very bottom is solid
of course the battery tray will have to be replaced
D Rex
gee they rusted fast didnt they. i mean thats 4 years worth.
but it still looks ok. pretty straightforward to pull her back from the brink.
go for it. great little car. fab color.

Posted by: Drex Aug 5 2023, 09:27 AM
where is the suspension ear?
i'll wire brush the hell hole down and re-post picture
thanks
D Rex
Posted by: MikeK Aug 5 2023, 09:41 AM
Do you know what brand of exhaust you have? I have the same setup on mine.
Neat project. Cool color.
Posted by: Drex Aug 5 2023, 11:28 AM
i don't know muffler brand
or if it is even original
still need to match the paint color
to re-paint the hell hole when repaired
D Rex
Posted by: 930cabman Aug 5 2023, 03:07 PM
i don't know muffler brand
or if it is even original
still need to match the paint color
to re-paint the hell hole when repaired
D Rex
I am restoring a '75 Palma Green example, original Cali car with minimal rusting. There was some hell hole work I completed and when done I used a brush on oil based enamel available from True Value. The color is reasonably close to Palma and actually still looking for Palma in single stage acrylic enamel.
Any progress with the engine? or too busy cruising in the vette
Posted by: Drex Aug 6 2023, 02:22 PM
between my daughter getting married (7/22)
and my partner gone all last week,
i've been too busy and tired to do much the last couple of weeks.
i have most of this coming week off and plan to work on 914 then.
hell hole work 1st (hopefully no surprises)
then new jack support plates welded in
then will turn to the engine
on FI engines
besides new hoses
what are the essential new parts i will need to purchase?
plan new
coil, distributor cap n rotor, oil cooler seals, air intake collars
fuel pump, etc
do i need a new
MPS, fuel pressure regulator and what else?
thanks
D Rex
Posted by: JeffBowlsby Aug 6 2023, 02:50 PM
between my daughter getting married (7/22)
and my partner gone all last week,
i've been too busy and tired to do much the last couple of weeks.
i have most of this coming week off and plan to work on 914 then.
hell hole work 1st (hopefully no surprises)
then new jack support plates welded in
then will turn to the engine
on FI engines
besides new hoses
what are the essential new parts i will need to purchase?
plan new
coil, distributor cap n rotor, oil cooler seals, air intake collars
fuel pump, etc
do i need a new
MPS, fuel pressure regulator and what else?
thanks
D Rex
Dave, you may need some of the FI parts, or none of them, other than gaskets, hoses and filters. It fully depends on the condition and completeness of what you have to start with. The great thing about D-jet is that each component can be tested individually, and the tests are not hard if you understand how each item functions.
Here is an excellent resource for the correct parts needed: https://members.rennlist.com/pbanders/
Your main concerns should probably focus on confirming a functional ECU, MPS, TPS, TS2, the trigger points, fuel pump, relay board, and the engine bay harnesses - FI, Ignition, and Alternator, as well as fuel injectors including the fifth injector (CSV).
Lay out what parts you have, post photos, and lets see where to go from here.
Your FI system is one of the simplest on a 914 ,it should look like this:
Attached image(s)
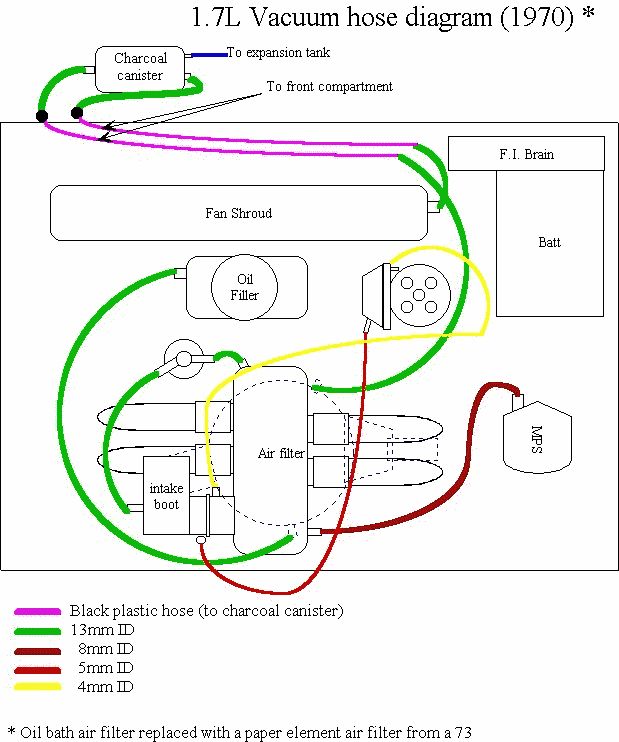
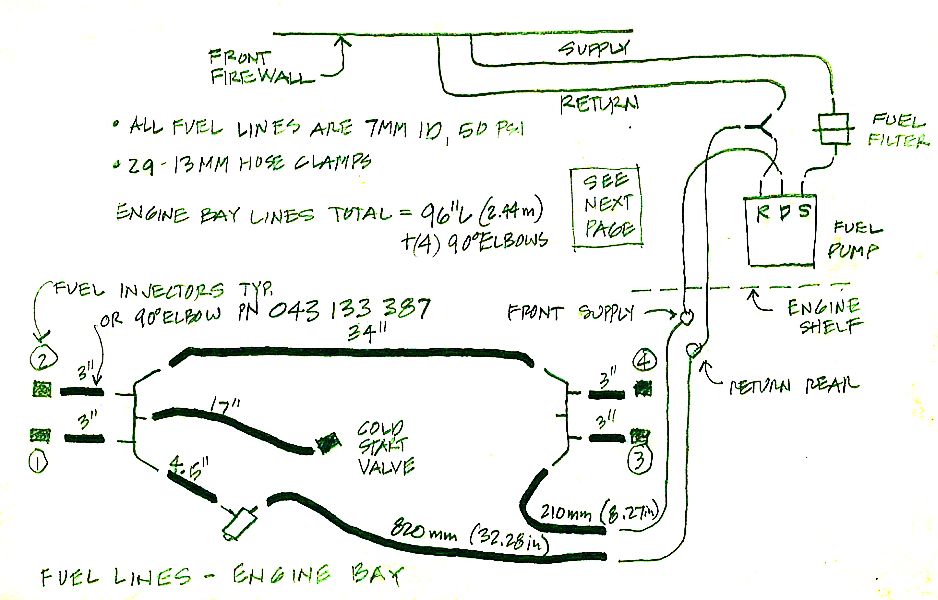
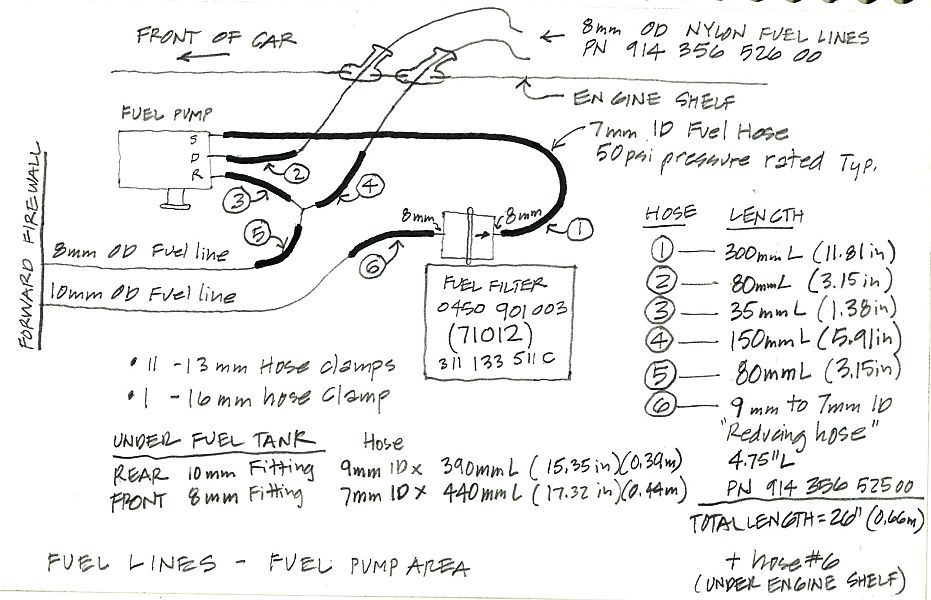
Posted by: Drex Aug 6 2023, 04:01 PM
thanks Jeff
lots of material to digest
will dive in
Dave
Posted by: krazykonrad Aug 6 2023, 05:52 PM
Suspension ear:
Posted by: Drex Aug 7 2023, 12:08 PM
thanks Krazy!
i'll check it out.
D Rex
Posted by: SKL1 Aug 8 2023, 09:59 AM
You mean Steve gets time off??????
Posted by: Drex Aug 8 2023, 10:46 AM
Steve is my partner
he's been gone for the last 8 days to California
Will be working on 914 tomorrow
D Rex
Posted by: Drex Aug 10 2023, 10:00 AM
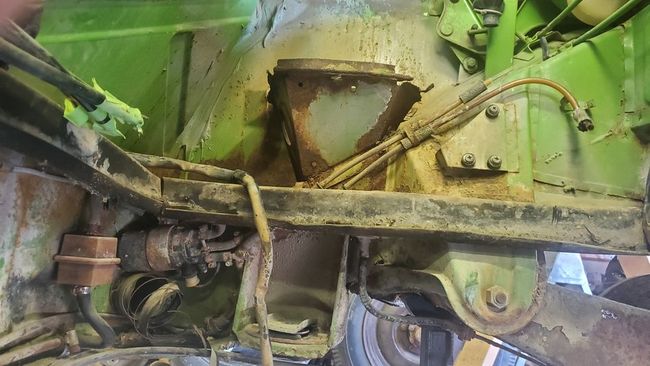
here is the area below the hell hole
also, today i took a piece of metal into
our local body shop to see if they can match the willow green paint
D Rex
Posted by: SKL1 Aug 10 2023, 07:39 PM
Doesn't look that bad from that angle but what does it look like at the jack receiver and longitudinal opposite to that?
Posted by: JeffBowlsby Aug 10 2023, 08:11 PM
Willow green is paint code L63K. They should be able to find that color formula.
Posted by: Drex Aug 12 2023, 01:39 PM
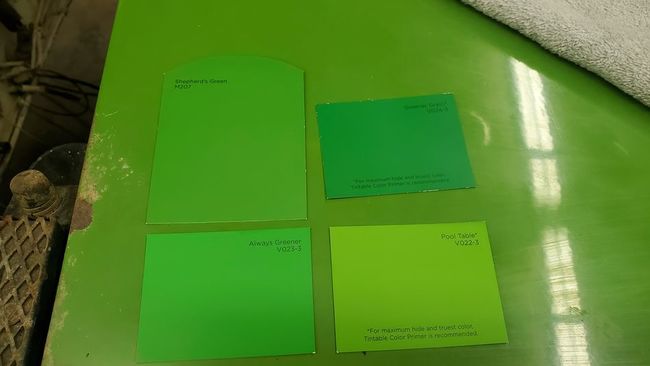
Here are some color cards from a local hardware store
D Rex
Posted by: Drex Aug 30 2023, 02:20 PM
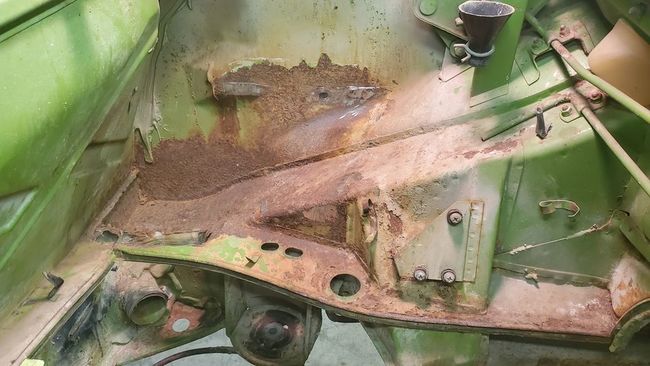
battery mount out
thin area cut out of hell hole bottom
what's left is surface rust
will clean up rust
weld patch in bottom
and paint...when i get it matched
also took engine rubbers out
D rex
Posted by: Drex Sep 11 2023, 10:50 AM
I have read several threads on material to seal seams
Is there a consensus on which is the best
before priming and painting?
Thanks
D Rex
Posted by: krazykonrad Sep 12 2023, 11:19 AM
I've seen Wurth products being highly recommended here, but I don't have experience with them myself.
Posted by: burton73 Sep 12 2023, 02:25 PM
I use Wurth products, got mine from AA (George) and Pelican Parts. Brushable Seam Sealer and
The Wurth High-Build Underseal. Very happy with them. If anyone needs a can of seam Sealer,
Hit me up as I will never use what I have. Free! if someone stops by my shop in Inglewood CA. I do not want to dick with shipping it.
Bob B
Attached thumbnail(s)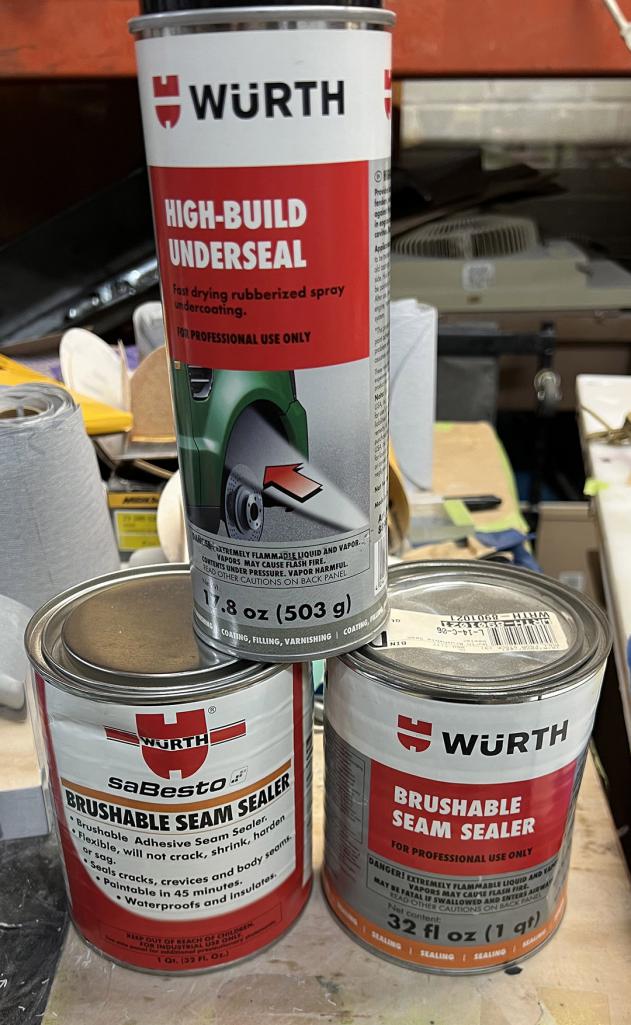
Posted by: Drex Sep 13 2023, 05:07 PM

thanks Burton73
i'll have to order some
as i don't think i'll be out to California for some time
its a long ways from Iowa
i take it that it is applied on bare metal
and then you prime and paint
also, i had our local body shop guy
match the paint off my engine lid
and this is what he came up with
it is a smidge darker
but he that it would compensate for any fading of the original color
i think it looks pretty good
D Rex
Posted by: Drex Sep 15 2023, 01:16 PM
Am going to buy a new battery tray and mount
Who should I buy them from?
Also, want to purchase a complete rubber kit
From who?
Thanks
D rex
Posted by: Drex Sep 18 2023, 01:04 PM
would this be okay for my engine?
or should i buy one from another vendor?
d rex
https://www.amazon.com/QSC-Porsche-Holding-Fixture-Yoke-Orange/dp/B07JH67MSD/ref=asc_df_B07JH67MSD/?tag=hyprod-20&linkCode=df0&hvadid=312158556601&hvpos=&hvnetw=g&hvrand=6908293332944109255&hvpone=&hvptwo=&hvqmt=&hvdev=c&hvdvcmdl=&hvlocint=&hvlocphy=9017834&hvtargid=pla-568028986239&psc=1
Posted by: burton73 Sep 18 2023, 02:02 PM
you do not need the heavy one for a type 4 eng.
You can save some money and get one of these. That is what we did this year for our 2270
Best Bob B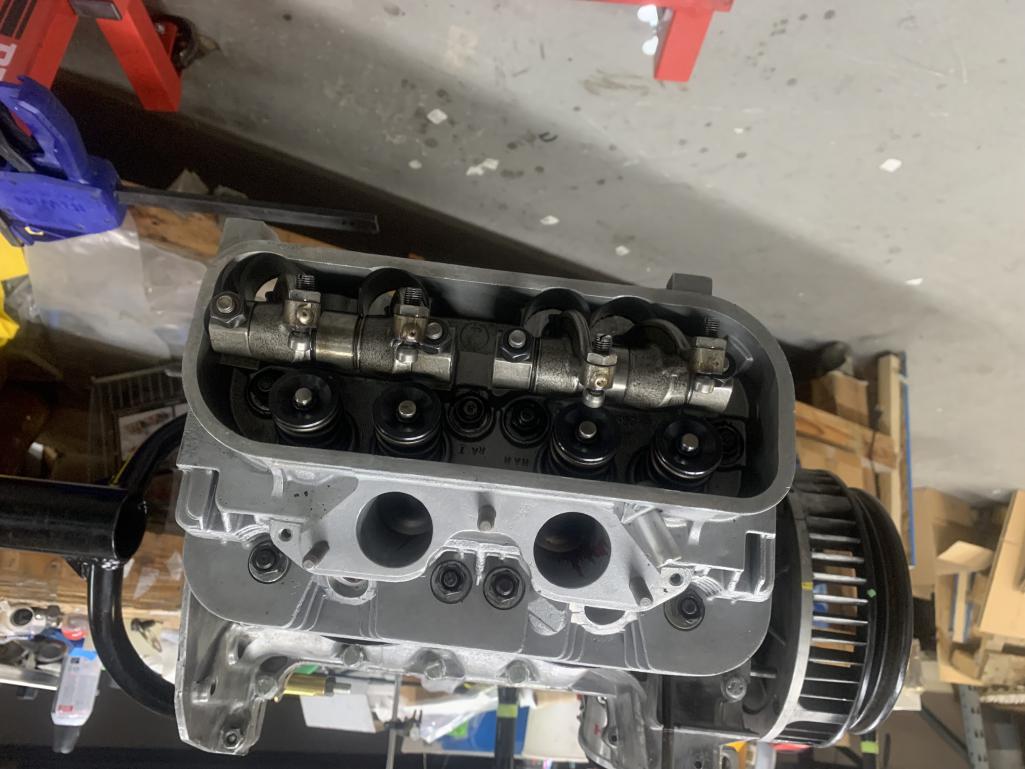
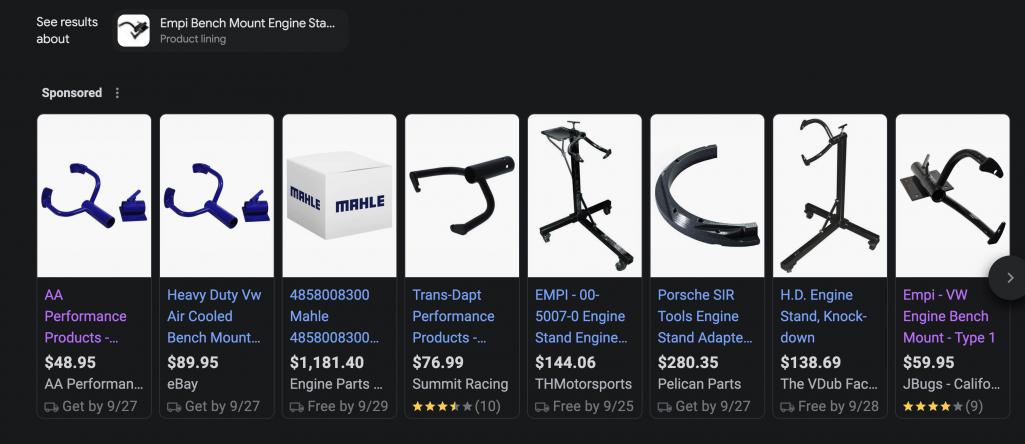
Posted by: Drex Sep 18 2023, 02:43 PM
I take it that one can take out the flywheel etc. ok?
Dave
Posted by: burton73 Sep 18 2023, 03:35 PM
I take it that one can take out the flywheel etc. ok?
Dave
Yes we had no trouble. You can remove all of it. You just need the lock for the flywheel not much at and VW supplier
Best Bob B
Posted by: vintagethunder Sep 18 2023, 08:23 PM
You can buy bits here and there (Auto Atlanta, 914 Rubber, Pelican Parts, and more), but 914 Rubber has all of what you are asking about. As far as I know, they are the only place offering complete rubber kits. I'm not sure if their main kit includes absolutely everything, but it is a substantial savings over buying it piecemeal. A top notch business, IMHO.
Pelican Parts has lots of 914 parts, including the battery shelf and support, and will give you a one time 10% new customer discount. They also offer a 10% off once a year discount as a a PCA member, which will likely more than offset the annual membership fee.
I bought my battery tray and support when I was at Restoration Design in Canada last summer. They produce a lot of stuff (as in sheet metal stampings) in-house. Their dedication is proven by their ability to create tooling to replicate an entire Speedster chassis and body! Plus, they use a more rust resistant steel. However, the two parts you mentioned that I bought from them were sourced from a European manufacturer. I suspect the other vendors get their from the same place.
Auto Atlanta has a paper catalog should you get tired of looking at a computer screen. Prices are likely out of date but it has diagrams and numbers, and I’m sure George looked it over closely when it was put together so it should be accurate. I learned a lot from their 700 914 Tech Tips book. Should you find yourself near Atlanta, stop there, and at The Porsche Experience.
My *favorite* place for mechanical parts is 914 LTD in Peoria, IL, because they are nearby (for me), have tons of used parts, unequaled knowledge, and they have answers for all questions. They are just fabulous.
As far as engine holder, this one is highly regarded, but the place is temporarily shut down due to a health issue. I am awaiting their return!
https://www.thesamba.com/vw/classifieds/detail.php?id=606308
They make 3,4, and 5 arm versions, are well made in the USA, and still cost less than others. They fit on a 2 3/8” inside diameter HF engine stand tube, and supposedly other, usually cheap, stands. From what I have read, the three arm should be plenty for a 914.
Tom
Posted by: MikeK Sep 19 2023, 08:41 AM
thanks Burton73
i'll have to order some
as i don't think i'll be out to California for some time
its a long ways from Iowa
i take it that it is applied on bare metal
and then you prime and paint
also, i had our local body shop guy
match the paint off my engine lid
and this is what he came up with
it is a smidge darker
but he that it would compensate for any fading of the original color
i think it looks pretty good
D Rex
Epoxy primer BEFORE seam sealing is the preferred method, regardless of what it says on the can.
Posted by: Drex Sep 21 2023, 09:40 AM
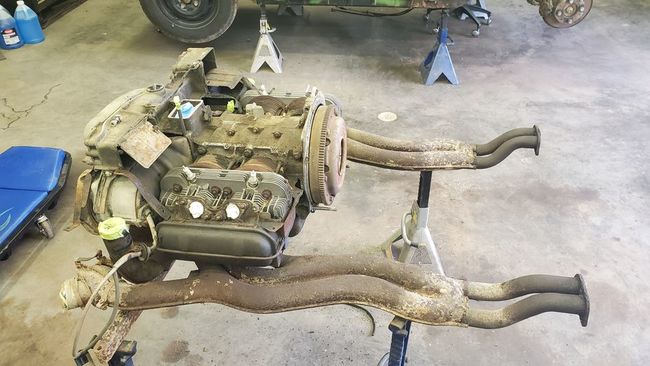
here is my progress
waiting for the engine mount bracket to arrive
need to remove muffler system
the bolts are hard to get to with the engine upright
and i'm worried about breaking bolts off in he head
then fan shroud
and eventually the heads to have them reworked
will finish the hell hole while heads are out
thanks
D Rex
Posted by: vintagethunder Sep 21 2023, 06:56 PM
I'm a bit ahead of you on this. I had my engine on my motorcycle lift (full bike table type) with 4x4s under the heads. I think I tilted it vertical so i could see, heated the exhaust nuts with my new MAP gas torch. Every nut, or the nut with stud in a few cases, came out without issue. I had no problem with the screws in the shroud. Just use a screwdriver that fits tight in the slot and work them loose. Once you get your shroud off, check for broken blades. I had four. I also found what looked like a alternator belt tooth, and the short part of a hose clamp that is under the screw part.
Fan shroud is part magnesium and gets grody looking. It will oxidize again if cleaned and let to sit. Opinions differ, but I'm going to paint mine, probably in Hammered Silver. If you need to take the fan off, you'll need a a triplesquare bit.
Tom
Posted by: jd74914 Sep 22 2023, 10:27 AM
Am going to buy a new battery tray and mount
Who should I buy them from?
Restoration Design
Tray: https://www.restoration-design.com/store/product/PP316
Support: https://www.restoration-design.com/store/product/PP317
Also, want to purchase a complete rubber kit
From who?
914rubber is who most people buy from.
Posted by: Drex Sep 23 2023, 04:39 PM
I know that stainless steal heat exchangers are available
but...do they make an original version for my 1971?
thanks
Dave
Posted by: Drex Sep 24 2023, 04:10 PM
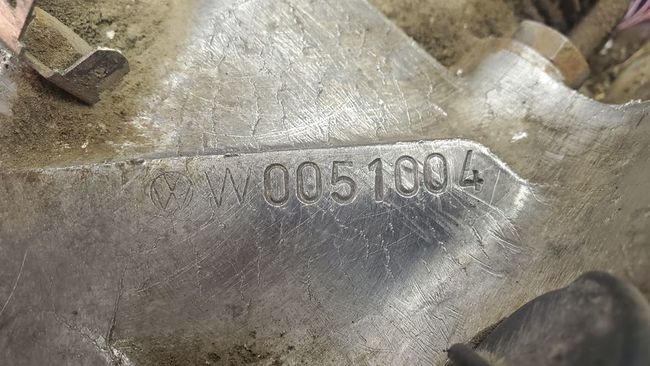
finally found the engine serial number!
was on the top R mid rear area of the case
back where the rear mount of the plenium is located
Dave
Posted by: Drex Sep 27 2023, 04:12 PM
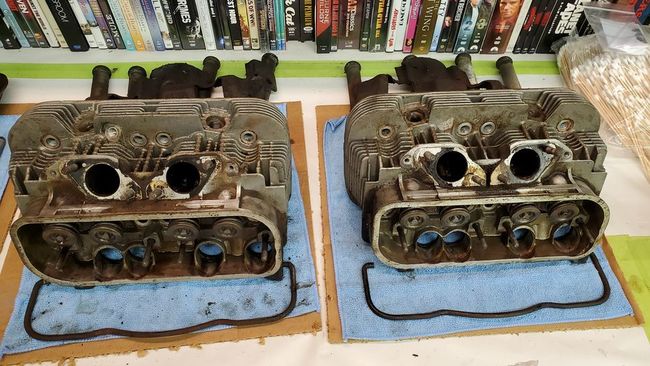
heads are off and ready for valve work
Dave
Posted by: Drex Sep 27 2023, 04:19 PM
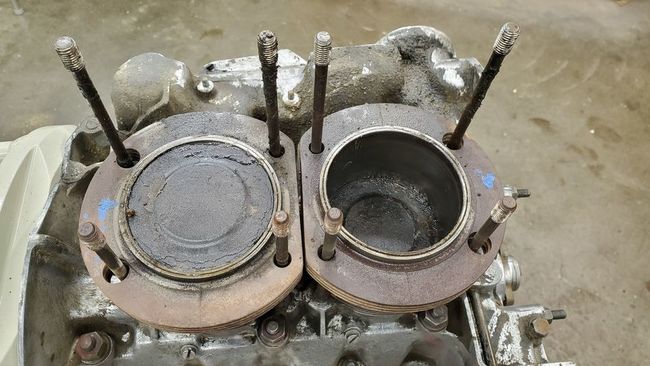
here are the cylinders and pistons
probably will have cylinders honed
and buy new rings
should I buy new pistons?
thanks
Dave
Posted by: Drex Oct 4 2023, 08:26 AM
couple of questions for the 1.7 engine:
are the right and left heads identical?
are all the cylinders identical?
is there a good thread on this?
i know that it is important to disassemble and reassemble
all parts in the same place and orientation
and i plan to mark this on all the parts.
is it possible to mistakenly put the heads on the wrong sides
or will they only fit one way?
Dave
Posted by: Drex Oct 5 2023, 10:24 AM
More questions
I see when ordering pistons and cylinders etc.
that they are listed as 90mm/93mm
Does this mean that the piston is 90mm
and the cylinder is bored out to 93mm?
I have restored six vehicles
but never performed engine work
Thanks
Dave
Posted by: Drex Oct 18 2023, 05:22 PM

took heads down to mechanic
valves ok but will need new guides
so will be sent away for 2-3 weeks
of interest, mechanic's dad used to use this old honer!
they don't use it now
dave
Posted by: MikeK Oct 19 2023, 08:44 AM
All of the cylinders/pistons are the same. The heads are symmetrical from side to side. Keeping the cylinders with their piston isn't really necessary as things will change once honed. What is critical is piston fit to the bore. You may consider buying a new, big bore set of pistons which will get you closer to 2.0 l, if yours are scuffed or worn.
If I were in your shoes:
Heads rebuilt with new guides, three angle valve job and a light flycut of the sealing surface. I'd consider new exhaust valves. CC the heads so they match. I'd do a little hand work to port match the manifolds, clean up the intake runners, etc..
Have the rods rebuilt and balanced, polish the crank, surface the flywheel, have the crank dynamically balanced with the fan, flywheel and clutch. Pin the clutch so it only goes on one way.
Clean and measure the pistons. Hone the cylinders. Check ring gaps. Balance pistons to within a gram or less.
Check the case to see if it needs a line bore and/or thrust cut. Have oversized bearings in hand before any cutting is done on the case. Deck the case bores so the cylinders have a nice surface to seat against.
That will get you on your way. Plenty more detail to go into once you start on the motor, like blue printing the oil pump, ensuring bearing oiling hole alignment and correcting it and some measuring, deburring the cam, checking cam gear engagement, etc...
Plenty of details, but getting a well balanced bottom end with the correct bearing clearances and a good set of heads is fundamental.
Posted by: Drex Oct 21 2023, 11:12 AM
lots of good things to do to an engine
i probably won't do some of them
the heads and cylinders are at shop for rebuild
think i will buy an ultrasonic parts cleaner
thanks for advise
dave
Posted by: krazykonrad Oct 22 2023, 12:48 PM
lots of good things to do to an engine
i probably won't do some of them
the heads and cylinders are at shop for rebuild
think i will buy an ultrasonic parts cleaner
thanks for advise
dave
Ultrasonic parts cleaner is the way to go. I have been pleased with the one I got from Amazon, but the advertised volumes are significantly smaller in real life.
Posted by: Drex Oct 24 2023, 05:36 PM
i'm thinking about getting the 6L model
also
https://www.youtube.com/watch?v=0mS1WNll3hs
is it possible to have a 72,000 mile car this perfect
and completely original?
Dave
Posted by: vintagethunder Oct 25 2023, 02:21 PM
Did you get an engine yoke yet? I noticed about half say the 2 arm ones are crap, and the other half say they use them with no issues. I just got the one from LJ Air-Cooled Engines and am satisfied.
I did have a problem with the stand, as some (including the Samba guy who is no longer building his yokes) said the newer HF 1 ton stands had the 2 3/8" ID top tube that is required for many of them, but the stands at my local HF are more like 1 15/16".
Posted by: Drex Oct 27 2023, 05:07 AM
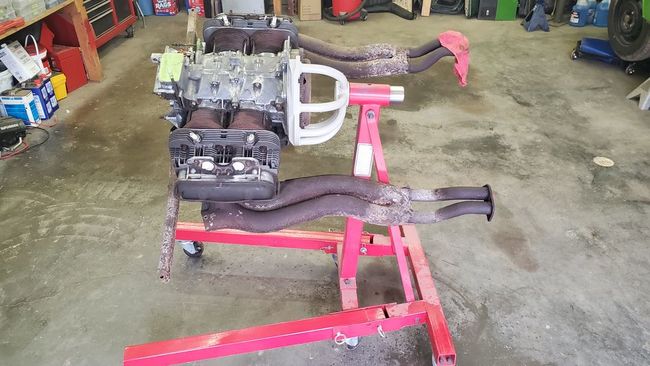
i went with the more expensive QSC from amazon
currently am waiting for all the parts to OH the heads
also, ordered new rings and piston snap rings
should come in the next few days from Auto Atlanta
more later
Dave
Posted by: Drex Nov 12 2023, 02:04 PM
My heads are at the machine shop
I ordered new valve guides from Auto Atlanta
and was sent the oversize intake guides for 1.7 1.8
It turns out that their O.D.'s measure 13.06 mm and are too large
The ones removed from my heads have an O.D. of 12.06 mm
Also, the new guides have a lip at one end which is absent on my original guides
I called AA and they told me that the 13's are the right ones!
that the head would have to be heated up and the guides cooled down
in order for them to be pressed into the heads!!
Is this true, or do they make a 12.06 mm intake valve guide?
What do you all think of this?
Thanks
Dave
Posted by: Shivers Nov 12 2023, 02:55 PM
I do not know for sure. But I asked google after looking at your heads. So I asked for valve guides for 1.7-1.8 heads and this was what I found.
https://sierramadrecollection.com/products/engine-valve-guide-914-1-7-1-8-p18868?currency=USD&variant=39799939366970&utm_medium=cpc&utm_source=google&utm_campaign=Google%20Shopping&stkn=b08021262f58&gclid=EAIaIQobChMInKWz3aq_ggMVoCCtBh3NogElEAQYAiABEgJJH_D_BwE
Posted by: Drex Nov 12 2023, 03:13 PM
yes, those are like the ones I received
But they are also 13.06 mm
The ones that came out of my heads are definitely 12.06 mm
Posted by: Drex Nov 13 2023, 04:31 PM
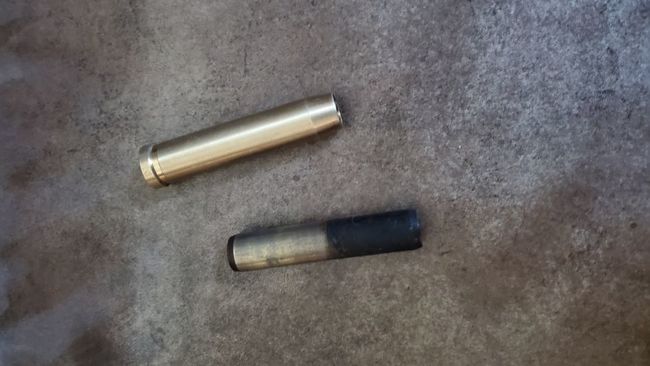
this is the new intake valve guide AA sent me
actually, they sent 6 exhaust VGs and 2 of these intake VGs
surely my old ones are original
am trying to talk to the shop mechanic at AA
thanks
dave
Posted by: Drex Nov 16 2023, 02:21 PM
Apparently no one makes the original 12.06 mm intake valve guides
this is because there was a problem with them slipping when engine warmed up
So they went to the 13.06 mm guides with a collar on them
one has to have the heads
reamed out to 13.058 (VG O.D. - 0.002)
heat the heads, cool the guides, and press them in
The collar end goes on the spring side
Thanks
Dave
Posted by: porschetub Nov 17 2023, 09:21 PM
Apparently no one makes the original 12.06 mm intake valve guides
this is because there was a problem with them slipping when engine warmed up
So they went to the 13.06 mm guides with a collar on them
one has to have the heads
reamed out to 13.058 (VG O.D. - 0.002)
heat the heads, cool the guides, and press them in
The collar end goes on the spring side
Thanks
Dave
Strange way do it end result will be the same ,seem to remember running an internal bore mic down the heads and machining the guides in a lathe to correct interference fit then the only reaming required is to suit new valves you are fitting which I hope you are or @ least the exhaust valves .
IMO re-ringing pistons is false economy unless they have ring grooves in spec and pistons that measure up for bore clearance after a hone which even with your lowish mileage will most likely not be great.
Just don't want to see you disappointed with oil burning which is the main issue with worn pistons /bores ok.
For the cost of all this checking and measuring go to 1.8 barrel and piston set with higher CR pistons ,a small increase in power and solves a lot BS later on .
Good luck Dave.
Posted by: Drex Nov 19 2023, 07:04 PM
would a 1.7 case, heads and valves
except 1.8 pistons and cylinders?
Dave
Posted by: Shivers Nov 19 2023, 08:56 PM
would a 1.7 case, heads and valves
except 1.8 pistons and cylinders?
Dave
This is a Jake Raby quote: “The 2.0 (94 or 96mm) cylinders will fit into the 1.7 or 1.8 crankcase exactly as they do the 2.0!!!! NO MACHINE WORK IS NEEDED AS ALL REGISTERS ARE THE SAME SIZE!”
So as long as the pin location is the same I see no reason it wouldn’t.
Posted by: Drex Apr 18 2024, 04:56 PM
Iowa is back...
had several non 914 issues to resolve this winter
(a very mellow Iowa winter BTW)
but now am ready to continue my restoration
is the ultrasonic cleaner best for cleaning engine parts?
what solution is best with this?
also, what sealer is best for the ring that
goes between the cylinder and the case?
glad to be back
Dave
Powered by Invision Power Board (http://www.invisionboard.com)
© Invision Power Services (http://www.invisionpower.com)