Printable Version of Topic
Click here to view this topic in its original format
914World.com _ 914World Garage _ Yet another progress thread from TG
Posted by: tdgray Aug 10 2005, 09:51 AM
So I figure I better start contributing with some real content rather than stupid jokes and snide remarks. So here goes.
I purchased my 1973 1.7L for $300.00. Damn good thing to because there was about 8 thousand times the rust that I could see  (duh!)
Before I tore the car apart I got the engine running. PO said fuel pump was bad. Turned out the relay was bad and in his attempts to fix the problem he reversed the fuel lines. Put a new relay fired right up...ran like crap but still it ran. 
After stripping all interior, electrical and accesories from the car the real work started. Nothing more than expected just a long list.
Some of the problem area identified.
1) Rust in longs
2) Rear trunk and valance panel totally rusted out
3) Floorboards very rusted out - quite a few holes
4) Sill plates and door jams very questionable
5) Typical battery tray and engine shelf damage
6) Front trunk rusted around AC unit
7) Sail panels - bad PO repair with Bondo
Just one note for the rest of this, I am not CptTripps... these pic's are over a years time span. The reason I am finally posting all this is to motivate me to get 'er done.
It may not be realistic but I am still shooting for the FFC this year. I really have to get moving NOW!
Posted by: tdgray Aug 10 2005, 09:52 AM
First task at hand was to cut the trunk and valance panel out. Lid was scrap. Got a few used pieces for replacement.
Attached image(s)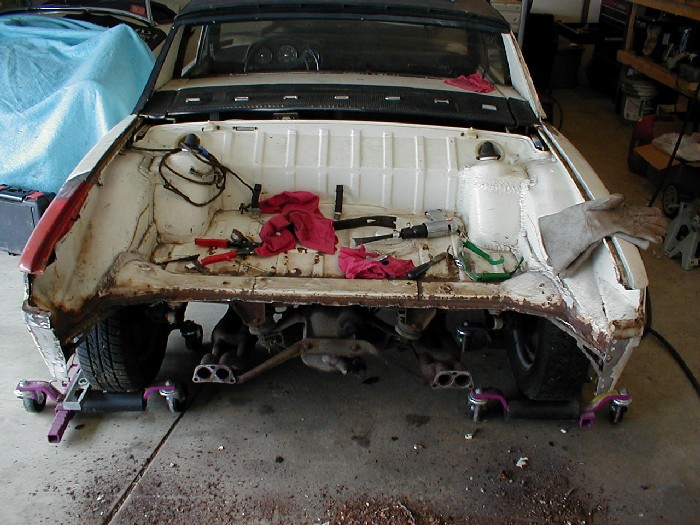
Posted by: tdgray Aug 10 2005, 09:53 AM
All buttoned up... still needs finishing and rear trunk pan.
Attached image(s)
Posted by: CptTripps Aug 10 2005, 09:53 AM
Man...you really have your work cut out for you...(No pun intended)
We'll motivate you...just you wait.
Posted by: tdgray Aug 10 2005, 09:54 AM
Next Task...
Drop the engine. Easy job took my brother and I about three hours.
Attached image(s)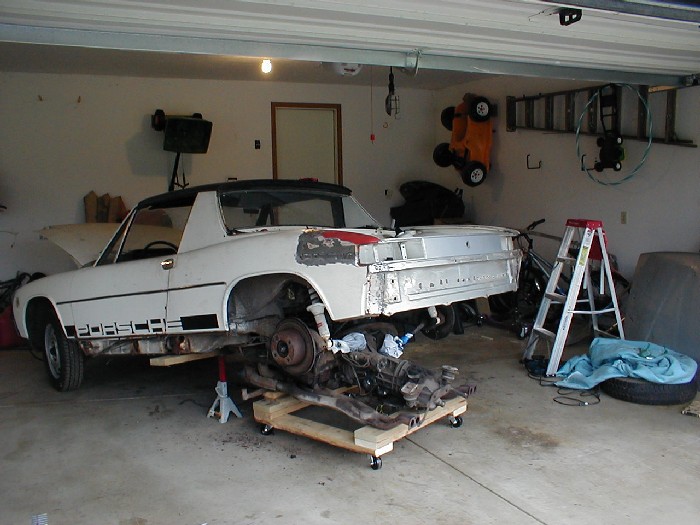
Posted by: tdgray Aug 10 2005, 09:55 AM
Damn that engine looks big when it is not in the car
Attached image(s)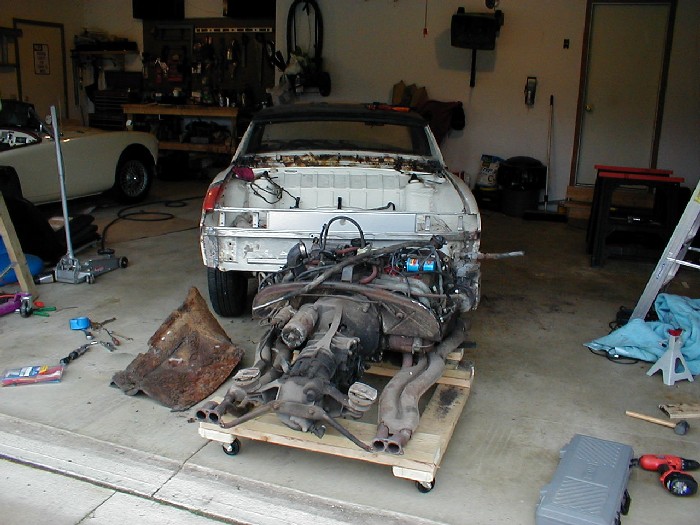
Posted by: tdgray Aug 10 2005, 09:55 AM
Hell Hole after engine removal 
Attached image(s)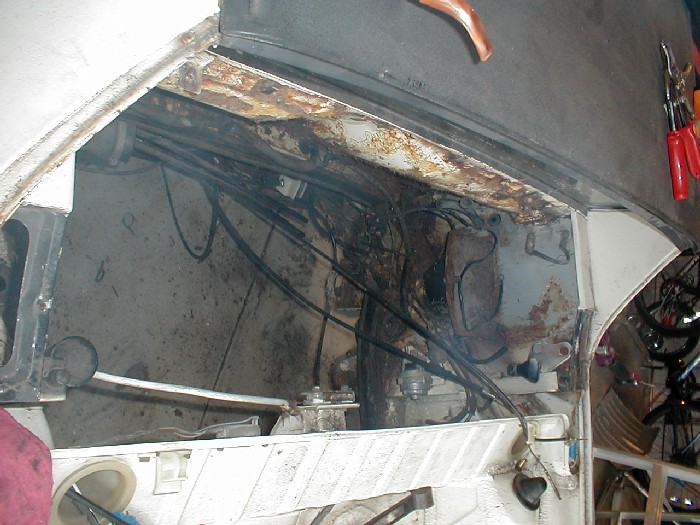
Posted by: tdgray Aug 10 2005, 09:56 AM
Big Problem when removing the engine... had to cut the engine bar. YIKES 
Attached image(s)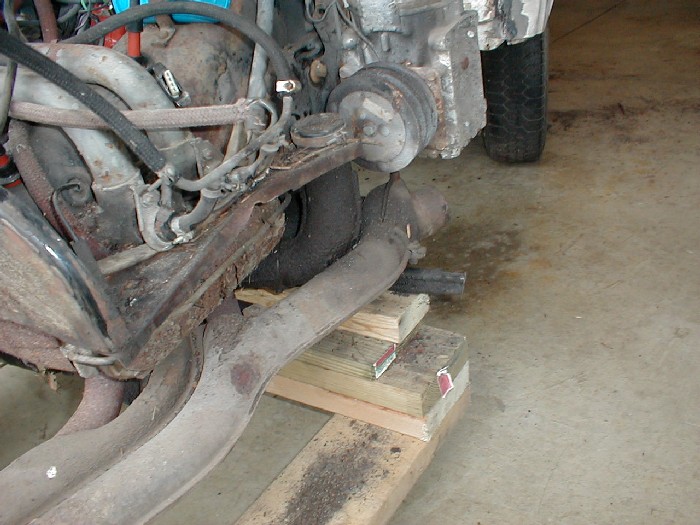
Posted by: tdgray Aug 10 2005, 09:57 AM
Next Task.
Longs are solid but have some major patches of rust. Cut it out and patch new metal in. Oh the carnage
Attached image(s)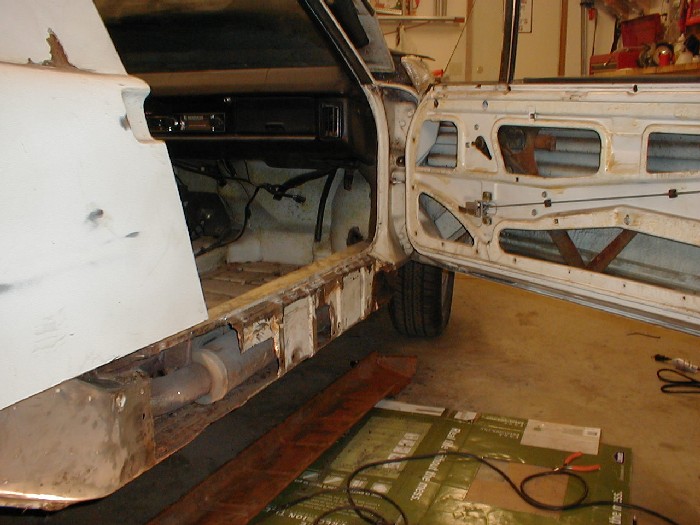
Posted by: tdgray Aug 10 2005, 09:59 AM
Thanks to Dr. Evil for the clam shells... Just what the Dr ordered.
A little test fitting
Attached image(s)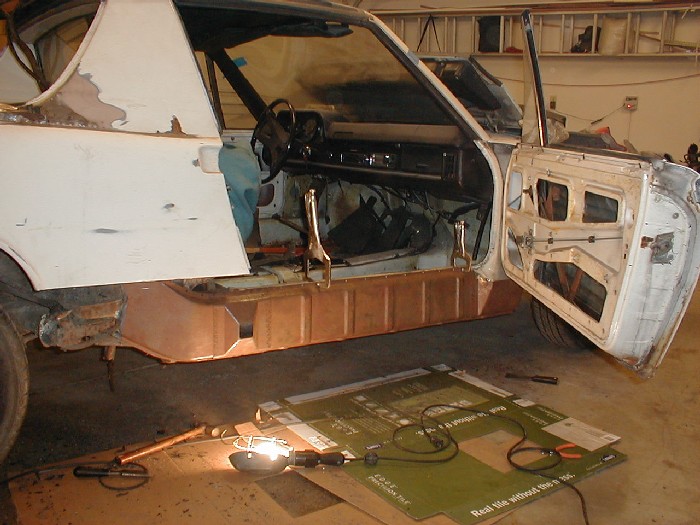
Posted by: tdgray Aug 10 2005, 10:00 AM
My buddy Dave (acting like a dork). Leveling the car before welding the clams on.
Attached image(s)
Posted by: tdgray Aug 10 2005, 10:01 AM
Finished Welding... still a little clean up to do but that will come soon.
Attached image(s)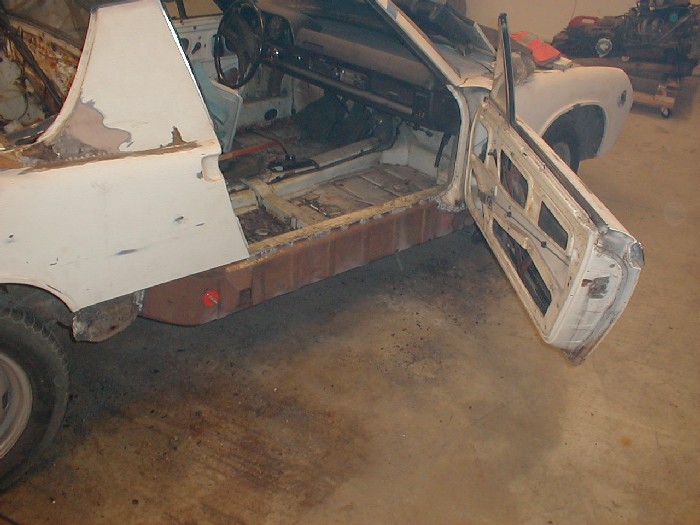
Posted by: tdgray Aug 10 2005, 10:02 AM
Other side... rust was not as bad. Less patching to do Clam ON
Attached image(s)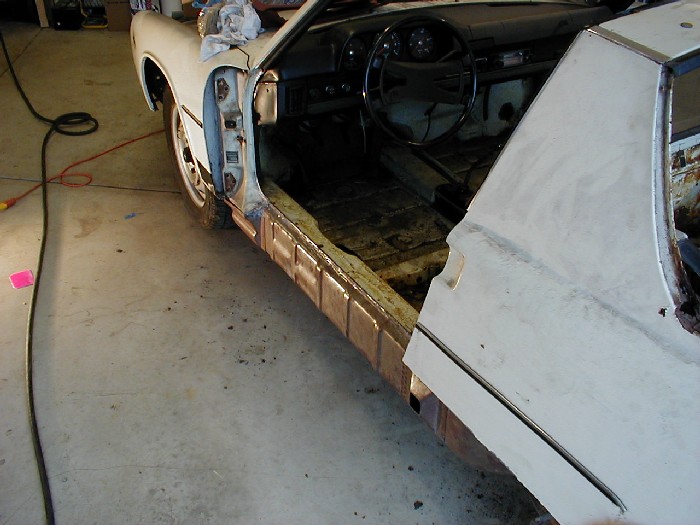
Posted by: tdgray Aug 10 2005, 10:04 AM
Stripped Down. Doors and targa off now that I trust the frame rigidity. Ready for sills and door jambs.
Attached image(s)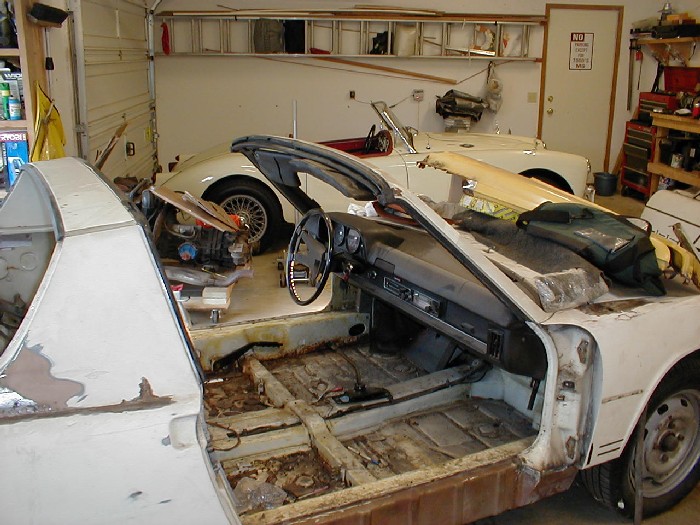
Posted by: tdgray Aug 10 2005, 10:05 AM
Door jamb carnage. Also firewall damage along with inner fender damage.
Attached thumbnail(s)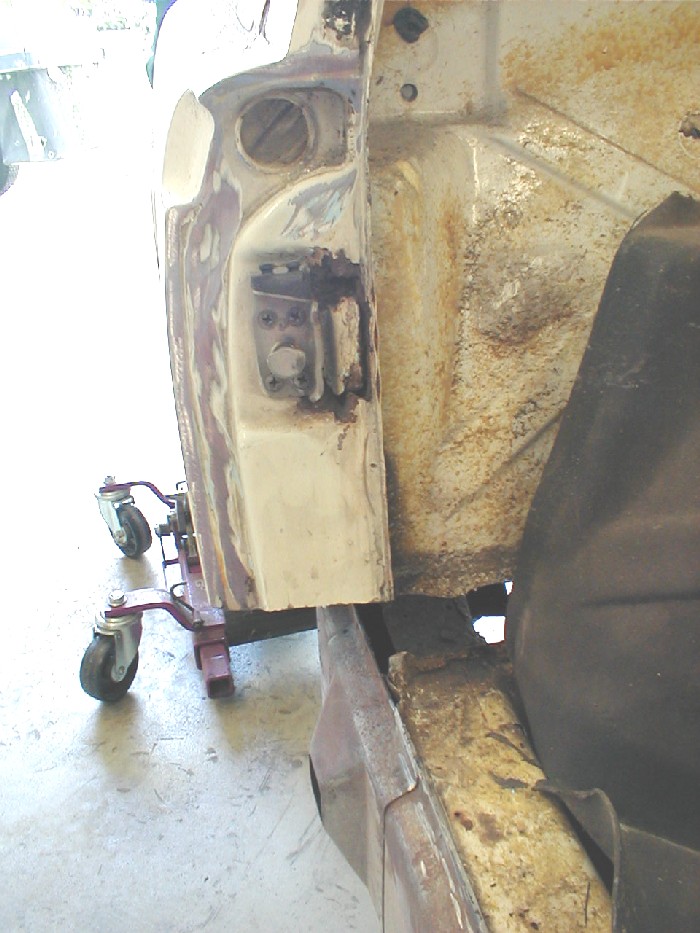
Posted by: tdgray Aug 10 2005, 10:07 AM
Cut the door jamb out. Normally you would pull the fender. I decided not to mess with aligning the fender etc. My plan was to grind out the old and smooth in the new.
Attached image(s)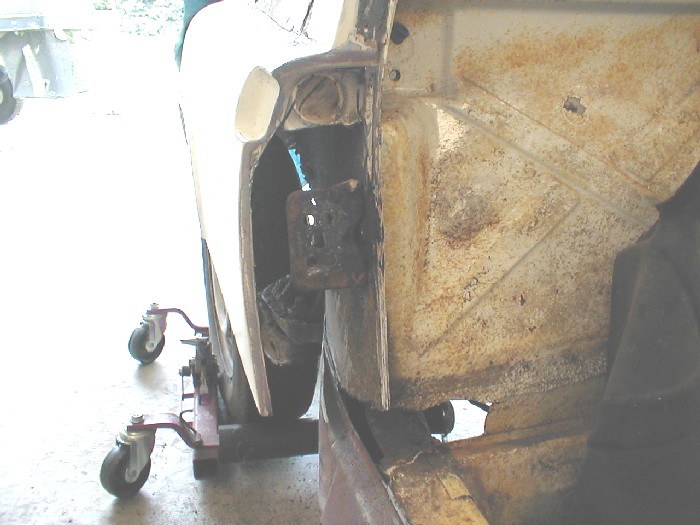
Posted by: tdgray Aug 10 2005, 10:08 AM
Firewall and inner fender repairs... no making fun of my welds please
Attached thumbnail(s)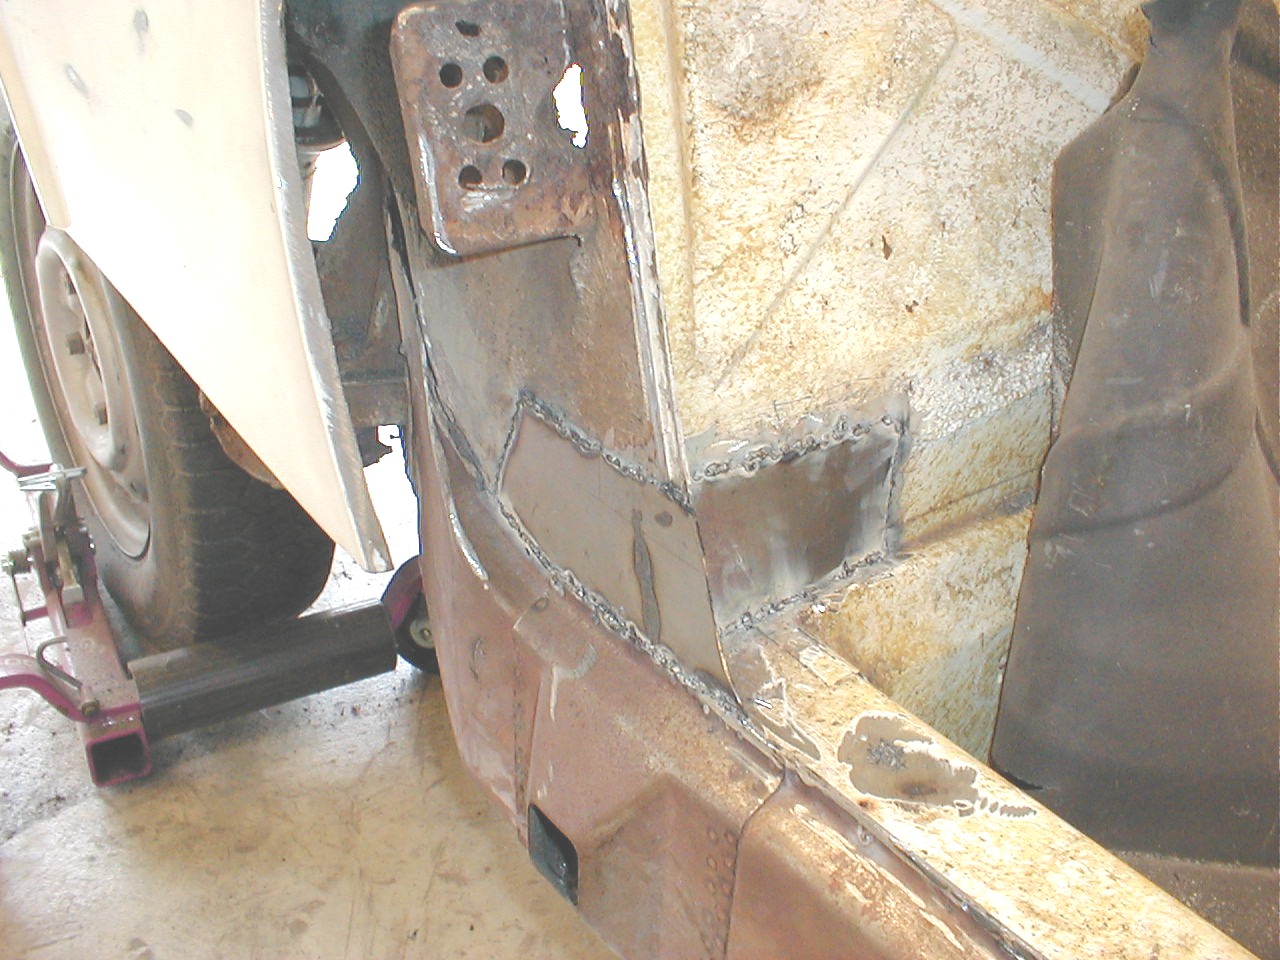
Posted by: tdgray Aug 10 2005, 10:10 AM
New door jambs. I test fit these suckers about a million times. Normally they fit in behind the fender. I fit the flush with the fender. No problems with door clearance.
Attached thumbnail(s)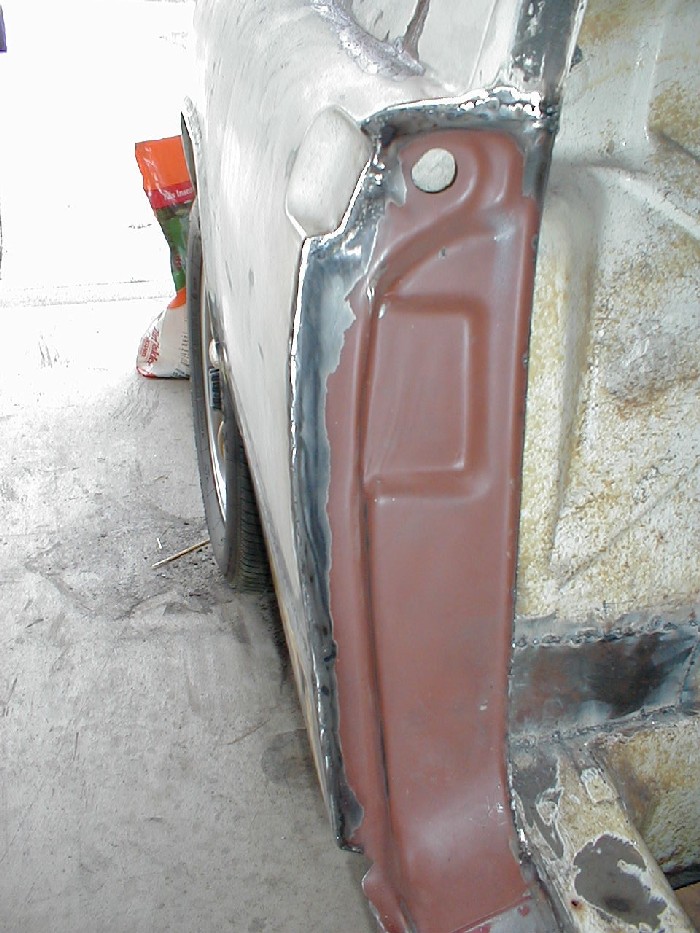
Posted by: tdgray Aug 10 2005, 10:12 AM
Next new door sills. Pretty easy installation.
Attached image(s)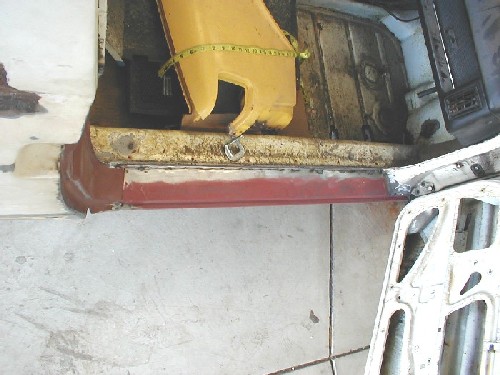
Posted by: tdgray Aug 10 2005, 10:13 AM
Test fitting donor lower fender. Original was absolute shit
Attached image(s)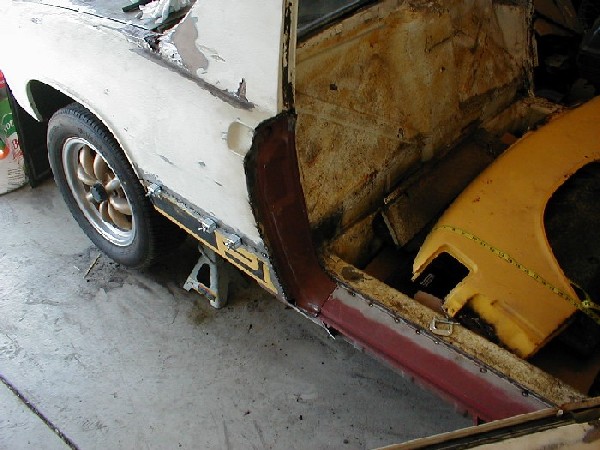
Posted by: tdgray Aug 10 2005, 10:15 AM
New fender welded in... major finishing to do. 
Attached image(s)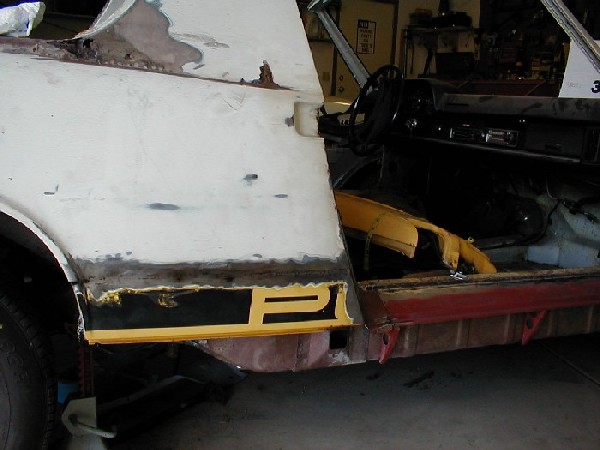
Posted by: tdgray Aug 10 2005, 10:16 AM
My car needs a special ed class... it stutters PPPorsche.
Checking the final alignment
Attached image(s)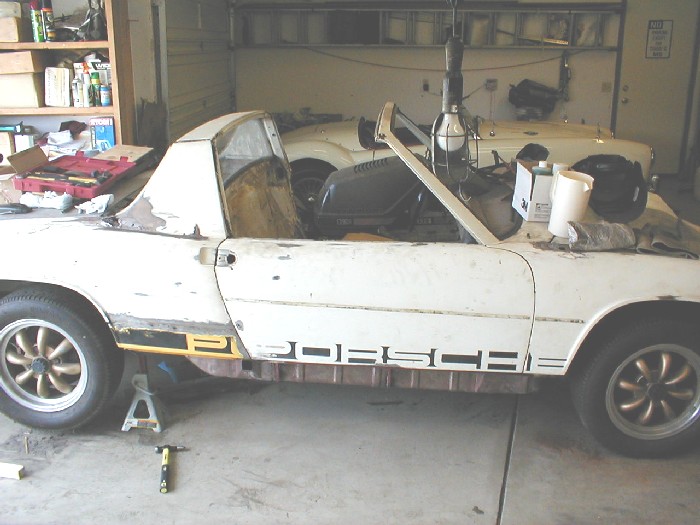
Posted by: tdgray Aug 10 2005, 10:18 AM
Oh BTW....
Doug when I was putting these pic together last night I saw the parts pics and remembered I forgot to send you something.
You should have mail in the next day or two... Thanks BUD!
Posted by: tdgray Aug 10 2005, 10:19 AM
Just some rattle can primer to protect the bare spots.
Also first coats of All Metal filler going on.
Attached image(s)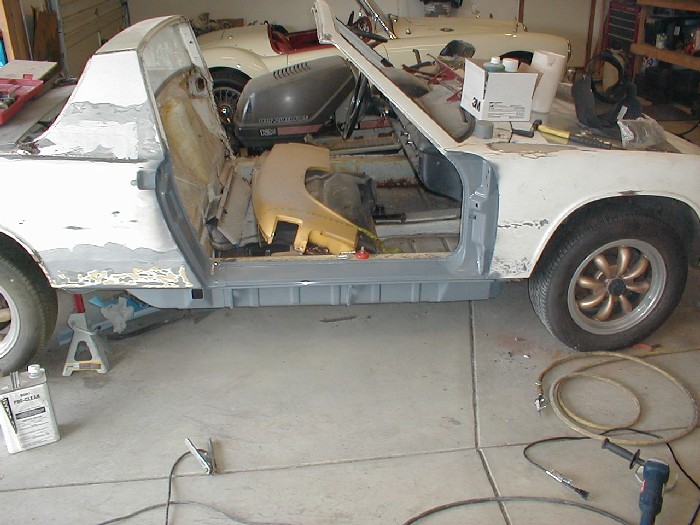
Posted by: tdgray Aug 10 2005, 10:22 AM
For those of you that do not know what All Metal is... well here it is.
It is a alluminum based filler. Totally waterproof, does not shrink, sands smooth and cures fast.
Attached image(s)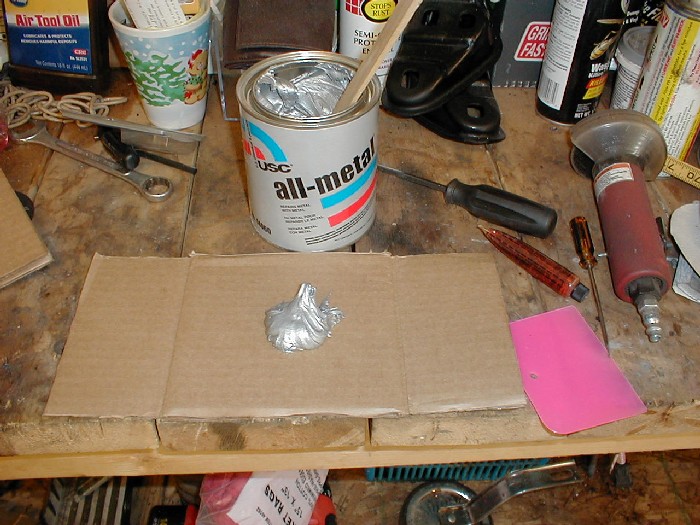
Posted by: tdgray Aug 10 2005, 10:23 AM
That's it for now. More pics at home on the Camera will post them tonight.
Posted by: Headrage Aug 10 2005, 10:59 AM
Great pics.
I've used the All Metal stuff on my car and love it. POR-15 sticks to it like glue.
Posted by: Travis Neff Aug 10 2005, 11:08 AM
Great job!!
Posted by: CptTripps Aug 10 2005, 11:10 AM
| QUOTE (tdgray @ Aug 10 2005, 11:18 AM) |
| Doug when I was putting these pic together last night I saw the parts pics and remembered I forgot to send you something... |
LOL...I saw that pic and had the EXACT same thought.
No worries man. I know you are good for it.Looking great...seriously. Let me know if you need me to come down and help with anything.
Posted by: tdgray Aug 10 2005, 11:18 AM
| QUOTE (CptTripps @ Aug 10 2005, 01:10 PM) | ||
LOL...I saw that pic and had the EXACT same thought. No worries man. I know you are good for it.Looking great...seriously. Let me know if you need me to come down and help with anything. |
Wheels look pretty good huh?

I think I am going to finish them like the bullit mustang wheels. That kinda dark grey... should go great with the white.
Thanks for the offer of help. I will call you when I get some of these major welding jobs done. We can probably make some good progress on the small stuff in a day.
Posted by: CptTripps Aug 10 2005, 11:38 AM
Just call. I can even drive MY 914 there so your wife can see what they are supposed to look like!
Angie is on call Q5 right now, so I get 1-2 nights a week that I can come help.
Posted by: rdauenhauer Aug 10 2005, 02:46 PM
| QUOTE (tdgray @ Aug 10 2005, 08:10 AM) |
| New door jambs. I test fit these suckers about a million times. Normally they fit in behind the fender. I fit the flush with the fender. No problems with door clearance. |
Good pics, where did you get the replacement door jam?
Posted by: tdgray Aug 10 2005, 02:52 PM
| QUOTE (rdauenhauer @ Aug 10 2005, 04:46 PM) | ||
Good pics, where did you get the replacement door jam? |
Restoration Design.... Bill is a very nice guy but don't be in a hurry for your parts and be prepared to bug him to remember your order.
EDIT - Scratch that - the Clams Shells were made by RD..... the Door Jambs came from Tweeks. VERY GOOD service from Tweeks.
Posted by: JerryP Aug 11 2005, 09:02 AM
Nice work Todd!  That is a big project. I started working on some longs in similar condition to yours when you started. Did you end up cutting out the whole clamshell and replacing it or did those fit over top of the original?
Posted by: tdgray Aug 11 2005, 09:55 AM
Jerry,
These are designed to fit over top of the existing longs.
I cut out the bad sections of the now "inner" longs metal. Replaced it with sheet metal and then fitted the clams over it.
Was kinda nice, didn't have to make the "inner" repairs look nice... just strong.
Posted by: JerryP Aug 11 2005, 10:13 AM
Thanks for posting the pictures Todd. I have most of the bad parts cut out so I guess I'll be looking for a set of those.
Posted by: Lou W Aug 11 2005, 10:20 AM
Great progress, keep the pictures coming.
Posted by: tdgray Aug 11 2005, 12:20 PM
| QUOTE (JerryP @ Aug 11 2005, 12:13 PM) |
| Thanks for posting the pictures Todd. I have most of the bad parts cut out so I guess I'll be looking for a set of those. |
Jerry,
See my edit above.
The Clams Shells - or Frame Stiffening Kits as they call them, are made by Restoration Design.
The Door Jambs are made by Tweeks.
Do a google search on both, they have web sites for ordering.
Posted by: tdgray Aug 12 2005, 04:42 PM
One small victory this week. 
No more side markers... personally I feel the stupidist thing on the 914. Absolutely ruins the lines... so gone!
I finally took a couple of vacation days this coming Monday and Tuesday. I have not been able to get away from work this year. One freakin vaction day since April 2004 DOES NOT CUT IT. I said  it. Twelve hour days for over a year striaght are not condusive to a 914 restoration.
Hopefully I can get some serious work done this long weekend
Attached image(s)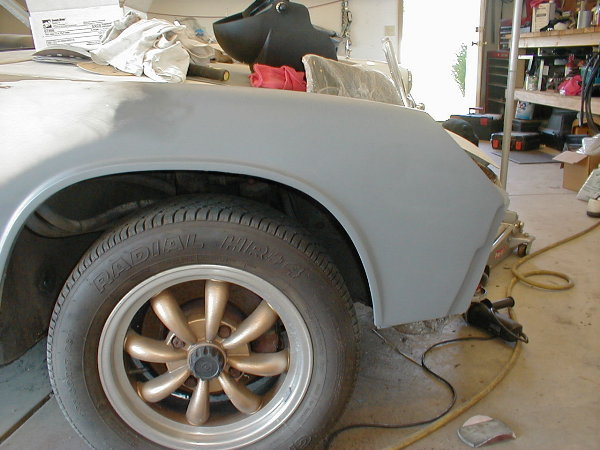
Posted by: tdgray Aug 12 2005, 04:45 PM
My helper...
She is my tool wench, if I drop a wrench she is on it like stink on 
Also, my best friend. Hard to see in pictures, first all black Cocker I've had, don't photograph well
Attached image(s)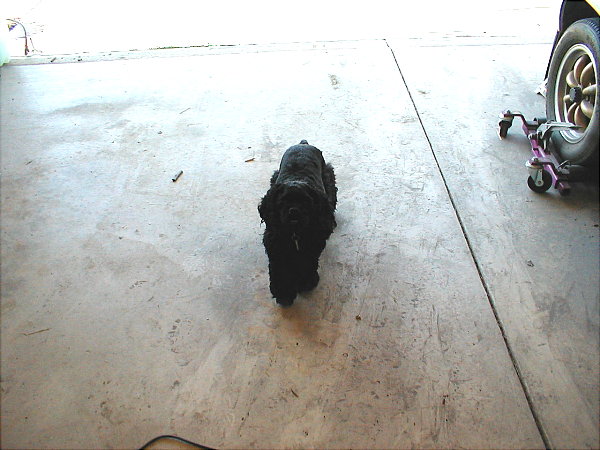
Posted by: redshift Aug 12 2005, 05:04 PM
I like the cooking show nature of your trunk repair pics.. you know, pulling the finished one out of the oven..
Insane work man! Looks great!
M
Posted by: tdgray Aug 12 2005, 05:08 PM
| QUOTE (redshift @ Aug 12 2005, 07:04 PM) |
| I like the cooking show nature of your trunk repair pics.. you know, pulling the finished one out of the oven.. Insane work man! Looks great! M |
Yea,
I haven't quite got the hang of a "progress thread".
I tend to go... I'll take a picture of the damage.
Then I work like HELL trying to get it done. Afterwards while drinking a
 I usually go " SHIT I forgot to take pic's... oh well here it is finished.
What can I say... I'm an idiot

Posted by: CptTripps Aug 12 2005, 08:40 PM
My simple fix for this was that I have a digital camera thats not allowed to leave the garage. I keep the charger out there, and put it on top of the car/bench so I'm sure to see it, and take pics.
Great work man...
Posted by: brp914 Aug 12 2005, 09:00 PM
I'm jealous. You guys get all the rust!
Posted by: Engman Aug 12 2005, 09:11 PM
Nice job!
To all those in the far off land of no rust - this is what we deal with in the midwest and east coast. This is a real nice job of saving what would be a 'parts car' in the land of no rust.
Now 'git r' done' and come to the FFC05! You must make it!
So far (and i will not disclose anything yet) there is well over $1000 in just give aways.
M
Posted by: tdgray Aug 17 2005, 06:28 PM
Well... my two days off came and went.
I spent half the first day fielding phone calls from work and spending time with the family. Cooked a mean breakfast of chorizo sausage omlets though 
Actually, went very well. Doesn't look like I got a whole of progress but believe me this was the hardest part yet. Crawling in and out of the engine bay with various and many tools is a total PITA 
This next project was engine bay prep time. Not for the faint of heart. 
Posted by: tdgray Aug 17 2005, 06:33 PM
Typical battery tray rust.
I had already cut ( in a previous work session) most of what remained of the engine shelf out.
This is the "other half" of the rust I encountered when replacing the door jambs and sill plates.
Time to make with my crappy welding skills
Attached image(s)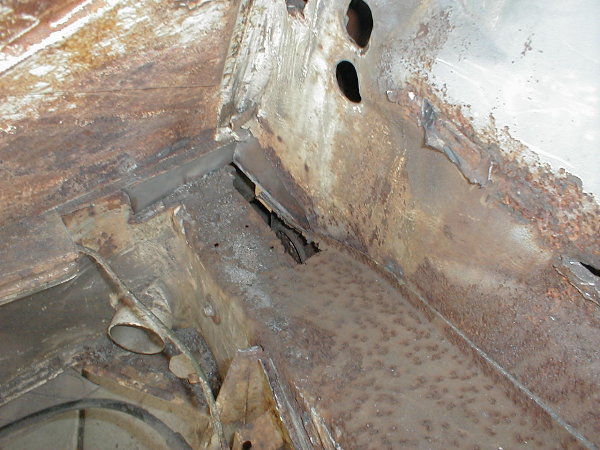
Posted by: tdgray Aug 17 2005, 06:35 PM
Other nastyness from this side.
Amazingly the other side (drivers side) is solid as a rock.
Attached image(s)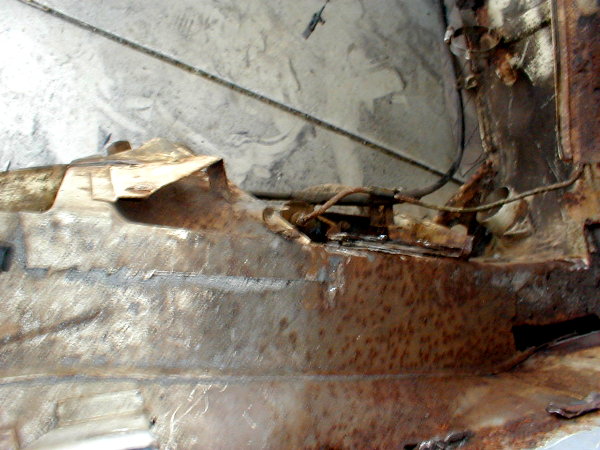
Posted by: tdgray Aug 17 2005, 06:41 PM
Fabricated and started welding in patch... and no obviously my welding skills have not got any better since the last posting.
I treated the area with Ospho (you can see the black sections starting to form. This will take a few coats. Ospho is a rust converter and a primer. I treated the rest of the engine bay with it later (don't really like to apply this stuff and weld around it).
Attached thumbnail(s)
Posted by: tdgray Aug 17 2005, 06:44 PM
Sorry for the somewhat " Andy" quality pics.
My arthritis was giving me some serious fits this day. I know, I know... I am not that old... just a bad break from the inheritance fairy. Early onset. sucks
Posted by: tdgray Aug 17 2005, 06:49 PM
Here is a fitting of the new engine shelf piece.
Notice the rear part.
Although this piece is high in quality from RD, as with all rustoration pieces they will need "customized".
This one was pretty easy. Just a little hand wrenching and a few hammer taps.
Although the end was a bit short, I'm sure that the seal will fill the gap properly
Attached thumbnail(s)
Posted by: tdgray Aug 17 2005, 06:52 PM
Tacking the rest in.
I am such a freaking baby when it comes to welding. I get the whole " gee I better not put too many welds in just in case I screw the rest of it up".
I really am getting better at it though ( I know it doesn't show but at least they're easier to grind )
Attached thumbnail(s)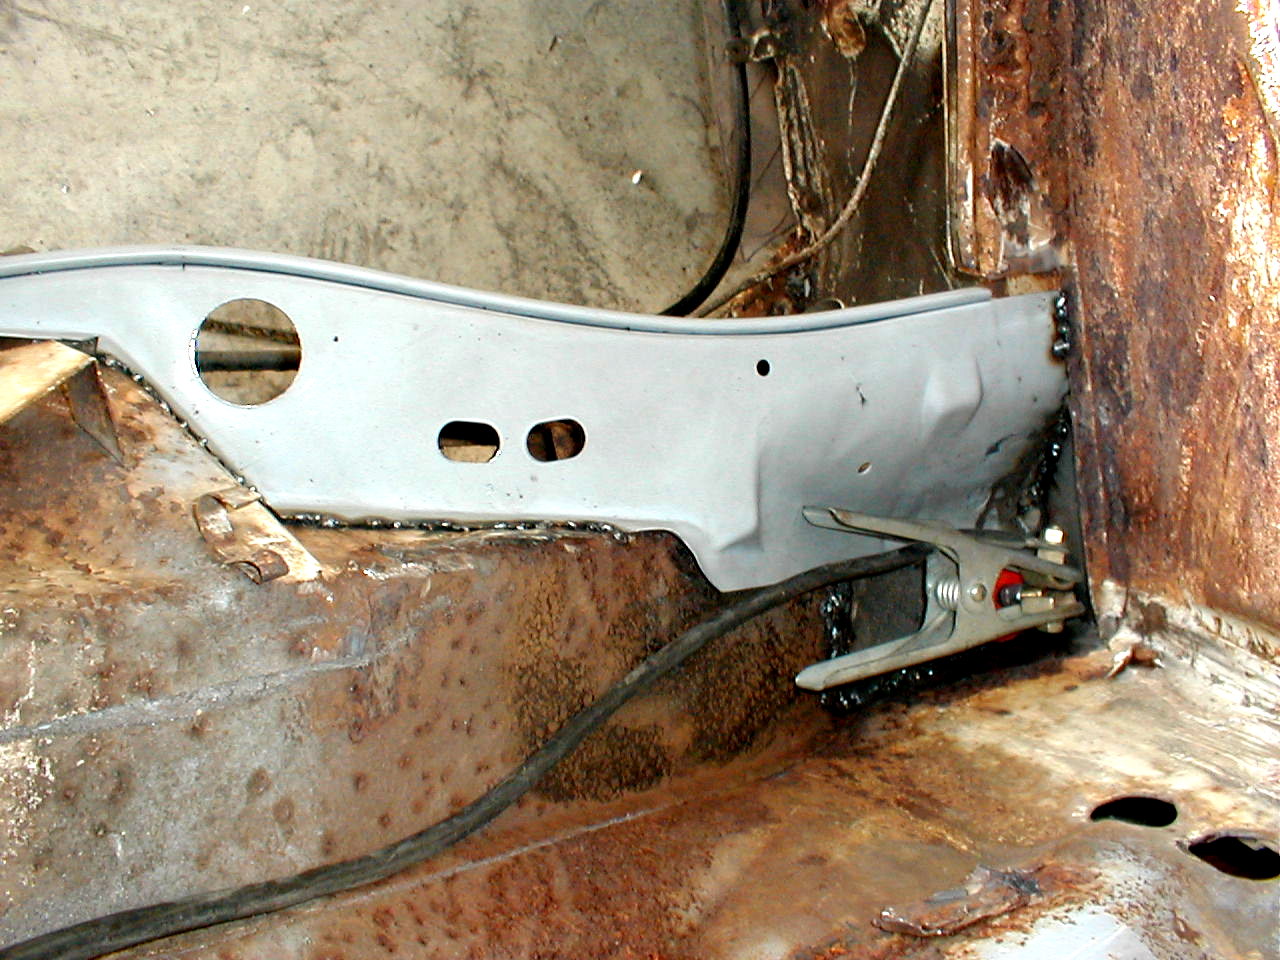
Posted by: tdgray Aug 17 2005, 07:03 PM
On to the battery damage.
Most of which was caused by taking out.
Pics is slightly deceiving., I saw this pic and said WOW it didn't look that bad. Actually it was. Lot's of grinding. Came out nice and smooth.
Attached image(s)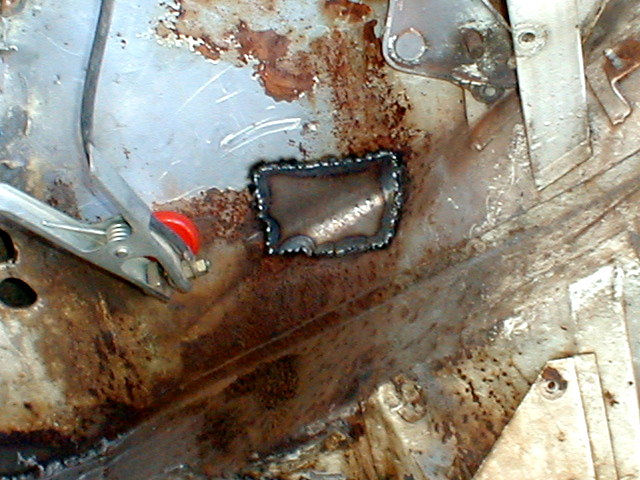
Posted by: tdgray Aug 17 2005, 07:06 PM
And in my usual style (read: yes I went like hell and forgot to take pics).
I wheeled the car outside and gave the engine bay a degreasing bath with the pressure washer. Let it dry for a couple of hours and then Ospho'd the lving crap out of it.
Got up the next morning and did this.
Attached thumbnail(s)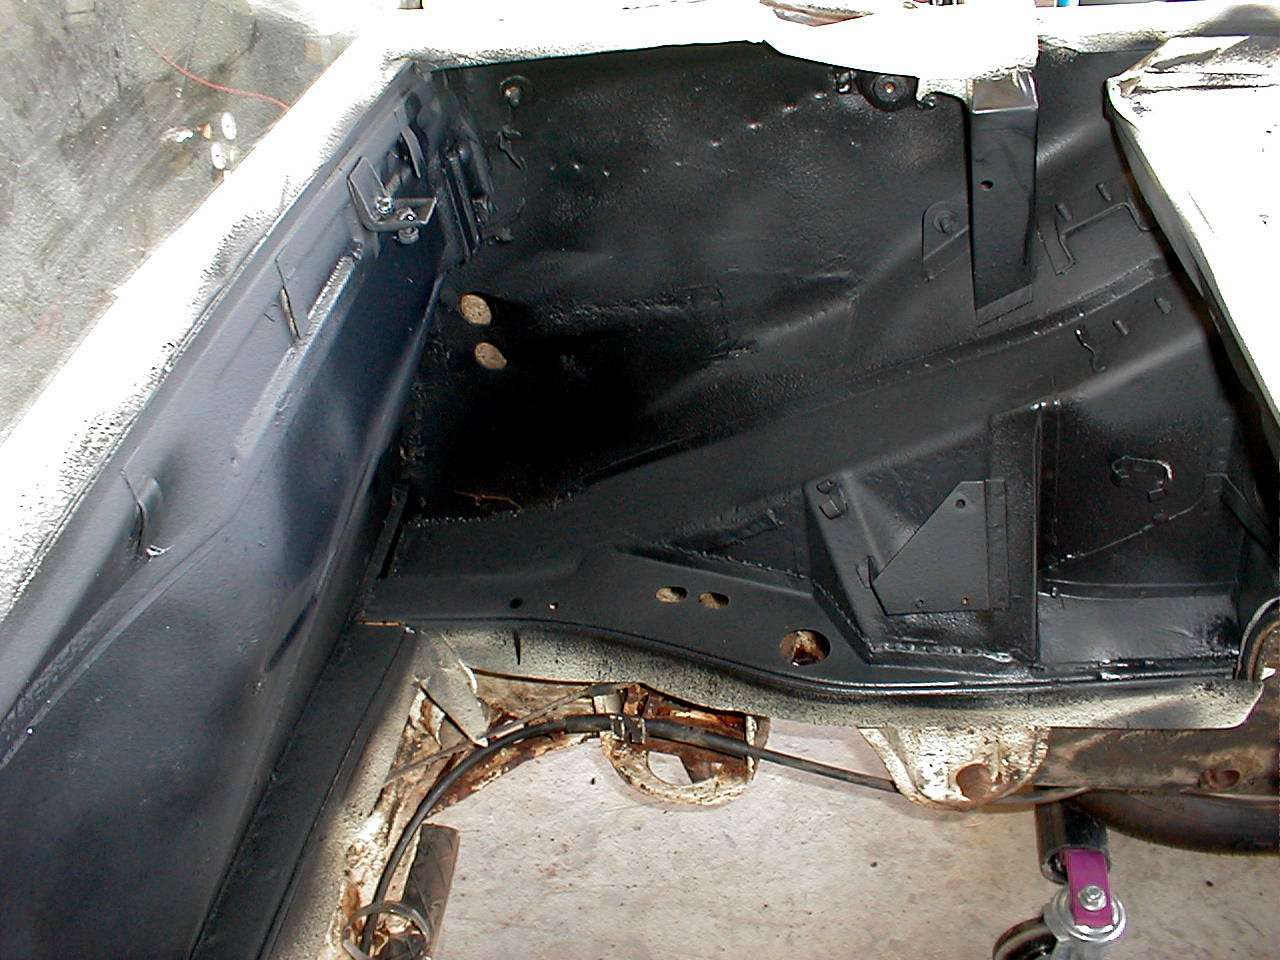
Posted by: tdgray Aug 17 2005, 07:12 PM
Don't worry... this is only "Rock Guard"
It is basically a textured spray that insulates sound and provides a chip resistant surface.
It is totally paintable. The engine bay will be white just like the rest of the car.
I did realize after I got this on that some of my welds from the previous day looked a little rough... to say the least.
At this point I went and bought an angle die grinder. SHIT if I knew how much better that worked I would have bought one long ago. OH WELL live and learn.
More after the bay is painted... next weekend hopefully.
Attached thumbnail(s)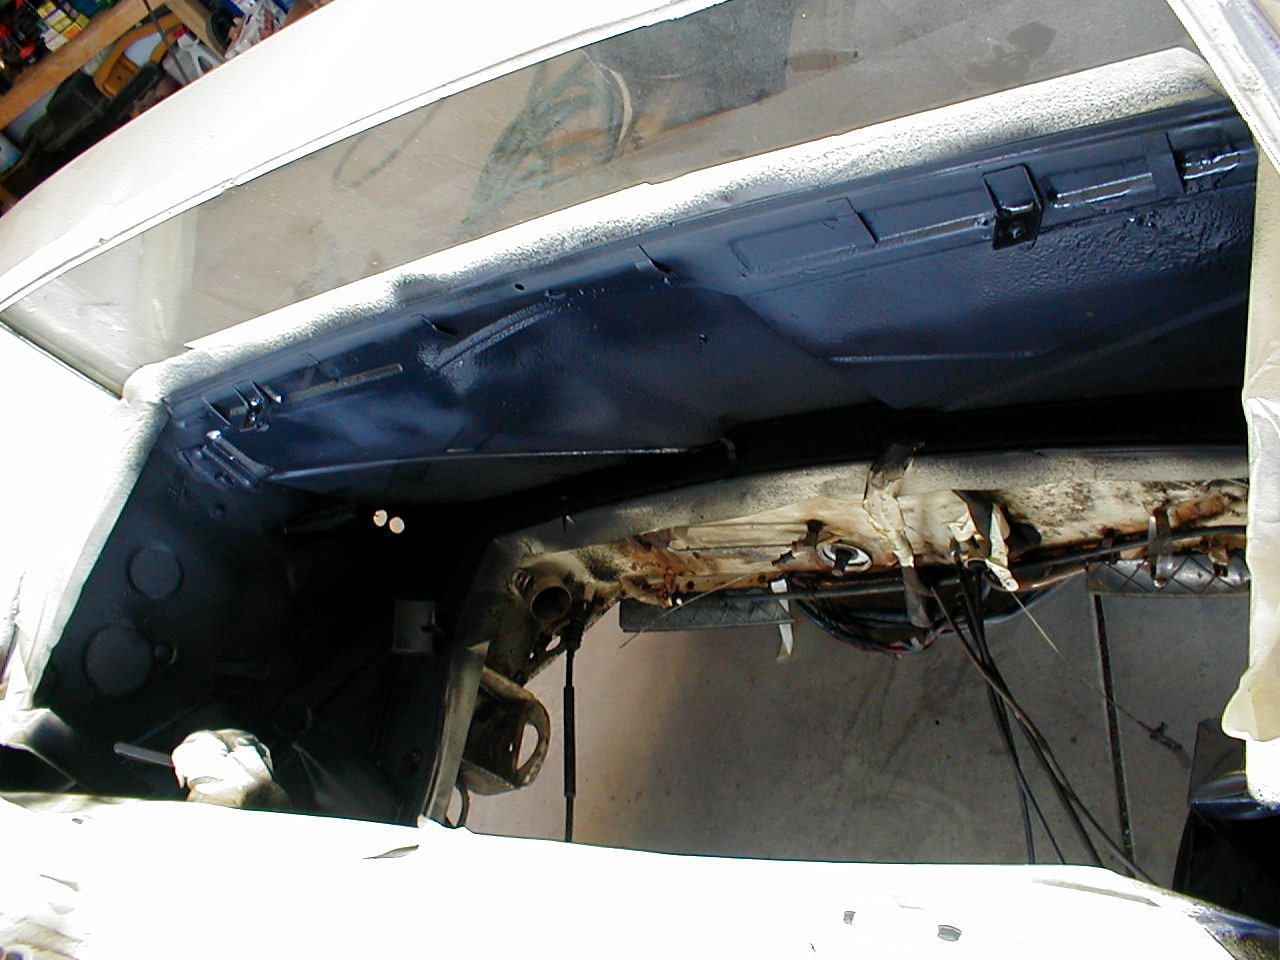
Posted by: tdgray Aug 17 2005, 07:16 PM
Oh forgot to add one more thing.
Before everybody goes "Well shit he didn't do the bottom of the bay"
I know this is going to be POR-15'd shortly (notice the making tape around all the channels and other surfaces)
Will do before painting.
Also, I am not totally committed to moving the battery to the front trunk. I still reserve the right buy a new battery tray and grind and weld it in.
Will advise.
Posted by: siverson Aug 17 2005, 07:23 PM
Man, looks like good work, but I can't believe you guys do this. For about $1500 (including shipping from So Cal) you could just start with a much stronger tub!!! That car needed a lot of work!!!
-Steve
Posted by: tdgray Aug 17 2005, 08:18 PM
| QUOTE (siverson @ Aug 17 2005, 09:23 PM) |
| Man, looks like good work, but I can't believe you guys do this. For about $1500 (including shipping from So Cal) you could just start with a much stronger tub!!! That car needed a lot of work!!! -Steve |
I know, I know.
I missed the last chance when B was going to bring a tub over.
Really... to tell you the truth.. it's more about therapy.
This is what I do to relax. It may be a giant pain in the ass, but I completley enjoy it.
It's like a pheonix rising from the ashes (OK overly dramatic, but true).
It's not about the $, it is about the time spent laboring, making something with your hands. It's the same reason I make furniture. My wife constantly tells me. "You know I saw those adirondack chairs for $XXX down at blah blah blah.
It doesn't matter. When my boy see's me working in the garage or in the workshop... and wants to join in.. freakin priceless. I feel I am teaching him the values in life. Life is more than buying something and calling it your own. It's about leaving your mark, where you can.
Just my .02
Posted by: CptTripps Aug 17 2005, 08:46 PM
| QUOTE (siverson @ Aug 17 2005, 08:23 PM) |
| Man, looks like good work, but I can't believe you guys do this. For about $1500 (including shipping from So Cal) you could just start with a much stronger tub!!! That car needed a lot of work!!! -Steve |

You are looking at 800-900 to get a car from Cali to Ohio. I just did it 4mos ago.
Granted, I'll be buying my next one from Cali and moving it here, but for the $300 he has into this car, it'll be pretty nice when he's done.
Keep rockin Todd...
Posted by: tdgray Aug 18 2005, 05:53 AM
A bit of bad news to go along with all of this
I was sorting through the engine components so I could put an order together today. Just misc stuff like vacuum hose, grommets and such.
As I was sorting and cleaning I came across my MPS, hmm I had a thought let's see if it still holds a vacuum. I had tested it when I first got the car, very breifly. This was when I was chasing down fuel and vacuum connections. I remember that it did at least "pump up" but I didn't take it any farther than that.
Well short story long here... I put the vac pump on and NOTHING. NOT A DAMN THING 
This is going to be a major problem. 
Posted by: CptTripps Aug 18 2005, 06:08 AM
coughCARBScough
Posted by: tdgray Aug 18 2005, 06:56 AM
| QUOTE (CptTripps @ Aug 18 2005, 08:08 AM) |
| coughCARBScough |
Carbs on a 1.7.
It's like puttin' a dress on a pig
Posted by: CptTripps Aug 18 2005, 07:29 AM
Well....I've got the dress for your pig if you are interested. YOU KNOW where I got them.
Posted by: tdgray Aug 18 2005, 07:41 AM
I've emailed Geoff (Bleyseng) to ask for divine assistance.
If anybody has seen him give him a  and direct him to me.
THANKS
Posted by: tdgray Sep 6 2005, 07:08 PM
Sorry Guys, it's been awhile
I have been working on the car... just not as much as I want to, DAMN JOB!
Here is two weeks ago. Talked the right side door jamb and sill. Easier than first since I been there done that.
Attached image(s)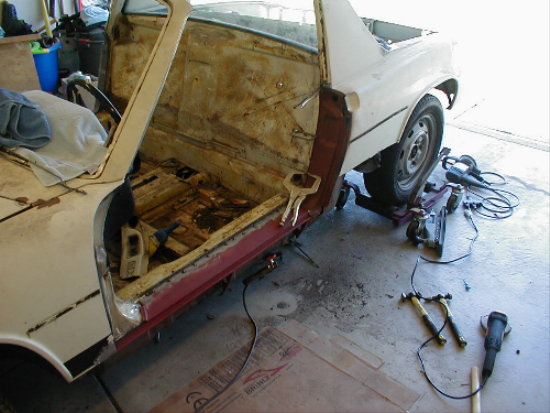
Posted by: tdgray Sep 6 2005, 07:12 PM
Here is final fitting before finish welding. Fender is original. Makes life much easier.
Attached image(s)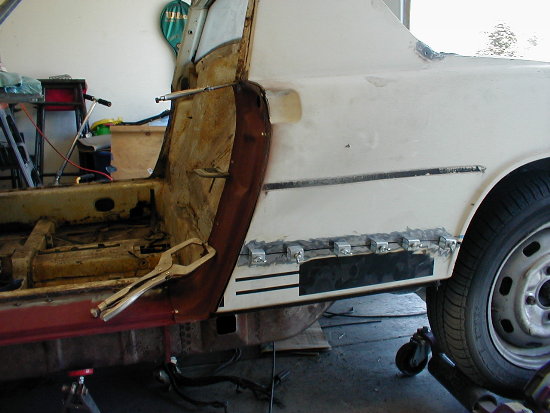
Posted by: tdgray Sep 6 2005, 07:14 PM
All welded up (hah.. I forgot to take pics so you cannot make fun of my welds).
First coat of all-metal.
Attached image(s)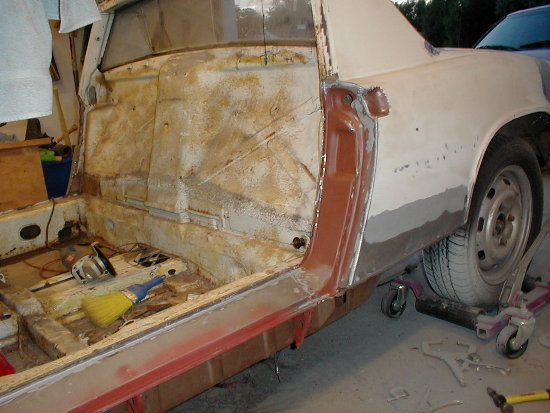
Posted by: tdgray Sep 6 2005, 07:19 PM
Here is the really UGLY  ... my eyes...my eyes.
This is actually a donor door I got from Doug H. Believe or not my orginal was worse.
That is a pretty deep smack in the door. Some A-hole had filled it with plastic filler.
The rest of the door is pretty straight. I have no doubt that the All Metal will be just fine. Shouldn't take more than three coats to egt it smoothed out.
Attached image(s)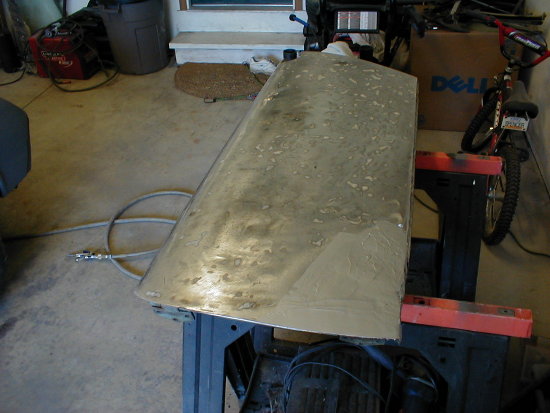
Posted by: tdgray Sep 6 2005, 07:21 PM
Took a little break from body work to work on the front valance.
Just a wire brush to remove some scale.
Again, this is rock guard. It will be painted whiet with the rest of the car.
Posted by: tdgray Sep 6 2005, 07:22 PM
Oops forgot the pic. That's enough for me tonight
Attached image(s)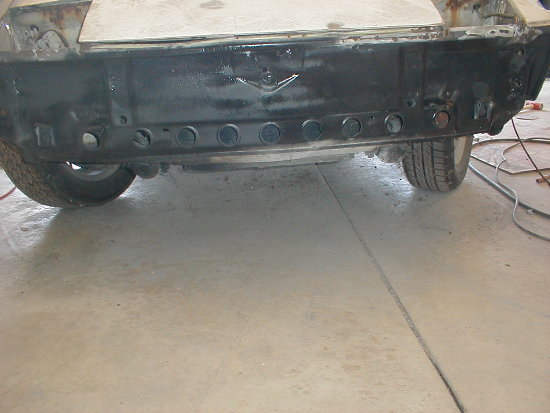
Posted by: CptTripps Sep 6 2005, 07:22 PM
Wow...that's some serious progress....
Want to come help with the body work on mine?
Posted by: tdgray Sep 6 2005, 07:30 PM
This is this last weekend. I dod quite a bit of body work. Mostly sandind filler and ID'ing spots for repair. No pics of this as it is pretty boring.
Body is totally roughed in. Mainly just finish filling to go. Almost ready for some high build primer and lots of blocking.
I decided to take a break on Monday and work on the engine, I would like to get it back in the car in the next ten days.
BEFORE
Attached image(s)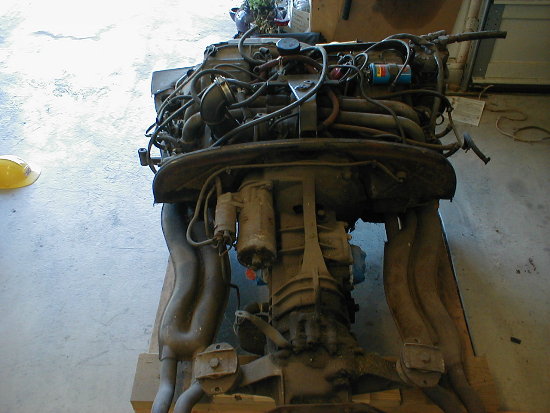
Posted by: tdgray Sep 6 2005, 07:31 PM
| QUOTE (CptTripps @ Sep 6 2005, 09:22 PM) |
| Wow...that's some serious progress.... Want to come help with the body work on mine? |
I'm gonna need some time to recover from this... maybe next weekend

Posted by: tdgray Sep 6 2005, 07:32 PM
Let the tear down begin
Attached image(s)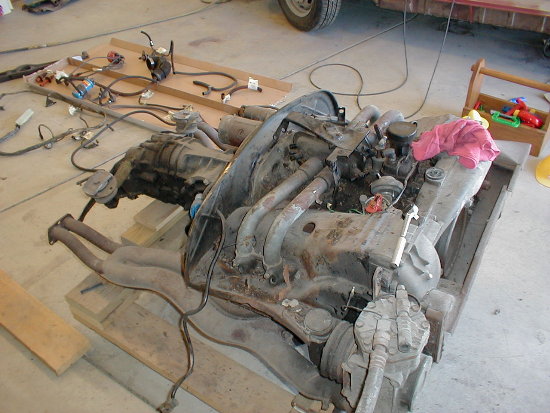
Posted by: tdgray Sep 6 2005, 07:35 PM
Oh BTW... the tool box in the prevoius pic belongs to my little mechanic... he lost interest about fifteen minutes into the tear down. He took a "break" to play baseball.
Attached image(s)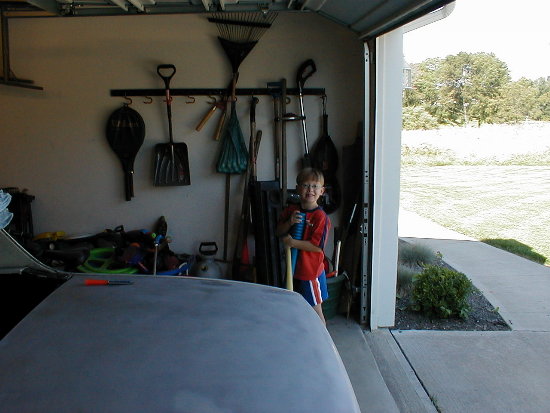
Posted by: tdgray Sep 6 2005, 07:37 PM
The parts boxes grow
Attached image(s)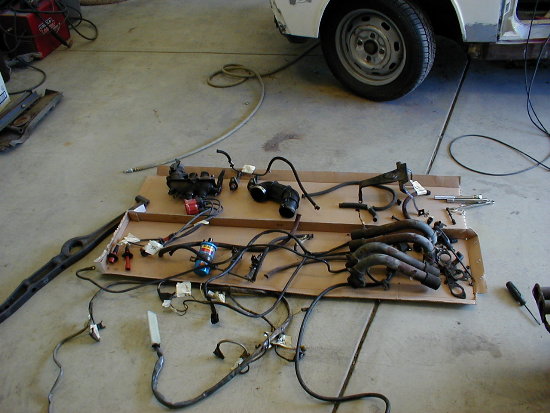
Posted by: tdgray Sep 6 2005, 07:38 PM
Stripped down naked... or almost. This is as far as she goes
Attached image(s)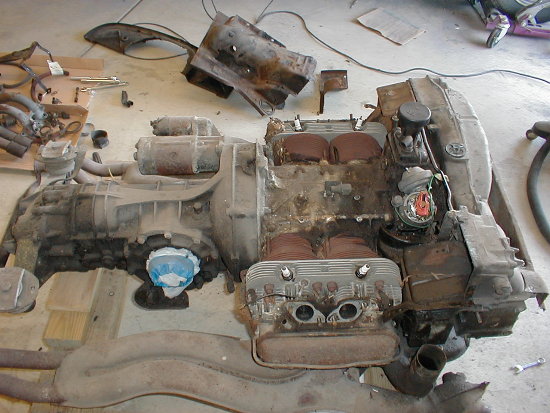
Posted by: tdgray Sep 6 2005, 07:40 PM
You would think with a valve cover this bad... the damage inside would be VERY BAD
Attached image(s)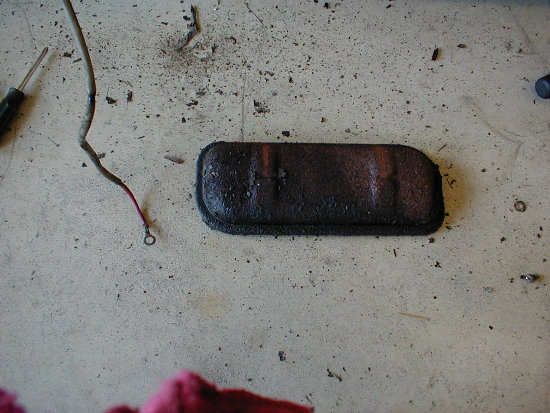
Posted by: tdgray Sep 6 2005, 07:41 PM
Not too bad... in definite need of adjustment. but pretty clean otherwise
Attached image(s)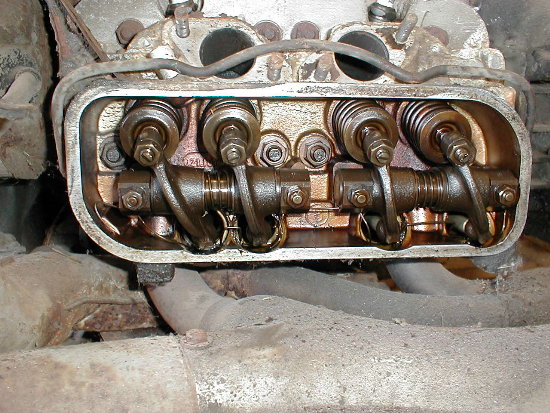
Posted by: tdgray Sep 6 2005, 07:43 PM
Here she is after a nice bath. Took me an hour to get the driveway clean after this.
The rest of the yuck should come off with a stiff wire brush.
Attached image(s)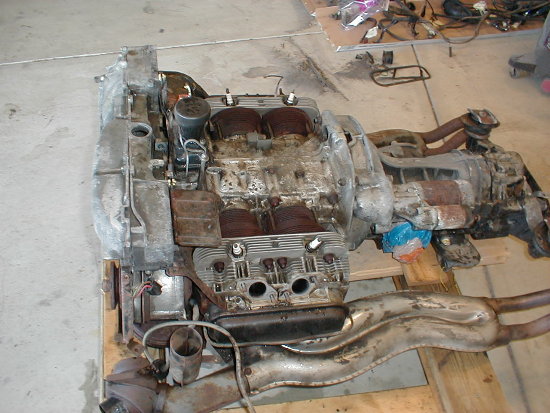
Posted by: tdgray Sep 6 2005, 07:46 PM
Tonight's progress
They could be better but, hey it's just a driver. The rest of the tin will be done this week.
I ordered some parts this AM. Maybe just maybe if all goes right the engine can go back in next week.
Still have to decide what to do about the battery tray and paint the engine bay.
Attached image(s)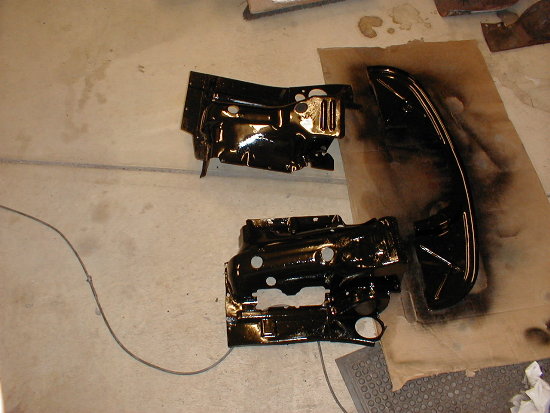
Posted by: tdgray Sep 6 2005, 07:48 PM
Enough for tonight... the wife is giving me the "are still doing that" look.
One more and it's crash time.
Posted by: aircooledboy Sep 6 2005, 07:58 PM
Todd, you are rockin' bud.
Really great work. I love these threads. Did you resolve your MPS problem?
Posted by: pete-stevers Sep 6 2005, 07:58 PM
I have to say "I am totally in awe"....... 
keep it up!
steve
Posted by: tdgray Sep 6 2005, 08:15 PM
| QUOTE (aircooledboy @ Sep 6 2005, 09:58 PM) |
| Todd, you are rockin' bud. Really great work. I love these threads. Did you resolve your MPS problem? |
Yep,
Our fellow club member Geoff (Bleyseng) has it as we speak. It will have rebuild and be good as new.
Posted by: tdgray Sep 12 2005, 05:35 PM
OK... While waiting on parts for the engine and a few misc other things...
Look what the sheet metal fairy brought me.
Attached image(s)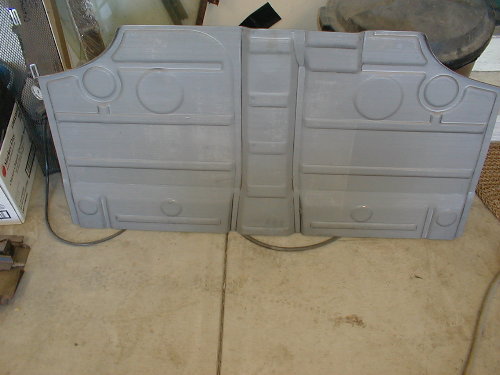
Posted by: tdgray Sep 12 2005, 05:36 PM
'nother
Attached image(s)
Posted by: tdgray Sep 12 2005, 05:41 PM
This is where they go.
I have to tell ya. This was the freaking hardest job on this car.
I know there is not alot of pictures for this progress... mainly because it was a tremendous amount of backbreaking work and not much to show until the end.
This was not the worst rusted part of the car.. but definitley the hardest to work on. I ruined more of the good metal getting the pans out than was rusted.
You absolutley want a good jack and at least five hands, unfortunatley I only have two.
If I had to do it all again, I would build a rottisere to do this.
Attached image(s)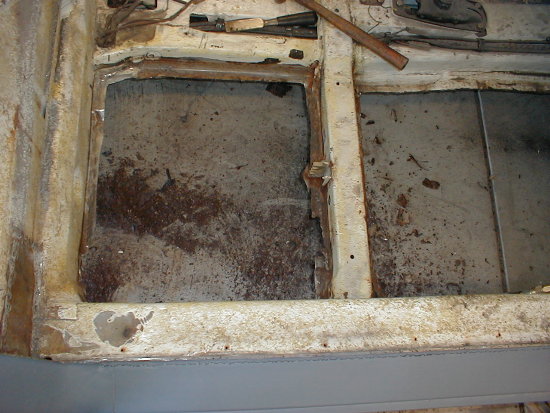
Posted by: tdgray Sep 12 2005, 05:48 PM
Passenger side pans * mostly * welded in.
I went back to flux core wire for this job. I knew there would be tons of welding and I would go through like 3 bottles of MIG gas if I went with mig on this.
Quite a bit of black scaring and ugly welds but they're in... plenty of grinding to do as well.
Biggest thing I hate about flux core is the shit popping all over the place. My arms are covered in pink spots (I know, idiot put on long sleeves).
Attached image(s)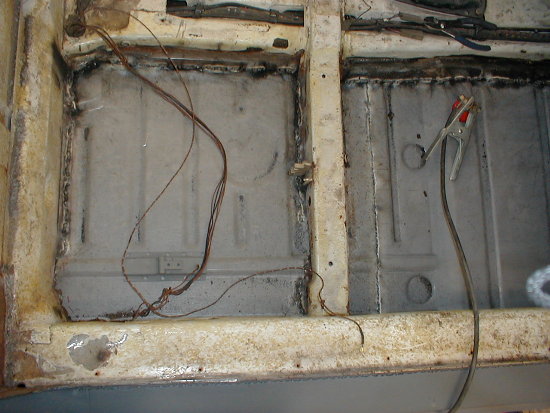
Posted by: tdgray Sep 12 2005, 05:51 PM
I add this pic only to tell of the horror that is getting off a rusted on hand brake lever.
I cranked the air compressor to 95 psi and went at this thing several times with an air hammer and ball joint removal tool. WHAT AN F'IN BITCH. I could not imagine trying to get this off with a pry bar and hand tools.
OH and obligatory rust holes
Attached image(s)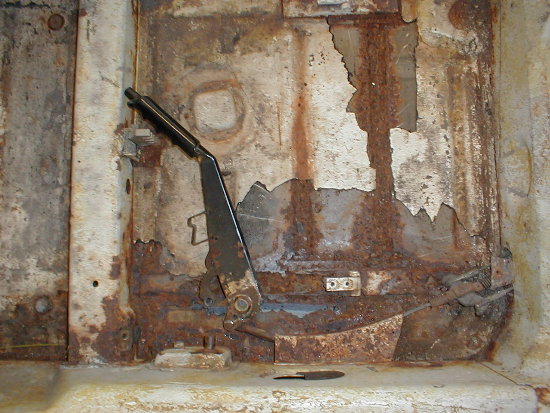
Posted by: tdgray Sep 12 2005, 05:55 PM
Drivers back. Tacked in.
Ran out of welding wire and steam at this point....
Ultimate F'in bitch this job. I figure one more day to go and we will be done.
Sheesh.
Attached image(s)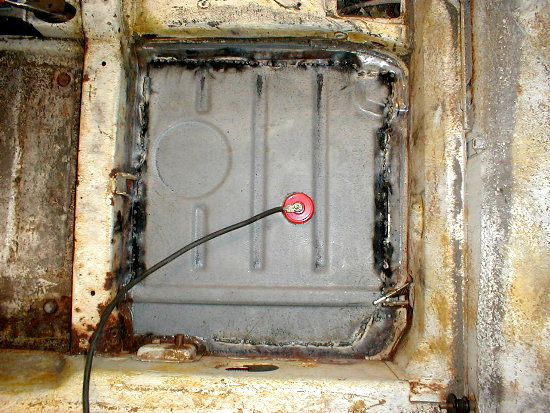
Posted by: tdgray Sep 29 2005, 06:01 PM
Sooo... it's been awhile.
I have been working pretty much non stop, well at least for the last 14 days in a row. I have had virtually zero garage time.
After I got home this last Monday, I felt I needed to unwind... so off to the garage I went. Wnated to keep it light, how about a valve adjustment???
Using the Cap'ns method, very easy. Worst part was figuring out the true point of "rocking" Messed a few up at first but went pretty well after a little nogin noodling.
Attached image(s)
Posted by: tdgray Sep 29 2005, 06:02 PM
After a little more cleaning and some new valve cover gaskets... time for reassemble. (this is Tues BTW).
Attached image(s)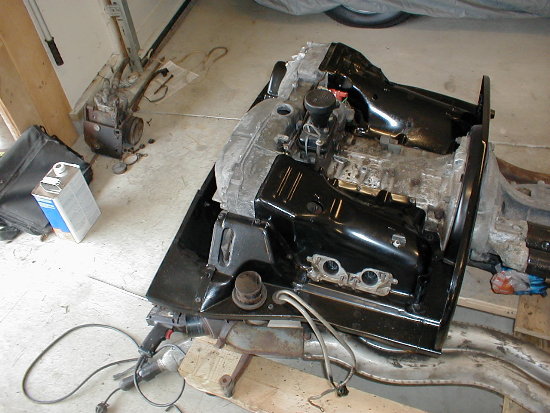
Posted by: tdgray Sep 29 2005, 06:04 PM
Little Further.
Attached image(s)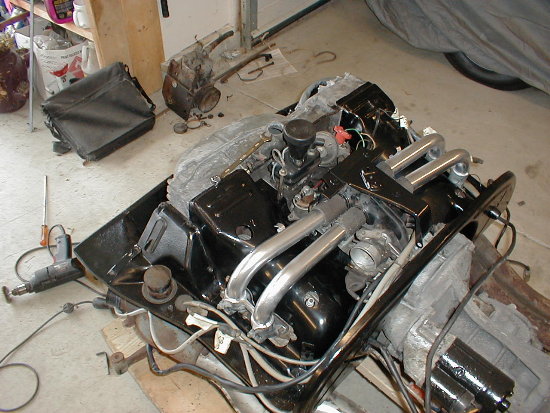
Posted by: tdgray Sep 29 2005, 06:07 PM
Yeah I know... you asking jeez those FI intake tubes are awful shiney.
WELL... I bought this paint. I thought it looked like dull alluminum. Then I started painting. DAMN stuff looks like chrome when wet, it did dull down a little.
Obviously a little mix up at the paint mfg or store. I was going to repaint them but the kids said it was "NICE BLING DAD"
I still reserve the right to yankthem off and repaint
Attached image(s)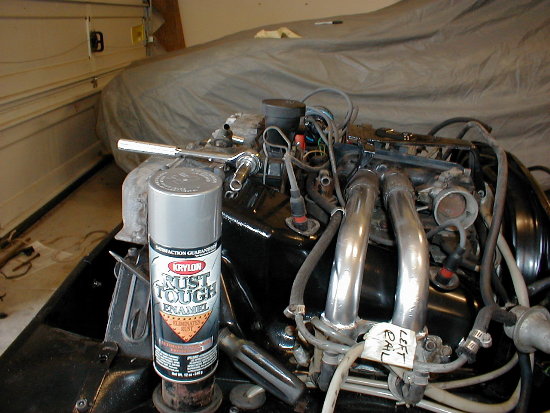
Posted by: tdgray Sep 29 2005, 06:08 PM
Mostly together.
Needs..... vacuum hoses.
Attached image(s)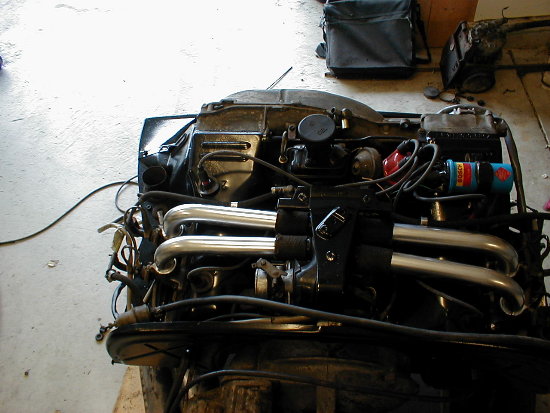
Posted by: CptTripps Sep 29 2005, 06:11 PM
| QUOTE |
| I have to tell ya. This was the freaking hardest job on this car. |
I second that!
Looks like you are kicking this things butt!
Posted by: tdgray Sep 29 2005, 06:11 PM
You will never, never , ever get me to tell you where I purchased these
But I did measure and record each hose and where it goes. I will post a VH diagram for 1.7's when I get some time so no one has to do the unthinkable like I did.
UNCLEAN.... AUUUUUUUUUUUGH
Attached image(s)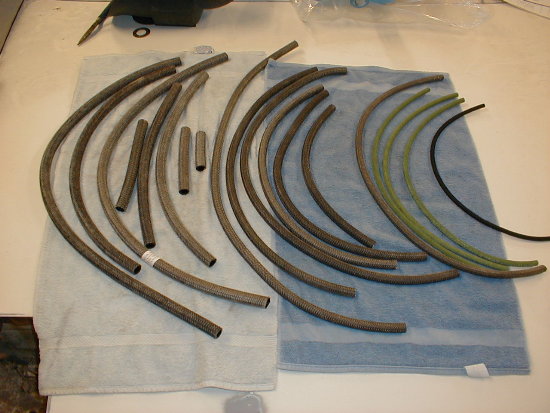
Posted by: tdgray Sep 29 2005, 06:13 PM
 my own thread.
Hey Doug ... long time no see... where ya been. How was China?
Pretty soon my man, hopefully a put it back together party eh?
Posted by: tdgray Sep 29 2005, 06:15 PM
Last one for tonight....
Looky what the parts fairy brought me. HUGE thank to Eric Shea. NICE JOB MAN.
Eric... core go bye-bye today. Thanks buddy.
Attached image(s)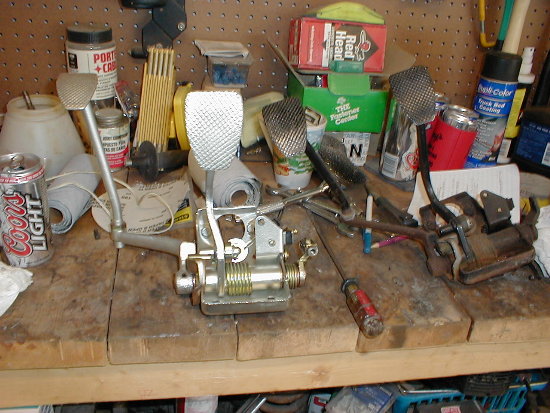
Posted by: Gint Sep 29 2005, 08:51 PM
Wow. I just went through the entire thread. Some good work you're getting done there.
Don't stop now. 


Posted by: tdgray Sep 30 2005, 05:55 AM
Thanks Gint, 'preciate the words of encouragement
Posted by: Hammy Sep 30 2005, 06:02 AM
good work. Glad to see one being saved. you're my hero
Posted by: Racing916 Sep 30 2005, 06:43 AM
Man, You are doing a great job, Body Work is very nice and Car is coming along great! Keep up the good work!!!!
Posted by: CptTripps Sep 30 2005, 06:57 AM
I'm up for another put-together party for sure...
...then we can do a 'take apart' party on mine.
I've got a plan
Posted by: watsonrx13 Sep 30 2005, 09:49 AM
Great job.
On sept 12, 2005, you have a photo showing the driver's back floor welded in, what is the red thing with the wire attached? Is it for the ground to your welder? If it is, what is it called, I could use something like that...
-- Rob
Posted by: tdgray Sep 30 2005, 04:57 PM
Rob...
Yes it is a magnetic ground for the welder.... very handy. A couple of bucks at Harbor Freight. Beats trying to find someplace to clamp on to. Just have to make sure it is clean, if not major sparks a'flyin.
Posted by: tdgray Oct 1 2005, 07:44 AM
Well, I took a half day off work yesterday to prime. Got the first coat on her before the kids came home from school.
Damn I forgot how smelly all that crap was.... my neighbors loved it I'm sure
BEFORE.
Attached image(s)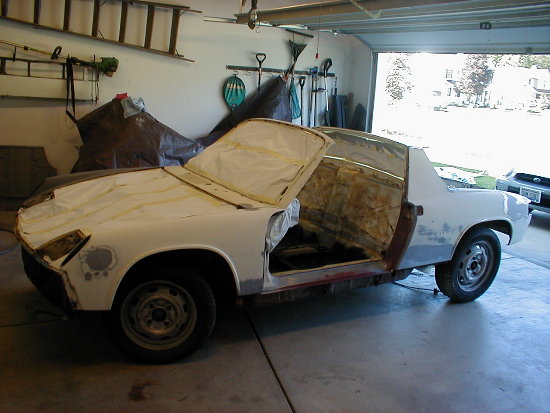
Posted by: tdgray Oct 1 2005, 07:45 AM
'NOTHER
Attached image(s)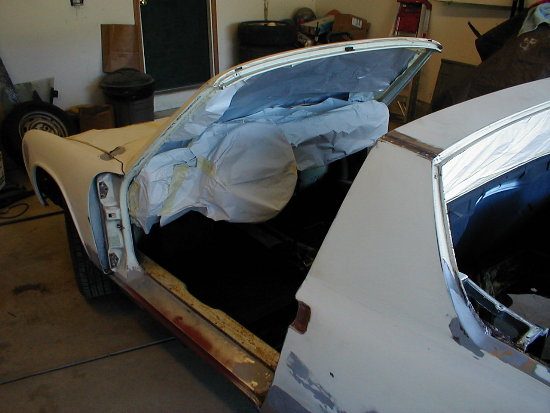
Posted by: tdgray Oct 1 2005, 07:48 AM
VIOLA... AFTER
Attached image(s)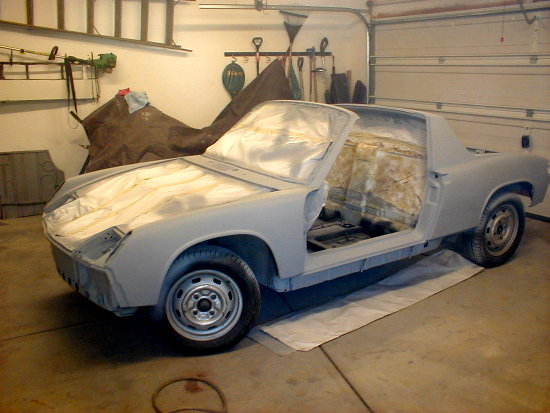
Posted by: tdgray Oct 1 2005, 07:50 AM
MORE AFTER
Attached image(s)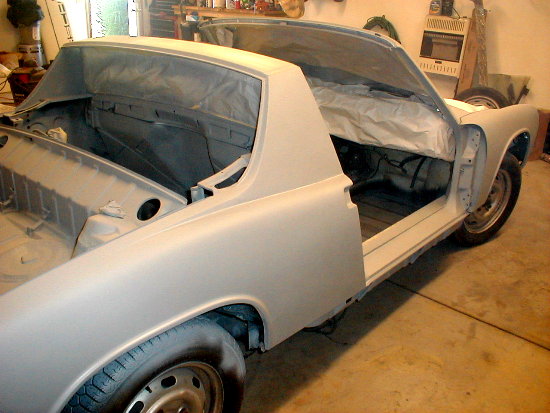
Posted by: tdgray Oct 1 2005, 07:50 AM
FRONT AFTER.... NO MARKER LIGHTS YEA!
Attached image(s)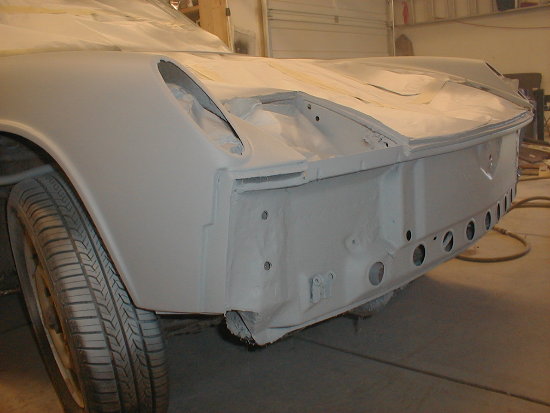
Posted by: tdgray Oct 1 2005, 07:52 AM
LAST ONE.... WOW IT IS SUPER HARD TO GET UNDER / IN THE ENGINE BAY ETC.
Attached image(s)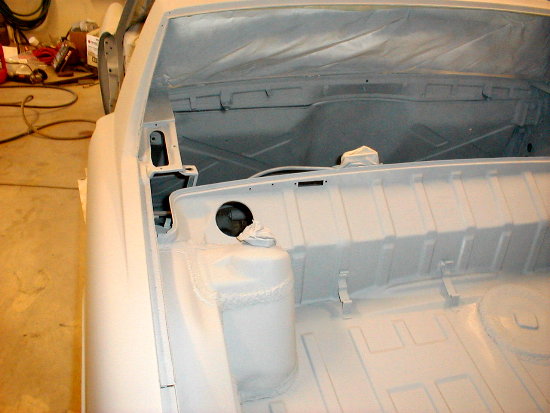
Posted by: CptTripps Oct 1 2005, 01:44 PM
looking sharp man...
I Love when they are all primed like that....thinking about using a darker grey like that on my next one...
Posted by: Gint Oct 1 2005, 03:25 PM
Nuthin like a tub in bare primer. Looks almost... new.
Posted by: tdgray Oct 19 2005, 06:57 PM
OK Guys just a little sneak preview.
I am soooo far behind it not funny. Work is just getting more hectic. But I managed last Sat and Sun to paint the body. No engine bay or rear tunk yet. Door and Lids need finished. If I get time this weekend I will finish. It is getting cold here... need to finish before it gets really cold.
A little teaser
Attached image(s)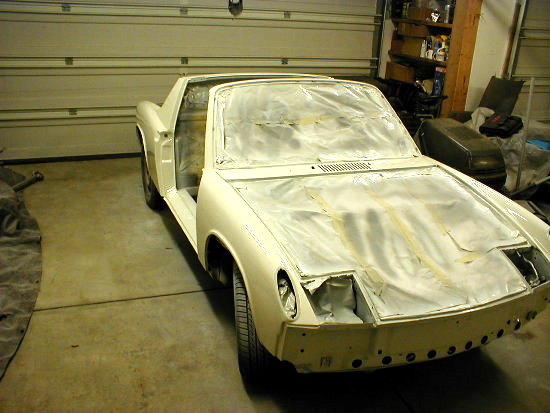
Posted by: tdgray Oct 19 2005, 06:58 PM
NOTHER
Attached image(s)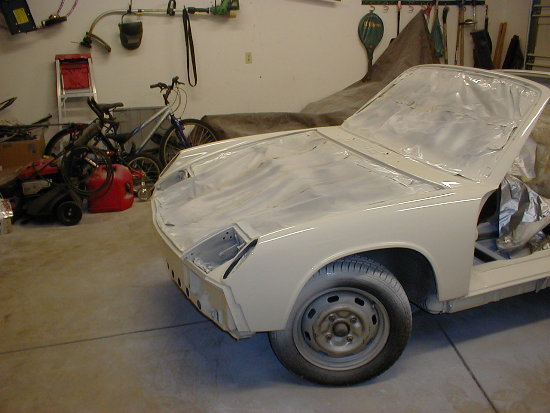
Posted by: tdgray Oct 19 2005, 07:01 PM
I don't know why I love this shot.... I just love '14 without the damn side markers. SHWWWWING.
Attached image(s)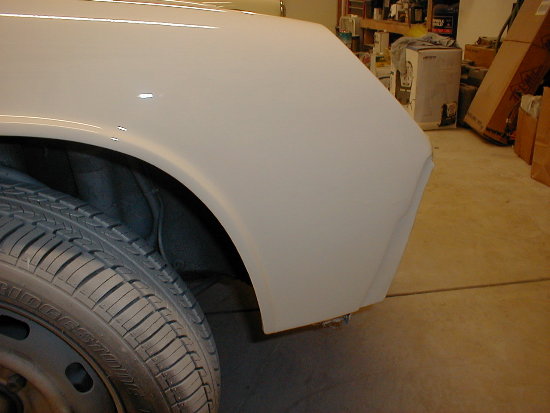
Posted by: tdgray Oct 19 2005, 07:07 PM
I am sooo pissed that I could not get this done in time to attend the FFC.
Hopefully next year will be a much calmer year and I can attend some car related events.
I have only been to one MG car related event this year... no seat time in either car. SUCKS!
Posted by: Vacca Rabite Oct 19 2005, 07:26 PM
| QUOTE (tdgray @ Sep 29 2005, 07:15 PM) |
| Last one for tonight.... Looky what the parts fairy brought me. HUGE thank to Eric Shea. NICE JOB MAN. Eric... core go bye-bye today. Thanks buddy. |
Where did you get that pedal cluster?
man, I want somehting like that. My pedals look horrid.
Zach
Posted by: tdgray Oct 20 2005, 06:13 AM
Look in the vendor section. Eric Shea rebuilds and plates them.... I know he will have a core available... as soon as I get off my ass and send it back to him.
Posted by: CptTripps Oct 20 2005, 06:23 AM
Nice work Todd...let me know if you need me to come down there and stand around in your garage pointing at things with you.
Posted by: CptTripps Dec 1 2005, 08:00 PM
::: Sound of Crickets :::
Anyone here?
Posted by: Dead Air Dec 2 2005, 06:50 AM
| QUOTE (CptTripps @ Dec 1 2005, 06:00 PM) |
| ::: Sound of Crickets ::: Anyone here? |
[QUOTE]

2 questions:
Capt.: Take apart party?

TD: Where'd you get the vacuum tubing?
No really...There's thin foam tape or gasket on the edge of the engine tin,
did you replace yours?
Posted by: Series9 Dec 2 2005, 09:54 AM
I can't believe I've never seen this thread before. Great work.
Posted by: Gint Dec 2 2005, 06:14 PM
Todd - How you makin out? MORE PICS!
Posted by: tdgray Dec 2 2005, 06:23 PM
Sorry Guys... it's been a long time. To tell you the truth I burned myself out trying to make the FFC and then there was the big rift in the club. I am still a little bitter over that whole mess so I have not been participating latley.
Here are a few updated pic's.
The weather got pretty bad here pretty quick.
On my last post I had painted the car but still had the doors, hoods and engine lid to do. I went out on a Sunday to paint them, got three coats of paint down and waited for my flash time to clear. Went back out to the garage and KA-FREAKIN-BLOOOOWIE the air compressor went out. Got a replacement the next weekend. Only problem was that I was not used to it or knowlegeable of the correct pressures etc. Result= A shit load of orange peel in the clear on the doors and hoods. Oh well I guess I'll be sanding and buffing come spring.
I had to get the garage back to some sense of order so that my wife could pull the crumb-cruncher van back in. So time to put the engine back in. Well it was interesting... you'll see.
That's about it... it's peacfully resting until I get some more energy to tackle it again. Seeing as it is the end of the year and this is when I am the most busy at work it may be awhile... gotta get those books closed and profit (hah!) booked.
Ladies and Germs the sad progress follows.
Posted by: tdgray Dec 2 2005, 06:24 PM
Parts-a-hangin.
This was after the aircompressor fiasco.
Attached image(s)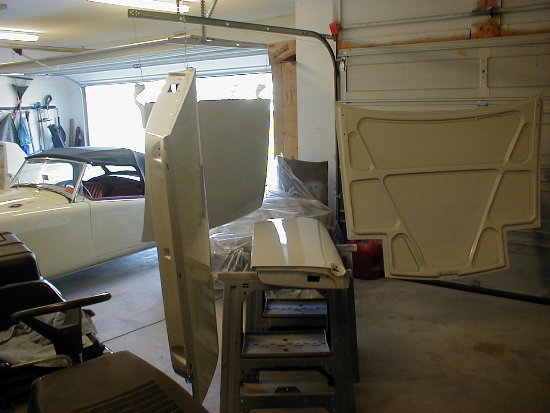
Posted by: tdgray Dec 2 2005, 06:26 PM
More linching of pieces parts.
Attached image(s)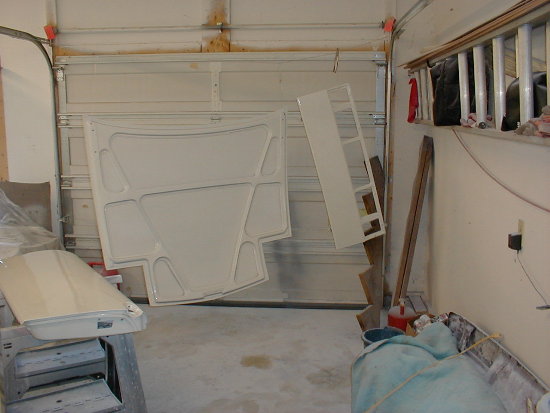
Posted by: tdgray Dec 2 2005, 06:26 PM
Ooooh new seals from GPR - $80.00 for the set. money well spent.
Attached image(s)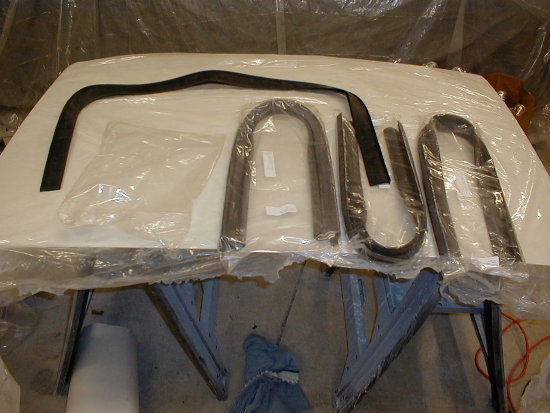
Posted by: tdgray Dec 2 2005, 06:29 PM
OK this is my... BOY AM I A DUMB FUCK MOMENT.
I knew I was putting the seals in upside down. I am not really sure why I did this. Just had to take picture of my absolute fucking stupidity.
BTW... took me an half an hour to correct this. 
Attached image(s)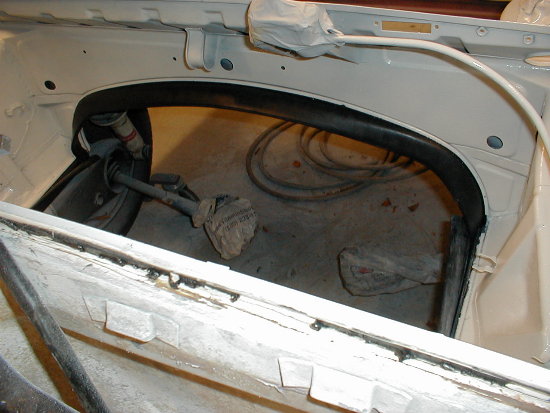
Posted by: tdgray Dec 2 2005, 06:31 PM
Seals Fixed!
Ready to lower the boat cap'n
This was a bit of a chore with one person...but not impossible...just go slow.
Attached image(s)
Posted by: tdgray Dec 2 2005, 06:35 PM
This is where she sits tonight (taken a few minutes ago) with my filthy Subby beside her. It snowed a bit today!
I will get back to it as soon as I can. Her sister ( the MG) is all ready for the winter and soon the 14 will get put to bed right beside her waiting for a long weekend to get pulled out and put back together.
See ya'll soon.
Attached image(s)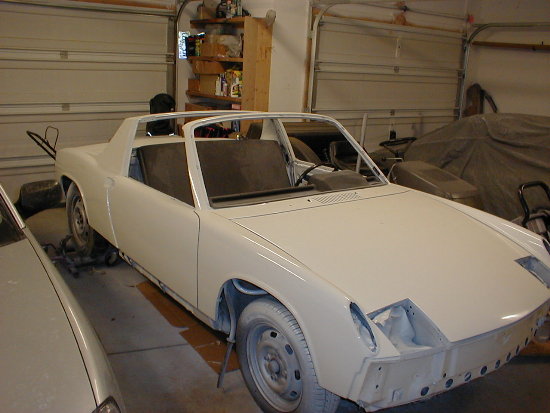
Posted by: Gint Dec 2 2005, 06:44 PM
Nice! I've always liked bright white teeners. I know how you feel about the burnout. Truly I do. That's why my tub sites all pretty and painted and BARE! Take a break. I did. But then I bought a driver teener and now it takes up all of my time.
Will we ever learn?!?!?
Posted by: Bleyseng Dec 2 2005, 06:56 PM

nope, I bought one for my son Blair so He could join me in my pain..
Posted by: tdgray Dec 2 2005, 07:28 PM
Thanks for the encouragment Gint and all.
Geoff... next is to hook up the engine and test that fine MPS you rebuilt...thanks again man.
Posted by: CptTripps Dec 5 2005, 07:05 AM
Looking good man!
I'm down in Akron 2-3 times a week lately. Let me know when you are around...I'd love to come take a look!
Posted by: rick 918-S Jan 30 2006, 09:11 AM
![]() Getting closer!
Getting closer!
Posted by: tdgray Mar 18 2006, 08:51 AM
After a long sleepy ![yellowsleep[1].gif](http://www.914world.com/bbs2/html/emoticons/yellowsleep[1].gif) winter... last weekend it was 60 degrees.
winter... last weekend it was 60 degrees.
Perfect time to pop open the garage door and take on a small task.
HUGE thanks to Alberto for the dash pad... major improvement.
Tough task too. Just takes time...and really small hands of which I do not have. But I do have a couple of bloody knuckles now
The OLD and UGLY
Attached image(s)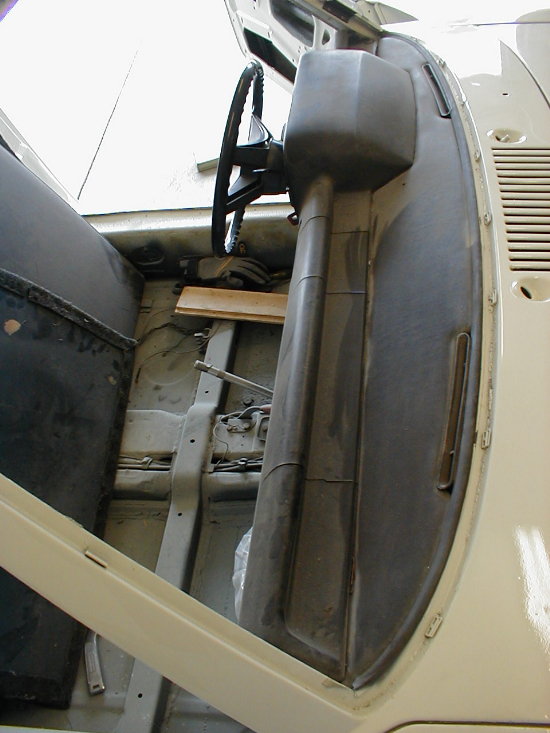
Posted by: tdgray Mar 18 2006, 08:52 AM
Anybody want some vintage tunes... at last a use for those 8 tracks in your basement.
Attached image(s)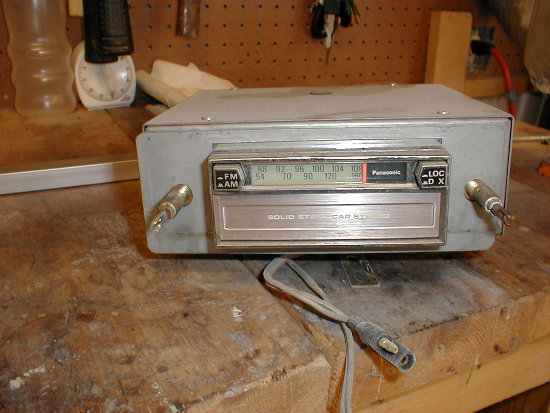
Posted by: tdgray Mar 18 2006, 08:53 AM
Nice and Smoooooth
Attached image(s)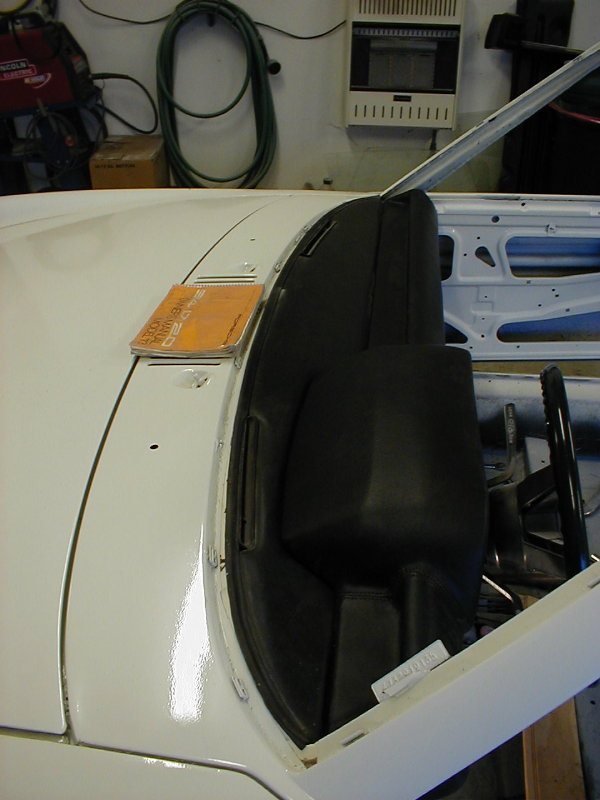
Posted by: tdgray Mar 18 2006, 08:54 AM
Inside... look ma no ashtray.
Attached image(s)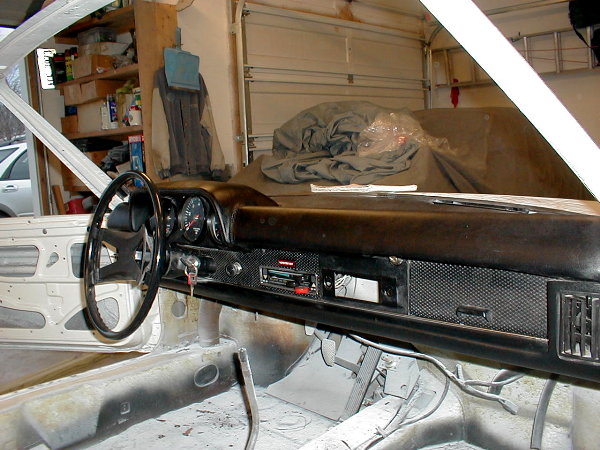
Posted by: tdgray Mar 18 2006, 08:57 AM
That's all for now. Was a short day. Got cold again pretty quick. Oh well.
Next project planned is to put in the windsheild and reaar window, then get the interior back in... oh and align the drivers side door. I think I'm going to need some shims
Posted by: dion9146 May 8 2006, 09:07 PM
Hey Todd, anymore progress? I just read through this entire thread and am as impressed as everyone else. Nice work so far.
I'm over on the East side of Medina if you need any help at all. Would love to get together sometime and check out your car. I'll get my Father to bring me over in his TR3 to keep your MGA company.  Lookin to get my 6 back on the road this Summer. It's been 5 years since I had fun in a 914, and the nice weather lately has me working hard to get her back on the road.
Later,
Dion
Posted by: reddog May 8 2006, 09:37 PM
Nice lookin MGA...  ... I used to live in summit county also...
Posted by: So.Cal.914 May 9 2006, 01:31 AM

Next Task...
Drop the engine. Easy job took my brother and I about three hours.
Three hours, what did you guys stop for lunch?
 Nice work on the resto.
Posted by: tdgray May 9 2006, 06:45 AM
Thanks for the inquiries guys...
Yes I am still working on it but not much to record in picture form.
Recently I have.
1) moved the battery to the front trunk with a jegs battery relocation kit (have pics will post)
2) replaced all fuel lines and vaccum lines
3) replaced fuel pump after the old one suddenly died. Now having fuel pressure issues, injector issues ect.
I want to get it running in some form so I can move her around a little easier. After I do that I will install the interior, windows, etc so that I can wet sand and buff...then we should be in good shape.
Oh yea I still have to weld in the rear trunk pan and decide what to do about the front trunk (re: reinstall AC or fill the hole).
When summer is offcially upon us I think we need to get some of the PA, OH, MI teeners together for a meet. We'll try to schedule something soon.
Posted by: tdgray May 17 2006, 05:58 PM
Well since the club site was down been actually getting some stuff done (actually was before then but just updating).
Here is the present the UPS man brought me one day a while back.
Jegs battery relocation kit. Nice kit all the stuff is there. Just have to make a bracket for it...so off to home depot for some angle iron etc.
Attached image(s)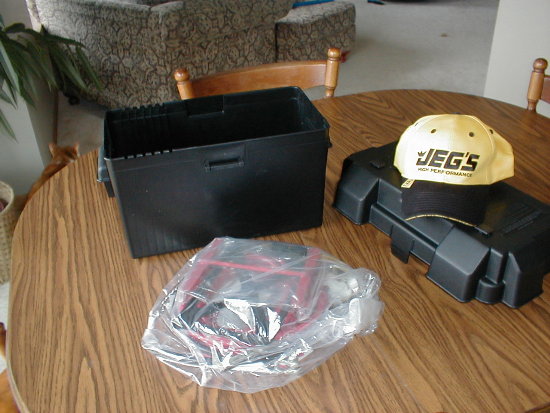
Posted by: tdgray May 17 2006, 06:01 PM
After a hour or so of welding and cutting this is what I came up with.
Problem being is that while the battery box is nice and clean looking... it is also LARGE. So I have to mount it very low in the front trunk. This obviously creates a small problem.
Attached image(s)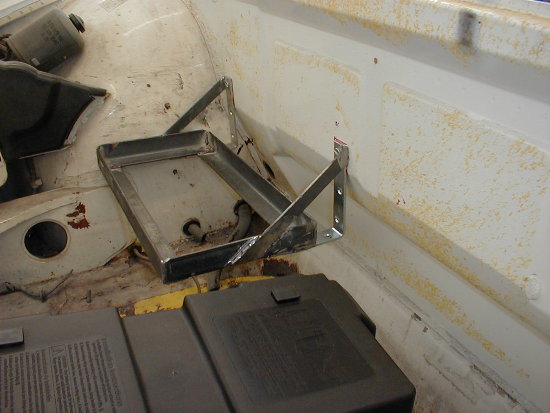
Posted by: tdgray May 17 2006, 06:03 PM
Problem solved.
Ignore the rusty trunk pan... I have not decided if I am putting the AC back in or not so not sure if I want to fill the hole.
Attached image(s)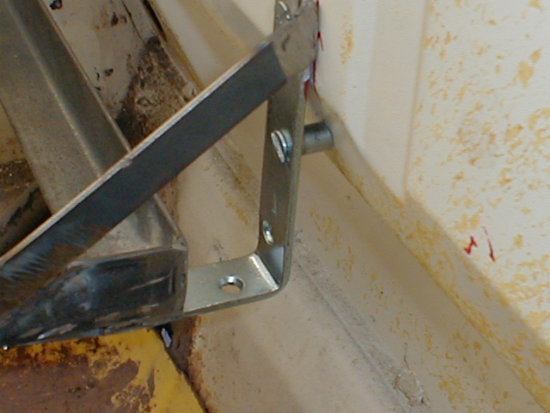
Posted by: tdgray May 17 2006, 06:04 PM
All painted and pretty.
Attachments to hold down the battery in the box on.
Attached image(s)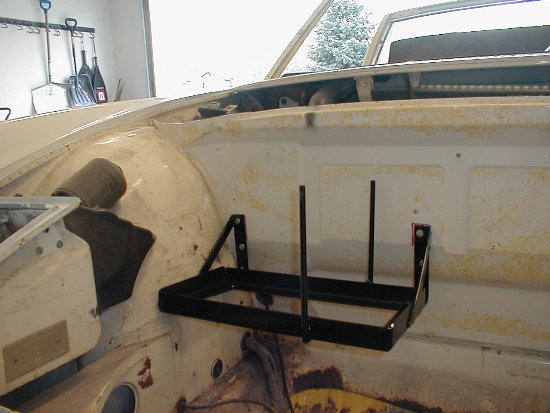
Posted by: tdgray May 17 2006, 06:05 PM
Box and battery mounted. Wire needed to be run to the back.
Attached image(s)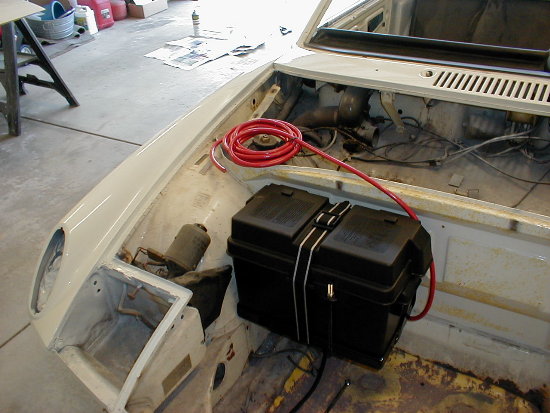
Posted by: tdgray May 17 2006, 06:09 PM
Well some non-picture important work ensued.
Heres what got done.
1) Ran battery wires to starter and juiced everything up.
2) Replaced all engine electrical components and plugged it all in.
3) Replaced fuel pump after it died with an MSD aftermarket from Summit Racing
4) Solved fuel pressure problem
5) installed new vacuum hoses and trouble shot all missed connections
YEA IT FINALLY RUNS. Needs timing set and some tweeking but runs strong and idles well. DAMN WHEW.
Major time for a after that one.
Posted by: tdgray May 17 2006, 06:11 PM
So with all that behind and some major projects ahead I decided to have some fun and put the interior back in.
All orginal carpets etc... not in great shape butwill do. Could use a good cleaning.
Attached image(s)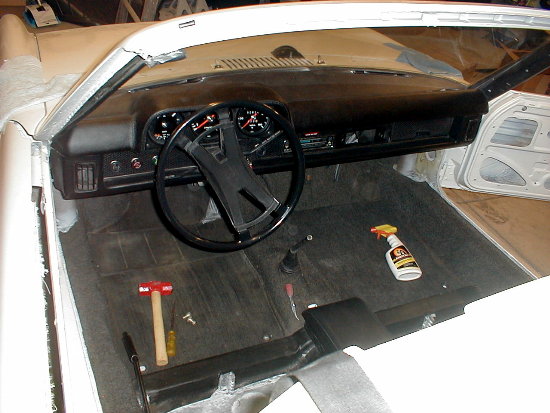
Posted by: tdgray May 17 2006, 06:12 PM
Back pad in good shape.
no major defects.
Attached image(s)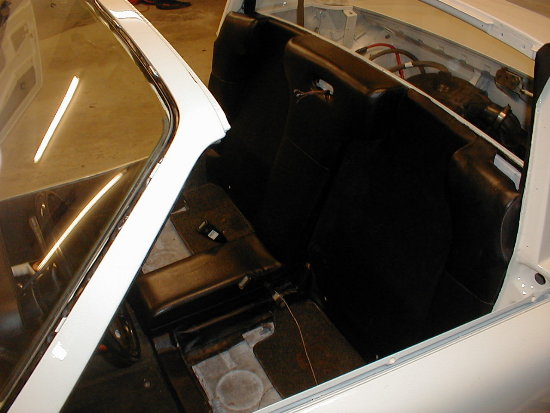
Posted by: tdgray May 17 2006, 06:14 PM
DUH kinda forgot this step...
BEFORE I installed the interior. I put the windsheild and rear glass back in.
Attached image(s)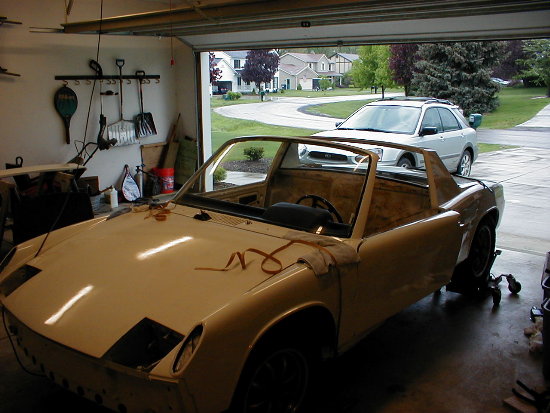
Posted by: tdgray May 17 2006, 06:16 PM
Seats in... pretty good shape. One small tear in the drivers side and one worn spot on the passengers side.
This was all for that weekend.
With last weekend being mothers day I only had one day to work, so I finished installing the interior trim, seals ect. Some of the seals are in pretty bad shape, they will need replaced.
Attached image(s)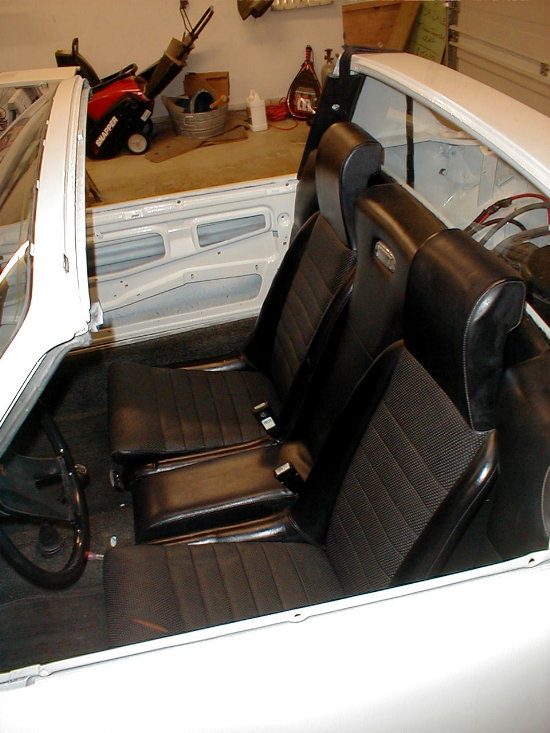
Posted by: tdgray May 17 2006, 06:18 PM
No pics from last weekend.. batteries in the camera were dead.
Here she sits tonight.
This weekend is brake work, adjust shift rod and clutch and maybe take here for an illegal but very fun ride around the hood.
Attached image(s)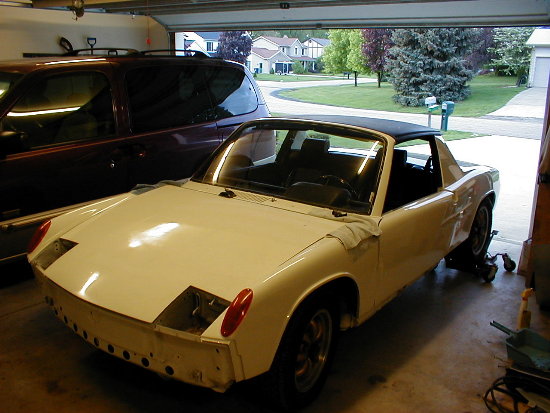
Posted by: Thack May 17 2006, 09:16 PM
how hard is it to replace/install the windshield?.
Posted by: tdgray May 18 2006, 06:05 AM
how hard is it to replace/install the windshield?.
That my friend is a 1 on a scale of 10.
Use paino wire to cut old out (or in my case it just fell out).
Clean all surfaces of old butyl.
Get new 3/8" butyl window kit from FLAPS and install. Nothing more than that.
Posted by: JOHNMAN May 18 2006, 06:17 AM
I don't mean to rain on your parade, but I feel that I should warn you about your battery support.
You either need to rethink that one, or put HUGE backup washers on the fuel tank side of that firewall. That mount will tear off that firewall eventually. (ask me how I know this)
I suggest doing something about it prior to reinstalling your fuel tank.
I just bought a battery box at walmart => $6.00
just my $0.02
Posted by: tdgray May 18 2006, 06:24 AM
Thanks Johnman,
I have some good sized washers there already but maybe I will reinforce them or cut some steel strip and make some support.
I still have to take it out once more to fix the front trunk... easy fix.
Posted by: tdgray Jul 19 2006, 04:58 PM
WOW... I did not realize it had been that long since I updated my progress thread.
Well here is the rest of it.
Getting it back together.
First bumpers on and door aligned.
Attached image(s)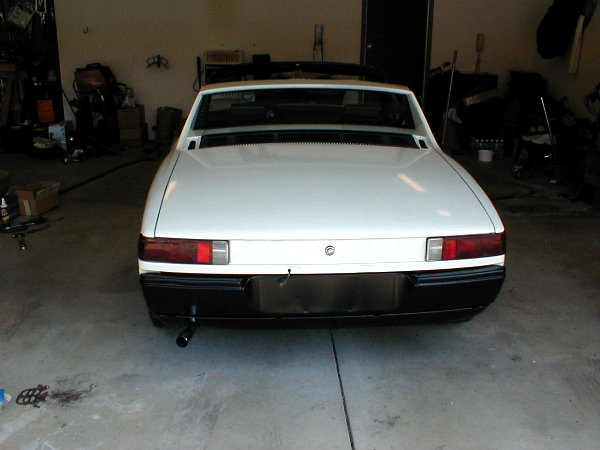
Posted by: tdgray Jul 19 2006, 04:59 PM
Pass Door
Attached image(s)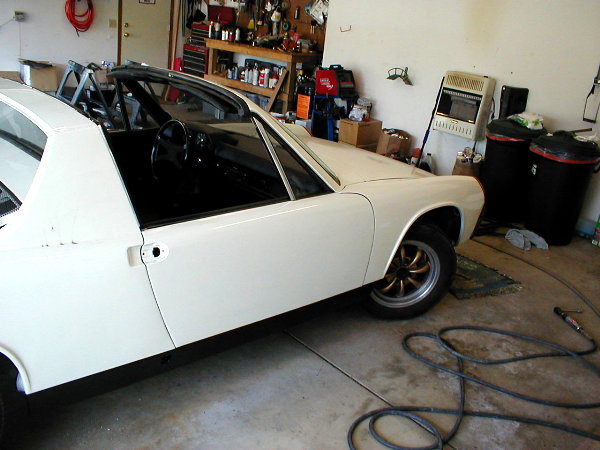
Posted by: tdgray Jul 19 2006, 05:01 PM
Front Bumper
sans fog lights etc
Attached image(s)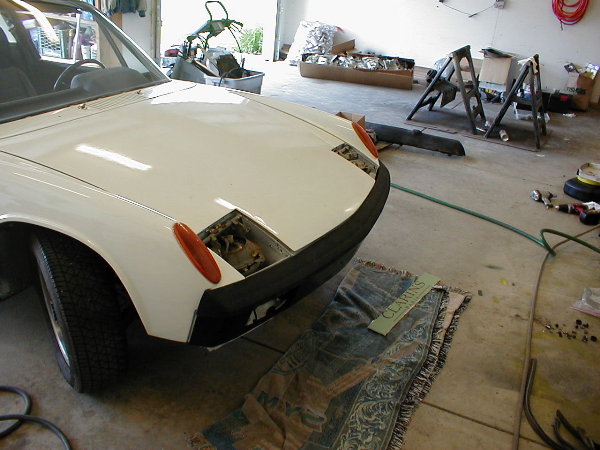
Posted by: tdgray Jul 19 2006, 05:01 PM
Other side door
Attached image(s)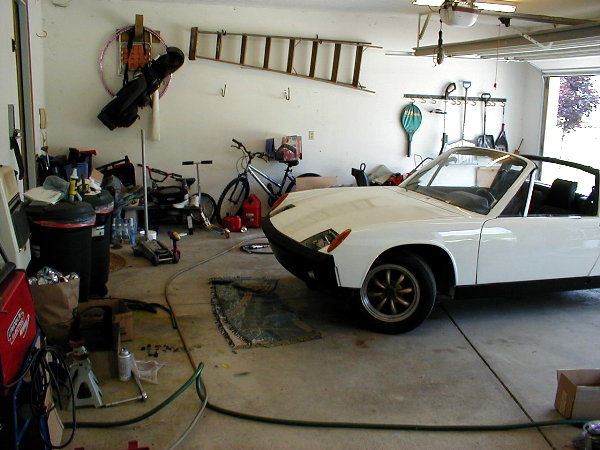
Posted by: tdgray Jul 19 2006, 05:02 PM
Time for some pieces parts to be painted. Fog lights and WW
Attached image(s)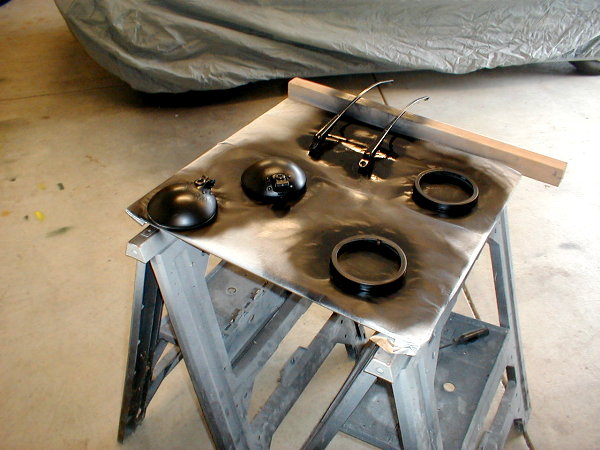
Posted by: tdgray Jul 19 2006, 05:03 PM
Whyat to do with this ugly wheel... why paint it of course
Picked out a cool paint. Ford Cobra wheel paint...
Attached image(s)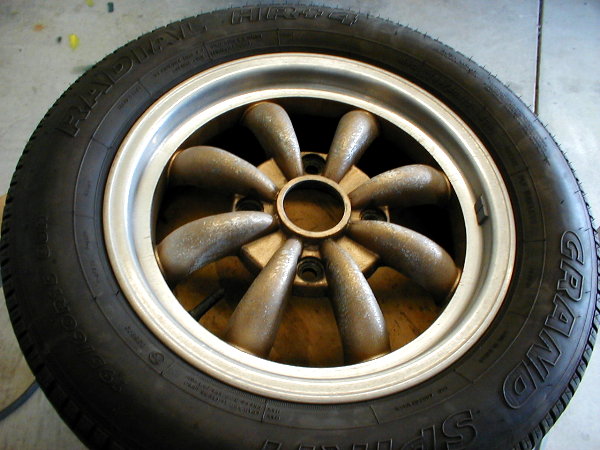
Posted by: tdgray Jul 19 2006, 05:04 PM
Sweeeeeet
Attached image(s)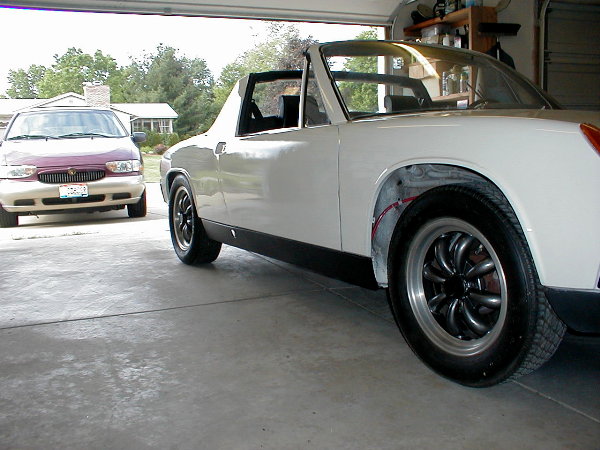
Posted by: tdgray Jul 19 2006, 05:04 PM

Attached image(s)
Posted by: tdgray Jul 19 2006, 05:08 PM
HL covers on and time to wet sand.
Always a good idea to cover your edges with automotive tape to prevent sand thru.
Attached image(s)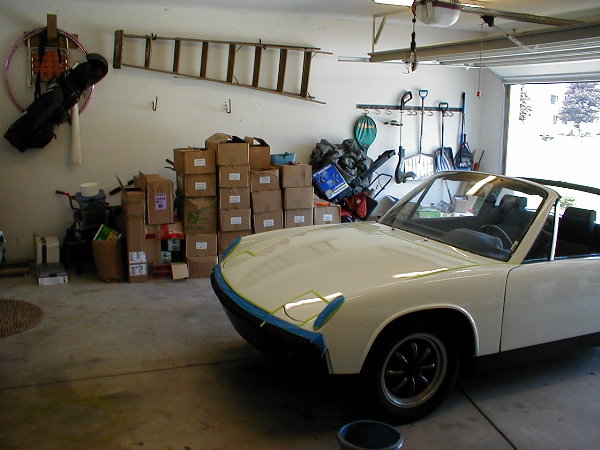
Posted by: tdgray Jul 19 2006, 05:10 PM
Hood after sanding.
Sorry folks camera died after this...
But .. tons of sanding and buffing followed. I still feel I should buff some more but I will let the paint "recure" before another assault.
Attached image(s)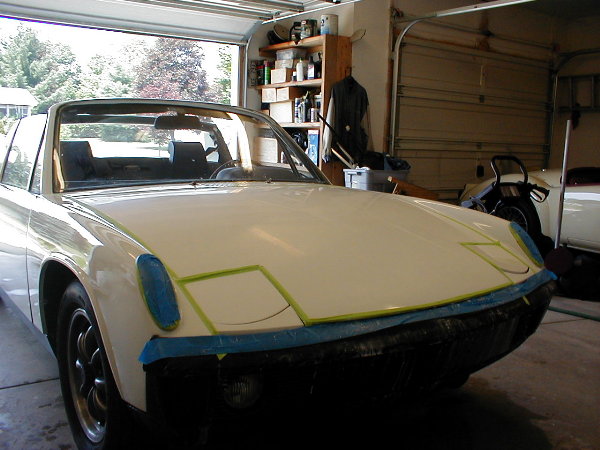
Posted by: tdgray Jul 19 2006, 05:11 PM
Here we go with trim and graphics.
HUGE thanks to our own Mike Z for the stripes. I love the Neg stripes...
Attached image(s)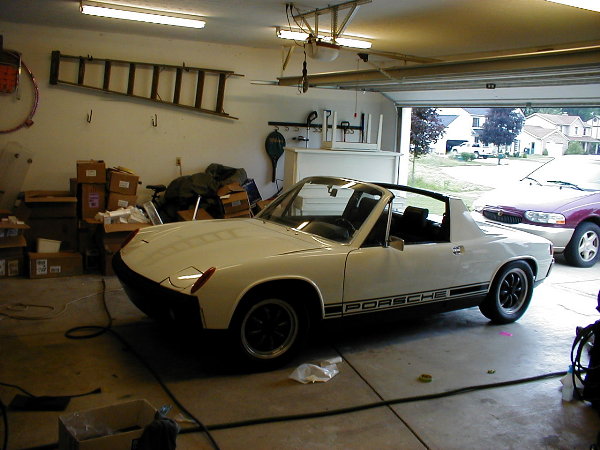
Posted by: tdgray Jul 19 2006, 05:13 PM
Back end badges.
I used 3-M emblem adhesive and ground the mounting tangs off the emblems.
That way if I want to remove them in the future... no holes to fill (can you say 3.2 baby???)
Attached image(s)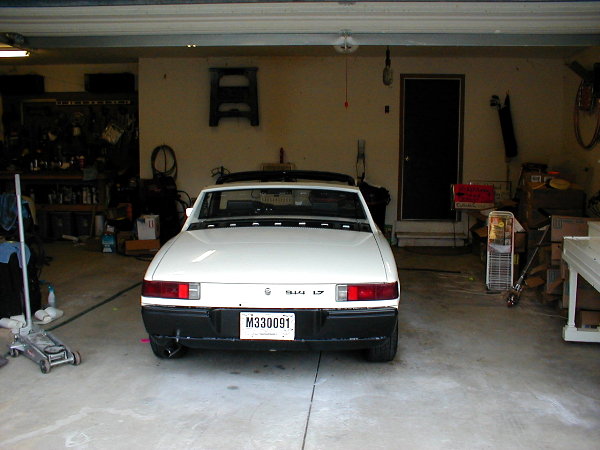
Posted by: tdgray Jul 19 2006, 05:14 PM
Other side graphics
Attached image(s)
Posted by: Travis Neff Jul 19 2006, 05:15 PM
I love the wheel color!
Posted by: tdgray Jul 19 2006, 05:15 PM
Craigs trunk shock kit so I can keep it up all night.... 
Attached image(s)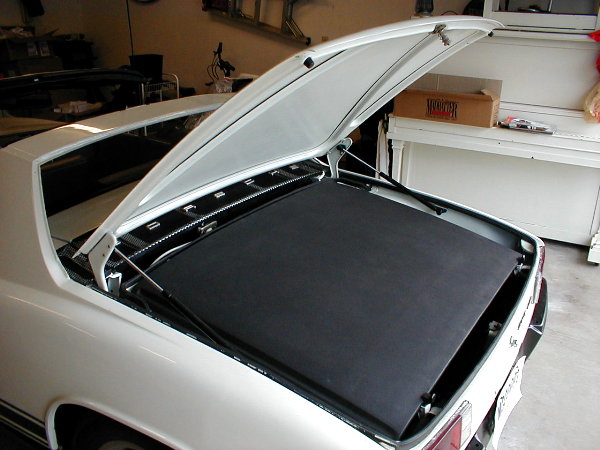
Posted by: tdgray Jul 19 2006, 05:18 PM
Sooo you thought I was close to done and driving. HAHAHAHAHAHAHAHA
After I drove it few times I quickly realized that the front end was a mess and I was running rich.
Soooo... off with the front wheel for ball joints, tie rod ends and struts (bilstiens)
and off with the engine lid cause I can't get my fat head in there to work on anything with it on.
Running much better now and front end is good as new.
Attached image(s)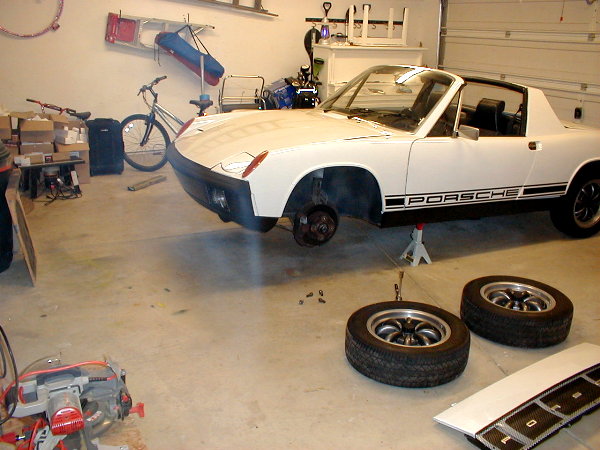
Posted by: tdgray Jul 19 2006, 05:32 PM
Well...
Here she sits tonight....
Not totally finshed by any means but I will aquire the remainig parts over some time ( rear bumper pad, roll bar trim etc)
I had way too much fun doing this car. Even more fun driving it the little that i have so far.
HUGE THANKS TO EVERYONE, ''Specially the following
In no particular order.
Bobolli - Bob from Pittsburgh for body panels.
Eric Shea - pedal cluster.
Geoff (bleyseng) for rebuilding my MPS
Alberto - for the dash pad
Mike Z for the graphics
the Cap'n for answering my stupid questions on fuel injection
Dave Darling for the same
Dr. Evil for the clam shells for my longs
Doug H (Cpt Tripps) for my wheels and master cylinder - lets cruise Dougy
Doug Leggins for that elusive part that I now have two of the left side of 
Qarl - for lending me the BJ tool. Its on it way back bud.
AND ALL the others that have given me advise and support which I cannot remember right now cause I have had a few 
Thanks all and we will see you soon... I hope.
This is truly the best club around - and I have never met most of you.
Attached image(s)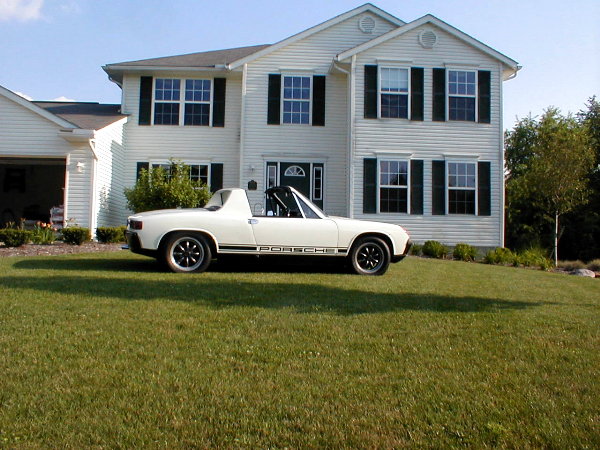
Posted by: tdgray Jul 19 2006, 05:33 PM
Few other money shots
Attached image(s)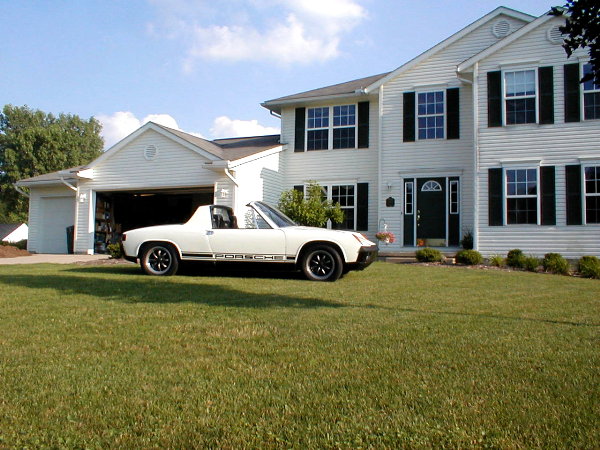
Posted by: tdgray Jul 19 2006, 05:33 PM
'Nother
Attached image(s)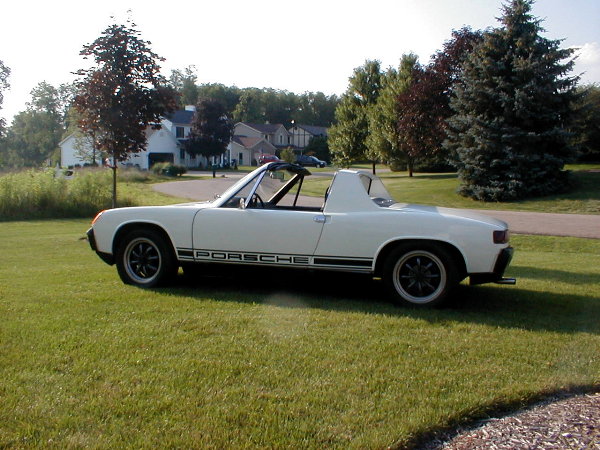
Posted by: cnavarro Nov 7 2006, 08:40 AM
Great thread. I just went through it again and it's inspiring.
Posted by: shelby/914 Nov 7 2006, 09:58 AM
Absolutely fantastic job! The car looks beautiful. Can't believe the amount of rust work you took on. Every one of us that lives west of the Mississippi should review this thread before we take a sawsall to another tub. 
Posted by: i love porsche Nov 7 2006, 11:19 AM
WOW...im practically speechless, ive been extremely dormant on my car..havent done anything in a long time...but this has really inspired me to get my butt in gear...awesome job man *applauds*
Posted by: Steve Thacker Nov 7 2006, 01:26 PM
Todd, that is pure inspiration bud! Fantastic work ethics when it comes to getting it done. Turn around and take a big pat on the back. 
Powered by Invision Power Board (http://www.invisionboard.com)
© Invision Power Services (http://www.invisionpower.com)