Printable Version of Topic
Click here to view this topic in its original format
914World.com _ 914World Garage _ 914-6 rebirth
Posted by: roundtwo Mar 21 2023, 02:39 PM
Rounding up my journey to resurrect the 914–6 that I purchased in the spring of last year.
Some basics. Originally a 1973, 914- 4. The previous owner did all the metal work, including flares, GT bracing inside the tub, front and rear. Epoxy primer with single stage Bahia red. He did an exceptional job in these areas.
What fell short was the engine rebuild. Short story what is the intermediate bearing was floating around the engine, pistons were the wrong ones, etc. With under 100 miles on the car the engine had to come out and be rebuilt. That’s where my journey began.
Fast forward about 8 months, the engine out and crated to Bruce Abbett in North Carolina who did a smashing rebuild on the 1976 €3.0 Carrera engine . A great referral from Michael @http://www.914world.com/bbs2/index.php?showuser=9712
Long block back- all the parts back on.
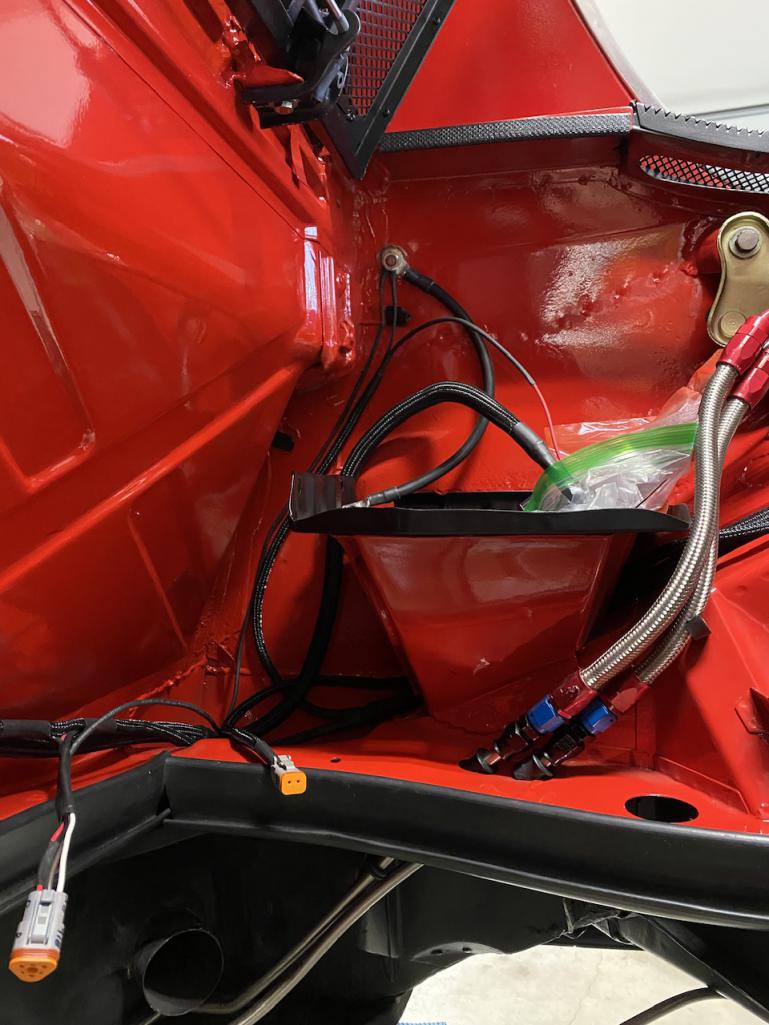
While the engine was out, I stripped most of the engine bay down to metal. My first time spraying with HPLV- epoxy primer, and ppg shopeline single stage after copious hand sanding.
After considerable coaching from Chris at the Redbarn @http://www.914world.com/bbs2/index.php?showuser=19241 I learned to build a
complete engine harness and replace the Pertronix wiring/ location. Love those Deutsch connectors! A very enjoyable process.
Too much other work to list at the moment.
Finally the engine is back in, all hooked up. Then… I was unable to start it. Andy @http://www.914world.com/bbs2/index.php?showuser=2104 saved the day! He thought I was kidding when I said I can make the car look beautiful, but I can’t make the engine run. A fact.
https://youtube.com/shorts/9avfyEaIwcU?feature=share
I’ll back post some pics.
Currently waiting to get in the door at Hitech in San Rafael for PMO tuning though it’s a long wait til mid April.
The initial 20 minute break in completed, but it’s just not running well. Uggg! Hard to be patient at this point.
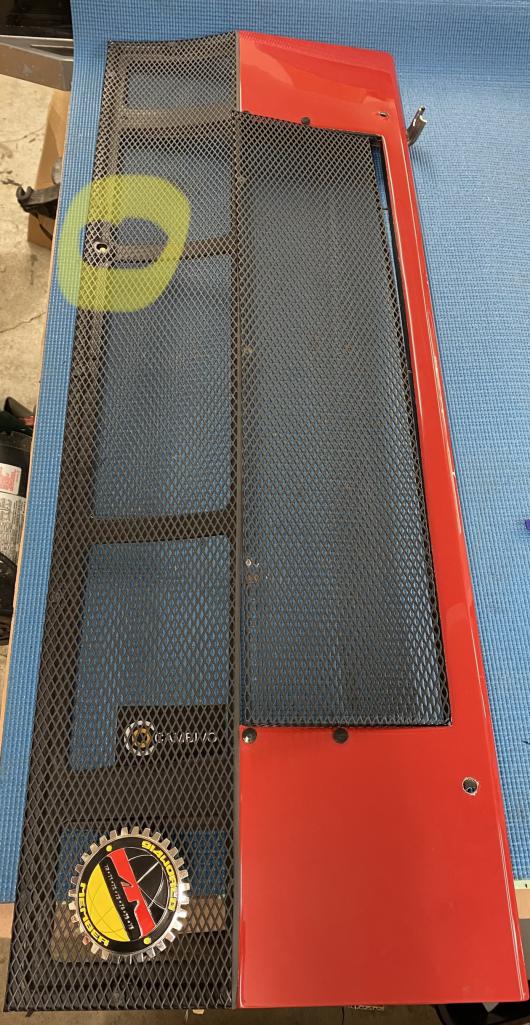
Fabricating a gt style engine lid meanwhile. The previous lid was super jankie with kitchen cupboard door handles on it.
Thanks for looking and all the 914world knowledge along the way. An awesome bunch of people.
Posted by: roundtwo Mar 21 2023, 02:41 PM
Posted by: roundtwo Mar 21 2023, 02:44 PM
Posted by: roundtwo Mar 21 2023, 02:49 PM
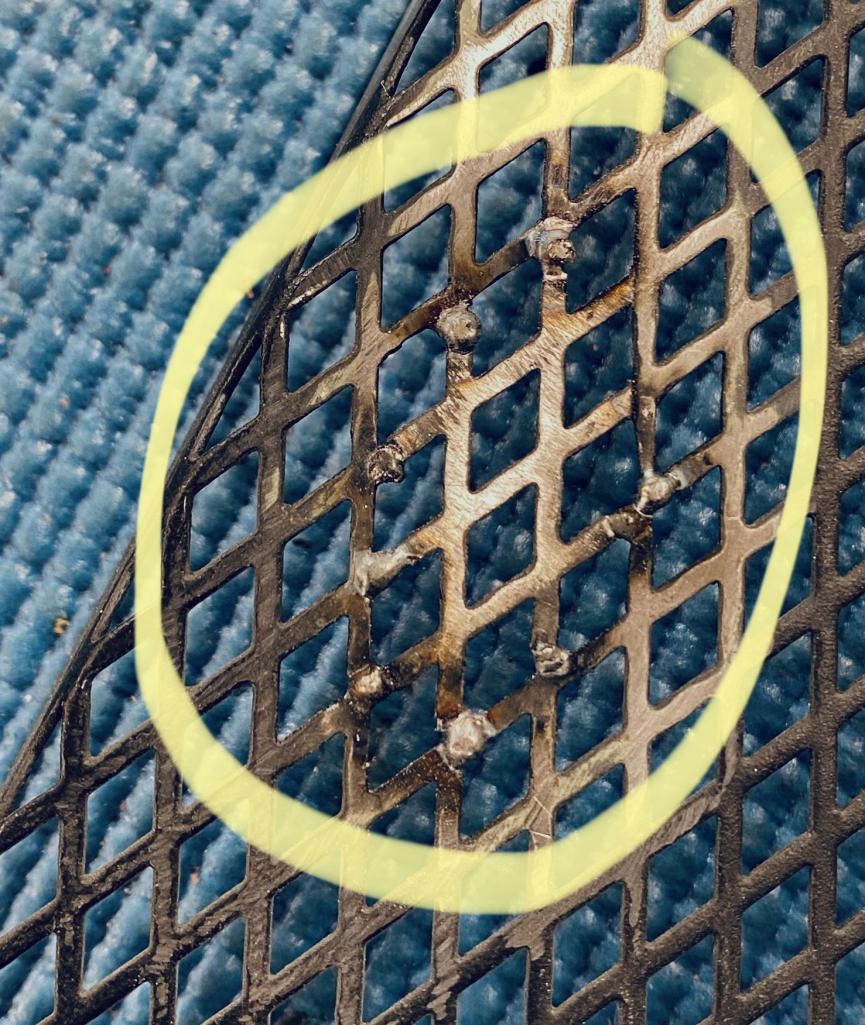
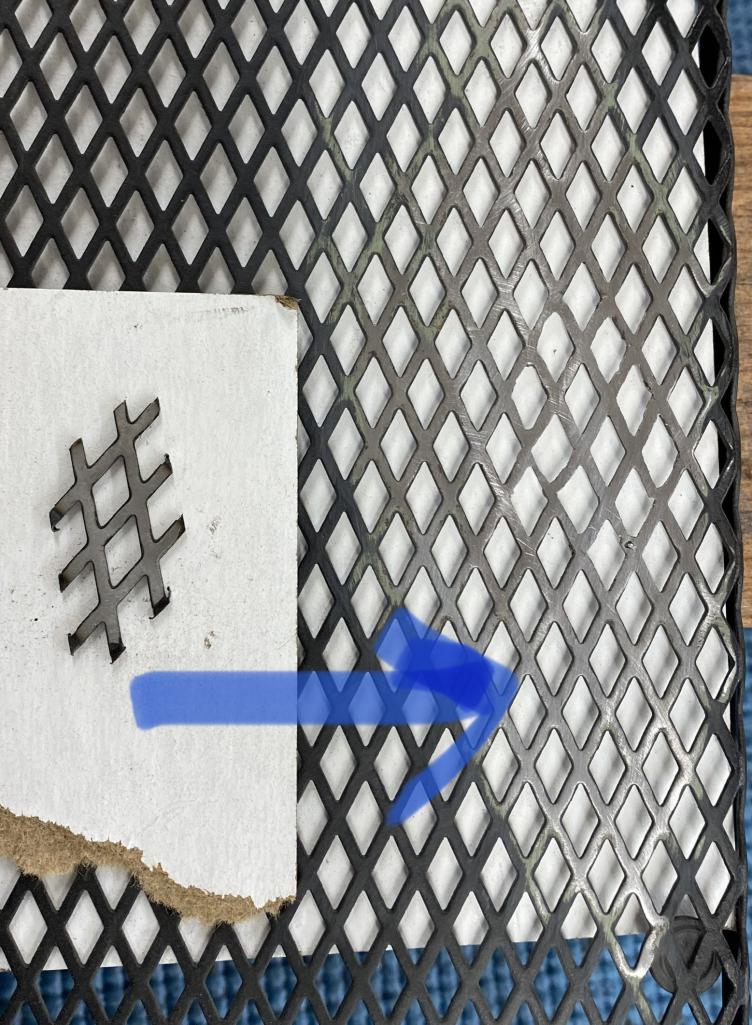
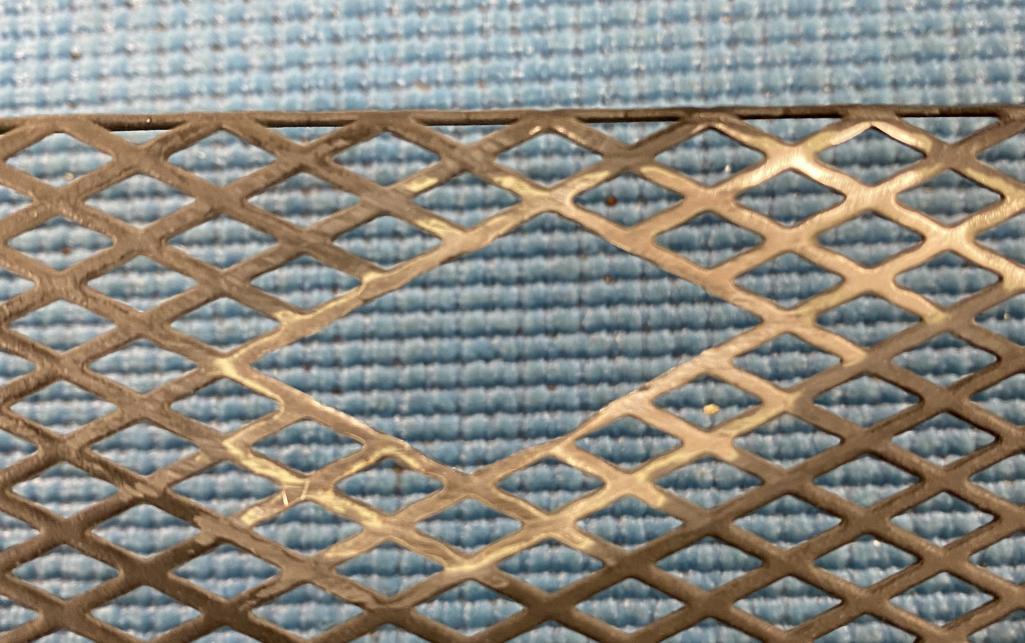
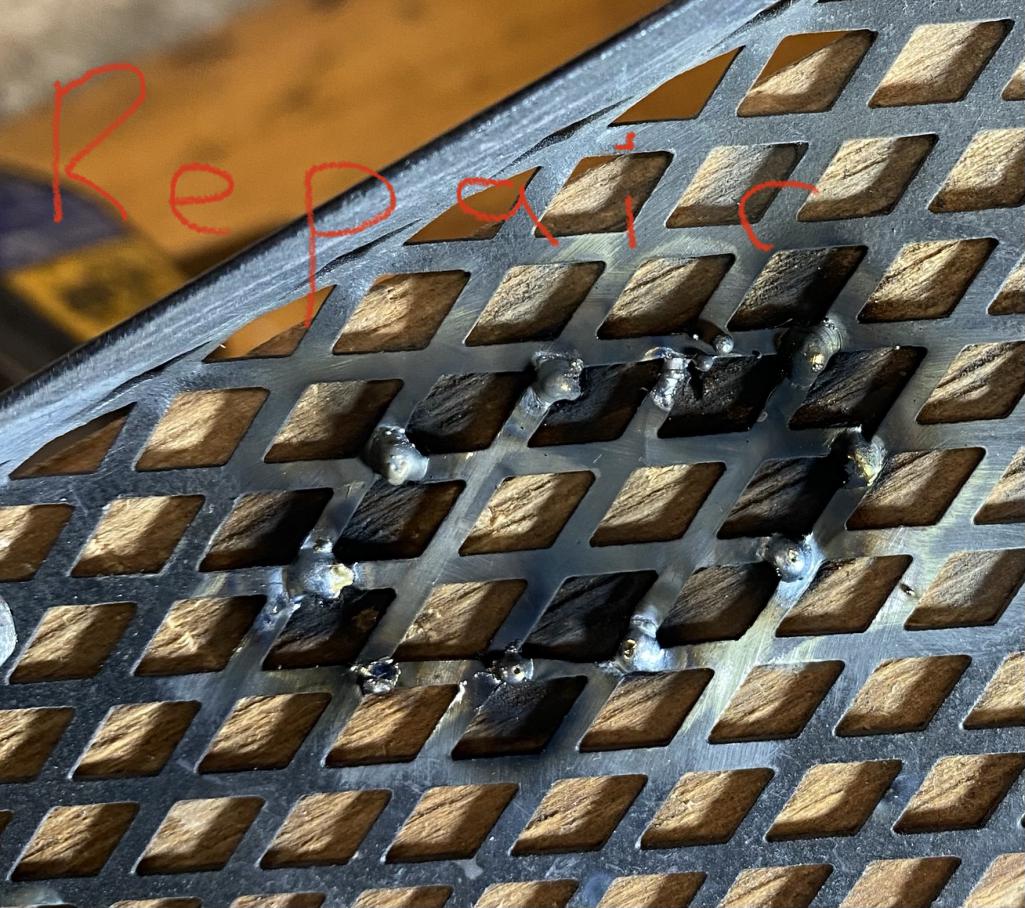
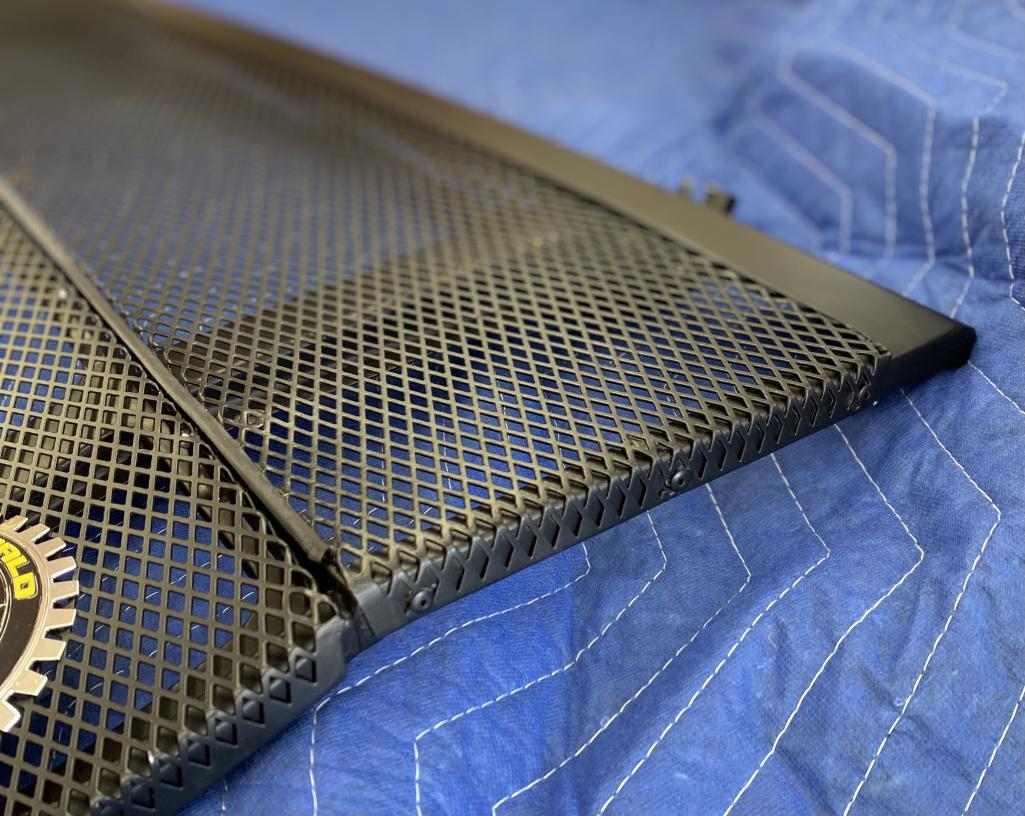
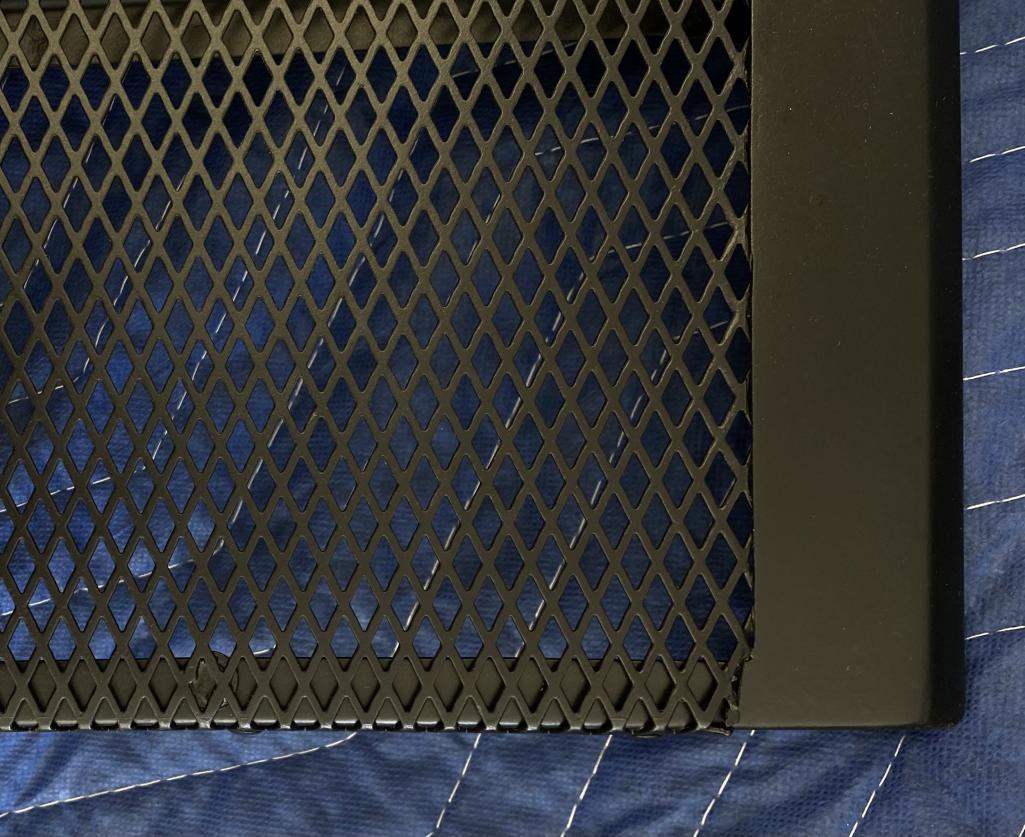
The one grill was in excellent shape, except for the small piece that was missing. I decided to fabricate a patch, and do some very delicate novice welding. I’m not sure I can repeat the act without burning it
There’s a couple flaws, but I have since added some metal to the little grill bars, filed them, and they look pretty good.
Posted by: roundtwo Mar 21 2023, 02:51 PM
Posted by: roundtwo Mar 21 2023, 02:54 PM

Posted by: roundtwo Mar 21 2023, 02:58 PM
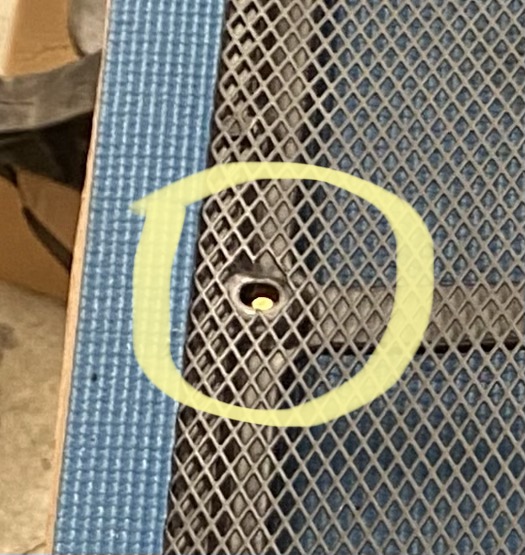
Needed to make a round blank to close one of the holes on lid.
Posted by: Root_Werks Mar 21 2023, 03:01 PM
Sounds and looks great!
Posted by: Cairo94507 Mar 21 2023, 03:14 PM
@http://www.914world.com/bbs2/index.php?showuser=23905 - Todd, your car is coming along great. I really look forward to the day we can plan a trip to meet at Chris' Red Barn to admire all of the work you have done. I am sure we will have good weather in 4 weeks just in time for the PMO sorting. it should all come together. 
Posted by: tygaboy Mar 21 2023, 03:33 PM
Your grill repair looks like it turned out well! Good on ya' for going after it. I don't think I would even have tried... 
Posted by: mepstein Mar 21 2023, 03:34 PM
Bruce is a great guy. I've known him for years. He has a soft spot for 914's.
Posted by: technicalninja Mar 21 2023, 05:00 PM
That grill repair looks great!
If you can do that as a "novice" you're going to kick ass with a bit of practice.
I'm with Tyga, I'd of started looking for another grill first...
Posted by: Krieger Mar 21 2023, 10:31 PM
 Way to go Todd! That car is going to be so much fun!
Posted by: roundtwo Mar 22 2023, 08:29 PM
Thanks for all the encouragement and thoughts.
The existing grill portion was in such pristine shape, without any shape deviations, I thought what the hell why not try a patch. Couldn’t resist the challenge :stir
One of the problems with the previous design was the brace had been removed from the underside. Even with lots of finicky adjustments, it never fit quite flat when installed as it had a twist once latched. It’s not clear to me why Porsche installed the latch, offset from the center. I guess they wanted a reason to manufacture some lid braces. 
I have a brace ready to be tacked on. I would like to add the dimples as pictured for the cool factor. 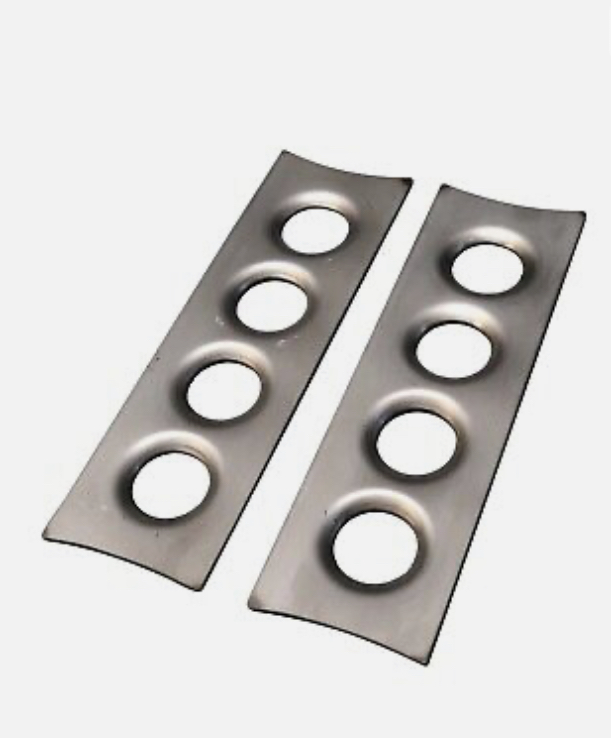
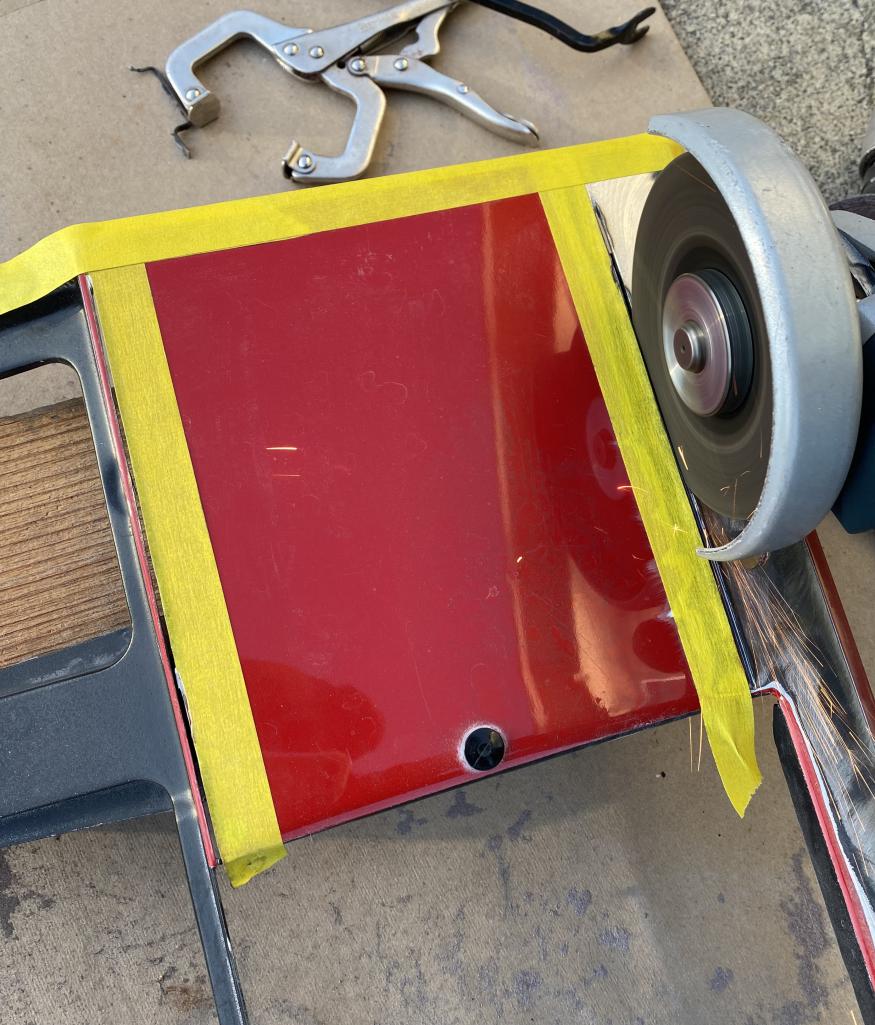
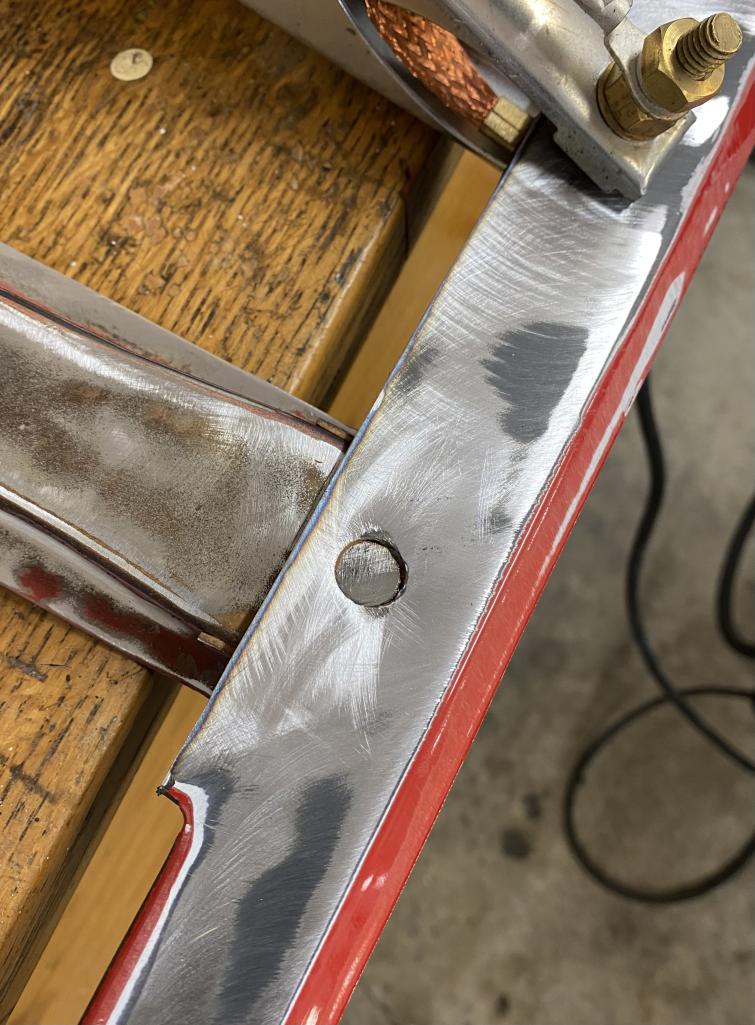
Final cuts completed after reshaping the small section of sheet metal on the forward leading edge- pretty jacked from po work.
Checked the fit today for proof of concept- likin’ the look so far. 
Posted by: roundtwo Mar 22 2023, 08:30 PM
Final cuts finished and welding of the holes 
Posted by: nditiz1 Mar 23 2023, 06:39 AM
Looking good.
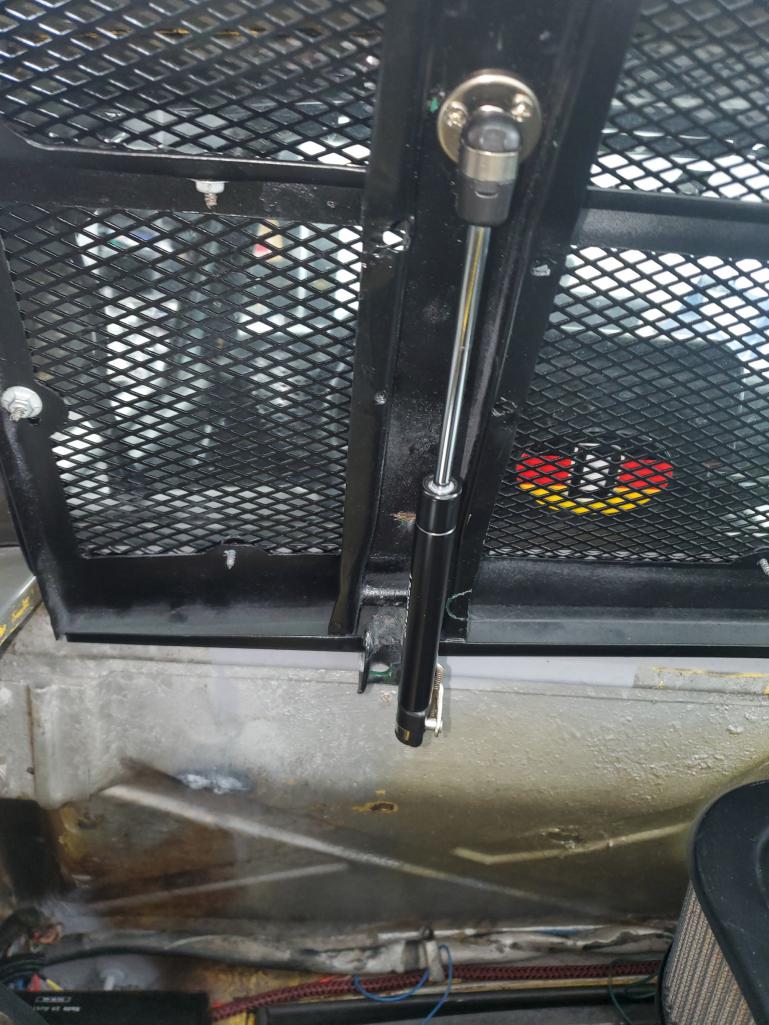
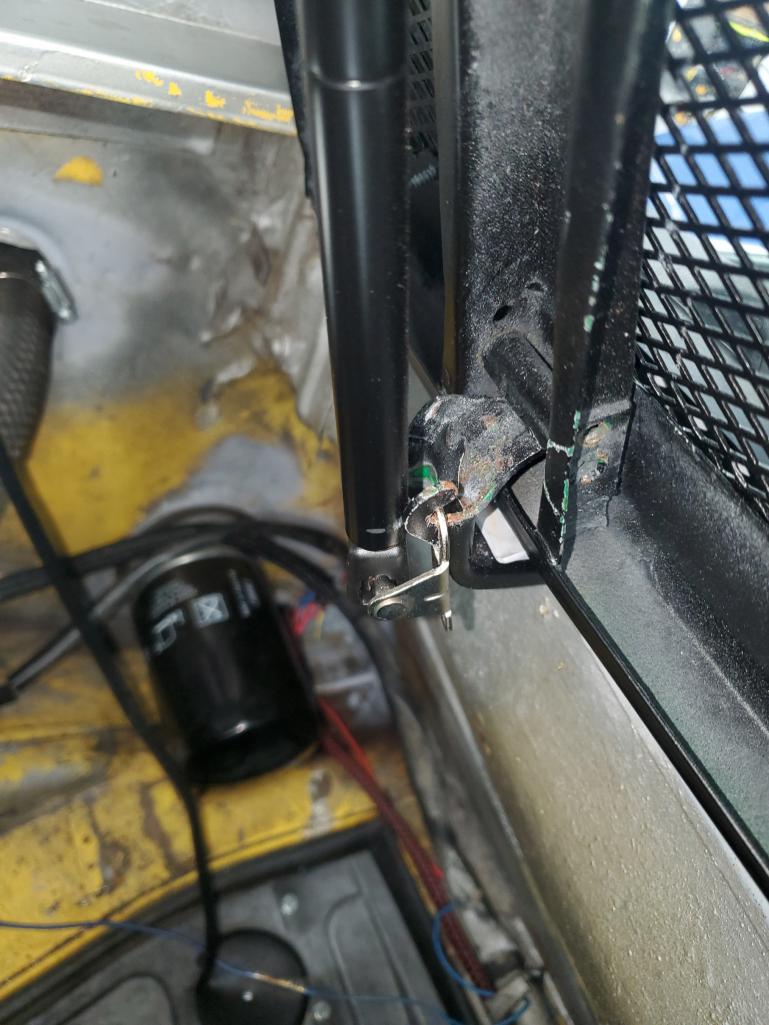
Something I did for mine was remove both springs and attach $20 gas struts from Amazon. Clean look and perfect application.
Credit and pics
http://www.914world.com/bbs2/index.php?showtopic=360841&hl=
Posted by: roundtwo Mar 23 2023, 10:20 AM
@http://www.914world.com/bbs2/index.php?showuser=18763
Thanks...a good idea as it's the springs that cause that twist of the lid when closed. I tired using only one spring (on the left and/ or the right ) but it didn't solve the problem.
Do you have a pic to share so I can see the location of the struts when open?
Todd
Posted by: nditiz1 Mar 24 2023, 07:57 AM
Posted by: roundtwo Mar 27 2023, 01:18 PM
@http://www.914world.com/bbs2/index.php?showuser=18763
Thanks for the pics. I like the way it tucts right up against the lid. Nice that it’s out of the way when the lid is up and it’s not visible from the top when the lid is closed! Great design.
Todd
Posted by: nditiz1 Mar 27 2023, 02:21 PM

@http://www.914world.com/bbs2/index.php?showuser=18763
Thanks for the pics. I like the way it tucts right up against the lid. Nice that it’s out of the way when the lid is up and it’s not visible from the top when the lid is closed! Great design.
Todd
I can't take the credit. I got it from another member on here with a Suby conversion that I met at the NEG last year.
Posted by: roundtwo Jun 3 2023, 04:04 PM
Engine lid finished. Just needs some fitting as the corners tend to stay above the rear trunk elevation. 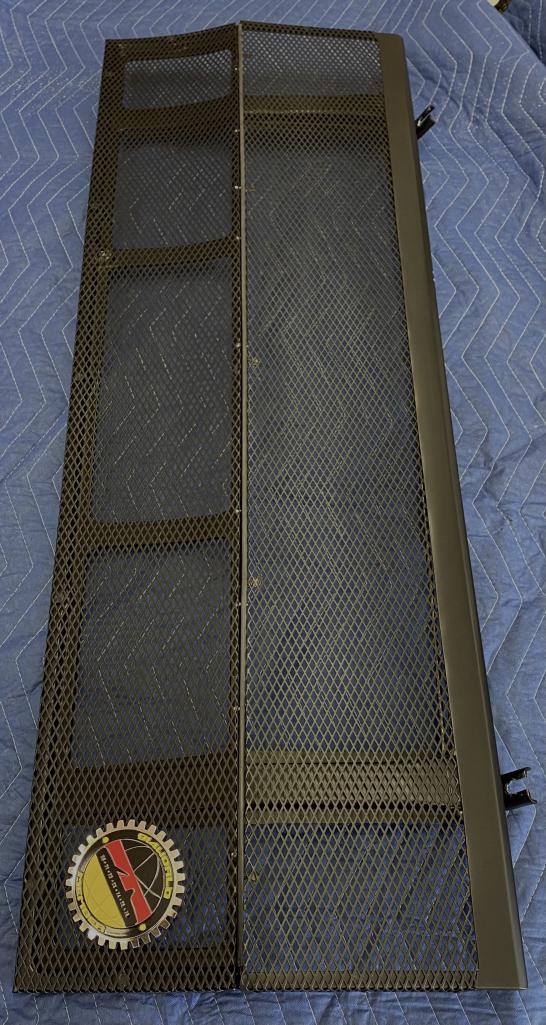
Posted by: roundtwo Jun 3 2023, 04:06 PM
Posted by: Krieger Jun 3 2023, 10:30 PM
That looks really good!
Posted by: roundtwo Jun 4 2023, 11:02 PM
That looks really good!
Thanks bro- now if I can get it to fit?!

Posted by: Cairo94507 Jun 5 2023, 07:40 AM
Very nice Todd. Are you able to put some miles on your car yet? Looking forward to a gathering and drive.
Posted by: roundtwo Jun 5 2023, 01:03 PM
Very nice Todd. Are you able to put some miles on your car yet? Looking forward to a gathering and drive.
in tuning the carbs...ran into some ignition problems...the fun never ends...waiting for parts and info.
We'll get there.
Todd
Posted by: roundtwo Mar 28 2024, 11:25 PM
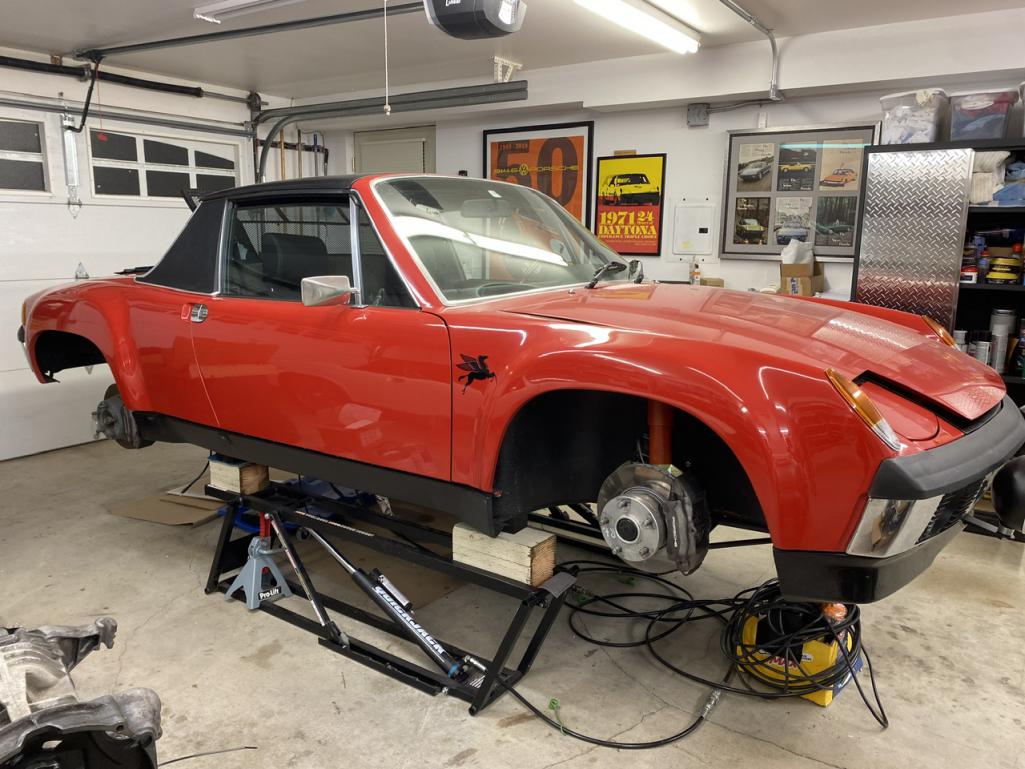
After some time off from posting and catching up on the project.
Engine out after initial break in
Valves adjusted.
Rear main seal was leaking, so I swapped that out for a Porsche branded part- insert hope here.
Install vacuum ports in lower intakes
Engine bay clean up.
Figuring out my emergency brakes.
Minor rewiring.
Tangarine Racing shift rod bushing
Just completed the one-man show engine install on my high lift jack. A little dicey alone.
This is what happens when you visit the Redbarn and become reinspired…and finish home improvement projects! 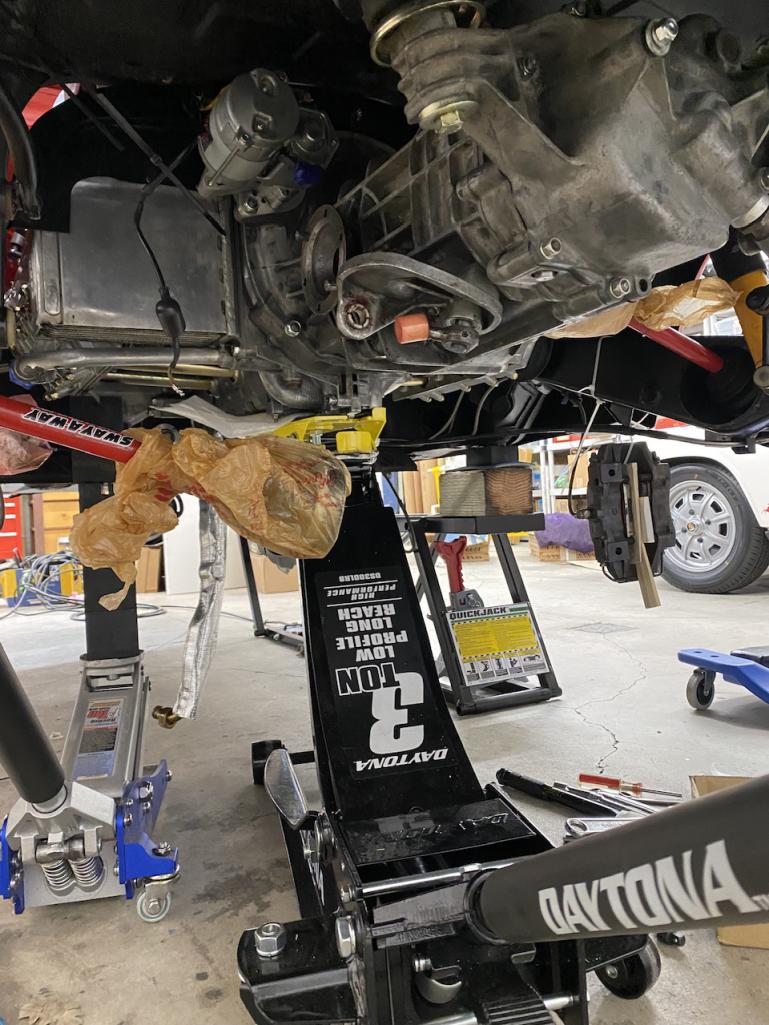
Attached thumbnail(s)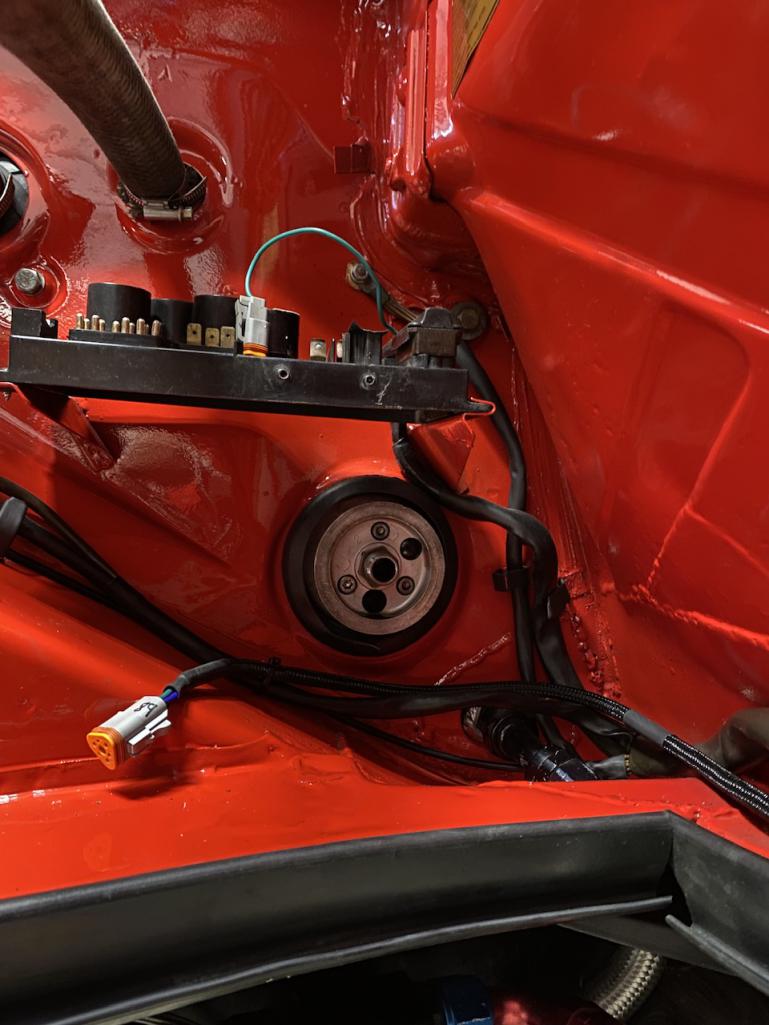
Posted by: roundtwo Mar 28 2024, 11:28 PM
Oh shifter rebuild 
Posted by: Cairo94507 Mar 29 2024, 08:28 AM
Hi Todd- Outstanding work. I look forward to getting together one day and catching up. My car is at the Red Barn and Chris is working his magic on my oil cooler upgrade. He also welded in some attachment plates for my later, retractible seat belts. I got tired of fighting my stock belts and felt they would not help in an accident.
Posted by: rick 918-S Mar 31 2024, 06:09 AM
Coming along nicely. ![popcorn[1].gif](style_emoticons/default/popcorn[1].gif)
Posted by: roundtwo Mar 31 2024, 11:28 AM
Hi Todd- Outstanding work. I look forward to getting together one day and catching up. My car is at the Red Barn and Chris is working his magic on my oil cooler upgrade. He also welded in some attachment plates for my later, retractible seat belts. I got tired of fighting my stock belts and felt they would not help in an accident.
Thanks Michael. Been watching the progress at the RB in person so I can "borrow" some of the oil cooler intellectual property for my next project.

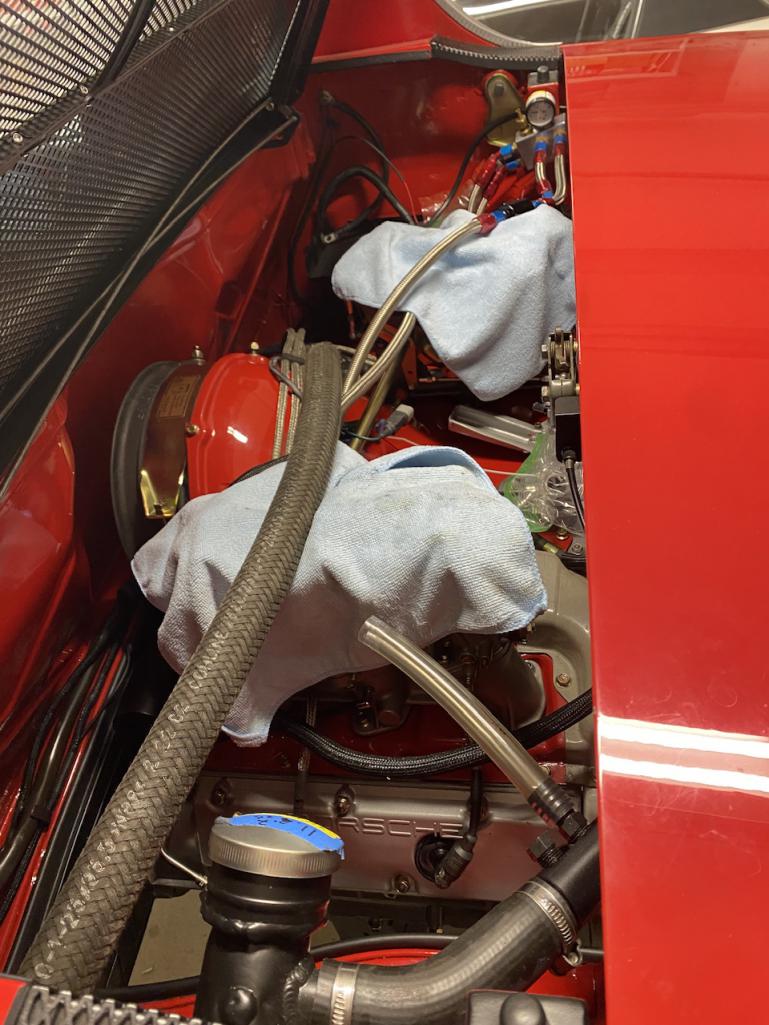
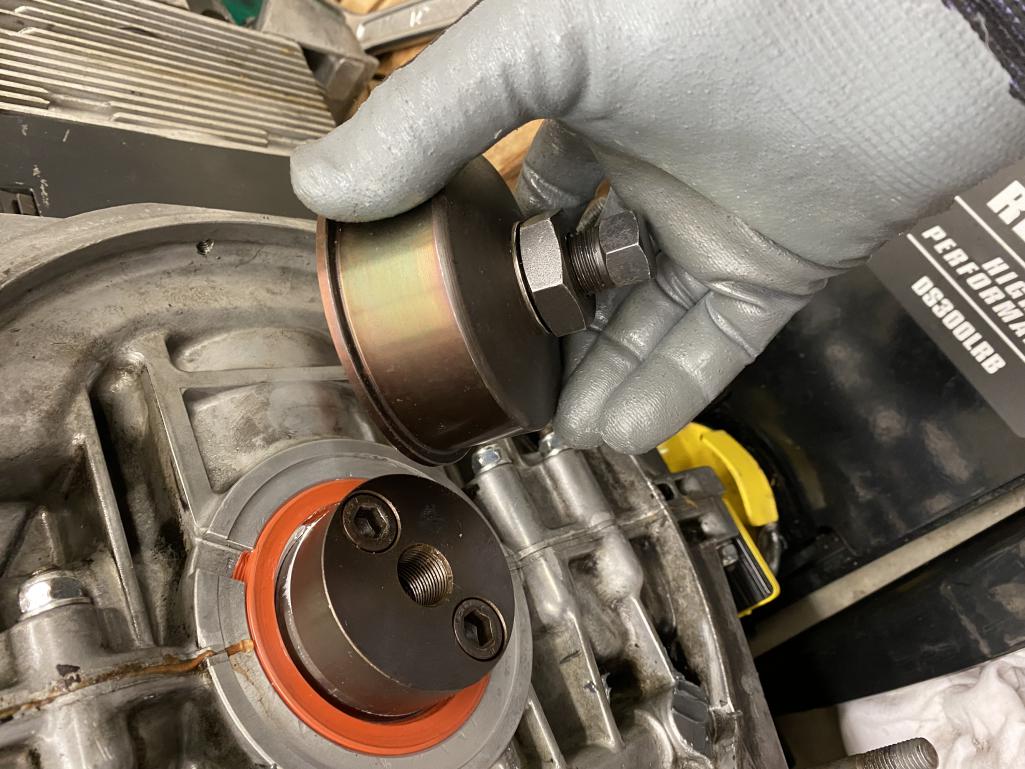
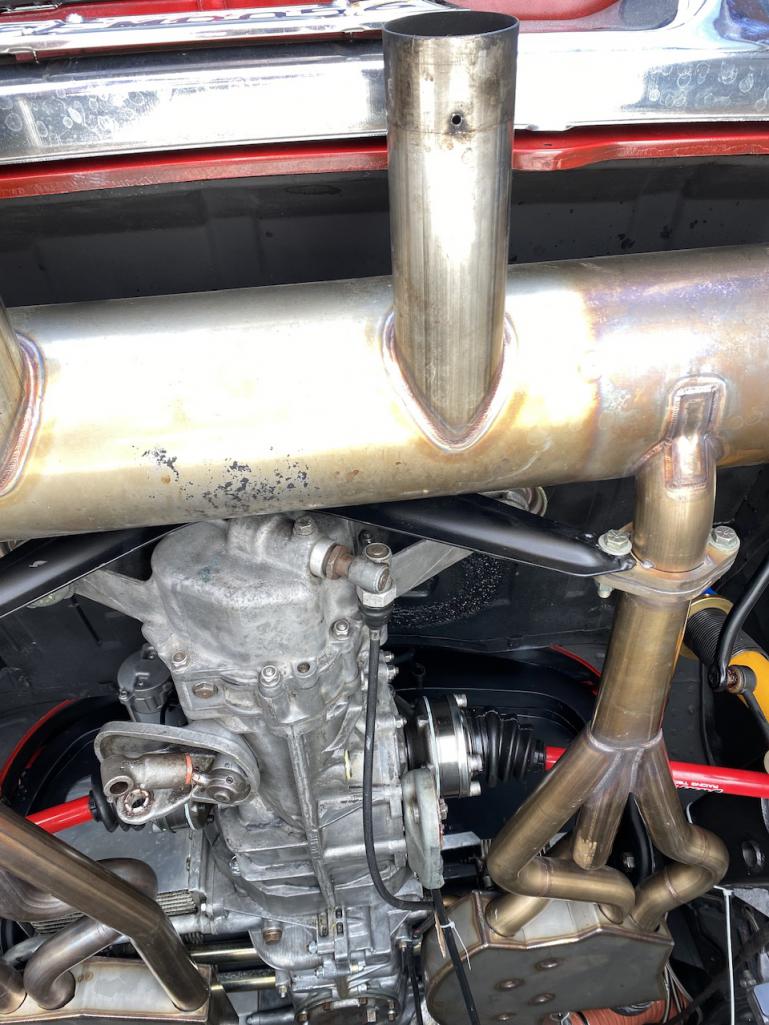
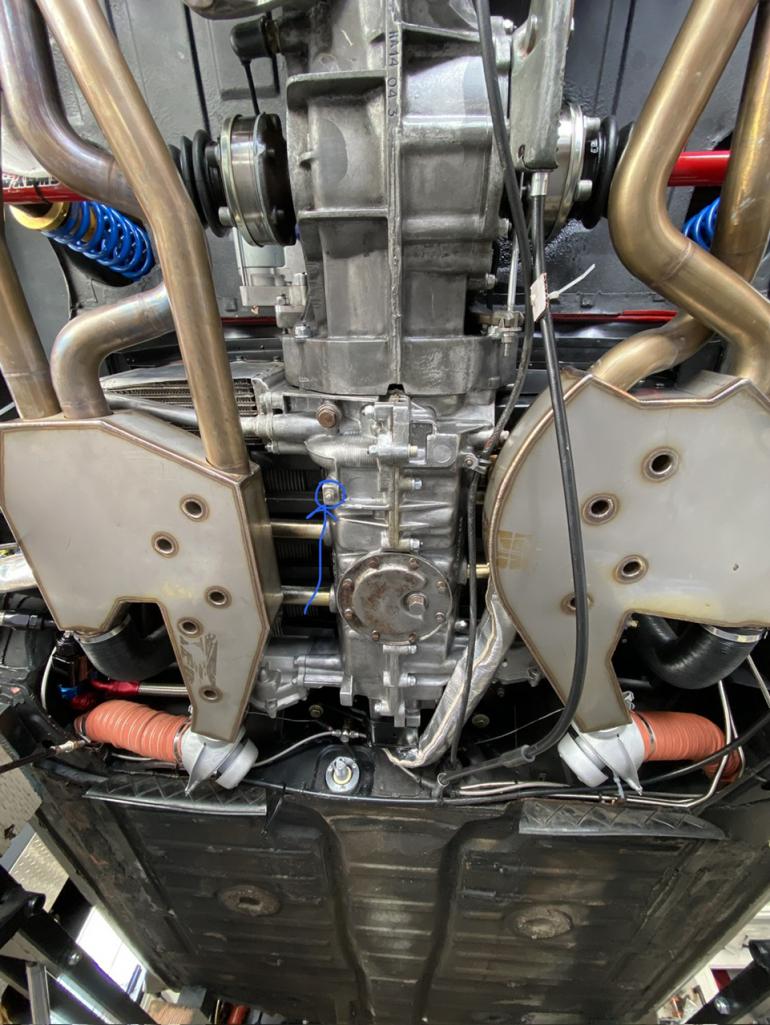
Engine in yesterday and now adding all the other bits.
Need to work out the 123ignition bluetooth programing. Not having the easiest time coming up with the approp curve.
Posted by: roundtwo Mar 31 2024, 04:17 PM
A productive weekend
Most bits attached
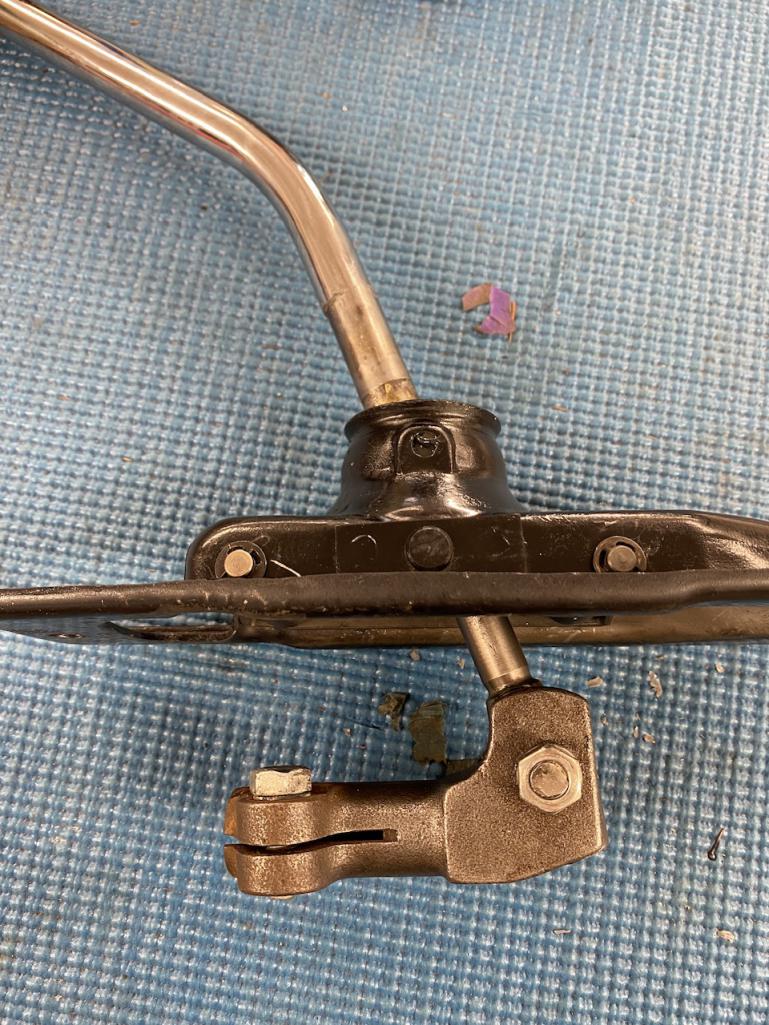
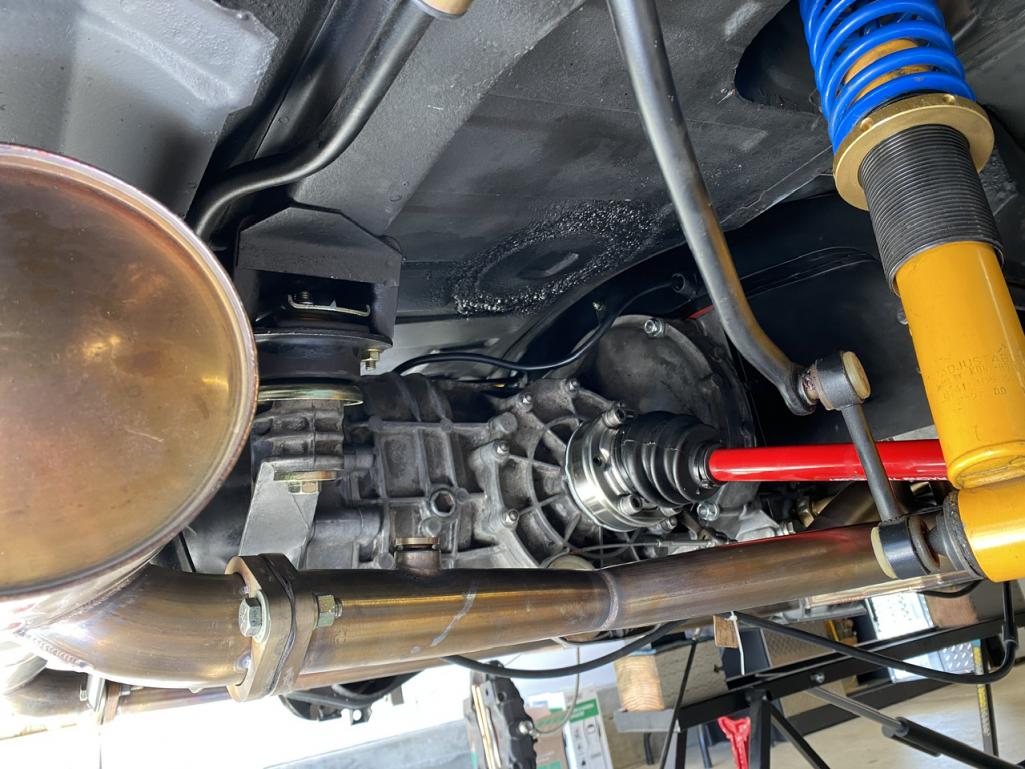
New Discovery is the previous owner didn’t fabricate the shift rod to the right length. Also, it kind of comes in at a weird angle into the shift housing. I think I’ll need to shorten the rod, and put a small turn in it as well.
Better consult the think tank at The Red Barn
Trying to figure out a good way to secure the clutch cable. See blue arrow. When I bring the cable over to that side of the engine, it’s still too far away to use the handy-dandy stud and nut. I might need to make a custom fastener?
Not sure what to do with the cable as far as fastening it. 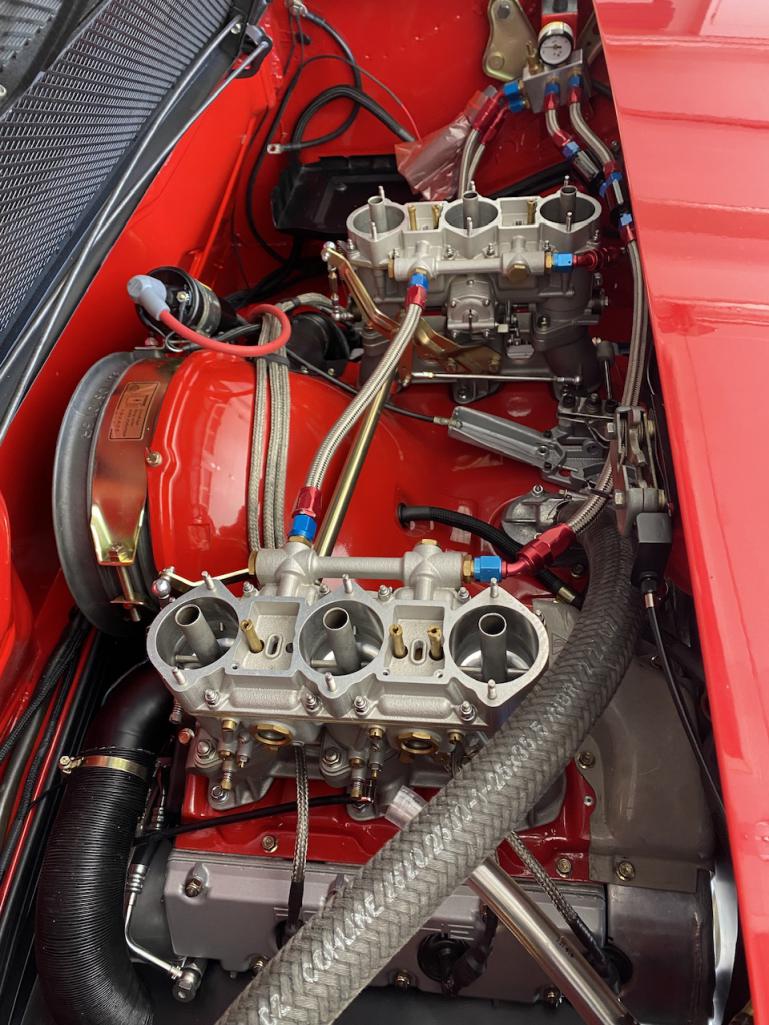
Posted by: roundtwo Mar 31 2024, 06:02 PM
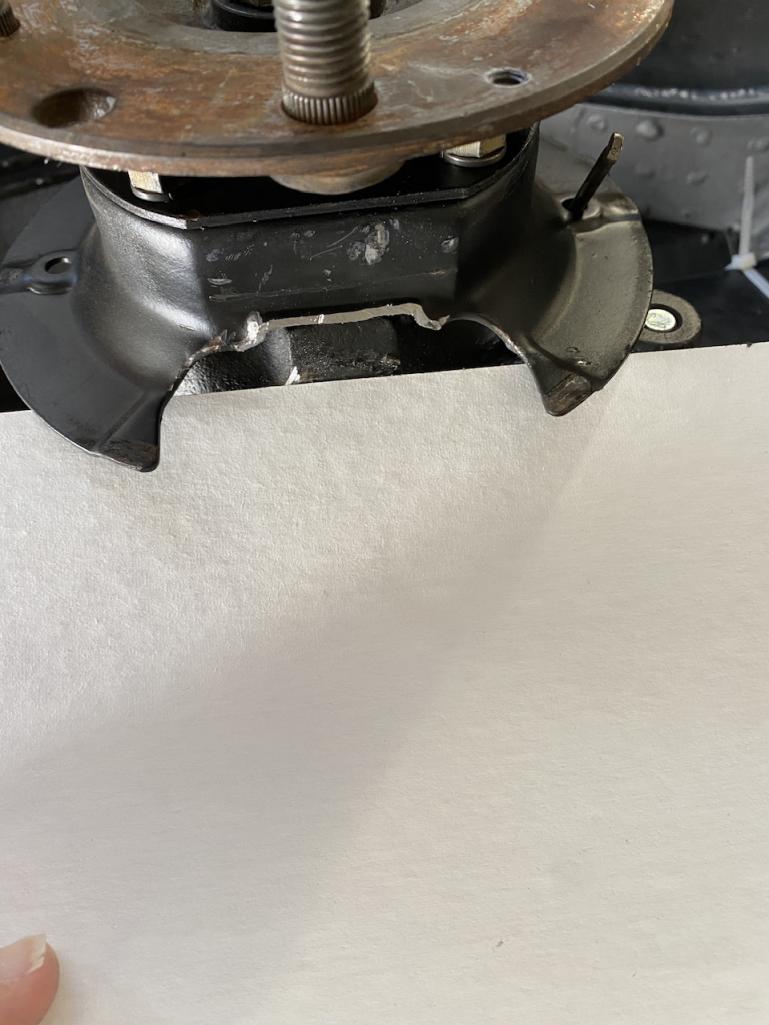
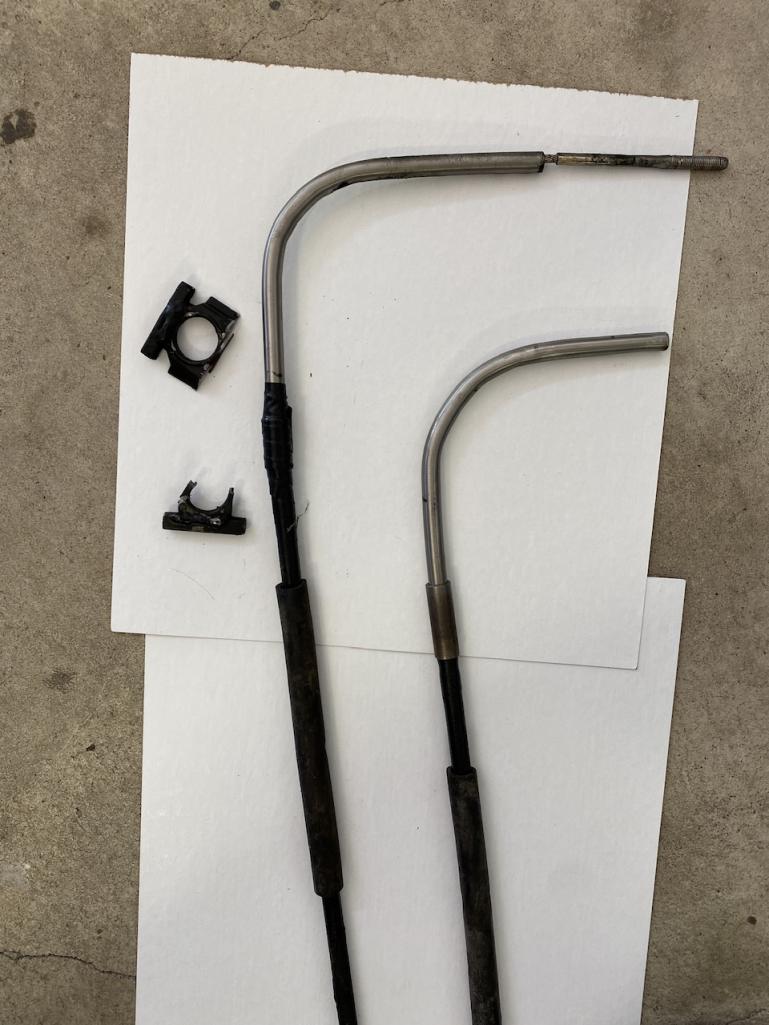
Next up parking brakes.
Another not so great effort by the previous owner. He used the brakes backing plate to support the parking brake shoes separator. Turns out that’s not all that strong. Also, e brake cables were bastardized. All super funky.
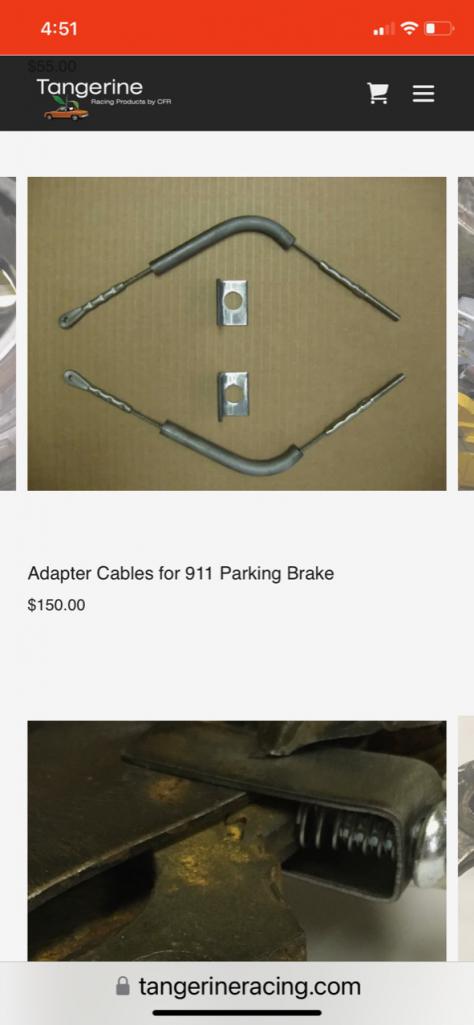
With the help of Chris at Tangarine Racing, I now have a plan with his brake kit. He let me know I can utilize the standard 914 emergency cables, and then connect those to the extensions that come with the kit. I’ll have to weld on the new brake pad separating L brackets to the trailing arms and then weld the 90° tubing on as well.
Meanwhile, I cut the extra material that was on the brakes you backing plate. Cleaned it up as well as I can , will prime and paint in place.
https://tangerineracing.com 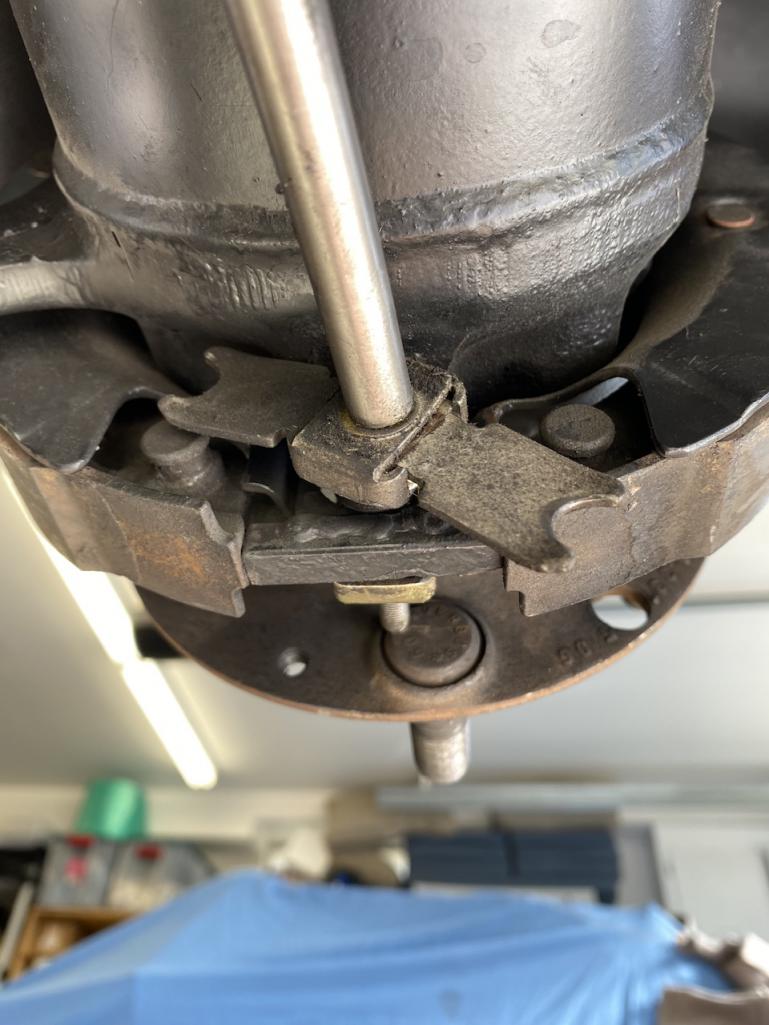

Posted by: roundtwo Mar 31 2024, 06:04 PM
Posted by: Cairo94507 Apr 1 2024, 07:57 AM
 Looking very nice Todd.
Posted by: roundtwo Apr 1 2024, 11:01 AM
Looking very nice Todd. mm by mm I make progress.
Two mail. Items left… well three really
1.Ebrake set up - going with Chris Foley’s product
2. Shift rod figure outing… rod needs length reduction and reworked angle at the transaxle shift housing.
3. Dreaded tire size and supplier decision. Harvey is giving my 15” wheel set 7 and 8” his magical RSS finish. I really like how 60s look on the car but they are very hard to find except BF goodrich T/A s that come in MANY 15” options . Prefer 205 up front and 225s or 235s in the rear. Looked extensively at coker tires, specifically Perelli, Avon and cannot find a 60s. Previous owner put 45s on Toyos on the rear and they looked ridiculous. 50s or 55 still look too small. 70s a little too much sidewall.
I saw Eric Sheas’ 914 six at Rennsport and he has running the TA 60s. Not the highest performing tired, but I’m running out of choices.

Posted by: Tom1394racing Apr 3 2024, 05:48 AM
Looking very nice Todd. mm by mm I make progress.
Two mail. Items left… well three really
1.Ebrake set up - going with Chris Foley’s product
2. Shift rod figure outing… rod needs length reduction and reworked angle at the transaxle shift housing.
3. Dreaded tire size and supplier decision. Harvey is giving my 15” wheel set 7 and 8” his magical RSS finish. I really like how 60s look on the car but they are very hard to find except BF goodrich T/A s that come in MANY 15” options . Prefer 205 up front and 225s or 235s in the rear. Looked extensively at coker tires, specifically Perelli, Avon and cannot find a 60s. Previous owner put 45s on Toyos on the rear and they looked ridiculous. 50s or 55 still look too small. 70s a little too much sidewall.
I saw Eric Sheas’ 914 six at Rennsport and he has running the TA 60s. Not the highest performing tired, but I’m running out of choices.
Have you considered Michelin TB’s?
Posted by: roundtwo Apr 4 2024, 10:36 PM
@tom1393racing
Looks like only four sizes are available. Even the smallest width requires an 8 inch rim. I have 7s upfront, so it doesn’t look like these are an option.
Cool tires, about $500 each but sizes won’t fly for my street oriented 914.
Thanks for the tip
Powered by Invision Power Board (http://www.invisionboard.com)
© Invision Power Services (http://www.invisionpower.com)