Printable Version of Topic
Click here to view this topic in its original format
914World.com _ 914World Garage _ Order of operations: front suspension
Posted by: rjames Nov 17 2023, 01:52 PM
My steering has started to feel 'floaty' at freeway speeds. I haven't been able to pinpoint why, but given I've had the car for 16 years and don't know all of the prior work that was done by the PO, I'm going to replace the following:
-Ball joints
-Tie rods (replacing with turbos)
-A-arm bushings
-Struts
-Maybe the steering coupler (thinking that might be why the steering feels the way it does).
I've watched Ian's videos and read countless posts, but can't figure out if I can do the above without dropping the whole front end. I have limited garage space, so would love to avoid that if possible.
Lastly, will I need to separate the brake lines to get any/all of the above done? (Hoping the answer is 'no' since I just the did the master cylinder not too long ago and don't relish the idea of bleeding the brakes again).
Thanks!
Posted by: rjames Nov 17 2023, 01:52 PM
Double post
Posted by: Mikey914 Nov 17 2023, 02:00 PM
You got all the usual suspects, so yes you will improve it. The brake lines will detach so carefully you can seporate them from the syrut assembly.
Its all comming out, i'd do the struts ball joints and rack arms 1st. You will get a pretty good idea while you are in there id the A arms need done.
Posted by: mepstein Nov 17 2023, 02:12 PM
No, you can hang the calipers away from the struts with zip ties.
You can definitely take it apart piece by piece. I think it’s easier to remove and install in one unit but it’s your choice.
We have a car in the lift right now getting all new suspension, not touching the brakes.
Attached thumbnail(s)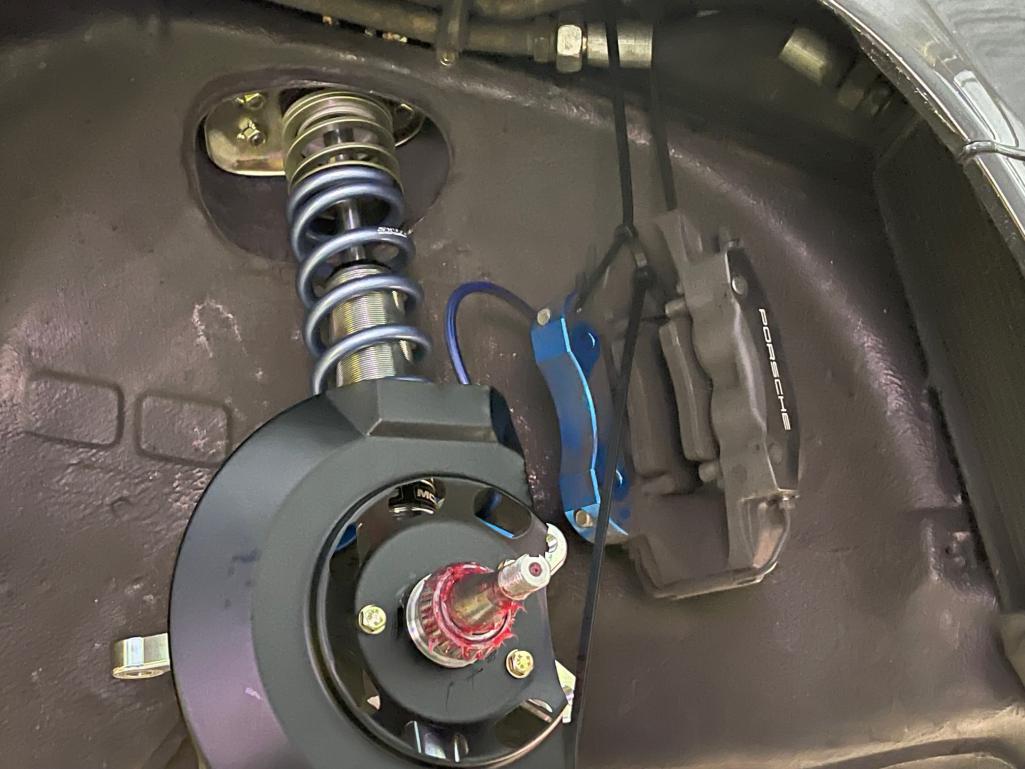
Posted by: 914_teener Nov 17 2023, 02:47 PM
If you haven't done rotors and bearings and races...I'd add those to the list.
The turbo tie rods made a huge difference along with adding in a stock sway bar.
Posted by: Shivers Nov 17 2023, 03:43 PM

No, you can hang the calipers away from the struts with zip ties.
You can definitely take it apart piece by piece. I think it’s easier to remove and install in one unit but it’s your choice.
We have a car in the lift right now getting all new suspension, not touching the brakes.
Isn’t that pretty
Posted by: mepstein Nov 17 2023, 03:55 PM
No, you can hang the calipers away from the struts with zip ties.
You can definitely take it apart piece by piece. I think it’s easier to remove and install in one unit but it’s your choice.
We have a car in the lift right now getting all new suspension, not touching the brakes.
Isn’t that pretty
SC getting MCS coil overs and Stompski sway bars. We did the Boxster brakes last year.
Posted by: burton73 Nov 17 2023, 04:29 PM
I had to post this here as well.
Shown is the front end for Mark. Sonners 2170 RAT Blue car at PMB that was going to be my V8 car, but I changed directions on it. Sent it all to PMB to finish the car. 914-4 a-arms with new rubber bushings, 911 Carrera hubs, 911 Carrera steering rack, turbo tie rods and new bearings and ball joints. Eric set it up with his Alpha calipers on 3 inch.
It is as clean as any I have seen and Eric says it is going to stop big time.
Bob B Burton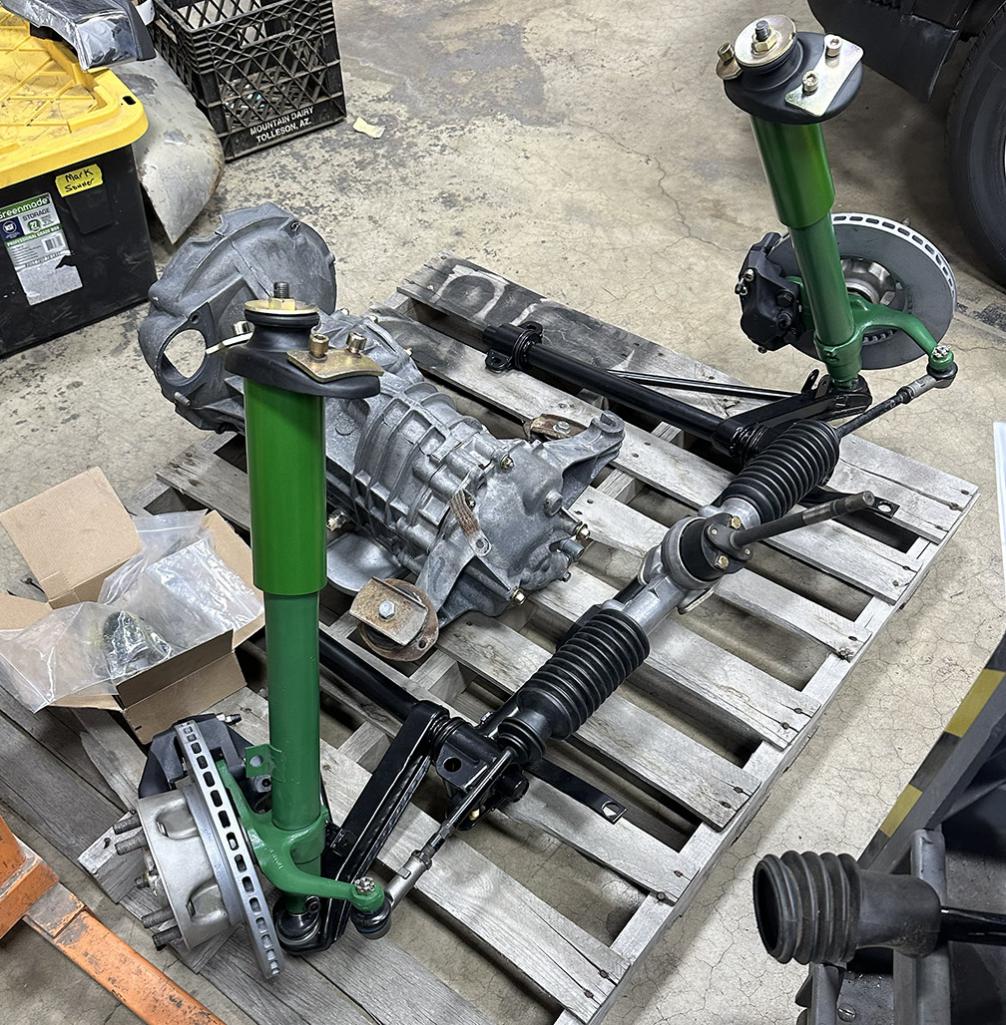
Posted by: rjames Nov 17 2023, 05:02 PM
If you haven't done rotors and bearings and races...I'd add those to the list.
The turbo tie rods made a huge difference along with adding in a stock sway bar.
Already have a sway bar. I did the bearings a while back, but probably not long ago enough to require replacing them. Good call on the rotors, although the were replaced when I did the bearings, I will measure them to ensure they're within tolerance.
Posted by: rjames Nov 17 2023, 05:13 PM
I had to post this here as well.
Shown is the front end for Mark. Sonners 2170 RAT Blue car at PMB that was going to be my V8 car, but I changed directions on it. Sent it all to PMB to finish the car. 914-4 a-arms with new rubber bushings, 911 Carrera hubs, 911 Carrera steering rack, turbo tie rods and new bearings and ball joints. Eric set it up with his Alpha calipers on 3 inch.
It is as clean as any I have seen and Eric says it is going to stop big time.
Bob B Burton
That pic makes me want to drop everything. Seems like it would be easier to get at all the parts. Is that true, or from a leverage standpoint, is it easier to do some of the work I'm planning without removing the entire thing? Does the gas tank have to come out to get at what you need to drop it all?
How to do you know if the rack needs to be rebuilt?
Posted by: SirAndy Nov 17 2023, 05:16 PM
Dropping the whole front end is easy and straight forward and makes working on things a *lot* easier.
There's only one problem, you will have to lift or remove the gas tank to get to the clamp that holds the steering rack coupler to the chassis.
![popcorn[1].gif](style_emoticons/default/popcorn[1].gif)
Posted by: rjames Nov 17 2023, 05:20 PM
Dropping the whole front end is easy and straight forward and makes working on things a *lot* easier.
There's only one problem, you will have to lift or remove the gas tank to get to the clamp that holds the steering rack coupler to the chassis.
ahh right.
 Well, I've done that before, I can do it again I suppose.
After looking at the above picture again, it looks like I could leave the struts and rotor and brake stuff in place but still drop the rack, A-arms and tie rods as a unit. No?
Posted by: SirAndy Nov 17 2023, 07:23 PM
Yes, you can undo the ball joints and just drop the center part.

Posted by: yellowporky Nov 17 2023, 09:21 PM
When i did my 73 1.7 i could not bring myself to install the rubber a-arm bushing even though i had already bought them and the install tool. The binding of the rubber as it fights with the strut just messed with my brain so i went with the Rebel racing RSR kit (no special tools or pressing) over the Elephant racing because you dont need to lube them every 3-4000 miles. Also added the turbo tie rods.
You are focused on the front of the car as the issue so i assume the rear is all good?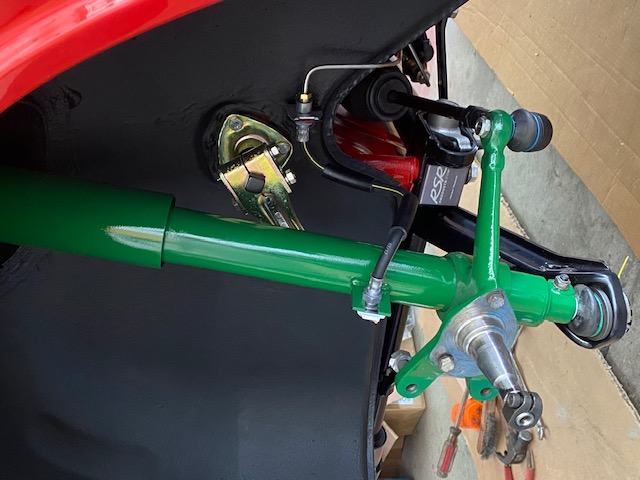
Posted by: Ishley Nov 17 2023, 09:37 PM
One issue that you want to be very careful with is bolt breakage. I broke a few and it really can set you back. Use a small 3/8 ratchet and go slow on disassembling the parts. Sometimes try to tighten them first. Whack the bolt hard with a hammer to help break it free. If you get out the big breaker bar you can snap a bolt in a flash. The pan under steering rack has 2 bolts in the rear that hold the aux suspension carrier. These are critical and are exposes directly to the elements. Use heat when things won’t move. If you have to repaint… it’s still faster then all the crazy stuff you’ll do to get a broken bolt out. Also… if you use a torch… the fuel tank has to be out. Don’t risk it.
For the ball joint you need a special socket and probably a powerful driver.
The early cars have a difficult bolt that clamps the strut to the ball joint. Lube and heat is the best way. I use a torch setup with mapp and oxygen. The O2 is expensive but you can get bolts red hot.
Of course good jack stands with a backup as you’ll be pushing and shoving against the car. I always setup a second set of stands as a backup.
Good luck!
Posted by: rjames Nov 27 2023, 10:30 AM
Got the tank out. Bulkhead area could use a little cleaning, but otherwise looks like it did when I had the tank out for cleaning and a sway bar install 10+ years ago. I've got a set of the stainless steel fuel lines that have been sitting in the box for awhile, so might as well get those installed now, too.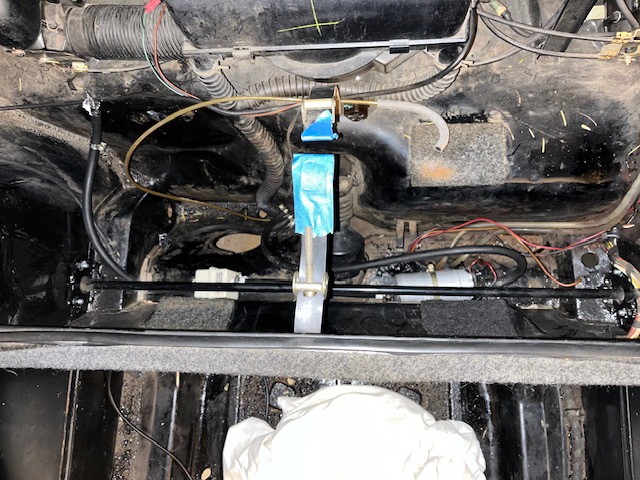
Tank still looks good. 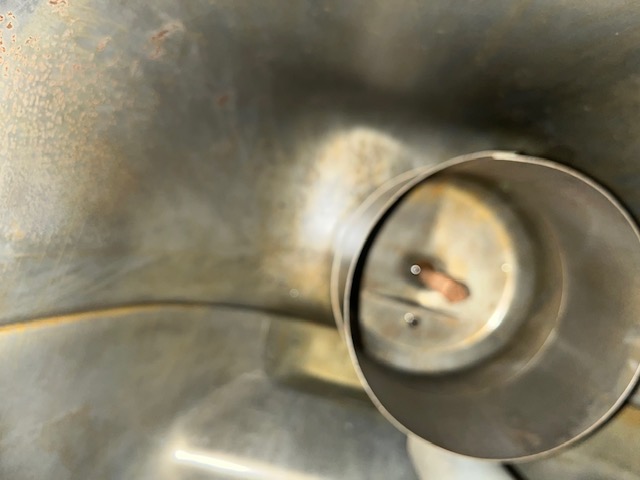
Time to replace the gasket that goes between the expansion tank and the tank. 
Ok, next round of questions:
To remove the rack, do I have to remove the master cylinder? If that's a yes, I'm now leaning towards leaving the rack in the car as getting the master cylinder installed was such a huge PITA and I only did it a couple of years ago.
If I do leave the rack in the car, is it possible to replace the steering coupler without cutting the plastic cover?
Posted by: burton73 Nov 27 2023, 11:01 AM
Got the tank out. Bulkhead area could use a little cleaning, but otherwise looks like it did when I had the tank out for cleaning and a sway bar install 10+ years ago. I've got a set of the stainless steel fuel lines that have been sitting in the box for awhile, so might as well get those installed now, too.
Tank still looks good.
Time to replace the gasket that goes between the expansion tank and the tank.
Ok, next round of questions:
To remove the rack, do I have to remove the master cylinder? If that's a yes, I'm now leaning towards leaving the rack in the car as getting the master cylinder installed was such a huge PITA and I only did it a couple of years ago.
If I do leave the rack in the car, is it possible to replace the steering coupler without cutting the plastic cover?
You do not need to remove the master cylinder. I dropped the full thing out at one time in 1979 in my 74 and just put a 911sc Front in place. I was in my mid 20s and it seemed easy back then. On the ground with just a jack and some stands for the front
Best Bob B
Posted by: rjames Nov 27 2023, 02:16 PM
Reading that I can remove the rack without removing the master cylinder just made my morning. Would love a 2nd confirmation before I get too excited.
Before I start removing things, anything I can do to keep the alignment near where it is? I expect I'll need a full alignment when finished with everything, but I don't want things to be so far off that I can't drive it to whatever shop eventually does the final alignment.
Posted by: SirAndy Nov 27 2023, 05:45 PM
Reading that I can remove the rack without removing the master cylinder just made my morning. Would love a 2nd confirmation before I get too excited.
Before I start removing things, anything I can do to keep the alignment near where it is? I expect I'll need a full alignment when finished with everything, but I don't want things to be so far off that I can't drive it to whatever shop eventually does the final alignment.
Confirmed, the MC should not interfere unless you have an aftermarket brace or brake-lines tied to the rack etc.
As for the alignment, if you are leaving the struts you *should* be pretty close to where you were on reassemble as long as you don't touch any of the adjustment nuts.
Pro tip, before you reattach the rack to the wheel side, center your steering the rack (both ends sticking out the same), lock the shaft in place, attach the steering wheel, then attach everything on the wheel ends, then unlock the shaft.
If you are removing the struts, you can mark the top plate and bolt locations to get back close to where you were.
Posted by: rjames Jan 21 2024, 05:02 PM
Finally moving on this. Figured I'd continue this thread as I already have questions.
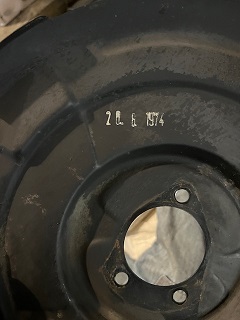
First some minutia- The dust shields on my '75 were born in '74. 
Got the ball joints loose with this awesome tool and just a breaker bar:
I must have overtightened the passenger side bearing retainer in the past because I couldn't remove it by hand. I think the spindle threads are ok because when removing the retainer it was tight through the entire length of the spindle threads and not just where it rests against the washer when installed. Will post a wtb for a left side retainer in hopes that the spindle threads are ok. 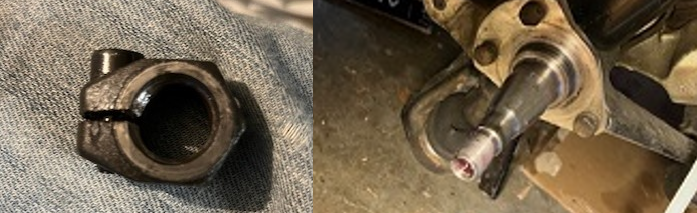
Lastly, how do I remove the shock's top bolt? When I try and loosen it, everything wants to turn- the big washer, the shock spindle and upper part of the strut housing inside the fender.
Is it possible to loosen (and re-install when the time comes) without an impact wrench? I I am using a 22mm box wrench now, but just ordered a 22mm socket. I do have a breaker bar- hoping that's enough leverage to loosen it, but can't figure out how to keep the rest of the assembly from wanting to rotate, too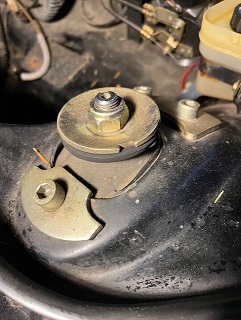
.
I also noticed my setup doesn't include a safety tab that's supposed to be there. Am I missing a washer of some sort with the tab?
Posted by: jhynesrockmtn Jan 21 2024, 05:21 PM
I did the whole front on my BB last year. New struts, bushings, ball joints, rack rebuilt by 914rubber, turbo tie rods, etc. Ian's videos were my guide. That nut will come off easiest with a rattle gun. I have an electric dewalt that was very helpful on my front and rear suspension. Yes, you are missing the washer that has a tab that bends up.
Posted by: iankarr Jan 21 2024, 05:28 PM
Glad my bleeding knuckles helped the greater good 
Posted by: r_towle Jan 22 2024, 05:07 PM
I remember when I was doing autox weekly, I replaced everything with different parts…all new
The final thing I had to chase was wobbly steering.
I could feel it even more amplified with all the race suspension.
It turns out that steering racks don’t last forever, and steering u-joints also do not have unlimited lifespans.
Check the basics, tie rods, ball joint and bearings.
Upper strut bearing/rubber
Then check for any play at all in the steering wheel to steering rack….and then the ring /pinion inside the rack.
I had to rebuild that piece, and replaced a few ujoints.
Btw, make a note (picture) of all steering ujoints while steering wheel is straight….it matters when you got put it all back together.
Rich
Posted by: rjames Jan 23 2024, 10:41 AM
Happy to report that last night I was able to finally get the top strut nuts off without having to buy an impact driver or a special wrench to hold the washer/spindle assembly. That F'er was on tight, though.
I remember when I was doing autox weekly, I replaced everything with different parts…all new
The final thing I had to chase was wobbly steering.
I could feel it even more amplified with all the race suspension.
It turns out that steering racks don’t last forever, and steering u-joints also do not have unlimited lifespans.
Check the basics, tie rods, ball joint and bearings.
Upper strut bearing/rubber
Then check for any play at all in the steering wheel to steering rack….and then the ring /pinion inside the rack.
I had to rebuild that piece, and replaced a few ujoints.
Btw, make a note (picture) of all steering ujoints while steering wheel is straight….it matters when you got put it all back together.
Rich
Thanks, Rich.
Everything seemed tight when trying to move by hand; No movement with anything connected to the strut housing, the steering shaft is tight, and the U-joint looks good.
Starting to think the issue may be the rack, although holding out hope that it's just a worn hockey puck. Hope to have it all out by next weekend.
Posted by: pek771 Jan 24 2024, 11:26 AM
Your rack needs maintenance, at best
Posted by: rjames Jan 26 2024, 07:47 PM
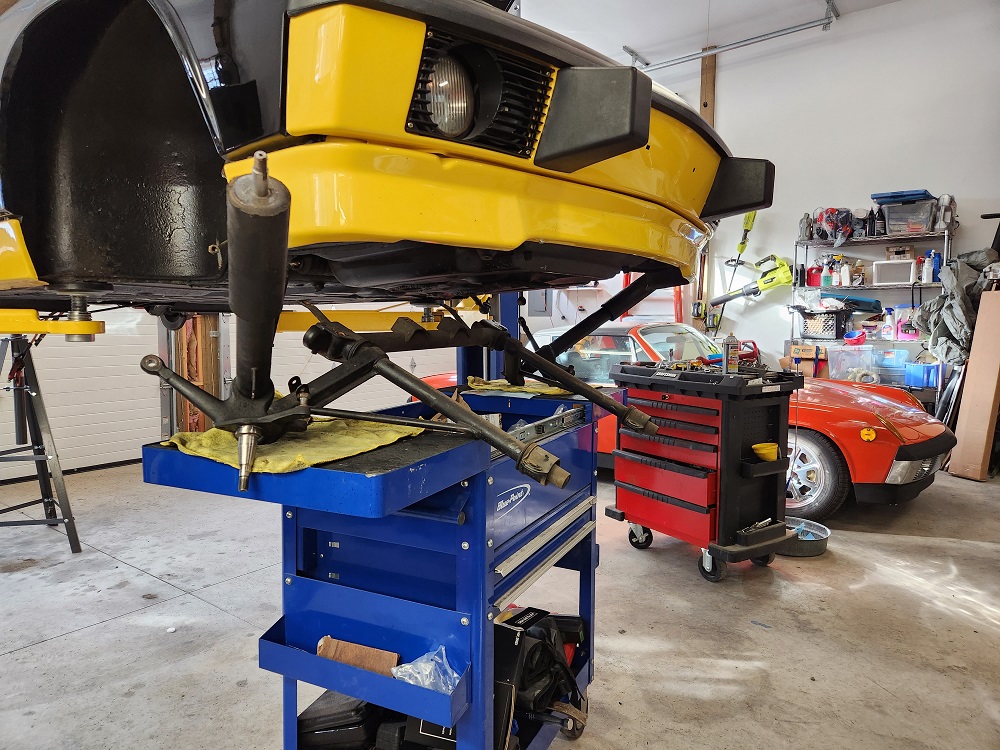
More progress, slow, but progress none the less:
Got the struts removed after much violence with a hammer.
First came trying to separate the tie rod from where it attaches to the strut assembly. A few billion blows with a hammer didn't seem to be doing much. I ended up having to MacGyver a too small bearing puller held tight with a plumbers wrench to get them removed on each side.
The hammer redeemed itself when trying to remove the ball joints from the struts. Lots of pounding and a torch to heat things up eventually allowed me to beat the bejesus out of them into submission and get them out.
Now I've got this to deal with. All the vids show a fastener that one could use a chisel on to loosen up. Of course that isn't what I have. Stuck the strut in a vice and tried to use an adjustable wrench on it, but it would budge. Is heat applicable here, too? Should I Dremel a chunk out of it and then use a chisel and my new best friend Mr. Hammer to try and get it loose? 
Posted by: DennisV Jan 27 2024, 05:35 AM
Now I've got this to deal with. All the vids show a fastener that one could use a chisel on to loosen up. Of course that isn't what I have. Stuck the strut in a vice and tried to use an adjustable wrench on it, but it would budge. Is heat applicable here, too? Should I Dremel a chunk out of it and then use a chisel and my new best friend Mr. Hammer to try and get it loose?
I've had some surprisingly good luck getting stuff like this to move with a BIG pipe wrench. Though it will probably chew on the surface where it grabs. Another effective, but possibly destructive, option is an impact hammer with chisel attachment.
Looking forward to seeing your reassembly order of operations.
Posted by: rjames Jan 29 2024, 09:53 PM
Got the gland nut off finally after applying heat and much swearing.
Pulled out the KYBs the PO had installed. Interesting how one is really discolored. What caused that?
Wish I could powder coat the struts, but after a bit of cleaning and minus all the oil on the outside, they’ll be going back in as is, albeit with new Konis.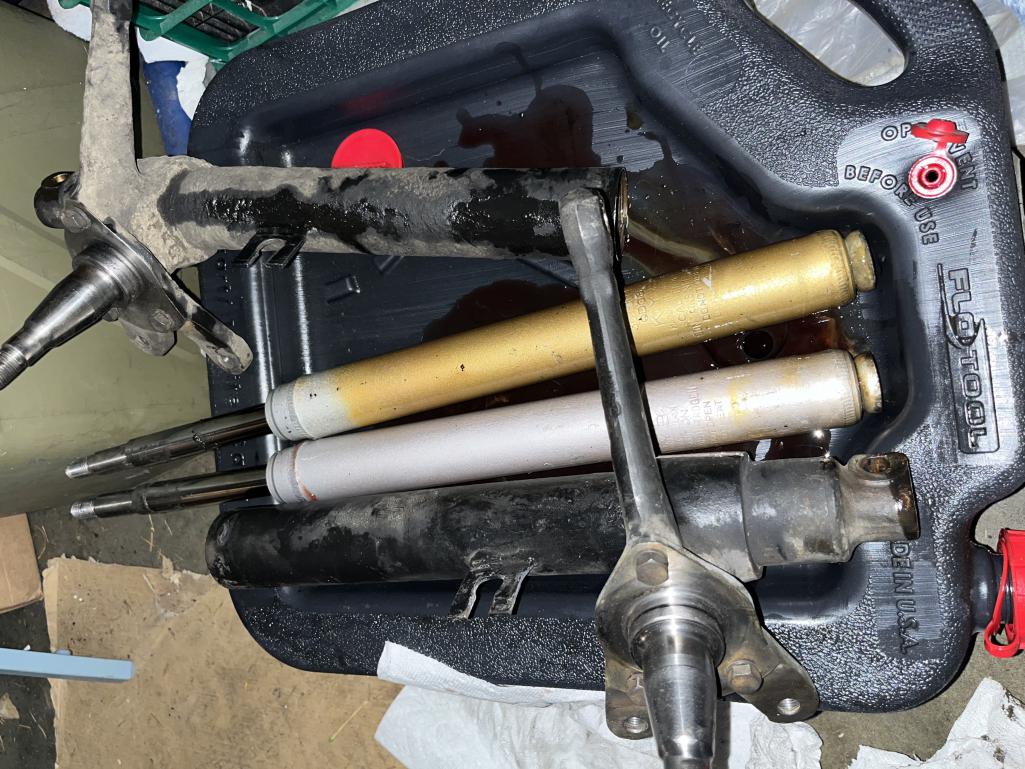
Posted by: r_towle Jan 30 2024, 08:58 PM
Making progress….woohoo!
I have a 2006 997 that is wobbly wobbly.
I have to do all of what you are doing , starting this weekend.
It saddens me that my 40 and 50+ year old Porsche cars did not have rubber that disintegrated.
2005-6 used something weird…it falls apart once you get the rubber out.
Good luck with your project.
Do take a look at the rack and pinion….there are articles out there on how to rebuild it, it’s not terribly hard todo, and worth it.
Rich
Posted by: rjames Feb 1 2024, 06:33 PM
Thanks, Rich. Yeah- I'm already residing myself to rebuilding the rack (or sending it out to be rebuilt).
Here's where I'm at now. Cleaned up the struts and got most of the undercoating off without also taking the paint off. It's too cold for painting, otherwise I'd be inclined to strip them completely and repaint, It's a huge improvement from how they looked before, so will likely leave them as is. 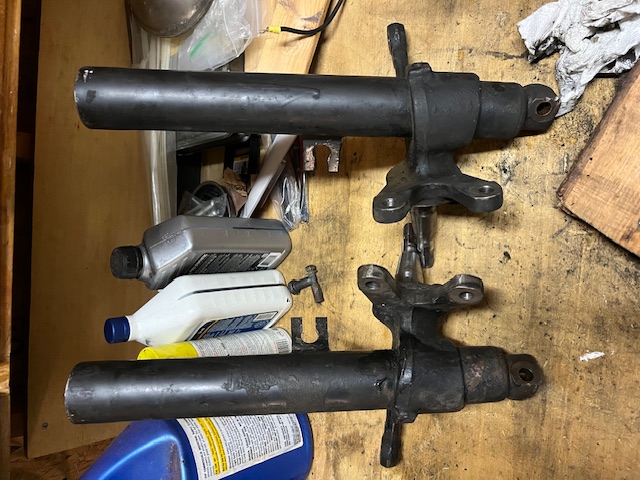
Left control arm ready for bushing removal and some cleaning.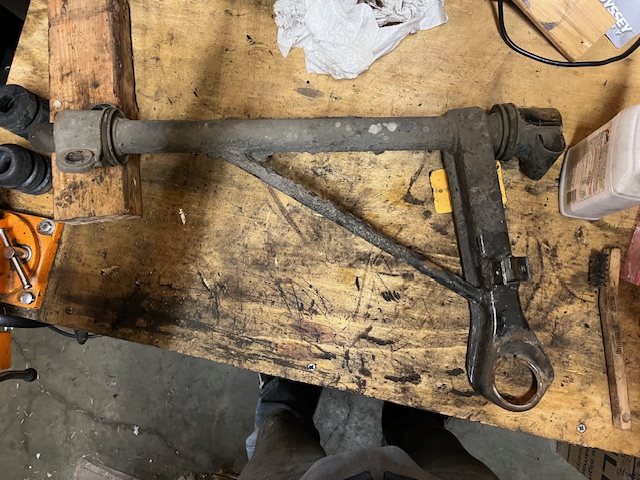
Haven't pulled the right control arm and torsion bar yet, but here's how the left one looked. Is this too far gone to re-use? 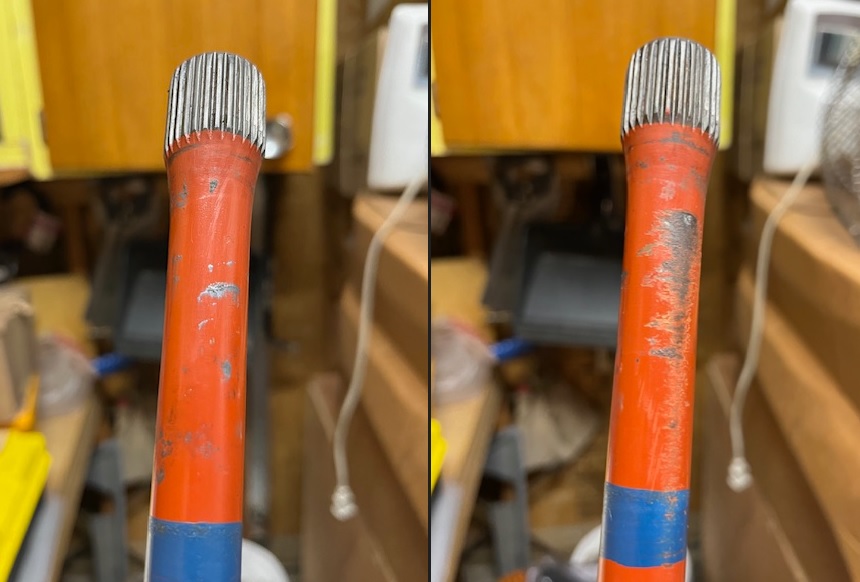
Posted by: rjames Feb 9 2024, 01:12 PM
It took a while, but I got 99% of the undercoating off of the control arms without damaging the paint underneath too badly.
Bushings came off easily enough with a little heat. 
Bushings were definitely worn. It's easy to see why the torsion bars were rubbing. If your 914 still has the original bushings, it's time to replace them.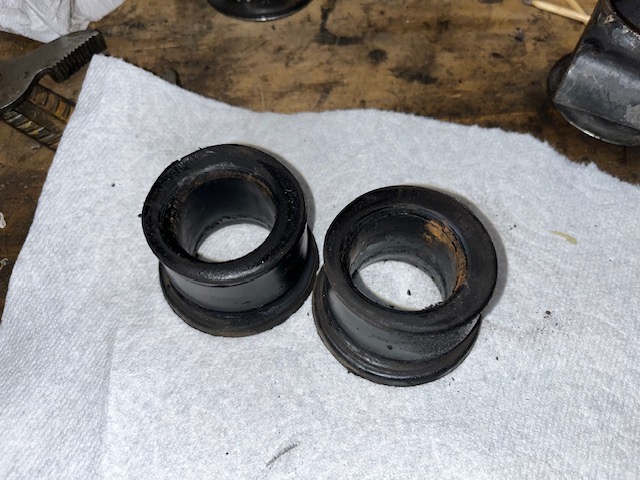
Question for @http://www.914world.com/bbs2/index.php?showuser=18749 or anyone else who wants to weigh in:
In the most helpful bushing install video Ian posted, it is said to index the the carriers at 21 and 14 degrees (front/rear), but I measured mine right before removing the bushings and they were 43 and 27 degrees (front/rear) on both sides. Anything I should be concerned about here or is that just a result of their last position when I jacked up the front end?
Posted by: iankarr Feb 9 2024, 11:20 PM
I don't remember which manual I got those numbers from, but i noticed that I had to adjust the angles slightly on installation.
Posted by: Superhawk996 Feb 10 2024, 07:26 AM
21 and 14 are the correct angles to allow the LCA to align to the body at install with LCA in proper rebound position. Those numbers are in the Elephant Racing install instructions.
Rubber bushings should not rotate on the LCA if installed properly.
Whatever angles you may have had when you removed worn out and slipping bushings is irrelevant.
Posted by: DRPHIL914 Feb 10 2024, 08:44 AM
@http://www.914world.com/bbs2/index.php?showuser=4467
wow great job, thats a big job to tackle, i did most of that about 10 years ago, but i didnt do the new strut inserts but feel like its time to do that soon, but am wrestling with whether or not i should then upgrade to actual 5 lug front not drilled 4 lug to 5 lug with studs int he OEM rotors, im just not sure itw worth the trouble and expense.
what brand strut inserts did you get? if i follow the KISS principle and just get a set of sport bilistein inserts or such, i am sure this would be the most cost effective option.
anyway , you are going to love how well your car handles with all that new gear i knowi did!!!
Phil
Posted by: rjames Feb 10 2024, 05:11 PM
@http://www.914world.com/bbs2/index.php?showuser=11106 I went with Konis front and rear when they were on sale everywhere a while back. I did the rear ones a few month ago along with new 100 lb. springs. Looking forward the improvements that all the new parts should bring!
Posted by: rjames Feb 10 2024, 05:13 PM
21 and 14 are the correct angles to allow the LCA to align to the body at install with LCA in proper rebound position. Those numbers are in the Elephant Racing install instructions.
Rubber bushings should not rotate on the LCA if installed properly.
Whatever angles you may have had when you removed worn out and slipping bushings is irrelevant.
I'll index them accordingly, thanks. I'm still trying to figure out how they could be so far off. Over double the angle for both ends on both sides? What would cause that?
Posted by: Superhawk996 Feb 10 2024, 08:56 PM
I'm still trying to figure out how they could be so far off. Over double the angle for both ends on both sides? What would cause that?
Worn bushings are letting LCA rotate within them.
I suspect that when you jacked up the car, the LCA went further into rebound.
The correct position with new bushings will be in rebound below curb, but not full travel rebound to the limit of strut travel. This allows for a mild bushing preload at curb and the bushing adding a rising rate as the LCA goes into compression over bumps.
You’ll probably have to use a jack to bring the LCA up to the strut to get the ball joint attached. This assumes you are using Elephant Racing bushings. Other brands - I can’t vouch for.
Posted by: rjames Feb 10 2024, 11:02 PM
I'm still trying to figure out how they could be so far off. Over double the angle for both ends on both sides? What would cause that?
Worn bushings are letting LCA rotate within them.
I suspect that when you jacked up the car, the LCA went further into rebound.
The correct position with new bushings will be in rebound below curb, but not full travel rebound to the limit of strut travel. This allows for a mild bushing preload at curb and the bushing adding a rising rate as the LCA goes into compression over bumps.
You’ll probably have to use a jack to bring the LCA up to the strut to get the ball joint attached. This assumes you are using Elephant Racing bushings. Other brands - I can’t vouch for.
That all makes sense- thanks. And I'm using the 914 Rubber bushings. Chose them based on the many threads comparing compounds/manufacturers. Hopefully I made the right choice as I’d like not to have to do this job again any time soon.
Posted by: rjames Feb 18 2024, 12:05 PM
Spent several hours last night removing the tie rods. The lock washer that sits between the rack and the tie rod may or may not have been making things harder. I'm still having a hard time picturing how it actually keeps the tie rod from turning at all, but whatever- they will be replaced with turbo tie rods anyway. 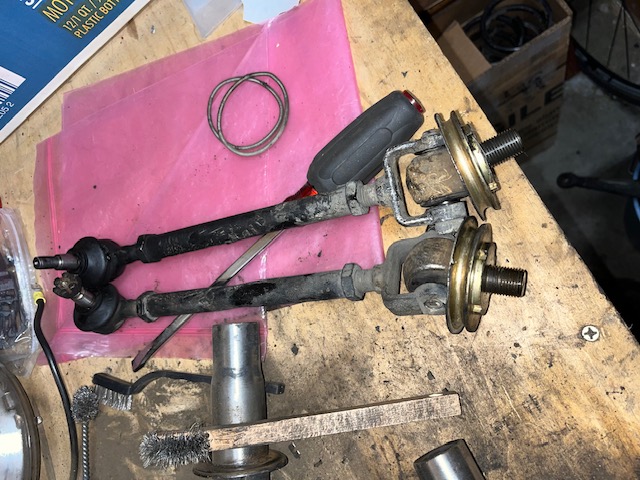
After getting the passenger side off without any special tools, I remembered that I bought a tie rod removal tool which worked like a champ and allowed me to remove the driver's side easily enough without removing the master cylinder. 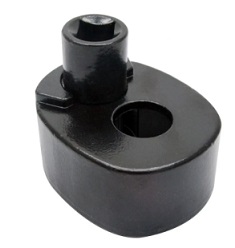
Remember my goal of not removing the MC because I just installed it not too long ago?
Is it really going to be possible for me to remove the rack without removing the master cylinder? Based on what I'm seeing it doesn't seem possible.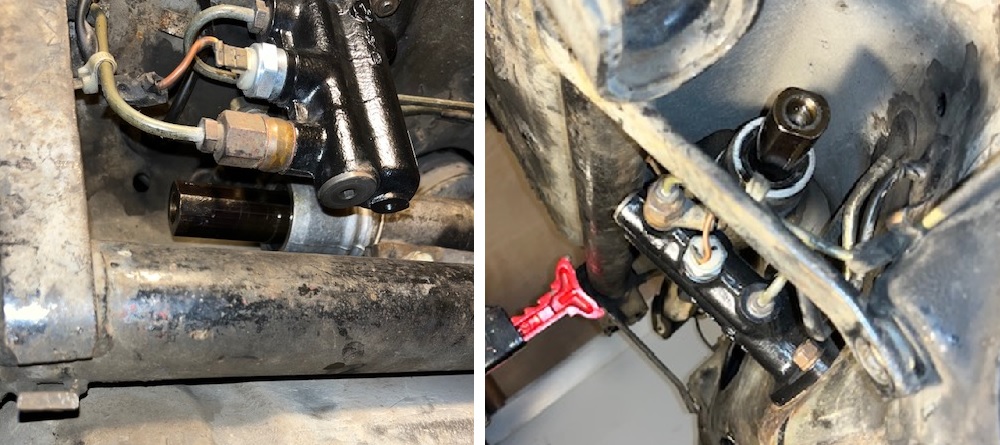
Posted by: jhynesrockmtn Feb 18 2024, 02:11 PM
Spent several hours last night removing the tie rods. The lock washer that sits between the rack and the tie rod may or may not have been making things harder. I'm still having a hard time picturing how it actually keeps the tie rod from turning at all, but whatever- they will be replaced with turbo tie rods anyway.
After getting the passenger side off without any special tools, I remembered that I bought a tie rod removal tool which worked like a champ and allowed me to remove the driver's side easily enough without removing the master cylinder.
Remember my goal of not removing the MC because I just installed it not too long ago?
Is it really going to be possible for me to remove the rack without removing the master cylinder? Based on what I'm seeing it doesn't seem possible.
I sent my rack to 914rubber to be rebuilt. I left the MC in place. I don't remember it being an issue, but I had the whole suspension console off the car.
Posted by: rjames Feb 18 2024, 02:24 PM
@http://www.914world.com/bbs2/index.php?showuser=20100 Thanks! Others have said the same thing but it just didn’t seem possible as I was lying on my back staring up at the bottom of the car..
I’m planning on having 914Rubber rebuild the rack. Nice bumblebee and lift. Having a lift would sure make this job easier!
Posted by: jhynesrockmtn Feb 18 2024, 07:47 PM
@http://www.914world.com/bbs2/index.php?showuser=20100 Thanks! Others have said the same thing but it just didn’t seem possible as I was lying on my back staring up at the bottom of the car..
I’m planning on having 914Rubber rebuild the rack. Nice bumble bee and lift. Have a lift would sure make this job easier!
There is room to slide it past the MC with the console removed. Thanks. The BB has been a fair bit of work, and I have more ahead of me, but overall it is a solid car. The lift sure does make things like this easier!
Posted by: rjames Mar 15 2024, 03:46 PM
Finally got some more work done.
Crossmember and rack removed without touching the MC! Based on the model# buried in grime, I have type a 'B' rack. It will be sent to 914 Rubber for a rebuild.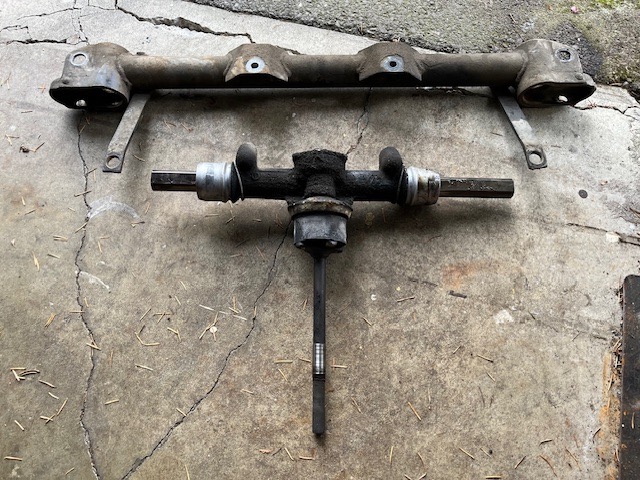
The coupler actually looked very good, but it will get replaced anyway since I already bought the part. 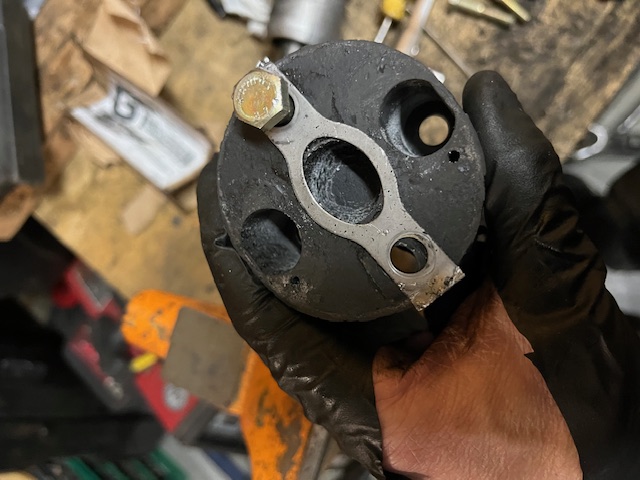
Per usual, a couple of questions:
Steering shaft bearing: Can I just clean and regrease this, or should I just replace it? The replacements I see for sale don't look quite the same to my eyes. 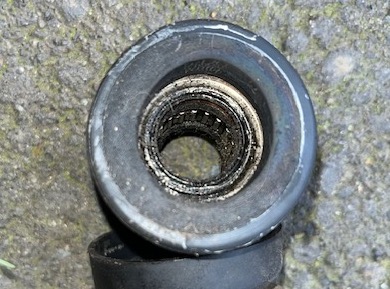
Suspension parts. I've removed all the rust and loose paint, cleaned and etched the metal for painting (powdercoating isn't in the budget).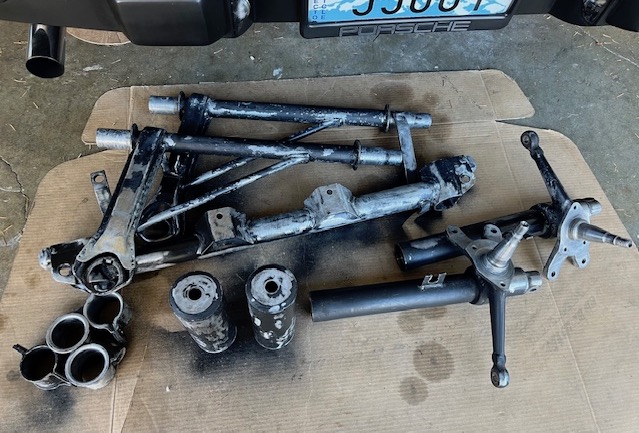
I'm thinking about using Rustoleum Professional enamel (brush on- not the spray paint) after applying coat of their pro metal primer. Anyone have experience using this stuff? Are there other products I should be considering? Cost is a factor and I'm not interested in anything that I have to mail order or remove all of the existing paint to apply.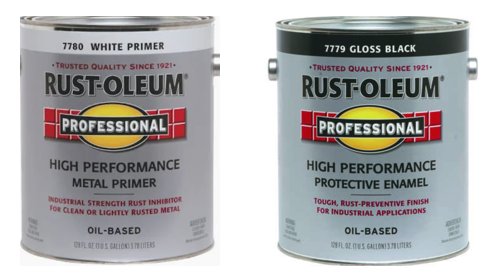
Posted by: TargaToy Mar 16 2024, 07:47 PM
Finally got some more work done.
Crossmember and rack removed without touching the MC! Based on the model# buried in grime, I have type a 'B' rack. It will be sent to 914 Rubber for a rebuild.
The coupler actually looked very good, but it will get replaced anyway since I already bought the part.
Per usual, a couple of questions:
Steering shaft bearing: Can I just clean and regrease this, or should I just replace it? The replacements I see for sale don't look quite the same to my eyes.
Suspension parts. I've removed all the rust and loose paint, cleaned and etched the metal for painting (powdercoating isn't in the budget).
I'm thinking about using Rustoleum Professional enamel (brush on- not the spray paint) after applying coat of their pro metal primer. Anyone have experience using this stuff? Are there other products I should be considering? Cost is a factor and I'm not interested in anything that I have to mail order or remove all of the existing paint to apply.
I used this Rustoleum on my front and rear arms and I’m extremely happy with the results. In fact I did the front strut bodies, rear hubs, and probably some other parts I’ve forgotten with the same stuff. They cured hard and glossy and feel like they were powder coated.
Posted by: rjames Mar 18 2024, 10:05 PM
@http://www.914world.com/bbs2/index.php?showuser=11509
Thanks for sharing your experience.
The primer has been applied. Topcoat in black to follow.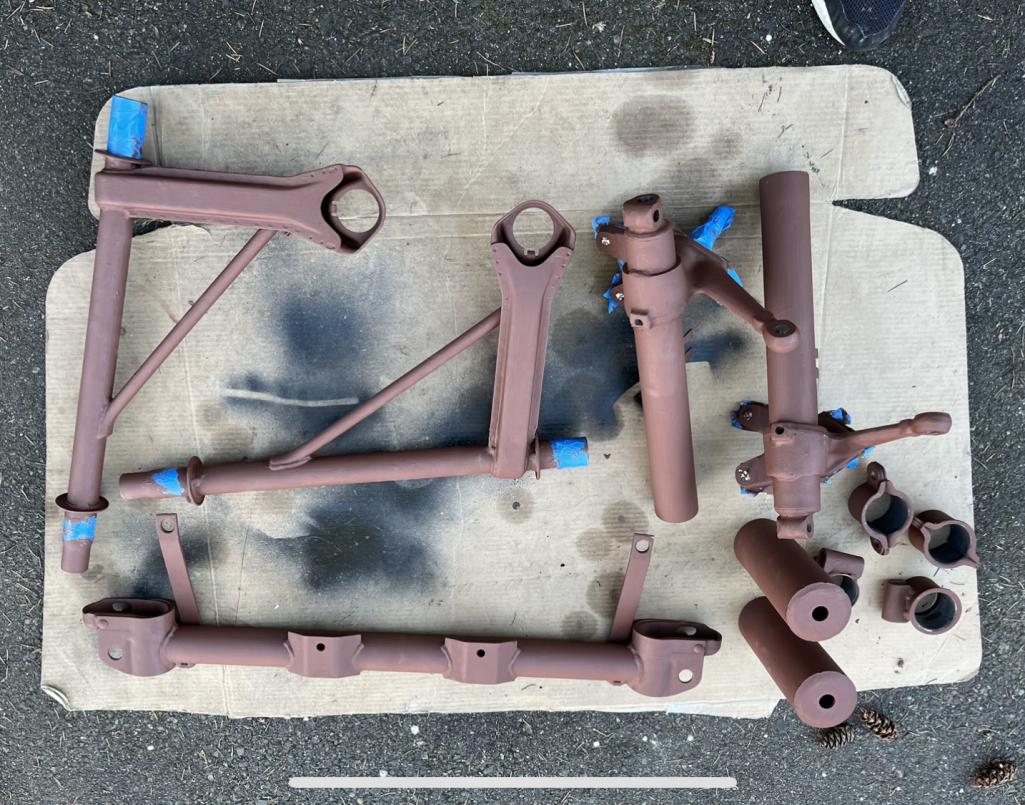
Posted by: jhynesrockmtn Mar 19 2024, 07:19 PM
Looking good! I'd replace the bearing, they are cheap.
Posted by: rjames Mar 20 2024, 07:26 PM
Parts ready to go back on the car when the rack rebuild is done.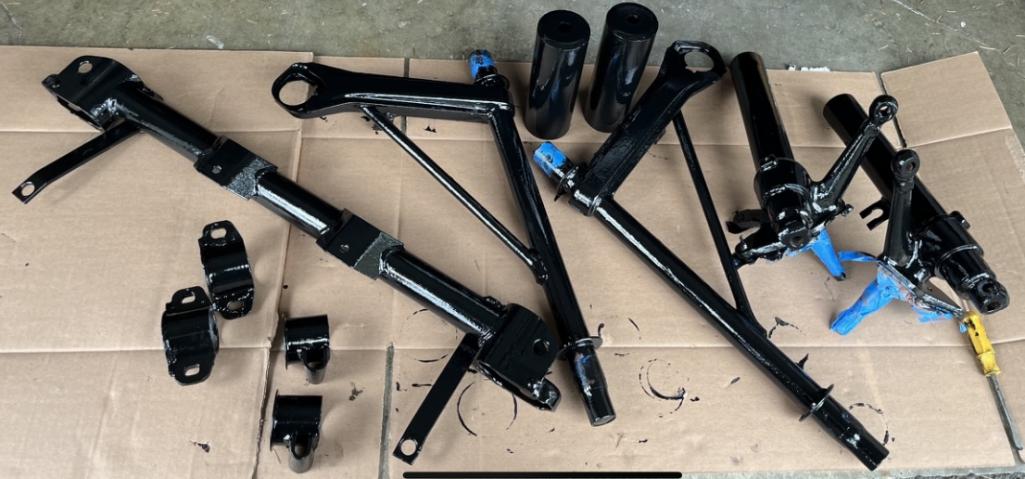
Posted by: rjames Mar 25 2024, 02:22 PM
While waiting for my rebuilt rack to come back from 914Rubber, I did a thing.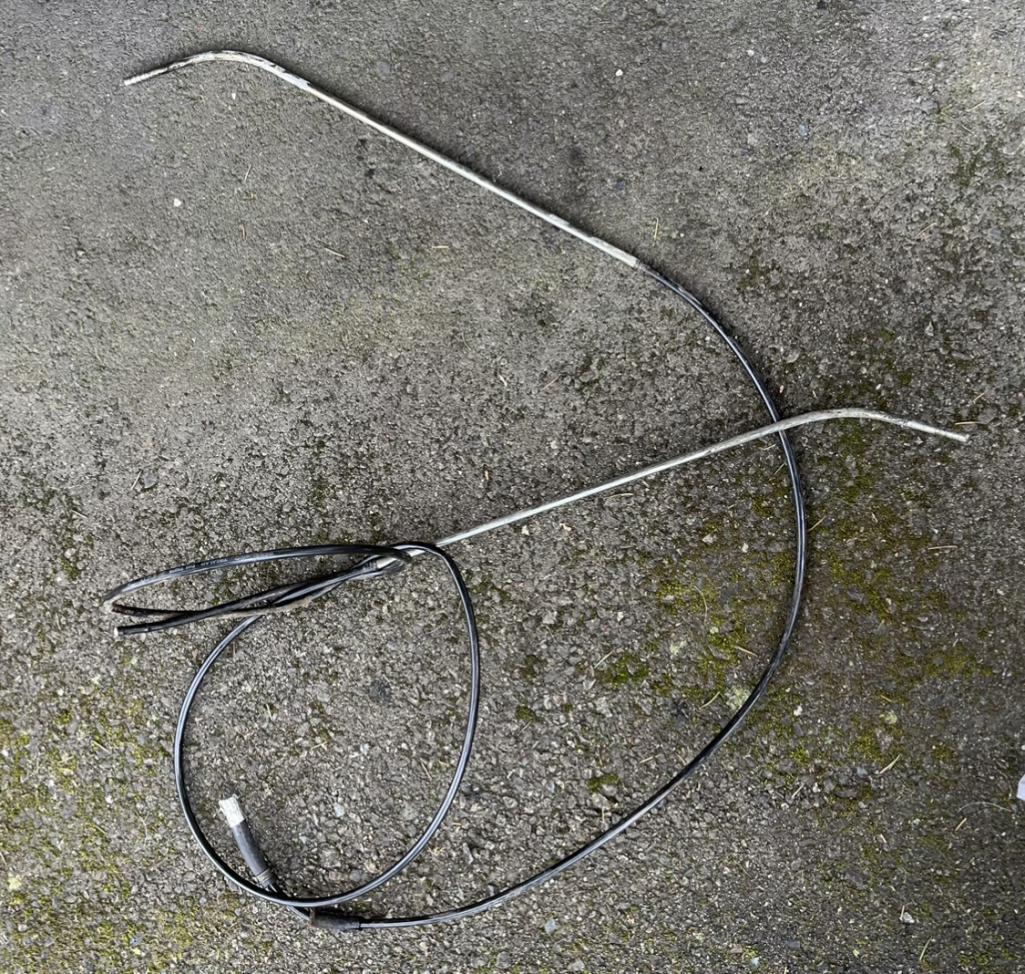
I don’t know what the old lines were made of, but they probably would’ve lasted another 50 years. Better safe than sorry, though.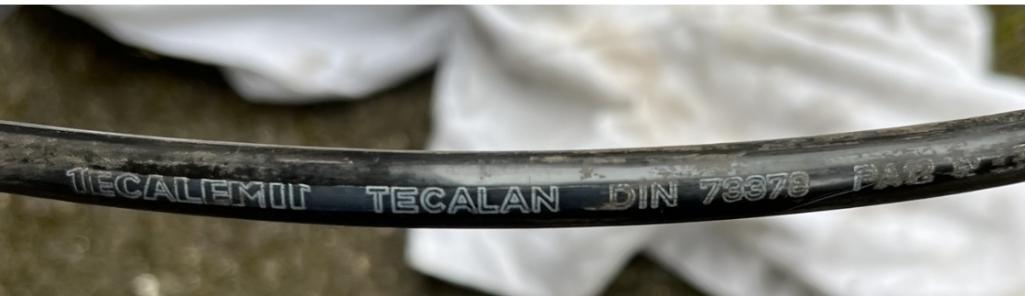
Took a couple of hours just to get them out when you include removing the center console and cleaning up. I really hate dealing with the fuel lines!
Amateur tip: plugging the lines at the gas tank ends with plumbers putty will keep them from leaking gasoline in the center tunnel when you pull them out from the rear firewall and won’t interfere with their removal.
I’ll take a run at getting the SS lines installed later today.
Posted by: jhynesrockmtn Mar 26 2024, 08:35 AM
While waiting for my rebuilt rack to come back from 914Rubber, I did a thing.
I don’t know what the old lines were made of, but they probably would’ve lasted another 50 years. Better safe than sorry, though.
Took a couple of hours just to get them out when you include removing the center console and cleaning up. I really hate dealing with the fuel lines!
Amateur tip: plugging the lines at the gas tank ends with plumbers putty will keep them from leaking gasoline in the center tunnel when you pull them out from the rear firewall and won’t interfere with their removal.
I’ll take a run at getting the SS lines installed later today.
 I've done this upgrade to all of my 914s. 3 so far. Well worth the peace of mind.
Posted by: rjames Mar 31 2024, 01:50 PM
In hindsight I wish I had left the original plastic fuel lines in tact. They showed no signs of failure, and removing them and installing the SS lines actually introduced additional failure points because after installing the SS lines, you have to add 2 rubber lines of decent length to connect the SS lines from the firewall up to the SS lines that go in the engine bay.
The original setup had the plastic lines going the way through the tunnel up into the engine bay.
If anyone with a '75 or '76 model car is contemplating the SS lines, save yourself the time and $ and keep the original setup.
Posted by: rjames May 3 2024, 08:54 PM
Just got a package today.
A few weeks ago I sent this off: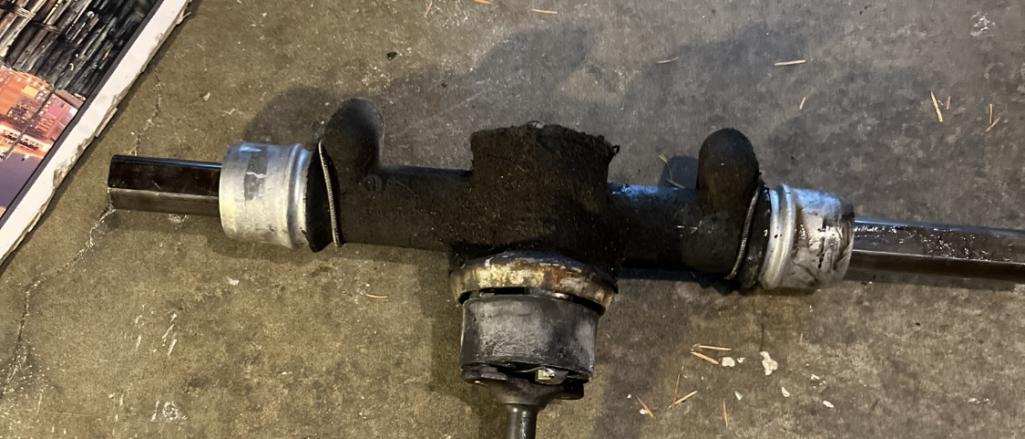
Scott at 914 Rubber turned it into this: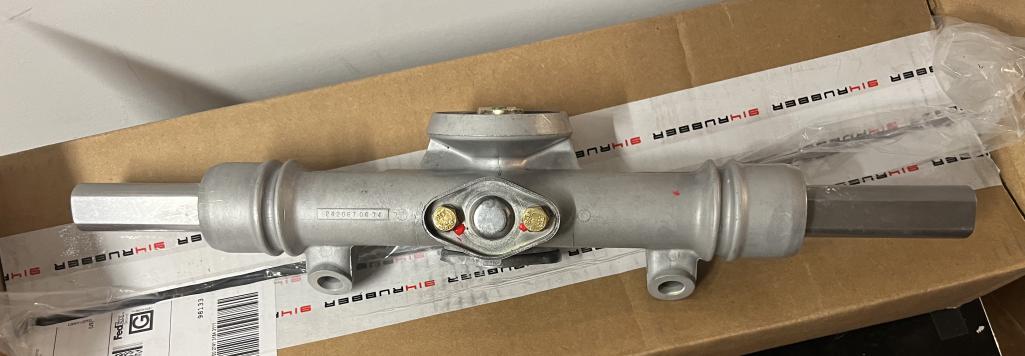

Powered by Invision Power Board (http://www.invisionboard.com)
© Invision Power Services (http://www.invisionpower.com)