Printable Version of Topic
Click here to view this topic in its original format
914World.com _ 914World Garage _ 70-914-6 Clean Up
Posted by: ctc911ctc Feb 4 2025, 09:19 AM
1970, 914-6, 93K miles - excellent shape, very minor rust
I will post to this thread occasionally as I move through this project, I have asked for guidance and received many good thoughts from this team - thank you 914World
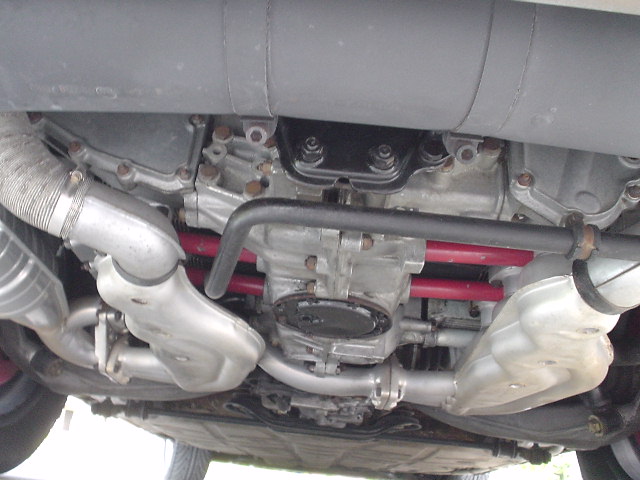
I am in the midst of removing the engine and transmission. All original. There is oil everywhere, not flowing but seeping - seems that the valve covers are not tightened or have loosened with age. Here are the first pics:
On the rack - hopefully not for long: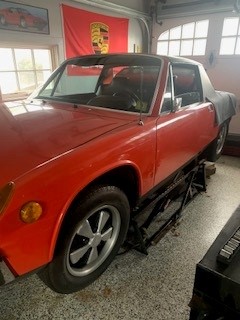
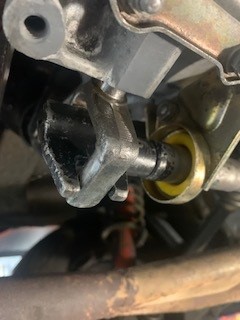
Shift Assembly is very clean, no wear, bushings are in good shape but all of them will be replaced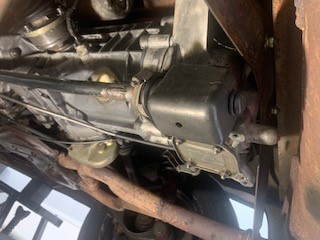
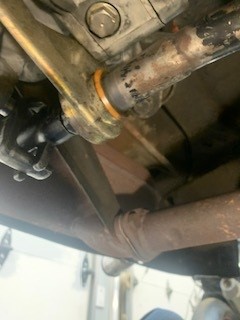
Heat exchangers have no holes in the pipes that I could find, the surrounding tin has been treated with anti-rust leakage - perhaps this was the plan in Stuttgart? 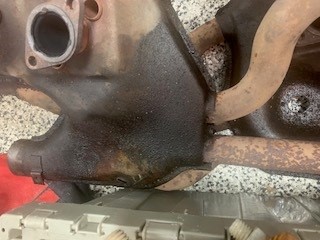
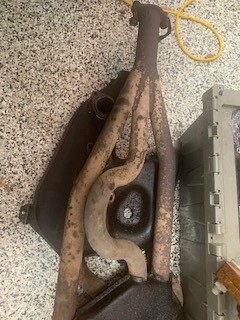
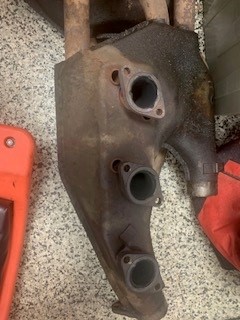
No plans to change the exhaust system - any guidance as to cleaning or preservation?
All comments and guidance appreciated - engine coming down on Friday
Posted by: DennisV Feb 4 2025, 09:37 AM

1970, 914-6, 93K miles - excellent shape, very minor rust
All comments and guidance appreciated - engine coming down on Friday
Nice example. Thanks for sharing.
You might consider a jack adapter for safely removing the engine. There are a variety of home made ways to do it. I am going to https://www.pelicanparts.com/More_Info/PELPW2563.htmwhen it comes time to install our freshly rebuilt engine.
Posted by: ctc911ctc Feb 4 2025, 10:59 AM
Great minds.................. 
It arrives on Friday from Pelican, that is why the drop is on Friday!
1970, 914-6, 93K miles - excellent shape, very minor rust
All comments and guidance appreciated - engine coming down on Friday
Nice example. Thanks for sharing.
You might consider a jack adapter for safely removing the engine. There are a variety of home made ways to do it. I am going to https://www.pelicanparts.com/More_Info/PELPW2563.htmwhen it comes time to install our freshly rebuilt engine.
Posted by: mb911 Feb 4 2025, 11:17 AM
1970, 914-6, 93K miles - excellent shape, very minor rust
I will post to this thread occasionally as I move through this project, I have asked for guidance and received many good thoughts from this team - thank you 914World
I am in the midst of removing the engine and transmission. All original. There is oil everywhere, not flowing but seeping - seems that the valve covers are not tightened or have loosened with age. Here are the first pics:
On the rack - hopefully not for long:
Shift Assembly is very clean, no wear, bushings are in good shape but all of them will be replaced
Heat exchangers have no holes in the pipes that I could find, the surrounding tin has been treated with anti-rust leakage - perhaps this was the plan in Stuttgart?
No plans to change the exhaust system - any guidance as to cleaning or preservation?
All comments and guidance appreciated - engine coming down on Friday
I have refurbished many original heat exchangers. I like to treat with Ospho then clean very well and paint with high heat gray primer. Works well
Posted by: ctc911ctc Feb 4 2025, 11:29 AM
powder coat?
[/quote]
I have refurbished many original heat exchangers. I like to treat with Ospho then clean very well and paint with high heat gray primer. Works well
[/quote]
Posted by: DennisV Feb 4 2025, 02:22 PM
Great minds..................
It arrives on Friday from Pelican, that is why the drop is on Friday!
Please post a follow up and let us know what you think of the adapter.
Posted by: Cairo94507 Feb 4 2025, 02:51 PM
If you are interested in doing more than Ben suggested, consider ceramic coating. But, I thinks Ben's suggestion is sound advise. 
Posted by: ctc911ctc Feb 4 2025, 03:19 PM
I found a very good powder coat shop here in the Boston area - they did all of my 2.0L engine tin as well as various other components.
I was going to have them do the engine tin as well as have them look at the heat exchangers, factory gray is a good idea - any more advice? Ceramic Gray?
If you are interested in doing more than Ben suggested, consider ceramic coating. But, I thinks Ben's suggestion is sound advise.
Posted by: ClayPerrine Feb 5 2025, 07:25 AM
On our 70 914-6, the DAPO had the heat exchangers ceramic coated. They were already in excellent shape, and I think it will help preserve them.
I don't think it is a bad thing. On par with LED lighting and replacing the plastic fuel lines with stainless steel.
Posted by: ctc911ctc Feb 5 2025, 08:43 AM
I have a set of the stainless fuel line ready to go! LEDs too,
On our 70 914-6, the DAPO had the heat exchangers ceramic coated. They were already in excellent shape, and I think it will help preserve them.
I don't think it is a bad thing. On par with LED lighting and replacing the plastic fuel lines with stainless steel.
Posted by: ctc911ctc Feb 5 2025, 08:47 AM
Drained the transmission last night, when I rolled out from under the car the cable from the trouble light pulled the oil catcher under the drain plug out of position. Did not notice for a few minutes - cleaned most of it last night, will be "Dawning" the floor tonight......sigh 
Posted by: Root_Werks Feb 5 2025, 11:41 AM
Sure looks like a clean 914-6, can't wait to see more pictures!
Posted by: 930cabman Feb 5 2025, 01:12 PM
Looks like a great example
Posted by: technicalninja Feb 5 2025, 01:41 PM
Drained the transmission last night, when I rolled out from under the car the cable from the trouble light pulled the oil catcher under the drain plug out of position. Did not notice for a few minutes - cleaned most of it last night, will be "Dawning" the floor tonight......sigh
DON'T DO THAT!
Slimy mess will result.
Gets some mineral sprits/carb spray/old school clay cat litter/paper towels.
Clean most of it up with the carb spray and paper towels.
Wet surface with mineral spirits, scrub it in with a brush. let sit 10 minutes and repeat.
Let sit 10 minutes (keep it wet always!) then cover with the cat litter.
The longer you let the litter sit improves the results. I'll let it sit overnight.
The litter will act like a sponge and suck the gear oil OUT of the concrete.
You can completely remove OLD stains from concrete this way as well.
If you still want to you can finish with a super light amount of Dawn. I normally don't use it as the "soapiness" comes back anytime that section of concrete gets wet...
Posted by: ctc911ctc Feb 5 2025, 03:22 PM
Drained the transmission last night, when I rolled out from under the car the cable from the trouble light pulled the oil catcher under the drain plug out of position. Did not notice for a few minutes - cleaned most of it last night, will be "Dawning" the floor tonight......sigh
DON'T DO THAT!
Slimy mess will result.
Gets some mineral sprits/carb spray/old school clay cat litter/paper towels.
Clean most of it up with the carb spray and paper towels.
Wet surface with mineral spirits, scrub it in with a brush. let sit 10 minutes and repeat.
Let sit 10 minutes (keep it wet always!) then cover with the cat litter.
The longer you let the litter sit improves the results. I'll let it sit overnight.
The litter will act like a sponge and suck the gear oil OUT of the concrete.
You can completely remove OLD stains from concrete this way as well.
If you still want to you can finish with a super light amount of Dawn. I normally don't use it as the "soapiness" comes back anytime that section of concrete gets wet...
Excellent Guidance - THANK YOU
I have an epoxy "cant find the part" floor. so no porous problems - same guidance?
Posted by: Rusty Feb 5 2025, 03:40 PM
On our 70 914-6, the DAPO had the heat exchangers ceramic coated. They were already in excellent shape, and I think it will help preserve them.
I don't think it is a bad thing. On par with LED lighting and replacing the plastic fuel lines with stainless steel.
Jet Hot did an excellent job on those exchangers. They were like jewelry when I got them back.
Posted by: ClayPerrine Feb 5 2025, 03:42 PM
On our 70 914-6, the DAPO had the heat exchangers ceramic coated. They were already in excellent shape, and I think it will help preserve them.
I don't think it is a bad thing. On par with LED lighting and replacing the plastic fuel lines with stainless steel.
Jet Hot did an excellent job on those exchangers. They were like jewelry when I got them back.
Dude.. I am NOT complaining. They are great! I was recommending them.
Posted by: technicalninja Feb 5 2025, 04:12 PM
Drained the transmission last night, when I rolled out from under the car the cable from the trouble light pulled the oil catcher under the drain plug out of position. Did not notice for a few minutes - cleaned most of it last night, will be "Dawning" the floor tonight......sigh
DON'T DO THAT!
Slimy mess will result.
Gets some mineral sprits/carb spray/old school clay cat litter/paper towels.
Clean most of it up with the carb spray and paper towels.
Wet surface with mineral spirits, scrub it in with a brush. let sit 10 minutes and repeat.
Let sit 10 minutes (keep it wet always!) then cover with the cat litter.
The longer you let the litter sit improves the results. I'll let it sit overnight.
The litter will act like a sponge and suck the gear oil OUT of the concrete.
You can completely remove OLD stains from concrete this way as well.
If you still want to you can finish with a super light amount of Dawn. I normally don't use it as the "soapiness" comes back anytime that section of concrete gets wet...
Excellent Guidance - THANK YOU
I have an epoxy "cant find the part" floor. so no porous problems - same guidance?
Nope. The epoxy solves the soak shit up problem. Just the carb cleaner and paper towels. Don't leave the carb cleaner on long time.
I still wouldn't use the Dawn, but epoxy also doesn't allow the soapiness to soak in either.
I have found the epoxy to be slippery anyway when wet.
Posted by: ctc911ctc Feb 6 2025, 08:53 PM
Found a 901 Core in CT yesterday, drove and picked it up - nice family, younger man - son- real car guy, had a few 914, and has never heard of 914WORLD 
I gave him the URL - perhaps he will chime in???
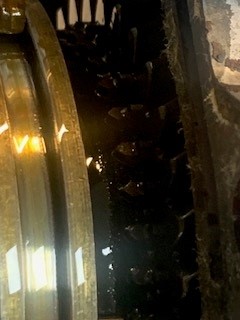
I wanted to harvest a few parts (you all know the one I was hopeful for) - I was hopeful but not too much - Wow, I think i found a freshly re-built transmission - YOU DECIDE!
The transmission is out of a car that burned in 86. Here it is: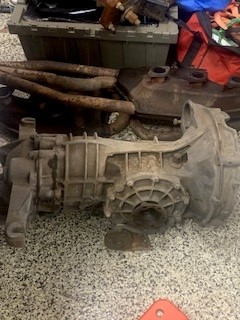
Case was easy to open and is a tail shifter.
Here is a clue - there are two folded tabs
Number 1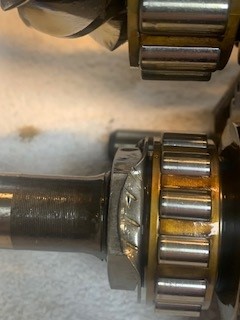
Number 2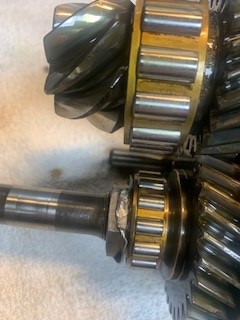
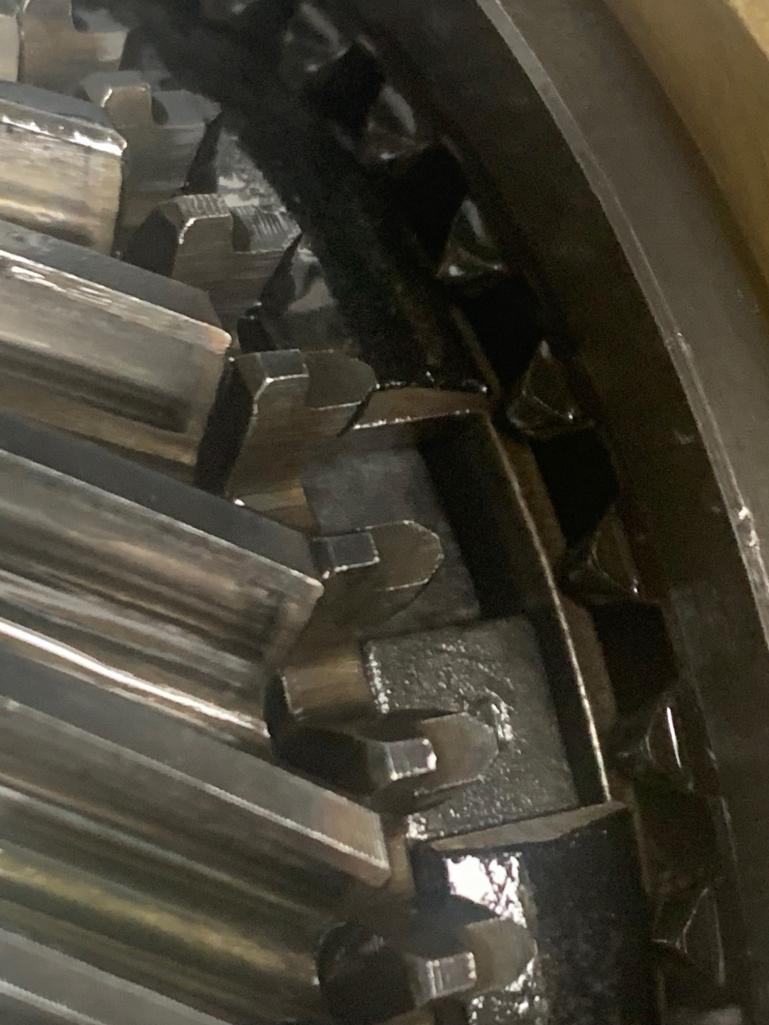
Lets look at First Gear

Sync Ring and Dog Teeth look near perfect to me - does anyone see anything different?
Here are 2nd and third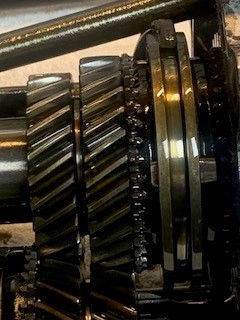
Here are 3rd, 4th and 5th
3rds sync is a bit worn, teeth look great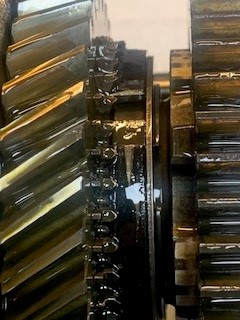
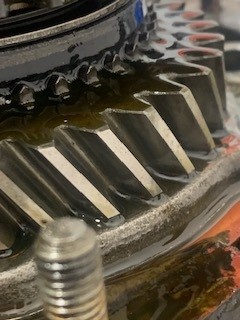
4th and 5th 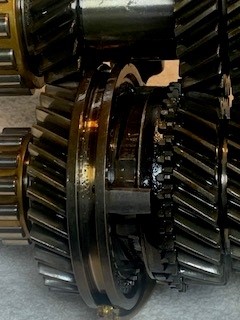
Dog teeth on 4th 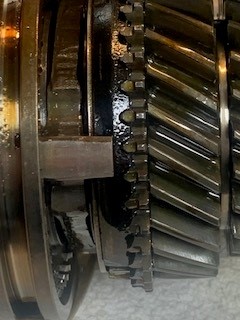
Dog Teeth on 5th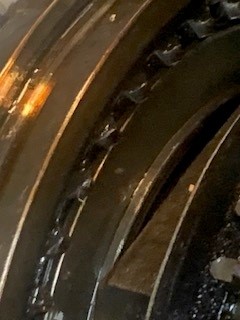
So I ask all of you teeners - this tail shifter looks pretty good - perhaps the good doctor will weigh in?
I will add my opinion after I read from a few of the more learned members - but I think it looks pretty good - there are a few clues that tell a story.
THANK YOU TEENERS!
Posted by: rgalla9146 Feb 6 2025, 09:14 PM
Your impression of the internals is good ?
put your 914 6 tailcover on it and install.
repair/rebuild the original at your leisure
Posted by: ctc911ctc Feb 6 2025, 09:20 PM
Rory, I will crack the 914-6 case this weekend, pretty sure 2nd sync ring is gone or close to it…….i like your idea!
Your impression of the internals is good ?
put your 914 6 tailcover on it and install.
repair/rebuild the original at your leisure
Posted by: ClayPerrine Feb 7 2025, 03:41 PM
Rory, I will crack the 914-6 case this weekend, pretty sure 2nd sync ring is gone or close to it…….i like your idea!
Your impression of the internals is good ?
put your 914 6 tailcover on it and install.
repair/rebuild the original at your leisure
I wouldn't do that. The gearing is different in an original six transmission.
The six has a GA second gear and a Z fifth gear. The 4 has an F second gear and a ZD fifth gear. The Z fifth in the six is to keep the fan spinning faster so it doesn't overheat.
I learned this the hard way. When I first had my 2.4 six in my conversion, I put an HB in for for fifth gear. I could not drive 60mph. I had to drive 50 in 4th or 75 in 5th. If I tired to run 60, the oil and heat temps skyrocketed.
Posted by: rgalla9146 Feb 7 2025, 04:39 PM
I have a rear shift 4 cyl. trans (with ZF ltd.slip !) in my 40 year owned 914 6
Yes, the ratios are different but as a temporary measure to keep the car on the road
or even just mobile, it can't be beat. My original trans is out for refresh.
Also, Boston temps vs. Texas
Posted by: ctc911ctc Feb 7 2025, 09:01 PM
Clay,
Thanks for the note! I would not change the gears, just the teeth and the sync rings - though the plug-n-play idea from Rory is compelling!
Thank you fellow teeners
Rory, I will crack the 914-6 case this weekend, pretty sure 2nd sync ring is gone or close to it…….i like your idea!
Your impression of the internals is good ?
put your 914 6 tailcover on it and install.
repair/rebuild the original at your leisure
I wouldn't do that. The gearing is different in an original six transmission.
The six has a GA second gear and a Z fifth gear. The 4 has an F second gear and a ZD fifth gear. The Z fifth in the six is to keep the fan spinning faster so it doesn't overheat.
I learned this the hard way. When I first had my 2.4 six in my conversion, I put an HB in for for fifth gear. I could not drive 60mph. I had to drive 50 in 4th or 75 in 5th. If I tired to run 60, the oil and heat temps skyrocketed.
Posted by: ctc911ctc Feb 9 2025, 03:17 PM
*********UPDATE***********
Drained all of the fluids - what a mess - I do not have the experience nor the equipment to understand all of the dynamics - but there is a great deal of oil in the system ! It just kept a comin'. Cleaned it all up - again - loosened the 3 bolts that hold the assembly in place and got the jack and the 911 jack plate that I purchased - DID NOT FIT, started a small thread on this topic - perhaps there is a magic adapter I can buy????
Will add picture once the engine is dropped!
Posted by: ctc911ctc Feb 16 2025, 03:04 PM
******UPDATE*******
Dropped the engine, all the way down it listed to the PORT, I have the engine resting on the Jack with the Pelican Yellow Engine Lift bracket and 2x4s to stabilize, picks below.
Here are some questions for the Teeners
1. If I have the engine on the ground temporarily (I need to wait for the snow to stop to get the engine on the engine stand - small garage, long story) where should I have the engine contact the wood 2x4s? I am concerned that I should NOT rest the engine on the heads - in the picture there is very little weight on the 2x4s, they are stabilizing only.
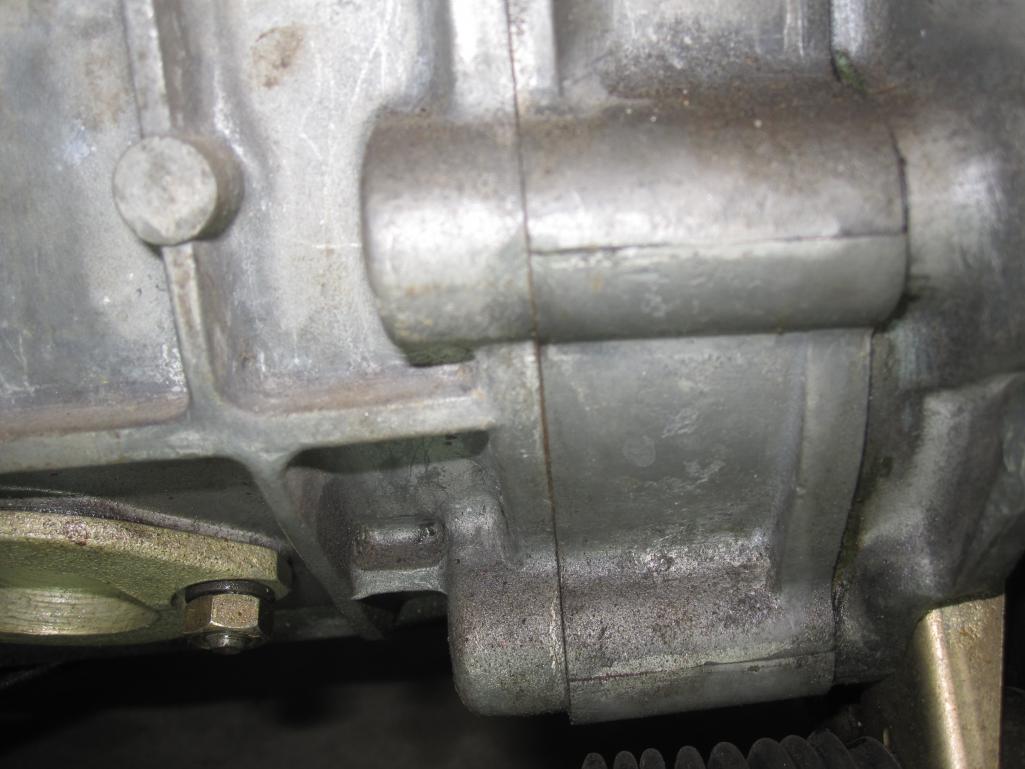
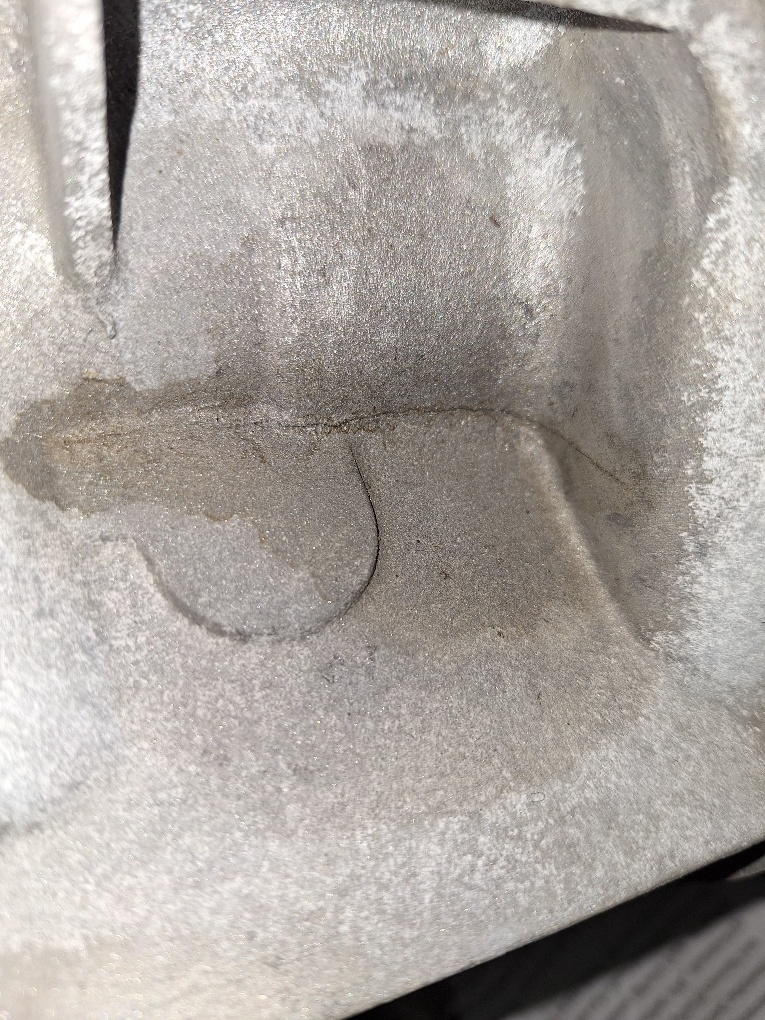
2. I will be disconnecting the transmission - please note in the last picture the intermediate plate is cracked - suggestions as to this? How do these break, do I get the stronger one to replace it, etc.
3. Engine weight distribution - I was disturbed as it was coming down that it was leaning (listing) to the PORT side of the car, is the engine that much heavier on the left side?
4. Any other advice is always welcome - you may see a problem that I have not recognized, please chime in!
Thank ! YOU! 
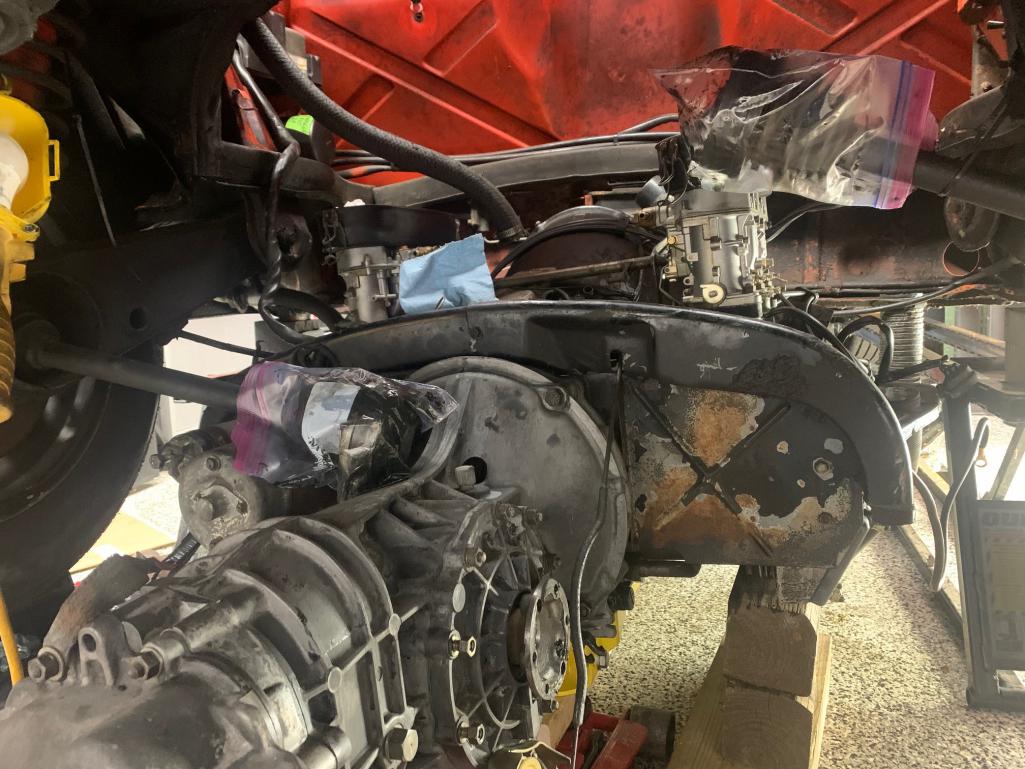
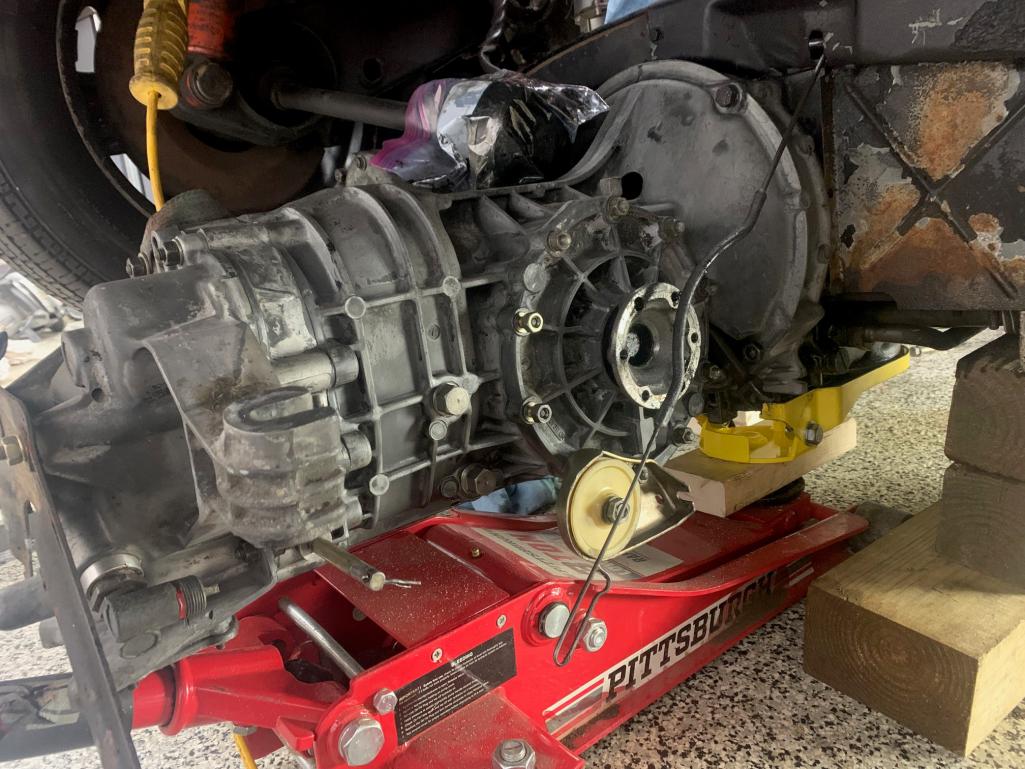
THESE ARE SUPPORTING THE ENGINES STABILITY - VERY LITTLE WEIGHT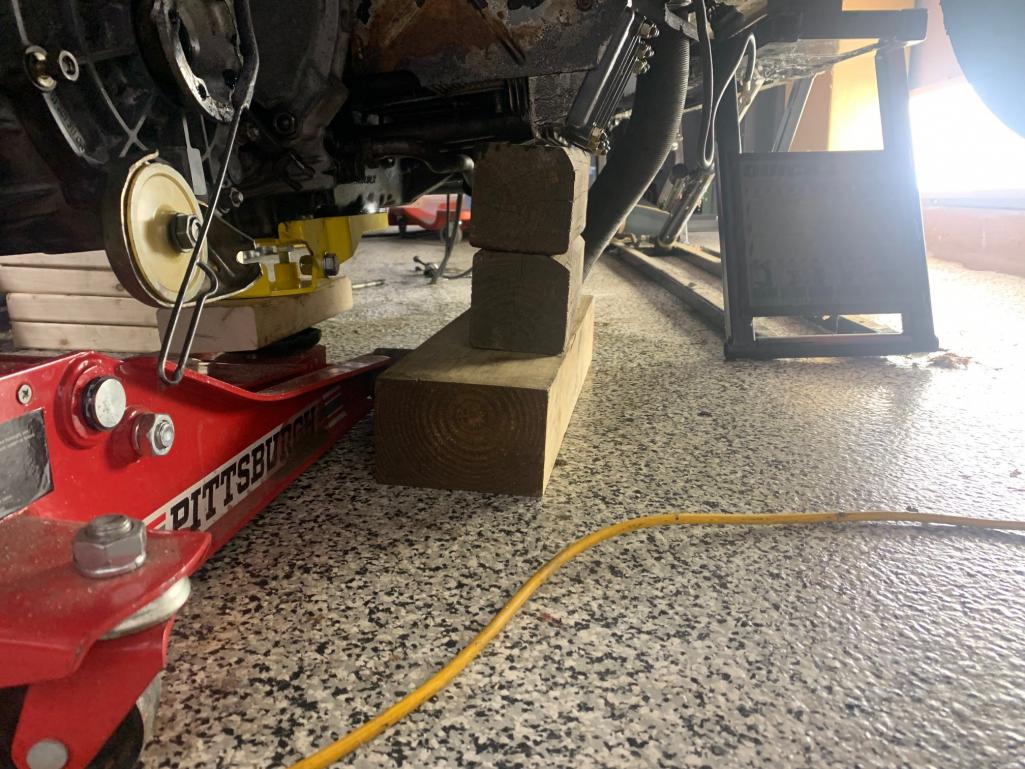
Need to replace the transmission plate - this one may have been new?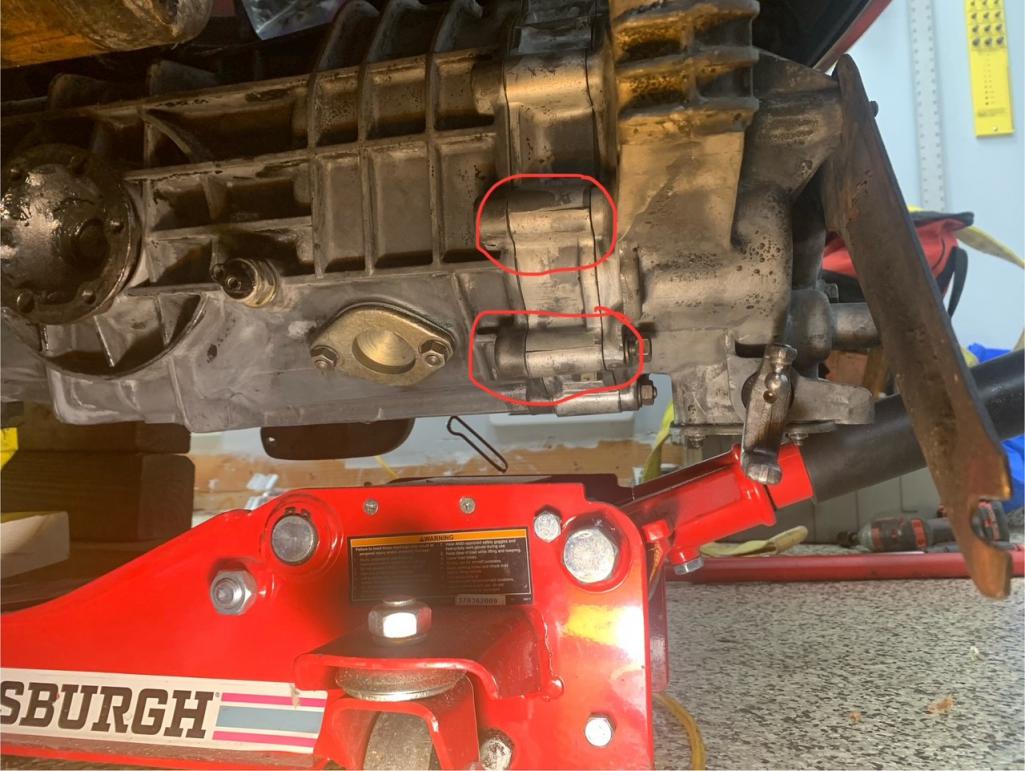
Posted by: rgalla9146 Feb 16 2025, 05:51 PM
Cary
Those are not cracks. They are shadows from casting flash.
I used this assembly on a floor jack to remove /install engine and trans. with
HE's removed.
It was nearly balanced front/rear, left/right with the 4x4s extending forward and the
jack cup centered. The 4x4 are 10" A wood disc could be added to the bottom
of the 2x6" cross board to keep it centered.
Attached thumbnail(s)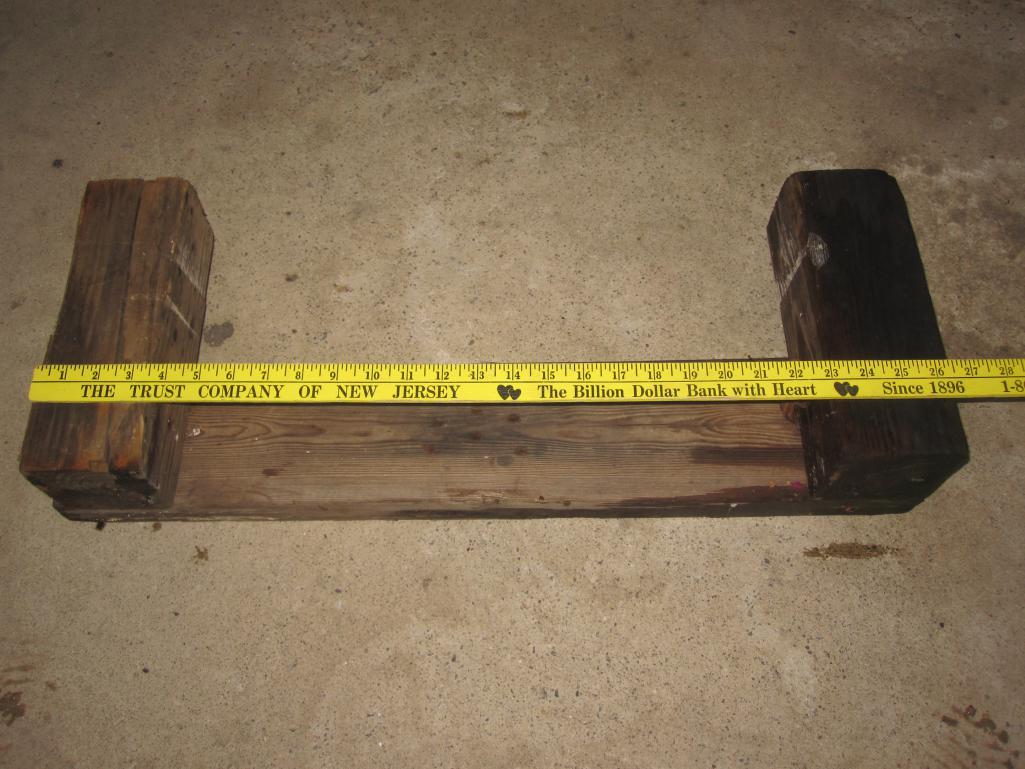
Posted by: ctc911ctc Feb 16 2025, 07:50 PM
Hey Rory,
Yes, I have the transmission apart and those “cracks” are indeed cast-flashing
Everything looks good on the inside, going to change 1st and second sync rings, perhaps 2nd/3rd slider and will take a look at dogteeth on 2nd
Chasing down the infamous 1st=>2nd grind
Will post update soon
Cary
Those are not cracks. They are shadows from casting flash.
I used this assembly on a floor jack to remove /install engine and trans. with
HE's removed.
It was nearly balanced front/rear, left/right with the 4x4s extending forward and the
jack cup centered. The 4x4 are 10" A wood disc could be added to the bottom
of the 2x6" cross board to keep it centered.
Posted by: HaraldD Feb 17 2025, 07:31 AM
Hello,
if you want to look for cracks, you have to take a look at the top!
There are cracks at 911 or 914 transmissions...
Harald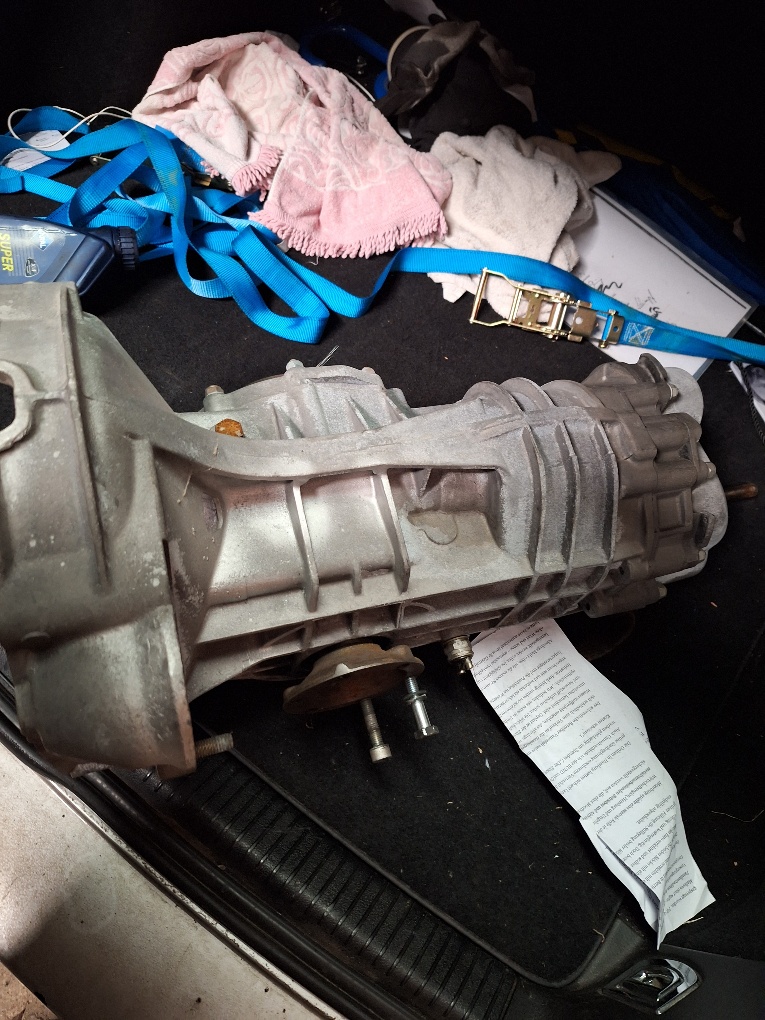
Posted by: rgalla9146 Feb 17 2025, 10:52 AM
Hello,
if you want to look for cracks, you have to take a look at the top!
There are cracks at 911 or 914 transmissions...
Harald
Harald did you find a reason for this ? Pinion teeth failure ? too much horsepower ?
Posted by: ctc911ctc Feb 18 2025, 02:15 PM
Two transmissions open, the core is as good as the one out of the 914-6,
Will be replacing Sync in 1&2 DogTeeth in 1&2 as well as the 1stgear/slider (money gear) for the 914-6 as to the core, will rebuild and have it as a spare
Should take care of the 1st to 2nd GRRRRRRRND sound......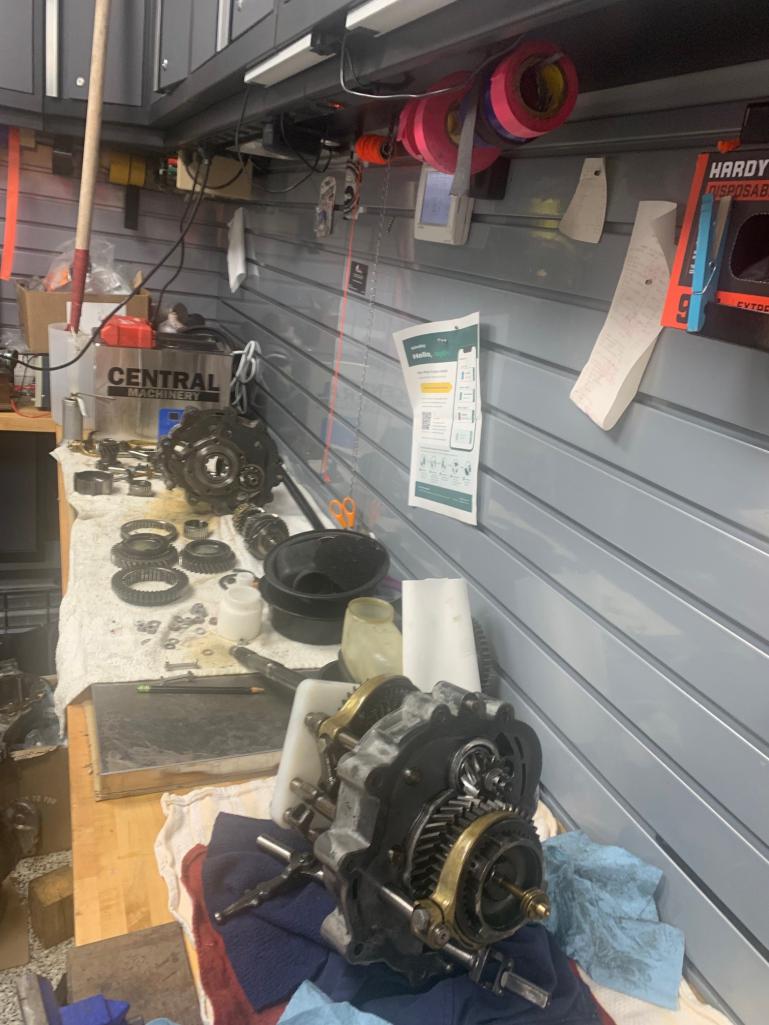
Posted by: worn Feb 18 2025, 09:06 PM
I learned this the hard way. When I first had my 2.4 six in my conversion, I put an HB in for for fifth gear. I could not drive 60mph. I had to drive 50 in 4th or 75 in 5th. If I tired to run 60, the oil and heat temps skyrocketed.
Oh, that’s the reason. I thought you were related to Sammy Hagar. I have a flipped HB in the fifth but also a taller 4th. Great for the highway.
Posted by: ctc911ctc Feb 23 2025, 11:04 AM
******UPDATE******
DOG TEETH Removal Stalled another week - perhaps 2. 
Transmission Inspection this week - all looked OK, need 2 Sync Bands, 2 DogTeeth and a slider.
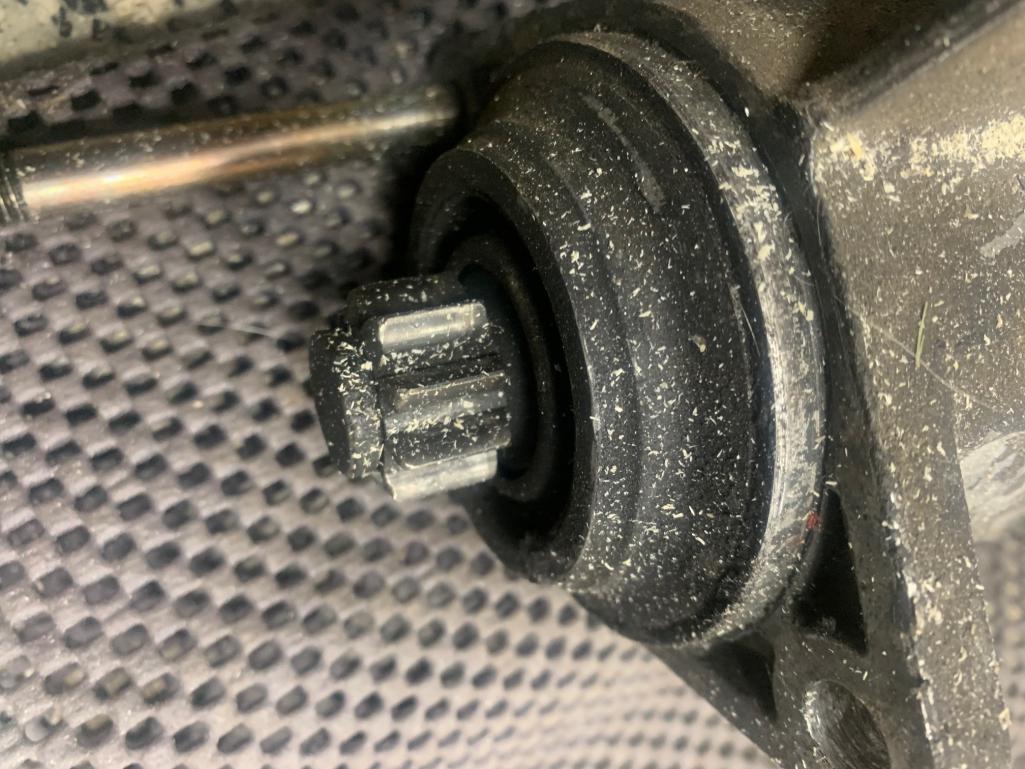
I found this - looking for the tooth in the case - it was not in the magnetic drain plug, not even in tiny pieces. 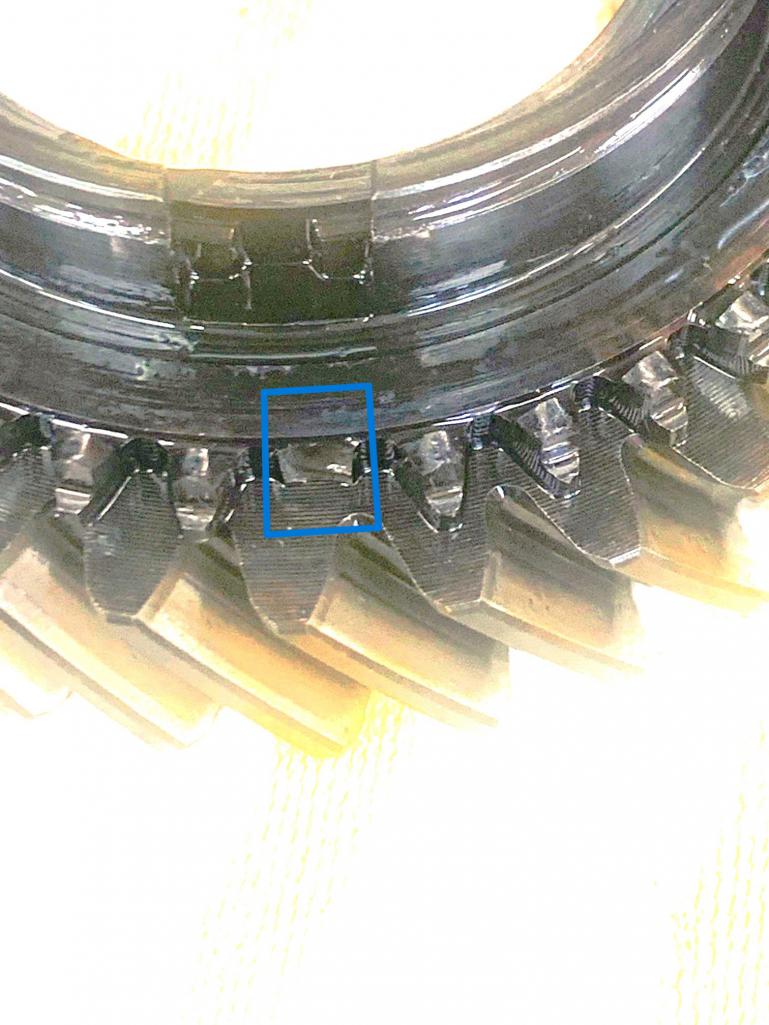
My home brew Dog Teeth removal tool (Muffler Clamps) did not work so I bought a P225 from a very reputable vendor - actually the only vendor that had one in stock - I believe I received a P226, it does not fit and is designed for a heftier gear.
The gear sits too high, the notch does not mate to the ring in the tool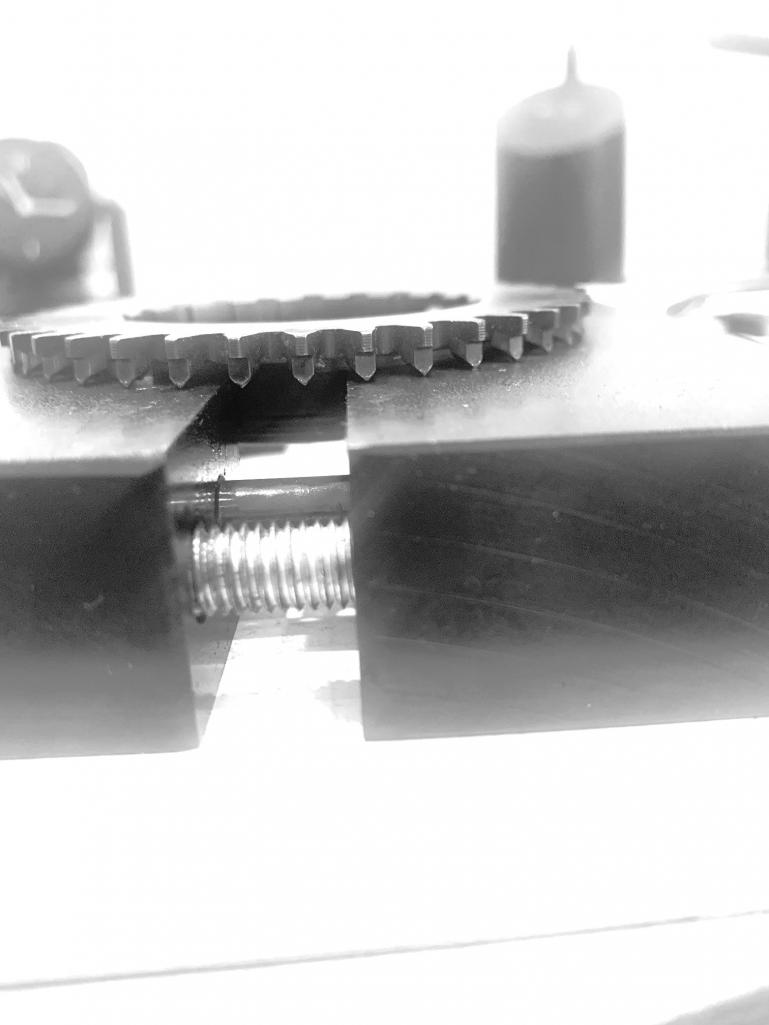
Bad close up of the same picture - the two do not mate. 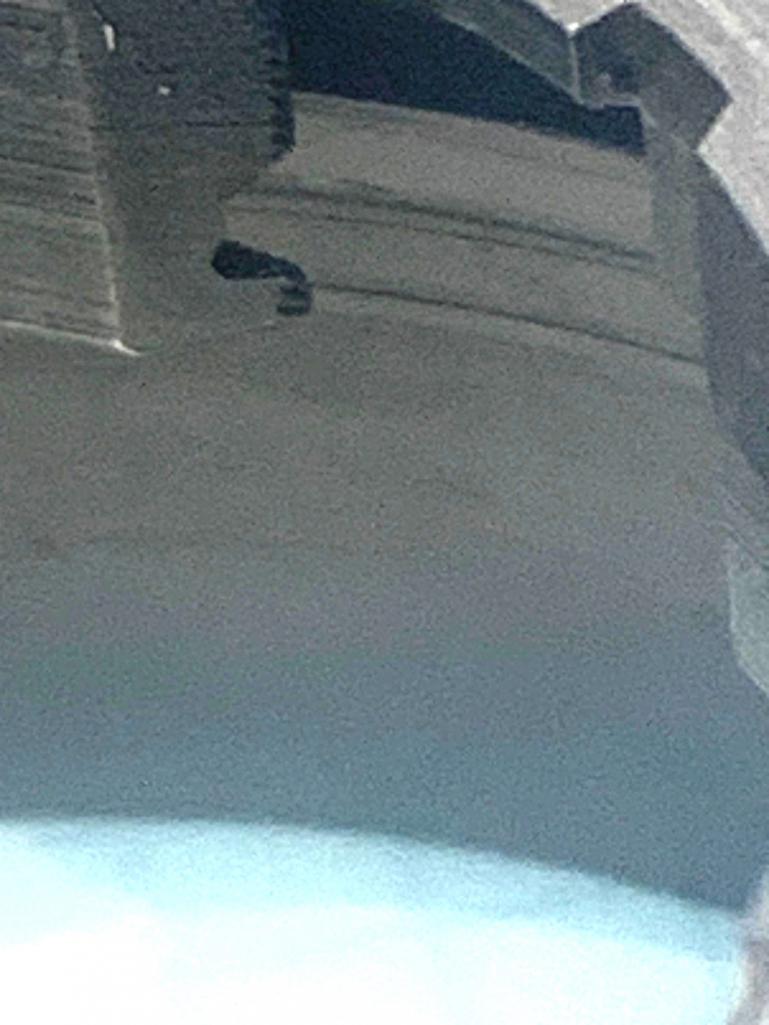
I will move to getting the engine on the stand - doing the 2x4 shuffle to get it out of the engine bay and low enough to clear the rear of the car. Removing Carbs for servicing and CLEANING the engine bay......
Posted by: Superhawk996 Feb 23 2025, 11:30 AM
FWIW I have the same tool issue. Bought from someone used actually marked P225; represented as a P225; but it clearly isn’t. They are out there floating around.
Please share vendor so that others don’t run into the same issue.
Posted by: ctc911ctc Feb 23 2025, 12:00 PM
Super Hawk,
Perhaps I am a bit naive, however, I believe that these are honest mistakes (perhaps not in your case) as a result of their being no MODEL STAMP on the tool, the 225 and the 226 are the same with a small (frustrating) variation
I have sent a note to Sir Tools with this suggestion....we shall see......
Depending on the response on Monday I will post more..,...
FWIW I have the same tool issue. Bought from someone used actually marked P225; represented as a P225; but it clearly isn’t. They are out there floating around.
Please share vendor so that others don’t run into the same issue.
Posted by: Superhawk996 Feb 23 2025, 12:28 PM
Super Hawk,
Perhaps I am a bit naive, however, I believe that these are honest mistakes (perhaps not in your case) as a result of their being no MODEL STAMP on the tool, the 225 and the 226 are the same with a small (frustrating) variation
I have sent a note to Sir Tools with this suggestion....we shall see......
Depending on the response on Monday I will post more..,...
Understood.
I’ll bet they will make it right. I don’t view the vendor sharing as a slam on them. Just a good heads up to others so they know the issue is occurring and to verify what they received right away vs putting it on a shelf and then falling outside a traditional return period.
In my case, I suspect it was a manufacturing error and whoever I bought it from sold it in good faith as I bought it as part of a bigger lot of trans tools.
Strange how P225 tools have been out of stock for years. Not sure what is going on there.
In my case, I’ll either modify the tool when I get my machine tools back up and running or I’ll save it for someday when I get a 915 transmission

Posted by: ctc911ctc Feb 23 2025, 04:39 PM
Agreed - my next target is an 84-86 911-SC, could use it then!
As Tom and Ray used to say, every job is an excuse to buy another tool!
CTC
Super Hawk,
Perhaps I am a bit naive, however, I believe that these are honest mistakes (perhaps not in your case) as a result of their being no MODEL STAMP on the tool, the 225 and the 226 are the same with a small (frustrating) variation
I have sent a note to Sir Tools with this suggestion....we shall see......
Depending on the response on Monday I will post more..,...
Understood.
I’ll bet they will make it right. I don’t view the vendor sharing as a slam on them. Just a good heads up to others so they know the issue is occurring and to verify what they received right away vs putting it on a shelf and then falling outside a traditional return period.
In my case, I suspect it was a manufacturing error and whoever I bought it from sold it in good faith as I bought it as part of a bigger lot of trans tools.
Strange how P225 tools have been out of stock for years. Not sure what is going on there.
In my case, I’ll either modify the tool when I get my machine tools back up and running or I’ll save it for someday when I get a 915 transmission
Posted by: ctc911ctc Feb 23 2025, 04:48 PM
Afternoon Update
Got the carbs off which allowed me to remove the engine from the underside of the car. 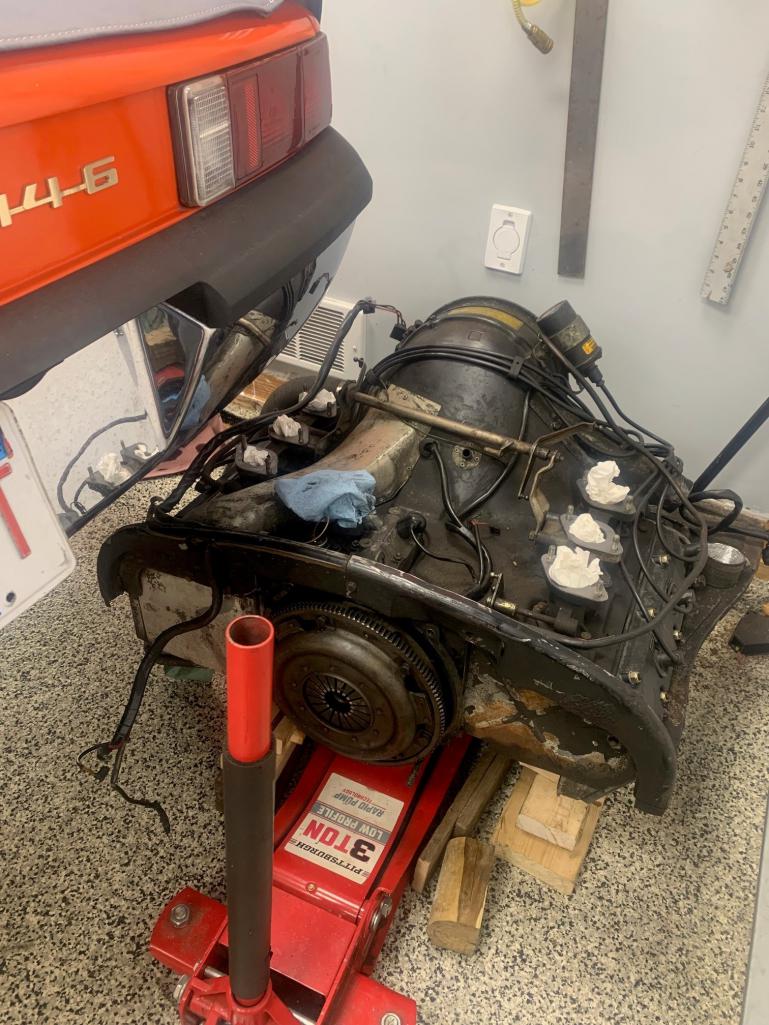
The Engine bay is full of oil residue, next on the list is a good scrub! 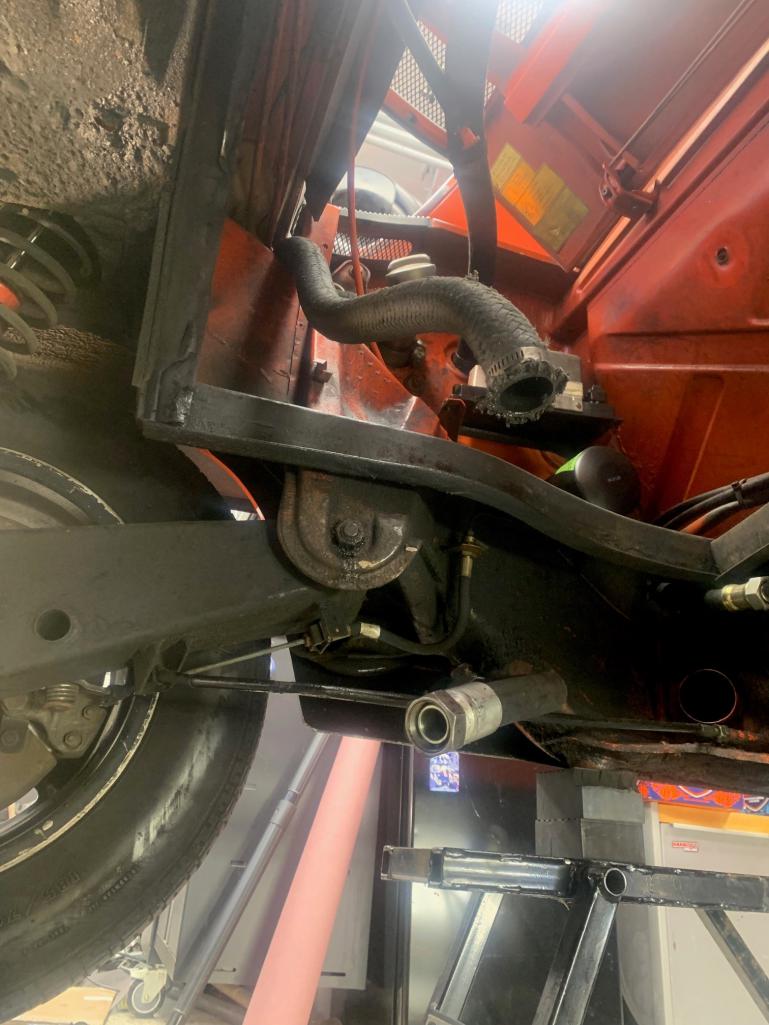
Lots of work to do here - needs new fuel lines, have the stainless ready to go, 

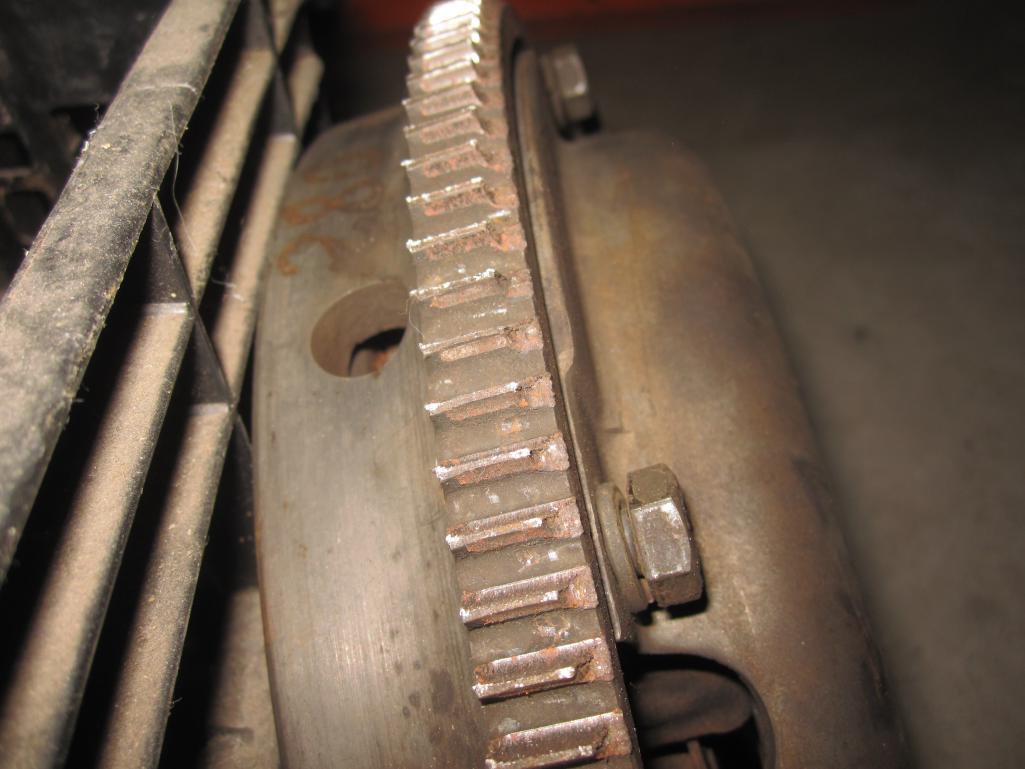
Fly wheel is ground up 
Starter gear is like new - perhaps it is a newer starter..... 
Attached thumbnail(s)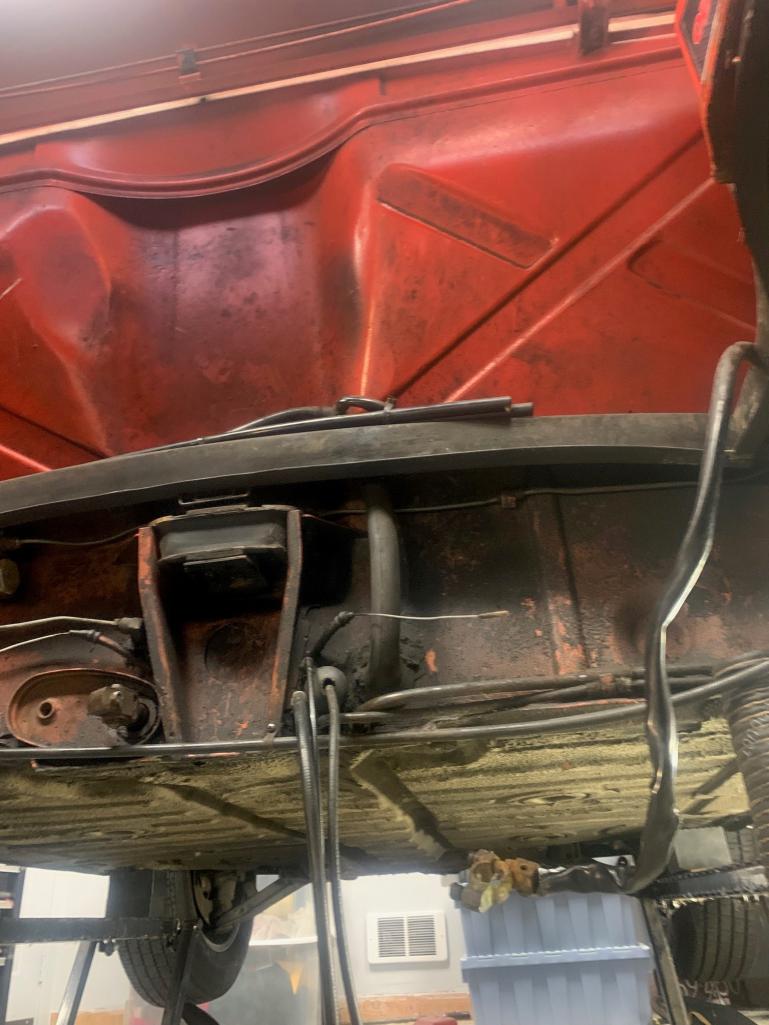
Posted by: ctc911ctc Feb 23 2025, 04:52 PM
**********Afternoon Work Continued***********
Got the Carbs off - they look great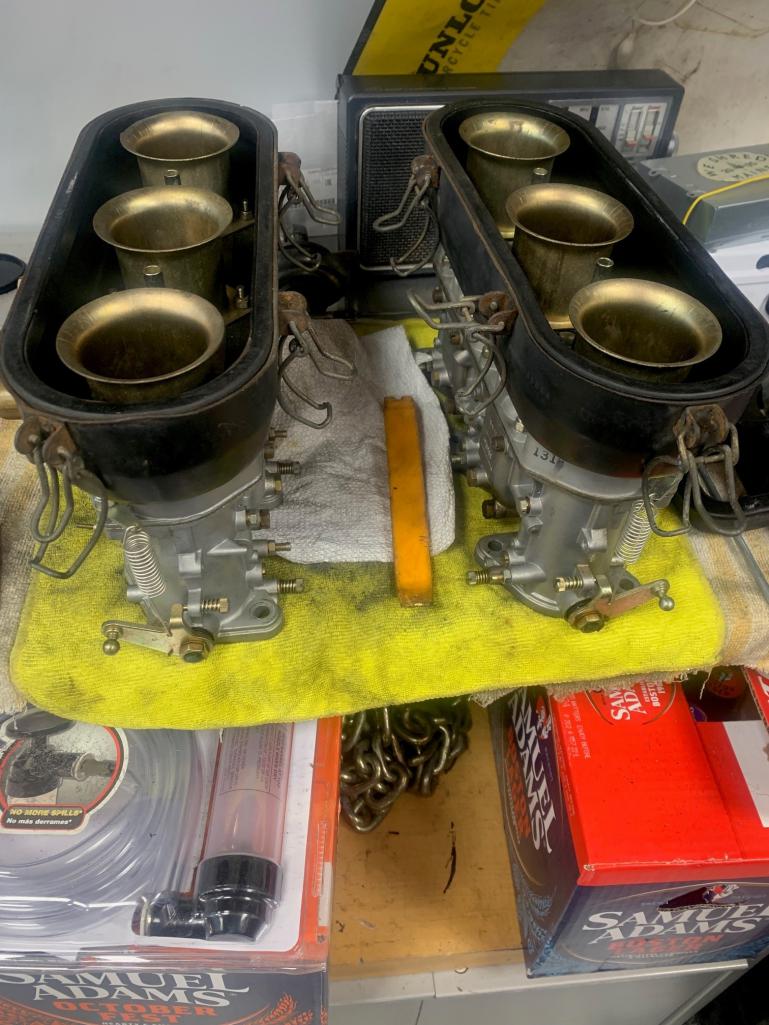
Cleaning the "Flap Control Boxes" used a solution recommended within these pages, Nice Before and After!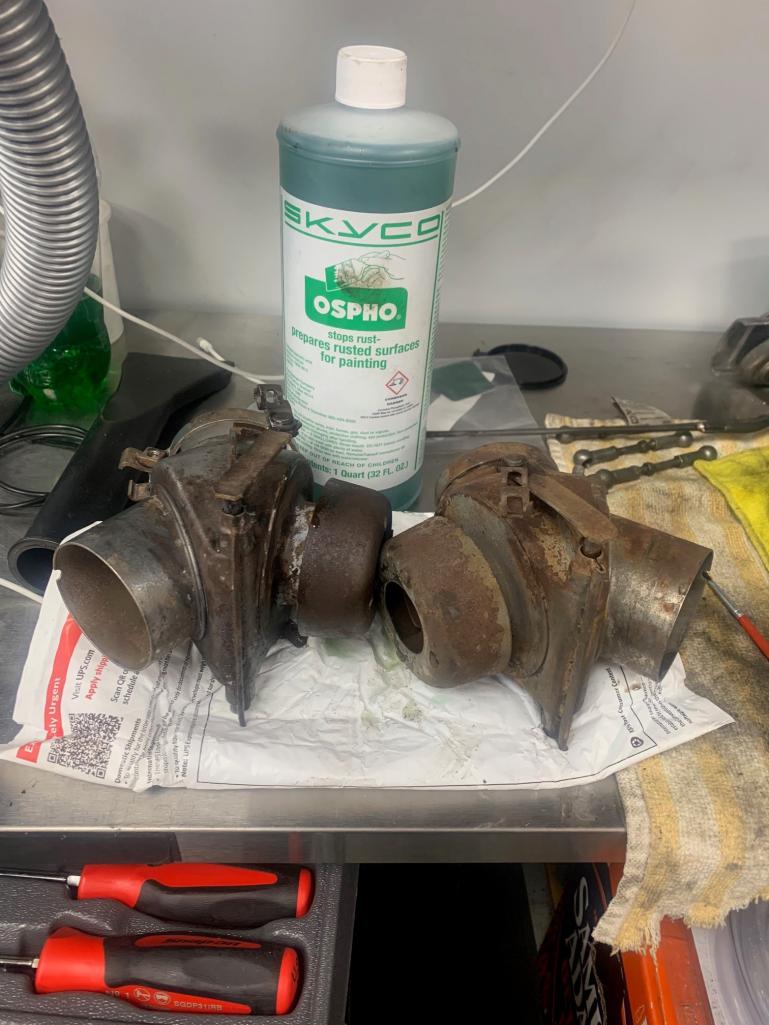
May powder coat once cleaned............
Posted by: Superhawk996 Feb 23 2025, 07:51 PM
Is starter one of the gear reduction / Denso types? Some of those have been known to chew up ring gears like that.
So sad to see that type of crap.
Glad you’re going through it thoroughly. 
Posted by: ctc911ctc Feb 23 2025, 08:31 PM
I do not think so - I do not see anything other than direct drive, will check more thoroughly tomorrow - good night SH! Thank you for your support!
Is starter one of the gear reduction / Denso types? Some of those have been known to chew up ring gears like that.
So sad to see that type of crap.
Glad you’re going through it thoroughly.
Posted by: barefoot Feb 24 2025, 08:02 AM
On our 70 914-6, the DAPO had the heat exchangers ceramic coated. They were already in excellent shape, and I think it will help preserve them.
I don't think it is a bad thing. On par with LED lighting and replacing the plastic fuel lines with stainless steel.
2nd the ceramic coating option. I did that with 911 exhaust and thought it was GTEAT
Posted by: ctc911ctc Feb 24 2025, 08:12 AM
I may be alone in this thought, however, looking at a 'like new' underside of a 914 is better than any picture I have seen within the SandBox. But, I only go there for the articles........
Yea, I know that it a 911 - I stand by my statement
On our 70 914-6, the DAPO had the heat exchangers ceramic coated. They were already in excellent shape, and I think it will help preserve them.
I don't think it is a bad thing. On par with LED lighting and replacing the plastic fuel lines with stainless steel.
2nd the ceramic coating option. I did that with 911 exhaust and thought it was GTEAT
Posted by: DennisV Feb 24 2025, 08:53 AM
Cleaning the "Flap Control Boxes" used a solution recommended within these pages, Nice Before and After!
Your flappers look pretty good. Something that might be worth checking is the inside. The springs and the sealing surface. It wasn't obvious, but the springs on ours were broken. There is a thin one that keeps the disc aligned. This kept the flapper from smoothly going through its motion because the disc inside would bind. The disc itself seems to be fiber (maybe asbestos?) over mesh and can disintegrate.
Posted by: ctc911ctc Feb 24 2025, 08:58 AM
The flappers are in really good shape - both springs are in great shape, I beleive I will have them vapor blasted and then powder coated. I am experimenting with the 'secret sauce' and its effectiveness - interesting product - low grade (ph) acid solution.
[/quote]
Your flappers look pretty good. Something that might be worth checking is the inside. The springs and the sealing surface. It wasn't obvious, but the springs on ours were broken. There is a thin one that keeps the disc aligned. This kept the flapper from smoothly going through its motion because the disc inside would bind. The disc itself seems to be fiber (maybe asbestos?) over mesh and can disintegrate.
[/quote]
Posted by: rgalla9146 Feb 24 2025, 10:32 AM
I do not think so - I do not see anything other than direct drive, will check more thoroughly tomorrow - good night SH! Thank you for your support!
Is starter one of the gear reduction / Denso types? Some of those have been known to chew up ring gears like that.
So sad to see that type of crap.
Glad you’re going through it thoroughly.
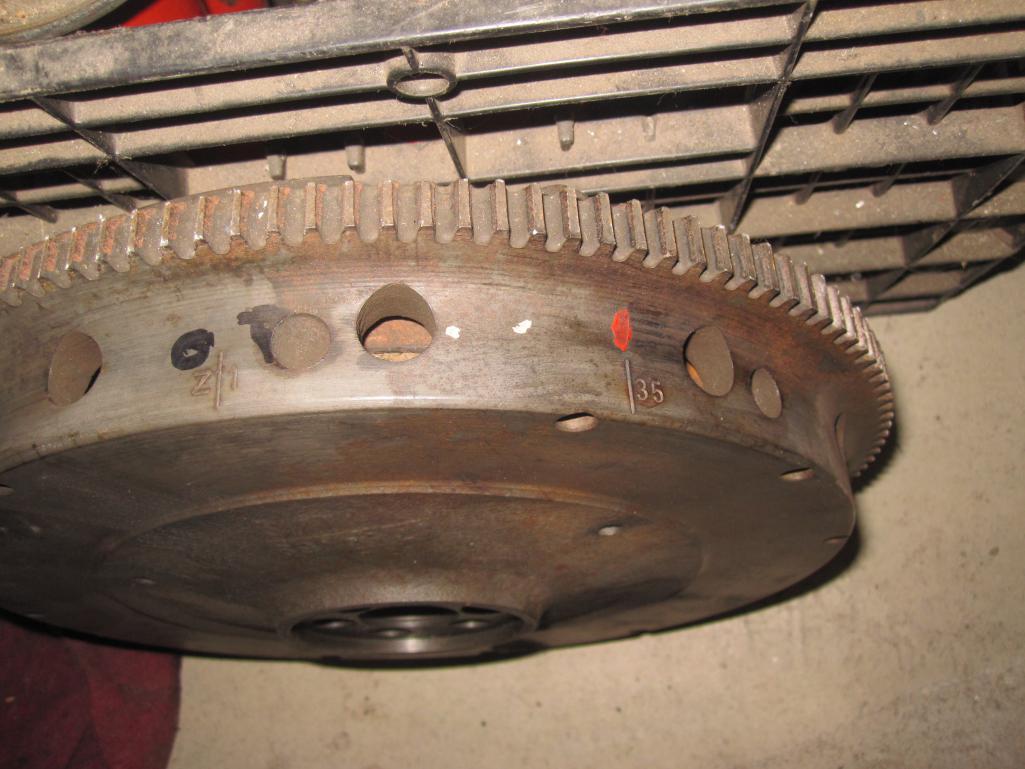
Cary your starter is standard 2.0 911- 914 6
Ring gear wear is common on these flywheels ... they've all endured 50 + years of use.
Consider it a consumable. Much like a pressure plate or clutch disc.
The 6 flywheel is the same as any 2.0 911 except...an original 6 flywheel is marked for
ignition timing and valve adjustment positions.
If you can't get a 6 flywheel (NLA) mark the one you get using the V belt pulley as the reference.
Attached thumbnail(s)
Posted by: ctc911ctc Feb 24 2025, 10:48 AM
As always Rory has great advice - Thank you Rory - there is a 914World member who lives close to me that has one - I will go and see it and most likey purchase it this weekend
I do not think so - I do not see anything other than direct drive, will check more thoroughly tomorrow - good night SH! Thank you for your support!
Is starter one of the gear reduction / Denso types? Some of those have been known to chew up ring gears like that.
So sad to see that type of crap.
Glad you’re going through it thoroughly.
Cary your starter is standard 2.0 911- 914 6
Ring gear wear is common on these flywheels ... they've all endured 50 + years of use.
Consider it a consumable. Much like a pressure plate or clutch disc.
The 6 flywheel is the same as any 2.0 911 except...an original 6 flywheel is marked for
ignition timing and valve adjustment positions.
If you can't get a 6 flywheel (NLA) mark the one you get using the V belt pulley as the reference.
Posted by: ctc911ctc Mar 1 2025, 04:59 PM
Spent a few hours this morning traveling to get a new flywheel from a fellow 914-6 owner - Thank you Mr. M!
Dragged the engine to the beam - when I rebuilt the garage I put in a beam, however, it is never where I need it so I had to squeeze the engine to the beam 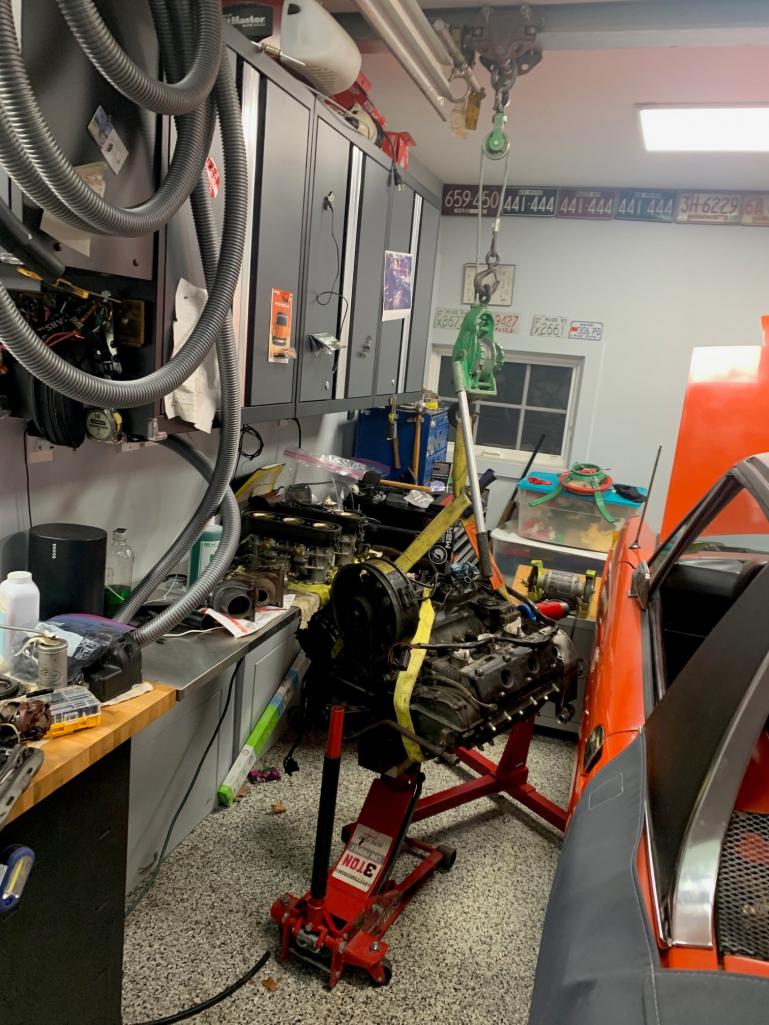
Took off the tin and started washing it - perhaps 50 year of grime on the inside - in places nearly 1 inch thick. Scraped and then Dawn and a brush - will fine-tune the cleaning later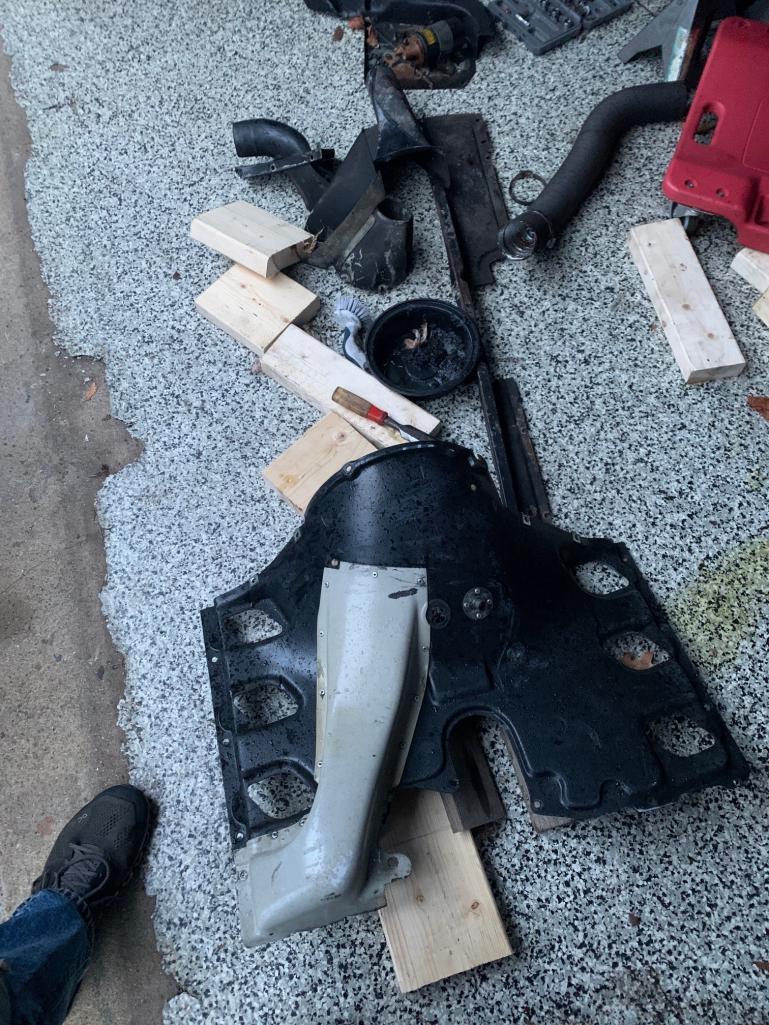
Tetris with the floor jack to get the engine high enough, the bean is rated for 4000, the pulley system around 2000 (so it says) and the engine is 400ish, still scary work, got the bolts to line up after realizing I was doing it wrong 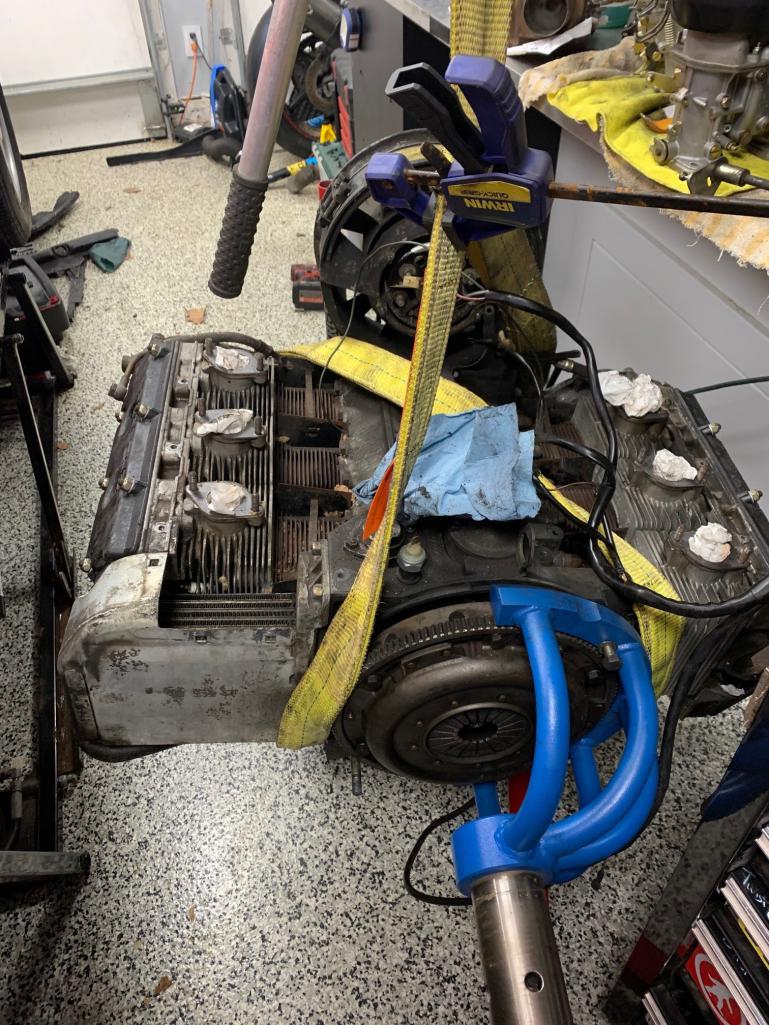
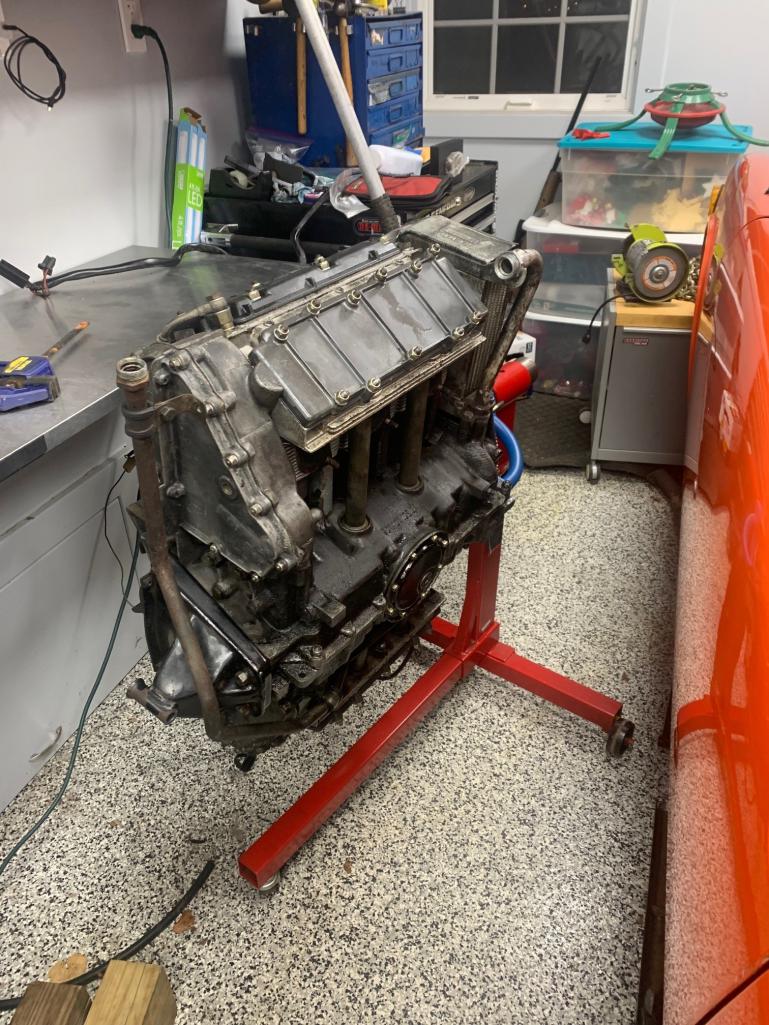
Posted by: ctc911ctc Mar 4 2025, 07:03 AM
Engine on Stand - Tetris with Blocks lift and patience. Not a one man job!
Posted by: ctc911ctc Mar 5 2025, 01:55 PM
********UPDATE*********
Heater Manifolds and all tin are being powder Coated
Tin = off gloss black, as close to factor color and shine as possible
Header Assembly = Gray Ceramic, a bit brighter than typical primer
Very Good Vendor in the Boston Area - Pike Powder Coat 
Also found a very good capable machine shop - I am taking a mil off of the face of the P225 so that it will fit the Dog Tooth
CTC911CTC
Posted by: Root_Werks Mar 5 2025, 03:03 PM
Lucky enough to also have a good powder coater close to home here as well. Exciting to see parts going off to get coated!
Looking good!
Posted by: ctc911ctc Mar 6 2025, 07:33 PM
Took the valve covers off, they were close to finger tight - pretty certain that they were not torqued - if they were is the torque setting 'finger-tight'?
Head Stud Nuts all very tight - no broken studs, no leaking at the cylinders at either the head or the case.
The mating points between the covers and the cam housing are very dirty, will try and get them shiny and able to seal.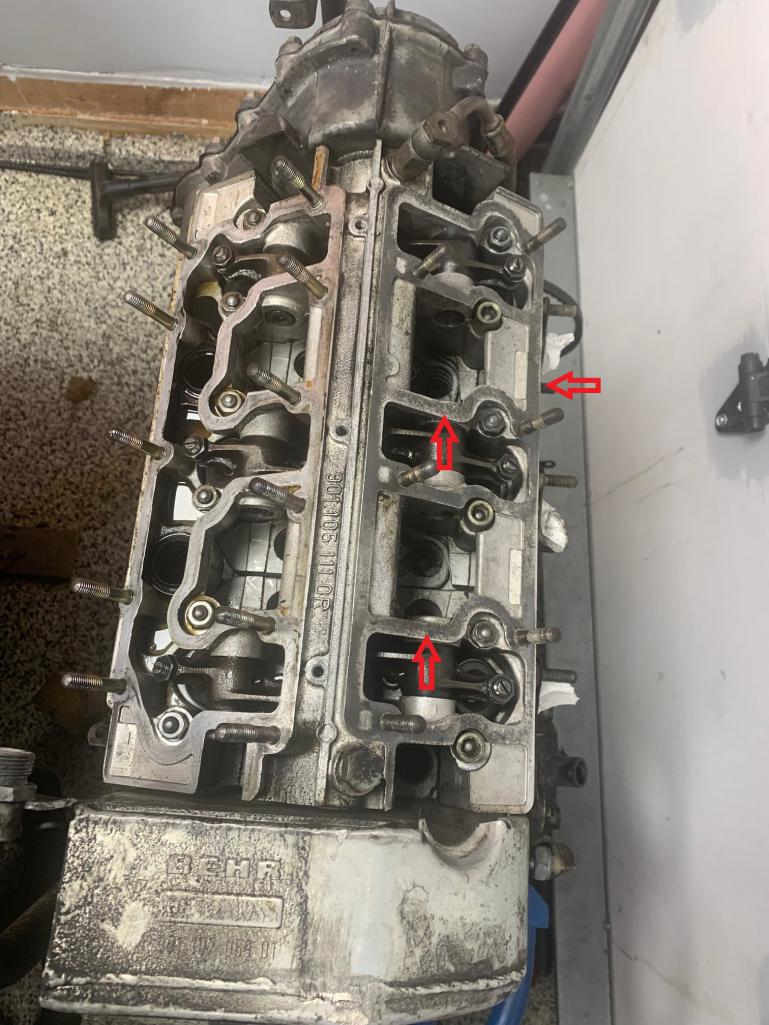
Also, the heat louvers are really looking good, a few coats of the green stuff and it all goes away, 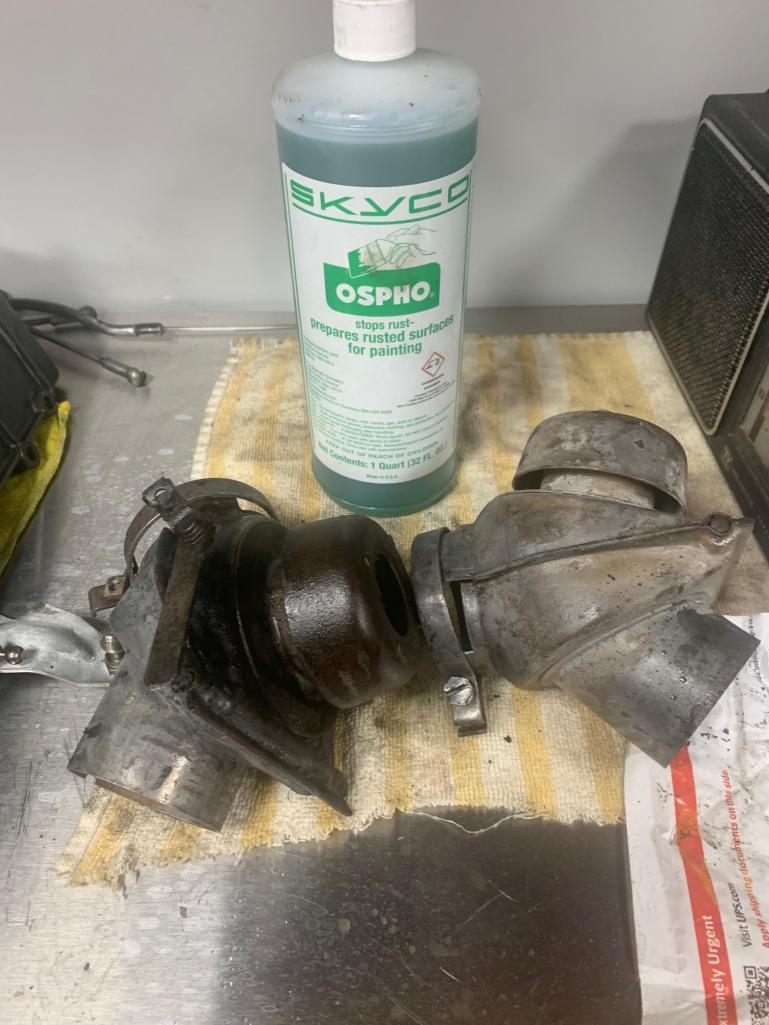
Posted by: mepstein Mar 6 2025, 09:18 PM
Are you doing a leak down on the heads?
Posted by: ctc911ctc Mar 9 2025, 08:12 PM
The compression is good and ran strong, I was mostly concerned with the oil leaks
Behind the flywheel was filled with dirt and grease - pics will follow
Are you doing a leak down on the heads?
Posted by: ctc911ctc Mar 10 2025, 11:15 AM
Still cleaning the engine - took off the flywheel and all of the crevases were filled with a gritty oily grime, this is mostly cleaned, I see no cracks or other points of leakage, most likely is from the gasket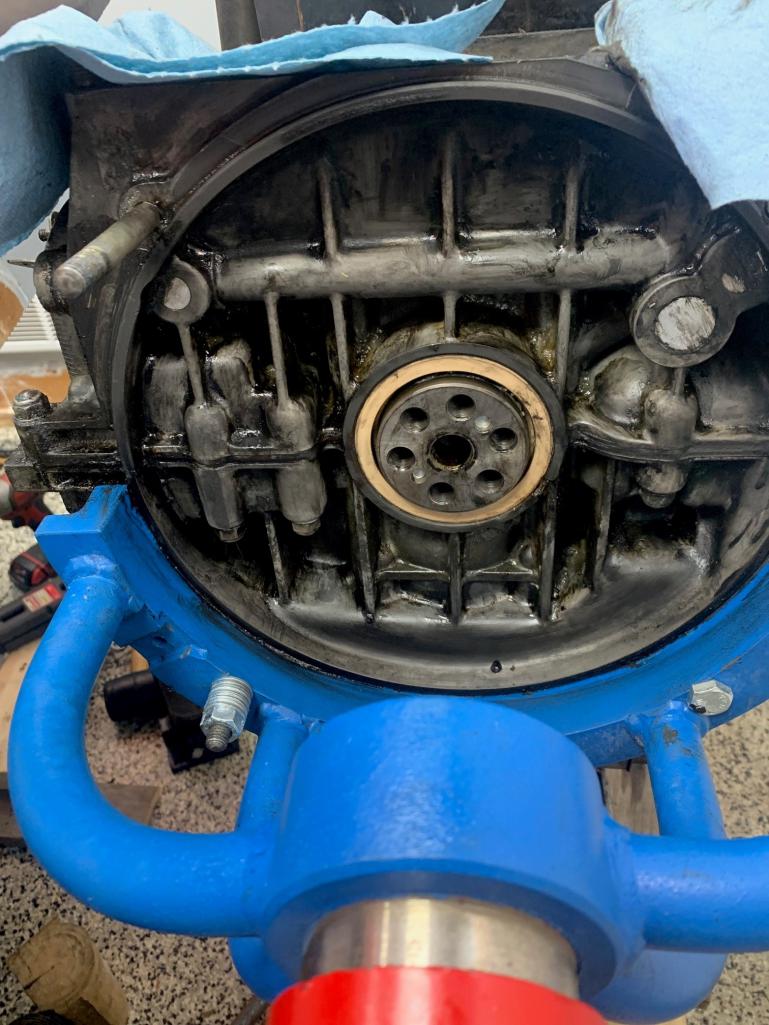
Spent a few hours cleaning all of the fins, lots of mouse parts and their house remnants were found 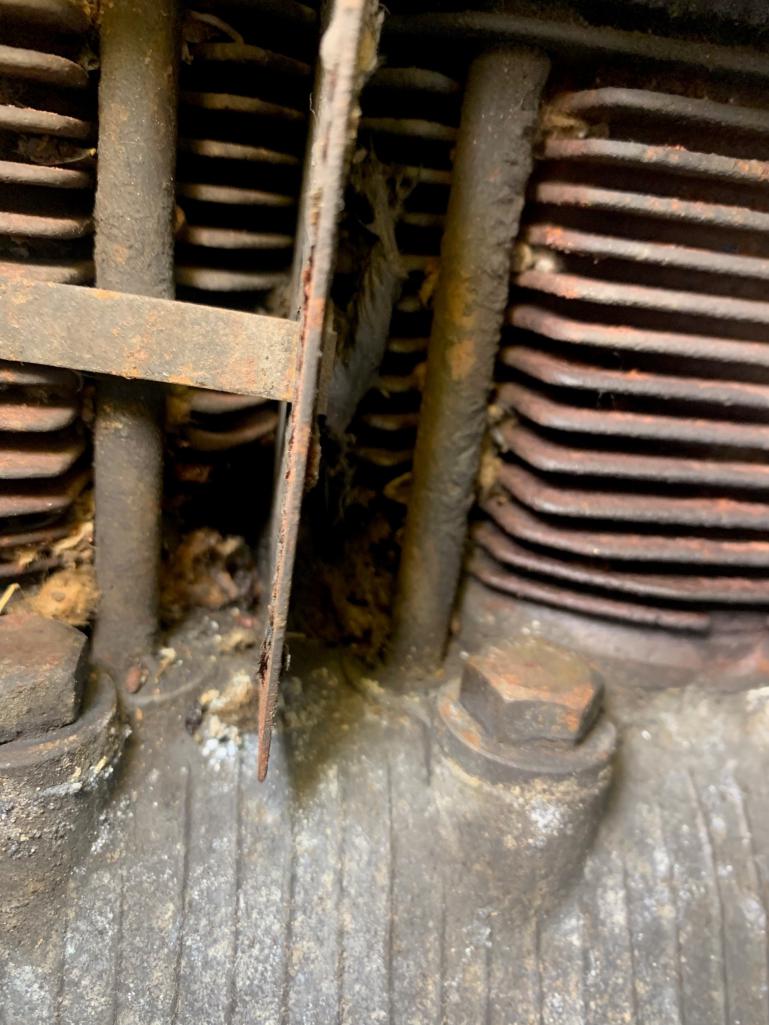


Posted by: ctc911ctc Mar 10 2025, 11:17 AM
just bought a leak-down tool - will let you know!
Are you doing a leak down on the heads?
Posted by: ctc911ctc Mar 10 2025, 07:43 PM
Lots of progress getting rid of the grease and dirt.
I took a Scotch-Bright pad with a bit of de-greaser to the valve cover seats, seems that there was goo used in the past - leaking from these was extreme, lots of small lumps from legacy sealant?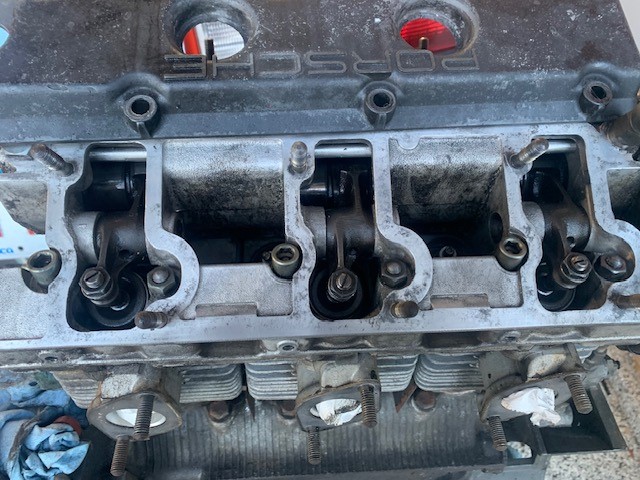
Fan Cowling - could not believe the layers on this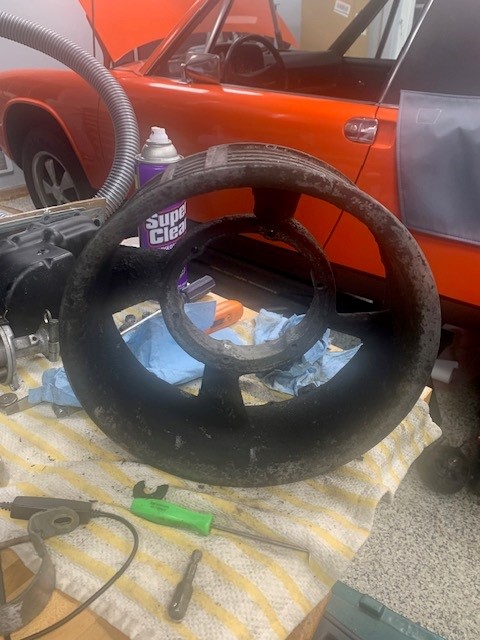
Or this!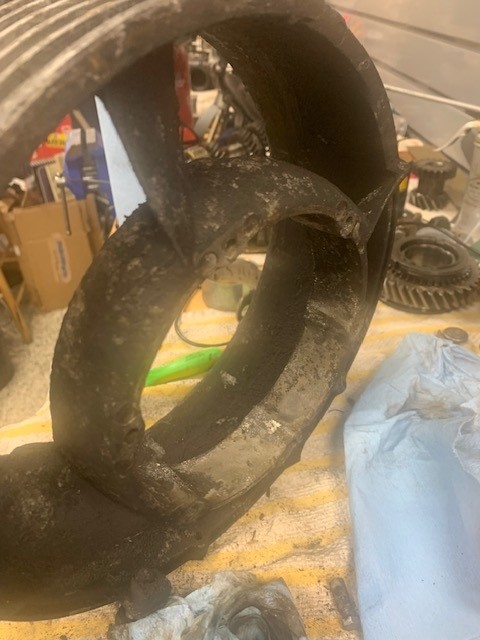
Fan is in the soup!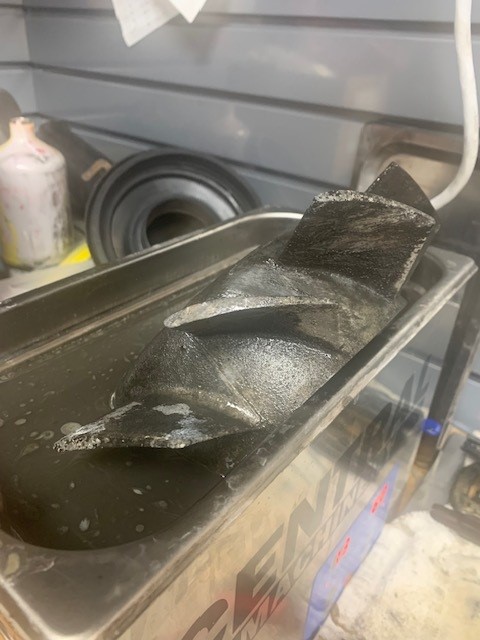
Oil cooler is very clean - was in the parts cleaner for 2-3 hours (30 minutes each run, turn and repeat) the inside has grease that is still making its way out - should be very clean - will power flush and dry prior to re-install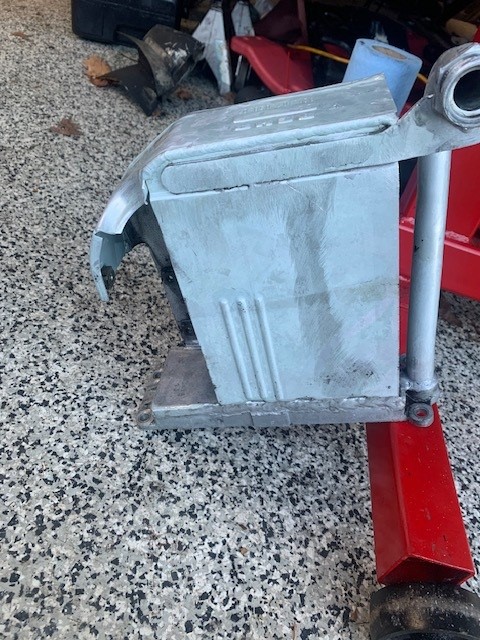
Posted by: fixer34 Mar 10 2025, 08:16 PM
Stock lower valve covers were notorious for warping and leaking. Replace with a set of 'turbo' valve covers, BUT make sure you machine some of the fins per several threads on here. This is needed if you ever want to remove the lower covers with the engine in the car. Otherwise Turbo cover fins hit the suspension and can't be removed.
Posted by: 930cabman Mar 11 2025, 04:42 PM
Stock lower valve covers were notorious for warping and leaking. Replace with a set of 'turbo' valve covers, BUT make sure you machine some of the fins per several threads on here. This is needed if you ever want to remove the lower covers with the engine in the car. Otherwise Turbo cover fins hit the suspension and can't be removed.
 there are several threads covering this
Posted by: ctc911ctc Mar 11 2025, 06:36 PM
On my small machinist table they are straight - I am going to close them up by the book once I am done with the cleaning and valve clearance setting. Thank you!
Stock lower valve covers were notorious for warping and leaking. Replace with a set of 'turbo' valve covers, BUT make sure you machine some of the fins per several threads on here. This is needed if you ever want to remove the lower covers with the engine in the car. Otherwise Turbo cover fins hit the suspension and can't be removed.
there are several threads covering thisPosted by: ctc911ctc Mar 11 2025, 06:44 PM
Today Did the leak down test, only could do one side - and the meter I bought is CRAP, very difficult to get the system to set to zero, estimating
#4 - 28
#5 - 27
#6 - 23
Engine ran strong this fall - not going in any deeper on this side.... ; )
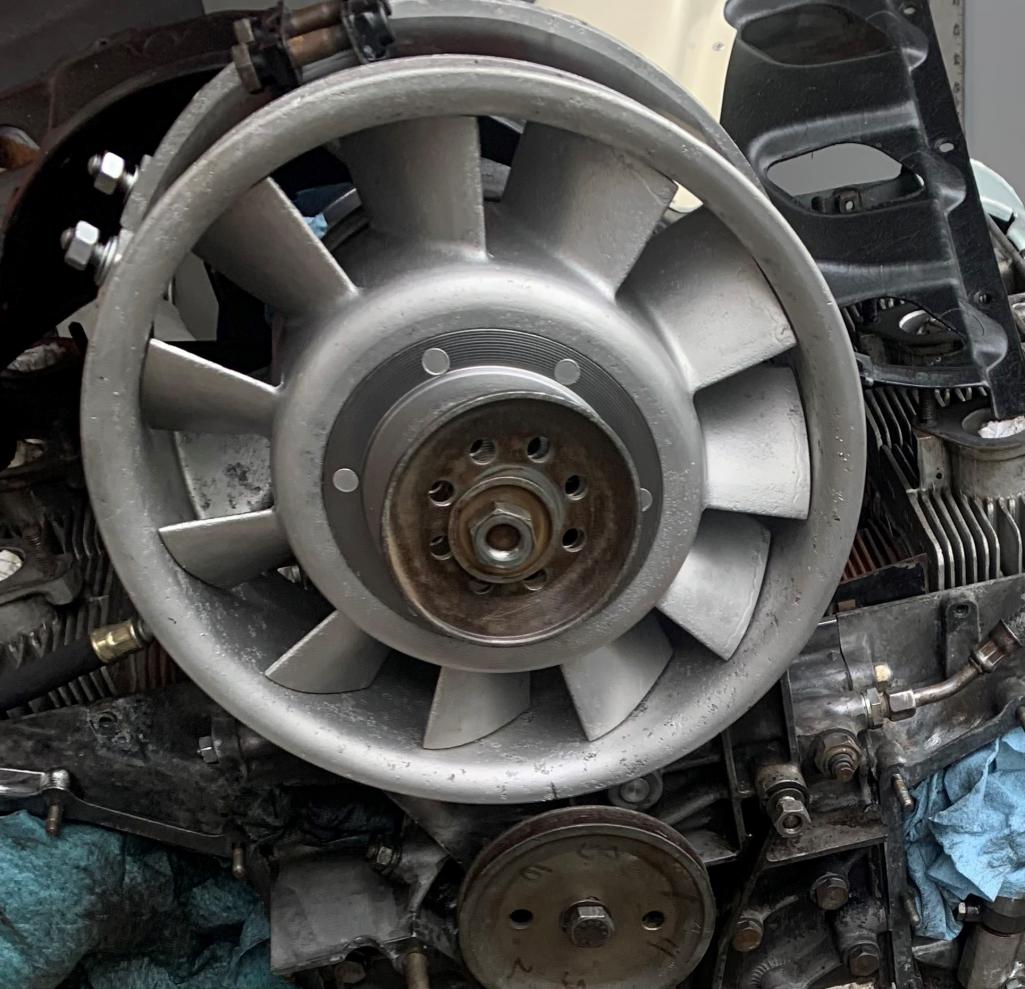
I got the fan out and it now looks like this:
I plan on having it vapro blasted, seems that the stuff I have been using (came with the ultrasonic cleaning machine) is salt based - perhaps that is all of the white crust.....sigh......
NOTE: One blade is cleaner, spent 20 minutes on it with steel wool, hence my decision to vapor blast
My shroud/tin bolts after cleaning look like this: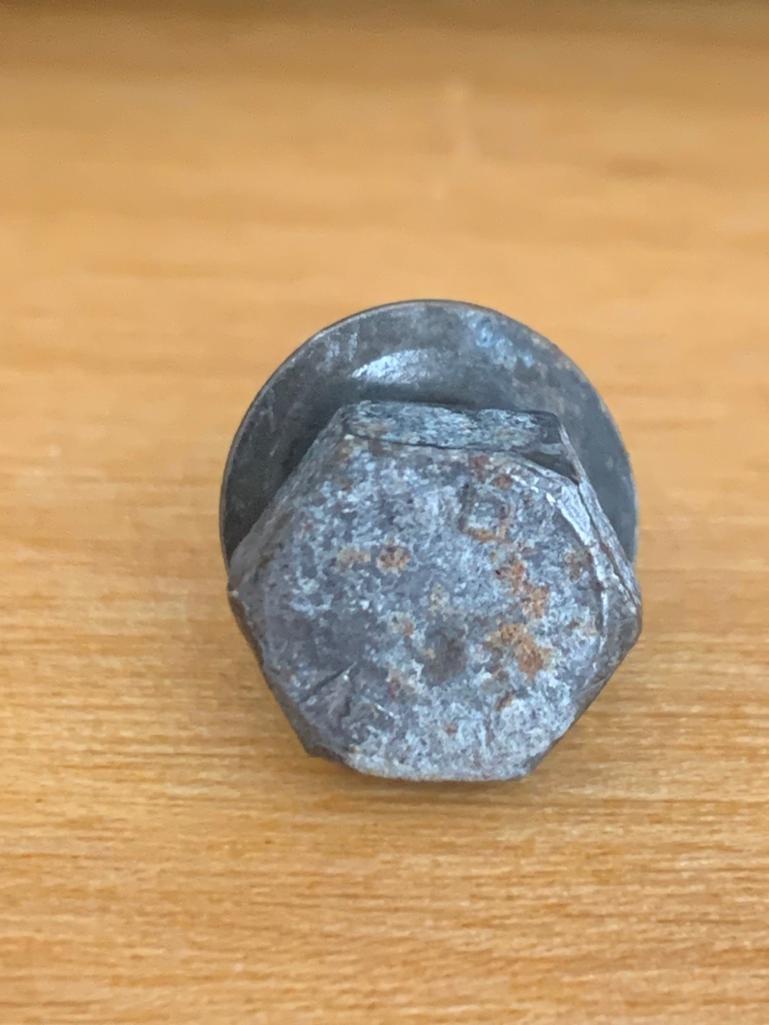
Next thing to clean!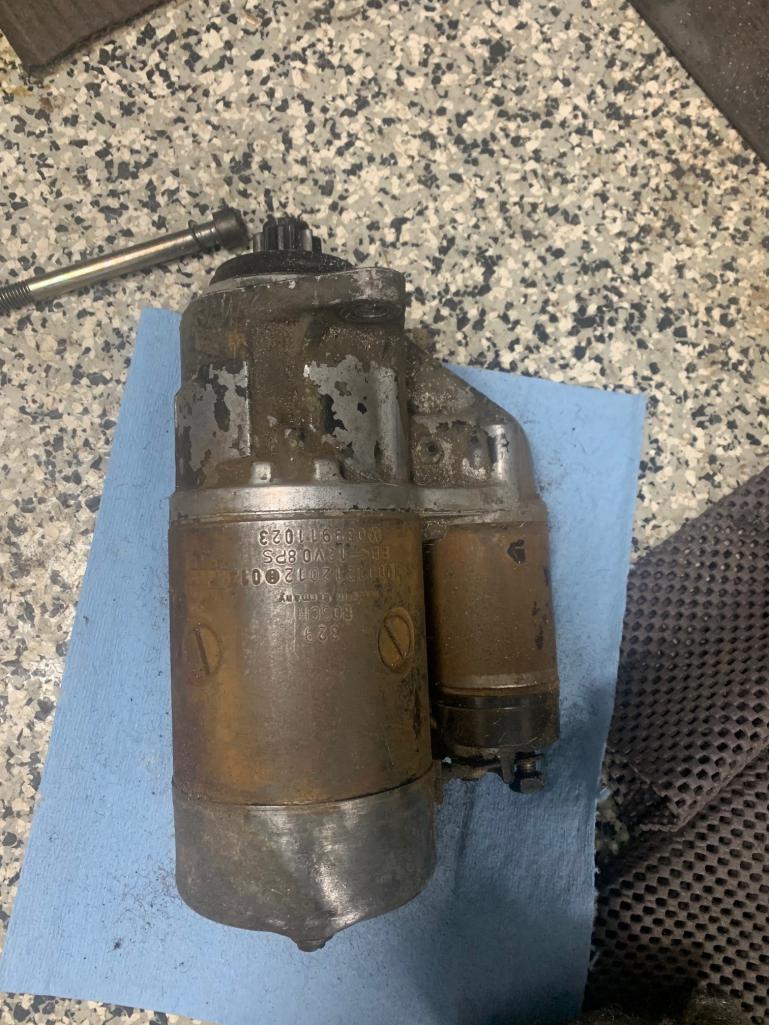
Posted by: ctc911ctc Mar 31 2025, 08:26 AM
******UPDATE*******
Transmission parts arrived here are some updates:
P226 Tool needed to be re-tooled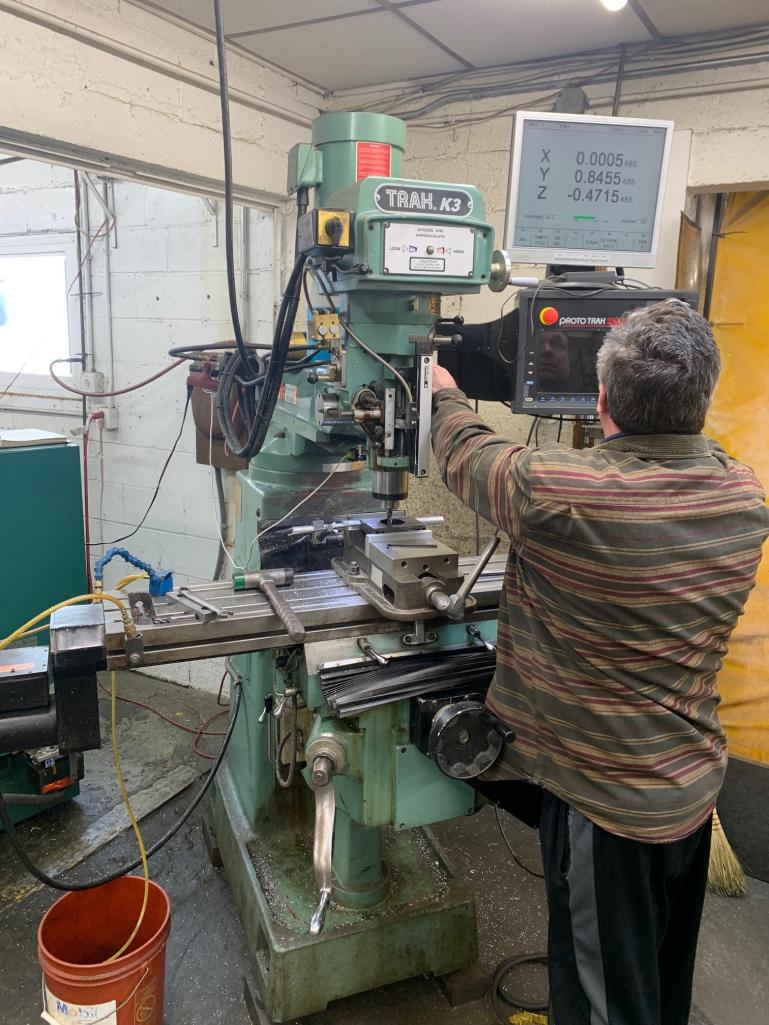
Needed to be faced a mil and the ring reduced .33mil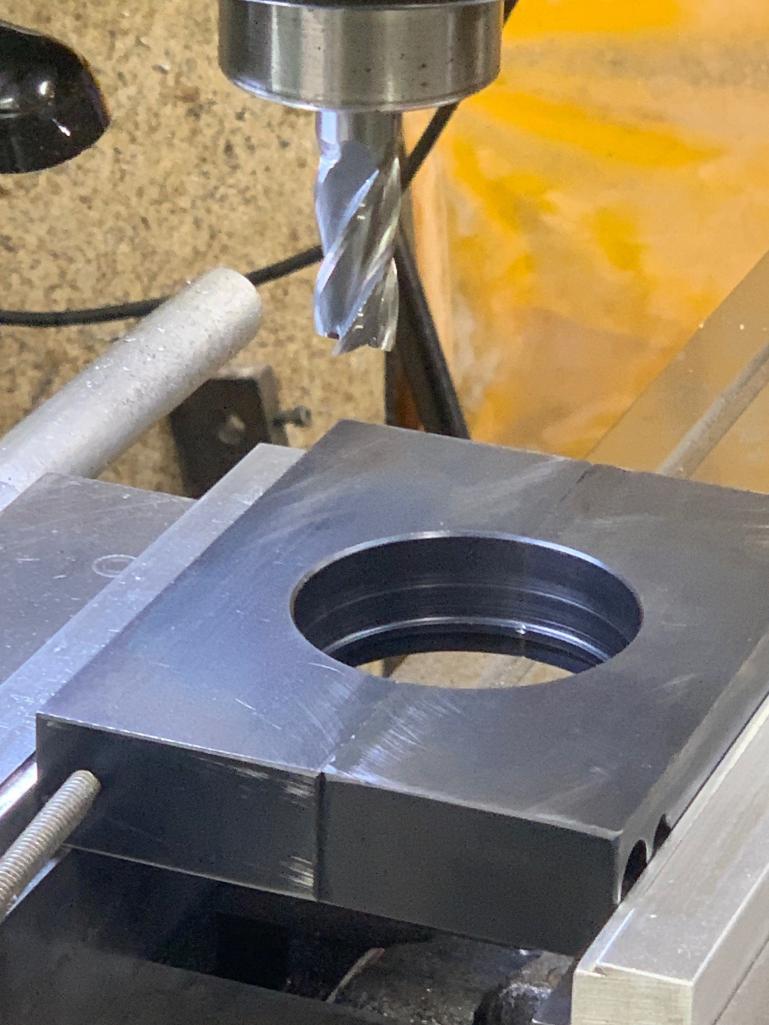
Once the dimensions of the Tool were correct for a 901 box, things started to work with the now correct P226 ****Note the DogTeeth are missing a tooth - never did find it....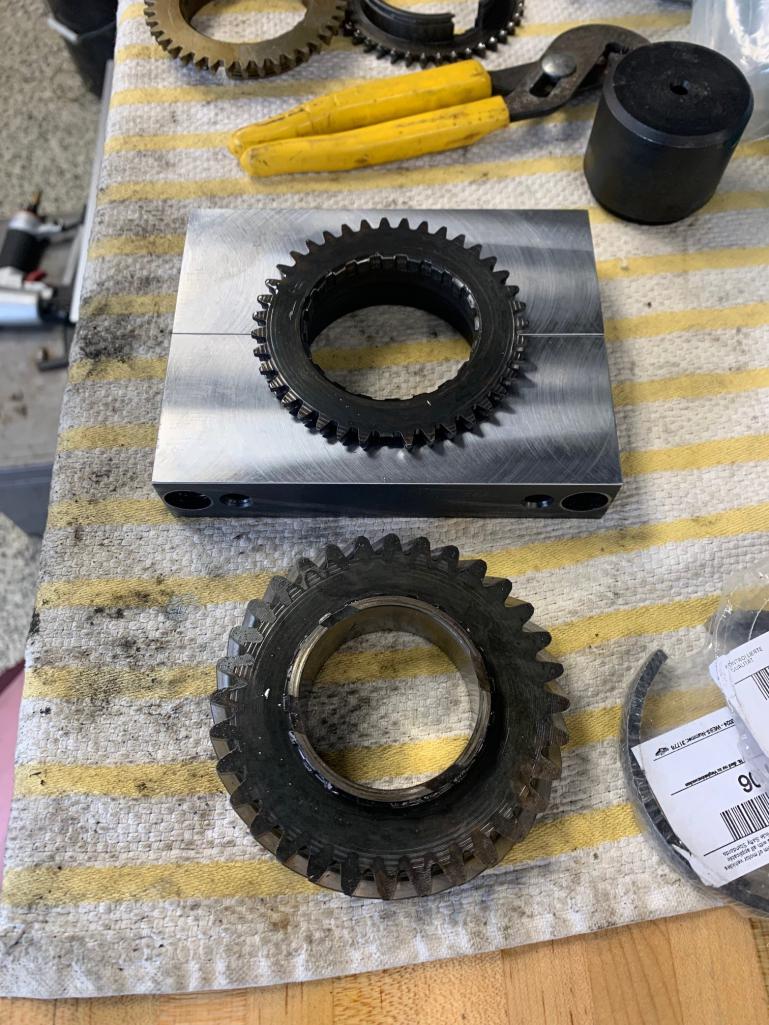
New 2nd gear Sync and Teeth!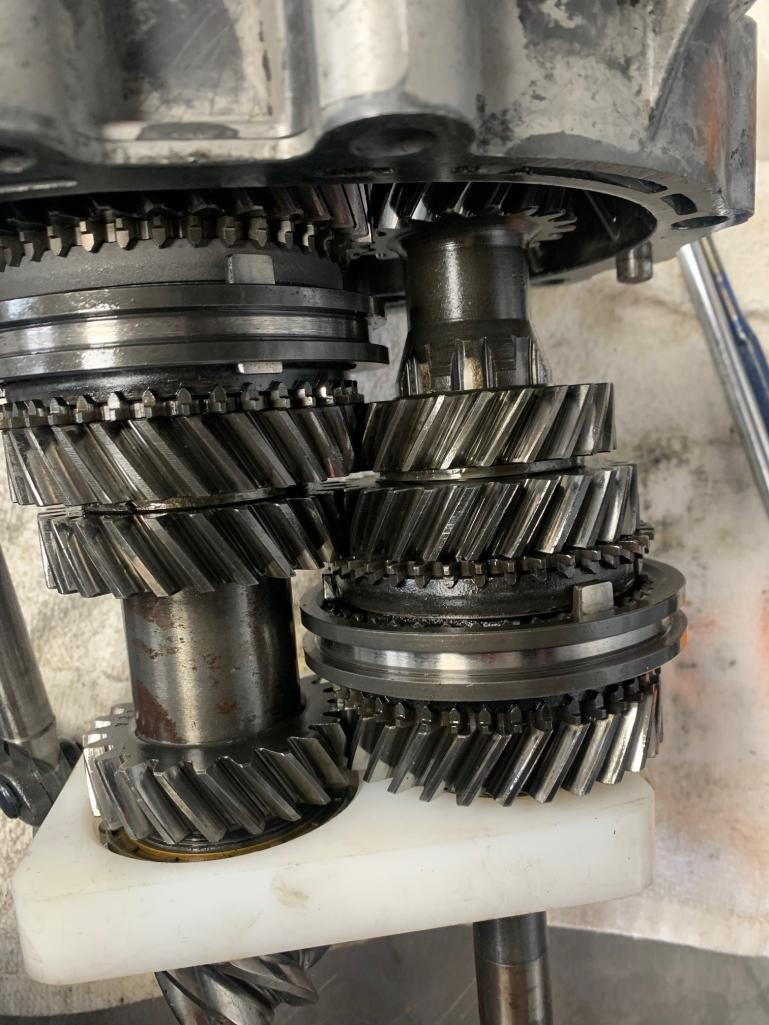
First Slider was coated with a wax/kosmaline stuff - hard to get off - Brake Cleaner (5 coats finely got it done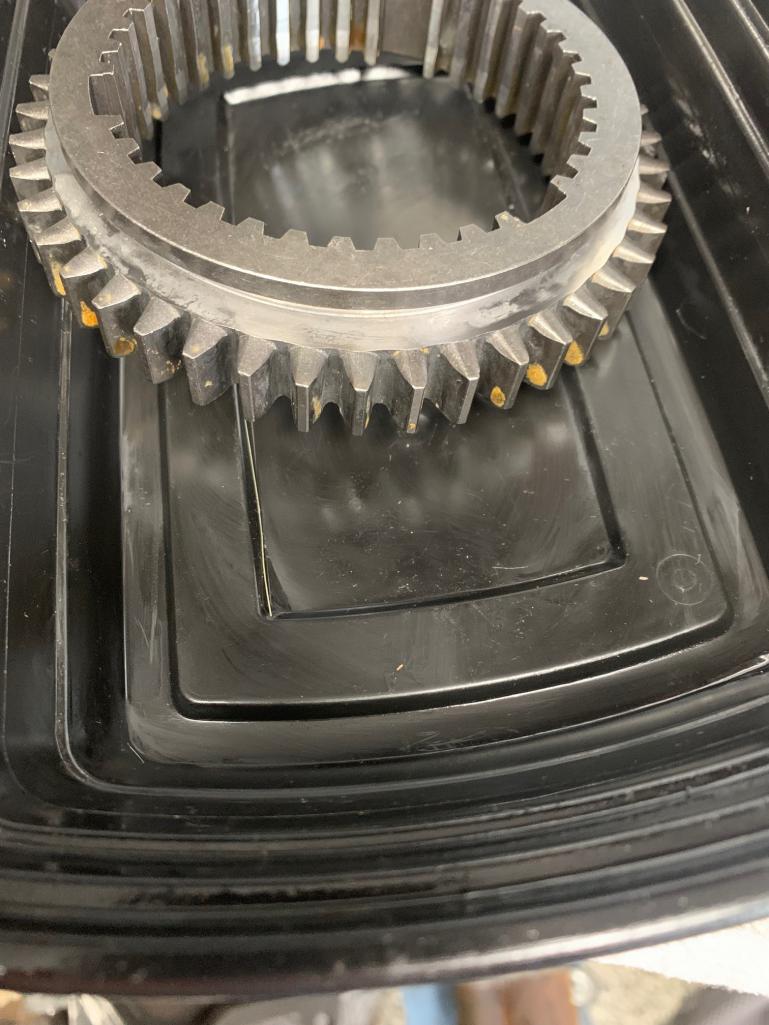
Posted by: ctc911ctc Apr 1 2025, 07:16 PM
****UPDATE*****
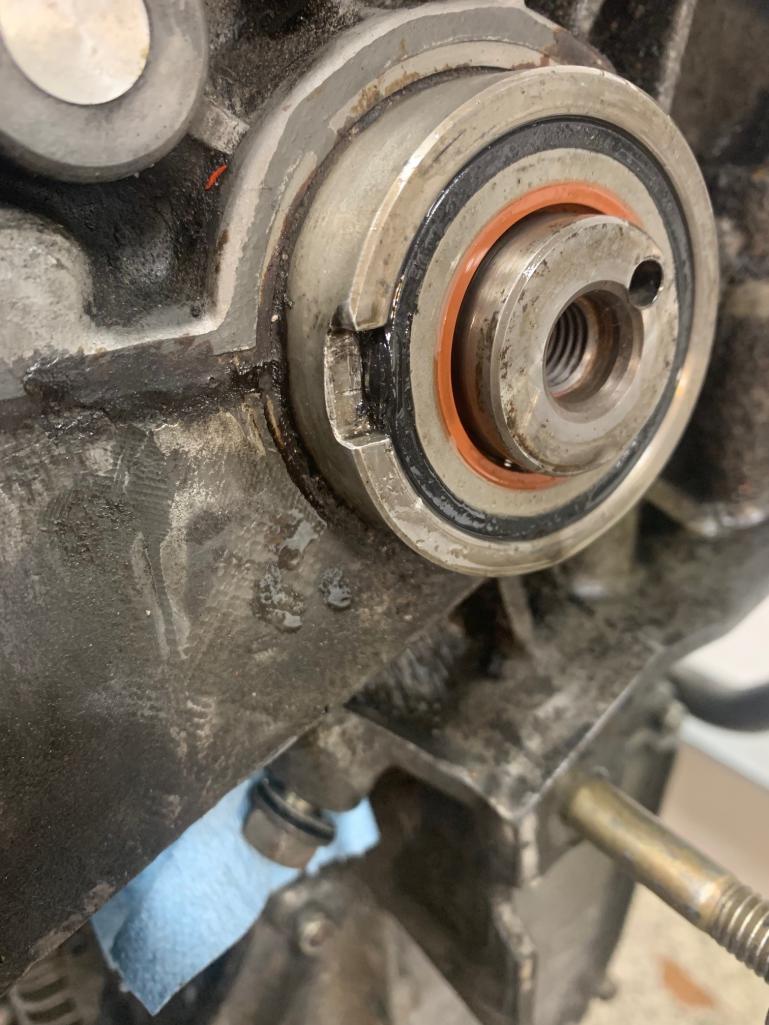
Pulley Seal came, time to remove the pulley, get to use my favorite tool - this one saved me 100 times in the past, holds everything and distributed the counter torque evenly, no mar marks on the pulley.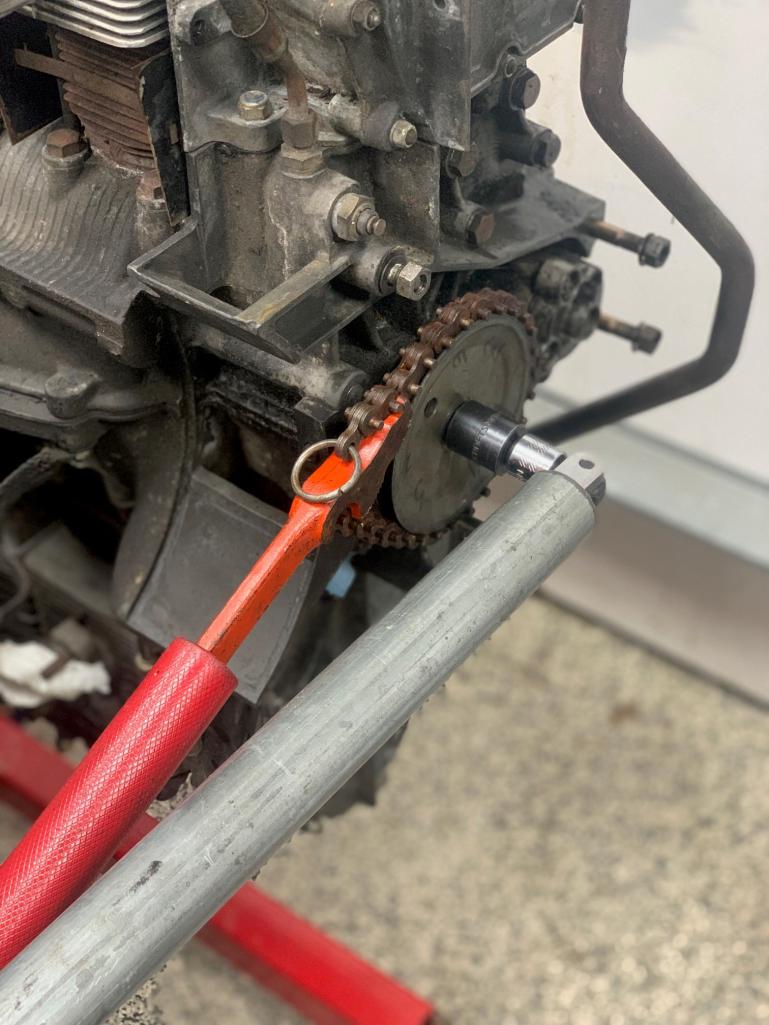
Hmmmm, not sure the seal is leaky, the triangle of death is/was VERY leaky, 
DANG!!!! Caught the lip, will try again when the new seal comes - fortunately there is a $300 version and a $12 version - I bought two of the $12......just in case 
Posted by: Luke M Apr 2 2025, 05:13 AM
You will want to replace the ims cover gasket.
The other thing you may want to do is put some jb weld on the oil gal plugs. There's a few of these plugs on a 911 engine and they all should be sealed. If you have the Bruce A or Wayne D engine book it'll show you the locations. Hopefully it's not the nose bearing o-ring causing the leak.
Posted by: ctc911ctc Apr 2 2025, 10:58 AM
Yes, I have this covered, working on flattening the cover and inspecting the fit with Prussian Blue. If I cannot get a proper fit I will use factory recommended Locktight 574 as a bit of added insurance.
You will want to replace the ims cover gasket.
The other thing you may want to do is put some jb weld on the oil gal plugs. There's a few of these plugs on a 911 engine and they all should be sealed. If you have the Bruce A or Wayne D engine book it'll show you the locations. Hopefully it's not the nose bearing o-ring causing the leak.
Posted by: ctc911ctc Apr 11 2025, 11:06 AM
*******UPDATE*******
I pulled the plugs and performed a leak down, all cylinders less than 20%
Compression reading is:
1 - 162
2 - 167
3 - 166
4 - 165
5 - 166
6 - 161
Here are the plugs: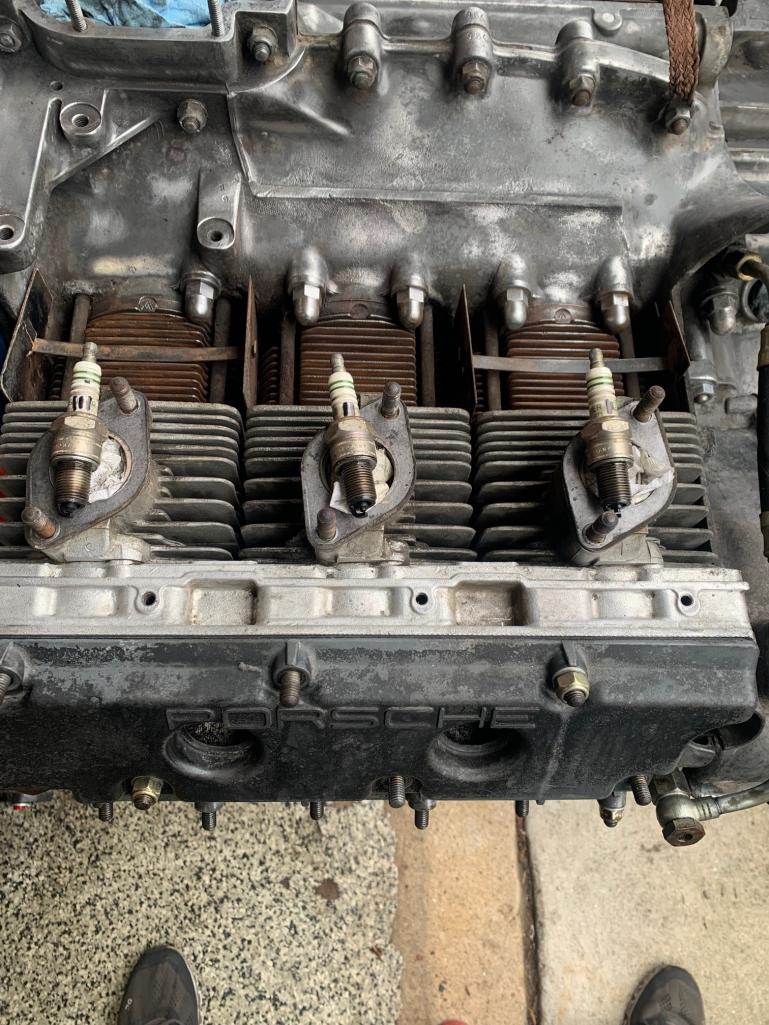
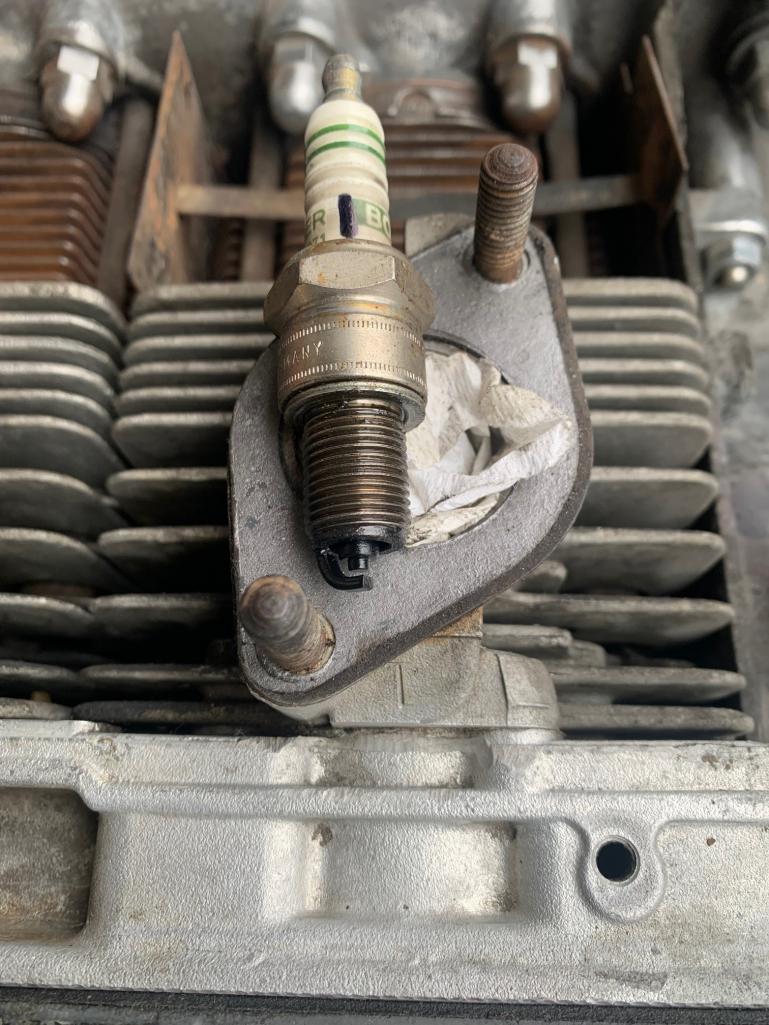
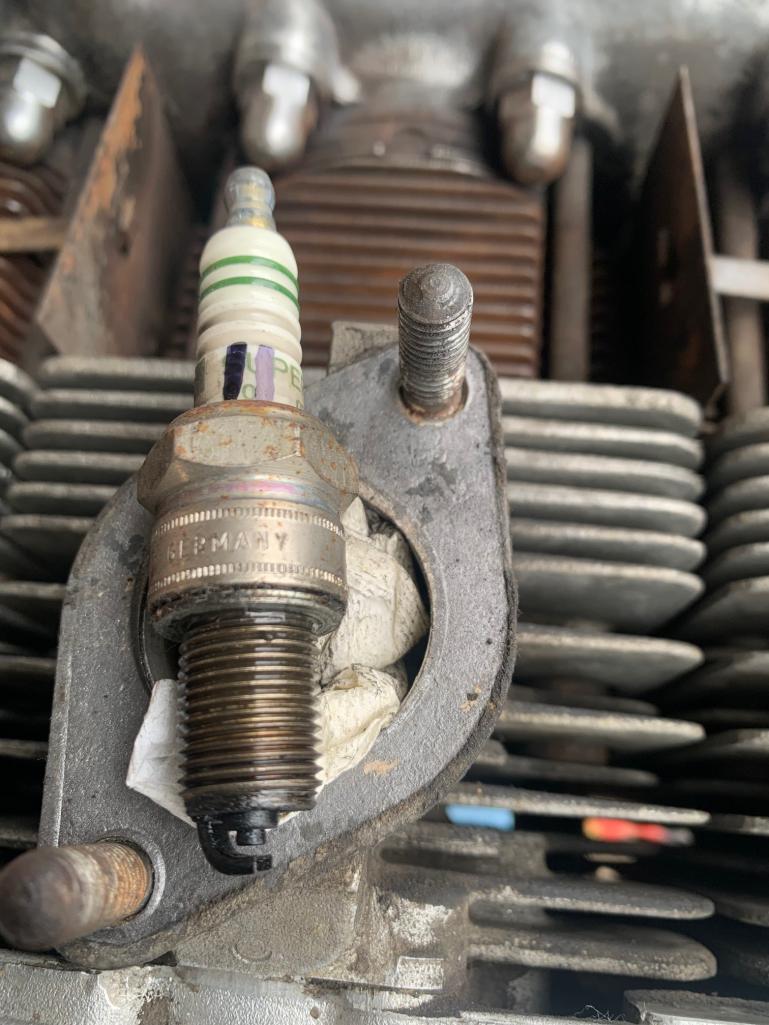

Posted by: ctc911ctc Apr 11 2025, 11:09 AM
*******UPDATE*******
I pulled the plugs and performed a leak down, all cylinders less than 20%
Compression reading is:
1 - 162
2 - 167
3 - 166
4 - 165
5 - 166
6 - 161
Here are the plugs:
AND the other Side
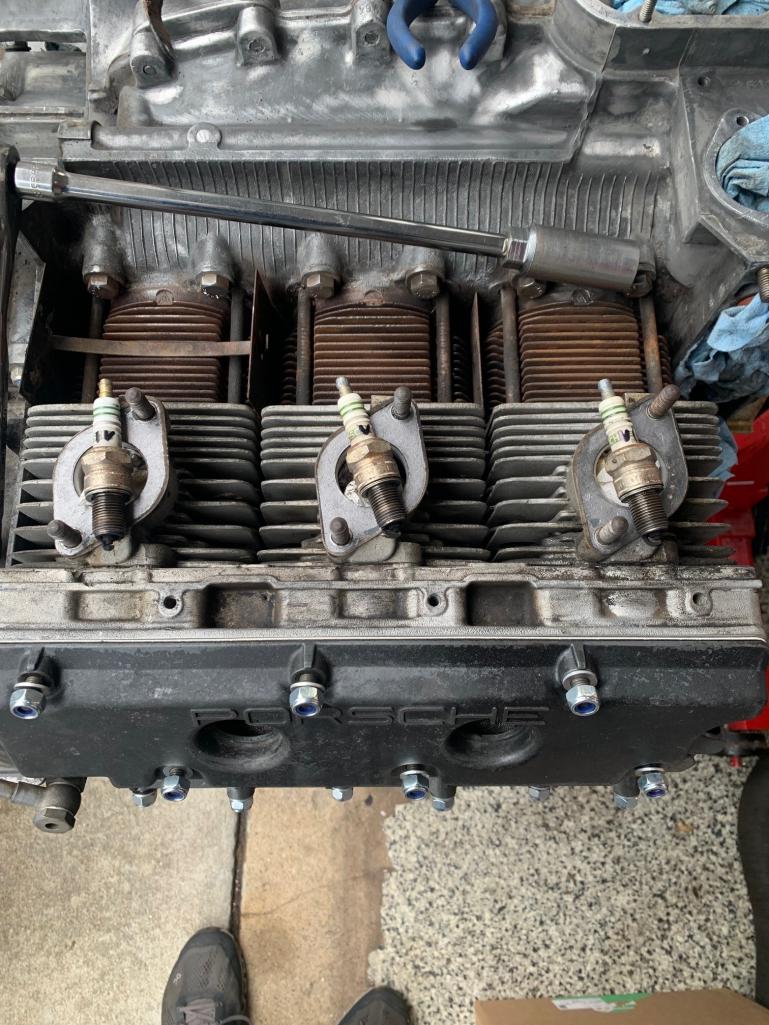
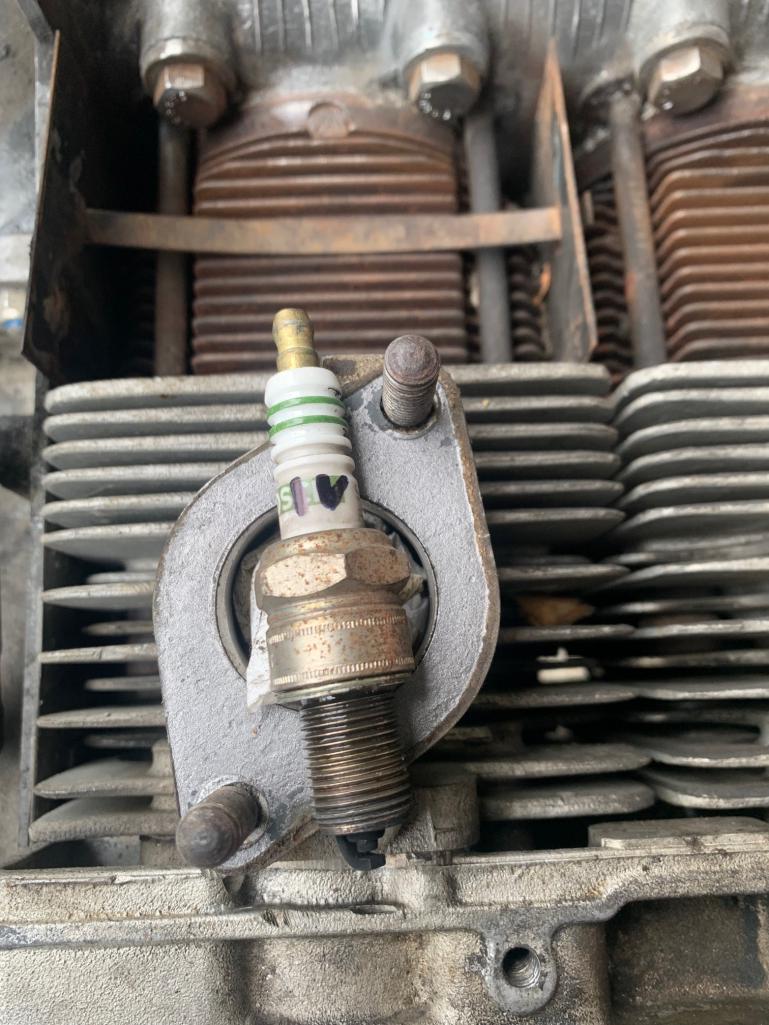
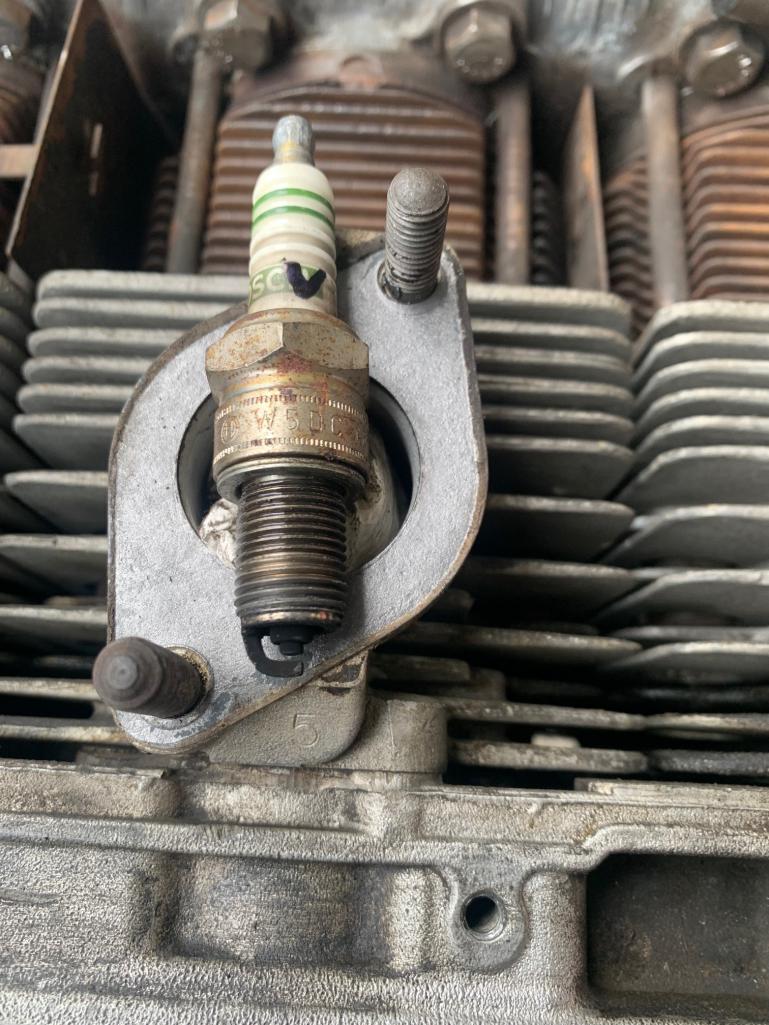
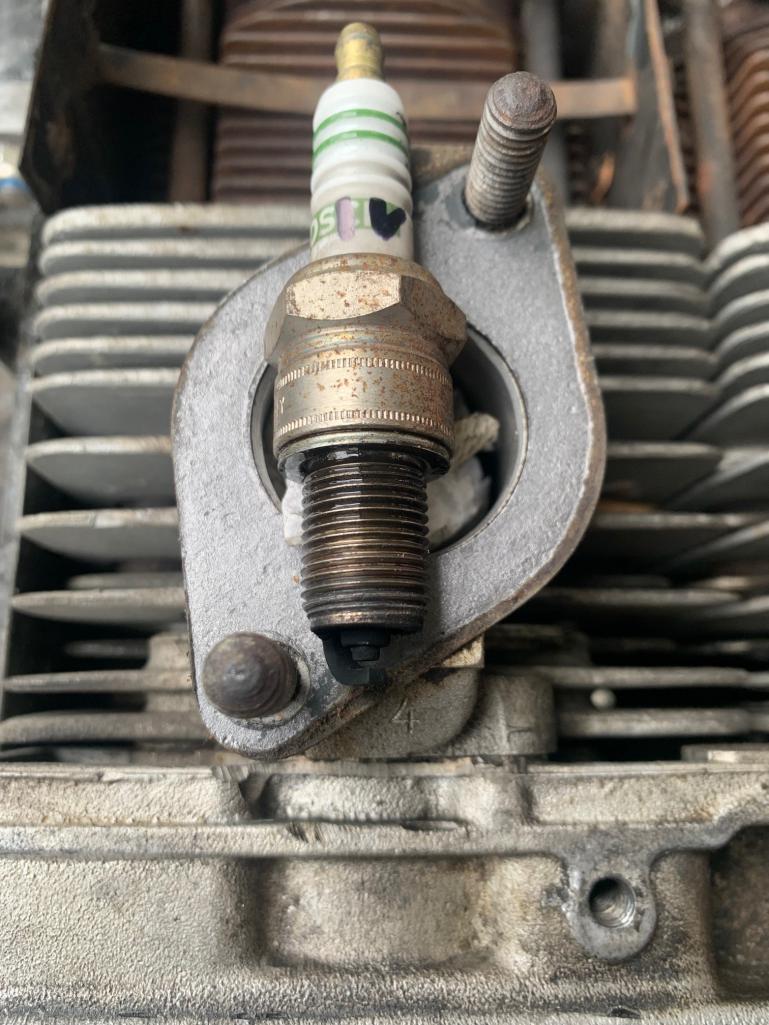
Looks very rich, any other observations from the Teener Team?
Posted by: rgalla9146 Apr 11 2025, 01:16 PM
Very stout numbers for an engine that has been basically dormant for twenty five
years (that I know of).
It was freshened as evidenced by number stamped in cyl. head. and invoices
that you have.
I'll take leaks and cleaning over rust and wrecks anytime.
Enjoy.
Posted by: ctc911ctc Apr 14 2025, 11:39 AM
This weekend I have been prepping to put things back together,
There were 2 friction holes on the cowling - not sure what from, filled and sanded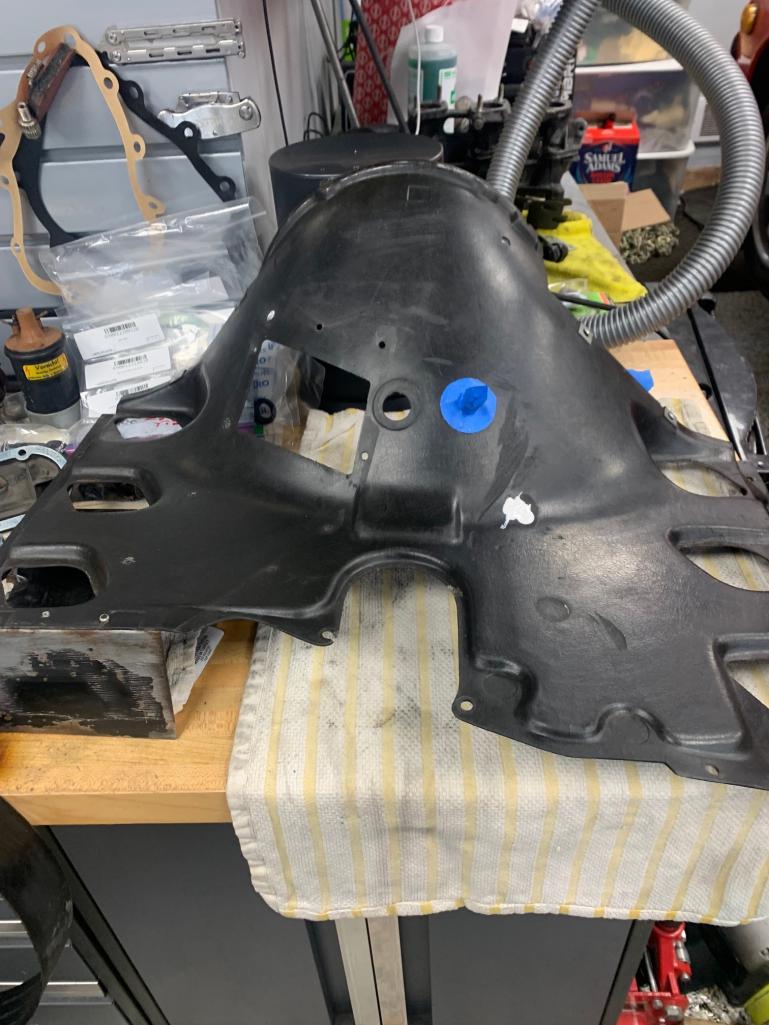
The Cam Box Cover was in tough shape - I painted and then removed the letter paint with a emery paper flat - very flat, block. I saw someone use a mill machine to do the same......talk about tool envy!
Paint Color is always a topic, I will be keeping all of the original colors, this one is supposed to be a match.....seems ok.......See the original below the freshly painted part. 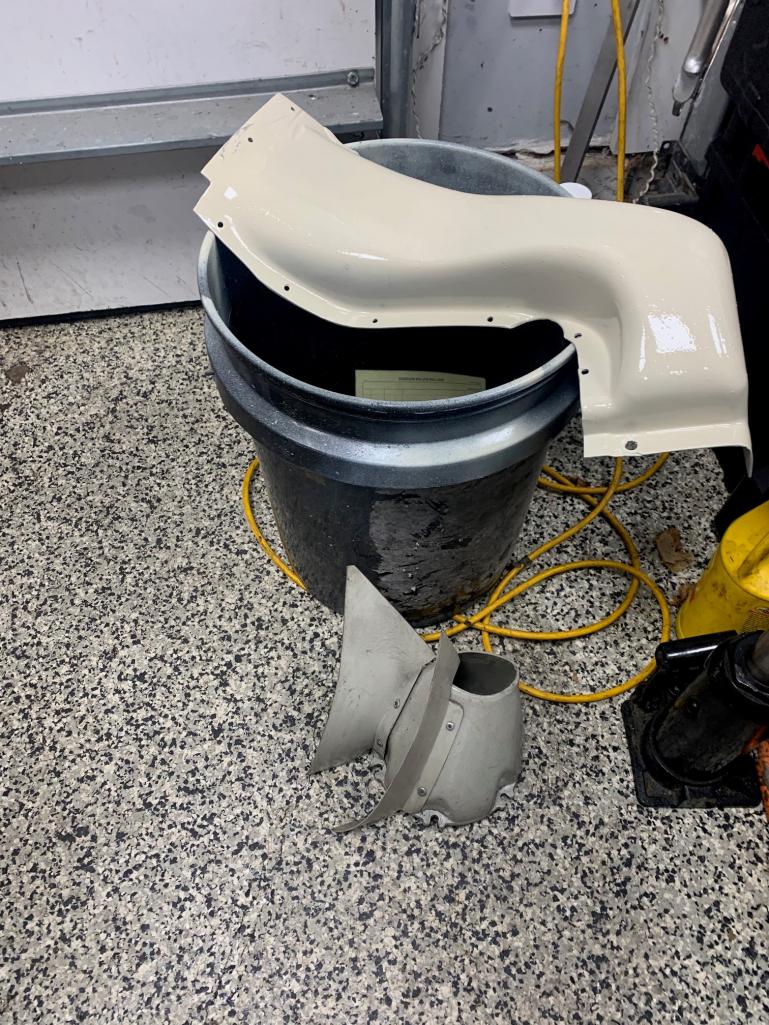
Attached thumbnail(s)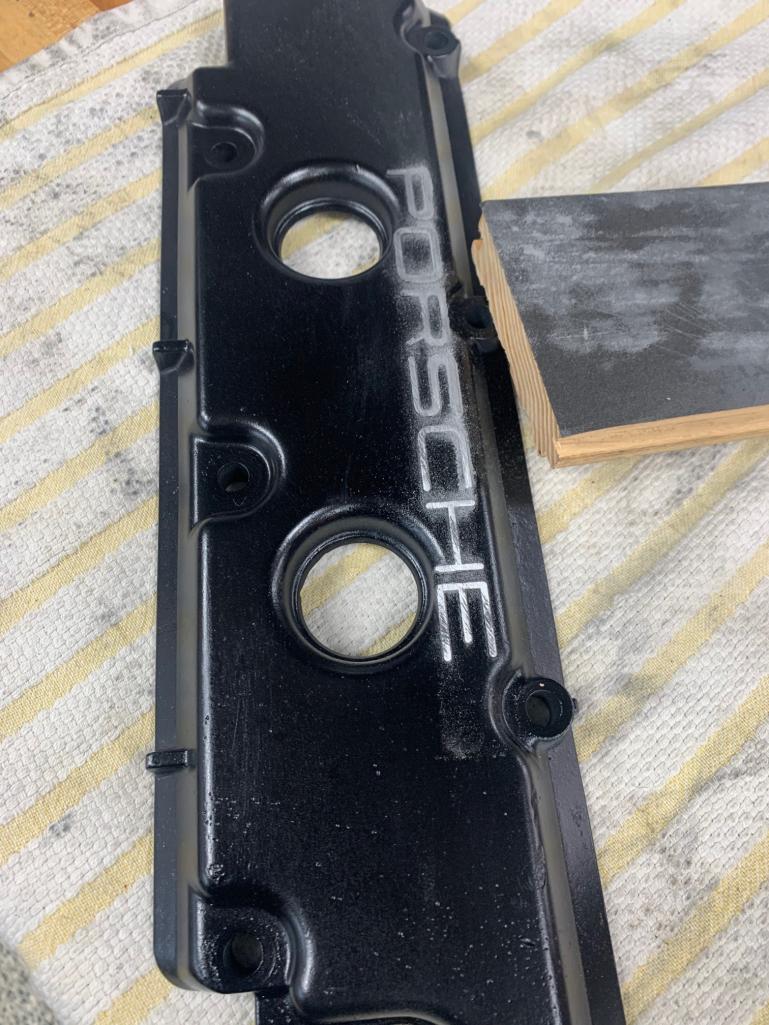
Posted by: ctc911ctc Apr 26 2025, 03:55 PM
Before and After
The Magnesium is pitted but cleaned up pretty good!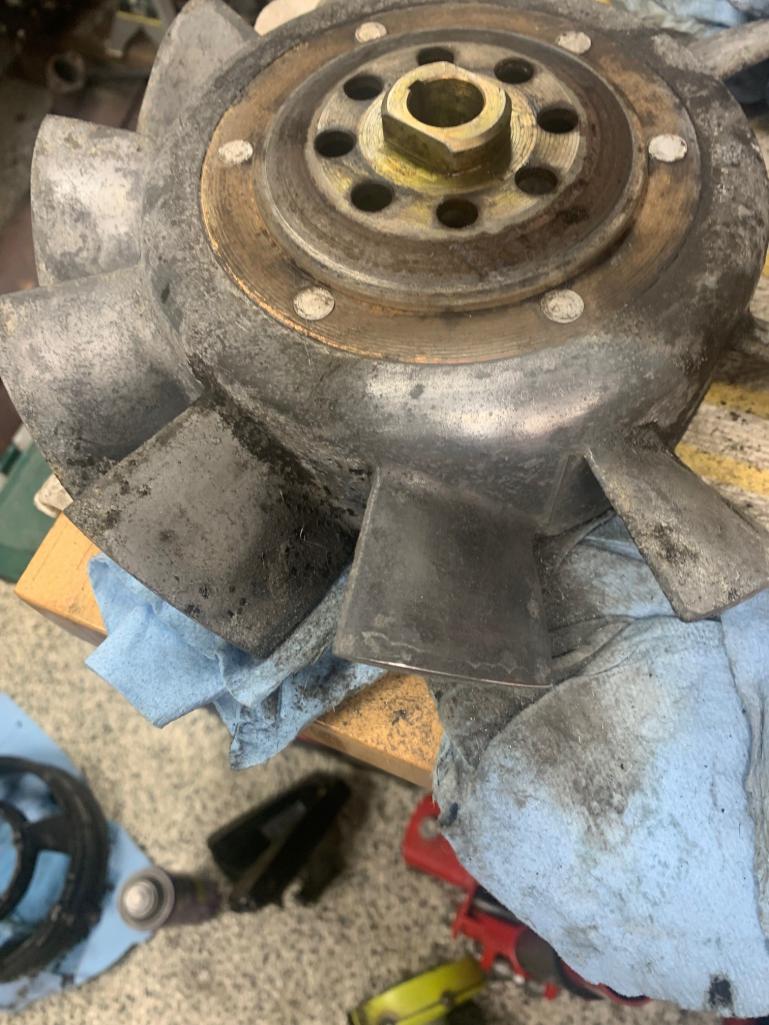
Posted by: ctc911ctc Apr 26 2025, 04:01 PM
Wiring and Shroud today here are a few pictures
Wiring done, new grommet, ready to bolt down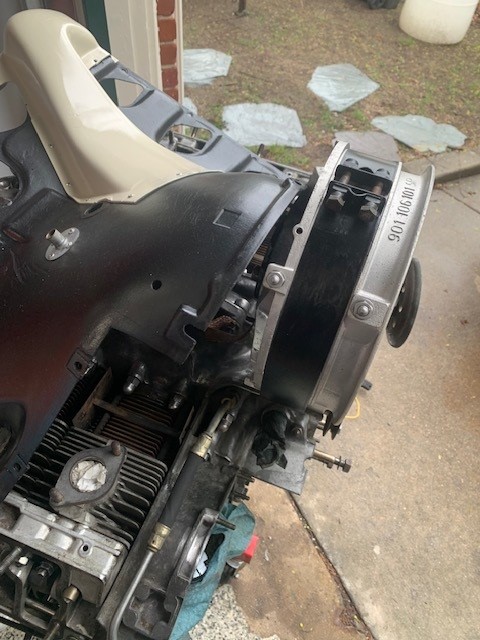
Front look - no fan......when will those gaskets arrive??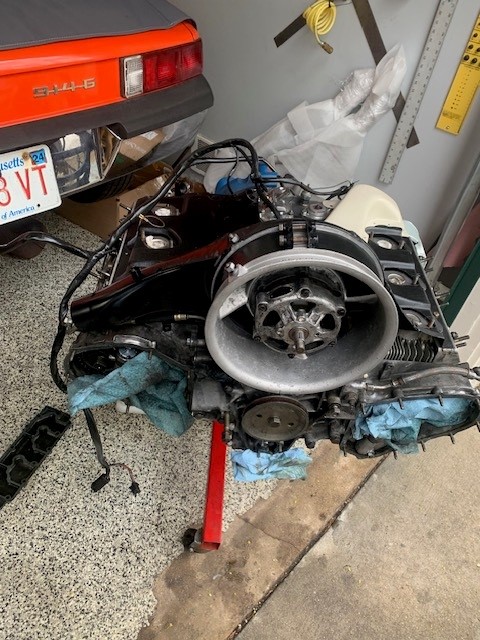
Cleaning this shroud took a week - it was caked with heavy grease, hard to remove without damaging the shroud.
Colors are original, new rivets and bolts - 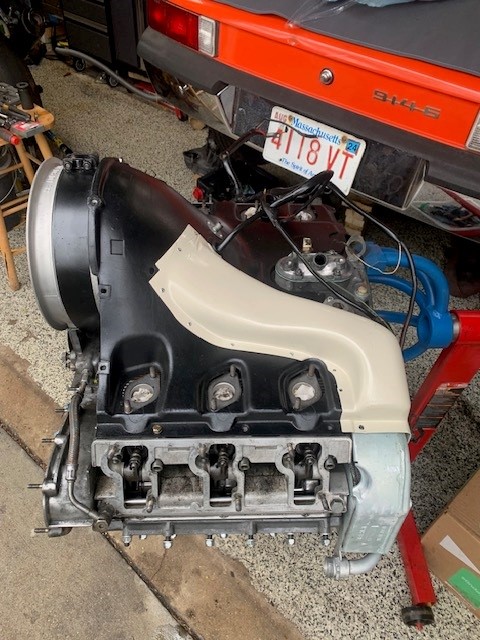
Posted by: ctc911ctc Apr 26 2025, 04:05 PM
I went to the hardware store and purchased some supplies, I could not find this gasket within our online vendors - and on a whim asked the owner about fiber gaskets.
He had an old box going back to the 60s, I got the last one.
Perfect material and size match. 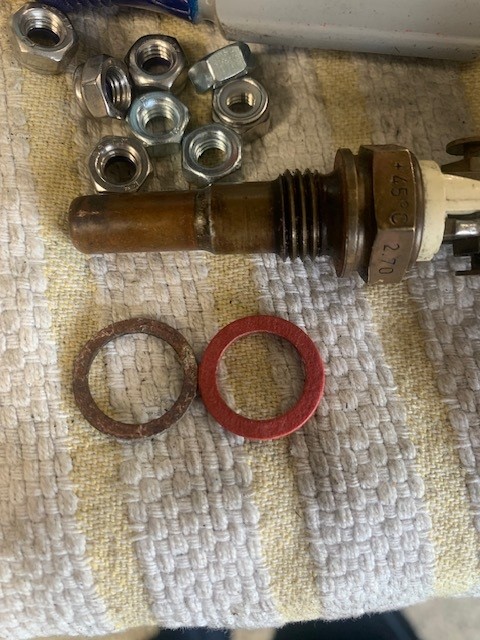
Posted by: porschetub Apr 26 2025, 05:57 PM
I went to the hardware store and purchased some supplies, I could not find this gasket within our online vendors - and on a whim asked the owner about fiber gaskets.
He had an old box going back to the 60s, I got the last one.
Perfect material and size match.
Nice job ,bit late to ask but did you replace the earth strap from the case to alternator ?,mine looked ok but after a clean it was too crusty to use ,had a new one on advice from Perry who built my new custom engine loom .
Keep up the good work ,cheers
Posted by: ctc911ctc Apr 26 2025, 06:41 PM
I am glad you asked - I used the existing ground strap and forgot (uh-oh) where it went so I bolted it to the shroud on the backside where the fan flow blades are attached, could not find a diagram as to how/where to attach the strap.....sigh
I took the strap off and polished it, looks new and the connections are solid. Still plenty of free electrons within the copper strap
Where did you attach the strap?
I went to the hardware store and purchased some supplies, I could not find this gasket within our online vendors - and on a whim asked the owner about fiber gaskets.
He had an old box going back to the 60s, I got the last one.
Perfect material and size match.
Nice job ,bit late to ask but did you replace the earth strap from the case to alternator ?,mine looked ok but after a clean it was too crusty to use ,had a new one on advice from Perry who built my new custom engine loom .
Keep up the good work ,cheers
Posted by: rgalla9146 Apr 27 2025, 06:55 AM
The ground strap attaches to the case just to the left of the blue plier handles in a
photo above
Posted by: porschetub Apr 27 2025, 01:39 PM
I am glad you asked - I used the existing ground strap and forgot (uh-oh) where it went so I bolted it to the shroud on the backside where the fan flow blades are attached, could not find a diagram as to how/where to attach the strap.....sigh
I took the strap off and polished it, looks new and the connections are solid. Still plenty of free electrons within the copper strap
Where did you attach the strap?
I went to the hardware store and purchased some supplies, I could not find this gasket within our online vendors - and on a whim asked the owner about fiber gaskets.
He had an old box going back to the 60s, I got the last one.
Perfect material and size match.
Nice job ,bit late to ask but did you replace the earth strap from the case to alternator ?,mine looked ok but after a clean it was too crusty to use ,had a new one on advice from Perry who built my new custom engine loom .
Keep up the good work ,cheers
Bolts on to the nearest top case 8 mm thru stud ,you should see where its been,then on to the altenator 6mm stud ,I used nylock 6mm nuts as all my mine were somewhat loose where they had sunk into the fiberglass ,also used new heavier washers for under those nuts ,gave it more support .
Make sure the air deflector is fitted as it came out as only works in that spot ,I marked mine with a top mark ,my alternator stopped charging shortly after fitting the motor was fitted which was a hassle but not too bad.
Cheers.
Posted by: ctc911ctc Apr 27 2025, 08:35 PM
I am glad you asked - I used the existing ground strap and forgot (uh-oh) where it went so I bolted it to the shroud on the backside where the fan flow blades are attached, could not find a diagram as to how/where to attach the strap.....sigh
I took the strap off and polished it, looks new and the connections are solid. Still plenty of free electrons within the copper strap
Where did you attach the strap?
I went to the hardware store and purchased some supplies, I could not find this gasket within our online vendors - and on a whim asked the owner about fiber gaskets.
He had an old box going back to the 60s, I got the last one.
Perfect material and size match.
Nice job ,bit late to ask but did you replace the earth strap from the case to alternator ?,mine looked ok but after a clean it was too crusty to use ,had a new one on advice from Perry who built my new custom engine loom .
Keep up the good work ,cheers
Bolts on to the nearest top case 8 mm thru stud ,you should see where its been,then on to the altenator 6mm stud ,I used nylock 6mm nuts as all my mine were somewhat loose where they had sunk into the fiberglass ,also used new heavier washers for under those nuts ,gave it more support .
Make sure the air deflector is fitted as it came out as only works in that spot ,I marked mine with a top mark ,my alternator stopped charging shortly after fitting the motor was fitted which was a hassle but not too bad.
Cheers.
Hopefully I have installed correctly, pretty sure the shroud will not fit if the deflector is incorrectly aligned}???
Posted by: ctc911ctc May 3 2025, 02:50 PM
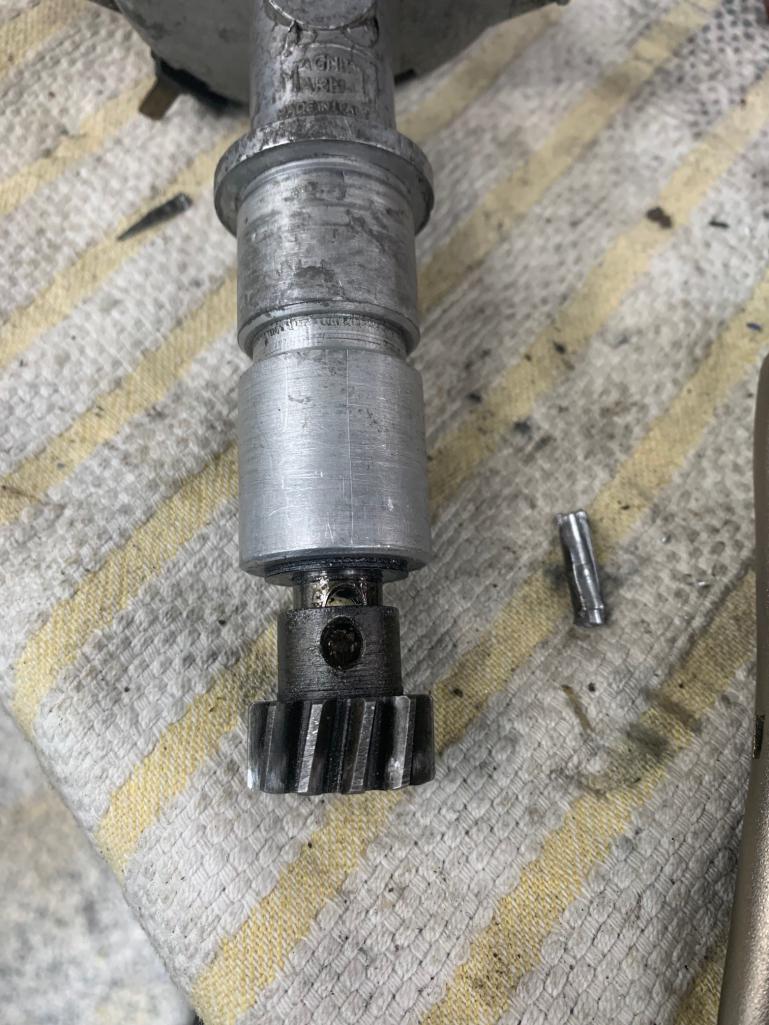
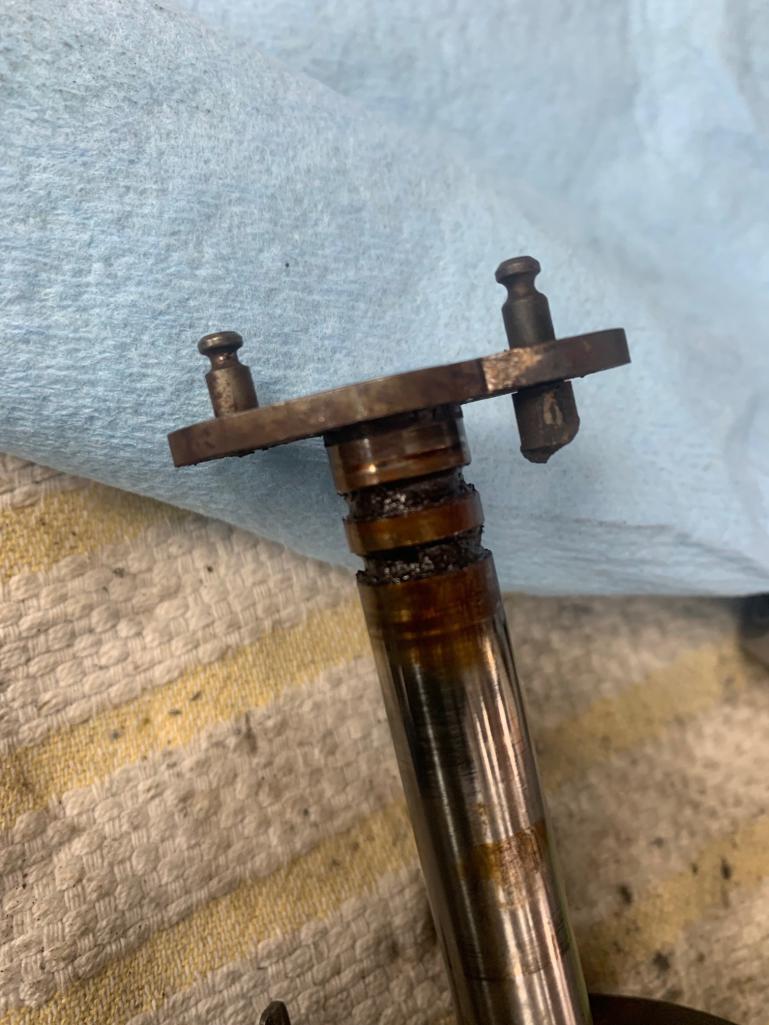
Distributor
I really like this setup, simple, no noticeable wear, however, old grease has made the shaft a bit stiff and the advance operation no doubt is effected by old grease that is now glue........interesting metaphor
I took apart all of the screws which were muscle-F****D at some time in the past, also ordered a rebuild kit from PartsKlassic.
The shaft was never removed from the assembly and I had to drill out the original drift, it was distorted most likely with a factory press on either side. My question is the re-distortion of the pin that is with the rebuild kit, has anyone else done this job? Is there a tool I could use in my press to properly distort the pin?
Looking for any guidance, thank you, 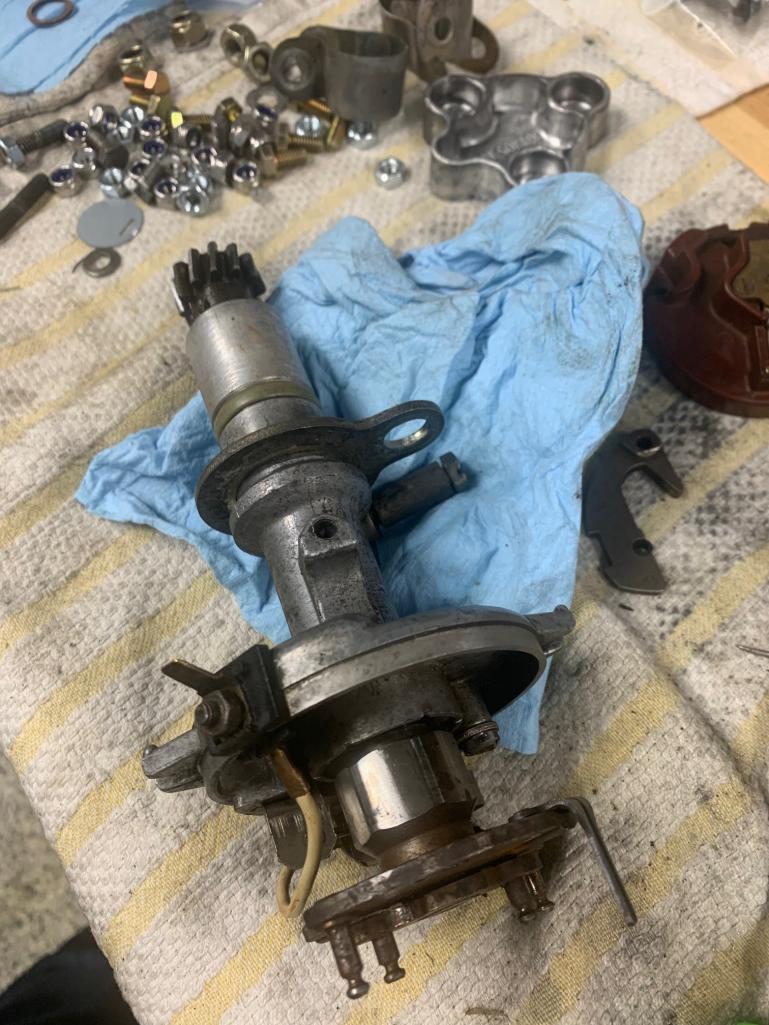

There was a minor deformation on the case at the entry to the Distro into the case. Just a small burr that made a nasty score on the shaft - I gently removed this marring with steel wool. 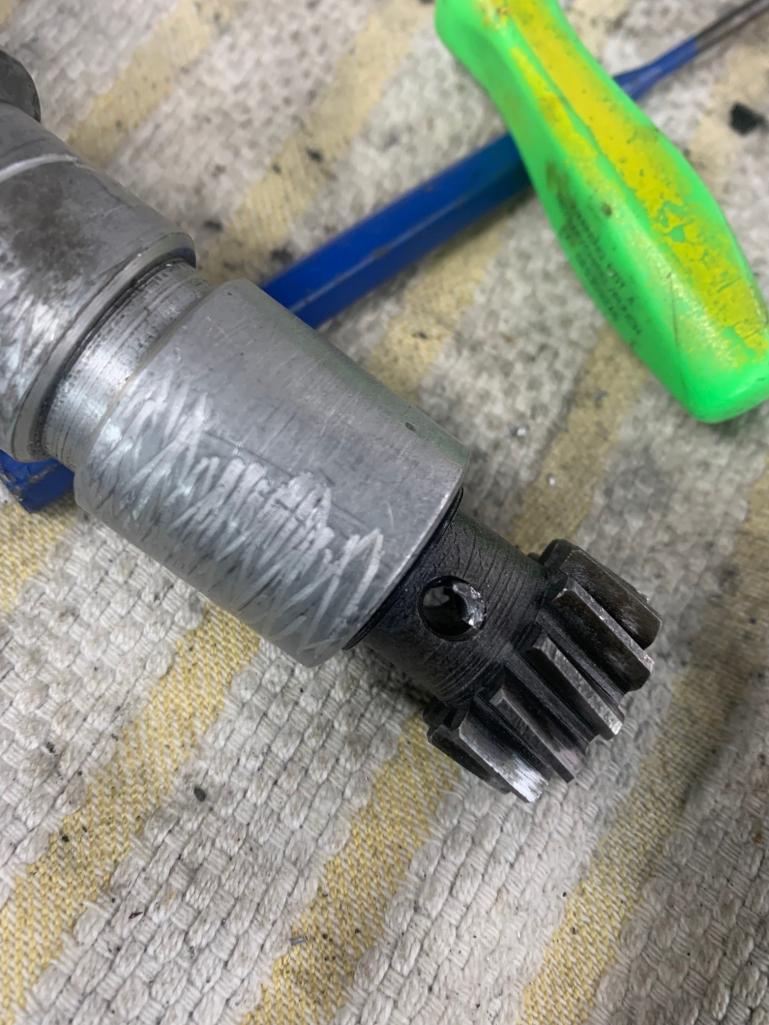
I could not, after removing the head of the drift on one side, get it to come out with a firm drift/punch tool - I did not want to hit it too hard, so I started the long and careful drilling process.............
3 HOURS LATER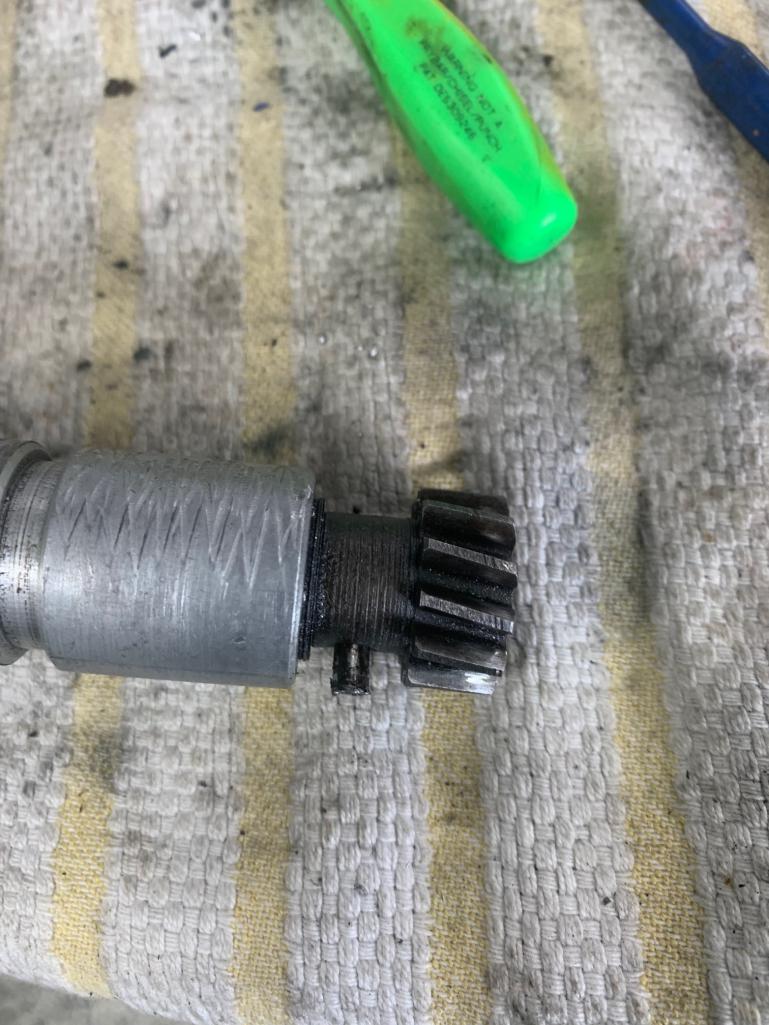
Posted by: mb911 May 3 2025, 05:09 PM
Where is there a rebuild kit available? I remember I did one years ago and had to reuse the pin and peened it over
Posted by: ctc911ctc May 3 2025, 08:06 PM
https://www.partsklassik.com/p-3794-distributor-rebuild-kit-marelli-bx.aspx
Where is there a rebuild kit available? I remember I did one years ago and had to reuse the pin and peened it over
Posted by: ctc911ctc May 3 2025, 08:11 PM
Here is what I am trying to fix - all of this old glue.......why did they use glue as a lubricant in the old days........
;^}>
Posted by: Cairo94507 May 4 2025, 06:23 AM
It may not be the same, but when we replaced the belt on my 3.6 distributor, we had to drill the pin out. I ordered a replacement from Porsche when I ordered the new belt. We installed the pin and used a punch to flare the ends of the pin; it is not going anywhere.
Posted by: ctc911ctc May 23 2025, 08:08 AM
Engine Ready for the tin, looking better, 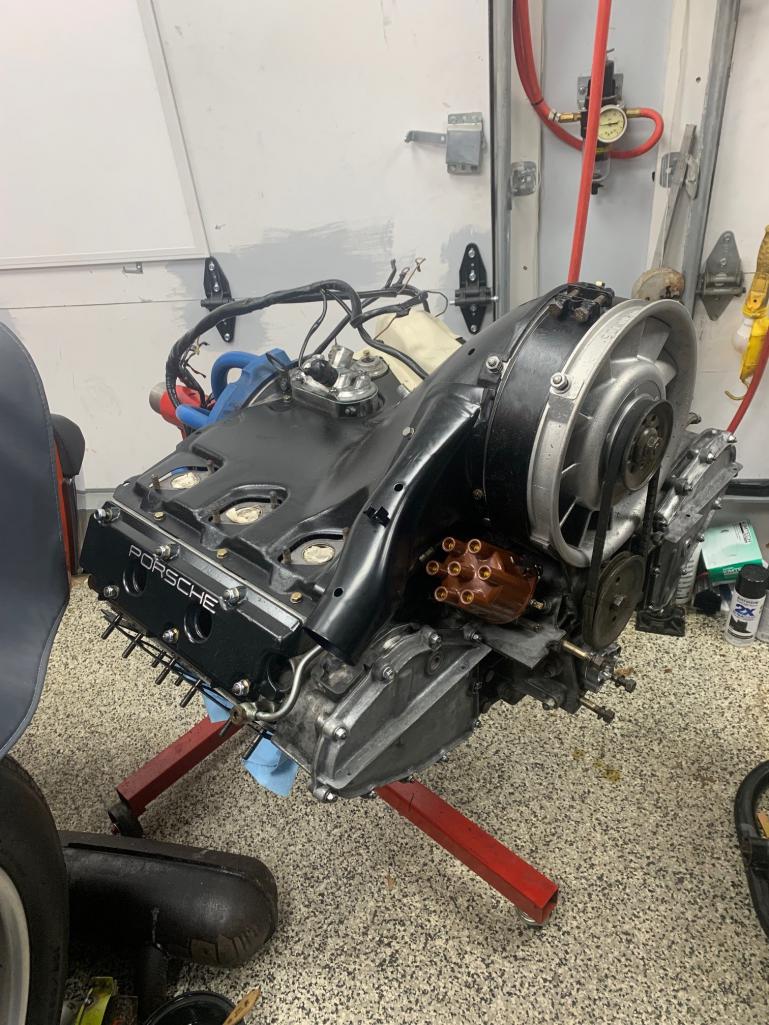
Moving on to the carbs...........
Posted by: ctc911ctc Jul 7 2025, 11:19 AM
*******UPDATE*********
Cleaning up the engine,
The engine Bay and other parts
I was able to get a smaller power-spray handle so I could get into the engine bay with the spray handle. 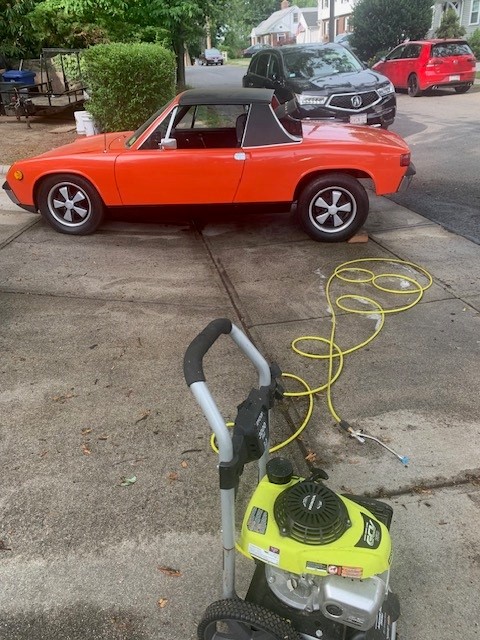
I am trying to understand if this car was coated by 'Zeibart' or similar, some of the crud in the engine bay was grease and grime, however, on the underside and wheel wells, there is a very tough material that seems like oil and gravel, however, it comes off in sheets in some places and will not come off in others. 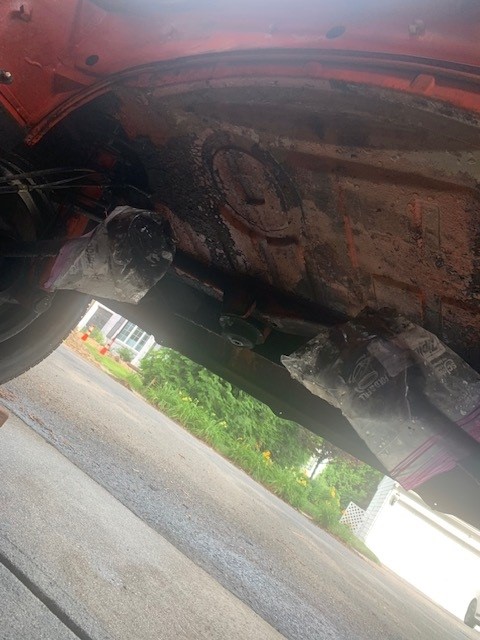
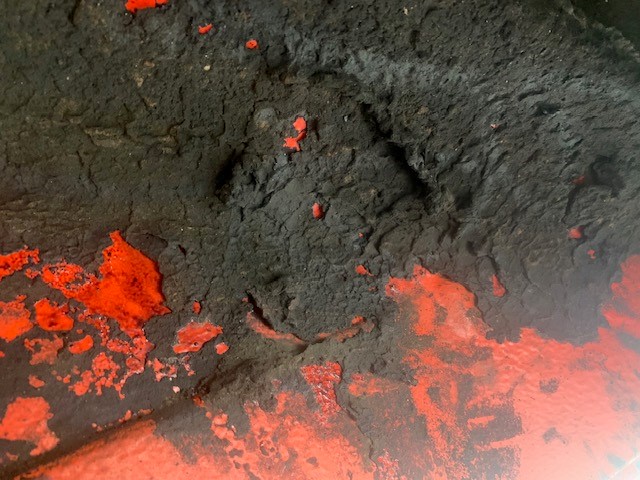
Does anyone else have experience with this type of undercoating?
Also, this is as clean as I am going to get the engine bay - will wax/buff it next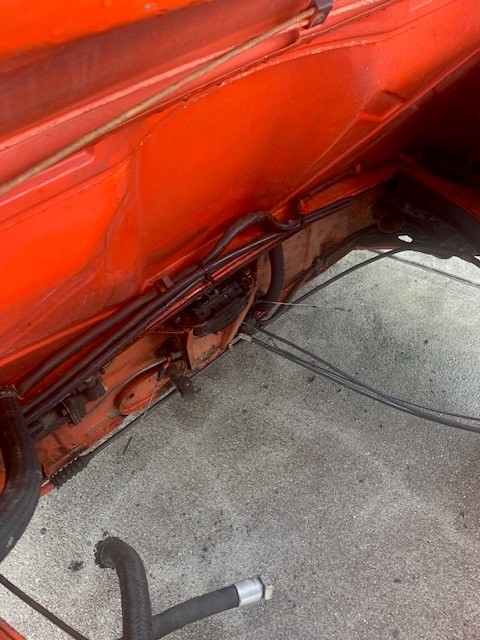
Here is the engine ready to go into the engine bay
Posted by: Cairo94507 Jul 7 2025, 12:51 PM
That may be undercoating applied when new. Mine had that on the bottom and some of it came off in large sections, the rest had to be blasted off. We re-undercoated the complete bottom and then shot it the body color. Your engine bay looks nice.
Posted by: ctc911ctc Jul 7 2025, 01:06 PM
Tooth Brush and Brake cleaner.........
That may be undercoating applied when new. Mine had that on the bottom and some of it came off in large sections, the rest had to be blasted off. We re-undercoated the complete bottom and then shot it the body color. Your engine bay looks nice.
Posted by: ctc911ctc Jul 7 2025, 01:38 PM
What did you use for the blasting?
That may be undercoating applied when new. Mine had that on the bottom and some of it came off in large sections, the rest had to be blasted off. We re-undercoated the complete bottom and then shot it the body color. Your engine bay looks nice.
Posted by: Cairo94507 Jul 7 2025, 05:15 PM
It was sandblasting and scraper.
Posted by: sixnotfour Jul 7 2025, 05:27 PM
Dry Ice Blasting ..I saw this Six at Morris Brothers Motorsport...
It cleaned up Nice.
https://www.youtube.com/watch?v=rYtQQBYdMQo
Posted by: gereed75 Jul 7 2025, 06:31 PM
Love this kind of preservation/ restoration.
Great looking car!!
Posted by: BillJ Jul 7 2025, 07:01 PM
I am a huge fan of dry ice blasting. Did the whole underside and wheel wells on mine and made inspection and recoat a breeze
Posted by: ctc911ctc Jul 7 2025, 07:40 PM
OK, Dry ice it is.........last time I bought dry ice it came with salmon from Alaska...............will figure this fish story out.....more to come!
Posted by: live free & drive Jul 9 2025, 02:32 PM
You can get the pellets at Continental Carbonic and I think they may rent the equipment too: 472 Amherst St Unit 26, Nashua, NH 03063
Powered by Invision Power Board (http://www.invisionboard.com)
© Invision Power Services (http://www.invisionpower.com)