Printable Version of Topic
Click here to view this topic in its original format
914World.com _ 914World Garage _ Target roadworthiness date 10/10
Posted by: Doug Leggins Sep 13 2005, 10:47 PM
I might be just too slow to get it done  , but I'm trying to get the 73 drivable for the FFC.
I've got a lot of work left to do, but if I can make good steady progress I've got a shot at driving it at the event. I don't think there is much of a chance of getting it 100% complete, so my goal is drivable.
I haven't posted any updates in a while so I going to post some pics of stuff I have done. And then I'll try to post frequent progress updates.
914 & 2.0 badges and license plate holder were powder coated a few weeks back. I installed them a couple of weekends back.
Attached image(s)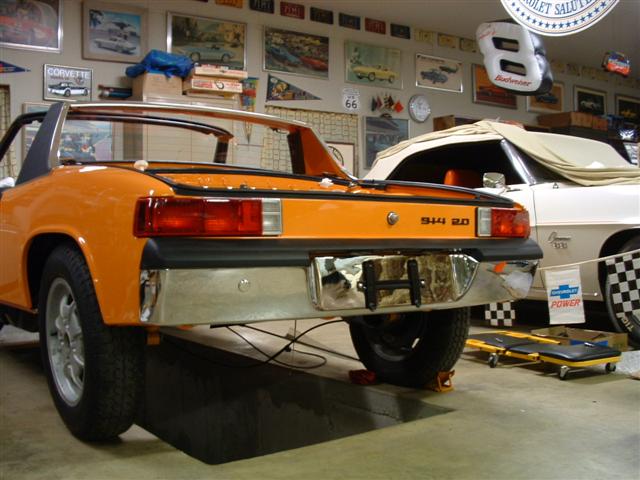
Posted by: Doug Leggins Sep 13 2005, 10:52 PM
I've recently been working on assembling the doors. Both are mostly assembled. Next step will be to install them on the chassis.
Attached image(s)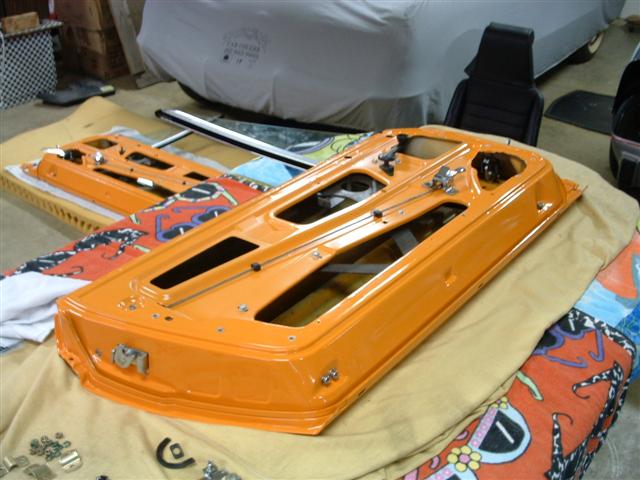
Posted by: Doug Leggins Sep 13 2005, 10:53 PM
asdf
Attached image(s)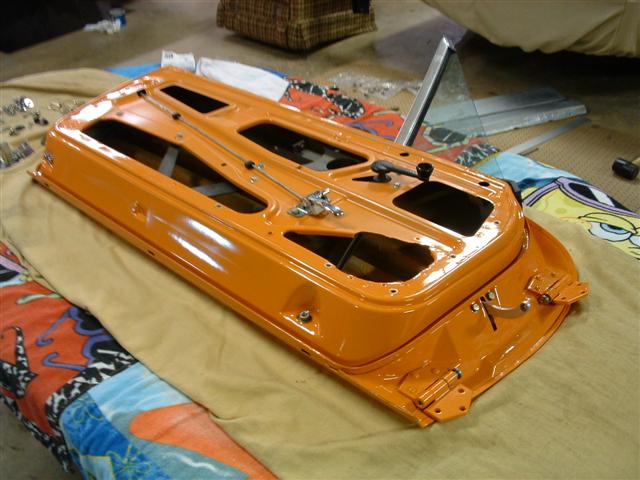
Posted by: Doug Leggins Sep 13 2005, 11:07 PM
Installing the inner fuzzy stip in the squeege gutter was every bit as difficult as everyone has said. I tried many things but nothing made it easy.
I used 2 clamps to create a fixture to hold the gutter in place while I pushed the felt strip in place. It was pretty much like trying to push a rope One clamp held a stop block in place that I pushed against and the other clamp captured the gutter and prevented it from moving too much.
I pushed the felt strip in about half way and then pulled ot out. Turned it around and then pushed it in about half way and pulled it out again. Did this a couple of times to reduce the amount of force that was required to push the strip in the gutter.
I coated the gutter grooves with glycerine and started the pushing. I found it helped greatly to place a block of wood under the felt strip to reduce the tendency for it to bend. At about the half way point the push started to be only 1'8" at a time ...this took a while!
Attached image(s)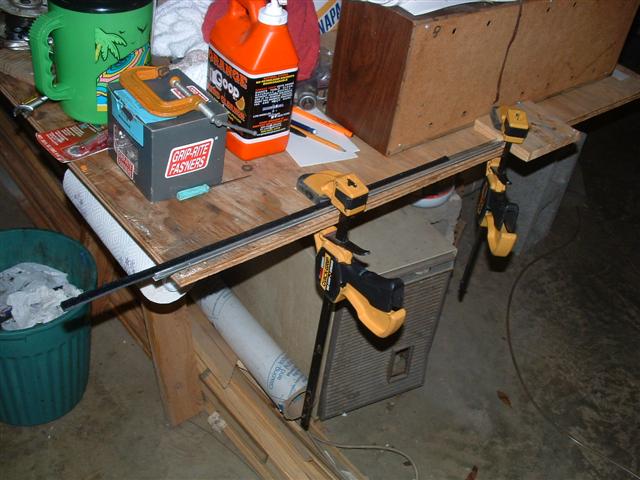
Posted by: Doug Leggins Sep 13 2005, 11:10 PM
piece of wood used to help push without bending
Attached image(s)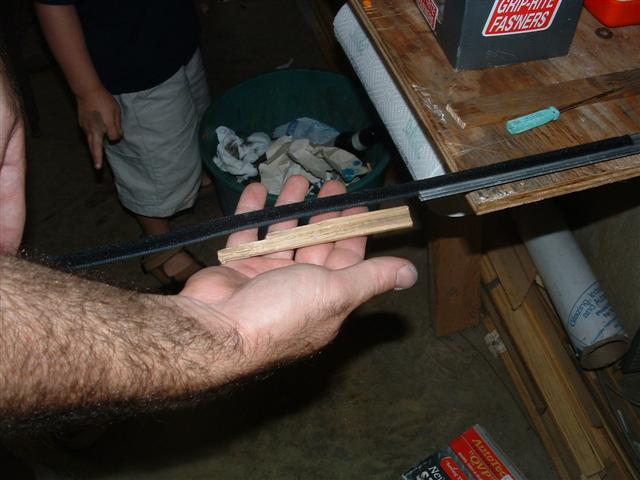
Posted by: Doug Leggins Sep 13 2005, 11:11 PM
A little at a time
Attached image(s)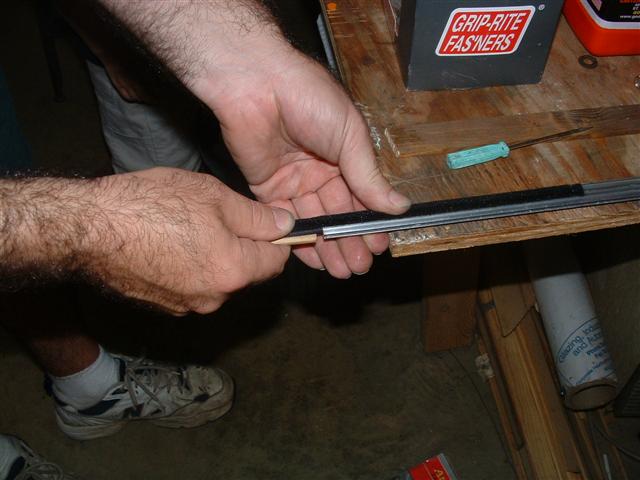
Posted by: Doug Leggins Sep 13 2005, 11:19 PM
Gathering parts for the doors took a while. Started with bare doors. Pulled out all of my used parts and sorted for the best. Layed out the new parts. There are a lot of seals used in and around the doors!
Cleaned up the used parts and started the re-assembly.
Attached image(s)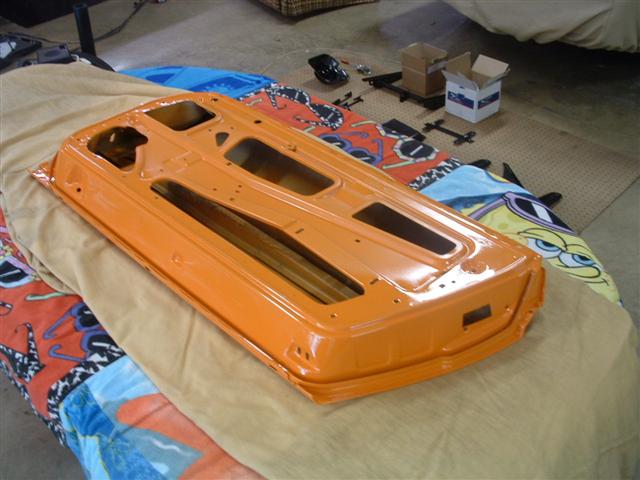
Posted by: Doug Leggins Sep 13 2005, 11:20 PM
Parts
Attached image(s)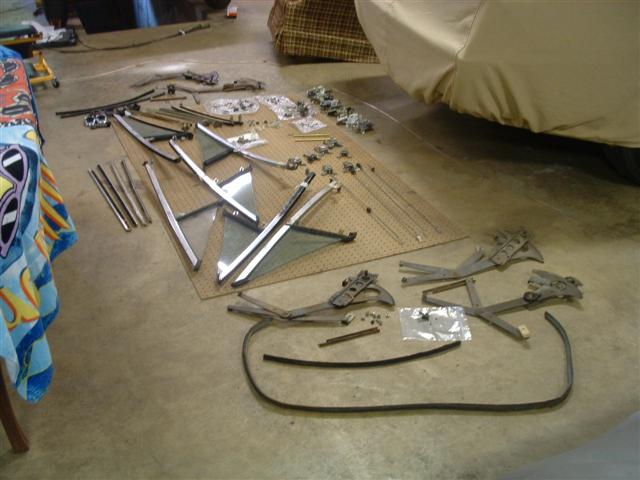
Posted by: Doug Leggins Sep 13 2005, 11:21 PM
more parts
Attached image(s)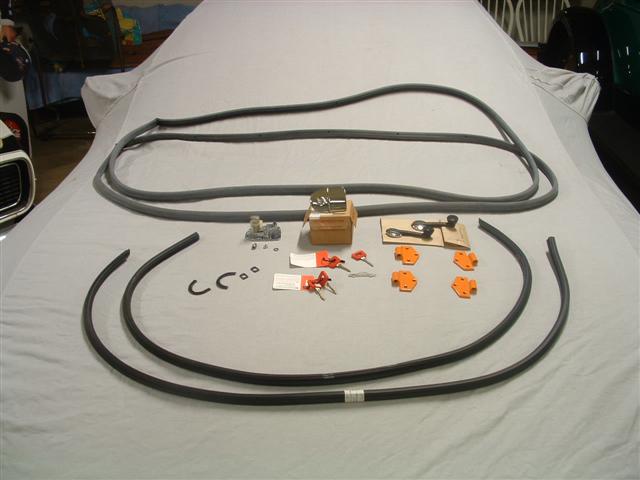
Posted by: Doug Leggins Sep 13 2005, 11:21 PM
A lot of seals and hardware
Attached image(s)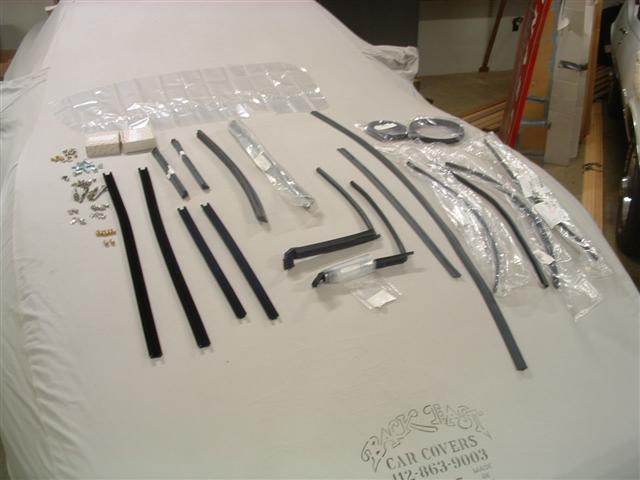
Posted by: Doug Leggins Sep 13 2005, 11:34 PM
Rebuilt the brake system a few weeks back. A lot of work here. Nearly done now! I need to adjust the rear brake venting clearance add brake fluid and bleed the brakes.
I rebuilt all 4 calipers. Kind of cool to see the insides of the calipers and learn how they work. But next time, if there is a next time , it will be money well spent to get some of Eric's rebuilt calipers.
Sand blasted, reassemmbled and partially painted
Attached image(s)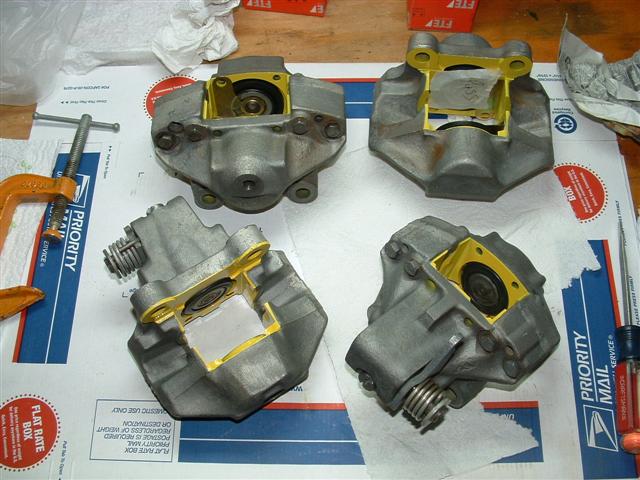
Posted by: Doug Leggins Sep 13 2005, 11:35 PM
hanging to dry
Attached image(s)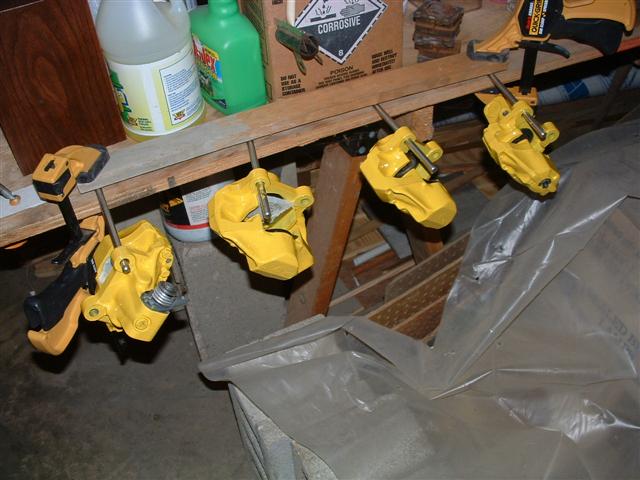
Posted by: Doug Leggins Sep 13 2005, 11:36 PM
master cylinder
Attached image(s)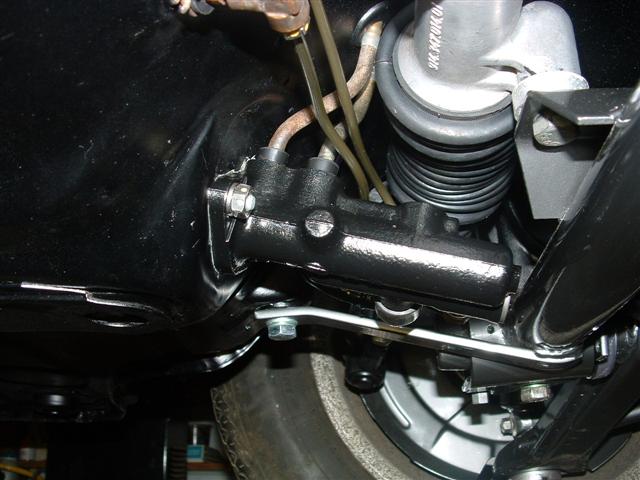
Posted by: Doug Leggins Sep 13 2005, 11:36 PM
asdf
Attached image(s)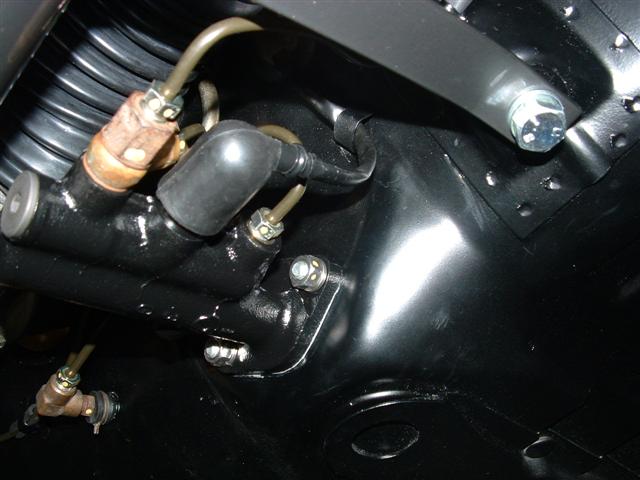
Posted by: Doug Leggins Sep 13 2005, 11:41 PM
front caliper installed
Attached image(s)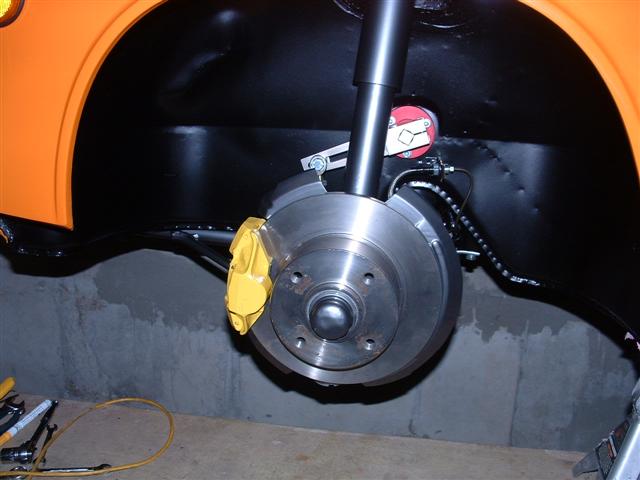
Posted by: Doug Leggins Sep 13 2005, 11:42 PM
front again
Attached image(s)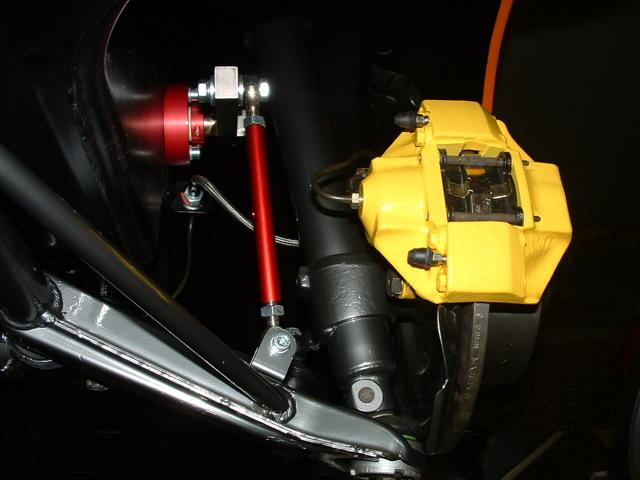
Posted by: Doug Leggins Sep 13 2005, 11:47 PM
rear brake T installed
Attached image(s)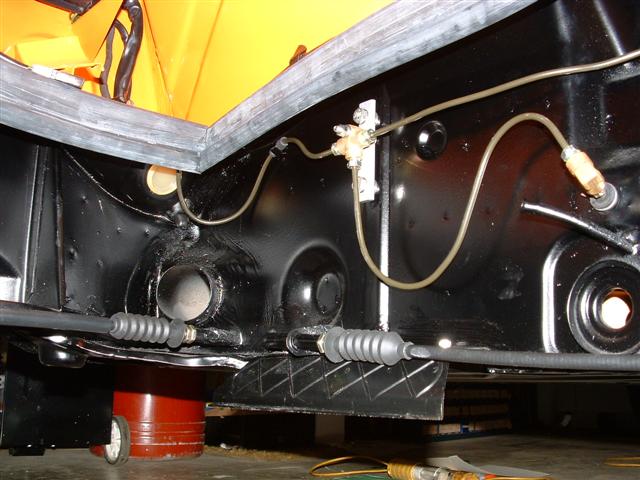
Posted by: Doug Leggins Sep 13 2005, 11:50 PM
rear caliper
Attached image(s)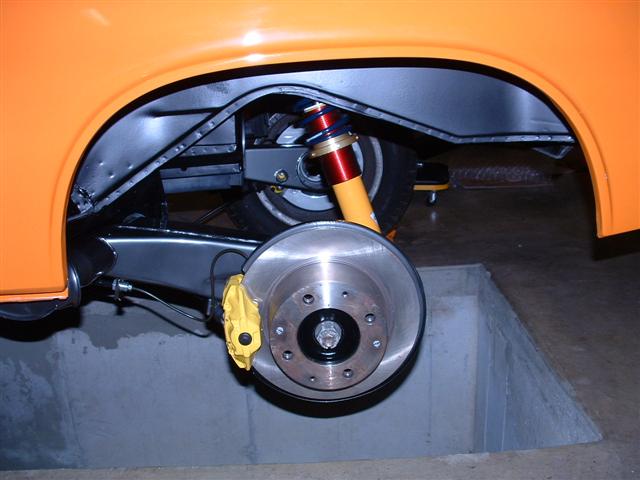
Posted by: Doug Leggins Sep 13 2005, 11:51 PM
asdf
Attached image(s)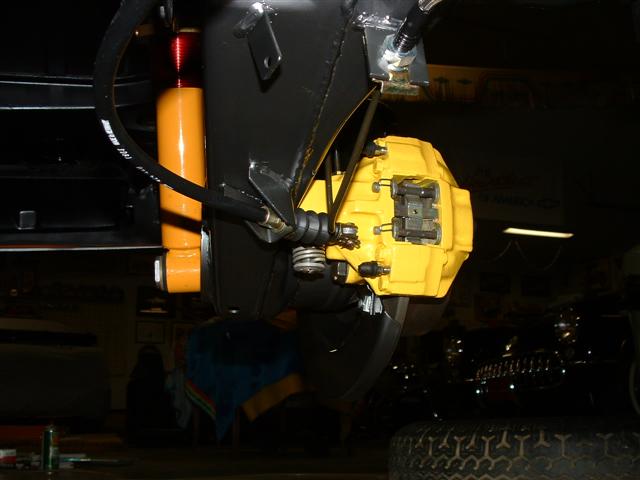
Posted by: Doug Leggins Sep 13 2005, 11:53 PM
This past weekend I installed the throttle cable and clutch cable.
Attached image(s)
Posted by: Doug Leggins Sep 13 2005, 11:59 PM
seat tilt adjustment bracket
Attached image(s)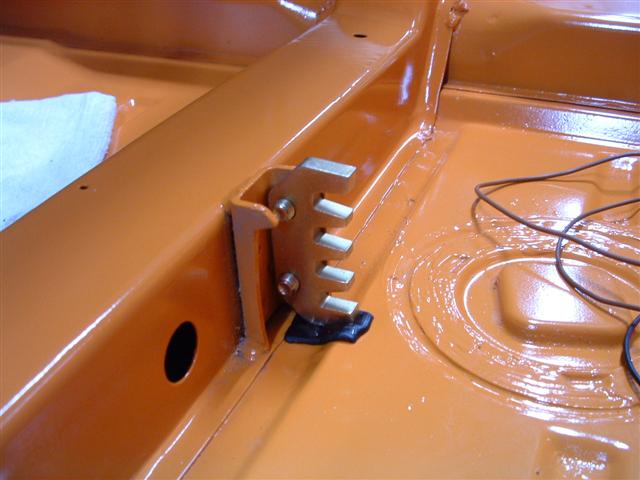
Posted by: Doug Leggins Sep 14 2005, 12:00 AM
pedal cluster ...rebuilt by Eric Shea -NICE!
Attached image(s)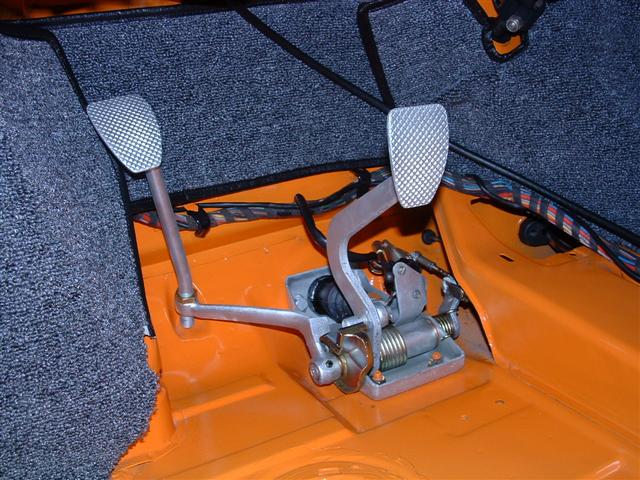
Posted by: Doug Leggins Sep 14 2005, 12:01 AM
Engman's pedal board in place -another great piece!
Attached image(s)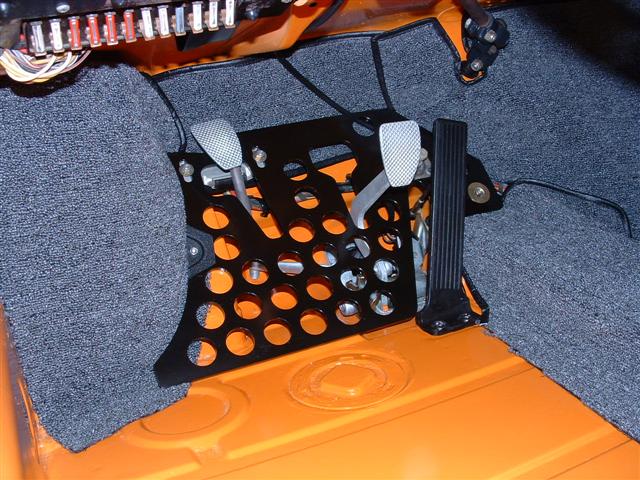
Posted by: Doug Leggins Sep 14 2005, 12:02 AM
Final pedal area
Attached image(s)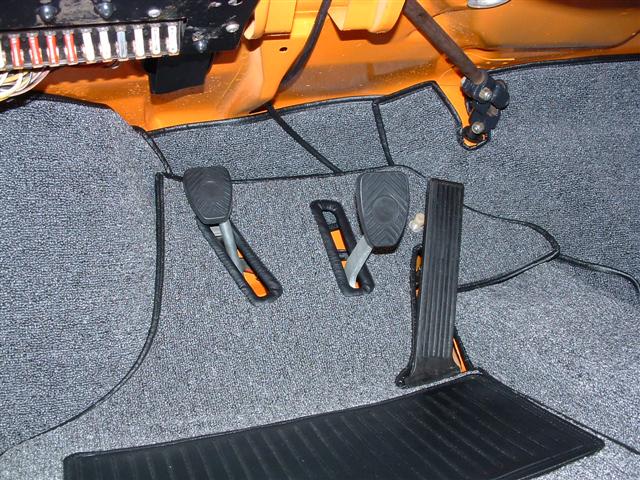
Posted by: Doug Leggins Sep 14 2005, 12:05 AM
Carpet mostly in place. This is the current status of the interior.
Attached image(s)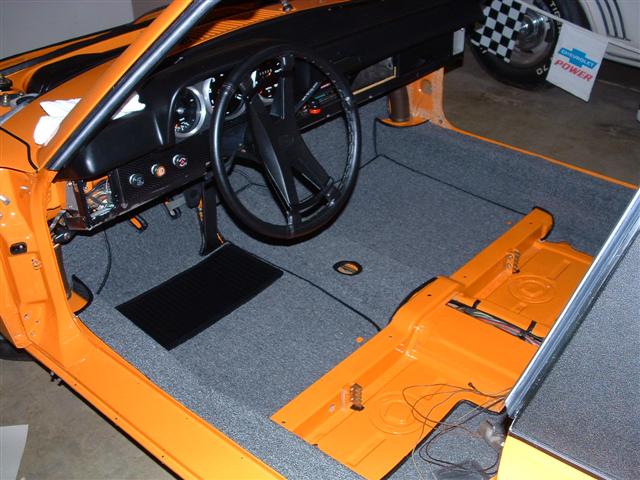
Posted by: Doug Leggins Sep 14 2005, 12:06 AM
interior again
Attached image(s)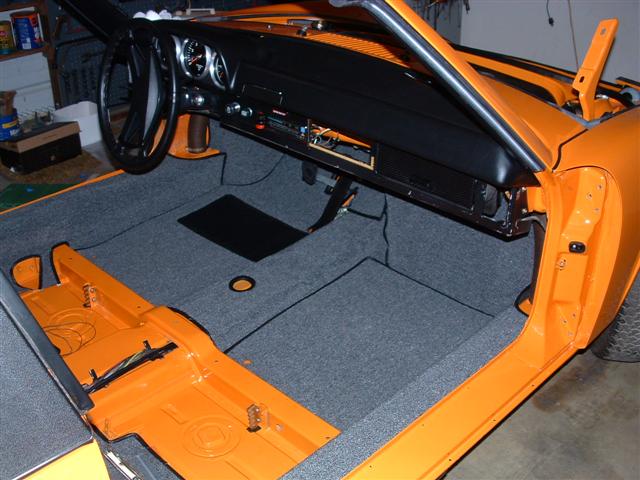
Posted by: Doug Leggins Sep 14 2005, 12:12 AM
I installed the rear trunk lid torsion bars last night. The one that engages on the driver's side rear trunk roller was a real PITA! I had to disassemble the drain funnels, pop out the targa latch cup, and twist, bend and pull the torsion bar forcefully yet being careful to not scratch the paint. A real PITA! But it is in now  The other torsion rod is not bad at all.
Attached image(s)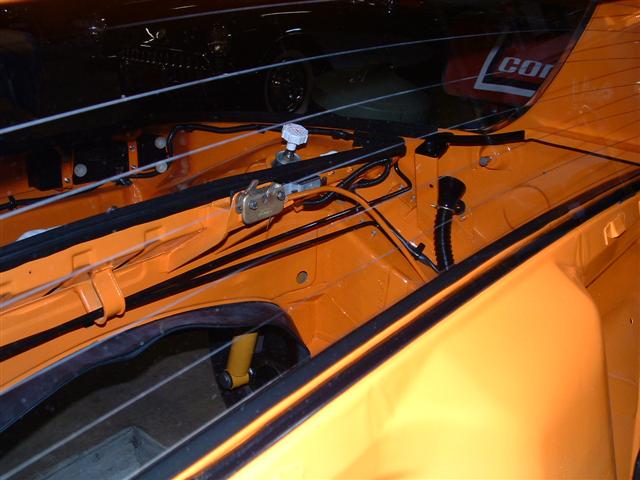
Posted by: Gint Sep 14 2005, 12:12 AM
Go Doug!
Damn that's pretty.
Posted by: Rand Sep 14 2005, 12:15 AM
Come on man, you aren't being realistic. That car is not clean enough to present at FFC.
Ok, that's not even funny. WOW DOUG. VERY NICE!

Posted by: Doug Leggins Sep 14 2005, 12:19 AM
More tomorrow.... got to get some sleep.
Posted by: seanery Sep 14 2005, 07:58 AM
Damn Doug, that's just insanely nice! 
Posted by: rhodyguy Sep 14 2005, 08:13 AM
very nice work. too clean  . it's a shame so much of the effort is hidden under the car, but you know it's done.
k
Posted by: Doug Leggins Sep 14 2005, 11:41 PM
Progress today.
I was able to make good progress on the front bumper area. Damn near got done as much as I hoped I could get done in one evening . That doesn't happen often enough -I am usually lucky to get done half of what I thought i could.
Here's what it looked at the start of the evening.
Attached image(s)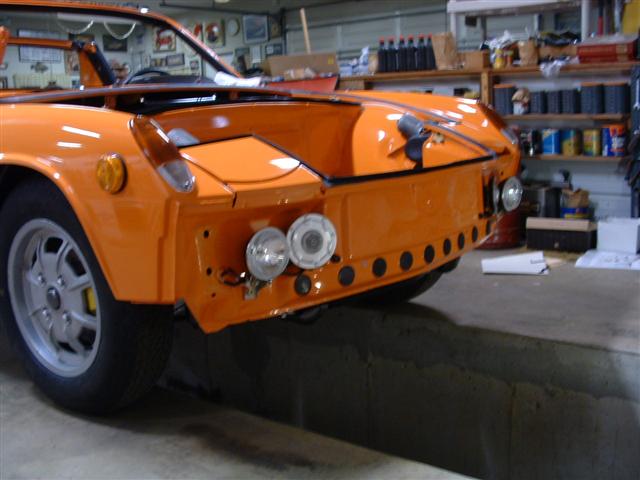
Posted by: Doug Leggins Sep 14 2005, 11:42 PM
Had my hardware gathered and ready.
Attached image(s)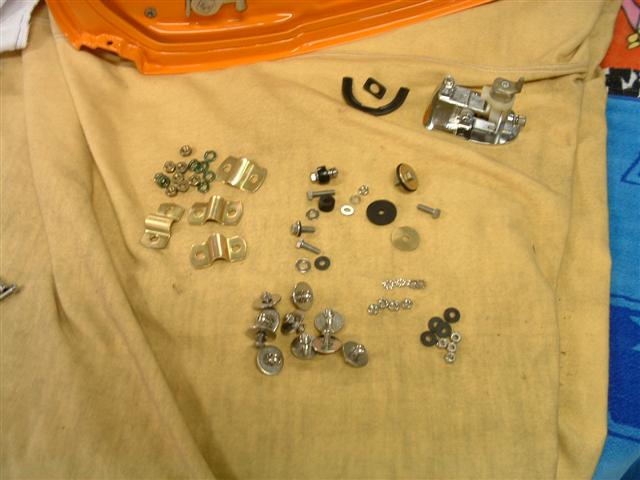
Posted by: Doug Leggins Sep 14 2005, 11:44 PM
bumper bones and hardware
Attached image(s)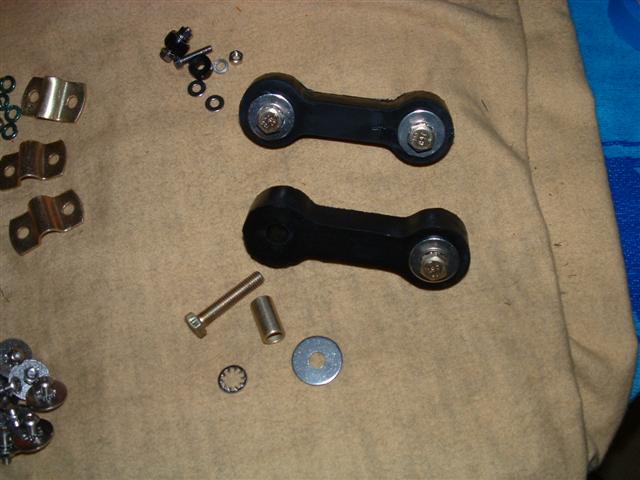
Posted by: Doug Leggins Sep 14 2005, 11:49 PM
I got a good deal on a 73/74 front bumper months ago. It is in excellent condition. But I did run into a problem with it. The bumper was about 1/2" too narrow to fit on the car. Discovered that the short return on the driver's side was bent in. A little  and it fit fine.
Attached image(s)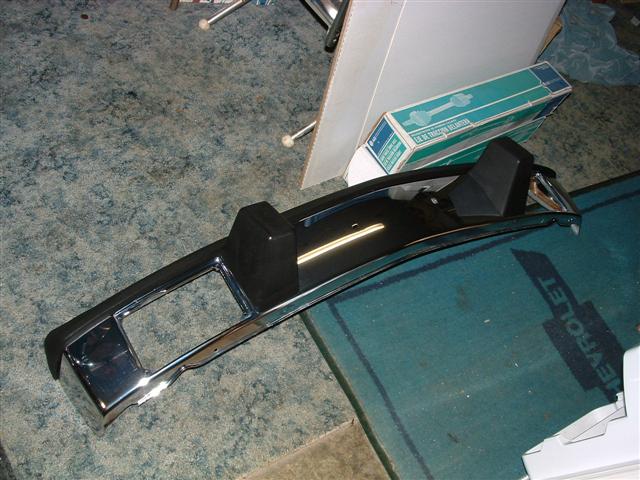
Posted by: Doug Leggins Sep 14 2005, 11:56 PM
I have several hours of polishing in each of the fog light grills. They were covered in that green corrosion stuff that forms on these parts. A whole lot of scrubbing with chrome polish turned them back into excellent condition.
I also cleaned up the speed nuts for attaching the grills to the bumper, and painted them with metal mask paint from POR products. New SS screws too
Attached image(s)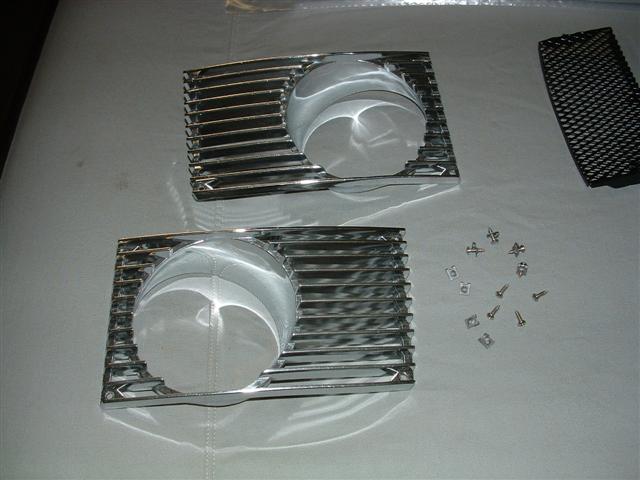
Posted by: Doug Leggins Sep 15 2005, 12:00 AM
Monday I picked up the fiberglass portion of the front flex dam from the painter. I should have fitted it prior to paint. I had to use a dremel tool to trim a little to get it to fit better.
Attached image(s)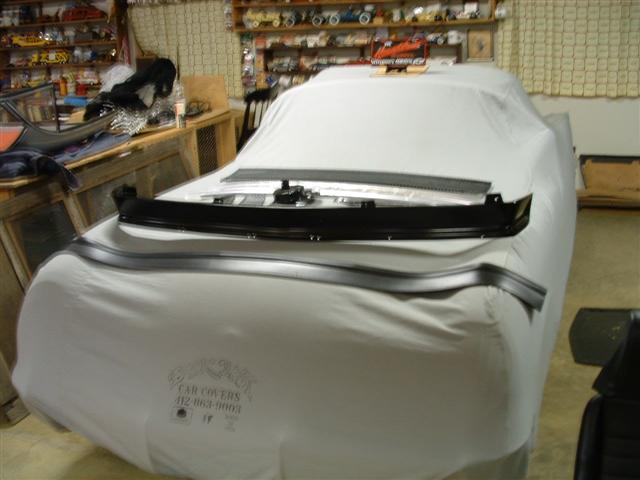
Posted by: Doug Leggins Sep 15 2005, 12:02 AM
Still need to adjust the fog lights and add a couple more fasteners. But nearly got it completely installed.
Attached image(s)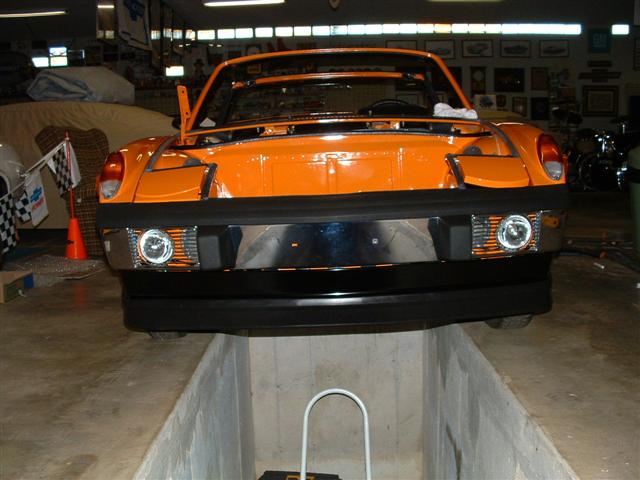
Posted by: Doug Leggins Sep 15 2005, 12:03 AM
last pic today, hopefully more tomorrow.
Attached image(s)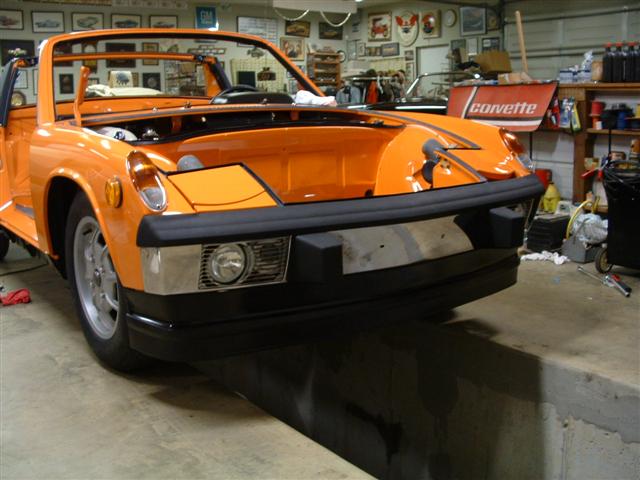
Posted by: jd74914 Sep 15 2005, 01:56 PM
Dude you have a pit in your garage. Thats wicked sweet.
Car looks great by the way
Posted by: bondo Sep 15 2005, 02:52 PM
Oh my.. This smiley says it best:
Posted by: andys Sep 15 2005, 04:21 PM
Doug,
Exceptionally nice work! You should be proud.
Andys
Posted by: Midtowner Sep 15 2005, 04:32 PM
Wowee! That is one nice ride! 
Posted by: Doug Leggins Sep 15 2005, 04:50 PM
Yes - having a pit in the garage is sweet! It makes many things much easier!!!
Thanks for the compliments folks! Sometimes I think that I am way out of control when it comes to the cleaning and details. But what the hell....I really enjoy it!!!
Posted by: MW 914 Sep 15 2005, 05:05 PM
Holy smokes.....this is gonna be one for the books! Sweet ride.
Posted by: Doug Leggins Sep 15 2005, 11:31 PM
Not a tremendous amount of progress tonight, but significant progress. The front bumper is done, fog lights are aligned and done and the flex dam is completely fastened. Feels great to have these parts done!!!!!
Little bit by little bit....
I thought about not using the rubber spacer that goes between the fender and the front valence. The car that I took the flex dam off of didn't have it and it seemed to look just fine without it. But, I had to see what it looked like done the right way. I'm glad I did. it looks better with the rubber spacer in place! Plus it is done more right
Attached image(s)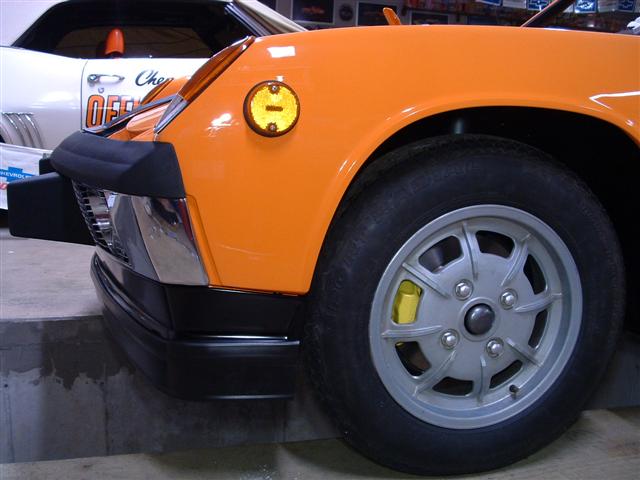
Posted by: Doug Leggins Sep 15 2005, 11:32 PM
Pass side -nice lines
Attached image(s)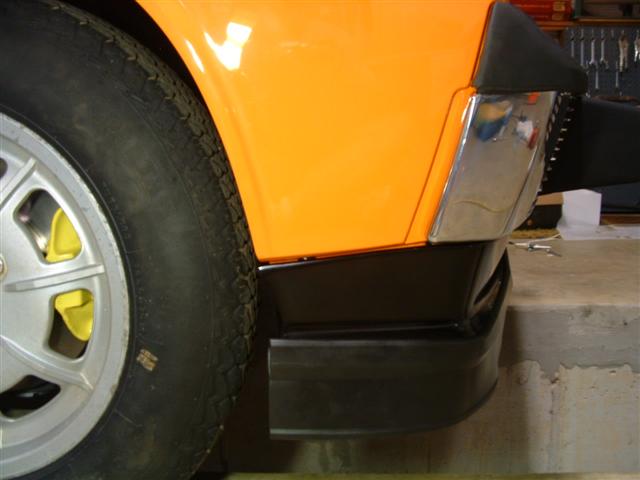
Posted by: Doug Leggins Sep 15 2005, 11:35 PM
Need to get the front hood installed.
Tomorrow is Friday I'll have a few more hours to work on the car!
Attached image(s)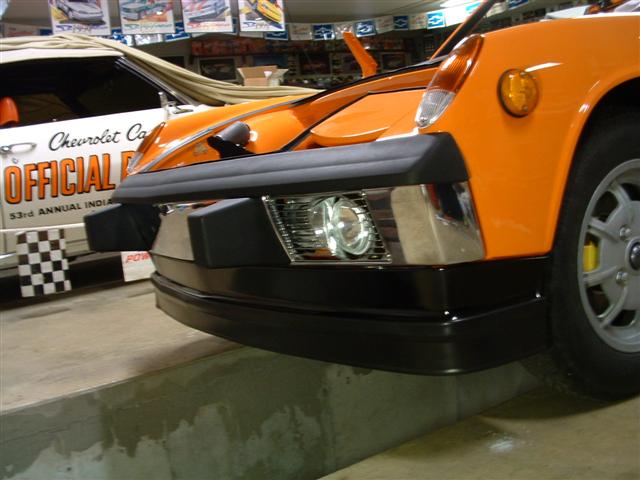
Posted by: Doug Leggins Sep 21 2005, 04:46 PM
I've been working away. Getting a little more done every day.
My home PC is screwed up once again so I haven't been able to post pics as often I I would like. Sometimes the PC will cooperate and other times it has a mind of its own. Just about time to wipe out the hard drive and start fresh.
Back to car progress stuff...
Here are the small side grills, seals and fasteners
Attached image(s)
Posted by: Doug Leggins Sep 21 2005, 04:47 PM
installed
Attached image(s)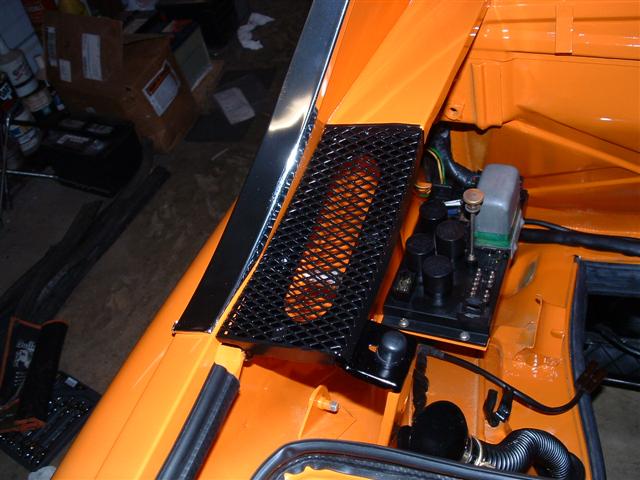
Posted by: Doug Leggins Sep 21 2005, 04:49 PM
I finished up the trim around the sail panels. I used the black butyl material that is used for windshield installation to create the seal on the back side of the AL trim pieces.
Attached image(s)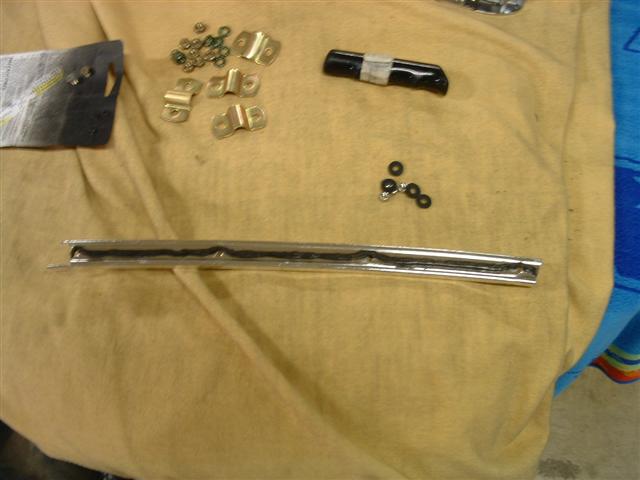
Posted by: Doug Leggins Sep 21 2005, 04:50 PM
AL strip installed
Attached image(s)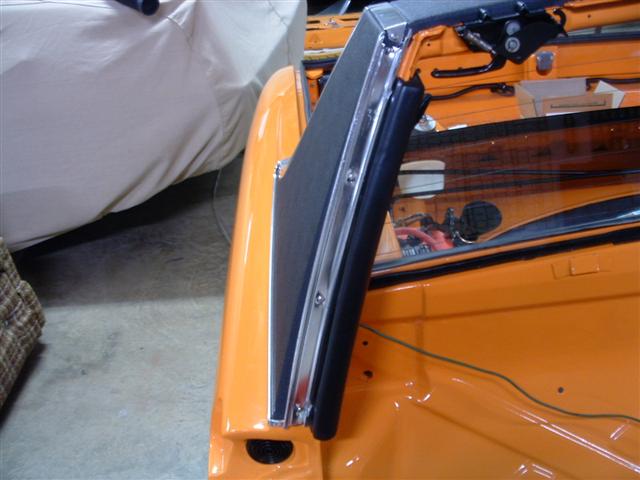
Posted by: Doug Leggins Sep 21 2005, 04:51 PM
Sail panel trim complete
Attached image(s)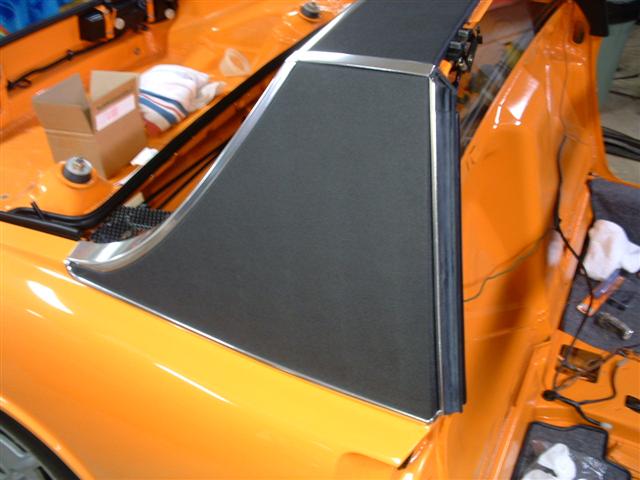
Posted by: Doug Leggins Sep 21 2005, 04:54 PM
I'm cleaning up every part.
Left before, right after... 
Attached image(s)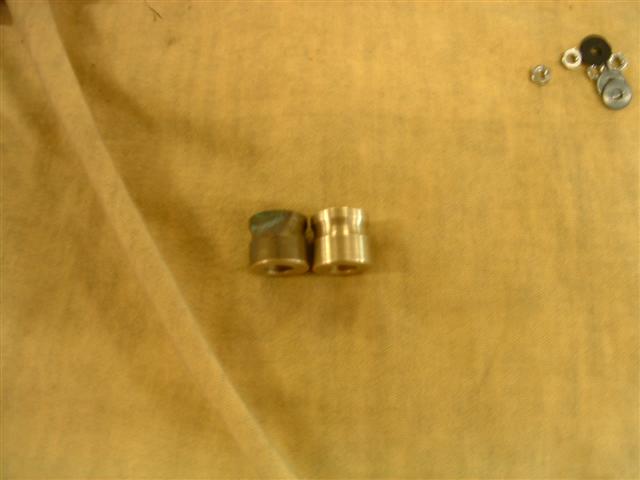
Posted by: Doug Leggins Sep 21 2005, 04:56 PM
I removed the paint from the rear trunk hinge pivot points and lubed them up well.
Attached image(s)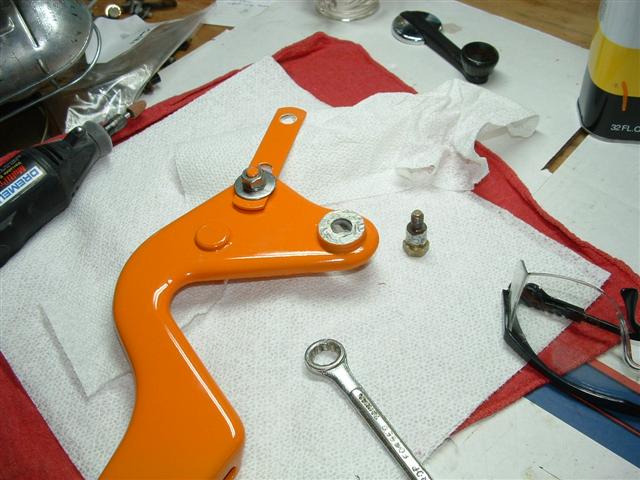
Posted by: Doug Leggins Sep 21 2005, 04:58 PM
pivot point, paint removed and lubed
Attached image(s)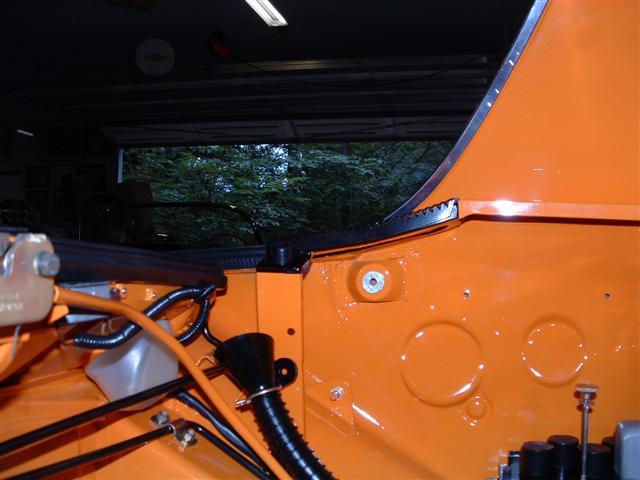
Posted by: Doug Leggins Sep 21 2005, 05:00 PM
Hinge installed.
Getting the torsion bars in place looks to be just about impossible 
Let me know if you have a good method for hooking them behind the rollers.
Attached image(s)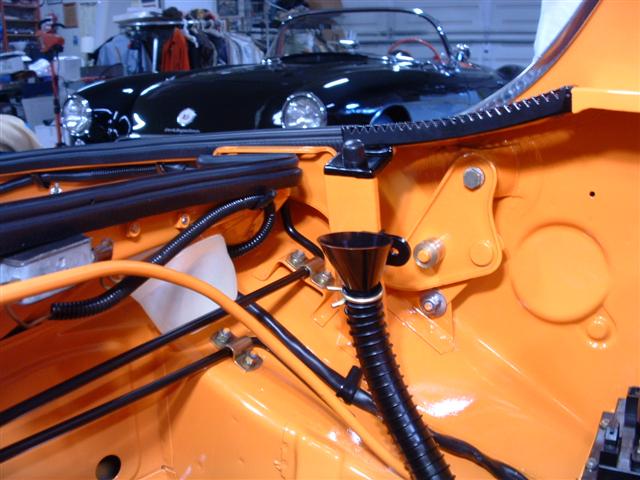
Posted by: Doug Leggins Sep 21 2005, 05:01 PM
other side
Attached image(s)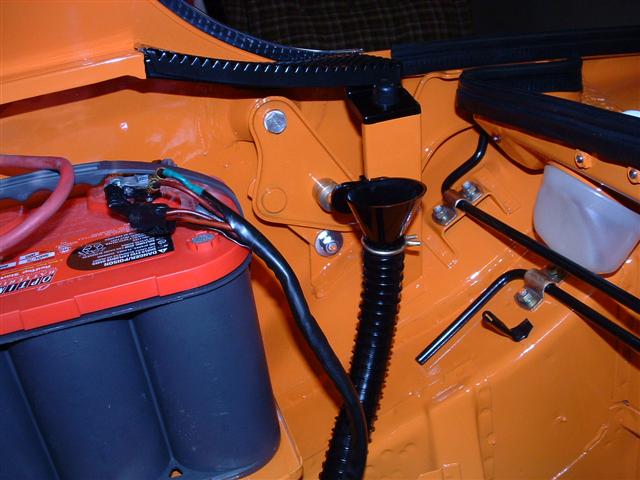
Posted by: Doug Leggins Sep 21 2005, 05:04 PM
Installed the driver's side front trunk hinge. Fairly easy when using this set up. I did have a helper press the spring hook down into position when I had it stretched to the right place.
Attached image(s)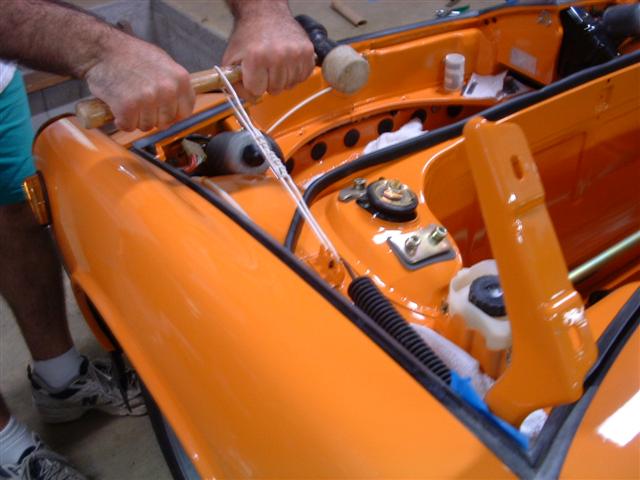
Posted by: Doug Leggins Sep 21 2005, 05:07 PM
The gas tank is installed.
I think that I'm ready to install the front hood as soon as I can line up some helpers.
Attached image(s)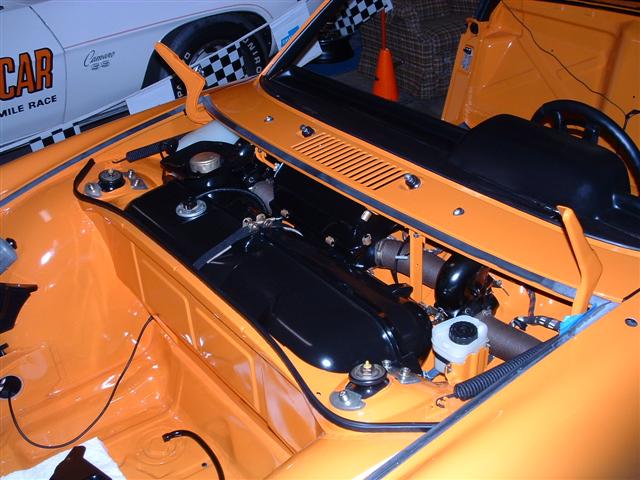
Posted by: Doug Leggins Sep 21 2005, 05:10 PM
I painted the gas cap with Eastwood's cad paint system. The finished look is pretty good with this stuff.
Attached image(s)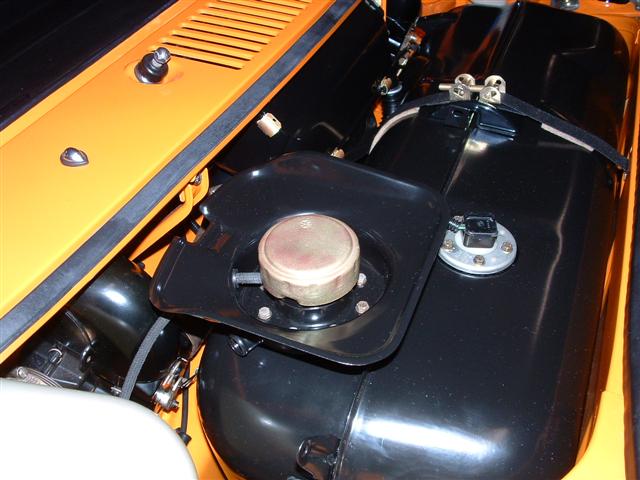
Posted by: Doug Leggins Sep 21 2005, 05:12 PM
Cleaned up, painted the bracket and powder coated the latches on the rear targa latch assemblies.
Attached image(s)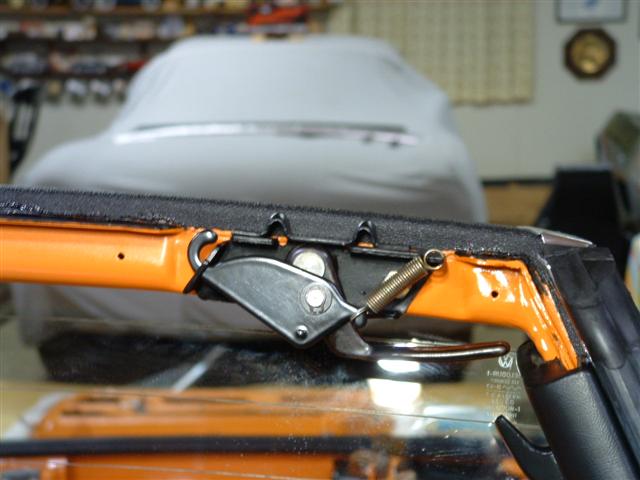
Posted by: Doug Leggins Sep 21 2005, 05:14 PM
The orange buttons sticking through the charcoal carpet didn't look right. -painted the buttons black.
Attached image(s)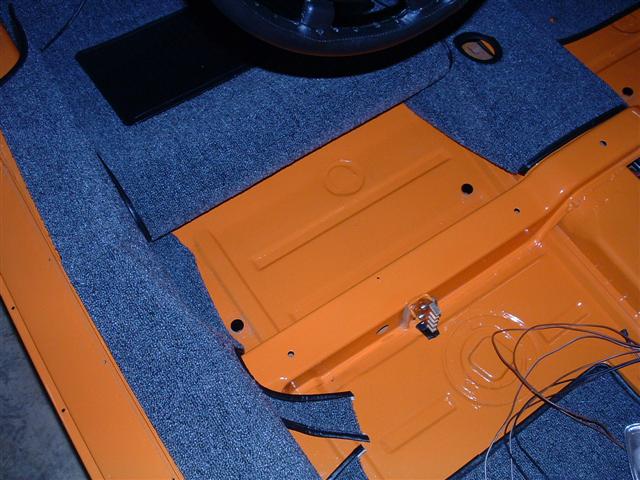
Posted by: Doug Leggins Sep 21 2005, 05:16 PM
She's coming together piece by piece...
Attached image(s)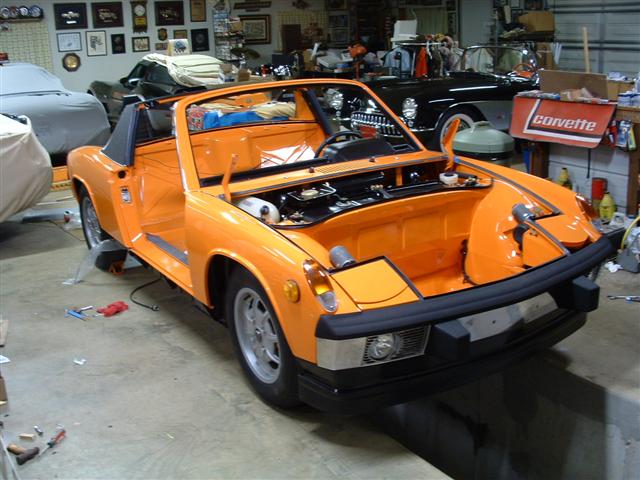
Posted by: Doug Leggins Sep 21 2005, 05:16 PM
asdf
Attached image(s)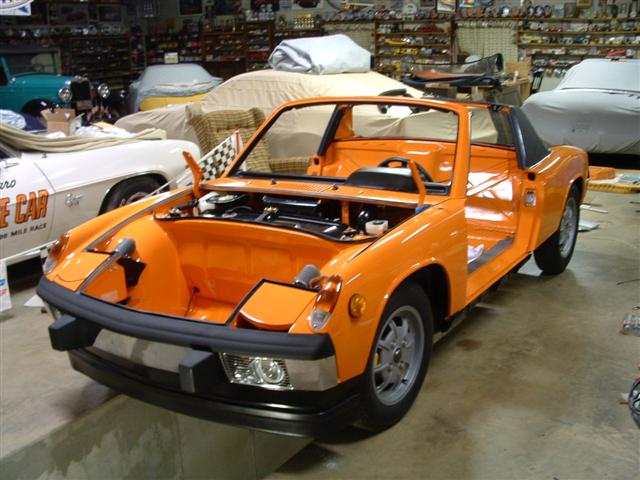
Posted by: seanery Sep 21 2005, 05:18 PM
wasn't this just supposed to be a "nice driver" ?
Posted by: Doug Leggins Sep 21 2005, 05:19 PM
I gathered the interior vinyl piece set from a couple of parts cars.
Attached image(s)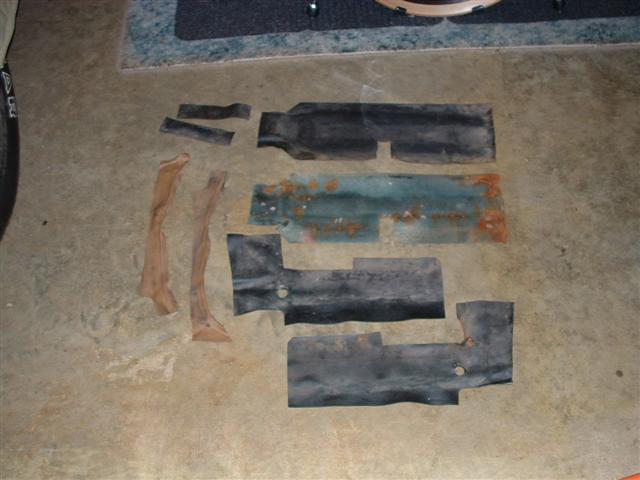
Posted by: Doug Leggins Sep 21 2005, 05:21 PM
I made these last night.
Gotta make one of them over. I had the pattern upside down 
Attached image(s)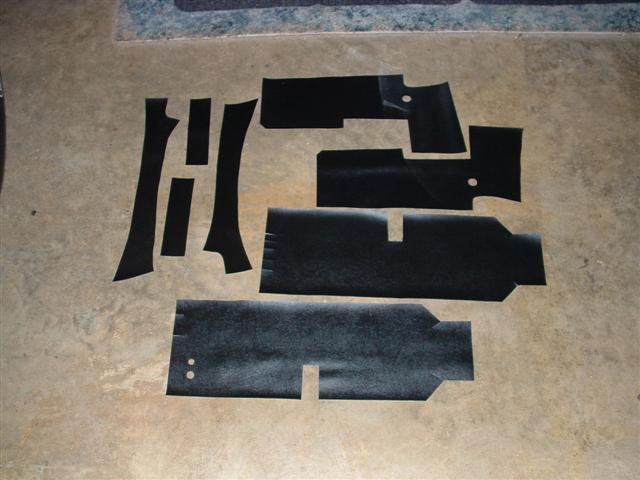
Posted by: Doug Leggins Sep 21 2005, 05:36 PM
| QUOTE |
| wasn't this just supposed to be a "nice driver" ? |
That was my goal when i started. I did get a little carried away
I'll have a nice driver when i'm done
Posted by: Doug Leggins Sep 21 2005, 05:42 PM
I got another part for the car that really got me excited!
A license plate!!!!
I'm getting close to having a 914 to drive again 
Posted by: markb Sep 21 2005, 05:47 PM
You'll have maore than a "nice" driver when you're done, you'll have an awsome driver! Makes me feel like such a slouch for just wanting to put one together to drive.  Of course, I do drive mine as much as possible, rain or shine, so I guess I wouldn't want one quite that nice. I'd be afraid to park it in a parking lot for fear of door dings. That's one beeeutiful car.
Posted by: Gint Sep 21 2005, 07:45 PM
Gorgeous Doug. Please keep those pics coming!
Posted by: Doug Leggins Sep 27 2005, 06:45 PM
I've been getting parts ready for installing the tin on my engine. I tried to speed things up, but I just couldn't bypass the cleaning and painting of many of the parts. It takes more time than planned (nothing new here ) but the end result ....
Attached image(s)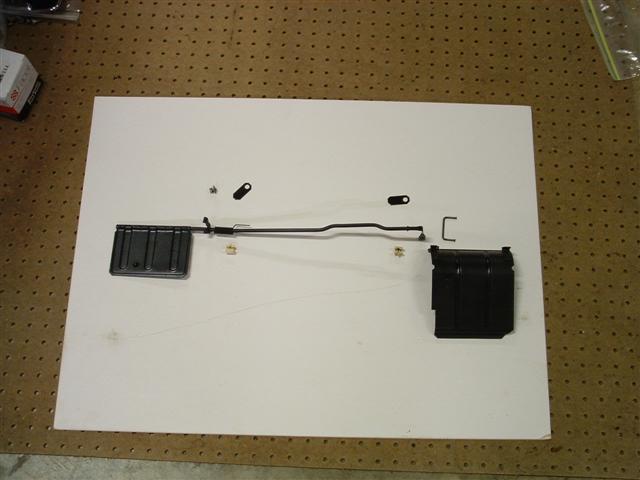
Posted by: Doug Leggins Sep 27 2005, 06:48 PM
A lot of the steps move along slow because it is the first time that I have delt with many of these items. 
I'm learning!!
Simply follow the illustrations.... Right???
Attached image(s)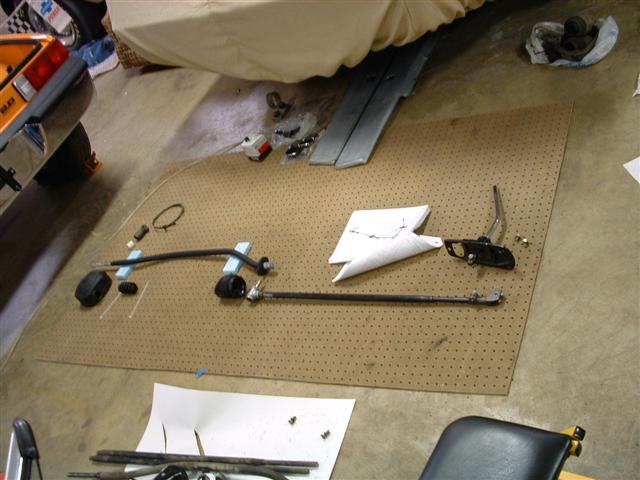
Posted by: Doug Leggins Sep 27 2005, 06:50 PM
Mostly alternator pieces. I had no idea that there were so many pieces in the alternator assembly.
Attached image(s)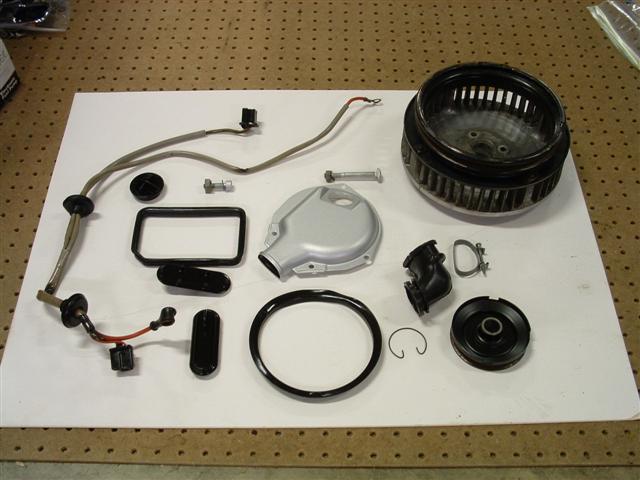
Posted by: Doug Leggins Sep 27 2005, 06:53 PM
Pretty brackets
Likely not to be seen much ever again, so posting them for all to see. 
Attached image(s)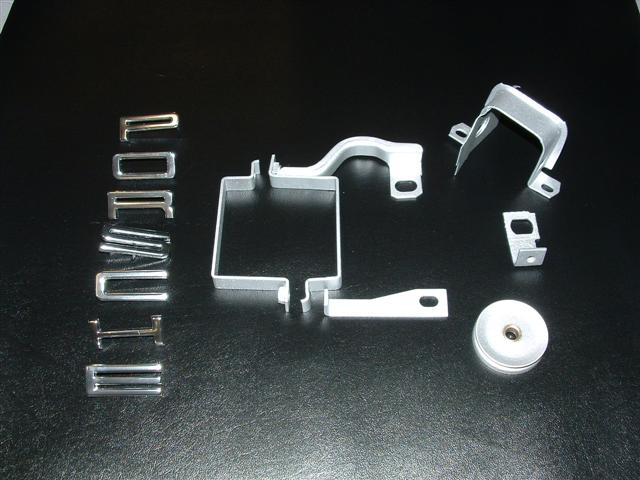
Posted by: Doug Leggins Sep 27 2005, 07:06 PM
Some assembly work completed
Attached image(s)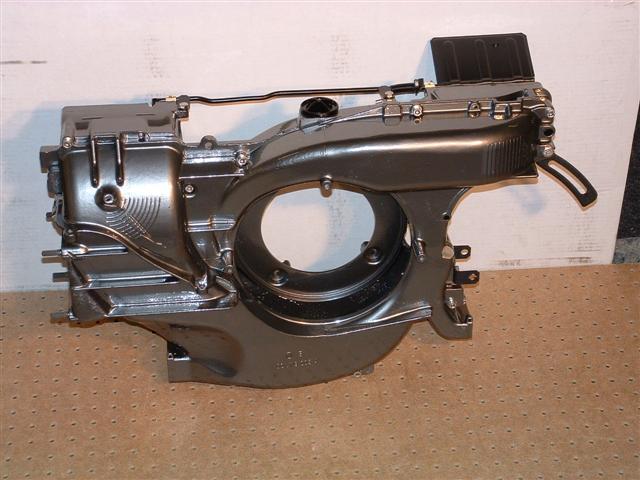
Posted by: Doug Leggins Sep 27 2005, 07:10 PM
I used SS fasteners to attach the blower housing halves together. I stick with the 8.8 grade on items where the proper strength is needed.
Attached image(s)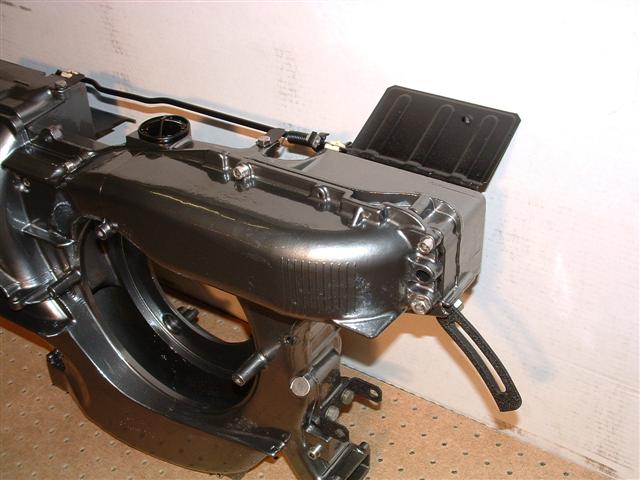
Posted by: Doug Leggins Sep 27 2005, 07:12 PM
A little more assembly that I completed last night.
Attached image(s)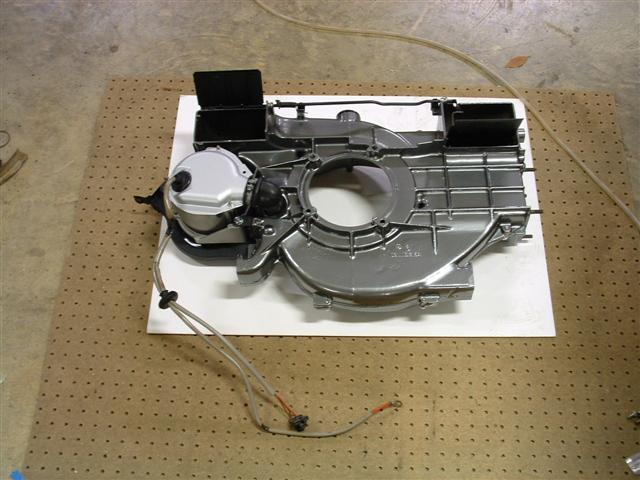
Posted by: Doug Leggins Sep 27 2005, 07:13 PM
I love the details!
Attached image(s)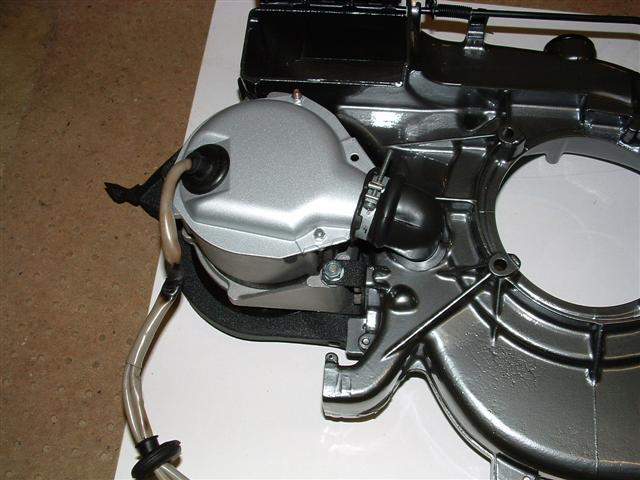
Posted by: Doug Leggins Sep 27 2005, 07:15 PM
This one more and I'm headed to the garage....
Attached image(s)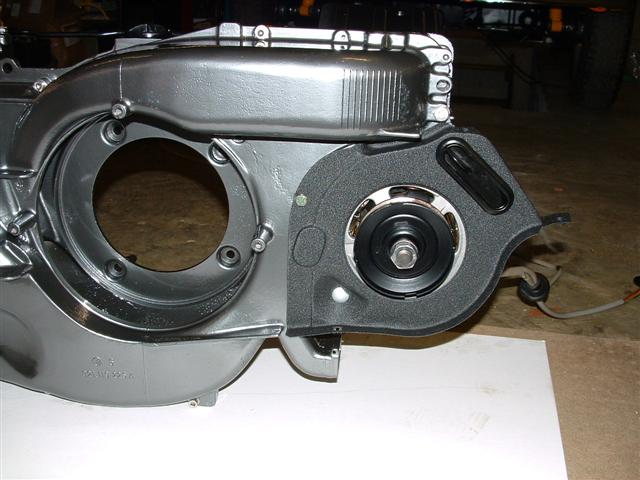
Posted by: olav Sep 27 2005, 07:48 PM
Where did you get the sail-panel vinyl and the interior vinyl to make the peices from?
Posted by: olav Sep 27 2005, 07:49 PM
Oh, and it looks awesome!
Posted by: bmunday Sep 27 2005, 07:51 PM
Doug,
Is that a "57" Corvette I see in the background on those pics?
I might be wrong on the year, but what a BEAUTIFUL CAR!!!!!
Can I have it?
Posted by: Doug Leggins Sep 27 2005, 10:54 PM
olav - I got the sail panel vinyl from GPR. The vinyl material for the interior trim pieces came from JoAnn Fabrics. It is a marine grade material. The grain pattern is an exact match, or at least extremely close, to the original material that was used.
I think that it was only 6.99/yd. I bought one yard and had about 1/4 of it left over.
bmunday - You are right, it is a 57 No, you cannot have it
Posted by: Midtowner Sep 28 2005, 09:25 PM
We have the same air dam except your rubber half fits over the bottom edge of the fiberglass. Where did you purchase the air dam? 
Posted by: Doug Leggins Sep 28 2005, 10:40 PM
| QUOTE |
| We have the same air dam except your rubber half fits over the bottom edge of the fiberglass. Where did you purchase the air dam? |
The air dam was on my 72 when I bought it, so I don't know where it was originally purchased. I bought the 72 in Indianapolis and the PO bought several items from Tweeks when they were located in Indy. Very likely that he bought it from Tweeks.
Posted by: Doug Leggins Sep 29 2005, 08:16 PM
Started retrofitting my engine to a 914 set up.
I bought an engine a little more than a year ago. It's a 2056 that was originally set up for a Manx kit car. The original owner gave up on the project and sold the components.
The engine was built by Jake in 01. It has zero miles on it since. I am hoping to put a few thousand on it this year before winter arrives.
Unfortunately, I had to remove the DTM . Not the right DTM set-up for a 914. After getting a little familiar with the DTM product, I am very impressed with the quality of the DTM, the engineering effort that is obvious in its design and construction, and the meticulous attention to detail on the installation!
Here's the engine as I purchased it.
Attached image(s)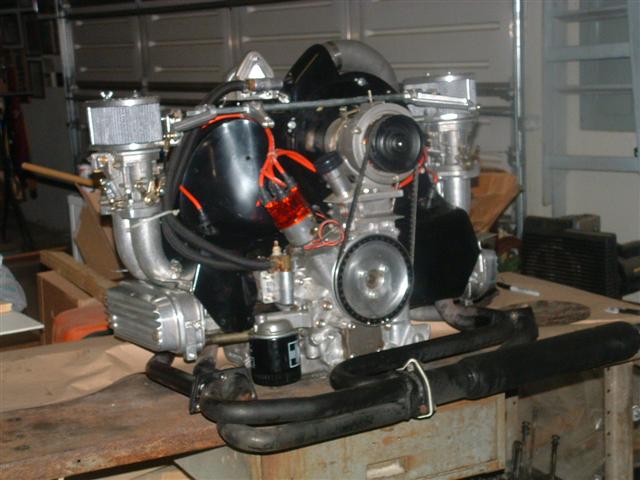
Posted by: SpecialK Sep 29 2005, 08:21 PM
hmmmm.......looks like you need some new heat-shrink on that alt. harness.  (just kidding, your car is friggin' awesome!!)
Posted by: Engman Sep 29 2005, 08:27 PM
Jeeezzz, stop already! You are making my car look really sick!
Really nice job - hope you get it running soon!
Awesome attention to detail! Looks like you WILL win all of the trophies at the FFC
But - its gotta run......
M
Posted by: SpecialK Sep 29 2005, 08:33 PM
| QUOTE (Engman @ Sep 29 2005, 08:27 PM) |
| But - its gotta run...... M |
Damn Doug......got you on a technicality!
You could probably show up with the car on a trailer, and the rest in the bed of a truck, and still win half of the awards (except farthest distance travelled to the event
)
Posted by: Doug Leggins Sep 29 2005, 08:37 PM
Here's what it looks like now.
I am planning on getting the 914 engine tin and accessories installed this weekend. And installing the doors, the front hood, carpet, .... A long way to go to get it running 10/10. Not much of a possibility of driving it 10/10. But, I think that I have a shot at having it ready 10/10 to take it for allignment that week and then just maybe being able to drive it home
Attached image(s)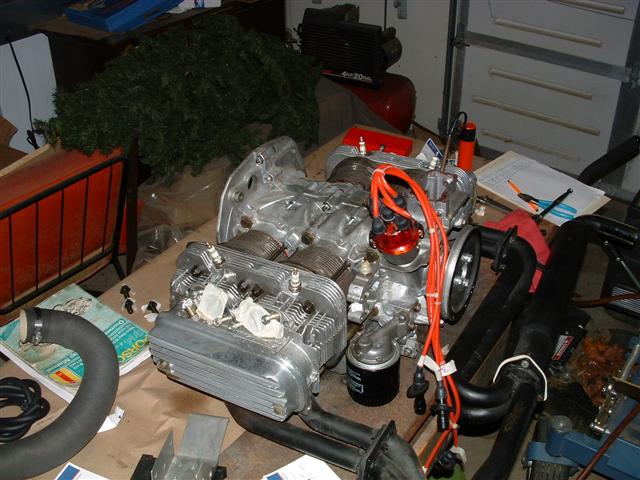
Posted by: Doug Leggins Sep 30 2005, 11:04 AM
| QUOTE |
| But - its gotta run...... |
She'll be running and I'll be smiling
I won one award last year. I won't be repeating that performance - "Dirtiest Engine Bay" -LOL
| QUOTE |
| hmmmm.......looks like you need some new heat-shrink on that alt. harness. |
I had 5 alternator harnesses to choose from. The one that I am using was by far the best looking one of the bunch! It does have some heat marks on sheathing but compared to the other harnesses, this one looks great.
Posted by: Jacco Sep 30 2005, 01:34 PM
Your car is simply drop dead gorgeous
I love the way you spend the time on details, a true work of art.
can't wait to start a 914 project and try to get close to your level!
keep us posted
cheers
Jacco
Posted by: Doug Leggins Oct 2 2005, 10:28 PM
It took a tremendous amount of time to get the engine back into 914 form! Fitting the engine tin so that the cheesehead screws can be installed is much more difficult than I ever imagined. This could be due to the set being powder coated and it being a set that was made up from pices from several different cars. It took some do overs on the sequence to install the pieces, a lot of pushing and pulling but I eventually got it all together!
I still have a couple of things to do but it is pretty close to ready to install. I plan to change out the bolt on valve covers and go back to stock. And I am waiting to get my flywheel and pressure plate back from machining -resurfacing and balancing. I've got a good shot at getting the engine and tranny installed next weekend -Any body want to help???
Attached image(s)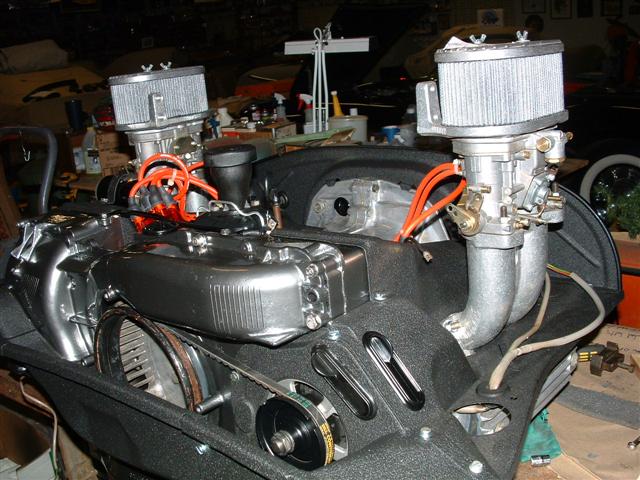
Posted by: Doug Leggins Oct 2 2005, 10:32 PM
So far I like the powder coating look. But still curious to see how well it holds up over time.
Attached image(s)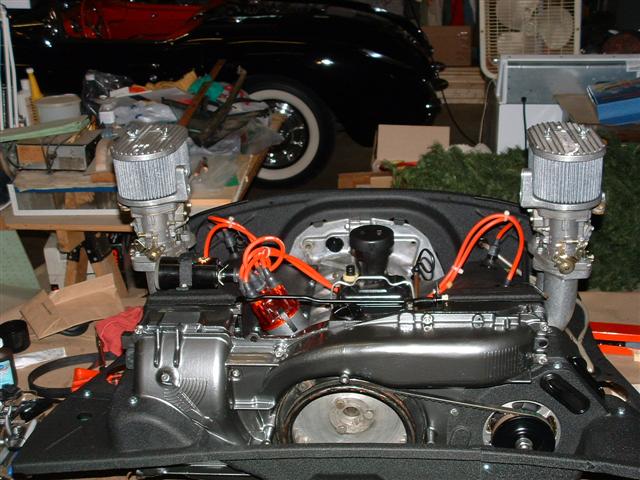
Posted by: seanery Oct 2 2005, 10:33 PM
is that rust on the fan!
That thing is beautiful!
Can you see my weld job?
Posted by: Doug Leggins Oct 2 2005, 10:36 PM
Last pic for now. I really wish that I had more progress pics to show, but I spent so much time on the engine this weekend that I didn't get much of anything else done on the car. Gotta figure out how to get back on schedule! 
Attached image(s)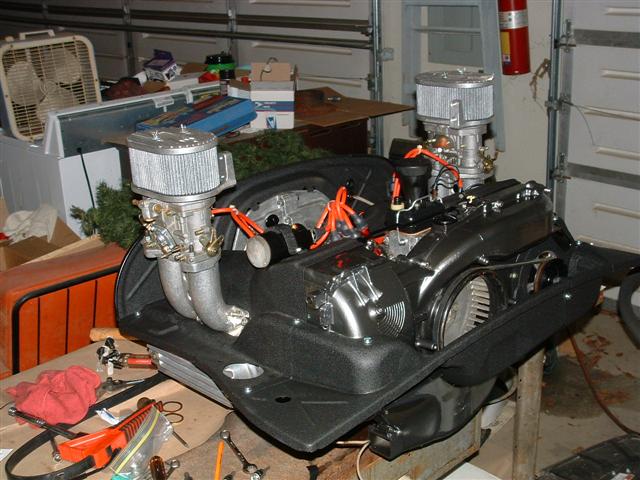
Posted by: Gint Oct 2 2005, 10:38 PM
| QUOTE (Doug Leggins @ Oct 2 2005, 10:28 PM) |
| I've got a good shot at getting the engine and tranny installed next weekend -Any body want to help??? |
If I were anywhere close Doug, I'd run over there to help work on that car.
Won't be long now!
Posted by: Engman Oct 2 2005, 10:40 PM
Looks like rust!
Good news is that that is where the belt runs for the alt. . So it will be gone in 10 mins of the engine run in.
M
Posted by: Doug Leggins Oct 2 2005, 10:49 PM
| QUOTE |
| is that rust on the fan! |
The one piece that I didn't paint or powder coat
I did spend way too much time cleaning all the grime off of the fan....
The weld area looks good! -thanks for taking care of that for me.
Posted by: seanery Oct 2 2005, 10:55 PM
when do you plan on installing it this weekend?
I'm working at the dome all day saturday, not sure about sunday...I could ask off.
Posted by: Doug Leggins Oct 3 2005, 11:11 AM
I'll be in the garage all day Saturday and Sunday. If you have some free time come on down. Don't miss work for it though -do that the weekend of the FFC
If I get the flywheel and pressure plate back this week, I should have a running enigine in the car on Sunday!!! Man... that thought just gave me a wierd sensation - a mixed feeling of finally she's gonna run!!!, can I really hit that date?, and oh shit what if it doesn't work.
Still alot of other things to complete in order to get the car roadworthy. If I can find enough time and make good progress this week and the weekend, I could be driving the car by the end of next week! WOW!!! 


Posted by: Doug Leggins Oct 14 2005, 08:42 PM
Well...I didn't hit the 10/10 date. But without setting aggressive target date I wouldn't have gotten near as much done. New target date is 10/17. The engine and tranny are going in this weekend!!
I have been making good progress and things are going together pretty well. Having a bunch of fun and learning alot!
A few pics-
Fuel pump mounted
Attached image(s)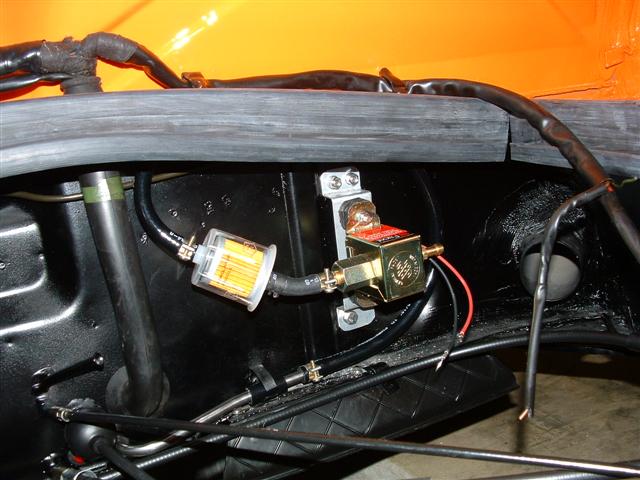
Posted by: Doug Leggins Oct 14 2005, 08:54 PM
It took a couple of attempts at installing the doors to find an easy enough method to get them installed. I ended up taking off the limiting strap that I had initially installed on the door during assembly. The strap just got in the way when trying to line up the hinges to the hinge plates. It was much easier to align the doors with the limiting strap removed.
Also, I found that it was very difficult at first trying to get a hinge bolt started in the hing plate in the front door jamb. The hinge plates float in the jamb to allow for proper door adjustment. What I finally came up with was to insert studs in 2 of the 3 hinge bolt holes in each of the hinge plates. Then the door with hinges already attached could be held in position, the hinges and plates being aligned by the 2 studs in each hinge. This allowed for the first bolt to be started easily. Then i removed one stud at a time and replaced it with a hinge bolt. this worked well.
Here is a pic of 2 studs in each hinge plate. I wrapped the threads on the studs with a thin wrap of tape to avoid scraping off the paint as the hinges slid over the studs.
Attached image(s)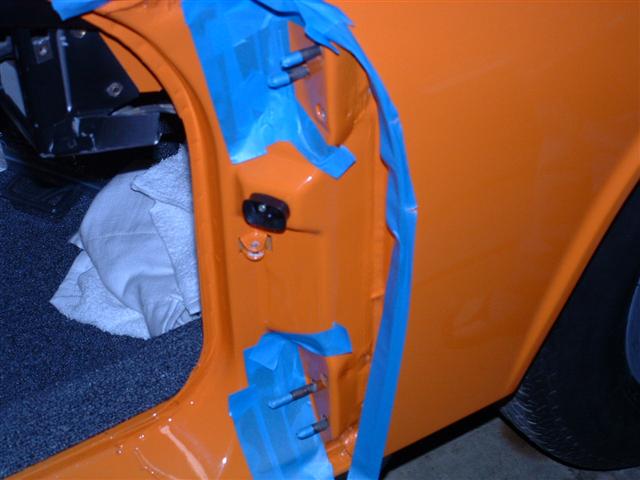
Posted by: Hammy Oct 14 2005, 08:54 PM
WOW. Your car is nice...  Amazing. Oh, and, just curious as to why the fuel pump was put in the engine bay, no relocation? Or did you not have fuel pump problems ? Or IS it relocated....
Posted by: Doug Leggins Oct 14 2005, 08:55 PM
some of the detail
Attached image(s)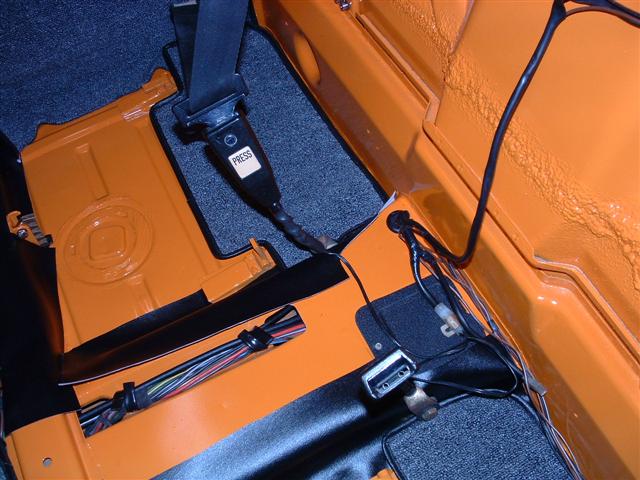
Posted by: Doug Leggins Oct 14 2005, 08:58 PM
Rear trunk lid installed. Pass door installed - it is challenging installing and adjusting everything on a door!
Attached image(s)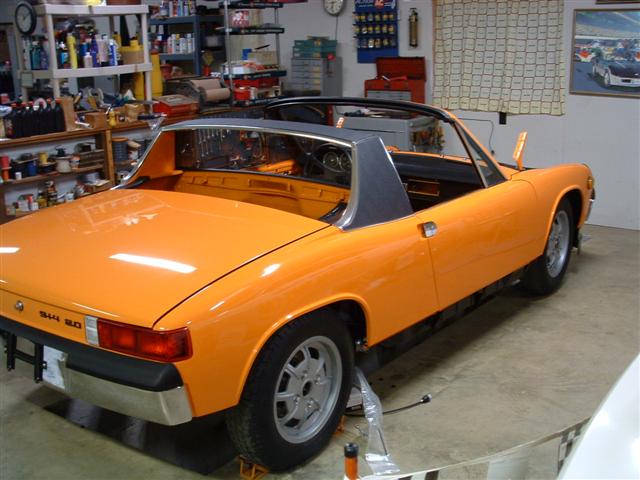
Posted by: Doug Leggins Oct 14 2005, 09:00 PM
Seat belts are in.
Attached image(s)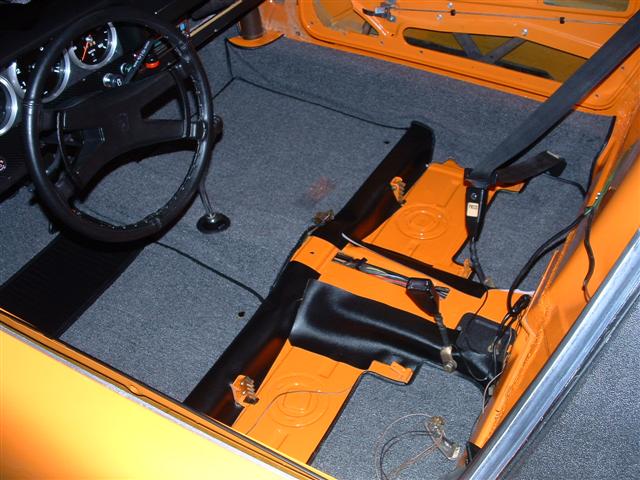
Posted by: Grimstead Oct 14 2005, 09:04 PM
Holly Hell, Batman! I am sooo way passed impressed. 
Posted by: Doug Leggins Oct 14 2005, 09:07 PM
This tire and wheel combination is Fuching SWEET!
Thanks to everyone that has posted pics of polished Fuchs and especially to those cars that I have seen with polished Fuchs!!!
Attached image(s)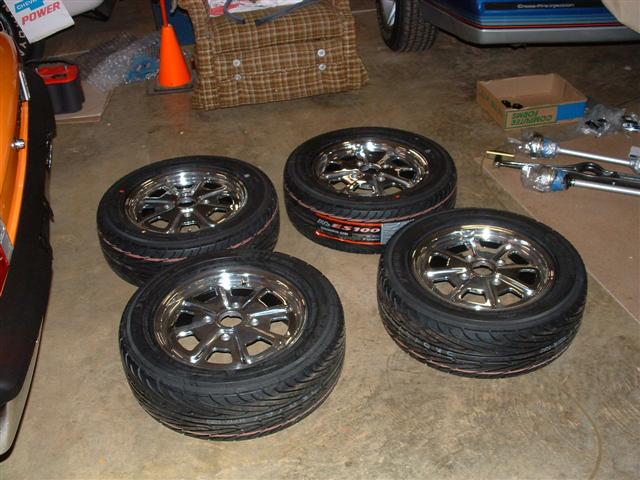
Posted by: Doug Leggins Oct 14 2005, 09:08 PM
Many of you helped guide me to this tire and wheel selection -Thanks! I love the impact of this tire and wheel combo!
Attached image(s)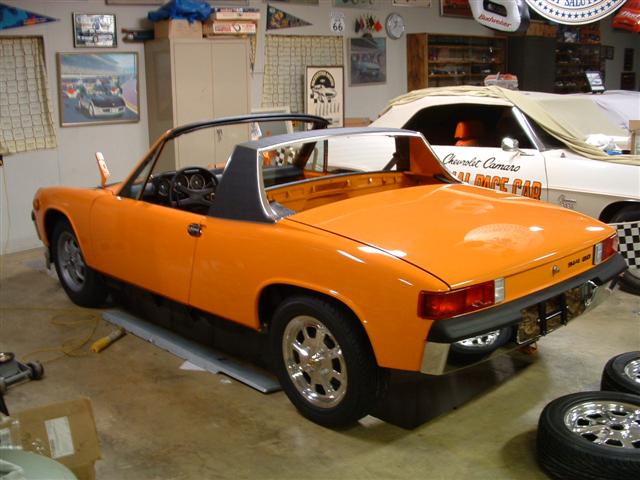
Posted by: jd74914 Oct 14 2005, 09:13 PM
looks good
Is that fuel pump bolted directly to the firewall, or is it on some rubber backing?
what kind of tires did you put on the fuchs?
Posted by: Engman Oct 14 2005, 09:13 PM
FUCH ME!
Sweeeet!
M
Posted by: Flat VW Oct 14 2005, 09:14 PM
| QUOTE (Doug Leggins @ Oct 14 2005, 07:07 PM) |
| This tire and wheel combination is Fuching SWEET! Thanks to everyone that has posted pics of polished Fuchs and especially to those cars that I have seen with polished Fuchs!!! |
Can you "turn down" your wheels, they are hurting my eyes!
John
Posted by: Headrage Oct 14 2005, 09:14 PM
So what about the fuel pump? If you don't answer Aaron "Will" gripe...
Posted by: Doug Leggins Oct 14 2005, 10:04 PM
The fuel pump is mounted on rubber blocks that have studs coming out of both sides. One side mounts to the Facet pump, the other side mounts to an aluminum bracket that I made from flat stock. The aluminum bracket is fastened to the firewall.
I had a 72 914 (the one that got me hooked) that i drove around for 4 years with the fuel pump in this location. Never had a problem with it in this location so i decided to put it there on this car. On the 72 the fuel pump was mounted directly to the firewall. It was a little bit loud, but it was kind of nice to hear it and know that it was working. I would like for the rubber blocks to take out some of the noise, but i still want to hear it.
Posted by: Engman Oct 14 2005, 10:26 PM
Hey - no time for posting - git-r-done
M
Posted by: olav Oct 15 2005, 09:17 AM
I like the original wheels better than the shiny ones.
But that's just me.
Everything else is right on!
Posted by: hi ho silber Oct 16 2005, 07:06 AM
Doug,
Your car is VERY NICE!!
The powder coat on the motor sheet metal will hold up great (mine has).
Where did you end up getting your carpet from?
Dave
Posted by: Doug Leggins Oct 20 2005, 09:16 AM
I have been putting a tremendous amount of hours trying to get the car drivable for the event! I ran into some electrical trouble late last night that may put me too far behind to get it drivable for Saturday -but, I am still trying!!!
Dave - I got my carpet from GPR.
Here are a few more pics.
Windshield was installed last Friday. I decided to let the pro's do the installation instead of doing it myself using the black butyl tape.
Attached image(s)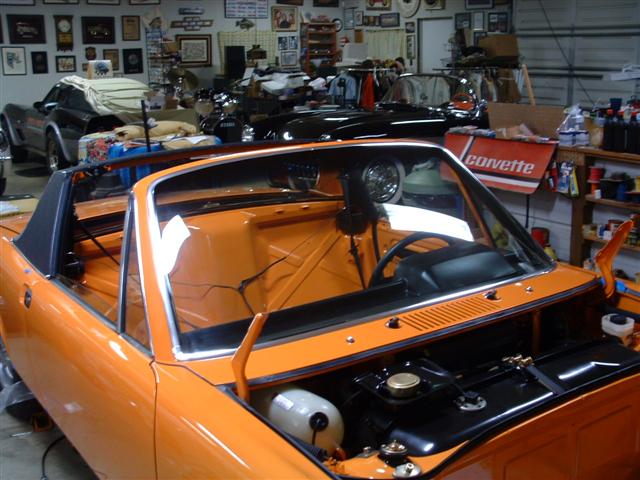
Posted by: Doug Leggins Oct 20 2005, 09:17 AM
Seat mounts - The black frames are powder coated. The tilt levers were re-plated. everything else was cleaned up pretty good.
Posted by: Doug Leggins Oct 20 2005, 09:18 AM
oops -here's the pic
Attached image(s)
Posted by: Doug Leggins Oct 20 2005, 09:20 AM
engine & tranny mounting hardware.
Attached image(s)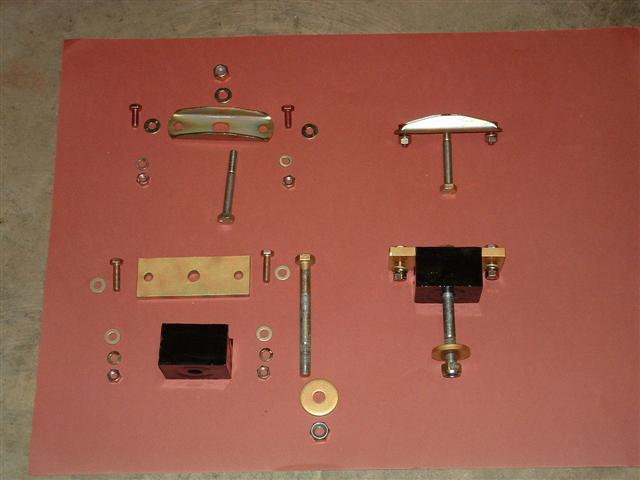
Posted by: Doug Leggins Oct 20 2005, 09:21 AM
The engine and tranny are in!!!
Attached image(s)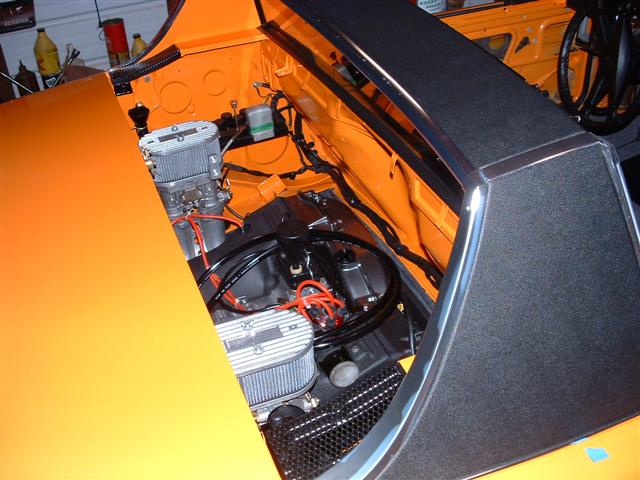
Posted by: Doug Leggins Oct 20 2005, 09:23 AM
Back to the garage for me for now.
Posted by: Thomas J Bliznik Oct 20 2005, 09:40 AM
Doug,
Beautiful workmanship. Your doing everything right & now your an official CW.
Tom
Posted by: Engman Oct 20 2005, 09:44 AM
????????????
Will Doug have his car done in time for the FFC?
Will he win the coveted awards?
Will he be there in time?
Stay tuned to this channel........
Actually, he has quite a bit of help coming tomorrow. I will be there around 5-6. Several others will also be arriving.
M
Posted by: greenie Oct 20 2005, 10:13 AM
Hey Doug,
That is one awesome job you've done! I can't imagine the car looked that good rolling out of the factory.
Great work!
Greenie
Posted by: Doug Leggins Oct 20 2005, 03:35 PM
I recruited one dedicated helper today. Next to me he is the biggest car lover in the family.
Attached image(s)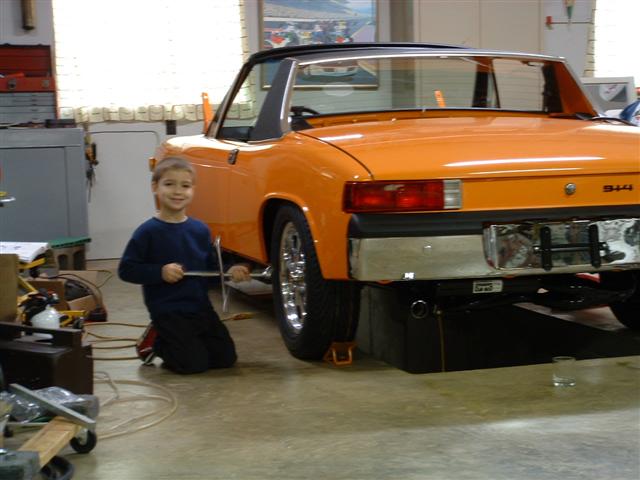
Posted by: Doug Leggins Oct 20 2005, 03:41 PM
Where there's smoke, there's a new Bursch muffler burning off the paint!
The car is running...............................
I knew that there would be some initial smoke. But, OH MY! What a huge amount of smoke there was initially!! My wife was near certain that the car was on fire. Fortunately no fire, just initial burn in smoke!
Man I am sure glad that she made me push it out of the garage to start it up!
And back to the garage for me to see if I can get enough done to get the car roadworthy for the FFC.
Attached image(s)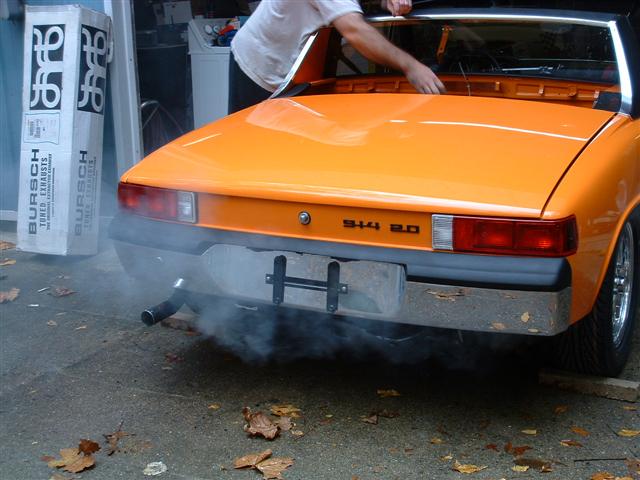
Posted by: seanery Oct 20 2005, 03:58 PM
what time(s) are you open for business tomorrow?
Posted by: Doug Leggins Oct 21 2005, 08:39 AM
| QUOTE |
| what time(s) are you open for business tomorrow? |
I am going to the garage in a few minutes. I set up an appointment for front and rear alignment at 2:00PM today. I might get enough done to make it.
Posted by: Engman Oct 21 2005, 08:46 AM
Tic - Toc - Tic - Toc
Not much time left!!!
Wont be long before 
M
Posted by: olav Oct 21 2005, 10:31 AM
You got the ugly wheels on....
Posted by: Engman Oct 21 2005, 11:44 AM
See you soon..... getting ready to leave.
M
Posted by: Doug Leggins Apr 18 2006, 09:06 PM
I missed the the 10/10 date and could not drive the car 2 miles down the road for the FFC gathering at the park  I did get in one four mile drive before winter set in and the salt went on the roads. Now the salt has been washed off of the roads and its driving time again!!! I had carb and electrical problems on the first drive but I have been working them out.
Nearly all of my electrical problems were/are related to the alternator not being grounded. During the rebuild I powder coated the alternator brackets and the blower housing. This coating is blocking the ground path -I got lucky discovering this issue. I have installed a temporary ground wire and the electrical system is now in pretty good shape.
I am still working through the carb issues. I drove the car againg tonight and the carbs were performing much better at the end of the drive.  4 drives now and a whopping 18 miles. Tonights drive was 9 miles. -Baby steps so far. I have some idle jets, main jets and air correctors due by the end of the week. This weekend could bring some significant driving time!!!! And then prep for a drive to the Blue Grass Classic in a few weeks!
Here's a few progress pics
ebrake parts prepped and ready for install
Attached image(s)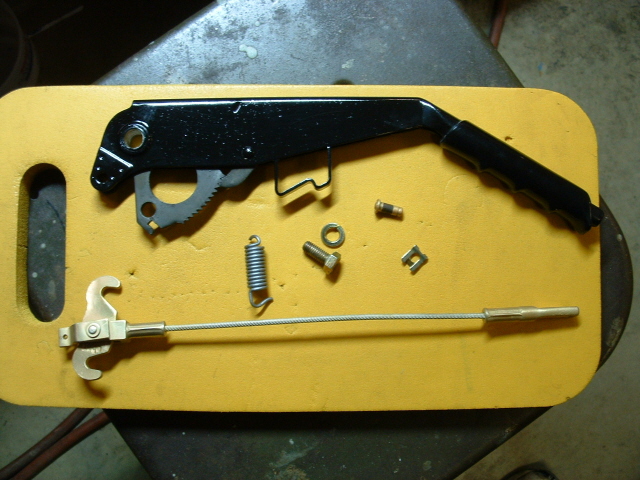
Posted by: Doug Leggins Apr 18 2006, 09:09 PM
ebrake and seat rail installed. I need to rework the carpet a bit to get the wrinkle out.
Attached image(s)
Posted by: Doug Leggins Apr 18 2006, 09:12 PM
I spent alot of hours repairing a backpad. The pad was in pretty good shape but had 3 of the 4 metal hooks pulled away from the fiber board and it had a few other cracks in the fiberboard.
Attached image(s)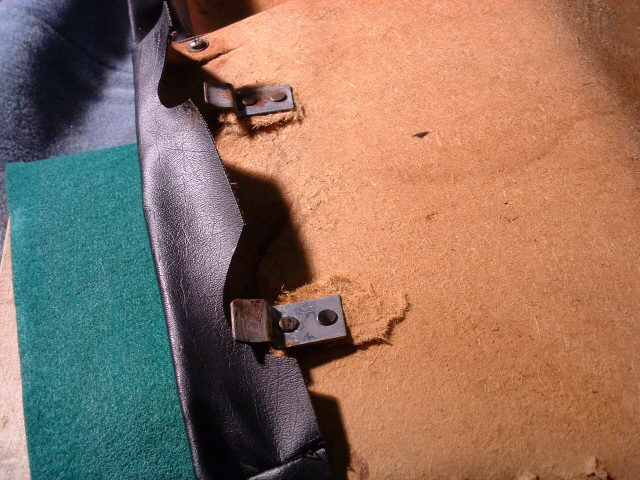
Posted by: Doug Leggins Apr 18 2006, 09:13 PM
puffed and cracked
Posted by: Doug Leggins Apr 18 2006, 09:18 PM
I considered several options for repairing the fiberboard and decided to use fiberglass resin. So far it seems to be working out very well. I used clamps and pads wrapped in plastic bags to compress and hold the repair areas in place until the resin cured. The plastic peeled away from the resin very clean leaving a good repair surface.
Several areas clamped and curing.
Attached image(s)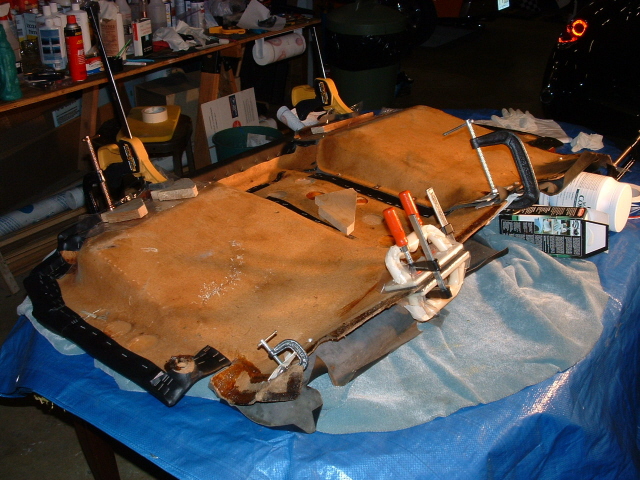
Posted by: Doug Leggins Apr 18 2006, 09:23 PM
completed repairs. I also put a light coating of fiberglass resin around the perimeter of the fiberboard to tighten up the fiberboard. Then I used 3M spray adhesive to reattach the vinyl to the fiberboard. Instead of spraying the adhesive directly onto the fiberboard and vinyl, I sprayed the adhesive into a container and then brushed it onto the 2 surfaces -much cleaner process for me.
Attached image(s)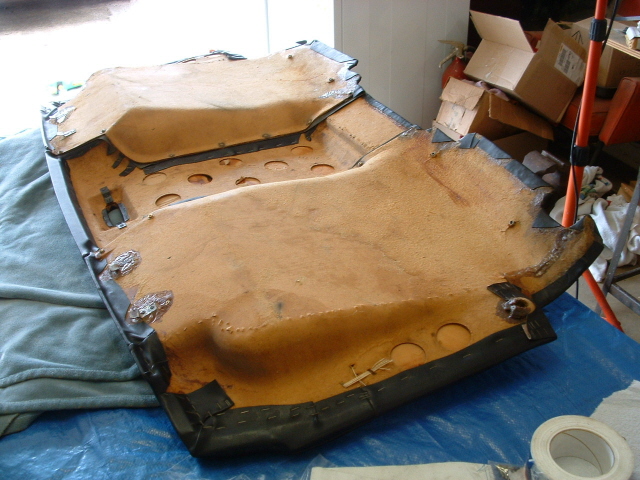
Posted by: Doug Leggins Apr 18 2006, 09:25 PM
The effort paid off well!
Attached image(s)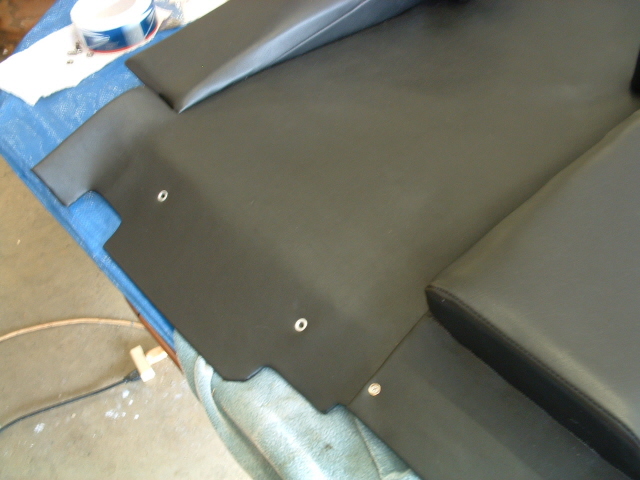
Posted by: Doug Leggins Apr 18 2006, 09:27 PM
Hours of work ... but the finished pad is nice!
Attached image(s)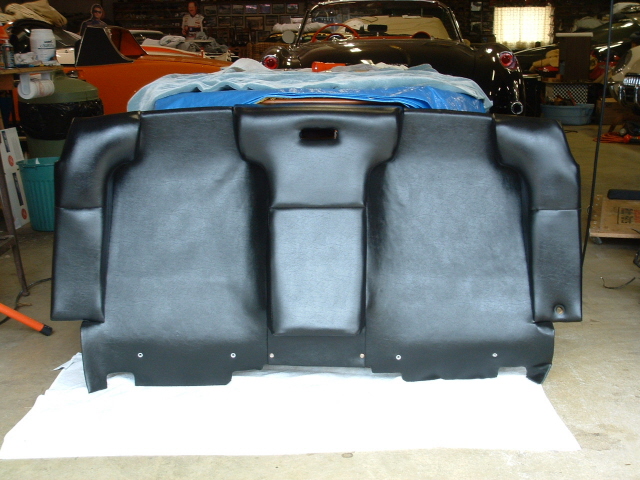
Posted by: Doug Leggins Apr 18 2006, 09:33 PM
A little prep before installing the rear targa bar pad. I painted a small area black where there is a gap between the targa pad and the pillar covers. Without the black there would have been orange visible in the gap after the parts were installed.
Attached image(s)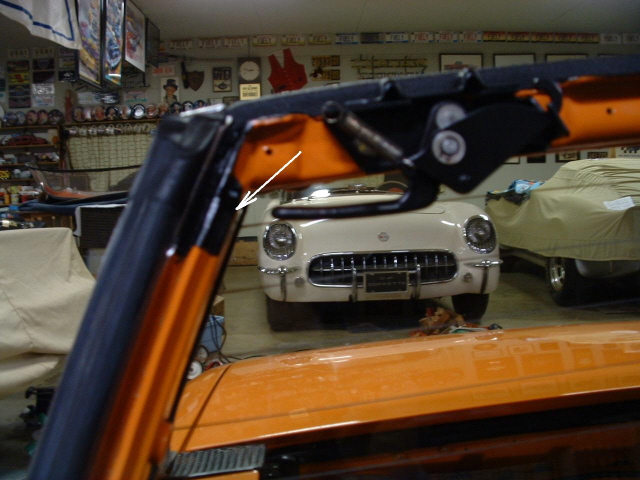
Posted by: Doug Leggins Apr 18 2006, 09:35 PM
Got real lucky and found a NOS targa pad -thanks Glenn!
Attached image(s)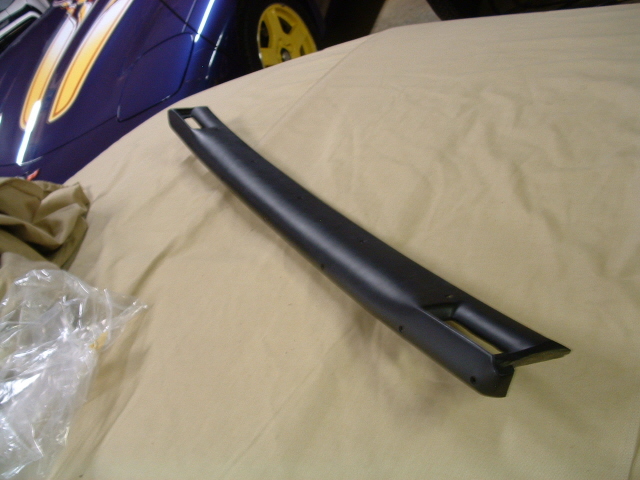
Posted by: Doug Leggins Apr 18 2006, 09:38 PM
targa pad installed, also installed 2 rows of black tape at the bottom of the rear window and the vinyl strips behind the seat belt reels.
Attached image(s)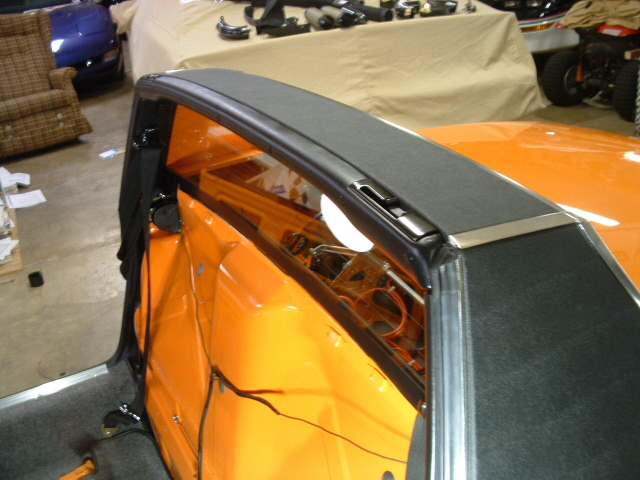
Posted by: Doug Leggins Apr 18 2006, 09:39 PM
backpad installed
Attached image(s)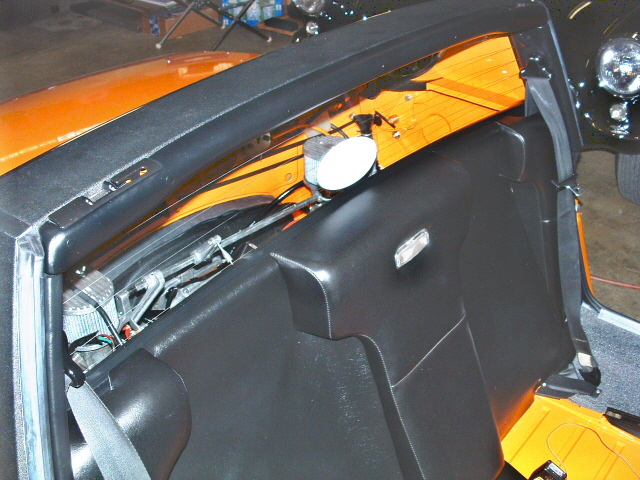
Posted by: Doug Leggins Apr 18 2006, 09:42 PM
Another pic of backpad repair that I wanted to show y'all. The repair of the previously puffed and cracked area turned out very nice.
Attached image(s)
Posted by: Doug Leggins Apr 18 2006, 09:45 PM
Seat rails painted with Eastwood's Silver Cad rattle can paint. Nice finish! but I don't think that it is very representative of real silver cad. I painted the adjustment hoops with VHT black. I am curious to see if the black holds up under use.
Attached image(s)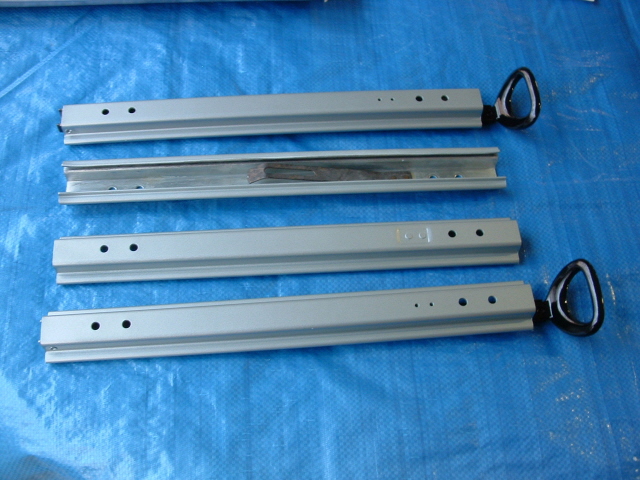
Posted by: Doug Leggins Apr 18 2006, 09:53 PM
I also spent a bunch of hours cleaning up and repairing a set of seats. They turned out great! I used a Permatex vinyl repair kit to touch up some small flaws. The repair areas were small, but i was impressed with how well the repair areas blended in. To improve the blending I used color coded black vinyl dye over the repairs. -Thanks Karl for the post on where to purchase the correct vinyl dye.
The passenger seat is original and is excellent. The driver's seat is a very good recover and looks great. If anyone has an original black driver's seat that is in excellent condition and you are willing to sell it -please let me know!
Attached image(s)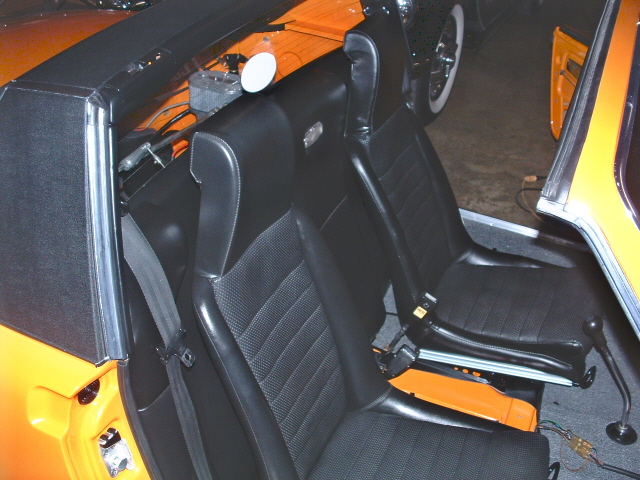
Posted by: Doug Leggins Apr 18 2006, 09:55 PM
another
Attached image(s)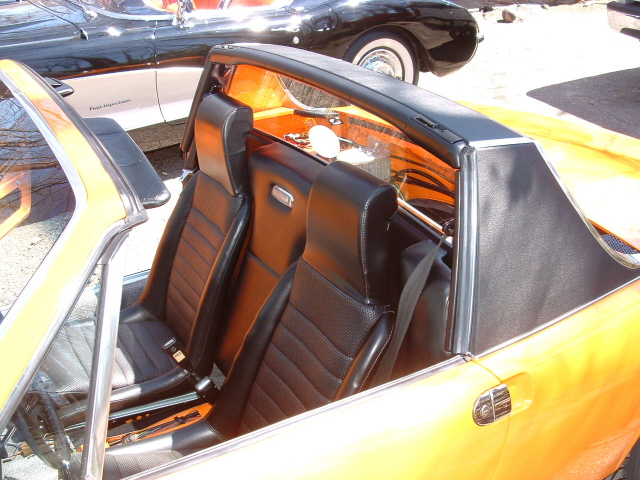
Posted by: Doug Leggins Apr 18 2006, 09:59 PM
That last pic reminds me that I lost one of my favorite parts of the car during the drive tonight. The oval on the rear window is the static cling 914 club sticker. It blew out of the window at around 65 mph -damit, didn't have it stuck down very well. Anyone have a spare they are willing to sell me.
Posted by: Lou W Apr 18 2006, 09:59 PM
Fantastic job Doug, sure does look sweet. 
Posted by: Doug Leggins Apr 18 2006, 10:01 PM
Last pic for now.
I'll try to keep up with posting progress being made to get prepped for a drive to the Blue Grass Classic.
Attached image(s)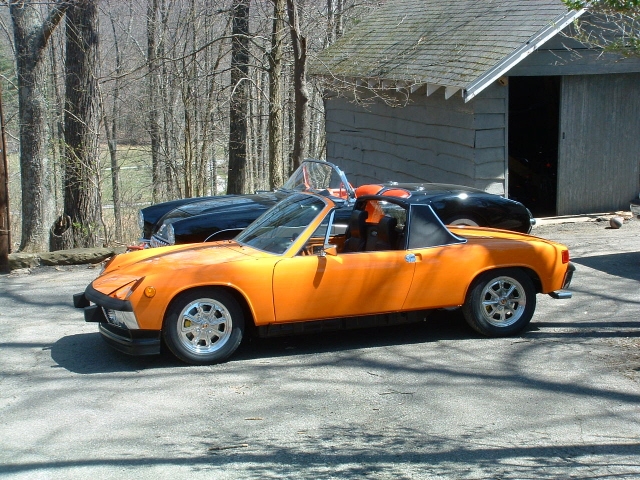
Posted by: Bertus Apr 19 2006, 06:12 AM
Doug, your car looks good! Can't wait to see the car in person at the Bluegrass Classic!
Bert
Posted by: robby750 Apr 19 2006, 07:41 AM
I can't wait to see the finished product too. The first time I saw this car it was nothing more than a white shell. Only problem, when you park next to Doug's, your car starts to look like crap.
Posted by: Doug Leggins Apr 23 2006, 07:41 PM
Got a little driving time in this weekend. The car is up to 73 miles now. I completed a couple of tasks over the weekend and have a couple of new ones to the list.
I rejetted the carbs. Went from 130 mains to 125. It had an impact on the stall at about 2300 RPM but did not get rif of it. I'm considering going back to the 130 and give them another try.
I finally was able to get the driver's side headlight aligned and eyebrow installed. I was able to get the headlight aligned very well after some component manipulation. The eyebrow needs just a little more work but its not bad for now.
I also finished the cleanup and reassembly of the center console.
Unfortunately I have 2 new issues. I am getting oil near cylinder 3 on top of the tin. I thought that it was due to a poor connection of the oil breather hose to the breather port, but I redid the connection and still have the leak. I also have a little bit of fuel leaking out of the pass side carb.
Here are a couple of pics.
Attached image(s)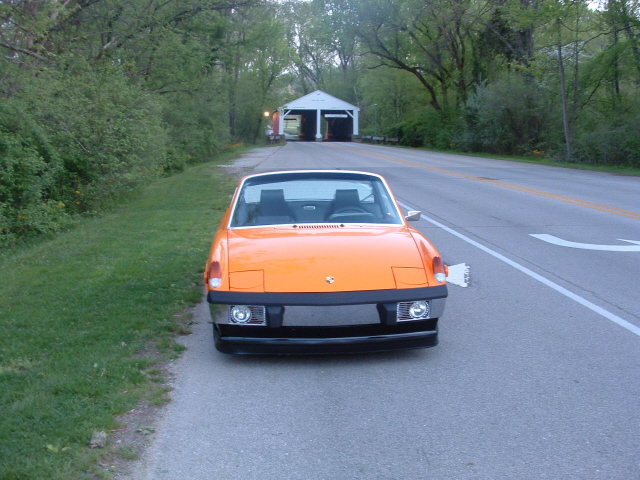
Posted by: Doug Leggins Apr 23 2006, 07:43 PM
I was thrilled to get pics of the car somewhere besides in the garage or in my driveway.
Attached image(s)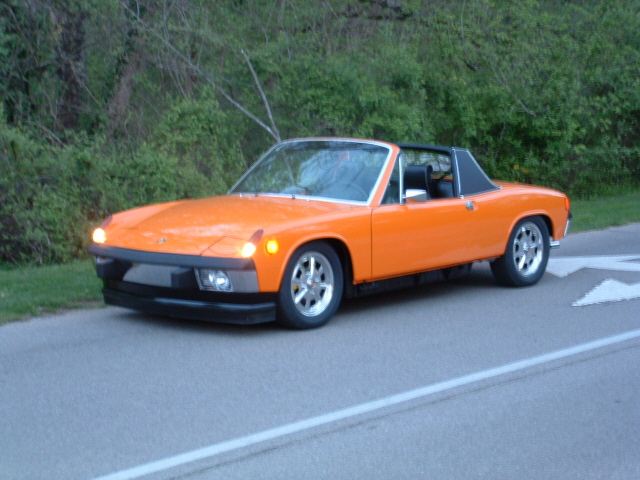
Posted by: tat2dphreak Jun 2 2009, 10:37 AM
amazing work man!! really! great job!
Powered by Invision Power Board (http://www.invisionboard.com)
© Invision Power Services (http://www.invisionpower.com)