Printable Version of Topic
Click here to view this topic in its original format
914World.com _ 914World Garage _ 3.6 914-6 Restoration Thread
Posted by: McMark Sep 30 2005, 09:37 PM
First off, some info. 1970 914-6 Chassis. Acid dipped. Left outside last winter (not by me). Getting a 993 non-VarioRam 3.6, Wevo 915, GT Flares, all the fun bits.
And the first order of business is sorting out the chassis. Starting with the rear trunk. These are some freaky looking reinforcement plates poorly welded in. I'm guessing they were for a rear sway bar. 
Attached image(s)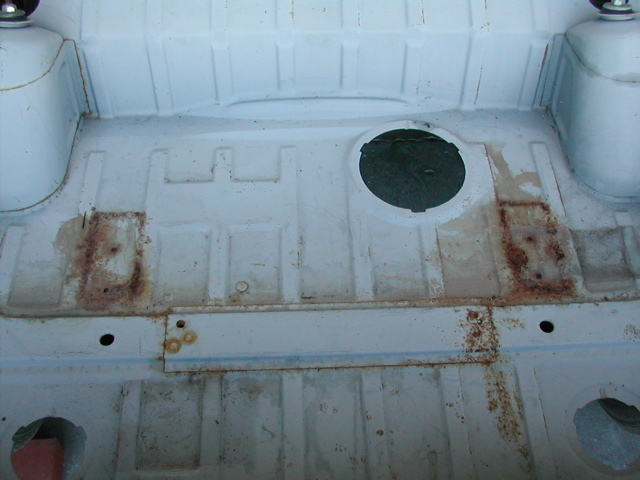
Posted by: McMark Sep 30 2005, 09:37 PM
And cut...
Attached image(s)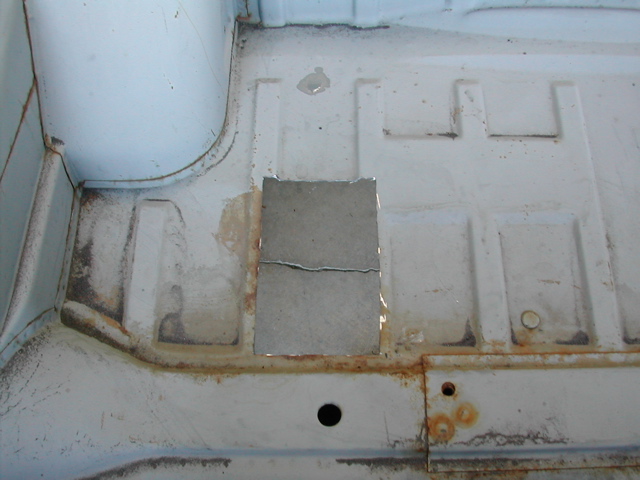
Posted by: McMark Sep 30 2005, 09:38 PM
And weld...
Attached image(s)
Posted by: McMark Sep 30 2005, 09:38 PM
Stay tuned... 
Posted by: SirAndy Sep 30 2005, 10:46 PM
schweet, "Blackie" is finally getting the attention she deserves !!!
 Andy
Andy
PS: btw. was that "timing" freaky or what? remember when we talked about the car? 
Posted by: nine14cats Oct 1 2005, 12:05 AM
Mark,
I'll make a prediction right now...I bet you're done with that 3.6 914 before mine is done.....
ouch... 
Bill P.
Posted by: McMark Oct 6 2005, 01:44 PM
Time to address the front passenger side headlight area. Lots of rust holes up here.
Attached image(s)
Posted by: McMark Oct 6 2005, 01:45 PM
Cut out the old brace piece for replacement as well as access to the area behind it. More rusty sections. 
Attached image(s)
Posted by: McMark Oct 6 2005, 01:46 PM
Without the flash you can really see how much swiss chesse it's got.
Attached image(s)
Posted by: McMark Oct 6 2005, 01:47 PM
The front section ready to be replaced.
Attached image(s)
Posted by: McMark Oct 6 2005, 01:48 PM
And just like that... *POOF* ... it's done. 
Attached image(s)
Posted by: McMark Oct 6 2005, 01:49 PM
Inner wheelhousing swiss cheese. 
Attached image(s)
Posted by: McMark Oct 6 2005, 01:49 PM
Bada-Bing. Bada-Boom. Nice new metal.
Attached image(s)
Posted by: McMark Oct 6 2005, 01:50 PM
And finally, drop the new brace into place and ZAAAAAAAAAP. 
All the patch pieces were from another car, bead blasted, and cut to fit. 
Attached image(s)
Posted by: neo914-6 Oct 6 2005, 02:02 PM
| QUOTE (McMark @ Oct 6 2005, 11:46 AM) |
| Without the flash you can really see how much swiss chesse it's got. |
another reason I don't want mine dipped...
Are you going to add reinforcements and Engman kit?
Nice work BTW...
Posted by: McMark Oct 6 2005, 02:15 PM
I'll probably add the Engman kit. I'm not sure anything else is worth it.
Posted by: michel richard Oct 6 2005, 02:40 PM
Nice work indeed
Posted by: Andyrew Oct 6 2005, 02:44 PM
I'll be watching this thread closely.
Looks good!!
Posted by: thesey914 Oct 6 2005, 03:22 PM
 That is some lovely welding skillz!!
Posted by: SirAndy Oct 6 2005, 05:03 PM
| QUOTE (neo914-6 @ Oct 6 2005, 01:02 PM) |
| another reason I don't want mine dipped... |
yes, but the rustholes are *not* from the dipping, they were in there before. the dipping just made them show up better.
also, the surface rust you see now is due to the fact that the tub had been sitting *outside* for a year after it was dipped ...
not good by any stretch ...
 Andy
Andy
Posted by: neo914-6 Oct 6 2005, 05:58 PM
| QUOTE (SirAndy @ Oct 6 2005, 03:03 PM) | ||
yes, but the rustholes are *not* from the dipping, they were in there before. the dipping just made them show up better. also, the surface rust you see now is due to the fact that the tub had been sitting *outside* for a year after it was dipped ... not good by any stretch ... Andy |
I know about this car, that was just my sarcasm of not wanting to know what "may" be there...
I'm relying on your expert eye when you patched the "big" ones, of course it just takes time and more neglect on my part to grow more holes...
Posted by: neo914-6 Oct 7 2005, 03:15 AM
Mark,
Do you metal finish both sides or just the "visible" side?
How do you deal with the surfaces you can't spray paint? I like the idea of dipping to get everything down to metal but it seems you'd also need to dip the whole car in paint to coat every nook & cranny...
Posted by: McMark Oct 7 2005, 07:23 PM
I didn't metal work both sides because the project doesn't allow for it ($). I don't believe that acid dipping and a normal thorough paint job will lead to a more rust prone car than anything the factory did. Dip it, paint it, done.
Posted by: McMark Oct 7 2005, 10:02 PM
Just got a PM. The sender will remain anonymous. Just wanted to clarify a few things.
The rust you see on the 3.6 I'm working on is caused by two factors.
1. The car was painted with sealer by the people who did the acid dipping. These people are obviously not painters so they didn't do a very good job. Had they covered the car more thoroughly there wouldn't have been a problem. Even with factor #2.
2. The car was left outside in the rain for over a year. All the areas that got poor sealer coverage have started rusting. There are areas where you can obviously see the poor spray pattern outlined in rust.
I'm not out to convince everyone to acid dip their cars, but for me, I believe 100%.
If you want to debate dipping vs blasting, please start a new thread.
Posted by: SirAndy Oct 7 2005, 10:22 PM
| QUOTE (McMark @ Oct 7 2005, 09:02 PM) |
| I'm not out to convince everyone to acid dip their cars, but for me, I believe 100%. |
do a search here for before and after pictures of this car regarding the acid dip ...this car had been sitting *outside*, completely stripped to the bare metal with just a coat of primer for over a year, for a complete raining season, before mark got it in his shop.
i actually think the shell looks remarkably good all things considered ...
 Andy
Andy
Posted by: SirAndy Oct 8 2005, 10:18 AM
ok, now i'm getting in the middle of this as well ...
here's my response to "you know who":
============================================
yes, there certainly is a problem now and we have been pondering on how to fix it. the initial idea was to have it dipped again, but the owner doesn't want to spent the money.
there is rust coming out of all the seams now because that's where the primer didn't get in very well but the rain water could.
i just want to make clear that this is *not* the leftover acid seeping out of the cracks, the whole car was soaked in a neutralizing bath for a day after the dipping.
our best bet at this point is to soak all the seams in Metal-Ready for a few days ...
============================================
 Andy
Andy
Posted by: McMark Oct 13 2005, 10:10 PM
Rear firewall had some nice rot.
Attached image(s)
Posted by: McMark Oct 13 2005, 10:11 PM
This was a challenging piece to put in because it's the firewall section as well as engine shelf.
Attached image(s)
Posted by: McMark Oct 13 2005, 10:11 PM
There were a couple gaps which were larger than I like, but it all worked out okay.
Attached image(s)
Posted by: McMark Oct 13 2005, 10:12 PM
Here it is from the other side.
Attached image(s)
Posted by: McMark Oct 13 2005, 10:13 PM
Also, a nice bit in the drivers footwell.
Attached image(s)
Posted by: McMark Oct 13 2005, 10:14 PM
I cut out the patch piece and then traced it and then cut it out.
Attached image(s)
Posted by: McMark Oct 13 2005, 10:14 PM
Works pretty well.
Attached image(s)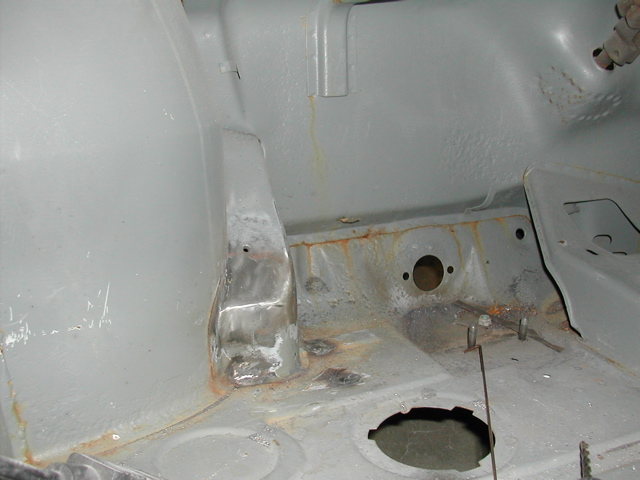
Posted by: SirAndy Oct 13 2005, 10:17 PM
| QUOTE (McMark @ Oct 13 2005, 09:12 PM) |
| This picture will be replaced with a picture from the engine side of things. |
hey, not sure how crazy you want to get on this car, but watching my friend raffi bring old sportscars back to live, one thing they do with those pitted areas that had surface rust but are not actually rusted through,
they fill them in with brass ...
i guess that's one of the reasons why he gets big $$$ for his cars, they always spent TONS of hours making them perfect ...
 Andy
Andy
Posted by: McMark Oct 13 2005, 10:19 PM
Unfortunately it's not in the budget.  But it's a great idea. I would think lead or body filler/glaze would work just as well. I think we'll end up just covering them with carpet.
Posted by: SirAndy Oct 13 2005, 10:22 PM
| QUOTE (McMark @ Oct 13 2005, 09:19 PM) |
| Unfortunately it's not in the budget. But it's a great idea. I would think lead or body filler/glaze would work just as well. I think we'll end up just covering them with carpet. |
yeah, lead would kill 'ya quick too !
too bad it's not in the budget. if i ever end up doing a car "right" that will be one of the things i won't cheap out on ...
Andy
Posted by: McMark Jan 19 2006, 01:15 AM
New updates finally.
Rusty inner fender.
Attached image(s)
Posted by: McMark Jan 19 2006, 01:16 AM
All fixed.
Attached image(s)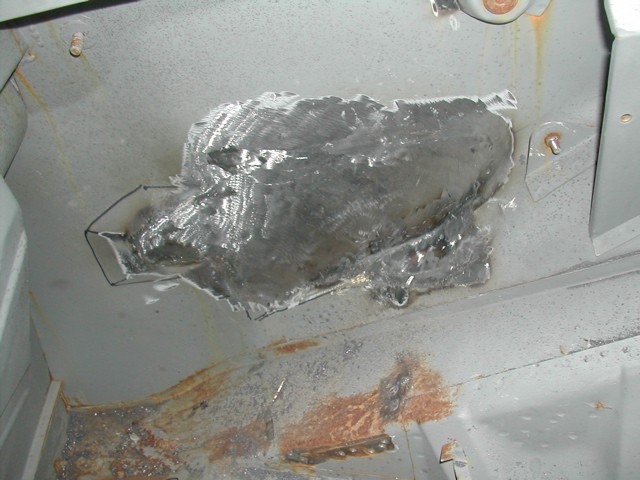
Posted by: McMark Jan 19 2006, 01:17 AM
Pedal cluster was rusted out. Notice the cluster mounting studs are sheared off.
Attached image(s)
Posted by: McMark Jan 19 2006, 01:17 AM
New metal, new studs. I just used plain sheet metal here since it'll be hidden under the cluster.
Attached image(s)
Posted by: McMark Jan 19 2006, 01:18 AM
New rear floor pans.  I hate doing floor pans.
Attached image(s)
Posted by: McMark Jan 19 2006, 01:19 AM
While I was in there I repaired the clutch tube and made sure everything was a-okay while I had access. Nice new solid floor pans.
Attached image(s)
Posted by: McMark Jan 19 2006, 01:23 AM
The 3.6 install in this car is actually a little unique. Since it's an original six it's not as easy as welding in an aftermarket six mount setup. Further complicating the install was the fact that this car is going to have air conditioning. So this required a custom mount to be fabricated. A stock six mount will bolt up, but would require a custom AC mounting setup. I decided to modify the stock 3.6 mount to be a hybrid 3.6/914-6 mount.
Here is an image of a stock six engine mount.
Attached image(s)
Posted by: McMark Jan 19 2006, 01:31 AM
Here is an animated GIF which flip flops between a stock 914-6 mount and a stock 3.6 mount with my welding jig.
Attached image(s)
Posted by: McMark Jan 19 2006, 01:33 AM
Finally, here's the finished product. Now I'm ready to test fit the motor in the car.
Attached image(s)
Posted by: McMark Jan 19 2006, 01:35 AM
Another angle.
Attached image(s)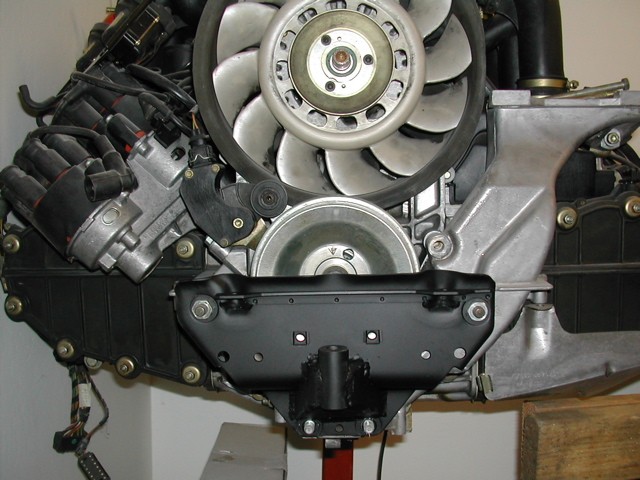
Posted by: Dr. Roger Jan 19 2006, 01:54 AM
wow, that's purdy.
McMark, you've got skills man. 
Posted by: East coaster Jan 19 2006, 08:18 AM
Is it going to fit with the extra pulley/dampner? I removed those items on my 3.6.
Posted by: McMark Jan 19 2006, 12:18 PM
I had to use the stock pulley system because of the AC setup. It's all there and bolted up.
Posted by: McMark Feb 15 2007, 01:52 PM
This project is finally under way again. We had some stopping and stalling by both me and my customer. But regardless, fun stuff is happening. 
I started out by thoroughly cleaning the car and using Por-15 Metal Ready liberally. All the rust is converted and the whole chassis will be scuffed with 80 grit and Metal Ready re-applied just before paint. The white coating on things is the protective zinc left behind by the Metal Ready. It will be cleaned up before paint.
I got the 31 mm SMART Racing front sway bar installed. No big deal, the instructions are very clear and the process is very straight forward. For the inner reinforcement plates I drilled a few holes and then used a file to open it up to the correct size. This made a very clean hole that is just the right size and has nice square corners.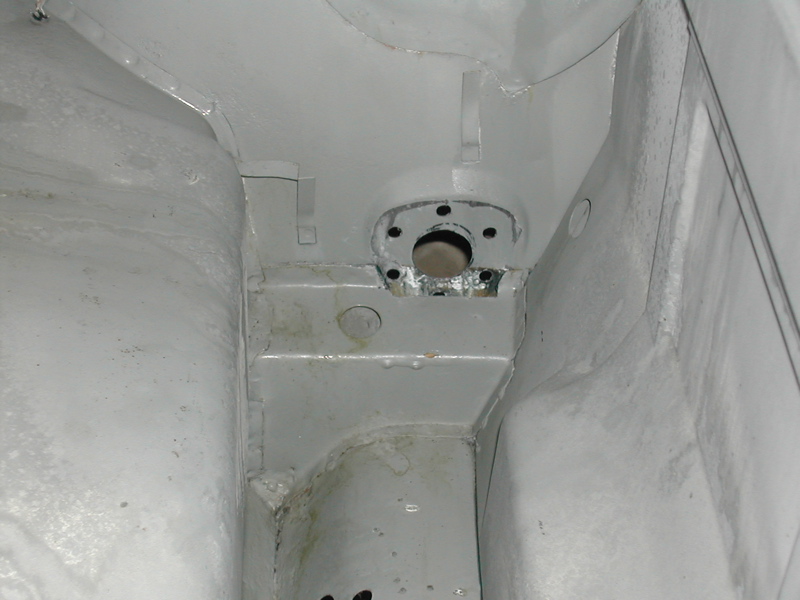
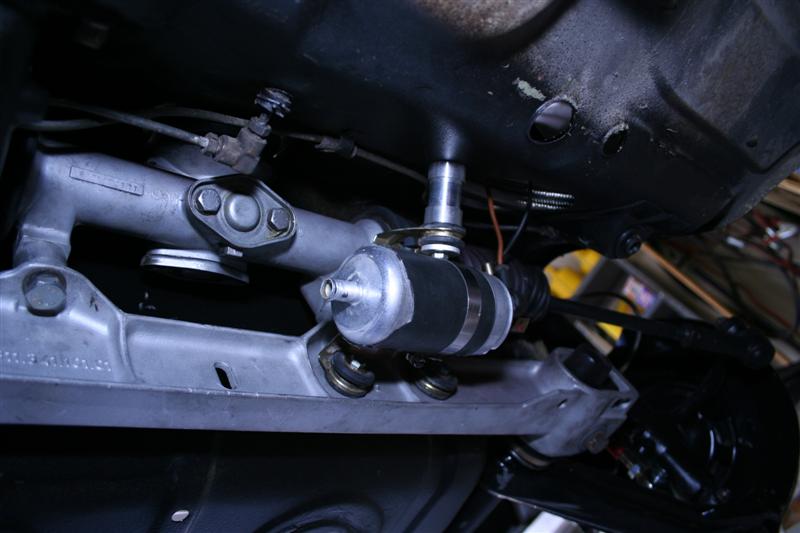
I'm using a stock 993 fuel pump to feed the motor. They're really cheap (~$125) and I know it's the correct flow rate, volume, pressure, etc. I took quite awhile to decide where to mount it. I wanted it close to the tank since the pump isn't meant to suck, it's meant to push. And I wanted it accessible without removing the tank. I'm satisfied with my final location. It will address both my needs and will be completely hidden.
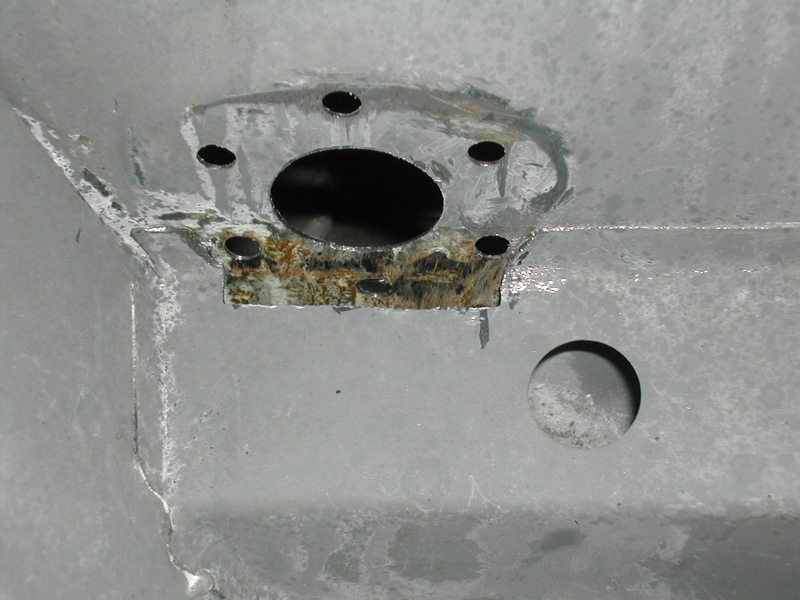
I cut a hole in the passenger compartment. This location goes right into the area where the fuel lines sit.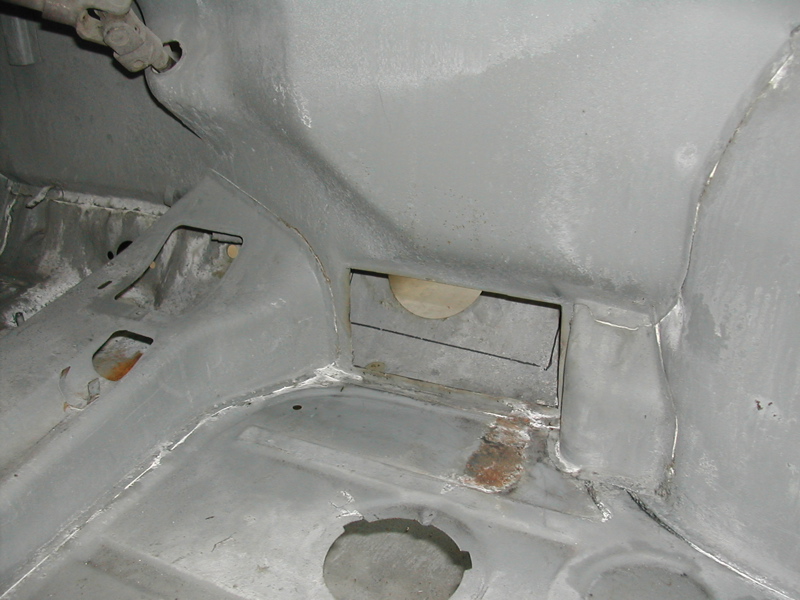
Here is the gigantic pump mounted to the first piece of the cover. I'll add some side plates to completely seal this area off from water or fuel vapor.
This is what it looks like in place. I will add four 6 mm x 1.0 bolts to hold it in place.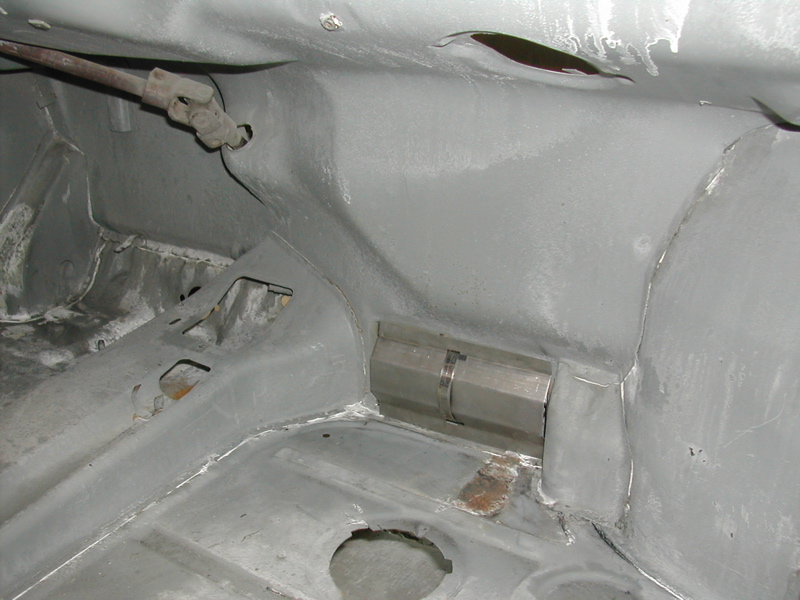
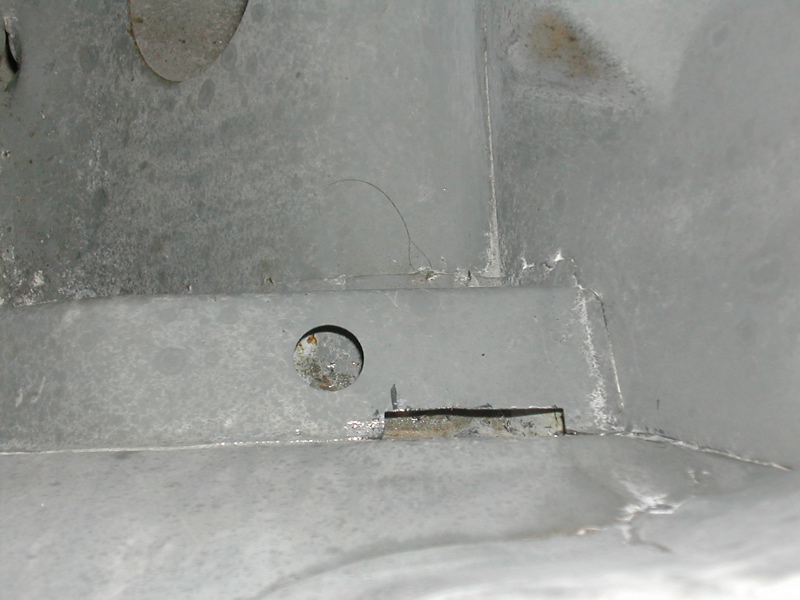
And here's what it looks like from the other side.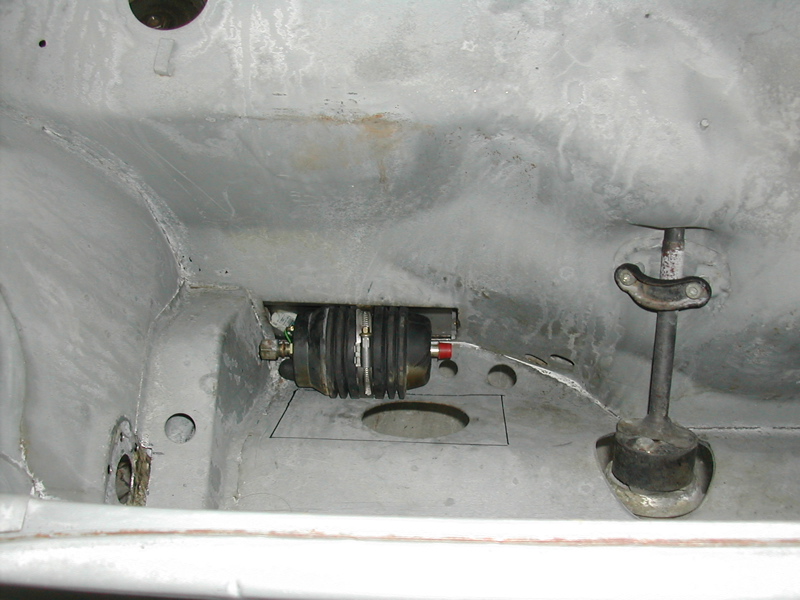
Posted by: McMark Feb 15 2007, 06:43 PM
Well, I finished this project. One step closer to paint. 
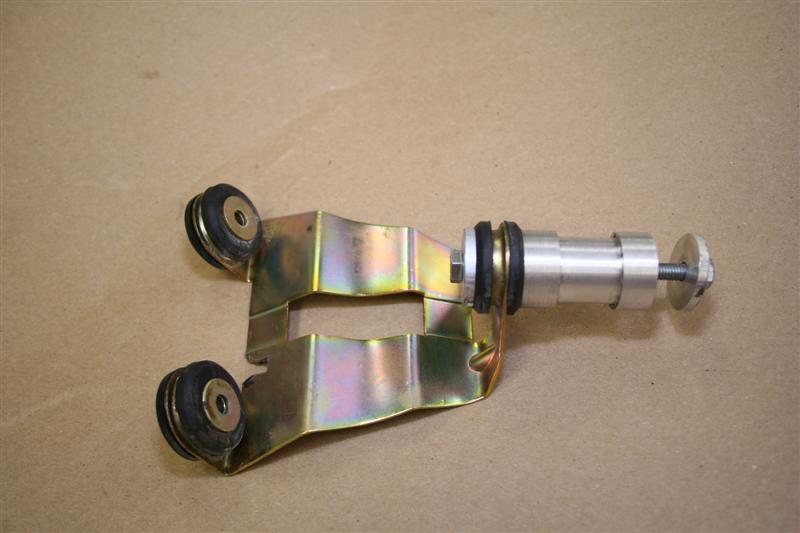
End caps TIG welded on and smoothed out. Ready for mounting holes.
Here it is finished off and installed. Now all it needs it a trip to the powder coating oven and it goes in the 'done' pile.

Backside finished off, nuts tack welded onto the back.
Posted by: rjames Feb 15 2007, 09:01 PM
I'm really enjoying following this one. I love watching rust being cut out and new metal being welded in. Can't wait to see photos after the paint job.
Nice work!! 
Posted by: Cruzing Feb 15 2007, 10:23 PM
WOW, I now fell very lucky to have found a 914 with very little rust. Nice work.
question:
I choose to go with the 2.2S motor, I figured I would not have to upgrade brakes, suspension, transmission nor axles. Money was a issue. Do you see any problems, I was figuring normal driving habits with a romp once in a while in the mountains. I am close to diving it, have not yet,,,
Larry
Posted by: John Feb 15 2007, 10:29 PM
That is one BIG fuel pump. I had no idea they were so big on the 3.6's. The 3.2 fuel pump is virtually the same physical size as the 75-76 914 pump.
Go Mark go! 
Posted by: McMark Feb 15 2007, 11:59 PM

Do you see any problems
Larry
Normal driving should be fine on the brakes. You'll probably never notice brake fade unless you get it on a track or REALLY push it for a seriously fast 30 minute hill run. Suspension, transmission and axles are all fine in stock form. But as always, drive safe and pay attention to what your car is telling you. Each car and each driver is different.

Go Mark go!
Thanks John, I'm having a great time. I think it's time to test fit the motor next.
 Oh, and wait till you see the air conditioning setup.
Posted by: Cruzing Feb 16 2007, 12:27 AM
Thanks for your input, I was hoping I was on track of usability without going too crazy on alterations. Nice to know I am going to be fine, not knowing how one drives yet I was getting nervious... 
waiting for this last part to get done AAHHGGRRR then happieness..
Posted by: Aaron Cox Feb 16 2007, 01:01 AM
bitchin metal work mark!
Posted by: Hammy Feb 16 2007, 01:47 AM
Sweet idea for the fuel pump... never would've thought of that myself.
speaking of floor pans.....how much would it run me to get my driver's side rear quarter pan replaced?
Posted by: JmuRiz Feb 16 2007, 12:53 PM
You didn't install the engman interior bracing? Just wondering why...
Posted by: McMark Feb 16 2007, 01:36 PM
Yeah, I did. But I need to take new pictures.
Posted by: PRS914-6 Feb 16 2007, 02:39 PM
That is one BIG fuel pump. I had no idea they were so big on the 3.6's. The 3.2 fuel pump is virtually the same physical size as the 75-76 914 pump.
Go Mark go!
The fuel pump is actually the same size. The rubber boot is to make it quieter. I like what you did Mark but personally I avoided mounting the pump under the tank. I know lots of cars have the pumps inside the tank but I wanted serviceability. I used the stock 3.6 mount with a little modification......
Posted by: McMark Feb 16 2007, 03:18 PM
That's a good way too.
Posted by: Johny Blackstain Feb 16 2007, 08:10 PM
Excellent work & a fantastic thread. Please keep up the posts of your progress. Fantastic! 
Posted by: Mueller Feb 16 2007, 11:56 PM
lot's of work Mark, great job.....
do you already have the needed parts for the motor such as the powersteering delete plate or whatever fancy parts you need?
Posted by: Cruzing Feb 17 2007, 03:12 AM
Have you chosen a color yet, stock interior or upgrading lt? Very nice work, Good thing we enjoy our projects... lots of detail work ,,, very nice..
I was just wondering, maybe I missed it, what is the projected cost on turnkey. Or is that too personel...
Posted by: McMark Feb 17 2007, 04:58 AM
Very, very expensive. It might cause convulsions in some of the CSOB members if I post a number. (no offense to the CSOB members  )
)
Posted by: McMark Mar 12 2007, 04:23 PM
Oil cooler mount is finished up. Big ass Fluidyne cooler that will dump under the car if I mod the skid plate, or out the wheel wells if I run the stock skid plate. I haven't decided which, but I'm leaning towards unmodded.
Attached image(s)


Posted by: 914wizard Mar 12 2007, 04:49 PM
Looks great!
Posted by: rick 918-S Mar 12 2007, 05:14 PM
![popcorn[1].gif](style_emoticons/default/popcorn[1].gif)


Posted by: McMark Mar 21 2007, 12:10 PM
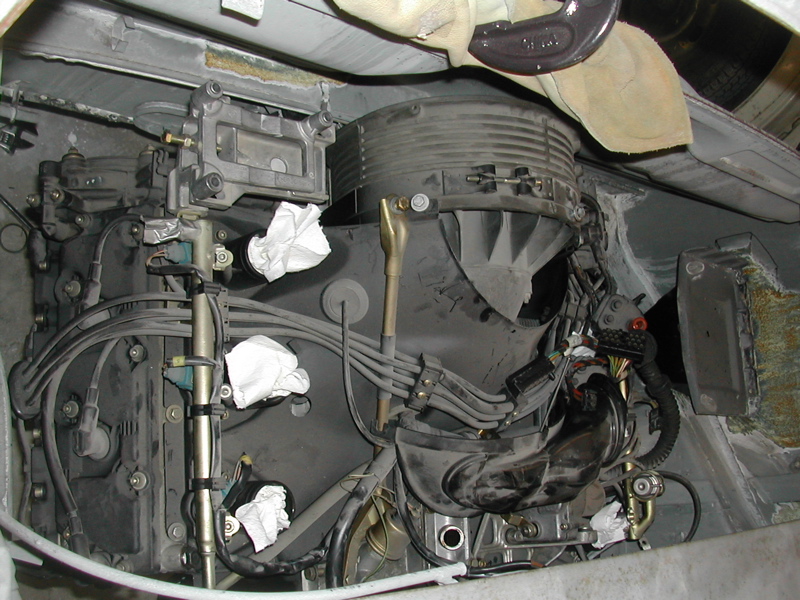
Motor is in for the first time. 
Attached image(s)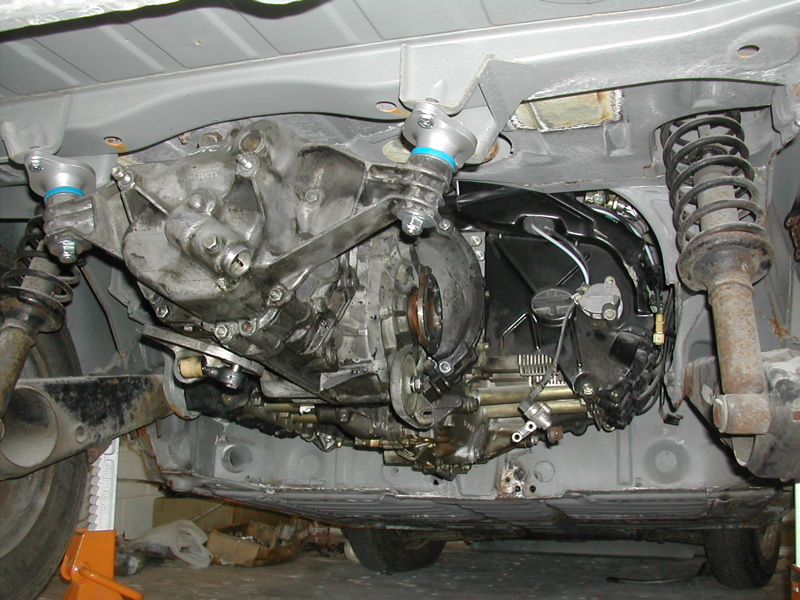
Posted by: -JR- Jun 17 2010, 11:57 PM
Is this project dead or just the thread?
Thanks Mark!
Posted by: Root_Werks Jun 18 2010, 09:43 AM
Very cool Mark! I didn't know you were doing one of these.
Posted by: hwgunner Jun 18 2010, 09:58 AM
looks like the project is 3+years old.
Posted by: Scott Schroeder Jun 18 2010, 10:05 AM
Wow - unbelieveable talent.
Mark - what do you use to grind and smooth your welds/repairs? You seem to get fantastic results in really tight places (like that firewall gap).
Fantastic job...
Oops - didn't realise this was an old thread.....
Posted by: McMark Jun 18 2010, 10:32 AM
Whoa, I didn't realize this was my old thread. 
This car got sold and shipped to germany. My customer still owes me $400. I guess he figured he sold the car, so he's devoid of all responsibility. 
One of my favorite tools is the carbide burrs in a pneumatic angle grinder. 
Powered by Invision Power Board (http://www.invisionboard.com)
© Invision Power Services (http://www.invisionpower.com)