Printable Version of Topic
Click here to view this topic in its original format
914World.com _ 914World Garage _ Coil-over install pics
Posted by: ChrisReale Aug 7 2003, 10:33 PM
Put car on jackstands and if you desire, remove both rear wheels
Attached image(s)
Posted by: ChrisReale Aug 7 2003, 10:33 PM
Undo top mount nut
Attached image(s)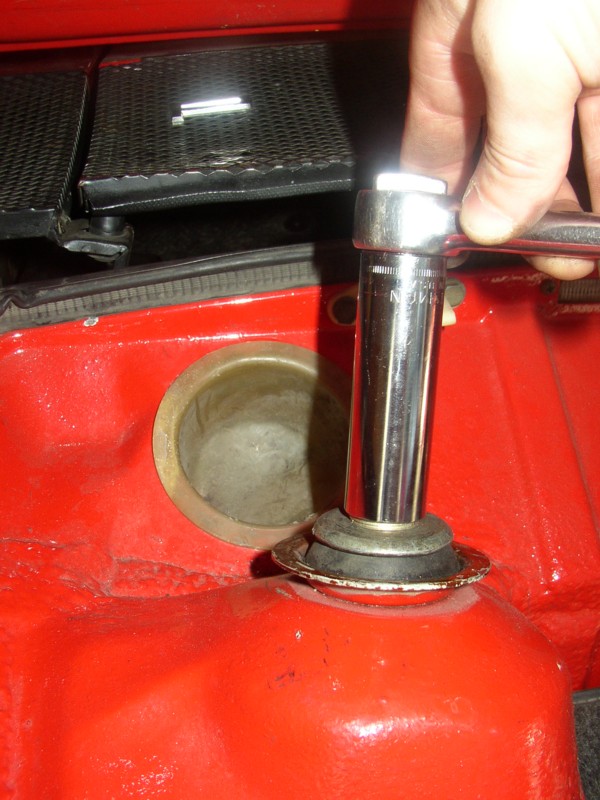
Posted by: ChrisReale Aug 7 2003, 10:35 PM
Unbolt bottom nut and slide bar out from strut and rear arm. Might be a good idea to support the rear trailing arm so it doesnt fall down onto your heat exchangers
Attached image(s)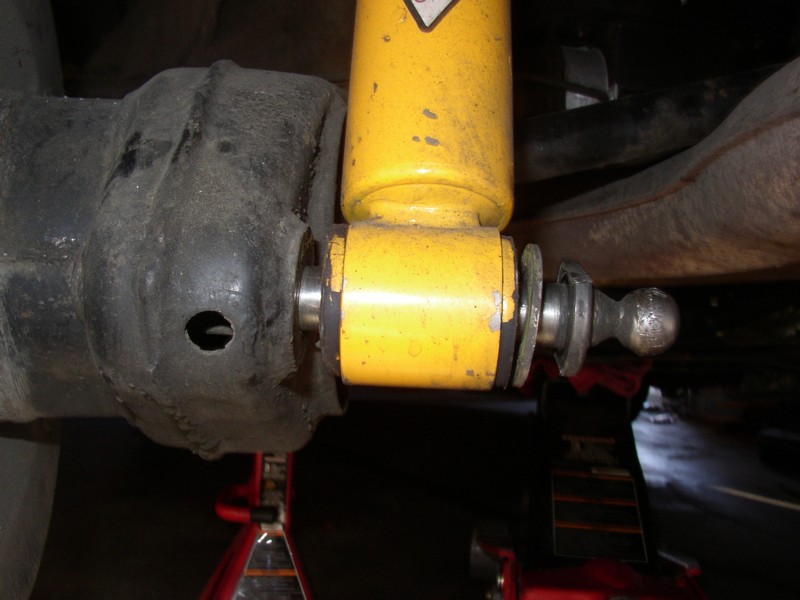
Posted by: ChrisReale Aug 7 2003, 10:37 PM
Remove spring/shock combo and undo the top bolt that holds the spring hat on. If you have stock springs, rent a compressor. If you have 140 or 180# springs, you probably wont need a compressor. Black rubber donut goes on the top of the assembled unit
Attached image(s)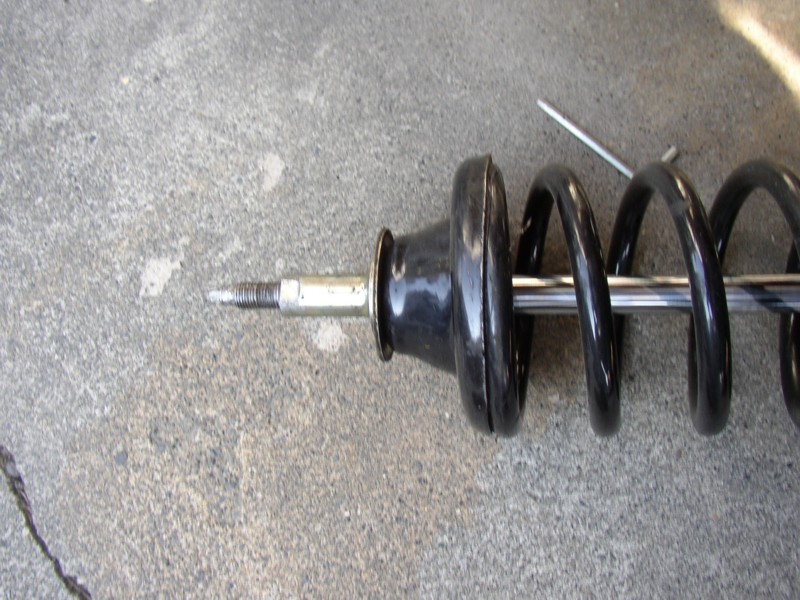
Posted by: ChrisReale Aug 7 2003, 10:37 PM
Now, I put the new threaded collar onto the shock
Attached image(s)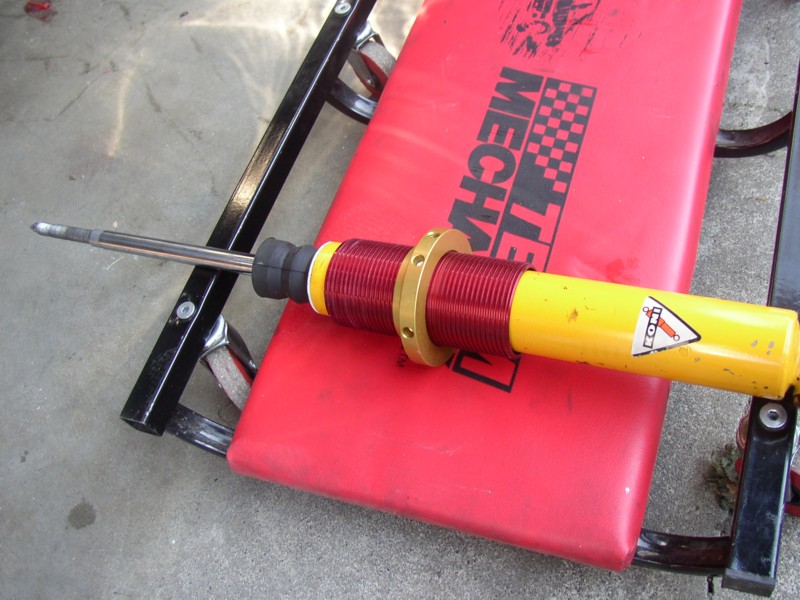
Posted by: ChrisReale Aug 7 2003, 10:39 PM
The threaded collar acts as an adjustable spring perch, with "infinate" height adjustment  Basically, you can corner balance your car better, and lower it a few more inches. Assemble unit and re-install. The procedure is opposite of removal
See that black donut on the left of the pic? DONT FORGET TO PUT IT ON!!!!
Attached image(s)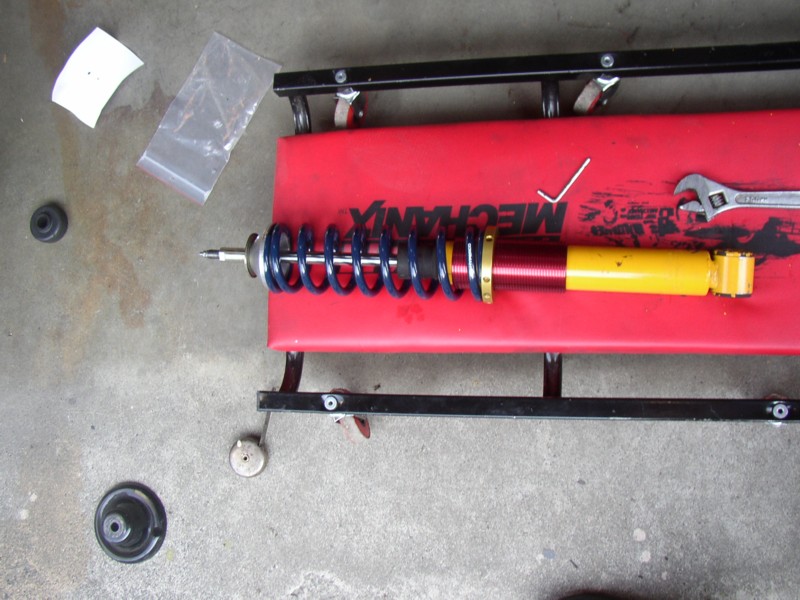
Posted by: ChrisReale Aug 7 2003, 10:42 PM
Pretty easy process. On left is a stock weight spring, middle is 180# progressive, and right is 200# Hypercoil
Big difference! One nice thing about this set is the top spring hats have two holes pre-drilled so you can zip-tie the springs to the hats easily
Attached image(s)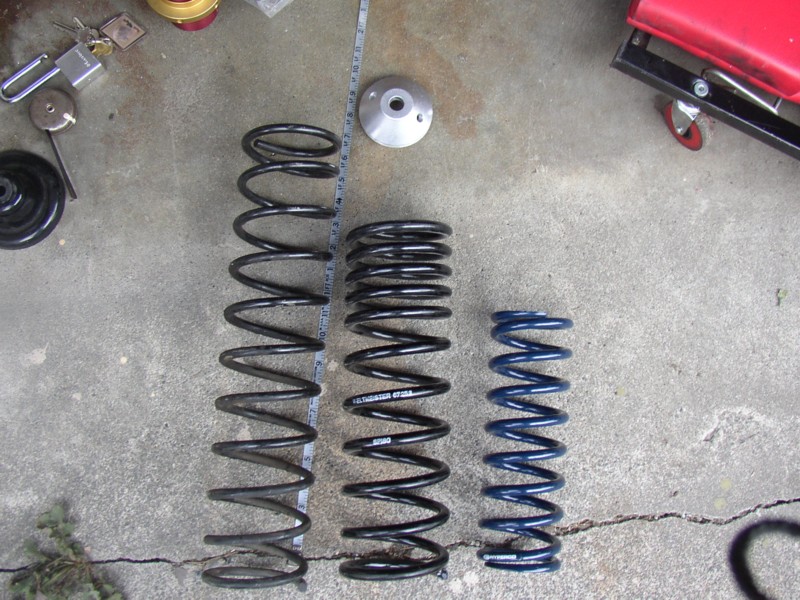
Posted by: Brad Roberts Aug 7 2003, 11:08 PM
Grass Hopper has a come along way..
Good job. 
Oh.. I dont take the wheel off. No need.
B
Posted by: maf914 Aug 8 2003, 07:16 AM
Chris,
Good photos and info. Thanks.
Who supplied the hardware? Collars, rings, and springs? I have Koni reds and would like to go this route, with a 120 or 140 spring rate.
Mike
Posted by: philinjax Aug 8 2003, 07:35 AM
What's that ball on the bolt head in the third pix. above??? Don't remember ever seeing that before.
philinjax 
Posted by: redshift Aug 8 2003, 07:36 AM
philinjax
Right side trailing hitch. Factory towing option.
I wonder if he has the teeny lil trailers?
M
Posted by: seanery Aug 8 2003, 07:41 AM
looks like a rear bar mount to me.
Posted by: JmuRiz Aug 8 2003, 07:50 AM
Yup, it's the rear sway bar mount...and boy is it a PITA to get back on. At least mine was when I did my adj coilover install. Also, the zip-ties that I used to attach the spring top to the spring hat lasted all of 2 seconds...anyone have a remedy for this...maybe just attach them loosely? Thanks
Posted by: seanery Aug 8 2003, 08:02 AM
what about safety wire?
Posted by: rhodyguy Aug 8 2003, 08:15 AM
so chris, are you going to install one of those air cushioned seats that are in kenworths/peterbuilts so you can still drive to ore?
kevin
Posted by: Jeroen Aug 8 2003, 08:29 AM
Hey Chris,
Good pics and write up!
Remind us in a little while to move this thread to the "classics"
cheers,
Jeroen
Posted by: KenH Aug 8 2003, 09:18 AM
Who made the Coil Over hardware???
Ken
Posted by: brant Aug 8 2003, 09:28 AM
I've had better luck with safety wire over zip ties...
brant
Posted by: Brad Roberts Aug 8 2003, 10:04 AM
Um guys ???
Your not tying the top AND bottom down are you ???
I have cars running round for 5-6 years with the same zip ties.
Yes.. the rear sway bar is a PITA to get back on the mounts.
B
Posted by: redshift Aug 8 2003, 10:06 AM
So you just jack it up, adjust the collars (I imagine those are set screws around the edge?) and there you go..
Those are the C2 parts you were asking about? I like that.
Where do you start when adjusting those?
M
PS: WD-40 would remove that nasty crap on your dolly, AND SKIN!
Posted by: Brad Roberts Aug 8 2003, 10:08 AM
KenH.
Paragon products is a 914 friendly parts place out of Corpus Christy Texas. They sell the Koni's and the kits. Ask for Jason and tell him you heard about them on the 914club site.
B
Posted by: rdauenhauer Aug 8 2003, 10:41 AM
One mention, Make sure to replace or restore the snubbers!!!
Dont know if youll be bottoming those springs but w/o them that would be VERY BAD 
Posted by: BIGKAT_83 Aug 8 2003, 01:27 PM
Looks Good!
But I can't really tell by the pictures the length of the spring. It looks like you would be getting pretty close to coil binding at full suspension travel. Did you get this as a kit or did you order the parts by themself?
Posted by: redshift Aug 8 2003, 03:34 PM
Another question:
What is the downward limit of useful adjustment?
M
Posted by: ChrisReale Aug 8 2003, 05:08 PM
I got them from Paragon Products. That ball is the rear sway bar mount. My tiars will stop the shock from bottoming out before the spring does I do have some around here somewhere. Hypercoil makes the springs, a company called Coleman(906-863-7883) makes the threaded collar and perch. In the pics, I had the threaded collar sitting WAY too high. Now I have the collar right at the bottom. Rear is sittinga tad too low, but I am going to re-clock the torsion bar adjusters and lower the front more....
Posted by: redshift Aug 8 2003, 05:16 PM
Ok, I am sold, I love that thing, I need that thing, that thing could make me like konis...
M
Powered by Invision Power Board (http://www.invisionboard.com)
© Invision Power Services (http://www.invisionpower.com)