Printable Version of Topic
Click here to view this topic in its original format
914World.com _ 914World Garage _ Cleaning Out The Trunk
Posted by: Spoke Oct 28 2005, 06:30 AM
OK, this little job started out simply as installing an original rear valence to my 914 and now has grown. The rear valence needed some body work and welding (love my new Millermatic 135  ). Its done and painted, ready for install.
I notice that the mounting tabs are a bit rusty, so off with the bumper to sandblast and paint the area. Currently my only air sprayer is a Binks air brush. It takes some time to paint with the air brush but the finish is excellent. I will buy an HVLP detail and paint gun set today at Eastwood Co in Pottstown to finish this job.
So I can't just sand blast and paint the valence tabs, I must do the entire area behind and around the bumper. So off with the tail lights. The entire area around the bumper is now painted.
While I have the sprayer out, why not fix the ripple in the front door? Smoothed out the ripple and painted only 1/2 of the door since the air brush is extremely slow for large areas. My PPG matched paint looks excellent and is a perfect match to the current paint on the car.
Then I notice that the area between the taillights has a ton of bondo on it and I don't like that. The stuff is almost 1/4 inch thick! So, off with the bondo, straighten the metal, prepare to paint.
Wait, while I'm here with taillights removed and will be getting a real paint gun, why not strip and paint the rear trunk? So remove the battery from the trunk and begin to strip the paint.
The trunk sure looks nice without the battery. OK, now the battery is going back in the engine compartment.
FINALLY TO MY QUESTIONS: How long is the cable from the battery to the starter? Also, where does the ground strap connect to the frame or engine?
Thanks,
Spoke
Attached thumbnail(s)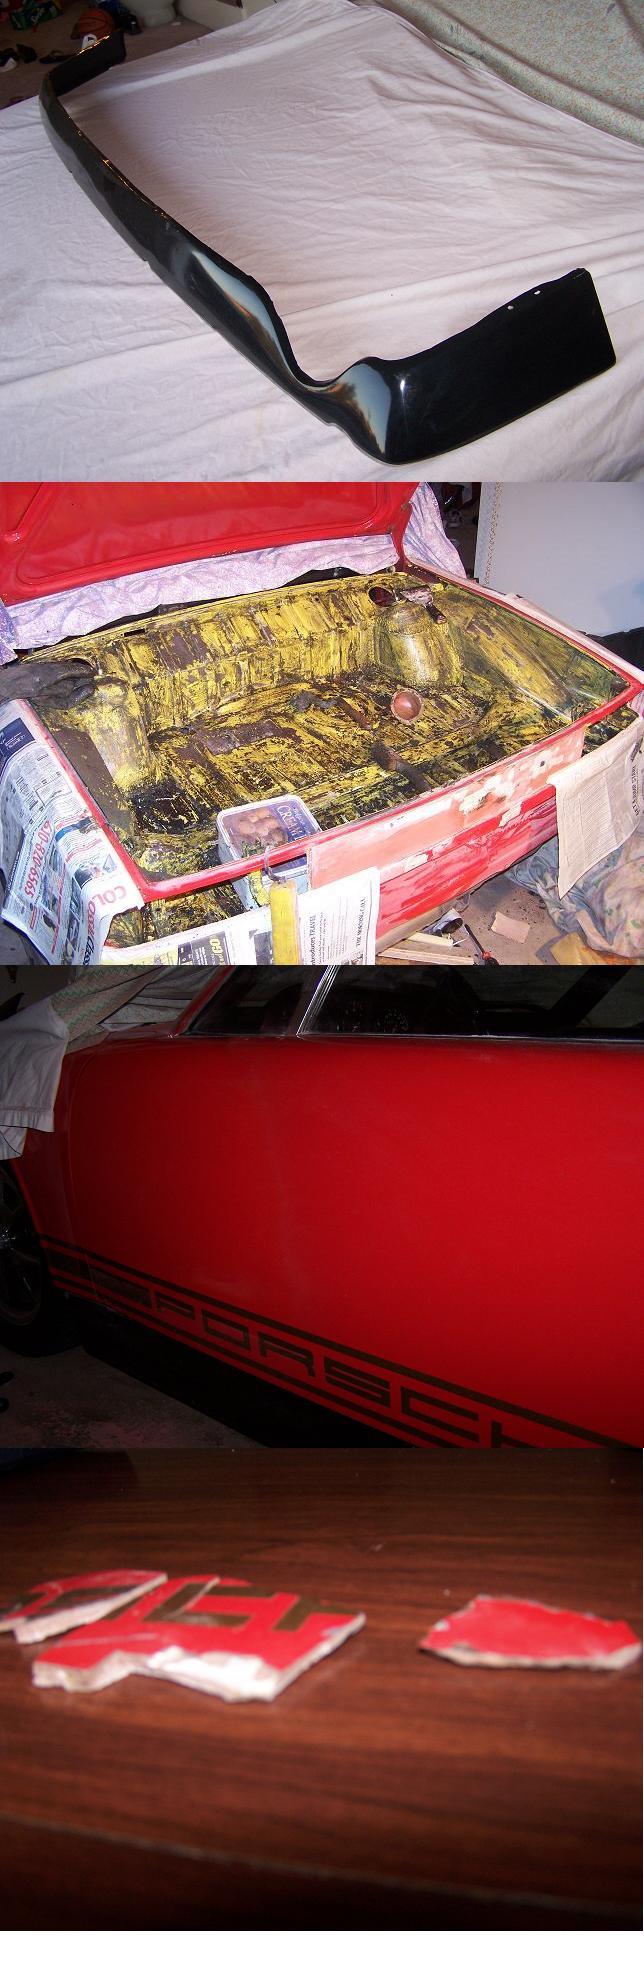
Posted by: markb Oct 28 2005, 08:02 AM

Oh, BTW, you officially have DWD. 
Posted by: brant Oct 28 2005, 09:02 AM
Nice job...
you know that there is no readily available cure for the disease right?
I'm afraid it could take years before it goes into remission.
I hope that you can gain support from family and friends.
hang in there.
brant
Posted by: maf914 Oct 28 2005, 09:27 AM
Wow, I have a couple of Paasche air brushes, but I never thought about painting large scale areas with one. Paint a car with an air brush? You got it bad! 
Good work though, way to go.
Posted by: Spoke Oct 29 2005, 06:01 AM
Just bought a Devilbiss HVLP set. Should go faster and neater than the air brush 
Spoke
Posted by: Spoke Oct 29 2005, 06:02 AM
HVLP
Attached image(s)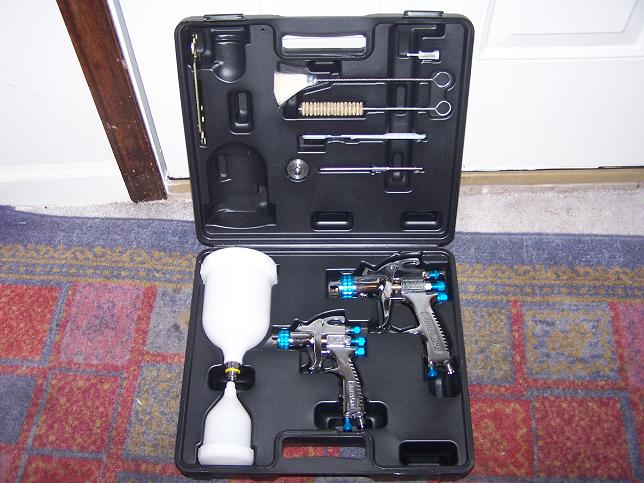
Posted by: Spoke Oct 29 2005, 06:10 AM
Question:
When the battery is in engine compartment, does the wire to the starter go through the trunk via the 2 circled holes below?
Can someone post pics or point me to pics of battery wiring? Where does the ground strap connect? To the engine or chassis? How long is the wire to the starter?
Spoke
Attached image(s)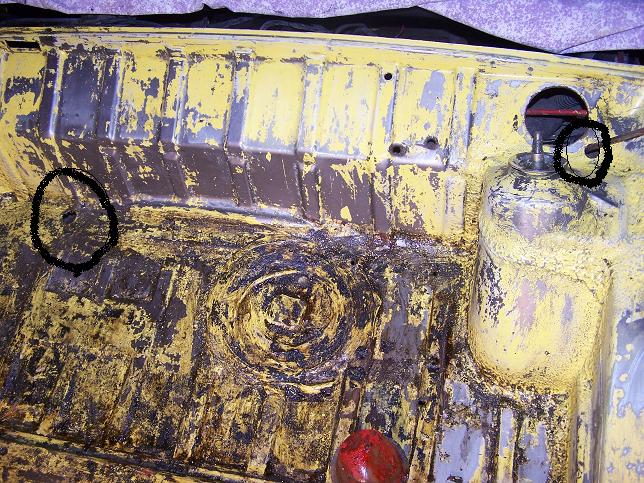
Posted by: Spoke Oct 29 2005, 06:13 AM
Uh-oh.
Custom venting in the trunk floor courteousy of Father Time and Mother Nature.
Spoke
Attached image(s)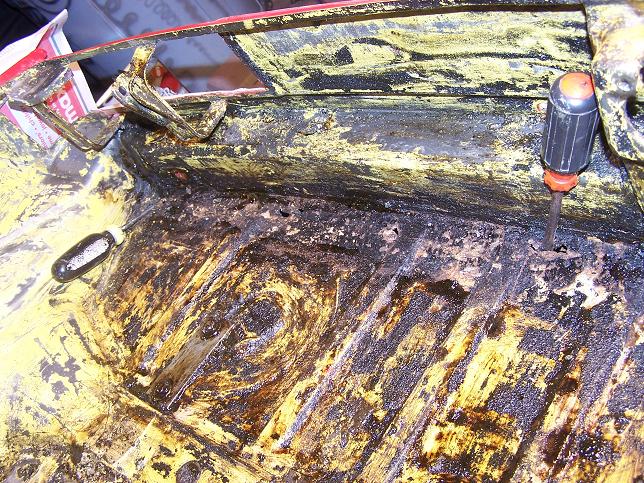
Posted by: swl Oct 29 2005, 08:09 AM
ground to body
Attached image(s)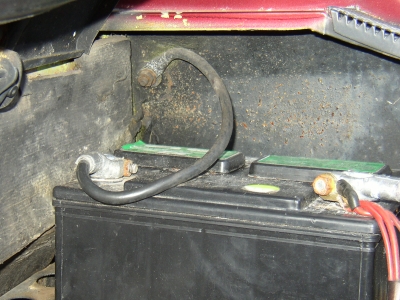
Posted by: swl Oct 29 2005, 08:10 AM
starter routing
Attached image(s)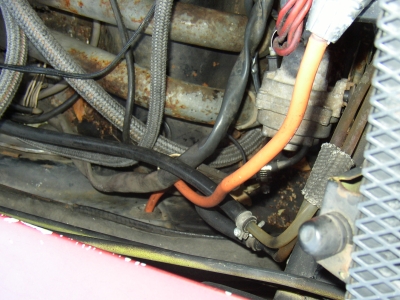
Posted by: Spoke Oct 29 2005, 08:52 AM
Steve,
Thanks for the pics. It looks like the positive cable goes into the trunk. Do you have a pic of the cable in the trunk?
Well, now the rust holes are gone. Time for some metal fab.
Spoke
Attached image(s)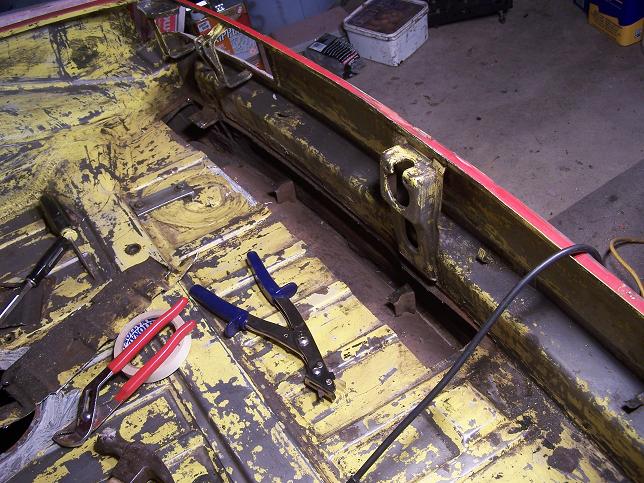
Posted by: Verruckt Oct 29 2005, 09:02 AM
| QUOTE (Spoke @ Oct 29 2005, 06:02 AM) |
| HVLP |
Hey let me know how that set works out. I was thinking of buying that very set. The amount of paiting I would do, I really don't think I need to go crazy and buy a $500 SATA gun. That set is the one that Eastwood sells for like $109 right? Would appreciate if you could post what you think of it.
Posted by: Spoke Oct 29 2005, 11:02 AM
Yeah, its the Devilbiss set from Eastwood on sale for $99. I drove to their shop yesterday to pick it up. I'm not crazy about the plastic bowls but the price is right. I'll let you know how they work.
Finally the plate is cut, ready to clean the metal and start welding. I didn't continue the ribs on this piece of metal. Too hard to mold and I have no metal tools. Maybe I'll weld on ribs after attachment.
Spoke
Attached image(s)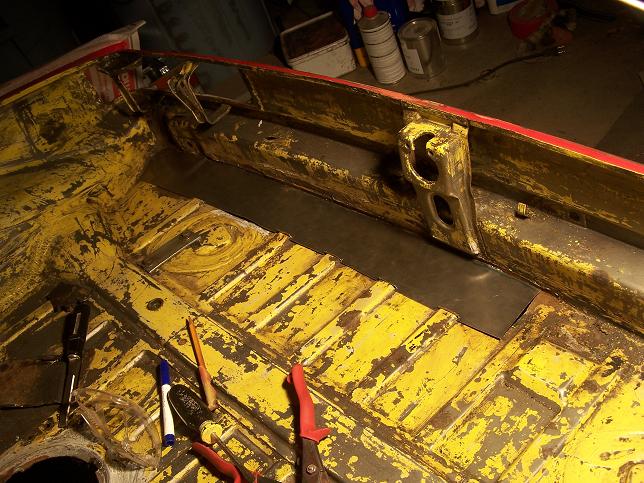
Posted by: Spoke Oct 29 2005, 11:35 AM
What is this number? Its in the trunk on the floor right in front of the passenger side taillight? Is it a chassis number or what? It's not the VIN.
Spoke
Attached image(s)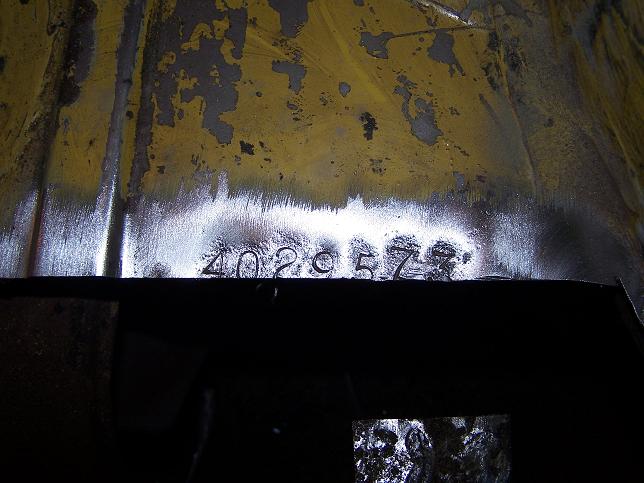
Posted by: jd74914 Oct 29 2005, 11:55 AM
I think it is the chasis number 
Make sure you don't dwell on it with a wire wheel; it will start to fade away.
Posted by: swl Oct 29 2005, 03:18 PM
| QUOTE (Spoke @ Oct 29 2005, 06:52 AM) |
| It looks like the positive cable goes into the trunk. Do you have a pic of the cable in the trunk? |
It goes through the tin below the trunk then straight to the starter. Doesn't pass through the trunk at all. Just took the car off the jacks to push it into the garage so I can't grab a pic of the underside but if you have the stock tin you should be able to find the hole pretty easily.
Posted by: Spoke Oct 29 2005, 06:19 PM
Steve, thanks, I found the original hole in the engine bay. I will patch up the 2 holes which must have been made for putting the battery in the trunk. BTW, the battery terminals on my battery are opposite from yours. Hmm.
Welded the hole and added bracing. The new metal is very solid now. I have to rank right up there with the worst welders ever. The job turned out ok but I'm not happy with the work.
Attached image(s)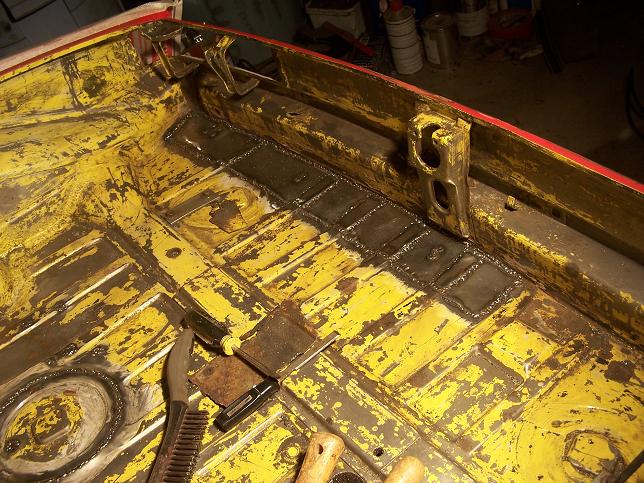
Posted by: swl Oct 29 2005, 07:46 PM
| QUOTE (Spoke @ Oct 29 2005, 04:19 PM) |
| BTW, the battery terminals on my battery are opposite from yours. Hmm. |
That sounds like a good plan. That positive terminal is a magnet for metal that is grounded. Tucked into the back corner would keep it out of harms way. Maybe it was supposed to be that way?
Posted by: wilchek Oct 29 2005, 08:07 PM
nice job, I just realized that you are nearby when you said you stopped at the eastwood plant. The number in the trunk in the Karmen body number should match the plate in the driver side front door jamb. The plate in the door jamb also has the original paint code. If you ever need anything let me know, I am about 40 minutes from you.
Posted by: MarkV Oct 29 2005, 09:36 PM
The positive cable goes through a gromet on the passenger side of the rear tin and mounts to the tin with two ties on either side of the transmission.
Attached image(s)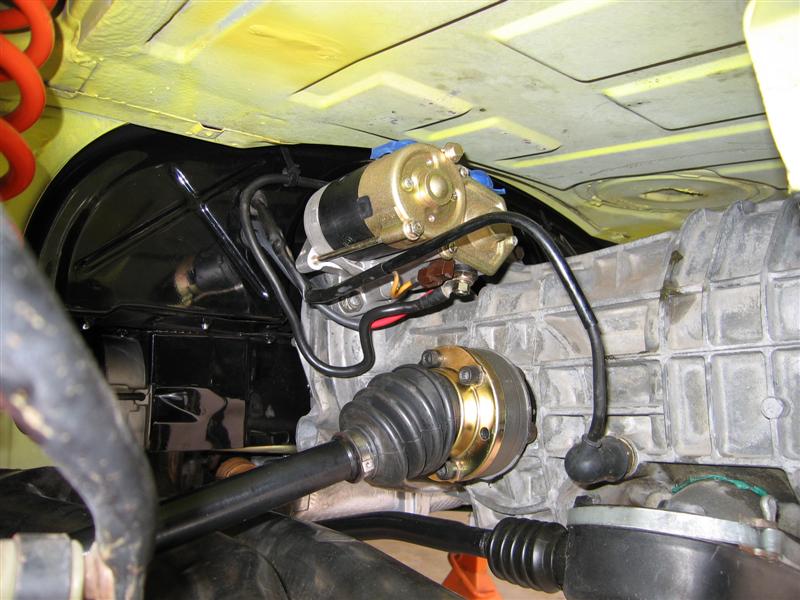
Posted by: MarkV Oct 29 2005, 09:43 PM
nother
Attached image(s)
Posted by: Spoke Oct 30 2005, 11:05 AM
Steve, Mark, Thanks for the pics. I understand the wire routing now. Mark, your car is super clean. How do you keep it so clean? Mine isn't a show queen but I try to keep it clean but just driving it produces tons of dust and junk.
Mounted the battery tray today. I used the battery tray that held the battery in the trunk. No time to purchase a 914 tray and wait for delivery plus I saved $100. Now time to paint the trunk and body behind the bumper.
Spok
Attached image(s)
Posted by: dlo914 Oct 30 2005, 12:45 PM
i had just replaced the positive line that runs directly from the starter to the battery, and that was at least 72inches in length. And you should just run the wires through the targa cups. There's one on each side of the car. Should just ground the battery to the chassis. At the stock location that's right next to the battery. And maybe relocate the battery to the center of the trunk. As close as you can get it to the front of the trunk.
Posted by: jsteele22 Oct 31 2005, 04:32 PM
You know, the front trunk is gonna look mighty shabby once the rear has fresh paint on it...
Posted by: Spoke Nov 1 2005, 07:13 AM
| QUOTE (jsteele22 @ Oct 31 2005, 02:32 PM) |
| You know, the front trunk is gonna look mighty shabby once the rear has fresh paint on it... |
Don't get me started on the front trunk. I want to get the car on the road. I've missed 2 weeks of beautiful weather here. You're right, the front trunk is shabby and is on the list.
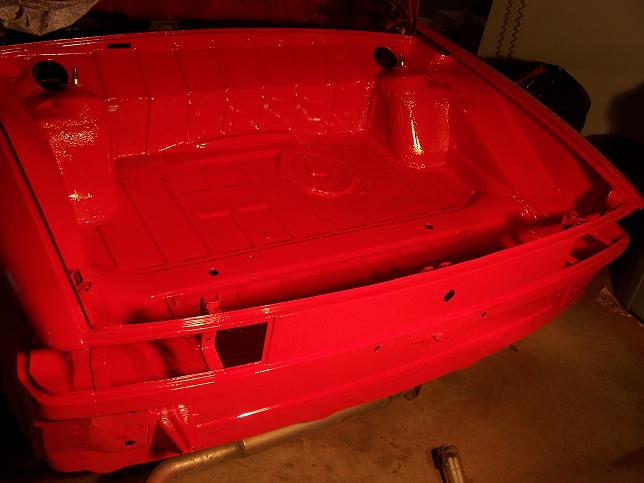
The trunk is now painted. The new HVLP gun works great and the PPG paint has a finish like glass. Will let the paint cure a couple of days then reassemble the trunk. On to the battery wiring now.
Spoke
Attached image(s)
Powered by Invision Power Board (http://www.invisionboard.com)
© Invision Power Services (http://www.invisionpower.com)