Printable Version of Topic
Click here to view this topic in its original format
914World.com _ 914World Garage _ GT style oil line routing
Posted by: michel richard Nov 5 2005, 07:19 PM
As part of my /6 restoration, I decide that if I run a front cooler, I'd like to run the lines to it GT style.
Here's the main retoration link:
http://www.914world.com/bbs2/index.php?act=ST&f=2&t=34896&hl=
I showed in a previous thread how I began to cut off the supports on the drive side outer longitudinal:
http://www.914world.com/bbs2/index.php?act=ST&f=2&t=40719&hl=
Here's the followup. I cutoff the front-most support entirely. Please note my mistake: this support does not extend all the way to the outer longitudinal. A chunk of the cut that I made was into steel that will remain:
Attached image(s)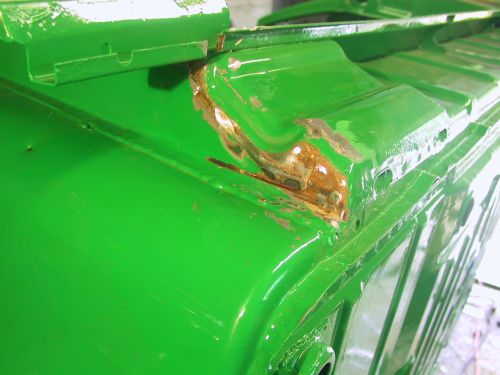
Posted by: michel richard Nov 5 2005, 07:22 PM
I then cut the actual hole, first a couple of 1.5 inch holes into the long, then a cutoff saw and some files. Note that I initially cut too far back and that I cut into the warm-air conduit. That will need fixing.
Also, the hole itself is certainly not pretty. But I want to make it a point to show my good moves as well as my not-so-good ones. Perhaps somebody else will find my mistakes useful.
In any event, here's the hole:
Attached image(s)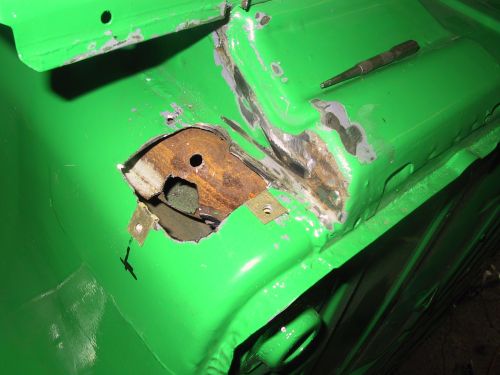
Posted by: michel richard Nov 5 2005, 07:24 PM
And the hole I drilled in the inner long. This is much easier, because I was able to drill a pilot hole into the inner long, from the outsede.
Attached image(s)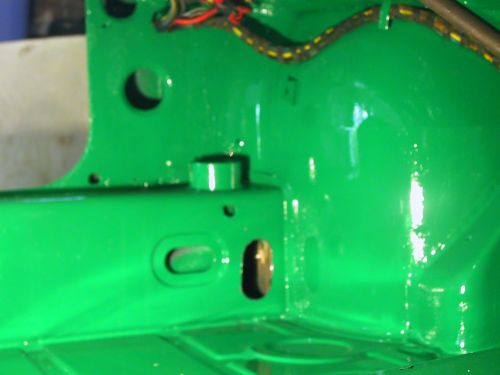
Posted by: michel richard Nov 5 2005, 07:24 PM
Thee is then a hole that needs to be drilled next to the pedal cluster:
Attached image(s)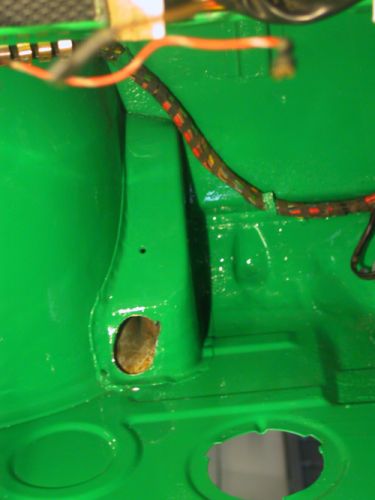
Posted by: michel richard Nov 5 2005, 07:28 PM
And finally, one hole into the front luggage compartment.
One worry that I had was how to deal with the front bulkhead, but I found that it is not a problem. There is a clear path from the "pedal cluster hole" to the "front luggage compartment hole"
The followign picture is taken from inside the front luggage compartment, looking towards the rear. The green area inside the hole is actually paint that is inside the cockpit, where I had a light for this picture.
Attached image(s)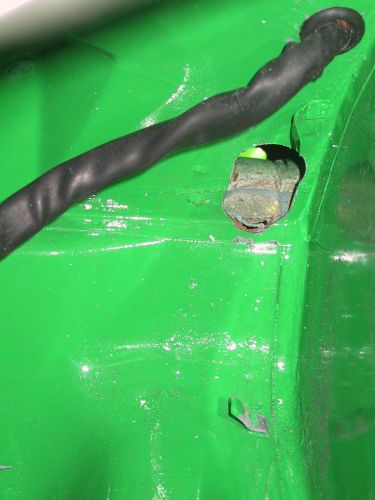
Posted by: michel richard Nov 5 2005, 07:32 PM
OK, so the picture may be a bit too much of a close up. I'll try and take another one tomorrow, to show where this hole is.
This part of the work was a little more nerve wracking, because I started with a bit of a mistake, and because it's a little bit harder to figure out where to put the holes.
Finally, I made a shut-piece for the hole on the outer long. I will obviously have to customize this when I put the oil lines in.
Attached image(s)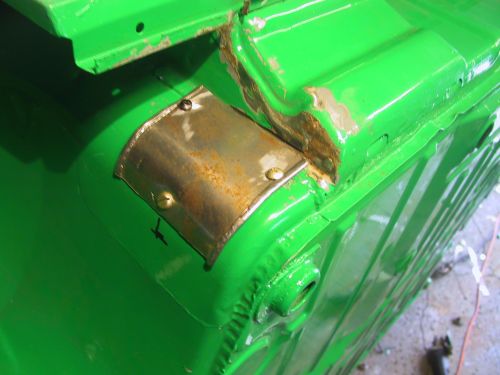
Posted by: Jeroen Nov 5 2005, 09:09 PM
nerve wreckin' when you get at that "point of no return"
keep up the good work!
Posted by: michel richard Nov 6 2005, 05:15 PM
Here's a picture of the luggage compartment hole, from further back:
Attached image(s)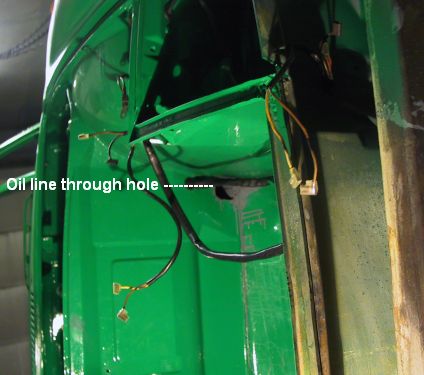
Posted by: michel richard Nov 6 2005, 05:18 PM
And there's always a little more work to do. I added some captive nuts so that the oil lines can be fixed down securely to the longitudinal.. Not real pretty, but it'll work. Also, I closed the jackpoint.
Attached image(s)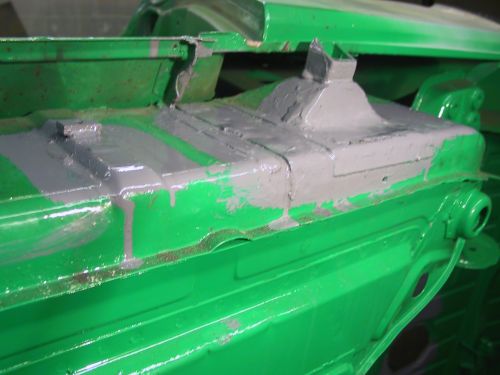
Posted by: michel richard Nov 6 2005, 05:21 PM
There is one captive nut here, it's the small piece of steel that is welded on top of the longitudinal. You will note, of course, that I fairly lathered the POR 15 on.
Once again, not pretty, but this part hides under the outer longitudinal, and I'm not building a concours car.
Michel Richard
Posted by: jdlamonica Nov 6 2005, 05:57 PM
Not pretty is an understatement. Somebody should take away anything sharp from you. Remember the old saying. "measure twice cut once"
Posted by: michel richard Nov 6 2005, 06:09 PM
| QUOTE (jdlamonica @ Nov 6 2005, 03:57 PM) |
| Not pretty is an understatement. Somebody should take away anything sharp from you. Remember the old saying. "measure twice cut once" |
Thank you for your support.
Posted by: brant Nov 6 2005, 10:24 PM
was your shell dipped.....?
I'm wondering because of the lack of undercoating inside some of the frame and panels.
brant
Posted by: trekkor Nov 6 2005, 10:46 PM
It takes courage to start. Glad you're doing it!
thanks for showing the pics as well.
KT
Posted by: 914Timo Nov 7 2005, 02:38 AM
Looks good !!
I removed the jacking point. It helped a lot to route the pipes.
Attached image(s)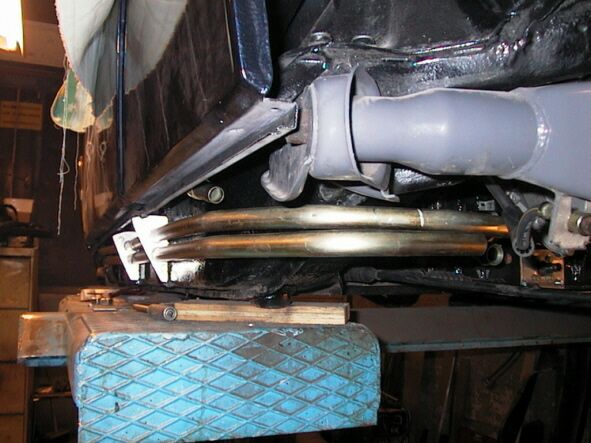
Posted by: michel richard Nov 7 2005, 06:23 AM
| QUOTE (914Timo @ Nov 7 2005, 12:38 AM) |
| Looks good !! I removed the jacking point. It helped a lot to route the pipes. |
Timo,
Thanks for your pics. Did you bend your lines yourself ? They look like brass, can you say exactly what you used ? i.e. diameter, wall thickness, end fittings, alloy ?
Thanks
Brant:
I did not have the tub dipped, and I don't think it had been dipped when I got it. Cutting those openings did make me realize that I should really try to do something about rust-proofing some of the more important "inside" parts, such as the longitudinals, etc . . . See my main restoration thread for a detailed sequence of what I've done.
http://www.914world.com/bbs2/index.php?act=...f=2&t=34896&hl=
Cheers,
Powered by Invision Power Board (http://www.invisionboard.com)
© Invision Power Services (http://www.invisionpower.com)