Printable Version of Topic
Click here to view this topic in its original format
914World.com _ 914World Garage _ GT F'glass Flare Install
Posted by: andys Dec 1 2005, 11:03 AM
Thought I'd take a few pic's of how I installed my 7" & 9" f'glass flares. I'll start with the results of the past Thanksgiving weekend.
This is where I finished. Flares are mounted with sheet metal screws (Tek-screws), and not bonded in place. Thanks goes to 914 neighbor, Dave, for all his help.
Andys
Attached thumbnail(s)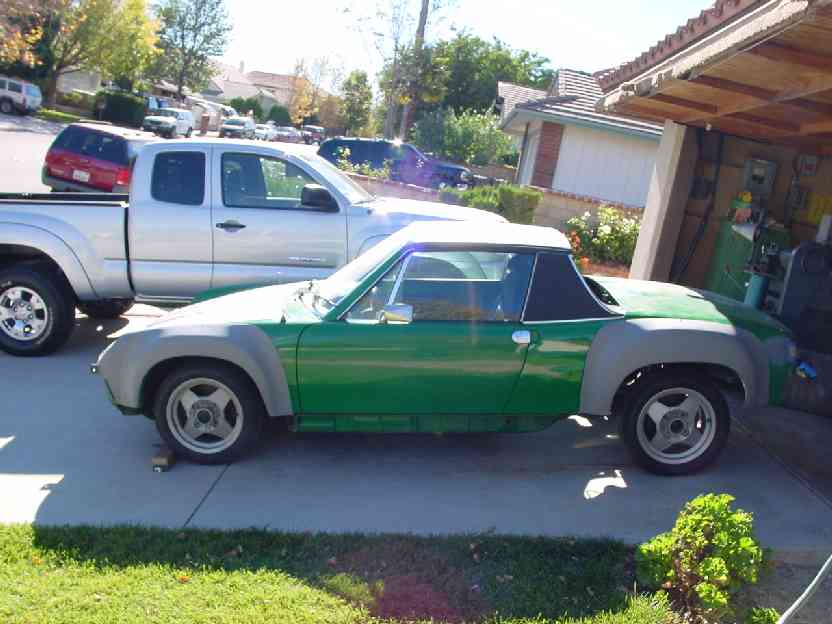
Posted by: andys Dec 1 2005, 11:08 AM
I first ground the inside of the flares to ensure a uniformwall thickness so that the edges would lay flat against the body. Also, I made sure that the outer perifery was the same, right to left (they were different, so trimming was required).
Attached thumbnail(s)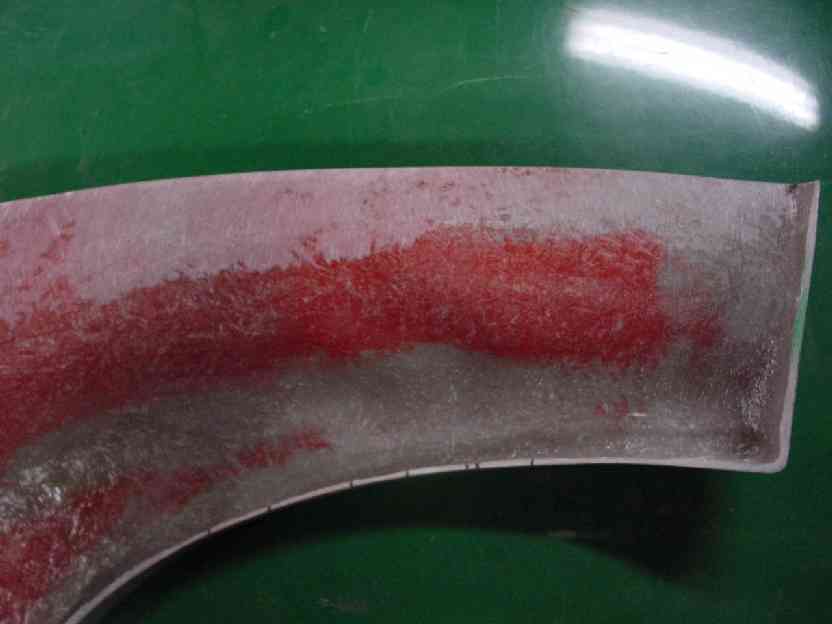
Posted by: andys Dec 1 2005, 11:10 AM
In this pic, the lines are scribed with a felt marker. First, the perifery, then again 1" inside of that.
Attached thumbnail(s)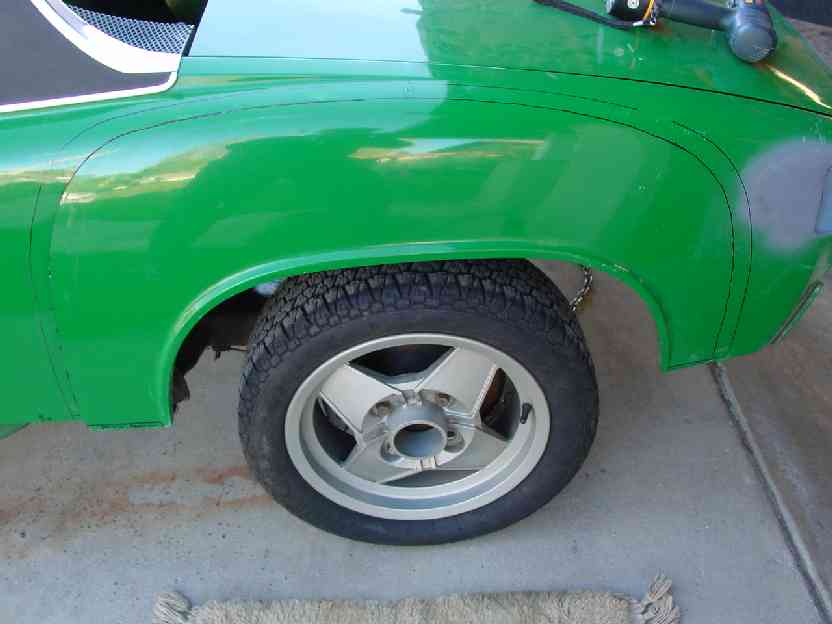
Posted by: andys Dec 1 2005, 11:12 AM
Another scribe pic of the left front.
Attached thumbnail(s)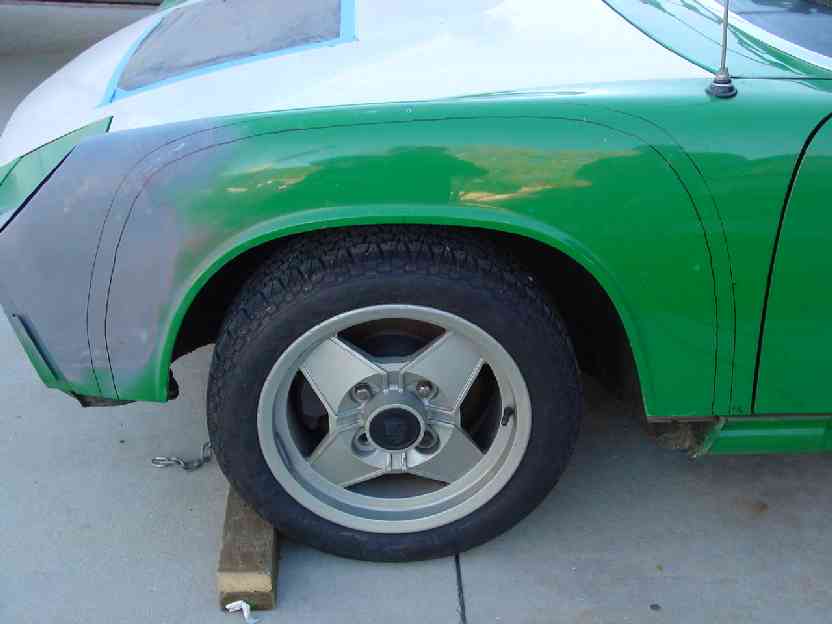
Posted by: andys Dec 1 2005, 11:14 AM
Right front fender cut out.......Somehow didn't save the rear cut out pic's???
Posted by: andys Dec 1 2005, 11:15 AM
Ooops, hit send too soon.............
Attached thumbnail(s)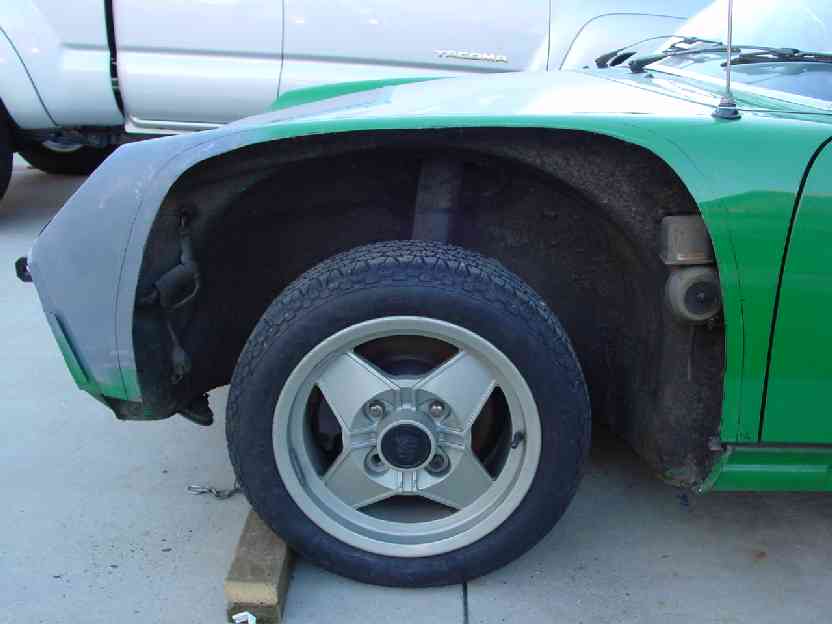
Posted by: andys Dec 1 2005, 11:17 AM
Close of left rear mounted.
Attached thumbnail(s)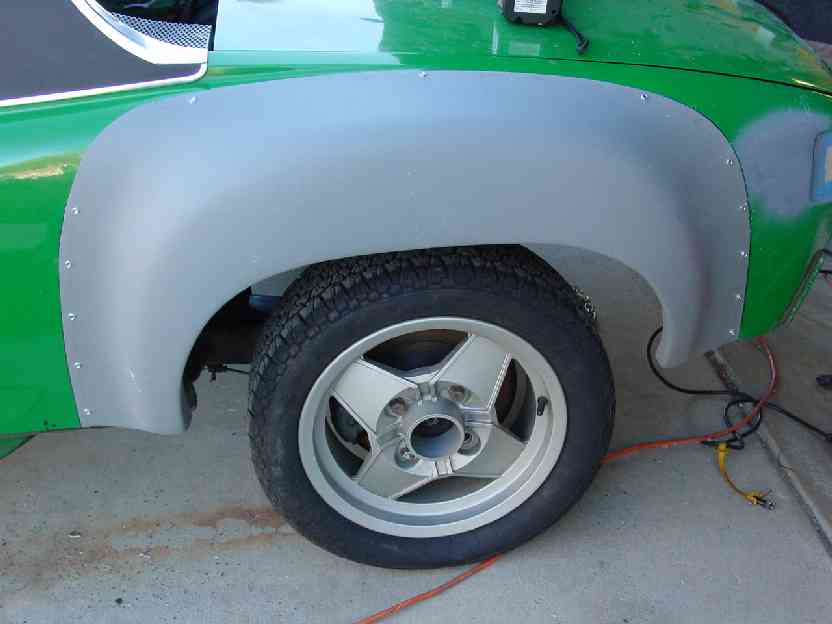
Posted by: andys Dec 1 2005, 11:19 AM
Close of left front mounted.
Attached thumbnail(s)
Posted by: andys Dec 1 2005, 11:23 AM
Final 3/4 view......I'll post some more pic's as I progress. BTW, the right side is done as well. Sure does change the look of the car!
Andys
Attached thumbnail(s)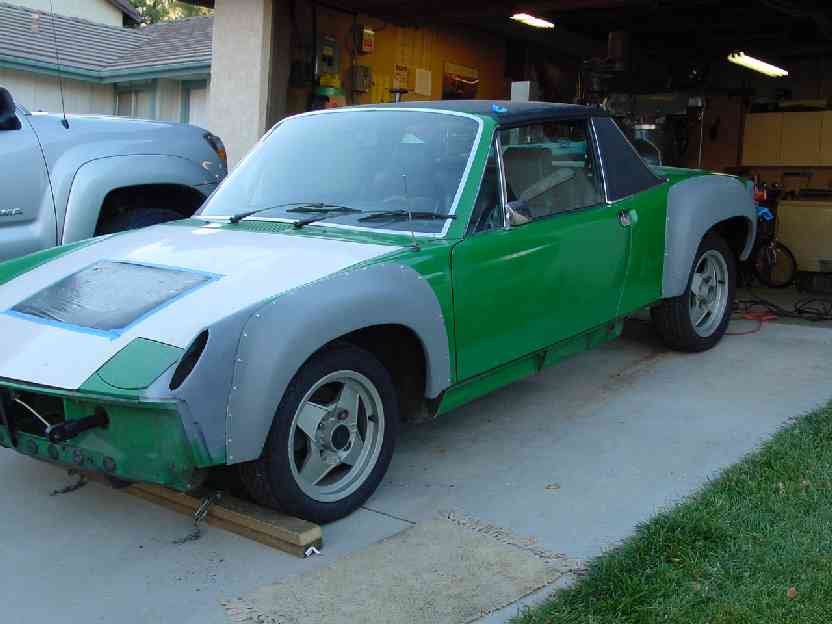
Posted by: Aaron Cox Dec 1 2005, 11:28 AM
nice!!! cant wait to see it done!
what wheels are those BTW?
Posted by: andys Dec 1 2005, 11:54 AM
| QUOTE (Aaron Cox @ Dec 1 2005, 09:28 AM) |
| nice!!! cant wait to see it done! what wheels are those BTW? |
Aaron,
Wheels are MOMO's, with 195-50's mounted on them. I think they looked pretty nice on the car before I cut it up. I'll be going to wider 993 wheels.
Andy
Posted by: boboli914@att.net Dec 1 2005, 12:00 PM
Looks great!! Now the harder part,to blend it into the fenders. Brings back nightmares for me. 
Posted by: Root_Werks Dec 1 2005, 12:00 PM
Andy, looks great, I did a thread on this a while back. Looks like your following a similar pattern. I opted for screws instead of rivots. Easier to remove.
I can't wait to see the progress! 
Posted by: maf914 Dec 1 2005, 12:22 PM
What type tool did you use to make the cuts? That step probably requires a few deep breaths! 
Posted by: andys Dec 1 2005, 02:46 PM
What I learned, was that there's an issue using Tekscrews (self-drilling), as the pressure required to drill the sheetmetal would push it in (in the flatter areas). The resultant hole in the sheetmetal was not aligned with the hole in the flare, and as you progressed, this would force the flare out of position. On the first attempt, the flare move nearly 1/2" by the time I progressed around to the bottom. I subsequently went to a pilot hole first. That solved the problem. Also, if you, for example, put one screw at the top, then one at each end at the bottm and then add screws in between the flare will buckle.
Hope the screws come out after I bond everything in place with epoxy. 
Yeah, I was apprehensive about cutting perfectly good sheet metal. I used a sabre saw with a fine tooth metal cutting blade. It cut fast and easy.
I'm not looking forward to all the finish work either. I've still got to prep the back side of the sheetmetal so that I can glass the inside.
Andys
Posted by: john rogers Dec 1 2005, 03:19 PM
Looks great. When I went to put mine on I bought a pair of Cleco pliers and a couple of dozen of the clamps and they hold things together amazingly well. Racer Parts Wholesale has them and they will most definately keep the upper fiberglass together with the underlying sheetmetal. I used tape to hold it for the first drill and then just progressed around the outside of the flare.
Posted by: Andyrew Dec 1 2005, 03:32 PM
I see radiator cutout and hood vent...
What engine??
Looks good!
Posted by: boboli914@att.net Dec 1 2005, 03:38 PM
| QUOTE (Andyrew @ Dec 1 2005, 01:32 PM) |
| I see radiator cutout and hood vent... What engine?? Looks good! |
Thats so the squirrels can breathe!

Posted by: andys Dec 1 2005, 05:22 PM
| QUOTE (Andyrew @ Dec 1 2005, 01:32 PM) |
| I see radiator cutout and hood vent... What engine?? Looks good! |
Andyrew,
Yet to be acquired LS1.
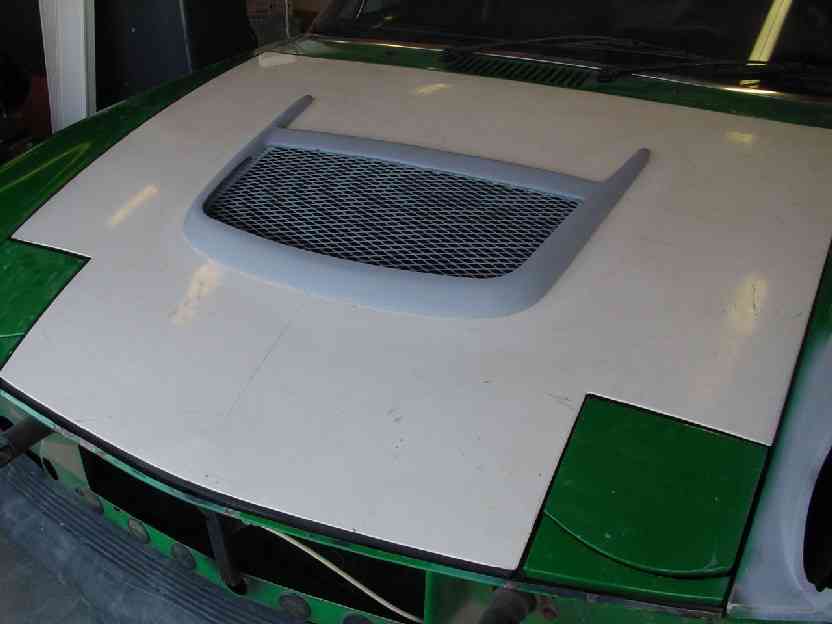
Hood venting will look like this:
Attached thumbnail(s)
Posted by: Andyrew Dec 1 2005, 06:36 PM
Interesting...
Where did you get that piece?
Will you be running ducting or just open trunk?
Looking very cool!
I have 2 hoods to fool around with.. Im playing with louvers and ducting in my head.. Still undecided.
Posted by: SpecialK Dec 2 2005, 04:10 AM
TIP: Bond the fenders with a high strength structural adhesive (check Aircraft Spruce's website), and use scrim cloth between the fender and body to ensure an even/consistent bond thickness.
Posted by: andys Dec 2 2005, 10:31 AM
| QUOTE (Andyrew @ Dec 1 2005, 04:36 PM) |
| Interesting... Where did you get that piece? Will you be running ducting or just open trunk? Looking very cool! I have 2 hoods to fool around with.. Im playing with louvers and ducting in my head.. Still undecided. |
Andyrew,
Yes, I will be ducting the air out the hood. Here's a pic of the not quite finished duct. It now has a flange contoured to the underside of the hood, and a foam gasket.
Andys
Attached image(s)

Posted by: andys Dec 29 2005, 09:06 PM
A little update on bonding the flares. Here's the stuff I'm using: PC7, two part epoxy used by the shop that sold me the flares.
Andys
Attached image(s)
Posted by: andys Dec 29 2005, 09:10 PM
I weighted-out the components, but it is not necessray. I just wanted to get an idea of how much it takes. 100 grams of each component (total of 200 grams), is plenty enough for bonding two flares. This stuff is pretty stiff to mix, even after slight warming.
Andys
Attached image(s)
Posted by: andys Dec 29 2005, 09:13 PM
Here's where I'm prepping the body. I used a 40 grit disc sander. I also did the underside, so that I can add glass as was suggested by someone in the Club.
Andys
Attached image(s)
Posted by: andys Dec 29 2005, 09:15 PM
Here's the epoxy applied to the body. Notice in the previous pic the scribe line was used as a guide for application. I used a putty knife to apply it.
Andys
Attached thumbnail(s)
Posted by: andys Dec 29 2005, 09:19 PM
Here, I applied the epoxy to the flare. My intention was to "wet" the surface of the f'glass. This is a thin coat. Sorry for the jumbo sized previous pic!
Andys
Attached image(s)
Posted by: andys Dec 29 2005, 09:22 PM
Here is a close of the flare screwed down. On the underside, I ran the putty knife so that the body to flare step was filled with epoxy such that the f'glass won't bridge when I get to that step.
Andys
Attached image(s)
Posted by: Andyrew Dec 30 2005, 03:21 AM
Wow! Really does look good!
Really helps me with what im doing VERY soon (ie tomorrow...)
Andrew
Posted by: andys Dec 30 2005, 12:24 PM
| QUOTE (Andyrew @ Dec 30 2005, 01:21 AM) |
| Wow! Really does look good! Really helps me with what im doing VERY soon (ie tomorrow...) Andrew |
Andrew,
Glad to know it helps. Post some pic's of your progress. The most time consuming part was cleaning the fenderwell. The most time consuming part was wirebrushing the fenderwells, and pressure washing with soap to get rid of the caked-on road grime. I used my 4 1/2" angle grinder with a cupped wire wheel to remove about a 1" wide strip of paint/undercoating on the back side, followed by some hand sanding with 40 grit in preparation for subsequent f'glassing. I'll be using layers of light weight glass mat and polyester resin.
Andys
Posted by: neo914-6 Dec 30 2005, 12:40 PM
Good work Andy reminds me of when I installed my Chalon kit decades ago! How's the trailing arms development?
Do you know about a fab/model shop called "Vengence" in your area?
Posted by: andys Dec 31 2005, 06:42 PM
| QUOTE (neo914-6 @ Dec 30 2005, 10:40 AM) |
| Good work Andy reminds me of when I installed my Chalon kit decades ago! How's the trailing arms development? Do you know about a fab/model shop called "Vengence" in your area? |
Felix,
Trailing arms are waiting for the flare install to be completed. After that, I'll be bolting them in along with the entire suspension, front and rear. That will also include a 19mm master cylinder, and just maybe an adjustable proportioning valve. There are lots of little pieces to buy; think I'll give GPR a call.
I do not know "Vengence." What's their specialty?
Andys
Posted by: andys Jan 3 2006, 12:40 PM
This weekend, I added fiberglass matt to the underside of the flares where they join the body. There in a faint seem visible where the body meets the flare. The red surface is the flare. Kind of a close shot; trailing arm was in the way.
Andys
Attached image(s)
Posted by: URY914 Jan 3 2006, 12:52 PM
It was be a major pain to get the wet mat on the inside of the fender.
Posted by: andys Jan 3 2006, 01:44 PM
Paul,
I worked with 6" long sections of matt, and I did not pre-wet it. What I did, was to paint some resin onto the furface, then stuck the dry matt to it followed by a short cropped brush with resin. It's never fun working up-side-down.
Andys
Posted by: URY914 Jan 3 2006, 02:29 PM
| QUOTE (andys @ Jan 3 2006, 11:44 AM) |
| Paul, I worked with 6" long sections of matt, and I did not pre-wet it. What I did, was to paint some resin onto the furface, then stuck the dry matt to it followed by a short cropped brush with resin. It's never fun working up-side-down. Andys |
That is how I would do it too.

Great minds think alike....
P
Powered by Invision Power Board (http://www.invisionboard.com)
© Invision Power Services (http://www.invisionpower.com)