Printable Version of Topic
Click here to view this topic in its original format
914World.com _ 914World Garage _ Remove dash top
Posted by: watsonrx13 Dec 14 2005, 07:34 PM
Well, I'm in the process of dismantling one of my parts car and I've decided to document the steps used to remove the dash top.
I began removing the top dash pad by removing the instrument cluster. If you haven't removed the steering wheel and knee pad, do that now. Next, remove the 4 screws that hold the cluster to the dash. Now, just pull the cluster forward, without removing the electrical connections. I have removed the cluster completely from the car because I'm stripping it. You don't have to do this to remove the dash top.
Attached image(s)
Posted by: watsonrx13 Dec 14 2005, 07:34 PM
This shows the steering wheel and instrumentation cluster removed. Again, I did this because I'm stipping the car and to be able to better photograph the location of the nuts/bolts.
Attached image(s)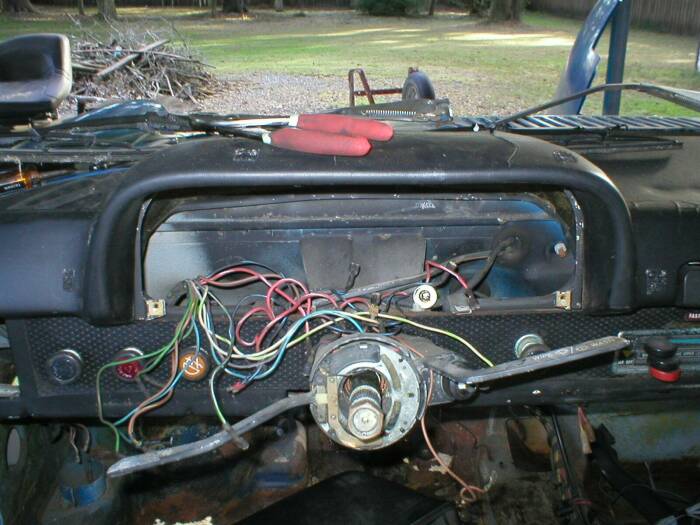
Posted by: watsonrx13 Dec 14 2005, 07:34 PM
Once the cluster is out of the way, you can remove the 2 plastic nuts that are directly behind the instruments on the 'hump' section.
Attached image(s)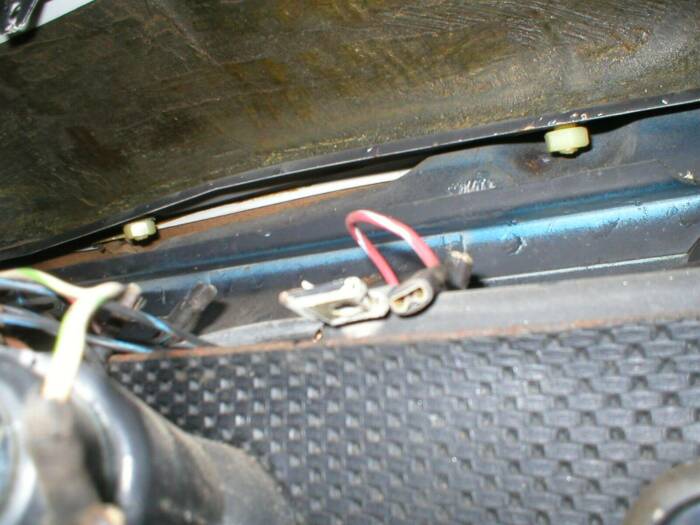
Posted by: watsonrx13 Dec 14 2005, 07:35 PM
There are 2 nuts that need to be removed from this area. There is one that is directly above this opening, facing towards the front of the car. The next one is just to the right of the opening, facing down.
Attached image(s)
Posted by: watsonrx13 Dec 14 2005, 07:35 PM
The next one is between the 'hump' and the ashtray. This shows the nut looking in from the cluster opening. This one is pointing down.
Attached image(s)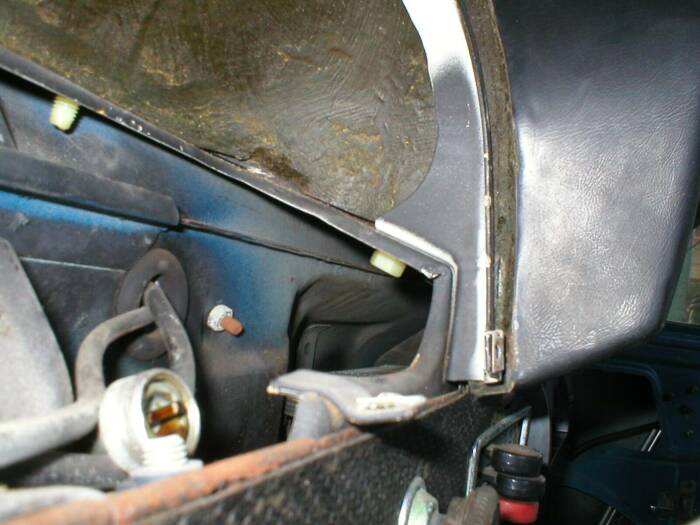
Posted by: watsonrx13 Dec 14 2005, 07:36 PM
Next I removed the ashtray. This isn't necessary, but since I'm stripping the car I just wanted it out of the way. I also removed the radio.
Attached image(s)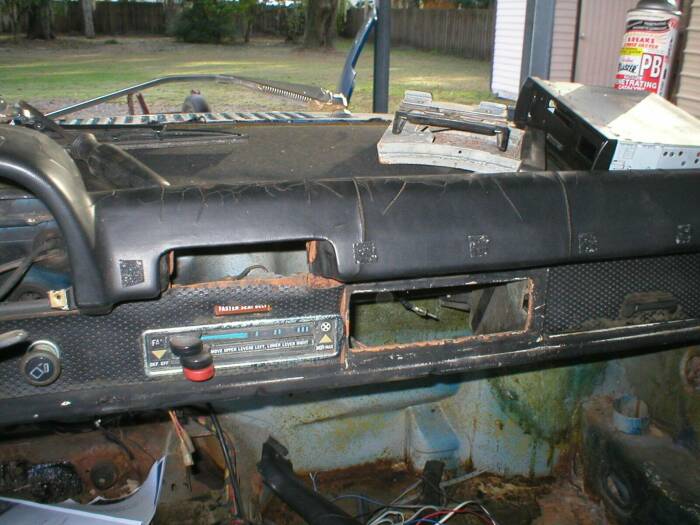
Posted by: watsonrx13 Dec 14 2005, 07:36 PM
This shows the next 2 nuts. There is one directly above the radio opening, near the driver's side, pointing forward. The other one is just off center of the radio opening, pointing down. This shot is from underneath the dash. The large dark rectangle is the radio opening.
Attached image(s)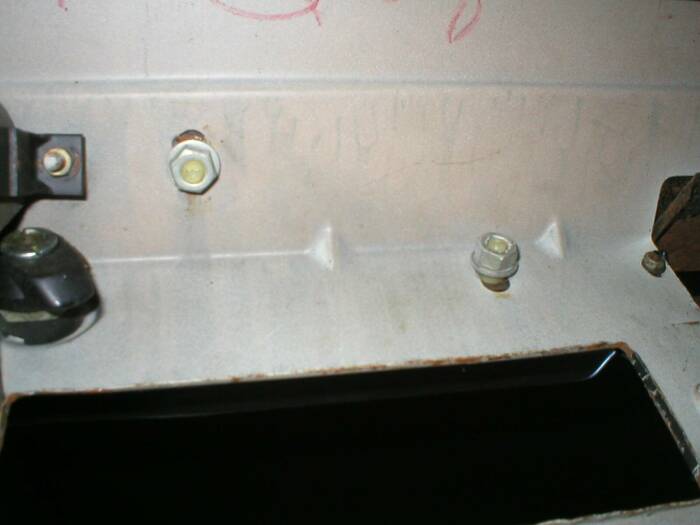
Posted by: watsonrx13 Dec 14 2005, 07:36 PM
Next I removed the glove box. Begin by removing the small nut, facing down. This holds the metal strap that wraps around the box.
Attached image(s)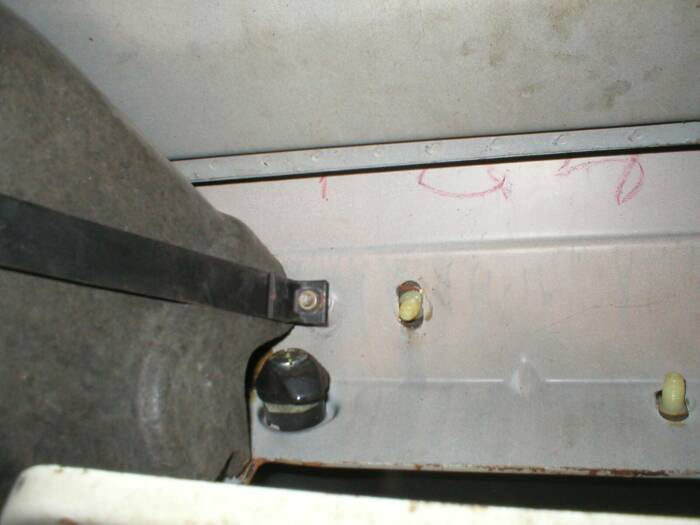
Posted by: watsonrx13 Dec 14 2005, 07:37 PM
Before removing the glove box, remove the spring, seen here through the vent opening. Finally, move the metal strap out of the way and carefully push the glove box, with its door, towards the front of the car. The box will be removed from underneath the dash.
Attached image(s)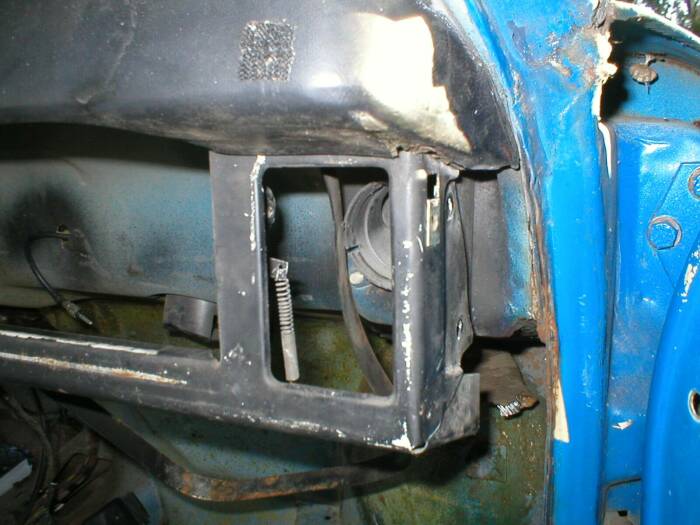
Posted by: watsonrx13 Dec 14 2005, 07:37 PM
The last 2 nuts can now be removed. Both are directly above the vent opening. One is facing down, the other is facing forward.
Attached image(s)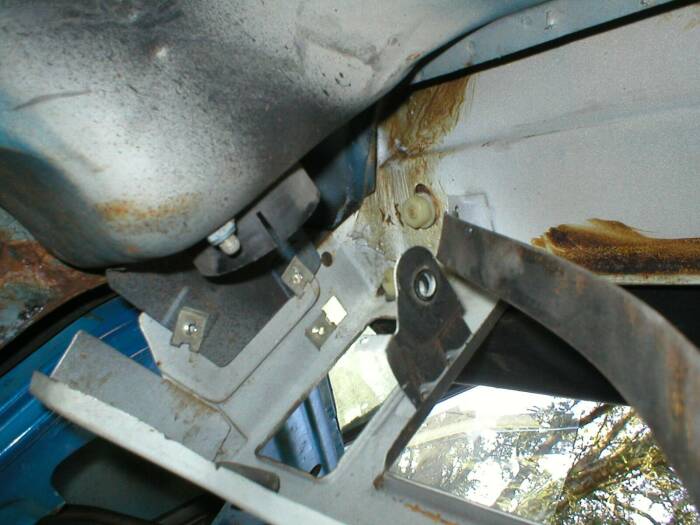
Posted by: watsonrx13 Dec 14 2005, 07:38 PM
Now, carefully pull the dash top up. There are 9 nuts that need to be removed. If you don't have 9 and there is some resistance, stop and find the ones that are still attached. Here's the dash top removed.
Attached image(s)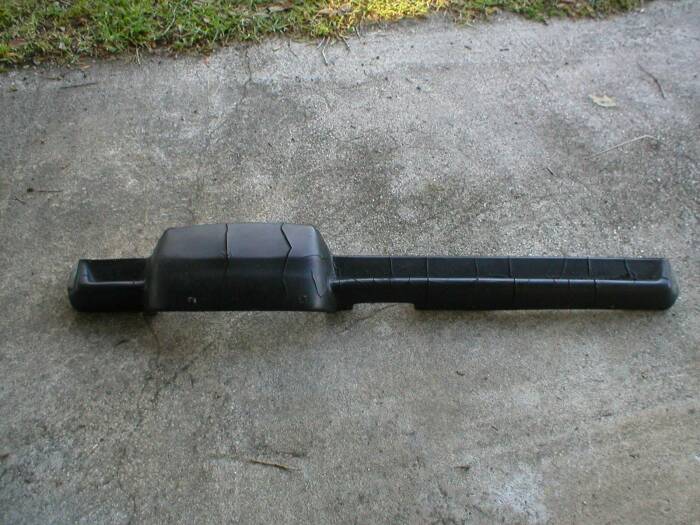
Posted by: watsonrx13 Dec 14 2005, 07:38 PM
This shows the plastic bolts on the passenger side.
Attached image(s)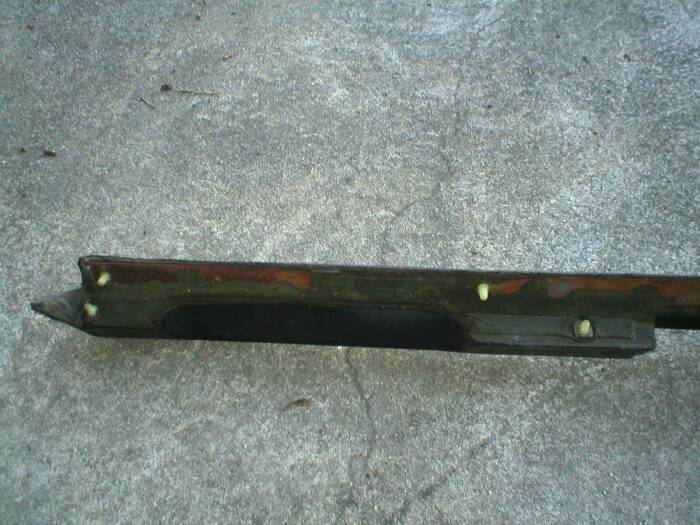
Posted by: watsonrx13 Dec 14 2005, 07:38 PM
This shows the bolts around the ash tray.
Attached image(s)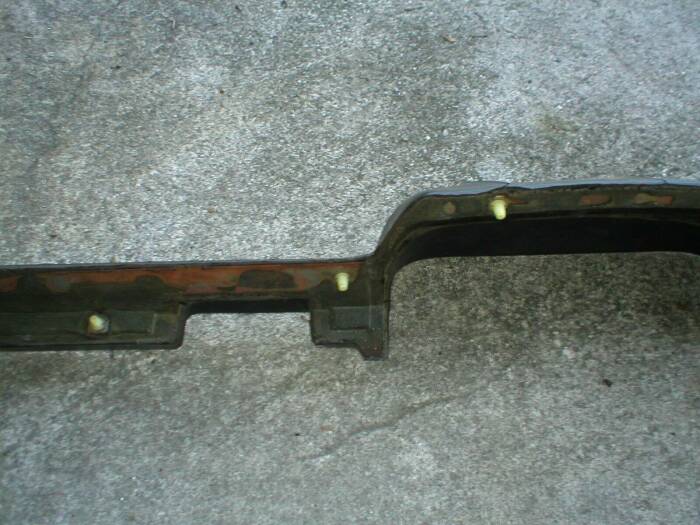
Posted by: watsonrx13 Dec 14 2005, 07:39 PM
This shows the bolts on the driver's side.
Attached image(s)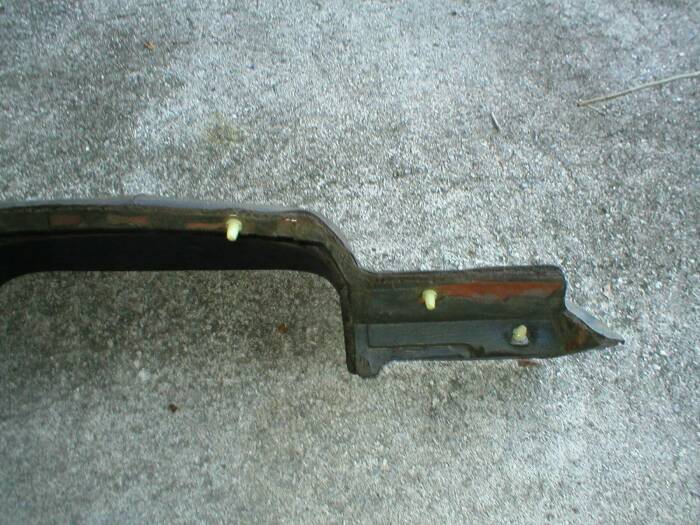
Posted by: boxstr Dec 14 2005, 07:41 PM
Looks like a valiant effort to document the procedure of dash pad removal 101. Let me state a couple of things. I have removed many dash tops but never completely removed the gauge cluster. Just pull out far enough to get the two SOB nuts at the top of the hump.
The removal of the two screws on the side is only needed if you are removing the complete dash assembly.
It would be very benificial for newbies to know the tools you are using for this operation.
Thank you .
CCLINDASHINGTHROUGHTHESNOW
Posted by: grasshopper Dec 14 2005, 07:44 PM
cool, i needed to know how to take that off! 
Posted by: watsonrx13 Dec 14 2005, 07:48 PM
| QUOTE (boxstr @ Dec 14 2005, 09:41 PM) |
| Looks like a valiant effort to document the procedure of dash pad removal 101. Let me state a couple of things. I have removed many dash tops but never completely removed the gauge cluster. Just pull out far enough to get the two SOB nuts at the top of the hump. The removal of the two screws on the side is only needed if you are removing the complete dash assembly. It would be very benificial for newbies to know the tools you are using for this operation. Thank you . CCLINDASHINGTHROUGHTHESNOW |
Craig, thanks for pointing several things out. I've modified the post to better reflect a removal only of the dash top. Thanks again for the positive comments.
BTW, the plastic nuts are 13mm....Other than a small socket wrench, I used a small crescent wrench on the glove box nut....
Posted by: tat2dphreak Dec 14 2005, 08:35 PM
I used a ratchet that can be actuateed by turning the handle... HF has them for under $20... it really saved some coins in the cuss jar...
great procedure, this is a definate classic thread!
Posted by: r_towle Dec 14 2005, 08:41 PM
ok, great, put it in the tech articles at the top under 914 info...
Rich
Posted by: grasshopper Dec 14 2005, 09:39 PM
| QUOTE (r_towle @ Dec 14 2005, 06:41 PM) |
| ok, great, put it in the tech articles at the top under 914 info... Rich |
 we need more tech articles... im working on some
Posted by: bondo Dec 14 2005, 09:41 PM
What if you have an early car with no dash side vents? Those holes come in handy.
Posted by: markb Dec 14 2005, 10:01 PM
You can get to them, it's just a little tougher. You don't have the vents in the way, so once you have the instruments moved, and the glove box out, you can get to the nuts.
Posted by: boxstr Dec 14 2005, 10:40 PM
One thing you will find is that some of the nuts are alloy, and not always nylon.
Great thread.
CCLINCOMPLETYLEYNUTZ
Posted by: jfort Dec 15 2005, 07:36 AM
thanks for the documentation and especially the pictures. the more of this type of thing the better!!
Posted by: Bartlett 914 Dec 15 2005, 08:02 AM
Great thread! I was getting ready to do this myself for the first time. You just took a lot of the guesswork out.
Mark
Posted by: tat2dphreak Dec 15 2005, 09:12 AM
| QUOTE (Bartlett 914 @ Dec 15 2005, 09:02 AM) |
| Great thread! I was getting ready to do this myself for the first time. You just took a lot of the guesswork out. Mark |
this is one of the most frustrating things to do the first time, a good walkthrough like this helps a ton... good job!
Posted by: rhodyguy Dec 15 2005, 09:26 AM
great write up and photos. perfect opportunity to clean the fresh air fan contacts too.
k
Posted by: Tobra Dec 15 2005, 11:55 AM
Very cool, you must have small digital camera and little hands for some of those picks. Can you get the seal between the dash and the windshield out with the dash removed, or does the windshield have to be out too?
Posted by: Aaron Cox Dec 15 2005, 12:02 PM
| QUOTE (Tobra @ Dec 15 2005, 10:55 AM) |
| Very cool, you must have small digital camera and little hands for some of those picks. Can you get the seal between the dash and the windshield out with the dash removed, or does the windshield have to be out too? |
its replaceable with the dash in...AND the window in.... ive done it
Posted by: Jeffs9146 Dec 15 2005, 12:14 PM
| QUOTE |
| QUOTE (Tobra @ Dec 15 2005, 10:55 AM) Very cool, you must have small digital camera and little hands for some of those picks. Can you get the seal between the dash and the windshield out with the dash removed, or does the windshield have to be out too? its replaceable with the dash in...AND the window in.... ive done it |
You don't even have to take off the wheel!
Posted by: grasshopper Dec 18 2005, 06:52 PM
well, i used this thread, and it worked great!! Since i am completely stripping this car, i decided to add to your thread, and remove the dash frame under it. it only took me about an hour. first, you need to remove all of the switches, the steering wheel, and disconnect all the other electrical connections, and pull them down below
With the steering wheel off, and the switches pull out of the back
Attached image(s)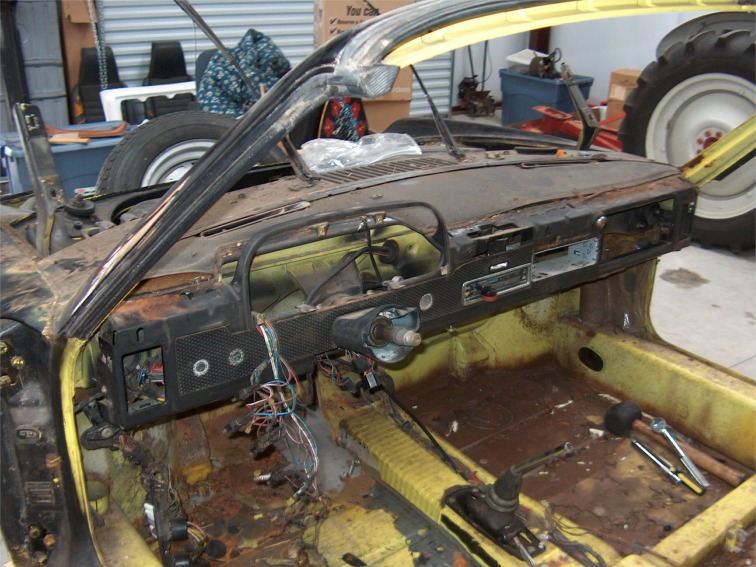
Posted by: grasshopper Dec 18 2005, 06:57 PM
next, remove the fresh air control unit in the dash. There are two ...8mm? nuts holding the cables to it, and a 10mm nut holding it to the body. Pull it out the front. Next, remove the steering column: there are four 7mm allen bolts holding it to the body
Attached image(s)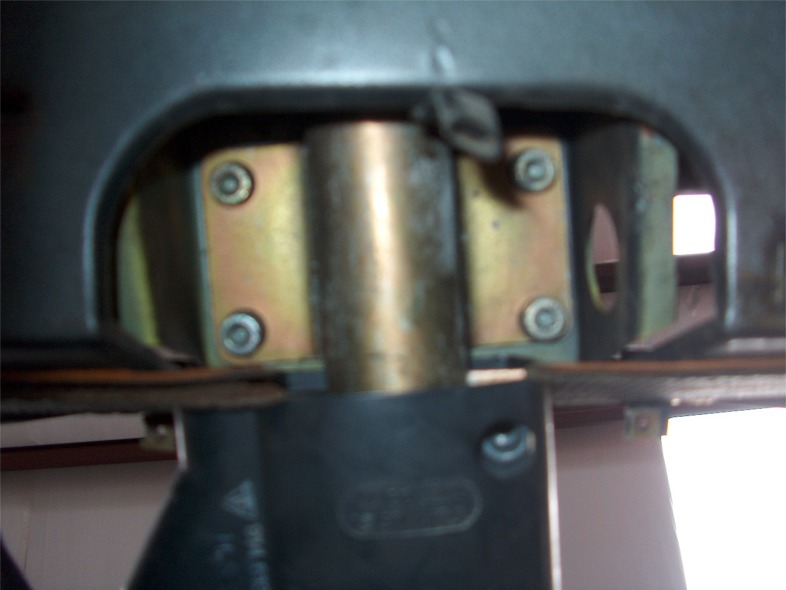
Posted by: grasshopper Dec 18 2005, 06:58 PM
with the nuts out
Attached image(s)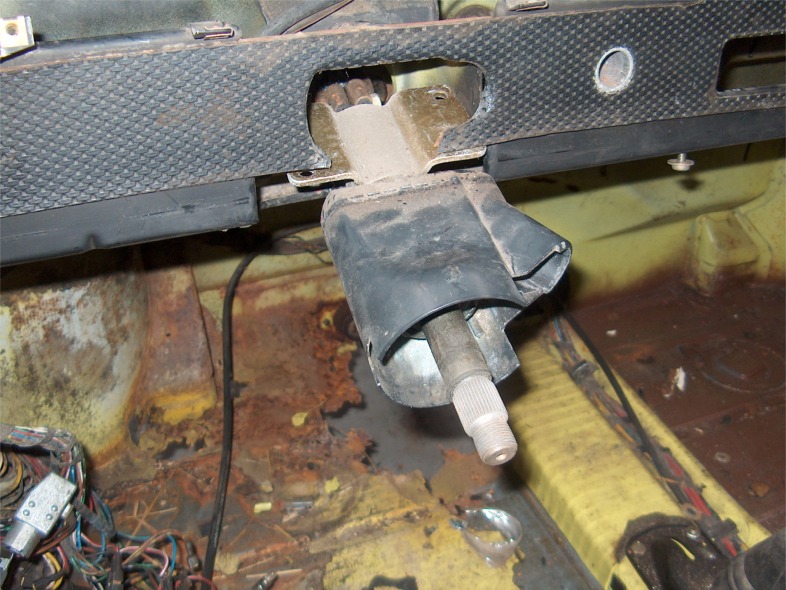
Posted by: grasshopper Dec 18 2005, 07:00 PM
disconnect the universal joint: 13mm bolt, and 14mm nut
Attached image(s)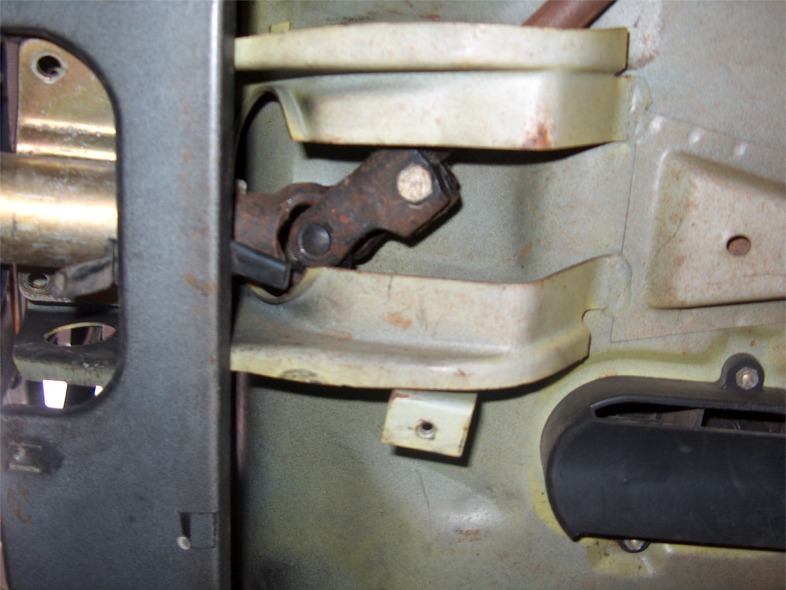
Posted by: grasshopper Dec 18 2005, 07:02 PM
with it removed:
Attached image(s)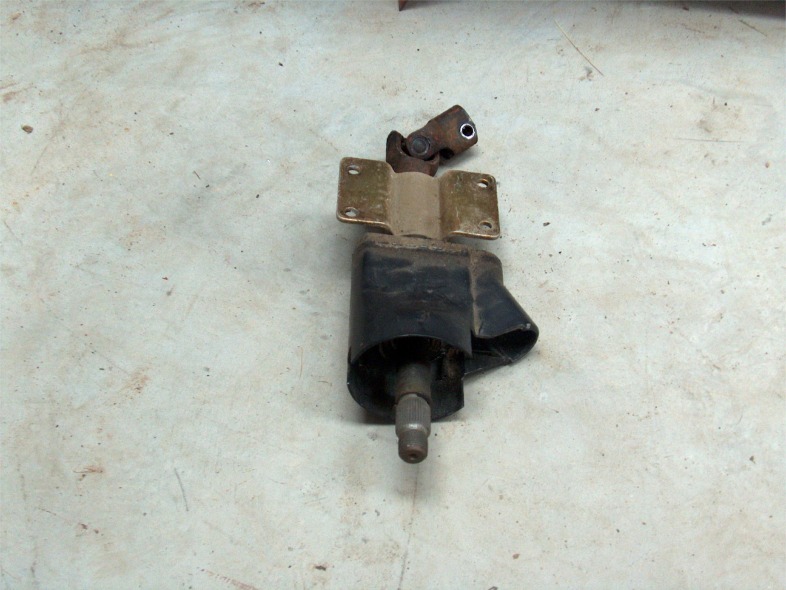
Posted by: grasshopper Dec 18 2005, 07:06 PM
next, remove the two upped dash vents. They seperate from the larger units in the front trunk, with two clips. Push them up a little, and pull them down and toward the front of the car. The drivers side can be a little tight, but it is possible with the gas tank in...i did it, you just have to wiggle it around alot. With it out
Attached image(s)
Posted by: grasshopper Dec 18 2005, 07:08 PM
next, remove the two screws on each side of the dash, right next the the air vents... on earlier cars, these screws should still be there..??.. i dont know
Attached image(s)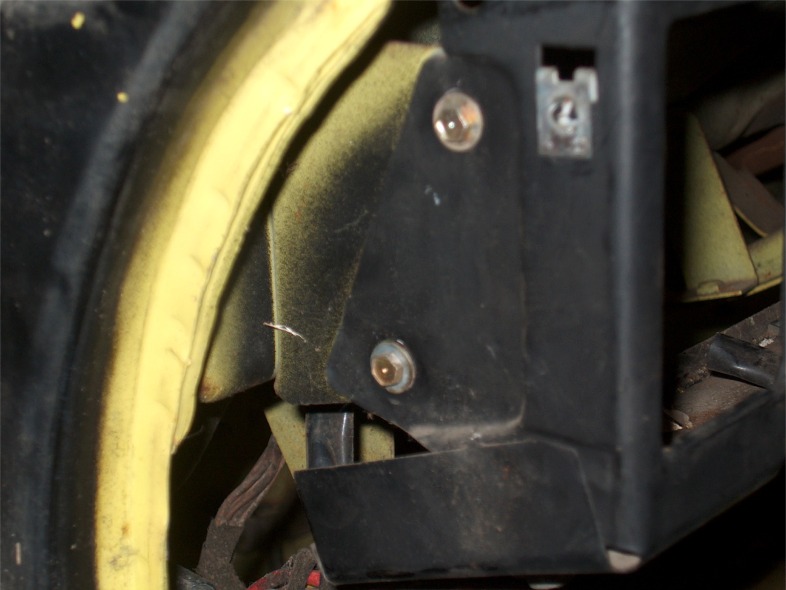
Posted by: grasshopper Dec 18 2005, 07:10 PM
now your dash should look like this, you need to remove the two screws pointed out here, too. I would have missed that, but michel reminded me
Attached image(s)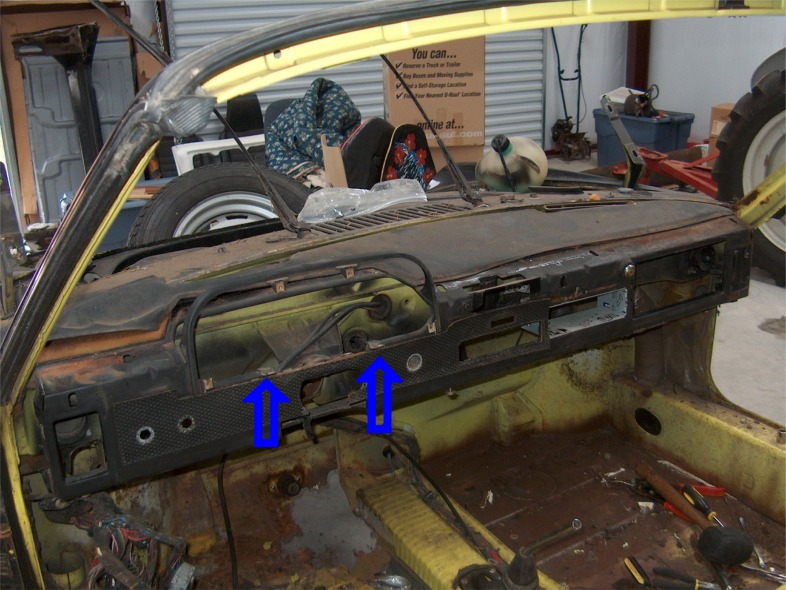
Posted by: grasshopper Dec 18 2005, 07:12 PM
remove the 10mm nut under the dash, connecting the dash frame to the body. This nut isn't hidden, it is right in the middle, but this is a bad pic.
Attached image(s)
Posted by: grasshopper Dec 18 2005, 07:17 PM
now there are only four more nuts holding the dash frame on. You will need to remove the nut holding in the windshield washer fluid bottle, and pull it forward. Then you should be able to get to the first nut. It is a 10mm nut. It is right next to the tube that feeds the fresh air vents in later cars. The nut:
Attached image(s)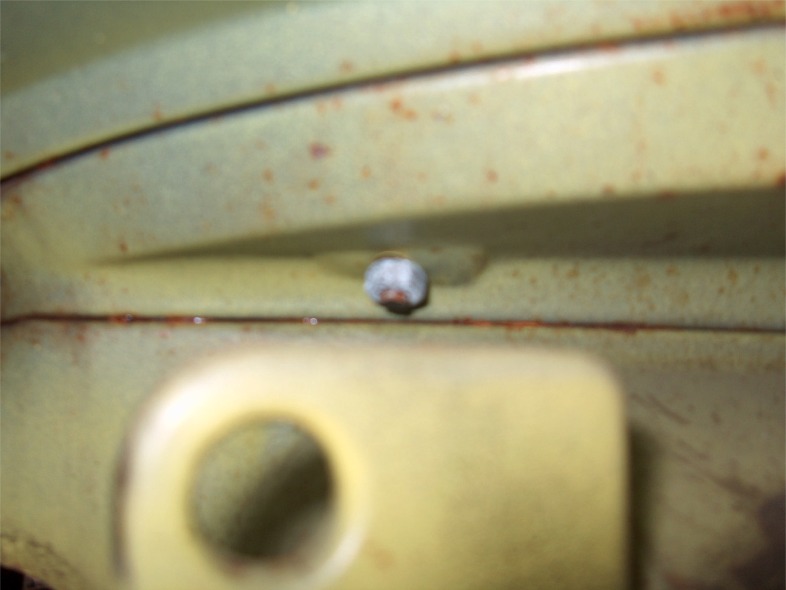
Posted by: grasshopper Dec 18 2005, 07:20 PM
the next nut is about 8-10 more inches down the dash... you just have to feel for it, because you wont be able to see it. It is 10mm also... a bad pic of it:
Attached image(s)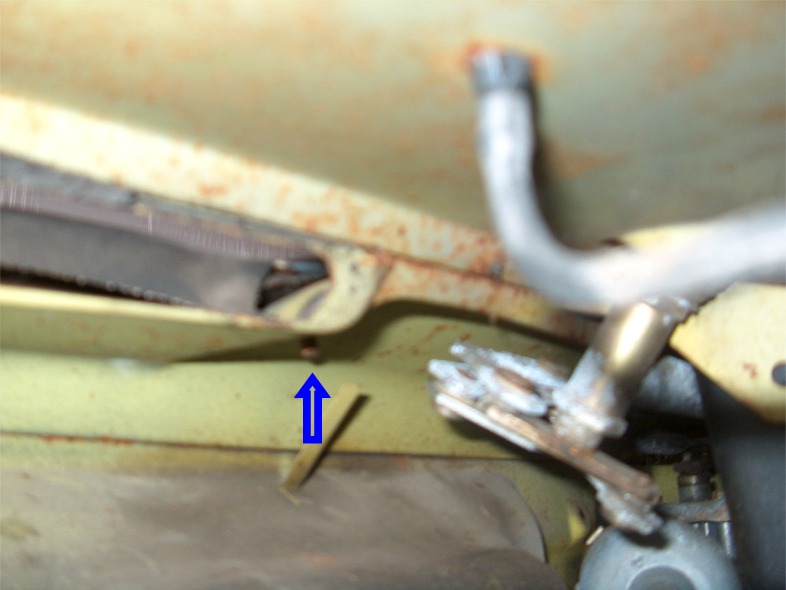
Posted by: michel richard Dec 18 2005, 07:21 PM
Are'nt there 6 screws that hold the instrument cluster face ? four on the face itself, but also two on the underside edge of the cluster face, that screw up into the sub-dash ?
Posted by: grasshopper Dec 18 2005, 07:22 PM
the other two nuts are in the same places on the other side. When these nuts are removed, the dash frame should pull out
Attached image(s)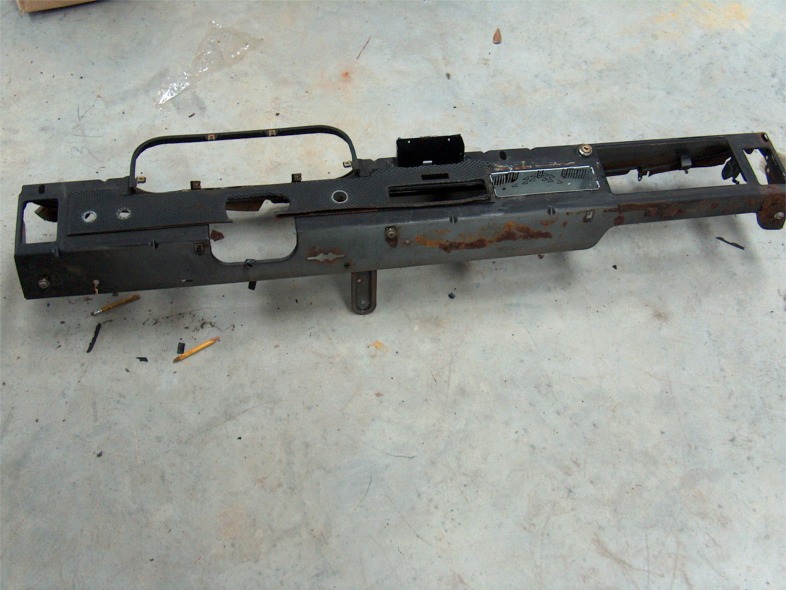
Posted by: grasshopper Dec 18 2005, 07:25 PM
thanks for reminding me about that michel, those were removed when i got the car, but i noticed them when the dash frame was out. i will edit my post.
with car with the dash frame out
Attached image(s)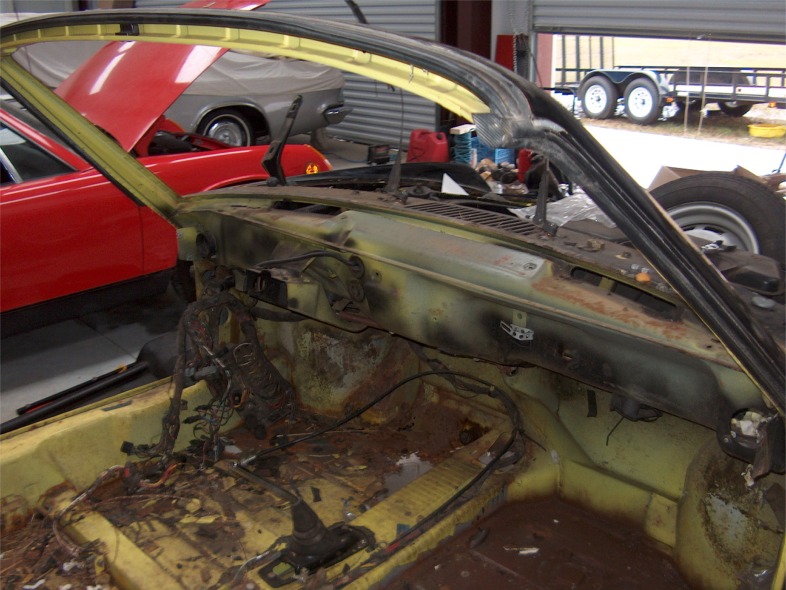
Posted by: grasshopper Dec 18 2005, 07:27 PM
still a few things on the frame itself
Attached image(s)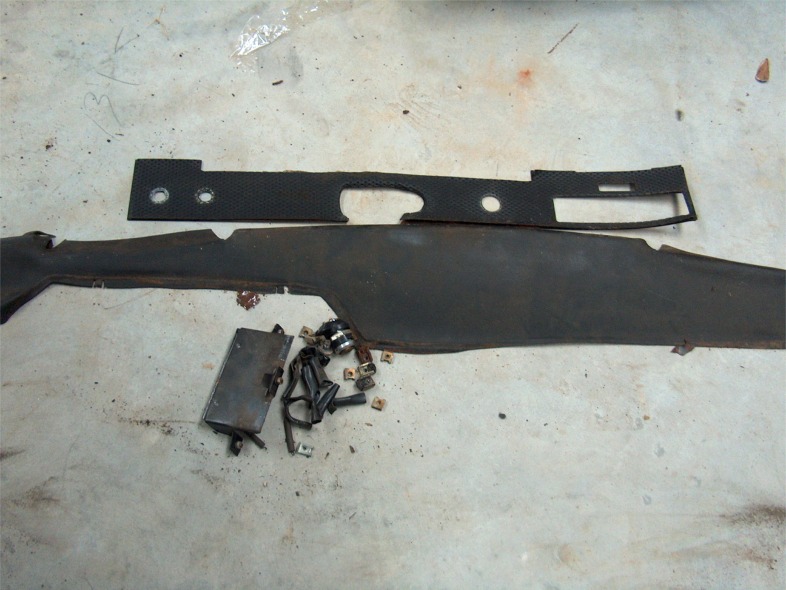
Posted by: grasshopper Dec 18 2005, 07:28 PM
the stripped dash frame
Attached image(s)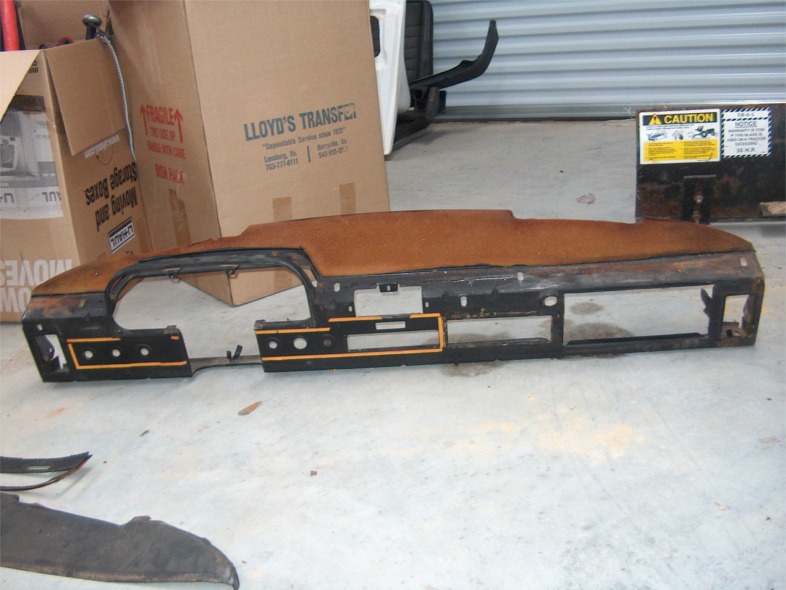
Posted by: grasshopper Dec 18 2005, 07:28 PM
thats all
Posted by: partwerks Jun 13 2021, 02:04 PM
I know there are four clips on each of the side vents, but to remove them, does a person just push like a flat blade screw driver in there so it don't catch, or does a person have to take that elbow off in front to release them??
Posted by: mitchdiego1 Jun 14 2021, 02:36 PM
I just did mine this weekend,

Posted by: partwerks Jun 14 2021, 08:29 PM
This article helped me to get the glove box, and lock out!
How does the heater control panel come out?
Powered by Invision Power Board (http://www.invisionboard.com)
© Invision Power Services (http://www.invisionpower.com)