Printable Version of Topic
Click here to view this topic in its original format
914World.com _ 914World Garage _ bad floor pics
Posted by: Sparky Dec 16 2005, 12:18 PM
Ok here are a couple of pics of what I found after grinding on the floor for awhile, oddly the longs appear fine 
So does it look like I can just take a 3" wide section of 16ga and weld it in to fill the holes along the longs and tunnel? If so where to buy? Is the center brace available anywhere?
A little advise please 
First up:
Attached image(s)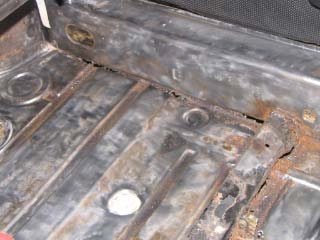
Posted by: Sparky Dec 16 2005, 12:19 PM
Then the center "non" brace (where can I find one?):
Oops
Posted by: Sparky Dec 16 2005, 12:20 PM
forgot the pic:
Attached image(s)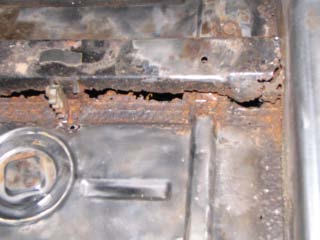
Posted by: Sparky Dec 16 2005, 12:20 PM
tunnel:
Attached image(s)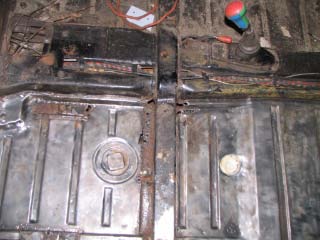
Posted by: Sparky Dec 16 2005, 12:21 PM
firewall:
Attached image(s)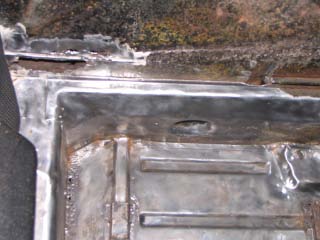
Posted by: Sparky Dec 16 2005, 12:22 PM
The victim right before I started grinding:
Attached image(s)
Posted by: riverman Dec 16 2005, 02:13 PM
I would cut out as much of the rust as I could and then weld in some angles from the floor up to the sides to cover the holes. Then treat the entire area with some rust preventative (Por-15 etc.), from behind as well. The area is going to be covered with carpet so it doesn't need to be perfect (unless you're doing a show car). The repair will maintain the structural integrity of the body.
Posted by: Sparky Dec 16 2005, 07:09 PM
If I use angle that wont let me fit the Engman kit properly. Flat stock?
Posted by: riverman Dec 16 2005, 09:55 PM
Put the Engman kit in first, then repair whatever else you can see. The Engman kit will make your frame super strong.
Posted by: sean_v8_914 Dec 16 2005, 11:28 PM
that looks like water intrusion into the cabin combined with that corner muck dirt mix that forms over years. I like the idea of installing the engmen kit first then the patches. I would stick to sheet metal
after you gring the rust away, it will be hard to weld to teh thinner metal at the horizontal to vert junction. the angle idea sounds better to me now
Posted by: Lou W Dec 17 2005, 12:10 AM
| QUOTE |
| sean_v8_914 Posted on Dec 16 2005, 10:28 PM -------------------------------------------------------------------------------- that looks like water intrusion into the cabin combined with that corner muck dirt mix that forms over years. I like the idea of installing the engmen kit first then the patches. I would stick to sheet metal after you gring the rust away, it will be hard to weld to teh thinner metal at the horizontal to vert junction. the angle idea sounds better to me now |

 That's what I did on mine.
Powered by Invision Power Board (http://www.invisionboard.com)
© Invision Power Services (http://www.invisionpower.com)