Printable Version of Topic
Click here to view this topic in its original format
914World.com _ 914World Garage _ More clamshell pics
Posted by: marks914 Jan 2 2006, 01:47 PM
Thought I would start this thread over,
I am installing Brad Mayeur's Longitudinal clamshell kit. It should make the car MUCH stiffer.
Specs:
3/32 thick, plug and seam welded to the existing longs, and ties into the suspension console
Mark
Attached image(s)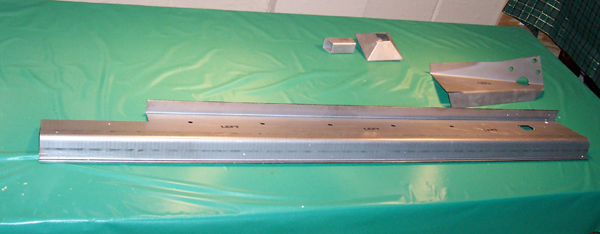
Posted by: marks914 Jan 2 2006, 01:48 PM
Here you can see the section, very strong..
Attached image(s)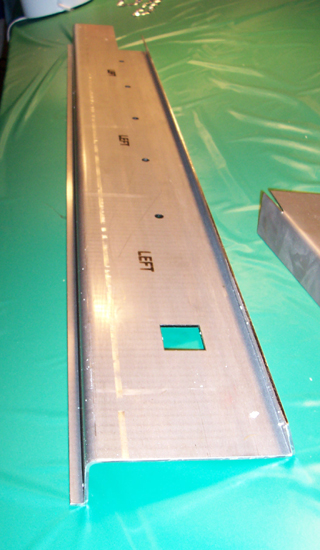
Posted by: marks914 Jan 2 2006, 01:49 PM
Here is how the two pieces fit together..
I marked where I am going to drill and plug weld to the chassis, I think you are supposed to weld along the top, but I just can't reach in there.
Attached image(s)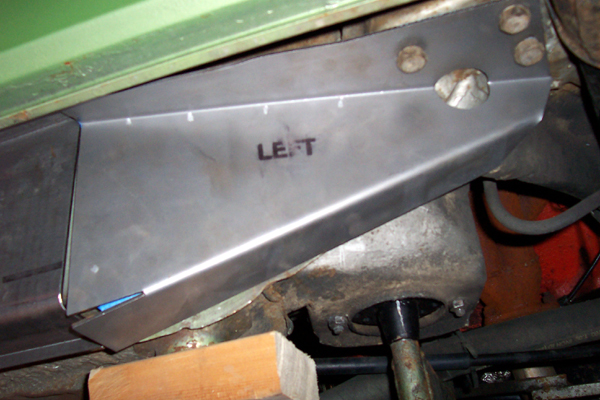
Posted by: marks914 Jan 2 2006, 01:51 PM
You can trim around the box section if it is strong...
Attached image(s)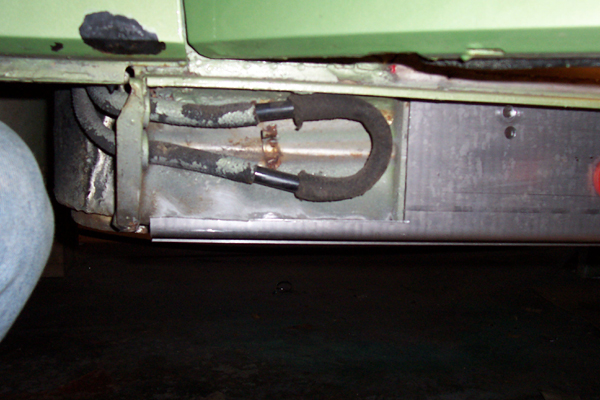
Posted by: marks914 Jan 2 2006, 01:53 PM
On the driver side I had to cut out the boxed section, install the clamshell and restore the box with 16ga sheetmetal.
Attached image(s)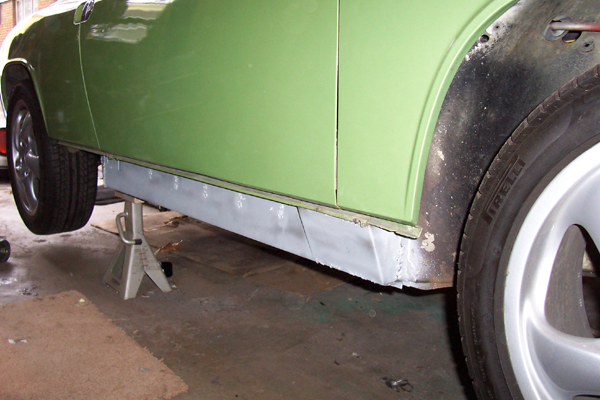
Posted by: marks914 Jan 2 2006, 01:56 PM
Here is how the downstanding flange mates with the kit, fits well, here it should be stitch welded.
Attached image(s)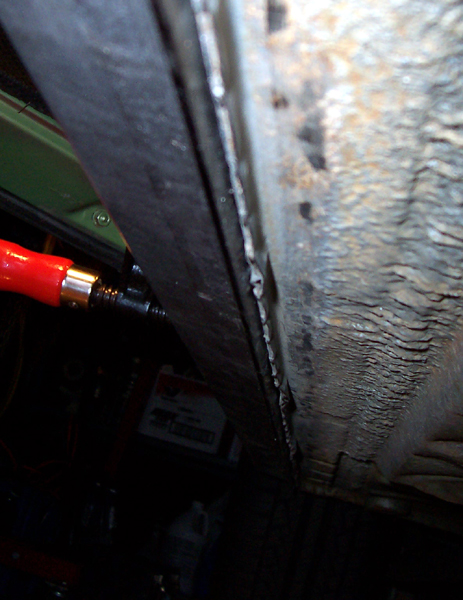
Posted by: marks914 Jan 2 2006, 02:01 PM
This is why I started this project, pass side was a bit rusty. I patched the holes before I installed the kit on the pass side.
Attached image(s)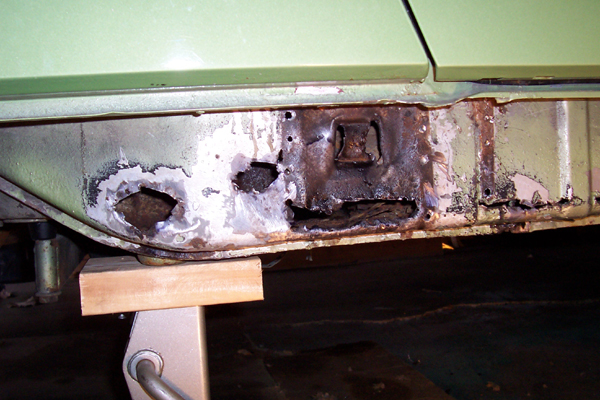
Posted by: dkos Jan 4 2006, 01:38 PM
| QUOTE (marks914 @ Jan 2 2006, 03:56 PM) |
| Here is how the downstanding flange mates with the kit, fits well, here it should be stitch welded. |
New to welding. What does stitch weld mean? I will be installing Brad's Reinforcement Piece as soon as I finish my inner log repairs. Do you have any other pics of how you welded this area?
Posted by: groot Jan 4 2006, 01:40 PM
Cool.... just curious, where are you in the Motor City?
I'm in Dearborn.
Posted by: marks914 Jan 4 2006, 02:21 PM
dkos:
Stitch welding is when you weld for a length, leave some without and weld some more, like a stitch:
==== ==== ====
groot:
I'm in Ferndale. Were you at the MWC? My car is the cybergreen V8.
Mark
Posted by: URY914 Jan 4 2006, 02:38 PM
I would be careful that your car is sitting level on the jack stands and not twisted. Take careful measurements before you weld it up. You could be welding a permenant "pre-load" into the car.
Posted by: dkos Jan 4 2006, 03:19 PM
| QUOTE (marks914 @ Jan 4 2006, 04:21 PM) |
| dkos: Stitch welding is when you weld for a length, leave some without and weld some more, like a stitch: ==== ==== ==== |
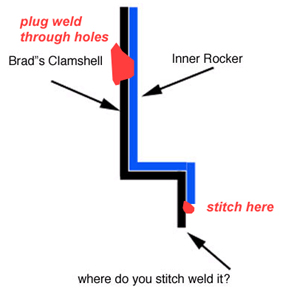
OK...I get it...like a stitch with tread. I can see where you would stitch weld two pieces that butt up to each other or overlap, but I don't get where you stitch weld the bottom length of Brad's Clamshell to the inner rocker?
Attached image(s)

Posted by: Britain Smith Jan 4 2006, 03:41 PM
IIRC, the actual strength of the longs are on the inside of the car. Why would one chose this kit instead of the one that installs under the carpet on the inside like Trekkor did.
-Britain
Posted by: horizontally-opposed Jan 4 2006, 03:44 PM
I like this idea a lot...
BUT what about the rusting away from the inside thing? With those over some of the weakest points in the 914's design, it seems a little scary to me.
Ditto on the preloading thing.
Posted by: marks914 Jan 4 2006, 06:46 PM
| QUOTE (Britain Smith @ Jan 4 2006, 01:41 PM) |
| IIRC, the actual strength of the longs are on the inside of the car. Why would one chose this kit instead of the one that installs under the carpet on the inside like Trekkor did. -Britain |
This kit ties the longs to the rear of the car, whereas the inner kit just strengthens the part between the door opening. The weakest point as far as I can tell is around the jack post. This is where the rear section joins the long. (and where cars sag)
horizontally opposed:
As to rusting from inside... The back side is painted, unlike the orignal. The car lasted 33 years, and this kit should last at least another 33. I don't think I will care when I'm in my 70s.
The whole point of the kit is to strengthen the weakest point of the car.
Yes, you do have to make sure the car is straight when you install the kit.
Here is a link on the Bird board with more info:
http://www.pelicanparts.com/techarticles/914_longitude_repl/914_longitude_repl.htm
I will post a full article in the future with complete pics.
Mark
Posted by: marks914 Jan 4 2006, 06:51 PM
Here's where to weld:
Attached image(s)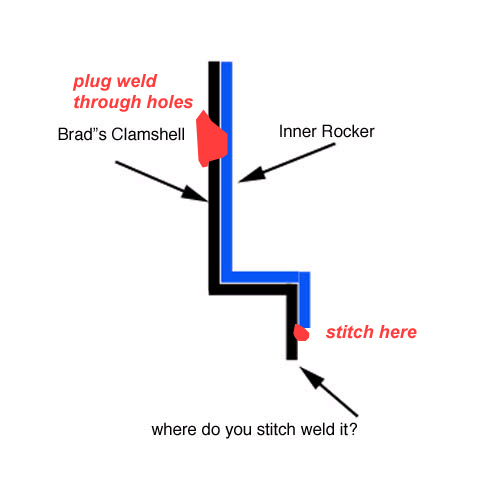
Posted by: 9146986 Jan 4 2006, 06:54 PM
The thing about this kit is it supports the outer suspension mount better than any other kit out there. Engman's kit is good, but it doesn't do anything for the suspension mount. If you've got serious corrosion and you aren't going for concours perfection, this is a great way to go. It's also really good for high horsepower cars.
Here's a pic of one of the installation "deviations" I do when installing this kit. It helps alot, and Brad likes the idea too. The "windows" are to weld the longitudinal stiffeners to the vertical ribs. The holes are covered by the sill plates. The other thing I do is to grind off the weep holes instead of crushing them flat. I'll post a pic of that too.
Attached image(s)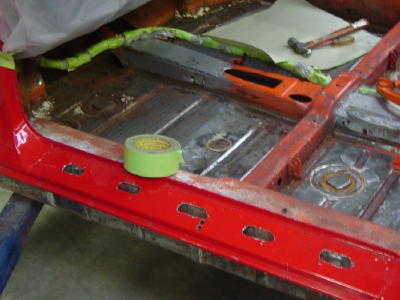
Posted by: 9146986 Jan 4 2006, 06:59 PM
Here's the other thing I do. The thing that isn't shown in this pic, is I punch the flange inward to make sort of a mirror of the original weep holes. First time around I just drilled holes in the same location, but I like the other way better.
As far as covering over any rust. IMHO the best thing to do is clean and treat all the rust you can before you install any repair pieces, and then do my corrosion treatment after all the welding is done. The only problem you could run into here is if the car is getting retro-fitted, as opposed to a complete restoration and then having the car painted.
Attached image(s)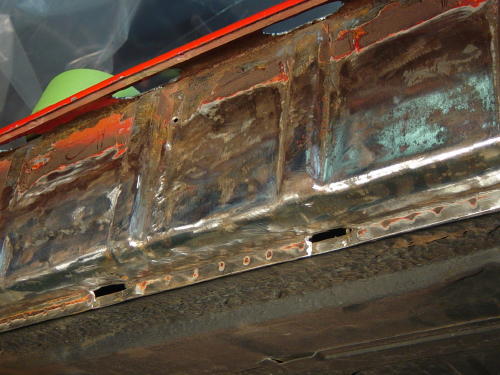
Posted by: marks914 Jan 4 2006, 07:08 PM
9146986:
Are you welding the top of the kit at the ribs as well? I drilled an additional hole on each rib and did another plug weld.
I agree, this is the best kit out there for connecting the whole car. I didn't want to stiffen with a cage and Brad told me about his kit when he did my tall gears last year.
I am running a SBC and I am sure this will help.
Mark
Posted by: 9146986 Jan 4 2006, 07:13 PM
| QUOTE (marks914 @ Jan 4 2006, 05:08 PM) |
| Are you welding the top of the kit at the ribs as well? I drilled an additional hole on each rib and did another plug weld. |
Yes, and I only did the single large plug weld holes on each rib.
Everyone who has a car with these on comments about how much less the top squeeks!

Posted by: mikelsr Jan 4 2006, 08:01 PM
| QUOTE (9146986 @ Jan 4 2006, 04:54 PM) |
| Here's a pic of one of the installation "deviations" I do when installing this kit. It helps alot, and Brad likes the idea too. The "windows" are to weld the longitudinal stiffeners to the vertical ribs. The holes are covered by the sill plates. |
Perry,
I plan on doing this mod in the spring. When I talked to Brad he thought it would be a good idea to find out how my car handles without the stiffeners and then with. So I spent part of this summer running AXes (when it wasn't on jacks). Do you have a close up of your "windows" mods or "deviations"?
Mark,
Brad and Mike showed me the stiffeners and how they fit but I hadn't see them on a car. Thanks for posting this.
Mike
Posted by: groot Jan 5 2006, 06:37 AM
Mark,
I missed MWC... I think it was a race weekend. My car's not exactly "show quality"
Posted by: dkos Jan 5 2006, 08:06 AM
| QUOTE (marks914 @ Jan 4 2006, 08:51 PM) |
| Here's where to weld: |
THANKS!!! Keep the info coming. I have Brad's Kit and intend to install it. I'm just waiting on Restoration Design. I've been calling for 3 days trying to order the inner rockers.
Attached image(s)
Posted by: Bleyseng Jan 5 2006, 09:33 AM
For the inner long, look at the Engman kit as it ties the long to the bulkhead and strenghtens the car right where it folds in two.
![popcorn[1].gif](http://www.914world.com/bbs2/html/emoticons/popcorn[1].gif)
Posted by: indydad Jan 5 2006, 12:32 PM
I'm doing the same thing right now. I got my stiffeners from Partwerk of Chicago. Actually had no problem from them, but that was several years ago.
I have Osphoed the inside of the longs twice, should be coated good. I plan to Por-15 the outer long after I do the same repair as you before the stiffener goes on and Por-15 both sides of the stiffener grinding off any welding spots.
I wonder if it would be a good idea to tack on both sides and then alternate welding from side to side to avoid warping. I am leaving the targa on and doors closed as much as possible. My door gap is good now.
Floor pans next. Does it ever end?
Ole dad in Indy
Posted by: marks914 Jan 5 2006, 02:20 PM
It seems that the 914 that are available recently are infected by rust. At least there are options for repairing them and keeping them from the crusher! That's why I started this thread, to show the mysterious clamshells to others so that more cars can be saved. They are not difficult to install, it just takes paitence.
I think the side to welding is a good idea, but it would take alot of warping to affect the frame.
Mark
Posted by: IanStott Jan 5 2006, 02:57 PM
I'm in the middle of a restoration and very interested in what you are doing. I have new inner rockers and a stiffening long piece from restoration design,( both sides) I agree in getting all rust looked after then rebuild. A product called Rust Check is very common here, I have been using it since the early 80's on all my cars, they have stood up to the salt and snow very well. I won't be driving my 914 in the salt!!! Noticed you have Pirelli tires, how are they and what size are they??
Ian Stott
Moncton
Canada
Posted by: marks914 Jan 5 2006, 07:22 PM
| QUOTE (IanStott @ Jan 5 2006, 12:57 PM) |
| I'm in the middle of a restoration and very interested in what you are doing. I have new inner rockers and a stiffening long piece from restoration design,( both sides) I agree in getting all rust looked after then rebuild. A product called Rust Check is very common here, I have been using it since the early 80's on all my cars, they have stood up to the salt and snow very well. I won't be driving my 914 in the salt!!! Noticed you have Pirelli tires, how are they and what size are they?? Ian Stott Moncton Canada |
I'm running Pirelli P6s, 205 50 17. I guess they're OK, they were the cheapest ones I could get. They do smoke easily!
Mark
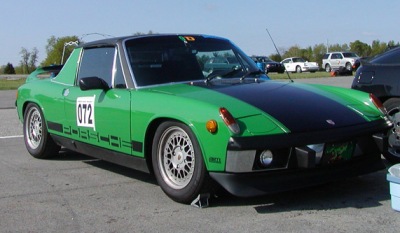
Posted by: marks914 Jan 5 2006, 07:23 PM
Here's a pic with the tires:
Mark
Attached image(s)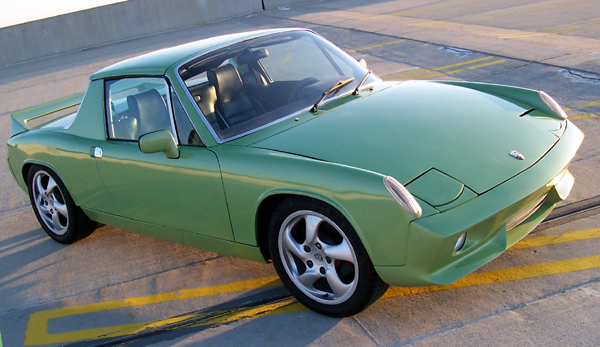
Posted by: IanStott Jan 6 2006, 07:54 AM
First you have a very nice looking car! If mine looks half that good I will be pleased. Would you recommend the Pirelli's?
Ian Stott
Moncton
Posted by: mudfoot76 Jan 6 2006, 09:01 AM
| QUOTE (IanStott @ Jan 6 2006, 08:54 AM) |
| Would you recommend the Pirelli's? |
I have them on my car too. I don't AX, but I do DE track weekends. So far, so good. They don't wear too quickly. They don't handle quite as well as the Dunlops that I replaced, but that is not too big a deal to me. I bought them b/c they were about $65/each from Tirerack and I needed a new set of tires at the time, and these were on sale. Oh yeah, 205s all the way around, under stock fenders. They are a good general purpose tire, IMHO.
Attached image(s)
Posted by: marks914 Jan 7 2006, 05:58 AM
| QUOTE (IanStott @ Jan 6 2006, 05:54 AM) |
| First you have a very nice looking car! If mine looks half that good I will be pleased. Would you recommend the Pirelli's? Ian Stott Moncton |
Sure, I'd reccomend the Pirellis, they aren't too bad.
These cars never seem to be done!
Mark
Posted by: Tom Perso Jan 7 2006, 07:17 AM
Nice car! I just had to add since I see my Michigan brothers are working while mine still sits on jackstands... 
Tom
Posted by: dkos Jan 7 2006, 03:13 PM
marks914,
I usually prefer the stock look, but your car looks awesome!


Posted by: wertygrog Jan 10 2006, 03:33 PM
hmmm where does one get this kit, and is it better than the RD clamshells? I'm from a tub-recovery perspective as the rear two thirds of my outer longs are rusted out. The plan is to cut out the rust, POR everthing, and throw a clamshell on there. Sound good?
brent
Posted by: 9146986 Jan 10 2006, 06:58 PM
| QUOTE (wertygrog @ Jan 10 2006, 01:33 PM) |
| hmmm where does one get this kit, and is it better than the RD clamshells? I'm from a tub-recovery perspective as the rear two thirds of my outer longs are rusted out. The plan is to cut out the rust, POR everthing, and throw a clamshell on there. Sound good? brent |
Brad Mayer, 914 LTD. Peoria, IL
Yes, better. Heavier though too, at least twice the weight. A little more crude, but easier to install than the RD pieces, and they give outer suspension support better than anything else.
I've installed them on some pretty high $ projects.
I'd recommend them for your application. These are perfect for saving a car and keeping on the road.
Posted by: marks914 Jan 21 2006, 08:10 AM
They were $330 shipping included, my car is stiff as hell now!
Mark
Posted by: wertygrog Jan 21 2006, 11:09 PM
was that for both sides?
brent
Posted by: alpha434 Jan 21 2006, 11:31 PM
| QUOTE (9146986 @ Jan 10 2006, 04:58 PM) | ||
Brad Mayer, 914 LTD. Peoria, IL Yes, better. Heavier though too, at least twice the weight. A little more crude, but easier to install than the RD pieces, and they give outer suspension support better than anything else. I've installed them on some pretty high $ projects. I'd recommend them for your application. These are perfect for saving a car and keeping on the road. |
Well, it's a positive weight increase. And now with the SCCA weight hit....
Well, everyone needs to gain some positive weight.
Posted by: turbo914v8 Feb 5 2006, 09:21 AM
The trick to getting your order processed from RD is to place your order on line. Bill will call you back in a matter of days to finalize your order. I have been ordering from RD like crazy and have no complaints. The parts are kick ass and fit great right out of the box.
Posted by: pek771 Feb 5 2006, 09:38 AM
I started this thread:
http://www.914world.com/bbs2/index.php?act=ST&f=2&t=44014&hl=long
so everyone interested could take a look at the deconstruction of a shoddily repaired 914, and what the rust patterns look like in the spots you can't see. The stiffener kits are great, but where there is obvious rust, I can guess it's like an iceberg...you can't see the other 90%
I m using the RD stuff, but I also built some pieces much like the Brad siffener, which is going on the cockpit side of the long.
Good luck!
Pat
Attached thumbnail(s)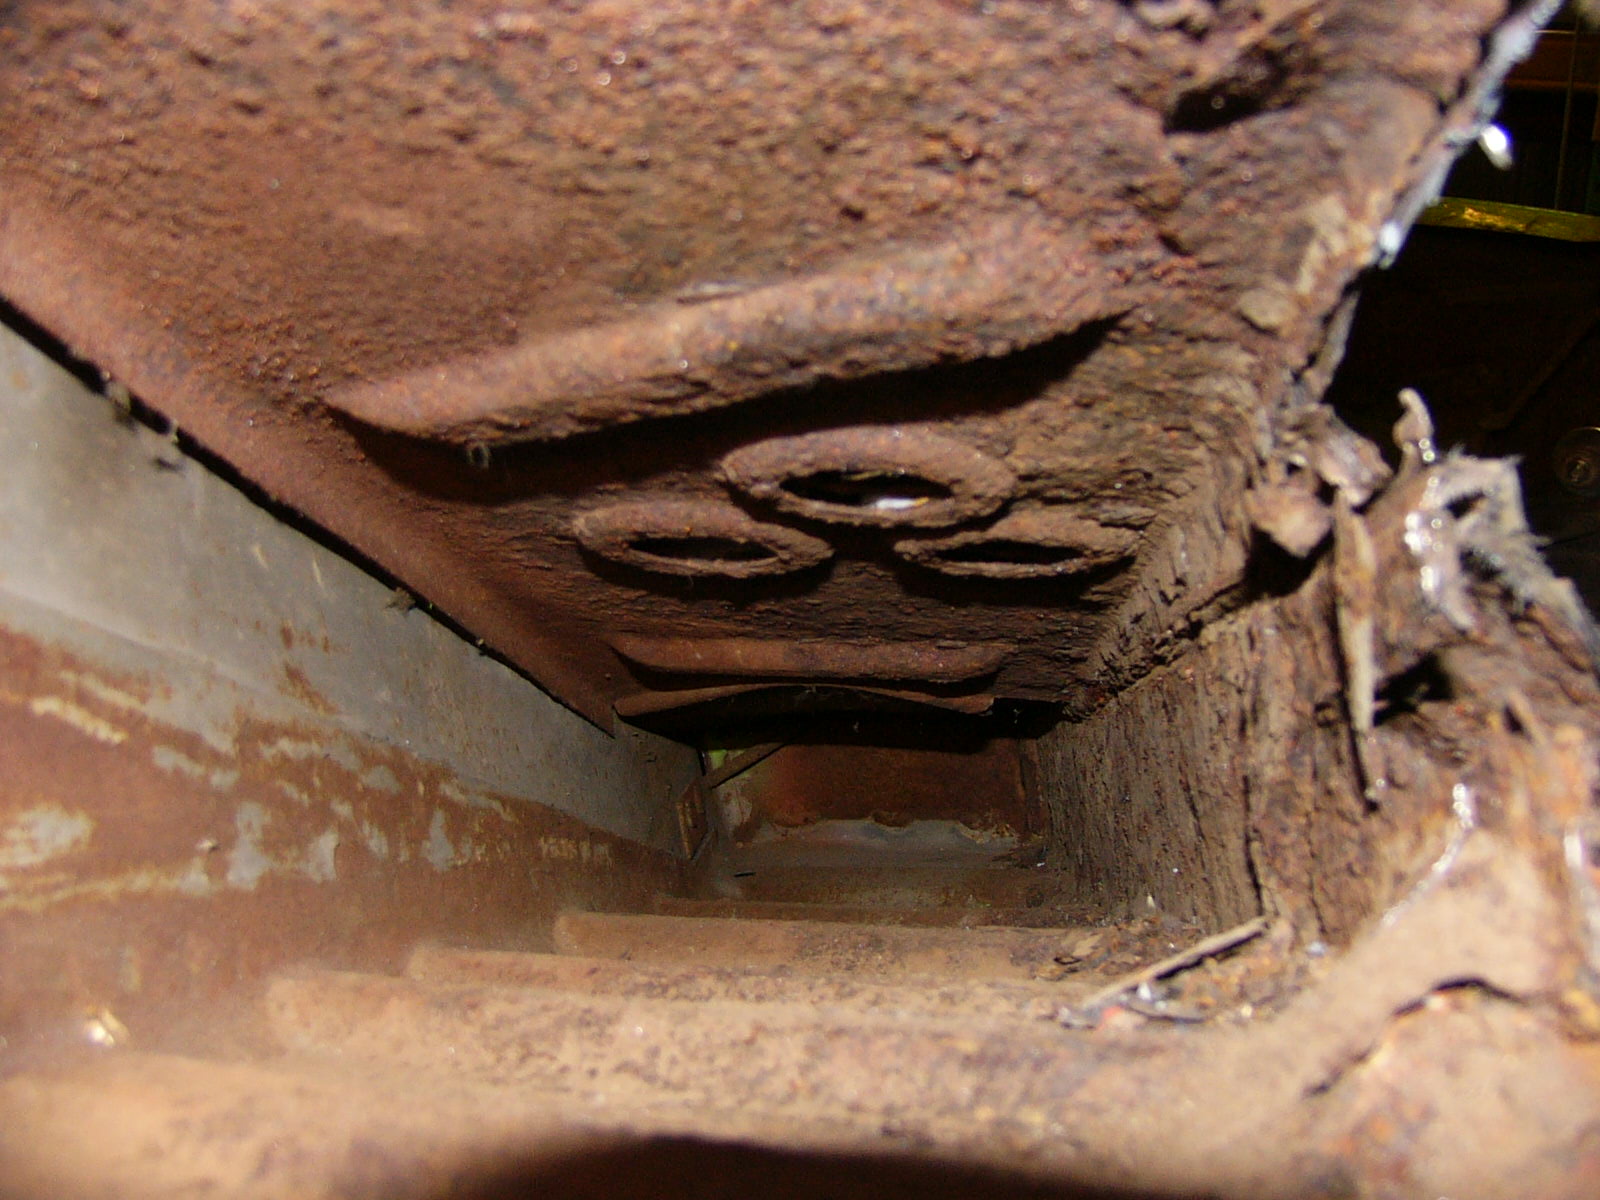
Posted by: SpecialK Feb 5 2006, 10:15 AM
The PO of my '73 also installed Brad's stiffener kit (was going to be a V-8 conv.), but instead of plug welding the holes, he drilled 3/8" holes completely through the longs (including the heat pipes  ), inserted 3/8" threaded rod all the way through the longs, used large washers and nuts to "sandwich" the parts together, tack welded the washers to the inner longs and outside stiffener, then tack welded the nuts to the rod and washer to keep them from loosening, and ground off the excess threaded rod..........and after a full 6 years of sitting on jack stands, there' been no visible signs of sagging

After seeing the method recommended by Brad and others, I'd have to say that the PO was really thinking (unusual for PO's). It literally ties the inner and outer longs together pretty effectively. Now, if someone was to use this threaded rod method in conjunction with Mark's inner long stiffener kit, you'd end up with one bullet-proof tub!
Posted by: tat2dphreak Feb 5 2006, 10:43 AM
I'm thinking of putting this kit on as a rust-repair on the outside of the long,
do you think the small piece that bolts to the rear suspension could be left out? I'm also planning on an Engman kit for the interior...
Posted by: SpecialK Feb 5 2006, 10:57 AM
| QUOTE (tat2dphreak @ Feb 5 2006, 10:43 AM) |
| I'm thinking of putting this kit on as a rust-repair on the outside of the long, do you think the small piece that bolts to the rear suspension could be left out? I'm also planning on an Engman kit for the interior... |
Personally, I think that the part that attaches to the rear suspension is what makes it such an effective stiffening kit.....you're spreading the loads of the suspension over a much larger area.
Of course that's just MHO.
Powered by Invision Power Board (http://www.invisionboard.com)
© Invision Power Services (http://www.invisionpower.com)