Printable Version of Topic
Click here to view this topic in its original format
914World.com _ 914World Garage _ A solid day of welding
Posted by: East coaster Jan 7 2006, 10:34 PM
Buried myself in the garage today and managed to get my last GT flare attached and even got to a few rust spots.........the project progresses 
Here's the passenger front (and the last) flare being tacked on:
Attached image(s)
Posted by: East coaster Jan 7 2006, 10:36 PM
nuther.....
Attached image(s)
Posted by: East coaster Jan 7 2006, 10:37 PM
clamps removed and more welding.....
Attached image(s)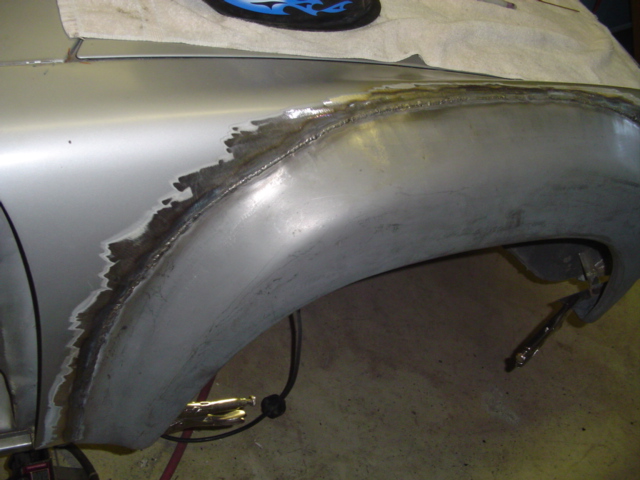
Posted by: East coaster Jan 7 2006, 10:38 PM
nuther....
Attached image(s)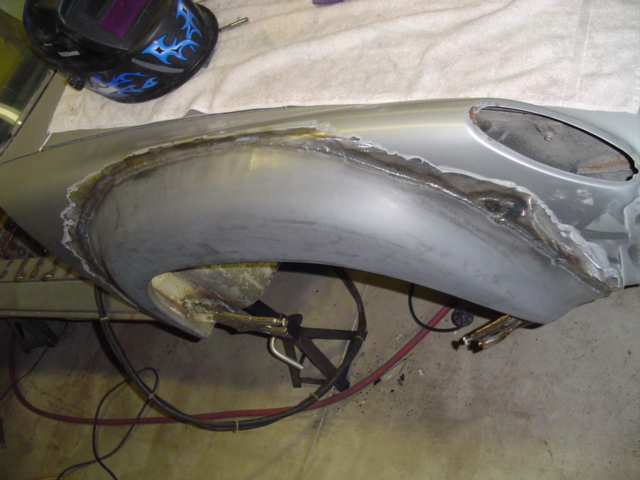
Posted by: lincoln Jan 7 2006, 10:40 PM
looks good
and to think i almost bought that same welding hood lol
Posted by: East coaster Jan 7 2006, 10:41 PM
Took a flat body file to the top of the flare to highlight the ripples (shiney spots) that you get with AA flares. It helps mark them and then it's hammer and dolly time to work them out. 
Attached image(s)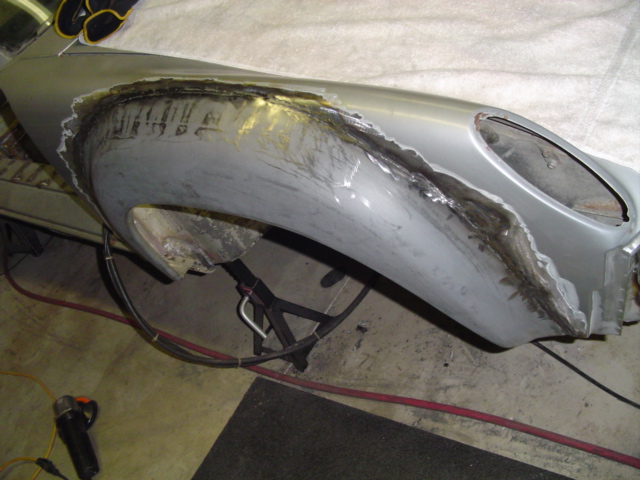
Posted by: East coaster Jan 7 2006, 10:51 PM
Took care of a couple of rust spots also. Here's a nice hole in the bottom of the drivers rear quarter panel.
before.........
Attached image(s)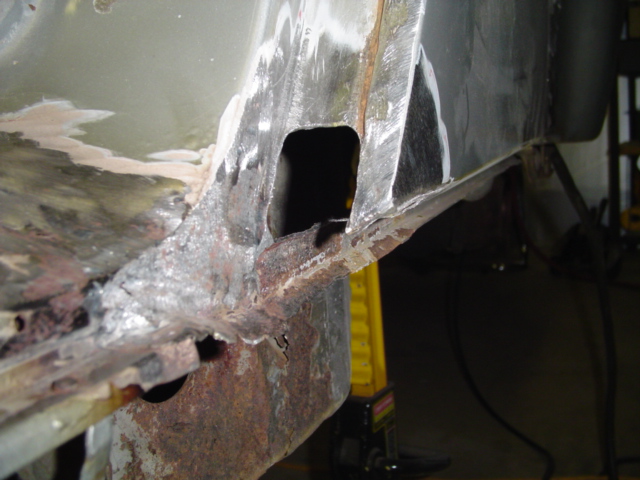
Posted by: East coaster Jan 7 2006, 10:52 PM
and underneath...........
Attached image(s)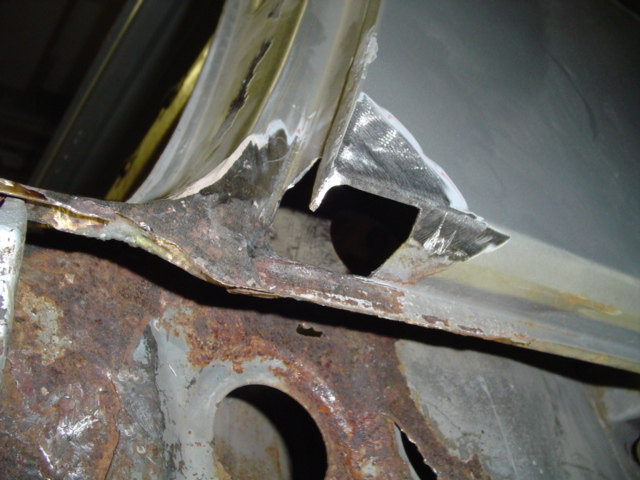
Posted by: East coaster Jan 7 2006, 10:54 PM
after........
Attached image(s)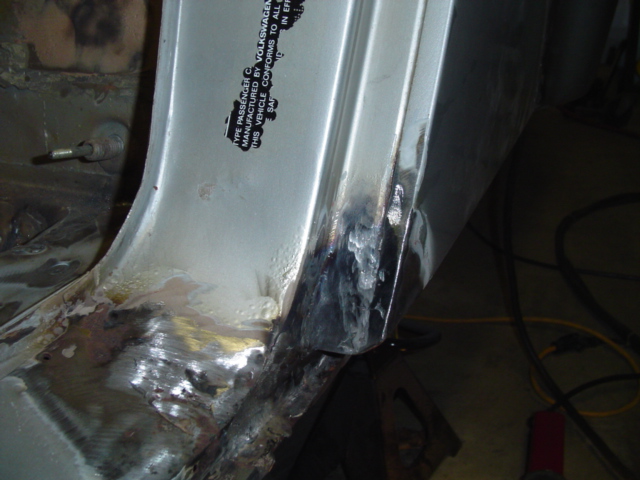
Posted by: East coaster Jan 7 2006, 10:56 PM
and under....
Attached image(s)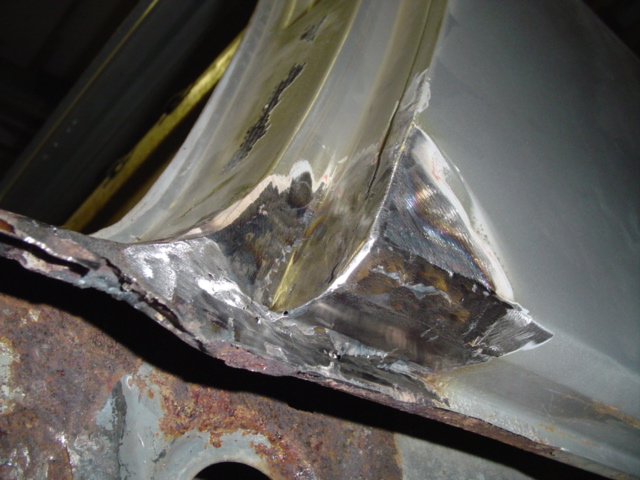
Posted by: East coaster Jan 7 2006, 10:58 PM
Made a commitment to Sirius radio too...........welded up the am/fm antenna hole!
Attached image(s)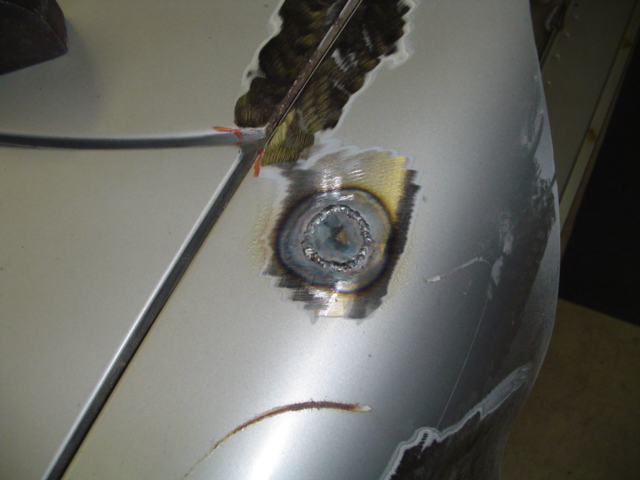
Posted by: East coaster Jan 7 2006, 11:01 PM
Repaired a wierd rust spot at the front bumper mount (dog bone). This was a pain in the ass, it's three layers thick here and all three were affected. The support bracket behind needed two patches and everything in front of the bracket had to be replaced (2 layers).
here's a front shot......
Attached image(s)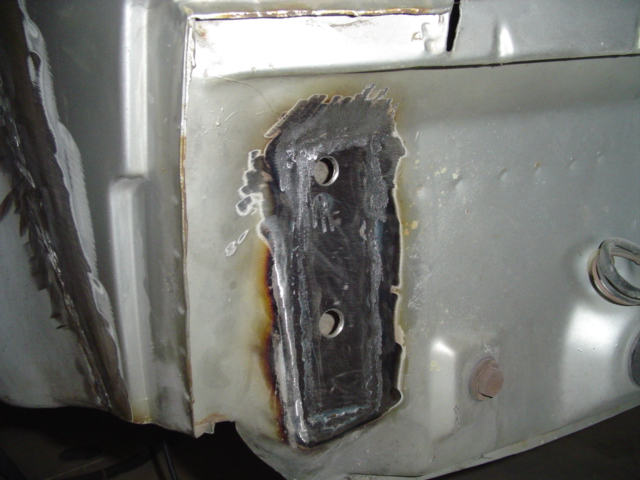
Posted by: East coaster Jan 7 2006, 11:04 PM
from behind.....
Attached image(s)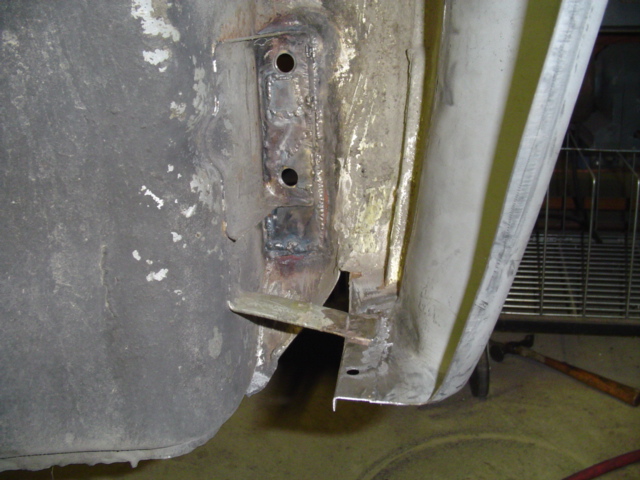
Posted by: East coaster Jan 7 2006, 11:07 PM
That's it for today. The flare is about ready for filler and the rust spots just need to be dressed. The drivers side jack post area is the only rust spot left unadressed and it should be taken care of tomarrow.
Posted by: Luke M Jan 8 2006, 01:35 AM
Nice job I'll be installing my flares next week.
Any problems that you ran into?
Luke
Posted by: East coaster Jan 8 2006, 06:50 AM
Best advice I can give is make sure you clean all welding surfaces very well, both inside and out. Any burning paint/undercoating/seam sealer will deplete the welding gas and give you a nice hole in the bead. On the first flare I neglected to prep the inside of the fender well enough and got some burn through. Also, be patient and weld small areas at a time (1" or so) to minimize heat warpage. The little extra time you take here will be saved 10 fold on hammer and dolly time.
If you're doing AA flares, you'll have to work the bottom of the flare into the stock bottom line. The AA flares are flat on the bottom and the stock were angled at the rocker line. A little hammer/dolly work will blend it from angled to flat.
Here's a pic for clarity:
Attached image(s)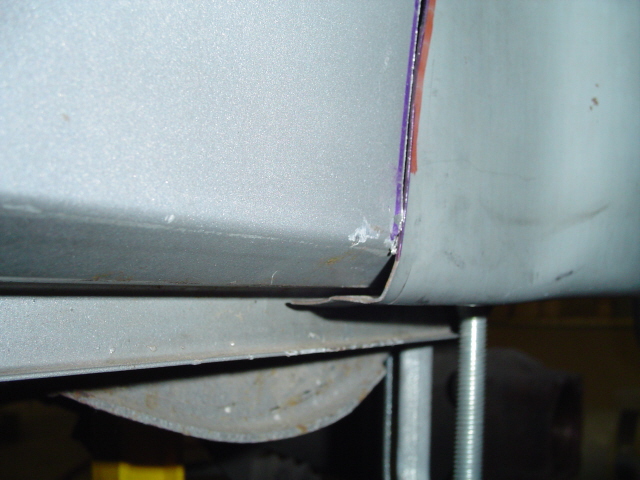
Posted by: East coaster Jan 8 2006, 06:51 AM
from inside.........
Attached image(s)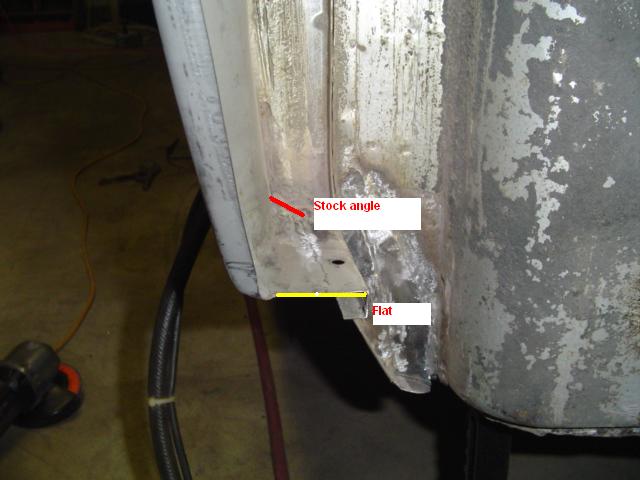
Posted by: URY914 Jan 8 2006, 07:23 AM
Very nice work! And I would say not your first time.
Posted by: Jeroen Jan 8 2006, 08:59 AM

wish the DPO of my car repaired the bumper mounts like you did
the way they are now makes me wanna 
Posted by: 9146986 Jan 8 2006, 09:57 AM
| QUOTE (East coaster @ Jan 8 2006, 04:50 AM) |
| If you're doing AA flares, you'll have to work the bottom of the flare into the stock bottom line. The AA flares are flat on the bottom and the stock were angled at the rocker line. A little hammer/dolly work will blend it from angled to flat. |
That may be a little better than the factory flares
Posted by: joea9146 Jan 8 2006, 10:16 AM
Looks Good Nice Job .... 
Powered by Invision Power Board (http://www.invisionboard.com)
© Invision Power Services (http://www.invisionpower.com)