Printable Version of Topic
Click here to view this topic in its original format
914World.com _ 914World Garage _ Mrdezyne's Suby convert thread....
Posted by: mrdezyne Jan 9 2006, 10:08 AM
I have really enjoyed following progress threads of others that are doing swaps to the Suby power plant. I have learned so much and avoided problems early on due to the information presented by fellow Suby converts here on the board. Thank you all.
With that said, I thought it was time to get my own going and maybe help fill in any gaps that other might be curious about. I am just learning as I go so most of you know tons more than I do about both Subaru engines and 914 workings than I do at this point.
The project"
1973 914 with minimal rust and a 14 year old 1.7 liter FI, stock.
Overall this car was in pretty good shape when I loaded it up on the trailer in Stillwater Ok and brought it home to Tulsa. It had been sitting in a garage since 1989-90 due to losing oil pressure, nothing had ever been checked or tried, they just parked it inside and let the years of dust and other stuff collect on top of it. Yeah for me!
Transplant for power is a 2004 EJ25 SOHC with 16k. Something like 165 hp stock and I am hoping to squeeze around 180 out of it with mild mods. Cams and such might come later which could pop it up over 200hp. Engine was in good shape when I bought it but needed timing belt and covers, and a new tensioner (since I screwed the original one up trying to compress it). Waiting on Kennedy plate and flywheel now.
17x7 front 17x9 rear, waiting for Bontempi flares for the rear...... as she sits of yesterday....
Attached image(s)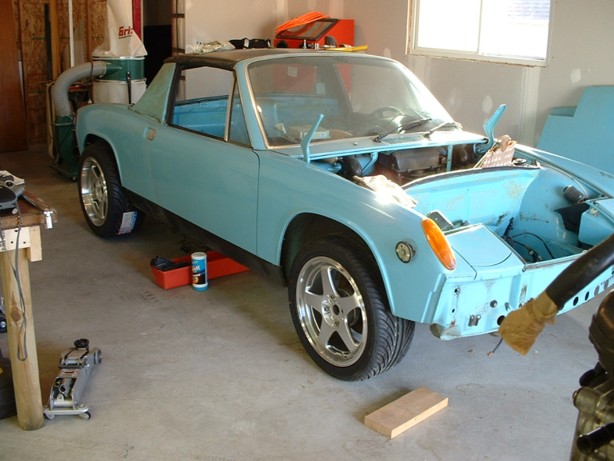
Posted by: mrdezyne Jan 9 2006, 10:08 AM
Quick shot of the engine....
Attached image(s)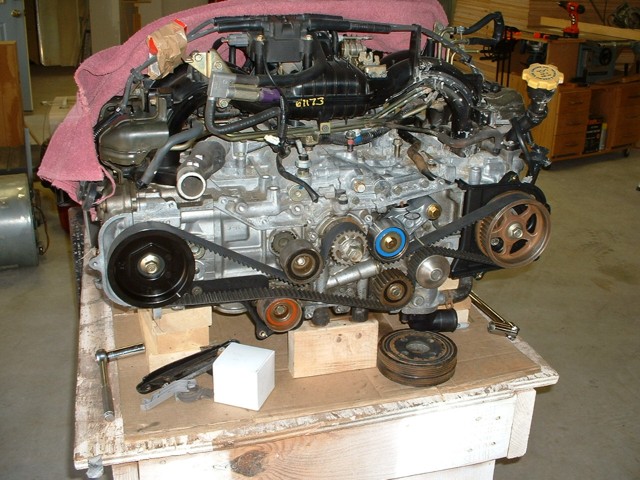
Posted by: Aaron Cox Jan 9 2006, 10:32 AM
what wheels are those?
nice project
Posted by: mrdezyne Jan 9 2006, 10:39 AM
They are a Honda bolt pattern with adapters. Took some searching to find a staggared set though. You like?
Attached image(s)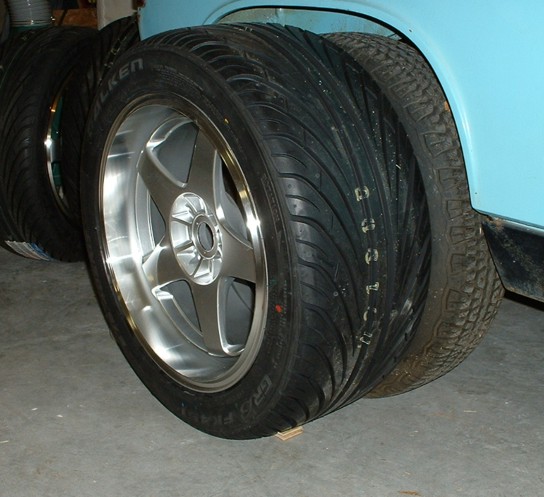
Posted by: mrdezyne Jan 9 2006, 10:40 AM
nother of the fronts and rears.... Anyone need this set of American Racing wheels that came on it? Might be for sale..... I think they are kinda rare.....
Attached image(s)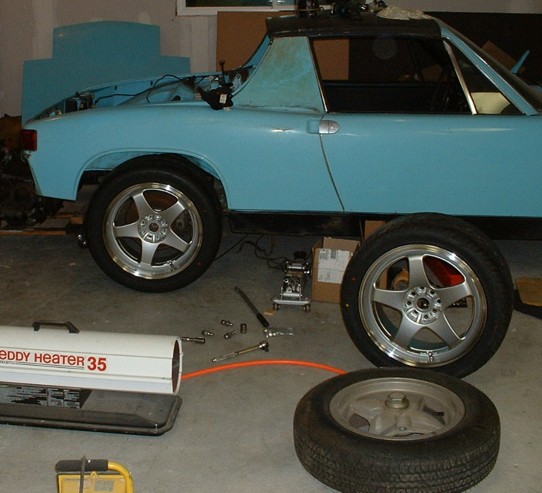
Posted by: nynone4 Jan 9 2006, 11:06 AM
Cool project! Are you getting your flares from HPH? I tried to contact Rich Bontempi there to get prices for a pair of those flares - but could never get a price out of him to order some. If you don't mind my asking - what do a pair of those go for?
Neat wheels too!
Posted by: mrdezyne Jan 9 2006, 11:13 AM
This is what Rich had to say to me a few weeks ago. Still doesn't sound like a firm price but I bet its close...
"Curt,
Yes those are my flares!
I think the current price is $595 for rears and $550 for fronts, plus shipping. I need to get to my guy and have some more made to get a current price.
Rich"
Posted by: mrdezyne Jan 11 2006, 10:37 AM
Rust repair is the name of the game at present. Anyone have this piece from a junk shell?
Attached image(s)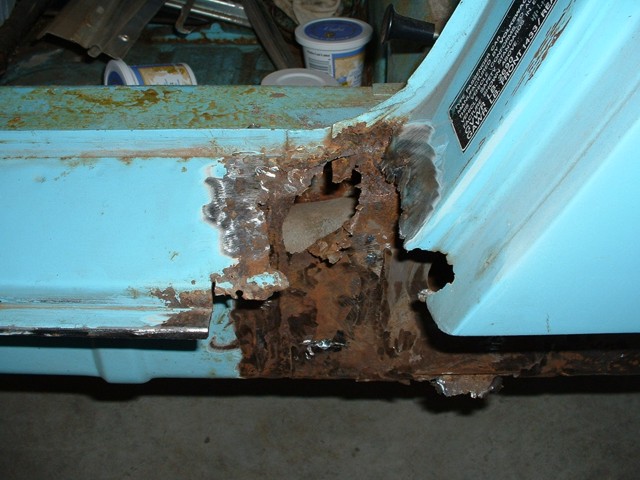
Posted by: mrdezyne Jan 11 2006, 10:39 AM
Shot from under side. The long is not in that bad of shape.....
Attached image(s)
Posted by: mrdezyne Jan 11 2006, 10:44 AM
Suby wiring harness installed..... yeah right. Still haven't gotten started on this yet, it looks like a nightmare but from what I hear its very doable..... This is everything from front turn signals to rear and all points inbetween.
Attached image(s)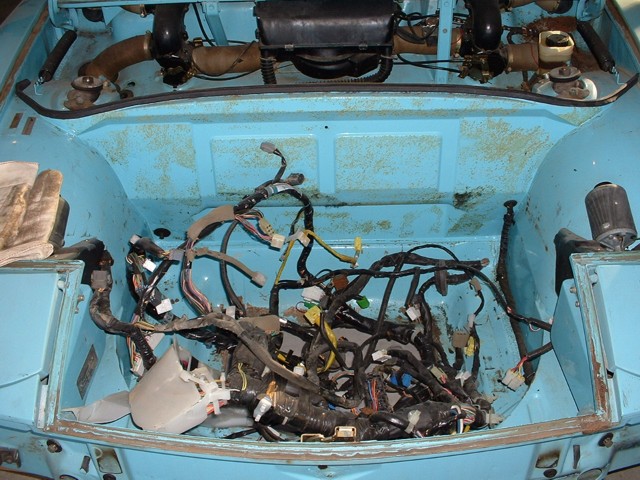
Posted by: fiid Jan 11 2006, 10:50 AM
looks like a great project!!  let me know if theres anything I can do to help!! (btw - PMing is a better guarantee of a response - I sometimes miss questions in threads)
Posted by: TonyAKAVW Jan 11 2006, 11:05 AM
My engine came the same way ( in need of a timing belt and covers). Don't make the mistake I did... Make sure when you take the old timing belt off, that you to id with the mark in the correct position. I cut mine off whereever it happened to be. According to information I found, the engine is an interfernce type, though I hve found contradictory information on that as well... 
Did you ever manage to find a factory service manual for your car to help you with the wiring?
-Tony
Posted by: mrdezyne Jan 11 2006, 11:39 AM
This OEM belt actually had tick marks on it that aligned with the timing marks on each pulley. I thought it was too good to be true myself but after calling the Suby dealer, they verified and the whole thing was a snap. Am I missing something? Could it be that easy?
Still no luck with manuals. I'm sure they are available for a 2004 but I'm just not ready to spend the $$$ on that just yet.
Need to find a radiator that fits the front. Is everyone using 1.5" or 1.25" ID hose to run coolant to the front? (Tony, I know yours is in the back...)
Working on yet another motor mount design (the mechanical engineer in me says I can do it stronger and better than what I have seen so far.... translation..... I'm going to waste a whole bunch of time, beer, and blood making something that works, eh, about the same as what you guys have done).
Heres the deal.
When I get my wiring harness done, I will share my results and diagram.
When I get my cradle built, I will share my design and dimensions.
Heck, I'll show you guys whatever you need to get more converts out there. This seems like the logical evolution of the 914 to me.
Suby with fresh covers.....
Attached image(s)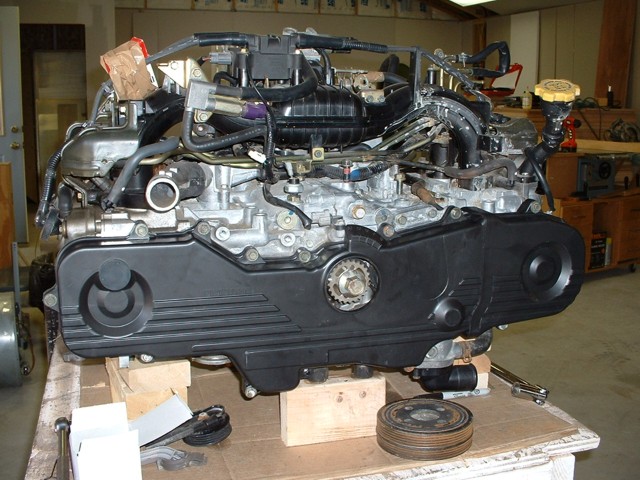
Posted by: WRX914 Jan 11 2006, 11:48 AM
| QUOTE (TonyAKAVW @ Jan 11 2006, 09:05 AM) |
| My engine came the same way ( in need of a timing belt and covers). Don't make the mistake I did... Make sure when you take the old timing belt off, that you to id with the mark in the correct position. I cut mine off whereever it happened to be. According to information I found, the engine is an interfernce type, though I hve found contradictory information on that as well... Did you ever manage to find a factory service manual for your car to help you with the wiring? -Tony |
Call Dana at Renegade. He rewired his and my harness with some rather
 instructions. However crapy the instructions are, he did it and it worked the first time. He can direct you the the source that he used to obtain the directions. I do know that he took about 40-50 lbs of wiring harness and reduced it to about 5-10 lbs and took about 3 nights after work till 2 am to finish. I have mine done, will try to take and posts some pics of the finished product.
Keith
Posted by: fiid Jan 11 2006, 11:48 AM
I have a 91-92 VW Golf Radiator in the front. I think there are pictures in my progress thread.
http://www.914world.com/bbs2/index.php?act=ST&f=2&t=7882
Posted by: mrdezyne Jan 11 2006, 12:01 PM
Fiid, are you going to try any sort of burp tank of overflow system for your cooling? I like the way that Golf radiator fits. Do you remember what size lines you are running to the back?
Keith,
I appreciate the direction, I'll give Dana a call and see what he says. Any photos would be great, thanks!
Posted by: WRX914 Jan 11 2006, 12:03 PM
| QUOTE (mrdezyne @ Jan 11 2006, 10:01 AM) |
| Fiid, are you going to try any sort of burp tank of overflow system for your cooling? I like the way that Golf radiator fits. Do you remember what size lines you are running to the back? Keith, I appreciate the direction, I'll give Dana a call and see what he says. Any photos would be great, thanks! |
Kinda screwed for pics right now...
Work PC does not have memory card slots, and home pc is on dial-up. Will figure something out soon.
Posted by: fiid Jan 11 2006, 12:08 PM
Yeah - my engine has a filler cap/expension tank on the top of it. The "radiator" pressure cap sits on top of that - and then there is a line to an overflow tank which is mounted on the firewall.
Posted by: mrdezyne Feb 1 2006, 04:13 PM
Found my radiator and fuel cell. I will order from Jegs this Scirocco radiator:
#555-51960
22" x 13"
double row all aluminum
and this fuel cell:
#547-200-010-01
25" L x 9" W x 12" H
10 Gallons
The area where the original fuel tank was located is now my front trunk area and should hold a couple duffle bags....
The new radiator and fuel cell wil fit in the front something like this.....
Attached thumbnail(s)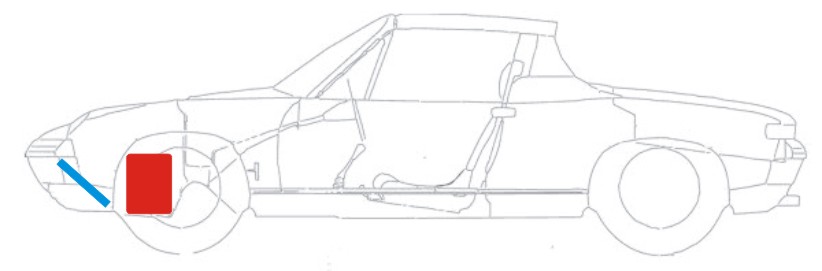
Posted by: Sideways Feb 1 2006, 05:26 PM
Looking good so far...
I am currently working towards a suby conversion myself, still in planning mode however. I am looking at putting the radiator in the front with an eye to turbo or other engine mods. Looking at you radiator and fuel cell location where are you going to vent the radiator?
Where did you source your engine from?
Sorry about all the questions...Keep fighting the good fight...
Posted by: mrdezyne Feb 1 2006, 09:59 PM
I have a long way to go but the fun is in the journey.
Check out this thread for radiator venting options in the front, I think they are just about all covered here. I'm shooting up through the front hood myself.
http://www.914world.com/bbs2/index.php?act=ST&f=2&t=44856&hl=v8
As for where I sourced my engine from, check out www.car-parts.com , you should be able to find something close to you that you can pick up. At least you will have a nice selection. After reading through several posts here and on other Suby threads, the block that seemed to have the most potential (non-turbo) was a 99 or newer EJ25 SOHC.
Posted by: mrdezyne Apr 19 2006, 01:21 PM
Ok a little progress since Feb 1st.
The car is now up on a makeshift kart so that I can roll it in and out of the shop without suspension and be able to work on the underside with less yoga moves.
I have my Kennedy parts in and they look great! 
Should have my radiator and fuel cell this week to start mocking up mounting locations and brackets.
Ordered a wiring harness kit and sensor board from Small Car Performance. If you are thinking about doing your own wiring harness, give these guys a call, they can hook you up with a DIY kit and a board that simulates sensors needed to run the motor. $180 total shipped.
and for a few new pics...
My Kennedy parts!
Attached image(s)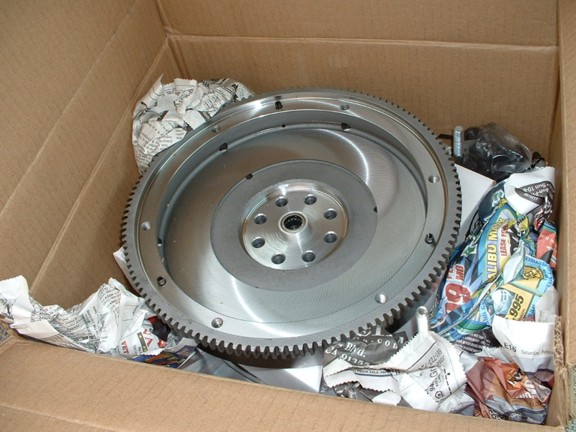
Posted by: mrdezyne Apr 19 2006, 01:25 PM
Up on the kart and pretty much stripped to a shell. I've cleaned up the underside, coated with rust preventer, and then put on a coat of roll on bed liner, that stuff is tough!
Attached image(s)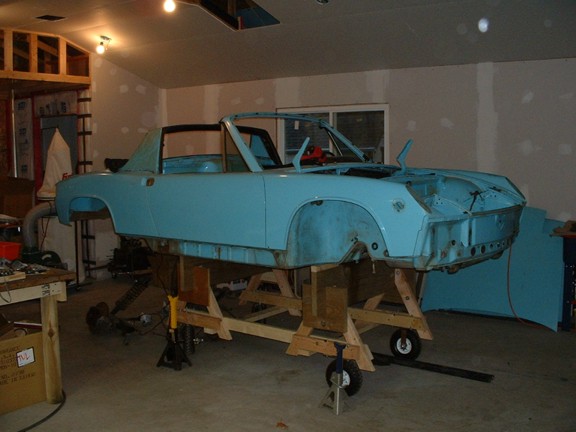
Posted by: mrdezyne Apr 19 2006, 01:30 PM
Dirty camera lens, but this is what the floor pans look like with bed liner coating applied. It has a bit of a shine to it really, hard to tell from the photo. Should make it easy to clean and keep clean.
Attached image(s)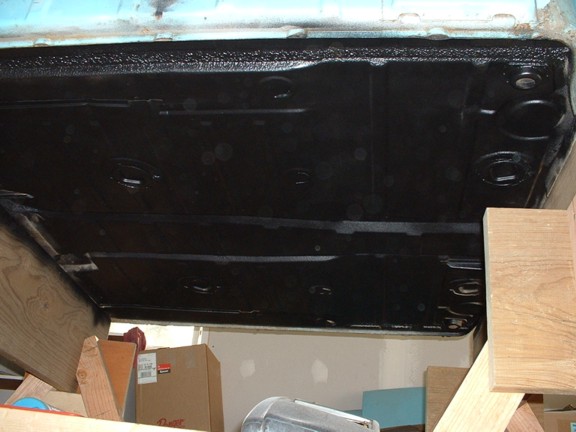
Posted by: mrdezyne Apr 19 2006, 01:35 PM
The next area to be cleaned up and undercoated. Still lots of rust patches to be welded in around the hell hole and firewall. I'll get pics of those soon...
Attached image(s)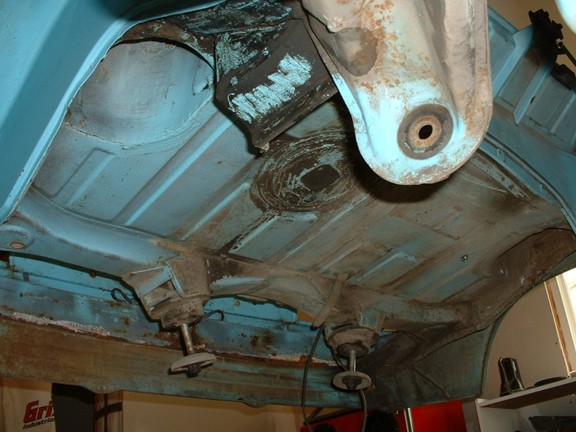
Posted by: mrdezyne Apr 19 2006, 01:42 PM
final shot for now, just another on the kart with my 944T from clip thrown on top. Yet another item on the list of things to do. I'll be cutting this down to fit soon and will be sure and take lots of pics of that progress...
Attached image(s)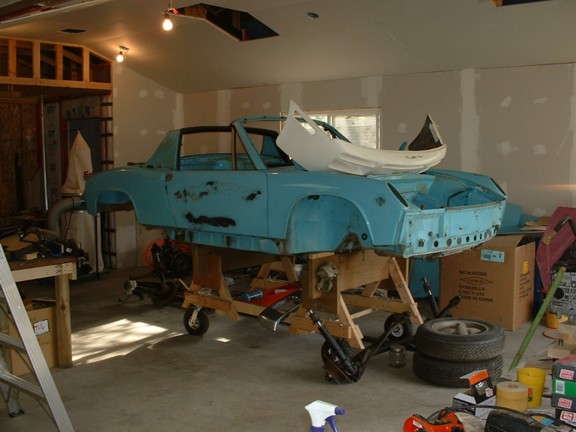
Posted by: GS Guy Apr 20 2006, 06:38 AM
Not meaning to hijack but from Fiid's Quote:
I have a 91-92 VW Golf Radiator in the front. I think there are pictures in my progress thread.
http://www.914world.com/bbs2/index.php?act=...t=ST&f=2&t=7882
Fiid - how's that radiator working on your conversion? I gather you've gotten in some decent run time, various temperature conditions by now. Doing a good job of controlling the engine temps?
I'll also interested in running a similar "Scirocco" style rad - probably from Griffin. They make one that's a little longer than the more or less standard 13" x 22", I think it's about 24" long but maintains the 13" height. It also has slightly larger tube sizes, and a bit more $$.
Got a part number/manufacturer for those cooling fans you're running? They look like a perfect fit on that Golf Radiator.
Jeff
Posted by: mcbain77 Apr 20 2006, 07:05 AM

They are a Honda bolt pattern with adapters. Took some searching to find a staggared set though. You like?
where did you get the adapters? are they 4 bolt?
Posted by: mrdezyne Apr 20 2006, 09:06 AM
For my spacers I found a guy right here in Oklahoma that does a great job. Don't let the name fool you, www.weirdharoldscoolparts.com . He will make whatever you can dream up and has pretty good prices for custom stuff.
The adapters are 4 bolt to 4 bolt which gives plenty of material around the studs on both patterns. I can now run a Honda donut spare as well, cheap and plentiful at the salvage.
Radiator came in today, I don't have my camera to take pics here at work but it looks as though it should do the trick and fit just about perfect. Super lightweight too.
Posted by: fiid Apr 20 2006, 09:31 AM
Not meaning to hijack but from Fiid's Quote:
I have a 91-92 VW Golf Radiator in the front. I think there are pictures in my progress thread.
http://www.914world.com/bbs2/index.php?act=...t=ST&f=2&t=7882
Fiid - how's that radiator working on your conversion? I gather you've gotten in some decent run time, various temperature conditions by now. Doing a good job of controlling the engine temps?
I'll also interested in running a similar "Scirocco" style rad - probably from Griffin. They make one that's a little longer than the more or less standard 13" x 22", I think it's about 24" long but maintains the 13" height. It also has slightly larger tube sizes, and a bit more $$.
Got a part number/manufacturer for those cooling fans you're running? They look like a perfect fit on that Golf Radiator.
Jeff
Hey,
The fans in my setup were from a generic autoparts place.... The gotelli speed shop actually - I'll see if I can find a part number. The radiator setup seems to work well with one caveat. The fan controller thermostat is setup for the fan to come on at pretty high temperatures, which probably works perfectly well in the stock application where the rad is really close to the engine, but I'd prefer they came on a little earlier.
To solve this, I'm going to use the megasquirt to control one of the fans with the lower threshold thermostat driving the second fan. I admit, I'm a little terrified of boiling the thing over, and I'm not sure exactly what temps I'm getting, but I know it runs a chunk cooler on the freeway than it does stationary, so that tells me it's not a problem to run cooler.
Any advice or comments that people have are totally welcome

Posted by: mrdezyne May 1 2006, 10:58 AM
My wiring harness kit came in today and what a dissapointment. I was hoping for more instruction on what to cut and maybe a few photos or pictures showing a step by step. No such luck, for $125 I got a few sheets of wiring diagrams that I already had and are avaialble free on the internet and a few stickers to label connectors. Stay away from this kit! Its only saving vurtue might be the PC board that I had to pay an extra $55 for. This thing is supposed to give the ECU from the Suby all the right signals it needs to keep the engine running right. We shall see and I will keep you posted.
My first Vendor dissapointment SmallCar.com
Posted by: mrdezyne Nov 16 2006, 02:31 PM
Finally a step in the right direction.
Delivered 901, rear suspension, CV's/shafts, and front suspension to Rennsport in Tulsa this week. Brian already has the transaxle rebuilt with new synchros, 1st/rev slider, 1st and 2nd engage teeth, and the case cleaned and clear coated.
The front suspension is getting new polygraphite bushings, new wheel bearings, rebuilt calipers, Koni yellows, and 22mm Welt torsions.
The rear is getting the stiffining kit welded to the arms, polygraphite bushings (couldn't spring for the Elephant Racing at this time), 180-200lb springs, adjustable perches, Koni yellows, rebuilt CV's, new wheel bearings, and rebuilt calipers...
Original intent was to get everything powder coated at this time also but the $$$$$$ just kept adding up so I'm opting for a bead blast and fresh paint to save some green. I'll be picking up pieces tonight to take home over the weekend to clean and paint. Next week everything should be reasembled and ready to go on the car again...... as soon as its ready... ugh...
Posted by: jsteele22 Nov 16 2006, 05:18 PM
Hey, great to see this thread; don't know how I missed it.
This is the first time I've seen the idea of using the stock fuel tank location for a mini front trunk. Anybody do this on a street 914 before ? Any pics ?
I know it's been a while since the issue was raised, but yes the SOHC EJ25 is an interference engine. I know the terms get tossed around and debated, so maybe it's safer to say "yes, the pistons and valves can smack together and create a very expensive boat anchor." BTDT. As long as you line up the arrows before you remove the belt, there's no problem.
Looks like a great project. Hope to see it in person some day.
Posted by: neo914-6 Nov 16 2006, 11:25 PM
Original intent was to get everything powder coated at this time also but the $$$$$$ just kept adding up so I'm opting for a bead blast and fresh paint to save some green. I'll be picking up pieces tonight to take home over the weekend to clean and paint. Next week everything should be reasembled and ready to go on the car again...... as soon as its ready... ugh...
Powdercoating looks great but for parts needing some filler or smooth finish, paint works fine. I have a heavily welded bracket I will finish and spray paint. I found my powdercoater if fairly reasonable, haven't found the "minimum" batch yet before he charges me more. I've even came back later with more parts, LOL
Keep up the progress, I am in the same phase of getting the wiring and mechanicals done... 
Posted by: mrdezyne Nov 17 2006, 10:20 AM
Picked up my truckload of dissasembled parts last night. All suspension pieces and brakes are ready to be cleaned up this weekend and painted.
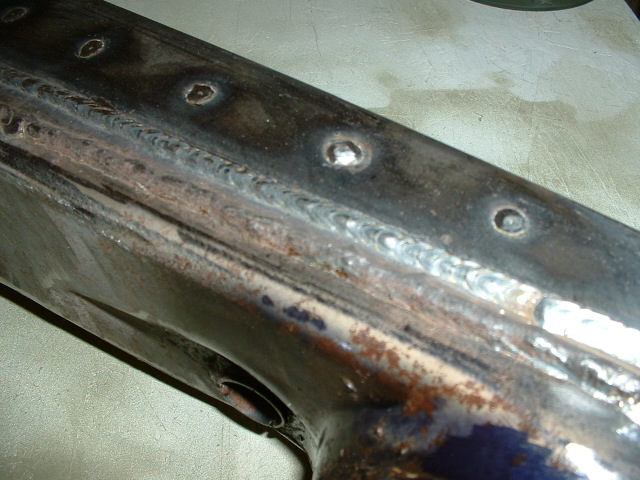
The stiffining kit for the rear trailing arms looks amazing! This welder has an eye for a perfect bead and I could not be happier. I'll post pics this weekend.
The transaxle is reassembled and in perfect working order again. One less problem down the road.
Any suggestions on a color to paint all of these working components? The konis are yellow, calipers will be red, I'm thinking the suspension components should be a gloss silver or black. Any thoughts on this?
Thanks for all the encouraging words. The pioneers on this board have played a bigger role in my project than they will ever know. Thanks again.
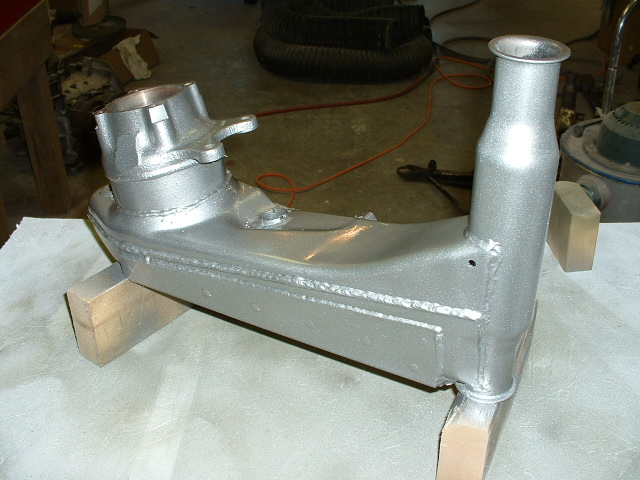
Posted by: mrdezyne Nov 29 2006, 11:30 AM
Trailing arms with the stiffening kit welded on. I know this is a debated topic of whether its worth it or even does anything but I had the kit already and the welder did a pretty slick job so I'm happy.
Attached image(s)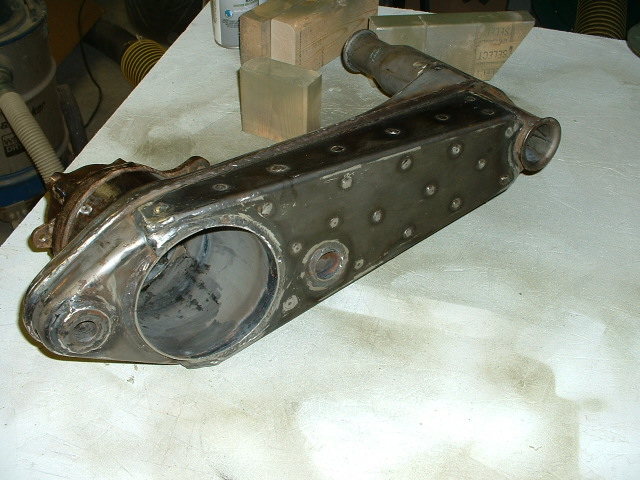
Posted by: mrdezyne Nov 29 2006, 11:38 AM
Here are the finished painted parts. The pics do not really show the clear coat, only the heavy silver metal flake. I striped the parts down to metal with the sandblaster, wiped them down with thiner to clean any residue, shot them with etching primer, then the wheel paint available from your FLAPS. Next was a couple shots of clear. This paint is pretty tough and goes on smooth. Its made to withstand brake fluid, dust, and road grime so I figured it would work well on suspension parts too. Several colors are available but they are all metalic I believe.
Attached image(s)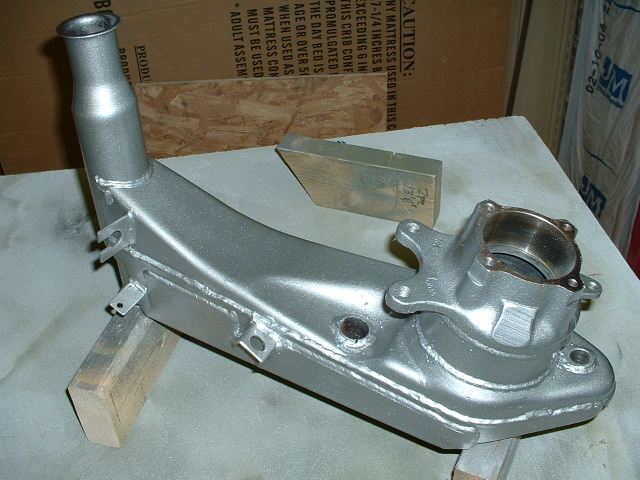
Posted by: mrdezyne Nov 29 2006, 11:45 AM
This is what the etching primer looks like, kinda green. Once this stuff dried you could not scratch it off, it really bites in and grabs the metal. I would highly recomend it for bare metal prep.
Attached image(s)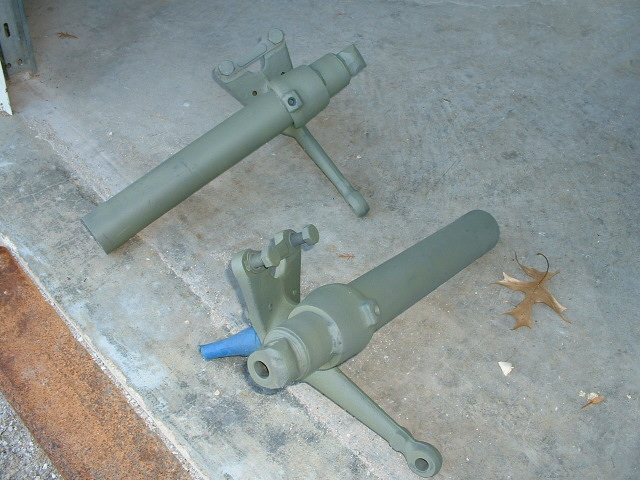
Posted by: mrdezyne Nov 29 2006, 11:50 AM
A few more parts basking in the WARM November sun...
(oops wrong photo..... try this)
Attached image(s)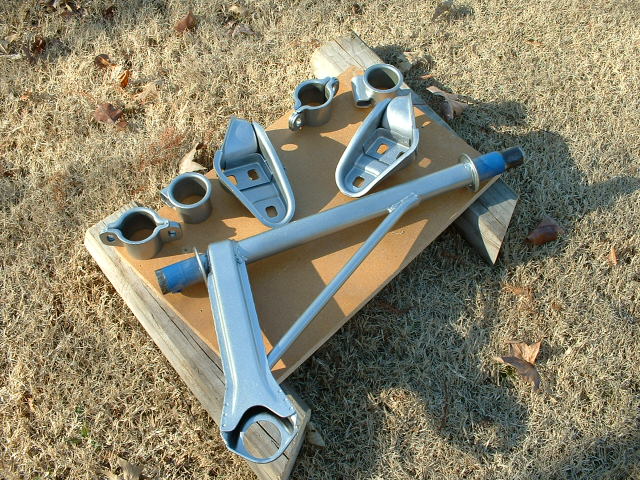
Posted by: neo914-6 Nov 29 2006, 12:11 PM

Nice work!
Posted by: mrdezyne Mar 28 2007, 04:43 PM
Wow, I figured this had been lost during the great forum split of aught-7. Started another progress thread over on the NARP board but I guess I'll continue here also..
Ok, decent progress lately, its amazing what warm weather and a little sunshine will do to your motivation.
Rennsport rebuilt my 901, calipers, installed poly bushings, and new ball joints. All parts are home now waiting to be re-mounted...
914 candy..
Attached thumbnail(s)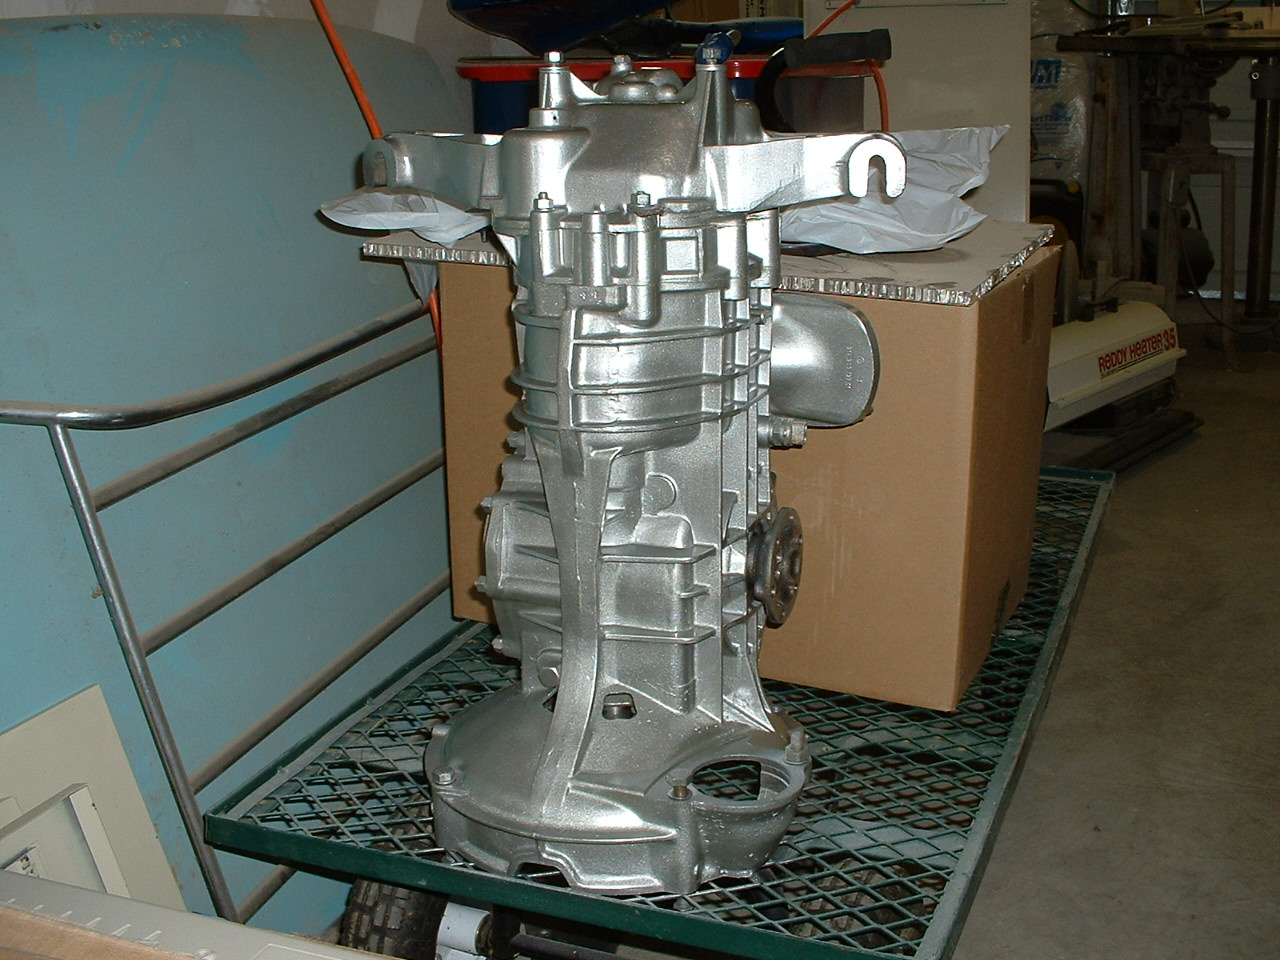
Posted by: mrdezyne Mar 28 2007, 04:47 PM
Look good enough to lick...
Attached thumbnail(s)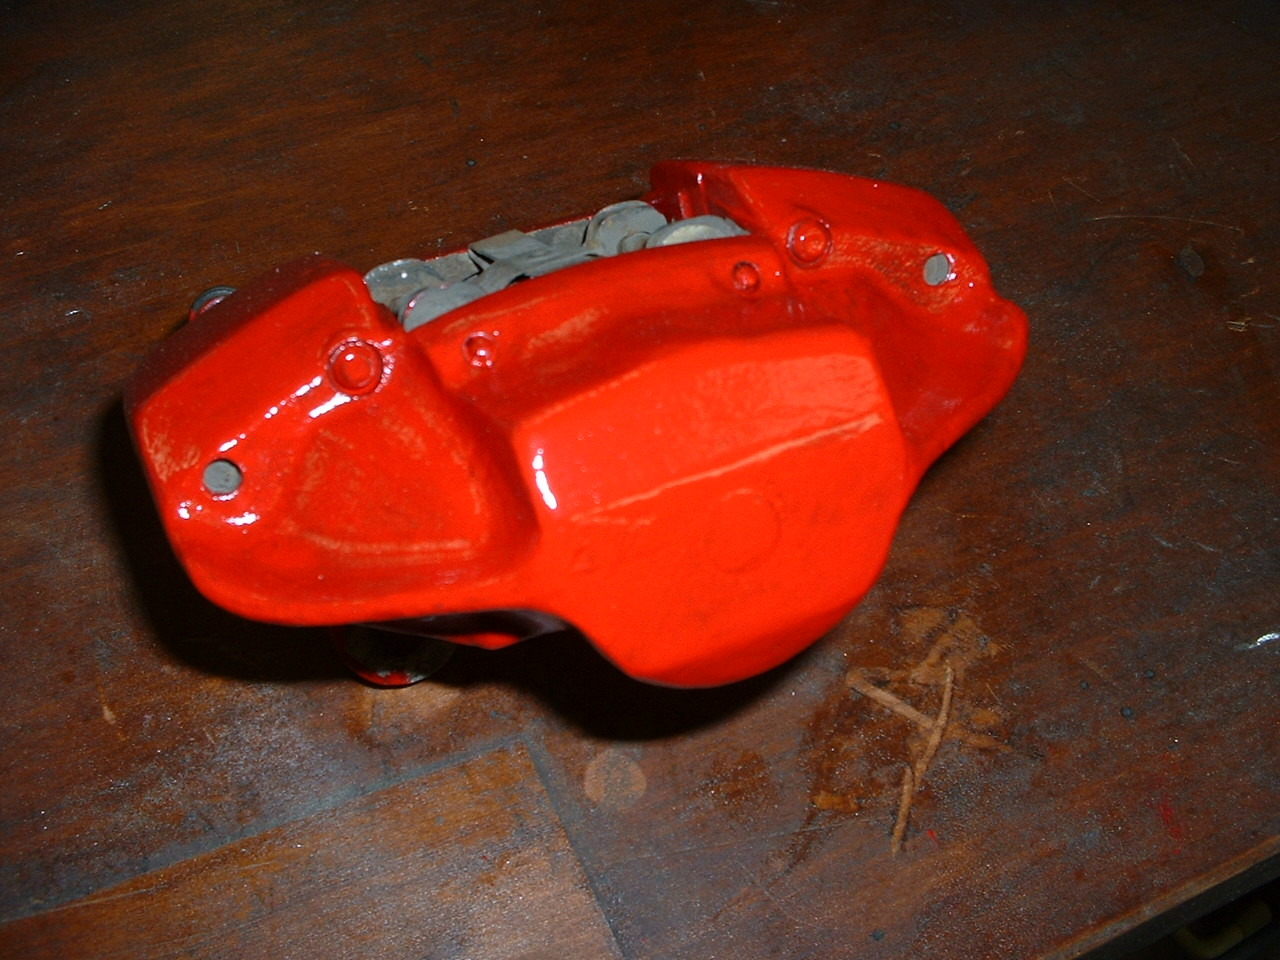
Posted by: mrdezyne Mar 28 2007, 04:54 PM
started fitting up the HPH flares for the rear. These are really nice pieces, very happy with this purchase...
Just the right size, the meat will tuck...
Attached thumbnail(s)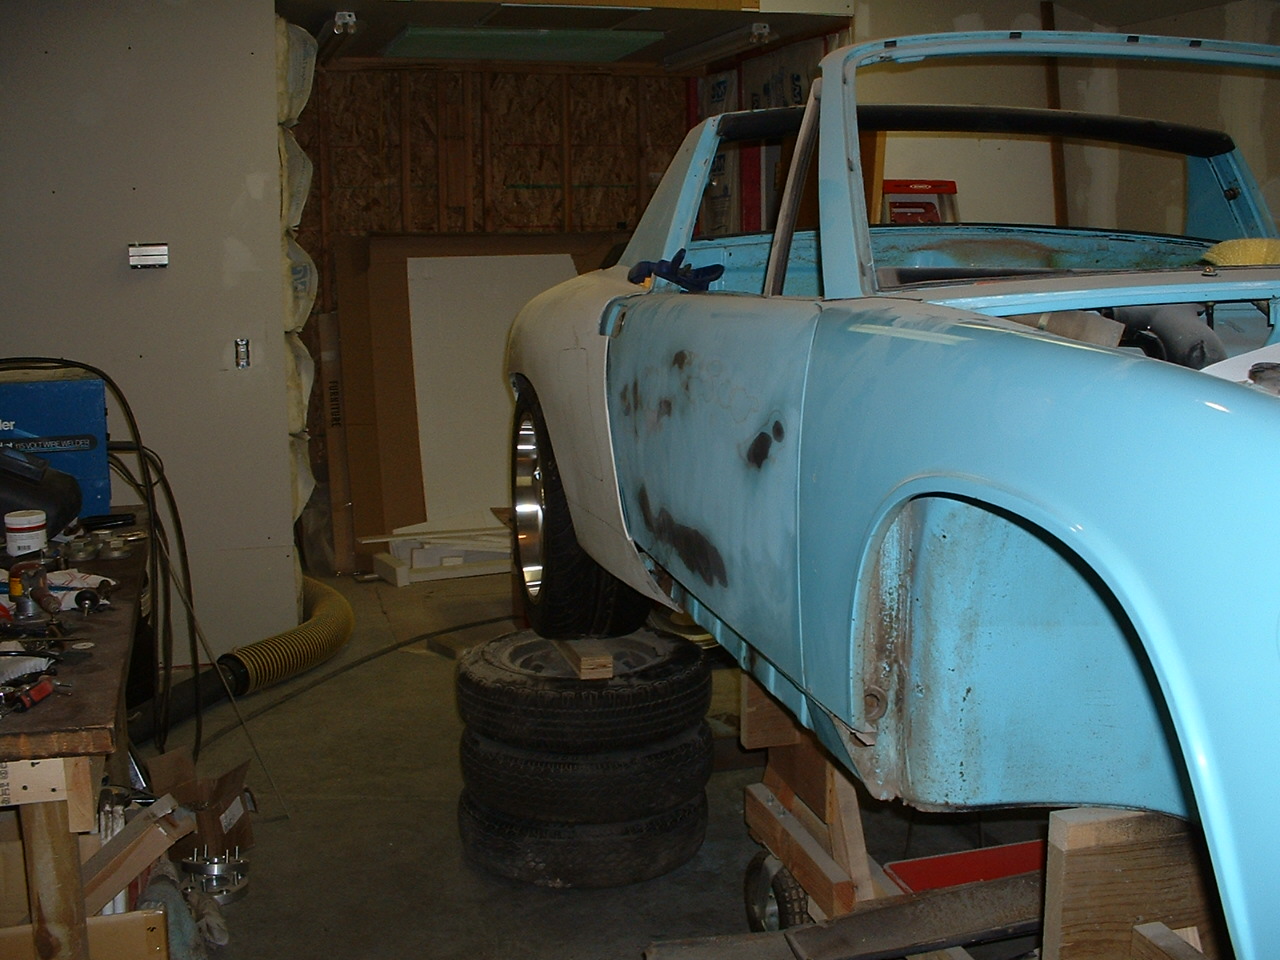
Posted by: mrdezyne Mar 28 2007, 04:59 PM
The idea here is to keep the original wheel well molding on the lip of the flare so it matches the front. I think the lip adds a little character to the lines...
Attached thumbnail(s)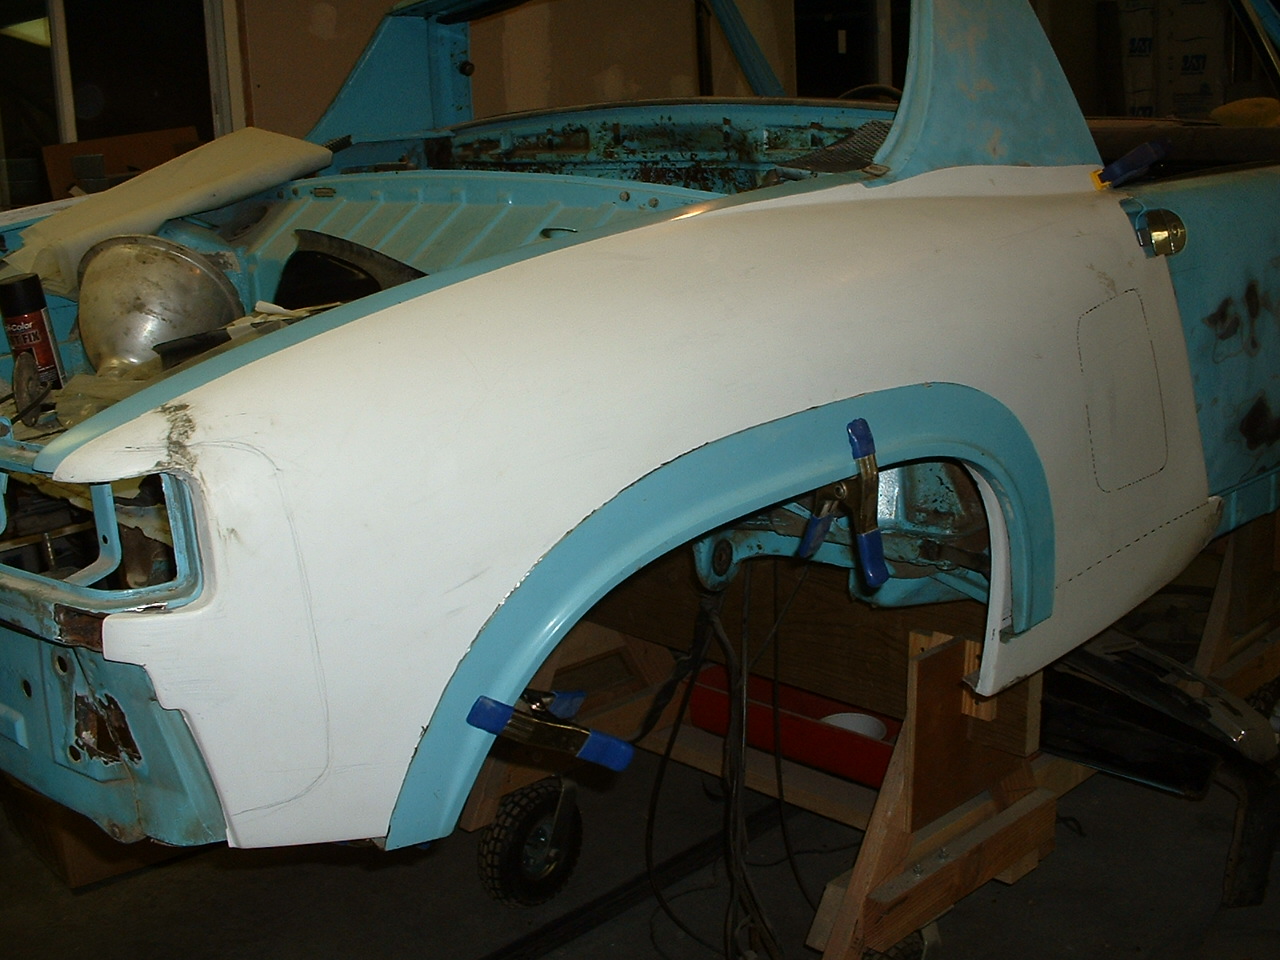
Posted by: mrdezyne Mar 28 2007, 05:03 PM
Have to finish welding in the stiffening kit before I get to crazy with the flares just yet. One side is pretty much buttoned down but I haven't got the pics yet. More to come....
Posted by: jd74914 Mar 28 2007, 05:38 PM
I like those flares, too bad they don't come in metal.
Posted by: project-914 Apr 1 2007, 10:54 PM
next time I'm in Tulsa I wanna check out the project...I've still got my little subaru project going too...it's slow, but it's going
Posted by: mrdezyne Apr 2 2007, 09:52 AM
Just give me heads up when you are coming up this way, I'm there working on it almost every weekend now. As far as that goes, anyone in the area that would like to come check it out or lend a hand is always welcome to join me. Its pretty much just me and sometimes my dad working in the shop.
Made a little more progress this weekend, removed the cracked dash, guages, and heater junk. Started removing the tar pad with a heat gun and scraper (heat gun is the only way to go on this part). Welded up a few more rust holes, and thought up a different roll bar idea which I will keep to myself until I have something to show on it... The rust patch photos are pretty boring so I have nothing to show right now...
Posted by: Zaney Jun 29 2008, 12:43 PM
Resurection BUMP! ![]()
Any progress pics?
Posted by: scotty914 Jun 30 2008, 06:19 AM
i just read this thread, and i like the idea of moving the gas tank forward and using the gas tank area as a trunk. i wonder how much a custom tank to fit along the bulkhead would cost. the reason i like this idea is so i could put AC in my car. i also wonder how well the bulkhead could be cut out, remade amd moved forward to make the "trunk" bigger. the tank and radiator would not need the whole front trunk
Posted by: neo914-6 Jul 28 2008, 05:13 PM
What sup Curt? 
Posted by: mrdezyne Nov 18 2011, 10:25 AM
Whats up Curt indeed.... well for starters, i DO still have this project believe it or not. and it is still in about the same condition it was in the last photos posted.
What is it now, 2011 almost 2012? So since the last post in 2007 I've... gotten married, moved, had my first kiddo, bought anothter BMW project, became BMWCCA VP for this region, started a Cars and Coffee style meet in Tulsa, swithced jobs, almost finished the BMW project, bought a Zuki Samuai 4x4 project crawler, gave up the BMWCCA VP spot, developed a color guage display used in the new McClaren MP4-12C GT3 race car, moved the 914 from dads shop to storage, and now starting the floor plan for a new house WITH shop so I can get crackilackin back on the 914. So really, I've just been procrasterbating...
Last month we went on our second anual fall drive for Caffeine and Gasoline ( for you facebookers http://www.facebook.com/#!/pages/Caffiene-and-Gasoline-Tulsa/369311772902 ) and with all the exotics zipping around me I started thinking how fun it would be to have the 914 out here in the middle of it all to see how it stacked up with the subie motor. How frustrating would that be for a Lambo owner to have this irritating little 39 year old 914 right on his azz the whole trip? hehehe, I could almost feel the horns sprouting through my forehead...
So with a lul at the office I have been jumping back into my build research and getting that old excitement back. Plan might be to sell off the BMW to have the instant fundage to dive head first into the 914 again. The Samuai stays because it fills a different driving need!
Pics:
*BMW project in the front, fall drive group last month.
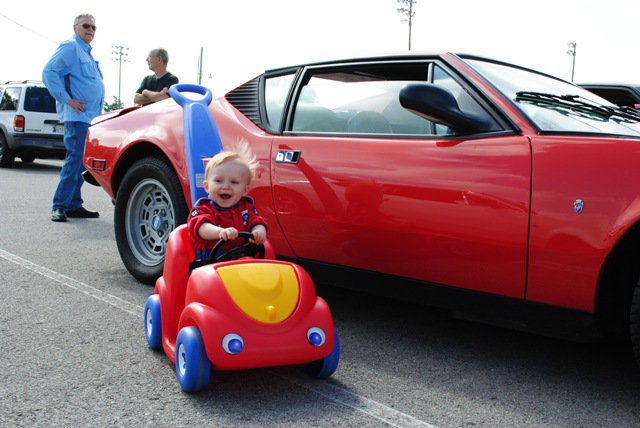
*Lil G in his first car, he's going to be an F1 driver by the way.... he will appreciate the pic with the Pantera one day...
*The zuk in the garage now, getting a motor upgrade and many other goodies, can't leave well enough alone...
Attached thumbnail(s)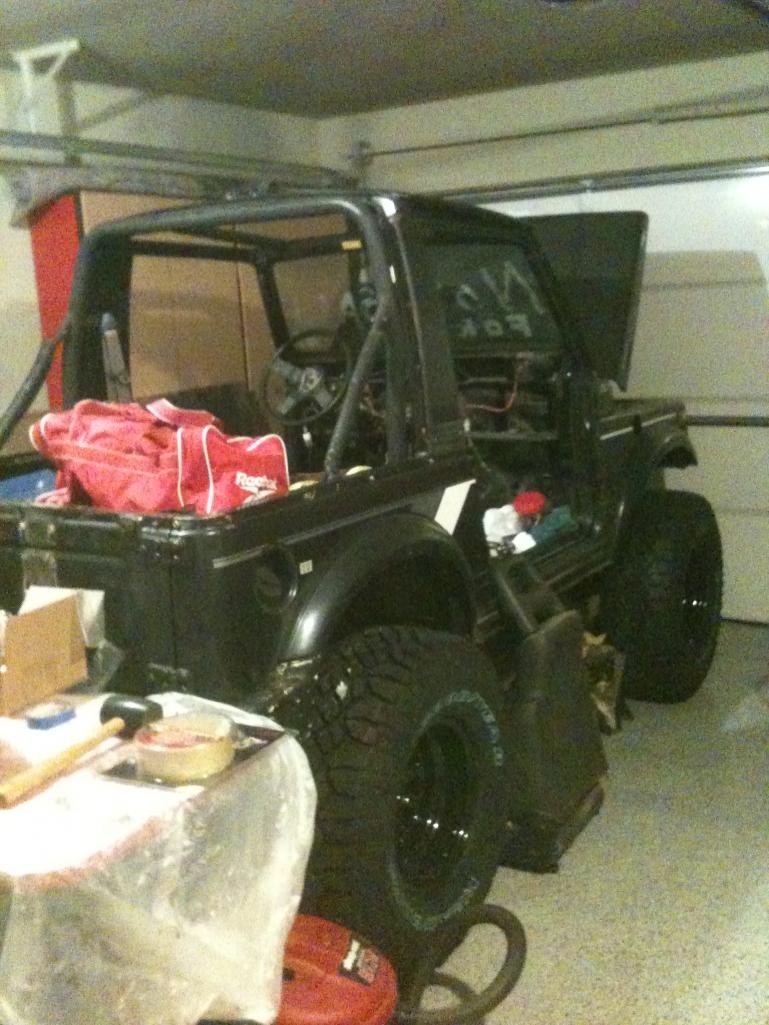
Attached image(s)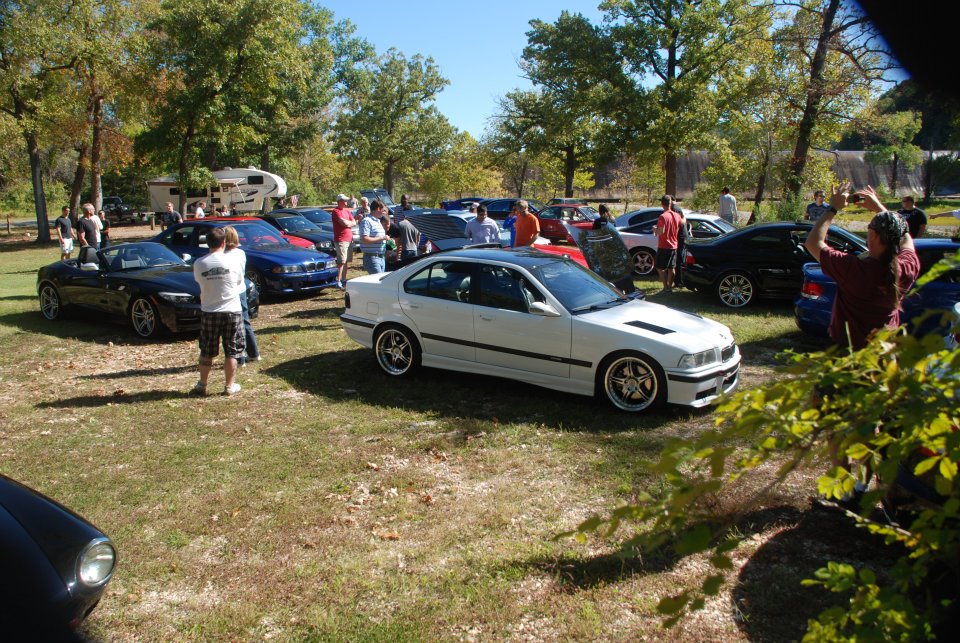
Posted by: ruby914 Mar 2 2014, 01:37 AM
What sup Curt?
That goes for you too Zaney. Resurection BUMP! ![]()
Posted by: 76-914 Mar 2 2014, 10:19 AM
Hey Mike, call 'em out on the slackers thread. 
Posted by: mrdezyne Aug 3 2015, 10:56 AM
This is by far the longest and laziest build in the history of 914's. I DO still have this project believe it or not and it is still in storage waiting on free time and room to finish it up.
My Caffeine and Gasoline club is taking up a lot of my time to manage events and meets but has introduced me to a few other 914 owners in the area like Mike Fugate who is working on his 3rd. Here is our FB page with events and photos, this was one of my buddies doing a hill climb at our "Marble City Mayhem" event in June...
https://www.facebook.com/CandGTulsa?ref=hl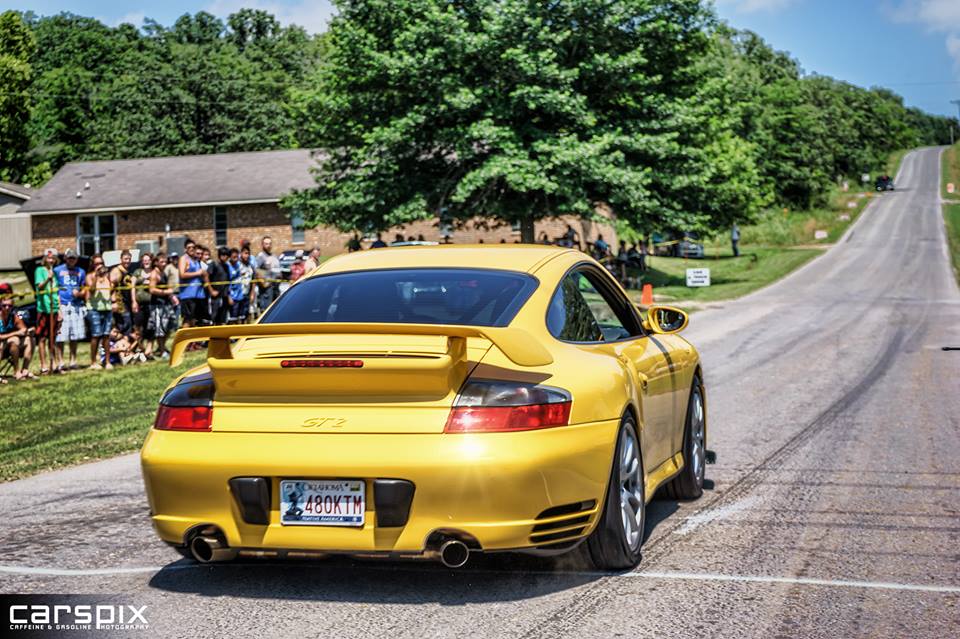
The Samurai is almost finished, and since my last post I've added another P car to the garage...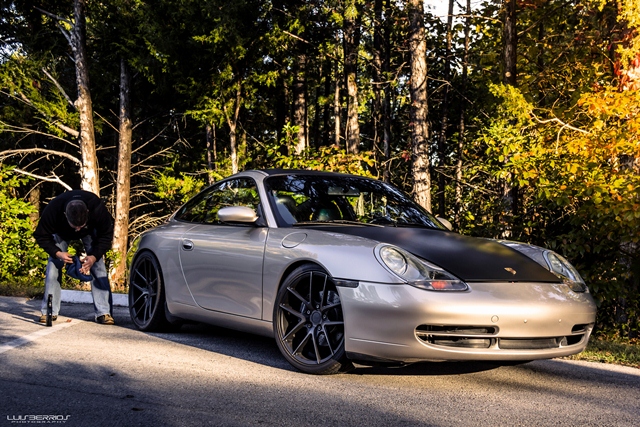
Just this past weekend I did start going through all of my parts stash for the 914 and found I have a lot more finished that I remembered. If I just had the room to get this thing spread out and assembled it could be rolling again under power within 6-9 months.... time and money / money and time... ugh...
Powered by Invision Power Board (http://www.invisionboard.com)
© Invision Power Services (http://www.invisionpower.com)