Printable Version of Topic
Click here to view this topic in its original format
914World.com _ 914World Garage _ New addition - red '74 2.0l
Posted by: watsonrx13 Feb 5 2006, 08:19 AM
Well, I purchased another teener yesterday, red '74 2.0l with center console, front and rear sway bars. A new member, Chris Spence, had the car for sale locally. I looked at the car last weekend and decided I 'needed' another project car to work on. We completed the deal yesterday. I talked with Paul (URY914) and he agreed to help me transport the car from Chris' house to my new shop, thanks again Paul....
The car is drivable, but it's making a 'strange and expensive' knocking noise, so I felt it would be prudent to tow the car, then have an engine 'expert' diagnose the problem.....
Here are the pics....
This is the pre-purchase side shot Chris sent me....
Attached thumbnail(s)
Posted by: watsonrx13 Feb 5 2006, 08:20 AM
Pre-purchase interior
Attached image(s)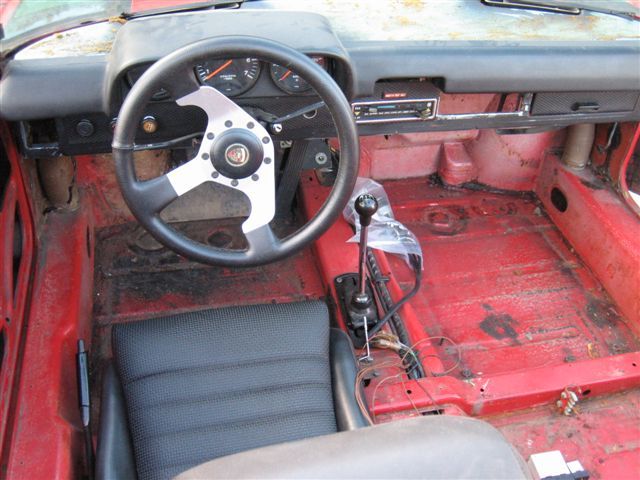
Posted by: watsonrx13 Feb 5 2006, 08:20 AM
front trunk...
Attached image(s)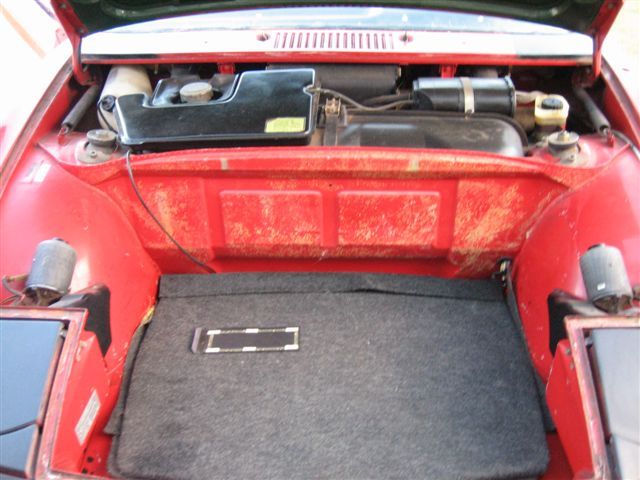
Posted by: watsonrx13 Feb 5 2006, 08:21 AM
longs...
Attached image(s)
Posted by: watsonrx13 Feb 5 2006, 08:21 AM
close up of jack post
Attached image(s)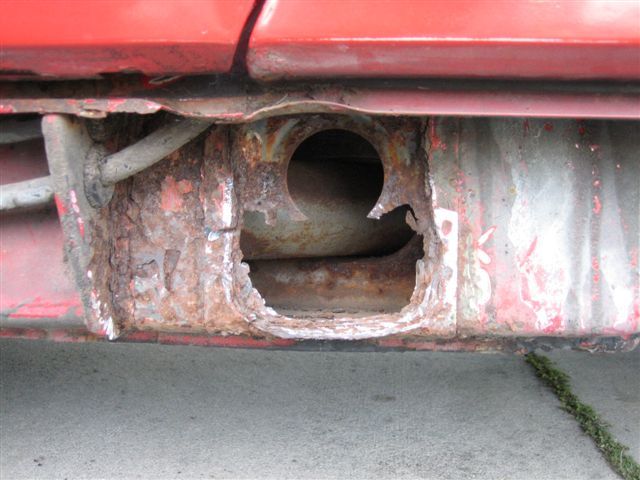
Posted by: watsonrx13 Feb 5 2006, 08:22 AM
preparing to load car onto Paul's trailer...
Attached image(s)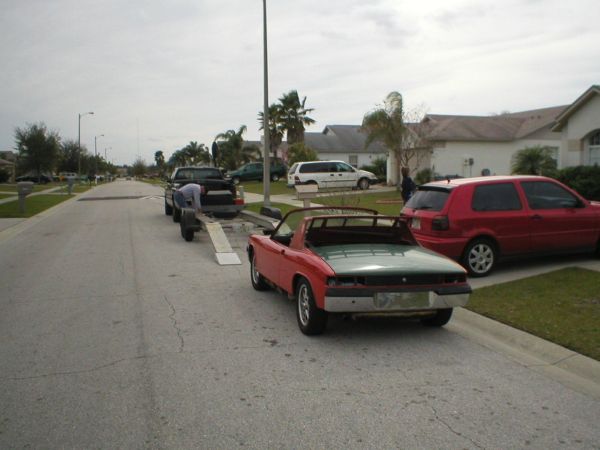
Posted by: watsonrx13 Feb 5 2006, 08:23 AM
This is a shot of Paul and his daughter, Emily, tying the car down on the trailer...
Paul, thanks again for all of your assistance.... 
Attached image(s)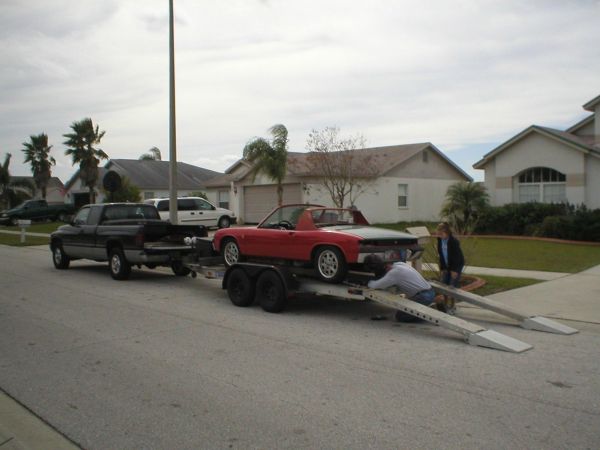
Posted by: Hammy Feb 5 2006, 09:13 AM
cool What do you have planned for it?
Posted by: watsonrx13 Feb 5 2006, 09:32 AM
I'm going to strip the tar from the interior, fix the rust that is found, rebuild the brakes, repaint the car the original color, fix the engine and put it back together. It still have the original FI and I want to keep it. I'm going to try to accomplish the restoration within a year. It will be the twin of my current car, but with FI....
I guess this will be the beginning of the restoration thread.... stayed tuned...
-- Rob
Posted by: stock93 Feb 5 2006, 10:01 AM
Cool! They are just addicting aren't they? I think I enjoy working on them almost as much as driving them. If you want me to listen to that weird knocking noise for you just let me know. I also know from experience what the loose cam gear problem sounds like.
John
Posted by: watsonrx13 Feb 5 2006, 12:02 PM
| QUOTE (stock93 @ Feb 5 2006, 11:01 AM) |
| Cool! They are just addicting aren't they? I think I enjoy working on them almost as much as driving them. If you want me to listen to that weird knocking noise for you just let me know. I also know from experience what the loose cam gear problem sounds like. John |
Yea John, they are addicting.... I agree with you, I enjoy working on them as much as I enjoy driving them....
Whenever you're available on a Sunday, you expertise in diagonizing the knocking will be greately appreciated....
-- Rob
Posted by: stock93 Feb 5 2006, 03:19 PM
I might be able to come look at it after this next tampa breakfast if I make it over there. I start a new part time job on wednesday so I dont know what my schedual will be yet.
John
Posted by: watsonrx13 Feb 20 2006, 05:26 PM
Well, I"ve begun the restoration process. I've removed the hood, front bumper and front wheels.
Attached image(s)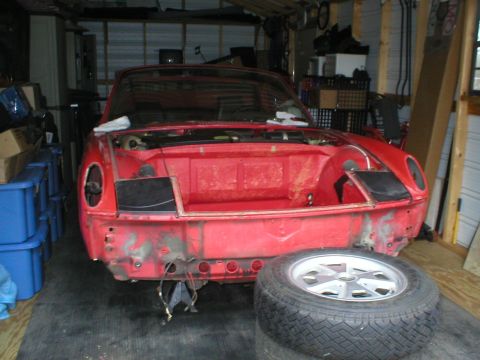
Posted by: watsonrx13 Feb 20 2006, 05:27 PM
Here's a shot of the passenger front fender. It appears to be previously repaired, but poorly. I'll cut this section out and replace with a better one.
Attached image(s)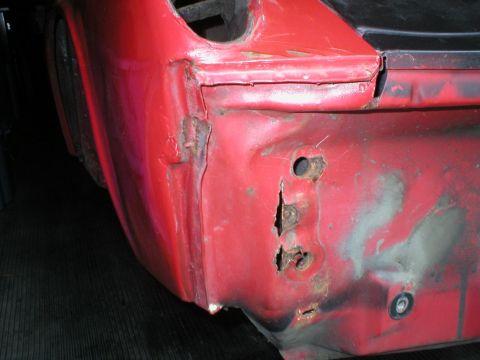
Posted by: watsonrx13 Feb 20 2006, 05:28 PM
sfdfsvv
Attached image(s)
Posted by: watsonrx13 Feb 20 2006, 05:28 PM
I've removed the headlights and the associated buckets.
Attached image(s)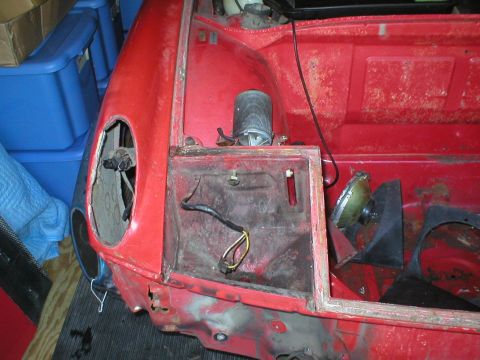
Posted by: watsonrx13 Feb 20 2006, 05:29 PM
Headling buckets, cleaned and painted.
Attached image(s)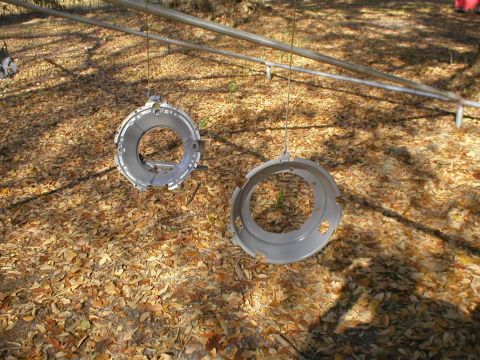
Posted by: smg914 Feb 20 2006, 11:51 PM
| QUOTE (watsonrx13 @ Feb 20 2006, 03:26 PM) |
| Well, I"ve begun the restoration process. I've removed the hood, front bumper and front wheels. |
I like what looks like the original spare wheel and tire. Is that the original spare Continental 165R15 tire?
Posted by: watsonrx13 Mar 5 2006, 06:54 PM
Hey Steve, I checked the tire, it's a 165r15, but not a Continental....
Anyway, I removed the passenger fender. There was up to 1/2" bondo where they tried to hide the damage. I removed all of the bondo and cut the damaged area off. Here's a shot of the fender removed....
Attached image(s)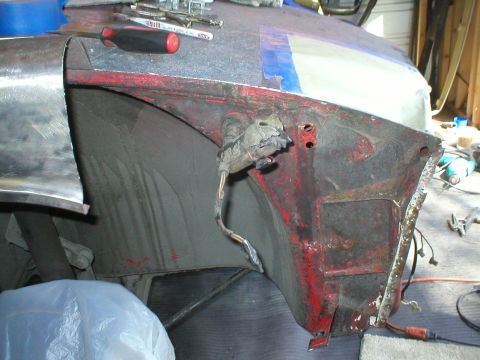
Posted by: watsonrx13 Mar 5 2006, 06:55 PM
Here's another shot...
Attached image(s)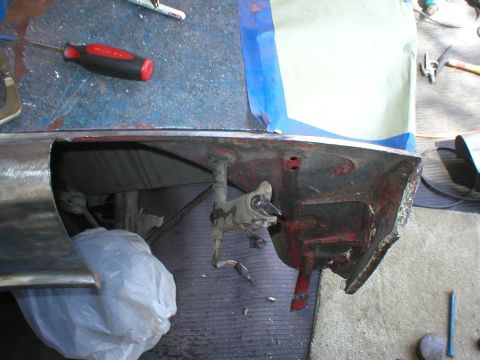
Posted by: watsonrx13 Mar 5 2006, 06:56 PM
And the damaged piece...
Attached image(s)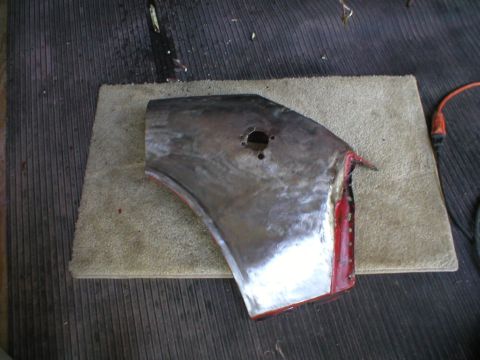
Posted by: Joe Ricard Mar 5 2006, 06:58 PM
Uh Rob, That's not how you put flares on...... 
You are truly a master at that body work stuff. 
Posted by: watsonrx13 Mar 5 2006, 07:00 PM
Thanks Joe, I figured if you can dis-figure your car, I can do the same to mine..... 
Posted by: Joe Ricard Mar 5 2006, 07:06 PM
| QUOTE (watsonrx13 @ Mar 5 2006, 05:00 PM) |
| Thanks Joe, I figured if you can dis-figure your car, I can do the same to mine..... |
Damn that's gonna leave a mark. Wanna race?
Posted by: watsonrx13 Mar 21 2006, 05:46 PM
I removed the fuel tank today. Here's the fuel that was drained from the tank.... not the best
Attached image(s)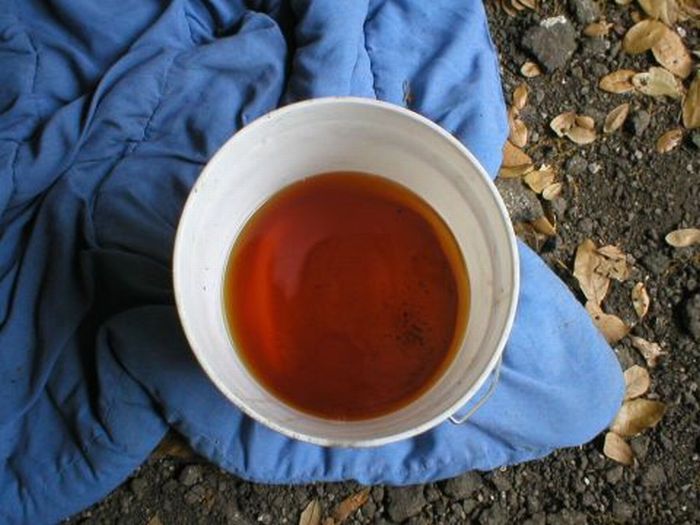
Posted by: watsonrx13 Mar 21 2006, 05:46 PM
Here's what it looks like underneath the tank...
Attached image(s)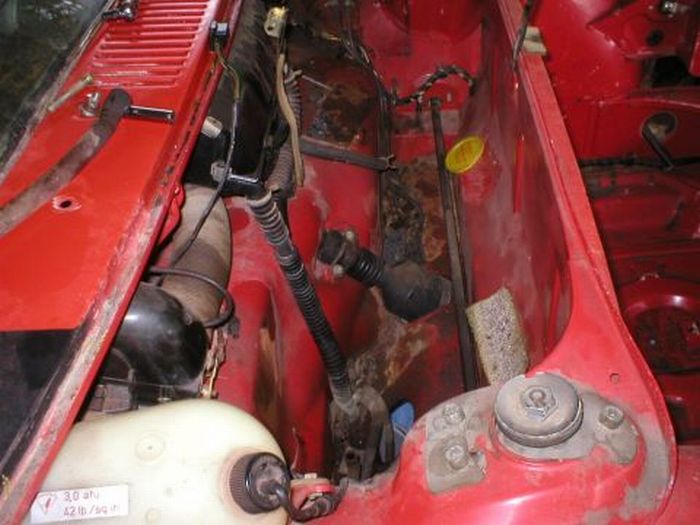
Posted by: watsonrx13 Mar 21 2006, 05:47 PM
Here's another shot...
Attached image(s)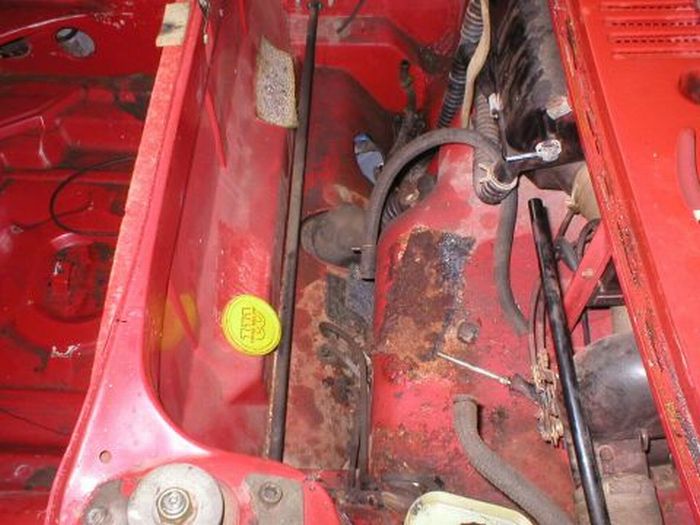
Posted by: watsonrx13 Mar 21 2006, 05:47 PM
Look what I found underneath the tank...
Attached image(s)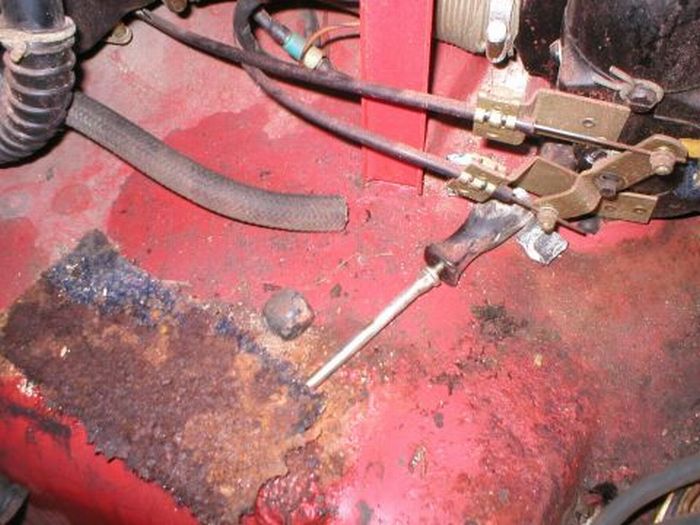
Posted by: watsonrx13 Mar 21 2006, 05:48 PM
Here's a close up. Is this the original screwdriver? BTW, it came apart in 3 sections...
Attached image(s)
Posted by: watsonrx13 Mar 27 2006, 07:40 PM
Well, I began installing the new fender. I worked several hours trimming and fitting before I was ready to position the part. Here's a shot of it in place before welding....
Attached image(s)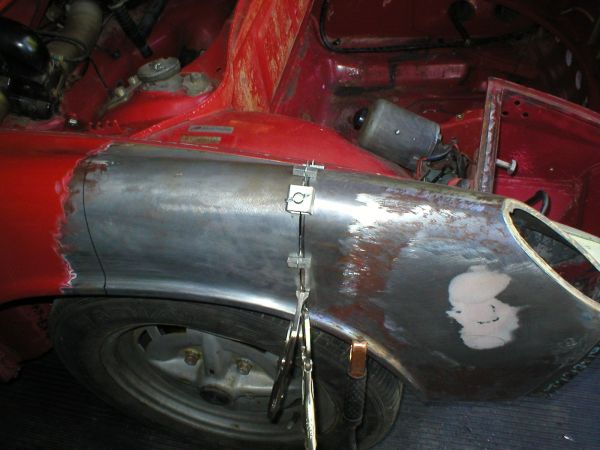
Posted by: watsonrx13 Mar 27 2006, 07:41 PM
Here's the inside attachment...
Attached image(s)
Posted by: watsonrx13 Mar 27 2006, 07:41 PM
Began the welding....
Attached image(s)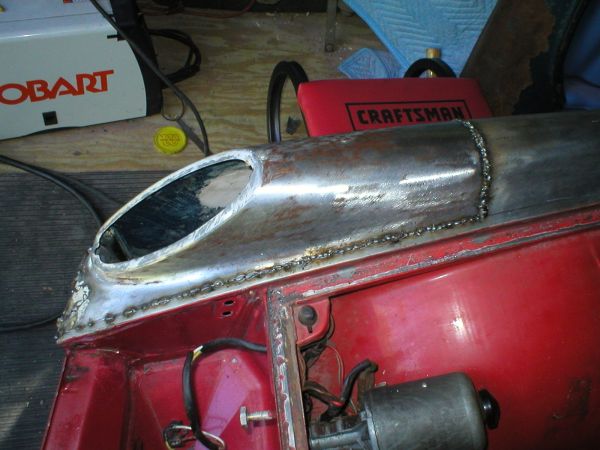
Posted by: watsonrx13 Mar 27 2006, 07:42 PM
I still have more welding, then a LOT of grinding, but I feel pretty good that it's position correctly...
Attached image(s)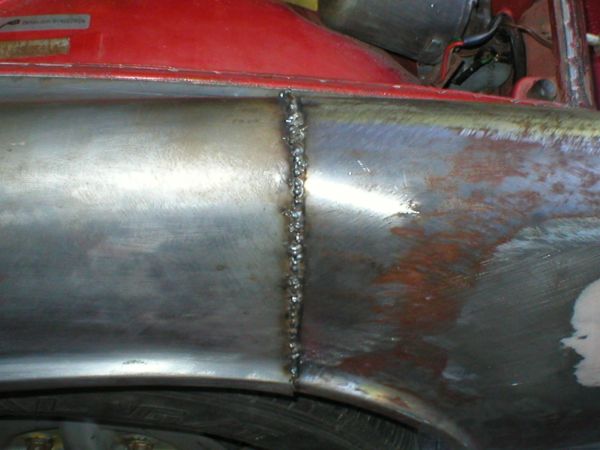
Posted by: jd74914 Mar 27 2006, 07:42 PM
| QUOTE (watsonrx13 @ Mar 21 2006, 06:48 PM) |
| Here's a close up. Is this the original screwdriver? BTW, it came apart in 3 sections... |
I found a screwdriver and wrench under my tank too, weird

Posted by: watsonrx13 Mar 27 2006, 07:45 PM
| QUOTE (jd74914 @ Mar 27 2006, 08:42 PM) | ||
I found a screwdriver and wrench under my tank too, weird |
Yea, I guess it was a lot easier to just 'forget' the screwdriver, then try to remove the tank....
BTW, after cleaning the screwdriver, it turns out to be a Snap-On. I wonder if they would replace it?
-- Rob
Posted by: Joe Ricard Mar 27 2006, 07:59 PM
Damn Rob You sure do weld Purdy.
My turn to whack ya. HOWZ that other car running? no, not the Miata. the other red 914.
Posted by: URY914 Mar 27 2006, 08:07 PM
Rob,
Better check your tank. It looks like part of it was left behind on that shelf that it sits on. Mine was the same was. Rusted out right were that felt pad is. I got a pretty good tank you can have if you need it.
P
Posted by: Joe Ricard Mar 27 2006, 08:26 PM
Paul if you had any metal on your car you could trade Rob some spiffy welding for some fancy carb tuning. 


Posted by: watsonrx13 Apr 2 2006, 05:44 PM
Ground down the welds, added several thin layers of bondo and a single layer of spot putty. This should hold it until I get to prime, then paint it. I'll prime it with etch primer soon. BTW, the bondo took most of the day. Bondo, sand, repeat as needed....
Attached image(s)
Posted by: URY914 Apr 2 2006, 05:47 PM
Nice job, Rob. 
Posted by: watsonrx13 Nov 5 2006, 05:05 PM
Well, after a very HOT summer, dropping the front suspension and weeks of prep work, I finally added a single primer coat....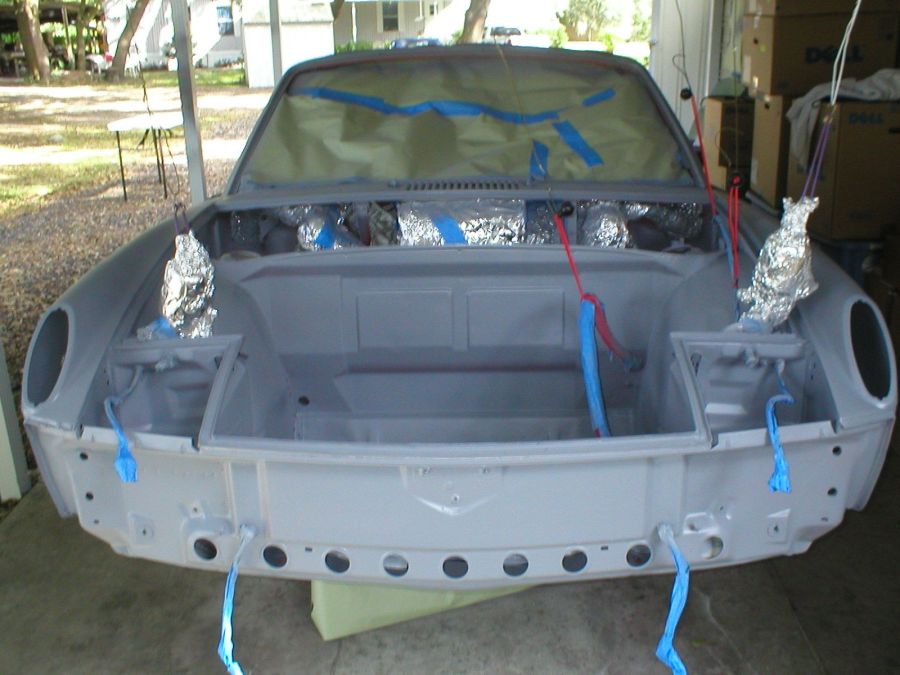

Posted by: VegasRacer Nov 5 2006, 05:20 PM
Lookin' Good Rob. 
Posted by: watsonrx13 Nov 5 2006, 05:25 PM
Thanks John. It was great seeing you again, meeting Felix and Ed....
Man, I'm so tired from the trip, but it was definately worth it....
-- Rob
Posted by: watsonrx13 Dec 10 2006, 07:58 PM
Added paint to the front section....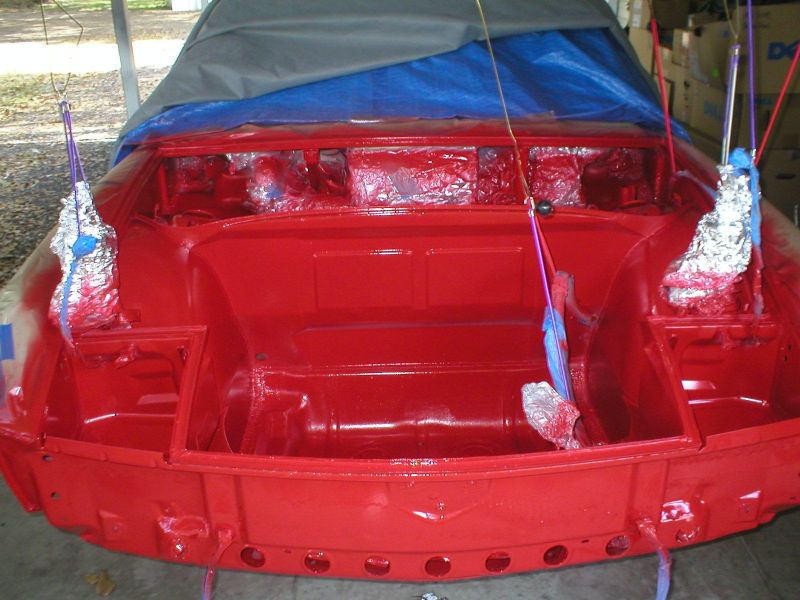
Posted by: watsonrx13 Dec 10 2006, 07:59 PM
xxx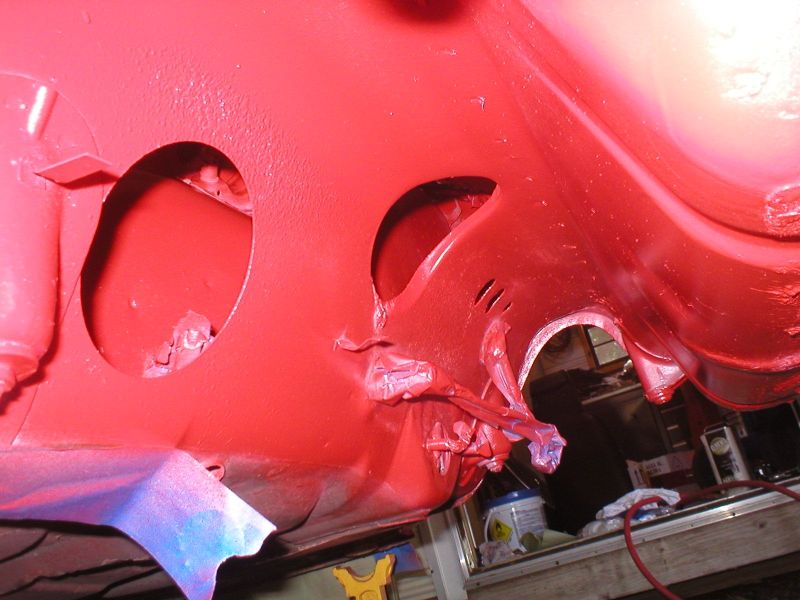
Posted by: watsonrx13 Dec 31 2006, 05:17 PM
I've reinstalled the front suspension...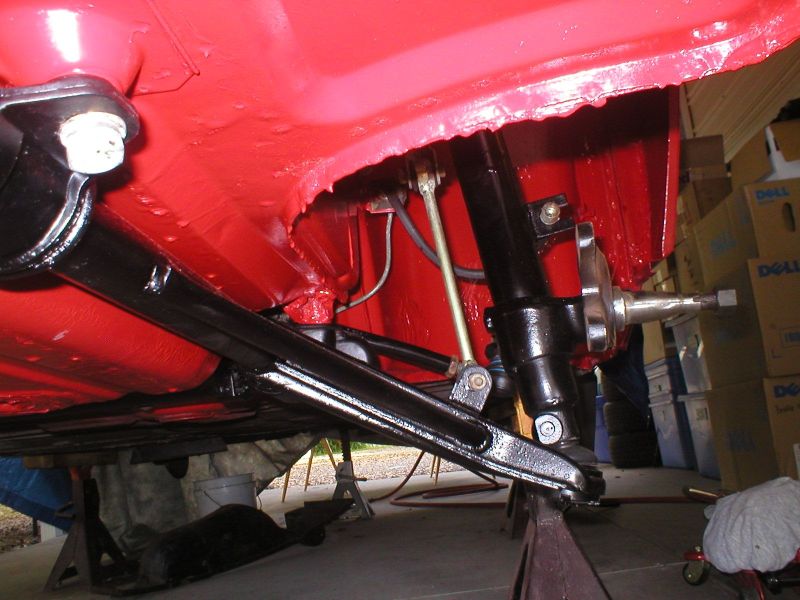
and the front brakes, less the calipers... I'll be sending the calipers to Eric for a rebuild.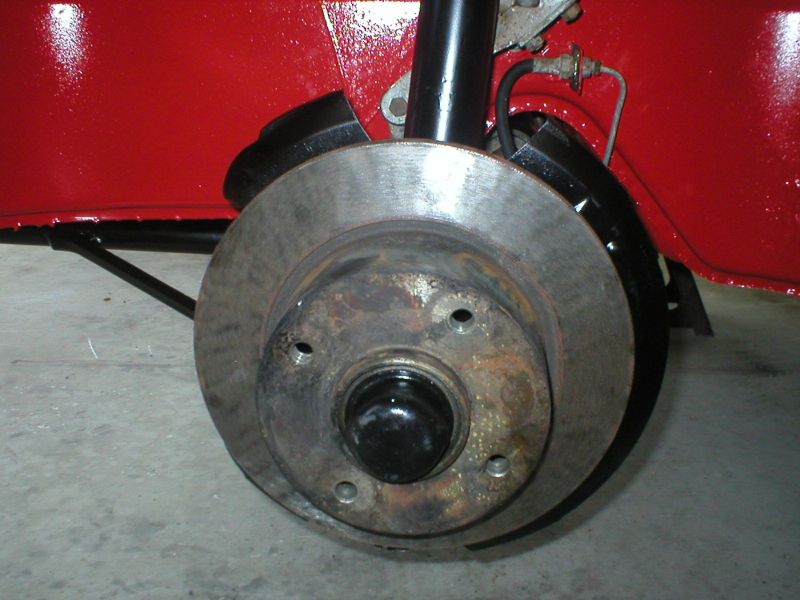
-- Rob
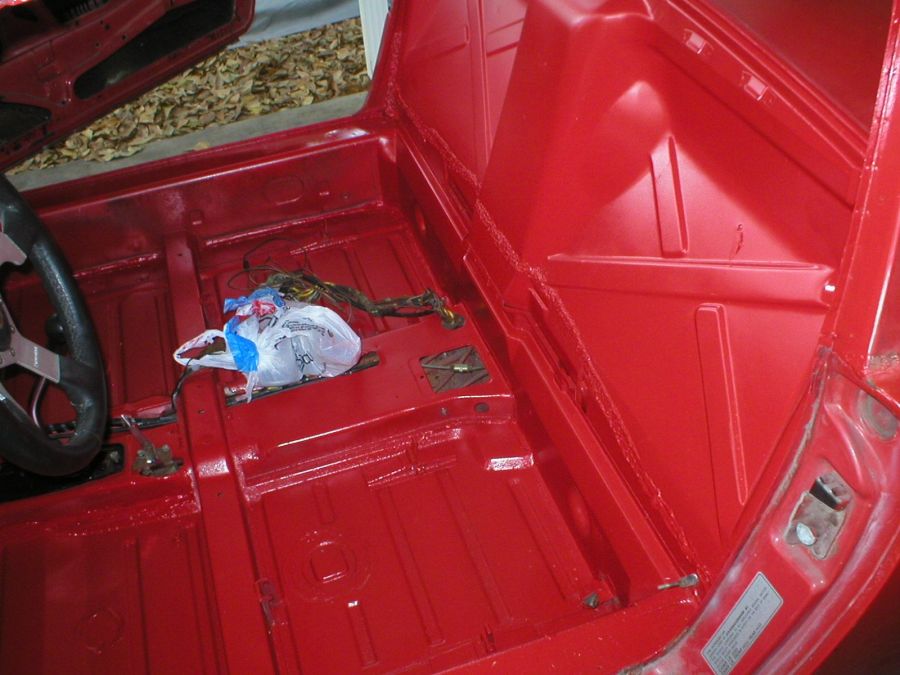
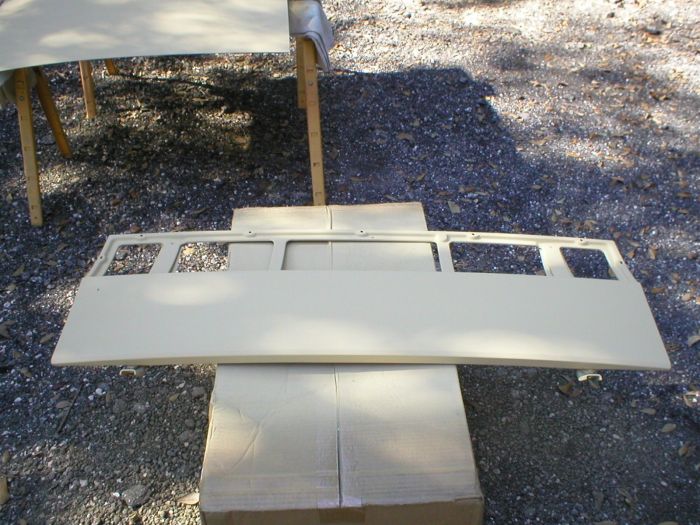
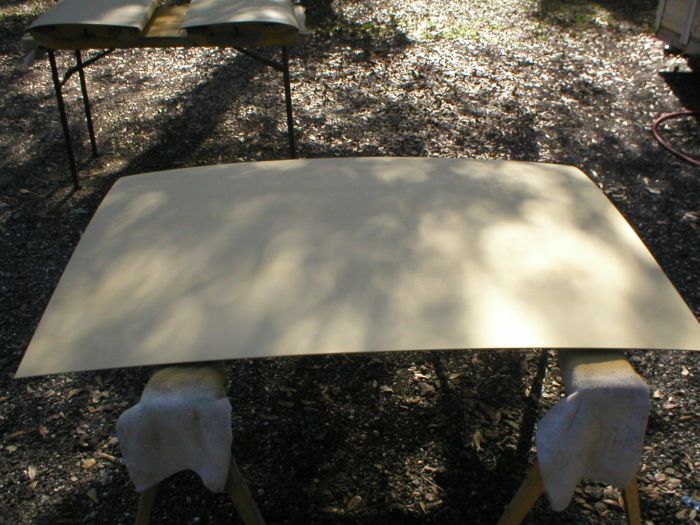
Posted by: watsonrx13 Jan 7 2007, 03:51 PM
Worked on the car again this weekend. It was a very productive one, too. I began working on the interior. I began by removing the tar on the floor and the glue from the rear firewall. After removing the seam sealer in the corner of the floor, I found a section behind the passenger seat had rusted out.
Here's the before shot...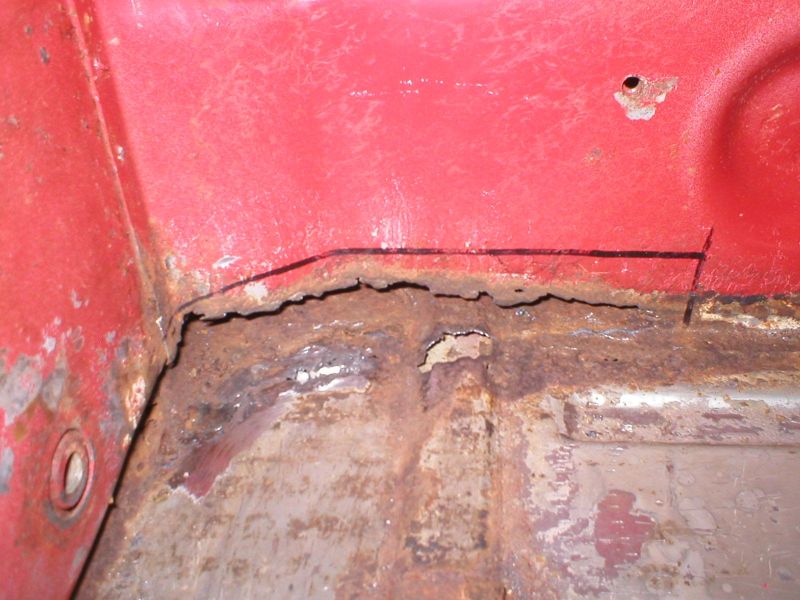
Here's the batch that I created...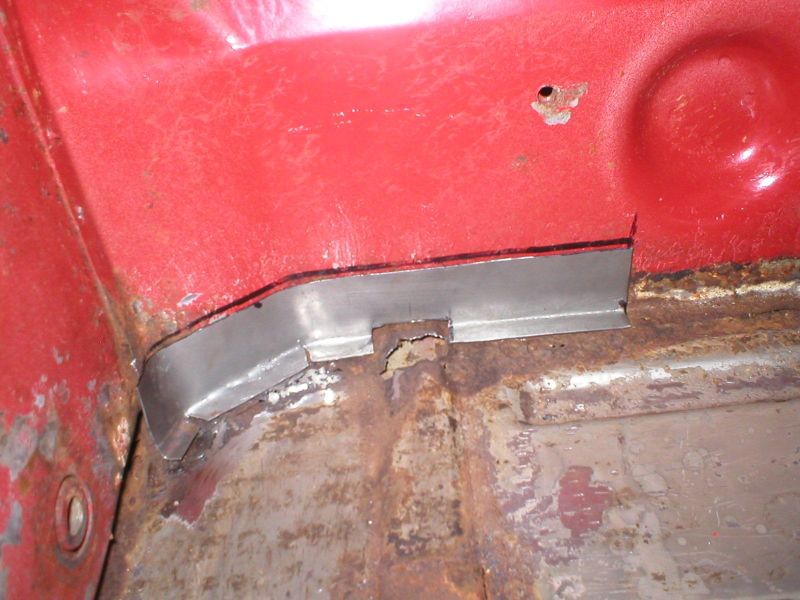
After cutting, fitting, welding, bondoing, spraying primer, here's the final piece... after about 6 hours...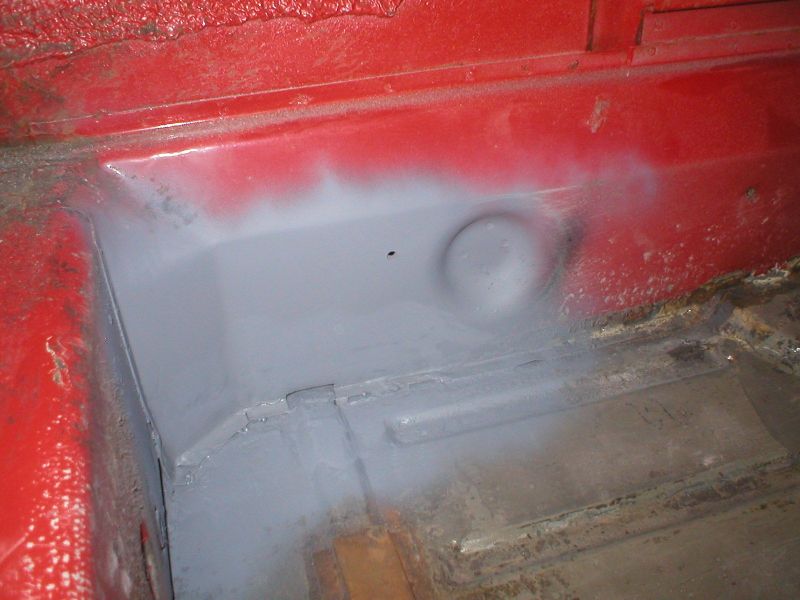
Posted by: watsonrx13 Jan 14 2007, 03:48 PM
Installed the fuel tank...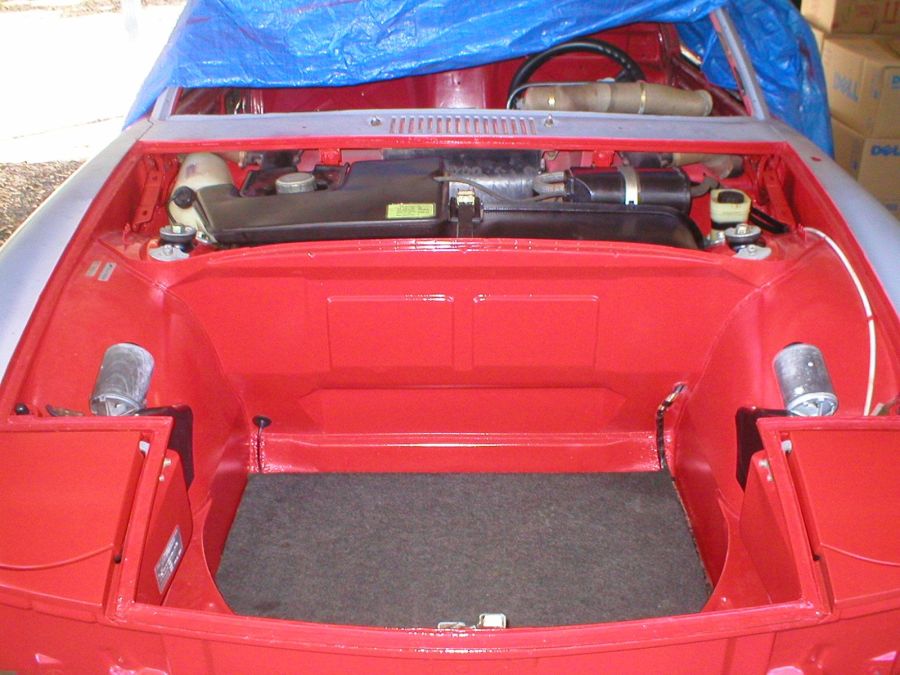
Installed and adjusted the headlights...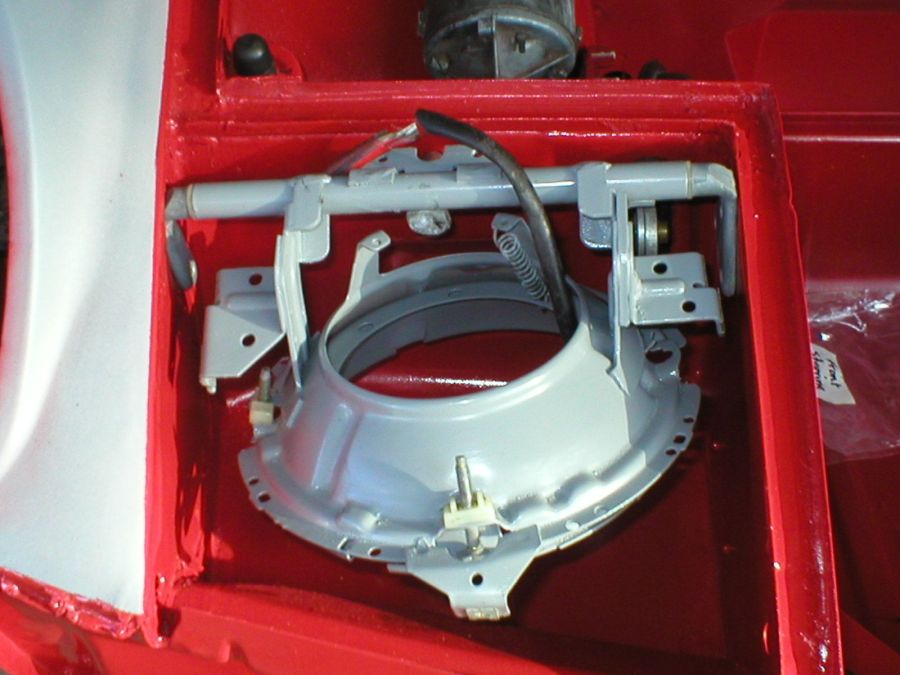
...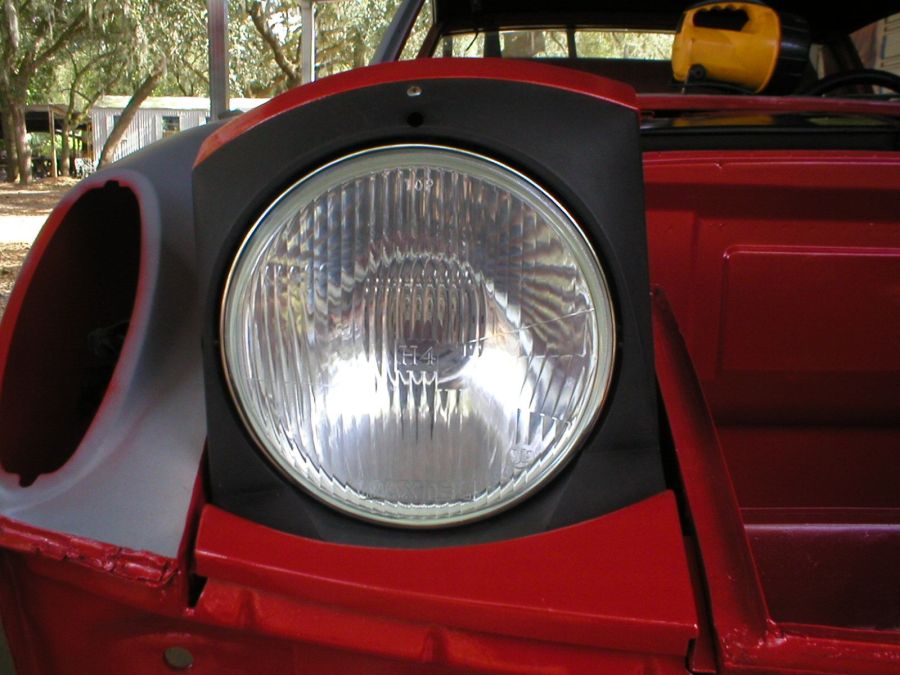
-- Rob
Posted by: watsonrx13 Jan 15 2007, 06:07 PM
Installed the front trunk....
BTW, I still have to do the final adjustment, but I'll work on that when I do the outside body work...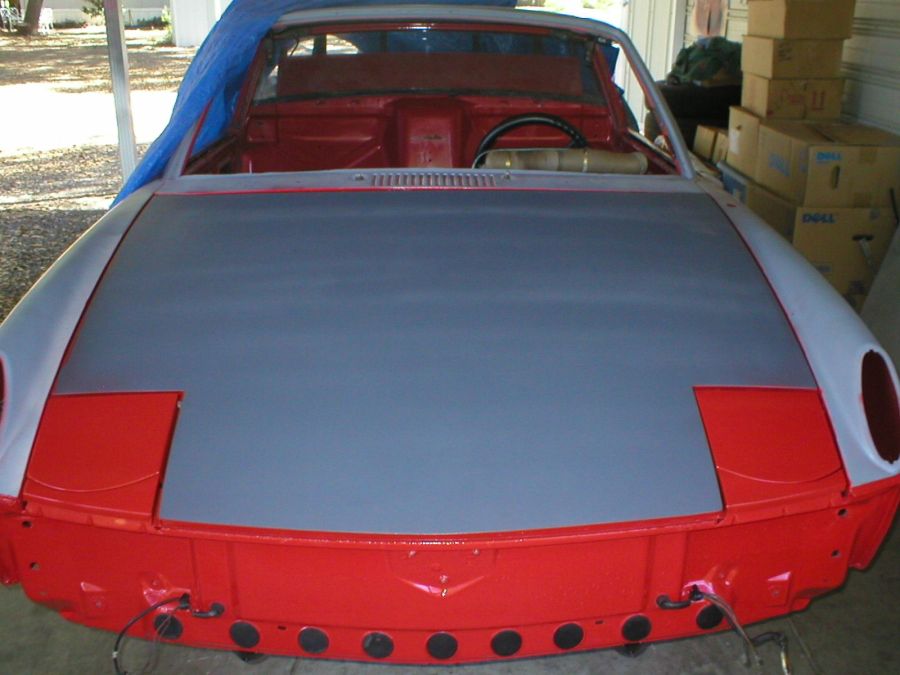
And, installed the horns...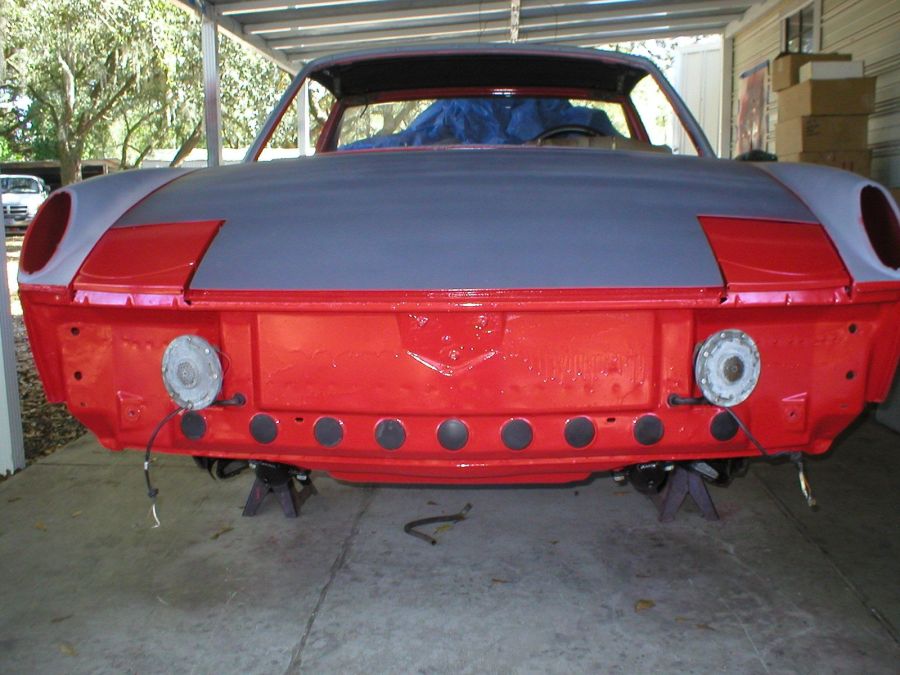
-- Rob
Posted by: mills914/s Jan 16 2007, 01:29 AM
Rob your the MAN....You make it look so easy.....
Posted by: Joe Ricard Jan 16 2007, 05:50 AM
Nice job Rob. Ya know they come in other colors than RED.
Posted by: watsonrx13 Jan 21 2007, 05:14 PM
Well, this weekend I removed pedal cluster and the sound-deading on the front section of the driver's side. When I removed the tar and seam sealer I found this area rusted out...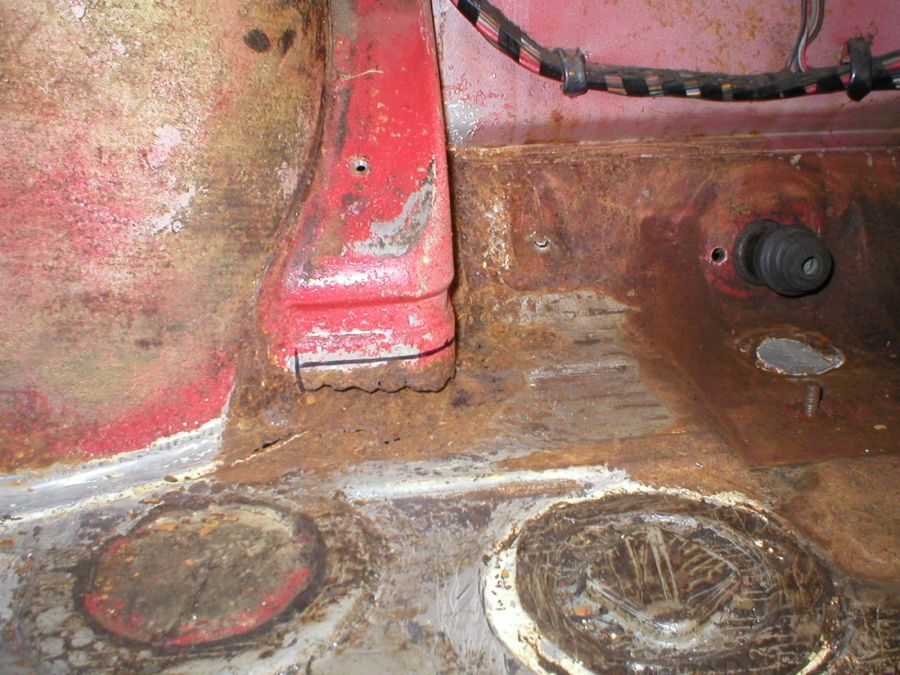
This is the patch I created...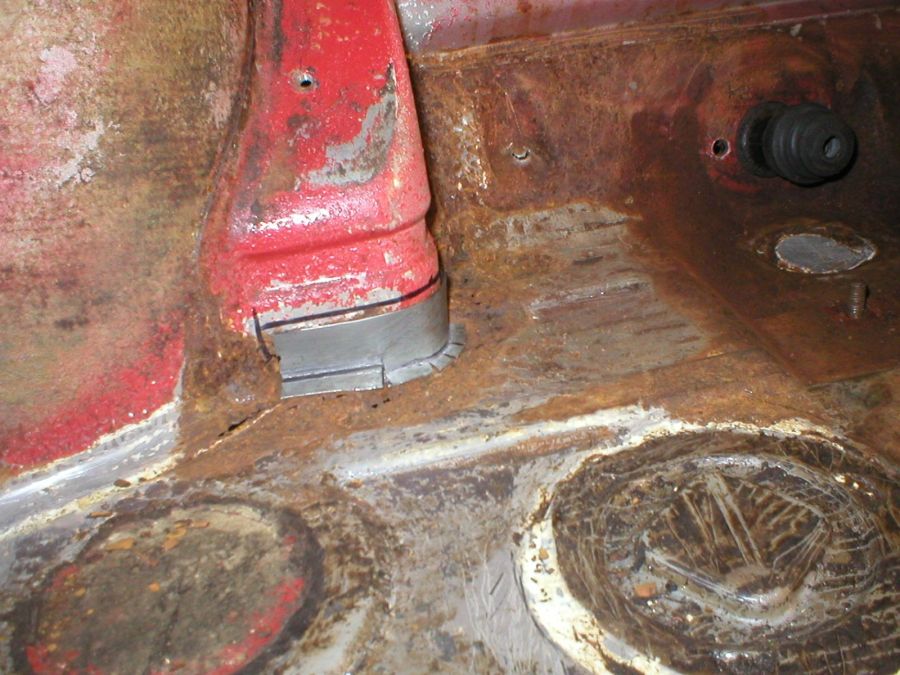
Posted by: watsonrx13 Jan 21 2007, 05:15 PM
After I cut out the rust, welded the patch in, cleaned, primered and seam sealed, this is the results...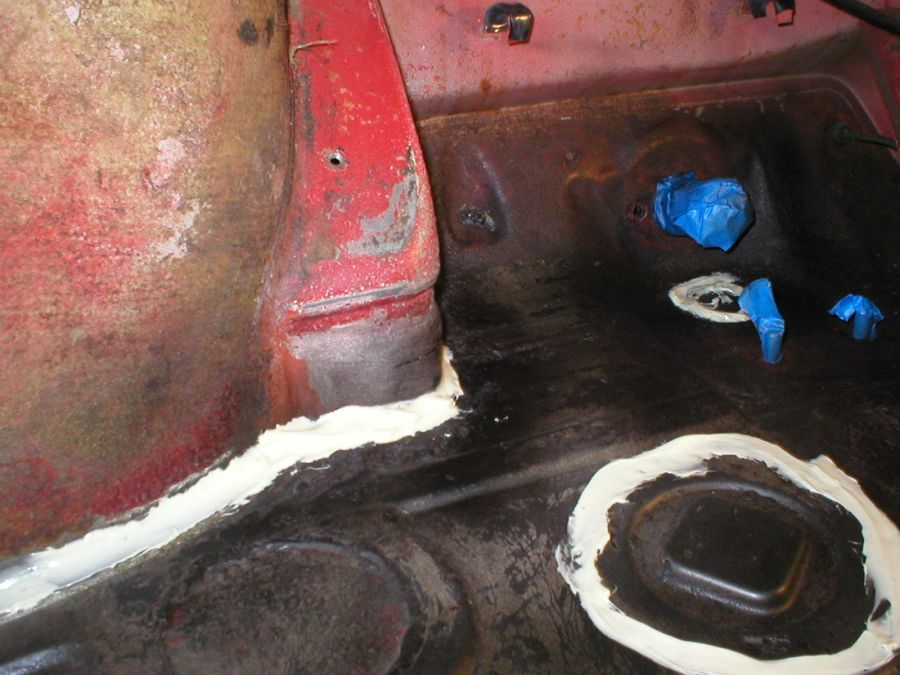
-- Rob
Posted by: shoguneagle Feb 11 2007, 05:22 PM
Great job!! I really like how you are approaching each part of the total project and getting control/finishing it.
Very nice job.
Will follow closely on the body work.
Steve Hurt
Posted by: solex Feb 11 2007, 08:13 PM

Great job!! I really like how you are approaching each part of the total project and getting control/finishing it.
Very nice job.
Will follow closely on the body work.
Steve Hurt
I have to agree with Steve, I like your approach, I'm doing something similar with everything else except the body/rust work. One day I will tackle the body work hopefully things will go as smoothly as you make it appear.
Great work and thank you for keeping us up to date..
Dan
Posted by: watsonrx13 Mar 2 2007, 05:21 PM
More progress... After a cold spell, vacation, wet weather, I was finally able to paint the floorboard and the rear firewall. With this painted, I'm now able to begin installing the interior parts. 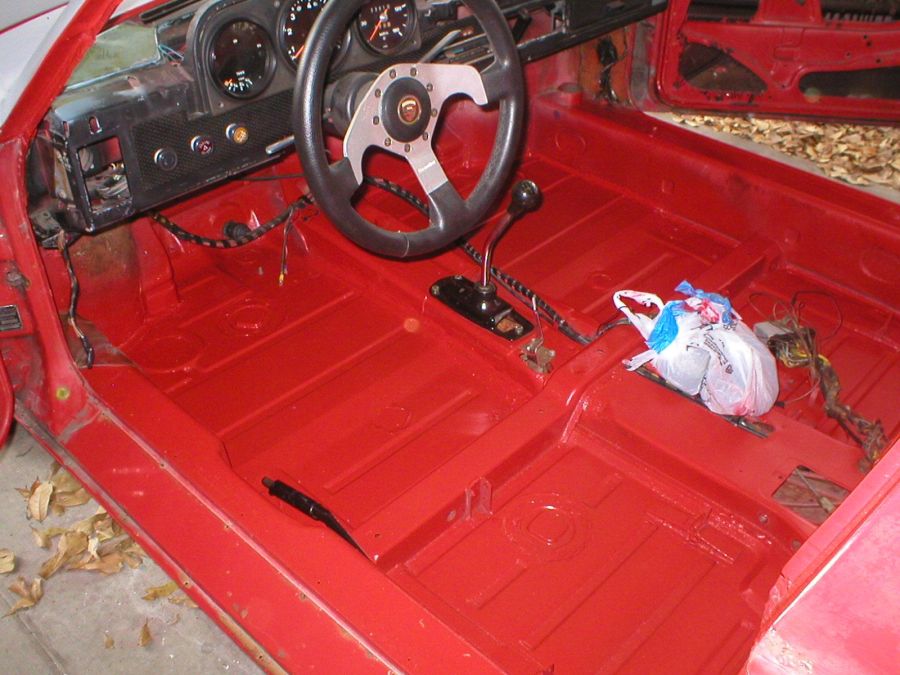
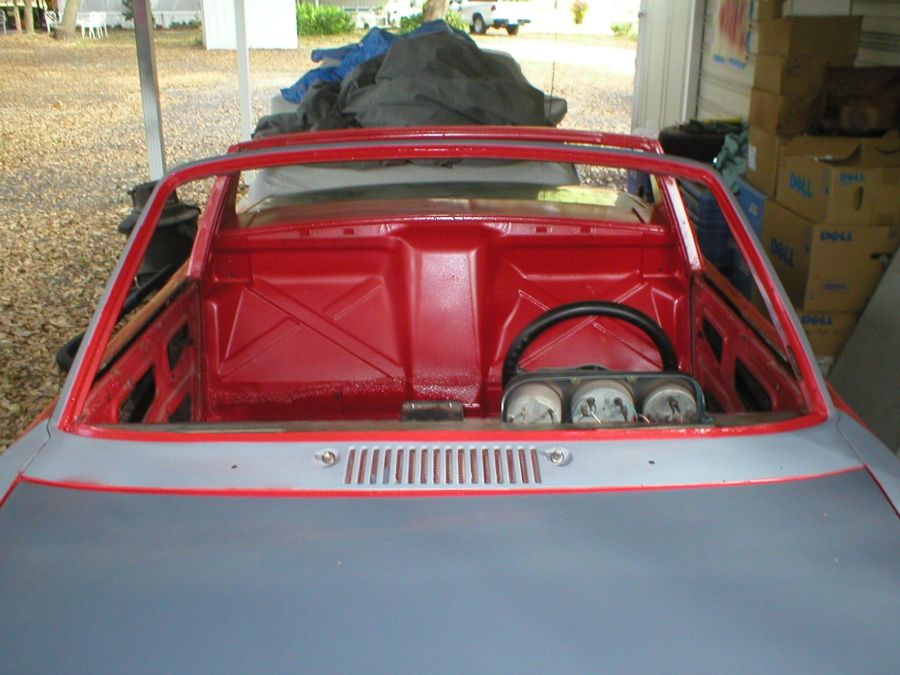
BTW, if you check my signature, it will take you to my website for more detailed pictures and descriptions...
-- Rob
Posted by: watsonrx13 Mar 21 2007, 04:50 PM
Well, I've started installing the interior...
I've installed the vinyl, carpet, back pad, center console, seats, rear window....
I still have more to do, but thought I'd give everyone an update...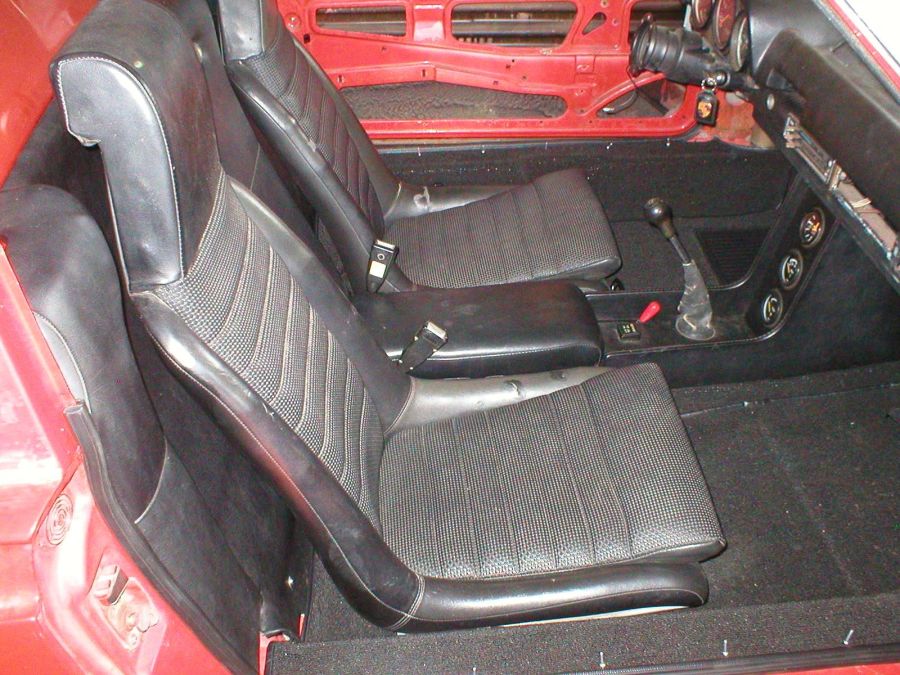
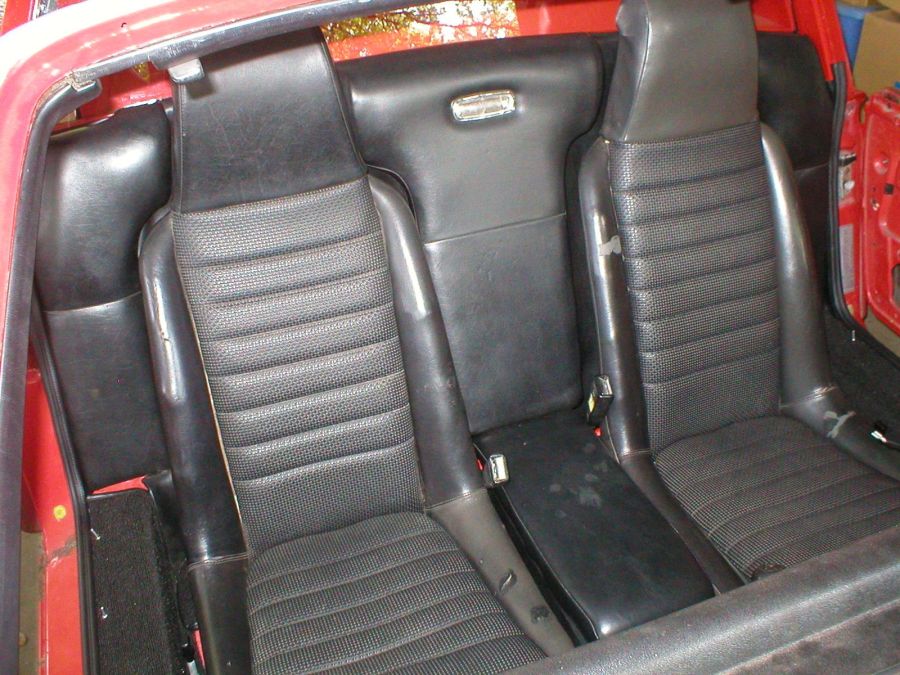
-- Rob
Posted by: watsonrx13 Mar 21 2007, 04:55 PM
I also installed a piece that will increase the value of the car by $1000.... 
Posted by: watsonrx13 Mar 21 2007, 04:56 PM
And here's a shot of it installed.... 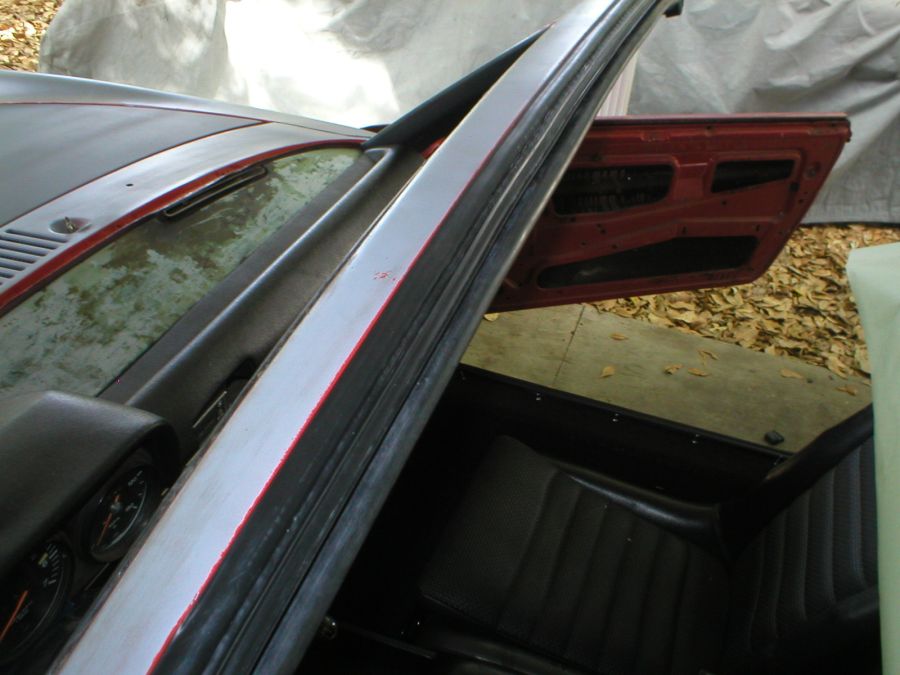
-- Rob
Posted by: watsonrx13 Oct 1 2007, 05:11 AM
I forgot to add a post when I installed the dash vinyl back in March. Here's the http://www.914world.com/bbs2/index.php?showtopic=69067 to the post showing the installation and here's what it looks like installed...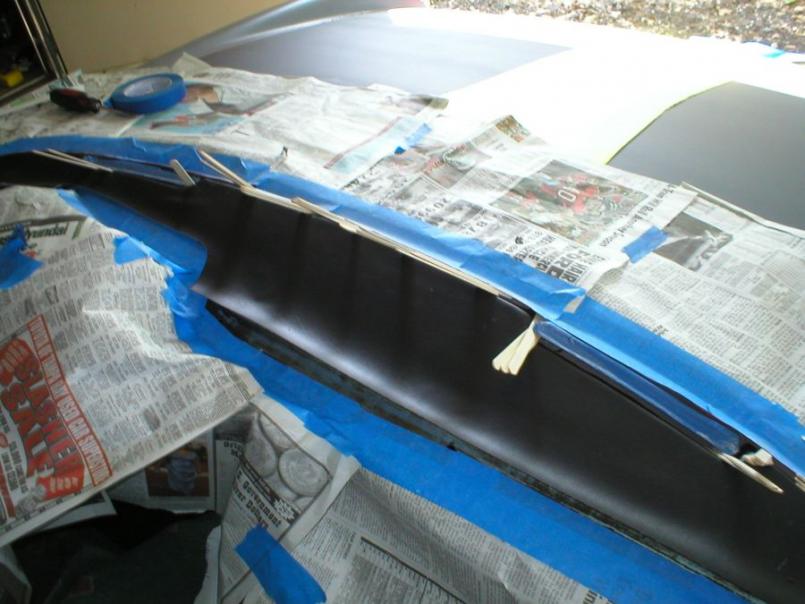
-- Rob
Posted by: watsonrx13 Oct 1 2007, 05:16 AM
Well, after getting my first project completed....  and surviving a very hot summer, I've gone back to working on this car...
Here's the http://www.914world.com/bbs2/index.php?showtopic=76624 to the post showing how I installed the rear trunk floor...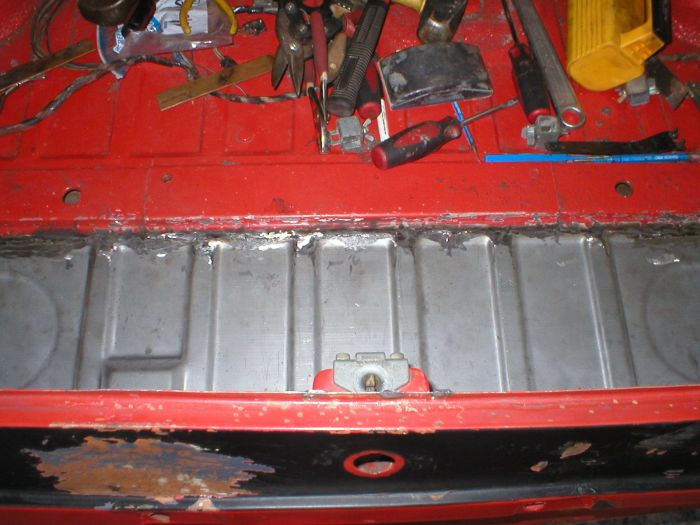
-- Rob
Posted by: thomasotten Oct 1 2007, 07:44 AM
I like your project... we'd be budds if you lived closer!
Posted by: watsonrx13 Oct 7 2007, 01:10 PM
Thanks Thomas.... good luck on your project... 
Trunk has been primered, now all I have to do is paint it...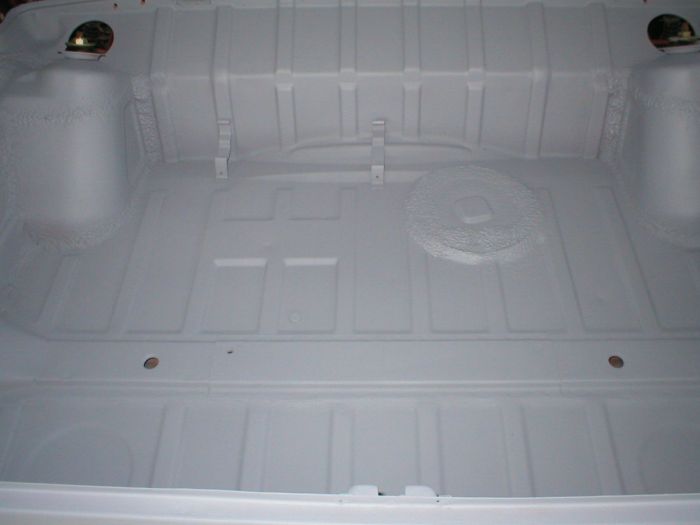
-- Rob
Posted by: watsonrx13 Oct 21 2007, 06:32 PM
I spent the last couple of weeks prepping the car and was finally able to paint it with primer this weekend. Man, it takes me several hours to tape this car... Anyway, here's the after pics....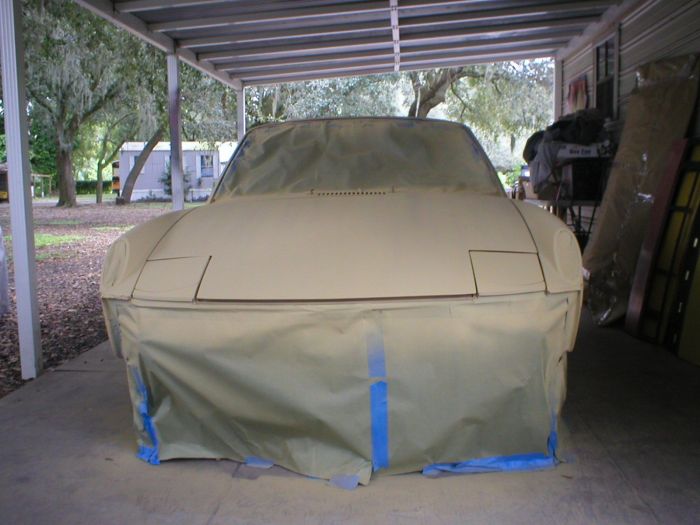
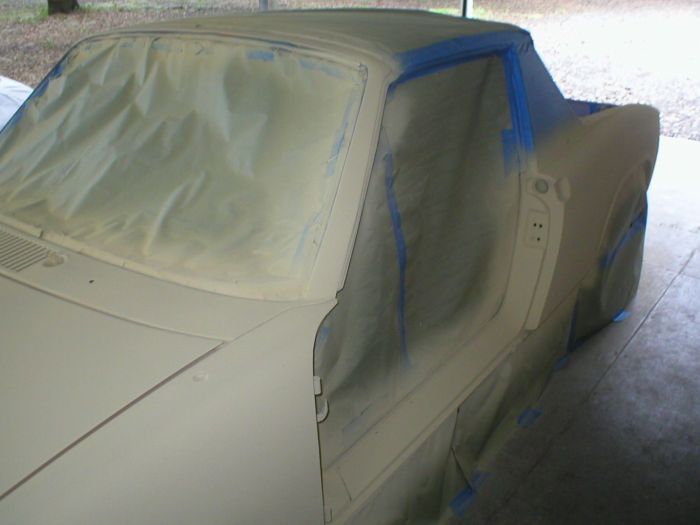
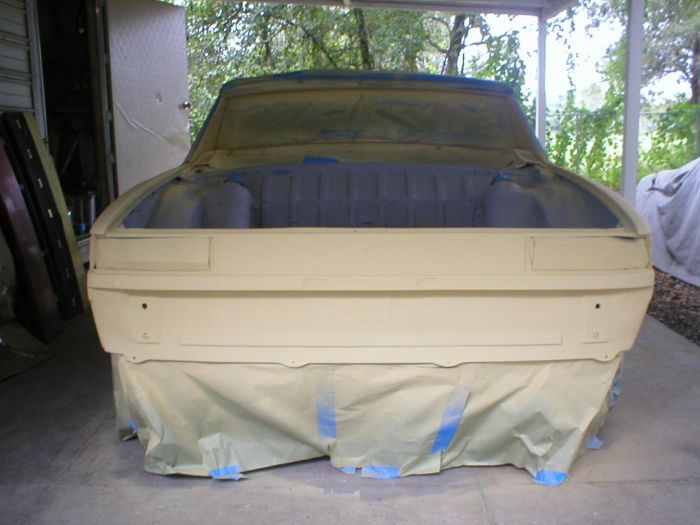
I'm soooo tired from this weekend. I'm popping open several Sam Adam's Octoberfest and relaxing tonight... 
-- Rob
Posted by: Joe Ricard Oct 22 2007, 12:24 PM
Are you doing the painting too?
Be prepared for lots of sanding as this is what makes a decent paint job into a spectacular one.
Posted by: watsonrx13 Nov 11 2007, 03:24 PM
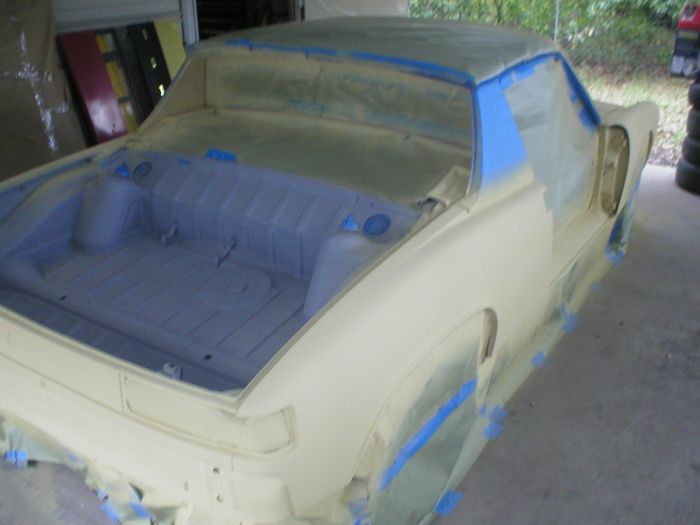
After a couple of weeks of prepping the doors, engine lid and rear trunk lid, I was able to lay the first couple of layers of primer on them. I still need to do some more sanding, then a light couple of layers of reduced primer before I can have them ready for paint...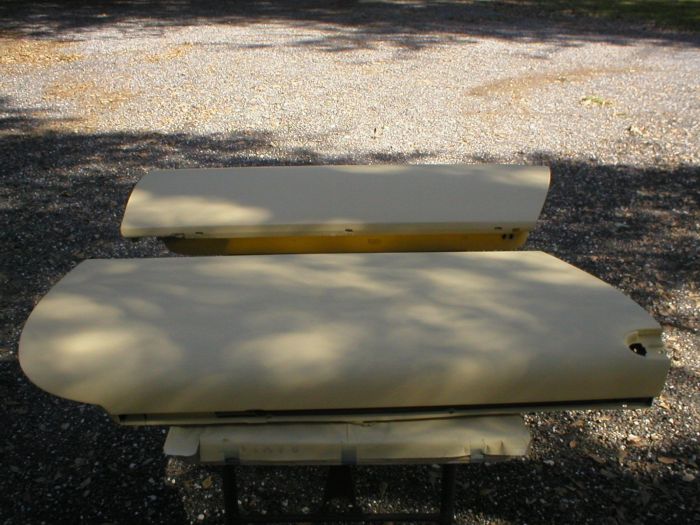
-- Rob
Posted by: stateofidleness Nov 11 2007, 05:18 PM
id like to steal that steering wheel from you 
car looks great, floorboards look awesome!
i noticed the wiring harness stayed in, so how did you paint with it in? just curious as i will be doing this soon as well and dont want to remove the wiring.
Posted by: watsonrx13 Nov 11 2007, 07:53 PM
id like to steal that steering wheel from you
car looks great, floorboards look awesome!
i noticed the wiring harness stayed in, so how did you paint with it in? just curious as i will be doing this soon as well and dont want to remove the wiring.
Thanks for the compliments....

Here's a http://www.tampabay914.com/7491420070304.html on my website that shows the center section painted. I used a plastic wiring loom and aluminum foil to protect the wires and small sections I didn't want to paint...
-- Rob
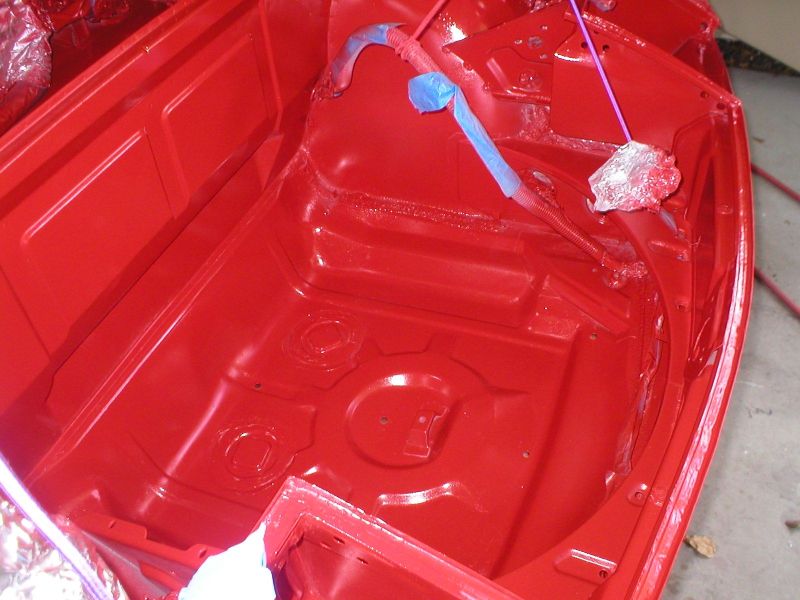
Posted by: watsonrx13 Nov 26 2007, 03:10 PM
Well.... I painted the car this weekend.... I decided to paint it with single stage acrylic/enamel, also the original color, bahia red...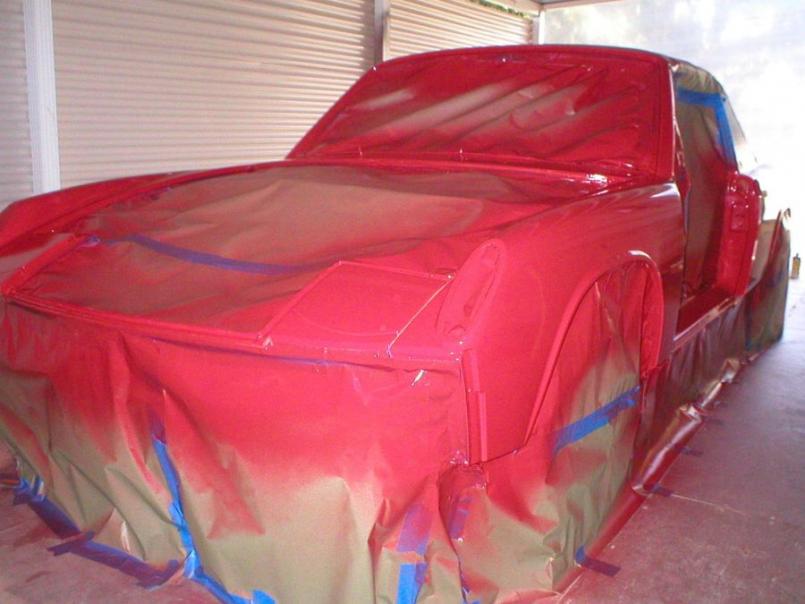
-- Rob
Posted by: watsonrx13 Jan 30 2008, 07:10 PM
Well, I've finally gotten back to working on the car. After the paint cured, I buffed it out and installed the hardware for the rear trunk.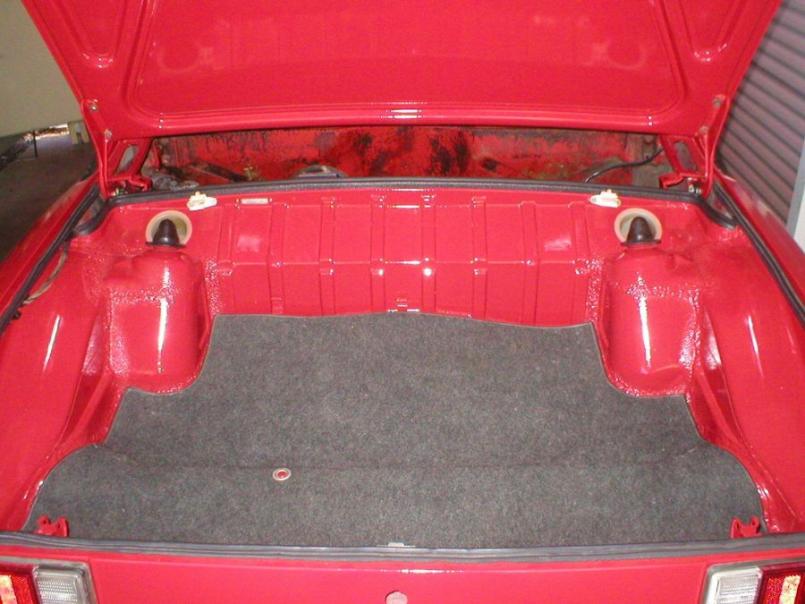
And the rear trunk lid and rear tail lights...
-- Rob
Posted by: Root_Werks Jan 30 2008, 09:01 PM
WOW! Nice work! 
Posted by: jd74914 Jan 30 2008, 11:07 PM
It looks great Rob.
Posted by: rhodyguy Jan 31 2008, 08:26 AM
super. looks great.
k
Posted by: watsonrx13 Feb 9 2008, 02:10 PM
Thanks for the compliments everyone....
I finished installing the rear valance, bumper and rear trunk lock...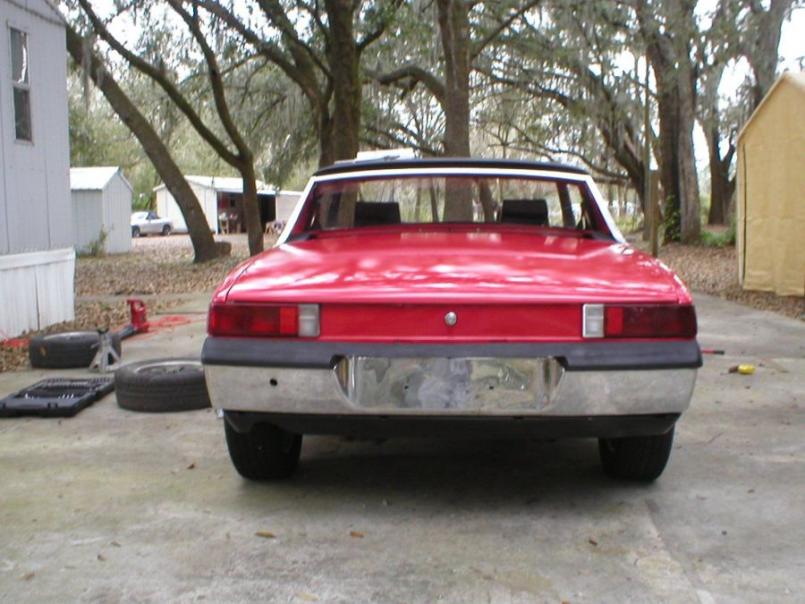
I also completed installing the interior, after I took some of it apart to paint the car. Here's a view of the seats.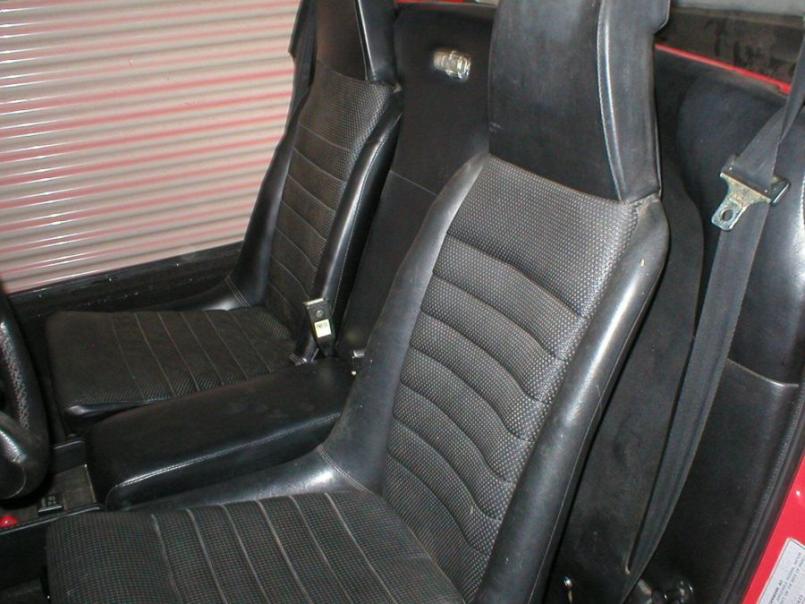
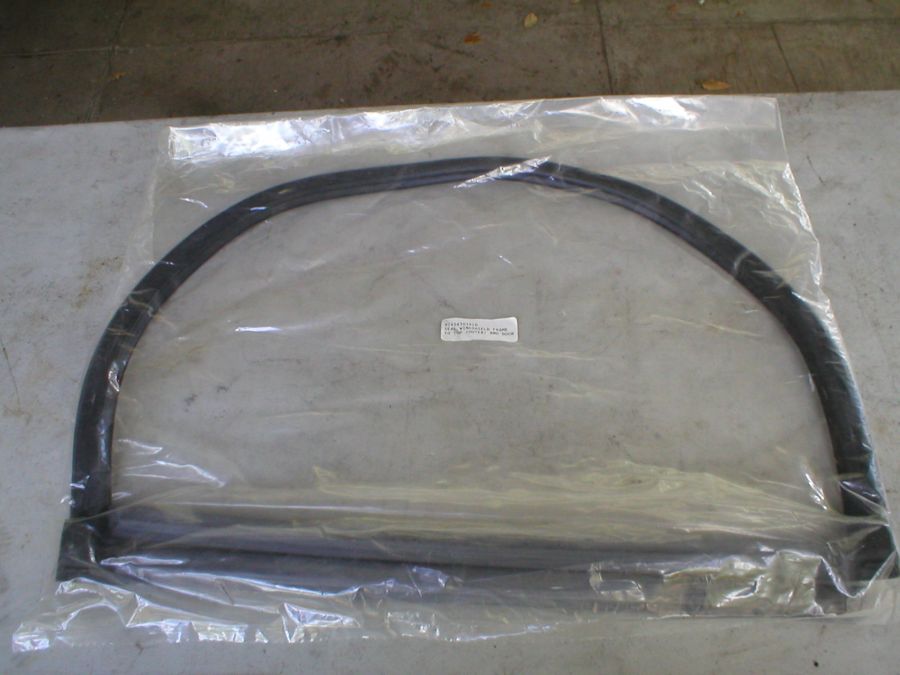
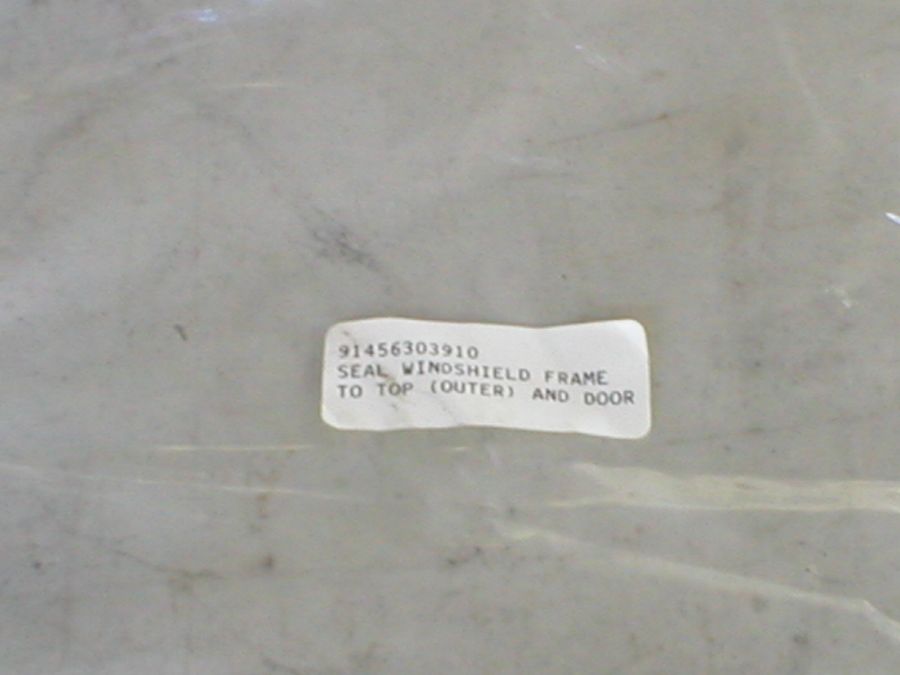
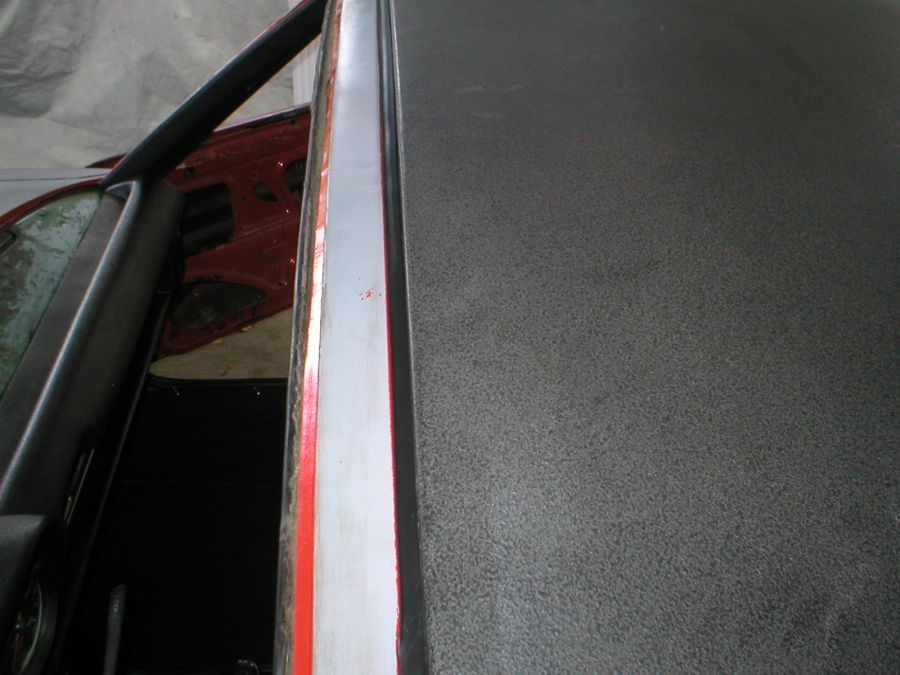
And here's the dash. I still have to wire the speakers, install the sun visors and have a professional install the windshield...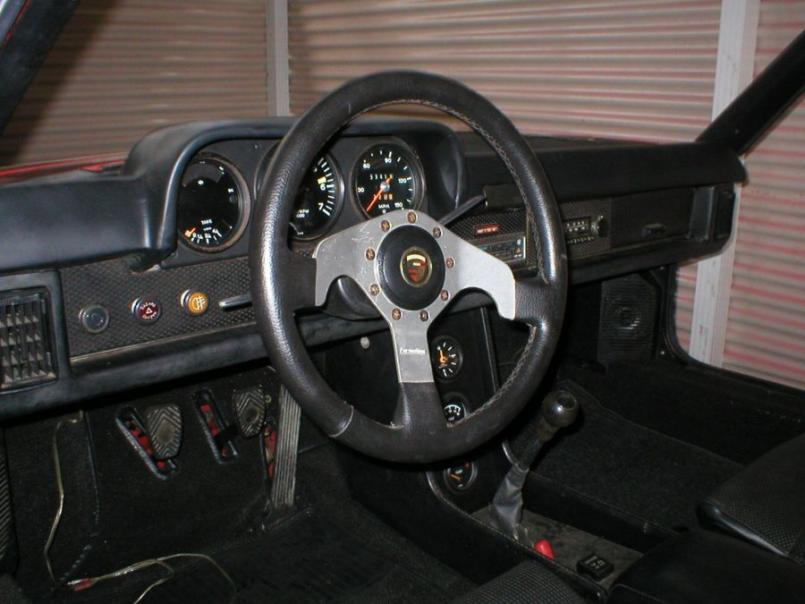
-- Rob
Posted by: biosurfer1 Feb 9 2008, 02:40 PM
this is the first time i have seen this thread...excellent work. its not often people post consistently throughout the build.
look forward to seeing the final project!
Posted by: watsonrx13 May 8 2008, 07:40 PM
Well, I've resumed working on this car. The current car that I've been driving has been sold and will be shipping out to NY soon. My wife and I are planning to attend Parade the first week of July. Well since I've sold my driver I'm going to try to finish this car and drive it up to NC...
Anyway, I dropped the engine/tranny so that I could finish the repairs in the engine compartment. This first business was to remove the battery tray and stand. The PO had already replaced this, but they mounted it back into place with either pop-rivets or sheet metal screws. Here's the before shot...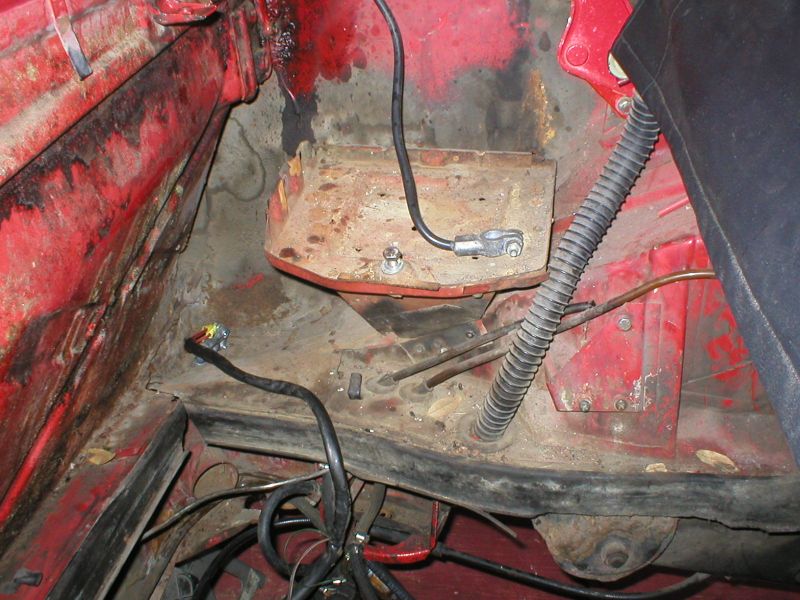
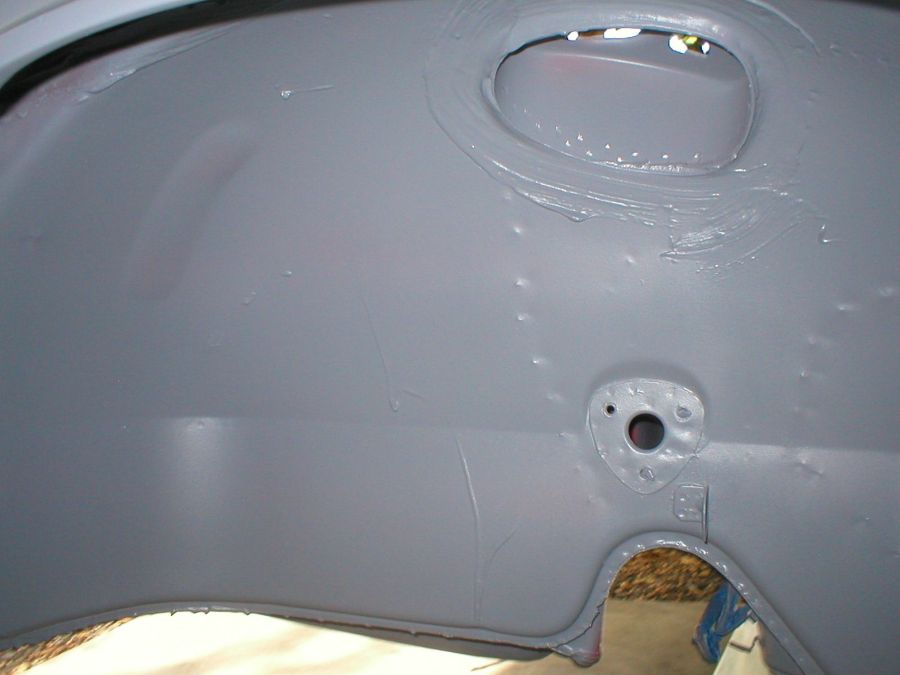
After I got the battery tray out of the way, I noticed that the side wall needed some repair..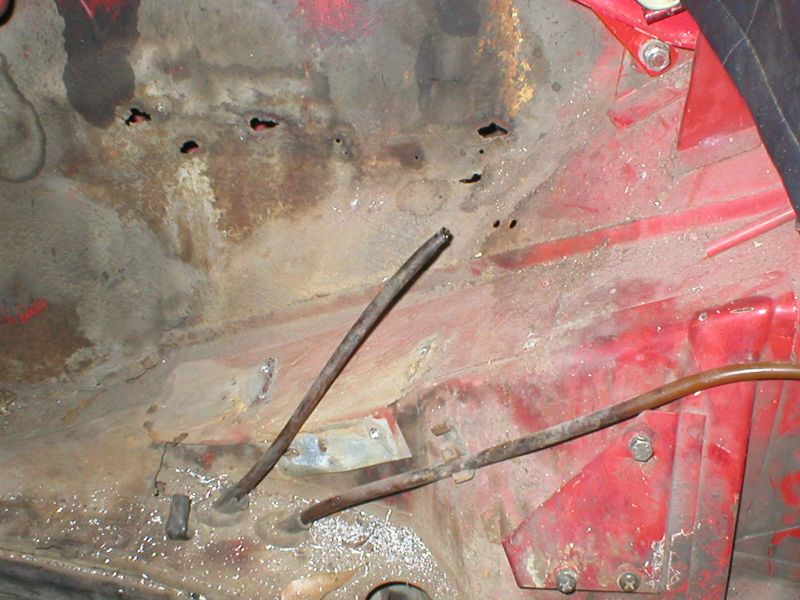
Then I noticed that the hell hole needed some attention...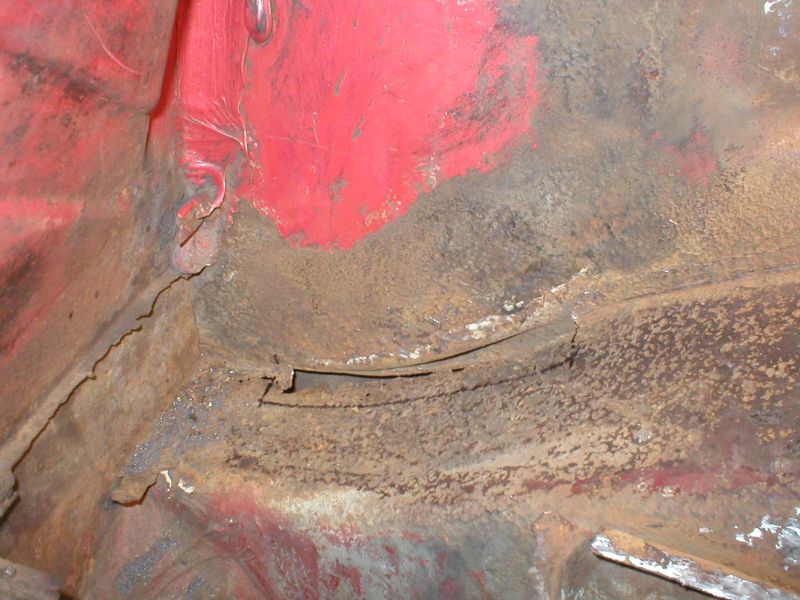
Posted by: watsonrx13 May 8 2008, 07:43 PM
Here's a shot of the rusted area cut out...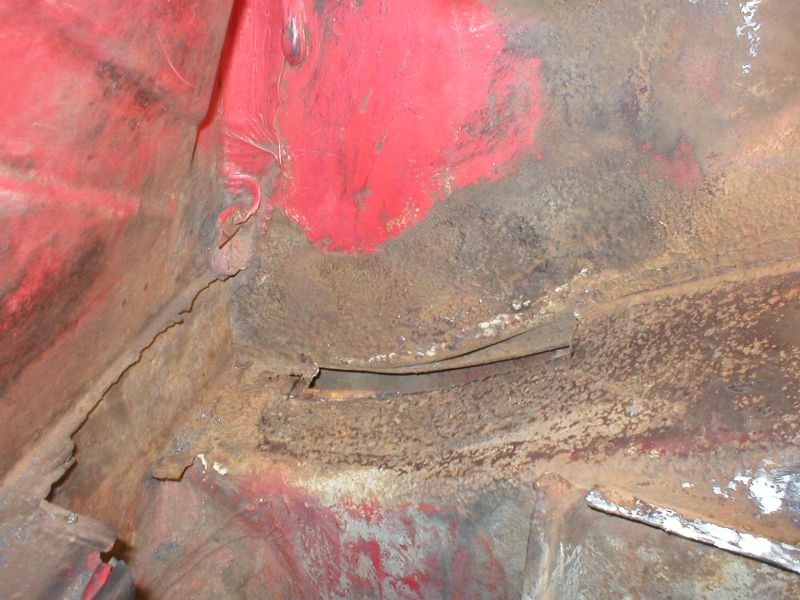
The patch I made and set in place...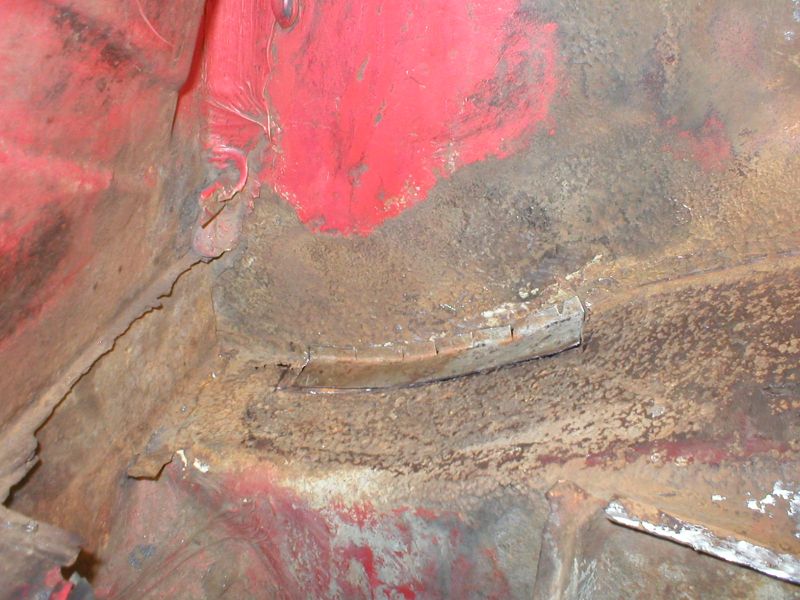
And here's a shot after welding, grinding, and primer...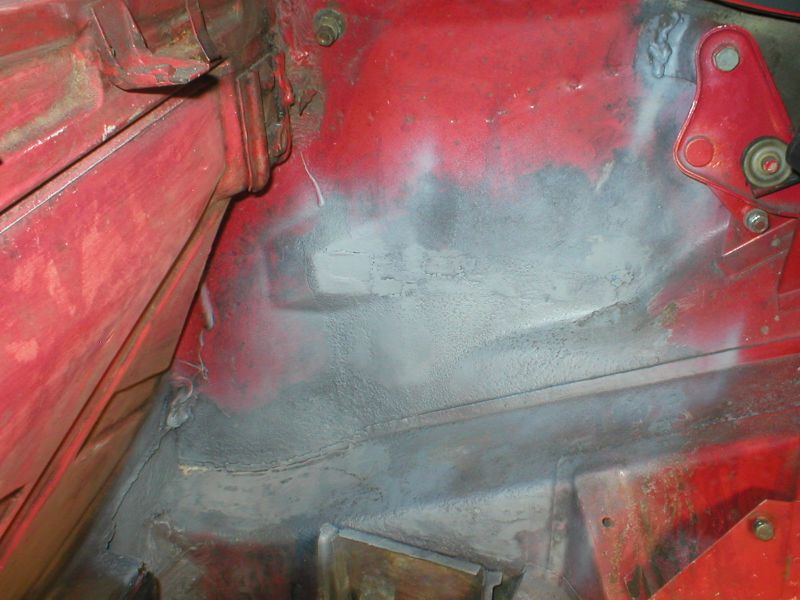
-- Rob
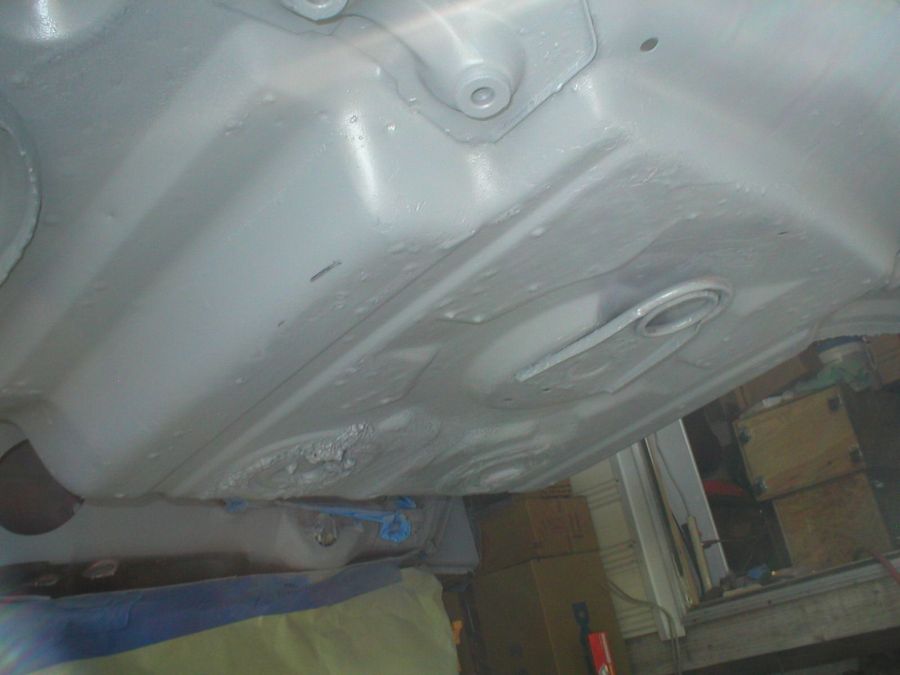
Posted by: watsonrx13 May 10 2008, 05:44 PM
More engine compartment clean up...
When I dropped the engine I noticed that the right rear suspension ear had been repaired in the past. Someone had done a lot of welding and didn't bother to grind/clean it up. So I decided to grind it down and see what the issue was.... Well here's a shot of the weld gone and a nice rusted hole ....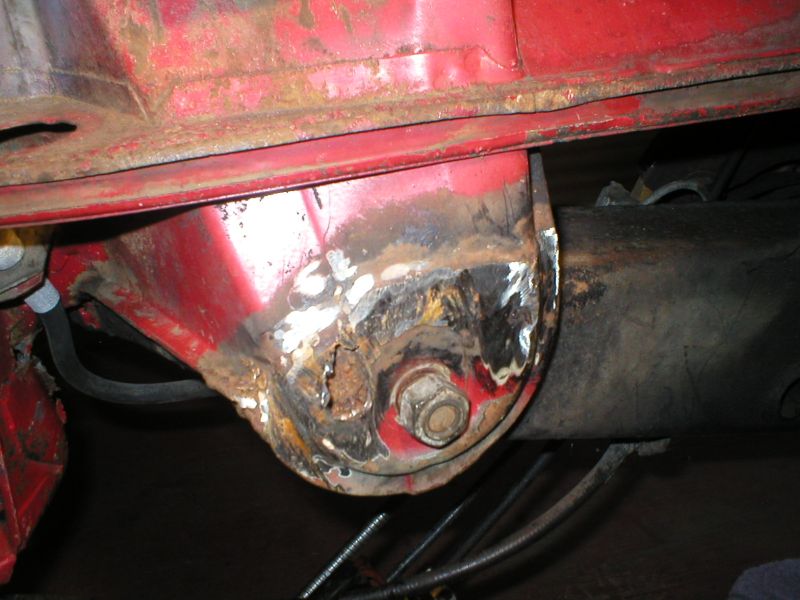
So I spent the day removing the suspension ear... BTW, I've seen other, more experienced 914ers remove theirs, but I had to remove mine in about 2-dozen pieces. The worst part was removing the factory applied strap welded underneath, in 2 places.... Anyway, here's a shot of it removed.... I have the part on order and expect to receive it next week....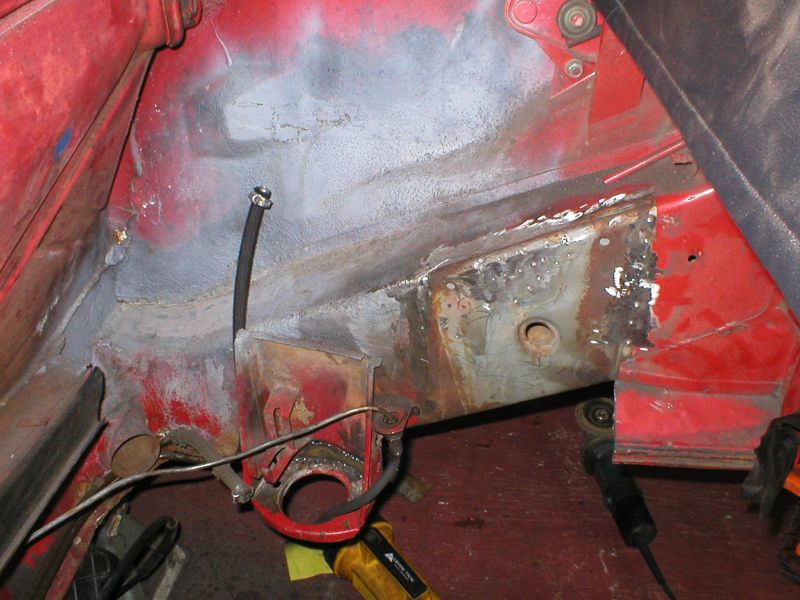
-- Rob
Posted by: watsonrx13 May 11 2008, 01:15 PM
I finished rebuilding the doors and mounted them today....
Here's a shot of the widow winder and the slider at the bottom...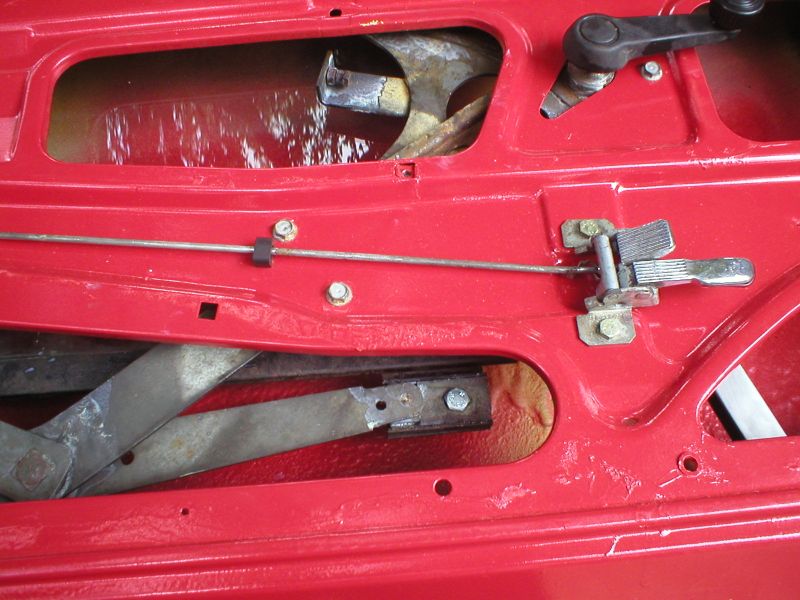
Here's a shot of the driver's door mounted...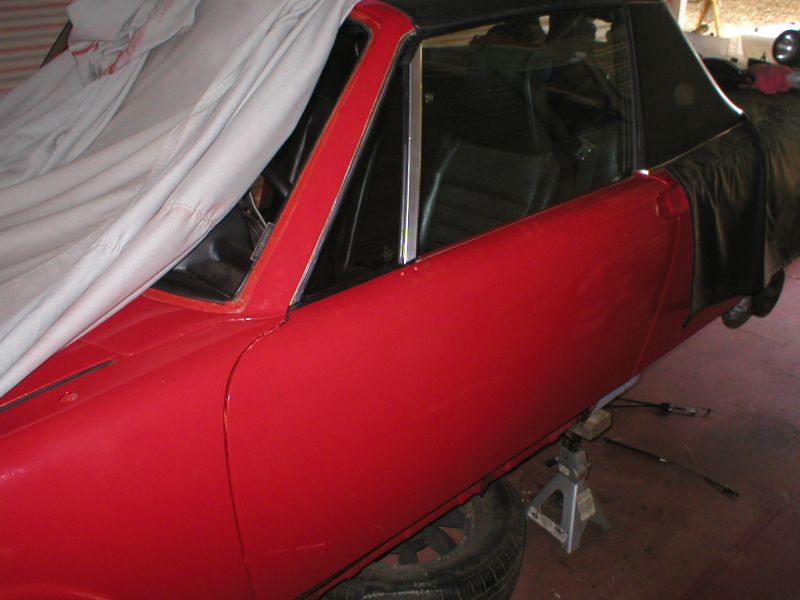
-- Rob
Posted by: evan May 11 2008, 05:46 PM

Rob, loved the work on the previous car! Turned out awesome, and your attention to detail start to finish is to be admired. So when can I bring my car down to you for a little nip and tuck??
Evan]
Posted by: watsonrx13 Jun 7 2008, 05:43 PM
Huge weekend, I had SafeLite come out and install the windshield.....  , it's starting to look like a car that can actually be driven.....
Also, got some of my parts in and installed them, the firewall gear shifter bushing, speedo, throttle and clutch cable....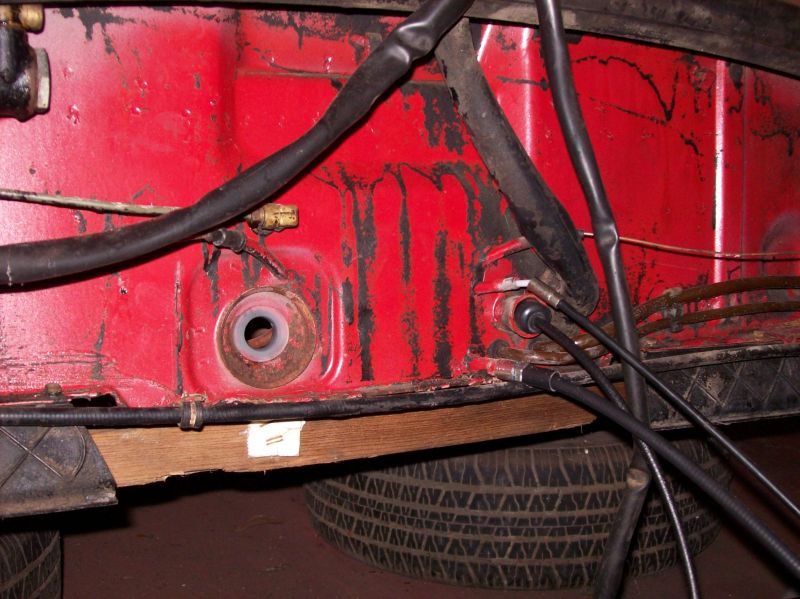
Now, I've been notified that the engine shelf has been shipped and I should get it next week, with welding to commence. Also, I have a box of tune-up parts coming soon. BTW, I shipped the FI injectors to Cruzin Performance, MI, and should get them back in a week or so....
Stay tuned...
-- Rob
Posted by: watsonrx13 Jun 7 2008, 05:46 PM
Rob, loved the work on the previous car! Turned out awesome, and your attention to detail start to finish is to be admired. So when can I bring my car down to you for a little nip and tuck??
Evan]
Evan, didn't see your reply earlier... Let me know when you want to bring your car down.... Driver or trailer it, and bring a bag of money.....
Thanks again for the compliments....
-- Rob
Posted by: watsonrx13 Jun 14 2008, 03:19 PM
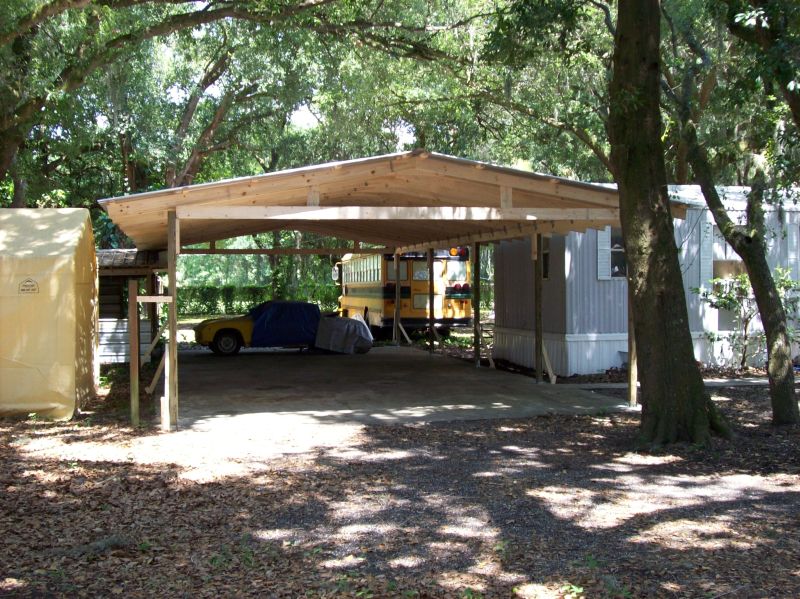
I finally got my engine shelf from R-D this week and installed it and the battery tray today....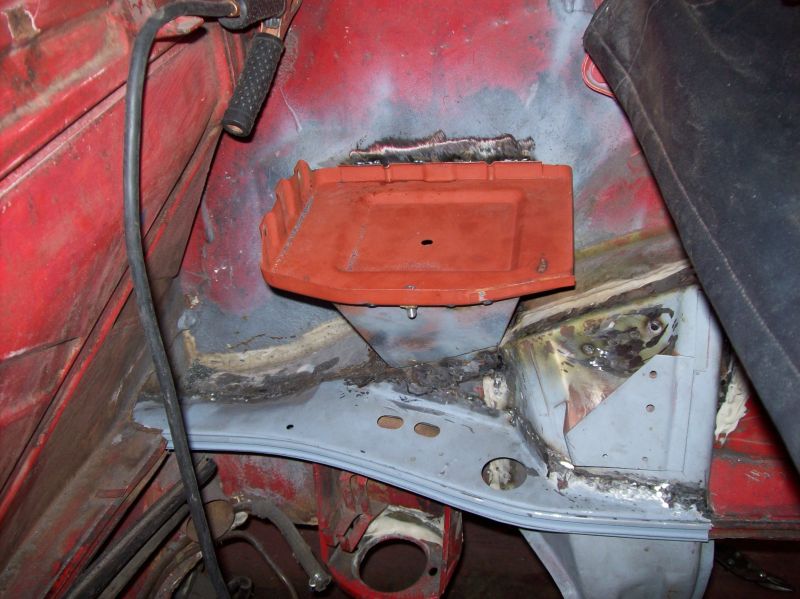
Yesterday was my birthday and Robin had her brother build me a pole barn on the 25' x 50' concrete slab out at my 'shop'. I now have a much larger area to work on the cars... 
-- Rob
Posted by: watsonrx13 Jul 1 2008, 04:33 PM
Well, I schedule to take this week off to attend Parade in NC, but personal issues came up and my wife and I decided not to go. I still took the week off and worked on this car.....
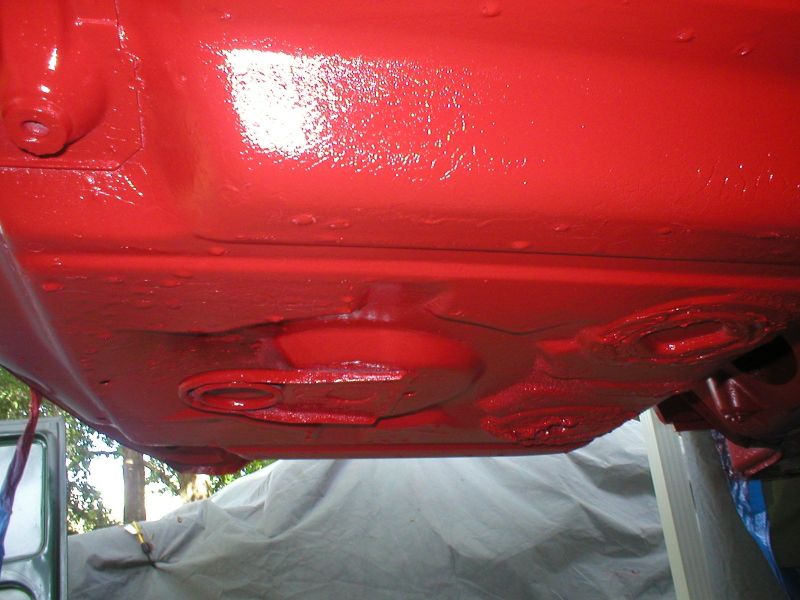
I finished prepping the engine compartment, rear fender wells and rear trunk floor... Here's the new engine console, engine shelf and battery tray in color... 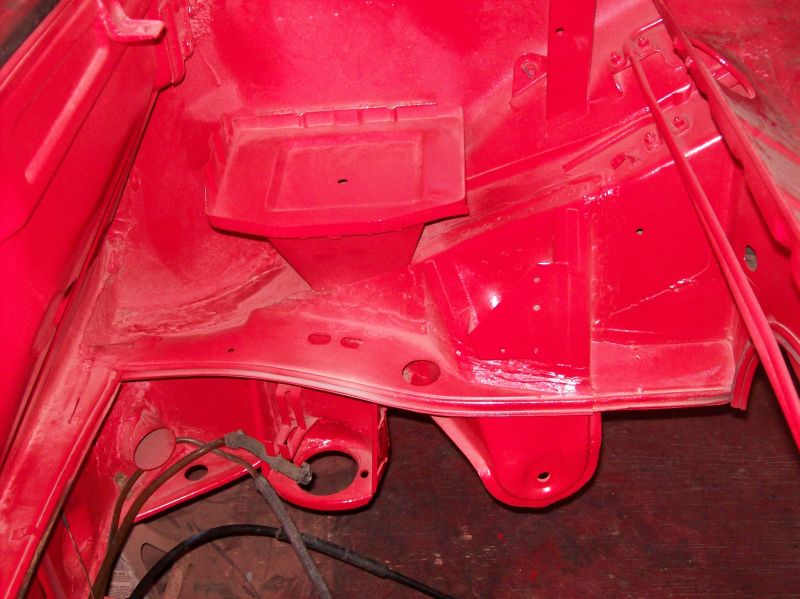
Here's a shot of the driver's side....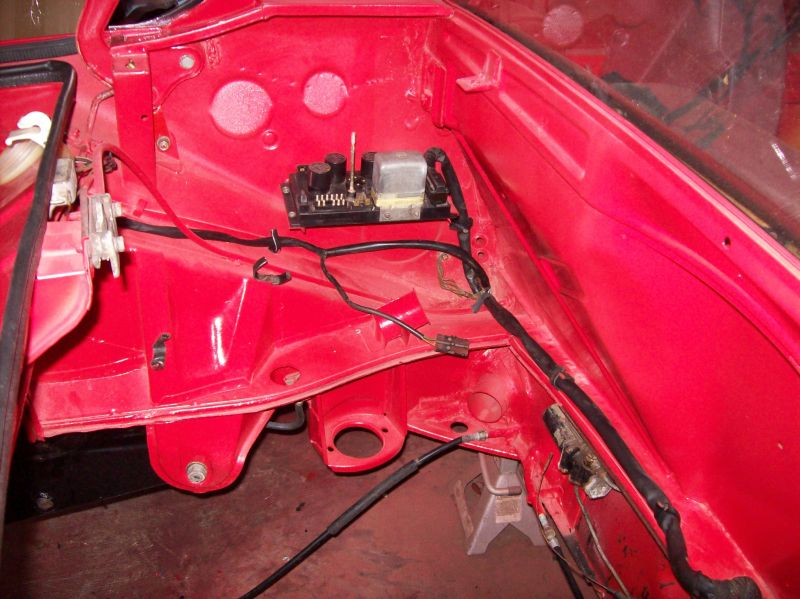
I also installed the rear suspension and sway bar....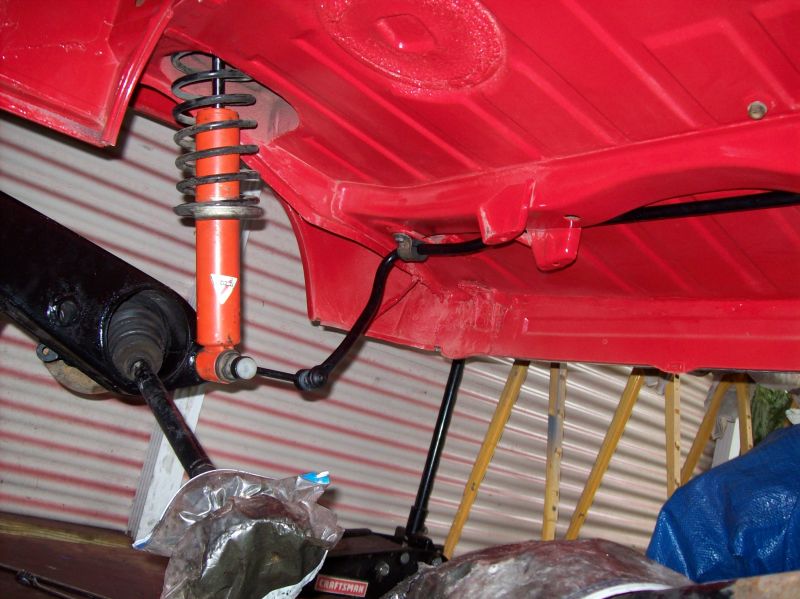
-- Rob
Posted by: g911 Jul 1 2008, 06:18 PM
Sweet!
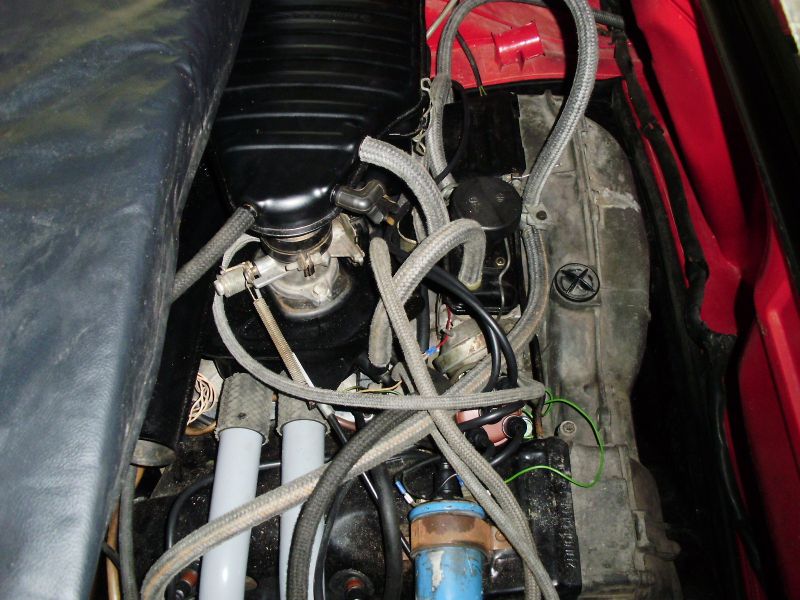
Posted by: watsonrx13 Sep 17 2008, 07:03 PM
Well, it's been a couple of very HOT months working on the car. Last month I removed the FI and cleaned the engine and installed the vacuum and fuel lines.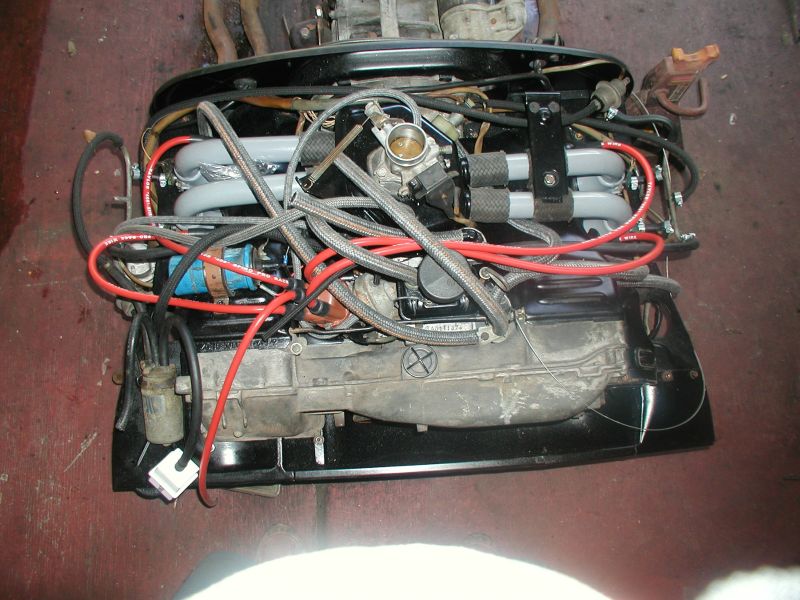
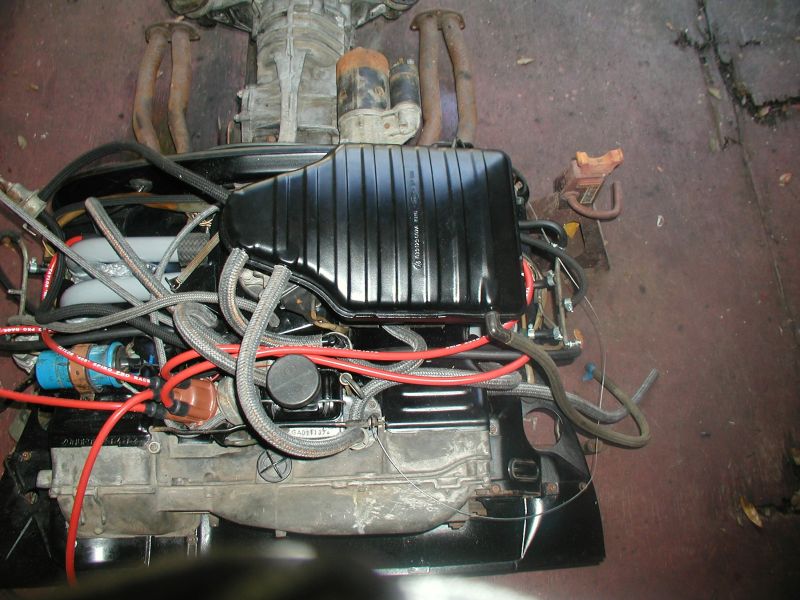
I then installed the engine and got it to run, but it was idling at 3000 rpm.
After asking for advice from the members here, I was able to track down the vacuum leaks and I got the car to idle at 900 rpm this weekend....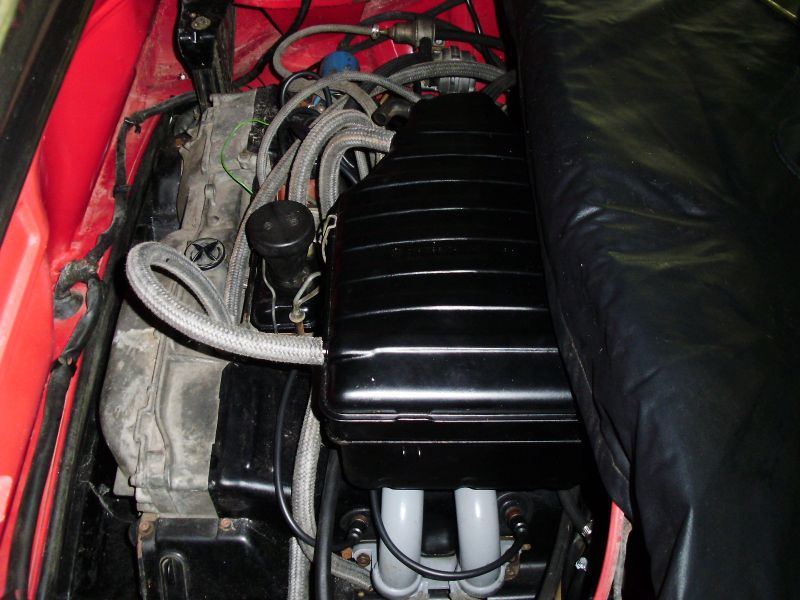
-- Rob
Posted by: watsonrx13 Sep 24 2008, 07:09 PM
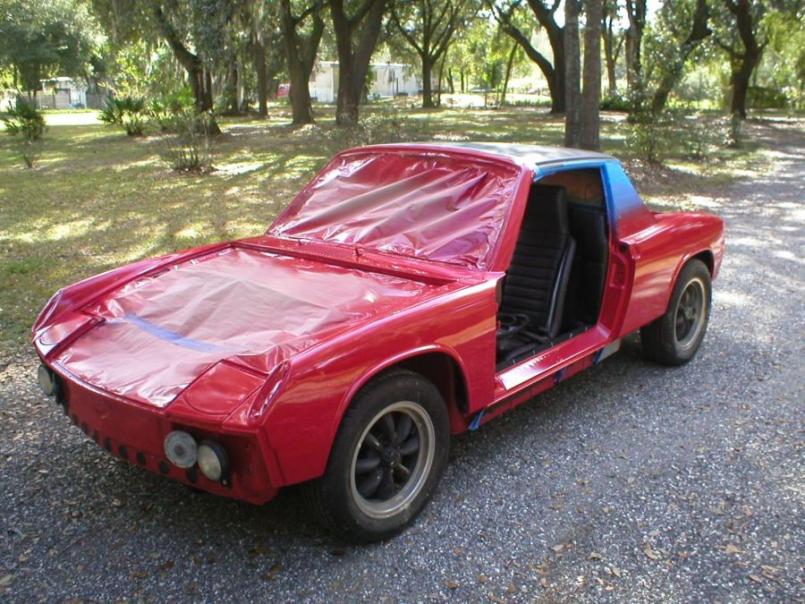
Well, today I called the insurance company and got the car insured.... I'll go to the DMV tomorrow and transfer the tag to my new drivable car....
Here's the pics I sent to the insurance company... I still have more work to do on the car, but now I'll be able to drive it and enjoy the cool weather coming to FL.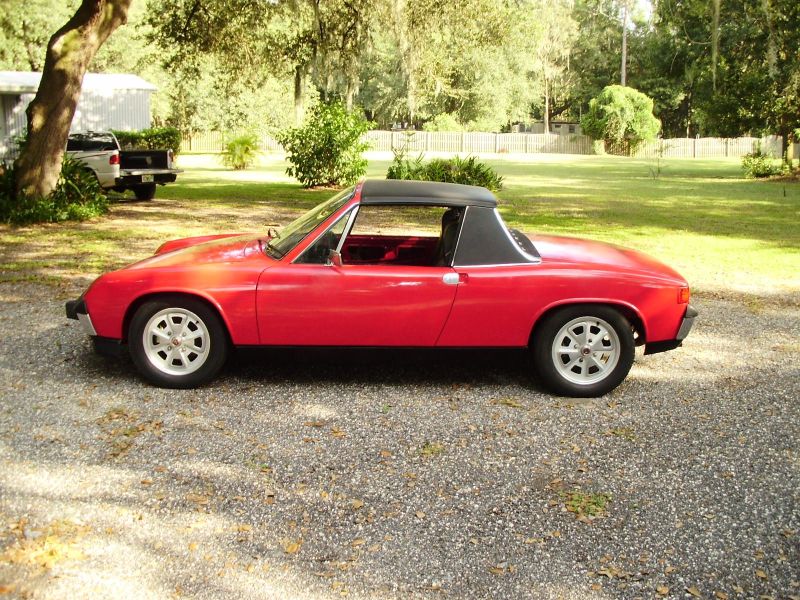
Other side...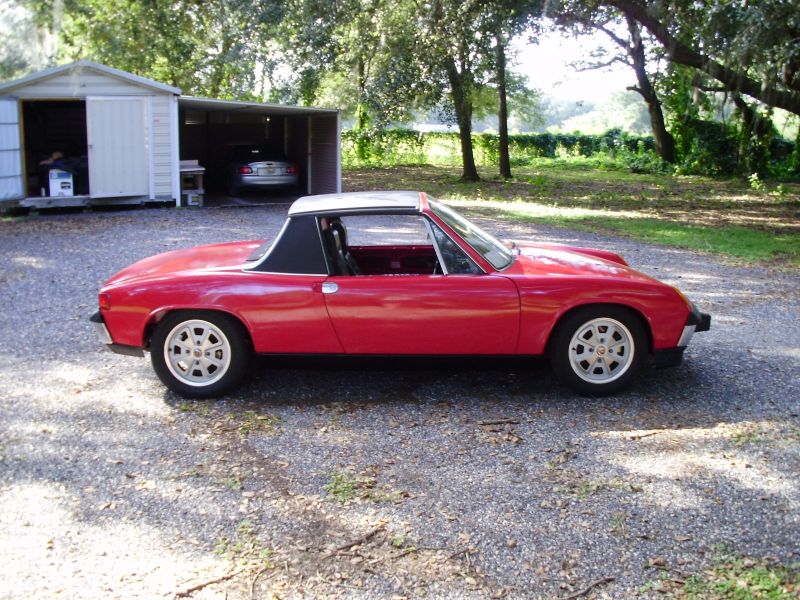
-- Rob
Posted by: Root_Werks Sep 24 2008, 07:42 PM
Wow! Great progress! I deem this 914 saved from the rust monster!
Posted by: watsonrx13 Dec 7 2008, 03:05 PM
I decided I didn't like the way the car looked after I painted myself, so I sanded all of the panels and reprimered it. I'll take to a professional painter and have them shoot the color.... It took me several days to get the front and rear trunk lids correct, but just a couple of hours per fender/door areas.
Here's a shot after I sanded all of the panels. You'll noticed that I removed the front and rear trunk and engine lids, along with the windows. Also, I taped up the front trunk area to minimize the dust.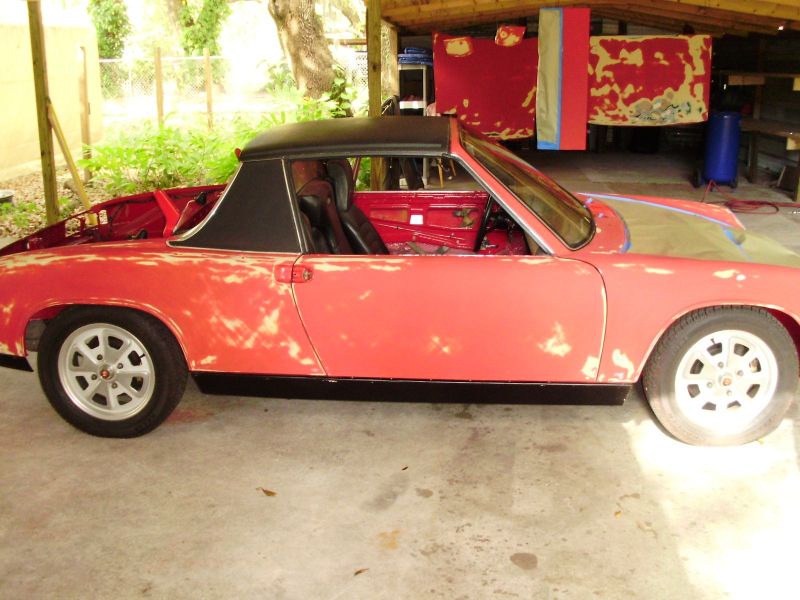
Here's a shot of it taped up. You'll also notice that I taped the paper to the floor, to keep any overspray off the suspension pieces...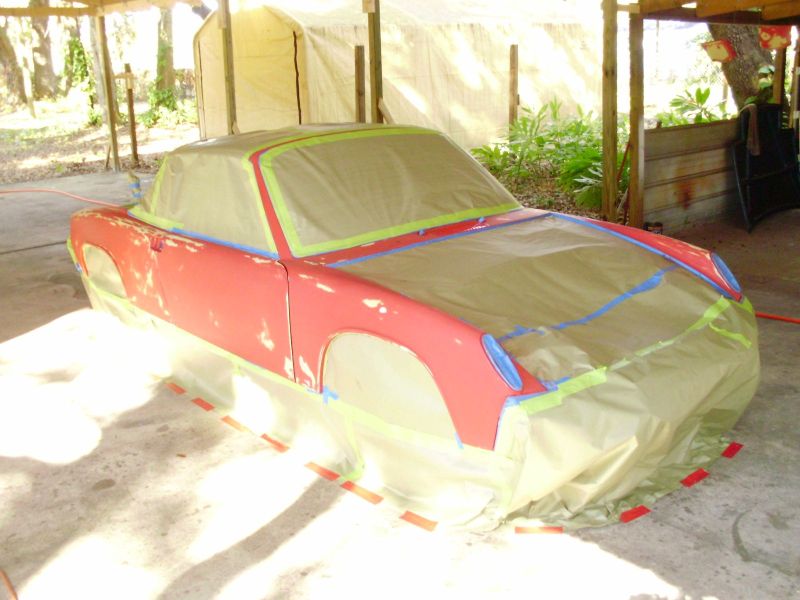
Finally, new primer....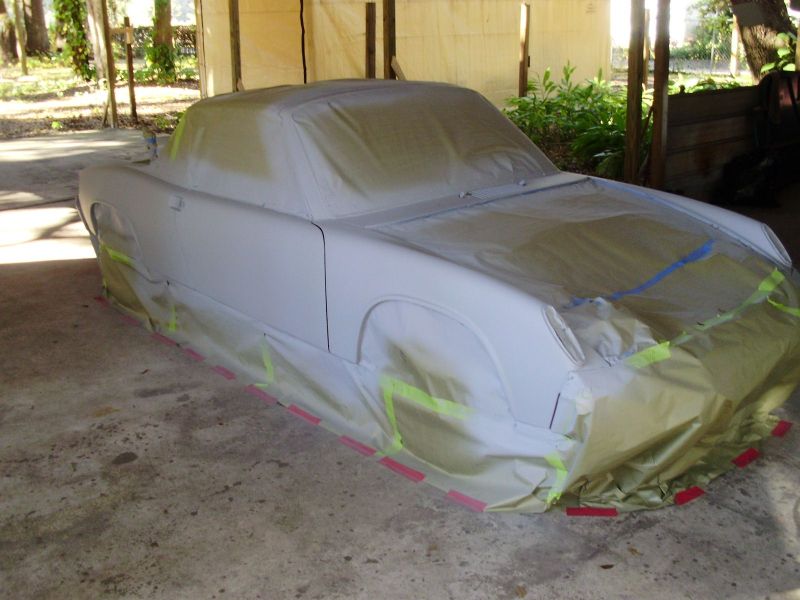
-- Rob
Posted by: bcheney Dec 7 2008, 05:01 PM
Rob,
I had not noticed this thread before. You are doing a great job with this one. I Can't wait to see it person someday.
Brian
Posted by: rpeagram Dec 7 2008, 06:30 PM
I'm a newbie
Great work. I hope to have the same success.
Posted by: URY914 Dec 7 2008, 06:43 PM
Good idea taping the paper to the slab. Helps keep the dust down too.
I remember long ago reading a tip about wetting the slab down to control dust and flying dirt also.
Posted by: watsonrx13 Dec 9 2008, 05:40 PM
I removed the paper and tape and installed all of the lids. I'm going to take the car to an auto body paint shop and have them finish aligning everything, the paint it using base coat/clear coat. And yes, I'll keep the original Bahia Red.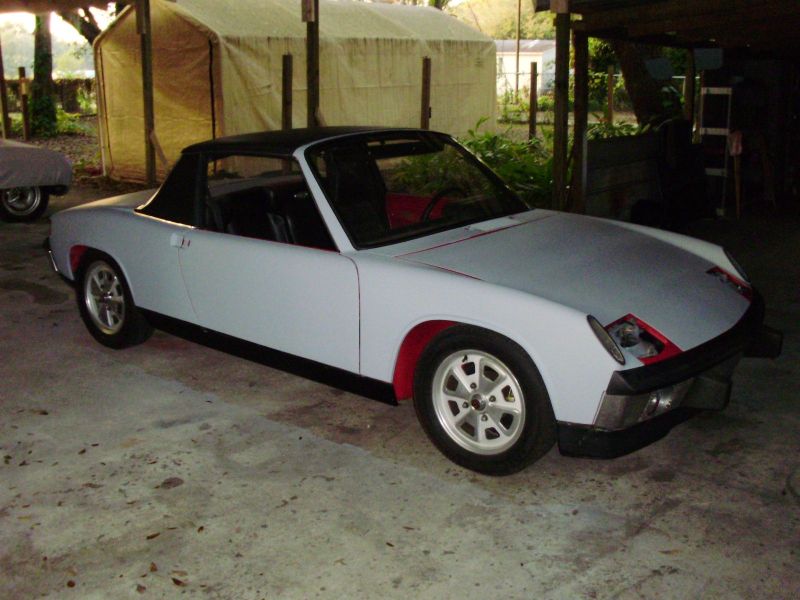
-- Rob
Posted by: watsonrx13 Mar 4 2009, 05:40 PM
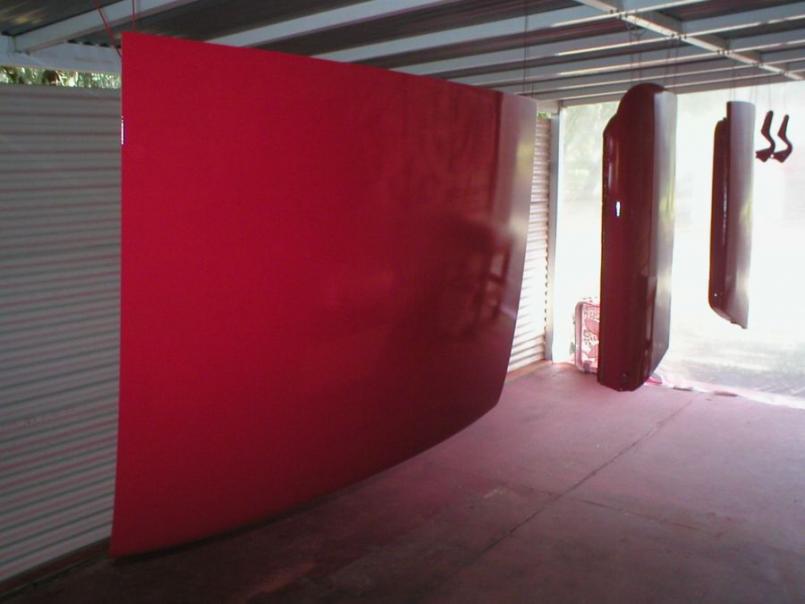
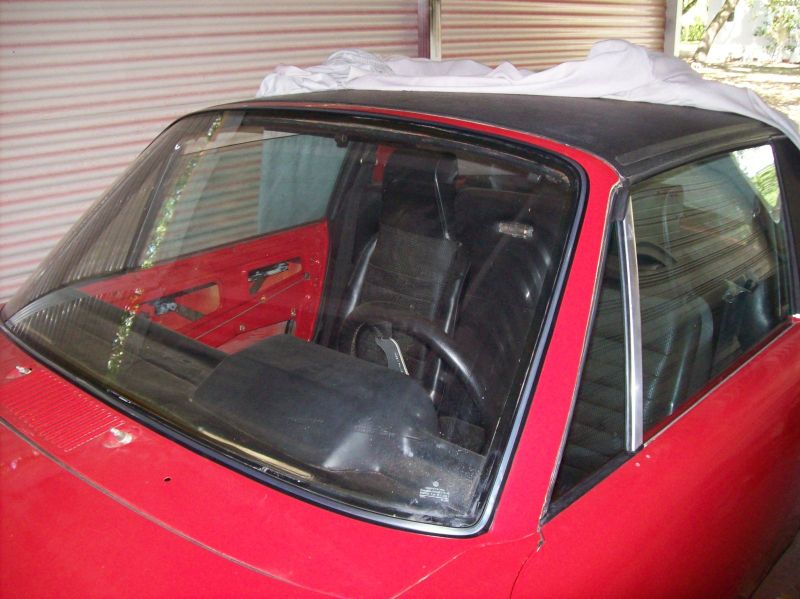
I finally took the car to the paint shop in January. They worked on it and painted it. I picked it up eary February and I started putting things back on it. Here's the latest pics. I've very happy with the paint job. I still have some more adjustments and small parts to install, but I should have it back together by the end of this month. Once I get everything back together, I'll put it up for sale....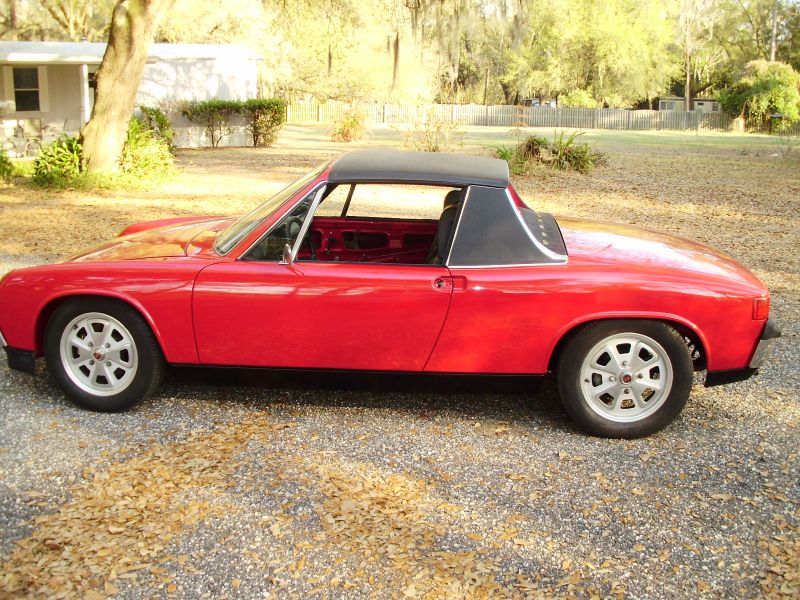
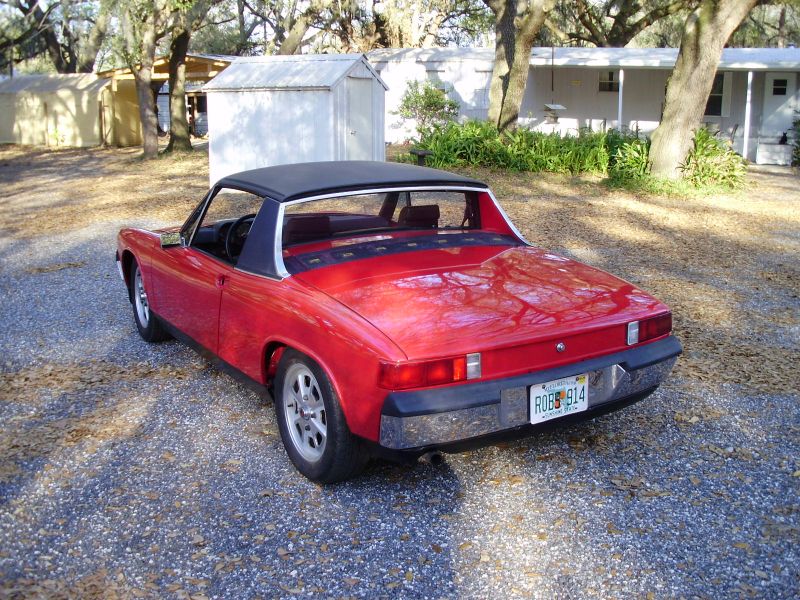
-- Rob
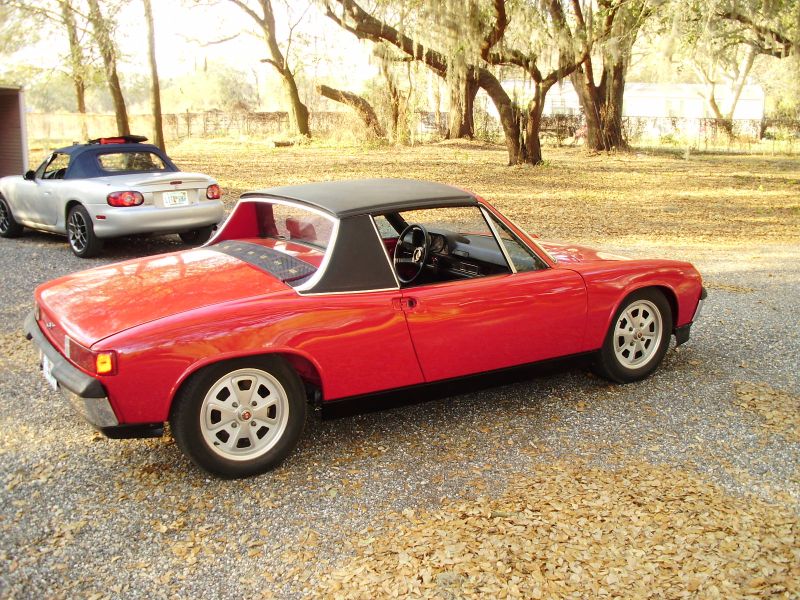
Posted by: watsonrx13 Mar 4 2009, 05:42 PM
Some more pics... After I put the interior back together, I'll add more pictures...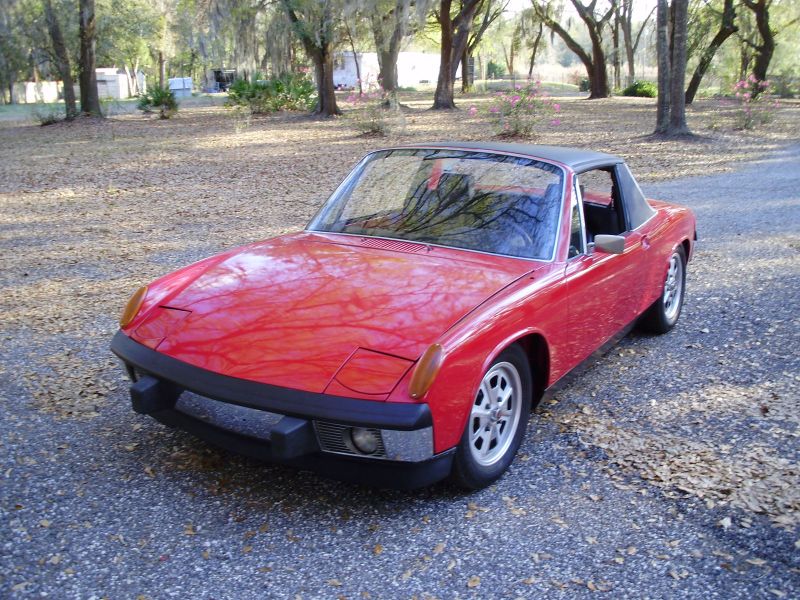
-- Rob
Posted by: watsonrx13 Jul 6 2014, 09:53 AM
Forgot to add update to this posting.
Car for sale Feb 2014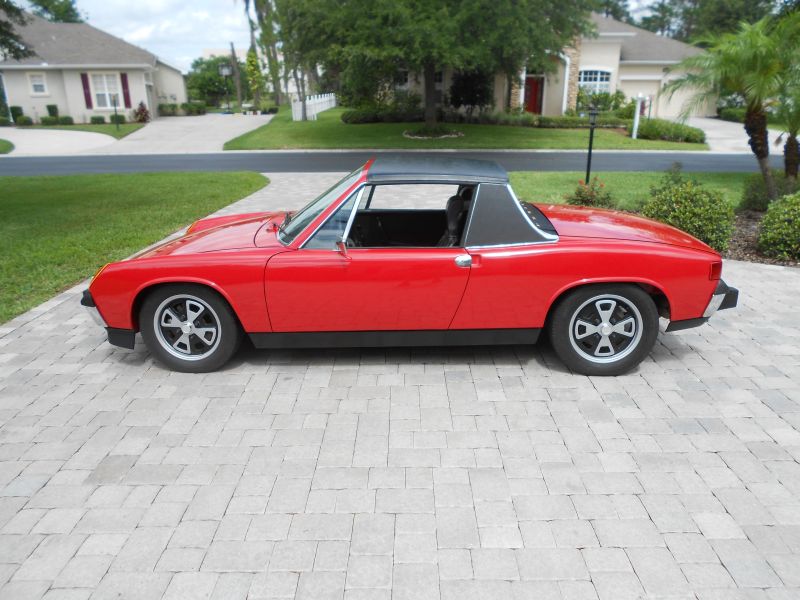
Sold June 2014 going to Michigan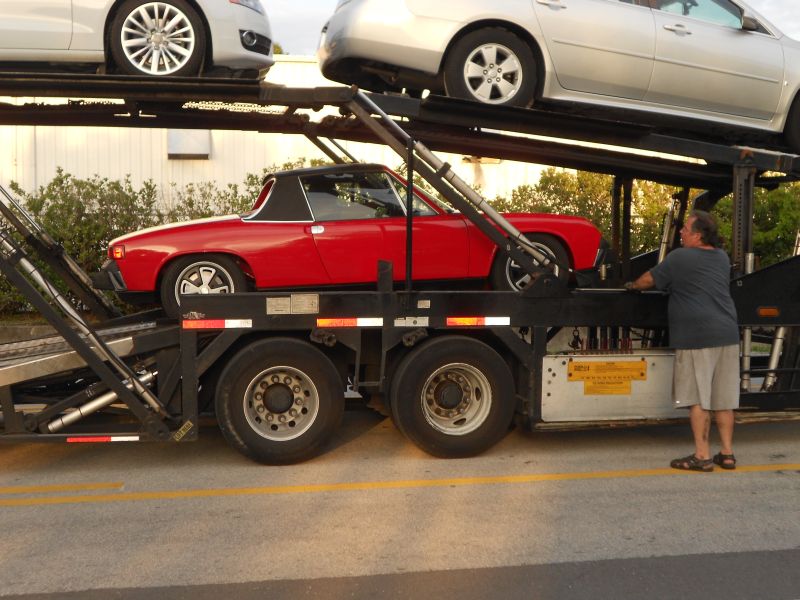
See my web site for more details: http://www.tampabay914.com/SN_4742905914.html
--- Rob
Powered by Invision Power Board (http://www.invisionboard.com)
© Invision Power Services (http://www.invisionpower.com)