Printable Version of Topic
Click here to view this topic in its original format
914World.com _ 914World Garage _ New shop---new build!
Posted by: tdsmoonchild Feb 7 2006, 07:32 PM
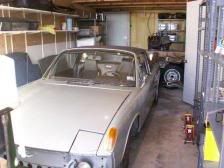 Inspired by all of you, and especially the "turtle girl build," I rented a shop and I'm starting my resto! I have a 1972 1.7L. I bought it about 5 years ago, also bought a '71 parts car. Drove the '72 home, barely.
Pulled the parts car home with a trailer. Parted out all the good parts on the '71. Dropped the engine and tranny, then lost my garage, along with my house, children, furniture, and half my money to my ex-wife. I moved the car and parts, but they have sat undisturbed ever since.
I found this club and it has really rekindled my interest in my car. So I rented a shop, moved the car and parts, and now I'm ready to get started! The "turtle-girl build" thread really got me going. Thanks alot! I am going to try and document my build along the way also. I hope you will all follow along as I will be needing plenty of advice. 
Posted by: tdsmoonchild Feb 7 2006, 08:04 PM
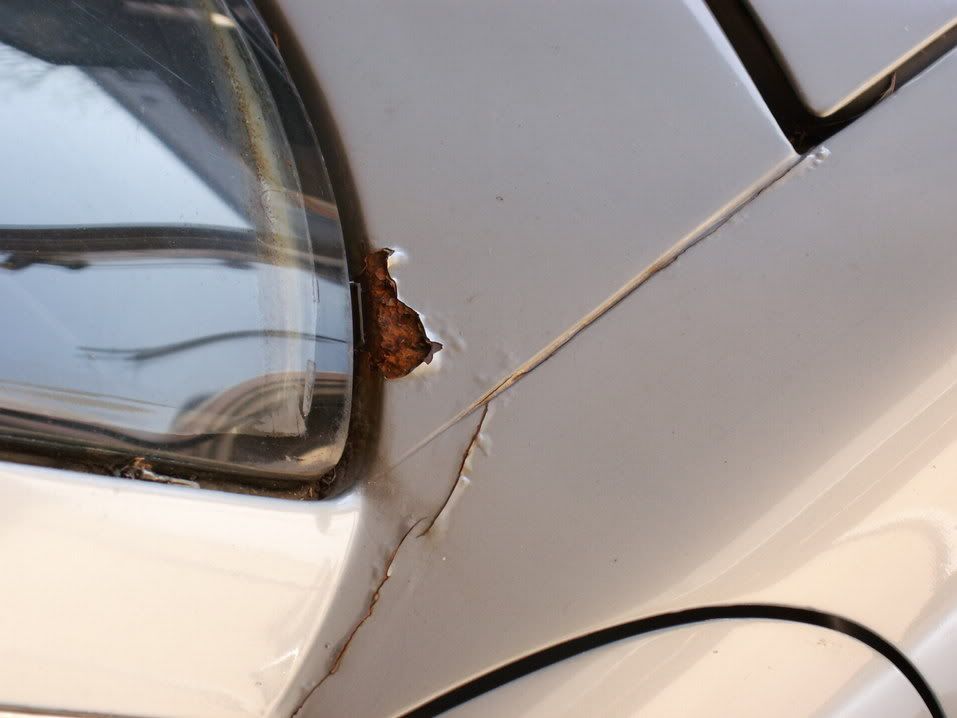
And this is just the rust you can see on the outside. The PO did a "resto" before I got it. I think he must of just painted over rust. 
Posted by: rick 918-S Feb 7 2006, 08:05 PM
 Lots of photos will keep you motivated. Ask me how I know....
Posted by: Series9 Feb 7 2006, 08:14 PM
Right on.
I am SOOOOO ready to sit back and watch someone else work.
![popcorn[1].gif](http://www.914world.com/bbs2/html/emoticons/popcorn[1].gif)
Posted by: Vacca Rabite Feb 7 2006, 08:18 PM
Take pictures of what it looks like now.
6 months from now, as it is on Jackstands and you are fighting for motiviation to drive to the shop and work on it (assuming that the place you rented is not at your home) those pictures _will_ motivate you.
They motivate me, when I am finding excuses not to go out to the garage.
It is a fun hobby, and an excellent way to take your mind off all the other stuff going around you.
Best of luck, and
Zach
Posted by: biggy72 Feb 7 2006, 10:53 PM
This is the pic I put up on the garage door for my motivation....boy it was ugly. I kinda hate orange now....
Attached image(s)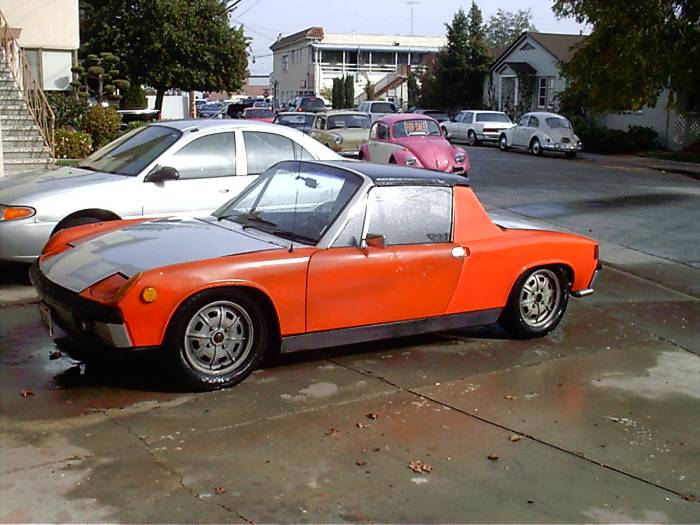
Posted by: tdsmoonchild Feb 11 2006, 04:46 PM
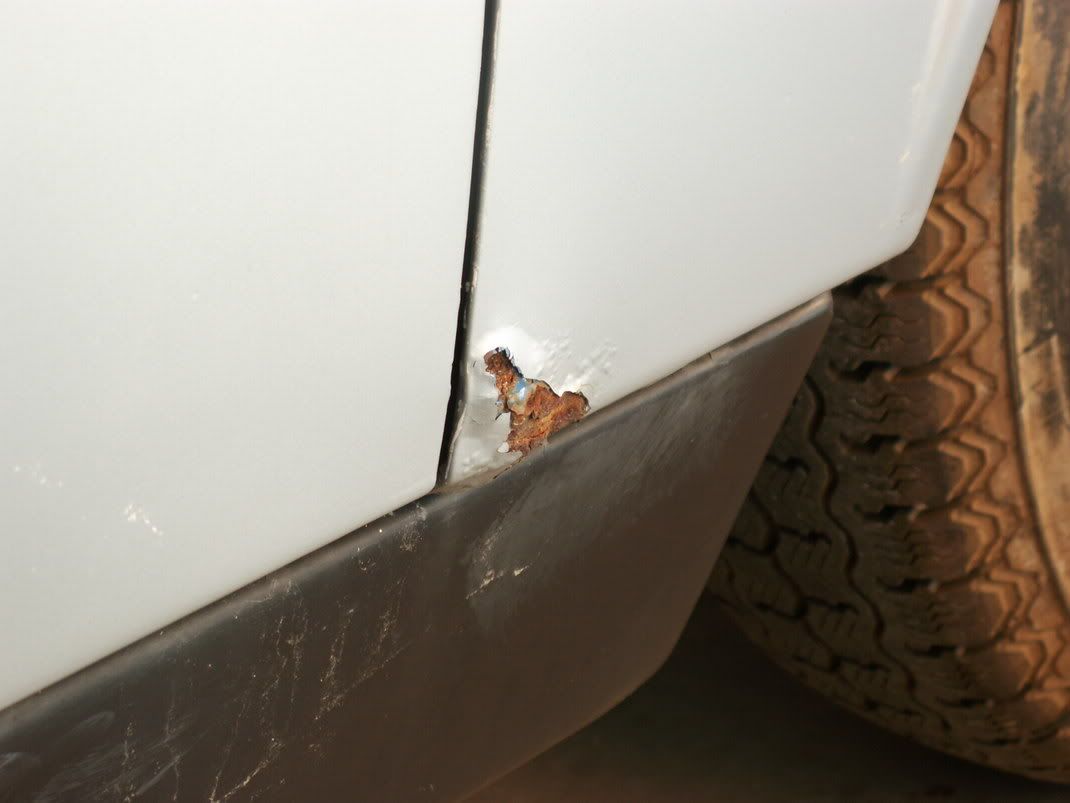
Just boggles me to see that someone spent all that time taking the interior out (seats, carpet, dash, everything) only to leave all that rust under the tar, and to fiberglass and paint over the rust that he could see.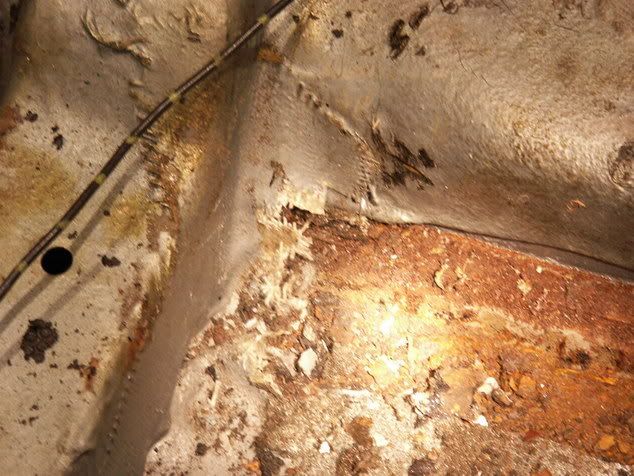
Posted by: tdsmoonchild Feb 11 2006, 04:49 PM
some more....
Posted by: tdsmoonchild Feb 11 2006, 04:50 PM
and more....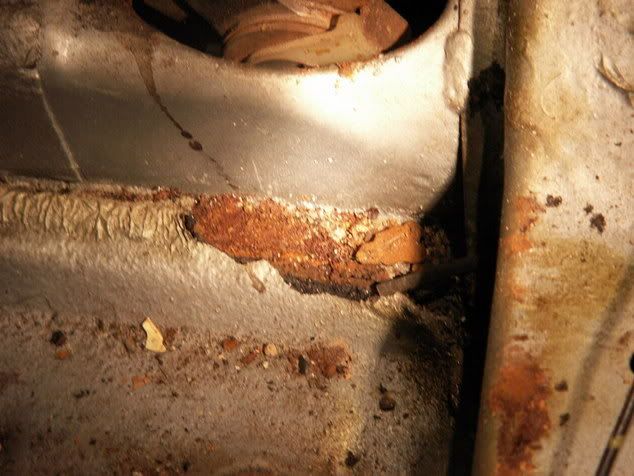
Posted by: tdsmoonchild Feb 11 2006, 04:52 PM
and still more....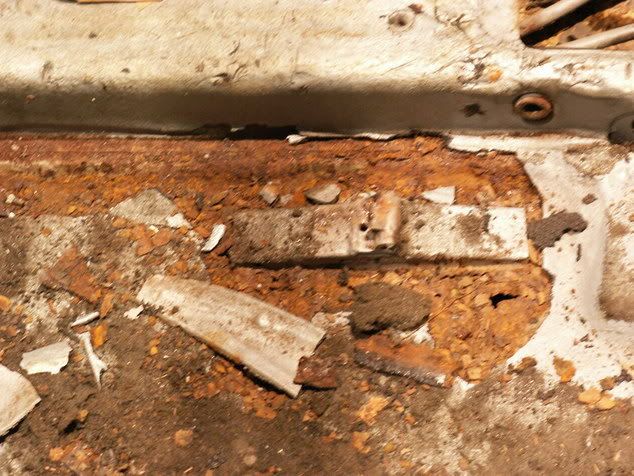
And this is just the driver's side. Can't wait to see the passenger side!
Posted by: tdsmoonchild Mar 7 2006, 06:11 PM
Finally down to the tub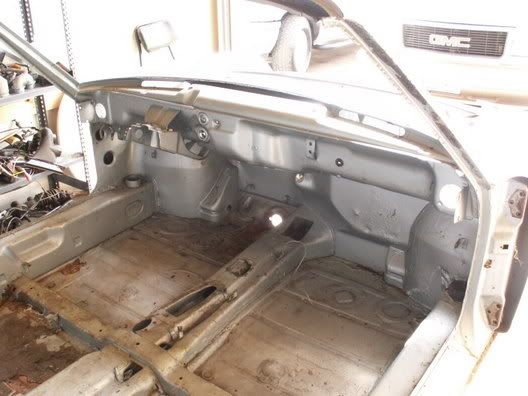
Posted by: tdsmoonchild Mar 7 2006, 06:15 PM
Thought my shop was big. Looks smaller now!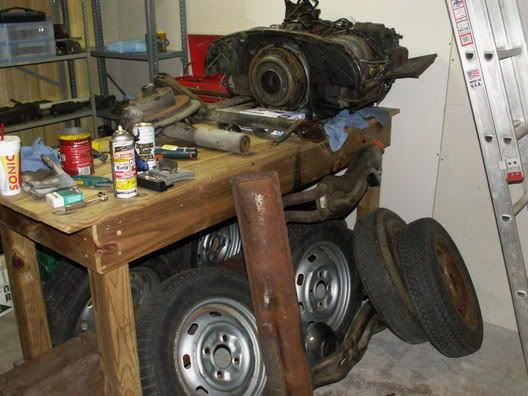
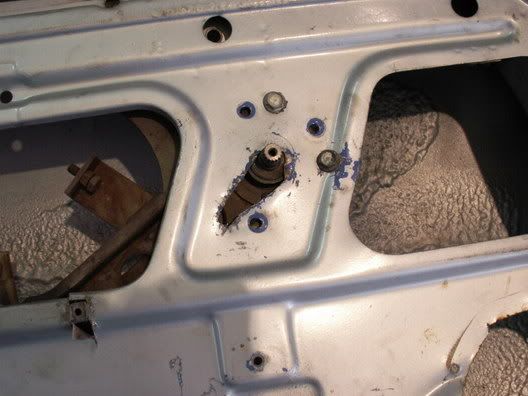
Posted by: tdsmoonchild Mar 8 2006, 07:46 PM
Has anyone seen a repair like this?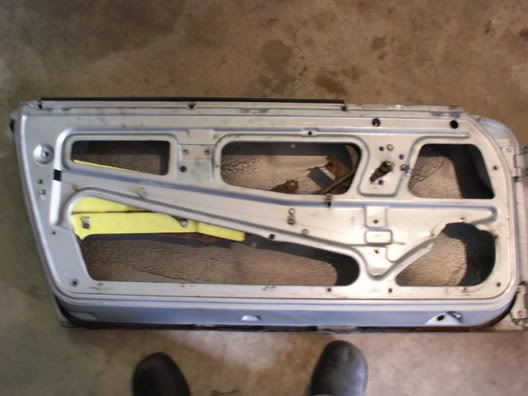
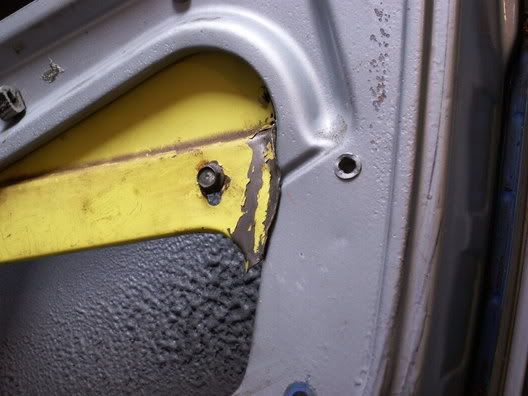
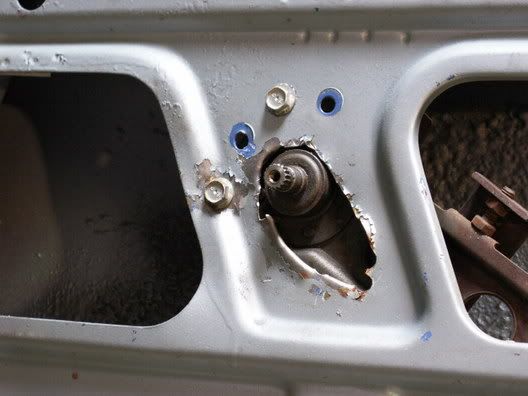
Should I take it out and try and fix it the right way?
Posted by: tdsmoonchild Mar 8 2006, 07:49 PM
The other door is done the same way!!!!!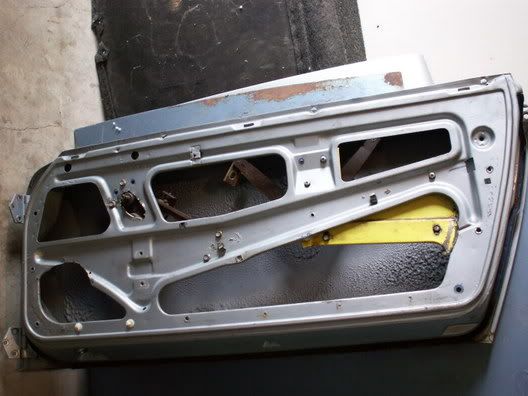
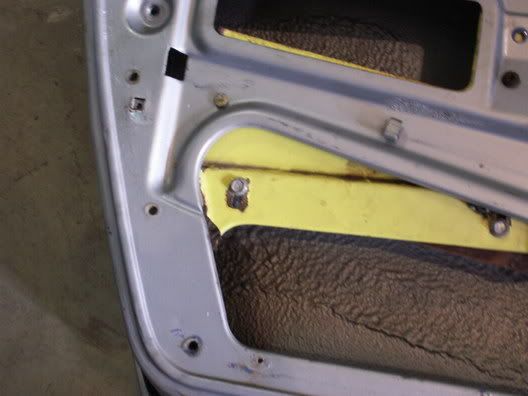

Posted by: McMark Mar 8 2006, 08:32 PM
Those are later winder mechanisms transplanted into early doors. Interesting method. 
Posted by: tdsmoonchild Mar 8 2006, 08:37 PM
| QUOTE (McMark @ Mar 8 2006, 06:32 PM) |
| Those are later winder mechanisms transplanted into early doors. Interesting method. |
It seems to be strong and to work well. The windows rolled up and down real easy. Think I should change it or leave it. It's so ugly that it's hard to turn a blind eye to!
Posted by: McMark Mar 8 2006, 08:39 PM
Got a welder? 
Posted by: tdsmoonchild Mar 8 2006, 08:43 PM
| QUOTE (McMark @ Mar 8 2006, 06:39 PM) |
| Got a welder? |
getting a welder this weekend! MIG

Posted by: dakotaewing Mar 12 2006, 10:15 AM
Terry -
Nice to see someone in the neighborhood - Where is your shop loacted ?
I live in Silver Creek, off Cockerell Hill between Cockerell Hill and Pleasant Run -
Posted by: Dead Air Mar 12 2006, 10:31 AM
Silver is good!
Posted by: tdsmoonchild Mar 12 2006, 05:53 PM
| QUOTE (dakotaewing @ Mar 12 2006, 08:15 AM) |
| Terry - Nice to see someone in the neighborhood - Where is your shop loacted ? |
I live at wheatland and freeman st. in Duncanville.
My shop is on N. Main ST. in Duncanville, just north of I-20.
PM me if you ever want to stop by and show me what a car looks like all put together and running!
Posted by: dakotaewing Mar 13 2006, 08:48 AM
| QUOTE (tdsmoonchild @ Mar 12 2006, 06:53 PM) | ||
I live at wheatland and freeman st. in Duncanville. My shop is on N. Main ST. in Duncanville, just north of I-20. PM me if you ever want to stop by and show me what a car looks like all put together and running! |

Can I just some by sometime? It's going to be a long time before my car is running...
I doing a compete paint up job as well....
Posted by: tdsmoonchild Mar 13 2006, 09:09 PM
PM sent dakotaewing...
Posted by: tdsmoonchild Mar 23 2006, 09:01 PM
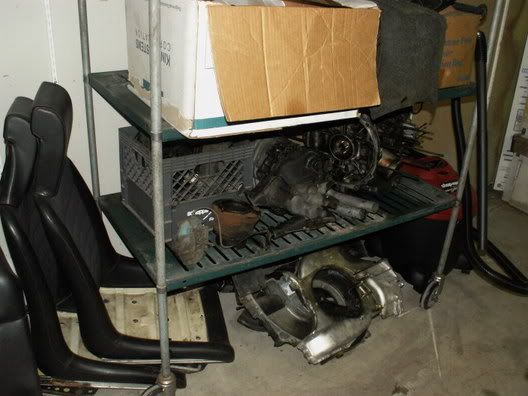
New toys for the shop!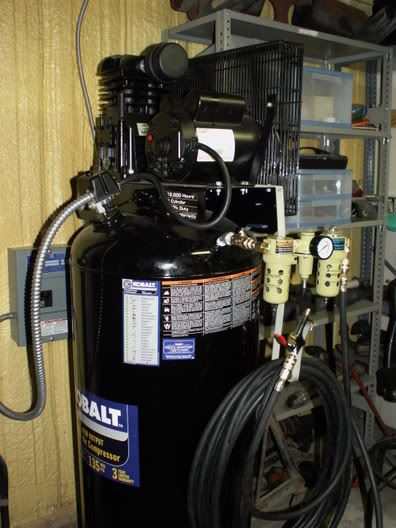
This one took some doing. My shop didn't have 220v and I'm too cheap to hire an electrician. Shop is an old building and the service panel only had one space available for another breaker. Well you need two breakers for the 220v. To make matters worse, the breakers I needed are no longer made anymore! Had to source the two big amp, obsolete breakers, use them to feed an add-on service panel, run my 220v circuit for the compressor off of the new add-on panel, plus replace the one circuit for my overhead lighting that I had to remove to make space for the two big-amp, obsolete breakers.
Major PITA. All done while original service was hot! Good news is it all works, looks professionally done, and nothing caught fire!
Posted by: tdsmoonchild Mar 23 2006, 09:03 PM
And behind door number two.......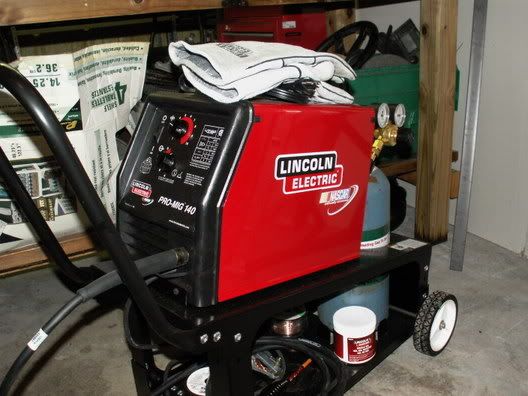
Didn't realize purchase of the shielding gas cylinder was so expensive..... 
Posted by: tdsmoonchild Mar 25 2006, 01:40 PM
Lots of rust repair to be done! My plan is to put the tub on a rotisserie, but then I have this: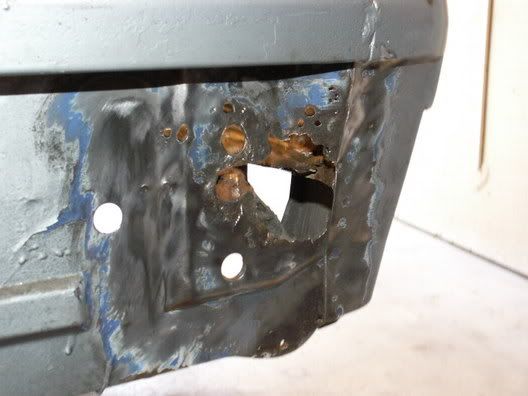
another look: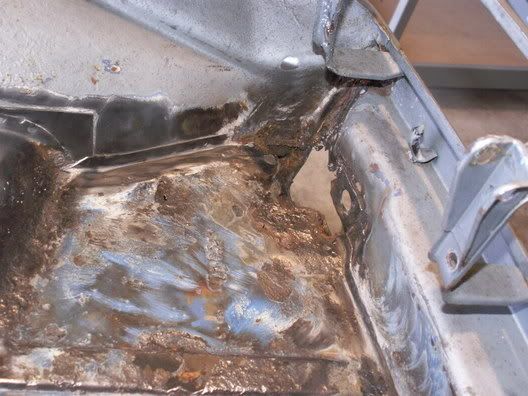
Posted by: tdsmoonchild Mar 25 2006, 01:44 PM
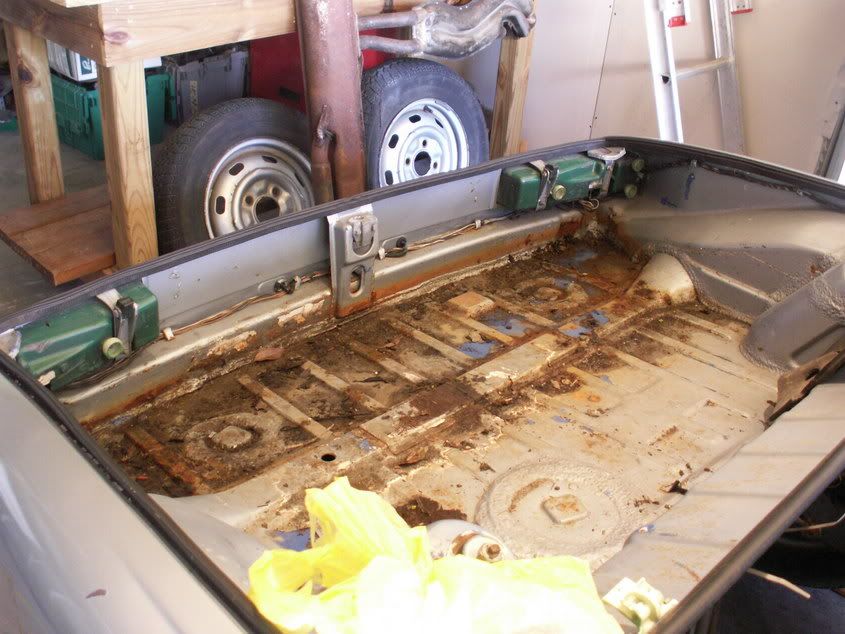
Trunk floor looks like this: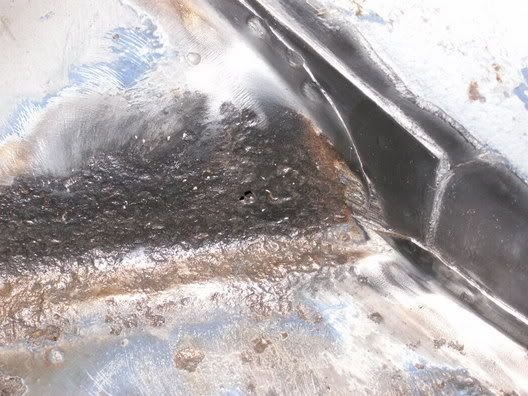
and: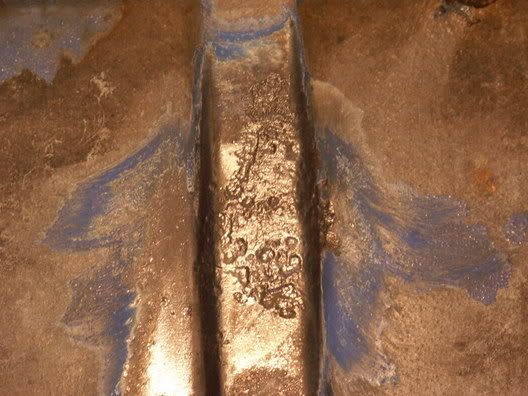
So looks like I need to replace whole trunk pan. Anyone know of sources for this?
Thought I would just use "Grasshopper" method for the bumper mounting point. Any suggestions?
Posted by: Brando Mar 25 2006, 02:13 PM
Also looks like they used a gas welder to put the pieces together... without rod. That's a fugly weld job 
Posted by: Sideways Mar 25 2006, 08:33 PM
| QUOTE (tdsmoonchild @ Mar 25 2006, 12:44 PM) |
| So looks like I need to replace whole trunk pan. Anyone know of sources for this? Thought I would just use "Grasshopper" method for the bumper mounting point. Any suggestions? |
Restoration Design has the rear part of the trunk floor..
http://www.restoration-design.com/index.html
Posted by: tdsmoonchild Mar 27 2006, 09:49 AM
Maybe I need more, like the whole trunk. Some of the other areas are very pitted.
Posted by: tdsmoonchild Mar 28 2006, 10:14 AM
![]()
Posted by: tdsmoonchild Mar 30 2006, 07:37 AM
Ok, so I've fabricated the piece for the rear bumper mounting point, but I need suggestions on protective coatings. Do I coat it before welding it? Weld-through primer, metal ready? Or after with something like POR15? Help me out.
Posted by: rjames Apr 4 2006, 01:23 PM
For similar repairs I've used Metal Ready followed by Por15 and am happy with the restults so far...
Posted by: tdsmoonchild Apr 4 2006, 03:55 PM
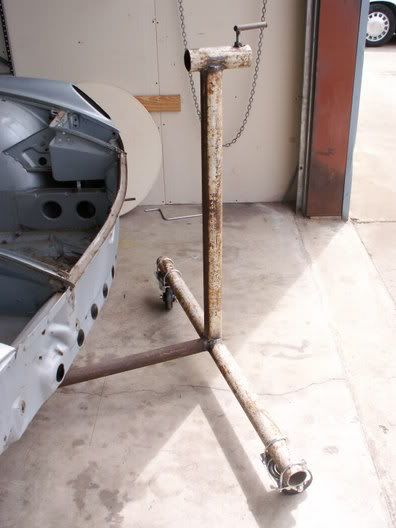
While I'm waiting on a fender section to finish repair of the back bumper mounting point, I decided to start building the world's cheapest (and ugliest) rotisserie. It started out like this: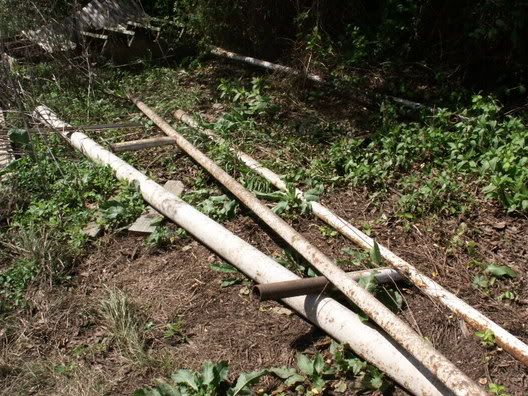
Big pile of old metal tubing in a field behind the shop.
Posted by: tdsmoonchild Apr 4 2006, 03:59 PM
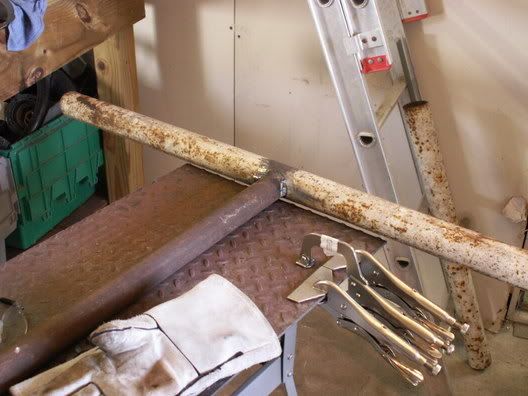
started putting pieces together.
Posted by: tdsmoonchild Apr 4 2006, 04:00 PM
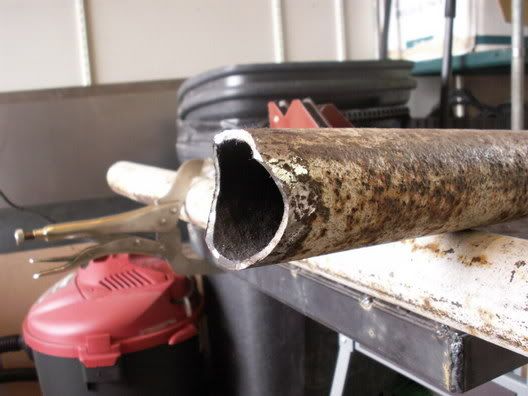
Pipe notching by hand with an angle grinder is tedious work.
Posted by: tdsmoonchild Apr 4 2006, 04:01 PM
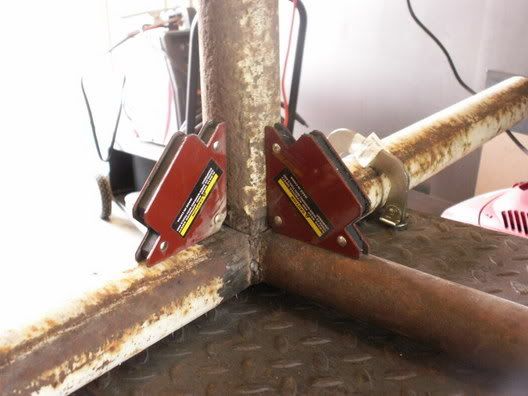
improptu welding jig
Posted by: tdsmoonchild Apr 4 2006, 04:02 PM
One side is done.
Posted by: tdsmoonchild Jul 6 2006, 07:46 AM
sorry no update for so long.....
took some time off for shop improvements
Posted by: tdsmoonchild Jul 6 2006, 07:49 AM
finally finished the world's cheapest (and ugliest) rotisserie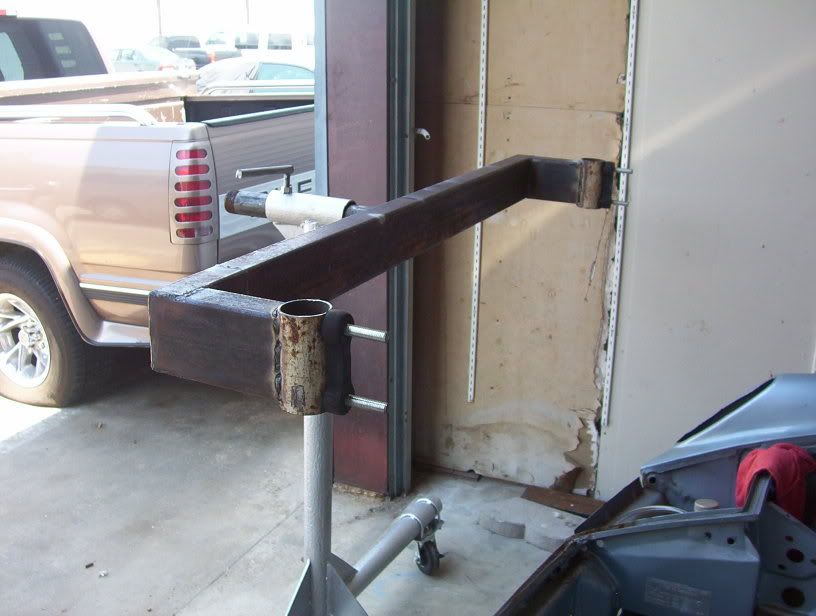
Posted by: tdsmoonchild Jul 6 2006, 07:51 AM
But I still had to fix rusted areas where the rotisserie mounts....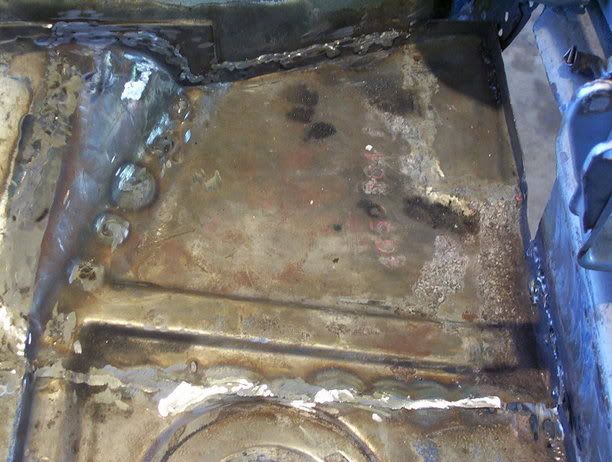
and......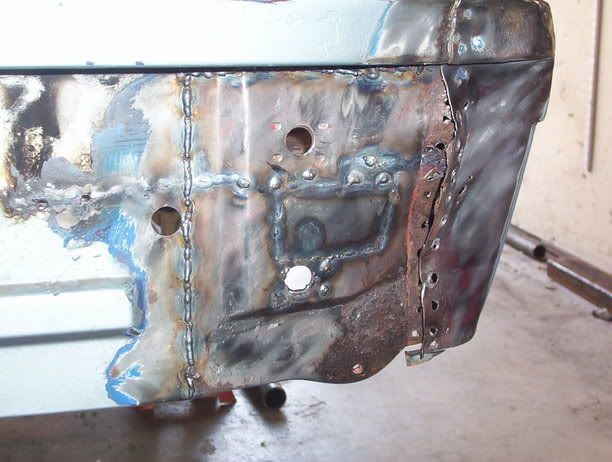
Posted by: tdsmoonchild Jul 6 2006, 07:54 AM
now the front.
before: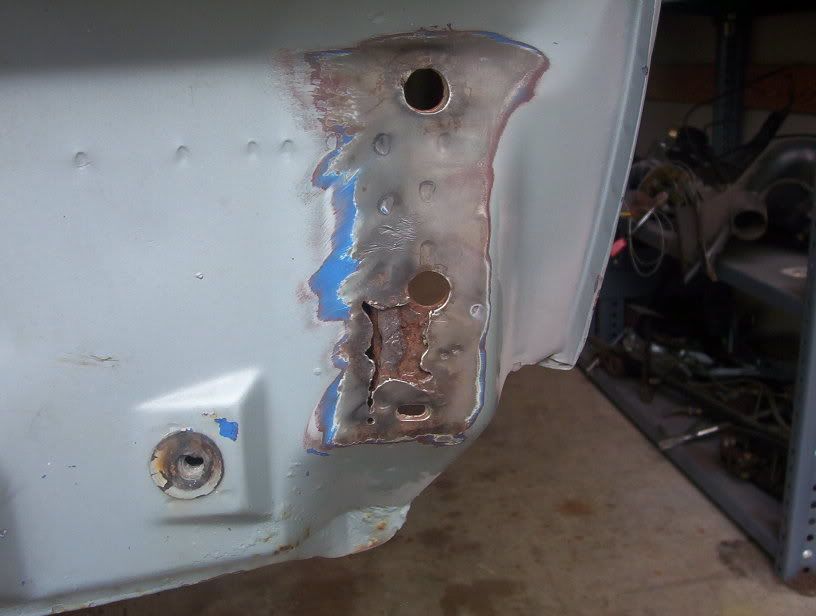
during: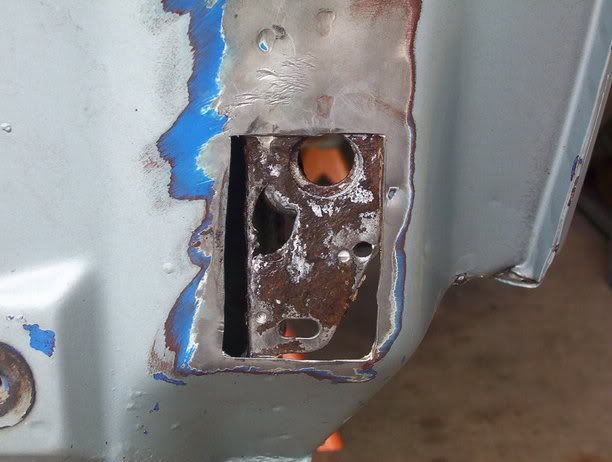
and after: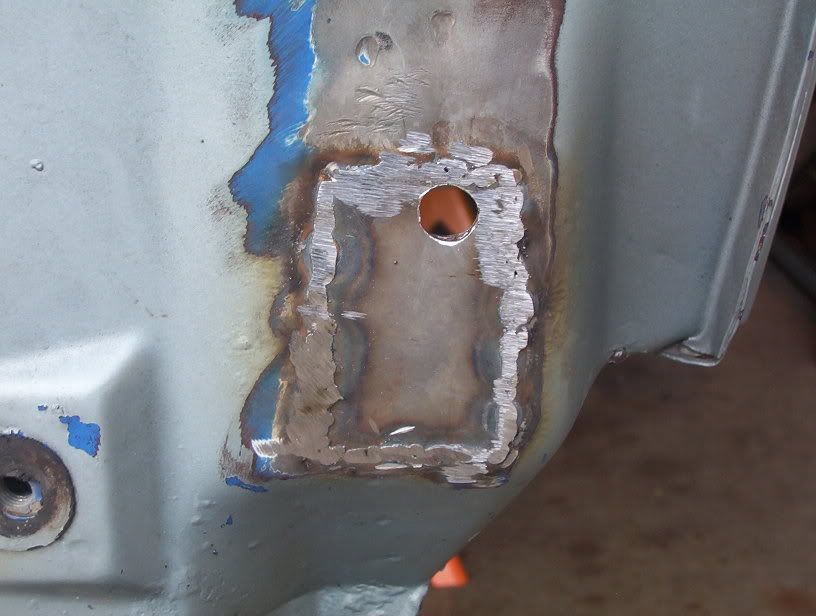
grasshopper style!
Posted by: tdsmoonchild Jul 6 2006, 07:55 AM
made my braces: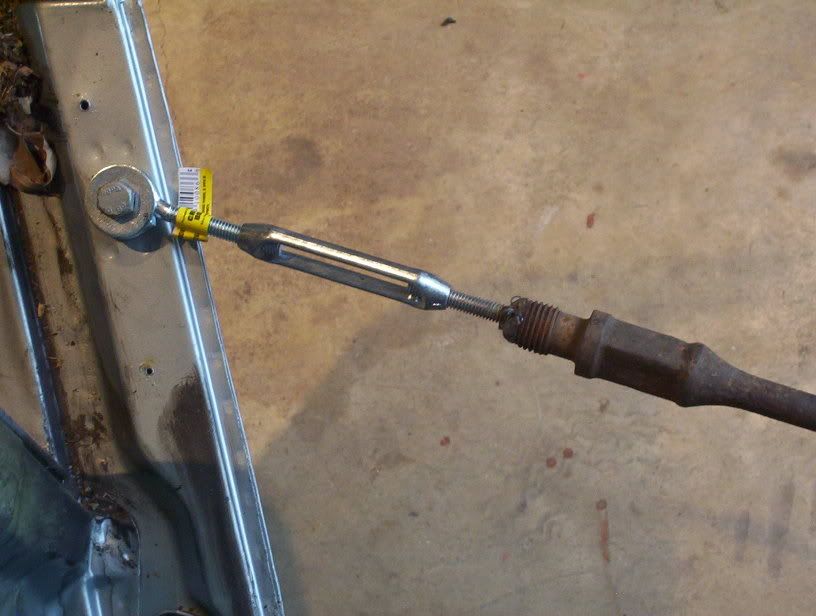
sorry about the blurry pic!
Posted by: tdsmoonchild Jul 6 2006, 07:58 AM
and finally: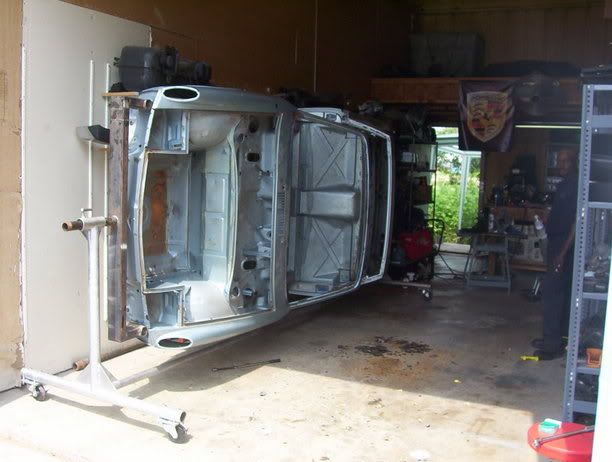
Posted by: tdsmoonchild Jul 6 2006, 08:00 AM
how to clean your car......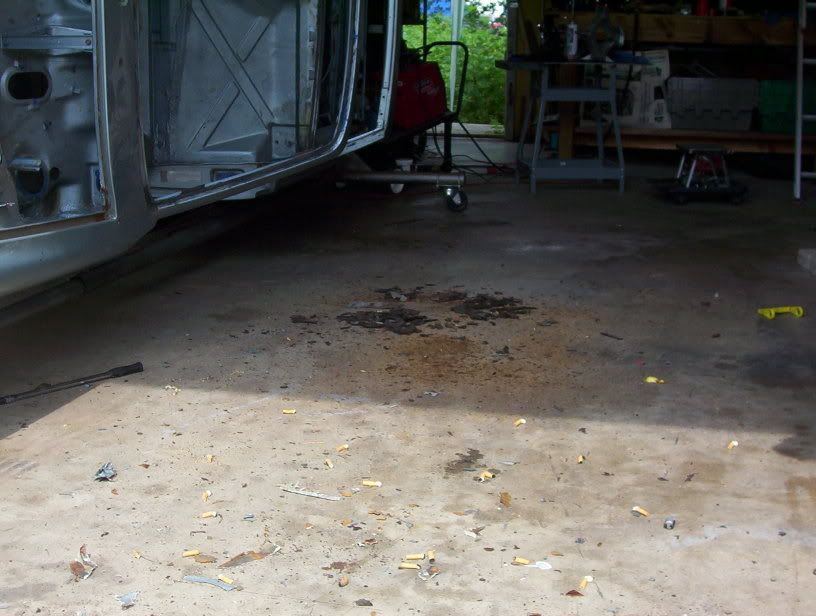
Posted by: tdsmoonchild Jul 6 2006, 08:02 AM
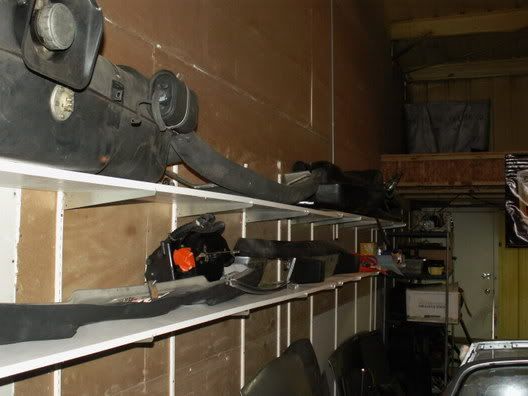
ugly fender repair by PO that needs replacement: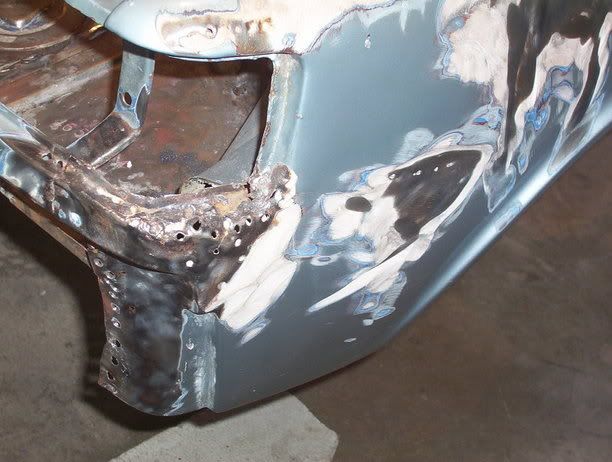
shout out to gregrobbins!
Posted by: MJHanna Jul 10 2006, 08:46 AM
you have a parts car correct? are you going to use the fender off it or fix the one on the car?
Posted by: tdsmoonchild Jul 11 2006, 06:31 AM

you have a parts car correct? are you going to use the fender off it or fix the one on the car?
I had a parts car but it was wrecked in the same area. I'll need another quarter panel.
shout out to gregrobbins!
Posted by: zen motorcycle Jul 11 2006, 07:21 AM
Might be to late now but there was a barn find 1.7 in the area that looked in good shape might think about using this as the parts car??? 
Let me know where your at I would like to come by and see one all apart since that is down the road for me.
Oh and good luck
Grady
Posted by: IanStott Jul 11 2006, 07:49 AM
I go in spurts, usually financially driven! I have many projects on the go as I'm sure everyone else does, but working on the teener is very satisfying. Yours looks in better shape than mine but I'm working hard to get back to how it should be. I am not one to just pave over defects! In that way I'm sure I am my own worst enemy, but when I am finished I will have something one can take a great deal of pride in. Looks to me you are the same way, good luck and keep the pics coming, it motivates the rest of us!
Ian Stott
Moncton
Canada
Posted by: Lou W Jul 11 2006, 11:19 AM
Looking good 
Posted by: tdsmoonchild Mar 20 2007, 10:12 AM
I haven't updated since the split, but I'm ready now.
South Dallas 914 fuel!
Posted by: tdsmoonchild Mar 20 2007, 10:17 AM
Whoa....swiss cheese.
Posted by: tdsmoonchild Mar 20 2007, 10:21 AM
guess I'll need a whole quarter panel. This is the same side that had the nasty 1" bondo repair in the back.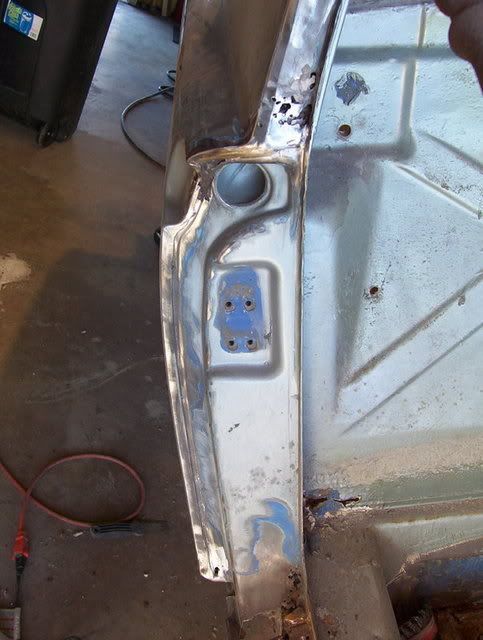
another...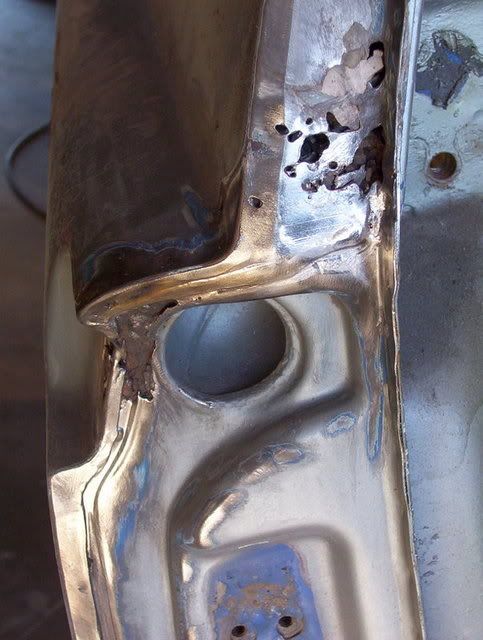
Posted by: tdsmoonchild Mar 20 2007, 10:22 AM
Voila!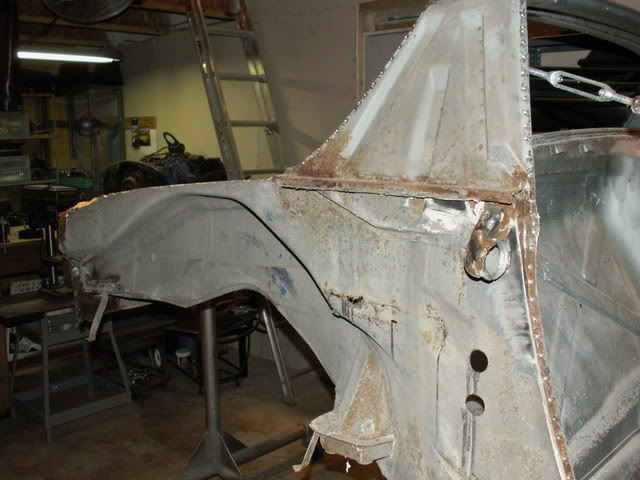
Posted by: tdsmoonchild Mar 20 2007, 10:24 AM
I'll need one of these....nudge,nudge,wink,wink.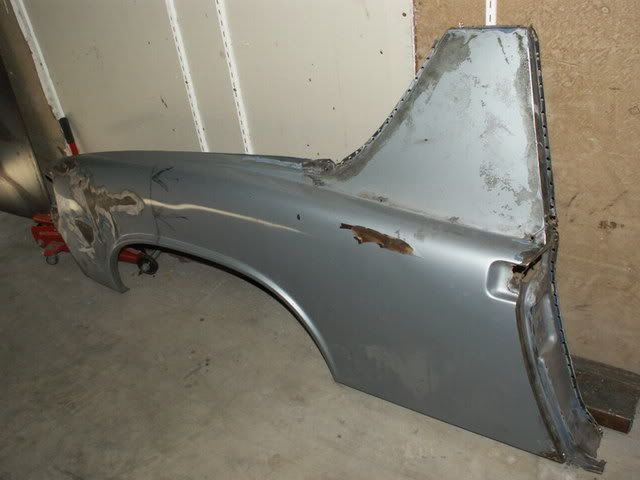
Posted by: tdsmoonchild Mar 20 2007, 10:25 AM
warming up my breakfast.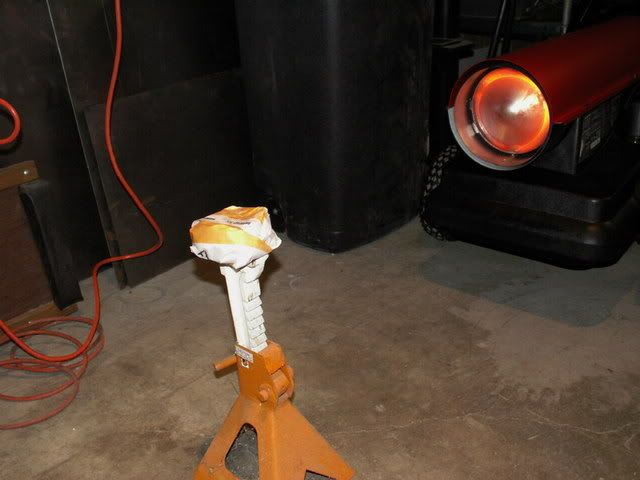
Posted by: tdsmoonchild Mar 20 2007, 10:27 AM
I've got alot more pics that I'll try to post tonight. Left my camera at the shop.
Next time........after the operation.
Posted by: rick 918-S Mar 20 2007, 11:44 AM
![popcorn[1].gif](style_emoticons/default/popcorn[1].gif)
Posted by: Johny Blackstain Mar 20 2007, 12:01 PM
Oh hell ya! Awesome thread !

Posted by: Lou W Mar 20 2007, 12:40 PM
I haven't updated since the split, but I'm ready now
What split?
Your doing a great job on your car.

Posted by: tdsmoonchild Mar 20 2007, 07:04 PM
here is what the inner looked like...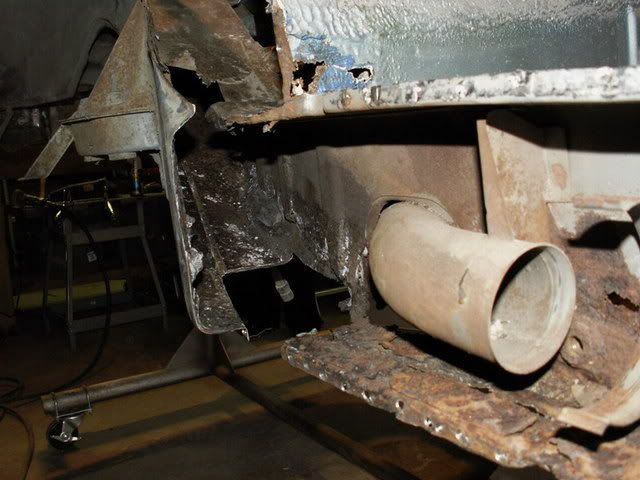
and another...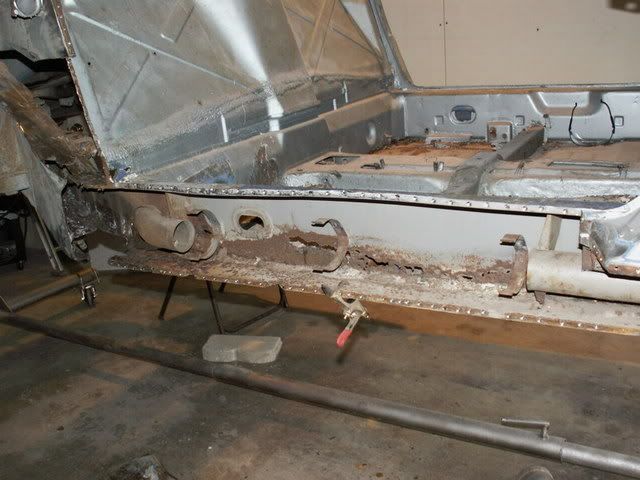
Posted by: tdsmoonchild Mar 20 2007, 07:07 PM
right side completely gutted.....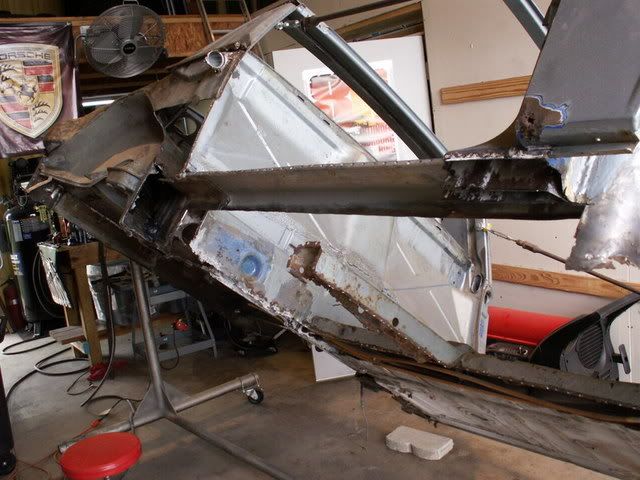
and another...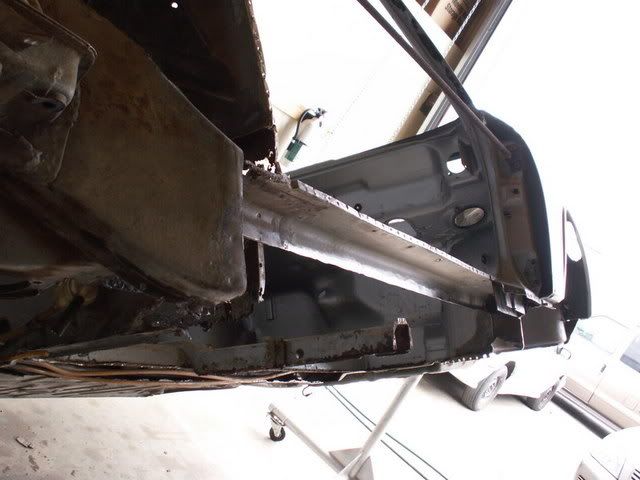
and still more...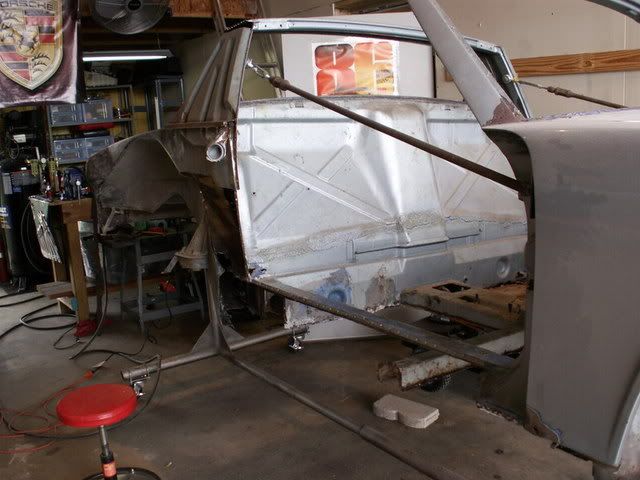
please make it stop!
Posted by: tdsmoonchild Mar 20 2007, 07:09 PM
what's this.....stack of sheet metal?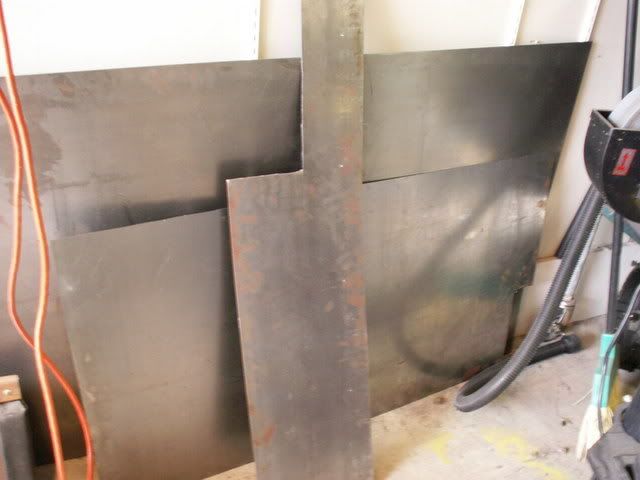
or is it 914 restoration parts???
Posted by: tdsmoonchild Mar 20 2007, 07:12 PM
wow, it's an inner long....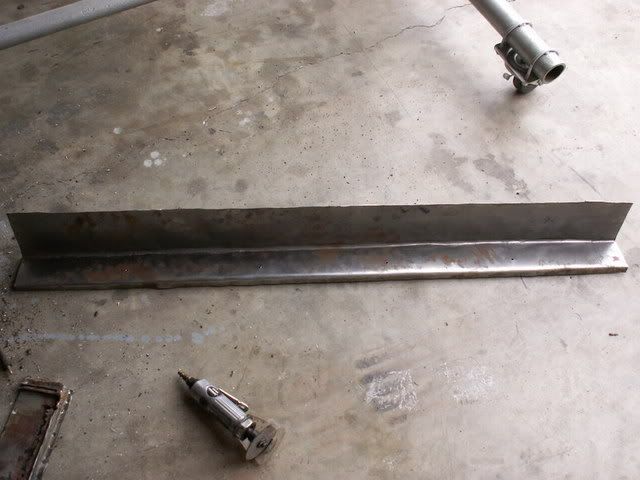
Where did that come from???
Posted by: tdsmoonchild Mar 20 2007, 07:13 PM
and presto!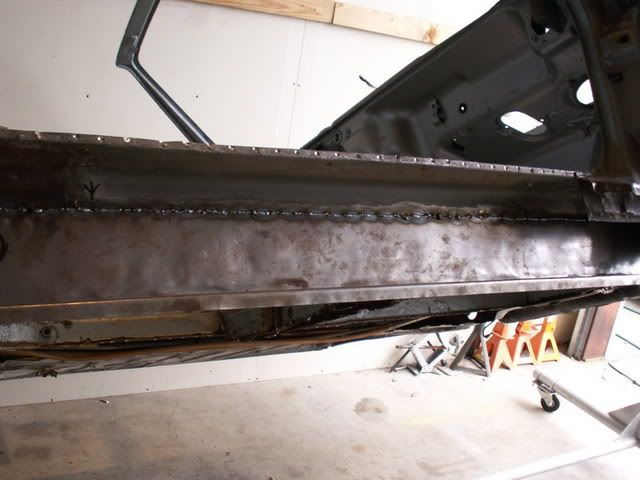
Posted by: tdsmoonchild Mar 20 2007, 07:17 PM
and now for something completely different....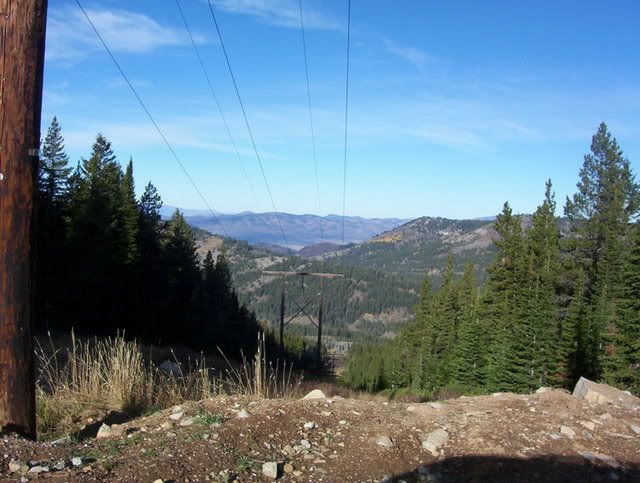
boy the hills of southern Idaho are nice when your from somewhere that is flat as a pancake!
My friend with his mule deer.....unfortunately I came back mule deer less!
Posted by: tdsmoonchild Mar 20 2007, 07:19 PM
five generations all together.....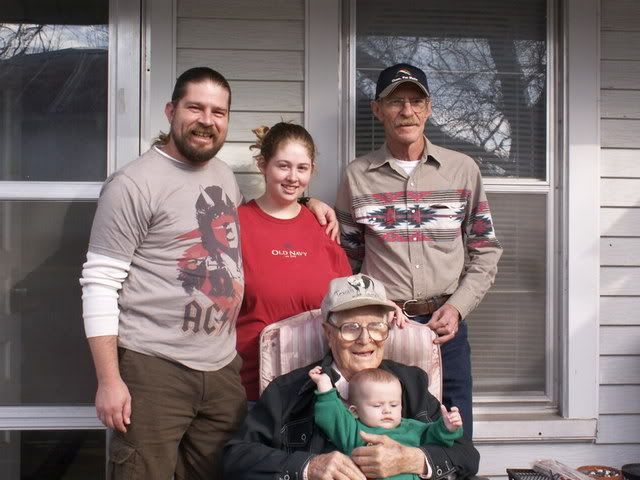
ya don't see that everyday! By the way, I'm the fat ass on the left.....
Posted by: tdsmoonchild Mar 20 2007, 07:21 PM
where was I! Oh yea....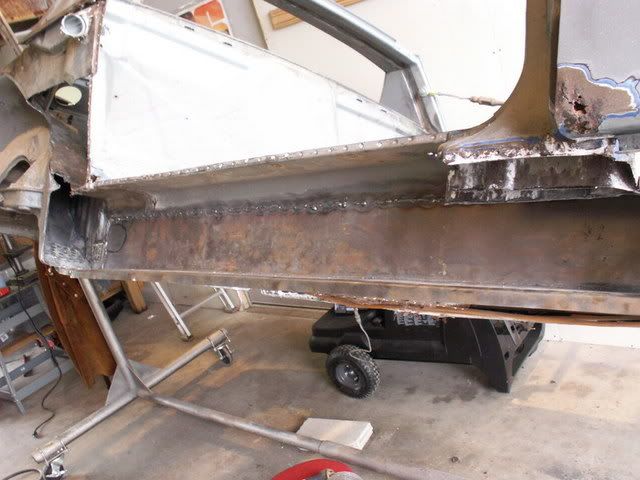
handmade inner stitched up...
Posted by: tdsmoonchild Mar 20 2007, 07:25 PM
metal fab hack's way to deal with compound curves....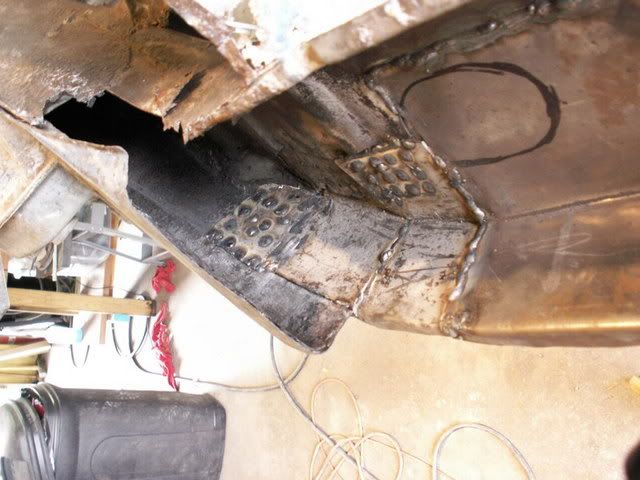
'nother....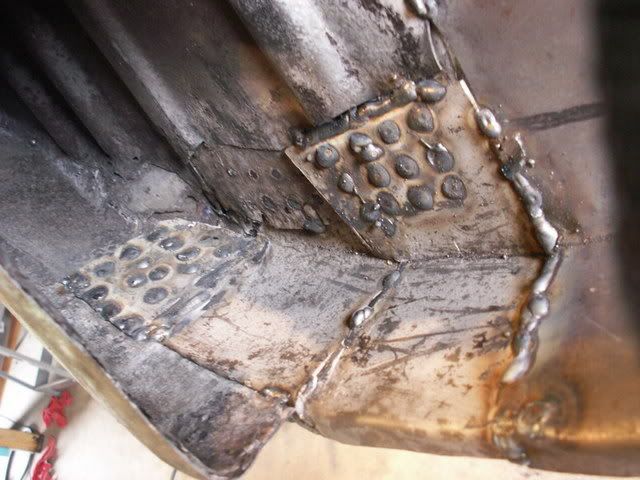
I know, I know....ugly welding..... but for pete's sake....it is on a part of the car no one will be looking at!
Posted by: tdsmoonchild Mar 20 2007, 07:27 PM
from the bottom...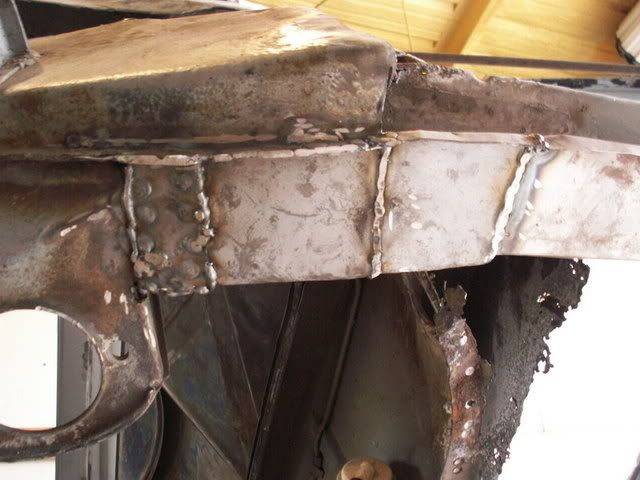
'nother...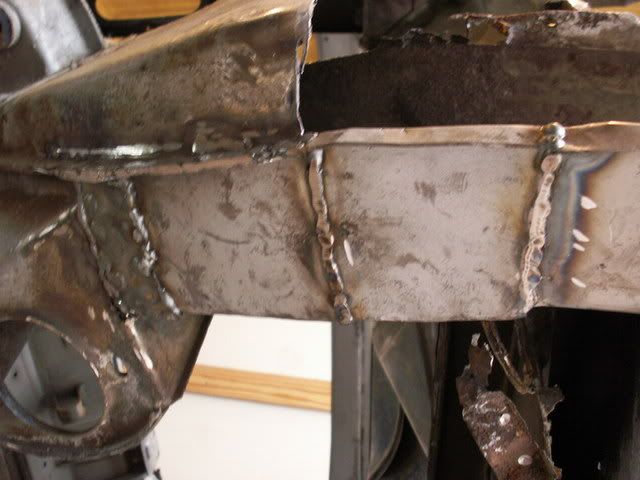
Posted by: Matt Romanowski Mar 20 2007, 07:44 PM
Hey, nice work!!!!! Keep it going!!
Powered by Invision Power Board (http://www.invisionboard.com)
© Invision Power Services (http://www.invisionpower.com)