Printable Version of Topic
Click here to view this topic in its original format
914World.com _ 914World Garage _ Spoke's Green 914 Progress Thread
Posted by: Spoke Feb 17 2006, 08:00 AM
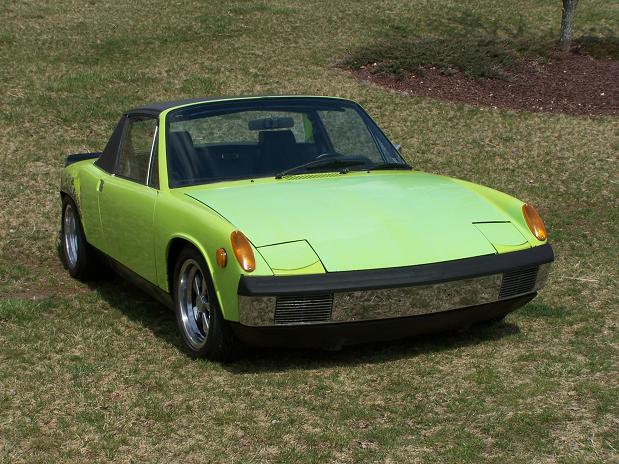
Just picked up my new 914 in its Ravenna Green livery. I'm not sure if my wife's more bummed out that the new car is lime green or that I still have my old 914.
Spoke
Attached image(s)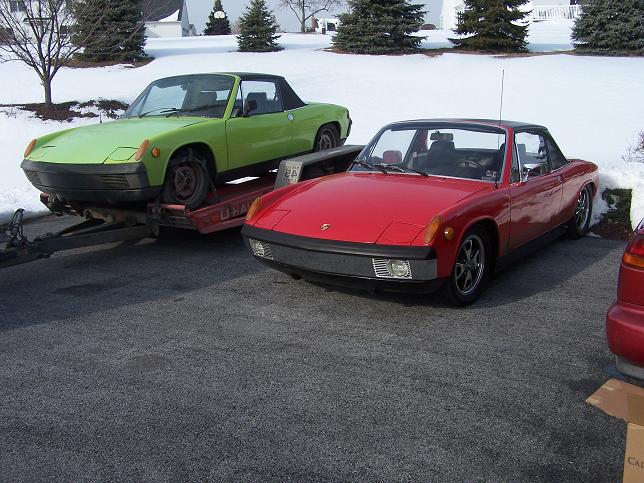
Posted by: Spoke Feb 17 2006, 08:05 AM
This was the first time that I've towed a car on a trailor. My buddy's 1500 Silverado pulled the 914 very easily. I kept the speed low, between 55 and 65. The ride from my house to the car in Connecticut was about 180 miles.
At 55-65 MPH, I was a moving chicane on rt 287, rt 78 in NY and NJ. I could see semi trucks 1/2 mile behind me start to make moves when they saw me turtling along up ahead.
Attached image(s)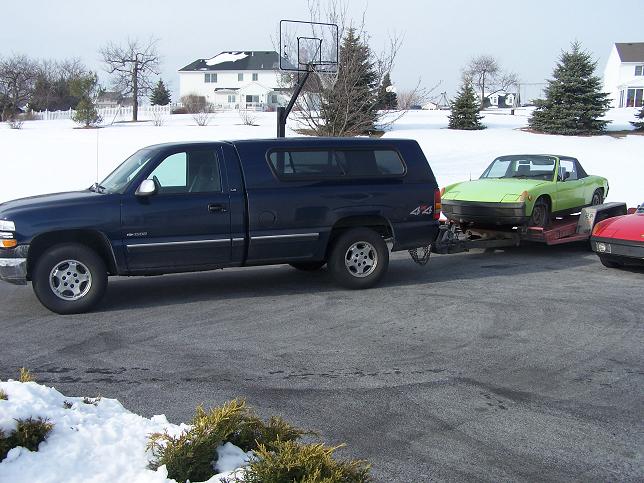
Posted by: rmital Feb 17 2006, 08:09 AM
| QUOTE (Spoke @ Feb 17 2006, 06:05 AM) |
| I could see semi trucks 1/2 mile behind me start to make moves when they saw me turtling along up ahead. |
Knowing the area well....I could safely say, your a very brave man....or a skilled defensive driver.
Posted by: Spoke Feb 17 2006, 08:16 AM
The first order of business with the green car is to get a new clutch in it, and get it on the road. This car will be converted to 5-lug, wheels will be Aaron Cox's 7/8 inch Fuchs (now in transit).
I want to do something with the engine, but not right now. Engine is a 2.0 with original FI. Eventially, I want to get some big HP, maybe between 150-200 HP, hopefully staying with a T4.
The car seems to be in really good shape, rust wise. Haven't popped the rocker panels yet but all other rust indicators look good (front trunk, no rust; rear trunk, just some minor surface rust in one area. Battery tray is original, seems to be very solid.
Attached image(s)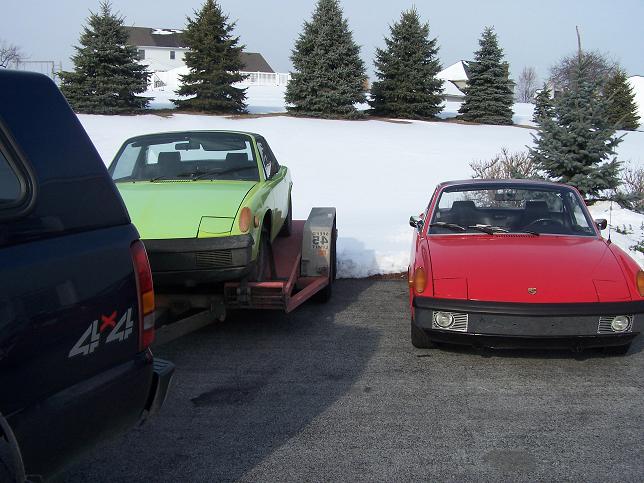
Posted by: Spoke Feb 17 2006, 08:19 AM
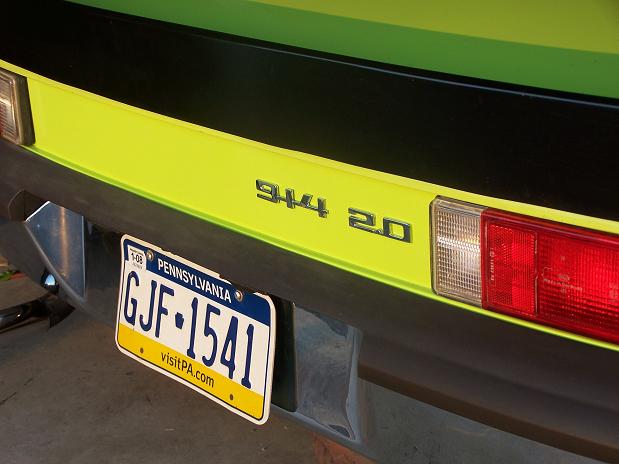
The paint for the most part appears to be original. The hood looks like it was painted once, but fenders, doors, and jams still have original paint on them.
The red car is starting to look like it did a month ago before the accident. Taking my time on pounding out the damage. I'll get the red one back on the road then decide whether to sell it or keep it.
Attached image(s)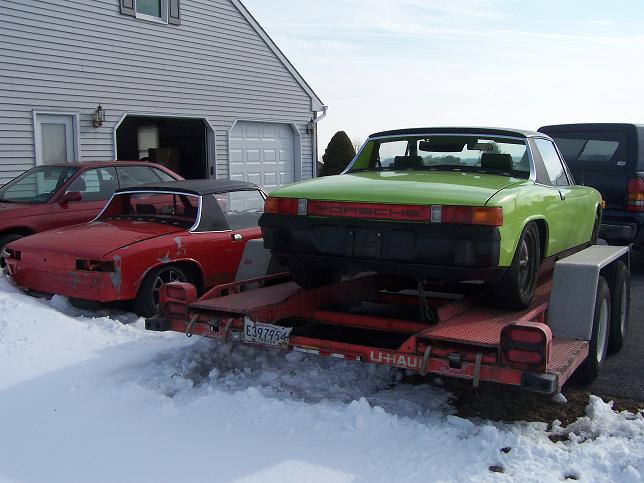
Posted by: Spoke Feb 17 2006, 08:24 AM
The wrinkles are slowly disappearing. The car still runs good. Can't drive it anywhere except in the neighborhood. No insurance, no registration.
Attached image(s)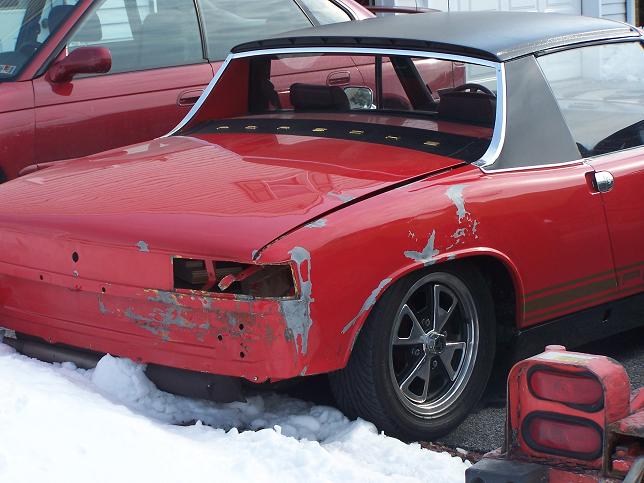
Posted by: Spoke Feb 17 2006, 08:27 AM
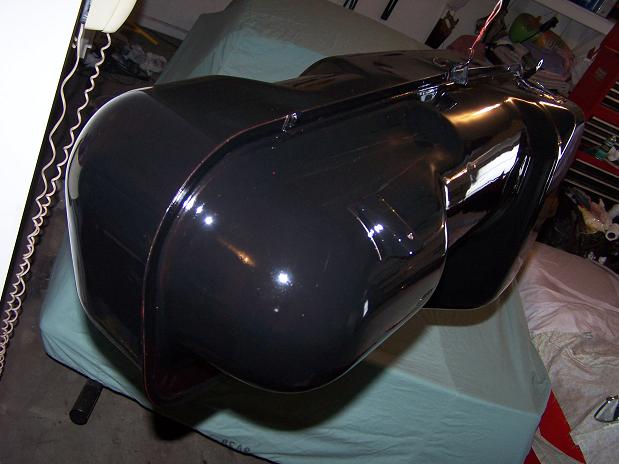
The trunk has a cable release for the lock. Would like to change this to electric.
Attached image(s)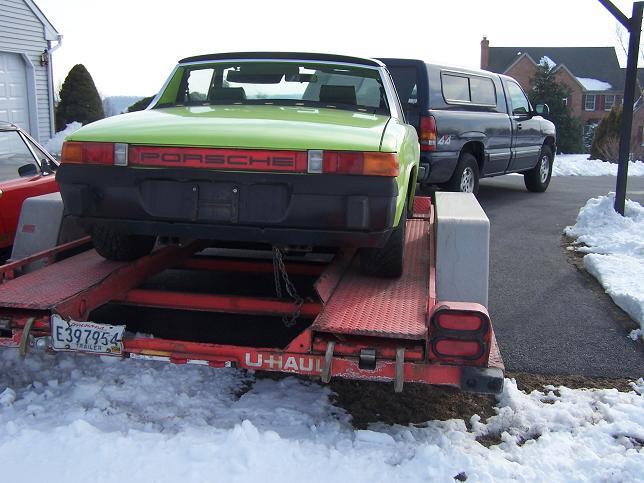
Posted by: Spoke Feb 17 2006, 08:28 AM
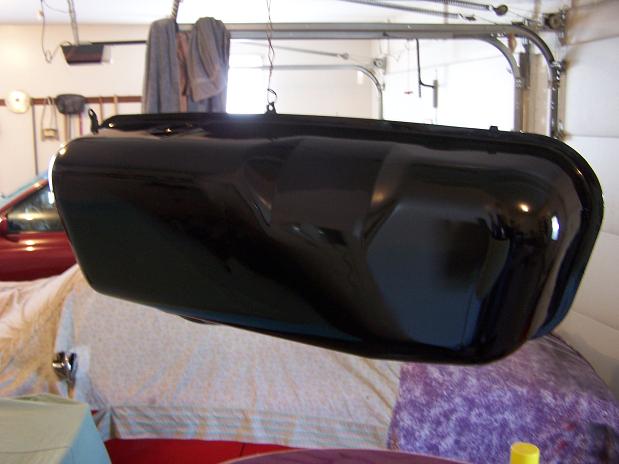
Front trunk is very clean. Don't like the electric window washer. I have the original washer bottle. Maybe I'll retro-fit the electric washer motor into the original bottle.
Attached image(s)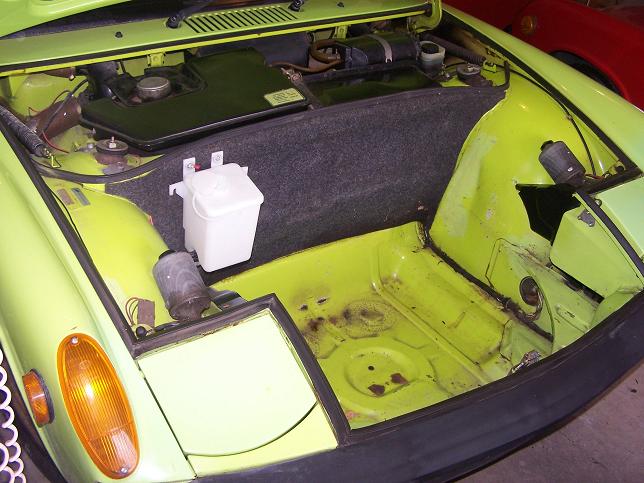
Posted by: Spoke Feb 17 2006, 08:32 AM
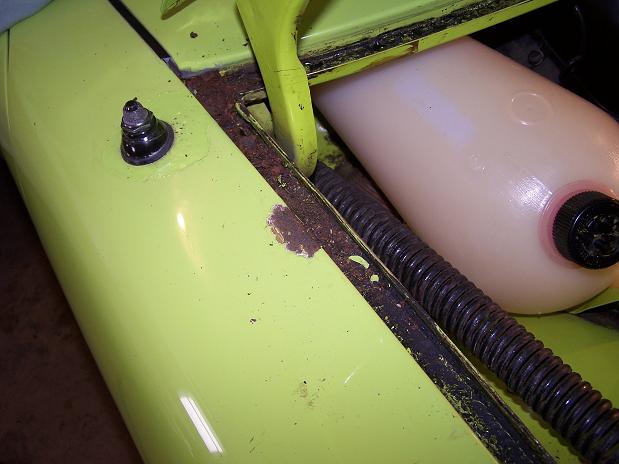
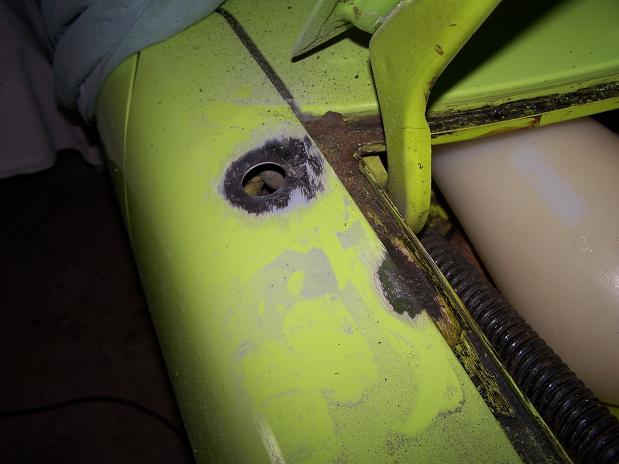
Door jams have original paint. The car was undercoated. I think this is why the car is in such good shape. One of the negative points of '70s undercoating can be seen in the plug near the door sill. The drilled hole allowed surface rust to begin. The positive point of undercoating is that the structure of the car is in excellent shape with very little rust. The car alledgedly has 137K miles.
Attached image(s)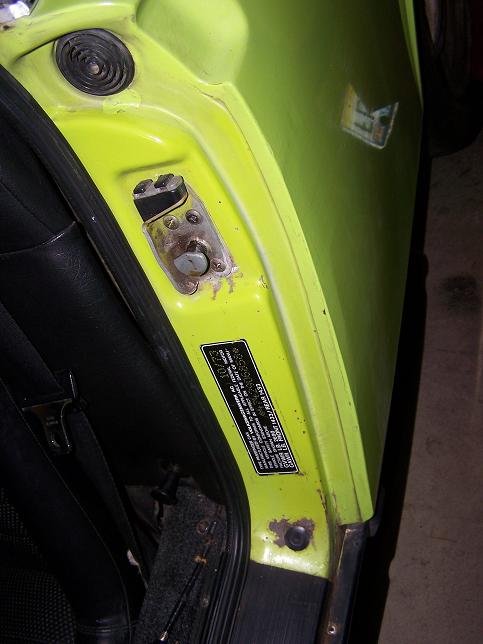
Posted by: yarin Feb 17 2006, 08:40 AM
Congrats on the purchase!
Where in CT did u find the car? I'm in Stamford.
When I got my car I borrowed my friend's trailer. Drove it from Rockaway to upper westchester to meadowlands and back to upper westchester. then next day from upper westchester to nassau collosium and back to upper westchester. left the car and returned the rig to rockaway. and of course had to drive home back to upper westchester, hehe.
That was all for an AutoX and a autox clinic. Same crappy roads, plus a few more. Route 80, 287, Tappan Zee, 684, 87, LIE, etc...
Posted by: KaptKaos Feb 17 2006, 08:46 AM
Nice score! 
Maybe next time I am home, I can "borrow" it for a litte while 
Posted by: Part Pricer Feb 17 2006, 09:01 AM
Jerry,
Good to see that you made it home in one piece. I found two extra sets of keys for the car when we were packing up the house. I'll send them off to you when I get a chance. It may be a few days though. We're a little busy with the move plus I spent the night in the hospital.  I'll get back up to speed eventually.
Hopefully getting it off of the trailer was easier than getting it on. 
Posted by: Spoke Feb 25 2006, 12:23 PM
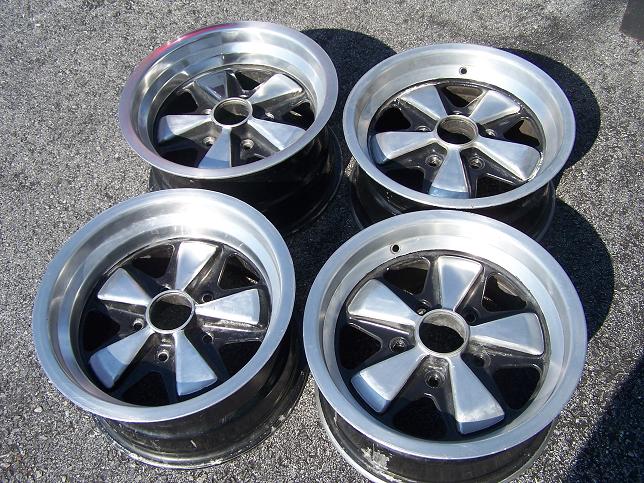
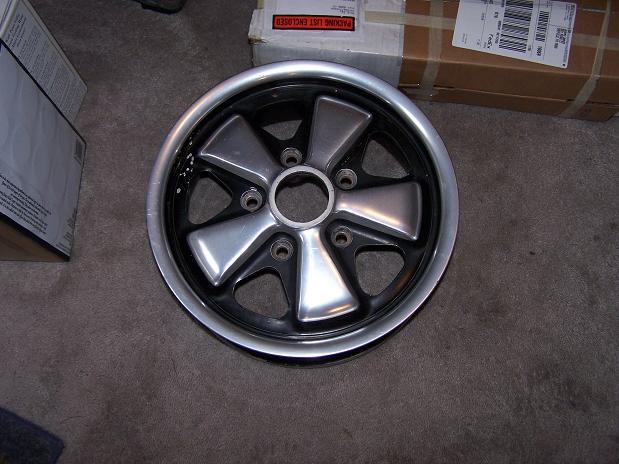
The car will be 5-lug. These 7-inch and 8-inch wheels will add some bling to the car. I'll strip, polish, and paint the wheels. Need to get some center caps.
I polished up one spoke and part of the rim on the the top left wheel just to see it shine. Looks nice.
Spoke
Attached image(s)
Posted by: Spoke Feb 25 2006, 12:27 PM
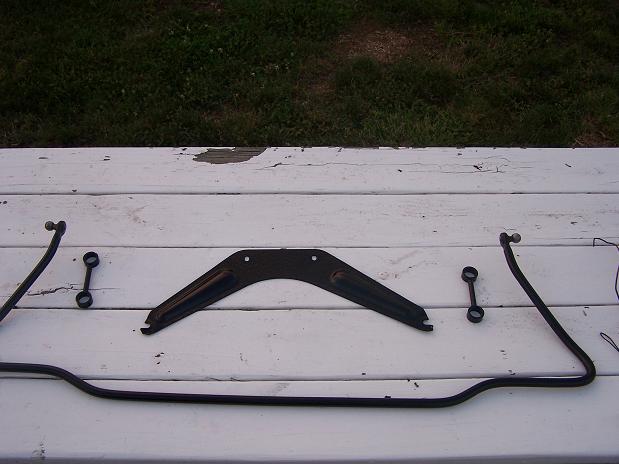
Just scored this set up from ebay. Picked it up in Long Island today.
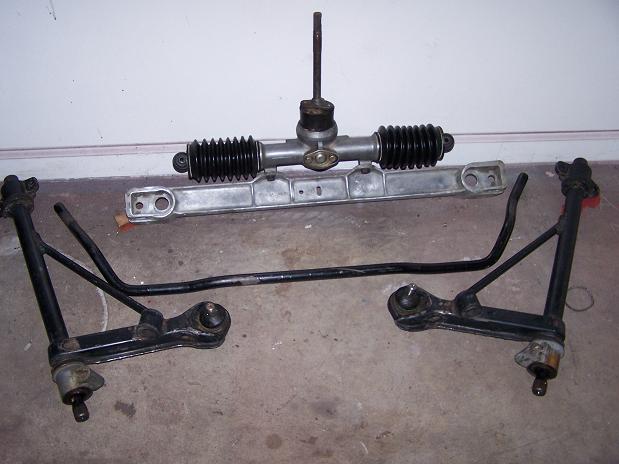
911 Carrera front end includes a-arms, torsion bars, aluminum crossmember (with horn attached), sway bar, struts, rotors, calipers, tie rods, and steering rack. Seller thought it was from a mid to late 80's 911.
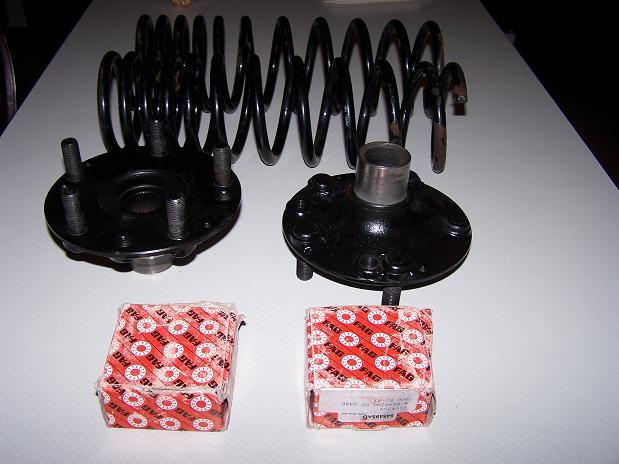
Rear end includes swing arms, complete axles w/inner/outer CVs, 4-to-5 lug converted hub and rotor, 914-4 caliper.
Attached image(s)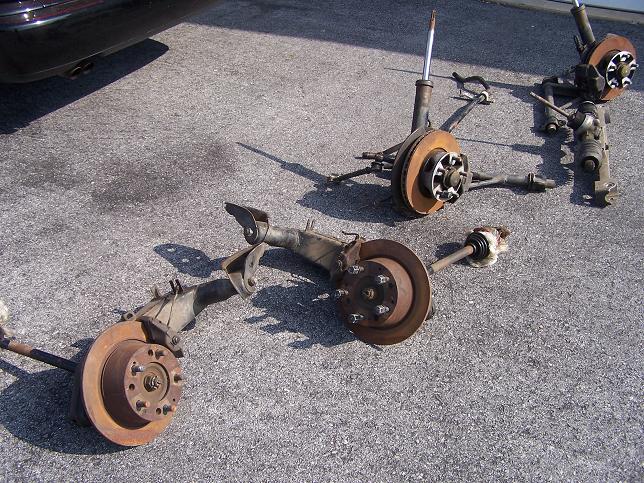
Posted by: Spoke Feb 25 2006, 12:31 PM
These braided brake lines were also included.
Attached image(s)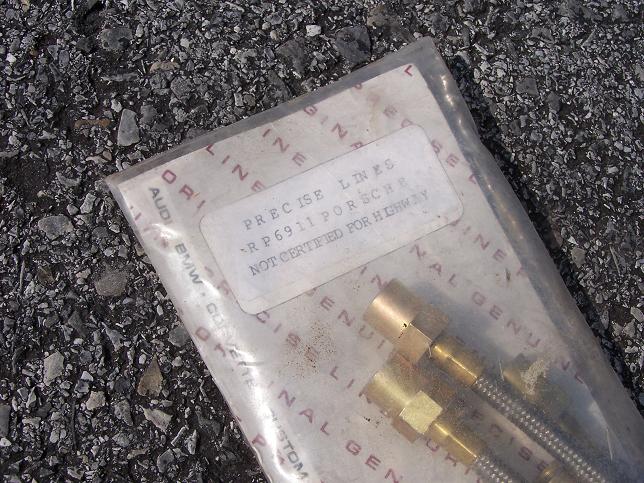
Posted by: Spoke Feb 25 2006, 12:33 PM
Here's the numbers on the struts. Boge shocks? duh. Will the adjustable Koni's on my stock 914 fit in these?
Attached image(s)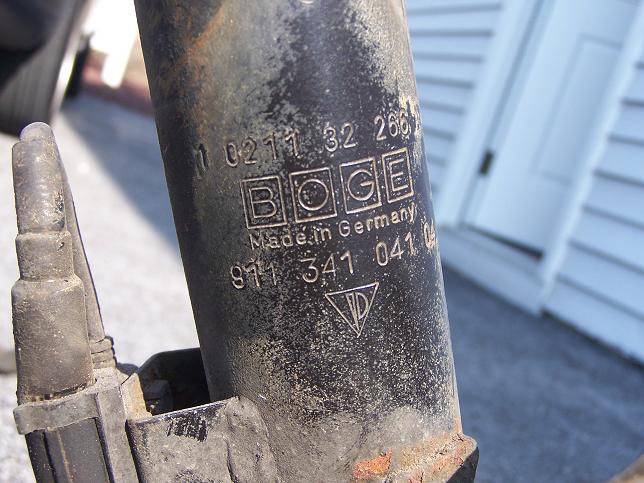
Posted by: rdauenhauer Feb 25 2006, 12:34 PM
Cool Color. Looks solid
Posted by: Spoke Feb 25 2006, 12:34 PM
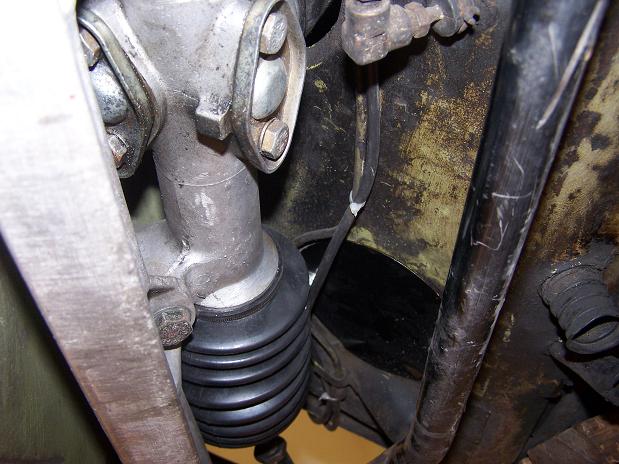
The far bellows on the rack has been chewed by mice. Should I consider using this rack or stay with the one on my 914? Would this one be better?
Attached image(s)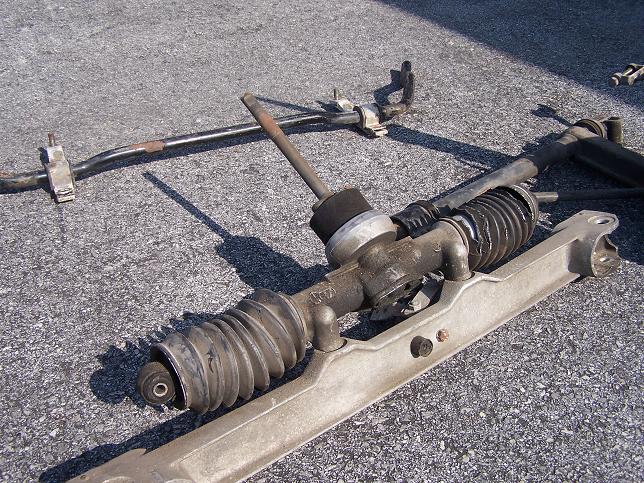
Posted by: Spoke Feb 25 2006, 12:37 PM
The calipers have 3.5 inch spacing between mounting bolts. The body of the calipers are metallic. A magnet sticks to the body of the caliper so I don't think it's aluminum. Does this mean that it's an "A"?
The brake pads have wear sensors on them and its wires are secured to the strut. Hmm, can I use these for wear detection? I guess I need an idiot light somewhere.
Attached image(s)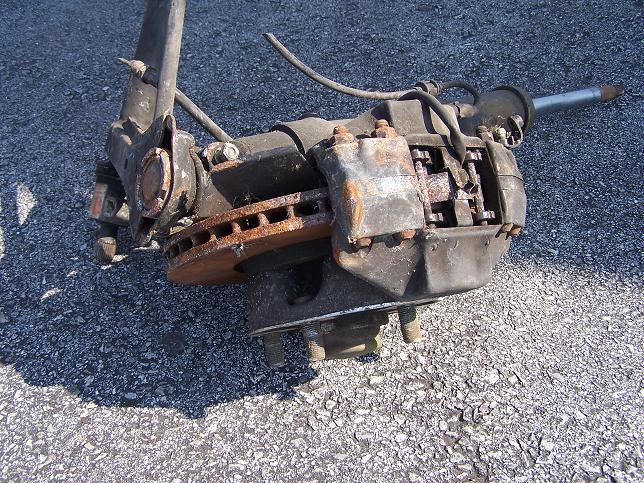
Posted by: drewvw Feb 25 2006, 01:17 PM
You bought this car off Criagslist right? I saw it too late....glad to see it went to a good home
Posted by: Spoke Feb 25 2006, 01:41 PM
I saw it on ebay.
Posted by: drewvw Feb 25 2006, 02:13 PM
ahh....i think it was on CL too. Looked a a good deal.
Posted by: Spoke Feb 28 2006, 02:27 AM
Well, I got closer to road ready with a new clutch.
Then on further inspection, I found the driver side rear swing arm has a bad bushing. The shiny part of the suspension ear shows how the trailing arm has been moving around. The blue screwdriver is in a hole in the metal caused by the movement of the arm at the pickup point.
This puts me in a real predicament since I have a 5-lug suspension to put on the car but have at least a month or more of work (at my pace) on the wheels (strip, polish, paint), install suspension, flare fenders, and I want to get the car on the road ASAP.
Question: How hard is it to replace a bushing? I'm thinking of repairing just this one bad bushing. Are any special tools required?
Maybe one of my local 914 brothers has a spare swing arm that I can "borrow" for a couple of months. Perhaps we can swap some parts.
Spoke
Attached image(s)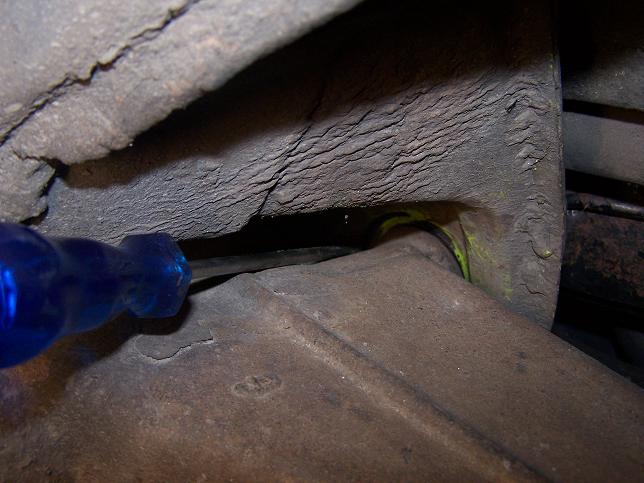
Posted by: Spoke Mar 13 2006, 10:17 PM
Before and After I added a little wheel bling. Wheels from my red car.
Spoke
Attached thumbnail(s)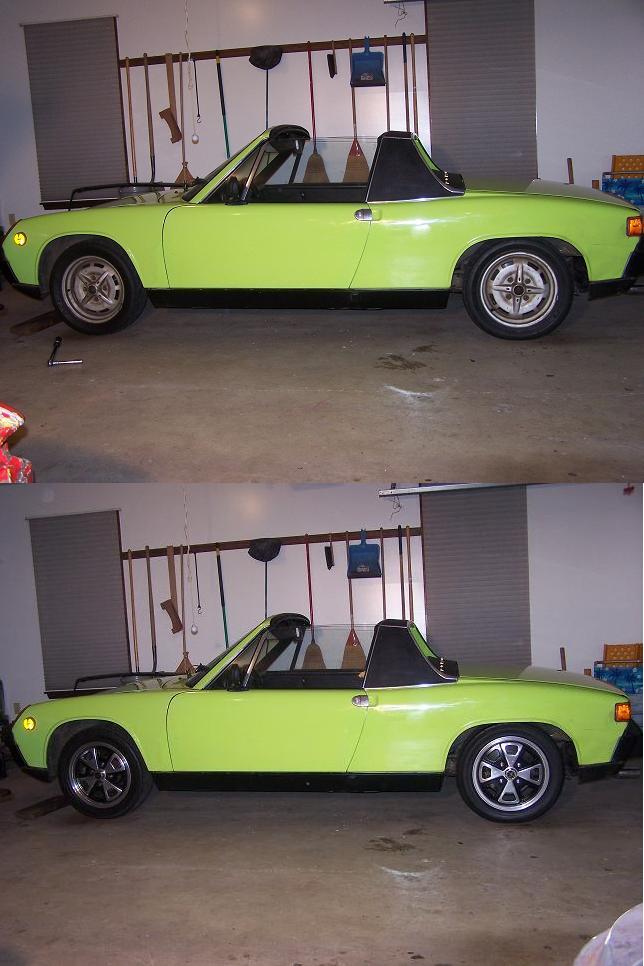
Posted by: Eric_Shea Mar 13 2006, 10:26 PM
A-Calipers... ditch the wear sensor. I used a cut-off wheel on the spring plate to remove the extra cable holder for the set here.
Posted by: SirAndy Mar 13 2006, 10:51 PM
| QUOTE (Spoke @ Feb 17 2006, 06:28 AM) |
| Front trunk is very clean. |
hey spoke, looks like the car was hit in the drivers front once ...
that "wrinkle" in the front fender is a default crumble zone. any dents there usually are the result of a frontal impact.
check the front for repairs and it wouldn't hurt to check the front axle geometry as well ...
ask me how i know ...
 Andy
Andy
Attached image(s)

Posted by: Spoke Mar 14 2006, 05:31 AM
| QUOTE (SirAndy @ Mar 13 2006, 11:51 PM) |
| hey spoke, looks like the car was hit in the drivers front once ... that "wrinkle" in the front fender is a default crumble zone. any dents there usually are the result of a frontal impact. |
Thanks!. I was wondering about the dent. Also, the hood has been repainted along with the headlamp door covers and eyebrows. I'll have to check a little deeper on this. Car doesn't pull or have any other strange characteristics. I did have to adjust the hood back a little as it was hitting the metal around the hood gasket near the front bumper and not closing all the way. Hmm...
Also looking at the pic, the inside front of the trunk has been repainted but I haven't found any strange wrinkles there. The color is a bit off from the original paint of the car.
Spoke
Posted by: Spoke Jun 4 2006, 07:06 PM
Got a set of chrome bumpers. Front one needs some pounding, back one just needed cleaning.
Before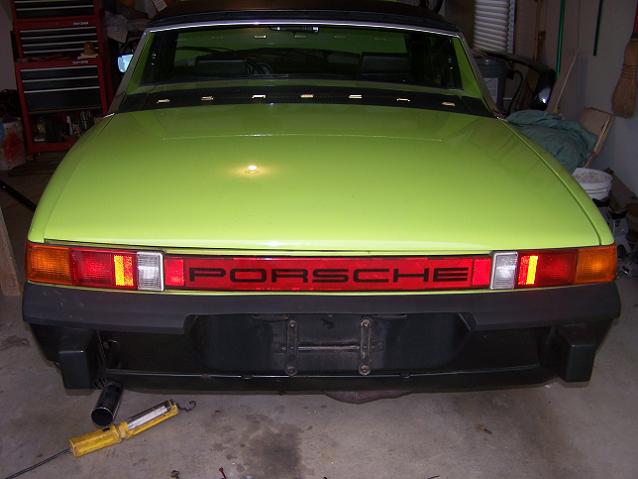
And After. Sorry, low light = bad pic.
Attached image(s)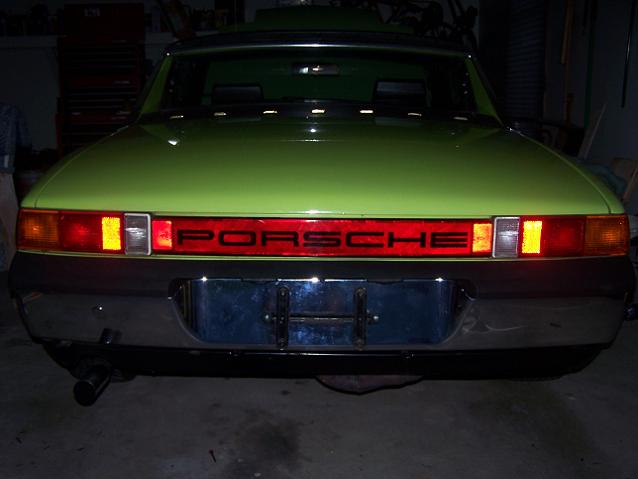
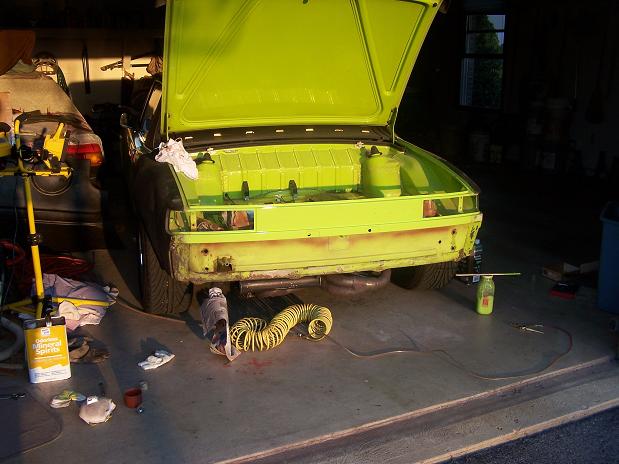
Posted by: Spoke Sep 9 2006, 05:58 AM
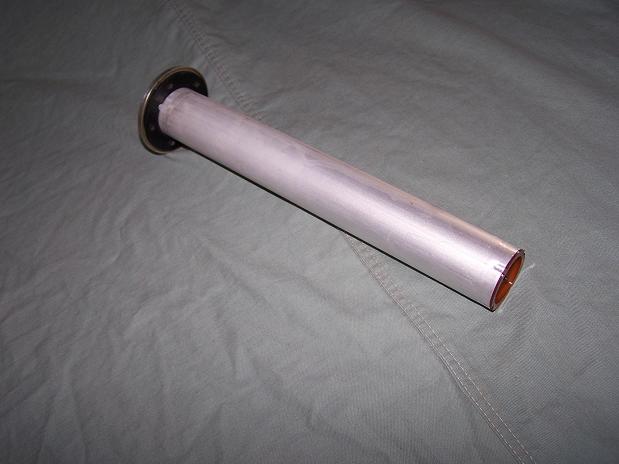
Well the weather is starting to turn here in PA and time for some heat. The car came with SSHE but none of the parts shown in the pic. I sandblasted the flappers and got the stainless steel tubes from an engine that I bought.
The tubes are very nice after polishing them but I had a problem getting them off the engine since all 4 bolts had either rusted to the nuts on the tubes or rusted to the nuts and the nuts rusted off of the tubes. Either way, I had to grind the bolts off and weld new nuts on.
All hardware now installed and I'm ready for the cold weather.
Spoke
Attached image(s)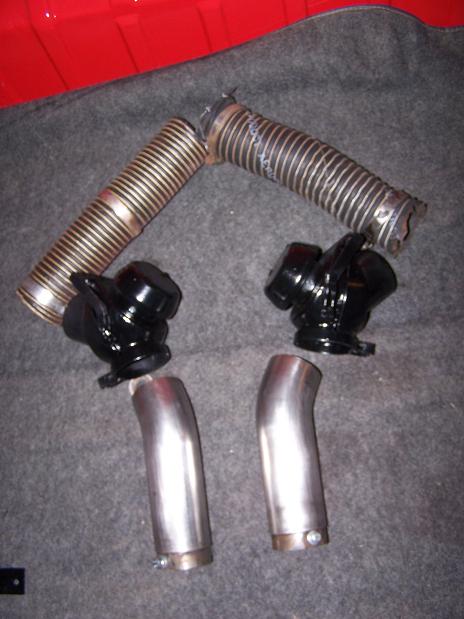
Posted by: Bleyseng Sep 9 2006, 07:31 AM
Nice Ravanna Green 914. 
How's the 5 lug conversion coming? I hope you sent out the calipers for rebuilding....
Posted by: Spoke Sep 12 2006, 07:12 PM

Nice Ravanna Green 914.
How's the 5 lug conversion coming? I hope you sent out the calipers for rebuilding....
I picked the car; the color came on the car. Nice classic color but not sure if I'll keep it once I start repainting..
The only thing I've done on the 5-lug is strip and polish the wheels. I spent a lot of time cleaning up the spokes of the wheels. Will paint the background black. 19mm Master Cylinder and rear Tee ordered.
For the suspension, I will inspect everything and unless something jumps out at me, I'll mount it all then replace items as needed such as ball joints, tie rod ends, bearings, rebuild calipers. The rears calipers on the green car will stay as they have been rebuilt recently and the rear is 4-to-5 lug converted 914.
Spoke

Before
Attached image(s)
Posted by: Spoke Sep 25 2006, 11:06 PM
Painted the wheels tonight. One step closer to 5-lug.
Spoke
Attached image(s)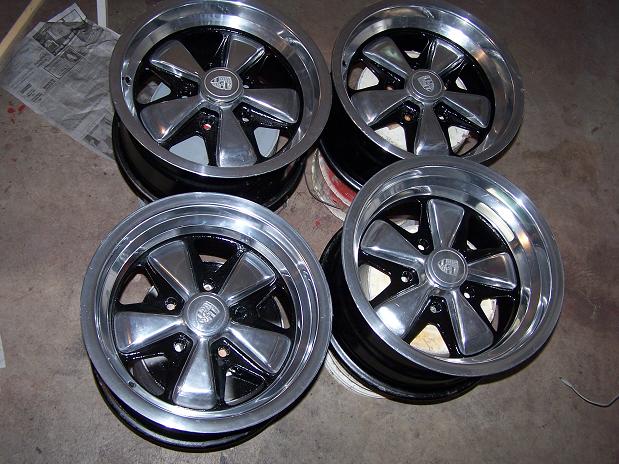
Posted by: Mueller Sep 26 2006, 12:24 AM
The far bellows on the rack has been chewed by mice. Should I consider using this rack or stay with the one on my 914? Would this one be better?
the racks are the same more or less...the one with the least amount of use would be my choice....
if you go with turbo tie rods (and you should, and I might have a brand new unused set for sale) they come with new boots...
Posted by: Spoke Oct 28 2006, 09:34 AM
I'm done cleaning and prepping the front end. Repacked the bearings, added lube to the ball joints, cleaned up the rotors.
I decided not to paint anything yet since everything cleaned up real well and with my flame-test just-bolt-it-on-and-see-what-works approach, I may be taking things apart later.
Ball joints and tie rod ends feel ok but won't know their true condition until mounted on the car.
Spoke
Attached image(s)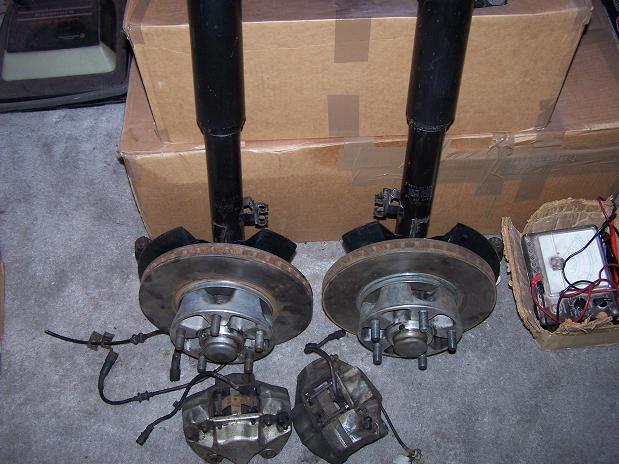
Posted by: Spoke Oct 28 2006, 09:41 AM
Tires are mounted. 205/50/15 Yoko ES100's on 7" wheels for the front, 225/50/15 Yoko's on 8" wheels for the rear.
Nice 14x5.5" Fuch for the spare from Camp914. I never leave home without a spare.  Once I ran over something on RT287 in NJ in my A6 and the tire deflated immediately. Tire had 1/4" hole in the tread. Had to ride the donut for 150 miles.
BTW, the box beside the spare Fuch holds a rebuilt front driveshaft for the A6. Outside boot ripped.
Spoke
Attached image(s)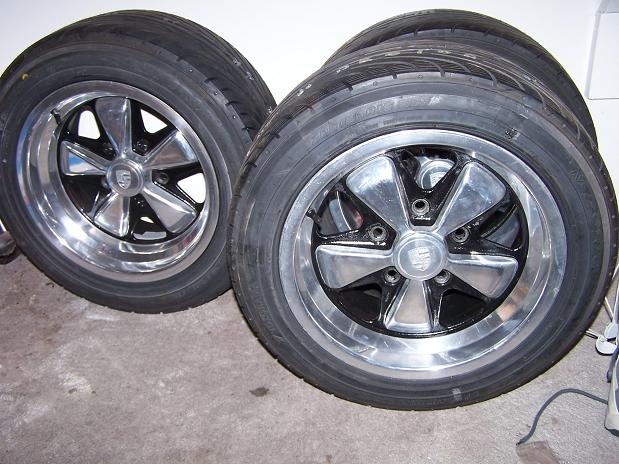
Posted by: Spoke Oct 28 2006, 09:46 AM
First fitment of the rear wheels on the hub assembly. Had to mount the tire to remove the spline nut to pull the driveshaft. The 8" wheels will give the back-end that lovely fat bottom look that guys like.
The red stuff on the swing arm is paint dust from painting the red car.
Spoke
Attached image(s)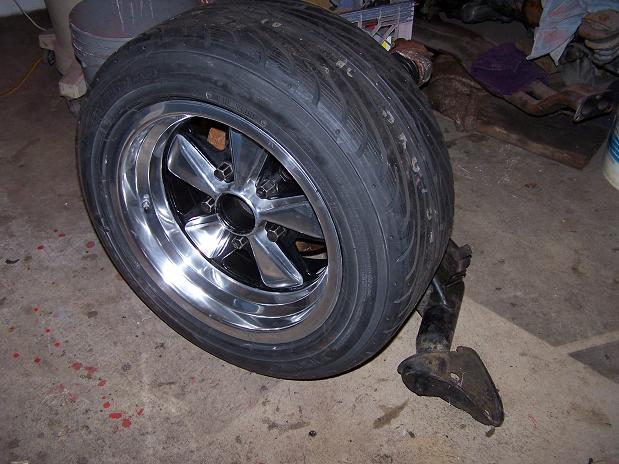

Posted by: Spoke Dec 2 2006, 04:13 PM
Time to do the 5-lug thing. Finally...
I'll do the front end first, then the back end.
Last pic of 4-lug front end.
Attached image(s)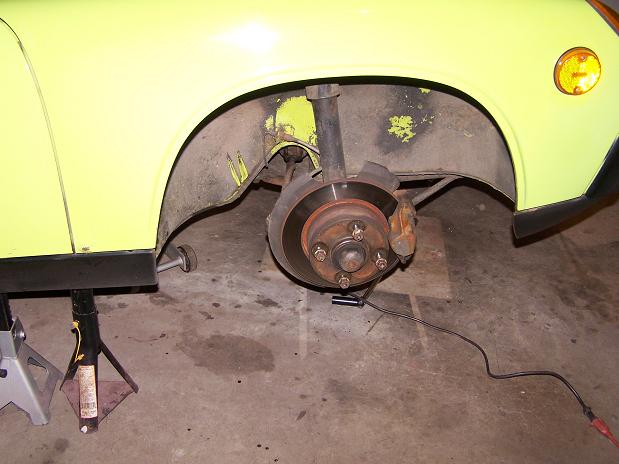
Posted by: Spoke Dec 2 2006, 04:15 PM
Dropped the old front end.
Attached image(s)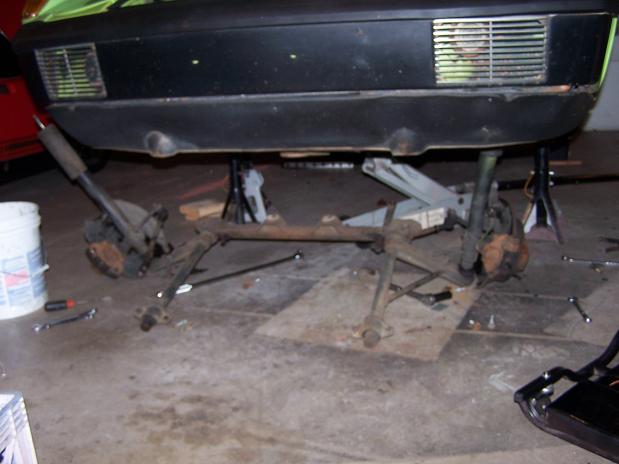
Posted by: Spoke Dec 2 2006, 04:17 PM
All the old front end stuff. Anybody need something? Rotors? Calipers? 17mm master cylinder is out, too.
Attached image(s)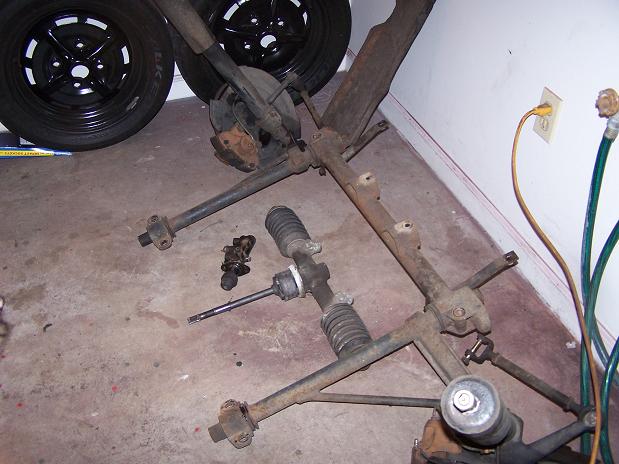
Posted by: Spoke Dec 2 2006, 04:20 PM
Ken Tyrell tried 4 front wheels, how about none?
Attached image(s)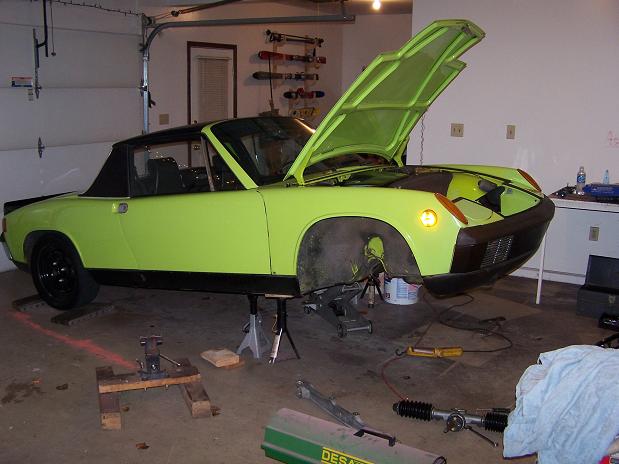
Posted by: Spoke Dec 2 2006, 04:22 PM
Old rack, new rack. I just can't take my eyes off a nice rack.
Attached image(s)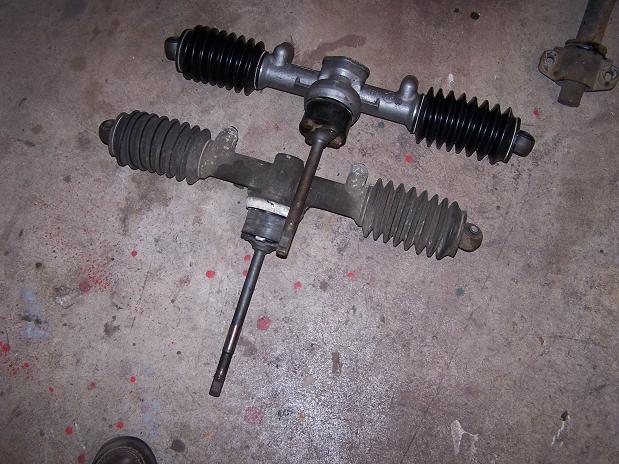
Posted by: Spoke Dec 2 2006, 04:23 PM
19mm master cylinder installed.
Attached image(s)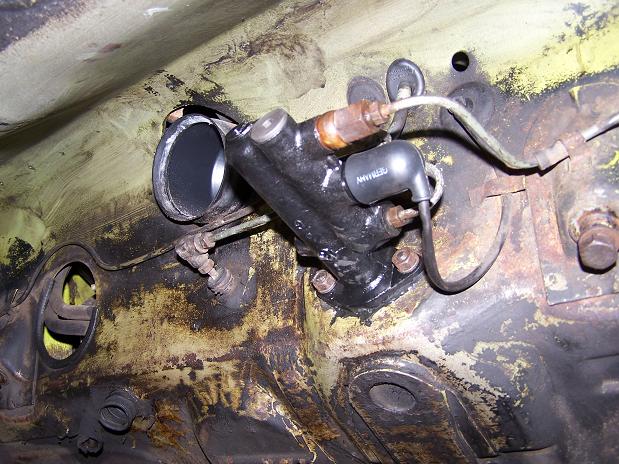
Posted by: Spoke Dec 2 2006, 04:24 PM
A-Arms, crossmember ready for install.
Attached image(s)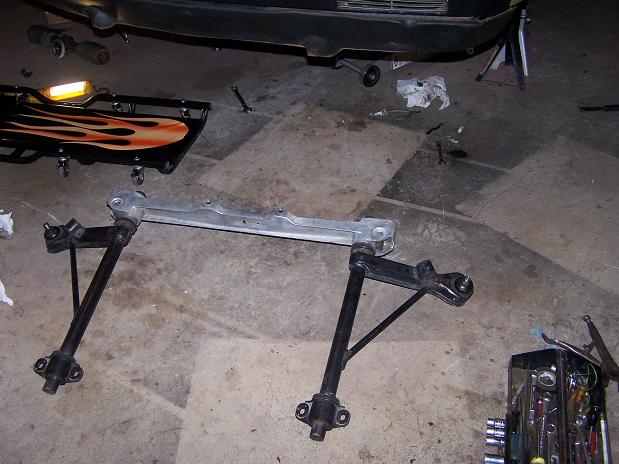
Posted by: Spoke Dec 2 2006, 04:25 PM
New rack in.
Attached image(s)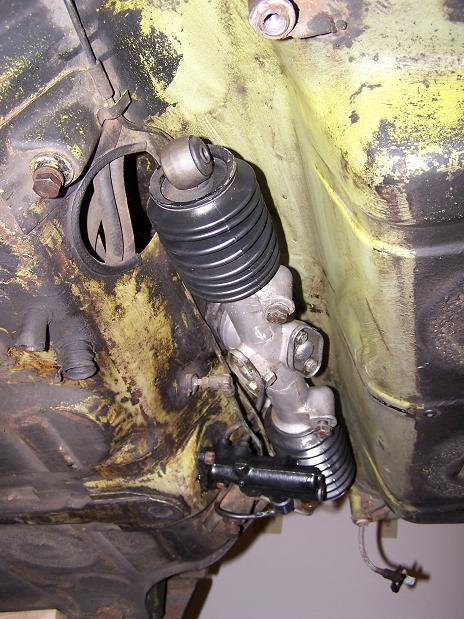
Posted by: Spoke Dec 2 2006, 04:26 PM
A-Arms, crossmember installed.
Attached image(s)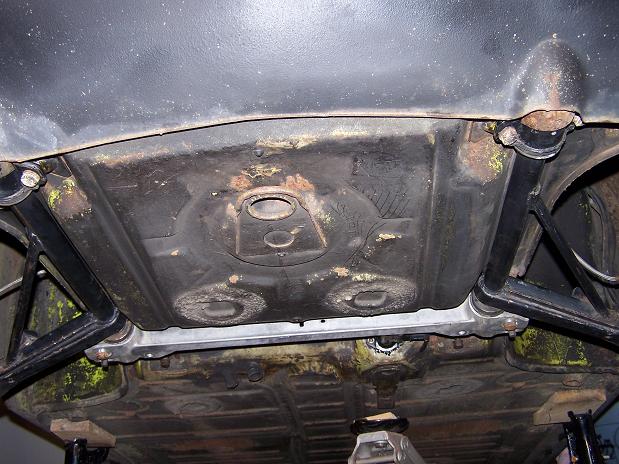
Posted by: Spoke Dec 2 2006, 04:27 PM
Nuther view
Attached image(s)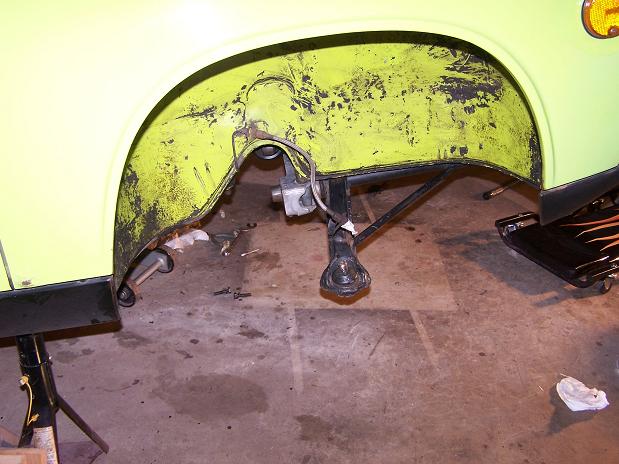
Posted by: Spoke Dec 2 2006, 04:29 PM
Struts and underbody swaybar installed.
Attached image(s)
Posted by: Spoke Dec 2 2006, 04:30 PM
Passenger side
Attached image(s)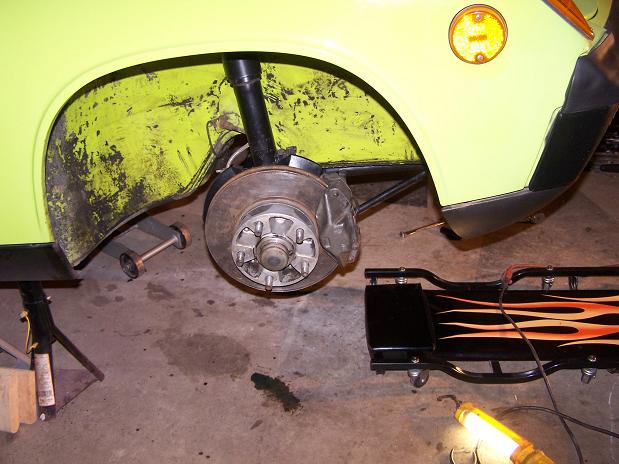
Posted by: Spoke Dec 2 2006, 04:33 PM
Front is done.
Road test was good. No looseness in the ball joints, tie rod ends, or bearings.
Brakes ok, rotors true.
Big time handling improvement with the 911 torsion bars, shocks, and swaybar.
Attached image(s)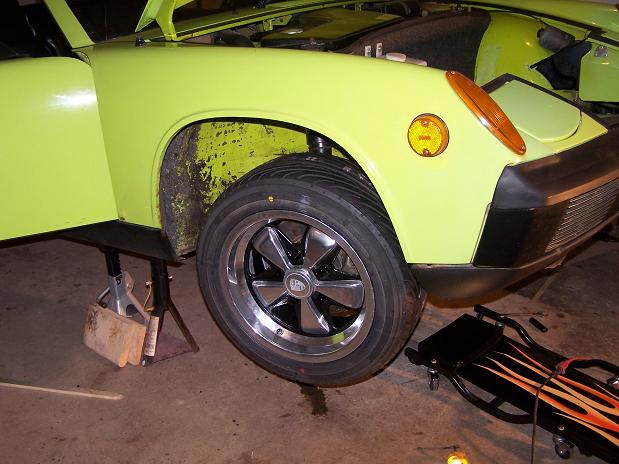
Posted by: So.Cal.914 Dec 2 2006, 04:37 PM
Looks good ,what year front suspension?
Posted by: 9146986 Dec 2 2006, 06:43 PM
There are supposed to be two straps that bolt to the aluminum crossmember and rear mounting bosses. I couldn't see them in any of the pics. Rarely do you get them with the aluminum crossmember. I've cut the ones off the steel rack, and I've fab'd them too, but you gotta have them.
Posted by: rdauenhauer Dec 2 2006, 11:10 PM
There are supposed to be two straps that bolt to the aluminum crossmember and rear mounting bosses. I couldn't see them in any of the pics. Rarely do you get them with the aluminum crossmember. I've cut the ones off the steel rack, and I've fab'd them too, but you gotta have them.
Perry Do you have pics of that setup?
I did the same thing but they dont EXACTLY fit.
Just curious what you did.
Posted by: cooltimes Dec 3 2006, 01:47 AM
Front is done.
Road test was good. No looseness in the ball joints, tie rod ends, or bearings.
Brakes ok, rotors true.
Big time handling improvement with the 911 torsion bars, shocks, and swaybar.
Had to say this Spoke. I really like what you have done to your 914's.
Owners like you are really what makes the 914club click.
Great info you shared as well as the electical help you walked another thru tonight.
Thanks for sharing your 914 information and know how with us.

MikeCool
Posted by: Spoke Dec 3 2006, 08:29 AM
Paul,
Suspension I was told was 88-89. It has 3.5in bolt spacing metallic body calipers. Are these "A" type calipers?
I don't think the donor 911 led a very long life. On all the suspension parts there was a yellowish undercoating that looked like it was done at the factory or dealer when new. It was sprayed on everything. Even the pad wear sensor wires on the pads had the undercoating meaning that these were the original pads. And the pads have maybe 10% wear. Zero rust (besides storage rust) on all parts and nice finishs which is why I didn't repaint anything.
Perry,
I did install the straps which also hold the swaybar after the pics were taken. A mistake in assembly I didn't instal the swaybar with the A-Arms and crossmember. I thought the swaybar can go on with the A-Arms in place. After about an hour of pissing with the bar with A-Arms in place, I finally unbolted the crossmember and detatched one A-Arm to install the swaybar. Took only minutes to do. What a dumb ass.
Mike,
Thanks for the kudos. Not having found this site until after 8 months of 914 ownership, I'm hooked on the 914club. Parts, help, entertainment, even found my green 914 on the club. Just glad that I can help someone out a little.
Spoke
Posted by: 9146986 Dec 3 2006, 10:51 AM
Perry Do you have pics of that setup?
I did the same thing but they dont EXACTLY fit.
Just curious what you did.
No, sorry I don't have any pics, maybe Spoke can post one. I don't have the car anymore. I did bolt up the crossmember and cut the "straps" off the old one and fit them in place though.
PK
Posted by: Spoke Dec 29 2006, 09:58 PM
Here's a pic of the strap that supports the sway bar.
Attached image(s)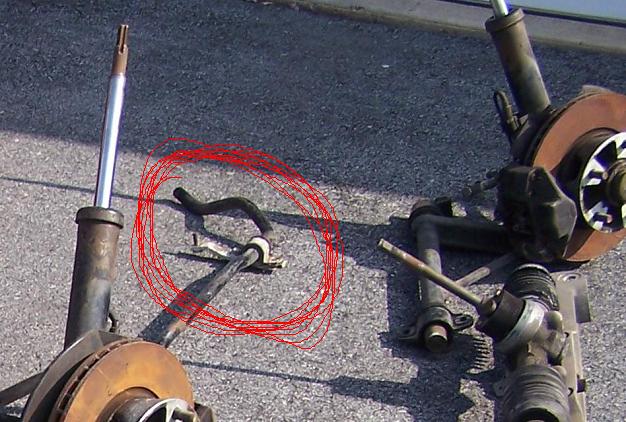
Posted by: Spoke Dec 29 2006, 10:23 PM
The rear suspension is ready to go.
Calipers painted. Wasn't going to paint but original paint was worn off and some rust appearing.
Rear bearings repacked; trailing arms painted
Using driveshafts from the green car. They had less play in the CV's than the ebay ones. Cleaned out old grease from CV's; repacked, reassembled, and painted shaft.
Shocks and springs originally on the green car.
Attached image(s)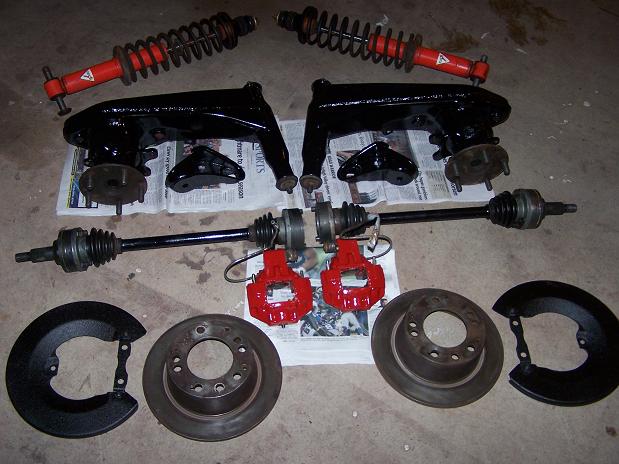
Posted by: Spoke Dec 29 2006, 10:26 PM
Driver side wheel well cleaned out. Used purple stuff to remove dirt, grease, and for the most part, the dried, hardened undercoating. Cleaned heat exchangers.
Attached image(s)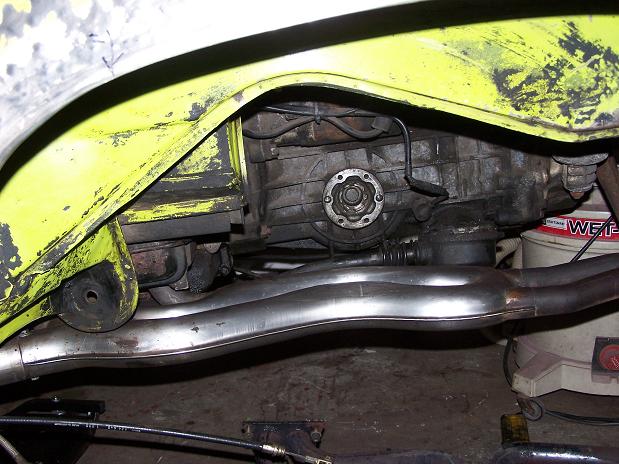
Posted by: Spoke Dec 29 2006, 10:28 PM
Passenger side cleaned out.
Attached image(s)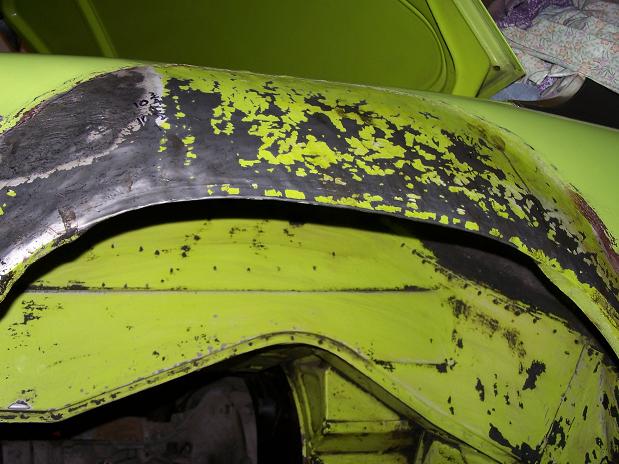
Posted by: Spoke Dec 29 2006, 10:28 PM
And presto! Driver side suspension installed.
Attached image(s)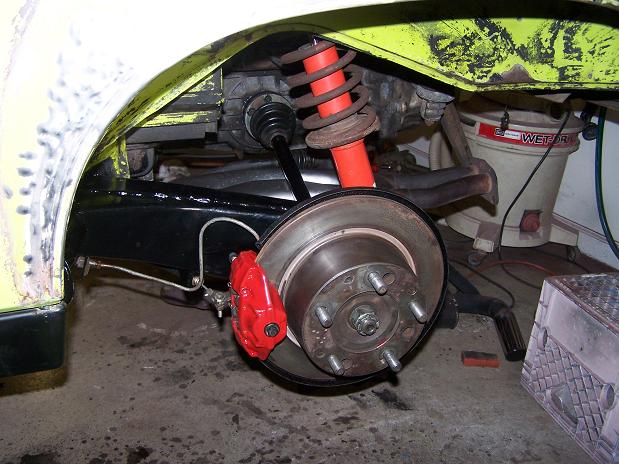
Posted by: Spoke Dec 29 2006, 10:30 PM
Nuther on the driver side.
Attached image(s)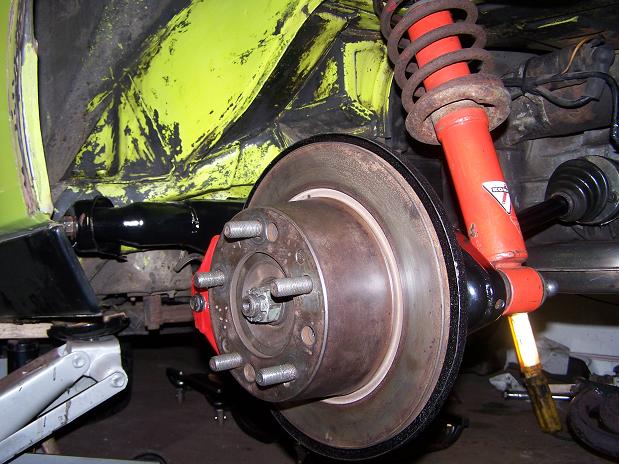
Posted by: Spoke Dec 29 2006, 10:30 PM
Passenger side suspension installed.
Attached image(s)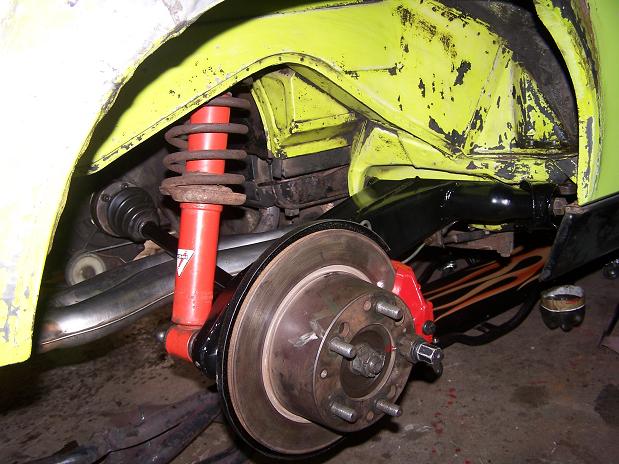
Posted by: Spoke Dec 29 2006, 10:31 PM
Nuther passenger side.
Attached image(s)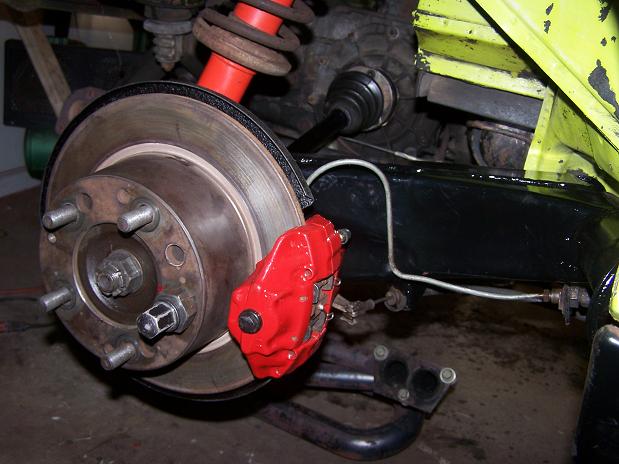
Posted by: Spoke Dec 29 2006, 10:32 PM
Finally sitting on 5-lug wheels.
Attached image(s)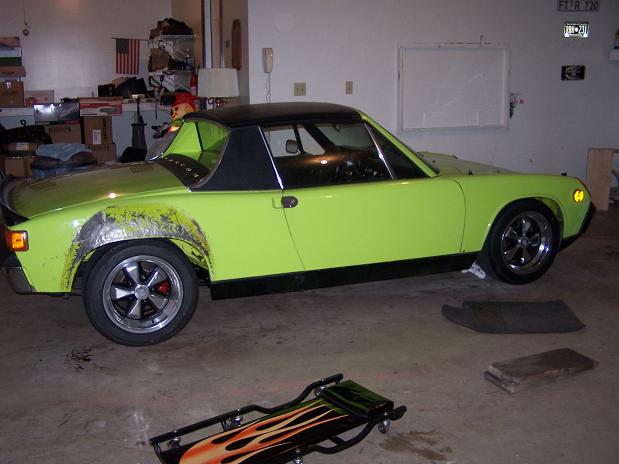
Posted by: Spoke Dec 29 2006, 10:34 PM
I think I want to lower the car. Have stock springs on the rear. Think I want to go with 180LB springs. Anybody have a set they want to part with?
Attached image(s)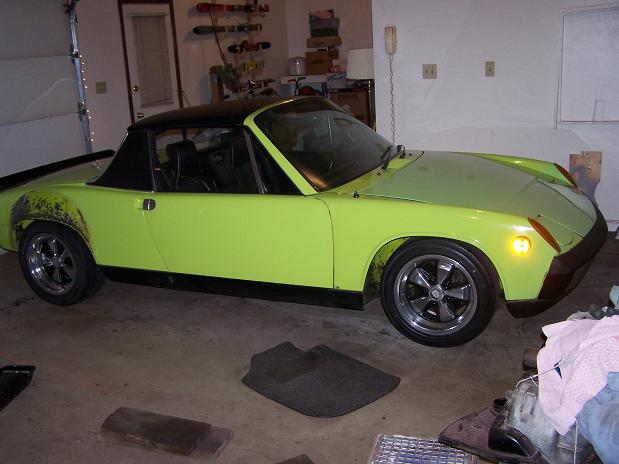
Posted by: Spoke Dec 29 2006, 10:35 PM
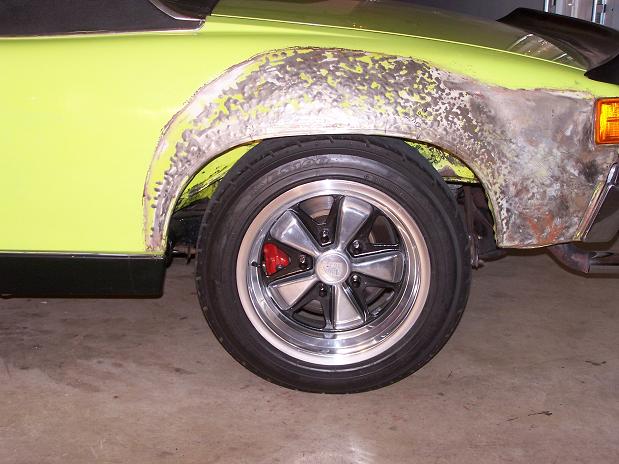
Close up of the driver rear. The fenders where quite a task to form but the most work went into un-pancaking the rear quarterpanel. Still have more work to do around the taillight.
Attached image(s)
Posted by: Spoke Dec 29 2006, 10:36 PM
Left front shot.
Attached image(s)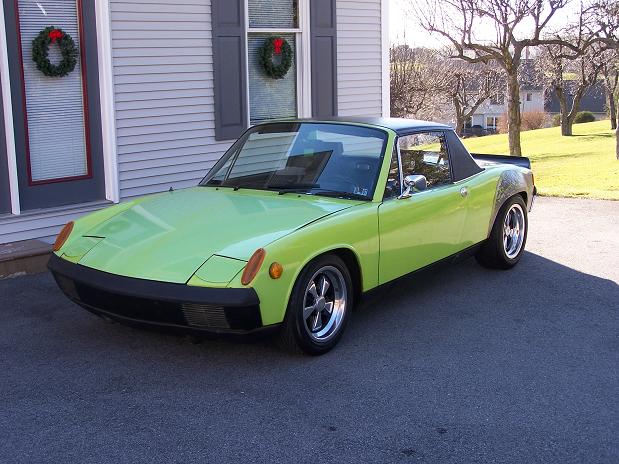
Posted by: Spoke Dec 29 2006, 10:37 PM
Right front.
Attached image(s)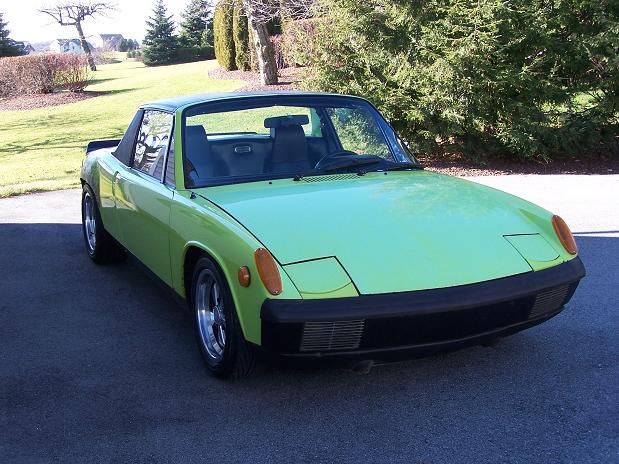
Posted by: Spoke Dec 29 2006, 10:38 PM
Fat ass ends are nice!
Attached image(s)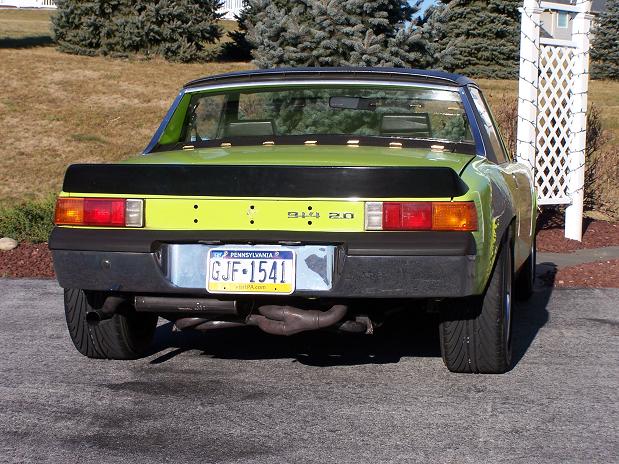
Posted by: Spoke Dec 29 2006, 10:38 PM
Right rear.
Attached image(s)
Posted by: Spoke Dec 29 2006, 10:39 PM
Left rear.
Attached image(s)
Posted by: Spoke Dec 29 2006, 10:40 PM
OK, a little OT.
My buddy's Saturn Sky.
Attached image(s)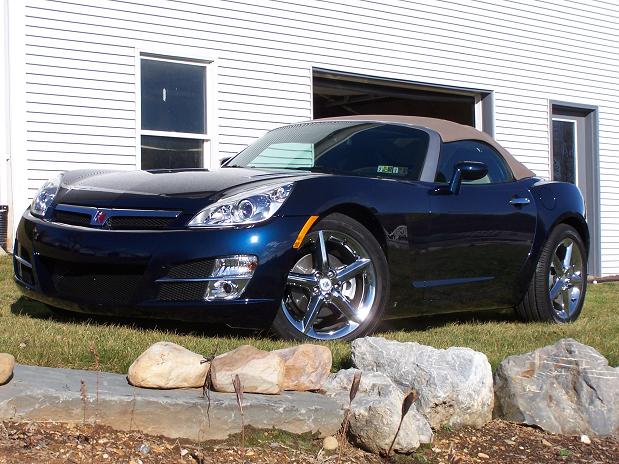
Posted by: Spoke Dec 29 2006, 10:52 PM
OK, more OT.
Last Sat. night we had some friends over for cocktails. About 10pm, my buddy gets a call from his daughter at home across the street. "Dad, someone is spotting deer behind our house".
My buddy jumps in his vehicle to investigate but no car seen on the lower road.
Then about 10:45pm, my buddy gets another call from his daughter. "Dad, they're spotting deer again and I heard a gunshot."
My buddy jumps in his car again with a neighbor while I ran down to his house. I could see an older SUV sitting on the road with his lights on. My bud pulls up behind the vehicle and runs up to it and yells at the guys.
They pull out like a bat out of hell and drive off, my buddy in tow. After about a 5 mile chase, my buddy breaks off as 911 is called and the licence number reported.
My bud goes back to the field behind his house and finds a nice 8-point buck laying in the field. Police said he could cut up the deer; they want the head for evidence. There goes a nice little trophy.
Latest info on the shooter: police found the driver and gun. He hasn't given names of the other 2 people. Police confiscated his gun and vehicle. This guy is in a hurt of trouble. Let's see:
Shooting deer from a vehicle: Illegal
Shooting deer at night: Illegal
Shooting deer with a spotlight: Illegal
Shooting deer within 100 yards of houses: Illegal
Shooting deer out of season: Illegal
Attached image(s)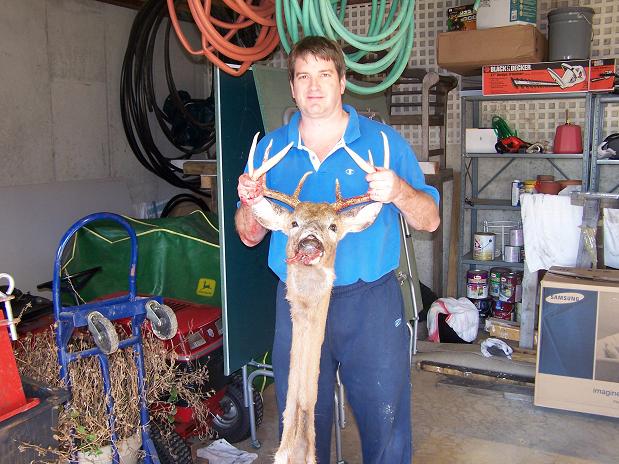
Posted by: Eric_Shea Dec 30 2006, 11:08 AM
That sucks 
Car is looking awesome... gonna take me a few minutes to get over the deer thing though. Happy as hell they caught him.
Posted by: Spoke Jan 14 2007, 12:01 PM
OT: Update on the Deer Shooter.
As happy as we were to catch the guy (actually just got his license number), we didn't catch him with the goods. The deer that is.
My buddy did pick the guy out of a line up of pictures so we placed the guy at the scene.
However, no deer in hand; no eye witnesses that he actually shot the deer; no one heard the guys saying something like "Lets go get the deer"; the guy denies shooting the deer.
My bud did get the slug out of the deer and gave it to the police. Ballistic tests I'm sure cost time and money. Question now is how much work do the police want to go through to nail this guy?
Until they prove that he shot the deer, they can't charge him with the counts listed above.
The police did confirm that his gun was fired very recently, so they did charge him with discharging a gun at night and discharging a gun from a vehicle.
So far, he doesn't have any deer related charges. This episode was sorta like catching a couple of guys in front of a bank with guns and masks on before they rob it. They didn't rob the bank yet so can't be charged with that.
If we would have slowed down a bit and realized that the guy was still sitting in his car and just drove by to get the license number, perhaps they would have gone and retrieved the deer. But then, hindsite is 20/20 and we were happy just to get the guy at the scene.
Spoke
Posted by: Spoke Jan 14 2007, 12:16 PM
OK, back to the green car. I've driven it for a couple of weeks. There is still more work to do on the rear of the car. The passenger side rear wheel bearing needs replaced. Also, the passenger rear hub has at least one stud that is not straight. This causes the wheel to wobble very slightly and the rear rotor to go out of round when the lugs are tightened.
So I'll get some new rear wheel bearings and some nice Eric Shea 5-lug hubs. The bearing and wheel wobble are not extreme so the car can be driven for a while until I get the bearings and hubs.
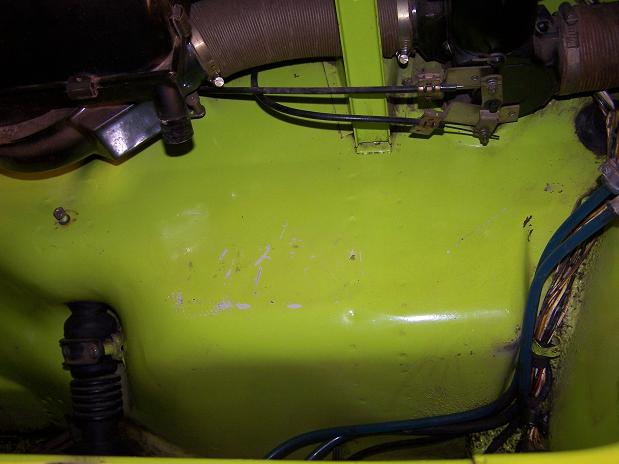
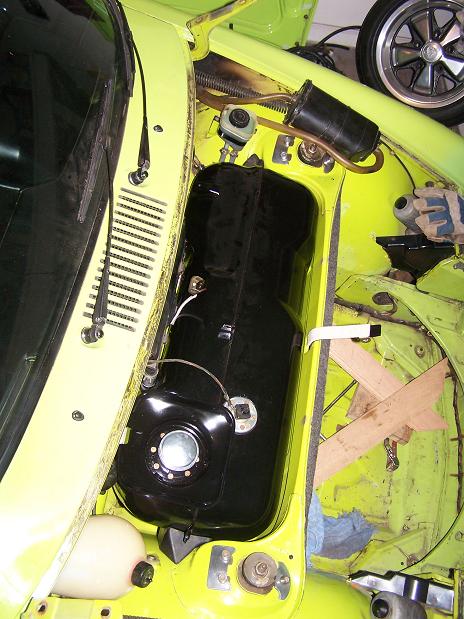
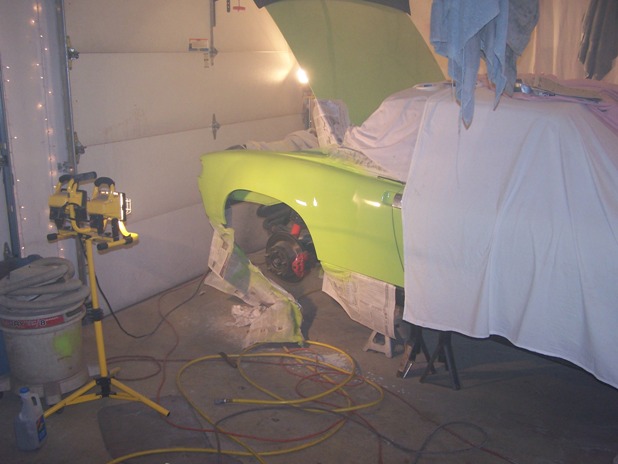
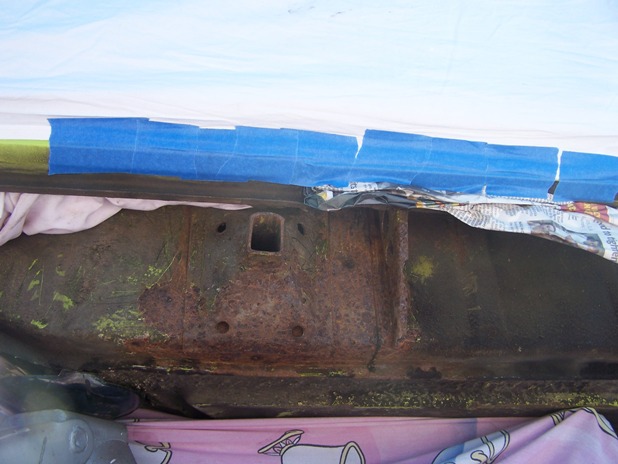
Time has come to investigate a fuel odor coming from under the gas tank. This has plagued the car since I bought it. I found that the lower the fuel level in the tank, the less it smells. Never observed an actual gas leak or moist areas.
The green car is now back in the corner spot in the garage for this gas leak work. I'll be driving the red car again as my DD when it doesn't rain or snow.
Attached image(s)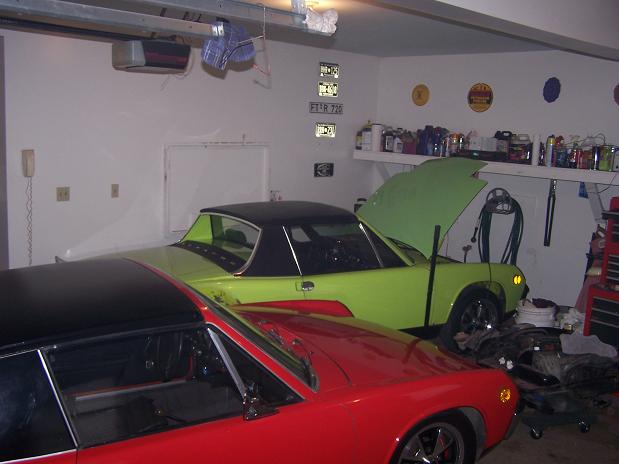
Posted by: Spoke Jan 14 2007, 12:22 PM
To empty the tank, I jacked up the driver side and siphoned as much gas out as I could. Then I jacked up the passenger side to get the leftoever gas away from the gas lines. Tank came out with no spilled gas.
Tank looks ok on the outside, no signs of leaking. I haven't looked inside the tank yet although I can hear something inside as I tilt the tank from one side to the other.
Attached image(s)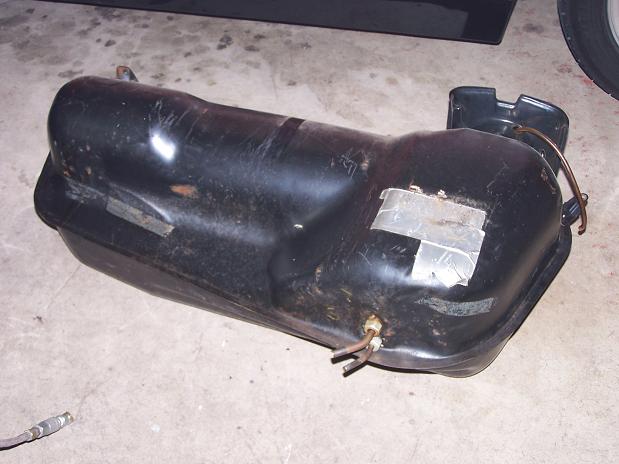
Posted by: Spoke Jan 14 2007, 12:25 PM
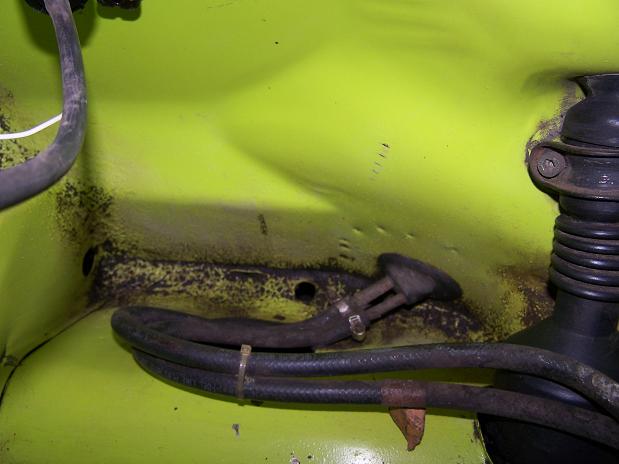
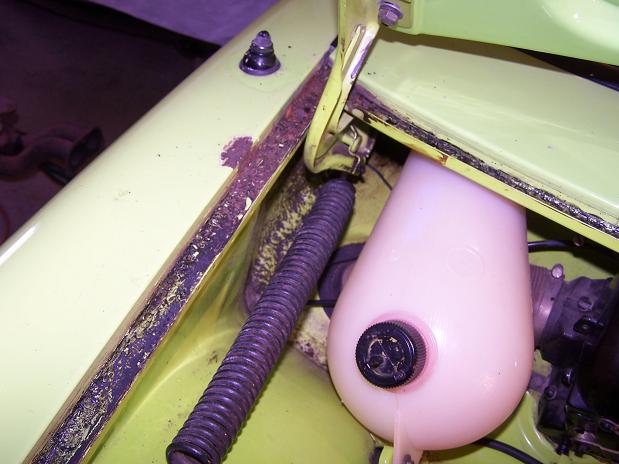
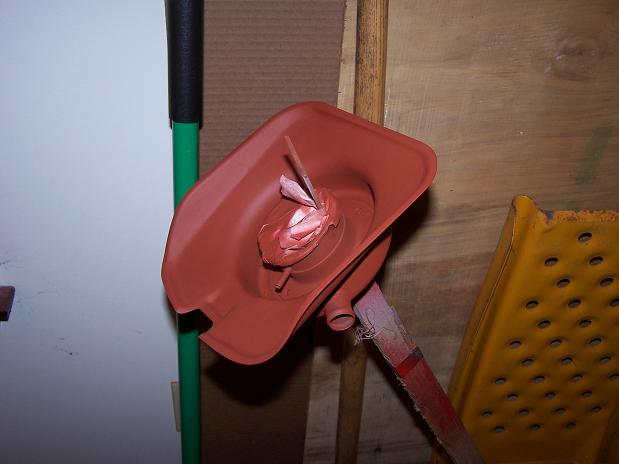
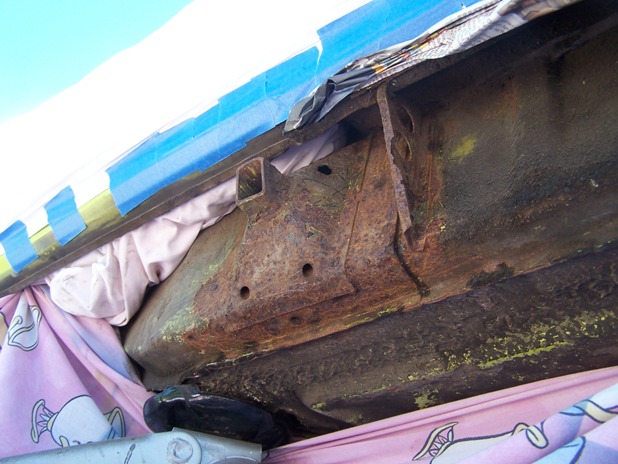
The gas fumes seem to be coming from the driver side of the gas tank. With the tank out, I could see that the fuel pump has been relocated along with the fuel filter. I'll change the filter while I'm here.
Attached image(s)
Posted by: Spoke Jan 14 2007, 12:26 PM
Pic of the fuel pump from the drivers side. Still not obvious what is leaking.
Attached image(s)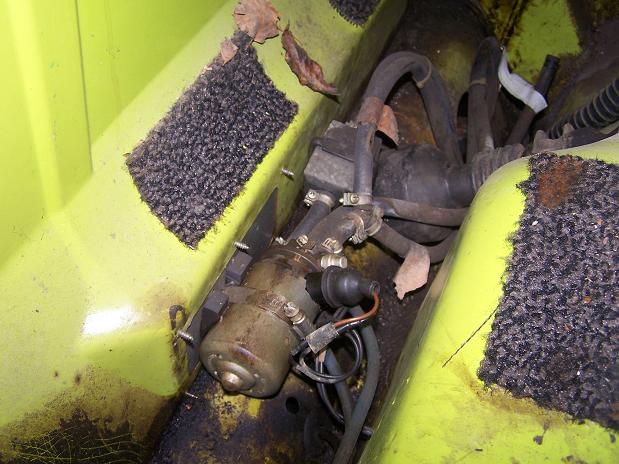
Posted by: Spoke Jan 14 2007, 12:30 PM
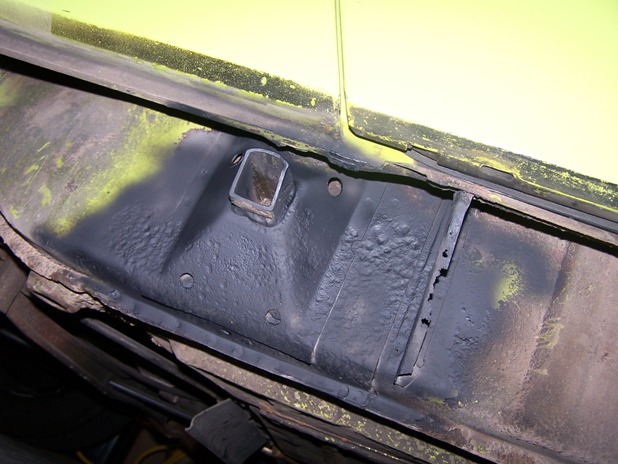
With the fuel pump removed, I can see a moist area in the corner of the wall. Now to figure out what is leaking.
Anyone have experience with these kinds of leaks? Hopefully it is not the fuel pump. Hoses and filter will be easy to change. I don't want to change the fuel pump unless necessary.
Attached image(s)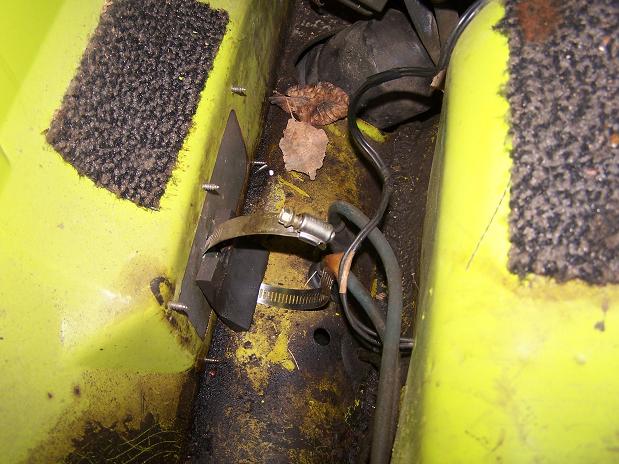
Posted by: rjames Jan 16 2007, 07:13 PM
My guess is that if you replace the hoses you'll be rid of the smell. I have the same exact thing happening, and the fuel pump and filter are new. The only things not new are the fuel lines up front- I'll be doing that when I go to remove the tank to install a sway bar this spring.
Posted by: martinef1963 Jan 16 2007, 09:07 PM
Before and After I added a little wheel bling. Wheels from my red car.
Spoke
Damn - I was going to ask if you were getting rid of the 4-lugger....

Posted by: Spoke Feb 9 2007, 04:56 PM
OK, took the gas tank apart. Outside of the tank looks good.
Attached image(s)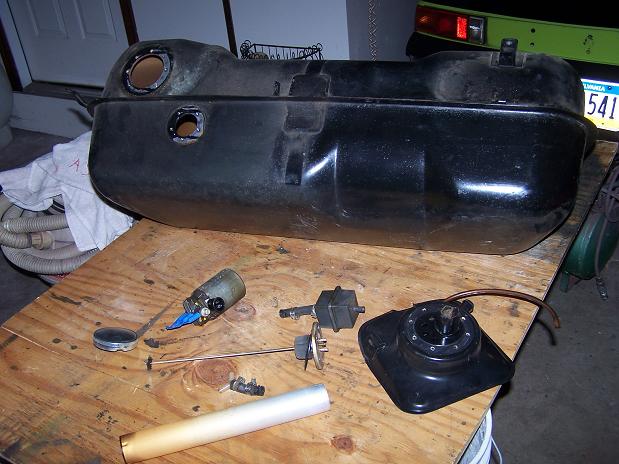
Posted by: Spoke Feb 9 2007, 04:57 PM
When I pulled the fuel gauge sender out, it came out in pieces, as the little nut on the bottom had unscrewed itself and dropped to the bottom of the tank.
Attached image(s)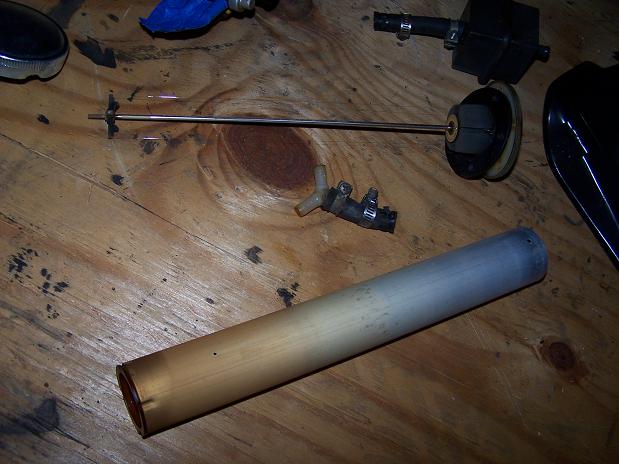
Posted by: Spoke Feb 9 2007, 05:00 PM
Inside of the tank looks very good. The only rust that I could see is in the bottom left of the pic. Don't think I'll be resealing the tank.
What can I used to clean out the gum out of the tank?
Attached image(s)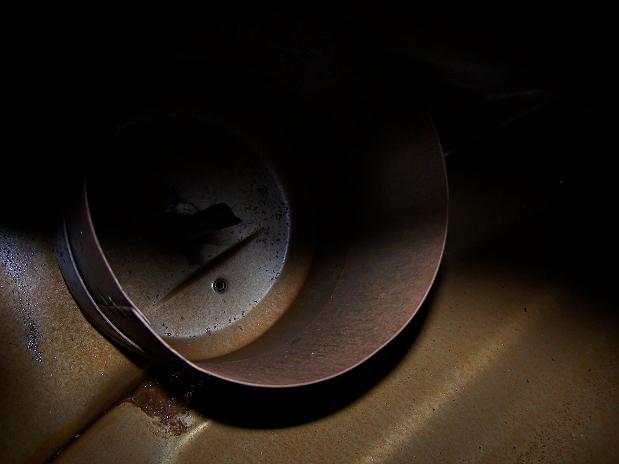
Posted by: rjames Feb 9 2007, 06:00 PM
I'm sure others will chime in here, but do a search as I think there've been a few past threads regarding cleaning up the inside of a tank.
Posted by: Spoke Feb 9 2007, 09:07 PM
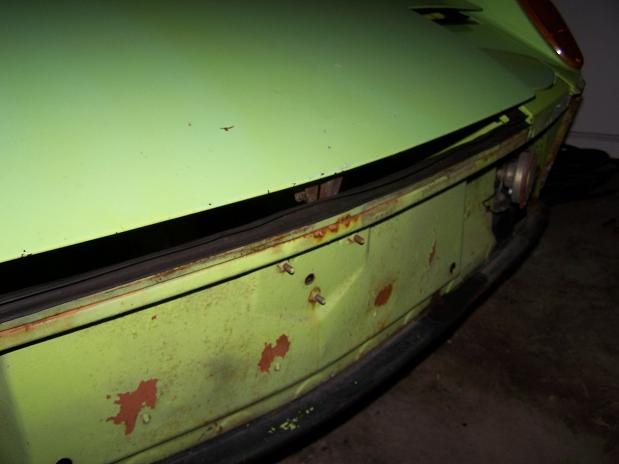
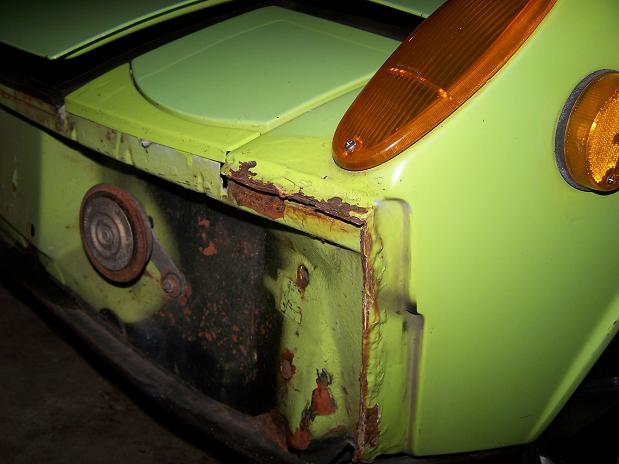
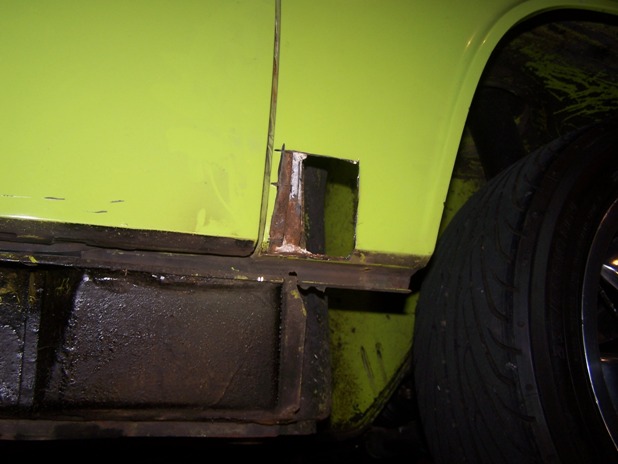
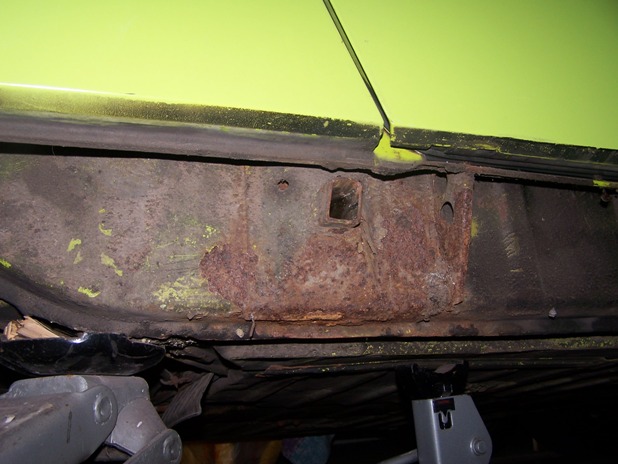
In the #26th post in this thread, Sir Andy pointed out that a dent in the front trunk was the sign of impact damage.
He, being Sir Andy, was 100% correct. As I took the car apart, I've seen other damage or repairs from at least 1 front end impact.
The driver side A-arm that I replaced as part of the 5-lug was bent such that the position of the ball joint on the arm was about 1/2 inch more rearward than the passenger side arm.
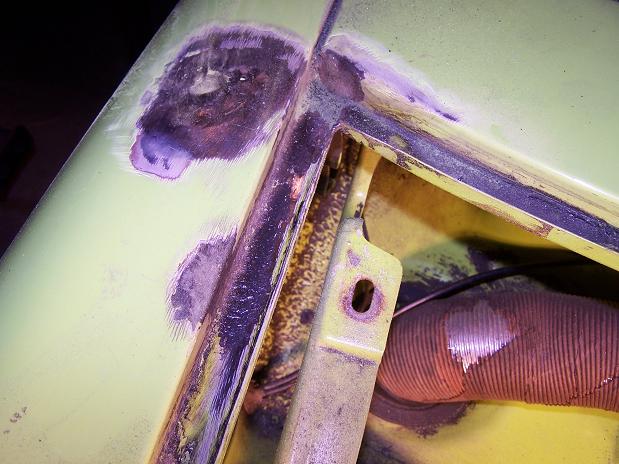
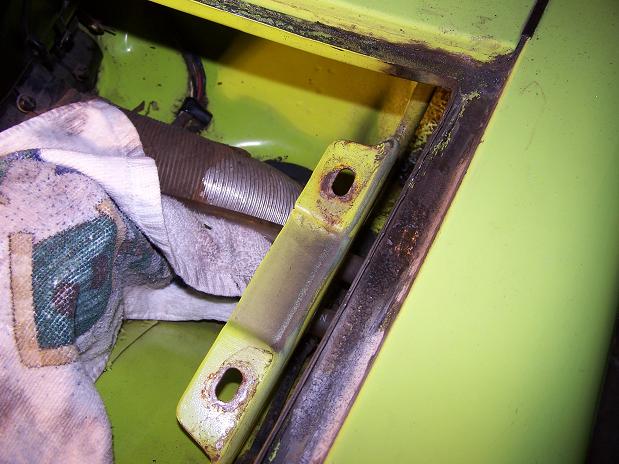
The front panel below was replaced in its entirety. I'm assuming the piece was welded on but its obvious now that the seam is rusting on both sides.
The other thing is the piece doesn't have the bolts to hold on fog lights. There's a flat spot on the front where the bolt should go. How can I determine where the bolts should go for fogs?
Attached image(s)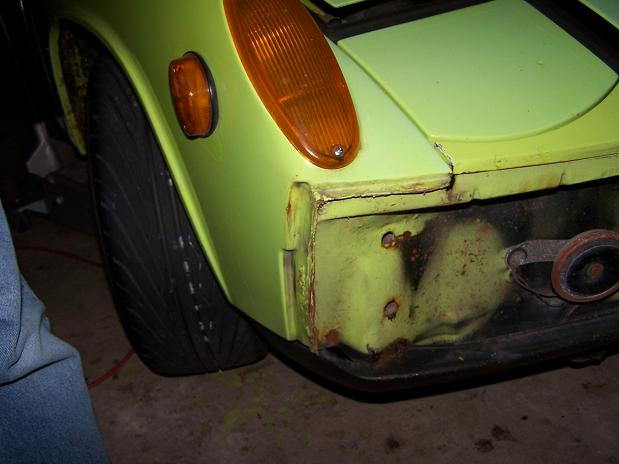
Posted by: Johny Blackstain Feb 10 2007, 10:13 AM
In the #26th post in this thread, Sir Andy pointed out that a dent in the front trunk was the sign of impact damage.
He, being Sir Andy, was 100% correct. As I took the car apart, I've seen other damage or repairs from at least 1 front end impact.
The driver side A-arm that I replaced as part of the 5-lug was bent such that the position of the ball joint on the arm was about 1/2 inch more rearward than the passenger side arm.
The front panel below was replaced in its entirety. I'm assuming the piece was welded on but its obvious now that the seam is rusting on both sides.
The other thing is the piece doesn't have the bolts to hold on fog lights. There's a flat spot on the front where the bolt should go. How can I determine where the bolts should go for fogs?
Just a thought- put the bumper back on w/out the grills & mark where you think the fogs should be. Use the circle as your guide by just placing the grills in place. Then, take off the bumper, grab a fog light w/ bracket, hold in place & mark out where the hole should be.


Posted by: scotty b Feb 10 2007, 11:44 AM
Inside of the tank looks very good. The only rust that I could see is in the bottom left of the pic. Don't think I'll be resealing the tank.
What can I used to clean out the gum out of the tank?
Kerosene, diesel fuel, laquer thinner
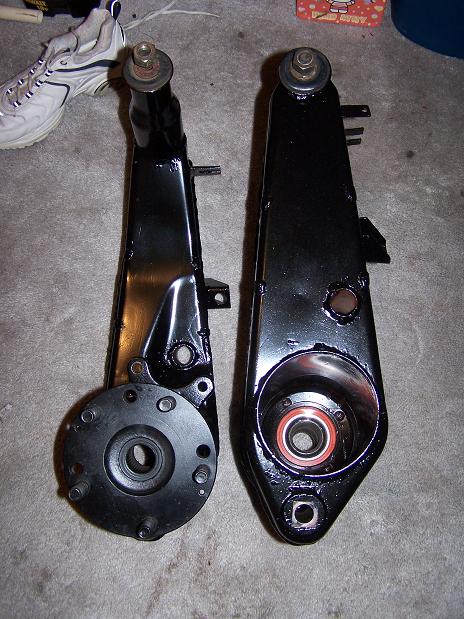
Posted by: Spoke Feb 10 2007, 12:36 PM
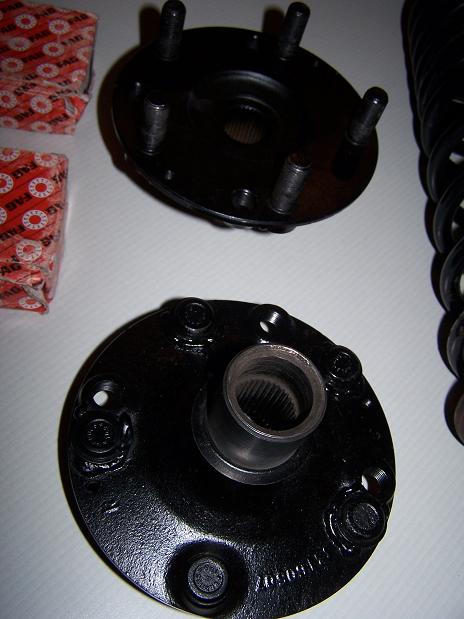
A little rear end bling. Eric Shea hubs, 180LB springs, and new bearings. The hubs are very nicely done. Quite a difference from the converted hubs on the car. The hubs on the car do not have the extra bosses around the studs thus some studs are longer than others. Plus not all are straight and they have been welded to the hub.
Eric, do you want the hubs that are on the car? As mentioned, the lugs are welded to the hubs. I believe the hubs are the later style.
Once the gas tank is cleaned and fuel hoses replaced, I'll finish up the 5-lug rear end including installing the rear factory swaybar.
Attached image(s)
Posted by: Spoke Mar 7 2007, 10:09 AM
OK, I finally started to work on the 914 again after the winter freeze. Also changed the name of this thread since I've now had the car for 1 year.
Cleaned out the gas tank cavity. Removed the undercoating and cleaned out all the junk. Looks a little nicer now.
Putting in the electric washer pump now.
Bought a generic pump from my FLAPS and decided to mount it out of the way under the cowling.
Attached image(s)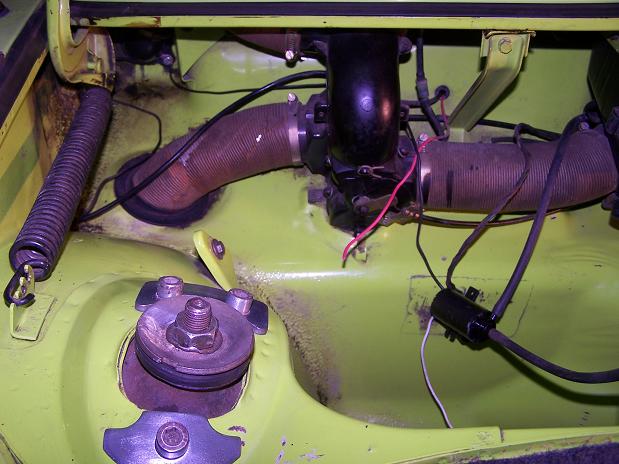
Posted by: Spoke Mar 7 2007, 10:13 AM
I wanted to mount the washer pump out of sight and didn't want to drill holes into the car to mount.
So I got a long tiewrap and fastened it to the cowling upright. As briefly as this pump is used, this fastening will be fine. I couldn't mount it where SirAndy did since the inlet and outlets were not in the same positions.
The wires for the pump nicely route into the interior directly behind the pump.
Attached image(s)

Posted by: Spoke Mar 7 2007, 10:20 AM
Found this bolt lodged in the seam sealer and painted. Unless the PO dropped this bolt and then painted the area, this bolt came from the original manufacture.
Attached image(s)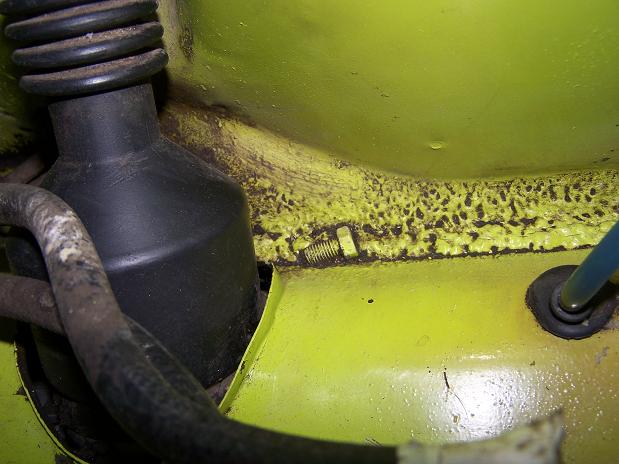
Posted by: Eric_Shea Mar 7 2007, 11:04 AM
I do need cores but... probably not those, since you sent those arms I think we be good.
There was a certain 914-6 (2233) that has a 10mm nut in the seam sealer in the rear trunk
That car is Saturn (Chrome) Yellow no?
Posted by: Aaron Cox Mar 7 2007, 11:13 AM
nice work! you turned those wheels into real beauties....!!
love the flares!
Posted by: Part Pricer Mar 7 2007, 12:08 PM
That car is Saturn (Chrome) Yellow no?
No. It is Ravenna Green.
Posted by: Eric_Shea Mar 8 2007, 11:06 PM
Gottcha

I went back through the thread and saw that... it's so weird though... some of those pictures are spot on for Saturn and others look green. Post 87 looks like Saturn. The first pic in post 91 too...

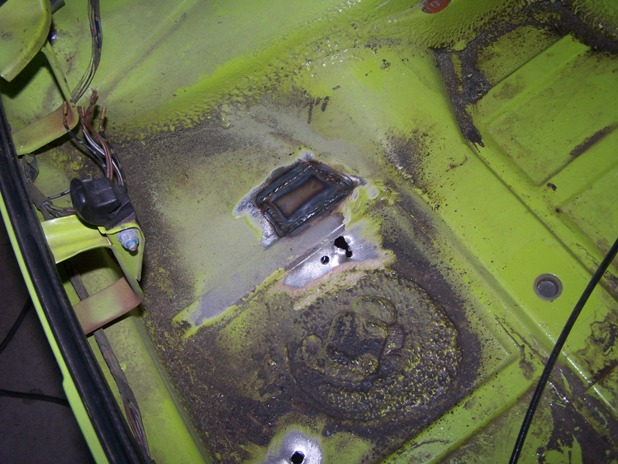
Posted by: Spoke Mar 18 2007, 11:43 AM
Intalled the washer tank. The pump can be seen at the bottom of the cowl brace. Drilled out the cap as per Sir Andy's thread. Also connected all wires to the washer arm on the steering column. I decided to put the switch on the ground side of the pump.
Attached image(s)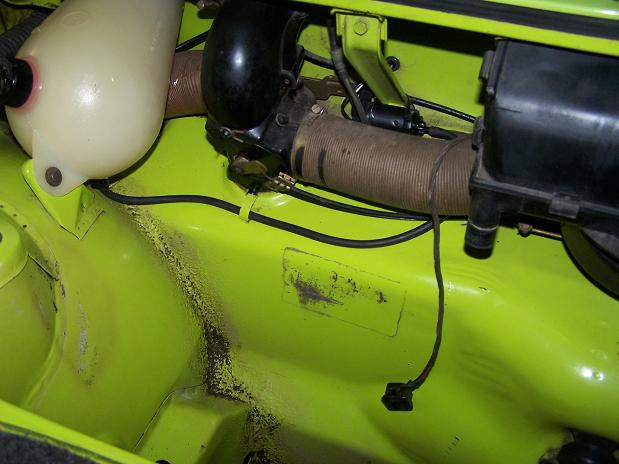
Posted by: Spoke Mar 18 2007, 11:49 AM
Cleaned out the tank and sending unit with degreaser from my FLAPS. The stuff did a job on the built up gum and residue in the tank and the sending unit. I mixed the degreaser with hot water in a about 1:4 (degreaser:water) ratio. Compare these pics with the ones a few posts ago for before and after cleaning.
Attached image(s)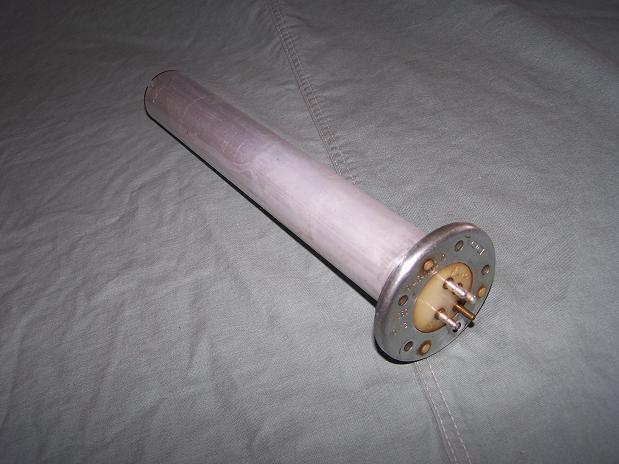
Posted by: Spoke Mar 18 2007, 04:27 PM
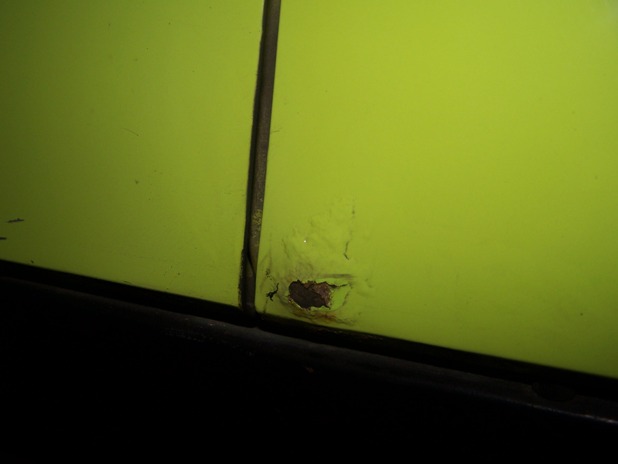
Pulled the front trunk gasket so to fix the rust on the passenger fender. Rust also on the driver side but hasn't worked its way up to the exposed fender.
Attached image(s)


Posted by: Spoke Mar 18 2007, 04:28 PM
Pulled the antenna out. Won't be replacing it. I listen to CDs only so I will weld up this hole.
Attached image(s)
Posted by: Spoke Mar 18 2007, 05:59 PM
Wetsanded, prepped, and primered the tank and filler.
Attached image(s)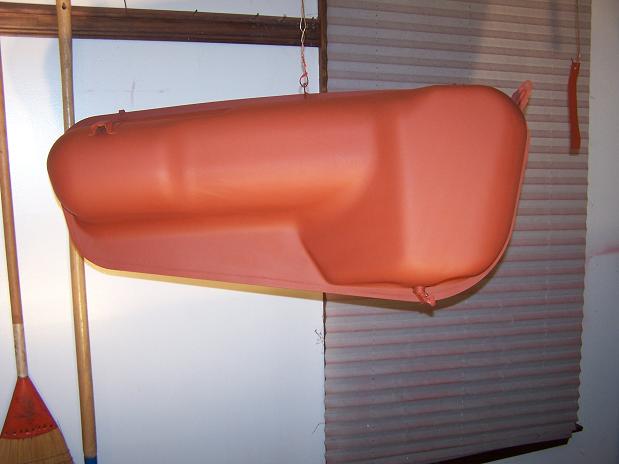
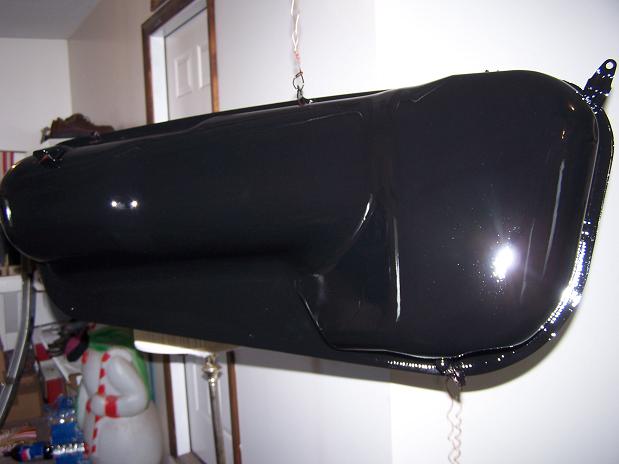
Posted by: Spoke Mar 18 2007, 06:03 PM
Painted the tank and filler assembly with Epoxy appliance paint from Home Depot. Gives a real nice sheen.
Attached image(s)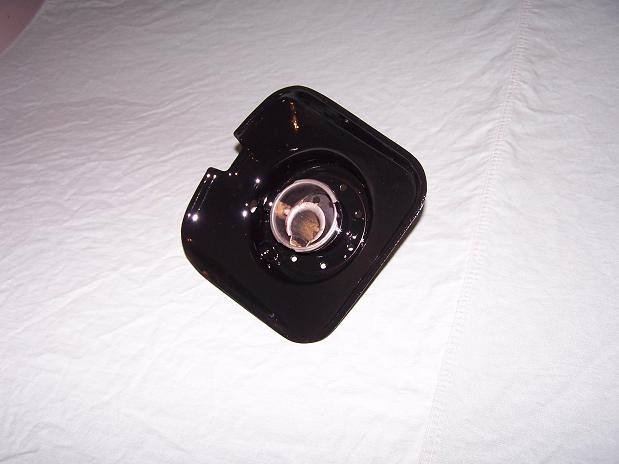
Posted by: Spoke Mar 24 2007, 07:06 AM
Pulled the front trunk rubber seal to repair the rust bubble on the passenger fender. Also will remove the antenna. No more terrestial radio for this car. The last time I listened to terrestial radio was one of Howard Stern's last shows before moving to Sirius.
Found rust holes in the channels on both sides of the car. 2 are small enough to fill with weld, one needs a little piece of metal to close the wound.
Attached image(s)


Posted by: Spoke Apr 1 2007, 11:57 AM
Got the antenna hole welded up. Rain channels also welded up.
Attached image(s)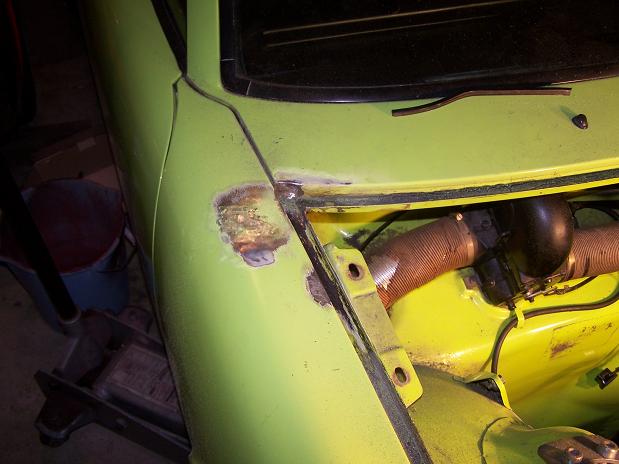
Posted by: Spoke Apr 1 2007, 12:02 PM
Fenders and rain channels primed and painted. I have about a pint of paint that came with the car. Need to use the paint sparingly as I want to paint the rear fenders after flaring.
Used my airbrush for the paint touch-up. Worked out real good using only a very small amount of paint. Very nice finish with the airbrush. The paint color looks to match very well.
Attached image(s)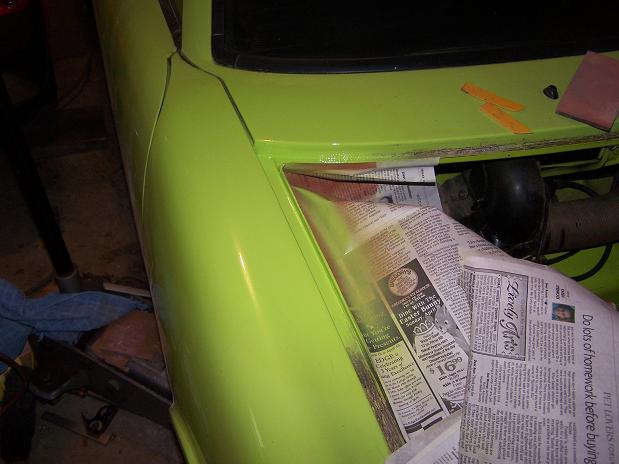
Posted by: Spoke Apr 5 2007, 08:28 PM
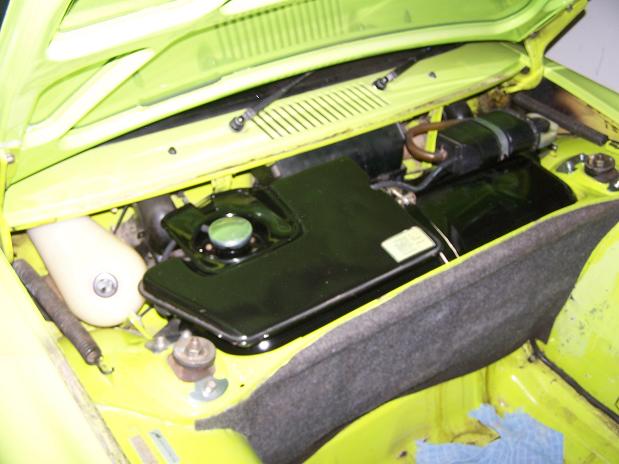
Fuel lines replaced, new filter, new clamps (FI type). Tested connections before lowering tank into place. Real easy to place the tank w/o the trunk lid.
Attached image(s)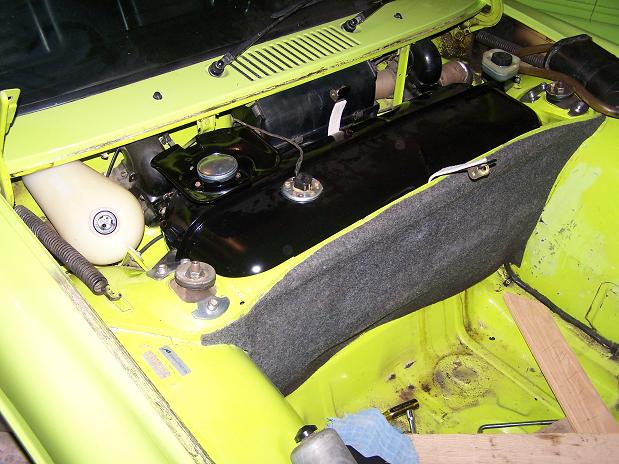
Posted by: Spoke Apr 5 2007, 08:31 PM
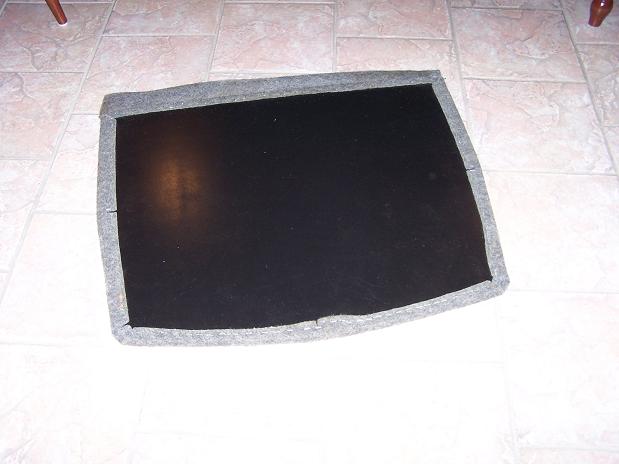
Replaced original broken trunk floor with MDF. Thickness is about 7/16 inch.
Attached image(s)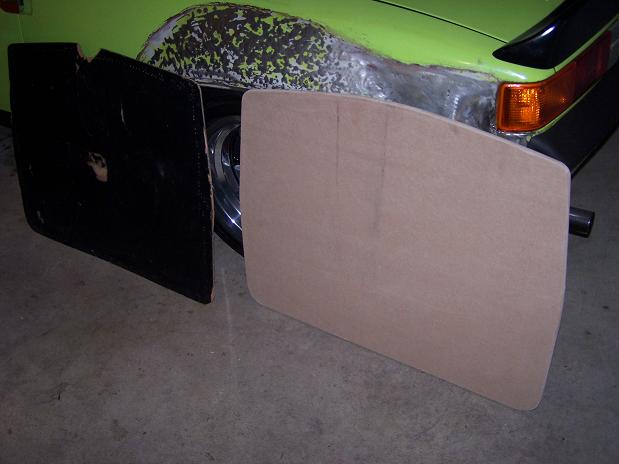
Posted by: Spoke Apr 5 2007, 08:38 PM
Installed new (to me) 180LB springs which I thought would lower the car although the current springs look to be 140/165/180 already and the same length.
Spring diameters:
74: 0.442 inch
180LB: 0.479 inch
The new ones are progressive. I did lower the bottom perches by about 1/4 inch. Overall result is no lowering of the rear.
Anyone need some springs? If I could determine the spring rate of the old springs, I'd sell them.
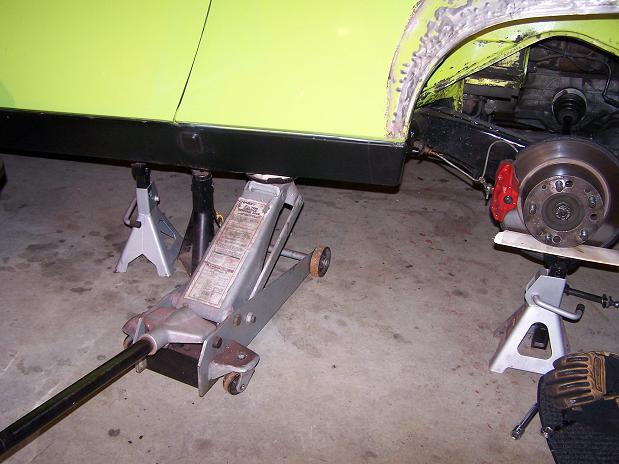
Multiple jackstands to avoid a Gint-event.
Attached image(s)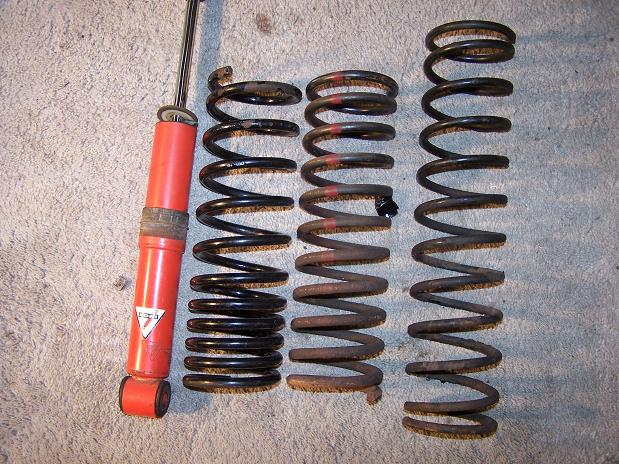
Posted by: Spoke Apr 7 2007, 11:13 AM
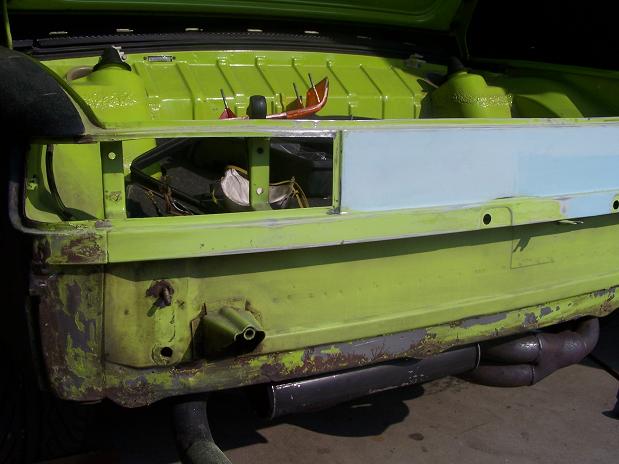
Chrome front bumper is on along with an excellent bumper top. Still need to pound out some ripples from where the bumperettes were. Haven't decided to put bolts in the bumperette holes yet; may just leave the holes.
I have fog lights and grills to install but the front panel behind the bumper was replaced after an accident a long time ago and the new panel doesn't have mounting bolts for the fogs. The whole front panel is a mess. The panel is in good shape, rust wise, but the welds around the front fenders on both sides have rusted as has the front part of the trunk lid gasket channel.
BTW, your eyes do not decieve you, the front trunk lid and headlight covers were repainted at some point with a nasty looking puke green color. Really not even a close match to the rest of the car.
Attached image(s)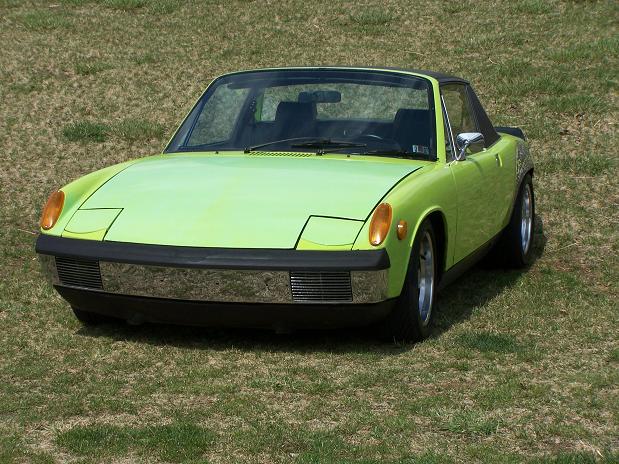
Posted by: Gint Apr 7 2007, 11:20 AM

It's lookin pretty good!
Posted by: Spoke Apr 7 2007, 11:22 AM
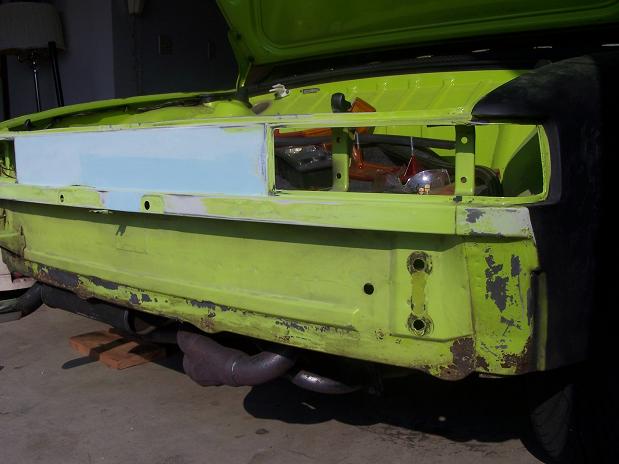
I haven't put the gasket back in and the driver side of the front trunk lid does not sit flush with the front fender. The rubber bumper is much lower than the lid position so it is not stopping the lid from fitting right. The passenger side is flush.
Can I twist the trunk lid to sit right or will this damage the lid?
Attached image(s)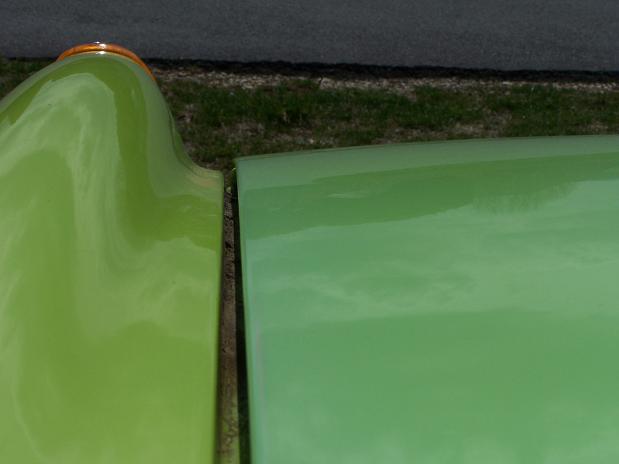
Posted by: Spoke Apr 28 2007, 05:37 PM
Still working on the rear flares, trying to get both sides to look alike.
Meanwhile, I removed the rear suspension to replace bearings and hubs.
I got inspired by Eric Shea's trailing arm strengthening as well as what Chris Foley had done and Aaron's comment:
"what if you ran one at a 45 degree angle.. inner right bottom to upper left top etc? oh wait... too much geometry LOL"
The pics below are from Eric's thread:
http://www.914world.com/bbs2/index.php?showtopic=65368&hl=rear&st=0
Eric Shea's strengthening: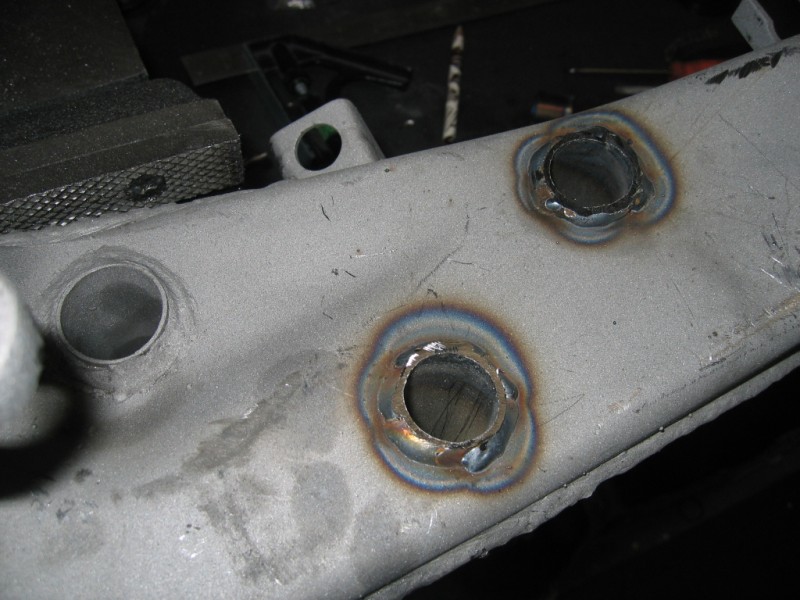
Chris Foley's strengthening: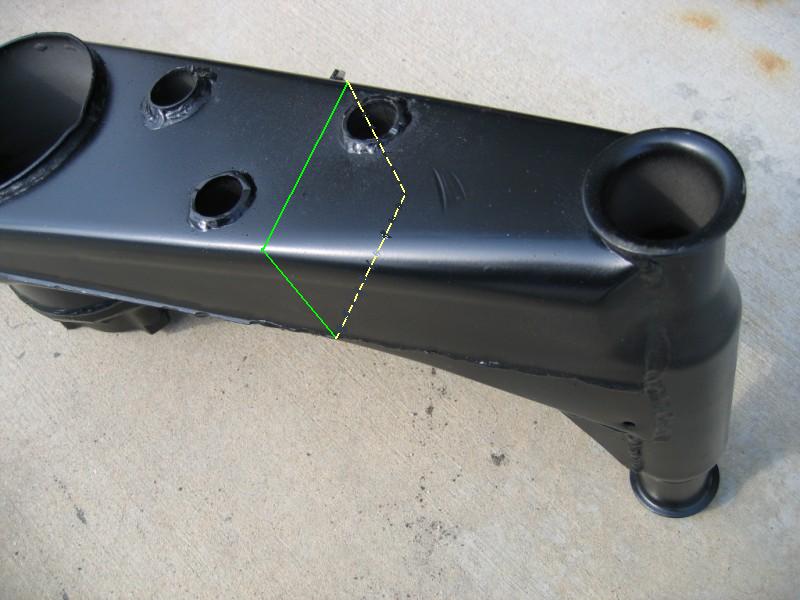
Posted by: Spoke Apr 28 2007, 05:52 PM
So combining Eric's, Chris's, and Aaron's ideas into one, I decided to use 3/8 inch steel rod at 45 degree angles in 2 pairs.
First order of business is to drill the holes. I used 4 drills starting with 1/4 inch up to 3/8 inch. Each pair of cross supports are offset as to not interfere with its mate.
These pics show the steel rod and long 3/8 inch drill bit as cross-support pair. The drilling took some time but was quite easy. Eric's large diameter hole drilling comments scared me away from his tubular strengthening.
Chris's cutting the arm in half to put in the plate is way out of my realm of experience and materials.
Not sure how much this will strengthen the arms but it sure was fun doing it.
Attached image(s)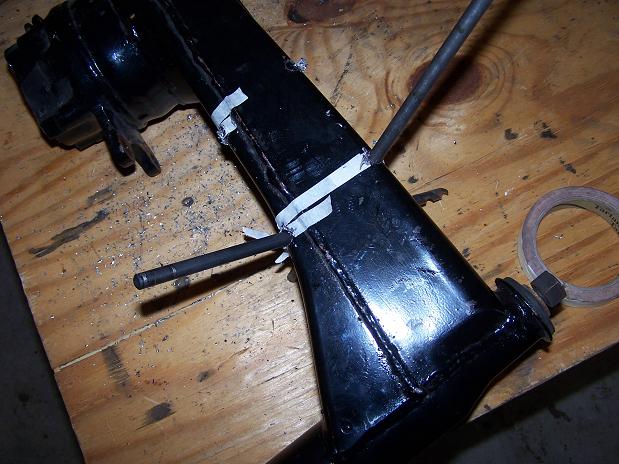
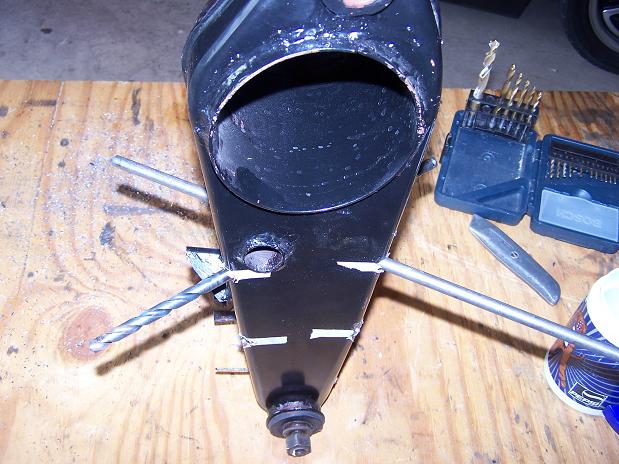
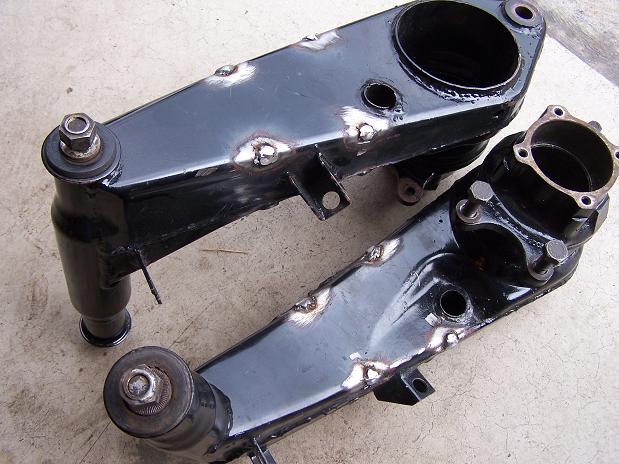
Posted by: Spoke Apr 28 2007, 05:58 PM
All holes drilled, wire wheeled the holes in prep for welding.
Welding was a breeze as the thick arm steel and 3/8 inch rod meant no blow-through like when welding on fenders. I used the Millermatic 135 on 5.5 heat setting (out of 10) and 55 wire speed (out of 100).
I started with the first weld with the end of the rod barely sticking out of the hole. When the other side was welded, I cut the rod off at the desired height.
This allowed me to not have to measure lengths of the rod and one 4 ft rod was all I needed for the 8 pieces.
Attached image(s)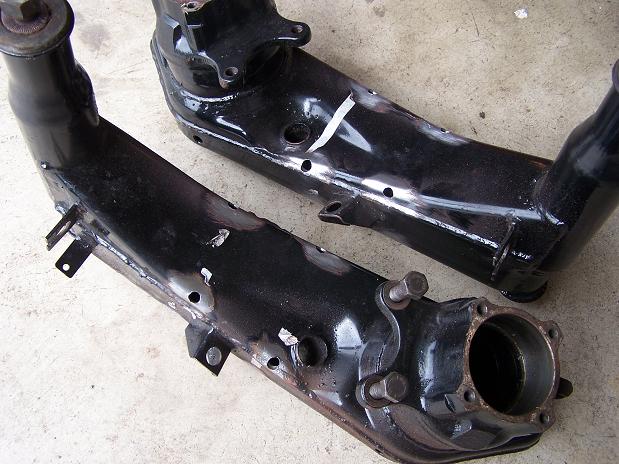
Posted by: Spoke Apr 28 2007, 06:04 PM
Nearing the end of the job. With the rod sticking out, this could very well be "Franken-Arm". I wonder if the car would go faster if I put 50000 volts on the rod? 
Finally, after some grinding, the finished product.
Again, not sure if I did any real strengthening, but it was a fun afternoon.
Now on to putting bearings in and hubs on. Both are in the freezer. My wife thought I was mental when she saw auto parts in the chest freezer.
Attached image(s)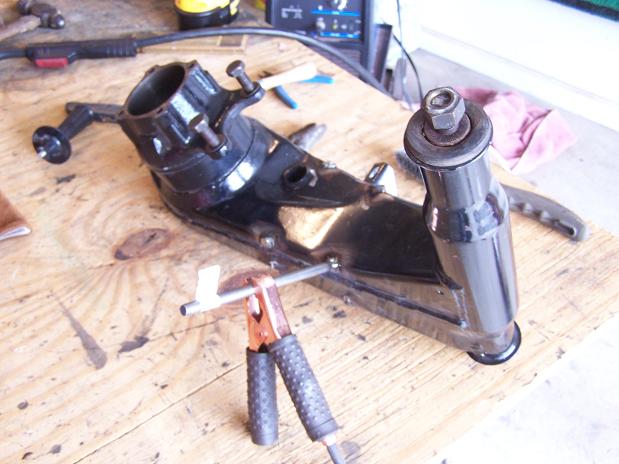
Posted by: Spoke Apr 29 2007, 09:37 AM
Bearings now installed. The first bearing needed quite a bit of coaxing to go in. Used the 1/2 inch all thread with the wood stops to pull the bearings in. The second bearing went more than half way on with gentle tapping before I needed the all thread.
I used one piece of wood in the back and one in the front with the bearing plate to buffer the bearing from the wood. The wood is 1 1/8 inch American Cherry. Not extremely hard but also not that soft.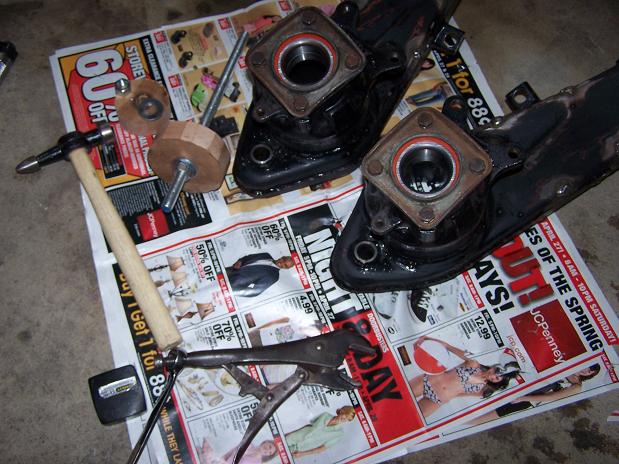
To pull the hubs on, I cut down the size of the rear piece of wood to fit on the bearing itself. The hubs went right on with moderate resistance.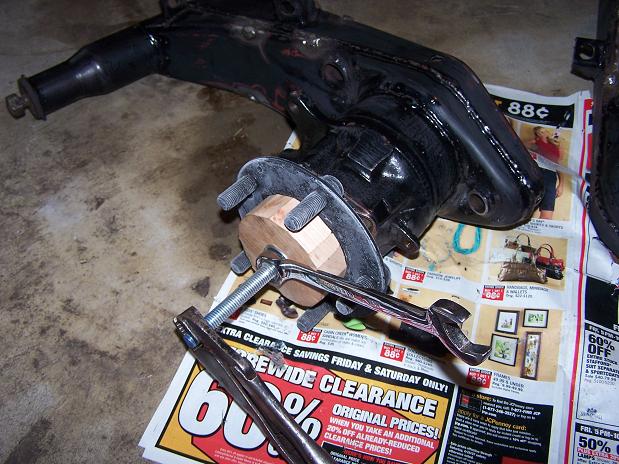
The hubs on, ready for paint.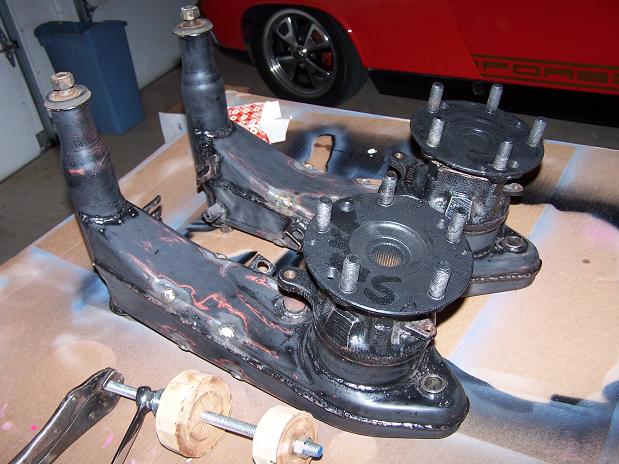
Posted by: Spoke May 7 2007, 09:47 PM
Rear arms painted gloss black.
Attached image(s)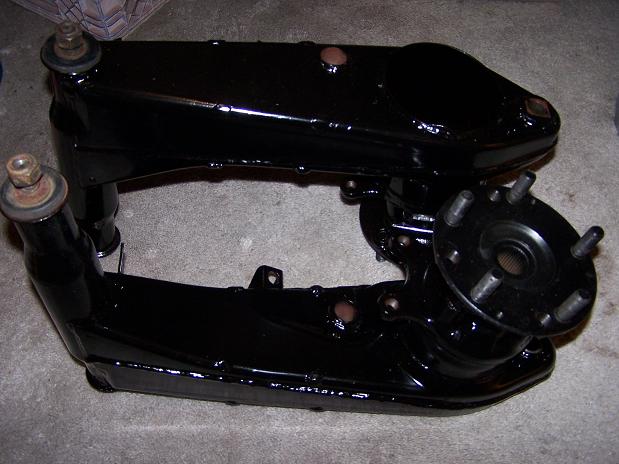
Posted by: Aaron Cox May 7 2007, 09:55 PM
NICE WORK!!!
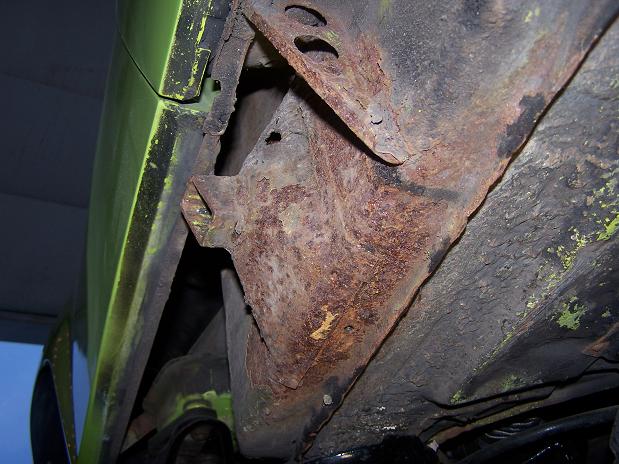
Posted by: Spoke May 7 2007, 09:56 PM
WTF?
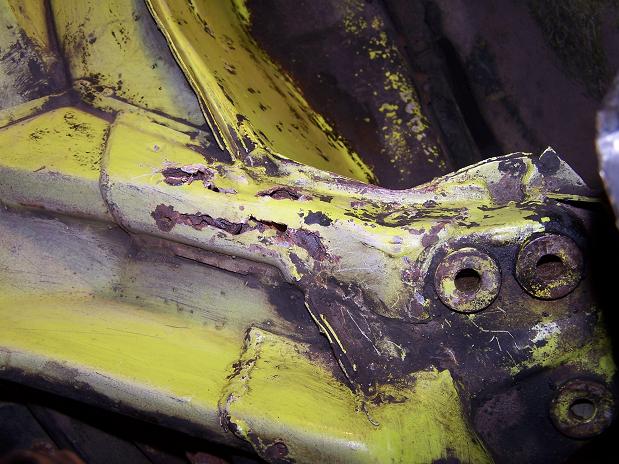
Things were going along well until I saw a little flake of paint on the passenger suspension console. After a little poking, I have found quite a bit of rust. I poked all around but didn't find any more. Will look at it later in detail.
So how bad is this rust? What else should I look at?
Right now I plan to cut out that entire section and weld on. How thick material should I use?
Attached image(s)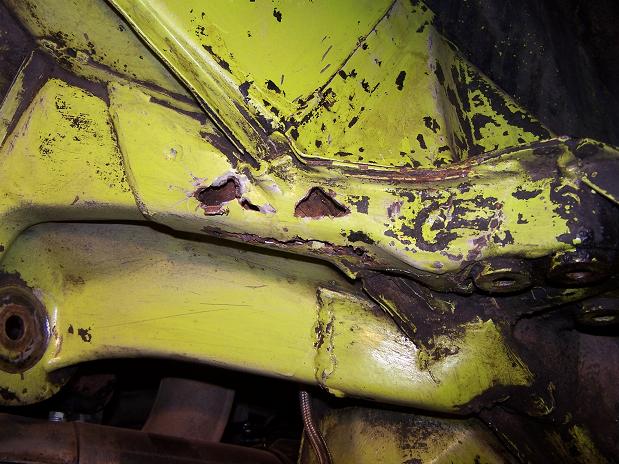

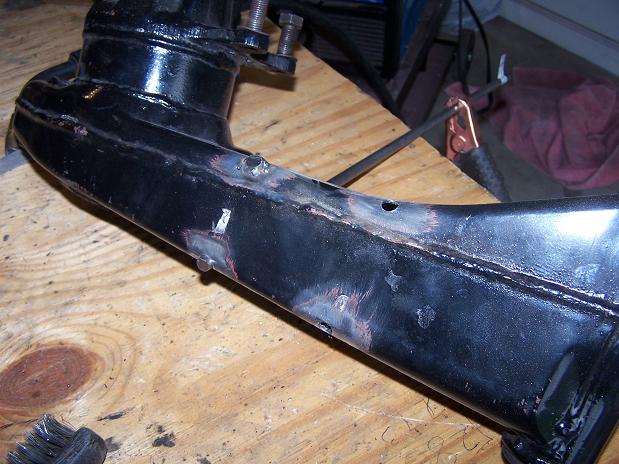
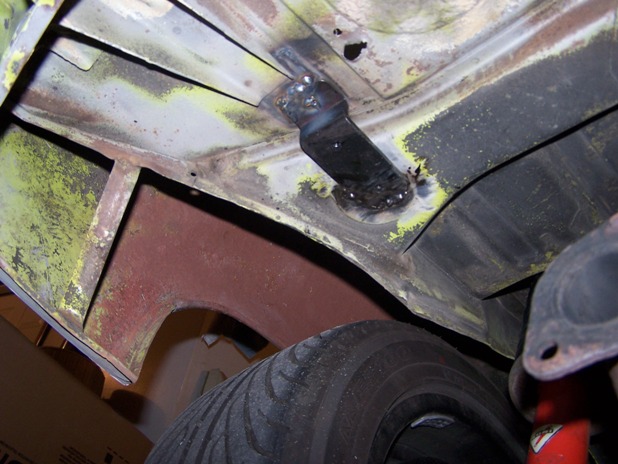
Posted by: Spoke May 9 2007, 07:25 PM
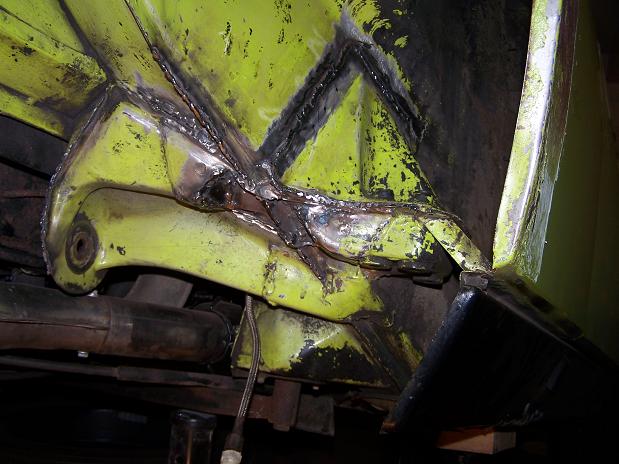
Took the grinder to the console rust. There's a hole in the console upright which was hidden by the outside support piece.
So should I be looking elsewhere for rust? How bad does this look? I've poked around and didn't find any soft spots. What is the gauge of steel? Is this 16 gauge?
Attached image(s)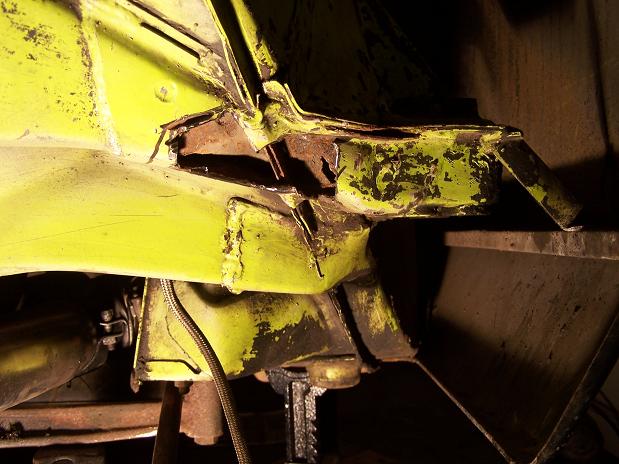
Posted by: Gint May 9 2007, 08:20 PM
Damn.
Make real sure that nothing is soft in there. I'd seriously consider getting a new suspension ear and doing it "100%", "while you're in there". You don't want to spend time repairing that area and finding out later that the console gave out from rust that you could have sured today.
Posted by: highways May 10 2007, 05:16 AM
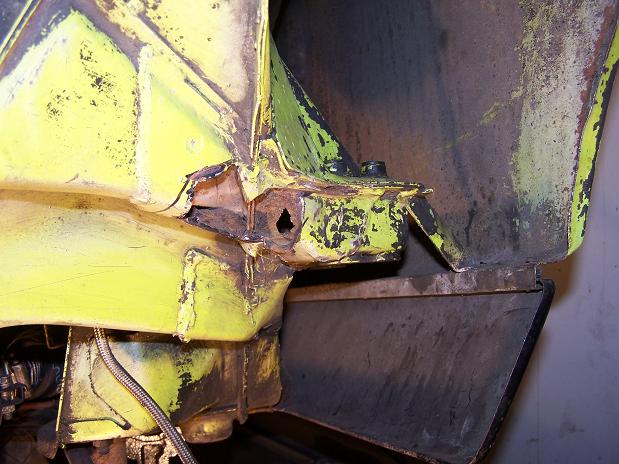
Yes, do the whole thing. You don't want to see this...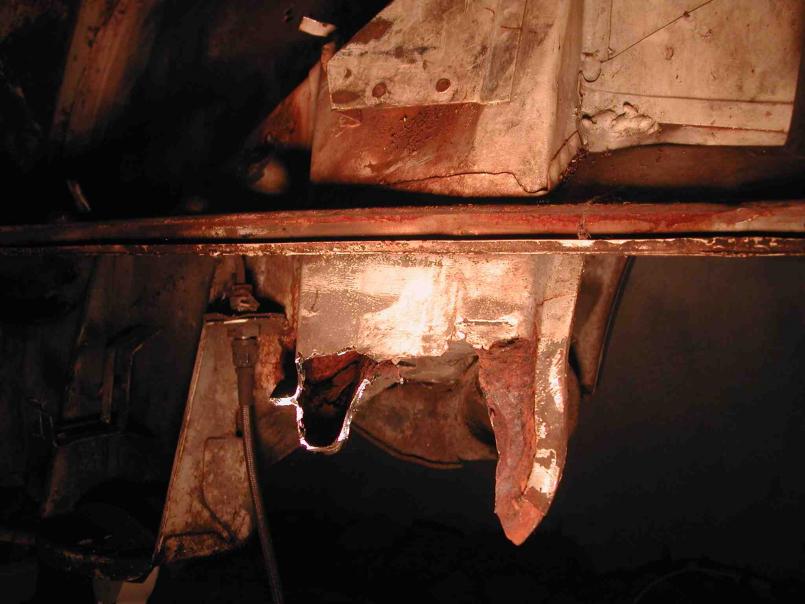
Posted by: Spoke May 26 2007, 10:20 AM
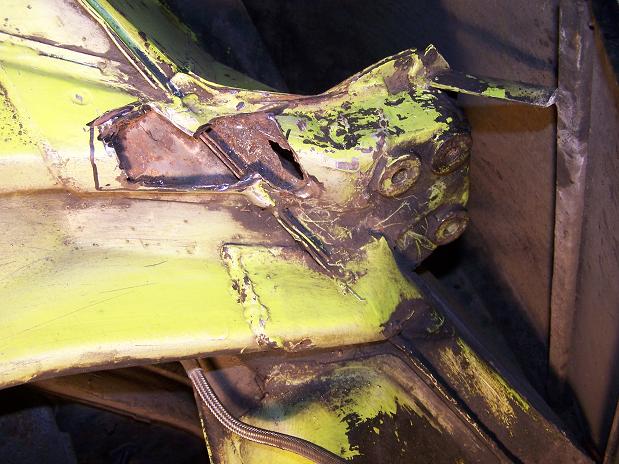
I've grinded all the soft stuff out. I will weld up patches on all the missing parts and put it back together and seam weld everything. Haven't seen anything else soft on this side and driver's side.
Attached image(s)
Posted by: Spoke May 26 2007, 07:01 PM
A little break from body work and fender repair to "upgrade" the tach from a 74 with single turnsignal indicator to 72 with individual turnsignal indicators.
Also will add a 3000uF capacitor to the tach windings to reduce the overshoot of the stock tach.
Removed the needles and faceplates. Old plate on the left new plate on the right. Tach in center was used to test the operation with the capacitor.
Here's the tach with the capacitor to test fit its placement. I will hot melt glue the cap to the turnsignal tubes to secure it.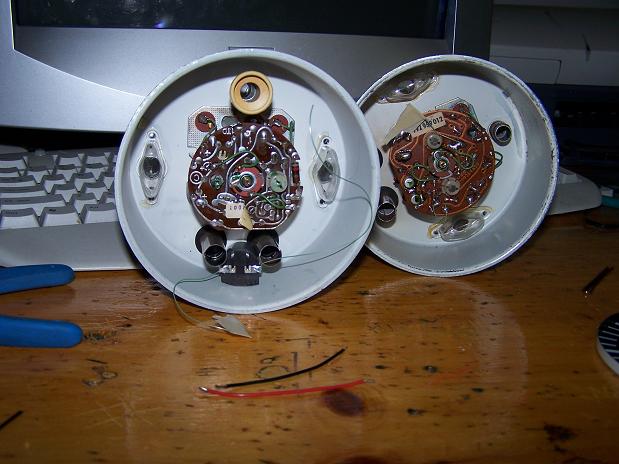
Posted by: Spoke May 26 2007, 07:19 PM
Capacitor wired and hot-melt glued into place. Glued the wire at the tach board edge and capacitor top for strain relief from vibration.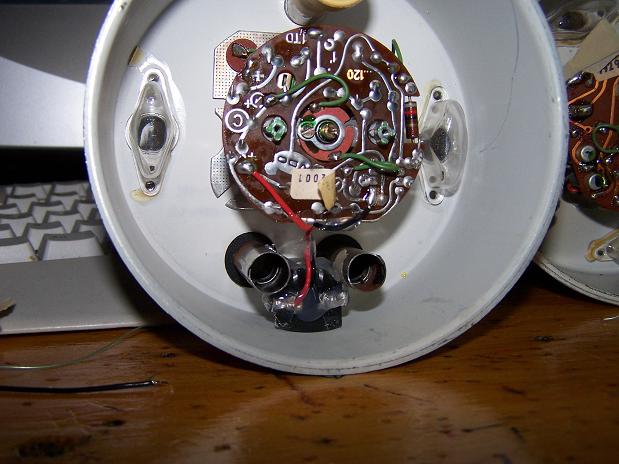
With the faceplate and needle installed, a little blurry test of the turnsignal and highbeam indicators. Ready for a road test to check for operation before replacing the glass and bezel. I am also replacing the glass as the one from my 74 had a plastic lense and the 72 has a glass lense.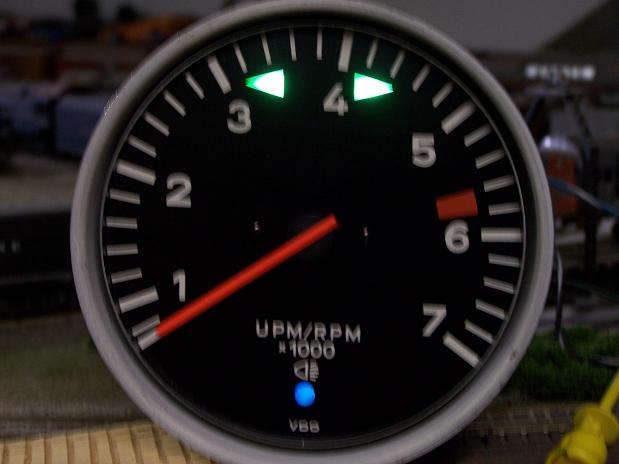
Posted by: Spoke Jun 7 2007, 12:30 AM
I have a set of lamps for the turn signal indicators from the old tach that I had. Added a length of wire to reach to the emergency flasher switch. I'll tap on to the front or rear turnsignal lamps which connect to the switch.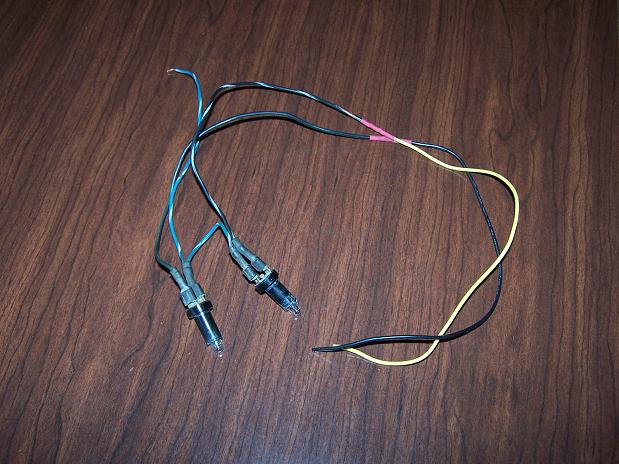
Turnsignal indicators soldered to the turnsignal lamps.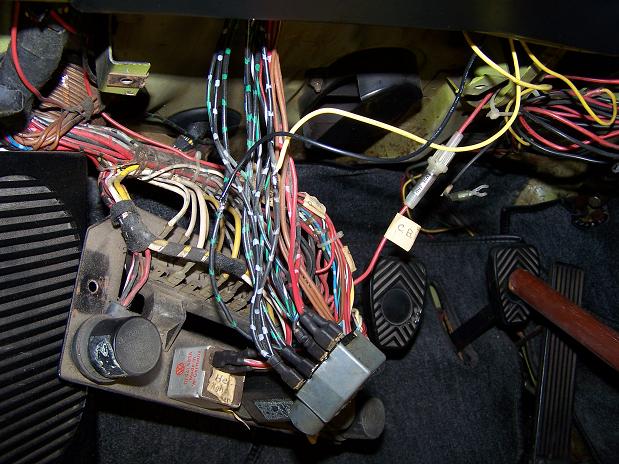
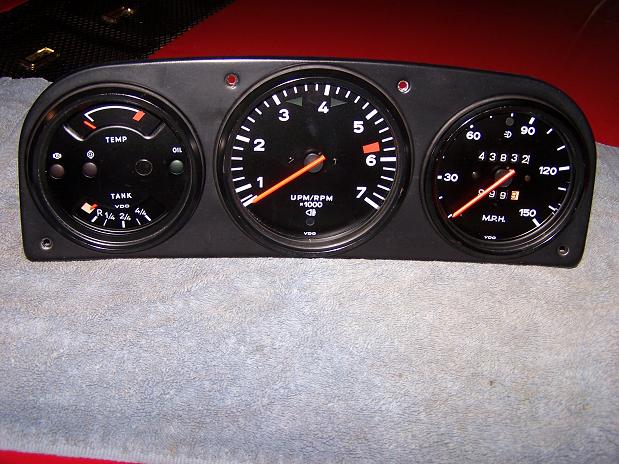
Here's the dash all refurbished and ready for install. The trim rings and frame were in good shape so I just cleaned and waxed them. Among the refurbishments:
Backdated tach with separate right and left turnsignal indicators. I used the old tach case, faceplate, and glass. The 74 had a plastic lense. From the 74 I used the tach mechanism, needle and faceframe. Painted the needle with red flourescent paint.
Added 3000uF capacitor across the tach windings to get rid of the bouncing. This cap worked wonders in calming the needle. Now the needle moves smoothly high and low without any bouncing or overshoots. I think 3000uF is a bit too much. The tach at times seems a bit lethargic in response but the stability of the needle makes up for it.
Opened up the speedometer and cleaned the faceplate and glass and painted the needle. The speedo's lense was the only glass lense on the car when I bought it.
Opened the gas/temp gauge to replace its plastic lense with a glass lense. Painted the needles on both gauges.
Posted by: Travis Neff Jun 7 2007, 12:42 AM
Nice job! Can you explain tach overshoot? tach bounce?
Posted by: Spoke Jun 7 2007, 06:03 AM
Nice job! Can you explain tach overshoot? tach bounce?
The tach needle is a very free moving mechanism. The tach electronics convert the opening and closing of the coil points or electronic ignition into a DC voltage. The DC voltage is proportional to the speed of the engine thus the tach needle goes up with increased engine speed and down when engine speed is decreased.
If the dc voltage on the needle is allowed to change rapidly like when the throttle is blipped in neutral or when the engine is slowed quickly, the tach will jump up or drop quickly to the correct engine speed but then overshoot because of its own momentum. The overshoot then oscillates a couple of times before settling down to the correct engine speed.
A capacitor across the needle windings dampens the change of voltage thus making the needle movement slower and eliminating the overshoot. The bigger the cap the more damping action. Just the right amount of capacitance across the windings will yield a nice fast response without the overshoot. 3000uF like I used is too much. If I dig into the tach again, I'll change to perhaps 2000uF which should give more responsive operation without bouncing around.
Posted by: Spoke Jun 7 2007, 06:30 AM
OK, back to the welding.
I've had a change of plans for the green car. Plan was to do the body work on the rear flares and paint. But the clutch in the red 914 is starting to slip pretty bad. Too much throttle in 3rd, 4th, or 5th gear will start the slipping. Acceleration is really touchy. So it's time to get the red car off the road. I have a new engine to go in along with a clutch which hopefully is in better shape than the one on the car now.
I can't have 2 914s and neither are operational so the green car will be repaired and put back together without finishing the bodywork. The bodyword will be finished as time permits between spirited drives 
Filled the 6 holes from where the reflector was mounted. My welding sucks but I'm getting better all the time. Can't run a full bead yet. I tried the stop/start method, running a bead about a 1/4 inch and stopping. Learning proper speed and power settings.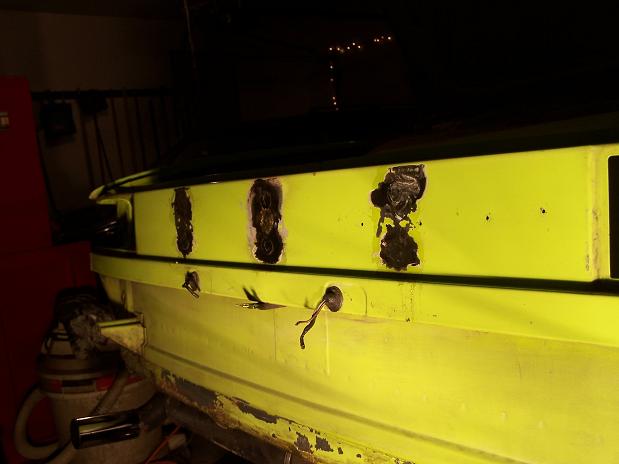
Welded up the little holes under the tie plate with 14 ga steel. Seam welded everything I could see from this vantage point without removing the engine or rocker panel. Will go back on the seam welds when the tie plate is welded.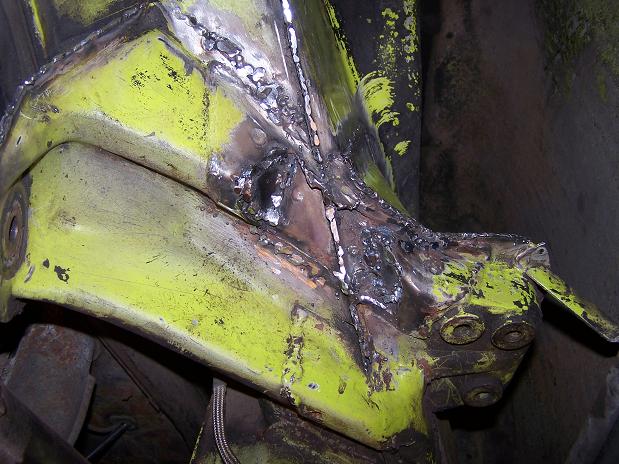
Posted by: Spoke Jun 8 2007, 09:58 PM
With a piece of cardstock, I fashioned a template for the replacement tie strip.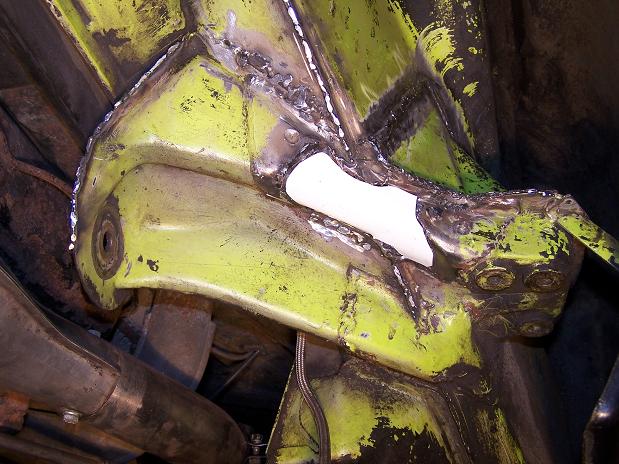
Tie strip cut from 14 ga steel. Bend and final shaping and its ready for welding.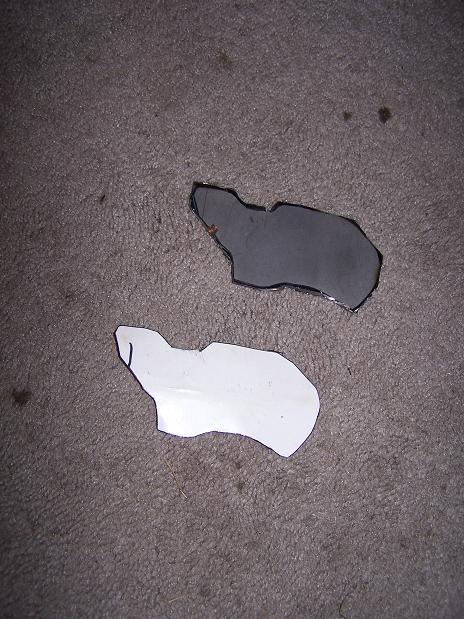
Posted by: Spoke Jun 8 2007, 10:01 PM
Welded up the metal around the taillight which was pancaked from a shunt. When I un-pancaked it, or as my neighbor would say, "I un-fucked it", the metal tore open so had to be welded up. The rear quarter panel is just about ready for final shaping.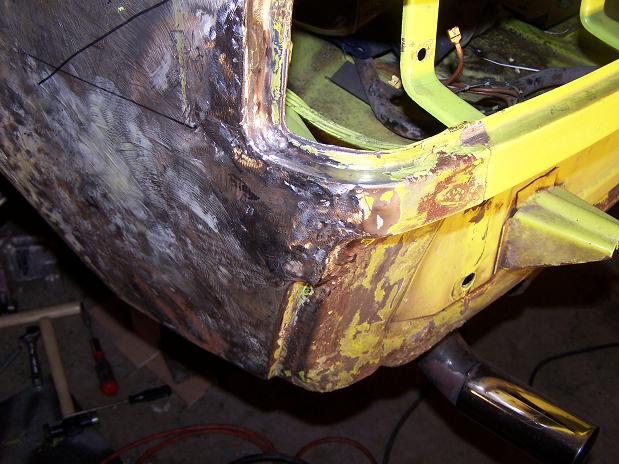
Tie strap welded in and excess weld grinded down and ready for paint.
It was no wonder that this tie plate rusted out as the edges of the plate were not welded all the way around and several openings were left un welded and un-seam sealed.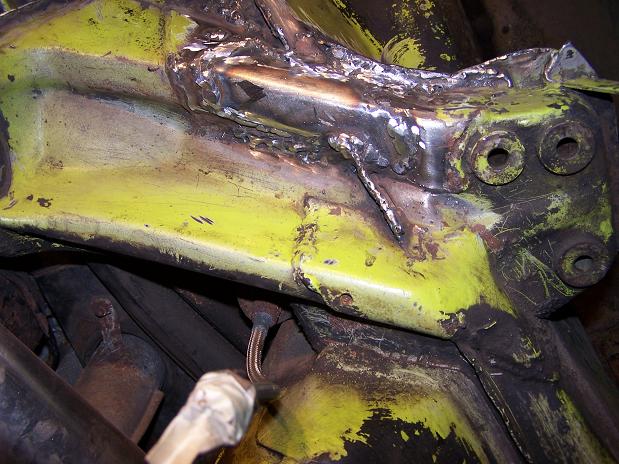
Posted by: Spoke Jun 9 2007, 05:09 AM
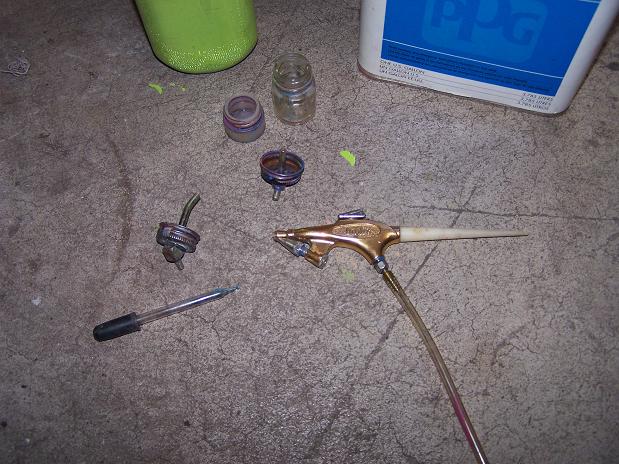
Sanded and degreased the area for painting. Rattle canned the primer and used my airbrush to put down the final coat.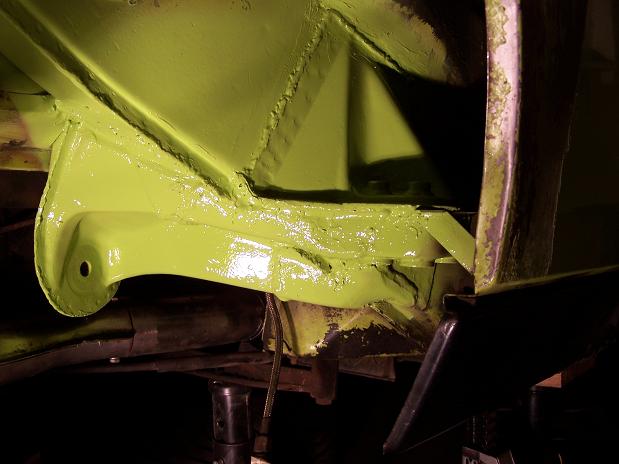
I only painted the area around the console repair. I resisted the desire to paint the entire wheel well or even paint and seam weld the driver's side. You know, avoiding the "while I'm in there" syndrom.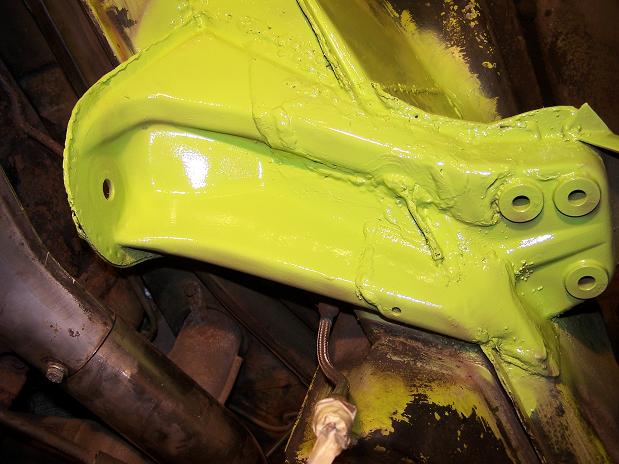
I didn't paint or seam seal the entire console since I couldn't remove the rocker panel since the car is wedged in the corner of the garage and it didn't have its back wheels on to move it. Will finish this job later when I pull the rockers.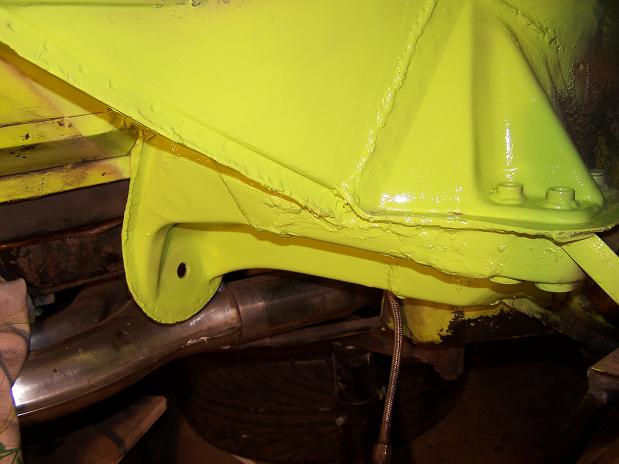
Posted by: Spoke Jul 20 2007, 10:03 PM
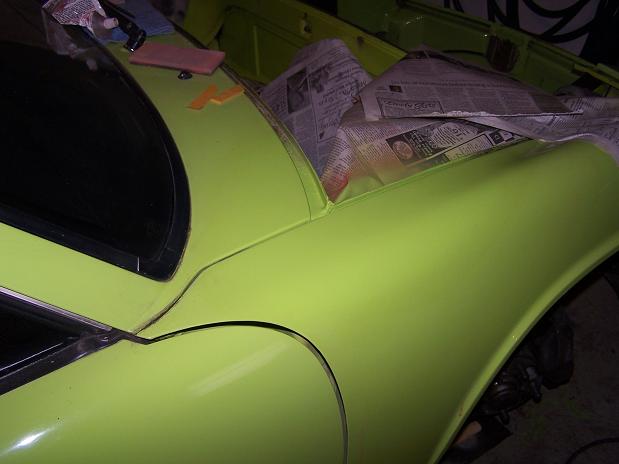
Keeping with my theme of doing small jobs while keeping the car on the road, next little job is to smooth the back panel after welding the holes and paint it.
After straightening the back panel, I applied a layer of glaze for the final coat.
Attached image(s)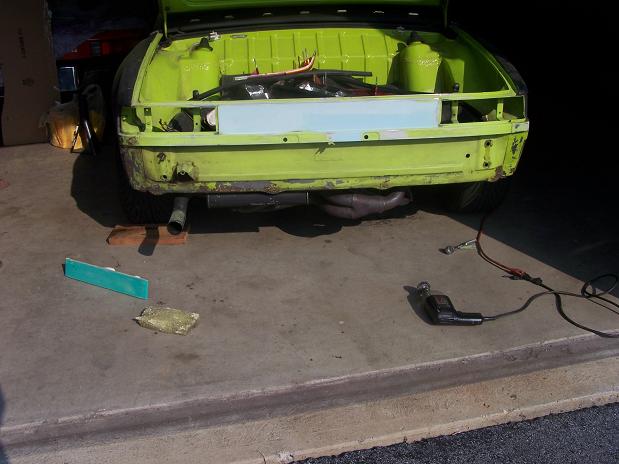
Posted by: Spoke Jul 20 2007, 10:16 PM
Only painting the outside and inside of the panel as well as the trunk lock support member.
I'm airbrushing the paint on to maximize the pint of paint left. Still need to do both rear fenders as well as a rust spot on the front passenger fender.
Attached image(s)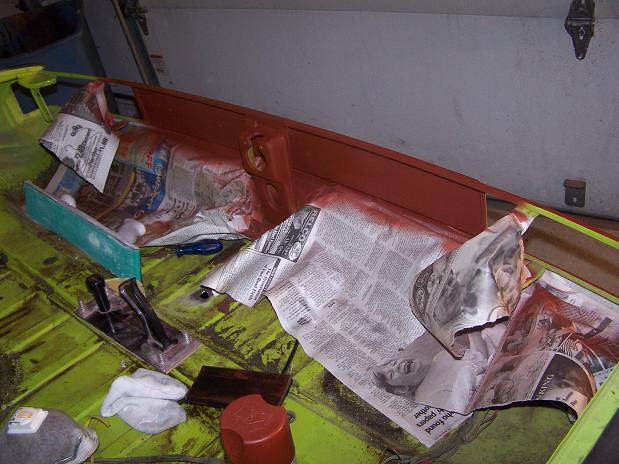

Posted by: Spoke Jul 20 2007, 10:18 PM
All painted and emblems reattached.
Attached image(s)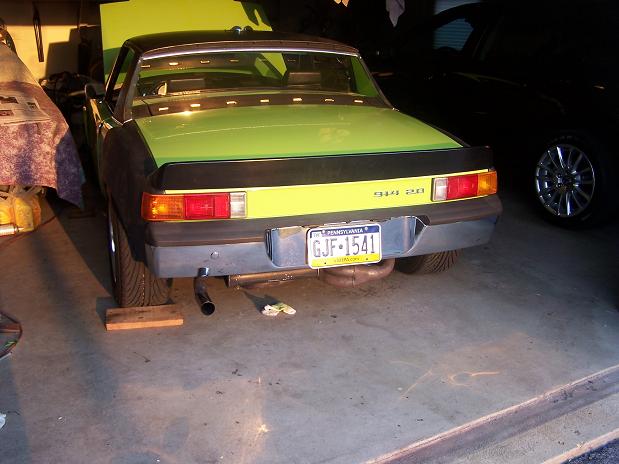
Posted by: sendjonathanmail Jul 21 2007, 05:19 PM
Looks good
Posted by: Spoke Aug 13 2007, 06:32 AM
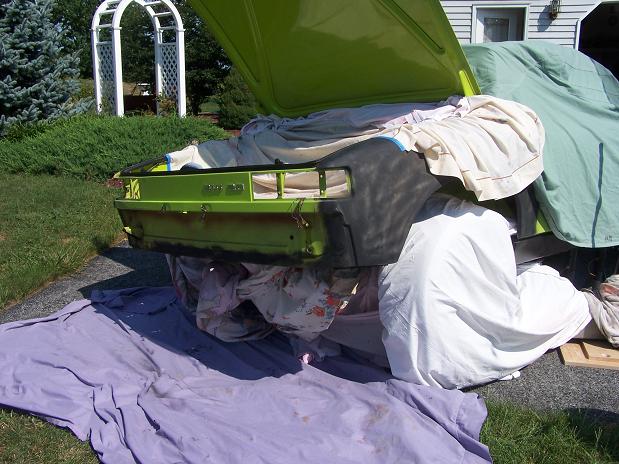
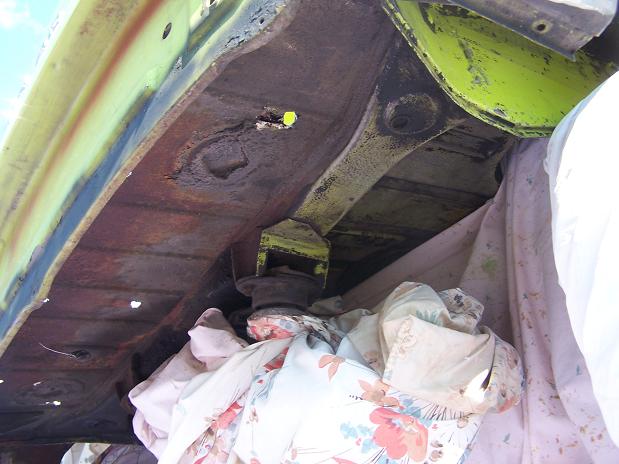
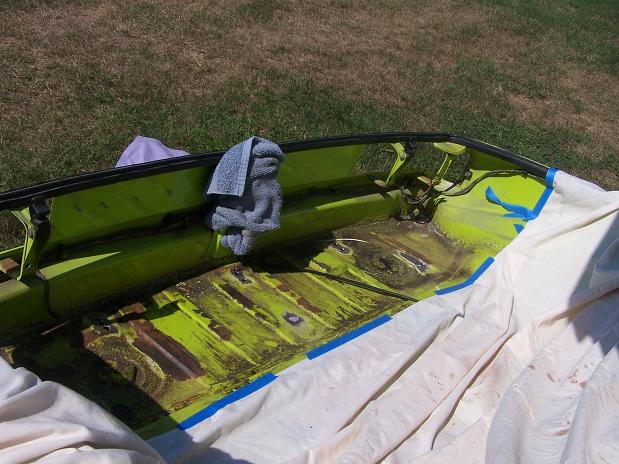
Next job is to get the back of the car cleaned up, rust-wise, install the rear swaybar brackets, and eventually put the muffler heat shield back on.
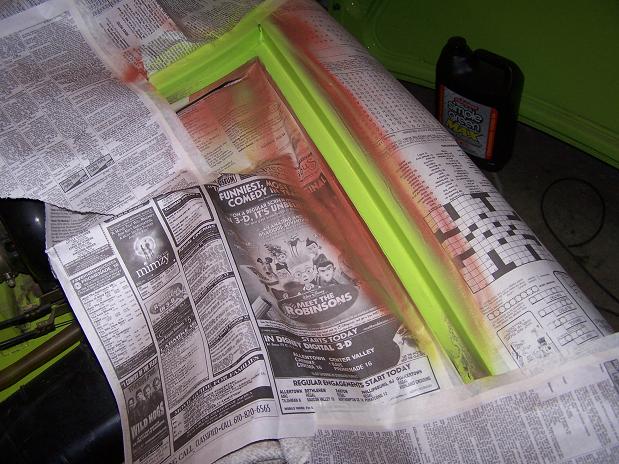
For now, need to sandblast the rear trunk floor top and bottom. Just surface rust so no major work needs to be done other than cleanup rust and paint.
I tried to cover everything on the car to make sure the sand doesn't penetrate into unwanted areas. Even covered up the jack and trunk lock mechanism.
I have many old bedsheets which work good in protecting the car from flying sand.
Attached image(s)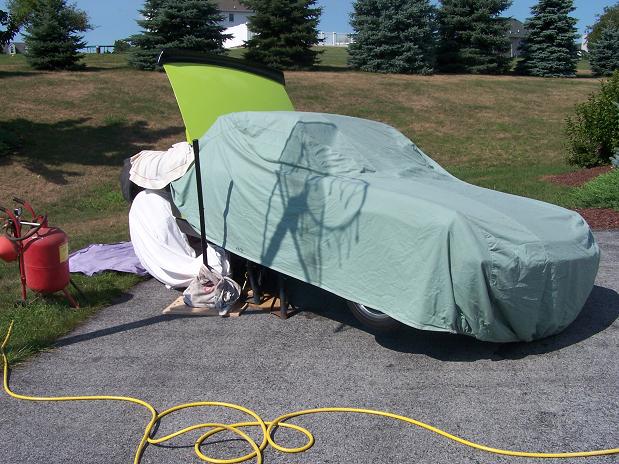
Posted by: Spoke Aug 14 2007, 05:07 AM
Sandblasted and painted some other parts including rear swaybar and muffler hanger.
Attached image(s)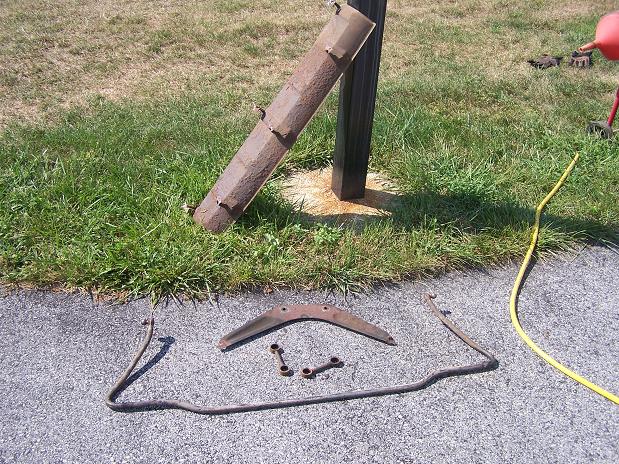
Posted by: tdgray Aug 14 2007, 03:39 PM
Lookin Good Spoke... keep it up.
Posted by: Spoke Aug 14 2007, 10:15 PM
Swaybar supports welded on.
Attached image(s)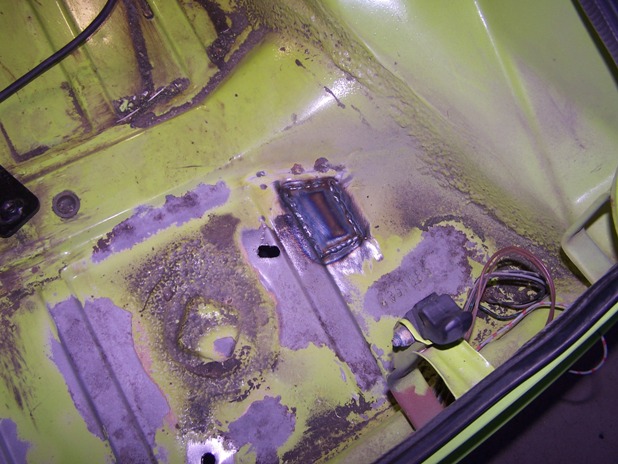
Posted by: Spoke Aug 14 2007, 10:19 PM
Swaybar mounting brackets welded on.
Attached image(s)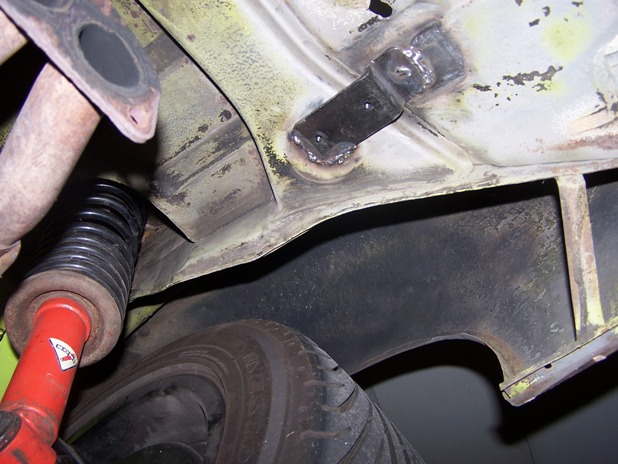
Posted by: Spoke Aug 19 2007, 09:33 PM
Finally, it's time to finish the rear flared fenders. Bondo is on and sanded. I used about a 1/2 quart of bondo, most of which has been sanded off and vacuumed up.
I'm just painting the minimum that is needed since I have less than 1 pint of paint. Got the primer on tonight and I've put the first coat of paint on. I used the full size paint gun for the primer and am using the smaller gun for the paint.
Here's the fenders with primer.
Attached image(s)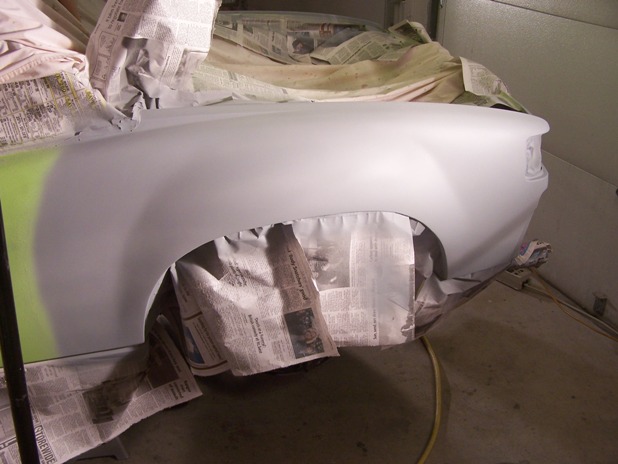
Posted by: LarryR Aug 19 2007, 09:58 PM
![popcorn[1].gif](style_emoticons/default/popcorn[1].gif)
Really nice work. I am in the process of starting to go through mine.
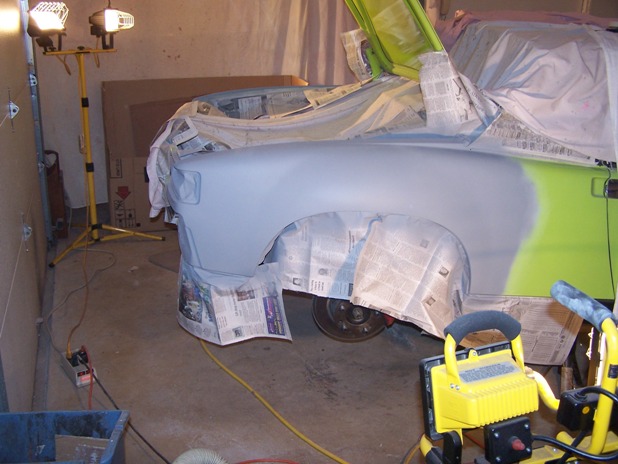
Posted by: Spoke Aug 19 2007, 10:47 PM
2 coats of paint, thinned 1:1 went on very nicely with the smaller HVLP gun. Paint looks like glass. Used very little of my paint. I should have enough to paint the rust repair on the front fender and hopefully, paint the hood.
Attached image(s)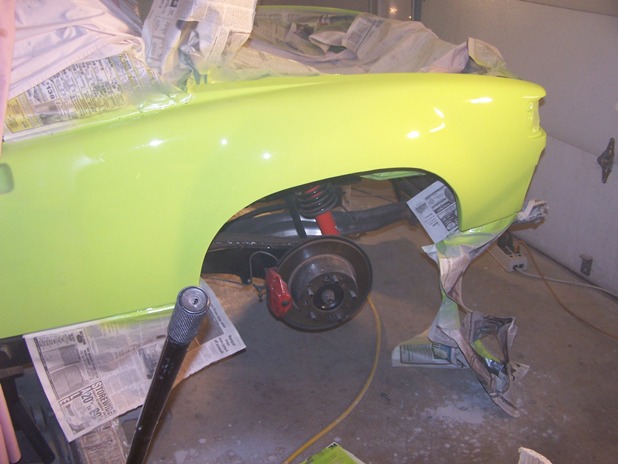
Posted by: Lou W Aug 20 2007, 12:40 AM
Looking good, keep up the good work. 
Posted by: Spoke Aug 31 2007, 06:35 AM
Time to attack the only rust through hole on the car on the passenger front fender. What gauge is the skin of a 914? It looks like it's 20ga. The cut out hole is larger than I expected but there was significant thinning of the metal around the actual rust through.
Attached image(s)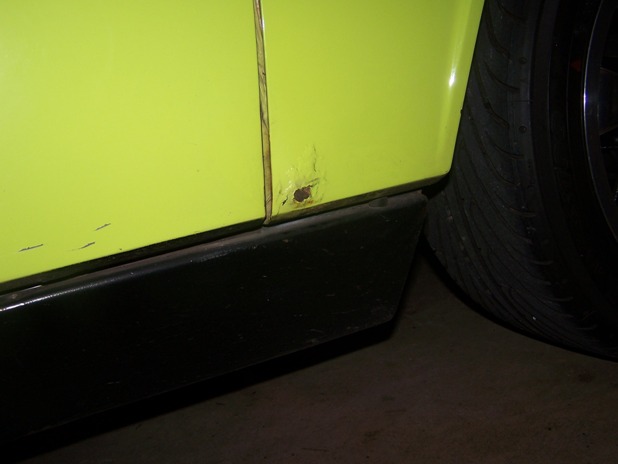
Posted by: Spoke Sep 2 2007, 07:41 AM
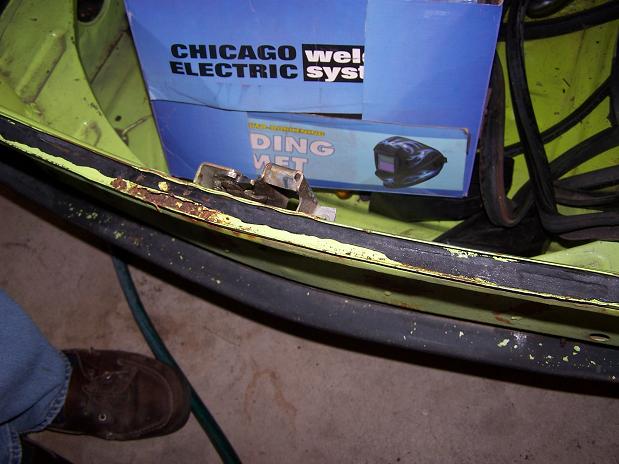
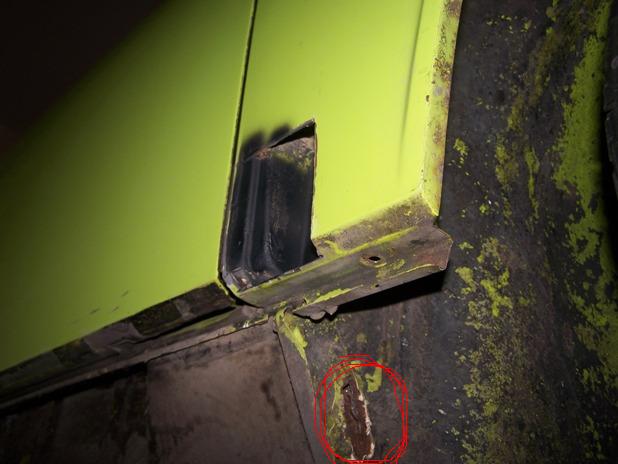
Pulled the passenger rocker panel off since it was showing some serious rust issues around the jack point. The rocker panel is in good shape except for this area around the jack point.
I don't know how the 914 designers could have messed this area of the car up any more. On the engine side of the long, you have the acid from the battery. On the outside of the long, you have road junk from the rear wheel accumulating on the jack point.
The jack point is still sturdy as I'm able to jack the car up with no flexing. Need to get this cleaned up to see the full extent of the damage.
Attached image(s)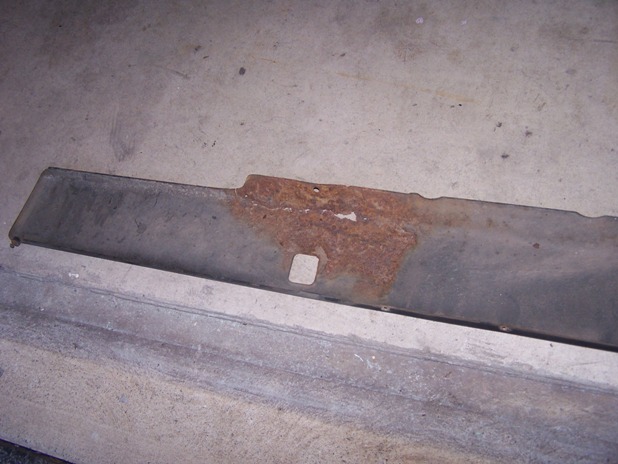
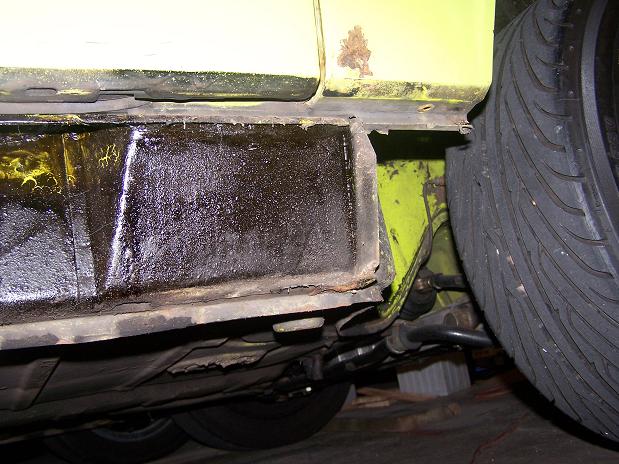
Posted by: Spoke Sep 2 2007, 03:48 PM
The rest of the passenger long looks excellent. Gotta love the 70's era rustproofing: Spray tar inside and out.
Attached image(s)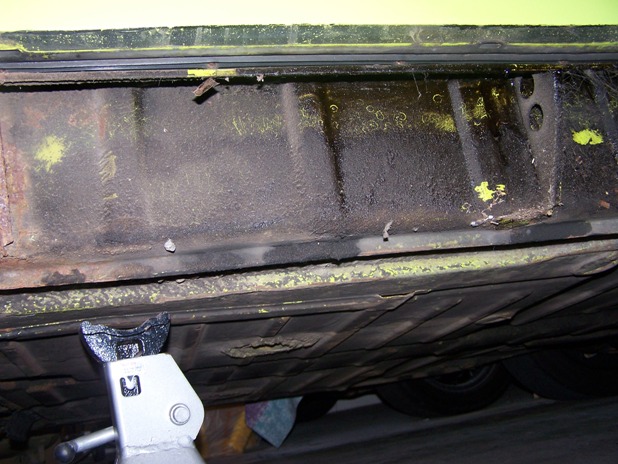
Posted by: Spoke Sep 3 2007, 12:32 AM
Ready to sandblast. Don't want sand in the car so it's wrapped up very tight with the car cover and an assortment of old bed sheets. The sheets on the driveway will help the clean-up effort as well as recycle the sand.
Note the paper jammed in a rust hole below the front fender. Found this when poking around after removing the rocker.
Rust on the longitudinal is quite serious. Didn't find any holes but it doesn't look good.
Attached image(s)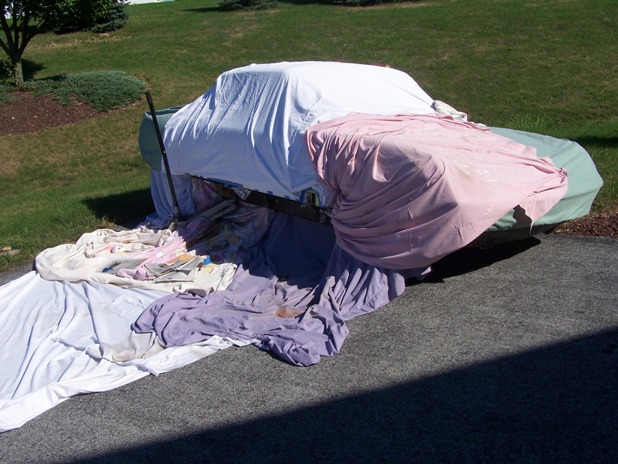
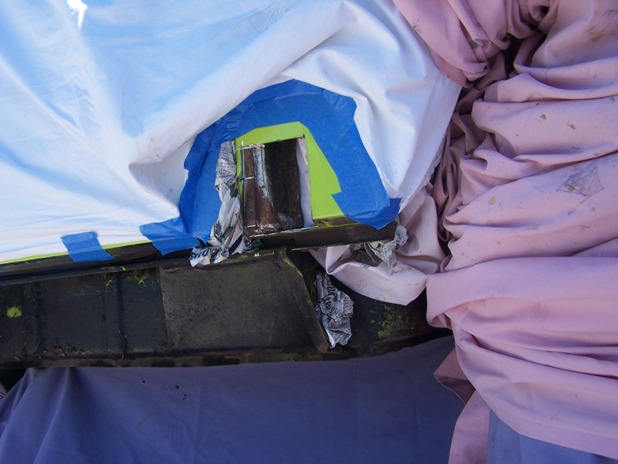
Posted by: Spoke Sep 3 2007, 12:40 AM
The long all cleaned up and primered. No rust through but there is significant damage. I'll seam weld the jack point and the one seam just in front of the jack point. The door jamb support is almost rusted off.
The front fender pic shows the rust hole in the bulkhead. Not real big but will be welded when I do the fender.
Attached image(s)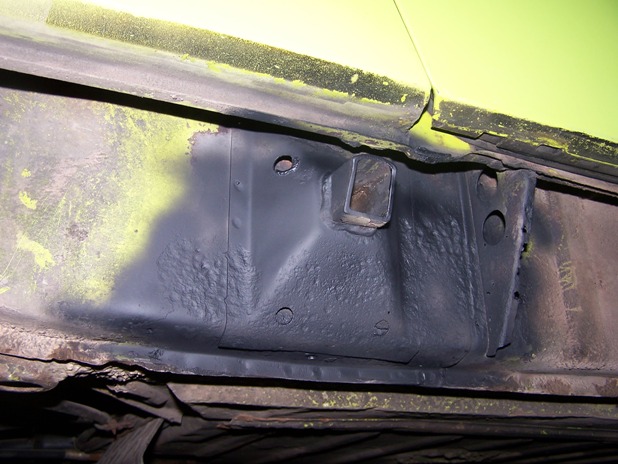
Posted by: Spoke Sep 3 2007, 01:00 AM
I could buy new rocker panels to replace the rusted ones on the car. But then again, that's why I bought a welder. First had to see how bad the damage and make a replacement piece. I made the piece before cutting out the bad stuff just so the piece would fit right.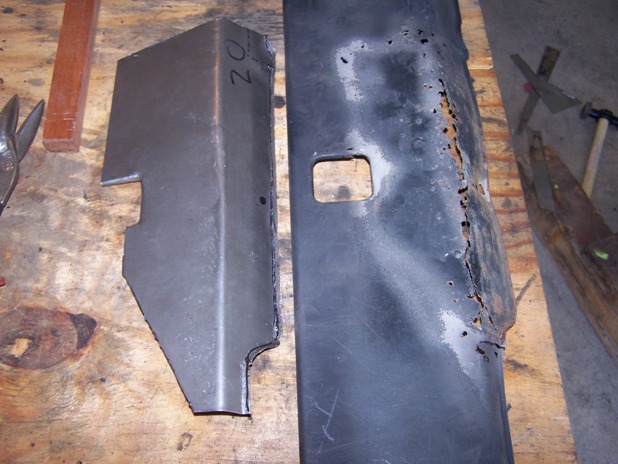
Cut out the bad stuff and test fit. Needed a little trimming here and there.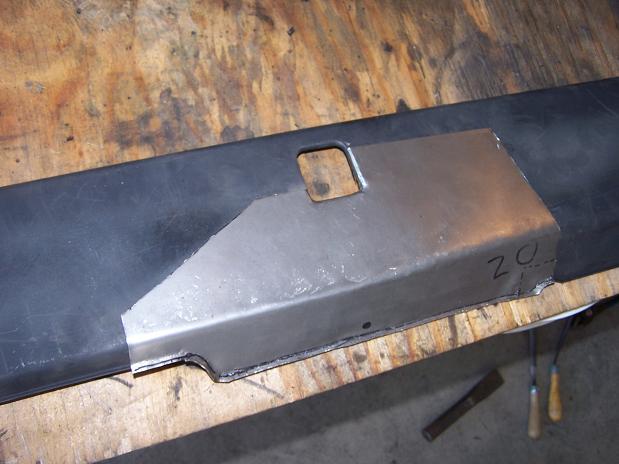
Just want to hold the piece in with some spot welds. The edges of the bottom and around the jack point were bent with a pair of pliers. Not real sophisticated but it worked.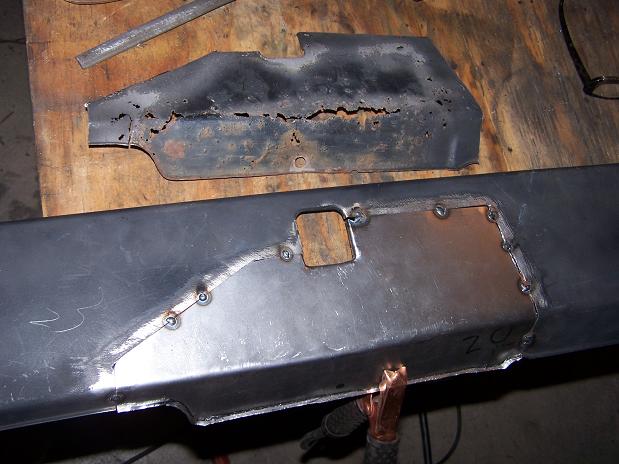
All welded in and grinded smooth. Will continue working the metal to get it flat then add some bondo to smooth the welds and paint.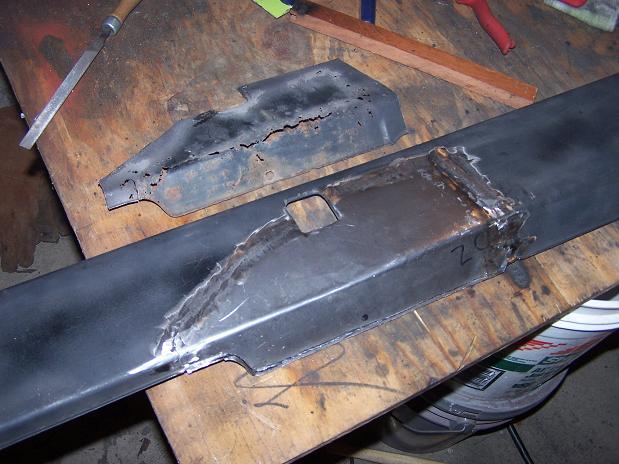
Posted by: rjames Sep 4 2007, 10:33 AM
Looking good!!
Posted by: Spoke Sep 9 2007, 08:31 PM
Painted the rocker after seam welding the jack support. The brace in front of the jack support is just about gone but I don't want to dig into this area just yet. It's still ok for now. 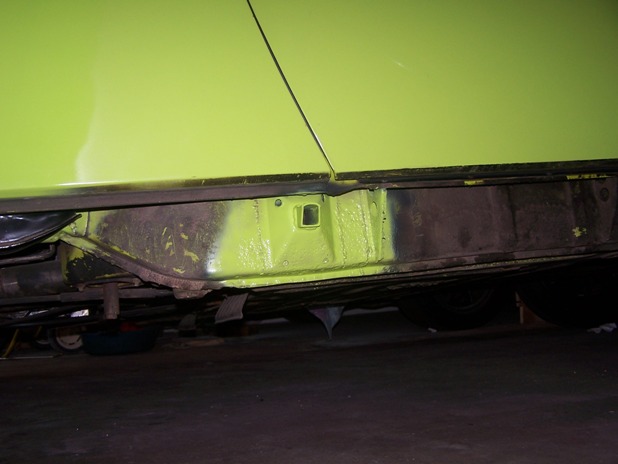
Painted the fender with my airbrush. Also painted the patch on the tub below the fender. While I was here, thought I'd paint the brake caliper.
Put the rocker panel on for now so I can drive the car and have it look complete. Since I'm using screws instead of the rivets in the door jamb, I can remove and replace the rocker panel in minutes. If only the factory used screws maybe rocker panels would have been taken off on a regular basis for cleaning out all the road debris that gets deposited behind the panel and more 914's would be in better shape.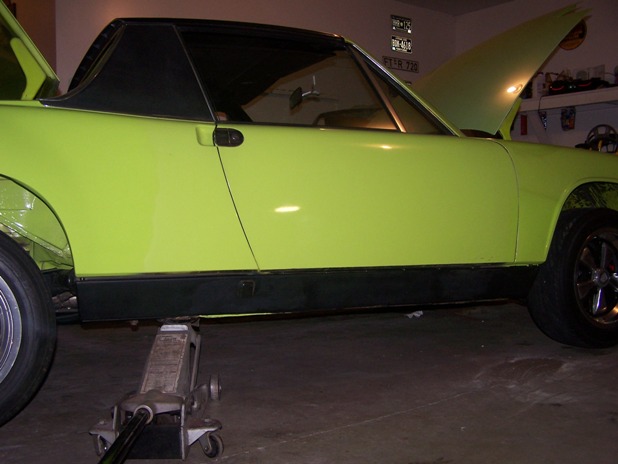
Posted by: Spoke Feb 3 2008, 06:42 PM
When I converted to 5-lug, the '87 911 front end was set up for brake wear sensors. I left the wear sensors on the pads and the mounting hardware on the struts but obviously the 914 is not set up for wear sensors.
I wanted to connect the wear sensors to the brake warning light in the dash. It should be easy to do since the parking brake-arm switch is a simple switch to ground. When the parking brake is pulled, the switch closes to ground and the brake warning light goes on.
Brake pad wear sensors are simple sensors being a short circuit when the pad is ok and an open circuit when worn. Just the opposite as the parking brake switch. The wear sensors are connected in series such that when either one wears, the alarm should be activated.
Since the wear sensors are opposite polarity as the parking brake switch, I needed to build an inverting circuit such that when the pads are good, the circuit should be open. When the pads are worn, the circuit should short to ground.
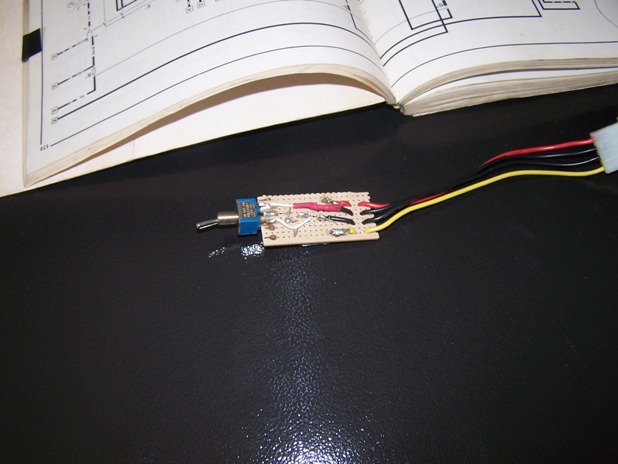
The circuit below provides the interface between the pad sensors and the parking brake switch. For ease of implementation, I connected the output of the circuit directly across parking brake switch.
The toggle switch on the circuit board is center off type so has 3 positions:
UP: wear sensors connected to circuit
Center: open circuit simulating worn sensors for testing.
DOWN: simulates good sensors and also allows disabling of the circuit.
The toggle switch is necessary in case the brake warning light is on so I can tell if the light is on for the wear sensors, the parking brake, or the master cylinder warning switch.
Connector to the circuit is a PC power connector.
Attached thumbnail(s)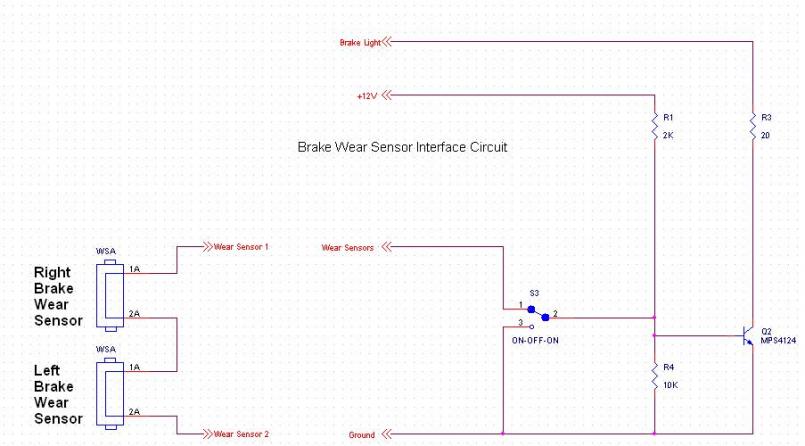
Attached image(s)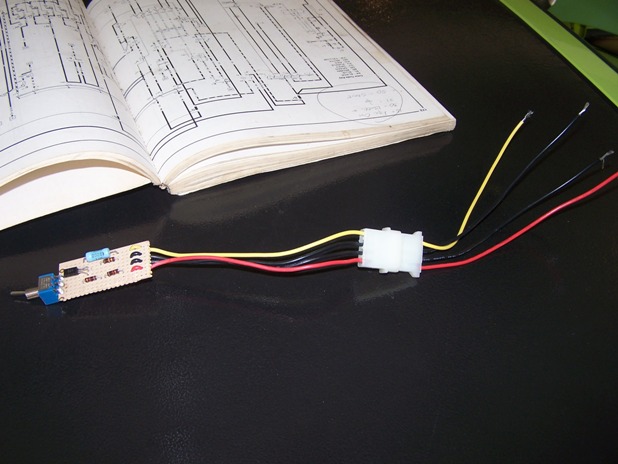
Posted by: Spoke Feb 3 2008, 06:55 PM
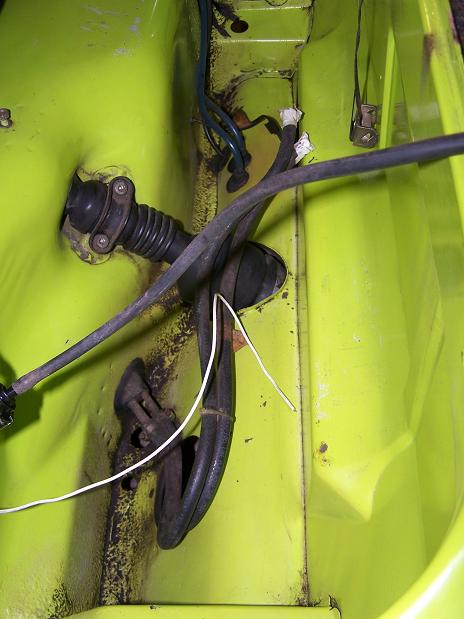
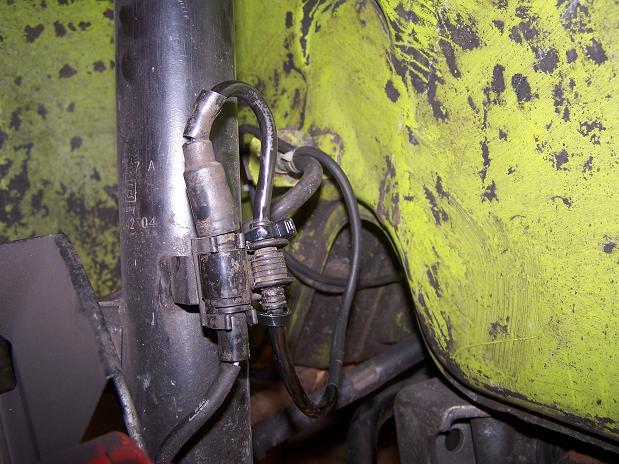
The chassis side connectors to the wear sensors were connected to the struts when I bought them. They were cut off so I need to make a harness with 2 wires. The harness needs to go from one connector to the other, and have wires going into the cabin to the inverter circuit.
Attached image(s)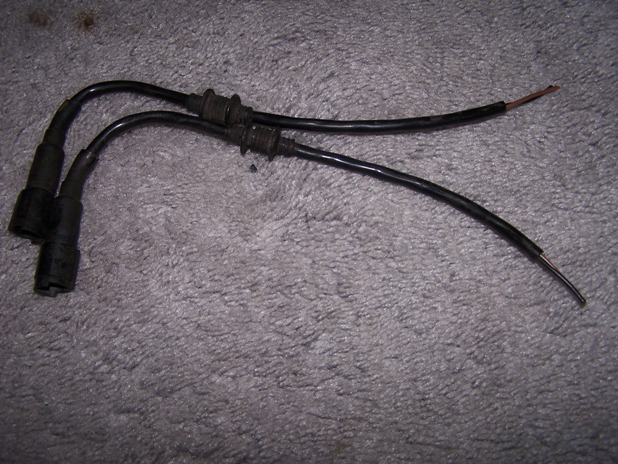
Posted by: Spoke Feb 3 2008, 07:26 PM
For my harness, I used a length of rubber hose I found in the attic. I couldn't fish 2 wires in this hose so I fished one first.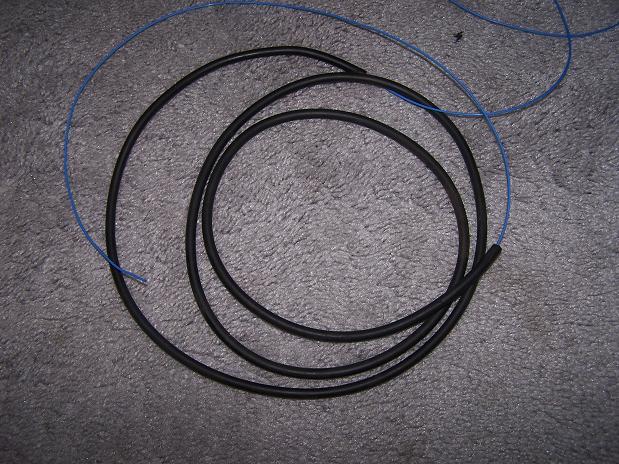
Then soldered the 2 wires to the first and pulled the 2 through. 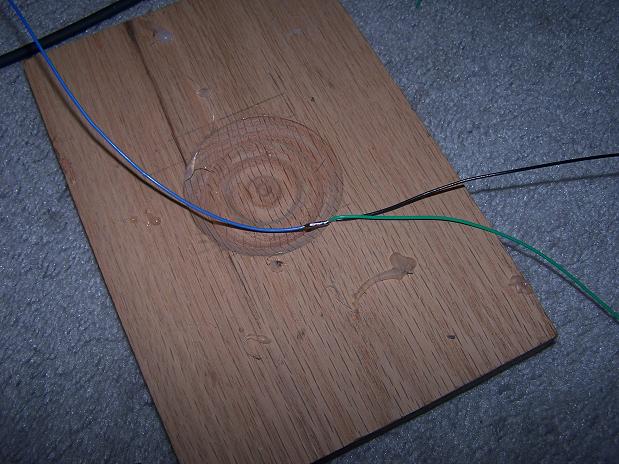
Soldered the two wires to one of the connectors. 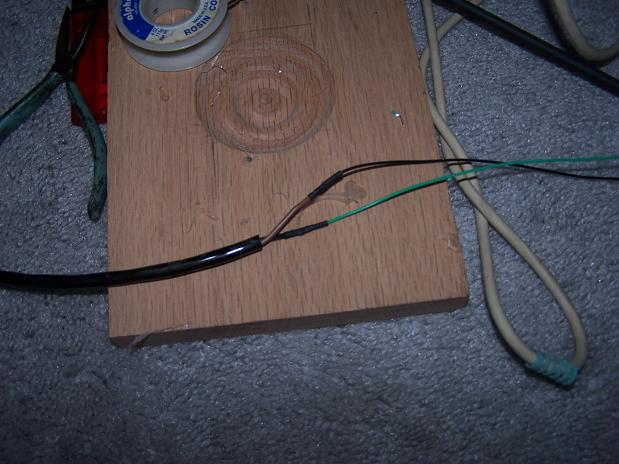
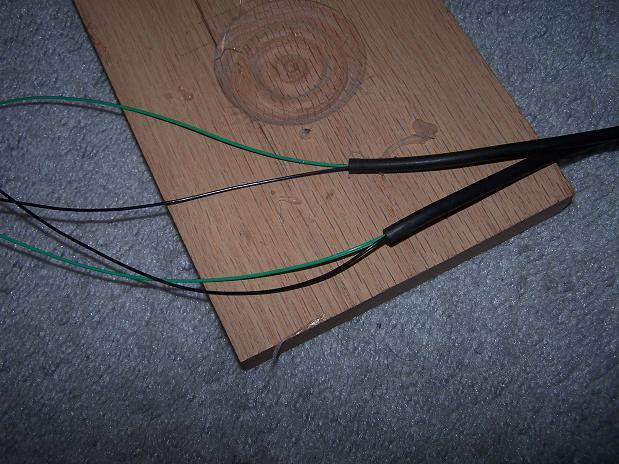
Posted by: Spoke Feb 3 2008, 07:33 PM
Once wires are soldered and heat shrink tubing applied, I pulled the hose up to the existing sheath. 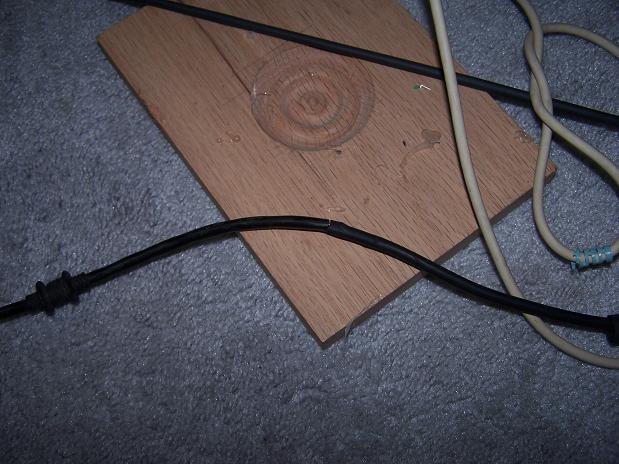
Soldered the other side and applied heat shrink tubing. I cut a small hole in the middle of the harness where the wires will go into the cabin. I left one of the wires very long so that it will be the wires into the cabin.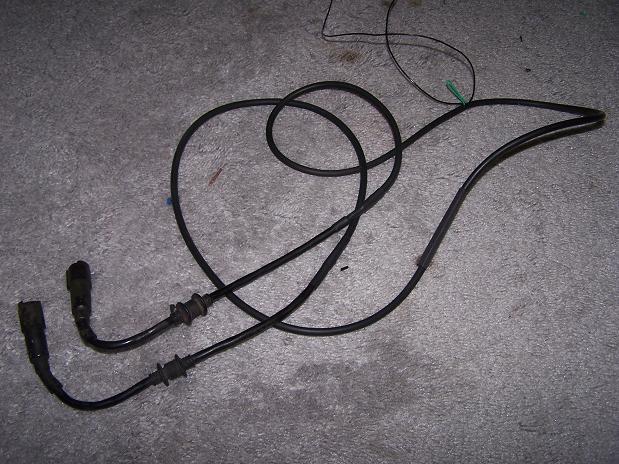
With heat shrink tubing on the cabin wire, the harness is finished and ready for install.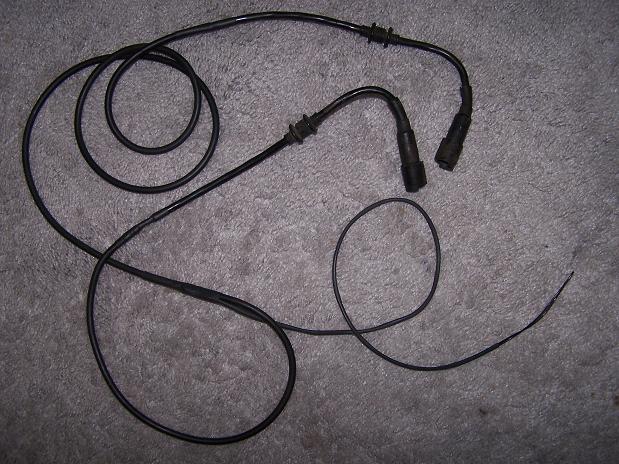
Posted by: Spoke Feb 3 2008, 07:49 PM
It's always a jackstand party when Spoke gets under the car. Can you count how many jackstands are being used?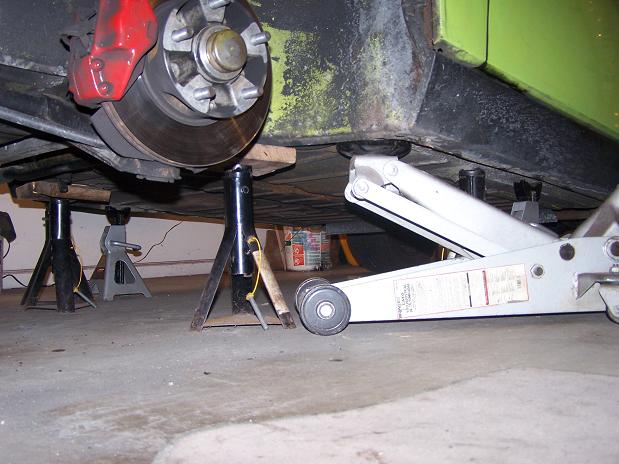
I simply tiewrapped the harness in place along the hard and flexible lines.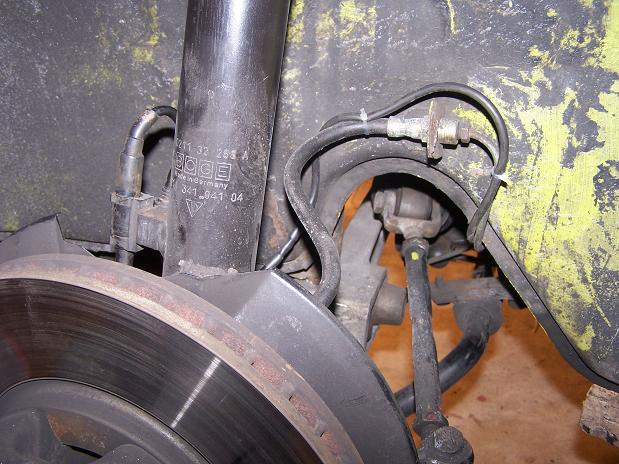
Posted by: Spoke Feb 3 2008, 08:12 PM
Pulled out the gauge to find the wire from the parking brake switch to the indicator light. The wire goes directly to the light so piece of cake to find it and splice on a wire to go to the inverter circuit.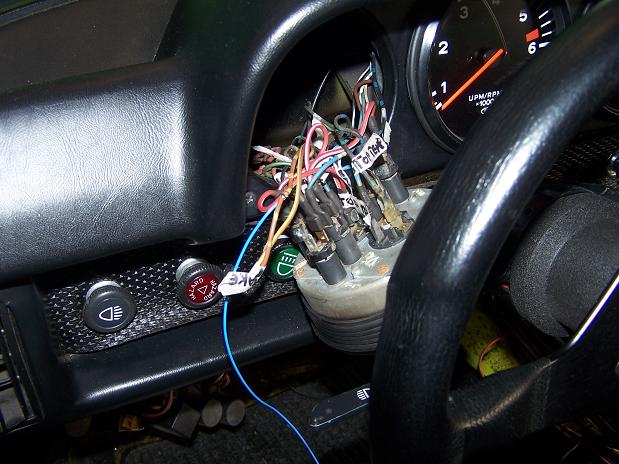
To get the wires from the undercarriage to the cabin, I drilled a small hole and installed a rubber grommet to protect the wire. Before installing the grommet, I put some paint on the exposed metal from drilling.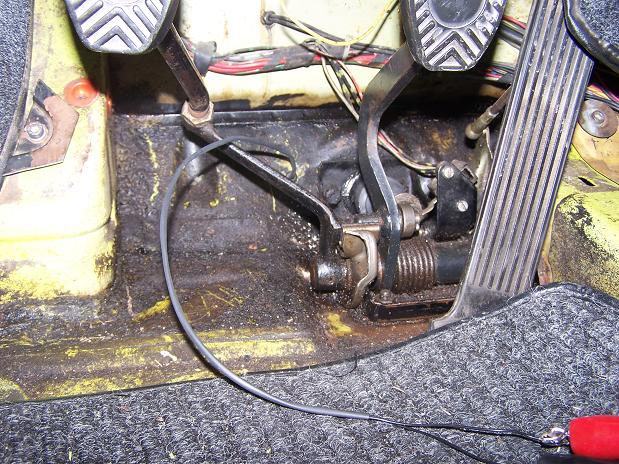
With all wiring completed, shrink wrapped and taped, the circuit will be placed on the dash support right under the radio. Circuit tested ok so it begins its life hidden under the dash. The next time I think about this circuit will be when the pads are worn.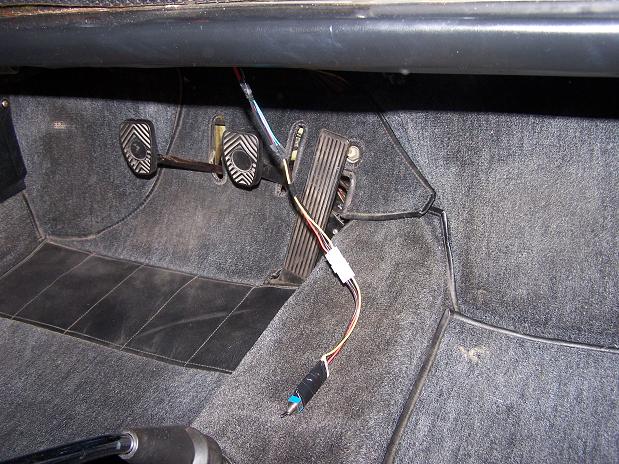
Posted by: zenocchio Feb 4 2008, 02:16 PM
I have been reading this post all in once!
Great job!
may I ask you a quick question,
I would like to repalce the rear suspension of my '73 2.0 by myself and I wonder about how hard is that job!
I can not high the car so much, just enought for going under
Is an easy job?
Ciao, and once again congratulation for your car from Italy!
Posted by: Spoke Feb 4 2008, 05:14 PM
Hi and thanks for the complement.
By the way,

Have fun on this site. This is the best 914 site on the planet. These guys here will help you out of any jam you get into with your 914. Chances are if you have trouble someone's already had it before and can help. Check the "Lapuwali Classic Thread Forum" here for how-to articles.
Removing the rear suspension is quite easy as jobs go. The only difficult part may be that some of the bolts are rusted. I had a major problem on my 71 914 with a shock bolt that was rusted on. I ended up grinding the head off so I could remove the shock.
Here's a quick how to remove the rear swing arms:
1) Jack car up, remove tire and remove cotter pin holding center nut. Replace tire and lower jack.
2) With breaker bar and correct size socket, loosen center nut and remove.
3) Put car on jackstands. Use more than one on each side for safety, and stack the tires under the car for added safety.
4) Push on brake pedal and hold down with a stick. This keeps the brake fluid from draining when you remove the rear caliper.
5) Remove brake caliper and disconnect from brake line and emergency brake cable.
6) Remove the shock. One nut at the top and big bolt through the rear swing arm. Support the rear swing arm with a jack or other item to keep it from dropping and the drive shaft hitting the heat exchanger.
7) Remove large nut on swing arm pivot on the inside. Remove outer nut too. Remove 3 bolts holding outer swing arm adjustment plate. Watch out for alignment shims falling to the ground. Keep track of where they go and how many.
8) At this point, I've found I can remove the swing arm without disconnecting the drive axle from the transmission. If the axle spline is stuck in the hub, push it out with a gear puller just to loosen it. It should then come out on its own. You may want to remove the axle from the transmission if you want to repack or inspect the CV joints.
I might be forgetting something or other members may want to chime in with their methods or point you to a link. It isn't necessarily a hard job, just takes some time. The rear end will need aligned after replacement.
Posted by: zenocchio Feb 5 2008, 04:22 AM
Thank you very much for your help!
This forum is very helpfull and you guys are nice and kind!
I will create a new post soon to show my car, and maybe to show the work that i will do on it 
Ciao!
Posted by: Gint Feb 5 2008, 07:30 AM
Thank you very much for your help!
This forum is very helpfull and you guys are nice and kind!
I will create a new post soon to show my car, and maybe to show the work that i will do on it
Ciao!
Please do!
http://www.914world.com/bbs2/index.php?showtopic=13637&
Posted by: AgPete139 Feb 17 2008, 03:51 AM
I just read through all 9 pages so far, and I must add that this is inspiring...
How are you going to remove rust from the frame/jack points when you are ready to tackle it, and how did you pick away at all the tar? My car has it undercoated as well, and just short of manually picking it all off and without a sand blaster, what would be a good method?
Again, good job on the resto. Have you tried taking a sample of your paint and getting it matched by computer?
How many coats of high gloss enamel (from Home Depot) did you use on the front gas tank and other parts?
Sorry for all the questions...
Pete
Posted by: Spoke Feb 17 2008, 10:08 AM
I just read through all 9 pages so far, and I must add that this is inspiring...
How are you going to remove rust from the frame/jack points when you are ready to tackle it, and how did you pick away at all the tar? My car has it undercoated as well, and just short of manually picking it all off and without a sand blaster, what would be a good method?
Again, good job on the resto. Have you tried taking a sample of your paint and getting it matched by computer?
How many coats of high gloss enamel (from Home Depot) did you use on the front gas tank and other parts?
Sorry for all the questions...
Pete
Thanks for the kind words. I just wish I had more time (and warm weather) to work on the car.
I didn't have to pick away the tar on the jack points as the rust had eaten into the metal. On the other areas of the frame where there was no rust, I didn't touch them. In the fender wells, the undercoating tar had hardened and could be scraped off or softened with parts cleaner & steel brush and wiped off.
I'll probably do the sample of paint when I'm ready to paint the entire car. At my pace that will be about 3 years from now. I like driving my car too much to want to dismantle it to paint it. I'll get there someday.
The paint on the gas tank is from HD. It's made by Rust-oleum and called "Appliance Epoxy/ultra-hard enamel". It's very slow drying and has a real high gloss. I've used it on both sets of fake fuchs on both of my 914s. Cleans up real well on the wheels.
Posted by: TINCAN914 Feb 17 2008, 10:39 AM
SPOKE FANTASTIC JOB SIR!!
Very helpful to those with less mechanical experience like myself. Keep up the great work!!
Posted by: JPB Feb 17 2008, 12:21 PM
Nice work homeskillet! Love them flares
Posted by: Spoke Nov 30 2008, 11:07 AM
Just a little added insurance tucked right in front of the passenger seat.
Attached image(s)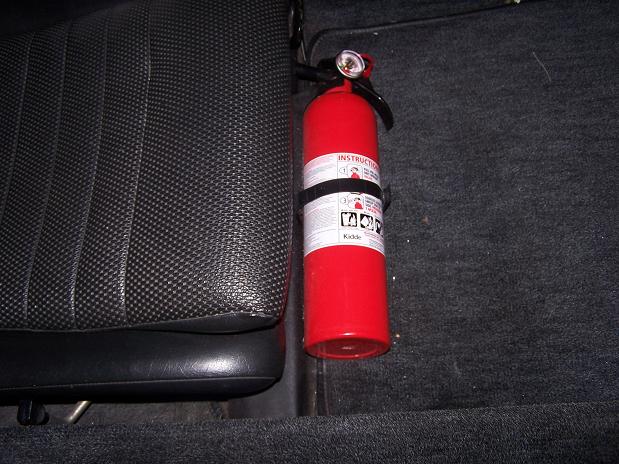
Posted by: StratPlayer Nov 30 2008, 11:29 AM
Well done, one hellva job....... 
Posted by: Spoke Dec 1 2008, 01:09 AM
Reinstalled the CHT and vacuum gauges which were originally mounted on the steering column.
The vacuum gauge was never on the car from the time I purchased the car. It was in a box of goodies that came with it. When looking behind the dash for the wires for the CHT, I saw a hose for the vacuum gauge which was routed through the tunnel and to the engine compartment and decided to install the gauge.
Turns out the hose was disconnected from the engine intake but not plugged up. I've had a vacuum leak for as long as I've had the car. The connection for the gauge was taken from the sense hose to the decel valve. This pretty much means my decel valve hasn't been working because of the vacuum leak at the T.
Attached image(s)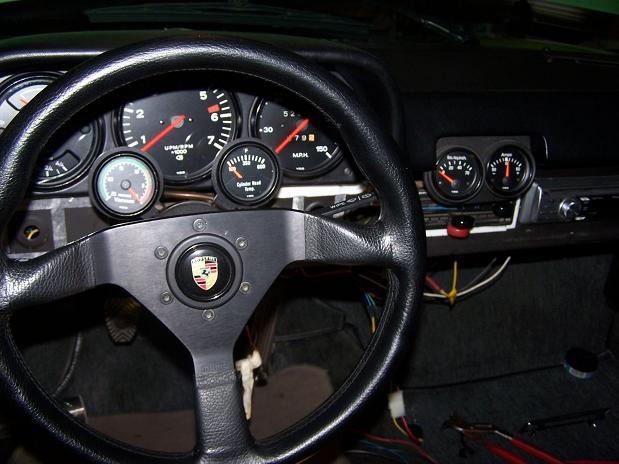
Posted by: Spoke Dec 1 2008, 01:12 AM
The CHT sender was never connected to the head. I didn't know where or how the sender was attached to the head so I just put the sender under a bolt for the tin. Where or how is this sender mounted?
Attached image(s)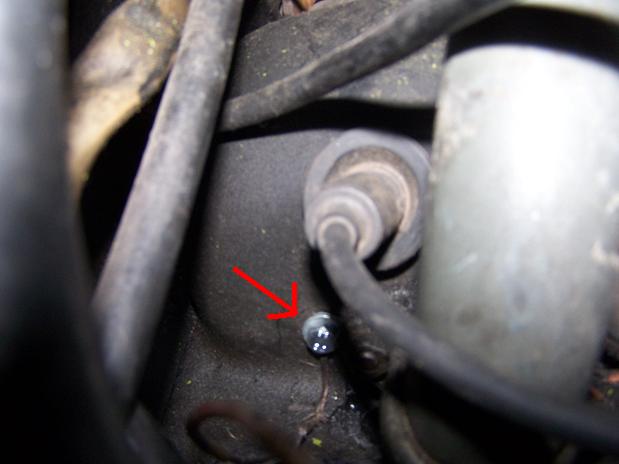
Posted by: Spoke Dec 1 2008, 01:26 AM
The CHT and vacuum gauge install is quite basic. They are panel mount gauges mounted on the steering column. The wiring came through a hole in the dash. I didn't change much except I cleaned up the wiring a bit. I put the wires in shrink wrap tubing.
The bottom wires are for the CHT sender and the top wires are for the lighting.
I covered the spades with scrinkwrap too. Using a larger diameter wrap, the wrap was heated and when hot, the loose part of the wrap around the wires was squeezed and folded to conform with the wire. Shrink wrap can be folded on itself when hot and will stick together in that shape when it cools. It is excellent for covering exposed spades.
Once I reinstall the dash face, I'll wrap the wires and hose with tape.
Attached image(s)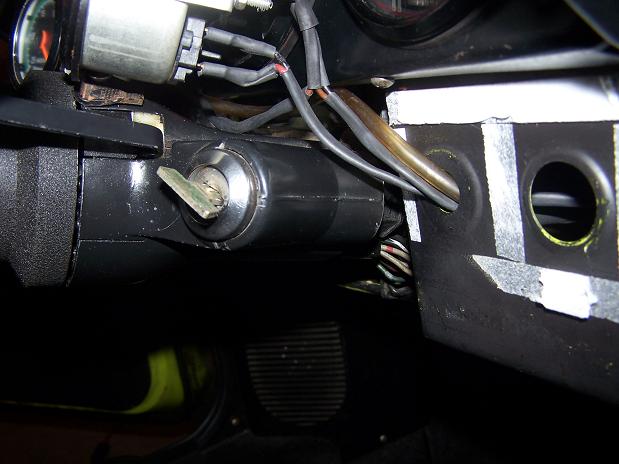
Posted by: Spoke Dec 29 2008, 10:34 AM
The dash background was separating from the dash so I removed it and reglued it. Also sprayed it with interior paint.
Attached image(s)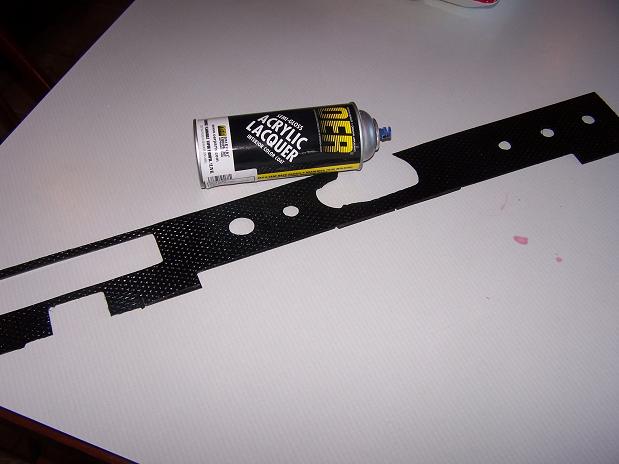
Posted by: Spoke Dec 30 2008, 10:56 AM
Painted the backs of the gauges that mount on the steering column. This way they will look a bit more finished.
Attached image(s)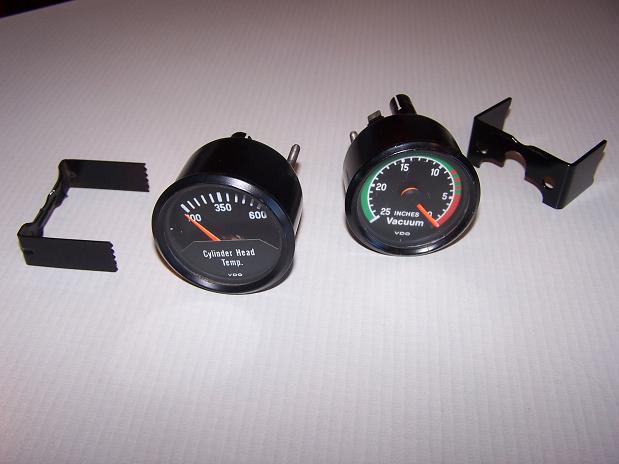
Posted by: Spoke Feb 7 2009, 11:14 PM
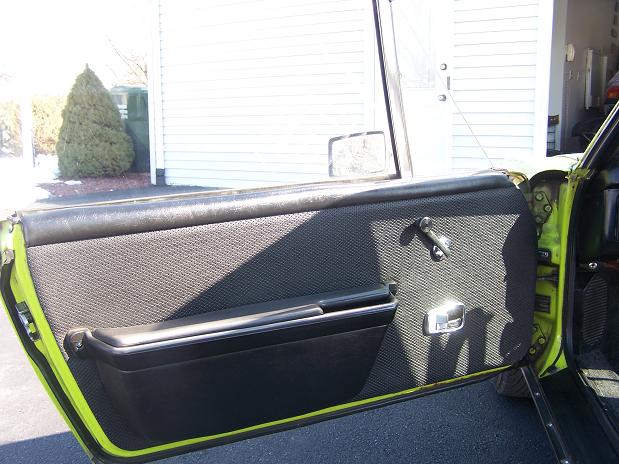
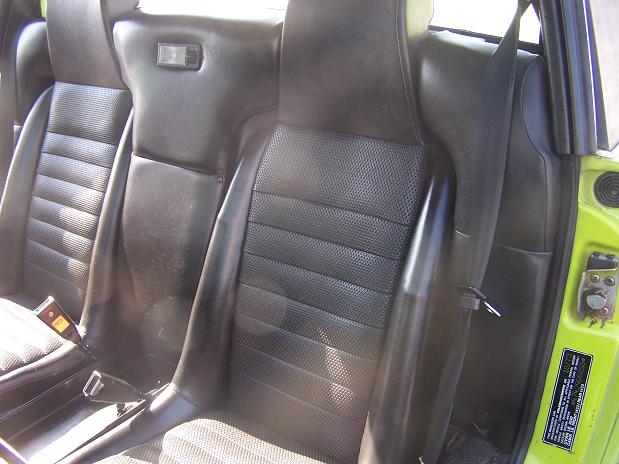
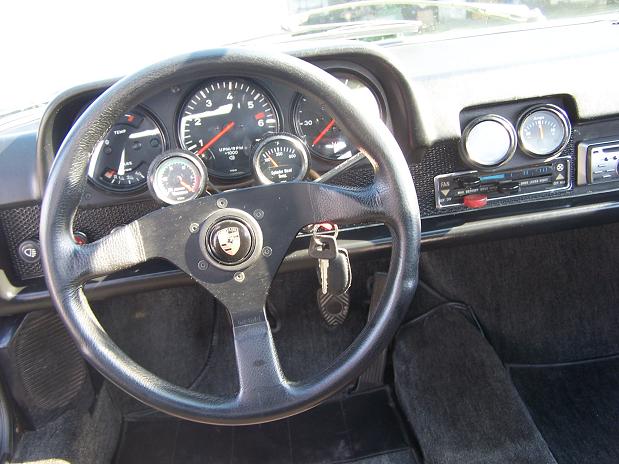
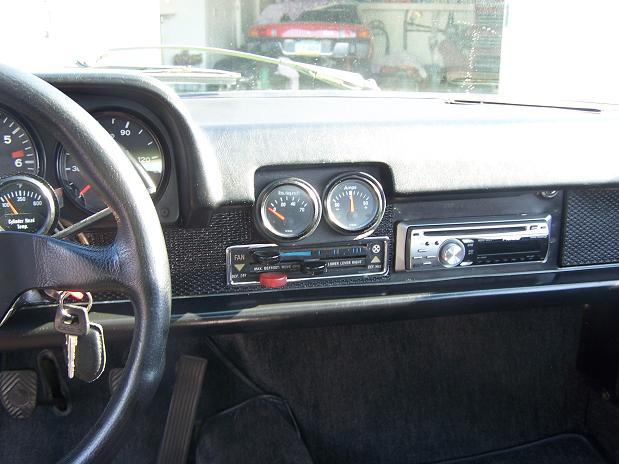
Some interior pics after finishing the dashboard background.
Just in time too, sale pending.
Attached image(s)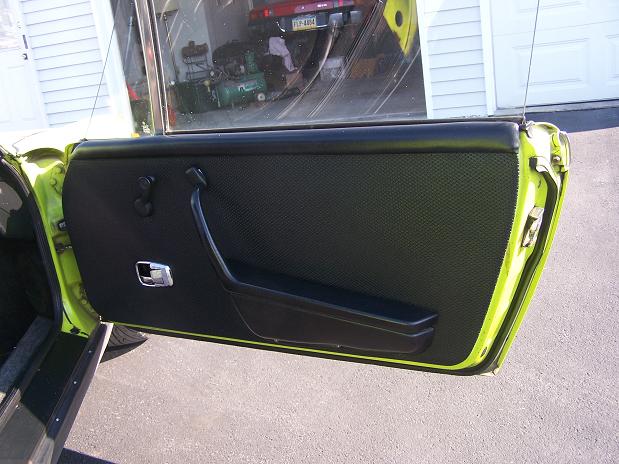
Posted by: slow914 Feb 7 2009, 11:44 PM
sale pending.
Damn, what an awesome car
Posted by: Spoke Feb 28 2009, 12:11 PM
Sold. The new owner (a 914World member) driving away. I should be sad but this makes room in the garage for a 911. I'm looking for a late 80s to late 90s 911. It'll be a retirement present for me.
I still have the red 71 914 so I'll still be driving a mid-engined Porsche.
Attached image(s)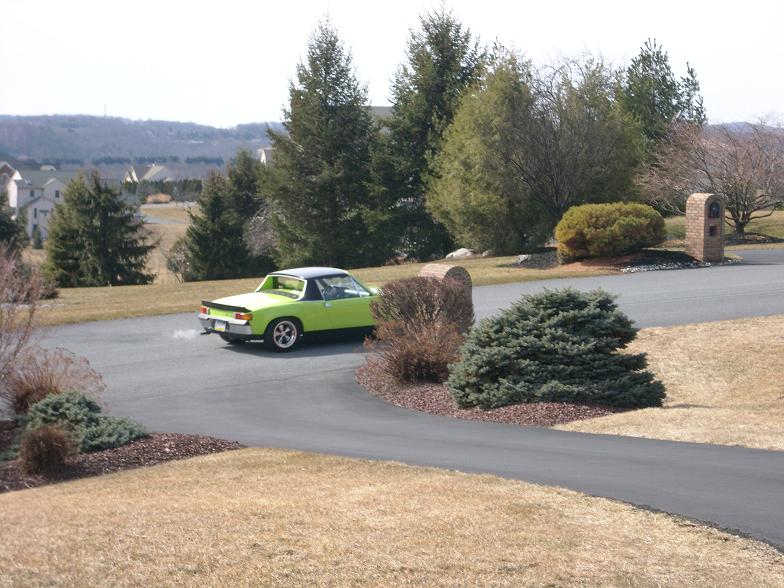
Powered by Invision Power Board (http://www.invisionboard.com)
© Invision Power Services (http://www.invisionpower.com)