Printable Version of Topic
Click here to view this topic in its original format
914World.com _ 914World Garage _ How to build a set of GT door panels...
Posted by: Aaron Cox Feb 22 2006, 12:04 AM
planning to copy dan's RS america handle'd smooth vinyl setup 
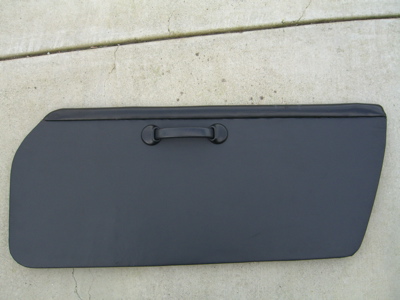
first - you need a set of core early door paels, with the one piece metal top.
cores... 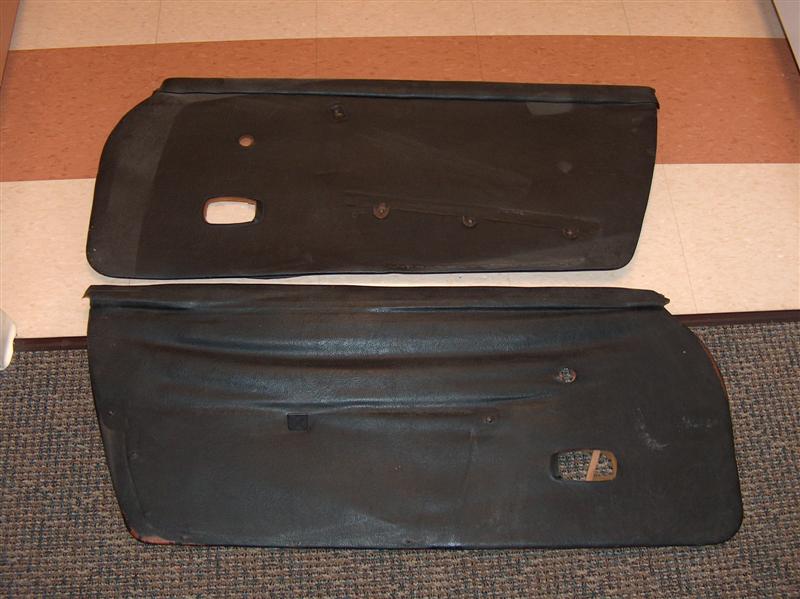
then - source some new laser cut piece from evilwerks/burrowerks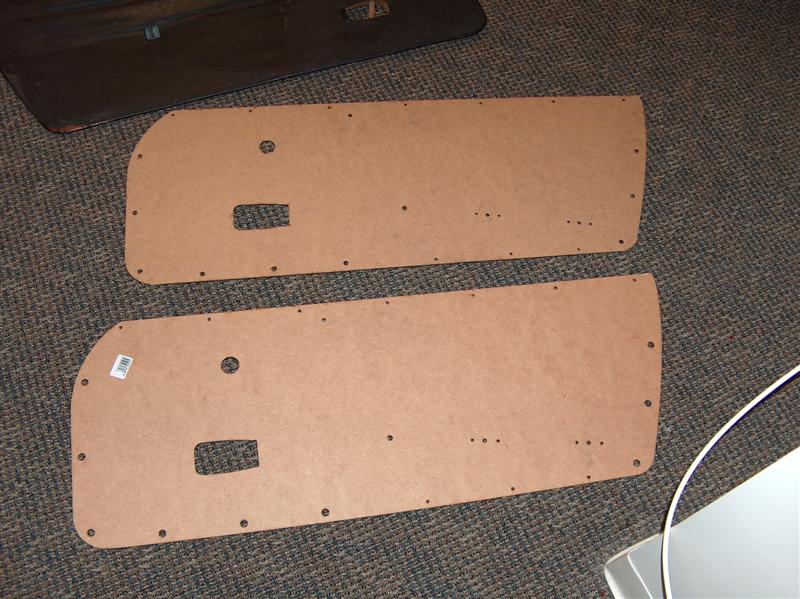
begin taking apart old core door panels. note the solid metal tops....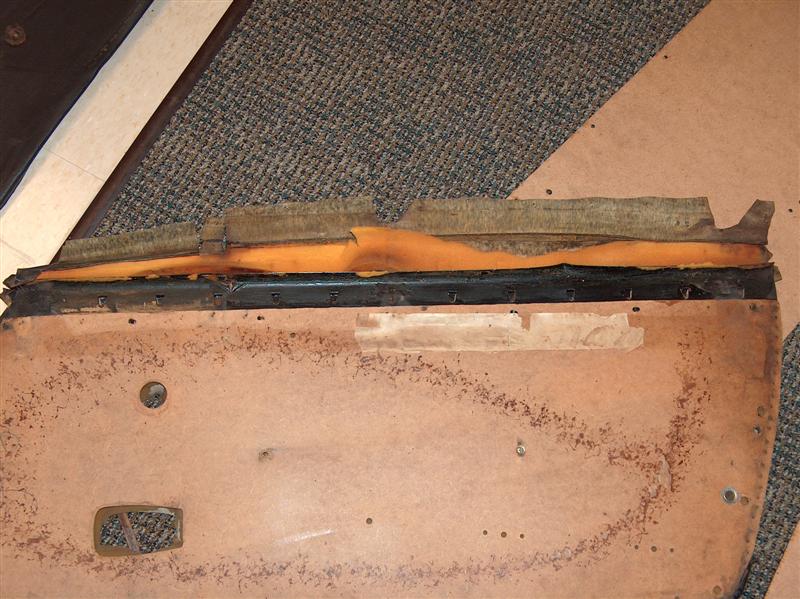
again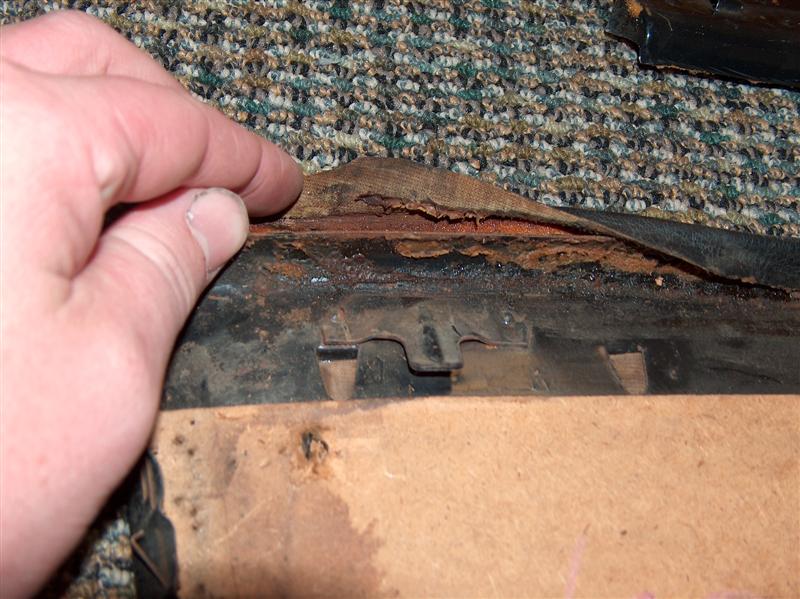
begin prying up old staples.....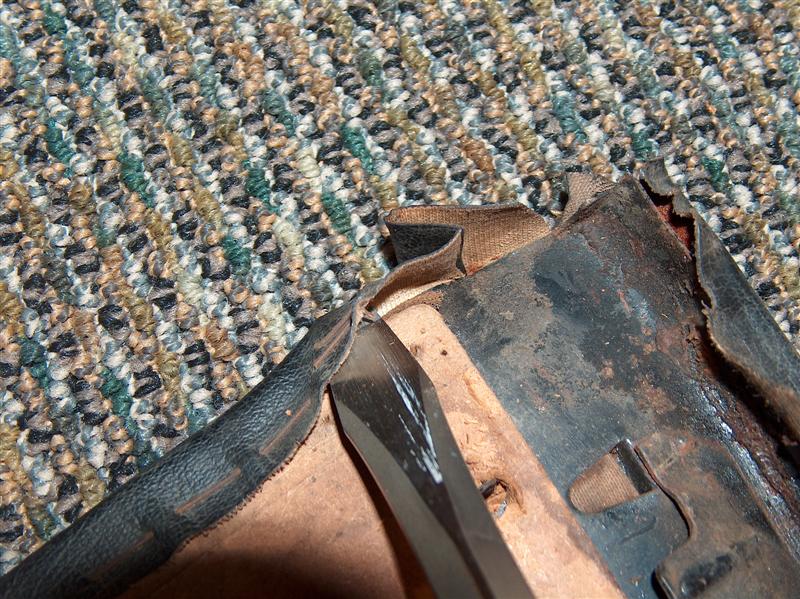
after removing vinyl and foam covering, begin to pry up the tabs holding the metal top to the core board...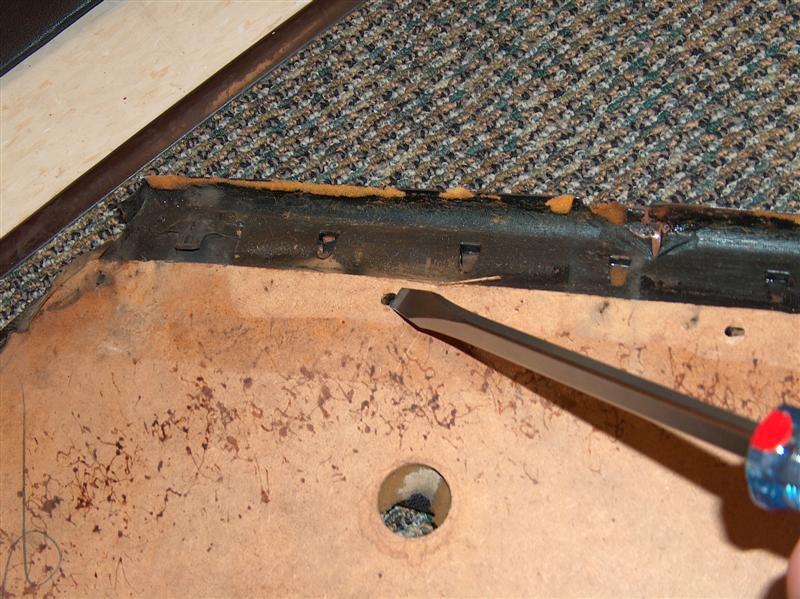
notice the "tuck and roll" (remember how this was done....)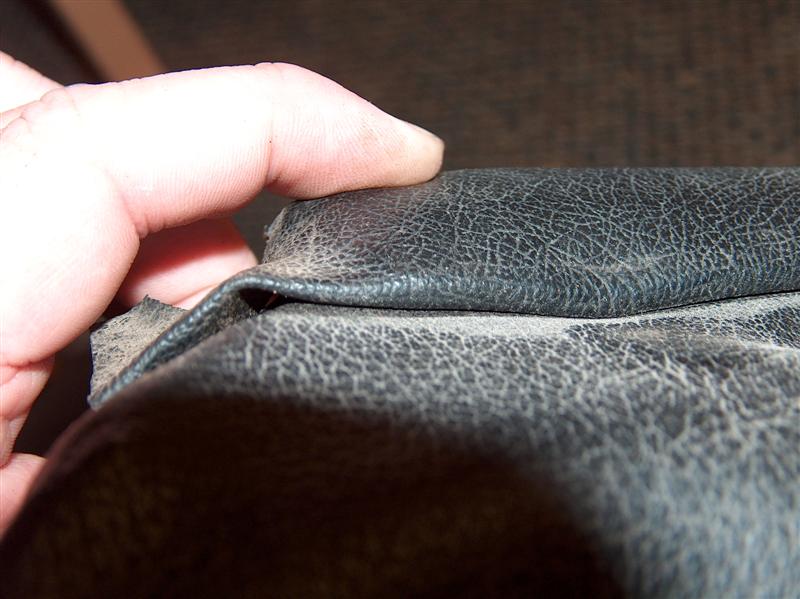
the old top with the new board....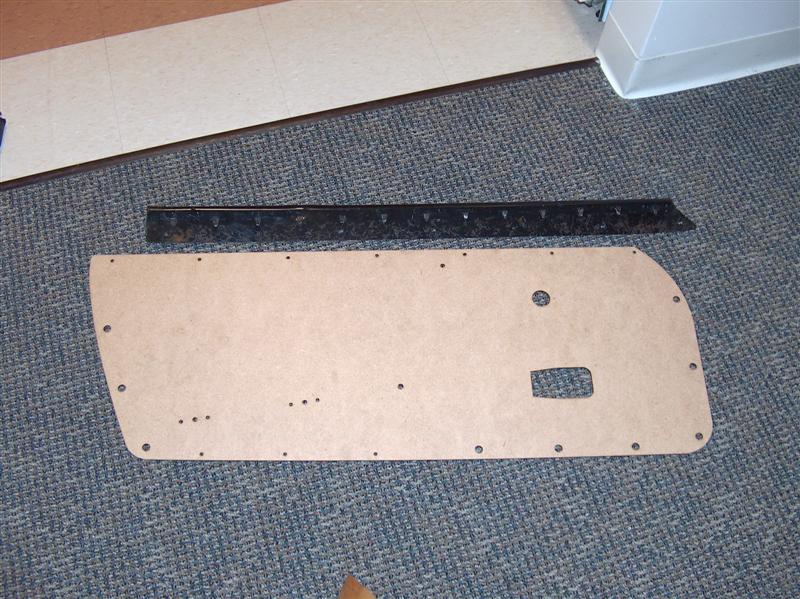
begin pushing holding tabs down on new board. the butt of a screwdriver werks great.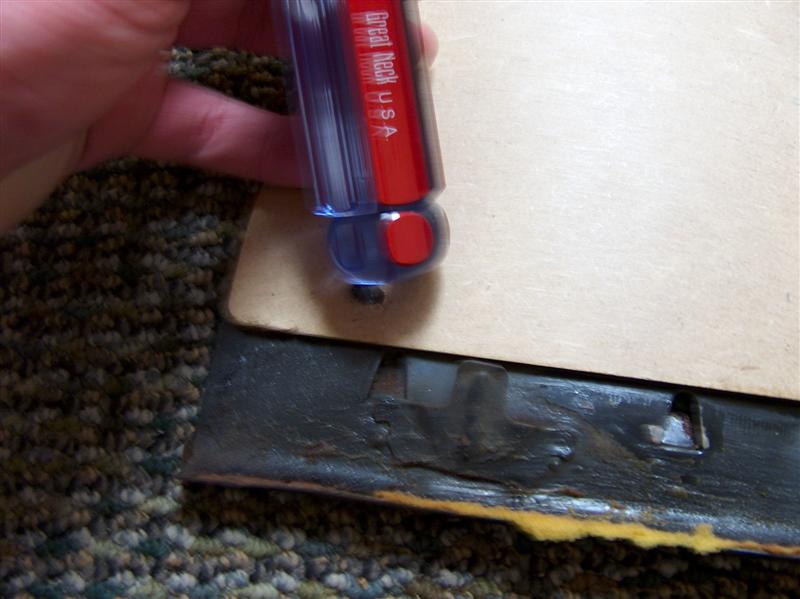
completed backboard....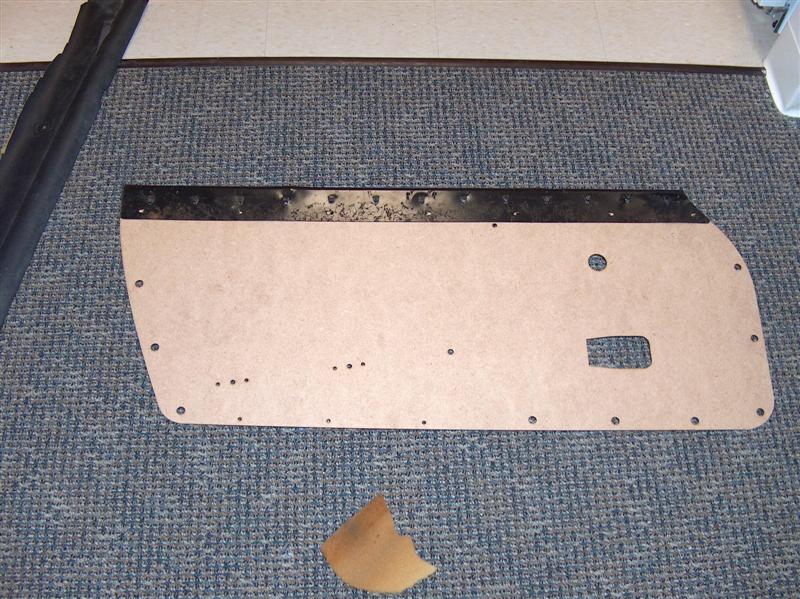
Posted by: Aaron Cox Feb 22 2006, 12:06 AM
cut out new 1/4" headliner material to pattern of core board.....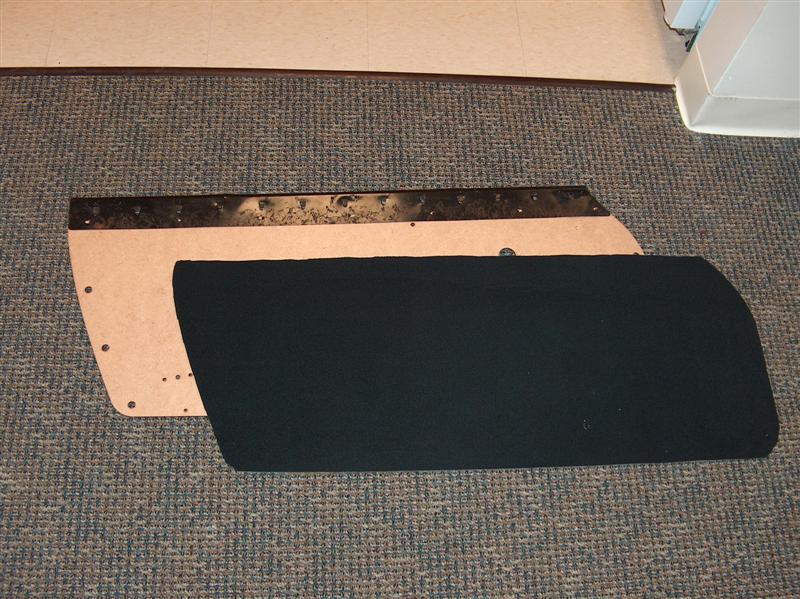
attached with 3m super 77 spray adhesive...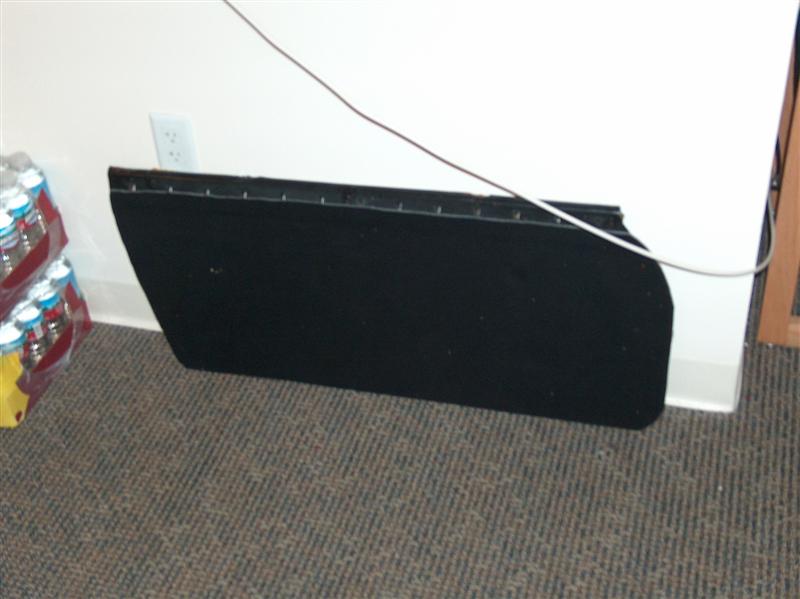
cut out door handle cutouts and window mechanism....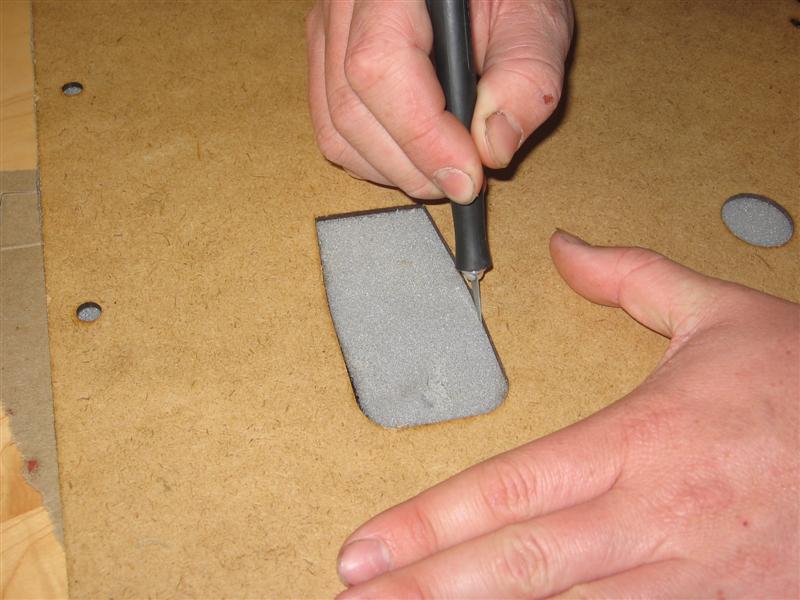
prepare to adhere vinyl to headliner foam material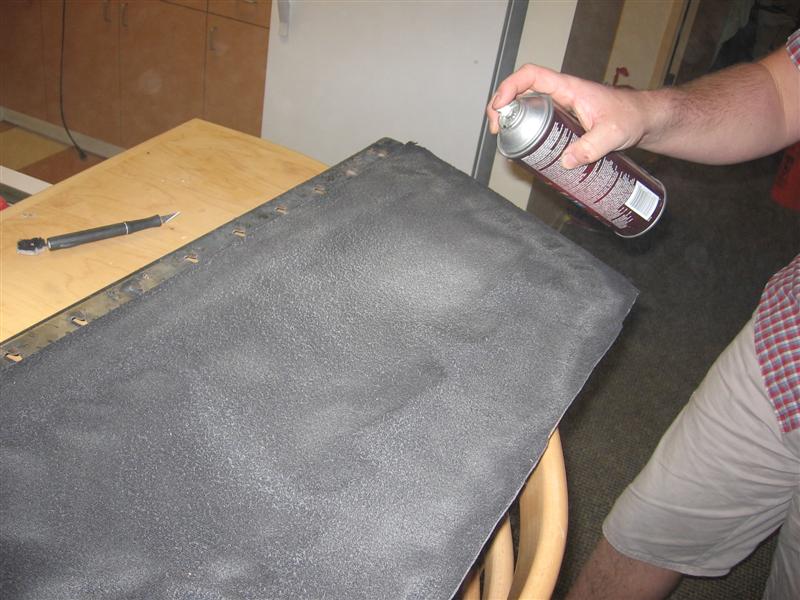
put new smoooth vinyl down, rubbing it into the adhesive below
fold back into the tabs to redo the tuck and roll.....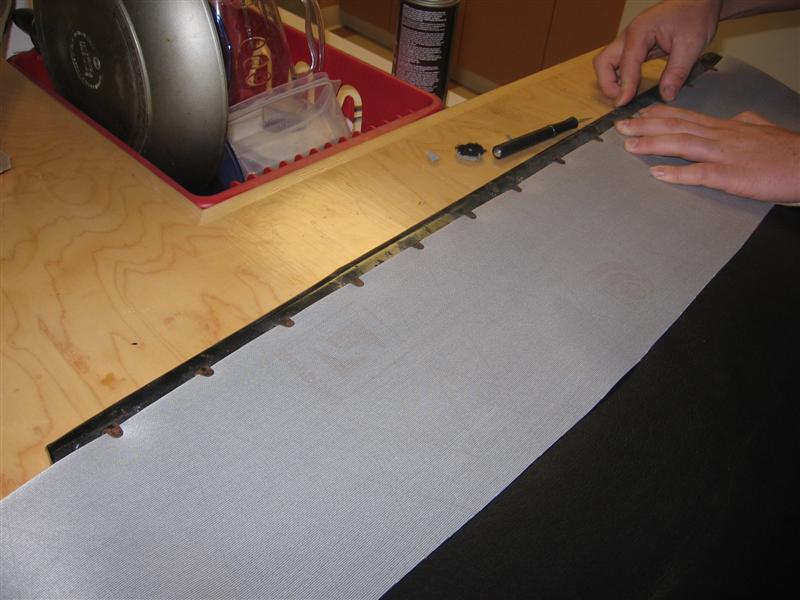
Posted by: Aaron Cox Feb 22 2006, 12:10 AM
i told you not to forget how this went together....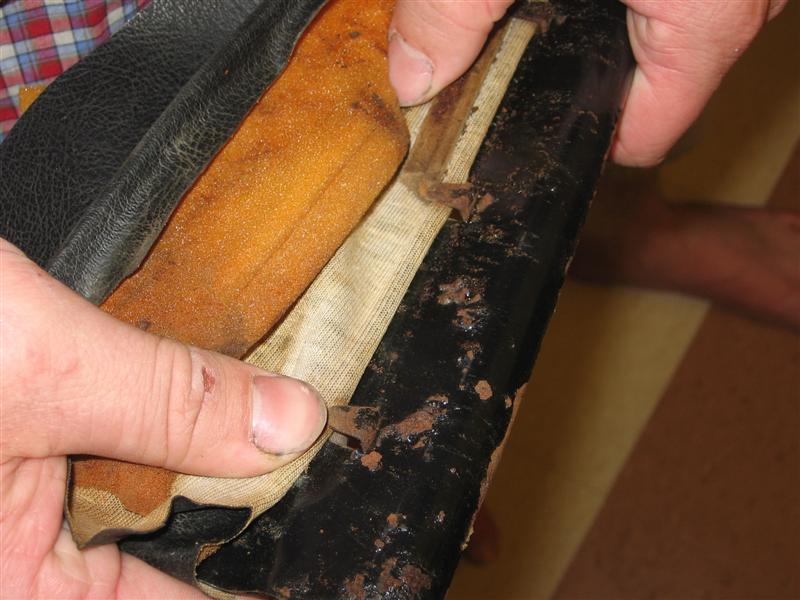
make the carboard tabs to make the line straight and not wavy.....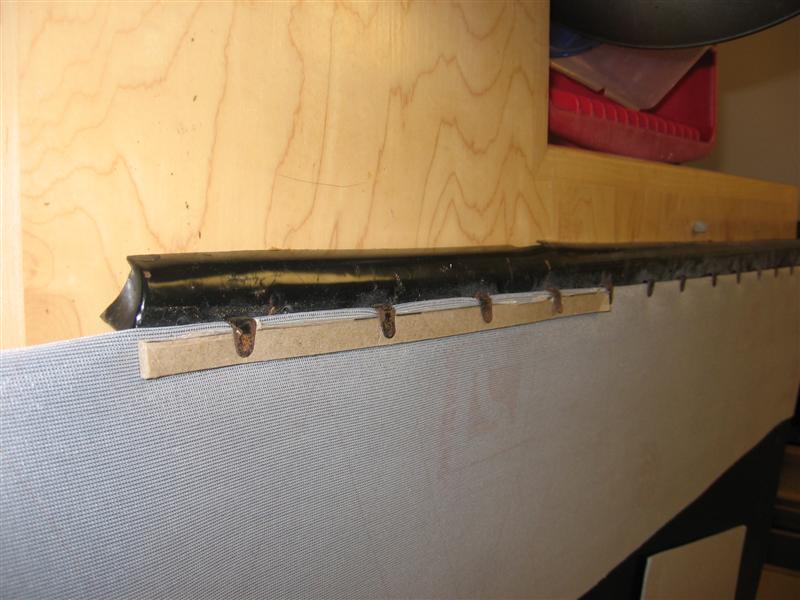
cardboard (left) vs no cardboard tabs (right)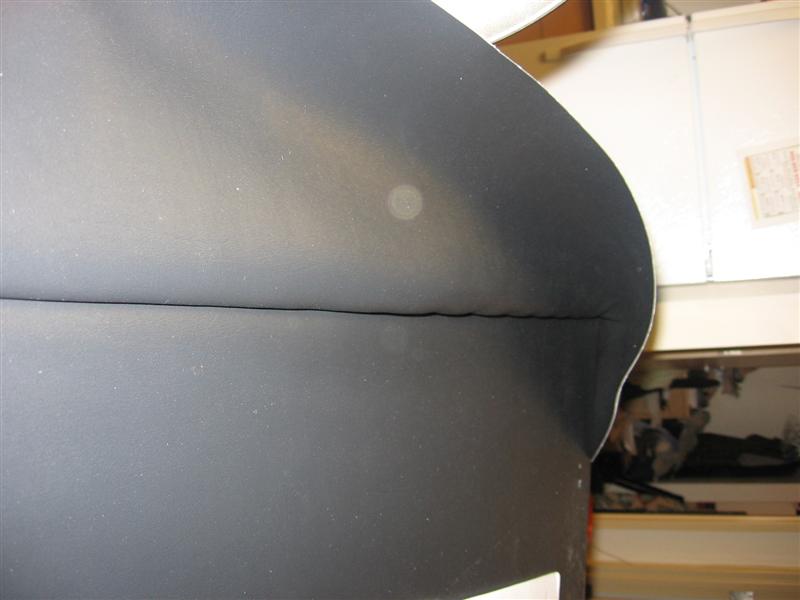
cardboard tabs completed.....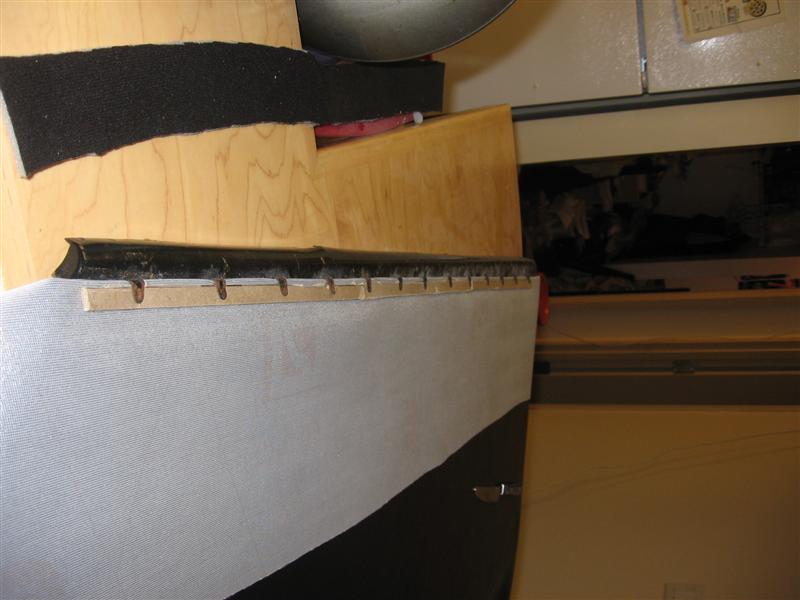
glue next layer of headliner material over the tabbed portion....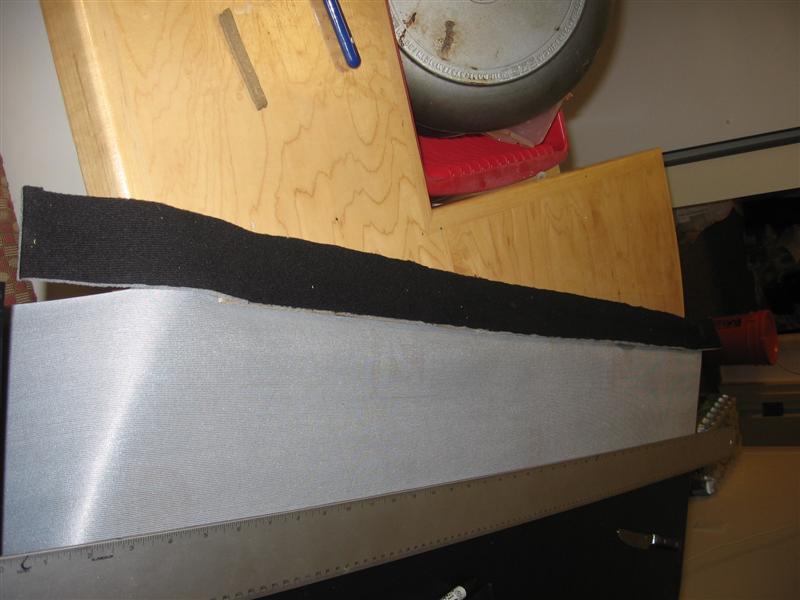
trim excess and begin to glue the top tuck and roll portion... a real pita. get the right glue and tons of closepins/clamps....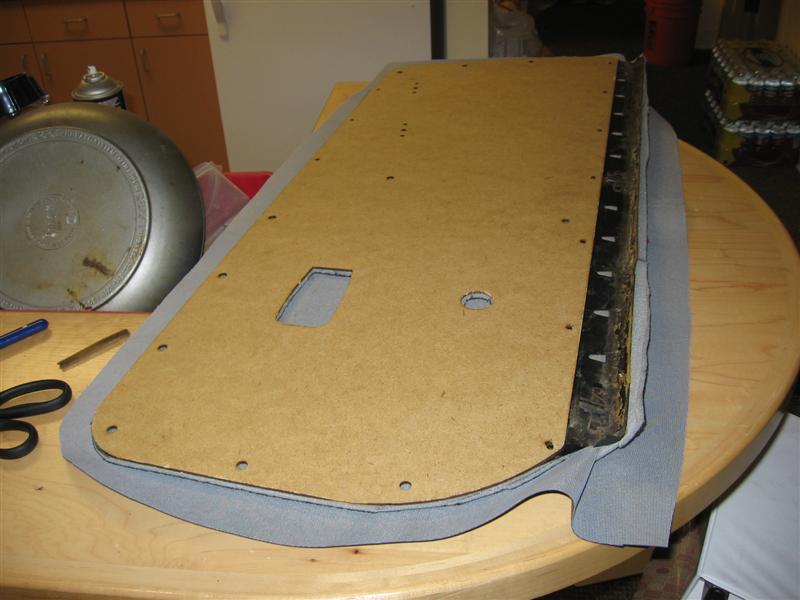
here is what it looks like when pulled over and not glued.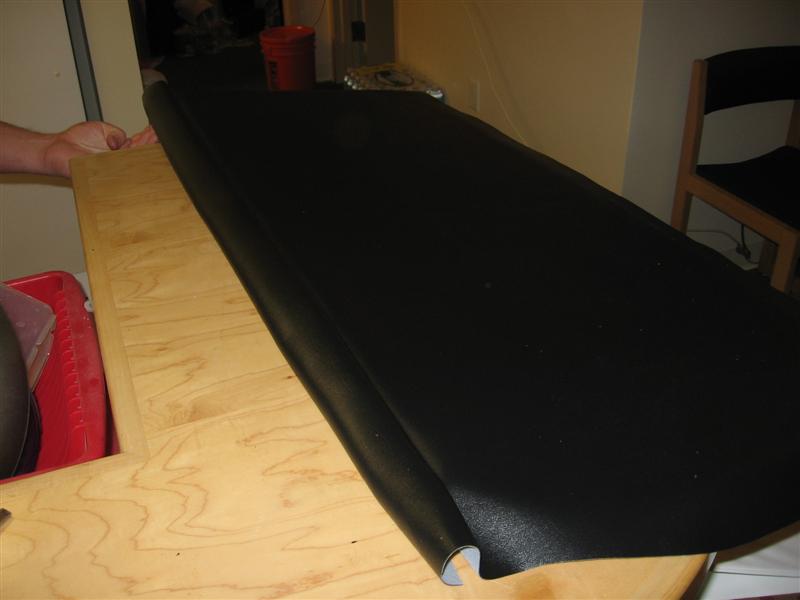
Posted by: Aaron Cox Feb 22 2006, 12:11 AM
will be updated and for the most part finished tomorrow......
Posted by: redshift Feb 22 2006, 12:17 AM

That stuff doesn't look used... or free!
Are you doing this for someone else?
GOOD DEAL!
M
Posted by: 736conver Feb 22 2006, 12:21 AM
Looks good.
I have a pneumatic staple gun and 5/32 staples. Works like a charm. Only had to glue the top. If you want to borrow it let me know.
Dont forget to clean the top metal piece before you reglue. And dont use to much glue it starts to eat the material. Thats the mistake I made the first time.
Posted by: MattR Feb 22 2006, 01:29 AM
Clean your fingernails or get a hand model 

looks good, kid
Posted by: Jeroen Feb 22 2006, 04:49 PM
nice work!
smells like a classic thread to me
Posted by: Aaron Cox Feb 22 2006, 11:33 PM
ok... the new glue to glue the top....
3m super strength adhesive from home depot. hold it for 5-10 min and then its on its own.....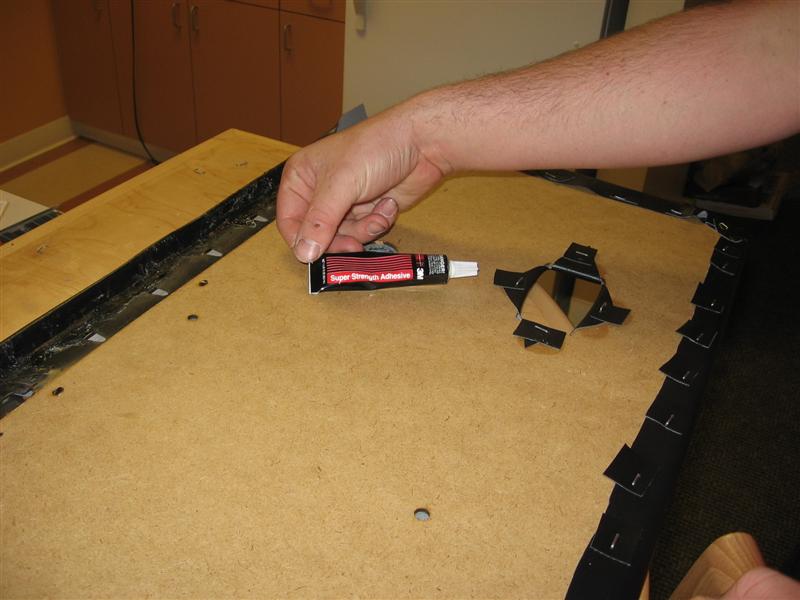
now, the stapling. 1/4" were smallest available. although probably fine on their own, i used vinyl scraps as washers....
you cannot feel the staple from the front.
PULL and staple. Stretch and staple....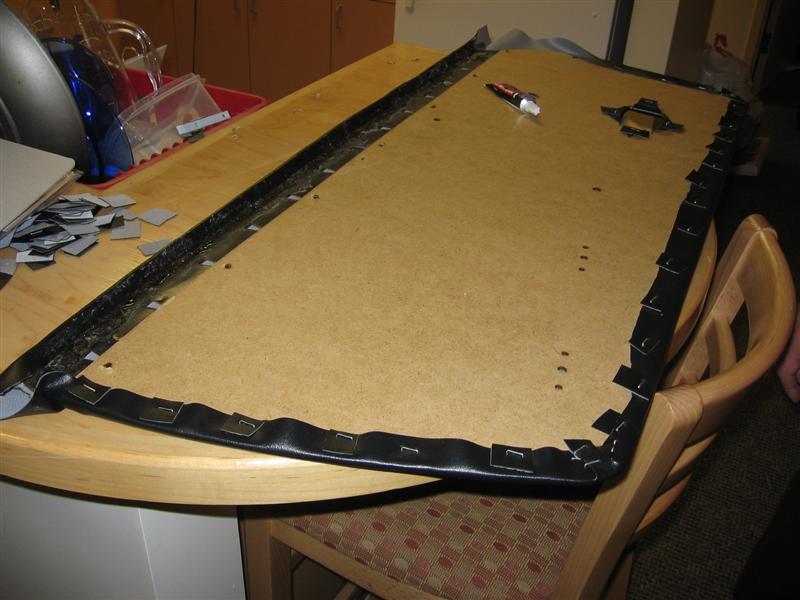
trim off the excess later after stapling.... making room for the door panel clips etc.....
The 90 percent finished product. need to let it dry before i finish the sides.....
RSA handles on order....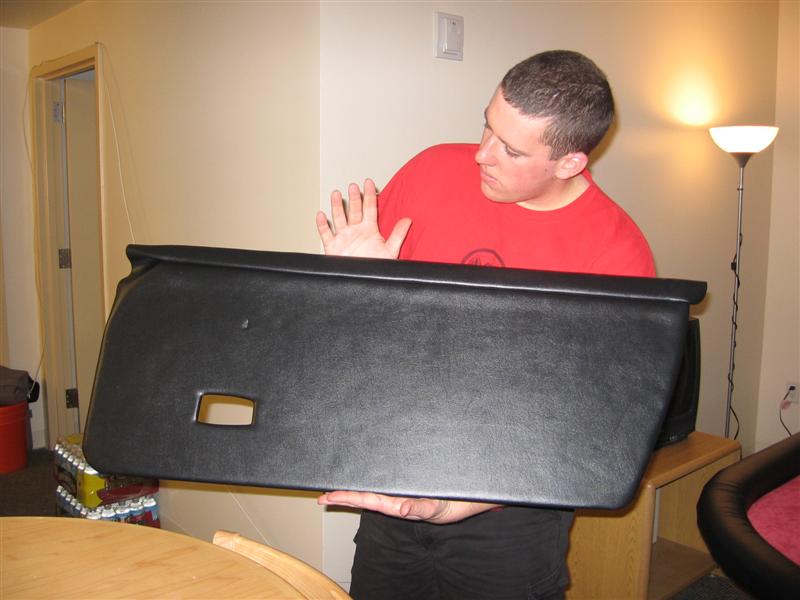
Posted by: Brando Feb 22 2006, 11:41 PM
that looks INCREDIBLY slick... no armrest... nada, very clean and crisp.
Posted by: rhodyguy Feb 23 2006, 08:34 AM
yep. it's a classic. real slick aaron  . combine the new units with "vapor barriers for dummies", and it's a thing of beauty. so where did you get the backing panels?
k
Posted by: Dr Evil Feb 23 2006, 08:42 AM
Nice! Did you foam between the metal top and the vinyl? I did my set like this, but I have stitched lines on them too. I am thinking of using velcro to mount them as it is easier and may be better in the long run. Another "performance enhancement" is to use some neoprene lining on the back to dampen the noise from the out side.
Attached image(s)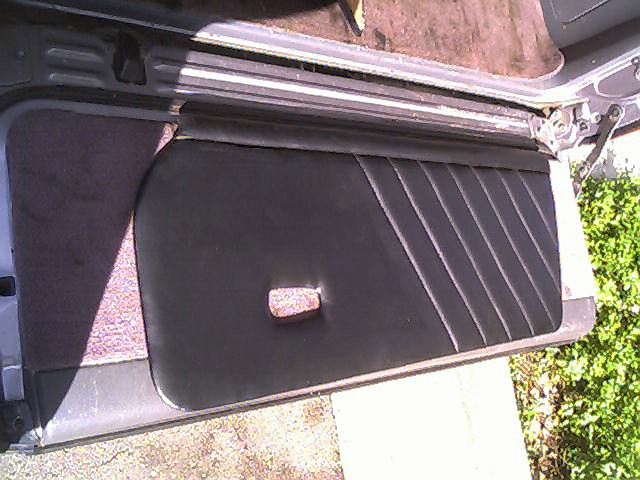
Posted by: Dr Evil Feb 23 2006, 08:45 AM
Oh ya, since the early metal door tops were always a pain for me to find I am working on having some made from a polymer by a local. If so I will be selling panels again.
I am glad that you took pics. People always had a hard time understanding that the whole top of the early panels were metal, not just the tabs.
Posted by: Jeroen Feb 23 2006, 08:54 AM
what years have the metal top on the panel?
Posted by: jasons Feb 23 2006, 08:55 AM
Those look killer. Maybe a classic thread?
BTW Did you consider trying to get the RSA nylon webbing door release to work with the 914? I've wondered how difficult that would be.
Posted by: seanery Feb 23 2006, 09:20 AM
 sweet job AAAAAAaaaaron
Posted by: Aaron Cox Feb 23 2006, 11:30 AM
| QUOTE (Dr Evil @ Feb 23 2006, 07:45 AM) |
| Did you foam between the metal top and the vinyl? I did my set like this, but I have stitched lines on them too. I am thinking of using velcro to mount them as it is easier and may be better in the long run. Another "performance enhancement" is to use some neoprene lining on the back to dampen the noise from the out side. |
rofl mike... i was going to do velcro also.....and a mylar barrier on the back.
yep, there is apiece of foam over the metal top....
mike, how did you stitch the line thru the carboard? or you did it thrue the foam?
Posted by: mike_the_man Feb 23 2006, 03:57 PM
Aaron, where did you get the RS style door pulls? I've been thinking of doing this exact same thing. Thanks for the how-to! I was also wondering about how to use the red nylon webbing for the inner door handles. Anyone have thoughts on this?
Posted by: Aaron Cox Feb 23 2006, 03:59 PM
| QUOTE (mike_the_man @ Feb 23 2006, 02:57 PM) |
| Aaron, where did you get the RS style door pulls? I've been thinking of doing this exact same thing. Thanks for the how-to! I was also wondering about how to use the red nylon webbing for the inner door handles. Anyone have thoughts on this? |
i thought about the red handle, but i like the ability to lock the car from the inside
the RSA handles im ordering from pelican, 18 bucks a pop....
these are original 911rs/9146 GT handles...


RS America

Posted by: bmunday Feb 23 2006, 04:21 PM
Nice work Aaron, thanks for sharing...
Posted by: mike_the_man Feb 23 2006, 04:29 PM
I dig the RS America look. Does anyone know how to make the red webbing work to open the door?
Although, I never did think about locking the car from the inside. That is a nice feature.
Hmm 
Posted by: Aaron Cox Feb 23 2006, 04:53 PM
so.. i glued the top, let it sit out overnight. came out ok. i may redo this one later....
kinda dark light... sorry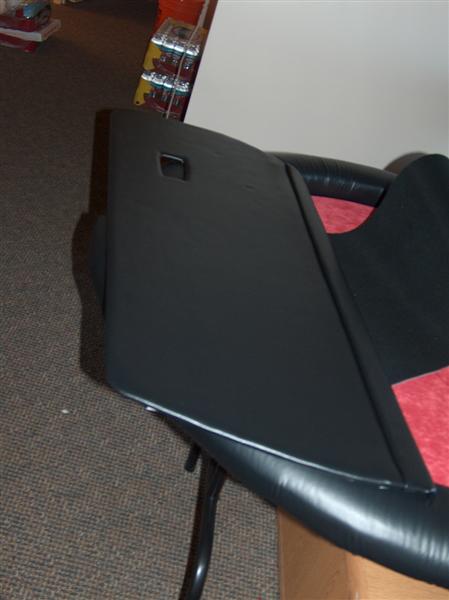
basically done. just add handles... 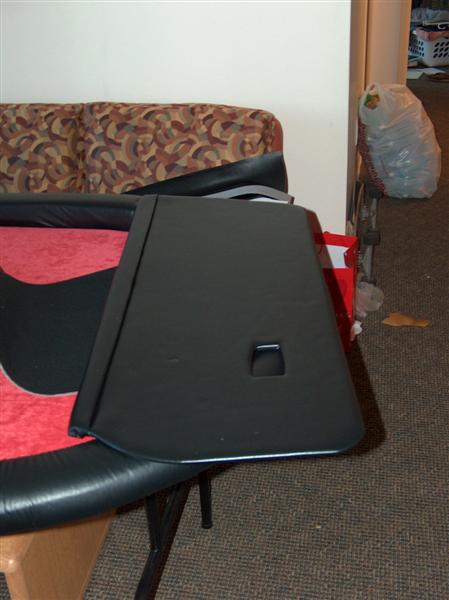
notice the home built poker table 
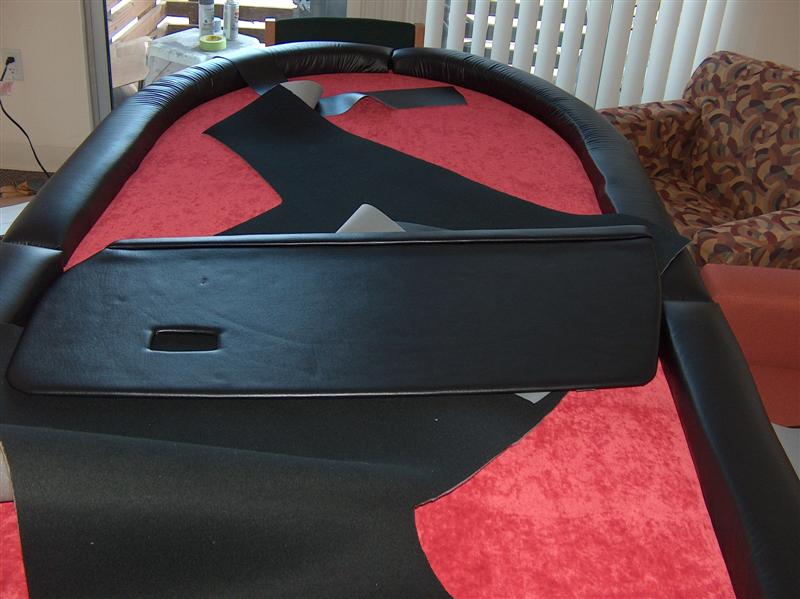
need to let the foam go back to rest, has some indents from the gluing effort....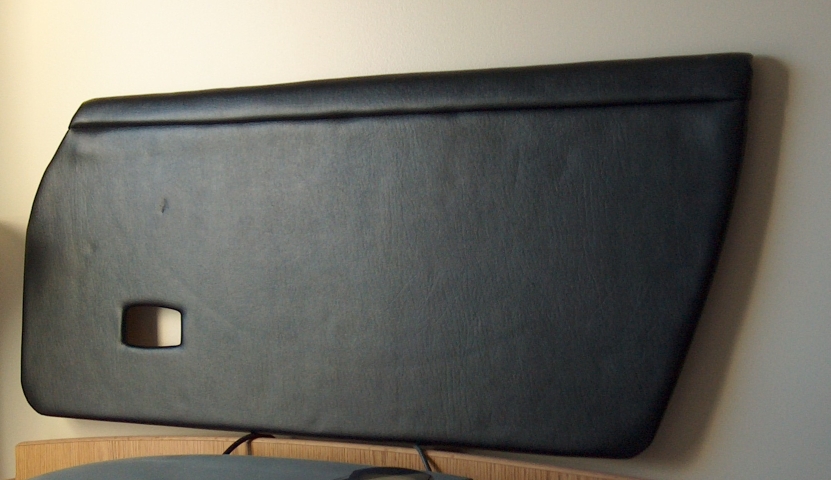
Posted by: jasons Feb 23 2006, 06:00 PM
| QUOTE (mike_the_man @ Feb 23 2006, 02:29 PM) |
| I dig the RS America look. Does anyone know how to make the red webbing work to open the door? Although, I never did think about locking the car from the inside. That is a nice feature. Hmm |
I'm sure it could be done. I think you could just attach the nylon webbing to the rod that unlatches the door. If that didn't work for some reason, I bet you could do it with a cable.
Posted by: mike_the_man Feb 24 2006, 08:30 AM
| QUOTE (jasons @ Feb 23 2006, 04:00 PM) | ||
I'm sure it could be done. I think you could just attach the nylon webbing to the rod that unlatches the door. If that didn't work for some reason, I bet you could do it with a cable. |
I don't think you could just attach the webbing to the rod. If memory serves, I believe to open the door, you have to pull the rod forward, towards the front of the car. With the webbing, you would be pulling it out towards the center of the car. So, you need to transfer the pulling out motion to a pulling forward motion (if that makes an sense
 ).
).But wait, I guess if the webbing was ahead of where the shaft ends, pulling out would = pulling the rod forward. Ok, I think that would work. Wouldn't it?
Posted by: turboman808 Apr 26 2006, 07:22 PM
this should be in the classics thread. I find it helpful! 
Posted by: Aaron Cox Apr 26 2006, 07:41 PM
i still havent finished them. i wasnt happy with the first one (im super anal like that, so im redoing teh tuck and roll portion.
Posted by: 396 Apr 26 2006, 07:48 PM
Thanks for the 'how to'

Posted by: Gint May 25 2006, 06:34 PM
Testing notifications for the "Evil procDoc"
Posted by: rhodyguy May 25 2006, 07:05 PM
what is it sitting on? a craps table?
k
Posted by: Aaron Cox May 25 2006, 07:06 PM
poker table in our appartment
Posted by: Gint May 26 2006, 05:55 AM

i still havent finished them. i wasnt happy with the first one (im super anal like that, so im redoing teh tuck and roll portion.
So, where ya at on this Aaron?
Posted by: RON S. May 26 2006, 07:25 AM
Aaron,
Not trying to hijack your thread but I too followed this thread.I always liked the GT look,and since your step by step photo's made recovering the door panel easy,I bought a set of good early boards and
set out to do the same on my early 6r.
I've done away,with the inner door handle,and had a local leather guy make me the pull straps.I fit'em to the boards,designed & lasered the little bezel the strap goes thru.Drilled & installed insert nuts in the door frame for the attaching screws.
I even picked up a set of the Fiat door pulls.
Get'm from a Fiat guy up in jersey. He goes by the name of Bruces Parts Bin.
Web address is www.fiatparts.com They were $20.00 a pair and are the exact same ones that everyother supplier sells for twice that amount to do GT doors on the teeners.
All I'm waiting on now is some vinyl from Autos Int'l.Sadly though, the German vinyl I picked out is outa stock for 3 weeks.
Hopefully then I can finally finish mine.
Thanks for your pics.
Ron
Posted by: mikez May 26 2006, 07:59 AM
Not bad Bubba.....for realism a little blood on the knuckles works.....
Posted by: GeorgeRud May 26 2006, 08:35 AM
Where are you folks attaching the handles to the door frame, or how is that done. Obviously, just attaching them to the inner door panel won't last too long before they pull out or deform the door panel.
Posted by: Dan (Almaden Valley) May 26 2006, 09:31 AM
I used the little nut inserts the factory used to attach the door bin and arm rest.
reposititioned them where I wated them and made some aluminum retainers and then pop rivited them in their new position for the door pulls. I used RSA door pulls.
Then you make a hole in your new door panel to be able to bolt the new door pull thru the panel and into the metal framework of the door itself. Just like the way the factory attached the bin and arm rest.
Posted by: RON S. May 26 2006, 10:58 AM
Where are you folks attaching the handles to the door frame, or how is that done. Obviously, just attaching them to the inner door panel won't last too long before they pull out or deform the door panel.
I went to AJ Serranos sight,opened up a good pic of a completed door,with the handle,then marked of the approximate location on the door panel.
Then drilled right thru the door panel.Then installed the door panel on the door itself.Transfer punched a mark on the door frame.Then drilled and installed Riv-nuts on the door frame.re-intalled the panel on the door,and everything lines up acceptably.
ron
Posted by: Aaron Cox May 27 2006, 10:27 PM
update... and nearly finished.
so i called ill grimstead, and we rocked out some wicked tuck and roll "guide pieces"
to replace the factory cardboard ones...
these give you a laser straight bottom edge.
1/8 masonite, ripped on bills table saw.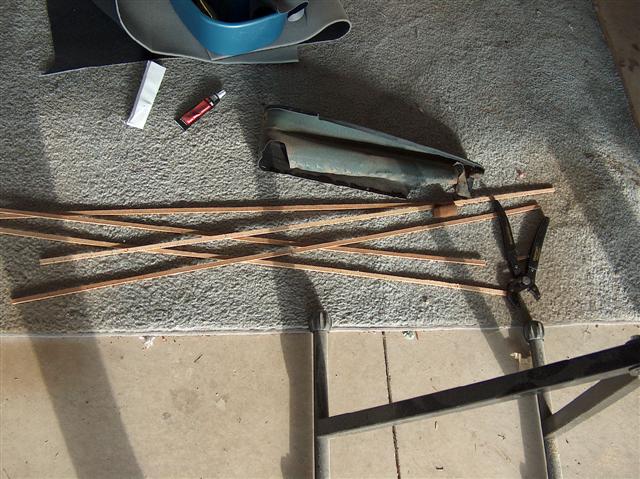
in use.....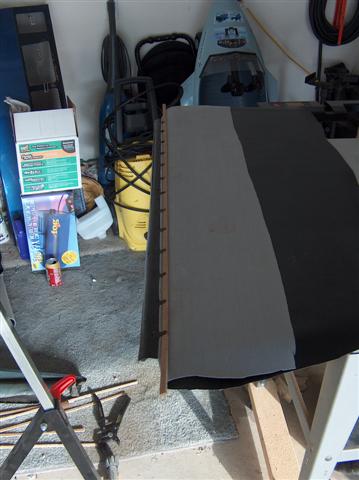
bill installing....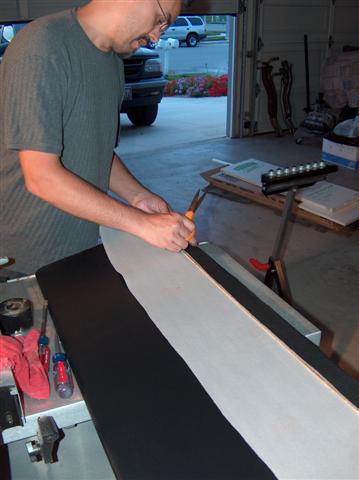
refoaming....
Posted by: Aaron Cox May 27 2006, 10:27 PM
cant find the finished pics...
must take more.
Posted by: geniusanthony Feb 18 2008, 08:10 PM
instead of going to the trouble of cutting stuff on a table saw or whatever, You can just go down to an actual Hobby Shop, The kind that would sell RC planes, cars, boats etc.. there is always a bin of any size wood you would want in: balsa-too soft, basswood-bout right, or spruce-also bout right. 3 and 4 foot lengths and no extra steps.equally straight wood.
Quick question, can one feel the edge of the tuck and roll material? Would some judicious sanding or extra pad on the face be wise?
Posted by: jd74914 Feb 18 2008, 08:32 PM
My brother and I redid mine using the same method Aaron did and you can't feel the edge. I guess you *might* be able to feel it if you really pry up under the vinyl, but the stuff we used was thick enough to totally hide the guide.
Powered by Invision Power Board (http://www.invisionboard.com)
© Invision Power Services (http://www.invisionpower.com)