Printable Version of Topic
Click here to view this topic in its original format
914World.com _ 914World Garage _ I DID IT . . .
Posted by: Mike McGrath Feb 27 2006, 11:55 AM
Picked up my first 914 on Sunday morning. Nice deal - straight trade for my project BMW 2002 (plus the time I put into that, but oh well). The new car still has its FI system in good working order, the PO put in a few thousand in the past two years getting it squared away, so mechanically, I'm all there.
I was digging around in the problem rust areas and discovered more in the hell hole corner than I spotted the first time (thanks to this board for pointing it out) and it appears that there are some penetrating tin worm holes. From my untrained eyes, it doesn't look like it went much further - can I check this from underneath the car or someplace else to see the extent of the damage? I'm having a tough time removing the box in front of the battery tray to get an unobstructed view from up top. Other than that and a nice JB weld patch just forward of the driver's seat, I haven't caught any nastiness (except the PO's aftershave odor, still in the car after all day with the top off!).
Definitely a tail shifter, but I think I've figured out the synchros enough to avoid that awful grinding noise on the low shifts.
I've got loads of pictures that I'll post tonight so the informed can point out any big things I might have missed (sitting too low, missing a door, where's this part or that, etc.).
TIA,
Mike (in Portland)
Posted by: Root_Werks Feb 27 2006, 12:03 PM
 Congrats! We want pictures!
Posted by: rjames Feb 27 2006, 12:10 PM
If I remember correctly there are a 2 screws holding the wiring connector to the brain box in the car. Although you shouldn't really need to remove them to move the box out of the way. There are however some screws holding it in to the metal bracket that goes over the top of it, after removing these you should be able to push the whole works out of the way to look at the metal below in order to check for rust issues.
Congratulations on the acquisition, can't wait to see photos!
Posted by: boboli914@att.net Feb 27 2006, 12:56 PM
Your tailshifter comment...If you replace all your bushings and line it up correctly your tranny will shift aswell as a sideshifter. My tailshifter actually shifts nicer than my sideshifter  Congrats on your trade!
Posted by: Toast Feb 27 2006, 12:59 PM

Congrats! 
Posted by: Bleyseng Feb 27 2006, 01:01 PM

![popcorn[1].gif](http://www.914world.com/bbs2/html/emoticons/popcorn[1].gif)
Posted by: rick 918-S Feb 27 2006, 01:51 PM
Posted by: Spoke Feb 27 2006, 01:59 PM
| QUOTE (boboli914@att.net @ Feb 27 2006, 01:56 PM) |
| Your tailshifter comment...If you replace all your bushings and line it up correctly your tranny will shift aswell as a sideshifter. My tailshifter actually shifts nicer than my sideshifter Congrats on your trade! |

My 71 tailshifter has all new bushings and it really does shift well. I would like to try a cable shifter although the unit that goes on the tranny seems big and bulky.
http://www.etischer.com/914cableshift.html
Spoke
Posted by: johannes Feb 27 2006, 03:28 PM
... I say ! I want pics !
Posted by: ventilator01 Feb 27 2006, 03:53 PM
Posted by: Mike McGrath Feb 27 2006, 08:10 PM
Okay, okay, here are some pictures. I may have to put them in separate posts. Yeah, on that second one...that gray stuff is probably just a reflection. Ha ha.
Attached image(s)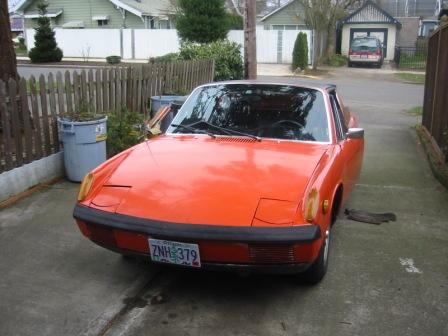
Posted by: Mike McGrath Feb 27 2006, 08:10 PM
2222
Attached image(s)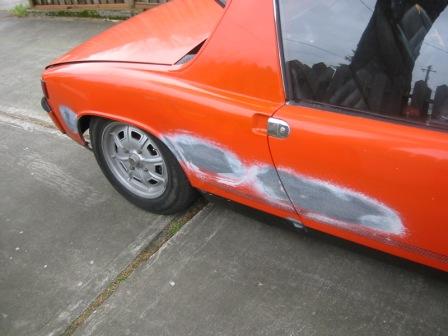
Posted by: Mike McGrath Feb 27 2006, 08:11 PM
33333
Attached image(s)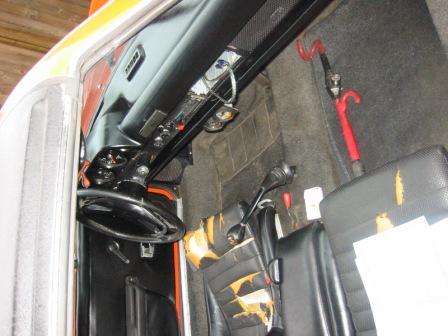
Posted by: Mike McGrath Feb 27 2006, 08:12 PM
Yeah, those seats are / were all original. I suppose it wasn't too bad for 36 or 37 years later, but time for a recover.
444444
Attached image(s)
Posted by: Mike McGrath Feb 27 2006, 08:12 PM
5555
Attached image(s)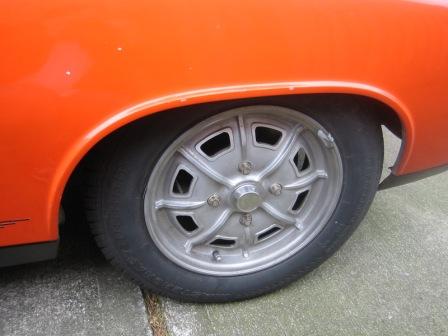
Posted by: Mike McGrath Feb 27 2006, 08:12 PM
66666 more more we want more
Attached image(s)
Posted by: Mike McGrath Feb 27 2006, 08:13 PM
77777
Attached image(s)
Posted by: Mike McGrath Feb 27 2006, 08:14 PM
88888
Attached image(s)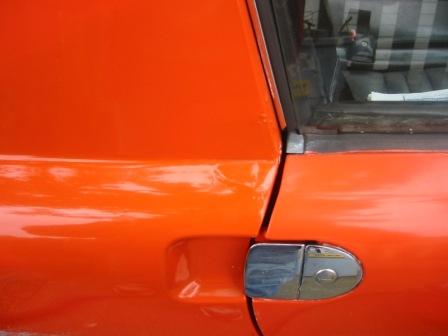
Posted by: Mike McGrath Feb 27 2006, 08:14 PM
9999
Attached image(s)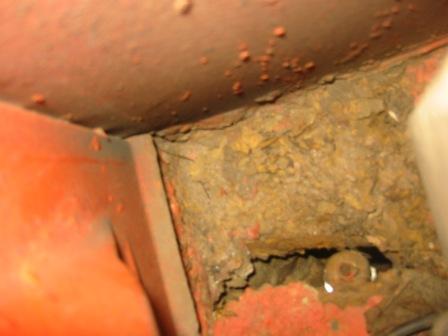
Posted by: Mike McGrath Feb 27 2006, 08:15 PM
10 10 10
Attached image(s)
Posted by: Mike McGrath Feb 27 2006, 08:16 PM
OKay, enough for now. I will post these and others along with my progress on a blog site so as to clog up someone else's bandwidth.
That battery tray is nasty, but the supports themselves are stable for the time being, so I just formed a piece of 18 gauge steel as a new "deck" to secure the battery.
Posted by: rjames Feb 27 2006, 10:04 PM
Make sure you check the area below where the battery tray sat VERY THUROUGHLY! Also check on the inner fender sidewall below where the battery tray was welded. Go as far to remove the weld spots completely and grind 'er down. I had rust/corrosion holes in a nice little line right below the welds. If you're going to go to the trouble of putting in a new tray best to make SURE it's all good (then metal ready or ospho it to be on the safe side!)

Posted by: rhodyguy Feb 27 2006, 10:18 PM
vaccum the crap out. dampen the area with a spray bottle and spinkle baking soda around with a sieve. let dry and vaccum again. it will help neutralise the battery acid that is everywhere. go to costco and get a optima.
k
Powered by Invision Power Board (http://www.invisionboard.com)
© Invision Power Services (http://www.invisionpower.com)