Printable Version of Topic
Click here to view this topic in its original format
914World.com _ 914World Garage _ Porsche Restoration Factory@ the Ghetto Garage in my alley
Posted by: highways Jun 27 2006, 01:40 AM
Ok, so I thought I'd start sharing some pics of my restoration project. I'm rebuilding my 73' 2.0L.
You ask, how did I arrive at this destitute Ghetto Garage in my alley restoration situation? Well I was driving all together too fast at a speed I will not mention (95mph) one night coming down the 405 around the Sepulvida pass when my passenger side rear wheel fell off.
I managed to coast off the freeway while teatering on two wheels it felt like (never applied the brakes)... and then I let my beloved 914 sit in the alley for a few years while I cursed it and nearly banashed it from my driveway forever.
Fortunately this year brought new inspiration when Proto31 purchased 914-6 #31 and we wagered a bet as to who could get their car driving first.
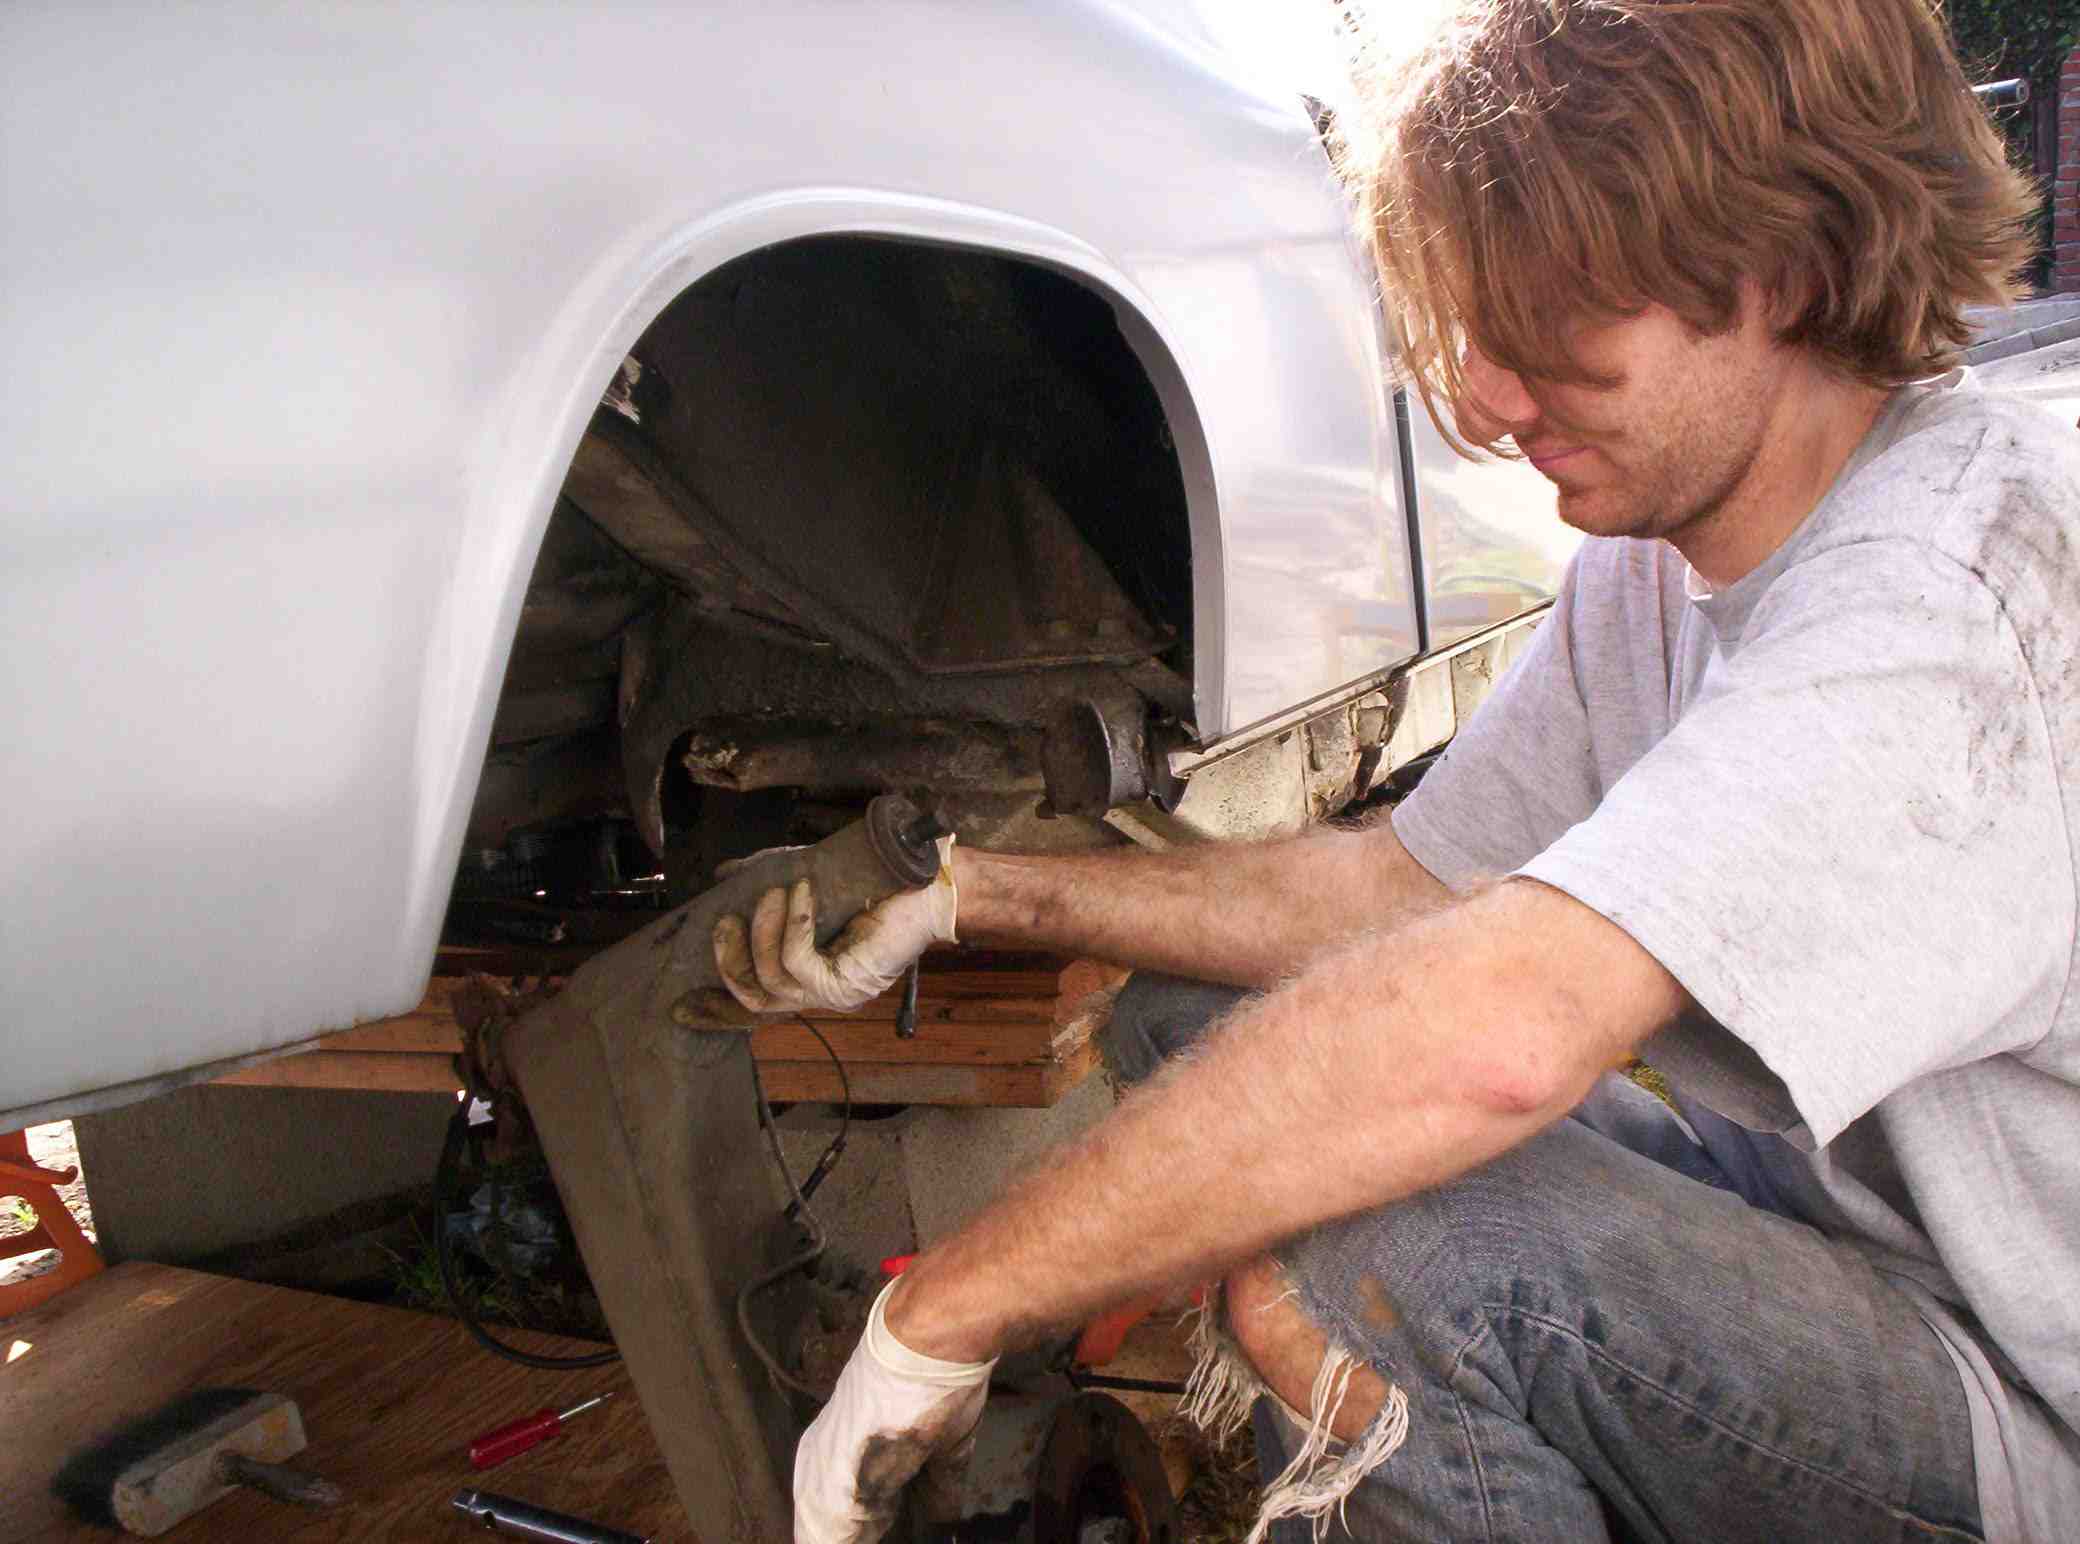
With the generous help and expertise from club member Bottomend- we pulled the engine last week and now it's time to get down to business.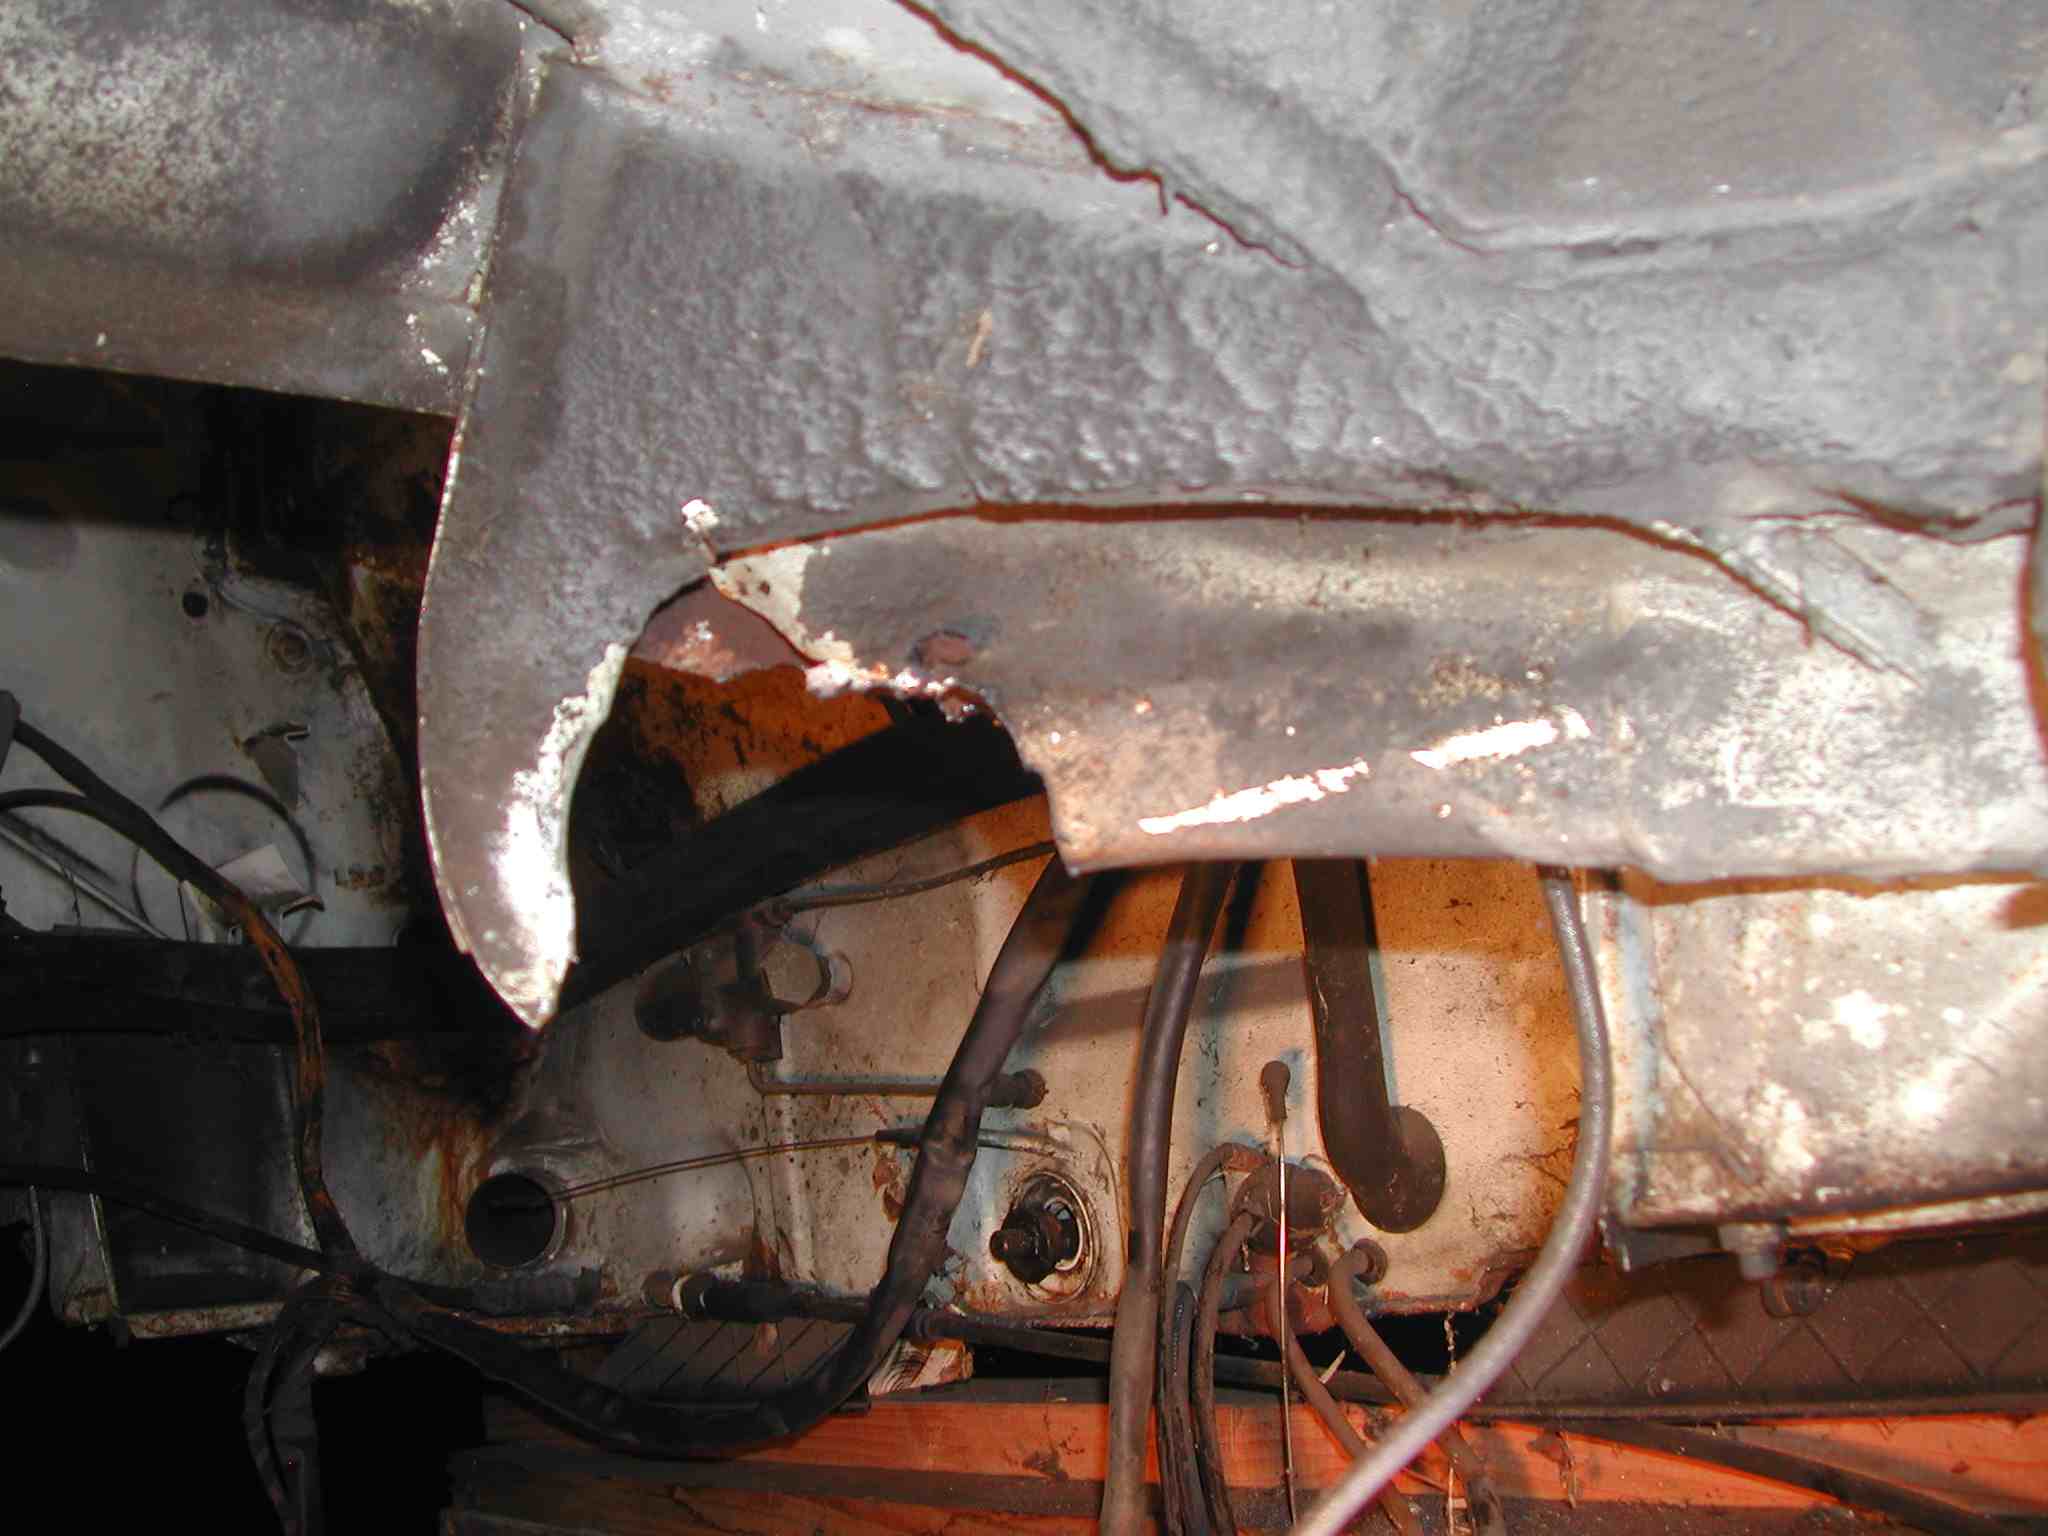
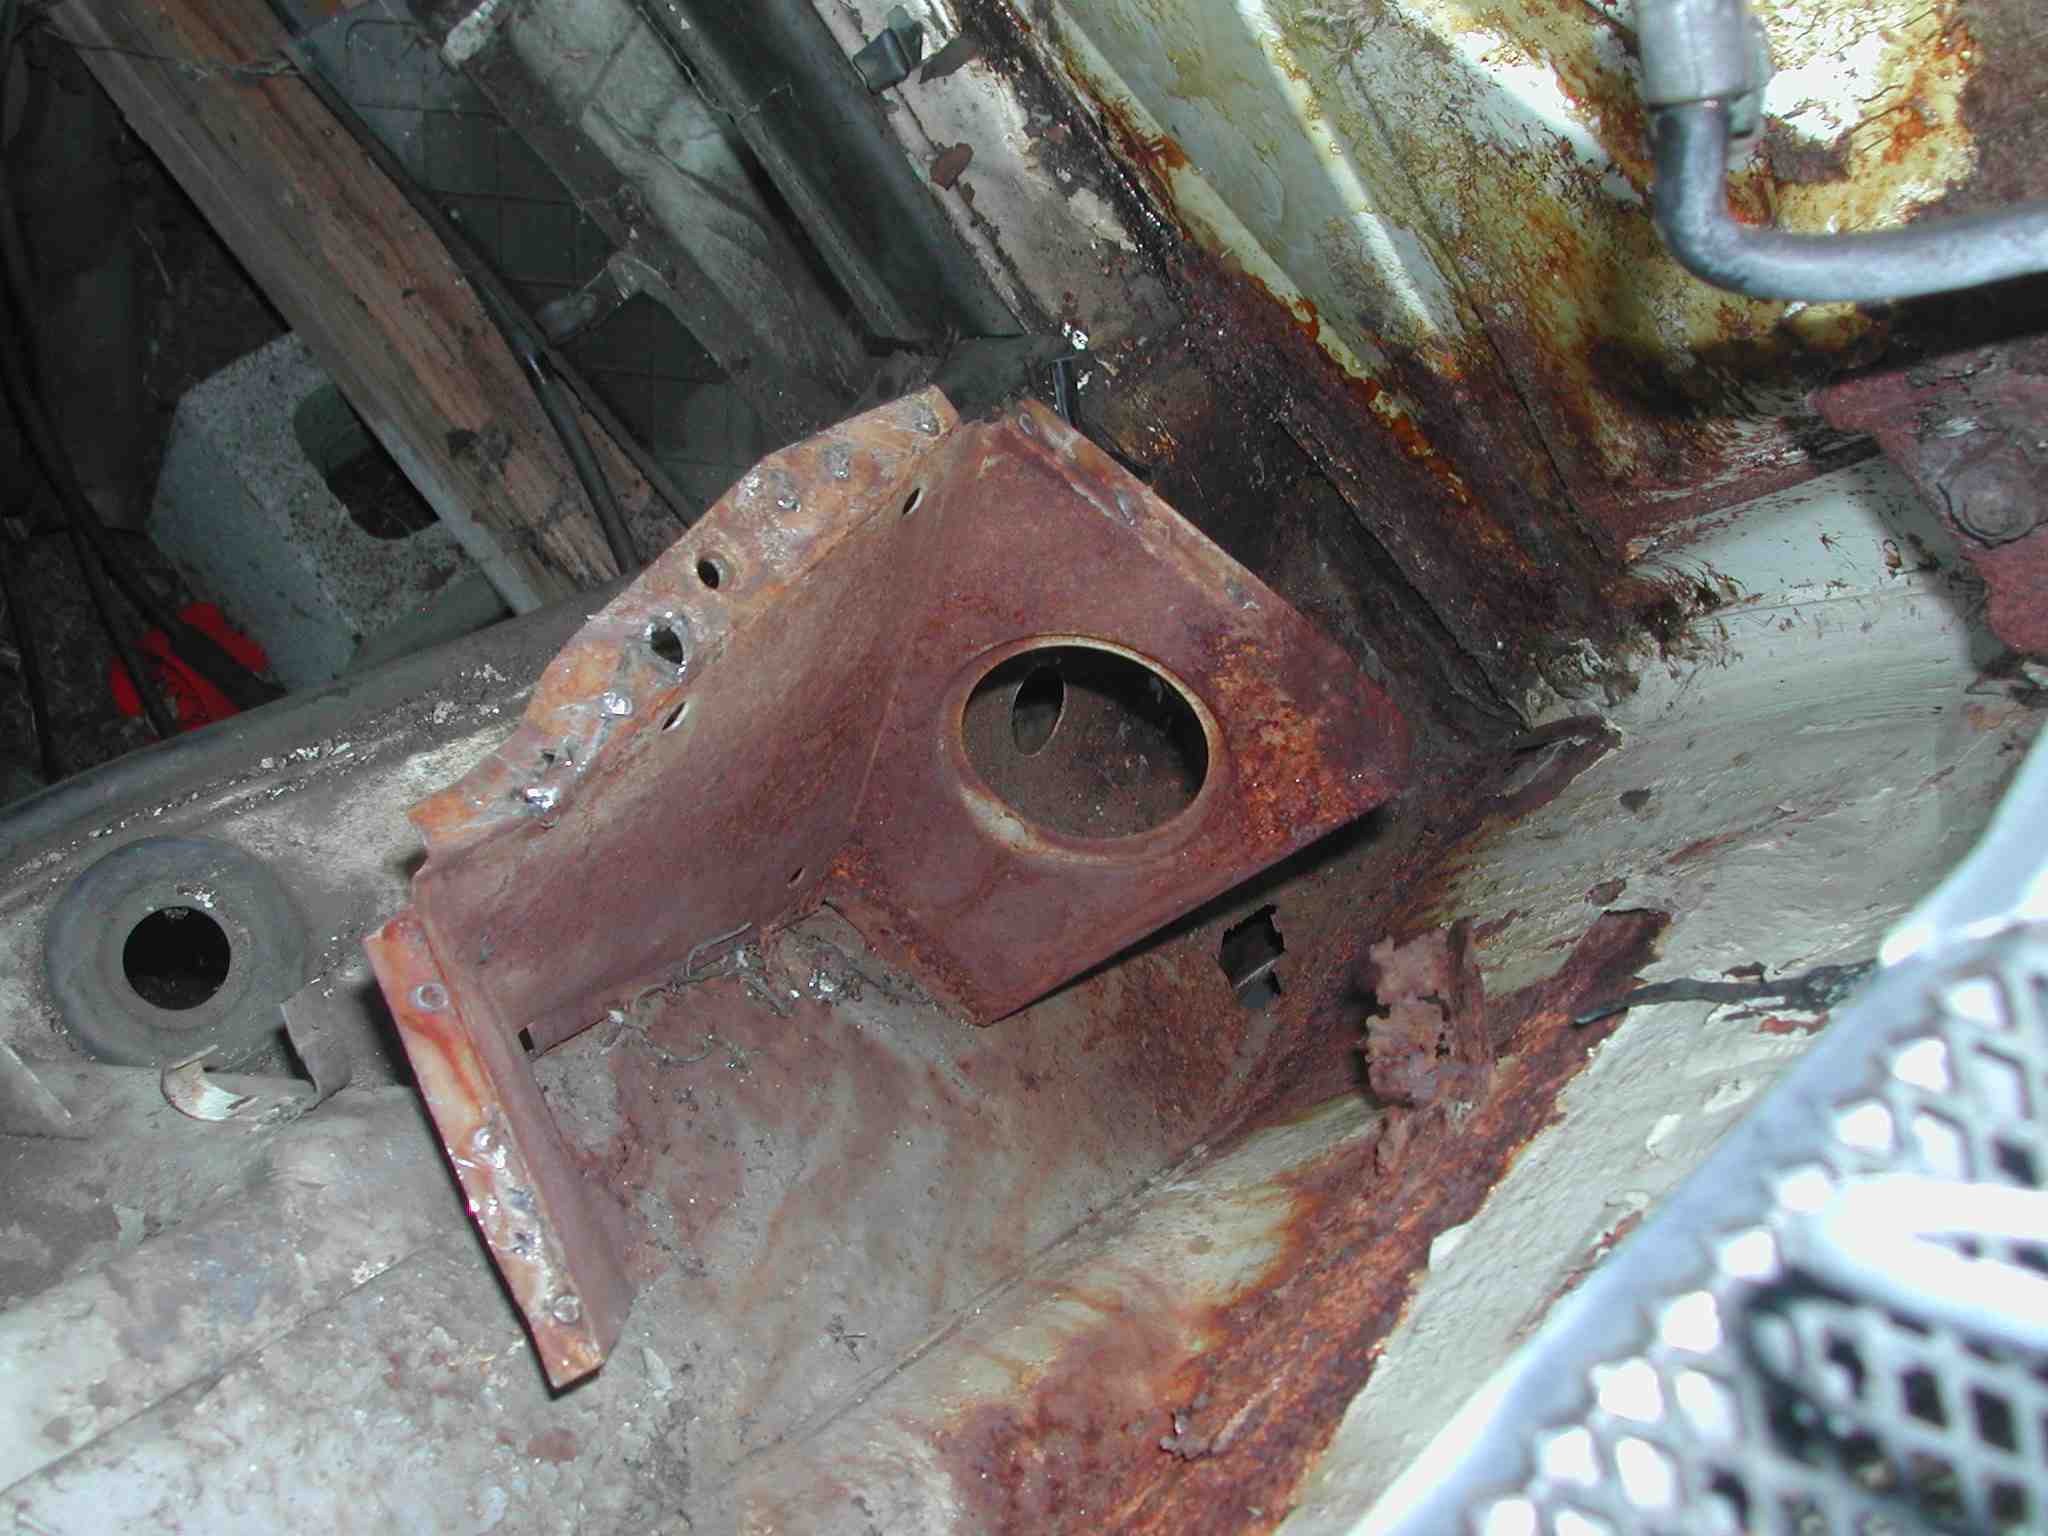
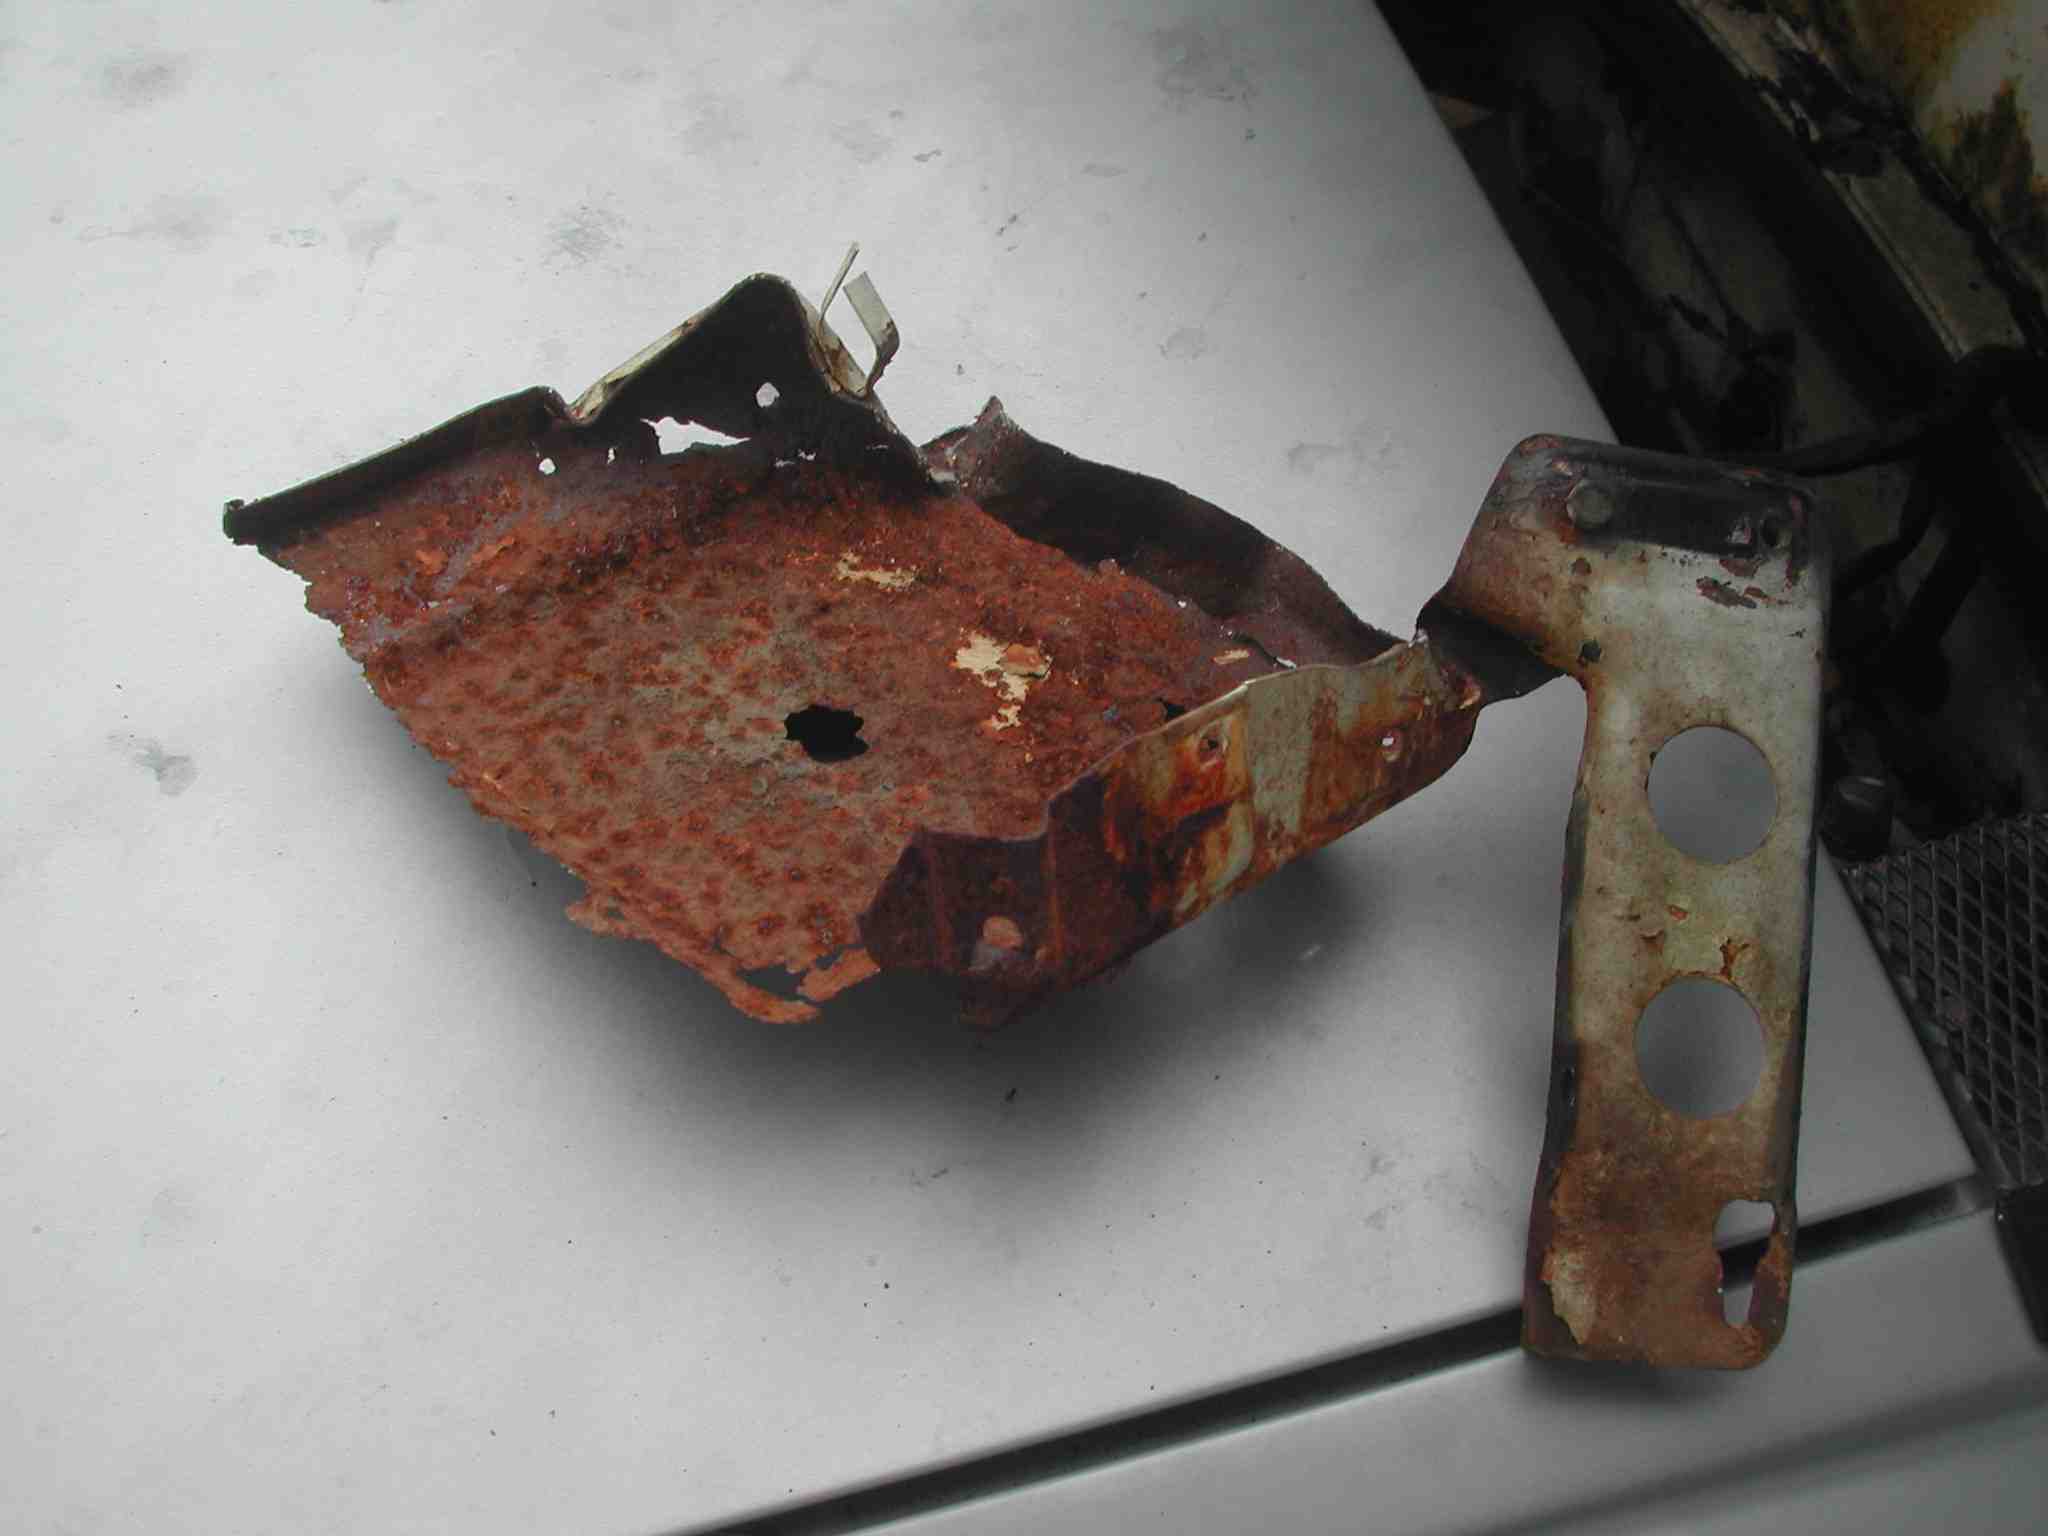
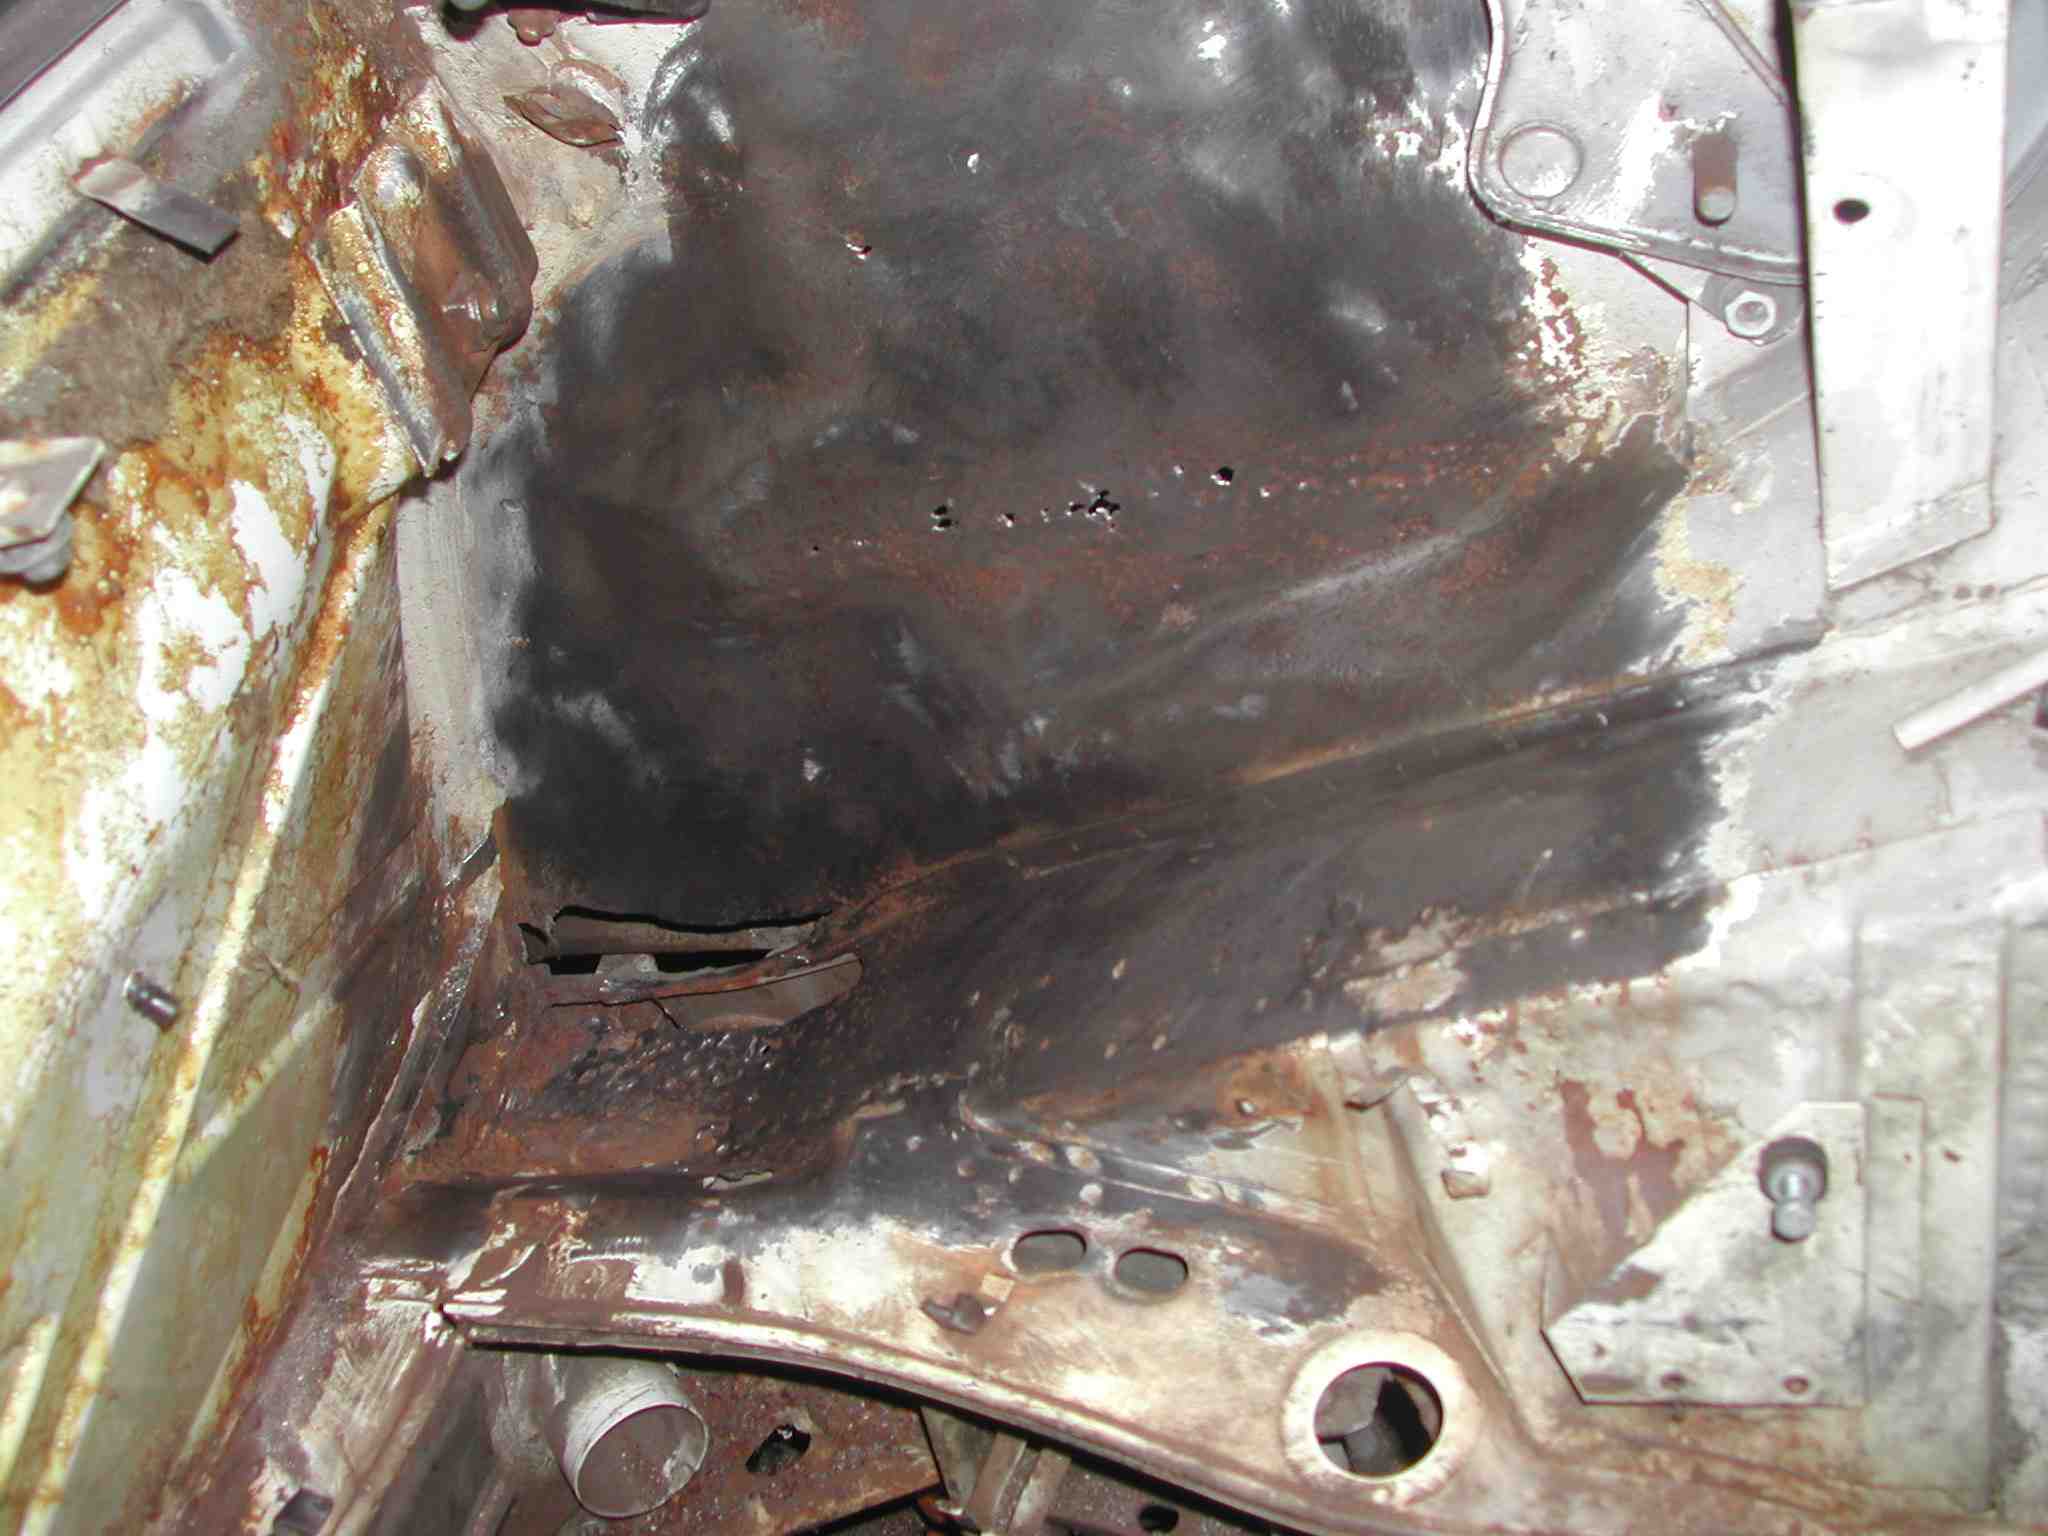
Here is what was left of the Suspension Console.
view from the engine side
Posted by: highways Jun 27 2006, 01:51 AM
hell hole looking down
hell hole view from engine
Posted by: highways Jun 27 2006, 01:55 AM
Batteries? We don't need no stinking Batteries!!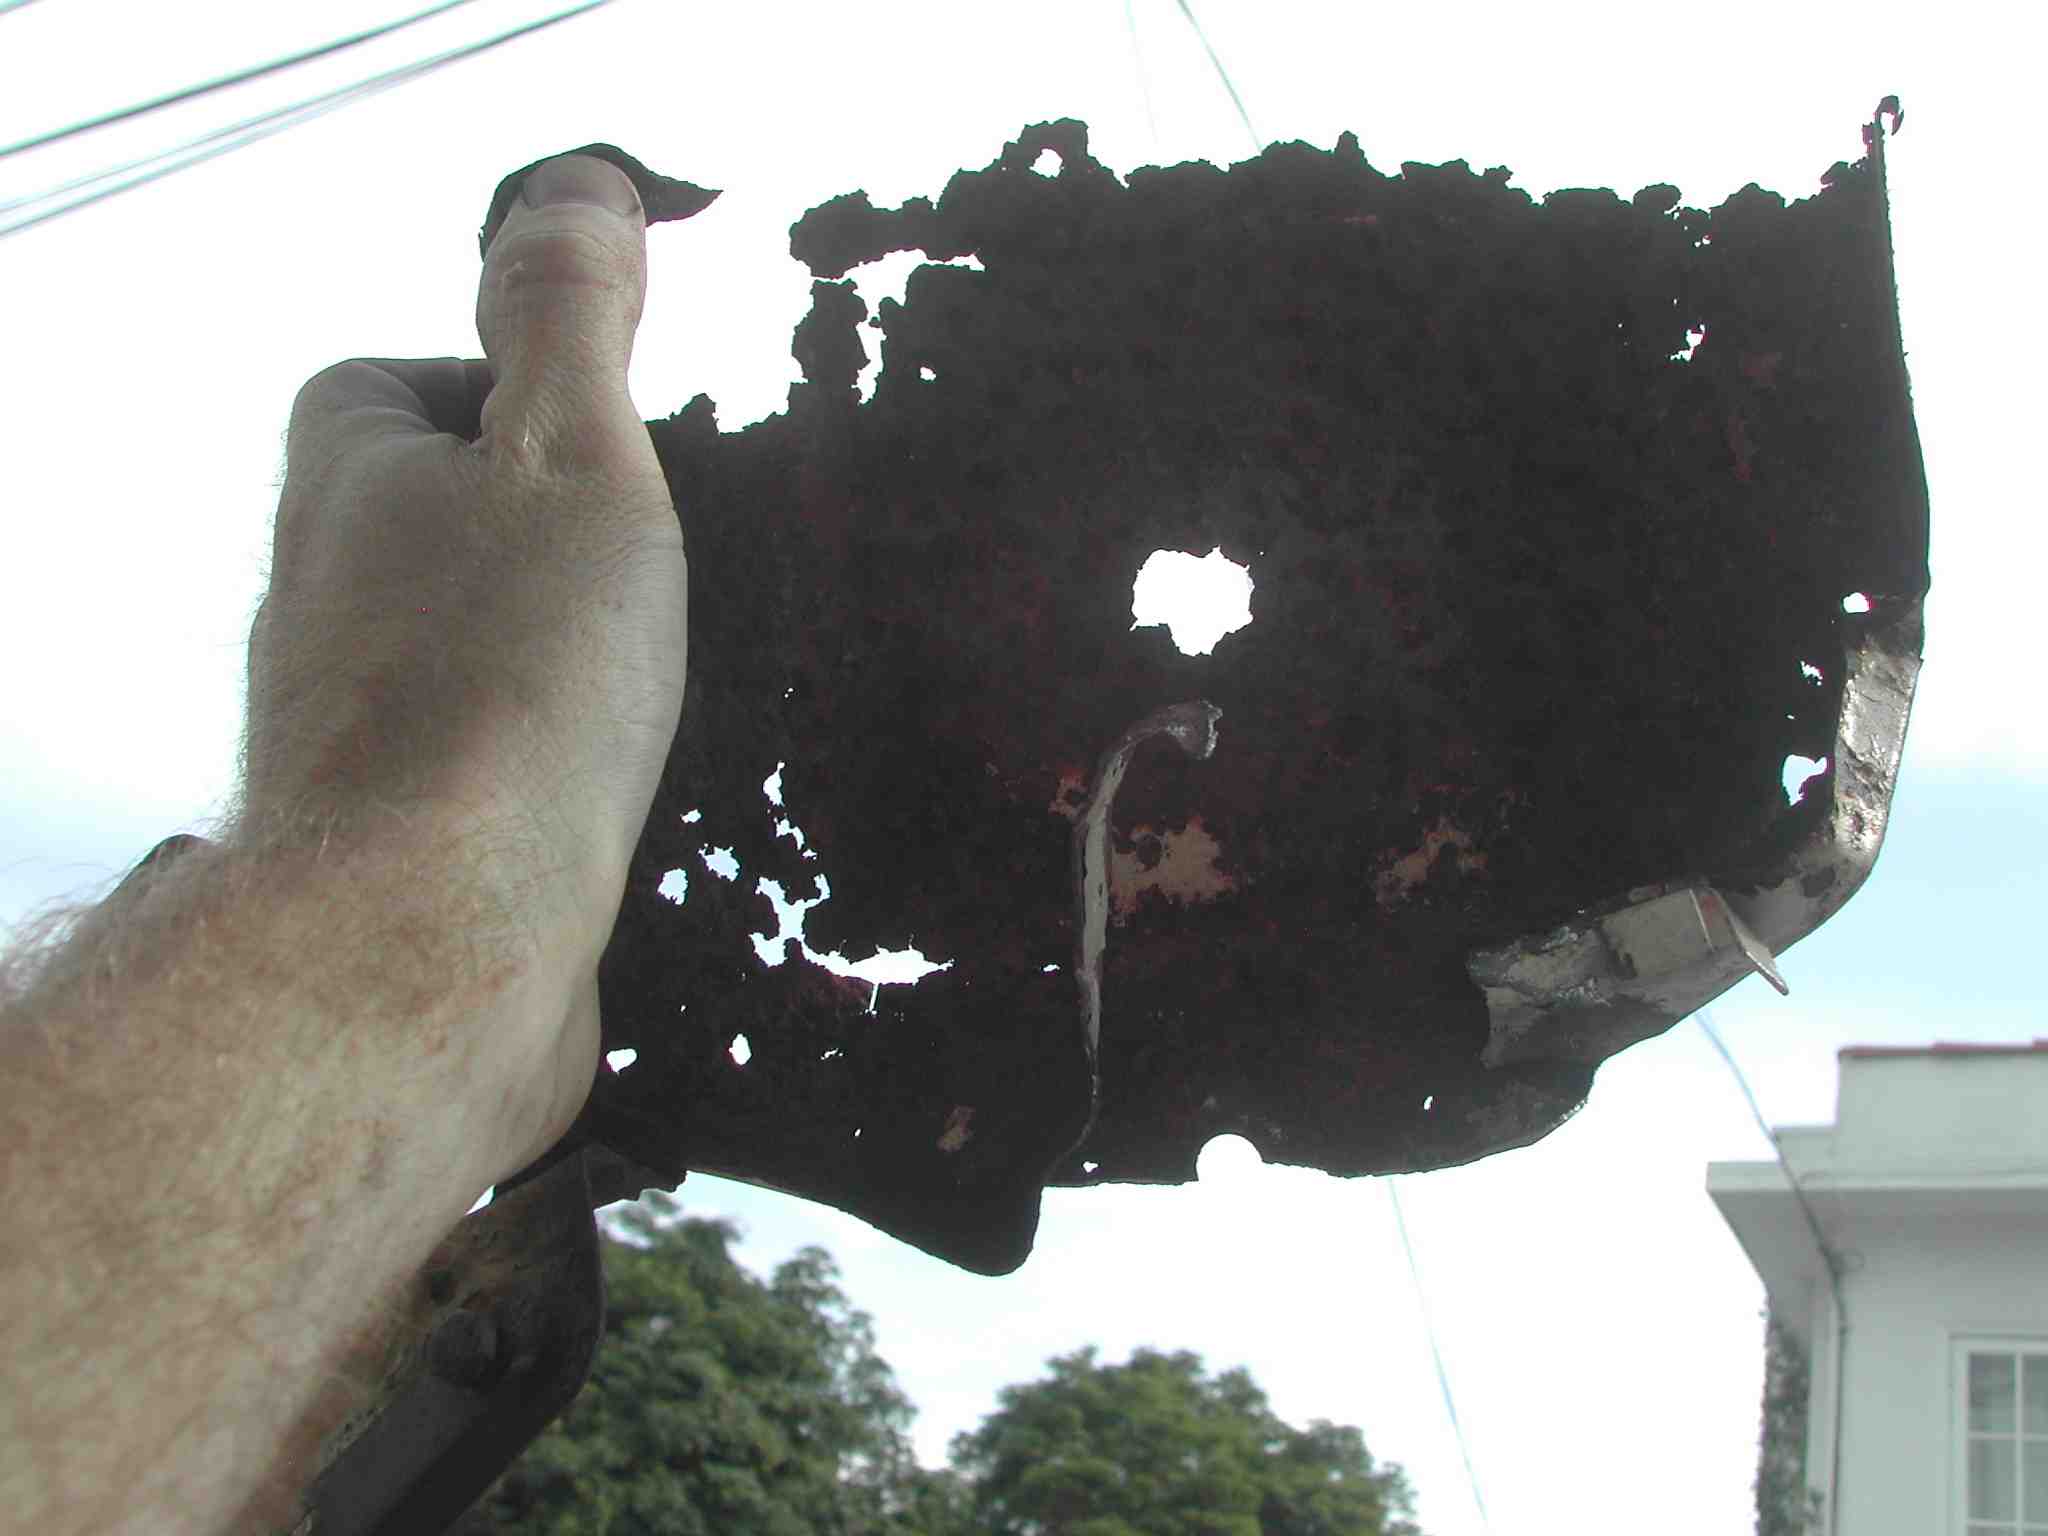
I finally saw the light... thank you Dewalt.
Posted by: bottomend Jun 27 2006, 01:56 AM
Hey "Driveways"! Did I send you the pics I took of your engine pull yet? I cant remember!!!! Lemme know, K?
Posted by: highways Jun 27 2006, 02:04 AM
This after I went Ape Crazy on that 

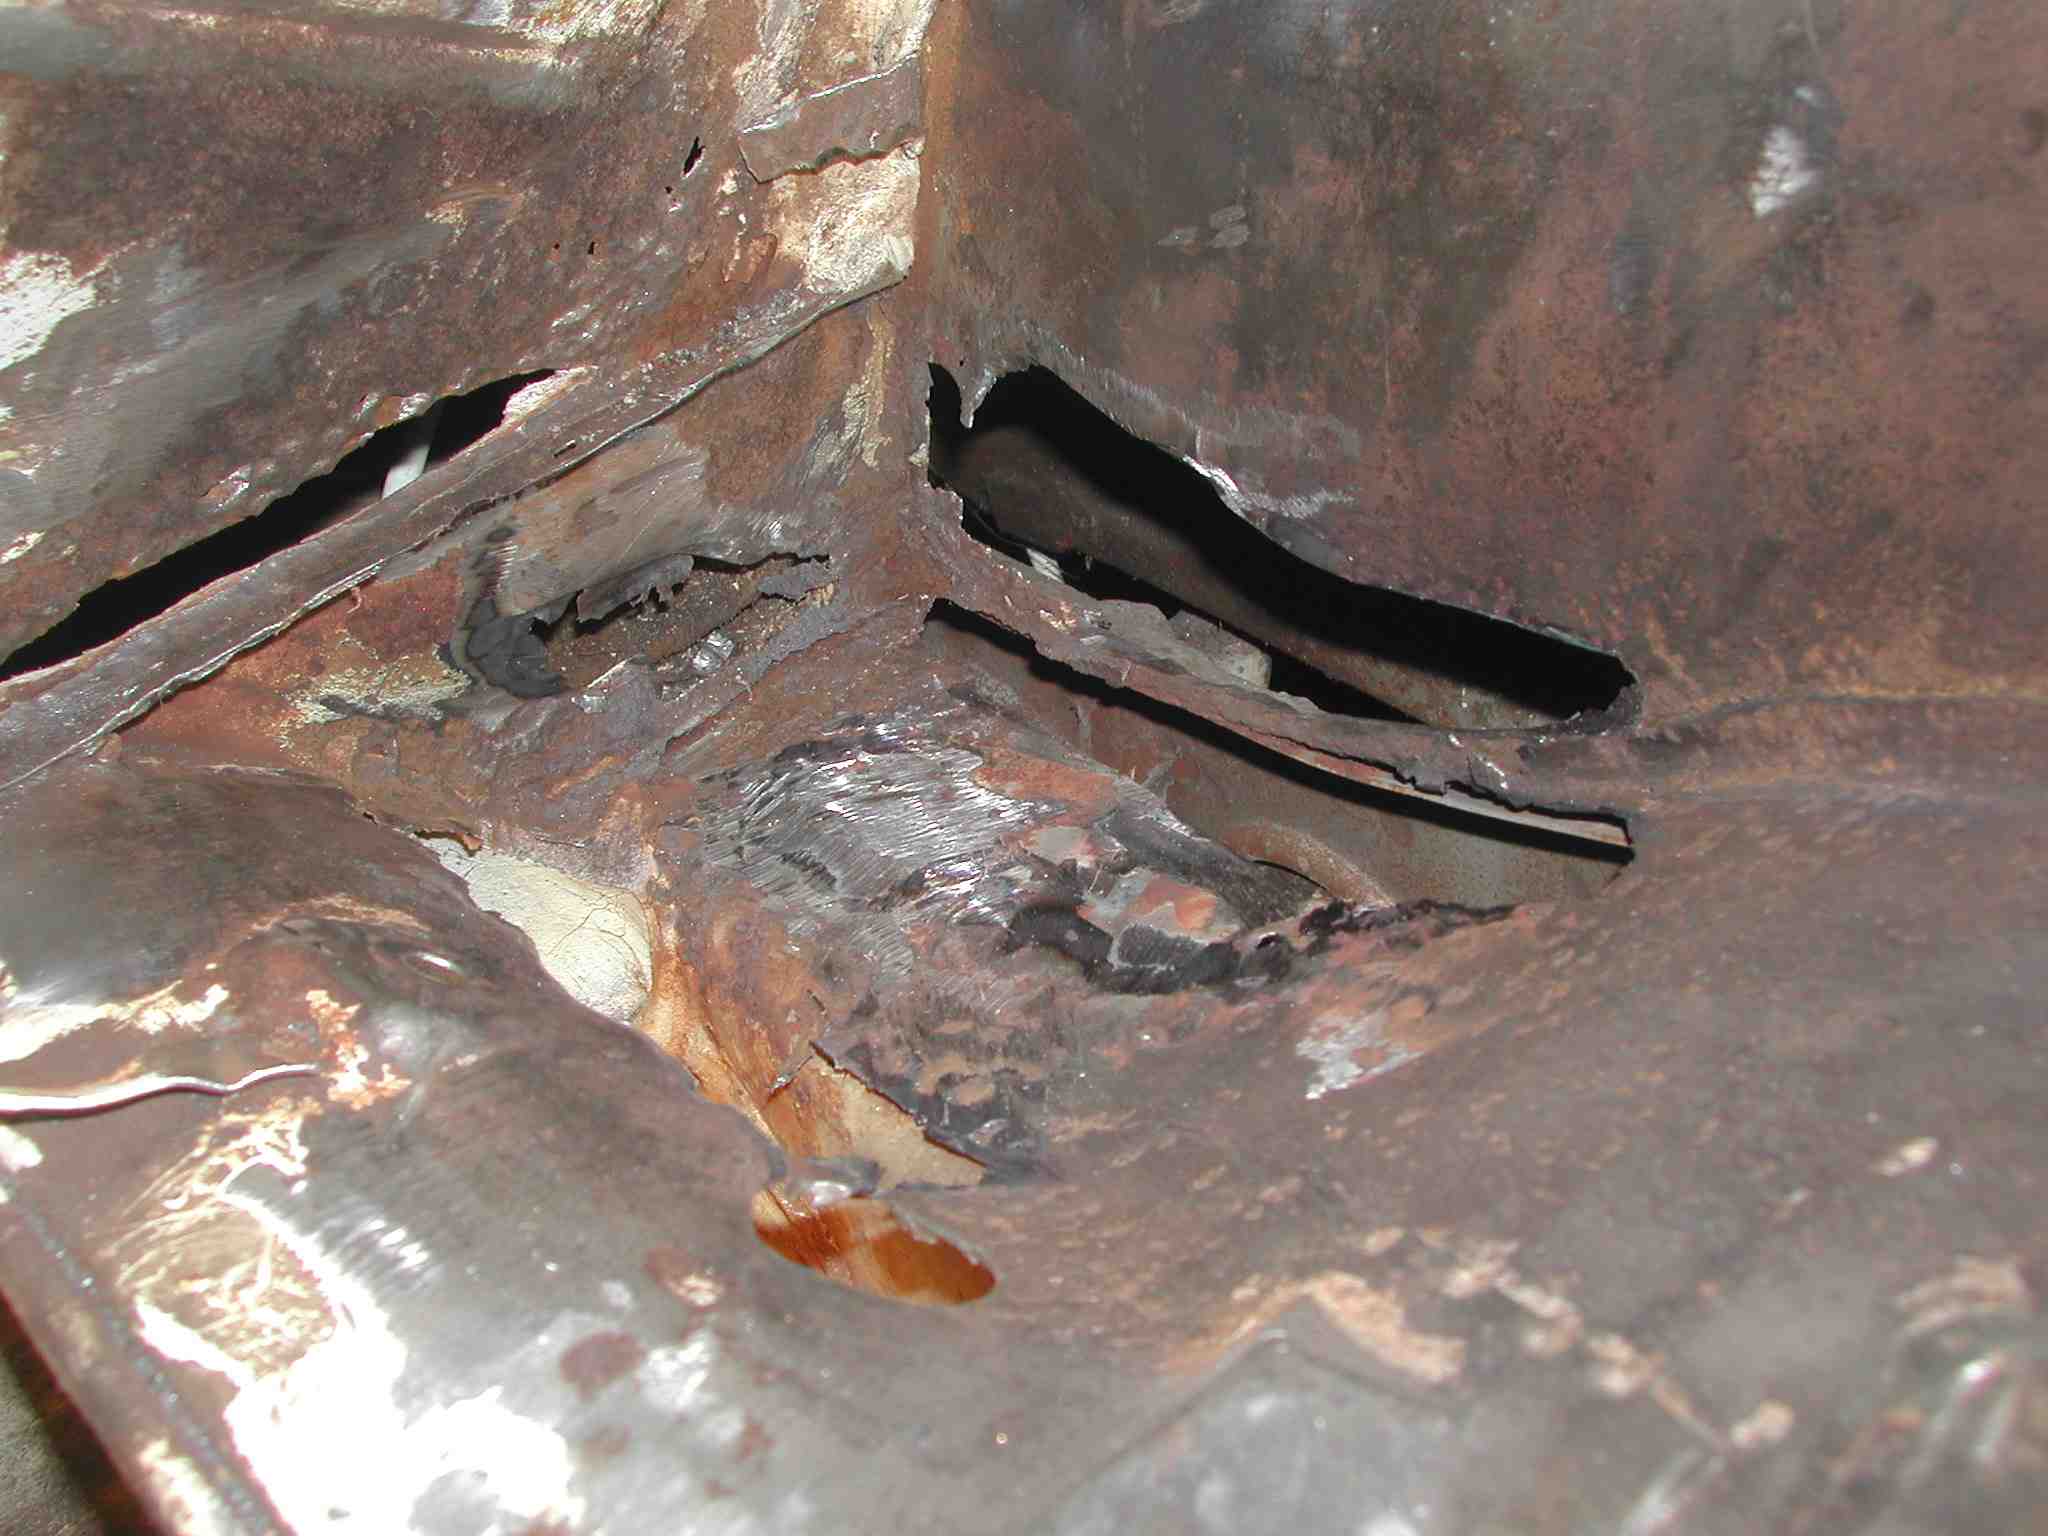
here we are close up to hell... is it getting hot in here?
No, I didn't get them yet... send em over... time to post!!!
Posted by: highways Jun 27 2006, 02:08 AM
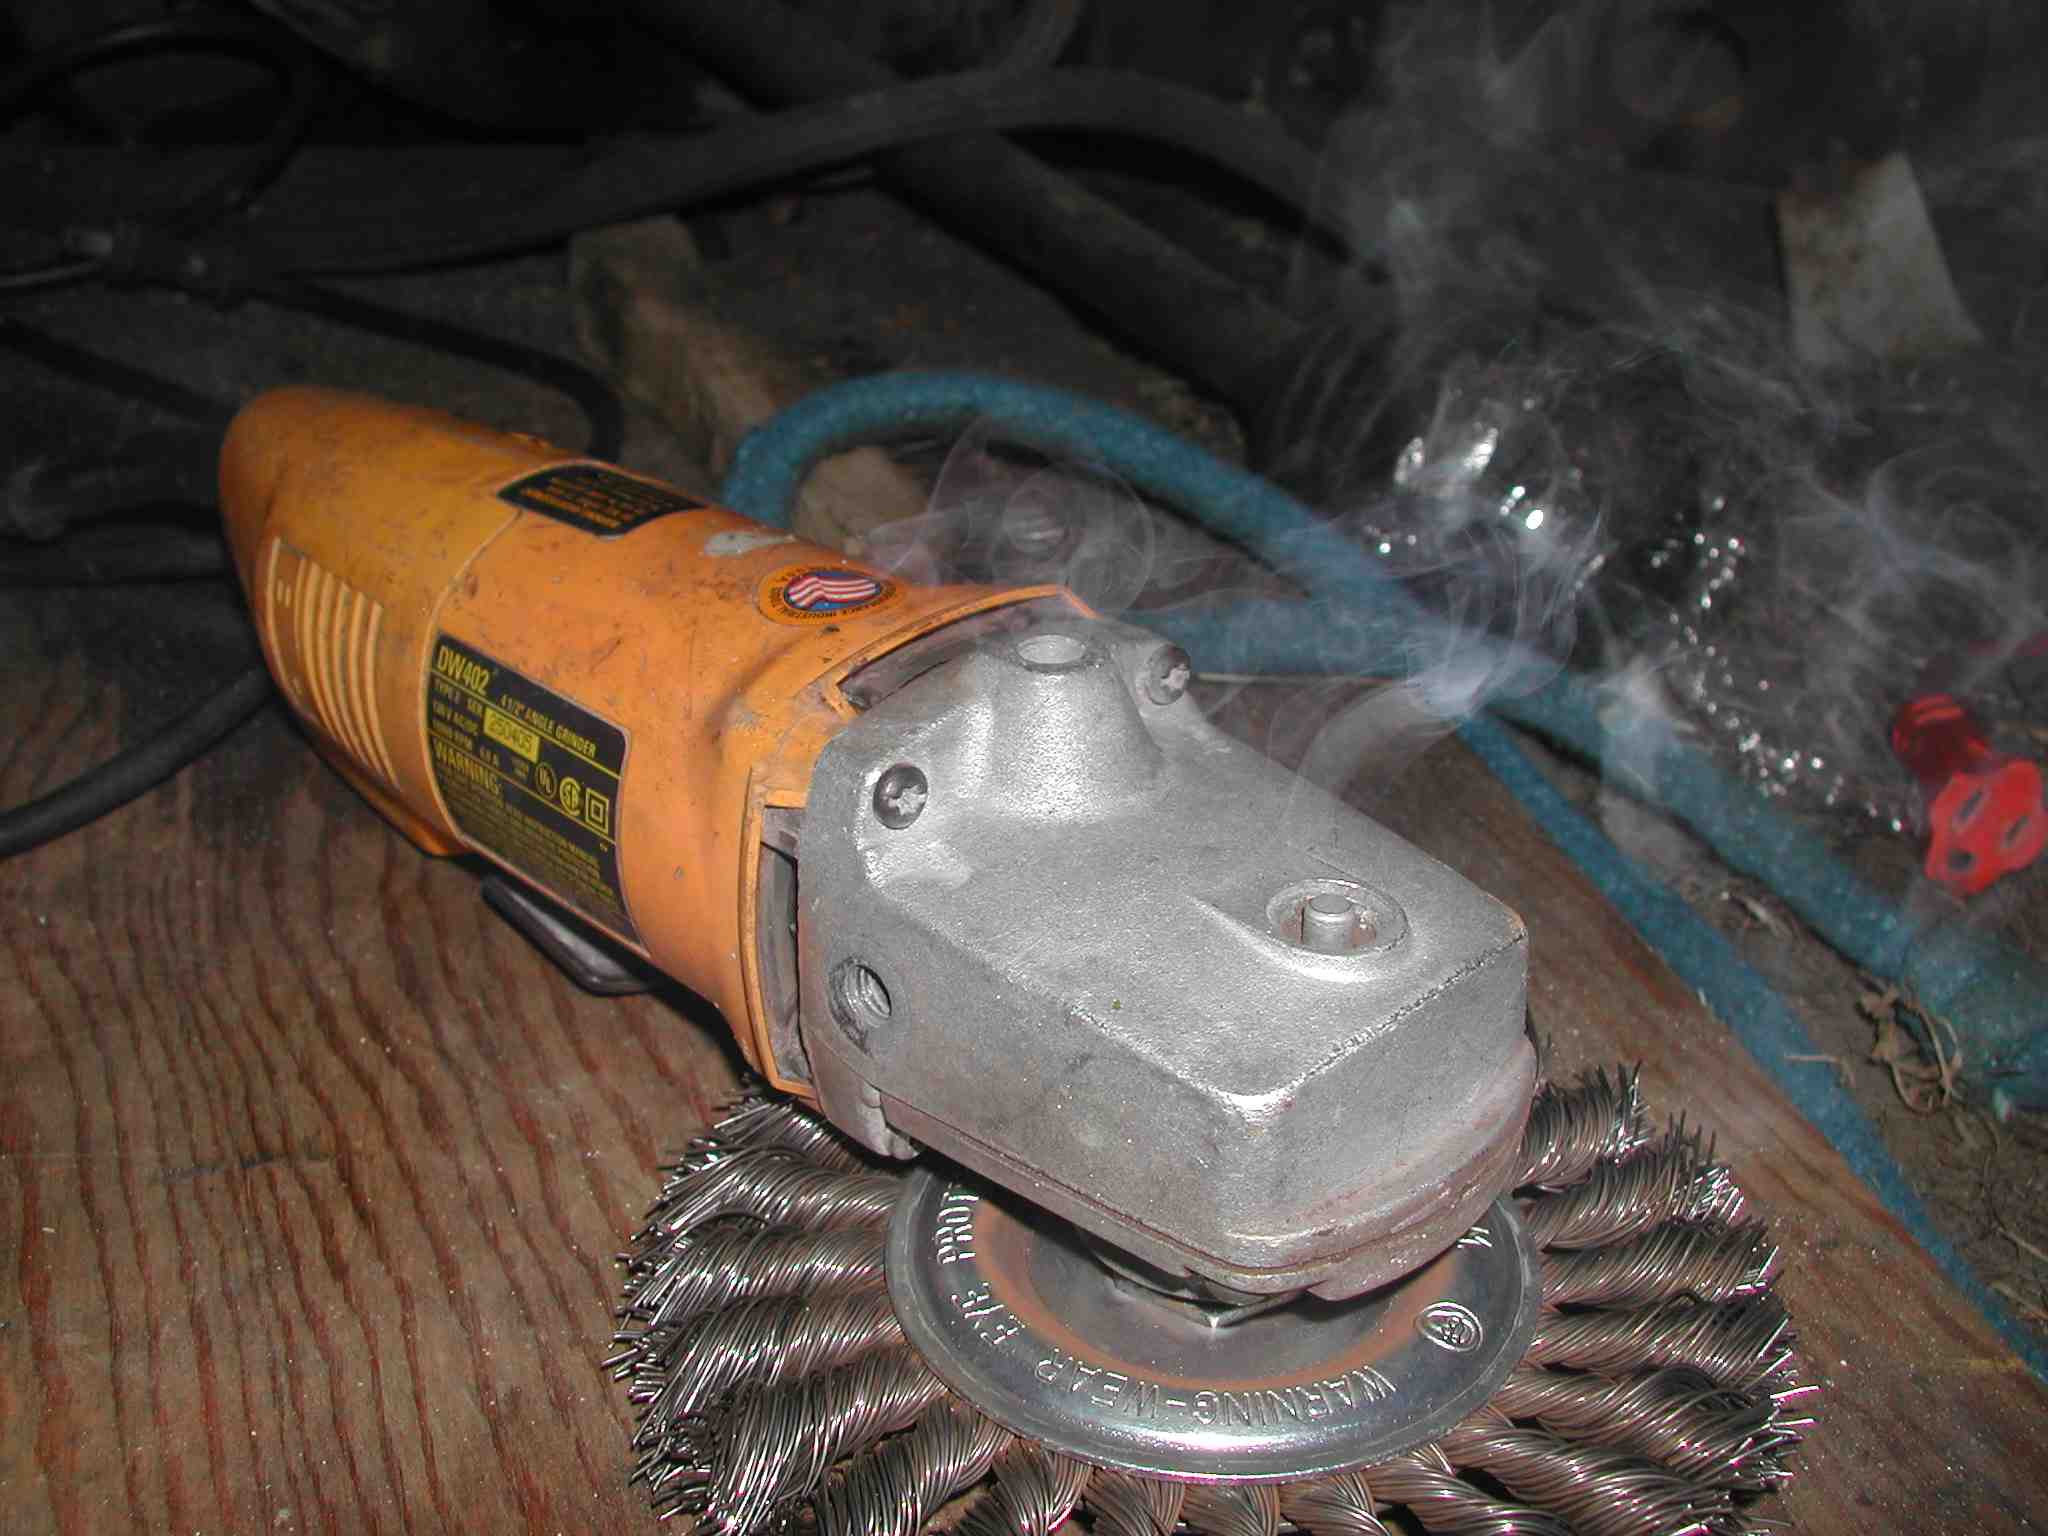
Yes it's getting hot in here...
It smoked for 15 minutes and was too hot to touch for a full HOUR... I thought it was toast... but it's ALIVE!!!!! 
Posted by: bottomend Jun 27 2006, 02:48 AM
Great picture... now put the bong away and get back to work!
Put some wd 40 or something (not paint. welding doesn't "stick' to paint) over the area you've grinded or it may start to rust again....
Posted by: highways Jun 27 2006, 03:05 AM
Yeah it already started to rust again... 12 hours later and it's rusting. WD40 sounds like a good idea. Anybody else have some suggestions? Proto31 mentioned using a weldable primer paint... anybody have experience with that? Welding is going to happen within the next month, but the rust is a fast mudder fudder. What's the best way to protect the work I get done as I do it? (that I can then weld on ofcourse)
Posted by: highways Jun 27 2006, 03:11 AM
REWIND<<<<< Day One: The Engine Pull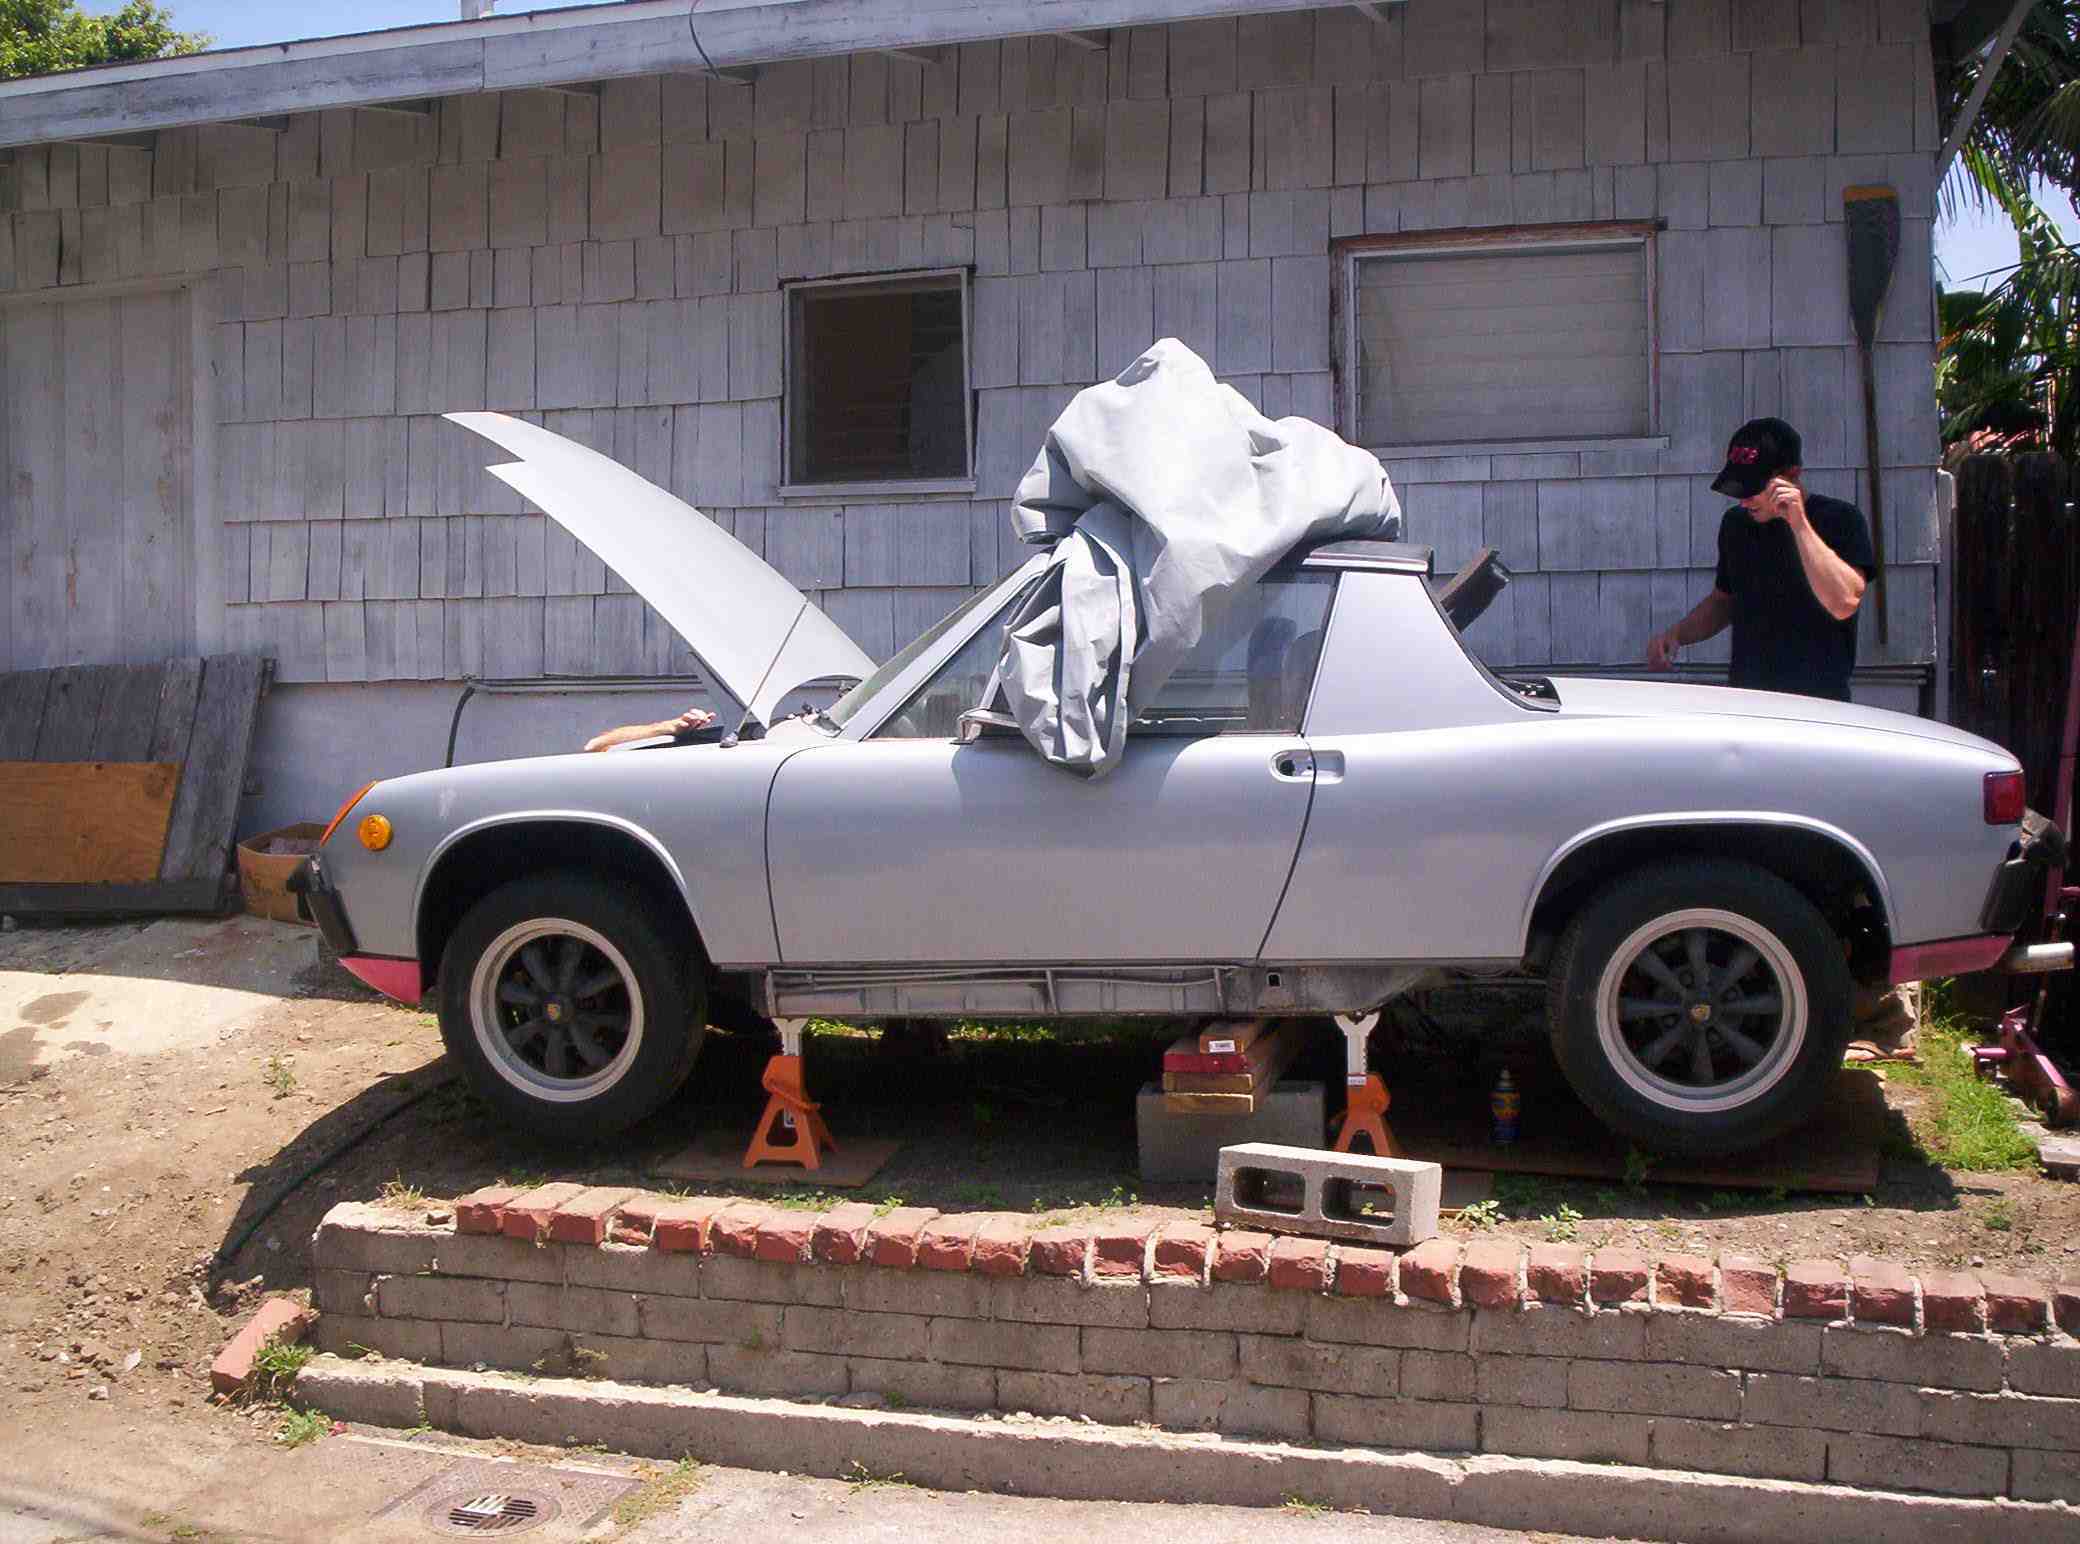
Welcome to the Porsche Restoration Factory @ the Ghetto Garage
Hey!! Is that Proto31 spying on my progress, or is he trying to sabotage my efforts thinking he's got this bet in the bag? 
Posted by: bottomend Jun 27 2006, 03:13 AM
dude, we need a timline or something. It took us like... 3 1/2 hours to get to this point, right!? Jacking on dirt is dirty buisness....
Posted by: highways Jun 27 2006, 03:16 AM
No kidding, and it didn't help that my 'driveway' is listing to one side about 15 degrees.
Proto31 ran and hid as soon as I started throwing this at him
Posted by: highways Jun 27 2006, 03:20 AM
The dissapointement of the family....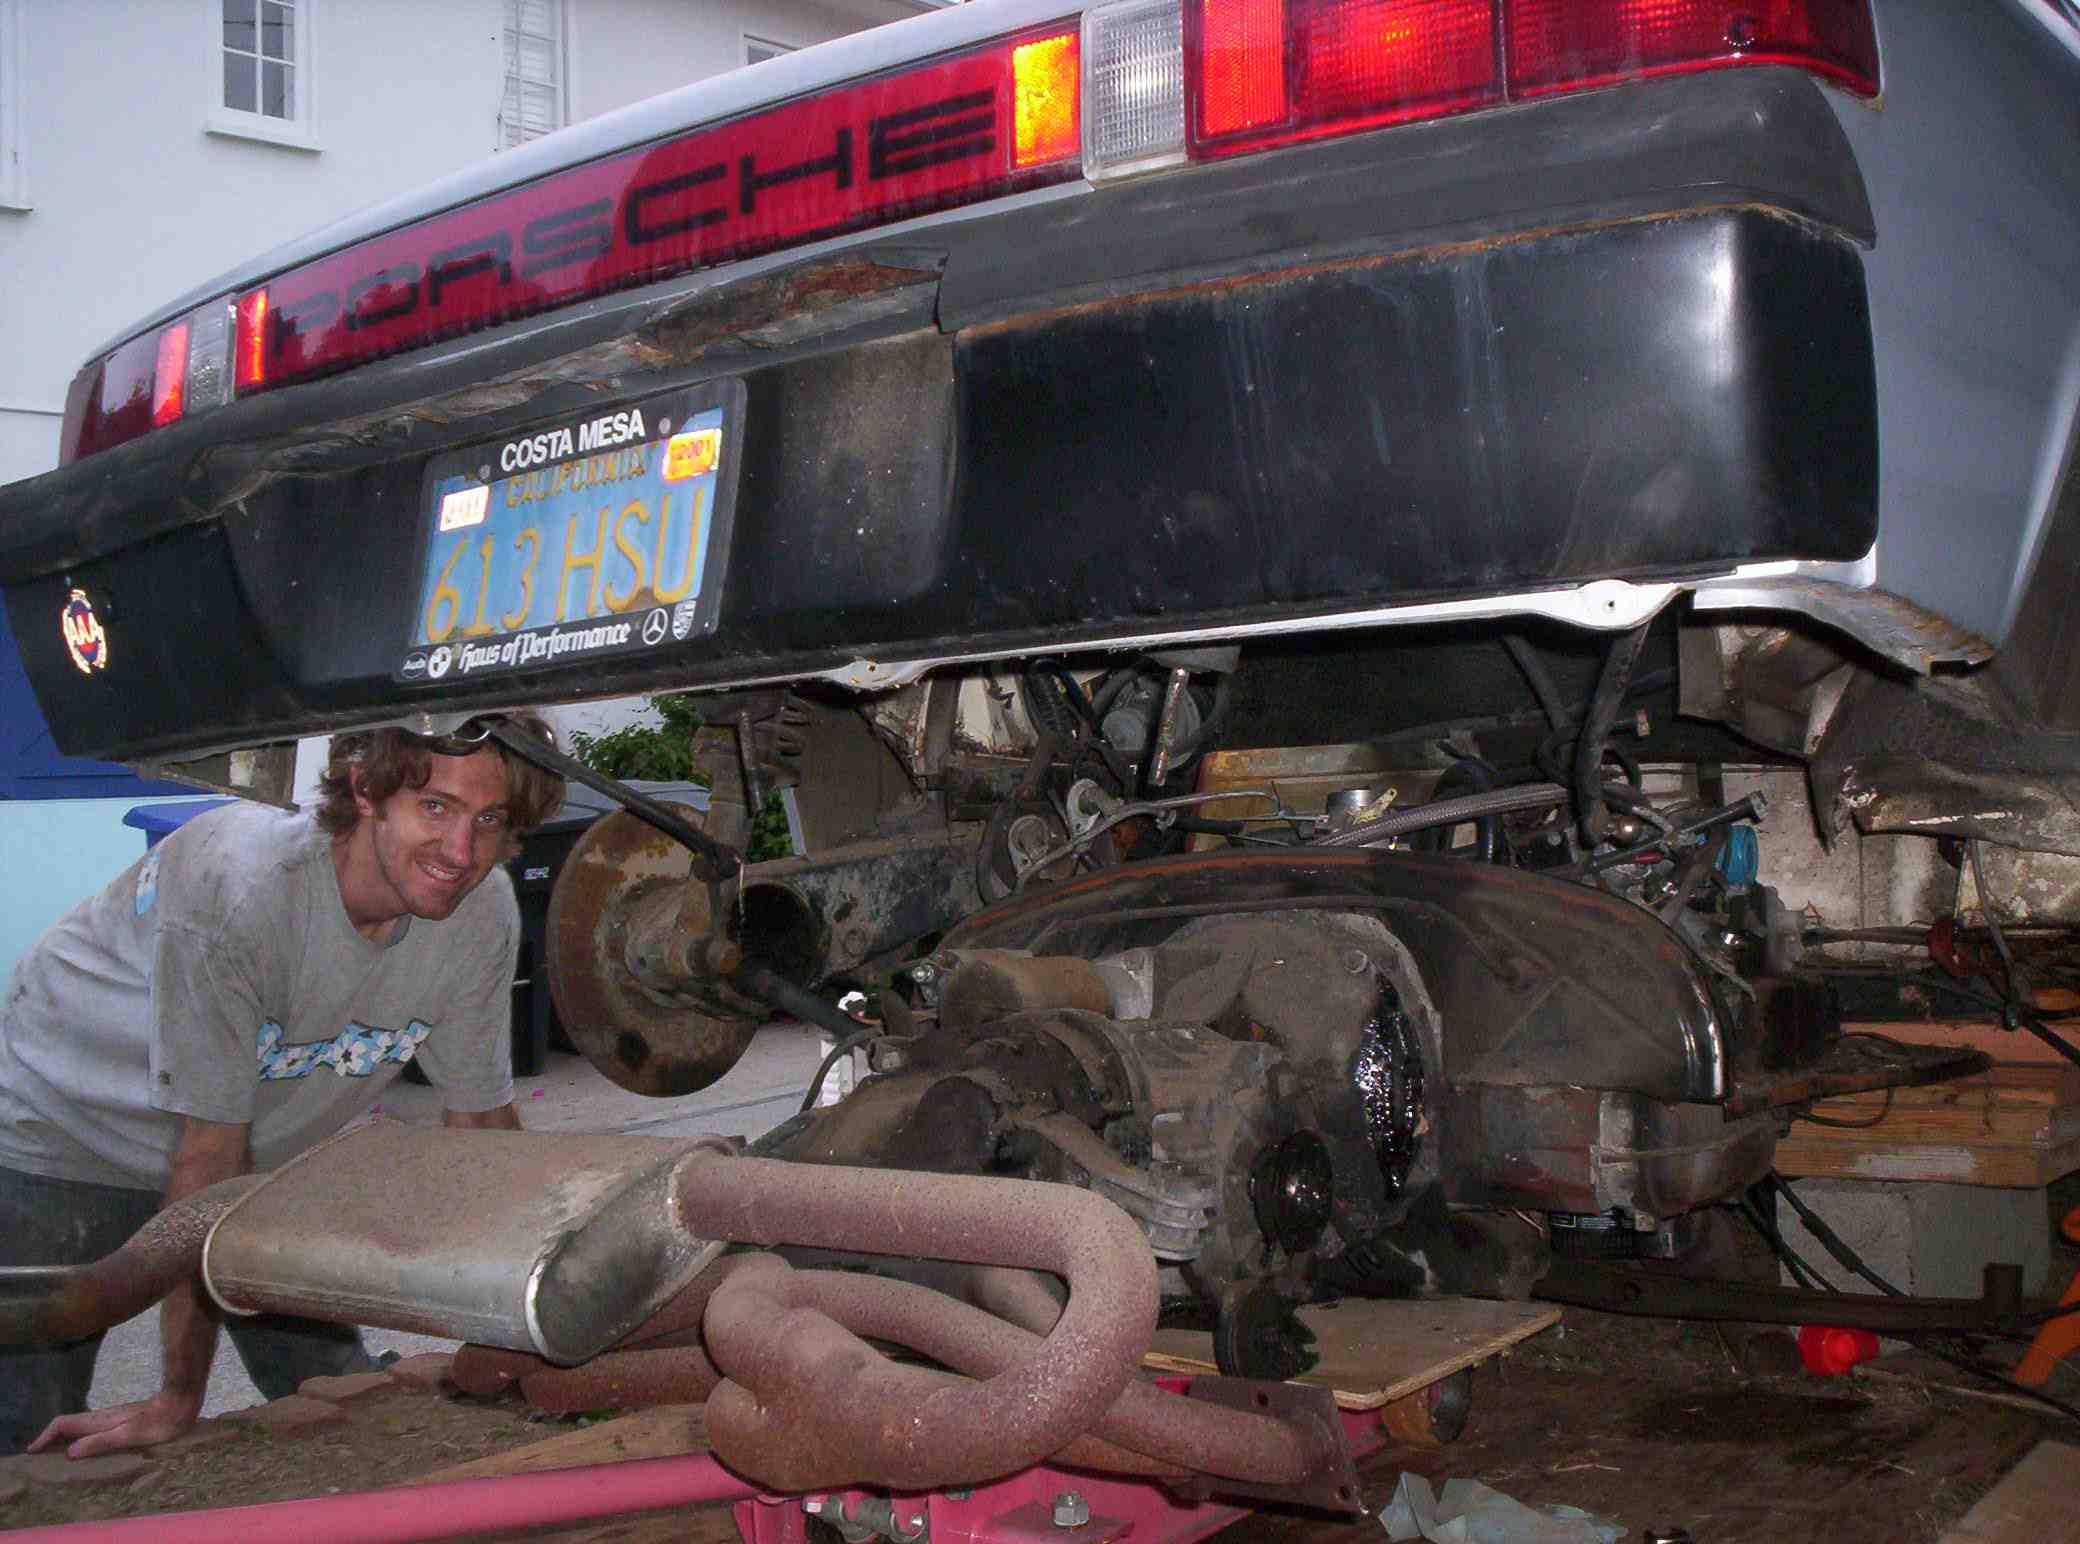
Wowsers! Dr. Bottomend what have you done?
Posted by: highways Jun 27 2006, 03:27 AM
Ghetto Garage Engine Drop Manual page 6.9 "Always use your hazard blinkers when playing with big toys"
Aren't we about 8 hours into it at this point? Time to roll it into the backyard, I mean engine vault. Notice the tree stump preventing certain disaster in the Porsche Restoration Alley.
Posted by: highways Jun 27 2006, 03:36 AM

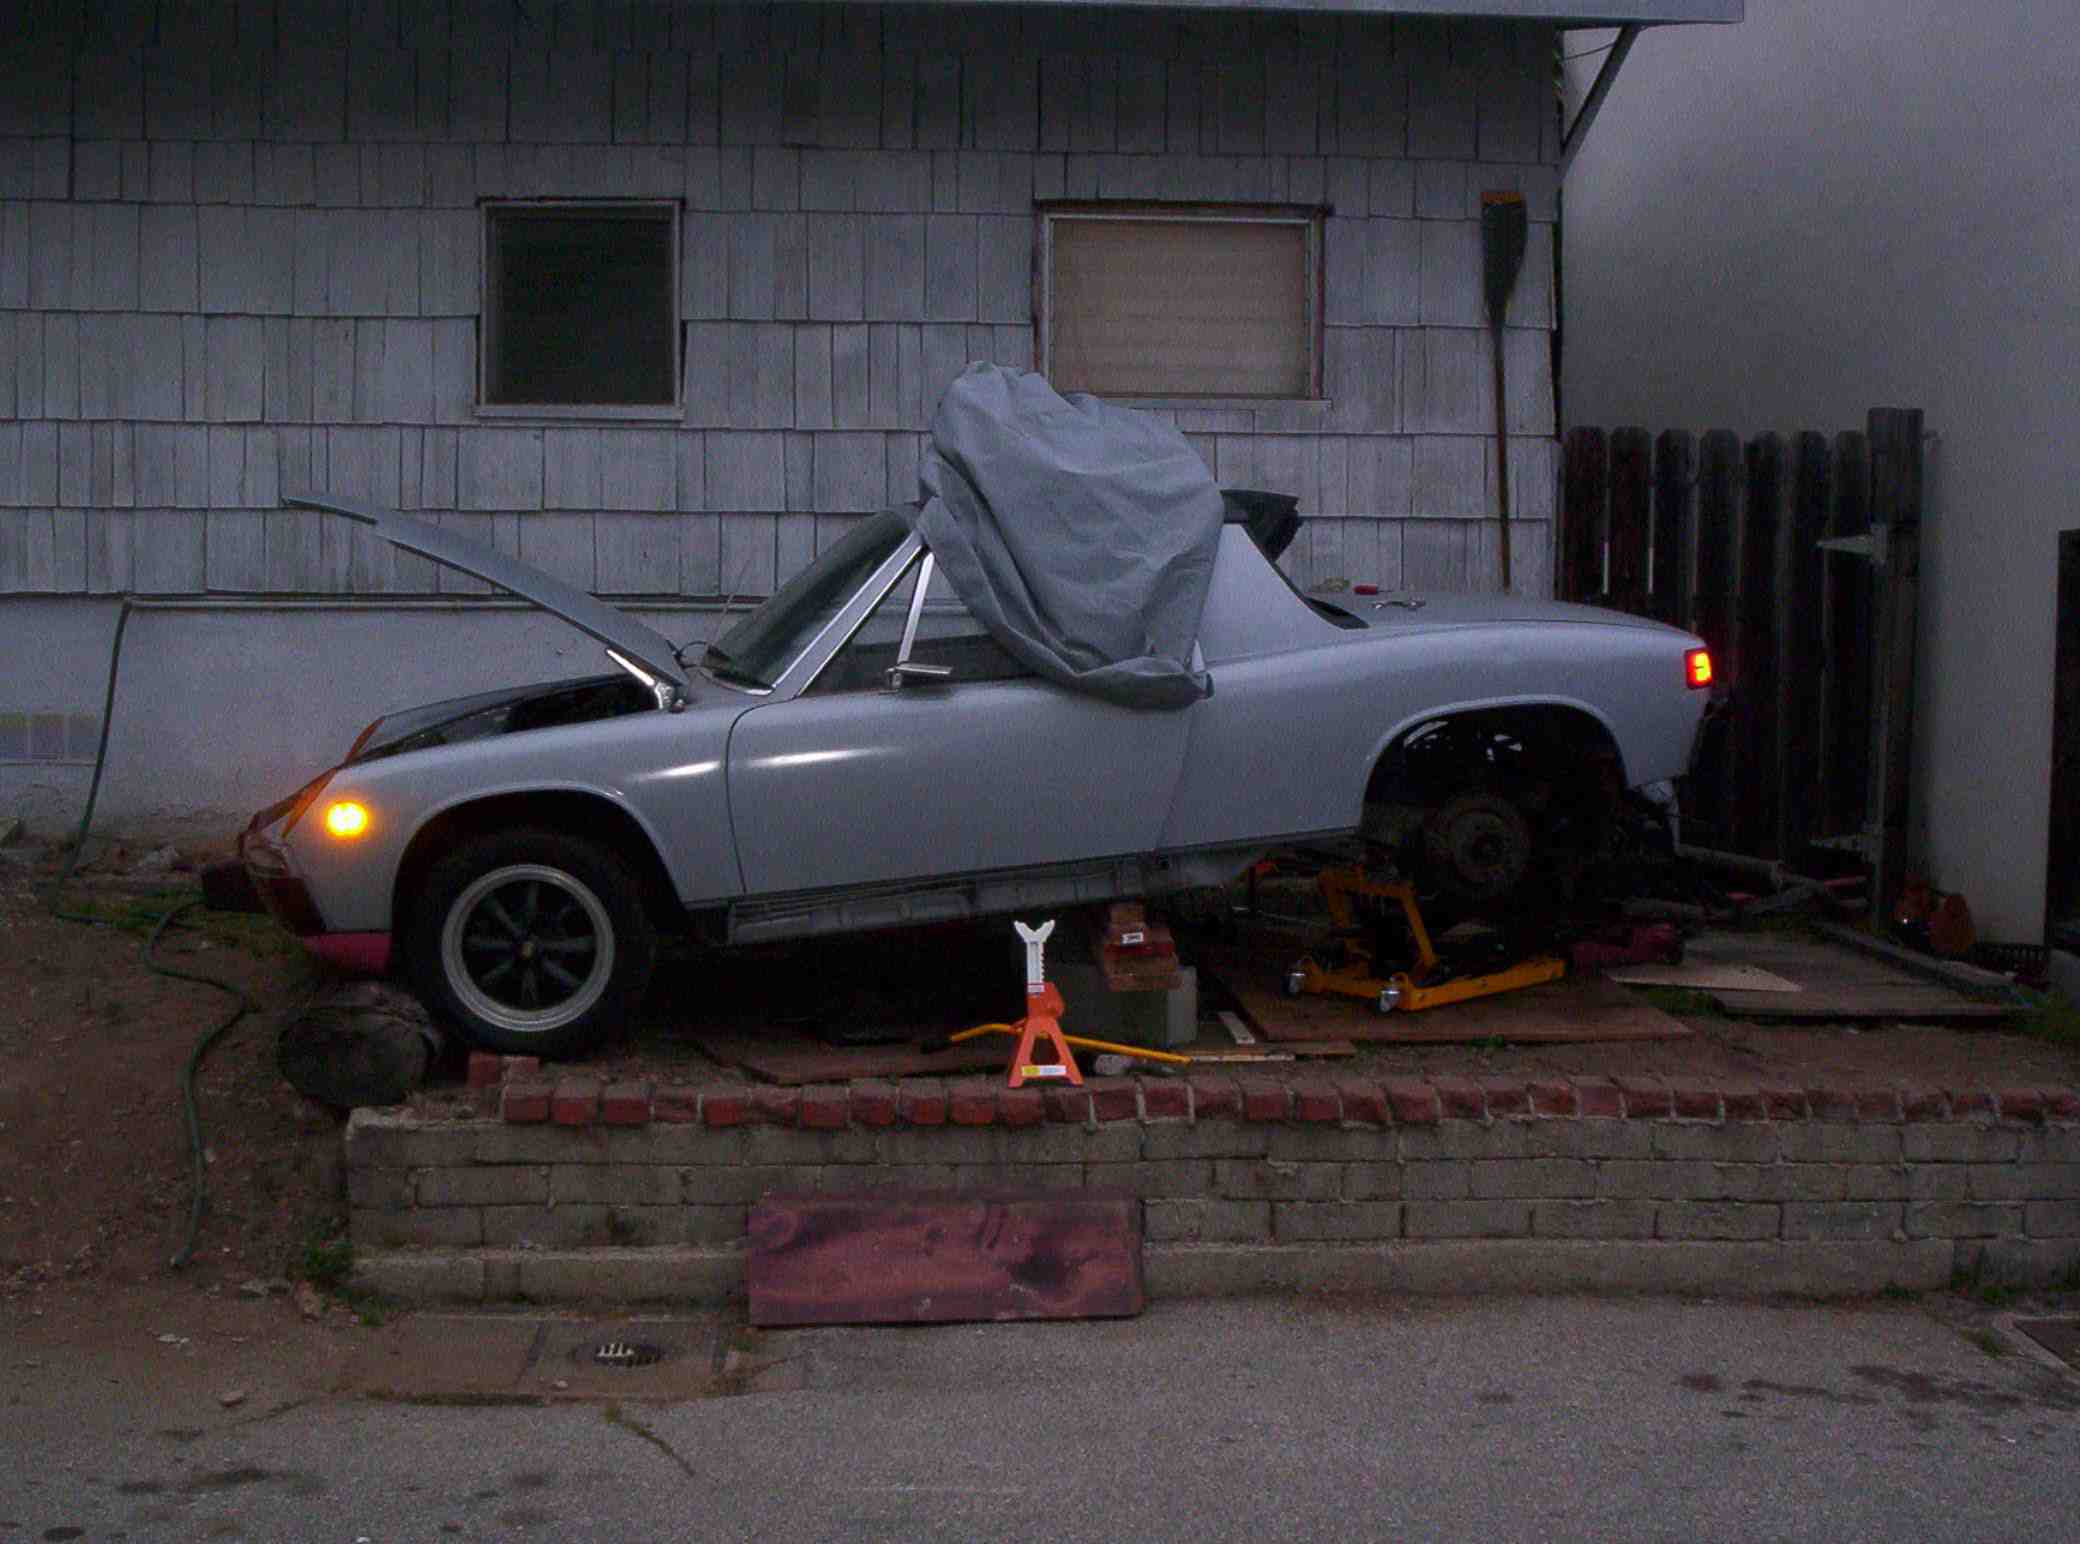
Check out this Egyptian Engineering marvel. We had to roll 'up' into the backyard, I mean engine vault, with about a 8" grade.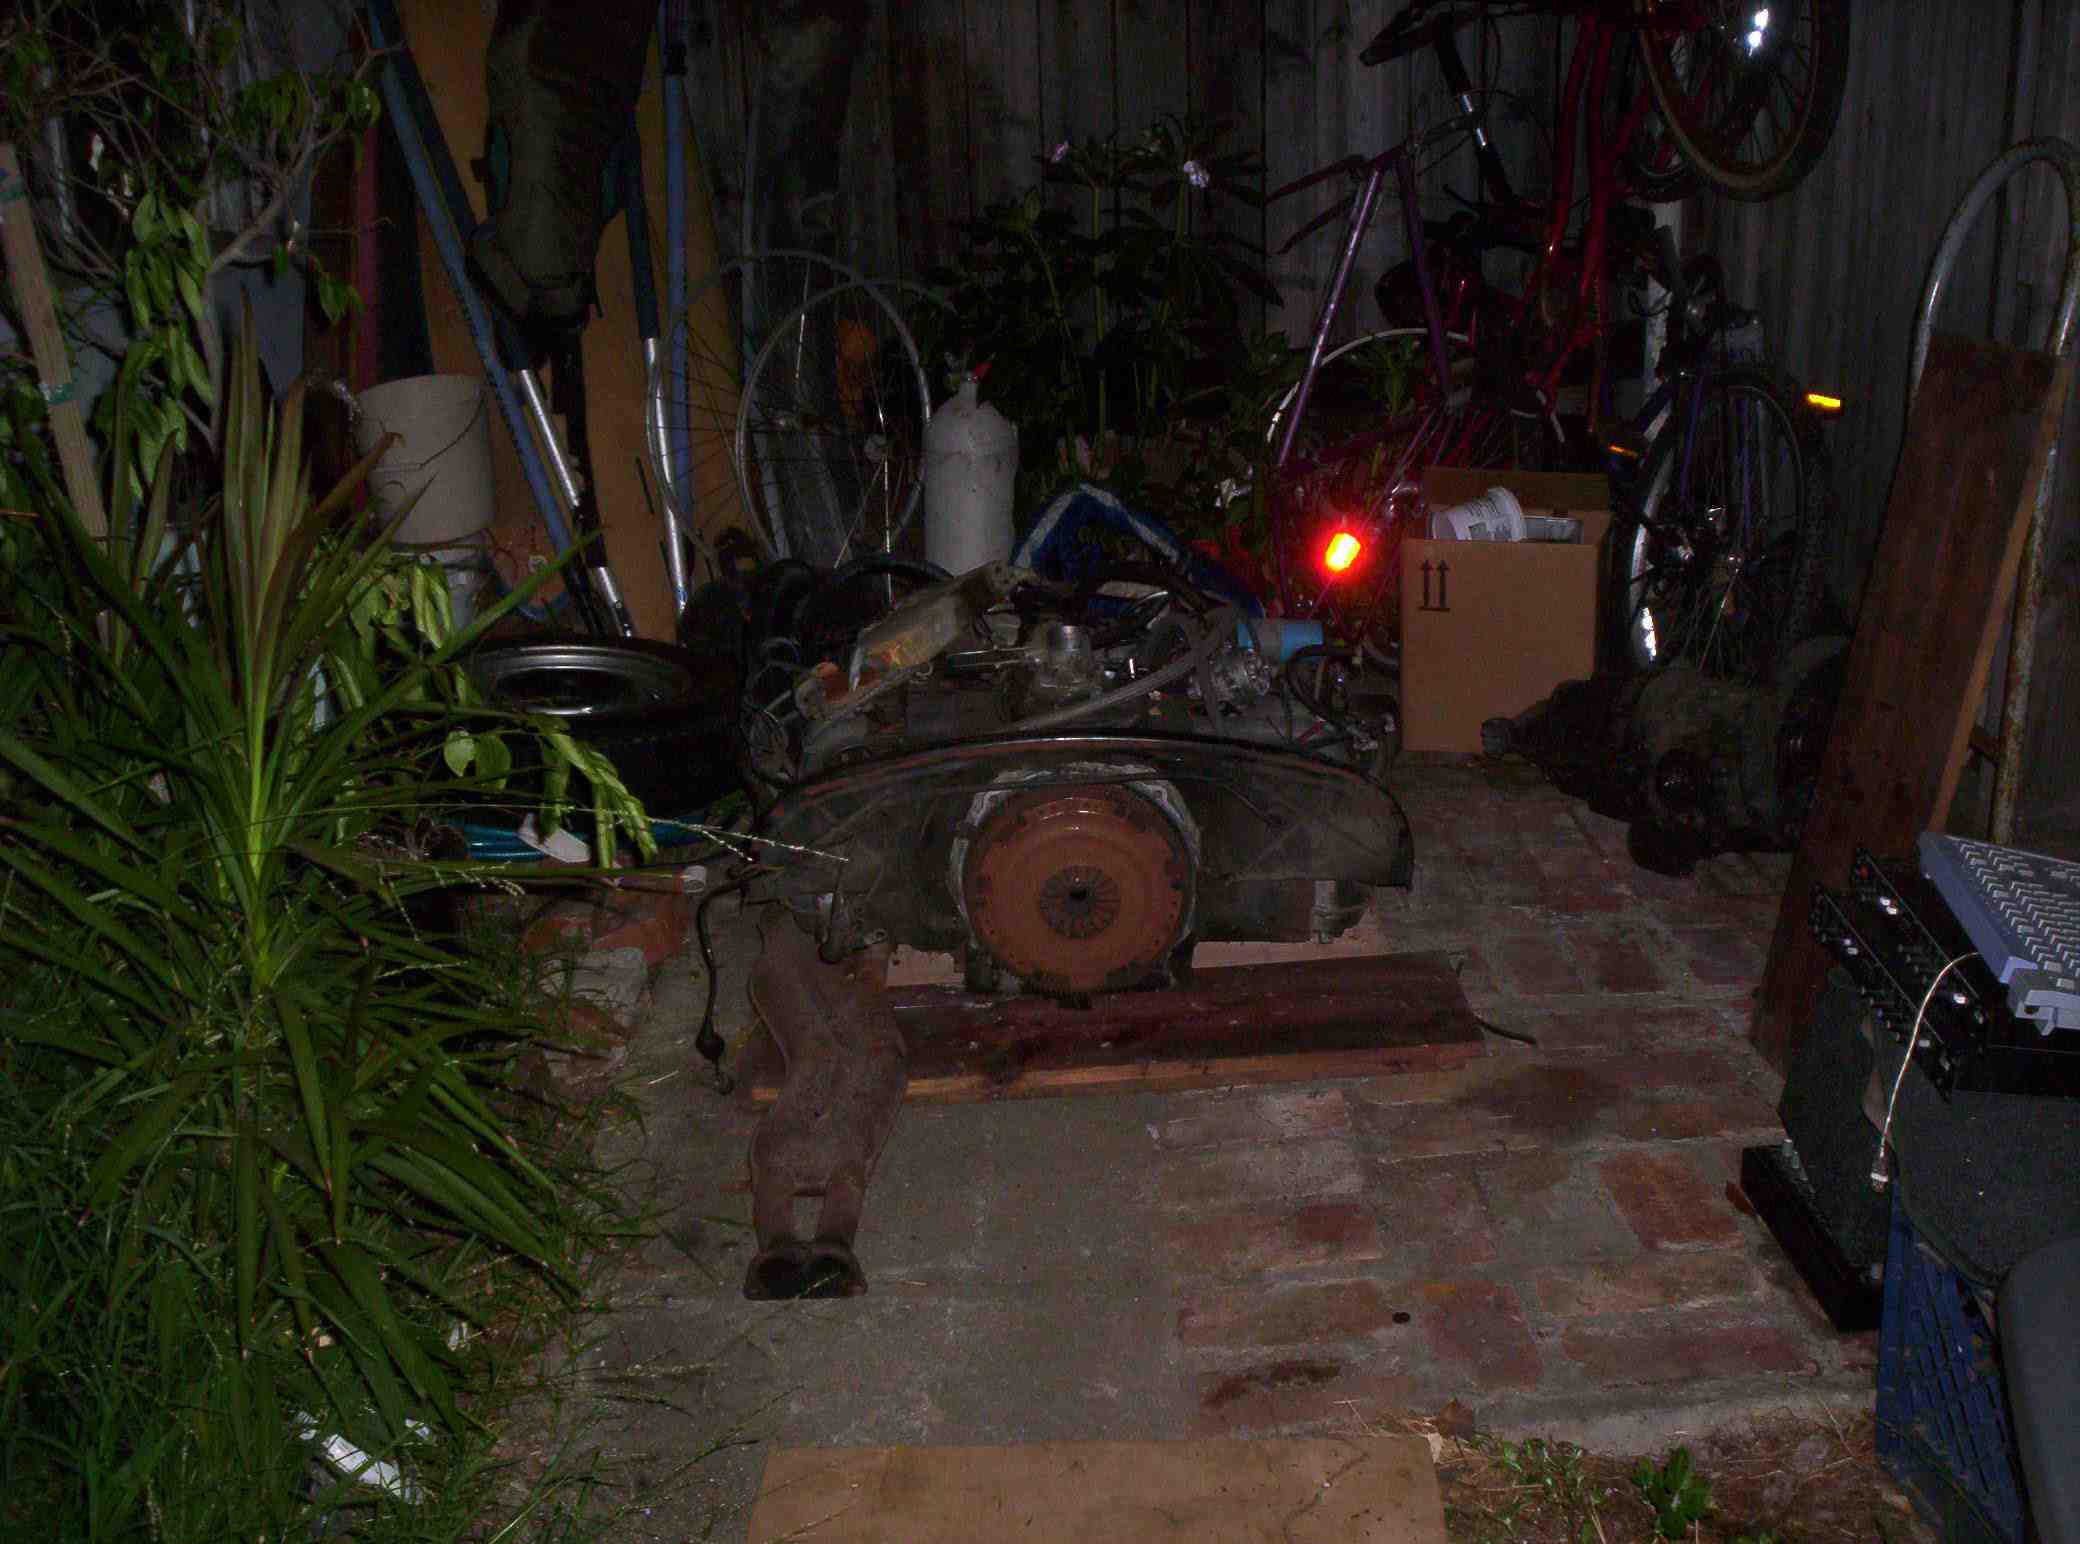
And there she lays. If I had followed Proto31's advice... he would've had me digging a hole in the dirt directly under the car, then dropping the engine into it Mexican style. Then he suggested I'd be better off just filling the pit back in with dirt and lay the damn thing to rest. Sorry to dissappoint you Protozoa.
Posted by: highways Jun 27 2006, 03:39 AM
And lastly.....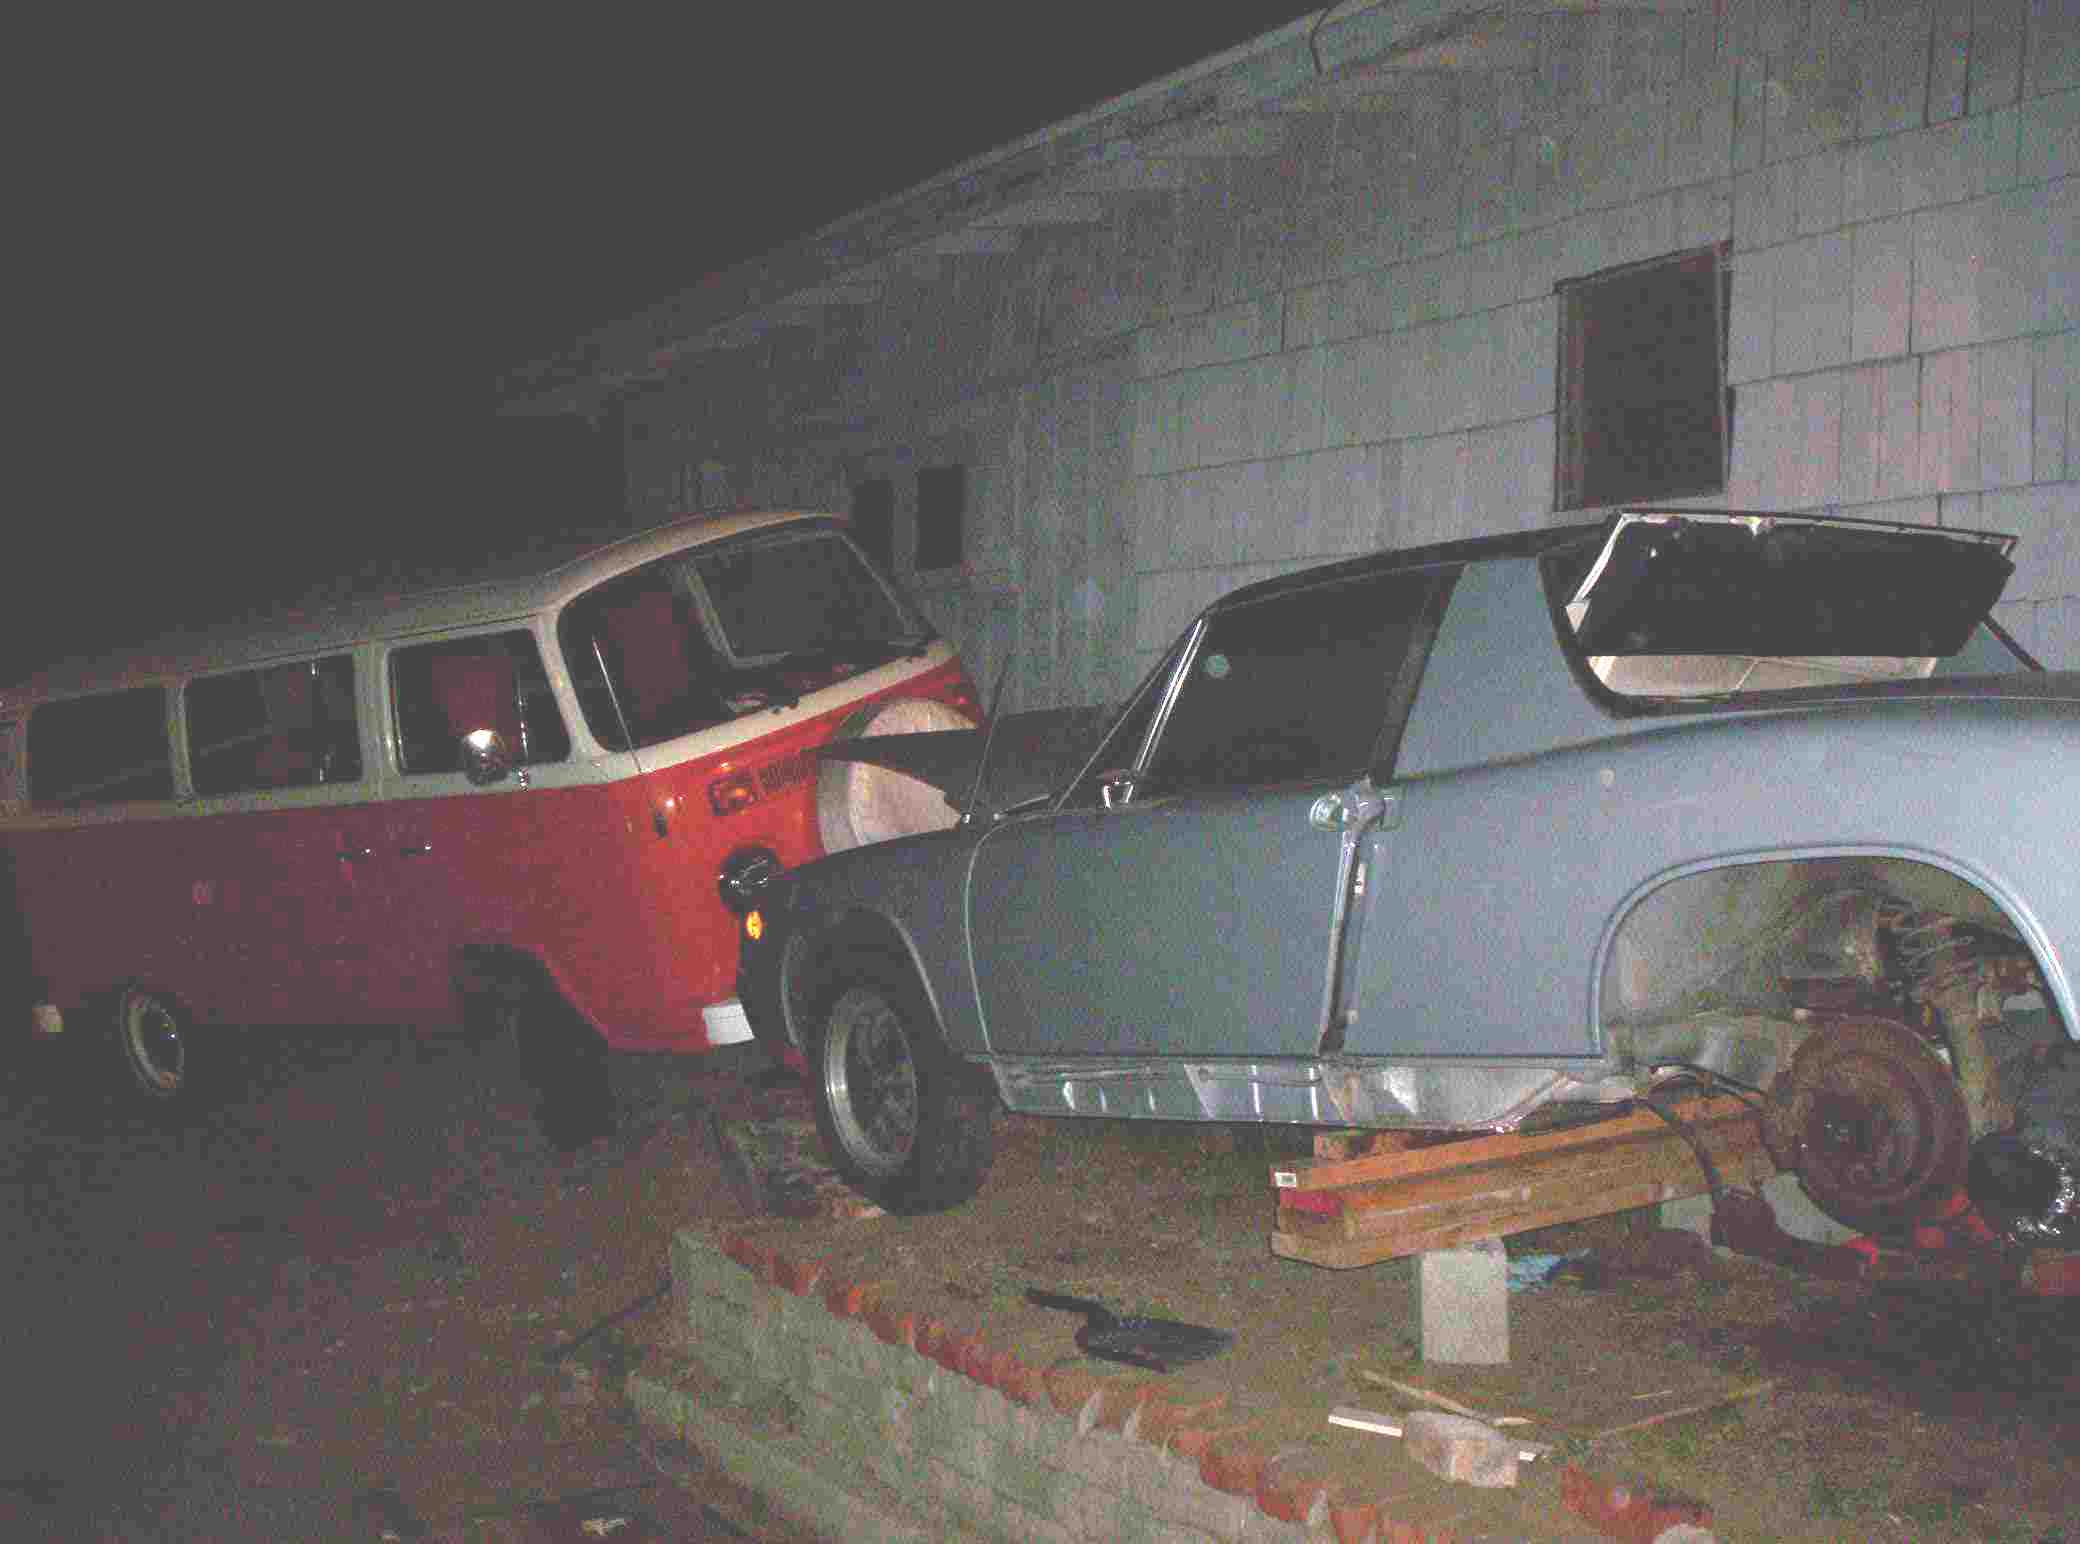
Here's a VW helping a Porsche. Who said they couldn't get along?
Posted by: bottomend Jun 27 2006, 08:41 AM
The goodnight kiss.... 
Posted by: highways Jun 27 2006, 02:04 PM
Yeah whatever... my car was immobolized and your bus went in for the smooch. My Porsche would never kiss a VW if it had 4 wheels... 
Posted by: SirAndy Jun 27 2006, 02:14 PM
well, about time you got off your lazy butt! 
nice to see some progress, feels good, doesn't it?
 Andy
Andy
PS: just remember ... we've all been there. or worse. when you get to that low point where you think "is this ever going to run again?", just think about how much fun it was to drive that thing ...
Posted by: TimT Jun 27 2006, 02:17 PM
Wear eye protection when using that angle grinder!!
Posted by: So.Cal.914 Jun 27 2006, 02:38 PM
I don't know about weldable primer, you do need a good ground and clean metal
to arc to. The liquid in WD40 is a carrier for graphite once the graphite is in place
the liquid is designed to evaporate, you might want to use something more like
gun oil. Sirandy summed it up well, it will be worth it once you are behind the
wheel again, canyons are fun.
Posted by: highways Jun 27 2006, 02:48 PM
Yean you got it... it's the memories of how fun it was to drive that's getting me going. Gotta have a convertable! Cause I like topless cars, fast food, and good women. Er... wait a minute, maybe that's fast cars, topless food and good women. No that's not right. I like good cars, fast food and topless women. Whatever, same difference.
So hey, I want to ask if there's someone who is going to WCC that can help me out on their drive back to southern california by picking-up some wheels I bought in San Jose???? Anybody? As you can see no expence is spared on the Ghetto Garage... but I am trying to avoid full shipping costs. I could certainly help you out with some gas money and a 6 pack if someone could do this pick-up (from CarreraGuy in San Jose) and bring them into the general Los Angeles area where I'll pick them up from you. Any help is greatly appreciated.
And next question... back to stopping the rust once I grind away. Do I.....
a. use a spray bottle to apply muriatic acid- also to get down into the nooks and crannys I can't touch..
b. weldable primer
c. or is WD40/ gun oil the way to go? are you saying I can weld right on top of the oil? Wouldn't it pick up dirt and contaminants by the time I'm ready?
d. any other suggestions?
Posted by: SirAndy Jun 27 2006, 02:54 PM
weldeable primer works good *after* you cleaned out all the rust ...
cut out all the rott, clean as good as you can, then spray the heck out of everything with "Metal Ready". put it in a spray bottle so you can get into all the cracks. spray plenty inside the long as well. let dry.
where you have access, clean off excess metal ready (once dry) with a damp cloth, let dry again, spray with weldable primer, then weld the damm thing shut!
 Andy
Andy
Posted by: Toast Jun 27 2006, 03:04 PM
Ruuuuuuuust! 
It's gonna be a close race.
Good Luck!
p.s. Thanks for the laughs. 
Posted by: bottomend Jun 27 2006, 04:19 PM
Acid is fun to play with but I dont know if I'd put it in a sprayer... I take that back.... I WOULD NEVER PUT IT IN A SPRAYER. it's too uncontrollable in that form. One good wiff of that stuff and you're going down... maybe for good. You know... THE LONG, UN-ENDING NAP. ![yellowsleep[1].gif](style_emoticons/default/yellowsleep[1].gif)
Posted by: highways Jun 27 2006, 04:56 PM
Proto31 likes his Muriatic in a sprayer... says it helps him get rid of hangovers in the morning after working on his beer machine. That guy is nuts  . Anyway it sorta helps keep him smelling less atrocious, since he doesn't shower every month.
Posted by: proto31 Jun 27 2006, 11:01 PM
 I can't beleive the slanderous comments that have been thrown my way. You try to give a guy a reason to get his car done, and then, that's right, and then he has the nerve to poke fun at Mexicans. Why?
  Highways (or more appropriatly- driveways), where would you be on that restoration had I not removed that damp set of crotchless euro undies out of the front trunk where it had been creeping for years, sitting there, recruting more rust devils
On a more serious note, I would not use any oil or grease type substance to coat your newly cleaned up areas of metal. It will prevent more rust, for now, but eventually you will have to get that stuff off before you can paint. Good luck trying to get all the oil out of all of the rust craters. 
I'd agree with Andy's approach, I can pick you up some weld-thru primer if you need it, but first you have to promise to stopping dissing Mexicans.
Posted by: highways Jun 30 2006, 03:53 AM
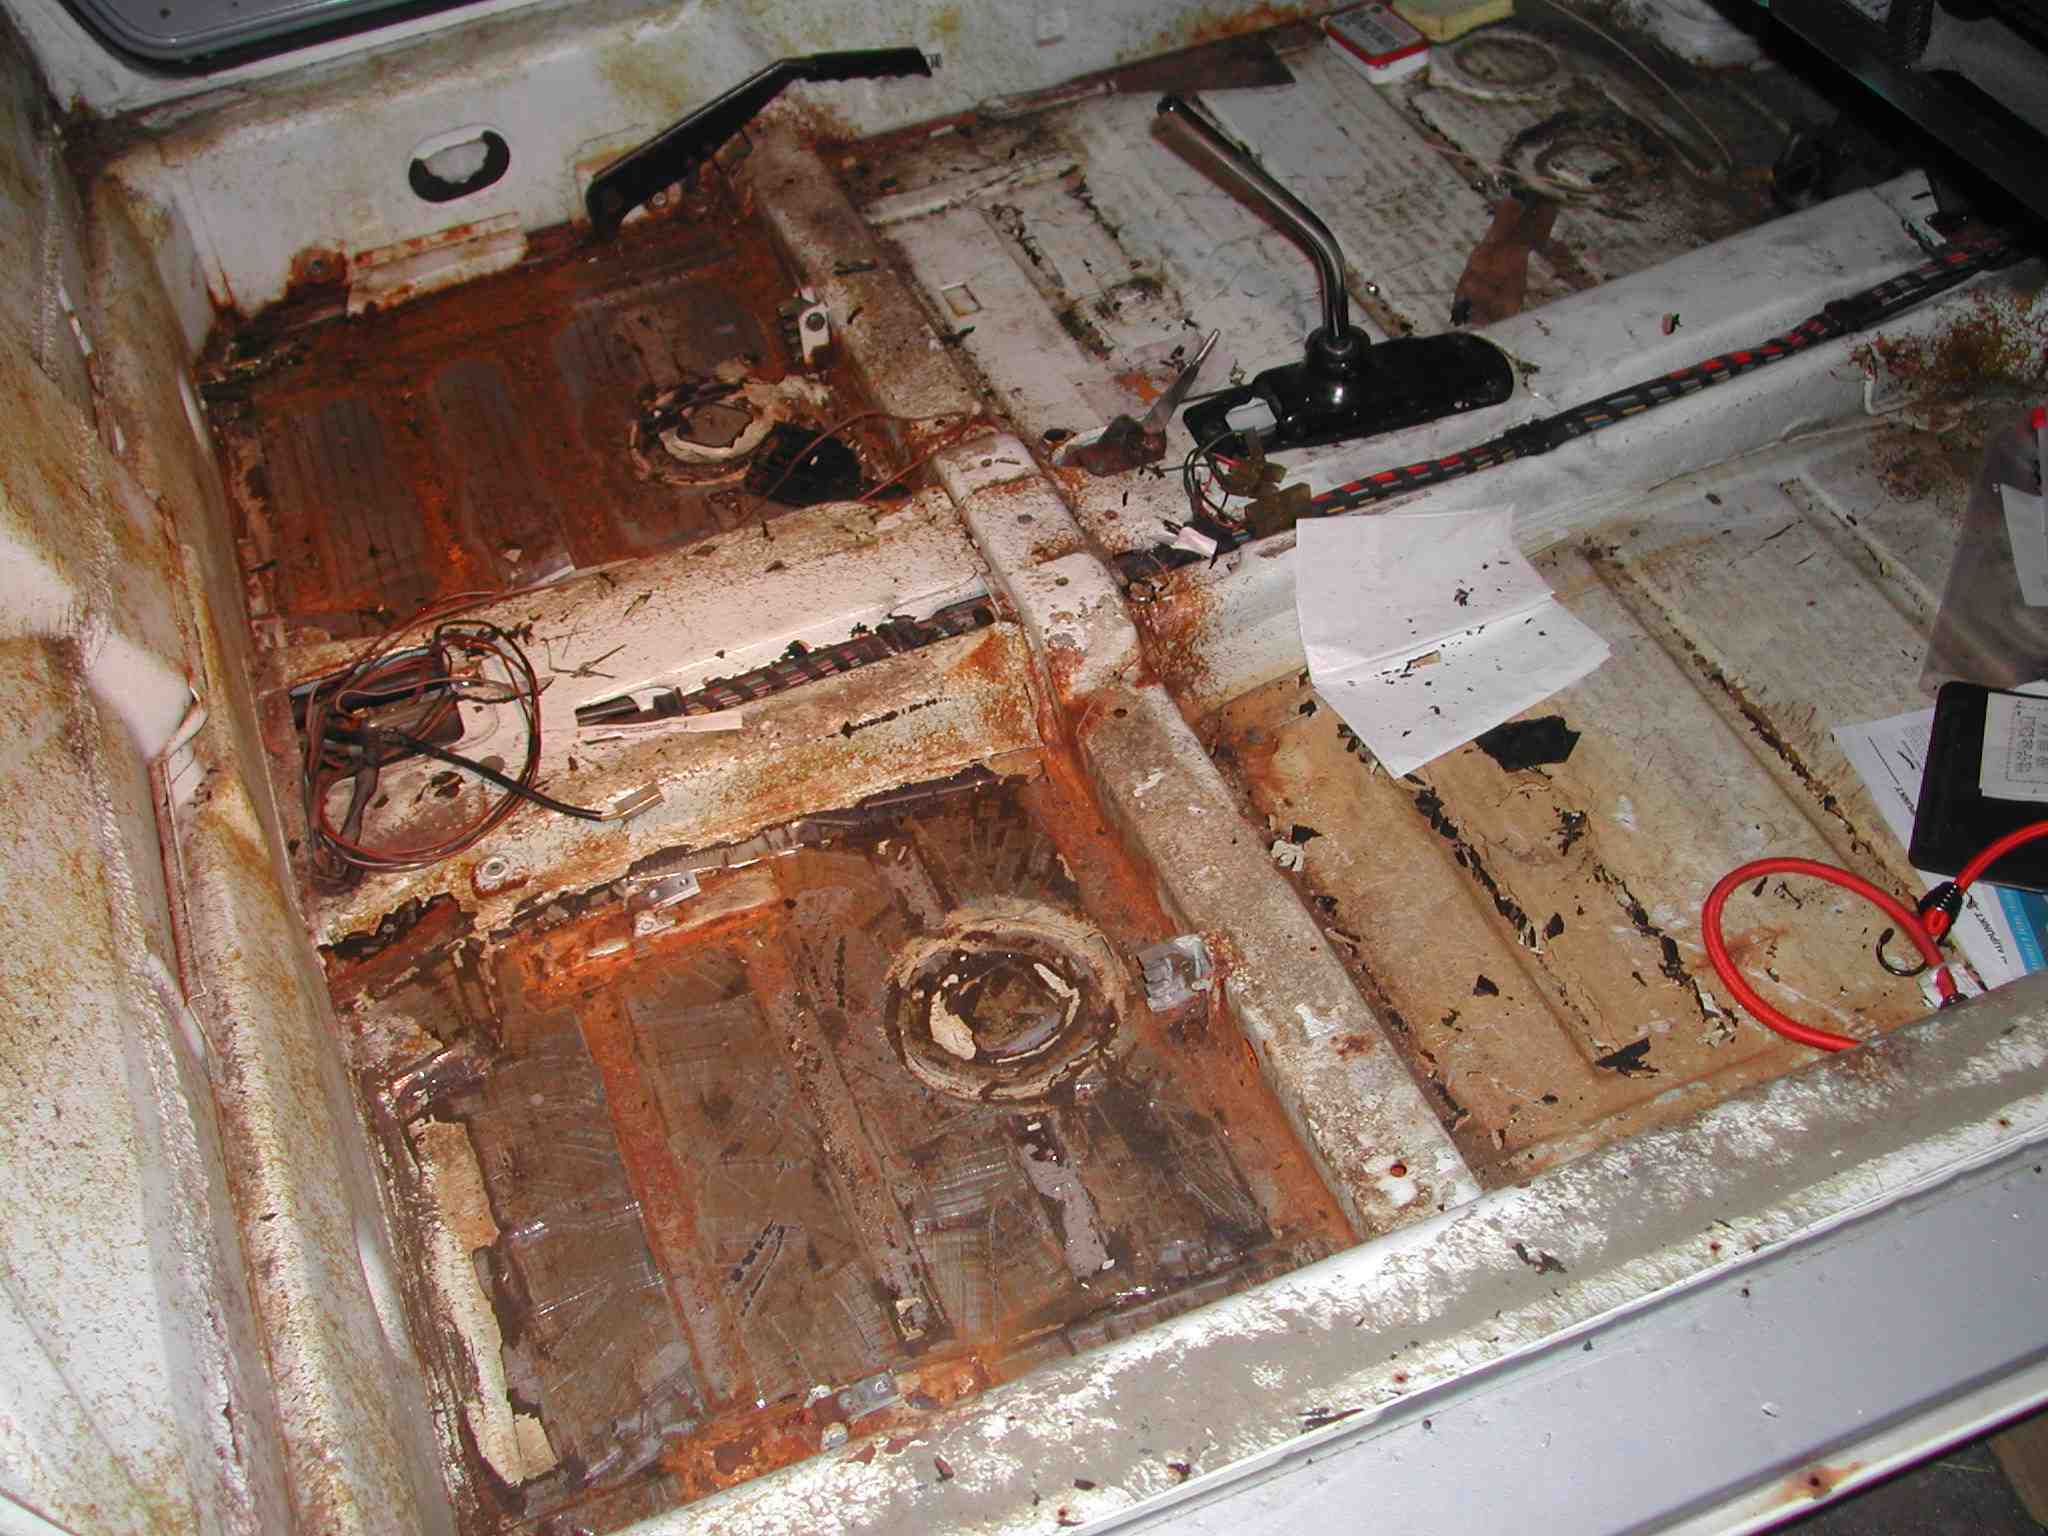
Hey Proto, you're missing out on all the fun man! This is SO much fun, fun fun fun! Why don't you come over next weekend and I might let do some too... Removing TAR from the floor boards so I can get to the rust. I love it. Although I think I would recommend to others who wish to go this route... DON'T. Get a pet goat. Put them in there, hungry. Goats will eat anything eventually. It's gotta be easier then what I'm doing.... 
Posted by: highways Jun 30 2006, 03:59 AM
One evening per side, hammer and chissel. And I haven't even dared to touch the front floor boards. I was hoping I could leave them alone... maybe I will cause they don't look as bad. Or maybe I should just go all out... decisions decisions 
This passenger side wasn't too bad I think, but the rust was starting. And being that the drivers seat bracket came off when I sneezed, I figured I had to do both.
Posted by: highways Jun 30 2006, 04:14 AM
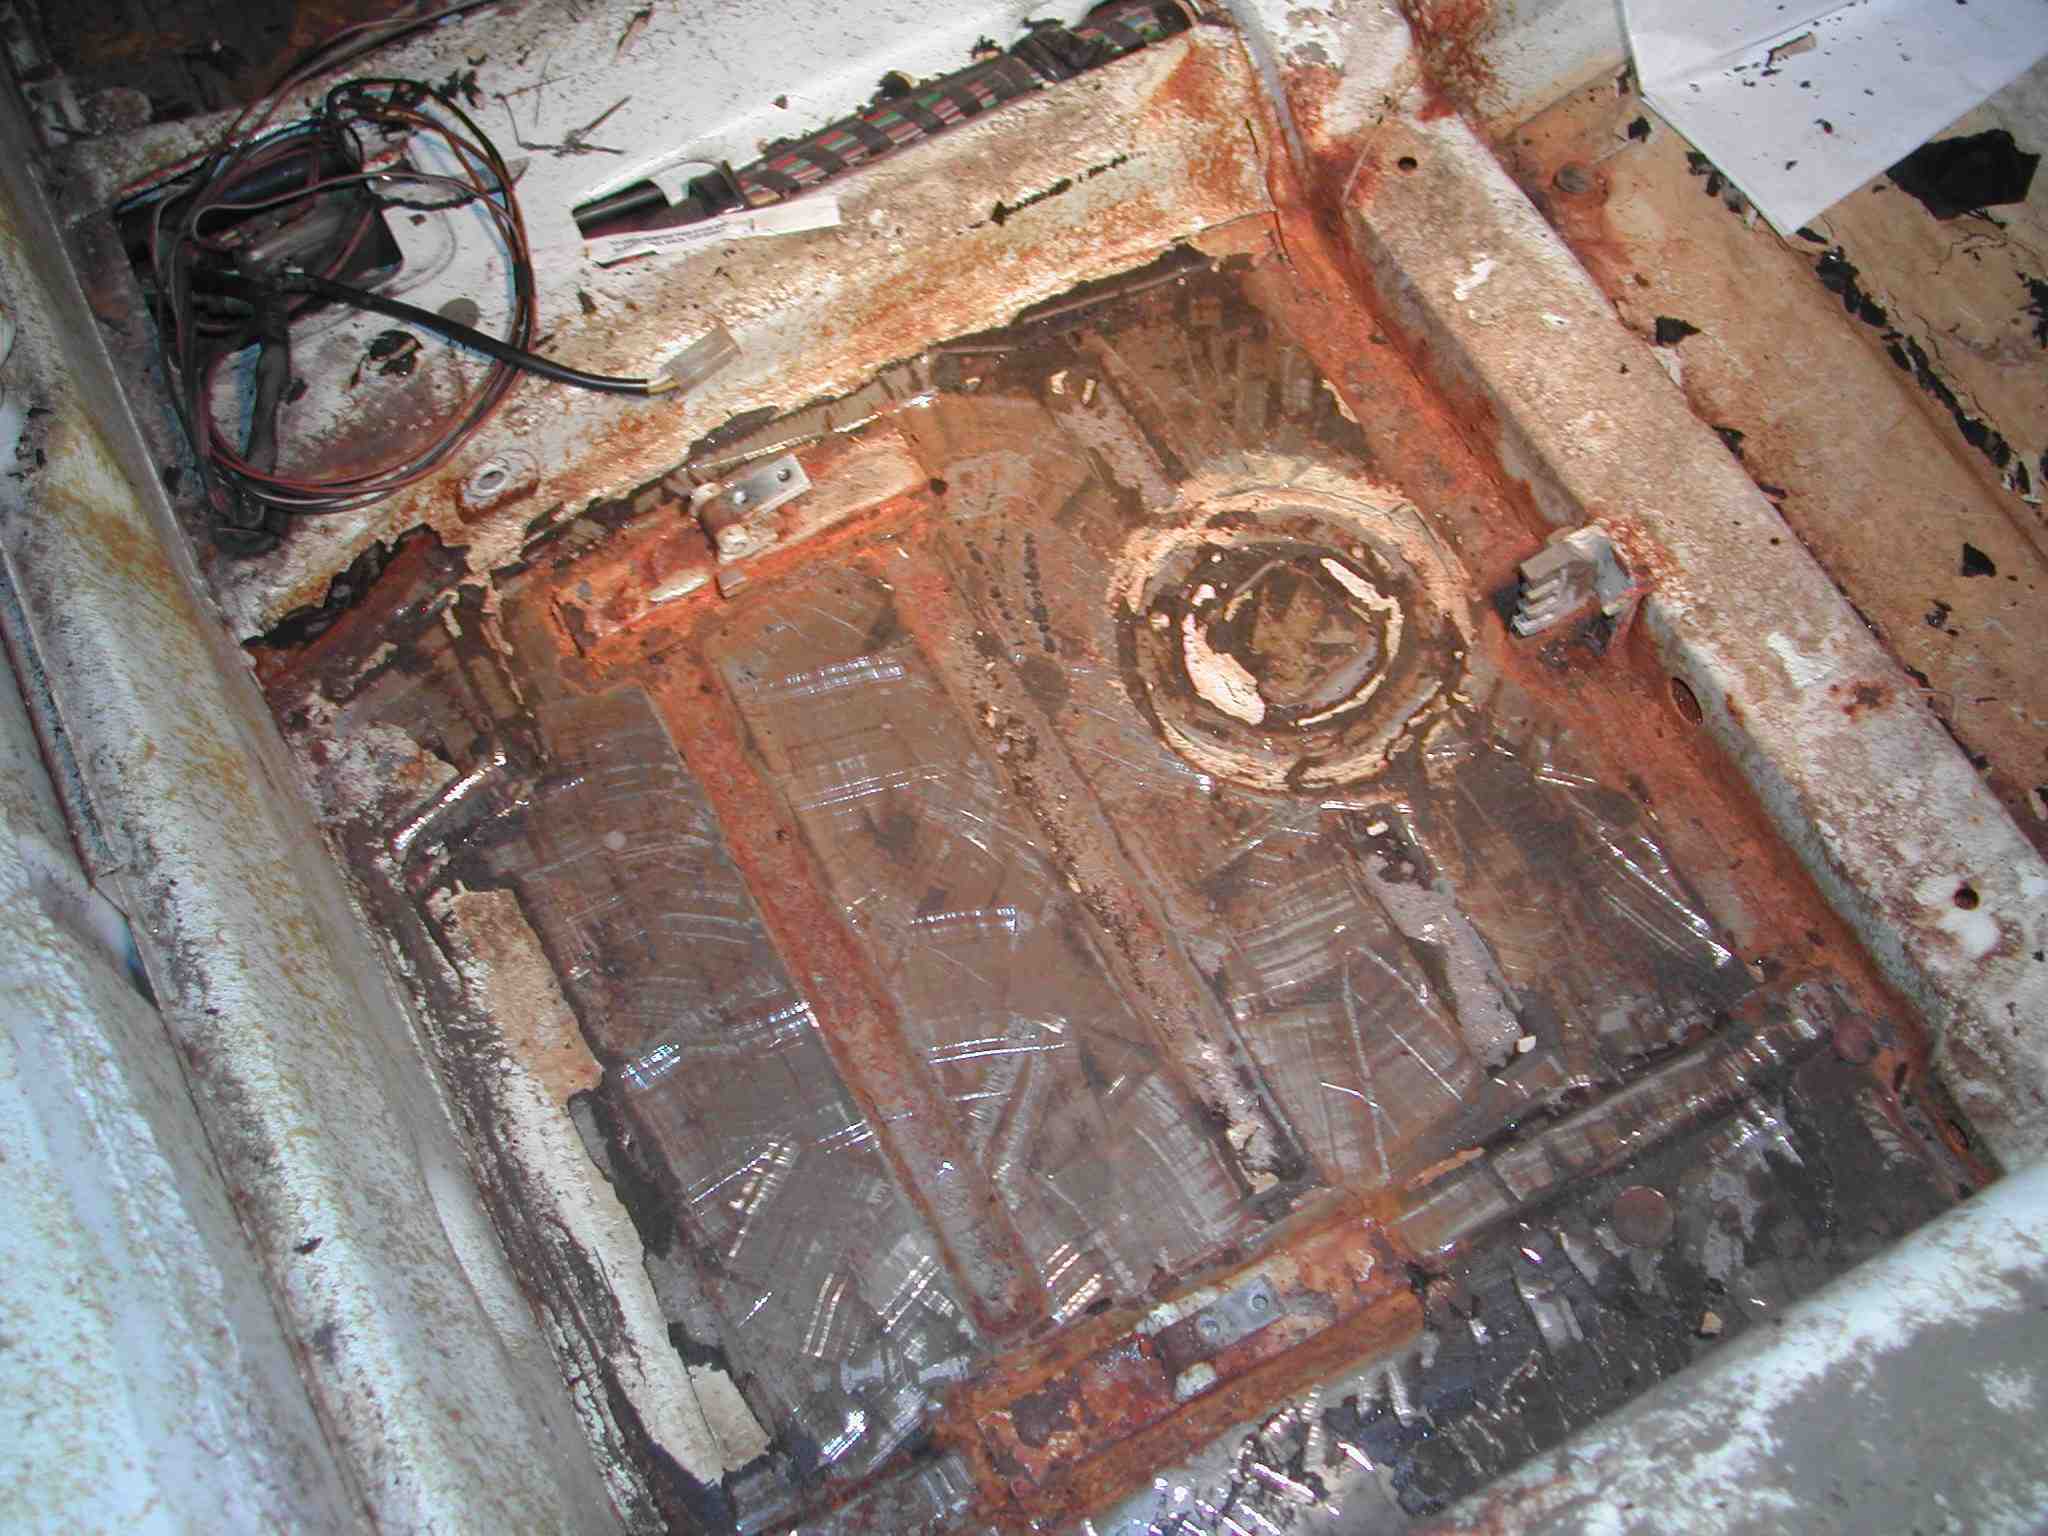
So here's a real question I need help on. I was planning on getting the new $190 suspension console sheet metal replacement from Pelican or somewhere. But I was looking at the pic of what they sell- and it sorta looks like it's only 1/2 or only one side of the console. Is that true? Or do they infact sell the complete console? The rust in mine seems to continue right up to the longitudinal (towards the left in this pic)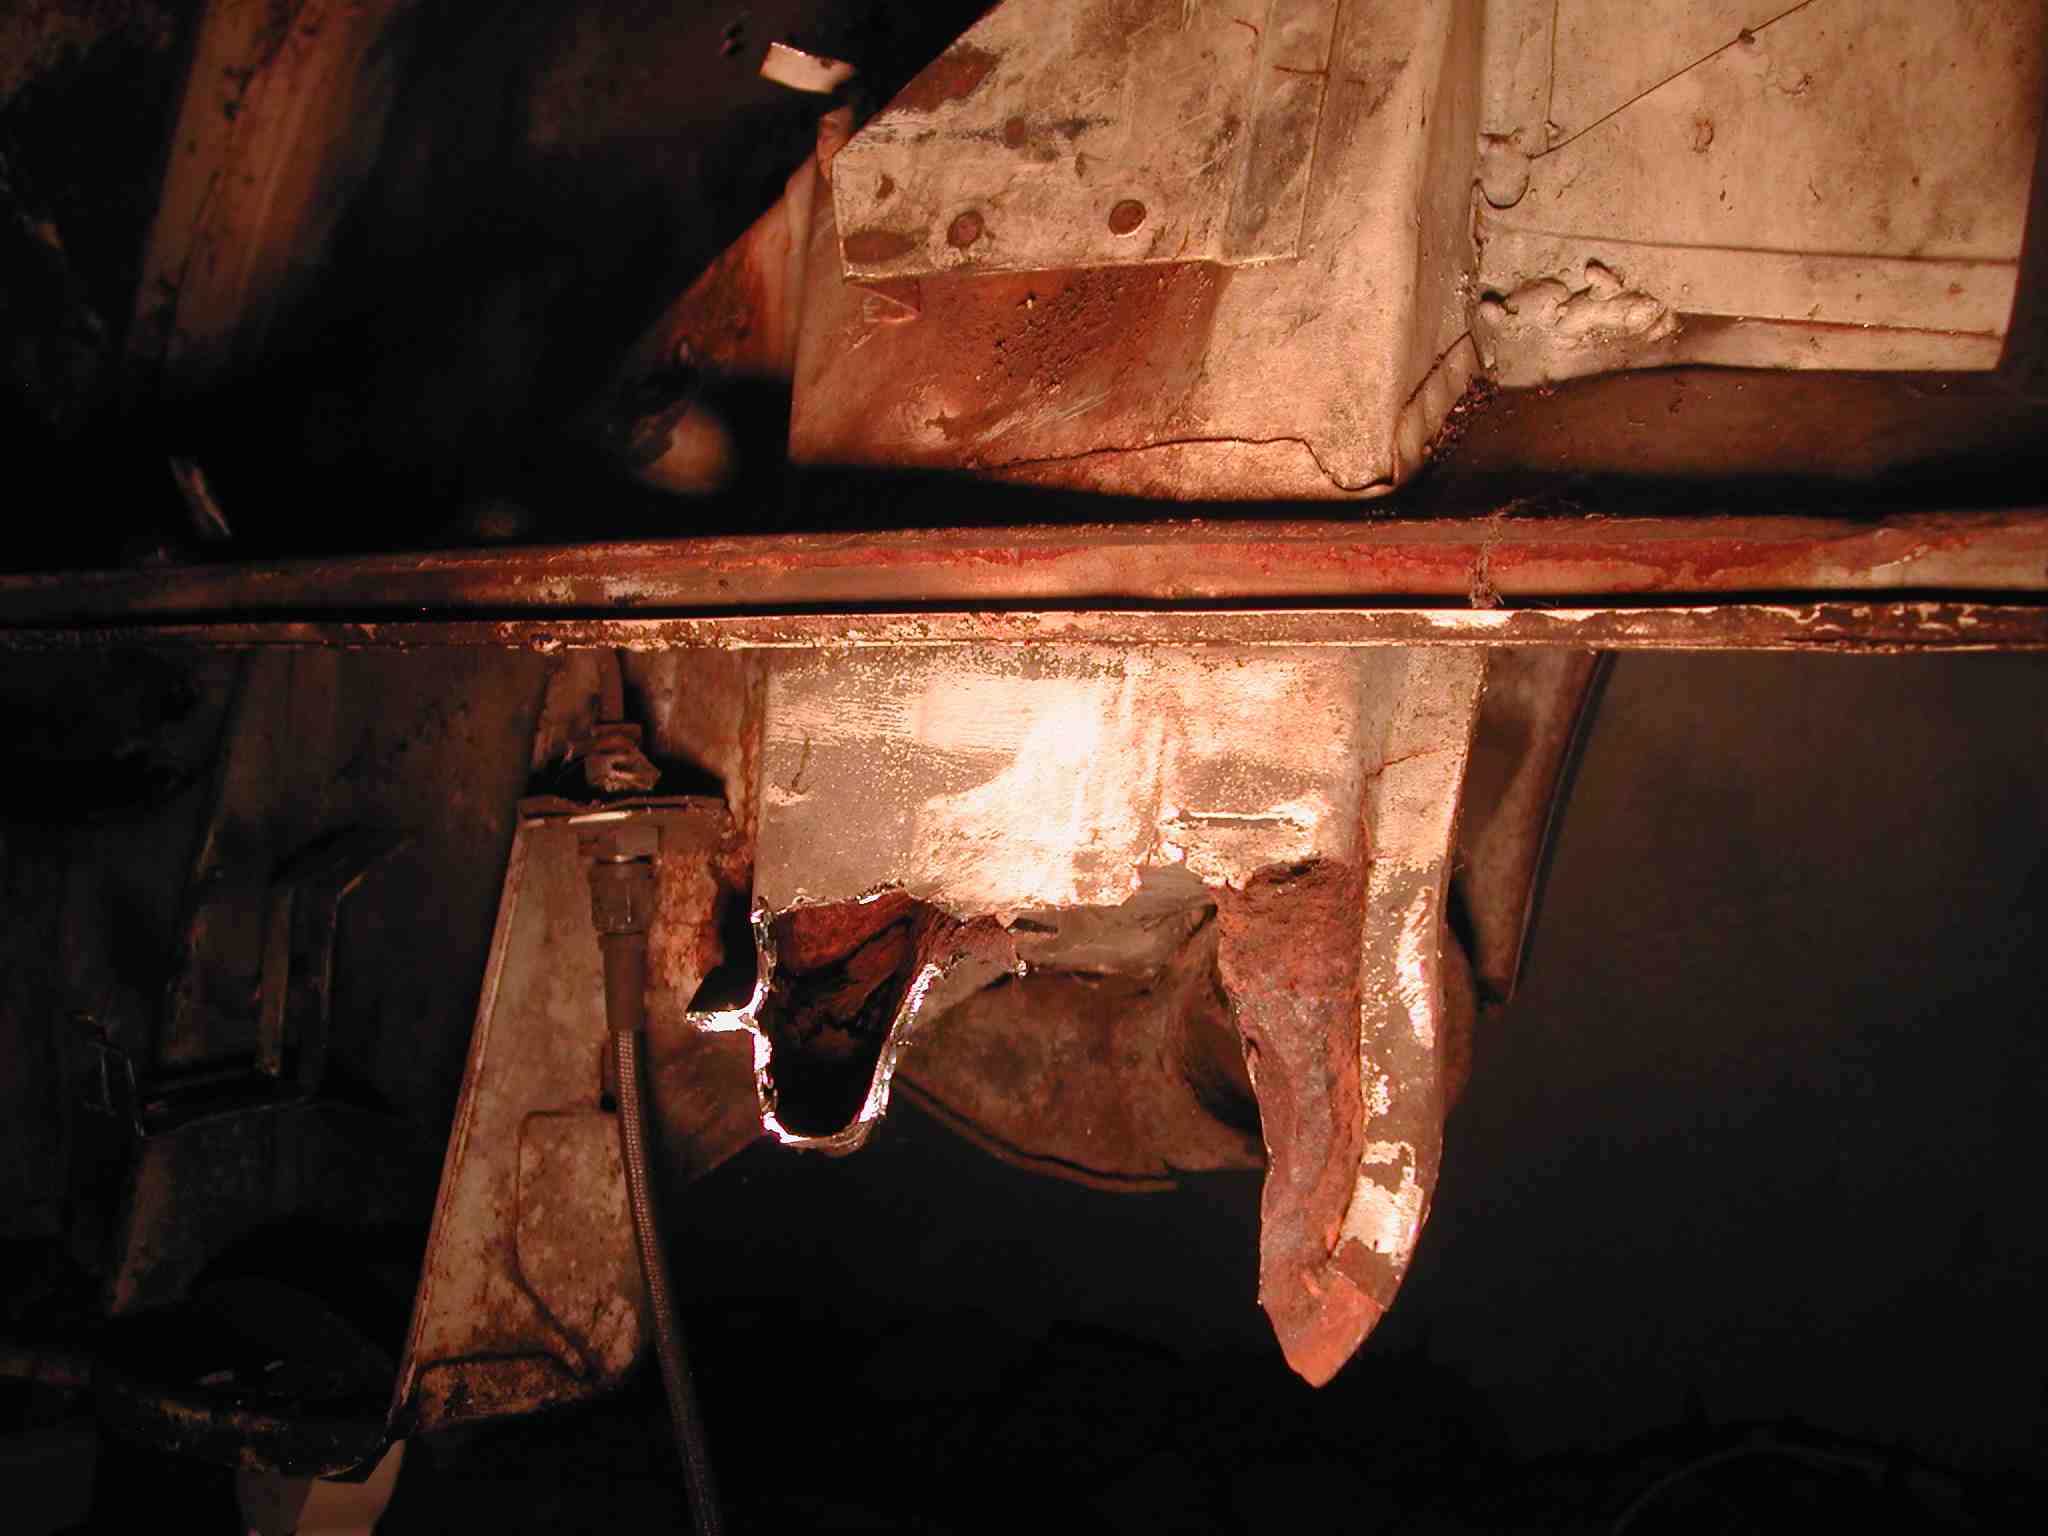
So far my plan of attack is to just start cutting back a couple inches at a time until I think I reach some decent metal. I'm worried that this could go pretty far forward and might exceed the size of the replacement console Pelican sells. Anybody have any suggestions? I'm also thinking of drilling out all the welds on the current console and removing it entirely. Will the replacement cover me? Maybe I'm not looking at it right.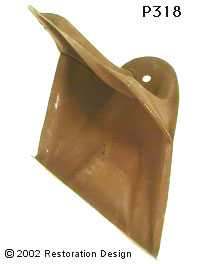
Posted by: turbo914v8 Jun 30 2006, 07:06 AM
You are defiantly on the right track. The part you have pictured is from RD and the view you are seeing is up side down. To answer your question yes it will replace your entire suspension console. It is actually two pieces spot welded together. Go with your second plan and remover the spot welds from your rusted suspension console and remove it. That is the best way to see how bad the rust damage is. By the way that part will dip into your pocket at @ $200.00 US. 
Posted by: bluiewest1 Jun 30 2006, 10:07 AM
 I can't beleive the slanderous comments that have been thrown my way. You try to give a guy a reason to get his car done, and then, that's right, and then he has the nerve to poke fun at Mexicans. Why? Highways (or more appropriatly- driveways), where would you be on that restoration had I not removed that damp set of crotchless euro undies out of the front trunk where it had been creeping for years, sitting there, recruting more rust devils
 On a more serious note, I would not use any oil or grease type substance to coat your newly cleaned up areas of metal. It will prevent more rust, for now, but eventually you will have to get that stuff off before you can paint. Good luck trying to get all the oil out of all of the rust craters.
I'd agree with Andy's approach, I can pick you up some weld-thru primer if you need it, but first you have to promise to stopping dissing Mexicans.
You might want to try a product by the name of Ospho. It is a phosphoric acid solution that preps the steel for painting. It not only etches the metal but forms a thin layer of iron phosphate that will slow surface rusting in the short term. You should be able to find Ospho at your local Ace Hardware or go to http://www.ospho.com/ for other retailers.
Posted by: proto31 Jun 30 2006, 02:46 PM
Nice work Driveways! I didn't think you had it in you... Well I'd say the best plan at this point is to douse the entire bird flu infested carcas with gasoline, let it sit for a few minutes. This will help it soak into all the nooks and cranies, and then drop a match on it- the best 4th of July fireworks show on your block, guaranteed or I'll reimburse you for all the gasoline you use. 
Posted by: highways Jun 30 2006, 03:03 PM
My car is not a Buddhist. It is finely tuned Vertriebsgesellschaf. 
Posted by: highways Jun 30 2006, 05:54 PM
Ospho sounds good. Thanks for the tip. Is it safe for welding?
And just cause I'm shopping around, anybody know where I can get 'Metal Ready' and Weldable Primer? I wanna buy my supplies tomorrow to do some work on the holiday... worried that specialty suppliers wont be open.
Posted by: proto31 Jul 4 2006, 11:48 PM
 I have heard, thru the grapevine, that smearing cocker spaniel fecies on the rusted areas actually turns the rust into gold! We all know that gold is a soft metal so you should remove it, but at least you no longer have any rust left, rights?
Posted by: McMark Jul 5 2006, 03:24 AM
Ospho, Metal Ready, Rust-Mort, etc are all phosphoric acid solutions. Same shit. Works great for stopping rust, but you'll need to grind to shiny metal just before you weld. The better you clean the metal (bright & shiny) the better your welds will be.  Looking good so far. Keep up the good work and the momentum.
Once you have the replacement suspension console in your hand you'll know exactly where it goes. Drill out the old spot welds and drill holes in the new piece and then plug weld the holes. The trickiest part is on the underside of the long. PITA. You'll see. Take measurements off the drivers side to double check your positioning before you do the final welding.
Posted by: watsonrx13 Jul 5 2006, 04:03 AM
Looking good so far...keep up the good work...
Here's a http://www.tampabay914.com/7491408292004.html to my website that show's how I removed and installed my suspension console....
Good luck...
-- Rob
Posted by: proto31 Jul 6 2006, 02:10 PM


 Stop talking to your dog so much and start fixing your car! It's not going to fix itself, despite what your dog says...
Posted by: highways Jul 25 2006, 02:31 AM
BIG News! Check it out....
Old Supension Console....
Posted by: highways Jul 25 2006, 02:33 AM
New Suspension Console...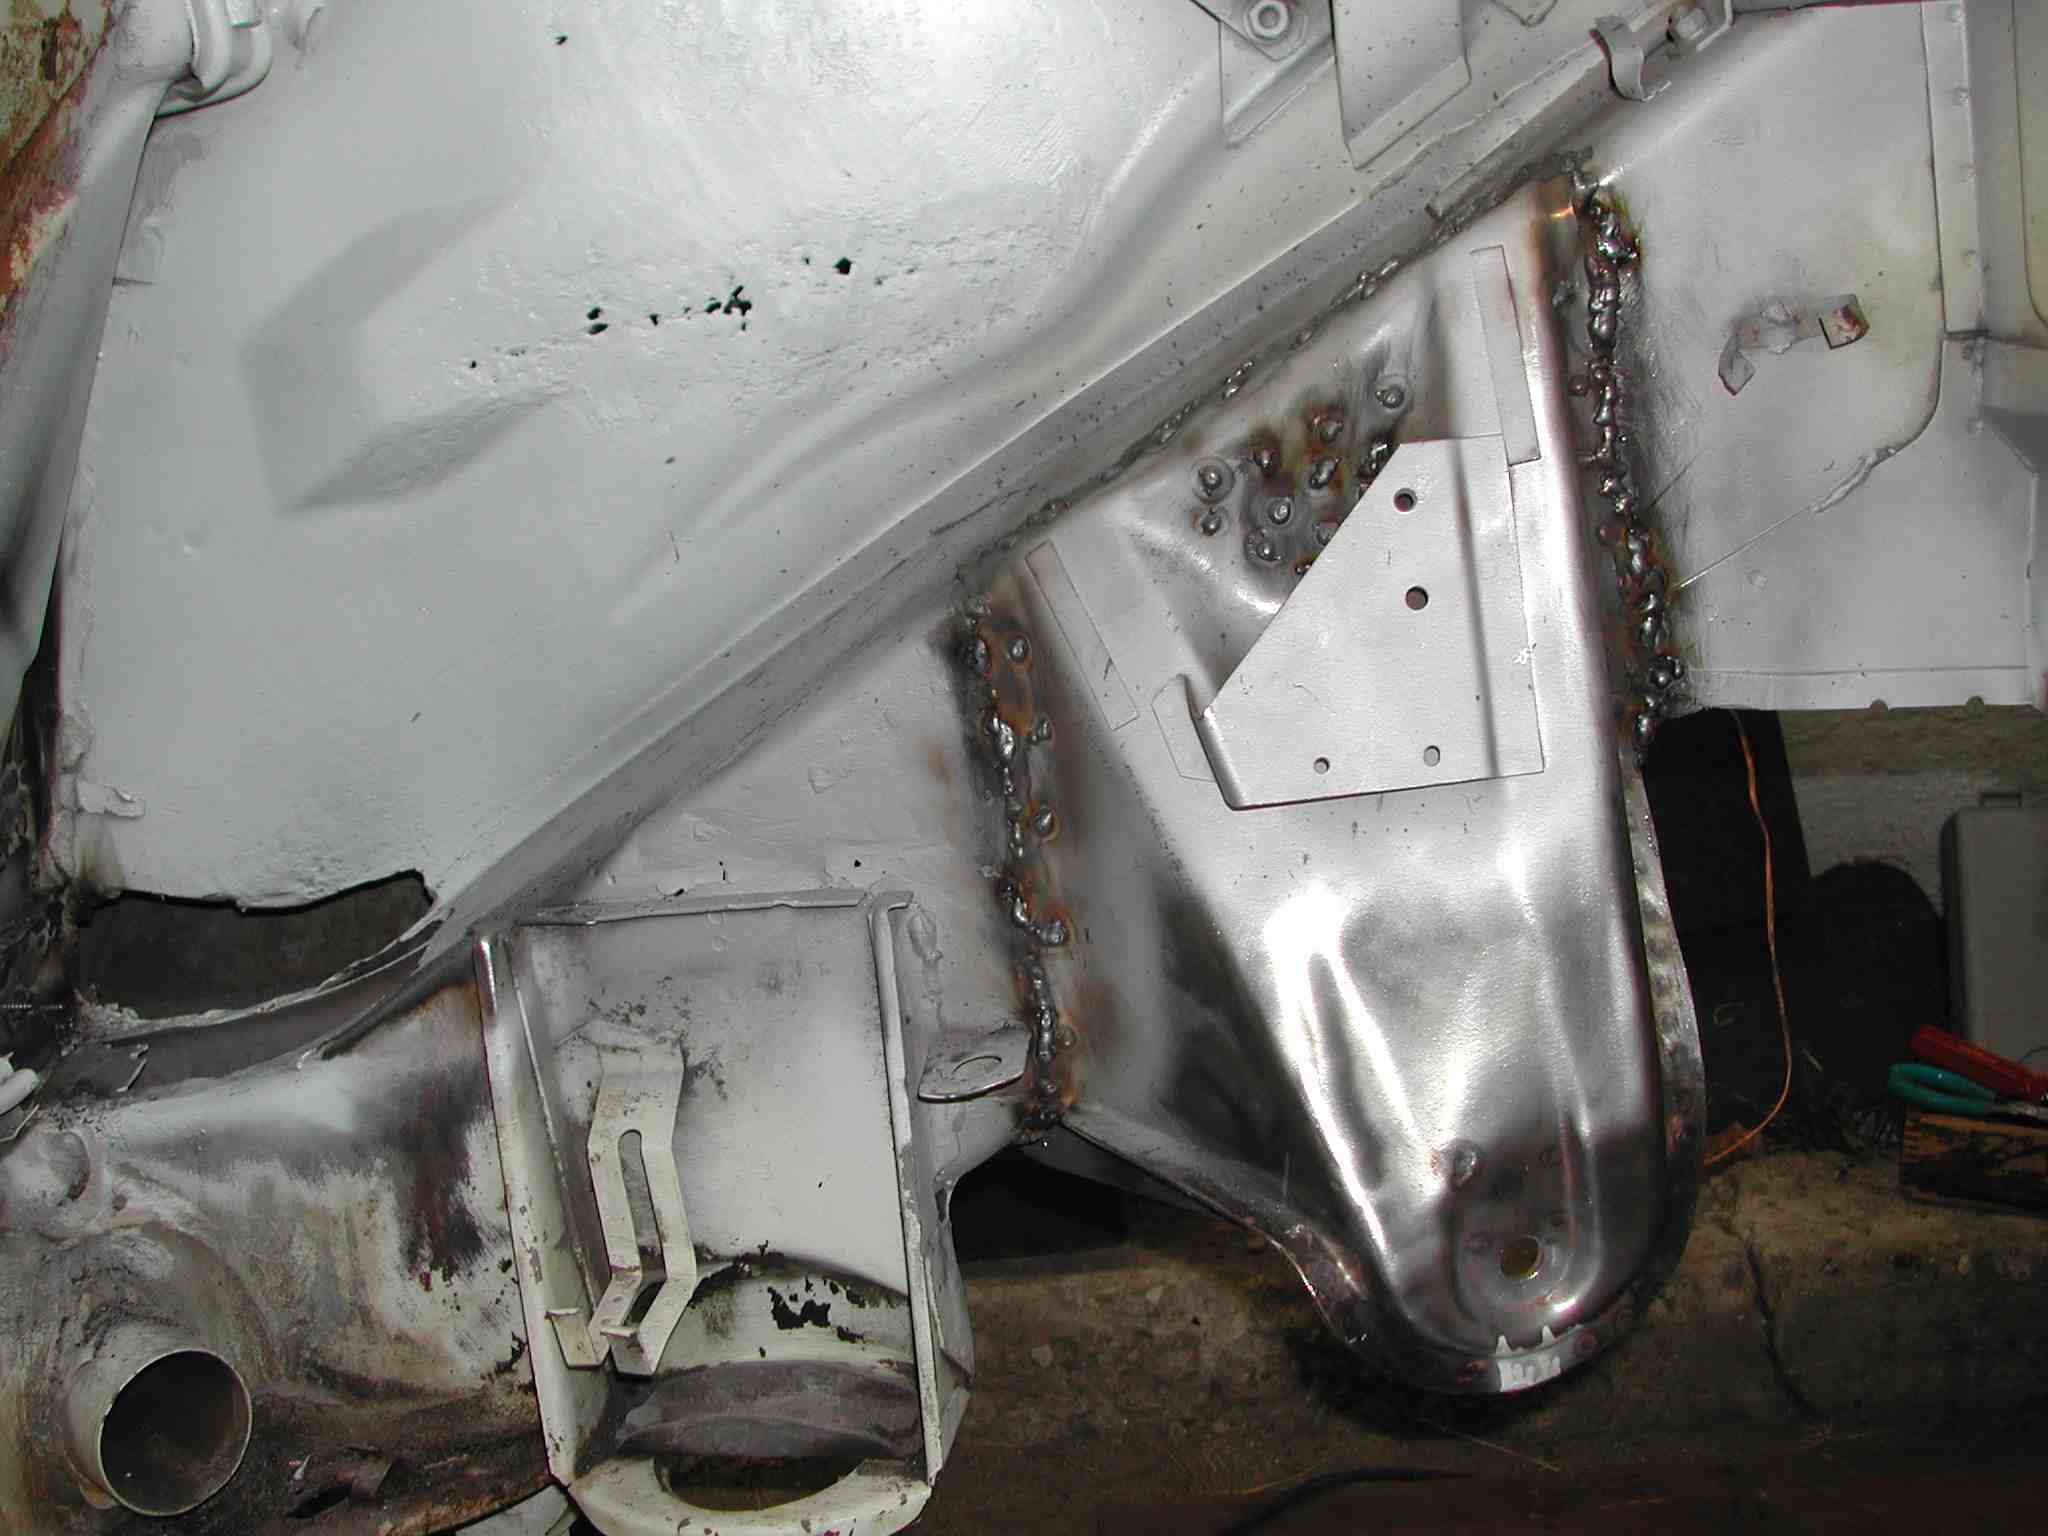
Thanks you DSRIDDLEIII for selling me this with the fast shipping so I could get this project moving!
Posted by: highways Jul 25 2006, 02:36 AM
Example of my welds: ok I know it's not the Mona Lisa, but I got good penetration and I'm smiling 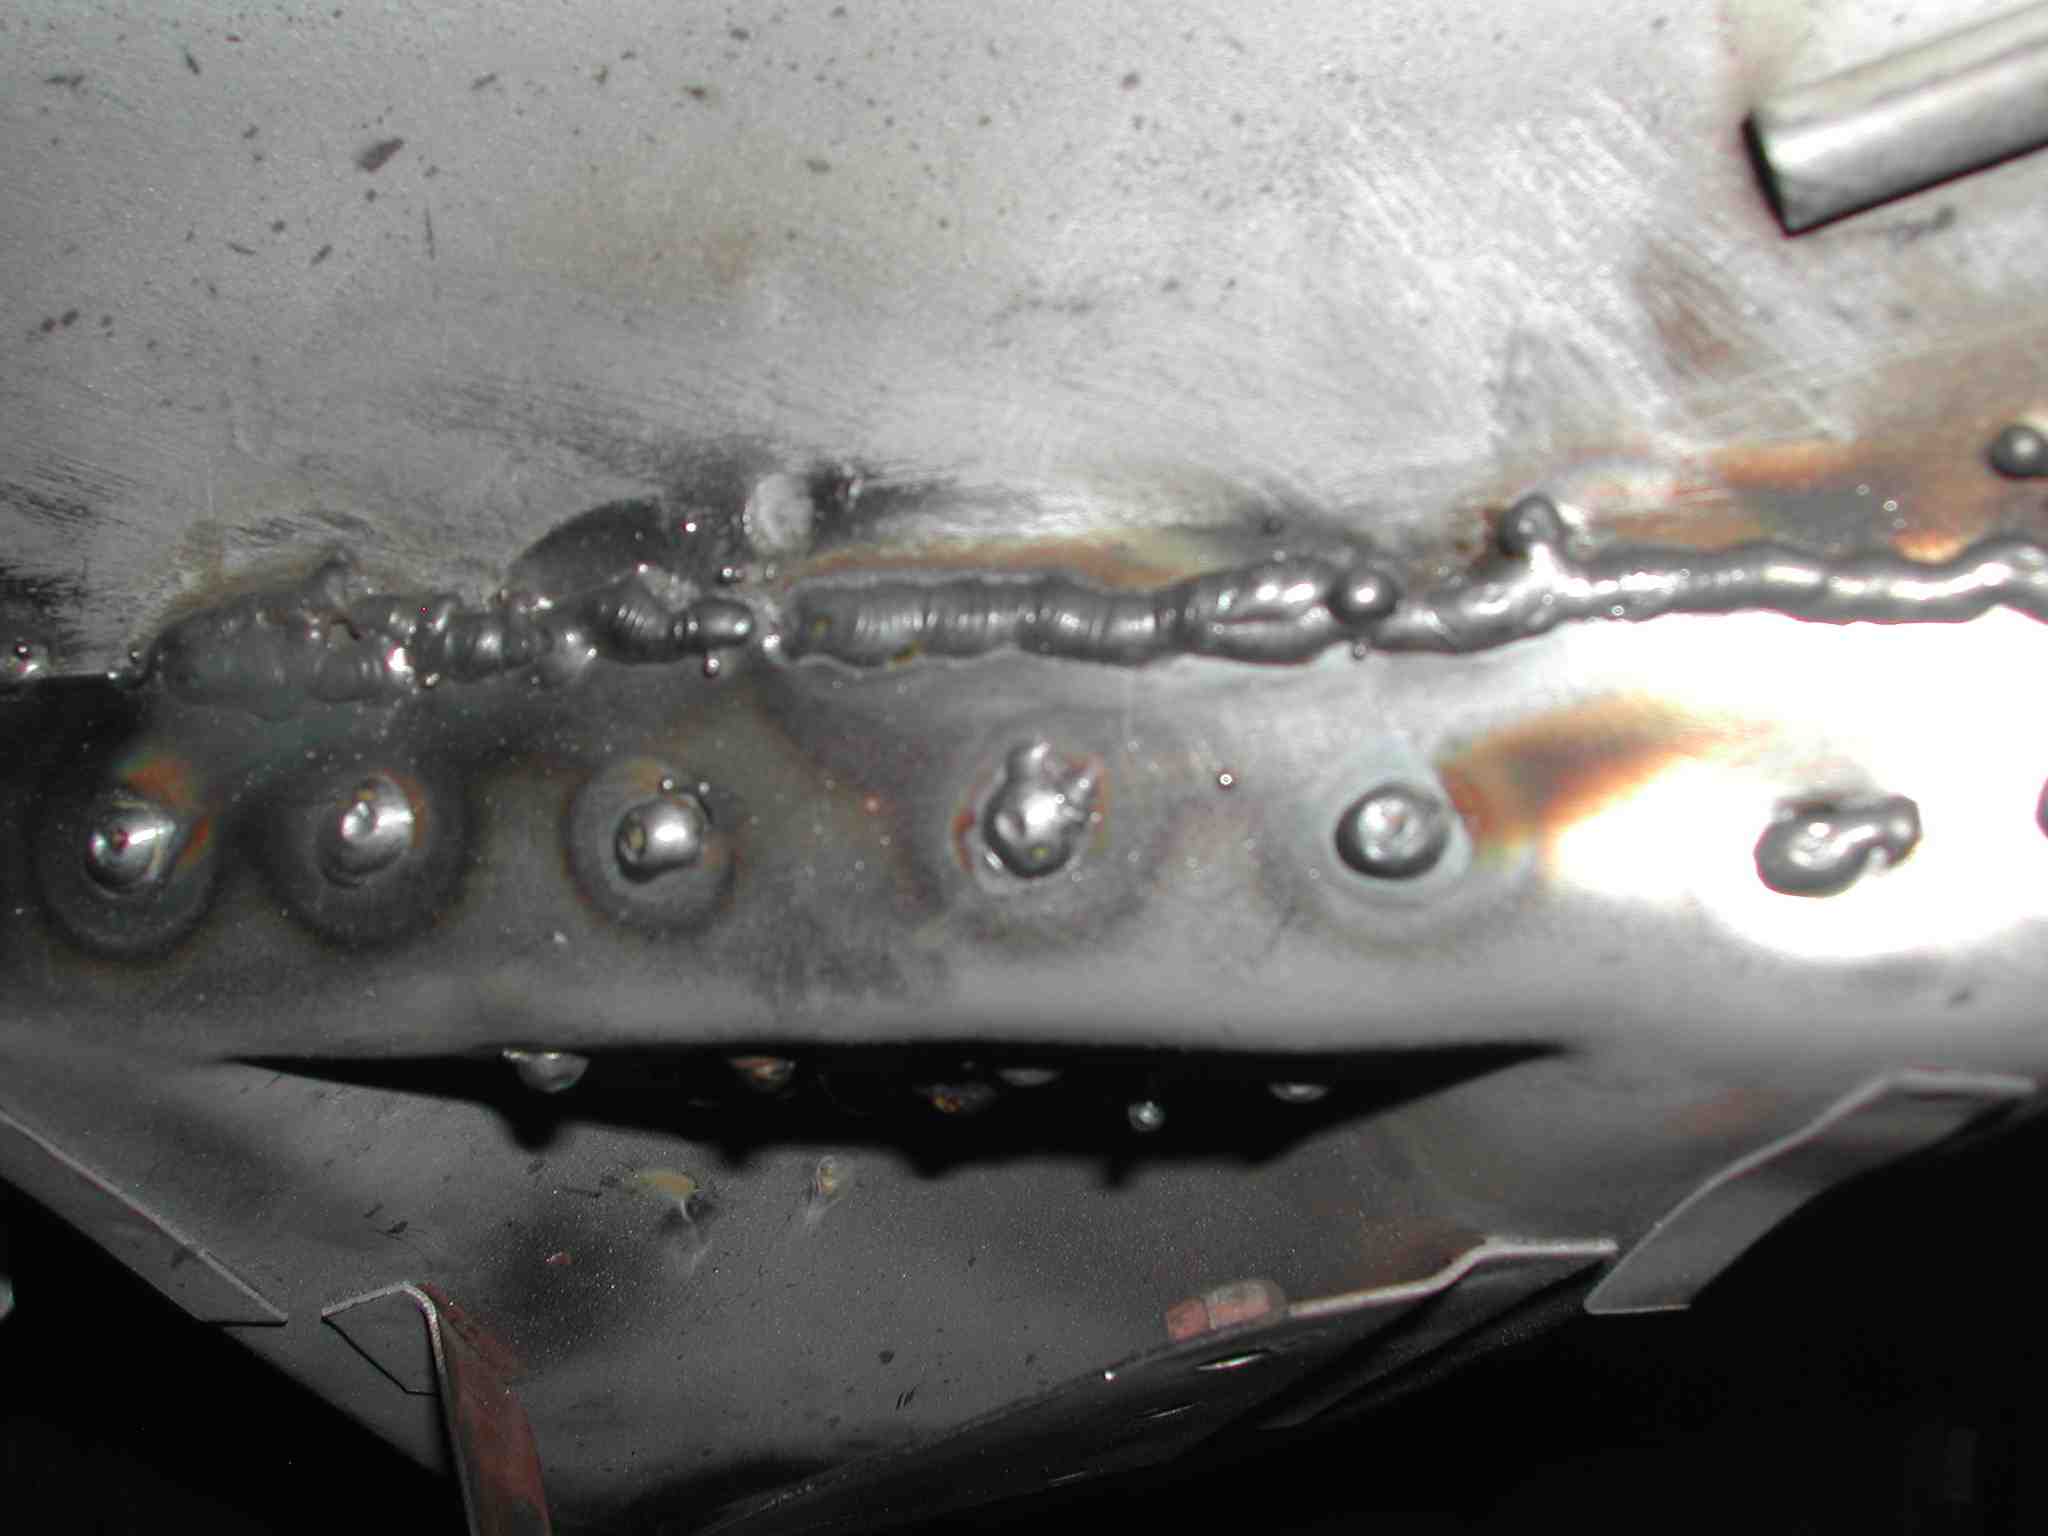
Posted by: highways Jul 25 2006, 02:44 AM
AND DRUM ROLL PLEASE 


Old Hell Hole: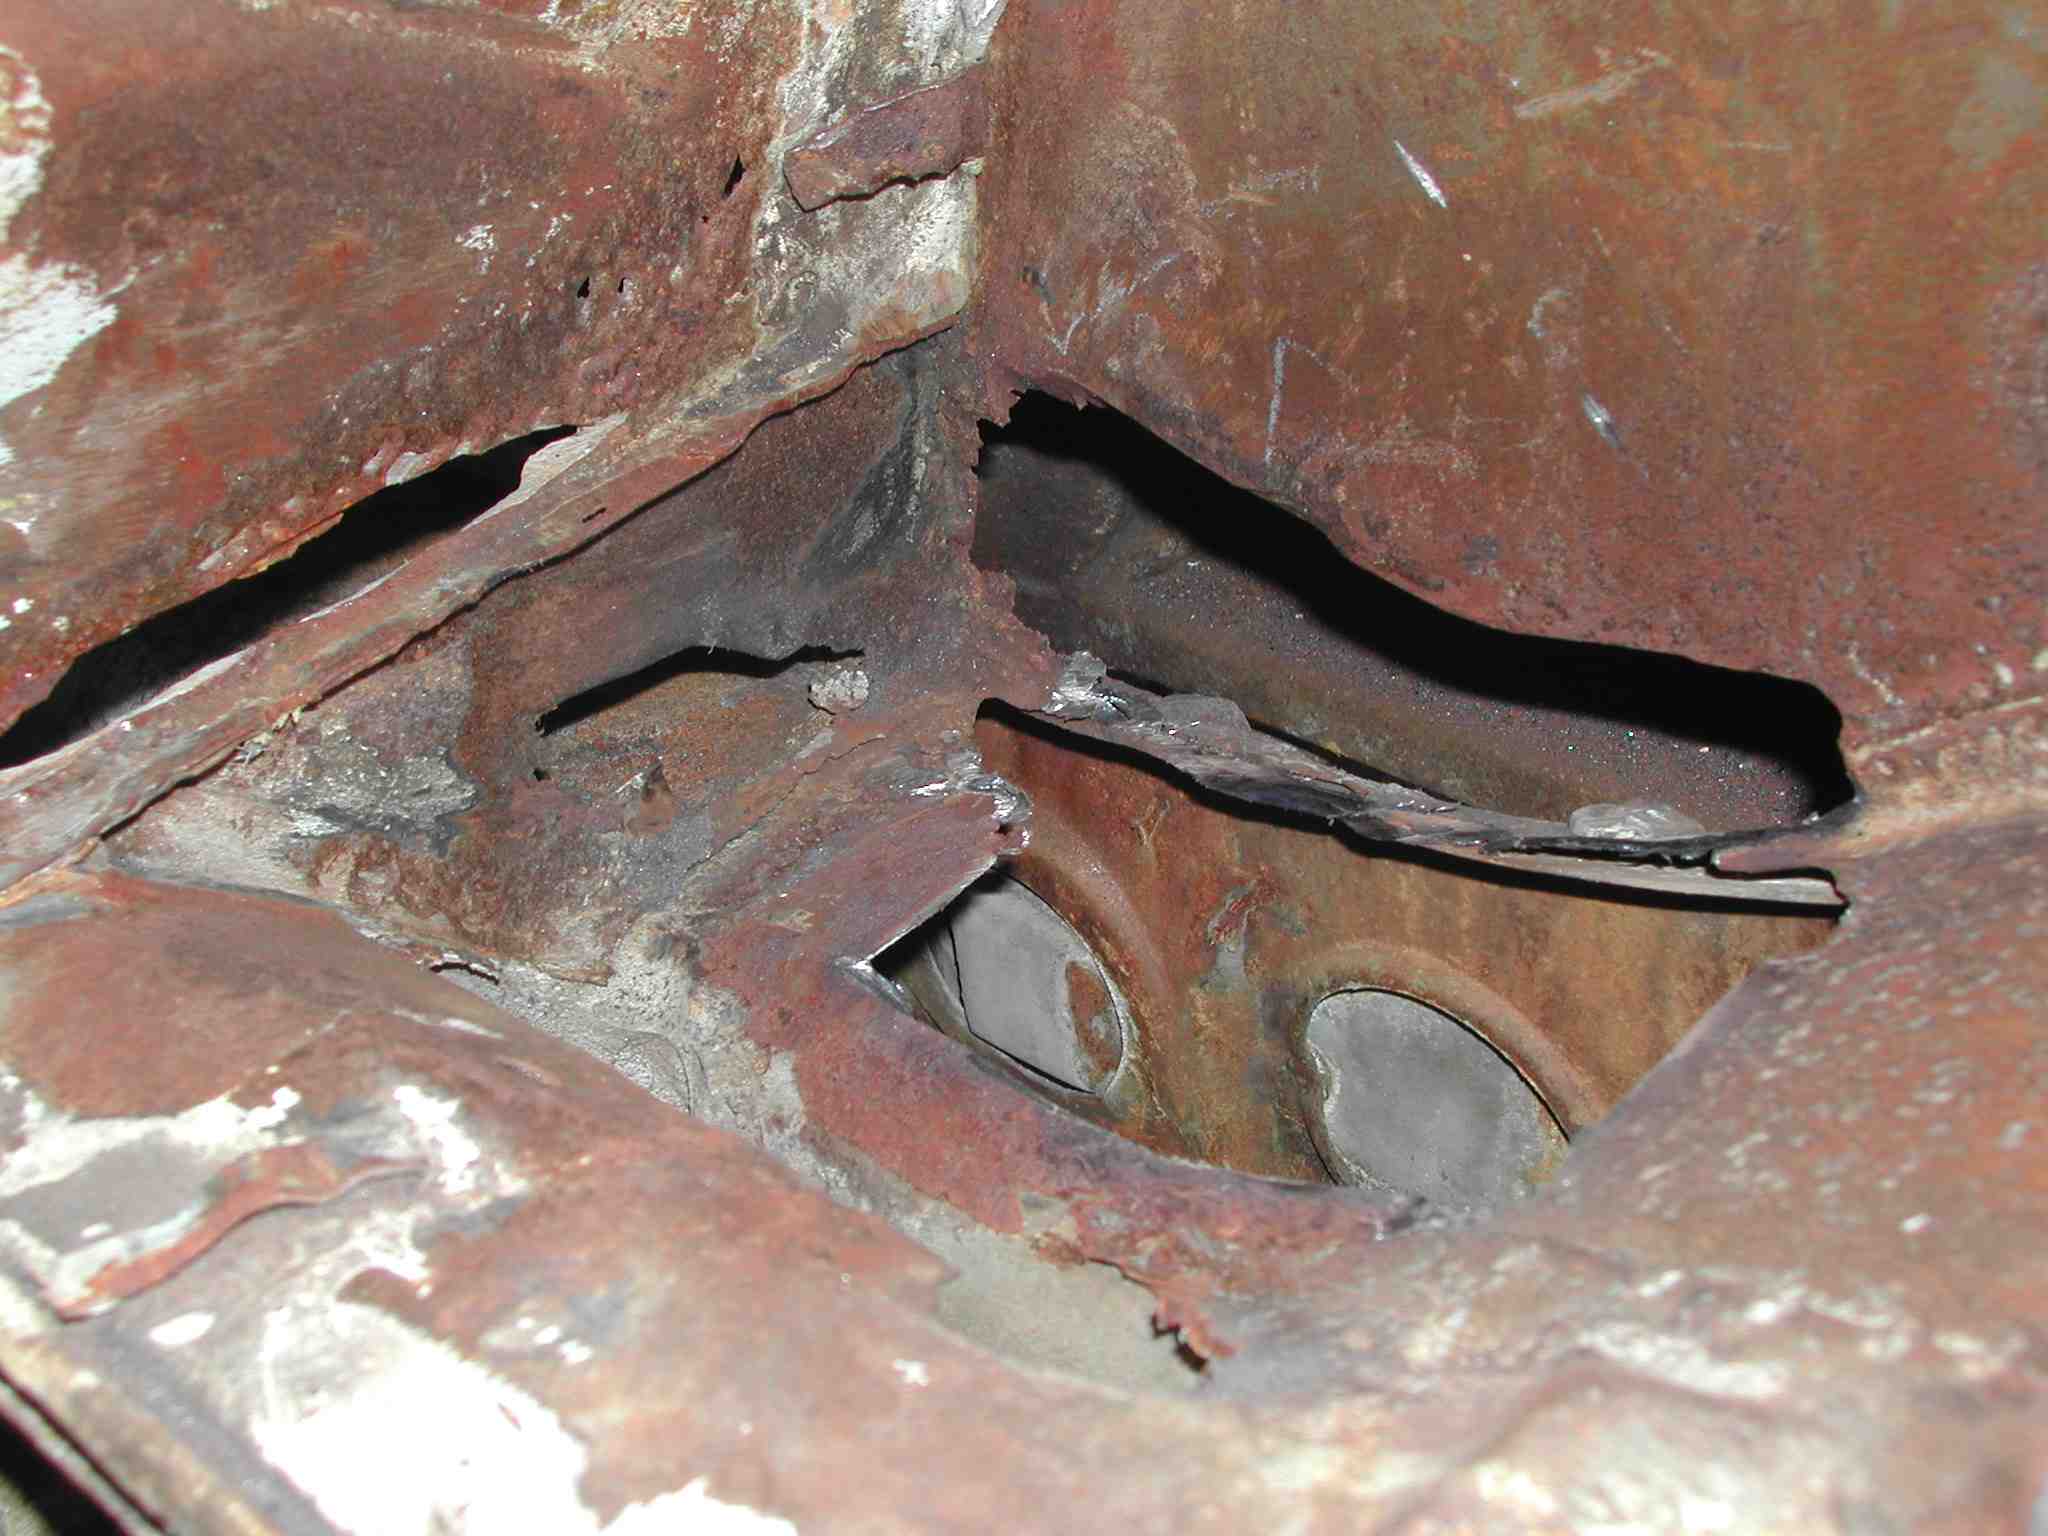
NEW HEAVEN HOLE, wait there's not a hole....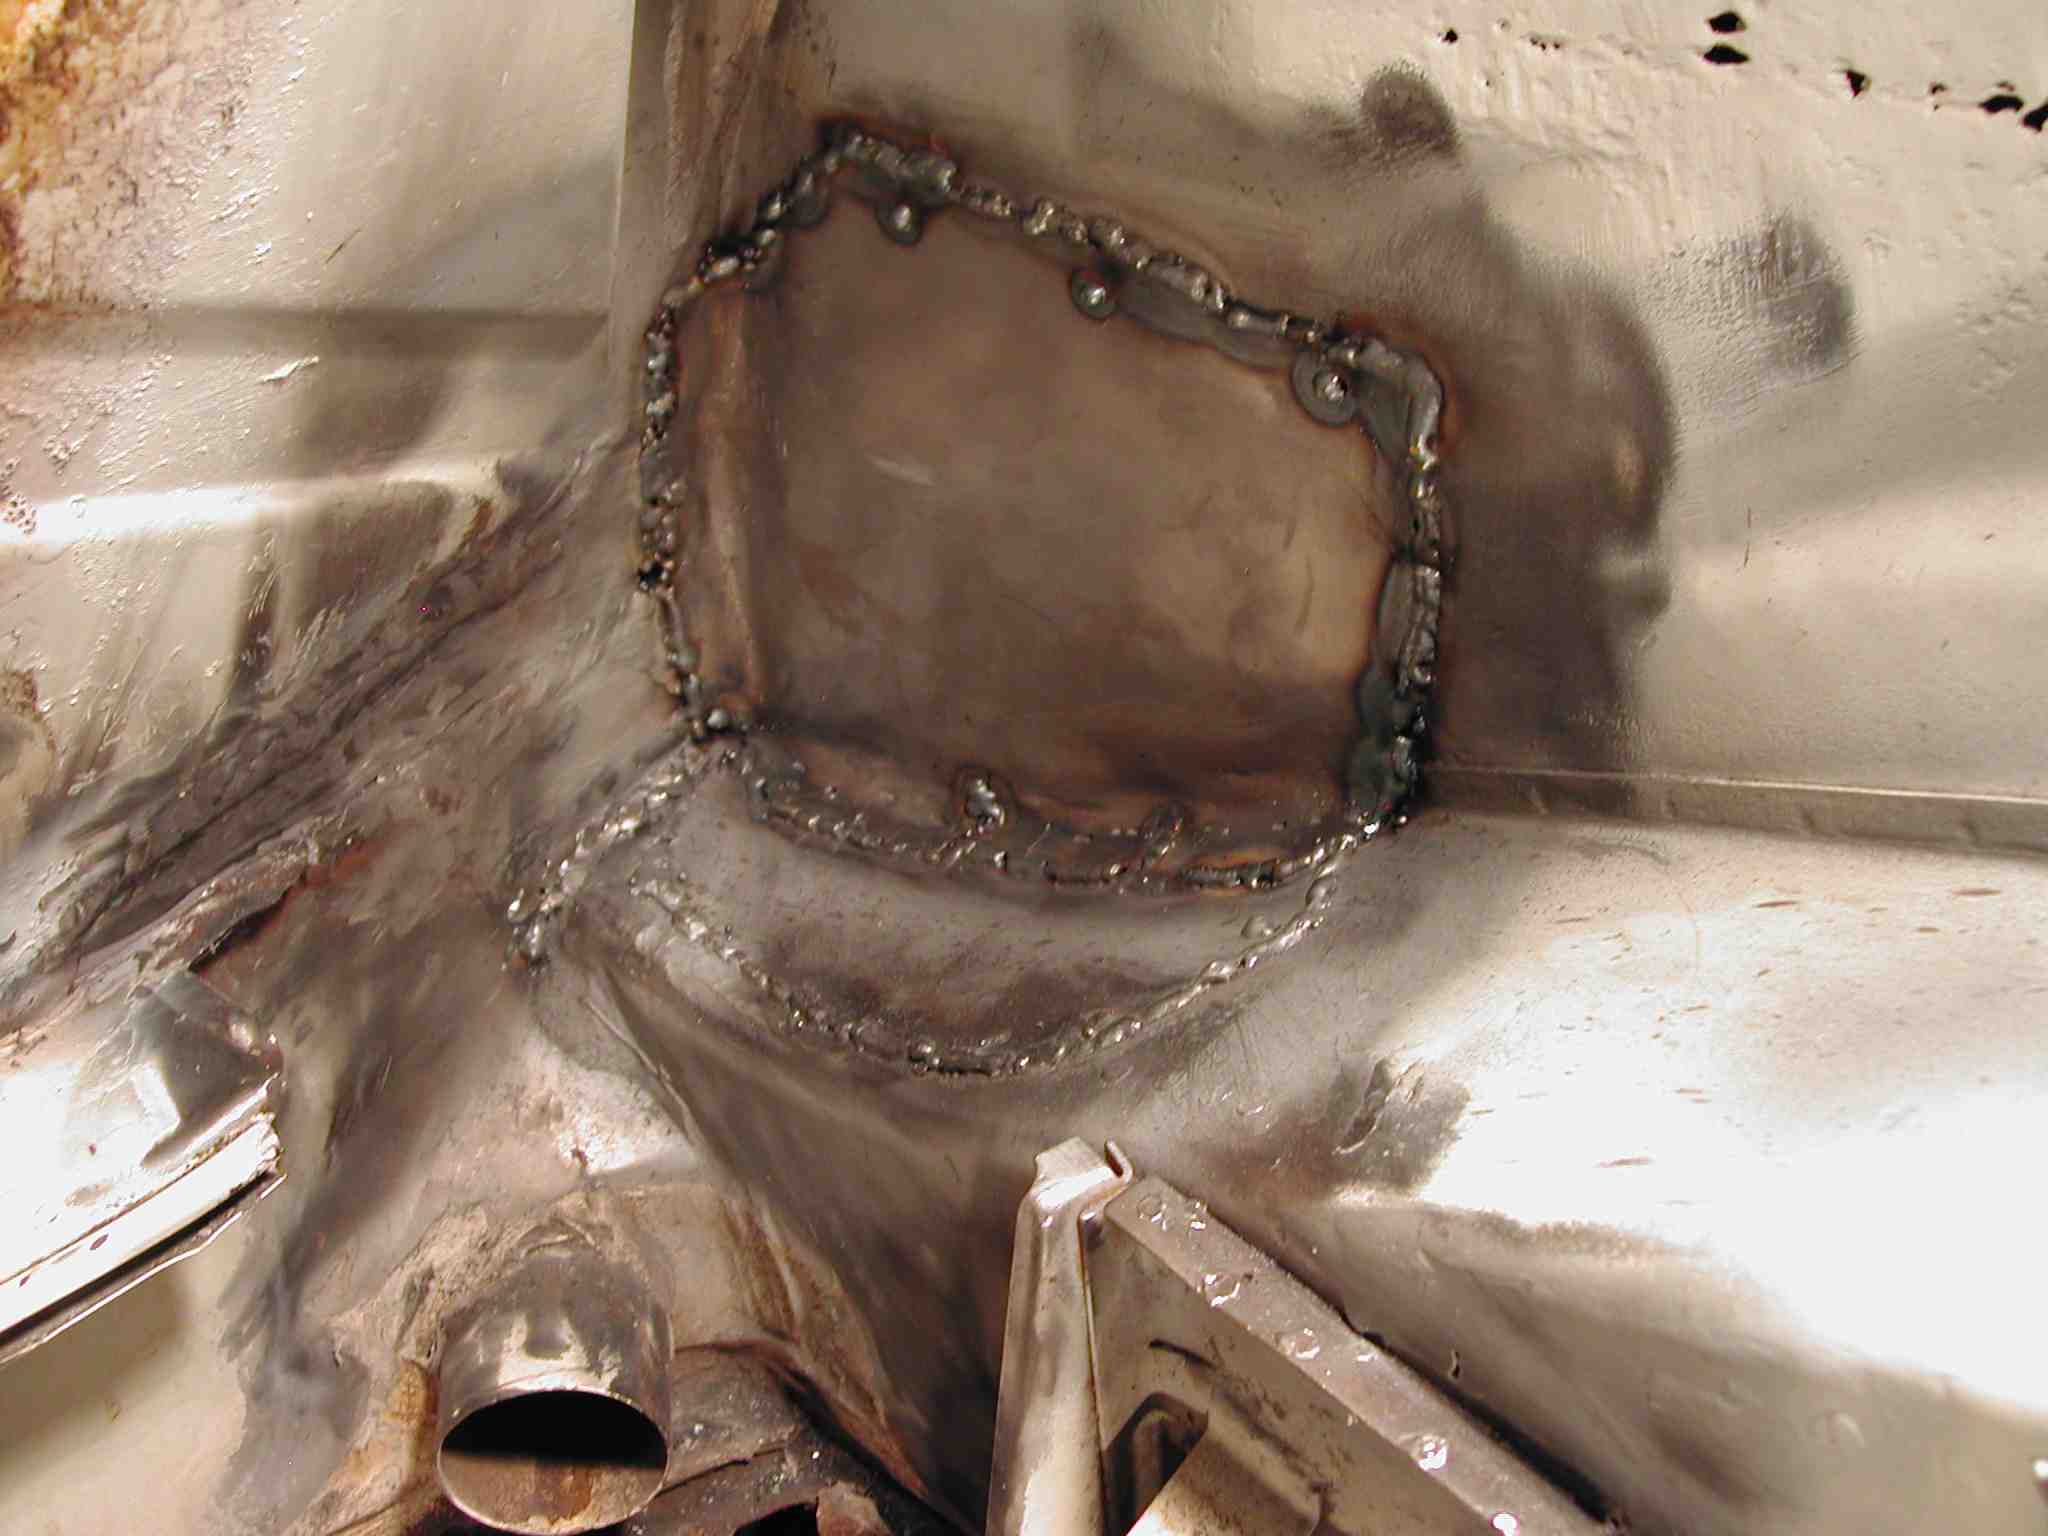
Posted by: ffranktly Jul 25 2006, 03:28 AM
good job man,, that looks like tough worki!!
Posted by: highways Jul 25 2006, 03:50 AM
Here's another pic of the suspension console with paint. "Zero Rust", thanks Proto... I'm laying all my faith in that name man. Cleaned out the longitudinal best I could inside the hell hole area and sprayed in there as well before I welded back up the hell hole. It was actually in great shape inside. Here's the console;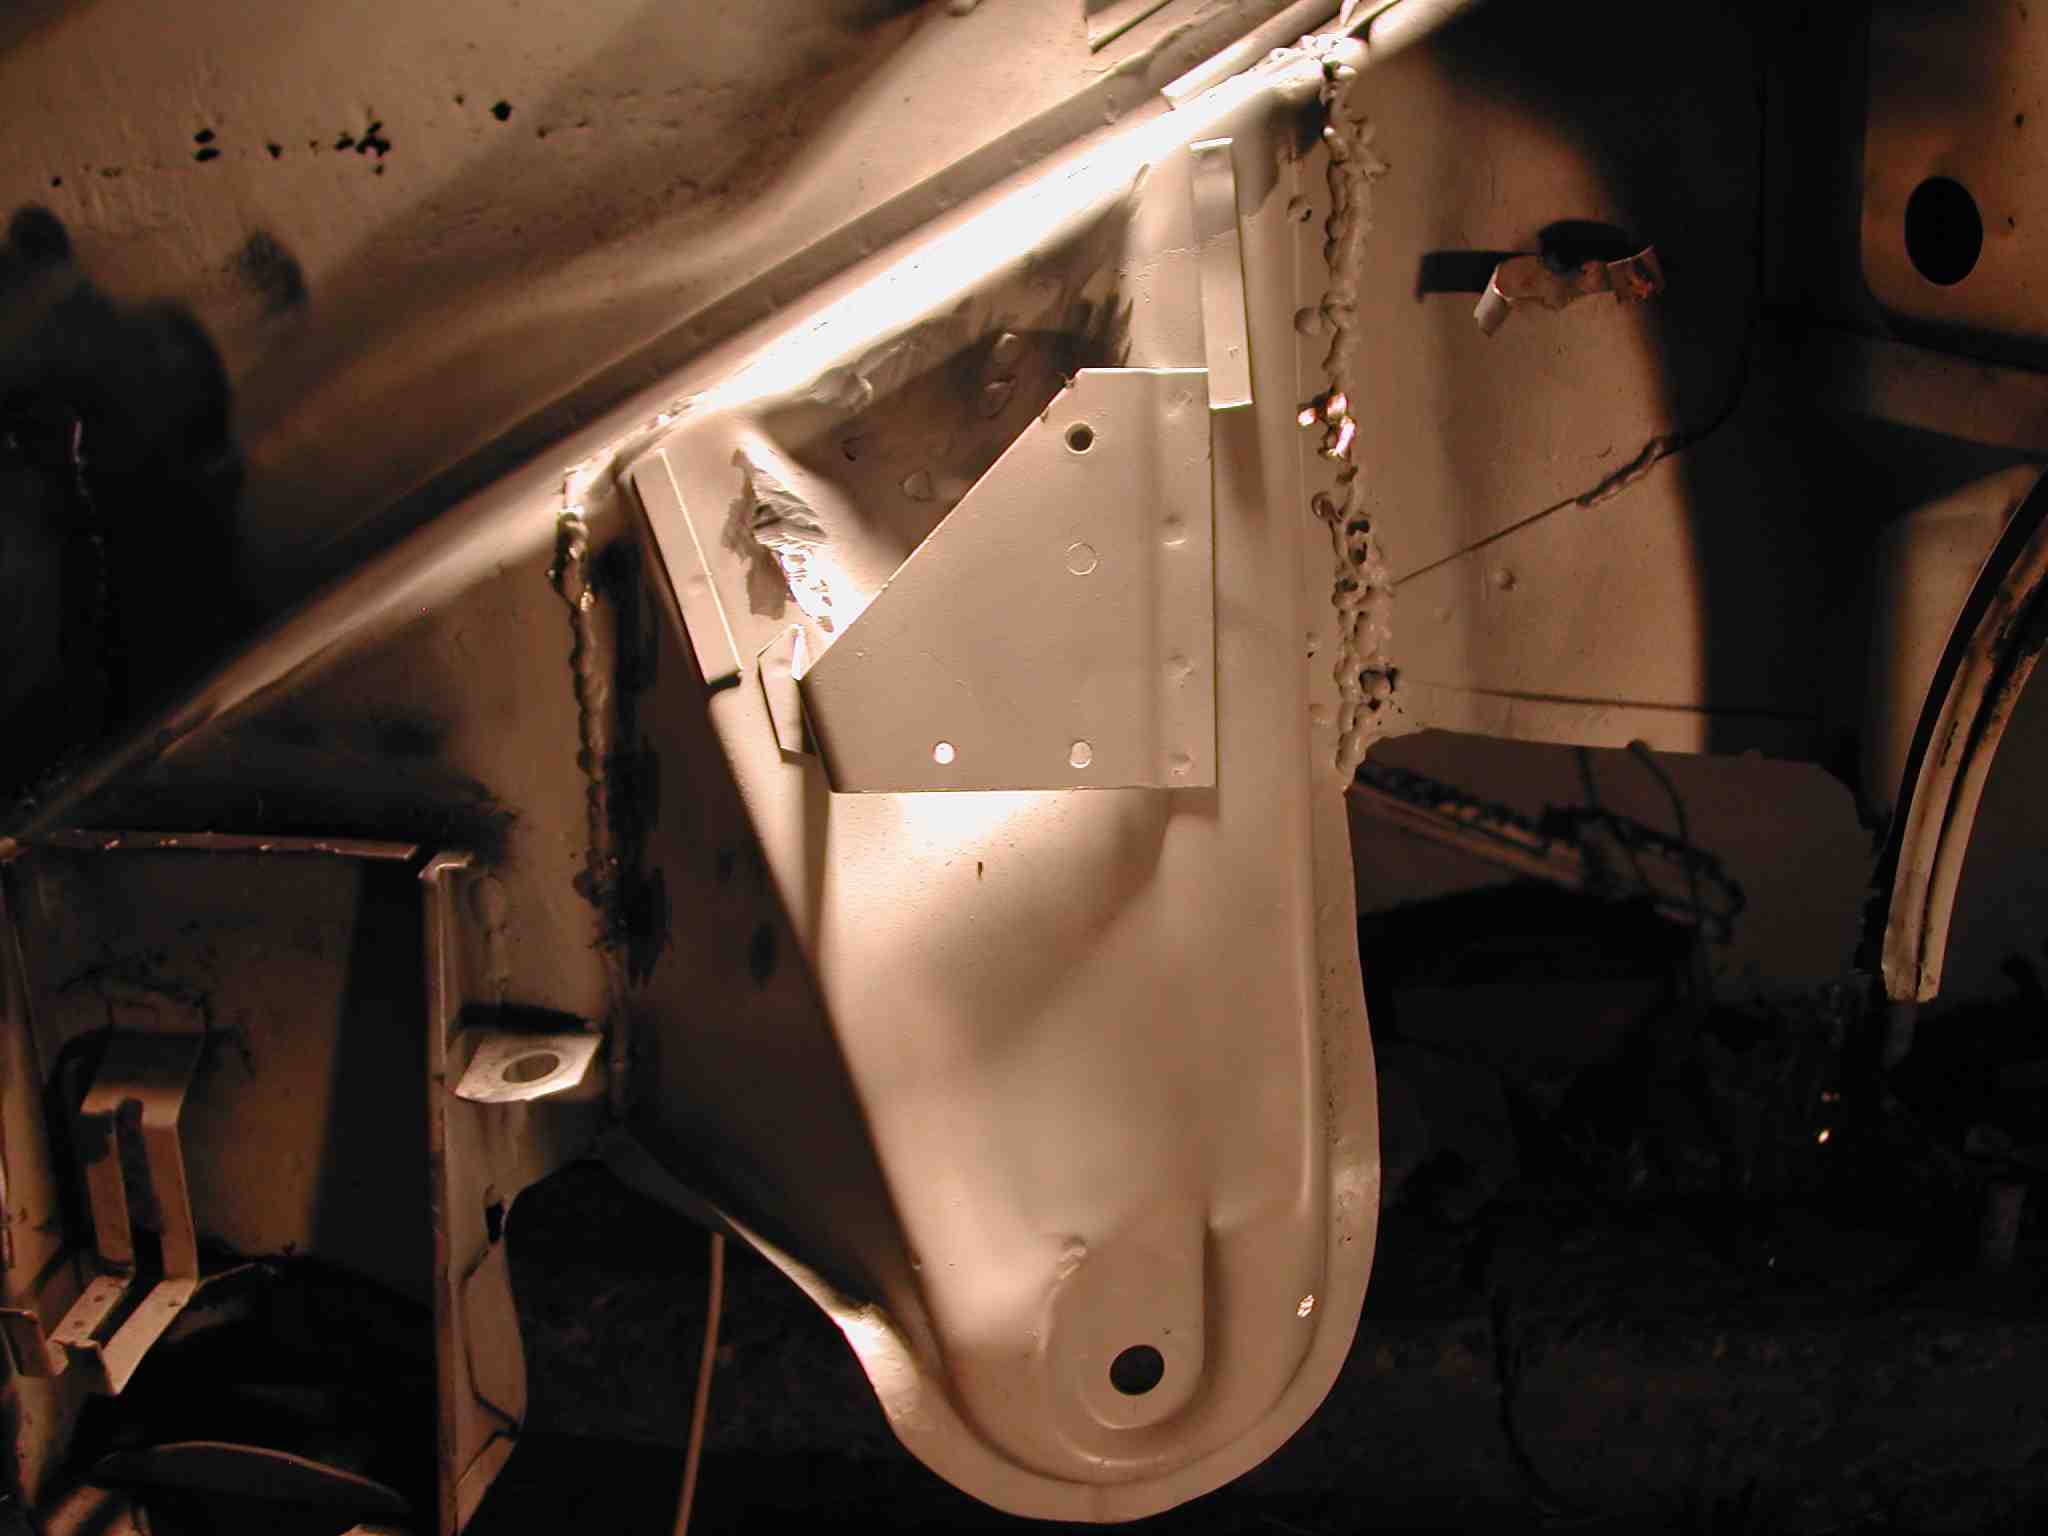
Posted by: KaptKaos Jul 25 2006, 08:39 AM
Looks great!! 
Powered by Invision Power Board (http://www.invisionboard.com)
© Invision Power Services (http://www.invisionpower.com)