Printable Version of Topic
Click here to view this topic in its original format
914World.com _ 914World Garage _ Setting up Koni spring perches
Posted by: RoadGlue Jul 17 2006, 01:47 PM
Bought a set of used Koni Yellows with 185# springs and screw type perches, but I don't understand how to keep the perches from backing off.
I have the perches turned to the point where they make contact with the spring (only compressing the srpings slightly), but now the rear end sits about 1.5" too high. If I back the perches off, the spring just flops around (until the car is back on the ground of course). With the car jacked up, the perches turns easily enough that I'm worried about them backing off while driving.
What's the correct method for setting ride height, and how can I keep the perches from slowly backing off?
Thanks for your help!
Here are some photos:
Attached image(s)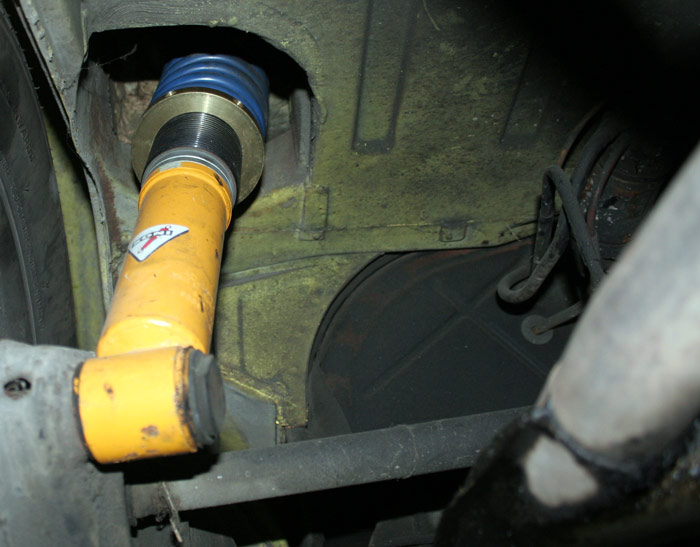

Posted by: lapuwali Jul 17 2006, 01:52 PM
With the weight of the car on the springs, and thus on the perches, there shouldn't be any movement of the perch. Simple friction will keep it from turning. Try turning it with your hand with the car in the air and the car on the ground, and you'll see what I mean.
Posted by: Brad Roberts Jul 17 2006, 01:55 PM
They will flop. You better have 1-2 allen screws in the bottom turn screw that locks it against the threaded portion.
Did you zip tie the springs to the top perch?
B
Posted by: RoadGlue Jul 17 2006, 01:58 PM

They will flop. You better have 1-2 allen screws in the bottom turn screw that locks it against the threaded portion.
Did you zip tie the springs to the top perch?
Don't recall seeing any allen screws to turn, but if the holes on the perch are threaded I'll order them from Koni asap.
Right now there's no slop with the spring (hence why it's sitting so high in the rear), so I didn't bother with zip ties (yet).
Thank you!
Posted by: McMark Jul 17 2006, 02:45 PM
The threaded portion and the adjustment ring will always spin as a unit on the shock. You just want to restrict the adjustment ring moving relative to the threaded portion. The shorter springs will come off the seat when you raise the car. The spring seats itself on the bottom portion pretty easily. The top doesn't align itself so you zip tie the cap to the spring to keep those two aligned when you rasie the car. Then when you lower it, the spring drops onto the perch easily.
Posted by: Aaron Cox Jul 17 2006, 02:47 PM
the "ride height nut" should have an allen set screw to keep it from loosening....
coleman or ground control setup?
Posted by: RoadGlue Jul 17 2006, 02:53 PM
coleman or ground control setup?
Not sure. I'll take a look when I adjust them again later tonight or tomorrow.
Posted by: RoadGlue Jul 18 2006, 07:23 PM
the "ride height nut" should have an allen set screw to keep it from loosening....
coleman or ground control setup?
I couldn't find any manufacturer markings on the perches.
I pulled the shocks and springs back out today, zip tied the top of the springs, lowered the perched about 1.5" and set them in place using 5/16" allen headed set screws that my dad just happened to have in his parts stash. Had they been metric I suppose I would have used a short bolt.
It's perfect now, so thank you everyone!
Posted by: Aaron Cox Jul 18 2006, 07:24 PM
gold adjusters are in fact the doing of coleman...
i have the same setup in my ride. see my blog.
Posted by: RoadGlue Jul 18 2006, 07:32 PM
gold adjusters are in fact the doing of coleman...
i have the same setup in my ride. see my blog.
That's the same setup alright, though I don't have the slot in upper mount like your mounts have:
http://www.914world.com/bbs2/index.php?automodule=blog&req=attach&id=5006
Posted by: Aaron Cox Jul 18 2006, 08:37 PM
you have the billet spring hats, and i have the cheaper cast units i am guessing 
Powered by Invision Power Board (http://www.invisionboard.com)
© Invision Power Services (http://www.invisionpower.com)