Printable Version of Topic
Click here to view this topic in its original format
914World.com _ 914World Garage _ PorSTi Project Thread…
Posted by: Amenson Aug 11 2006, 01:49 PM
As the title states my project has turned a critical corner. After may months of planning and measuring and prognosticating how great it will be, I put down the sand blaster and stripping pad and got down to real work.
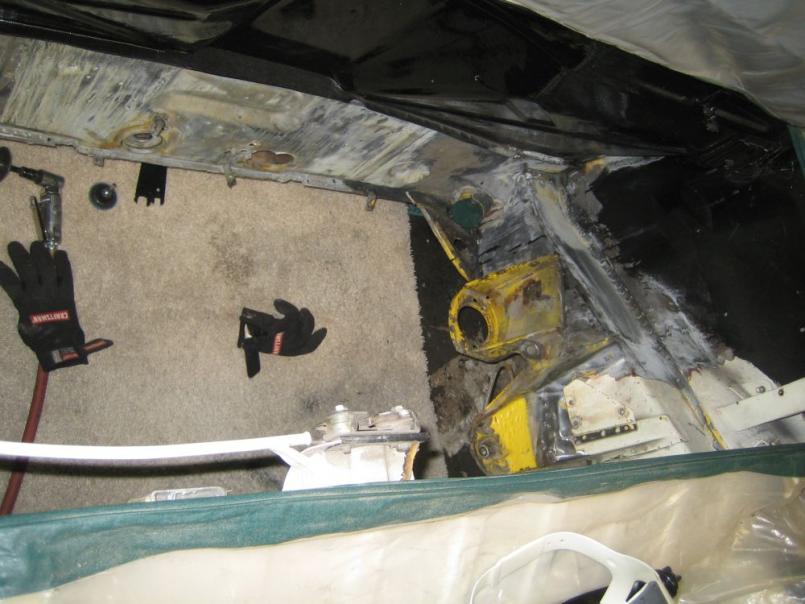
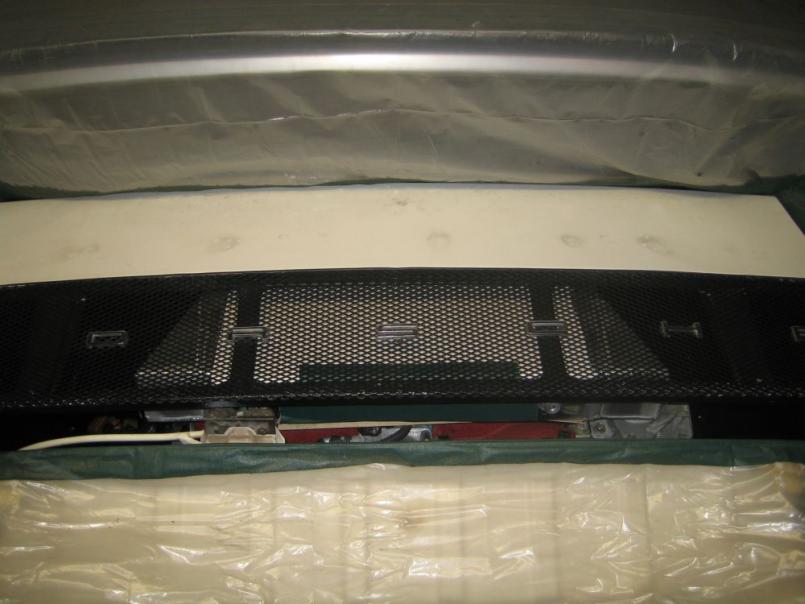
I purchased my 914 with the plan of dong this swap. The motor is from my ex-daily driver that I managed to shorten a bit. The 914 that I am starting with has been restored once before and had a decent autocross suspension. The first thing I did to it was to upgrade the front calipers to 3-series BMW. It is not perfect but is pretty clean and straight. The only part that had not been repainted was found behind the heat/sound pad in the engine compartment. The plan is to repair some shoddy patch work in the battery tray area and repaint the engine compartment once all of the fab work is complete for the swap.
Project details:
Engine:
’05 Subaru STi
Trans:
Stock…for now
Adapter Plate/Clutch:
Kennedy Engineering adapter plate and Stage 3 clutch.
Engine Mount:
Modified Small Car Performance mounts bolted to the stock engine bar. The solid body mounts at the ends of the bar have been replaced with stiff 911 mounts. The engine bar has been modified to accommodate the mounts without changing the position of the bar.
Oil Pan:
I will probably take the easy way out and have Small Car Performance shorten and box out the stock pan.
Exhaust:
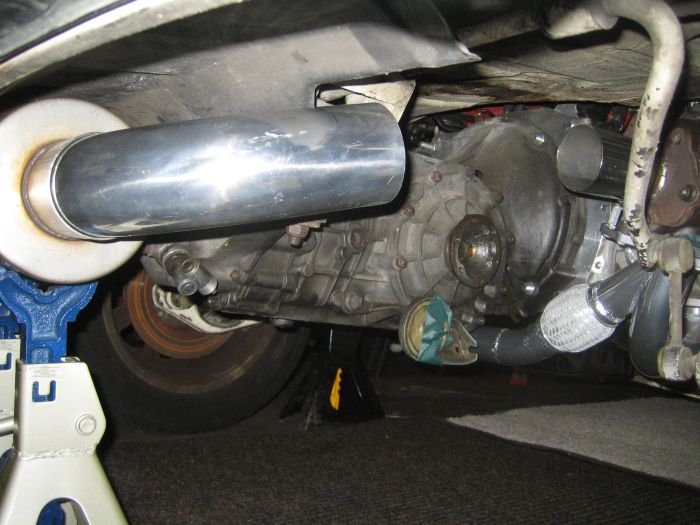
Custom exhaust will be made starting with Outback stub headers. 2” tubing will be run to the turbo from each header. Exhaust from the turbo will be 3” SS to a straight through MagnaFlow muffler. The exhaust will exit in the stock location (maybe people will not notice anything unusual about the car when they pull up next to it).
Electrical:
The entire electrical system will be taken from the STi harness with unnecessary parts removed. This may seem like a lot of effort but it will provide a much needed update to the old stock harness and allow me to still develop my digital display product. It will also make it straight forward to use the throttle by wire.
Cooling:
Ron Davis 28” x 16” x 3” double pass radiator mounted in the front vented through the hood like wbergtho’s. The current plan is to run the cooling lines through the center tunnel.
Steering:
The stock steering column will be replaced by a shortened STi column. This will allow use easy use of the of the stalk switches and more importantly, the RF ID security key system. Initial measurements show that this will be fairly straight forward to do and will also give the benefit of adjustable steering wheel height.
Seating:
Momo Start. These seats were chosen because of the FIA certified seats they have the thinnest seat cushion and are bottom mounted to allow for the lowest possible seating position (they are also quite economical). I tried a set of Corbeau seats that I had from another project and I hardly fit in the car at all much less with a helmet on.
Belts:
For the road I am going to run Schroth Rallye Cross 4-points. They are DOT approved and have a quick latch mechanism. I will install 6 points for track use.
Intercooler:
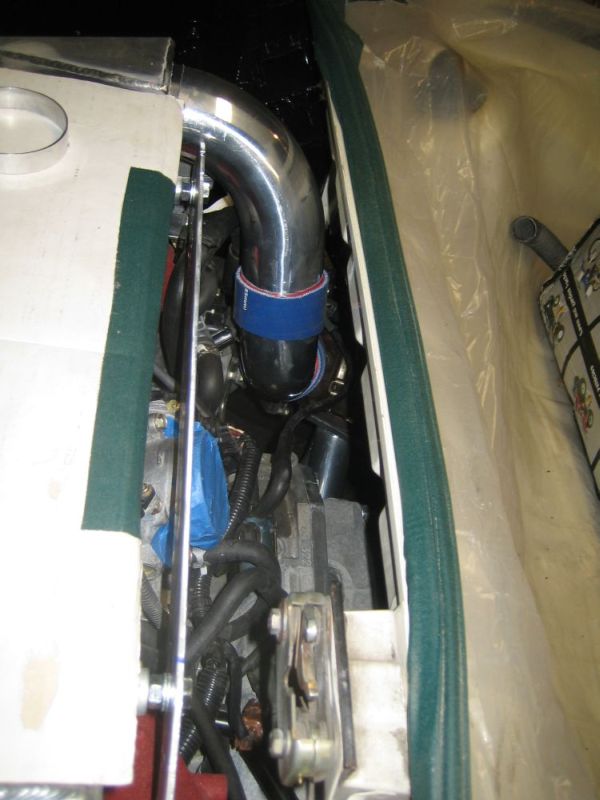
A 25” x 12” x 3” Ebay bar and plate front mount intercooler will be mounted to the top of the engine. While this is not ideal, the intercooler will get quite a bit of fresh air from in front of the engine. The engine lid will be modified to a GT style so that as much air can flow through the area as possible. 3” Al tubing will be run from the turbo to the intercooler and on to the throttle body.
Oiling:
A remote filter/cooler is necessary because the stock oil/water cooler does not quite fit with the engine mount in place.
Unresolved Items:
Turbo placement.
It is awfully tight under there even with some of the sheet metal removed. We will find out on Saturday, that is when the exhaust will come together.
Cooling lines:
The plan is to run them through the tunnel in thin walled Al or SS tubing. With the heater control and throttle cable tubes removed, two 1” od test tubes fit to the front of the tunnel. I would like to use slightly larger tubes and still need to fit the fuel and brake lines. The tightest spot is right at the shifter. I am considering widening the tunnel at this point.
Throttle Pedal:
I am not sure how to mount the STi electronic throttle. In the Suby it is top pivoting. This may be uncomfortable with the floor pivot brake and clutch pedals. I have also considered linking the throttle sensor to the stock 914 pedal. This will have to wait until I have seats in the car again.
Starter:
Not really a problem…just have not picked one out yet.
Wipers:
I have not yet checked if the STi wiper control system will run the 914 wiper motor.
As much as possible items will be mounted to the engine in a way that will allow for minimal disassembly when removing the engine/trans. The current exhaust/turbo plumbing plan should all come out with the engine with the exception of the supply to the turbo.
Timing….the goal is to have it ready for the track day at Mid Ohio on Oct. 6th. This is a bit aggressive, especially considering that I will be vacationing in London for 8 days at the end of the month. I have been making great progress the past month and I have most of the critical parts already. Just need to keep plugging along and hope that my friends keep helping. Without them this project would not be possible.
Now for the important stuff…the pictures.
This is the engine that I started with, it came out of my daily driver STi that came to an untimely death:
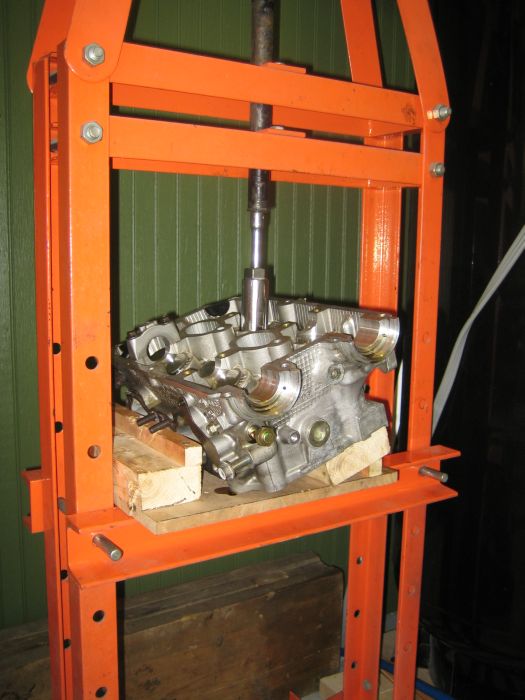
When the timing belt broke 2 valves were bent so a teardown was necessary:

Due to the obscene cost of the Subaru tools to remove the valves I, made my own:
Put the engine back together and attached it to the trans:
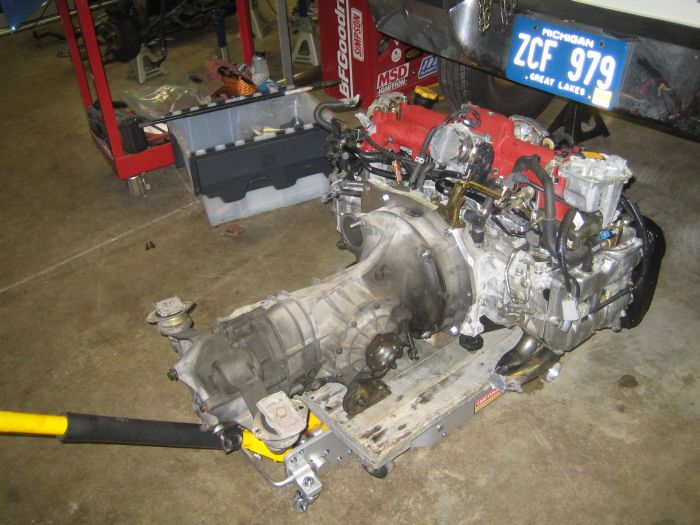
Slipped it into place and attached the trans mounts:

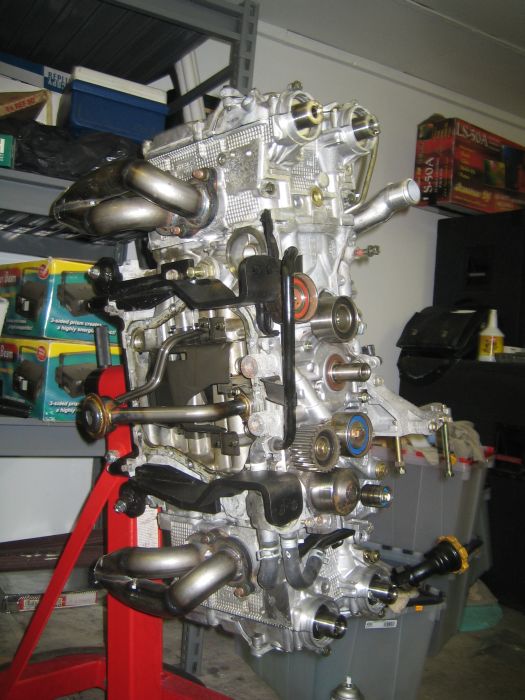
Here is a picture of the unmodified Small Car Performance engine brackets mounted to the bottom of the engine. They wrapped nicely around the oil pan. There was a slight interference between the water line from the oil/water cooler that required a notch.
Posted by: Amenson Aug 11 2006, 01:50 PM
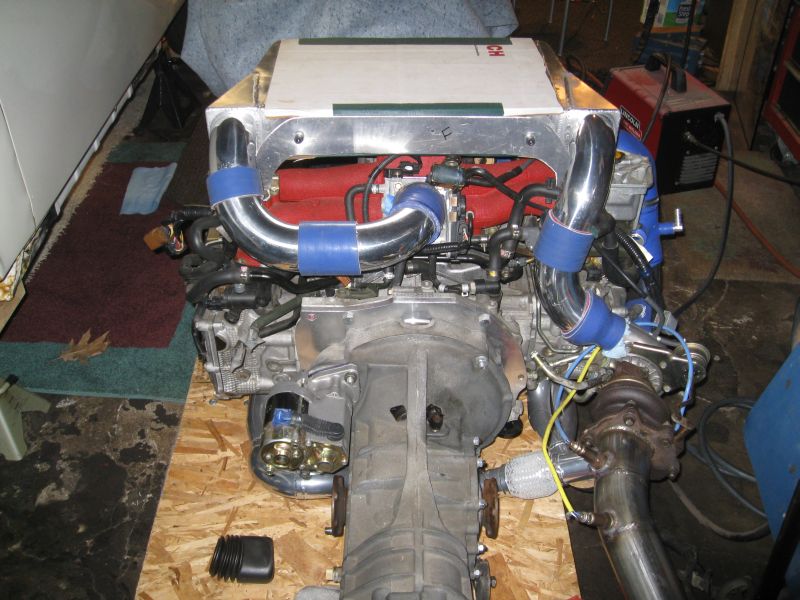
Then spent hours and hours getting it to the right level and notching the brackets fit the stock engine bar. It is a little tight to the water pump housing. Otherwise there is plenty of room.
Lots of room in the front for air to get to the intercooler:
Welding a cross piece between the brackets that will bolt to the stock engine bar.
It was a bit tight welding under the car so we only partially welded it on the car. 
Finish welding was done on a bench, fixtured to make sure that it did not move.
Done!
On the car…look ma, no jacks!
You may have noticed that a notch was taken out of the top of the mount. This is a mistake and is not necessary. While the mount is very solid and should do its job very well, it is not as tidy as I would prefer. I may make another one paying a bit more attention to the finish portion of “Fit & Finish.” Now that I have this one made it would be easy to make a jig to make another mount.
You also probably noticed that everything looks pretty bad in the engine compartment. I am partially through stripping/restoring the engine compartment. I took a break from that work to do the more interesting fabrication work. The engine/trans need to come out again so that I can run the cooling, fuel and brake lines. The beautification will be completed at this time.
I am sure that I missed some details so feel free to ask questions. Also feel free to use my mount design. If you order the parts from Small Car Performance, mention this post...maybe if a few people order the parts I can get a discount on my oil pan work.
More pictures to come as more work gets done.
Scott
Posted by: TonyAKAVW Aug 11 2006, 02:02 PM
COOL!!! It will be really interesting to see how this engine works with a 901 transmission. Sounds like you have quite a project on your hands but you've identified a lot of the tricky aspects. I'll definitely be watching whatever progress is posted.
-Tony
Posted by: JerryP Aug 11 2006, 02:10 PM
![shocked[1].gif](style_emoticons/default/shocked[1].gif) Wow...good luck.
Wow...good luck.
Posted by: Travis Neff Aug 11 2006, 02:44 PM
Very cool project, and ambitious one at that!![popcorn[1].gif](style_emoticons/default/popcorn[1].gif) I'll be watching!
I'll be watching!
Posted by: fiid Aug 11 2006, 02:53 PM
NICE WORK!!! 
That's a new approach to the engine mount problem - very interested to see how that works - looks like you have all the bases covered.
Where are you planning to put the turbo? Do you think you have enough space for the shift linkage?
Posted by: Amenson Aug 11 2006, 03:05 PM

Where are you planning to put the turbo? Do you think you have enough space for the shift linkage?
I have had the shift linkage installed (not sure why I don't have a picture) and it works as well as stock. The exhaust tube that will connect the left header to the turbo needs to make a slight jog around the shifter shaft but that is not a problem. The turbo will go behind the right head, as far up and to the right as possible. I hope to have the pressure side of the exhaust done tomorrow so we will find out soon if my plan will work.
Scott
Posted by: Loser_Cruiser Aug 11 2006, 04:10 PM
Im sorry for asking, I may not have read enoguh yet, but did you make those mounts your self or buy them and adapt them for your purpose? BTW awesome project. hopefully I will be doing this in the future.
Posted by: Rotary'14 Aug 11 2006, 09:37 PM
I like your engine mount too. 
-Rob
Posted by: mongrel-gs Aug 11 2006, 09:42 PM
Very Nice! That's going to be a fun ride!
Posted by: BKLA Aug 11 2006, 09:50 PM
Keep the pic's and stories coming!!!
Nice job! 
Posted by: boogerboy72 Aug 12 2006, 05:36 AM
your engine mount looks awesome. Looks like i found a simplier one to replicate for my project  did yuo buy the brackets somewhere? link please?
Posted by: Amenson Aug 12 2006, 07:19 AM
Thank you for all of the positive feedback.
I guess that I did not mention Small Car Performance enough times as the supplier of the brackets that I used, so here it is again...in link form.
http://www.smallcar.com/sparts.htm
It is the "Subaru 4 Cylinder to Vanagon Engine Mount Adaptor"
Off to make the exhaust...
Scott
Posted by: Porcharu Aug 12 2006, 08:46 AM
Interesting engine mount. That is almost exactly how I am doing mine (just an N/A 2005 RS engine) except I am not using the stock engine bar. I'm using the 911 sport mounts at all 4 corners.
Posted by: DNHunt Aug 12 2006, 09:34 AM
I've dealt with Small Car Performance many times. They also supply type IV stuff. I usually get my Mahle oil filters, and consummables from them. Good people. They do conversions in their shop and keep trying to get me do this same conversion. The last time I was in there they had a WRX engine sitting on the floor and thet keept saying it had my name on it.
Dave
Posted by: Loser_Cruiser Aug 12 2006, 12:21 PM
Do you think the shift rod will have to be changed at all?
Posted by: Aaron Cox Aug 12 2006, 12:38 PM
"cooling lines thru center tunnel"
bad idea....
ask 'series9' how much of a PITA it was to do smaller 6cylfront cooler lines....
go thru the heater tubes/outside of longs/under car/ etc....
Posted by: 914-8 Aug 12 2006, 12:48 PM
Wow, youse gots some serious tools and workspace! And it looks like you know how to use them.
Cool project, keep the updates and pics flowing!
Posted by: Amenson Aug 13 2006, 11:18 AM
Interesting engine mount. That is almost exactly how I am doing mine (just an N/A 2005 RS engine) except I am not using the stock engine bar. I'm using the 911 sport mounts at all 4 corners.
When I ordered my parts from Small Car Performance they told me that one other person had ordered them for a 914 Suby conversion...I guess that would be you. Do you have any pictures of your setup? I checked your blog but did not see any.
Scott
Posted by: Amenson Aug 13 2006, 02:49 PM
We made most of the pressure side exhaust yesterday. We did not finish because I messed up the tube order and ended up one bend short.  Still need to finish the collector into the turbo and final weld the seams, it is now only tacked.
The turbo fits! It was tight but clears everything. The final position will be slightly different than what is shown in the picture, it is only sitting on the tube right now so it rotated a bit.
It took a little more than anticipated to get around the shifter shaft.... The clutch pulley will need to be rotated slightly.
The major problem with the turbo location is caused by the waste gate actuator. It would be a much better fit if an external waste gate turbo were used. When I upgrade the trans I will also upgrade the turbo. This is why I did not make this part of the exhaust out of SS, the rest will be.
Scott
Posted by: Rotary'14 Aug 13 2006, 07:09 PM
exhaust looks sweet! keep the enthusiasm up! If I go subie,, I'll use your car for inspiration and as a guide.
-Rob
Posted by: Amenson Aug 17 2006, 06:41 PM
Not much progress this week...partially because I was waiting on some parts and partially because I had some stitches on my chin to keep clean. I made it 30 years doing careless and generally stupid things without having to be stitched up and I ruin the streak by running into somebody during an indoor soccer game. 
Today my intercooler arrived and it looks like it will fit very well...there is actually room for a much longer one but this one is sized properly and allows access to the dipstick, oil filler and water tank.

I am probably going to relocate the in/outlets to the end of the tanks pointing toward the rear of the engine. This will make the plumbing much shorter.
The seat also came in this week.
Hopefully I can get the pressure side of the exhaust done this weekend...although with the Dream Cruise going on this weekend I may not get much done.
Scott
Posted by: zaphod750 Sep 25 2006, 09:49 PM
Awsome project...I say this because im doing something similar. Was wondering what parts of the harness you plan to keep? I have a 2004 sti engine that I am putting in my 914, and I have gotten rid of everything that doesnt connect to the engine as far as wiring is concerned, and i was interested in what parts you are keeping...cruise, gauges, etc? Cant wait to see how yours turns out...looks like you will be done a lot sooner than me, I got caught up in some rust repair..
Posted by: banksyinoz Sep 26 2006, 03:38 AM
cheers great work on the sti transplant we have an 04 with the six speed over here and it looks nuts,
q: are you bolting the engine bar directly to the block or using the suby mounts, just curious?????
hey your exhaust looks awesome but will it cause boost to be later? not that its a problem.
the wiring is definetly the best way to go, just quietly been lookin at the suby 3.0 six quad cam
great work keep it up 
Posted by: GS Guy Sep 26 2006, 07:22 AM
Great looking conversion Scott.
I might be the person Small Car was talking about using their mounts? I bought a set of the side pieces for my Suby conversion, going onto a 914 trans (though not in a 914 vehicle) back earlier this year.
Comment - on the oil pan. As you know, the Small Car mounts severely restrict what kind of oil pan you can use. I went with Outback and they were very specific that I use their "mid-engine" version pan, which wasn't listed in their literature at the time. According to Outback, when you shorten the pan 1.5" and the pickup a corresponding amount, it moves the pickup head forward in the pan. This, in conjunction with the angled shape at the rear of the pan can cause starvation problems during hard acceleration - oil runs back away from the pickup and up the back of the pan. Their mid-engine pan locates the pickup more towards the rear and a small kick-out is boxed at the rear of the pan. Something to think about for your conversion - pic attached.
Question - can you tell me how far below the head exhaust surface the Outback primary tubes hang? I've got limited room below the heads for exhaust routing, couple of lower chassis tubes below the heads.
Great looking intercooler BTW!
Cheers, Jeff
Attached image(s)
Posted by: Amenson Sep 26 2006, 09:21 PM
Not much to report so I will first answer the questions.
-Harness: I am keeping everything that has a corresponding system in the 914. The list of things that will not go in is shorter and includes things like ABS, DCCD, power locks/doors and HVAC. Other than that, the car will think that it is an STi.
-The exhaust should not cause any lag. With smoother bends and merges, and slightly shorter routing (virtually no up-pipe) on the pre-turbo side and a 3", very short, only marginally muffled and cat-less post exhaust, spool up should be a bit sooner. Not that it really matters with the tiny stock turbo.
-Oil Pan: I have not yet decided. I am thinking about doing my own but am considering going with the small car pan+baffling to save a bit of fabrication. The Outback pan sticks down a bit to far for my liking.
-The headers are the Outback Mid-engine "shorty" headers. They stick down about an inch less than the Small Car motor mounts.
GS Guy...what are you building?
It has been over a month since my last update, here is what I have been up to...
-Trip to London, 10 days plus packing/recovery time really ate up garage time. Great fun though.
-Wiring my buddies soon to be 30 psi Audi 200 20v with a stand alone ECU. This ate up much of the last week but turned out great and was quite fun.
-Pulled apart and figured out how to modify and mount the Suby steering column.
-Cut up the shiny new intercooler to move the inlet and outlet to the ends of the end tanks.
-Replaced the alternator and troubleshot a rich condition in my daily driver (Galant VR4). Every time I turn up the boost something seems to go wrong. 
-...and more weekend social events than I care to think about. Fun stuff but bad for progress.
So, not much progress. I hope to get back at it tomorrow.
Thanks for the kind words.
Scott
Posted by: eric914 Oct 2 2006, 07:02 AM
I have been in contace with Brian Steel at small car and they will sell the side pieces and hardware from the Van motor mount for $185. No point in paying for a piece you do not need.
Posted by: jsteele22 Oct 2 2006, 08:59 AM
Just stumbled across this thread. Very nice work. I like the engine mount idea a lot : small, simple, and easy for others to copy.
One thing I didn't quite follow. Where the stock 914 engine bar bolts to the chassis, is there some kind of motor mount (vibration damper) that you inserted ? If not, where are the front engine mounts ? If so, does this lower the bar ?
Sounds like you're on an ambitious schedule ! Keep up the good work !
Posted by: Amenson Oct 2 2006, 08:42 PM
jsteele22: The motor mounts are at the ends of the slightly modified stock engine bar. I gave an explanation in my (long winded) first post. You can see the mounts in most of the pictures.
iric914: Small Car worked out the same deal for me. They are a great supplier.
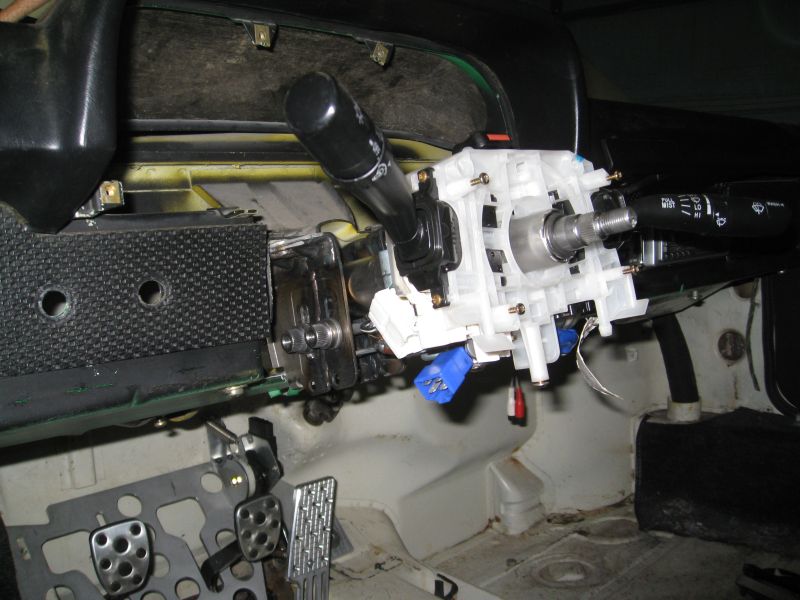
I made a bit of progress this weekend. The Suby steering column is installed.
Here is the modified shaft:
Here is the old and the new, notice that the stock u-joint fit the suby spline. The section I removed from the shaft is laying against the wall...it is about half as long as it started:
Installed, it is positioned very high in this picture...the comfortable position is much lower:
It adjusts up and down but also rotates around the adjuster so I need to make a pivot at the end of the column. Not a big deal just a little more work. As hoped the suby wheel is closer to the driver than the stock so the driving position should be much more comfortable for me.
I also spent some time on the exhaust but did not finish it so no pictures.
Scott
Posted by: Amenson Oct 8 2006, 06:23 PM
Finally finished the pre-turbo exhaust. I think that it turned out pretty well. Still need to finish weld all of the seams.

I started to mount the muffler side of the exhaust only to find that the muffler does not fit behind the skirt very well. I will need to find a smaller one or modify the the one that I have. Now it will be even louder. 
Probably will not make much more progress this month. I leave for a 2 week business trip to Japan on Friday.
Enjoy,
Scott
Posted by: zaphod750 Mar 11 2007, 06:20 PM
any news on the conversion??
inquiring minds want to know..
Posted by: Amenson Mar 14 2007, 09:33 PM
Unfortunately there has not been much progress. Due to considerable business and pleasure travel this winter/spring plus a move to a new house, I have not even seen the project much. The good news is that the new house has a big enough garage so that I can set up shop at home instead of using my buddies shop. This should allow me to make progress much more quickly.
I did accomplish a few things since the last post:
Finished welding the header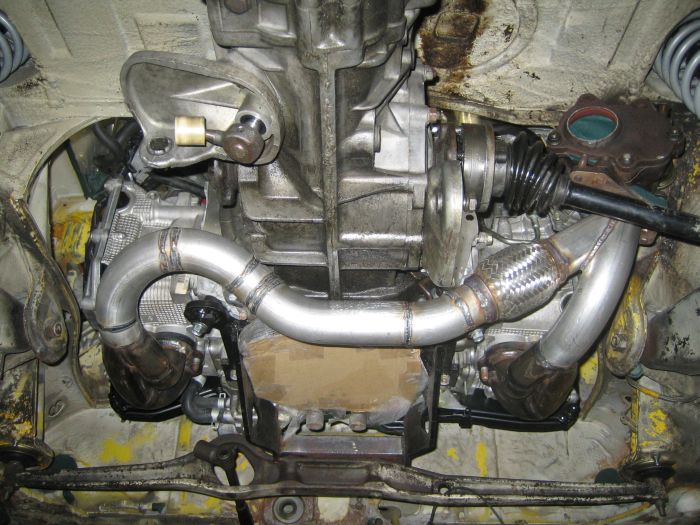
Modified the intercooler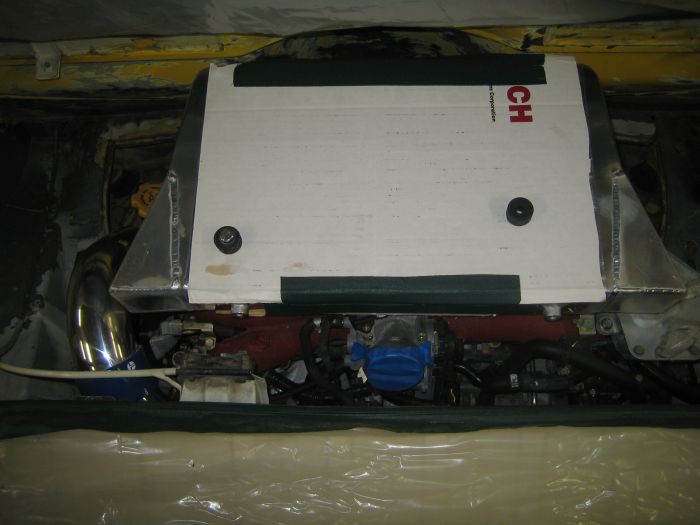
Hopefully progress will start up again within 2 weeks. My friends have started planning for Power Tour 2007 at the beginning of June and I would really like to take the PorSTi.
Scott
Posted by: Amenson Jun 22 2007, 09:29 PM
Well, it's been a while since the last update. Have not stopped working on the project, just too busy to document it.
Moved the car to it's new home at the end of April. Yup, it is sitting next to a potential donor car, my girlfriends '05 Legacy.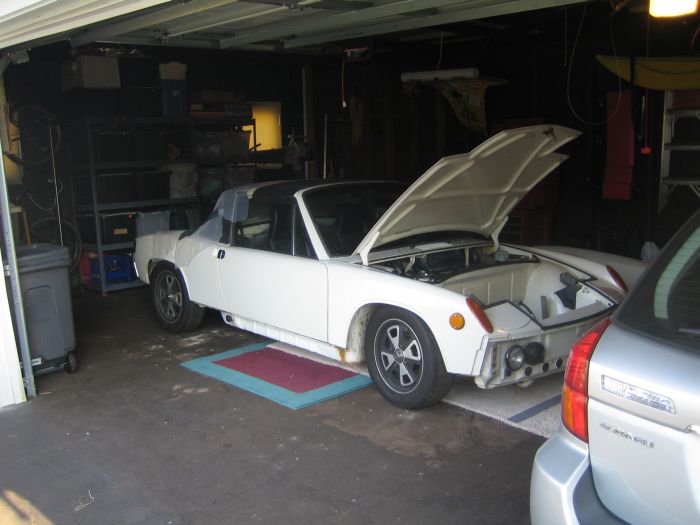
Had the header ceramic coated. I went with the silver because it was supposed to be the most durable color. Not a huge fan of the chrome look though. Based on my buddies header with the same coating, after it heats up a few times it should dull a bit.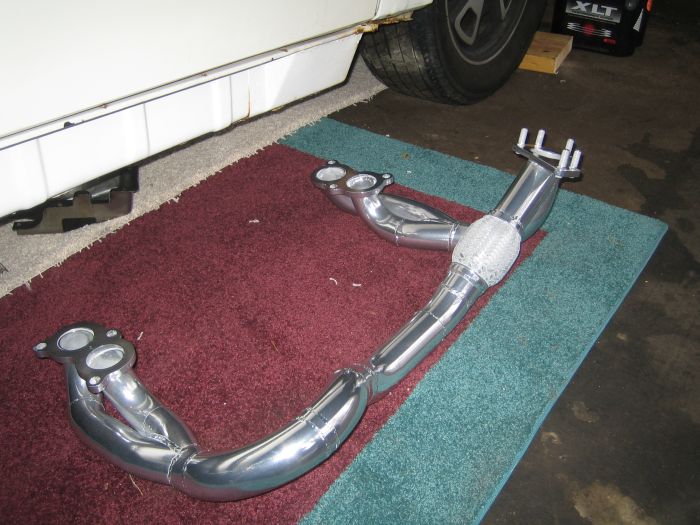
Decided to take the easy, although expensive route and order a shortened oilpan from Outback Motorsports. Shown next to the stock Suby oilpan.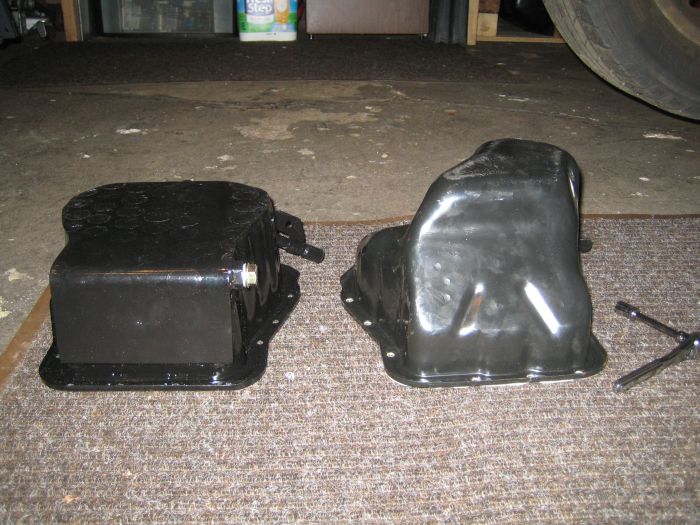
Ordered an aluminum fuel cell from Summit Racing. Fits really well!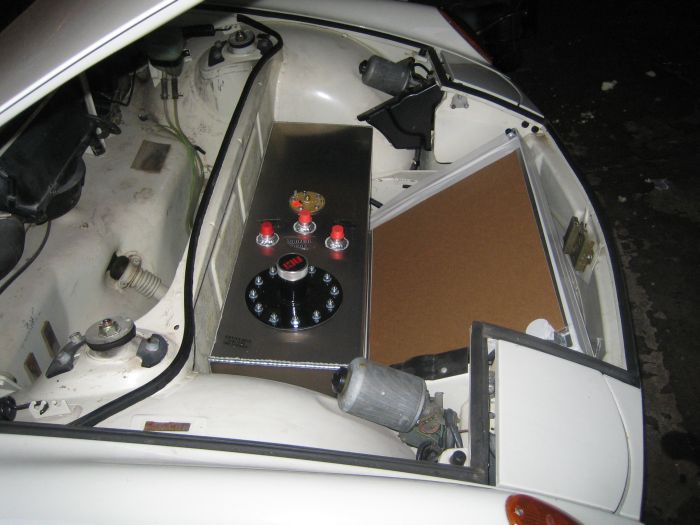
....
Posted by: Amenson Jun 22 2007, 09:42 PM
...
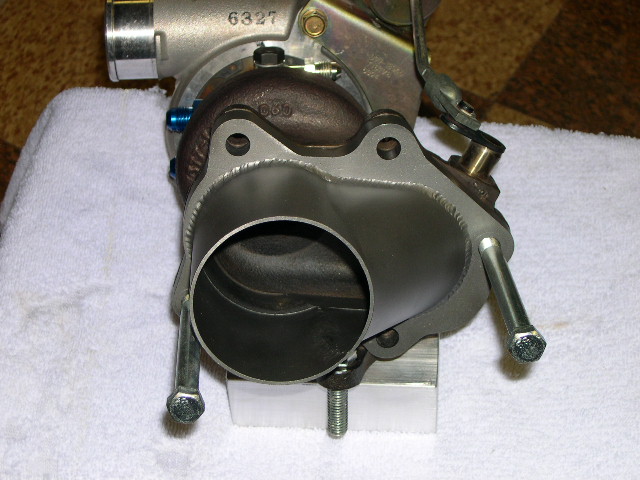
Modified the stock turbo flange for the 3" ss exhaust.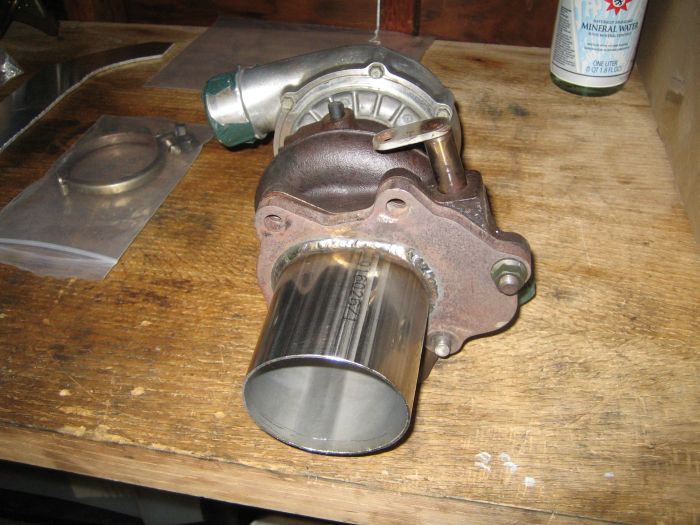
New oilpan, exhaust and turbo flange installed.
Mock-up of the exhaust. The outlet of the muffler will be in the stock location of the rear valance...maybe nobody will notice that it is a bit bigger than stock 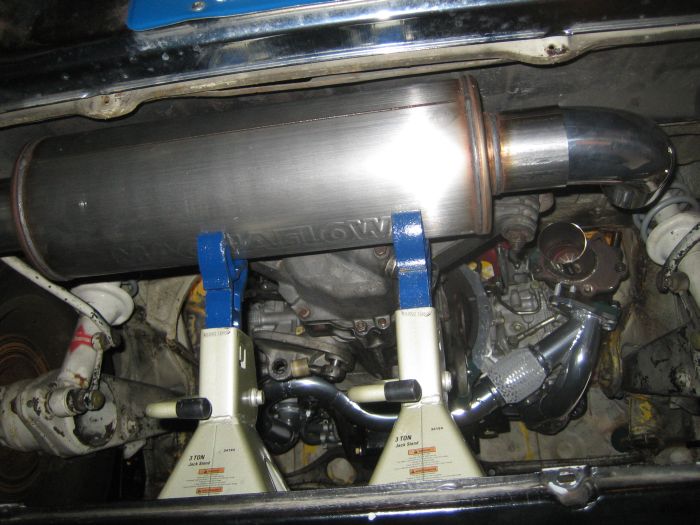
...
Posted by: Amenson Jun 22 2007, 09:45 PM
...
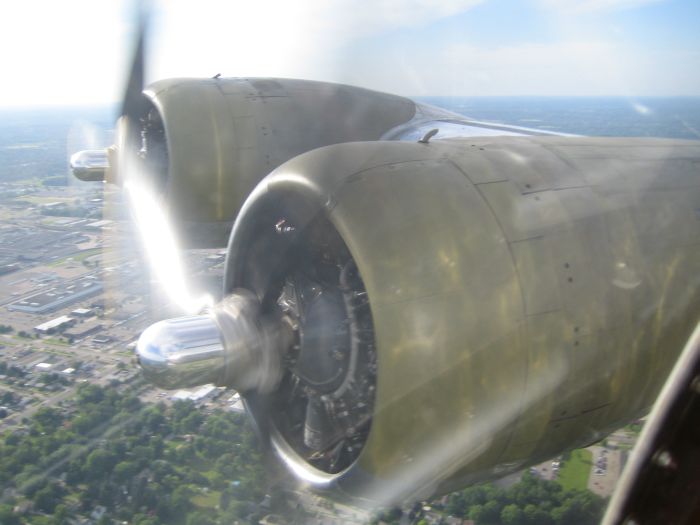
Got engaged...in the nose of a B-17 "Flying Fortresses" flying up the Detroit River!!!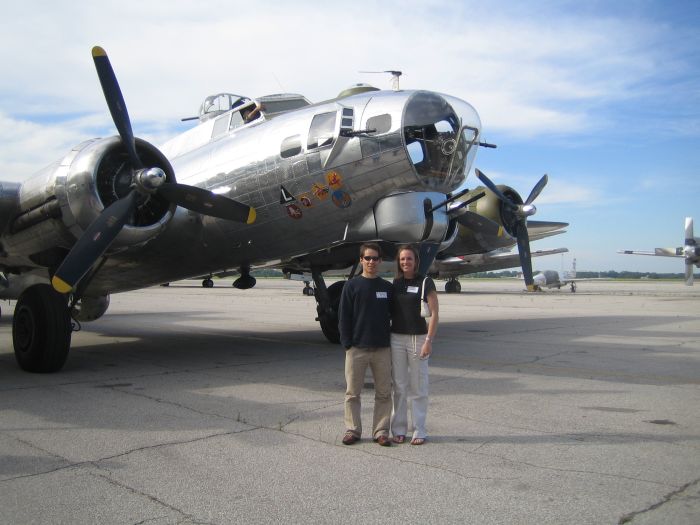
Finished a few more things but can not find the pictures right now. Will post again soon.
Scott
Posted by: scotty b Jun 22 2007, 09:46 PM
That's going to be one wicked ride ! What if anything will you be doing to the body? While I am generally in favor of body mods....keeping the stock appearance would be a killer sleeper
Posted by: neo914-6 Jun 22 2007, 10:20 PM
Great work!  Makes me want to get back to my project...
That must've been fun to fly in a B-17, did you get in the turret?
Posted by: bigkensteele Jun 23 2007, 12:13 AM
Congratulations on your engagement! However, you will now need to finish the car asap. Free-time as you know it will cease to exist. There will be wedding planning, which is Hell on Earth if you have to be even remotely involved. After the ceremony, I found that my attendance was required to events that were once optional. We needed to spend more time together. I would rather work on my car than be with her. Yada, yada. Then we had kids, who are currently 5 and 1. While I love them with no bounds, they are not conducive to leisure time in the garage, unless you are married to a true saint.
Was that out loud? Sorry. I think that I might be a little jealous of your free-time and more importantly, your skills. Your project, and work is incredible.
Posted by: Blood red 914-6gt Jun 23 2007, 12:26 AM
Wow that is reat work. I wish I had the talent to do all the fab work you are doing. Keep it up.
PS. tat's cool that you got to fly in a B-17. My grandfather was a belly gunner.
Posted by: Amenson Jun 23 2007, 08:44 AM
Thanks to everybody for the kind words and congratulations.
-I am going to leave the body stock for now. Eventually it will need flares of some sort so that I can put some decent rubber on it.
-The only place on the plane that we could not go was the belly turret. I asked several different members of the ground and flight crews hoping that somebody would let me in.
-My free time should be safe until kids come into the picture, which will be a few years yet. My fiancee fully supports work on the 914...she came over and introduced herself for the first time while I was working on it!
-The plane was pretty darn loud. Not so loud though that I could not ask the question 
Scott
Posted by: Blood red 914-6gt Jun 23 2007, 10:52 AM
That's awsome you found a good lady. My wife likes me making my 914 better. She wants me to win. Rather competitive woman;) Even when the kids come along I am sure you will have 914 time. You have to get away from the for sanity sake sometimes. I also have my 10 monthy old with me all day, and he likes making car noises.
On the belly, you have to be very folded up to sit in there. They had one at an air show near my house when I was 10, and when they found out my grandfather was killed in there they let my dad and I sit in it. I could fit as I was a little kid, but my dad was too tall at 5'6". I guess my grandfather was 5'6" as well but very thin. Sounds like a very creative way to propose. Nice work and congratulation.
Posted by: GS Guy Jun 25 2007, 07:34 PM
...
Modified the stock turbo flange for the 3" ss exhaust.
...
Man - you've got to get one of these to to finish off that awesome turbo exhaust!
PM me for details.
Conversion is looking good - can't wait to see how you plumb the intercooler.
Jeff
Posted by: Amenson Jun 25 2007, 08:32 PM
Very cool turbo outlet, I sent you a PM to find out where you got it.
I made a bit of progress this weekend. Finally got the turbo apart so that I could port the waste gate hole. It took a torch and a big soft hammer and then some very careful prying. The porting is necessary to avoid boost creep with a low back pressure exhaust.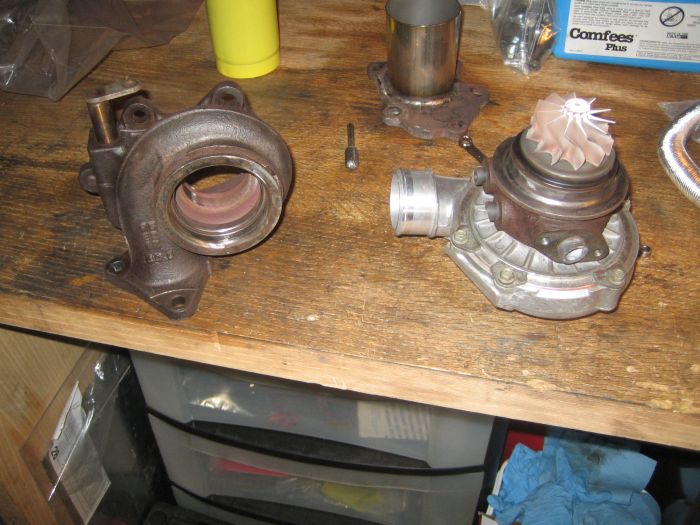
Made a frame to mount the fuel cell. Still need to weld it in and make some straps to hold the cell down to it.
I have the engine out so that I can cut the engine shelf out of the engine bay and fix some rust. Could not resist to pose the PorSti engine with my daily driver...'05 STi II. Hopefully I do not make this one into a donor car also.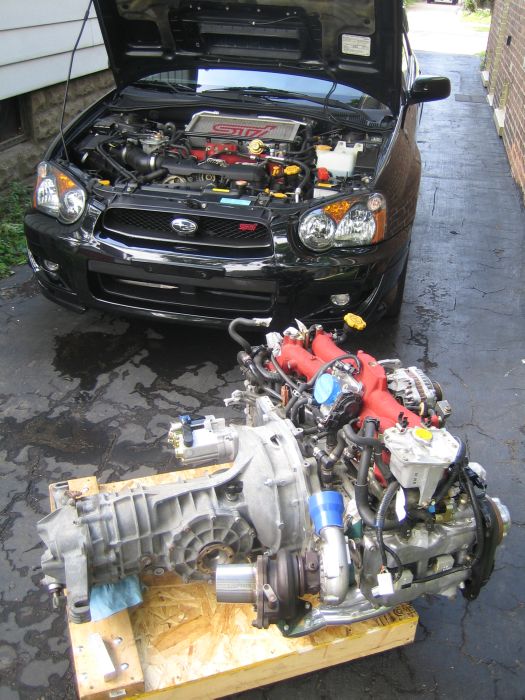
This pic shows the engine compartment w/o the engine shelf. I ordered some POR-15 and plan to seal everything up this week.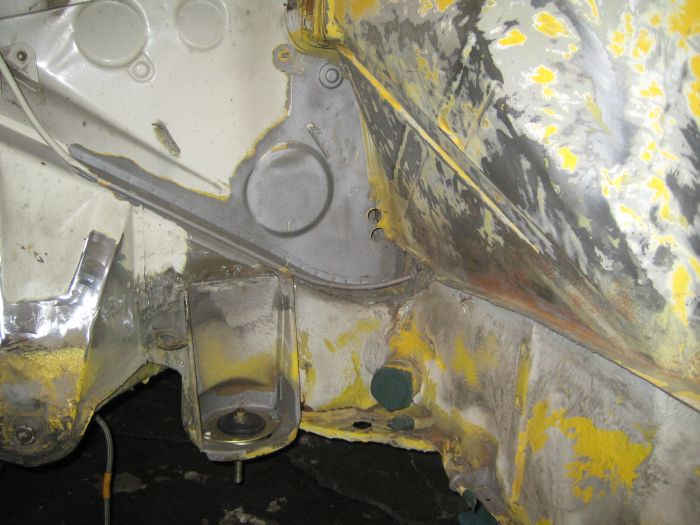
Scott
Posted by: mrdezyne Jun 27 2007, 04:50 PM
Excellent work! Love the mount, much easier than what I had planned and it looks like it provides plenty of room for exhaust. One quick question.... I think the Renegade mount raises the motor and moves it forward so you can use the stock Suby oil pan, if you had not notched the Small Car mount do you think it would have raised the motor enough to keep from cutting the oil pan? Difference might be using the 2.5 NA as opposed to the 2.0 STI turbo model. Any insight would be appreciated. At this point I'm looking for ways to cut my build time down and get mine rolling again. Your mount looks straight forward enough it should save a ton of time.
Posted by: Amenson Jun 27 2007, 07:09 PM
I mounted the engine so that the crank is parallel to the floor of the car, which turns out to be about as low as you can go and still use an oilpan. My STi engine is also an EJ25 although you may have a different oilpan as the late model engines have a different oil pan. Maybe your pan is shorter. It seams like you would have to raise the motor a whole lot to use the stock oil pan and not have it be the lowest part of the car. The Outback pan is only 4.25" deep and it is just barley above the bottom of the car.
This is the best picture that I could find that shows the position of the oilpan with respect to the cross bar and the bottom of the car. The cross bar is in the stock location.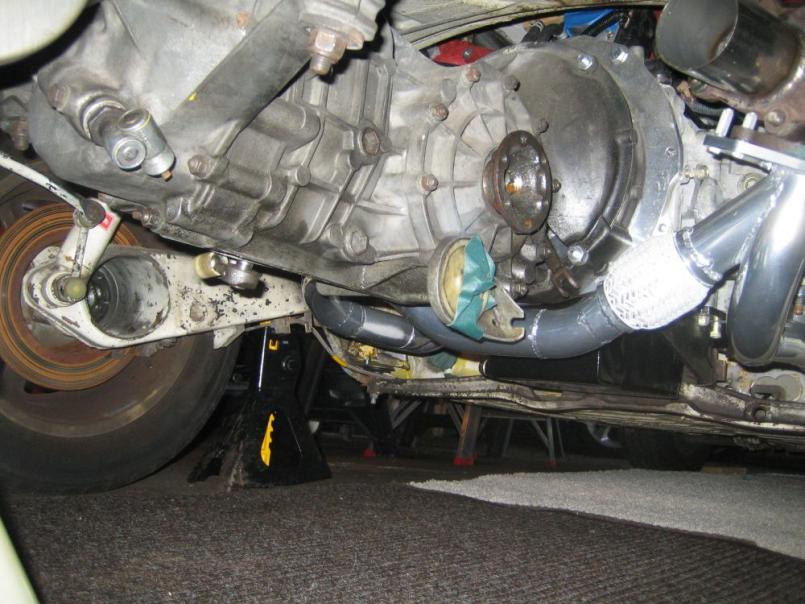
Scott
Posted by: Amenson Jun 30 2007, 01:53 PM
Made some more progress cleaning up the engine compartment. Man, does it take a long time to cleanly remove all of the extra brackets, etc. I would probably be done with the conversion by now had I not decided to do some extra cleanup and restoration work at the same time. Tis' the right thing to do though.
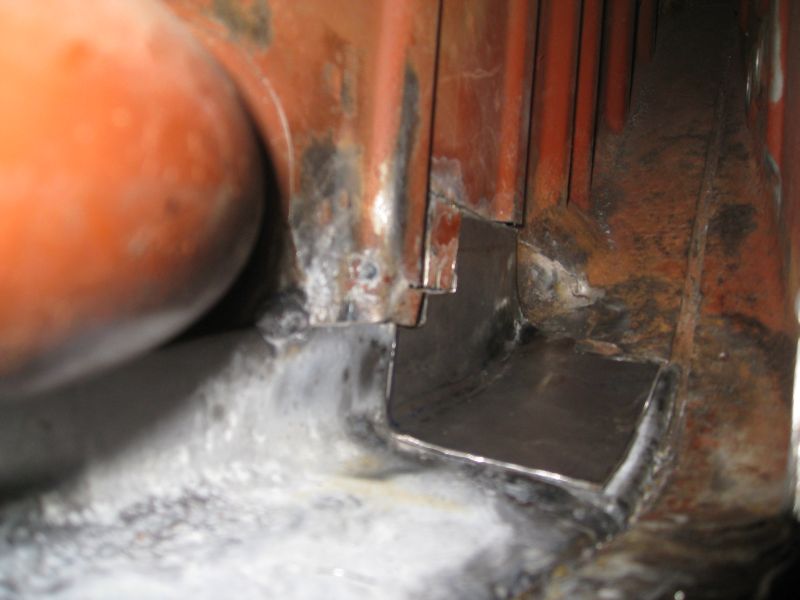
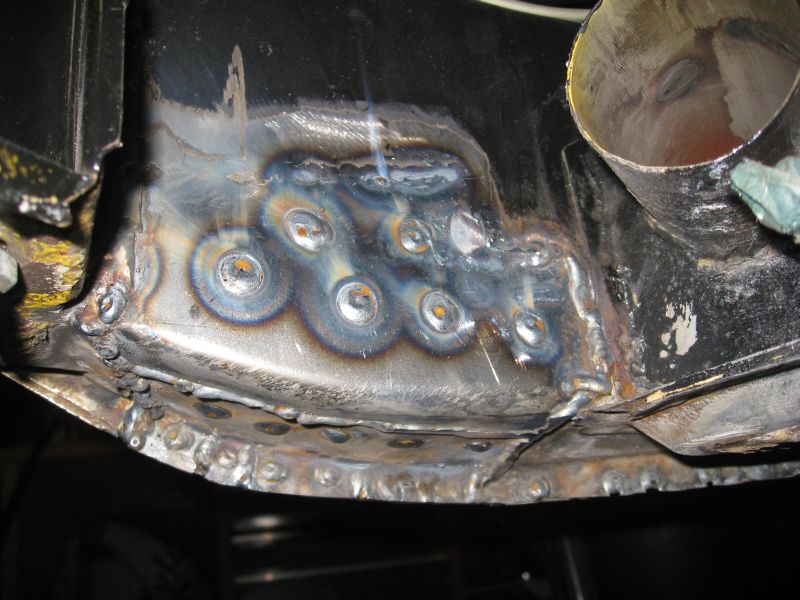
I finally built up the guts to cut out the hell hole rust. 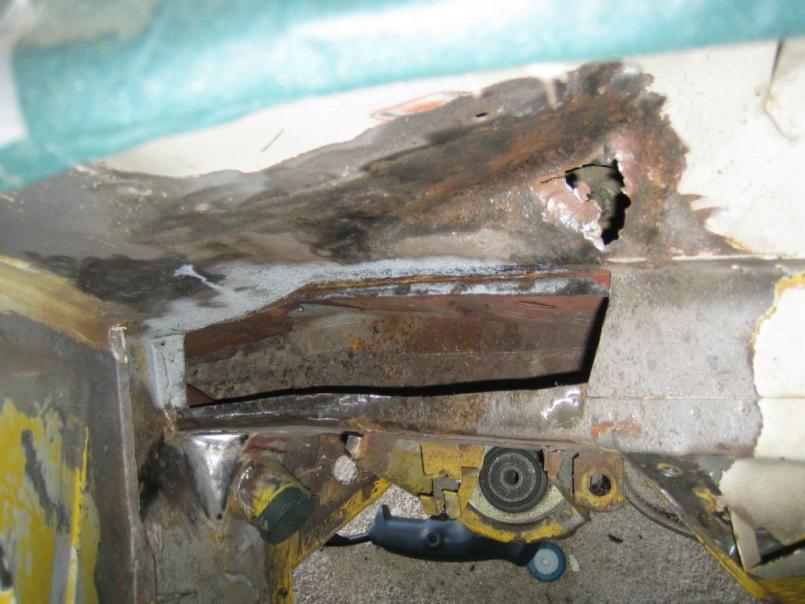
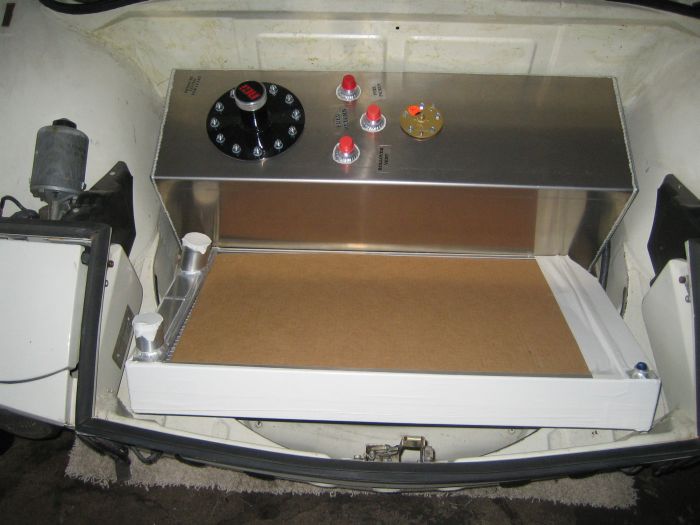
I also figured out how to hold down the fuel cell...use the stock fuel tank strap!!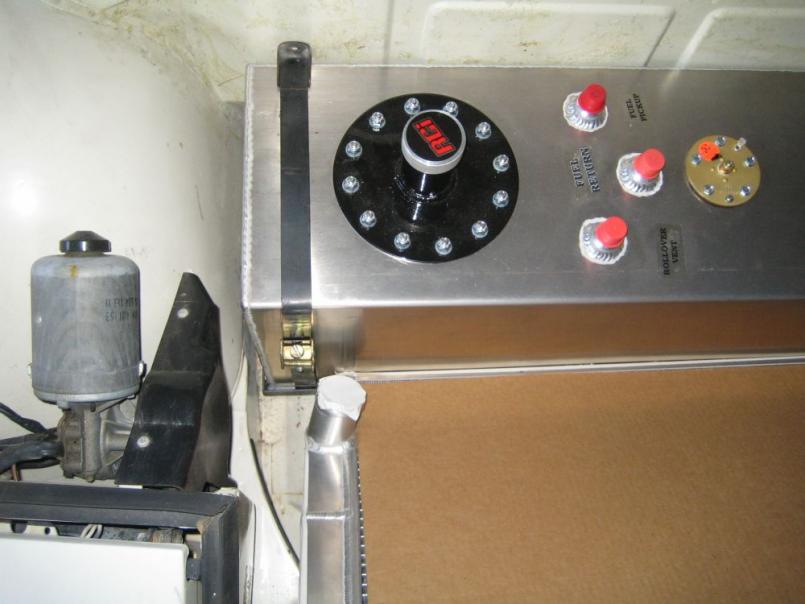
I will need another one for the other side. Anybody have an extra one lying around?
Should make some serous progress this week because I took the entire week off of work  Won't get to spend all 9 days off on the car, I will be going up to Mackinac Island next weekend for a quick vacation.
Scott
Posted by: Amenson Jul 2 2007, 08:58 PM
Made a couple patch panels today. I am really pleased with how they turned out. The large one fits better than it looks, I could not hold it in place and take the picture at the same time.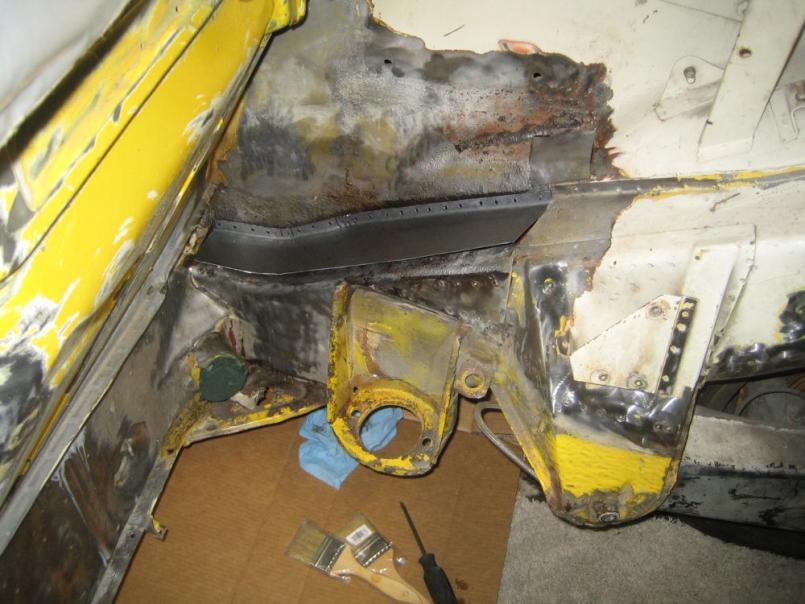
Will weld them in tomorrow.
I am going to Por15 the entire engine compartment tomorrow as well. Does anybody have any experience with por15 over paint. The instructions say that it is OK but warns that it adheres better to rough metal. I would prefer not to have to remove all of the paint but if the por15 is not going to stick I will have to.
Scott
Posted by: Blood red 914-6gt Jul 2 2007, 11:49 PM
Hey Scott
I would just rough up the paint. Paint adhears to a rough surface the best. Doesn't need to be barfe metal as long as it is rough.
Posted by: ChrisNPDrider Jul 3 2007, 12:44 AM
Nice photo of the side by side STIs
I also have a potential donor Suby as a daily driver. I really hope it never gets totaled, leaving me a free/salvaged EJ25 for my 80 HP 914
Posted by: RoninEclipse2G Jul 3 2007, 10:18 AM
Awesome work!
this thread really makes me want another teener to do a suby swap in, I love the handeling of the creamsicle but I also love the power the WRX gives me.
Posted by: TonyAKAVW Jul 3 2007, 11:05 AM
Your pictures of the engine bay look nearly identical to mine. I sanded mine down to almost the identical level of remaining paint. Instead of POR15 I used ZeroRust. I ahve used both ZeroRust and POR15 now and I definitely prefer the ZeroRust over POR15. When using POR15 I have always prepped the surface properly and still have adhesion problems after a year+. By and large the POR15 sticks but there are spots where I've had to retouch it. (this is for the interior primarily)
I sprayed the engine bay (with a paint gun) with two coats of ZeroRust. First coat was black, and the second coat was grey. I purposefully used two different colors because it allowed me to really make sure that I had the right thickness. So far (going on 10 months of continuous use, most of that with an engine bay radiator and its associated dirt, etc.) the paint is holding up perfectly. You can buy ZeroRust in spray cans as well.
-Tony
Posted by: Brian Mifsud Jul 3 2007, 01:12 PM
Scott,
This is really nice work. Are you a fabricator by trade? I am planning on getting a stainless exhaust system ceramic coated.
It appears you had the flex coupling ceramic coated. Will that crack and break down the coating for interfere with the "accordian" pleats inside? How about on the braided stainless. Is the coating "bridging" the weave, or is it adhearing to individual 'wires'?
This is part of my custom system for an non 914 vehicle, but the application is similar:
Posted by: GTeener Jul 3 2007, 03:59 PM
Attached image(s)
Posted by: JPB Jul 3 2007, 05:20 PM
You are one sick and twisted individual!!!! How can I be like you? 
Posted by: Amenson Jul 3 2007, 08:54 PM
Scott,
This is really nice work. Are you a fabricator by trade?
Nope, not a fabricator...I am electrical and mechanical engineer by training, currently managing software development for a living. I do almost all of the fab work, up to tacking parts together, myself and then have one of my friends do the finish welding. If you look closely at todays picture, you will see that my welding skills are not so great yet.
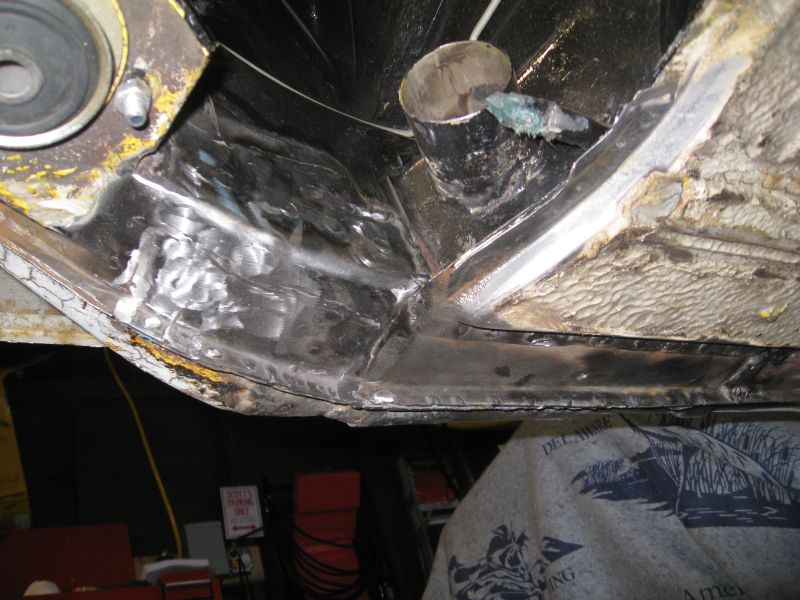
I made some more progress today (need to take more days off of work to work on the project!). The hell hole is repaired and part of the engine compartment is painted.
I did find some more rust by the driver's side jacking point. Will need to fix that...later. I have had enough rust repair for this week. The goal for tomorrow is to get the rest of the engine compartment painted and while that is drying, weld in the fuel cell bracket so that I can start working on the radiator mount.
Scott
Posted by: Amenson Jul 4 2007, 07:55 AM
Sorry, forgot to answer this question...
Scott,
It appears you had the flex coupling ceramic coated. Will that crack and break down the coating for interfere with the "accordian" pleats inside? How about on the braided stainless. Is the coating "bridging" the weave, or is it adhearing to individual 'wires'?
I am not sure how the coating on the flex joint is going to work out. The guys at the coating shop said that it will be OK...they have a very good reputation. For the most part each wire is coated and it still flexes fine. We will just have to wait and see.
Scott
Posted by: Amenson Jul 15 2007, 09:39 PM
Took a big item off of the to do list this afternoon. Pretty much finished the exhaust!!
Here is a picture of it on the ground: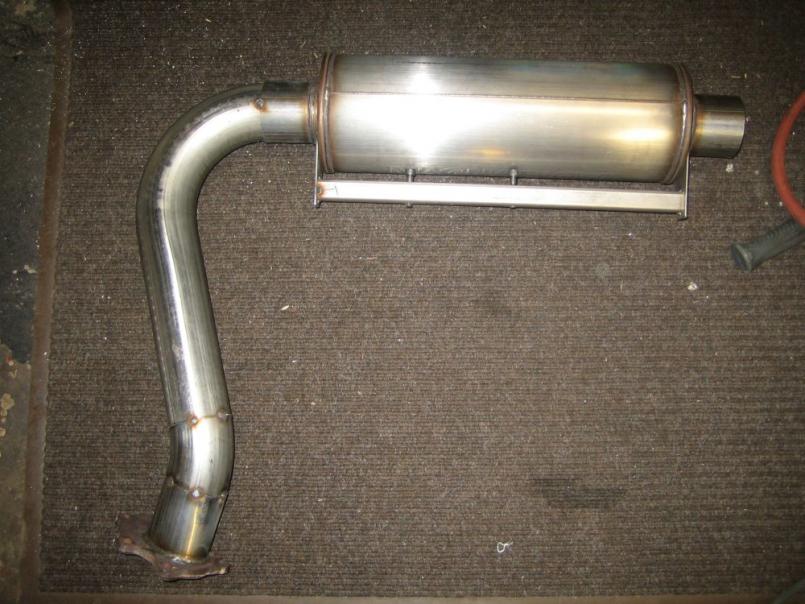
Installed!!!!!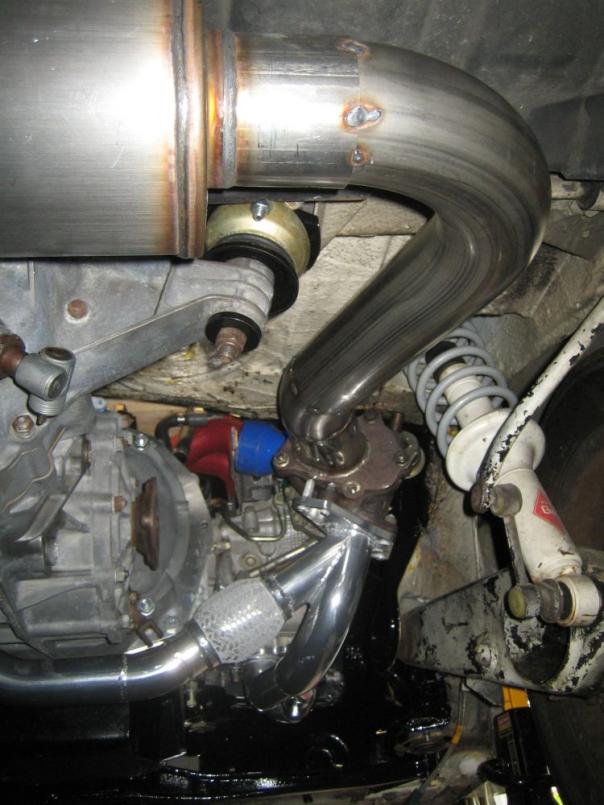
As always, I still need to have one of my buddies finish welding it.
Scott
Posted by: Amenson Jul 18 2007, 09:20 PM
I fit the engine cover on tonight to make sure that the intercooler fits beneath it...it does!!!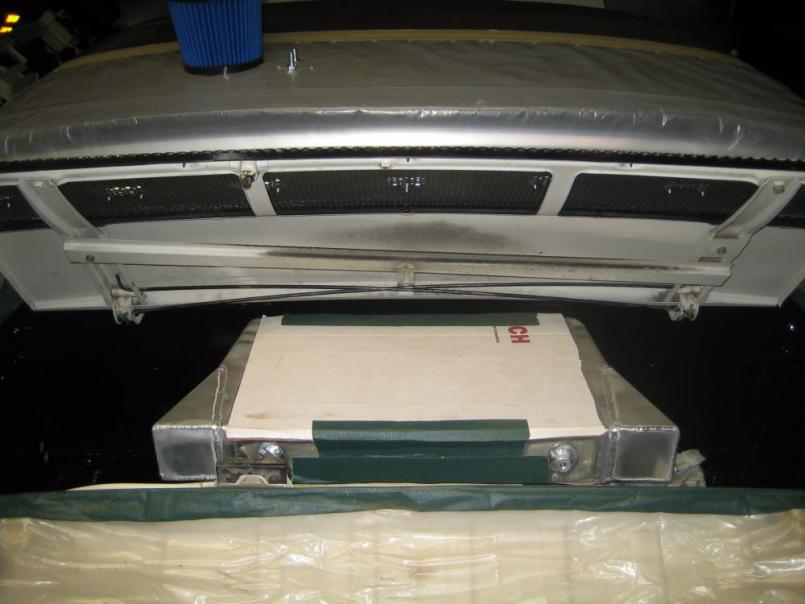
I am going to make a GT style, fully vented engine cover to allow the air to get through the intercooler a better. Is there a source (Grainger or somebody) for the expanded metal that matches the stock stuff?
Scott
Posted by: MrKona Jul 18 2007, 09:48 PM
Nice work, I'm really enjoying watching this thread. Maybe this topic from the classics by Eric Shea will help you with the GT-style lid.
http://www.914world.com/bbs2/index.php?showtopic=6167
Posted by: fat73 Jul 18 2007, 10:23 PM
Scott
Is this engine a "drive by wire" throttle body? Wondering why you swapped out the steering wheel? I'm building an '02 stock body also. Thinking of going twin turbo and moving the turbos back to the rear end similar to a 935.
Ed aka W9R1
'73 914 w/2003 WRX EJ20
'06 Subaru Forester 2.5 XT
Posted by: Crazyhippy Jul 18 2007, 10:31 PM
Scott
Is this engine a "drive by wire" throttle body? Wondering why you swapped out the steering wheel? I'm building an '02 stock body also. Thinking of going twin turbo and moving the turbos back to the rear end similar to a 935.
Ed aka W9R1
'73 914 w/2003 WRX EJ20
'06 Subaru Forester 2.5 XT
MUCH better off sticking w/ common Scooby stuff. You know it will work, what turbo works w/ what motor etc.
I'm waiting for my 8CM TD06-20G to show up along w/ a new intercooler. Should be over 350HP at the wheels, going to try for 400 on C-16
BJH
Posted by: Amenson Jul 19 2007, 11:36 AM
Scott
Is this engine a "drive by wire" throttle body? Wondering why you swapped out the steering wheel? I'm building an '02 stock body also. Thinking of going twin turbo and moving the turbos back to the rear end similar to a 935.
Ed aka W9R1
'73 914 w/2003 WRX EJ20
'06 Subaru Forester 2.5 XT
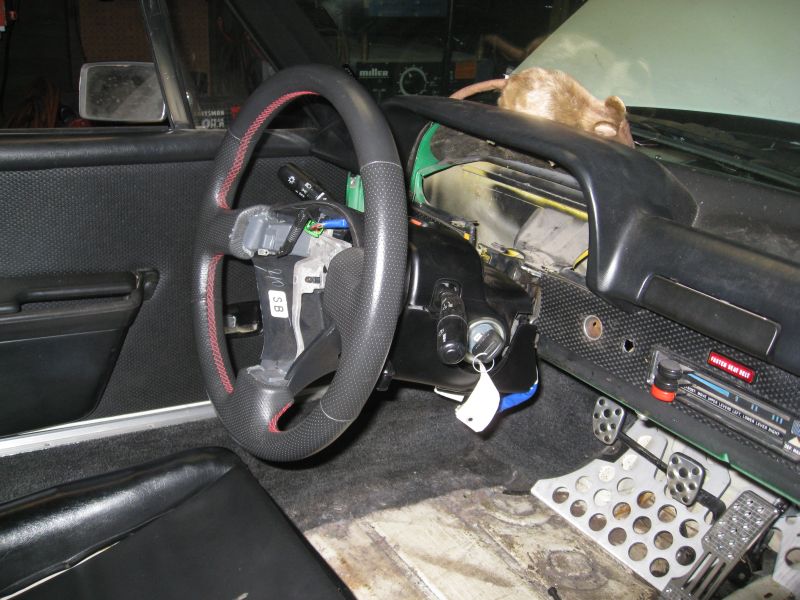
Ya, it is throttle by wire. Also, it has a security key so without the ignition cylinder and key the ecu will refuse to do much of anything.
Thanks for the GT lid link...that will help. Now I need to add another engine lid to my shopping list.
Scott
Posted by: fat73 Jul 19 2007, 10:26 PM
Scott
Is this engine a "drive by wire" throttle body? Wondering why you swapped out the steering wheel? I'm building an '02 stock body also. Thinking of going twin turbo and moving the turbos back to the rear end similar to a 935.
Ed aka W9R1
'73 914 w/2003 WRX EJ20
'06 Subaru Forester 2.5 XT
MUCH better off sticking w/ common Scooby stuff. You know it will work, what turbo works w/ what motor etc.
I'm waiting for my 8CM TD06-20G to show up along w/ a new intercooler. Should be over 350HP at the wheels, going to try for 400 on C-16
BJH
Precisely...but what about using one of the (much less expensive) twin turbo'd engines and just moving the turbos down and back to the rear (to avoid having to cut the trunk area), with stock ECU stuff?
By the way....that setup of yours should be crazy stupid fast.


Oy yeah...I'm going to the dupont registry magazine meet here in Clearwater this Saturday at 7am to what they call the Cars and Coffee meet.
They have some insane cars show up there from what I've seen on http://www.myspace.com/carsandcoffee
At least one of the other local 914ers is going too. I'll post pics.
Ed aka W9R1
Posted by: Amenson Jul 22 2007, 10:11 AM
Had a few buddies over to help yesterday and we made some really good progress.  ...ok, and had a few beers also.
Made the Radiator support and welded in the fuel cell frame: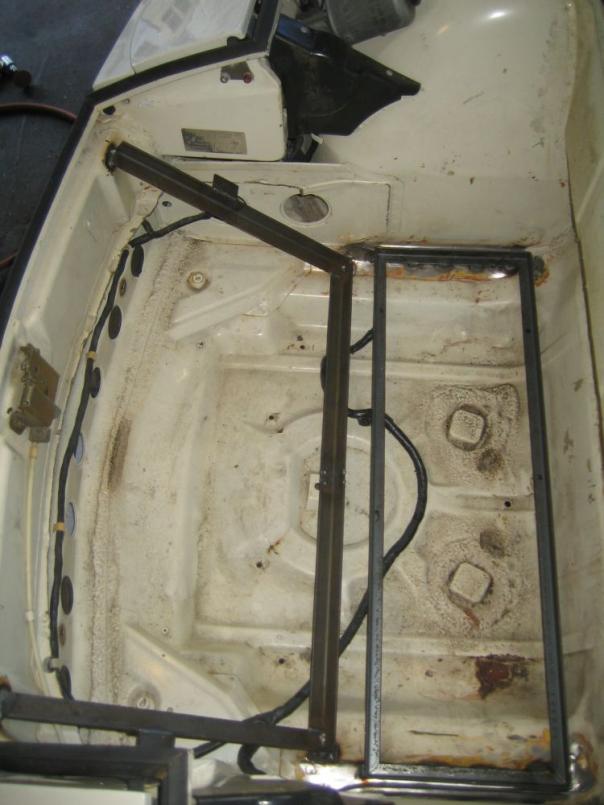
Installed: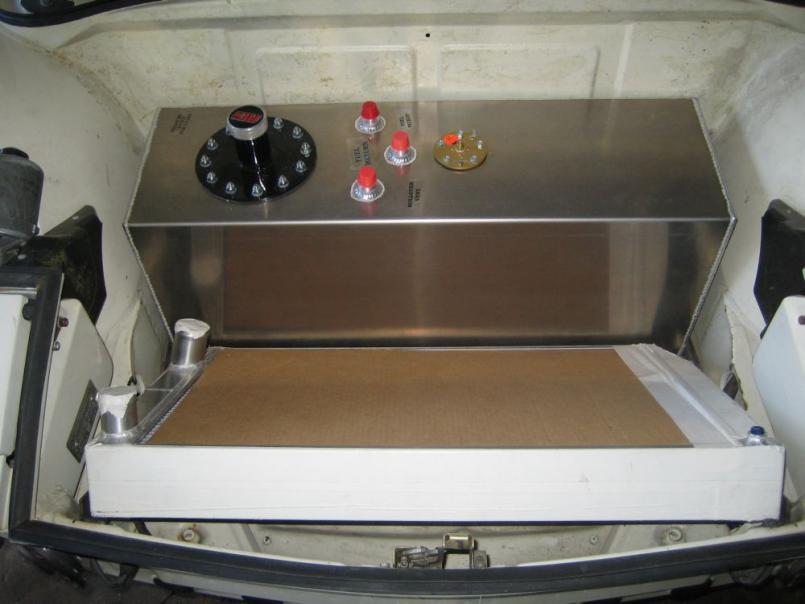
Made the outlet of the exhaust and the rear intercooler support: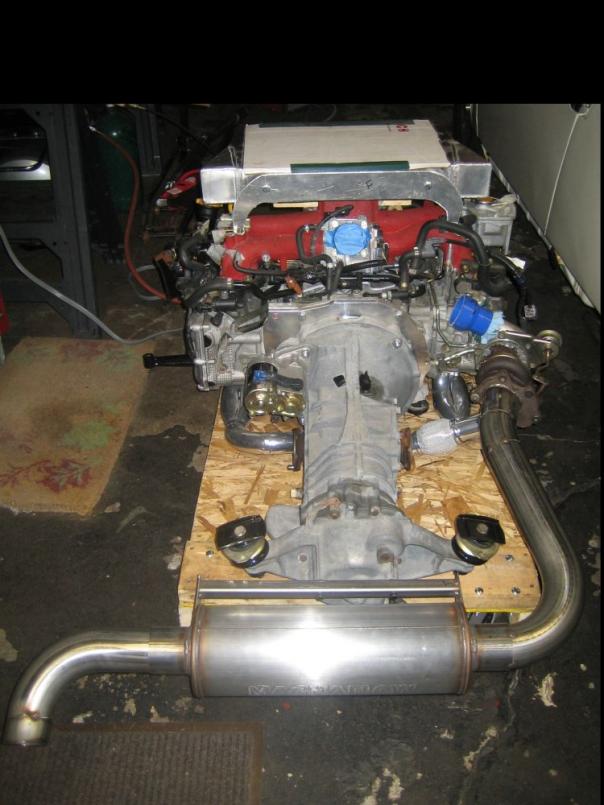
Going to try to get the fuel lines run and the rear brakes/prop valve plumbed today.
One month until Woodward Dream cruise...need to get this thing running so I can go up to Pontiac and show the hot rod guys how to make some smoke!
Scott
Posted by: Amenson Jul 23 2007, 05:20 PM
Progress from Sunday:
Installed new brake lines in the rear: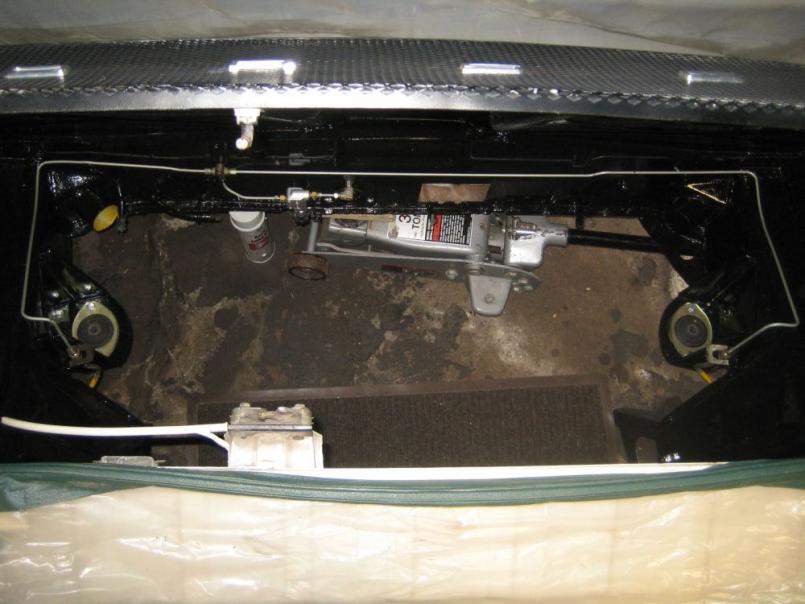
Finally buttoned up the timing belt: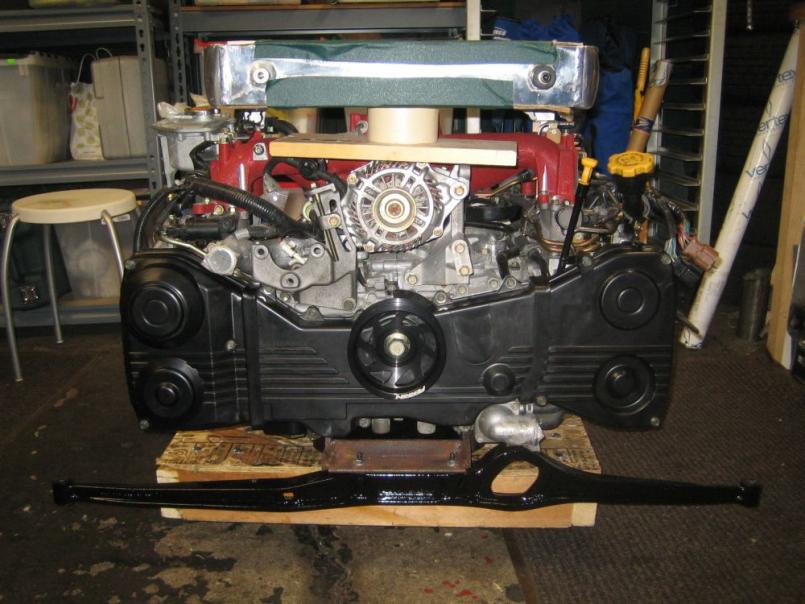
I think that the single most difficult part of the entire project was dealing with the damn cam pullies. Getting them off in the first place, especially the broken ones, and getting them torqued back down w/o the Subaru special tools has been a real pain in the butt. I ended up pushing the engine 2 blocks down to the Subaru dealership to use their tools. I can probably install the timing belt while sleeping now.
While checking the cam timing I rotated the engine and found that the starter is partially engagued. I have one of the recommended eBay high torque gear reduction starters. I am going to install my old starter to see if I have partial engagement with that one also.
Is a shim required to use this starter normally. Could my flywheel be the problem? I have a Renegade flywheel/adapter plate made for the engine/trans combination.
Scott
Posted by: ChrisNPDrider Jul 23 2007, 06:37 PM
Nice progress!
My mini-starter fit fine, but others have the same problem. One actually thrashed the flywheel due to the limited engagement. Use the *search* on the upper right link and try searching for "starter" in titles...there was a good discussion recently where mcMark talked about shimming the mount to match the starter gear on the flywheel teeth better - again, in some cases this problem exists but not all. Good luck
Posted by: RS22b Jul 23 2007, 07:23 PM
i must say, this has got to be one of the most complete STi conversions i have seen. Would love to do the same kinda thing someday. Not sure if it will come sooner than later, but would love for it to come sooner than later 
Are you on nasioc as well?
As you can see by my sig im a subaru junkie as well, but the 914 was first.
cant wait to see the final product!
g/l
_billy
PS: dont throw any of that subaru stuff away! before you do, let me know
Posted by: Amenson Jul 23 2007, 10:30 PM
...there was a good discussion recently where mcMark talked about shimming the mount to match the starter gear on the flywheel teeth better - again, in some cases this problem exists but not all. Good luck
Thanks for the tip. I am a little less irritated by the situation now. Guess that I have to add one more thing to the "to make" list.
RS22b, I am on nasioc but I rarely read it and pretty much never post. I have sold almost all of the STi stuff already. All that is left are the struts, rocker covers, front subframe and a few other small odds and ends. Oh, center console and carpet also...but only because I had a non-paying idiot win those items on eBay.

Scott
Posted by: Amenson Jul 26 2007, 09:07 PM
Made a little more progress today. The intercooler no longer needs a board and roll of tape to hold it up. I flattened the ends and bent up some 3/8" SS fuel line. I think that it worked out well although do need to adjust the back of the intercooler up a bit as I can no longer remove the coolant cap.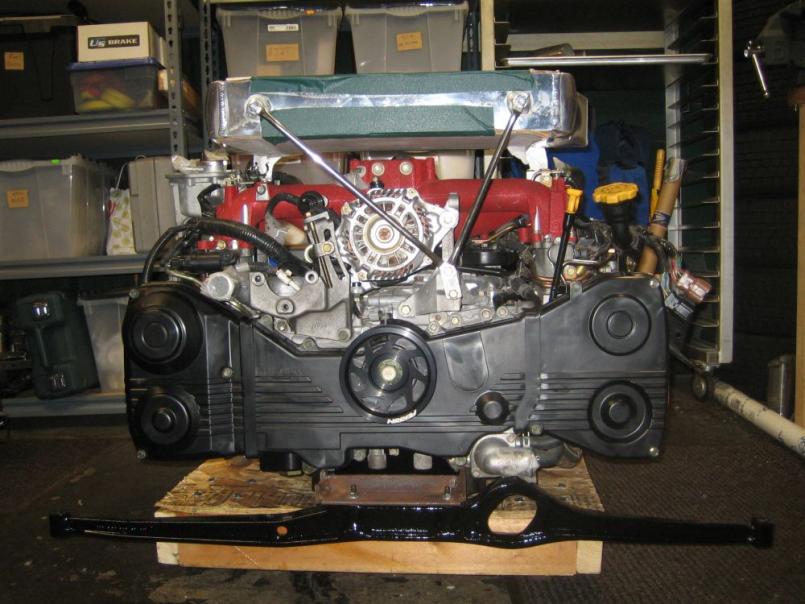
The fuel lines are next on the list.
Scott
Posted by: Amenson Jul 30 2007, 09:29 PM
Got a bit more work done the last couple of days.
Made the through tunnel fuel lines. Also had the exhaust welded and installed the O2 bungs, as always it turned out great...this project would not be going so well without the help of my buddies: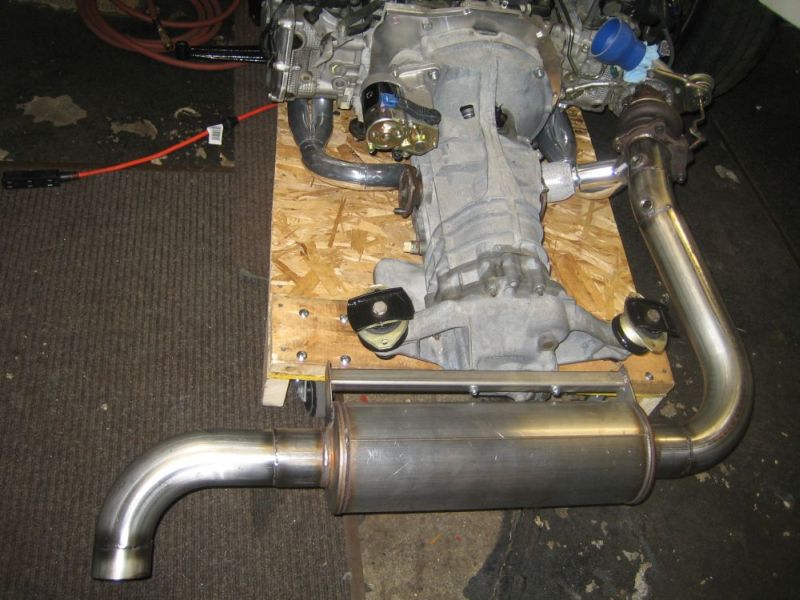
Mocked up the turbo to intercooler piping...need to tack it into place and have it welded: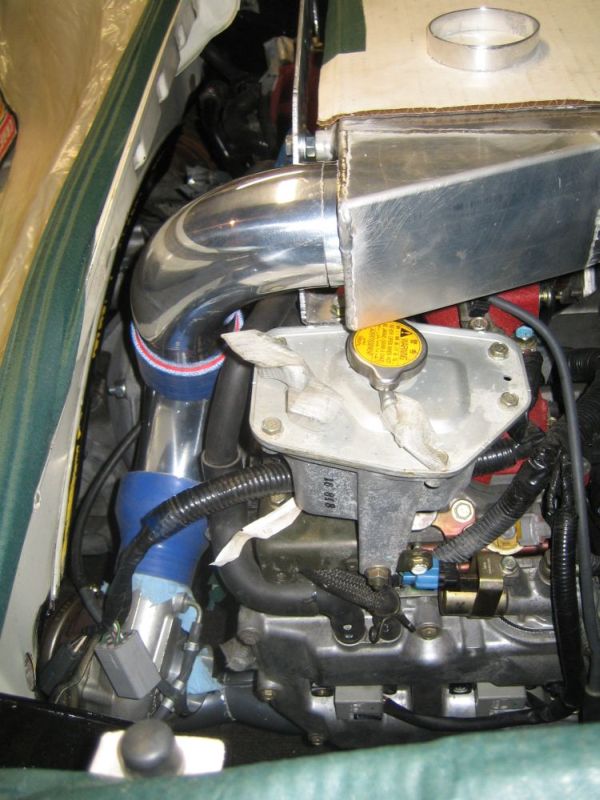
It looks like I am going to need to remove the engine lid latch to clear the IC tubing on the other side. I was really hoping to avoid doing this.
Somebody buy my 2.0L... I mean 1.7/1.8L http://www.914world.com/bbs2/index.php?showtopic=74560, the project fund is running low!
Scott
Posted by: charliew Aug 2 2007, 06:07 PM
Hi Scott, I'm pretty new to this forum but I'm lovin it. It's like a gold mine to me. Is the turbo going to drain oil back ok? I'm trying to use a twin turbo and am interested in the positioning of yours. Also are you aware that a light crank pulley creates harmonics that disturb the oil pump? I'm not positive on this but it's something I read on nasioc. You can take this with a grain of salt. I put my original pulley back on though. I will have plenty of power without the risk. Also we have found a better oil pump lately thats discussed on nasioc. Don't worry if your not going to be bouncing of the rev. limiter. Hope the tranny holds up. I really enjoy your thread.
Charlie
Posted by: Amenson Aug 3 2007, 11:05 AM
Hi Scott, I'm pretty new to this forum but I'm lovin it. It's like a gold mine to me. Is the turbo going to drain oil back ok? I'm trying to use a twin turbo and am interested in the positioning of yours. Also are you aware that a light crank pulley creates harmonics that disturb the oil pump? I'm not positive on this but it's something I read on nasioc. You can take this with a grain of salt. I put my original pulley back on though. I will have plenty of power without the risk. Also we have found a better oil pump lately thats discussed on nasioc. Don't worry if your not going to be bouncing of the rev. limiter. Hope the tranny holds up. I really enjoy your thread.
Charlie
Charlie,
Thank you for the tip on the pulley, I will look into it. I still have my original but it was scuffed in the accident so I replace it. I don't think that I will get to use the full rev's all that much anyways.
As for the turbo oil drain, I am going to try to use the stock block return modified a bit to point in the correct direction. I also have a fitting for the oil pan if that does not look like it will work.
I hope the tranny hold up also!
Scott
Posted by: Amenson Aug 14 2007, 09:36 PM
Have not posted in a while because I have not made any interesting progress. I have been plugging way on a load of small projects:
Made the spacer for the starter
Made the flange for the blow off valve
Started removing the engine lit latch
Test fit the clutch cable
Modified the clutch pulley housing to lower the clutch cable under the exhaust
Started running the cooling lines. This was a bit of a set back. I purchased gates 75w marine type colling line. The specified bend radius was 12 inches. I figure that I could cheat it a little...I was wrong. It creases quite easily. Now I am going to have to put a few stainless steel bends where I need to make a tight direction change. I know, more places to leak but I do not have much of an option right now.
On the brighter side, I proved once again that good things do come from eBay!!! I got an '83 CS front suspension for $285 + shipping which was only $55 because the seller let me arrange shipping through my BAX account.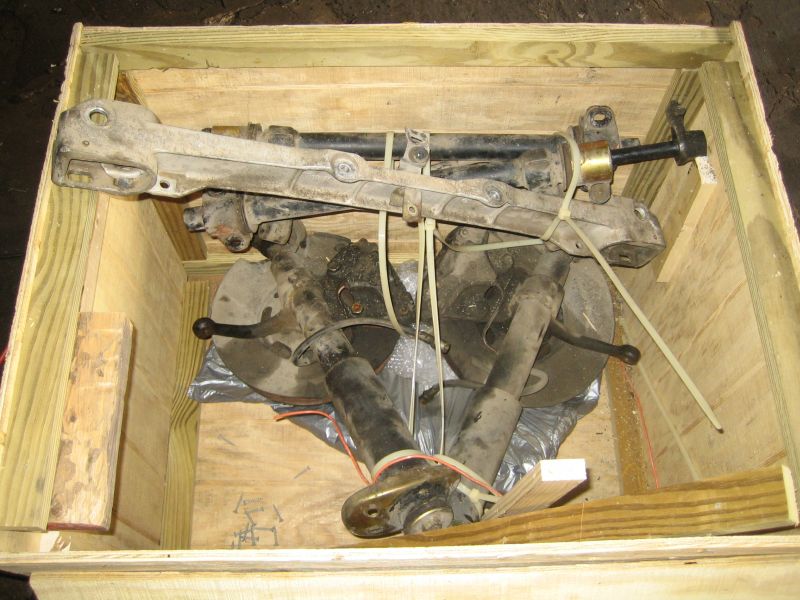
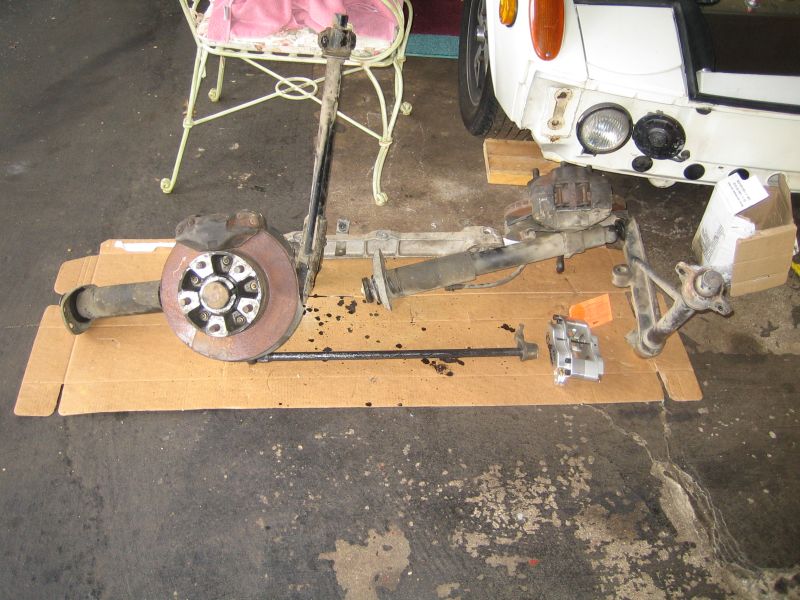
You can see one of the 4-pot billet calipers that I plan to use both front and rear in the above picture. As this is not a critical part of the project at this point I promptly disassembled the parts so that they would fit into bins and stored them away until winter. 
So needless to say, with Woodward Dream Cruise coming up this weekend I will not be participating with the PorSTi. I will be having a party for it Saturday night. If anybody is planning to be in the area and wants to stop by for a beer and check out the project I am a block east of Woodward in Ferndale...just send me a PM and I will give you the details.
Scott
Posted by: Brando Aug 14 2007, 10:36 PM
Quick question...
Since this is a water-pumper, how will you be moving air through the engine bay (and the intercooler) when sitting at idle or at low speeds? Running big high-flow fans?
Posted by: pffft Aug 14 2007, 11:48 PM
Quick question...
Since this is a water-pumper, how will you be moving air through the engine bay (and the intercooler) when sitting at idle or at low speeds? Running big high-flow fans?
Why would you need to? It won't be making any boost at idle and very little at low revs.
My sube intercooler draws air through a scoop, and I never thought about it needing
fan circulated air. Not saying it doesn't, but I always figured the intercooler was for cooling
the compressed air from the turbo, not the coolant.
patrick
Posted by: Brando Aug 15 2007, 04:15 AM
Even at low revs and idle you'll be pumping 'exhaust-heated' air through that intercooler. I thought the premise was to cool that air? Without airflow (or in a water to air intercooler, coolant flow) it's perpetuating higher intake temps. Not to mention, you'll be keeping warm/hot air in the engine bay.
Sure, you might not 'need' it, but I'm just taking a practical standpoint on the issue. If I were running a boosted car, I'd be doing what I could to keep that intake charge as cool as possible.
Posted by: fat73 Aug 15 2007, 08:34 AM
Even at low revs and idle you'll be pumping 'exhaust-heated' air through that intercooler. I thought the premise was to cool that air? Without airflow (or in a water to air intercooler, coolant flow) it's perpetuating higher intake temps. Not to mention, you'll be keeping warm/hot air in the engine bay.
Sure, you might not 'need' it, but I'm just taking a practical standpoint on the issue. If I were running a boosted car, I'd be doing what I could to keep that intake charge as cool as possible.
Speaking from 17,000 miles of experience with zero-zilch problems with the engine, here's my $.02. My intercooler is stock and is top mounted horizontally (Renegade setup) just to the right of the engine bay. I don't know anybody with this setup that has intake air cooling problems; although I'm sure more air flow across the intercooler would be better for performance. As is you can get 4.5 secs 0-60, and ~10 seconds 0-100.
 I did remove the engine lid drain pan on my car for clearance of the intercooler. In my opinion the engine bay doesn't get any hotter, if as hot, as the original air cooled engine.
 Ed aka W9R1
1973 914/2003 EJ20 WRX engine
1972 914 Roller in process
community.webshots.com/user/fat73
youtube.com search for Porsche W9R1
Posted by: Amenson Aug 15 2007, 09:14 AM
Even at low revs and idle you'll be pumping 'exhaust-heated' air through that intercooler. I thought the premise was to cool that air? Without airflow (or in a water to air intercooler, coolant flow) it's perpetuating higher intake temps. Not to mention, you'll be keeping warm/hot air in the engine bay.
Sure, you might not 'need' it, but I'm just taking a practical standpoint on the issue. If I were running a boosted car, I'd be doing what I could to keep that intake charge as cool as possible.
From a practical standpoint I am significantly better than stock. On the STi (and all other Subies) the intercooler is mounted almost directly above above the turbo. At least now I have the relatively cool air coming off the engine going through the intercooler while stationary.

I intend to monitor intake air temps to see how the system works.
Scott
Posted by: charliew Aug 15 2007, 02:55 PM
Hey guys, my son has a sti and we put a front mount ic on it about a year ago. He ordered a water injection kit to add to it. After installing the ic I told him I had some thermocouple wire and a hand held temp guage for the wire and we ran a little check. We ran a wire under the silicon hose at the tb and another under the hose at the outlet of the turbo. It was about 99 degrees by a thermometer on the wall in the shade. In 2nd gear the turbo hit 340 degrees f. and 3rd about 350. We then used the wire to the tb and in second and 3rd we only saw 106 degrees. This was air coming off of asphalt on a 100 degree day. We decided we needed to check the guage so we boiled some water and the water boiled at about 217 degrees if I remember correctly. We are at about 770 ft elevation. My son is a mech. engineer so he is pretty thorough on his evaluations. Needless to say he has not gotten around to adding the water injection and he's now running about 22 lbs. boost. (with a different turbo) When we did the check he was still using the stock sti turbo and I think about only 18 lbs. of boost and I'm not sure if it held that much all the way to redline. On the 914 if you run headers with out wrap the nasioc boys claim you loose boost temperature and turbo performance when you no longer have the cast iron manifolds and insulated pipes.This would also lower the air temps at the turbo and increase lag time. Don't forget the turbo is also water cooled. The subie can be made to run at 180 degrees, I believe, and this also lowers the engine bay temps. Of course there is going to be heat soak when going slow or stopped. Don't plan on real power till you've gone a little ways. One hot evening when my son was first tuning( he was adding springs to the waste gate) he would run through 4th and come back and set with the air cond. on and study the data on his lap top. After several runs he said it wasn't running as good as it ran that morning going to work. I reminded him that we were inducing heat soak considerably enjoying the air. This was about 10pm at night but it was still hot. I am going to eliminate the water lines to the tb and iac valve on my subies. If it gets very cold here I should be hunting. One thing we don't have is the fans blowing air from a radiator over the motor as in a stock application. I still haven't decided for sure which way the air is moving through the engine compartment at speed on the 914. I think it's down but I'm not positive. My 75 has little rubber flaps on the belly in front of the engine bay. This would appear to enhance the downward air movement I would think. Probably a belly pan from the front of the tranny back to the rear valance would also help. I believe at 17 lbs. boost with 93 octane the ic in the engine bay is good enough till it gets above 120 degrees outside and if it's over 100 I'll be in the pool or on the web.
Charlie
Posted by: Crazyhippy Aug 15 2007, 09:34 PM
I've done similar thermocouple tests...
The hill next to my house (freeway, canejo grade) 4th gear @ 7000RPM had the turbo outlet @ 360* (stock turbo). The throttle body temp would slowly creep up and stabilize just under 200*. Now have a MUCH bigger turbo, and need to up size the intercooler to match.
Damn this HP adiction is never ending.
BJH
Posted by: ptb Sep 10 2007, 06:52 AM
Any updates?
Posted by: charliew Sep 10 2007, 04:37 PM
Scott
Is this engine a "drive by wire" throttle body? Wondering why you swapped out the steering wheel? I'm building an '02 stock body also. Thinking of going twin turbo and moving the turbos back to the rear end similar to a 935.
Ed aka W9R1
'73 914 w/2003 WRX EJ20
'06 Subaru Forester 2.5 XT
MUCH better off sticking w/ common Scooby stuff. You know it will work, what turbo works w/ what motor etc.
I'm waiting for my 8CM TD06-20G to show up along w/ a new intercooler. Should be over 350HP at the wheels, going to try for 400 on C-16
BJH
Precisely...but what about using one of the (much less expensive) twin turbo'd engines and just moving the turbos down and back to the rear (to avoid having to cut the trunk area), with stock ECU stuff?
By the way....that setup of yours should be crazy stupid fast.
Oy yeah...I'm going to the dupont registry magazine meet here in Clearwater this Saturday at 7am to what they call the Cars and Coffee meet.
They have some insane cars show up there from what I've seen on http://www.myspace.com/carsandcoffee
At least one of the other local 914ers is going too. I'll post pics.
Ed aka W9R1
replying on the twin turbo comment. I bought a twin turbo complete setup but after considering all the parts that eventially will go bad and the fact that the ecu can't be reflashed and is setup to run on 98 octane fuel, I've decided to just run a vf39 with wrx style headers with the 20h heads and sti block maybe recammed and with solid lifters. I really wanted to make the tt setup work but there are too many challenges to deal with.
Charlie
Posted by: Amenson Sep 29 2007, 07:59 PM
It's been a while since a progress update, unfortunately not so much to report.
Worked a bit on the IC plumbing. Am waiting on some more tubing to arrive so that I can finish it off.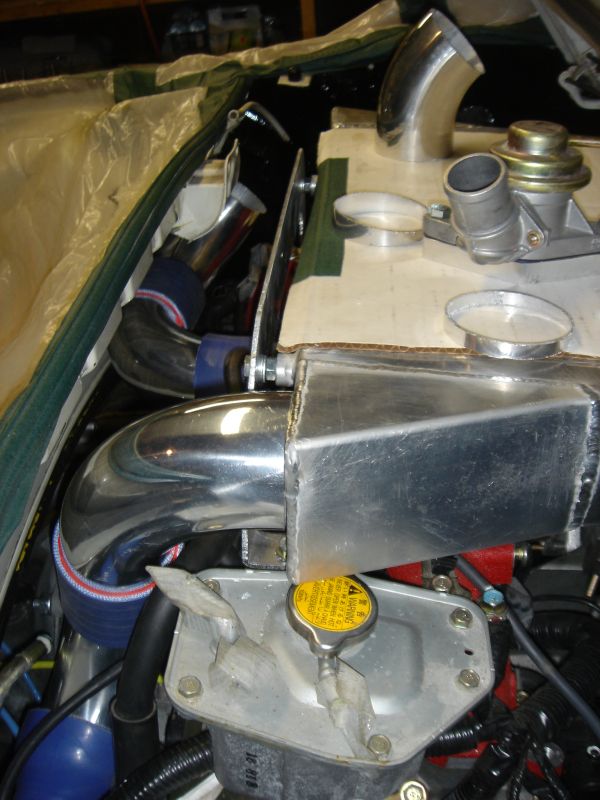
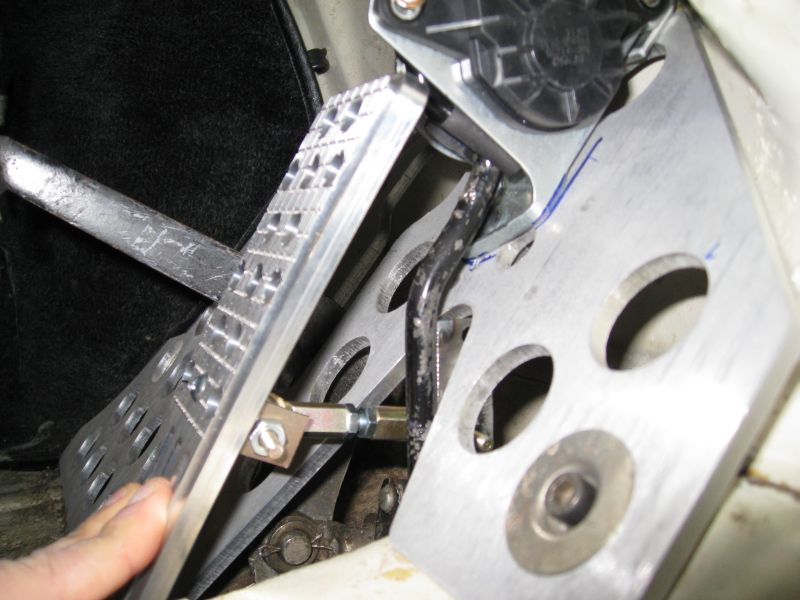
Mounted the throttle sensor this afternoon.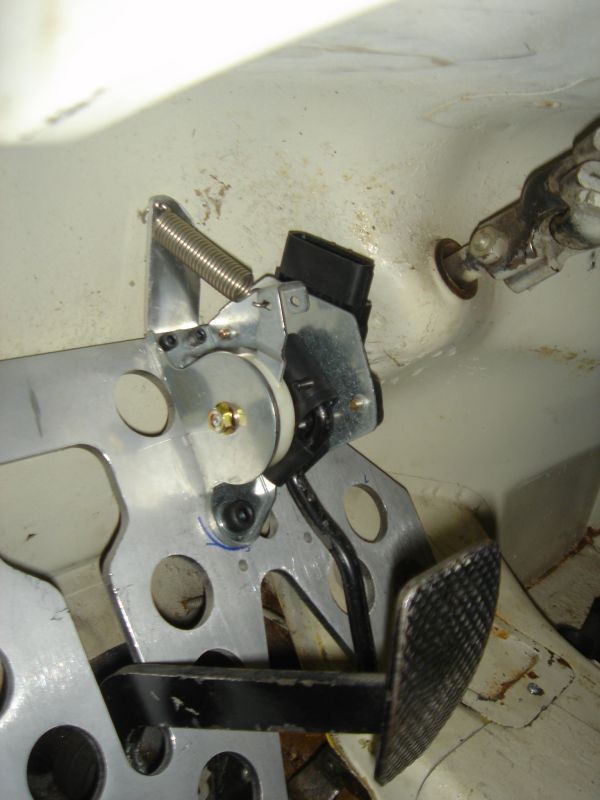
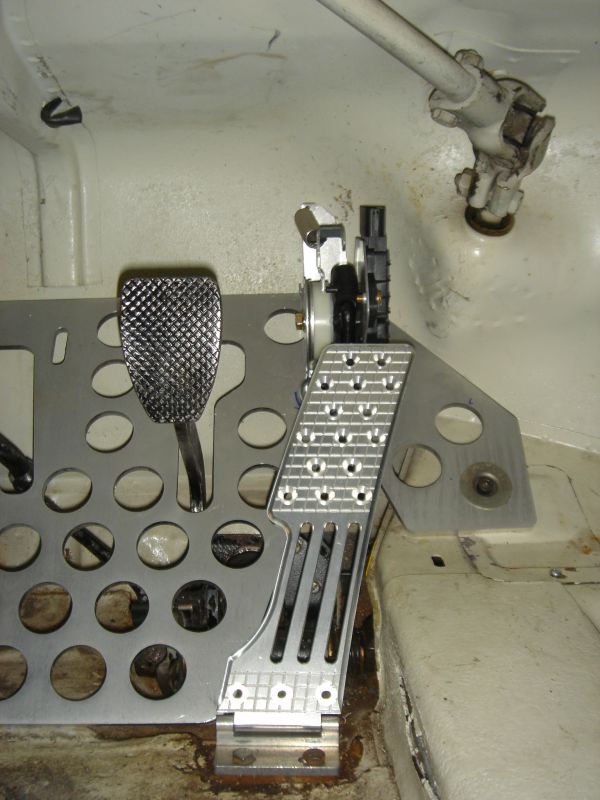
Still need to connect the pedal to the sensor. I will be using some tiny heim joints. Should work out quite well.
With the additional IC tubing on it's way is all of the bends I need to run the radiator lines and the rest of the fuel lines. Lot's-O-plumbing to do yet...
Scott
Posted by: Coneatr Oct 3 2007, 04:29 PM
wow! really nice work! I'm in the planning stages of an STI-914 swap myself, but I don't have near the fabrication skills you've demonstrated. Thanks for setting an example!
As for the steering column, is that necessary? I'm building mine as an autox/track day (not street legal) car, so turn signals and such are irrelevant, but I'll need the wipers working - is it possible to leave the porsche wiper controls as 'stand alone', if you will?
I'm also eagerly watching your pedal/drive-by-wire set up as that was a concern of mine.
PS - ever thought of fabbing up a couple more of those exhaust systems and selling them?? its beautiful! nicely done!
Posted by: Amenson Oct 4 2007, 07:57 AM
wow! really nice work! I'm in the planning stages of an STI-914 swap myself, but I don't have near the fabrication skills you've demonstrated. Thanks for setting an example!
As for the steering column, is that necessary? I'm building mine as an autox/track day (not street legal) car, so turn signals and such are irrelevant, but I'll need the wipers working - is it possible to leave the porsche wiper controls as 'stand alone', if you will?
I'm also eagerly watching your pedal/drive-by-wire set up as that was a concern of mine.
PS - ever thought of fabbing up a couple more of those exhaust systems and selling them?? its beautiful! nicely done!
Thank you for the kind words. Building nice parts requires a little patience and the willingness to buy (or borrow) the correct tool for the job.
Lot's of interest in the steering column...It is not required but depending on the ECU you use, you may need to have the RF ID key transponder from the column. I believe that the '04's and earlier do not have that security feature. For the wipers, it would be a lot easier to stay with the stock column/switches. I am going to have to install the Subaru wiper motor into the 914 wiper assembly.
I don't think that anybody would be willing to pay what I would need to get in order for it to be worth my time to make another exhaust system. When I eventually upgrade transmissions and put a bigger turbo on the car I will put the current setup up for sale.
Scott
Posted by: Amenson Nov 4 2007, 09:29 AM
Work has been continuing at a slow although constant pace. The most interesting development was made yesterday when I connected the pedal to the sensor. Still need to clean up the brackets and make a pedal stop but...at least I know that I got the pedal ratio and feel right.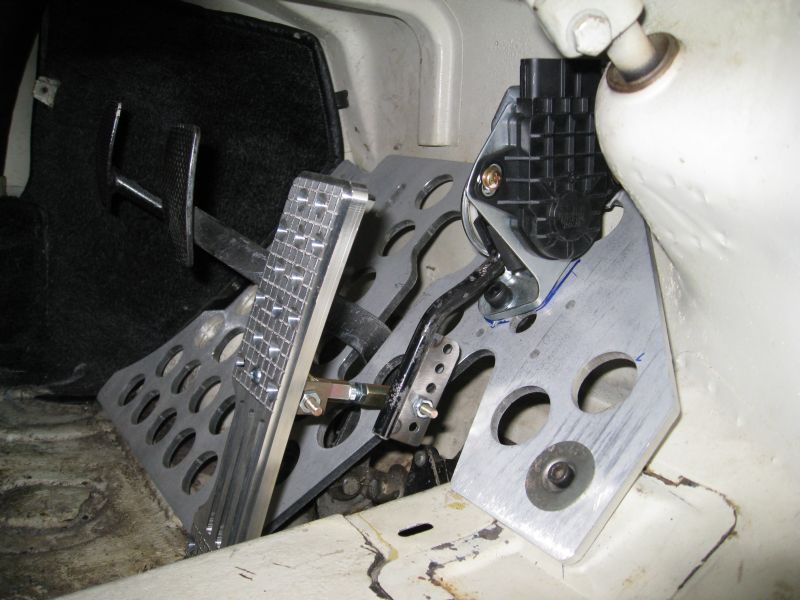
Worked on the filter/intake. I had to shorten the ebay silicone part quite a bit. Will make a better mount than a zip tie when the engine comes out next.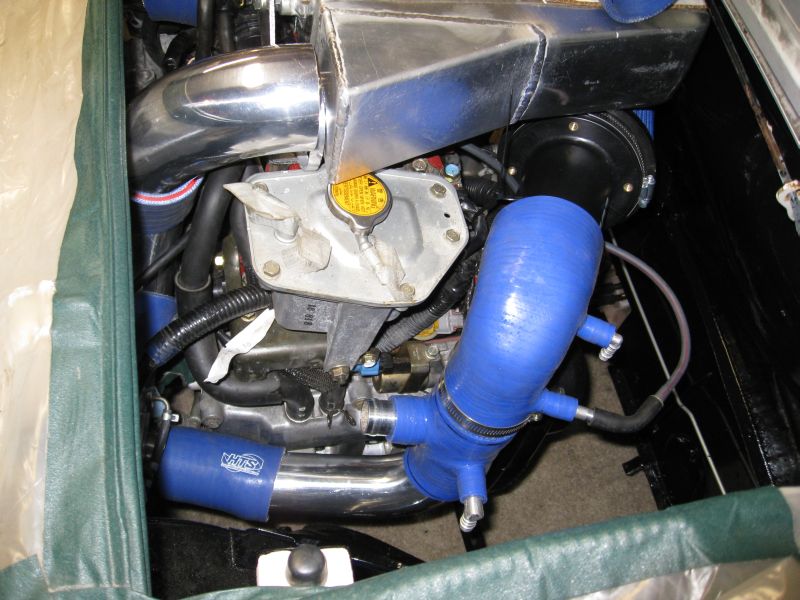
Had to take some time off from working on the car to make a birthday "candle" for my Grandmother's 90th birthday. The cake is actually a wood box that we frosted. Yes, there are 90 holes.

Scott
Posted by: Amenson Nov 4 2007, 09:33 AM
Also spent some time on the radiator plumbing.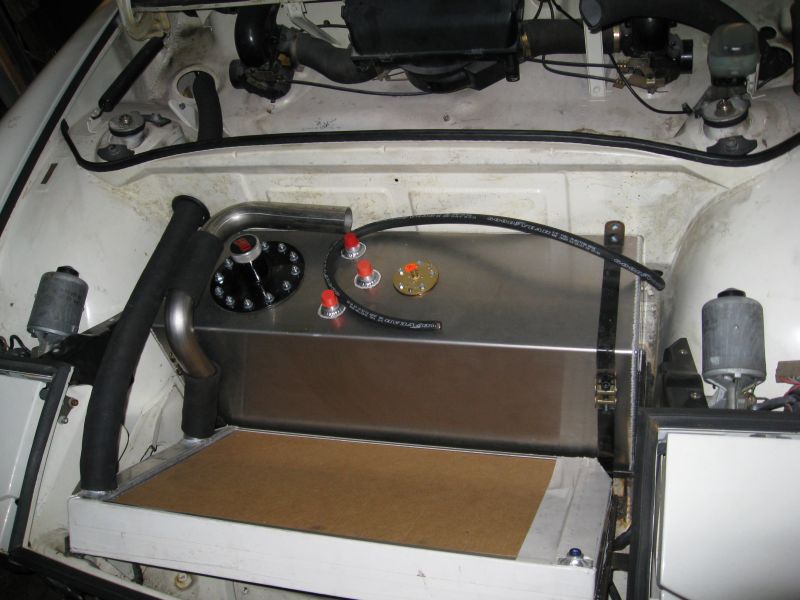
and fuel filter/pump plumbing.
Scott
Posted by: fat73 Nov 5 2007, 11:04 AM
Scott....Very nice work.
What fuel pump are you using? Also, I see you're sing a fuel cell so it may not matter, but on my WRX conversion (stock tank) I had to tee both the outlet and the return line together into 1/2" fuel line to allow enough fuel flow to the fuel pump (928 Bosche), and weld a return bung into the tank. Just wondering....these engines require ALOT of fuel flow and I was told without the overkill I would get fuel starvation.
Ed aka W9R1
Posted by: Amenson Nov 5 2007, 11:30 AM
Scott....Very nice work.
What fuel pump are you using? Also, I see you're sing a fuel cell so it may not matter, but on my WRX conversion (stock tank) I had to tee both the outlet and the return line together into 1/2" fuel line to allow enough fuel flow to the fuel pump (928 Bosche), and weld a return bung into the tank. Just wondering....these engines require ALOT of fuel flow and I was told without the overkill I would get fuel starvation.
Ed aka W9R1
Ed,
I am using a Walbro 255 l/hr. It should be good for just over 500hp. With 3/8" lines to and from the engine, I should have plenty of fuel.
Also, a while back we were discussing alternator belts via PM. Did you ever find out what part number was for your alternator only belt accessory belt?
Scott
Posted by: charliew Nov 5 2007, 01:36 PM
Scott....Very nice work.
What fuel pump are you using? Also, I see you're sing a fuel cell so it may not matter, but on my WRX conversion (stock tank) I had to tee both the outlet and the return line together into 1/2" fuel line to allow enough fuel flow to the fuel pump (928 Bosche), and weld a return bung into the tank. Just wondering....these engines require ALOT of fuel flow and I was told without the overkill I would get fuel starvation.
Ed aka W9R1
Ed,
I am using a Walbro 255 l/hr. It should be good for just over 500hp. With 3/8" lines to and from the engine, I should have plenty of fuel.
Also, a while back we were discussing alternator belts via PM. Did you ever find out what part number was for your alternator only belt accessory belt?
Scott
Hi Scott, I don't know if it will help but I bought the alt. brkt and belt from outback and the belt measures about 12.625 if you squeeze it together and the part #s are AC Delco 5K275 and a longer # of 88932567, it's a 5 rib belt. Also on the fuel line thing I run a 350hp ram jet in a k5 blazer and it starves for fuel at 5k in high gear with 3/8 fuel lines I thought 3/8 was big enough but I wish now I would have gone with 1/2 it's a lot of work to do over.
Charliew
Posted by: budman5201 Nov 7 2007, 02:02 AM
HOLY COW!!! Man I like your system, because I live in Arizona and I have done it exactly the same way without even seeing your thread till today. I honestly thought I was the first to use Small Car Performance mounts with my own custom crossbar. I made my own so i could put the engine as low as possible than using the stock bar. (I have the older transmission in great shifting condition) Cool now i know its possible for the sideshift too!! I did unfortuneately buy the wrong shortened OIL pan from a sandrail, that was cut at just the wrong angle. Oh well, thats my next purchase. Intake throttle body had to be shortened so it could fit without cutting rear trunk area. Once done and using a turbo tight 90 degree silicone bend....fits Perfect!! Dude its kinda wierd!! I even have the exact same fuel pump and pre and after filters, bought them from Arizona TPI.
I have to tell you though, mine is a ej25 naturally aspirated NON-TURBO and its killer!! 165 stock, but mine is about 180 due to free flow intake and exhaust. I dont have it dynoed yet but lets just say I have a big problem having the rubber stick to the street. I can break them loose in 1st, 2nd, and 3rd around a corner. My first time out, i hit the gas coming out of a corner and the tires broke loose and I looked like Fast and Furious Tokyo Drift! Awesome drift!! Killer acceleration, LOVE IT. Yours is going to be killer. I cant imagine another 45 HP.
My setup bolts up just like yours and doesnt modify the car at all except the front for the radiator.
I am using the Link ECU at Linkecu.com The G3 is the model. Works Killer and total programamble with laptop, cant wait for the dyno to get a few more horses!!
Here are some pics of my car
Attached image(s)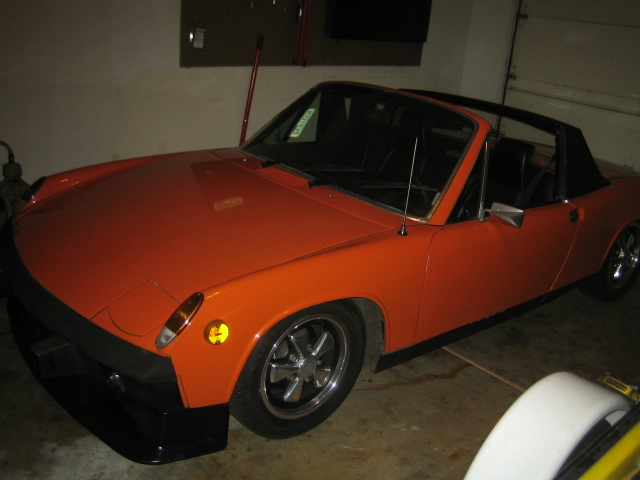
Posted by: budman5201 Nov 7 2007, 02:04 AM
engine bay
Attached image(s)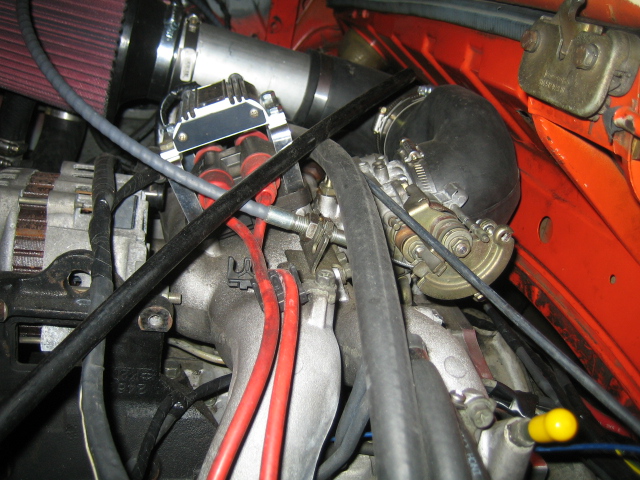
Posted by: budman5201 Nov 7 2007, 02:05 AM
engine bay
Attached image(s)

Posted by: budman5201 Nov 7 2007, 02:06 AM
engine bay
Attached image(s)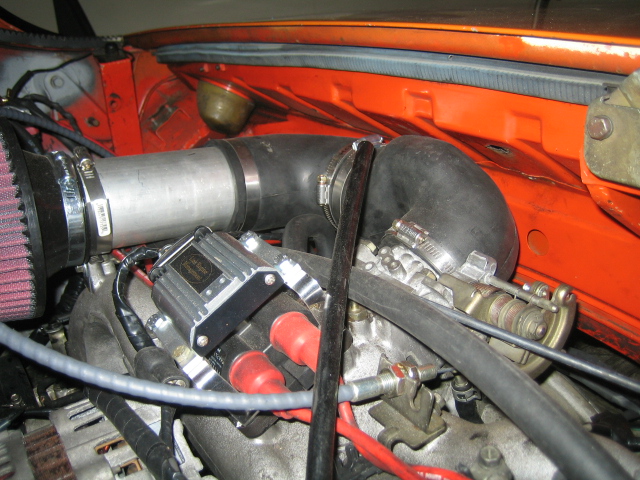
Posted by: budman5201 Nov 7 2007, 02:09 AM
underneath engine / custom bar that bolts right up to small car performance mounts with no mods to them
Attached image(s)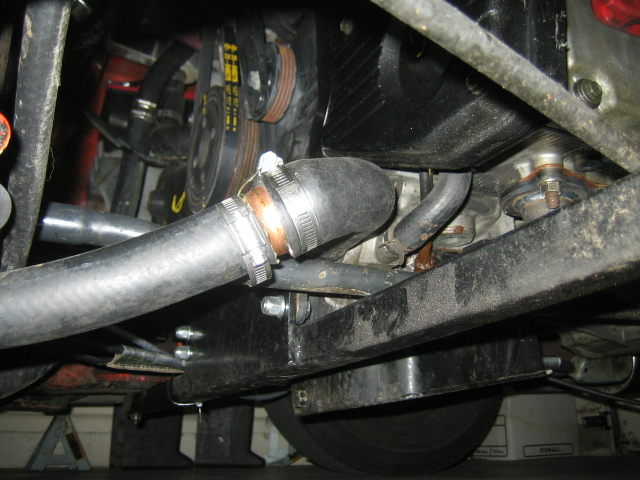
Posted by: budman5201 Nov 7 2007, 02:11 AM
once again wrong oil pan ordered. Have to get outbacks special mid engine one.
Outback Headers stubs straight through to Patrick Motorsports Stainless cans in the back and Supertrapps tied on the ends of them so the neighbors dont get too irritated, and so that I can swap out the restriction when i need to. They are somewhat quiet with the 12 supetrap plates, and a little above normal with 6 plates. THe more backpressure, its crazy how much my torque goes up, and with the Link ECU i can program them for both setups so i am not running too rich or lean. Its as easy as pluggin in the laptop and selecting the other .pcl map file for the link ecu.
Attached image(s)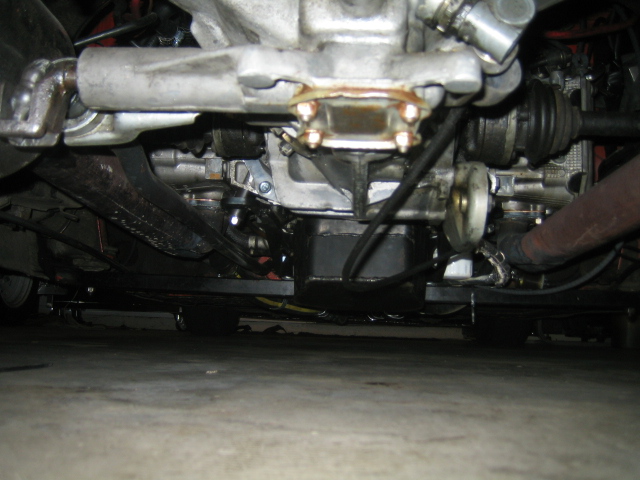
Posted by: budman5201 Nov 7 2007, 02:19 AM
Front still not complete, hole works fine, just needs to be a little larger to look a little more put together... Oh Renegades radiator, nice setup, no brainer proven setup. Still fairly new....... Anyone have a little advice to get all the air out of the system. I have added water about 10 times so far and still finding air in system. guess it takes that long to work out the bubbles in the lines, etc.
Attached image(s)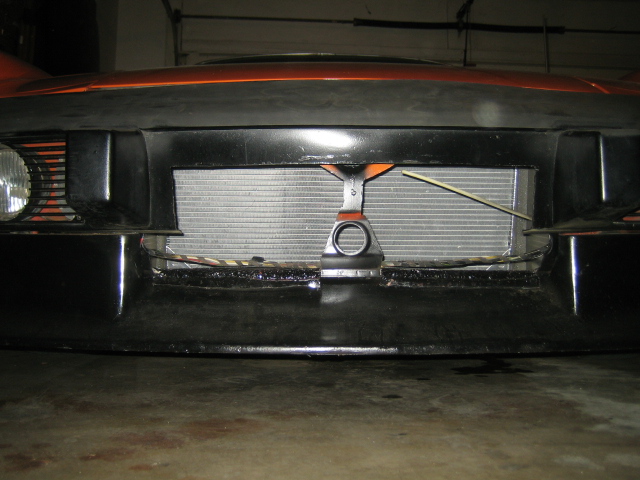
Posted by: charliew Nov 7 2007, 02:06 PM
Front still not complete, hole works fine, just needs to be a little larger to look a little more put together... Oh Renegades radiator, nice setup, no brainer proven setup. Still fairly new....... Anyone have a little advice to get all the air out of the system. I have added water about 10 times so far and still finding air in system. guess it takes that long to work out the bubbles in the lines, etc.
Budman, You did a nice job on your conversion. I appreciate the pictures of your swap. I also am planning the turbo subie swap but with a subie tranny. Oh yeah the motor Scott is using is stock with 300 hp, thats 145 more hp. actually. With a little tuning and better intake and exhaust it's even more.
Charliew
Posted by: Amenson Nov 10 2007, 02:49 PM
Budman,
Great looking conversion! Do you have the engine solid mounted? How is the engine vibration? Any cracking issues? How much does it weigh?
Charliew,
Thanks for the belt info.
Scott
Posted by: budman5201 Nov 10 2007, 11:47 PM
Engine is solid bolted to engine bar and when driving just as much vibration as stock. Remember i am still running stock motor mounts on the sides and stock trans mounts (not solid).....Screams.
Posted by: Amenson Feb 10 2008, 04:41 PM
Phew, its been a while since I posted any progress, mostly because I have not made much. I have been away quite a bit since the beginning of December until now due to business and vacation travel.
I made a new steering column. This one is 2 inches shorter than the last which was desperately needed to make the driving position more comfortable. I also added another adjuster mechanism to help keep it from rotating. It works really well.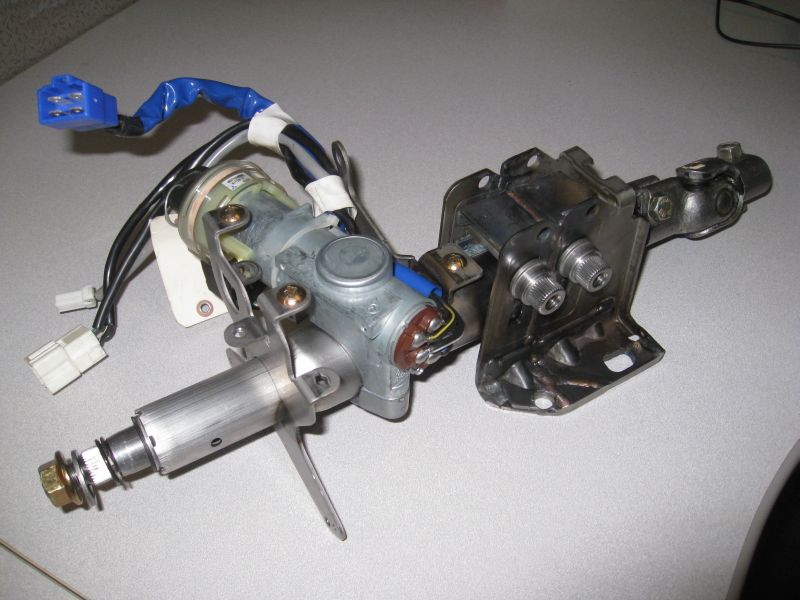
Have also been spending a lot of quality time with the wiring harness. I now have about 70% of the unneeded circuits out of the harness.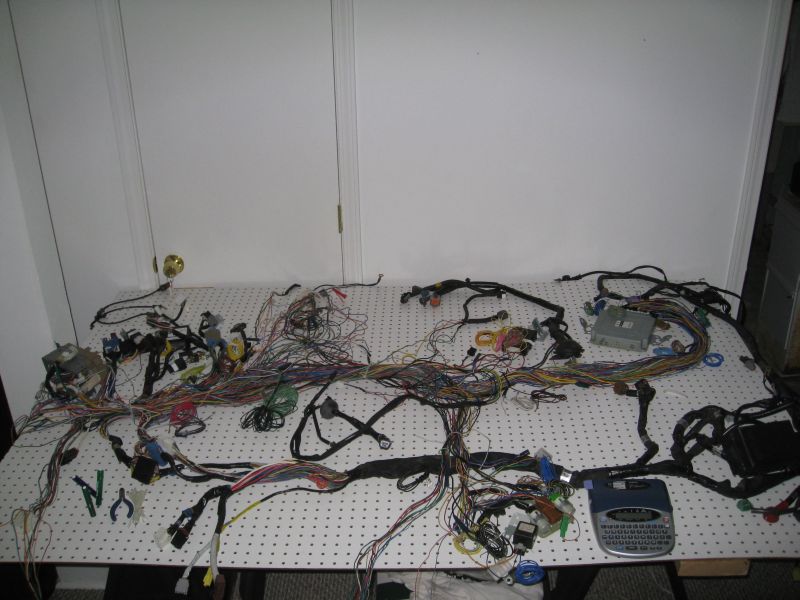
Scott
Posted by: Spoke Feb 10 2008, 05:51 PM
Nice harness. Shouldn't the red and green wires go together?
JK, your car looks good and your work superb. Can't wait to see the parking lot donut video when you're done.
Posted by: fat73 Feb 11 2008, 01:01 AM
Nice...What's the plan for gauges?
Ed aka W9R1
Posted by: Amenson Feb 11 2008, 09:16 PM
Nice harness. Shouldn't the red and green wires go together?
JK, your car looks good and your work superb. Can't wait to see the parking lot donut video when you're done.
I don't think that donuts will be a problem. The engine in the car has already proven more than capable of doing donuts, with more than twice the tire....
http://www.digitaldash.org/images/Scott%20STI%20smoke%20show.mpg
Nice...What's the plan for gauges?
Ed aka W9R1
Gauges..I have a working prototype LCD designed to display a high contrast monochrome version of this:
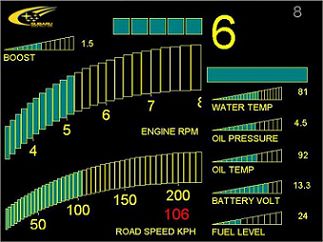
I am working on the PCB layout now. It is designed to plug directly into the 3 Subaru instrument cluster connectors.
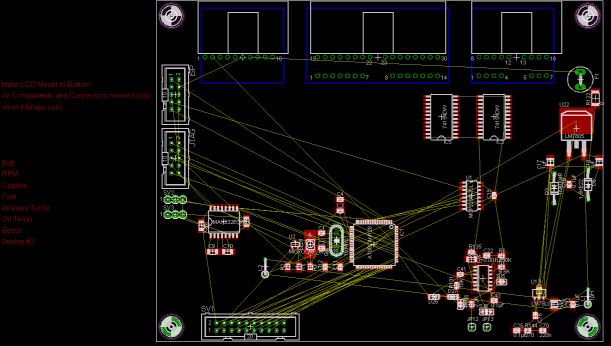
Sorry for the poor resolution...I have a lot of time into the design and I do not want it stolen.

Scott
Posted by: ChrisNPDrider Feb 11 2008, 09:31 PM
Sweet!
If you sitck with KPH on the LCD it looks like you're going pretty fast
Posted by: fat73 Feb 12 2008, 09:39 AM
Nice harness. Shouldn't the red and green wires go together?
JK, your car looks good and your work superb. Can't wait to see the parking lot donut video when you're done.
I don't think that donuts will be a problem. The engine in the car has already proven more than capable of doing donuts, with more than twice the tire....
http://www.digitaldash.org/images/Scott%20STI%20smoke%20show.mpg
Nice...What's the plan for gauges?
Ed aka W9R1
Gauges..I have a working prototype LCD designed to display a high contrast monochrome version of this:
I am working on the PCB layout now. It is designed to plug directly into the 3 Subaru instrument cluster connectors.
Sorry for the poor resolution...I have a lot of time into the design and I do not want it stolen.
Scott
Now that's cool.

Posted by: Amenson Mar 30 2008, 07:12 PM
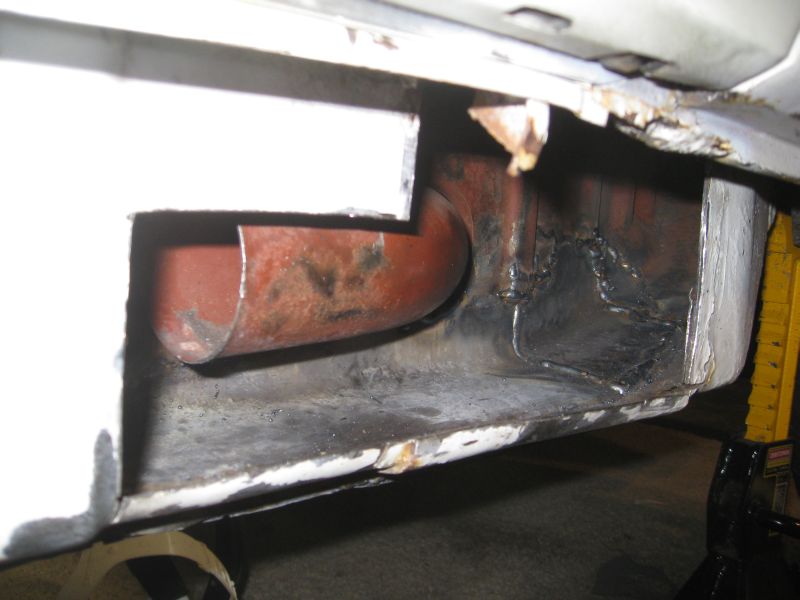
Well, I was poking around under the car getting ready to some conversion related work on the PorSTi when I found a gift from the PO!!! Apparently when the longs were off to replace them he decided that it would be sufficient to prime this nice area of rust.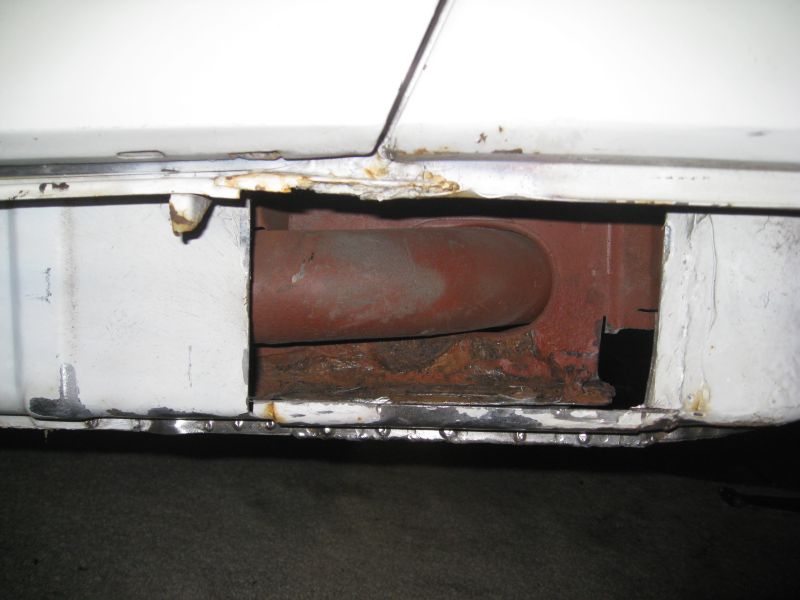
After much cutting and grinding to find good metal, I was left with a substantial hole…and this does not even show all of it.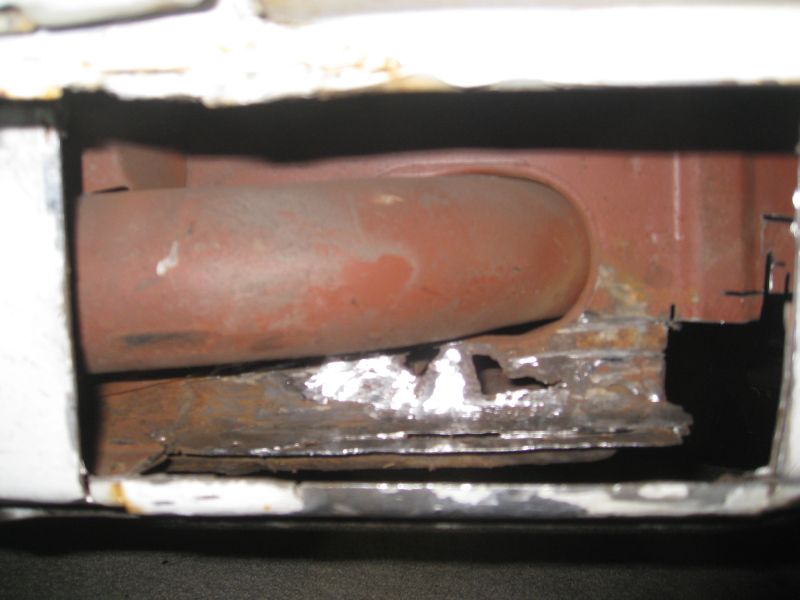
I had a few hours on an airplane flying to Japan for some meetings, so I was able to read a few metal working books. When I returned I picked up some 16 gage sheet metal and started working.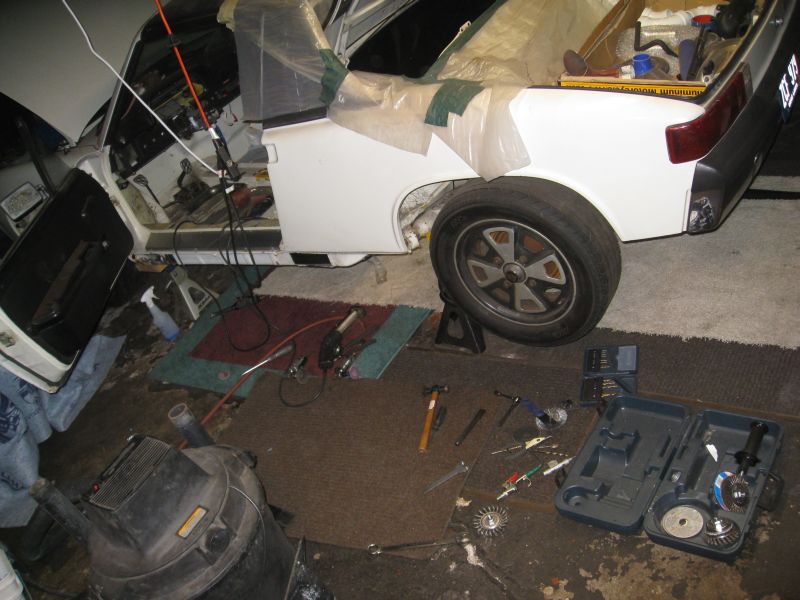
I had to make a total of 3 pieces. The one inside the long was a SOB to get shaped and fit properly and nearly broke my will to continue. But I managed to get it in.
Once that was done the rest was somewhat fun…
Posted by: Amenson Mar 30 2008, 07:22 PM
…I took to opportunity to try my new tig welder to make a form. (I know...I really need to build a welding table)
Clamped it in the vice, beat on it a bit and tada, a part!
Second piece tacked in.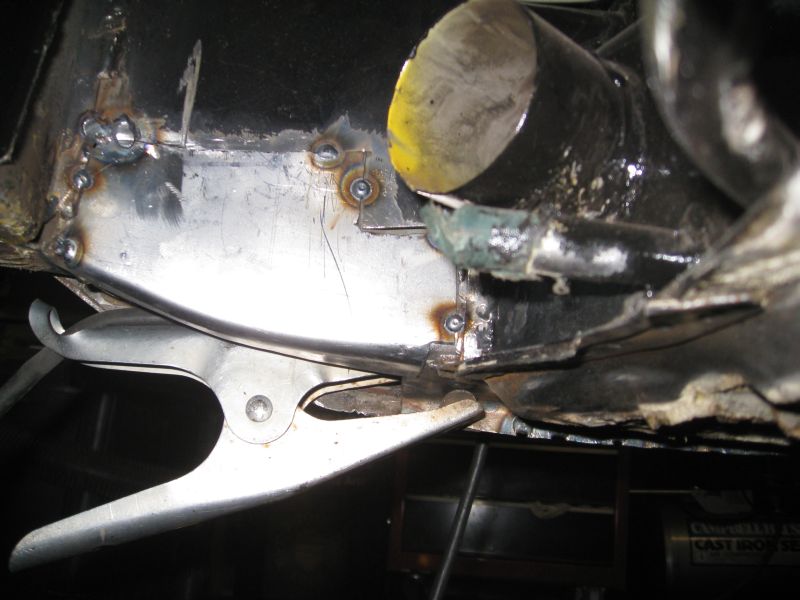
More beating, banging and welding and the third piece is in.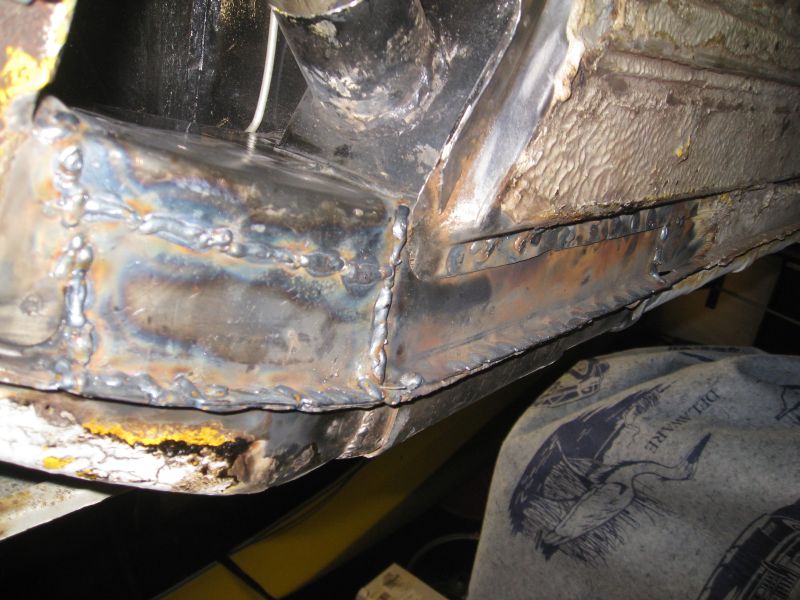
...
Posted by: Amenson Mar 30 2008, 07:26 PM
And the inside. I am probably doing to make another piece for the inside to have double thickness where the jacking point goes.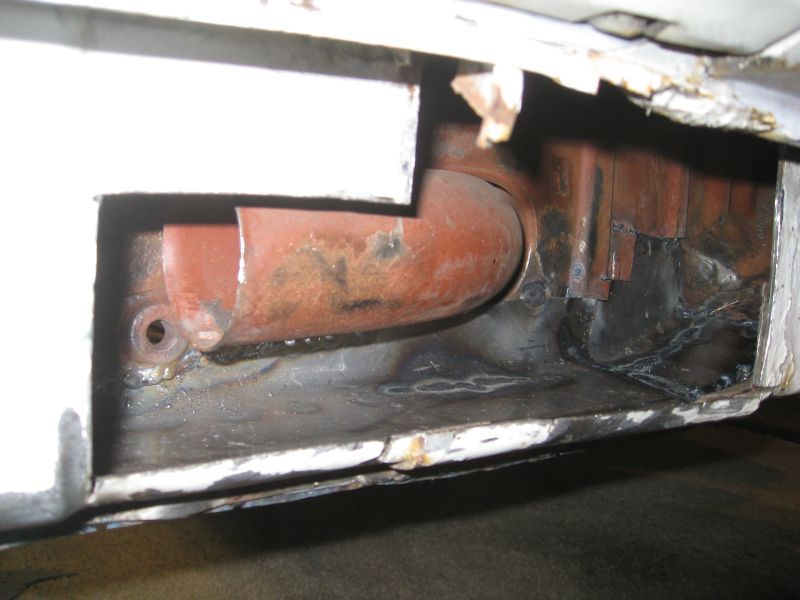
Once I do a bit more grinding it should be hard to tell I did anything. Seems like a colossal waist of time. 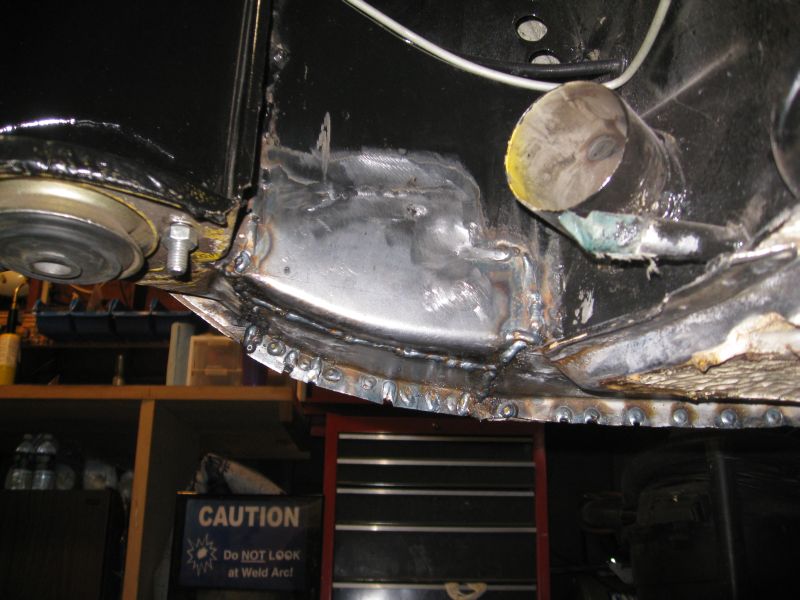
Now hopefully I can get back to making it run.
Posted by: my928s4 Mar 30 2008, 08:23 PM
Nice work, wish I had a fraction of your welding skills !
Posted by: Amenson Apr 4 2008, 09:51 PM
I had a request a while back for some pictures of the IC routing. With the engine out I was able to get a couple good ones...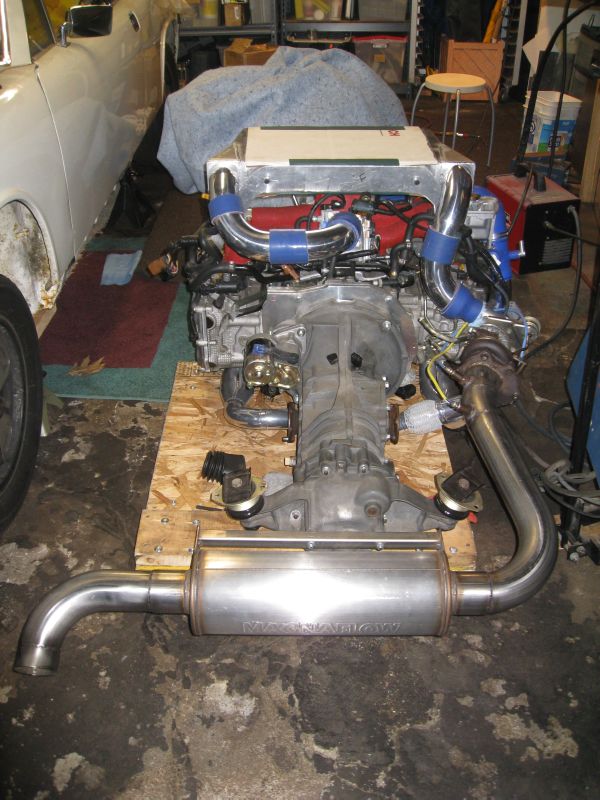
Nice and short...this thing should spool like mad. Ok, so most of the quick spool will be facilitated by the tiny turbo.
Posted by: Zaney Apr 5 2008, 11:38 AM
Looks awesome!
How much more is there to do? Looks almost ready to go!
What is the number on the stock turbo? I am looking for a quick spool up at lower RPM's for AX and zooming around onramps.
Again, looks beautiful!
Nate
Posted by: Amenson Apr 6 2008, 07:16 PM
Looks awesome!
How much more is there to do? Looks almost ready to go!
What is the number on the stock turbo? I am looking for a quick spool up at lower RPM's for AX and zooming around onramps.
Again, looks beautiful!
Nate
Thanks for the positive feedback. I only wish it were almost ready to go. The next things on the list and the last major tasks are to weld in the Engman long reinforcement kit and then install the coolant lines in the longs. After these, there are a load of little things to take care of but it should be all down hill from there.
The turbo is the stock VF39.
And now for the progress from the weekend. I made and welded in the inner layer of the repair area.
Fits great but can I weld it in? Sure, but the welds in back are not the prettiest. I could barely get the torch back there.
I had to make the spot type welds from the outside to make sure that I could get to them. Oh well, just more grinding to do.
Finally all ground down...No more rust!!!! Still waiting for the corner triangles from AA. Hopefully they arrive this week.
Now back to improving the car...
Posted by: Amenson Apr 6 2008, 07:22 PM
...which I did by installing the Tangerine inner console reinforcements. This was fun!!! What a great product.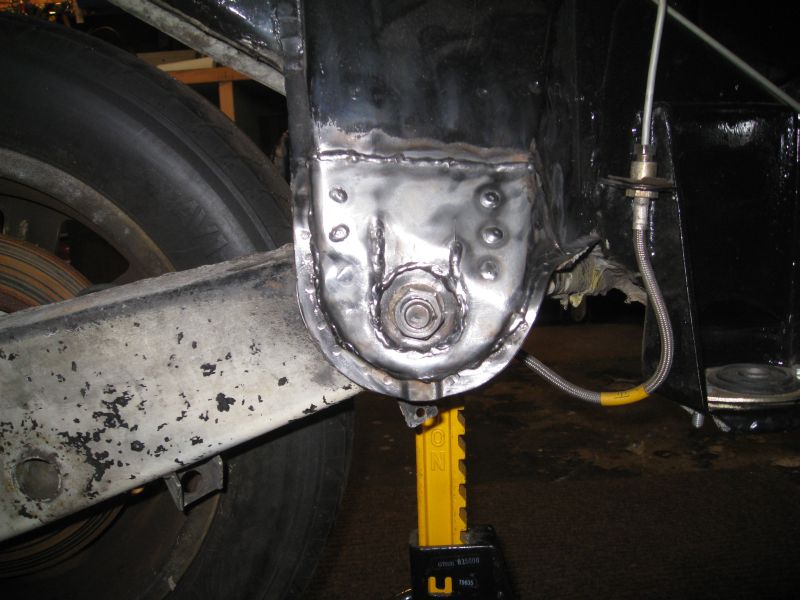
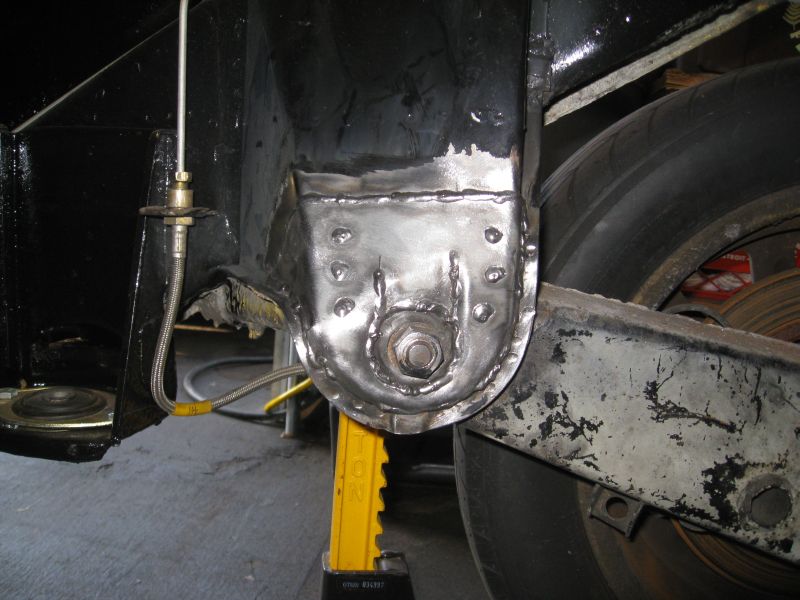
I was sick of grinding so I left the welds alone. They don't look too bad, maybe I will just paint them and call it good.
Posted by: SirAndy Apr 6 2008, 07:30 PM
And now for the progress from the weekend.
where's your heater muffler ???
AndyAttached image(s)
Posted by: Amenson Apr 6 2008, 07:54 PM
And now for the progress from the weekend.
where's your heater muffler ???
AndyI had to remove it so that I can get the radiator return tube through the long. I was hoping to run it through the heater muffler but the return tube is just a hair big. It is going to be a pain to support the tube w/o the muffler. The rad feed tube should just barely fit through the muffler on the other side...I hope.
Scott
Posted by: ipozestu Apr 15 2008, 10:13 AM
I had a request a while back for some pictures of the IC routing. With the engine out I was able to get a couple good ones...
Nice and short...this thing should spool like mad. Ok, so most of the quick spool will be facilitated by the tiny turbo.
NIce work on getting this put together. Just a couple comments. The O2 sensor in the yellow jacket is completely useless. That particular sensor provides monitor of the exhaust gas after the CATS. It has no control function. Using the stock ECU this will throw a CEL. It can be bypassed by throwing a resistor in there or performing a mechanical fix. The sensor with the blue jacket on the other hand is critical to the ECU. This is a very expensive wide band O2 sensor. The readings this sensor sends to the ECU in combination with measurements from the MAF, IAT, ECT, determines your fuel trim, timing. It is very important that this sensor be placed pre-turbo. Huge amounts a heat energy are consumed in the turbo that will throw this critical sensor for a loop.
Posted by: Amenson Apr 15 2008, 12:13 PM
NIce work on getting this put together. Just a couple comments. The O2 sensor in the yellow jacket is completely useless. That particular sensor provides monitor of the exhaust gas after the CATS. It has no control function. Using the stock ECU this will throw a CEL. It can be bypassed by throwing a resistor in there or performing a mechanical fix. The sensor with the blue jacket on the other hand is critical to the ECU. This is a very expensive wide band O2 sensor. The readings this sensor sends to the ECU in combination with measurements from the MAF, IAT, ECT, determines your fuel trim, timing. It is very important that this sensor be placed pre-turbo. Huge amounts a heat energy are consumed in the turbo that will throw this critical sensor for a loop.
Ipozetsu,
Thank you for the comments. You are correct with most of them. The concern over the criticality of placing the wide band sensor after the turbo is a bit misplaced. The only issue it will cause is to delay the sensor heat up time after startup. This will delay operating in closed loop fuel control and is only an issue if I were to be concerned with startup emissions. The lack of a cat is clear indication that this is not a concern. Placing the wide band sensor after the turbo will make life a bit easier on it. There may be a small change to the transport time but nothing significant.
Scott
Posted by: charliew Apr 15 2008, 11:46 PM
Scott I forgot are you tuning with engenuity? I am also thinking the after turbo o2 is gonna be tough. It's gotta be way cooler there. I am anxious to see.
Charliew
Posted by: Amenson Apr 16 2008, 08:24 AM
Scott I forgot are you tuning with engenuity? I am also thinking the after turbo o2 is gonna be tough. It's gotta be way cooler there. I am anxious to see.
Charliew
Charliew,
You are correct that the turbo cools down the exhaust gas but as I replied to ipozestu, this only delays the sensor getting up to operating temperature. Once at operating temperature the lambda sensor will read the same before and after the turbo. The temperature difference before and after the turbo does not affect the composition of the exhaust gas.
I am not exactly sure what engenuity is but I am sure that it is a bit of a derogatory pun on my perceived design methodology. Please be assured that it is sound. I have been doing various types of controls design since I graduated in ’99 with my Electrical Engineering degree (and most of an ME). I am currently working for Bosch developing Electronic Stability Control as Lead Systems Engineer. How does my background help you trust that my feedback concerning engine control is correct? It does not, but it should help you understand that I am smart enough to identify what I do not know and ask somebody who does. Which is one of the great benefits of working in the in the controls side of the auto industry. I have several friends and many colleagues inside Bosch and at other suppliers and OEM’s that work in engine management development from R&D to production tuning. We discussed in depth about the placement of the wide band sensor while I was building the exhaust and established that it will not be a problem.
Keep the comments coming, I am open to feedback and very much enjoy friendly debate based on sound engineering principals and direct experience.
Posted by: jd74914 Apr 16 2008, 09:48 AM
He may have been talking about the open source code that some people have been using to "crack" the OE ECU.
Edit: I don't know if they are in existence anymore, but the description still on google is:
Enginuity is a free, open source application created for viewing, editing and tuning Engine Control Units (ECUs). Enginuity is written in Java and, as of version .20 alpha, uses XML to define ECU versions, meaning it is infinitely extensible and usable on any ECU you can retrieve an image from. Any information stored in your ECU (timing advance, fueling, boost, etc) may be altered, making your stock ECU nearly as powerful as expensive stand-alone units, better than piggy back units, and more functionality than commercial software costing in the thousands of dollars.
Posted by: Amenson Apr 16 2008, 02:32 PM
He may have been talking about the open source code that some people have been using to "crack" the OE ECU.
Hmmm, now wouldn't that be embarrassing. I was figuring that it was some combination of engineering and intuition, with the connotation that I was making design decisions based on what I feel should work. If this is not the case then I apologize for the pompous chest thumping in my previous post.
Posted by: charliew Apr 16 2008, 02:53 PM
What I meant by after the turbo is that it might take to long to adjust the maps that far from the exhaust port. As in if you go to wot it will take the o2 awhile to adjust the afr and timing. Of course wot I think goes open loop so maybe it won't matter. I'm just going by the fact that I don't see it placed there on the many different configurations that are done on nasioc.
I may have mispelled it but engenuity is a programming method used on subarus. My son uses it on his sti and I thought maybe you might be fluent in it but I guess you don't fool with tuning. He is hopefully going to help me with mine as he tunes his 04 sti with it. He also uses utec delta and zietronics data logging but now thinks maybe all I will need is a stock retune. I like the utec delta's switch that lets him pick different maps for different fuels.
Sorry you misunderstood engenuity.
Also the stock ecu has the ability to learn a neat feature the aftermarket standalones don't have.
Oh yeah my son is an Aggie ME who also graduated in 03. My oldest son has a assoc degree in EE but he doesn't do hot rods.
Also where will you come into the longs with the radiator tubes in the front? I am still studying this tubes to the front deal.
Charliew
Posted by: Amenson Apr 21 2008, 06:02 PM
What I meant by after the turbo is that it might take to long to adjust the maps that far from the exhaust port. As in if you go to wot it will take the o2 awhile to adjust the afr and timing. Of course wot I think goes open loop so maybe it won't matter. I'm just going by the fact that I don't see it placed there on the many different configurations that are done on nasioc.
I talked to a few more of my colleagues about the WB placement and after being analyzed to death
 nobody has presented any evidence that there could be an issue. They are looking for some non proprietary algorithms or data for transport time. If I get anything that I can post I will put it up.
I may have mispelled it but engenuity is a programming method used on subarus. My son uses it on his sti and I thought maybe you might be fluent in it but I guess you don't fool with tuning. He is hopefully going to help me with mine as he tunes his 04 sti with it. He also uses utec delta and zietronics data logging but now thinks maybe all I will need is a stock retune. I like the utec delta's switch that lets him pick different maps for different fuels.
Sorry you misunderstood engenuity.
Nope not familiar with that programming method. I looked briefly at a few tuning tools when I purchased my first STi in '05 but have not done any research since then. I am avoiding modifying my current daily driver STi and the PorSTi is going to be tire limited until I flare the thing. Then maybe I will start upping the boost.
Also the stock ecu has the ability to learn a neat feature the aftermarket standalones don't have.
Having known somebody who did development on throttle by wire and know what goes into the failsafe systems, I think that I will be sticking with the stock ECU with this engine.
Also where will you come into the longs with the radiator tubes in the front? I am still studying this tubes to the front deal.
Charliew
I would really like to be able to post pictures of my radiator plumbing. Unfortunately I have been dealing with rustoration work the past month. Here is the best picture I have of the routing so far. Once past the fuel tank area, the cooling lines will follow the heater ducting into the engine compartment. I really wanted to run them through the center tunnel but was strongly advised not do it by a few people who tired.
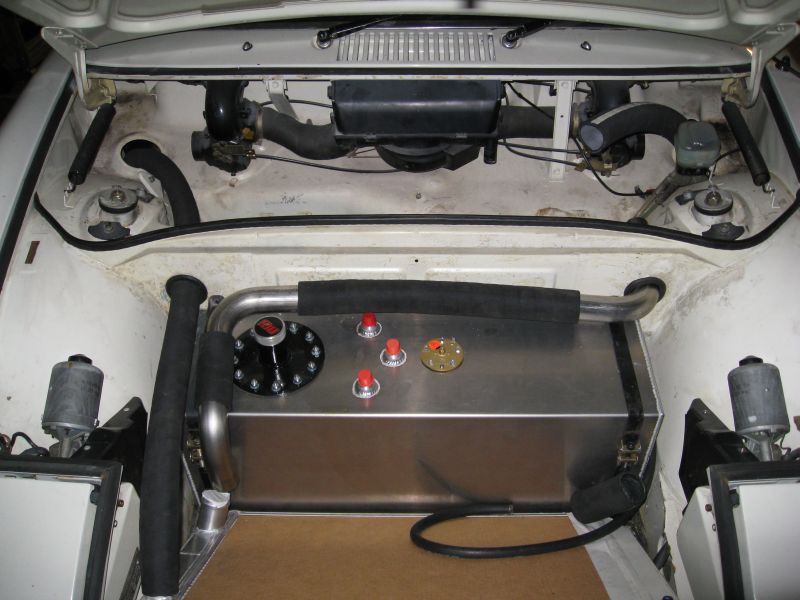
I found a cooling fan that fits my radiator perfectly! Bought it here http://www.the-fan-man.com/shop/size-11dual-pull-part-2052-p-189.html?cPath=33
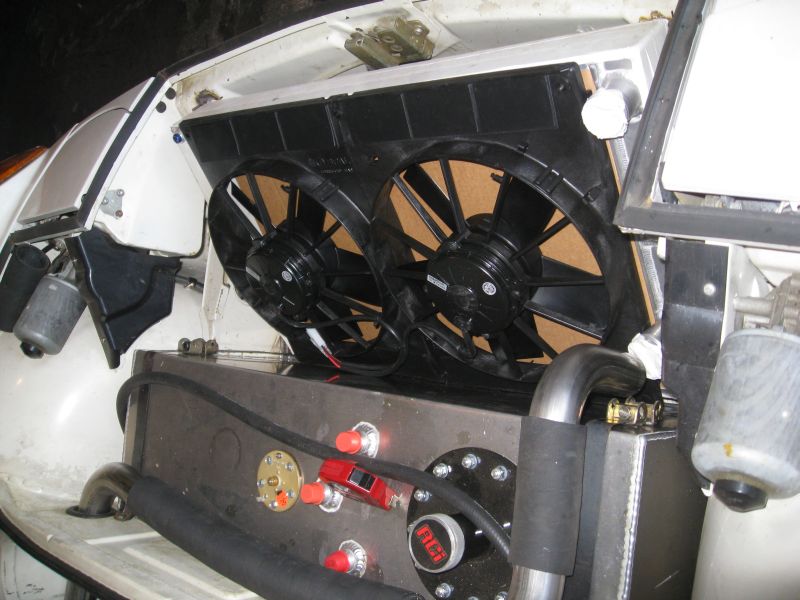
One last bit of progress before getting into the Rustoration. I welded in the corner piece and made more of the fuel lines.

Posted by: Travis Neff Apr 21 2008, 06:11 PM
Are you venting the radiator through the hood?
Posted by: Amenson Apr 21 2008, 06:15 PM
Now on to the rustoration. I think that the past two owners thought that primer, seam sealer, bondo and maybe even JB Weld were great rust encapsulation techniques. I found a few more "soft" spots wile repairing to install the Engman reinforcement kit.
Hmmm, that does not look quite right...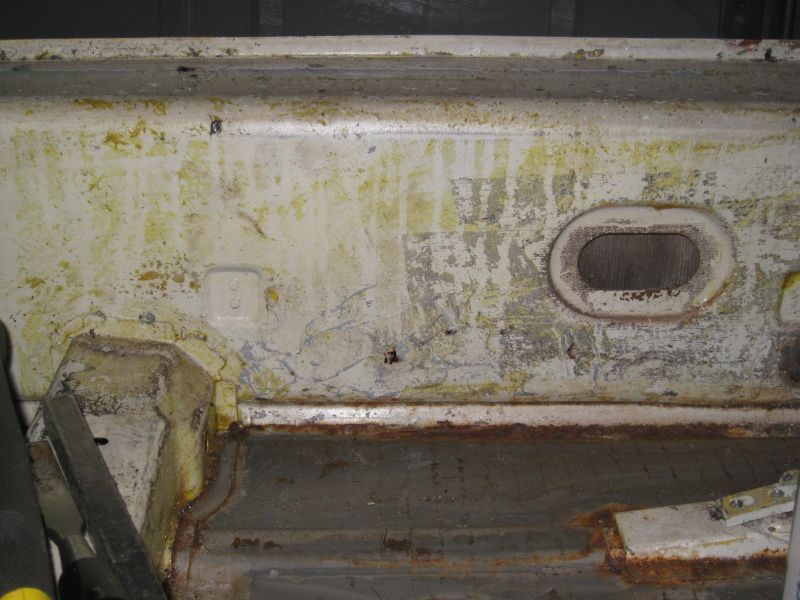
Nope, not right at all...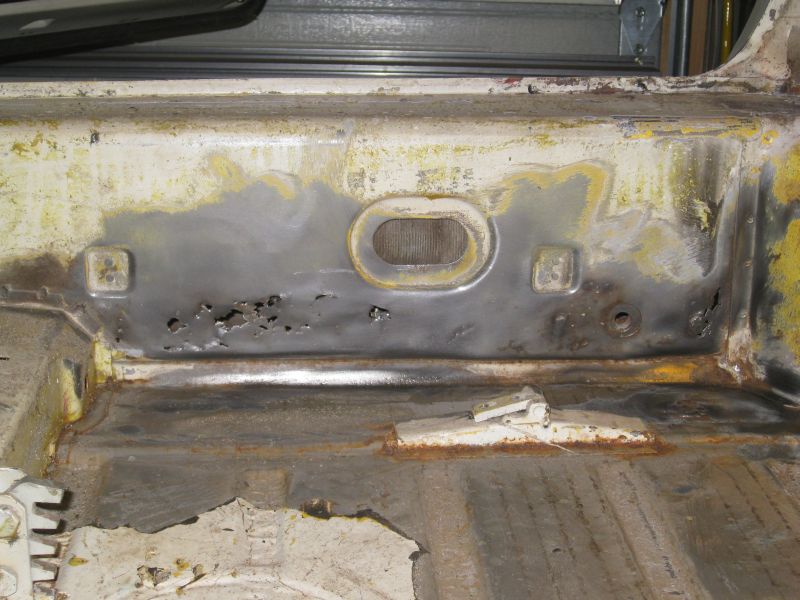
Get out the angle grinder again.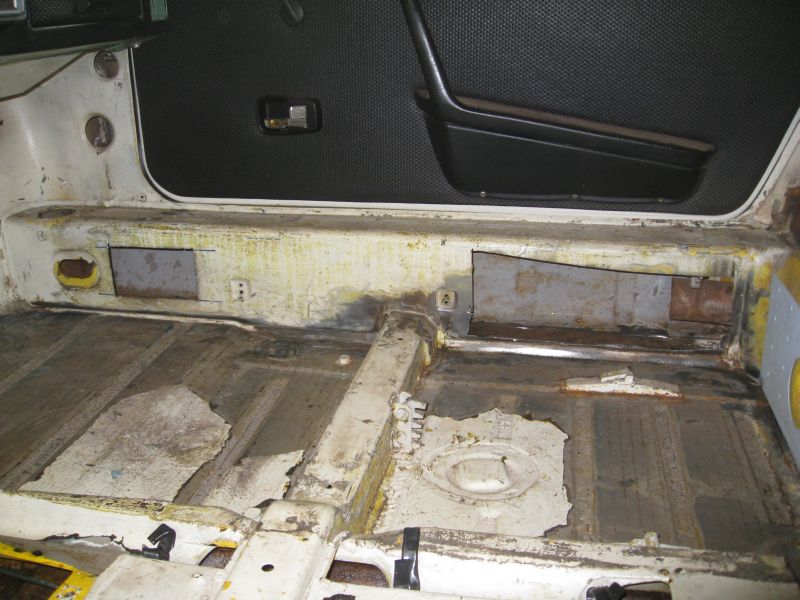
I know the hole on the right is really crooked. I made it soon after I realized the the lower half of the inner long is going to need to be completely replaced. The hole on the left is so that I can joint the SS bend to the tube.
....
Posted by: Amenson Apr 21 2008, 06:22 PM
....What in the hell is this? 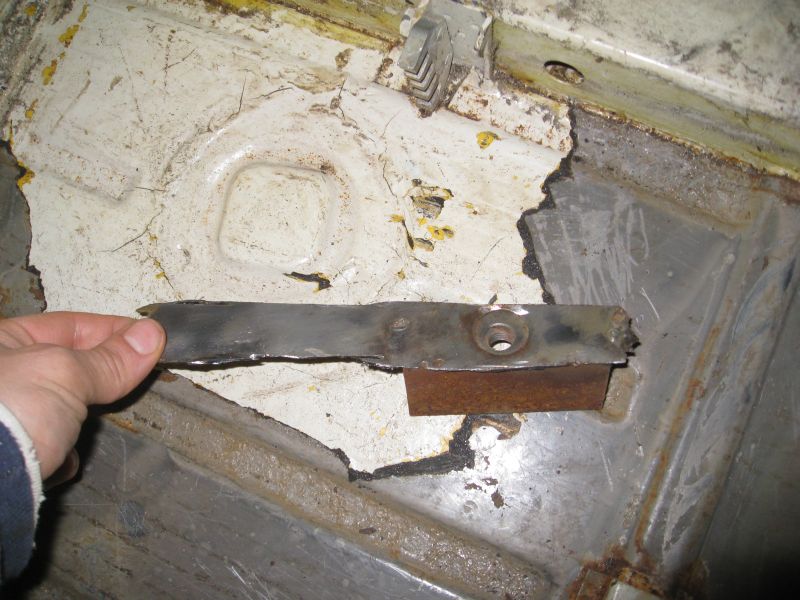
In case it is so bazaar that you do not recognize it, that is the PO's exquisite use of angle iron to replace the seat belt nut plate.
Hmmm, that does not look good either.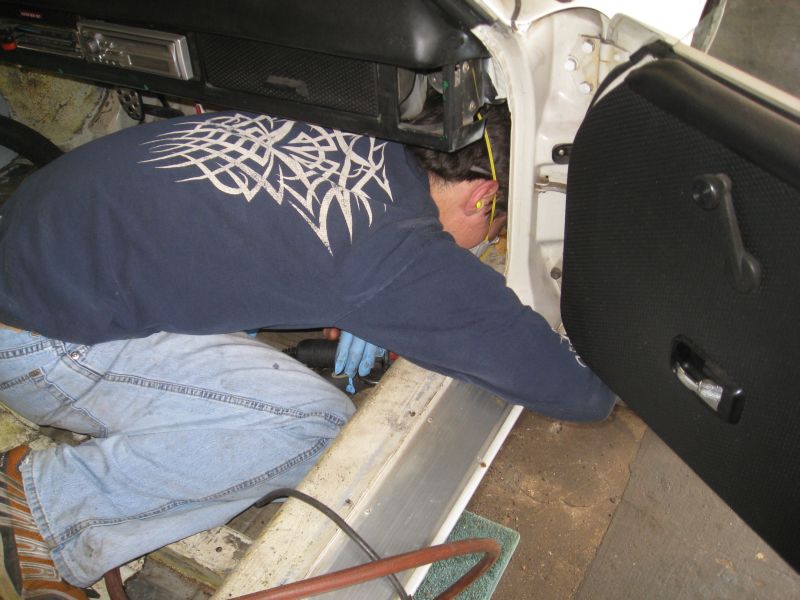
Not much more I can say that will not get censored by the admins.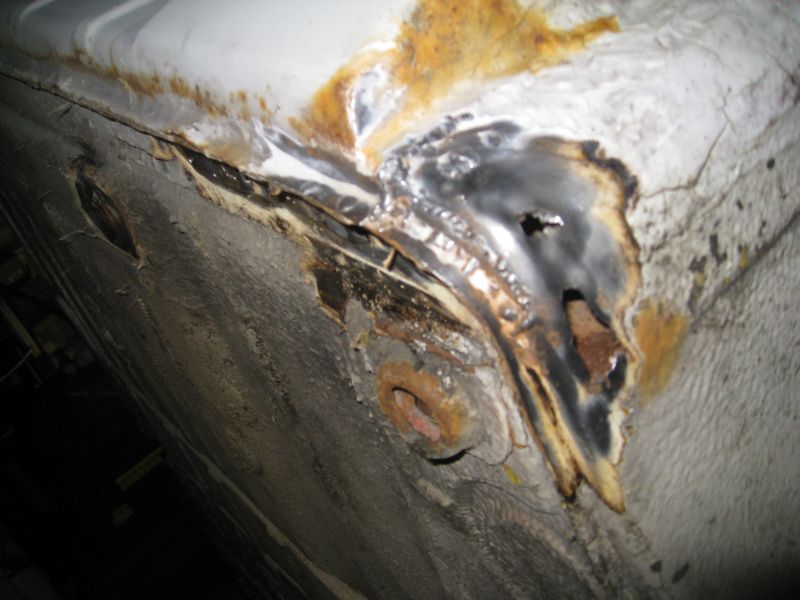
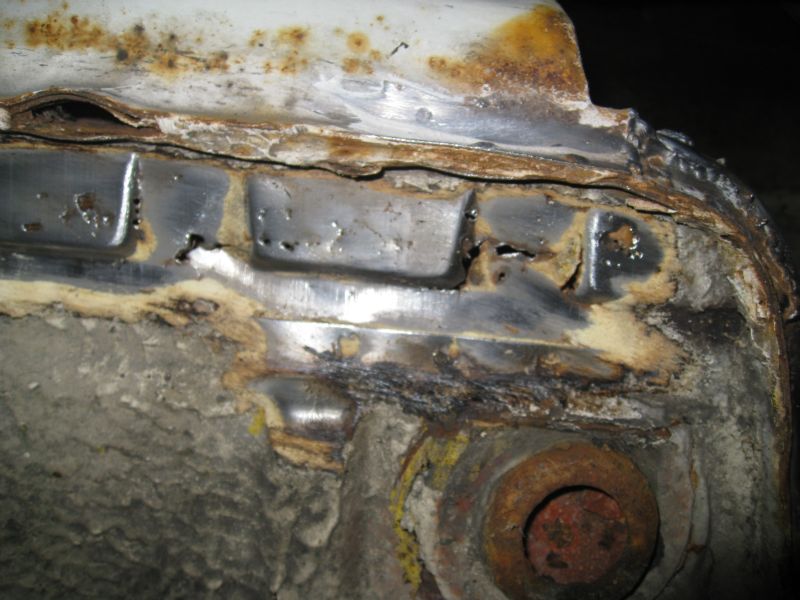
Posted by: cobra94563 Apr 21 2008, 06:35 PM
..."I would really like to be able to post pictures of my radiator plumbing. Unfortunately I have been dealing with rustoration work the past month. Here is the best picture I have of the routing so far. Once past the fuel tank area, the cooling lines will follow the heater ducting into the engine compartment. I really wanted to run them through the center tunnel but was strongly advised not do it by a few people who tired."
I'm interested in seeing you the run the lines thru the longs. I thought that would be a good way to go, but didn't have the patience to figure out how to do it.
I did run them thru the center tunnel. No problem yet. Excess heat is not a problem, now that engine temp is under control. But even inside the longs, you will be accumulating the radiant heat. It is tight in the center tunnel, but no interference with the other stuff. I have not run on a hot day yet.
Posted by: Amenson Apr 21 2008, 06:41 PM
But wait...that's not all!!!
This can't be good.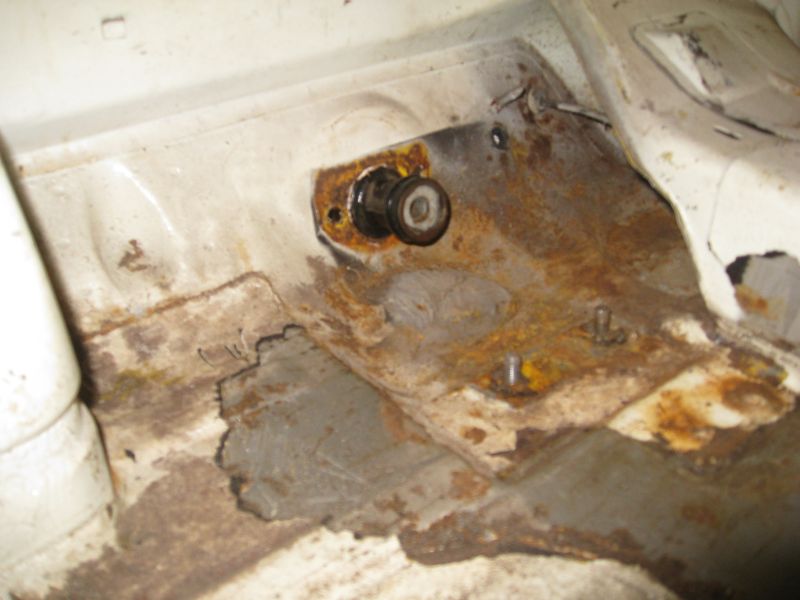
It is not!!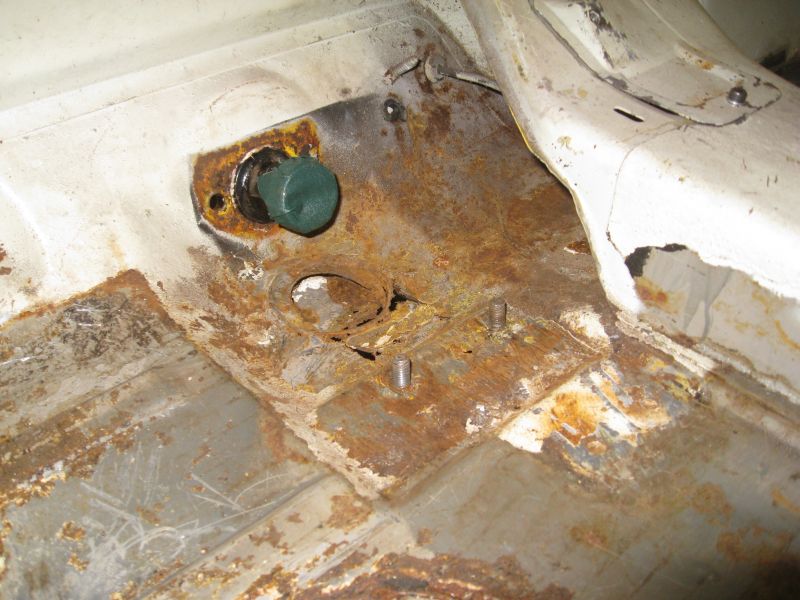
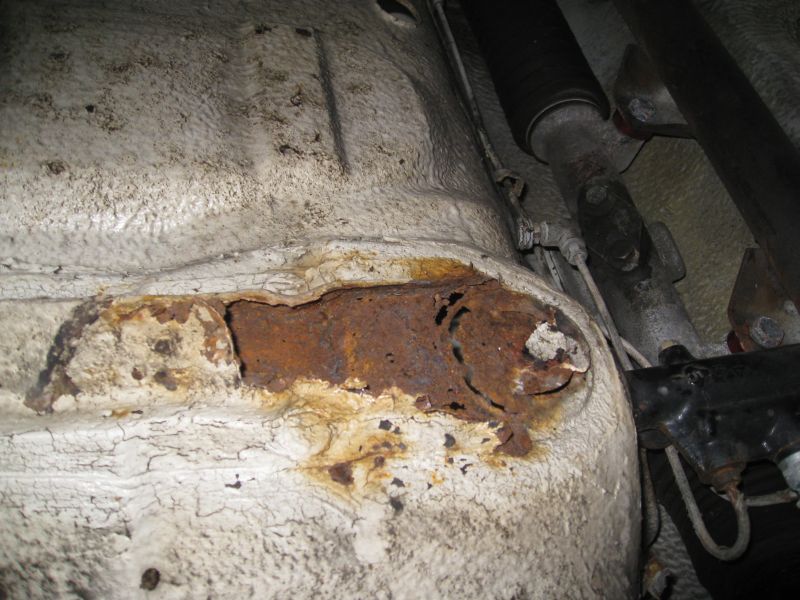
Posted by: Amenson Apr 21 2008, 06:43 PM
I actually tackled repairing the pedal area.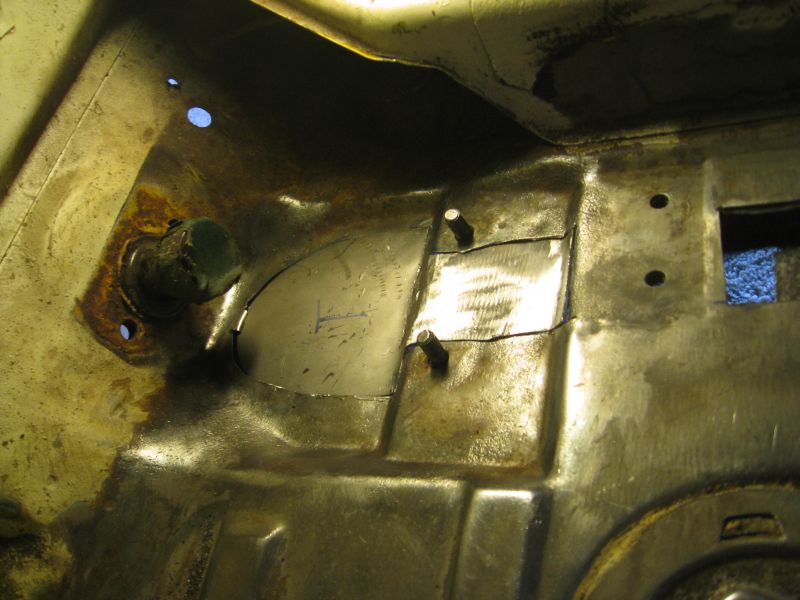
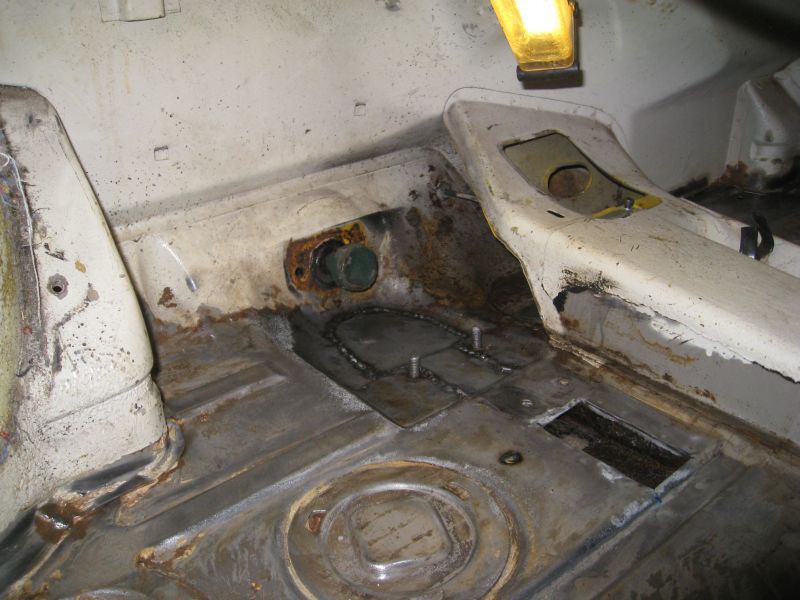
More work that should be invisible when I am finished.
Scott
Posted by: Amenson Apr 21 2008, 06:49 PM
Are you venting the radiator through the hood?
Yup, inspired by wbergtho's hood.
I'm interested in seeing you the run the lines thru the longs. I thought that would be a good way to go, but didn't have the patience to figure out how to do it.
I did run them thru the center tunnel. No problem yet. Excess heat is not a problem, now that engine temp is under control. But even inside the longs, you will be accumulating the radiant heat. It is tight in the center tunnel, but no interference with the other stuff. I have not run on a hot day yet.
Will you post or send me some pictures of your installation.
Thanks
Scott
Posted by: Amenson May 5 2008, 08:51 AM
Saturday was the wedding shower and as expected we received a bunch of great gifts for domestic use. We (I;-) also received a couple of gifts for the garage. My future inlaws gave us a really nice cordless tool set with a reciprocating saw, 1/2" drill and cirular saw. I need to pick up some metal cutting blades for the saws and I will be ready for a parts car! My parents gave us a belt sander! 
My parents and sister came in for the shower. Most of the weekend was spent entertaining but after we dropped my sister off at the airport on Sunday my parents spent some time helping in the garage. We cut out the lower portion of the inner passenger long. My Father insisted on doing all of the dirty work.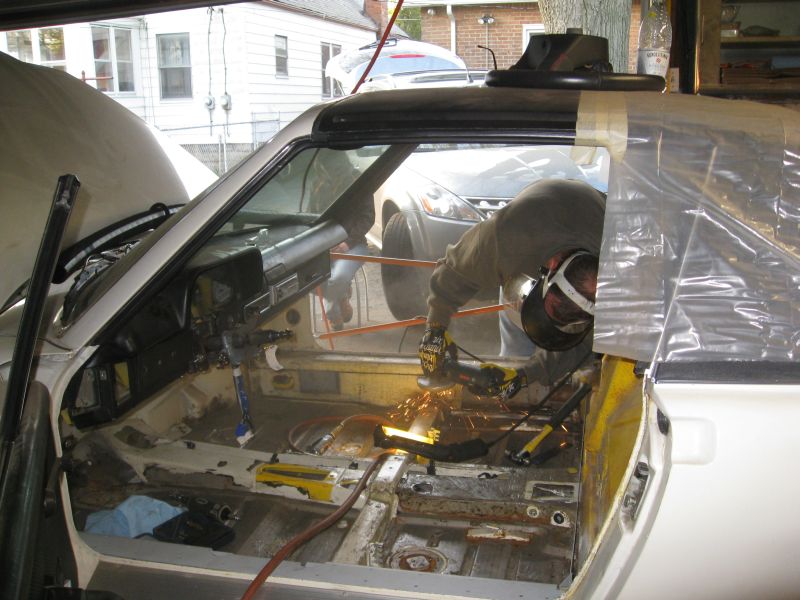
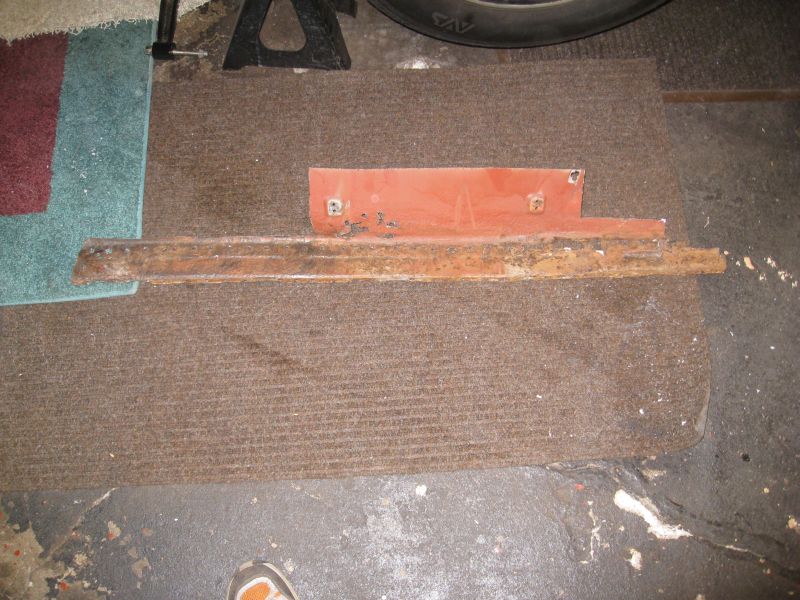
...
Posted by: Amenson May 5 2008, 08:58 AM
This is my Mother helping: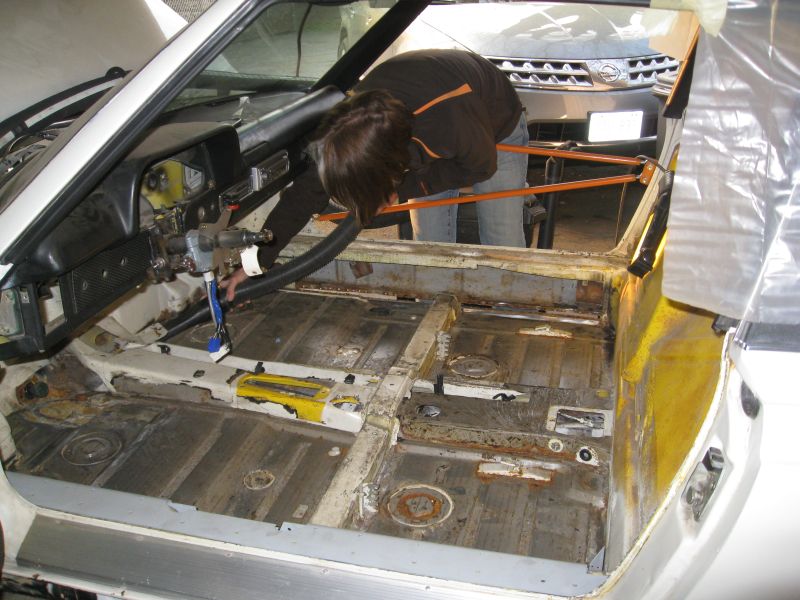
I still need to finish removing the chunk up in the front. I left it in place for now so that I can use it for measurements and a template.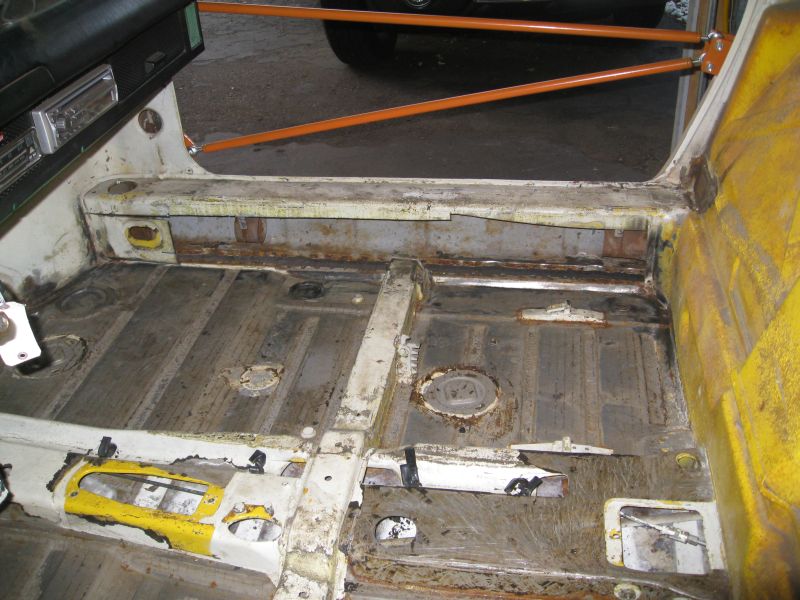
Thank you to everyone for all of the great gifts and help in the garage!
Scott
Posted by: Amenson May 11 2008, 06:46 PM
Made some more progress on the restoration work this weekend. Started by tackling this: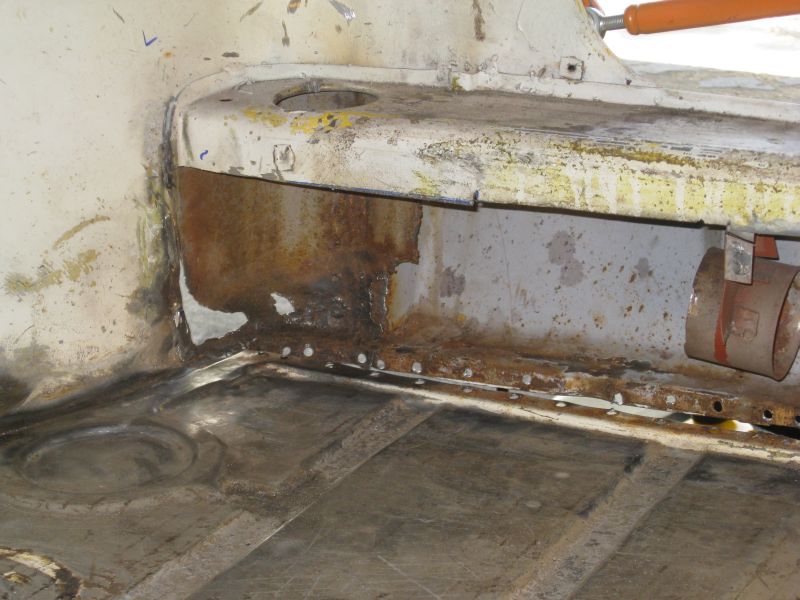
Gone!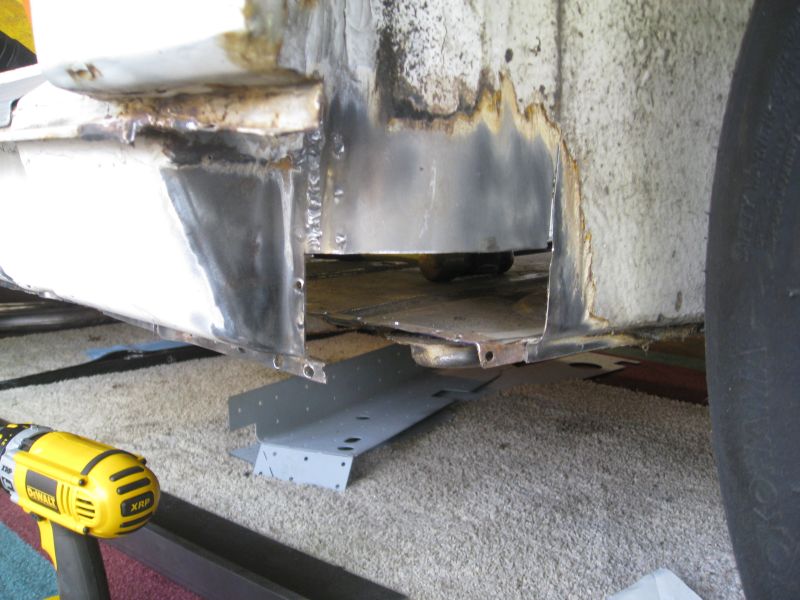
Working on the new piece. I practiced tig welding by tig'ing all of the shrinking seams. It took much longer than mig welding but I needed the practice and the results are much nicer. It makes me angry ever time I see the previous owner's attempt to fix this area. 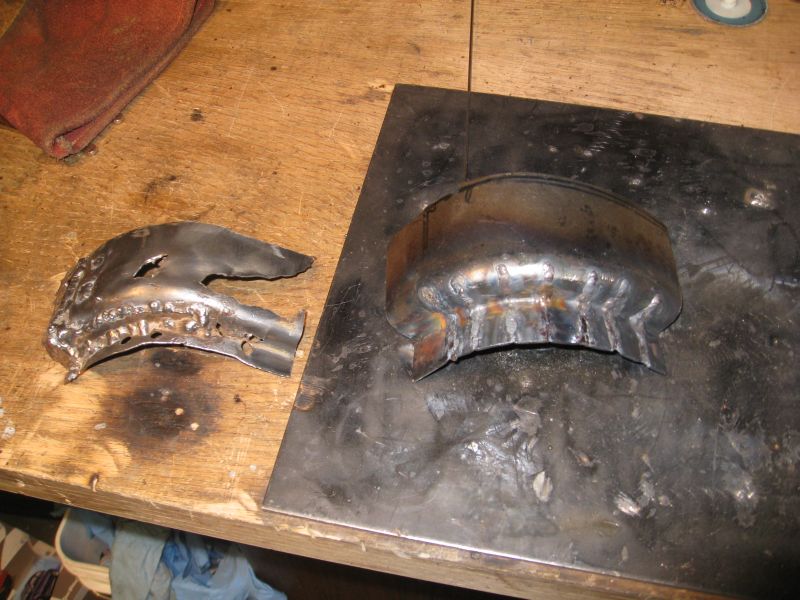
In place with much grinding to do. 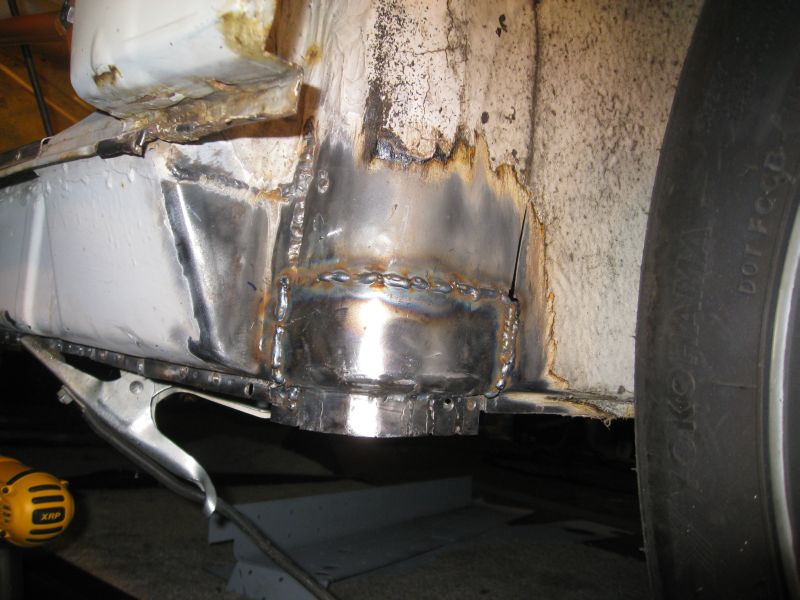
Posted by: Amenson May 11 2008, 06:58 PM
From the inside. Still need to weld the vertical piece in.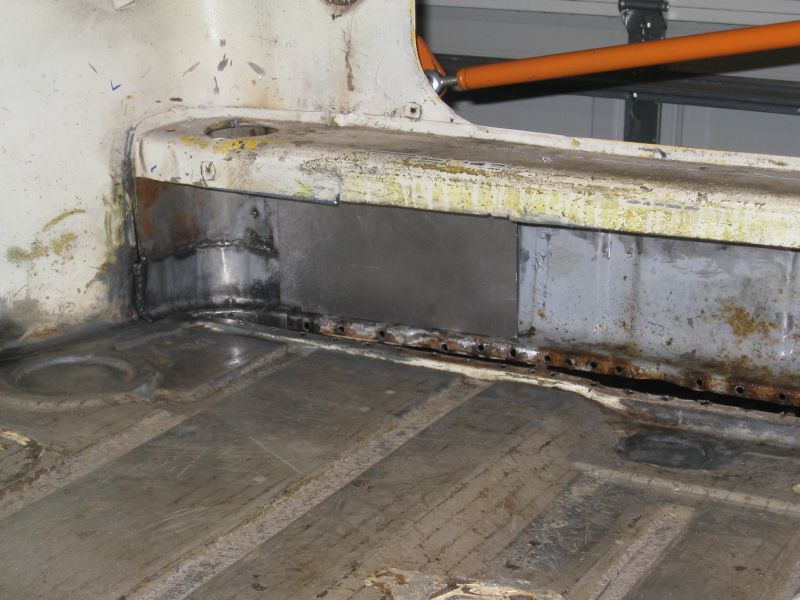
How did I remove the inch of crud that was caked between the firewalls???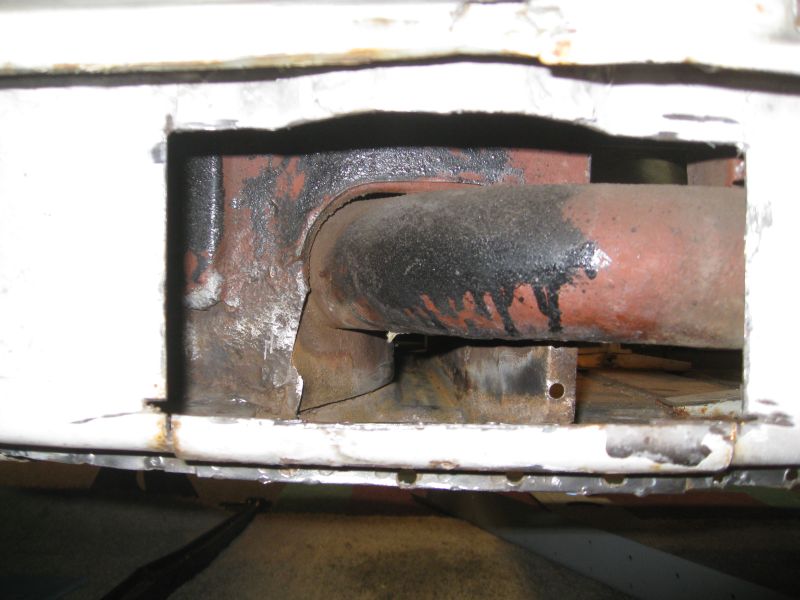
Not sure why but I was particularly proud of myself for this simple contraption. Probably because I sat and stared at the crud in the hole for a while before I came up with it.
Hopefully by next weekend I will be done restoring and back to conversion work.
Posted by: McMark May 11 2008, 08:05 PM
Lookin good. 
Steel pipe is a good idea. I also use various sizes of rubber tubing to get into nooks and crannies (like the center tunnel).
Posted by: Amenson May 11 2008, 09:25 PM
Steel pipe is a good idea. I also use various sizes of rubber tubing to get into nooks and crannies (like the center tunnel).
I used rubber and plastic tubes and compressed air on the other side and in the center tunnel...they worked ok. The wire brush at the tip really loosened up the crud.
Scott
Posted by: Amenson May 18 2008, 08:11 PM
I feel a lot better about the project after today. I mis-specified the size of the blanks for the passenger side inner long replacement panel so the ones my father brought would not work. It looked like I might not get to work on the most critical section of the repair work this weekend. I sent my Father the new dimensions and 2 days later new blanks show up. Thanks Pa!!! Today I made it fit, and did not need the extra one the he sent.
One end of the blank ready for cutting.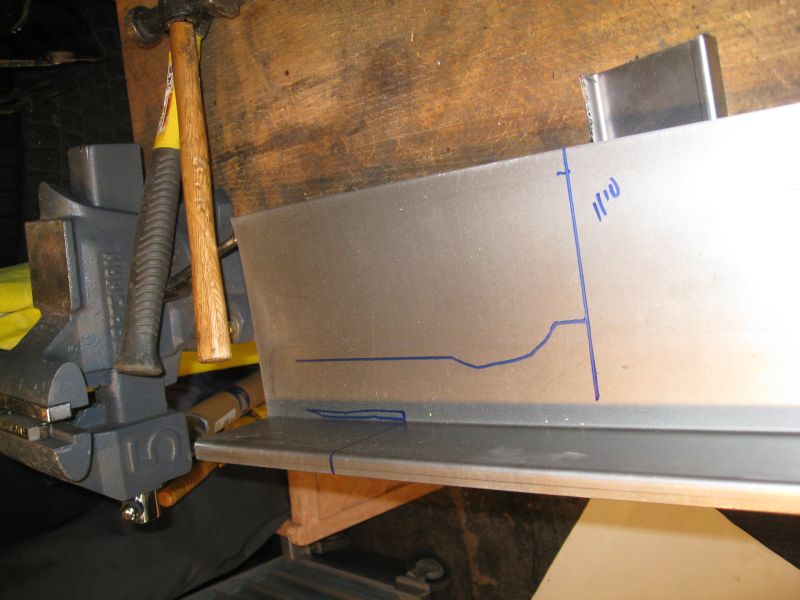
Cut and ready to go in:
Some adjustments required: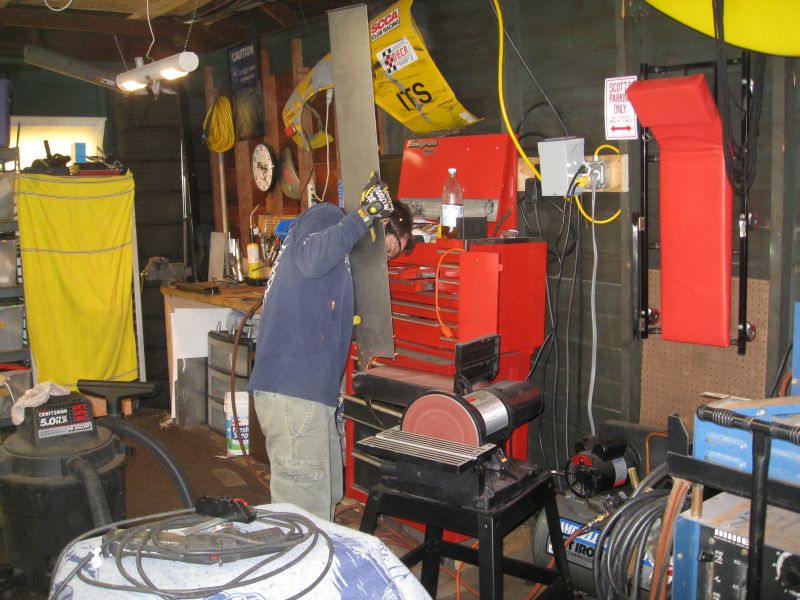
Posted by: Amenson May 18 2008, 08:17 PM
It fits but the top needs to be cut. I decided to cut high enough so that I would cut through the patch panel and the existing inner long metal. Theoretically everything would line up with a saw sized gap between the panels.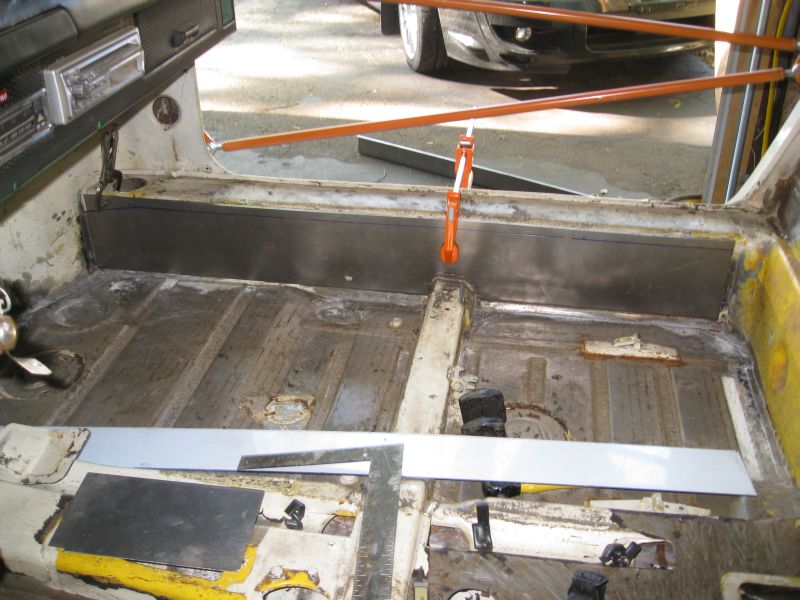
It worked!!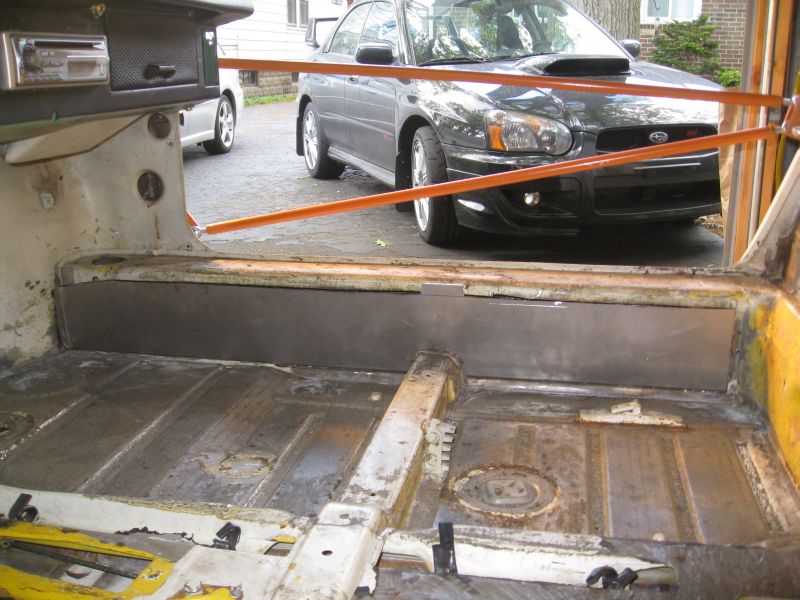
Bottom
Posted by: Amenson May 18 2008, 08:24 PM
Inside: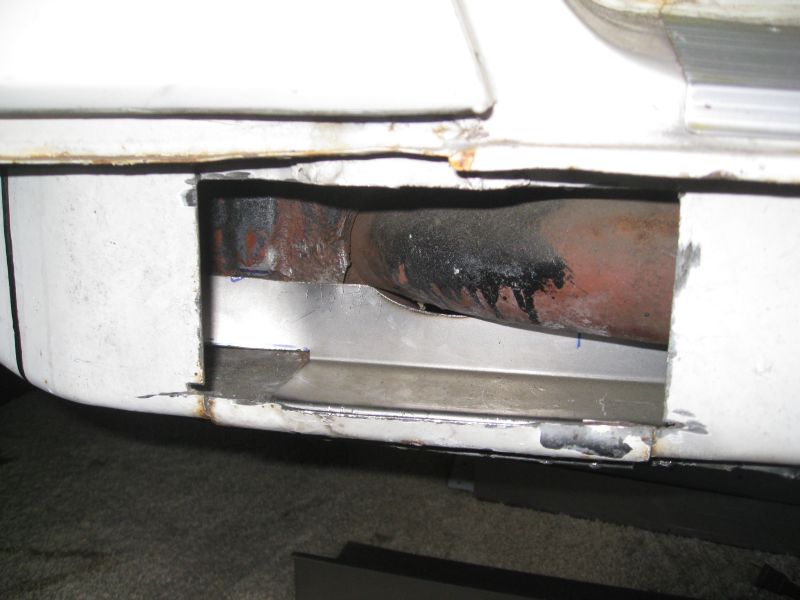
I must add a thank you to my fiancee. She has been very supportive of all of the time I have been spending in the garage trying to get the PorSti on the road. Today she even made me dinner and came out into the garage to eat with me and the PorSti in the makeshift dining room I set up. 
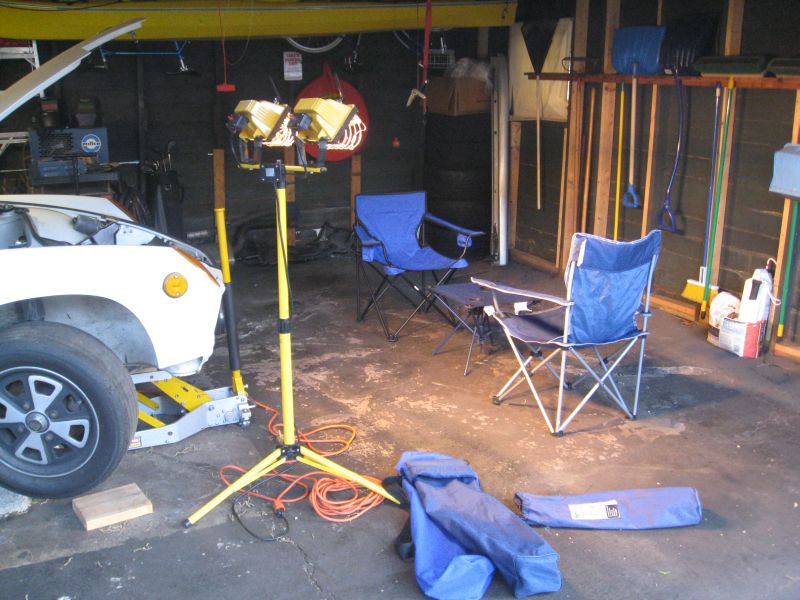
Thanks Tara!!!
Posted by: jimkelly May 18 2008, 08:26 PM
the radiator and fuel cell sharing the same cramped space should result in a rise in fuel temp - could this be an issue or benefit ??
Posted by: Amenson May 18 2008, 08:31 PM
the radiator and fuel cell sharing the same cramped space should result in a rise in fuel temp - could this be an issue or benefit ??
The duct I plan to make should shield the tank from direct contact from the heated radiator air. It still could be an issue though and is something that I intend to keep an eye on.
Scott
Posted by: Amenson May 23 2008, 07:51 PM
I picked up some 15x7 Phone Dials on ebay this week. I am not planning to do the 5-lug conversion anytime soon but got a smok'n deal that I could not pass up. Now I just need the 4th. They will be powder coated before going on the car.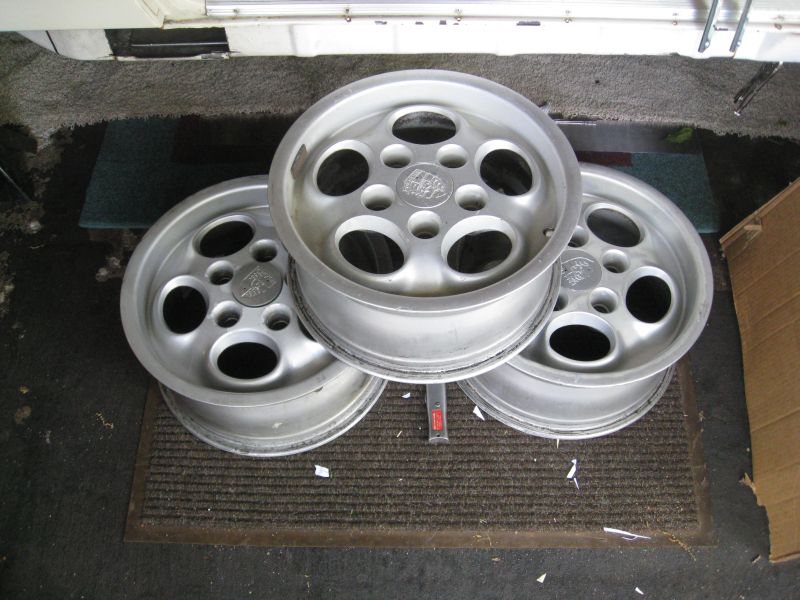
I mocked the radiator plumbing for the passenger side before welding in repair panel. You can just barely see the rubber tube connecting to the SS tube at the front of the long. I will need to shorten the SS tube and pull the hose further forward.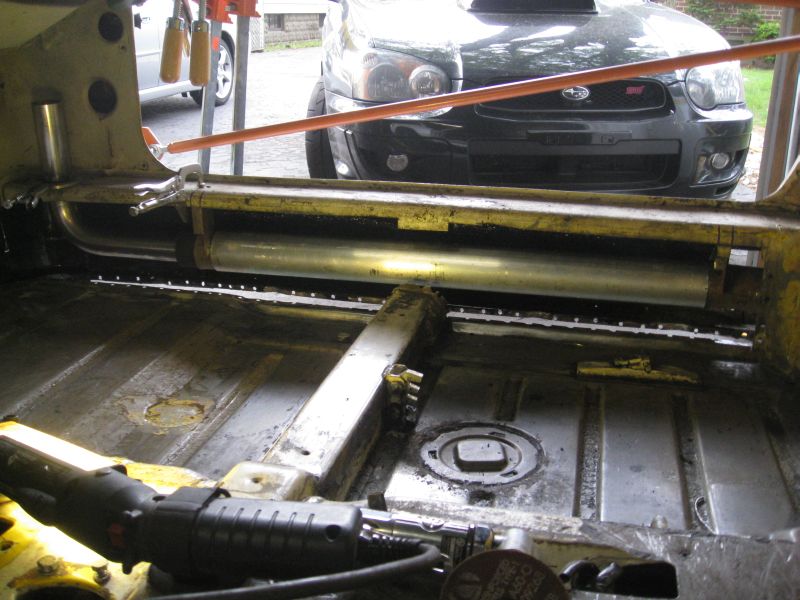
Scott
Posted by: Jeff Hail May 24 2008, 12:26 AM
Saturday was the wedding shower and as expected we received a bunch of great gifts for domestic use. We (I;-) also received a couple of gifts for the garage. My future inlaws gave us a really nice cordless tool set with a reciprocating saw, 1/2" drill and cirular saw. I need to pick up some metal cutting blades for the saws and I will be ready for a parts car! My parents gave us a belt sander!
My parents and sister came in for the shower. Most of the weekend was spent entertaining but after we dropped my sister off at the airport on Sunday my parents spent some time helping in the garage. We cut out the lower portion of the inner passenger long. My Father insisted on doing all of the dirty work.
...
Parents helping? In the garage? Parents helping working on the car?
Your Dad rocks!!!!!!!!! My Dad on the otherhand ......well he's cool but his "bursitus" acts up when the very mention of tools, cars, hey Dad can you help with the..... you get the picture. He does supervise very well though.........
Posted by: Amenson May 26 2008, 10:37 PM
Parents helping? In the garage? Parents helping working on the car?
Your Dad rocks!!!!!!!!! My Dad on the otherhand ......well he's cool but his "bursitus" acts up when the very mention of tools, cars, hey Dad can you help with the..... you get the picture. He does supervise very well though.........
Ya, my parents are very good about helping with the car projects. When I was racing they would make a point to drive over once or so a season to crew for the weekend. I try to repay the favors as much as possible. Two christmas' ago my present to my Mother were the parts and labor to rebuild the front suspension on her E-Type. My father and I spent much of the holiday vacation in the garage.
I finally filled the gaping hole in the passenger side long. In order to make sure that everything is straight and that the reinforcement panel fits, I used it as a guide. I made three windows to the weld seam with a hole saw and clamped it down. The floor and pinch seam are already tacked in place at this point.
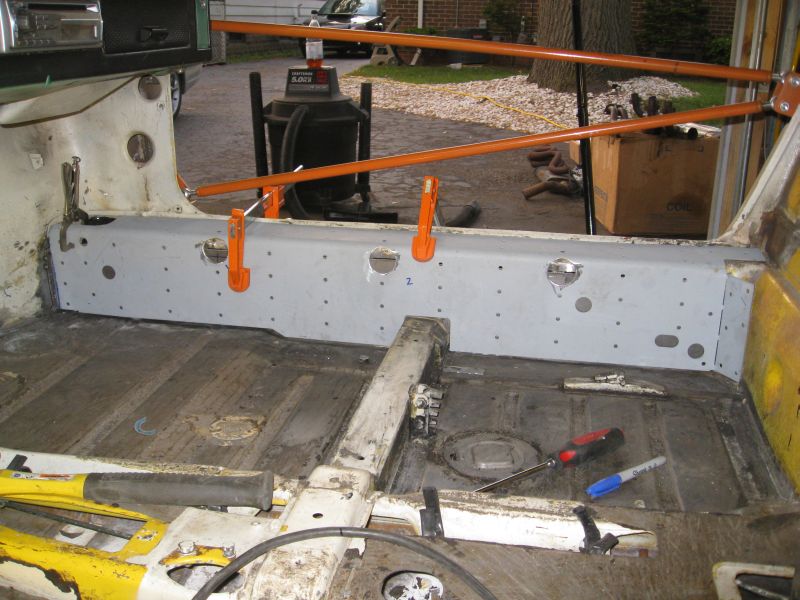
Decent gap...
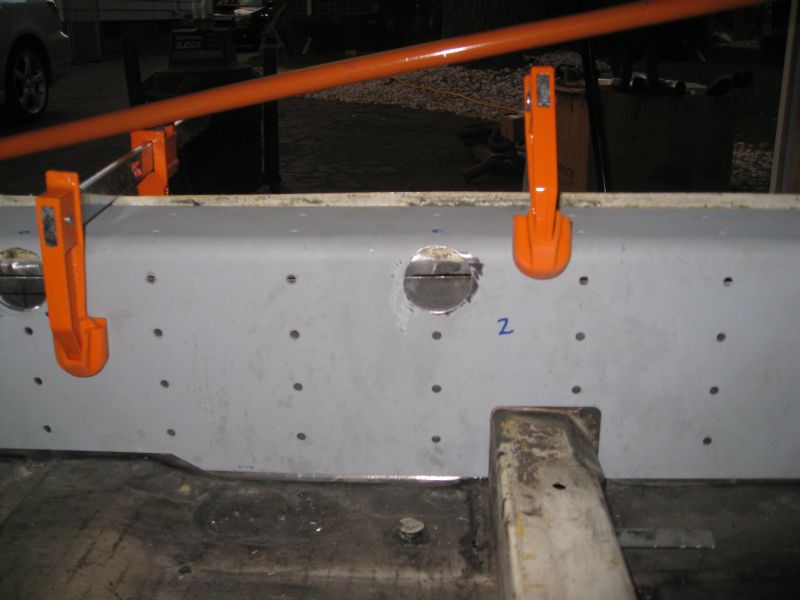
Tacked
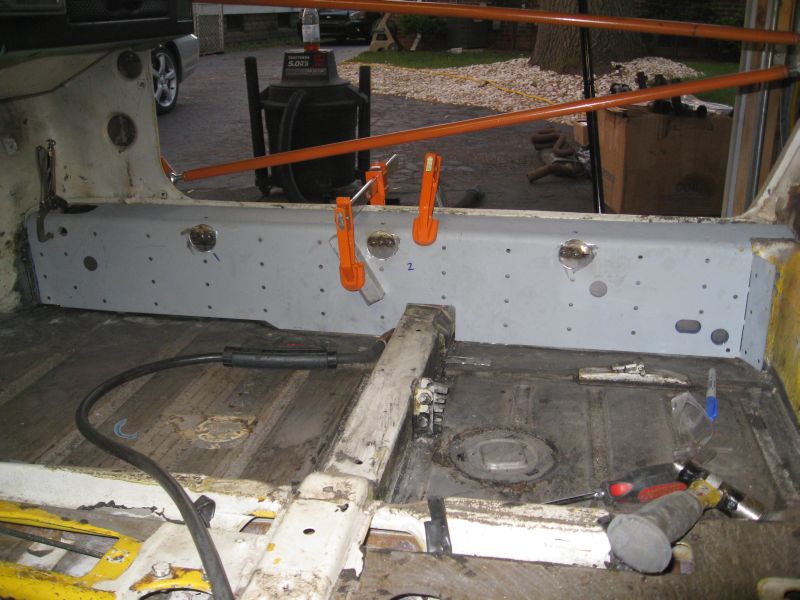
Ready to be welded shut

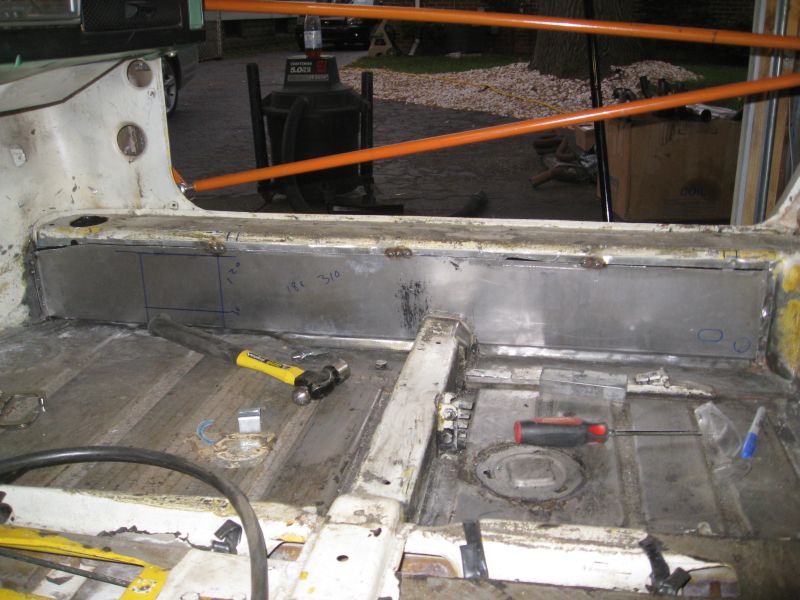
It was getting late so I put in a few more tacks just to make sure that everything was in place. Before calling it a night I decided that it would be ok to get into the car again. Seems silly but after working bent over the door supports for several days the idea of working from the inside again is something to look forward to. My lower back has been taking a beating.

Posted by: cobra94563 May 27 2008, 11:05 AM
very nice...what size piping is that for the cooling line? ARe you running one on either side?
Posted by: Amenson May 27 2008, 08:49 PM
very nice...what size piping is that for the cooling line? ARe you running one on either side?
I am running one on each side. The line to the radiator is 1.5 and the return is 1.75.
Finally...I have all of the rust out of the longs. It is like the last 2 months never happened.
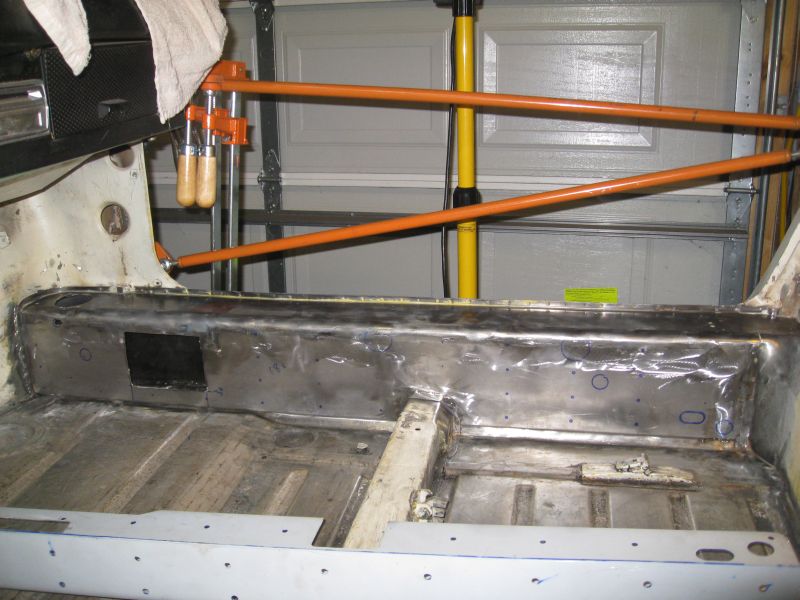
Back to progress
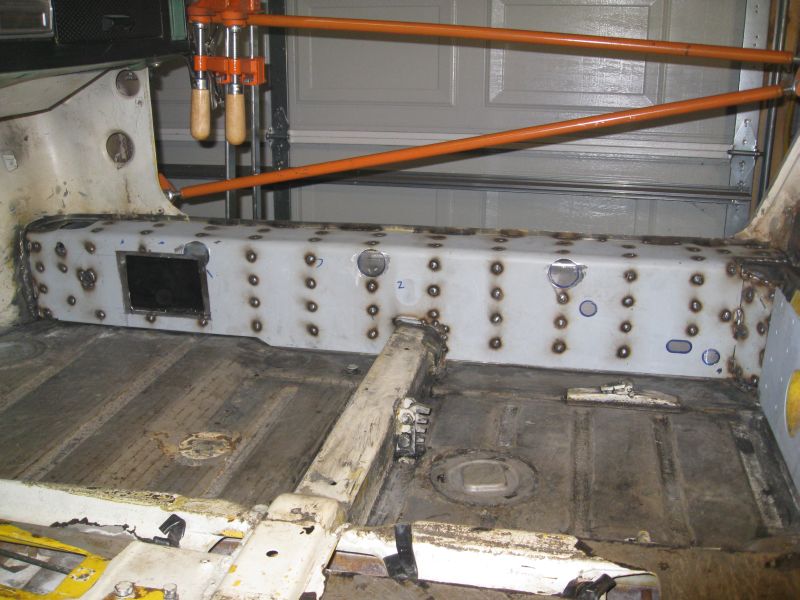
Still a bit of welding to do and I need to install the seat belt mounting lug. I have not decided if I am going to run the plumbing through the passenger side before getting the driver side ready for plumbing. Probably should finish up the passenger side just in case there is an issue that requires changes that I could carry over to the driver side.
Scott
Posted by: championgt1 May 27 2008, 09:33 PM
Just read this thread for the first time. HOLY CRAP MAN. Nice work!!!
I wonder if my wife would let me use the 3.0, tiptronic trans and paddle shifters out of her 08 legacy. Just joking I have nowhere near the skills you have. Again very nice work.
Posted by: Zaney May 28 2008, 12:15 PM
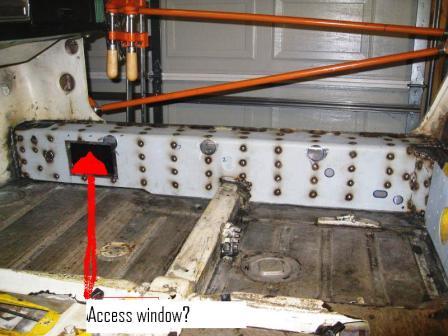 What is this in the long?
Posted by: Amenson May 29 2008, 09:33 AM
Just read this thread for the first time.
HOLY CRAP MAN. Nice work!!!I wonder if my wife would let me use the 3.0, tiptronic trans and paddle shifters out of her 08 legacy.
Just joking I have nowhere near the skills you have. Again very nice work.Don't let skills (or the lack there of) get in the way of a good idea...I didn't! Just resolve to do it right. Take your time, do the research, throw out bad parts, buy the correct tools and seek assistance when necessary. I had the convenience of having friends who provided some key assistance (and tools) to get me started.
My fiancee's car is an '05 legacy GT with the lower spec version of the 2.5 STi engine. She did not think that it was funny when I called it a spare engine for the PorSti.

What is this in the long?
It is an access hole so that I can connect the SS bend to the Gates hose.
You can see the area here, just below the vertical locking pliers:
Scott
Posted by: Amenson Jun 10 2008, 10:28 PM
Ok...so here is how the passenger side cooling line will be run.
From the Radiator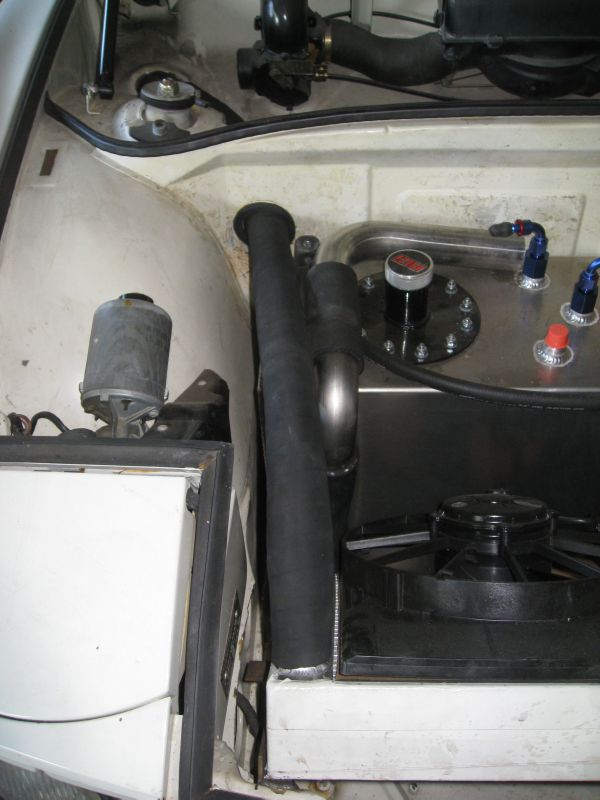
Through the heater hole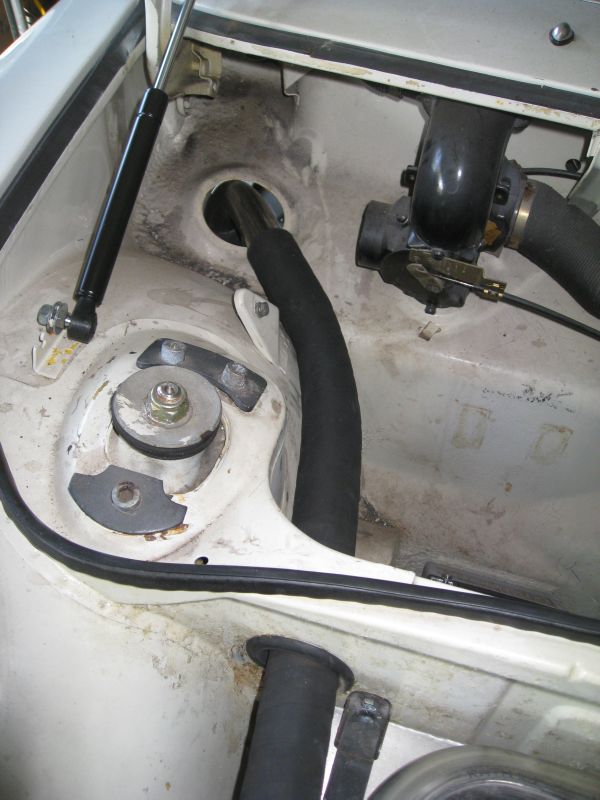
Into the long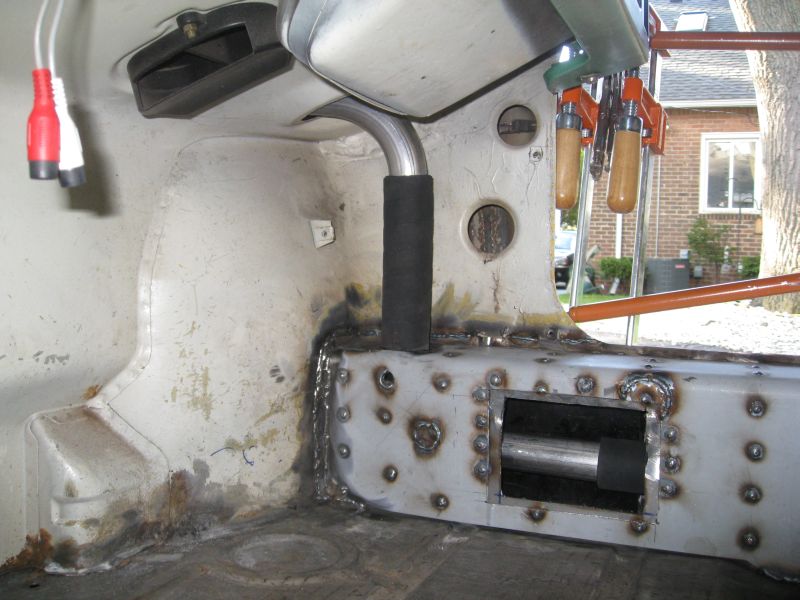
And into the engine compartment...boy is it dirty back there.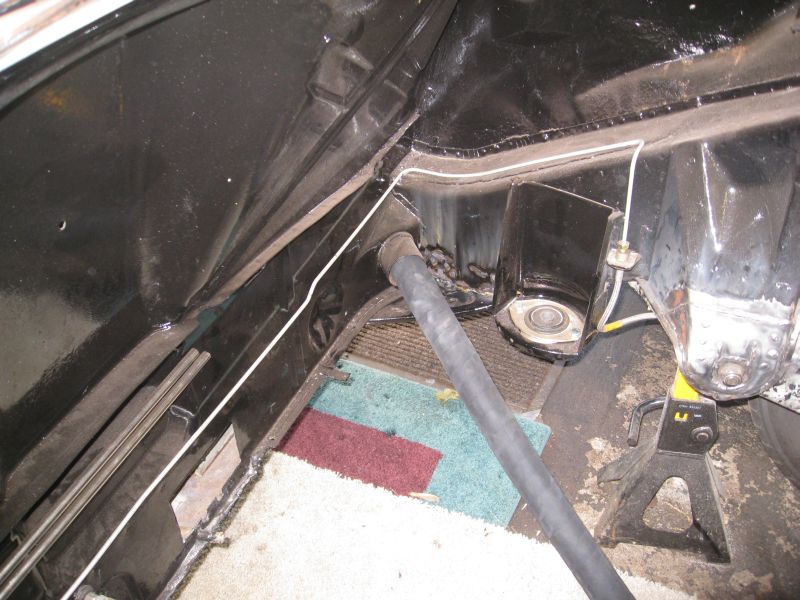
Posted by: Amenson Jun 10 2008, 10:35 PM
Finished welding in the passenger Engman reinforcement...put a few extra welds in for good measure and because I was enjoying welding. 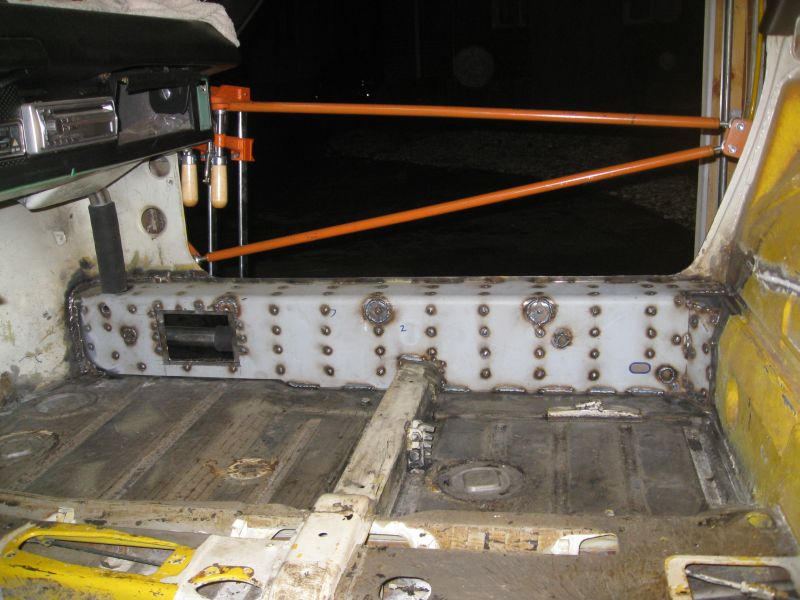
Cleaned up the driver's side. No surprises here!!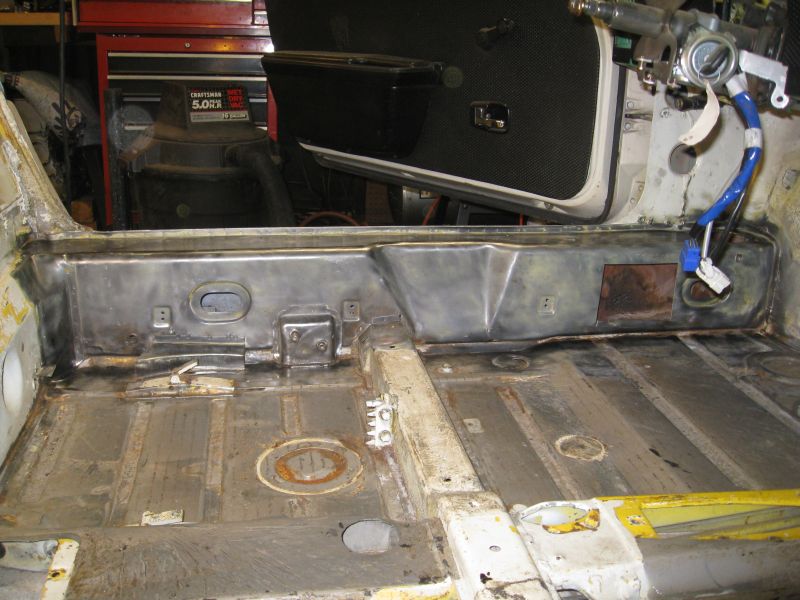
Mmmm....if you live in the Michigan area and have access to Bell's beer, I highly recommend finding some HopSlam. It does not get any better than this.
Posted by: Amenson Jul 8 2008, 07:54 PM
I have not posted an update for a while but not because of the lack of effort or progress, just have not been doing anything that a dozen other people have not already posted a more novel or skillful implementation. So here are the end results...
Finished welding in the Engman reinforcement kit. 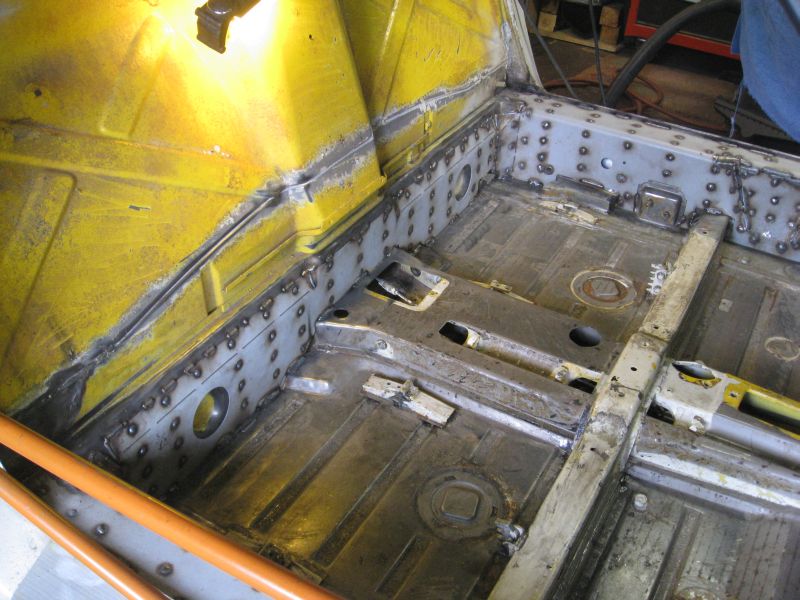
After a load of grinding.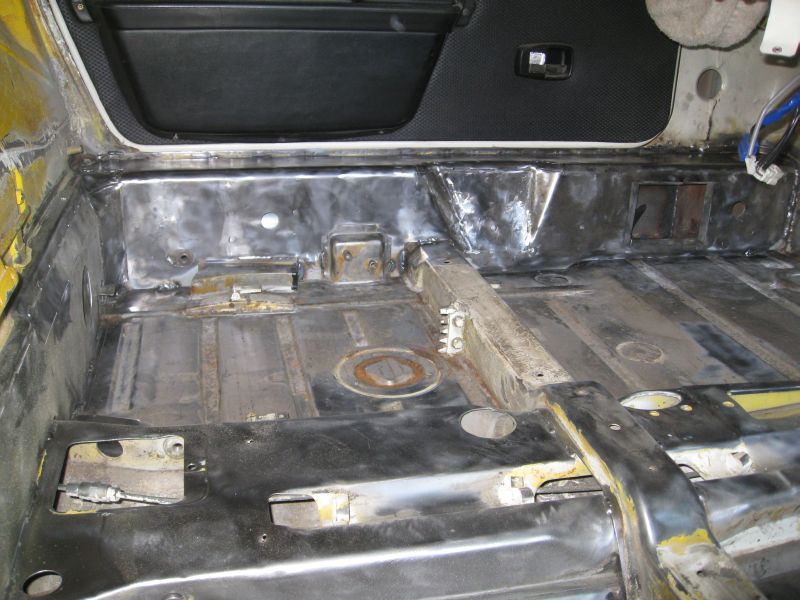
Finished repairing the pedal area.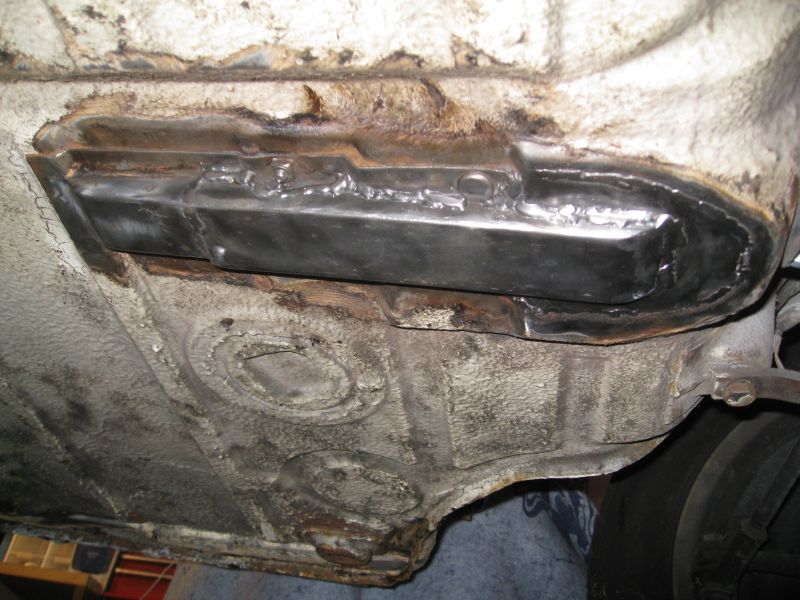
....
Posted by: Amenson Jul 8 2008, 08:10 PM
Installed the driver side cooling line support. Had to cut open the long to get it in.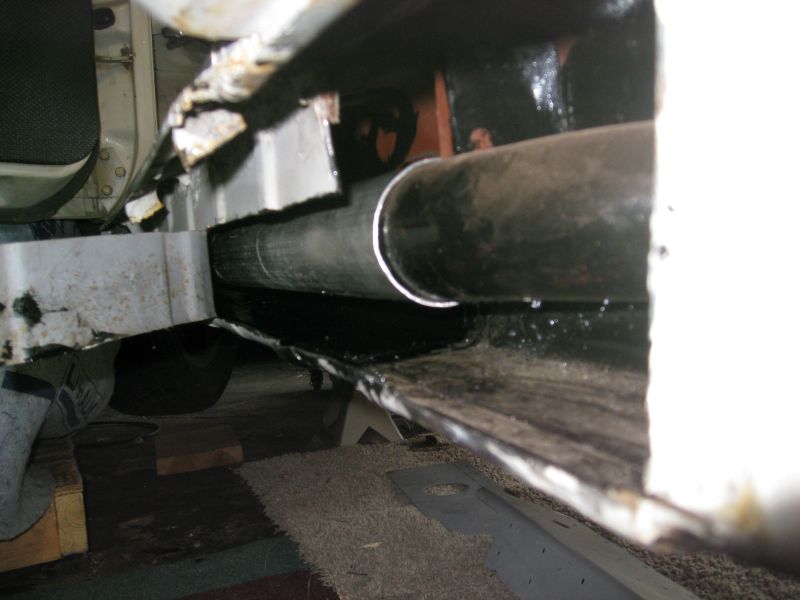
Welded back up.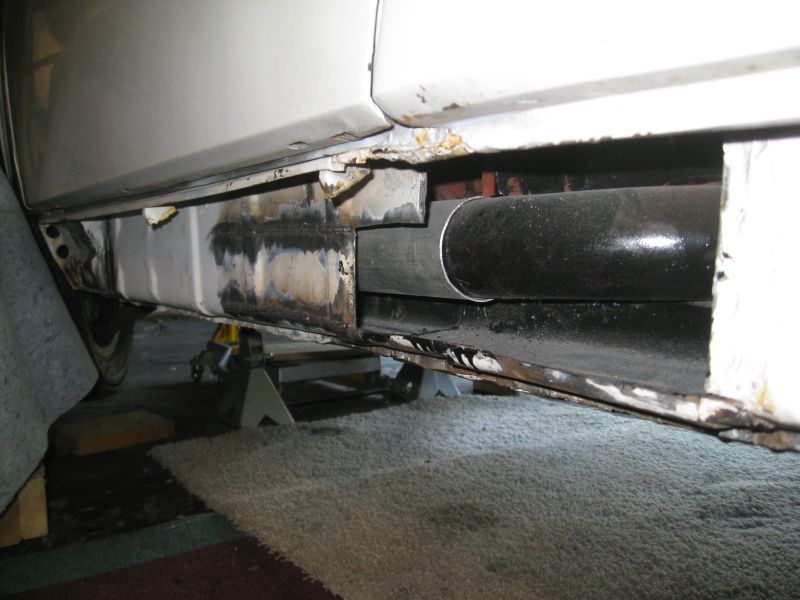
Worked on the engine plumbing a bit. Cleaned up the crank case vent hoses and rerouted the turbo cooling lines.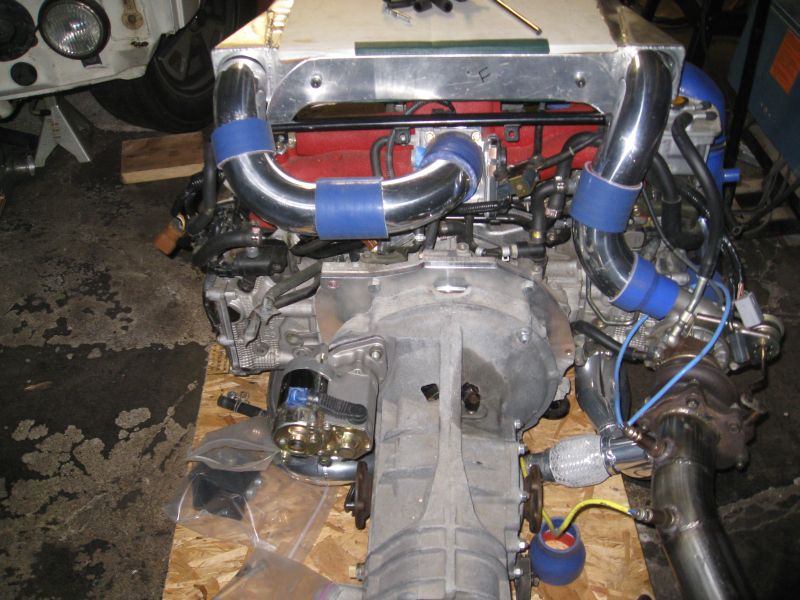
I have been spending hours practicing Tig welding Al. It is as challenging as everybody told me it would be. I am making strong welds but not quite as nice looking as I want considering the high profile locations I need to weld on the intercooler and the radiator. This is my creation from this weekend.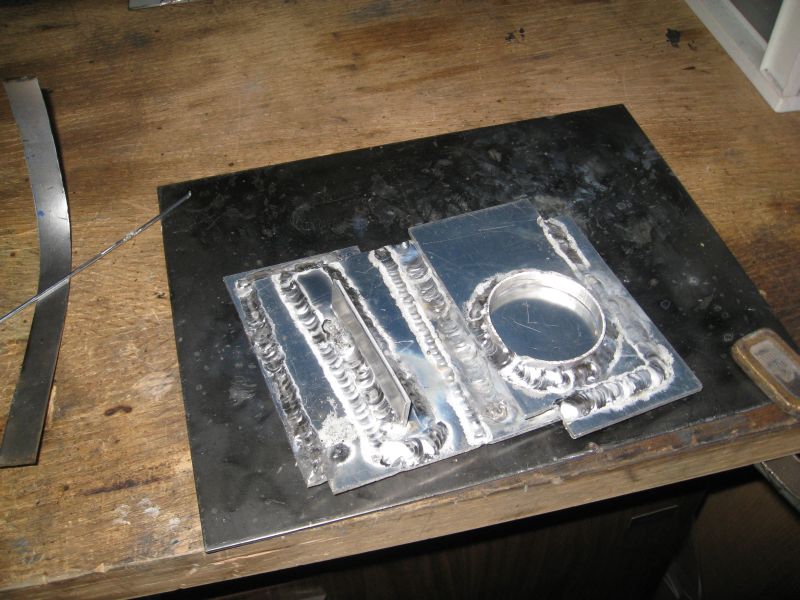
I am working on the new oil lines to the turbo and remote oil filter now. And the filter to intake plumbing, and the wiring harness and...
Scott
Posted by: Amenson Jul 12 2008, 03:36 PM
Made bit more progress today. Made another mount for the fuel lines and a cover for the access hole into the center tunnel.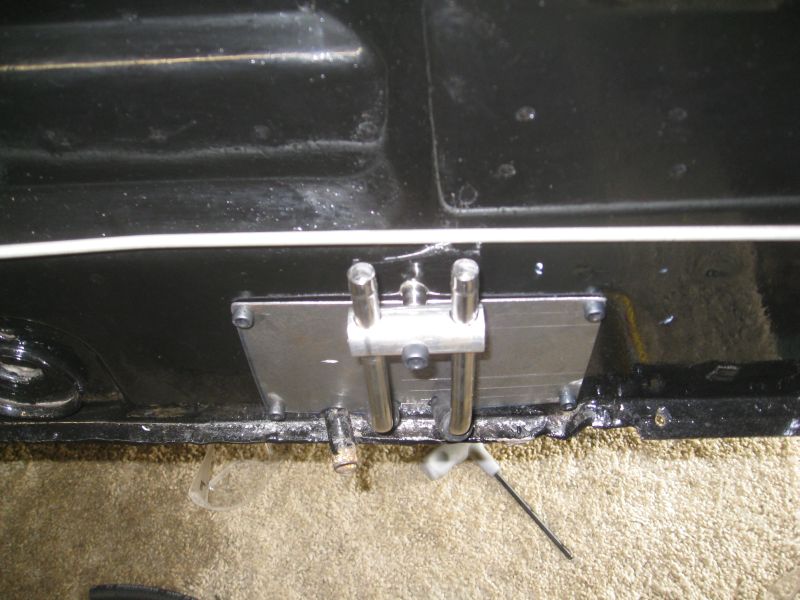
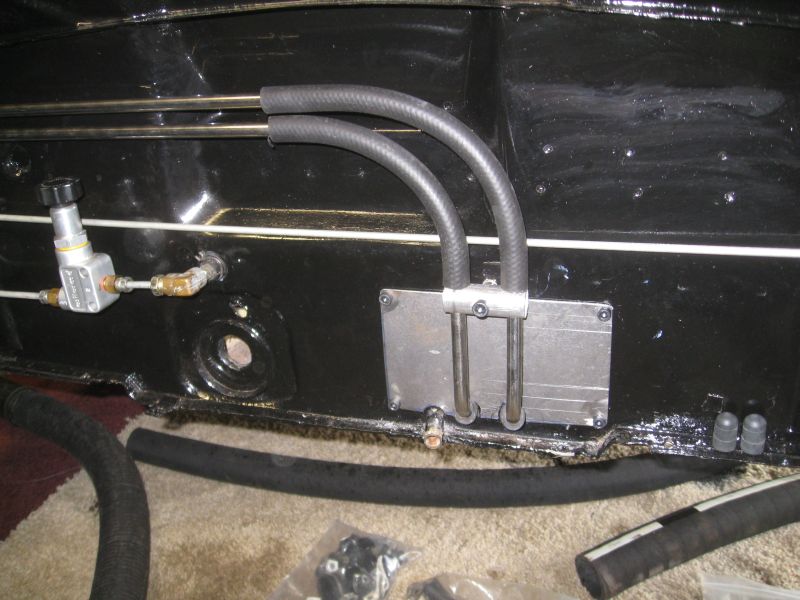
I think that next to the tig welder, nutserts are my second favorite tool. No more sheet metal screws for me!!
Scott
Posted by: Phoenix 914-6GT Jul 12 2008, 03:54 PM
What tool did you buy and where did you get it to use the nutserts?
Posted by: Amenson Jul 13 2008, 06:56 PM
This is my nutsert tool
Nutserts for the plate and fuel line mount
Another fuel line mount using a nutsert.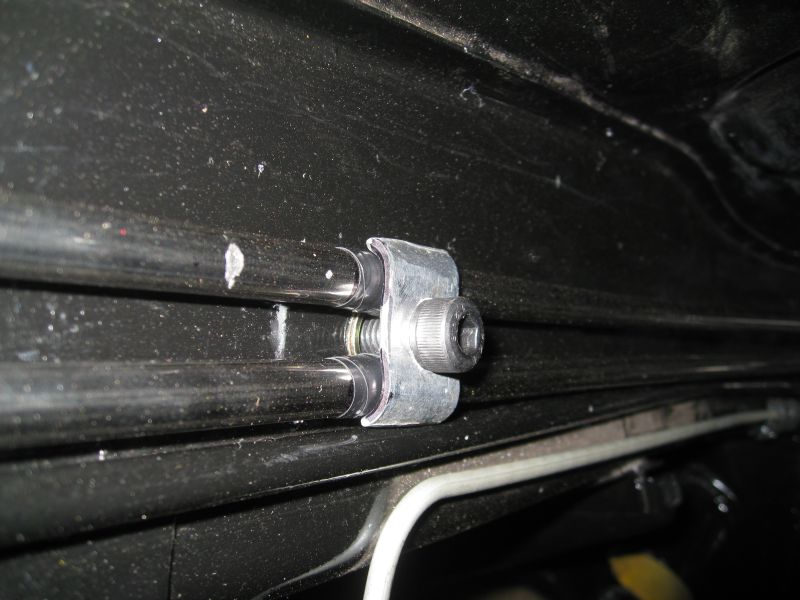
All of the fuel pump and filter brackets use nuserts. I started installing nutserts for the rear valance and will use them for the front valance as well.
Finally, the fuel lines are in for good. 
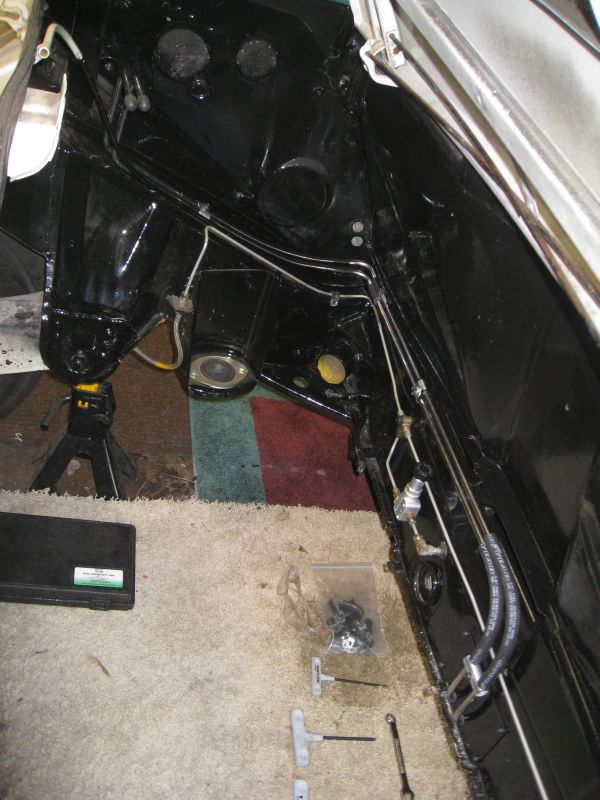
I also reinstalled the passenger side door today. I finally appreciated the value of the chassis braces. The door opening was a bit tight and uneven before all of the work on the passenger side. I cranked open the gap until it met the measurements in the manual before welding in the new metal. I was able to remove the shim from the lower hinge which helped the gap at the front of the door. The gap at the back is more even now.
It feels really good to be installing things permanently.
Scott
Posted by: Phoenix 914-6GT Jul 13 2008, 07:07 PM
So where did you buy that handy tool. Looks like a great tool to have.
Nice work.
Posted by: Amenson Jul 13 2008, 08:06 PM
So where did you buy that handy tool. Looks like a great tool to have.
Nice work.
Picked it up at Grainger:
Edit:deleted bad link
Scott
Posted by: Phoenix 914-6GT Jul 13 2008, 08:49 PM
Thanks... Just ordered one.
Posted by: Amenson Jul 15 2008, 08:59 PM
A couple important things happened today.
I finally have the oil feed line for the turbo. Seems like it would not be such a big deal but the one end was female M12x1.0 and getting to it w/o a load of adapters was a major afare. Eventually I found a shop 4 miles away from my house to make one for me.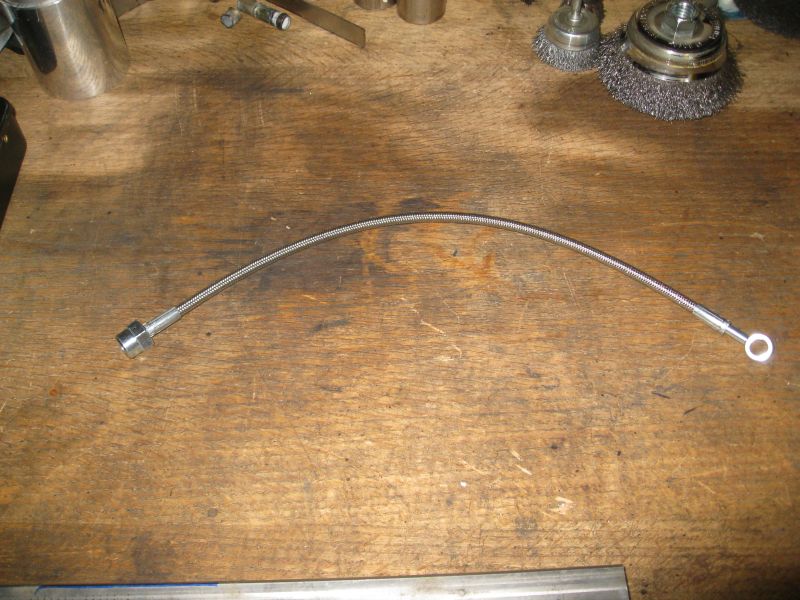
Temporarily installed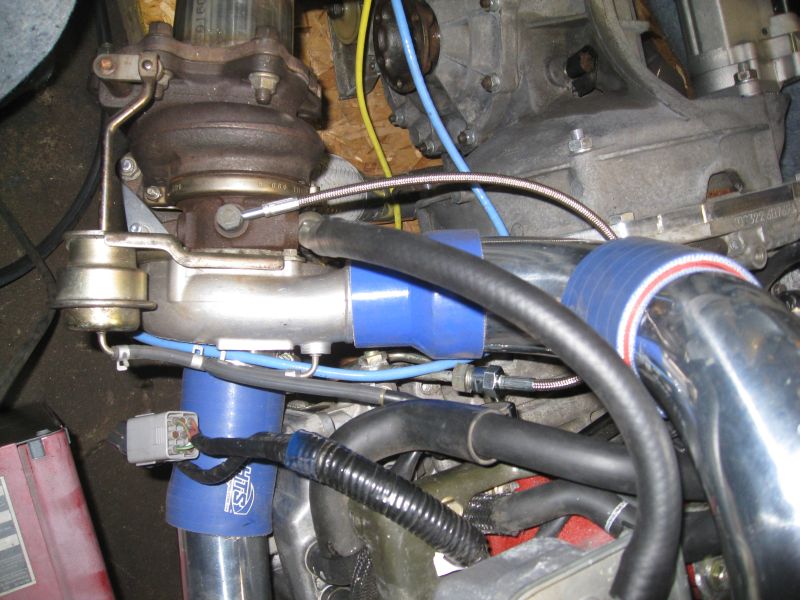
After a panicked search I have a matching seat to the Momo Start seat that I bought at the beginning of the project over 2 years ago. Momo has made 2 revisions since then and the old style was no longer available. I picked up the seat on the right from somebody who bought it a while ago and never used it! It just arrived today 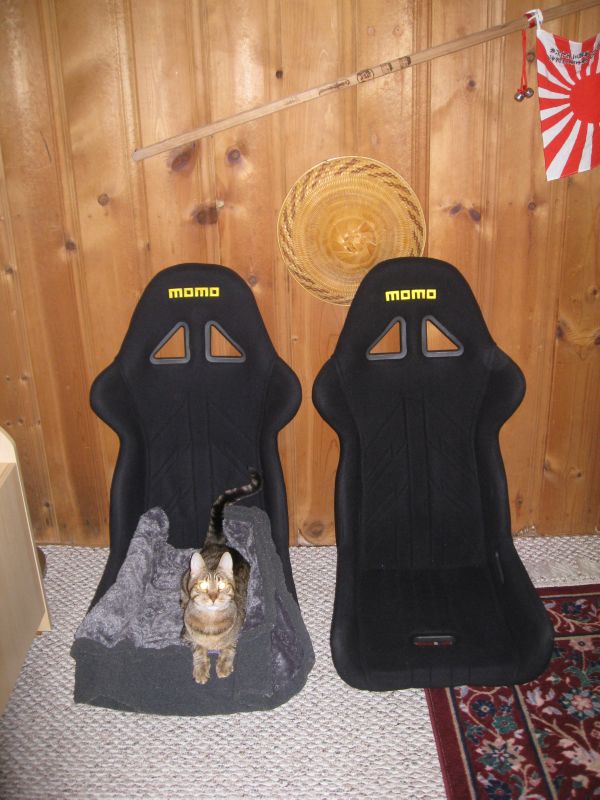
The Puss has made the first seat his.
Scott
Posted by: DBCooper Jul 17 2008, 02:35 PM
Look how excited he is! That new seat's made him think he's getting a new little sister....
Posted by: Zaney Jul 17 2008, 07:10 PM
Are you going to install flares on your car? What size wheels/tires do you intend to run under all that torque?
Thanks,
Nate
Posted by: Amenson Jul 17 2008, 10:35 PM
Are you going to install flares on your car? What size wheels/tires do you intend to run under all that torque?
Thanks,
Nate
205's...maybe 215's on 2.0 Fuchs, this is my trans preservation plan. I have a set of 7x15 phone dials for when I put in the 5 lug parts. Eventually I would like to do a Sheridan body so that it can have some proper rubber. Until then its nickname will be "The Smoke Machine".
Scott
Posted by: fat73 Jul 18 2008, 07:15 AM
Are you going to install flares on your car? What size wheels/tires do you intend to run under all that torque?
Thanks,
Nate
205's...maybe 215's on 2.0 Fuchs, this is my trans preservation plan. I have a set of 7x15 phone dials for when I put in the 5 lug parts. Eventually I would like to do a Sheridan body so that it can have some proper rubber. Until then its nickname will be "The Smoke Machine".
Scott
My car has the 03 WRX engine with 295/35 Toyo Proxes on 18"x11" s and it will still light 'em up. When you start hard on one of these and get the tires spinning it's almost instant red-line banging off the rev-limiter.
Hope you got a good tranny. Already broke one. It's a blast.Ed aka W9R1
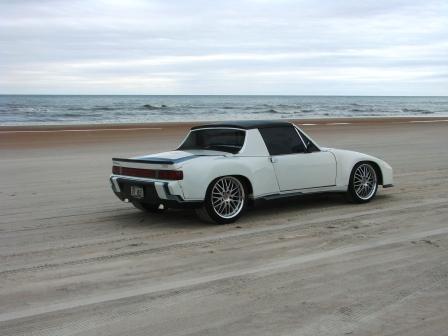
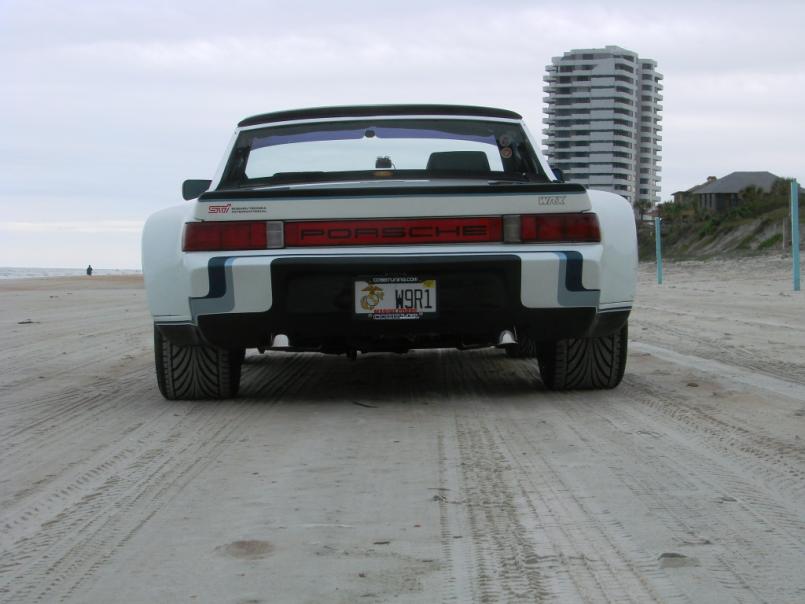
Posted by: Amenson Jul 20 2008, 07:55 PM
Hope you got a good trany. Already broke one. It's a blast.
The 901 in the car is solid with a recent refresh. I just need to remind myself to be mindful when in 1st.
I made some progress this weekend.
Mounted the air filter, actually a one of my buddies came over and did this so that I could work on other things:
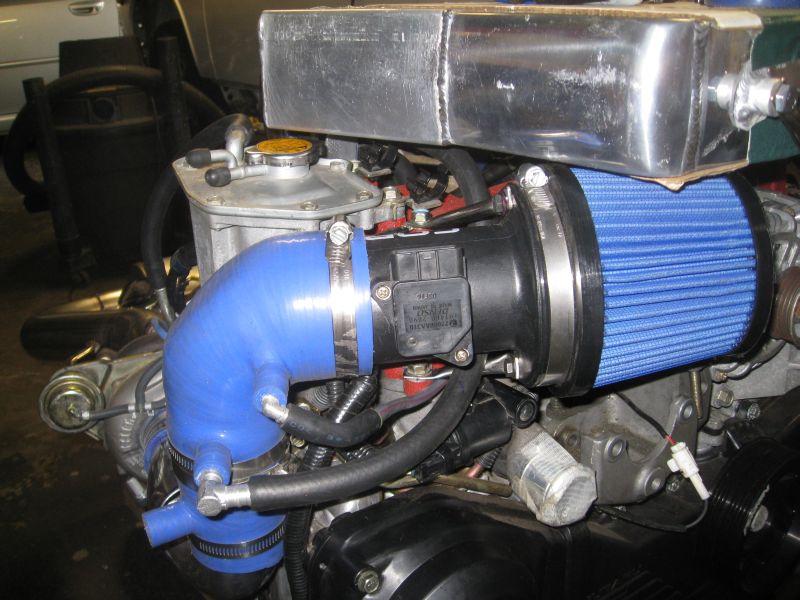
Made the tube from the turbo to the air filter silicone piece. This is the first "real" aluminum part that I welded. Notice the fairly tidy practice weld in the background. Now notice how not tidy the weld is on the part. Welding a odd shape with varying wall thickness and not perfect gaps is considerably more challenging then welding straight test tube. Oh well, not bad for my first part. It is strong and leak free. Hopefully I get better as the parts become more visible.
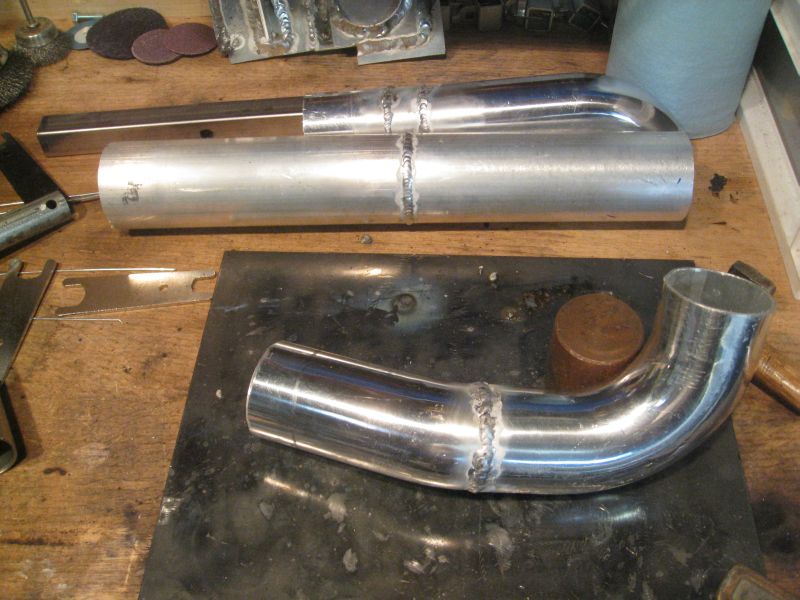
Fits perfectly!!
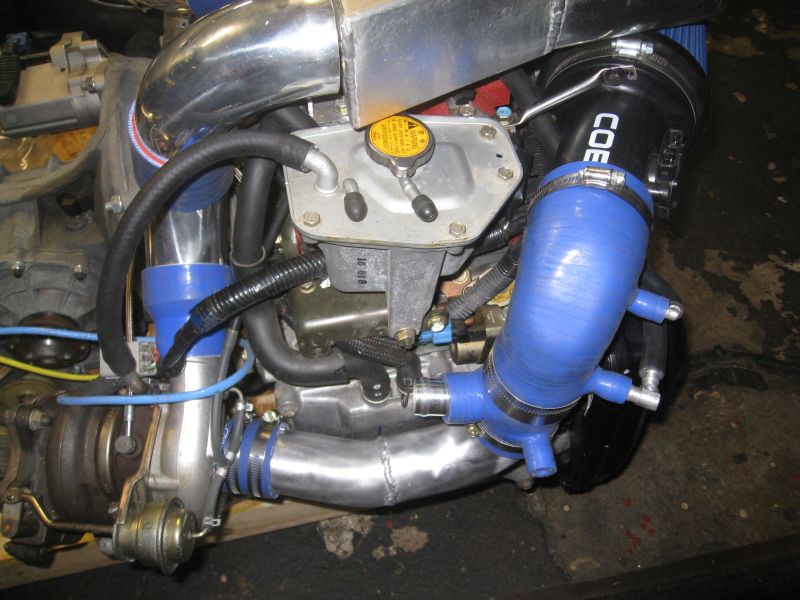
I also started plumbing the remote oil filter. I need to drill another hole in the engine mount for the remote filter housing but can't until I get the engine off of the cart. Eventually it will be straight.
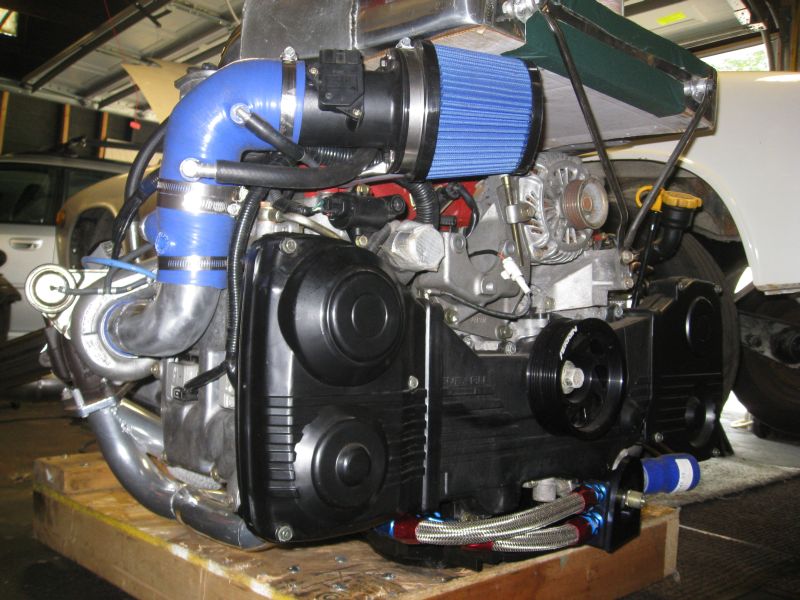
Scott
Posted by: Amenson Jul 27 2008, 08:10 PM
Well, still not confident enough to weld the tubes to the intercooler yet so I spent much of the garage time this weekend making practice art.
This is a creation made of 3" diameter .065 aluminum tubing, the same stuff as the IC plumbing...almost ready to weld the real thing 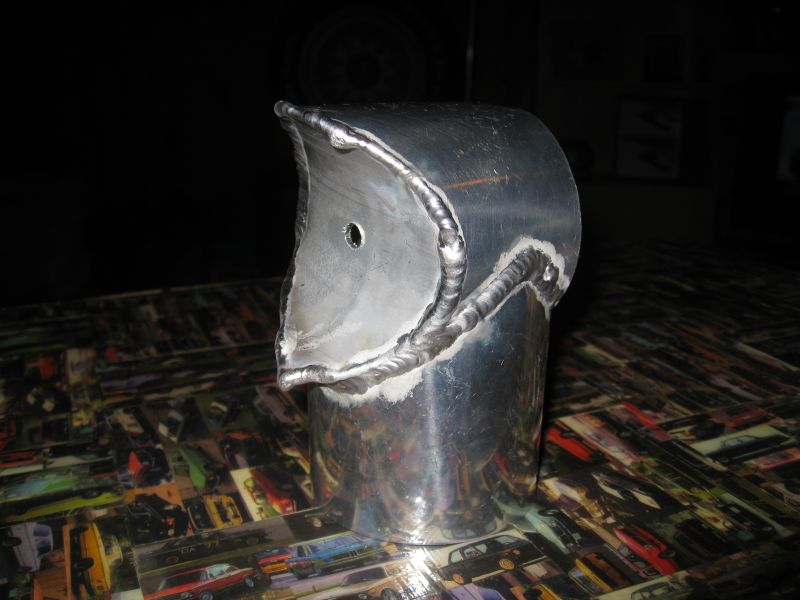
Scott
Posted by: Amenson Jul 29 2008, 09:57 PM
Made another small step tonight. I finally removed the turbo oil return on the head. I could not find any good information on the Subaru sites to I slowly worked it loose with gradually larger tools.
This is what I wanted out: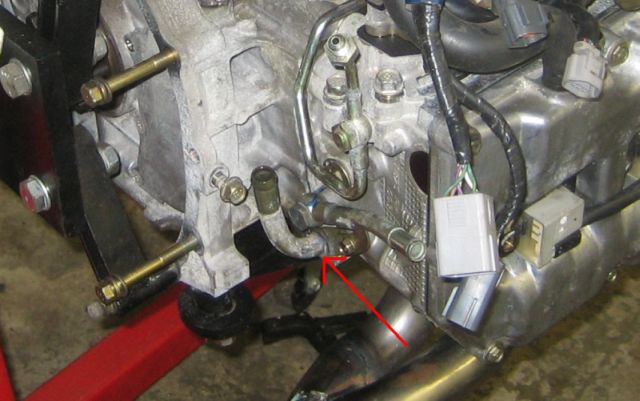
This is what it looks like out: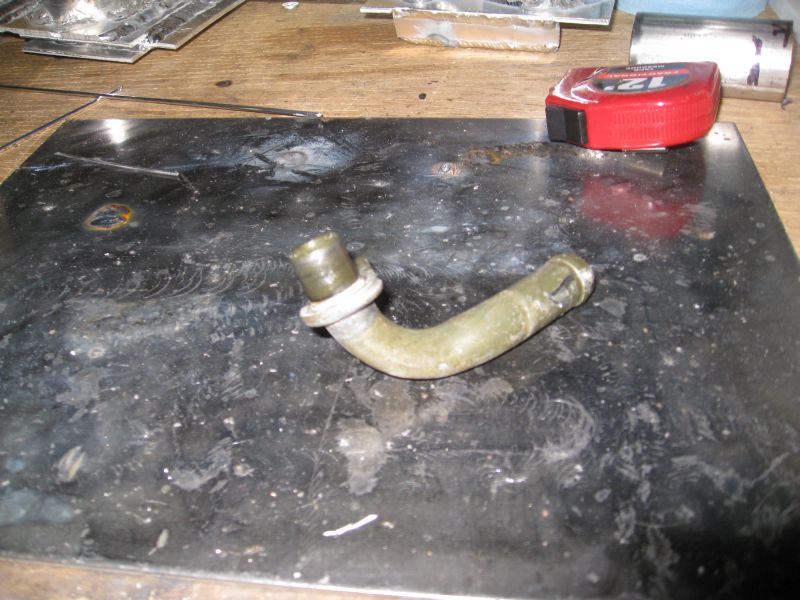
The damn thing was press fit in with a ring of glue for good measure: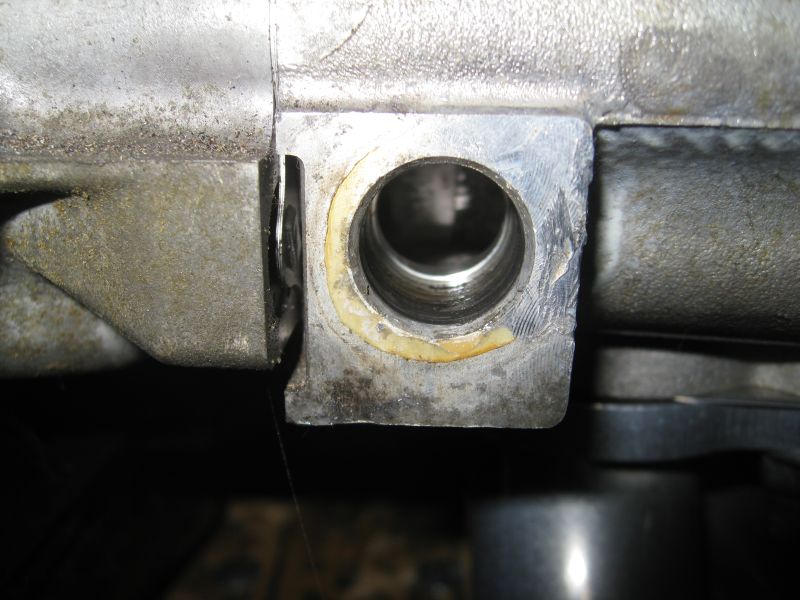
I feel fortunate to get it out without damaging anything. Now I get to modify it  and put it back together so that it points toward the new turbo location.
Posted by: Amenson Jul 30 2008, 08:50 PM
Welded up the turbo drain tonight.
Pre-welding: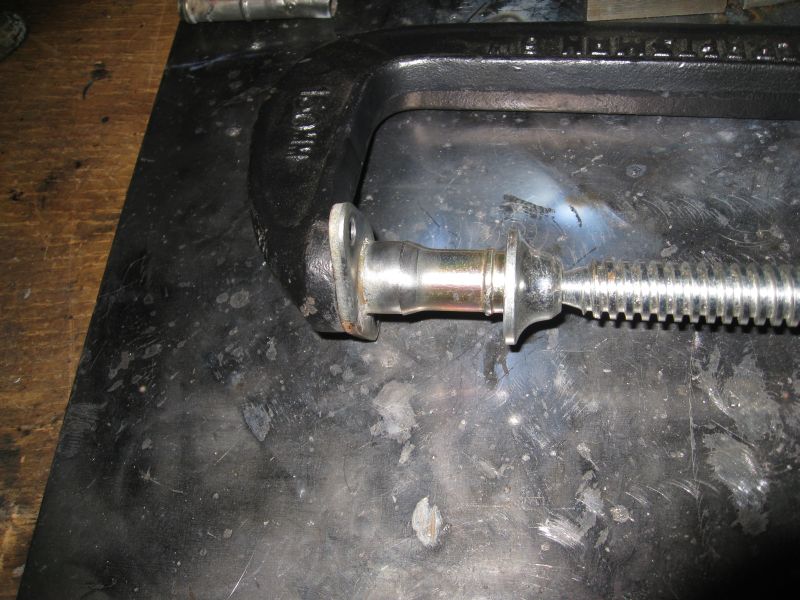
Post welding...steel is so much easier than AL!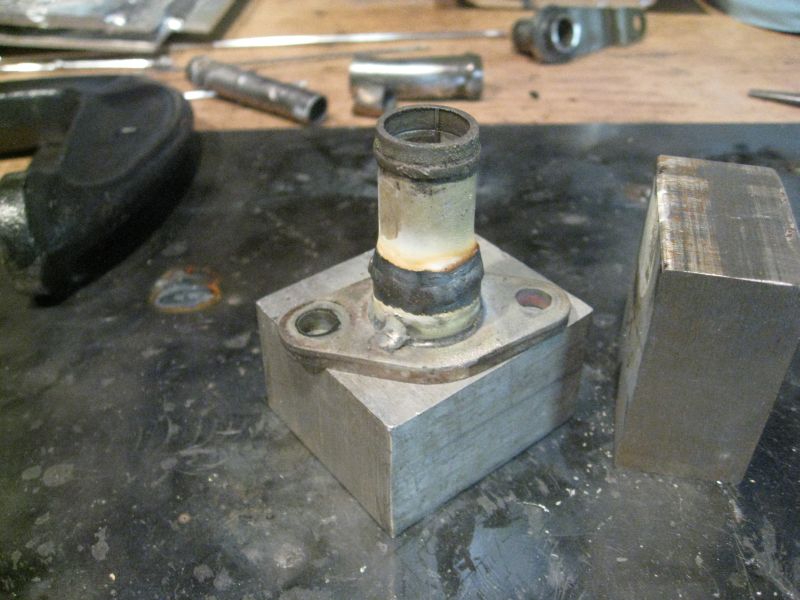
Head side post welding: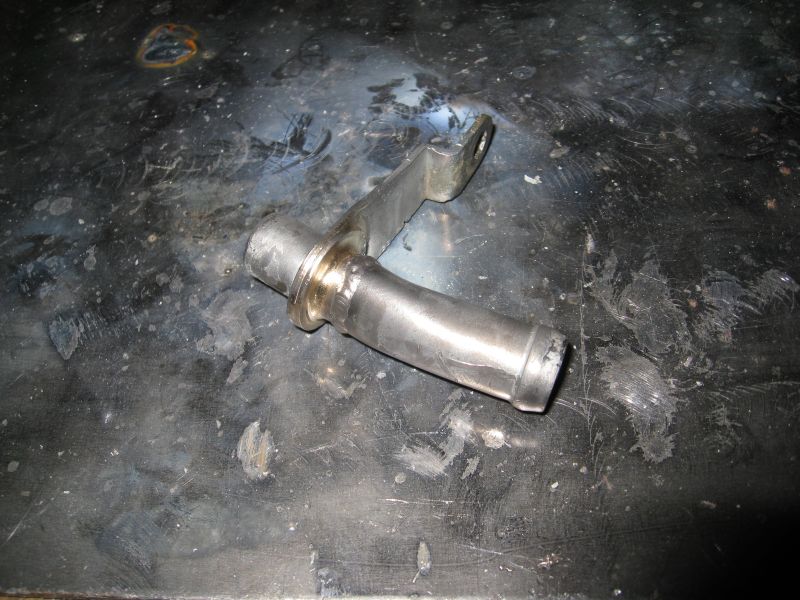
Installed minus tube: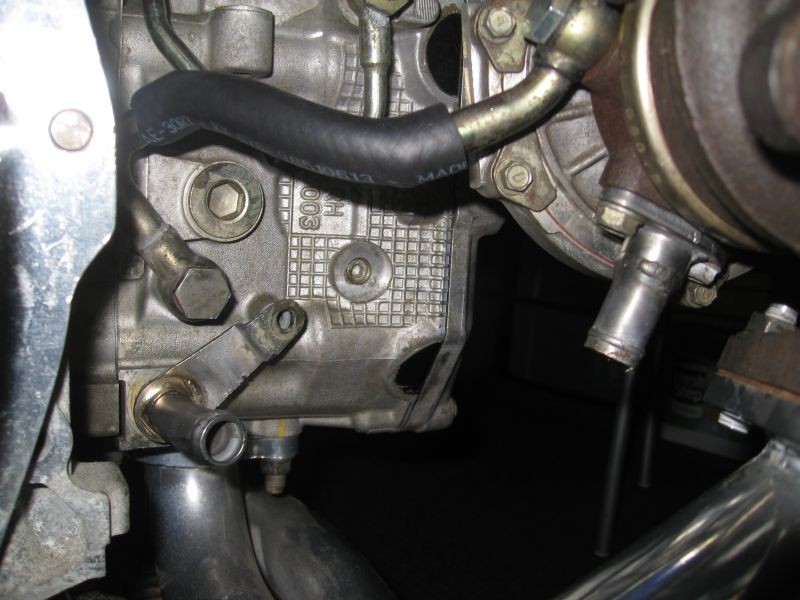
Good night........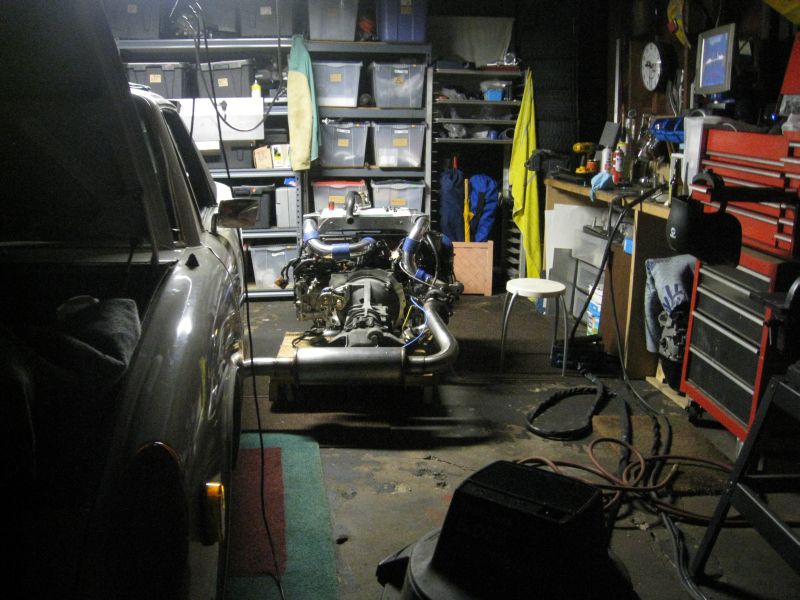
Scott
Posted by: GS Guy Jul 31 2008, 04:59 PM
Looking good Scott!
I may use some of your ideas if my turbo oil drain is a bit off optimum angle.
Now I want to see your shift linkage solutions! Especially with the Small Car mount.
Jeff
Posted by: Amenson Jul 31 2008, 05:47 PM
Looking good Scott!
I may use some of your ideas if my turbo oil drain is a bit off optimum angle.
Now I want to see your shift linkage solutions! Especially with the Small Car mount.
Jeff
Jeff,
Hopefully you do not have to remove the drain...what a huge pain in the ass.
As for the shift linkage, stock works just fine!
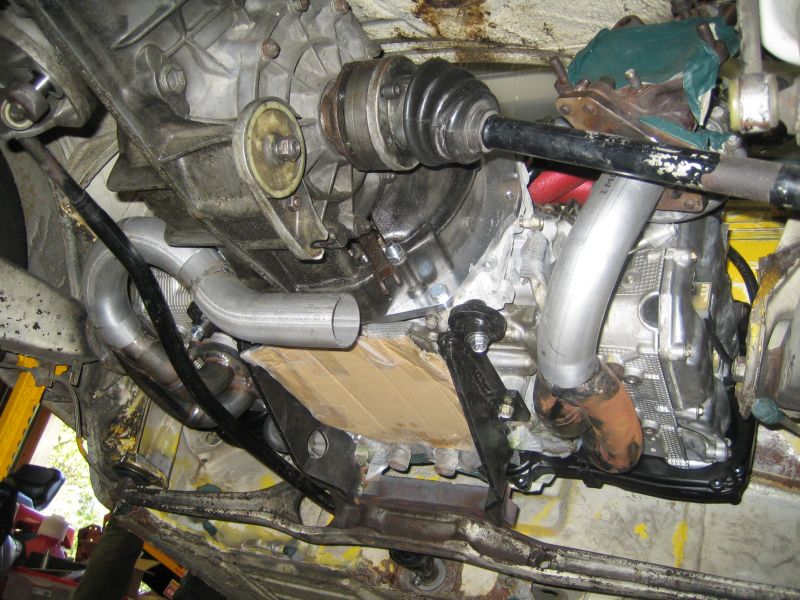
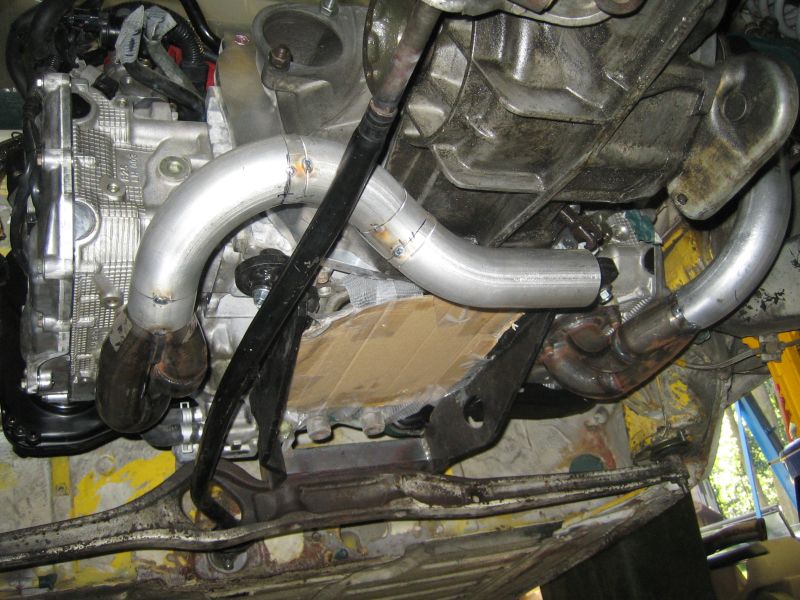
I had to dig through a load of old project pictures to find these. It reminded me how far I have come and renewed my sense of accomplishment. Makes the the first drive seem not so far off

Scott
Posted by: fat73 Jul 31 2008, 08:17 PM
Ahhhhh what a beautiful sight.....Makes you feel good don't it?
Great work...Ed aka W9R1
Posted by: GS Guy Aug 2 2008, 07:56 AM
Rats,
That stock shift rod does fit nice! No such luck on my build - I've got frame and suspension members in-line with the shift rod - almost as if they'd been designed to be in the way!
I've noticed other cooling line connections seemed to be "press fit" into the various engine components too - such as the little lines on the throttle body heater, the cockpit heater supply connection into the water crossover on top of the engine. How are you planning to seal that turbo drain back up? Locktite?
I may have to do someting similar to the turbo drain fittings? Haven't yet permanantly located the turbo - but the block connection "may" be OK. Still looking for a bolt-on NPT (or similar) adapter for the turbo drain - but may have to make something custom like yours. Not much room for pipe fittings under there - especially in the large sizes required for a good drain.
Car is lookig great Scott!
Jeff
Posted by: jimkelly Aug 2 2008, 08:21 AM
wow - awesome work - suby sterring column - sweet.
i love the friendly one ups-man-ship on this board - just when you think you've seen the most amazing work - someone else raises the bar.
for me - i am pretty proud for weeks - when i install a set of chrome caps on my wheels valve stems - but you guys - wtf!
Posted by: Amenson Aug 3 2008, 07:55 PM
I've noticed other cooling line connections seemed to be "press fit" into the various engine components too - such as the little lines on the throttle body heater, the cockpit heater supply connection into the water crossover on top of the engine. How are you planning to seal that turbo drain back up? Locktite?
Car is lookig great Scott!
Jeff
I have not figured out what I will use to seal the oil return. I thought about Loctite but am concerned that it would never come apart again. The oil return is not pressurized so I may just put some high temp RTV type sealant there.
Do you have an update progress thread of your project anywhere? The yahoo link you sent a while ago is down.
i love the friendly one ups-man-ship on this board - just when you think you've seen the most amazing work - someone else raises the bar.
Not so much one ups-man-ship...just the advantage of knowing how other people have done things so that you can see what worked and what did not.
Made some small progress yesterday. Mounted the crank case breather tube and boost control solenoid. Both are held in place with nutserts!
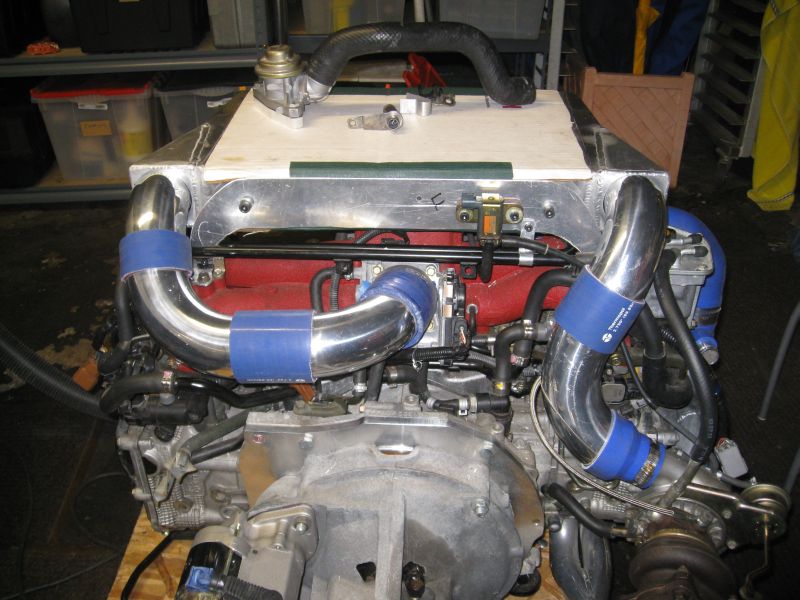
Probably will not have any updates for a couple of weeks. I am getting married next weekend
 and the Woodward Dream Cruise is the weekend following that.
Scott
Posted by: Zaney Aug 3 2008, 08:01 PM
Scott,
Congrats ahead of time for next weekend! 
The car and workmanship is awesome as usual!
Cheers to you and the MRS.
Posted by: Amenson Aug 24 2008, 09:12 PM
Made it through the wedding!! Everything went well and nobody died on the hike in the mountains, ropes course, rafting trip or any of the late nights out
My beautiful bride and I, freshly married!!
Driving to the reception the '39 Rolls Royce
Celebrating with a nice Cab and a Cohiba. The Cohiba is from Cuba thanks to my brother in law from London. And my custom matte finish tungsten carbide ring.
Now back working on the PorSTi...
Posted by: Amenson Aug 24 2008, 09:12 PM
Filled in one of the heater control tube holes.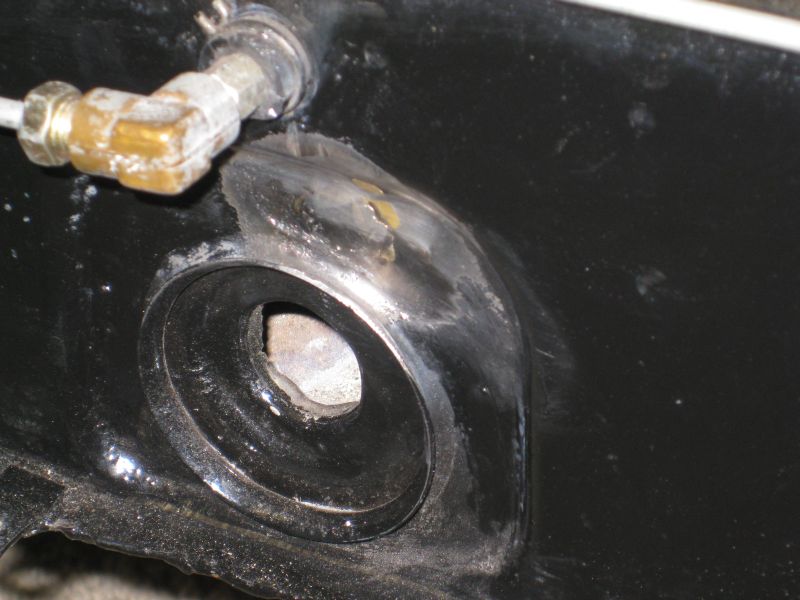
Removed a load of paint from the driver's compartment.
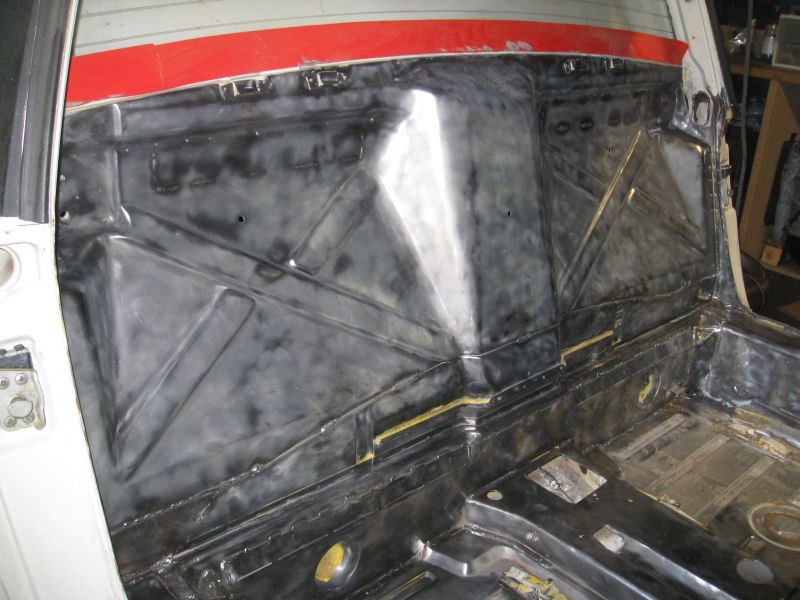
Welded in reinforcements for the shoulder Harness'.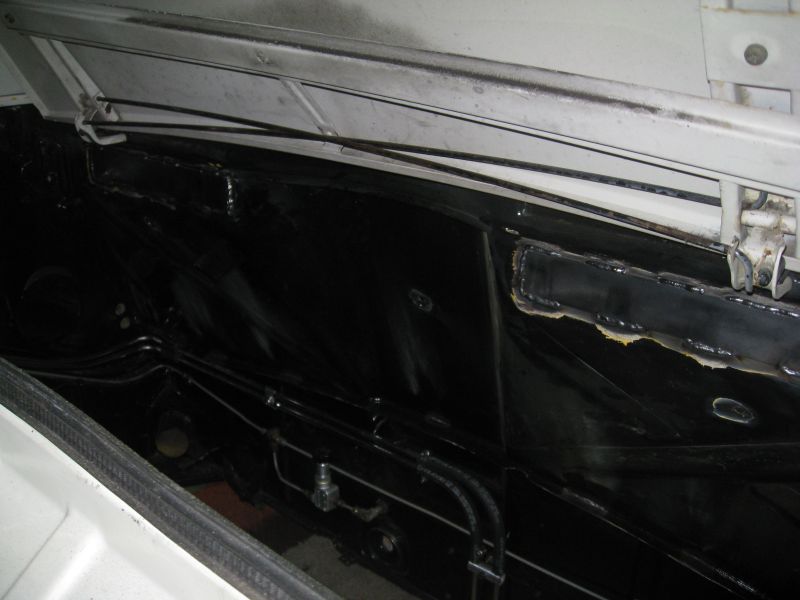
Picked up a welding table and a spot welder. 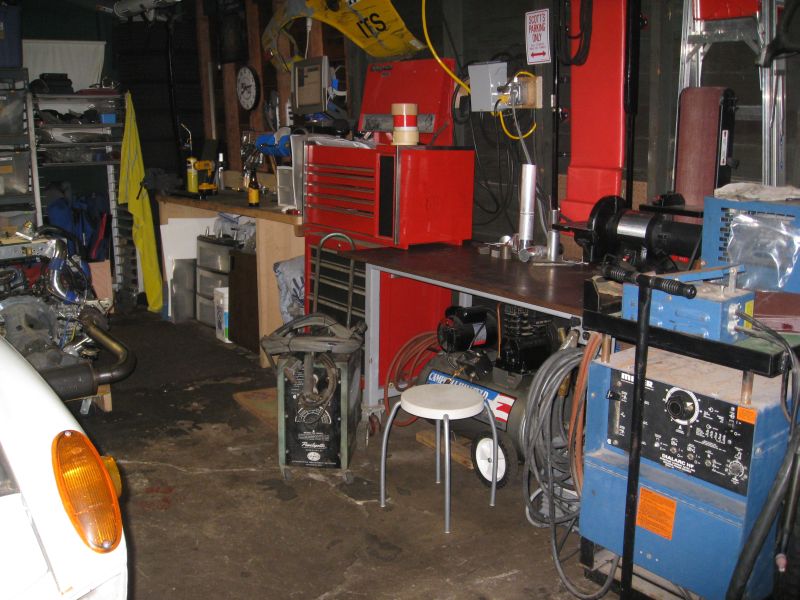
Scott
Posted by: Slider Sep 2 2008, 05:30 PM
Cool.. you got hitched in Fort Collins?
Made it through the wedding!! Everything went well and nobody died on the hike in the mountains, ropes course, rafting trip or any of the late nights out
My beautiful bride and I, freshly married!!
Driving to the reception the '39 Rolls Royce
Celebrating with a nice Cab and a Cohiba. The Cohiba is from Cuba thanks to my brother in law from London. And my custom matte finish tungsten carbide ring.
Now back working on the PorSTi...
Posted by: Amenson Sep 4 2008, 07:20 PM
Cool.. you got hitched in Fort Collins?
Of course, where else???
My wife got her undergrad at Colorado State. I had never visited Colorado before meeting her...now I can't spend enough time there. Great State, great beer!! Posted by: Amenson Sep 14 2008, 08:45 PM
Finally, enough free time for an update. I have been overly busy the past few weeks with events away from the house but have still managed to find time to work on the project...actually took Thursday off from work to spend in the garage gussying up the PorSTi for the party that I had yesterday. The goal is to get everything painted and the engine in for the final time. Several things needed to be done to meet this goal...
First on the to do list was to clean up all of the repairs around the longs and engine compartment so that I could seal them with Por15. While working away with the wire brush I found some more rust hiding under bondo/seam sealer.
Time to 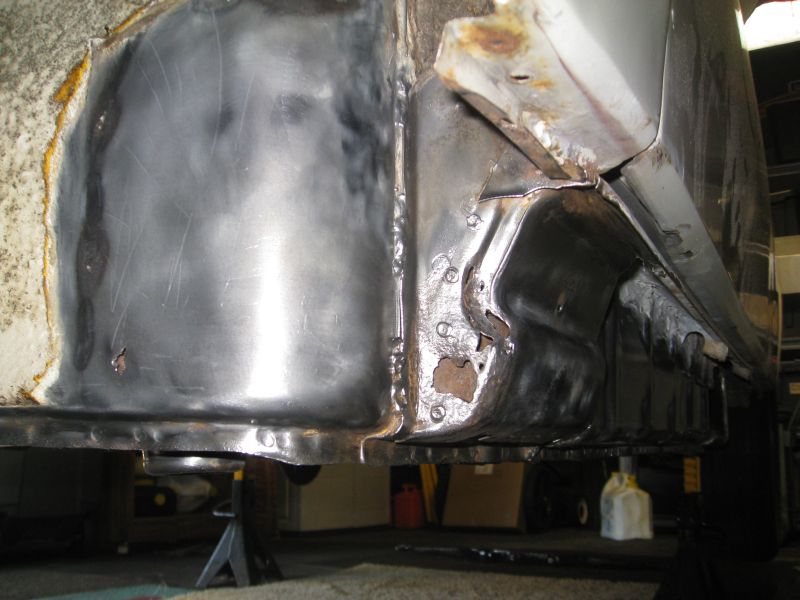
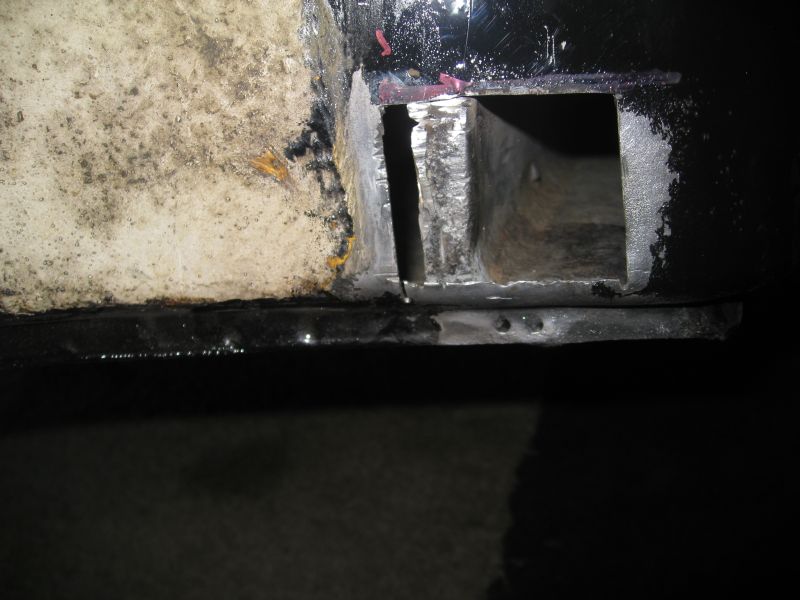
No more hole...still need to fix the other problem. Decided to put that off for a bit as it will not keep me from finishing the inside of the longs so that I can run the cooling lines.
Next I needed to get the intercooler tubes and blow off valve tacked in place. First I had to convince myself that I could make pretty enough welds...several hours of practice later I think that I am ready.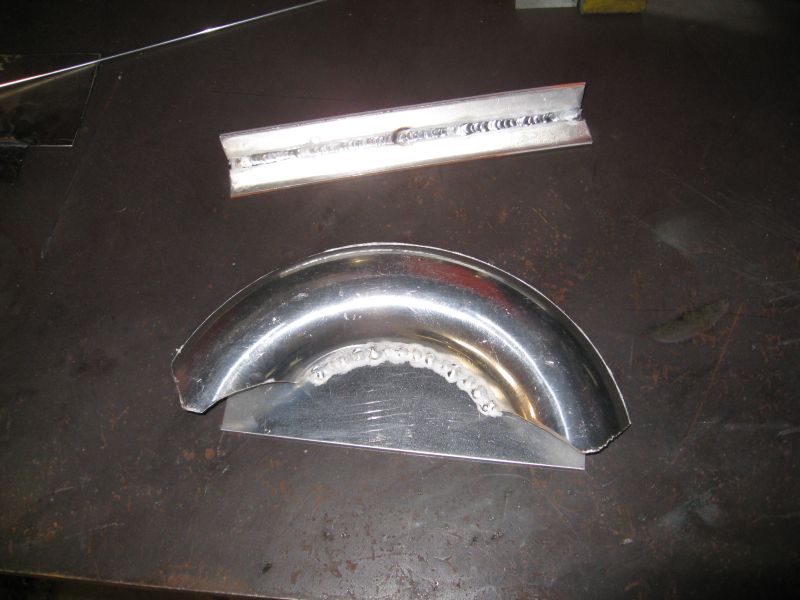
Make the holes for the BOV mounting plate...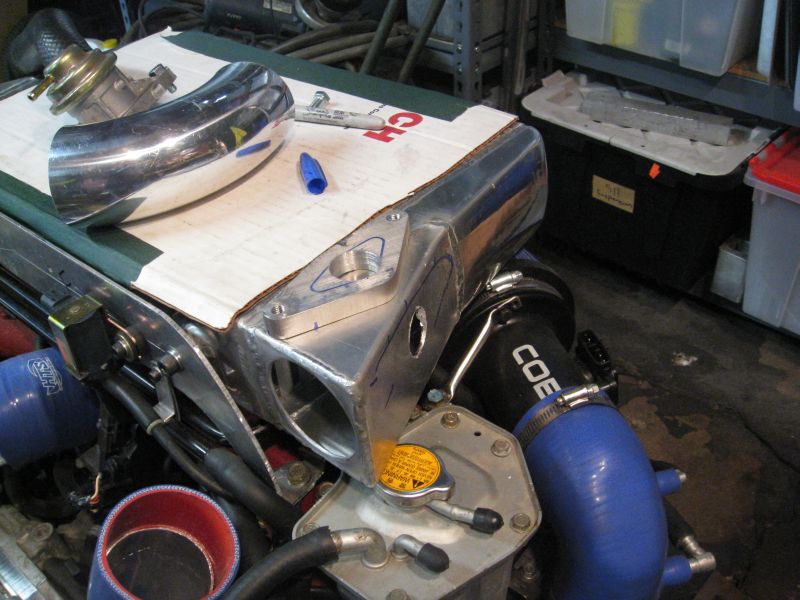
Attached without blowing any holes Still need to figure out how to get the BOV tube to run to the intake.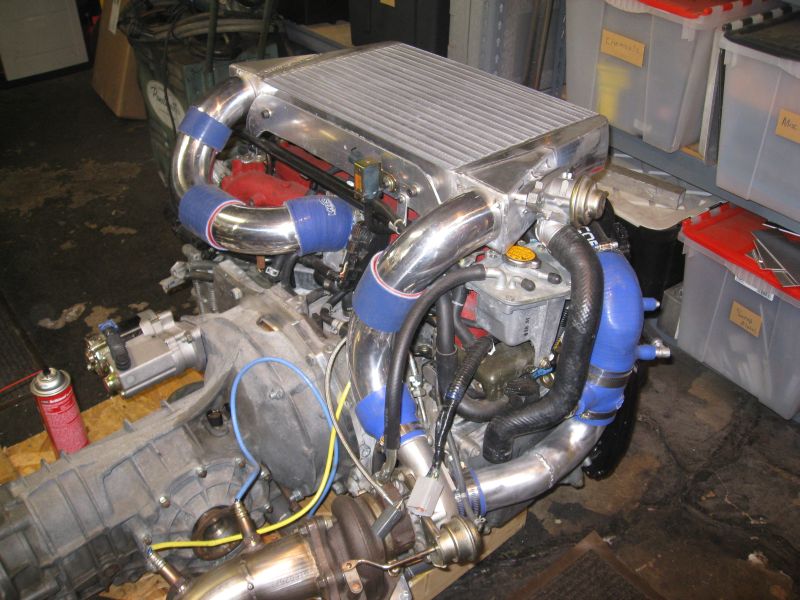
...
Posted by: fat73 Sep 14 2008, 08:47 PM
Finally, enough free time for an update. I have been overly busy the past few weeks with events away from the house but have still managed to find time to work on the project...actually took Thursday off from work to spend in the garage gussying up the PorSTi for the party that I had yesterday. The goal is to get everything painted and the engine in for the final time. Several things needed to be done to meet this goal...
First on the to do list was to clean up all of the repairs around the longs and engine compartment so that I could seal them with Por15. While working away with the wire brush I found some more rust hiding under bondo/seam sealer.
Time to
No more hole...still need to fix the other problem. Decided to put that off for a bit as it will not keep me from finishing the inside of the longs so that I can run the cooling lines.
Next I needed to get the intercooler tubes and blow off valve tacked in place. First I had to convince myself that I could make pretty enough welds...several hours of practice later
I think that I am ready.Make the holes for the BOV mounting plate...
Attached without blowing any holes
Still need to figure out how to get the BOV tube to run to the intake....
Why not just let the BOV vent into the atmosphere? Would save you the trouble.
Ed aka W9R1
Posted by: Amenson Sep 14 2008, 08:53 PM
...Next is to get the car out of the garage and give it a good cleaning to get rid 2 years of restoration residue. It has been a long time since it has seen natural light!!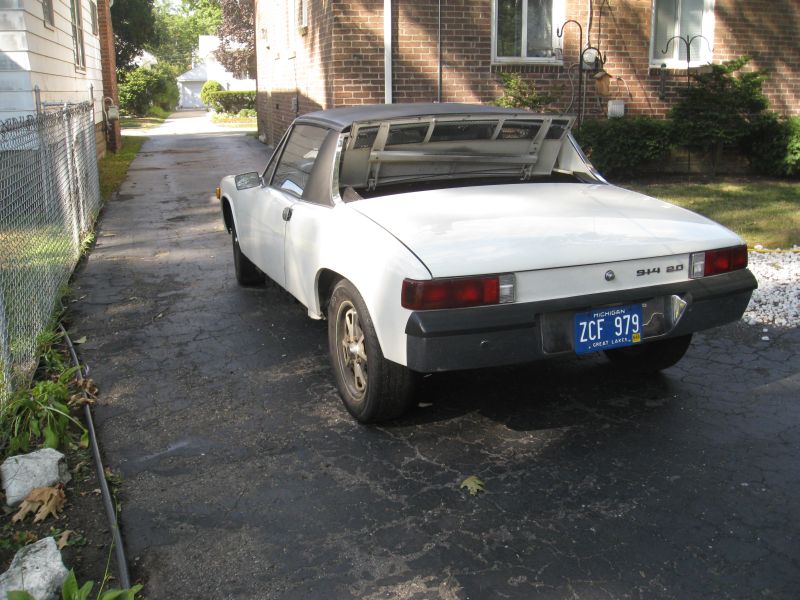
After a good cleaning I installed the front shift rod and pulled the Gates tube through the longs. I somehow did not take any pictures of the cooling lines. Will get some next time I am in the garage. Time to get ready...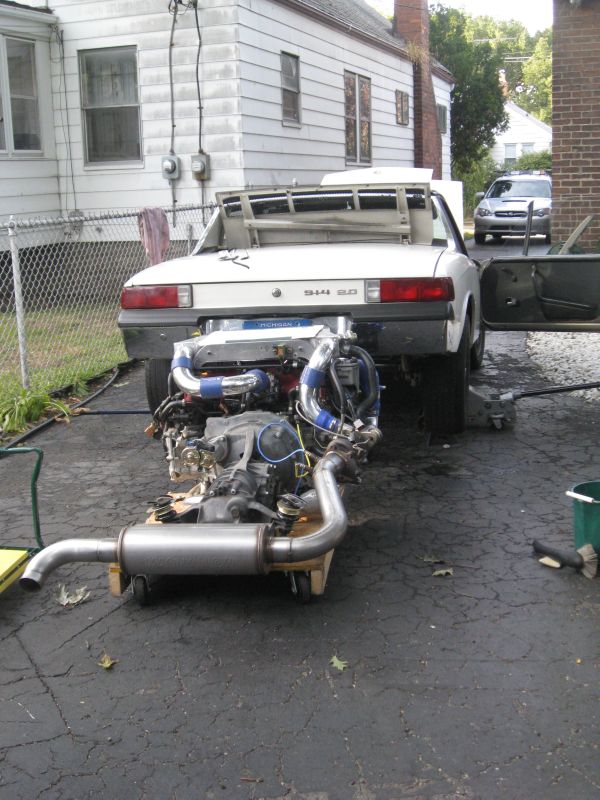
Stick it in there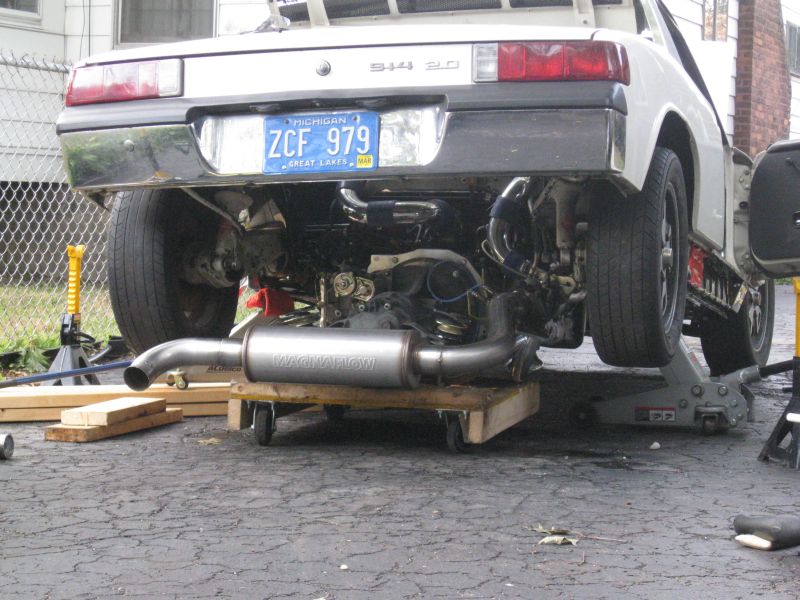
Looks a little tight around the turbo intake tube.
Maybe there is some room on the other side.
...
Posted by: Amenson Sep 14 2008, 09:03 PM
...Nope. Going to have to remove the tube. One of the goals for the project was to be able to get the engine in/out without having to take any parts off of the engine. I guess taking one part off is not soo bad 
Still Fits 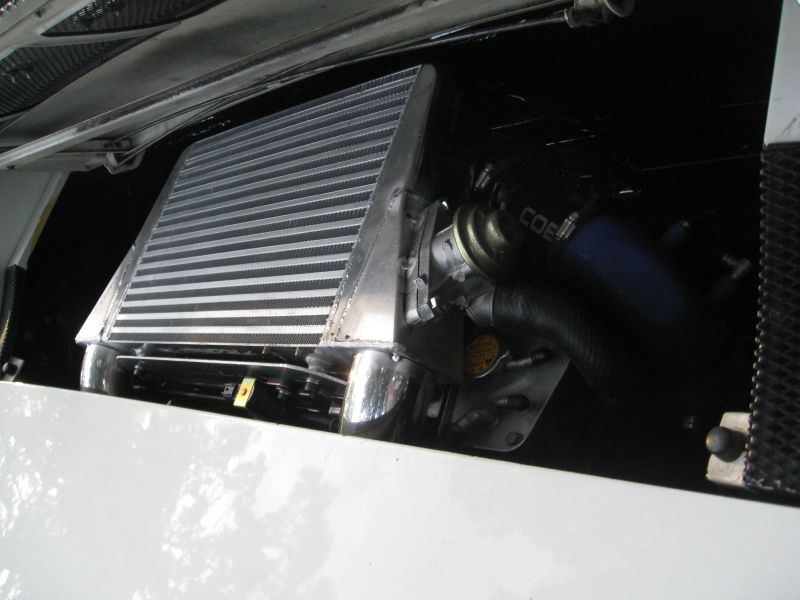
Next on the to-do list is to finish painting the passenger compartment. A few more hours with the wire brush.
And a few more with the paint brush. Por15 is great stuff.
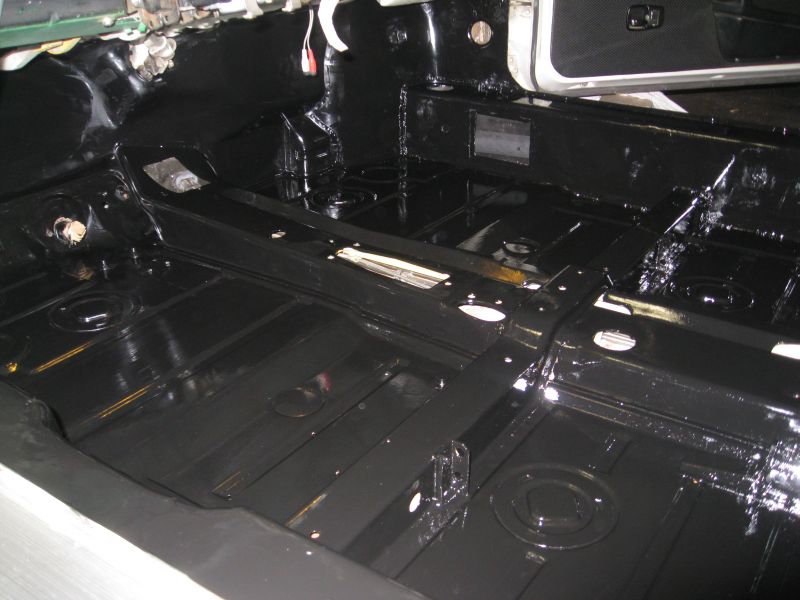
Ready for the party 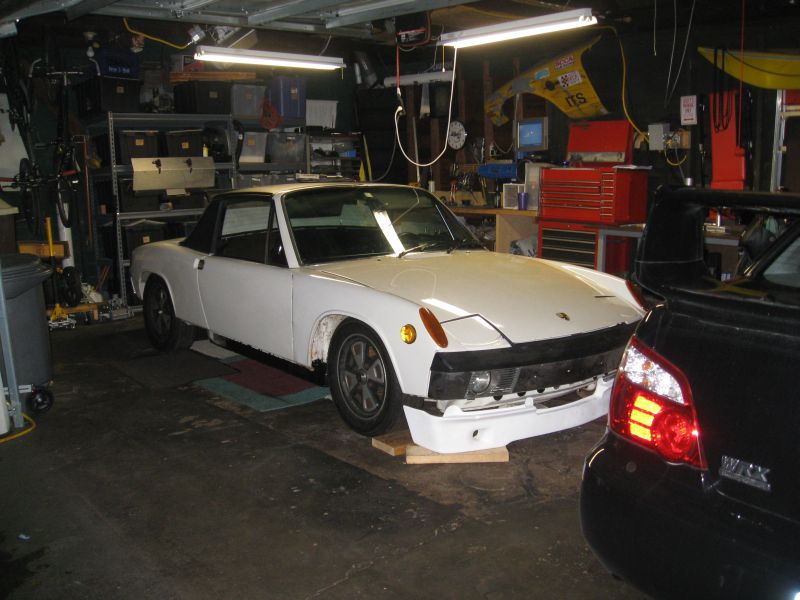
Posted by: Amenson Sep 14 2008, 09:30 PM
Still need to figure out how to get the BOV tube to run to the intake.
...
Why not just let the BOV vent into the atmosphere? Would save you the trouble.
Ed aka W9R1
Venting to the atmosphere will alter MAF calulation a bit and could cause some, likely small, drivability issues with a stock ECU. Although...it could lead to off throttle tailpipe flames
Maybe I will reconsider.Scott
Posted by: charliew Sep 14 2008, 11:10 PM
It will run way rich without the air going back into the intake after the maf. You can switch to speed density though.
Posted by: fat73 Sep 15 2008, 12:03 AM
It will run way rich without the air going back into the intake after the maf. You can switch to speed density though.
Doesn't bother mine, with a stock ECU.
Ed aka W9R1
http://rides.webshots.com/photo/2030710190076795939abxCLB?vhost=rides
Posted by: Wilhelm Sep 15 2008, 01:18 AM
"After a good cleaning I installed the front shift rod and pulled the Gates tube through the longs. I somehow did not take any pictures of the cooling lines. Will get some next time I am in the garage. Time to get ready..."
Few inquiries........
What size gates tubing did you use, its rating (temp/pressure) and supplier.
How did you shove it through the longs? Mine seems to get hung up about a foot in when shoved in from the engine compartment. I suspect its getting tangled in the tube insulation.
Are you going to exit the longs on the front vertically of horizontally?
Thanks, Wilhelm
Posted by: Amenson Sep 15 2008, 09:25 PM
Doesn't bother mine, with a stock ECU.
Ed aka W9R1
http://rides.webshots.com/photo/2030710190076795939abxCLB?vhost=rides
Ed,
Ya, I am sure that it would be ok for me as well...I have it pretty much set up for recirc already so I am just going to finish it off.
"After a good cleaning I installed the front shift rod and pulled the Gates tube through the longs. I somehow did not take any pictures of the cooling lines. Will get some next time I am in the garage. Time to get ready..."
Few inquiries........
What size gates tubing did you use, its rating (temp/pressure) and supplier.
How did you shove it through the longs? Mine seems to get hung up about a foot in when shoved in from the engine compartment. I suspect its getting tangled in the tube insulation.
Are you going to exit the longs on the front vertically of horizontally?
Thanks, Wilhelm
Wilhelm,
I am using http://www.gates.com/brochure.cfm?brochure=5071&location_id=5216. The spec's are at the link. I purchased it through a local branch of Motion Industries.
If you look a few pages back there are some pictures of the full coolant plumbing. I replaced the heater mufflers (or whatever they are called) in the longs with aluminum tubes to avoid the hangups that you are having. The 1.5 pushed right through. It took a rope and a a little lube to pull the 1.75 through the bend.
Scott
Posted by: LarryR Sep 15 2008, 10:31 PM
Next on the to-do list is to finish painting the passenger compartment. A few more hours with the wire brush.
And a few more with the paint brush. Por15 is great stuff.
Wow clean pans nice!
Posted by: Amenson Sep 20 2008, 05:41 PM
Made some progress today. I pulled out the engine mount so that I could make the second hole for the remote oil filter. I also plumbed the driver's side cooling line. The shift rod is pretty darn close to the oil filter. I think that the rubber cover might rub a bit. Will have to keep an eye on it.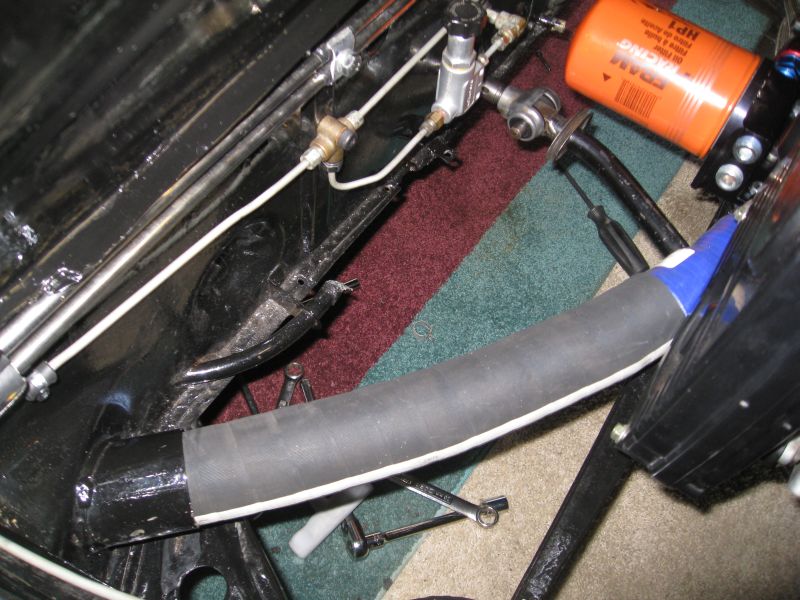
While working down there I was reminded of one of the critical points when mounting the Suby engine the way that I am. The hump for the shift rod hole is very close to the driver's side coolant housing when the engine is mounted close to horizontal. In the picture below you can see that the hump is actually pinching the silicone adapter a bit.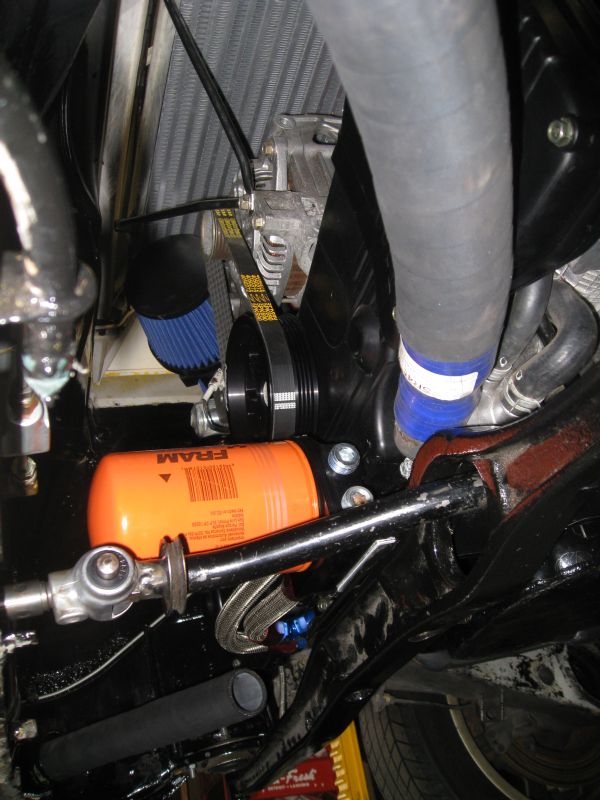
Scott
Posted by: charliew Sep 21 2008, 12:09 AM
Scott you could make a new thermostat housing and go to the 1.75 od size aluminium tube and run the housing tube out past the hump and put the hose on it out there.
Posted by: Wilhelm Sep 21 2008, 04:01 AM
Thanks for the hose links! Looking at your pic of the 1.75" hose entering the air tube in the long, I am amazed you got that giant hose through there. Curious as to why you use such big coolant lines? It seems a lot of the V8 guys are running 1.25" to the radiator and back.
The floor cleaning with wire wheel seems quite meticulous. I tried this approach and got tired of getting wacked by bristles flying out of the wheel or nearly losing skin ever time I would catch an edge with wheel nearly ripping the grinder out of my hands. I ended up sandblasting which certainly has it downsides.
Your doing a great job.
Posted by: Amenson Sep 21 2008, 09:18 AM
Scott you could make a new thermostat housing and go to the 1.75 od size aluminium tube and run the housing tube out past the hump and put the hose on it out there.
The clearance really is not an issue, just something to keep in mind if doing a swap similar to this.
Thanks for the hose links! Looking at your pic of the 1.75" hose entering the air tube in the long, I am amazed you got that giant hose through there. Curious as to why you use such big coolant lines? It seems a lot of the V8 guys are running 1.25" to the radiator and back.
The floor cleaning with wire wheel seems quite meticulous. I tried this approach and got tired of getting wacked by bristles flying out of the wheel or nearly losing skin ever time I would catch an edge with wheel nearly ripping the grinder out of my hands. I ended up sandblasting which certainly has it downsides.
Your doing a great job.
The stock Suby lines are 1.5" and I arbitrary matched the return line to the radiator that I purchased. Did not want to take any chances with cooling issues. A boosted 4 banger can get pretty hot.
I sand blasted part of the engine compartment. Afterwords when I was digging around fixing the longs, I found a lot of sand. I really enjoy sand blasting and will continue to do it but not for anything where the sand has a place to become trapped. Although picking wire slivers is not so much fun either.
Time to get back to the garage.
Scott
Posted by: Amenson Sep 28 2008, 09:56 AM
Worked on the cooling system a bit yesterday. I did not like how the elbows were unsupported coming out of the longs so I took them back out and made some tabs.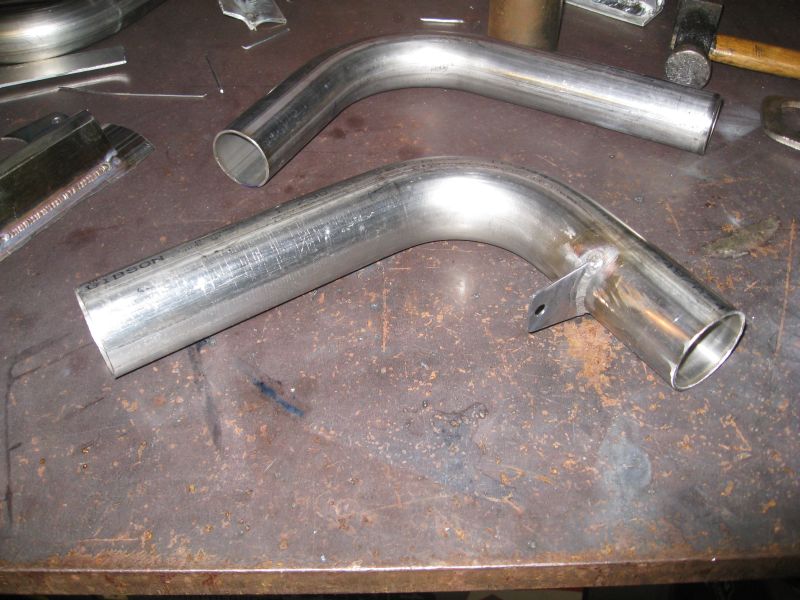
Installed: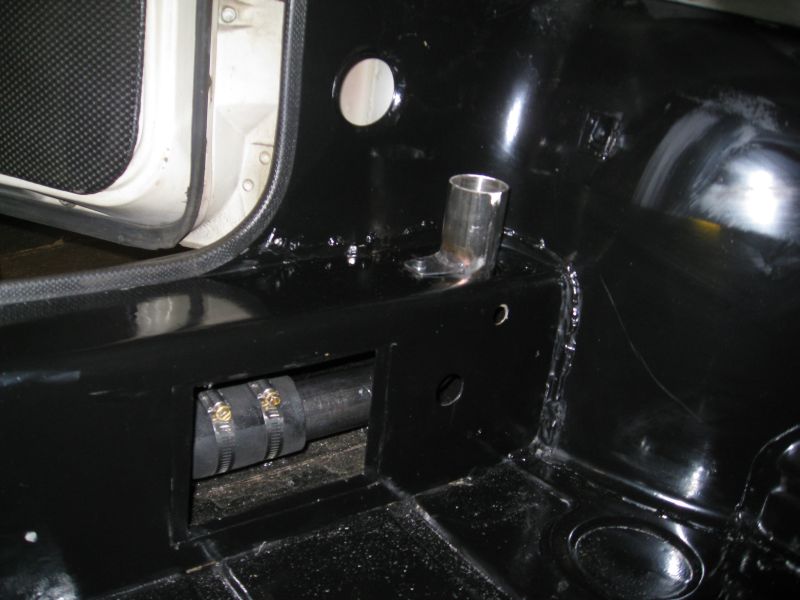
Really Installed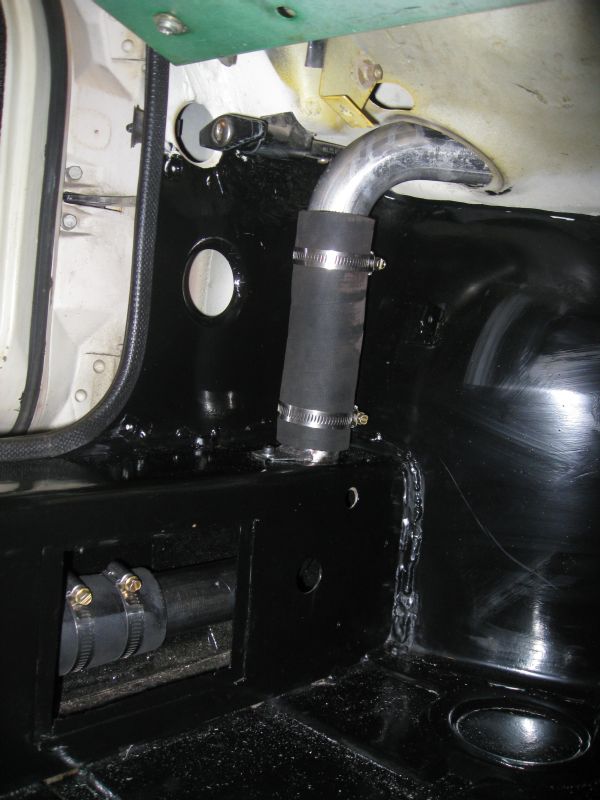
Passenger side, partially installed
I also installed the oil pan pickup yesterday. The project parts bins are starting to empty out
Scott
Posted by: pktzygt Oct 1 2008, 09:22 AM
I'm anxious for you. I can't wait for you to post driving impresions.
Posted by: Amenson Dec 14 2008, 04:54 PM
Sorry for the lack of updates lately. PorSTi has a new home that I hope to get up and running over the holiday. See details here:
http://www.914world.com/bbs2/index.php?showtopic=90860&st=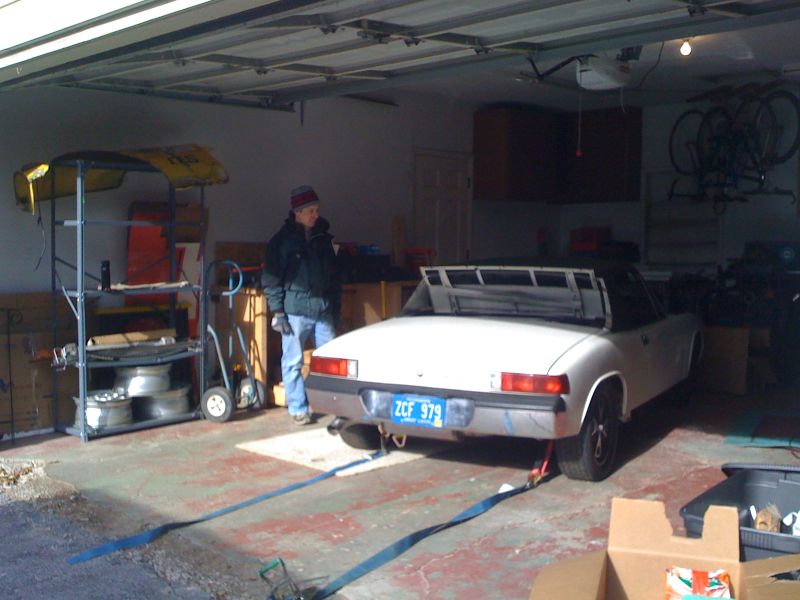
Should be making progress again soon.
Scott
Posted by: Amenson Jan 4 2009, 05:21 PM
Finally, home enough to get things settled inside the house so that I could organize the garage. The Suby still has to live outside but there is plenty of room to work on the PorSTi: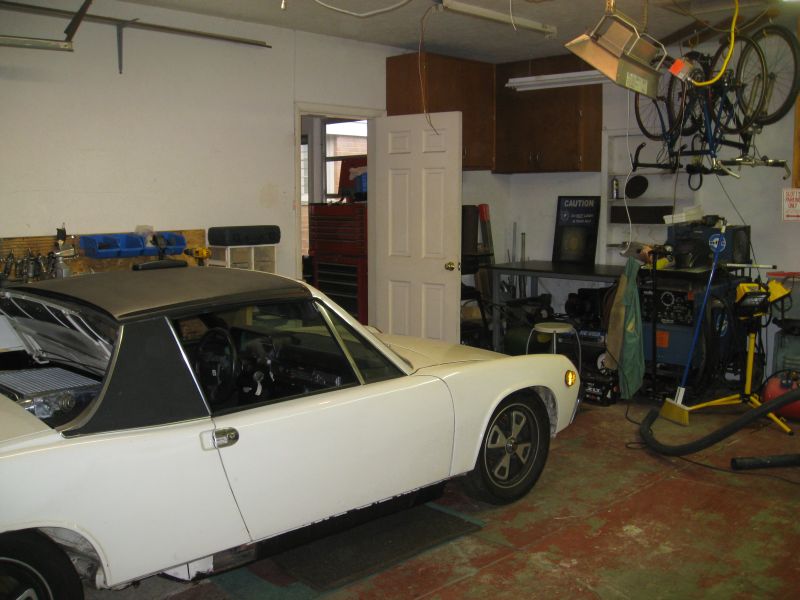
The breezeway is considered part of the garage 
First task to complete was to get some measurements that malaga_red75 has been wanting for quite some time:
The distance from the bottom of the engine to the bottom of the engine mount/top of the cross bar is 70mm. You can see where I took the measurement in this picture: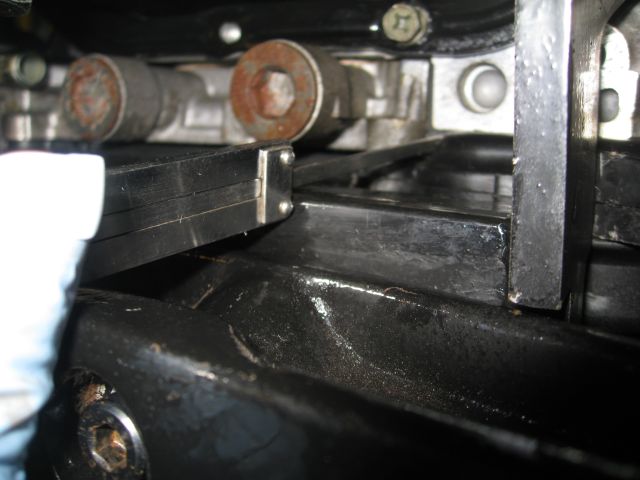
The distance from the engine to the vertical plane of the angle iron is 9mm. The bottom of the angle iron is 2 inches wide and the cross bar sits almost flush with the front edge. You can see where I took the measurement in this picture: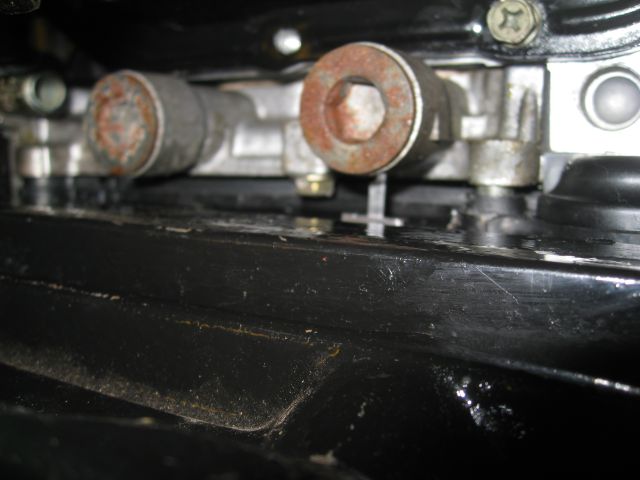
I also removed the passenger side seat mounts so that I can install the new seats.
Finally back to work.
Scott
Posted by: malaga_red75 Jan 4 2009, 07:29 PM
Scott,
First, thanks so much for getting these to me. I am still a little confused though. Does the bottom piece of the cross bar sit flush with the original bottom of the engine mount, or does it sit flush with the notches you made? Thanks.
-Peter
Posted by: Amenson Jan 4 2009, 08:26 PM
Scott,
First, thanks so much for getting these to me. I am still a little confused though. Does the bottom piece of the cross bar sit flush with the original bottom of the engine mount, or does it sit flush with the notches you made? Thanks.
-Peter
The cross bar sits flush with the notches. Here are a few pictures to clarify. The notch on the top is a mistake. The bottom notch on the passenger side has been made flush since these pictures.
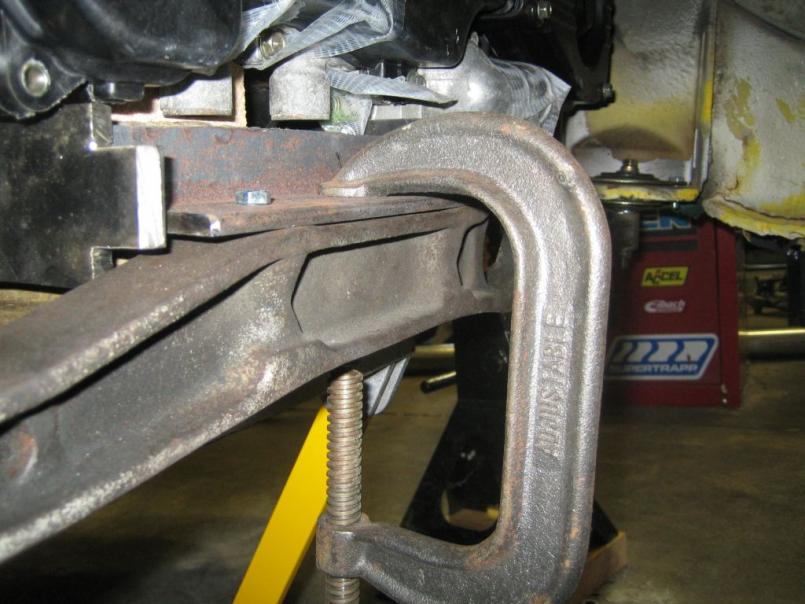
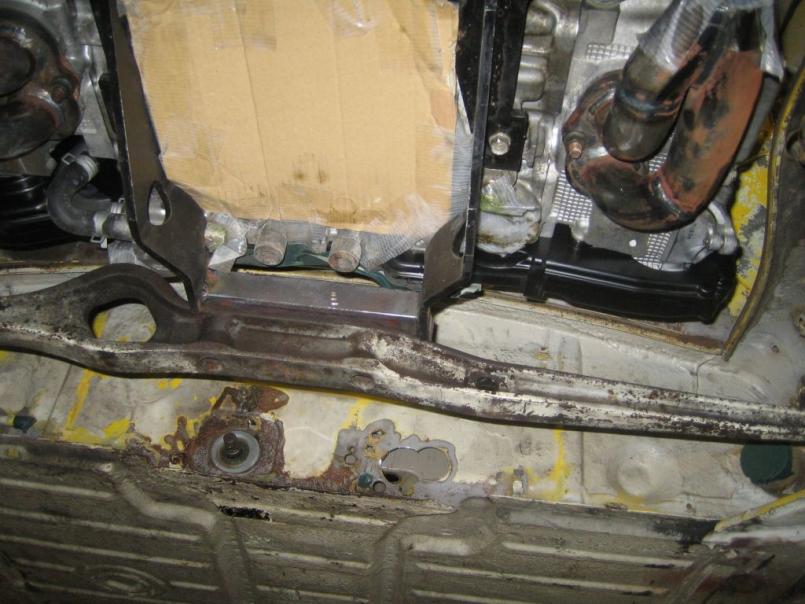
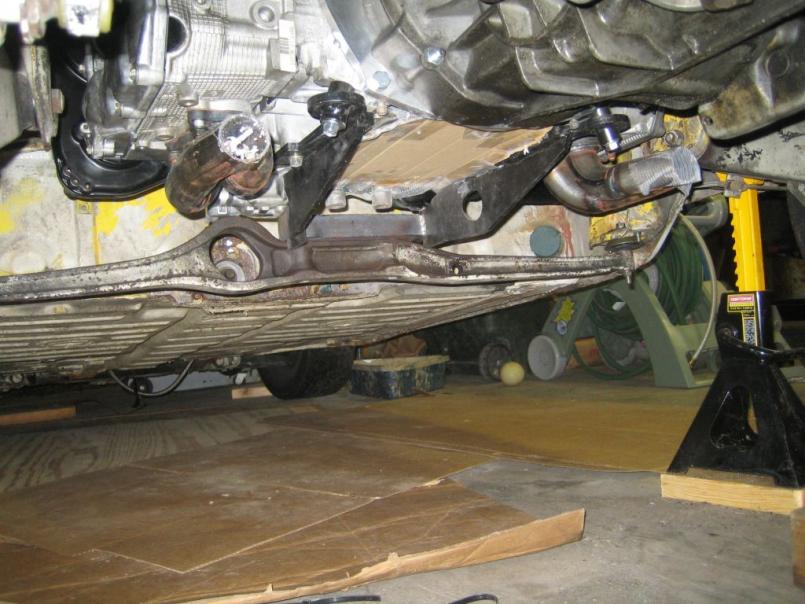
Let me know if you need any more details.
Scott
Posted by: Amenson Feb 22 2009, 04:29 PM
Wow, over a month since the last update. Is to be expected considering that I just finished the annual winter testing season at work. I did manage to accomplish a few things over the past 2 months.
I cut out the stock seat mounting points so that I can install the new seats as low as possible so that I can fit with a helmet on. I am only 5'7" but with a helmet on in the stock seats I hardly had any clearance between the helmet and roof. The passenger side will sit flat while the driver's side will be mounted at an angle, possibly adjustable because I tend to be quite picky about the seating position...
...which is why I just ordered a new pedal set. It is not possible for me to get the seat, steering wheel, shifter and pedals all where I would like them to be w/o moving the pedals. I have been considering this for the entire project but just found a set nice enough and cheap enough to get me to pull the trigger and order a set. 
Unfortunately the http://www.rallydesign.co.uk/product_info.php?products_id=13604 that sells it does not ship to the US so I am having to order it to some family in London and then they will ship it to me. The hydraulic clutch master cylinder will of course require the installation of a hydraulic slave. Luckily, GS Guy has shared the details of his well thought out mount with me.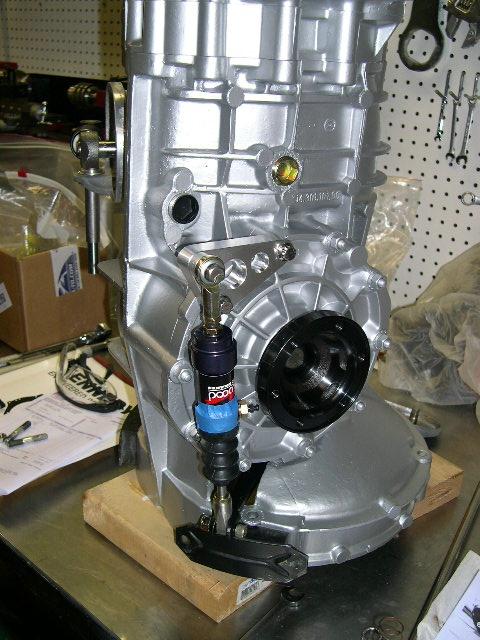
I also purchased a Rennshift and am considering moving it back a few inches to get it to where I want it. 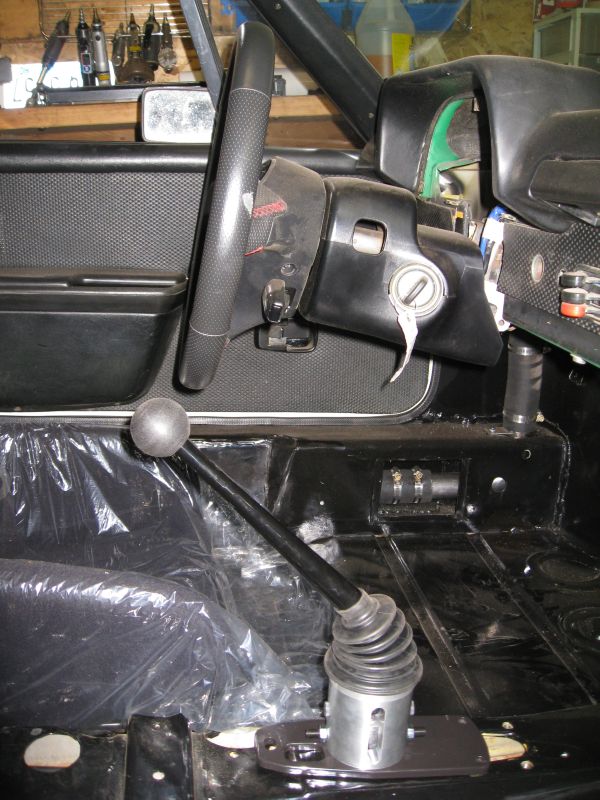
I know that there have been 100's of pictures posted of this shifter but it is too nice of a piece not to post a couple in my thread. 
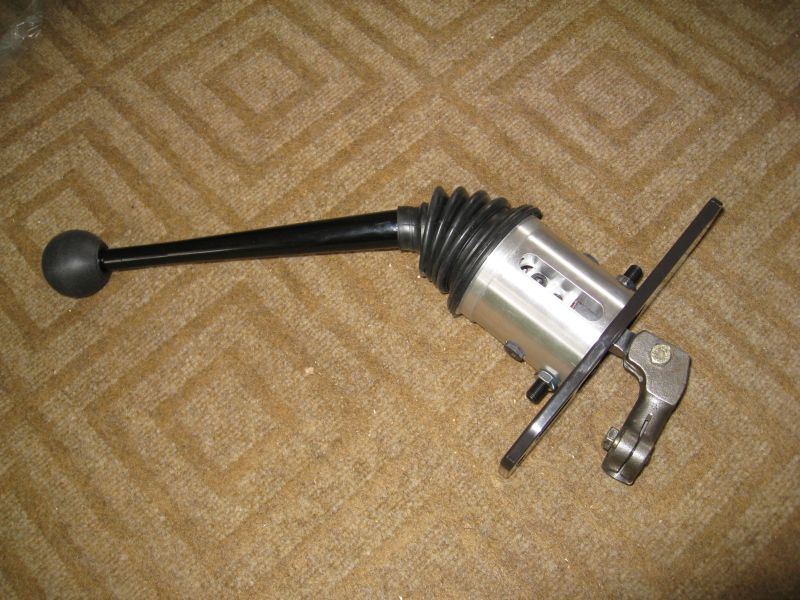
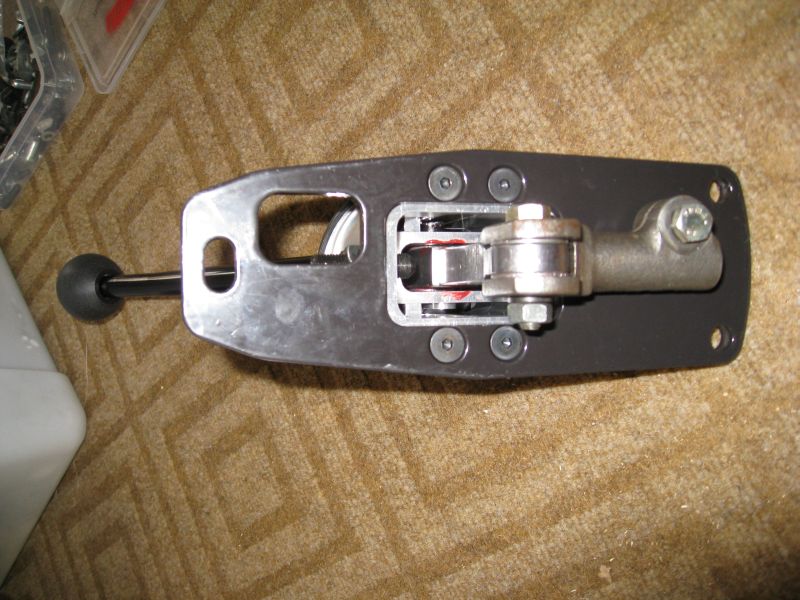
I also made a replacement lug for the passenger side seat belt mount (a buddy actually made it for me), cleaned up the axles and some other random stuff.
My wife had arthroscopic knee surgery on Friday so I am taking care of her this weekend. If she is healed up enough to be reasonably independent next weekend I hope to jump back into the project full bore 
Posted by: roadster fan Feb 23 2009, 03:29 AM
Hey Scott great progress!
I re-read your thread and was wondering if the Accelerator pedal sensor is a subaru part? What model did it come from, figuring STI but can you clarify?
Awesome build, keep the pics coming!
Jim
Posted by: dakotaewing Feb 23 2009, 09:11 AM
Scott -
Just an idea, and am sure you have thought of this, just not sure why you would
not do this -
If moving the shifter back is for optimum hand placement, why not just make the handle longer ?
Best -
Thom
Posted by: Amenson Feb 23 2009, 07:49 PM
Hey Scott great progress!
I re-read your thread and was wondering if the Accelerator pedal sensor is a subaru part? What model did it come from, figuring STI but can you clarify?
Awesome build, keep the pics coming!
Jim
Jim,
I am not sure that what I am making is progress but thanks for the kind words.
The sensor is from the stock Subaru accelerator pedal.
Scott -
Just an idea, and am sure you have thought of this, just not sure why you would
not do this -
If moving the shifter back is for optimum hand placement, why not just make the handle longer ?
Best -
Thom
Thom
The steering wheel sits about 2" further back than the stock wheel. I purchased the longer shifter handle to try to compensate for this and it still does not sit right. If I make the shifter any longer the trow would be way too long. It is a bit too long for me now and I hope to be able to shorten the handle eventually.
I am going to mount the shifter in the stock location until I get the pedals and seat in place and so that I can really tell if/how much I need to move it.
I have considered making another (would be the third) steering column as I think that I can take another inch or so out of it.
What I really need to do is concentrate on the things still needed to get the thing to drive...
Scott
Posted by: dlo914 Feb 23 2009, 08:43 PM
Could i get some dimensions of the engine you created? Also what grade of steel was used? Great progress on your suby swap. Will definitely look toward your installation for guidance on our swap. http://www.914world.com/bbs2/index.php?showtopic=92942 Thanks!
Disregard my post up above...lol...i just went through all 11 pages of your build and found the necessary info. Also why route the water lines in the longs and not below the car attached to underside of the floor pans?
Posted by: Amenson Feb 24 2009, 11:42 AM
Could i get some dimensions of the engine you created? Also what grade of steel was used? Great progress on your suby swap. Will definitely look toward your installation for guidance on our swap. http://www.914world.com/bbs2/index.php?showtopic=92942 Thanks!
Disregard my post up above...lol...i just went through all 11 pages of your build and found the necessary info. Also why route the water lines in the longs and not below the car attached to underside of the floor pans?
Looks like you have one heck of a project on your hands there. Hopefully you can work through the rusteration pretty quickly and get on to the fun conversion work.
Concerning the cooling lines...I really do not like the idea of having anything hanging below the car, especially something as critical as the cooling lines. I plan to do a fair number of track days with the car and from past experience (several seasons of SCCA racing in 2 different race cars, numerous track days and much closed course diving for work) I have a tendency to find myself on/over curbs and do not want to take the chance of scraping the cooling lines off during one of these excursions.
As an example, I'm the red car in front about to drop 2 wheels onto the grass and scrape the hell out of the belly pan...though this one was not my fault, really.
The car to the right had just punted me as is evident from his broken nose 
Many people say that they have had no problems and that the marine grade hose is quite abrasion resistant but I just don't want to find out. I really wanted to run the cooling lines through the center console but just could not find the room. The longs were the next best place.
Scott
Posted by: dlo914 Feb 24 2009, 09:20 PM
Could i get some dimensions of the engine you created? Also what grade of steel was used? Great progress on your suby swap. Will definitely look toward your installation for guidance on our swap. http://www.914world.com/bbs2/index.php?showtopic=92942 Thanks!
Disregard my post up above...lol...i just went through all 11 pages of your build and found the necessary info. Also why route the water lines in the longs and not below the car attached to underside of the floor pans?
Looks like you have one heck of a project on your hands there. Hopefully you can work through the rusteration pretty quickly and get on to the fun conversion work.
Concerning the cooling lines...I really do not like the idea of having anything hanging below the car, especially something as critical as the cooling lines. I plan to do a fair number of track days with the car and from past experience (several seasons of SCCA racing in 2 different race cars, numerous track days and much closed course diving for work) I have a tendency to find myself on/over curbs and do not want to take the chance of scraping the cooling lines off during one of these excursions.
As an example, I'm the red car in front about to drop 2 wheels onto the grass and scrape the hell out of the belly pan...though this one was not my fault, really.
The car to the right had just punted me as is evident from his broken nose Many people say that they have had no problems and that the marine grade hose is quite abrasion resistant but I just don't want to find out. I really wanted to run the cooling lines through the center console but just could not find the room. The longs were the next best place.
Scott
Good point made, and through the longs it's a cleaner setup as well, but then would require cutting up perfectly rust free longs. Also there's not that much rust to take care of other than the right rear corner right above the taillight bucket, small patching of hell hole, and the right side jack point is slightly rusted through. We should have more progress on the rust repairs this weekend, when we bust out the grinder/cut off and welding machine. Will be my first time welding, but luckily a third friend took a course and will give us a crash course on welding.
Posted by: Amenson Mar 15 2009, 07:12 PM
Pretty much back in the swing of regularly completing tasks on the PorSTi. Had a bit of a distraction last weekend because it was my birthday so my wife organized some events for me. First stop was Rahal Letterman Race shop. We got to go through the entire shop except for the shock room and see a load of cars in various stages of prep. The best part was the visit was to the area where they maintain/store the BMW Motorsports collection.
Here I am climbing into their McLarin F1
And into an Alpina Tii:
The guy responsible for all of the cars was really cool. When I walked in pretty much everything was covered and he was on the other side of the shop filling up one of the cars with fuel. He hollered over to go ahead and uncover whatever I wanted to see. Then he came over and told me to hop in whatever I wanted. It was like the christmas morning I had always dreamed of. There are too many pictures to post here and many more that I had wished I had taken.
As for my project. After the birthday festivities I spent Sunday working on the 914. Finally finished off the passenger seatbelt lug.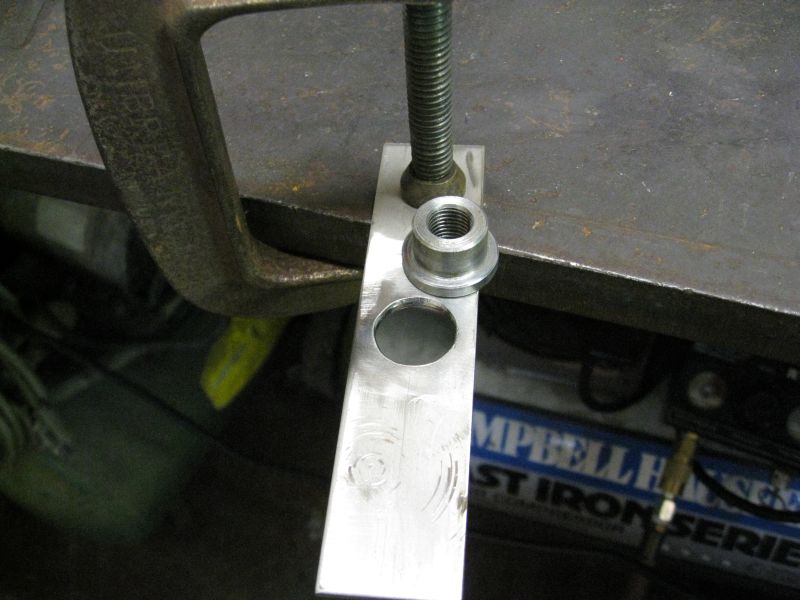
Welded: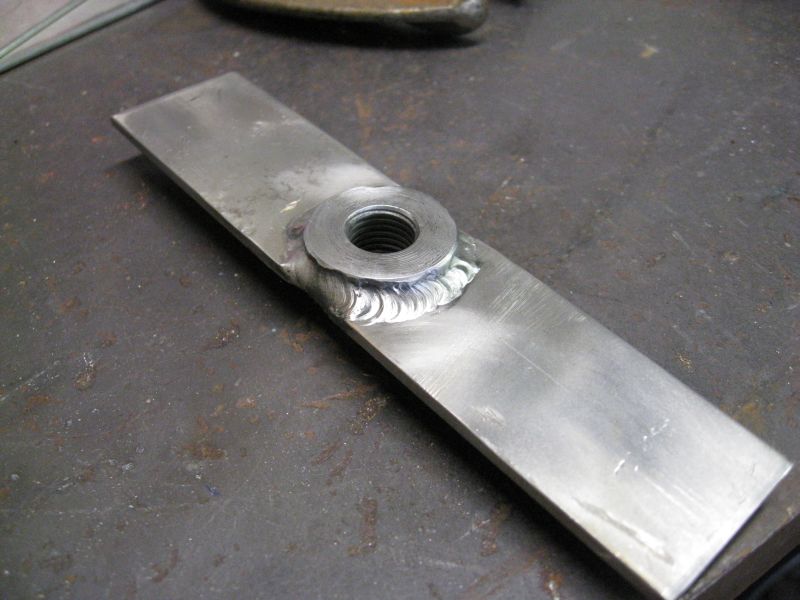
Clamped in place: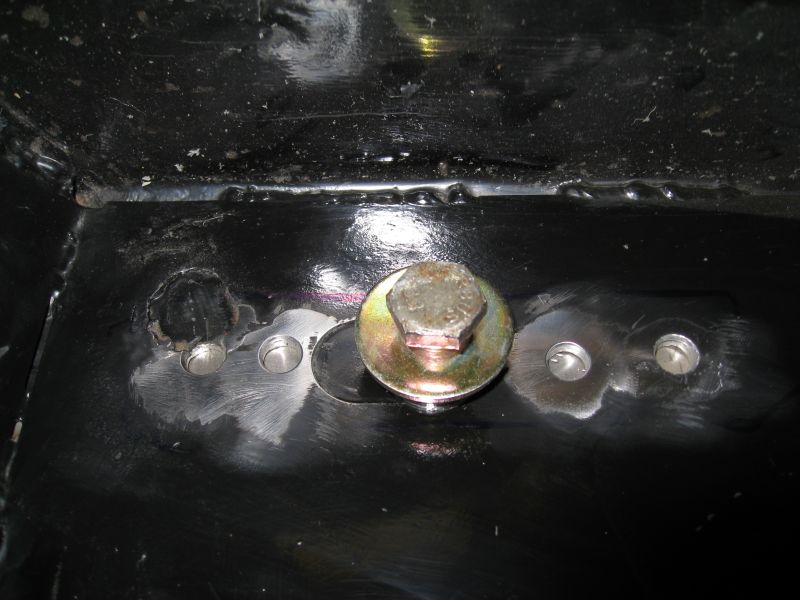
Welded...with the TIG welder. The MIG that I had been using was one of my buddies but since I moved to OH I left it with him so I am without. I was pretty excited to try making a rose weld with the TIG welder but let me tell you, it is not the correct tool. I ended up making some good welds but it was not easy and it took forever. Need to dig into the car budget and and buy a MIG.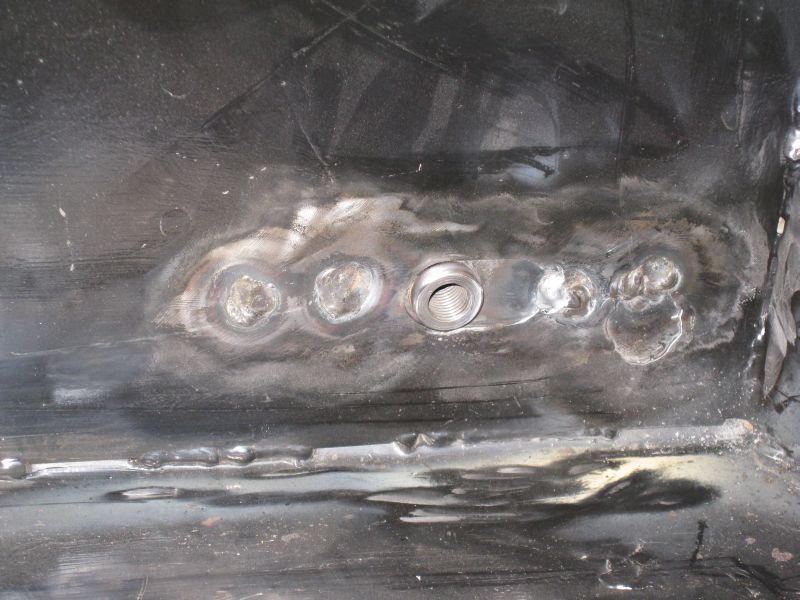
...
Posted by: Amenson Mar 15 2009, 07:31 PM
This weekend I started by working on the bandsaw that came with the house we are leasing. It is currently set up for cutting wood and has a blade speed 10x what it needs to be for metal. I have been thinking about how to lower the speed and make it adjustable. Stepping it down by pulleys would require adding an idler shaft to take it down in two steps and then would be cumbersome to change the speed. So I purchased a Variable Frequency Drive and a 3-phase motor off of eBay. The VFD will run the motor down to pretty much 0 rpm with decent efficiency. I used to use them when I was doing CNC controls for industrial automation. Way overkill for what I am using it for but it should work very well. The motor is not here yet but I decided to mount the drive and pull the old stuff out.
I then started to prepare to ream the dowel holes into the CV's...when I noted that they did not look like the old ones. Instead of having the step for the gasket there is a taper.
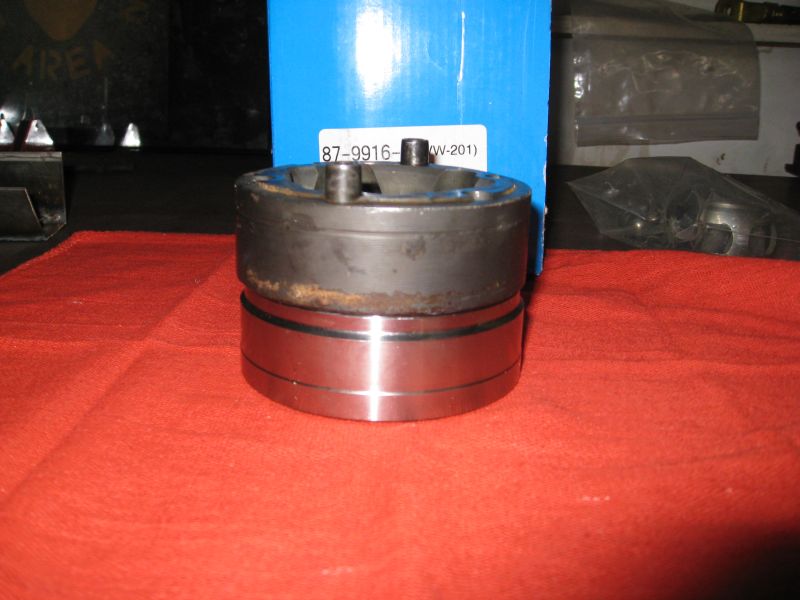
It seems to fit ok and I checked that the spline is correct. What in the heck did I purchase and will it work? 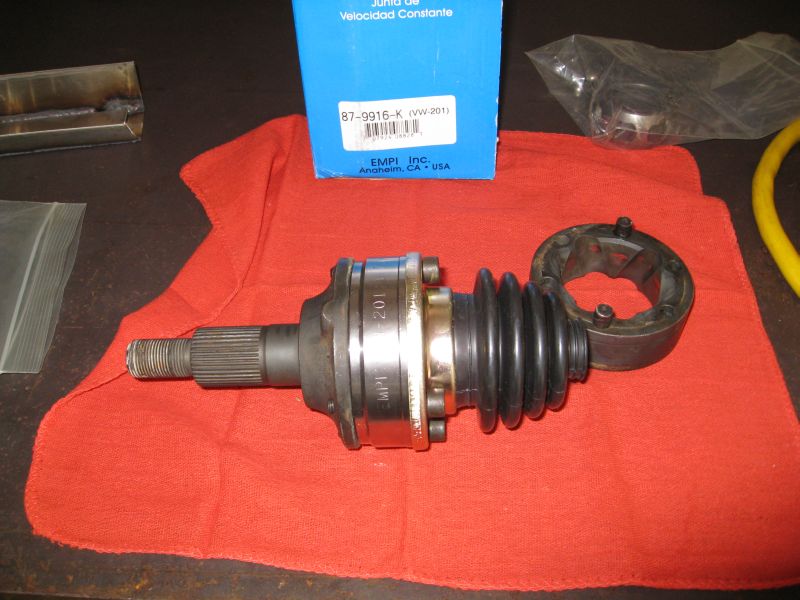
Then I cleaned and painted the axles and started fitting the clutch slave cylinder. 
The pedals should arrive early this week.
Scott
Posted by: charliew Mar 15 2009, 09:29 PM
Scott this is ot but I just noticed your air tools and thought about mine. Here in TX. we have little bees that are not honey bees but they sorta look like them. They make nest in every hole they can find. I don't know if you have them up north but if you do here's my solution. I took a 2x6 and bored some small holes that the disconnect for the air would fit in and then bored a larger hole that the bottom of the tool would drop into to hold it snug. That keeps the bugs out.
Posted by: Amenson Mar 16 2009, 05:42 PM
Scott this is ot but I just noticed your air tools and thought about mine. Here in TX. we have little bees that are not honey bees but they sorta look like them. They make nest in every hole they can find. I don't know if you have them up north but if you do here's my solution. I took a 2x6 and bored some small holes that the disconnect for the air would fit in and then bored a larger hole that the bottom of the tool would drop into to hold it snug. That keeps the bugs out.
I don't have problems with bees but your suggestion might be worth trying to keep dirt from making its way down the fittings.
Anybody have any comments on my CV's?
Scott
Posted by: Wilhelm Mar 23 2009, 01:28 AM
Enjoying reading your build. These aluminum elbows: Did you bend them, and if so which type aluminum and temper? Or do you have a source for pre made bends? Thanks. Looking back, it looks like you may have some stainless steel in your coolant lines. Are you concerned about electrolysis between the SS and the aluminum? : http://www.914world.com/bbs2/index.php?showtopic=93887
Posted by: Brett W Mar 23 2009, 11:25 AM
Those are stainless bends.
Posted by: charliew Mar 23 2009, 11:33 AM
Wilhelm fiero's use ss coolant lines, aluminum water pumps and radiators and cast iron motors. I have two 86's and one 88 and no problems with electrolysis. It might have something to do with the antifreeze additive or the grounding.
Scott the new cv's appear to be made for a stub that has a ring that the cv sets in. I have a 74 aluminum rear 911 assembly that uses that type of cv and also what I think is a 87? 944 assembly that can use 11inch rear wheels that uses that cv.
Posted by: Wilhelm Mar 23 2009, 04:47 PM
Knew if I searched this site long enough, I'd find what I want. A post by Mueller points in the right direction. http://www.914world.com/bbs2/index.php?showtopic=45894&hl=tube++bending http://www.burnsstainless.com/AluminumTube/aluminumtube.html
Posted by: Amenson Mar 23 2009, 07:02 PM
Enjoying reading your build. These aluminum elbows: Did you bend them, and if so which type aluminum and temper? Or do you have a source for pre made bends? Thanks. Looking back, it looks like you may have some stainless steel in your coolant lines. Are you concerned about electrolysis between the SS and the aluminum? : http://www.914world.com/bbs2/index.php?showtopic=93887
Wilhelm,
As Brett pointed out those bends, along with the rest of the metal in the cooling lines, are stainless. I buy them all pre-bent. Pretty much all of the tube I purchased for the project came from:
http://www.verociousmotorsports.com/
I ordered a few things that I could not find elsewhere from Burns but generally they are significantly more expensive. Their collectors and other fabricated parts are works of art.
I had not considered the possibility of having issues by using SS in my cooling system with the aluminum engine. Do you have any articles, links, books...etc that you can point me to so that I can look into this this concern?
Thanks
Scott
Posted by: Wilhelm Mar 23 2009, 07:58 PM
Thanks for another source of tubes. Regarding the stainless issue:
http://ntrs.nasa.gov/archive/nasa/casi.ntrs.nasa.gov/19770010255_1977010255.pdf
Also was raised when I asked others on 914world about mixing different metals in my cooling system.
Posted by: Wilhelm Mar 23 2009, 11:51 PM
Just found a cheaper source of aluminum Mandrel Bends, close to PDX. http://www.mandrel-bends.com/catalog/mandrel-bends-34/6061-aluminum-16-gauge-54/
Posted by: Brett W Mar 24 2009, 07:06 AM
I know the Toyota MR2 uses stainless coolant lines, an aluminum head, and cast iron block. Never seen one with problems.
Posted by: Amenson Mar 24 2009, 07:21 PM
Thank you for the link to the NASA paper. I read it and then went searching for more information on cooling system corrosion. I have not been able to find any information indicating that by adding some SS to the cooling system, I am creating issues that did not already exist in the vehicle that the engine came from. That being said, my research did reinforce the importance of using a coolant with the best possible anti-corrosion properties. For these reasons I will probably stick with the stock Subaru coolant in the PorSTi.
Thanks
Scott
Posted by: charliew Mar 24 2009, 09:52 PM
When I was modding my son's ic lines for his sti I got my bends from
http://www.stainlessworks.net
They are not cheap but the stuff is good.
Another solution is to buy knock off stuff on ebay and cut it up for the bends. I bought a sti downpipe that goes from the turbo to the muffler, about 5 feet long 3.0 od polished for not much I really don't remember but it will make most of the rear exhaust for the suby. The polished ss muffler with 3.0 od inlet and outlet was a different story.
Posted by: GS Guy Mar 25 2009, 02:25 PM
Best "coolant materials" article I know of.
http://www.rjes.com/html/material_choice.html
According to this, a mix of steel (iron) and aluminum is OK, more noble materials like brass, copper and stainless steel to be avoided except in very small amounts.
Another source for SS elbows, seems to be a good compromise for quality (304 available) and price (much less than Burns). Custom bends too!
http://www.mandrelbendingsolutions.com/servlet/StoreFront
Jeff
Posted by: Amenson Mar 25 2009, 08:16 PM
Best "coolant materials" article I know of.
http://www.rjes.com/html/material_choice.html
According to this, a mix of steel (iron) and aluminum is OK, more noble materials like brass, copper and stainless steel to be avoided except in very small amounts.
Another source for SS elbows, seems to be a good compromise for quality (304 available) and price (much less than Burns). Custom bends too!
http://www.mandrelbendingsolutions.com/servlet/StoreFront
Jeff
Now those are some compelling articles. I am going to have to strongly consider going to aluminum.
Scott
Posted by: Amenson Jun 8 2009, 09:10 PM
I figured that it was time for another post and looking back at my pictures, one is long overdue.
One of the things distracting me from the forum is my new RC heli. This is my 4th bird and by far the best. It is an Align Trex 250. Not really relivant to my PorSti build thread but I did build it .
Started like this...
...and ended up like this.
Now on to the real stuff. I finally have my new axles assembled.
Mmmm, pretty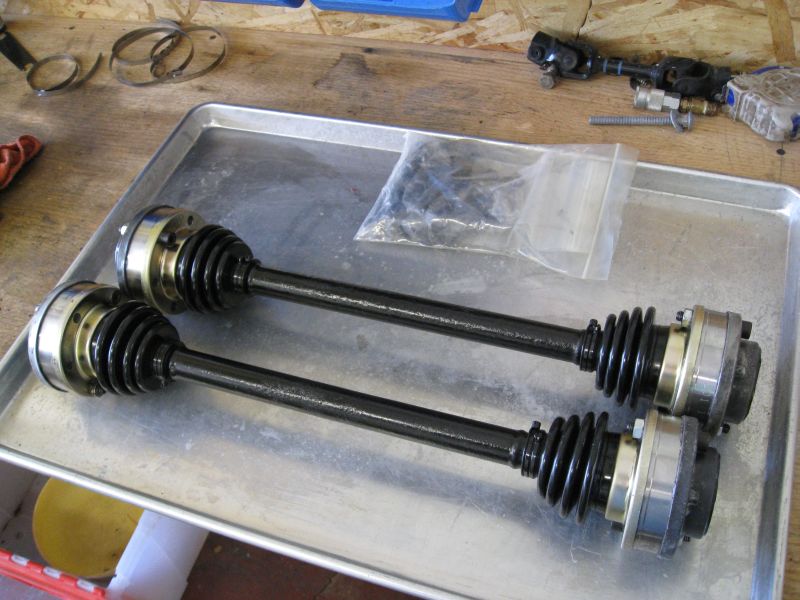
Probably not a new technique but it was novel to me. I used the old CV boots and a little plastic to make covers so that the packed CV's would not get nasty grease all over the place.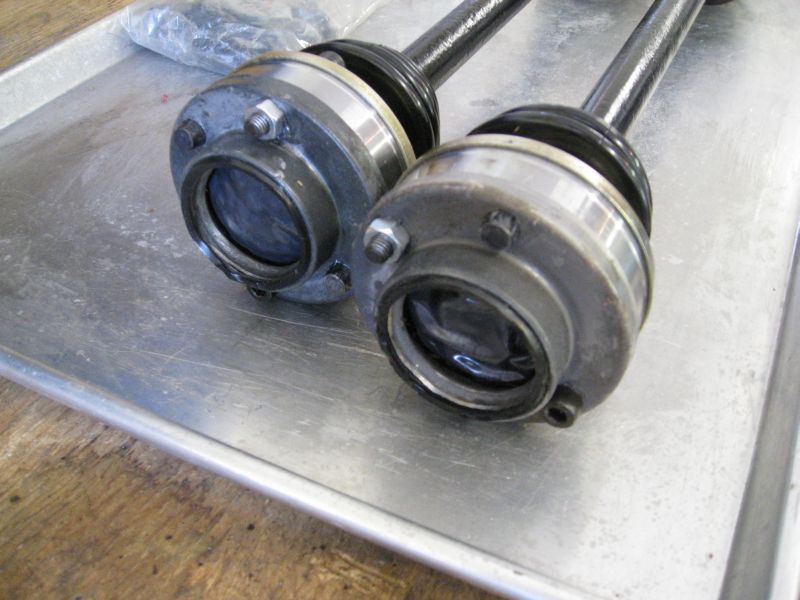
With the help of my Father I now have a battery box for the new tiny battery. I drew up the pattern, he had one of the guys at his work bend it from SS and I tig'ed it together.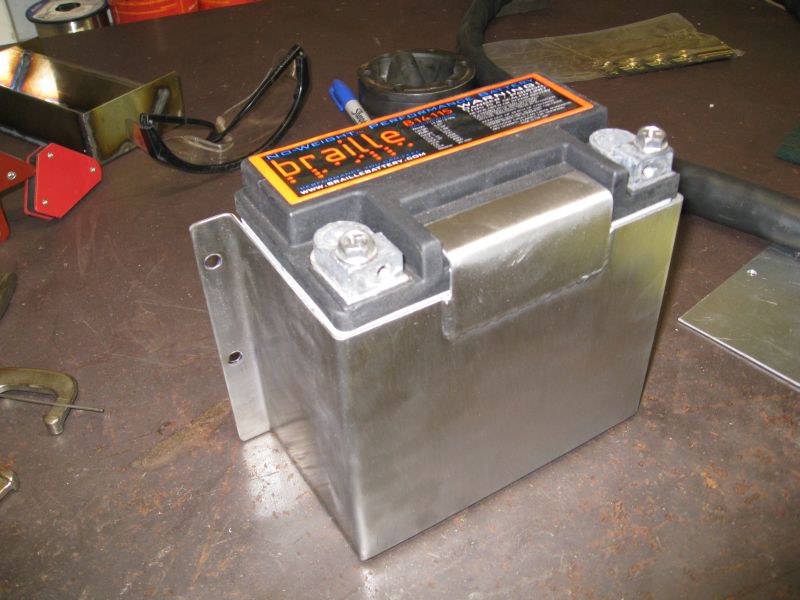
...
Posted by: Amenson Jun 8 2009, 09:24 PM
...
Bottom View (just to show the nice welds )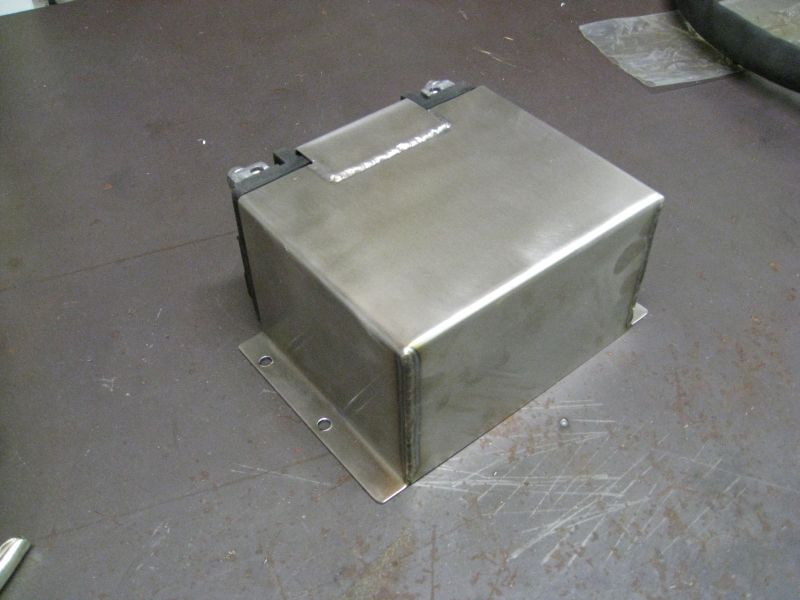
My Mother took a cool picture of me welding while they visited. Not making a car part though...I needed a banzai tray so I fabbed one up.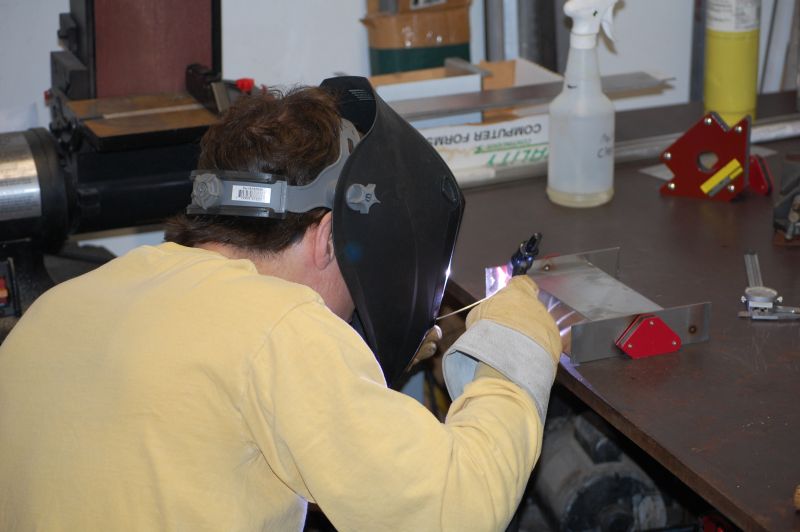
In the car.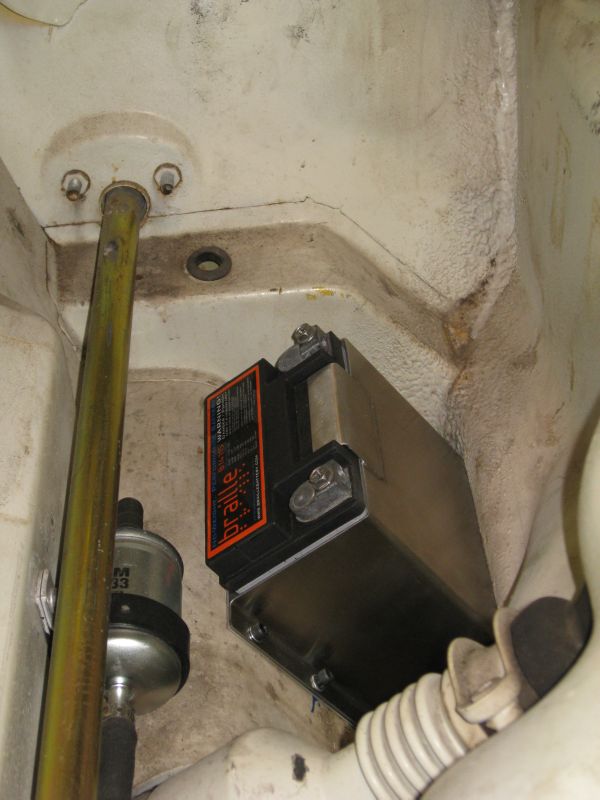
The next task was to install the new pedals but I need a new MIG before I could get started. After months of searching I found the right machine at the right price. The guy I purchased it from said that he had waxed it a few times, I did not belive him until I pulled the covers off and found wax residue stuck in the seams.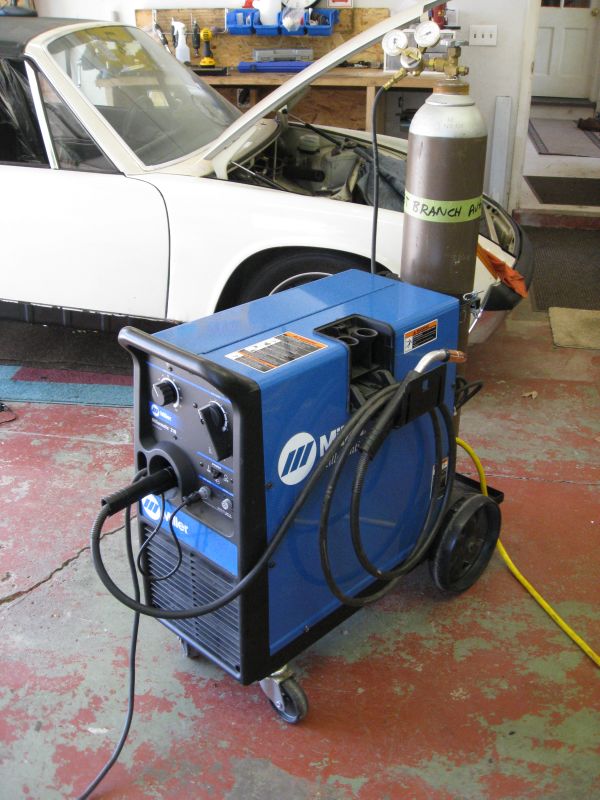
Pedals Set in place with the new base plate before cutting/welding.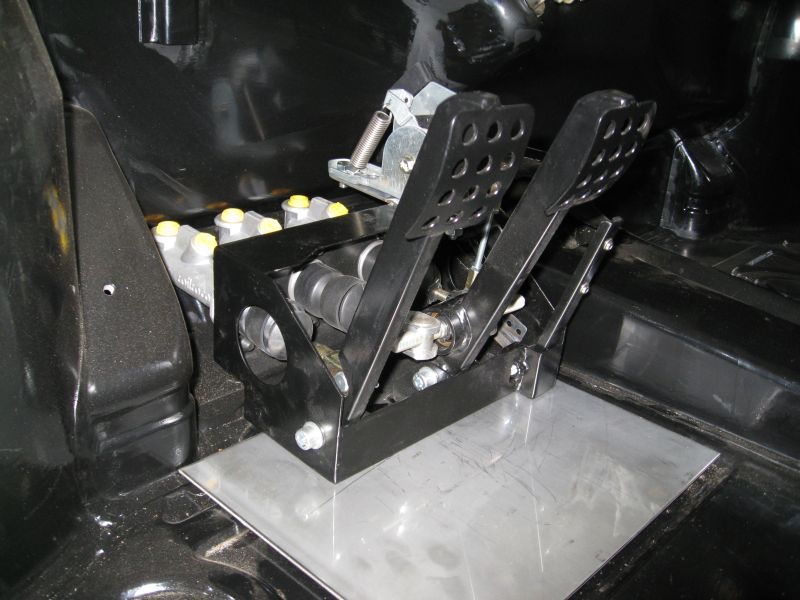
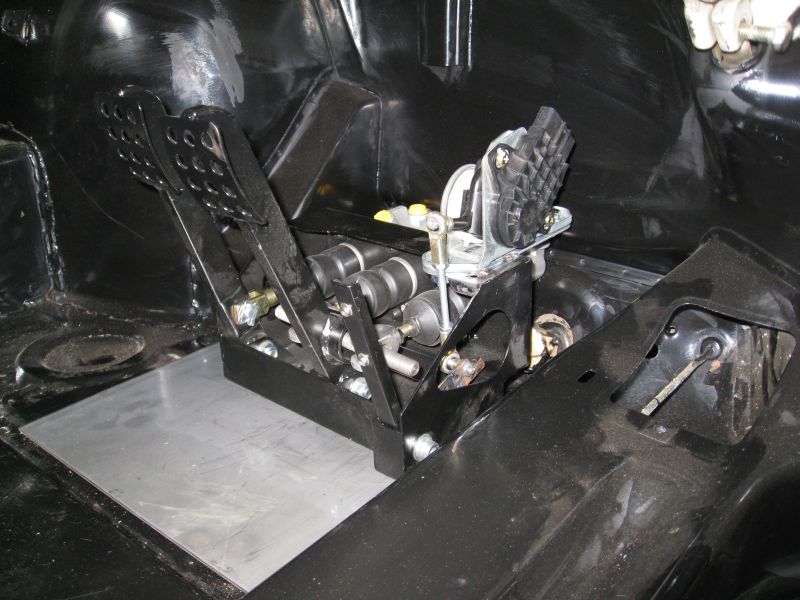
...
Posted by: Amenson Jun 8 2009, 09:32 PM
...
I welded an edge to support the back corner in the dip where the stock pedals mount.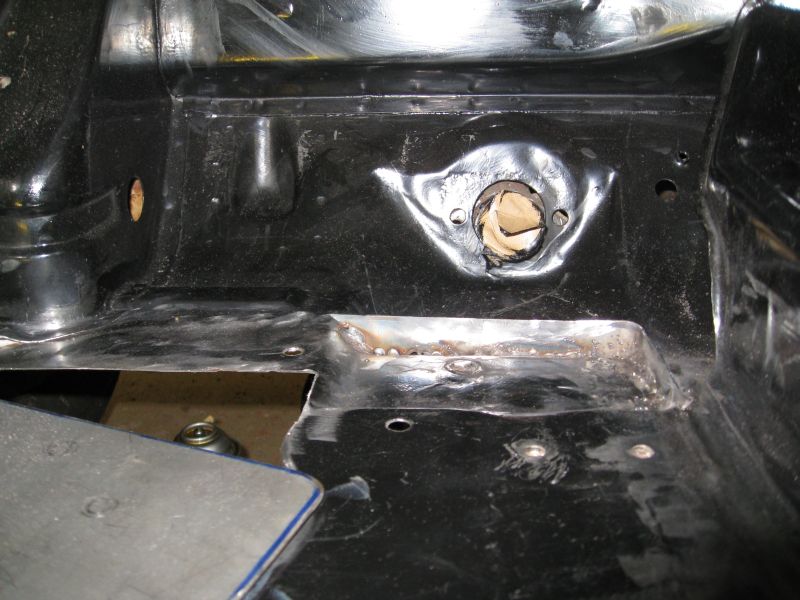
Tacked in place from the top: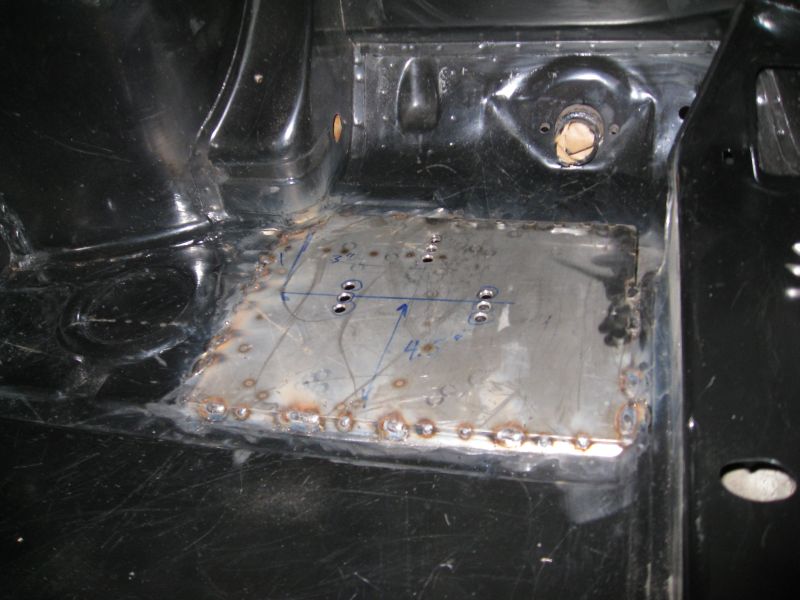
Tacked in place from the bottom:
Back corner support after welding: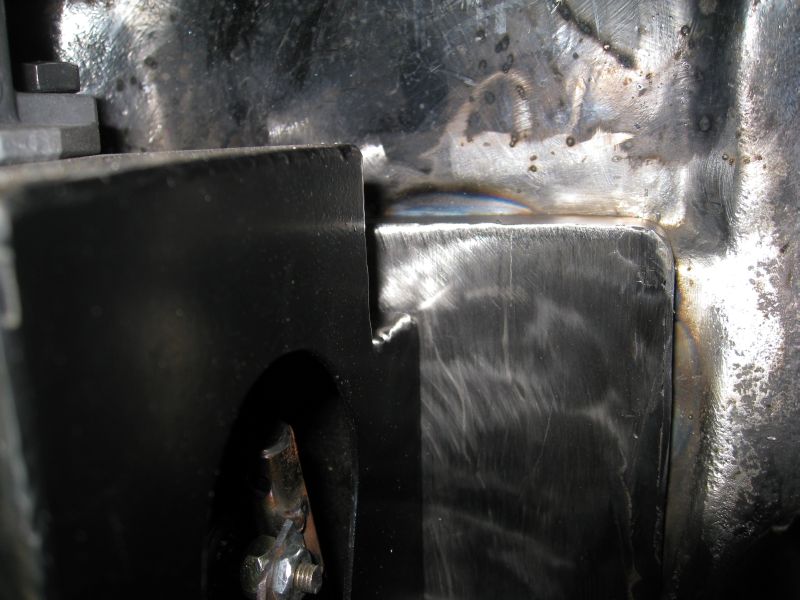
After getting the mount in place it was time to fab up the switch/sensor mounts.
Finished throttle sensor mount: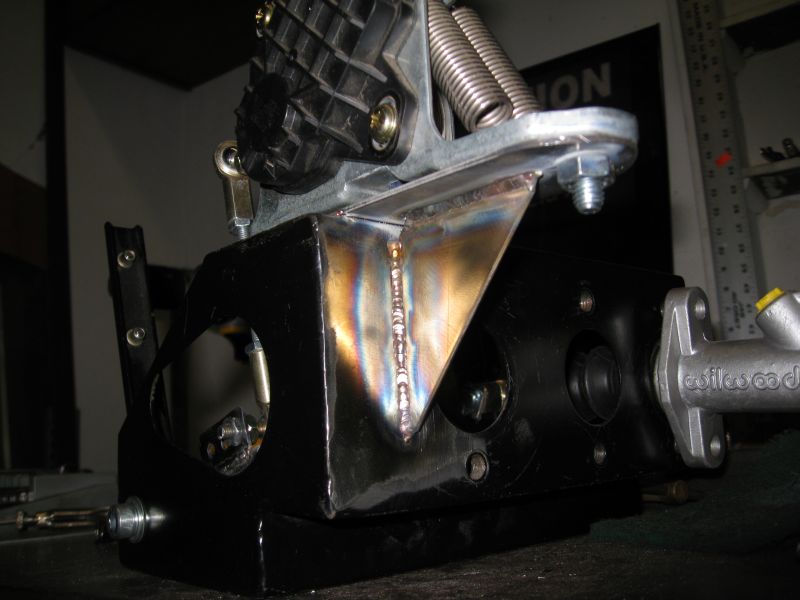
Linkage: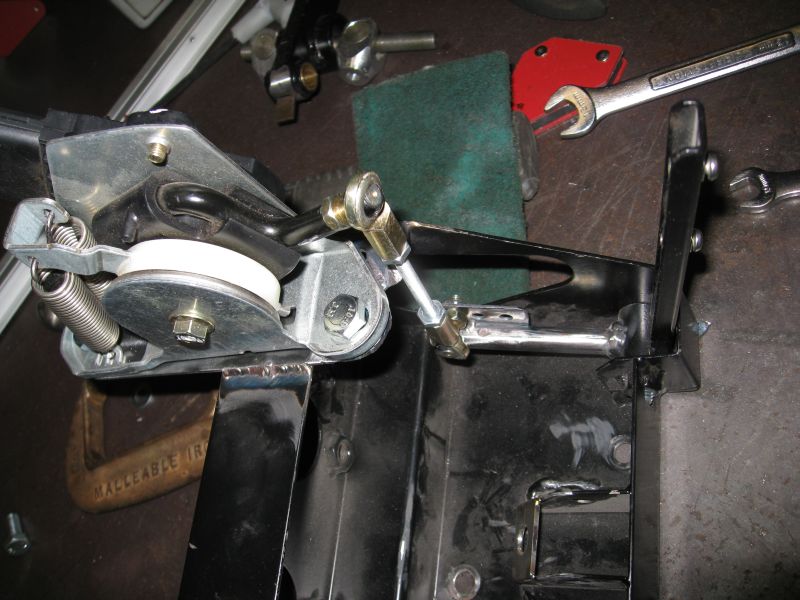
...
Posted by: Amenson Jun 8 2009, 09:46 PM
...
Clutch switch/pedal stop (Can you spot the TIG weld that I buggered up so badly that I had to grind it. Just when I think that I am getting good I really mess something up):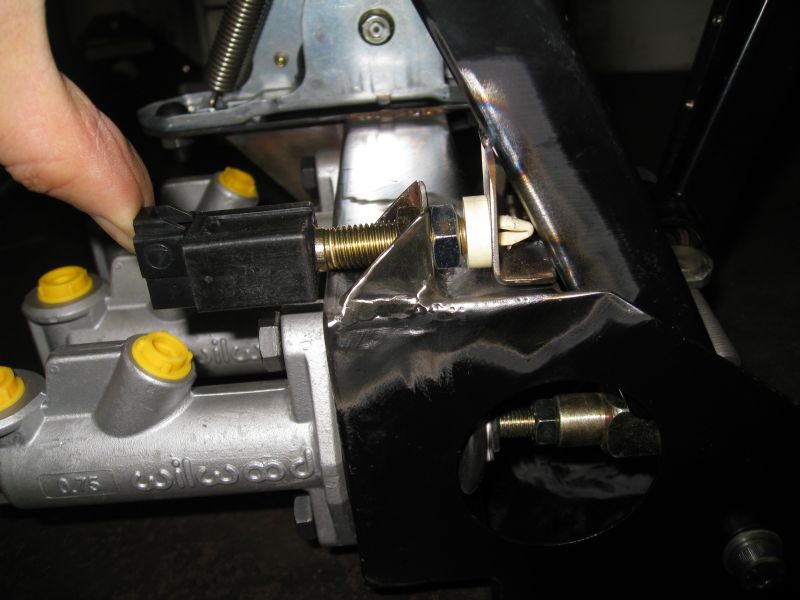
You can see the BLS between the two brake master cylinder rods.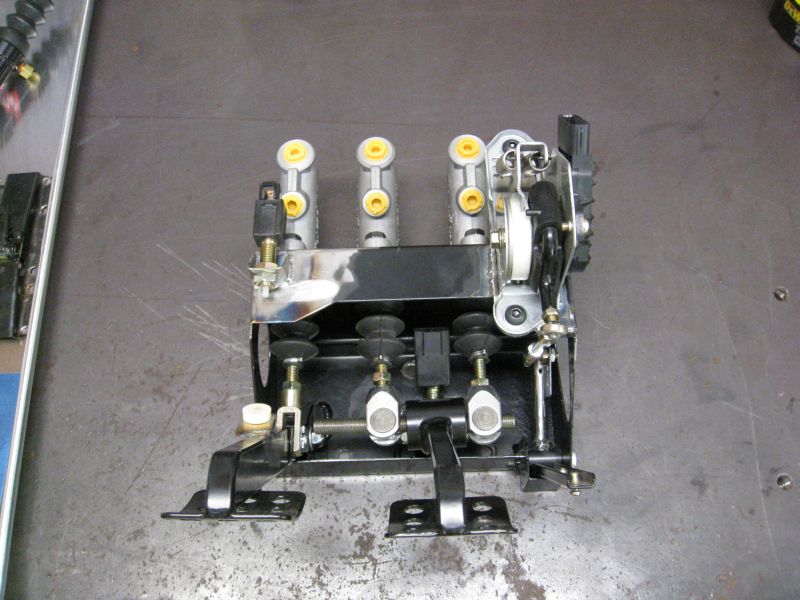
Side shot: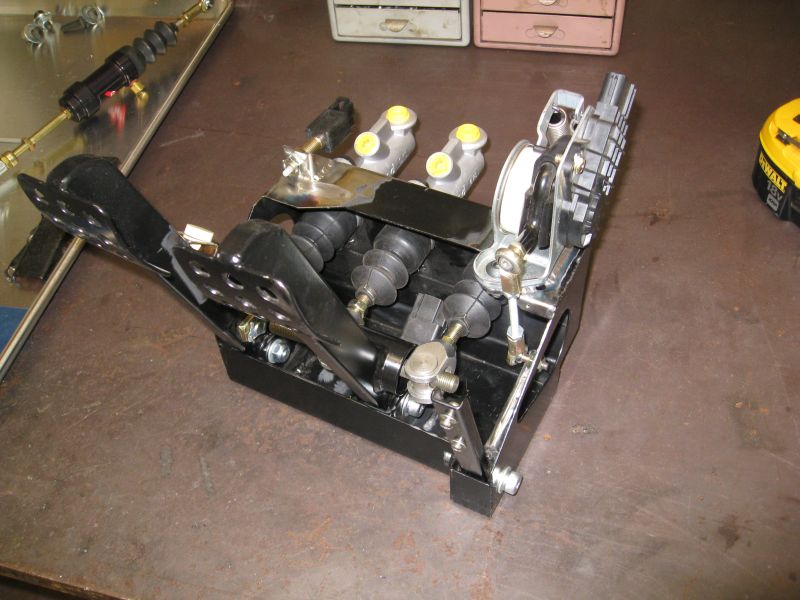
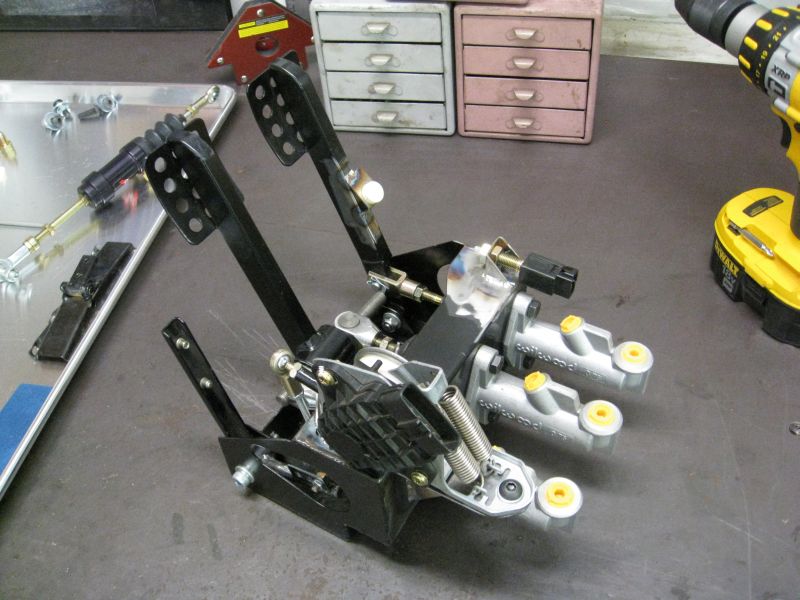
Modified the throttle pedal to use the pivoting Suby pedal. Still need to add two set screws to the assembly to hold the shaft in the tube.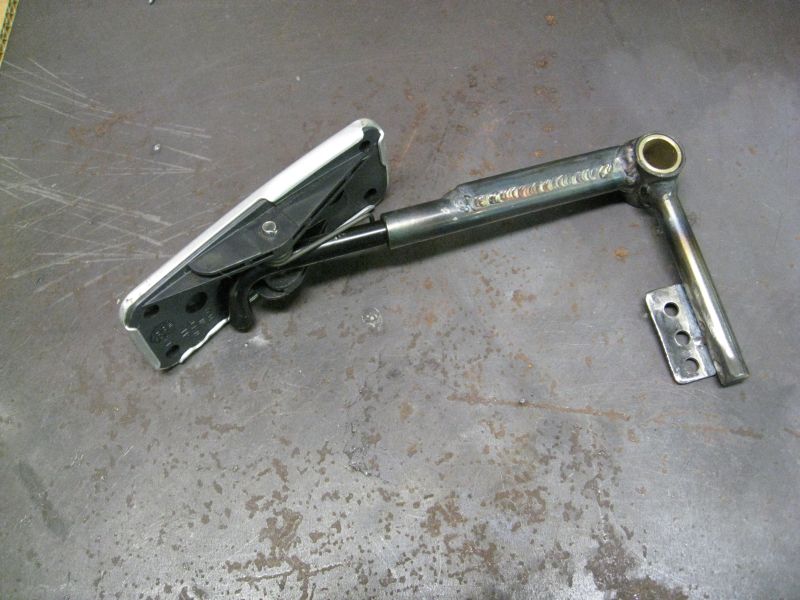
Will take some pictures of the box installed once it is finished. I am going to have to shift the clutch pedal away from the brake as things are a bit tight with normal shoes.
...
Posted by: Amenson Jun 8 2009, 09:52 PM
...
I also started making room for the new seats/sliders to fit. Still a lot of work to be done here.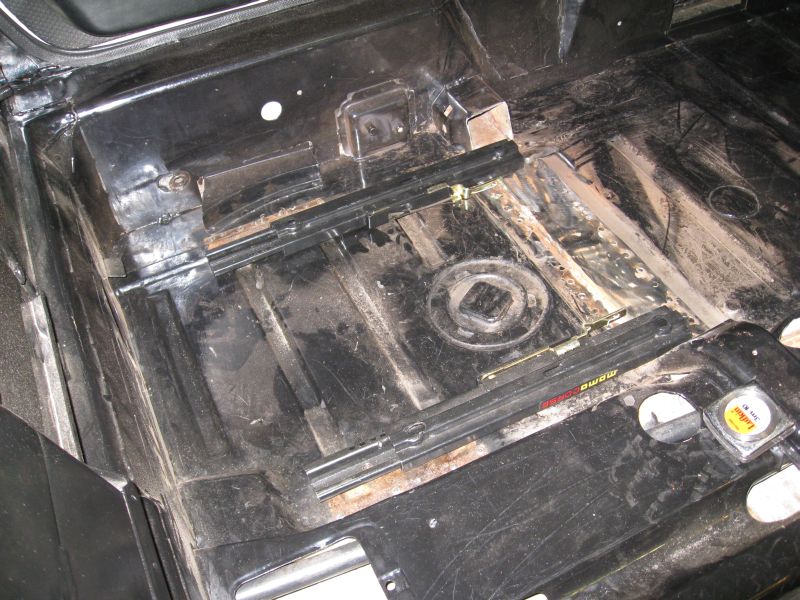
Next up was the radiator fan mount. This took a lot of time to get right but I am very happy how it turned out.
Top mount prior to welding: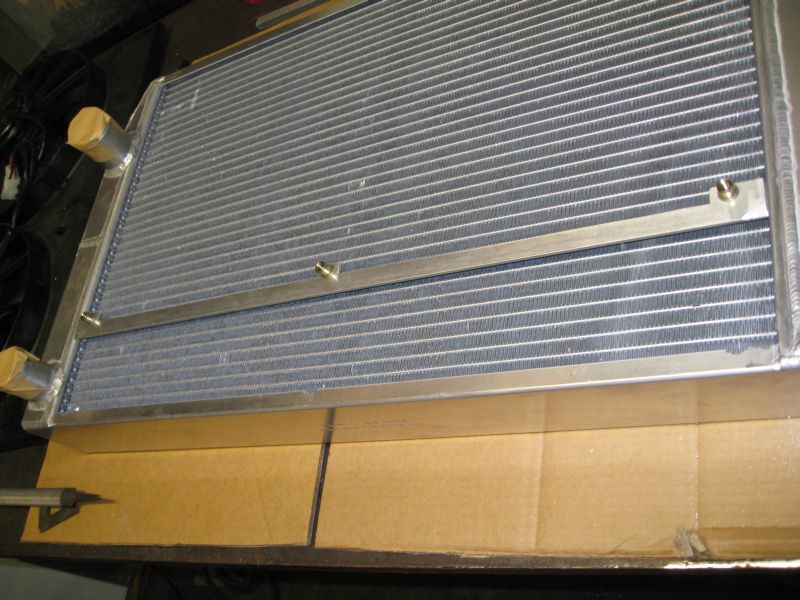
Both mounts welded in place: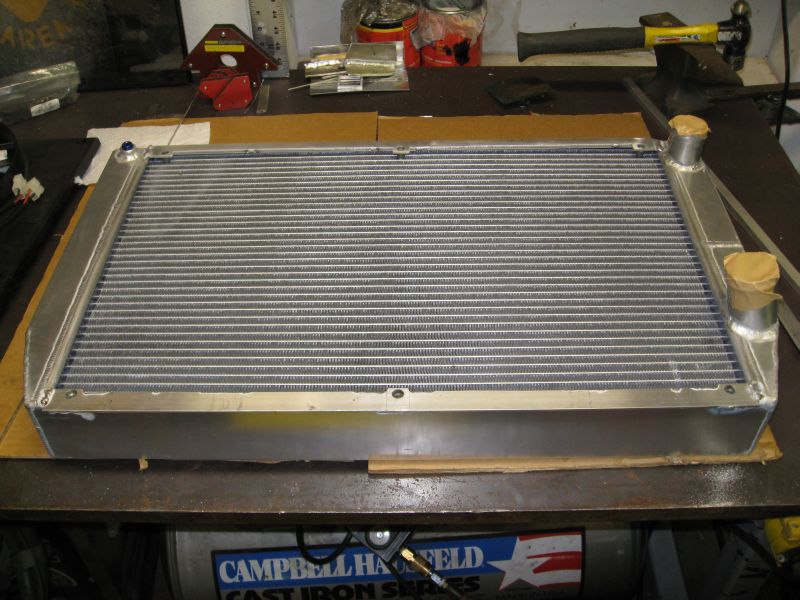
Bolted up: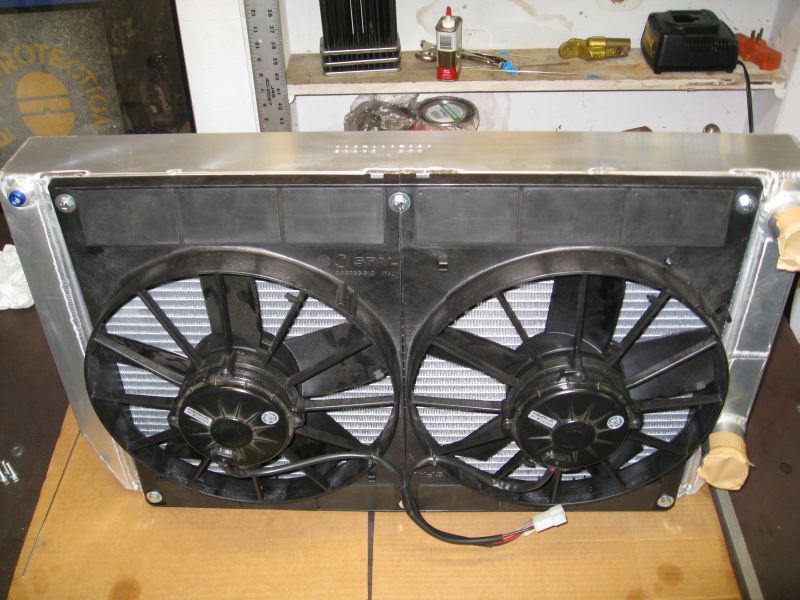
Next will be to fab up the hold downs. Am going to try to get that stared in the evenings this week.
That's all for now.
Scott
Posted by: Zaney Jun 9 2009, 01:13 PM
Scott, as usual. Top Notch work!
Thanks for the update!
Nate
Posted by: Amenson Jul 12 2009, 09:52 PM
Still making progress, took a week off from work and the garage to tour the Finger Lakes region of New York. Apparently the lakes and hills in the region make it suitable for grape cultivation so there are a ton of wineries in the area. Probably tasted a bit over 200 wines. Not all of them were good but we found 6 cases worth that we liked
Made the hold downs for the radiator:
Starting point: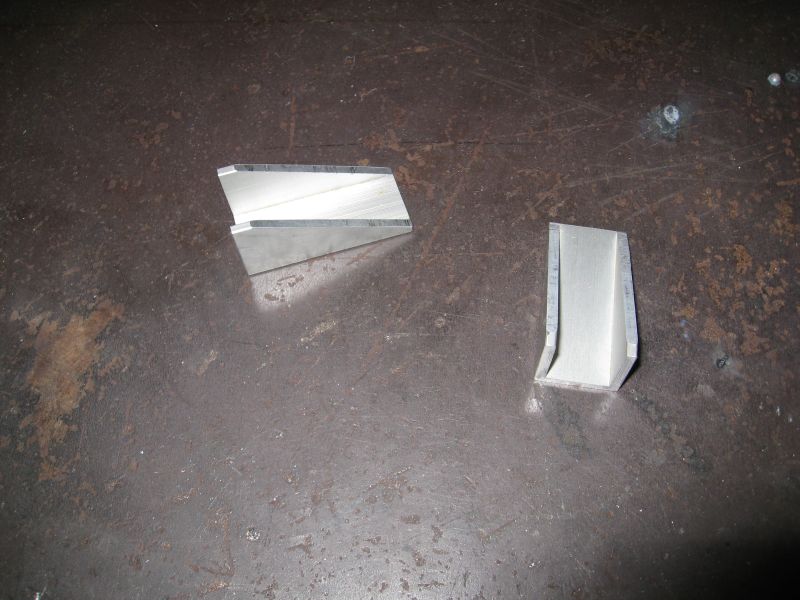
Ready to go on the rad:
Installed, still need to weld the sides: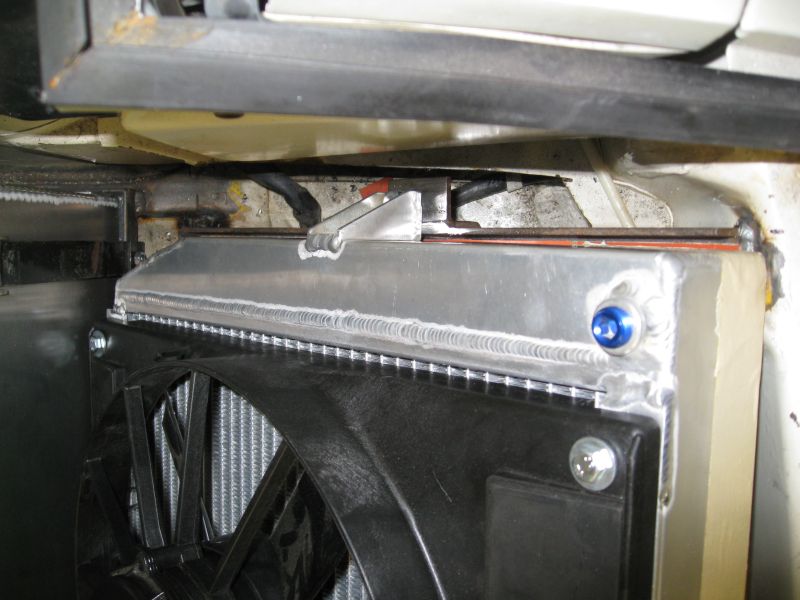
Spent a load of time getting the chassis ready for the seat.
Bolted in, and the center storage still fits. I am going to need to recline the seat ~10deg to get the driving position right.
...
Posted by: Amenson Jul 12 2009, 10:10 PM
...
Painted the pedal box parts.
Ready for assembly.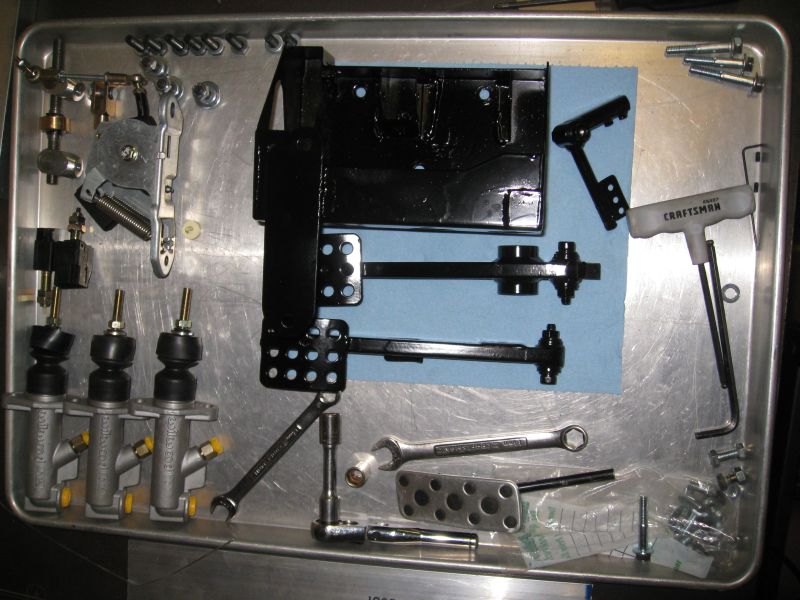
Had a bit of beer left after cleaning up for the night so I started assembly.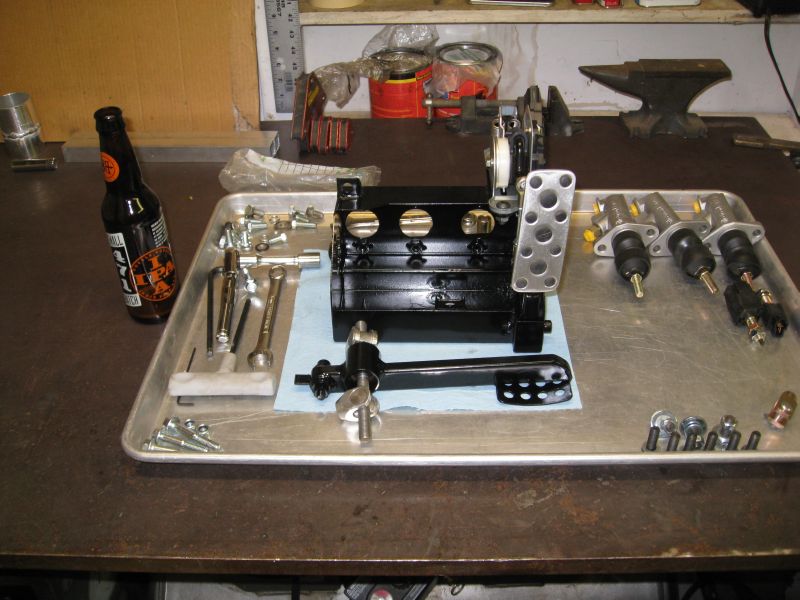
My wife gave me a trip to the local winery to make a couple batches of custom wine for my birthday. We bottled it the other week. I made the label for the red to commemorate what should be the year of the first drive of the PorSTi.
Not too far left to go...
Scott
Posted by: Amenson Jul 19 2009, 09:12 PM
Lots of progress this week.
I finished assembling the pedal box only to find that the balance bar interferes with the throttle pedal. I really do not have the time to fix stupid mistakes like this.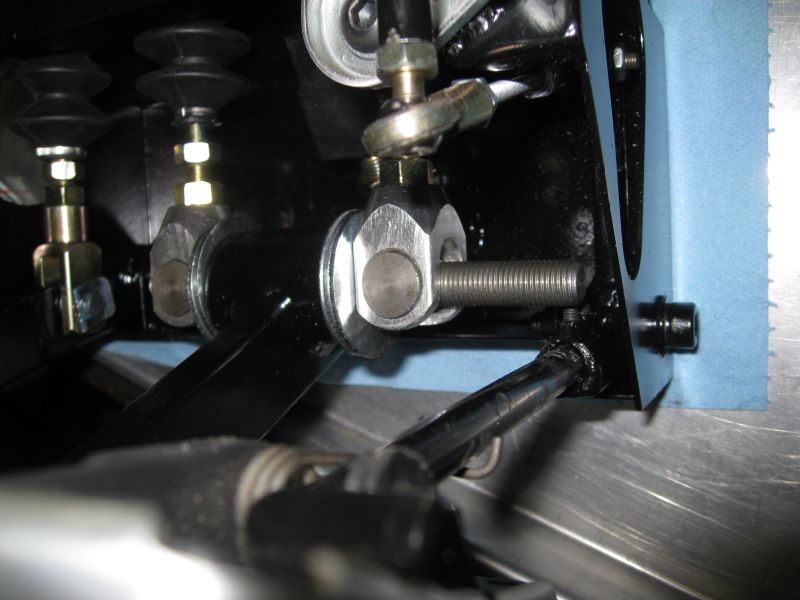
The aluminum tubes arrived to replace the SS parts of the cooling system. Ordered them from http://www.globaltecheng.com/default.asp. Good quality stuff at a great price. Fast shipping as well. 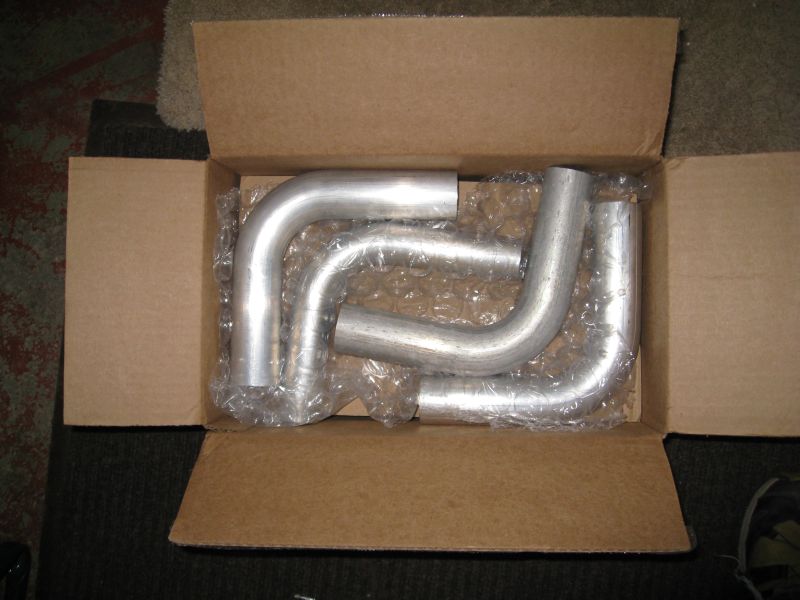
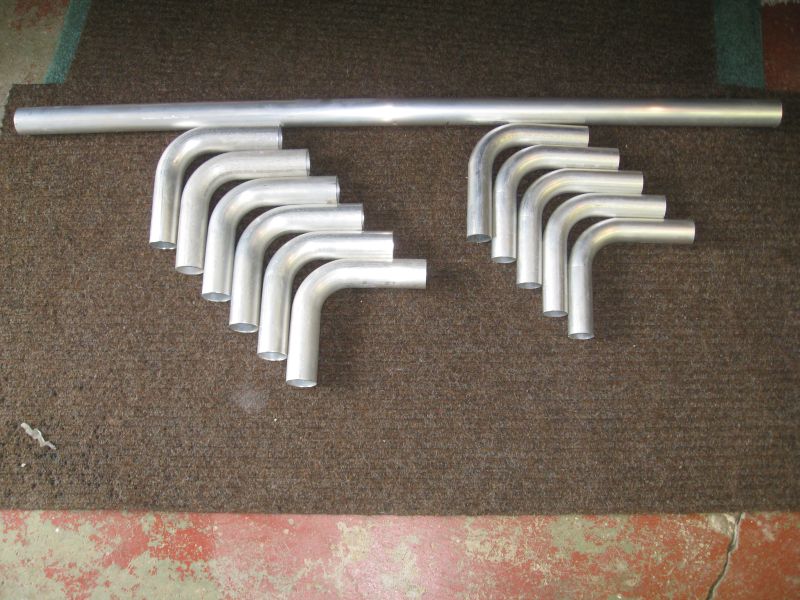
Made the clutch slave cylinder mount per GS Guy's directions. Still need to clearance the shifter fork so that the heim joint fits properly. Looks like it should work really well.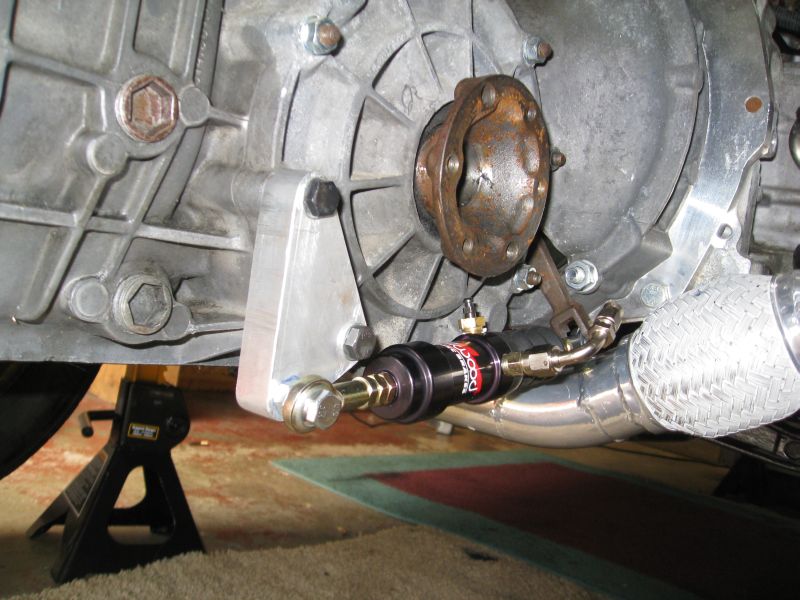
...
Posted by: Amenson Jul 19 2009, 09:49 PM
Mid way through fabbing the cooling line that crosses over. While I was fitting everything up I decided to redo the radiator exit stub. The one that came on the rad was at a very strange angle and would have interfered with the ducting. The new one looks much better too.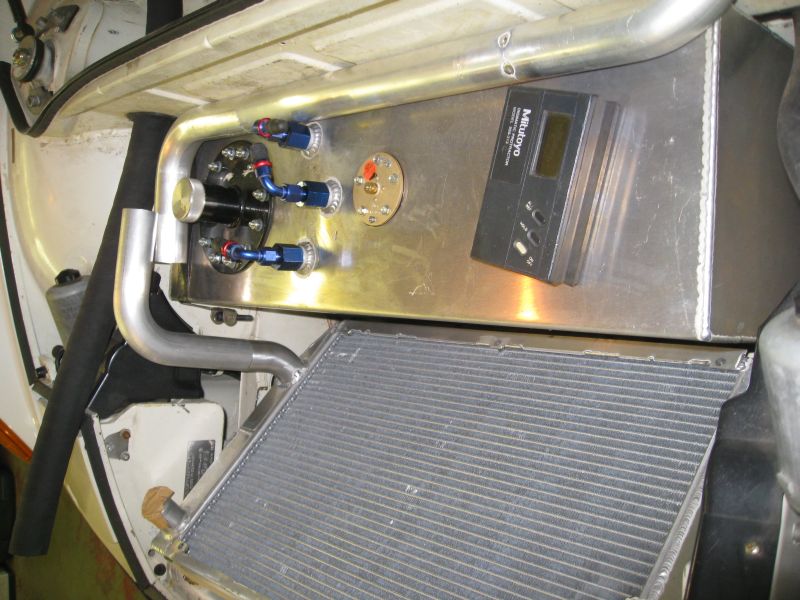
Everything fit together, ready for for the two halfs to be tacked together. I found that a piece of angle and a couple of hose clamps really helps with fitting and keeps everything straight and aligned while tacking.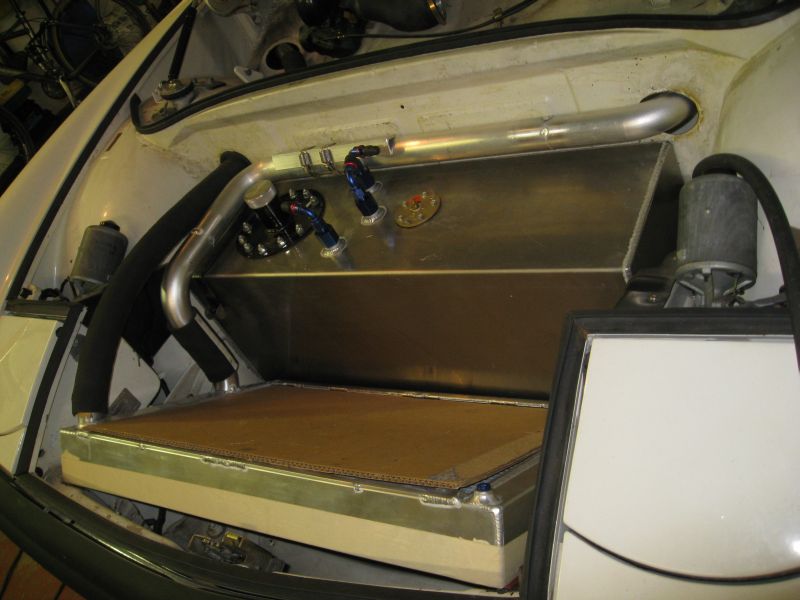
All welded 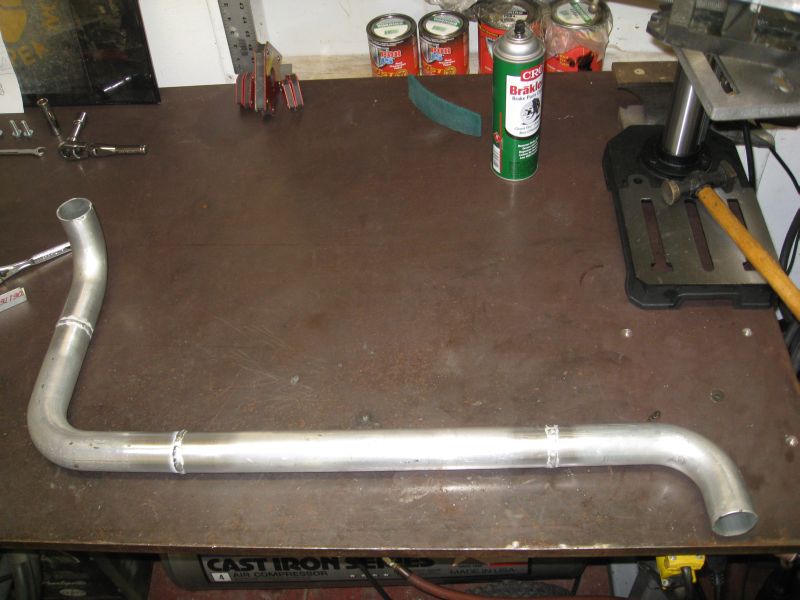
Worked on plumbing the new pedal box..
"T" in the front.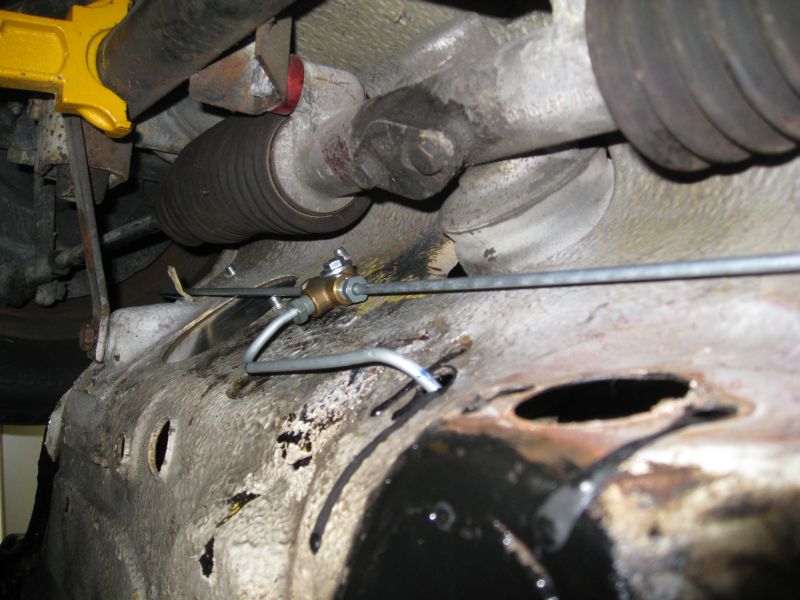
No more adjustable prop valve in the back. Also notice the line coming out of the clutch tube. I ran the hydraulic line where the cable used to to live. Still need to trim and flare it.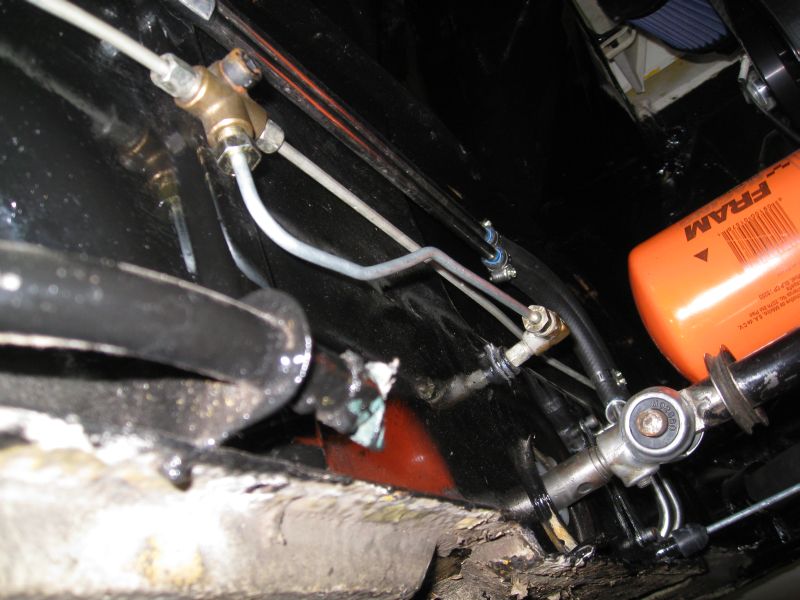
Clutch and front master cylinders pretty much done. Still need to tweak them a bit. I messed up a few tubes so I ran out before I could finish the rear. There are no original brake lines left on the car. You can also see the lines to the brake fluid reservoir. Need to pick up some rubber grommets.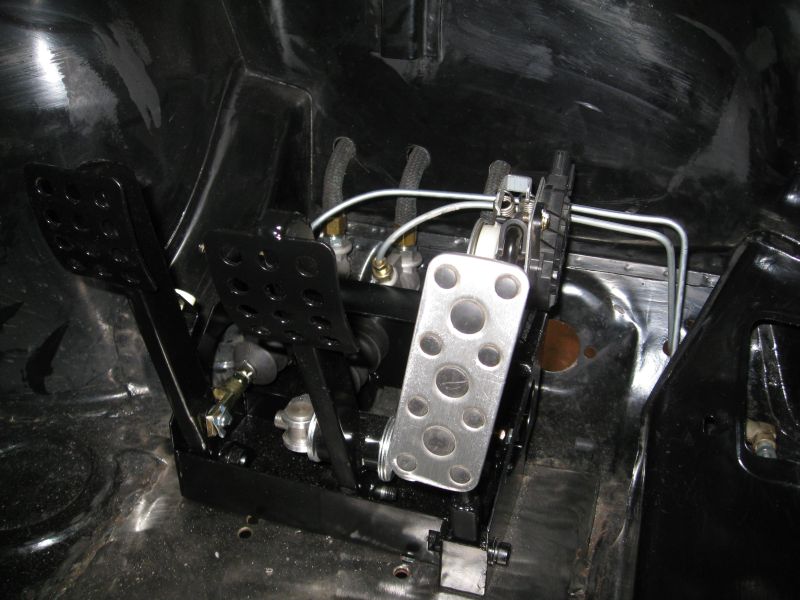
...
Posted by: Amenson Jul 19 2009, 09:57 PM
After searching to the end of the internet I finally found a singe reservoir that woudl feed all three master cylinder and would fit where I wanted. Turns out that I had one in the garage for my other project car, a BMW 2002. It is getting full down there.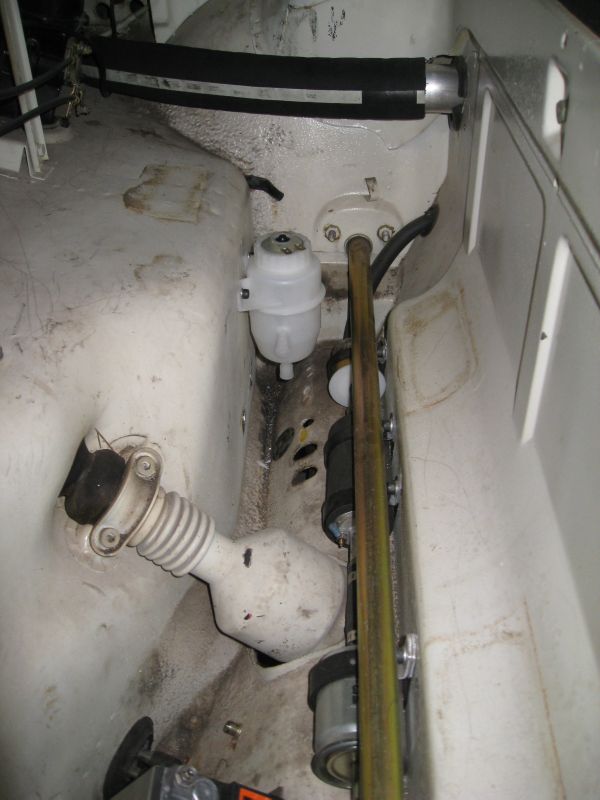
I am in full thrash mode to get the car done for the Woodward Dream Cruise in Detroit on August 15th. Starting last week I am taking every Friday off until Woodward. I did not quite get everything I needed finished this weekend, if I can't make up for it next week I may have to burn more vacation 
Posted by: FourBlades Jul 20 2009, 09:39 AM
Wow, that is some beautiful work. Love the pedals.
Did you make the fuel cell?
John
Posted by: Amenson Jul 20 2009, 11:24 AM
Wow, that is some beautiful work. Love the pedals.
Did you make the fuel cell?
John
The fuel cell came from http://www.summitracing.com/. I do not have the confidence to build something to contain gallons of flammable liquid quite yet.

Scott
Posted by: Amenson Jul 22 2009, 09:43 PM
Made some parts the last couple of nights.
I started fitting the passenger seat and found that the right side needs to be directly above the reinforcing rib for the original seat mount in order for my wife to be comfortable with the seating position. Nice and strong location but I had to shorten the mount.
Cut out the middle.
Welded back together.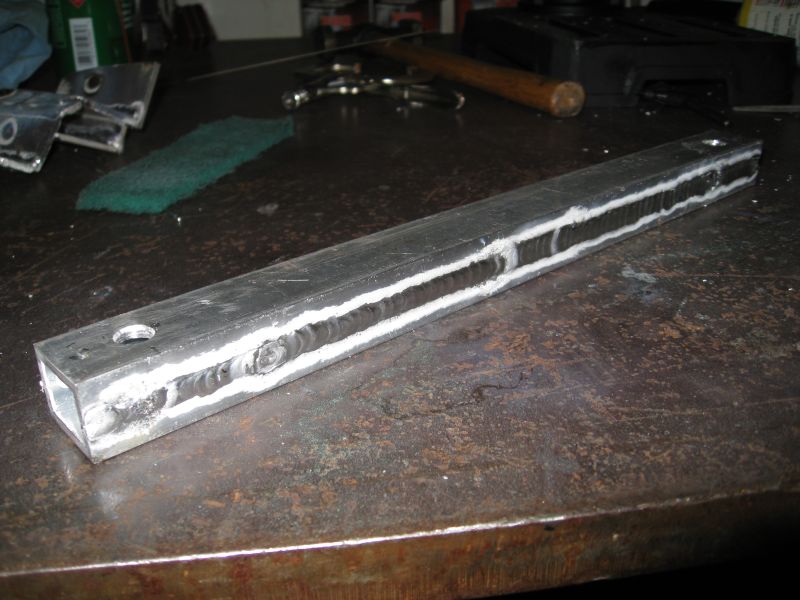
Made the final tube of the cooling system.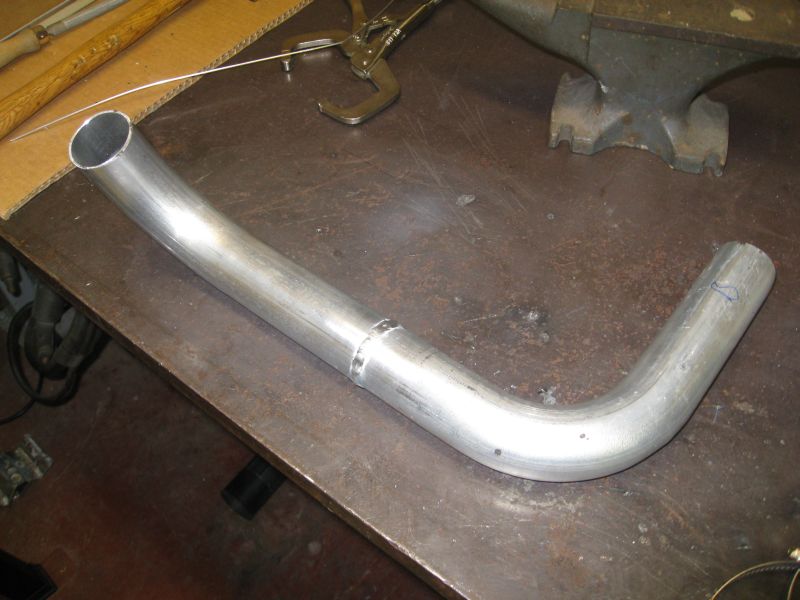
Installed, from above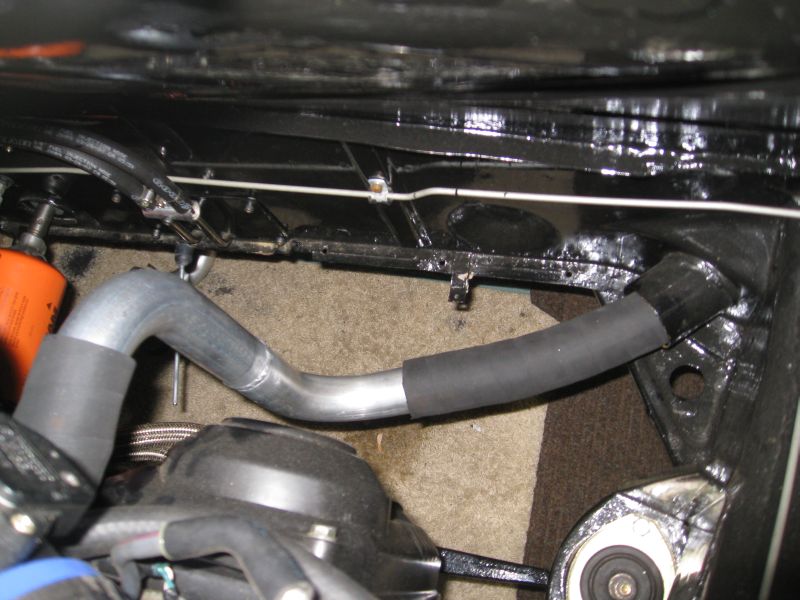
From passenger side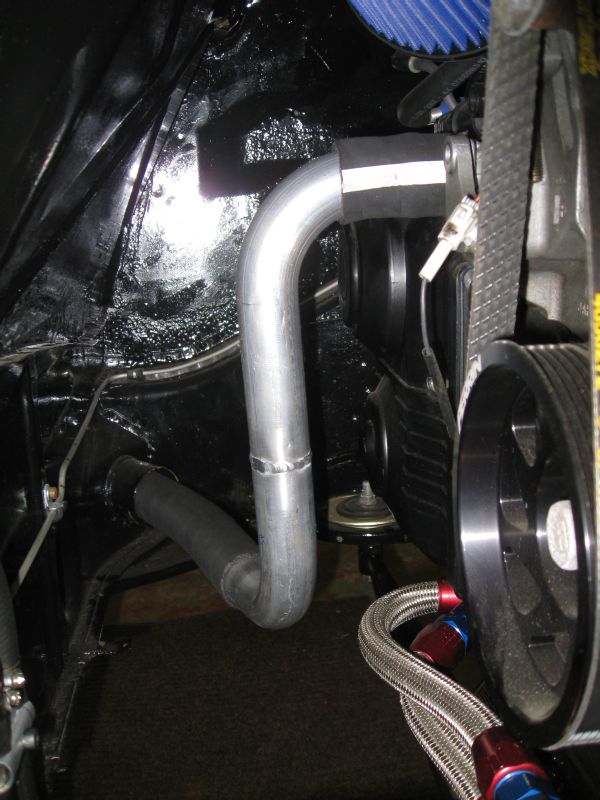
I could fill it with water if I wanted to now. I should be excited but the looming deadline is is really weighing on me. That and all of the hoops to jump through trying to close on a house at the end of the month. The worst part of it is that by buying the house I am probably going to lose the band saw that is in the basement. The owner of the saw seems to be unwilling to sell it for a reasonable price.
Scott
Posted by: Amenson Jul 25 2009, 09:26 PM
Still plugging away...
I managed to install the passenger seat. While this may not seem like such a huge feat, because the threaded inserts in the Momo seat were no where near where they belonged (based on the other seat), it was a huge pain in the ass. I wish I would have realized this when I first purchased the seats, I would have returned it. Now they do not make this style any more so I am stuck. Oh well, I made it work.
With the passenger seat in place I was able to mark the harness shoulder mounts. Took the seats out and installed the mounts.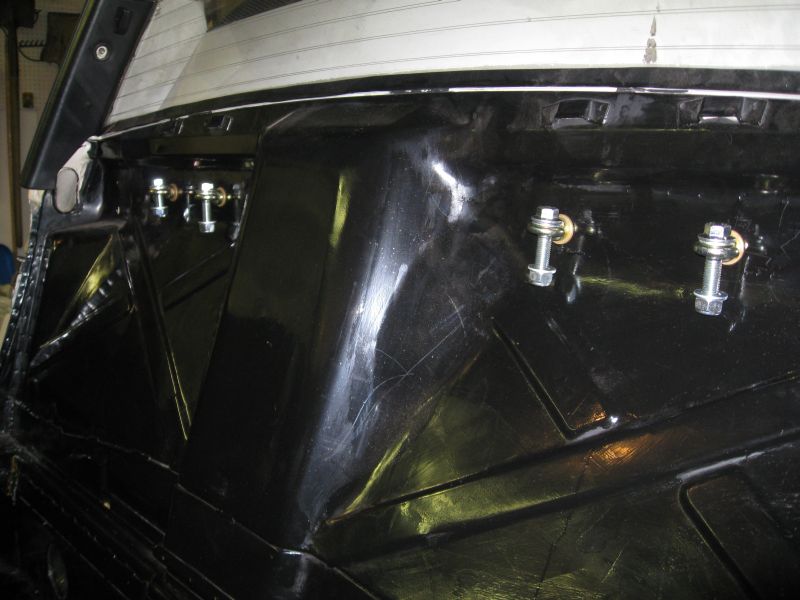
After remaking a few lines, the pedal box plumbing is finished...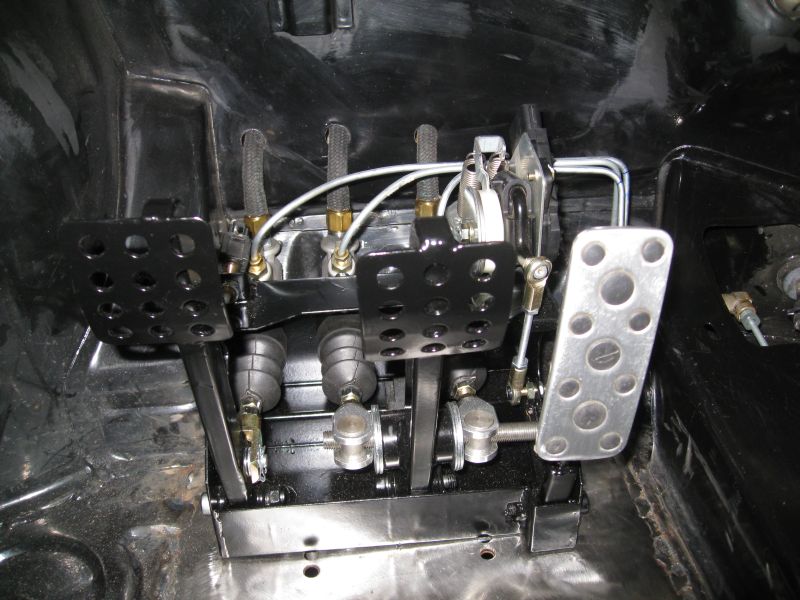
...so I took everything back out and repainted the floor for the third, and hopefully last time. No more bare metal, can hardy tell I did anything down there.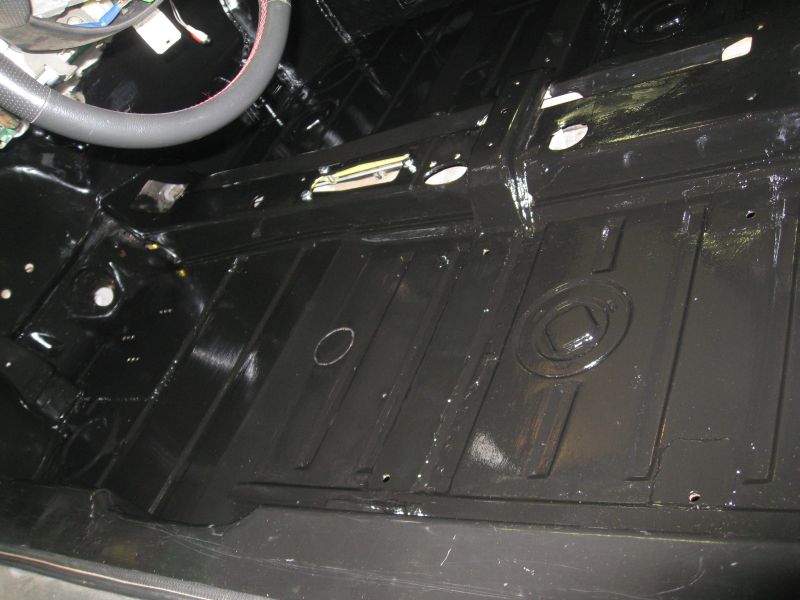
Tomorrow the engine/trans come out so that I can button everything up. There are a number of fittings and hoses that need crush washers and clamps installed/tightened.
Scott
Posted by: my928s4 Jul 26 2009, 08:05 AM
Looking great, still love looking at those welds. Good luck with the deadline !
Posted by: Amenson Jul 27 2009, 09:37 PM
Lots more progress.
Pedals are back in, hopefully for good.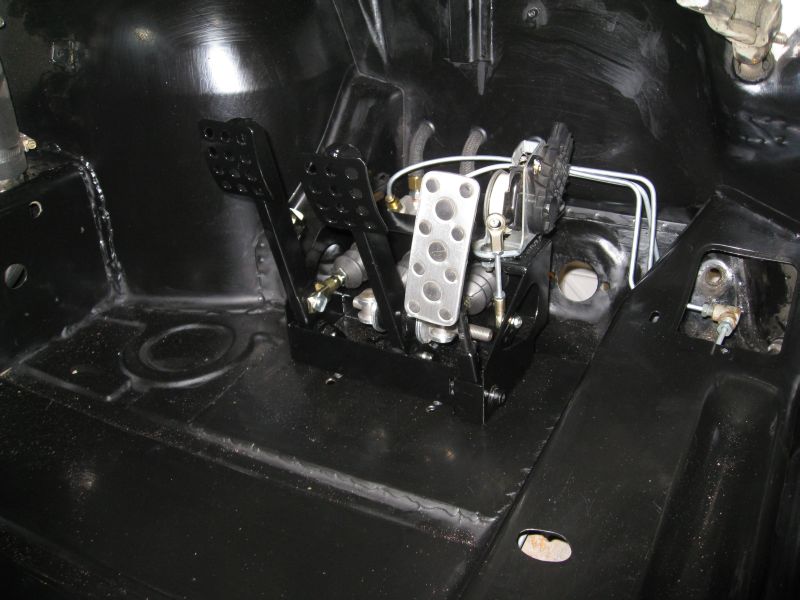
Painted the front trunk. I did not intend to paint the entire bottom but dripped paint when covering the bare metal. I figured that it would happen so I prepped it proactively. Also installed the isolating rubber. The stuff below the fuel cell is black. The high temp stuff for the radiator is red.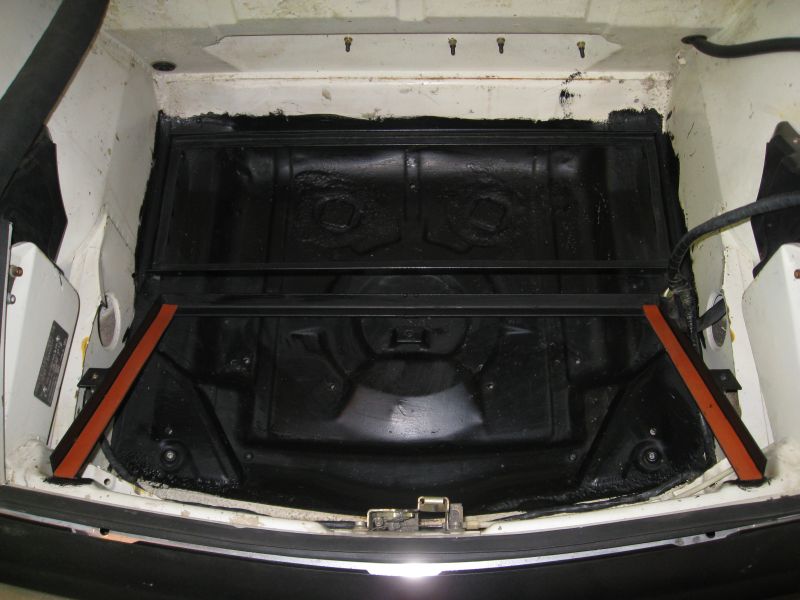
Back in, I decided to take a few minutes to paint the hold down straps as well.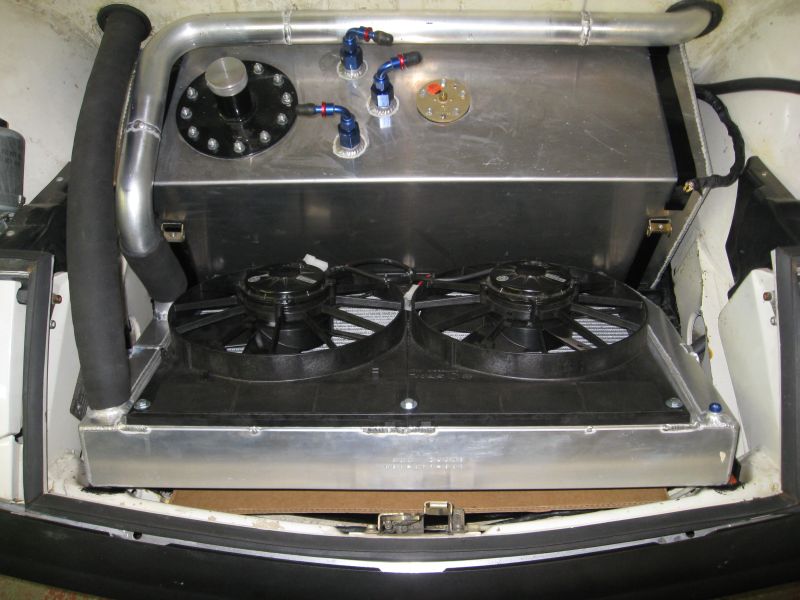
Out comes the drive-train. I tried leaving the trans mounts in place and just remove the nuts from the mounting ears...unfortunately the intercooler is in the way and I still ended up removing the mounts. I just realized that I could invert the mounting bolts so that the nuts are on top and could leave the mounts in. Any reason that this would be a bad idea?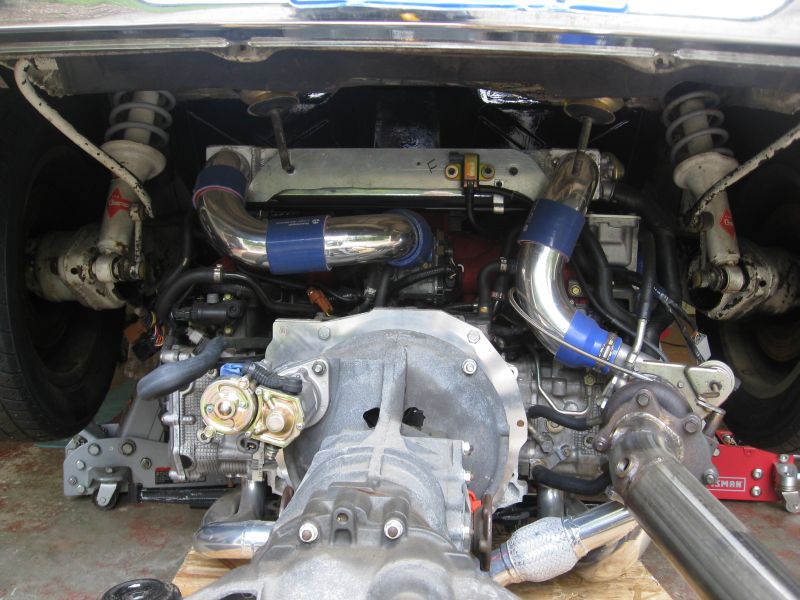
I also realised today that I did not make the exhaust so that I could remove the trans w/o dropping the header. Damn  Put that on the list for REV2.
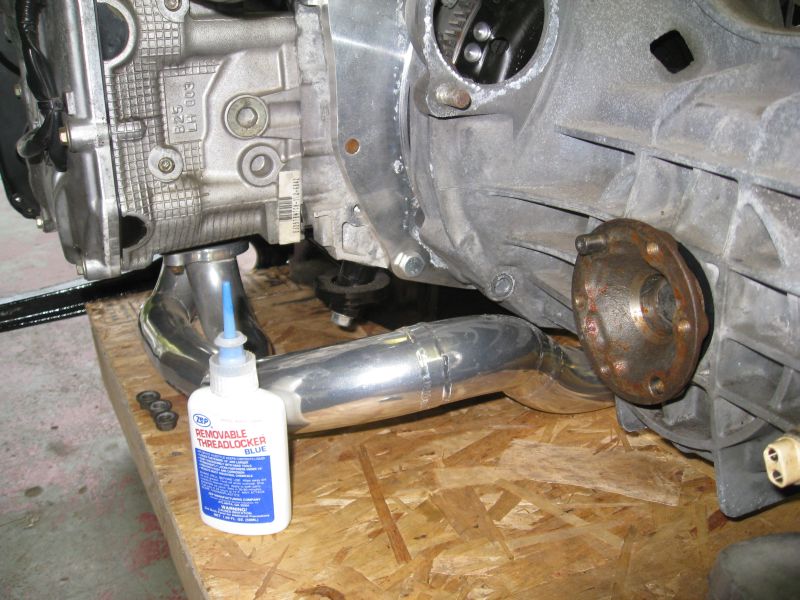
I pulled the trans so that I could clearance the clutch fork for the slave cylinder heim joint. Unfortunately I did not get a very good picture of it.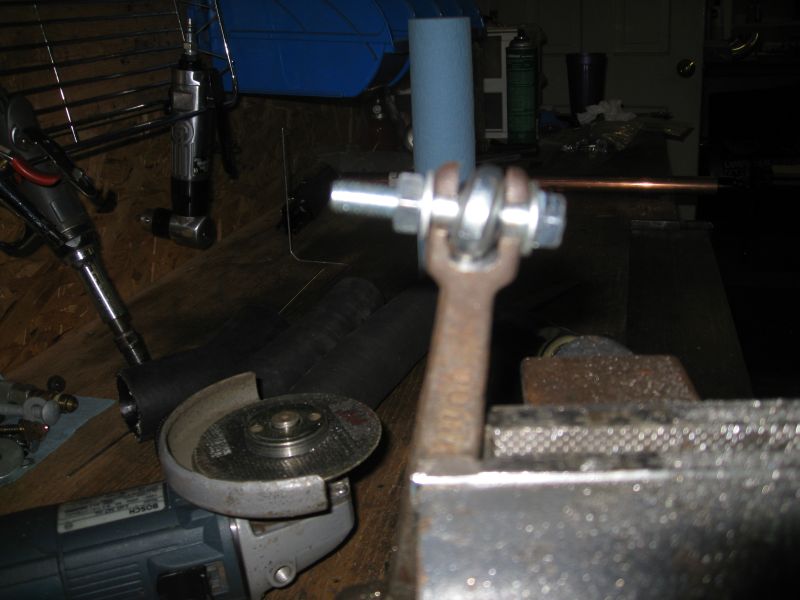
...
Posted by: geniusanthony Jul 27 2009, 09:55 PM
I kinda wanna see the bonzai that you made the tray for, Is that doable? I mean since you made it it kinda counts to the thread. You're doin great work though.
Posted by: Amenson Jul 27 2009, 10:01 PM
...
Detached Trans.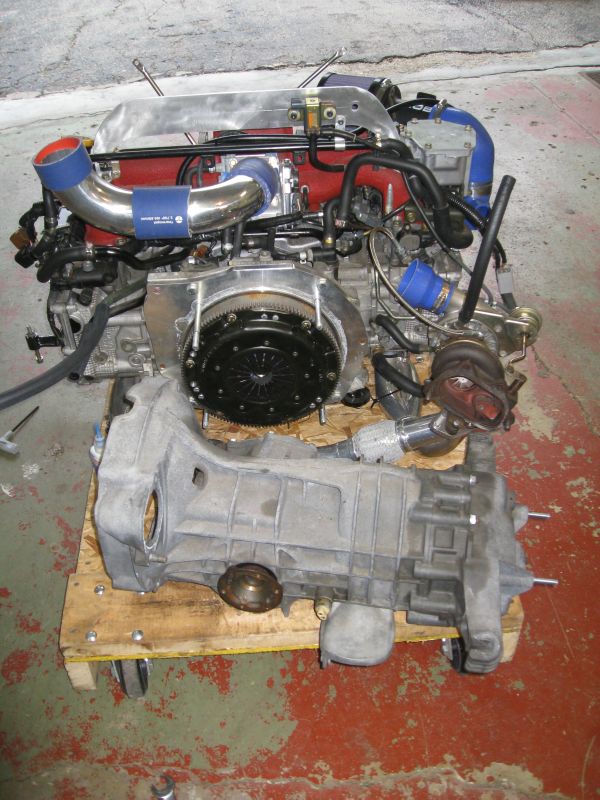
Slave cylinder attached at both ends for the first time.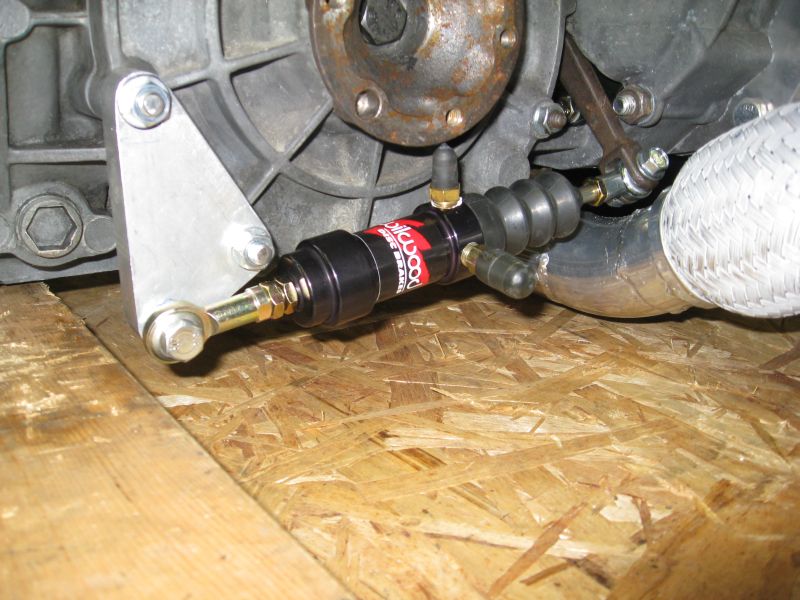
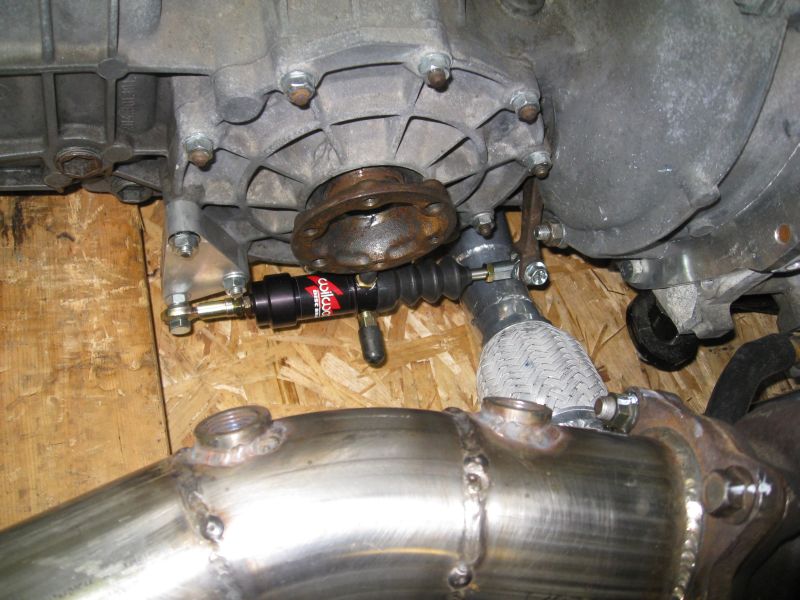
I have a bit of welding to do. Unfortunately I found that it takes more than the 30amps that I am currently fused at to weld the BOV mount. Home Depot does not carry the size fuse that I need so I am stalled until I find an industrial electrical supply shop.
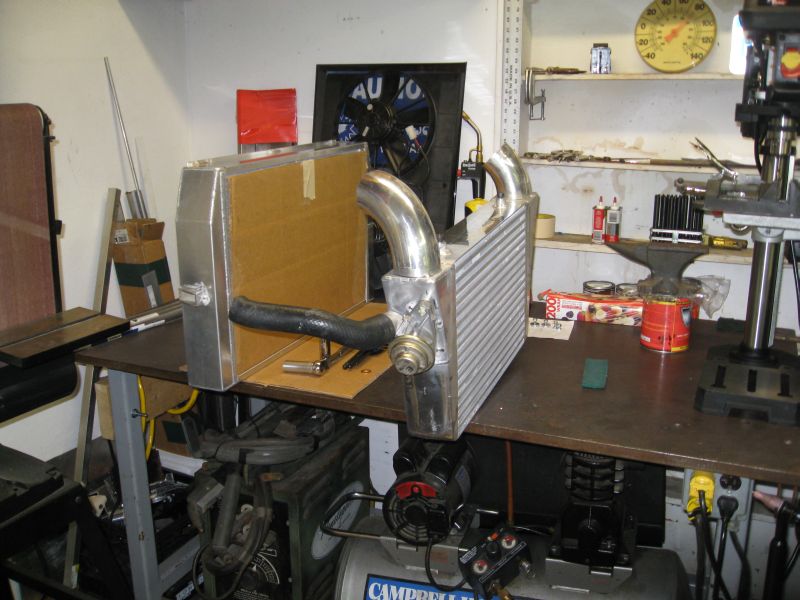
The engine after a day's work. See the difference? Didn't think so, neither can I. What is different is my confidence that nothing is going to fall off or leak once I start the thing up. I also cleaned up the intercooler mounts and a few other parts that I made before I had the belt sander.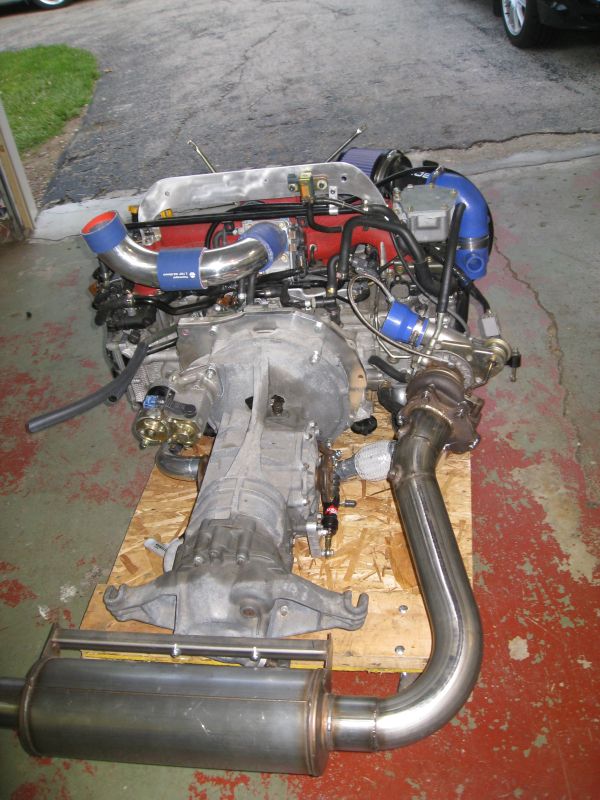
I spent the evening yesterday and this morning assisting/monitoring the owner dissemble/remove the equipment that is in the house that I should own by the end of this week. Fortunately the band saw is still here We could not come to an agreement on the price but the guy decided that he would leave it until we worked out a price or he sells it to somebody else. Based on what he is asking for it, I do not see it leaving.
Scott
Posted by: Amenson Jul 27 2009, 10:24 PM
I kinda wanna see the bonzai that you made the tray for, Is that doable? I mean since you made it it kinda counts to the thread. You're doin great work though.
No problem. I am just starting with the bonsai hobby so I harvested a sapling silver maple from my back yard that had a really nice start on some interest roots/trunk to use as a trainer tree. The little guy is a 15 year old kingsville boxwood that I picked up at the local arboretum.
The poor thing has has had a rough life. Apart from me uprooting it during the summer dormant period, one of the deer in my backyard decided that it looked tasty. He ate half of it and threw the rest on the ground.

I repotted it and it is still hanging in there. The deer gave me an excuse to experiment with a partial defoliation to promote smaller leaf and internode length.
If I can keep it alive it should be a great tree with really good character in 15 years. Scott
Posted by: GS Guy Jul 28 2009, 07:45 PM
Looking good Scott - that clutch set-up looks very familiar!
I like it as it puts the bleeder up high, and keeps any side loads off the clutch fork. Looks a little close to the exhaust? Might need a shield of some sorts?
I decided to fit a couple of springs onto mine as well - one to keep the fork compressed against the pivot bolt, and a return spring pulling the fork towards the engine (hopefully keeping any unnecessary loads off the throughout bearing?).
Couple of questions:
Any concerns about the post-turbo exhaust being bolted tightly to the trans (with no flexibility for expansion)?
Also - what kind of coupler did you find that will fit the turbo compressor inlet? Mine measures 2.2" OD - a little too big for a 2" and little too small for 2.25" connector.
Keep up the nice work!
Jeff
Posted by: Amenson Jul 28 2009, 10:01 PM
Looking good Scott - that clutch set-up looks very familiar!
I like it as it puts the bleeder up high, and keeps any side loads off the clutch fork. Looks a little close to the exhaust? Might need a shield of some sorts?
I am considering what to do about heat management. I may end up wrapping the whole left side of the exhaust to the "Y" to keep the trans and save cylinder cool. I am pretty sure that I am going to need to shield the passenger damper from the turbo as well.
Couple of questions:
Any concerns about the post-turbo exhaust being bolted tightly to the trans (with no flexibility for expansion)?
We (my buddies and I) discussed putting in a flex section when I was making that part of the exhaust and decided that it probably would be ok. Will be able to tell pretty easily if it needs one or not by loosening mounting bolts on the end of the trans after a couple hard heat cycles.
I remember having a similar dilemma. I think that I used a 2.25. I will see if I can find what I bought tomorrow.
I just finished welding the intercooler. Did not go too badly considering all of the crazy angles and vastly different material thicknesses that I had to deal with. It got a bit goobery in a couple of places but I did not blow any holes and it should be leak free and crack resistant. I made the whole thing hot enough that when I blew compressed air in one side, the air coming out the other was too hot to hold my hand in front of more than a couple of seconds.
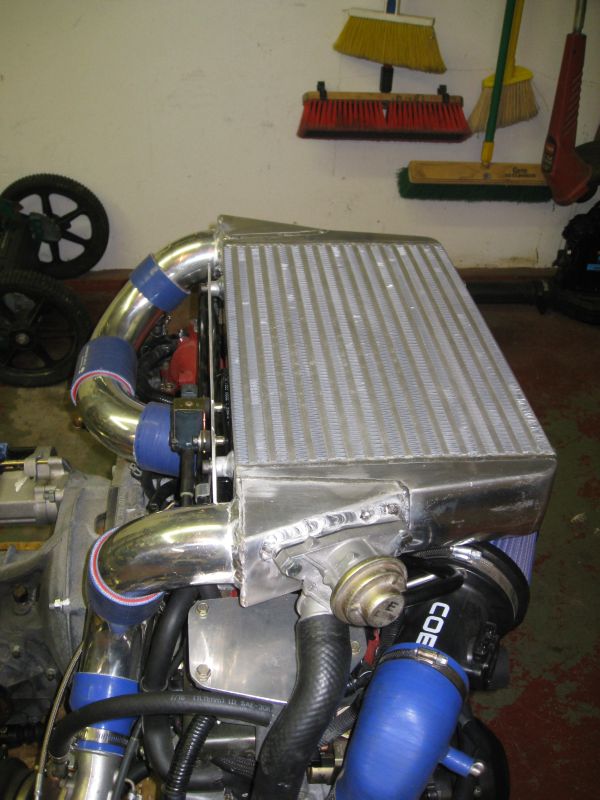
When I was shutting down the garage for the night I found myself standing and admiring the drivetrain from this angle. May just be a father's pride but damn is it purty.
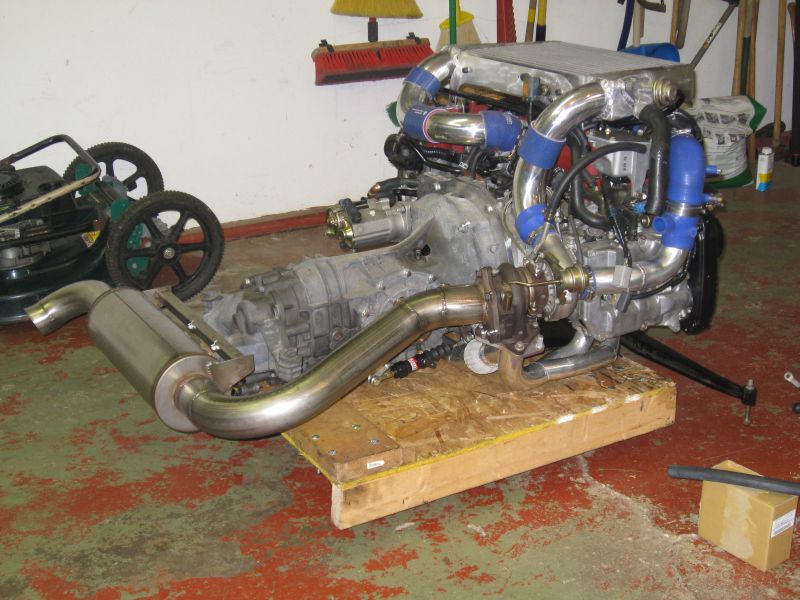
Scott
Posted by: McMark Jul 28 2009, 11:40 PM
It is beautiful.
Loving the progress.
Why not use the internal wastegate?
Posted by: Amenson Jul 29 2009, 11:07 AM
It is beautiful.
Loving the progress.
Why not use the internal wastegate?
I may not quite understand the question. I am using the internal wastegate on the turbo. Maybe you are thinking about the recirculating blow off valve on the side of the intercooler?
Scott
Posted by: kwales Jul 29 2009, 11:15 AM
Nice work!
Maybe this is the wrong time to ask, but how do you expect change the oil and plugs on that engine?
Posted by: Amenson Jul 29 2009, 04:57 PM
Nice work!
Maybe this is the wrong time to ask, but how do you expect change the oil and plugs on that engine?
Changing the oil is very easy. I ordered the oil pan with the drain in the middle of the front so when I jack up the rear of the car the oil comes right out. The oil filter is easily acessable at the front of the engine as well.
The plugs will not be so bad to change. I will have to remove the AL tube feeding the turbo but other than that there is nothing really in the way. It will be much easier than changing the plugs with that engine in the Suby, that is a pain in the ass

Scott
Posted by: kwales Jul 29 2009, 06:55 PM
Glad you thought it out.
I had visions of that engine being serviced a la Boxter- ie- everything is accessed from the bottom...
Posted by: McMark Jul 30 2009, 12:04 PM
Nope, I was confused. I understand now.
Posted by: Amenson Aug 2 2009, 09:39 PM
Lots has happened since my last post.
My wife and I purchased our first house on Friday! Thankfully it is the house that we are currently living in so the move will not be so bad...already done Now that we own it the house projects will start ramping up, yet another good reason to get the car on the road in the next 2 weeks.
Suby wires touched the car for the first time. Had to make the mount for the main fuse box before the engine went back in. The harness was quickly returned to the basement for further modification.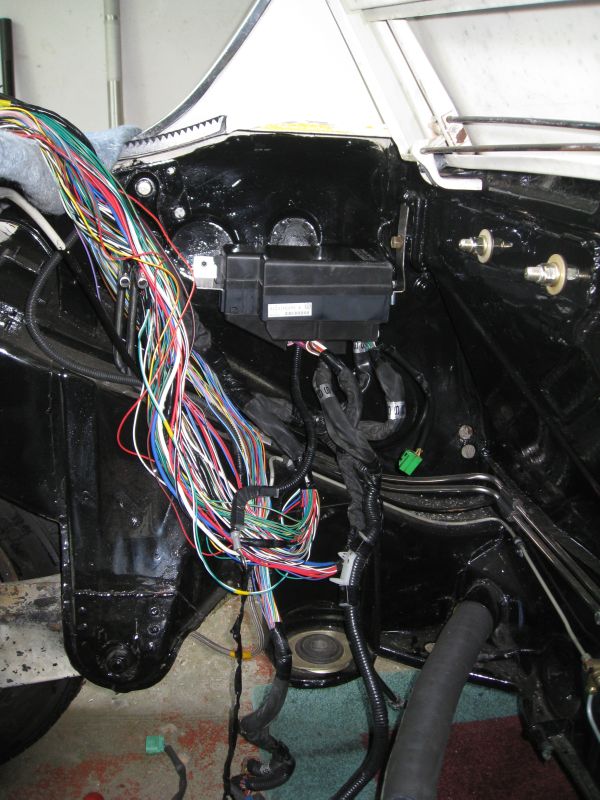
While going through the parts bins I realized that I forgot to install the gaskets for the timing belt covers, so off those came. While I was in the area I helicoiled the alternator/PS bracket bolt that the dealership stripped when I brought the donor car to them for a new power steering pump. 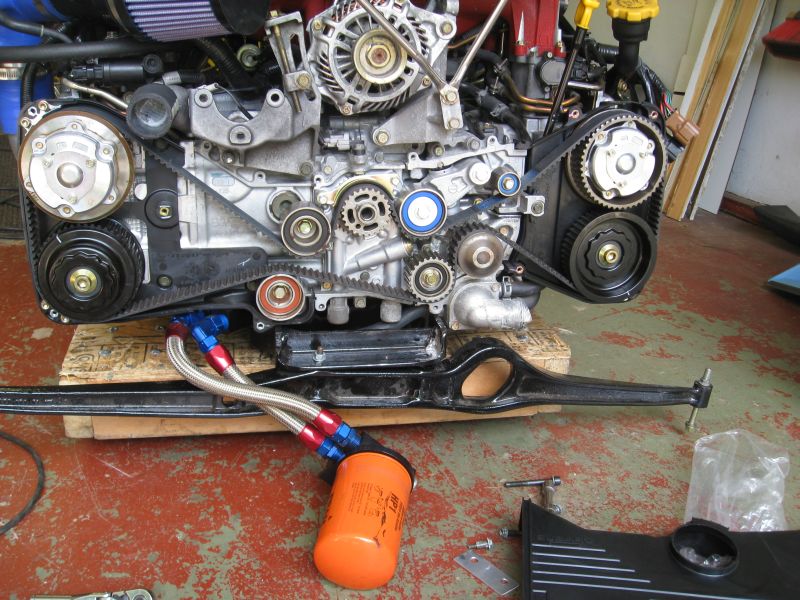
Hopefully the last picture of the firewall like this for a while. I went through and tightened everything while I had easy access.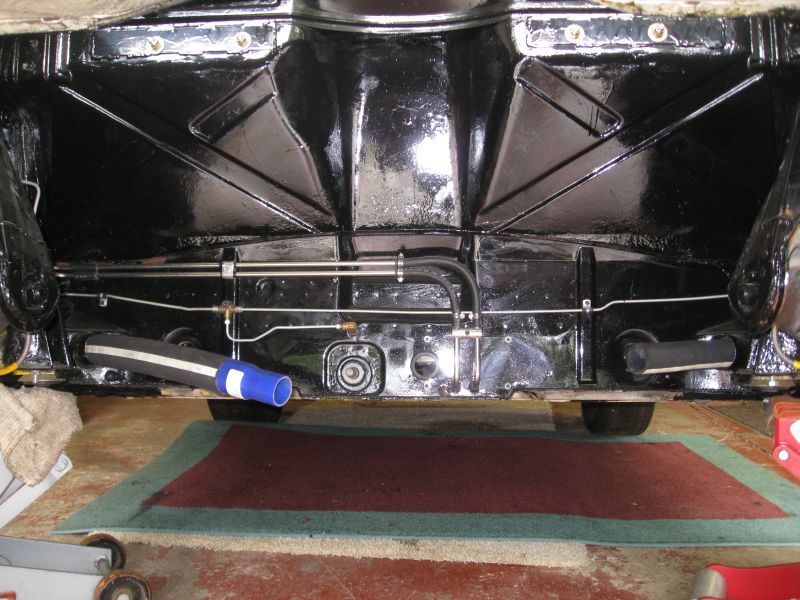
...
Posted by: Amenson Aug 2 2009, 09:47 PM
...
A gratuitous glamor shot on the way back home.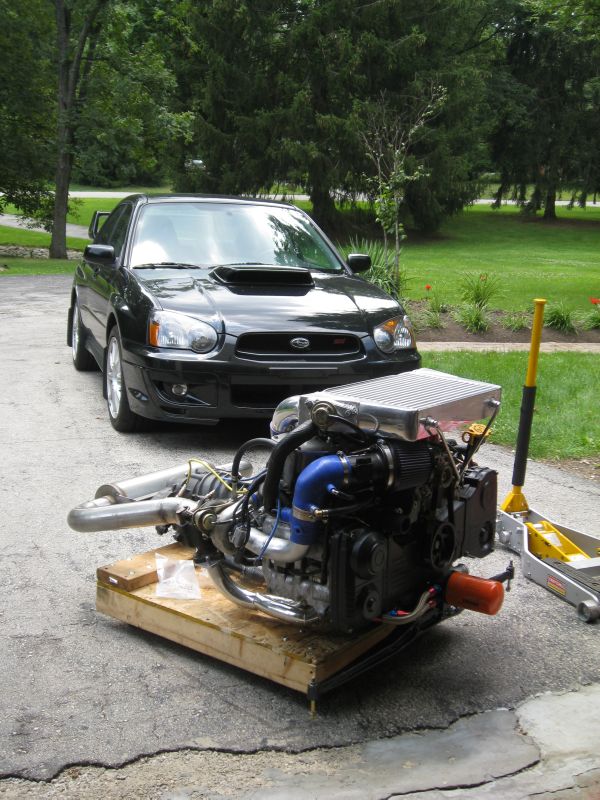
Home again.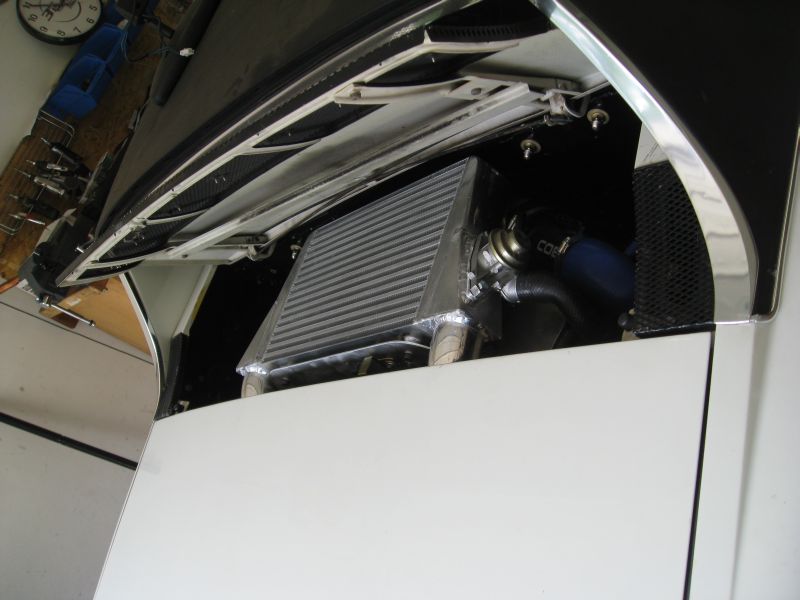
Made and mounted the line for the slave cylinder. Can't hook it up because my SnapOn inverted flare took broke. This is the first really crappy tool that I have purchased from them.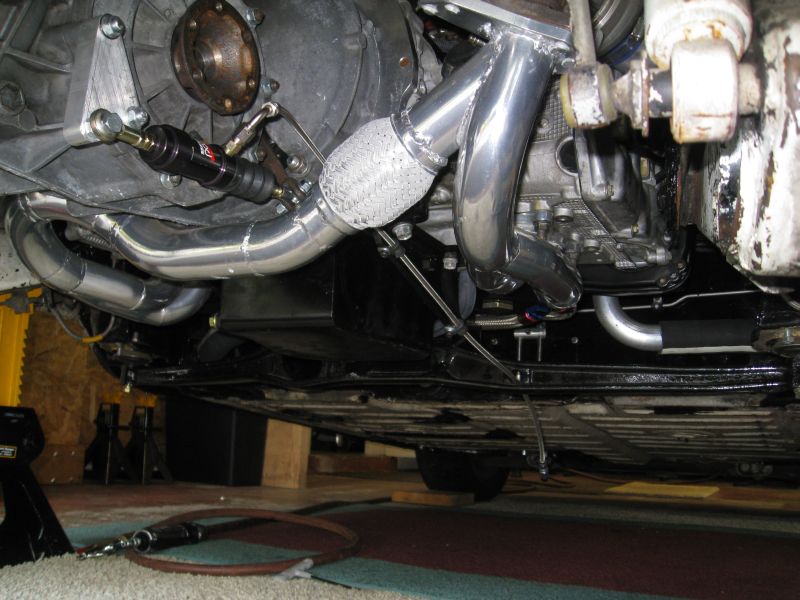
Shift linkage is in.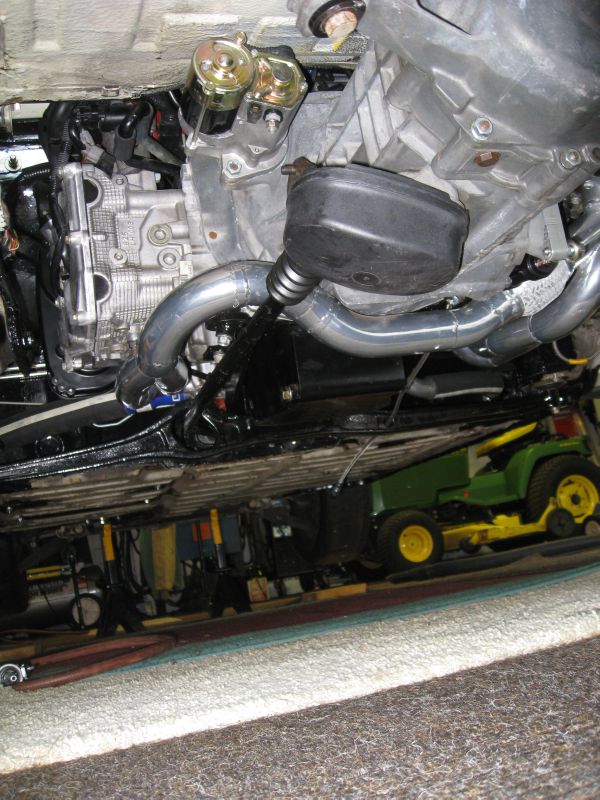
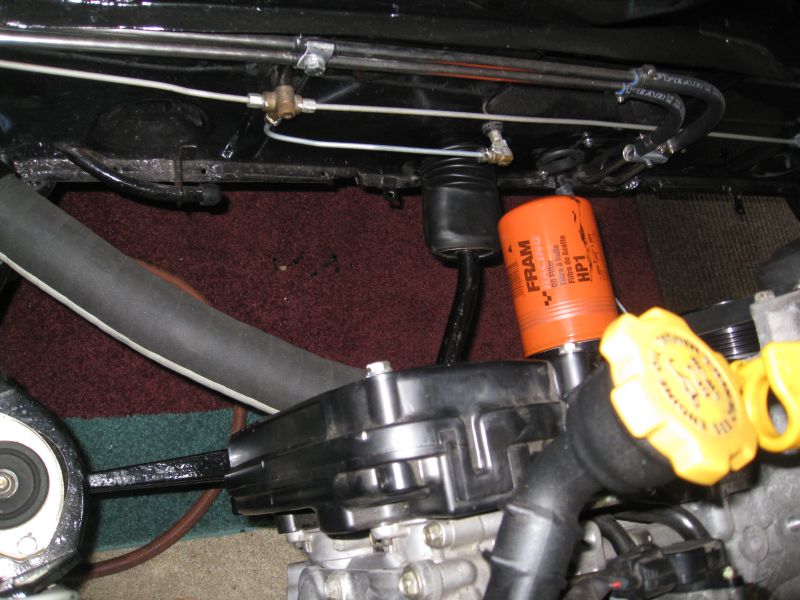
...
Posted by: Amenson Aug 2 2009, 09:58 PM
...
Also installed the drivers seat and shifter. I was going to leave the seat out until the last minute to keep it from getting scuffed up but decided that it would probably be a good idea to give my wife someplace to sit when she is helping me bleed the brakes. Plus it makes the car seem more drivable 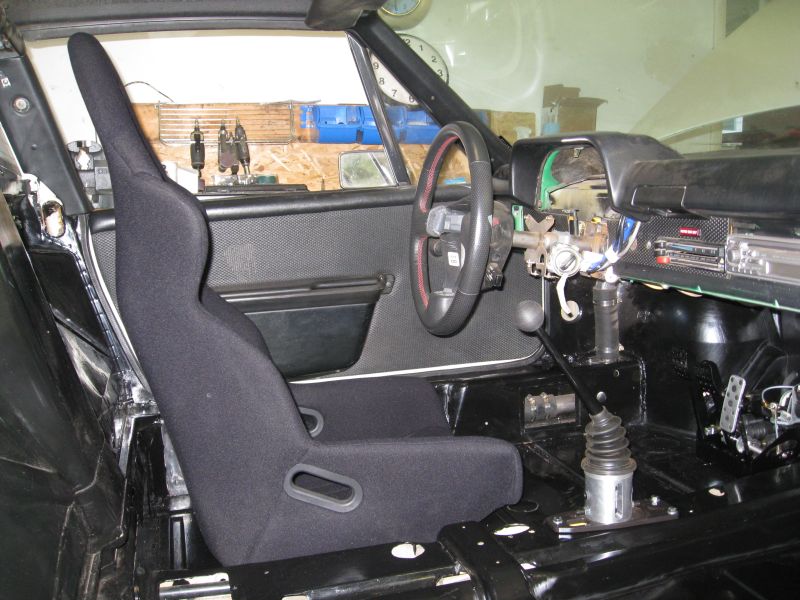
I still have some mechanical stuff to finish up but am going to start spending the majority of the time working on the wiring. Less than 2 weeks until Woodward, must stay focused. 
Scott
Posted by: pktzygt Aug 3 2009, 03:27 PM
I'm really jealous. I'm still in the staring at the motor in the car and wondering how to reconnect all the loose vacuum lines and plugs. Then I still need to figure out how to get an intercooler to stay put in there.
Posted by: Amenson Aug 3 2009, 05:10 PM
I'm really jealous. I'm still in the staring at the motor in the car and wondering how to reconnect all the loose vacuum lines and plugs. Then I still need to figure out how to get an intercooler to stay put in there.
You would not be jealous if you knew how much time it has taken to get this point.
I would recommend going to the Subaru technical website and download the factory manual for the engine"s donor car. Very useful stuff.
Oh, and it really helps to have the same car that the engine came from in your driveway to look at when you get stuck
Keep at it,
Scott
Posted by: Amenson Aug 5 2009, 09:42 PM
Still plugging away.
My new flare tool came in so I finished the clutch plumbing.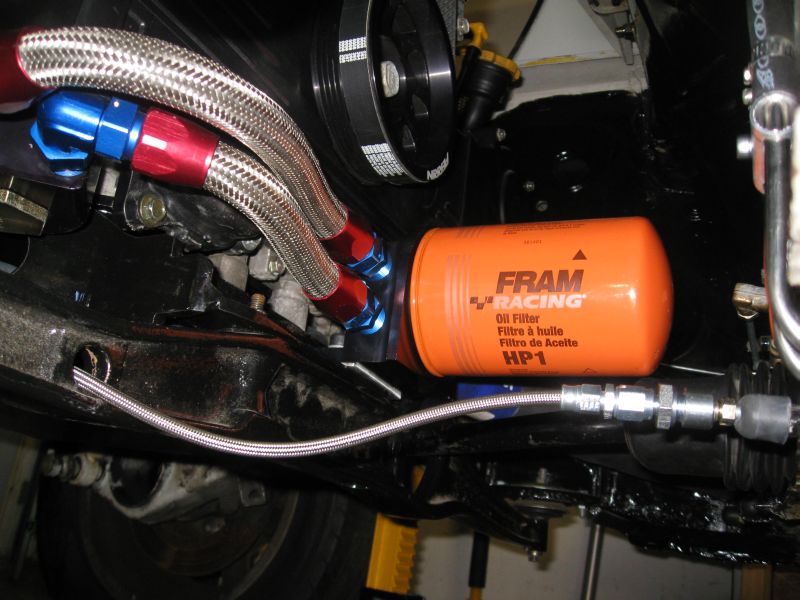
Figured I should give it a try so I bled all three new hydraulic circuits. Takes a while to fill all those lines but got it done with the help of my wife. The clutch seems to work very well. The brakes are, well...stiff, to put it mildly. The master cylinders are sized for the new calipers, not the ones on there now.
First fluid in the car!!!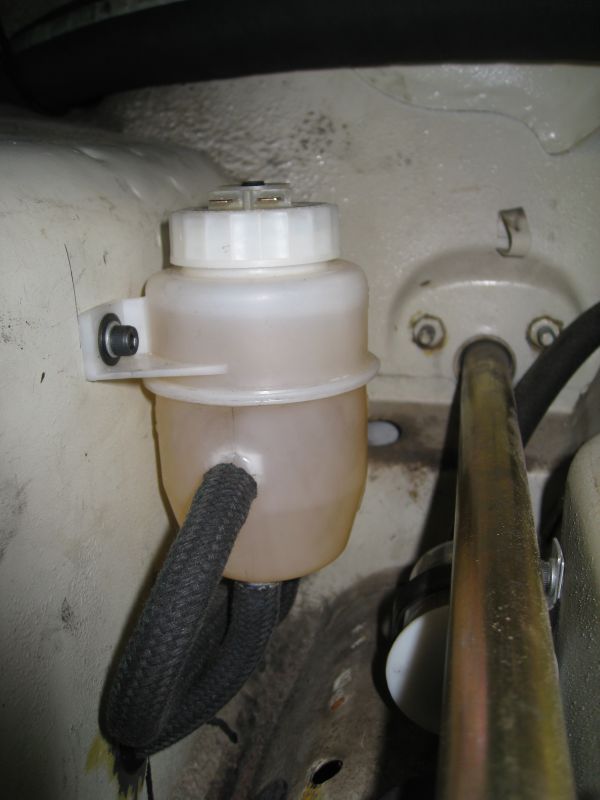
Looks so sad up on the stands w/o wheels.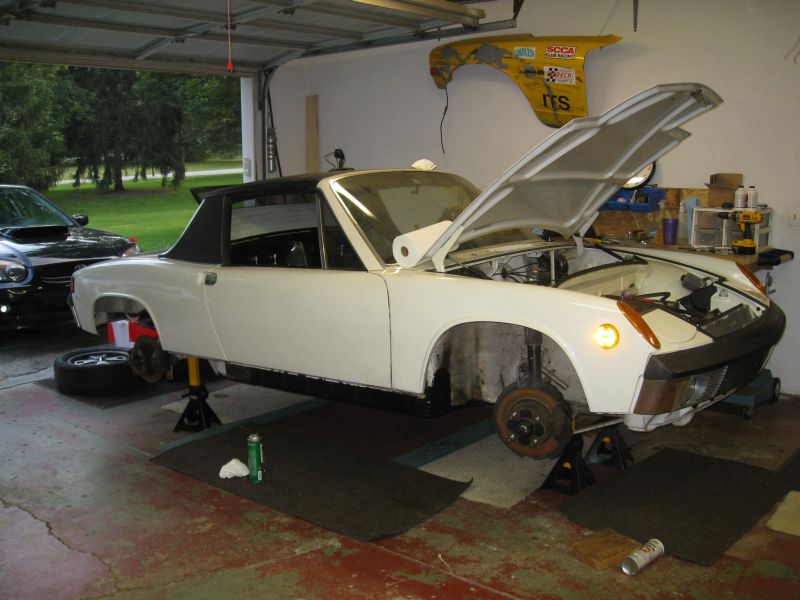
I also installed all of the intake plumbing clamps. Bought a boatload of T-clamps and it was so tight in places that I had to resort back to regular old hose clamps.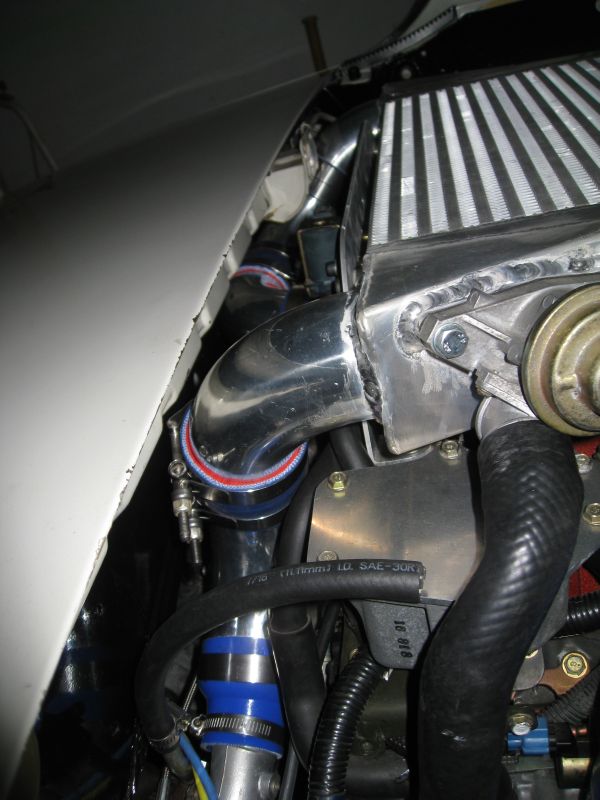
And installed the driver's harness. Unfortunatly it might not work very well because I am probably going to run out of adjustment. The belts are made to be installed in normal sedans with a much larger gap between the mounting point and the seat.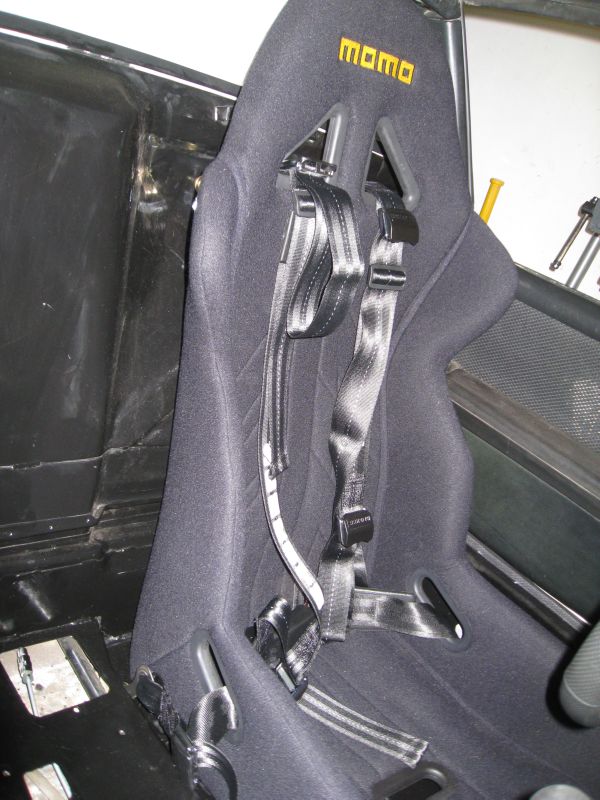
Did a bunch of other things not picture worthy like install the rubber strip under the fuel cell straps and tighten everything up, ran the soft part of the return line, set all of the steering coupler positions and tightened everything down, and worked on the wiring harness.
Still more to go but the end is in sight.
Scott
Posted by: Amenson Aug 7 2009, 09:07 PM
Today was harness day, and what a day it was.
Apparently this is what I look like after 10, nearly continuous, hours of working on the harness. Not pretty 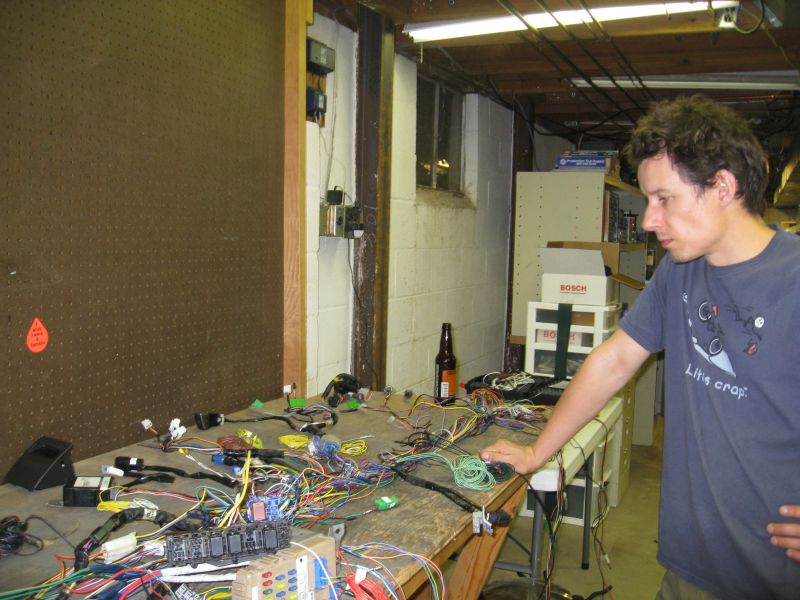
This is what I removed.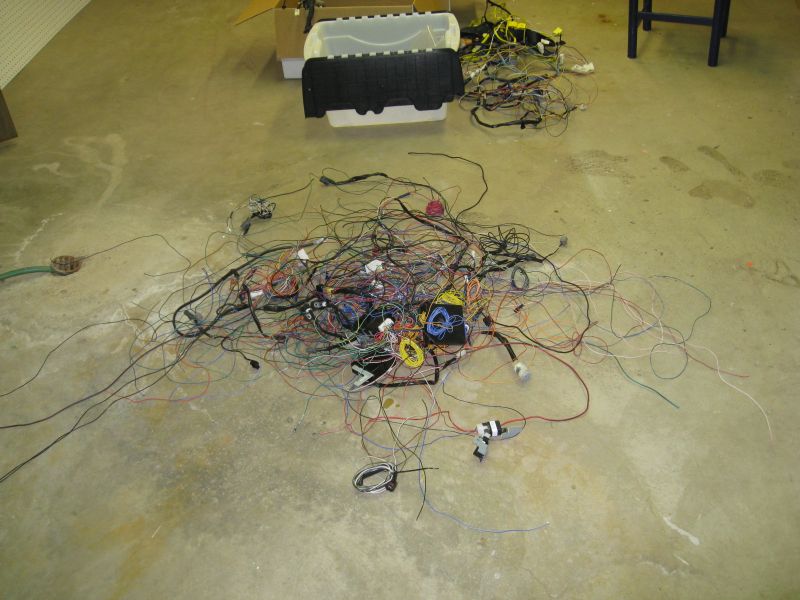
This is what is left.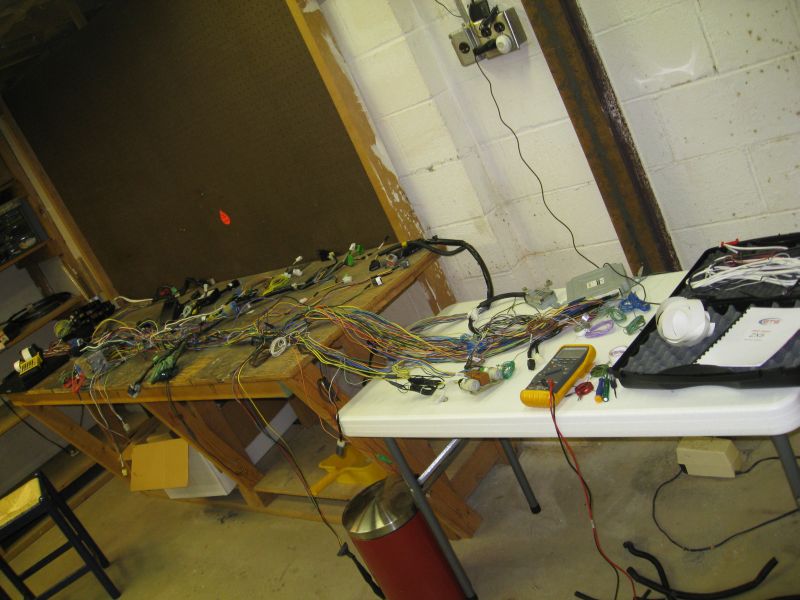
I can't seem to find the main cruise control switch, rear blinkers, or brake lights. Other than that, everything that I need is there and labled. There are a few things that I have not identified yet. Hopefully get these things figured out first thing tomorrow morning so that I can wrap it up a bit and lay it in the car to see where things will mount and how much I will need to extend parts of the harness to get to the front of the car. I know that the harness in the back could be shortened up a bit but that will be a winter project. Now I just need to do what is necessary to get it running.
Scott
Posted by: Amenson Aug 9 2009, 10:35 PM
Still not running. It seems like the to do list is infinite, just when I think that it is getting shorter I find new things to add. I was really hoping to have it running today. Not going to happen. I did take tomorrow off from work so I should be able to get it to fire tomorrow.
Here is the harness pretty much ready to go for initial fitting.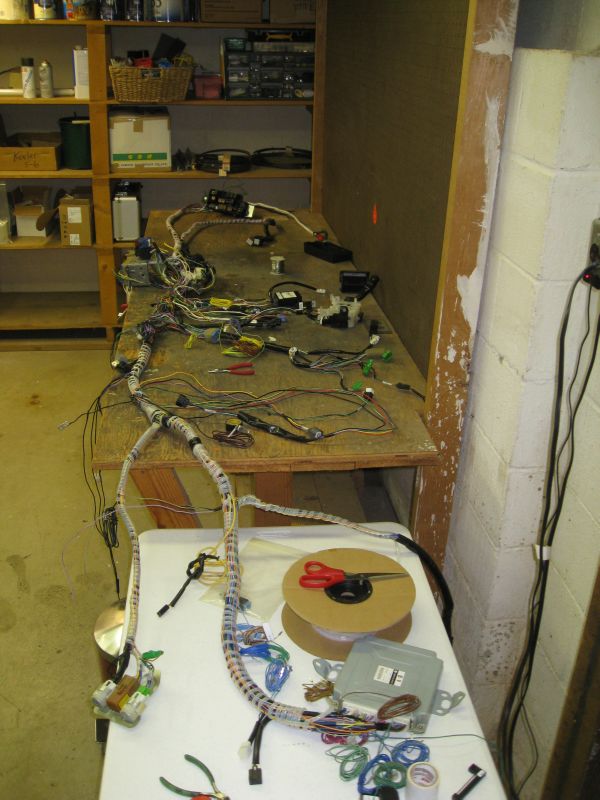
Subaru made the main chunk of the harness in two parts that seperate by a load of connectors. Here is the left half.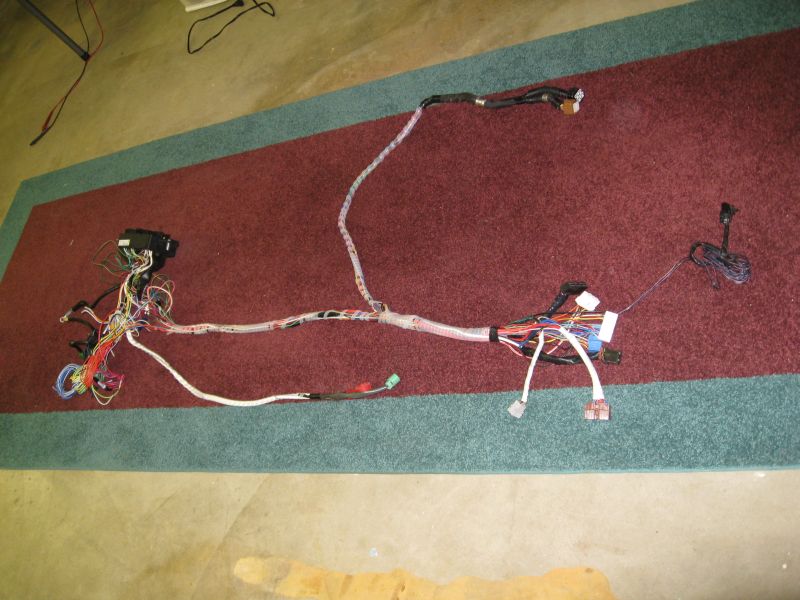
In the car. The loose wires dangling below the fuse box are the radiator fan and headlight circuits. They will be extended to the front and then wrapped.
I decided that in order to reduce the potential bugs, I would start the engine before I start lengthening the harness to the front. This means that all of the switches, sensor, etc will be in the trunk for startup. Once everything is working as expected I will start cutting/splicing.
Finished the top to the coolant filler tank. It was nice to pick up the torch again after staring at wires for 3 days straight.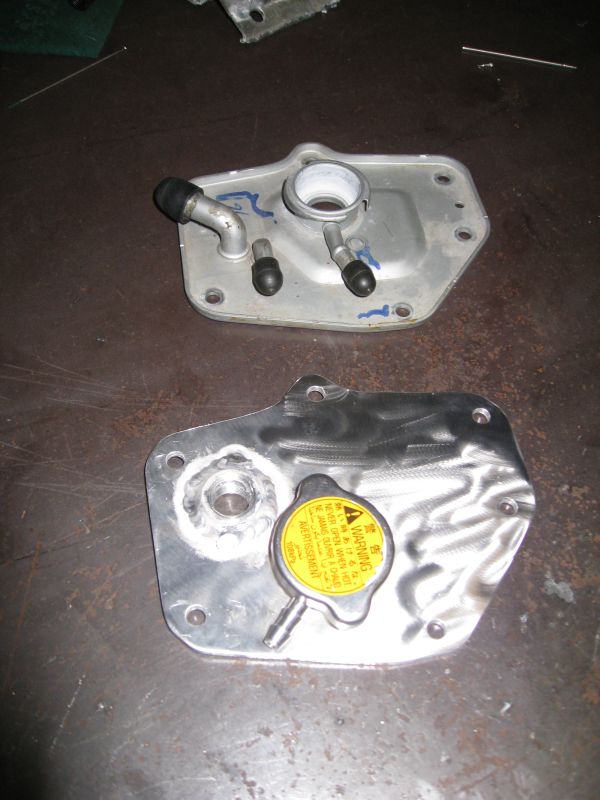
Filled it with trans fluid and oil.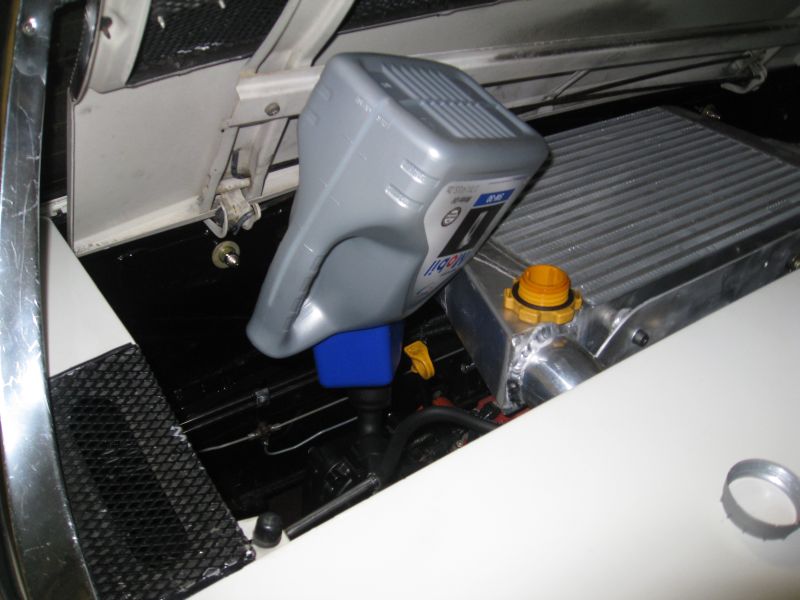
Also wrapped the exhaust going under the trans and tidied up/tightened a load of other things. It is going to be very tight getting it ready for next weekend but there is still a real chance. Tomorrow will tell.
Scott
Posted by: Amenson Aug 10 2009, 10:17 PM
Running!!!
https://www.youtube.com/watch?v=kembTjP-4ao
It would have started on the first turn of the key had I remembered that the clutch needs to be pressed. The ecu is not entirly happy and then there is the small matter that everything is still in the trunk. Oh, and based on the valve noise I did not quite get the valve clearances quite right.
Much more to do and not much time before Woodward. I have had it for today, time for bed.
Scott
Posted by: championgt1 Aug 10 2009, 10:34 PM
Congrats! Just the fact that it runs has to be a huge success. What a cool project.
Posted by: VOX Aug 11 2009, 12:51 AM
whoo congratulations!
Posted by: Zaney Aug 11 2009, 09:23 AM
Great Job Scott!!!!
The attention to detail is simply awesome! This thread shows that it can be done!!
(now it is time for a WRX tranny!  )
)
Good luck for the Cruise!
Nate
Posted by: Amenson Aug 11 2009, 11:01 AM
Great Job Scott!!!!
The attention to detail is simply awesome! This thread shows that it can be done!!
(now it is time for a WRX tranny!
)Good luck for the Cruise!
Nate
Thanks the positive feedback guys
The accomplishment feels a little better today after a good night sleep. I was a bit exhausted and overwhelmed by the thought of the work required over the next few days to enjoy the moment. Just ordered an AccessPort to help work through debug...and no, I will not change to the stage 2 map.
I will go through a couple 901's before I switch to a WRX tranny, hopefully by then someone will have a really nice shift linkage worked out.
Cheers,
Scott
Posted by: charliew Aug 11 2009, 06:49 PM
Nice work, I'm sure the wiring is tough. Disabling the cells will be a trick. My son's subaru mag says that subaru now has a 6 spd the same size as a 5 spd although I don't know what ft lbs it will handle or if it will convert to the front wd like the 5 spd. They also have a cv tranny but it's not in the turbo cars.
Bummer about the valve lash though.
This winter you might want to check out romraider for your tuning although the drive by wire makes it really complicated.
Posted by: roadster fan Aug 12 2009, 03:46 PM
Keep it up, it will be drivable in no time. Awesome!
Jim
Posted by: Amenson Aug 29 2009, 09:48 PM
About time for another update. I have spent the last couple of weeks trying to find a reason not to open the engine up again. Checked the valve clearance...3 times, all ok. Compression check, fine. Leakdown...better than perfect. Fire up the engine, still clacking. WTF. Finally decided to open her up.
Where did all of this crap come from?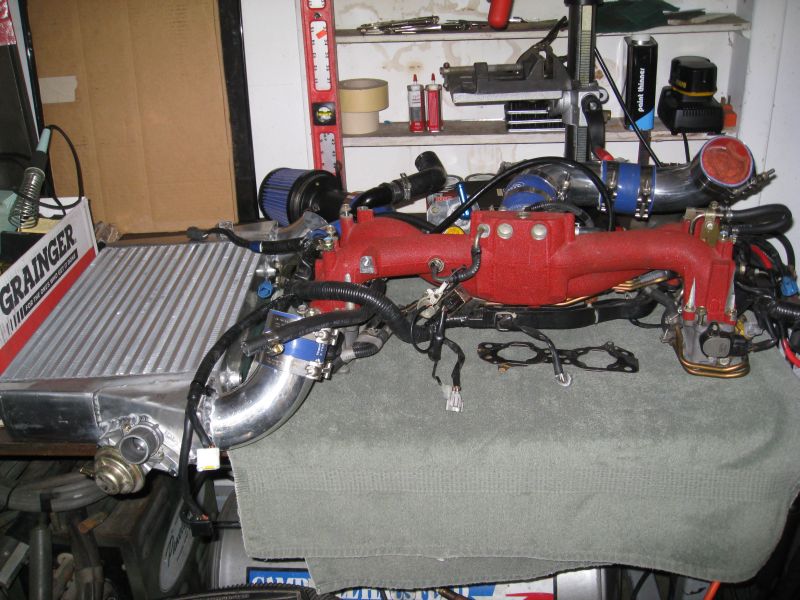
Oh, from here.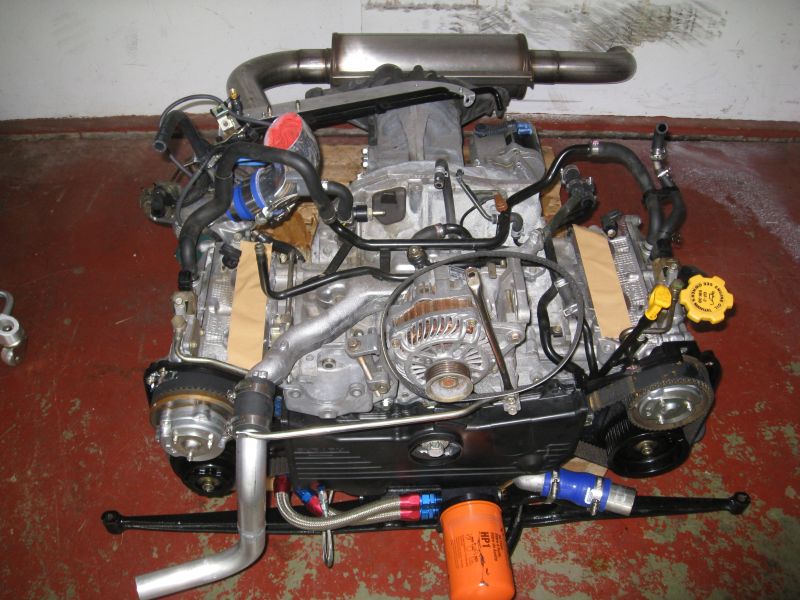
What is wrong in there?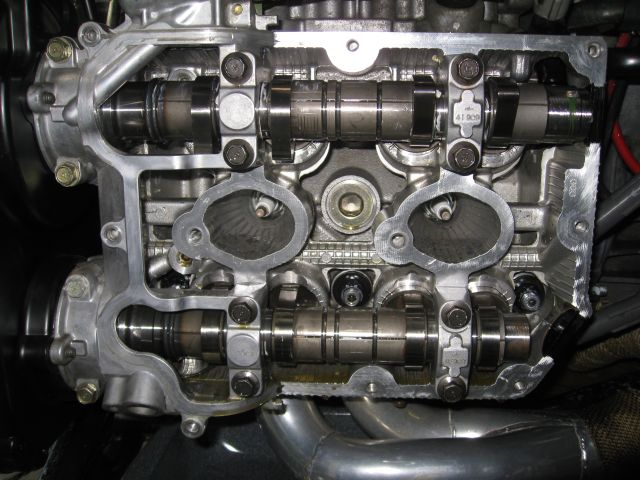
Nothing obvious here.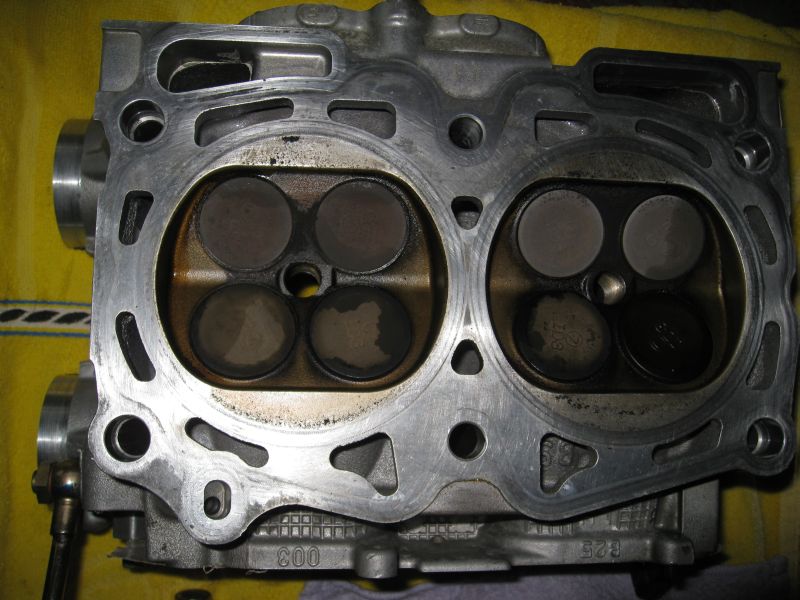
Is this one straight?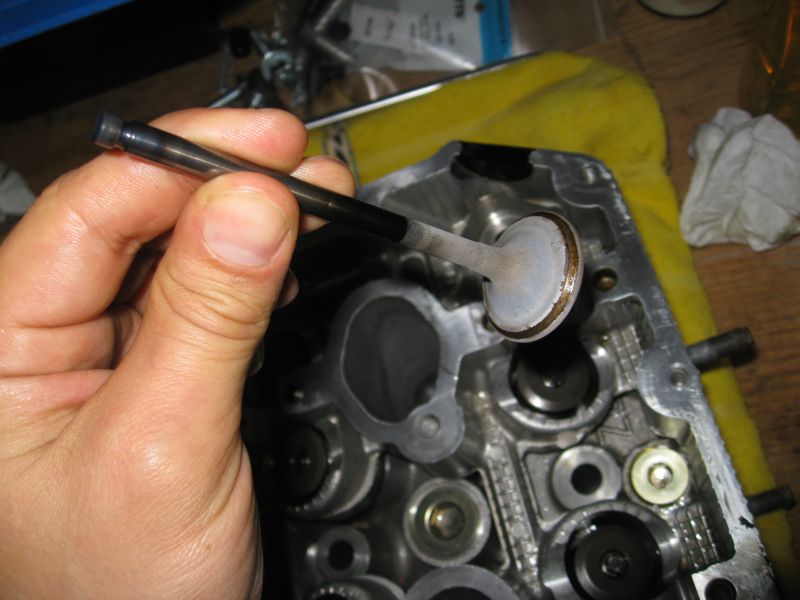
A spin in the drill says yes.
...
Posted by: Amenson Aug 29 2009, 09:52 PM
...
Six of the first six show straight as well. I am starting to get concerned that I my prognosis of bent valves was incorrect. The last two did not disappoint. This is not an optical illusion.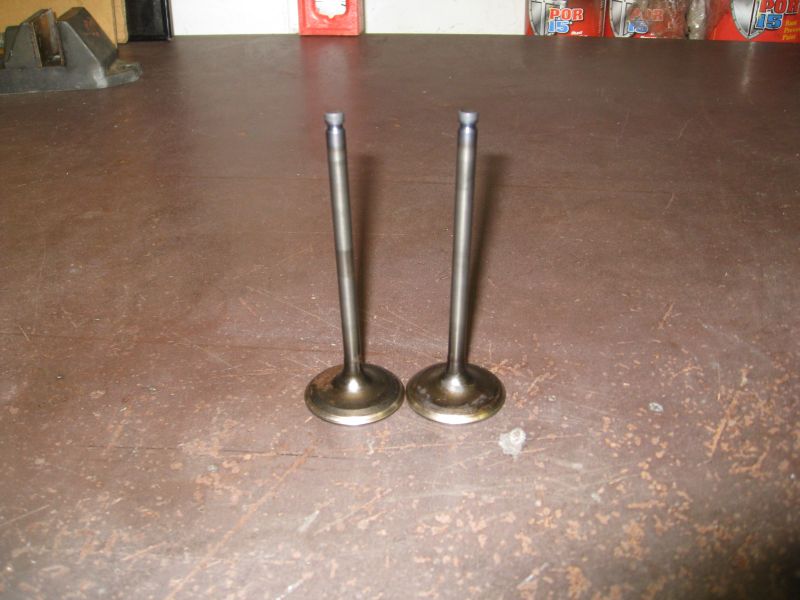
A few calls to the regional Subaru dealerships and I have 2 new valves and some gaskets. Time to put it back together...it really looks pitiful.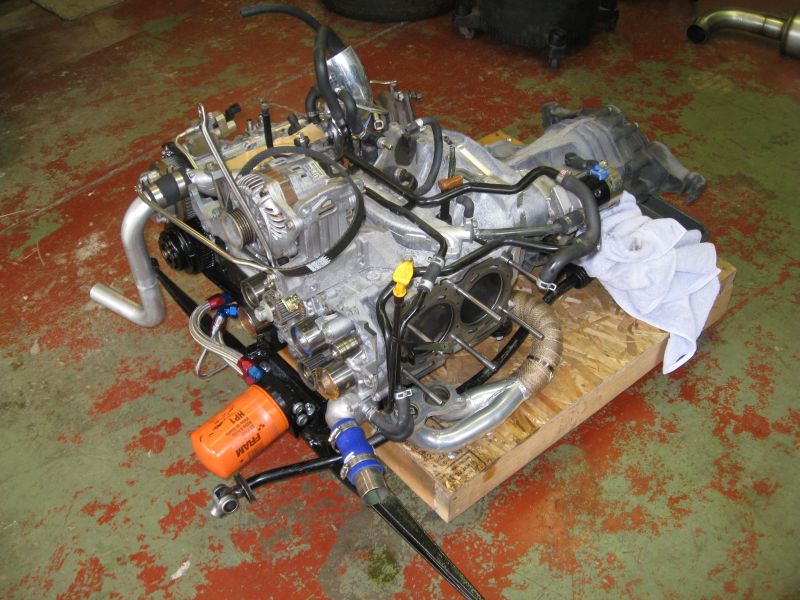
Valves are back in.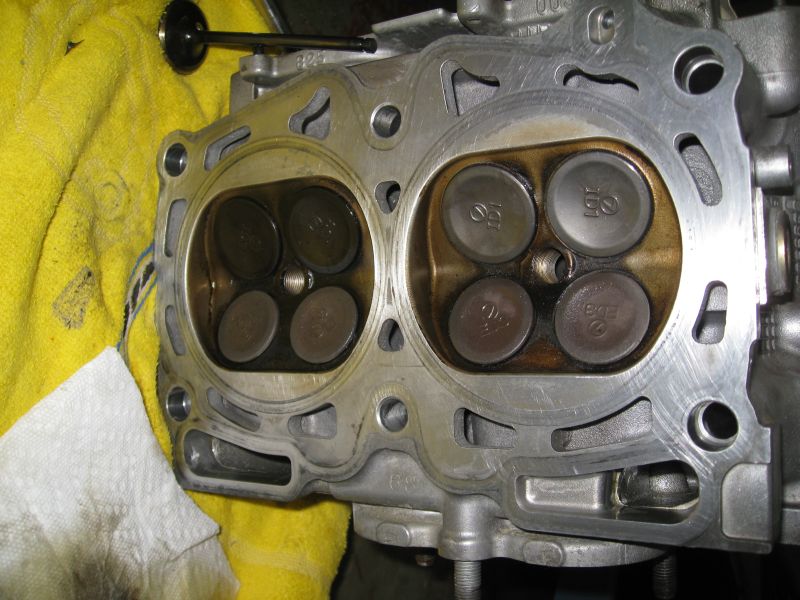
Put it it back together.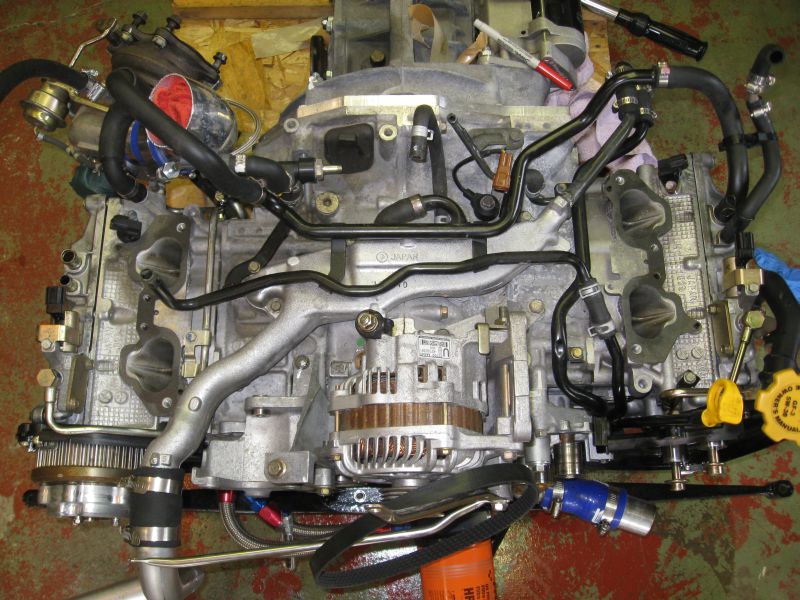
...
Posted by: Amenson Aug 29 2009, 09:57 PM
...
Starting to look like an engine again.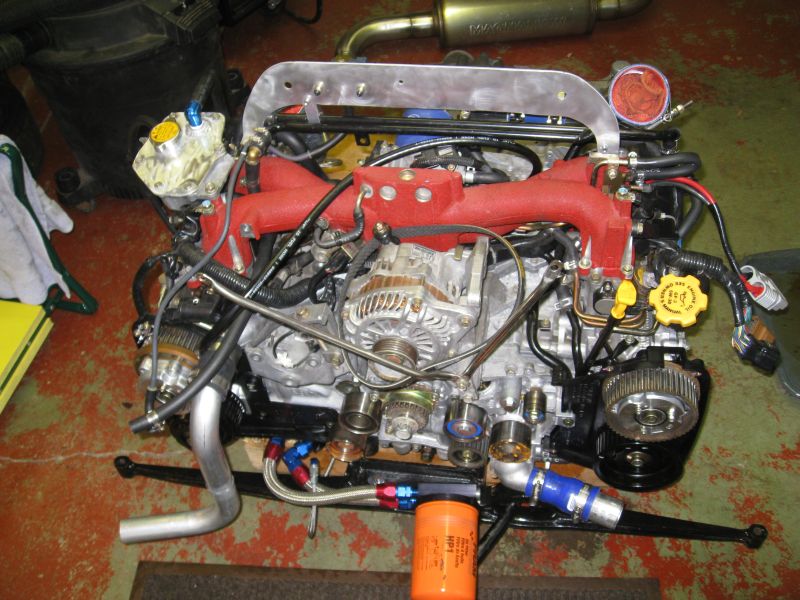
Button it up and stick it in.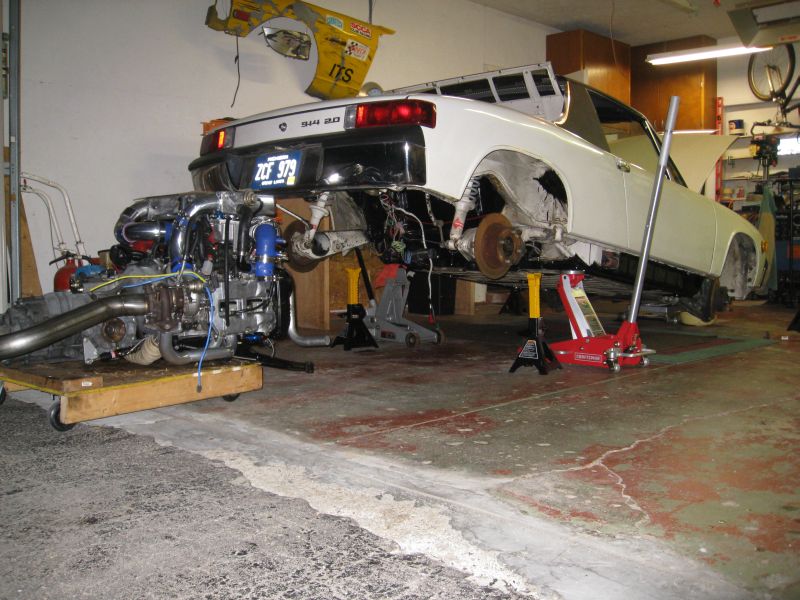
Home again.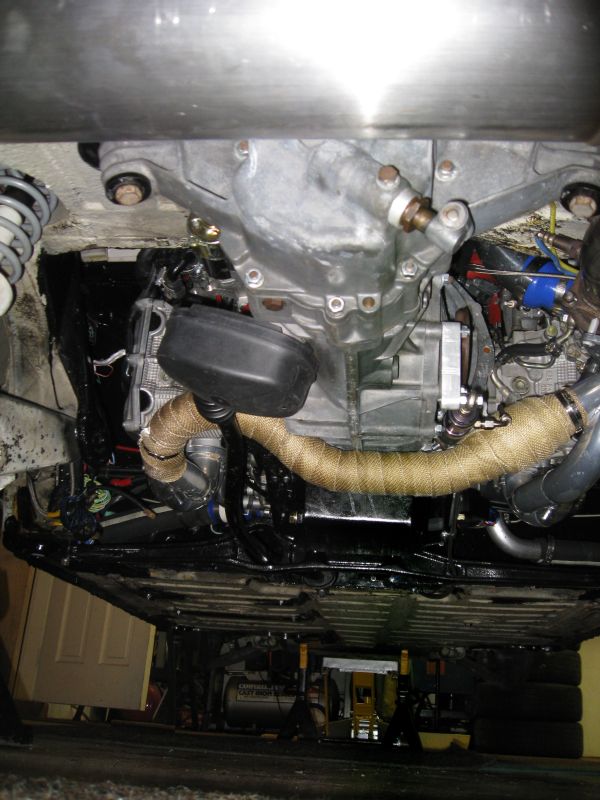
I will connect and start it up tomorrow. Man I hope that it is ok now.
Scott
Posted by: Amenson Aug 30 2009, 11:51 AM
I will connect and start it up tomorrow. Man I hope that it is ok now.
Back in business. The only noise it is making now is the sweet, sweet music of a boosted flat 4.
Scott
Posted by: charliew Aug 30 2009, 05:39 PM
When did the valves get bent? If they touched the piston there is a chance the rod inserts got mashed. I guess only time will tell at this point. You can check for bent valves by putting some naptha or mineral spirits in the combustion chamber with the head setting level, if it doesn't leak past the valves they are good. How can a bent valve pass the leakdown test? Also a bent valve would cause more bucket clearance than normal because the valve is not completely on the seat.
It's great that it is now quiet.
Posted by: Amenson Aug 30 2009, 06:57 PM
When did the valves get bent? If they touched the piston there is a chance the rod inserts got mashed. I guess only time will tell at this point. You can check for bent valves by putting some naptha or mineral spirits in the combustion chamber with the head setting level, if it doesn't leak past the valves they are good. How can a bent valve pass the leakdown test? Also a bent valve would cause more bucket clearance than normal because the valve is not completely on the seat.
The valves probably got tweaked in the accident or I could have twisted the cam when I was not supposed to when I was reassembling the engine for the first time.
The valves would seat fine. They were bent just enough to come into the seat out of alignment and then snap into place...noisily. With the valve springs out I could get them into the seat with only a very small amount of force with my hand. So, it is possible to have good leakdown and valve clearance readings with a bent valve. I would assume that my engine would have passed your mineral spirits test as well.
I learned many valuable lessons with this fiasco.

Scott
Posted by: budman5201 Aug 30 2009, 08:00 PM
Hey Scott,
My engine was noisey too when i first started it up. I think mine was sitting in a japanese junkyard for years before i got my hands on it. Not until about and hour running and a quick first oil change did it quiet down. Oh yeah by the way, the more on tune my engine got (aftermarket computer) the quieter it got. Purrs likes yours does now.
Now if it wasnt for that pesky A/C compressor thats going out it'd be quiet again....Next item to fix!
Posted by: charliew Sep 8 2009, 05:17 PM
The early tt dohc motors (96) had hydraulic lifters and they are notorious about being gummy and noisy. Sometimes they need to be removed and cleaned to get to run quiet.
Posted by: Amenson Sep 12 2009, 04:47 PM
It had been a while since I have had a sense of accomplishment so I decided to make the front filler tank today.
I was planning to order all of the fittings and material and making one from scratch until I found this one at Speedway Motors for nearly the same price as the parts I needed. Of course it did not come pre-cut.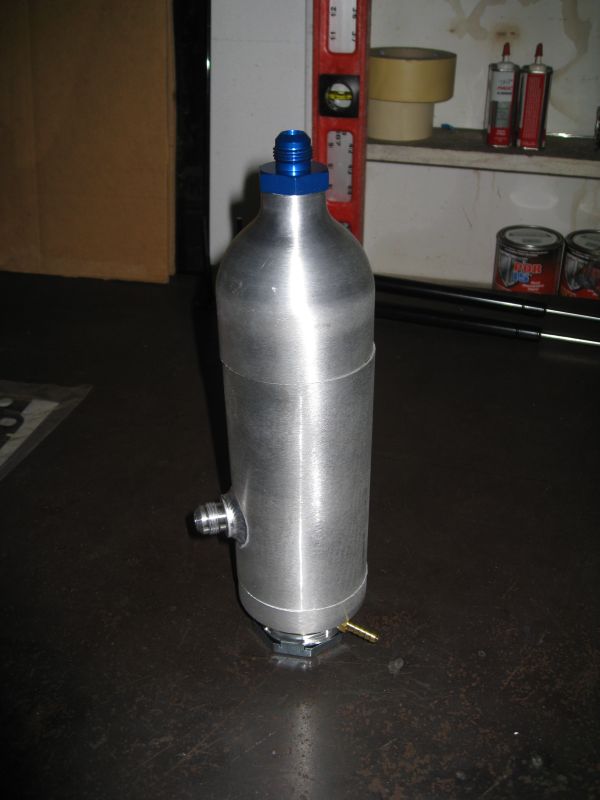
Down to size: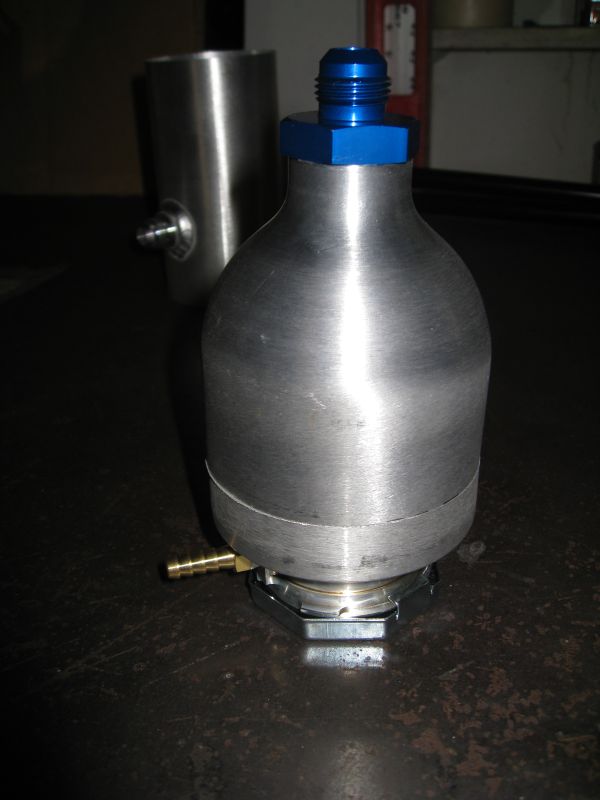
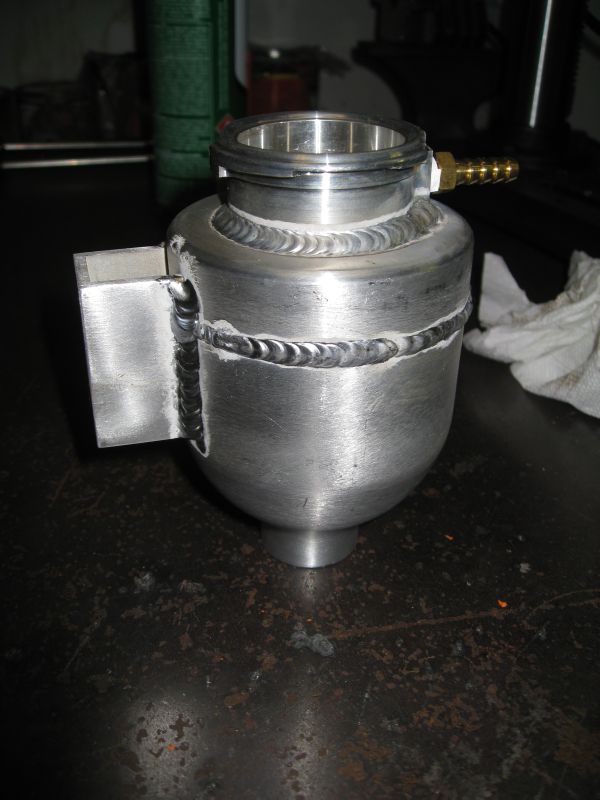
Installed, forgot to order the barb fittings so I can not hook it up yet.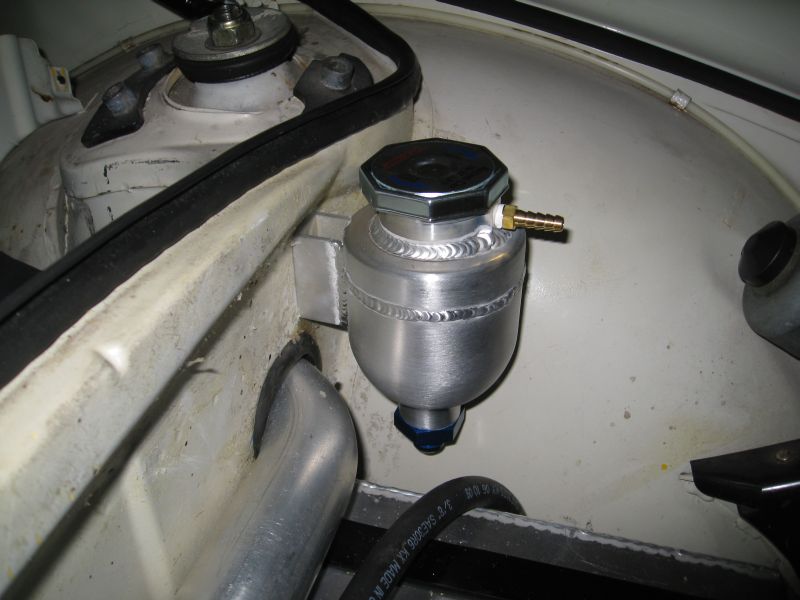
I think that I will install the axles next and then start pulling more wires.
Scott
Posted by: Zaney Feb 18 2010, 10:35 PM
Scott,
We are Jonesing for an UPDATE ![]()
Hope all is well!
Nate
Posted by: Amenson Feb 23 2010, 11:23 AM
Scott,
We are Jonesing for an UPDATE
Hope all is well!
Nate
All is well, although I have been slacking on the car a bit...sort of. I have taken care of a load of piddly uninteresting things. Also finished the plumbing for the radiator expansion tank which really helped purge the air from the cooling system. I can now idle the car indefinitely w/o the temperature threatening to leave the normal range without fans.
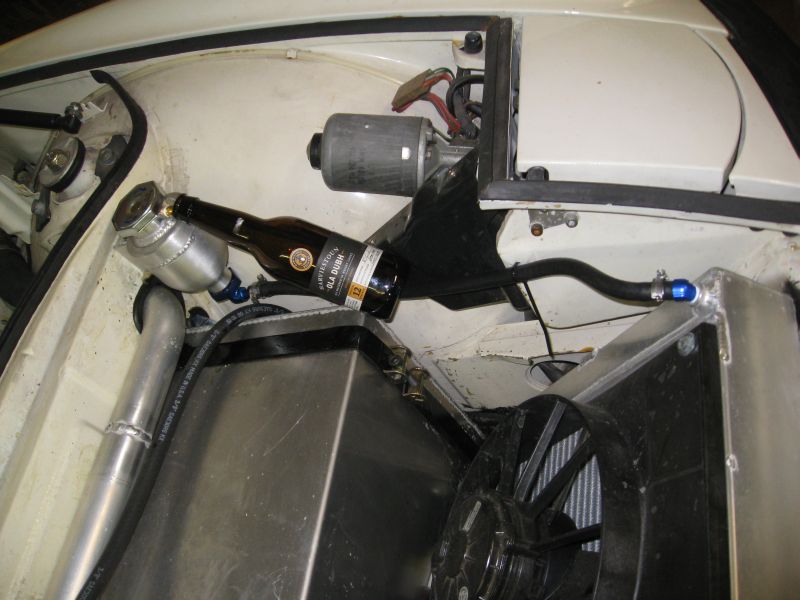
Over Thanksgiving my father and I installed the front air dam. I am thoroughly unimpressed with the fit of this part. Somewhere on the passenger side it is over 1/2" short. Not sure what I am going to do about it. I am really not in the mood to cut it apart and glass it back together but it bothers me every time I look at the car.
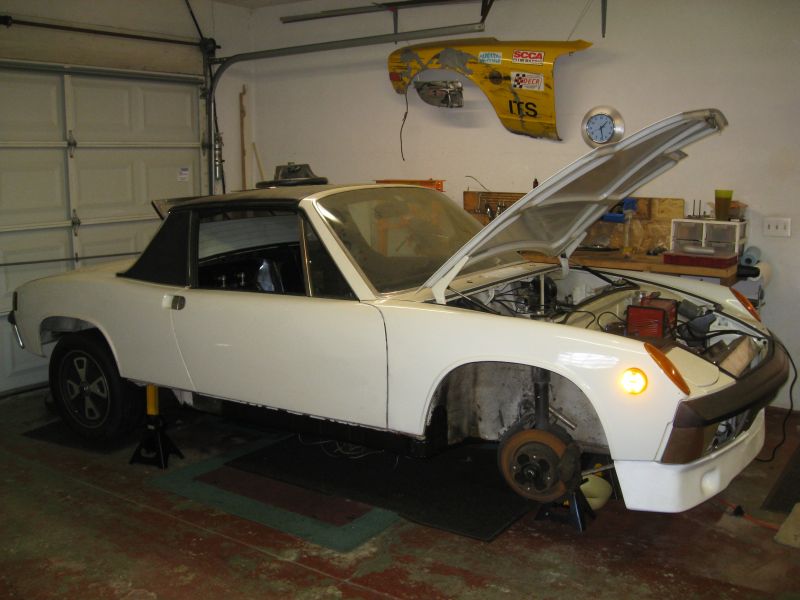
...
Posted by: Amenson Feb 23 2010, 11:43 AM
My parents bought us a new heater for the garage as a house warming present! 60,000 btu...much nicer to work in the garage now!
While I was winter test for 17 days earlier this month I decided to modify the aftermarket electronic spedo sender that attaches to the angle drive so that I could get rid of the angle drive.
Unfortunately I did not take a picture of the part that I made but essentially I remade the brass piece on the right so that I could use the bolt from the angle drive. It is pressed into the housing and the bushing is pressed into it.
Finished product with extra parts: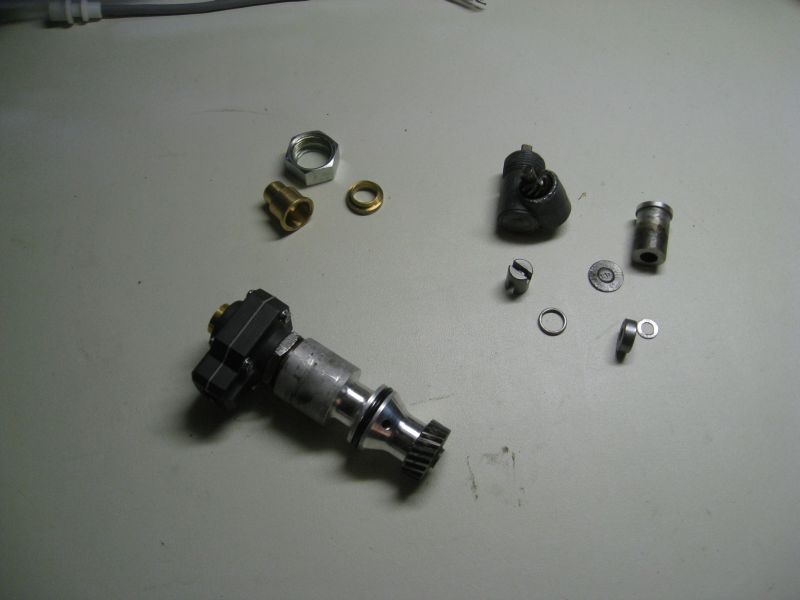
Guts: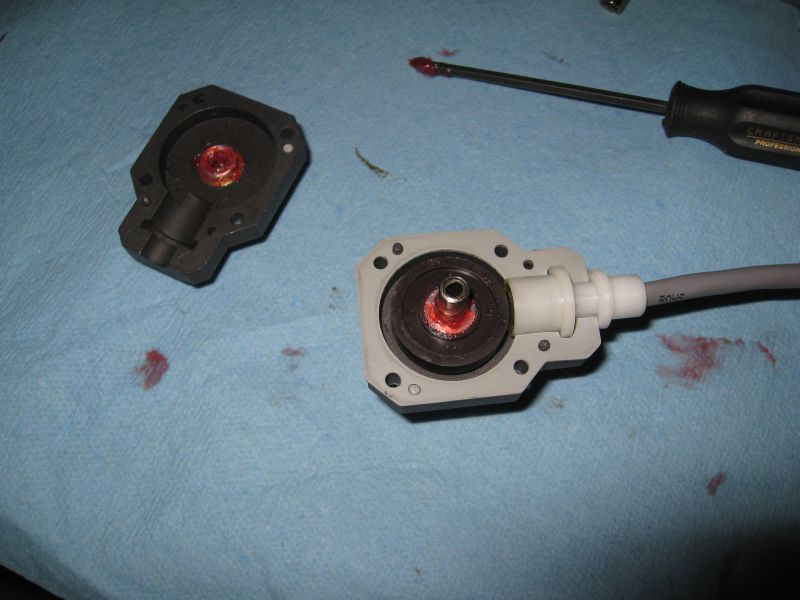
Installed: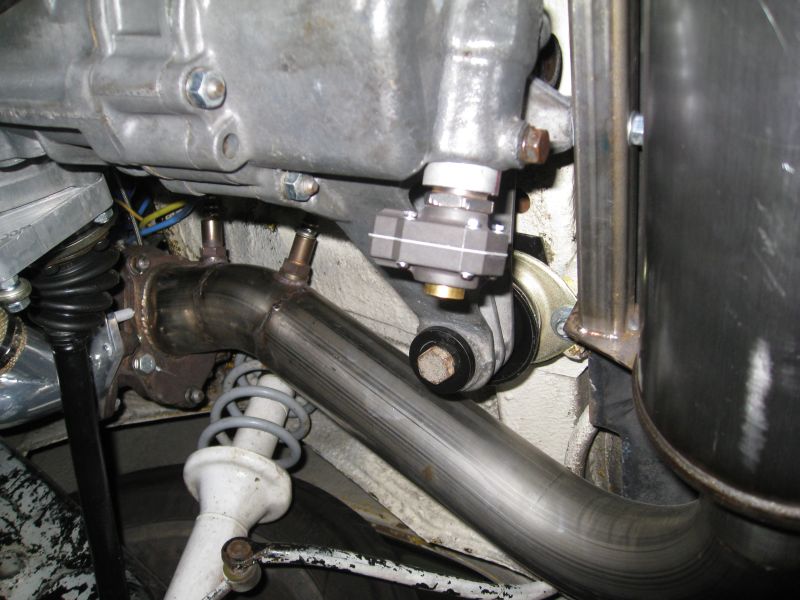
I made a detailed 3D drawing in Google Sketchup if anybody is interested in doing this to their sender.
Scott
Posted by: Amenson Feb 24 2010, 09:11 AM
Here is the drawing of the bushing: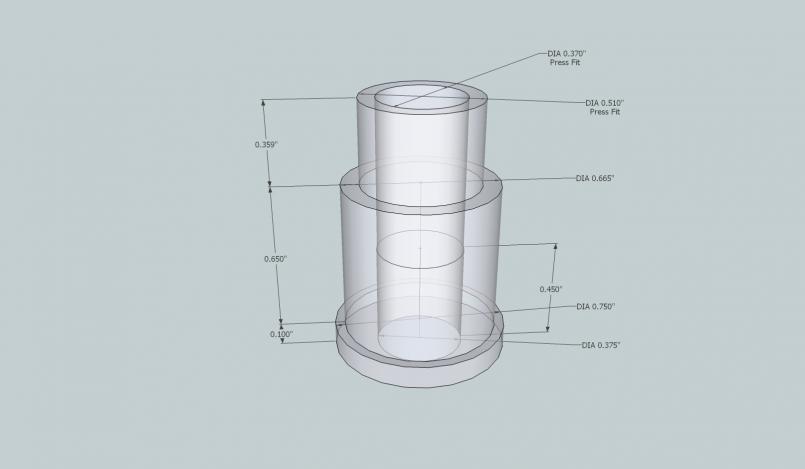
Scott
Posted by: fat73 Feb 24 2010, 09:14 AM
Here is the drawing of the bushing:
Scott
The talent on this forum continues to amaze me. Awesome work.
Ed
Posted by: GS Guy Feb 24 2010, 07:39 PM
That's a pretty trick modification to the electronic speedo adapter Scott! I'm going to have to look into doing that to mine. The angle drive serves no real purpose with the electronic sensor, except to adapt it to the trans!
It looks like you cannibalized some parts from the angle drive - obviously the nut, but what else? Sounds like some internal portion that presses into your custom bushing?
Material of the new bushing? What kind of press fits did you use - couple of thousandths?
Is the end product just the 3 new parts added to the sensor housing - the new bushing, piece pressed into the inside and nut on the outside - all this simply pressed into the sensor housing?
I like it!
Jeff
Posted by: Amenson Feb 24 2010, 09:09 PM
That's a pretty trick modification to the electronic speedo adapter Scott! I'm going to have to look into doing that to mine. The angle drive serves no real purpose with the electronic sensor, except to adapt it to the trans!
It looks like you cannibalized some parts from the angle drive - obviously the nut, but what else? Sounds like some internal portion that presses into your custom bushing?
Material of the new bushing? What kind of press fits did you use - couple of thousandths?
Is the end product just the 3 new parts added to the sensor housing - the new bushing, piece pressed into the inside and nut on the outside - all this simply pressed into the sensor housing?
I like it!
Jeff
I only used the nut from the angle drive. The piece in the drawing is the only part that I made. The original was brass but I did not have any in the shop at work so I used aluminum. I reused the pressed in brass bushing from the original speedo piece.
The press fits were ~3-4 thou...a bit tight but matched the original parts. The brass bushing presses into the aluminum piece that I made and that presses into the speedo housing. If you want the Sketchup, file let me know and I can email it to you.
Oh, I had to drill out the rivets that hold it together. I replaced them with 3x20 mm hardware.
Scott
Posted by: Amenson Mar 13 2010, 09:07 PM
Well, it is time to dig back into the wiring harness. I started by troubleshooting the only non-functioning part of the electrical system...the alternator. Of course I assumed that I messed up something in the initial harness modification so I spent much longer than normal coming to accept the reality that the alternator is dead. In order to pull the alternator the intercooler had to come out and in order to remove the intercooler the rear trunk had to come off.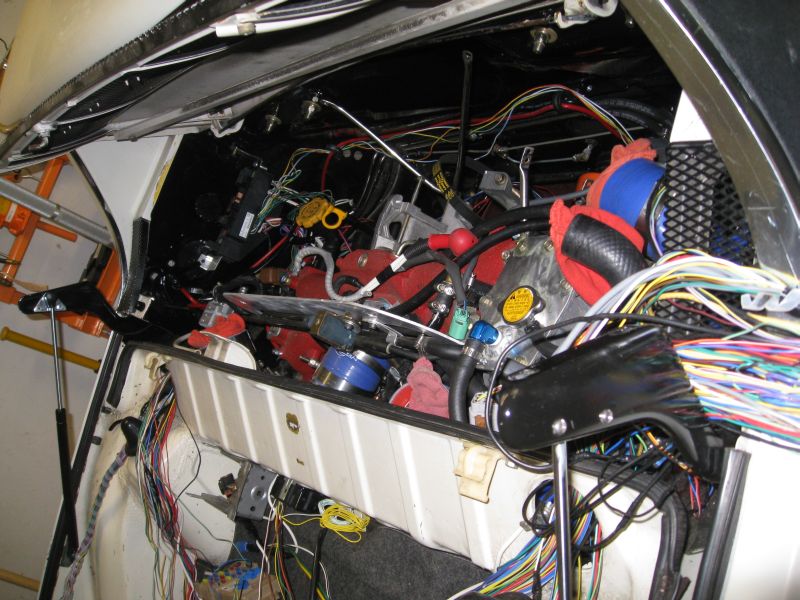
With that resolved I started in on the wiring. The task is to separate the stuff that needs to be in the dashboard area and the stuff that does not. When I first started back on the wiring I had the distinct feeling of being overwhelmed again. After an hour or so I regained my familiarity with the schematic and it was full steam ahead.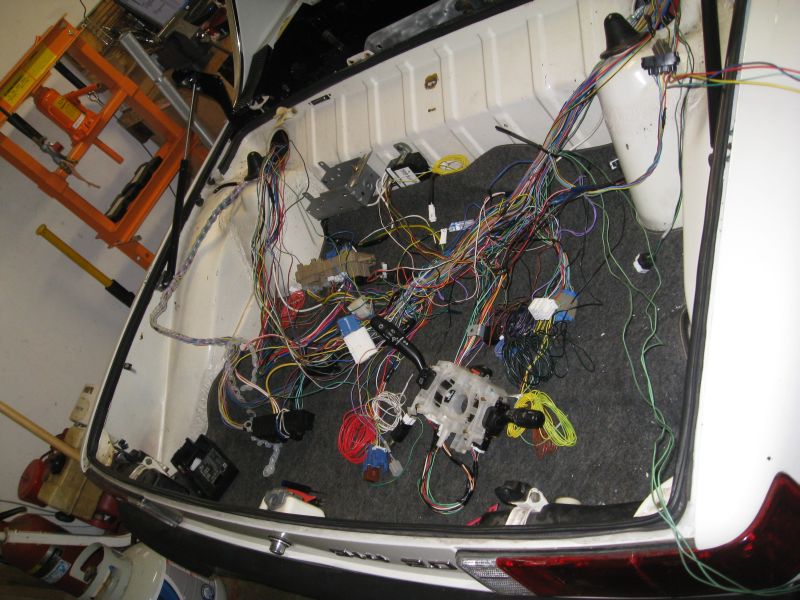
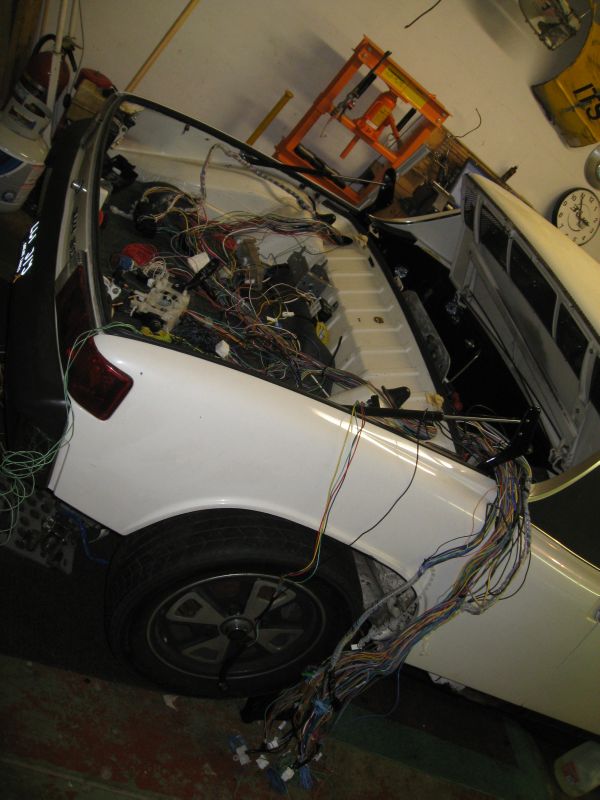
A few more long days like this and I may be able to start it from the driver's seat finally!
Scott
Posted by: GS Guy Mar 14 2010, 09:19 AM
I only used the nut from the angle drive. The piece in the drawing is the only part that I made. The original was brass but I did not have any in the shop at work so I used aluminum. I reused the pressed in brass bushing from the original speedo piece.
The press fits were ~3-4 thou...a bit tight but matched the original parts. The brass bushing presses into the aluminum piece that I made and that presses into the speedo housing. If you want the Sketchup, file let me know and I can email it to you.
Oh, I had to drill out the rivets that hold it together. I replaced them with 3x20 mm hardware.
Scott
Hey Scott - I completed the same modification to my speedo sensor yesterday and it seems to work perfectly for mechanical fit. The only thing I found I needed beyond your description was running a 1/4" reamer through both rotor bushings while the unit was assembled (without the rotor installed) to correct a very slight mis-alignment between top and bottom bushings. I was getting some stiffness in turning the rotor after assembly, kissing it with the reamer cleaned it up perfectly.
Now about that spaghetti... sure that engine doesn't have some Italian blood?
Jeff
Posted by: ruby914 Aug 3 2010, 09:55 AM
Scott,
Nice work.
Seems you are taking a break from all the wires.
I know the feeling.
I saw what you were doing with your steering column and was inspired to follow. I will try to incorporate the instrument cluster and fabricate a new dash around it also.
I have all I need but the WRX steering wheel. I already started cutting but I am thinking it is still too long?
I see you cut it down "two more inches" so I know you have been there.
I don't have the Subaru wheel yet so I wonder if the depth between the grip and shaft is shorter on the Subaru wheel?
I measure about 7.5" outboard and 8.5" inboard from the stock 914 wheel to flat dash face. What did you finally come up with, from the dash, with the Subaru wheel?
Posted by: Amenson Aug 4 2010, 10:50 AM
Scott,
Nice work.
Seems you are taking a break from all the wires.
I know the feeling.
I saw what you were doing with your steering column and was inspired to follow. I will try to incorporate the instrument cluster and fabricate a new dash around it also.
I have all I need but the WRX steering wheel. I already started cutting but I am thinking it is still too long?
I see you cut it down "two more inches" so I know you have been there.
I don't have the Subaru wheel yet so I wonder if the depth between the grip and shaft is shorter on the Subaru wheel?
I measure about 7.5" outboard and 8.5" inboard from the stock 914 wheel to flat dash face. What did you finally come up with, from the dash, with the Subaru wheel?
Ruby914,
Thanks for the feedback. Glad you could find some of my experiences useful
. Although, the steering wheel adaptation is one area where my current implementation can be improved. Currently the steering wheel sticks too far away from the dash. I do not have the stock IC installed so I measured from the back of the steering wheel to the vertical face of the dash along the steering column and the wheel is 10" away. This will be difficult to change and there is not so much room if you intend to use the Subaru plastic column cover. For me it is not much of a problem because I am short and made my pedal box position adjustable. I will have to recline my seat yet to get the perfect seating position.
There is also a problem on the back side. The shaft sticks out a bit too far and it required that I shorten parts of the intermediate shaft so that I could slide the knuckles as far over the splines as possible to avoid exceeding the max working angle of the knuckles. Before I did this I had a bit of binding. I would recommend shortening the back side even more than I did so that the shaft ends up in the same place as stock. This will require a modified/different mounting method.
Eventually I will do it again, maybe this winter. Hopefully you can refine the design so that I can copy you!
As for the wires...I have actually started to revisit them again the past couple of weeks. I have not posted any pictures because a bundle of wires looks like a bundle of wires no matter how much time I put into them. I did have a bit of a breakthrough...maybe more accurately, a reason to redo a whold bunch of work.
After much measuring and many mental iterations of wire routing, I think that I have figured out a very clean way to run the wires with a minimal amount of harness stretching. In some areas I may eventually get to shorten a few sections. If I move the main fuse box to the front where the old master cylinder reservoir was located and move the ECU to the center tunnel just in front of the rear access panel, I should be able to mount the secondary fuse box and relays under the dash or mabye under the front hood someplace. This will put all of the connectors for the Instrument cluster, switches, IG, ...etc in the proper place.
In order to do this though, it required pulling the pins for most of the wires so that I can separate the right and left engine bundles from each other and from the wires that go to the dash area. This is a very tedious process of getting the pins out of the connectors, fishing the wires out of the bundle running it back with the other wires for the same location and then getting the pin back in the correct place in the original connector. So far there have been ~10 wires that take short cuts that I have had to mark, cut and eventually extend. I have a few more hours of reorganizing before I can lay the harness in the car to confirm if my plan will work. Stay tuned.
Cheers,
Scott
Posted by: ruby914 Aug 12 2010, 10:29 AM
Scott,
I did some more cutting as seen in this photo and cut 1/4" off of each end of the intermediate shaft.
I drilled a new hole about 7/8' AFT of the original mount hole so all this gained me an extra 7/8", if I don't get a bind.
I also trimmed the cover until I got to where the back cover snaps together. This just fit but it may be better to trim the dash so the cover fits inside. I may still need to do that.
Were you trying to keep the tilt feature?
I really want to keep that but I think I will have to weld on a bar to mock a longer steering column and have that pivot around the first U-joints.
That will be a hard fit but other wise it seems to rotate too easy when locked and I think it will bind at any other pivot location.
I put my ECU behind the passenger seat you can see how that fit here http://z8.invisionfree.com/ClubNARP/index.php?showtopic=5431
Attached image(s)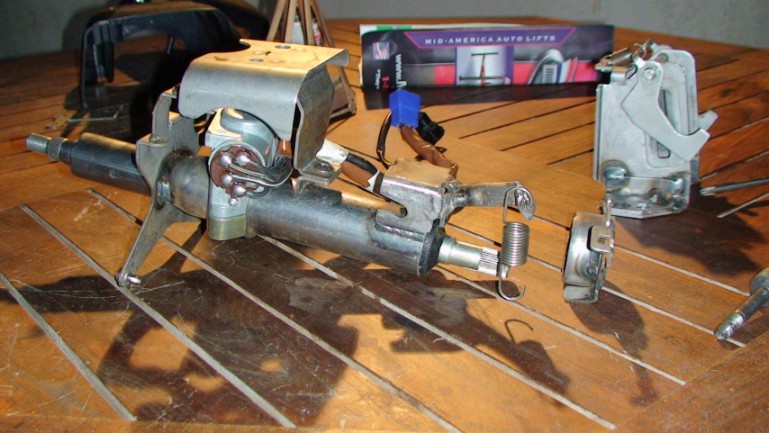
Posted by: Amenson Aug 15 2010, 07:52 AM
Scott,
I did some more cutting as seen in this photo and cut 1/4" off of each end of the intermediate shaft.
I drilled a new hole about 7/8' AFT of the original mount hole so all this gained me an extra 7/8", if I don't get a bind.
I also trimmed the cover until I got to where the back cover snaps together. This just fit but it may be better to trim the dash so the cover fits inside. I may still need to do that.
Were you trying to keep the tilt feature?
I really want to keep that but I think I will have to weld on a bar to mock a longer steering column and have that pivot around the first U-joints.
That will be a hard fit but other wise it seems to rotate too easy when locked and I think it will bind at any other pivot location.
I put my ECU behind the passenger seat you can see how that fit here http://z8.invisionfree.com/ClubNARP/index.php?showtopic=5431
Ruby914,
I checked out your thread on ClubNARP, amazing composite work. If you work out a new dash that fits the Suby cluster I would likely be interested in a copy.
I did keep my steering column adjustable, if for no other reason that I could not decide where to put it permanently. There is a picture of my mount back a few pages.
I moved the harness back into the car to see how everything fits. Pretty much the only place where I can get the passenger side of the engine connected at the same time as the dash stuff is with the ECU on the center tunnel. I should be able to modify the stock between the seat storage box to hide it and still have some storage.
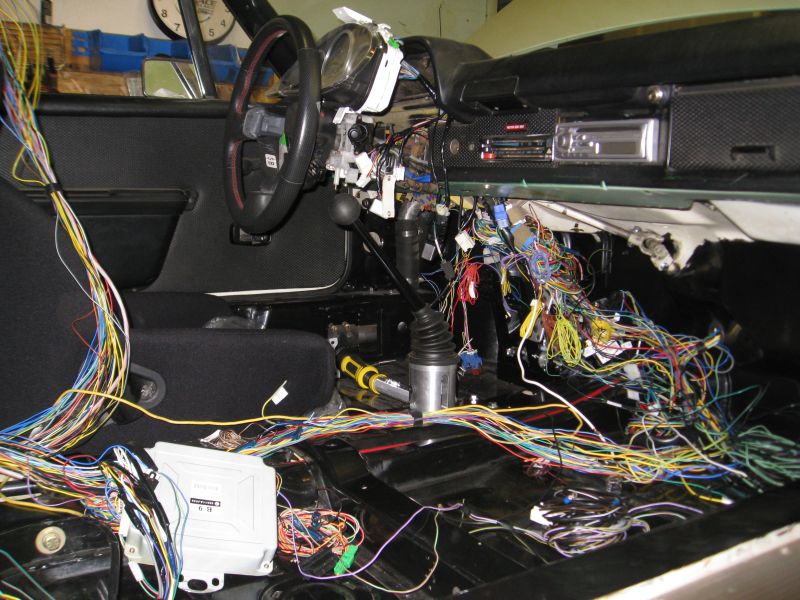
I mounted the main fuse box down where I have the battery.
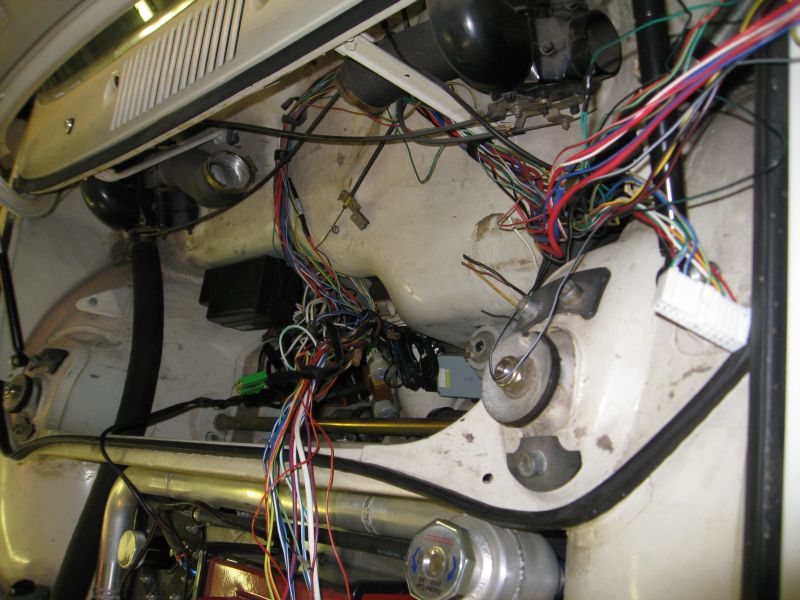
The secondary fuse box and relays seems to fit where the stock fuse box was. Although I have not figured out how to mount it. Maybe I can get that done yet this morning.
Cheers,
Scott
Posted by: ruby914 Aug 20 2010, 09:45 AM
Scott,
Thanks for the compliments on the dash.
Actually, you were one of the first I thought would possibly need the dash.
But when I saw you were working on a custom, printed circuit board, LED instrument panel, I figured you would not need it.
I don't think I would be going this direction if I had not read your thread and I would be happy to help your project come together.
With your interest, I have swayed back to a more robust mold and will see what I can do to accommodate you.
I will get an e-mail back to you shortly.
Posted by: ruby914 Sep 23 2010, 10:06 AM
Scott,
I checked the resistance between the WRX and 914 fuel sending units and added a 250 ohm resister in parallel from the green to brown 914 wires.
The resisters were from radio shack and only 1/2 W so I don't know what it should be or if that will last. This seems to work using the 914 sender unit for now.
You are a lot more knowledgeable than i with electronics, if you see any problem let me know.
I got my blinkers, and high beam lights working off the Suby column switch also but I have no 2002 Daytime running lights resister.
So I still have no low beams.
PN. 84057FE010 $69 - $45 is the cheapest I have found. I have been hunting around for the ohms and wattage of this part if you have an 02 maybe you could check yours for me?
I also tend to wonder if the 914 lights would need a different ohms value?
Edit:
I got high and low working.
I still don't understand the DRLs 100% but it is looking like I don't need the resister or any part of this circut.
Posted by: Root_Werks Sep 23 2010, 10:09 AM

Oh man, I stared too long at all those wires. 
Seriously, amazing work! I couldn't even begin to think I could keep track of all that. What a cool project!
Posted by: Amenson Sep 29 2010, 06:26 PM
Scott,
I checked the resistance between the WRX and 914 fuel sending units and added a 250 ohm resister in parallel from the green to brown 914 wires.
The resisters were from radio shack and only 1/2 W so I don't know what it should be or if that will last. This seems to work using the 914 sender unit for now.
You are a lot more knowledgeable than i with electronics, if you see any problem let me know.
I got my blinkers, and high beam lights working off the Suby column switch also but I have no 2002 Daytime running lights resister.
So I still have no low beams.
PN. 84057FE010 $69 - $45 is the cheapest I have found. I have been hunting around for the ohms and wattage of this part if you have an 02 maybe you could check yours for me?
I also tend to wonder if the 914 lights would need a different ohms value?
Edit:
I got high and low working.
I still don't understand the DRLs 100% but it is looking like I don't need the resister or any part of this circut.
Mike,
Good to hear that you found a solution for the fuel sending unit. The sender in my tank has the opposite resistance to the suby unit. Not sure what to do with that yet.
My harness is out of an 05, I do not have running lights. Can't help with your issue but resistors are pretty cheap if you order one from someplace like http://digikey.com.
One thing that I have been thinking about is how to get the headlights to flip up from the Suby column. The 914 switch has a few extra contacts to work with the headlight motor. I am pretty sure that I can work it out with a relay, maybe two, but have not drawn the circuit yet. What did you come up with?
Cheers,
Scott
Posted by: Amenson Sep 29 2010, 06:31 PM
Oh man, I stared too long at all those wires.
Seriously, amazing work! I couldn't even begin to think I could keep track of all that. What a cool project!
They are all color coded
Posted by: Amenson Sep 29 2010, 08:05 PM
I thought a little bit more about the daytime running lights. Is there a relay or set of contacts that switches the resistor into the headlight circuit for DLR's?
In the end I don't think that it makes much sense having daytime running lights with flip up headlights. Unless you wanted to run your fog lights as DLR's
Scott
Posted by: AZ914 Sep 30 2010, 11:27 AM
Unless you wanted to run your fog lights as DLR's
Scott
I know a few guys that have their FOGS wired to be hot on ignition (switched on) instead of with the parking lights. They use them for DRLs but you can always turn them off. Works great.
Posted by: ruby914 Oct 1 2010, 12:38 AM
I spent all this time and effort to get my low beams working thinking it was the ground that I didn't have the resister for.
I just wanted low beams, didn't even know what DRL's were for. I didn't have the DRL module and found people were taking them out of there cars, so I didn't need one.
Someone told me the resister was to lower the intensity of the lights, I didn't see a need for that.
I connected the DRL solenoid to ground with no resister. lights still didn't work. I was rotating the switch thinking first click was low, 2nd was high.
Finally found that the high beam is push forward and pull. But at this point the ground was not connected?
I looked at the circuit again. Seems I don't need the DRL module, diode and if I remove the DRL solenoid and connect the YG and YR wires that is all that is needed?
I am still not sure what the first rotation of the light switch should do? I am thinking it will operate the headlight motors through the unused DRL solenoid?
Again Scott, your far better with the electronics than I. Am I missing anything?
Quick update: I now have all the outer lights working, the tail / running lights were last. I put a diagram on my build thread at NARP.
Posted by: Britain Smith Nov 4 2010, 12:23 AM
Which remote oil filter kit is this?
-Britain
Posted by: GS Guy Nov 4 2010, 03:35 PM
Looks like Scott's running Canton hardware for the oil system? They make some nice stuff!
Posted by: Amenson Nov 6 2010, 12:49 PM
Looks like Scott's running Canton hardware for the oil system? They make some nice stuff!
Yup, they are Canton parts. I think that I ordered them directly from Canton.
Cheers
Scott
Posted by: Amenson Jan 16 2011, 06:43 PM
OK, so I made some decent progress recently, mostly thanks to ruby914. He made me a copy of his Subaru instrument cluster adapted dash. There is a link to his build thread a few posts back and if you have not already visited it, please do. He has made some really nice parts for his car.
So back to the dash, the part is amazing. 
If you have removed the dash from your car, you will definitely appreciate what I have to say. If not, go out and remove it and then reinstall it before you continue reading.
He built all of the mounting lugs into his part. Yes, all 8 of them.
When removing the stock dash I was not sure that it would actually come out because the bolts stick through the vertical and horizontal faces of the sub dash. You have to lift and pull at the same time but there it only moves a short distance before the bolts in the other plane start binding. Anyways, after talking to ruby914 and seeing pictures of his work I was pretty sure that the part would fit but even with his skill I anticipated a bit of wrestling to get it in just because the fit is so stink'n tight. Not the case at all. I put the part in place checked a few holes for alignment, wiggled it a bit and it popped right in place.
I had to do some modifications to the sub dash to get the bottom ears of the instrument cluster to fit but the directions in his build thread made it very straight forward.
Isn't it cool!! 
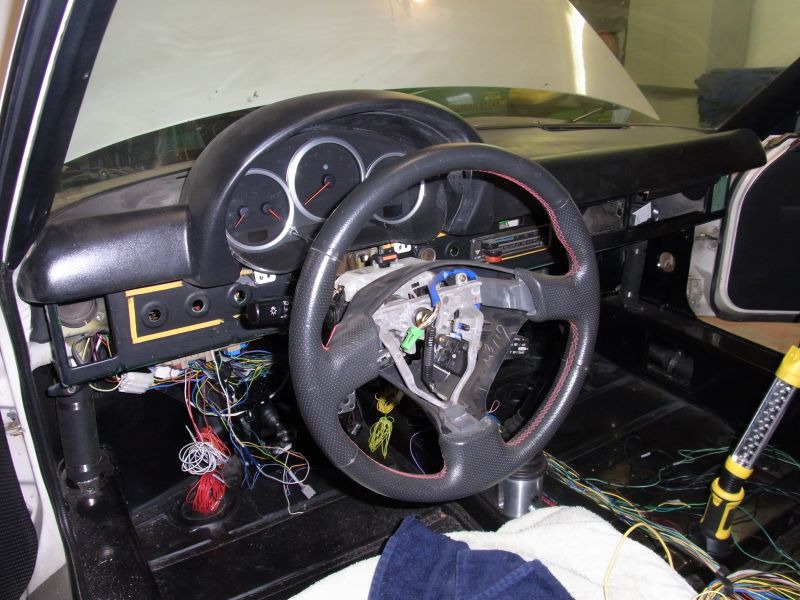
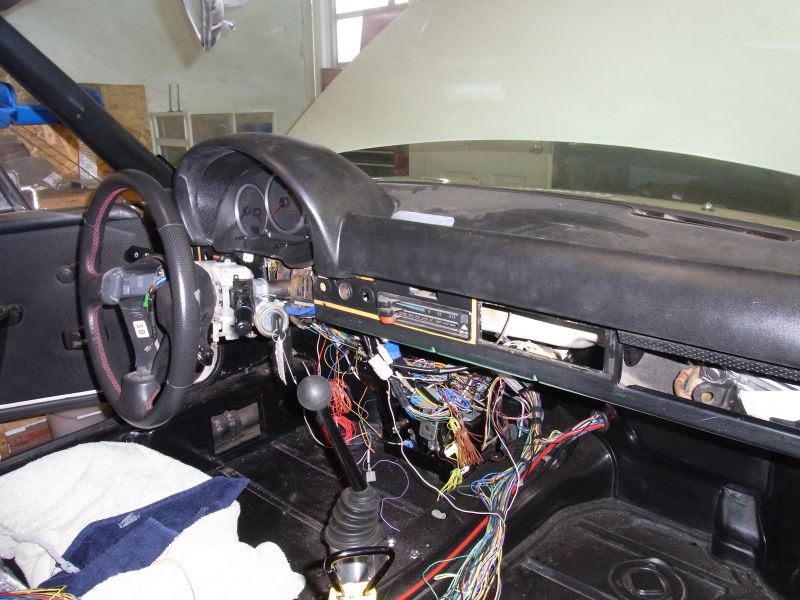
I also did quite a bit of very uninteresting stuff. Mostly organizing wires and mounting relays, switches and other random harness components. I am getting closer to being able to take the harness out again to lengthen and reconnect the wires that I have been cutting to get the harness to match the position of the components.
Cheers,
Scott
Posted by: Amenson Jan 17 2011, 11:24 AM
While I was sitting in the driver's seat admiring my new dash and making engine noises I happened to decide to row through the gears. Much to my dismay, I was really disappointed by the sloppiness of the shift linkage. I have a RennShift and when I first installed it I was blown away by how much it improved the feeling over the short shift kit I already had. I soon found myself disappointed with that so I upgraded the new rear shift bushing with a Patrick brass bushing. That made an improvement in the feel also but I guess the incremental improvements have warn off and now I need something better.
So I ordered the JWest Shift linkage based mostly on the review SirAndy did a while back...if this is as good as it get's then I need one.
I did a search and read through his installation threads and the JWest instructions but have yet to find a picture of what it looks like installed on a stock 4 cyl side shifter. If you have a picture, will you please post one here. I would really like to see the position of the front joint on the crooked rear shaft.
Cheers
Scott
Posted by: SirAndy Jan 17 2011, 11:56 AM
I could probably crawl under the car and take a picture, but i'm using a straight shift rod on the /6 so that might not help you much ...
One thing to note, when you cut and weld the shift rod, make sure both ends are exactly in the same plane!
Meaning, the part that slides into the front coupler needs to be in the same 3D plane as the part that slides into the transmission console.
If you don't get that right, you will get some binding in certain positions ...
I am very happy with my JWest setup. I think as far as shift rods go, this is probably the best shifting you will ever get for a 914.
The only thing better would probably be to ditch the rod setup completely and go with a good cable shifter solution ...
Posted by: Amenson Jan 17 2011, 05:37 PM
I could probably crawl under the car and take a picture, but i'm using a straight shift rod on the /6 so that might not help you much ...
There are already some really nice pictures in your instillation thread. Very good writeup, thanks for taking the time to make it.
One thing to note, when you cut and weld the shift rod, make sure both ends are exactly in the same plane!
Meaning, the part that slides into the front coupler needs to be in the same 3D plane as the part that slides into the transmission console.
If you don't get that right, you will get some binding in certain positions ...
This is exactly why I want to see a picture. Taking some very quick measurements of my spare rear bar based on the JWest instructions, the front u-joint would end up almost in the same place as the first bend in the bar. This makes the front splined stub significantly un-parallel to the rear splined stub. I must have messed up the measurements but want to see a picture to prove it.
Cheers
Scott
Posted by: ruby914 Feb 16 2011, 01:40 PM
Scott,
I'm glad you're happy with the dash and thank you for the kind words.
It is nice to help and see your project come together.
I like your STI instrument cluster, it's going to look great all lit up.
I don't know how many time I have pulled my dash and wires out. I still have little unsolved problems like the dimmer circuit not dimming, thinking about putting a map light in the dash just above the radio. Maybe satellite tweeters at the end of the dash and my last and final clean up of all wires will have me pulling it all out at least one more time.
I was looking back at your great VSS set up. I like that better then the one I mounted to my CV. Do you recall the brand?
As for shifting, I used a cable shift but still think the Porsche transaxle is the biggest problem. I already had my KEP adapter and wanted to get on the road. So, I let the guys work out the bugs on the Subie trans. Maybe a little late but in the end the path has been cleared and I expect that is the way to go.
Posted by: Amenson Feb 10 2012, 12:38 PM
It was just pointed out to me that it was basically a year since the last update. Sadly I have not make enough progress to actually drive the car.
I have been slogging through the harness and am just about to the point that I can pull it back out and start reconnecting all of the wires after the latest re-org of the component locations.
I also worked on the radiator ducting a bit and will have to suck it up and cut the hole in the hood.
I finally got around to purchasing a new shift linkage. I missed the opportunity to pick up a J-west setup before they discontinued it so I ended up getting the kit from http://www.tangerineracing.com/transmission.htm. After fussing a bit to make sure that I got the holes in the shift console in the correct place the kit bolted right in and is nice and precise. The the supplied metal hole location template made the process very straight forward.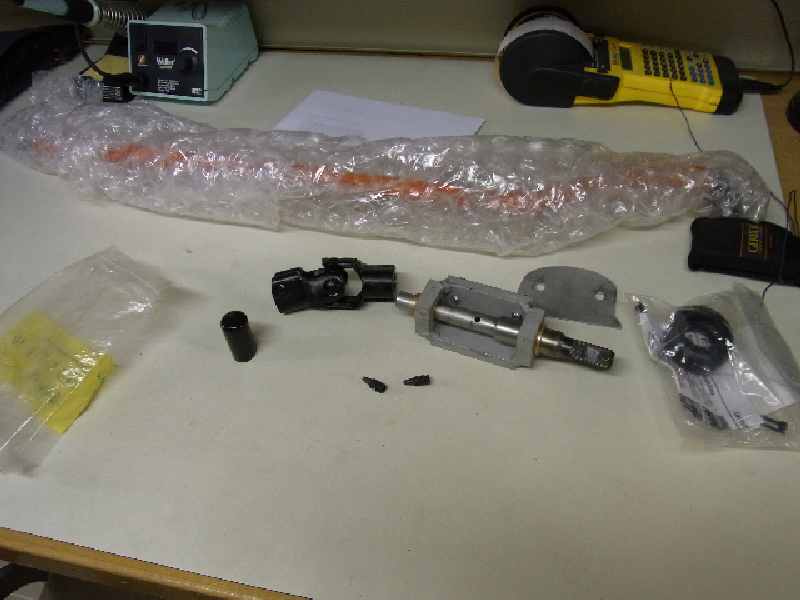
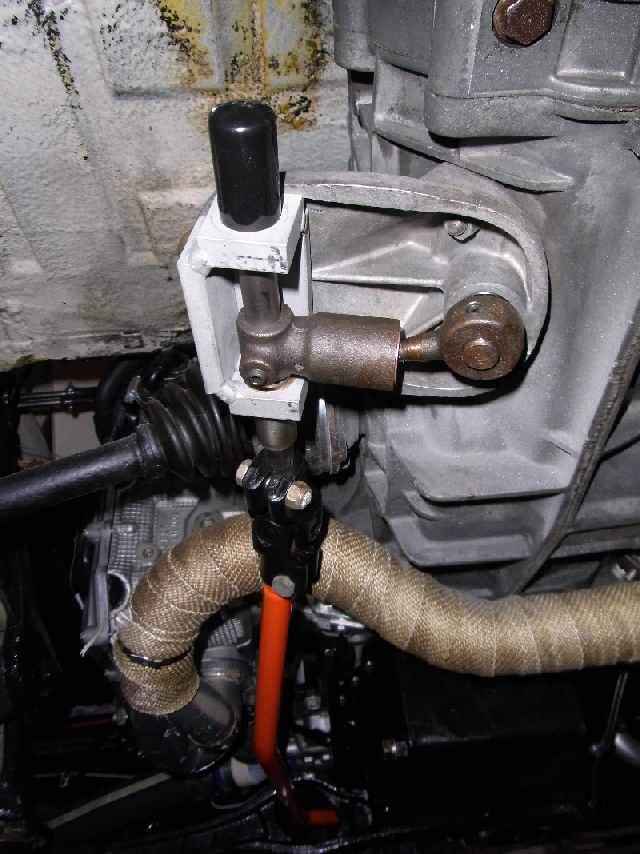
Having now eliminated all of the slop between the top of the shifter to the input shaft on the transmission I am still not overly impressed with the shift feeling. I know it is a 30 year old transmission design but with my BMW 2002 transmission, when all of the bushings are replaces with brass, it feels like you have your hand inside the transmission directly moving the shift forks.
I was hoping for a similar feel with my 901, but when when in gear there is quite a bit of movement in the shift lever shaft both in rotation and in/out.
Is something wrong with my transaxle or is that how they all are?
How much movement should I expect to get with "healthy" 901 in gear?
Regards
Scott
Posted by: dian Sep 16 2012, 11:26 AM
how come this thread is inactive? so much to learn.
Posted by: ruby914 Nov 9 2012, 12:01 PM
how come this thread is inactive? so much to learn.
Scott, Its that time again.
Your yearly
Posted by: Amenson Nov 29 2012, 06:19 PM
Hi All,
Sorry for the lack of updates. I have been a little busy lately. I know, you are probably expecting the same old story, bla, bla bla, work, family, money, bla, bla, bla. Not this time!
I am finally building my dream garage. Spent the last year designing it and broke ground at the end of October. We (myself, wife, father-in-law and other misc friends/family) are building it ourselves. The only thing that we contracted was the foundation and concrete work.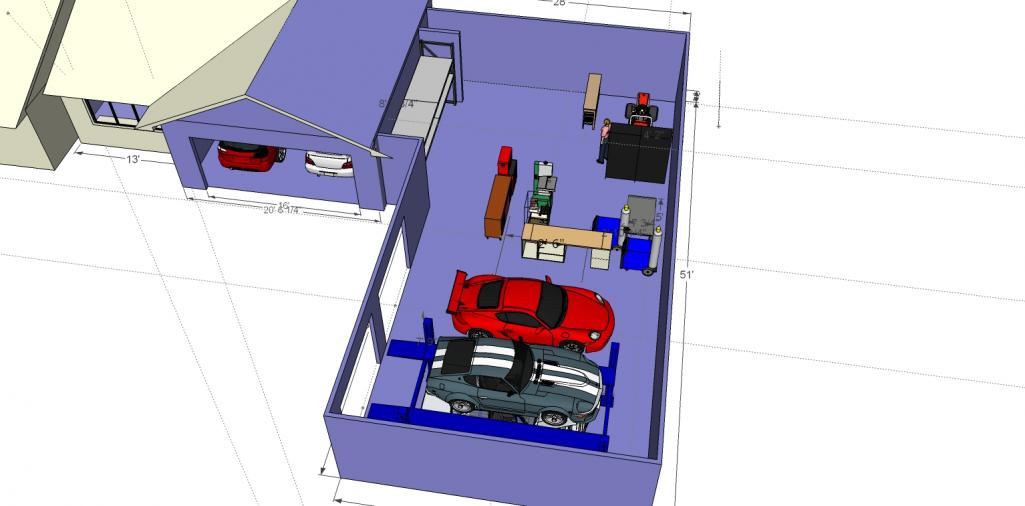
The new garage shop is 1300 sq.Ft. Daily drivers will live in the two car garage. We are also finishing/expanding the breezeway so that we have an office, laundry room, half bath and mud room.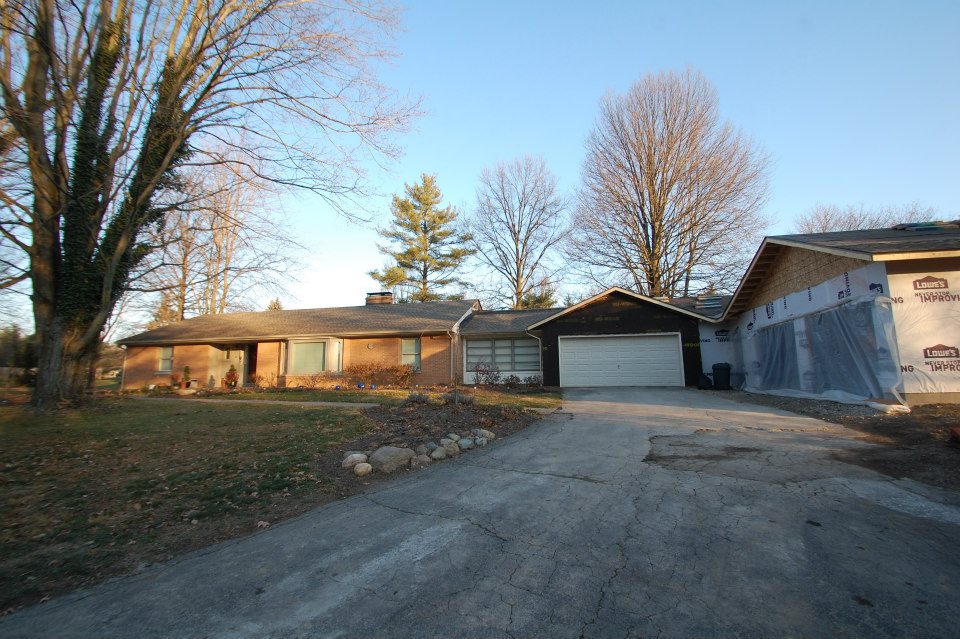
Fish-eye shot of the new space. Ceiling over the parking are is 11.5ft for lift room.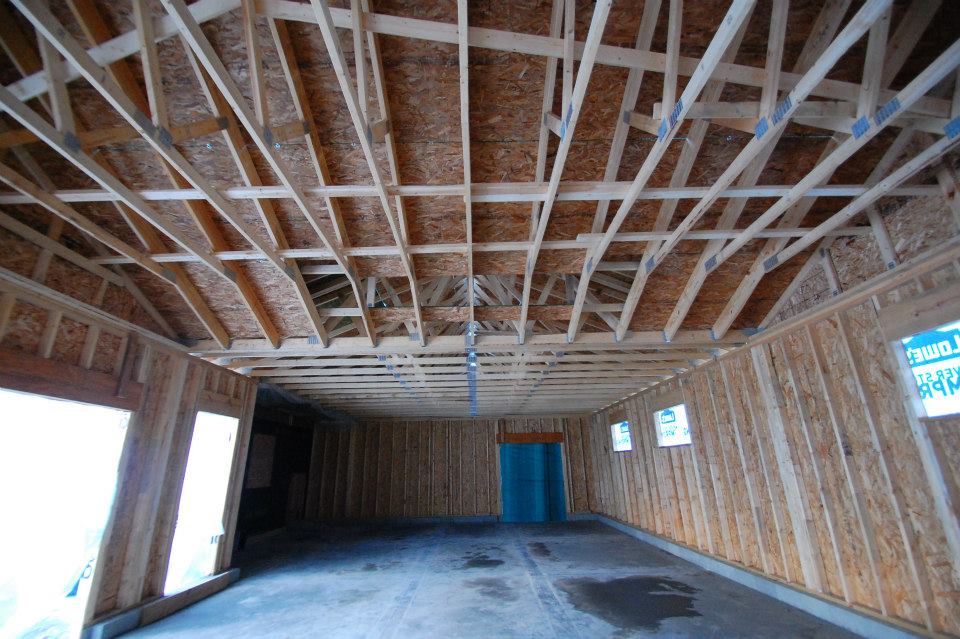
I built in a half lift that I found on Craigslist a few months ago, still need to refinish it.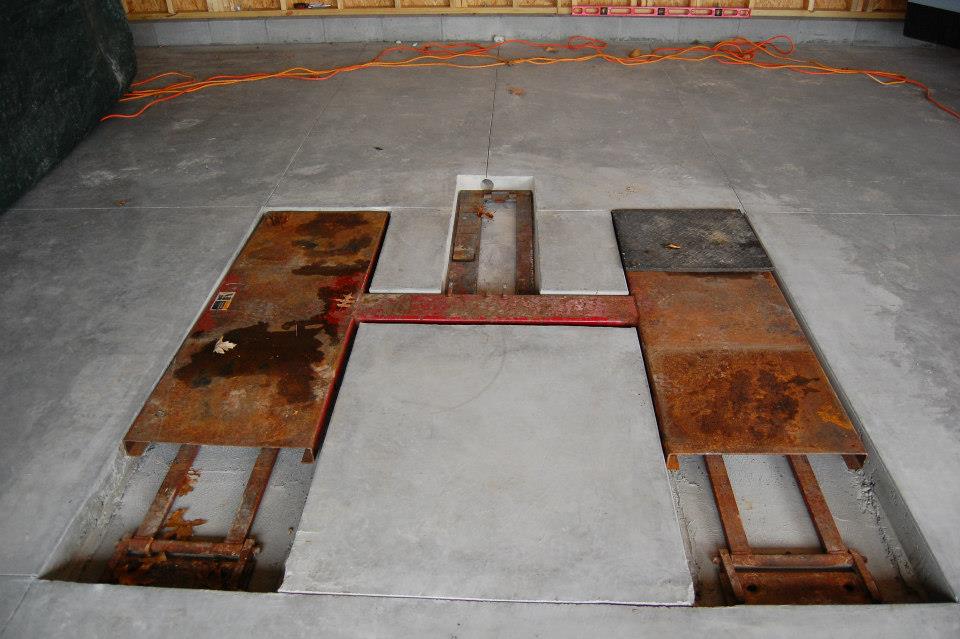
Part of the project was to buy a "work" truck. Picked up a '70 C10 with a modded 350. Total burnout monster...also good for hauling 800 lbs of steel siding to the scrap yard. Already installed power steering/brakes and harvested an 80's C10 front suspension to convert to disk brakes and front anti roll bar. Will be lowering it soon to make it easier to load. 
It will definitely be a few months until I get back to the Porsti project. I can't even move it into the new shop because the concrete is still curing so I can not apply the stain/sealer. 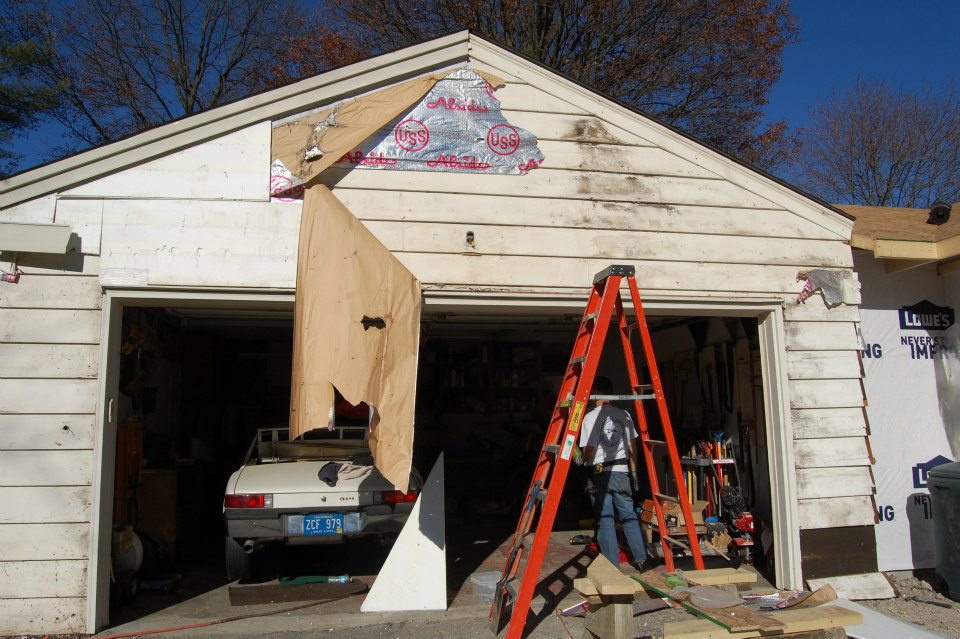
Need to get it done before I get my '72 2002 back home.
Stay tuned!
Cheers
Scott
Posted by: Amenson Jan 6 2013, 08:48 AM
Well, still no progress on getting the PorSti closer to driving but the weather has kept us from working on the exterior of the construction project so we were able to move some stuff to the new garage. The 914 included 
It is really motivating to see it off of the jack stands.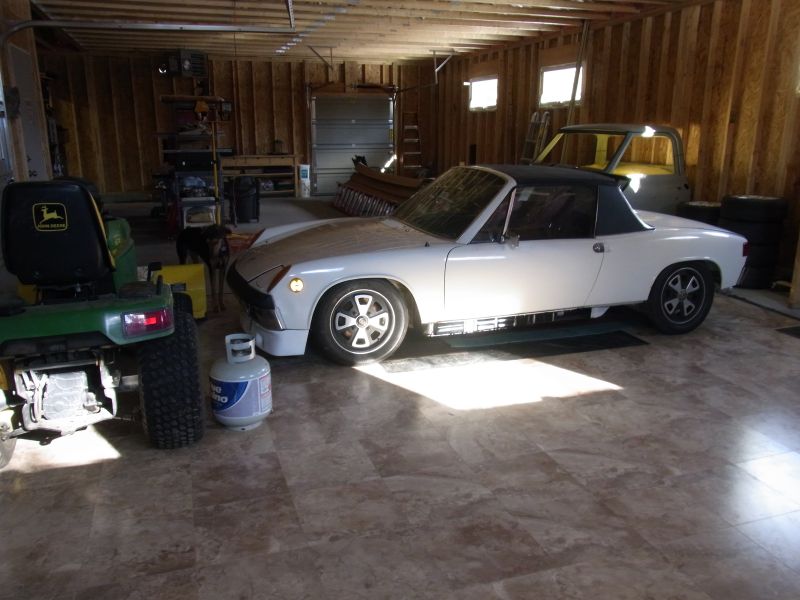
I am not able to install the coating on the garage floor until spring so I can only setup a temporary workspace. Should be just enough to make some progress this winter.
Cheers,
Scott
Posted by: tscrihfield Jan 6 2013, 11:16 AM

Man, that looks like a real nice place to wrench! Turns out your only an hour and a half from me...

Thomas
Posted by: tscrihfield Jan 6 2013, 11:17 AM
I have no idea why it quoted rob above?
Posted by: ruby914 Jan 6 2013, 11:27 AM
Wow, nice. Heat and all.
Wish my house has that big.
Posted by: Amenson Jan 6 2013, 02:45 PM
Man, that looks like a real nice place to wrench! Turns out your only an hour and a half from me...
Thomas
Let me know if you get over my way and want to stop in sometime.
Wow, nice. Heat and all.
Without a ceiling the main forced air heater mostly just warms the attic area. The induction heater directly over the car helps a bit more but only in a very small area. Better than nothing but far from efficient.
Cheers,
Scott
Posted by: tscrihfield Jan 6 2013, 03:50 PM
Man, that looks like a real nice place to wrench! Turns out your only an hour and a half from me...
Thomas
Let me know if you get over my way and want to stop in sometime.
Cheers,
Scott
Will do! I'm in Columbus area quite frequent.
I know Ross wanted to plan a get together in the cinci area, maybe we could have you join?
Thomas
Posted by: Dasnowman Jan 6 2013, 05:37 PM
Oh man, I stared too long at all those wires.
Seriously, amazing work! I couldn't even begin to think I could keep track of all that. What a cool project!
They are all color coded
lol I was thinking the same thing about what I might be into if and when I do a Suby swap.
I was wondering if you could steal HID adjuster motor switch from a STi and use that, you might even be able to have it open just a 1/4, 1/2, 3/4 and all the way?
But I might be just talking out my ass, just know some of the Nasioc guys have done retro fits on non HID cars.
Posted by: ruby914 Jan 7 2013, 01:19 AM
Man, that looks like a real nice place to wrench! Turns out your only an hour and a half from me...
Thomas
Let me know if you get over my way and want to stop in sometime.
Wow, nice. Heat and all.
Without a ceiling the main forced air heater mostly just warms the attic area. The induction heater directly over the car helps a bit more but only in a very small area. Better than nothing but far from efficient.
Cheers,
Scott
Sounds like all you need now is a good ceiling fan. or 4
Posted by: Amenson Jan 7 2013, 06:00 PM
I know Ross wanted to plan a get together in the cinci area, maybe we could have you join?
Thomas
Let me know when you start making plans.
I was wondering if you could steal HID adjuster motor switch from a STi and use that, you might even be able to have it open just a 1/4, 1/2, 3/4 and all the way?
But I might be just talking out my ass, just know some of the Nasioc guys have done retro fits on non HID cars.
It might be possible. The motor on the adjustable low beams is pretty small though.
I should have a spare headlight to tinker with thanks to an inattentive driver that smashed the front of my daily driver STi.
Sounds like all you need now is a good ceiling fan. or 4
I can't install ceiling fans until I get power installed...which is on hold until the budget has a few months to recover.
Posted by: tornik550 Jan 7 2013, 06:09 PM
Man, that looks like a real nice place to wrench! Turns out your only an hour and a half from me...
Thomas
Let me know if you get over my way and want to stop in sometime.
Cheers,
Scott
Will do! I'm in Columbus area quite frequent.
I know Ross wanted to plan a get together in the cinci area, maybe we could have you join?
Thomas
im up for a get together in the columbus area.
Posted by: tscrihfield Jan 7 2013, 09:36 PM
[quote name='tornik550' date='Jan 7 2013, 07:09 PM' post='1798360']
[quote name='tscrihfield' post='1797711' date='Jan 6 2013, 04:50 PM']
[/quote]
Will do! I'm in Columbus area quite frequent.
I know Ross wanted to plan a get together in the cinci area, maybe we could have you join?
Thomas
[/quote]
im up for a get together in the columbus area.
[/quote]
That's a possibility for a garage opening/finishing celebration?
I know there are a few teeners around columbus....
Posted by: edwin Jan 8 2013, 08:11 AM
What are you doing for a floor coating?
2pac I assume?
Dad insisted on it in our shed and we are both a little upset with how it turned out.
I was hesitant after seeing a few workshops with lots of marks and ours is no different.
Welding means putting a mat down now.
Much prefer the idea of pvc tiles or something similar if a coating is needed
Just a thought
Edwin
Posted by: Amenson Jan 8 2013, 12:31 PM
im up for a get together in the columbus area.
That's a possibility for a garage opening/finishing celebration?
I know there are a few teeners around columbus....
I would be open to having a 914 gathering in the new garage, might motivate me to get the thing running. My work travel schedule for the rest of Jan and Feb is all jacked up so I wont be able to commit to a date for a week or so. Feel free to make recommendations.
What are you doing for a floor coating?
2pac I assume?
Dad insisted on it in our shed and we are both a little upset with how it turned out.
I was hesitant after seeing a few workshops with lots of marks and ours is no different.
Welding means putting a mat down now.
Much prefer the idea of pvc tiles or something similar if a coating is needed
Just a thought
Edwin
Ahh the floor coating dilemma. After months and months of research, quotes, soul searching I have decided to install it myself using contractor grade products. I will be using a non acid stain and two coats of either polyaspartic or polyurthane. Surface will be diamond ground to to the proper roughness for the products.
Is it the best way? No, but given my budget and intended use of the area, it should be more than adequate.
Cheers
Scott
Posted by: charliew Jan 8 2013, 04:12 PM
Scott good to see you are getting a nice place to work. I am 68 and have been working on cars since I was 15. My tools and workplace has changed a lot over the years. I'm sorry but I have never placed an importance on a concrete floor finish that I will be welding, beating on metal, dropping heavy objects on, painting on, spilling or dripping many different solutions on and so forth. I do try to not damage the floor but stuff happens. I always wipe up spills but the floor does have stains on it. I have a friend who's shop looks like a display room but he mostly tinkers with stuff. I would be more concerned with insulation and trying to keep the utilities down as electricity will only go up in cost.
Good luck any way you go though. I see the little person has his hotrod in the shop.
Posted by: tscrihfield Jan 8 2013, 07:59 PM
im up for a get together in the columbus area.
That's a possibility for a garage opening/finishing celebration?
I know there are a few teeners around columbus....
I would be open to having a 914 gathering in the new garage, might motivate me to get the thing running. My work travel schedule for the rest of Jan and Feb is all jacked up so I wont be able to commit to a date for a week or so. Feel free to make recommendations.
Cheers
Scott
I know how you feel! I'll have enough frequent flyer miles by June to fly to Munich and back 2 or 3 times.. (not sure if itll really be that much)... But Ill be free the later part of January and February. Where you headed? I'll be in Minneapolis next week....
Thomas
Posted by: Amenson Jan 9 2013, 03:26 PM
I see the little person has his hotrod in the shop.
Ahhh....I don't have any little people in my family

All of the hotrods in that garage are mine!
Where you headed? I'll be in Minneapolis next week....
Thomas
I have to spend a couple of weeks in Baudette, MN (I can't exactly say why I am going there but if you look at the Google satellite view of the airport you might be able to figure it out). Then I have a week in Japan for some meetings.
Cheers,
Scott
Posted by: Runman07 Aug 5 2013, 12:18 AM
Any updates on this?? This thing is a beast! Hope to maybe see this in person one day as I live in the Dayton area...
Posted by: AfricanHijinx Aug 14 2013, 10:48 AM
Is this thing on the road yet?
Posted by: Amenson Feb 12 2014, 06:26 PM
Here we go again….recovering from a long period of project dormancy.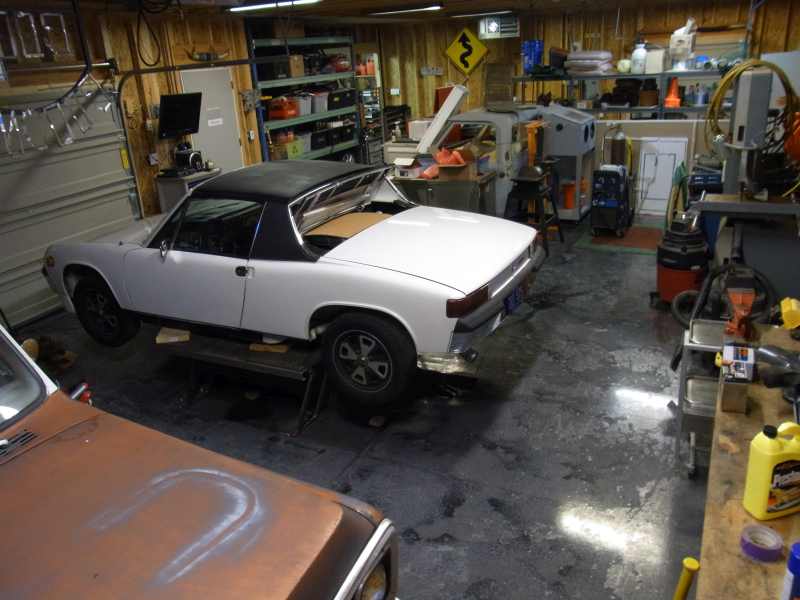
You might notice that Porsti is proudly perched on top of a fully restored lift, in a nice new shop. The shop while not finished inside, is completely functional. I still need to put up more lights, more outlets, run the compressed air system and insulate and cover the walls/ceiling. That can wait…it is time to get the Porsti running.
But first I must digress…
While building the garage I also found myself working on the ’70 C10 that we purchased so that we could haul lumber. Even in the middle of building an extensive shop and adding several new rooms to the house, which was essentially a second 50hour/week job, I was able make time to install power brakes, power steering, and a few other updates to a crappy old truck and have a great time doing it.
What does this have to do with anything?
The Porsti project has been stalled for quite some time, even before construction started on the new shop. Sure there were other priorities and distractions along the way but why could I enjoy making mundane upgrades to a $2000 truck during a huge construction project while the Porsti, with almost 10x the money and 100’s of hours of effort already invested, sat ignored so close to completion?
The remaining work in the Porsti project is adapting the complete wiring harness from the Subaru to the 914. This includes not only getting the Suby engine running (which I did Aug. ’09 with the entire wiring harness in the trunk) but also get the lights (including popup functionality), instrument cluster, windshield wipers (intermittent with the Subaru motor on the 914 linkage), radiator fans, new fuel level sender, new vehicle speed sender ….etc, etc, etc all complete and installed to my somewhat neurotic level of refinement. The approach I was taking was that the wiring was a single task like building the exhaust or cooling system or installing power steering on the C10. The goal for the wiring is that once complete, a turn of the key would result in a running engine with no faults and all other systems working and installed to a near OEM level. I spent hours, day after day, working on the wiring and at the end of each day all I had a mess of slightly less jumbled wires with no way to experience the satisfaction of completion. The task of installing the wiring is simply too large to be viewed as a single goal. The reward of completion was gone and with it the incentive to dedicate precious spare hours to the project. What is needed is a change of mindset.
Even though the car is a mess of jumbled wires, I am going to get it running. There are a few connections that that I need to make in order to achieve this and if I have to splice in a random colored wire because I don’t have the correct pins or colored wire, so be it. Just make a note of what needs to be cleaned up in the future and move on. Once it is running I should be able to drive it out of the garage and smoke the rear tires off of the rims. Then I can pull it back into the garage with a smile on my face get back to the task of getting all of the other systems working, one by one with a feeling of achievement at the end of each project. Once everything is working and the car is fully functional I can worry about cleaning up any esthetic compromises that I made getting it running.
Time to make some progress...incrementally!
Sorry for the non technical, somewhat philosophical and rambling post but I thought that it could help others with stalled projects figure out how break through the progress block.
It also helped me organize my thoughts and clarify my way forward.
Cheers,
Scott
Posted by: CptTripps Feb 12 2014, 07:03 PM
Happens to the best projects sometimes. I can appreciate the level of effort you have put in already, and needing to take time off from it!
Posted by: 76-914 Feb 12 2014, 10:02 PM
Alright, another Suby player.
Posted by: wobbletop Feb 13 2014, 09:20 AM
What did you use to design the garage?
Posted by: Amenson Feb 13 2014, 09:46 AM
What did you use to design the garage?
Google Sketchup...great (free) program, very easy to use.
Posted by: CptTripps Feb 13 2014, 09:53 AM
Sketchup is one of my favorite programs!
Tip: Try to find an older version. Google sold Sketchup about a year ago, and the newer versions push you (often) to purchase the $600 version of the software.
Posted by: ruby914 Feb 13 2014, 01:54 PM
Scott,
Good to see you back.
I can fully understand your stall. I remember thinking you were operating over my pay grade on the wiring. It may have been your planed ECU location? I would have go back and read up.
Anyway, I followed your lead but tried to stay out of the big bumps that you were tackling.
I used all the colored wires I could find from AT harness, etc... to extend the instrument cluster 3' but came up very short. So, like Porsche do it on the 914 ECU I used all the same color where I couldn't find the correct size and color. That's all in a single loom and you can still keep the correct pins.
My ECU wire loom is still a foot or more too long for my ECU location but I was afraid to cut it down. It just loops under the seat. That's not so bad. Fuse box's behind my seat and between the seats is livable as well.
I still have all my extra wires if you want them. It's still about a kitchen trash can worth and I did pick out many but some may useful.
Posted by: Amenson Feb 16 2014, 09:36 PM
Scott,
Good to see you back.
...
I still have all my extra wires if you want them. It's still about a kitchen trash can worth and I did pick out many but some may useful.
Thanks Mike,
Great to be back on it. Appreciate the offer for the wires if we were closer I would take you up on it.
Throughout the week I studied the wiring schematic and got reacquainted with the component locations in the car. Spend a good part of Saturday under the front hood sorting out the power distribution from the main fuse box/battery. I also rework twin two speed fan control do work with the twin singe speed fans in the car now.
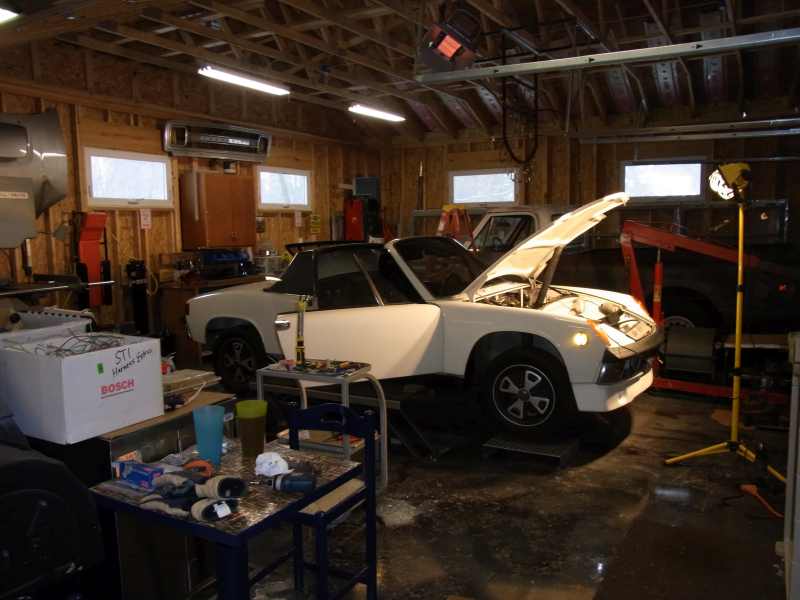
Could only spend a few hours on Sunday but I was able to get a good start reconnecting all of the cut wires. Luckily I took the time to label both sides of the cut as I made them. Now it is just a matter of finding both ends and reconnecting them. I got sick of playing "Concentration" against myself (and losing) so I made a map to record the wire number and color.
Underline means that both ends are on the map and crossed out ones have been connected.
I was kind of disappointed that I did not get far enough to try to turn the key but decided to be happy that I had a very productive weekend and had a great time doing it.
Cheers,
Scott
Posted by: Amenson Feb 22 2014, 04:32 PM
PorSTI started again today. For the first time ever I was able to rev the Suby engine from the driver's seat. I had 15 minutes of terror when it would turn over but not start. I was confident that I had reconnected all of the cut wires properly and the faults I was getting did not make sense with that assumption. I eventually found the main connector going to the driver side of the engine disconnected. Plugged it in and it started right up.
Tomorrow I have a buddy coming over to help me do a thorough check to make sure that everything is tight (to avoid loose connector type issues with something safety critical ) and hopefully it will pull out of the garage under it's own power for the first time in, well, forever.
Will post video if successful.
Cheers,
Scott
Posted by: CptTripps Feb 22 2014, 05:59 PM
That sounds awesome.
I'm nervous about that happening to me too. Spending all this time/money/energy and having something real simple stump me.
Can't wait to hear the success story!
Posted by: ruby914 Feb 22 2014, 06:05 PM
Wow, that was a fast rebirth.
Posted by: Amenson Feb 23 2014, 07:27 PM
So, not quite the video I was planning to post but it will have to do.
https://www.youtube.com/watch?v=gooqcFg4dmA
We went through all of the fasteners on the back half of the car, adjusted the shift linkage and tidied up a few things in hope of making the maiden voyage out of the garage but the clutch will not disengage. I am not sure if my custom hydraulic clutch setup is not stroking far enough or if there is some other issue. I remember reading that the Kennedy flywheel/clutch setup sometimes having this issue if everything is not perfect but I can't recall the details.
If anybody has any suggestions, I am looking for answers. If someone can measure how much the clutch fork moves on a functioning setup that would be extremely helpful.
Cheers.
Scott
Posted by: Amenson Feb 23 2014, 08:11 PM
The Kennedy parts are the Subaru 2.5 adapter to 228mm Clutch disk with stage III pressure plate. Invoice says Porsche trow out bearing.
Any ideas?
Posted by: ruby914 Feb 23 2014, 09:02 PM
The kit I got from KEP had a problem with the pressure plate. For 2 weeks, I thought it was my linkage or that ball pivot. But no, a spring was broken on the pressure plate. They sent me a new one.
Posted by: Amenson Feb 24 2014, 02:22 PM
The kit I got from KEP had a problem with the pressure plate. For 2 weeks, I thought it was my linkage or that ball pivot. But no, a spring was broken on the pressure plate. They sent me a new one.
I called KEP to ask about the travel required at the TOB to to disengage the clutch and they said about 3/16". He recommended 1/8" of slop at rest before the TOB touches the pressure plate. I am pretty sure that I am over that, maybe too far.
I measured some pictures of a clutch fork and it appears to be about a 2.6 motion ratio. If this is the case and I am stroking the fork ~1" on the outboard side, the TOB should be moving .38", almost perfect if I have the proper slop. If I am fully stroking the slave to the max 1.375" the TOB moves .53"...maybe far enough to crack a spring?
I need to measure the actual slave stroke and confirm the motion ration to know for sure. Does anybody have a clutch fork laying around to measure the dimensions from both ends to the center of the pivot cup.
I have been considering that the clutch disk could be rusted to the flywheel due to the obscenely long time that the project has been sitting. I mentioned this idea to KEP but they said that the disk I likely have is mostly organic and probably not the problem. I will still try to pop it free as a last resort before pulling the trans.
Cheers,
Scott
Posted by: GS Guy Feb 24 2014, 04:13 PM
Scott,
Had my trans with installed clutch TO-arm and Kennedy TOB installed sitting in the basement and took some quick measurements. This is maximum throw of the arm, only limited by the physical opening in the bellhousing. Slave is not installed. My set-up also uses the 9" clutch/flywheel but just a stage II PP.
At the TOB face and outer slave pivot point I got:
TOB movement: 11/16" (0.6875)
Outer pivot movement: 1-5/8" (1.625)
1.625/0.6875 = 2.364 motion ratio
To get 3/16" movement at the TOB, should require 0.443" at the outer fork (slave) attachment pivot, less than 1/2"! My Wilwood slave has 1-5/16" total travel, waaay more than enough, at least on paper.
Hummm... I've got a 3/4" MC and the slave is also 3/4, easy 1:1. My Wilwood pedal ratio is 6:1 so that should be 2.66" of pedal movement for 3/16" at the TOB. That's good because I only have about 3" of total pedal travel available in my set-up!
Cheers,
Jeff
Posted by: Amenson Feb 25 2014, 08:37 AM
At the TOB face and outer slave pivot point I got:
TOB movement: 11/16" (0.6875)
Outer pivot movement: 1-5/8" (1.625)
1.625/0.6875 = 2.364 motion ratio
To get 3/16" movement at the TOB, should require 0.443" at the outer fork (slave) attachment pivot, less than 1/2"! My Wilwood slave has 1-5/16" total travel, waaay more than enough, at least on paper.
Hummm... I've got a 3/4" MC and the slave is also 3/4, easy 1:1. My Wilwood pedal ratio is 6:1 so that should be 2.66" of pedal movement for 3/16" at the TOB. That's good because I only have about 3" of total pedal travel available in my set-up!
Jeff,
Thanks for the details, this is exactly what I needed.
I did a really quick measurement and my slave is moving 1", maybe a hair under. This makes my TOB displacement ~.42". Plenty of movement to release the clutch and should not be too much to have broken a spring. Sounds like your setup will work also.
So why isn't my damn clutch releasing? At this point I have convinced myself that the disk is stuck to the flywheel. Besides the rusty rotors the there has been no resistance on the drive wheels as it has only started in the air. I only started it in gear once or twice and it was in first and revere to see if the wheels would actually turn. From what I have found online, starting it in 5th and braking should free it.
I am leaving for a business trip this afternoon, so I will not get to try to "brake" it free this until Friday or Saturday. Maybe I can hop into it quickly at lunch and give it a try.
Cheers
Scott
Posted by: Amenson Feb 25 2014, 10:58 AM
The clutch works!!!
Started it up in 3rd with the clutch depressed, pressed the brake and the engine did not stall. No major shaking or thunking noises. Let the clutch out and the wheels started turning, pushed it back in and the wheels stopped. It even goes into gear with the engine running Wish that I would have tried this on Sunday.
Should be driving it out of the garage this weekend
Cheers
Scott
Posted by: ruby914 Feb 25 2014, 11:07 AM
Cool, I was just digging up the old posting about my clutch troubles for you.
Looks like you will not need them.
You're going to love your new toy.
BTW, the car sounds great.
Posted by: Amenson Mar 1 2014, 02:30 PM
Cool, I was just digging up the old posting about my clutch troubles for you.
Looks like you will not need them.
You're going to love your new toy.
BTW, the car sounds great.
Hey Mike...mind finding that info about your clutch dilemma.
I put the car on the ground and it will not go in to gear with the engine running. I shortened the slave cylinder to make sure that I could adjust it properly and still could not get the clutch to fully release.
It will release enough that I can sit on the ground in gear w/o stalling the car but it will not go into gear. With the tires off of the ground they will slowly turn when in gear and the clutch pushed in. If I start the car in gear I can get it to move in that gear by releasing the clutch but if I want to select another gear I have to shut off the engine. I did get it out of the garage under power using this method but it was not glorious, it was rather infuriating.
Something is dragging in the clutch. I guess that I will have to pull the trans to figure out what.
Posted by: Amenson Mar 1 2014, 06:06 PM
I was out of ideas so I pulled the trans. Actually came out relatively easily.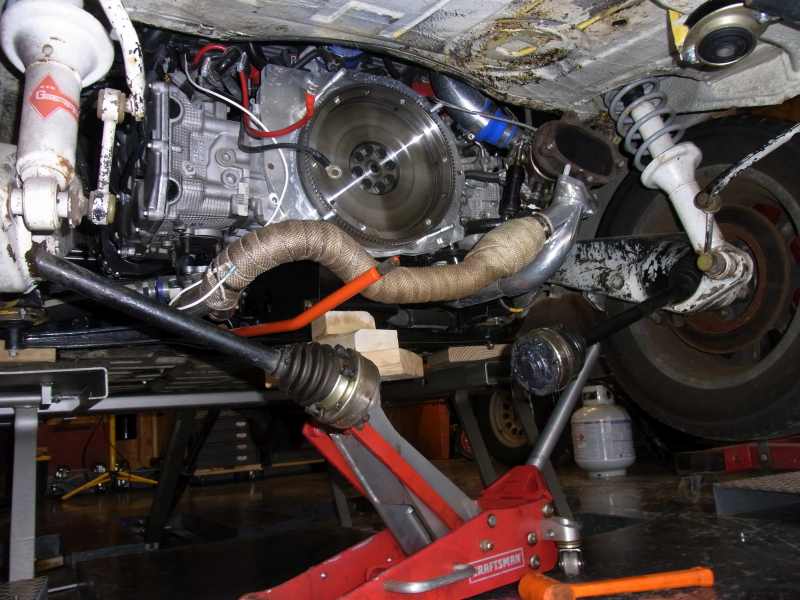
The pressure plate appeared to be properly in place and all of the bolts tight.
The disk looks basically new: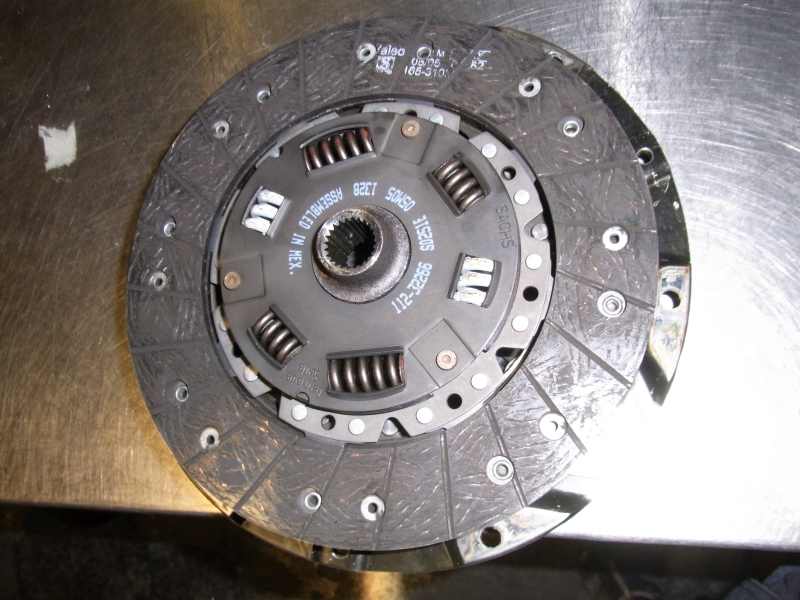
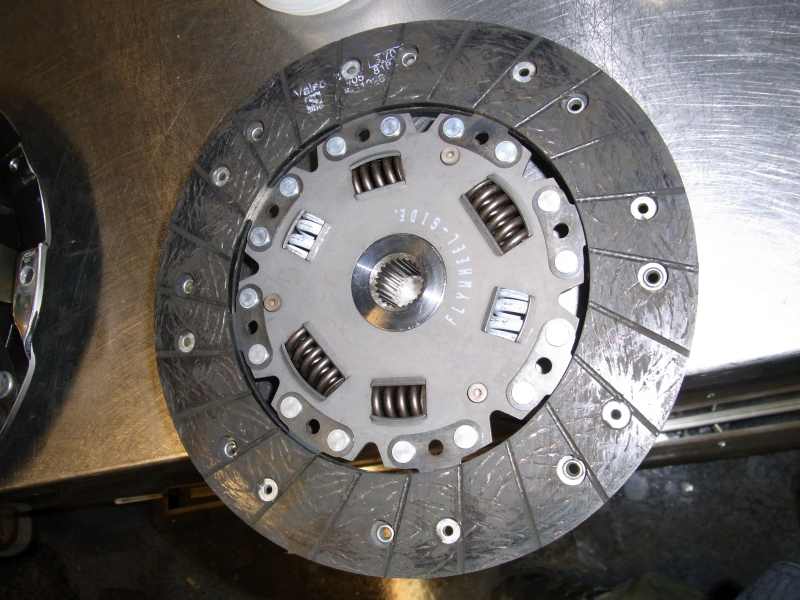
The flywheel looks unused except one area is starting to show some heat spots.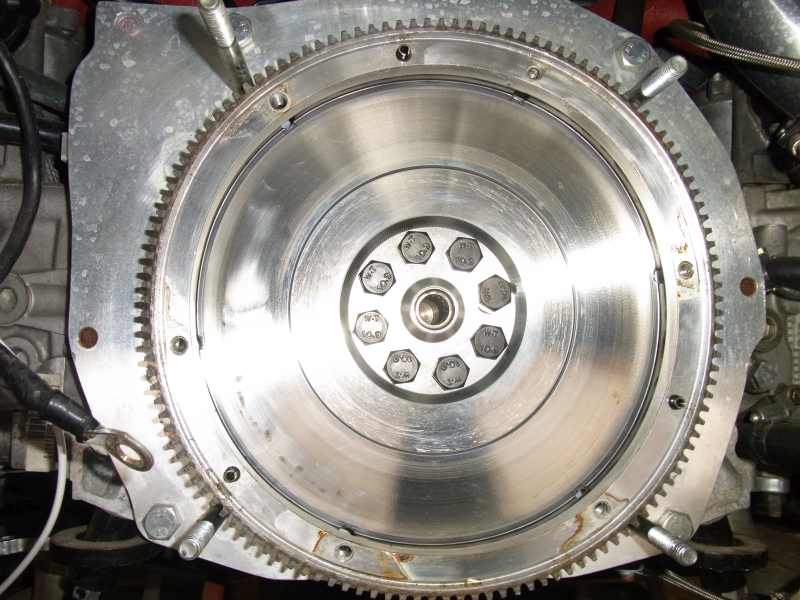
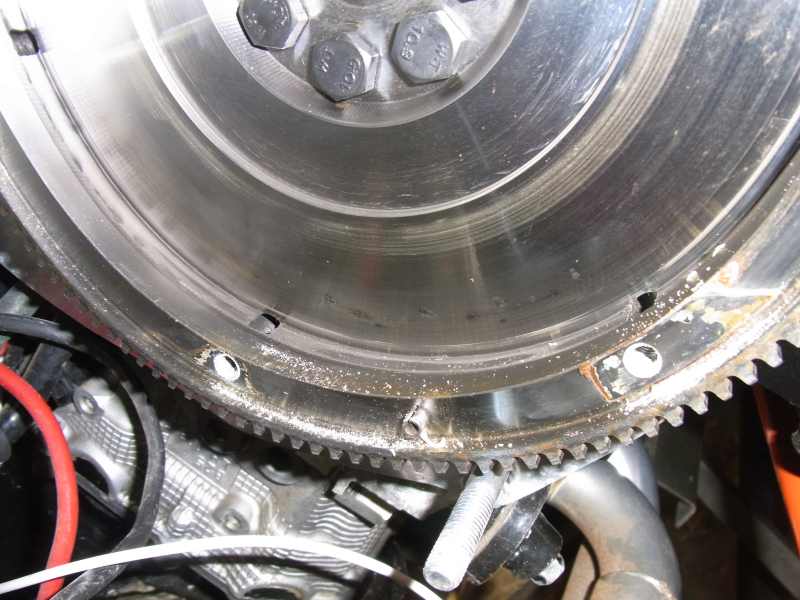
The pressure plate is the same with a matching area showing some heat spots.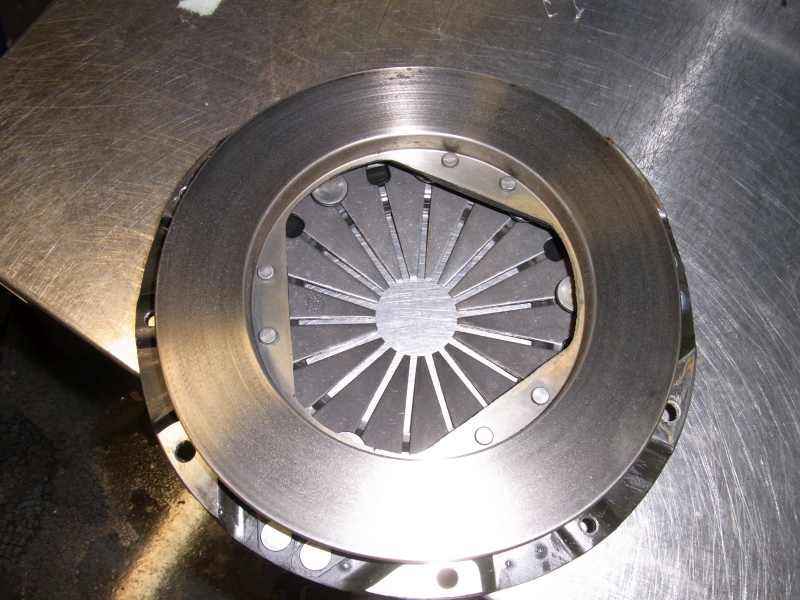
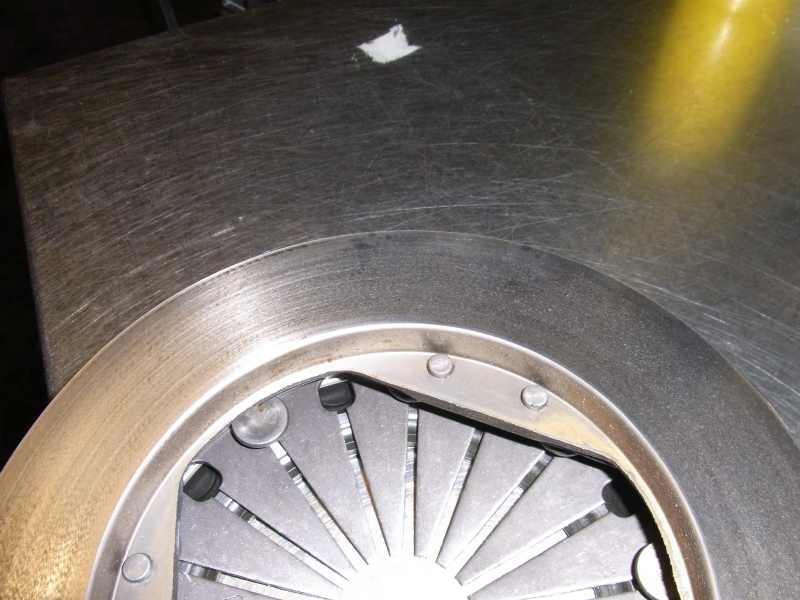
I have no idea what these parts should look like at this point in their life but it is odd that there are asymmetric marks in the same region of both the flywheel and pressure plate. Seems like those areas could be rubbing even with the clutch in. Nowhere else does it show any signs of slipping.
Any thoughts?
Cheers,
Scott
Posted by: rnellums Mar 1 2014, 08:37 PM
I know on the subie flywheels you can over tighten and cause dragging. Do you have a torque spec for the pressure plate bolts? I think it is around 14 ft - lb for the subie pp.
Posted by: jaxdream Mar 1 2014, 09:04 PM
Do you need the spacer washers behind the cluch release bearing fork piviot ball if the flywheel has been turned ???
Jack
Posted by: ruby914 Mar 2 2014, 01:06 AM
Here you go Scott.
From my Narp thread:
Posted: Sep 21 2009, 09:39 AM
I got the stage II, 9" Porsche heavy duty pressure plate and clutch from KEP but the clutch is not fully engaging.
It's adjusted so tight that it bottoms out on the transaxle case. KEP tells me, I may need to place a washer under the little Teflon pivot on the clutch arm, or bend the arm. Wish I knew before I installed the motor.
Is this normal?
Sep 25 2009, 11:23 AM
I found the thread: Suby conversion and hydraulic clutch?, Two mods at once??
GS guy said:
"While studying the Kennedy installation instructions, it states specifically to:
1) Remove the sealing washer behind the ball stud where the clutch arm pivots -
apparently to reposition the clutch arm slightly and allow more lever travel?"
I don't know if I ever got installation instructions, not to say they didn't send them but I don't find any in my file.
I don't remember a sealing washer behind the ball stud, in my case I think I need to go the other way and add the washer behind the cup.
Looks like it will come apart soon, maybe I will just bend the arm?
Nov. 5
I pulled the transaxle back from the motor to remove the clutch pivot arm, shim the pivot cup and bend the arm.
The clutch still did not fully disengage. Pulled the motor and checked everything in relation to the stock motor and transaxle. Everything looked good.
Called the good people at KEP more than one time.. Finally found the problem. The diaphragm was cracked from between two fingers to the outer edge.
KEP mailed out a new one that day. I was told, with the newer kits you don't have to remove the washer from under the pivot ball.
And that was it.
Problem is, from your photo yours looks ok.
The diaphragm was cracked behind the rivet in the photo.
Attached image(s)
Posted by: Amenson Mar 2 2014, 08:34 AM
Thanks for the feedback.
I know on the subie flywheels you can over tighten and cause dragging. Do you have a torque spec for the pressure plate bolts? I think it is around 14 ft - lb for the subie pp.
I could not find the instructions for the pressure plate assembly so I am not sure what the spec was. I am generally careful about torque specs for critical components so I would assume that they were properly torqued. Although anything is possible?
Do you need the spacer washers behind the cluch release bearing fork piviot ball if the flywheel has been turned ???
Jack
All of the parts are new.
And that was it.
Problem is, from your photo yours looks ok.
The diaphragm was cracked behind the rivet in the photo.
I checked again, very carefully, for cracks and could not find anything that even hinted of a crack.
I also measured from the pressure plate face to the flywheel mounting face and it was consistent.
What I did notice, and I have no idea if it is actually an issue, is that when I set the pressure plate finger side down, the pressure plate face does not sit level.
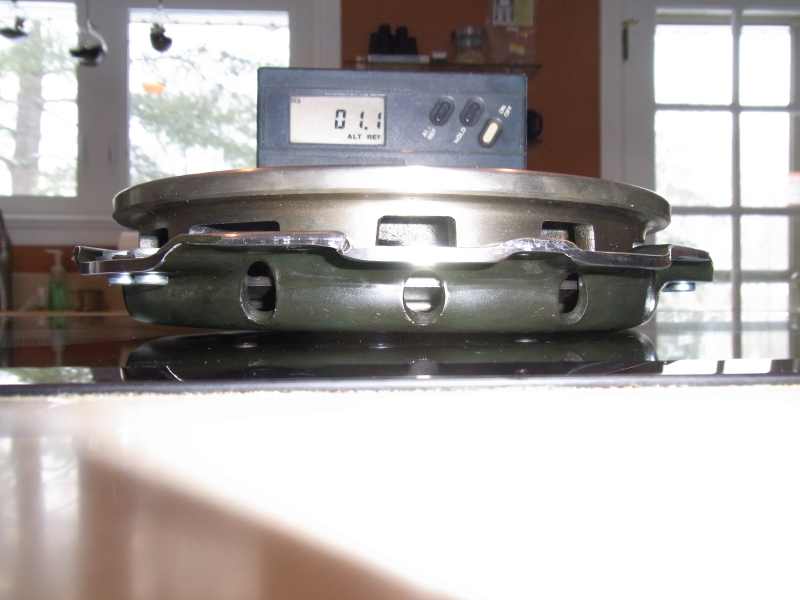
The level is zero'd to the measurement surface (otherwise known as my glass cooktop).
Is this a problem? It is the only thing that I can find that even hints at an issue.
I sent an email to KEP with all of my observations. They were helpful when I called last week. Hopefully they can give me some feedback to get me moving forward again.
Cheers,
Scott
Posted by: Amenson Mar 4 2014, 11:19 AM
The feedback from KEP is that the the pressure plate likely has some issue.
I have a new on on the way and the old one is going back to KEP for inspection.
If all goes as planned I will have the car back together and working on Saturday as my from me to me birthday present and, more importantly, in time for our annual Chili Cook-off party where a whole bunch of people will be at the house who have been asking me for a long long time when the car will be running.
Hopefully I will never have to be asked that question again.
Cheers,
Scott
Posted by: 76-914 Mar 4 2014, 11:37 AM
Happy birthday. I'll be celebrating with you.
Posted by: Amenson Mar 6 2014, 02:11 PM
Happy birthday. I'll be celebrating with you.
The tracking number says that my new pressure plate will arrive tomorrow.
Here is my excellent schedule through the end of the weekend.
Now...Continue to work like a dog to put the finishing touches an a work project that started 3 years ago.
6pm- Clean the flywheel and organize the tools/fasteners required to get the PorSTI back together.
Tomorrow:
7-9am final review/cleanup of work Documents.
9am-12pm Meeting to release project to production.
10am; UPS should arrive with pressure plate.
12:01pm Drive home and open Hopslam.
12:30pm-end: Install and test clutch. Drink more beer.
Saturday:
Morning: clean up garage for party. Pick up beer bottles from Friday.
11am-2pm: Brunch and beers at favorite restaurant.
2pm-5pm: Get ready for Party.
5pm-end: Party.
 Maybe do a burnout to prove to friends that PorSTI really is working.
 Sunday:
Pick up more beer bottles.
Posted by: Amenson Mar 7 2014, 02:00 PM
My plan was going great until the UPS guy showed up at work and did not have my pressure plate. Called KEP and apparently they are incapable of differentiating between a shipping and billing address. 
The pressure plate will arrive today but instead of installing it this afternoon during the half day of vacation I took for the purpose, I will install it tonight.
Posted by: Amenson Mar 7 2014, 09:22 PM
Bad news, new pressure plate, same problem.
This must be a stroke issue. What else could it be?
Posted by: ruby914 Mar 7 2014, 11:09 PM
How's the beer?
Posted by: Amenson Mar 8 2014, 08:00 AM
How's the beer?
Beer was great. Had a Hopslam, New Belgium Rampant, and NB 1554 while waiting for the pressure plat to arrive. Nothing like a couple of Imperial IPA's to take the edge off.
Hopefully I can get some more travel out of my clutch pedal to confirm if more TOB travel will fix my issues.
Posted by: Amenson Mar 9 2014, 12:46 PM
Not quite in time for for my party yesterday but....
https://www.youtube.com/watch?v=MIKFcDL4-NA
Time to take the wife for a ride around the block!
I will document what I did to fix the clutch issue later today!
Cheers,
Scott
Posted by: ruby914 Mar 9 2014, 02:22 PM
Cool!
Now, take some time to drive it before you put it back on the jack stands.
Posted by: CptTripps Mar 10 2014, 06:58 AM
Admittedly, I was expecting something more dramatically bad to happen when you revved it up there.
Posted by: Amenson Mar 11 2014, 04:03 PM
Admittedly, I was expecting something more dramatically bad to happen when you revved it up there.
I too was a bit uncertain about what would happen but the car needed to start its new life in an appropriate way so I went for it. Turned out quite well.
After the burnout I took it out for a leisurely cruise with my wonderful wife. The temps starting climbing so I brought it back to the garage to work some more air out of the cooling system.
I then took it out for a less leisurely drive and blew an intercooler line off attempting a rolling 2nd gear WOT launch. Made some awesomely terrifying noises but no harm done. This thing is going to be very fun
I also found out that near full throttle pedal travel, the sensor faults out so I need to modify the linkage a bit. Not a huge problem but did result in some pushing before I figured out what what going on.
At the end of the testing the car started to stall out. I am pretty sure that I am almost out of gas because the tank is not baffled so it could suck air as the fuel is sloshing around.
Unfortunately in the middle of this I found out that my 96 year old grandmother is terminally ill so I parked it and am now in Wisconsin.
Stay tuned.
Scott
Posted by: Amenson Mar 23 2014, 05:24 PM
Had a great day in the garage. Took care of a transmission output shaft seal leak on my wife's '05 Legacy GT Wagon. While I had it out I also fixed a small exhaust leak. It went so well that I had a couple of hours to work on the PorSTI.
I have been struggling with an issue where when the engine loads up it starts running like garbage. I had convinced myself that the ECU was hitting some failsafe target and going into a protection mode because it felt a lot like when my Galant VR4 would hit fuel cut. I took log after log with different signals but could not find anything maxing out. The only thing that looked at all abnormal was that the O2 sensor was saturating at full rich when this occurred. I figured that it was part of the protection mode.
Some more research and deep thought and I changed my diagnosis to a boost leak. Pulled the intercooler and checked all of the couplings. Sure enough, one of the couplings had slid past the clamp but was still over the tube so at low boost/vacuum it was still sealing but at high boost it would leak. Put everything back together and it goes like mad. Rolled into the throttle in second gear and got almost immediate wheel spin Gotta love boost!
As for the clutch, the problem is a lack of stroke at the slave cylinder. I am going to replace the 3/4" master with a 1" to increase the slave stroke.
Posted by: Amenson Apr 16 2014, 07:21 AM
With the car running I had a chance to drive it to get the required out of state vin inspection so that I can register it.
My plate idea was still available! 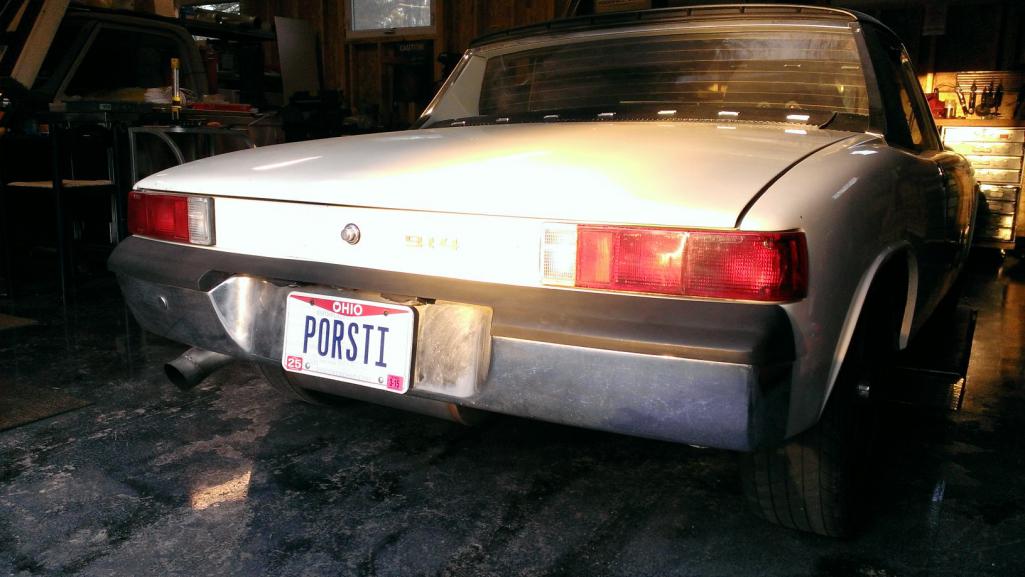
I actually received the plates last weekend but I have been too busy following CptTripps build thread to update my own!!
Posted by: CptTripps Apr 16 2014, 07:39 AM
Ok...so I have a HUGE issue here mister.
You're only about 1:45 south of me and I'm just now figuring this out?
I need you to get in that car and drive your ass up here so I can compare things and make sure I don't build myself a hand grenade.
No excuse. I'll expect you in my garage at 6:00pm tonight.
Posted by: 76-914 Apr 16 2014, 08:00 AM
Outstanding! Great work. Mucho congratulations.
Posted by: Amenson Apr 16 2014, 09:38 AM
Ok...so I have a HUGE issue here mister.
You're only about 1:45 south of me and I'm just now figuring this out?
I need you to get in that car and drive your ass up here so I can compare things and make sure I don't build myself a hand grenade.
No excuse. I'll expect you in my garage at 6:00pm tonight.
Looks like you have everything well under control but if you need any specific pictures or anything just let me know.
I still have some minor details like brake lights and blinkers to hook up before I can get too far away from home. Hope to get most of it knocked out on Friday and then I can start finding excuses for mid range road trips.
I need to get some serous miles on it before June because I will be joining by Detroit buddies on Hot Rod Power Tour. Need to know that it will hold up to 2500 miles over a week of daily burnouts and other shenanigans.
Posted by: CptTripps Apr 16 2014, 09:42 AM
It may LOOK like I have it all under control, but I imagine that there's something backwards somewhere that I will need a 2nd...or 3rd...or 4th set of eyes on before I feel comfortable driving it more than around the block.
So I'll expect that next weekend you'll be able to come up and help me shake-down mine! Right??? Come on man...it can be your first "mid-range" trip. I'm a short 2h drive up 71!
Posted by: Amenson Apr 17 2014, 07:28 AM
It may LOOK like I have it all under control, but I imagine that there's something backwards somewhere that I will need a 2nd...or 3rd...or 4th set of eyes on before I feel comfortable driving it more than around the block.
So I'll expect that next weekend you'll be able to come up and help me shake-down mine! Right??? Come on man...it can be your first "mid-range" trip. I'm a short 2h drive up 71!
I had a buddy conduct a sanity check for me. It was useful to have somebody reasonably unfamiliar with the setup check it over because I had looked at it so many times that I was missing some obvious things.
Biggest things to pay attention to are those that can cause over boost. Make sure the boost control solenoid is plumbed properly and if you are using the stock plumbing, check that the restrictor pill is in the correct place.
Good to hear that you are stepping back from the goal to drive to Hershey this weekend...no sense cutting corners now.
Posted by: 1stworks Apr 17 2014, 08:18 AM
Congratulations!!!!!
The car sounds sick!!!!!!
Posted by: Amenson Apr 20 2014, 06:36 PM
Had a some fairly productive garage time over the long weekend.
I installed the 1" master cylinder for the clutch. I am definitely getting full disengagement of the clutch but the pedal force is somewhat obscene. I am considering changing to a 7/8" master but need to do the calculations to see how much the pedal force and slave travel will go down.
I had the wife drive it just to see what her reaction would be to the clutch. She was more uncomfortable with the position of the steering wheel than she was with the clutch 
I also hooked up the brake lights and blinkers so the car is legal to drive. Unfortunalty when I took it to go on the madden voyage to the gas station, the car started bucking again...apparently when I was doing burnouts in the driveway earlier in the day I blew a IC hose off again.
Anticipating that this would continue happening I purchased a Harbor Freight http://www.harborfreight.com/18-inch-sheet-metal-fabrication-kit-34104.html during the last super sale. 
It does a pretty good job but I had to clamp a reinforcing bar on the back side to keep the rollers aligned.
I even put a bead on the input/output of the IC.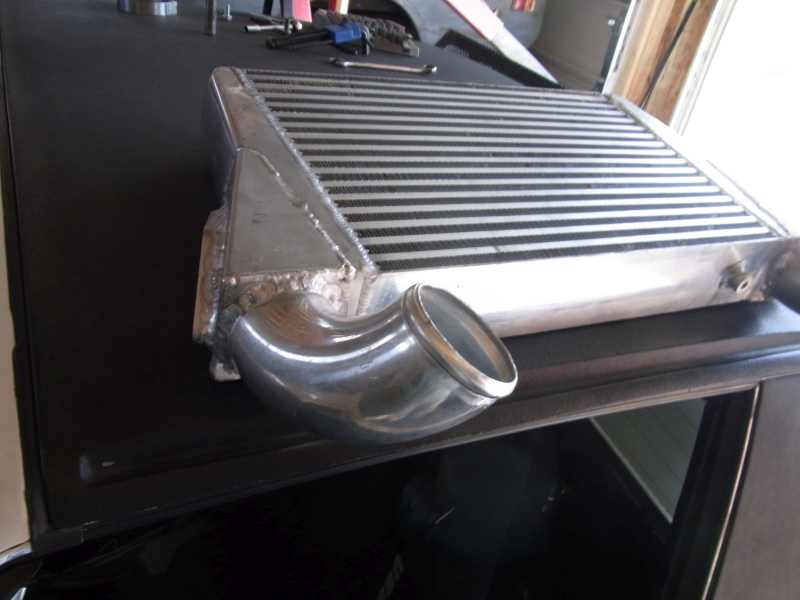
Talked the wife into powering the rollers while I rotated the IC.
Unfortunately I must have something mis-clamped because I am still getting a hesitation. Sucks, I was planning to drive it to work tomorrow.
Cheers
Scott
Posted by: 914forme Apr 20 2014, 06:52 PM
Very Nice, I have one of them and never thought about doing that, I will have to try this. I have built them out of Vice grips and exhaust clamps. Did what I needed it to do, on my turbo pipes on my TDI.
Posted by: RonW Apr 20 2014, 08:13 PM
great thread, from start to end. glad to here its on the road.
Posted by: Amenson Apr 21 2014, 02:59 PM
I think that I just calculated myself into a corner and am now doubting myself.
I went from a 3/4" master to a 1" master.
The slave is 7/8".
I calculated that this increased the force needed at the master cylinder ~79%.
If I would have went from a 3/4" to a 7/8" master, I calculated that I would have only increased the force needed at the master cylinder ~29%.
Anybody want to double check my math....
Posted by: Amenson Apr 21 2014, 08:42 PM
Come on...somebody wants to dust of the old HP48 
Posted by: jcd914 Apr 21 2014, 10:35 PM
Well with the increase in diameter of your master cylinder piston, the area of the circle has increased from 0.442 square inches with the 3/4" master cylinder to 0.785 square inches with the 1" master cylinder.
I calculate that at about 78% increase in area.
The 7/8" master cylinder would put you in the middle with 0.601 square inches or about 34% increase.
Jim
Posted by: Amenson Apr 22 2014, 09:53 AM
Well with the increase in diameter of your master cylinder piston, the area of the circle has increased from 0.442 square inches with the 3/4" master cylinder to 0.785 square inches with the 1" master cylinder.
I calculate that at about 78% increase in area.
The 7/8" master cylinder would put you in the middle with 0.601 square inches or about 34% increase.
Jim
Thanks Jim!
Basing the comparison on area vs force is a much cleaner way of getting to the same results.
I ordered a 7/8" master to get the force improvement. The slave stroke should still be fine.
Cheers,
Scott
Posted by: Amenson Apr 24 2014, 11:30 AM
I sorted out the issue with the boost and it is running great again. So great in fact that I decided to drive it to work today.
Took the opportunity to fill it up at the pump for the first time.
I did find that with a full tank, fuel will slosh out of the vent. It is so fun finding issues like this finally!
Posted by: CptTripps Apr 24 2014, 05:13 PM
Posted by: RonW Apr 24 2014, 07:11 PM
NICE! no vids?
Posted by: 914forme Apr 24 2014, 07:22 PM
I sorted out the issue with the boost and it is running great again. So great in fact that I decided to drive it to work today.
Took the opportunity to fill it up at the pump for the first time.
I did find that with a full tank, fuel will slosh out of the vent. It is so fun finding issues like this finally!
Who's. valance are you running, it looks like the one Patrick sells, but if you have a better source do tell. I am in the market for one.
And great to see it out on the road. That is a great day in every car projects life. Now go and work the bugs out
Posted by: Amenson Apr 25 2014, 06:54 AM
NICE! no vids?
Not much to show that is video worty, just tooling around town.
Who's. valance are you running, it looks like the one Patrick sells, but if you have a better source do tell. I am in the market for one.
And great to see it out on the road. That is a great day in every car projects life. Now go and work the bugs out
It is the Patrick valance. It is a pretty nice piece but it did not fit symmetrically on my car so I had to offset it about 1/2 inch from center. Might be my car but it seems pretty straight up front.
The car got a little warm sitting in traffic on the way home from work yesterday. Probably due to the lack of a vent on the hot side of the radiator. Also did not help that I had a few weeping connections in my cooling system. Man would it be nice to have a set of tube beaders the next time I have my cooling system apart
Posted by: JTSmithson Apr 25 2014, 09:39 AM
Just read this cover to cover, amazing stuff you've done. My father and I are in the process of putting a '74 2.0 back together. I have my doubts on the quality of life our little 2.0 has and if it get's a Suby Motor this thread will be printed on poster boards for reference.
Posted by: Amenson Apr 26 2014, 10:48 AM
Just read this cover to cover, amazing stuff you've done. My father and I are in the process of putting a '74 2.0 back together. I have my doubts on the quality of life our little 2.0 has and if it get's a Suby Motor this thread will be printed on poster boards for reference.
Thank you for the kind words. Hopefully my successes and more importantly my failures can help others improve the quality of their projects.
That being said, I just swapped out the clutch master cylinder and the 7/8" master has a much more reasonable pedal force and the stroke is enough to fully disengage the clutch.
Posted by: Amenson May 2 2014, 09:12 PM
I have been going through all of my parts to see what I have...more like what I can find.
Looks like I lost my Subaru fog light switch. Anybody have one left over from their harness that they want to sell?
It should look like this:
Posted by: Amenson May 4 2014, 07:48 PM
Had another pretty successful weekend in the garage. Spent a few hours cleaning up some unused or poorly routed wires. Then I tackled installing the upper dash.
The metal support dash came out pretty easily.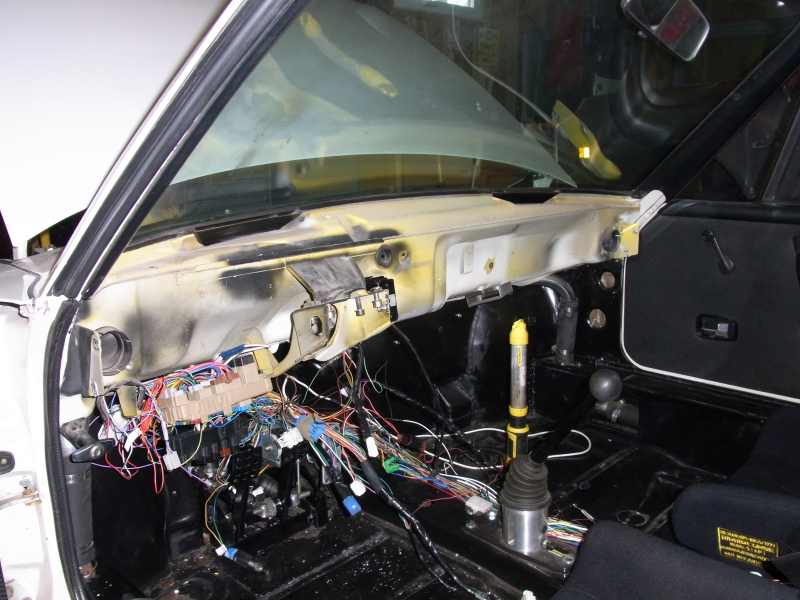
Mocked up the assembly on the bench so that I could weld up some cuts make to fit the Suby IC.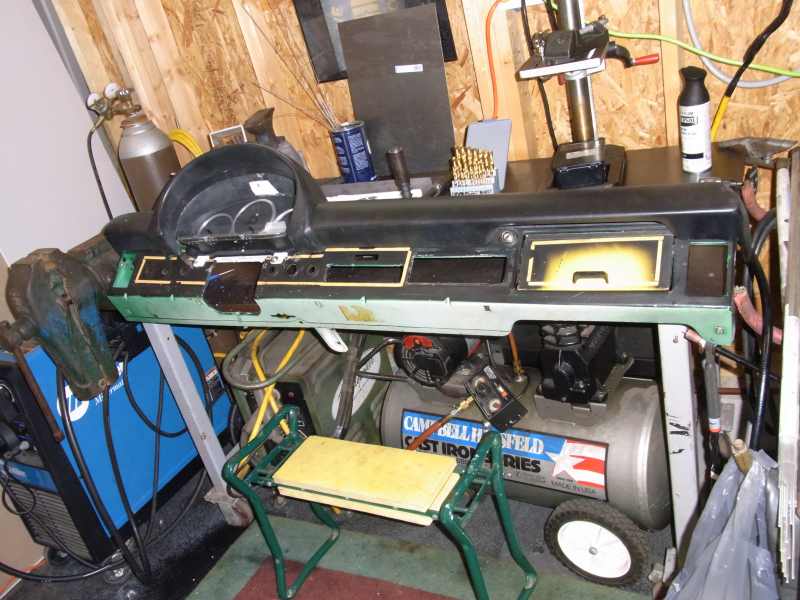
Many hours of welding, grinding and painting later...it is ready to go back in.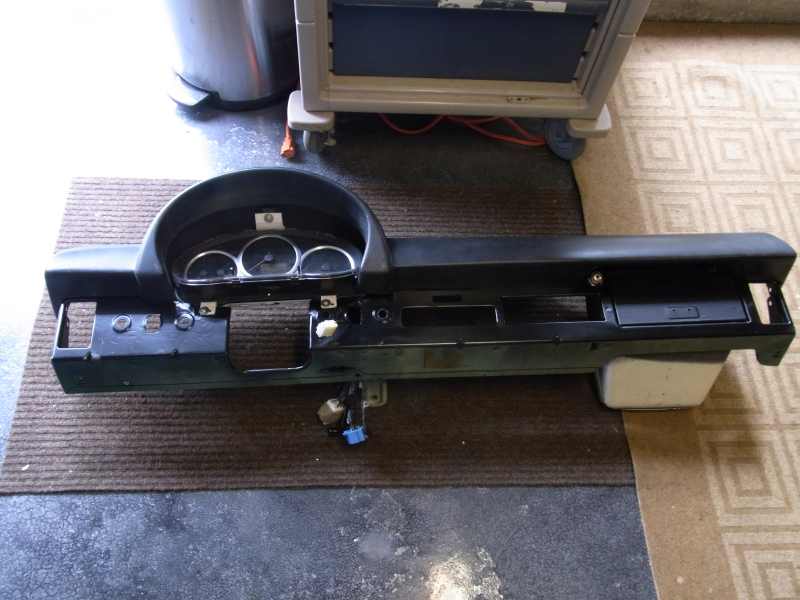
Installed! The paint job is crappy but much better than is was previously.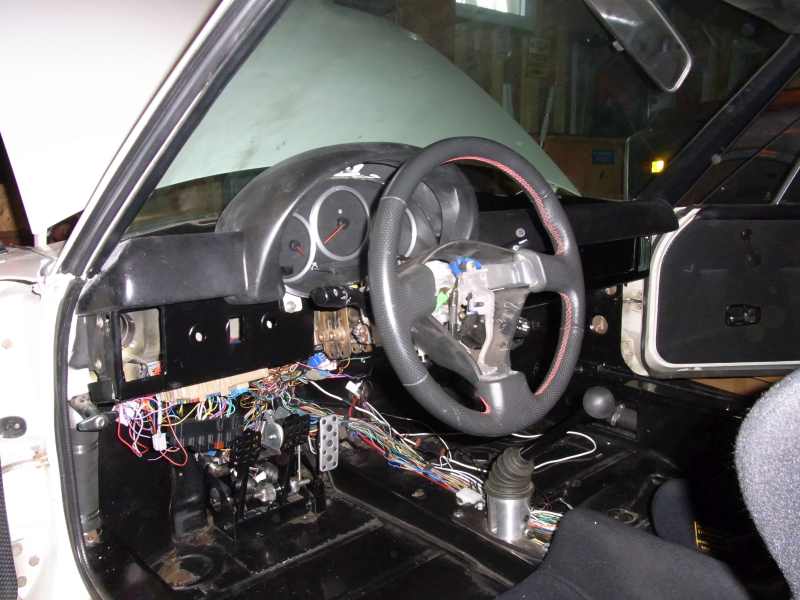
Now I can accelerate without having to hold the IC in place!
Cheers,
Scott
Posted by: Amenson May 15 2014, 01:50 PM
With the dash in and some of the wiring tidied up the car feels almost like a real car. So much so that I have been driving it a lot...apparently too much for the unvented radiator.
The engine temps have stayed almost ideal but after a half hour drive through traffic and highway speeds on a beautiful 80 deg day the thing started sputtering and quit on me. Sort of started up enough to get onto a side road where I could check things out. After poking around for a bit I noticed that the fuel pump was not making any noise. Went to touch it and damn near blistered a finger. Apparently containing all of the heat from the radiator in the same area as the fuel cell and heats up the fuel so that it no longer cools pump causing the pump to seize. I did not like the external pump anyways so I picked up one of these:
http://www.tanksinc.com/index.cfm/page/ptype=product/product_id=84/mode=prod/prd84.htm
I am also going to apply some adhesive heat barrier to the fuel cell and finally put the hole in the hood so I should be ok.
I found it to be very irritating that the fuel gauge reads backwards so I ordered a new sender.
http://www.egauges.com/VDO-Tube-Type-Sender-90-0-Ohms-Adjustable-Gauges-s/23211.htm
I also noticed that the radiator fans were running all of the time and that the ECU was commanding them to do so. After a bit of reading the ECU considers speed when turning on the fans so I guessed that the vehicle speed sensor disconnected fault was causing this. Temporarily hooked up my sensor and the fans work properly. While messing with the sensor I considered that there was no way possible for the speedometer to be correct so after some searching of the internets I found and ordered this wonderful device:
http://www.fastforward.ca/harness_retrofit_accessories.html
I was still struggling with a fuel/boost cut type feeling as boost started to build. Again I had convinced myself that it was indeed fuel/boost cut. In preparation to have my car tuned next week I made a quick boost leak tester to confirm that everything was OK. Well, it was not. I had a few small leaks that were together causing a huge loss of air under boost. Welded up a few pinholes and adjusted a few clamps and it is making power again. When I took it out for a test drive last night the roads were a bit damp so I had a load of fun boiling the tires with any moderate throttle apply.
I also found that all of the wheel bearings need to be replaced. I read a number of different explanations on how to remove the rear bearings and would like to try it while on the car w/o the spendy tool. Anybody want to convince me that trying to "tap" them out is a bad idea? I have a press so I could do it that way but really do not want to pull the trailing arms.
I have to say again just how cool the custom dash is that I picked up from ruby914. If you want to use the suby IC you really need to convince him to make one for you.
Cheers,
Scott
Posted by: ruby914 May 17 2014, 11:58 AM
I don't know Scott. Have you have you seen what Kent (76-914) is doing with his Suby/914 cluster. He is making the need for complete dash replacement obsolete. He is 1/2 way there.
I have to take a 2nd look at the Suby cluster, see if it can be drawn and quartered with the parts reintegrated into the 914 cans and still get full functionality out of it. It would be cool if the odometer was still there and the Suby harness connectors utilized.
I see you did manage to get the fuse box up under the dash, wow, great job.
Where is the ECU now? I think anything FWD of the stick shift is a major task.
I also like the upside down fuel sender tube, wish I knew they made them sooner.
Do I recall your wife didn't feel comfortable with the control locations? What was it?
I think I did manage to get the steering wheel just a little more forward. I also tilted the seat back some.
Posted by: Amenson May 20 2014, 08:32 PM
Mike, I did see what Kent is doing and while it is really impressive, it just feels right to have the suby gauges and with your handy work...it integrates really well. I do hope that you go back to a stock configuration so that I can have your carbon covered piece
My ECU is between the seat. I will hide it under the center seat cushion/tray. My wife did not like how low the steering wheel was and how her legs were unsupported. The wheel is now much higher so that I can see the gauges and the seat will be reclined 15 deg very soon. Should be pretty much ideal seating position for me and not so bad for anybody else sorter than 6'.
On the progress front, I got the in tank pump and new fuel sender installed. No pictures because it was a somewhat hectic install...partially because one of my buddies stopped over with a couple of Cuban cigars that distracted me for a couple of hours. I did make a valuable swap fact. The suby fuel pump controller requires an isolated ground in order to control the duty cycle. The in tank pump kit that I used has a pump ground that is not isolated so the pump does odd things...like run continuously when the IG is on but engine is not running. Not really a problem except that I also had a leak inside the tank that was causing the engine to run like crap. I went to bed Sunday night with the car not running and no idea how to fix it with an appointment first thing in the morning with the tuner. After a restless night of mental troubleshooting I fixed it first thing in the morning and made my appointment. The result is this: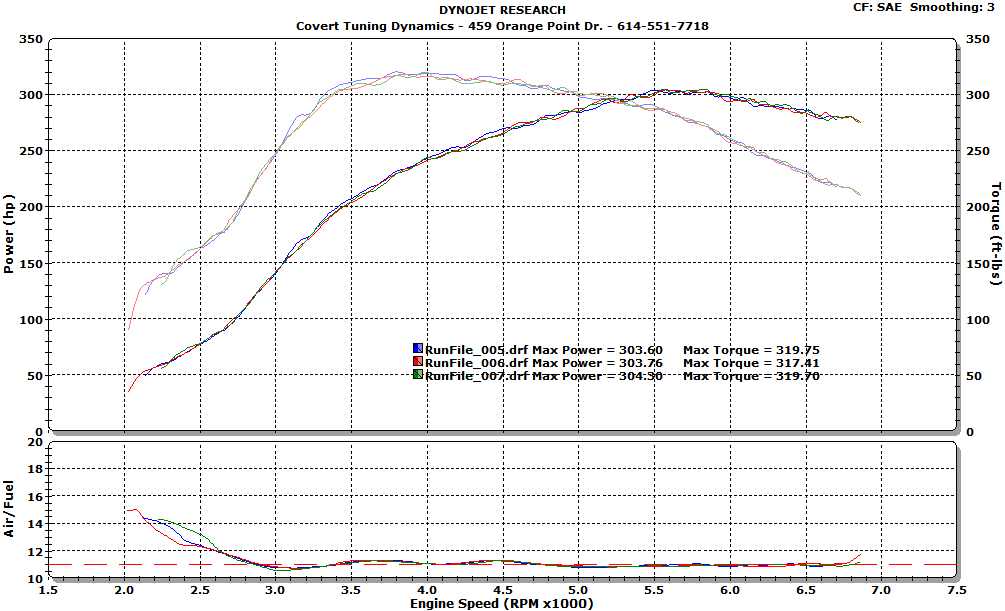
Pretty standard stock turbo results. I had him be a bit conservative so that I can put pretty much any quality of premium and still beat on it w/o any fear of detonation.
I also had my new tires installed which really helped with the straight line traction but the sidewalls are really compliant. I actually pulled over on the way home from the shop because I thought that something was wrong. I feels like I am driving on gummy bears. I played with the tire pressures a bit and got some improvement and it will get a bit better when I replace the wamped out bearings but the handling will still be less than super. Maybe I will have to install the 911 front suspension and 16" phone dials I have squirreled away. Anybody have a set of rear 5 lug parts laying around?
Tires are 205/55R-15 Dunlop Direzza DZ102's. Wheels are stock 2.0 Fuchs.
Anyways, still have a load of stuff to clean up before I will be comfortable to drive it 2500 miles on Hot Rod Power Tour. Less than 3 weeks to go, time to get serious.
Cheers
Scott
Posted by: Amenson May 20 2014, 08:53 PM
...almost forgot. After the tuning session, which was particularly nerve wracking listening to some strange guy wail on my "baby" on the dyno for almost 4 hours. Every time he brought it to redline at WOT I cringed waiting for horrible noises of catastrophic failure. None happened but after the session he asked me what fluid in the car was blue. WTF...did the tranny crack? Swepco is blue! Got under the car on the lift and the passenger side of the trans was soaked. Pressure plate was dripping. Looked around and it appeared that the front seal was leaking. Got it home and looked at it closer and it actually looks like the fluid was coming out of the breather.
Is it possible/common for gear oil to get slung out of the breather?
Posted by: 914forme May 20 2014, 08:54 PM
I have a spare set of drilled hubs. You can take your -4 rotors, bolt the hobs on and mark the -5 bolt holes, and drill the 4 holes. on each of the rotors. If the hats are as soft as the metal in the disk, you should have no problem drilling them.
Iam swapping over to 911 rear hubs and stubs. So these are just kinda hanging out in the rear arms, still haven't pressed them out yet. I could get that done if your in need.
Posted by: JTSmithson May 20 2014, 09:01 PM
What would you want for the 4-lug Fuchs if start doing swappy swap stuff??? You can PM to keep the bidding down.
Posted by: Amenson May 21 2014, 07:15 AM
I have a spare set of drilled hubs. You can take your -4 rotors, bolt the hobs on and mark the -5 bolt holes, and drill the 4 holes. on each of the rotors. If the hats are as soft as the metal in the disk, you should have no problem drilling them.
Iam swapping over to 911 rear hubs and stubs. So these are just kinda hanging out in the rear arms, still haven't pressed them out yet. I could get that done if your in need.
This is definitely an option. Realistically the conversion will not happen before Power Tour so I am not in a hurry. When you get them out, get in touch and we can work something out.
What would you want for the 4-lug Fuchs if start doing swappy swap stuff??? You can PM to keep the bidding down.
Send me a pm with an offer. This will get you first in line when I do sell them and give me an idea what my budget would be for the swap.
Nobody has any feedback about the trans fluid situation??
Posted by: mgp4591 May 21 2014, 08:02 AM
I have a spare set of drilled hubs. You can take your -4 rotors, bolt the hobs on and mark the -5 bolt holes, and drill the 4 holes. on each of the rotors. If the hats are as soft as the metal in the disk, you should have no problem drilling them.
Iam swapping over to 911 rear hubs and stubs. So these are just kinda hanging out in the rear arms, still haven't pressed them out yet. I could get that done if your in need.
This is definitely an option. Realistically the conversion will not happen before Power Tour so I am not in a hurry. When you get them out, get in touch and we can work something out.
What would you want for the 4-lug Fuchs if start doing swappy swap stuff??? You can PM to keep the bidding down.
Send me a pm with an offer. This will get you first in line when I do sell them and give me an idea what my budget would be for the swap.
Nobody has any feedback about the trans fluid situation??
I've only seen oil out the breather tube if it's overfilled... or if the bottom of the tube is venting below the fluid level. Other than that...??
Posted by: CptTripps May 22 2014, 12:11 PM
My size 13 foot would catch EVERY one of those wires!
Posted by: 914forme May 22 2014, 04:14 PM
Added a catch can and see what happens with your trans fluid. Many a thread on how to do it, you can go cheap on it, a bike bottle, and cage, and some hosing. Its not a bad idea anyway if your planning on auto-xing it or taking it to the track anytime.
People don't like oil on tracks.
And for some reason unless there is a VW Beatle in the crowd the first place they always come and look is at the 914s.
I was at one event a guy in an Eagle Talon dumped 4 Quarts all over the paddock and they came over to inspect my car. I am like what are you looking for, I am clean, go look at that guys car, with the trail of oil heading to that trailer over there.
Posted by: Amenson May 23 2014, 08:15 AM
Added a catch can and see what happens with your trans fluid. Many a thread on how to do it, you can go cheap on it, a bike bottle, and cage, and some hosing. Its not a bad idea anyway if your planning on auto-xing it or taking it to the track anytime.
People don't like oil on tracks.
And for some reason unless there is a VW Beatle in the crowd the first place they always come and look is at the 914s.
I was at one event a guy in an Eagle Talon dumped 4 Quarts all over the paddock and they came over to inspect my car. I am like what are you looking for, I am clean, go look at that guys car, with the trail of oil heading to that trailer over there.
I like the idea of adding a catch can, thanks for the suggestion.
When I used to race F500 we had a run group with Formula Vee. Even though we ran two strokes and probably put a decent amount of oil out of our exhaust we still complained about the oil from the FV guys
Air cooled flat 4's are always to blame.Cheers,
Scott
Posted by: Amenson May 25 2014, 08:47 PM
Had a productive day in the garage today and ticked off some major items.
The biggest but least interesting thing was to fill the access holes in the outside of the longs. I always hate doing things that when complete just make it look the way that it should have in the first place. So boring that I did not even take any pictures.
The other thing is something that I have been avoiding....cutting the cooling scoop in the hood. Lots of measuring, marking, measuring, and more measuring...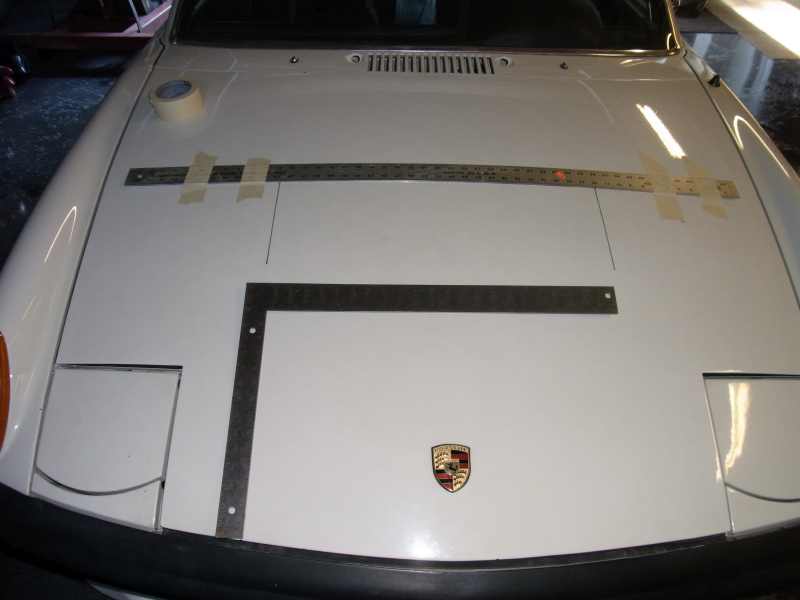
..then finally some cutting.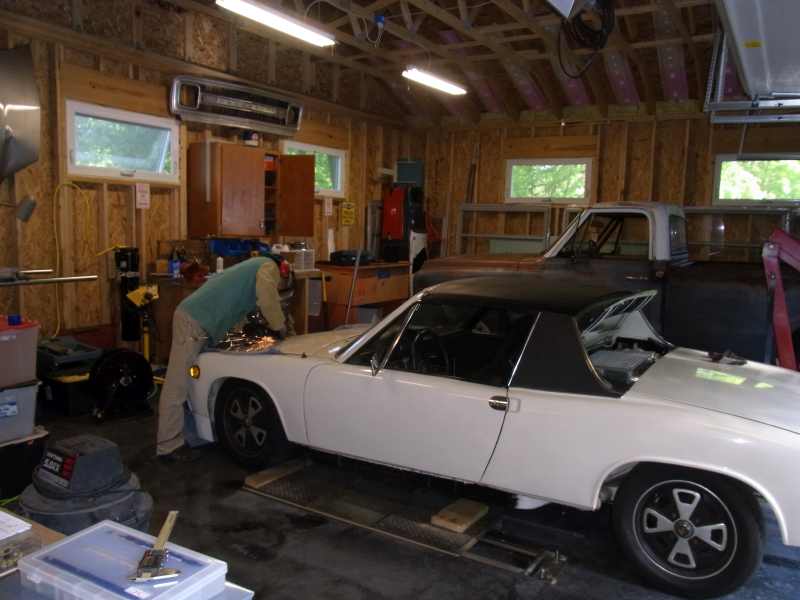
Cuts came out almost perfect, wobbled a bit on the longitudinal cut but can't really tell.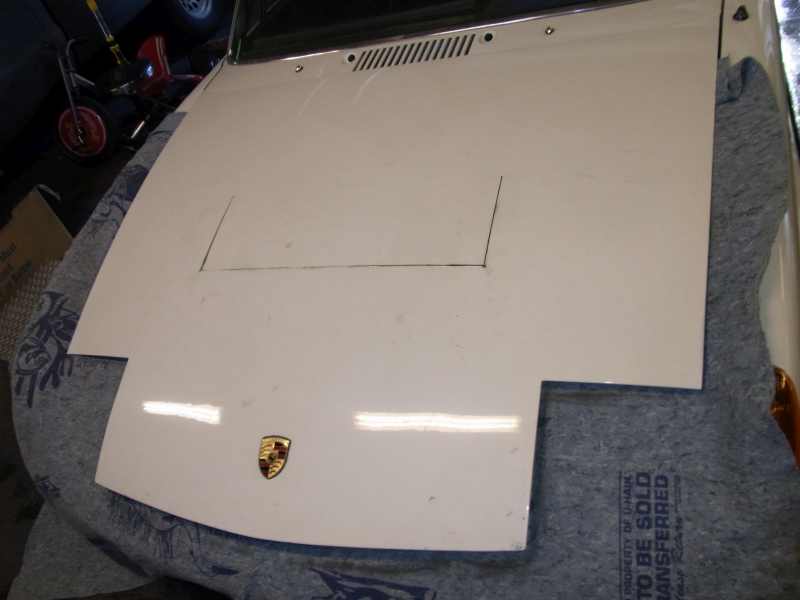
Still have to bend it open further and fab in some sides but it should be fairly discrete.
The opening will be about 12cm deep. The cut out is 60cm x 20cm.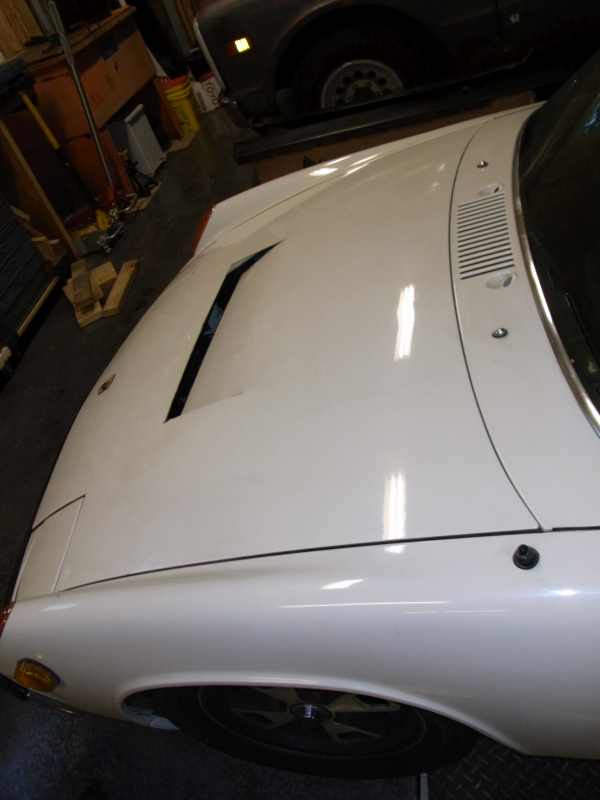
Eventually I will fab up ducting to the radiator but that can wait, too many other things to do before the start of HRPT on the 6th.
Cheers,
Scott
Posted by: Alphaogre May 25 2014, 10:08 PM
I'm really diggin that hood!
Posted by: Amenson May 26 2014, 07:58 PM
Continued work on the scoop today.
Was struggling to get the right curve in the flap until I found this custom bending tool laying around the shop 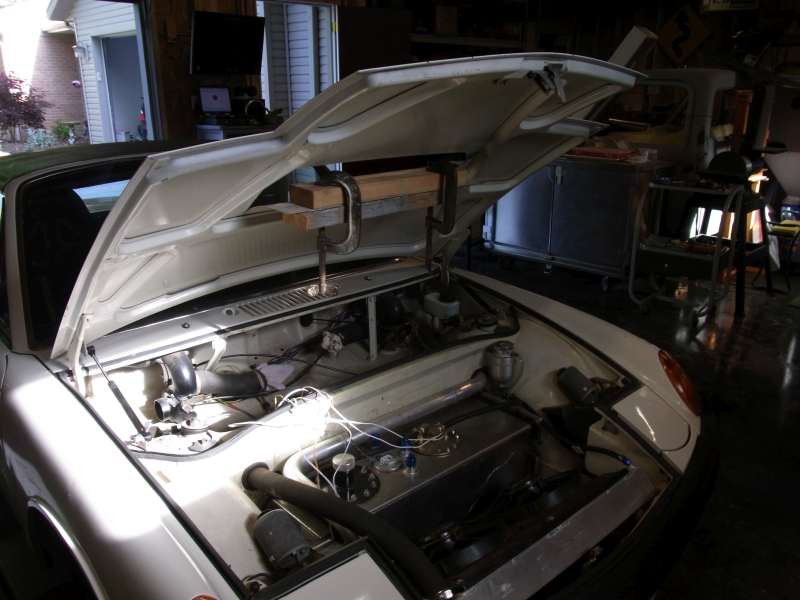
Once I got the curve the way I wanted it I made a template and the side pieces.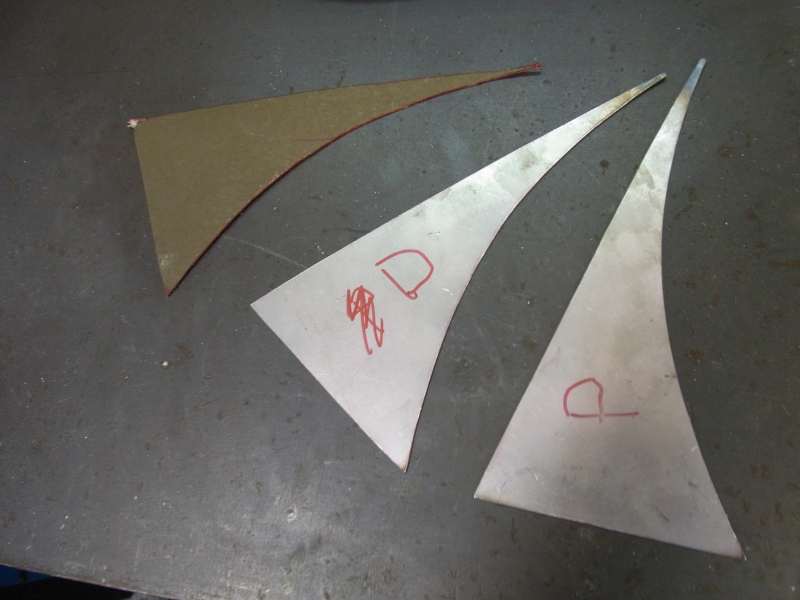
Pulled the hood. Sort of liked this view but I really need to tidy up the wires.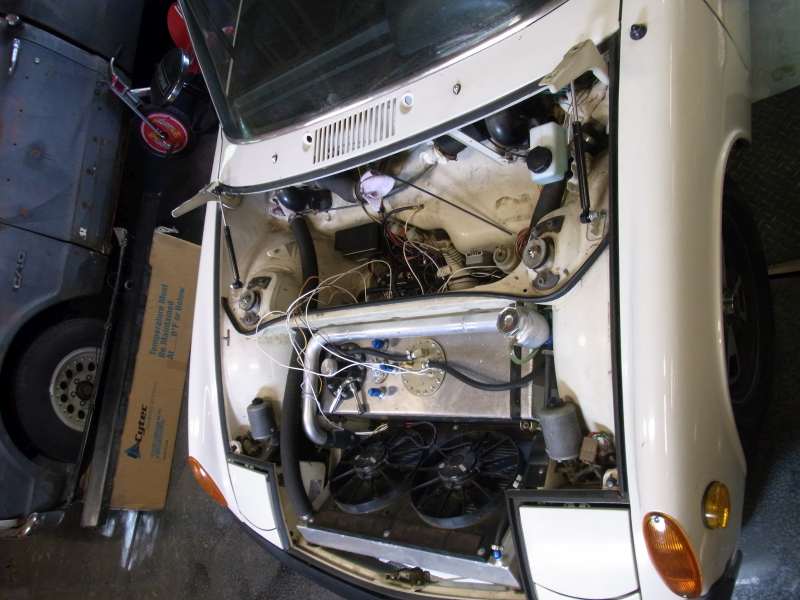
Time to break out the tig 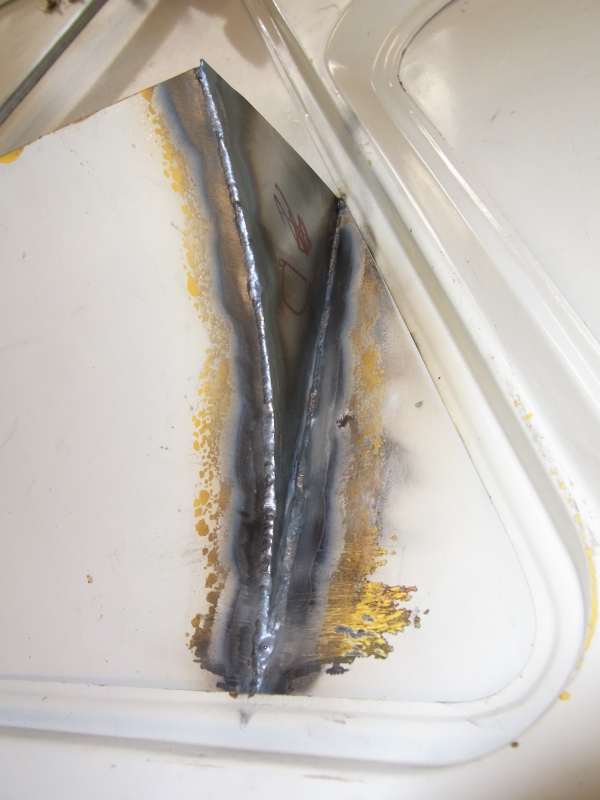
After I got the feel for the material I was making no filler micro tacks on the edge of the 1mm sheet.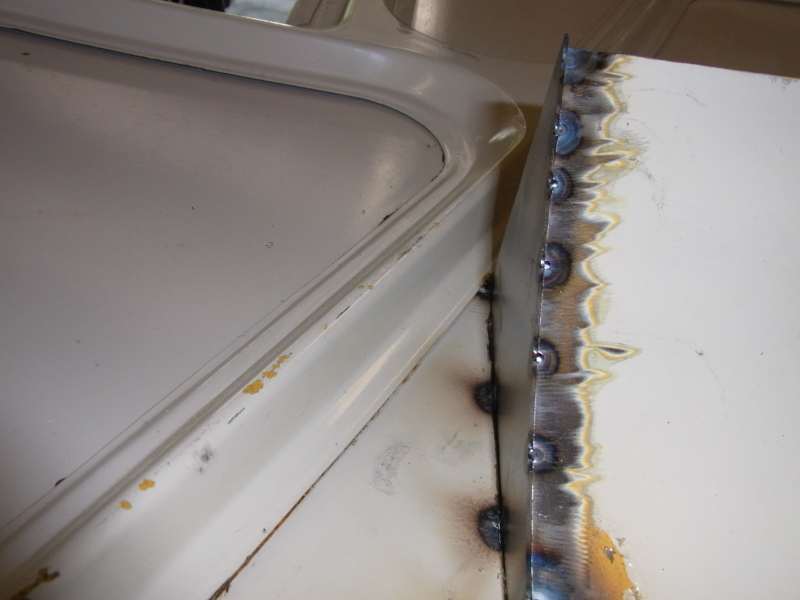
I love TIG...less than 5 minutes of grinding with 100 grit to clean edges.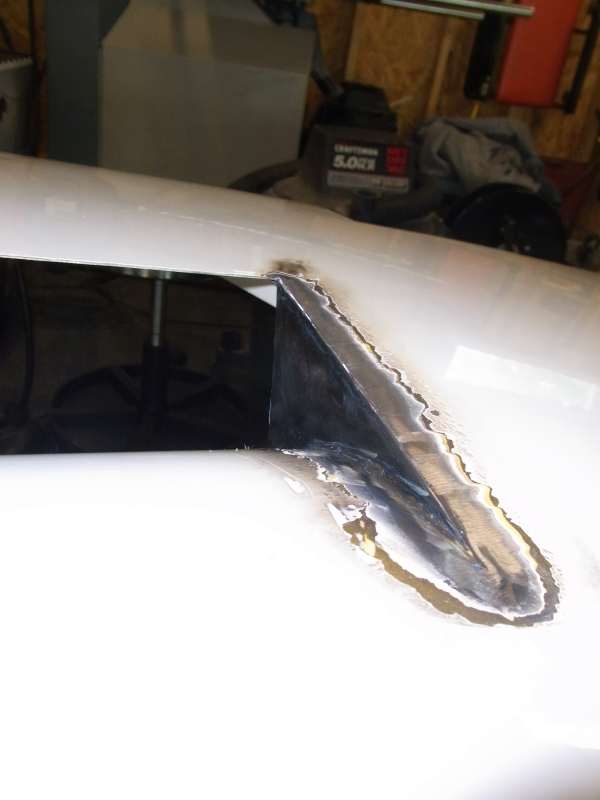
Looks pretty darn good if I must say so myself.
Will be fairly discrete once painted.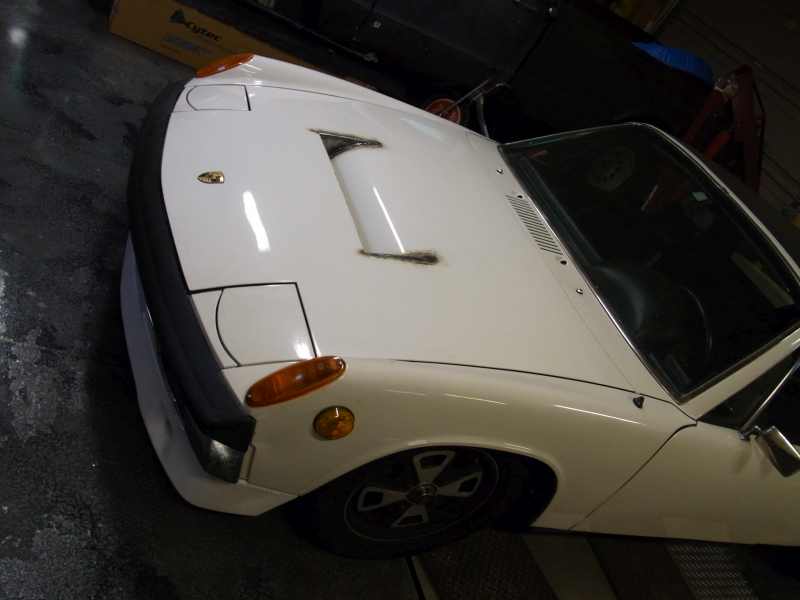
Venting!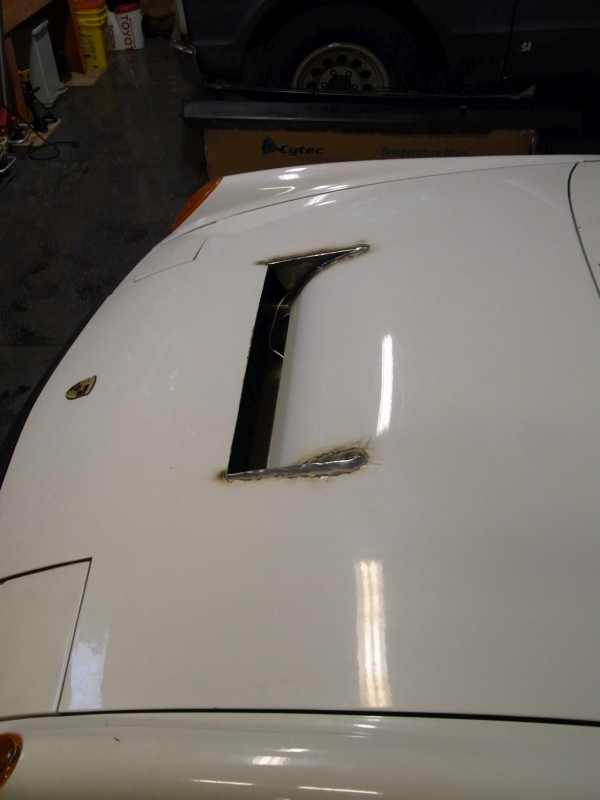
Will find some reasonably close color in a can and spray bomb it so that it looks decent from 10 feet.
Almost done with the high effort tasks...time to burn through all of the little tasks on the check list.
Soctt
Posted by: CptTripps May 27 2014, 06:47 AM
That's pretty cool man. I'm wondering why you felt you needed to cut the hood. Was using the wheel wells not an option? Mine are cut out for venting, and on the V8 that worked just fine. Is it because the fuel cell is in the way?
Posted by: Amenson May 27 2014, 08:29 AM
That's pretty cool man. I'm wondering why you felt you needed to cut the hood. Was using the wheel wells not an option? Mine are cut out for venting, and on the V8 that worked just fine. Is it because the fuel cell is in the way?
I struggled a lot with the radiator venting method. The wheel well vents obviously work based on the number of cars that use them. I just could not rationalize dumping all that hot air onto the front brakes and tires.
Until yesterday there was no vent and during normal driving the temperature did not get high enough for the ECU to even turn on the fans!
Posted by: veekry9 May 27 2014, 07:16 PM
"Looks pretty darn good if I must say so myself."
Yup,looks good and works a charm.The hammer and wood method of sheetmetal-work.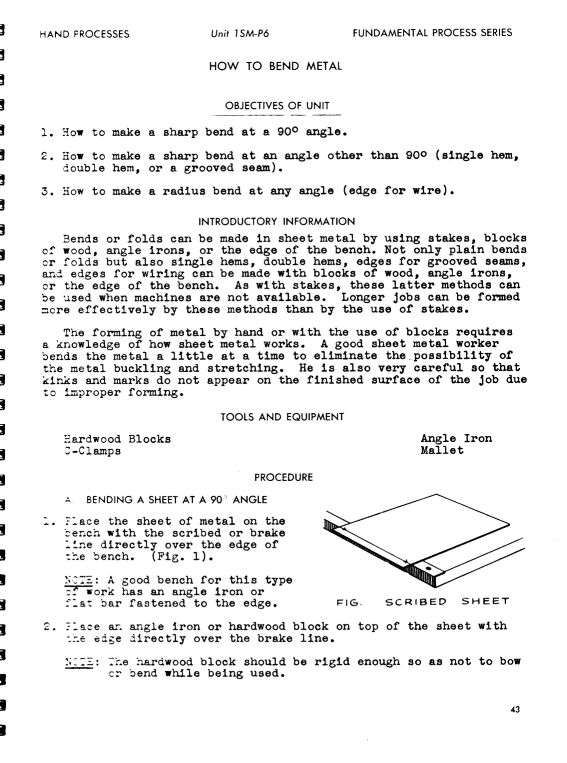
Did an entire tow-truck rear-bodywork with this method,not using a brake.
Looked good in black,all the facets of the rear flares.
Labour intensive.
Posted by: Amenson May 28 2014, 08:06 PM
Pulled the fuel pump to isolate the ground and replace the in tank fuel line that was leaking a bit.
I wanted to put fine fuel filter in the tank also but there was not enough room.
Still a really nice setup.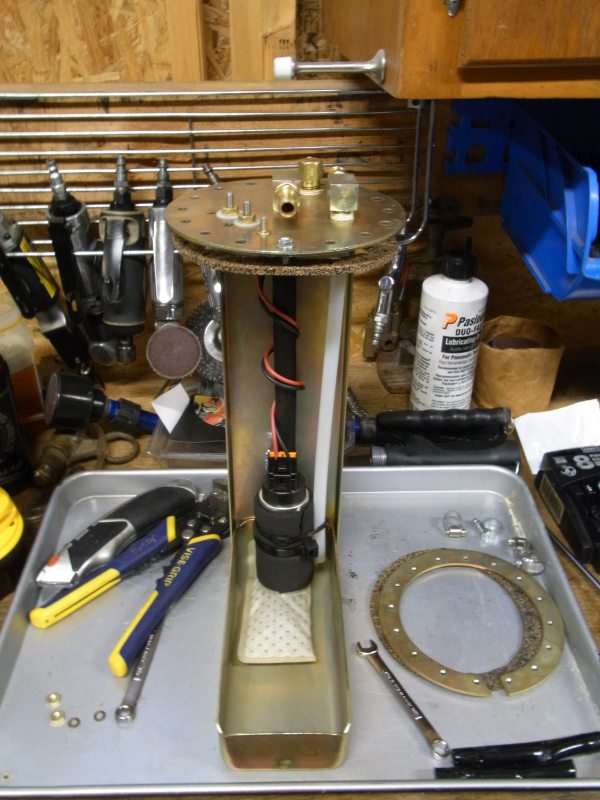
Installed for good!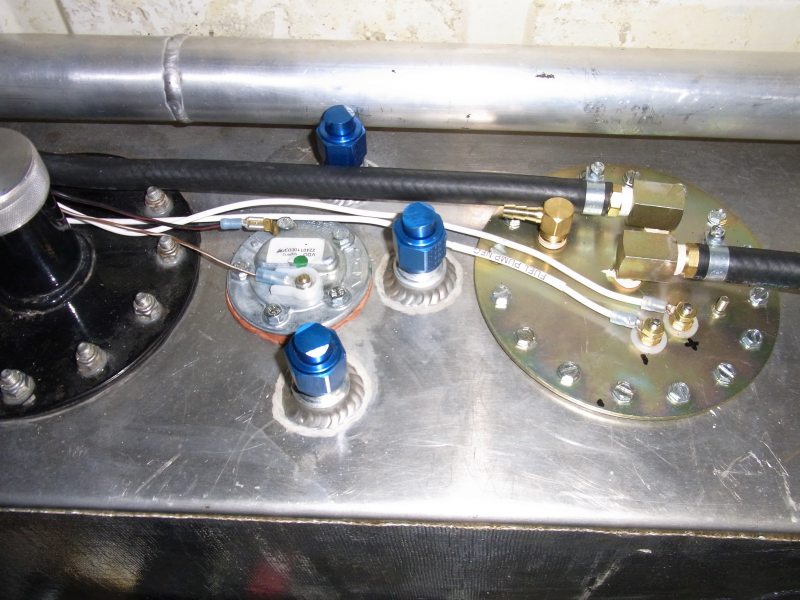
Isolating the ground returned control to the fuel pump controller so it does a fixed priming run at key-up and proportional speed based on engine load. Can't even hear the pump at idle now!
Scott
Posted by: Amenson May 29 2014, 08:25 PM
Installed the modified angle drive WSS tonight.
I really enjoy using modern connectors:
All wired up and it works! 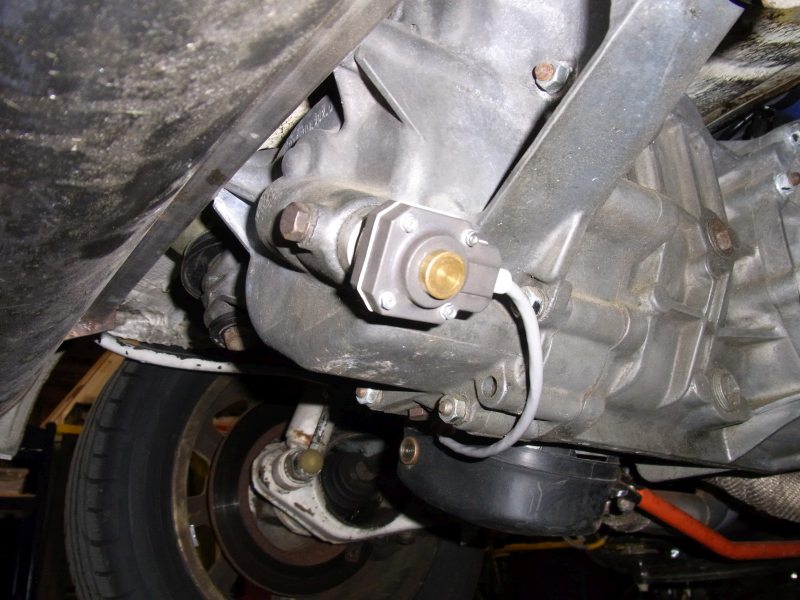
Put it into gear on the lift and the spedometer moves finally. Played with the Speedpuls Tachotronic and the speed changed. Can't wait to calibrate it tomorrow morning on the way to work.
Scott
Posted by: Amenson Jun 2 2014, 08:21 PM
The speedometer is working and perfectly calibrated. Went to use the cruise control and it would turn on indicating that the system was fault free but it would not set. Looked into it a bit and figured out that the second clutch switch (not installed because there is no room) needed to be connected and held closed. Put some tape on it and checked the signal on the Accessport...good to go. Took it for a quick drive and the cruise would still not set. Though about it for a few days and could not come up with any other ideas. Checked my daily driver STI and and compared it to the Porsti and the clutch switch was not right. The tape had stretched.
I considered replacing the switch with a jumper connector but I though that it would be fun to use a mechanical solution to an electrical problem so I welded a cap on one of the nuts.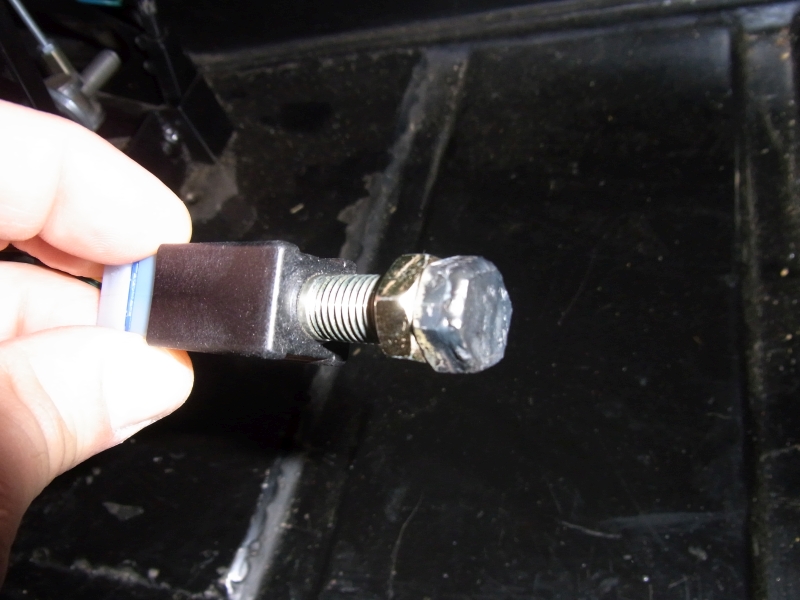
This is the kind of stuff that I always give my ME buddies crap for doing...they will be impressed.
So Cruise works now.
I also installed the wiper motor and wired the intermittent circuit to the stock motor...works like a charm. How many 914's have cruise and intermittent wipers! All of the work to use the suby harness is really starting to pay off.
I still have some trans fluid dripping and the area around the breather is staying dry. My wife mentioned that her employer had a bore scope that could be used for government work. What better way to look for a leaking trans seal! She brought it home and the scope is worth considerably more that my car! Has a steerable head, zoom and a whole lot more features.
Worked great...now I have to pull the trans this week and replace the seal.
Scott
Posted by: Amenson Sep 18 2014, 09:53 AM
Time for an update...
In my last post I was in the last push to get the car ready for Hot Rod Power Tour....well we made it although did not make the fist day in Charlotte due to an endless to do list. Thankfully my Father flew down from WI a day early to help.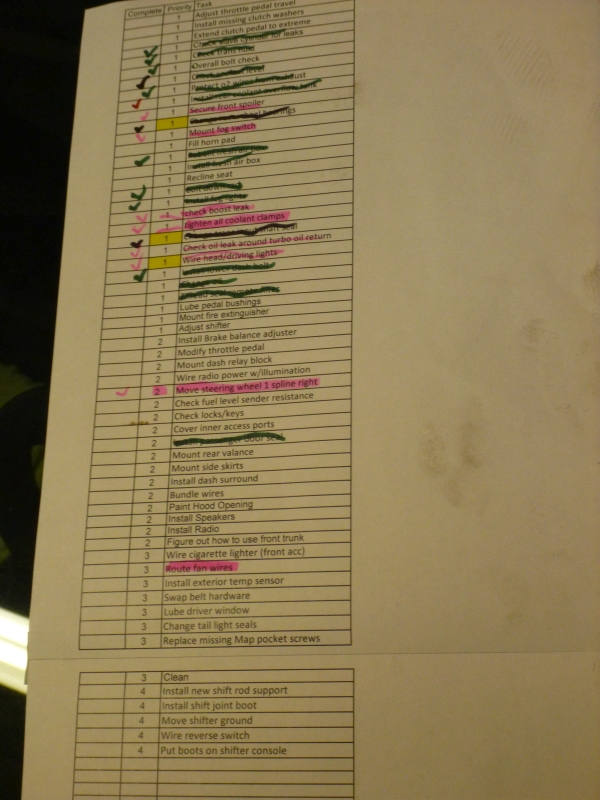
Some little things to take care of 2 days before departing!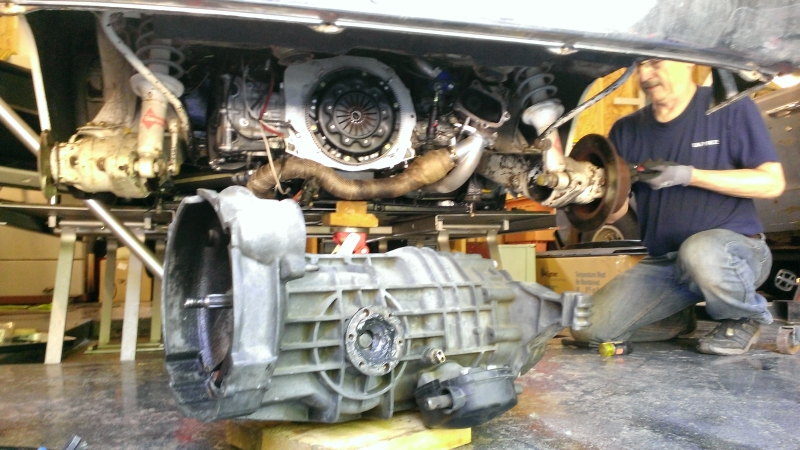
Time to go...just a little bit exhausted and excited/terrified to see if she holds together.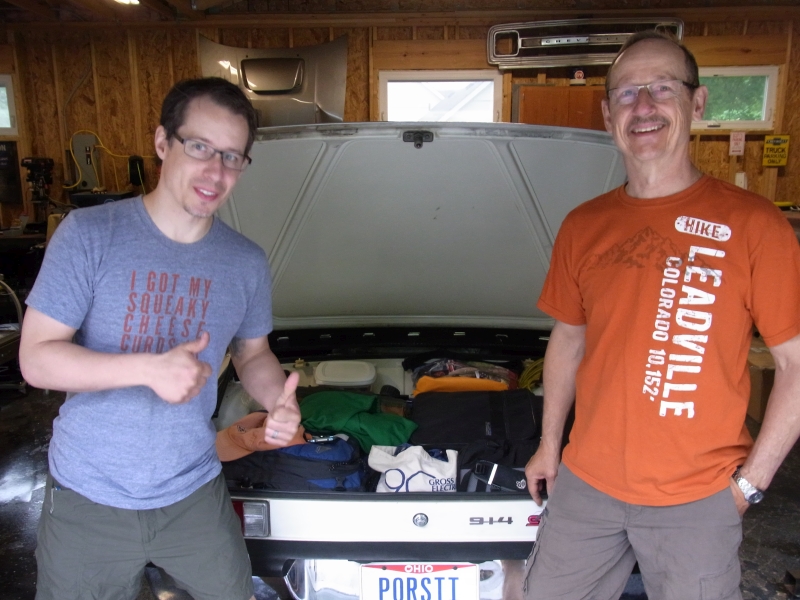
The trip from Columbus to Knoxville went perfectly, finally together with the Late Hauler crew on Power Tour again after 8 long years.
PorSTI parked at the first Hotel. Picture only shows about half of the cars in our group, most everything has LSx something and half of them boosted. 
Time for the shenanigans to start....
Posted by: Amenson Sep 18 2014, 12:38 PM
Each day of Power Tour has an organized car show at some huge venue. Somewhere between 3000-5000 cars. The Late Haulers carve out a small area of the show and set up tents and coolers, the rest of the afternoon is spent drinking beer and checking out cars.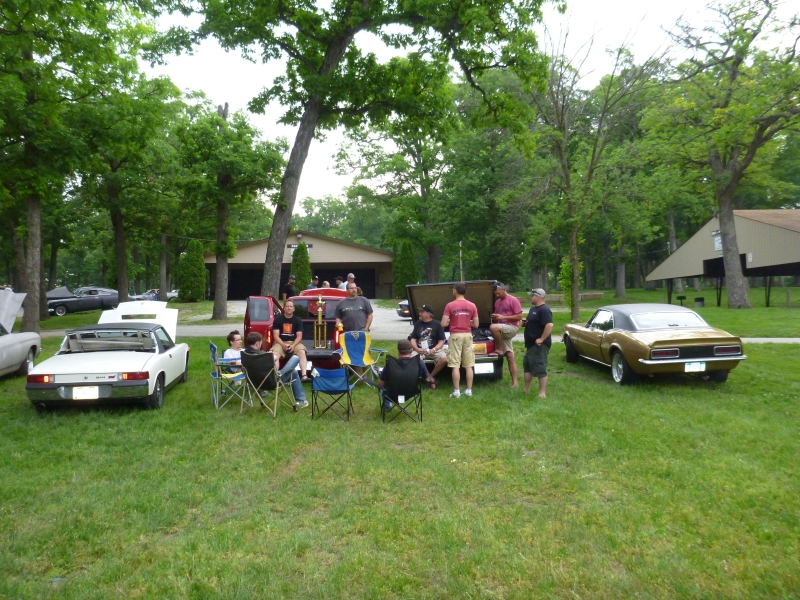
After the event everybody heads to the hotel and relaxes before dinner.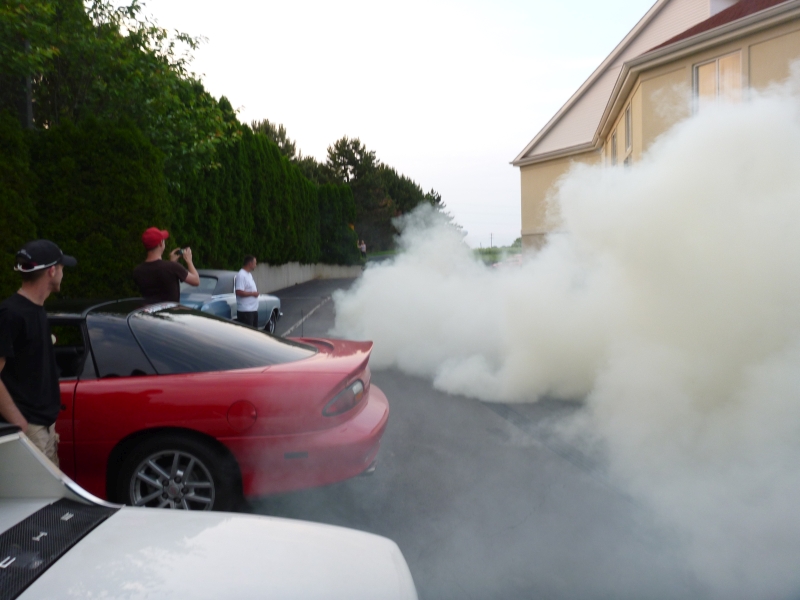
After dinner and maybe a bar, back to the parking deck for more beer and...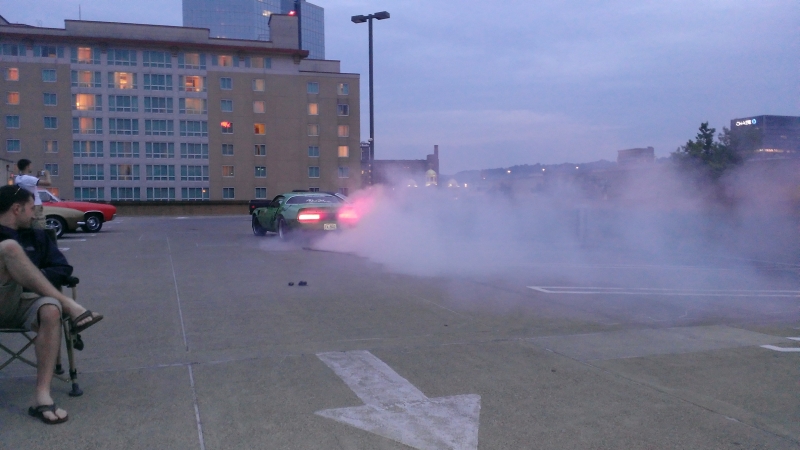
It took a while to get the PorSTI dialed in for burnouts. The first night I made a load of smoke but it was a one wheel peal. The rubber pattern was pretty cool because the exhaust was pushing it out to the side...
Over the next day or so I figured out that if I started the burnout in second while rolling both wheels would spin. We were getting ready to leave on the second morning and I decided to try a second gear burnout stationary from my parking spot to inspire the group to get on the road. Gave it a little throttle, let the clutch out and kerplowee...the car lunged, made some horrible noises and stalled. Went to put it in neural and found the shifter cocked way over to the side. Got out and surveyed the damage. Turned out both of the front engine mounts pulled out the rubber and then engine was held up in the front by the shift rod. Moments after the failure jacks, and tools started showing up. 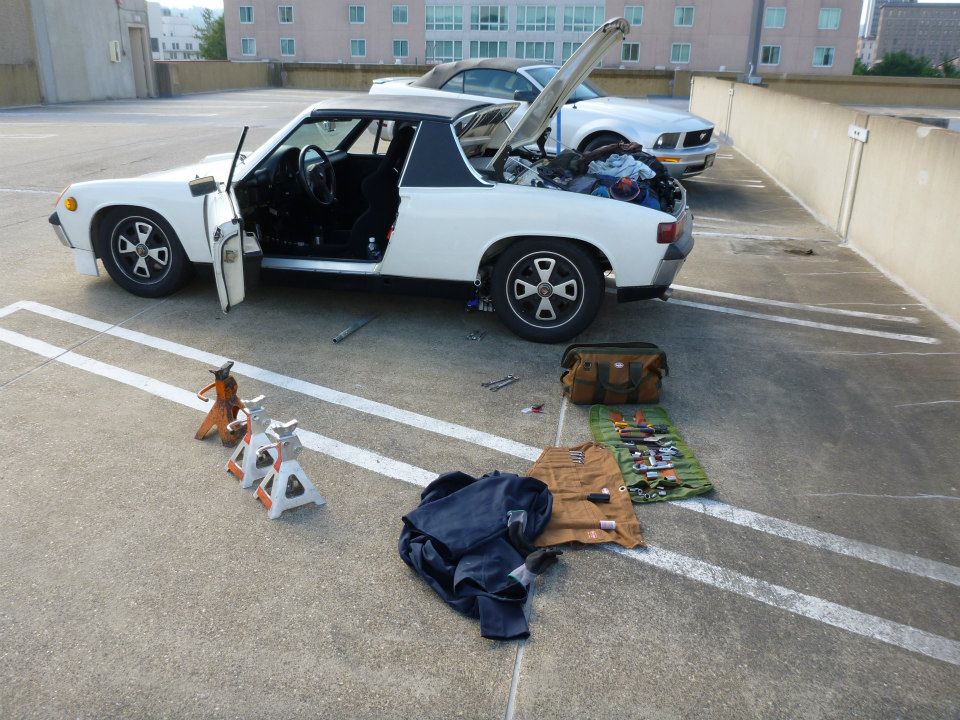
In 10 minutes the first mount was removed and the guys were trying to squeeze it back together. It took a trip to a local shop where they let me in back to press the parts back together and 1.5 hours later the car was back together with some big washers installed above the mounts to keep the failure from occurring again. Had to do a quick test burnout to make sure that it would hold together for the long trip to the next venue. It is too bad that this picture was not zoomed out a bit further because my Father was standing there with a look of disgust on his face that I was abusing the car again 
Each day the trip from the hotel to the next venue was filled with rolling races on the open road, traffic jams through small towns and the inevitable breakdown. After the motor mount incident the PorSTI had zero problems and proved it to be the second fastest car of the group, only the 600+rwhp turbocharged Vette was faster. The PoSTI flat out hauls. 5th gear pulls feel as strong as 3rd, until better judgement steps in and shuts it down.
Anyways, this goes on day after day and besides the seat needing some additional padding the car is great to drive. The cruise control is a real plus on the long open sections.
Finally after much practice I was able to put down a really pro burnout. The picture only shows the end after I had been slow rolling for about 50 feet and could no longer see where I was going so I did a beautifully slow doughnut. Random strangers were coming over the rest of the night and even the next morning to say how great a burnout it was and to talk about the car. Apparently there is video of it that my buddy took but I don't have it yet. Looks like a "9"
On the drive to the last venue one of the guys overextended is aftermarket clutch slave cylinder. The shop we rolled to a stop at did not have the correct type of lift to pull the trans so he took us to another local shop that just happened to be the Ring Brothers. They gave us full access to the entire shop and when they departed for the event, left two of the builders back to help us get the car fixed. They even had the exact slave cylinder we needed that they installed but never used on some other project and gave it to us. Buddies car going up on the lift with their Pantera 'ADRNLN' and this years SEMA car in the background.
While we were working on the car a few Hot Rod magazine people showed up to interview the Ring Brothers and take pictures of the shop. They noticed what we were doing and said that if we got it together and to the show in time, they would set up a photo shoot. It is amazing what can be accomplished with a dozen gear heads working together. We made it to the show and got our photo shoot.
The picture did not make the magazine but we did get invited to the Hot Rod hospitality bus for an afternoon of free booze and got to hang out with the Hot Rod magazine people. (that is David Freiburger on the left).
They even had me bring the PorSTI over and park it in the hospitality area!
What a great ending to a great trip.
Cheers,
Scott
Posted by: Amenson Sep 18 2014, 12:53 PM
Since the trip I have been driving it daily and finishing/fixing little things. The biggest improvements have been made to the pedals. All three have been cut apart to improve the position, force ratios and travel.
I did have a CV let go on me a couple of weeks ago. Fortunately it happened as I was returning home from visiting a new friend that I met on power tour. He was nice enough to give me a tow home.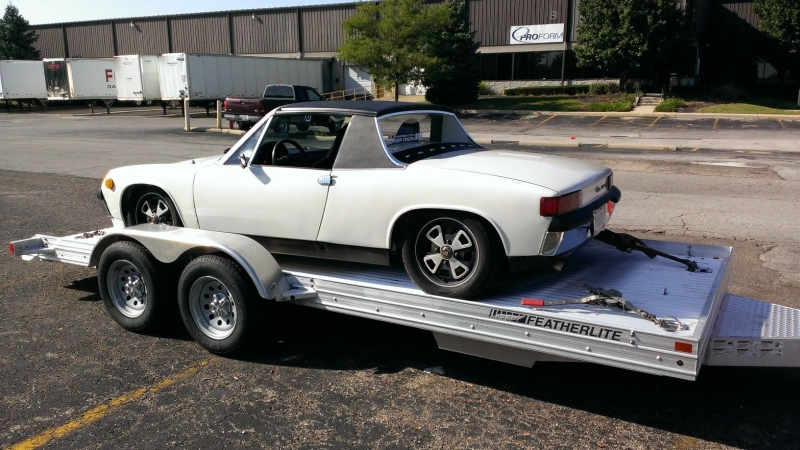
I am currently building a fresh transmission as the one that is in it now is suffering a bit. First and second syncro parts are on their last legs and I think that the internal rods were repositioned a bit when the engine was sitting on the sift linkage. Just a bunch of parts now but should be together and swapped in shortly.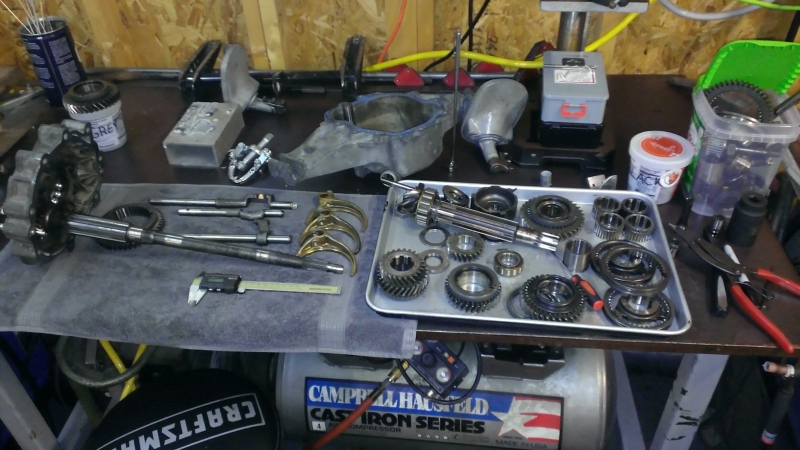
Cheers,
Scott
Posted by: CptTripps Sep 18 2014, 01:48 PM
I've got one thing to say about that...
Attached image(s)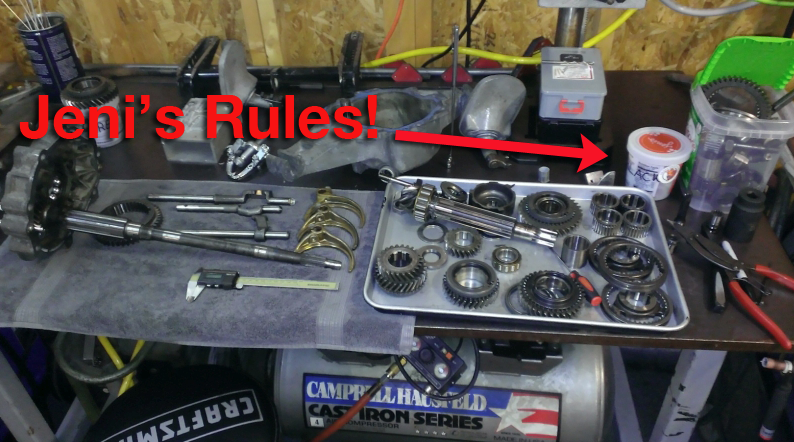
Posted by: Amenson Sep 25 2014, 11:55 AM
I've got one thing to say about that...
Good eye...
I have 2 Jeni's withing 5 miles of my house. Drive by one of them to/from work every day. It is a problem.
On the transmission front, I wanted to pretty up the trans a bit so I did some research into painting magnesium parts and found a whole bunch of nasty and expensive options. I ran into a couple of mentions of Prekote Surface Pretreatment. It is supposed prevent corrosion and aid paint adhesion all while being non hazardous. I gave it a try and it does seem to be non hazardous because I splashed it all over my fade and arms as I was applying it and did no have any reaction. After treatment I put on a few coats of Tempo LYC Gray Engine Enamel and it looks pretty good. Only time will tell if it holds up.
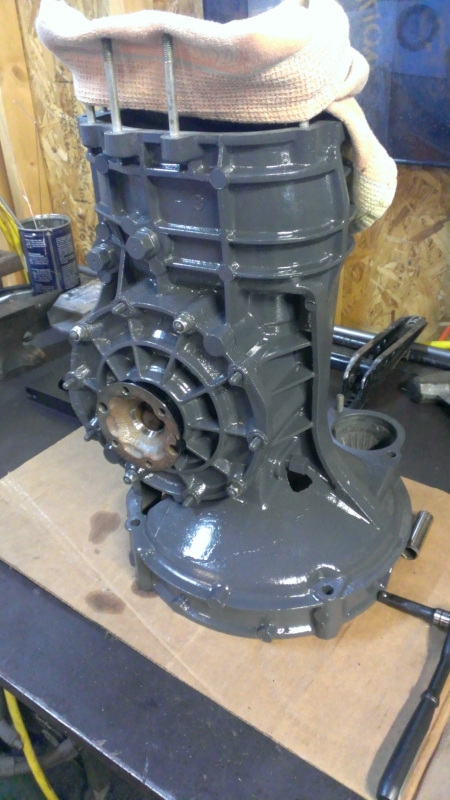
Gear stack with stock gears, new syncro bands, new or nearly new syncro hubs and new/nearly new sliders.
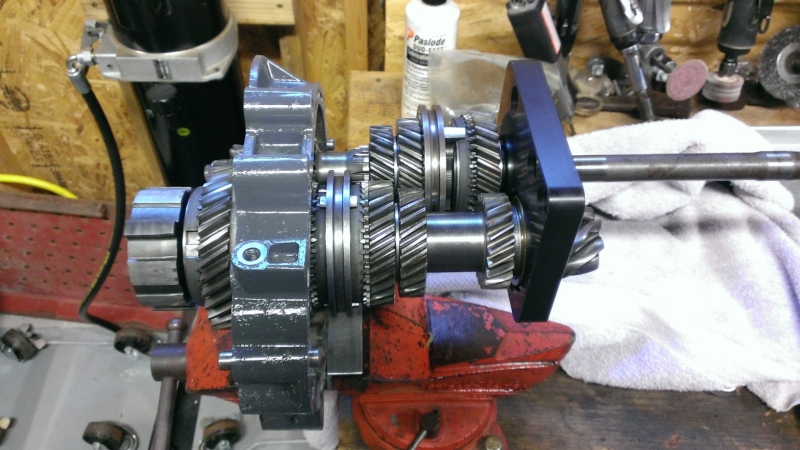
The tail covers on the transmissions I picked up both had some problems so I have to swap the one on the car over before I can button it up. Of course it will need to be painted so I will have a bit of downtime for the swap. The weather is supposed to be great this week and we have plans solid for the next 3 weekends so I may not get to it until the end of October.
Need to get it in before the snow flies because if this trans does not meet my shifting expectations I will have to start shopping for a suby 5 speed to drop in over the winter...
Cheers,
Scott
Posted by: Amenson Oct 7 2014, 03:19 PM
I now officially have a problem...
To make a long story even longer, I was searching craigslist for an exhaust for my '05 STI daily driver because it is developing a small leak. A guy from a bit outside my area bought some parts from me over the summer and said that he frequently parts out Subaru's so I searched his area for parts. What is the second add that shows up? 2009 WRX transmission, 19000 miles, needs new output shaft bearing.
Call the guy up and apparently his son did a stage two update with a performance clutch to his new WRX and destroyed the output shaft bearing. He says the trans was shifting fine when it started to make noises spins freely in all gears when turned by hand. Couple of texts later and he agreed to sell the trans, ACT Heavy Duty Performance Street Disc Clutch Kit, ACT StreetLite Flywheel and two front axles for $300. Drive out to get it, the trans was as he described and the clutch/flywheel is in very good condition.
Now I have a problem.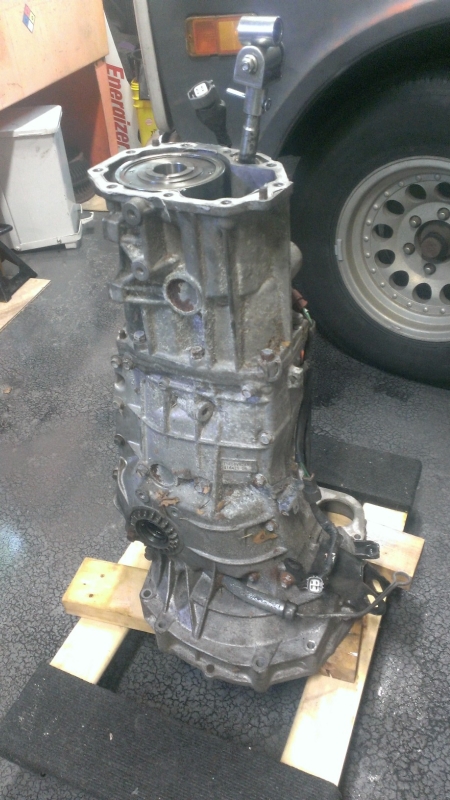
I have a really fresh 901 almost ready to go back in and the parts to build a really nice close ratio track box.
How do I not put the Suby trans in this in this winter?
Anybody in the market for a really nice 901 sideshifter?
Cheers,
Scott
Posted by: DBCooper Oct 7 2014, 03:34 PM
Ha ha ha, good job. We're doing EXACTLY the same thing to my son's car right now. I've had that transmission in my car for a while now and believe me, you have no choice, you have to put it in. Seriously. And another plus is that no one's 901 is as good as they'd like it so you should have no shortage of takers for a good transmission. Means you should net out pretty well.
Well done. Again.
Posted by: Chris H. Oct 7 2014, 09:29 PM
Nice score. $300 for a low-mileage 2009 trans? You STOLE that even if it needs a little work. And as DB said, there's always a market for a good 901. You'll be so happy with a Subaru trans. You CAN'T NOT DO IT. They paid more for the clutch/flywheel than you did for the whole setup.
Edit: LOL! Looks like the center diff is still in there! If it's still good that's worth ~$250ish on NASIOC
Posted by: Amenson Oct 8 2014, 07:49 AM
Ha ha ha, good job. We're doing EXACTLY the same thing to my son's car right now. I've had that transmission in my car for a while now and believe me, you have no choice, you have to put it in. Seriously. And another plus is that no one's 901 is as good as they'd like it so you should have no shortage of takers for a good transmission. Means you should net out pretty well.
Well done. Again.
Ya, I know that I really do not have a choice about putting it in. Whenever I walk by it I have to play with the shift rod, just so precise and crisp feeling.
I will finish the 901 that I am building and install it in the car to get a few miles on it before the snow flies. Have enjoy the fruits of my labor and prove that it is built properly. Then I can put it up for sale to fund the parts to install the Suby trans.
Nice score. $300 for a low-mileage 2009 trans? You STOLE that even if it needs a little work. And as DB said, there's always a market for a good 901. You'll be so happy with a Subaru trans. You CAN'T NOT DO IT. They paid more for the clutch/flywheel than you did for the whole setup.
Edit: LOL! Looks like the center diff is still in there! If it's still good that's worth ~$250ish on NASIOC
The clutch/flywheel setup is probably going to seal the deal and make the swap happen this winter. Had I had to purchase it, the setup that came with the trans. would have been toward the top of the list and cost ~$1k. Now I can toss an OBX lsd in it instead!
I have all of the parts to the trans. I dropped in the center diff so that I could spin the input shaft and see the front diff turn. It looks a bit beat up from when the bearing failed so I probably won't sell it because I can't guarantee the condition.
If anybody is thinking about getting a fresh 901 sideshifter, the second one that I am building could be put together with any combination of stock gears plus M,S,X,Z.
Cheers,
Scott
Posted by: Amenson Nov 6 2014, 12:39 PM
Every time I look for parts for my daily driver I find Suby 5mt's for sale
There are two '02 WRX 5MT's for sale with bad center diff's for sale in the Columbus Ohio area. One guy is looking for offers and getting none and one is listed for $150 plus an R160 as partial trade. My guess is both can be had for next to nothing. They are listed in a closed Subaru facebook group so if you are interested I will have to send your contact information to the sellers. Just send me a PM.
Cheers,
Scott
Posted by: CptTripps Nov 6 2014, 12:59 PM
I need to get you up here to give me some pointers on my build. I likely did a few things very wrong and having someone else that's done a subie build take a look at it, would be great. I've had a few take a look, but yours seems to be the closest to mine...and you're only a few hours away.
Posted by: Amenson Nov 7 2014, 05:00 PM
I need to get you up here to give me some pointers on my build. I likely did a few things very wrong and having someone else that's done a subie build take a look at it, would be great. I've had a few take a look, but yours seems to be the closest to mine...and you're only a few hours away.
This is entertaining....I have started looking at your build and a few others as reference for the suby 5mt and water air intercooler details!
It would be nice to get up there to give you some pointers but while you are relatively close, all of my "free" time is booked converting the PORSTI tans. Not to mention I have a '70 C10 that will be torn down to the frame starting thanksgiving week
You are welcome to come down and check mine out some time. Always cold beer in the garage
Cheers,
Scott
Posted by: Amenson Dec 4 2014, 09:44 PM
The 2014 version of the Late Haulers Hot Rod Power Tour video is finally in the public domain. Enjoy....
https://www.youtube.com/watch?v=tdv4WFbOTw8
Major PorSTI Shenanigans at 2:27, 11:43 and 13:57.
Back to putting together a bullet proof drivetrain for next year.
Cheers,
Scott
Posted by: Mike Bellis Dec 4 2014, 09:58 PM
When I did my first V8 conversion I use the "upgrade 911 mounts". First start, put it in second gear, eased the clutch pedal up with no gas, ripped the 911 mount apart at idle torque.
I went to solid steel after that. Never had another problem.
Posted by: Amenson Dec 9 2014, 08:57 PM
I couldn't stand looking at the suby trans sitting under the bench any longer so I pulled the 901 and bolted up the 5mt after work today.
Liberated from the 901.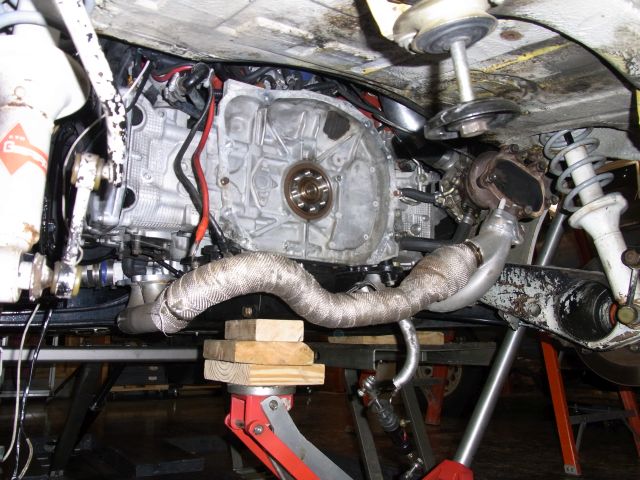
The clutch assembly feels like it weighs half as much as the KEP parts!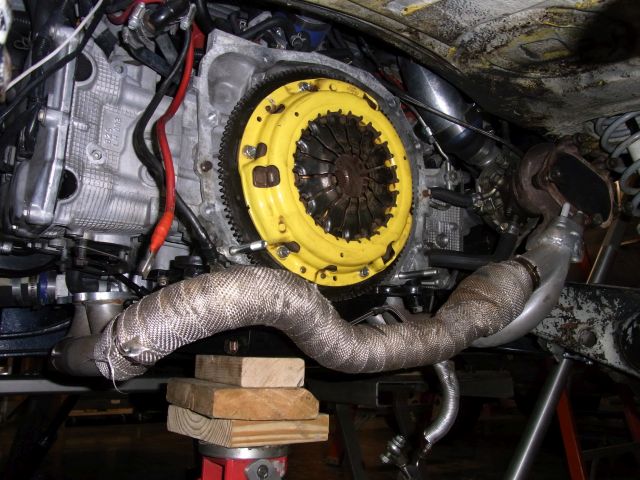
Looks pretty good in there.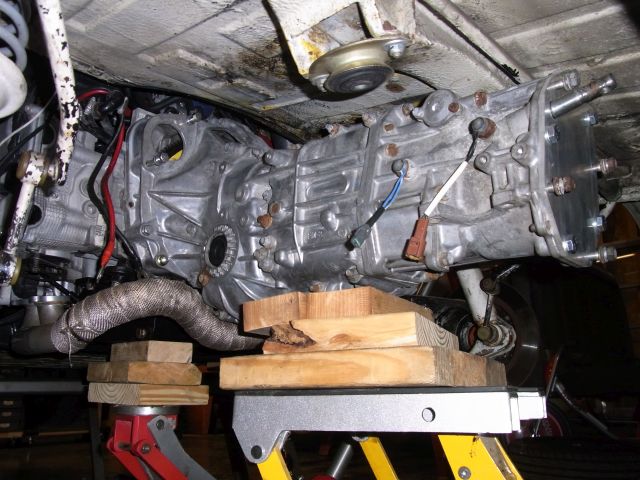
Going to have to remake the exhaust cross over.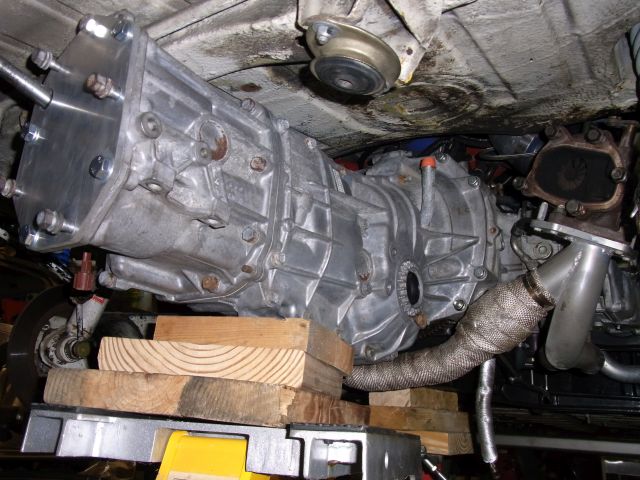
I have the parts and material to make a transmission mount similar to DBCoopers.
Can't wait to start making parts again
Cheers,
Scott
Posted by: 76-914 Dec 9 2014, 09:27 PM
Enjoy, they grow up and leave the garage before you know it!
Posted by: CptTripps Dec 10 2014, 08:12 AM
Get a set of Ian's motor mounts while you're in there. You'll surely never run into the problem you had on the Power Tour again!
Posted by: Amenson Dec 11 2014, 09:29 AM
Enjoy, they grow up and leave the garage before you know it!
It stuck around in the garage a bit too long the first time, it is getting booted in spring this time.
Get a set of Ian's motor mounts while you're in there. You'll surely never run into the problem you had on the Power Tour again!
I was trying to buy the transmission mounts from Ian but I don't think that he is up and running again quite yet.
Eventually I will make a cradle to move the engine/trans back to align the axles better using a hybrid of the back of DBCoopers mount tied in to the trailing arm ears like Ruby914's mount.
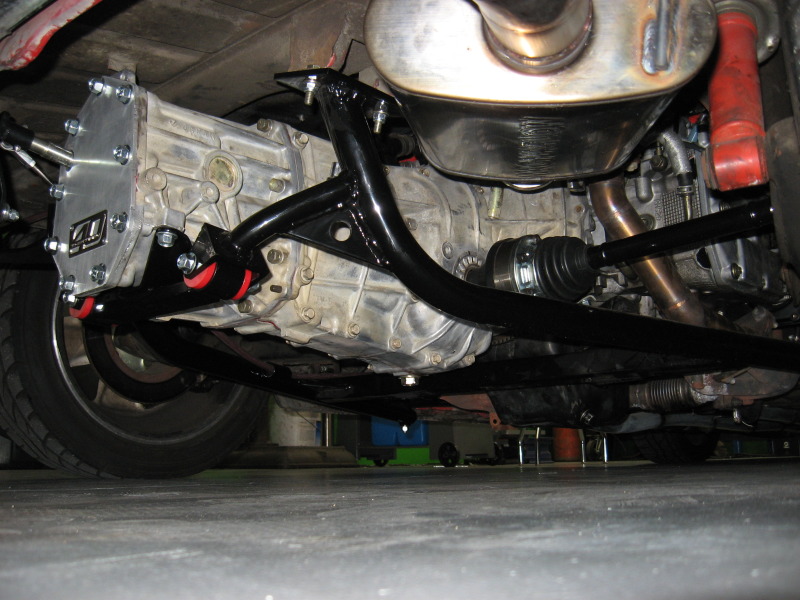
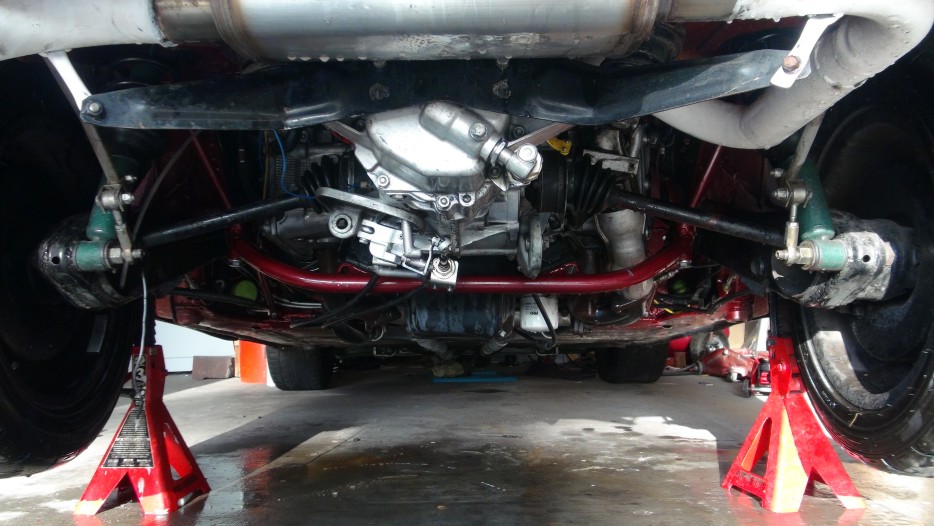
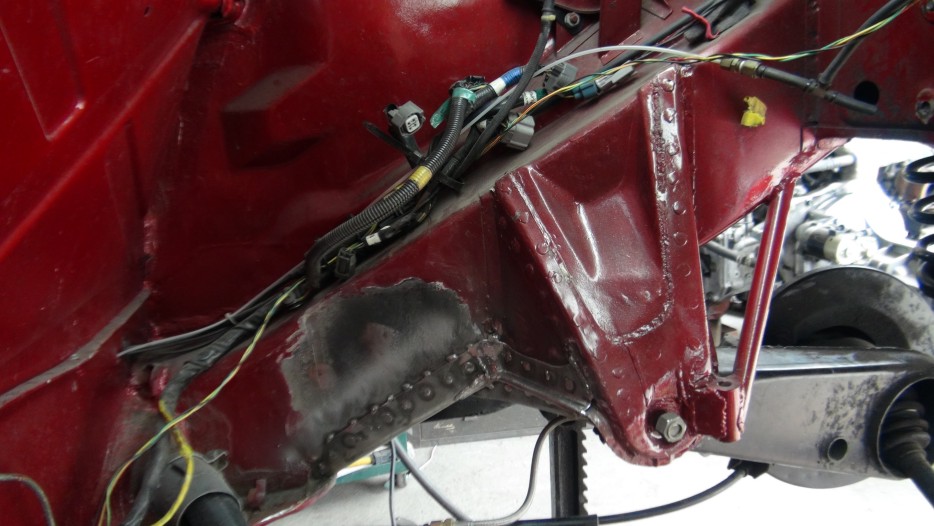
Making the transmission side mount now will save a step when I make the new cradle down the road some time.
Cheers,
Scott
Posted by: Amenson Dec 12 2014, 03:21 PM
I think that I just stepped on a mid-mue slope...not supper slippery but slick enough. 
I have been agonizing over what to do about the CV's. I eventually want to run 108mm CV's but that requires a 5 lug setup, which I really do not want to do now. I can run stock 914's with Ian's conversion axles and then jump to 944's when I do the 5 lug...but then I am stuck with the smaller CV's unless I want to change axles again.
So...I just happen to have a '83 SC Boge front suspension...complete. I did some looking and it seems like the 914 strut inserts will fit the 911 Boge's and the ball joints seem like they should be the same also. Can I really just pop the current struts off of the ball joints, swap the inserts into the SC struts and bolt them back onto the ball joints?
Assuming this is the case, anybody have an 23.3 ET 7x15 phone dial or two laying round that they want to get rid of. I have a set of three, but one is marked as being repaired.
Then I can use my "new" tires (well, at least three of them, one is already on the wear bar for some strange reason ) and get this done reasonably inexpensively.
Cheers,
Scott
Posted by: DBCooper Dec 13 2014, 08:21 AM
I think that I just stepped on a mid-mue slope...not supper slippery but slick enough.
Ha ha ha, you are SO screwed! Grin and bear it, though, when you're through it it will all be done and good.
Can I really just pop the current struts off of the ball joints, swap the inserts into the SC struts and bolt them back onto the ball joints?
Yes you can. I think mine's an 87 so a little different and I think we used the 911 inserts and ball joints, but that's how it's done.
Have fun.
Posted by: r_towle Dec 13 2014, 08:27 AM
I think that I just stepped on a mid-mue slope...not supper slippery but slick enough.
I have been agonizing over what to do about the CV's. I eventually want to run 108mm CV's but that requires a 5 lug setup, which I really do not want to do now. I can run stock 914's with Ian's conversion axles and then jump to 944's when I do the 5 lug...but then I am stuck with the smaller CV's unless I want to change axles again.
So...I just happen to have a '83 SC Boge front suspension...complete. I did some looking and it seems like the 914 strut inserts will fit the 911 Boge's and the ball joints seem like they should be the same also. Can I really just pop the current struts off of the ball joints, swap the inserts into the SC struts and bolt them back onto the ball joints?
Assuming this is the case, anybody have an 23.3 ET 7x15 phone dial or two laying round that they want to get rid of. I have a set of three, but one is marked as being repaired.
Then I can use my "new" tires (well, at least three of them, one is already on the wear bar for some strange reason
) and get this done reasonably inexpensively.Cheers,
Scott
Take a picture of the back of the wheel.
Oddly, I might have one...but I am not very smart about all the right numbers, so post a pic, and I will too.
Rich
Posted by: Amenson Dec 13 2014, 09:46 AM
Take a picture of the back of the wheel.
Oddly, I might have one...but I am not very smart about all the right numbers, so post a pic, and I will too.
Rich
The back of one of the spokes will say "7x15 ET23.3"
I tried to take a picture but they are too dirty to show the numbers clearly.
Thanks,
Scott
Posted by: Mike Bellis Dec 13 2014, 10:05 AM
Assuming this is the case, anybody have an 23.3 ET 7x15 phone dial or two laying round that they want to get rid of. I have a set of three, but one is marked as being repaired.
I think I have a pair of them. I will need to check the condition. In total I have at least 10 phone dials in various sizes.
Posted by: Amenson Dec 14 2014, 11:39 AM
Assuming this is the case, anybody have an 23.3 ET 7x15 phone dial or two laying round that they want to get rid of. I have a set of three, but one is marked as being repaired.
I think I have a pair of them. I will need to check the condition. In total I have at least 10 phone dials in various sizes.
They don't have to be pretty, just straight w/o too much curb rash. I have to strip the ones I have and will probably repaint some non stock color.
Posted by: Amenson Dec 28 2014, 09:25 PM
I finally received my cable shift setup from Ian! Also started mocking up the transmission mount. Should have it mostly made tomorrow.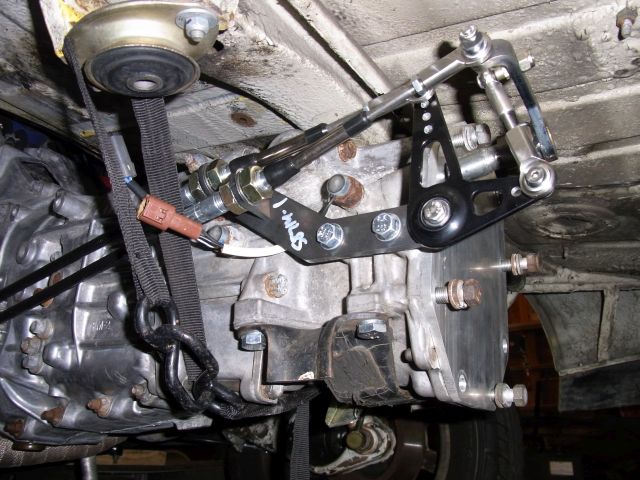
I picked up a pair of 108mm CV stubs and a boxster hub. The base of the hub centric ring has a raised edge that interferes with the phone dials. Should be easy to turn down on a lathe...good incentive to get mine up an running finally. This is not correct...the wheel fits fine with a brake rotor in place 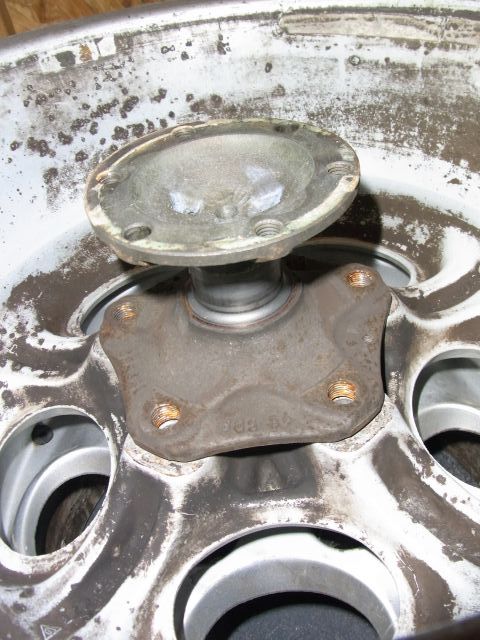
I started pulling apart my SC front struts. I picked up one of Doug's strut wrenches and even using it the nut does not want to budge. Any recommendations?
Cheers,
Scott
Posted by: r_towle Dec 28 2014, 11:08 PM
I finally received my cable shift setup from Ian! Also started mocking up the transmission mount. Should have it mostly made tomorrow.
I picked up a pair of 108mm CV stubs and a boxster hub. The base of the hub centric ring has a raised edge that interferes with the phone dials. Should be easy to turn down on a lathe...good incentive to get mine up an running finally.
I started pulling apart my SC front struts. I picked up one of Doug's strut wrenches and even using it the nut does not want to budge. Any recommendations?
Cheers,
Scott
A two or three foot pipe wrench does the trick.
Posted by: CptTripps Dec 29 2014, 01:00 PM
Looking good man!
Posted by: Amenson Dec 29 2014, 09:39 PM
A two or three foot pipe wrench does the trick.
Only took a foot long cheater! It was nice to know that I could lean on it a bit, Thanks!
Looking good man!
Thanks, it is starting to look like your car, only a heck of a lot less shiny
It was great to spend a few hours fabricating today, even got to use my huge new (to Me) anvil to tweak the ears of the stock suby mount into place.

A quick trip through the sandblaster and it will be ready to weld. I was planning to use the MIG but the gaps are tight enough to TIG.
Cheers,
Scott
Posted by: Amenson Jan 3 2015, 06:52 PM
I finally got the transmission side mount cleaned and tacked. The remaining rubber on the half of the mount would not come off. I eventually used a wire brush on my plug in grinder, sandblasted it, more wire brushing, and then more sandblasting.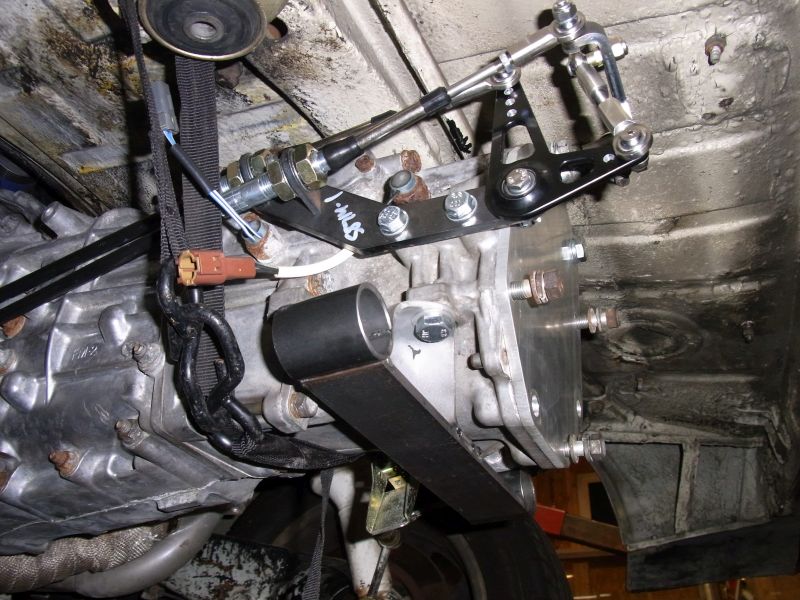

Now to make the body side part of the mount.
Cheers,
Scott
Posted by: Amenson Jan 18 2015, 08:07 AM
It was a beautiful winter day in Ohio (above 40F) so I took the opportunity to work in the garage.
Welded up the transmission mount.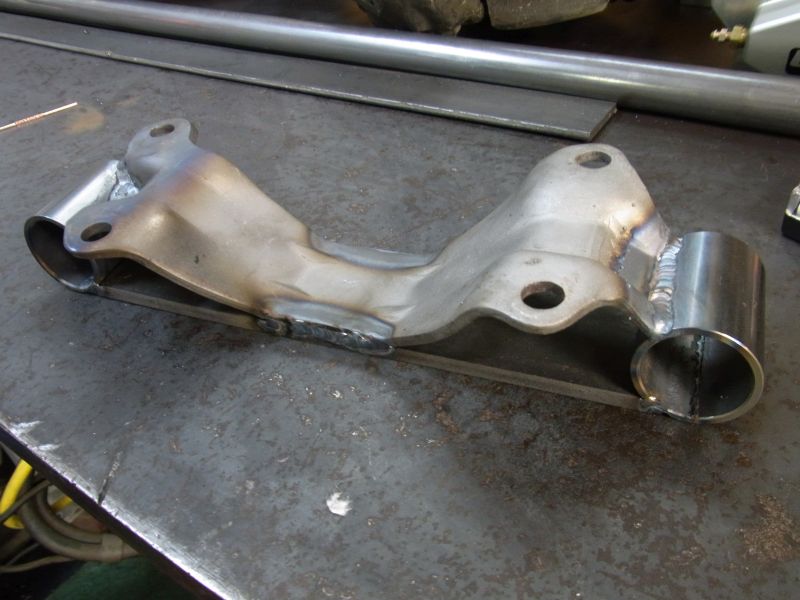
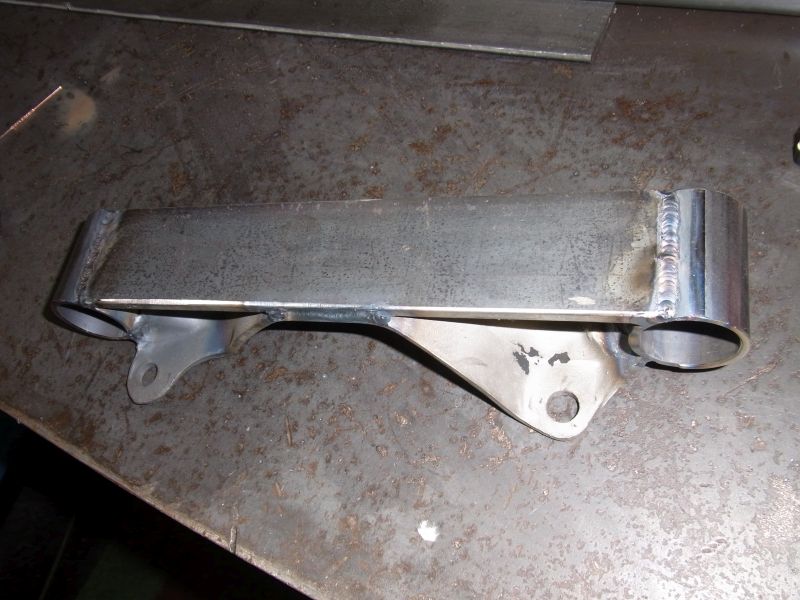
While I was waiting for the paint to dry I jumped over to the other project. Cut the roof off and drove it around at Thanksgiving.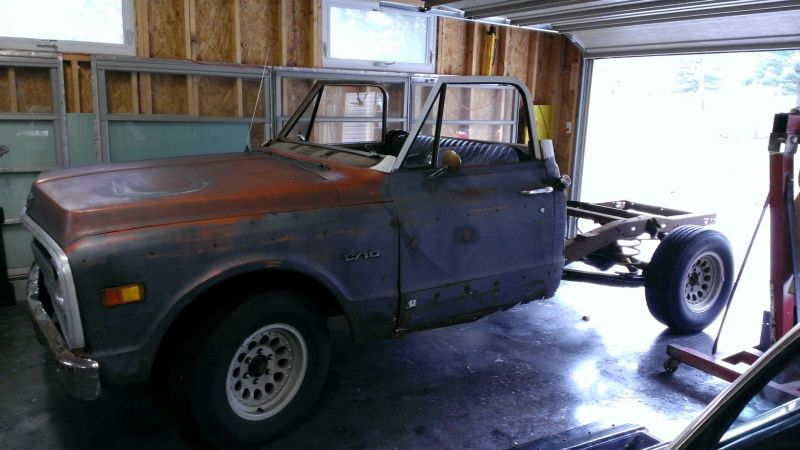
Today I remove the doors, seat, fuel tank and other random stuff from the interior. And started cutting 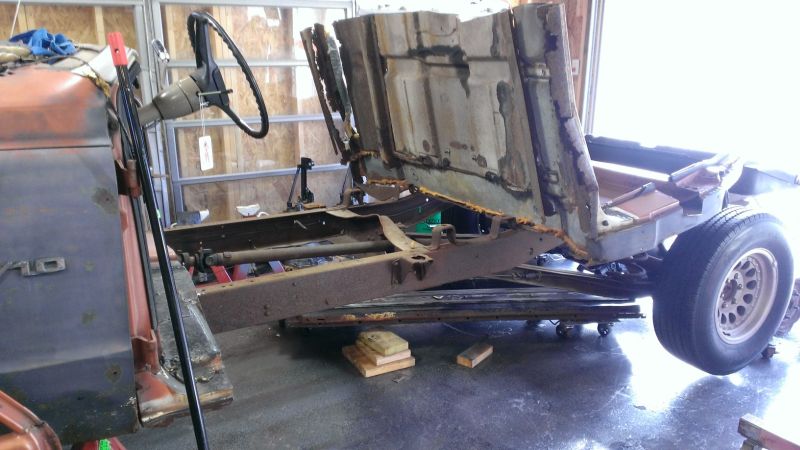
Ready for stage 3, 12 inches out of the center of the frame!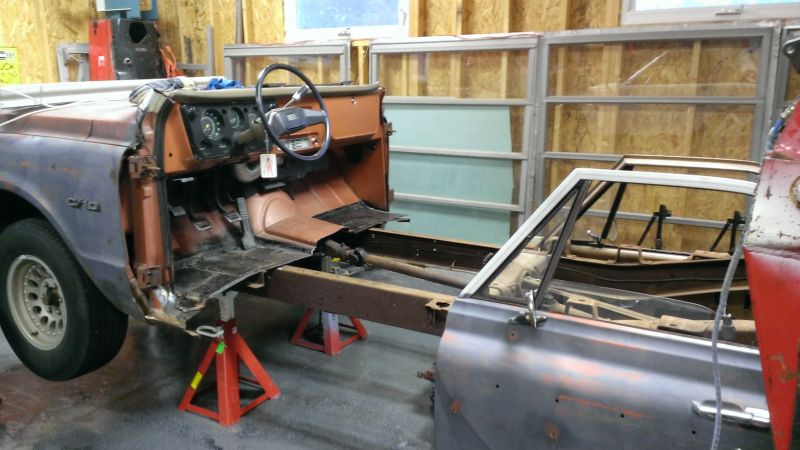
Mmmm, perty: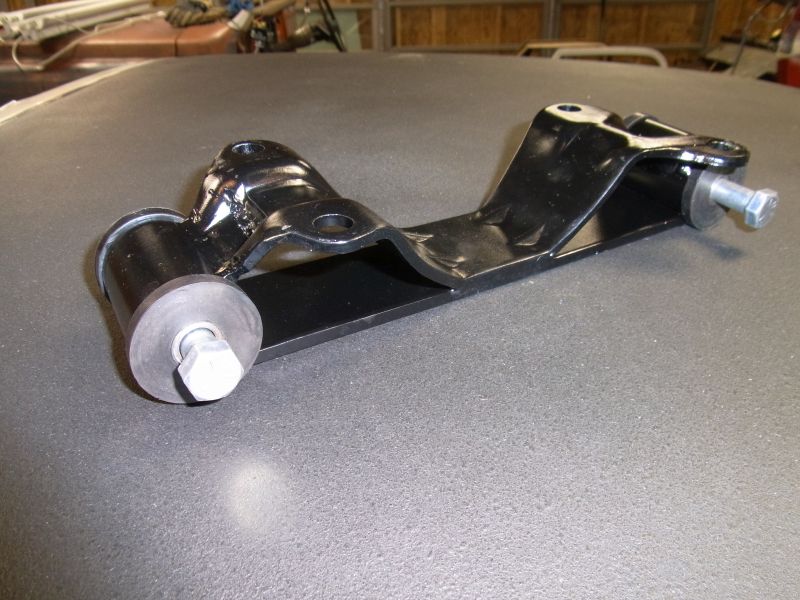
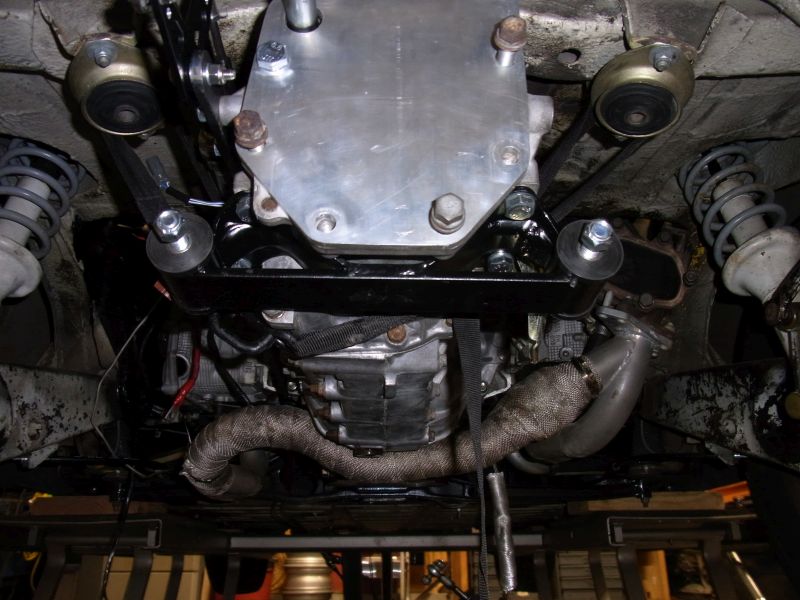
I finally found a set of '04 STI DOJ's for the drive-shafts. Lined up with 108mm cv's, stubs and Boxster Hubs. Should be as strong as I can get with OEM parts.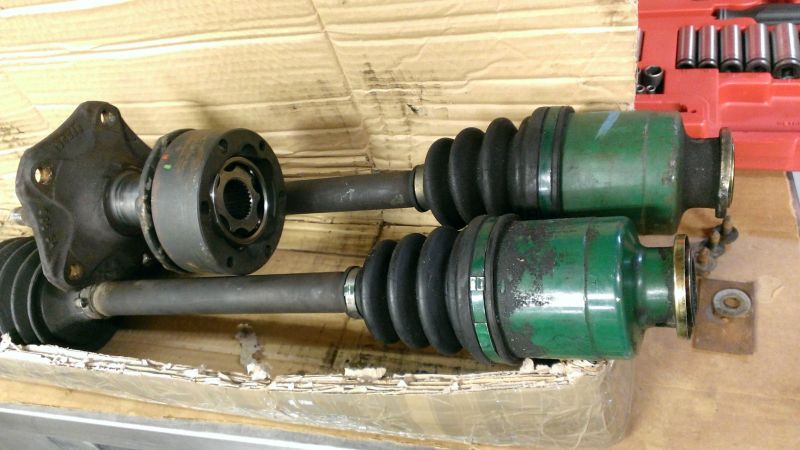
Good day of work!
Cheers,
Scott
Posted by: 914GTSTI Jan 18 2015, 10:07 PM
Scott, what in-car shifter did you use ? And what car are the 108's stubs from ? I'm not a Porsche guy I just play one in my Garage.
In 2007 I found you build and some where along the way I got stopped. Now I'm back on it and may even go with the Subaru 5 speed.
Randy
Posted by: Amenson Jan 19 2015, 07:57 AM
Scott, what in-car shifter did you use ? And what car are the 108's stubs from ? I'm not a Porsche guy I just play one in my Garage.
In 2007 I found you build and some where along the way I got stopped. Now I'm back on it and may even go with the Subaru 5 speed.
Randy
And I though that my project had been stalled...
Get back at it.I have an MR2 shifter. It is not great and will be modified substantially before it gets installed. The only other shifter with the correct stick to cable motion that I know of is the Lotus cable shifter (barrym is using one for his build).
The stubs came off of a pile of used axles that I found, not sure which actual vehicle they are from. I have an extra pair that I may sell once I confirm that they really do work with the Boxster hubs.
Cheers,
Scott
Posted by: Amenson Feb 1 2015, 12:58 PM
Oh almighty supreme being of all things mechanical, grant me the serenity to accept the things I cannot change, the courage to change the things I can, and the wisdom to know the difference.
My name is Scott and I have a problem. It has been about 2 hours since my last transmission purchase.
I was shopping for a busted early 2000's suby trans to scavange the VSS assembly from. This what I found: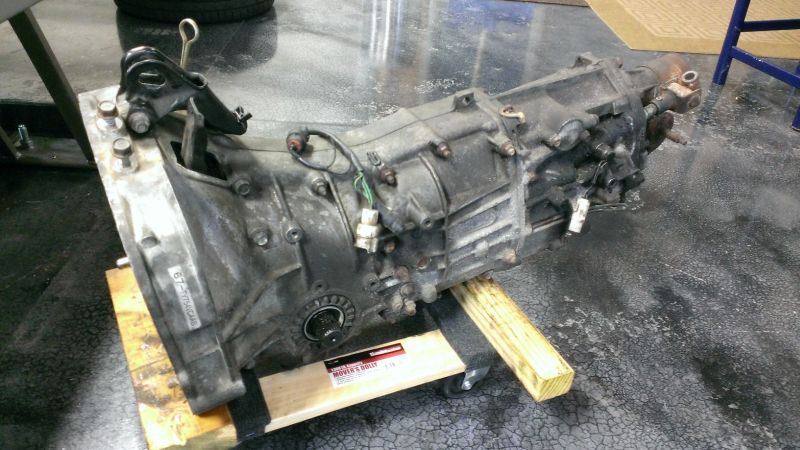
US Impreza 2.5RS MY99-01 TY754VCAAB
Seems to be in really good condition, was apparently removed from the car to do a STI swap. If anybody in the area is looking for one let me know, I will let it go very cheap once I get the VSS parts removed. 914forme...you know you want to replace the old one you have, all it will cost is your set of tube beaders 
On the topic of old 5mt's I would like to share a link to a good overview of the differences between the different generations of Suby 5mt's.
http://thefactoryfiveforum.com/showthread.php?9909-THE-Transmission-Thread-2-0-Now-with-Pictures
Apparently the internal oiling of the early transmissions requires the oil slinging off of the center diff to work properly. It is not recommended to use that style in 2wd configuration.
On another note, my OBX lsd arrived 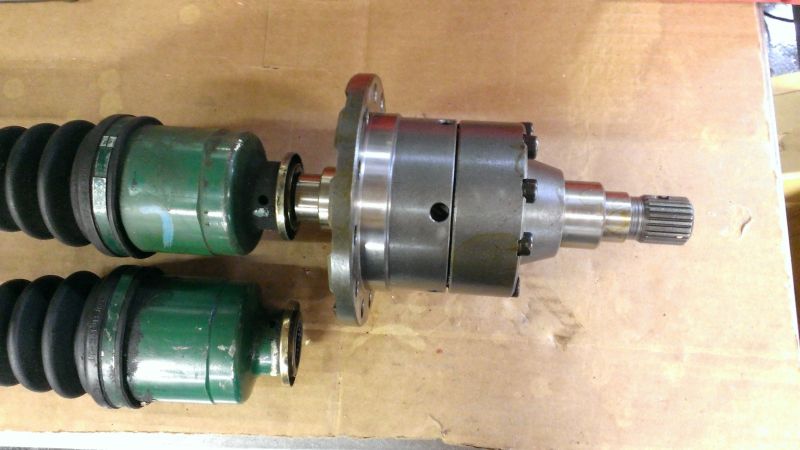
I have the upgraded washer and bolt kit to install.
I have hit a small snag in my transmission mount creation. While checking that everything is centered and level I found that the engine is 1.5 deg off. Lots of measurements later and found that the cross bar is aligned with the body but the engine is not in line with the cross bar. Looks like the engine mount was bent somewhere along the way, probably when I had the mounts pull though. Not a big deal to fix but I have to pull the pan and some plumbing to get the mount off.
Cheers,
Scott
Posted by: DBCooper Feb 1 2015, 01:21 PM
My MR2 shifter was modified to sit flat and fit, but my son mounted his a little higher with some home improvement store brackets so it just bolted up: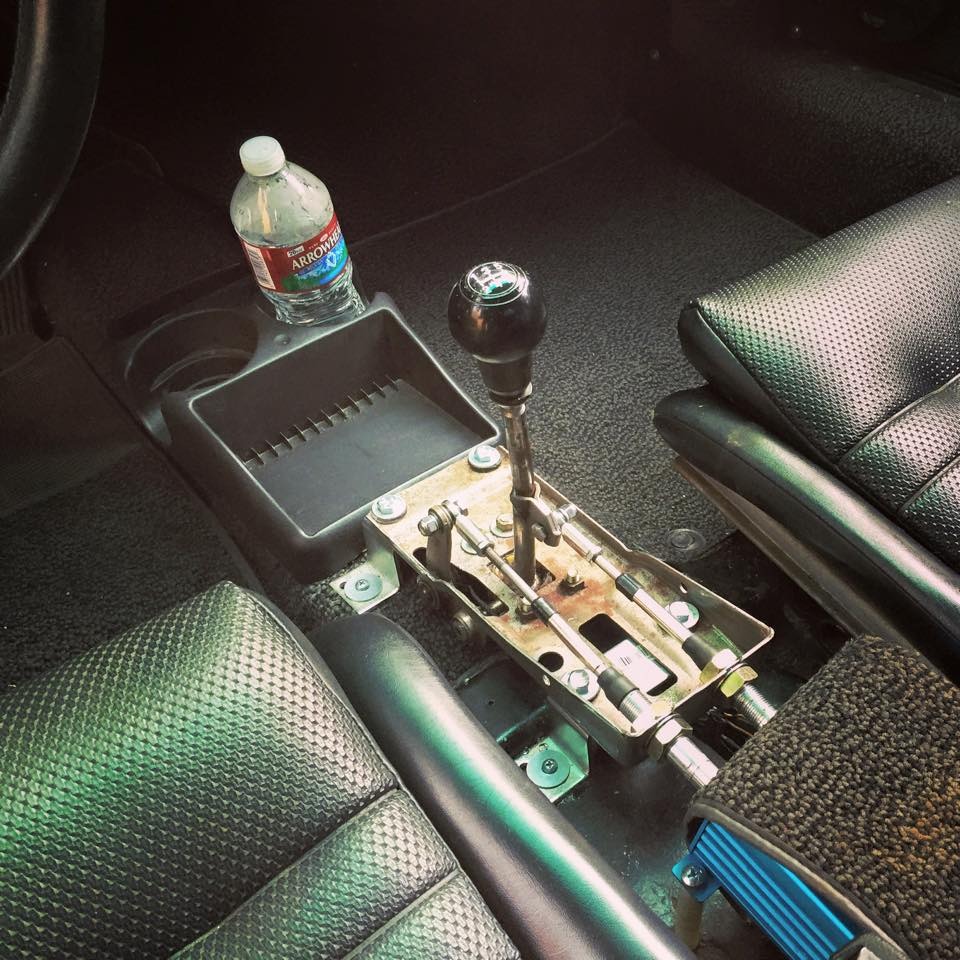
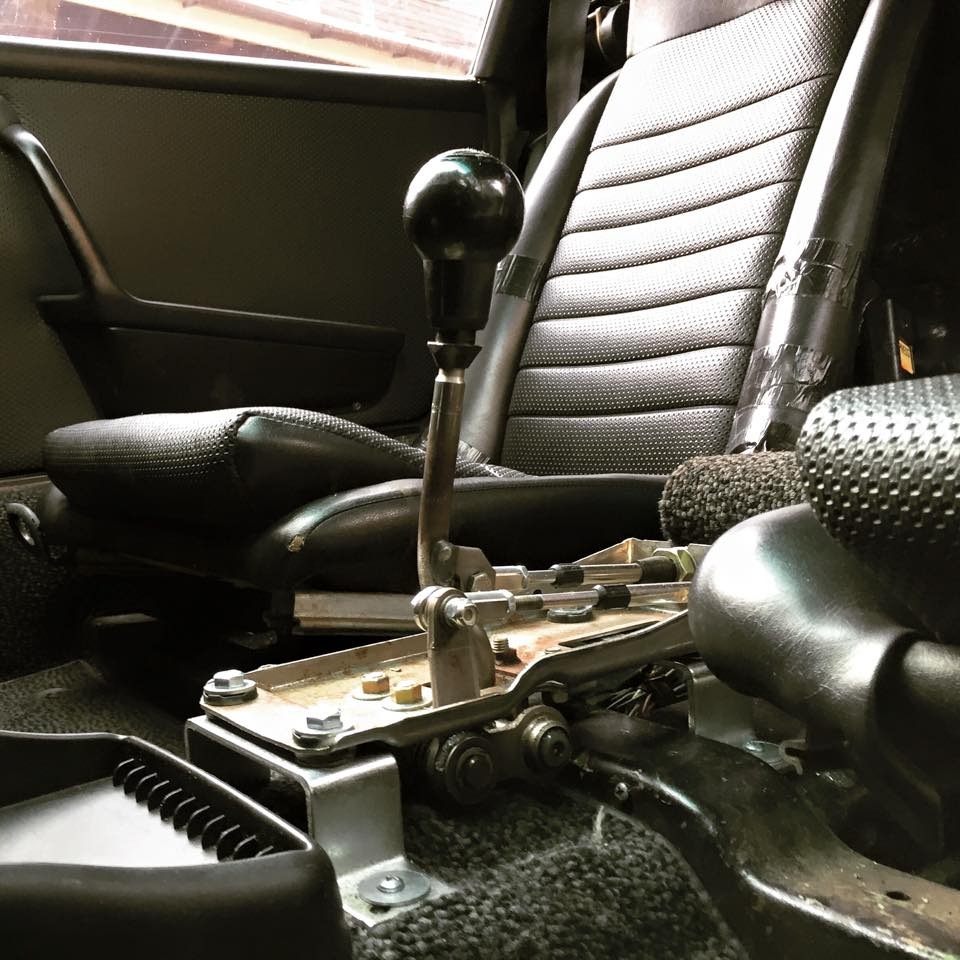
Pretty clever, cheap, works well, and no need to cut anything. He's apparently smarter than I am.
Posted by: Amenson Feb 2 2015, 07:52 AM
Pretty clever, cheap, works well, and no need to cut anything. He's apparently smarter than I am.
That looks wonderfully simple and effective, unfortunately my unrelenting need to over engineer everything will result in a solution significantly more effort that that. I really want the shift knob to be located adjacent to the steering wheel. I am considering using only the pivot block and linkage from the MR2 and putting it on an elevated base like this:

I have also considered changing the motion ratios and having a much longer shaft like this:
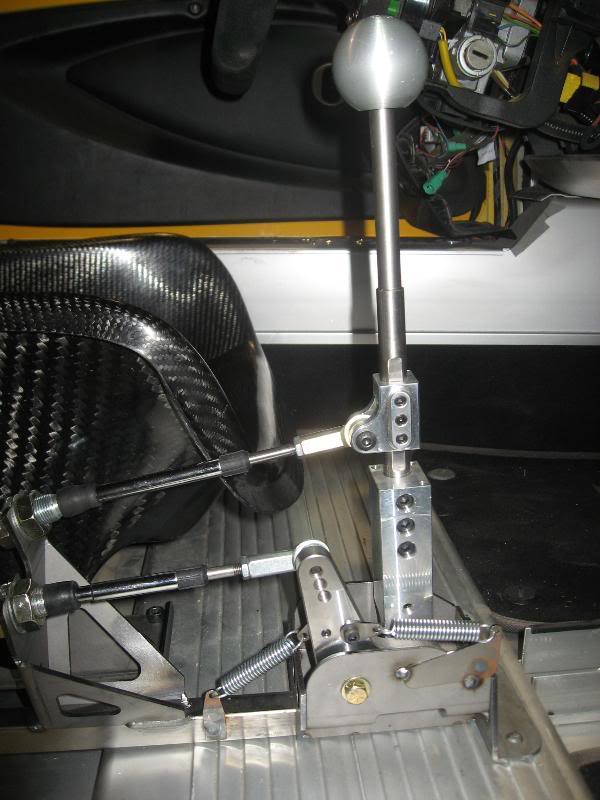
I am concerned that the second option would really magnify any slop in the linkage/cables.
How is the slop in your son's car?
Cheers,
Scott
Posted by: DBCooper Feb 2 2015, 09:06 AM
How is the slop in your son's car?
It was good before and he says it's better now, but since I haven't driven since then I have to say I don't know. Mine's very good and I think probably good enough to work well with your long lever. Too bad you're so far away, when people ask me questions like that I usually give them my keys and ask them to try to not hit anything. Unless they're drooling or I'm pretty sure they're nitwits, those guys just get a ride.
Posted by: Amenson Feb 6 2015, 10:11 AM
Too bad you're so far away, when people ask me questions like that I usually give them my keys and ask them to try to not hit anything. Unless they're drooling or I'm pretty sure they're nitwits, those guys just get a ride.
You are a brave man letting people drive your car. The only people who have driven the PorSTI are my wife, father, mother and buddy Jake. The only reason Jake got to drive it was he helped build my garage...and he is the most careful guy in the entire world.
Does anybody have a tail shift engine mount laying around that they would be willing to sell? I am looking at reworking the engine mount to correct the slight lean and thinking that I should get rid of the huge cast side shift bar while I am at it. The tail shift bar seems like it should be much lighter. I am also considering making a bar but really do not need another project.
Cheers,
Scott
Posted by: DBCooper Feb 6 2015, 11:55 AM
You are a brave man letting people drive your car.
Ha ha, I think you actually meant "foolish", no?
The only people who have driven the PorSTI are my wife ... mother...
Well now if you ask me THAT was pretty brave.
Posted by: Amenson Feb 6 2015, 12:09 PM
The only people who have driven the PorSTI are my wife ... mother...
Well now if you ask me THAT was pretty brave.
Not really, the wife knows that if anything happens to the car it will result in extended garage time. My Mom's daily driver in the summer is an E-Type, she is classic car approved.
Cheers,
Scott
Posted by: ruby914 Feb 6 2015, 12:30 PM
Scott,
I am working on a pitch mount of sorts. It looks like you may have this area of your car clear to look at so I thought I would show you what I have come up with. I don't hear much chatter on the need for it but I think I will feel better with it tied in on top.
I picked up an aftermarket VW bug urethane motor mount. The plan is to weld some mounting points to both sides of the rear firewall, bolt the motor mount to that and then to the trany. I will have slotted holes for and aft at the trany and a nut plate with slotted holes up and down at the fire wall. The fire wall has a joggle in it so I will use a partial spacer there.
I will try to up date my thread as this progresses...
Oh, and I made a 1/2" tube frame riser for my shifter.
Attached image(s)
Posted by: 914GTSTI Feb 6 2015, 01:05 PM
Scott, has anyone used the plastic MR2 shifted ?
Randy
Posted by: DBCooper Feb 6 2015, 01:22 PM
Not really, the wife knows that if anything happens to the car it will result in extended garage time. My Mom's daily driver in the summer is an E-Type, she is classic car approved.
Wow, good taste, good sense and good genes. Good job on all counts!
Posted by: Amenson Feb 6 2015, 01:49 PM
Scott,
I am working on a pitch mount of sorts. It looks like you may have this area of your car clear to look at so I thought I would show you what I have come up with. I don't hear much chatter on the need for it but I think I will feel better with it tied in on top.
Oh, and I made a 1/2" tube frame riser for my shifter.
Your shifter is what got me thinking about improving the shift knob placement!
Unfortunately I do not have your composite skills so I have to make sure whatever I build is aesthetically pleasing...although your tube frame is pretty nice looking too.
I think with factory rubber Suby mounts, the pitch stop could be beneficial. I am replacing the engine mounts that I busted with the J-west urethane part and the mounts that I am making in the back are nearly solid so I should not have much engine motion at all.
Scott, has anyone used the plastic MR2 shifted ?
Randy
I think that the stick to cable motion is not correct with the plastic shifter.
Cheers,
Scott
Posted by: 914GTSTI Feb 6 2015, 02:16 PM
Thanks Scott.
Posted by: Amenson Feb 8 2015, 05:48 PM
Finally took the time to remove the STI DOJ's from the axles. They are in really good shape and both fit the LSD!
It is amazing how much plunge the joints have. Definitely do not need floating axles with this type of joint.
I started pulling apart my extra suby trans so I took the oportunity while the center diff and other parts where off to weight it. Came in at 105 lbs. Measured a 901 and it is 80 lbs. Both were dry.
I decided to make my own engine cross bar. Considering using 1x1.5" rectangle tubing .120" wall (A513). Any FEA geeks out there want to provide feedback if this will be strong enough? Engine should weigh ~300lbs + a bit for exaust, intake etc.
Still looking for another phone dial or two.
Cheers,
Scott
Posted by: 914forme Feb 9 2015, 07:10 AM
Do you want the Lotus approach - its to heavy. Weight is not the only stress it has to endure. You have torque and forces induced by engine rotation. The arms become a huge lever. With out putting it through modeling or real world trails its just a guess.
My approach is go stronger, because not knowing your design, means I have to compensate for things beyond my current understanding. I just built my transmission hangers, well they are in mockup and tacked together. I used 1.5" DOM with a 0.125 inch wall. It is most likely over kill, but I had it and well thats the best metal to use, free!!! I ended up using the factory bar from a tail shifter because I had it around, and I bored the bolt holes out for 1/2" bolts, because thats what my Energy Suspension bushings required. It is also most likely over kill. But the engine mounts I picked up where built from 3/8 inch plate. The original ones I was building was 3/16" So I might have been wrong or Small Car, decided they wanted the no pictures of it yet.
But here are my trans hangers. Still need a little fitting, the gap is a little wider than I like. I now know why Ian went with Angle for his trans hangers. Hold it in place, mark, cut, and done. I am a masochist when it comes to working with metal. So much pain for so little pleasure. 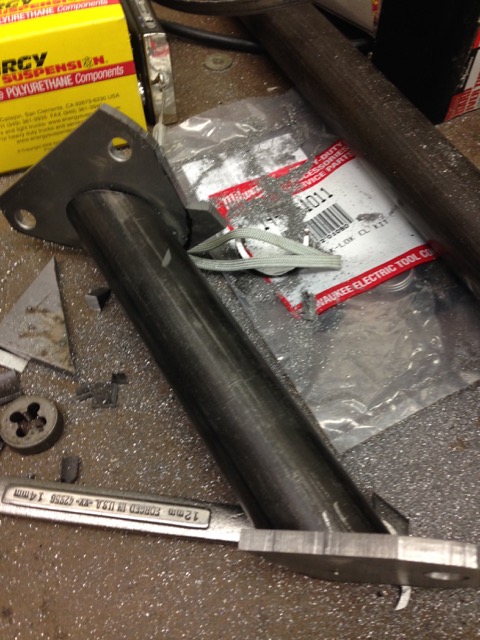
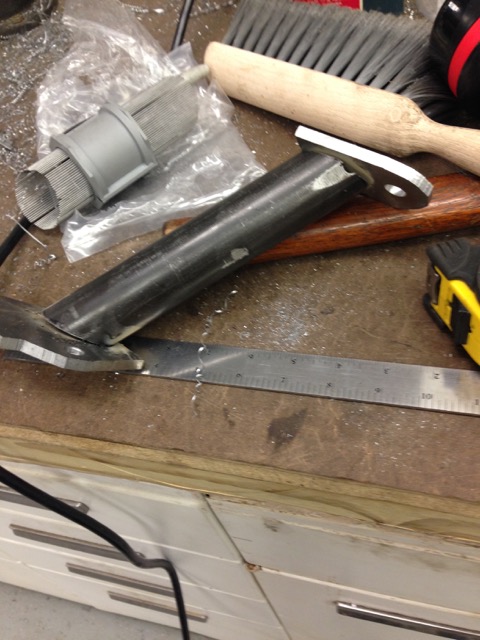
I might be adding the Subaru mount piece to them also, to tie them together. Not needed, but I am thinking of using it for a place to mount a wheel, just in case I need a wheelie bar. In reality, it would be to have a location for a caster to make the engine easier to move about.
Posted by: Amenson Feb 9 2015, 08:29 AM
Do you want the Lotus approach - its to heavy. Weight is not the only stress it has to endure. You have torque and forces induced by engine rotation. The arms become a huge lever. With out putting it through modeling or real world trails its just a guess.
My approach is go stronger, because not knowing your design, means I have to compensate for things beyond my current understanding.
Still need a little fitting, the gap is a little wider than I like. I now know why Ian went with Angle for his trans hangers. Hold it in place, mark, cut, and done. I am a masochist when it comes to working with metal. So much pain for so little pleasure.
Ya, about those gaps...
... I see one of the tube mockup thingies in your picture. Does it help?
I am in the same boat. I know that the current bar works but is way beefy. Something lighter will work, just don't want to risk going too light. Luckily somebody
is providing a tail shift engine bar for me to use or reference for material selection! See you Thursday.Cheers,
Scott
Posted by: 914forme Feb 9 2015, 09:05 AM
Ya, about those gaps...
... I see one of the tube mockup thingies in your picture. Does it help?
I am in the same boat. I know that the current bar works but is way beefy. Something lighter will work, just don't want to risk going too light. Luckily somebody
is providing a tail shift engine bar for me to use or reference for material selection! See you Thursday.Cheers,
Scott
Quick answer Nope thus the reason for the gaps!!!!! I hate copying others work, but Ian had the right idea here. Easy to mockup, scribe a line, cut, and well, weld in place. It could also allow the brackets to be smaller. Which would help with leverage on the mounts and other factors. With out going into a bunch of force calculations, it becomes basic physics. Less leverage on a given point if it can be avoided, means less stress on the given point, thus lighter materials can be used.
The issue with the tube tool is keeping it oriented correctly, keeping a constant angle on the tube that matches the finale angle of the production piece. Then be able to get it in there. So I marked a line on the tube. Marked a line on the tool, always keep the two on the marked lines. And still got a gap.
It was closer than if I had done it with a pencil, and just guessing, but not close enough for me to say it was easier. If some one has an easier way, I am open to suggestions. Wood dowels, build a prototype, and then recreate it with metal. I used to do it with a roll of tape, and a sharpie, it works. I have also used a holes, but that works in fitting two tubes. This should have been a simple angle calculation.
I could weld up a box section, two sides to build the angle then make a pattern and for the other two sides and fill it in. That would have been way easier, and could be made just as strong or stronger do to better joints. And I would have been done, when we had a nice day to weld outdid yesterday Tube is just so sexy though, I keep going back to it.
Posted by: 76-914 Feb 9 2015, 09:15 AM
If you want "lighter" go with 4130 .095" chromoly.
Posted by: mgp4591 Feb 9 2015, 09:27 AM
Have any estimates about the weight of your homebuilt cradle? I'm thinking of using rectangular tubing also because it may be easier to mock up and provide some great torsional rigidity...
Posted by: 914forme Feb 9 2015, 09:45 AM
Chromoly lol, Im a CSOB, I had the 1.5 in my metal bin.
BTW, I just got done talking plasma CNCs with a co-worker, when we started talking my pipe fitting issue. He said I need this book, it solves all my issues. Pipe Trades Pocket Manual head to Amazon, no new ones in stock, one used. Okay, well, easy enough I am willing to learn.
Then I was walking away and thought oh crap, I know how to do this!!!! 4 hours of frustration would have been ended with a few steps.
Mark the plate with where you want the center of the tubes to land. Drill a hole big enough for you to pull a piece of wire through.
Bolt everything up
Pull the wire down and pass it through both holes. 2 points create a line.
Now I have all the information I need, measure the angles. Duplicate it in tube form.
Am I correct in this thinking?
Still might be easier to do it in flat sections and build the box.
Sorry for the thread hijack here Scott.
I'll start a new thread to see if I get better answers.
Posted by: Amenson Feb 9 2015, 12:56 PM
Sorry for the thread hijack here Scott.
I'll start a new thread to see if I get better answers.
This is a good discussion. I will be doing something similar once I get my engine square with the chassis again.
Posted by: Amenson Feb 18 2015, 10:46 AM
Moving along with progress, just stockpiling parts now.
I am considering using the AL front 911 cross member when I swap the front struts. I know, it is supposedly less stiff, but...I kind of like it so I may use it. Unfortunately my suspension setup was missing the bracing straps, or whatever they are called.
The think pointed to below:
Anybody have a pair that they want to sell or measure so that I can make them?
Thanks,
Scott
Posted by: 914GTSTI Feb 18 2015, 11:08 AM
Man that is a pretty pan !
Funny your thinking about that.Todays work. LOL
Posted by: 914forme Feb 18 2015, 02:23 PM
Moving along with progress, just stockpiling parts now.
I am considering using the AL front 911 cross member when I swap the front struts. I know, it is supposedly less stiff, but...I kind of like it so I may use it. Unfortunately my suspension setup was missing the bracing straps, or whatever they are called.
The think pointed to below:
Anybody have a pair that they want to sell or measure so that I can make them?
Thanks,
Scott
I have a set I could measure up for you, have to find them in the bin. I run one, its a heck a lot lighter than stock 914 unit. I never noticed flex, even with DOT-Rs or Slicks. Maybe with wider wheels and tires.
Posted by: Amenson Feb 22 2015, 09:09 AM
I picked up the smallest Subaru 5mt a starter I could find on Ebay to test the fit. I think that it is similar to the starter that 914forme just posted in his build thread but a different part number. Mine is 23300AA560 and might have come out of an 08 WRX.
It fits w/o cutting...just like Stephen said it would!!!
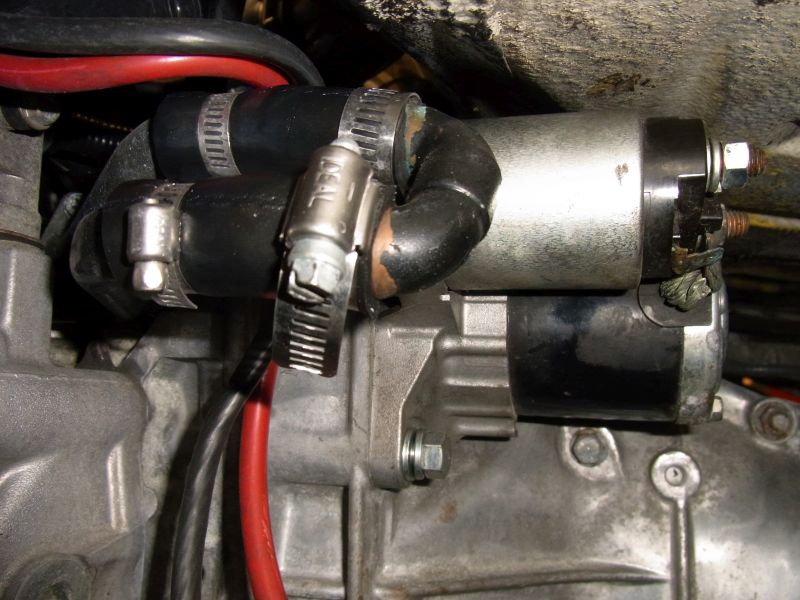
I think that I will still need to make a little room for the clutch slave, it is going to be very close.
I picked up a tail shifter engine mount from Stephen and tried it out yesterday. Surprisingly the cast bar is 1/2lb lighter. It also does not fit quite like I was hoping so now I am going to built one. I should be able to make it low profile enough so that it does not hang below the bottom of the floor/oil pan. It really makes me nervous now that the bar is the lowest point.
Cheers,
Scott
Posted by: 76-914 Feb 22 2015, 09:51 AM
I fretted about cutting the trunk as well but I'm glad that I did. The black box in the pic is the cover. I now have direct access to the starter, solenoid and slave cylinder w/o crawling under the car. Very convenient!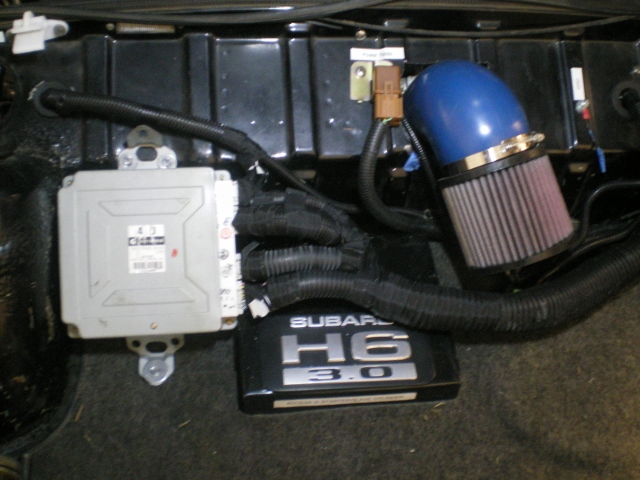
Posted by: Amenson Feb 22 2015, 10:10 AM
I fretted about cutting the trunk as well but I'm glad that I did. The black box in the pic is the cover. I now have direct access to the starter, solenoid and slave cylinder w/o crawling under the car. Very convenient!
I am definitely not fretting about cutting up the car...if I need to for some purpose. If I can fit something w/o comprising functionality I will and spend the time/money saved improving something elsewhere on the project. Like welding the unnecessary seams in the intercooler plumbing and installing v-band clamps at the IC!
Posted by: Amenson Mar 1 2015, 09:09 PM
It was above freezing today (34F) so I thought that I would tinker in the garage for a bit. Started cleaning up the 911 front suspension and got stuck trying to remove the dust cap. Didn't have a 2" exaust clamp so I switched over to the engine cross bar. Figured that I would just confirm my measurements and start marking up the parts to cut. 3 hours later and was somehow pretty much finished.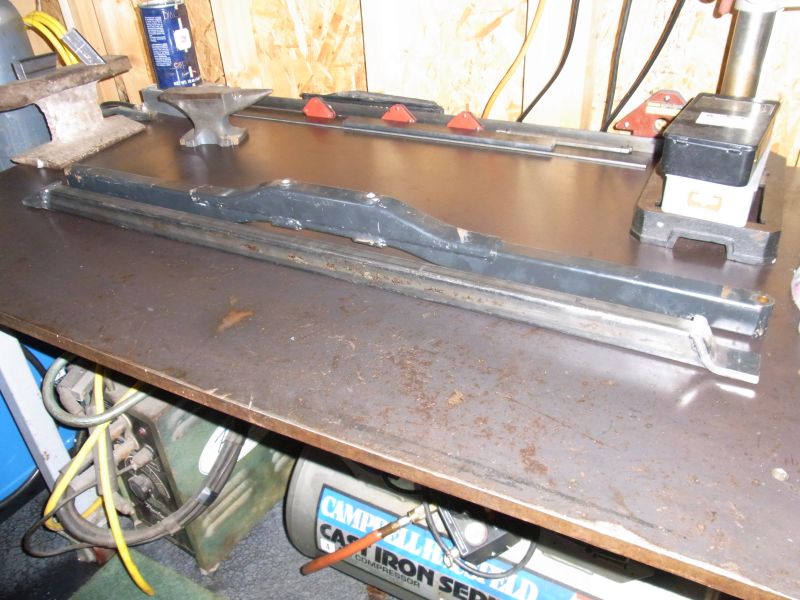
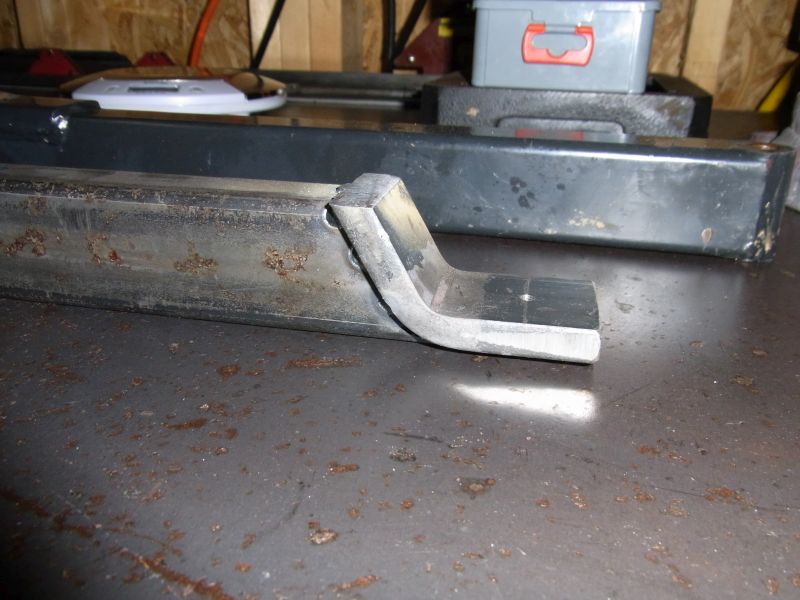
Need to finish welding it, size the holes, radius the edges and paint it.
Can't wait to get rid of the huge cast piece.
Cheers,
Scott
Posted by: 914forme Mar 2 2015, 08:23 PM
I don't recognize that part since you removed all the saw dust. Nice job on the cross bar.
Posted by: mgp4591 Mar 2 2015, 09:06 PM
Specs on the bar? Looks to be 2x2x1/4 with 3/8ths ends? Nice work!
Posted by: Amenson Mar 3 2015, 08:37 AM
I don't recognize that part since you removed all the saw dust.
Nice job on the cross bar. Everything that might go on the car gets a quick swim in the parts cleaner!
Specs on the bar? Looks to be 2x2x1.4 with 3/8ths ends? Nice work!
Bar is 1"x1.5", 0.120" wall. The end material material is 3/8 and is welded to the bottom thickness of the bar for a total cantilevered thickness of 0.495". This should swap in for the current bar and keep the engine at the same height. I am going to weld the bar to the engine mount and add some gussets to provide a little extra margin against bending.
Cheers,
Scott
Posted by: mgp4591 Mar 3 2015, 09:10 AM
I don't recognize that part since you removed all the saw dust.
Nice job on the cross bar. Everything that might go on the car gets a quick swim in the parts cleaner!
Specs on the bar? Looks to be 2x2x1.4 with 3/8ths ends? Nice work!
Bar is 1"x1.5", 0.120" wall. The end material material is 3/8 and is welded to the bottom thickness of the bar for a total cantilevered thickness of 0.495". This should swap in for the current bar and keep the engine at the same height. I am going to weld the bar to the engine mount and add some gussets to provide a little extra margin against bending.
Cheers,
Scott
That works and should be plenty strong. Looking forward to your progress!
Posted by: Amenson Mar 3 2015, 08:16 PM
Could not wait until the weekend to finish the bar...didn't hurt that it was over 40F in the garage. Heat wave. 
New bar with the old bar.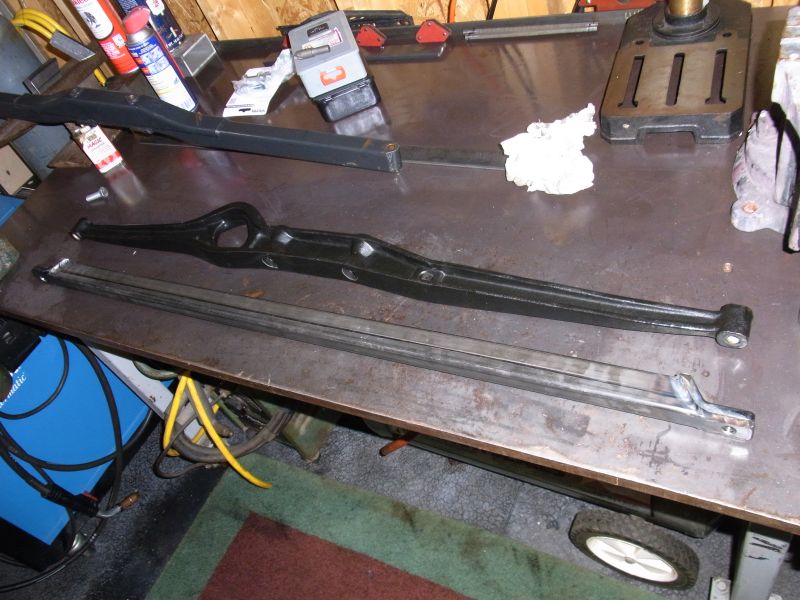
Should not be able to break this setup.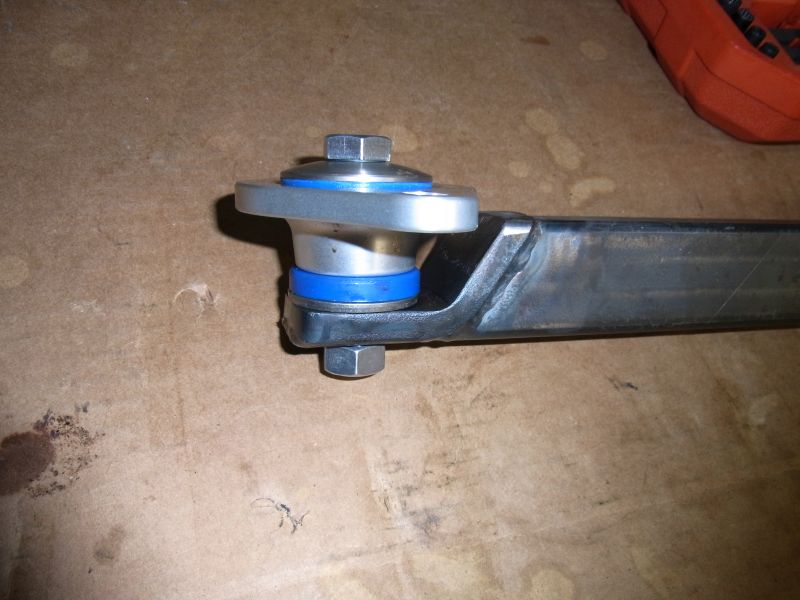
It holds the engine up!!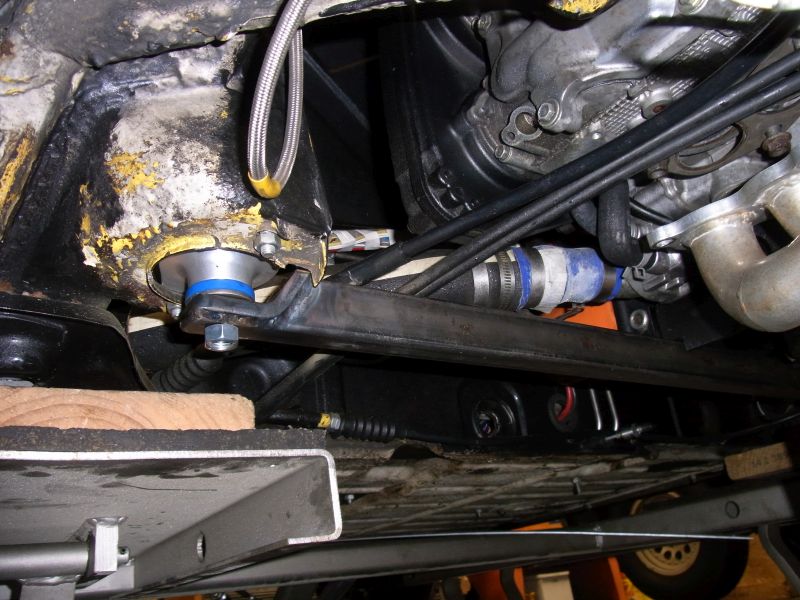
Should be able to put in a full day on Sunday to finish the engine and trans mounts.
Cheers,
Scott
Posted by: Amenson Mar 4 2015, 09:27 PM
I was cleaning the 911 5-lug front suspension and pulled the A calipers...I knew they were going to be heavy but damn, it was ridiculous. This will not do.
I have had a set of billet dynalite style calipers in a bin forever. I dug them out and started drawing up adapters. Did a search online and found some cheap weld brackets from Jegs that have half of the work done already.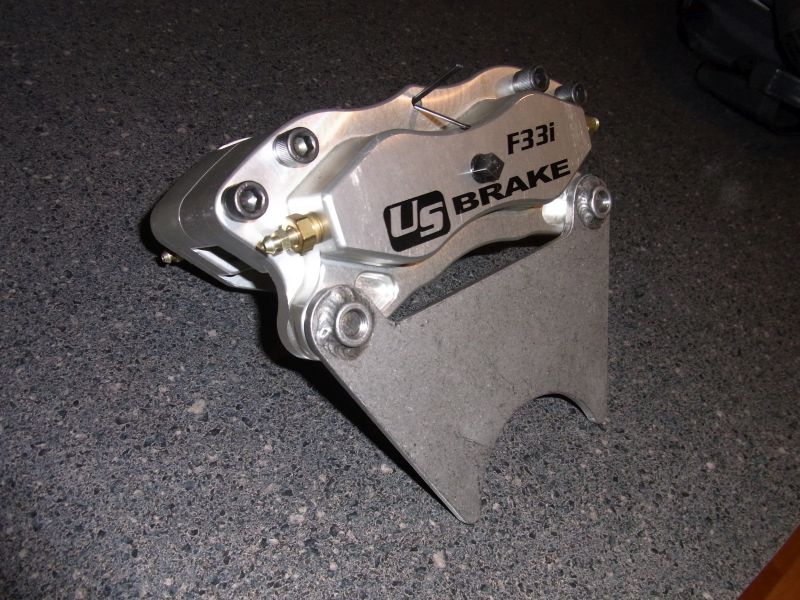
I laid out the strut side holes, now I just need to drill them and cut off the rest...hope my math was right! I will need some spacers to center the caliper on the rotor but I think that it is less than 5mm.
As an added bonus, I sized the master cylinder for these calipers so the pedal feel should soften up a bit...it is a bit stiff now.
Cheers,
Scott
Posted by: Amenson Mar 8 2015, 07:45 PM
Had a buddy over today and we swapped in the 911 front suspension. Went in no problem. Also finished the plate for the new calipers, still need to add a spacer but it seems to fit well.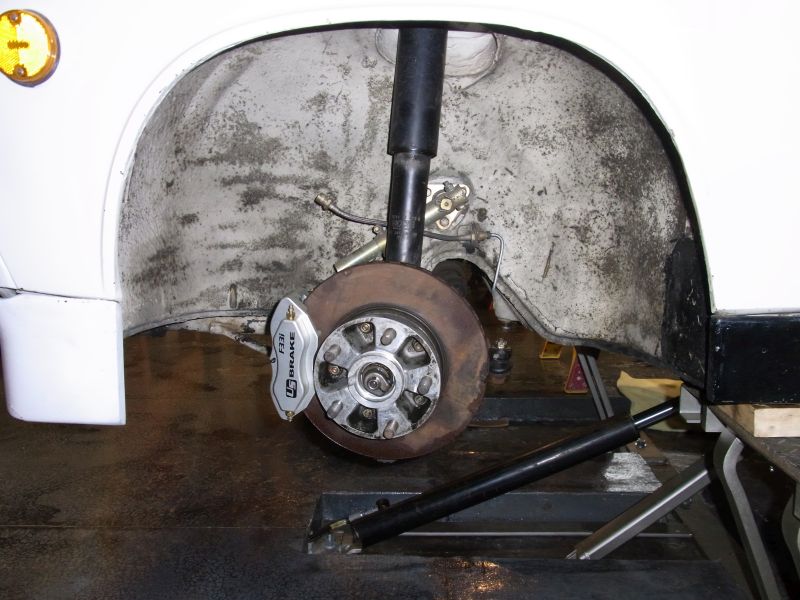
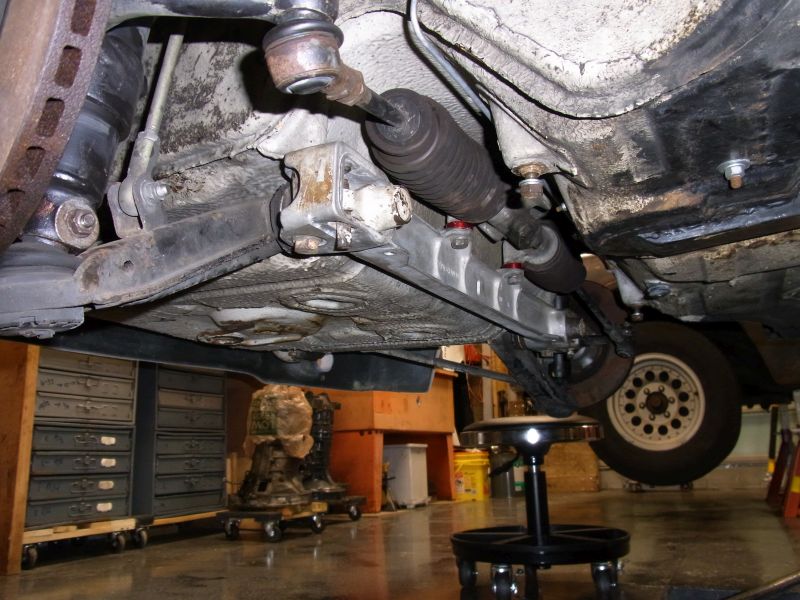
I did notice that the strut insert retaining nuts to not properly center the strut. I think that I have the stock nut with KYB (they came with the car) inserts.
Is this the stock nut?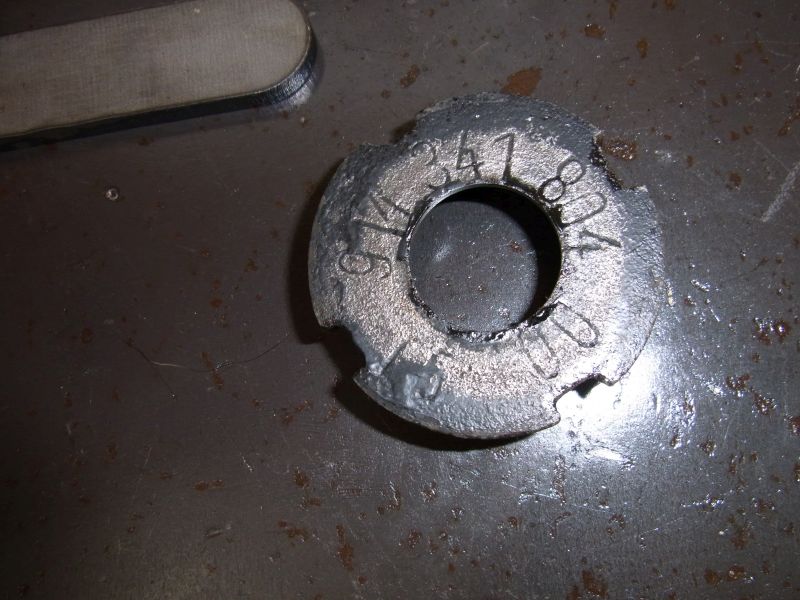
I also fussed around with the engine mount. It is deflecting a tiny bit so I am going to run a reinforcing rib down the top.
It is coming together but still quite a bit to do before the roads are salt free!
Oh, anybody want a set of stock front struts? They have BMW calipers with Hawk HP+ pads, fresh rotors and bearings. Trade for a nice 6 pack in person.
Cheers,
Scott
Posted by: Amenson Apr 4 2015, 08:14 PM
Finally after hours in the garage I have some results to share. I fit the reinforcing ribs to the engine cross bar. 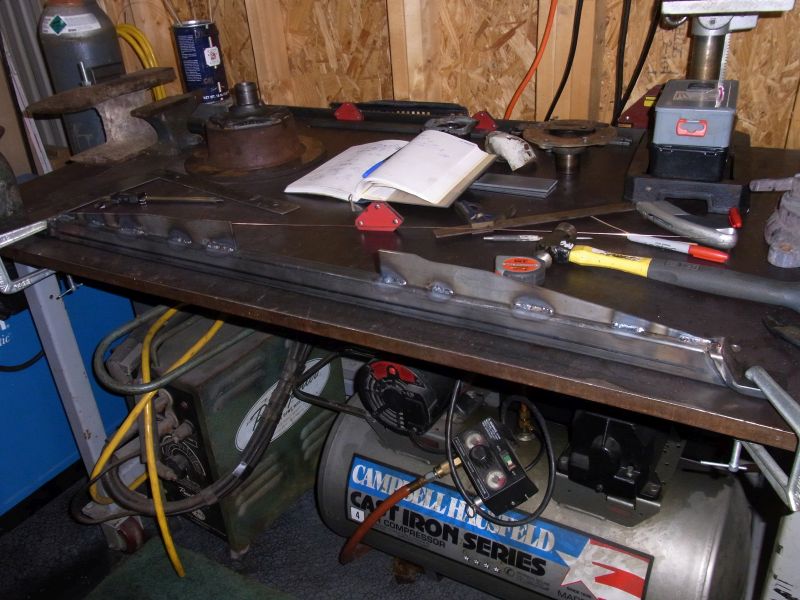
In order to maximize the height I had a load of clearancing to do for the perfect fit. Also notice the sandblasted ends of the engine side brackets. I cut the previous bracing out of the mount and prepped it to be welded to the new crossbar.
Mounts on the transmission came together also. Ready to be welded to the upper plates.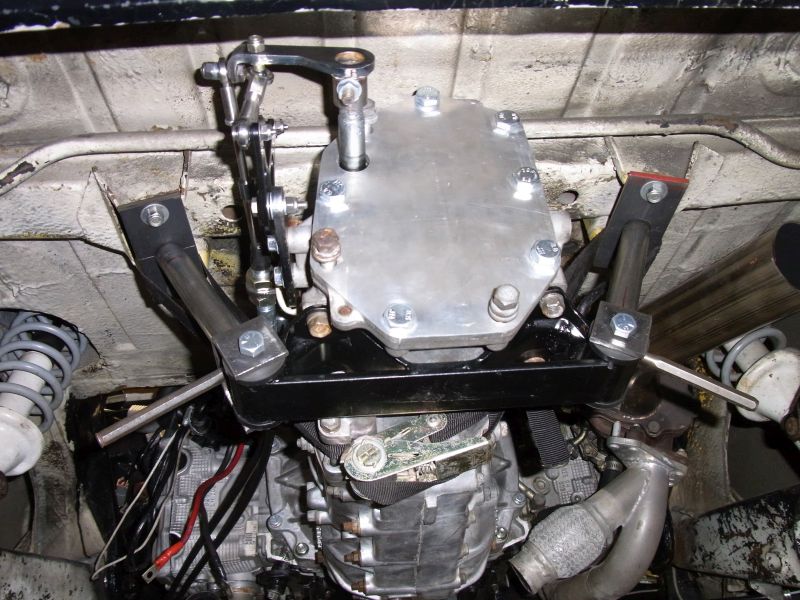
Virtually no gap, these should be a treat to weld.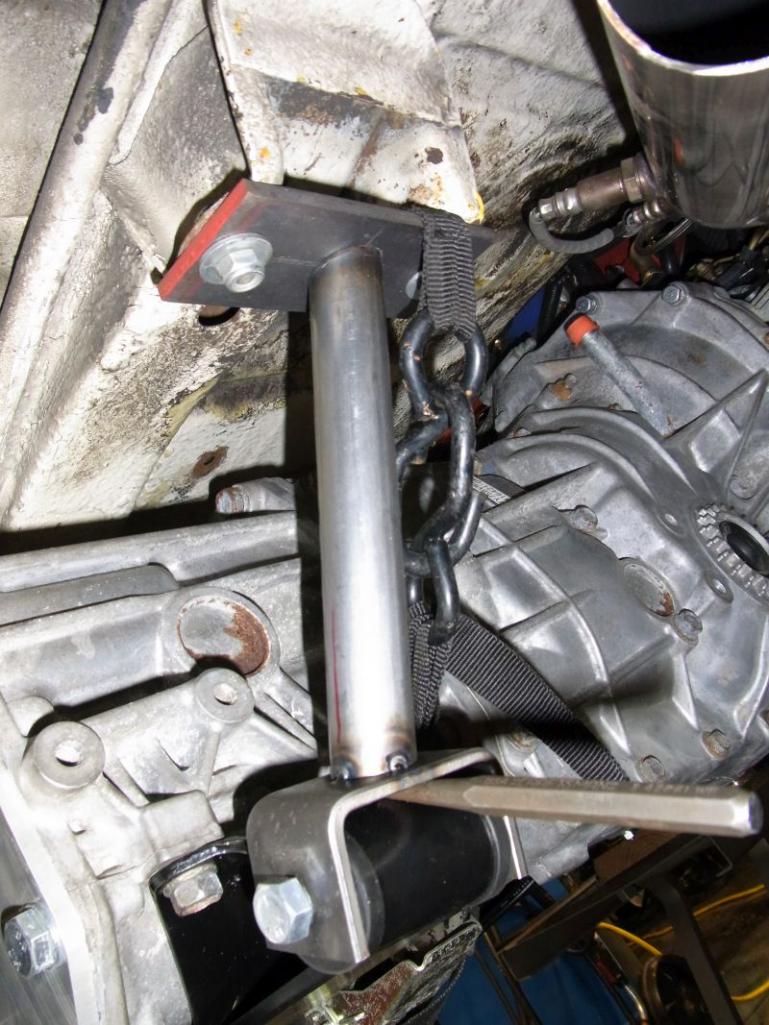
And they were.
Look ma...no ratchet strap!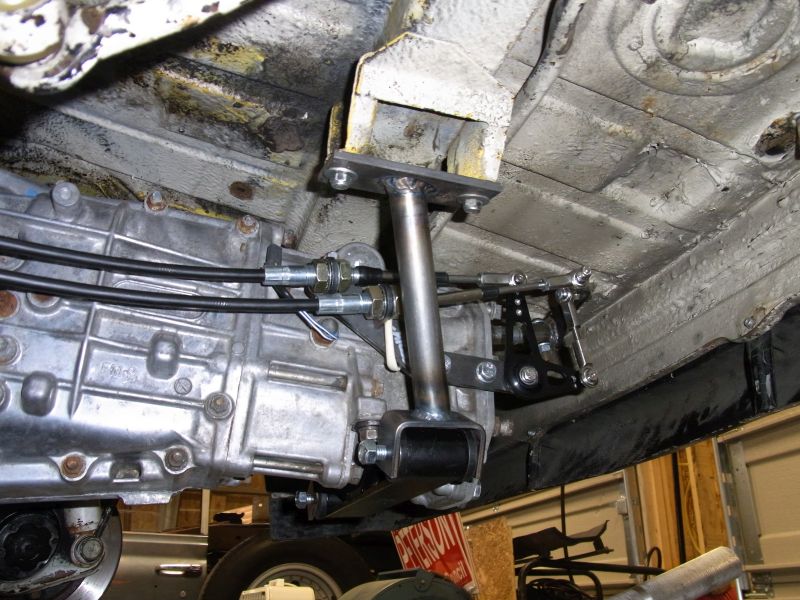
Also had the phone dials stripped and powder coated. The tires get swapped over tomorrow. Yes, the Fuchs will be available then also 
Posted by: Amenson Apr 5 2015, 06:06 PM
Finally finished the engine mount today. Had to use the torch twice to straighten it after welding.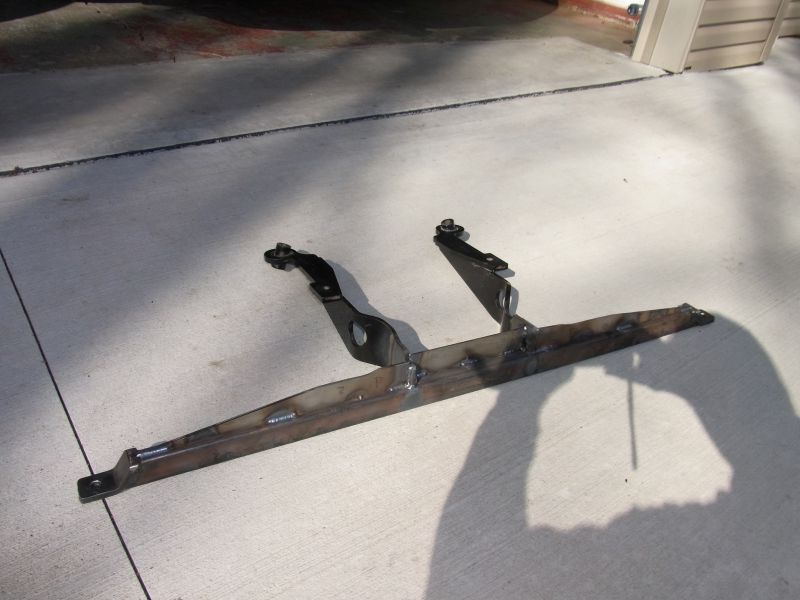
Drivetrain is fully supported. Nothing from Porsche exists except the mounting holes in the chassis 
Now I can drop the drivetrain and install the LSD!
Cheers,
Scott
Posted by: mepstein Apr 5 2015, 08:27 PM
Nice progress
Posted by: veekry9 Apr 24 2015, 11:51 AM
A very nice build.
http://www.performanceforums.com/forums/showthread.php?67303032-New-CNC-close-deck-EJ25-subi-setup
Nice trick to keep the heads on.Drydeck the block to keep the sleeves in place.First time seeing it done to the Subaru blocks,an elegant touch is the matching pockets.Good work.
Posted by: Amenson Apr 26 2015, 08:05 PM
Time to get serious on progress....HRPT is at the beginning of June and I want to drive the car all May to may sure that it is robust.
Pulled the engine trans and opened the trans to install the LSD and subaspool. Spent hours cleaning the case sealant and leftovers from the exploded center diff. Fortunately the gears and bearings look mint.
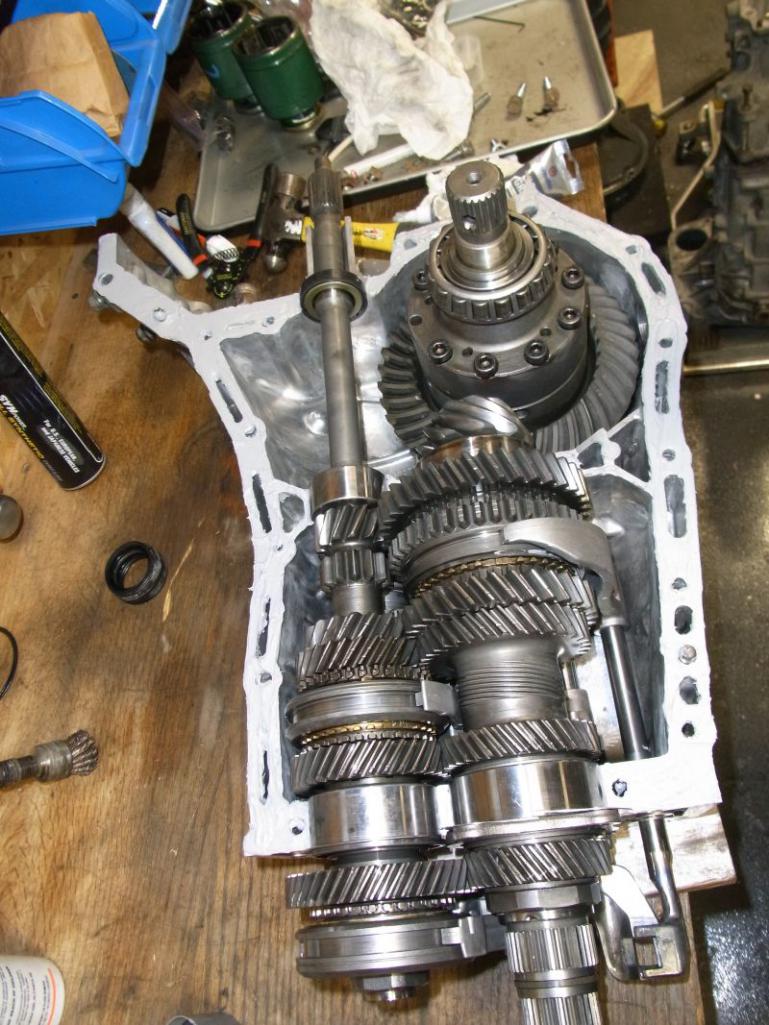
Got the gearbox back together, backlash set and went to install the o-rings in the bearing carriers. Got a little tight screwing it back in, must be a dry spot grabbing the o-ring...nope stuck. Will not move. Pulled the gearbox back apart and applied heat, will not move. Made a special tool, will not move. Pull the blade from the hacksaw and manually, very carefully, cut the carrier out of the case.
Pulled the carriers out of the spare gearbox, ordered a load of new seals and put it back together...again. Finally ready to go back in.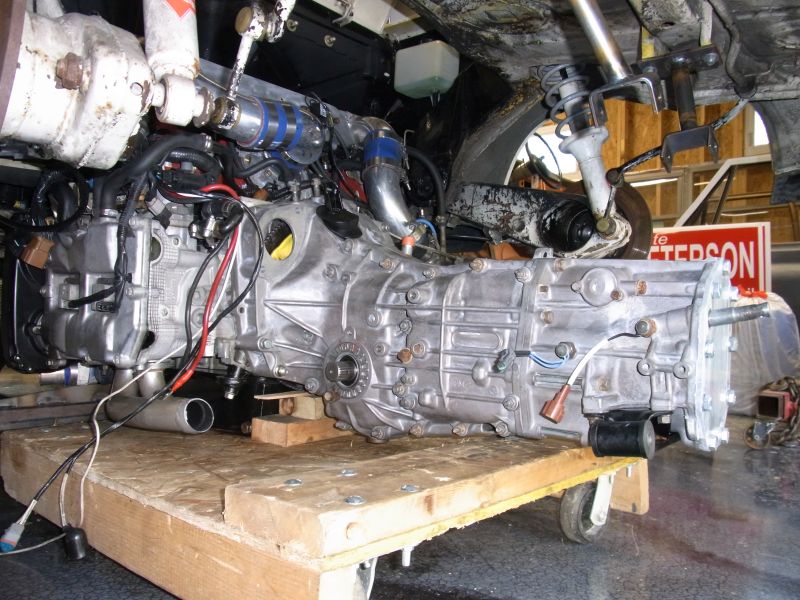
The engine trolly is set up for the 901 transmission and the suby trans does not sit level on it. Made for a bit of excitement getting it out, the engine slid off the dolly and wedged against the firewall...no harm no faul. Getting it back in was less eventful but inefficient enough that I will remake or modify the trolly before dropping it again.
Got it back in so that I can mock up the axles. This configuration may hold 1 ft/lb!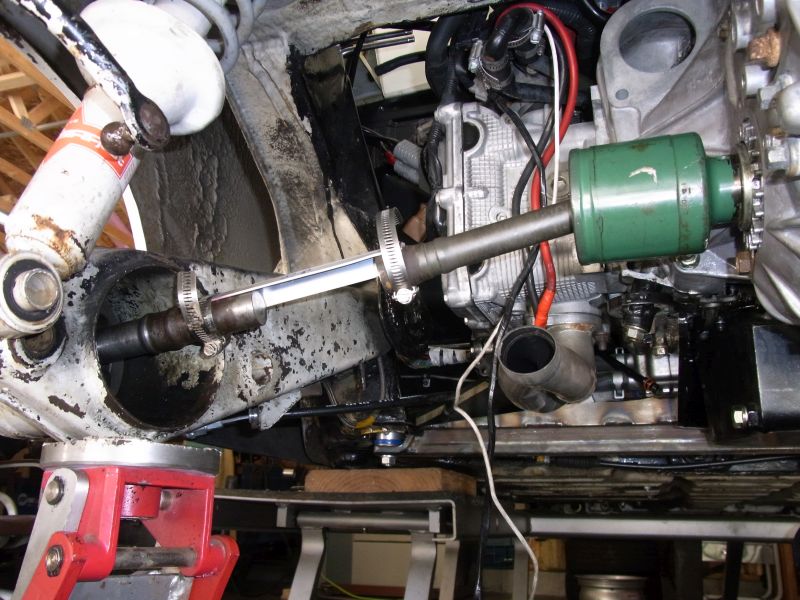
With the suspension at full droop I left .5" of clearance to remove the axle. Should give some clearance for toe adjustments and the DOJ has some remaining travel:
Big outer CV's look very happy!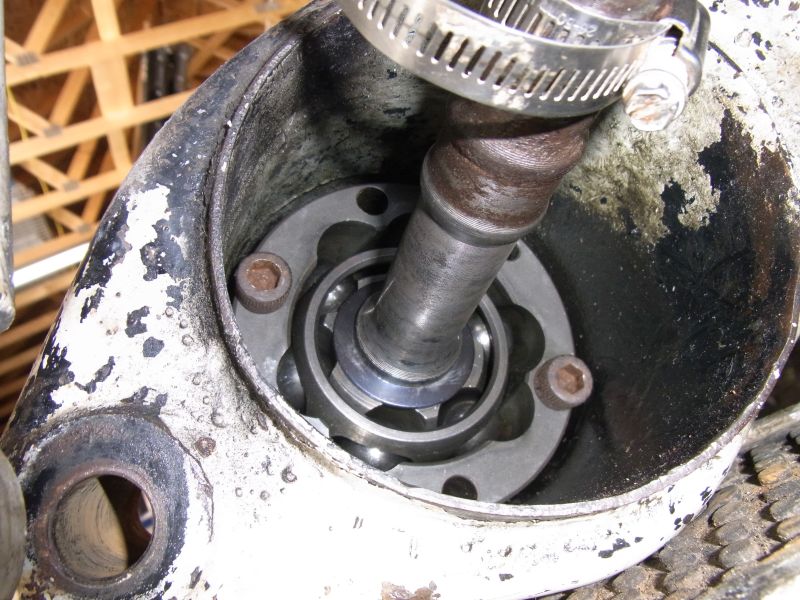
Still a load of stuff to do and the engine needs to come back out to do much of it but the axles were the last of the parts to order. With a solid weekend next week I should be able to start it again....hopefully.
Cheers,
Scott
Posted by: JRust Apr 27 2015, 02:02 PM
Looking great Scott! I like the no cradle. Looks very clean & less to work around for the exhaust. Great job
Posted by: 914forme Apr 27 2015, 07:50 PM
Wow that looks great, make me want to redo my setup. I really like the calipers.
Posted by: Amenson May 4 2015, 08:18 PM
Banged out some big projects this weekend.
Rerouted the header around the new trans and DOJ's. The exhaust get's a bit close to the boot on the passenger side, special measures will need to be taken to keep it alive.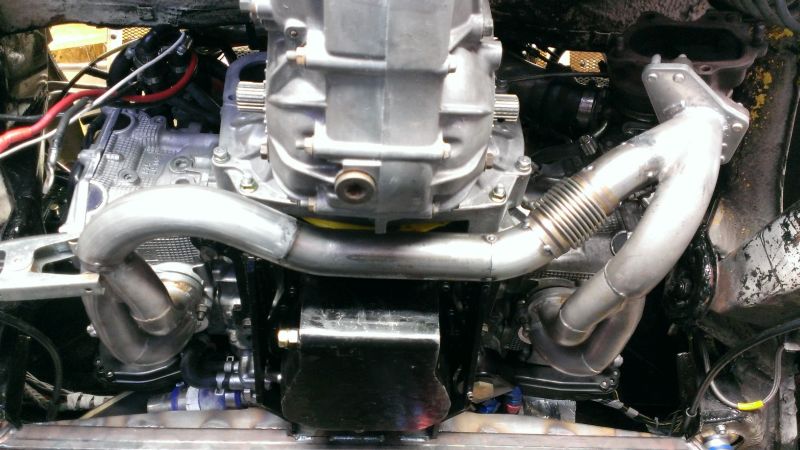
Welding is so much fun with no gaps, some of the joints were so tight I was able to fusion weld them (no filler)!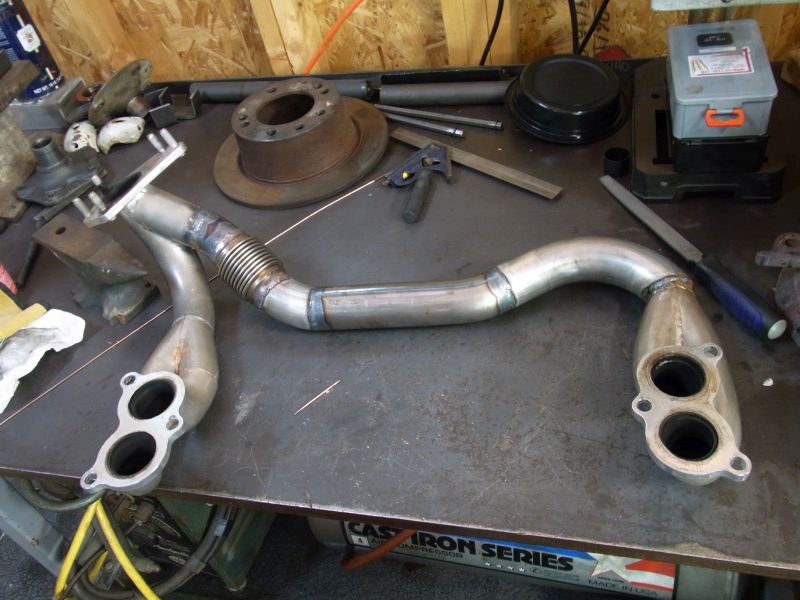
Also hacked the post turbo exhaust to the bare minimum and installed a v-band joint...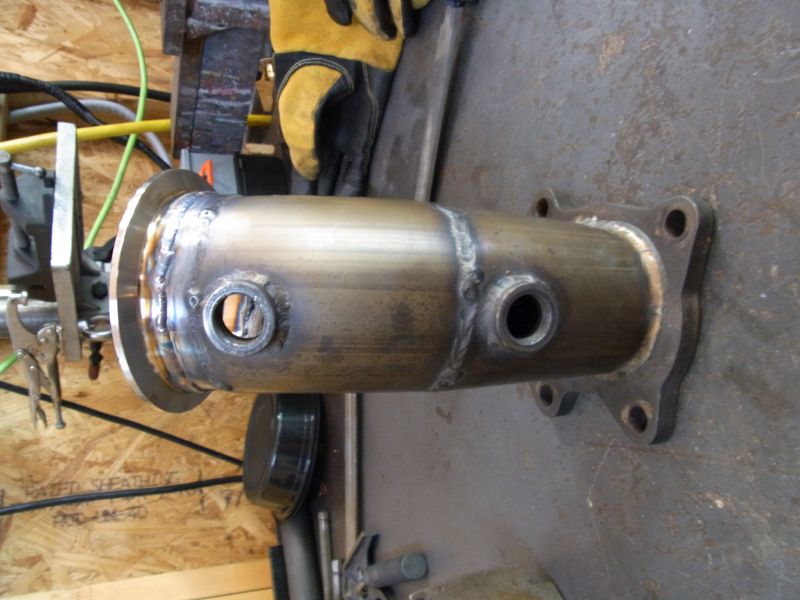
...so the rest of it can be done in aluminum. Simplify and add lightness.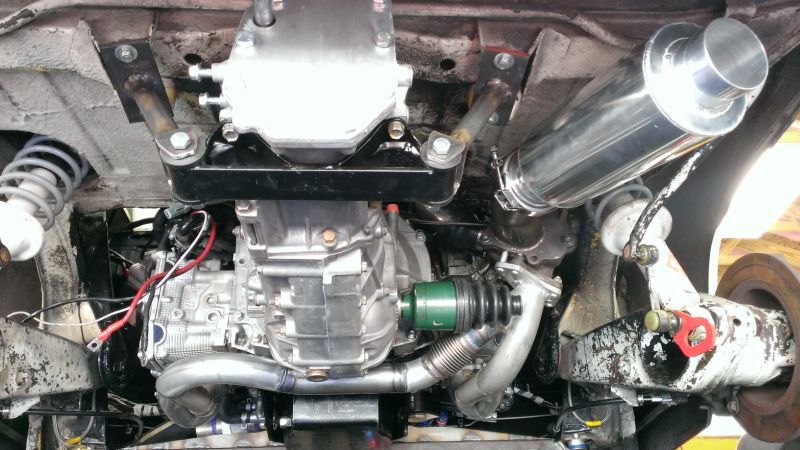
Next on the list were the pesky silicon/clamp joints on the IC plumbing.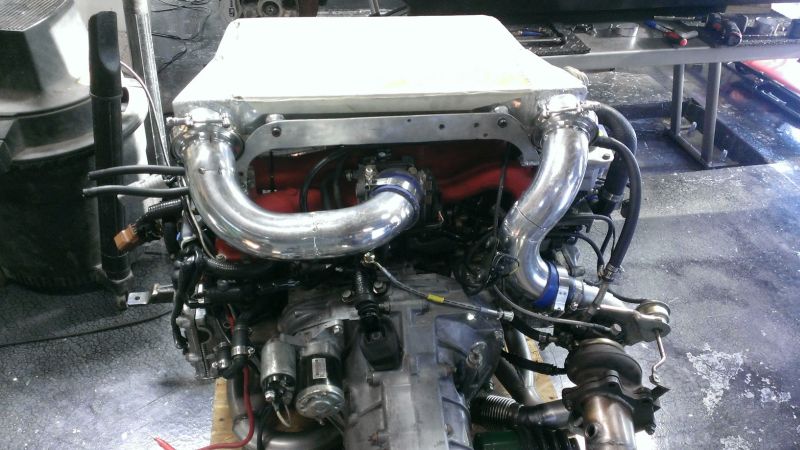
Gone...took a lot of cutting.
Also made clearance for the clutch fork.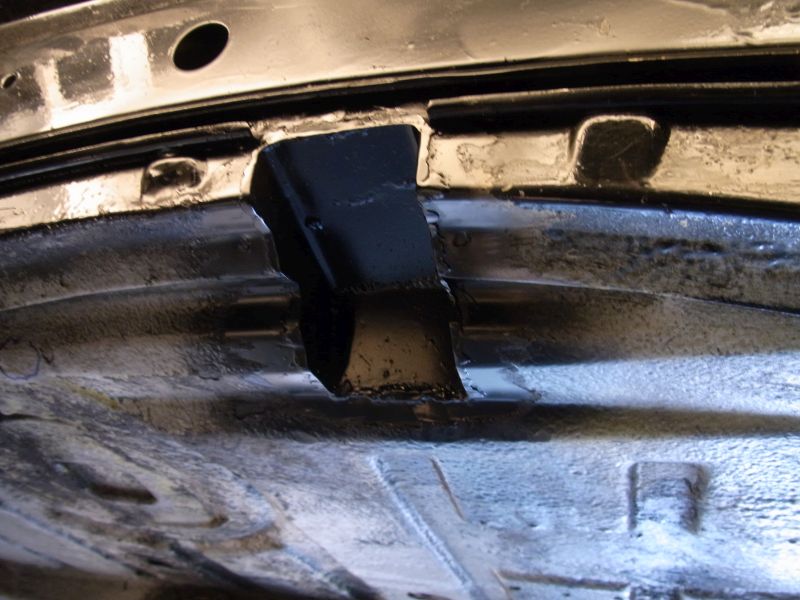
Ran out of argon after tacking the IC tubing so I had to use the mig. Man do I hate grinding welds.
Total package, see if you can pick out all of the other little modifications.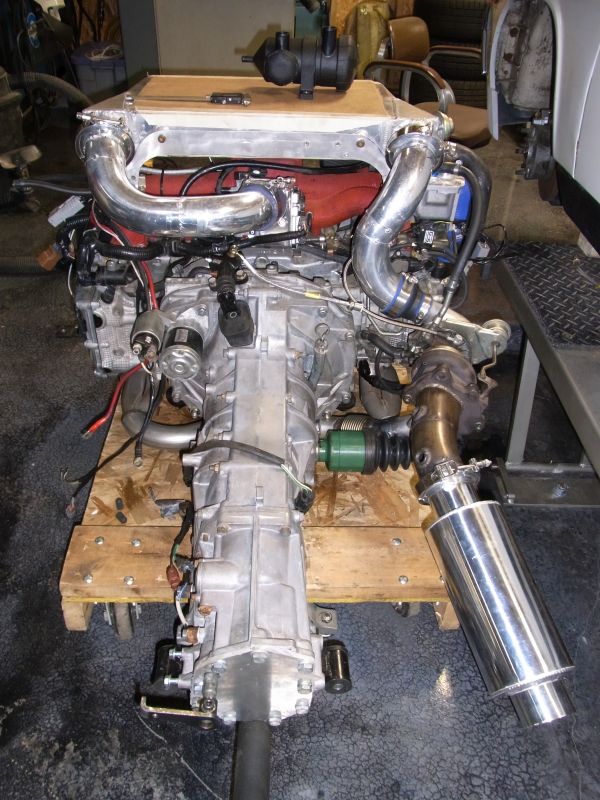
Cheers,
Scott
Posted by: barrym May 5 2015, 04:42 AM
Do you know what your pre &/or post intercooler air temps are ??
Posted by: Amenson May 5 2015, 06:52 AM
Do you know what your pre &/or post intercooler air temps are ??
Generally at standstill it heat soaks quite a bit but cools down quickly while moving. I have considered installing the stock STI IC water sprayer, which Subaru probably installed for this exact reason.
I found a few data logs on my work laptop and the highest Intake Temp was 47C although I think that I have some other data with higher values.
Posted by: Amenson Jun 3 2015, 06:25 PM
It turns out that the axles I had made are too short. During testing tonight I pulled the DOJ apart.
I need to have another set made but am out of 911 axles. If anybody has a pair that they would be willing to ship ASAP to Dutchman Motorsports I could use a logistical miracle in order to make Power Tour this weekend.
Send me a PM if you have something.
Scott
Posted by: Andyrew Jun 3 2015, 06:46 PM
Why not machine some spacers and run loger bolts? How much shorter are we talking??
Posted by: Amenson Jun 3 2015, 07:15 PM
Why not machine some spacers and run loger bolts? How much shorter are we talking??
I am not sure how much length I really need but spacers are a great idea. Not sure why I did not think of that, I was looking at these when I ordered my CV Boots.
http://www.pacificcustoms.com/ac501930gr.html
They even come with longer bolts!
Probably not good enough for full power but might allow me to limp trough the event.
Thanks!!!!
Still looking for axles to modify.
Cheers,
Scott
Posted by: Andyrew Jun 3 2015, 08:22 PM
Those are actually pretty cool! Gonna save that link for later...
Posted by: Mike Bellis Jun 3 2015, 08:22 PM
I run one of these spacers on my 6 speed. I implanted magnets to use with my speed sensor.
Posted by: Amenson Jun 4 2015, 10:22 AM
All right, Bruce (BDStone) is coming through with a set of axles and beyond excellent customer service to get them to Dutchman Motorsports tomorrow.
Dutchman has agreed to make them a priority in the shop when they arrive and seem to be able to turn them around in a day. Then it is a simple overnight Saturday delivery to me and I am back in business.
The plan for the axles is to make them as long as possible so that they don't bind when level. It will require dropping the back of the control arm to install them but, I am not going through this BS again.
I have done a ton of stuff since my last post, some of it I am particularly proud of and some of it might be useful to others. Will make an update after Power Tour...and probably have a garage sale to pay for the expedited shipping.
Cheers,
Scott
Posted by: Angry_Subaru Jun 8 2015, 08:31 PM
All right, Bruce (BDStone) is coming through with a set of axles and beyond excellent customer service to get them to Dutchman Motorsports tomorrow.
Dutchman has agreed to make them a priority in the shop when they arrive and seem to be able to turn them around in a day. Then it is a simple overnight Saturday delivery to me and I am back in business.
The plan for the axles is to make them as long as possible so that they don't bind when level. It will require dropping the back of the control arm to install them but, I am not going through this BS again.
I have done a ton of stuff since my last post, some of it I am particularly proud of and some of it might be useful to others. Will make an update after Power Tour...and probably have a garage sale to pay for the expedited shipping.
Cheers,
Scott
Hi Scott,
I just signed up on this board to tell you that I think your car is amazing!
I saw it at Parkland College, in Champaign, IL during the Power Tour. Your car caught me as soon as I saw the license plate and of course the STi badging. I have a "lightly modded, never tracked...ah.. who am i kidding....
2005 Subaru WRX STi so it was I thought it was really neat and liked the attention to detail. I was hoping to tell you this in person but I decided to move on to check out the rest of the 4000+ cars before the storms rolled in.Very cool car man!
(I hope you don't mind me posting/sharing a few pictures I snapped of it with my buddies. If so, let me know and i'll take them down. I'll post them here first)
Very nice!
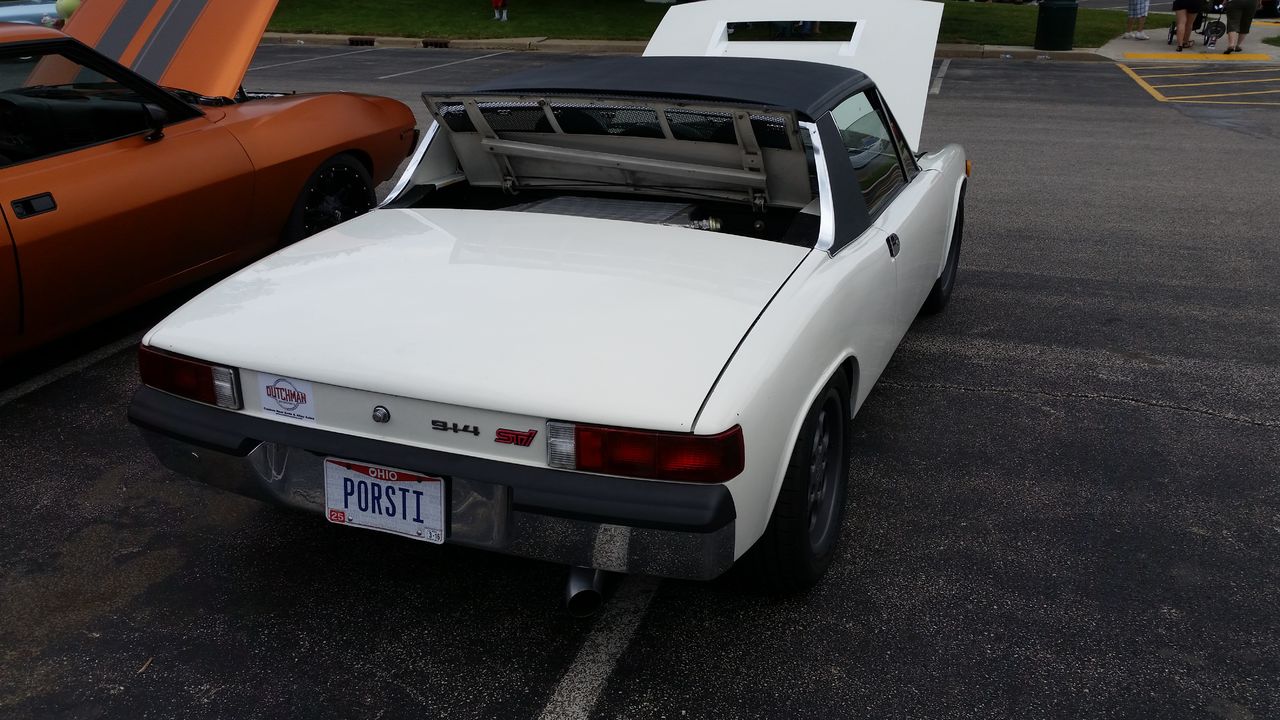
Hello there Mr. Snail. The old Familiar
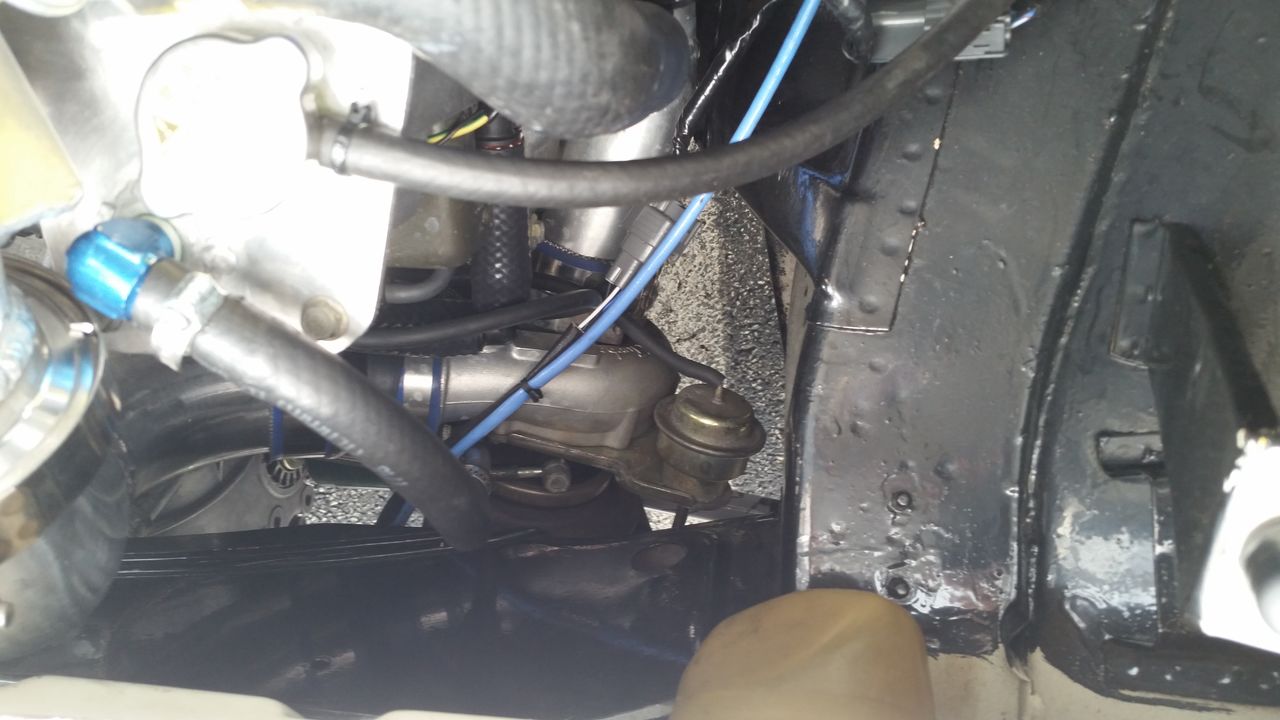
Very Clean and well done!
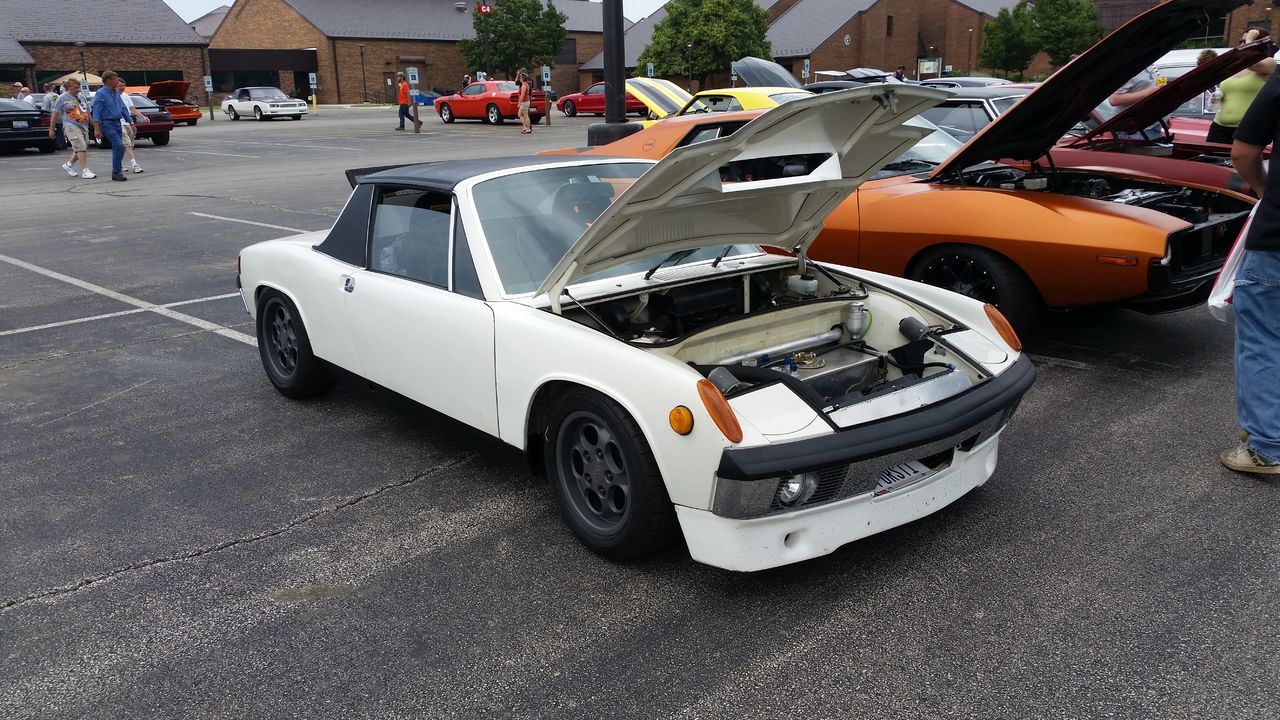
Just to show you my car during heavy braking in autocross.
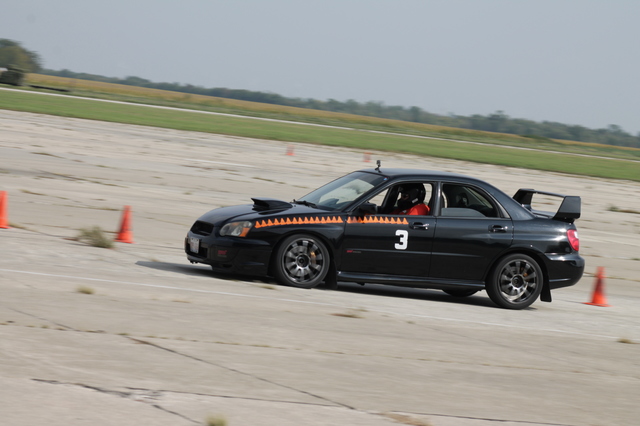
You probably won't see this until after the Power Tour so I hope everything went well, and you made it safely home.
Thanks for bringing the car out, it was awesome!
-Eric
Posted by: Mueller Jun 8 2015, 08:51 PM
^Eric, great action shot of the Subaru braking hard!
As for the 914, I love those wheels in that color, not too dark or glossy!
Very inspirational build, I must stop viewing it,,,,hahaha
Posted by: Amenson Jun 13 2015, 06:55 AM
Hi Eric,
Thank you for the very kind words and even more than that, making the effort to find the car on the internets and then signing up to the forum to share them. Now that you are here you should check out the other awesome Suby builds and start planning your own, you already have the same engine donor car that I started with.
Post all of the pictures that you want...especially the one of the rear. Dutchman Motorsports deserves some extra exposure for the job they did turning my axles around in a day. If you post it on Facebook, please tag them.
Thanks,
Scott
Posted by: 914forme Jun 13 2015, 07:17 AM
Glad you made the tour, uneventful I hope!! Car wise that is.
How is the hood opening doing for your temps, and is that the only opening you have for exit? Still at the point I am pondering the cooling, like everyone else does. But your system seems to work, and well I don't think you just drive around at idle in fear that it will over heat.
Posted by: Amenson Jun 13 2015, 06:22 PM
Glad you made the tour, uneventful I hope!! Car wise that is.
How is the hood opening doing for your temps, and is that the only opening you have for exit? Still at the point I am pondering the cooling, like everyone else does. But your system seems to work, and well I don't think you just drive around at idle in fear that it will over heat.
The hood opening is the only place air exits the radiator. Cooling is rock solid no matter what I do. Fans do not turn on unless I am stationary for a while even in super hot weather after beating on it. Most mornings on my 15 minute drive to work with several stop lights the fans don't turn all at all. The rather large Ron Davis radiator probably has something to do with it.
Cheers,
Scott
Posted by: Tyler E Jun 22 2015, 10:16 PM
I've just finished reading 25 pages of a really well thought out and beautifully executed build. Damn!
Its hard to tell from the many pics you have posted so I will ask. How much room do you have between the Suby valve cover and the Porsche rear suspension console. (I suppose the threaded stud would be the first point of interference) In a few pics it looks really tight then in others it appears to be a few inches. Could you take a measurement for me?
Posted by: Amenson Jun 24 2015, 06:43 AM
I've just finished reading 25 pages of a really well thought out and beautifully executed build. Damn!
Its hard to tell from the many pics you have posted so I will ask. How much room do you have between the Suby valve cover and the Porsche rear suspension console. (I suppose the threaded stud would be the first point of interference) In a few pics it looks really tight then in others it appears to be a few inches. Could you take a measurement for me?
Thanks for the very kind feedback.
There is a generous 3.5cm clearance between the valve cover and the suspension ear
.Are you planning your own project?
Cheers,
Scott
Posted by: Tyler E Jun 24 2015, 07:21 AM
I just looked and I joined this site 6 years ago. Wow. I guess I've had my '74 for that long. It hasn't moved, but I've been planning....and collecting parts. It needs a lot of love.
I have a line on a wrecked '05 Legacy GT with a manual trans for a good price. (Not quite an STI motor, but close) The clearance you've checked is one that has concerned me.
You have a few pics of Boxster hubs that you were using for your 5 lug conversion. Did you have any troubles with that? There is another thread here that suggests to mill the bearing retaining plate for clearance and it works. Did you have any other issues?
Thank you for the time you took to measure that for me. I hope to get at this soon.
Posted by: Amenson Jun 26 2015, 09:32 AM
You have a few pics of Boxster hubs that you were using for your 5 lug conversion. Did you have any troubles with that? There is another thread here that suggests to mill the bearing retaining plate for clearance and it works. Did you have any other issues?
The Boxster hubs do interfere with the stock bearing retainer. I used CFR aluminum bearing retainers and they fit perfectly. The axle bolt does require a step spacer as shown in the other thread. My lathe was not running so I used 3 stock washers, one of which was bored out to clear the little bit of stub axle that protrudes the hub. The 2nd additional washer was to space the castle nut to where it will interact with the cotter pin.
I don't think that I have a picture, I was in full thrash mode when assembling this area.
Posted by: Tyler E Jun 26 2015, 10:06 AM
Thanks for the info Scott. This whole thread has given me the answers I need.
Now where are the burnout videos? :-)
Posted by: Amenson Jun 26 2015, 11:12 AM
Thanks for the info Scott. This whole thread has given me the answers I need.
Now where are the burnout videos? :-)
http://www.914world.com/bbs2/index.php?s=&showtopic=58431&view=findpost&p=2118339
This year was quite tame due to the clutch issue, only one on video and I have not seen it yet. I did one massive burnout because the entire level of the parking deck was wet from the guys power washing...only they got to enjoy it. I am not so sure they were so impressed after the show as I filled their work area with smoke. Overall I am glad that I had some restraint, there was not much life remaining in the clutch disk.
Posted by: Amenson Jun 27 2015, 07:40 AM
Finally took the time to grab the photos from the last couple of weeks of work before HRPT.
One project that turned out to be a much larger PITA than expected was installing the ProVent recirculating crank case air oil separator.
Looks pretty straight forward...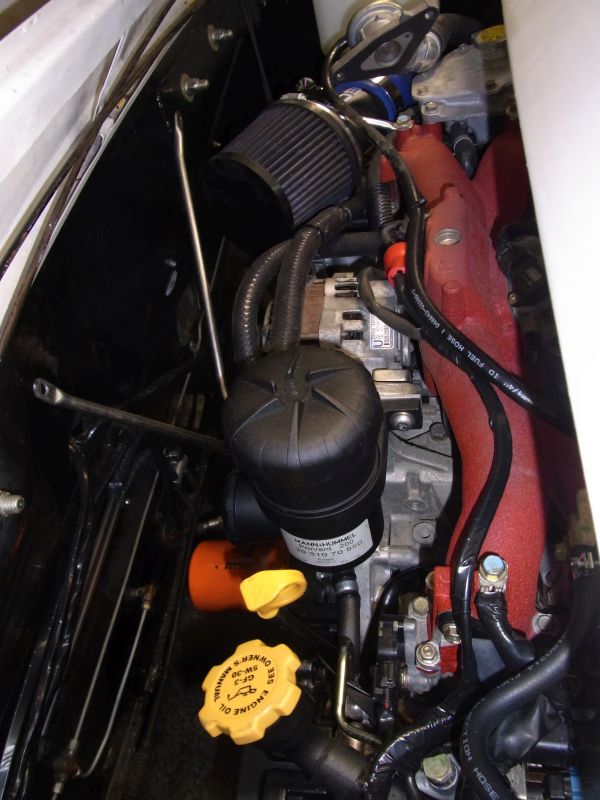
Look at the bend I had to make to avoid the alternator.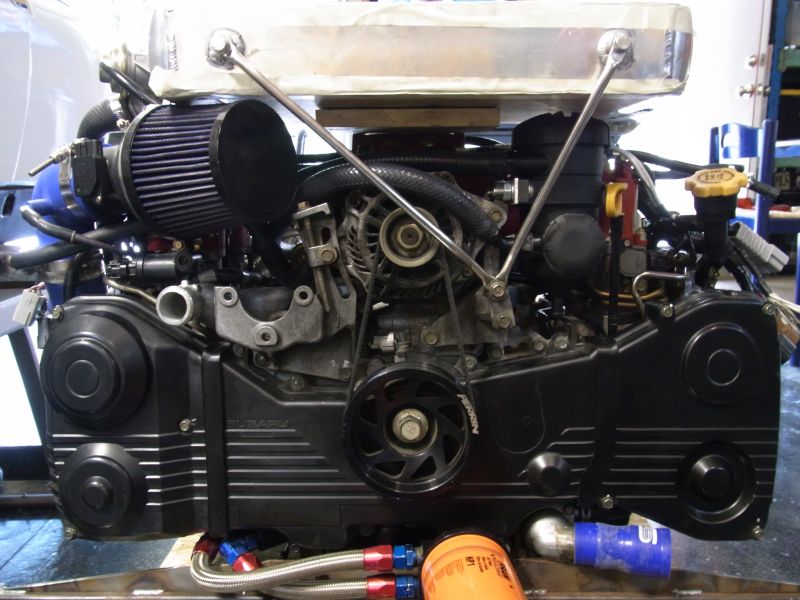
Do you think that anybody in the world makes a fitting that will fit there? Nope, had to cut apart two different fittings and weld them together to get what I needed.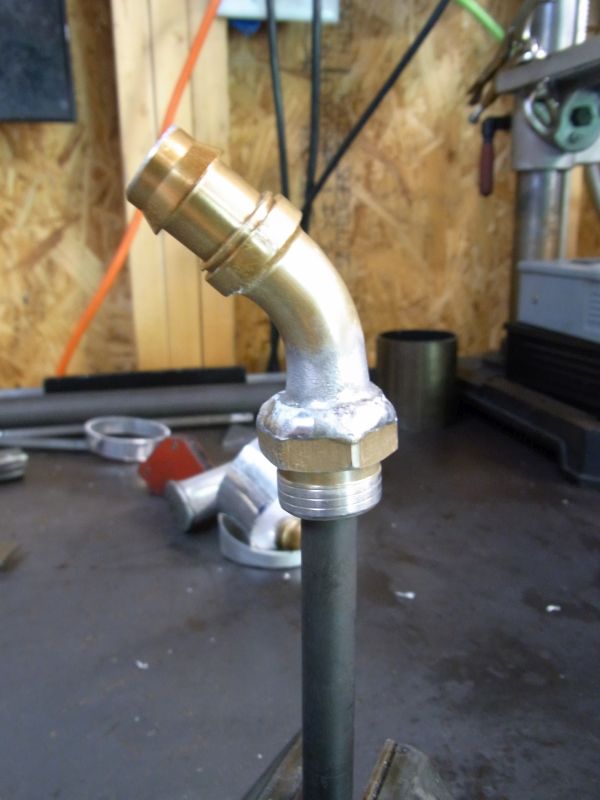
This is a poor attempt to show the plumbing from the block. A tube connects the center block vent to the valve cover vent on each side of the engine and to the bottom of the ProVent.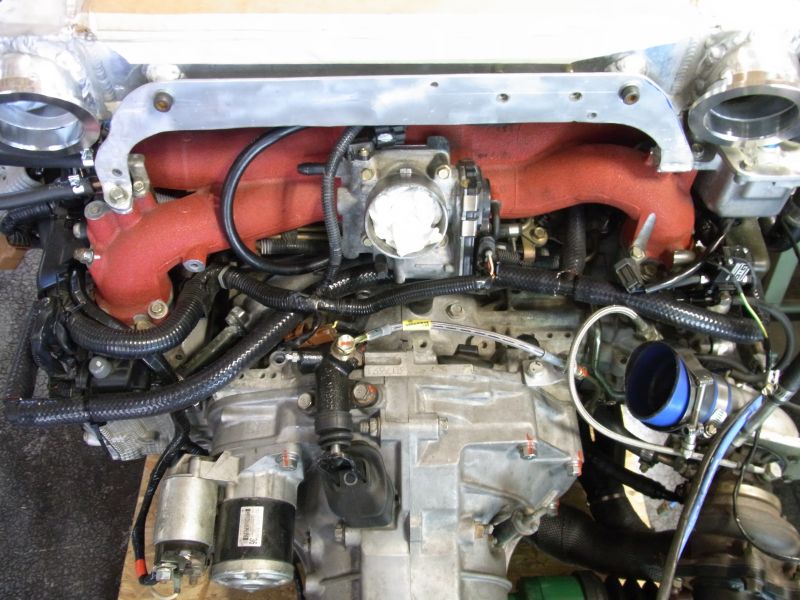
After the ProVent does its job I dump the oil back to the pan through the dipstick tube.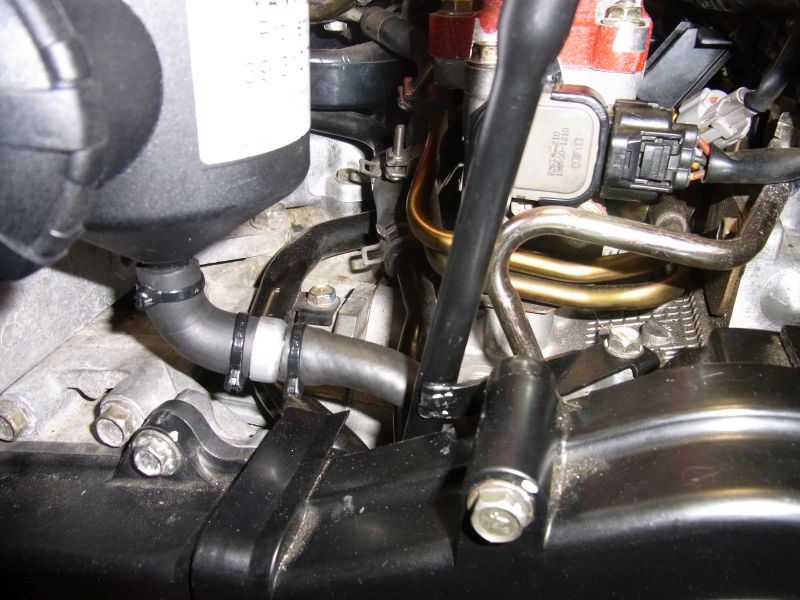
I probably have the most custom Subaru Dipstick tube in the entire world.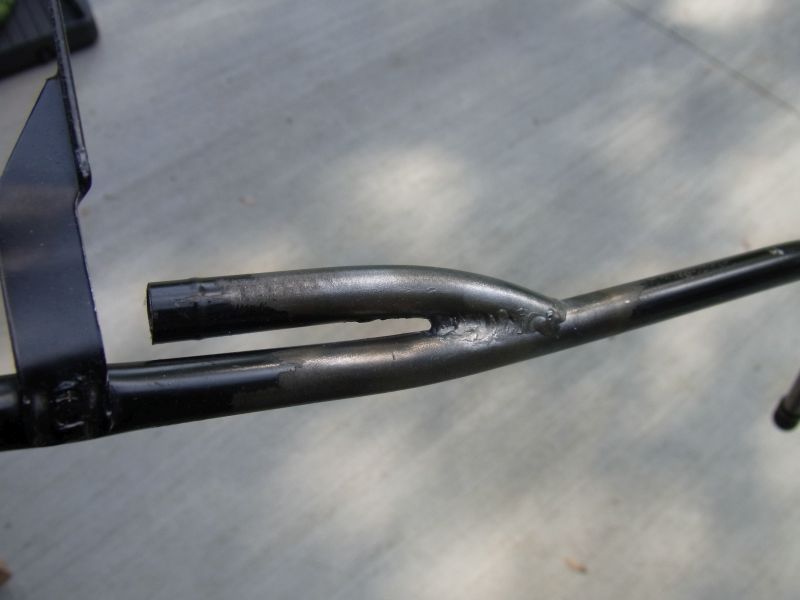
I also extended the bottom of the tube because I shortened the inlet to the oil pan so that I could remove it with the front engine mount in place. Smallest weld bead on the car!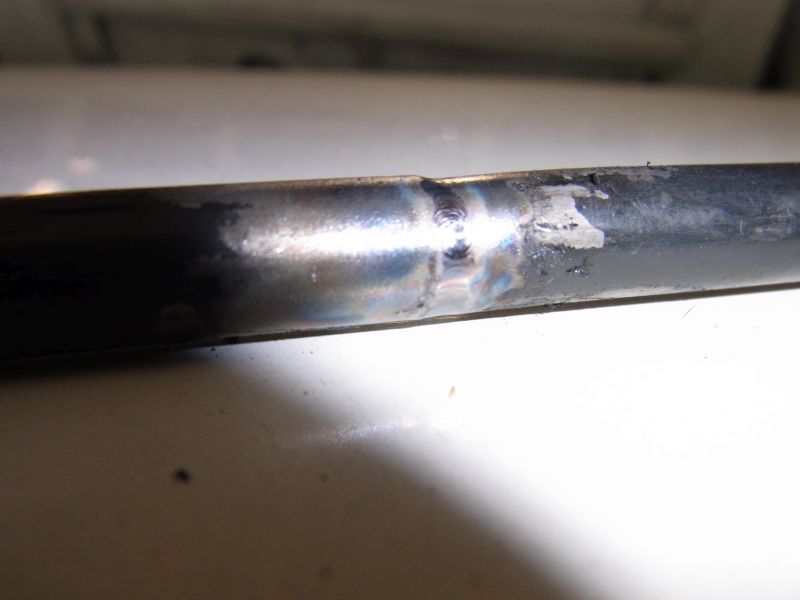
Also learned how to Tig Braze in order to reinstall the shortened oil pan tube.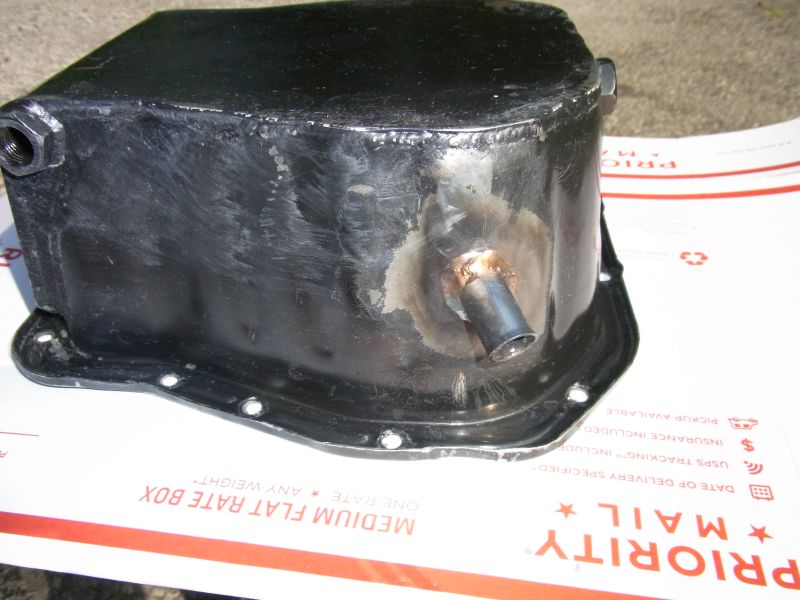
While I had the pan off I installed a Killer B windage tray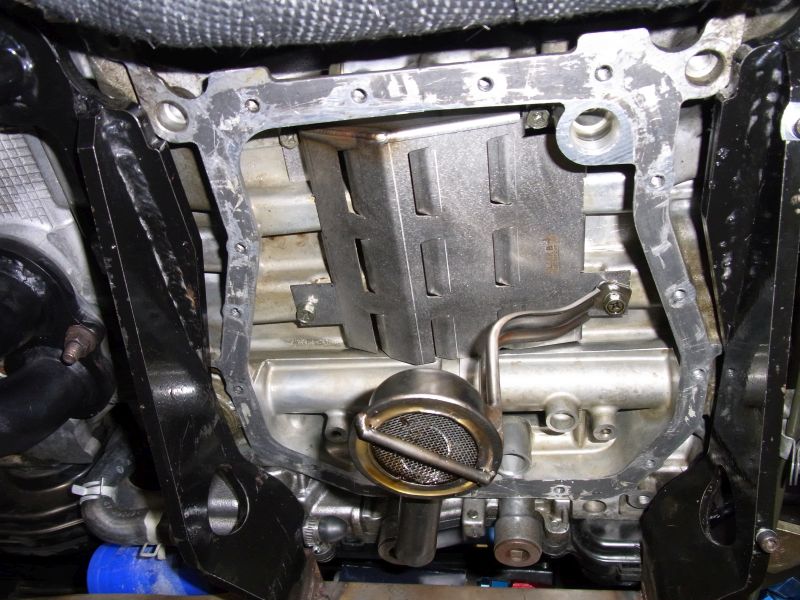
Phew...that was a project and a half.
Cheers,
Scott
Posted by: 914forme Jun 27 2015, 07:50 AM
I used to run the Pro-Vents on my TDIs, never got them to work as well as I wood have liked. But they certainly reduced the oil in the intercooler that plagued the A4 TDIs.
Haven't even looked at my new TDI to see if it has the same issue
You know Scott your pictures make it look so easy, we never feel the pain of all the hard work you put into that car. As always you do top notch work.
Posted by: Amenson Jun 27 2015, 08:08 AM
I also decided that I needed to rework the shift linkage. I am sure that it works completely fine the way it was but...
This is a picture of CaptTripps install. Notice the small ends on the rotation link.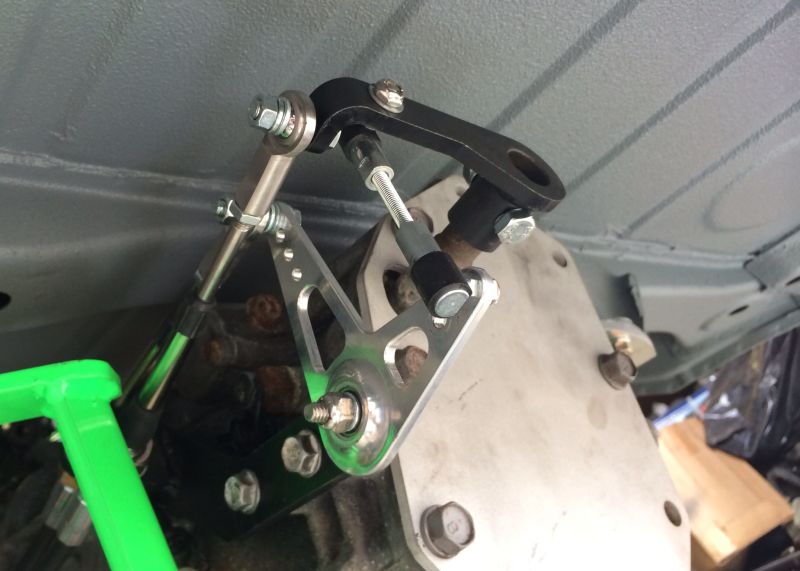
My kit came with normal sized ends and a spacer mount stud thingy. When I mounted it on the inside the angle was less than 90deg. 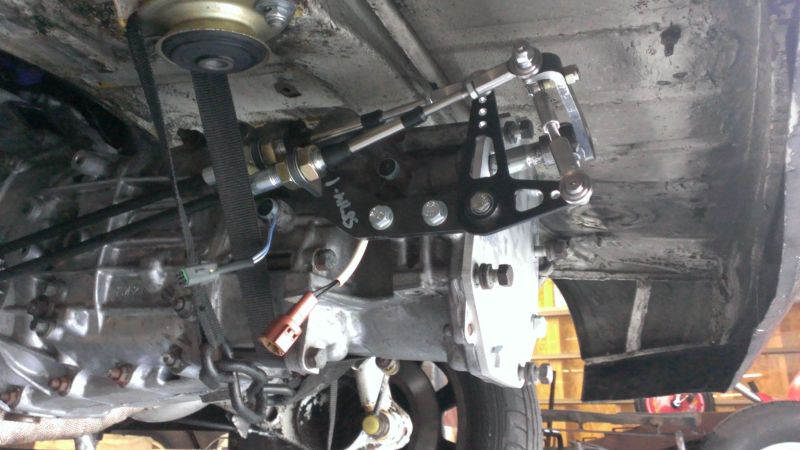
When I mounted it on the outside the angle was larger than 90deg. Also notice the in/out cable is almost at the extreme operating angle to the top and outside of the vehicle. It seemed to slightly bind when at the retracted position.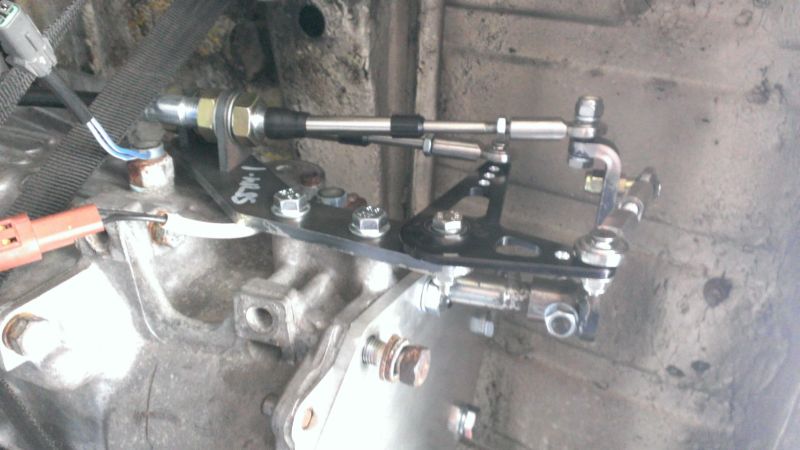
What I did was shorten the arm by 4-5mm and added an extension so that I can run it upside down to the above pictures.
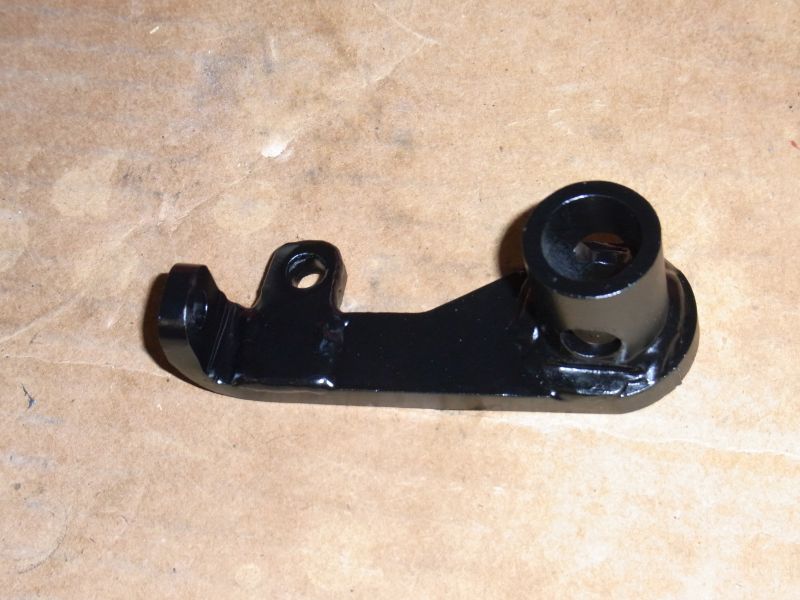
This is what it looks like installed.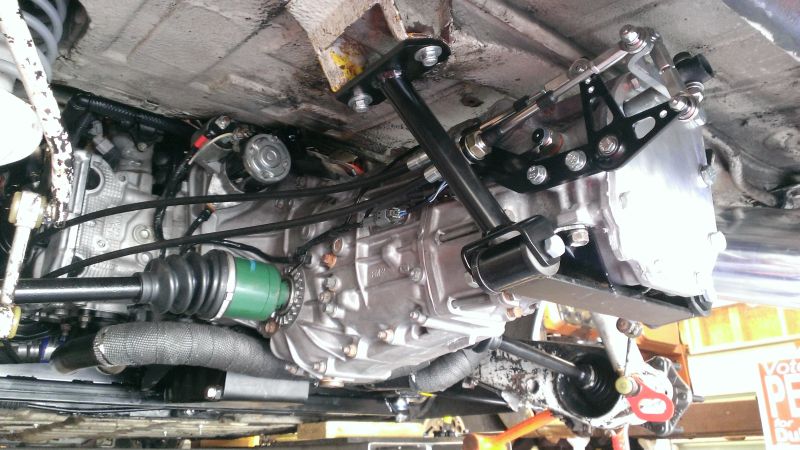
The hours of fiddling were so worth it Probably not but it makes me feel much better.
Cheers,
Scott
Posted by: Amenson Jun 27 2015, 09:30 AM
I used to run the Pro-Vents on my TDIs, never got them to work as well as I wood have liked. But they certainly reduced the oil in the intercooler that plagued the A4 TDIs.
Haven't even looked at my new TDI to see if it has the same issue
You know Scott your pictures make it look so easy, we never feel the pain of all the hard work you put into that car. As always you do top notch work.
So far it seems to be working great. I had the IC tubes off after 1600 miles and everything was dry. Previously there was so much oil it was pooling a bit in the intake. The engine has not used any oil yet either. I am quite satisfied.
The pictures I post make it look easy because I neglect to take pictures of all of the failures.
Cheers,
Scott
Posted by: 914forme Jun 27 2015, 10:21 AM
Not failure learning how not to do something invaluable to knowledge building.
Posted by: zipedadoo Jun 27 2015, 06:56 PM
Wondering if you could give me some advise with my linkage. Obviously its a homemade version based on the one you're using.
It shifts ok but, when shifting from first to second the gear shift lever wants to move to the right a little so its not a straight pull back. Kind of feels like you're going to go into fourth gear.
I guessing my geometry is off on the "L" bracket.
Why did you rework yours? did you have the same issue?
Thanks for any advise you might have.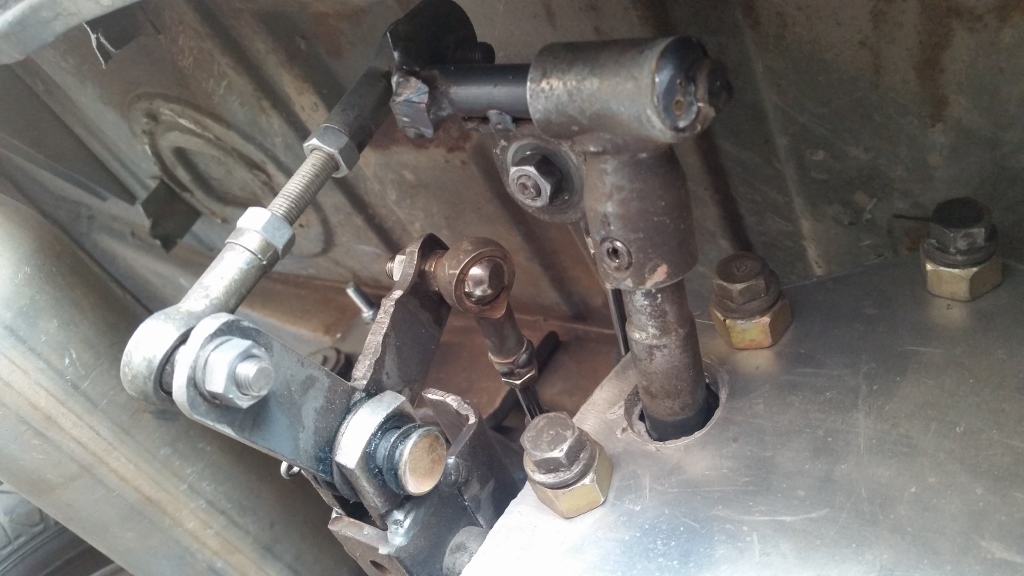
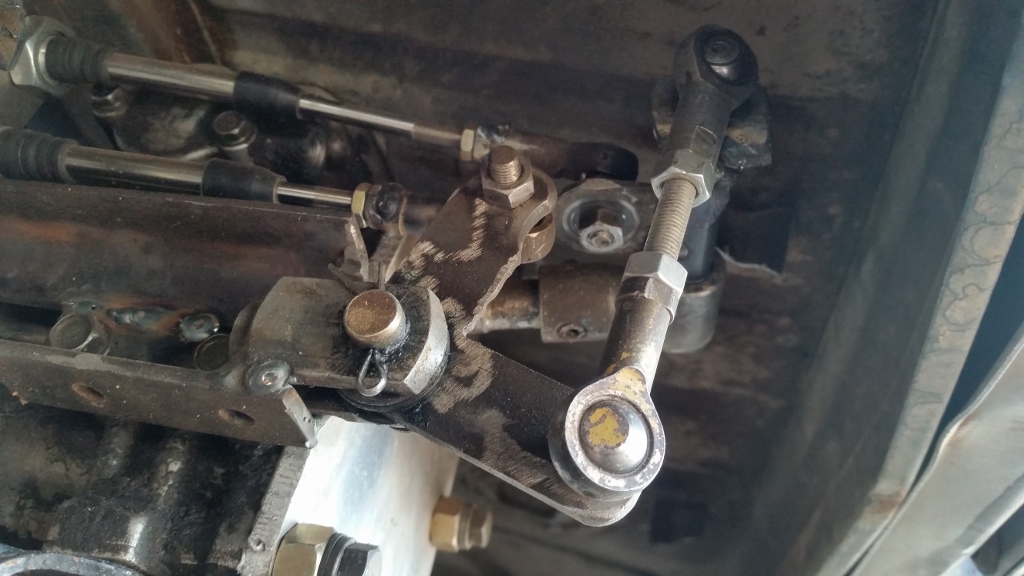
Posted by: Amenson Jul 1 2015, 11:13 AM
Wondering if you could give me some advise with my linkage. Obviously its a homemade version based on the one you're using.
It shifts ok but, when shifting from first to second the gear shift lever wants to move to the right a little so its not a straight pull back. Kind of feels like you're going to go into fourth gear.
I guessing my geometry is off on the "L" bracket.
Why did you rework yours? did you have the same issue?
Thanks for any advise you might have.
I reworked mine before even installing the shifter so I am not sure if what I did made a difference or not. In principal what I wanted to achieve was to keep the linkage components parallel and perpendicular when in neutral. This would make any linear displacement due to the rotational movement symmetrical and as small as possible.
I made an illustration to show the point. The bottom of the "L" is parallel to the input shaft, both shown with red lines. The linkage between the two (blue line) should be perpendicular to both.
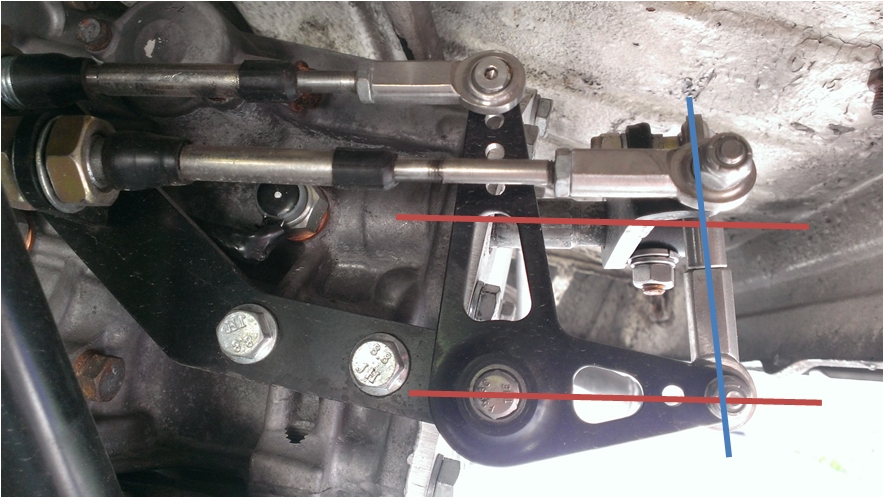
I currently have a very small amount of side to side motion when shifting between 1st and 2nd. Not measurable but I can feel it. Would be nice if I could not
Looking at it in this picture it seems like I have an adjustment to make, or maybe it is the angle of the picture.
Keep tweaking until it is perfect!
Cheers,
Scott
Posted by: zipedadoo Jul 1 2015, 11:44 AM
Thanks for the reply. I'll make some adjustments and see what happens.
Posted by: ruby914 Jul 30 2015, 11:28 PM
Wondering if you could give me some advise with my linkage. Obviously its a homemade version based on the one you're using.
It shifts ok but, when shifting from first to second the gear shift lever wants to move to the right a little so its not a straight pull back. Kind of feels like you're going to go into fourth gear.
I guessing my geometry is off on the "L" bracket.
Why did you rework yours? did you have the same issue?
Thanks for any advise you might have.
I reworked mine before even installing the shifter so I am not sure if what I did made a difference or not. In principal what I wanted to achieve was to keep the linkage components parallel and perpendicular when in neutral. This would make any linear displacement due to the rotational movement symmetrical and as small as possible.
I made an illustration to show the point. The bottom of the "L" is parallel to the input shaft, both shown with red lines. The linkage between the two (blue line) should be perpendicular to both.
I currently have a very small amount of side to side motion when shifting between 1st and 2nd. Not measurable but I can feel it. Would be nice if I could not
Looking at it in this picture it seems like I have an adjustment to make, or maybe it is the angle of the picture.
Keep tweaking until it is perfect!
Cheers,
Scott
Scott and Zipedadoo,
I did my own linkage. At first, I didn't feel a big improvement from the 901. (bad)
I never had a problem with the lever moving from side to side as I moved from 1st to 2nd. The way I did my linkage the pusher is aligned as close to the trans shaft as possible so it has little influence on the rotating linkage and visa-verse. Yours is different. My rotating linkage is farther out from the shaft. The drop link limits what you would feel from the push pull influencing movement on the bell crank.
My problem was in the side to side shifter movement maxing out, not moving the rear linkage enough to clearly get into gear. The way I fixed that was to move the cable end pivot point on the vertical (long leg) of the bell crank down. New location not shown in this photo.
This gave me more leverage and it feels much better. I have moved my pivot point up and down the shift lever so yours will be different. You have some extra holes in the bell crank, give them a try. I also made an adjustable gate for the shifter so I don't push or pull too far in order to find 1st, 2nd, 5th & R. It works great now.
Attached image(s)
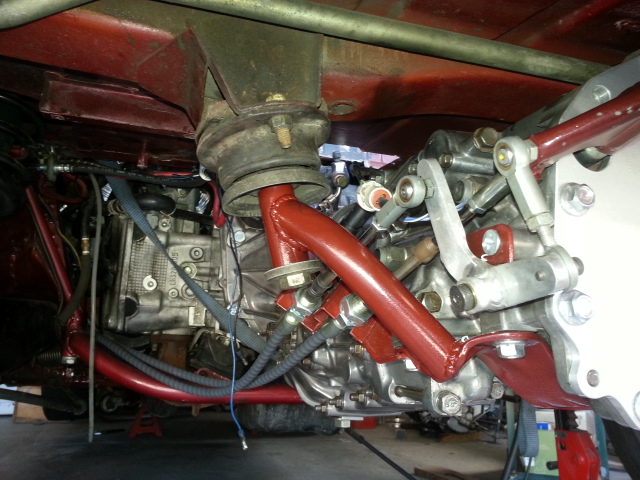
Posted by: Amenson Feb 6 2016, 12:11 PM
I had a request to update the thread and I am just sitting in the Phoenix airport waiting for my connection to Reno on my way to Squaw Valley so why not.
Porsti spent the summer on daily driver duty. Only problem was a the rear IC mount kept cracking.
It is currently resting through the winter sharing the garage with its half sister that made it's way back after being in storage in WI for 13 years.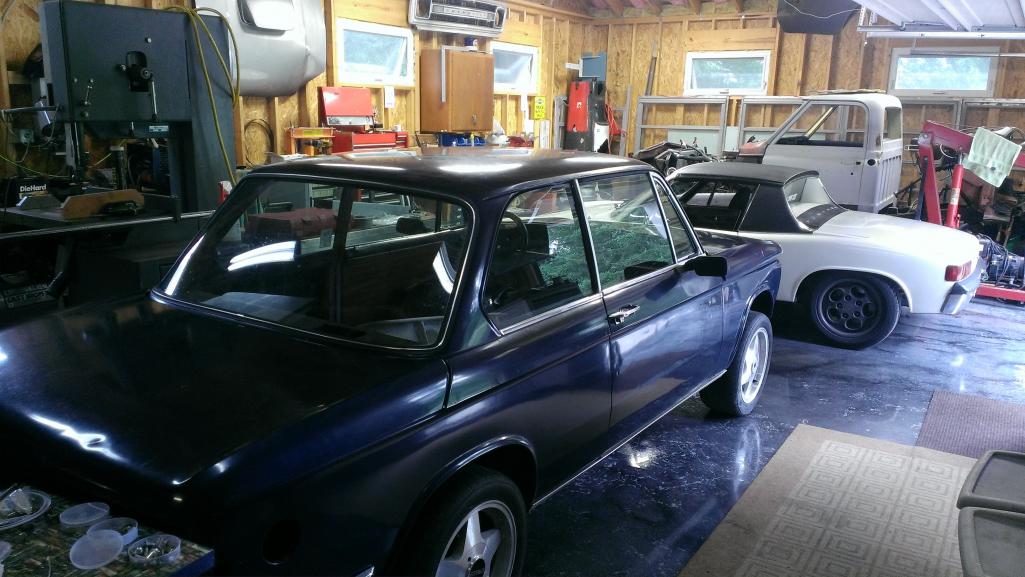
I have a list of to-dos that I will start in a few weeks.
Cheers
Scott
Posted by: Amenson Mar 19 2016, 09:11 PM
After spending most of the winter wiring, plumbing, insulating, vapor barriering, and metal ceilinging it is time to actually work on the car. It is so nice to have a garage that can be heated to high 50's with the heater only running sporadically. 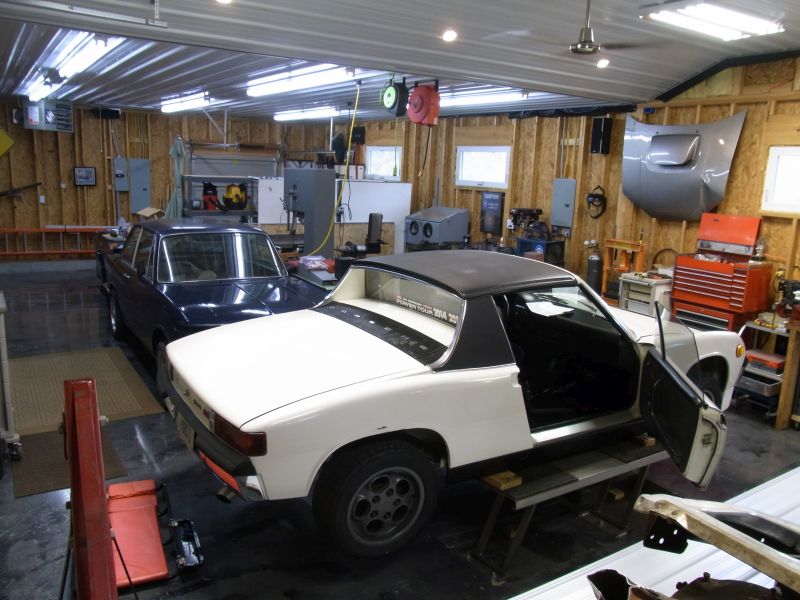
Part of the push to finish the ceiling was my 40th birthday party. We normally have a Chili Cook-off party around my birthday but with this year being a bit special my wife organized some birthday activities also. We had almost 50 people at the house! Super awesome cake.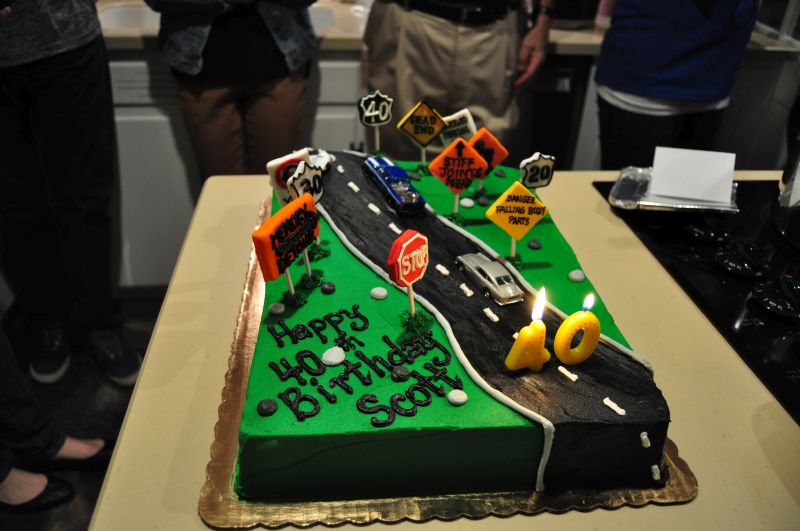
One thing lead to another and a birthday burnout happened.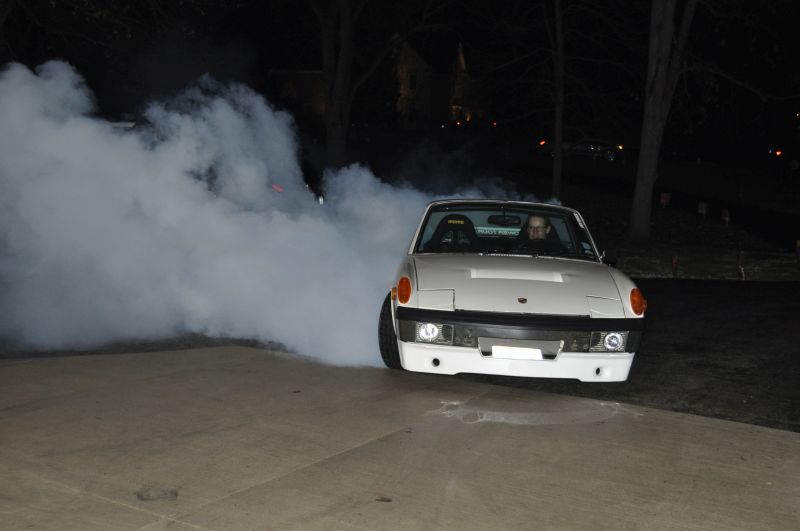
On with progress. Finding the ideal routing of the wiring harness has been a ongoing irritation. I had run the rear part of the harness through a hole between the seats and it always bothered me. I figured out a way that I could reroute the wires through the center tunnel. There was also a bundle of wires going to the engine that were too long but I could never find the correct terminals to the ecu plugs to shorten them.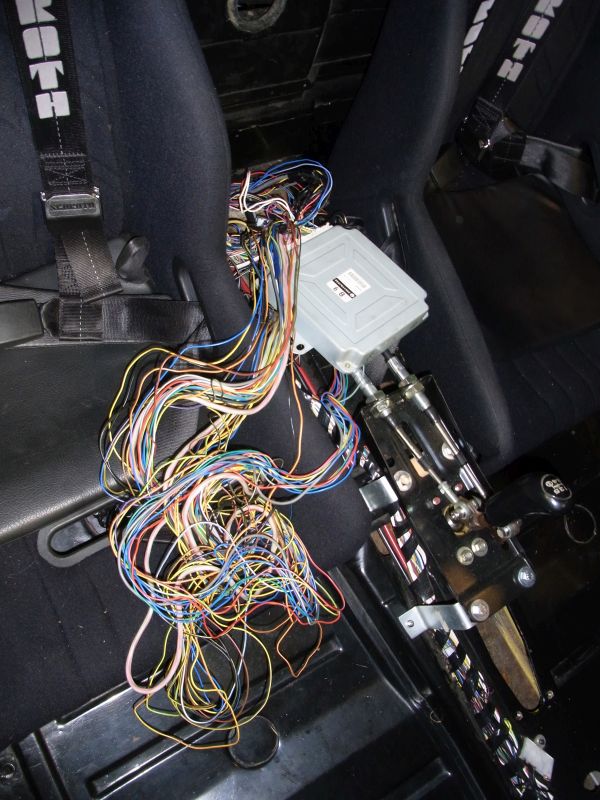
I found them. After about 5 hours sitting in the passenger foot-well the hernia of wires is gone.
Extras...and it still runs!
Tomorrow I need to re-wrap the entire back half of the harness.
Cheers,
Scott
Posted by: 914forme Mar 20 2016, 06:15 AM
Sorry I missed the epic burnout, seriously bummed.
Garage looks great, being semi warm makes a huge difference.
Posted by: 914forme Apr 24 2016, 11:34 AM
Stopped by Scott's place on my way to Hersey. I had a decent time at Hersey, I had a great time with Scott. We have a 2014 Subaru STI in our stables. That car is fast, Scott's PORSTI is faster if he can keep it hooked up. Amazing what a difference a couple thousand pounds and no AWD makes to a car. This car is driven, it is raw, and a blast, and the workmanship is so nice.
Thank you for the ride, hope you enjoy the refreshments. Maybe next year at Hersey we both can be in attendance with some serious Subaru powered 914s.
Posted by: Amenson May 11 2016, 08:45 PM
I have had a nagging leak from the fabricated top of the coolant expansion tank. The weld neck just did not seem to work well with the stock cap. I cut it off and installed a standard size neck and cap. I managed to leave a pinhole when installing the new neck. No problem, pull off the cover and fix the weld. After coming apart so many times the big o-ring in the stock expansion tank tore. A quick trip to the Subaru dealership revealed that the seal is no longer available.
Time for another solution. I searched online and found two fabricated expansion tanks. The Mishimoto looked like the cap might just be in the correct location so I ordered one.
Nope filler neck was in the way. Surgically removed the filler neck and extra barb and installed another standard size neck. Oh, and added a bottom mount like the stock tank. No idea why Mishimoto decided that it was not necessary. Much more solid with it.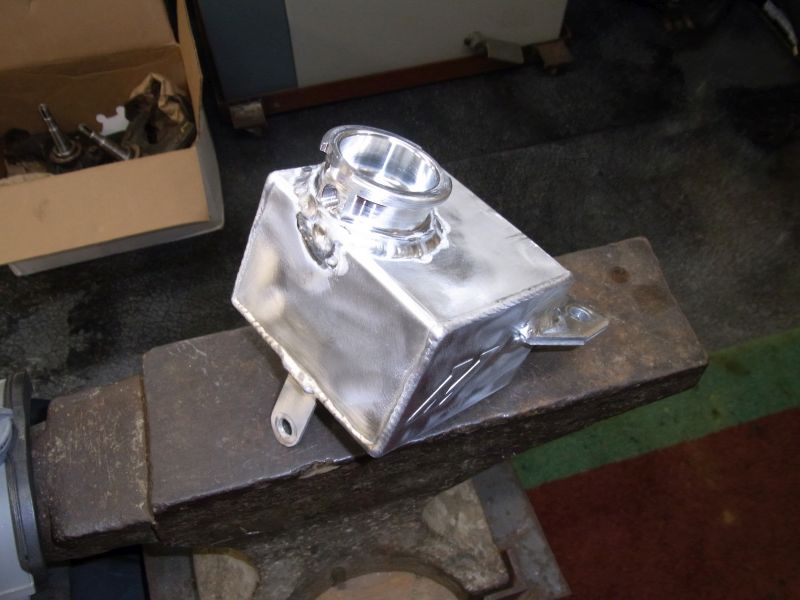
It fits and is leak free!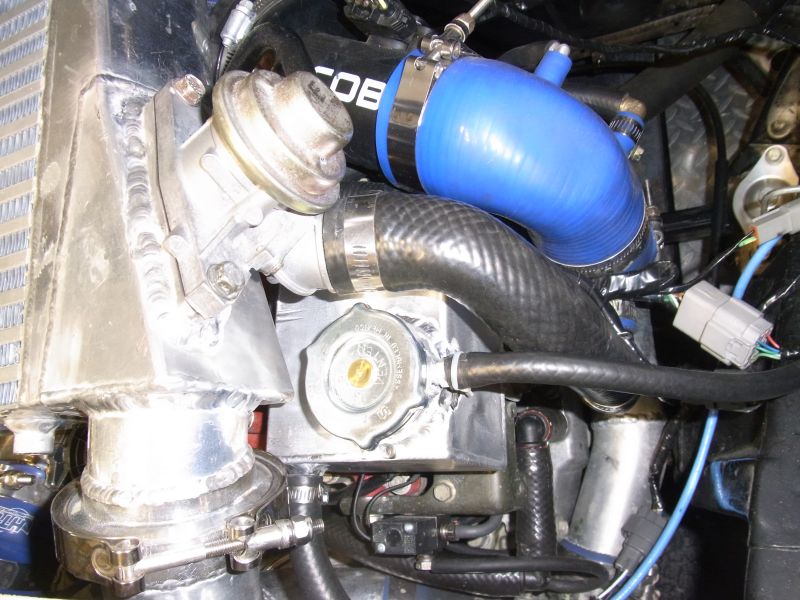
Next project is to make a new rear IC mount. Then pull the passenger trailing arm to confirm that it is bent. Anybody have a spare trailing arm that they want out of the garage?
Cheers,
Scott
Posted by: 914forme May 14 2016, 04:59 PM
Maybe, I have an e-mail out for you
Posted by: Amenson Jun 27 2016, 08:20 PM
Getting ready to post about converting to 911 park brake and new rear calipers when I realized that I never posted one of my favorite parts on the car.
I probably complained several times about my IC mount cracking. I have fixed it 3-4 times and finally got fed up. Time to make a proper tubular mount. I purchased a really nice tube notcher for when I build a cage and figured that it would make quick work of all of the tube for the IC mount...nope, tube is too small. Had to resort to the band saw and hand file. Good welding starts with good fitup Many hours later and it is finished.
Out with the old...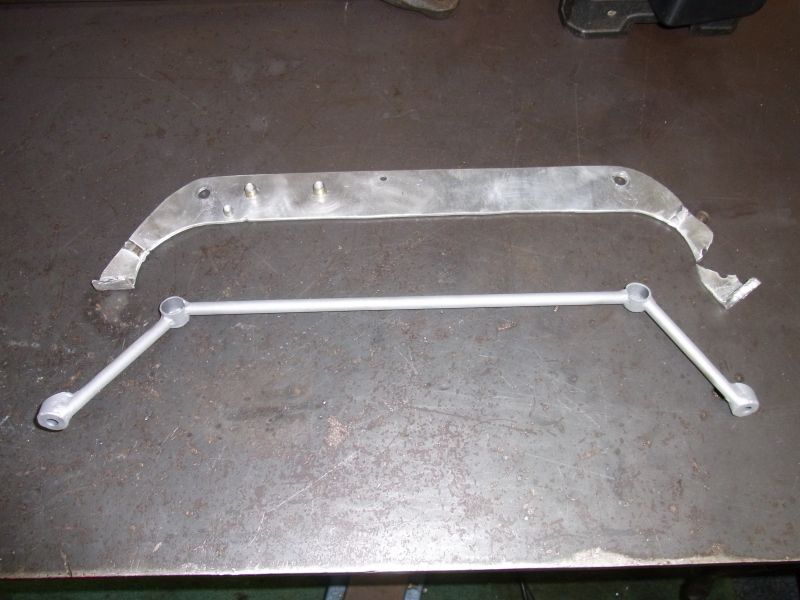
Purty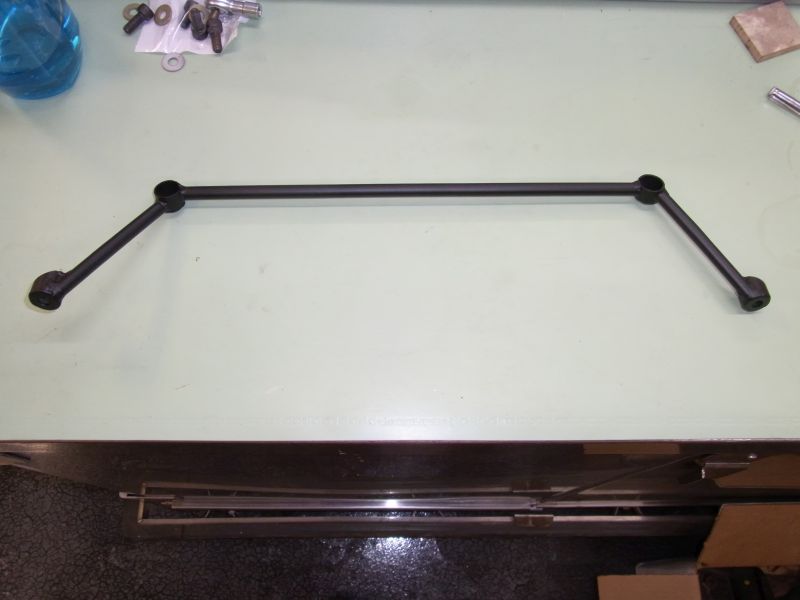
I was very careful tacking it before welding to avoid pulling it out of position and it worked. The thing drops right into place and all 4 bolts go in with out even needing a wiggle.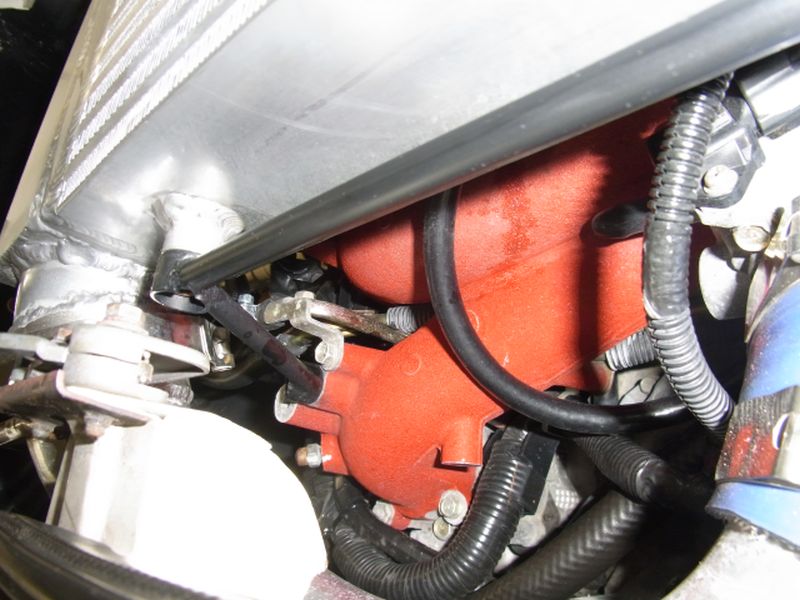
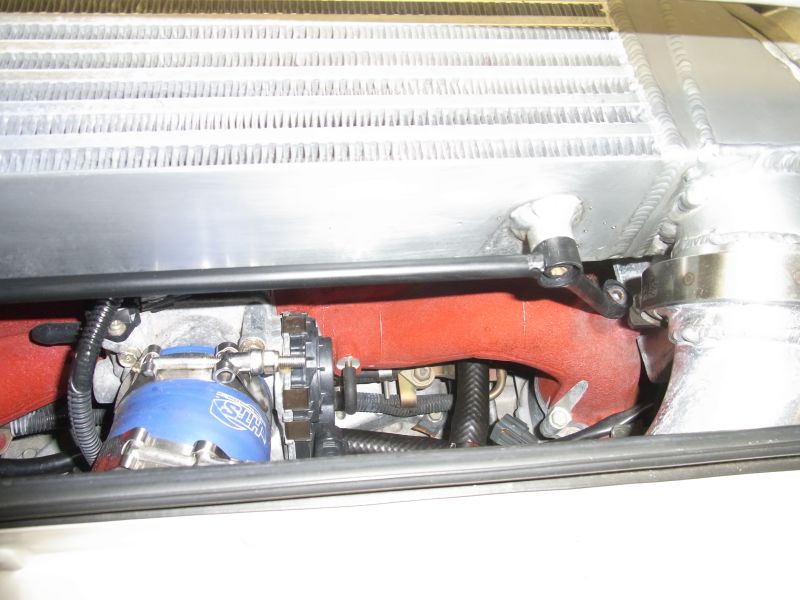
Took hours to make but man am I pleased with it.
On with the current project...
Posted by: Amenson Jun 27 2016, 08:36 PM
Stephen ended up hooking me up with his old trailing arms, calipers and rotors..including the Elephant Bushings . I picked up an "early 70's" 911 drum brake setup and Tangerine conversion cable. Time to starting grinding and welding.
I have always been a little slow when laying down tig welds in odd positions which result in solid but slightly hot welds that grey a bit when cooling. Made a conscious effort to keep up the pace this time and the welds are nice and shiny. If I was better with the camera a little bit of color in the welds would show...boo-ya.
The park brake setup is not quite early enough so it is the big bearing setup that requires slotting the holes to make it fit. I also noticed when I put the rotor in place the pads are not completely up in the rotor. I noticed in pictures using the proper park brake parts there is a decent size gap between the caliper ear and the park brake. Not so much here. 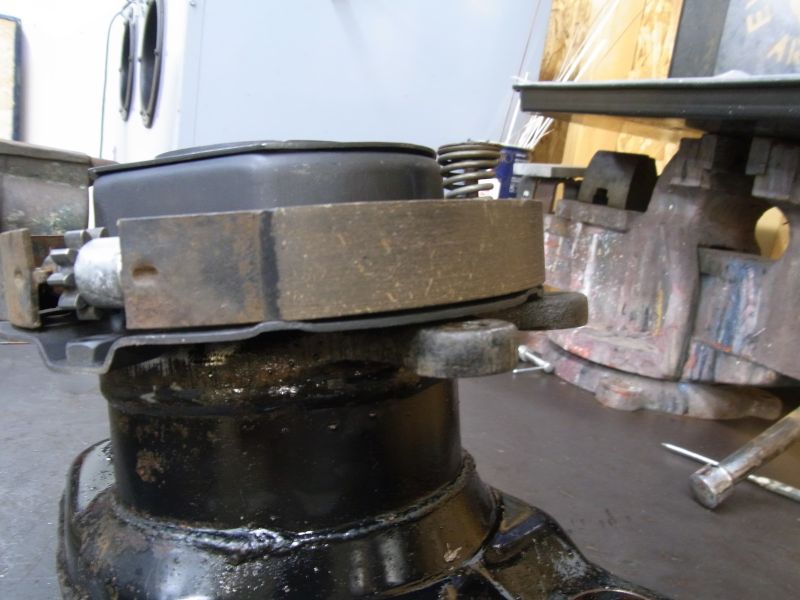
I know it probably does not matter but I am thinking about spacing the park brake to get it deeper into the rotor. I have tangerine bearing retainers that are 3/16" thick...almost perfect thickness if I fit it under the park brake. Has anybody tried this?
I could not figure out how to support the parts for painting, much too heavy to hold and spray. While thinking about the quickest way to fab up a rack I noticed the engine hoist hiding in the corner. Perfect!!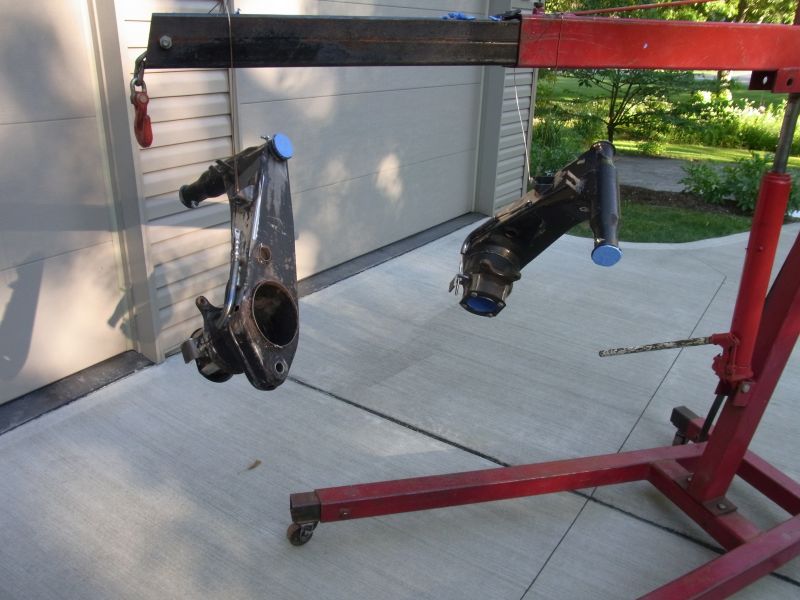
I was in too much of a hurry to get over to the neighbors house for a beer so i forgot to take a post painting picture but man does a fresh coat of matte black make everything look better. Should have them installed later this week.
Cheers,
Scott
Posted by: 914forme Jun 28 2016, 10:49 AM
Sounds like a plan to me. It should work. The other idea I ha was mount it up at a 90 and section it and weld it back together. More practice for your TIG skills.
I puled the trigger on a TIG this weekend, as I think it will help out with body mods, keeping the heat down should allow me to not have to grind so much. I can also use EZ grind wire, and make it easier to hammer weld. My MIG does not like to feed the EZgrind well. Balls up in the feed, right infant of the rollers.
Looking good as usual.
Enjoy the
Posted by: charliew Jun 29 2016, 10:45 AM
Scott as you know I've been following you from the start. I really like the power tour parts as I have always wanted to take a project on one but it will never happen for me. Life has caught up with me.
Once I had a good grasp of the 911 park brake set up as that was my intended setup. I have all the parts but that was as far as I got. There are several good 911/914 parking brake threads from a few years ago. If you don't like the way yours works try to find the thread here or on narp that uses 944 angle adjusters and I think I remember a 90* pivoting arm with a short straight rod connecting link to the 914 cable. My memory is not as good as the threads if you can find them.
I wonder if the ic shrinking and growing is not what breaks the mount?
914forme, have you put the little oilwick on the wire infront of the feedwheels on your welder? I have always used one but have not tried the soft wire as the local places don't stock it but if I ever get back on this I will order some as that always was my iintention to put the flares on if my tigging was not up to snuff.
Scott you are becoming very good on your welding I think.
I do wonder if your short dipstick tube will not leak at the oring as it looks like it is close to the oil level in the pan.
My son has had the mann provent for several years on his sti. We found that the original oring will grow a huge amount and will not go back in if you take it apart to clean it. It as you know is a diesel part and the oring needs to be a different one for some reason, they can be found as thats what we did, don't take it apart till you get one. That has been discussed a lot I think on nasioc. I know the provent does work very good but the longer the hoses are and the higher the provent is the better it works on the suby. Also we put the return below the oil level to try and keep the pressure in the return lower if I remember right. I'm 71 now so things get lost a little.
Also If you check your sti you will see the motor is up in the front but that may not be a big deal but might affect the oil supply in the pan.
I think you have done a very good job and the street testing have been very valuable. I really like the cable diagnosis on the motion and the changes to the arms for your Ian stuff and the discussion from both you and ruby914 in one place on this thread. A 5 spd fiero has a simple mech but it is backwards for the mid engine application I think, I remember.
Posted by: Amenson Jul 4 2016, 08:14 AM
The upgrade is finished and while it took much longer than anticipated everyting about it is a resounding success. 911 Park Brake works perfectly and even has a shorter pull than stock so it clears my seat better. Pedal feel with the larger rear piston area is really nice. The Elephant bushings are actually noticable as the rear end sets much earlier during transition.
The post would not be complete without pic's so here we go...
Stephen provided his modified trailing arm brackets with the arms but I could not bring myself to use them because I did not make them, but I did basically copy them. I didn't relocate the pivot shaft hole and now after getting it back together wish that I had.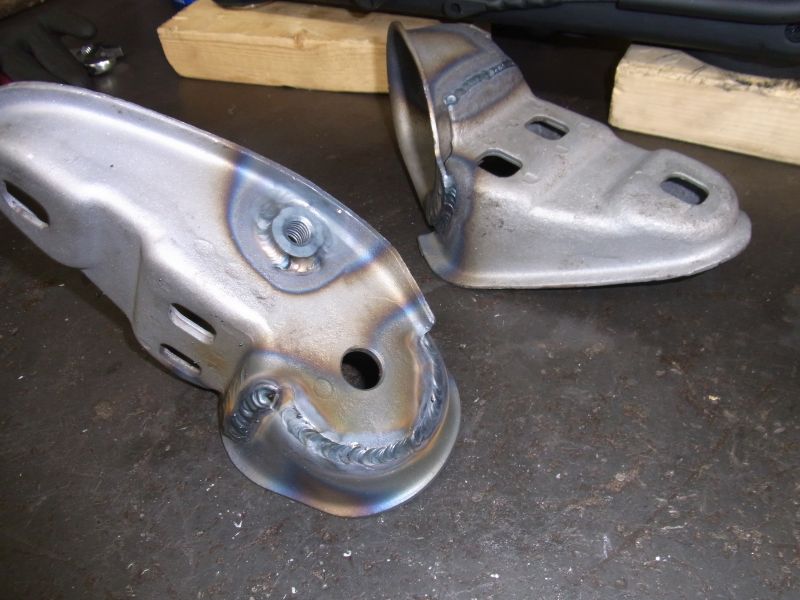
I ended up installing the Tangerine bearing retainers under the park brake assembly.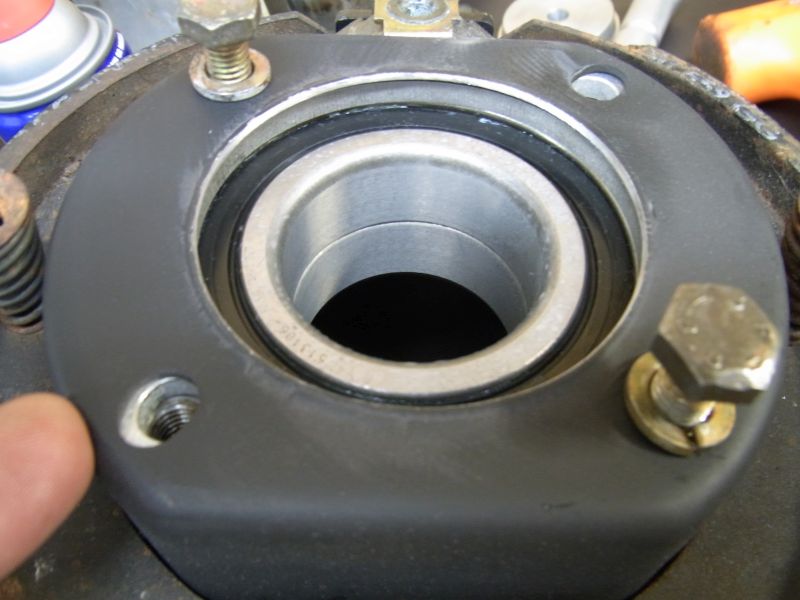
The lip needed to be ground off of the park brake to avoid hitting the Boxster hub.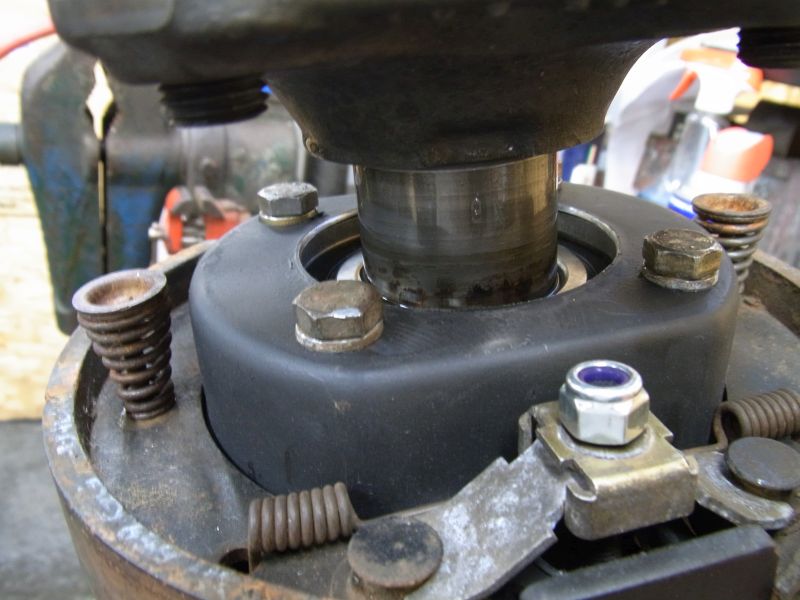
Everything together and no interference!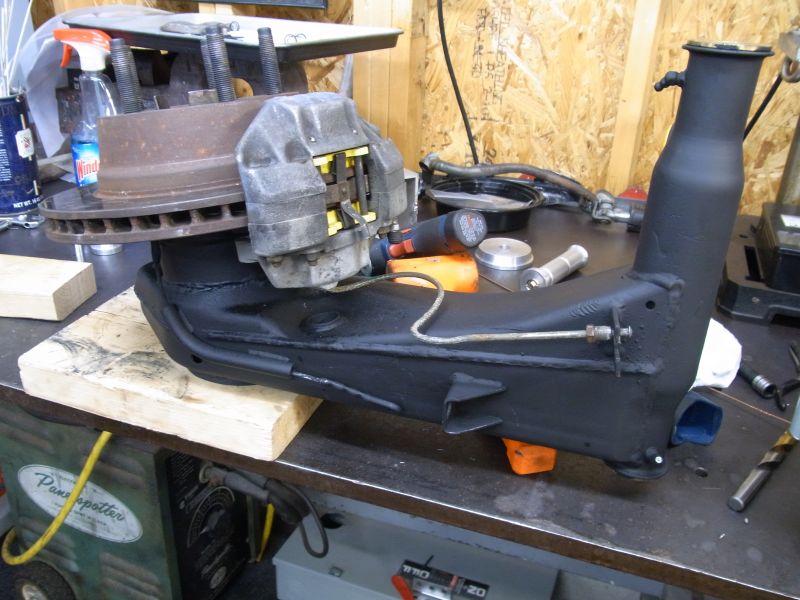
I think that it goes in here.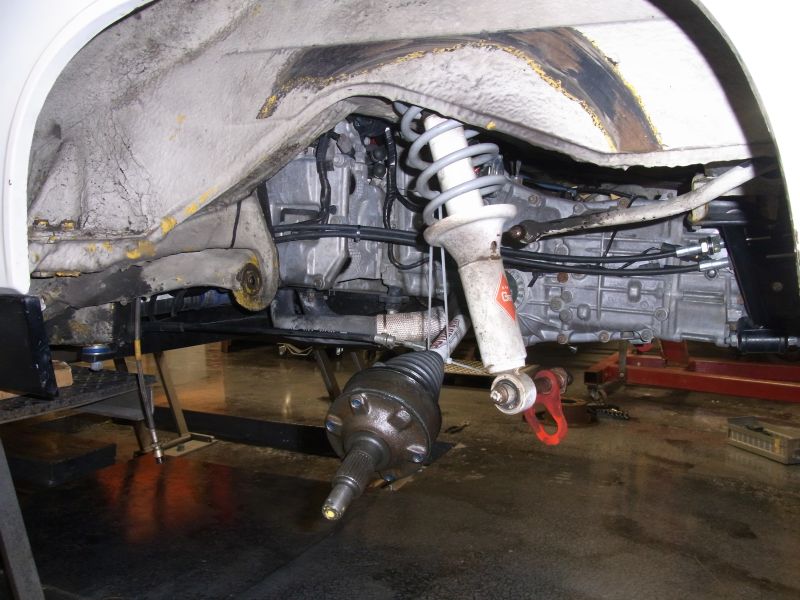
Every time I have the car on the lift I can not help but take a picture like this.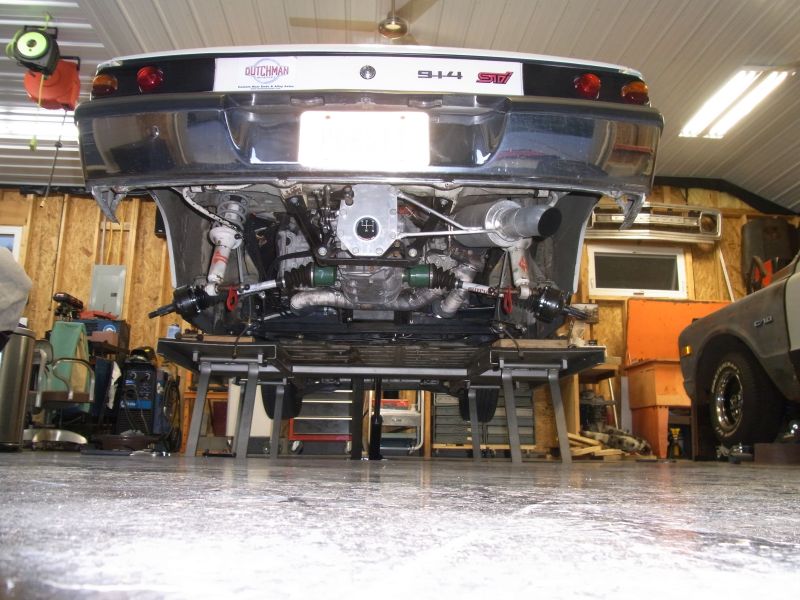
Installed! 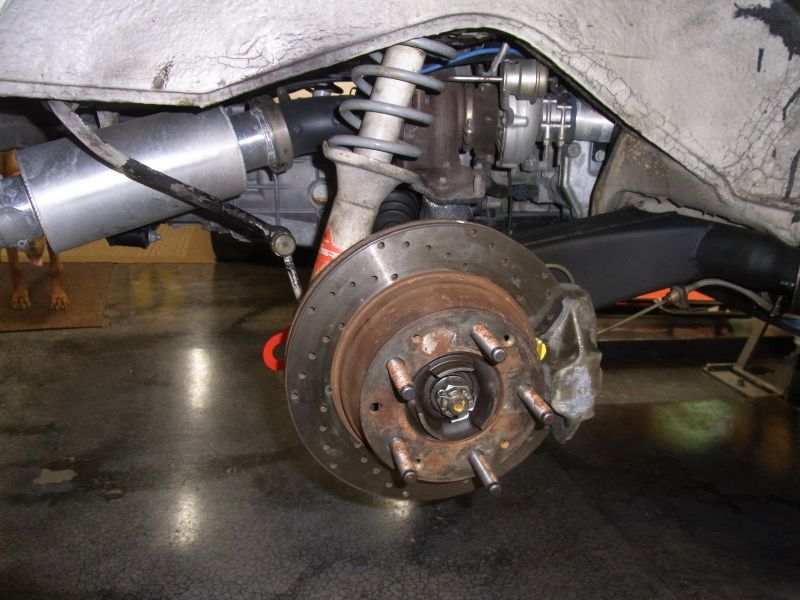
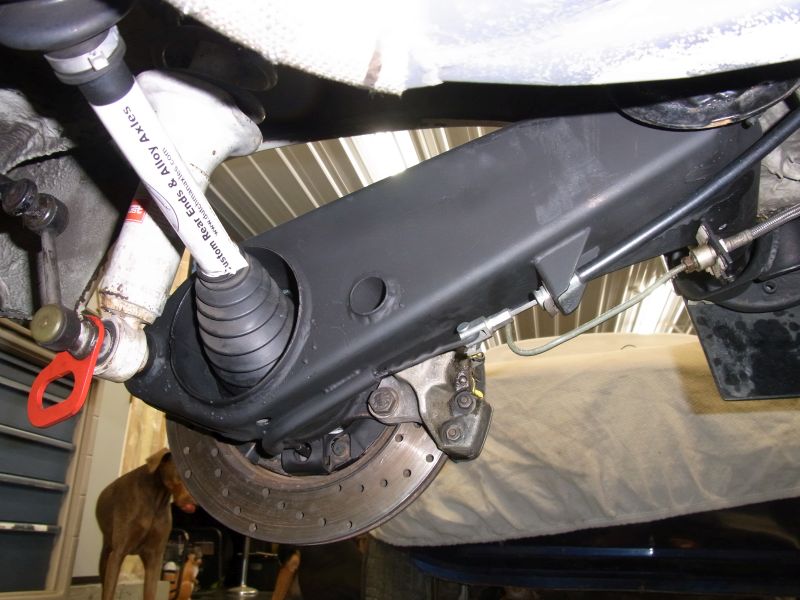
You can see in this picture that the shoes are flush with the back side of the drum. 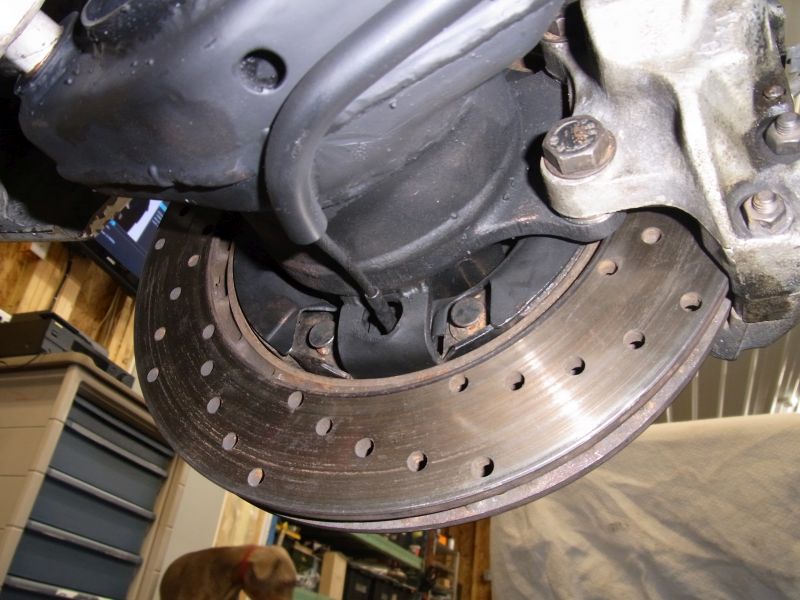
Cheers,
Scott
Posted by: mepstein Jul 4 2016, 08:43 AM
what is the reason for the modified trailing arm brackets?
Posted by: Amenson Jul 4 2016, 11:29 AM
what is the reason for the modified trailing arm brackets?
Primary reason is so that I can install a toe link to make adjustments easier.
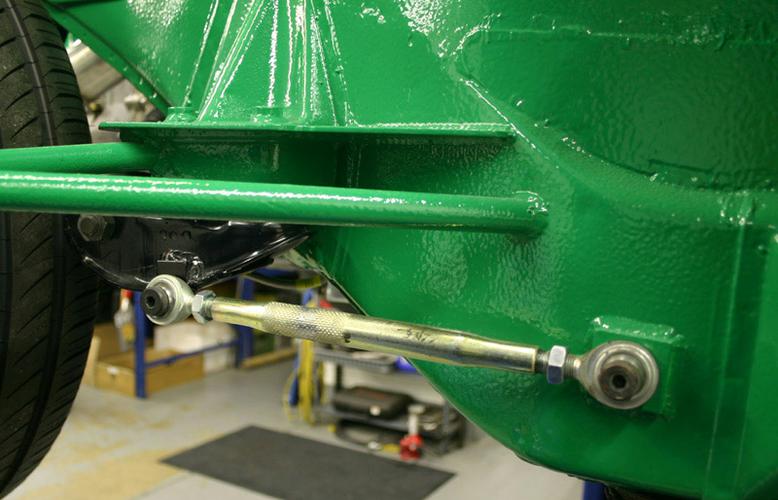
The rest of the welding is to reinforce the spot welds to stiffen it up a bit.
Cheers,
Scott
Posted by: 914forme Jul 4 2016, 08:37 PM
Looking good
Posted by: Amenson Jul 17 2016, 05:36 PM
I had a pleasant surprise this week. One of my wife's co-workers bought a lift and she proposed that we should get one also. The ceiling half of the garage was designed to be high enough to stack most things I might buy but I was not actually planning to get one in the near term. I called up the lift company, negotiated a deal (much better than her co-workers ) and it arrived Friday afternoon. Few hours assembling it on Saturday and....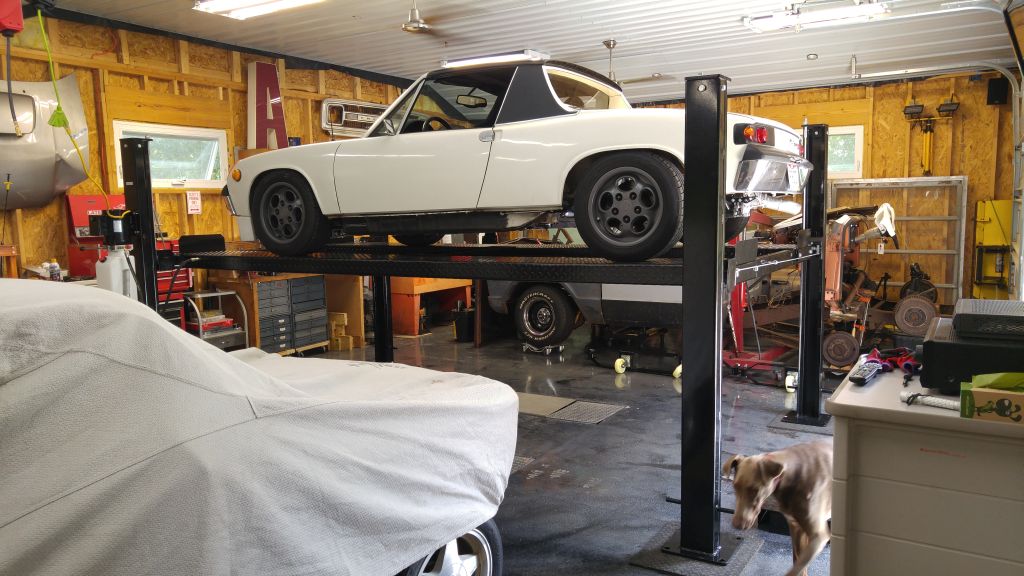
It will move to the stall with the C10 once I pick up some more hydraulic fluid so that I can raise it high enough. Now I just need to get the C10 on 4 wheels so I can park it on the lift and then I will have room to work on Grey Matter
Posted by: 914forme Jul 18 2016, 07:54 AM
Need to notch that C10 frame, I think you need clearance them C10s are tall beasties. Would help a lot if it could sit down on putting grass levels
Nice score on the lift, I was not expecting your wife to approve anything that put a couple tons up in the air. Figured that would set off all the safety alarms. I know my fingers distracted her.
Posted by: 914forme Jul 18 2016, 08:05 AM
You all are deprived of Tractor Supplies 
And Rural Kings, man that sucks, you can buy Hydraulic Oil buy the drum there. Looks like the small jugs for you, let me know if you can't find some locally.
Voss Brothers up in Powell should have what you need, as wold any hydraulic hose dealer, Parker store in your area.
Never bought the stuff, at a big box store before, Napa might be another place to get it in larger quantities. Of course the guys dealing in Cat or JD construction equipment will have it also, but you pay CAT and /JD markups for the yellow and green and gold bottles.
Posted by: Amenson Jul 18 2016, 08:45 AM
Need to notch that C10 frame, I think you need clearance them C10s are tall beasties. Would help a lot if it could sit down on putting grass levels
Nice score on the lift, I was not expecting your wife to approve anything that put a couple tons up in the air. Figured that would set off all the safety alarms. I know my fingers distracted her.
I already have a C-notch that will get it in the grass if I don't cut it for 2 weeks.
She did already check out the warning labels and refuse to go for a test ride on the lift. She also confirmed a half dozen times if it should be bolted to the floor.
You all are deprived of Tractor Supplies
And Rural Kings, man that sucks, you can buy Hydraulic Oil buy the drum there. Looks like the small jugs for you, let me know if you can't find some locally.
Voss Brothers up in Powell should have what you need, as wold any hydraulic hose dealer, Parker store in your area.
Never bought the stuff, at a big box store before, Napa might be another place to get it in larger quantities. Of course the guys dealing in Cat or JD construction equipment will have it also, but you pay CAT and /JD markups for the yellow and green and gold bottles.
I get the fluid from a local Parker store. I also have some JD fluid on the shelf but did not want to mix.
Posted by: 914forme Jul 18 2016, 10:45 AM
She did already check out the warning labels and refuse to go for a test ride on the lift. She also confirmed a half dozen times if it should be bolted to the floor.
I would have been disappointed if she hadn't read the labels, the manual, the anchor specs, then sent it off for verification. Need to borrow my SDS drill to drop 16 holes into your floor? Epoxied set anchors are the way to go, unless your planning on moving it allot.
Posted by: Amenson Jul 18 2016, 11:25 AM
She did already check out the warning labels and refuse to go for a test ride on the lift. She also confirmed a half dozen times if it should be bolted to the floor.
I would have been disappointed if she hadn't read the labels, the manual, the anchor specs, then sent it off for verification. Need to borrow my SDS drill to drop 16 holes into your floor? Epoxied set anchors are the way to go, unless your planning on moving it allot.
It will not be bolted o the floor.
 This breaks a primary design constraint of easy layout flexibility.
Posted by: Chris H. Jul 18 2016, 11:36 AM
Ummm...I'll say what most of us are thinking. You made an EXCELLENT choice in your "better half" or got very lucky. Either way well done sir .
I need one of those before winter ...any chance you would PM me the pricing details? Don't want to impose.
Posted by: charliew Jul 24 2016, 08:22 AM
nice lift, a guy can't have too many tools.
I like the toe link because it will keep the adj more secure with the added torque and bigger tire footprint.
Posted by: Amenson Aug 8 2016, 01:56 PM
After much consternation and research I finally decided to bring the Porsti to a shop for an alignment. I found a local shop that specializes in "custom" cars and had a lift that I could get onto. I insisted on being present during the alignment, which was not a problem for the shop...all good.
I expected the toe to be way out in the rear as I had just eyeballed it after installing trailing arms, and it was. Also way out was the right rear camber, this is why I replaced the control arm in the first place. Great, maybe the chassis is tweaked. We put two spacers in and it gets better but only a couple of tenths of a degree per spacer but is still over a half of a degree off from the passenger side. Seems odd but that is what the fancy machine is saying so I tell him to leave it and will sort it out with my smart camber gauge when I get home. We adjust the toe which is way easy with the new links. Front is pretty much spot on so we just make a small toe correction to both sides to even out the steering wheel.
Mechanic has something come up with his daughter so he does not take the car for a test drive. Fine with me so I pay and leave. I take the long way back to he office to get some interstate miles to enjoy the arrow straight chassis. Not quite, the steering center is still off and the car pulls slightly to the right. I get home and pull out the smart camber guage. Passenger side rear is 1.4 ish degrees and driver is 2.1. Passenger front is basically zero with the driver front 1.3. WTF Gauge must be off so I check it on both sides of a couple of windows plus check it against two spirit levels and my digital angle cube. Reads +- 0.1. Check the floor with all of the tools and it is, for all practical purposes, level. Recheck the camber a few more times and get the same readings.
Next I take out the shims from the driver side (which I can do without messing up the toe due to the links ) and the camber is 2.0. I have no fricken clue how the modern Hunter alignment machine could be wrong but it was. I guess that it is time to make a set of smart strings after all.
Other issue I am dealing with is a rattle that only occurs between 2.5k and 3kish rpm and only under load. I tried running it on the short lift with the wheels off the ground but could not get the rattle. I initially thought that it was the letters on the engine grill vibrating but after taping then gluing them down and replacing he rubberized speed nuts for the letters and the screen I pulled the engine cover off completely. Still there. Zip tie all of the loose wires and connectors, still there. Install he foam under the timing belt covers, still there. Re-tighten every bold accessible, still there. Install heat barrier on the aluminum exhaust support, still there. I resorted to banging on random things with a mallet and found that the flex joint in the exhaust with clank when hit just right. I loosened the exhaust and wedged some blocks to keep the exhaust from vibrating, still there. The next step is to pull the header and see if I can shave off whatever is making contact in the flex joint. Seems excessive but the noise is ruining my driving experience. Sometime I wish that I was not so particular.
Cheers,
Scott
Posted by: Amenson Aug 16 2016, 06:59 PM
Europe is on summer vacation and Japan is on Obon so I figured it would be a good week to take a couple of days off to play in the garage and recharge. Looked at the to do list and decided alignment strings would be a good place to start.
Drew up a quick sketch and headed to the metal store. Unfortunately they did not have so much thin walled tube so I had to use 1/2 emt which is perfect...except for the galvanized coating which is not so much fun to breathe. The knotcher paid for itself on just this project alone. Perfect fitment makes for easy fun welding.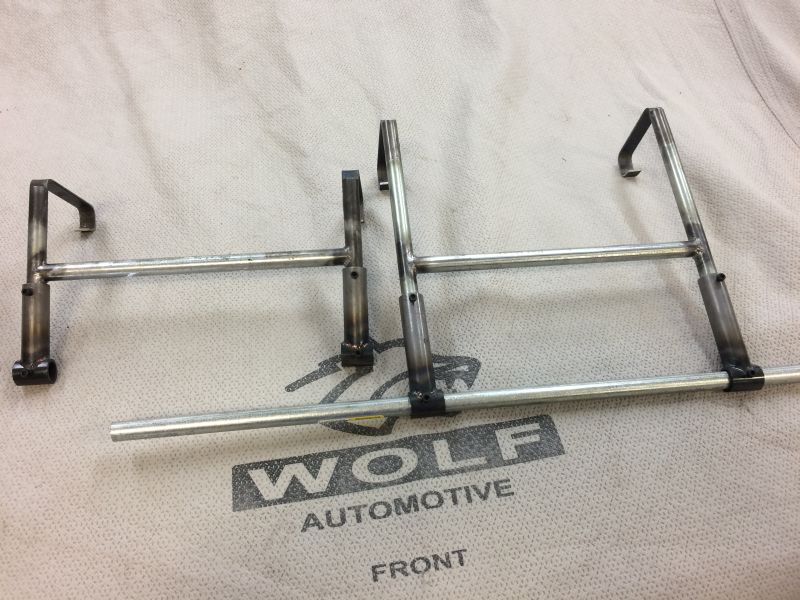
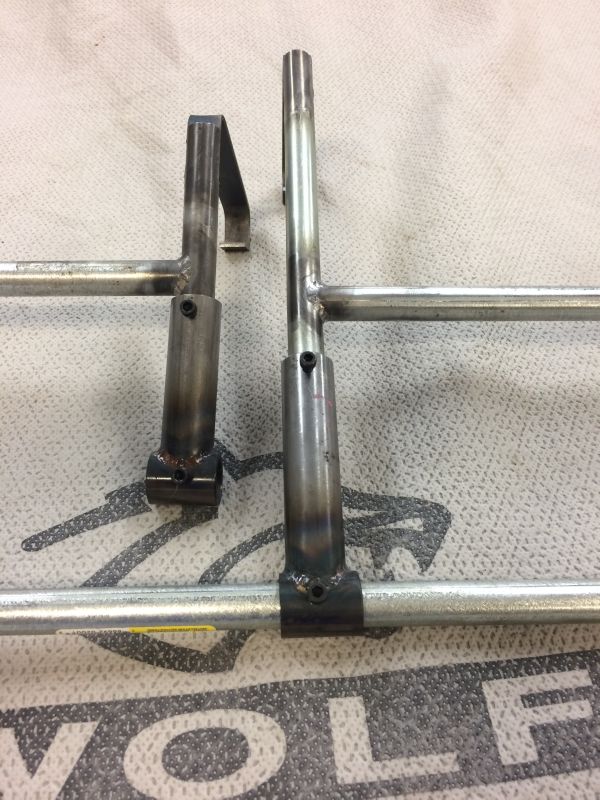
I still need to find adjustable bumpers so that I can get rid of the block of wood and stack of spacers.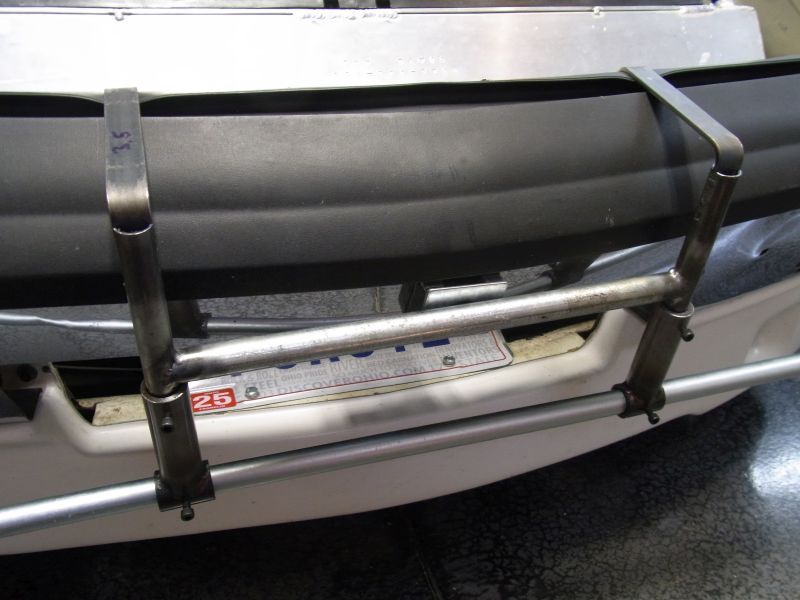
I could not decide how to hold the string in place until I was using a tube cutter and noticed the nice grove it left in the tube before it cut though. Work perfect.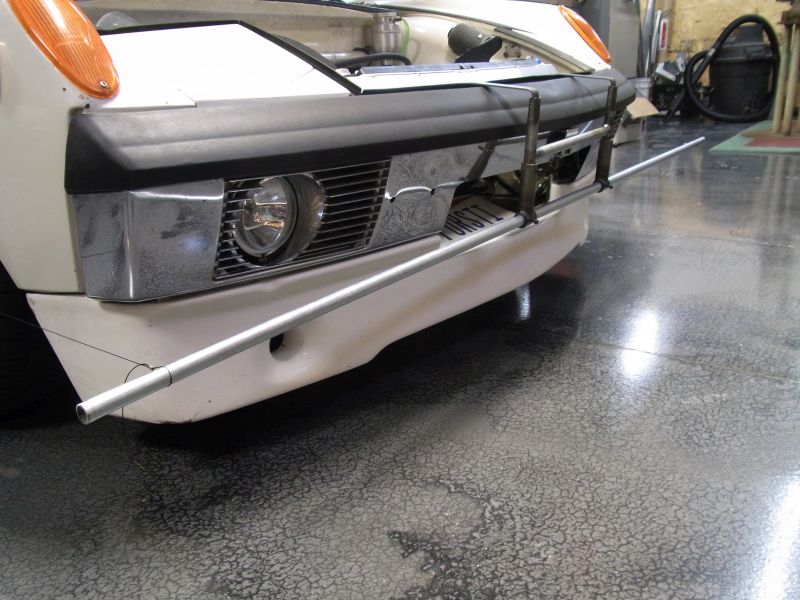
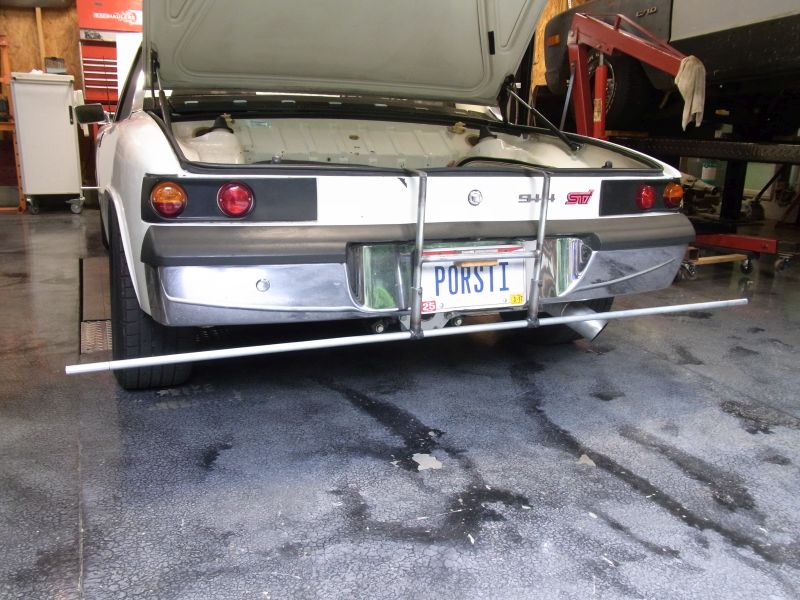
Equal length strings and equal spacing makes parallel strings no matter what.
Did a quick alignment to fix the "pro" job and it is pretty nice. Still need to set the corner weights and it should be perfect.
Cheers,
Scott
Posted by: 914forme Aug 17 2016, 12:08 PM
looks great
Posted by: Amenson Aug 22 2016, 09:31 AM
I brought the car to the lab at my wife's work to check the corner weights. LF/RR was noticeably off. Cranked up the RF and it is spot on and drives like it.
Total weight: 2197 lbs with ~13 gal of gas.
Distribution: 53% Rear 47% Front
Cheers,
Scott
Posted by: Amenson Aug 29 2016, 09:07 PM
I figured out my rattle....what it was exactly, I have no idea. I gave the engine bay a quick wipe down before going to Cars and Coffee and it just stopped. Pretty sure it was one of the engine connectors vibrating. I wiped under the connectors on both sides and positioned them a bit. I thought that I had zip tied them so they could not vibrate but maybe not.
With that solved and Okteenerfest coming up I though that I would take care of a tiny pinhole leak in the radiator from a rock hit. While visiting Doug to check out Grey Matter he donated the 1.5" green stripe hose to the project so while I have the cooling system dry to fix the radiator I might as well reroute the cooling lines.
Step one, pull the raidiator and all of the cooling lines except the one in the passenger long. Then pull the Fuel tank to get access to the front of the steering rack hump.
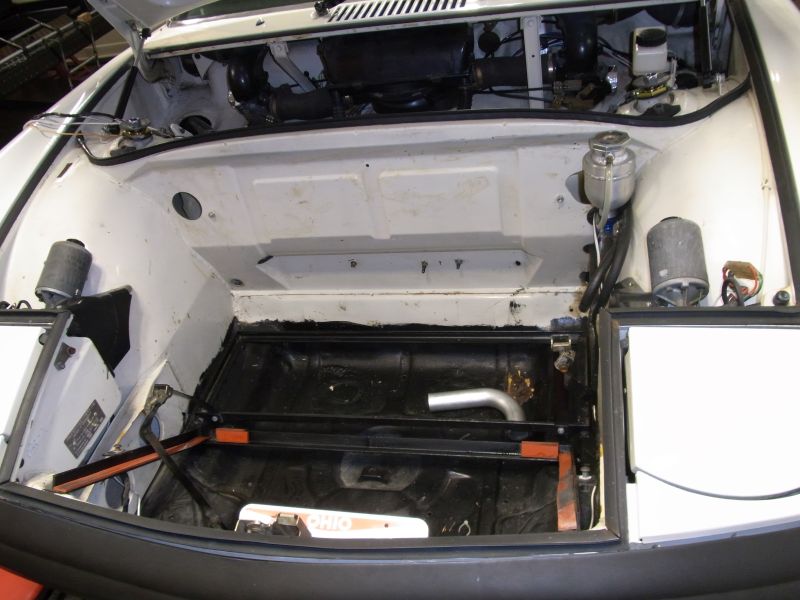
Cooling lines will come out of the lower front of the longs and enter the steering rack hump channel here: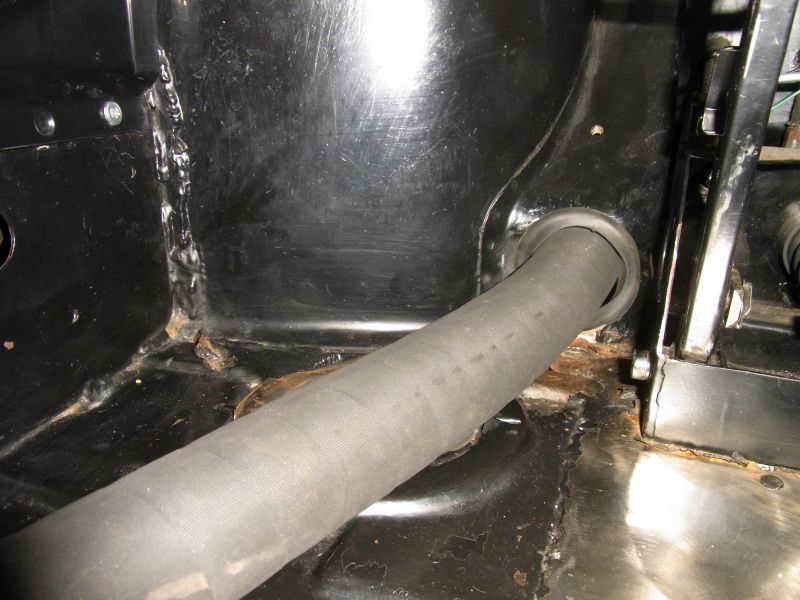
And come out here: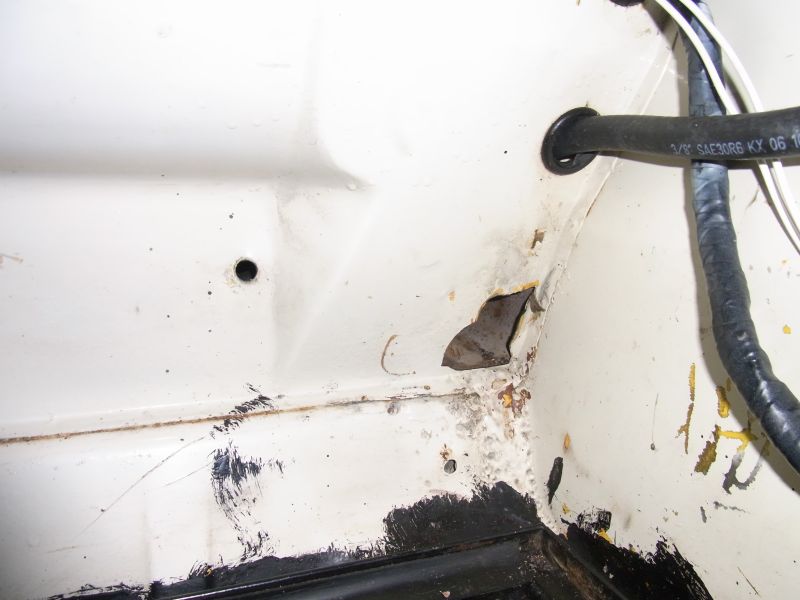
Then go under the fuel tank and enter the radiator from below instead of above. This requires removing and plugging and exiting connections and installing new ones. I will also end up remaking most of the elbows. Plenty of work to do.
While I was aligning the car with my new stings setup I noticed that I could get half of a degree more camber on one side than the other. It sort of bothered me and after looking at it for a while I decided that my upper bushings must be off somehow. I looked into replacement bushings and really liked the Elephant Sealed Monball units. While I was ordering those I decided that I might as well put the pollybronze bushings in the front suspension also. Jez, while apart it would be a great time to install new strut inserts so I ordered a set of Bilsteins. No big deal, plenty of time before Okteenerfest.
Thankfully Stephen was nice enough to stop over Sunday morning to give me a hand with the struts, bushings and top monoball mounts. He also brought over his tube beader set for the cooling lines elbows and a box of beer. What a guy
It is still going to be pretty tight to get it back together for Okteenerfest. I have a mini vacation this weekend then I leave for a week and a half business trip in Europe on the 12th where I just happen to end up in Munich for the opening weekend of Oktoberfest. I fly back the Tuesday or Wednesday before Okteenerfest. No problem, there will plenty of time for sleep when I am dead someday.
While I am thinking of Okteenerfest, it looks like I am going to have an empty seat for the Friday Drive. If anybody with a strong back and a complete disregard for their hearing wants to experience a suby powered 914, the seat is available. Preference will go to anybody building or thinking about building one. Bribes of beer or fine liquor go a long way too!
Cheers,
Scott
Posted by: 914forme Aug 30 2016, 06:11 PM
More than welcome, that was the easy thing to do, and while I was under your car, I started to think how I don't need a perfect 914 I need a driver So got back did a couple of things and dove in on mine.
Enjoy the
Posted by: Amenson Aug 30 2016, 08:34 PM
More than welcome, that was the easy thing to do, and while I was under your car, I started to think how I don't need a perfect 914 I need a driver
So got back did a couple of things and dove in on mine.Enjoy the
I have over 10,000 miles on the conversion and I am just starting to get frustrated by the esthetics.
Driving is fun 
Wife was having girl time tonight so I had big plans on the project, ufortunately did not make as much progress as hoped.
First problem was the Elepant Weather Sealed Monoballs for the strut tops. When Stefan and I first installed them I could not get the snap ring in. Figured once they were torqued down it would go...it does not. Both sides tightened to exactly the same place so I assumed that the mounts were not deranged. Called Elephant and they said that it was not known problem. On a whim I dug out a 911 camber plate cleaned it up, pulled the monoball out of the 914 and voila, fits great. Tightens past the snap ring groove with finger torque.
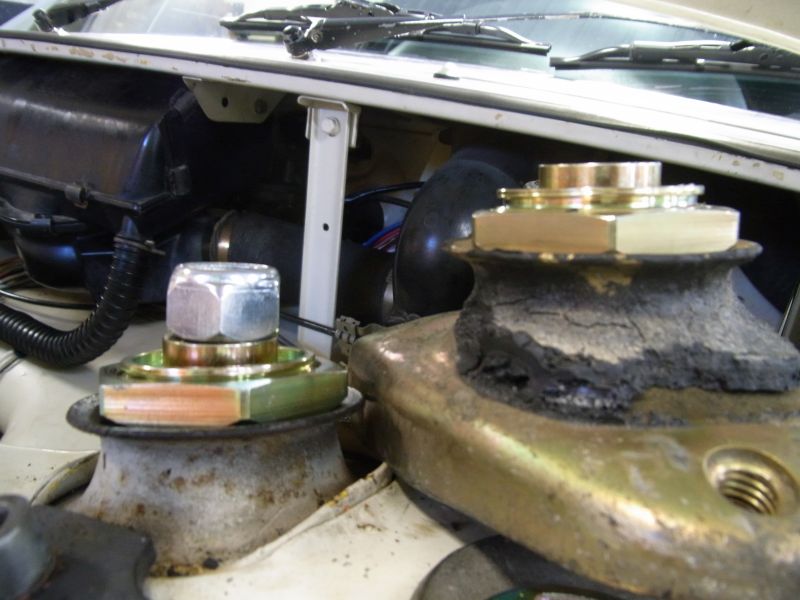
Apparently 911 and 914 camber plates are different enough that the monoball does not fit 914's properly. Talked to Elephant and they are going to get back to me with a proposal. I would like to just install the 911 camber plates and be done with it but I only have one good one. Anyone have a spare or two they want to sell?
The other issue I had was removing the 1.75" tube from the driver side long. Bloody hell, not sure how I got it in there but for a bit I did not think that it would come out. After much tugging to exhaustion, inch by inch it finally came out.
Back to progress, cleaned up the trunk side access hole.
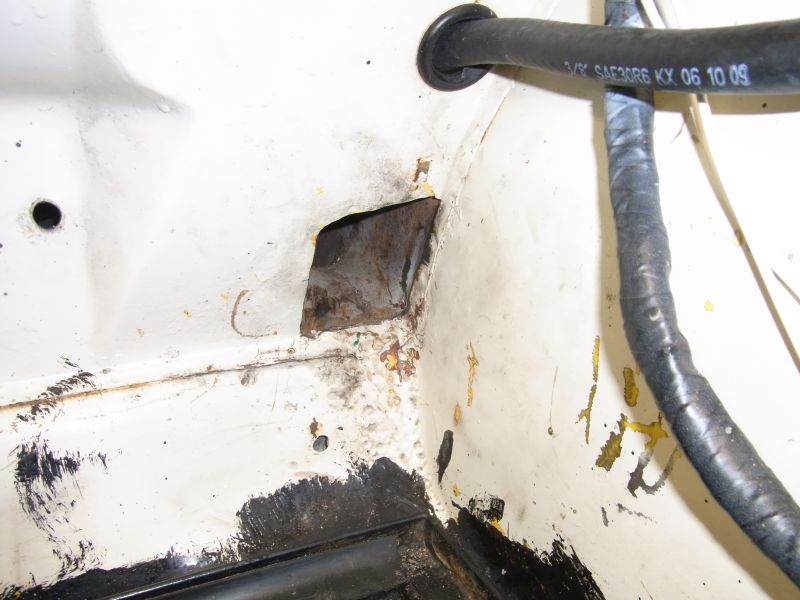
Cut the hole into the long and test fit an elbow, looks pretty good.
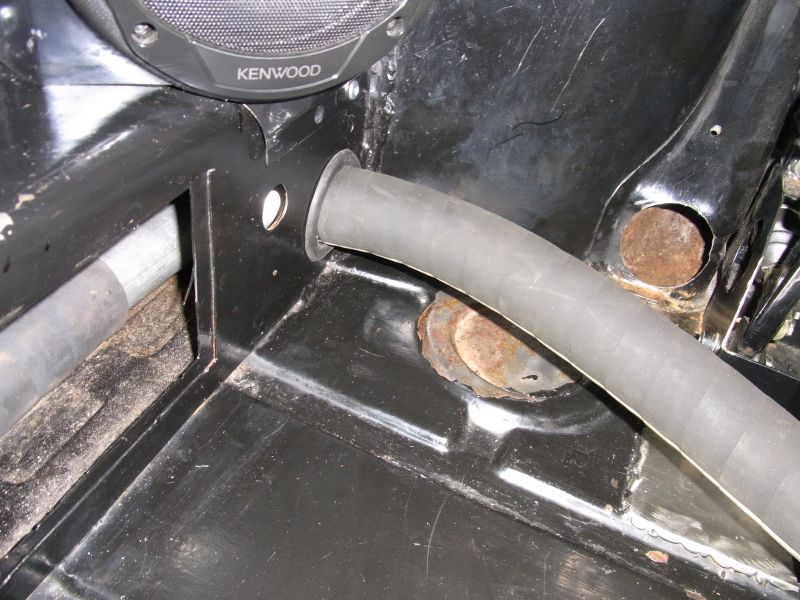
Would look even better with the tube through the tunnel but it just would not go in. It will, just need to give it another try with a fresh mind and muscles.
Getting close to beader time, I can't wait!!!!
Cheers,
Scott
Posted by: Amenson Aug 31 2016, 12:07 PM
Update on the Elephant Front strut monoballs. They agree that the parts do not fit the 914 camber plates properly and offered to refund the purchase or send me a pair of 911 plates. I really like the parts so I am having the 911 camber plates sent. I offered in return to send my 914 camber plates so they can adapt the parts to our cars. They agreed on the swap so maybe sometime in the future they will be compatible with our cars.
Cheers,
Scott
Posted by: 914forme Aug 31 2016, 04:04 PM
I have two I won't need s I am going with so rubber trick Tangerine parts.
They are yours.
Good you resolved it. If not let me know offer still stands.
Posted by: Amenson Sep 1 2016, 09:34 PM
One step forward and two steps back today.
Great point is that I fished the tube through the tunnel. I buckled the mouth of the tube and taped it into a point. Add a bit of silicone spray and it went through pretty easily.
Bad news is that I was able to confirm just how little room I have behind the fuel tank to make the turn. It fits back there but not very well. Playing with the feasibility of pie cutting a 90deg bend to reduce the radius to make the fit a bit more comfortably.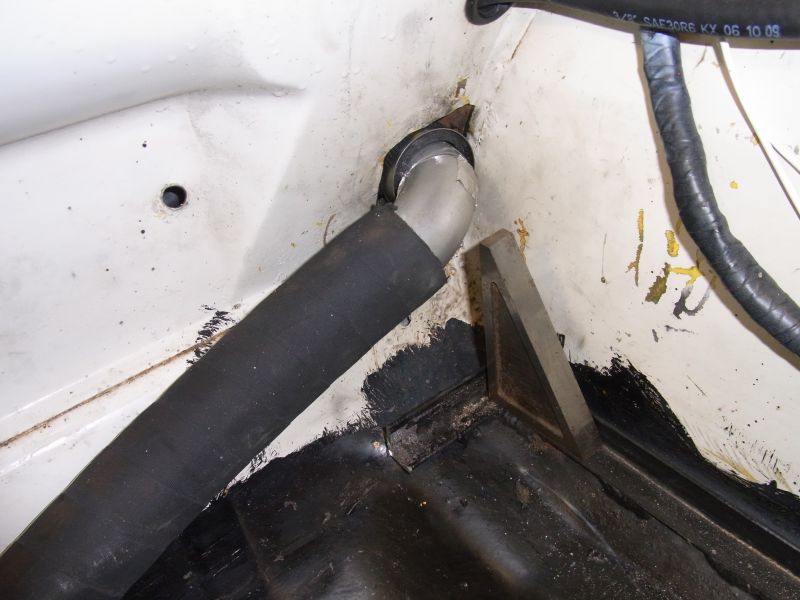
It will work but is a lot more effort than I was planning to spend on the project.
Cheers,
Scott
Posted by: mskala Sep 2 2016, 08:20 AM
Update on the Elephant Front strut monoballs. They agree that the parts do not fit the 914 camber plates properly and offered to refund the purchase or send me a pair of 911 plates. I really like the parts so I am having the 911 camber plates sent. I offered in return to send my 914 camber plates so they can adapt the parts to our cars. They agreed on the swap so maybe sometime in the future they will be compatible with our cars.
Cheers,
Scott
I guess I found that out a couple years ago. I thought it was just me. A bit of
machining (on the nut I think) to get the damn thing to fit.
Posted by: Amenson Sep 6 2016, 09:18 PM
Had a great evening in the garage. Project "don't mess up a cooling system that is already rock solid" is progressing nicely. I look forward to its completion and a dramatic lack of change in functionality
Passenger side routed over the steering rack hump.
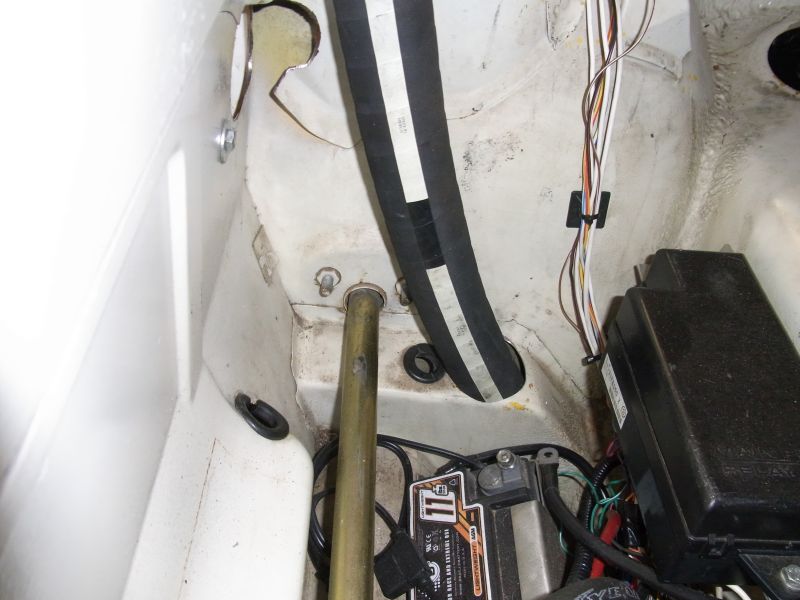
Eventually it will run next to the fuel tank and into the top of the radiator.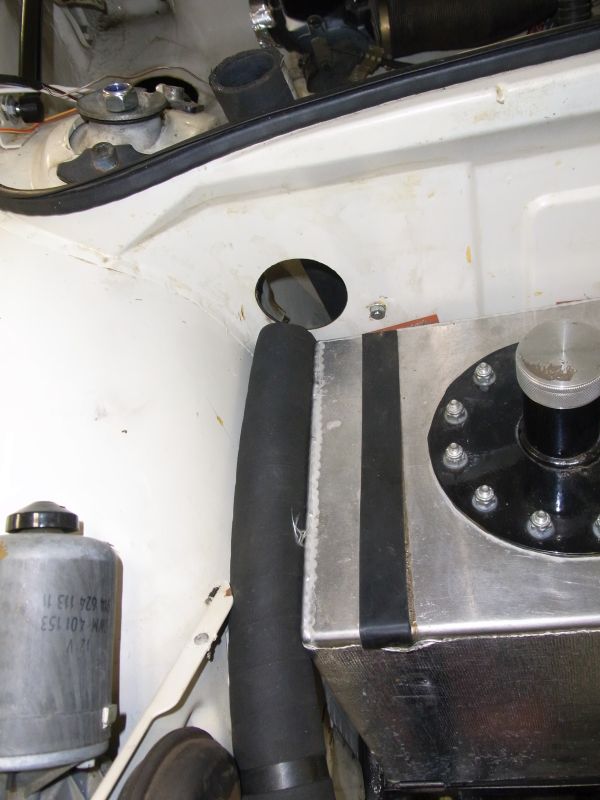
I wanted to run it under the fuel tank but there just is not room. It will meet the requirement that it will be even or lower than the top of the radiator.
Driver side routed over the steering rack hump...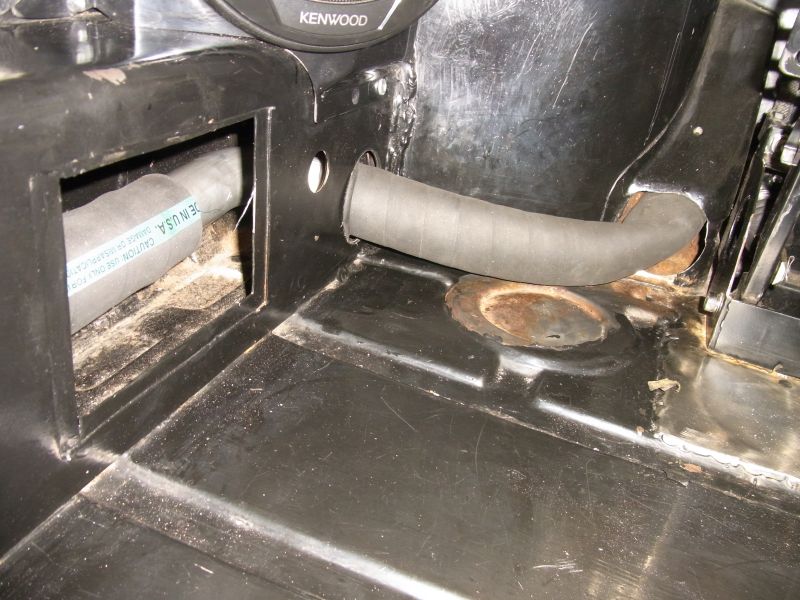
Behind...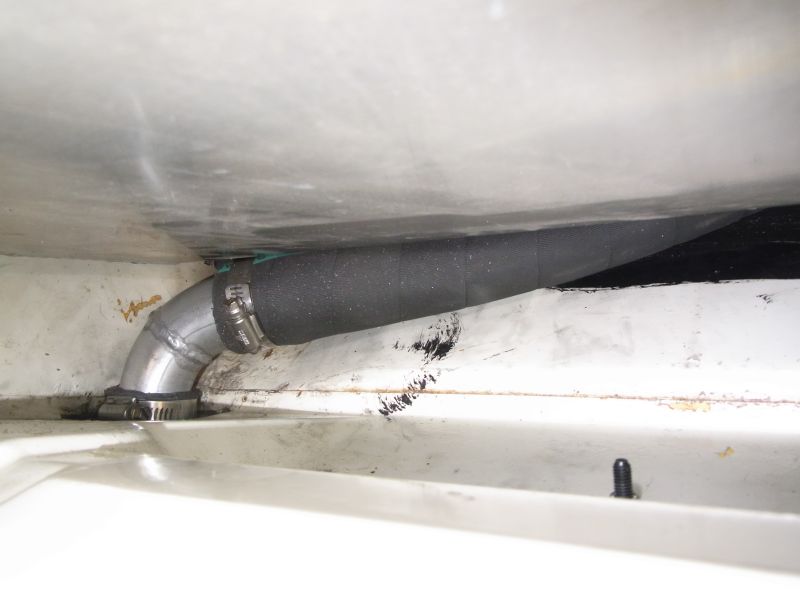
and under fuel tank.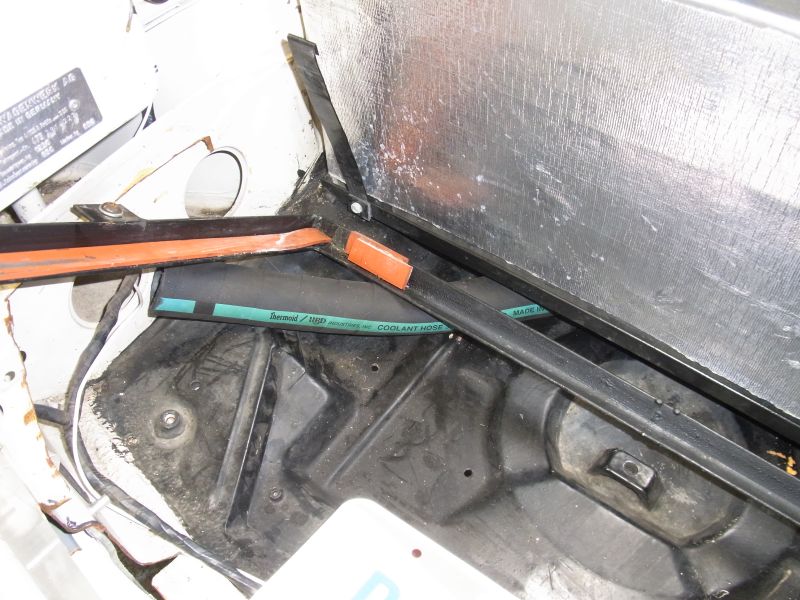
Entire suction side tube will be well below the majority of the volume of the radiator. This is the primary benefit of the project.
All that is remaining is to modify the radiator connections and fix the leak. I also need to install some low profile edge protection to keep the tube from chafing. Any suggestions?
Back on track to go Oktoberfest to Okteenerfest!!
Cheers,
Scott
Posted by: Andyrew Sep 6 2016, 09:54 PM
Are you going to replace the bent/collapsed tube with steel? If not I recommend this..
I use another layer of tube to keep the tube from chafing. That and duct tape works surprisingly well in un-scene areas.
Have you test fit the gas tank in that area? Or is the silver tank you gas tank?
Posted by: Amenson Sep 7 2016, 07:28 AM
Are you going to replace the bent/collapsed tube with steel? If not I recommend this..
I use another layer of tube to keep the tube from chafing. That and duct tape works surprisingly well in un-scene areas.
Have you test fit the gas tank in that area? Or is the silver tank you gas tank?
The tube is only lightly kinked. A bit of heat and pressure and it should pop out. The tubes I pulled out from the previous routing took a set with some pretty impressive permanent bends.
I ended up finding some really nice edge trim from Trim-lok. Comes in several sizes for different thicknesses of metal. Hopefully it is as bendable as advertised. Should look almost OEM!
Cheers,
Scott
Posted by: 76-914 Sep 7 2016, 08:00 AM
Had a great evening in the garage. Project "don't mess up a cooling system that is already rock solid" is progressing nicely. I look forward to its completion and a dramatic lack of change in functionality
Passenger side routed over the steering rack hump.
Eventually it will run next to the fuel tank and into the top of the radiator.
I wanted to run it under the fuel tank but there just is not room. It will meet the requirement that it will be even or lower than the top of the radiator.
Driver side routed over the steering rack hump...
Behind...
and under fuel tank.
Entire suction side tube will be well below the majority of the volume of the radiator. This is the primary benefit of the project.
All that is remaining is to modify the radiator connections and fix the leak. I also need to install some low profile edge protection to keep the tube from chafing. Any suggestions?
Back on track to go Oktoberfest to Okteenerfest!!
Cheers,
Scott
1st, I agree with Andrew on the bends. There are spiral spring wraps to prevent that. FWIW, each 90 elbow has the parasitic drag value = to 12ft of tubing! What is the reasoning behind elevating or lowering the radiator hoses in relation to the radiator?
Kent
Posted by: Andyrew Sep 7 2016, 08:33 AM
Are you going to replace the bent/collapsed tube with steel? If not I recommend this..
I use another layer of tube to keep the tube from chafing. That and duct tape works surprisingly well in un-scene areas.
Have you test fit the gas tank in that area? Or is the silver tank you gas tank?
The tube is only lightly kinked. A bit of heat and pressure and it should pop out. The tubes I pulled out from the previous routing took a set with some pretty impressive permanent bends.
I ended up finding some really nice edge trim from Trim-lok. Comes in several sizes for different thicknesses of metal. Hopefully it is as bendable as advertised. Should look almost OEM!
Cheers,
Scott
Radiator tubes dont work like that
I suggest making some steel pipes for that or else those tubes will collapse every time they cool down and possibly not expand after some use. Posted by: Andyrew Sep 7 2016, 08:37 AM
FWIW, each 90 elbow has the parasitic drag value = to 12ft of tubing!
I believe this 100%. On my exhaust I have 3' straight pipe to a mandrel 90 (3" tube). The exhaust before the 90 barely gets warm, but the exhaust at the 90 is blueing. Note its stainless steel.
If anything your going to retain quite a bit of heat in those areas.
Im all for thinking outside the box, but whats really wrong with routing the hoses under the car? At this point you've done most of the work already but still.
Posted by: Chris H. Sep 7 2016, 08:56 AM
Yeah just trying to help here so no offense at all. I really admire your fabrication skills, which far exceed mine, but those kinked hoses need to be fixed or you might have a flow problem as Andrew said. You can try squeezing the kinked area in the opposite direction several times and see if it will take on a more normal shape permanently. If not you need to change those out to slightly longer pieces so that they don't buckle like that or go with a 90 degree aluminum piece in the middle. I had the same problem because the thicker the hose the less pliable. Had to make more dramatic turns to get the kinks out. The hose needs to be shaped like an oval at LEAST, and not kinked or flattened at all. I went from 2 smaller hoses under the car with reducers and several connections to 2 larger hoses with no adapters or flow interruptors and the difference is crazy. It will BARELY get to 185 now. 2 pythons under the car.
Keep at it! The car is getting better and better!
Posted by: Amenson Sep 7 2016, 10:49 AM
The tube is only lightly kinked. A bit of heat and pressure and it should pop out. The tubes I pulled out from the previous routing took a set with some pretty impressive permanent bends.
I ended up finding some really nice edge trim from Trim-lok. Comes in several sizes for different thicknesses of metal. Hopefully it is as bendable as advertised. Should look almost OEM!
Cheers,
Scott
Radiator tubes dont work like that
I suggest making some steel pipes for that or else those tubes will collapse every time they cool down and possibly not expand after some use.Then how do you explain this?
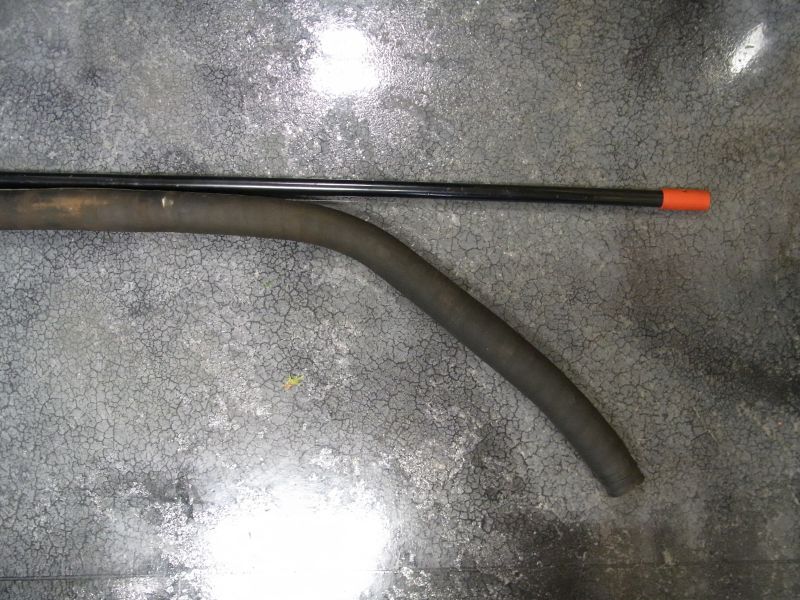
I am fully prepared to fab up a nice section of aluminum tube for the areas if it does not go as planned but I really want to avoid hose clamped connections on a high temp, high pressure liquid in the cabin of the car.
Background for rerouting the lines:
-There are currently two hose clamped connections behind each speaker pod waiting to fail and kill me.
-Water pumps should have the "suction" side flooded so they do not actually have to suck. I am really surprised I have not had problems already. There must be enough water volume in the longs to keep the pump happy.
-Having the tubes as the highest point in the system makes it really hard to bleed.
-I did not like the way it looked.
Running the cooling lines under the car works perfectly well for many people but, in my not so humble opinion, is just a lazy way to do it that introduces unacceptable risk.
Cheers,
Scott
Posted by: 914forme Sep 7 2016, 01:45 PM
Now get back to it, and button this thing up. You have a plane to catch. BTW, did you use the Parker's, I want to see some beads. And not the kind you get in the Mardi Gras parade.
You could also add some metal splash shields over the hoses as they enter and exit the cabin. Hot liquids in you lap are no good. Also add contents are hot stickers. Your wife would love that. Safety First
Posted by: Amenson Sep 7 2016, 03:07 PM
Now get back to it, and button this thing up. You have a plane to catch. BTW, did you use the Parker's, I want to see some beads. And not the kind you get in the Mardi Gras parade.
You could also add some metal splash shields over the hoses as they enter and exit the cabin. Hot liquids in you lap are no good. Also add contents are hot stickers.
Your wife would love that. Safety First The the Parker beader is everything I hoped and dreamed it would be. Arms got a bit tired after a few but the results are excellent. Unfortunately the tubes were all installed before I got out the camera. I will take some pictures when I have it apart to install the edge trim.
I will eventually cover the tubes somehow. Thinking about trying my hand at fiberglass...pretty complicated shape to make neatly out of metal w/o buying an English wheel or other metal forming tools.
I have avoided having warning stickers applied to the car so far, hope to keep it that way.
Cheers,
Scott
Posted by: Amenson Sep 7 2016, 07:12 PM
Stephen...found a piece I had beaded but not used. 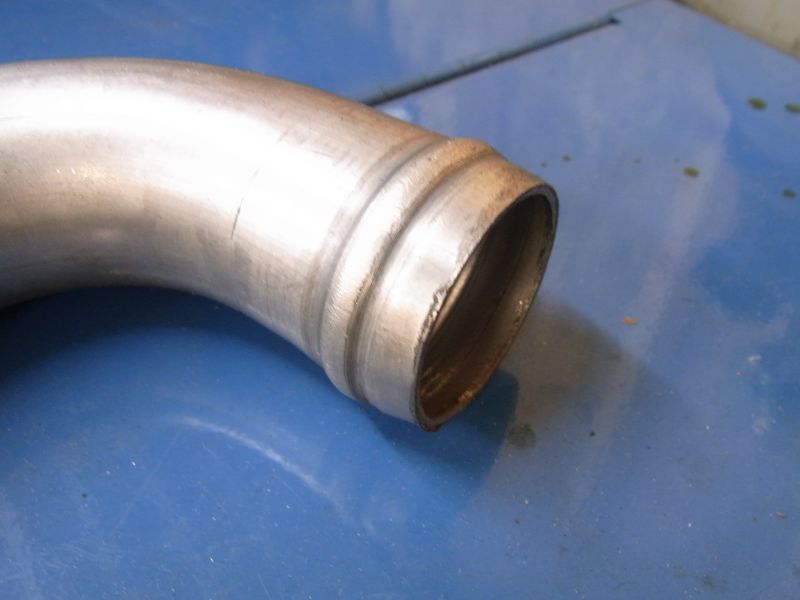
Puuurty
Nothing better than having the perfect tool for the job. Now come pry them out of my cold dead hands!
Cheers,
Scott
Posted by: charliew Sep 8 2016, 08:25 AM
In the 70's when we had 10:1 compression and wanted to run high octane with the sbc we ran a tank that was pressurized to keep the air out. It was just a sealed tank with it's cap sealed and it's outlet at the bottom and the one on the radiator just sealing at the top but the overflow went to the sealed tank. The tank had a schraeder valve on it to pressureize the system. The sealed tank meant you didn't have to have the tank at the highest point also. sbc's were bad about air pockets in the heads and the cooling was marginal at best.All we really were doing was raising the boiling point and maybe not loosing coolant. At that time you needed a modded alternator to keep up with the two electric fans at idle if you also ran ac. I just thought about all the different tries we attempted to use high compression on the street reading this.
That beader is really a nice tool. On my son's suby we actually used a strap between the clamps at the throttle body hose clamps to keep it from blowing off at 30 psi. Even a bead wasn't enough. But now that I think about it, it was always the tb side that came off so maybe that bead wasn't as big as the tube bead.
Posted by: Amenson Sep 8 2016, 08:32 AM
A pair of 911 camber plates arrived from Elephant. Back on track to to install the Monoball strut mounts.
Question, the camber plates are asymmetric. How do I tell which one goes on the passenger side and which driver? I did not see a part number but they were pretty grimy so maybe I missed it.
Cheers,
Scott
Posted by: 914forme Sep 8 2016, 09:18 AM
Stephen...found a piece I had beaded but not used.
Puuurty
Nothing better than having the perfect tool for the job. Now come pry them out of my cold dead hands!
Cheers,
Scott
 I'll learn to leave no tool behind.
Posted by: ruby914 Sep 17 2016, 12:33 AM
Hey Scott,
I see you, Chris and Kent all working on coolant line plumbing. Yours is the STI, not a 6, so I check yours first. I am again thinking about rerouting my 1.25 ID ~ 1.62OD lines from under the car to behind the kick panel and out side of the longs.
The hose would turn in sharply into the cabin, the same as yours. That turn, even before where yours kinked, is the problem area.
I had a 1/2 baked plan last year. Something like welding in a 1.75 guide tube and feed the hose thru... I try to revisit and work out the bugs again. A smaller hose would help. Kent may have found the small hose limit. What size coolant lines are you using?
PS. ELYSIAN Space Dust powered this post.
Posted by: 76-914 Sep 17 2016, 02:44 PM
 Just wanted to make a quick point. I have absolutely no cooling problems with the 7/8 & 3/4 hoses since changing over to the Celica dual core. My only cooling problem happened with the Scirocco single core radiator, running 3500-4500rpm uphill for 5-10 mins, out of the desert 95F. That's asking a lot from that setup. I switched to dual core when I added AC as a precaution. If I didn't have a propensity to drive like a juvenile dare devil I might have keep the system as it was. Regardless, the reason I am upsizing to 1.3/8" is some unfounded theory that I made up in my feeble mind which convinced me that with high rpm and restricted flow I increased the pressure on the system resulting in my head gasket failure. I plan on leaving the small hoses in the longs in case I change my mind again. Highjack over. Kent
Posted by: mepstein Sep 17 2016, 03:07 PM
Just wanted to make a quick point. I have absolutely no cooling problems with the 7/8 & 3/4 hoses since changing over to the Celica dual core. My only cooling problem happened with the Scirocco single core radiator, running 3500-4500rpm uphill for 5-10 mins, out of the desert 95F. That's asking a lot from that setup. I switched to dual core when I added AC as a precaution. If I didn't have a propensity to drive like a juvenile dare devil I might have keep the system as it was. Regardless, the reason I am upsizing to 1.3/8" is some unfounded theory that I made up in my feeble mind which convinced me that with high rpm and restricted flow I increased the pressure on the system resulting in my head gasket failure. I plan on leaving the small hoses in the longs in case I change my mind again. Highjack over. KentLeave the hoses in the longs? All that extra weight
Posted by: 76-914 Sep 17 2016, 04:57 PM
Just wanted to make a quick point. I have absolutely no cooling problems with the 7/8 & 3/4 hoses since changing over to the Celica dual core. My only cooling problem happened with the Scirocco single core radiator, running 3500-4500rpm uphill for 5-10 mins, out of the desert 95F. That's asking a lot from that setup. I switched to dual core when I added AC as a precaution. If I didn't have a propensity to drive like a juvenile dare devil I might have keep the system as it was. Regardless, the reason I am upsizing to 1.3/8" is some unfounded theory that I made up in my feeble mind which convinced me that with high rpm and restricted flow I increased the pressure on the system resulting in my head gasket failure. I plan on leaving the small hoses in the longs in case I change my mind again. Highjack over. KentLeave the hoses in the longs? All that extra weight
Yeah, as long as I'm experimenting it won't hurt anything to leave them in temporarily. I won't notice 5-8 extra lb's. You'll see soon enough.
Besides, I'm used to running heavy. I usually run about a 1/2 ounce heavier than everyone else.
Posted by: Amenson Sep 18 2016, 02:24 PM
Hello from Poland. Spent last week in Germany with a grand farwell at the opening day of Oktoberfest. Whoever invented liter beer mugs is a complete asshole. But I only had 4 beers 
Anyways, back to the project. With my trip on Sunday I had to get it running so I put in 12 hours on Saturday.
First finished routing the tubes.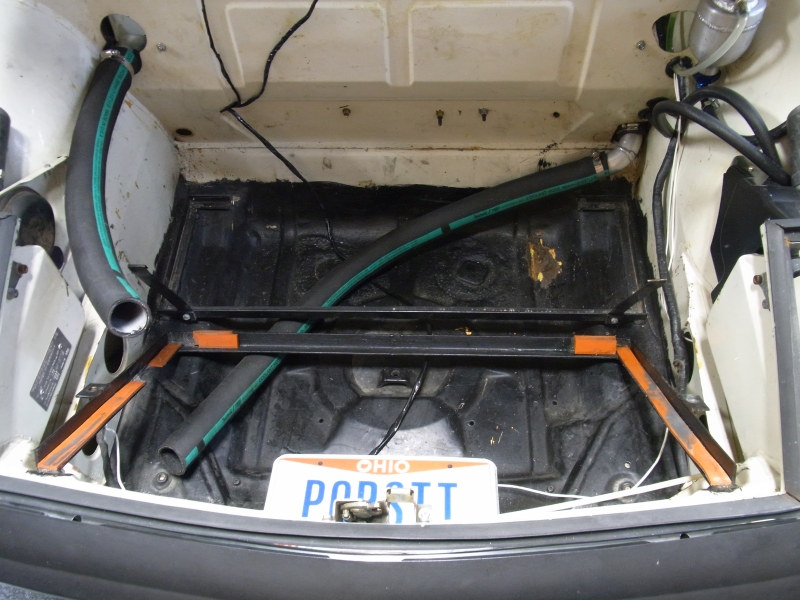
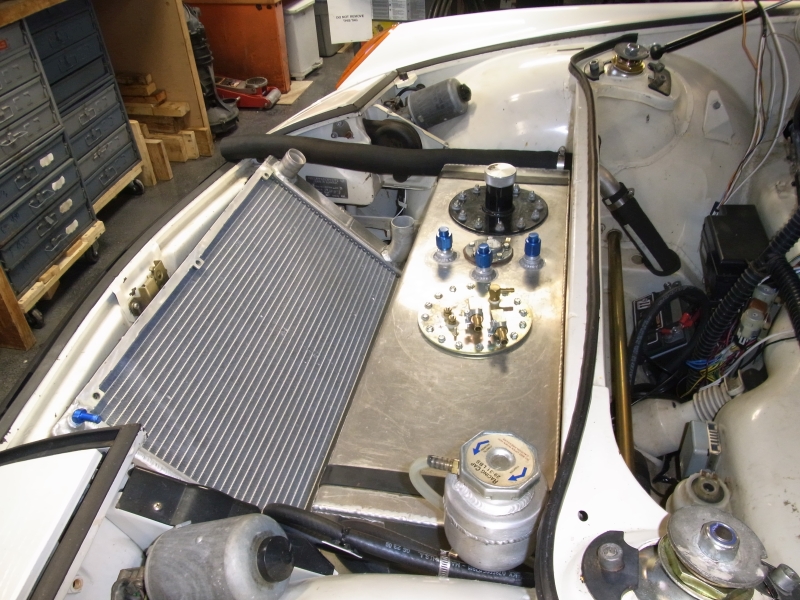
Then modified the radiator. Didn't take any pictures due to full thrash mode. Installed the fuel tank/lines and tided up some wiring stuff.
Car started right up. It was 11pm so I could not really rev it to build heat but got it warm just idling so that it could suck off of the expansion tanks overnight. Found a leak at the driver side long elbow where I had not tighten a hose clamp fully.
First thing Sunday morning I brought it up to temperature with throttle. Everything pressurized nicely and as soon as the radiator started warming up the passenger side kink popped out! There was a bit of steam coming from the radiator but I figured that it was from spillage while filling. The entire radiator was coming up to temp and the engine temp was right where it should be. Waiting for the driver kink to pop up as the tube heated up when I noticed a lot more steam coming from the radiator. A quick inspection and it was easy to see that my hole repair had not only failed but made it worse.
At this point my departure for the airport is only a couple hours away and I return 36 hours before I need to leave for Okteenerfest. I quickly decide that one of my buddies will have to pick up the radiator and drop it off someplace that can fix and test it properly. I finish packing while the car cools and out comes the radiator. Buddy picks it up as I am leaving for the airport. I got word Thursday that it is repaired, tested and back in the garage waiting for me to return.
So this is how she sits.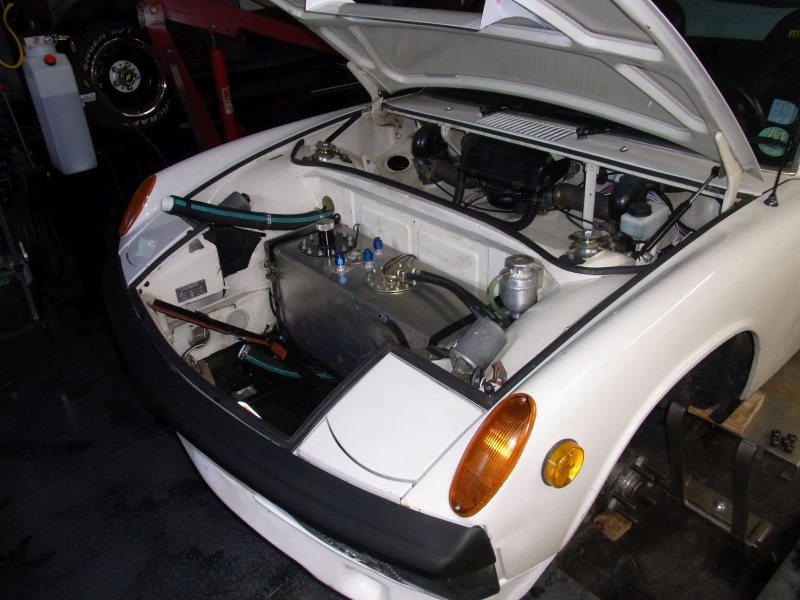
Unproven cooling setup, no radiator and front suspension that is only loosely installed...Okteenerfest, no problem!
Cheers,
Scott
Posted by: Amenson Sep 18 2016, 02:30 PM
Hey Scott,
I see you, Chris and Kent all working on coolant line plumbing. Yours is the STI, not a 6, so I check yours first. I am again thinking about rerouting my 1.25 ID ~ 1.62OD lines from under the car to behind the kick panel and out side of the longs.
The hose would turn in sharply into the cabin, the same as yours. That turn, even before where yours kinked, is the problem area.
I had a 1/2 baked plan last year. Something like welding in a 1.75 guide tube and feed the hose thru... I try to revisit and work out the bugs again. A smaller hose would help. Kent may have found the small hose limit. What size coolant lines are you using?
PS. ELYSIAN Space Dust powered this post.
I am using 1.5" ID hose, the stuff is huge. Doug has 1" silicone that I will be installing into Grey Matter. It feels substantially more flexible, really looking forward to working with it.
Cheers,
Scott
Posted by: 914forme Sep 19 2016, 10:51 AM
Hey Scott,
I see you, Chris and Kent all working on coolant line plumbing. Yours is the STI, not a 6, so I check yours first. I am again thinking about rerouting my 1.25 ID ~ 1.62OD lines from under the car to behind the kick panel and out side of the longs.
The hose would turn in sharply into the cabin, the same as yours. That turn, even before where yours kinked, is the problem area.
I had a 1/2 baked plan last year. Something like welding in a 1.75 guide tube and feed the hose thru... I try to revisit and work out the bugs again. A smaller hose would help. Kent may have found the small hose limit. What size coolant lines are you using?
PS. ELYSIAN Space Dust powered this post.
I am using 1.5" ID hose, the stuff is huge. Doug has 1" silicone that I will be installing into Grey Matter. It feels substantially more flexible, really looking forward to working with it.
Cheers,
Scott
Silicone the best choice for coolant? From what I read on the Gates Site they say it can be used for coolant but tends to have a 10-15% higher water permeation over their rubber counter parts. Since most cars have a total of 3-4 feet of hose. That might not be to bad. Since a conversion will have 15-20 feet of hose!!! You can do the math. They also tend to cut easier, and clamping can be an issue. As worm clamps will cut into the silicone. Under extreme pressure they will pop right off your beaded tubing even with T clamps
learned that lesson the hard way.All materials have the positives and negatives. Flexibility is plus of silicone. Also don't get fuel on or in it. Fuel
on silicone.
Posted by: Amenson Sep 21 2016, 07:26 AM
Back in the good old (actually quite young comparably) USA. Within 8 hours of landing (including a 45 minute meeting) the radiator is in and the whole system brought fully up to temp.
No leaks, temp is rock solid and best of all....the kinks going into the longs are gone.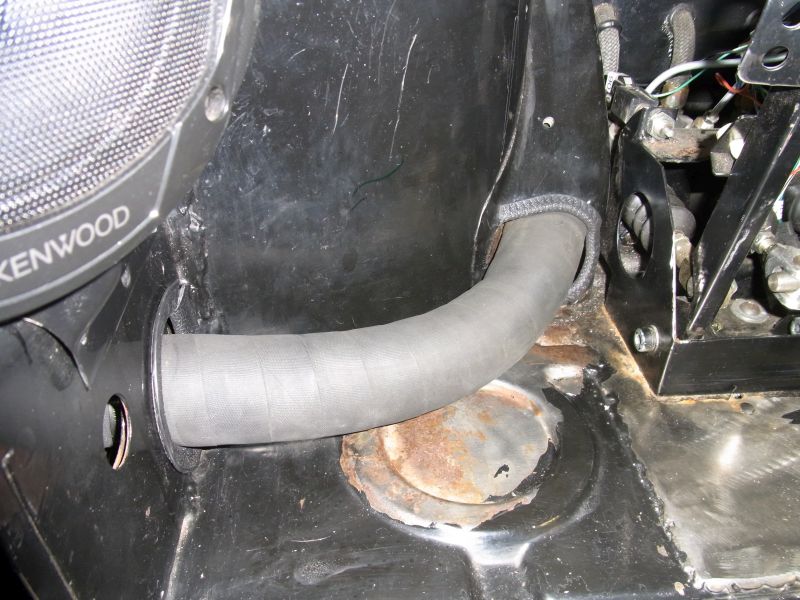
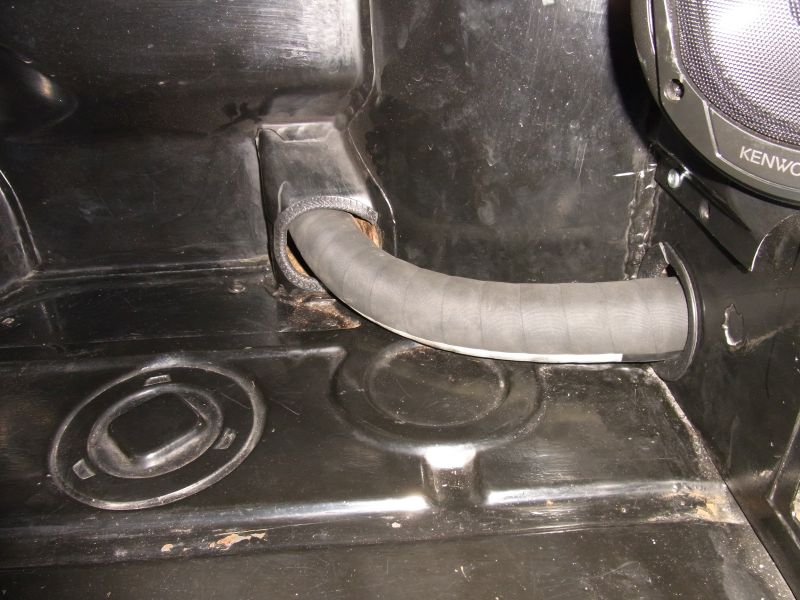
The driver side still has a slight pucker and I think that I can make some adjustments to make that go away.
Now onto the front suspension, after a few more business calls.
Cheers,
Scott
Posted by: Mike Bellis Sep 21 2016, 08:43 PM
Only real problem I see is you are going to have 200°F fuel. Not good. Gasoline starts turning to vapor at -45°F, at 200°F it turns to vapor much faster. More fumes, less MPG and most of all... Lower performance. Don't worry, you are well below the auto-ignition temp of 536°F...
If it were me, and I have been considering the same tank, I would have it cut and modified to fit in the original location.
Posted by: Amenson Oct 11 2016, 09:20 PM
Just realized that I never posted an update.
After a solid thrash I got the front suspension together and the air worked out of the new cooling system. A quick alignment and test drive and I was off to Okteenerfest. Temps were rock solid and the suspension is amazing. Really mad that I took so long to ditch the KYB's. The elephant polybronze bushings and strut top monoball really enhance the directness of the steering and feedback from the chassis. Both of which really helped keep on the road while chasing "Huey" through the twisties.
I did have one issue after getting it back together. The idle was periodically bizarre with very rare stalling on clutch in deceleration. The off throttle response was also sluggish and, much to the amusement of my passenger for the mountain drive, it felt a bit down on power. I checked for obvious vacuum leaks but did not find anything. Once home a bit of research showed that a dirty MAF could cause similar issues. I pulled it and it was pretty filthy, as was the filter. Amazing how much tire smoke clogs things up I also found a vacuum leak while getting to the MAF.
With these things taken care of it was better but still not right. Still had the bizarre throttle response, periodic stalling and sluggish off throttle behavior. Out of desperation I checked the compression to make sure I had not hurt the engine along the way. Perfect numbers.
Then I started looking into the ECU maps to see what signals go into the idle control and logging data to see if anything was wonky. I started fixating on the off throttle behavior because it activates the idle maps. Started getting to a point where the little problems made me want to stop driving the car.
By chance I decided to yank on the harness bundle going to the ECU. The engine went crazy. I almost parked it on the way to work. Took quick look but did not see anything. Of course I was not logging at the time. After work it was back to the small issues. I went through all of the ECU connectors looking for loose pins and checked the wires for nicks. Nothing. There were a few factory splices for the shield grounds on the MAF and electronic throttle. One of them had some loose tape with a slightly exposed ground. Not sure if it was the real problem but everything is back to normal.
Except the off throttle sluggishness. While looking through the maps I found one that sets a throttle offset based on Target Airflow. This applies when in gear when the car is moving. Target airflow is set in a map based on RPM. Put them together and you get a non zero throttle opening when decelerating by engine braking. At most points this ends up being 9%. No wonder it feels the way it does. A quick update to the Target throttle vs Idle airflow target map and the car is transformed....almost feels like there is a throttle cable!
Now I get to enjoy driving it on these beautiful fall days and focus on Doug's Grey Matter Project.
If you are looking for Suby Mods, follow his thread for the next few months.
Cheers,
Scott
Posted by: Amenson Jan 12 2017, 10:19 PM
From the first throttle application after the suby swap it was clear that the car needed wider tires and flares to fit them. For a while I was all about "doing it right" and installing steel flares. Then after investigating some rust areas and other areas of concern, like a probable full driver side rear fender replacement, I decided that QRS full fiberglass fenders would be the way to go so that I could ditch the crappy steel. Now a project is coming together that will make me the proud new owner of a set of steel flares so it is time to see how bad it is....

The vent area is pretty roached and it does look like a new fender was installed but it is not insanely terrible.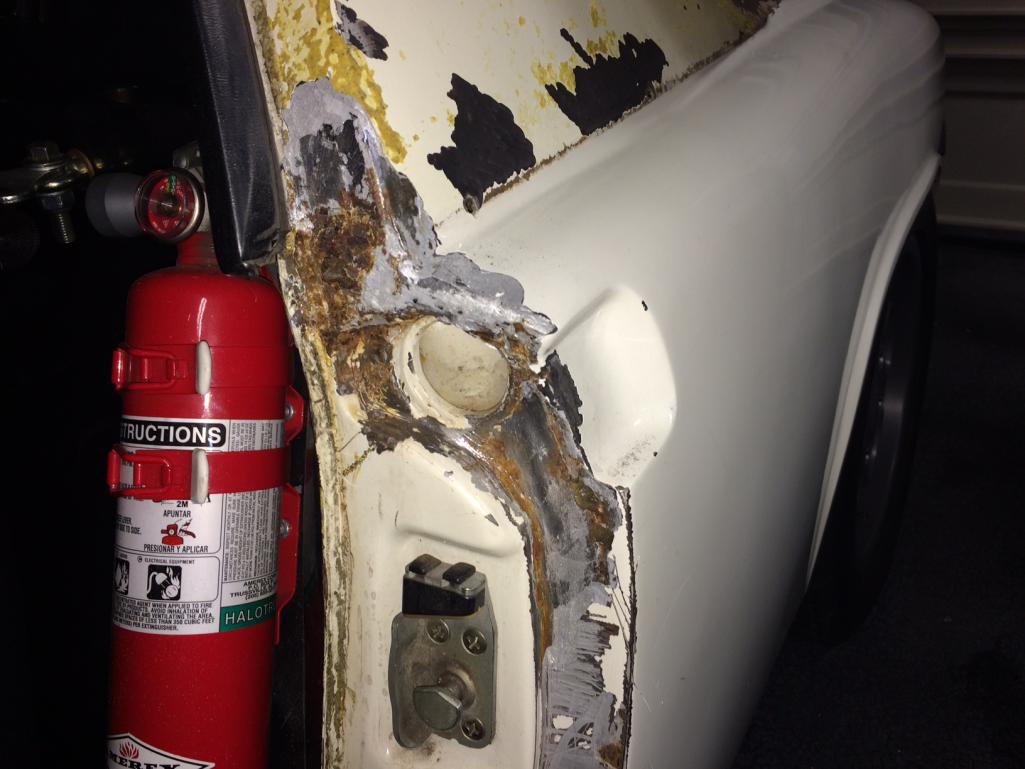
OK, it is ugly but fixable.
I hated to take time away from Doug's car but I had to see if I needed a part that Stephen just offered to me....yup, I will definitely be taking you up on the sail panel chunk.
I will probably also need some other sections of the fender to clean up the fender replacement but I should have access to a decent fender also.
Back to Grey Matter!
Cheers,
Scott
Posted by: 914forme Jan 14 2017, 09:43 PM
The vent area is pretty roached and it does look like a new fender was installed but it is not insanely terrible.
OK, it is ugly but fixable.
I hated to take time away from Doug's car but I had to see if I needed a part that Stephen just offered to me....yup, I will definitely be taking you up on the sail panel chunk.
I will probably also need some other sections of the fender to clean up the fender replacement but I should have access to a decent fender also.
Back to Grey Matter!
Cheers,
Scott
Well I plan on cutting it out tomorrow, and bring it over after my meeting this week.
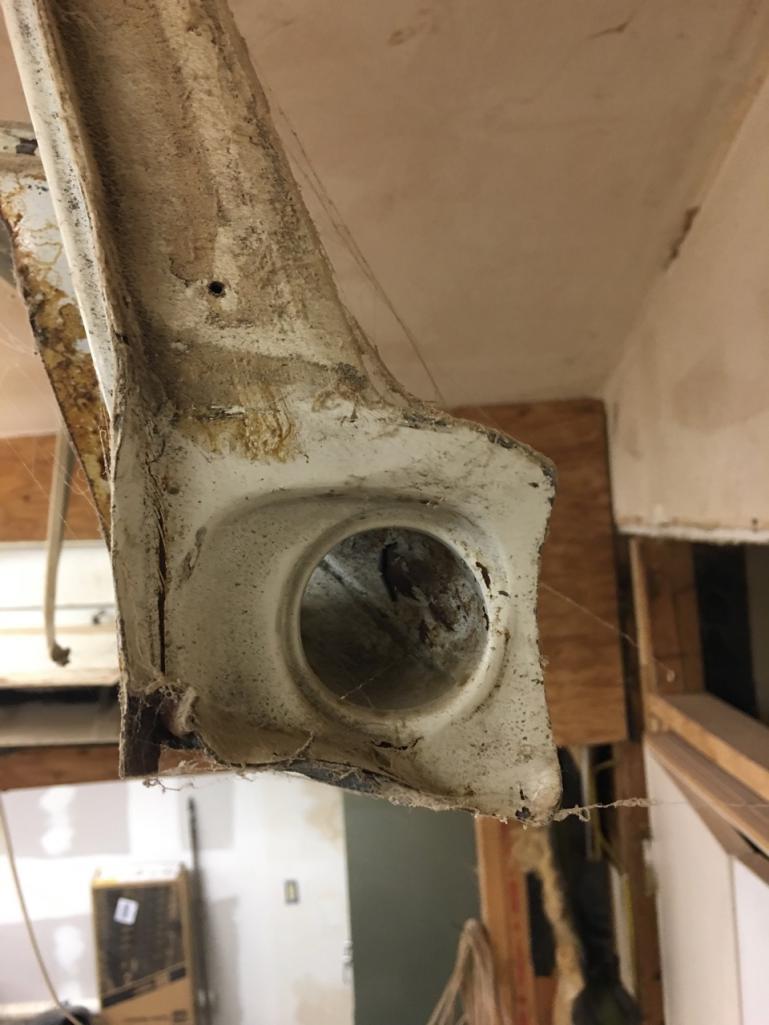
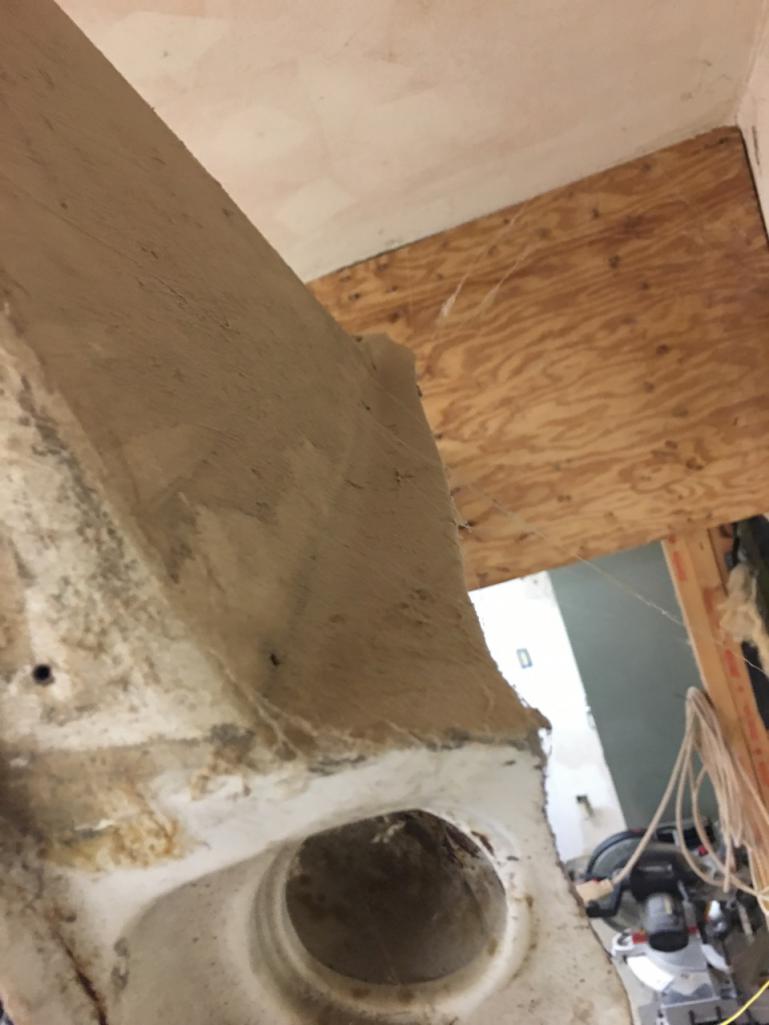
Posted by: Amenson Jan 22 2017, 08:39 PM
It was a spring like day so I took the opportunity to get the PorSTI out of the garage for some exploratory grinding.
Not super happy with what I found.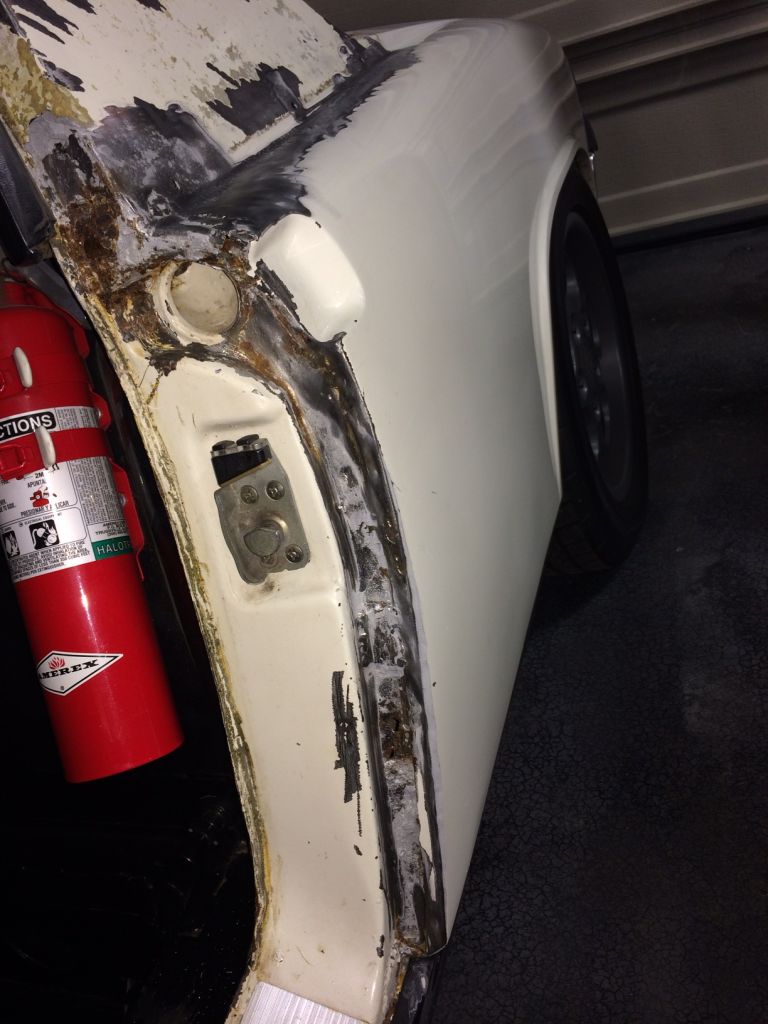
There was a huge chunk of filler in there.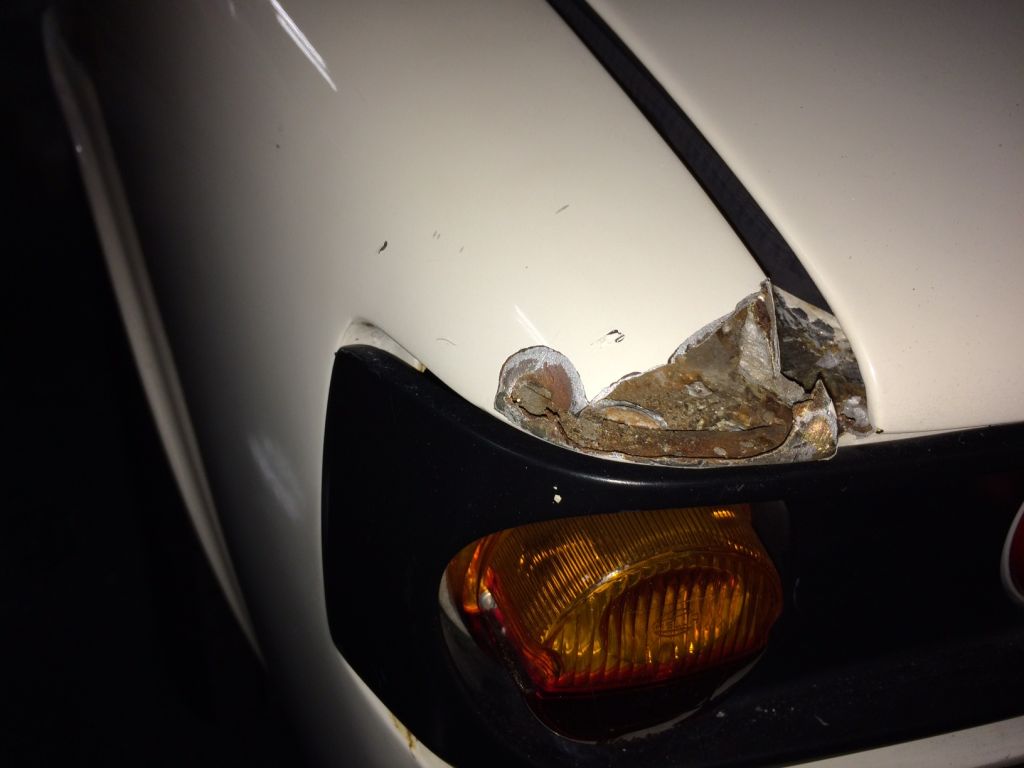
I ground back looking for a seam but it looks like the full fender was replaced. Based on the thickness of the filler over rust, the fender was rusty when installed and installed over rust. I just can't make any sense out of what I am finding.
Cheers,
Scott
Posted by: 914forme Jan 22 2017, 08:55 PM
To bad it is not the pass side, I could hook you up. I hate seeing that,
Posted by: charliew Jan 23 2017, 10:11 AM
on a lot of redos you will find rust under the filler. most older repairs were done on bare metal without a two part sealer first so the porus filler lets moisture set in on the bare metal and it eventually raises the filler up. also some people wet sanded the primer that was porous and that let the moisture into the mix and it started the rusting process before the top coat was put on in some cases. filler and primer is porous. some redos take years and a car in a humid climate will soak up moisture in the repaired areas. It is a shame but thats the way with our old unibody cars, the cavities are tough to forsee their problems. Thats why I hate to weld on any area that the back side can't be treated to stop the rust that will come from being heated from welding. All the old foam they put in the corners cause more problems than it fixed. I guess washing up under the fenders might have added to the problem also.
You know that is a lot of work but I am sure you can handle it. I thought I bought a rust free car but I have found rust at the bottom of the threshold were the brazing is and in the vent area where the foam was like yours but not very bad. you really never know unless it is stripped. I wonder how much longer we will have good parts from parts cars.
Posted by: Amenson Apr 23 2017, 09:04 PM
Time for the sabbatical from working on the porsti to end. Last year I had the radiator repaired and well...it wasn't. I pulled the radiator this spring and brought it back to be fixed again and well...it still isn't. I decided to throw in the towel and contact Ron Davis for a replacement. Unfortunately they do not make my style of radiator as one of their standard models any more. They make the size but it is not the same, looks more OEM than custom/race. Ron gave me a price to make a full custom radiator with my modifications for only a couple hundred bucks more than the standard model. My radiator was out of the car and in the mail the next day.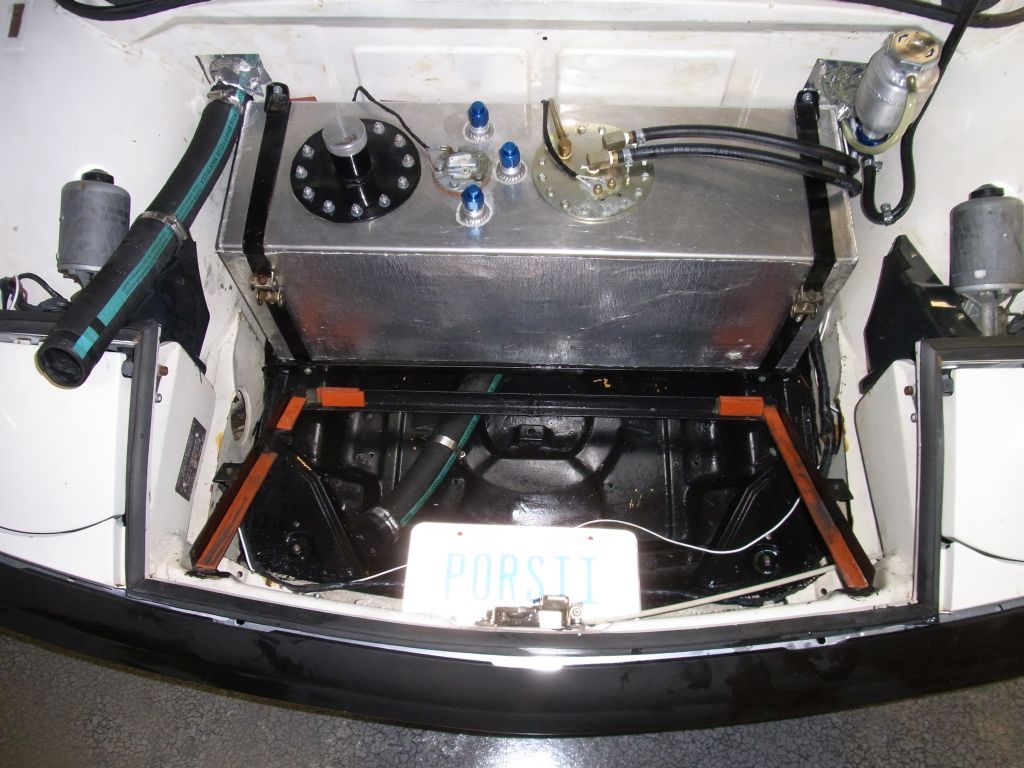
It has always bothered me that I didn't fully remove the front spare tire shelf when I initially installed the radiator. While I was working out how to install a screen to protect the new radiator I took the time to remove the remaining ugly bits. Much better.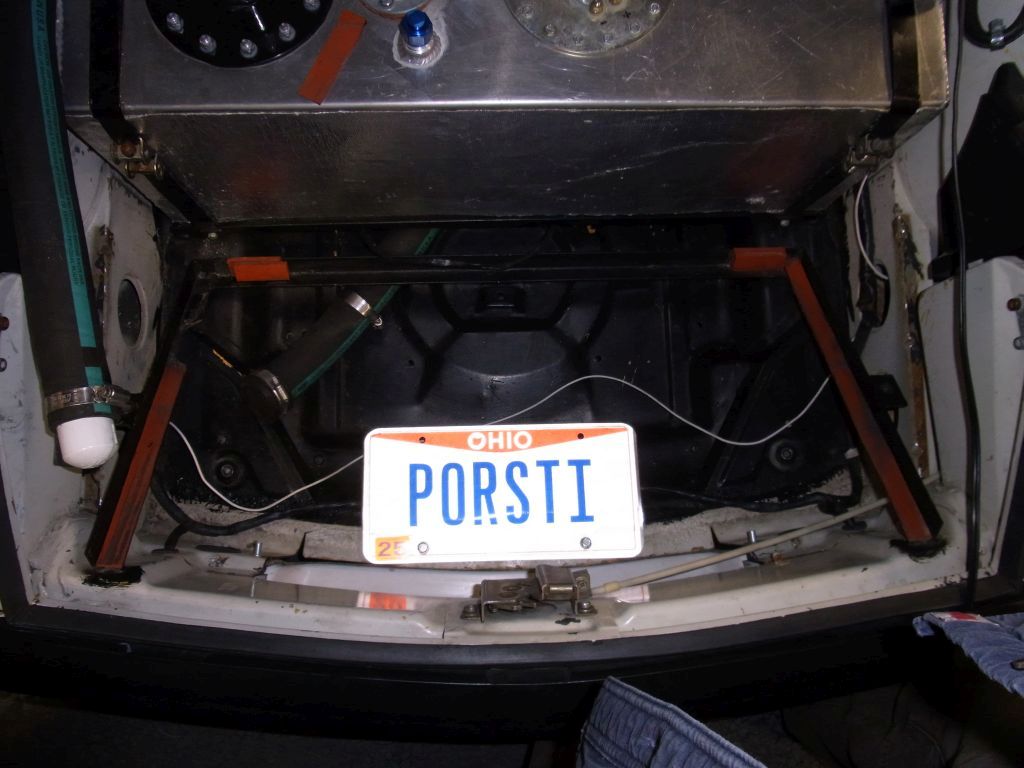
On to progress. Mark enticed me to work on his EG project with wheels and flares, including a driver side rear fender to replace the disaster that is there now. Stephen picked them up from Hershey this weekend and delivered them yesterday. You might say that things are getting serious!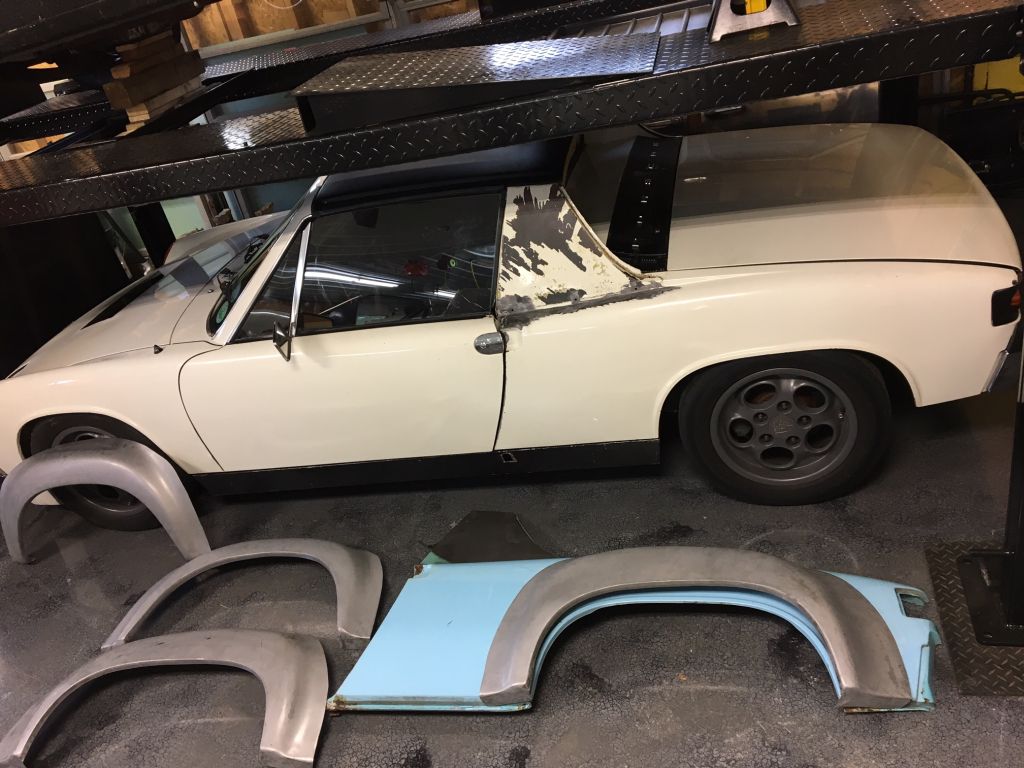
Flares need to be on the car by June 10th so I got started immediately by removing the guts from the sail panel. So many spot welds.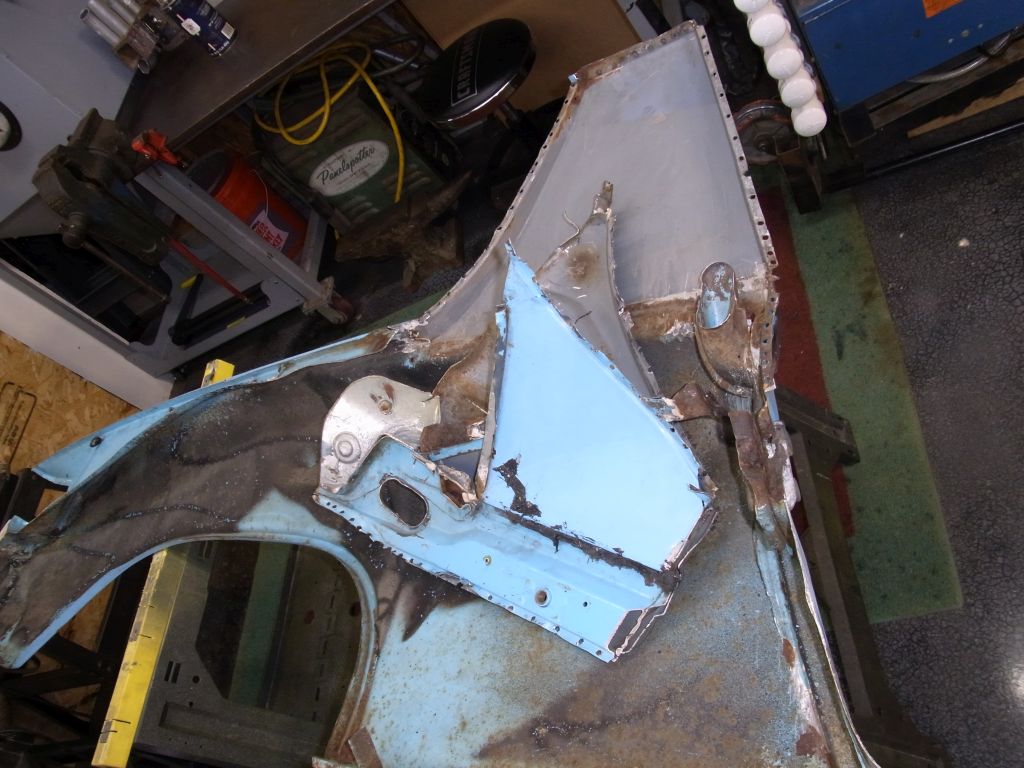
All this work for this! 9x17 and 7.5x17 Cup 1's. So convenient to have a flared car in the garage to test fitment. Thanks Tom!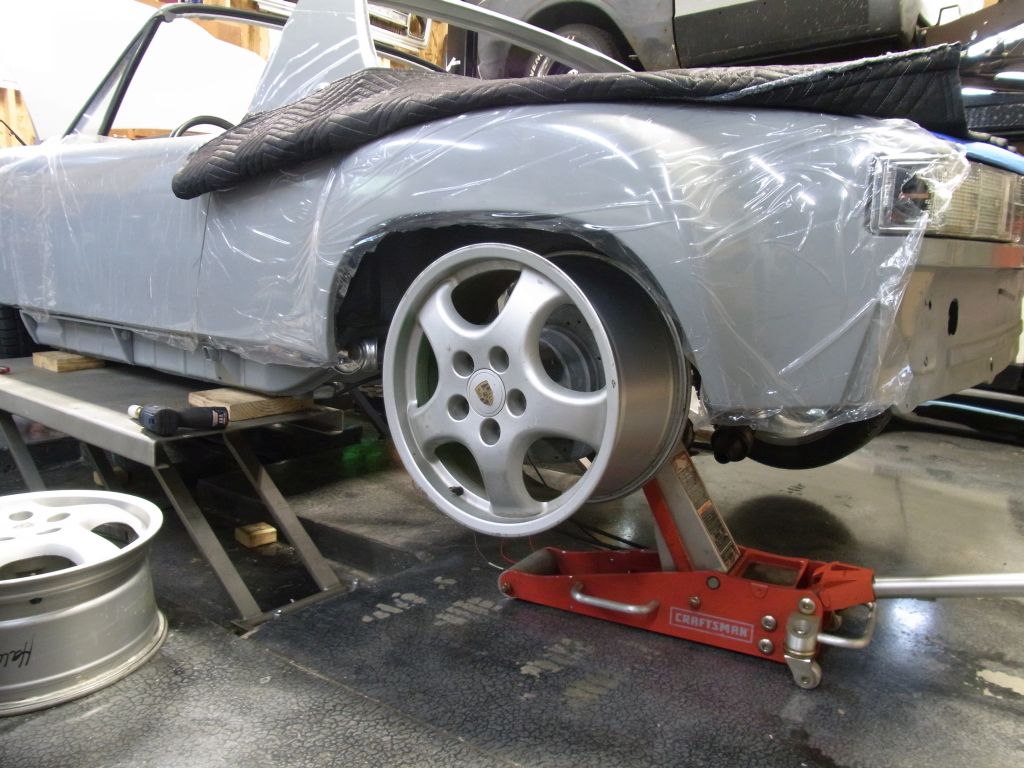
Wheels are off to the power coater tomorrow. Will be the same color as the current phonedials. Tires will be mounted next week.
So much work, so little time.
Cheers,
Scott
Posted by: theer Apr 24 2017, 07:44 AM
Looks good, Scott.
Glad to be of assistance.
Tom
Posted by: charliew Apr 26 2017, 01:18 PM
Scott I thought I made this comment but I don't see it so here goes. I met a member in Arlington, tx. at a small swap meet/gettogether a few years ago and he had a nice example with flares. I asked him what he thought about it after it was done. He also had some nice metal rocker panels on the car. He showed me where I thought the front flares could have been positioned a little more rearward to clear wide front tires when you turn all the way. It is just a suggestion that you might mount your tires and wheels on your example and see about that. I have remembered that. My boxter wheels are 1/2 narrower than yours. It might be hard to check as the ride height and how low on corners the car dips might also play in the clearance.
Posted by: BIGKAT_83 Apr 26 2017, 05:47 PM
Scott PM sent
Posted by: Amenson Apr 27 2017, 08:13 AM
Scott I thought I made this comment but I don't see it so here goes. I met a member in Arlington, tx. at a small swap meet/gettogether a few years ago and he had a nice example with flares. I asked him what he thought about it after it was done. He also had some nice metal rocker panels on the car. He showed me where I thought the front flares could have been positioned a little more rearward to clear wide front tires when you turn all the way. It is just a suggestion that you might mount your tires and wheels on your example and see about that. I have remembered that. My boxter wheels are 1/2 narrower than yours. It might be hard to check as the ride height and how low on corners the car dips might also play in the clearance.
Thanks for the hint. I have been scouring the forum for flare install discussions and thought that the common recommendation was to shift the fronts forward a bit for clearance. Either way I will install my wheels and check before final placement.
Cheers,
Scott
Posted by: Amenson Apr 28 2017, 06:03 PM
Feel much better now.
I just finished what I had planned to be prepping the fenders for the steel flare install. What I actually just finished was grinding through sickening amounts of body filler.
I expected front right fender to need some repair, not quite this much but OK not the end of the world. Took some time to grind out over 1/4" of filler.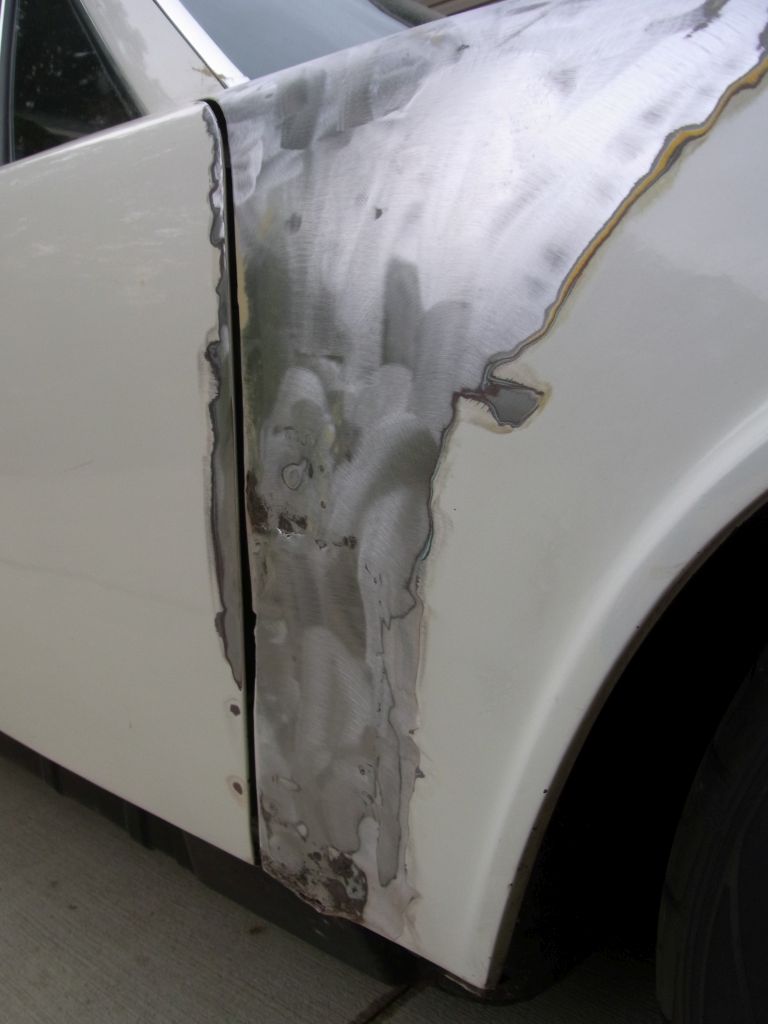
Rear right fender showed no signs of any issue. It has as much filler as the front right.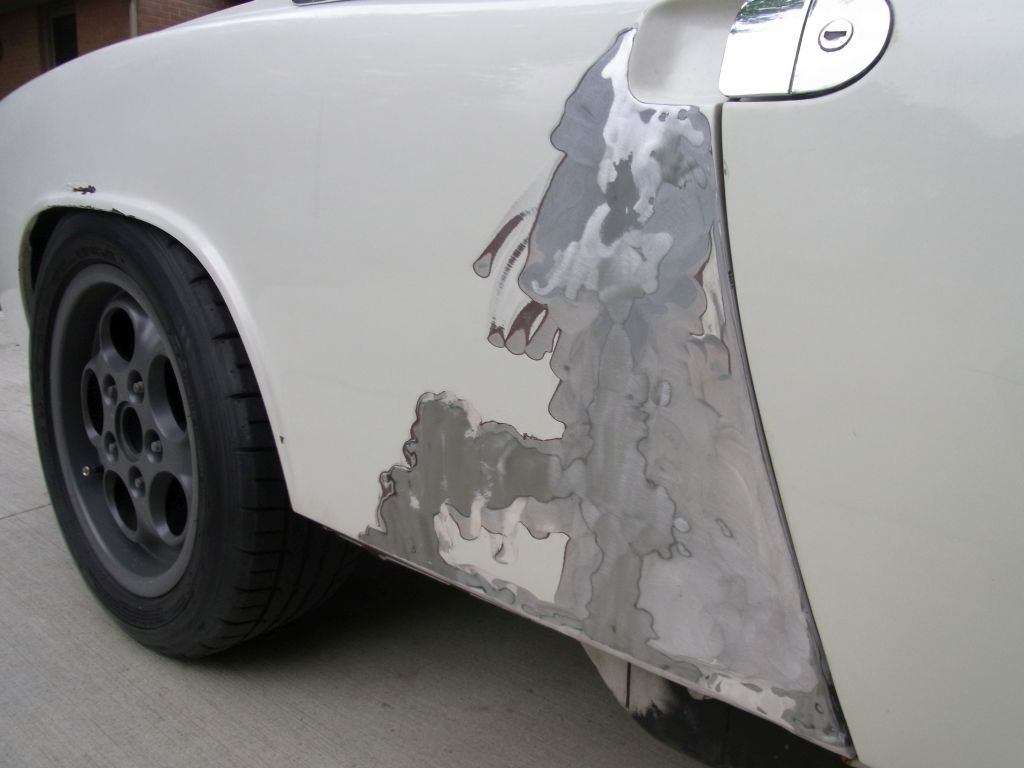
Front left fender had a small bubble but should be otherwise OK. WTF! A good 0.25" of filler. 
Time to call QRS and order a set of fiberglass flared fenders.
Anyone need a set of steel flares?
Time to go to my buddies house to drink bourbon and smoke cigars.
Cheers,
Scott
Posted by: 914forme Apr 28 2017, 09:21 PM
Oh that sucks, but yes, you have a solution.
Steel GT flares, should be an easy sell.
So time for me to get out my dual plunger mixing gun, and pickup some 3m or SEM epoxy and it will be a very nice and easy fix. BTW, screws are what you use now, clecos will get gummed up by epoxy.
Posted by: charliew Apr 28 2017, 09:40 PM
I guess maybe it will be lighter also? I forgot but maybe there is a formula for every 10 lbs. less equals more hp?
Posted by: 914forme Apr 29 2017, 05:38 AM
It might be lighter, not sure if Scott needs more HP to weight ratio it is all ready hard enough to keep up with him.
Heck I'm building a forced induction EG33 to run E85 just to give me a fair shake at it. If Cobb gets the E85 mod done for his engine year, then well
In reality the forced induction EG33 on E85 is more because I've got a bad disease
BTW, don't get down on this, just get the parts ordered, and move on. So many good projects in your shop, pick one, work, hit a stand still, go to the next. Or hell start something a new, or practice fusion welding with the TIG on old beer cans. And if you need help staring at the car I'm good at that too I know this nice Bier garden in Cincinnati that still serves the good stuff in them Liter Mugs you love so much. And when your with me, we leave the Warstiener alone and move up the bier scale to much more optimized biers to drink from a liter or a boot.
I'm off to do a brake job on a Chevy 2500HD, then maintenance on an Rabbit, and an EOS. Then have to fix a mower deck hopefully from where my wife decided it was a stump grinder by accident. Not really her fault, she could not see it. Might need to put stump shields on that mower. Then installing LED lighting in an outbuild, and after that, repairing another mower deck because I can see, and then trying to get one of the desiel tractors on the farm re primed Running a diesel engine dry of fuel is bad very bad, harder than hell to get them re-primed. Mechanical pump, no boaster pump, it is all gravity. And gravity is a bitch. Oh in the middle of all this I get to have a meeting with one of our financial advisors to take car of some paperwork.
Posted by: charliew Apr 29 2017, 10:51 AM
Blow a little air in the tank with a airtank or the compressor if the hose will reach to prime the pump. Just use a rag to try and plug the filler a little pressure is all it takes. You should not cut trees so close to the ground, leave the stumps tall so later you can push them over after the roots rot. we also gotta do estate planning which I hate for some reason. We try to keep at least three mowers going. This time of year it is hard to have any extra time for fun projects. At least I have propane on my miller 250 bobcat. the diesel mower is the most reliable mower we have.
Posted by: 914forme Apr 29 2017, 12:45 PM
Blow a little air in the tank with a airtank or the compressor if the hose will reach to prime the pump. Just use a rag to try and plug the filler a little pressure is all it takes. You should not cut trees so close to the ground, leave the stumps tall so later you can push them over after the roots rot. we also gotta do estate planning which I hate for some reason. We try to keep at least three mowers going. This time of year it is hard to have any extra time for fun projects. At least I have propane on my miller 250 bobcat. the diesel mower is the most reliable mower we have.
Thanks for the tip(s) I will give that a try
Posted by: Amenson Apr 29 2017, 09:04 PM
Moving forward....
Closed all of the browser tabs with steel flair install info and looked up all of my links to fiberglass flared fender installs. QRS was not answering the phone today so I will have to wait until Monday to place the order.
Unfortunately I still have to fix the passenger sail panel/b-pillar so that I have something decent to attach the fender to. I started prepping the chunk from Stephen today and outlined the section of the fender from Mark that I still need. I gave up for the evening when I got to the goo around the b-pillar vent. I really wanted to cut off the fenders but will wait until I get the replacements so that I don't hack off something that I need.
As for the weight, best case would be to offset the gain from the new wheel/tire setup. Not that it really matters, the power fluctuates more based on intake air tems that I would even notice from +- 50 pounds of weight change. As Stephen said, I need E85 and a new snail to make a difference at this point.
Cheers,
Scott
Posted by: Amenson Apr 30 2017, 08:12 PM
Continued prepping the car for the fender extraction. Removed the remaining B-pillar trim, sail panel vinyl, and lights in the front fenders. While I was playing in the front fender worked out new routing for the front harness. Currently it sits on the floor below the cooling inlet, very sloppy. I also mounted the external air temp sensor and ran the wires to the junction connector. I think that I need to pull the headlights to install the fenders, If I do I'll pull and rewrap the entire harness section to tidy it up and incorporate the additional wires I installed for the headlights and temp sensor.
With the fenders ready to cut off I needed a fun distraction to keep myself from hacking them off before I have the replacements to know what I can actually remove. I decided that it would be quick and satisfying to properly mount the ECU. I had not done it previously because it requires rerouting the shifter cables.
First step was easy, pull the cables, tidy up the wires, trim the ecu ears and two nutserts. So much better.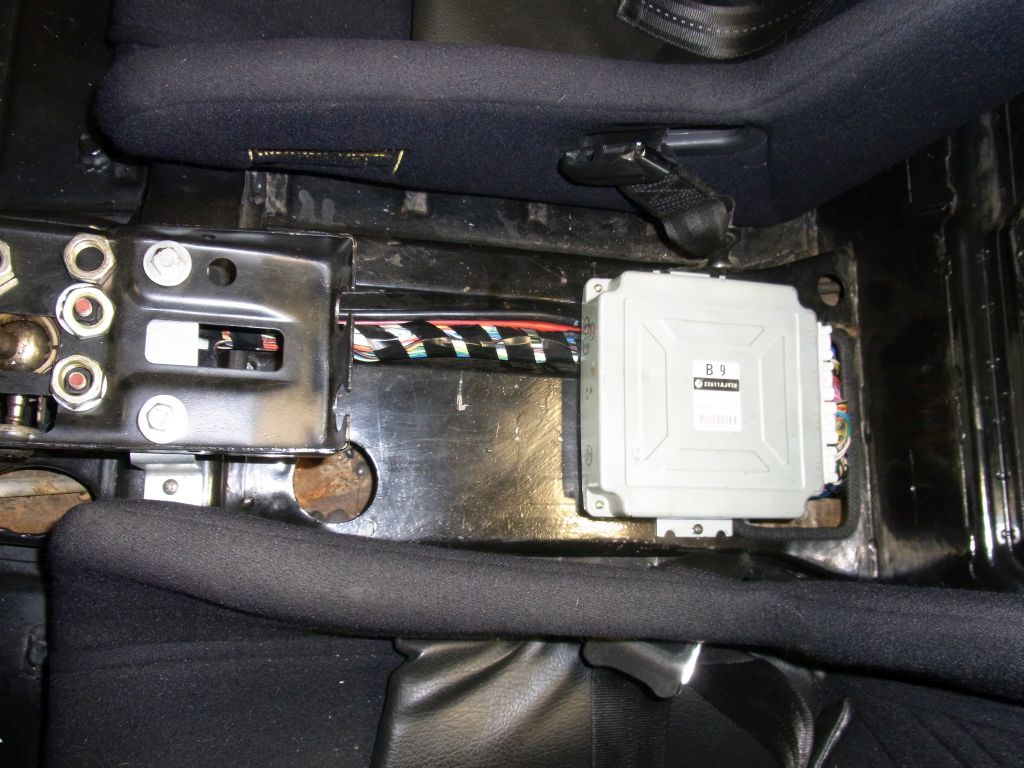
To run the cables I need to make sure that they would fit under the future center console/shifter stand.
I designed the part so that there was exactly enough room to fit the cable above the ecu and under the console. After much measuring I drilled a pilot hole to make sure that the crazy zigzag brake line that runs through the hollow section of the fire wall does not interfere with the cables. It does, perfectly. Now I get to remake the small chunk of brake line. Not a huge deal, it will take longer to clean up brake fluid than it will to make the brake line. Then I get to bleed the brakes. While I am doing that I might as well install the new 3-chamber Tilton reservoir that Stephen dropped off the other day. So much for a fun easy project.
Cheers,
Scott
Posted by: Amenson May 6 2017, 06:50 AM
Wheels, wheels, wheels!
New vs. Old, the phone dials are awesome but the Cups are amazing. Phone dials will be available if anybody is looking for a set.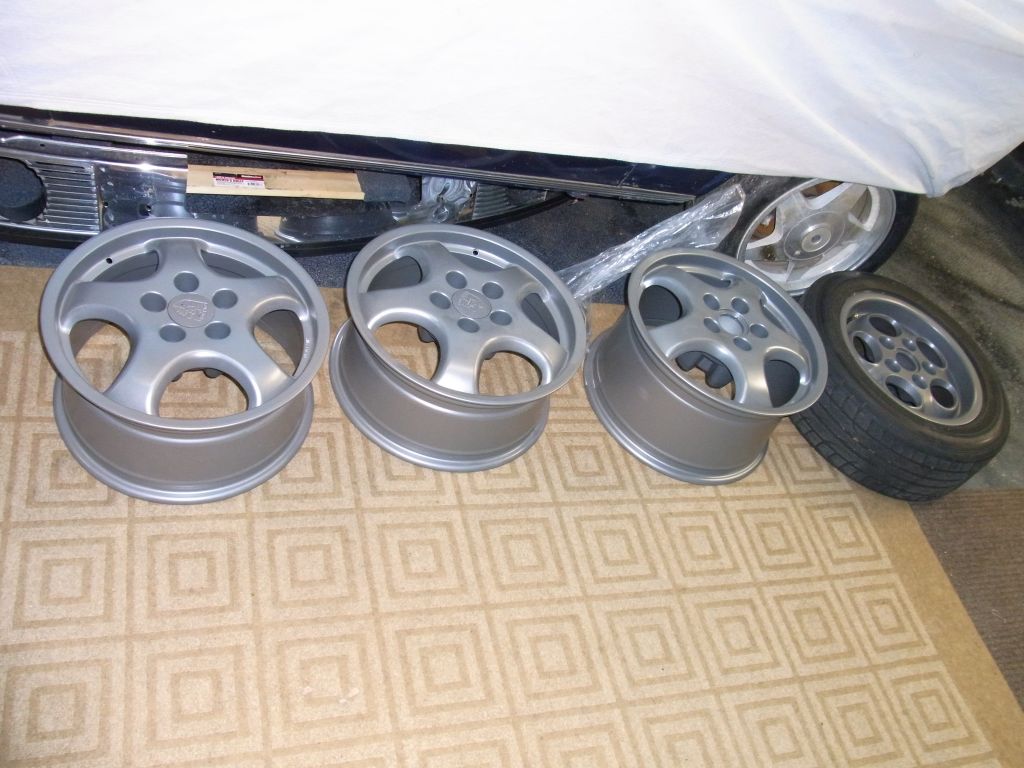
So nice. Bolts up w/o spacers but will need some to avoid rubbing on the inside with tires at ride height.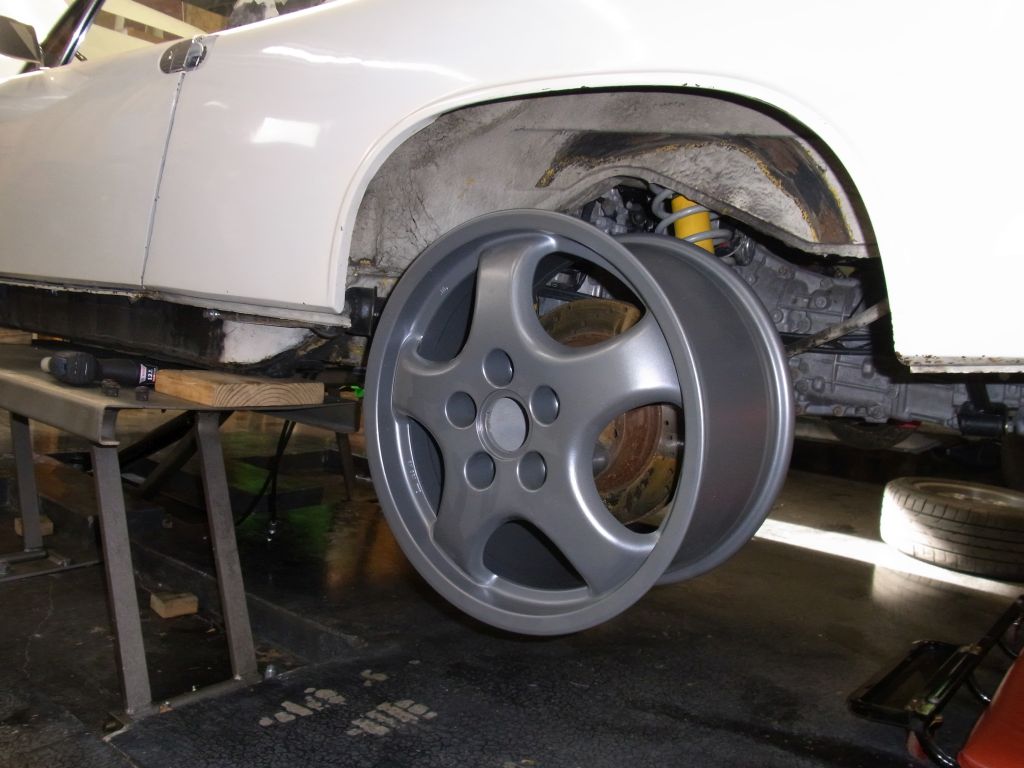
Who needs flares...this guy!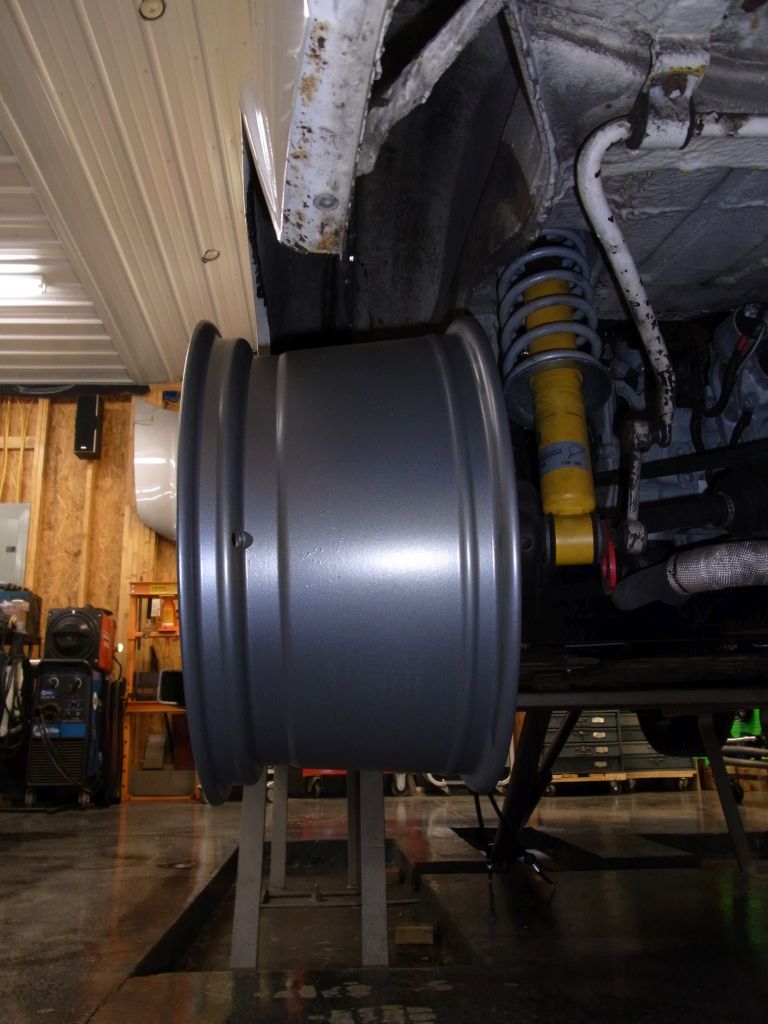
And a little hint of future plans arrived in the mail yesterday.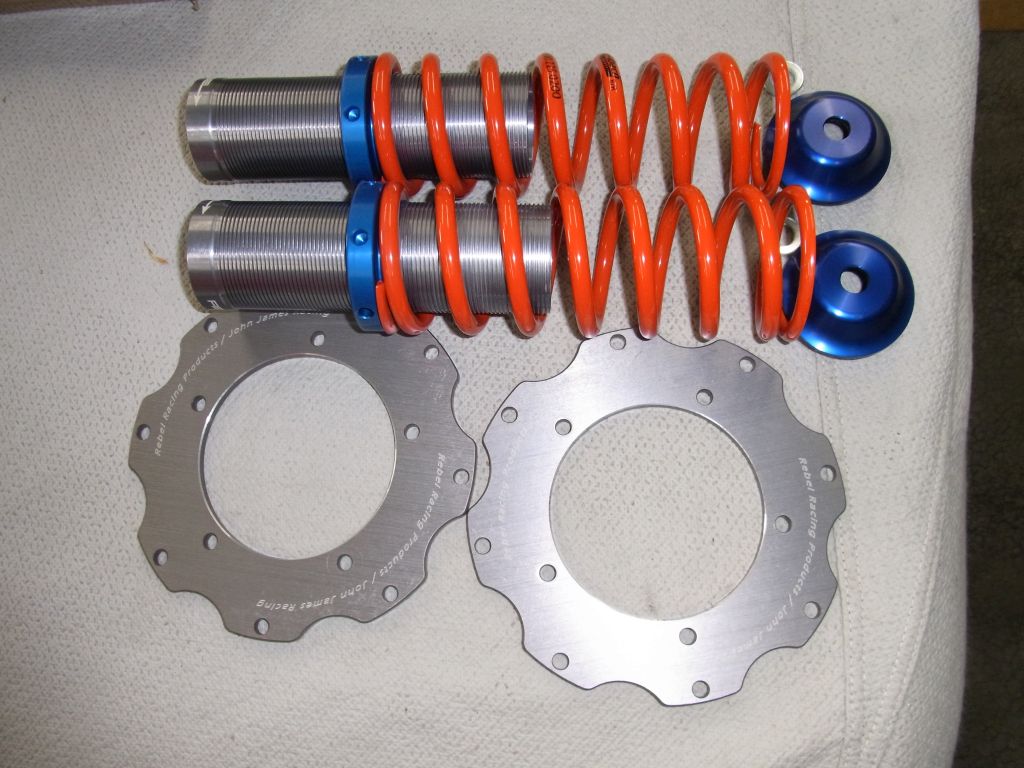
I did get the new brake line made this week and got two of the holes for shifter cables positioned and drilled. I stopped after binding a bit while drilling on the engine side of the firewall and smashed myself in the chin with the drill. No damage but shit did it hurt.
Cheers,
Scott
Posted by: 914forme May 6 2017, 05:29 PM
I recognize those parts
I like the wheels
Posted by: Amenson May 7 2017, 08:51 PM
Sometimes small things make me so happy. 
Time to focus on the Flares. They will arrive on Thursday, just in time for me to leave for a long weekend fly fishing in North Carolina.
A new toy...tool, showed up yesterday. Stephen liked his so much I had to have one too.
Hopefully it saves me some time getting the inner fenders to bare metal while I have access before the new fenders go on.
Cheers,
Scott
Posted by: Amenson May 11 2017, 06:26 AM
Tires were mounted yesterday and I could not wait to bolt them on to get a feel for how they would look. To be quite frank, with them on and the car on the lift the 17's really look out of place. Even the rears on the ground and not under the fenders it does not look particularly good....but at ride height with a bit of tuckage. Wowza'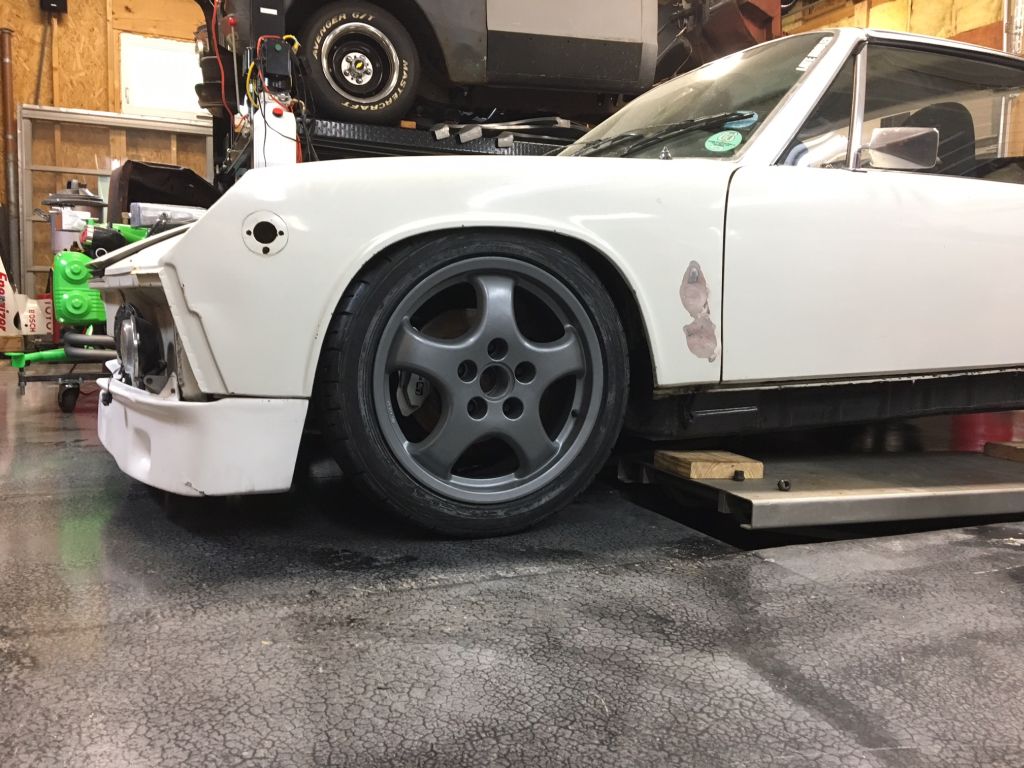
I will probably go 1/2" or so lower once I get the rear at the proper height.
Had a bit of a snag finding out while balancing that one of the rears was bent but it is being taken care of quite expeditiously.
Another thing that I have been working on is making a new airbox so that I can block the fresh air intake (aka: radiator heated air intake). Eventually I might want to run heat so I found a heater core that will fit in the space I plan to use. Of course, step one of any purchased part, bandsaw.
I will use the fan from the Summit airbox.
I am making it so that it will fit behind a stock tank. Why, mostly because I have a pipe dream of making a fiberglass insert where the stock tank used to be for additional storage. Also, if somebody wants to copy the design for their car with a stock tank.
Delivery status of the QRS fenders...Out for Delivery!!!!
Cheers,
Scott
Posted by: 914forme May 11 2017, 02:43 PM
Delivery status of the QRS fenders...Out for Delivery!!!!
Posted by: Amenson May 19 2017, 07:41 PM
Deep breath... 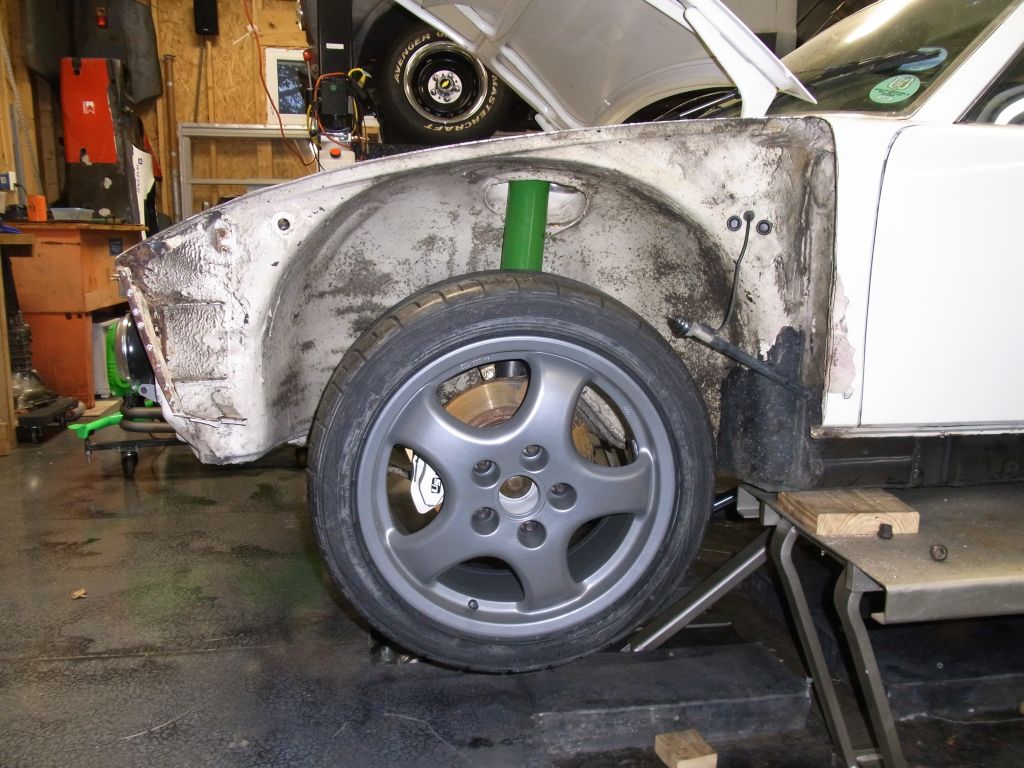
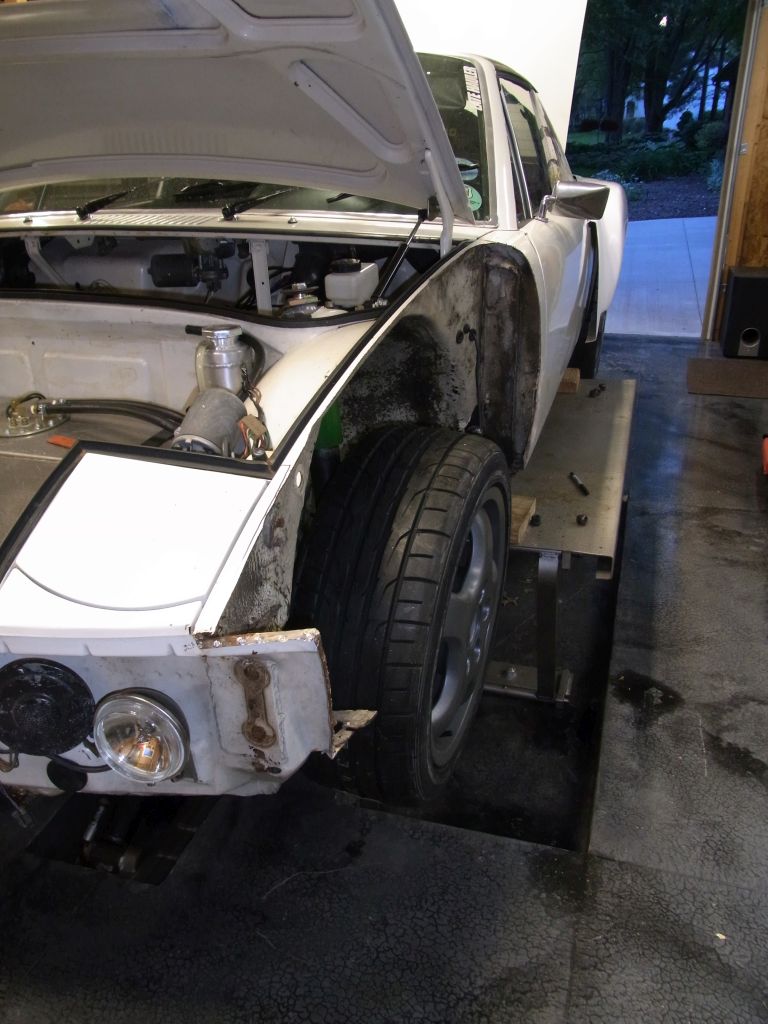
Ok, let's try a rear... 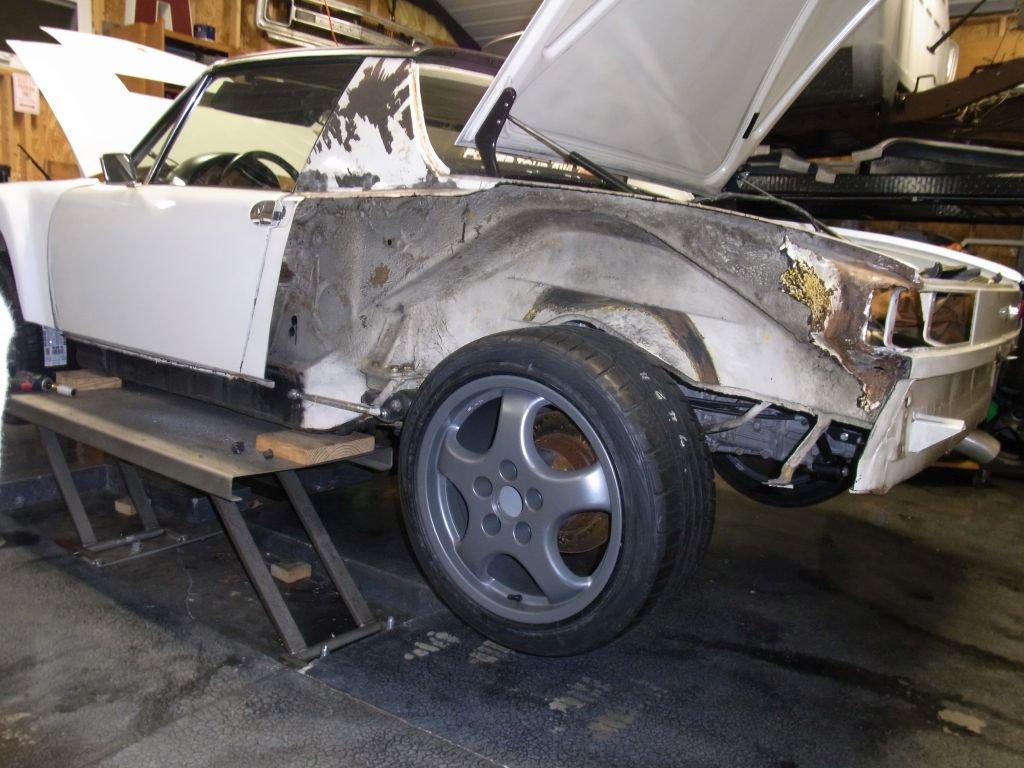
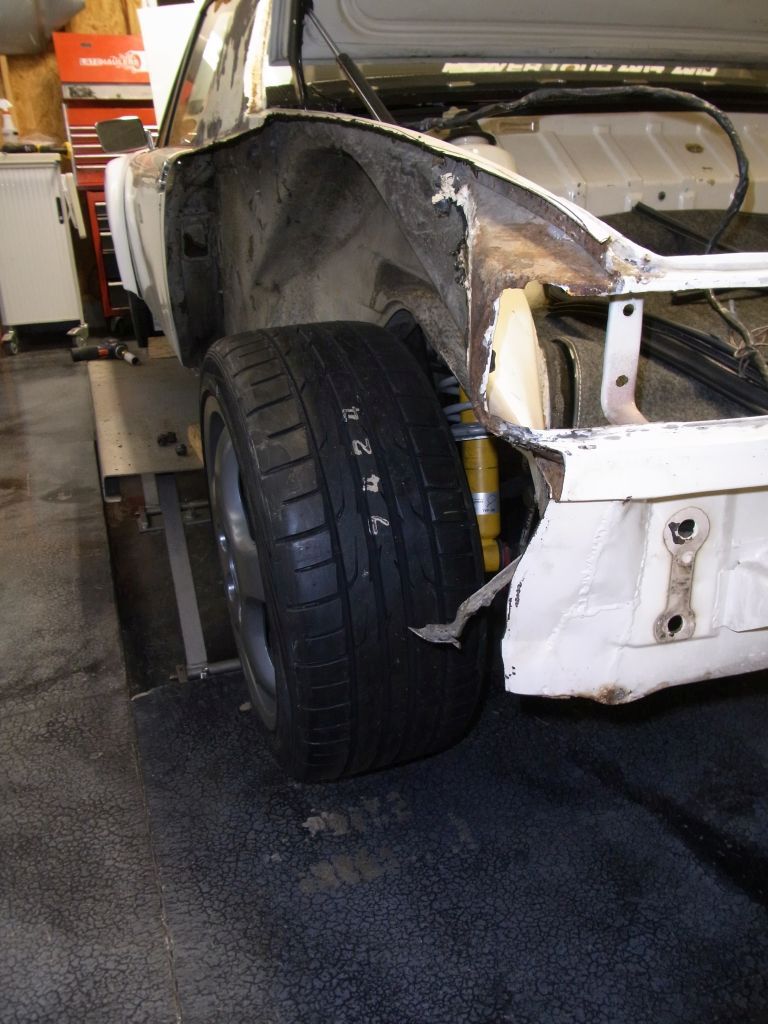
Not super happy with what I found, more areas of bondo'd over rust and other stupidness that I will need to fix. No worries, 22 days until departure and I will be in Mexico Monday-Friday next week on business.
Cheers,
Scott
Posted by: effutuo101 May 20 2017, 08:31 AM
Looking good! Progress is progress. Even if you do find that four letter word under everything.
Looking forward to the next update!
Posted by: 914forme May 21 2017, 06:36 PM
Add some rubber mud flaps and some welting on the exposed metal bits and go man go. The Jeep guys do this stuff all the time.
That will let you run the tour.
Let me know how I can help or if you need my help. Or just drink your beer
Posted by: Amenson Jun 18 2017, 08:28 PM
Long time no post. Unfortunately it is not for the lack of work on the car as I have put in insane hours over the past weeks. I just have not been motivated to post as the effort is being wasted on rust repair. I have complained before the the previous work was shoddy at best but now I am convinced that it is criminal. Really terrible "repairs" are covered by filler with weld seams recreated in filler. Even after hacking off the fenders there is still a ton of metal work to do.
The result is that I could not get the car together in time to attend Hot Rod Power Tour. I had this week of vacation scheduled so I took the time to work int the garage. Made great progress but still some areas to fix before bonding on the fenders. I would much rather be building awesome parts for Grey Matter. Maybe in a could of weeks.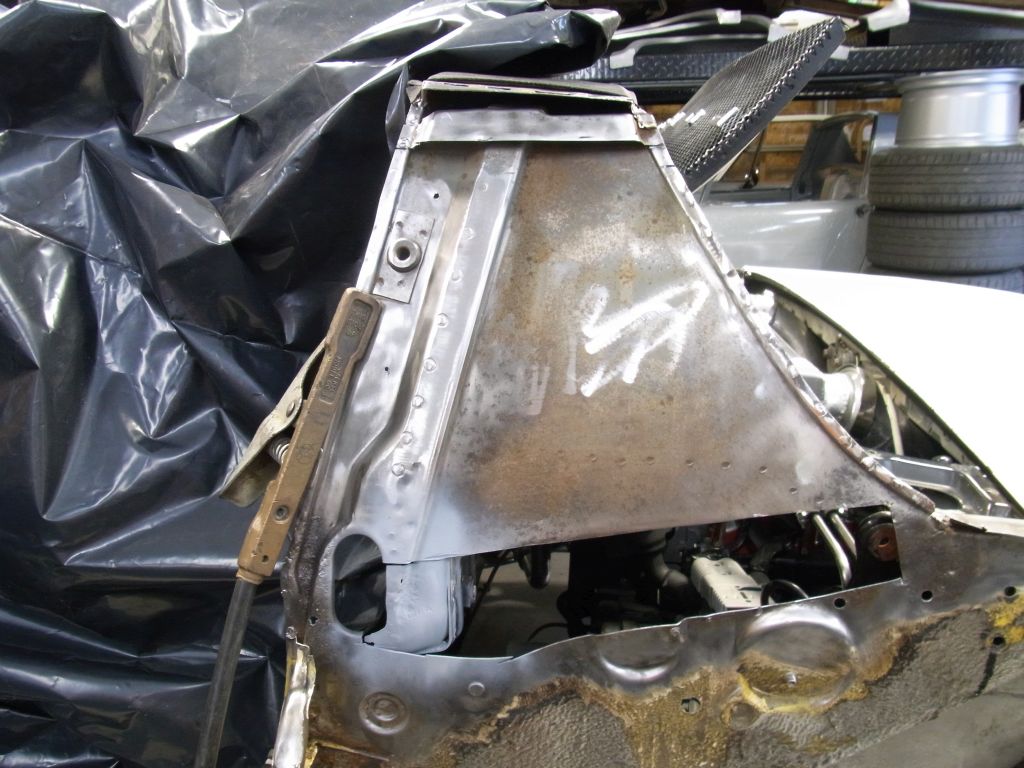
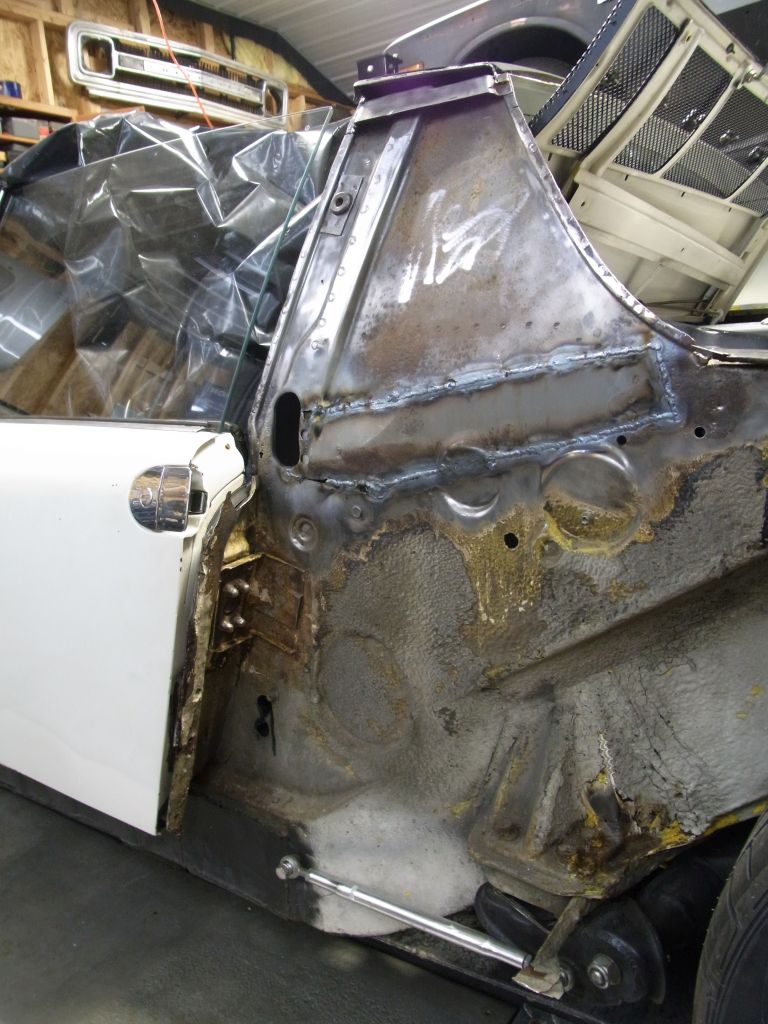
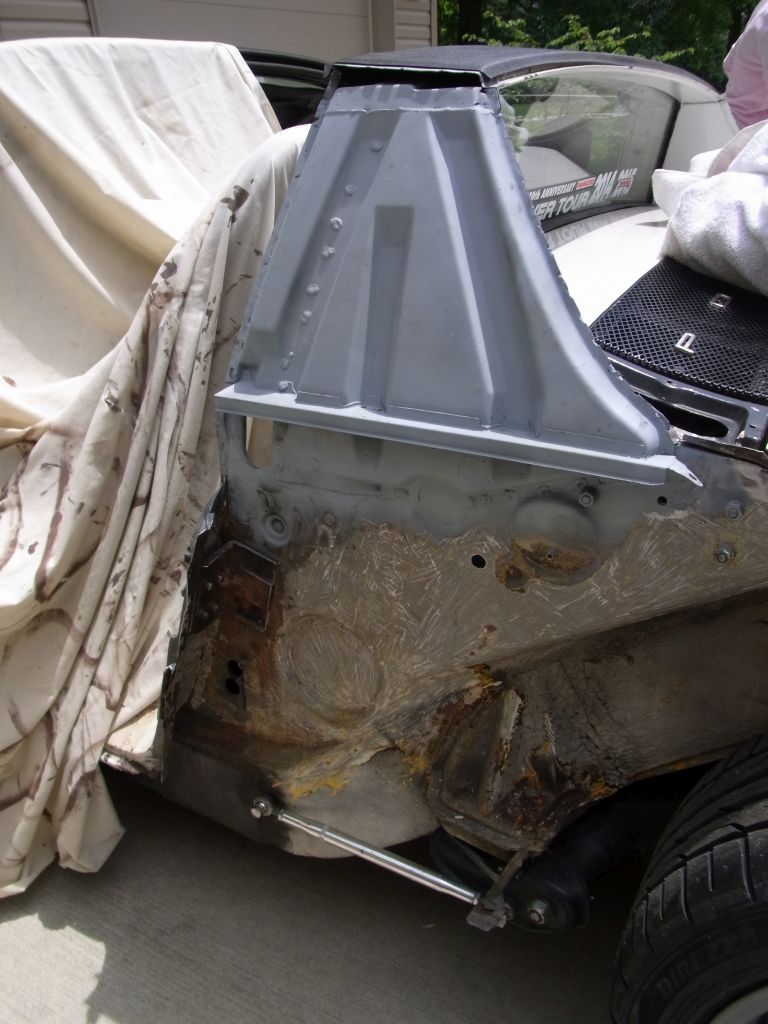
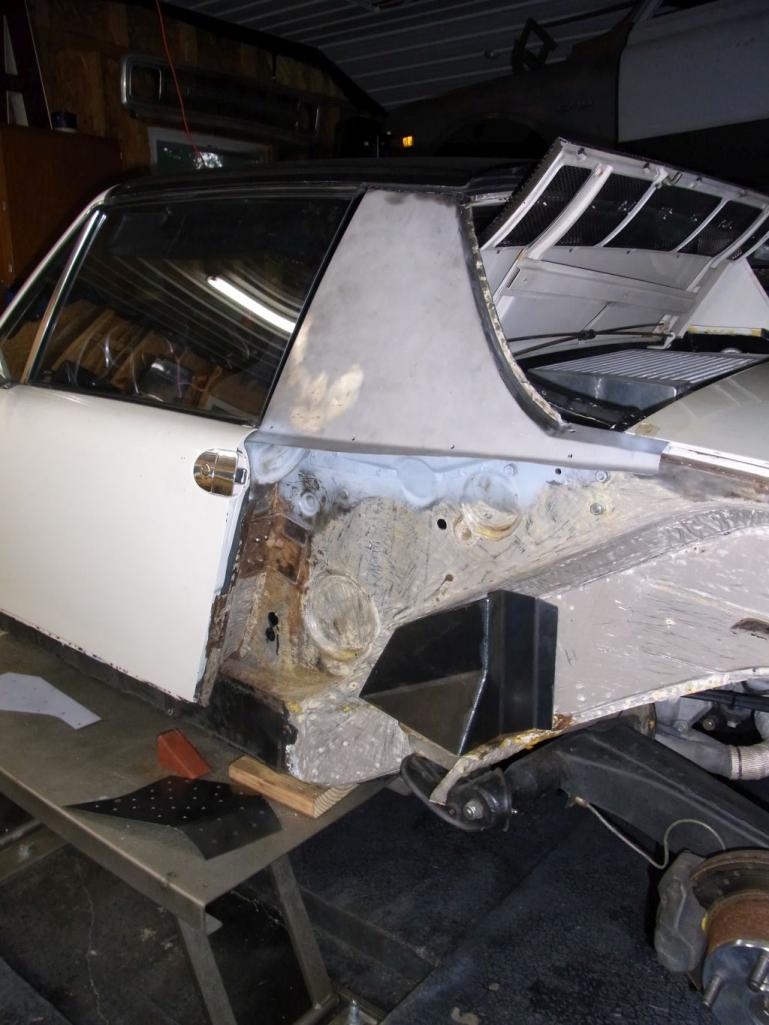
The spring kept coming out of the hat at full droop so I ordered and installed helper springs but at ride height the helper was not long enough so I had to open up the hole in the hat and zip tie it to the sprint to keep it in place.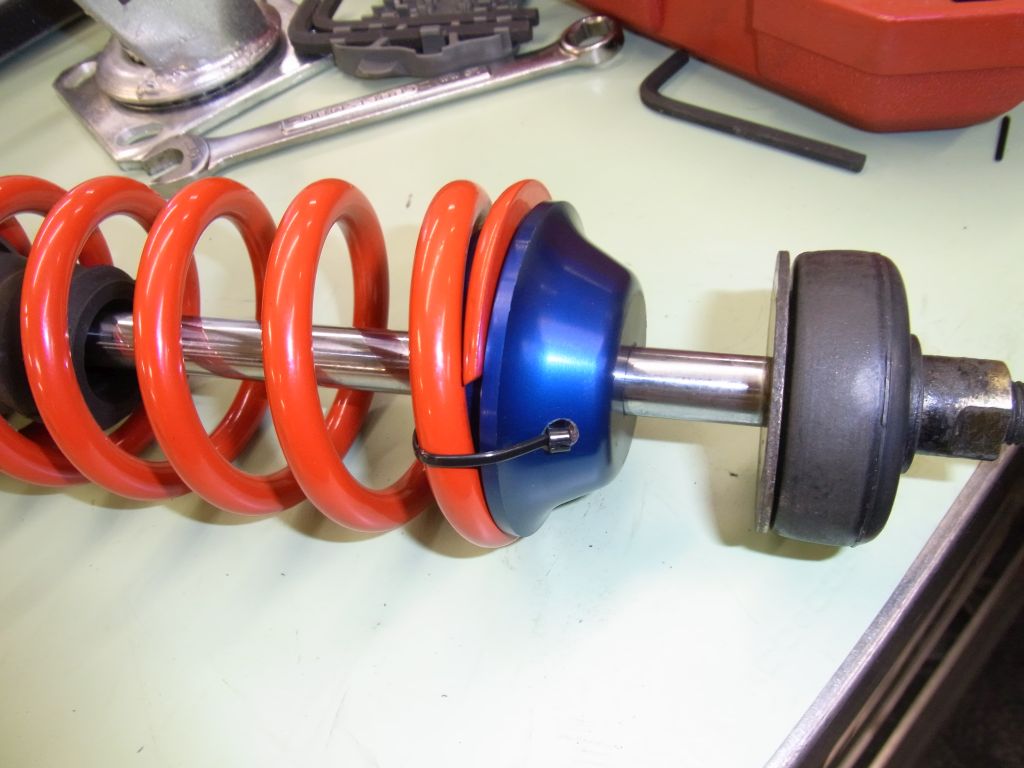
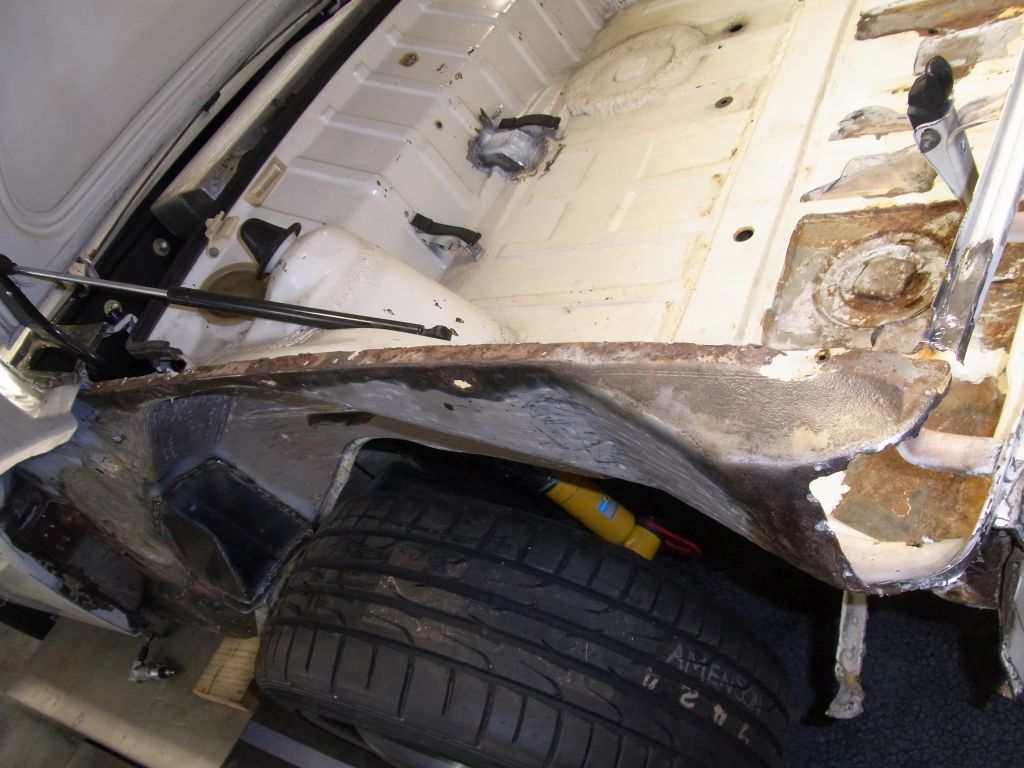
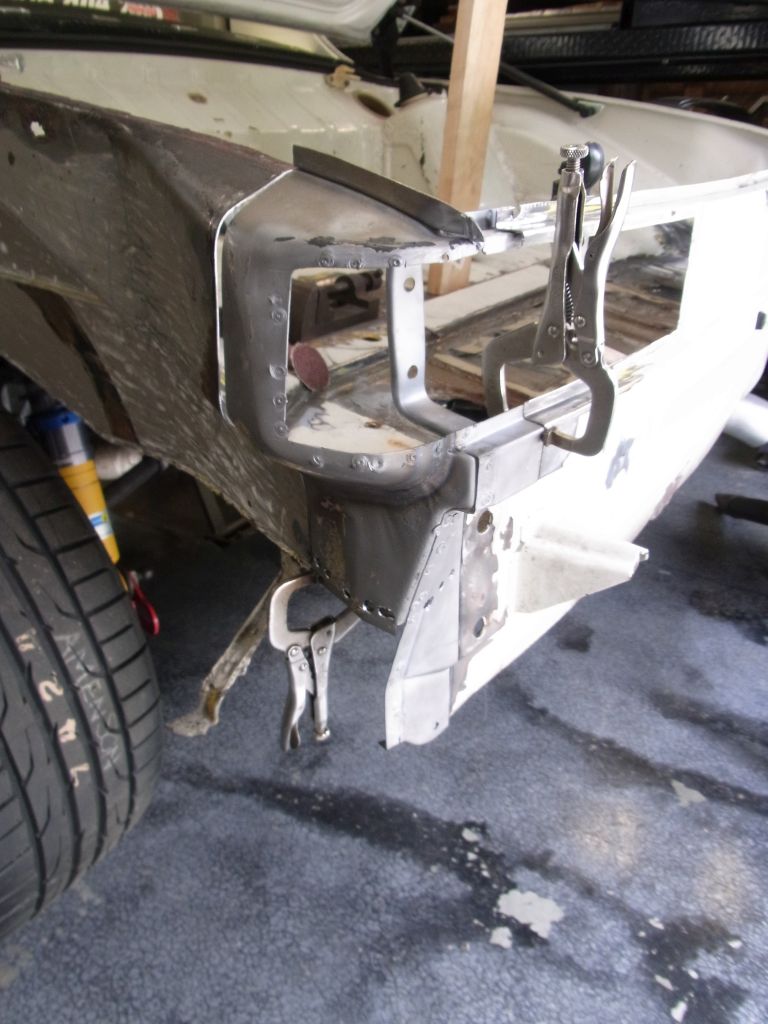
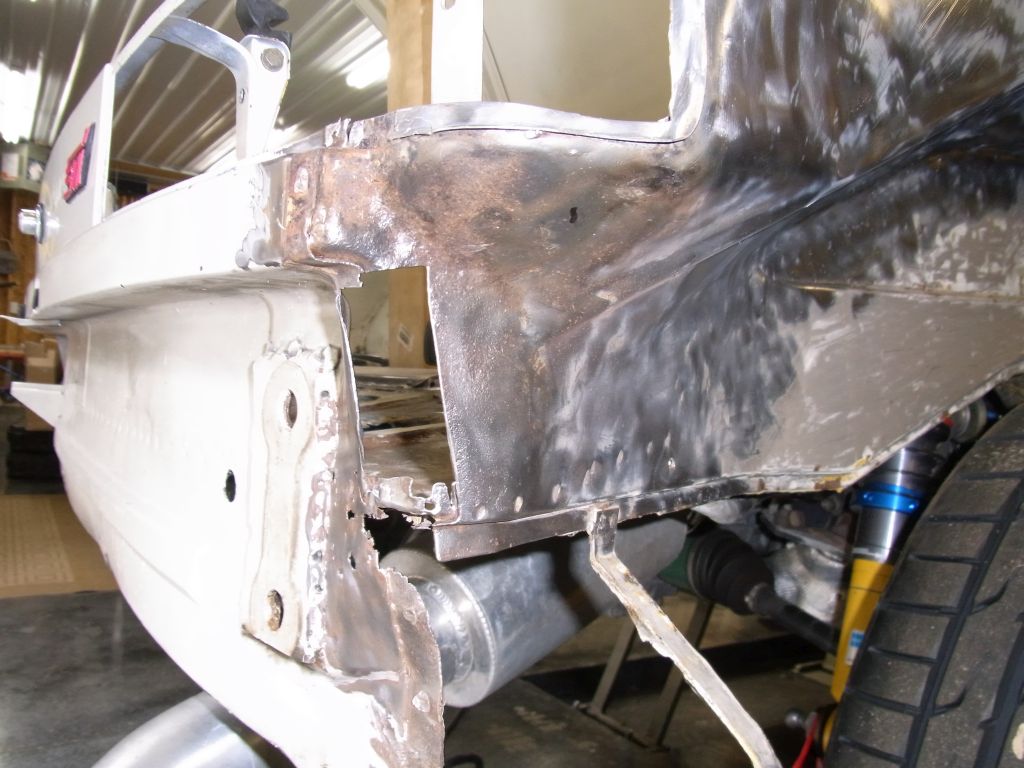
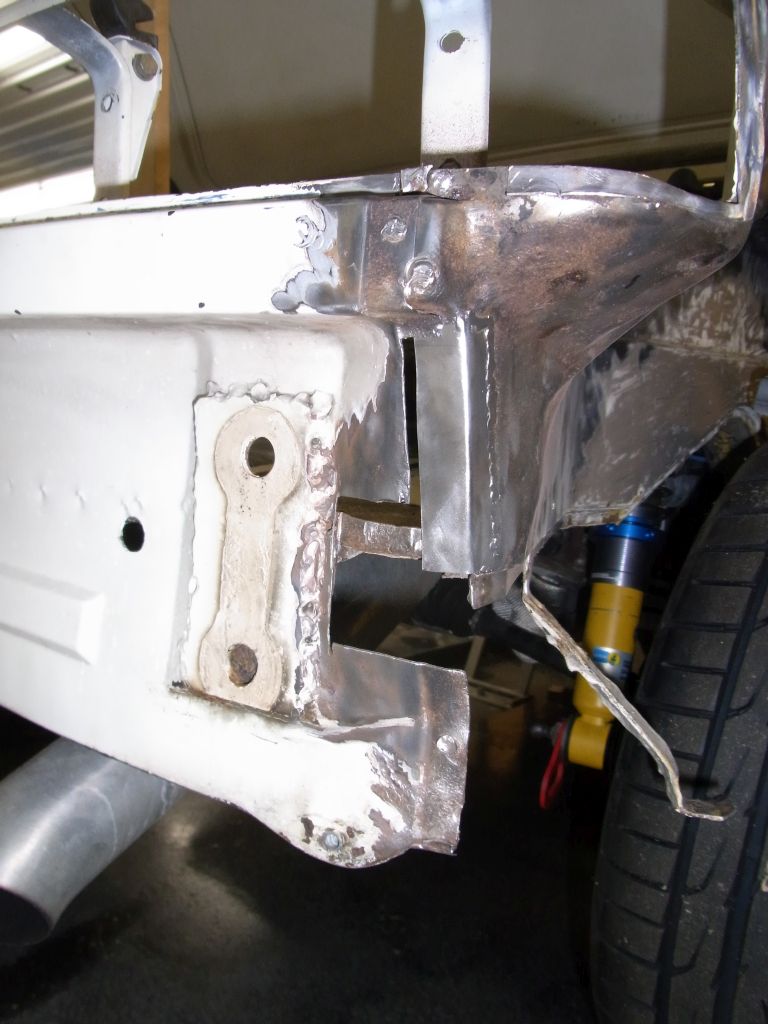
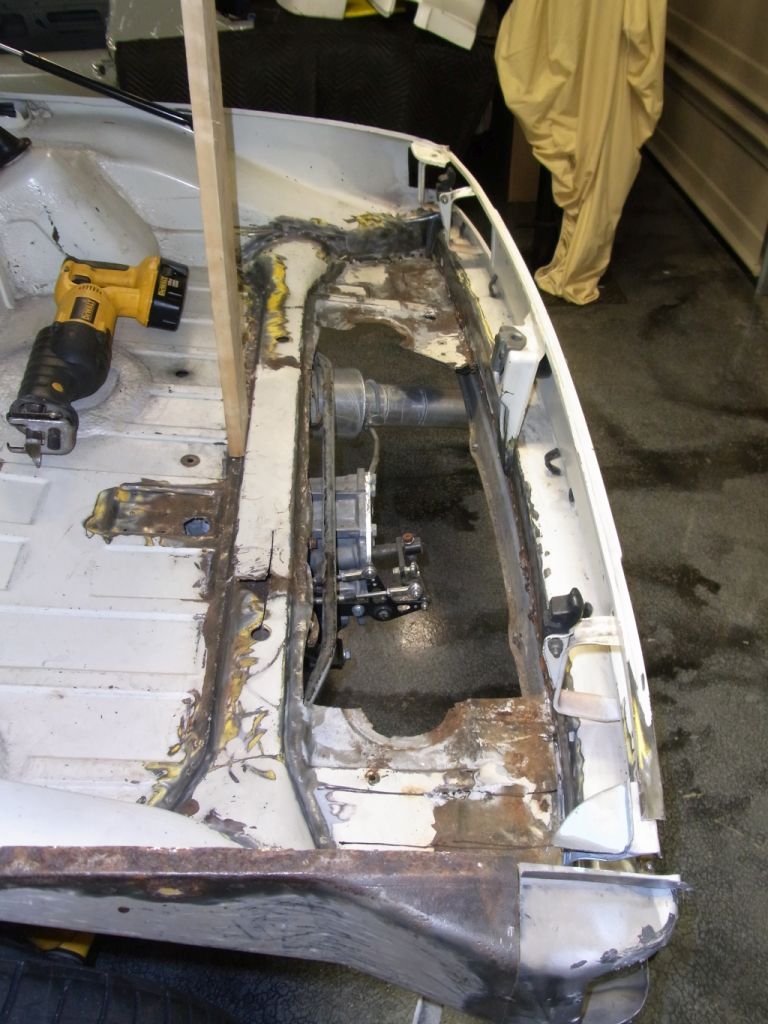
While I had access I decided to order and install CFR rear console reinforcing kit.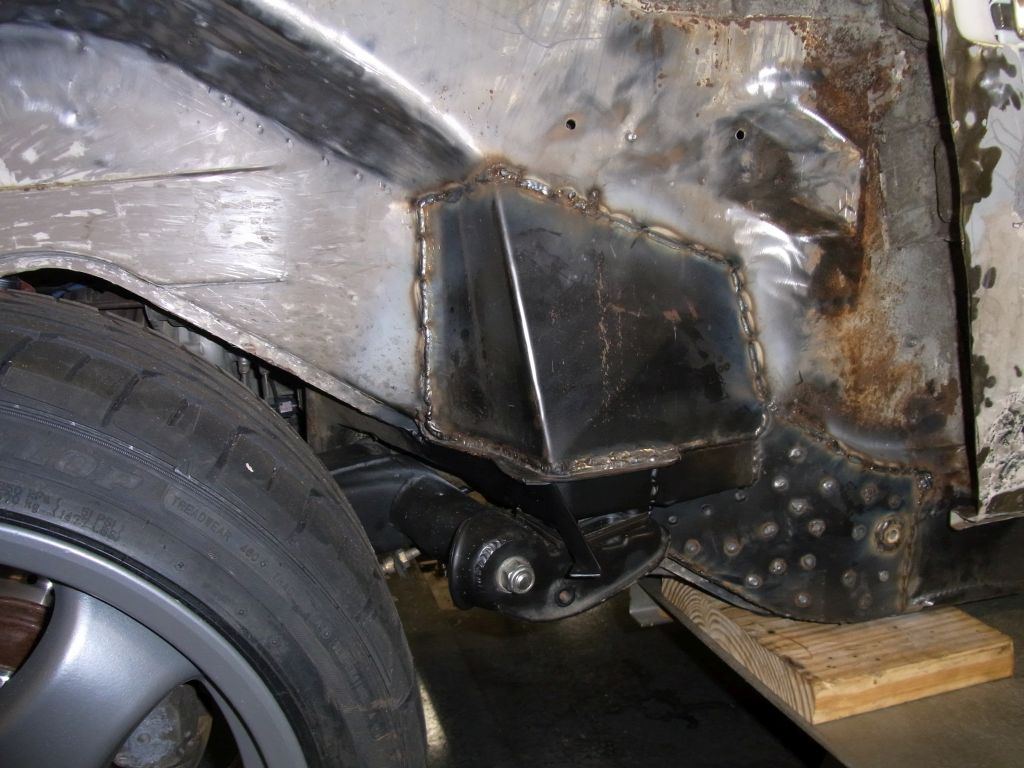
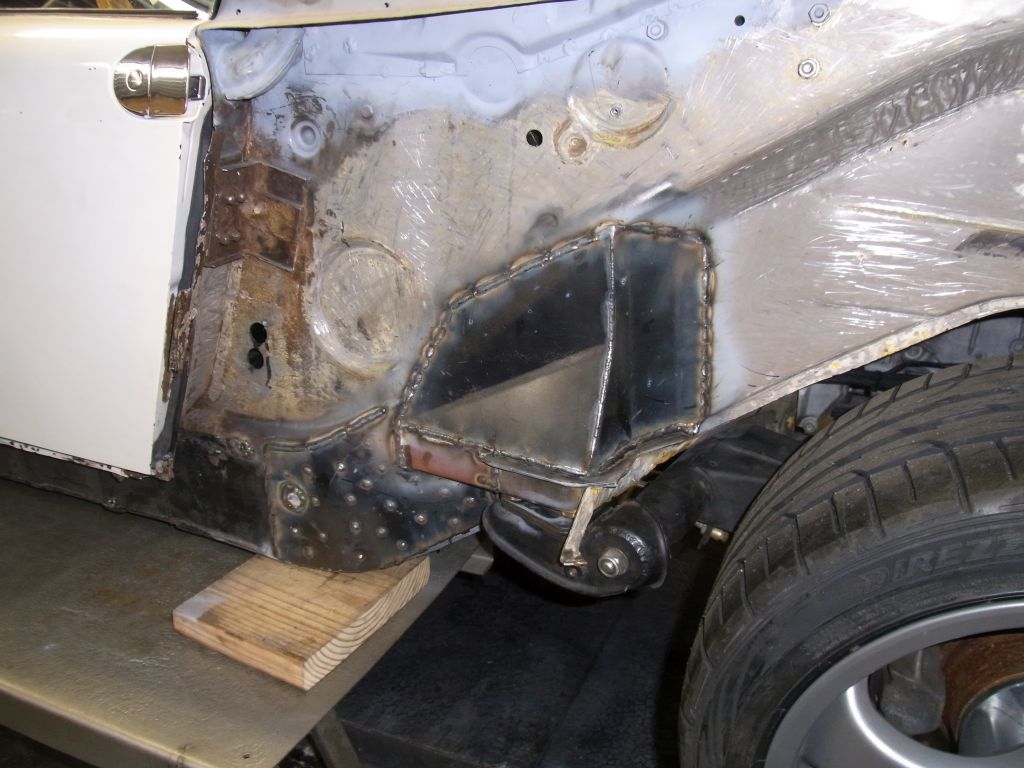
Posted by: charliew Jun 19 2017, 09:14 AM
Scott you should get a trophy for your continuing diligence in repairing a unibody that's 40 years old. harbor freight has stainless steel zip ties that might work better on the hole in the hat, the spring moving up and down will probably do the plastic tie in pretty quick, course full droop will only happen when it is jacked up or on your short lift, ooor you compete in jumps at power tour. This would maybe be a time to use the area in front of the wheels for something like a oil cooler or accusump while it is easy to work on, you've got a year till the next power tour now it seems. What I like about the accusump is it gives the motor a shot of lube as soon as you turn on the key to lube it all up after sitting for a week or longer like a month or so turbo and all plus the extra lube capacity. My sons car has 8 qt cap pan I made and every time I checked the oil it, it was a qt low after only a couple thousand miles on the oil change. I guess it is the heat breaking the oil down and getting past the rings. the motor is pretty low mileage but his oil temps do get up in the 240f range occassionaly on long high rpm jaunts with old guys in caddys and vettes.
Posted by: 914forme Jun 19 2017, 07:55 PM
I ran two plastic zip ties for years on my spring hats, never an issue.
Progress looks very good.
Console reenforcement looks great.
Posted by: Amenson Jun 24 2017, 08:15 AM
I ran into this video yesterday and had two thoughts:
-Poor guy...I feel your pain.
-Wait...he had a team of trained professionals fixing his stuff. I need a team of trained professionals to do my bodywork!
https://www.youtube.com/watch?v=SJHJlOdZtOA
When I get around to my BMW 2002 build the first step will be full body media blasting.
Off to Germany for a week of meetings...no progress in the garage.
Cheers
Scott
Posted by: Amenson Jul 24 2017, 09:10 PM
Month since a post...time flies when you are having fun! Germany was great, my wife enjoyed exploring the foothills of the Alps while I was in meetings all day. Before I left I put in a bid on a new welder and ended up winning it. Picked it up a few days after returning. Now the proud owner of a Miller Syncrowave 350lx. It is a 2005 but only has 28 hours of weld time on it. I opened it up to give it a good cleaning and noticed a coating of rust dust on everything, including wires and other things that don't rust. Strange but it wiped up easily. The cooling system was full of rust so I spent several hours flushing it with water. Yes hours, the flow was pretty low. While flushing I noticed that the pressure sensor was leaking. After a while the leaking stopped, mostly, so I took the opportunity to see if it would weld. Almost immediately made some really nice aluminum welds. Usually it takes me a while to get dialed back in on aluminum, this is exactly why I wanted a more modern welder. I did notice the the torch got a bit warm, strange for a water cooled torch. Went on to weld a few patch pieces for the Portsi and then the welder shut down. Error -19, no coolant flow. A quick look showed that the pump was not running and was very hot. Let it set for a while and it started back up. Welded for a bit and it shut down again. Pulled the pump and took it apart. Absolutely spotless inside. Put it back in and the same thing happened. When I had it apart I did not remove the pressure relief valve because I was concerned about getting the pressure set again. Nothing to lose because it is definitely not working so I pull the valve and find that the adjustment screw is as loose as it can be without falling out. The pump is, for the most part, just recirculating fluid through the relief valve creating heat. Crank it down and it now runs cool. It also dramatically increased the leaking through the pressure sensor and showed how rust residue got on everything. Amazing that I did not get electrocuted. Pulled the sensor, plugged the port and jumpered the wires and back in business. Took an amazing number of hours to get here but man is it nice. 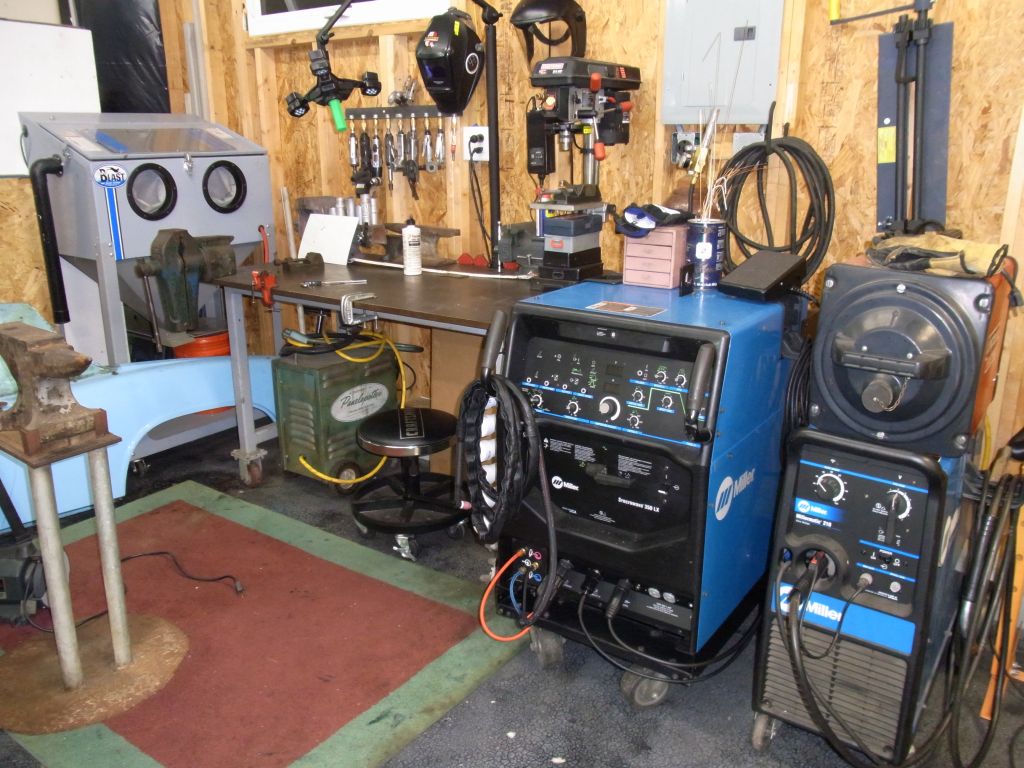
Progress on the rustoration work.
Hacked out the trunk.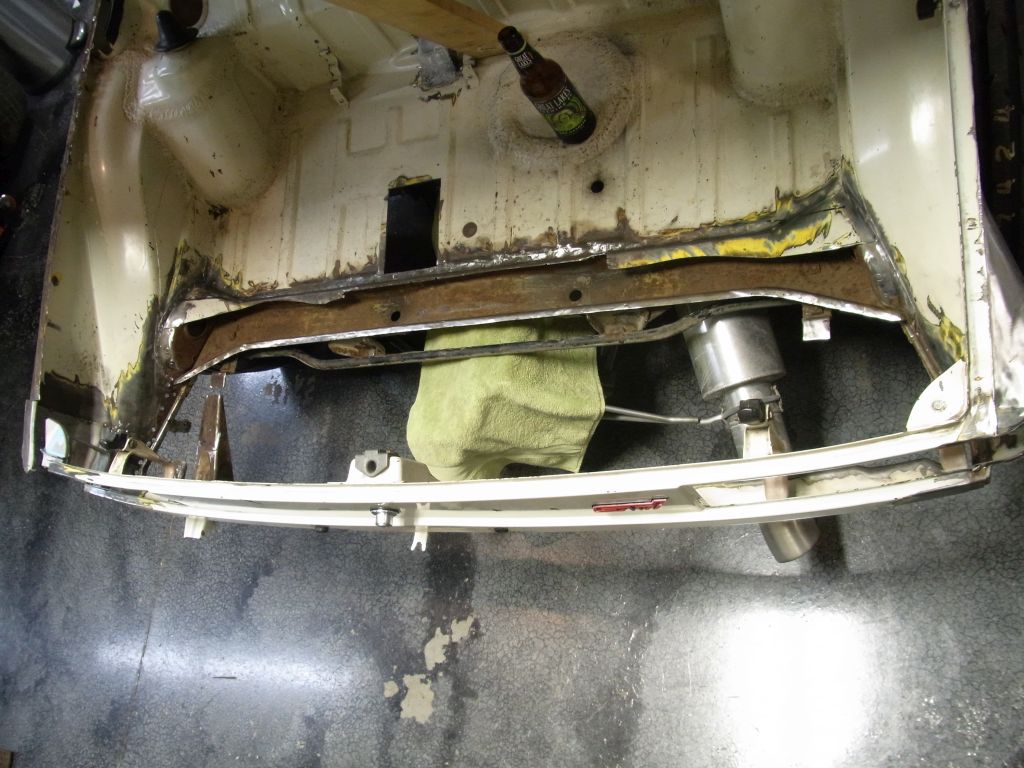
Time to remove whatever this 1/8" thick patch is covering.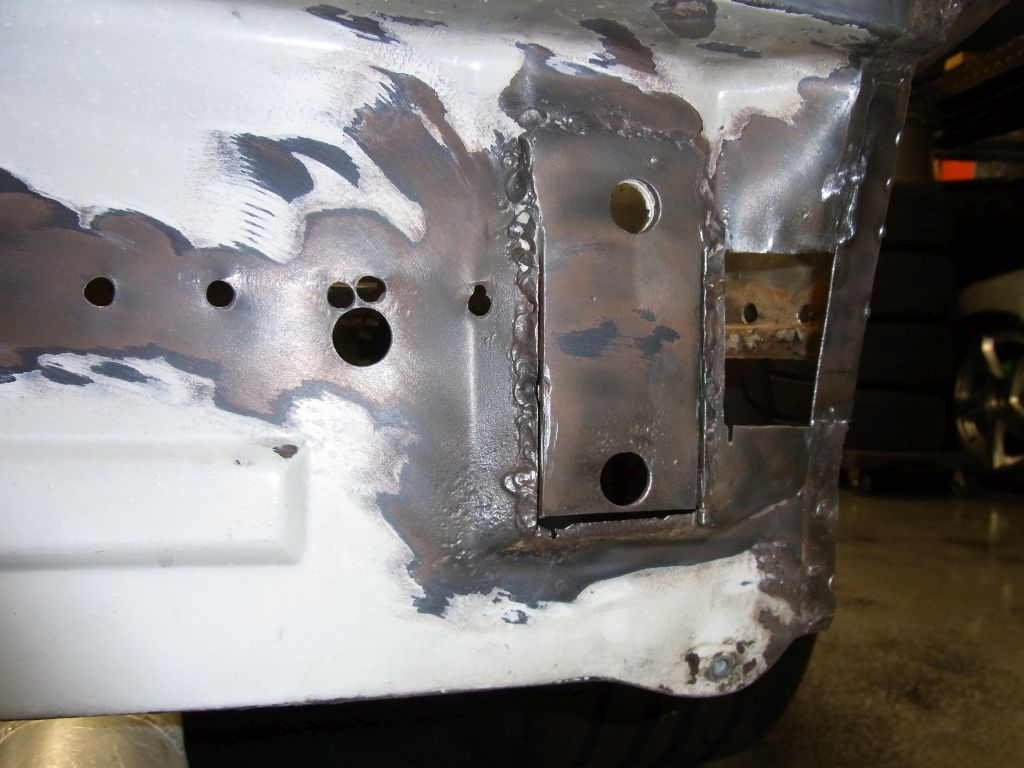
Yuk...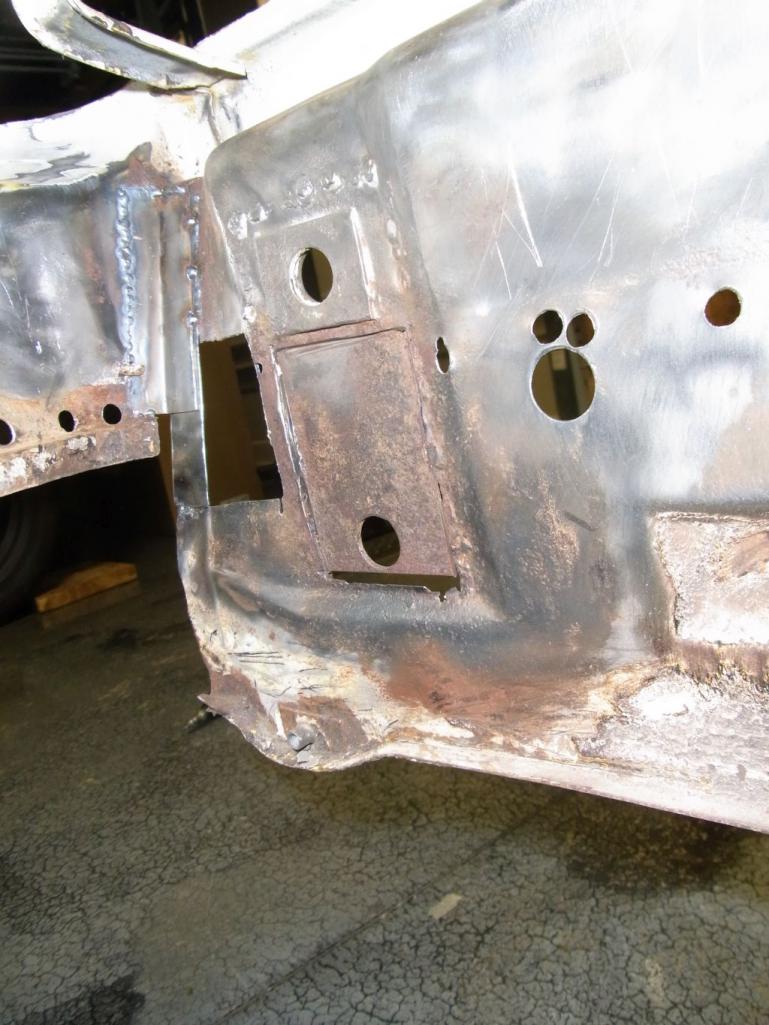
Much better.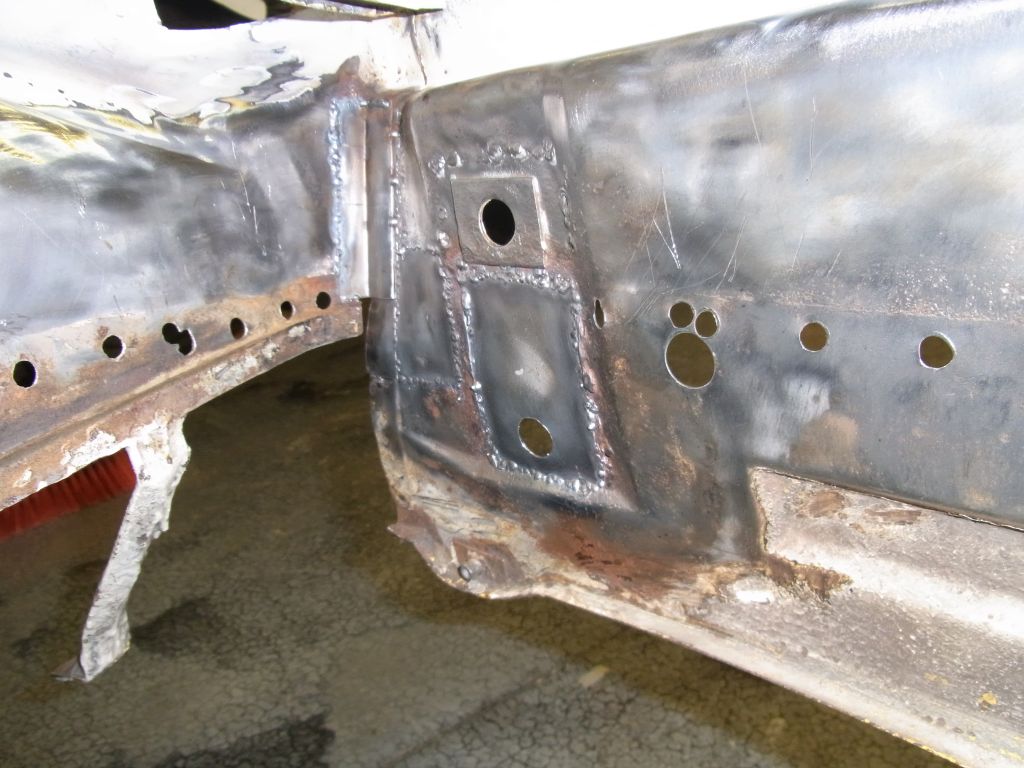
Trunk fitting commence.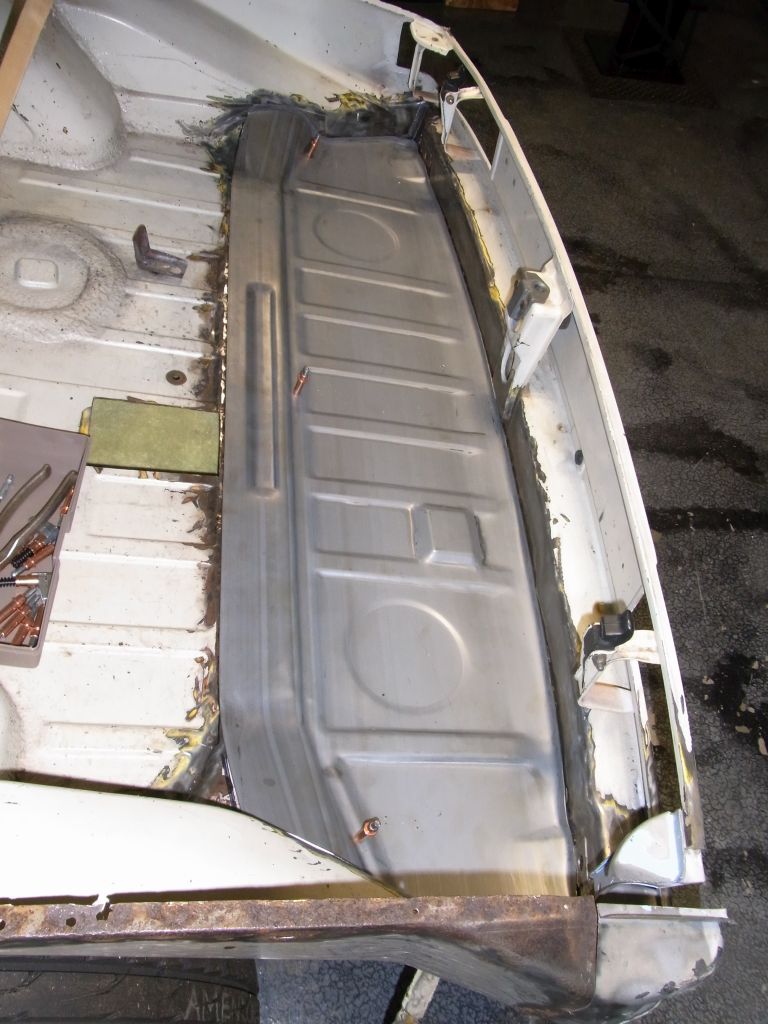
It is rewarding to take care of these problems but I would much rather be making cool parts so I am going to get back to finishing the IC plumbing on Grey Matter. Stay tuned for some aluminum dime stacking.
Cheers,
Scott
Posted by: charliew Jul 26 2017, 12:17 PM
nice welder. my friend has a extra 350 that he tried to sell me but I don't have a 100 amp breaker or circuit to supply it and I'm never going to be good enough to need it at this stage in my life, you will get lots of good use out of yours I'm sure. He had his on a 100 amp circuit and after about ten years the plug smoked so he redid it with 150 amp breaker and new plug and wires. luckily his was also on a short run like yours. he welds a lot of thick aluminum though as a business.
Posted by: Amenson Aug 17 2017, 08:48 PM
After much fitting, over 4ft of tig welded butt joint and 20 gazilion spot welds, the trunk area is almost fixed. Still some welding and then much grinding to remove the evidence of the squirt gun.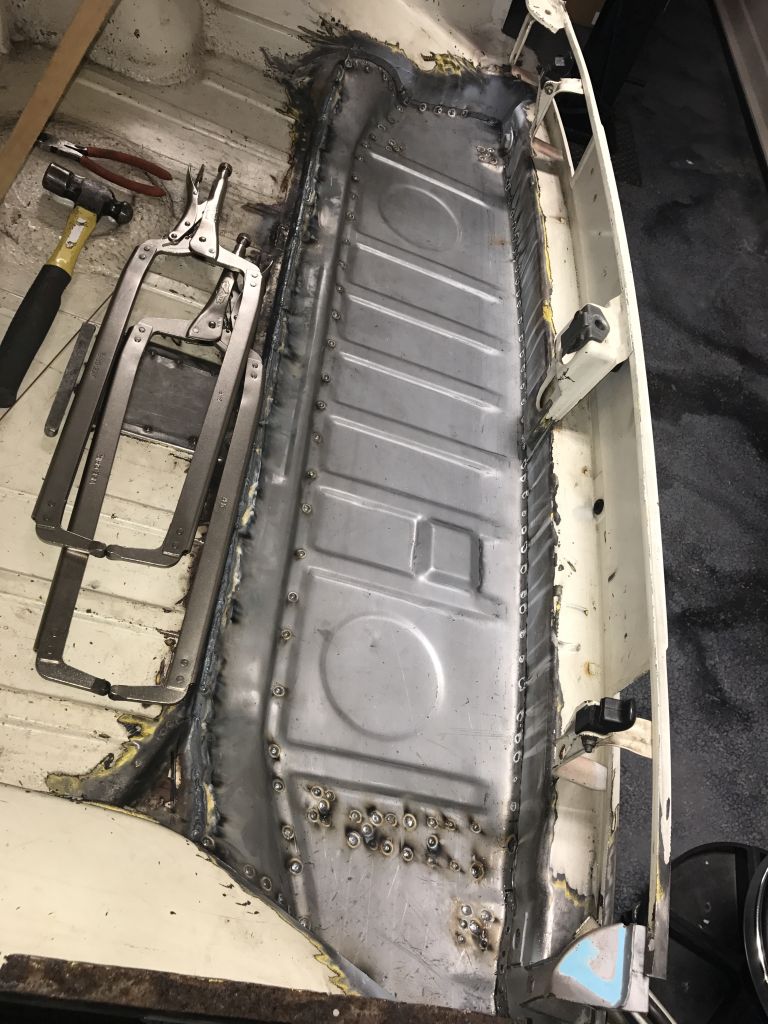
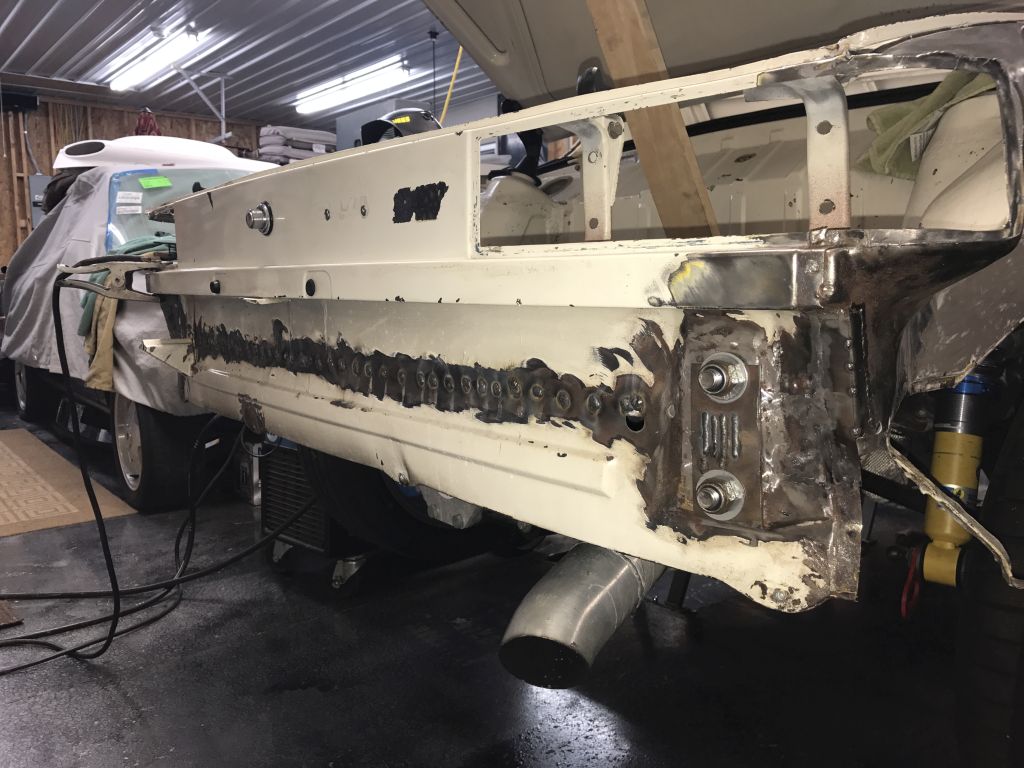
In preparation of the work on the front I removed the front wiring harness to rewrap it and install the external temp sensor. 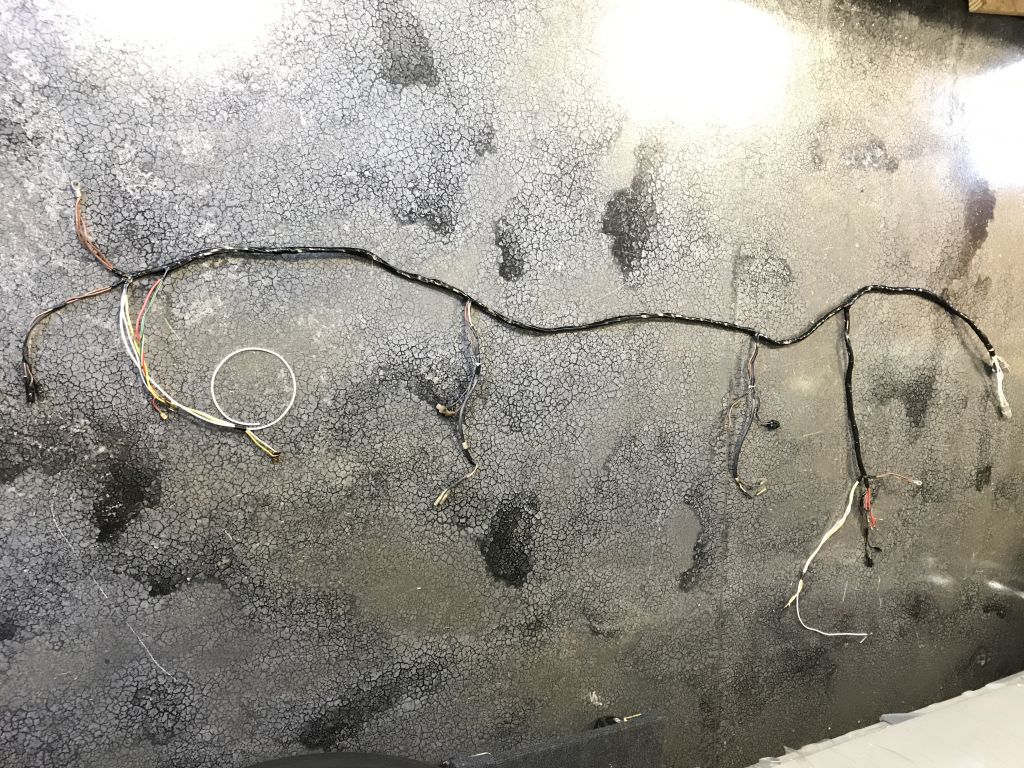
Anyone parting out a car willing to pull this section of the wiring harness. I need it for Grey Matter. PM me if you have one.
Cheers,
Scott
Posted by: 914forme Aug 19 2017, 07:25 AM
PM sent
Posted by: Amenson Aug 21 2017, 06:26 PM
PM sent
Not sure how to post pictures in PM so I will add it here...
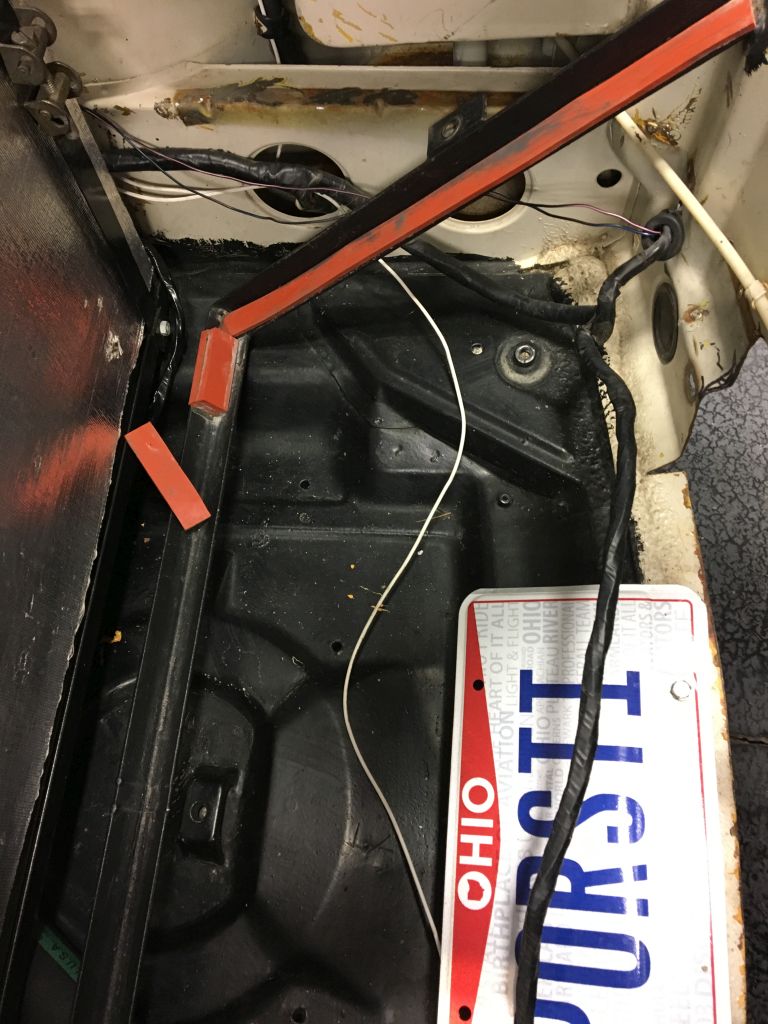
This is the section that we need. Between the headlights including the fogs and horns. Back as far as possible to the fuse box.
Cheers,
Scott
Posted by: mepstein Aug 21 2017, 08:02 PM
If Stephen doesn't have it, I can pull it from my parts car.
Posted by: 914forme Aug 22 2017, 12:58 PM
You could have texted it to me
Posted by: Amenson Aug 22 2017, 02:05 PM
You could have texted it to me
I could if I had your number in my new phone. After much enjoyment of my Bosch iPhone I finally dumped my personal Windows phone and got another iPhone. Unfortunately I have not found a way to transfer my contacts between the two platforms yet and I refuse to enter them manually.
...and I kind of wanted to post a before picture of the front harness.
Posted by: 914forme Aug 22 2017, 06:32 PM
Easiest thing to do is use Outlook to transfer contacts from one to the other. Just need an e-mail system that will allow you to house contacts. You can use a trail version of office365. That will give you a month to get everything transferred. Or outlook.com
I'll look for the harness section and let you know. I need to get to your place anyway. I have a light unit to pickup, and dash parts for Grey to drop off.
Posted by: theer Aug 23 2017, 10:34 AM
Oh yeah - that harness is for Grey Matter. Great to see the project stirring back to life!
Posted by: Amenson Aug 24 2017, 12:29 PM
Easiest thing to do is use Outlook to transfer contacts from one to the other. Just need an e-mail system that will allow you to house contacts. You can use a trail version of office365. That will give you a month to get everything transferred. Or outlook.com
I'll look for the harness section and let you know. I need to get to your place anyway. I have a light unit to pickup, and dash parts for Grey to drop off.
Great recommendation for the contacts transfer.
I could visit your place as well but there does not seem to be much progress happening in your shop
Posted by: 914forme Aug 24 2017, 06:40 PM
Nope this is the busy season at work, so I am trying heard cats and keeping everyone from for the next couple of weeks.
Lots of stuff going on behind the scenes even though nothing to show for it right now. But I hope to get back on the -6 in a week or so.
Posted by: Amenson Nov 12 2017, 10:05 PM
Not much going on with the PorSTI lately, I have been focusing on getting Grey Matter together.
I did have a long awaited upgrade to the Cobb Accessport features released.
https://www.cobbtuning.com/products/flex-fuel/subaru-flex-fuel-package-3-pin-sti-2004-2006-wrx-mt-2006-2007
Flex fuel
Why do I want Flex fuel? 350 WHP and 403 WTQ!
https://www.youtube.com/watch?v=4yncQ3GjqmE?t=1m35s
The dyno plot in the video for Stage 2 match my dyno numbers very closely making the E85 numbers believable. There are claims of higher gains on stock turbo/pistons but I plan to keep PorSTI tuned on the conservative side to keep it mindlessly reliable.
The Flex fuel setup used the TGV inputs for the flex fuel and pressure sensor inputs making TGV delete necessary. I was thinking about TGV deletes but really don't like the 3 piece intake manifold so I did some research into "long runner" intake manifolds.
The 2.5i big plenum long runner manifoldhttps://forums.nasioc.com/forums/showthread.php?t=2229576 and is cheap so I picked one up off eBay. I knew ahead of time that the TB mount is in a different location and probably would not fit my current setup. It won't so I found a JDM STI manifold which is long runner with the same TB position as my three piece manifold.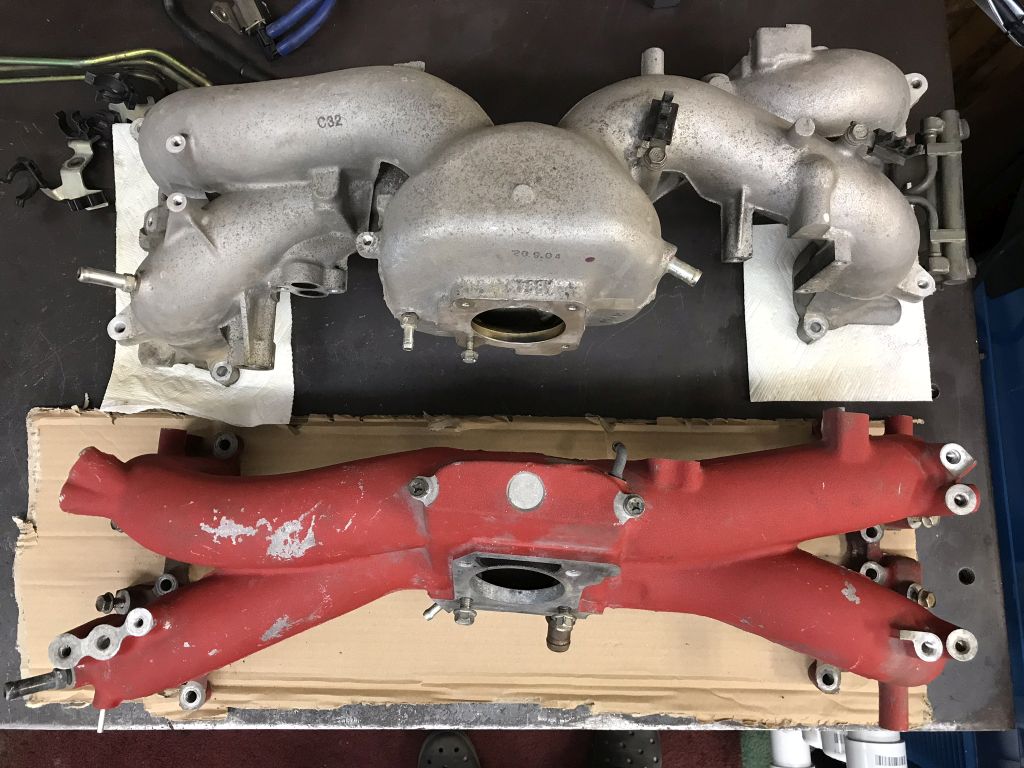
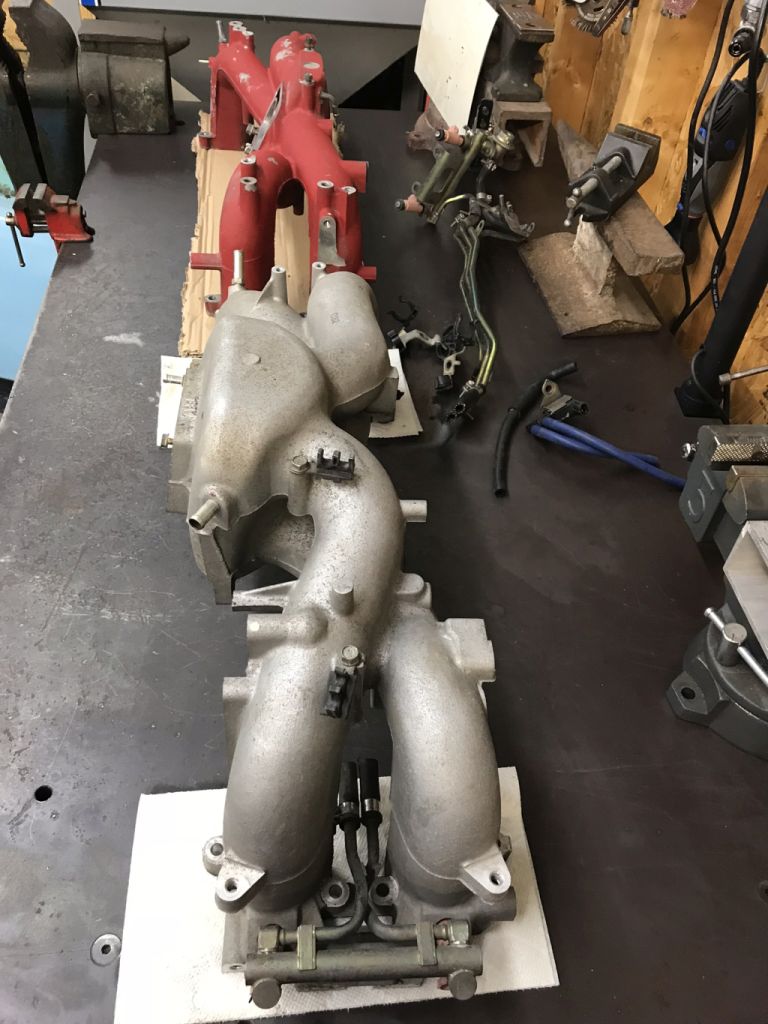
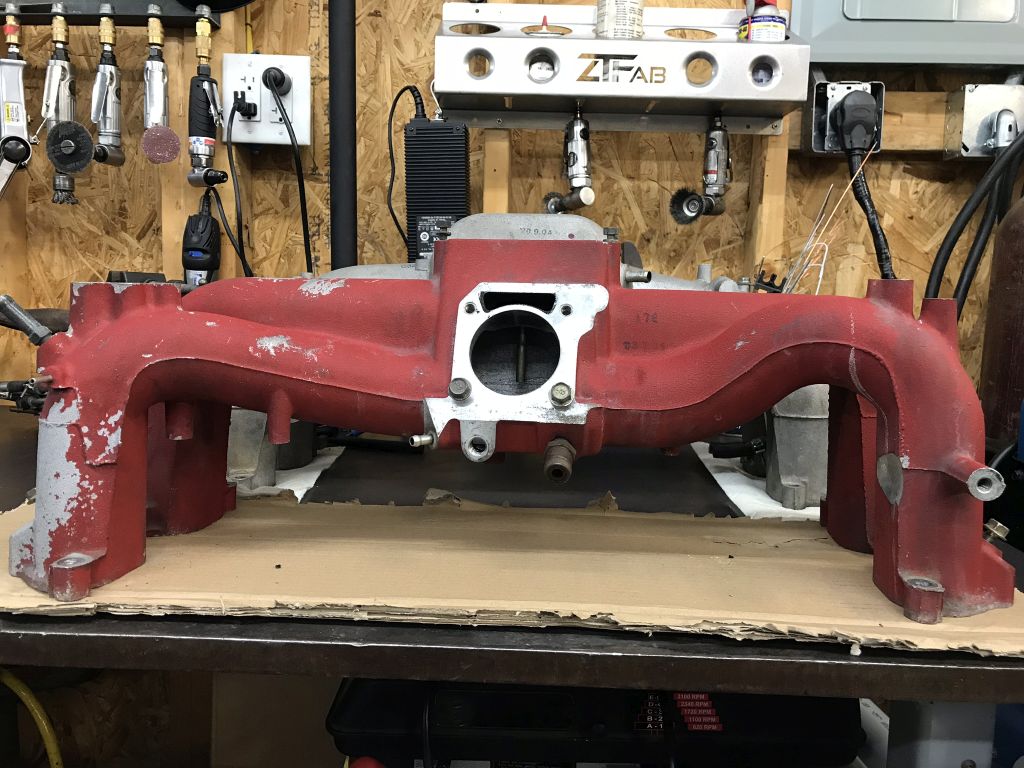
Plan is was to use the JDM STI intake until I upgrade my turbo and build a rotated intake setup with air/water IC like Grey and then use the 2.5i intake.
I wanted to see how it would look installed so I threw it on Grey's engine...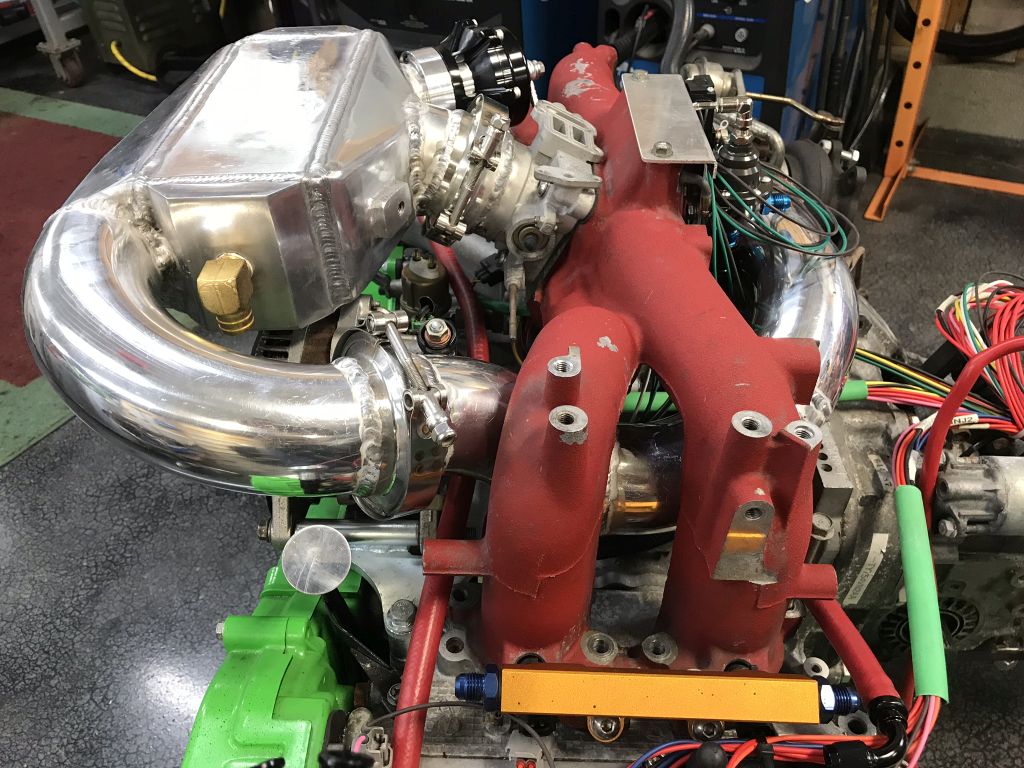
So much cleaner than the three piece manifold.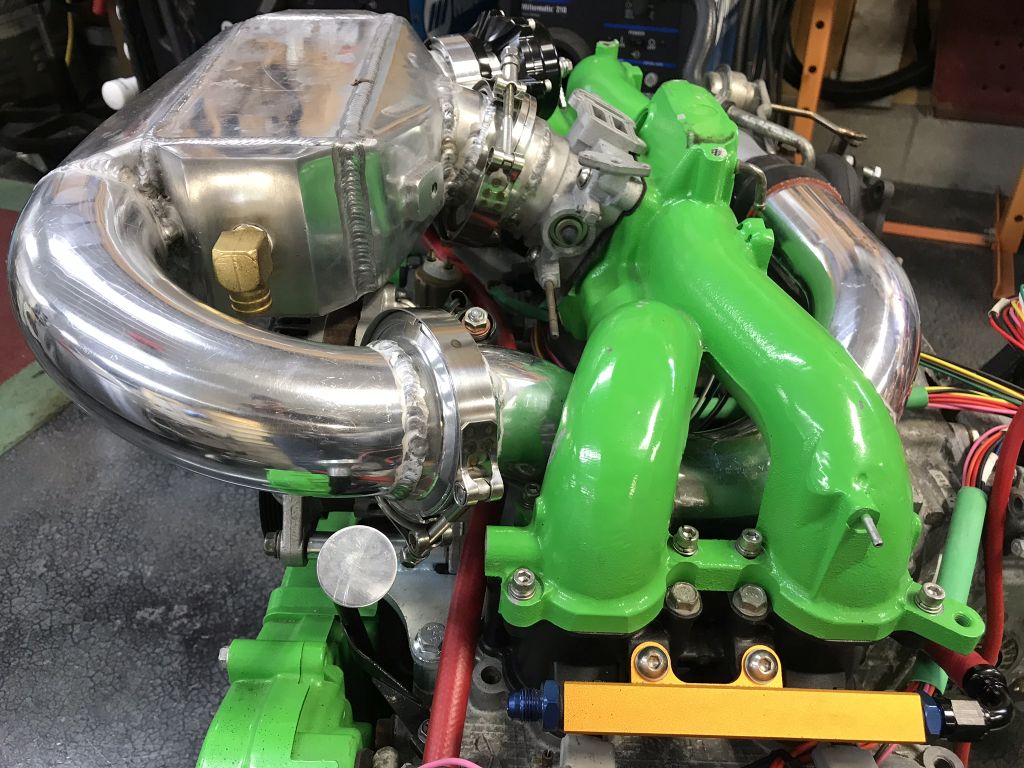
Now I am thinking that it would be a waste to hide it under the IC on PorSTI.
Cheers,
Scott
Posted by: charliew Nov 13 2017, 11:04 AM
that looks great using the stock turbo location. Just my rambling but if I was planning on a bigger turbo and using the awic and needing to build all new plumbing, you might consider putting the big turbo down in front with the awic above it and then the big plenum intake on. the big intake has a lot of good value, it increases low end torque and of course acts like a capacitor to level out the pressure as the motor uses it, I do like the cob as my son always had only two places to get e85. The only bad thing is all the expense of the bigger fuel lines and injectors and pump to flow the greater volume e85 requires.It took about 26/28 psi with a big turbo, on e85 to get to 500 awhp with his sti on a safe tune. that was on a 98 degree day after driving 90 miles to the dyno. that was with a front mount air ic that we tested with a temp gauge at the throttle body. I am anxious to see your compilation of parts as I have most of them except a big turbo and awic and the plumbing. I will never be able to tig that good I'm afraid.
Posted by: 914forme Nov 13 2017, 11:50 AM
Wow how stuff changed since Friday night. I like the Grey market part on Grey it is only fitting.
For PORSTI I agree with Charlie, as you love to weld, and make intricate cuts on your huge bandsaw.
Keep the long runner, put it on PORSTI, TB, then A2WIC in front of that, and then Turbo just off to one side, nice and short plumbing. The header could give you a bit of an issue with your motor mount moving it forward.
In reality do you really need more than what E85 will give you. It does make some very nice power, and your car all ready has issues with keeping the power to the ground. I don't think the larger meats out back are going to help you much.
Posted by: charliew Nov 13 2017, 12:05 PM
I agree, also the tranny will work great until the rear traction gets too good. about 400ft lbs is the max on the 5 spd tranny with awd and the heavier wrx body. also a larger turbo takes up a lot of room but will make less heat at higher pressure and more volume.
Posted by: Amenson Nov 13 2017, 12:30 PM
In reality do you really need more than what E85 will give you.
It does make some very nice power, and your car all ready has issues with keeping the power to the ground. I don't think the larger meats out back are going to help you much. ...no, I probably don't need a bigger turbo, but that really is not the point.
Realistically, a bigger turbo is a ways off because with it comes new pistons, rods, clutch and probably gearbox upgrades.
More likely is that I build the AWIC setup with the current turbo.
Cheers,
Scott
Posted by: charliew Nov 13 2017, 12:50 PM
Just info I just remembered. I have a flow bench and when we did my sons sti heads we added 1/2 mm larger valves because you can use the factory seats. he has cams that go to .410/.420 lift I think I remember and at full lift the intake ports flow about 300 cfm each after porting. that's why subys can make that much hp. a 350hp chevy can use 600/700 cfm total. Also he used the tgv's with stock ecm and tuning.
Posted by: Amenson Feb 20 2018, 09:05 PM
Still not much going on with PorSTI, spending all of my garage time on Grey Matter.
I did get an extra set of hands in the garage but I won't let anyone else work on customer projects so I gave him my new center counsel to play with. I have had the bent blank in the garage for over a year, time to get it in.
Looks pretty good and the shifter is exactly where I want it.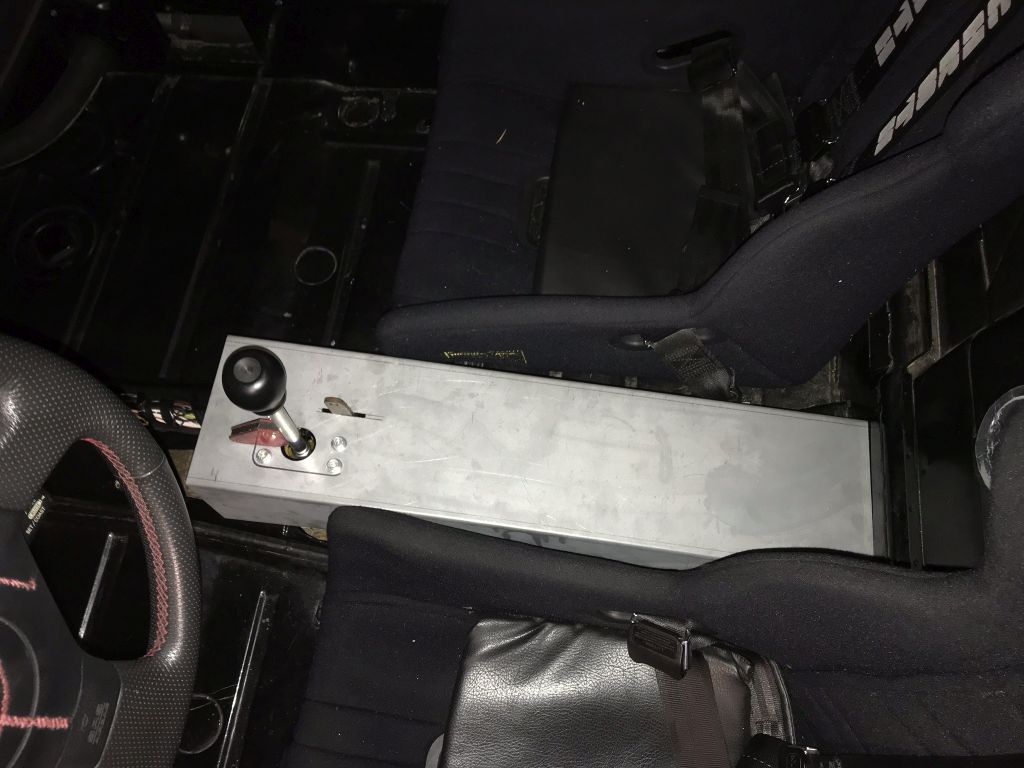
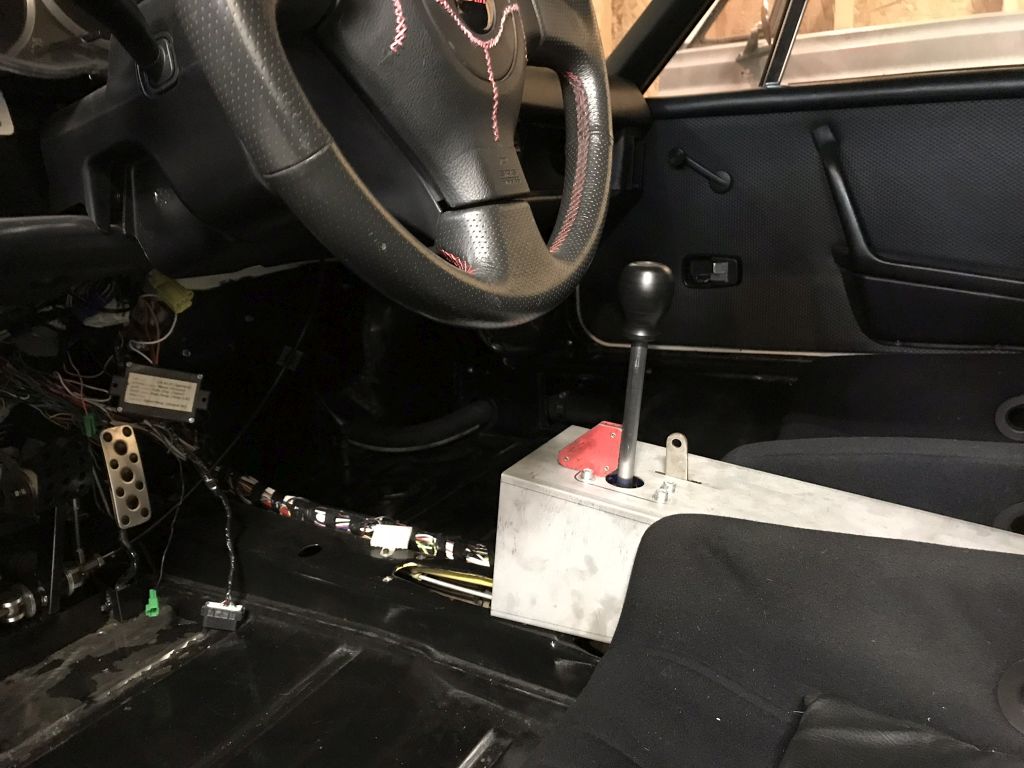
Took all of the guts from the MR2 shifter rotated them 180 to even out the cable attachment points and mounted them in the center console.
Made a new shaft.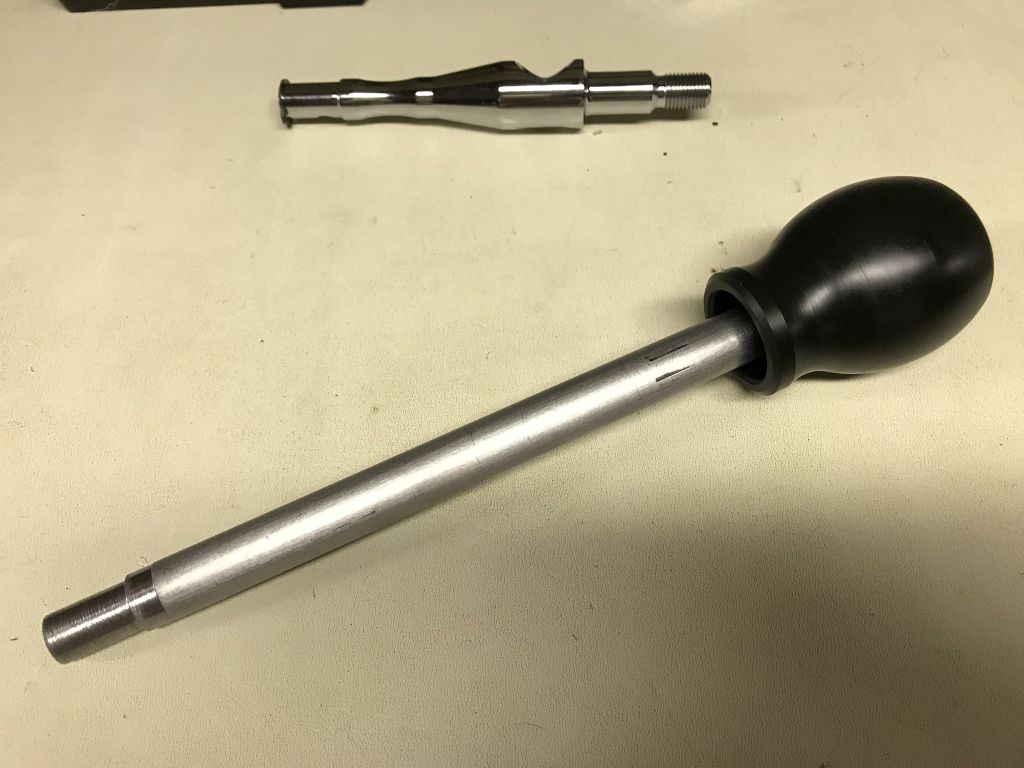
Getting the cables up through the console will be quite involved so I will do that myself eventually.
Other than that just, accumulating parts so that I can hit it hard when it is on the working side of the shop again.
Posted by: Amenson Mar 14 2018, 03:59 PM
With all of the time in the garage working on Grey I get to see PorSTI quite a bit and I have been thinking about what to do aesthetically with the car. I really like orange and am leaning toward Tangerine for the main color with black or dark grey brightwork. Also considering some modest graphics with a period racing feel. Primary candidate has been something on the rear upper corner of the front fenders. I really like the Heuer decal but don't have one in my modest watch collection...so I felt it would be a bit poserish. The pegasus is my second choice.
Not any more! I was browsing for random watches for sale and scored a late 60's Heuer stopwatch.
The same one commonly mounted on the dashes of race cars. I have a dash mount on the way! Now I can do the Heuer decal.
Posted by: Amenson Apr 30 2018, 09:29 PM
My yearly week of shenanigans with my car buddies is quickly approaching. I was working to get Grey on the road prior to getting back to my own project but endless details made that impossible. I proposed to Tom to take a few weeks to focus on Porsti and he graciously agreed for Grey to sit on the sidelines.
On with progress.
My Father is again planning to join the trip this year as he was last year until rust and the sins of the PO resulted in the complete removal of the fenders. He is quite experienced with car projects and agreed to come down with my Mom to give me a head start on this year's push to drivability. Over 4 days we probably put in 50 hours of solid work, Mom even helped! The goal was to get the rear fenders bonded on but ended up just a bit short but took the opportunity while we had access to fix a few other issues.
Lots of smoothing of welds from previous repairs and the never ending removal of undercoating and paint.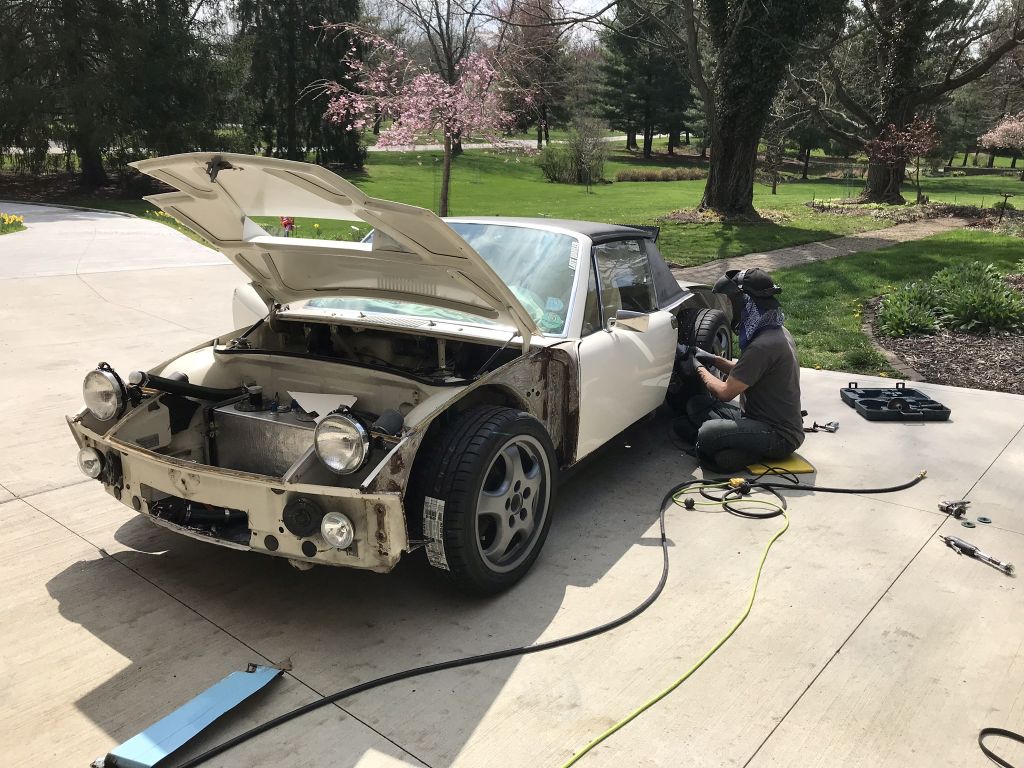
One of the unexpected repairs was a rusted out drivers side latch bracket.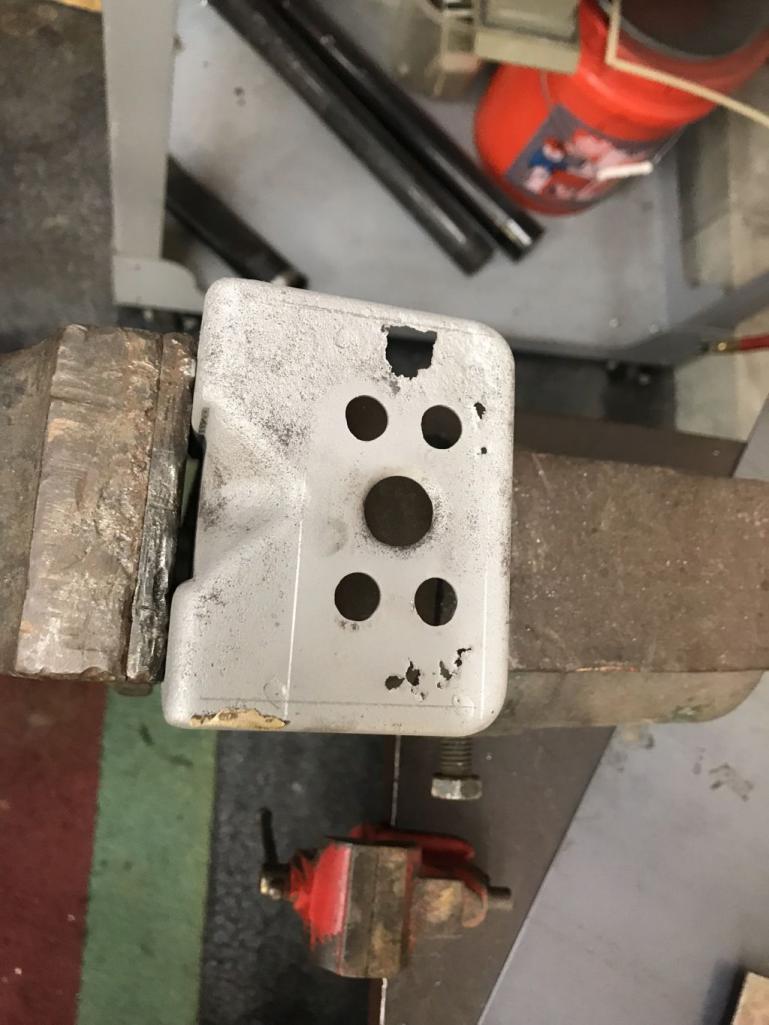
Would have been easy to order one from Restoration Design but no time for that so cut/weld.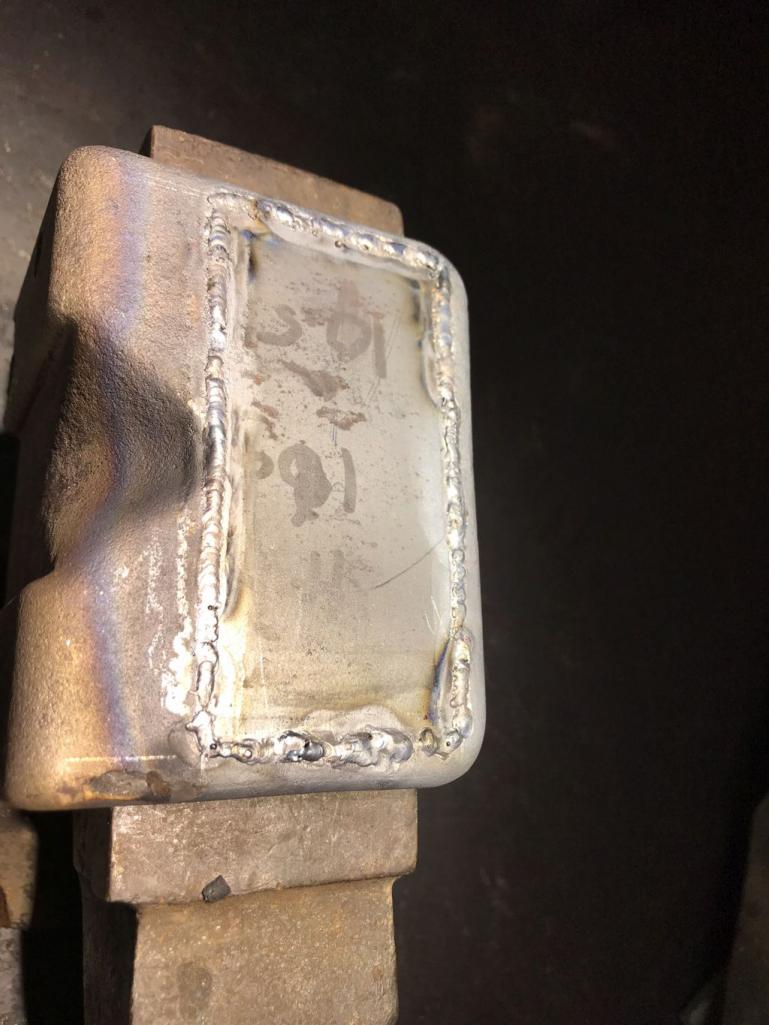
Still fits. You can also see several unneeded holes that we welded shut.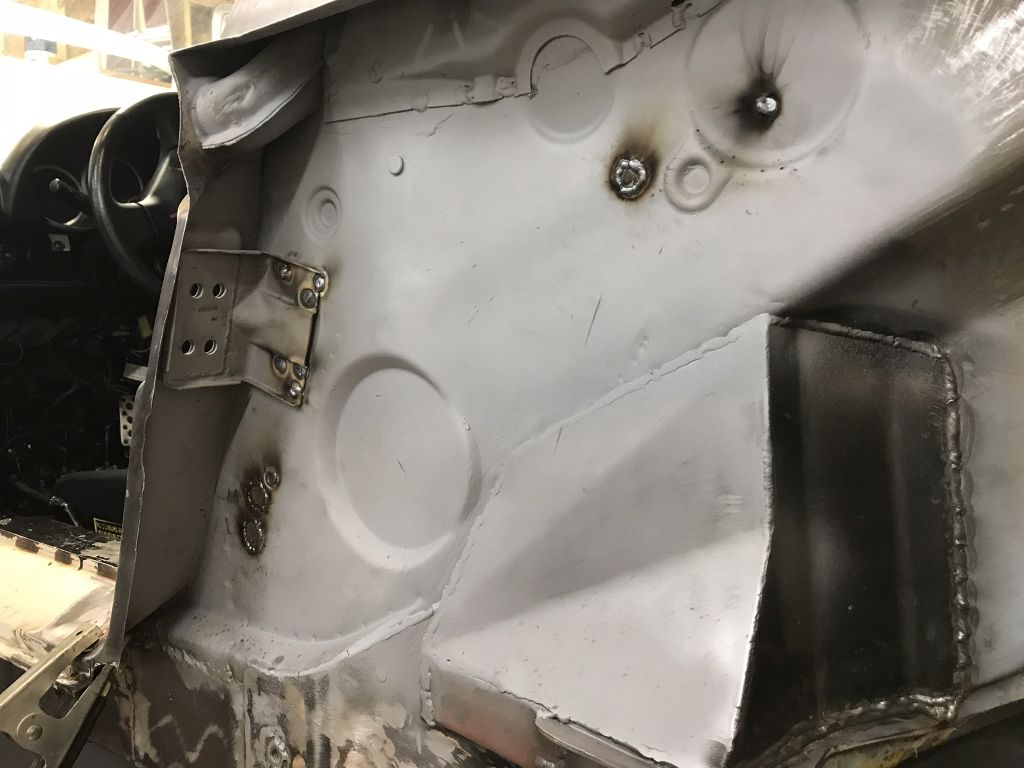
The patch panels that I picked up for the project were really nice but had a couple of soft spots that needed to be repaired. Just a few angles here to sort out.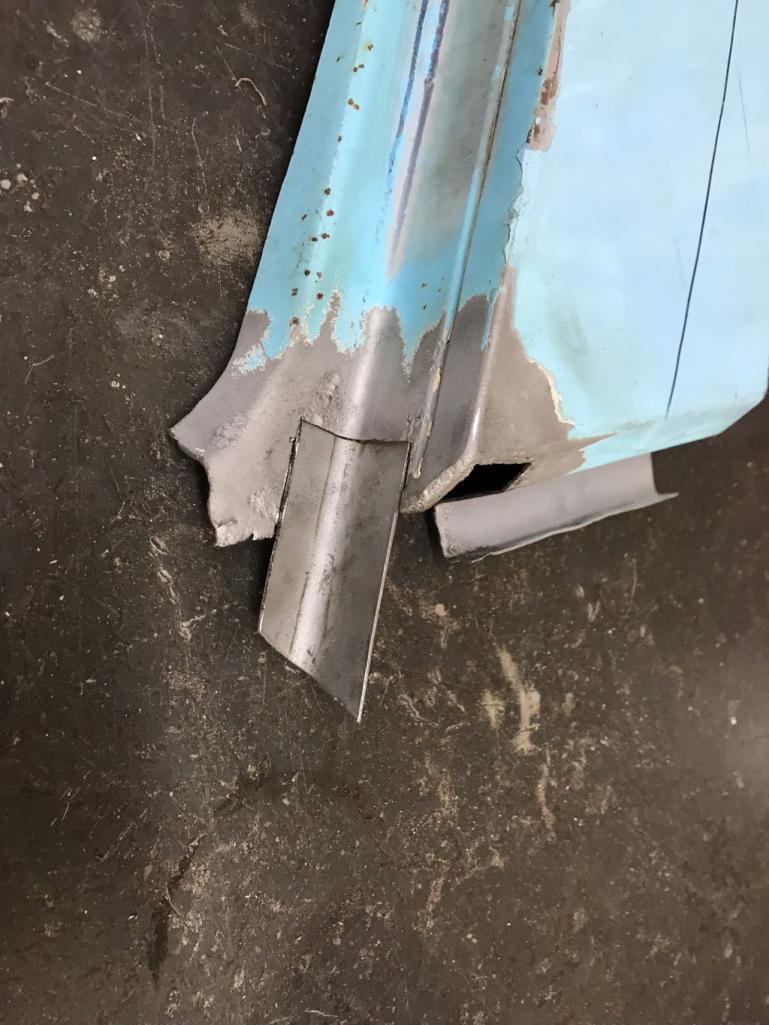
Turned out pretty well.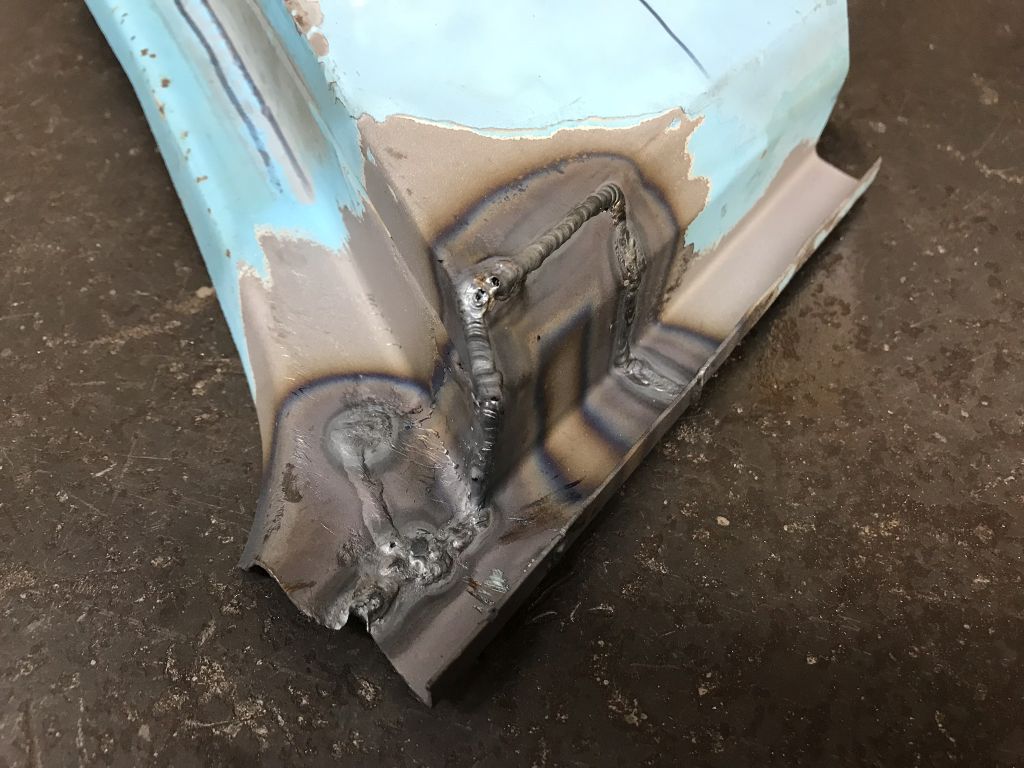
Panel fitted and a patch at the top of the door latch relief formed from flat. That took almost 2 hours! My Father asked if I was gong to make a career out of that piece.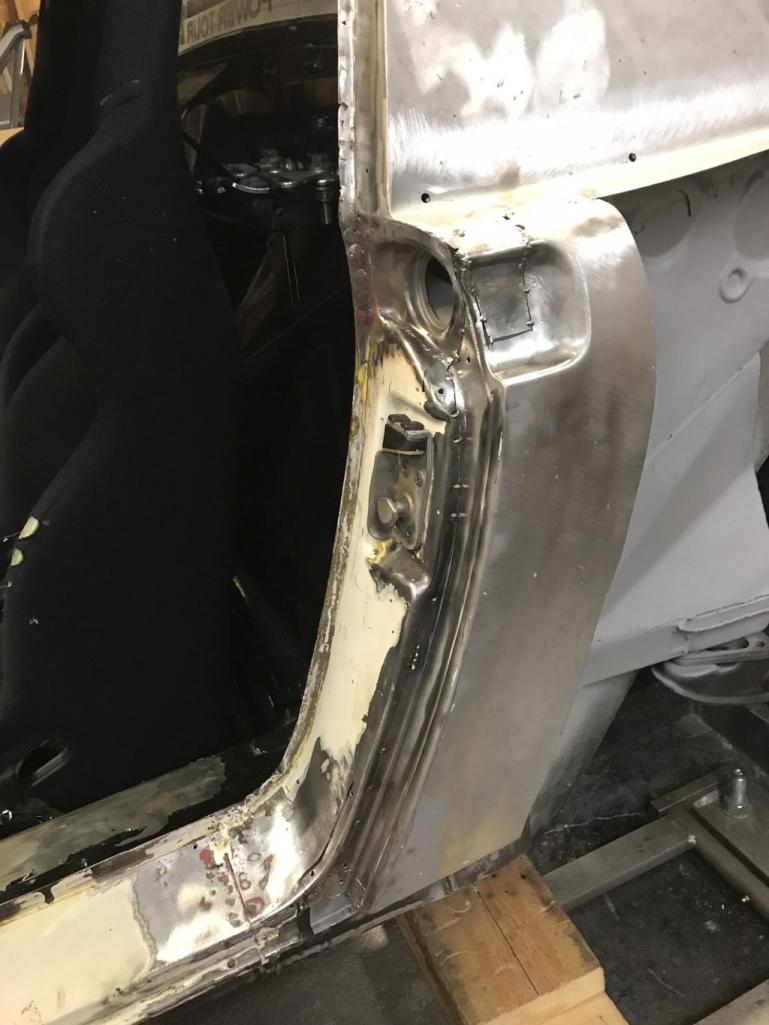
Two areas on the driver side need small patches along with complete replacement of the bottom. Part was make from a Restoration design panel and the rest formed from the bottom of another fender. Also cut out and repaired what was left of a rusted out jack pad. No pictures but it is slightly visible.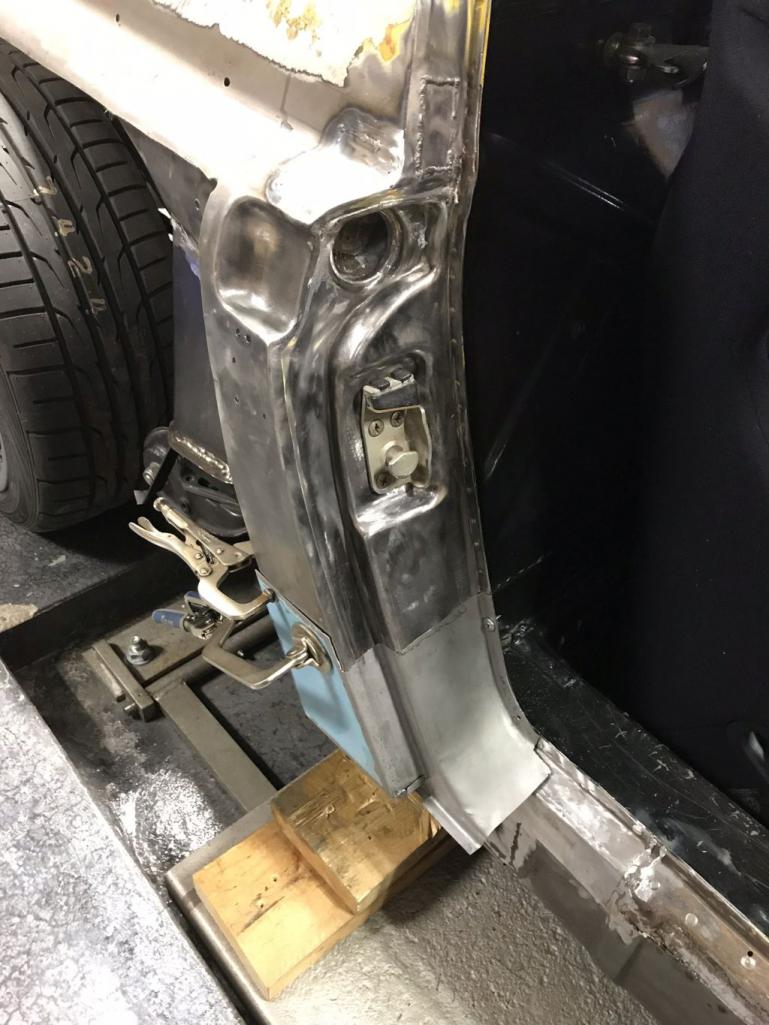
Such an insane amount of work just to get solid medal to bond the fiberglass fenders to. I have another 4 day weekend scheduled for this weekend. Should be able to finish up the rear and get the fenders boned on. Front is next. Full steam ahead.
Posted by: 914forme May 1 2018, 08:51 AM
Great Progress
Posted by: mepstein May 1 2018, 09:14 AM
With all of the time in the garage working on Grey I get to see PorSTI quite a bit and I have been thinking about what to do aesthetically with the car. I really like orange and am leaning toward Tangerine for the main color with black or dark grey brightwork. Also considering some modest graphics with a period racing feel. Primary candidate has been something on the rear upper corner of the front fenders. I really like the Heuer decal but don't have one in my modest watch collection...so I felt it would be a bit poserish. The pegasus is my second choice.
Not any more! I was browsing for random watches for sale and scored a late 60's Heuer stopwatch.
The same one commonly mounted on the dashes of race cars. I have a dash mount on the way! Now I can do the Heuer decal.
Im trying my best not to pick up the watch hobby but that’s a cool piece.
Posted by: charliew May 1 2018, 10:10 AM
boy that damn foam really causes a lot of hours of work. that's where I found the first rust throughs on my 75 around the air vent. I'm afraid to dig around the rear corners.. At least you know it will last a lot longer in those areas this time around. Have you mentioned if you will leave the flex joint at the top rear of the front fenders? I guess your dad is going with you on the power tour?
I collect pocket watches mostly hunter style. I have a screw that is about 1/8 the size of a flea. It is so small I thought it was dirt in the envelope it was sent in. It is supposed to be a screw that holds a jewel in, in a very small 21j pendant type ladies watch. I just found a 1944 Waltham navigation watch in the box dated oct 44. It still has a cloth pouch on it in the box. Kinda different from my other watches but it is a Waltham 18 size. the paper tag on the outside shows the mil spec and it is also on the back of the watch. It came from philidelphia pa. but who knows how many folks have been caring for it over the years. It is one month younger than me but in perfect shape unlike me. I need to reglue the paper label back down on the box on it's corners but I'm worried I will screw it up.
Posted by: Amenson May 2 2018, 07:34 AM
Im trying my best not to pick up the watch hobby but that’s a cool piece.
I don't recommend getting into watches. Too many opportunities to distract your time/budget from other hobbies.
boy that damn foam really causes a lot of hours of work. that's where I found the first rust throughs on my 75 around the air vent. I'm afraid to dig around the rear corners.. At least you know it will last a lot longer in those areas this time around. Have you mentioned if you will leave the flex joint at the top rear of the front fenders? I guess your dad is going with you on the power tour?
I collect pocket watches mostly hunter style. I have a screw that is about 1/8 the size of a flea. It is so small I thought it was dirt in the envelope it was sent in. It is supposed to be a screw that holds a jewel in, in a very small 21j pendant type ladies watch. I just found a 1944 Waltham navigation watch in the box dated oct 44. It still has a cloth pouch on it in the box. Kinda different from my other watches but it is a Waltham 18 size. the paper tag on the outside shows the mil spec and it is also on the back of the watch. It came from philidelphia pa. but who knows how many folks have been caring for it over the years. It is one month younger than me but in perfect shape unlike me. I need to reglue the paper label back down on the box on it's corners but I'm worried I will screw it up.
I will keep the flex joint at the base of the a-pillar. My Dad will join me on power tour. He was already getting reacquainted with the seats and grabbed a cushion so that he could have my Mom make one that is a bit more plush.
Watch restoration is something that I will likely dive into when extensive garage time is no longer possible/practical.
Posted by: BIGKAT_83 May 2 2018, 07:48 AM
I hope to see you on the Power Tour this year. Finishing my Ac install now.
Bob
Posted by: Amenson May 2 2018, 12:36 PM
I hope to see you on the Power Tour this year. Finishing my Ac install now.
Bob
Are you doing the entire route? What are you driving?
Let's plan on it.
Posted by: BIGKAT_83 May 3 2018, 11:44 AM
Working hard to get my Pro Tour Camaro done. But it looks like it will be the 914.
Plan to do the whole thing. After you leave Atlanta you will come 20 miles from my house.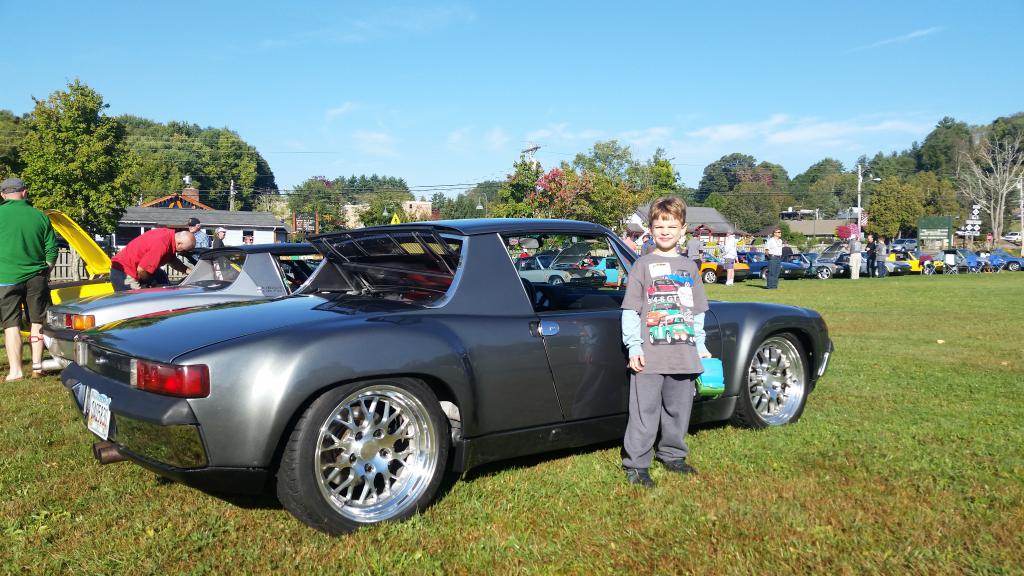
Posted by: Amenson May 3 2018, 08:21 PM
Working hard to get my Pro Tour Camaro done. But it looks like it will be the 914.
Plan to do the whole thing. After you leave Atlanta you will come 20 miles from my house.
It would be cool to see the Camaro but your Teener will at least make the right noises for the event. I'll check back in closer to the event and set up to meet.
I started ordering parts and the first thing in were the AIG TGV deletes. These are top feed to get better injector options than the STI side feed configuration. I was going to modify a pair of stock WRX units I picked up for cheep but the amount of effort to make them decent just does not make sense when you can get a set of these for $260 delivered including gaskets and fasteners. I couldn't help but dig out the new fuel rails and ID1050x injectors. Bling!
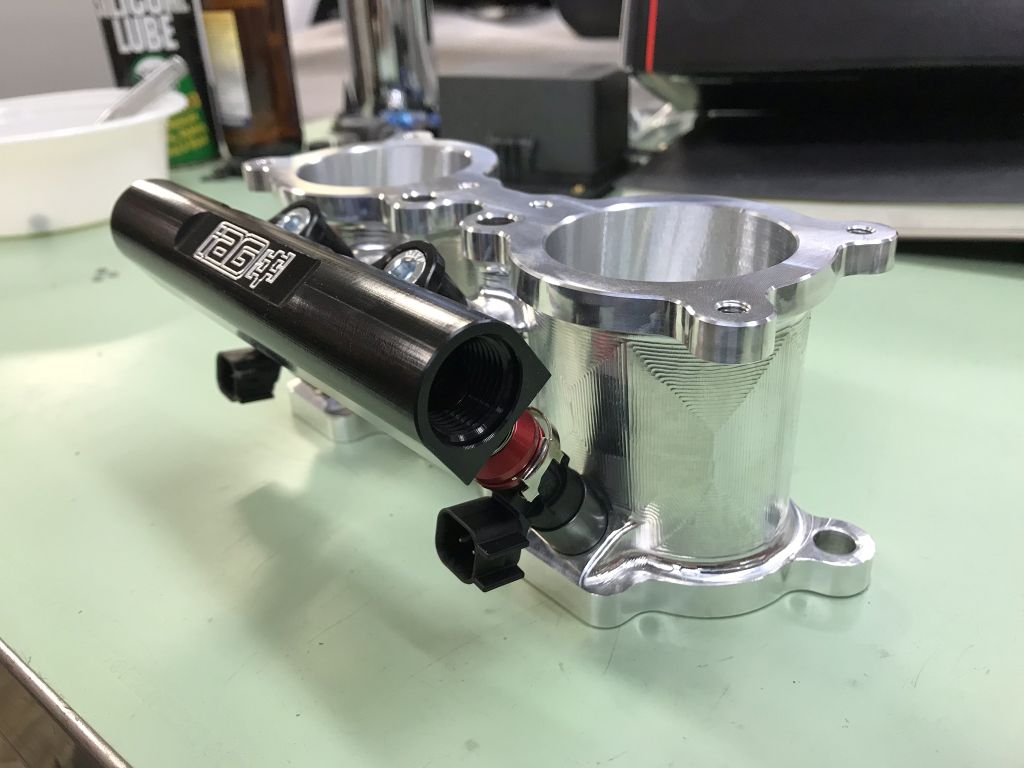
On to some real work...fitting the fenders. I had forgotten how crappy it was working with fiberglass and went glove and sleeveless. So itchy and prickly.
Fitting together fairly well for fiberglass but much tweaking to do.
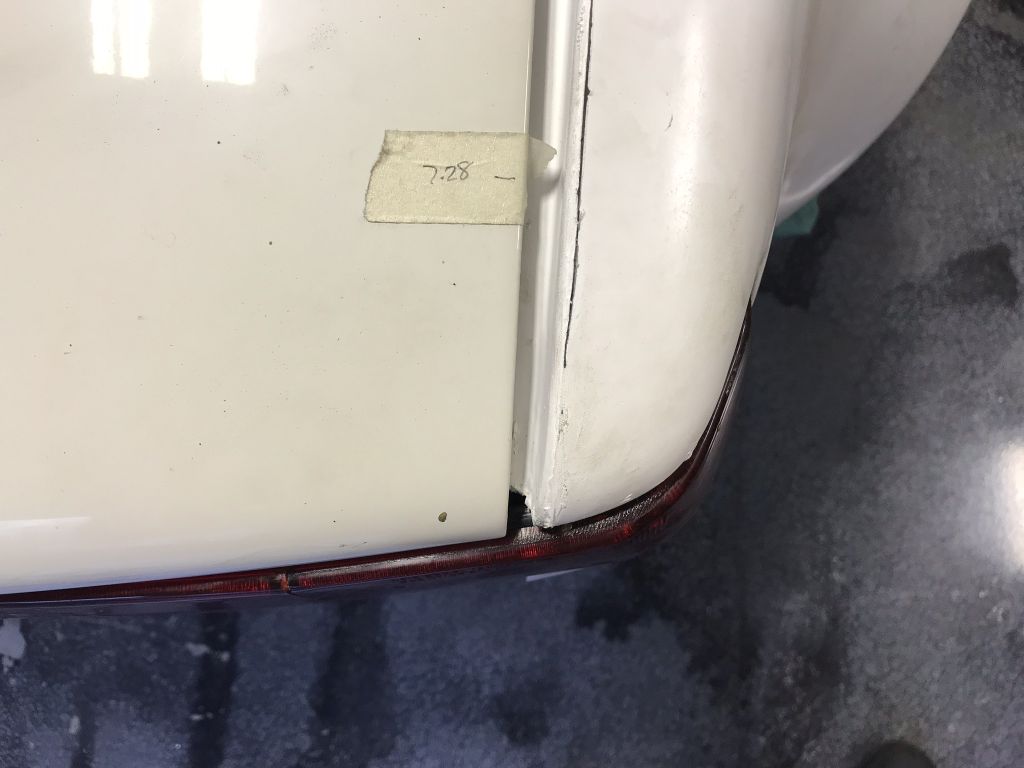
Posted by: Amenson May 4 2018, 08:22 PM
On with fender fitting. I had the trunk shocks mouned with fasteners and needed to weld them in place so that the fiberglass fenders could sit down. I started cleaning the area for welding and found more grey bondo...
I thought that I had found all of the BS. Didn't get a picture of the area pre-repair but there was a strip of metal riveted under the rusted out area to support the grey bondo. Base area repaired.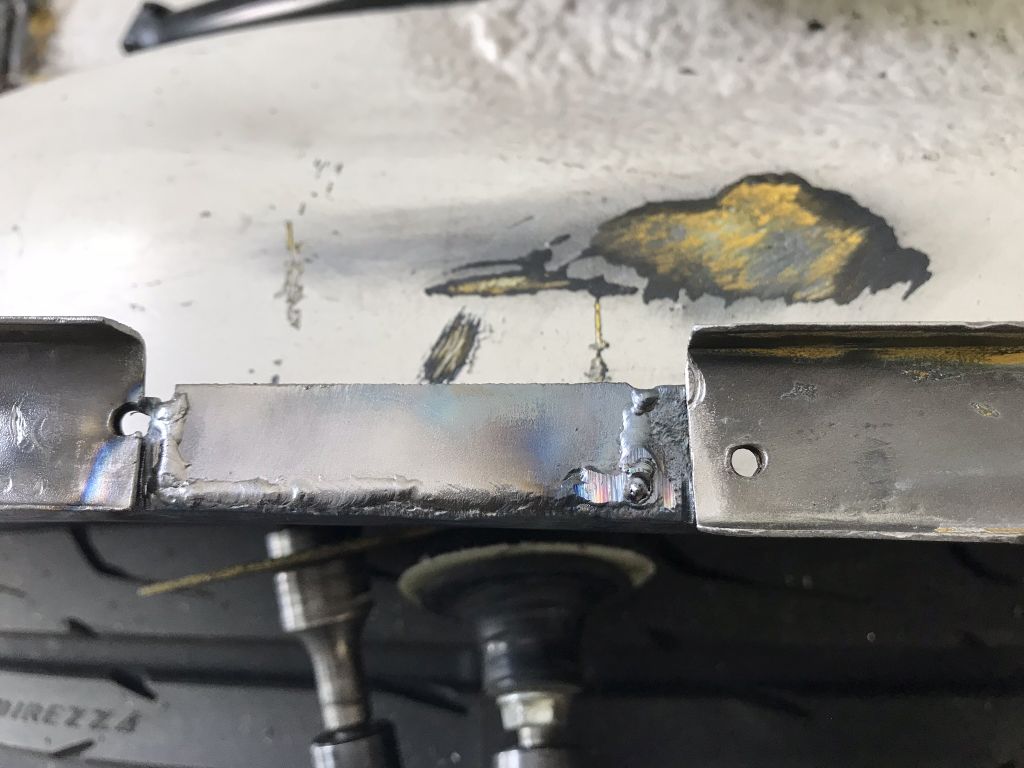
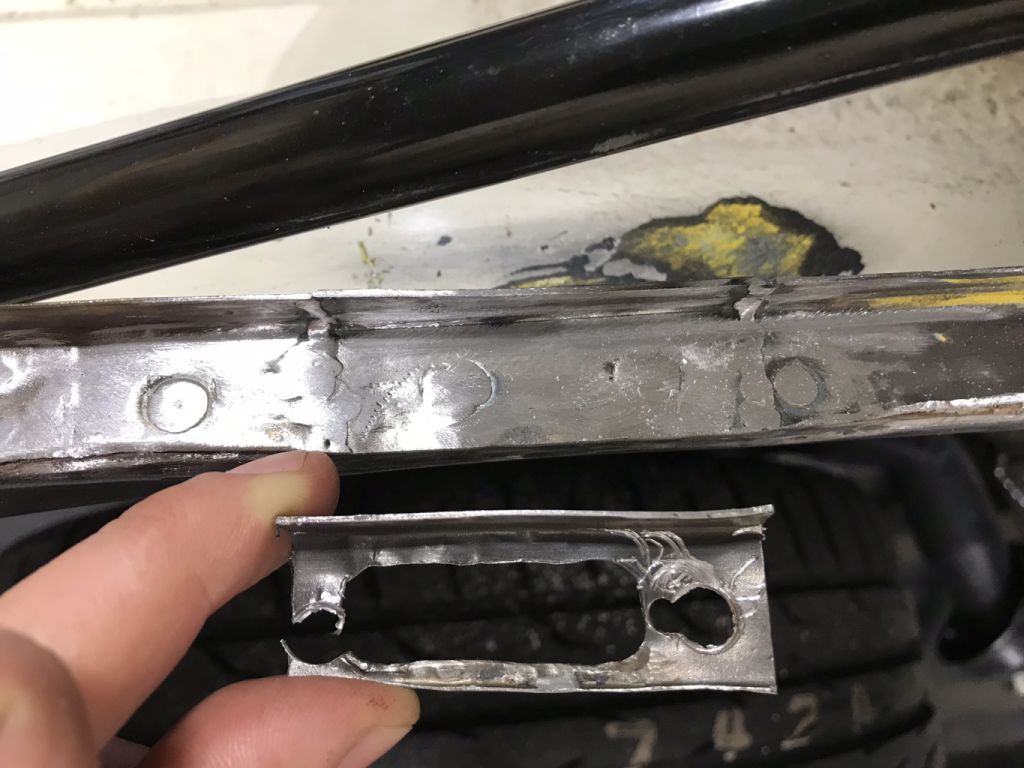
The passenger side fender fits much better now. On to the driver side. My substantial repairs were just off enough to make the new fender fit just a bit off so I had some tweeking to do. Much grinding and fitting later...
Almost ready for bonding. I left all of the new weld seams only tacked in case I had to adjust something. Tomorrow they all get welded. Nothing beats a couple of hours of torch time.
More parts arrived today. Fuel pressure regulator with all AN fittings and fuel pressure sensor.
I am taking my no hose clamp mantra to a whole new level. AN20 for the new radiator plumbing. 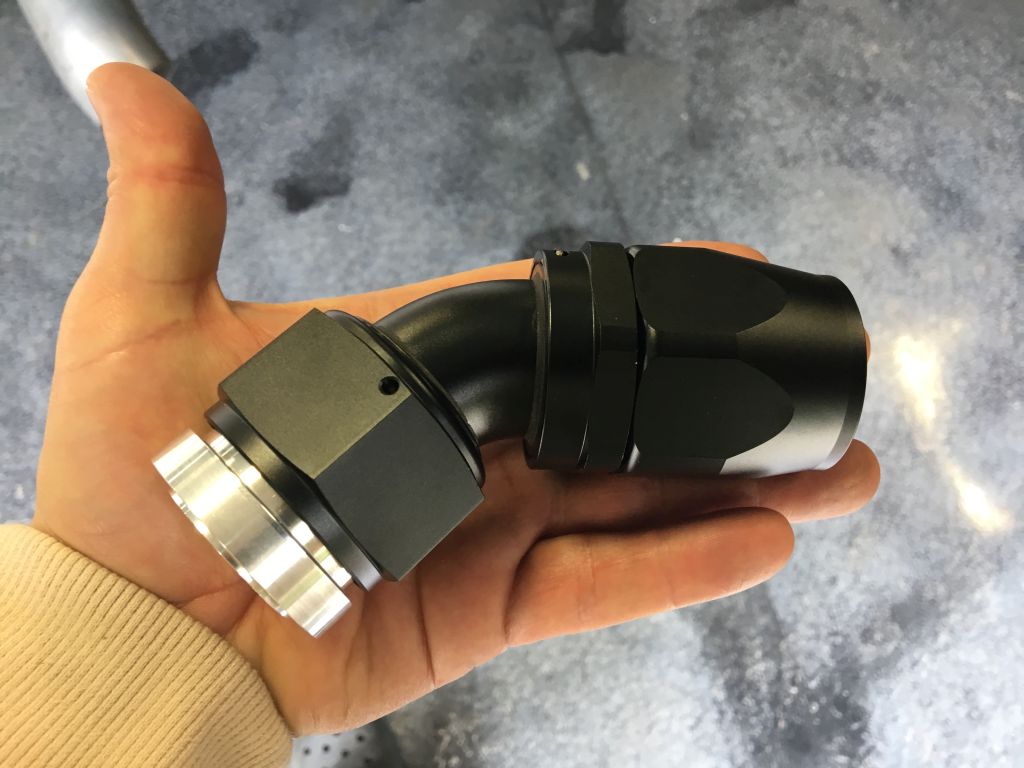
Posted by: Amenson May 5 2018, 09:43 PM
Passenger side repairs in place.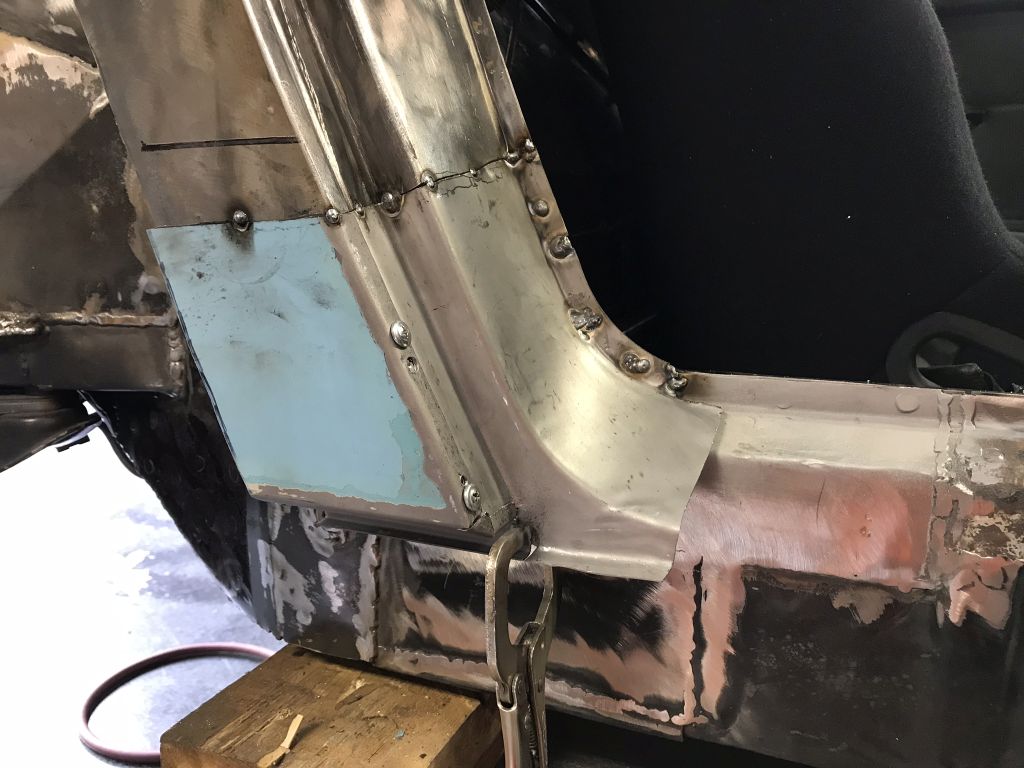
So much work just to get solid metal to bond the fiberglass fenders to.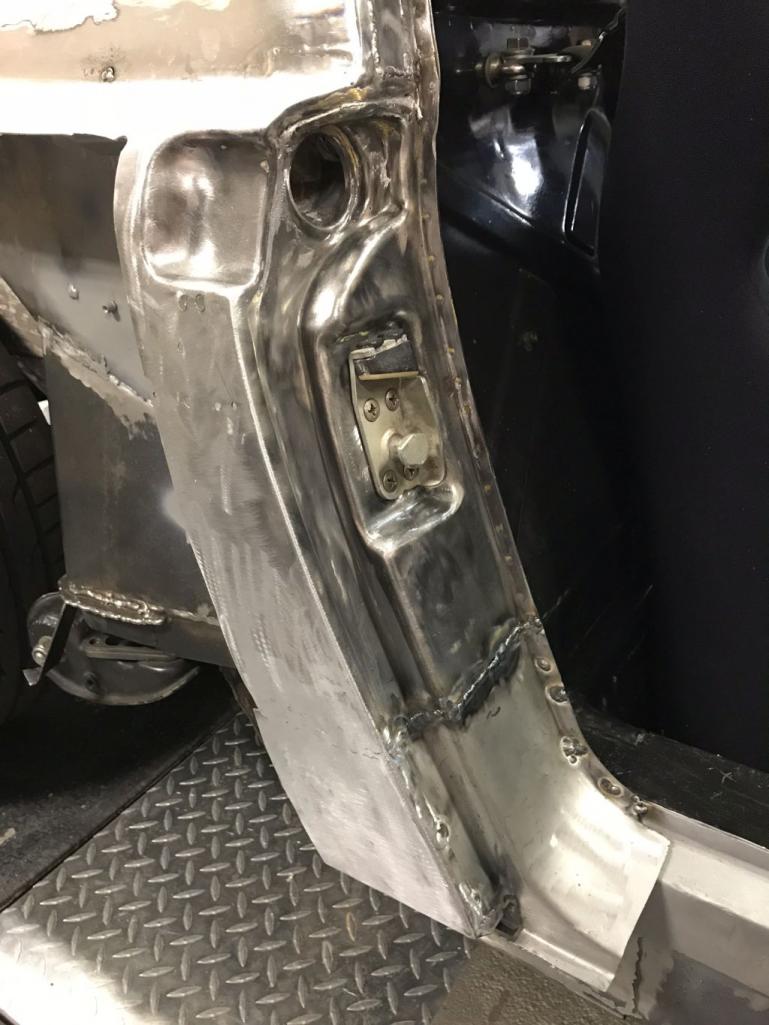
So much work to get all of the moisture trapping white stuff from hell out. Well worth the effort.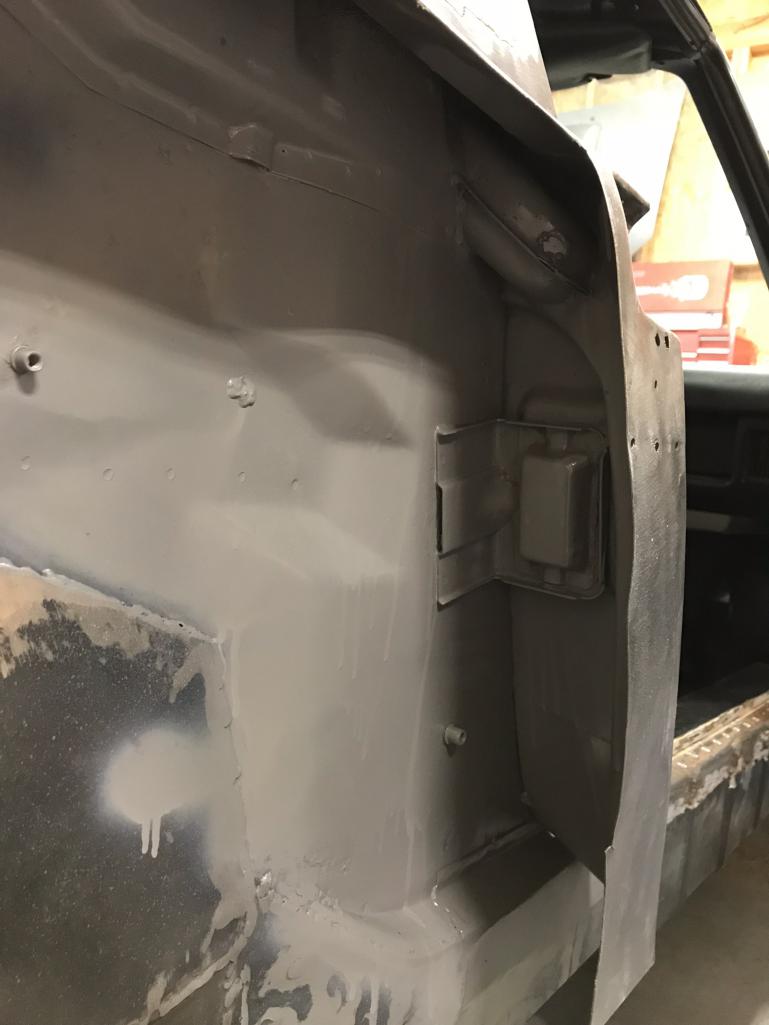
Driver side welded. Got sick of grinding so the welds are not quite flush...yet.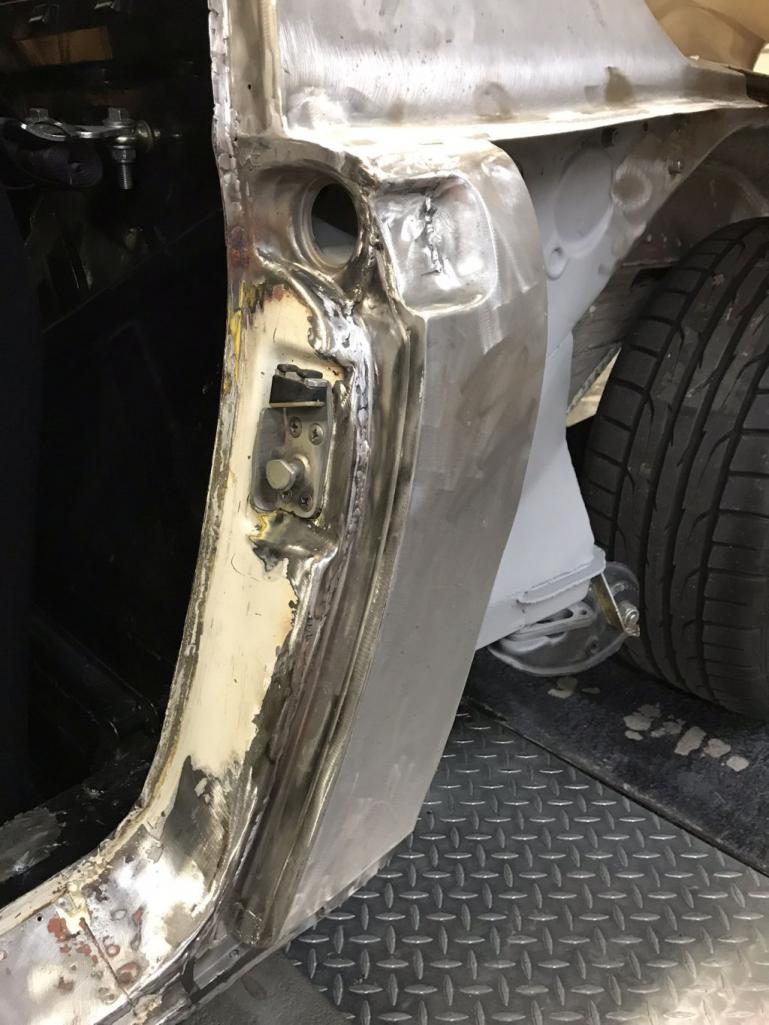
Fed ex guy was probably wondering why I was so excited to get a rusty chunk of car in the mail. Thanks Mark, this is much better than the pictures.
Anyone have the passenger side of this? I would love to acquire it.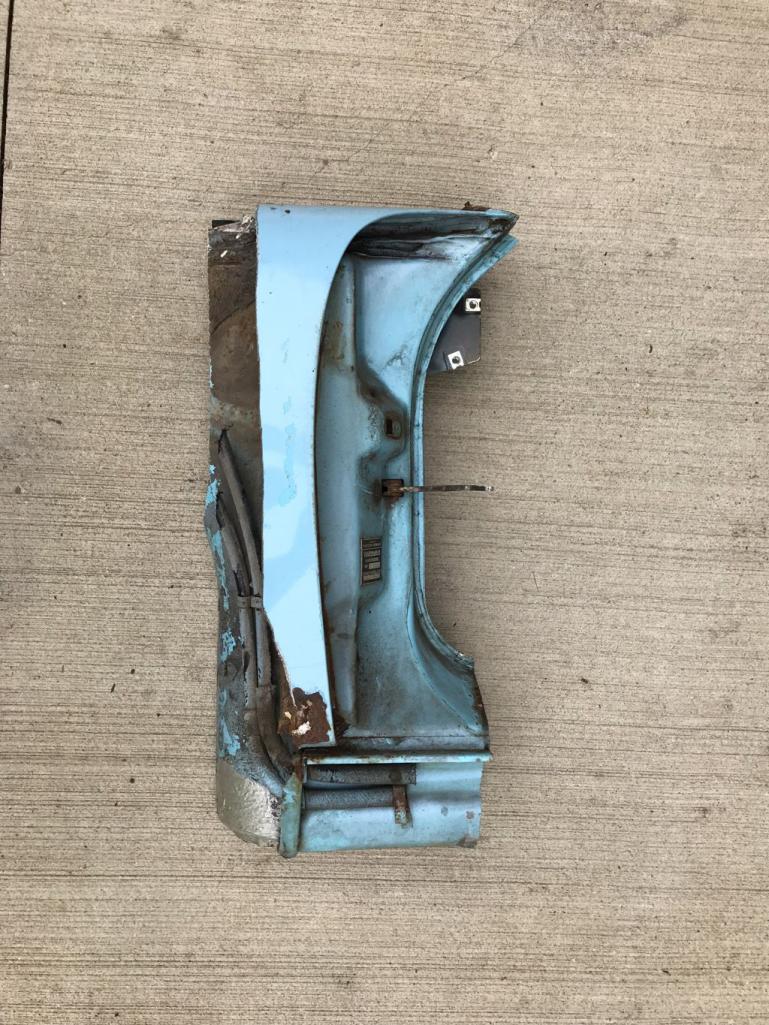
Thought that it looked cool as the sun went down.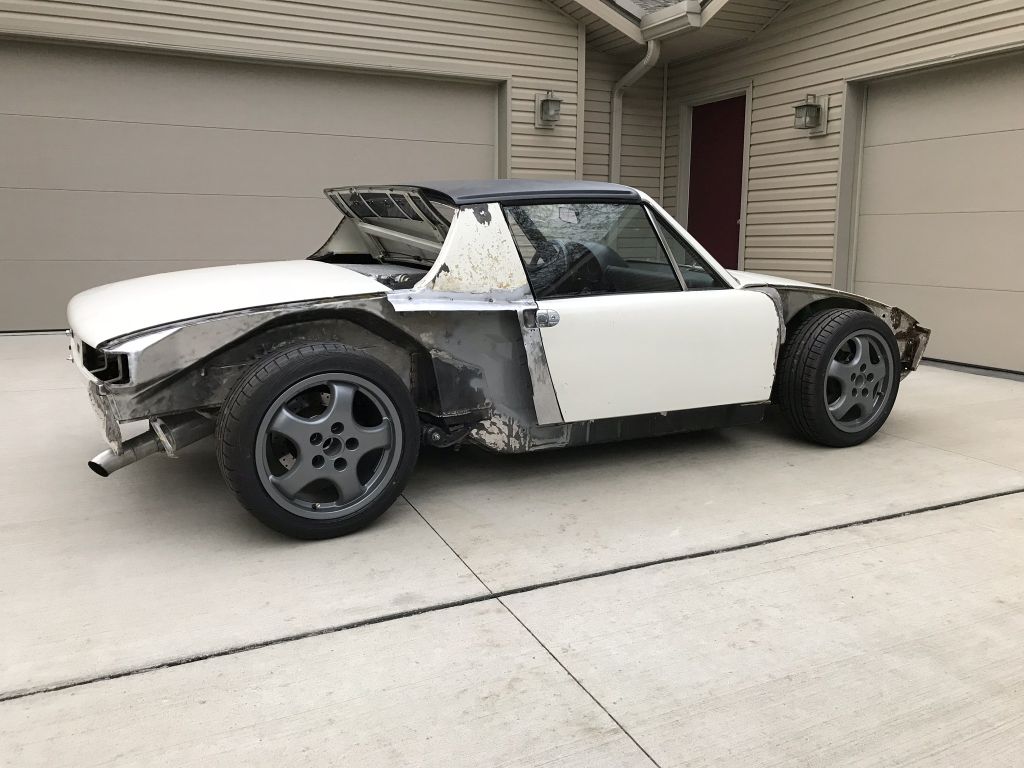
After cleaning up the days mess I could not resist putting the chunk on the operating table to get started removing the rust causing white stuff from hell.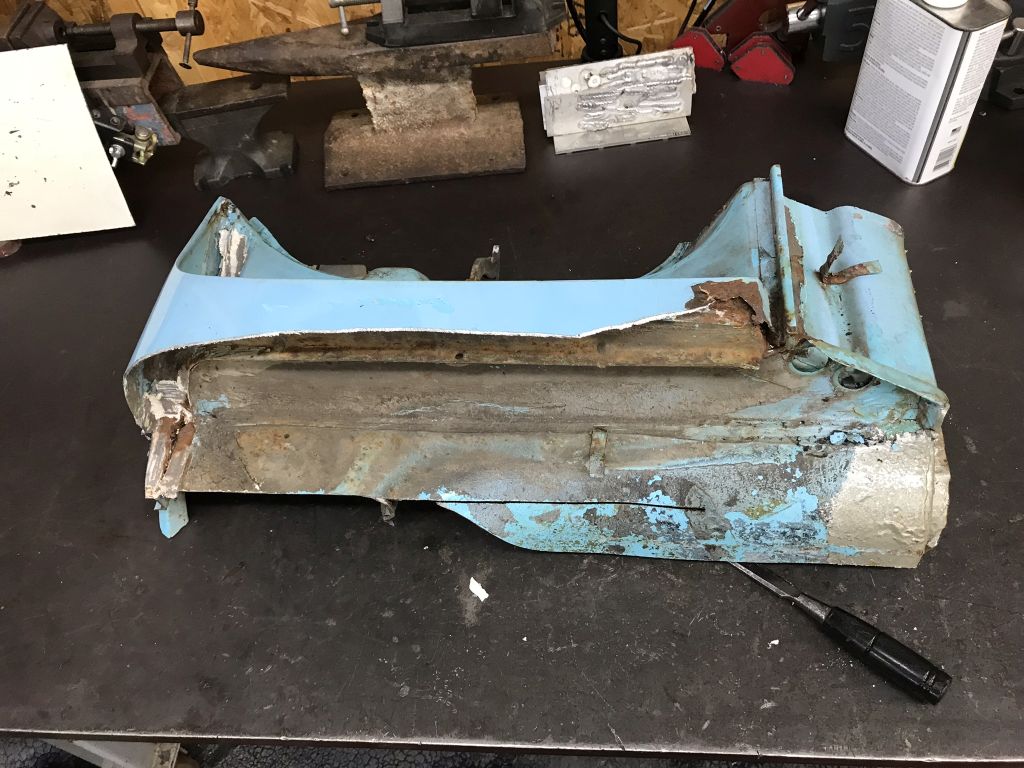
Posted by: Amenson May 7 2018, 08:21 PM
Sunday was supposed to be bonding day. I spent countless hours checking, tweaking, fussing, and delaying...because I was terrified that it was going to go terribly wrong.
Finally got to a point where bonding had to happen. Got out the adhesive and the dispenser and...that won't work. Turns out the dispenser works for 3M which is probably why Stephen recommended that I use 3m adhesive. SEM dispenser will be here Wednesday.
Was actually a huge relief. Not only did it give me a chance to fuss a bit more, the earlier start mowing the lawn was just enough to finish as the rain was starting!
After mowing the lawn I started working on the front fenders. Mostly just scraping the white stuff from hell and figuring out where to start cutting.
Posted by: 914forme May 7 2018, 09:02 PM
Posted by: Joemo5 May 7 2018, 11:04 PM
That's some impressive work and impressive dedication! I love those AN20 fittings.
Posted by: 914forme May 8 2018, 09:49 AM
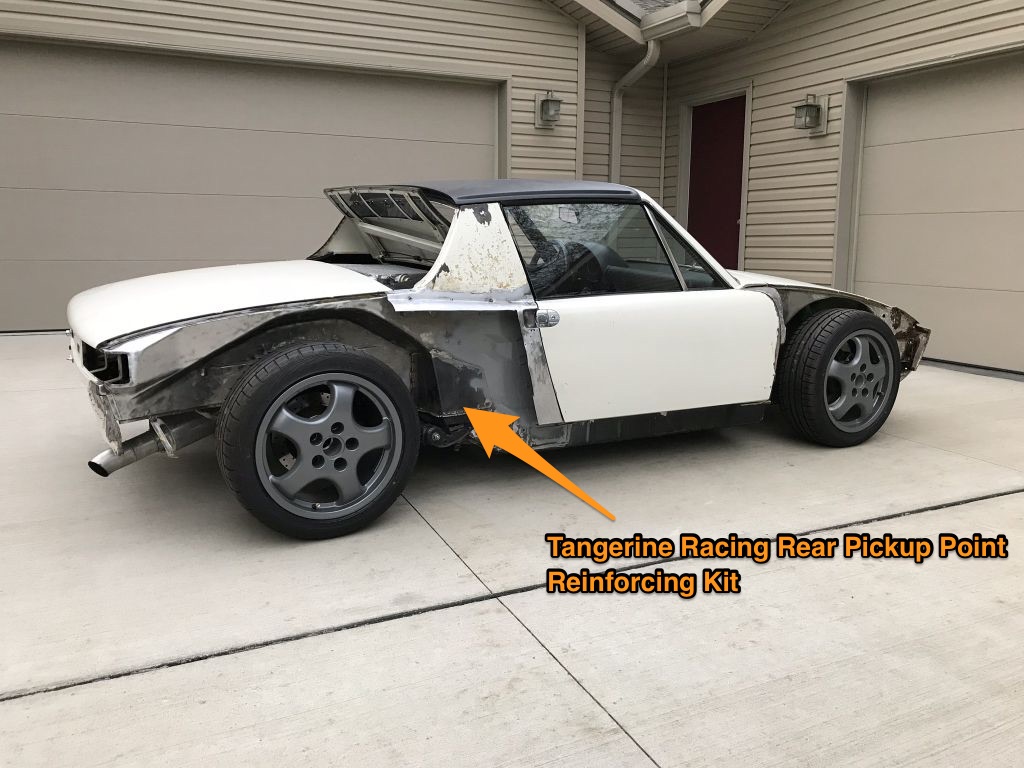
one good thing is having the fender cut off makes it much easier to weld that in place.
Posted by: charliew May 8 2018, 12:29 PM
I wish my concrete was that new.
Posted by: Amenson May 9 2018, 07:04 AM
That's some impressive work and impressive dedication! I love those AN20 fittings.
Thank you for the kind words. I really wish that I did not need to have such dedication, although I have learned a lot...that is good I guess

one good thing is having the fender cut off makes it much easier to weld that in place.
I highly recommend the CRF kit, especially if you have access.
I wish my concrete was that new.
The concrete by the house is 4 years old, the rest is less than a year. My wife still reminds me of the consequences should I decide to lay 2 big black stripes down the driveway.
Posted by: charliew May 9 2018, 10:47 AM
I'm sure you know by now about rust cure or por15 on concrete and also a 3k pressure washer will write your name in concrete. I hope it stays nice a long time. A hunting friend who is a civil eng. once told me there are two types of concrete, that that has cracked and that that will crack. It is just a matter of time and temperature. It sure looks nice now. I bet that took a second mortgage at todays prices.
Posted by: Amenson May 9 2018, 09:42 PM
The dispenser arrived today. What a well built tool, just feels solid and smooth.
Which is good because I put down a ton of SEM 39747. Applied to both the body and the fender. Both were wiped down with mineral spirits beforehand.
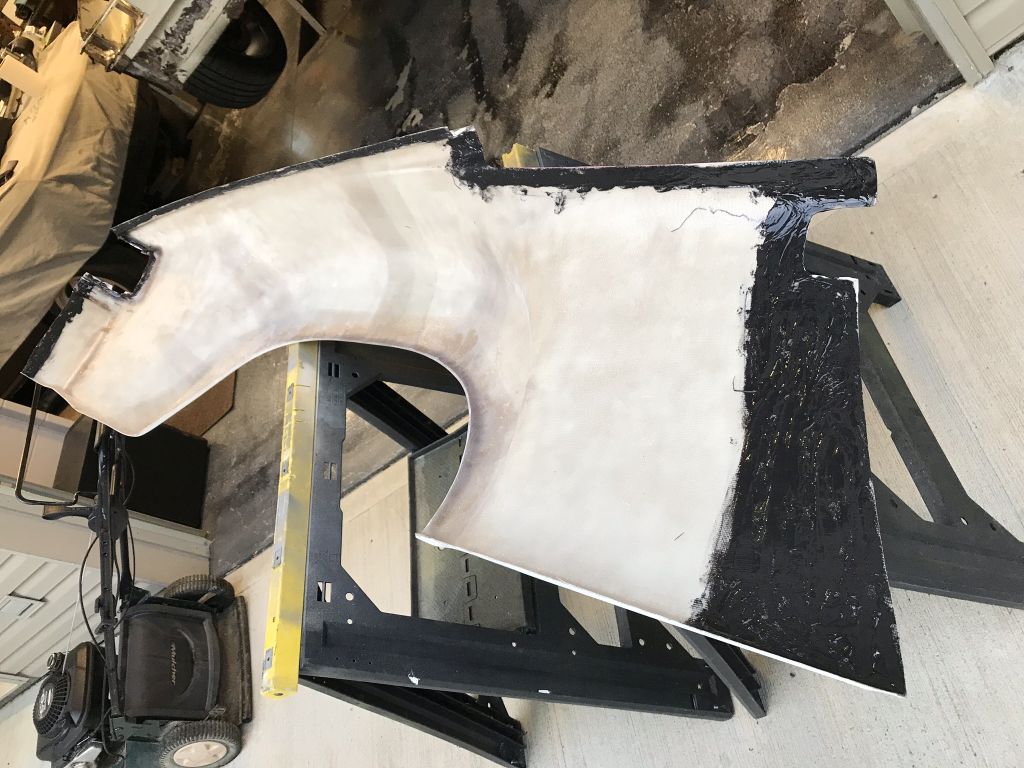
I may have went a little nuts with the fasteners but I wanted to regret having too many holes to fill than having areas that were bulging or not bonded.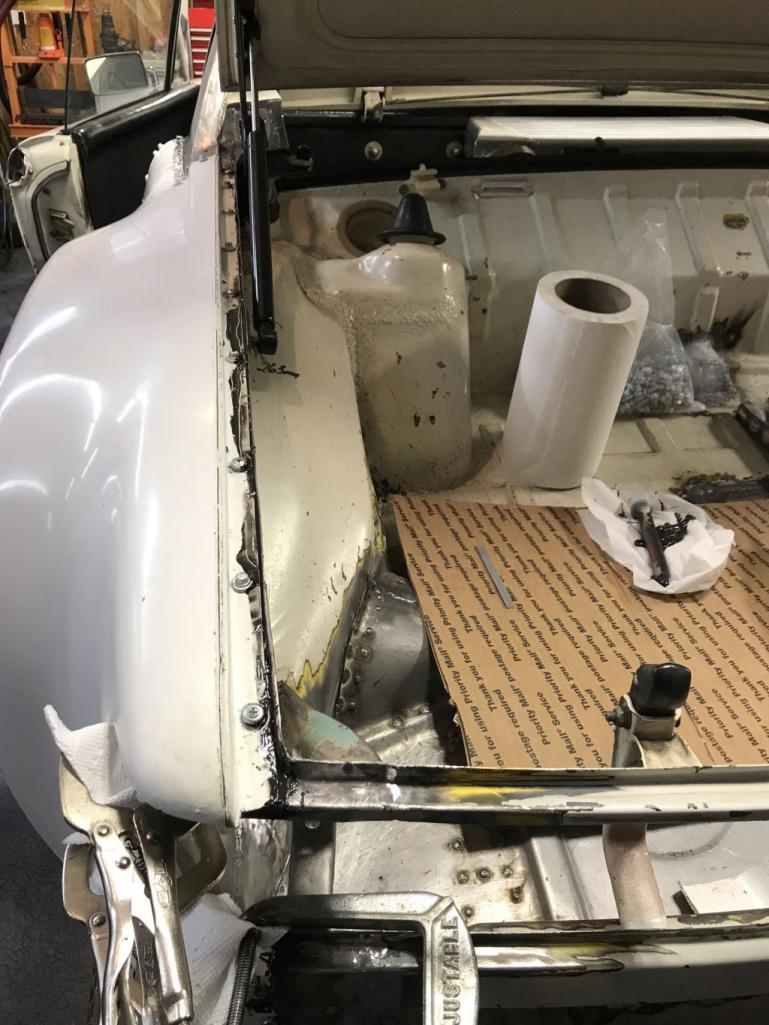
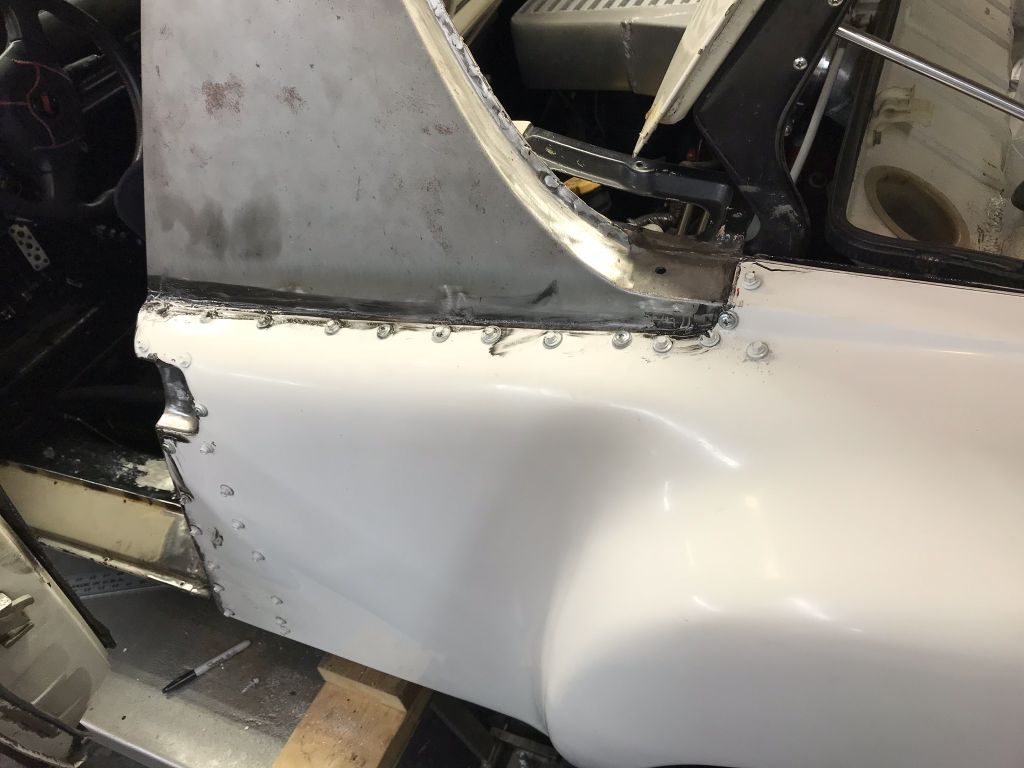
I had time to do the other side but wanted to see how this one ended up so that I could make any needed adjustments.
Posted by: 914forme May 10 2018, 06:39 PM
Very nice, one down 4 to go.
Posted by: Mueller May 10 2018, 06:51 PM
Nice, I was wondering how those are attached.
Posted by: Amenson May 10 2018, 09:31 PM
Very nice, one down 4 to go.
Two down

Posted by: Mueller May 10 2018, 09:58 PM
That is a nice beefy intercooler. I'm afraid to look up that -AN fitting to see how much those puppies cost!
Posted by: Andyrew May 10 2018, 10:09 PM
AN radiator fittings??? Jeeeeeeesus..
Posted by: mepstein May 11 2018, 05:12 AM
That is a nice beefy intercooler. I'm afraid to look up that -AN fitting to see how much those puppies cost!
$25-35. doesn't seem bad.
Posted by: Amenson May 11 2018, 06:17 AM
That is a nice beefy intercooler. I'm afraid to look up that -AN fitting to see how much those puppies cost!
$25-35. doesn't seem bad.
I am using Vibrant fittings with the locking ferrule, still under $50. Well worth it to avoid wrestling with squished and baked on hoses any time I want to work on anything.
That intercooler will be on the chopping block this winter. Water/air like I did on Grey is the way to go.
Posted by: Andyrew May 11 2018, 07:18 AM
That is a nice beefy intercooler. I'm afraid to look up that -AN fitting to see how much those puppies cost!
$25-35. doesn't seem bad.
Till you have to buy 8 of them to make them work... My fuel lines are AN10 and AN6. You would have thought that E85 compatible nylon braided fuel lines in black would have been the expensive part, no way.. fittings themselves F'in killed me.
I am confident my next project involving hoses and lines is going to have a LOT more solid line connections. I think its cleaner and more stout.
Posted by: 914forme May 11 2018, 07:35 AM
I like it, looking good.
Andrew if you can pull it off, solid lines are the only way to go. You will still have expenses, flare tooling for the proper flare on the tube. Or tubing beaders to make the proper end on the tube. Don't forget all the audial clamps you will ned to properly support the tube. Sheet metal tabs bent over the a tube isolated in rubber is how the factory solved the issue. I prefer Andial clamps, each their own. You still have fitting costs in transitions from moving to solid parts. Weld on bungs are nice, but still $$ in fitting costs, and TIG time. Just depends on the level of what your building and willing to accept.
Vibrant Performance Fittings Scott you just moved that build to the big leagues.
Posted by: Amenson May 11 2018, 07:52 AM
I like it, looking good.
Andrew if you can pull it off, solid lines are the only way to go. You will still have expenses, flare tooling for the proper flare on the tube. Or tubing beaders to make the proper end on the tube. Don't forget all the audial clamps you will ned to properly support the tube. Sheet metal tabs bent over the a tube isolated in rubber is how the factory solved the issue. I prefer Andial clamps, each their own. You still have fitting costs in transitions from moving to solid parts. Weld on bungs are nice, but still $$ in fitting costs, and TIG time. Just depends on the level of what your building and willing to accept.
Vibrant Performance Fittings
Scott you just moved that build to the big leagues.I use Vibrant AN stuff because it is generally cheaper than Earls, etc. $20-$30 cheaper in AN20!
I will be transitioning to hard line through the tunnel. You can see the weld bung in the fitting picture above. Plus you have to add the AN bungs on the engine and radiator side. Loads of TIG time in my near future.
Posted by: mepstein May 11 2018, 09:12 AM
I like it, looking good.
Andrew if you can pull it off, solid lines are the only way to go. You will still have expenses, flare tooling for the proper flare on the tube. Or tubing beaders to make the proper end on the tube. Don't forget all the audial clamps you will ned to properly support the tube. Sheet metal tabs bent over the a tube isolated in rubber is how the factory solved the issue. I prefer Andial clamps, each their own. You still have fitting costs in transitions from moving to solid parts. Weld on bungs are nice, but still $$ in fitting costs, and TIG time. Just depends on the level of what your building and willing to accept.
Vibrant Performance Fittings
Scott you just moved that build to the big leagues.I use Vibrant AN stuff because it is generally cheaper than Earls, etc. $20-$30 cheaper in AN20!
I will be transitioning to hard line through the tunnel. You can see the weld bung in the fitting picture above. Plus you have to add the AN bungs on the engine and radiator side. Loads of TIG time in my near future.
where do you purchase your vibrant fittings?
Posted by: Amenson May 11 2018, 07:30 PM
where do you purchase your vibrant fittings?
Lately https://www.summitracing.com/search/brand/vibrant-performance/product-line/vibrant-performance-hose-end-fittings?SortBy=Default&SortOrder=Ascending, but Jegs has them too.
Posted by: Amenson May 14 2018, 09:10 PM
Tom (the owner of Grey) and his son stopped by the garage this weekend to check up on the project and install some parts that will make test driving it less troublesome. It was great to have them in the shop and I took advantage of the extra hands to install the rear bumper. I wanted to make sure that it fit with the fiberglass fenders...looks like it does.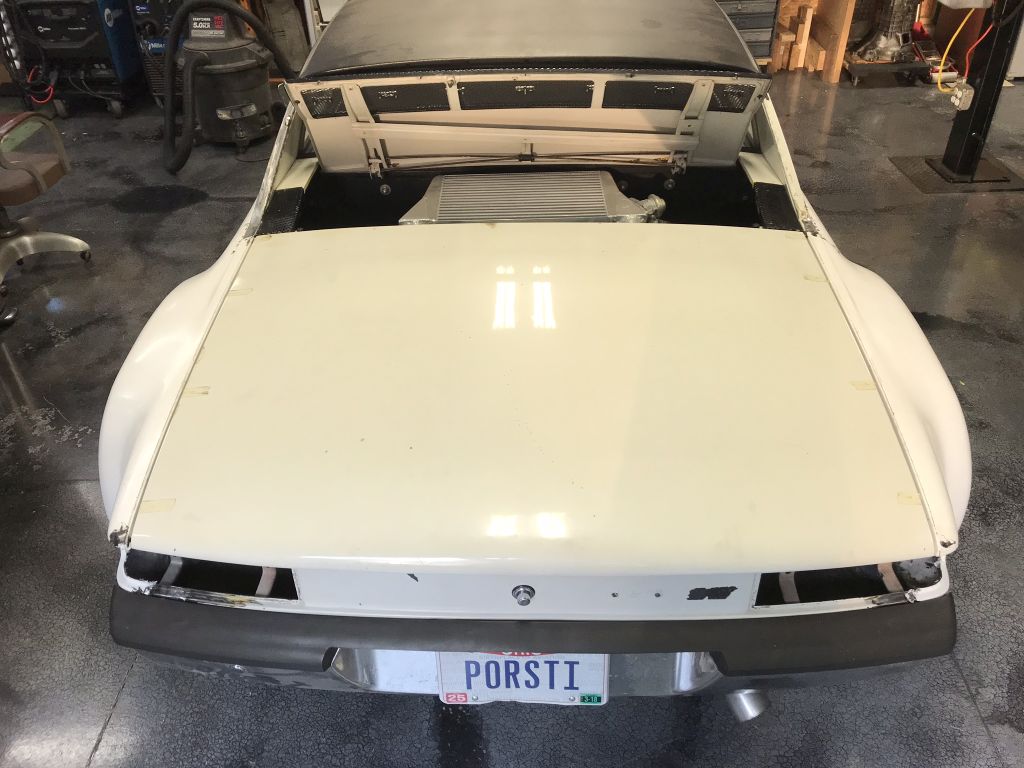
Now I can make the fiberglass bumper fit to match.
The flares were installed purely to allow wider tires but damn do they look good too!
On with real work. I got out the plasma cutter to help me slice through the various layers of the a-pillar chunk. In the end it came down to the spot welds along the flange and the two mig welds colored in black.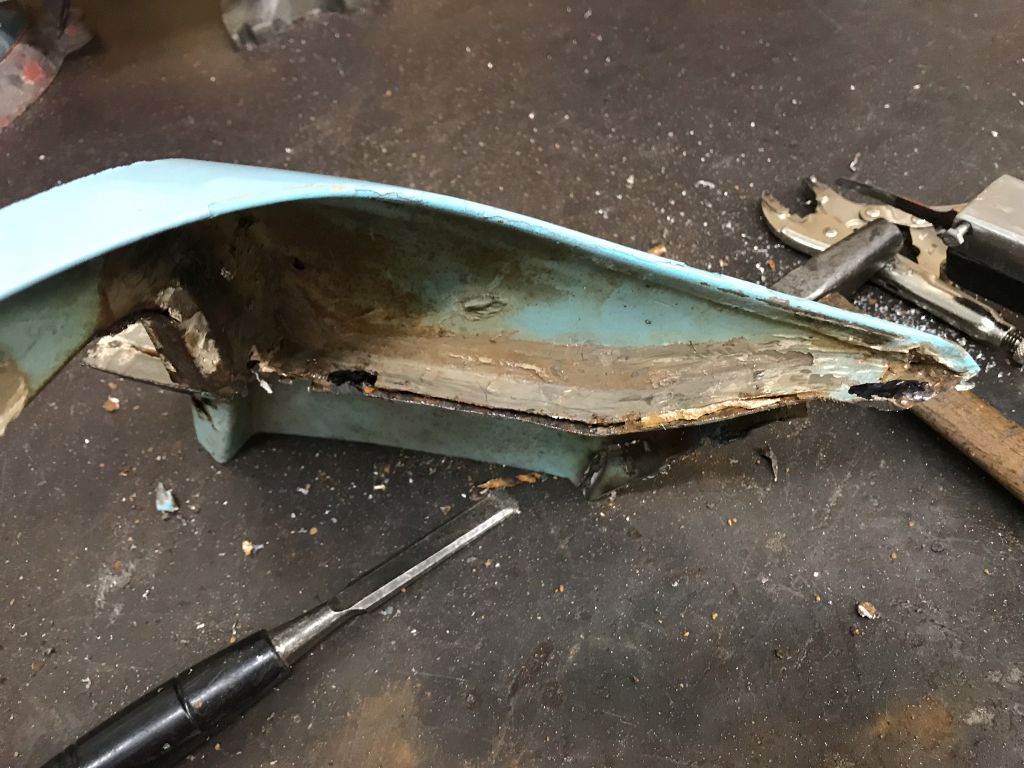
Nice piece to put back on the car.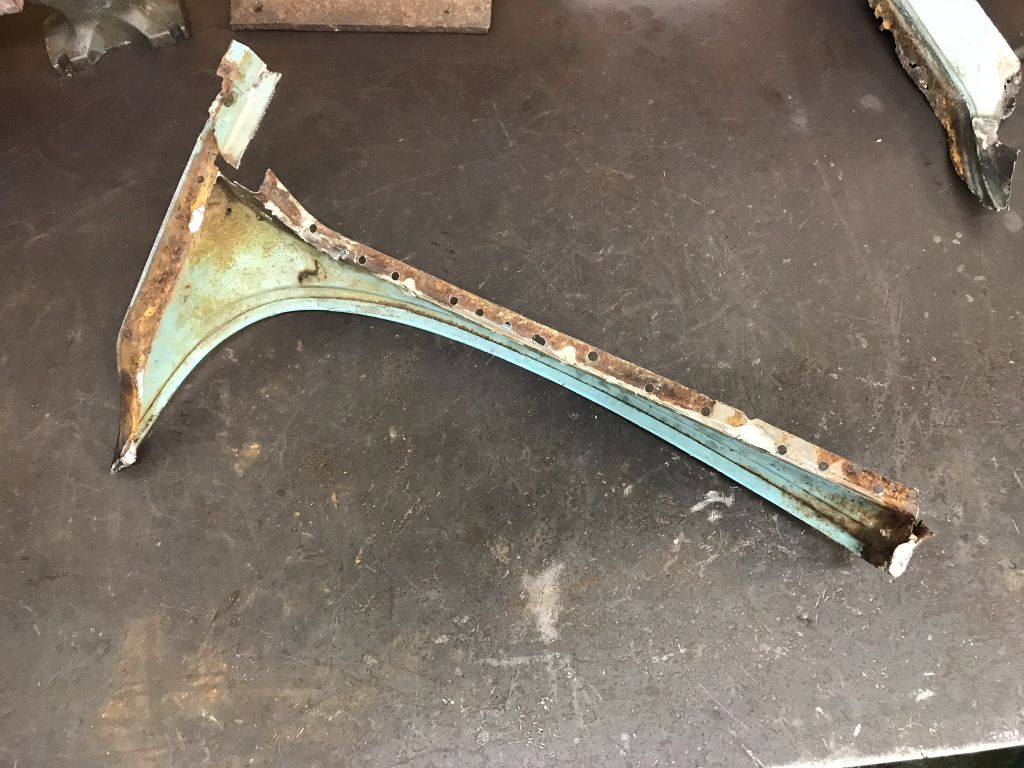
Just a small area at the bottom to fix.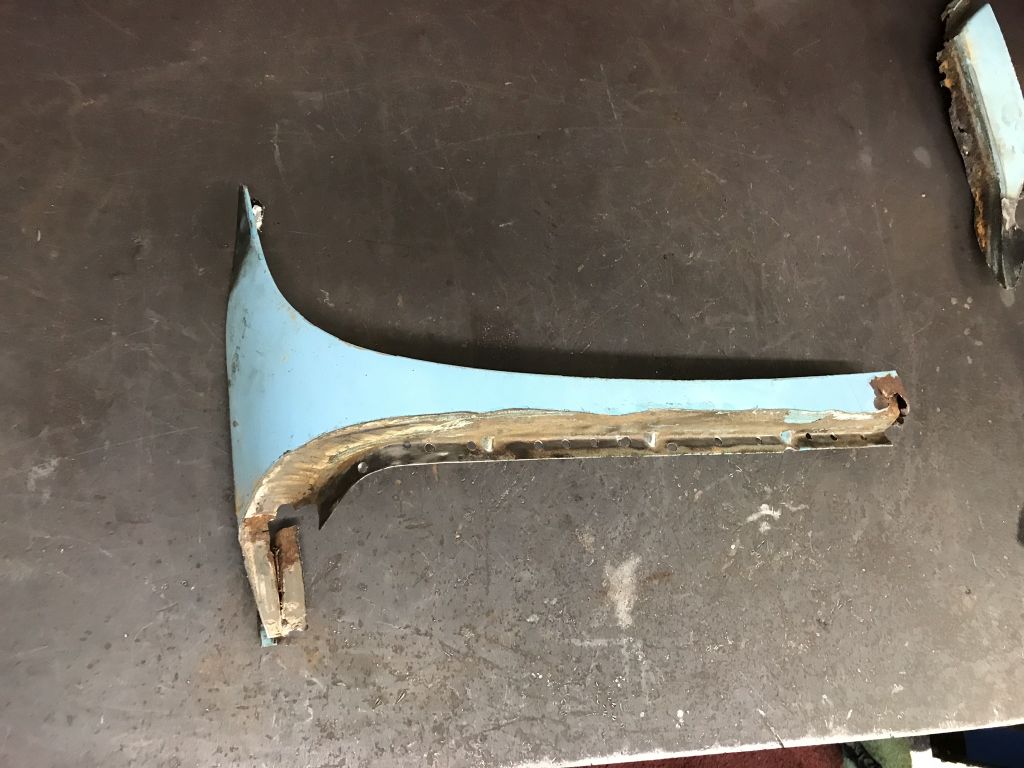
Hack off the rusty crap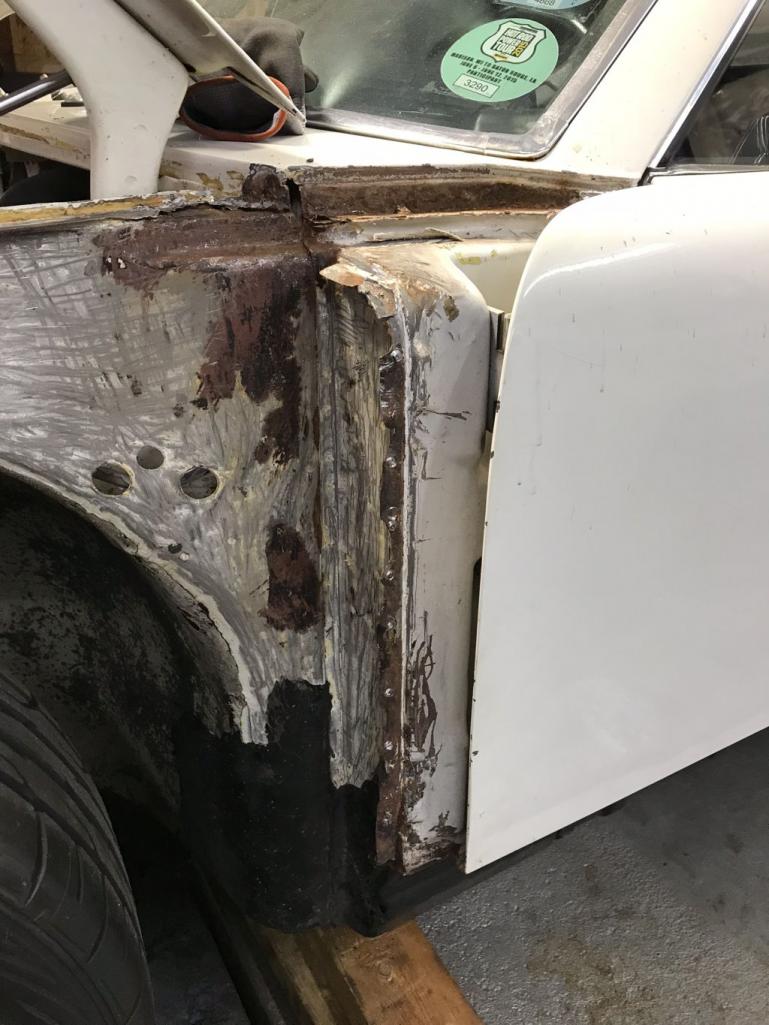
Posted by: effutuo101 May 14 2018, 10:49 PM
Keep it up! Looking good!
Posted by: Amenson May 15 2018, 08:19 PM
I called my backup plan for front passenger fender parts today and he agreed to let me hack up one of his yard cars. If that fails I am sure he will have a nice $$ fender in the building. That good news combined with confirmation from the power team (my parents) that they will come down again for Memorial weekend to help grind through some more tasks gave me the confidence to kick off the performance upgrades.
First step was to disconnect the cooling lines from the engine and make a terrible mess. I rewarded myself by yanking my least favorite part on the car. My cobbled together intake with all of the recirc connections behind the MAF. We don't need no MAF where we are going (will actually keep it in the intake temporarily to help with the speed density tuning). Yes, that is a copper plumbing elbow 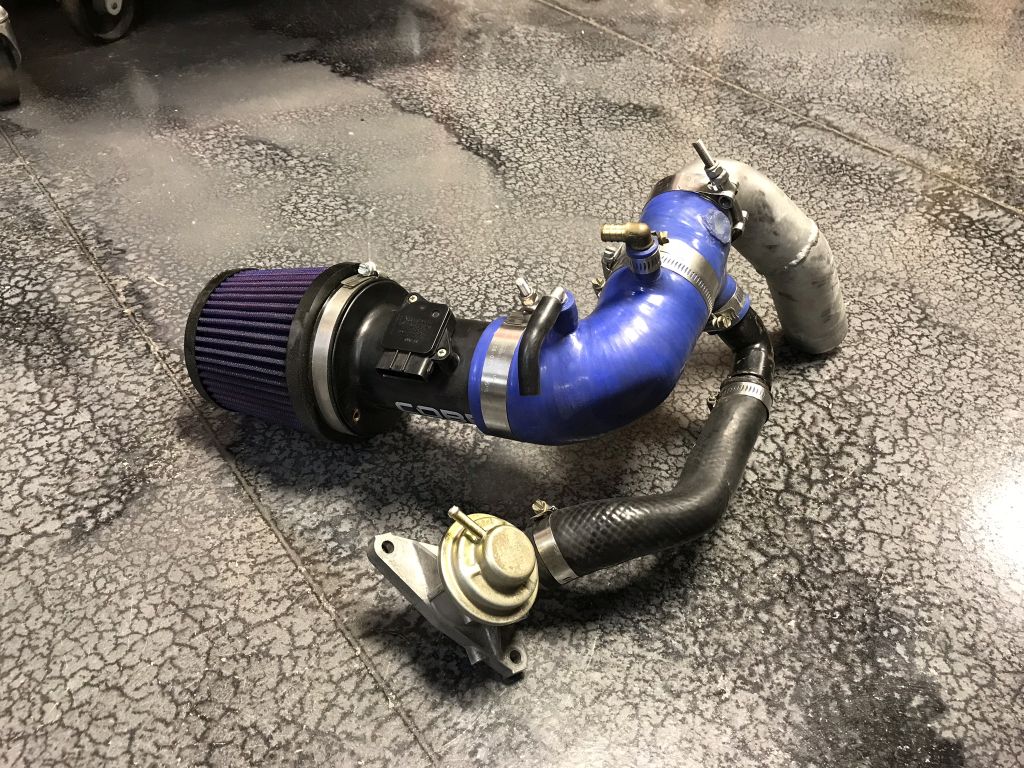
I also enjoyed cutting the never to be used again hose clamped fuel lines.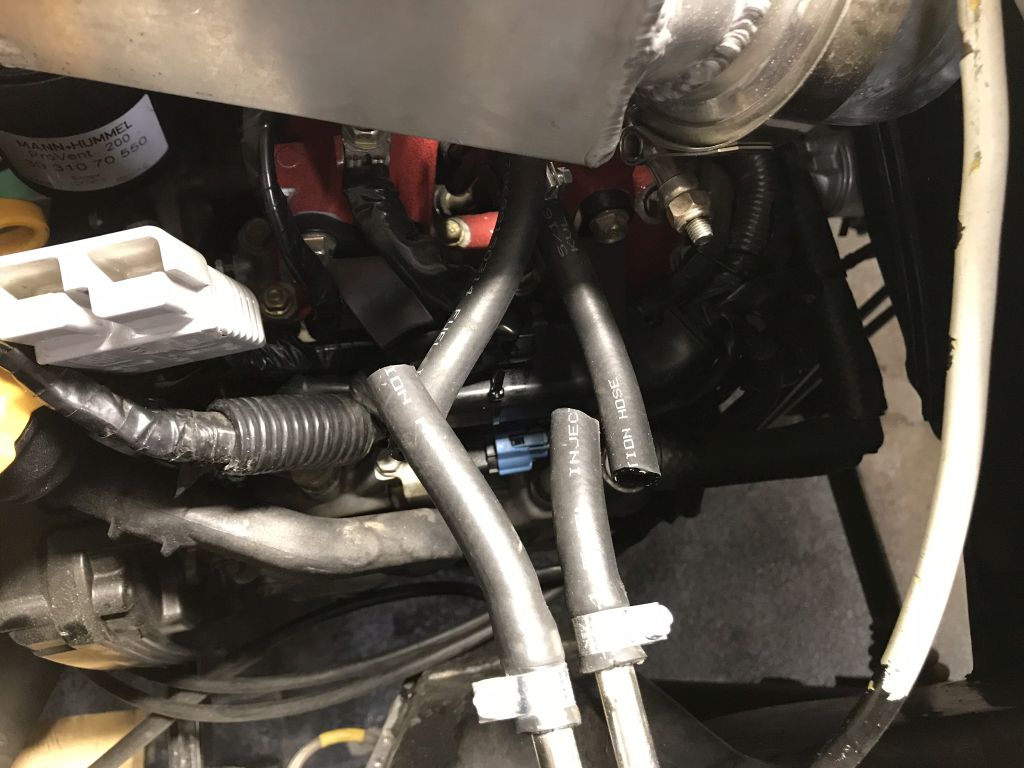
Posted by: charliew May 16 2018, 10:09 AM
great progress, suby plumbing is complicated and hard to keep clean. I want to emphasize the importance of a updated breather system on a hot-rodded suby. If you have time try to study up on the big turbo applications. The simply way is a catchcan but it really means a lot closer check of the oil level in the pan on every filup. the hot oil breaks down and goes out the exhaust and also into the catchcan. a lot of suby motors went bad from low thin oil. the thing with a turbo is the lower pressure or vaccum below boost and then the pressure in the intake at boost. one sign of too much crankcase pressure is the dipstick rising in the tube after a hard run. you have gone to a lot of nice high tech parts so don't leave the breather stuff out. also the longer the breather lines the better to keep the oil in the sump.
Posted by: Amenson May 18 2018, 09:13 PM
Engine is out and upgrades are in progress. It is amazing how much can be accomplished when not fitting body sections.
Took 360 pictures of the starting point just for fun.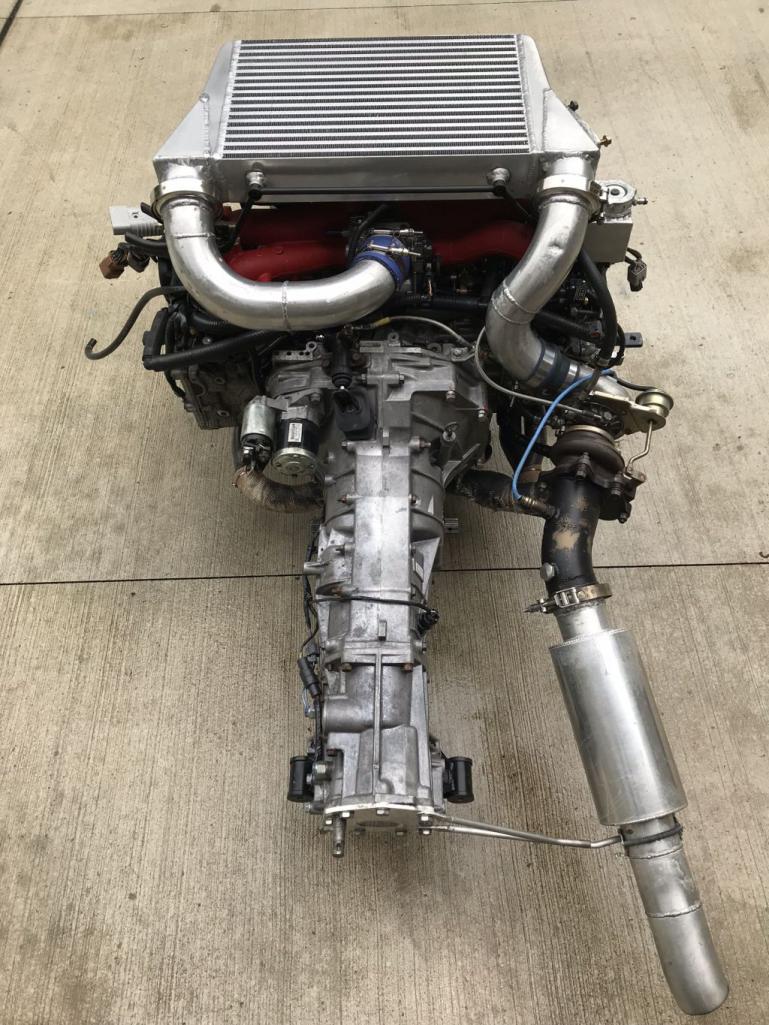
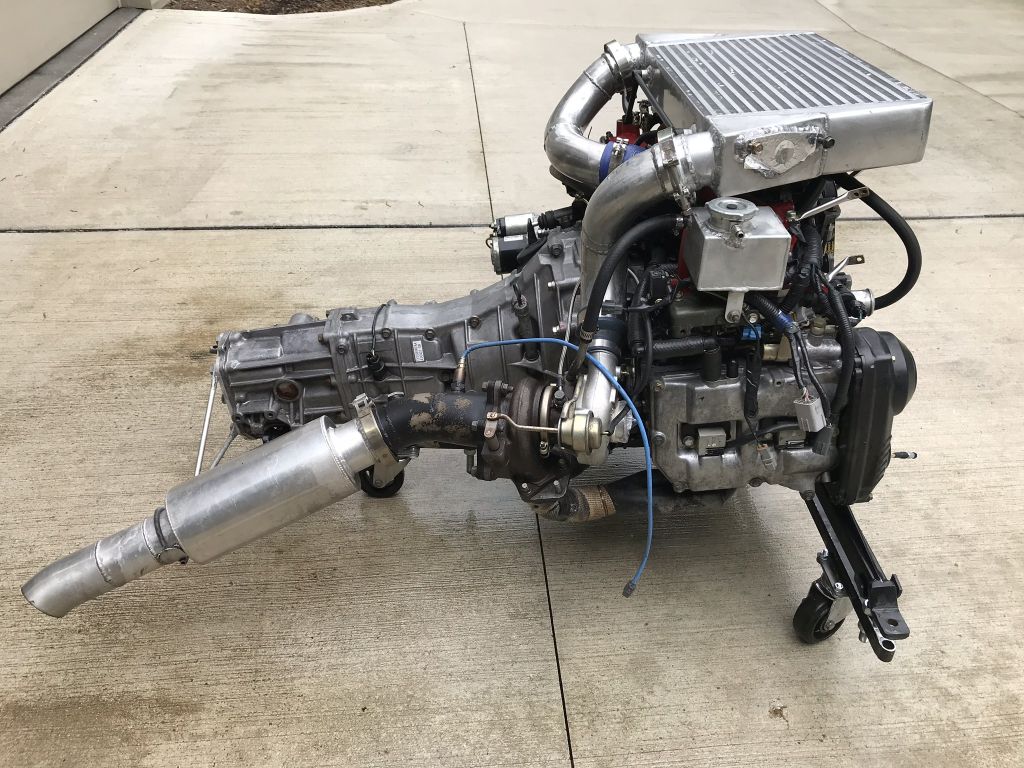
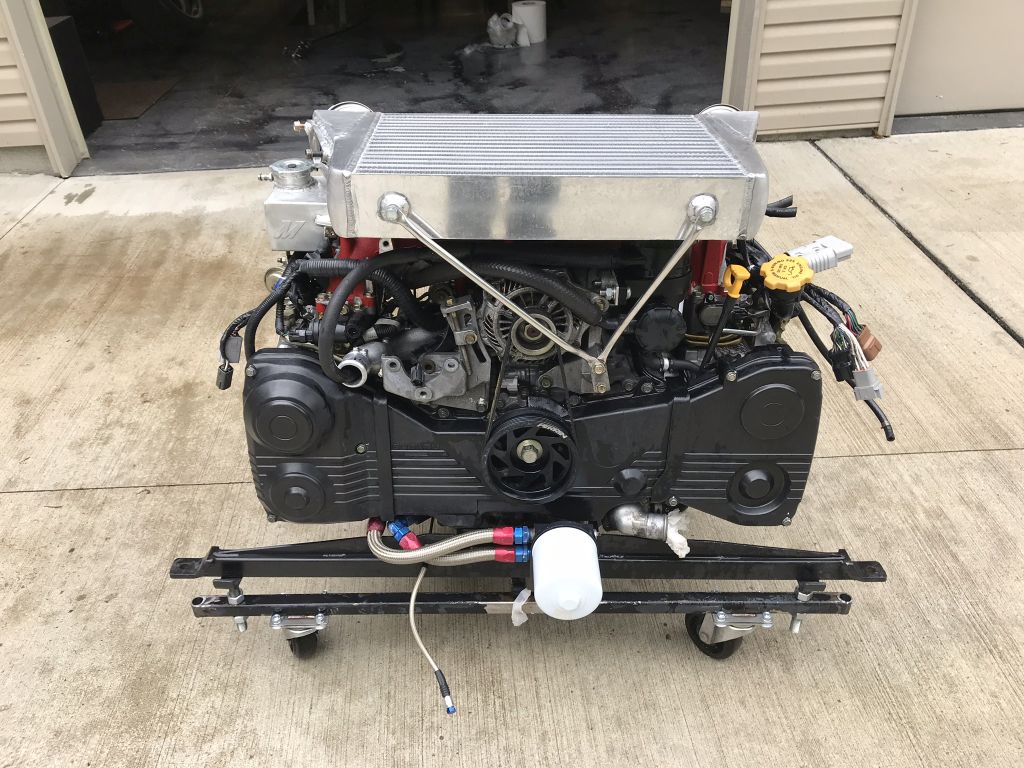
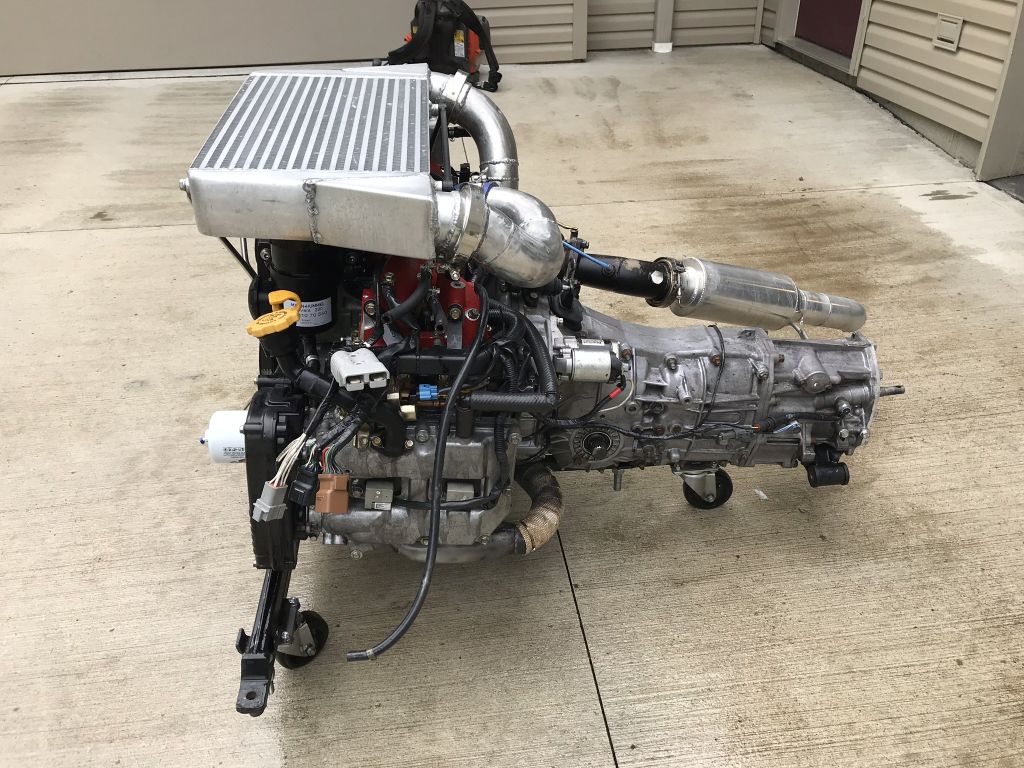
I picked up a earlier cooling cross over because it has fewer connections to deal with. The heater core outlet has been plugged but decided that I would hook it back up using an AN setup that is on Grey. The hole is perfect size for 3/8 NPT!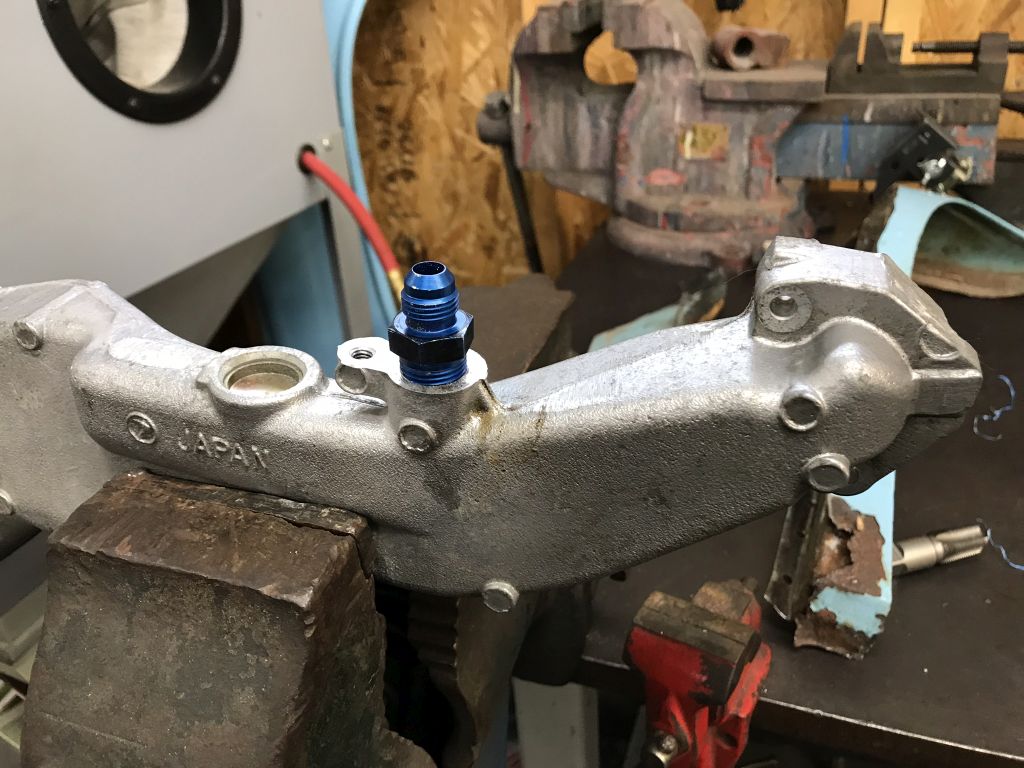
First AN cooling fitting. AN all the things.
TGV Deletes installed. So much cleaner than the EOM setup. I will tuck the wires under fuel railes to clean it up a bit more.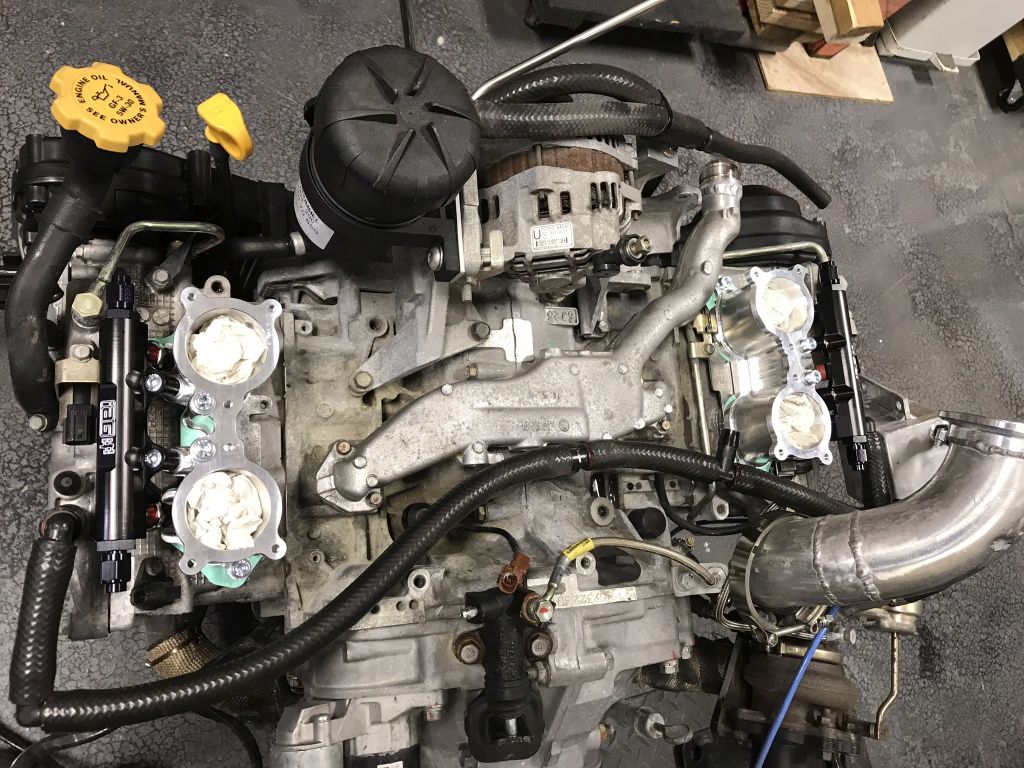
Posted by: Amenson May 18 2018, 09:43 PM
Two of Subaru's crappiest ideas all in one...TGV's and side feed injectors. 
Threw on the top of the intake to start fitting/routing.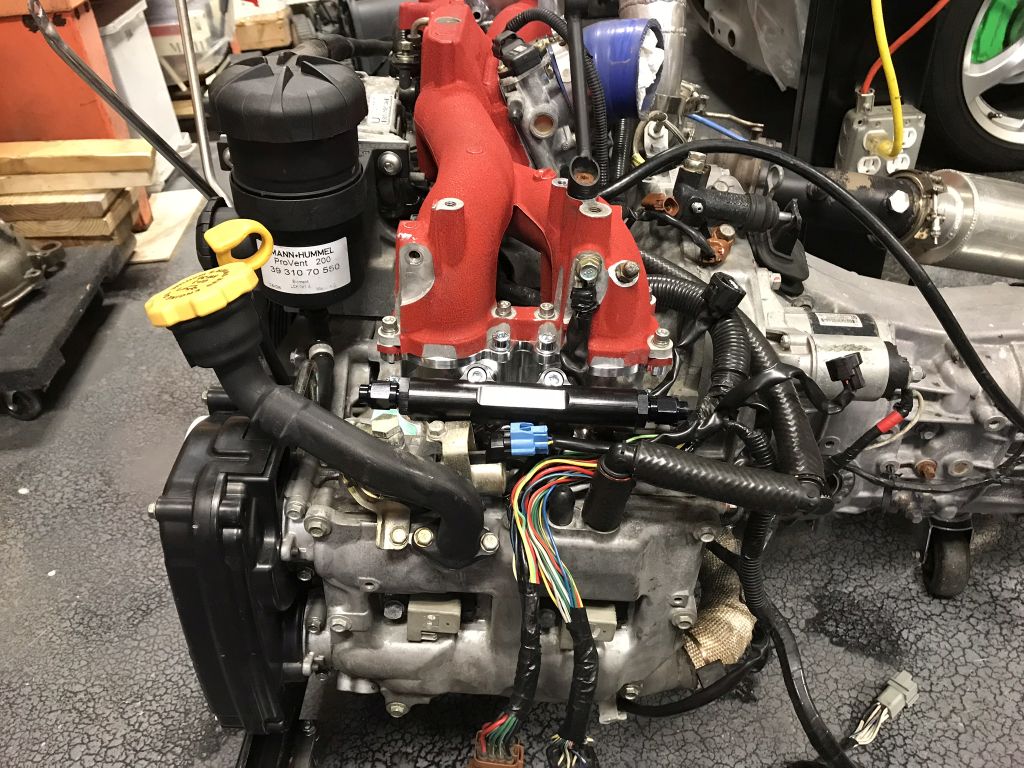
The fuel pressure regulator is huge but I think that I found a good place to mount it. Just have to make sure the ethanol sensor will also fit.
Posted by: Amenson Jun 24 2018, 08:55 PM
I'll spoil the ending right at the start...PorSTI did not get finished in time for Power Tour. Even taking an entire week off plus several other days to create long weekends...I cut it too close starting the work, added to many while I am in there projects, had some equipment failures and one huge mental failure.
Going back through he pictures reminded me just how much I did and how much I did that I did not take progress pictures of. It will be easier to make the post by systems instead of chronologically. I'll only show the highlights, if anyone wants detailed pictures of a certain thing let me know and I can post them.
Cooling System:
This was a colossal amount of work but so nice now that it is in. In retrospect I probably would not use tube down the center. Or, if I did, not use the double gasket. They area awesome and will seal nicely but spaced the tubes further apart than necessary and they just barely fit down the tunnel. In a car with a stock pedal assembly with added clutch MC, it would not fit. Also, the cost of the additional fittings almost offsets the price of the AN20 hose. Also, welding on the fittings, while fun, also added an incredible amount of time.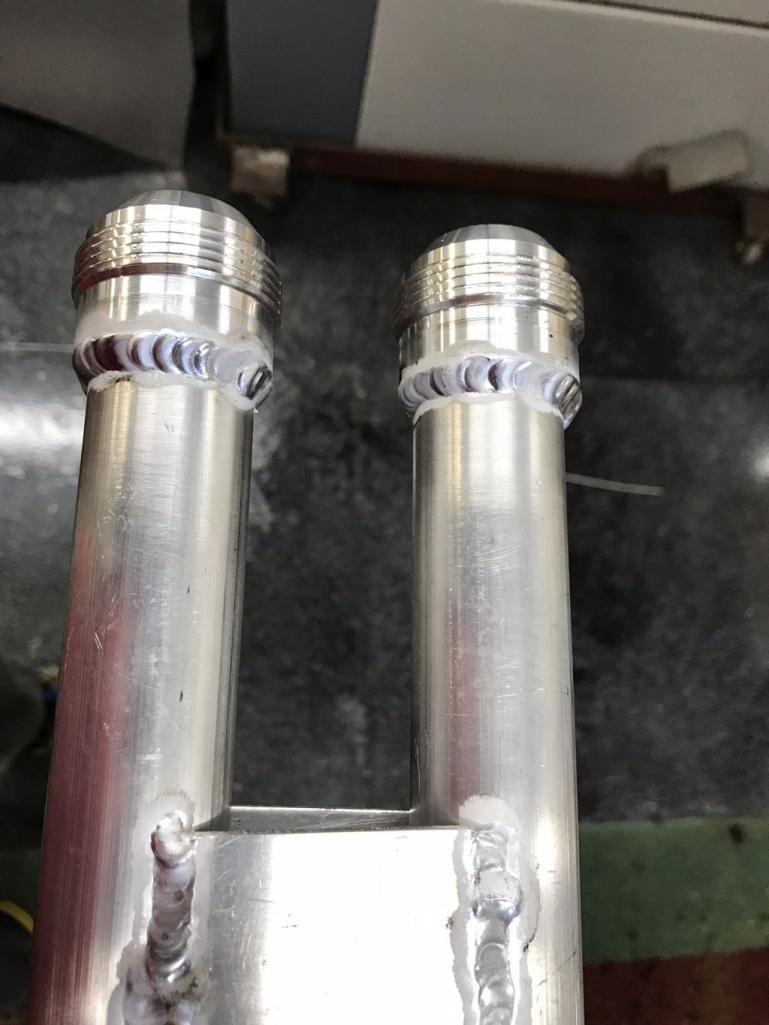
As did machining each fitting to match what it is interfacing to...stock on the right.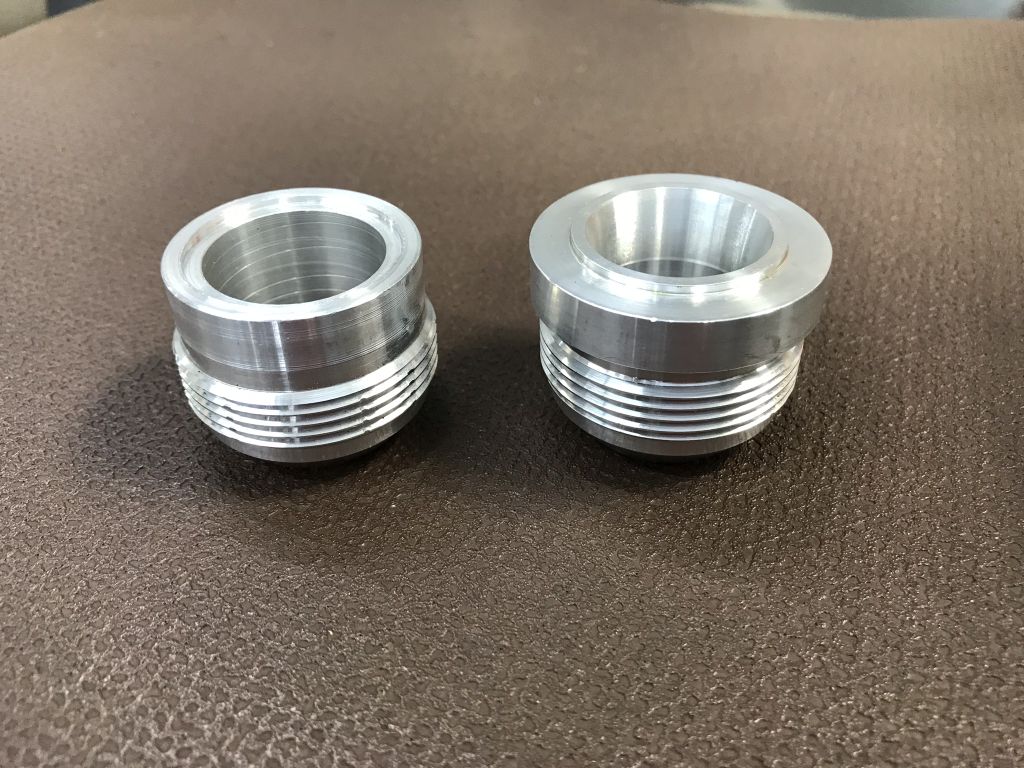
I also cut out and replaced (again) the firewall so that I could start fresh.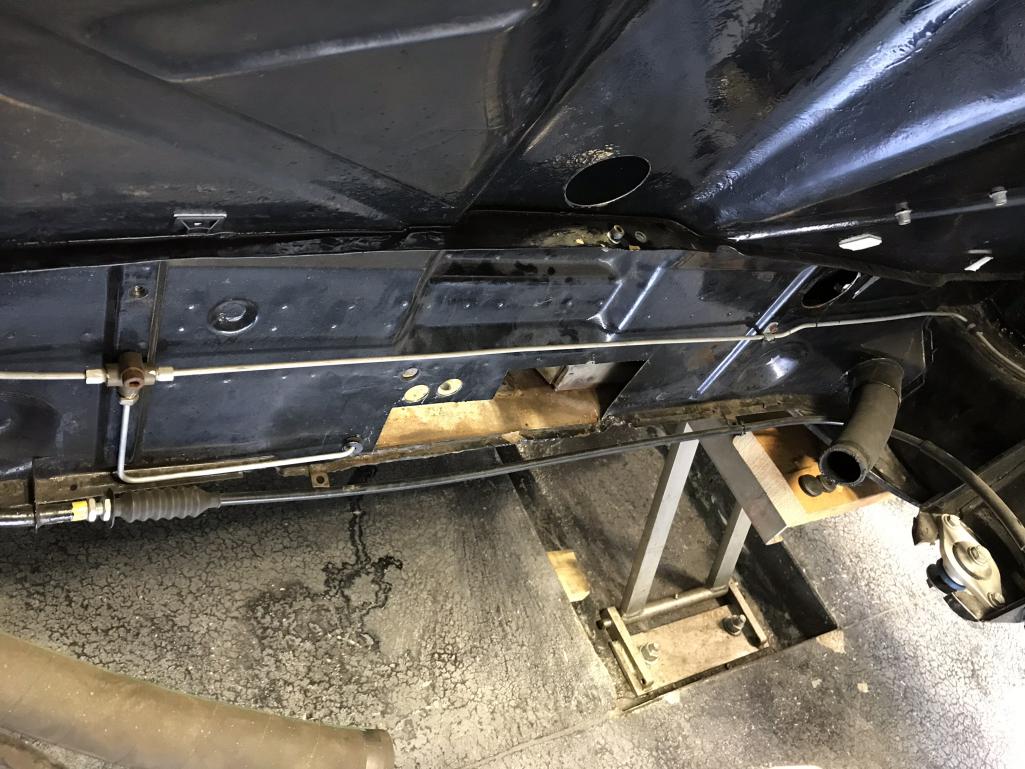
Full.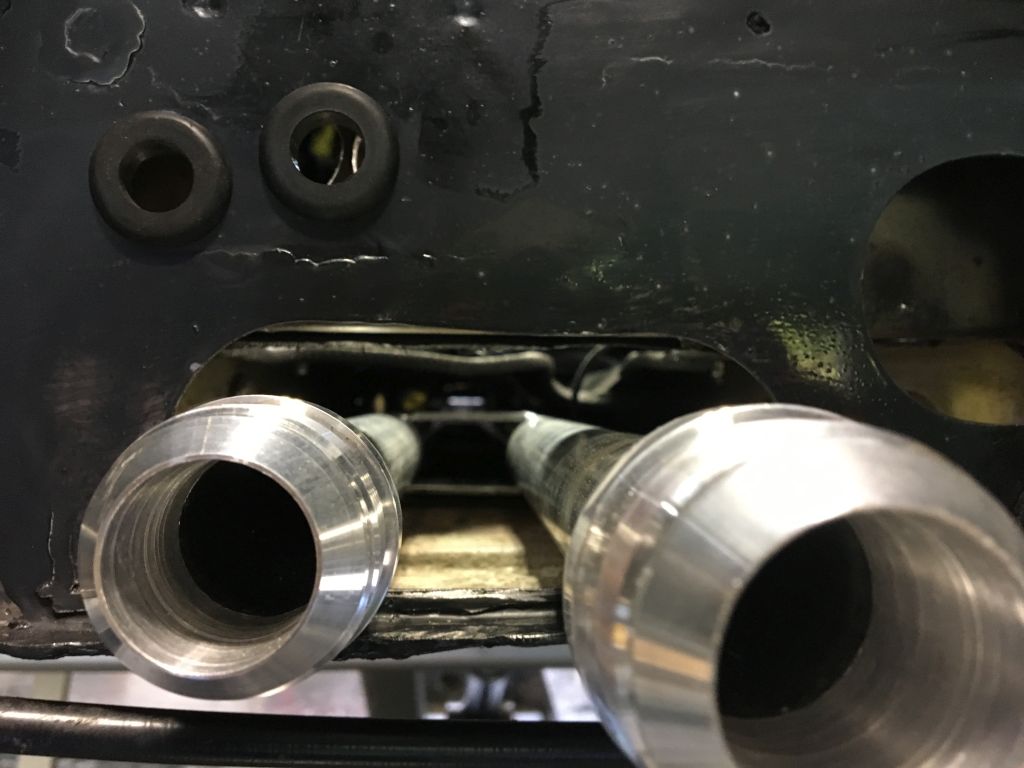
Can see the new fuel line routing here too!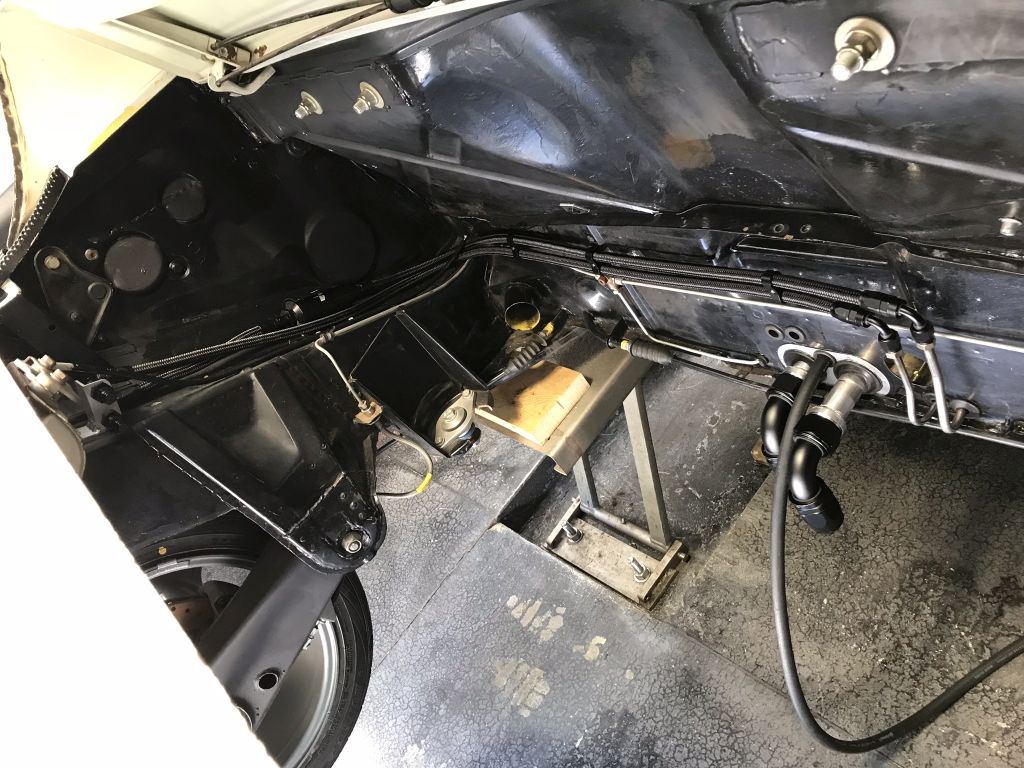
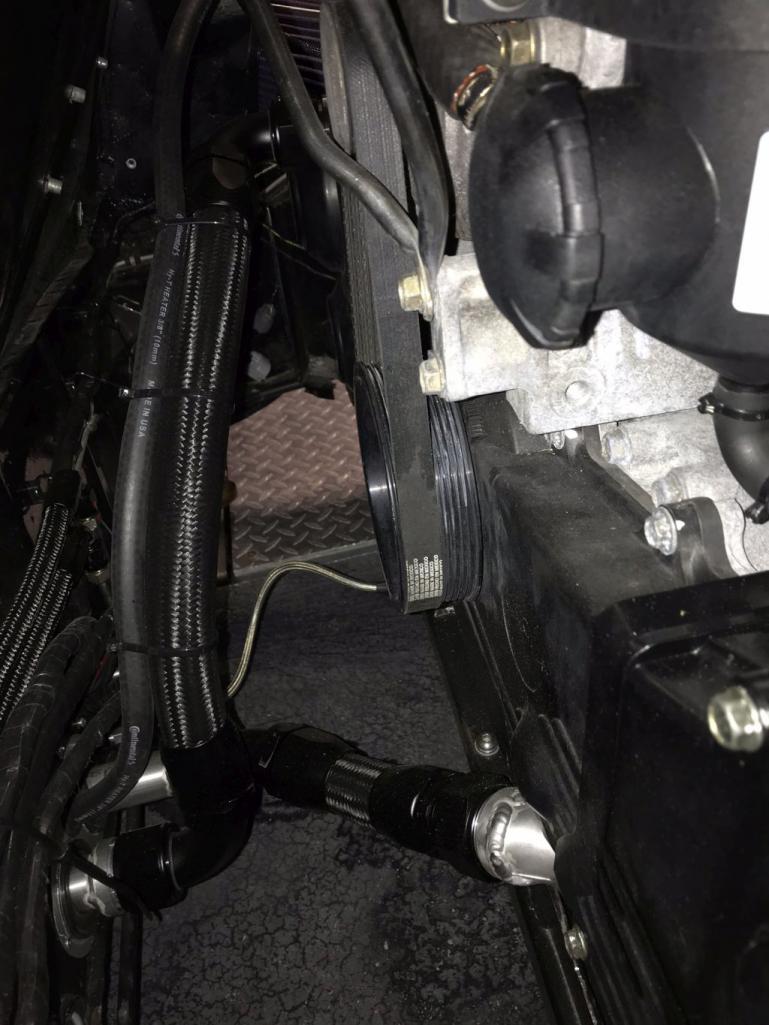
Path through front. You can see the new mount for the pedal->tunnel soft lines for brake/clutch. I always hated the routing of the hard lines. to the pedals. All of the lines in the tunnel are new as well.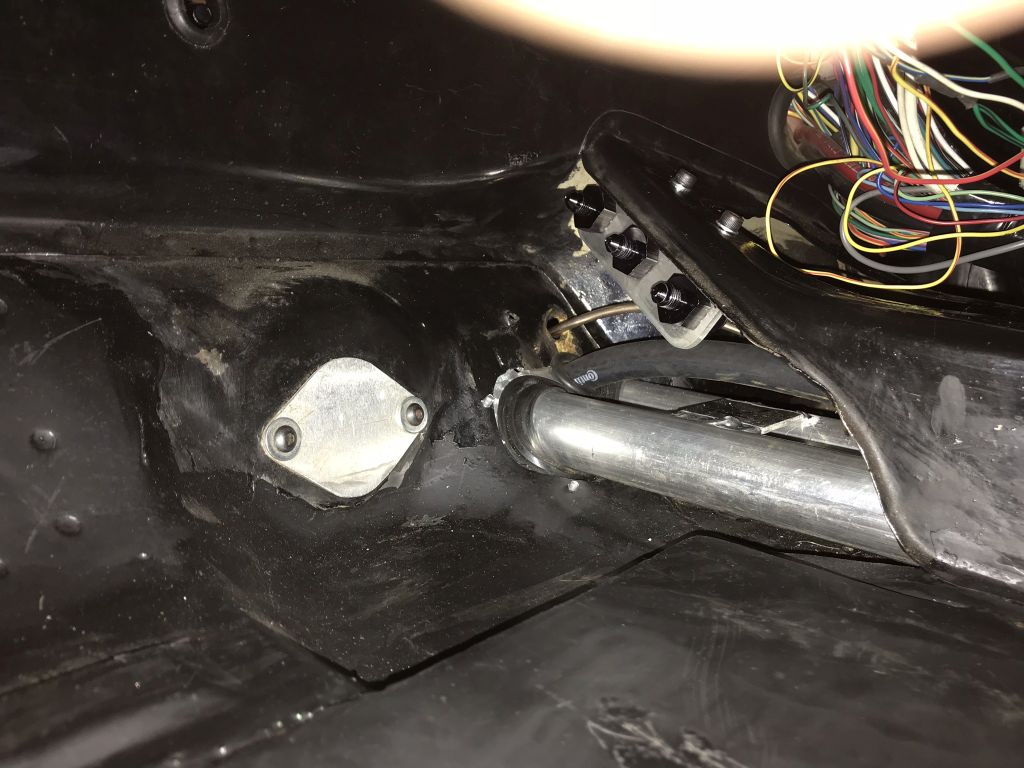
This is so incredibly tight but there is clearance. Had to order 30 deg. fittings, 45's just would not work.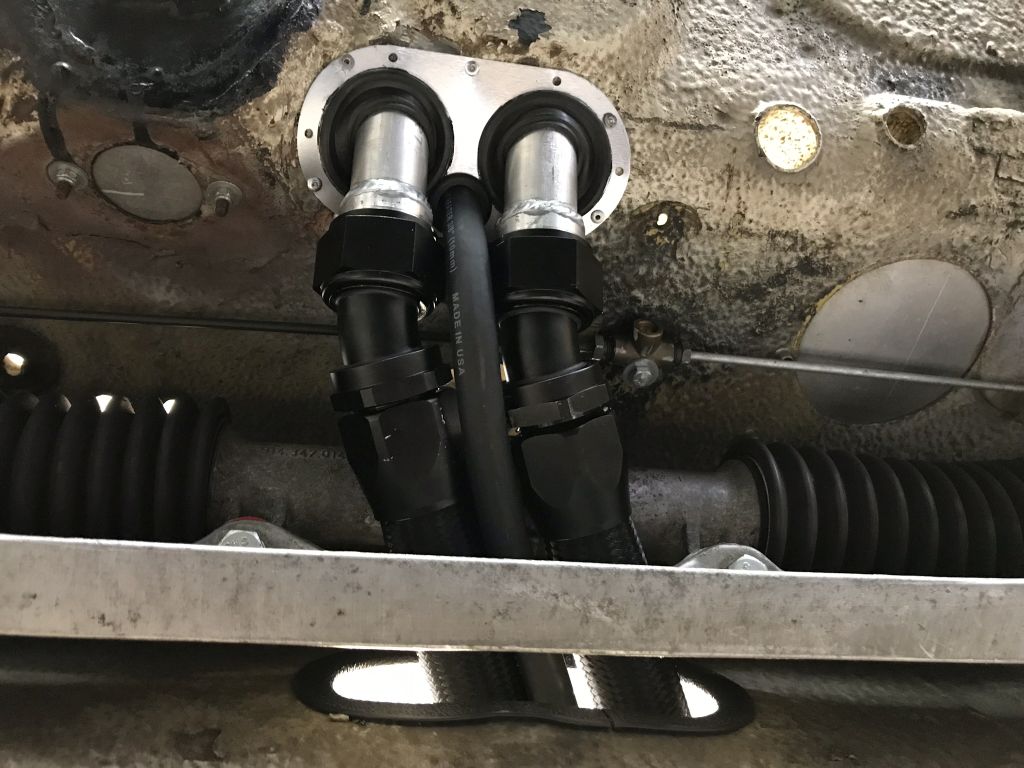
I spaced the fuel tank up 10mm to give the lines a bit more space to avoid kinking.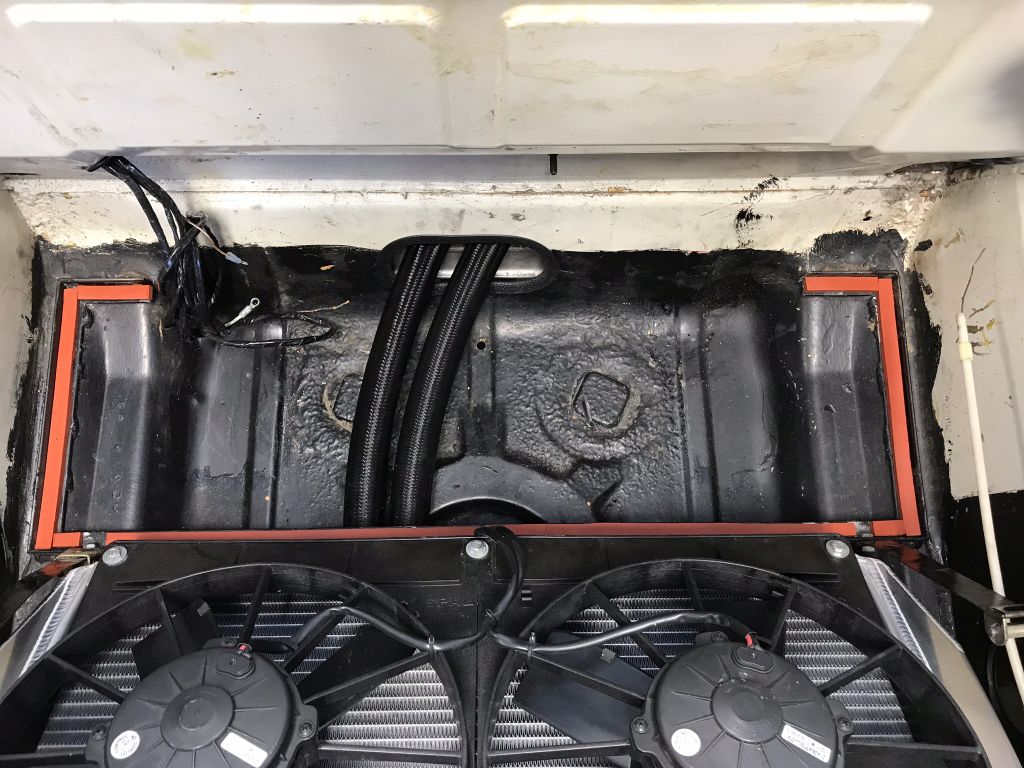
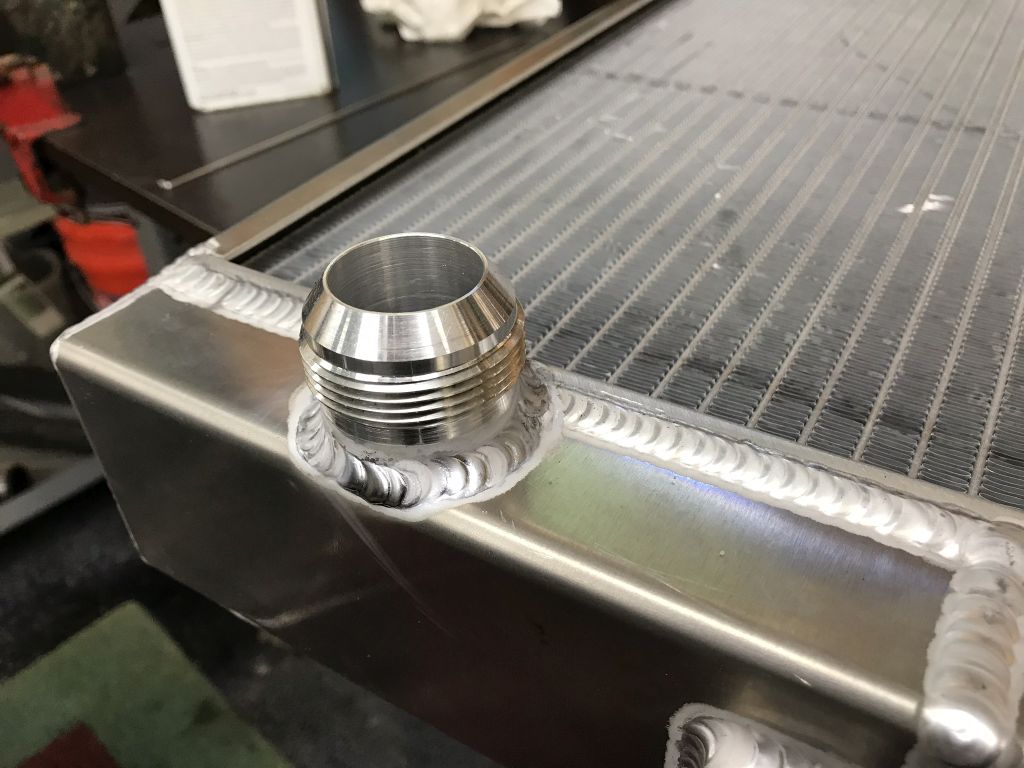
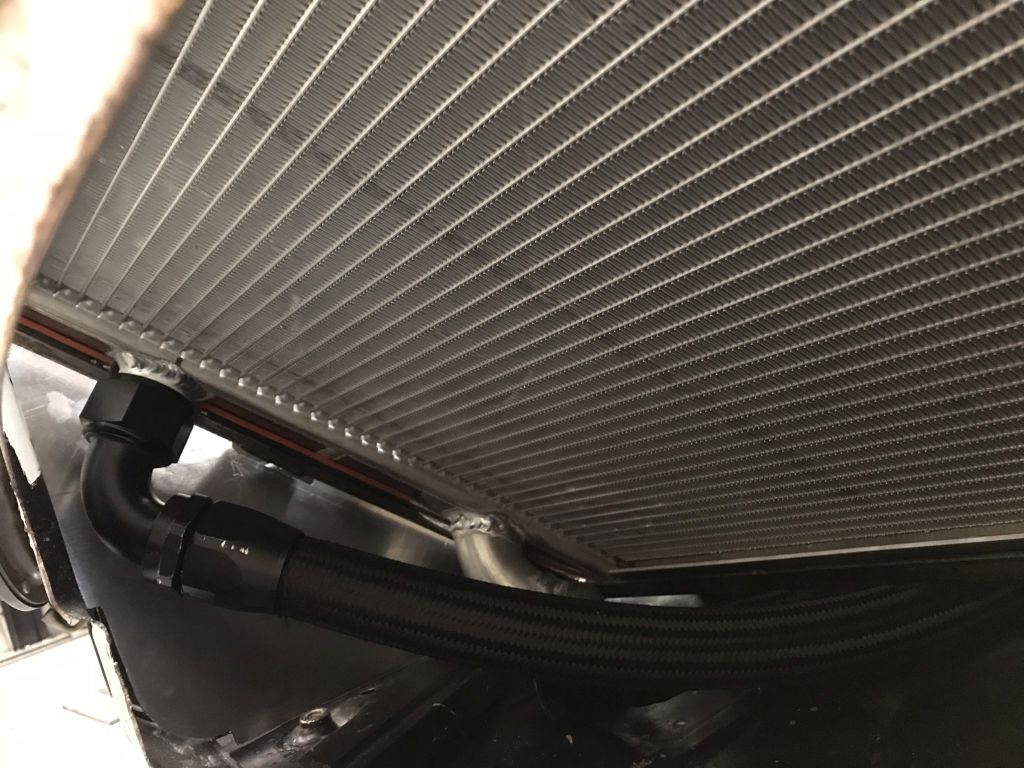
That is enough for tonight will post more tomorrow.
Posted by: CptTripps Jun 25 2018, 07:45 AM
Looks amazing. You're an artist with a welder, and have an amazing engineering mind.
Posted by: charliew Jun 25 2018, 06:48 PM
great pictures, nice Heli arcing too, I bet getting the wrench on those fittings was tricky. Is the aluminum tubing apt to bend when you tighten the fittings? My idea is to get my ac guy to form a 11 ga u channel and cut the bottom of the tunnel out to form the channel in the bottom of the car for the tubes, that way the air can help cool the coolant and maybe get the lines for the wtaic in there also. course talk is cheap. now that they have fuel feed setups that don't require return fuel lines to the tank it might help some. I wonder now if you ever thought about putting a clip board on the wall and record your time? I know it's fun but we each only have so much of it. Oh yeah somehow I missed the part about the mann provent install.
Posted by: 914forme Jun 26 2018, 04:00 PM
"I'll spoil the ending right at the start...PorSTI did not get finished in time for Power Tour. Even taking an entire week off plus several other days to create long weekends...I cut it too close starting the work, added to many while I am in there projects, had some equipment failures and one huge mental failure."
Posted by: Amenson Jul 5 2018, 09:16 PM
Looks amazing. You're an artist with a welder, and have an amazing engineering mind.
Thanks...lots of practice!
great pictures, nice Heli arcing too, I bet getting the wrench on those fittings was tricky. Is the aluminum tubing apt to bend when you tighten the fittings? My idea is to get my ac guy to form a 11 ga u channel and cut the bottom of the tunnel out to form the channel in the bottom of the car for the tubes, that way the air can help cool the coolant and maybe get the lines for the wtaic in there also. course talk is cheap. now that they have fuel feed setups that don't require return fuel lines to the tank it might help some. I wonder now if you ever thought about putting a clip board on the wall and record your time? I know it's fun but we each only have so much of it. Oh yeah somehow I missed the part about the mann provent install.
There is pretty good clearance to get to the fittings. I did have to buy a few new wrenches for the big guys. I think that Tygaboy is going to make a removable bottom center tunnel. Could be a good idea if executed properly, I am sure he will. Recording my time would take the fun out of it.
"I'll spoil the ending right at the start...PorSTI did not get finished in time for Power Tour. Even taking an entire week off plus several other days to create long weekends...I cut it too close starting the work, added to many while I am in there projects, had some equipment failures and one huge mental failure."
Ya, so about that. During the next to last week before PT I was cranking through the stuff that needed to be completed before the car went on the dyno the last Monday before departure. On Saturday I was wrapping up the last few things and planned first start. I had just spent over three hours modifying the thermostat housing/lower radiator hose to firewall. The part welded like crap even though it was perfectly cleaned, figured that the housing had some crud from casting. While it was cooling I drained the oil.
Next up was relocating the BOV. Welded up the old location and got the new V-band flange fit for the new one. Put a really nice tack, flipped it over and the made the crappiest charred looking tack I could ever imagine. Started inspecting the torch and noticed that it was spitting out coolant! The flex part of the torch failed allowing coolant to get into the shield gas connection. It is Saturday so there is no option to find another torch so I jump onto the next tasks prior to startup....check for fuel leaks and test the new sensors. I got the wife to help with leak checks and in the few seconds of the fuel pump running during the priming cycle I pumped fuel all over. Turns out that I did not tighten the plugs on the bottom of the fuel rails for the optional dampers. Another two wasted hours of cleanup and disassembly/reassembly later and I am ready to test again. No leaks but the fuel pump will not run long enough during the short priming cycle for the Accessport to startup and show the flex fuel and pressure sensor data. The pump will only run again when it sees the crank signal. The intercooler is uninstalled so I figured that I could bump the starter without worrying about the engine starting. Give the starter a quick bump and not only the fuel pump start but so did the engine. While I was enjoying the sound of a running engine and wondering how it was actually running I had forgotten that I had drained the oil and in the chaotic previous hours sopping up welder coolant and fuel...never put fresh oil in. After about a minute I realized this terrible fact and shut off the engine.
After I regained a bit of composure, I put oil it it and started it. Sounds fine, compression check looks fine but after a few beers I decide not to take any chances and consider it in need of a rebuild. Plan is to pull it apart and confirm that machine work is not necessary and then put new bearings, forged rods and forged (slightly higher compression) pistons. Not something I wanted to do in the short term but was necessary to get to my reliable 500 whp target with a new turbo down the road.
Posted by: Amenson Jul 5 2018, 09:32 PM
There is a ton more stuff that I successfully accomplished.
Engine:
I now realize why I had not installed AN fittings previously. Box full of gold...
I added the flex fuel setup and "while I was in there" reorganized and rewrapped the engine engine harness.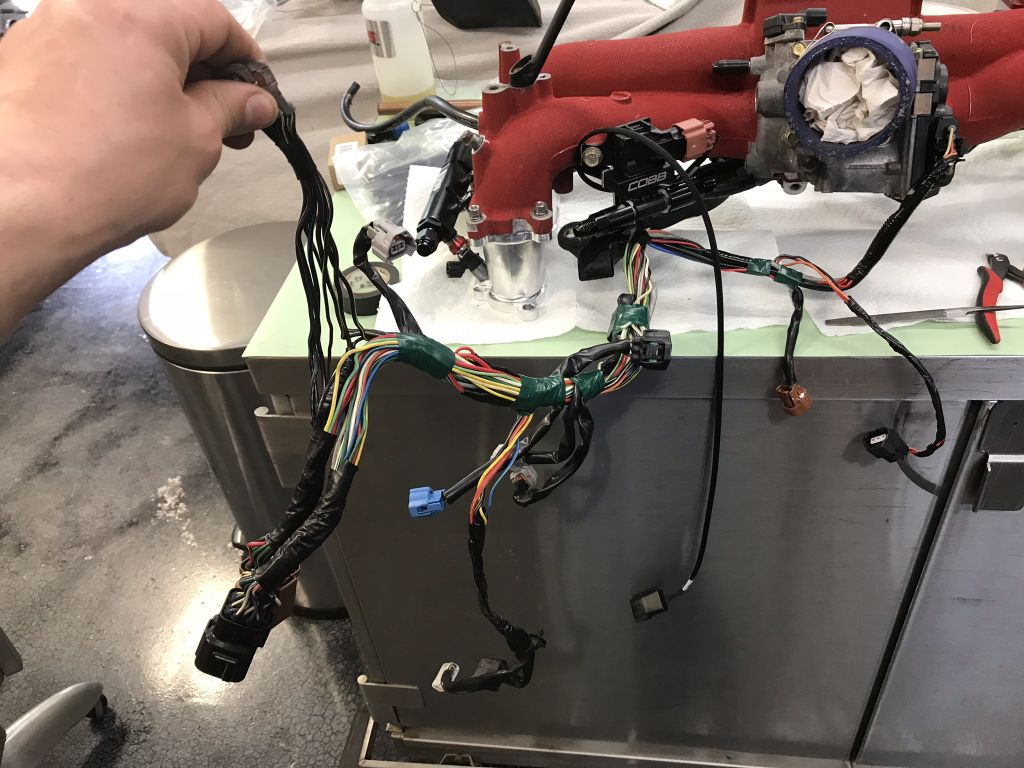
Wiring sorted and sensors mounted...just before running the new AN lines/fitting. Didn't get a picture due to time constraints.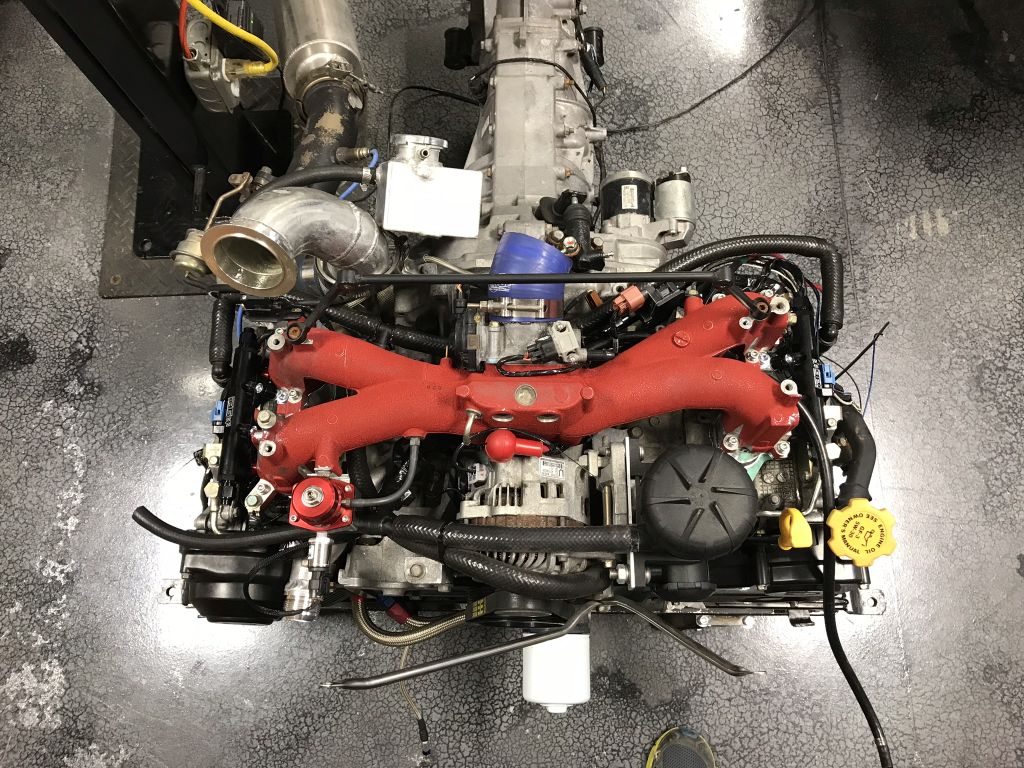
AN all the things...including the return lines from the header tank and heater core bypass.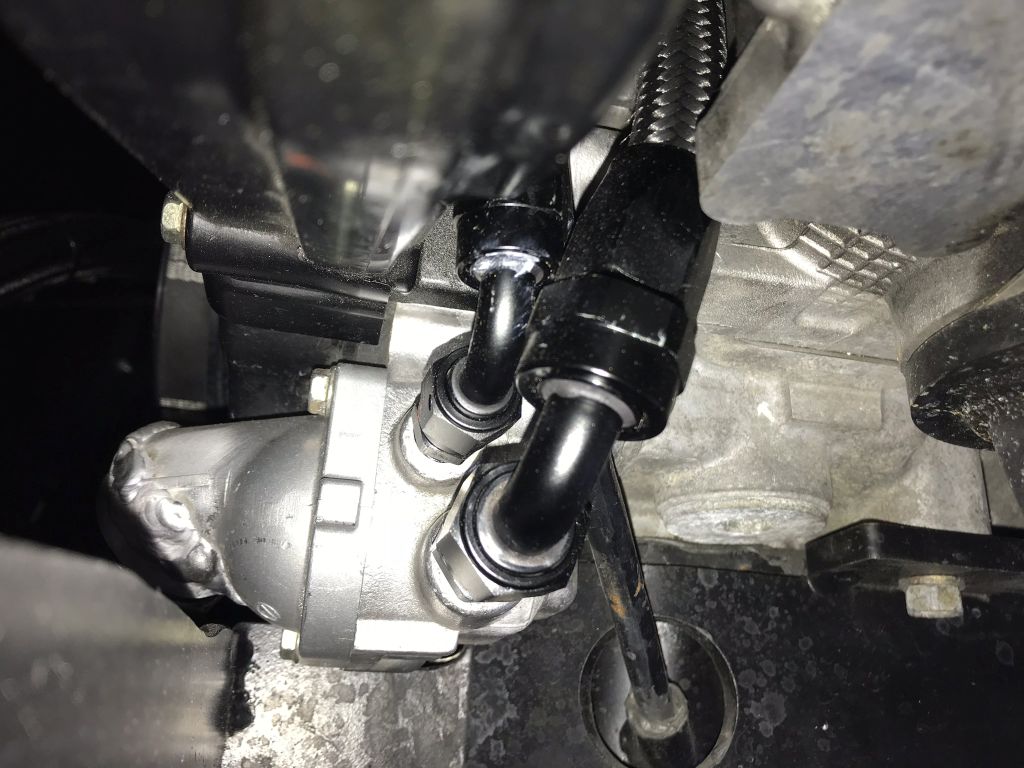
IAT Installed just before the throttle body.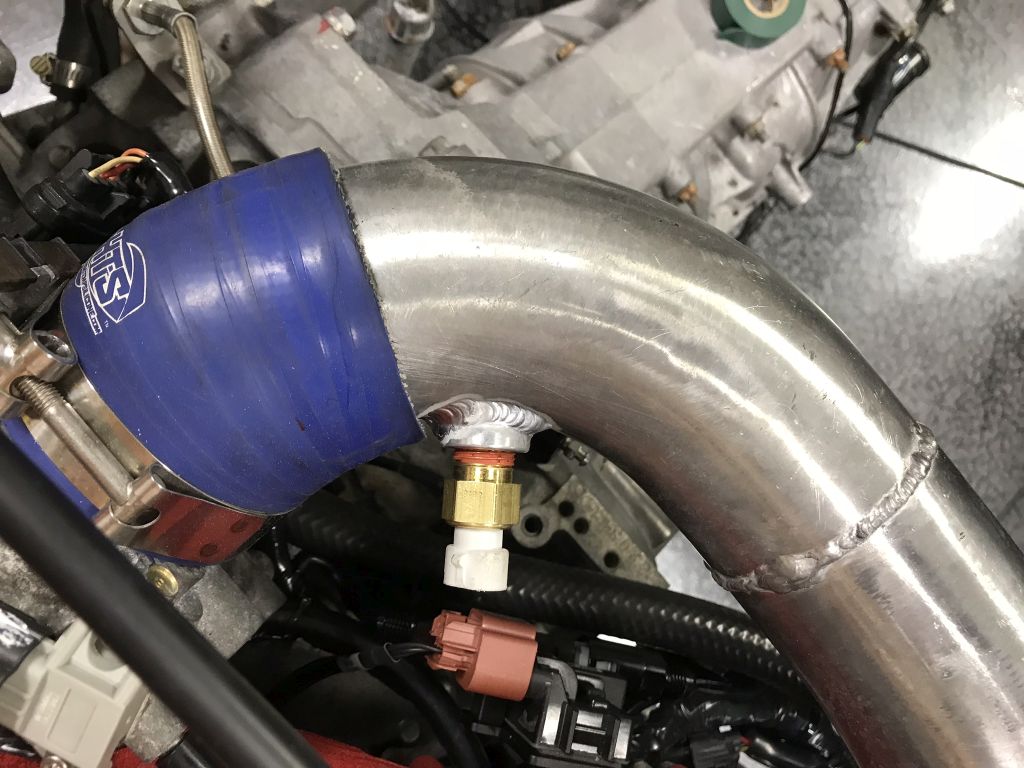
Old BOV location, so much cleaner on this side of the engine. Air filter much lower now with only the suction side of the Provent plumbed pre-turbo.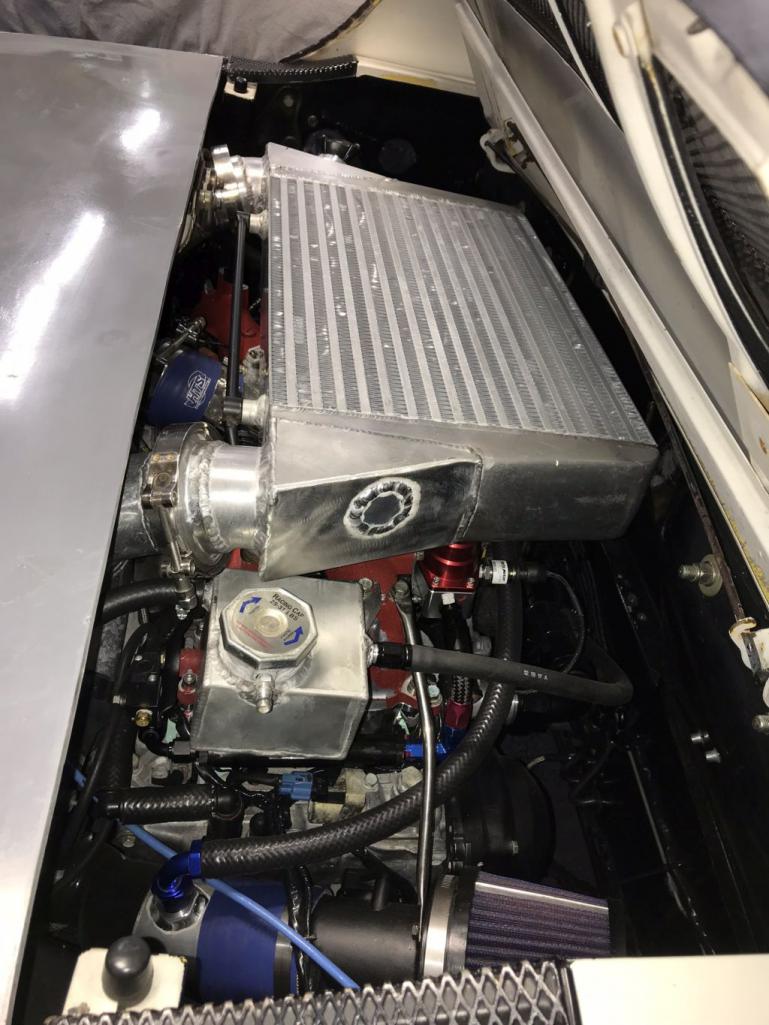
New BOV. Should sound great!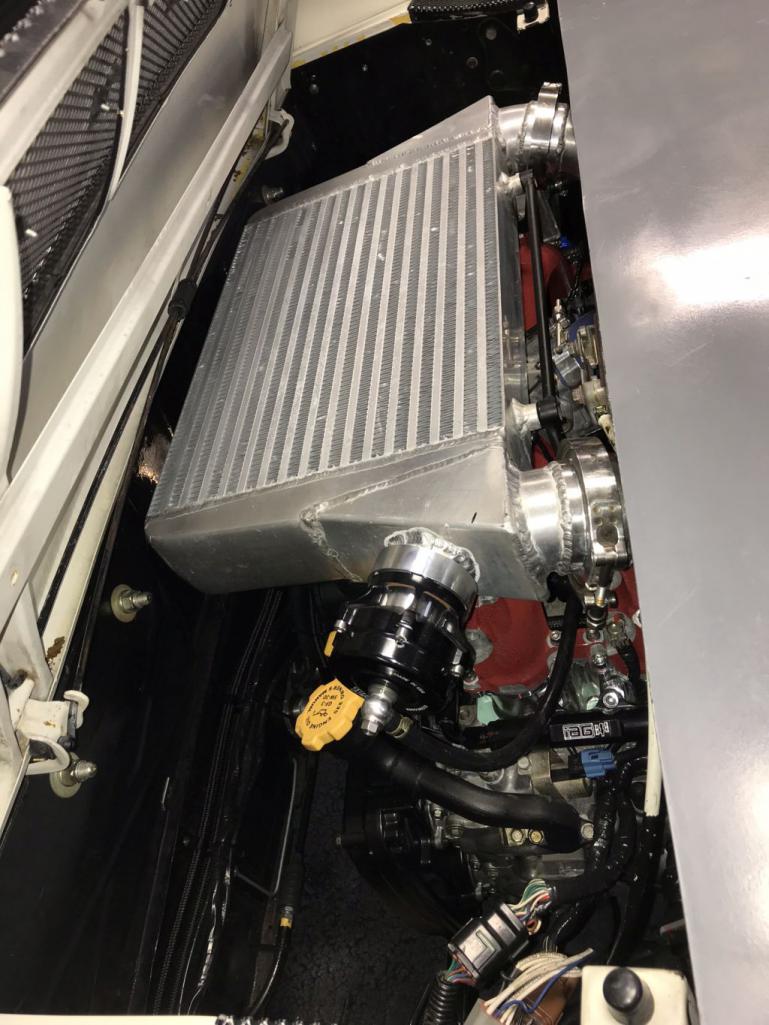
New fuel pump.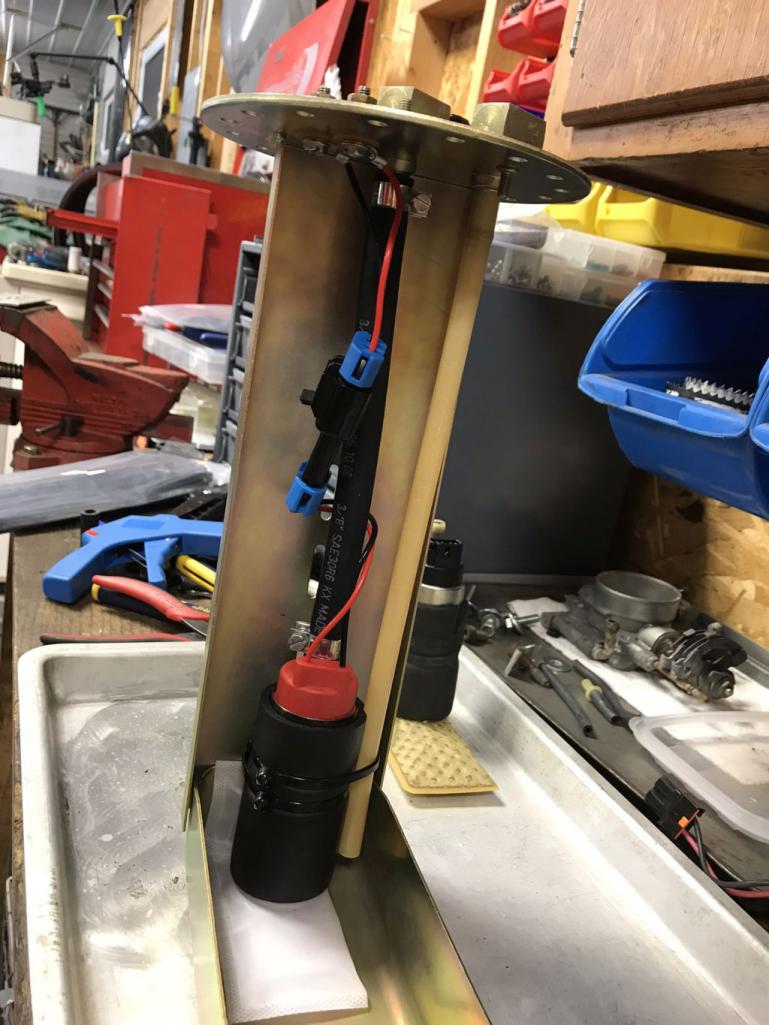
Front trunk is much cleaner now.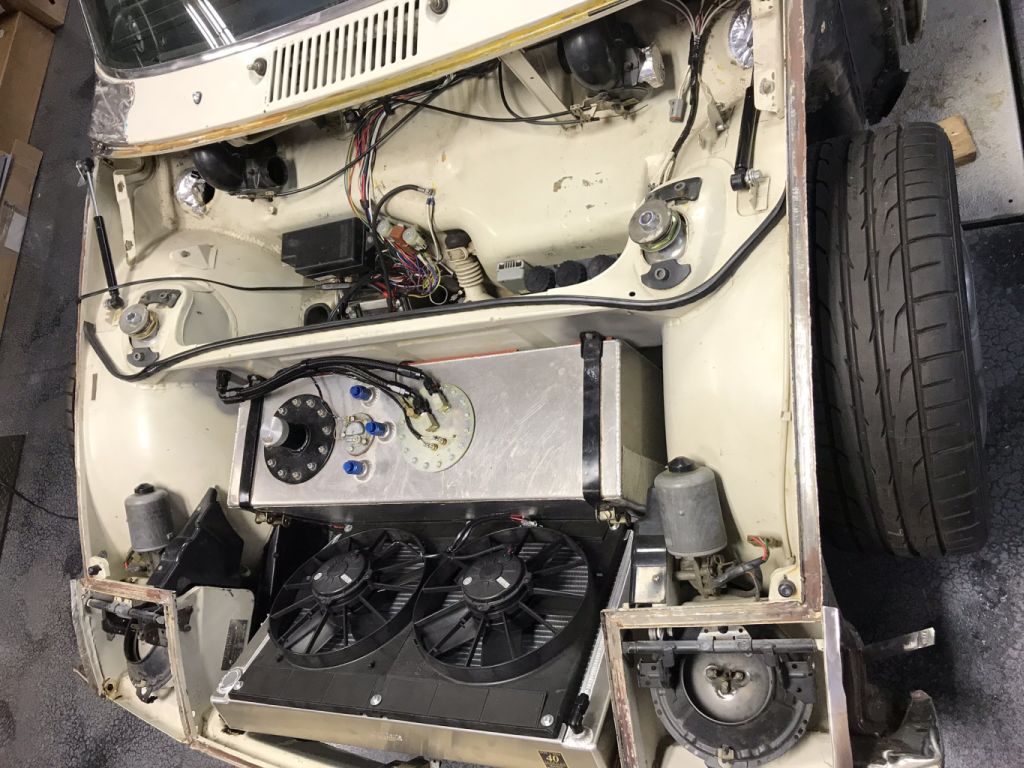
Posted by: Amenson Jul 5 2018, 09:41 PM
Pedals:
The clevis for the clutch pedal was wearing through the pedal and had a really bad feeling. I cut it apart so that I could install a proper heim join.
Also replaced the ball joint on the bottom of the throttle linkage with a quick disconnect joint to make it easier to adjust. Also added a threaded adjuster to the end of the linkage so that I can adjust the stop position. No good pictures of any of these mods. This is what it looks like finished.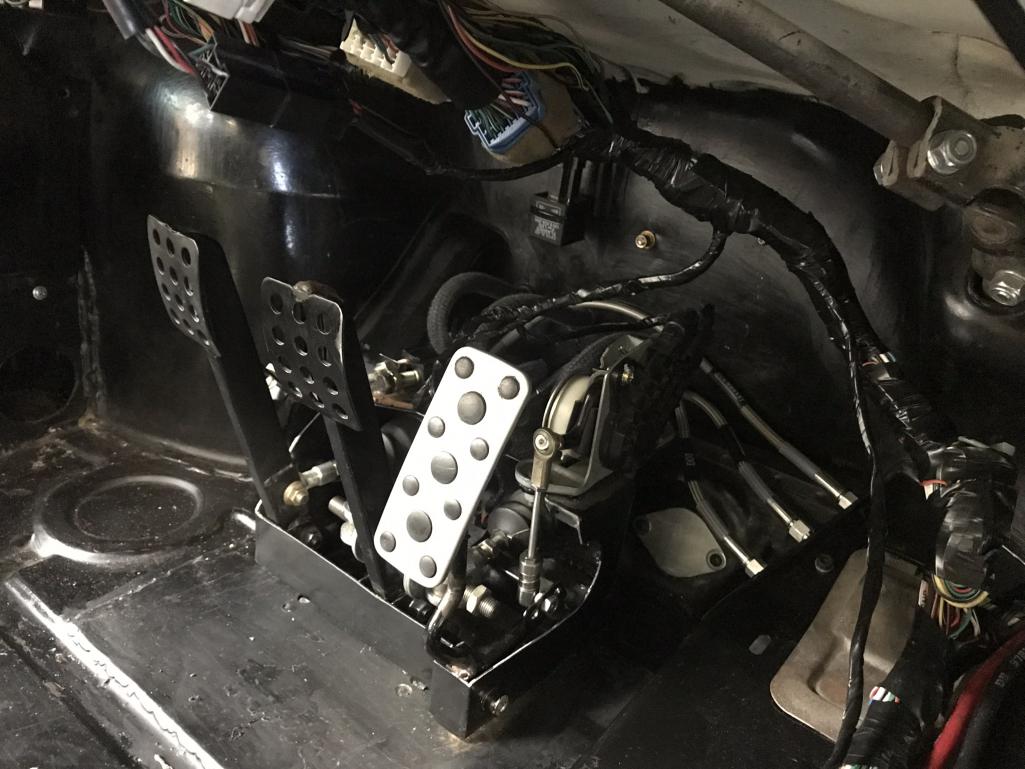
I also reorganized and rewrapped much of the cabin harness while I had access.
Will get a post picture, you can see some of it in the first pedal picture.
Still have the body to post but don't have the motivation to go through the pictures of carnage tonight.
Cheers,
Scott
Posted by: 914forme Jul 6 2018, 10:48 AM
We have all done it in the excitement of thrashing a project. At least I have, part of the reason I started using check lists and paint pens. I used to get in a rush to get prepped for the races. And well, stuff happens, great progress even though the ending is not what you wished for.
BTW, that is why I have multiple MIG Torches, should get a second for my TIG
And should have called me, I have two friends that work at two separate welding supply houses, chances are good one of them had access to a few Miller TIG torches, even after hours. Or knew of someone who could get you a torch on short notice.
Posted by: Amenson Jul 16 2018, 08:39 PM
I couldn't stand not having the PorSTi to drive so I replaced the daily driver! Not a particularly imaginative choice to replace my '05 STi with a '14 STi but I really wanted a hatch.
It is amazing how much more refined yet how familiar it is. The whopping 5 additional HP barely offsets the additional 100lbs....it really needs another 200whp.
Now I need to deal with all of the vape kids trying to buy the '05.
Posted by: 914forme Jul 17 2018, 01:15 PM
This vape kid loves the 05, PM sent.
Wow congratulations, that is a nice looking STI
You know how to make more HP
Posted by: Amenson Jan 1 2019, 10:18 PM
No progress on the porsti as I have been focused on Grey matter. I did take a couple of weeks to insulate and put up proper wall covering in the shop. Looks much nicer now and is substantially more efficient to heat.
The parents visited over the holidays and helped decorate!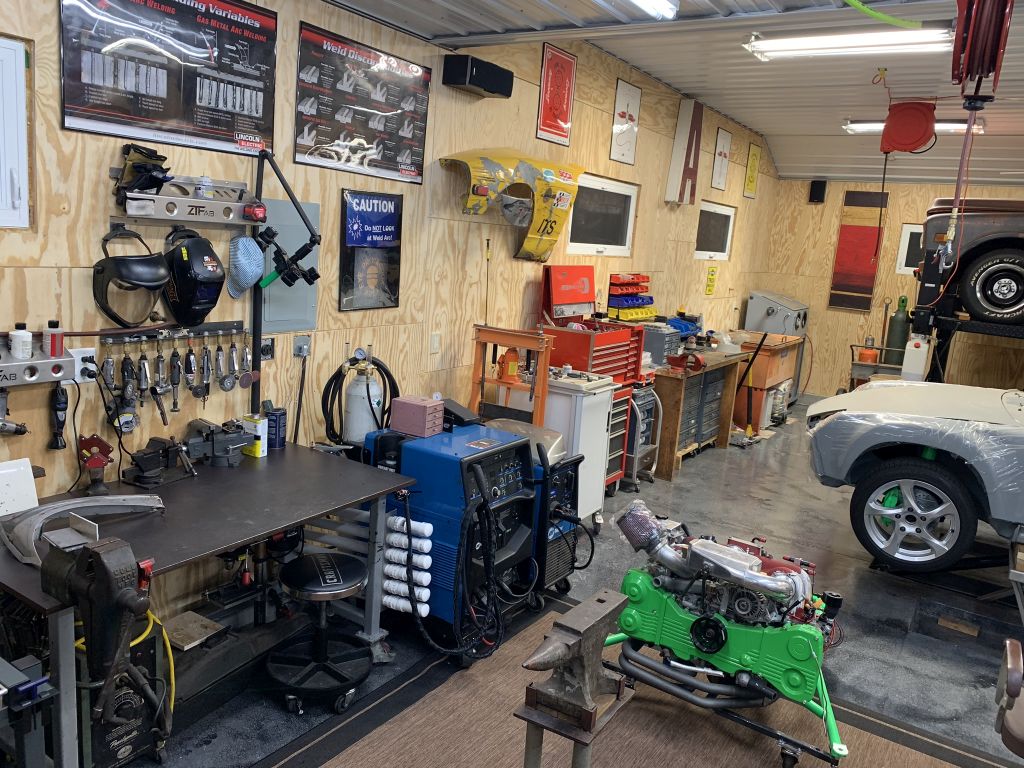
I did get hooked up by Mike (ruby914) with a carbon version of his low profile dash.
Much too nice for my car....
That's all until Grey is finished....
Cheers,
Scott
Posted by: mepstein Jan 1 2019, 10:58 PM
The shop looks great. Almost looks ready for a new project.
Posted by: Amenson Jan 2 2019, 10:00 PM
The shop looks great. Almost looks ready for a new project.
Very close to being ready for a new project and looking forward to doing a 6. Had lunch with Stephen a few weeks ago and was picking his brain on flipping the manifold
Posted by: Chris H. Jan 3 2019, 08:50 AM
My manifold is flipped so let me know if I can help. Also check out ThePaintedMan's thread. He has some good pics of how he did it.
Posted by: Chi-town Jan 3 2019, 11:29 AM
https://www.outfrontmotorsports.com/accessories/subaru-ej-offset-alternator-bracket-kit
Posted by: Amenson Jan 3 2019, 10:19 PM
My manifold is flipped so let me know if I can help. Also check out ThePaintedMan's thread. He has some good pics of how he did it.
I have been checking out your thread...thanks for the tip on ThePaintedMan's. His pictures with notes filled in a few blanks.
https://www.outfrontmotorsports.com/accessories/subaru-ej-offset-alternator-bracket-kit
That is a great kit, we are using it on Grey.
Posted by: Aerostatwv Jan 4 2019, 05:40 AM
Looks great Scott! Will you have PorSTi at Okteenerfest this year?
Posted by: Chris H. Jan 4 2019, 08:54 AM
I have been checking out your thread...thanks for the tip on ThePaintedMan's. His pictures with notes filled in a few blanks.
Yes I can give you a pretty good idea of what to do and one or two things not to do. Fairly detailed discussion so PM me when you're ready and I can give you my $.02. I might be pulling the engine to do a final cleanup of wiring and the engine bay which will allow me to take some better pics.
Posted by: Amenson Jan 4 2019, 12:57 PM
Looks great Scott! Will you have PorSTi at Okteenerfest this year?
There is a pretty good chance that I will be able to make it with PorSTi this year.
Yes I can give you a pretty good idea of what to do and one or two things not to do. Fairly detailed discussion so PM me when you're ready and I can give you my $.02. I might be pulling the engine to do a final cleanup of wiring and the engine bay which will allow me to take some better pics.
Will do, Thanks!
Posted by: 914forme Jan 5 2019, 12:46 PM
Scott the flip is not hard, some of the stuff just needs to moved to make it happen, like we talked about. Once you see the EG you will know. The IRIS system is what clutters up the flip.
I don't think You're going to have an issue with it. It is very easy if Mark is not going to have AC in the car, becomes harder if Mark is.
Workshop is looking great, let me know if there is anything you need from me to help these along. Yeah I know of 5 little round items you need all ready
Posted by: mepstein Jan 5 2019, 01:42 PM
Scott the flip is not hard, some of the stuff just needs to moved to make it happen, like we talked about. Once you see the EG you will know. The IRIS system is what clutters up the flip.
I don't think You're going to have an issue with it. It is very easy if Mark is not going to have AC in the car, becomes harder if Mark is.
Workshop is looking great, let me know if there is anything you need from me to help these along.
Yeah I know of 5 little round items you need all ready I don’t want to turn this into a thread for my car but...I do want a/c & heat. I was hoping the bulkhead mount might make things a bit easier with positioning but that might not be the case. My plan is not to micromanage the build but to turn it over to Scott A and let him do his thing. The only challenge I see with the build is Scott likes to build to a high standard for both looks and functionality and I’m looking for a good running conversion but not a showcase car. I’m sure it will work out. The nice thing is with my car is there is no fresh paint to worry about.
Posted by: 914forme Jan 5 2019, 05:33 PM
Fresh paint, and yes this is about PorSTI, we just started talking about EG33 intake flips. I am a huge proponent that the bulkhead mounts for the EG, if anything it allows for even better positioning of the engine giving the clearance needed for the flip.
Mark I am sure a build thread will be started to discuss your car, once the process starts.
Posted by: Amenson Nov 23 2019, 05:48 PM
After getting Grey Matter Back to Tom and the C10 back on the road I found myself wandering aimlessly around the garage. Then this stuff showed up this week.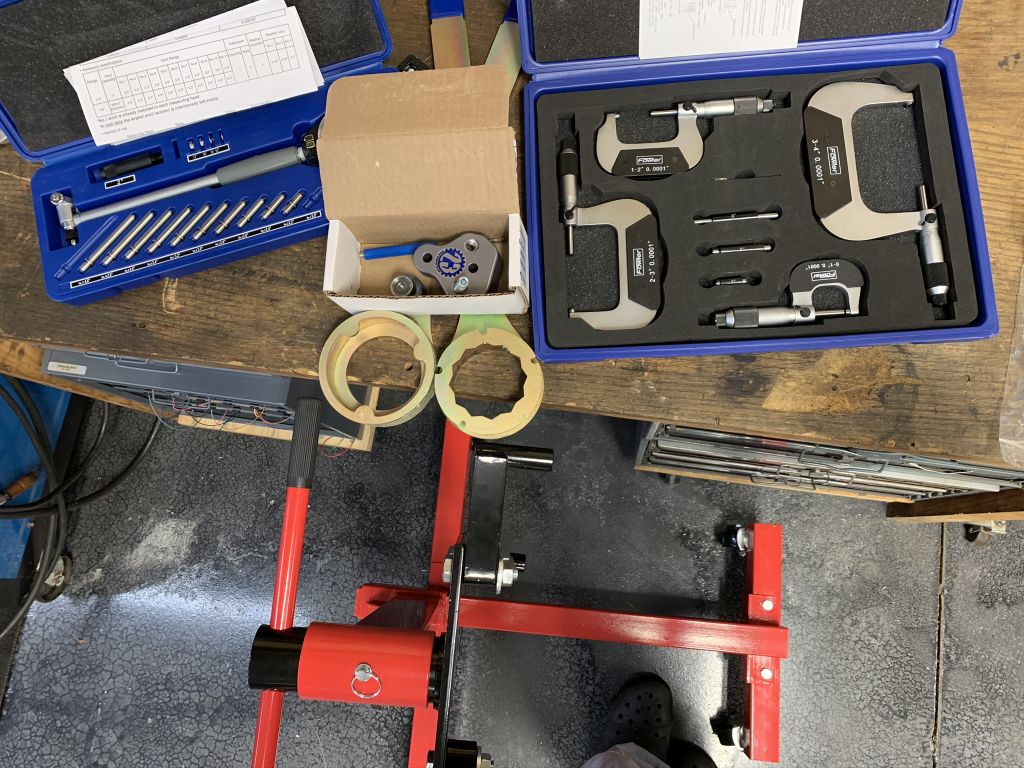
I guess that it is time to open up the engine and see if I did any damage when I started it sans oil. Need to figure out if I can order standard clearance components this week so that I can take advantage of all of the sales on Cyber Monday.
Gratuitous shop shot.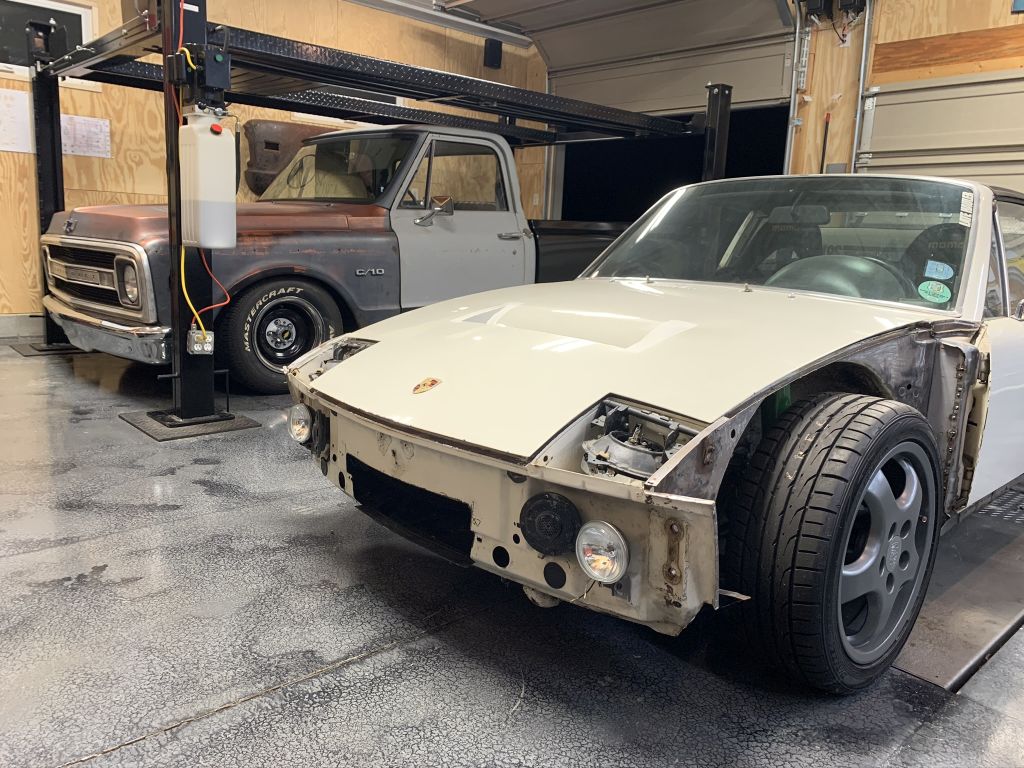
Posted by: 914forme Nov 25 2019, 06:33 PM
I see some bare floor space that I should fill with lots of parts
Posted by: Amenson Nov 26 2019, 10:39 PM
I see some bare floor space that I should fill with lots of parts
Don't worry, I took care of the free floor space problem.
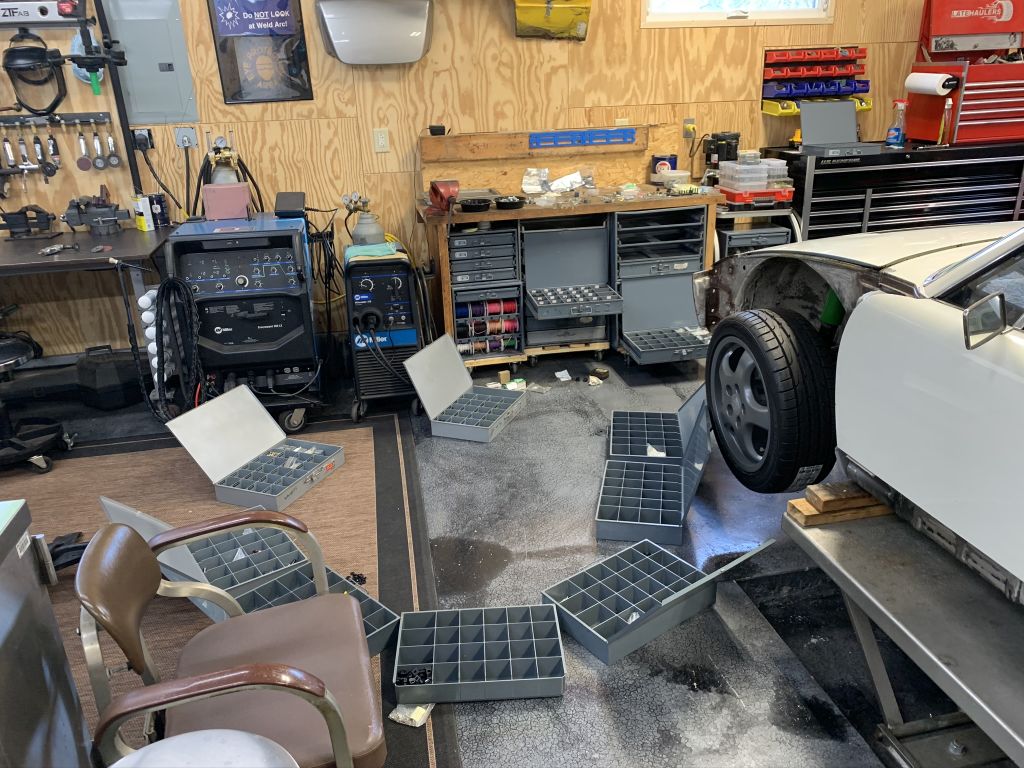
Looks like some sort of demented satanic ritual circle.

In preparation for the engine disassembly and general tidiness I went through the random collection of parts and fasteners that was strewn around the garage. That let me into the random collection of stuff in the drawers. Three days later and I am almost finished.
Posted by: Amenson Feb 14 2021, 07:08 PM
Wow, been a while since I updated this protect. While it is still not on the road quite a bit has occured.
Engine Rebuild! 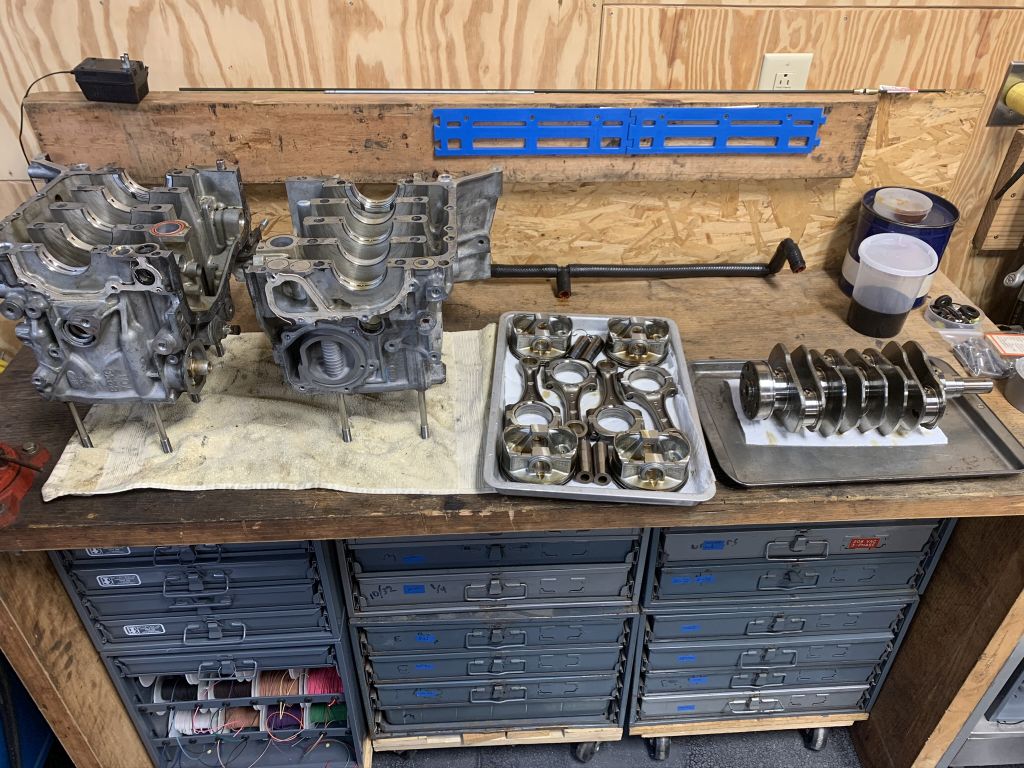
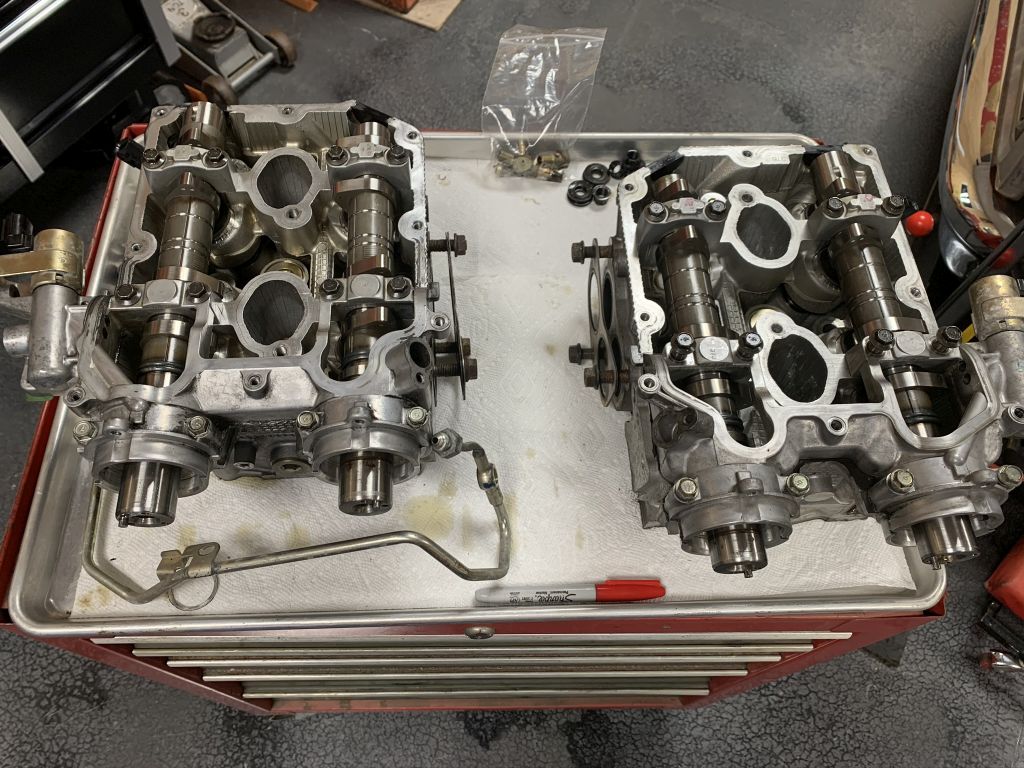
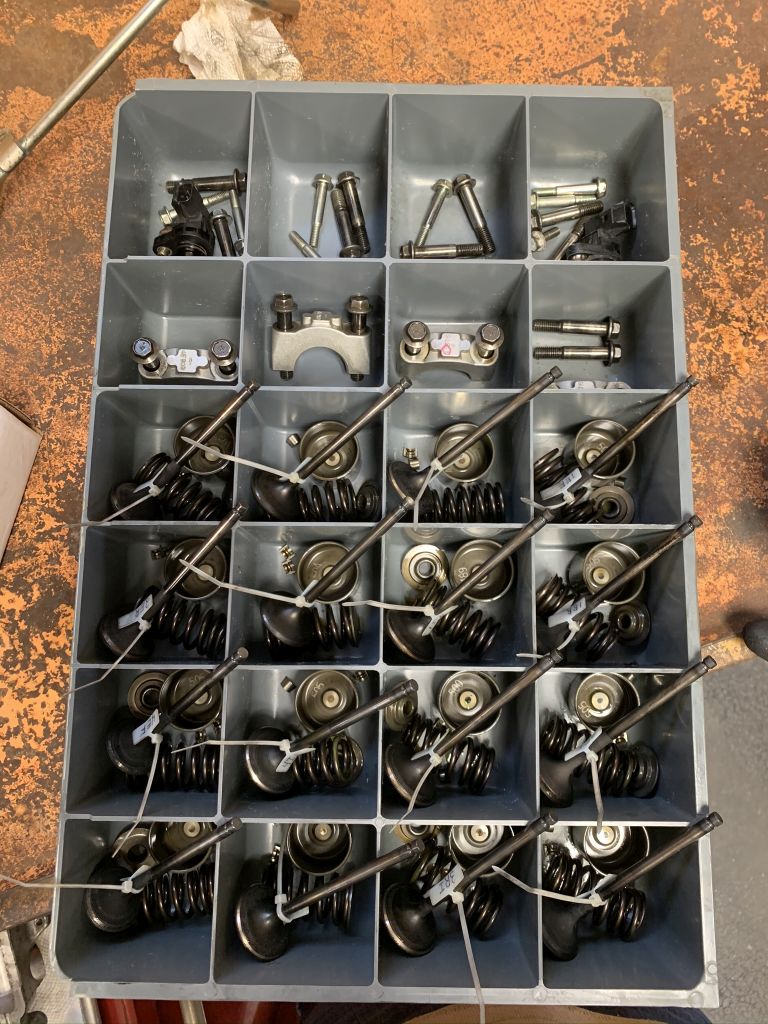
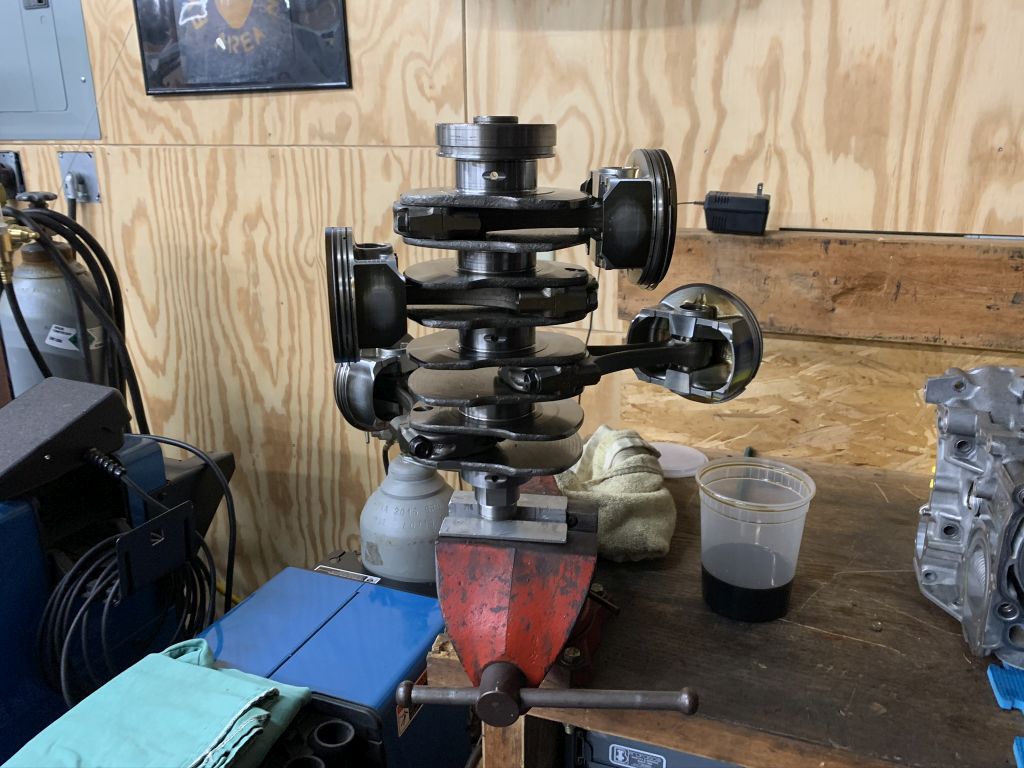
Initial plan was rods and pistons as it already had ARP headstuds...that got derailed when I found a crack in one of the bores. A few winters ago I had significantly diluted coolant in the system and I am guessing that it actually froze causing the crack.
With that found a new block was ordered and while I was at it, new crank, stiffer valve springs, Ti retainers, and 11mm oil pump and kevlar timing belt to handle the 8k rpm redline.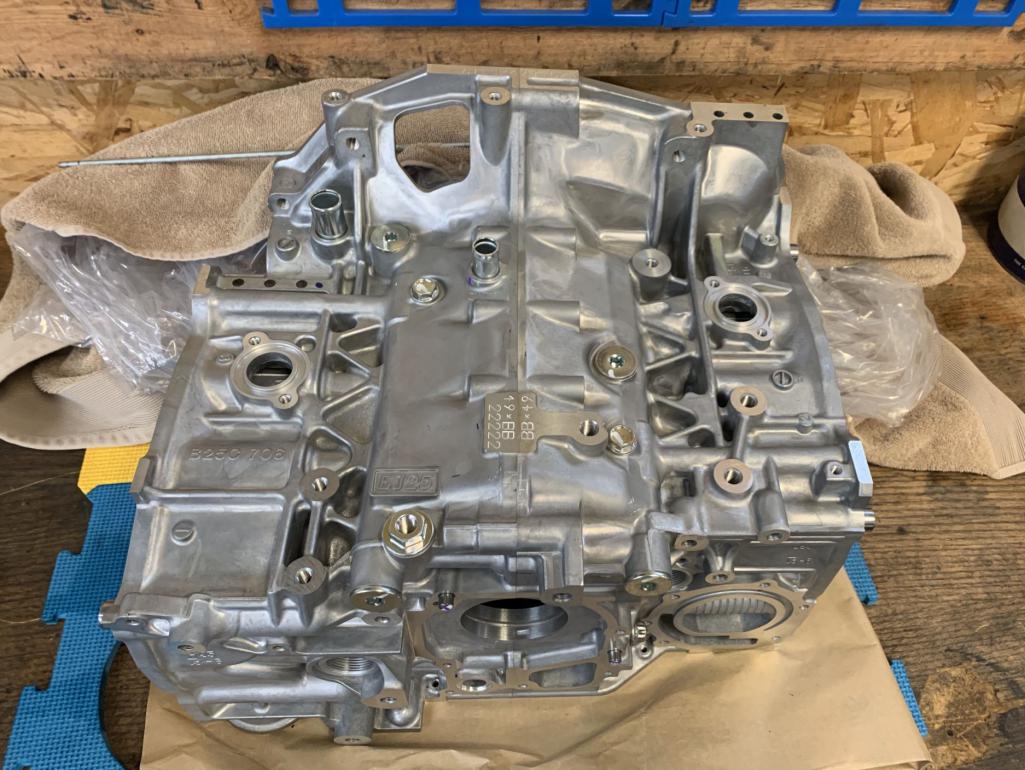
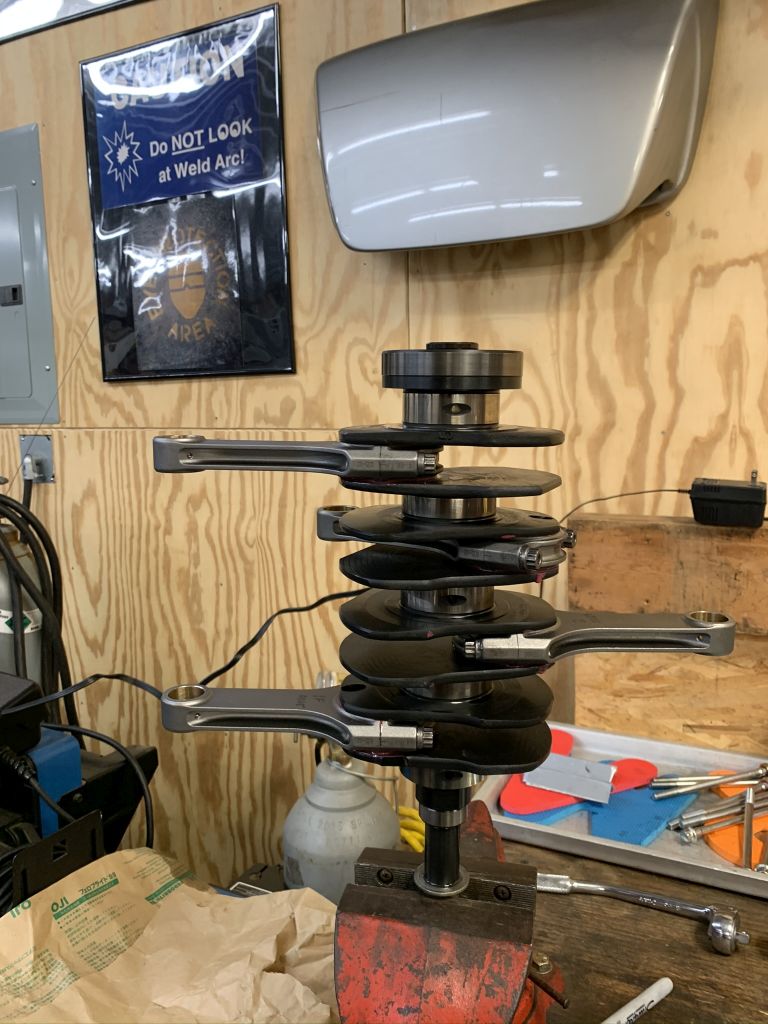
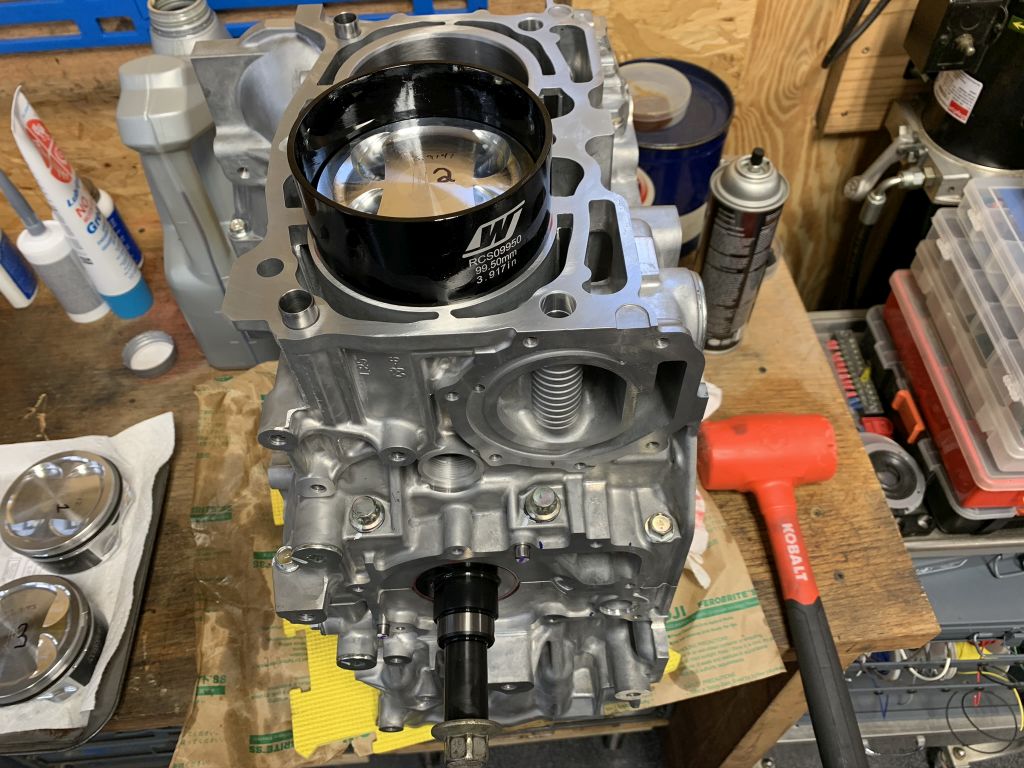
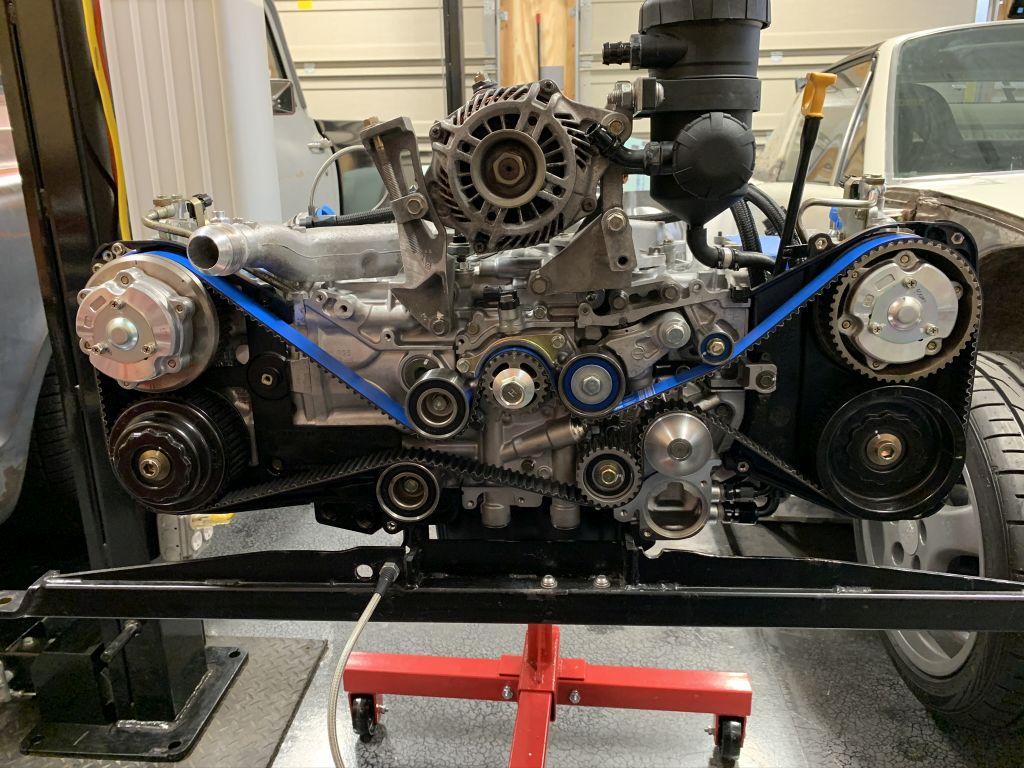
Also modified a few things to clean up the install a bit.
Added a AN drain.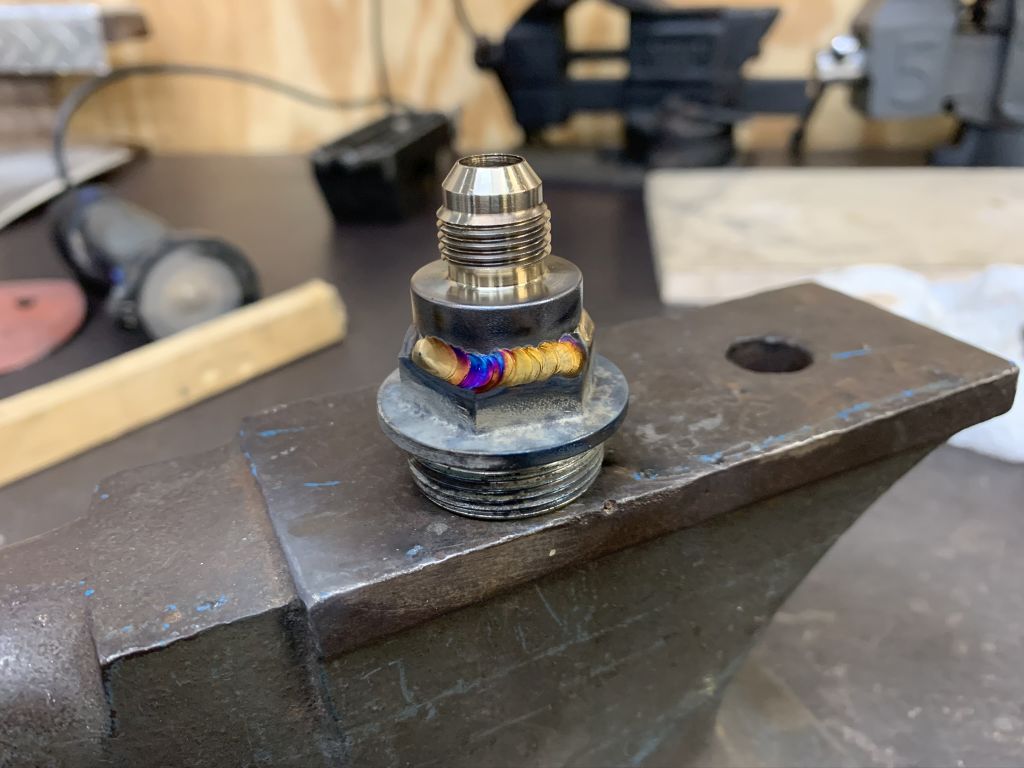
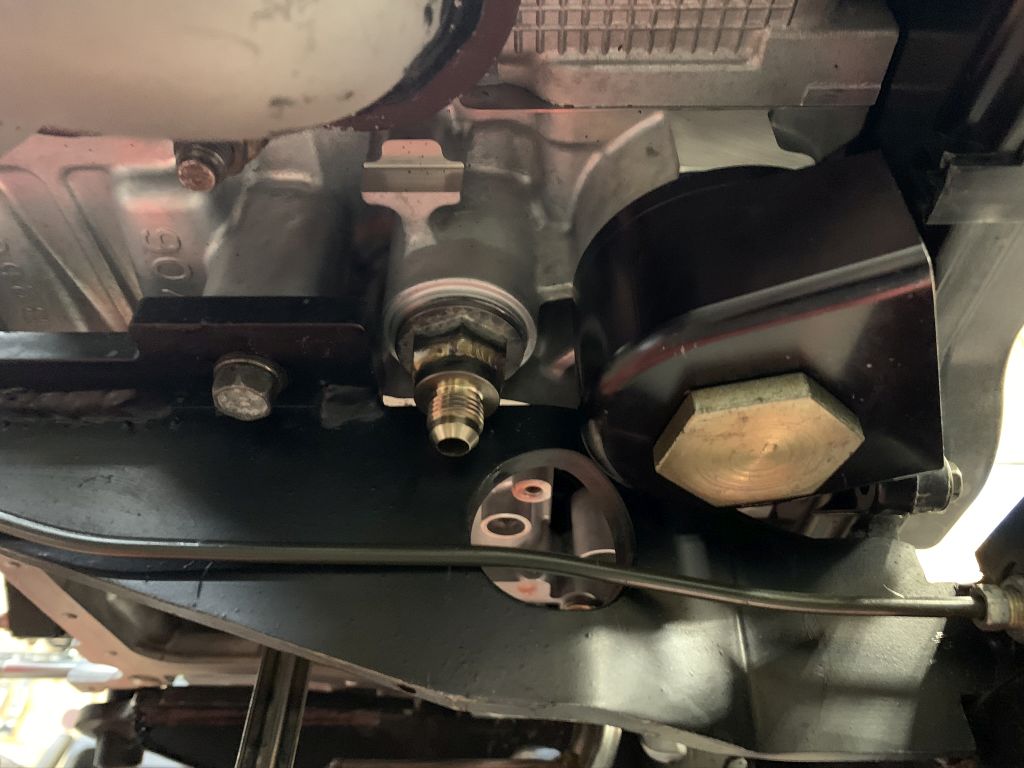
Redid the turbo oil feed.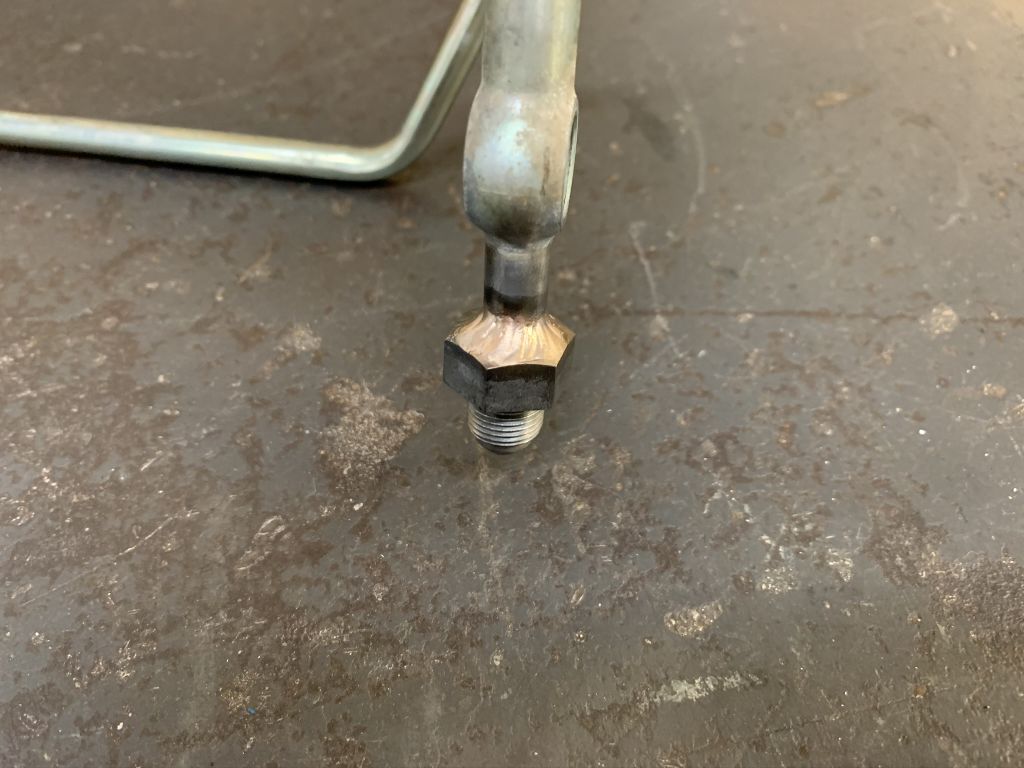
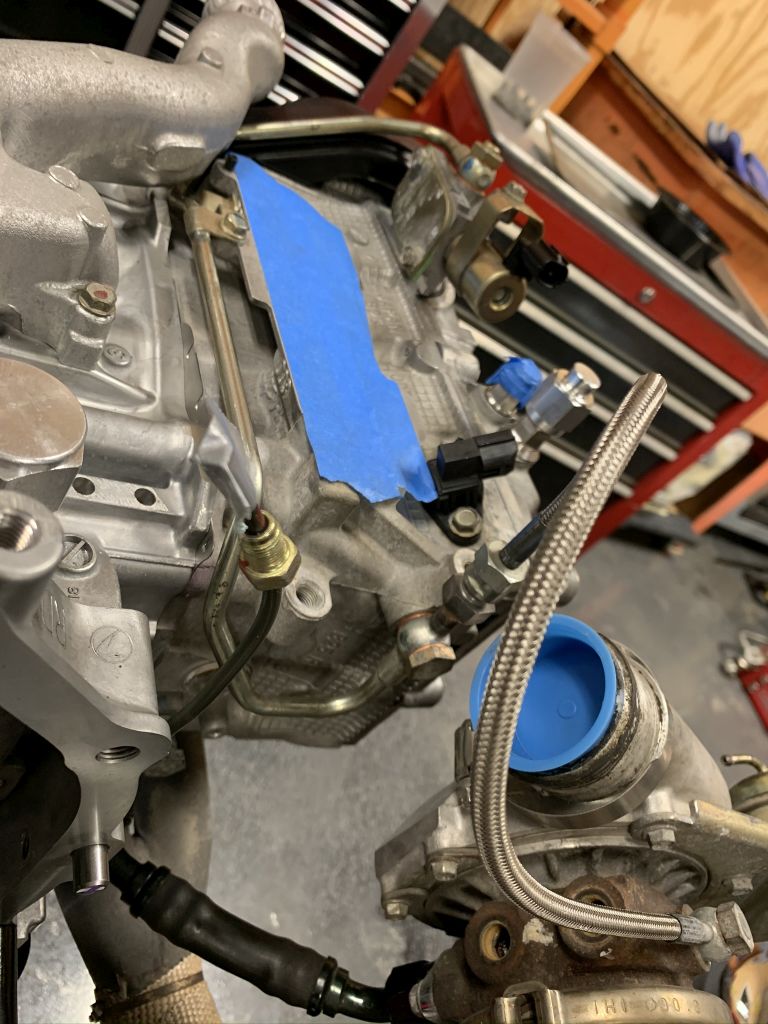
Who doesn't need a twin disk clutch?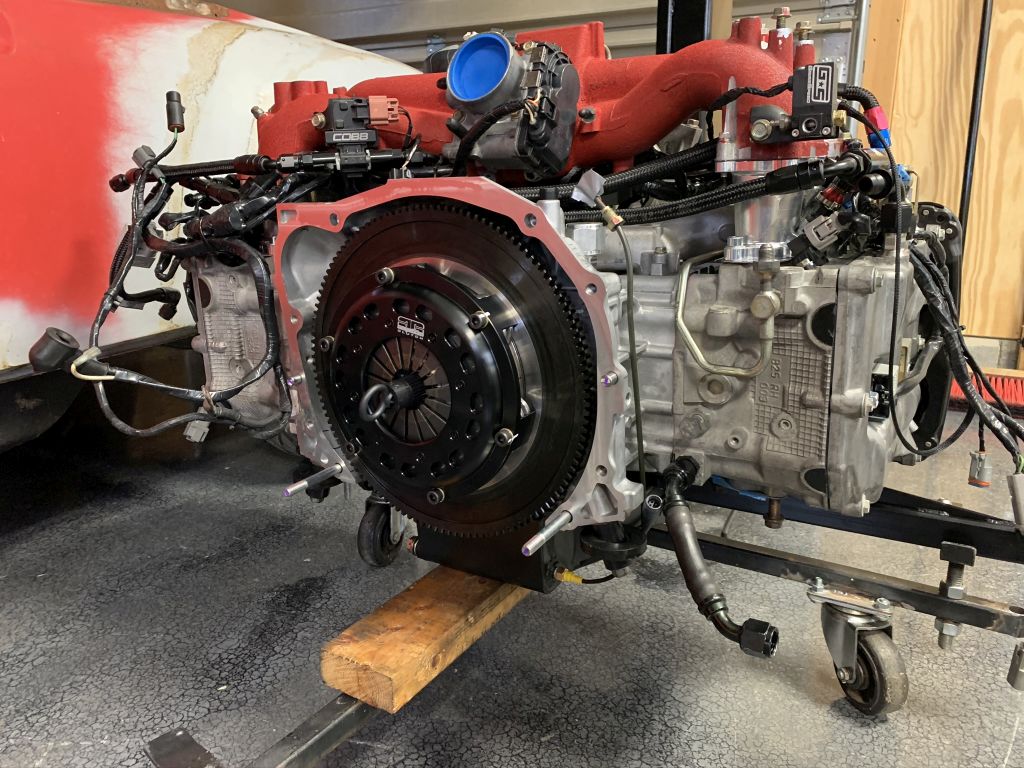
Mostly back together.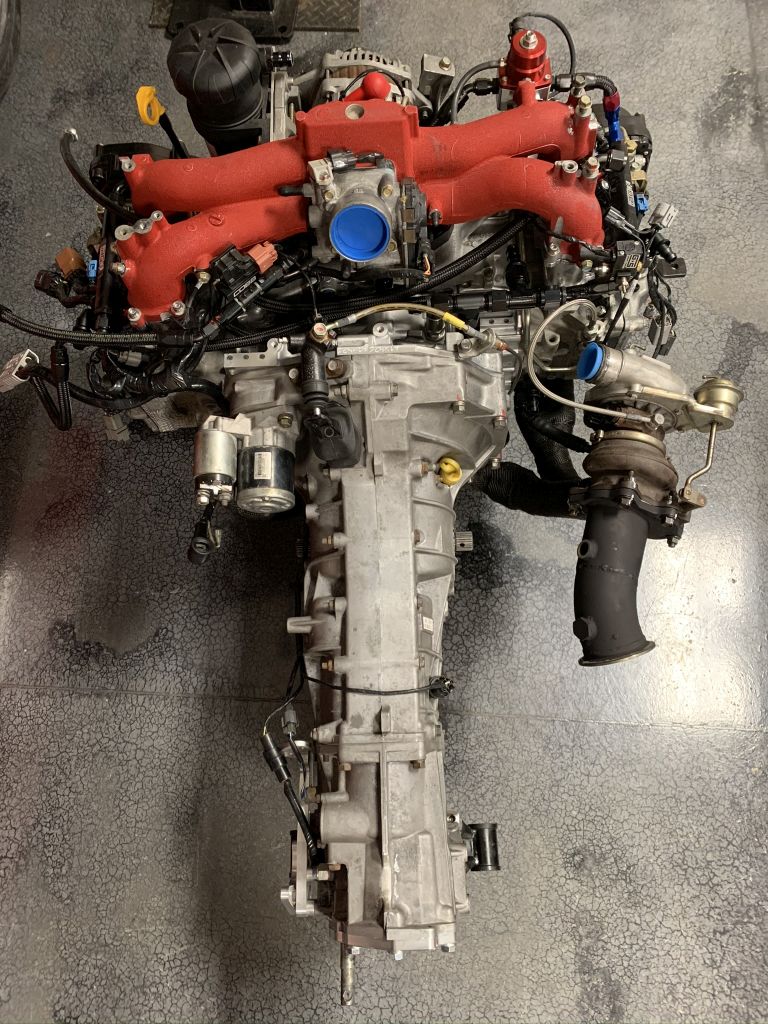
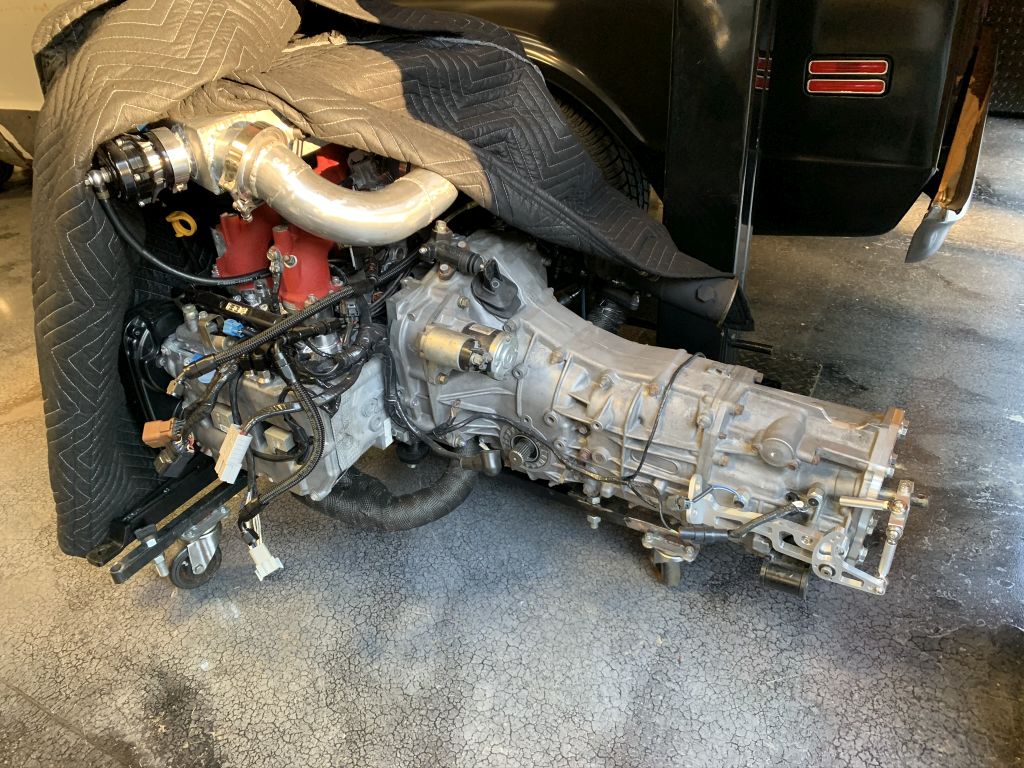
Posted by: Amenson Feb 14 2021, 07:21 PM
Also did some chassis stuff.
Raised rear shock mounts.
Custom adapters to maximize the height of the top of the shock. Goal is to keep the springs in the perches when i jack it up.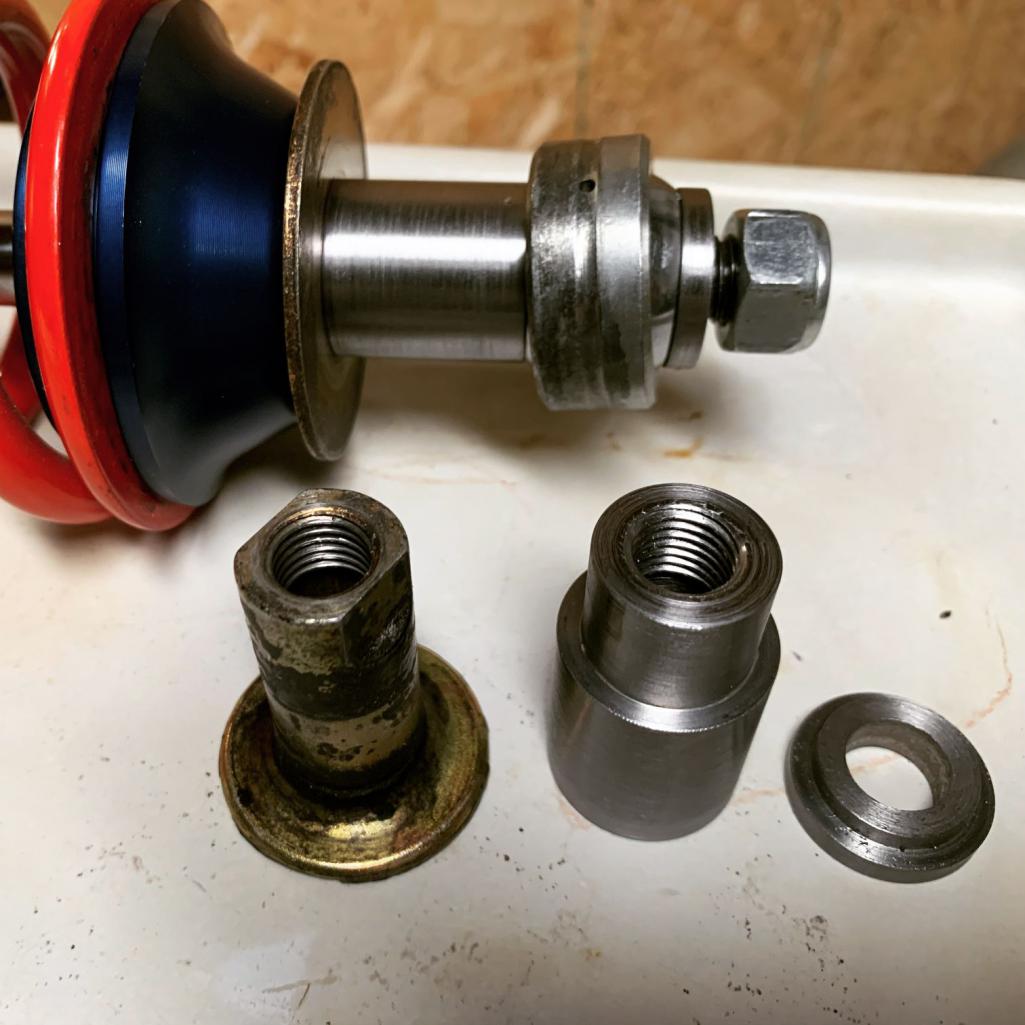
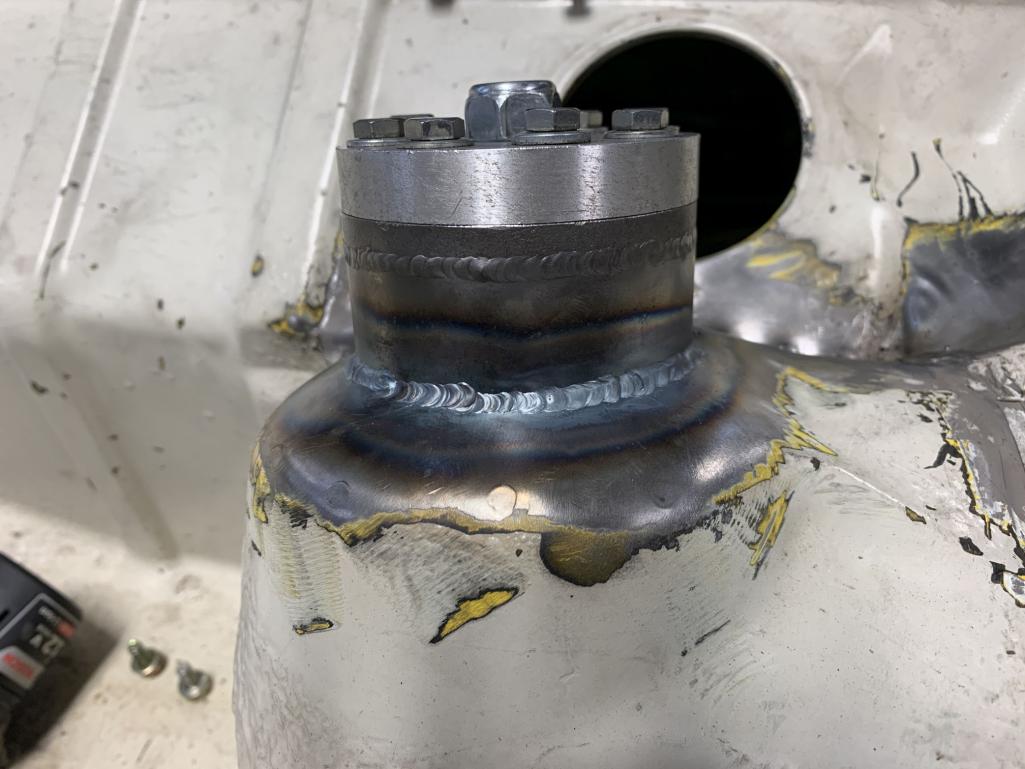
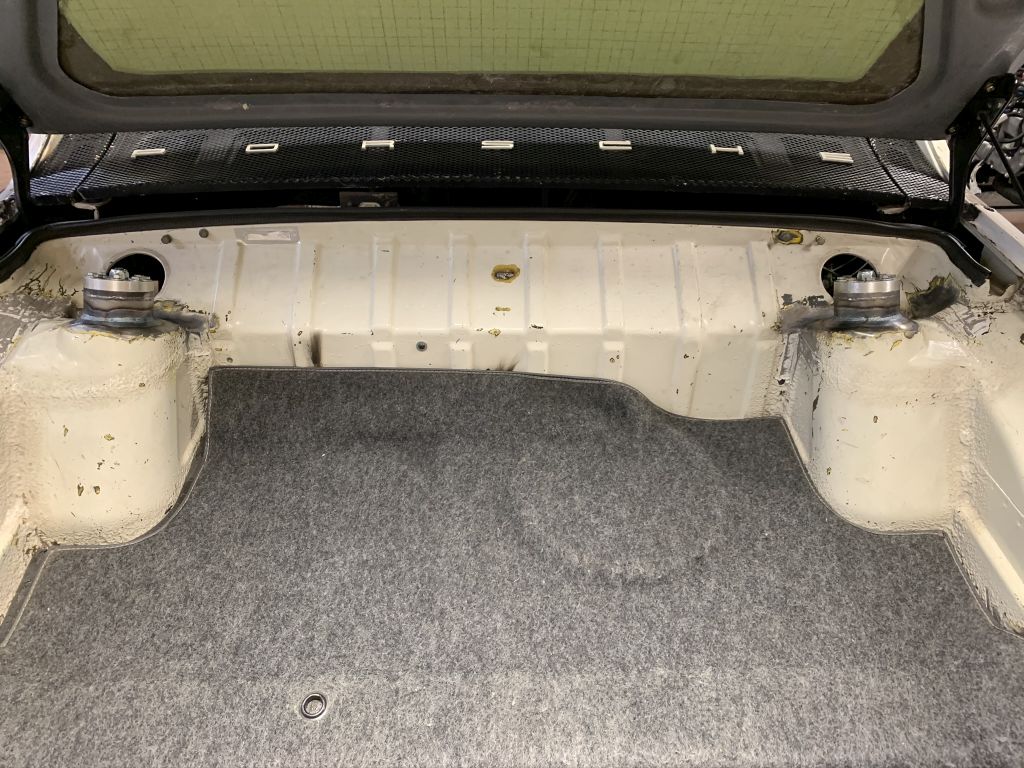
The car is getting fast/stiff enough that a cage for safety and chassis rigitity is necessary. Will be a 10ish point cage eventually. Being a street car I am going to extremes to keep the cage as tight as possible to the existing structure. Step one in that, remove the pinch weld on the targa bar.
I am designing the cage in CAD and it took three tries to get used to the bender/SW but I think that this is as tight as I can possibly get it.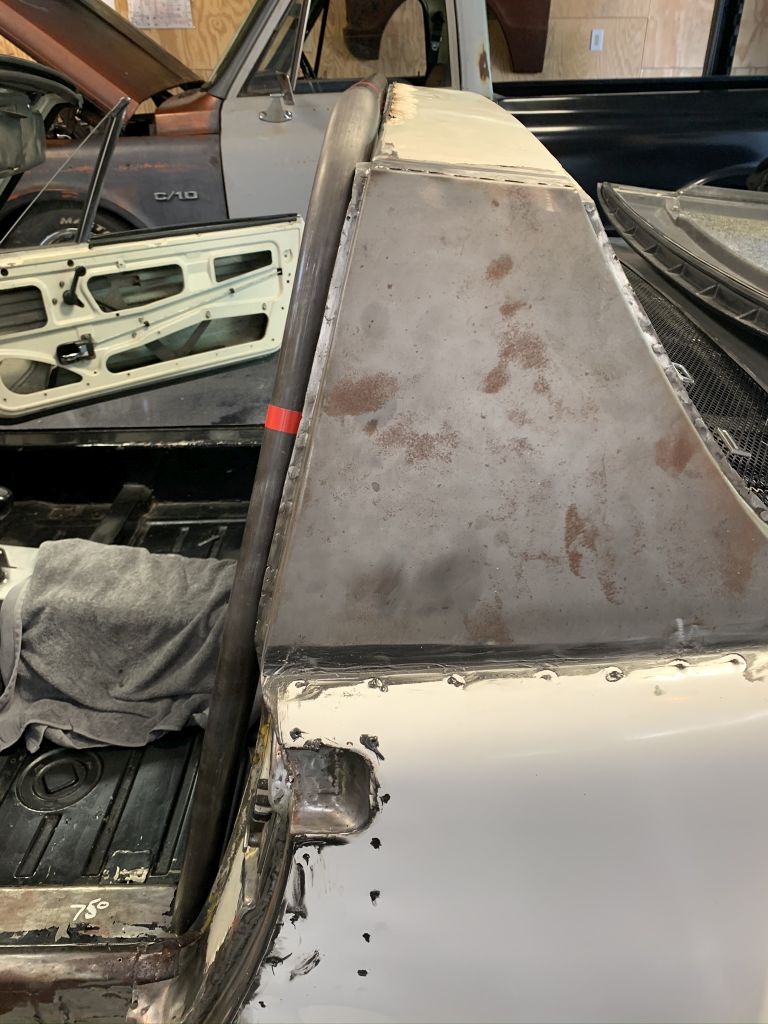
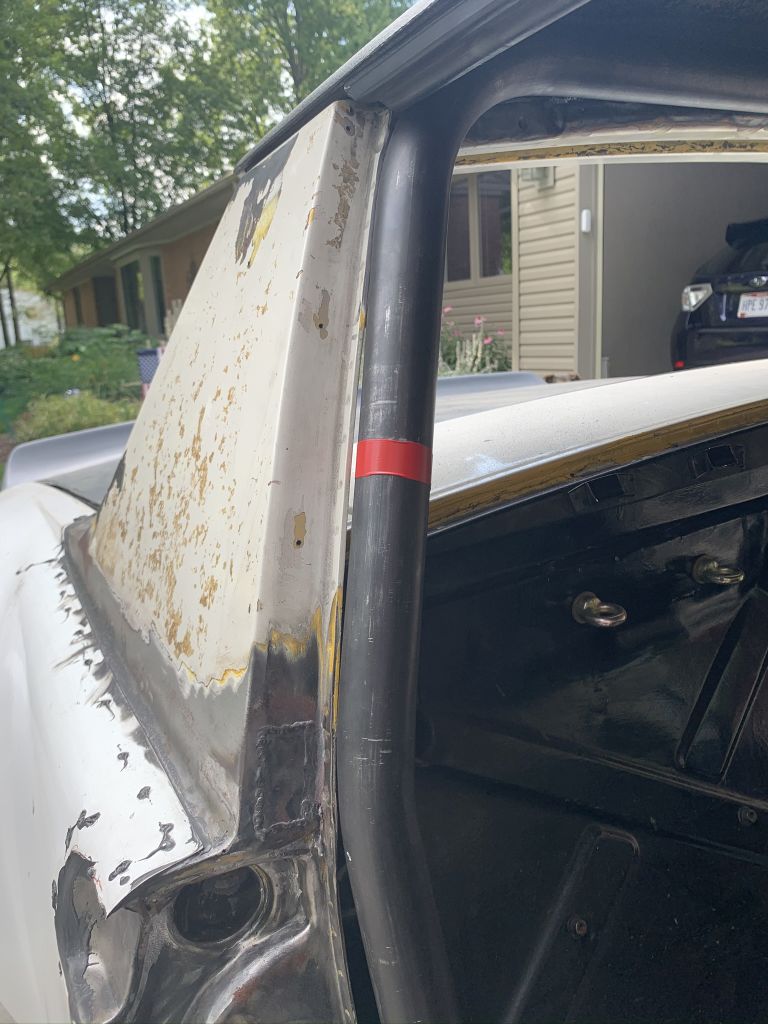
Of course this deleted the rear top latch so I am working on an alternative.
The rear trunk hinges were nasty so new ones.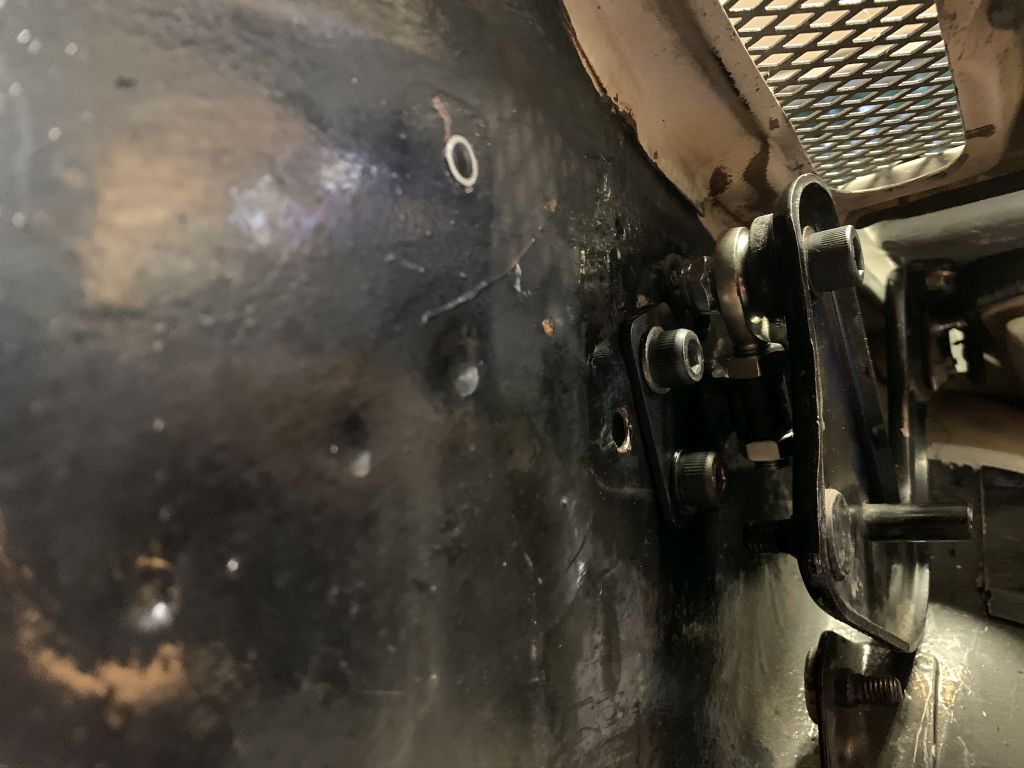
I got sick of fighting with the lugs on the trunk mounts while installing the hinges so I modified them.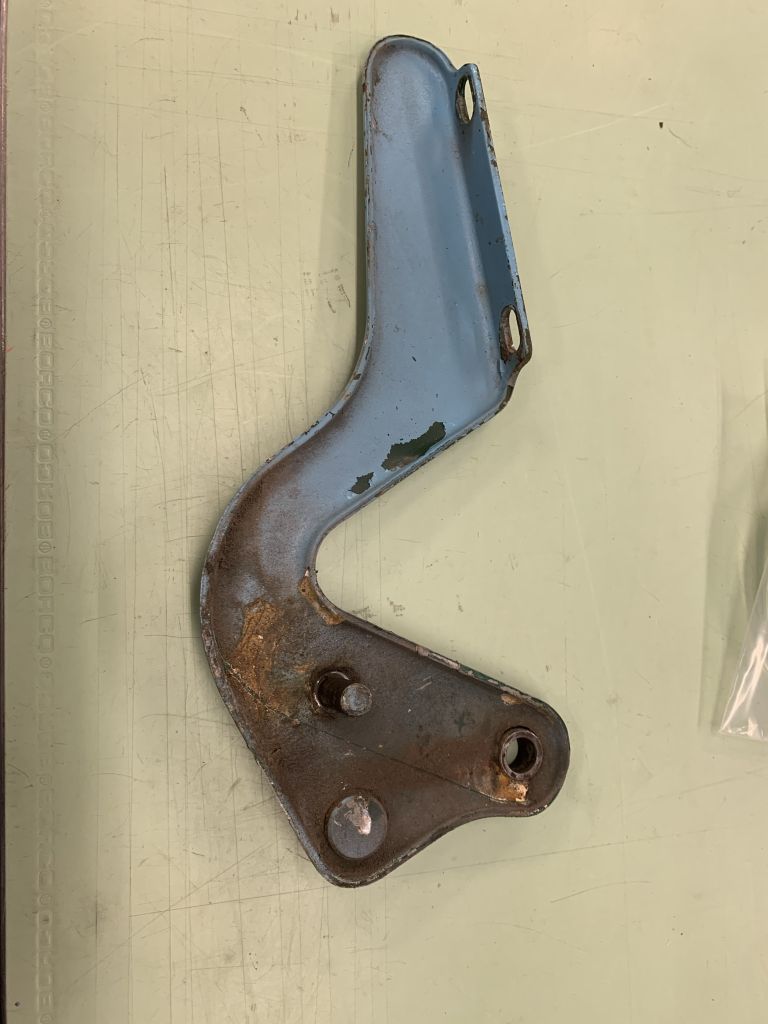
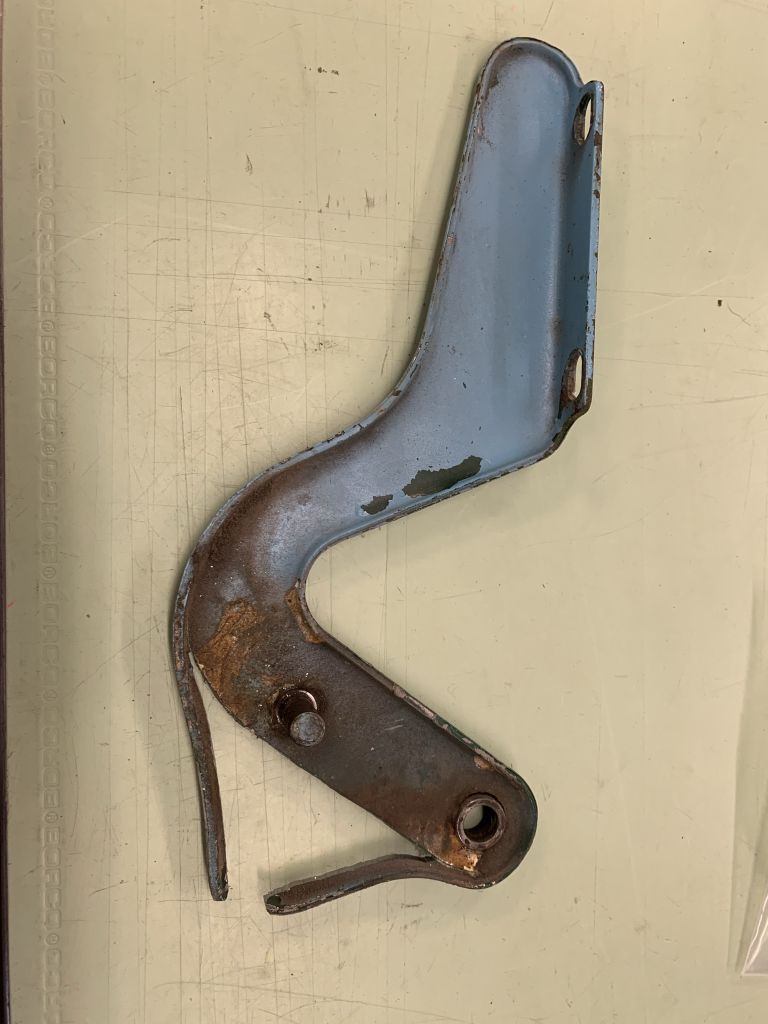
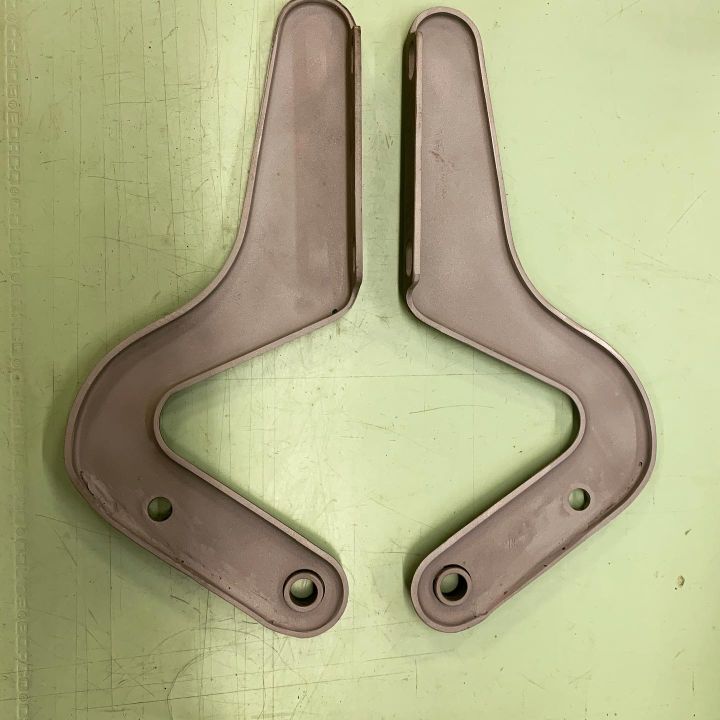
Posted by: Amenson Feb 15 2021, 01:27 PM
In case anyone is interested, here are the parts that I used in the engine. Pistons are higher compression...hopefully it gets me to 400whp with the current turbo and to above 500whp with a sensibly sized upgrade in the future.
Oil pump: 11mm Subaru 15010AA360
Pistons: Manley Performance Platinum Series Piston Set 99.5mm 9.8:1 (Part Number: 612100C-4)
Rods: Brian Crower bROD Connecting Rods Model #: BRIBC6609
Bearings: King Engine Bearings Standard Crank Main Bearing Set Model #: KGNMB5382XPG
King Engine Bearings Standard Connecting Rod Bearing Set Model #: KGNCR4125XPG
Valve Springs/Retainers: Brian Crower Single Spring/Titanium Retainer Kit Model #: BRIBC0600
Crank: Subaru OEM Forged Salt Bath Nitrated Crankshaft Model #: SUB12200AA430
Subaru OEM Complete Gasket Kit (Including Head Gaskets) Model #: SUB10105AA590
Head studs: existing ARP
IAG Stainless Steel AN Breather Fitting Set Model #: IAGIAG-ENG-7301
Posted by: mepstein Feb 15 2021, 02:24 PM
I saw the engine when I was as Scott's house. It was sort of stunning for a water cooled engine. Smaller than I expected and though I imagine it wasn't cheap, just think about what it would cost to put a 400hp Porsche engine into our cars.
Posted by: Aerostatwv Feb 16 2021, 03:29 PM
I saw the engine when I was as Scott's house. It was sort of stunning for a water cooled engine. Smaller than I expected and though I imagine it wasn't cheap, just think about what it would cost to put a 400hp Porsche engine into our cars.
Agreed. Can't wait to see the completed project. Is that yours in his garage?
Posted by: mepstein Feb 16 2021, 04:16 PM
I saw the engine when I was as Scott's house. It was sort of stunning for a water cooled engine. Smaller than I expected and though I imagine it wasn't cheap, just think about what it would cost to put a 400hp Porsche engine into our cars.
Agreed. Can't wait to see the completed project. Is that yours in his garage?
Yes. I'm lucky that Scott was willing to take on my project and turn my pile of
Posted by: Aerostatwv Feb 16 2021, 04:33 PM
I saw the engine when I was as Scott's house. It was sort of stunning for a water cooled engine. Smaller than I expected and though I imagine it wasn't cheap, just think about what it would cost to put a 400hp Porsche engine into our cars.
Agreed. Can't wait to see the completed project. Is that yours in his garage?
Yes. I'm lucky that Scott was willing to take on my project and turn my pile of
Can’t wait to see it when done. It will be perfection. It looked fairly solid from what I remember.
Posted by: Shivers Feb 16 2021, 07:17 PM
Some fine work dude
Posted by: Amenson Feb 17 2021, 08:02 AM
Agreed. Can't wait to see the completed project. Is that yours in his garage?
Completed! This car will likely never be finished. I do hope that once it is back on the road from this round of work that I can manage to keep it that way at least until the winter of 2022.
Yes. I'm lucky that Scott was willing to take on my project and turn my pile of
It is a good base for a conversion. Not too nice but pretty decent.
Some fine work dude
Thanks....go back to the start of the project and you will see what it took me to get to a point where I can make somewhat respectable parts. I started not even being able to weld my own parts. Luckily I have some very tallented friends that got me going in the right direction.
Posted by: Mueller Feb 17 2021, 09:15 AM
Impressive shop, love that C10.
The new motor looks great and should be a blast.
This thread reminded me I still need to make something for you...
Posted by: Amenson Feb 17 2021, 09:46 AM
Impressive shop, love that C10.
The new motor looks great and should be a blast.
This thread reminded me I still need to make something for you...
The C10 is great. Can hardly drive the thing without someone wanting to talk to me about it. If things go well with Mark's car and the Porsti, next winter it is getting swapped with a drive-train that has never been installed in one of these.
As for the other thing, I have a spot still reserved for it and would be honored if you would take the job of making it for me. Haven't followed up on it because you have been making such great progress on your project and didn't want to distract you from it.
Posted by: Amenson Nov 9 2021, 07:16 PM
Some of you may have seen the reference to some issues with this project in my post on Marks thread. Well, let's kill the suspense, it runs and is stupid fast but is far from where I planned on it being this summer. On to the details.
As is customary, my annual trip with my buddies to participate in Hot Rod Power Tour pushes progress. In order to force myself to be ready for Power Tour I signed up for Airstrip Attack Indy for the weekend before. That will really push the issue and give me an opportunity to find issues on a closed course and could trailer it home in case of breakage.
With the car mostly apart and a completely fresh engine to install I decided that I needed to get everything in the engine compartment "done" so that the drivetrain could stay in the car, hopefully for quite some time.
Big thing was the cage from the main hoop to the rear shock towers and then down to the transmission mounting points. (The front part of the cage can be installed later.)
Before that can go in…
-Fill in any unused holes
-Remove any unused brackets
-Install the new trunk hinges
-Seam weld and pretty much shave the horizontal seam in the firewall
-Clean up some of the seams from the previous rust repairs.
Also In the spirit of having the engine compartment "done":
-Remove the intake on the engine and unwrap the engine harness (yes, again) so that I could remove all unused plugs/wires and run the new sensors through the subaru engine connectors.
-Unwrap the harnesses in the engine compartment and run the new wires to the ecu/dash
-Also decided to put a new center section with billet compressor wheel in the turbo
Not to mention tidying up all of the new stuff that had been installed since the last time it was running like a basically entirely new cooling and fuel systems, updates to the pedal box plumbing and the new shifter setup.
Oh yeah, and after it is driving again, finish the rust repair around the a pillar area and fit the fiberglass front fenders.
You kind of get the point, a shit ton of really fussy work to be done.
Also part of getting it ready was putting the car on the dyno to get it to run with the new flexfuel system, external BOV and turning it up to make proper power. I made an appointment 5 weeks from Airstrip Attack with a very reputable tuner, the same one that tuned it last time but at a different shop. He said that we would make a startup and break in file for me.
As was somewhat predictable I wasn’t ready for the first appointment on the DYNO and had to cancel the night before the appointment. When I canceled I fully expected to pay a cancelation change but the tuner said that it was fine and he had plenty of other cars to work on (this is foreshadowing). The next appointment I could get was only 16 days before Power Tour. Not great and will make it impossible to attend Airstrip Attack but better than nothing.
So I plugged away and got pretty much everything done but found while I was doing the final welds on the cage that I didn't leave enough slop to move the cage enoug to fully weld all of the tubes. I didn’t have enough time to wait for the micro tig torch to arrive so I left the cage unwelded and pushed on getting the drivetrain installed and running. I got it running 5 days before the appointment to give me enough evenings to get one trip around Columbus and an oil change each night so that the engine would be somewhat broken in for the Dyno.
https://www.youtube.com/watch?v=tktUowQCInM
The first trip out really highlighted how sensitive the engine is to not having the recirculating BOV. The startup MAP wasn’t converted to speed density so it would not idle. I had to keep the rev's up to keep it running or let it stall and restart it at every stop. It is really loud and I have to go through an area with a bunch of nice restaurants with patios so I went with the stalling/restart. The restarts were still pretty rowdy because of the higher RPM's to keep it running and a completely fresh twin disk clutch. Finally get it onto the highway, enjoying the sound of the turbo and general satisfaction when the hood comes unlatched. Window is cracked, hood is mangled and the hinges both tore through the cowl. Whatever, smash it back down and get my miles in for the evening. The rest of the break in drives were uneventful.
The appointment at the dyno was planned to be a full day plus a bit of the next. I took the first day off from work so that I could stay at the dyno and support any issues that came up because there was no time for delays. I arrive at the shop, drive around back and there is another car there. The tuner went to the office and came back after a while and the dyno was double booked for the morning. He said that he could get other car finished pretty quickly and then get mine on directly after lunch. He would call when he was strapping Porsti down. I took an uber home and stared at my phone for the next few hours waiting for it to ring. Around 2pm with no call I decided to drive back only to find my car still in the parking lot. The other car was gone but he had not started mine. I stayed around until 6 and he managed to strap my car to the dyno and spent some time working on updating my map to SD plus the other changes. Car was started once before I left. He said that he would get it finished tomorrow.
This started 3 weeks of little to no communication about the status of my car. I popped in a few times only to find other cars on the dyno and left with no commitment on when my car would be finished. Best way I could find to describe the experience was being stuck in an airport in another country because your flight was cancelled so you are super angry but the gate attendant is holding all of the power so you had to be nice in order to have any chance of getting home.
This killed any hope of having it ready for Power Tour so I transitioned over to getting the C10 road trip appropriate. Before leaving for Power Tour I had to grab my road trip gear from the Porsti and while picking up the gear I had a very frank conversation with the shop and they committed to getting my car finished before I returned from the trip.
Power tour with the C10 was great except it needs 500whp more to hang with my buddies. I'll fix that during 2022 winter. Does great burnouts as is though.
https://www.youtube.com/watch?v=VNoQbCEqp5k
To give you a halftime reward during this way too long post, here is a video of my buddies LSA powered extended cab, long bed dually doing doughnuts in a drift competition at one of the events that I took with my 360 gopro. You should be able to rotate the view during the video.
https://www.youtube.com/watch?v=3jsh94iOcMI
When I returned from Power Tour Porsti was ready for pickup. Dyno chart is much better than the last but a bit disappointing. 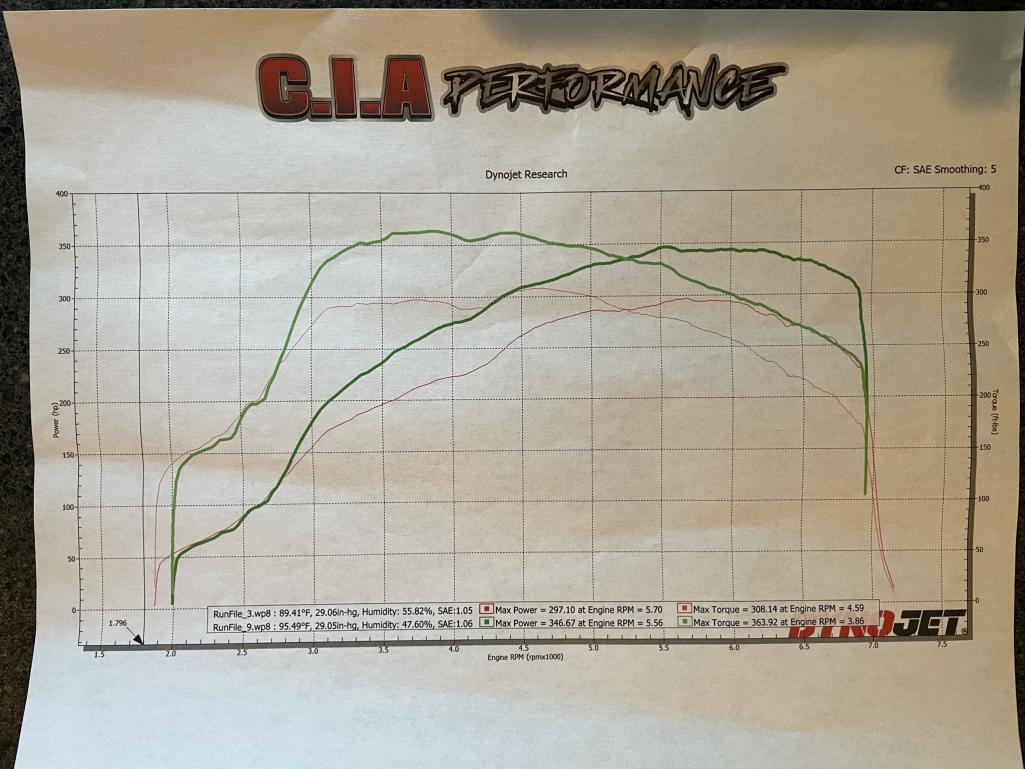
With the higher compression and billet compressor wheel, closer to 400whp on E85 should have been possible. He didn't think that the billet compressor did anything and thought that my header was also hurting output. He also pointed out that the intercooler is heat soaking terribly so it was hard to get runs without having timing pulled.
Drove it home during rush hour so I couldn't really push it but it felt quite nice. There was an annoying rattle in the cabin and when I arrived home I found this in the passenger side. 
I couldn’t figure out what it was…until I was returning from Cars and Coffee and was able to give it a proper rip onto the interstate. Whole bunch of wheel spin with every shift and beautiful noises until a huge woosh and loss of power. I blew the BOV off.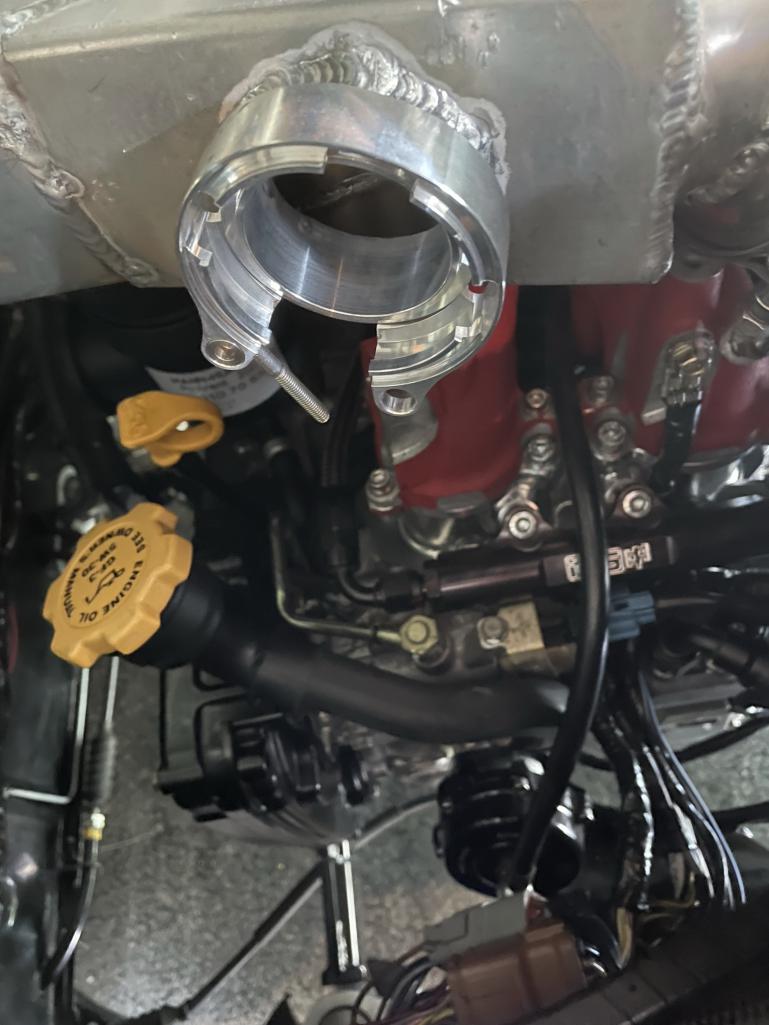
The fastener that I found on the way home was part of the t-bolt for the v-band. This had apparently come loose while on the dyno and somehow made its way into the cabin. My theory is that the shop found it on the floor and tossed it in there because even without the rear window, it is highly unlikely to have flown in. The tuner was not sure how it got there and dismissed my concern that it was tuned with a boost leak but assured me that even if it had, the tune was robust and that it would be safe.
I did some testing and confirmed that it was safe. After studying the boost/wastegate targets in the tables and the data in several logs, I convinced myself that the gains that should have been coming from the billet compressor where still there to be had. So I cranked up the boost and wastegate targets in all areas except peak boost and went out for some more testing. I definitely found some more midrange power and the limits of my resplined axles!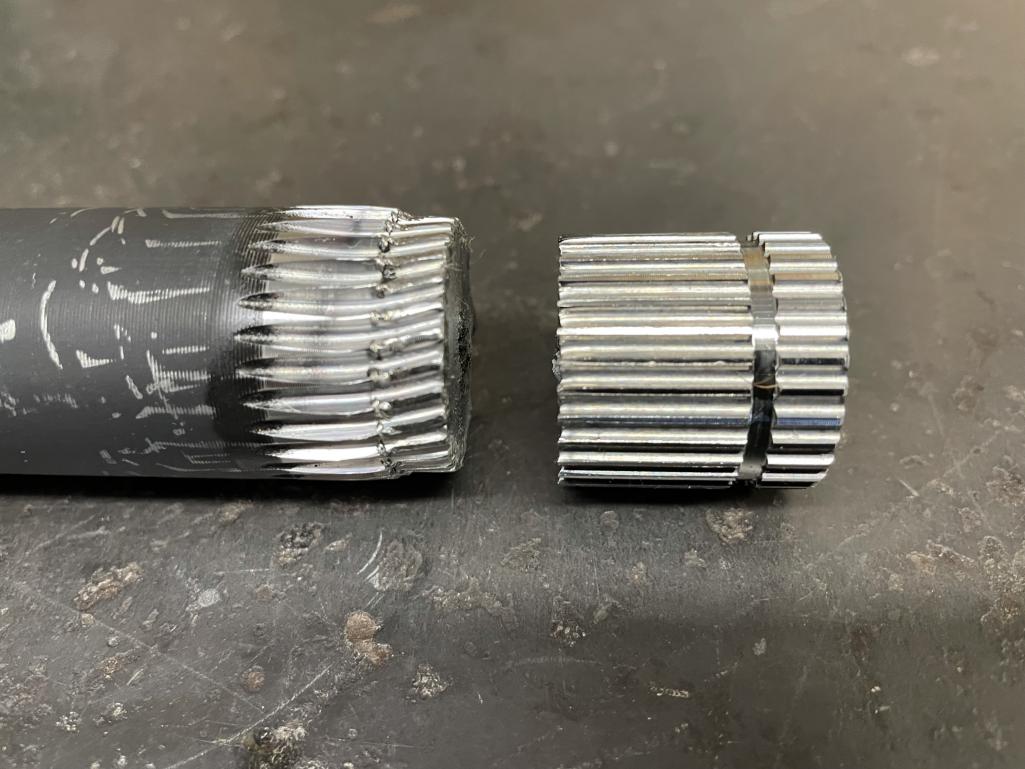
This happened ~ 40mph in third coming out of a roundabout…wasn't even launching it!
This already turned into much more text that I could have ever imagined and there is a ton of cool details to share so I'll just skip to the current state of the new axles installed and a video of axle testing.
https://www.youtube.com/watch?v=42TIK2RV8vU
This wasn't in Mexico so I won't disclose the speeds. But to give you an idea, the first shift was at redline into third and the second at redline into 4th. Yes I bounced off the rev limiter both times…it gets there a bit quicker than I am used to.
I've only driven it a dozen times or so but have already decided that it needs wider/stickier tires. Last drive I got a bit confident with the loud pedal on an uphill swooping onramp and exceeded traction at about 60mph in third and had a fair amount of tire spinning drifting to deal with unexpectedly.
I'll make posts of detail stuff in case anyone wants to borrow, refine or criticize.
Cheers,
Scott
Posted by: jeepguy06 Dec 27 2021, 11:57 PM
wanted to see what rear springs are you running?
Posted by: 123quattro Nov 1 2023, 04:07 PM
Just wanted to give a small update if anyone on here still follows the car. Scott passed away unexpectedly earlier this summer. I bought the car and spares from his wife last week. He and I were coworkers at Bosch over the years. Another work friend of his and I will keep PorSti in the PowerTour group of friends.
It's still a bit of a mystery as to what state it's in. I do know last summer the plastic cam timing pulley came apart in Tennessee and wiped out the heads. It appears to be fixed, but we haven't pulled the belt covers to confirm yet. Also, it doesn't start so could be that, or something else. It will be an adventure.
John
84 928S
Posted by: mepstein Nov 1 2023, 06:21 PM
Just wanted to give a small update if anyone on here still follows the car. Scott passed away unexpectedly earlier this summer. I bought the car and spares from his wife last week. He and I were coworkers at Bosch over the years. Another work friend of his and I will keep PorSti in the PowerTour group of friends.
It's still a bit of a mystery as to what state it's in. I do know last summer the plastic cam timing pulley came apart in Tennessee and wiped out the heads. It appears to be fixed, but we haven't pulled the belt covers to confirm yet. Also, it doesn't start so could be that, or something else. It will be an adventure.
John
84 928S
John -

I recently was at Scott's house and met his family. I told Tara it was a really cool car and would hopefully be picked up by someone who knew him. I'm glad it's in good hands. Please reach out if there's any Porsche parts needed. I'll help out with whatever I can.
mark
Powered by Invision Power Board (http://www.invisionboard.com)
© Invision Power Services (http://www.invisionpower.com)