Printable Version of Topic
Click here to view this topic in its original format
914World.com _ 914World Garage _ Rear swing arm mounting plate
Posted by: tracks914 Sep 28 2006, 08:36 PM
The 3 hole mounting plate on my project car (passenger side) is rusted pretty bad so I figured they have to come off for my resto so off they come. They seemed pretty rusted and tight so I soaked them from the top for about 2 weeks with penetrating oil.
Last night I went to take them off but I knew I was in trouble when they were spongy. WTF, grabbed the impact and got 3 bolts out OK and 3 broke off! 
Now this is going to be hard to get the broken bolts out. I might have to resort to drilling and re-tapping the holes unless some has a better idea?????Anyone ever have these seized in before??(a stupid question but....)
BTW I now need a passenger side mounting braket (plate) and shim!!
Tx
Posted by: mihai914 Sep 28 2006, 08:53 PM
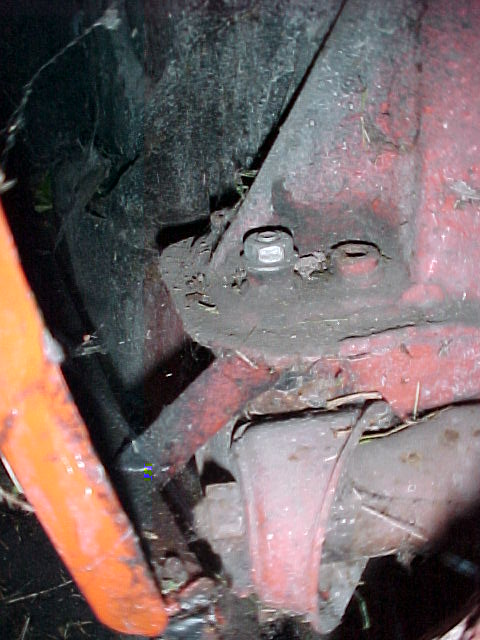
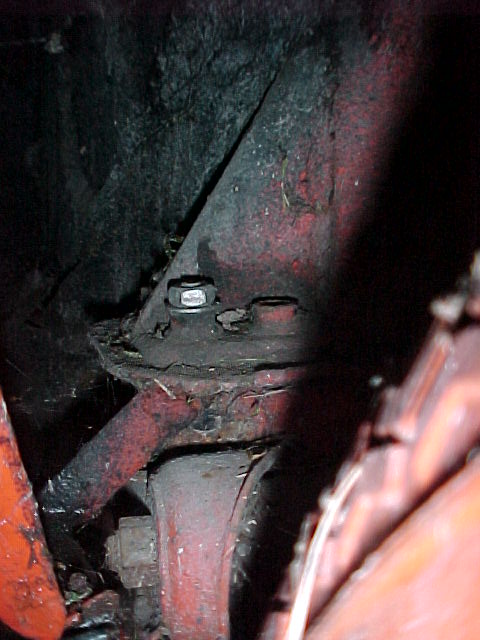
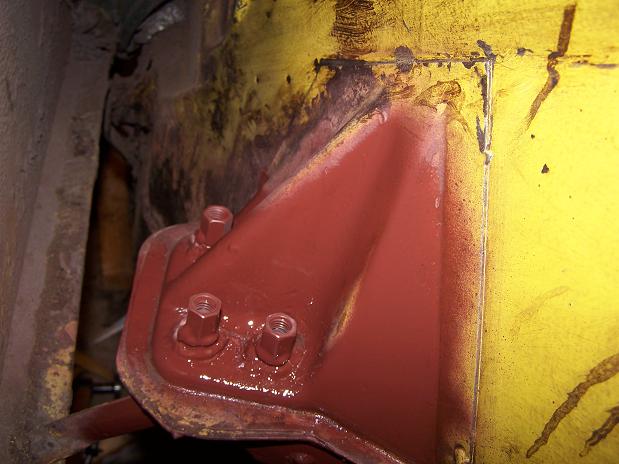
Had it happen to one bolt on the previous car. It's too late but did you heat them up before? Anyway the fix I did was to drill out the broken bolt, it's pretty hard to drill, you'll need plenty of bits and try and stay straight... After drilling crooked once then straight the second time, I just passed a long bolt that went all the way through with a washer and a nut and it held really good.
Another option may be to replace that outer console ear, the end result may be much better that drilling... It may be even more time effective.
As for tapping a new thread, it may be possible but those threaded "tubes" are pretty thin so you won't have plenty of chances.
Good luck!
Edit: Added some pictures for you.
Attached image(s)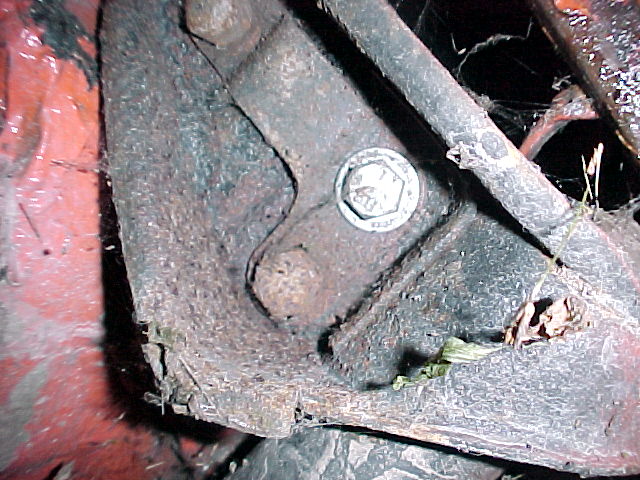
Posted by: tracks914 Sep 28 2006, 08:57 PM
Mihai, did you once have an orange car that hit a pole???
Posted by: mihai914 Sep 28 2006, 09:04 PM
No, mine was Phoenix Red and a tree jumped in front of it!
Should of sued the city for not putting a tree crossing sign 
Yep that's probably me, if you need a picture of the repair I can shoot one up for you tomorrow from half of the car.
Posted by: JOHNMAN Sep 28 2006, 09:49 PM
I would recommend drilling it out and running a long bolt all the way through the tube and put a nut on top. Double nuts will work as a jam nut. I think the through bolt method would actually be stronger than original and would prevent future rust issues as the hole would be kept clean.
Posted by: davep Sep 29 2006, 05:44 AM
You will require cobalt drills to do the job, a reverse twist drill would be best. Steph has that rotisserie for sale, that would help. You almost need a drill press to drill it straight. It may be worth talking to a machinist to get his advise. Doing a proper job is critical for the suspension. It is a hell of a job to do just one. Three, OUCH. I'll give you a plate, but don't have spare shims. I have seen a thread on cutting this out and pictures of the inner tubes.
Posted by: michel richard Sep 29 2006, 06:39 AM
That has happened to me too, several times. Those bolts are high grade steel and will dull regular high speed steel bits pretty quickly. So, get some cobalt bits, and try not to break them, because they're expensive, and drill away.
In some cases that I've done it, it proved not to be too hard. In others, it was frustrating. In all cases, I managed to do it and to put a bolt through with nuts on top as others have said.
Let us know how it goes !
Posted by: Racer Chris Sep 29 2006, 07:17 AM
I have gone so far as to use a hole saw to remove the metal tube that has the threads in it and replace the tube with one from a donor outer console. Currently I have pieces on the shelf for my raised trailing arm pivot kit that are nearly identical to the factory metal tube. It isn't that hard to cut the welds out with two hole saws and a hand drill, and the tube will come out the bottom.
I don't like the idea of a long through bolt, other than for convenience. Another reasonable method of repair I have seen is using a helicoil or timesert in the lower section of the hole and using a much shorter bolt than original. The most convenient thread pitch may be different than original for this.
Posted by: URY914 Sep 29 2006, 09:38 AM
What about drilling it over sized installing a bolt from the top and welding the head of the bolt to the ear? It would be like a stud on the bottom side.
Whata think? 
Paul
Posted by: tracks914 Sep 29 2006, 06:54 PM
I'm going to wait until I get it up on the rotisseri to do the drilling. I have a bit of a nub left showing so first I'll attempt to weld a nut on it, get it good and hot, red hot, then attempt to remove them again. If that doesn't work, I'll have to cut away part of the rear quarter panel to fix the frame rot properly so I'll go in from the top and try to drill it from the top down and use the nut as a guide to keep the drill bit straight. I have about 3/8" before I hit the top of the bolt so it should go in straight. If all that doesn't work...I'll just drill it out and put a nut on it like in Mihai's pictures.
Posted by: URY914 Sep 29 2006, 07:11 PM
I'm with Chris on using a bolt and a nut. I don't like it because it can move around in the hole. I feel you need to attach the nut or the bolt to the car. You could weld the bolt head to the car like I said above or run the bolt from the bottom and weld the nut to the car. A "floating" bolt holding a suspension member isn't a good thing IMHO.
Posted by: JOHNMAN Sep 29 2006, 07:27 PM
I used the same size and thread of bolt when I ran my through bolts.
This is essentially the same as what the factory did, with the exception that my bolts are longer. 5 of the six of the holes are threaded per factory. Only one had a broken off bolt and upon drilling, that "tube" no longer had threads.
This being a slip critical connection (to hold toe adjustment), is of poor design from the factory.
If you want to hold toe, you need to install adjustable turnbuckles/braces in this location anyway. (I believe Brandt has pics of these on his car)
With the through bolts, you are able to really tighten the bolts, keep crap out of the tubes and you are able to jam-nut the top.
Posted by: mihai914 Sep 29 2006, 08:23 PM

I'm with Chris on using a bolt and a nut. I don't like it because it can move around in the hole. I feel you need to attach the nut or the bolt to the car. You could weld the bolt head to the car like I said above or run the bolt from the bottom and weld the nut to the car. A "floating" bolt holding a suspension member isn't a good thing IMHO.
Honestly I don't understand where the issue is, if you drill the hole to match tightly the diameter of the bolt, where is the problem. The bolt I put in isn't threaded all the way, it has threads only on the last third of it's lenght. It's just like many suspension bolts on many cars. Of course if you put a fully threaded bolt where you're supposed to have partially threaded one, then you'll work the hole loose.
If you weld a new bolt for example, chances are good that it can brake also and then you have to work with the same type of problem again.
Anyway the subject is open to debate.
I think the rusting issue comes from the fact that the plastic plug they put on top of the tube can't seal well, and by memory, the factory fixed the issue on later cars (maybe 75-76) by sealing the tubes with steel caps.
I still think that if you have all three broken on one side, it's easier to just weld a good piece from a donor car than spending hours trying to drill straight or to replace each individual tube.
Posted by: tracks914 Sep 29 2006, 09:55 PM
I don't have all 3 broken on one side...its 2 and 1.
Posted by: TargaToy Jul 28 2010, 09:14 PM
Sorry to revive an old topic but I was in the process of drilling out a snapped bolt in the rear swing arm console and....broke off a Cobalt bit inside the bolt.
Does anyone have any advice other than "Good luck with that"?
I'm not quite at the stage where I want to cut out the entire tube, although I know that's an option. The fragment of the bit left inside is1/8" in diameter. If I start in with a slightly larger Cobalt bit, will it simply stop all progress when it reaches the old piece?
Am I screwed?
Posted by: Mark Henry Jul 28 2010, 09:19 PM
Plan B would be the way Racer Chris explained how to do it...he knows his shite.
Posted by: TargaToy Jul 28 2010, 09:59 PM
Since Racer Chris mentions using 2 hole saws, can I ascertain that the tube is actually welded on the interior of the console body in addition to the obvious weld bead around the top of the tube on the outside?
I seem to recall toying with this option and thinking I would need some odd-ball sized hole saws for the procedure.
Racer Chris....any specifics on this?
Thanks in advance!
Posted by: veltror Jul 29 2010, 01:33 AM
Look at post 60 in my thread, you could always make one
http://www.914world.com/bbs2/index.php?showtopic=84350&st=40
Posted by: sechszylinder Jul 29 2010, 02:52 AM
Hi,
sorry to hear that, cause it's really pain in the ass to get the broken bolts out of the mounting plate.
My recommendation is not using any drill bits or something similar, cause there is a very high risk that the bit breaks inside of the mounting . In that case you're really in big trouble.
I did several times the following:
I've welded a new big nut onto the broken bolt. I've used a big nut, cause you can better weld from the inside of the nut onto the broken bolt.
If you think that the weld is strong enough, then use an impact wrench to get the bolt loose. Do not use a simple wrench, cause you might break the nut from the bolt.
In most cases it works due to two reasons:
1. While welding, the whole things warms up and the rust inside get loose
2. The impact wrench will not break the welded nut from the bold due to the limited turning moment and the constant strokes on the bolt.
As I wrote I did this several times but it's always a real challenge ... but it never failed ;-)
greetings from Germany / Berlin
Benno
Posted by: Racer Chris Jul 29 2010, 09:32 AM
Racer Chris....any specifics on this?
I finally got around to putting our replacement sleeves on the website:
http://www.tangerineracing.com/body.htm#Trailing%20Arm%20Threaded%20Mounting%20Sleeve
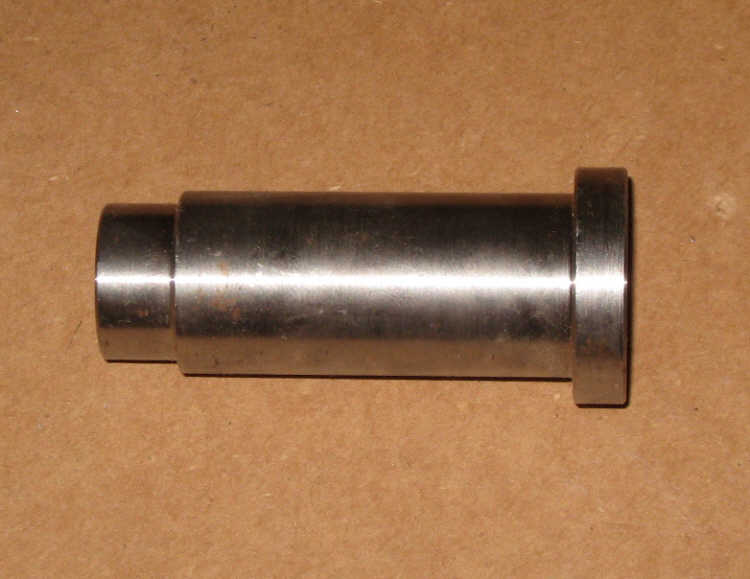
A 7/8" holesaw is used to cut through the top weld, and a 1 1/4" holesaw cuts the bottom weld IIRC.
Be careful not to cut through the sheetmetal or the hole will be too big when you insert the new sleeve.
Posted by: Spoke Jul 29 2010, 01:59 PM
I had the same problem with all 6 bolts.
I drilled them out starting with a real small bit and going to larger and larger bits till I got it wide enough for a bolt.
Then I welded 2 nuts together (wow, that just sounds wrong) to make a larger support length.
Then welded the nuts (it still sounds wrong) to the console.
Attached image(s)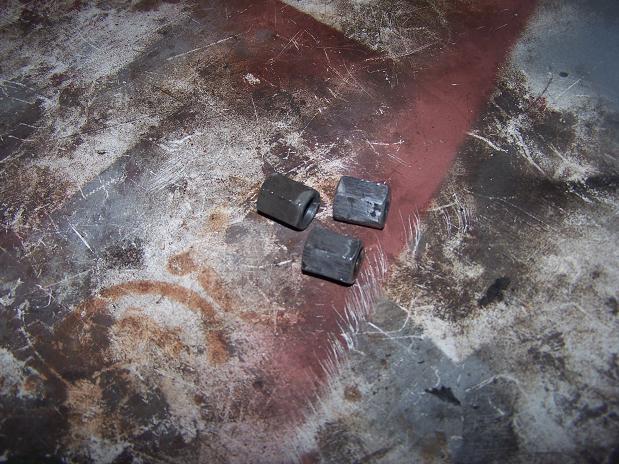
Posted by: TargaToy Jul 30 2010, 04:57 AM
Thanks, everybody, for your input on this. I am curious about Racer Chris's option if it should come to that. There aren't any visible welds on the bottom side. Are they INSIDE the console? And, if so, and you cut around the wider base of the tube, won't you still have to replace sheet metal on the bottom of the console so that there's a tight hole to fit snugly around the tube of the insert?
I've always wondered if the bead of weld around the top was "IT".
Thanks again. Really appreaciate all the help from everybody!
Posted by: jmill Jul 30 2010, 07:45 AM
Sorry to revive an old topic but I was in the process of drilling out a snapped bolt in the rear swing arm console and....broke off a Cobalt bit inside the bolt.
Does anyone have any advice other than "Good luck with that"?
I'm not quite at the stage where I want to cut out the entire tube, although I know that's an option. The fragment of the bit left inside is1/8" in diameter. If I start in with a slightly larger Cobalt bit, will it simply stop all progress when it reaches the old piece?
Am I screwed?
I've broke many a cobalt drill bit off. You can't drill out a drill successfully. The new bit will seek the softer metal and then most likey break off when a corner of it grabs the broke off one. I've had luck using a rivet gun and a flat set to vibrate out the broke bit. You'll have gravity working with you on this one.
Posted by: Racer Chris Jul 30 2010, 09:49 AM
I've always wondered if the bead of weld around the top was "IT".
I checked two of the cars here at the shop. One is welded around the bottom, the other is not.
I don't think there are any hidden welds inside the console.
Posted by: TargaToy Aug 1 2010, 07:43 PM
"Plan C" worked. I thought I would take one last poke at the tube before cutting it out and ordering the replacment (not that I won't have to when I do the other side  ).
).
Ended up "funneling" out both ends of the hole with progressive (old) bits. This allowed my 1/8" drift to go further into the hole without the shoulder of the drive bottoming before the tip made contact with the broken bit. This was a very slow process--as in it probably took me 2-3 hours of careful nibbling so that I didn't break off another bit.
Finally got the whole tube drilled out and was able to chase the original threads with a 10x1.50 tap.
Like I said, this cost me a few hours and I also blew the side out of my corded drill when turning the largest bit and it caught what was left of the bolt in the old threads. Why do they make drill bodies out of plastic anyway?
Powered by Invision Power Board (http://www.invisionboard.com)
© Invision Power Services (http://www.invisionpower.com)