Printable Version of Topic
Click here to view this topic in its original format
914World.com _ 914World Garage _ Retrofitting 1976 with early front bumper.
Posted by: dhopkins Oct 27 2006, 08:36 PM
Is it possible to install an early bumper on a 1976? If so how is it done?
Don
0-----------------------------------------------------
1976 914 2.0
1969 911S
1981 911SC
Posted by: boxstr Oct 27 2006, 08:54 PM
Yes it can be done. You might try a search for the subject it has been a thread recently.
If you don't find it I will give you some help a little later tonight.
Craig
Posted by: porschecb Oct 27 2006, 09:10 PM
what! you don't like late style bumbers! There faster than the older style (on the track) !!! 
Posted by: So.Cal.914 Oct 27 2006, 09:19 PM
The condom bumpers are heavier. There are four bolts that hold the old style
bumpers on, two on each side. Get your measurements from an old tub for
those holes and drill them into yours. Measure twice drill once.
Oh and you will need the bones.
Posted by: Dave_Darling Oct 27 2006, 09:23 PM
I believe Paul means "rubber dog-bones", which go between the metal bumper and the car's body.
You also need to grind off the tabs on the side of the car that hold the ends of the bumper cover, and shorten the front lip of the front trunk's seal channel. That serves as a lip to hold the top of the bumper cover.
Remember to paint any bare metal...
--DD
Posted by: dhopkins Oct 27 2006, 10:06 PM
I searched but found not a single thing. If I change to the early
bumper will it hurt or help the car's value?
Don
___________________________________________
1969 911S
1976 914 2.0
1981 911SC
Posted by: jk76.914 Oct 27 2006, 10:06 PM
I did it on my '76. I think it was worth it.
I found the front bumpers in good shape to be much harder to locate than the rear ones. Mine isn't perfect, but its better than most, and most people don't notice.
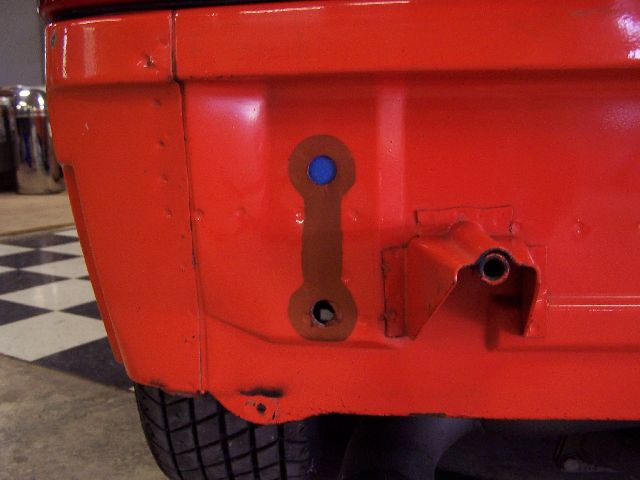
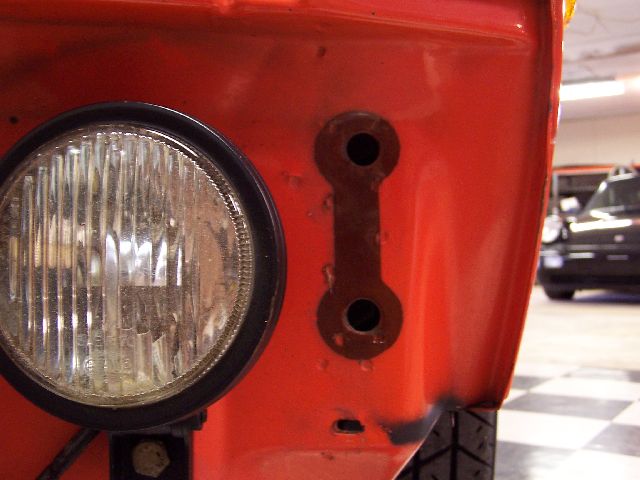
After you pull the bumpers and bumper shocks, you have to remove the tabs on the sides where the ends of the rubber cover used to hook. Then you fill the big holes that the shocks used to go through. Also, the thin metal tab that runs along the front edge of the trunk openning isn't needed anymore either. I is supposed to hold the top edge of the rubber cover down and in place. I think it was spot welded inplace and can be removed by drilling the spot welds out.
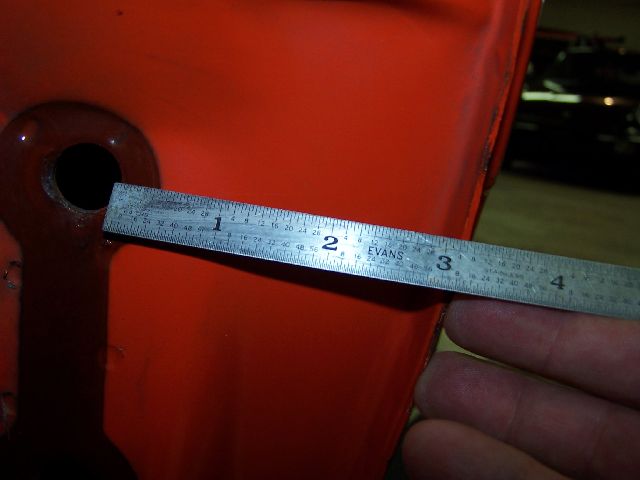
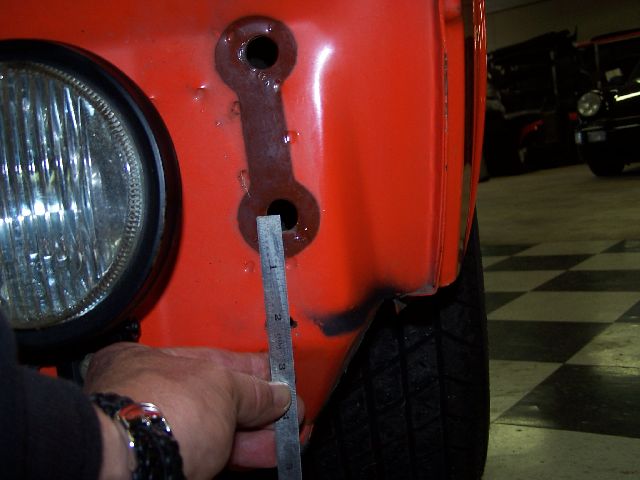
Finally, you drill new holes for the dogbone bumper brackets. I found this to be the trickiest part, because there isn't much room left and right for the bumper to sit off center, muchless look right.
On the original cars, there were L brackets welded in to reinforce the bumper mount to the side rail of the unit body. These are in the wheel well. I did not put anything in there, so my bumper and front panel would probably cave in an accident before the side rail. Maybe someday I'll have something welded in, I don't know. It's easy enough to do when ever I get the motivation.
In the back, you'll also need new license plate lights- the early ones are different. Also, there's a steel tab from the body, directly above the license plate, that the center stud from the rubber cover goes through.... another tricky part, getting it the right height and centered....
Good luck!
Jim
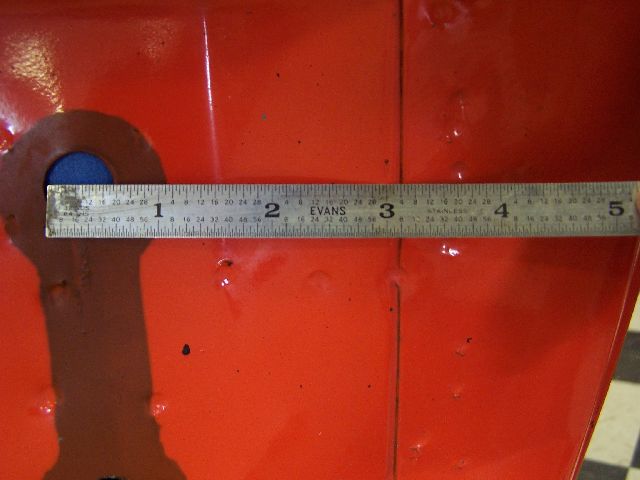
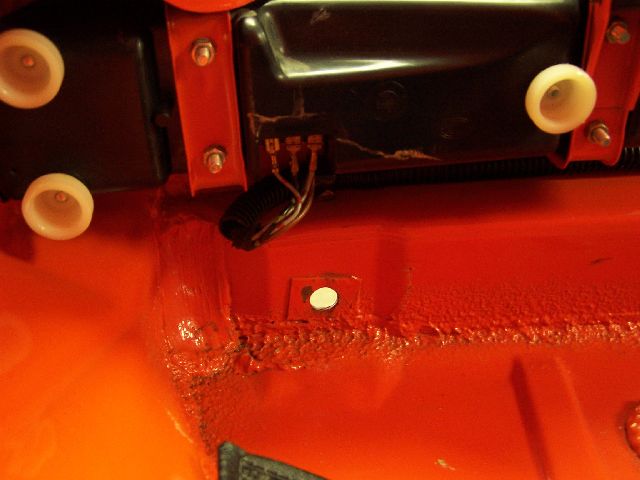
Some pictures- the back is a similar process.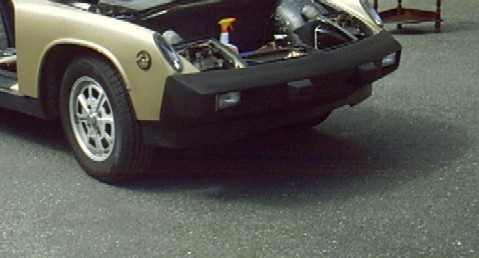 started with this
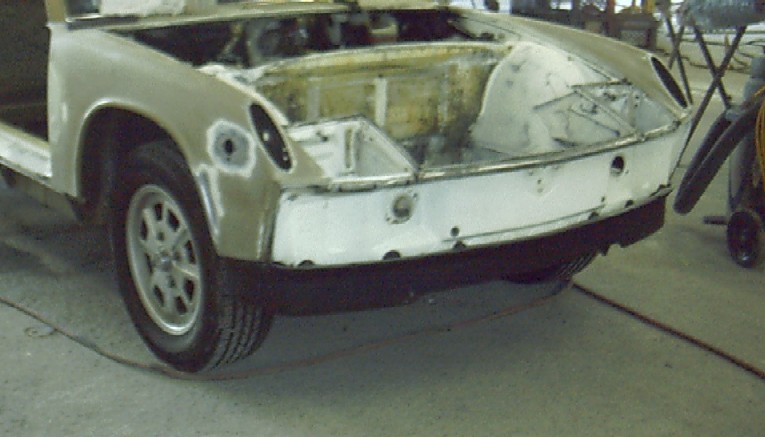 big shock holes to be filled....
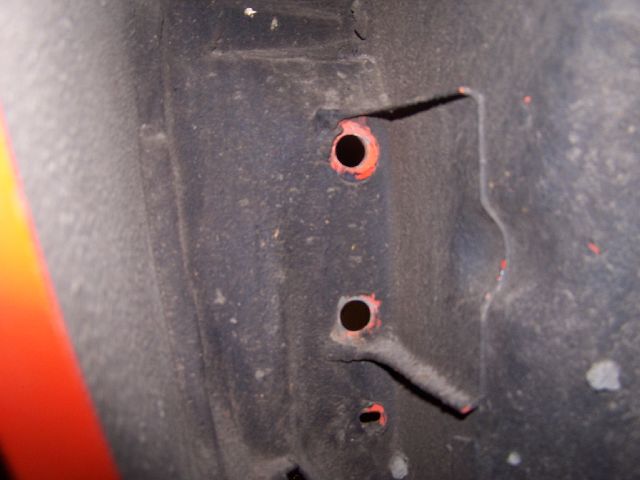
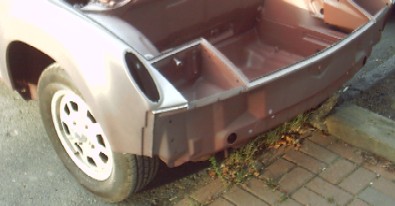 shock holes filled, attachment holes drilled, everything primed
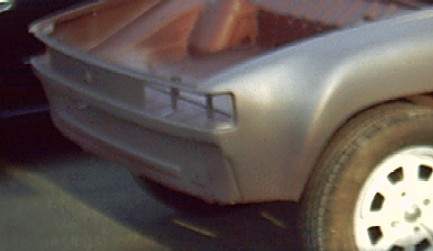 fuzzy pic, but the tab is there below the lock hole
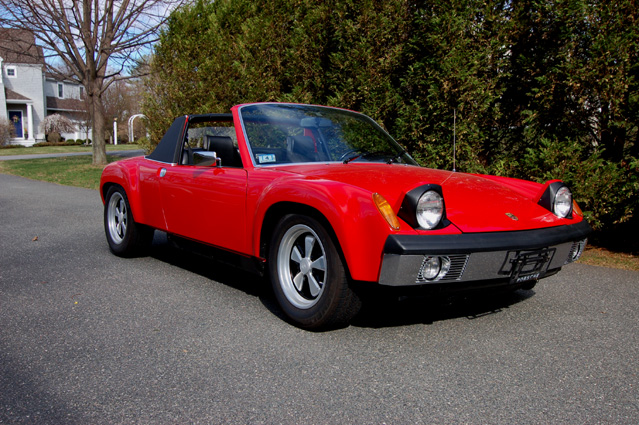 today! TA DA!
Posted by: boxstr Oct 27 2006, 10:34 PM
Well It looks like most of the process has been covered.
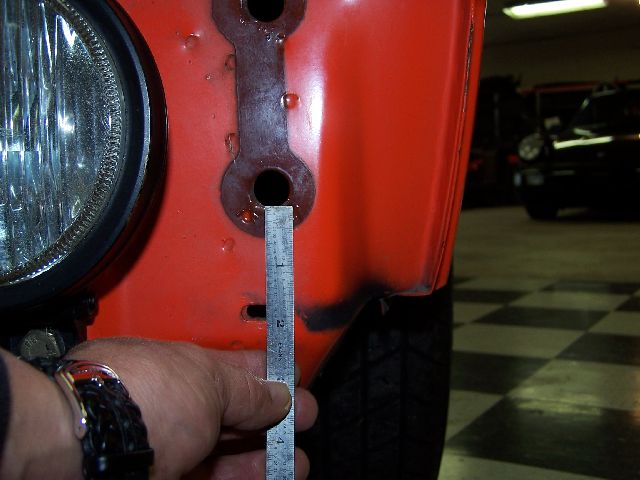
The major part of this process is the purchase of good front and rear bumpers. You will need the dogbones , you will also need good rubber bumper tops.
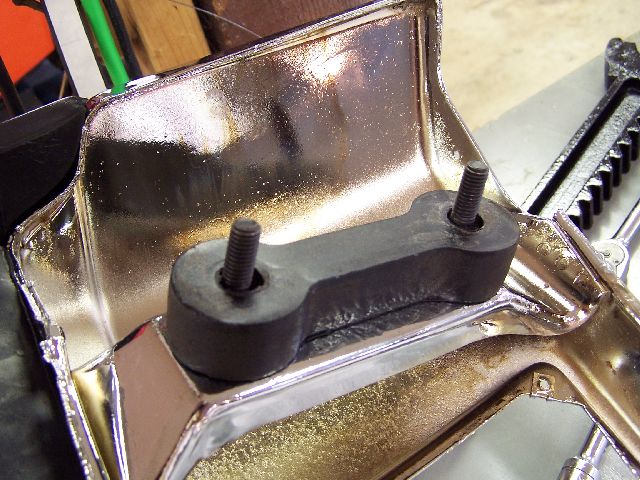
One thing that I always do is use threaded studs instead of bolts.
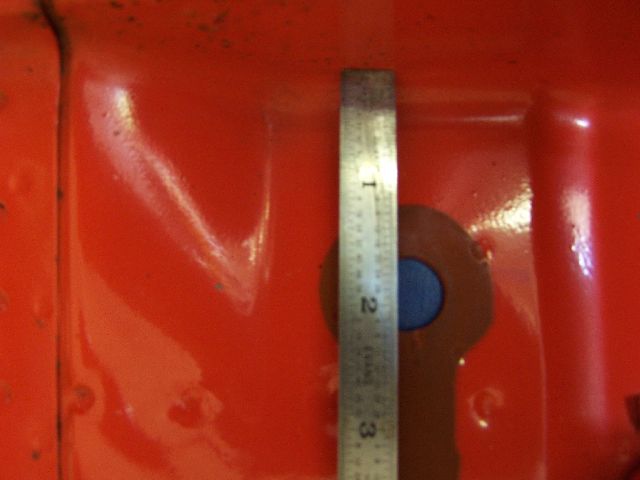
You put the studs in where the bolts are supposed to go and you can slide the dogbones over the studs, and slide them into the holes that you have drilled for them. This makes it a one person operation.
Note: you will use the dogbones for measuring the distance for the holes you will need to drill in the front and rear.
I will add a couple of pics for reference.
I have done about 20 different bumpers backdates, It is really very easy.
CCL
Attached image(s)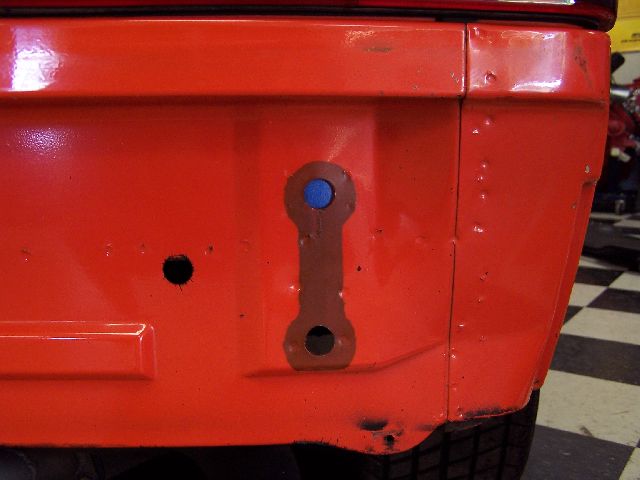
Posted by: boxstr Oct 27 2006, 10:35 PM
A few more pics.
Attached image(s)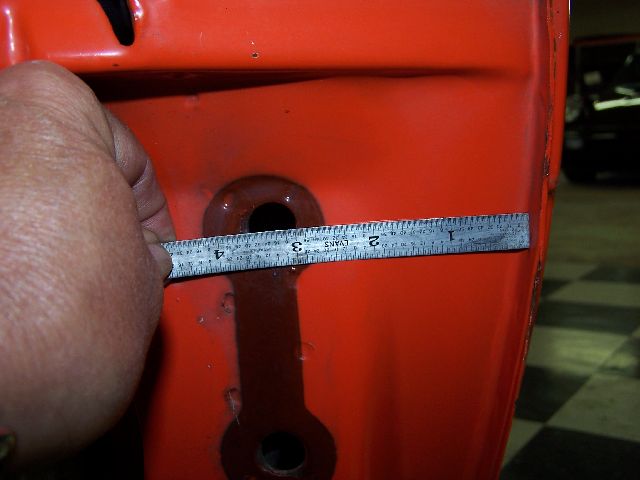
Posted by: boxstr Oct 27 2006, 10:37 PM
Last one....
Attached image(s)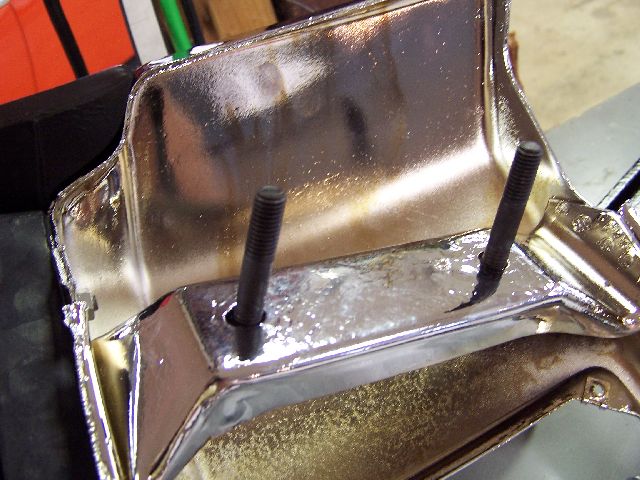
Posted by: Bleyseng Oct 27 2006, 11:18 PM
Nice pics Craig!
yep. its fairly easy to do and worth it.
Attached thumbnail(s)
Posted by: So.Cal.914 Oct 27 2006, 11:45 PM
The studs in the bumper are a great idea Craig.
jk76.914 nice job on your 76.
Posted by: dhopkins Oct 28 2006, 11:17 AM
Thanks very much. Great job! How about the rear bumper? Anybody know how that is done?
Posted by: Headrage Oct 28 2006, 11:42 AM

Thanks very much. Great job! How about the rear bumper? Anybody know how that is done?
Pretty much the same way the front is done except you only have to trim the brackets on the left and right sides.
Also, get Engmans cover plates for the front shock holes or you'll fill the front trunk with water everytime you was the car...
Posted by: jk76.914 Oct 28 2006, 02:35 PM
Thanks very much. Great job! How about the rear bumper? Anybody know how that is done?
Also the tab over the license plate. It'd be tempting to leave it off, but I wouldn't. Otherwise the rubber top is self-supporting in the center. Take another look at my earlier post.... I have a fuzzy pic of the tab.
Jim
Posted by: shelby/914 Oct 28 2006, 04:36 PM
There is another very good thread from Jan 04 entitled Old School Bumpers, retrofitting to a 76, but I could not get the search function to go straight to it. Found it by searching bumper conversion which came up with 23 pages. On page 21 there is a post called bumper backdate. There is a link in it which goes to old school. Good Luck. It should be easier but, 
Powered by Invision Power Board (http://www.invisionboard.com)
© Invision Power Services (http://www.invisionpower.com)