Printable Version of Topic
Click here to view this topic in its original format
914World.com _ 914World Garage _ How I painted my 914
Posted by: thomasotten Nov 29 2006, 02:29 AM
Hi folks,
I wanted to show some pictures of the process I went through in painting my 914. I thought it might be helpful to those who are considering the same task for their car. By painting your own car, you will be saving yourself a lot of money, and you will be able to reach a level of detail that most body shops will not provide, at least not for an economic fee. Be warned, however, it is a lot of work!
The first picture here is a photo of the car with my girlfiend, now wife, back in '91. Since then, the elements have really taken a toll on the car, and hence, the car needed extensive body work to get things back the right way.
Attached image(s)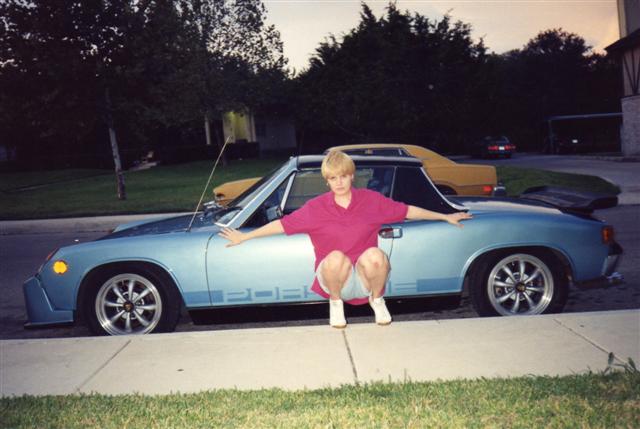
Posted by: mikez Nov 29 2006, 02:33 AM
Does this involve scantily clad wimmen and cars?
Posted by: thomasotten Nov 29 2006, 02:36 AM
First of course, there is the body work. I prefered to remove each door and work on a panel at a time. That way I stay focused, and pay attention to detail.
What you want to do is use a good quality filler, and a long sanding block....
By long sanding block, I mean get yourself a 4' level, and get some 80 grit sanding paper that has the stock on backing. You then sand the door, or any panel in an X pattern. From lower left to upper right, and vise-versa. That way your panel comes out wave free.
Attached image(s)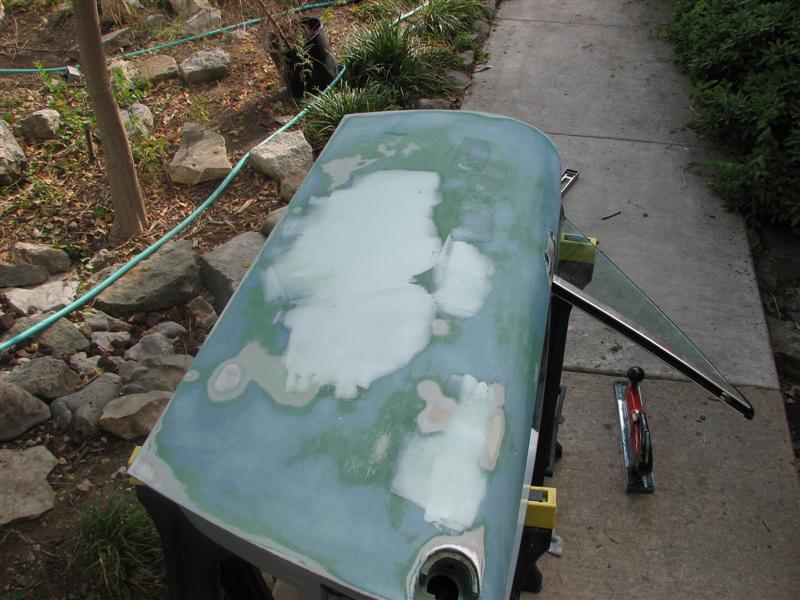
Posted by: thomasotten Nov 29 2006, 02:41 AM

Does this involve scantily clad wimmen and cars?
Eventually, I hope...
Another tip I picked up when working with filler: always add a skim cout when you think your done. Then sand that. See my 4' level on the driveway?
Attached image(s)

Posted by: thomasotten Nov 29 2006, 02:49 AM
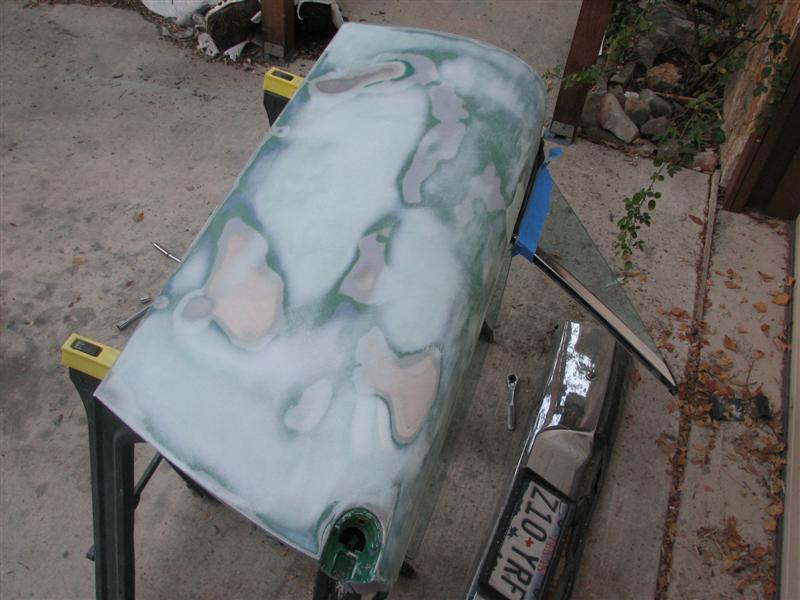
When you have finished your body work, you are left with body filler with lots of 80 grit scratches. At that point, you need to use some primer-surfacer to fill in the scratches. There are different qualities of these fillers, just like anything else. The better quality ones don't shrink. If your filler shrinks as it ages and cures, the scratches will start to become noticeable again, which kinda defeats the purpose. So don't go cheap on the filler.
Attached image(s)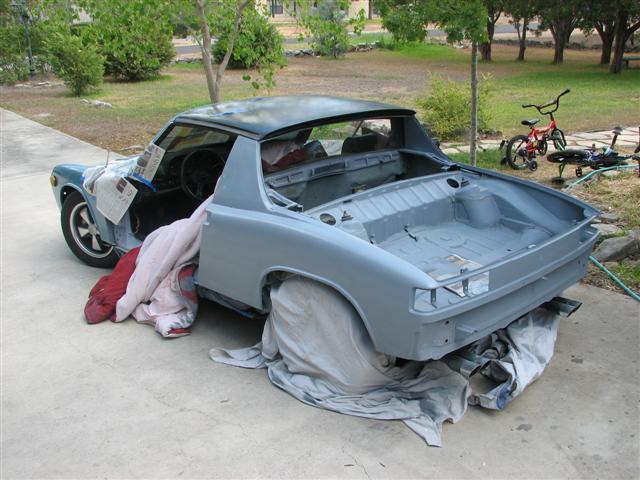
Posted by: thomasotten Nov 29 2006, 02:57 AM
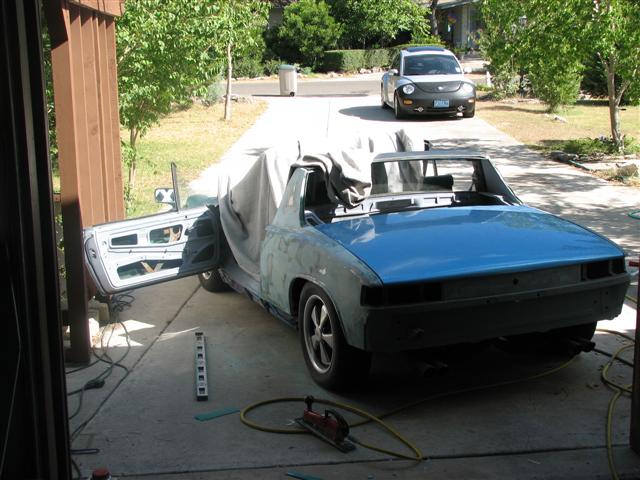
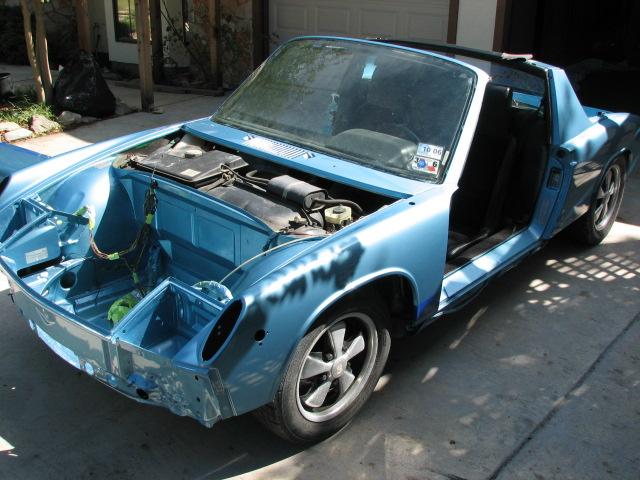
One thing that is a good idea when you are painting the whole car, inside and out, it to do the inside parts first. I removed the doors and painted the inside portions. My trunks were also a mess, which required a lot of prep time and degreasing.
Attached image(s)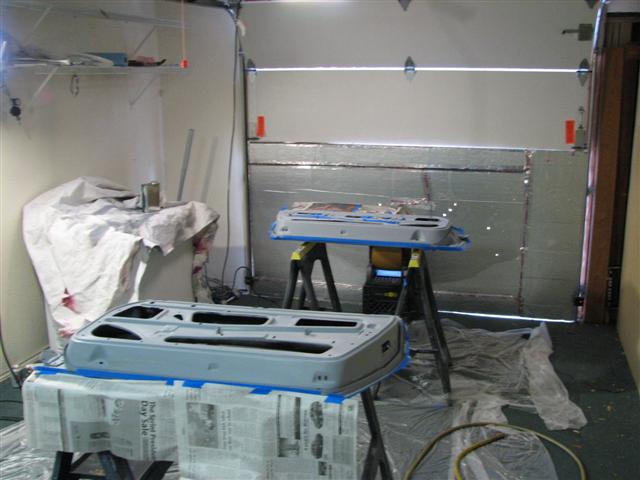
Posted by: thomasotten Nov 29 2006, 03:02 AM
I sprayed primer-sealer in the trunk area. Then painted...
Attached image(s)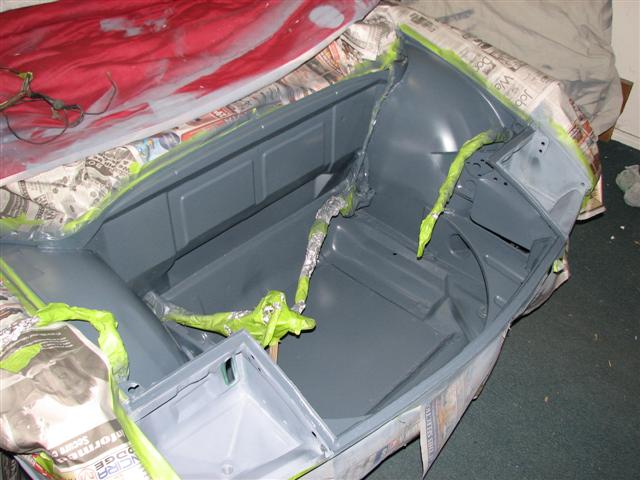
Posted by: thomasotten Nov 29 2006, 03:05 AM
In the sun...
Attached image(s)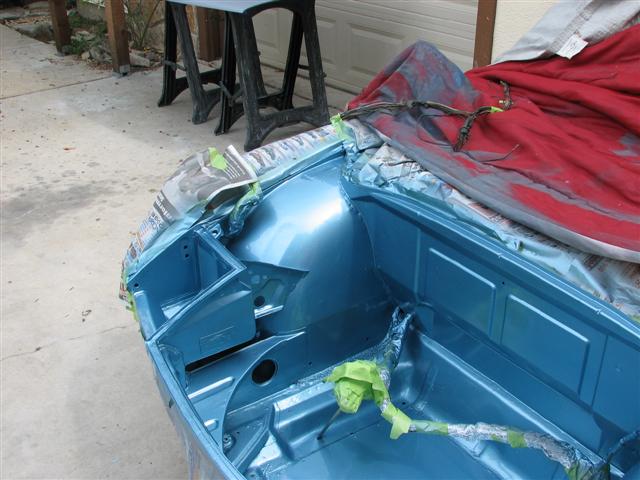
Posted by: thomasotten Nov 29 2006, 03:06 AM
I painted one of my son's hot-wheels at the same time...
Attached image(s)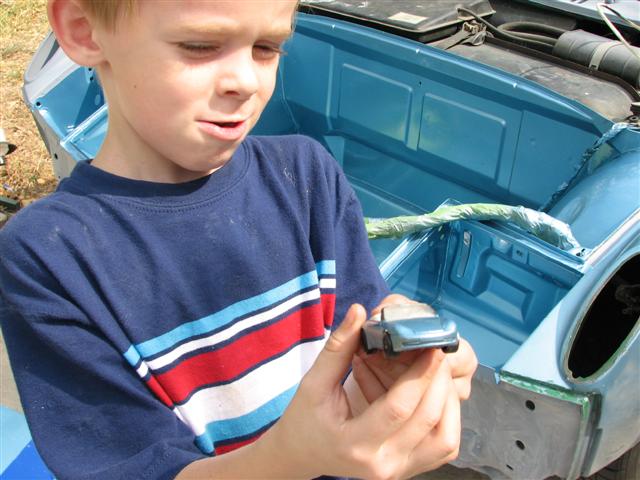
Posted by: thomasotten Nov 29 2006, 03:10 AM
I had my engine lid dipped and removed all the paint. I though it would be easier than removing all the grease underneath. I then coated with metal-etching primer, then sealer, then I sprayed color/clear.
Attached image(s)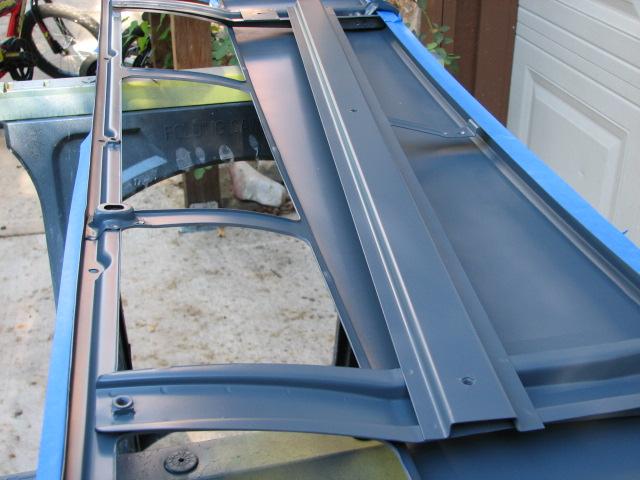
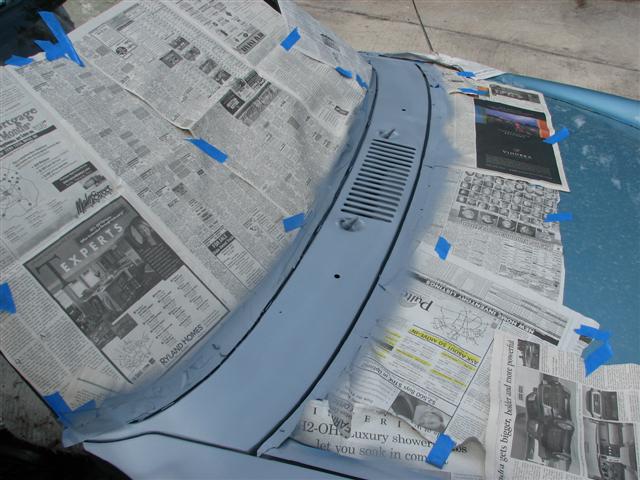
Posted by: thomasotten Nov 29 2006, 03:15 AM
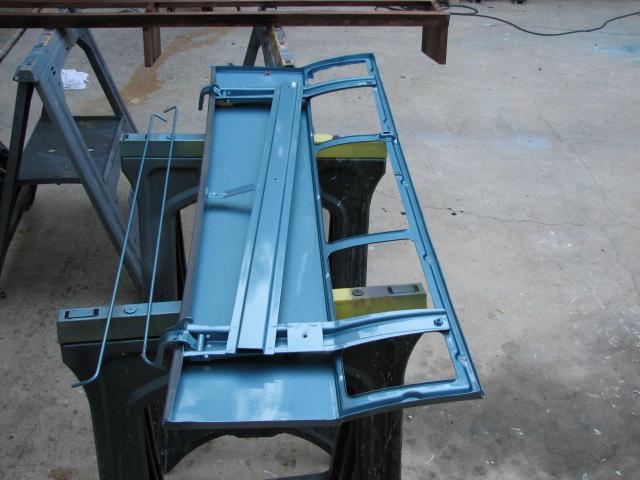
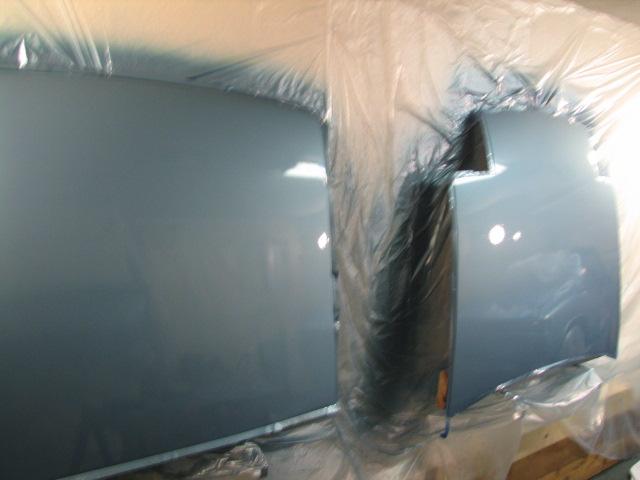
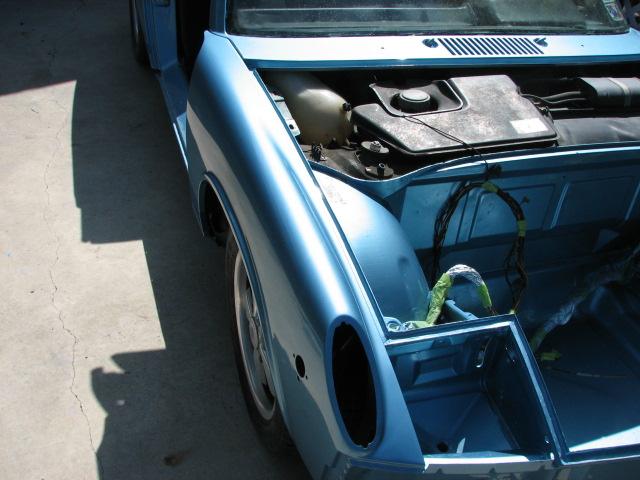
This is one of the harder areas to paint on the 914. I wanted to paint this area before I did the main body. That way, I wouldn't have to be reaching in awkward positions over the rest of the body while it had paint drying on it. I did the door jambs at the same time.
Attached image(s)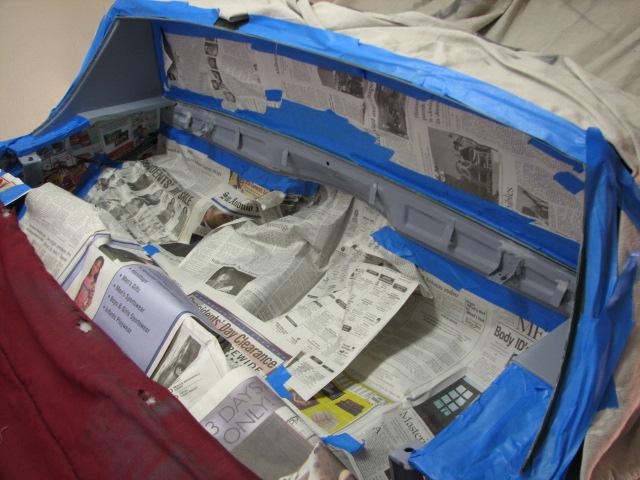
Posted by: thomasotten Nov 29 2006, 03:19 AM
Next went the trunk and other areas...
Attached image(s)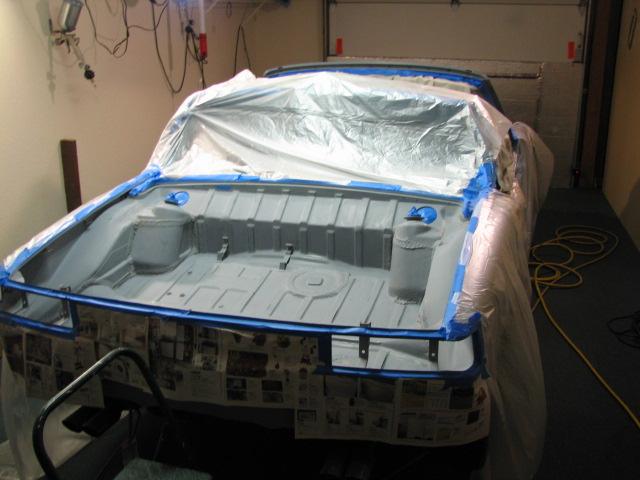
Posted by: thomasotten Nov 29 2006, 03:24 AM
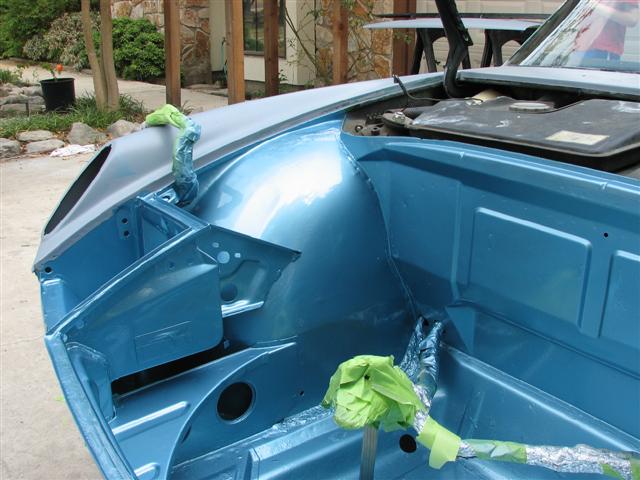
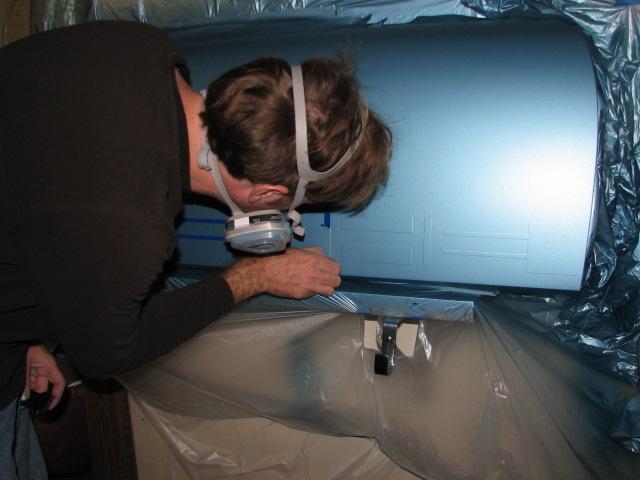
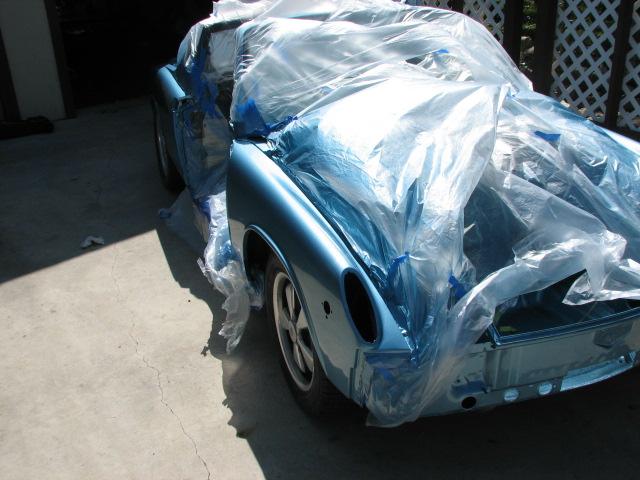
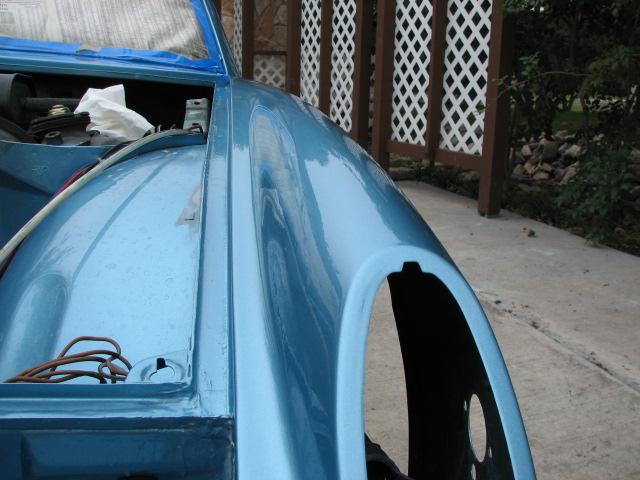
At the same time I sprayed the trunk, I also sprayed this area. Now, this probably goes against the advice most commonly given when spraying metallic paints. Typically, since metallics lay down differently based on the temperature, and the spraying habit of the sprayer, most painters will recommend that you paint all of the body at the same time. I didn't want to do that becasue I didn't want to be reaching over my fenders. So I decided to risk it and paint this area already. I didn't end up having any noticeable difference in the end, so I guess I got lucky.
Attached image(s)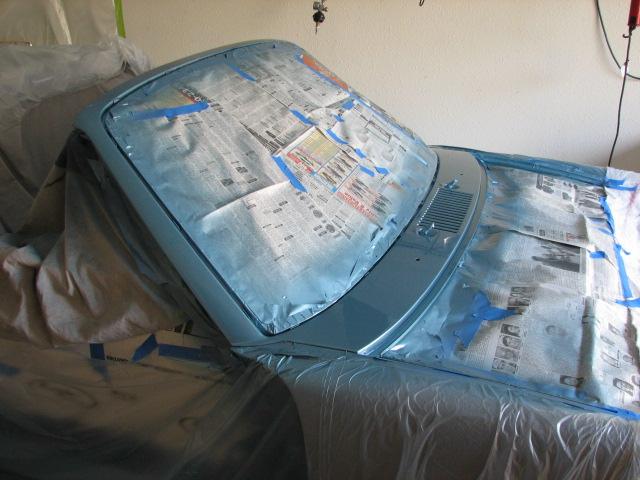
Posted by: thomasotten Nov 29 2006, 03:32 AM
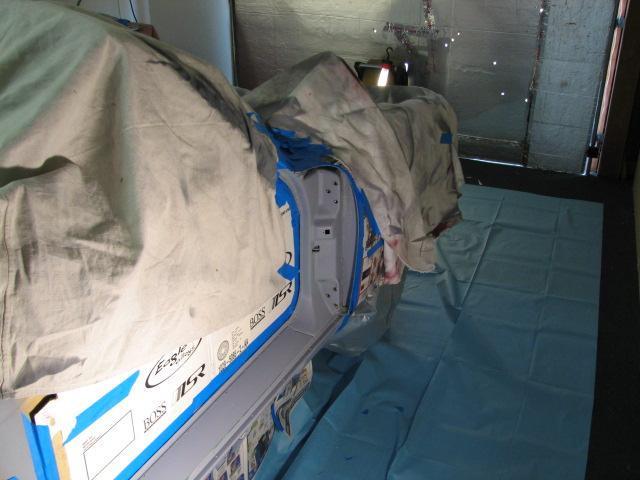
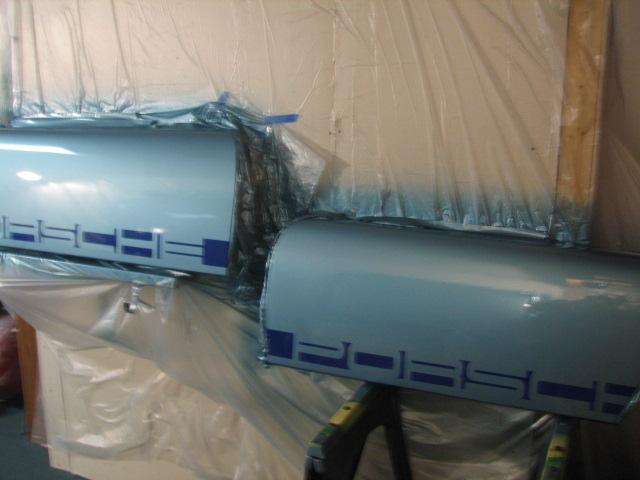
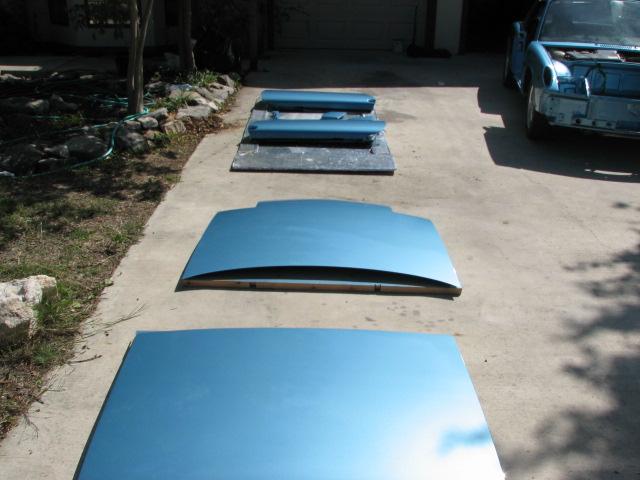
I painted the bottom of the lids as well. I decided to mount them standing up because
1. It is easier to paint that way, easier to see what you are doing, and you don't get fatigued as easily.
2. Less dust will fall on the vertical surface.
Attached image(s)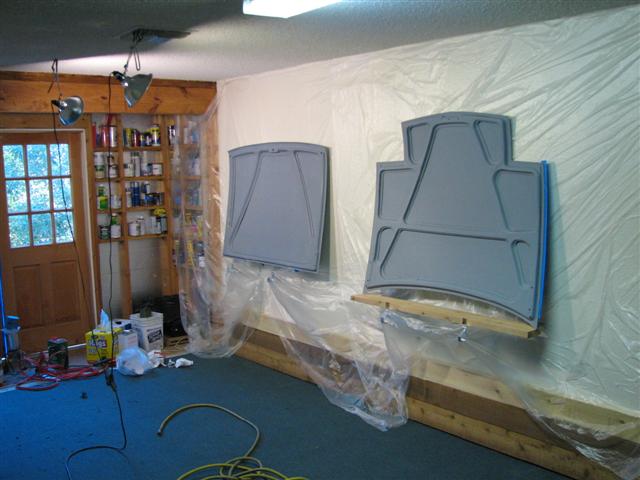

Posted by: thomasotten Nov 29 2006, 03:39 AM
OK, now we are up to D-Day. The day this old tub got painted. The entire body was left sanded with 400 grit paper prior to this day. On D-Day, the day started out with several hours of wet sanding the primer-surfacer to bring the entire body to 600 grit smoothness.
Attached image(s)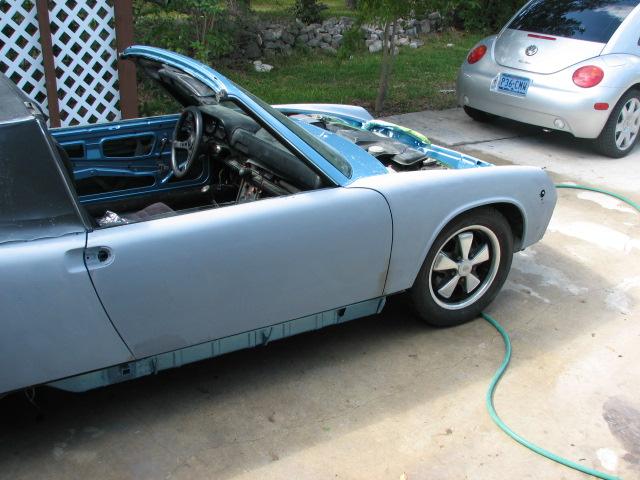
Posted by: thomasotten Nov 29 2006, 03:44 AM
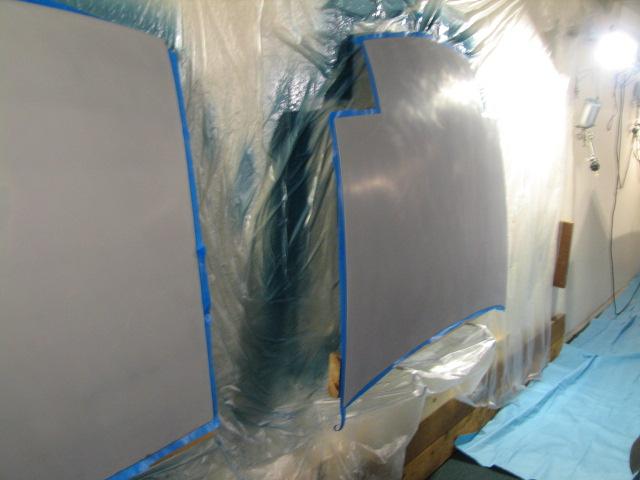
Next, several hours are spent masking off areas. This takes more time than you would expect. I also devised a way to mount the lids to the wall. I didn't want to worry about one of them falling off...
Attached image(s)
Posted by: thomasotten Nov 29 2006, 03:51 AM
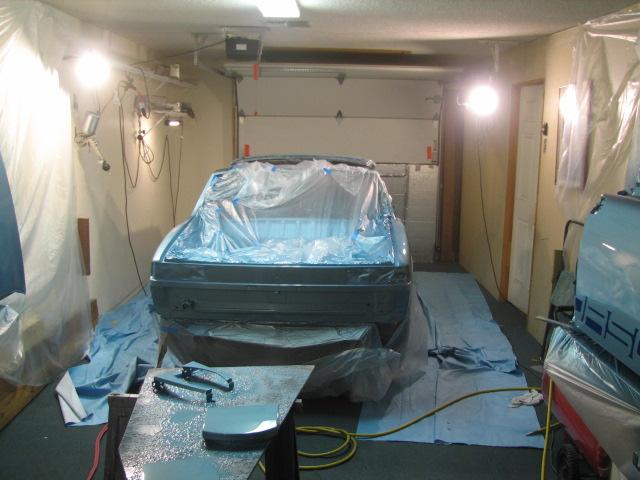
Next, with everything masked off, the body was prepped with pre-cleano. This gets any grease off the body that was from your fingers, or anything else. Then a tack cloth is used to remove any dust.
And so here we are....By this time it was already 7:30 PM. Should I paint it now? DO I have the energy still? How will it go? Someone on the Autobody forums once said that once you pull that trigger, the odds are against you. And so they were. I''ll post pictures of the rest in the morning...
Attached image(s)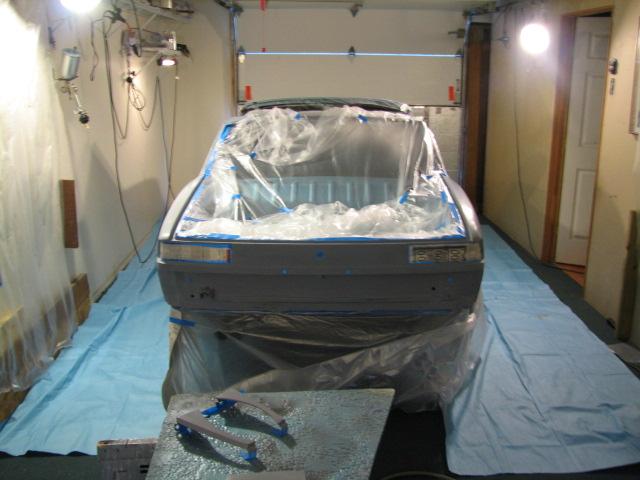
Posted by: Lou W Nov 29 2006, 07:30 AM
![popcorn[1].gif](style_emoticons/default/popcorn[1].gif) paint... paint... paint...
paint... paint... paint...
Thanks for sharing 
Posted by: ptravnic Nov 29 2006, 07:59 AM
Very Nice! Are you able to quantify the now long it has taken you?
Posted by: thomasotten Nov 29 2006, 08:15 AM
Very Nice! Are you able to quantify the now long it has taken you?
Yes, I can, and I must say a lot of time. I would say most of the time is spent on body work, and prepping of surfaces to be painted. I would say several weekends on all the body work and prep. It could go faster, it just depends on how much time you have in a given weekend. I spent quite a bit of time practicing also, and shooting odd jobs on friends and families cars. That way I paid for my spray equipment! In some cases I was my worse enemy in that I spent a great deal of time choosing the colors I wanted. To give you a time perspective, the car was painted starting in September, with the main body being painted in October, and I am just now finishing up buffing it out.
This is the gun I used in painting base coat and clear, by the way:
http://www.autorefinishdevilbiss.com/main.php?p=g&id=1
Posted by: ptravnic Nov 29 2006, 08:44 AM
Very Nice. I'm going to have about 8 months off before grad school starts in September. I'm looking forward to some projects & painting the teener myself sounds like a good way to go!
Thanks for the posts!
-pt
Posted by: 1bad914 Nov 29 2006, 10:50 AM
Very nice job!
I wrote a small manual on home paint jobs, if anyone is interested send me a PM with your email and I will send it to you. It is in PDF format.
That looks like a conventional gun, have you tried an HVLP? I actually like a conventional gun, but have been trying to switch, much less waste. I have had problems getting my HVLP to lay down flat, wants to OP, I have done about every adjustment out there, I was told to try reducing it more. Any way, nice job on the paint, I like your idea of building braces on the wall for the hoods, I always hang them from the ceiling and then fight them moving while spraying. I 'll give that a try next time.
Posted by: thomasotten Nov 29 2006, 11:18 AM
My gun is sort of a hybrid, but it sprays much like a HVLP.
Posted by: thomasotten Nov 29 2006, 11:27 AM
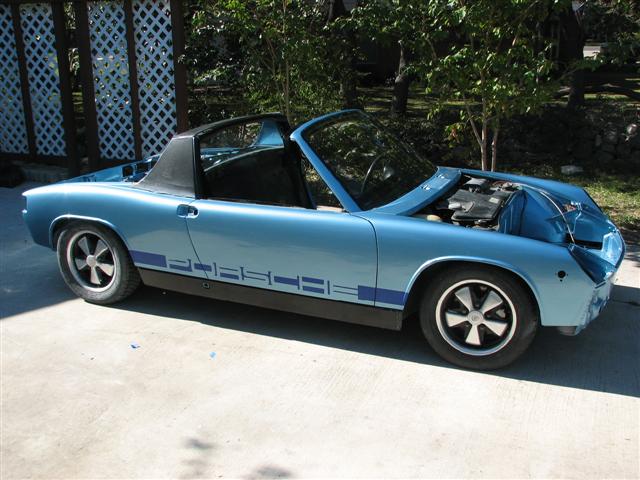
Ok, so one thing I wanted to have on this car is those PORSCHE negative side stripes. But, I wanted mine to be painted on. I also wanted to precisley dictate the color, which meant that stick-ons were not an option. So, here I'll show how you can easily paint on these stripes using the stickers as a template....
Step 1: With the base color you want the letters to be, spray enough color for coverage in the area where the sticker goes along the length of the car. I chose this cool VW/Audi dark blue, that I think you see on the Golf GTI's. Spray that and llow that to dry at least 30 minutes or so just to be safe.
Attached image(s)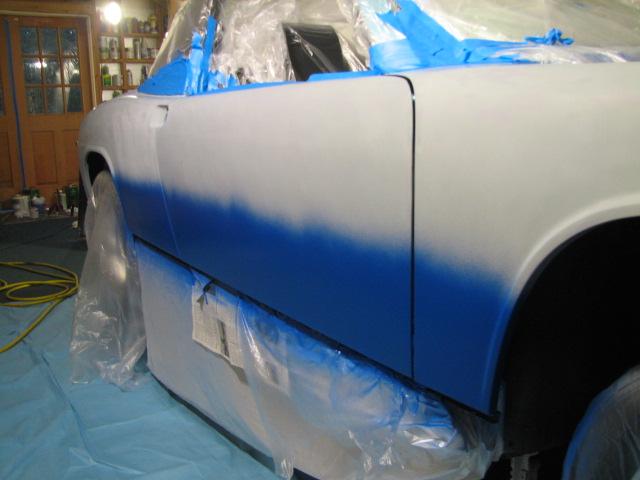
Posted by: thomasotten Nov 29 2006, 11:30 AM
...
Attached image(s)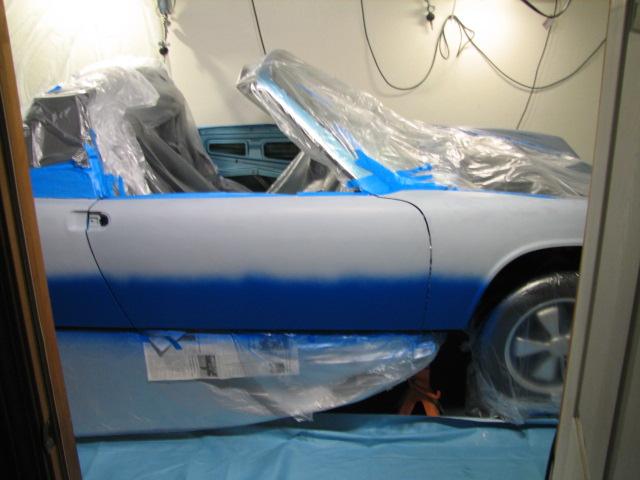
Posted by: thomasotten Nov 29 2006, 11:37 AM
Next, you apply the stickers...
There are currently two sticker kits available for the 914: One from AutoAtlanta that has 3M backing, and one from Ebay. You will want to use the Ebay one. I practiced this technique before I went live, and I found that the Ebay kit was much more accurate in the lettering, and the sticker came up a lot easier when it came time to remove than did the AutoAtlanta kit.
The sticker is pretty easy to put on, the only tricky part is that you need to create a reference line along the car, that is fairly straight, and then lay out the sticker slowly along that reference line. I used 1" masking tape, applied in small sections, along the bottom of the car, and use a long straight edge to line it up straight. When you apply the sticker, you don't need to get rid of all the air bubble, you just need to make sure that the edges of the letters are stuck on real well, that way you don't get any bleeding.
Attached image(s)
Posted by: thomasotten Nov 29 2006, 11:40 AM
Once the decal is applied, you are ready to paint your main color.
One thing to remember when appying these decals, when the body is raised, is that there is body flex to be considered. If you have a lot, then apply the decal with the car on the ground, so the letters go straight across. My flex wasn't so bad.
Attached image(s)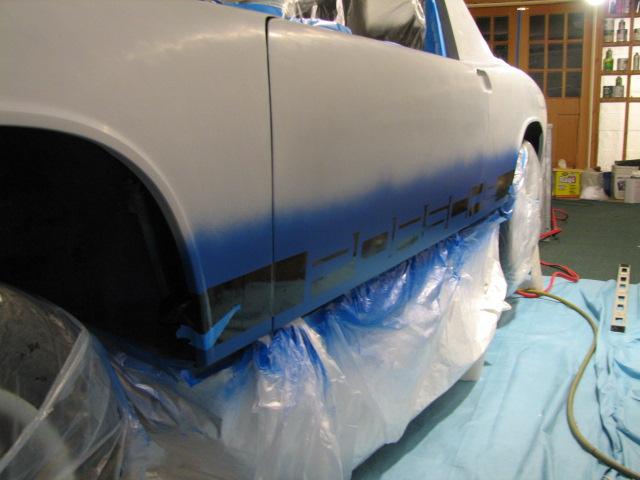
Posted by: thomasotten Nov 29 2006, 11:47 AM
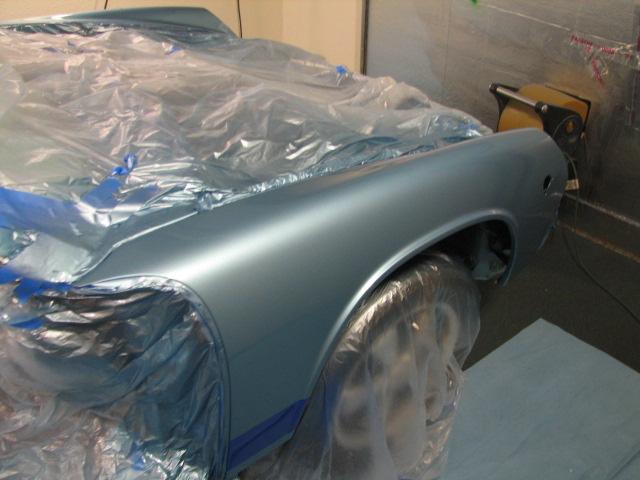
Ok, so next part, you spray your main base coat color. With metallics, I think the trickiest part is to develop your technique so that you don't get tiger-stripes. Tiger stripes occur when you are laying down metallic, and the metal flakes kind of stay in streaks together. I think everyone has to develop their own technique for that, and adjust their gun accordingly.
My general rule is to spray till you have coverage, then add another coat to be sure, then take care of any streaking. That's how I do it, and would love to hear what other folks do.
Posted by: thomasotten Nov 29 2006, 11:51 AM
Ok, so after you have finished spraying your base, and alowed it to dry, then it is time to remove the decals. I took my doors off the car earlier to make painting easier for me, by the way.
Here, you want to have some decent fingernails so you can get the decals up by prying under one of the corners of each letter. Nice and slow, and they come up just fine...
Attached image(s)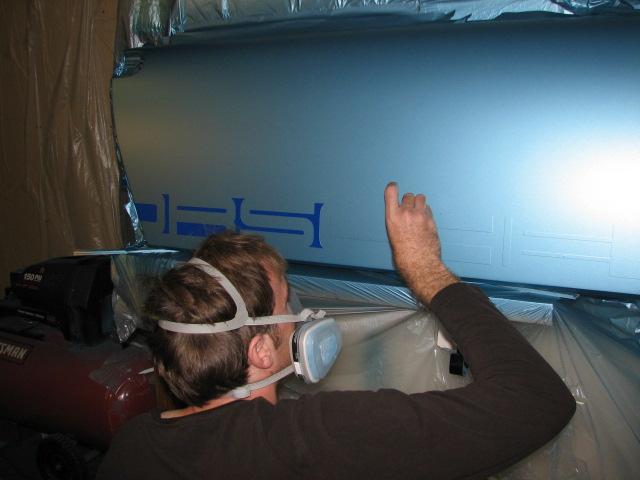
Posted by: tyler Nov 29 2006, 11:51 AM
Looks like you're doing a nice job. I'm doing mine now and exactly like you are. I just hope all the paaint matches when it's done. I used a conventional gun on the door jambs and inside of the sail and it flowed perfectly whith a good final finish. I'm using HVLP for all the rest and I don't think there's any way to avoid OP. I'm putting on 4 coats and color sanding it out. The best thing about the HVLP is the fact that it takes so much less paint. I paid $400 for the color paint $ catalyst so it's a big deal. Not only did I use epoxy sealer on the bare metal but I also put it over the primer after final sanding to keep my burnt orange dark. You're absolutly right about doing it yourself - a shop would never get all the rust out or take the extra effort to make sure nothing happened to the paint job later on. Only problem I have is sanding out the bugs.
Very nice job!
I wrote a small manual on home paint jobs, if anyone is interested send me a PM with your email and I will send it to you. It is in PDF format.
That looks like a conventional gun, have you tried an HVLP? I actually like a conventional gun, but have been trying to switch, much less waste. I have had problems getting my HVLP to lay down flat, wants to OP, I have done about every adjustment out there, I was told to try reducing it more. Any way, nice job on the paint, I like your idea of building braces on the wall for the hoods, I always hang them from the ceiling and then fight them moving while spraying. I 'll give that a try next time.
Posted by: 7T Porsha Nov 29 2006, 12:02 PM
Looks great!
How did you spray? In your garage? How did you rig the ventilation up?
I am in this same situation.
Posted by: thomasotten Nov 29 2006, 01:07 PM
Looks great!
How did you spray? In your garage? How did you rig the ventilation up?
I am in this same situation.
Only a single fan was used to exhaust, kept real low, so not to stir up dust.
Posted by: Eric_Shea Nov 29 2006, 04:27 PM

Posted by: thomasotten Nov 29 2006, 05:13 PM
Ok, next I applied 3 coats of Dupont clear. Of course, thats when all the flying bugs come out....
Attached image(s)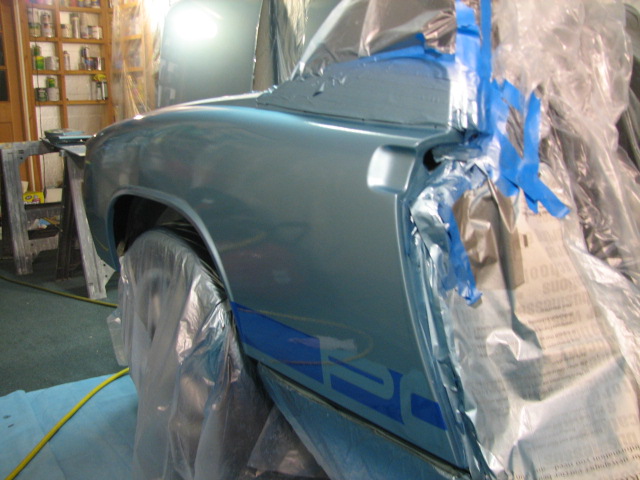
Posted by: thomasotten Nov 29 2006, 05:16 PM
I finished painting about 2:30 AM. I was very tired, but it took at least another hour for me to wind down before I could fall asleep. Dreaming of my baby blue.... 
Attached image(s)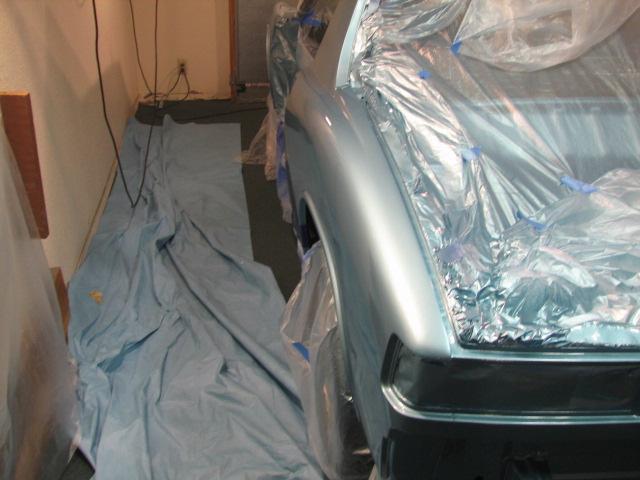
Posted by: thomasotten Nov 29 2006, 05:22 PM
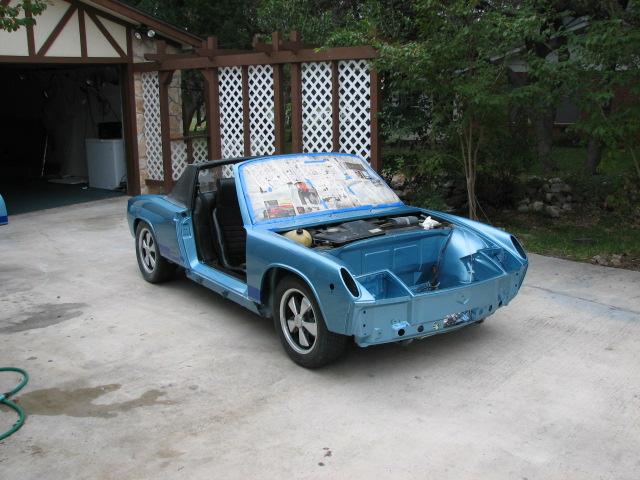
The next day, I was anxious to see the car in the sunlight....
..."I knew the moment had arrived, and I headed straight into the shining sun"...
(Pink Floyd song)
Attached image(s)
Posted by: thomasotten Nov 29 2006, 05:26 PM
...
Attached image(s)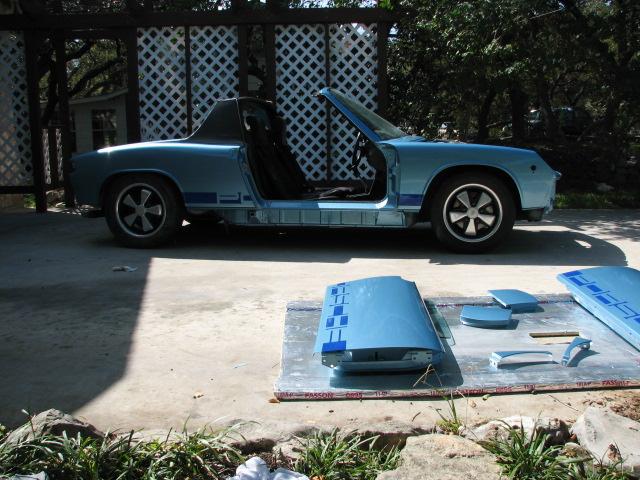
Posted by: Jenny Nov 29 2006, 05:33 PM
Drool.. It looks so good, I just wanna take a bite out of it! Kudos!
Jen
Posted by: TonyAKAVW Nov 29 2006, 05:37 PM
Very very cool.
What sort of air compressor did you use for that?
-Tony
Posted by: markb Nov 29 2006, 05:42 PM


Posted by: Boojum Nov 29 2006, 05:53 PM
Awesome job, and great color too! If my handiwork comes out looking half as nice as this when it comes time for me to do some of this I'll be greatly pleased.
Posted by: SGB Nov 29 2006, 06:11 PM
There is German in your ancestry... somewhere.
wow
Posted by: JPB Nov 29 2006, 06:34 PM
Wow nice work and looks fantastic!
Crap I'm lazy.
Posted by: jd74914 Nov 29 2006, 06:35 PM
Wow, thats very impressive 
I agree with Boojum; if mine comes out half as nice I'll be very pleased.
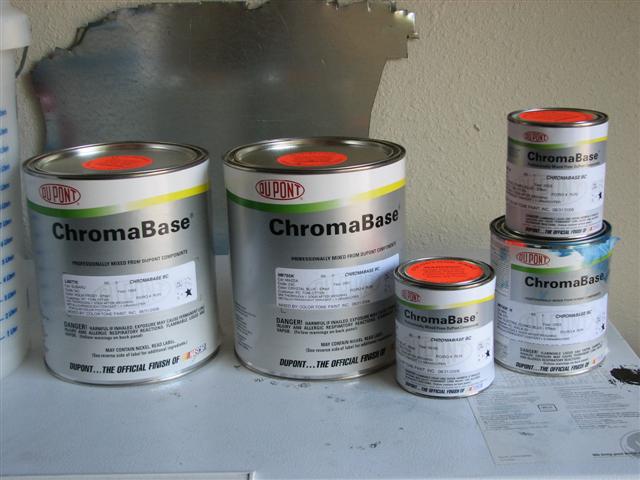
If you don't mind, what brands of paint did you use?
Posted by: thomasotten Nov 29 2006, 06:52 PM
There is German in your ancestry... somewhere.
wow
Yep, 100% German, mom and dad came to the U.S. back in the 60's.

The paint is Dupont Chromabase. I way overestimated what I would need. MY compressor was a sears 33 Gal.
Attached image(s)
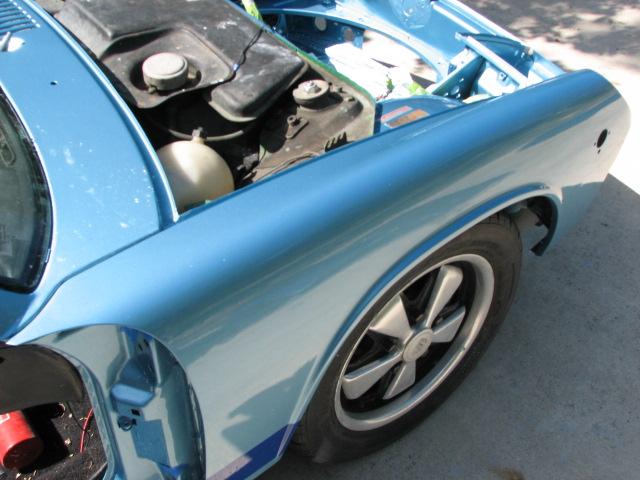
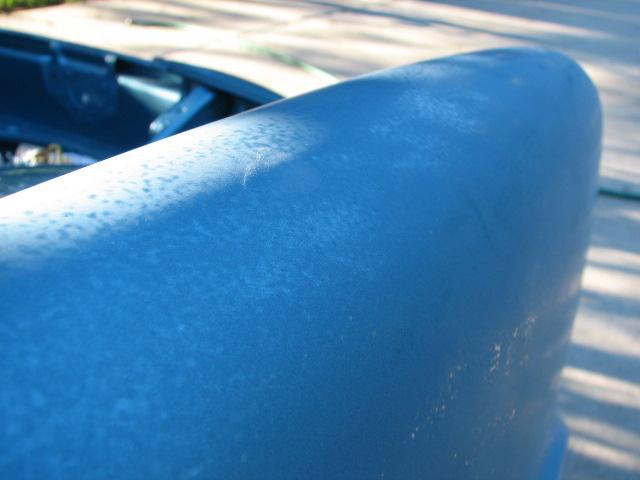
Posted by: thomasotten Nov 29 2006, 08:20 PM
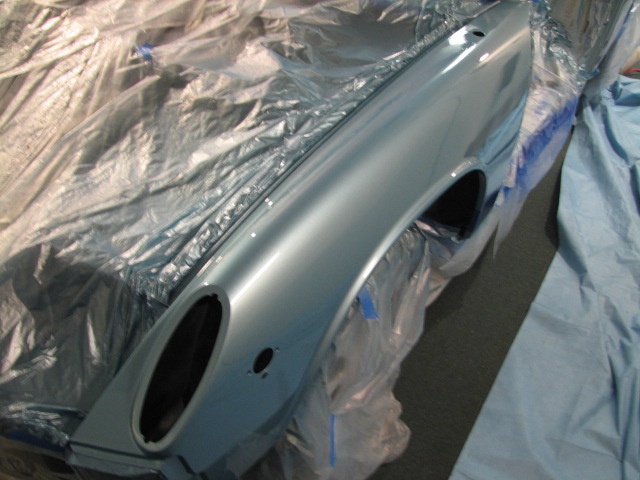
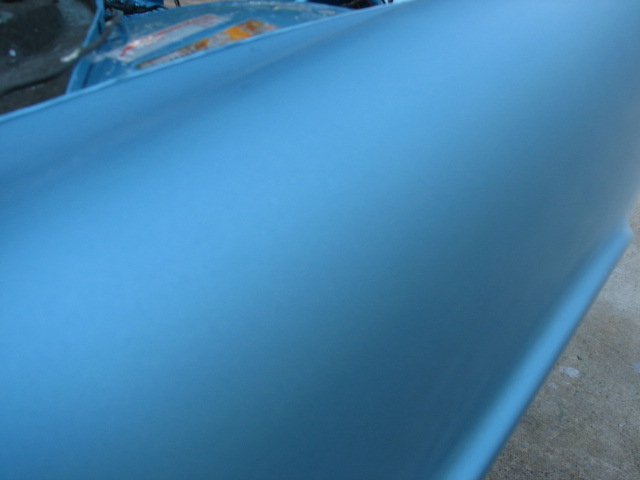
Thanks, for the compliments, everyone. Yes, at this point the car looked pretty good. But, as this picture shows, the clear coat has far too much ORANGE PEEL.
But never fear, we're only halfway done with our paint job at this point....stay tuned...
Attached image(s)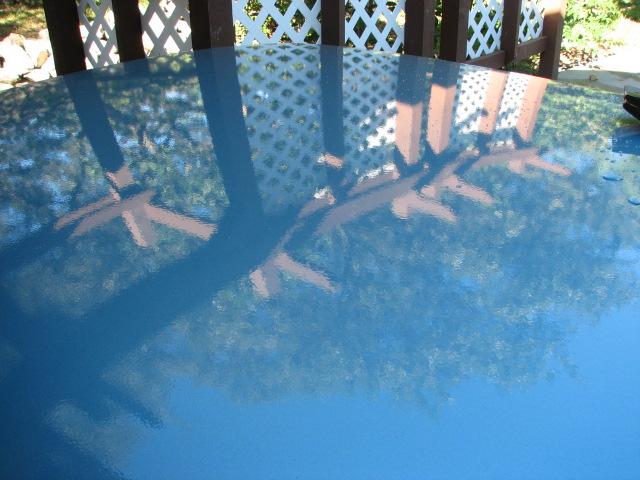
Posted by: TINCAN914 Nov 29 2006, 08:36 PM
Looks great!!!
Nice work Thomas!! 
Posted by: HeloMech Nov 29 2006, 08:44 PM
I bet these pics don't even do it justice. And orange peel? pshaw... wet sanding is your friend... that's gonna be glass...
Yay...
Posted by: lybones Nov 29 2006, 10:47 PM
That's gonna be one jaw dropping home paint job. Outstanding work.
Posted by: Borderline Nov 29 2006, 11:08 PM
Looks great!  I'm at the point where I'm just about ready to put on my first coat of primer. Did your Craftsman 33 gallon compressor keep up with the gun? I've been reading all I can on painting and they say that any pressure drop while painting can effect the performance of the gun. Sure looks nice. Wish I was that far along.
Posted by: sj914 Nov 29 2006, 11:49 PM
Great Job
Is that a Devilbiss Plus gun your using?
Posted by: thomasotten Nov 30 2006, 06:30 AM
Great Job
Is that a Devilbiss Plus gun your using?
Yes sir, Devilbiss Plus. The compressor kept up just fine. You can paint several panels without it coming on somtimes.
Posted by: thomasotten Nov 30 2006, 07:01 AM
Ok, so at this point I had a freshly painted car with three coats of clear on it. What could be done here is to buff out the car and be done with it, and it would look great. But I decided that I wanted an even better paint job. If you search on the internet you will find that the hot-rodders and custom paint guys have a way for making a deep clear glass-like paint job. Basically, what you do is you sand the entire car down again until the clear is perfectly flat again. Then, you apply MORE CLEAR!
The more clear you put on the car, the less-flat the surface gets. That's because each coat of clear introduces a bit of orange peel each time. So what you have to do is cut the clear down - block sand it with 600 grit paper and prepare to reshoot more clear on to the car. The common objections to this technique is that you will be able to see the scratches left by the 600 grit paper through the clear. This is not true, and there is a guy on the Autobody forum that even goes as far as 320 grit. But 600 is enough to provide a pretty good mechanical bond between your clear layers.
So off I went sanding again....
Attached image(s)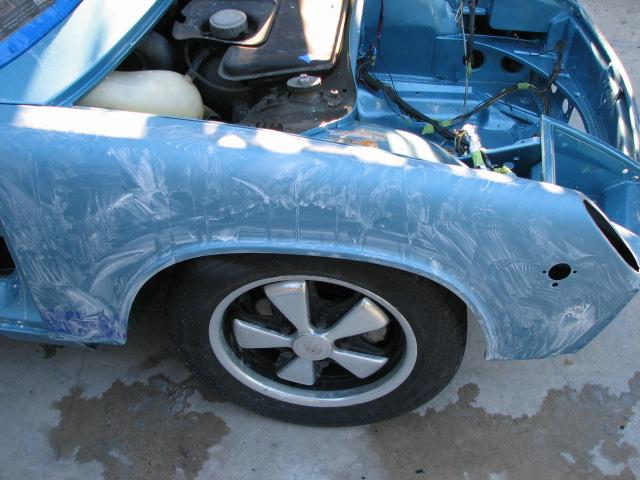
Posted by: thomasotten Nov 30 2006, 07:04 AM
You can really see the orange peel and dust nibs when you start sanding. With three coats of clear, you can sand and sand without much fear of sanding through to the base. Except around edges, where one should be very carefull.
Attached image(s)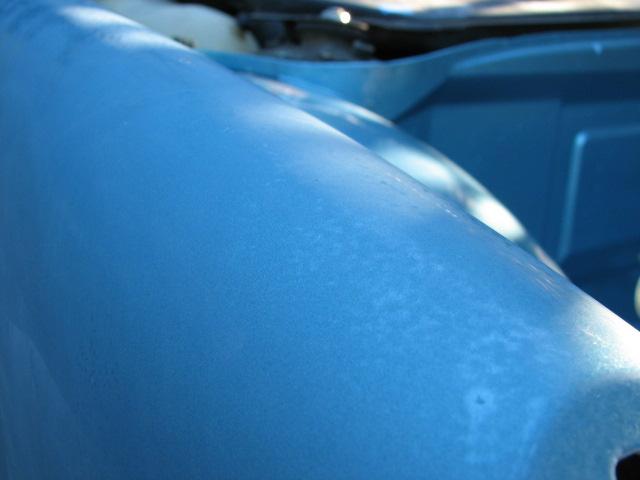
Posted by: thomasotten Nov 30 2006, 07:07 AM
Sanding the car down again also allowed me to eliminate the ridge that develops when you apply stripes. This door had to be agressivly sanded to get the ridge line eliminated.
Attached image(s)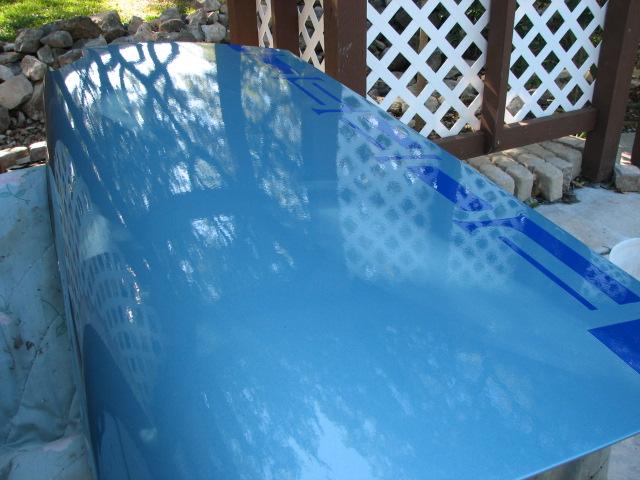
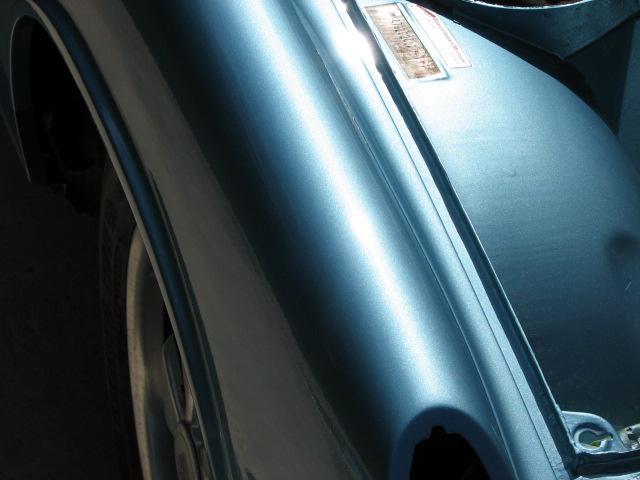
Posted by: thomasotten Nov 30 2006, 07:11 AM
So this is how everything looked when cut down with 600. FLAT!
Attached image(s)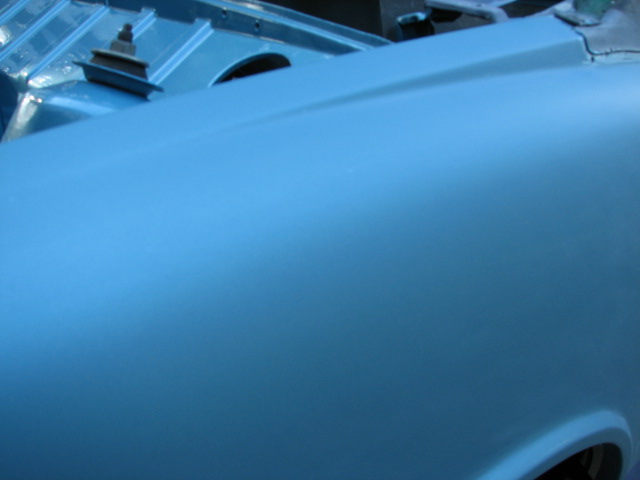
Posted by: thomasotten Nov 30 2006, 07:12 AM
More pics later...
Posted by: 1bad914 Nov 30 2006, 07:21 AM
Wow, sand and re-clear seems extreme, I have always had great luck wet sanding the clear from 1000 thru 2500 grit and then buffing it out. Interesting, I might give that a try once. I can see that it might add depth, but I don't see that it will make it flatter, if the OP and nibs are gone then it would be flat...hmmmm I have to think about that.
Posted by: thomasotten Nov 30 2006, 08:59 AM
Wow, sand and re-clear seems extreme, I have always had great luck wet sanding the clear from 1000 thru 2500 grit and then buffing it out. Interesting, I might give that a try once. I can see that it might add depth, but I don't see that it will make it flatter, if the OP and nibs are gone then it would be flat...hmmmm I have to think about that.
If your interested, check out these two links to see a similar procedure done on a cool 356 Speedster...
http://www.autobody101.com/forums/about5183.html
http://www.autobody101.com/forums/about5195.html&highlight=356
Posted by: biosurfer1 Nov 30 2006, 10:22 AM
wow, good write up...i can't believe he was so calm about the guy hitting him, after all that work, if someone hit me only 2 months after i finished i would have gone crazy!
Posted by: andys Nov 30 2006, 10:40 AM
Thomas,
Nice work. Very time consuming for sure, but it come with rewards.
Question: After your initial filling and blocking, did you spray any etching primer to cover the exposed metal areas?
Andys
Posted by: thomasotten Nov 30 2006, 11:46 AM
Yes, I always sprayed etching primer on the exposed metal surfaces. Generally, I am against stripping a car down to the metal, for this very reason. And also, the factory paint is providing a pretty string defense against rust, so I didn't want to disturb that barrier and cause more problems.
Posted by: thomasotten Nov 30 2006, 04:42 PM
So, when all was sanded flat, back into the paint booth we went....
Attached image(s)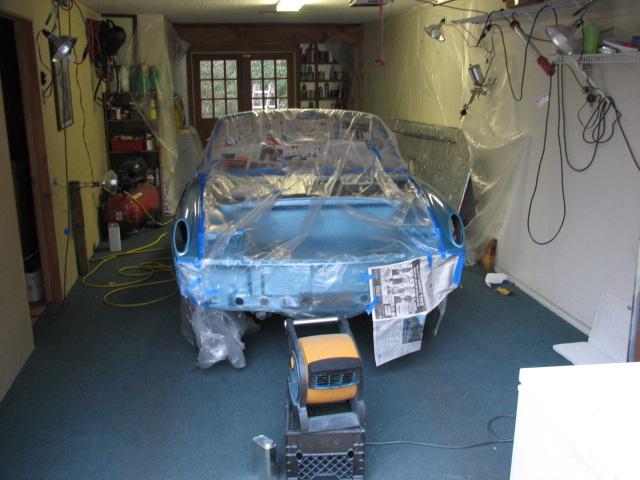
Posted by: thomasotten Nov 30 2006, 05:15 PM
And out we come, now woth 5 total coats of clear...
Attached image(s)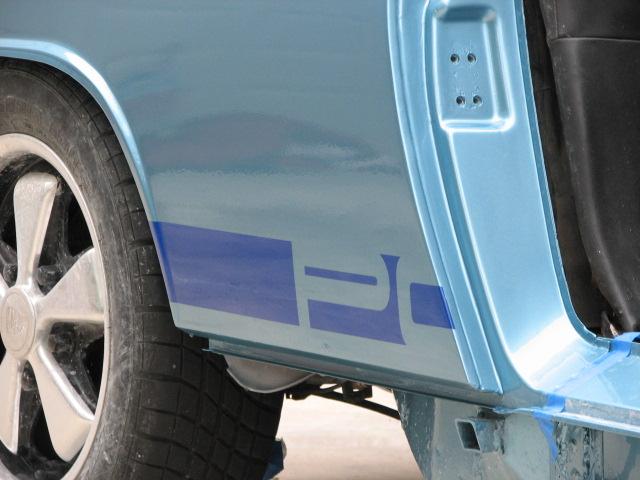
Posted by: HeloMech Nov 30 2006, 06:07 PM
don't stop there... I mean, since you over estimated how much you needed, SPRAY it ALL.... sandy sandy, painty painty, sandy sandy, painty painty, sandy, buffy, drivey... weeeeeeeeeeeee
I've seen "those" car guys do like 20 coats of clear... seems crazy to me, however, it looks like you can "walk into" their paintjobs
Now, if you're not quite happy with your paintjob, I'd be more than happy to let you "learn" on my car until you're perfect! 
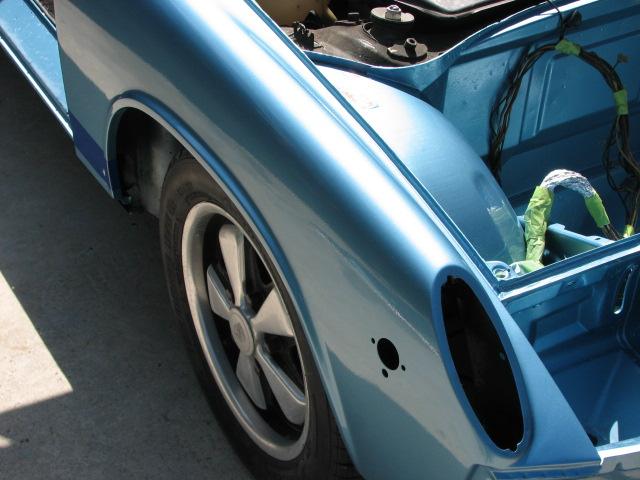
Posted by: thomasotten Nov 30 2006, 07:51 PM
Well, so now, It was time for buffing. The final two coats of clear reintroduced orange peel, as one can see in the photo...
Attached image(s)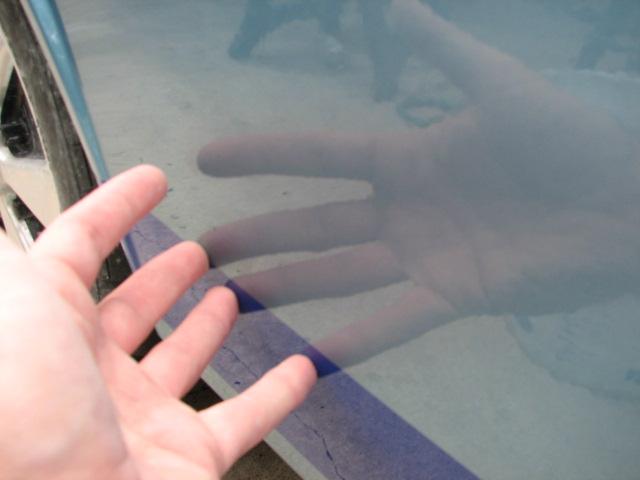
Posted by: thomasotten Nov 30 2006, 07:53 PM
I started sanding with 1200...
Attached image(s)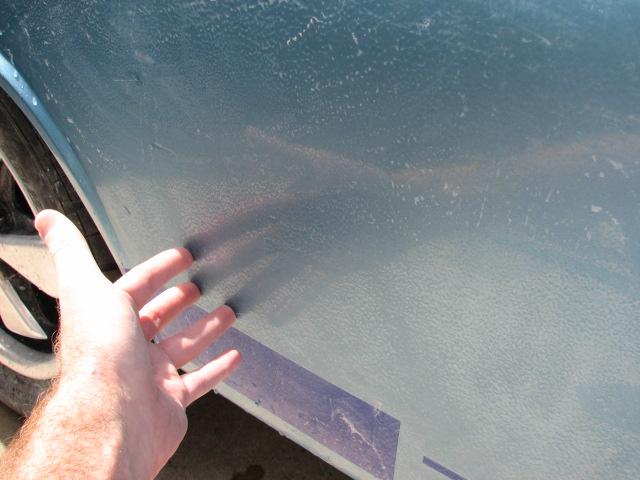
Posted by: thomasotten Nov 30 2006, 07:55 PM
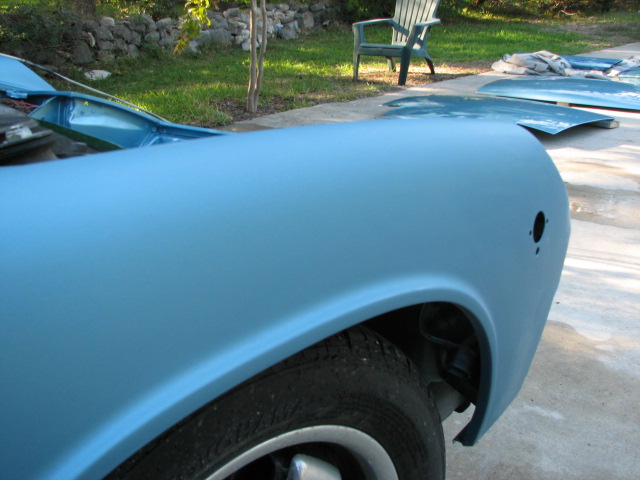
And then I sanded with 1500 and finally with 2000 till it looked flat like this...
Attached image(s)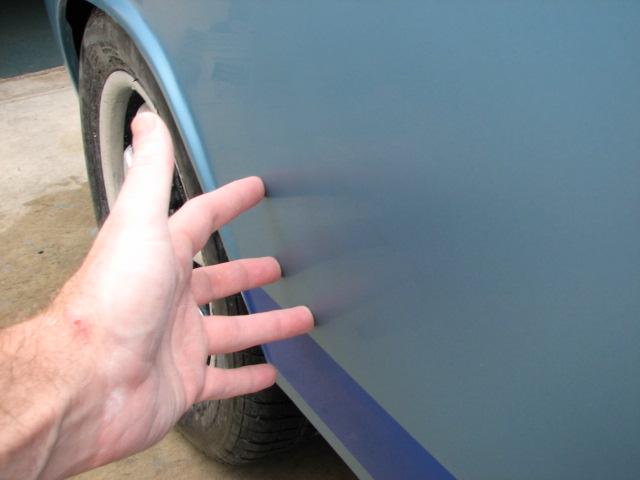
Posted by: thomasotten Nov 30 2006, 07:58 PM
Then, it was time for buffing. Note to anyone considering this, it is always better to sand and buff your fresh clear within 3 days after painting. Buffing is much easier to do during that time period.
Attached image(s)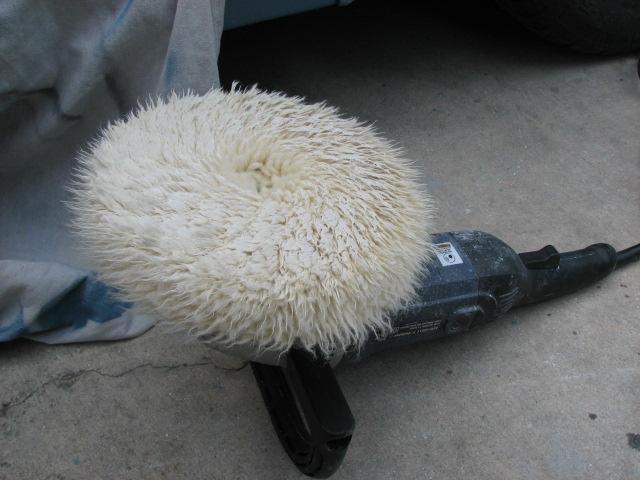
Posted by: project-914 Nov 30 2006, 08:01 PM
more more I'm lovin' it
Posted by: thomasotten Nov 30 2006, 08:01 PM
I use this stuff made by Wizard. It smells good, but be careful....Bees like the smell too!
Attached image(s)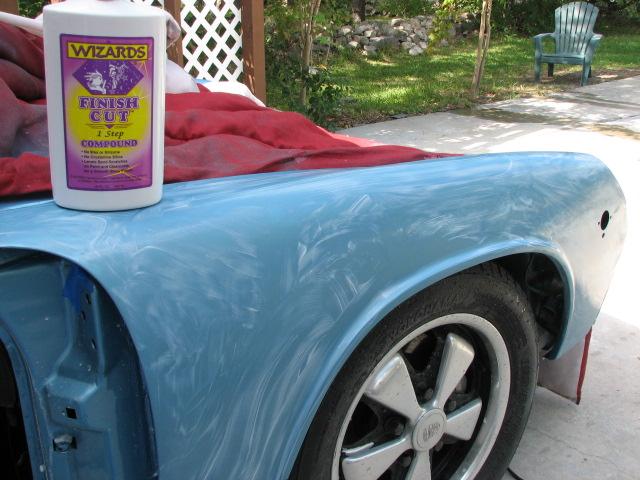
Posted by: thomasotten Nov 30 2006, 08:04 PM
OK, so after buffing with the cutting pad, and the polishing pad, you can see in this photo, that the quality of the shine and finish is greatly enhanced.
Attached image(s)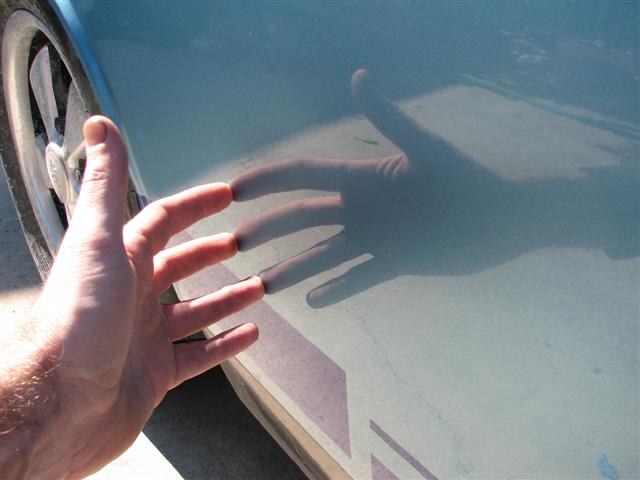
Posted by: thomasotten Nov 30 2006, 08:06 PM
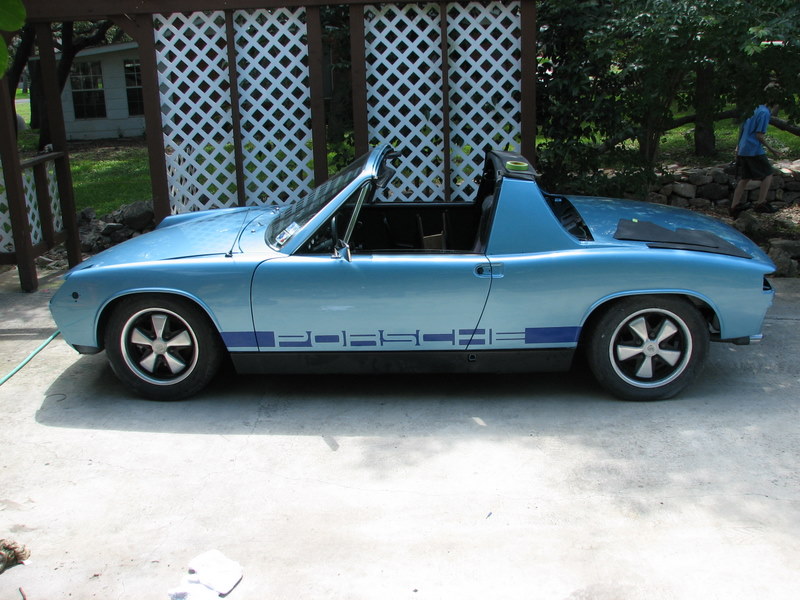
Sometimes I just like to stare at my car...
Attached image(s)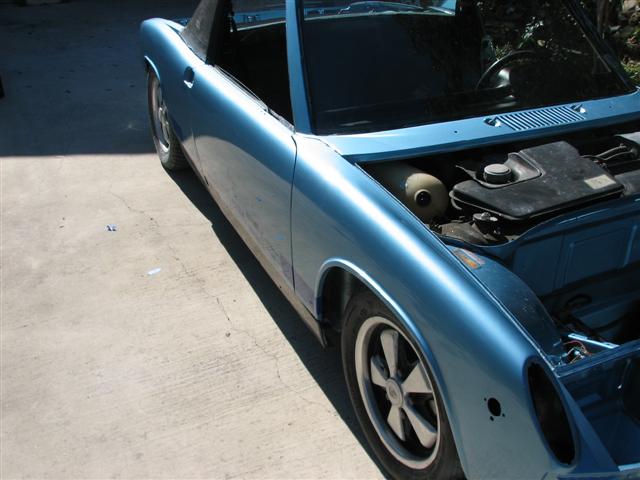
Posted by: thomasotten Nov 30 2006, 08:07 PM
...
Attached image(s)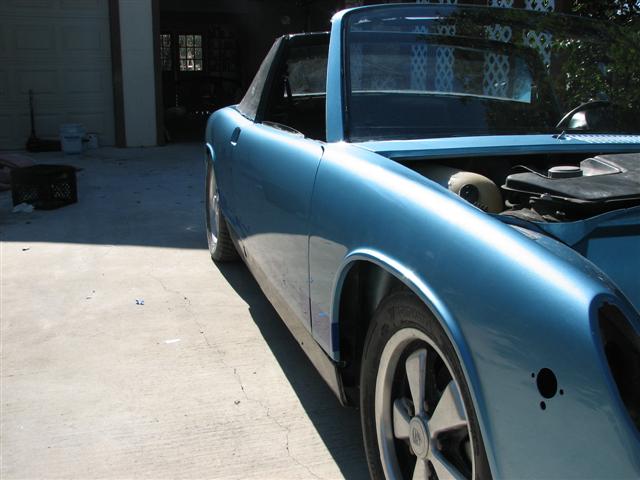
Posted by: AZ914 Dec 1 2006, 08:50 AM

Lookin great!!
Posted by: SGB Dec 1 2006, 10:58 AM
sha-zaam!
I just like staring at your car too.
Posted by: JmuRiz Dec 1 2006, 11:43 AM
Wow, too bad you don't contract out work and live in the DC area!!!
Posted by: sjhowitson Dec 1 2006, 12:25 PM
For those of us that are lurking and loving it. How did you buff the area around the windshield and other small area.? Keep up the good work. The car looks great !!!
Posted by: thomasotten Dec 1 2006, 12:30 PM
For those of us that are lurking and loving it. How did you buff the area around the windshield and other small area.? Keep up the good work. The car looks great !!!
I stood on the seats and buffed the top of the frame. If the area is too small, you may not be able to buff it, at least not with a machine. For instance, under the rollbar. I will be doing that by hand... and I am not looking forward to it! Again, the best thing you can do for yourself is sand and buff as much as you can in that 3-day window after shooting your final clear. It is so much easier...
Posted by: jfort Dec 1 2006, 03:45 PM
very cool. enjoyed the thread immensely!
Posted by: 914helo Dec 1 2006, 05:56 PM
Excellent thread! You did a great job. One question, why did you say it's easier to wet-sand and buff within 3 days of spraying the clear? I heard once from someone to let their clearcoat harden for like 2 weeks.
Yours turned out excellent.
Posted by: thomasotten Dec 1 2006, 06:49 PM
Excellent thread!
You did a great job. One question, why did you say it's easier to wet-sand and buff within 3 days of spraying the clear? I heard once from someone to let their clearcoat harden for like 2 weeks.Yours turned out excellent.
The clear is just so much softer before it dries for two weeks. And so the scratches that you put into it by sanding some out a lot faster when it is still soft like that. For the panels that I waited longer for, I had to switch to the coarser compound to make the process easier.
Posted by: 914helo Dec 1 2006, 07:32 PM
Thanks for the reply. Again, excellent work!
Posted by: scotty b Dec 1 2006, 08:49 PM
Excellent thread!
You did a great job. One question, why did you say it's easier to wet-sand and buff within 3 days of spraying the clear? I heard once from someone to let their clearcoat harden for like 2 weeks.Yours turned out excellent.
The clear is just so much softer before it dries for two weeks. And so the scratches that you put into it by sanding some out a lot faster when it is still soft like that. For the panels that I waited longer for, I had to switch to the coarser compound to make the process easier.
Exactly. You are ALWAYS better off wet sanding and buffing within a few days. The longer you wait the more you have to werk at it and the WERSE your results will be. I have quite frequently sanded and buffed cars the same day I shot them. As far as using news paper to mask with .....bad idea. Paint WILL bleed through news paper and leave not only paint on the underlying surface but also newspaper articles. Real mess to have to clean up after. NO I repeat NO painter gets the "perfect" paint job every time (rarely), so don't feel bad about some orange peel or runs. It happens. As for the orange peel drive around some of the typical car lots and look at the brand new paint jobs
 As much as I love then Jeep has always been a HUGE offender in the paint department. Also take a look at a C class Benz then go look at an S class...drastic difference in quality! All that said good job and nice color combo!
Posted by: fat73 Dec 4 2006, 09:46 PM
Excellent thread!
You did a great job. One question, why did you say it's easier to wet-sand and buff within 3 days of spraying the clear? I heard once from someone to let their clearcoat harden for like 2 weeks.Yours turned out excellent.
The clear is just so much softer before it dries for two weeks. And so the scratches that you put into it by sanding some out a lot faster when it is still soft like that. For the panels that I waited longer for, I had to switch to the coarser compound to make the process easier.
Most excellent work.
I'm debating on whether to do my own paint. I've done it before, but this time it would include some fiberglass work which I've not done but I figure if I screw it up just start over. I've already checked with one custom shop and they want $5500 just to get the car ready to paint, which includes making the body kit fit perfect (no small job). That may seem like alot to some folks, but considering the time it takes.....well you know what I mean for sure. I love to see guys do this kind of stuff on their own. Very nice. An asset to the club, I'd say. Ed aka W9R1
Posted by: JOHNMAN Dec 5 2006, 12:01 AM
Take your time putting it all back together. Take many many pics. It won't look this good forever. The first or second time you drive it you will get the notorious stone chip (it's the law of the west). I have gone through this enough times to know it's true.
It will happen, so don't worry too much about it (most people won't see the small imperfections that you will know are there).
Keep a bit of touch up paint for small chips and it will look like a million bucks for a long long time.
You did an amazing job. How many other cars have you done?
Posted by: thomasotten Dec 5 2006, 06:26 AM
Take your time putting it all back together. Take many many pics. It won't look this good forever. The first or second time you drive it you will get the notorious stone chip (it's the law of the west). I have gone through this enough times to know it's true.
Oh I know, when you hear someone yell "No!!!!!!!", you'll know it was me. Right now I've been thinking about motion detectors to alert me via pocket pager when car-keying kids away, being that I work across from a high school. To your other question, this is the first whole car I have painted, but I have done other small jobs before to get my confidence/technique up.
Posted by: GTeener Dec 5 2006, 01:45 PM
Wow!  Work of beauty! You got patience and mad talent
Posted by: thesey914 Dec 5 2006, 02:35 PM
Breathtaking results. That blue really suits the 914 too
Posted by: thomasotten Dec 6 2006, 12:01 PM
I'll be posting rebuild photos shortly, I got a lot of new parts (and a Raby engine kit one the way)....stay tuned.
Posted by: seanery Apr 30 2007, 08:25 PM
Great Thread! Awesome Job Thomas!!!
Posted by: tracks914 Apr 30 2007, 08:59 PM
Awsome work
I wait a year to cut and polish my clear coat. It was a lot of work but the shine was better than any car on a car lot. Next time I will do in the first week. 
Posted by: LarryR Apr 30 2007, 10:26 PM
My wife is going to hate you forever for this thread I like to paint and seeing your results have inspired me to paint the 914. I figure that you have produced aprox. a 15-18K paint job by your efforts so I am thinking to do the same.
Great looking car.
Posted by: tdgray May 1 2007, 07:40 AM
Awesome Job Thomas
As another person that has done this let me tell you it is a ton of work.
I always wanted to see if I could do it and I did... but I will never do it myself again.
You results are much better than mine. Excellent job my man
Posted by: Bartlett 914 May 1 2007, 08:18 AM
I hope to paint my project this Spring. This thread has been a real inspiration. I have a question about the trunks. I assume you used the same paint with a base coat and a clear coat without sand the clear. I would think that would really be a pain.
Posted by: lotus_65 May 1 2007, 08:48 AM
That's a classic thread.
Really NICE!
Posted by: Rob Ways May 1 2007, 09:17 AM
Classic thread !
What will the total cost / hours be ?
Posted by: thomasotten May 1 2007, 09:54 AM
I hope to paint my project this Spring. This thread has been a real inspiration. I have a question about the trunks. I assume you used the same paint with a base coat and a clear coat without sand the clear. I would think that would really be a pain.
The trunks are easy, and they are great for practice! But yes, you won't need to buff that, and you will want to be careful not to get runs. But even if you do, no big deal, you can take care of them by hand. They will have more grease issues, so you will want to degrease them with something like simple Green BEFORE you sand anything. Once you start sanding, there is the potential to imbed grease into the paint. Cleaning these areas can be a real pain, but it is worth it. The beauty is in the details.
Take your time and you can turn this....
Attached image(s)

Posted by: thomasotten May 1 2007, 09:55 AM
into this...
Attached image(s)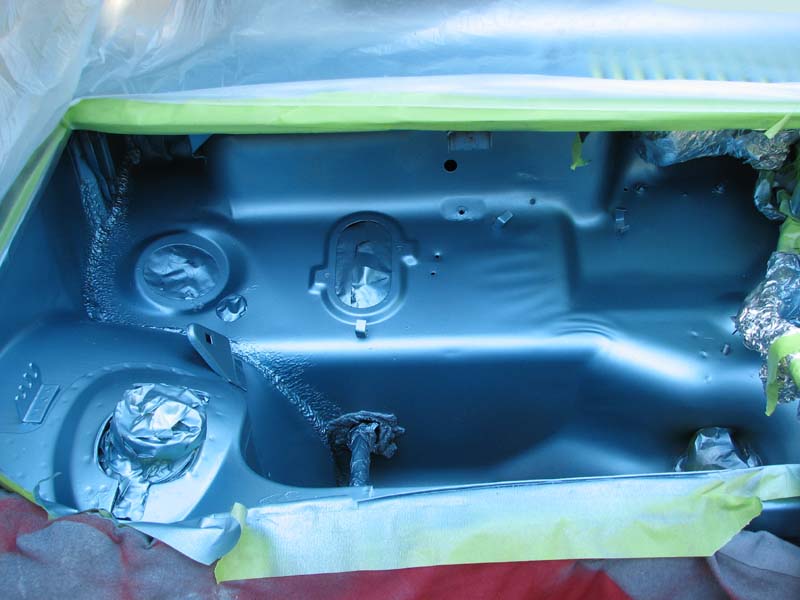
Posted by: Bartlett 914 May 1 2007, 10:59 AM
Thanks Thomas.
The trunks look great. Seeing the trunks match the outside really makes a paint job outstanding. How many coats of clear did you use?
Posted by: Mike431635 May 1 2007, 11:04 AM
I usually just lurk and don't post, but I just had to pop out of hiding for this one. Your car looks AMAZING and seeing the whole process is awesome. Great-looking 914 for sure!
Posted by: thomasotten May 1 2007, 12:05 PM
Thanks Thomas.
The trunks look great. Seeing the trunks match the outside really makes a paint job outstanding. How many coats of clear did you use?
On the trunks, 2 coats of clear. On the body, 5 total.
Posted by: andys May 1 2007, 02:24 PM
I'm glad this thread got going again, as I have a question.
So Thomas, how did you prep the trunk areas (and all those nooks and crannies) prior to priming? What did you do to insure good adhesion?
Andys
Posted by: thomasotten May 1 2007, 02:59 PM
I'm glad this thread got going again, as I have a question.
So Thomas, how did you prep the trunk areas (and all those nooks and crannies) prior to priming? What did you do to insure good adhesion?
Andys
Well, to start out, I degreased the areas, and hosed off with water. Then, I scrubbed the nook and crannies with a scotch pad (grocery store type) and a little Simple-Green cleaner. Cleaned with water again. Next, I sanded with wet/dry. 400 grit should be good enough in those areas. Finally, I sprayed sealer down.
Posted by: tracks914 May 1 2007, 07:41 PM
For my underside, wheel wells, interior and trunks I used a good quality enamel paint. I only used base coat clear coat for the outside of the car and nobody has noticed yet...until now...the secret is out!!
Posted by: thomasotten May 22 2007, 11:49 PM
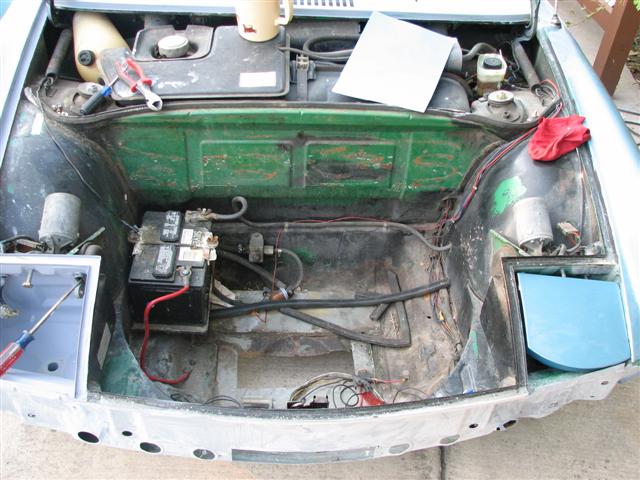
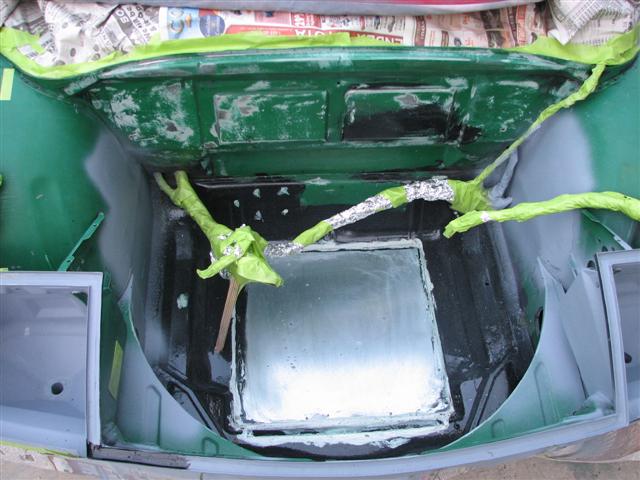
Hey guys, here's some shots of how I repainted/restored my gas tank and that whole area.
This is what I started with...
Attached image(s)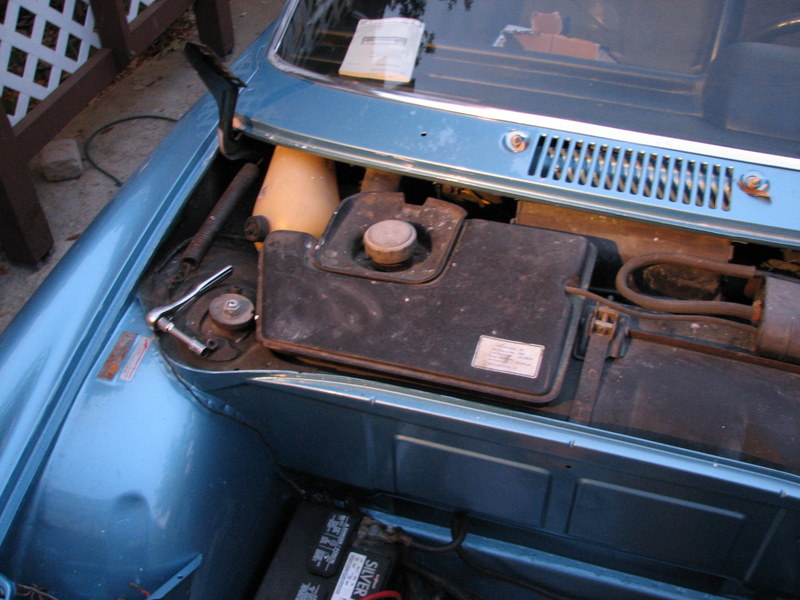
Posted by: thomasotten May 22 2007, 11:53 PM
There's that green paint again...still can't figure out why the factory would choose to paint all the insides of a car green that was meant to be blue. 

Attached image(s)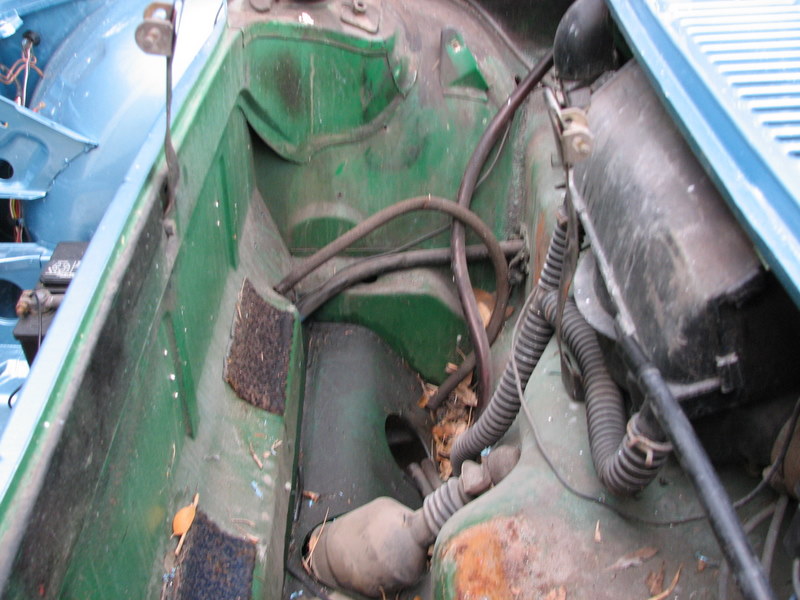
Posted by: thomasotten May 22 2007, 11:55 PM
Pulled the tank, cleaned it real well, braised up some holes, and then shot it with sealer...
Attached image(s)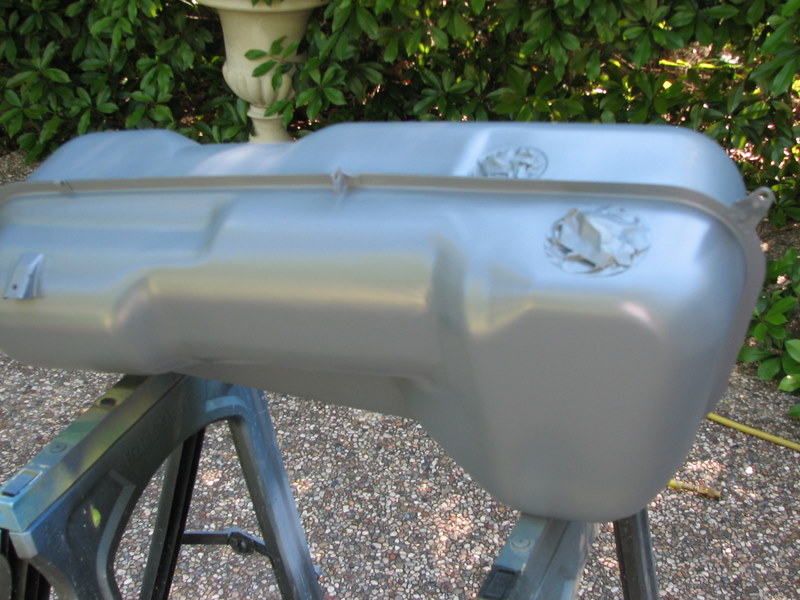
Posted by: thomasotten May 22 2007, 11:56 PM
Don't forget the springs...
Attached image(s)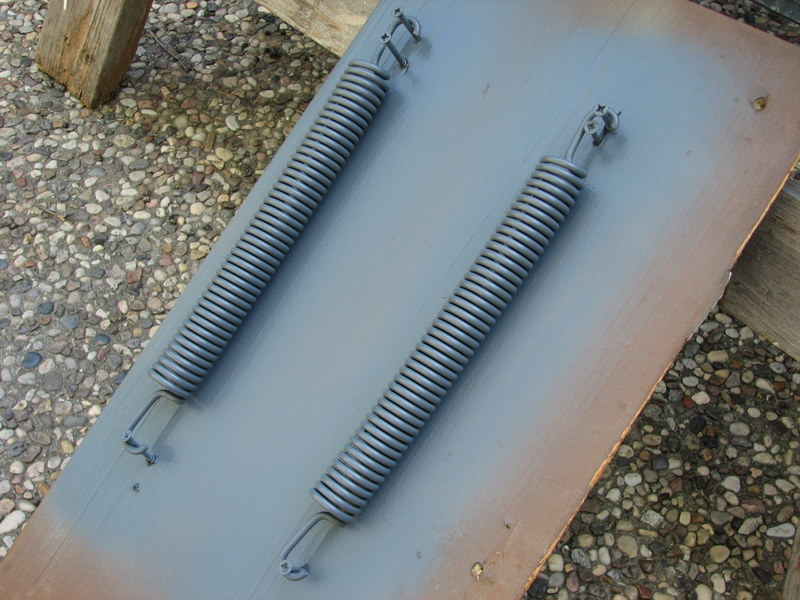
Posted by: thomasotten May 22 2007, 11:58 PM
And all the tank's friends...
Attached image(s)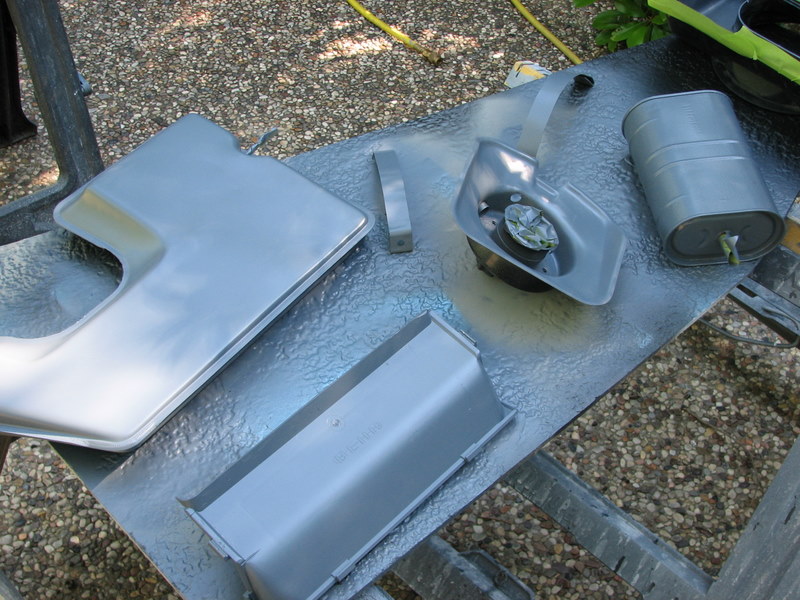
Posted by: thomasotten May 23 2007, 12:03 AM
Sealed this area, after a thurough cleaning...
Attached image(s)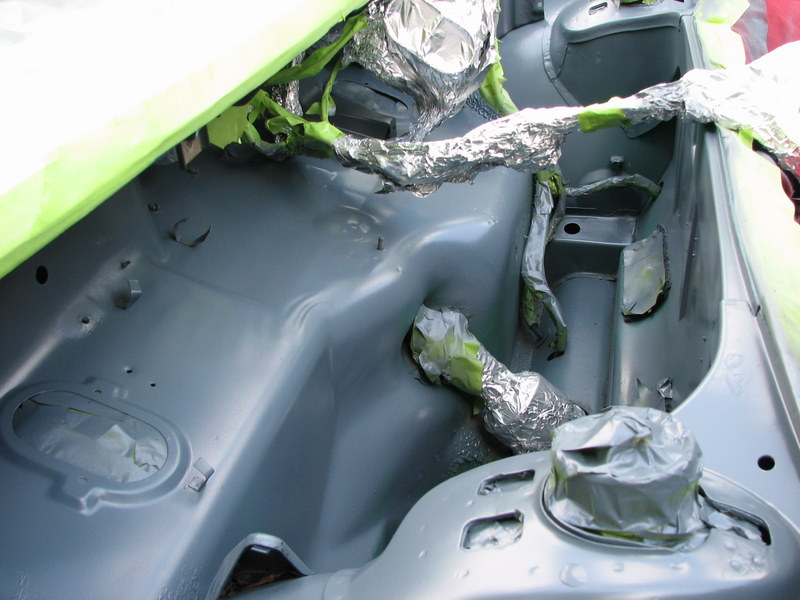
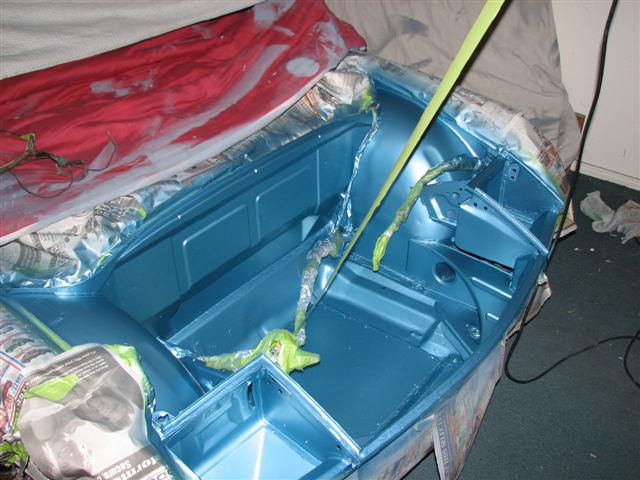
Posted by: thomasotten May 23 2007, 12:04 AM
See, now doesn't it look better in blue?
Attached image(s)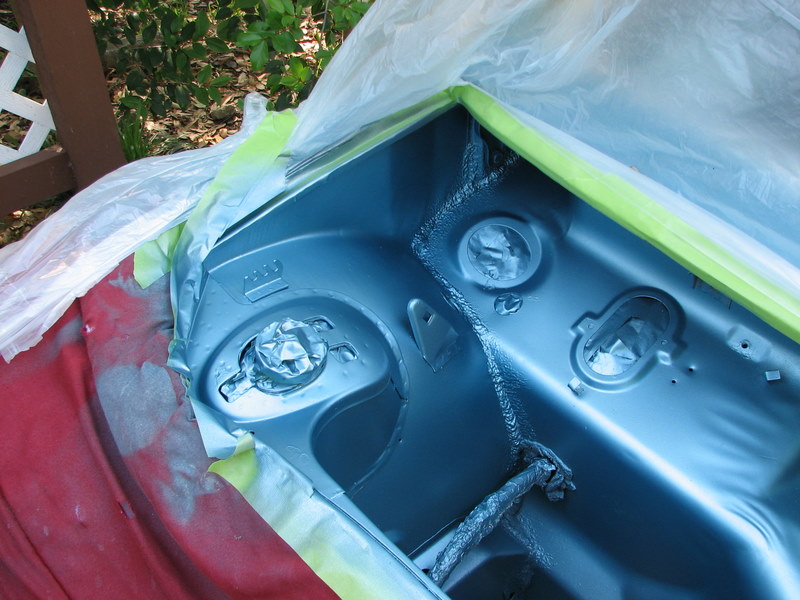
Posted by: thomasotten May 23 2007, 12:07 AM
Installed a new fuel pump while I was there. My old one was in the trunk. This one's a rotary and nicely hidden.
Attached image(s)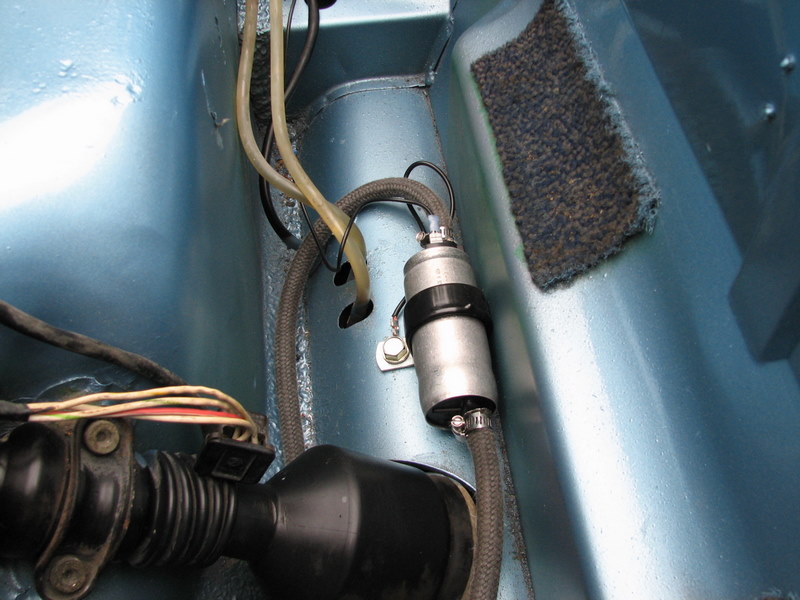
Posted by: thomasotten May 23 2007, 12:12 AM
Here's a shot of the tank. To paint the tank, I used a black base coat, followed by Hot Hues Matte Clear. I didn't want it too shiny...
Attached image(s)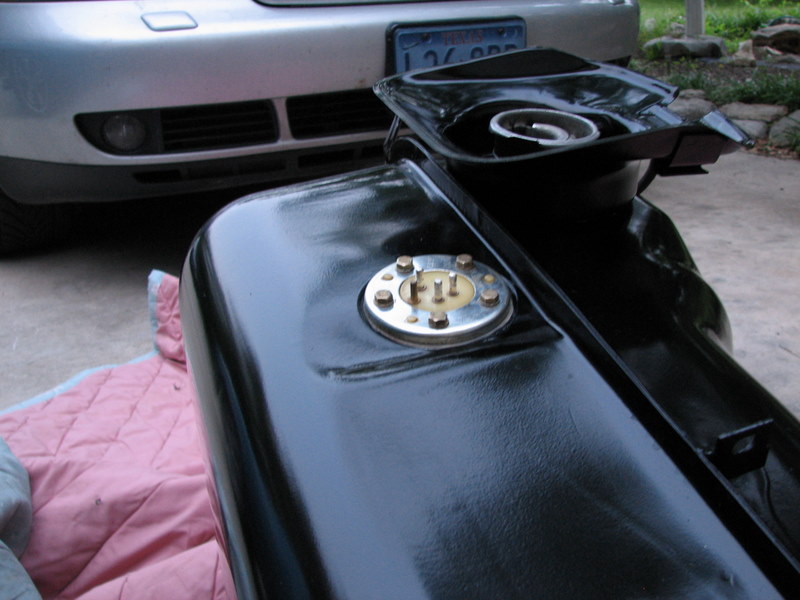
Posted by: thomasotten May 23 2007, 12:14 AM
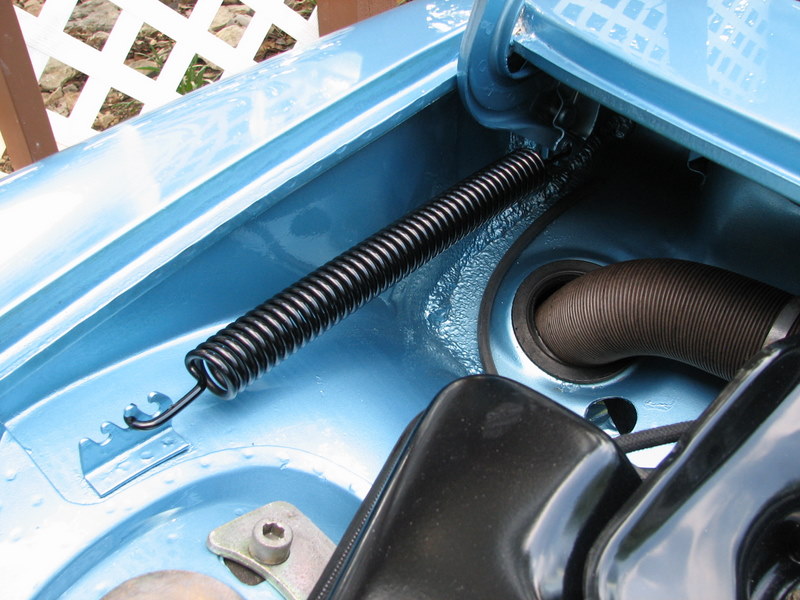
And back in she went...
Attached image(s)
Posted by: thomasotten May 23 2007, 12:15 AM
Attached image(s)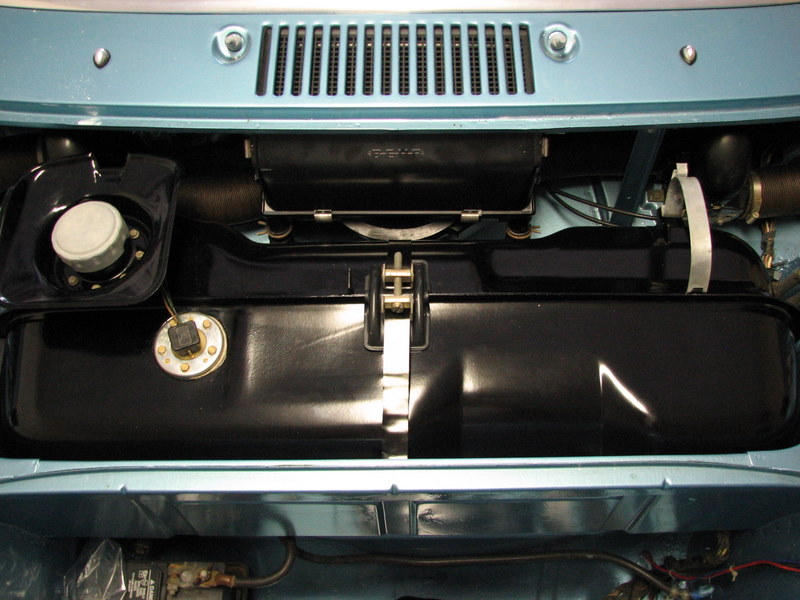
Posted by: thomasotten May 23 2007, 12:19 AM
And a new sticker for the gas tank adds the finishing touch..
Attached image(s)
Posted by: thomasotten May 23 2007, 12:25 AM
Springs came out nicely...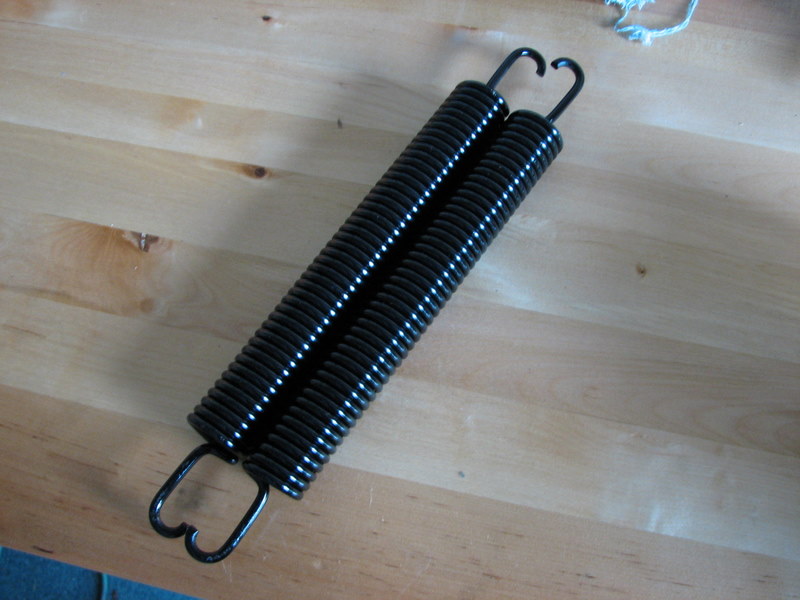
Posted by: thomasotten May 23 2007, 12:28 AM
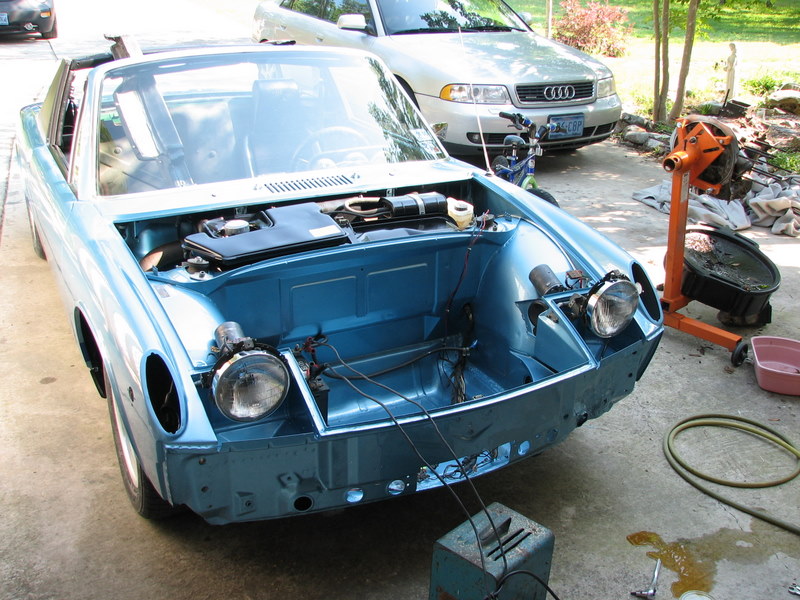
Now, I'm starting on reassembly...
Posted by: thomasotten May 23 2007, 12:32 AM
Got some brand spanking new lights...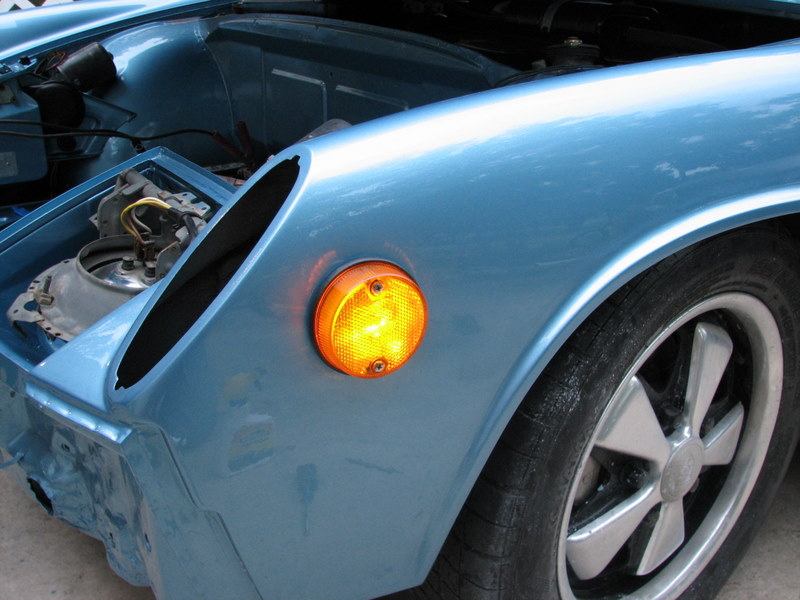
Posted by: thomasotten May 23 2007, 12:35 AM
IT WILL BE SO COOL...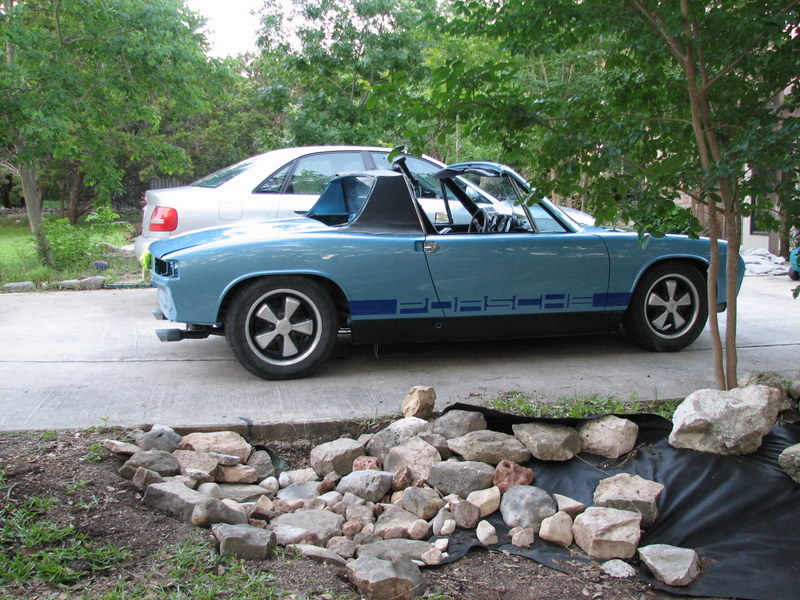
Posted by: Ferg May 23 2007, 09:41 AM
Nice job on the tank!
Ferg
Posted by: brer May 23 2007, 11:06 AM
I love your car.
what brand sealer and filler primer did you use?
I'm going to fix and seal some areas, but painting is a bit off still.
Posted by: RoninEclipse2G May 23 2007, 11:10 AM
I love your car.
what brand sealer and filler primer did you use?
I'm going to fix and seal some areas, but painting is a bit off still.
I'd like to know as well, not a blue fan but that car is gorgeous! keep it up.
this is what I want to do once I have a garage
Posted by: thomasotten May 23 2007, 09:28 PM
I love your car.
what brand sealer and filler primer did you use?
I'm going to fix and seal some areas, but painting is a bit off still.
I used Nason's brand of sealer. Requires no mixing, just pour in the gun and shoot. Then, save whatever you didn't use. Nason is DuPont's non-name-brand line. I used the Nason high build primer for bodywork as well.
Posted by: Headrage Jun 3 2007, 10:52 PM
Your car looks freaking great.
Except for the graphics.
Sorry,
I have to give you a  for that...
Posted by: euro911 Jul 16 2007, 09:12 PM
Very nice job and thread ...
Posted by: jaminM3 Jul 17 2007, 11:58 AM
Wow, what a confidence builder. If he can do that Kick Ass job in his Garage on a two stage paint, then there may be hope for us mortals that are going to attempt a single stage in our garage...
Thanks for the thread, nice work 
Posted by: Cairo94507 Jul 30 2010, 09:33 PM
Truly a masterful job. You have skills my friend. I really enjoyed the pictures and commentary. Bravo!
Posted by: Lou W Jul 30 2010, 09:42 PM
Looks beautiful, very nice job.
Posted by: thomasotten Jul 31 2010, 06:15 AM
It is nice to see that this thread resurfaces from time to time.
One of our club members created a PDF file for his own use of this thread. He is to use it as a guide for his own painting endevours. Here is is, just in case anyone would like to have it.
http://www.uber-werks.com/Painting_a_914_at_Home.pdf 
Thanks goes to Vern Simmons for creating the PDF.
Posted by: Cheapsnake Jul 31 2010, 06:46 AM
Thanks Thomas, as someone who has home-painted cars in the past and is about to do a 914 soon this is one valuable thread and you read my mind by posting that link. I can't agree with you more - this is a LOT of work, but your finished product is just reward. Congrats on the great job and thanks again.
Tom
Posted by: jjbunn Jul 31 2010, 12:02 PM
Superb thread - excellent stuff. Congratulations on a job very well done.
Posted by: JTarver Jul 31 2010, 12:45 PM
My wife is going to hate you forever for this thread
I like to paint and seeing your results have inspired me to paint the 914. I figure that you have produced aprox. a 15-18K paint job by your efforts so I am thinking to do the same. Great looking car.
Larry, is that your car in your avatar pic? If so, what color is that?
Thanks,
Joe
Powered by Invision Power Board (http://www.invisionboard.com)
© Invision Power Services (http://www.invisionpower.com)