Printable Version of Topic
Click here to view this topic in its original format
914World.com _ 914World Garage _ Clutch Tube Repair, alternative to welding
Posted by: Greenguy Feb 5 2007, 10:20 PM
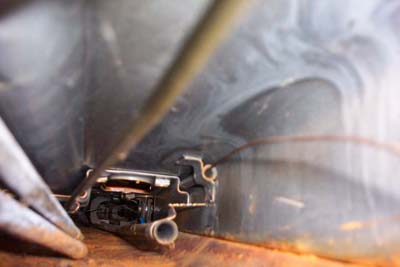
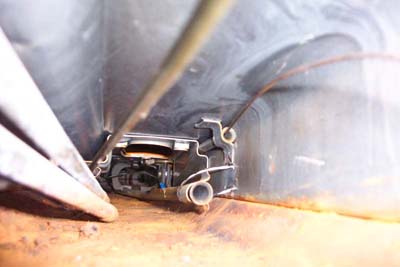
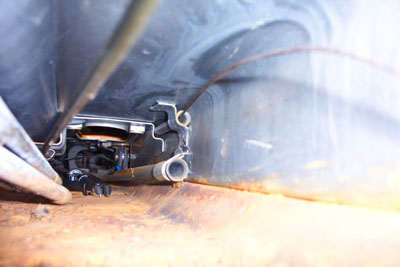
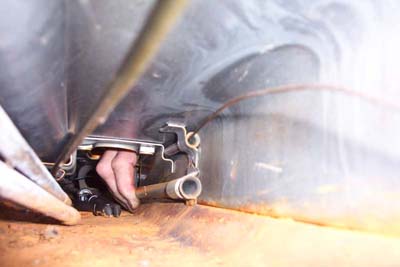
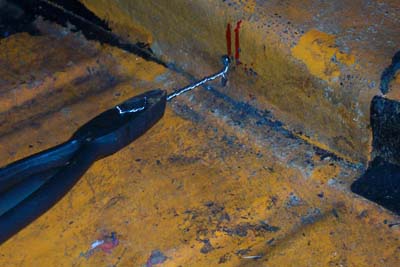
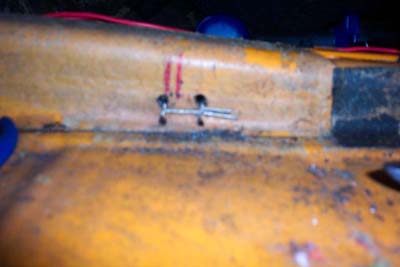
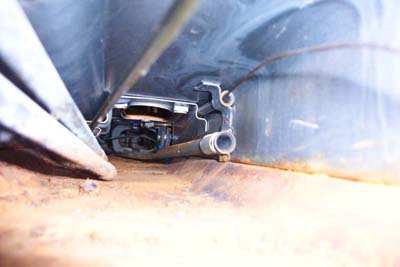
Decided to use aircraft safety wire instead of welding…pictures detail the repair. The repair itself took about 30 min.
Attached image(s)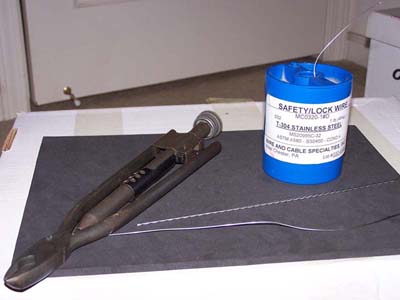
Posted by: So.Cal.914 Feb 5 2007, 10:24 PM
I love the pics, wire will work for a while as a temp fix. Good idea.
Posted by: ws91420 Feb 5 2007, 10:25 PM
Good outside the box thinking. 
Posted by: Brian_Boss Feb 5 2007, 10:26 PM
How did you take those pics?
Let us know how your repair holds up.
Posted by: Greenguy Feb 5 2007, 10:32 PM

I love the pics, wire will work for a while as a temp fix. Good idea.
My bet is the the braided stainless steel safety wire will last longer than the original weld did, I hope anyway.
Posted by: Greenguy Feb 5 2007, 10:34 PM
How did you take those pics?
Let us know how your repair holds up.
Once you get the pedal cluster out there is enough room to get a small camera inside the tunnel
Posted by: So.Cal.914 Feb 5 2007, 10:35 PM
By the way if it hasn't been said:

Posted by: ClayPerrine Feb 5 2007, 10:38 PM
How did you take those pics?
Let us know how your repair holds up.
Once you get the pedal cluster out there is enough room to get a small camera inside the tunnel
I was going to bet on a borescope (I so want one..
 )
)Posted by: Greenguy Feb 5 2007, 10:43 PM
By the way if it hasn't been said:
Thanks for the welcome...awesome care, awesome board
Posted by: SirAndy Feb 5 2007, 10:51 PM

now, get a gallon of metal ready and spray the heck out of that tunnel before that surface rust spreads any further ..
 Andy
Andy
PS:
Posted by: Cap'n Krusty Feb 5 2007, 11:52 PM
Perhaps you can tell me how that will stop the longitudinal movement? You know, the movement that causes the rear weld to break? Excuse my Krusty welcome, but that's just me, the guy with an attitude. My experience (34 years of teeners) tells me your efforts, clever as they may be, aren't gonna prevent further damage. Nice pix, though. The Cap'n
Posted by: DerekKim Feb 5 2007, 11:55 PM
Lol or you can do what I did which is what the guy before me did... Take a hose clamp to it... same idea different thing used. Hopefully it will hold up. How the heck would you spray all of the tunnel with a coat? Mine is hecka rusty too!
Posted by: Greenguy Feb 6 2007, 12:05 AM
Perhaps you can tell me how that will stop the longitudinal movement? You know, the movement that causes the rear weld to break? Excuse my Krusty welcome, but that's just me, the guy with an attitude. My experience (34 years of teeners) tells me your efforts, clever as they may be, aren't gonna prevent further damage. Nice pix, though. The Cap'n
I worried about that as well. The middle weld and the firewall weld on my clutch tube seem to be good as there was no longitudinal movement with the tube. When I installed the safety wire I secured one strand in front of the forward bracket and one strand aft of the bracket thinking that this would also prevent longitudinal movement. About 1000 miles so far and the clutch performs wonderfully, but you may be right, I'll keep you posted
Posted by: Hammy Feb 6 2007, 02:23 AM
Lol or you can do what I did which is what the guy before me did... Take a hose clamp to it... same idea different thing used. Hopefully it will hold up. How the heck would you spray all of the tunnel with a coat? Mine is hecka rusty too!
Metal ready or Ospho... watery like stuff. I guess you'd just spray as much as you can or leave a nice puddle of it up front and jack the car up

Posted by: Demick Feb 6 2007, 09:47 AM
Good temporary fix, but I agree with the Capt'n - you will have failure of the other welds unless this one is fixed properly. What happens is that once one of the welds is broken, the longitudinal stress has to be supported by the remaining welds - so their stress level goes up, and those welds will fail. Might be 5 months, might be 5 years, but it will happen.
Great photos though!!
Posted by: pbanders Feb 6 2007, 10:00 AM
I had mine done years ago by my mechanic in CA (Bob Grigsby). He took the shotgun approach - he welded it AND he used clamps along the length. It's never going to move again.
Posted by: John Feb 6 2007, 11:50 AM
Now that the tube is pulled up tight and the bracket is located, it's a real easy job to drill 2 holes and plug weld with a MIG.
Probably won't take 1/2 hour from start to finish. You did the hard parts (location and getting the tube pulled tight against the tunnel).
Posted by: Rand Feb 6 2007, 02:23 PM
It's been said clearly. What I was thinking. You did a fantastic job of securing the tube the the tunnel. But the real problem is... The actual-use tension is not sideways, it's backwards. Your fix just might hold it... But it's still a *might*. It needs some strength to handle the forward/back motion.
Posted by: Andyrew Feb 6 2007, 10:26 PM
What John said, Although 30 mins is a little long.. I'd say 5 mins...
Do it once, Do it right, DONT blow through.
I used clamps till I bought my welder, Worked just fine.
Posted by: John Feb 6 2007, 10:31 PM
I was giving him time to park the car, pull the carpet back, find a drill, find an extension cord, drill holes, find a vacuum, vacuum the metal shavings, find a grinder, scrape some tar off, grind a little paint, vacuum the dirt, get the welder, unroll the leads, plug in the welder, find the hood, find the gloves, turn on the gas, weld two spot welds, touch up the paint, and put everything away.
I'd say 1/2 hour.
Posted by: Andyrew Feb 6 2007, 10:34 PM
I was giving him time to drill the holes, Turn on the welder, adjust the settings, make the plugs and MAYBE throw some primer on it...
hehe
Posted by: muddboy Feb 6 2007, 10:39 PM
Did that years ago... probably 10 or so... it worked for about a month untill it pulled out the wire... Was still on the cheap side then so I used U bolts to bolt it to the floor instead. Now I have 4 little studs with nuts that you can see under the car (floorpan). that and a reinforcement on the firewall and has worked for 9+ years... I ain't proud, but it drives.
Posted by: rgalla9146 Dec 28 2010, 01:58 PM
I've used the hose clamp method with very good, long lasting results.
As I recall two clamps were used inside the car on the side of the tunnel.
The hard part is creating parallel slots that the open hose clamp can be fed through. It's obviously better to put them close to one of the three openings.
One advantage of using a hose clamp over a U bolt is that a U bolt can crush the clutch tube. Another advantage is that there is no ugly hardware to rust outside the floorpan.
The slots can be created by drilling three 1/8" ( or smaller ) holes in a row and then connecting them by filing.
Use the smallest, widest clamp available and put the parallel slots just at the width of the tube.
To ensure firm grip to the tube slide a 1" length of split hose over the tube inside the clamp, then tighten.
As they say in Ohio.....Walla!
Powered by Invision Power Board (http://www.invisionboard.com)
© Invision Power Services (http://www.invisionpower.com)