Printable Version of Topic
Click here to view this topic in its original format
914World.com _ 914World Garage _ Sklines new V8 project car
Posted by: skline Mar 12 2007, 12:01 AM
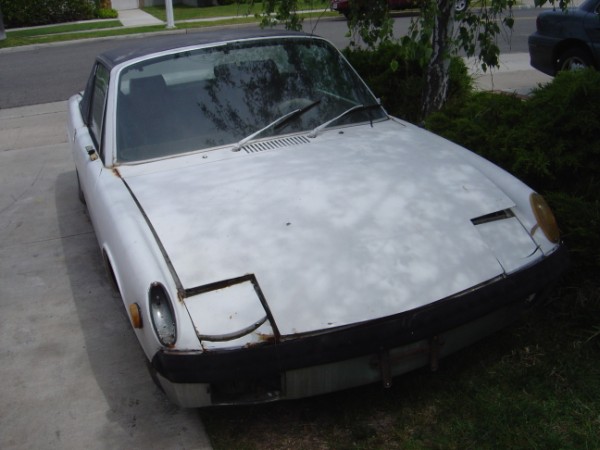
Here it starts, I spent about 5 years working on the last project car and it sold on Saturday and I took delivery of the new one the same day. It was someone elses project that had been sitting for years untouched. Here is what I know about the car so far.
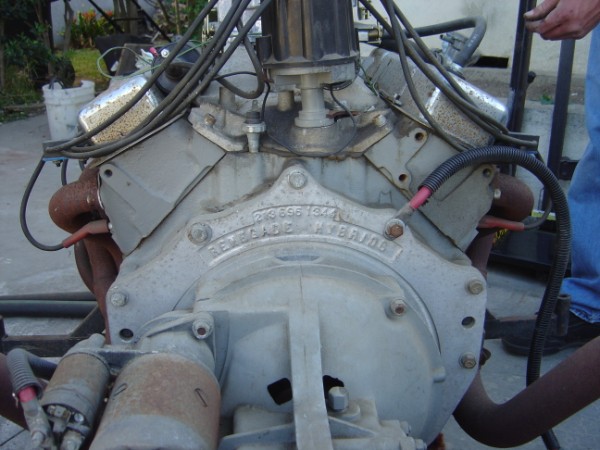
One PO started building a Renegade V8 conversion on a 1975 914. Not sure why but he did a slant nose conversion on it, in steel of course and bought a Renegade conversion kit to do a V8. Apparently he never finished it as the last PO bought it and tried to find someone to finish it for him with no luck. The car has pretty much not changed since the first owner. As far as I know, the last PO had it for 3 years. Now I have it.
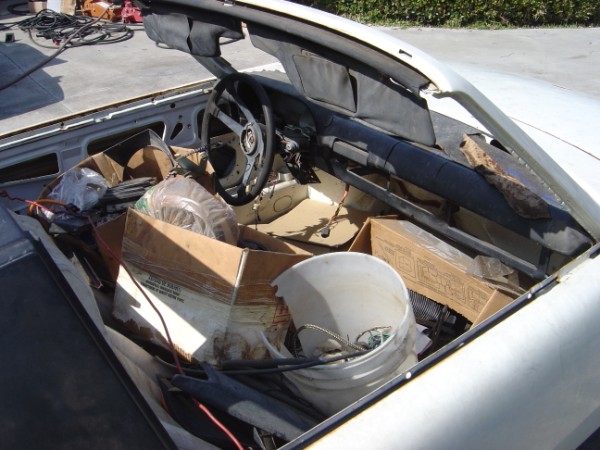
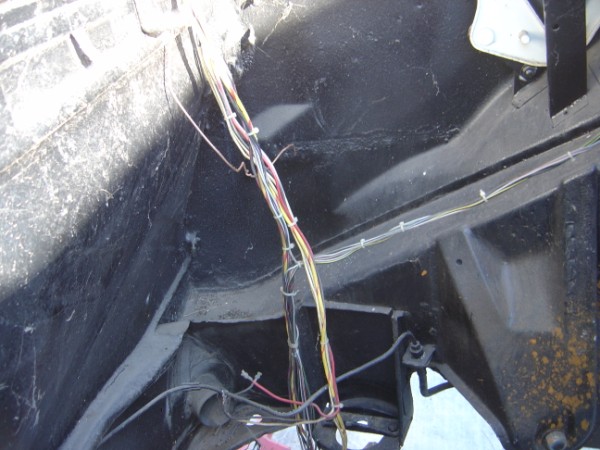
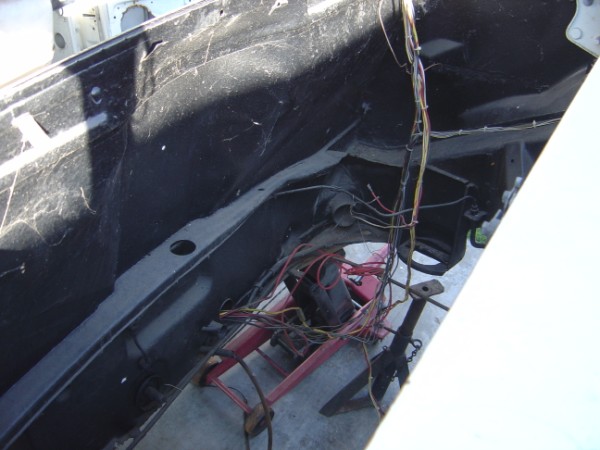
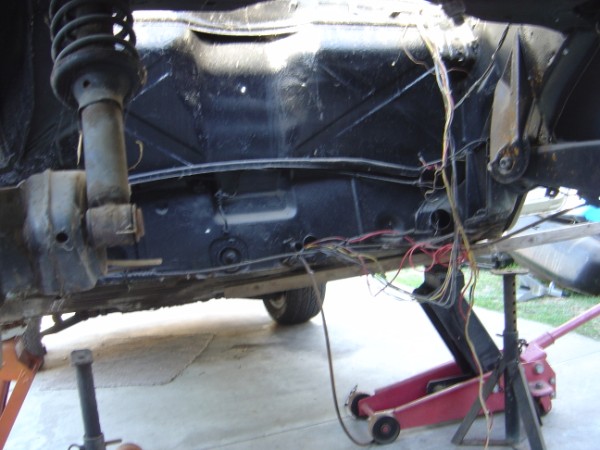
The car is missing a lot of small parts. Read that as so many I dont know where to begin. Door strikers, door handles, the only interior are destroyed white seats. No lower dash, top dash no good at all, no dash face, no pedal cluster, or shifter, no cables or partial cables, wiring pulled out most everywhere and not connected to anything. The engine and trans are mounted and a very old original RH radiator is sitting in front not really mounted. The gas tank just sitting there not connected to anything, no rockers or rubber. It's pretty much just a shell with an unknown engine and trans.
So here is where it begins:
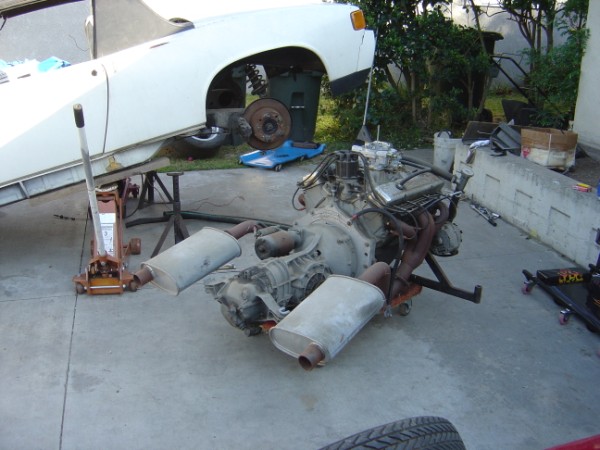
Today, I sourced a 327 from a 68 Camaro engine casting number #3914678 which I will rebuild with a known configuration that I have used before. Thomas came by earlier and picked up my billet IM plate and HB gearset to install in the transmission. He left before the trans and engine were pulled. Jared was here helping me most of the day. We cleaned everything out of the car and then dropped the engine and trans and removed the radiator and hoses. The radiator looks brand new and never used. The engine and trans looked really clean underneath. The top looked like it was parked outside for the last 3 years, which is probably the case. Anyway, I wanted to find out what clutch and flywheel were used and what I was going to have to upgrade to meet my needs. I measured it and it is the 9" clutch and PP. I can use that for now. I am going to install the new RH radiator and fan setup and new marine exhaust hoses. Tomorrow I will finish removing the rest of removeable parts from the car and move forward with body work.
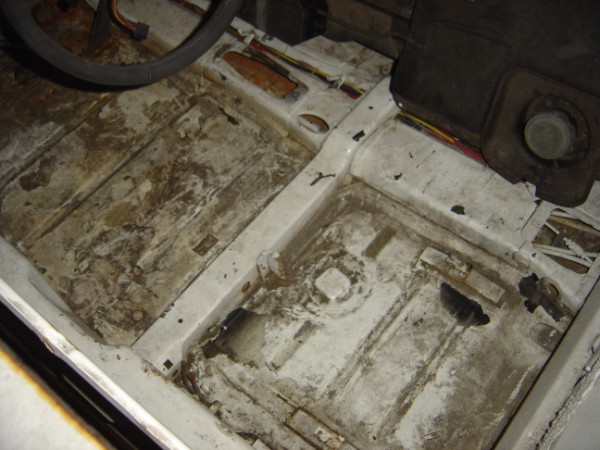
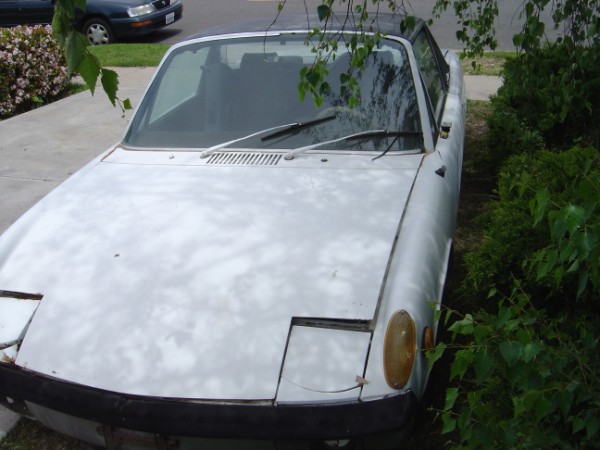
Did I mention there is no RUST in this car? However, I did find that both rear fenders were replaced at one time, the one on the drivers side rear was originally Yellow and the one on the passenger side rear was bronze I think. The front has taken a hit at one time too and the body work is not as good as the rear. I have my work cut out for me. With any luck, and time, I could get it close to running by the end of summer?
Here are some pictures of the car and what I did today.
Attached image(s)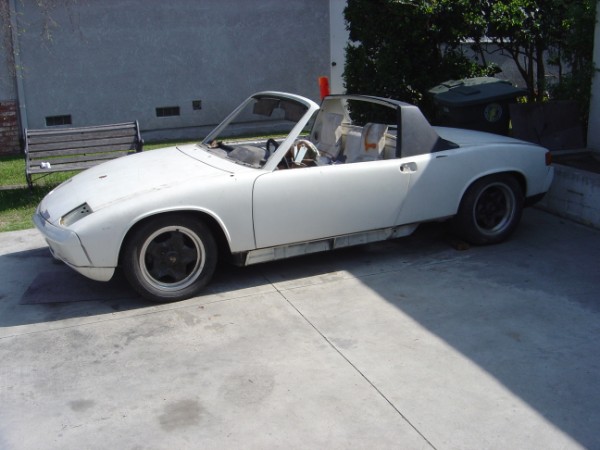
Posted by: skline Mar 12 2007, 12:03 AM
Did I mention, NO RUST?
Attached image(s)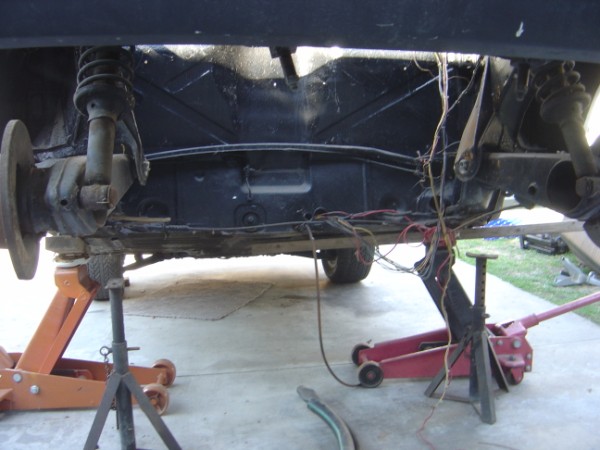
Posted by: Lawrence Mar 12 2007, 01:41 AM
![]()
Posted by: army dude Mar 12 2007, 03:42 AM
Great score!! No rust??? No, really, NO rust?? And being outside for so long???? KEWL!!
What will the engine configuration and internals be with what output??
Ian in Iraq...Again
17 days till end of second tour
Posted by: skline Mar 12 2007, 06:39 AM
Great score!! No rust??? No, really, NO rust?? And being outside for so long???? KEWL!!
What will the engine configuration and internals be with what output??
Ian in Iraq...Again
17 days till end of second tour
I have built an engine before with the exact same configuration and it was dyno'd at 380. I may go with a roller cam this time though so I am not sure what it will do as the same cam specs are not available. Close but not exact. We will see.
The compression should be around 10.5:1 so I can run pump gas from anywhere. I will know more as I source the parts for the build. I am picking up the engine on Wednesday and it is going to be torn down and taken to the machine shop by the first of next week to check the block for everything. I will know more when I get that done.
Posted by: rick 918-S Mar 12 2007, 07:36 AM
![]()
![]()
Posted by: Dr Evil Mar 12 2007, 08:09 AM
![]() glad it worked out Scott
glad it worked out Scott ![]()
Posted by: Solana-Bob Mar 12 2007, 11:11 AM
I have a late model lower dash and some pedal sets if you still need them.
Posted by: faux916 Mar 12 2007, 12:28 PM
Looks like you got the best of both worlds with that deal. It will be great to see you posting again and sharing your knowledge with the rest of us ![]()
Posted by: tyler Mar 12 2007, 02:28 PM
Just a few thoughts.............
Looks like a real "project". I'm just finishing mine up and it was similar to yours to start with except I also had to weld a roll bar back in. You probably have it planned out ok, but if I had to do it over I think I'd buy a nice complete 914 and install the v8 stuff. All those little parts really add up, then there's the dash and all the very, very, very expensive rubber.
Also mine was a primer rat rod when I finally got it running. Now I just finished painting it and I regret it. With a good paint job, not only is taking it out more of a worry, but all the small stuff (like the rubber) that didn't matter before, now have to be right to go with the new paint.
Posted by: skline Mar 12 2007, 07:25 PM
I know what you mean Tyler, but I think some of the fun about these projects is the actual working on the car to get what you want. If I bought one complete, it would probably not be exactly as I want it and I would spend almost as much making it what I want. If that makes any sense. I wont be installing a roll bar but the entire stiffening kit inside and out will have to be welded in. The nicest thing about starting like this is that when I am done, I know the car inside and out. I will be painting it myself so it is not as much of an issue opposed to paying 5k for a paint job by someone else. The first thing I will do to the car is get the body and paint done including the stiffening kits.
Posted by: skline Mar 13 2007, 11:08 AM
I am off to get the new engine today so I will take some pictures of it and post them up. I will also document the build as I go too, should be interesting.
Posted by: faux916 Mar 13 2007, 11:59 AM
Scott, Did you decide on a color yet? Is there another sunshine yellow in your future?
Posted by: turbo914v8 Mar 13 2007, 12:20 PM
Good day, I have a pedal cluster PM me if your interested. Pic's are available.
Posted by: markb Mar 13 2007, 12:29 PM
Nice to see you're jumping right back into things, Scott.
This should be an interesting build, so please post lots of updates for those of us who are less ambitious.
Posted by: skline Mar 13 2007, 01:16 PM
Well, I just got home from picking up the engine I commited to on Sunday, I have no place to put it yet so I took it to a friend of mine who has a shop about 3000 yards from where I got it. While at my friends he asks what I am doing. I told him and he said he has a 327 that is up in his rafters that I could have for free. So I climbed up in his rafters and got the numbers off it and sure enough, 1968 327. So now I have 2 of them ![]()
Life is getting better all the time. Pictures when I get the engines home to my house.
Posted by: skline Mar 13 2007, 01:16 PM
Oh, Bob, yes, it will be yellow and we all know why!! ![]()
Posted by: Aaron Cox Mar 13 2007, 01:31 PM
because we would razz you about painting it pink?
Posted by: skline Mar 13 2007, 01:33 PM
because we would razz you about painting it pink?
Never happen, what do you think my name starts with Aa?
Posted by: Aaron Cox Mar 13 2007, 01:34 PM
![]()
Posted by: So.Cal.914 Mar 13 2007, 01:36 PM
I think what you ment to say was...Salmon.
Posted by: SLITS Mar 13 2007, 01:44 PM
200220032004200520062007
SOLD
New Project20072008200920102011
Your name wouldn't be Glenn "Master of the Unfinished Project" Sager would it?
![]()
Posted by: skline Mar 13 2007, 01:51 PM
Why I really wanted the 327 as a base starting point.
The 327 in (5.4 L) V8, introduced in 1962, was bored and stroked to 4 in (102 mm) by 3.25 in. Power ranged from 250 hp to 375 hp (186 kW to 280 kW) depending on the choice of carburetor or fuel injection. In 1962, the Duntov solid lifter cam versions produced 340 hp (254 kW), 344 ft·lbf (466 N·m) with single Carter 4-brl, and 360 hp (268 kW), 352 ft·lbf (477 N·m) with Rochester mechanical fuel injection. In 1964, horsepower increased to 365 for the now dubbed L76 version, and 375 for the fuel injected L84 respectively, making the L84 the most powerful naturally aspirated, single-cam, production small block V8 until the appearance of the 385 hp (287 kW), 385 ft·lbf (522 N·m) Generation III LS6 in 2001. * L76, L84 1963-1965; Chevrolet Corvette. This block is one of 3 displacements that underwent a major change in 1968/1969 when the main bearing size was increased from 2.30 in to 2.45 in.
Posted by: skline Mar 14 2007, 11:03 AM
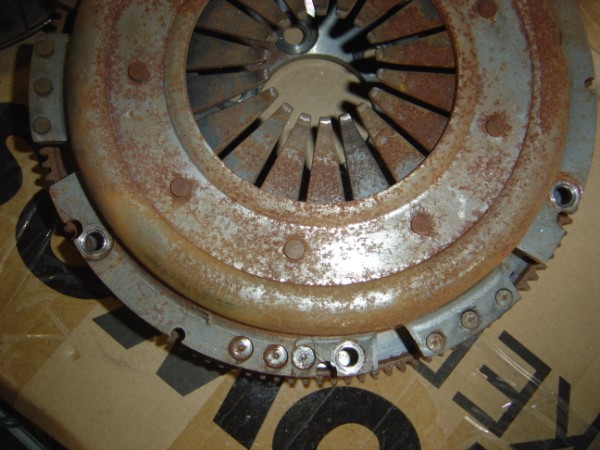
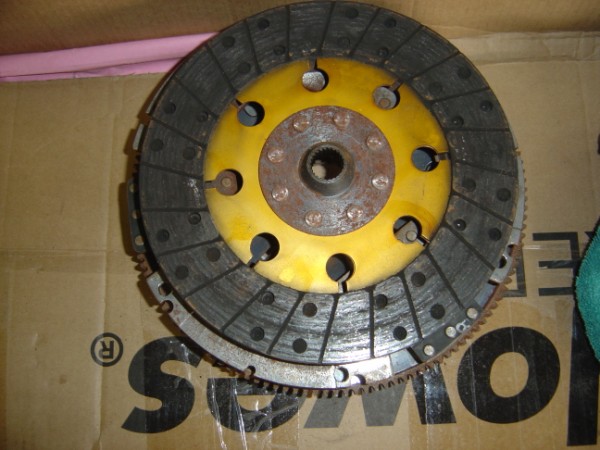
Well, I just got off the phone with Kennedy and we couldnt figure out what PP and clutch this is that I took off the conversion in the car so I am going to box it up and send it to them for evaluation. I feel it is better to be safe than sorry. From my description to him he said it sounds like a stage 1 which will not handle the 327 I am building so he is going to check it out and make his suggestions which from past experience I will probably follow. Most likely I will wind up with the same one I put in the Chalon. It had the 228mm Kevlar Stage II and it held really good.
Here are pictures of the clutch and PP, if anyone knows or can tell from the pics what it is, let me know please.
Attached image(s)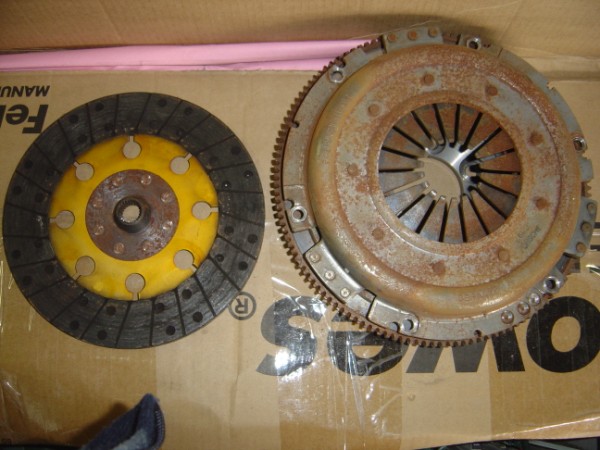
Posted by: skline Mar 14 2007, 07:22 PM
Ok, I found a pedal cluster from a 911 I was told will work in my car and while digging through the garage today I found a lower dash in excellent condition so I can scratch those off my list.
I still in the market for rear shocks, prefer Koni adjustables and some 180 to 200 LB springs, a rear sway bar complete with shock bolts, complete steering column with ingition switch and many other things to be listed in the near future. Obviously I am not in a hurry for any of this quite yet as I have a ton of body and paint to do and then worry about assembly but I figure I would put my feelers out now and see what kind of responses I get.
Posted by: drew365 Mar 14 2007, 07:56 PM
If you are going to use adjustable perches for the rear springs I have a set of brand new 250# 2.5" X 12".
You can definately tell that clutch belongs in a 914. ![]()
Good to see you back Scott, I wish you still had the Chalon. I need help defending against the mobs.
Posted by: Aaron Cox Mar 14 2007, 09:40 PM
good to see ya today buddy!
looks like a wicked project.
Posted by: skline Mar 14 2007, 10:37 PM
Aaron, it was good to see you too, and Elliott Cannon came by too, it was nice.
Andy, I will most likely not be using adjustable perches unless you have those for me too. ![]()
Posted by: Brando Mar 14 2007, 10:59 PM
Skliney, if the shop be closed friday I may be able to drive down and lend a hand (![]() ) with the bodywork and engman kit
) with the bodywork and engman kit ![]() .
.
Posted by: dmenche914 Mar 15 2007, 09:59 AM
what radiator and cooling lines are used in this V8 set up? any photos?
Most intersted in size / location of coolant lines, and how rtadiator is set up in front.
thanks
Posted by: messix Mar 15 2007, 10:08 AM
the disk looks like a race setup with the solid marcel, you'd get a lot of chatter try to slip that on the street trying to pull away from a stop with out reving the sh-t outta it.
Posted by: skline Mar 15 2007, 03:04 PM
what radiator and cooling lines are used in this V8 set up? any photos?
Most intersted in size / location of coolant lines, and how rtadiator is set up in front.
thanks
The Radiator being installed is a new Renegade Hybrids but instead of the Gates Green Stripe hose they sell, I am using Marine Exhaust hose. Other than that, it is all RH stuff.
Posted by: skline Mar 15 2007, 03:08 PM
the disk looks like a race setup with the solid marcel, you'd get a lot of chatter try to slip that on the street trying to pull away from a stop with out reving the sh-t outta it.
I will find out next week, I am sending the whole thing off to Kennedy to have them check it out and tell me what it is. Then I will go from there.
Posted by: Andyrew Mar 15 2007, 07:26 PM
Andy, if you have no use for those 250's I do..
Andrew
Posted by: LarryR Mar 15 2007, 10:18 PM
I am new to 914 world but I can see I am in good company ![]() I am also doing a 914 v8 conversion. My last build up was a 911 with a 3.6 and I am hoping to top the perfromance at about 20% of the cost and have a car that handles better to top it off.
I am also doing a 914 v8 conversion. My last build up was a 911 with a 3.6 and I am hoping to top the perfromance at about 20% of the cost and have a car that handles better to top it off.
I am entertaining the idea of a LS1 due to the lite weight. @ 395 pounds wet with acceories it is 105 pounds less than a 3.6 porsche engine. Edelbrock has a nice cam and intake combo that is good for 519 hp on the LS1 ....
At any rate good luck on your project and since it looks like we are starting at the same time maybe we can compare notes.
Posted by: skline Mar 16 2007, 05:29 PM
I need a set of Koni rear adjustables if anyone has some laying around they want to part with. ![]() Let's talk, I have a little money I can spend and want to invest it on the car.
Let's talk, I have a little money I can spend and want to invest it on the car.
Posted by: skline Mar 18 2007, 12:42 PM
Ok, another day I can do some things on the car. This morning while it was still dark I ordered my Distributor for the new engine and the chassis stiffening kit and a piece from Tangerine racing called an Inner Console Reinforcement. I figured it is better to be safe than sorry. This will be enough to get started on things. Mark should be getting me a list of things to order from him also soon. I want the body, paint and chassis all done before I put it back together.
Posted by: Brando Mar 18 2007, 12:47 PM
Hey man, I'm real sorry I had to bolt friday afternoon. I swear never let anyone buy a fucking focus... They're all lemons. Car is less than 6 years old and the fuel pump took a shit. Mine's an OE bosch and still pumping strong! What a POS. If I'm not doing an engine swap/breakin next friday I might be able to head down again and actually help you get something done ![]()
Posted by: skline Mar 18 2007, 05:18 PM
More things to add here.
I just made a deal on some Bilstein adjustable perch rear shocks and a set of 180 and a set of 200 lb springs, a Fitipaldi steering wheel with quick release hub and an Optima billet aluminum battery tray. Yes, it was expensive but I think for the investment, it was a good thing for me. ![]()
Posted by: skline Mar 19 2007, 06:19 PM
Bad news today from Kennedy, they looked over the clutch, pressure plate and flywheel I sent them and Eric had nothing good to say about them. The only plus is the flywheel is a 9". They are going to resurface it and send me a new PP and stage III clutch. He kept making comments about how old it all was. He estimated 1901, I swear that was the year he said. So $375 later, my new one will be here on Wednesday. The parts are just adding up and I still could not drive it or assemble it yet. So far I am about $1400 and climbing. I still have to build the new engine for it.
Posted by: skline Mar 21 2007, 04:11 PM
New parts came today from Chris at Tangerine Racing. I think I will weld these in today and get that step over with. Nice weather today so it should go smooth. It was raining yesterday which is really a hold up since my car is not yet in the garage. Maybe by the weekend I can get it inside.
Attached thumbnail(s)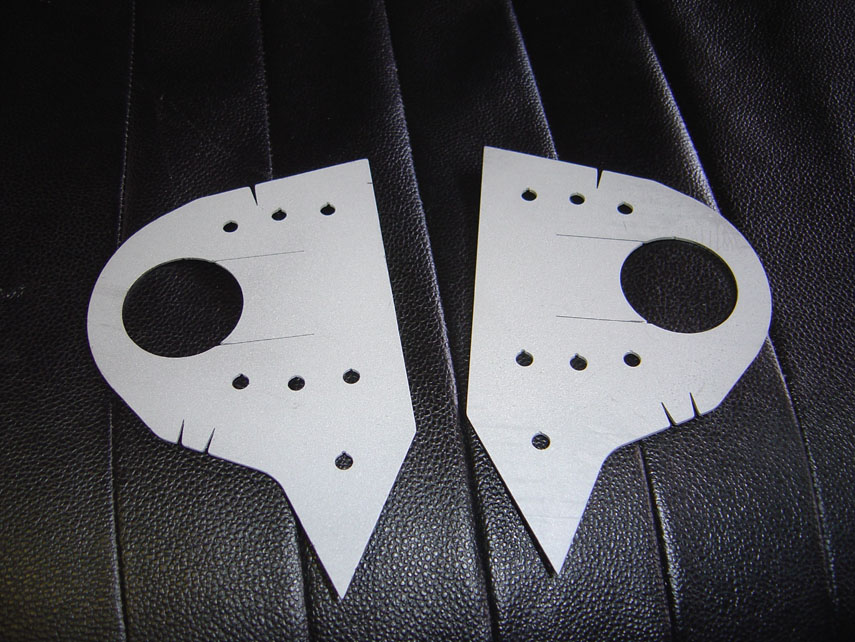
Posted by: skline Mar 23 2007, 10:21 AM
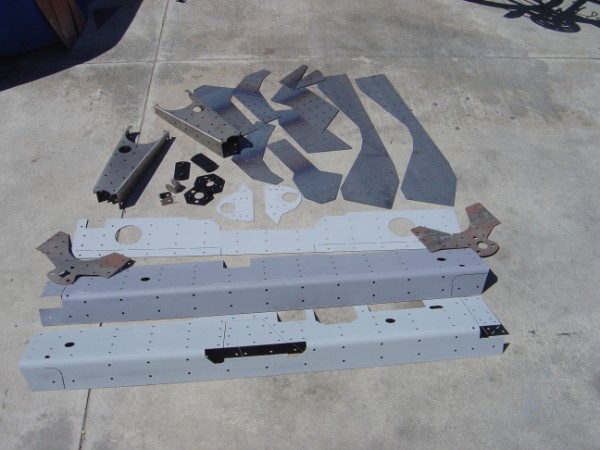
On the ajenda today is strip and prep the enderside of the car ready for welding in all the parts I got this week, with any luck I will have it all done by the end of the weekend. I know I will be working at the port on one day or evening but the rest of the time, I will be cleaning, grinding, welding, more grinding and painting. Here is the stuff for the outside of the car. The inside stuff should be here today from Engman.
Attached image(s)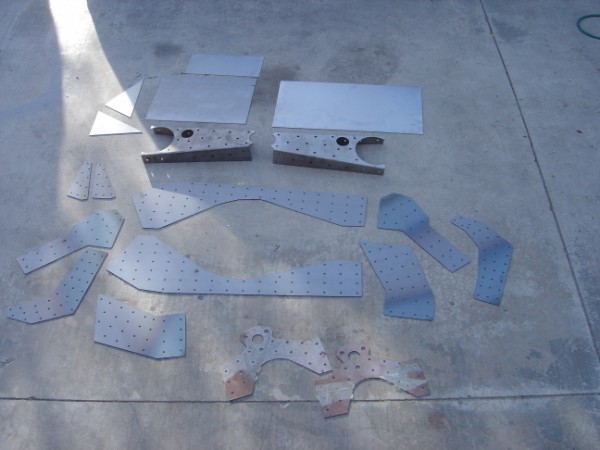
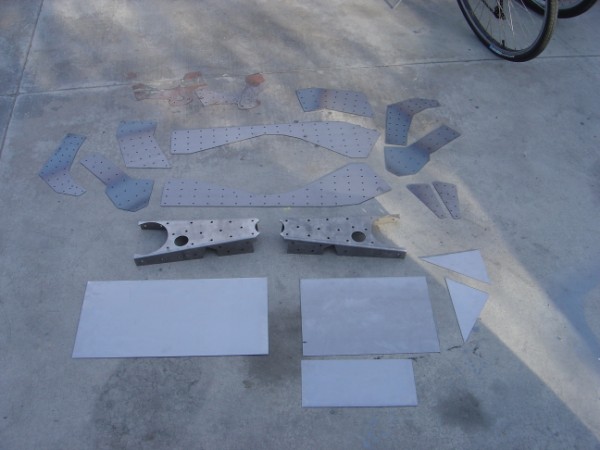
Posted by: spunone Mar 23 2007, 10:52 AM
What there not in yet ![]() Me thinks ya need to get up earlier
Me thinks ya need to get up earlier ![]()
![]()
![]()
Posted by: skline Mar 23 2007, 10:57 AM
Well, I am off to get some stripper now to remove all the paint and undercoating in the wells and engine compartment. Then I will start fitting and welding all this stuff in.
Thanks again Paul for the metal parts. Maybe I will name my car after you? ![]()
Posted by: spunone Mar 23 2007, 11:03 AM
No Problemo Scotty if ya need something else just holler & dont forget to give me those hole sizes for the alum flanges we need to make ![]() Now get to burnin
Now get to burnin ![]()
Posted by: skline Mar 23 2007, 11:58 AM
No Problemo Scotty if ya need something else just holler & dont forget to give me those hole sizes for the alum flanges we need to make
Just measured them, they are 2" across so I would guess make them 2.25" so the hoses fit since I am using marine exhaust hose, that should make a perfect fit.
Posted by: spunone Mar 23 2007, 12:00 PM
How big a flange ya need ??
Posted by: skline Mar 23 2007, 12:06 PM
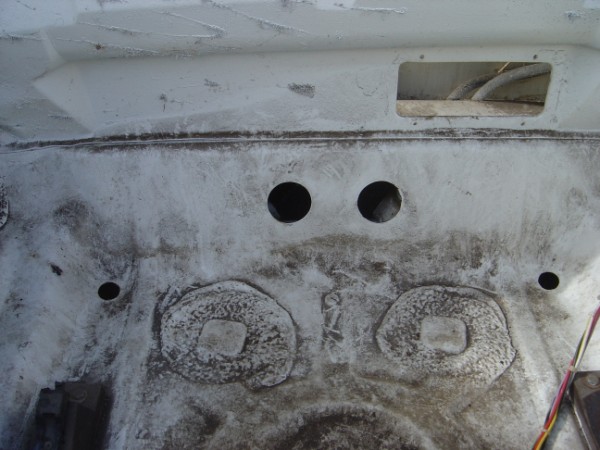
There are 2 holes and they are 2" each, I will open them up a little for the flanges and the hose I am using is a Marine Exhaust hose, after thinking about it, just make them both 2", I am sure the hose will fit through.
Here are aome pics of the holes
Attached image(s)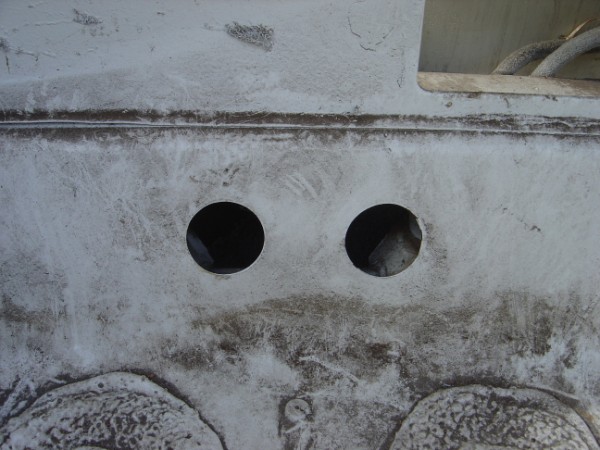
Posted by: Aaron Cox Mar 23 2007, 12:14 PM
dont put your fingers into dark holes...
could be trolls... or worse... slits is in there with clayton!
Posted by: skline Mar 23 2007, 03:52 PM
Here is an updated picture of the weld in kits going into this car. I wonder how much all of this weighs? It wont be the lightest car but it will be strong for sure and with the V8 it should still be fast enough.
Attached image(s)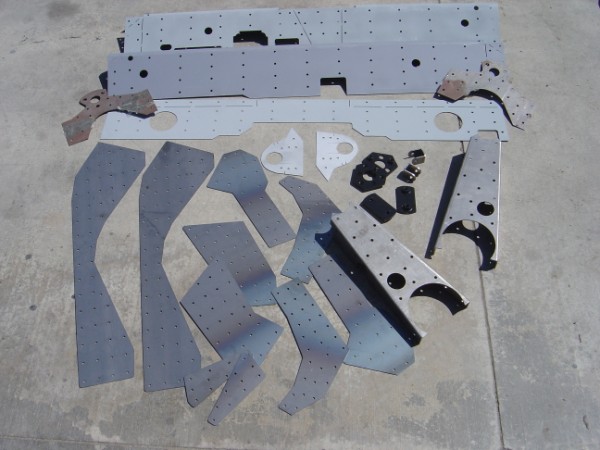
Posted by: r_towle Mar 23 2007, 05:11 PM
Your electric bill is gonna be big!!!
Rich
Posted by: dakotaewing Mar 23 2007, 05:12 PM
Skline -
You are missing the Brad Mauer outer stiffening kit... ![]()
It will add anther 50 or so pounds as well -
Good luck on your project, and do not get in a hurry welding in the Engman inner... you rush it, and you will mess up your door gaps big time !
Best -
Thom
Posted by: skline Mar 23 2007, 05:17 PM
This will be the fourth Engman inner kit I have done but thanks for the advice. ![]()
Posted by: skline Mar 24 2007, 09:09 PM
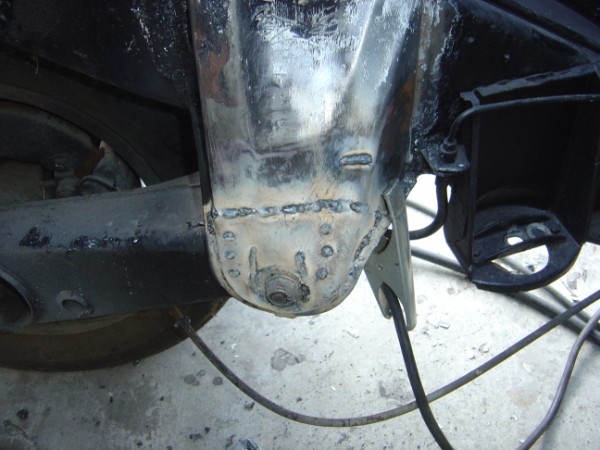
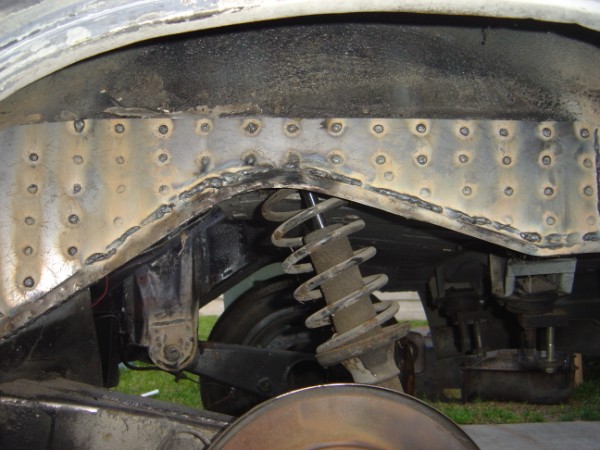
Welding in some of the parts today, I had forgotten how difficult it was to get the kit to lay flat. Here are some pics of what is being done so far. Almost done with the drivers side outer.
Attached image(s)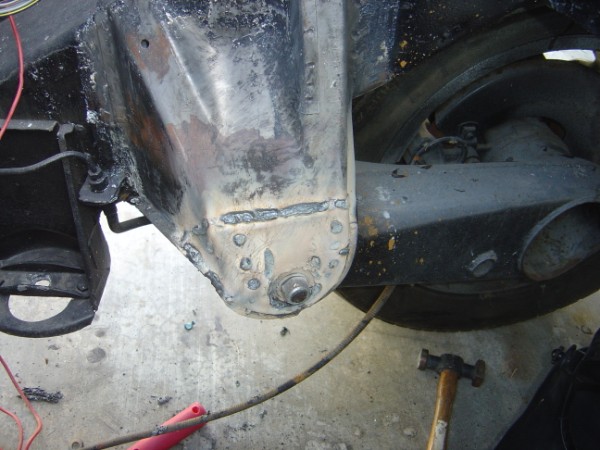
Posted by: type47fan Mar 24 2007, 10:49 PM
Scott,
May be a little early, but are going to be running the same muffler set up as on the Chalon?
Thanks,
Posted by: LarryR Mar 24 2007, 11:12 PM
I just want to add into the mix LS1 400 hp and less weight than the porsche 6!
old school 327 is ok but new tech 400 hp for less weight is welll... make your own decisions.
Posted by: Aaron Cox Mar 24 2007, 11:16 PM
I just want to add into the mix LS1 400 hp and less weight than the porsche 6!
old school 327 is ok but new tech 400 hp for less weight is welll... make your own decisions.
he has to put it through a 901.....
400hp + 901 = big hunk of lube and wasted cash
Posted by: Crazyhippy Mar 24 2007, 11:29 PM
I just want to add into the mix LS1 400 hp and less weight than the porsche 6!
old school 327 is ok but new tech 400 hp for less weight is welll... make your own decisions.
he has to put it through a 901.....
400hp + 901 = big hunk of lube and wasted cash
I had a V8 car over 400hp through a 901... 3 transaxles in 2 yrs. One lasted 6 months
Narrow bodied cars are so traction limited that the transaxles can survive. Limited slip and slicks w/ HP is a lil tough on them though....
BJH
Posted by: skline Mar 25 2007, 12:58 PM
Yes, I am going with the same exhaust setup as I put in the Chalon, I liked the sound of it and it was quiet inside.
Posted by: skline Apr 9 2007, 10:36 PM
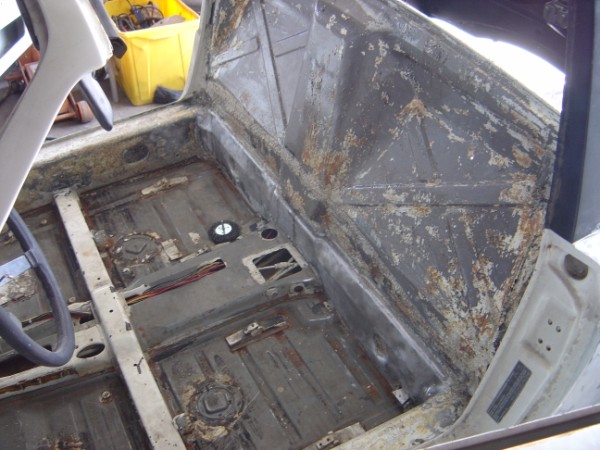
The floorboard is now stripped, (Thank you Jared, he is working off the parts I gave him) and I am happy to say the worst rust is minor surface rust around the pedal area. The floor is the cleanest and most solid of any car I have seen or owned. The bad news for Jared is he also got around to taking the engine apart, (top end only), the reverse cooling was clogged solid along with the lower end of the block and the water pump was pretty solid too with crap. I will need to rebuild the water pump and replace the reverse cooling fittings on the engine as they were corroded and broke when removed from the engine. I will need to replace them also. Jared will have to clean out the block and the manifold and heads as they are pretty clogged with rust and some white stuff. The oil looks like it had some water in it so he is going to have to drop the pan and check everything. So his will be a few weeks longer till he is ready to get it running. That is all we have done so far, I will take pictures tomorrow after work.
Posted by: skline Apr 13 2007, 10:29 AM
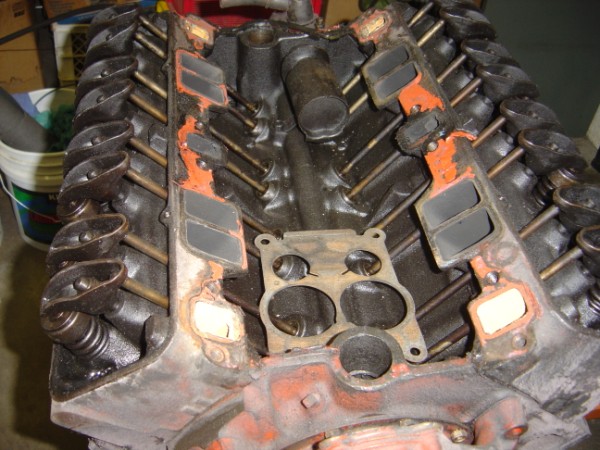
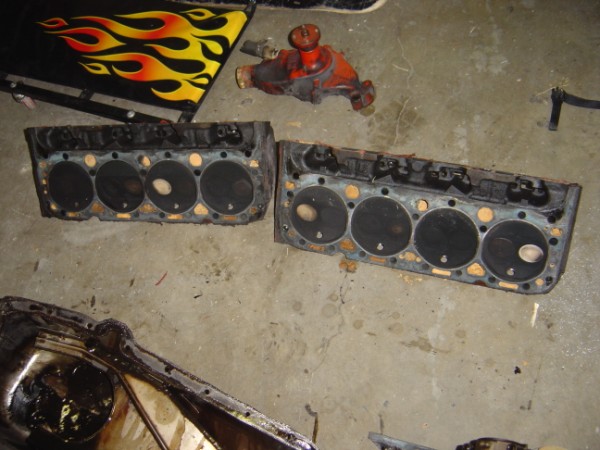
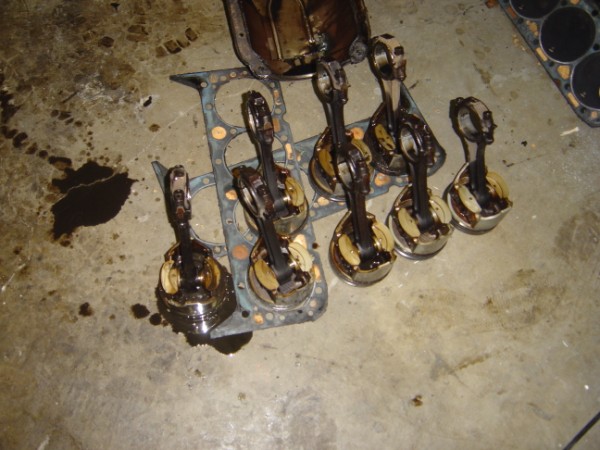
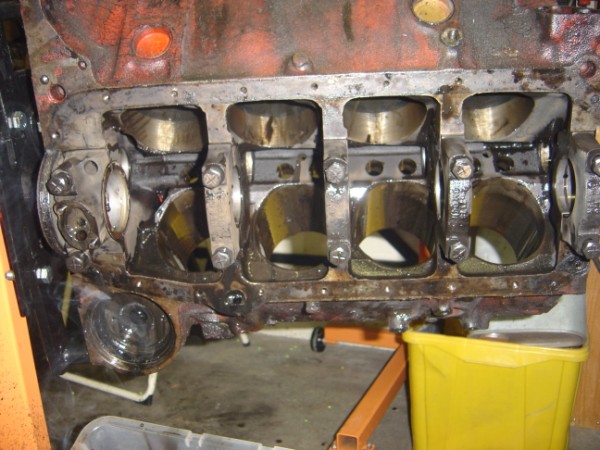
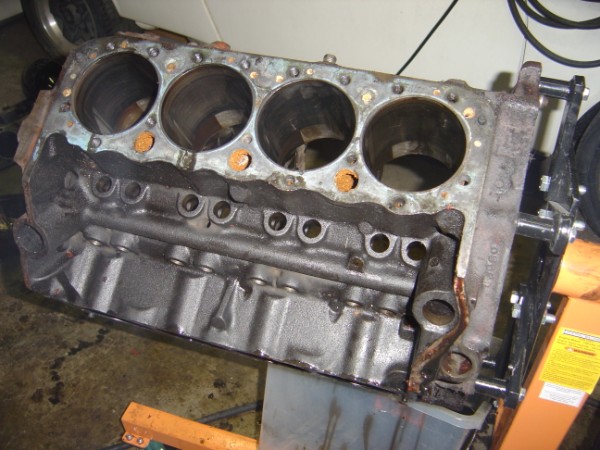
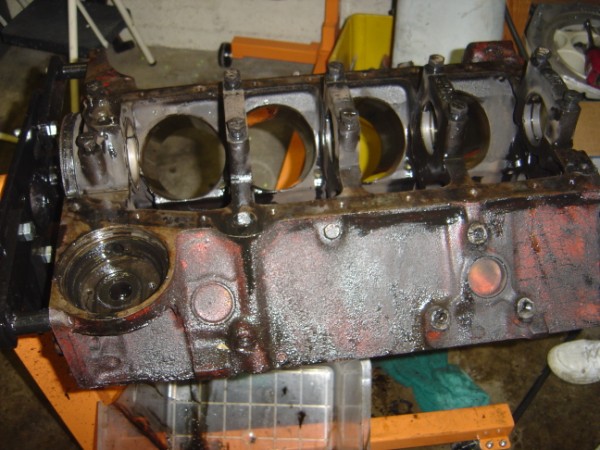
Brought one of the engines home today and got it on the stand. Then proceeded to pull it all apart and see what I have to work with. The heads wont be used as I am going to go with a set of ProComp aluminum 205 heads with 64cc chambers. I took a picture of the heads removed anyway as the valves tell stories of how it was running when pulled. Anyone venture a guess as to why it has 3 white valves?
Today I will take the block, carnk, pistons and rods to the machine shop and drop them off to be cleaned and machined.
Attached image(s)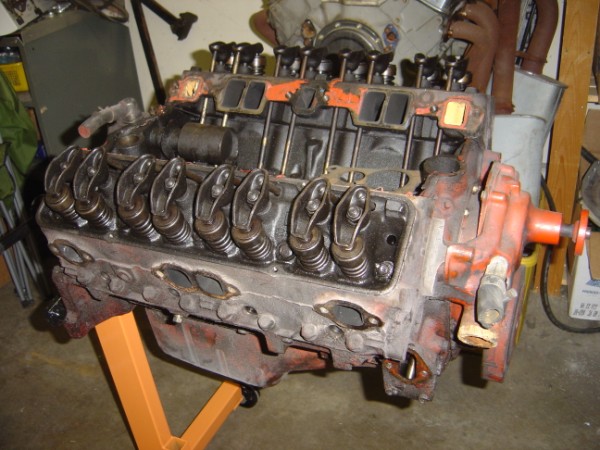
Posted by: skline Apr 13 2007, 10:31 AM
A few more pictures.
Attached image(s)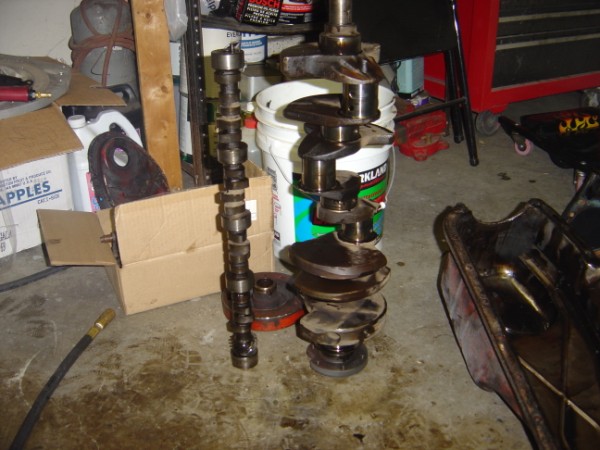
Posted by: Dr Evil Apr 13 2007, 10:58 AM
Yo man, Sorry I didnt call you back. I was no ton spring break and this weekend is a test weekend. I have a very stout set of springs that I would be willing to sell you for low$$. You can check them out and see if they can work for you.
Posted by: GS Guy Apr 13 2007, 04:24 PM
Brought one of the engines home today and got it on the stand. Then proceeded to pull it all apart and see what I have to work with. The heads wont be used as I am going to go with a set of ProComp aluminum 205 heads with 64cc chambers. I took a picture of the heads removed anyway as the valves tell stories of how it was running when pulled. Anyone venture a guess as to why it has 3 white valves?
Today I will take the block, carnk, pistons and rods to the machine shop and drop them off to be cleaned and machined.
Maybe running a little lean on those cylinders?
Those heads look like they might have ported intakes? Valves look pretty good sized too - 2.02?
I love following these V8 threads - living vicariously as it were...
FWIW, I read today about one of the major engine manufacturers (Motown?) is making a new block that takes gen 1 bottom end parts - but gen 3/LS top end! Cool!
Something else for the V8 guys to ponder...
Posted by: drive-ability Apr 13 2007, 06:30 PM
Hey skline your really going at it!
The white valves you see surely mean a little more heat, but with a carburetor and a small block who knows, lean, outside cyls get less fuel, intake leak, EGR heat in the center one. Now clean it up and get it running ![]()
Posted by: skline Apr 13 2007, 06:55 PM
Trying to find a machine shop to do the work. Talked to Clayton and Joe Buckle and now know where one is locally but they said he is not cheap, so far the parts I want to put in it are not cheap either. I am going with aluminum heads with 205 valves and 195 intake runners and 64cc chambers, forged H-beam rods, flat top pistons or +55 domes which should put the compression around 11:1, trying to decide on a camshaft for it, going to run either a performer RPM intake with a 750 Edlebrock carb or the same carb on a Performer Air Gap manifold. Of course it will be running the roller rockers like the last one, I really liked the fact that they were easy to install and adjust and I never heard them tick. I am going for about 375 HP with the torque up in the higher RPM range. It should really kick in around 2200 and stay strong to around 6500. I will put this one on the dyno when I get it going.
So far just in parts I am looking at around $3k and the machine work around 1K with the splaying of the main caps.
Posted by: Aaron Cox Apr 13 2007, 07:44 PM
john the machinist ...
does a great job.
my stuff is there right now.
Posted by: skline Apr 13 2007, 08:08 PM
john the machinist ...
does a great job.
my stuff is there right now.
PM me his number if you have it please
Posted by: Twystd1 Apr 13 2007, 10:13 PM
Scottarama
This is Johns info... he is as good on Type IVs as he is on V8s
John Edwards
Costa Mesa R&D Automotive Machine Shop
123 Monte Vista Ave
Costa Mesa, CA 92627
(949) 631-6376
Posted by: Aaron Cox Apr 13 2007, 10:14 PM
and is a great human to boot. i always come away with some knowledge and a smile.
Posted by: Crazyhippy Apr 13 2007, 10:24 PM
I called and spoke w/ John earlier today... My parts will be in his hands tommorrow...
The rest of you guys can get in line behind me dammit... LOL
BJH
Posted by: Aaron Cox Apr 13 2007, 10:27 PM
I called and spoke w/ John earlier today... My parts will be in his hands tommorrow...
The rest of you guys can get in line behind me dammit... LOL
BJH
i just have to write him a check... my stuff is done-
what are you having him to BJ? he has a bunch of scooooby stuff in there too.
Posted by: Crazyhippy Apr 13 2007, 10:32 PM
STI shortblock, and some head work... I need a bit more HP, and lots more TQ ![]()
Posted by: Twystd1 Apr 13 2007, 11:11 PM
BJ,
I don't know if you were aware that John does most, if not all of Lance Nists machine work on his 600+ HP suby engines. He also does the SUBY steel liner conversions and the dry sump pan conversions.
He knows some stuff.... Me thinks...
He used to be the prototype guy at Kieth Black for some years. Then moved on to Sunnen to help run their R&D facility's.
He also wrote a couple of books that you guys might have some interest in. You can get em at Amazon.
1.) Sunnen's complete cylinder head and engine rebuilding handbook by John G. Edwards
2.) Turret Mill Operation by John G. Edwards
3.) Lathe Operation and Maintenance by John Edwards
And 4 other books plus 2 automotive videos. He is also the monthly engine performance author for "Sand Sport" Magazine.
I dunno... I guess the guy knows something... And he is ugly and smells bad. Udder than that... I don't know the guy... ![]()
![]()
![]()
Posted by: GS Guy Apr 14 2007, 07:30 AM
Ask John about his alcohol conversions! I've got an article he wrote on doing a Suby/ethanol conversion - made a bunch more power!
Maybe run that V8 on alchy? ![]()
Posted by: skline Apr 14 2007, 08:56 PM
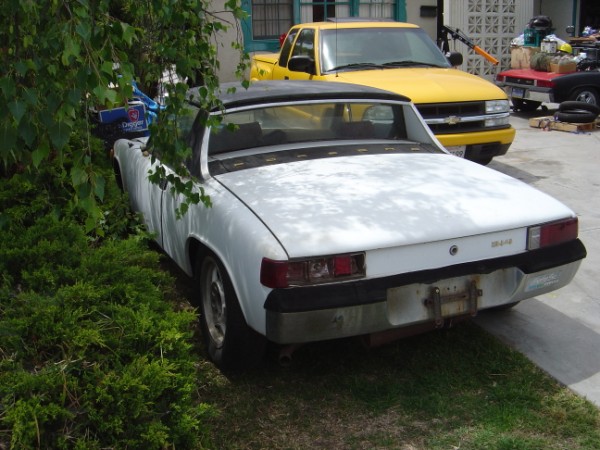
Parts car arrived today, it is a complete 72 with 1.7 and tailshifter still in it. I think I am going to try to make it run before taking it all apart. The motor looks complete with the FI still on it. I have a battery charging for it right now. Anyway, here are the pictures of it just for the keepsake of the thread.
Attached image(s)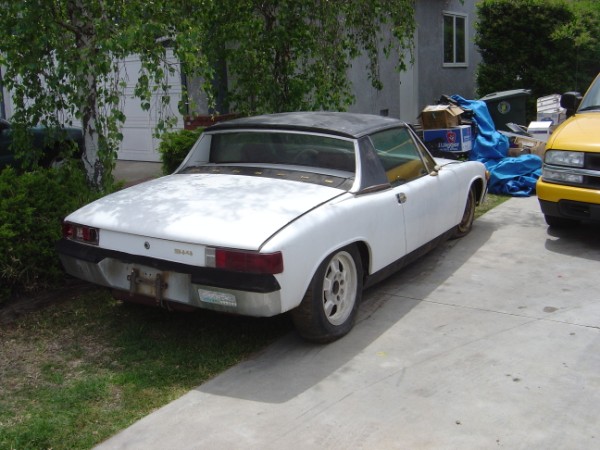
Posted by: Crazyhippy Apr 14 2007, 09:26 PM
GREAT looking "parts car"
BJH
Posted by: skline Apr 14 2007, 09:31 PM
It's not bad actually, I have not done any rust assessment yet, Carmen's 10 year old wants the car for his project. That would give him 6 years to restore this car, what do you think?
Posted by: Crazyhippy Apr 14 2007, 10:55 PM
a 1.7 powered teen, that he has put his sweat, tears and blood into would be nice, trouble is 90% of kids 1st cars get wrecked... so maybe a toyota tercel would be a better choice.
BJH
Posted by: skline Apr 14 2007, 11:00 PM
Well, I just threw a battery in and the car turns over, there is no gas in it so we will get some tomorrow. The 10 year old is so excited he is going to pee his pants. I am working at the port tomorrow and wont be home till around 6 so he is all sad and thinks that Jared will help him tomorrow. He already pulled the front bumper off to open the front deck lid to see what was in it. The rust so far doesnt really look very bad on the underside. There is some typical rust by the drivers side door handle and the front windshield but the trunks look really good. I will look underneath it tomorrow when I get home.
Posted by: skline Apr 17 2007, 01:40 PM
Dropped off the engine block and crank today with John Edwards, super nice guy with a sense of humor too. Told him there was no rush on it as the car has a very long way to go yet. I did tell him my goal to get it together around the end of summer. He has a very busy shop with a very wide array of engine types.
Posted by: Aaron Cox Apr 17 2007, 02:32 PM
did you see my stuff there? i got to go pick it up this week.... ill drop bye.
Posted by: skline Apr 17 2007, 04:34 PM
did you see my stuff there? i got to go pick it up this week.... ill drop bye.
I did ask him about it, he said he sold it for storage fees. Anything held past the deadline is sold to the highest bidder, he said some guy named Clayton bought it for like $40.91 with tax.
No, I didnt see it there, but he had so much stuff there I dont know how he keeps track of it all.
Posted by: skline Apr 21 2007, 05:44 PM
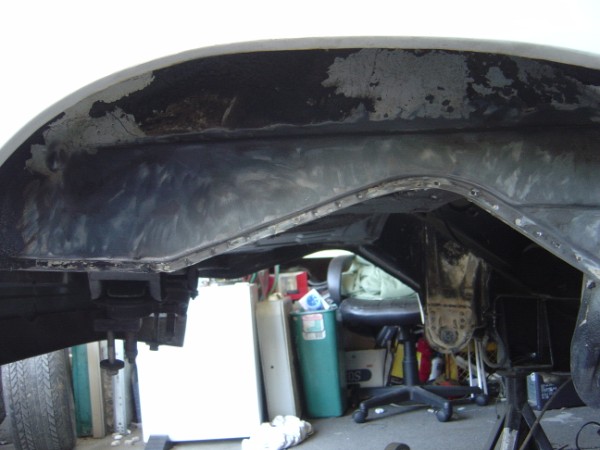
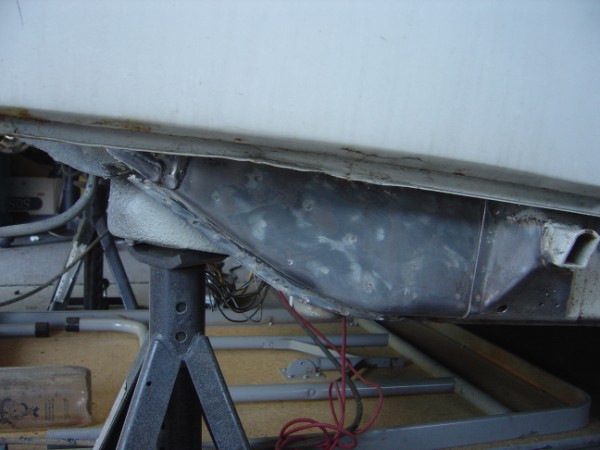
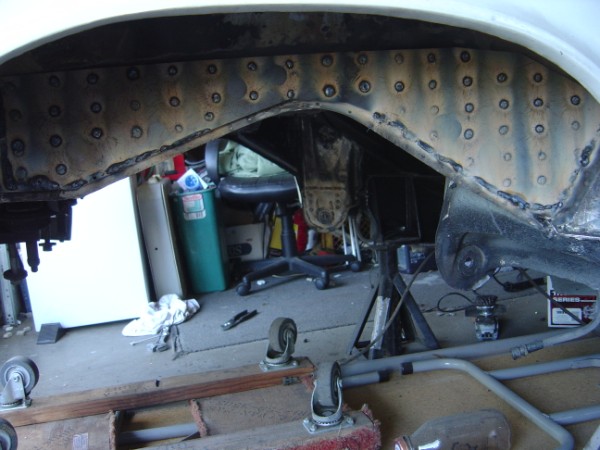
I am back working on the car again since it is in the garage and all. It's a nice day here in Sunny Southern California and I really should be over helping Joe pull his engine out so he can get it over to the paint shop and get it going. Our schedules did not coincide today so I came home and started in on mine. I got the passenger side of the outter stiffening kit welded in and will weld in the small pieces next and then grind it as smooth as possible with a 4" grinder. I pulled the entire rear suspension so I can weld in all the pieces correctly without trying to work around the control arms. They needed to come off anyway to clean them up and weld on the stiffening kit and then I may have them powder coated. Some of my welds dont look as good as some of my others, I think I need a new mask as I am having trouble seeing what I am doing as I go. I should have the entire outer long kit welded in today and then I can get started on the inner long kit from Engman. I also have the front sway bar reinforcement kit to weld in on the front along with the actual sway bar mounts to weld in so I may pull the front suspension today as well and put the car up on 4 jackstands. Yes, I am taking pictures as I go to document progress and what I have done to the car. I will post some up now and then more later today.
Attached image(s)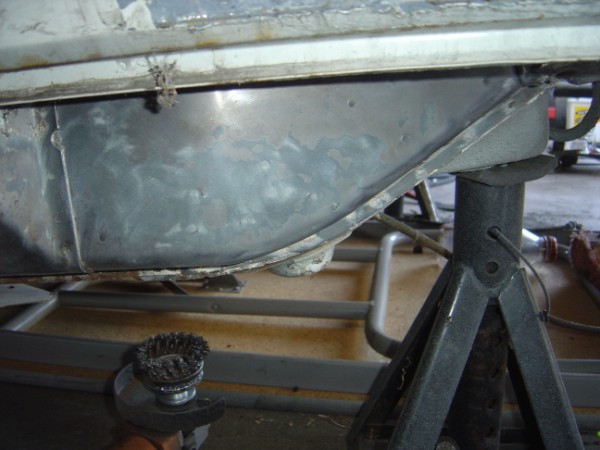
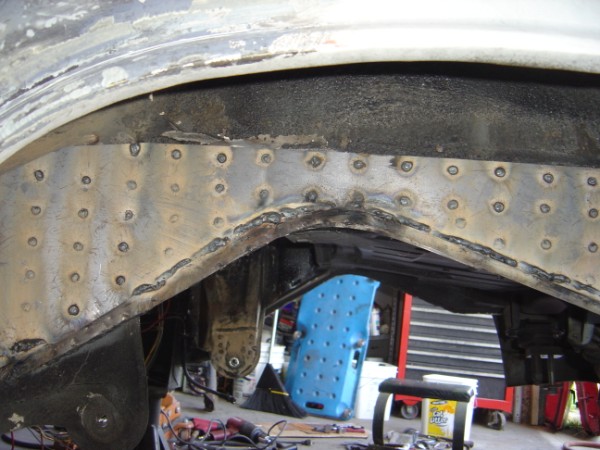
Posted by: skline Apr 21 2007, 05:46 PM
I am also looking for a few parts if any V8 guys have these parts laying around and they want to sell them, let me know, they are the parts circled in the picture.
Attached thumbnail(s)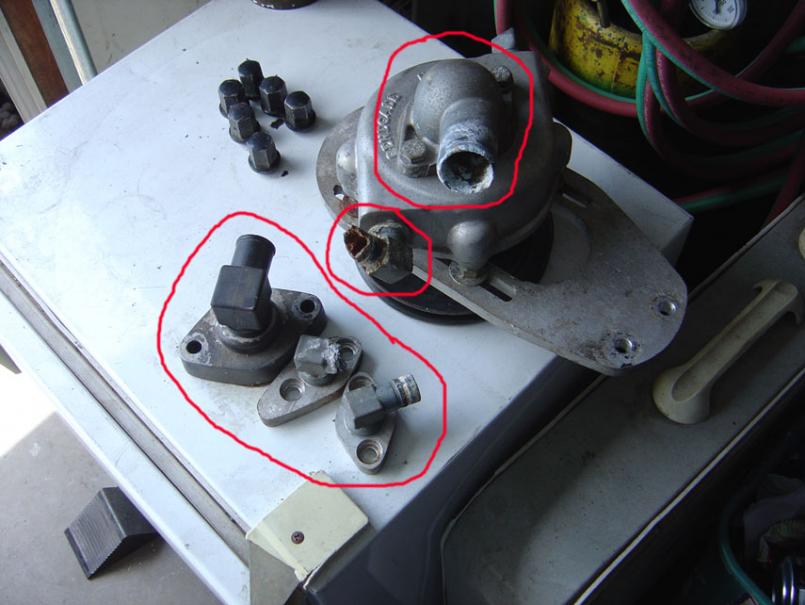
Posted by: skline Apr 21 2007, 10:13 PM
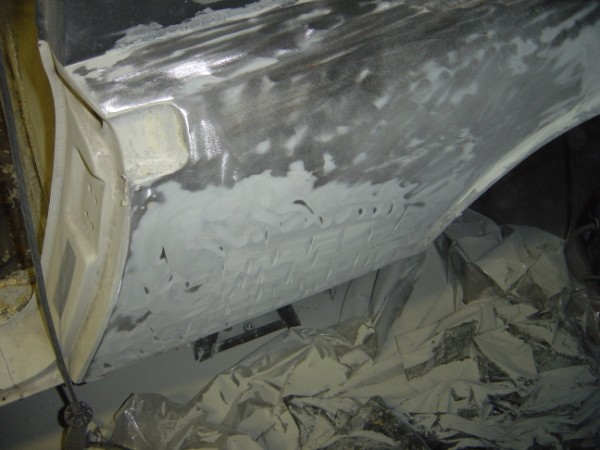
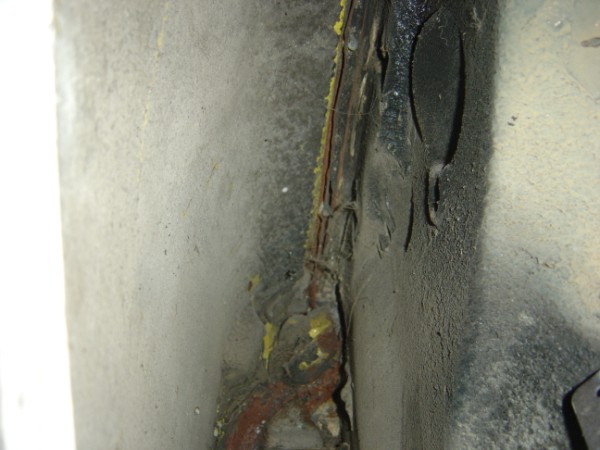
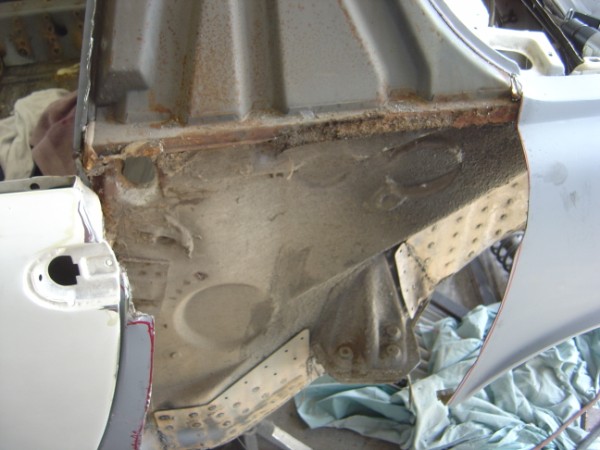
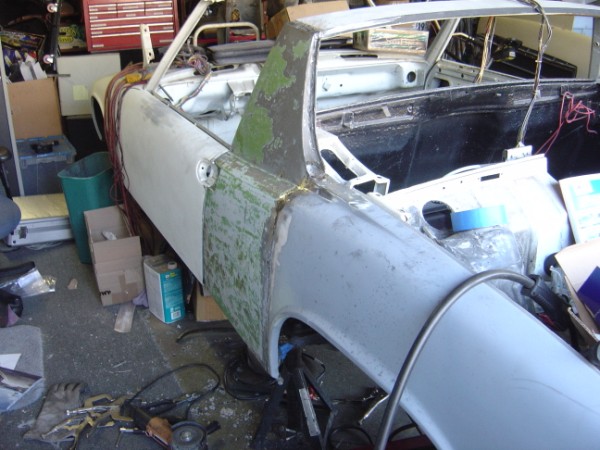
Why cant I get a straight car for once??? I was working on the car today and started stripping the paint from the rear quarter that had the dent in it on the drivers side. I knew that both rear fenders had been grafted on from other cars and the dent should have been easy to repair. Not sure what I will do at this point but I will continue to strip all the bondo and crap and I may wind up just replacing the whole quarter panel with one I have on the side of the house. Notice the door gap and the line where the metal ends. I would guess the bondo amounts to about 8 to 10 pounds on this side alone. ![]()
The last shot is looking up inside the fender
Attached image(s)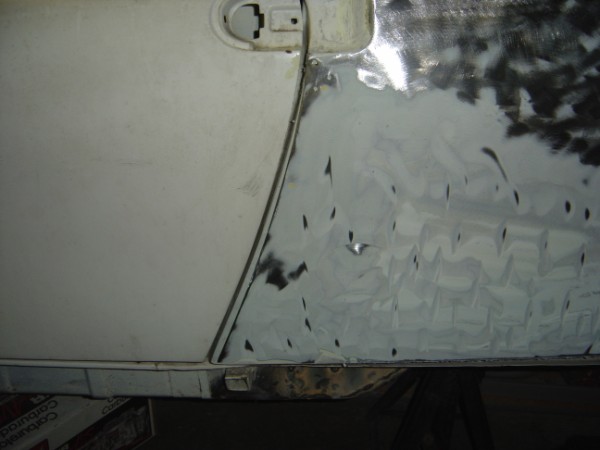
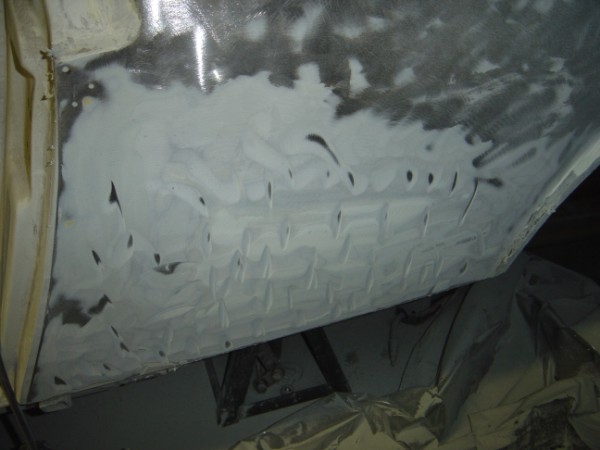
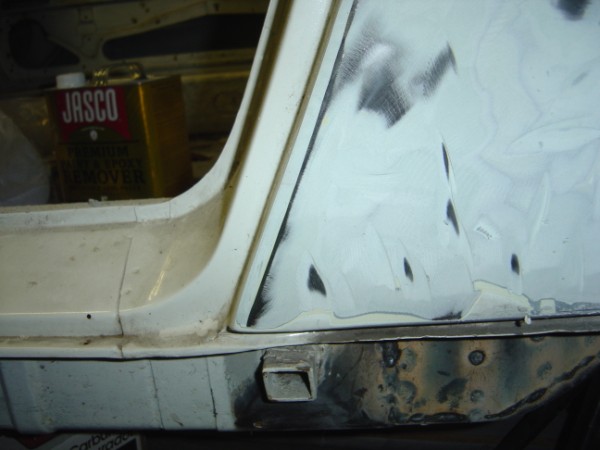
Posted by: skline Apr 23 2007, 03:36 PM
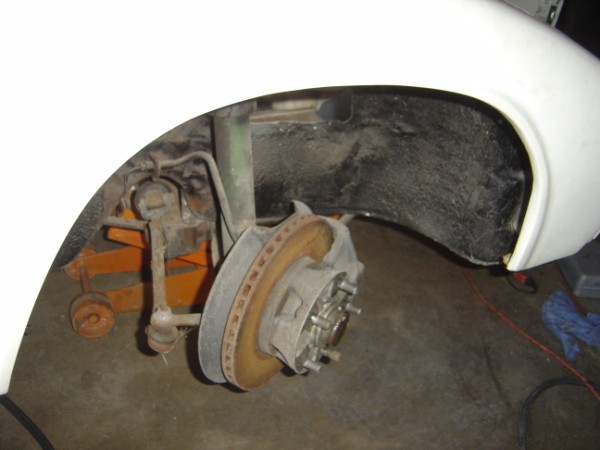
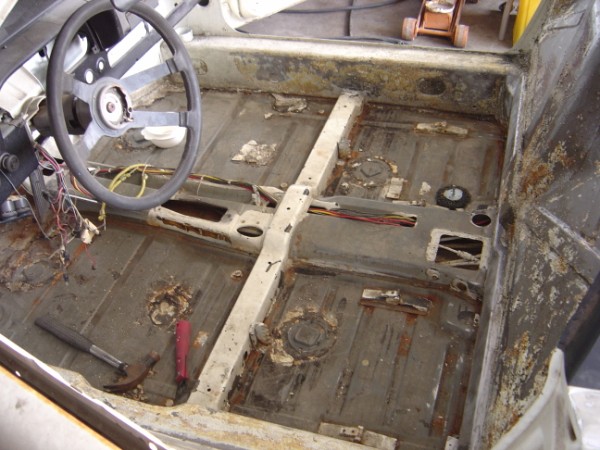
A little progress update and question. Can anyone identify the front struts on this car? Isnt green struts Bilstien? Or are the Boge? It is a Carrera front suspension and I will be griding off the front sway bar rings to replace with the U tabs to run a through the body sway bar. I am also going to replace the tie rods with a set of the Turbo tie rods so if anyone has any laying around, let me know. Here are some pictures of the progress I am making on this car so far.
Attached image(s)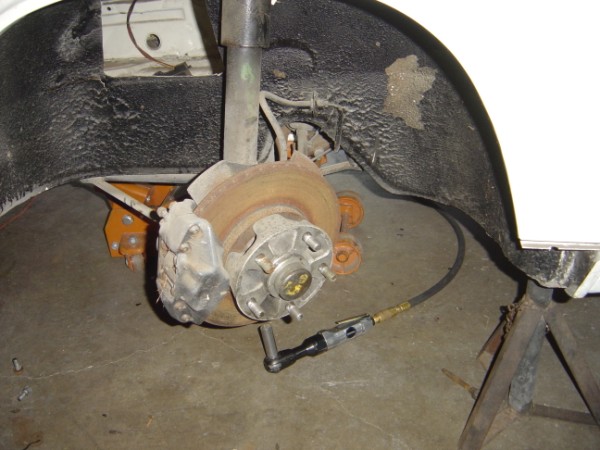
Posted by: Headrage Apr 23 2007, 04:11 PM
Can anyone identify the front struts on this car? Isnt green struts Bilstien? Or are the Boge?
I don't remember the color codes but mine had "BOGE" stamped into the strut.
Posted by: Aaron Cox Apr 23 2007, 04:15 PM
green housings are bilstein....
if its black with a green dustcap up top... its a bogelstein (bilstein was the only company to make replacement upper caps LOL)
black housings say BOGE on them as allan mentioned
Posted by: Crazyhippy Apr 23 2007, 11:53 PM
I am also looking for a few parts if any V8 guys have these parts laying around and they want to sell them, let me know, they are the parts circled in the picture.
They are reasonably Cheap new... The thermostat housing is an alluminum housing w/ a glass fiber (high tech plastic) threaded 90... Same w/ the block inlet pieces next to it. Assuming the aluminum is in decent shape (and it's hard to hurt...) you can replace just the plastic 90 degree fittings. The water pump inlet is cheap on it's own.
Call Scott @ Renegade(866-498-2421), and tell him i said to give you a good deal.
BJ H
Posted by: skline Apr 24 2007, 12:12 AM
I am also looking for a few parts if any V8 guys have these parts laying around and they want to sell them, let me know, they are the parts circled in the picture.
They are reasonably Cheap new... The thermostat housing is an alluminum housing w/ a glass fiber (high tech plastic) threaded 90... Same w/ the block inlet pieces next to it. Assuming the aluminum is in decent shape (and it's hard to hurt...) you can replace just the plastic 90 degree fittings. The water pump inlet is cheap on it's own.
Call Scott @ Renegade(866-498-2421), and tell him i said to give you a good deal.
BJ H
I called him today and the parts with everything I need is $179.00 which includes the thermostat housing and 4 of the small 90's for the block and the pump and also the filler neck for the firewall. Probably order it later this week or next, I just need the money to start flowing in again.
Posted by: BIGKAT_83 Apr 24 2007, 03:53 AM
Scott you can get the glass reinforced plastic pipe fittings http://www.gannproducts.com/fittings.htm
I suspect its pretty close to where you live
Bob ![]()
Posted by: skline May 19 2007, 07:57 PM
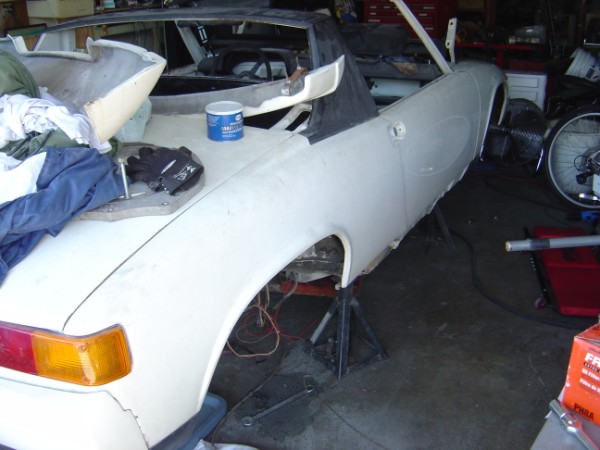
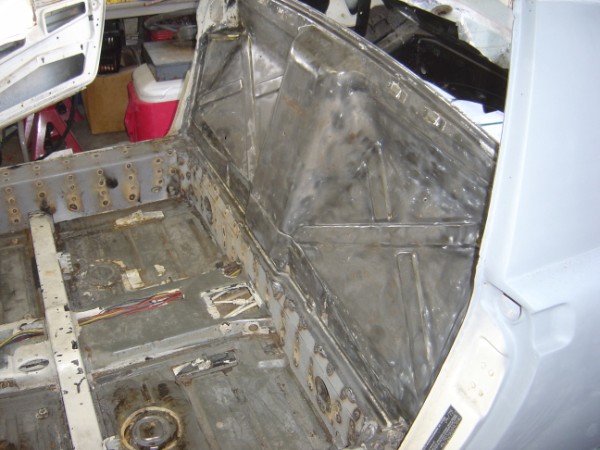
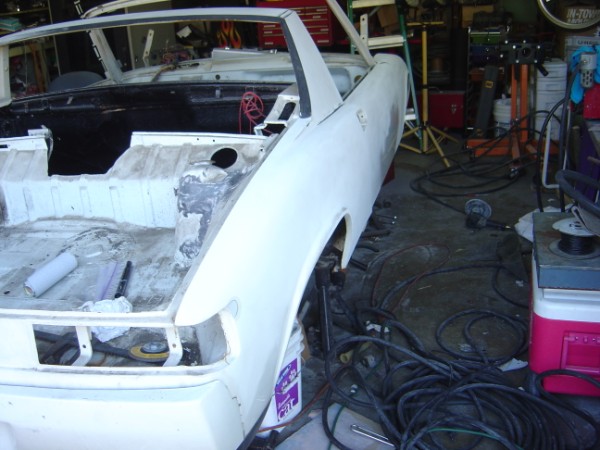
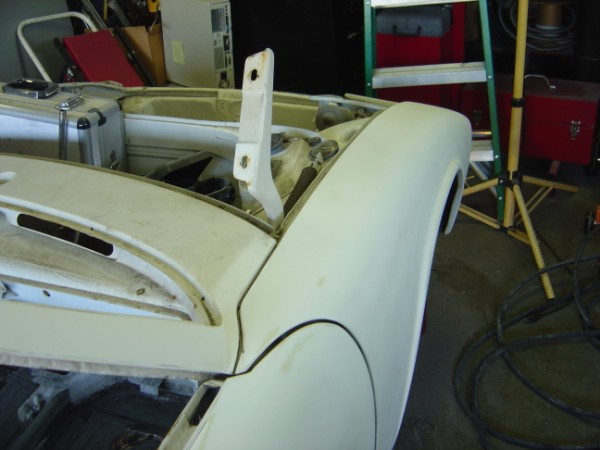
Progress report for today, I worked on it a little last night and all day today. Here are some pictures of what it is looking like so far. Long way to go yet but I think it is coming along just fine.
Attached image(s)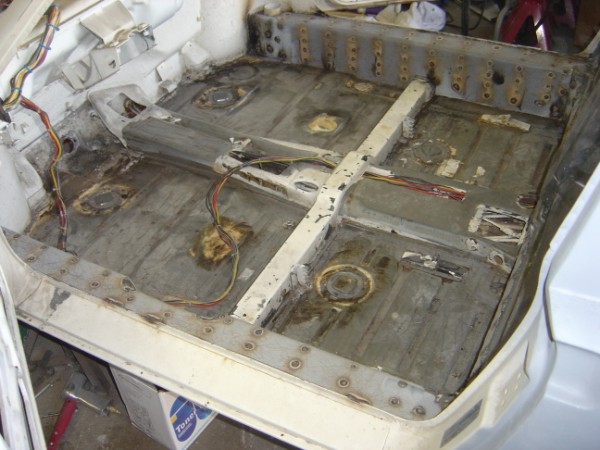
Posted by: JB 914 May 20 2007, 01:16 AM
Why cant I get a straight car for once???
Posted by: Brando May 20 2007, 04:26 PM
Heya skliney... Give us an update!
If I'm not working this Weds. or Thurs. I'll head down and give you a hand demolisherrrr restoring the car ![]()
Posted by: skline May 26 2007, 03:20 PM
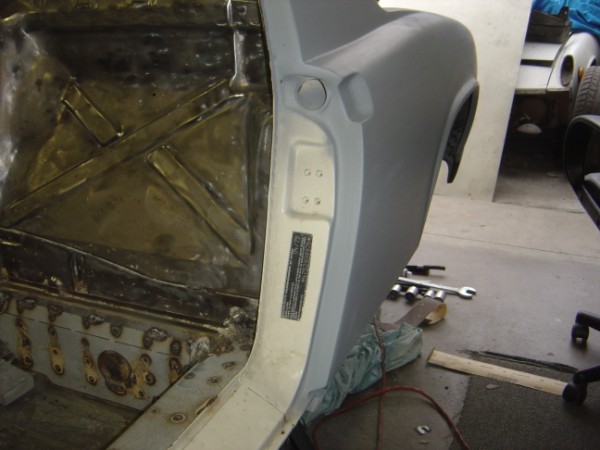
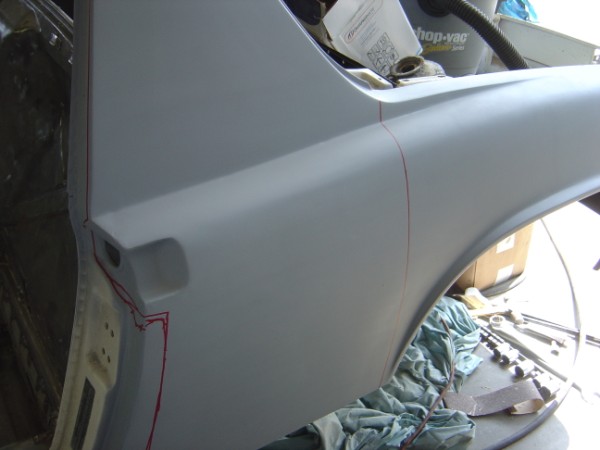
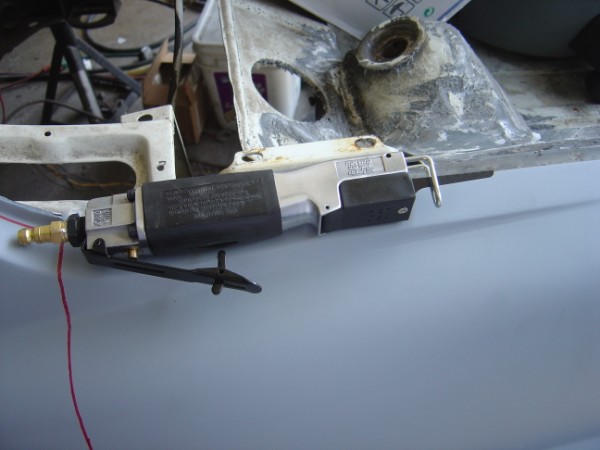
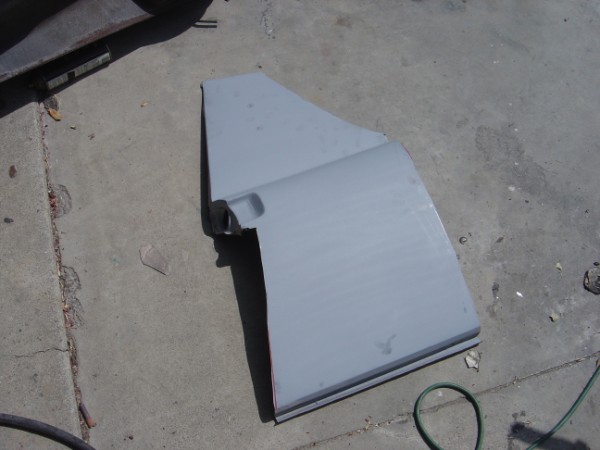
Well, it's Saturday of Memorial weekend and I am stuck in town hoping for a job at the port this weekend so I figure I would do some stuff to my car since there is so much to do. Today, I got up and decided to cut off the fender I just worked over trying to make it right. Since the door gap was not good and never would be right so I fingured I would fix it and make it right ![]() Thats what I try to do. Well, as you can see, I have cut part of the fender off to replace with a new one I have here already. The door gap was really messed up so I knew I would have to start there. I cut back to the middle of the fender right in front of the fender well opening. I kind of liked the way the PO had flared it to fit 225's on 7 inch wheels and still look stock at first glance. Well, the damage to the door jamb was worse than I had expected after I cut it off.
Thats what I try to do. Well, as you can see, I have cut part of the fender off to replace with a new one I have here already. The door gap was really messed up so I knew I would have to start there. I cut back to the middle of the fender right in front of the fender well opening. I kind of liked the way the PO had flared it to fit 225's on 7 inch wheels and still look stock at first glance. Well, the damage to the door jamb was worse than I had expected after I cut it off. ![]() I can fix it and I will have to now in any case. After talking to Joe Buckle, I am thinking I may buy his rear flares he has up in his garage that he has changed his mind about using and he in now going with a full Sheridan kit. I want to get those from him and see how they look on the car and what I will need to weld back in to use them. Here are some pics of what I have done so far this morning.
I can fix it and I will have to now in any case. After talking to Joe Buckle, I am thinking I may buy his rear flares he has up in his garage that he has changed his mind about using and he in now going with a full Sheridan kit. I want to get those from him and see how they look on the car and what I will need to weld back in to use them. Here are some pics of what I have done so far this morning.
Attached image(s)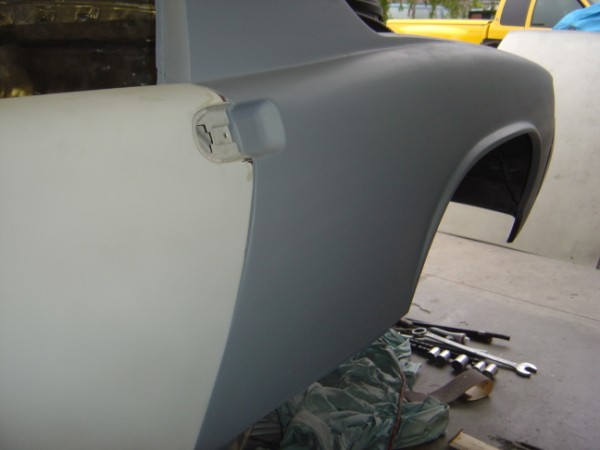
Posted by: Dr Evil May 26 2007, 03:26 PM
Hey Scotty,
For the water/thermostat housing on the water pump you can probably go to your FLAPS and match it up for like $10-20. It looks a lot like an old camaro one except for the bend int he neck.
You look very competent in what you are doing, keep it up!
Posted by: skline Jul 14 2007, 08:54 PM
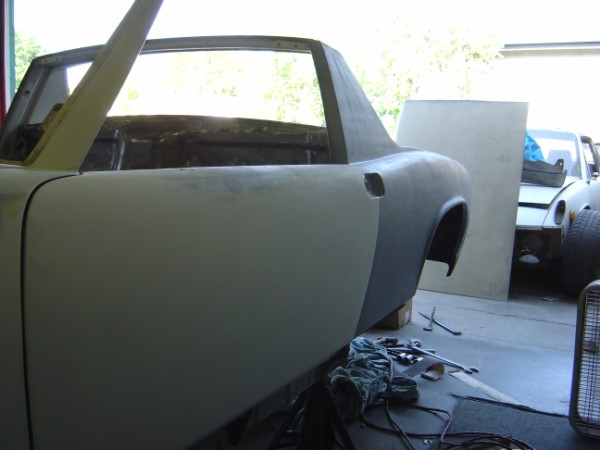
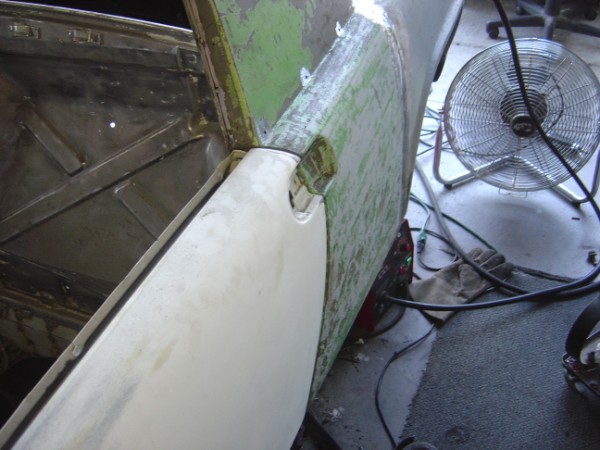
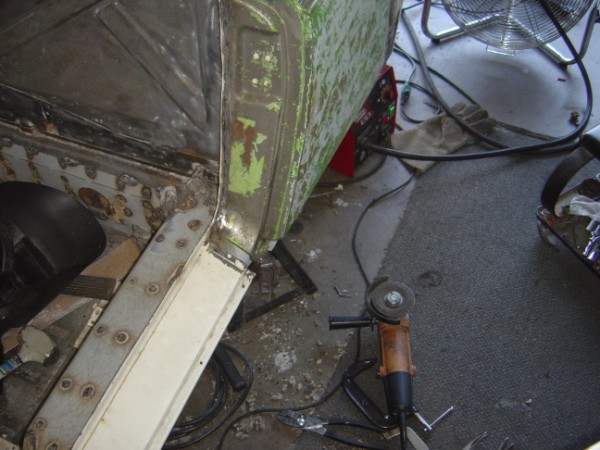
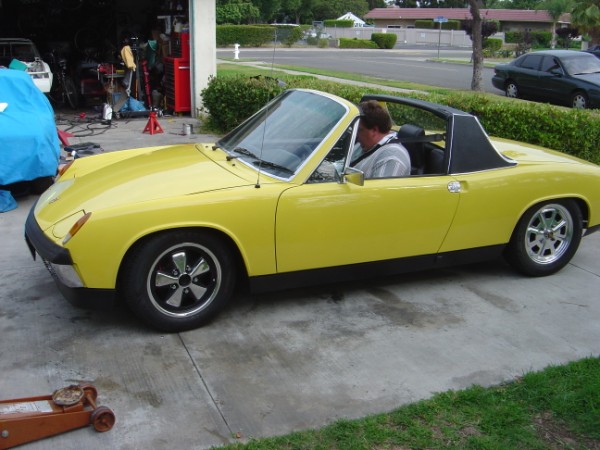
Well it's been almost 2 months since I had time or inclination to work on the car. Today, I got motivated after seeing Ed (Willowcreeklane) drive off in his car I did the front 5 lug conversion on and decided to work on my car and weld the fender back on. The drawback is that when I cut the panel off the car, I should have looked at the one I was going to put back on. ![]() I cut off too much from the car and the new panel is a tad shy in the door jamb at the base so I am going to have to weld in a piece from the old door jamb to make it right. It's been a long day here and I got the new panel on the car after much grinding, cutting and test fitting. It didn't come out too bad so far. Much more work is needed to get it all straight and all welded in. So far, everything lines up ok. The new panel has no bondo on it so that is a plus right off the bat. I want to get as much done on it tonight as I can because I have to work tomorrow at the port. There were a few gaps here and there that I need to tend to and weld in the holes for the sail panel trim but I think it is going to turn out just fine. Here are some progress pics for now.
I cut off too much from the car and the new panel is a tad shy in the door jamb at the base so I am going to have to weld in a piece from the old door jamb to make it right. It's been a long day here and I got the new panel on the car after much grinding, cutting and test fitting. It didn't come out too bad so far. Much more work is needed to get it all straight and all welded in. So far, everything lines up ok. The new panel has no bondo on it so that is a plus right off the bat. I want to get as much done on it tonight as I can because I have to work tomorrow at the port. There were a few gaps here and there that I need to tend to and weld in the holes for the sail panel trim but I think it is going to turn out just fine. Here are some progress pics for now.
![]()
![]()
![]()
Attached image(s)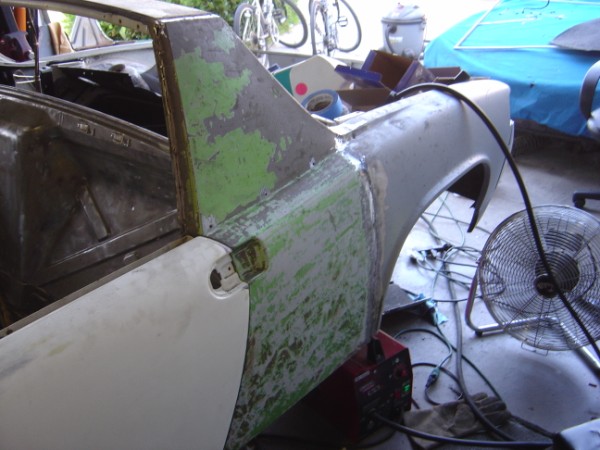
Posted by: skline Jul 14 2007, 08:58 PM
Here is the motivational shot of Ed driving off with his car this morning. It made me want to drive a 914 again. My own that is. ![]()
Attached image(s)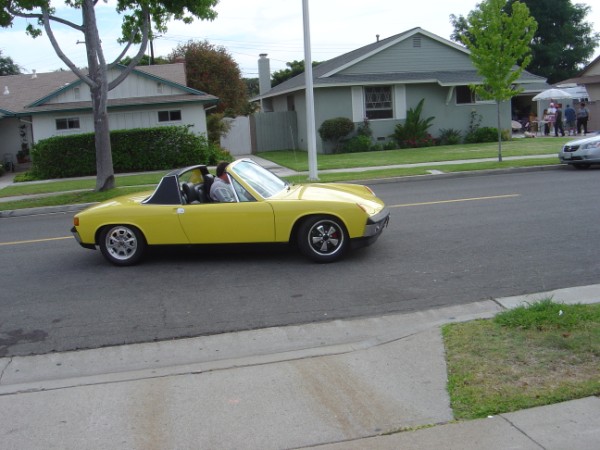
Posted by: neo914-6 Jul 14 2007, 09:13 PM
Hey Scotty,
For the water/thermostat housing on the water pump you can probably go to your FLAPS and match it up for like $10-20. It looks a lot like an old camaro one except for the bend int he neck.
You look very competent in what you are doing, keep it up!
I think the size is wrong so you'd need a reducer and you only have 2 directions of choice. I fit a swivel housing I bought for ~$20 with my Jaide engine mount bar. It was thicker than the Renegade so it had less room. I used the RH outlet after I bought a RH engine mount bar.
Posted by: DrifterJay Jul 15 2007, 02:27 PM
Wish I could be there to make fun of your progress...
Posted by: skline Jul 17 2007, 05:44 PM
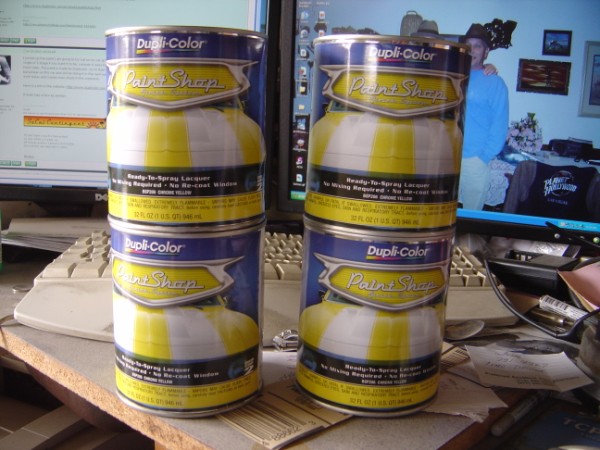
Well, I am not giving up and figured since I was already out here working on it I might as well get as much done as I can. The last 2 days I have been welding and pounding and welding some more and today I am filing and grinding and using a little filler to get the panel as straight as I can. I applied some etching primer to the inside of the car and I am going to paint the inside probably tomorrow. I ordered the primer for it yesterday and it should be here tomorrow at which time I am going to try to primer the whole car and start looking for defects to fix. Once I have got all the defects taken care of I will start block sanding till it is as smooth as a baby's behind and then I am going to shoot the base coat. Which by the way, I am going to try out the new Duplicolor system available at any Kragen auto parts store. It's about $23.00 a quart and I am going to shoot 4 quarts on it and then colorsand and shoot 2 or 3 coats of clear and see how it comes out. The whole paint job will probably cost around $190.00 for materials. We will see how it come out. Here is a current pic of the fender so far. Another hour or so and it should be good to go.
Attached image(s)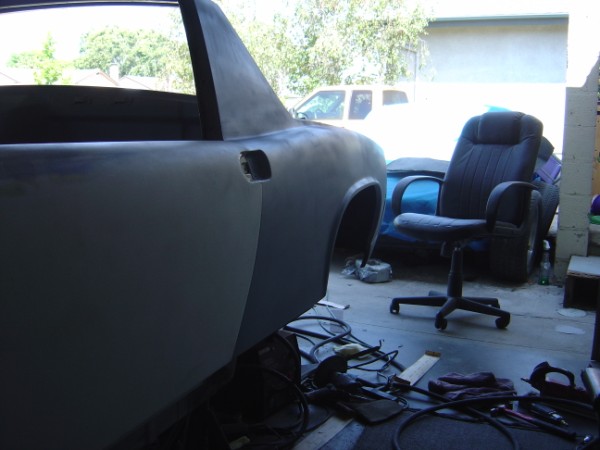
Posted by: spunone Jul 17 2007, 06:53 PM
Heh Scott wish i could get back to workin on my car kind of busy at this time. If ya need any Metal you know where to go. Keep at it ![]()
![]()
Posted by: skline Jul 18 2007, 03:52 PM
Thanks Paul, I appreciate the offer. I have found the only way to get time to work on these cars is to make time. Mine being in the garage lets me work on it at night with the door closed. I still need to keep the noise down to a minimum but there is a lot of sanding to do and some of it needs to be done by hand like door jambs and stuff. My 2k primer came in today so I shot the inside back wall and the fender I welded on to see all the imperfections. Still needs more work but it is getting there.
Posted by: DrifterJay Jul 18 2007, 05:21 PM
Ok....I have restrained myself...but I will finally do it....for the first time...
![]()
Posted by: skline Jul 18 2007, 10:18 PM
With it all one color and this great primer, I can see every imperfection. I will work on these tomorrow. Here is a picture for you Jay.
Attached image(s)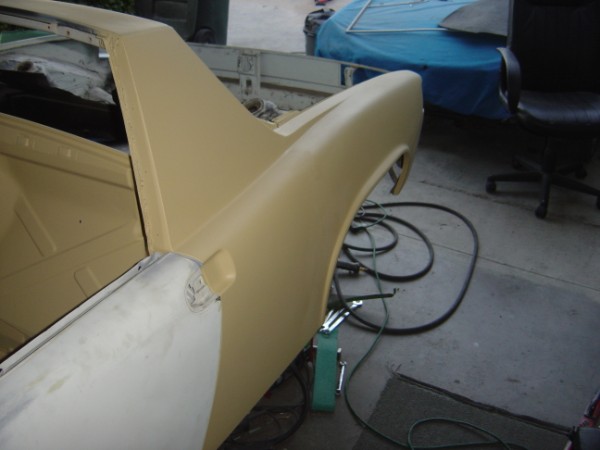
Posted by: JB 914 Jul 18 2007, 10:36 PM
![]()
![]()
![]()
![]()
![]()
Posted by: drive-ability Jul 18 2007, 10:47 PM
With it all one color and this great primer, I can see every imperfection. I will work on these tomorrow. Here is a picture for you Jay.
Scott,
I have to say you do fine work! That car looks fantastic, its amazing how something so "used and neglected" can come back in the right hands. How's you engine coming?
Posted by: skline Jul 18 2007, 10:54 PM
I am short on funds right now so the engine is still at the machinist. I need to take my rods over to him so he can recon them. I still have a ton of work to do. Some PO has sprayed undercoating in both front and rear trunks and then painted the white over it. It is making a huge mess just trying to clean it up and ready for paint. With any luck, I will have the whole car in primer and ready to block it by the end of the weekend. Maybe, just maybe it will be ready for paint next week. The paint all came in today with the primer, the only thing missing is the clear, I should have it next week.
Posted by: skline Jul 19 2007, 04:35 PM
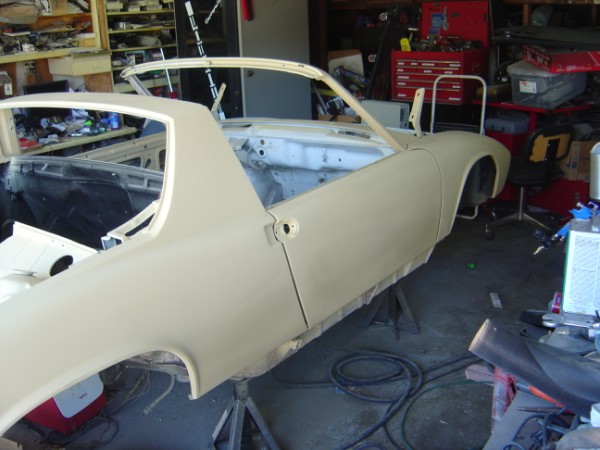
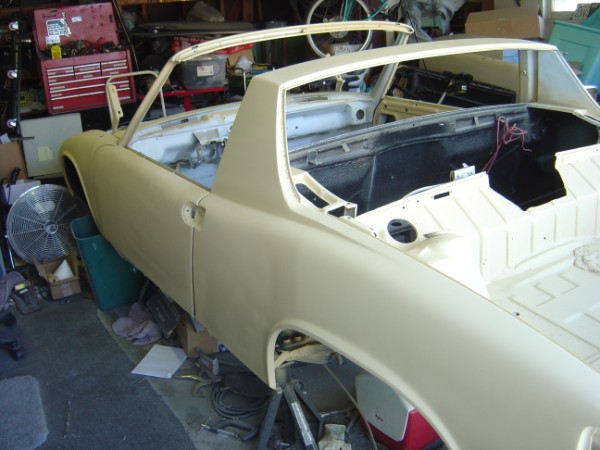
Today's progress so far. Elliot just came by to chat for awhile while the first coat of primer dried. Now it is time to start block sanding the whole car. A word of advice to anyone deciding to paint their own car, if you use 2k primer, wear a good mask or respirator, I was coughing it up the whole time Elliot was here. Anyway, here is how she looks right now before the block sanding.
Attached image(s)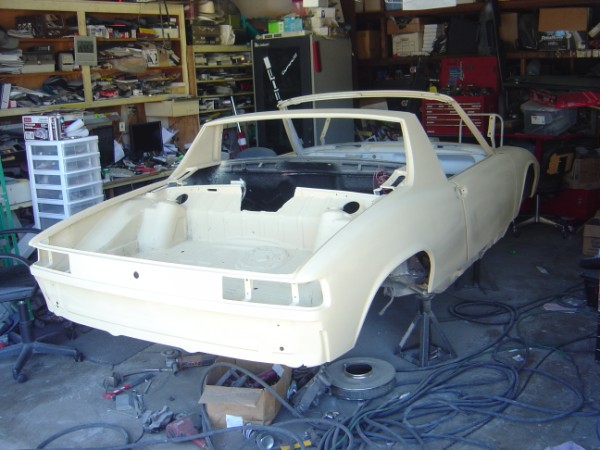
Posted by: DrifterJay Jul 19 2007, 04:52 PM
my what a big hole you have for the distributor....must be for that twin plug HEI setup your gonna run...hehe...
Posted by: Brando Jul 19 2007, 05:12 PM
Lookin damn good skliney! If I hadn't lost a transmission on the way home from jack in the box today, I'd be down there helping you paint. Now I gotta wait till it cools off to install some trans mounts. Ugh...
Posted by: skline Jul 19 2007, 05:53 PM
Lookin damn good skliney! If I hadn't lost a transmission on the way home from jack in the box today, I'd be down there helping you paint. Now I gotta wait till it cools off to install some trans mounts. Ugh...
I don't really need help with painting, it's the block sanding that is hard on me. I just did the driver side and my back is now killing me. So I thought I would take a short break and eat something.
I am going over the whole car with 320 and then I will shoot it again and check for imperfections and then block it again with 400 or 600 before shooting the color base coat.
Posted by: LarryR Jul 19 2007, 10:15 PM
Great progress... I wish I was a painter... I plan on doing the pan replacement on the drivers floor since I can weld but painting is another story... I might have to learn since it seems that good paint jobs are now in the 6-7K range... and a paint job to the level of what you are doing would cost ~18-25K.
Posted by: skline Jul 19 2007, 10:22 PM
It's all the prep work and taking the time to sand, prime, sand again, prime again and then block it out before painting the color coat. I know it wont be perfect but it will be close. There are some flaws in the body I just dont want to mess with and if you dont know they are there you probably would never notice. Then again, maybe you would. I just want a nice shiny paint job on it that I am not embarrassed about. Anyone could paint a car with the right tools and patience.
Orange peel and runs are easy to fix with a little color sanding and buffing. It's the dents and ripples that are hard to deal with and get perfect.
I just spent the day block sanding the whole car with 320 and now I am ready to shoot another coat of primer so I can do it all again tomorrow with 400 or 600 grit. I had forgotten how much work it really is. I should charge myself about 6 or 7k for this work. ![]()
Posted by: JB 914 Jul 19 2007, 11:55 PM
my what a big hole you have for the distributor....must be for that twin plug HEI setup your gonna run...hehe...
Big? you call that big? Jesus, you should set the gaping fuchin crater the PO cut in my car. i can almost put the engine in thru it!
Posted by: skline Jul 20 2007, 11:51 AM
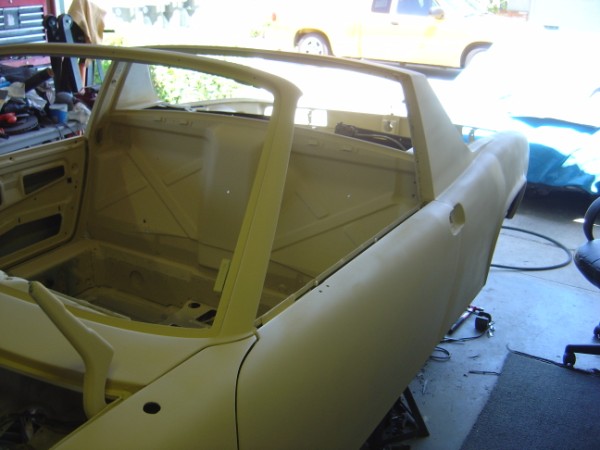
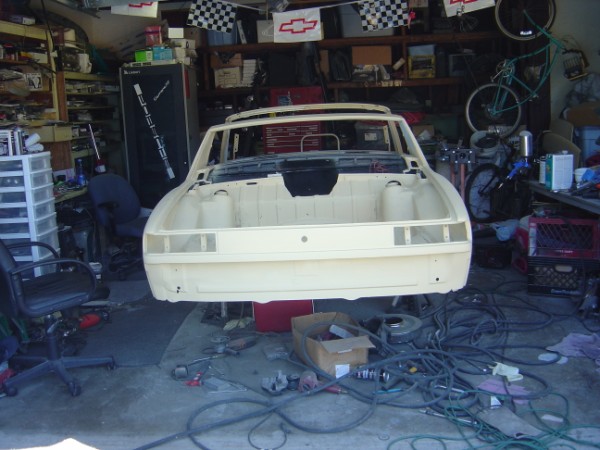
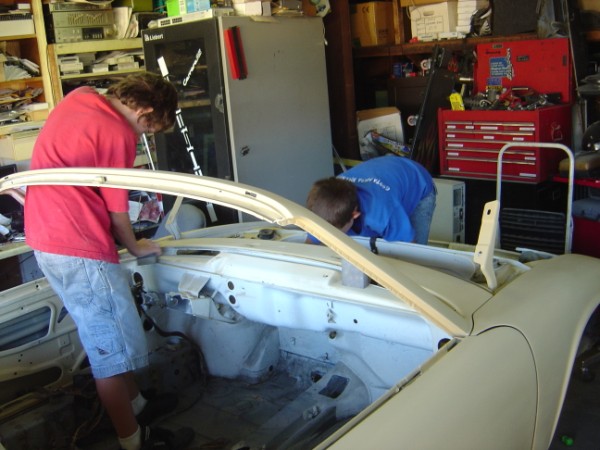
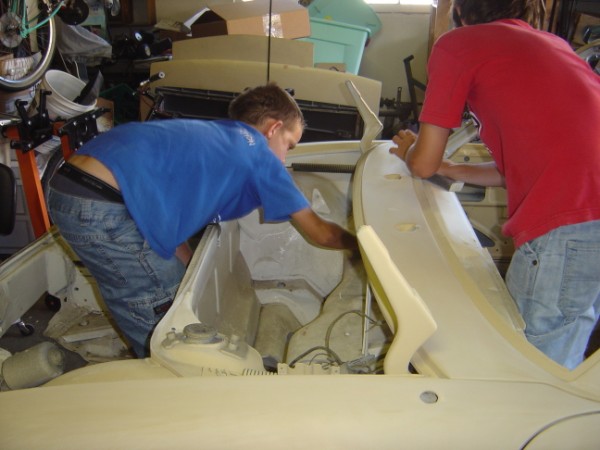
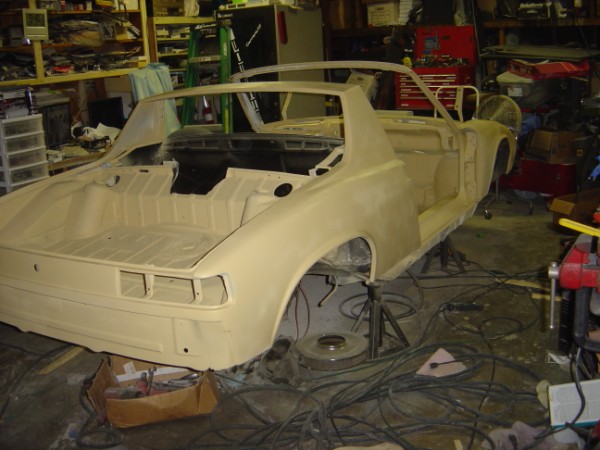
Well, the paint is here, the body work is mostly done, still a few things I am not happy with I will fix today, and I am almost ready to shoot the color coat. I will most likely shoot the inside and front and rear trunks today. I employed the boys yesterday when they got home to scrub and sand the front trunk and inside floor and under dash as those are tedious to do. I am sure I will have to go over them again to make sure they are good to go. It's really starting to take shape now. Here are some pics from last night. And of course, the paint I am using. Chrome Yellow from Duplicolor. I will let you know how good it is after I shoot it. I also have 2 quarts of clear by the same company I will apply after I am done with the color coat.
Attached image(s)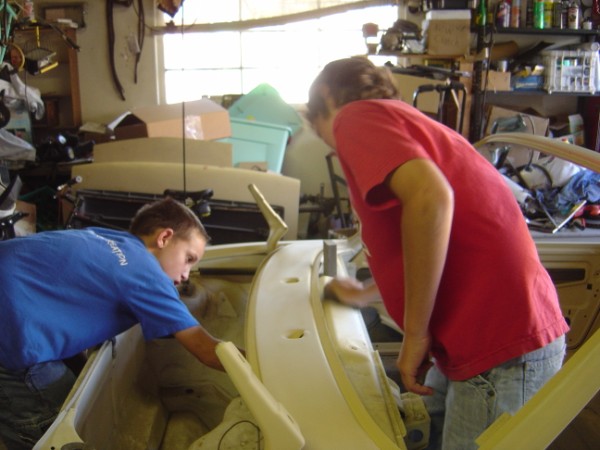
Posted by: DrifterJay Jul 20 2007, 11:57 AM
If you think they are good at sanding...Watch them work on the sound deadening...Jonny did all my wheelwells....
Posted by: skline Jul 20 2007, 12:18 PM
If you think they are good at sanding...Watch them work on the sound deadening...Jonny did all my wheelwells....
They are both at camp during the day so they can only help in the evenings. Reece doesn't really want to help but Jonny is all over it if you offer money. When their friends come around, they lose interest and start slacking off till I tell them to just go. I will worry about the underside after the rest is done. Most of the sound deadening is going to stay in the wheel wells but I need to clean it off where the sway bar support goes in the front and the rear I already did to install the stiffening kits.
Posted by: Brian Mifsud Jul 20 2007, 12:27 PM
If you think they are good at sanding...Watch them work on the sound deadening...Jonny did all my wheelwells....
They are both at camp during the day so they can only help in the evenings. Reece doesn't really want to help but Jonny is all over it if you offer money. When their friends come around, they lose interest and start slacking off till I tell them to just go. I will worry about the underside after the rest is done. Most of the sound deadening is going to stay in the wheel wells but I need to clean it off where the sway bar support goes in the front and the rear I already did to install the stiffening kits.
This is a great project. Your sons appear to be near the age of my oldest (10) and this is his summer of "discovery". He has taken a strong interest in cars (out of nowhere). While when requested to clean up his toys, or quit wrestling/teasing his younger brother (8) I get nothing but attitude, he JUMPS at the chance to do anything related to working on cars. This was an unexpected "perk" of the car hobby.
Good luck with it and enjoy the company of your son while it lasts.....
Posted by: skline Jul 20 2007, 12:32 PM
If you think they are good at sanding...Watch them work on the sound deadening...Jonny did all my wheelwells....
They are both at camp during the day so they can only help in the evenings. Reece doesn't really want to help but Jonny is all over it if you offer money. When their friends come around, they lose interest and start slacking off till I tell them to just go. I will worry about the underside after the rest is done. Most of the sound deadening is going to stay in the wheel wells but I need to clean it off where the sway bar support goes in the front and the rear I already did to install the stiffening kits.
This is a great project. Your sons appear to be near the age of my oldest (10) and this is his summer of "discovery". He has taken a strong interest in cars (out of nowhere). While when requested to clean up his toys, or quit wrestling/teasing his younger brother (8) I get nothing but attitude, he JUMPS at the chance to do anything related to working on cars. This was an unexpected "perk" of the car hobby.
Good luck with it and enjoy the company of your son while it lasts.....
Actually Brian, Jonny is 10 and Reece is 8 so the kids are the same age. And they are constantly at each others throats so there is a lot of intervention required at all times. They were even bickering while they were working on the car. I should have had one in the front of the car and one in the back just to keep them separated.
Posted by: Brian Mifsud Jul 20 2007, 02:00 PM
Scott... I have to laugh at that... I don't feel so bad now in thinking my kids are frequently arguing and fighting because I don't spend enough time with them.
Since the older one is very "technically oriented", and the younger is the artist, I'm hoping to get them involved for mechanical, then paint work seperately.
Posted by: skline Jul 23 2007, 12:04 AM
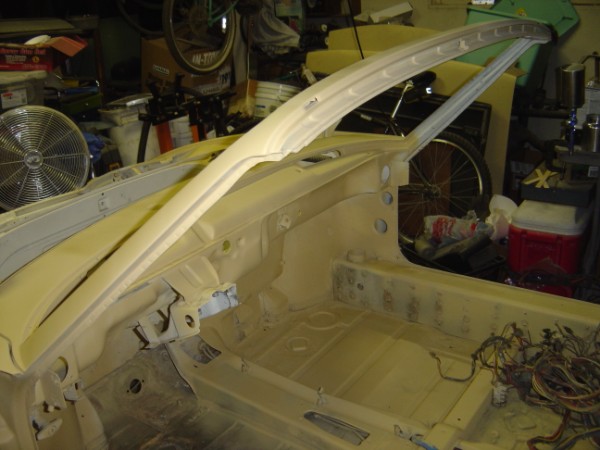
Yesterday and today's progress, The pictures are only half the story here. I wire wheeled the front inner fender wells and prepped for the sway bar stiffening kit from Engman and molded in the rear window trim with fiberglass and then went to try to make it all straight and smooth. Lot's more work to do yet but it is getting there. I decided not to rush applying the color coat so it won't be this weekend, maybe next. The body has to be as perfect as I can get it before I shoot it. I still want to clean out the front trunk of all the seam sealer and finish the rear trunk as well. But here is what it is looking like so far. My primer gun was spitting and sputtering so it may be time to take it all apart and clean it out really good. It took forever to get this coat of primer on.
Attached image(s)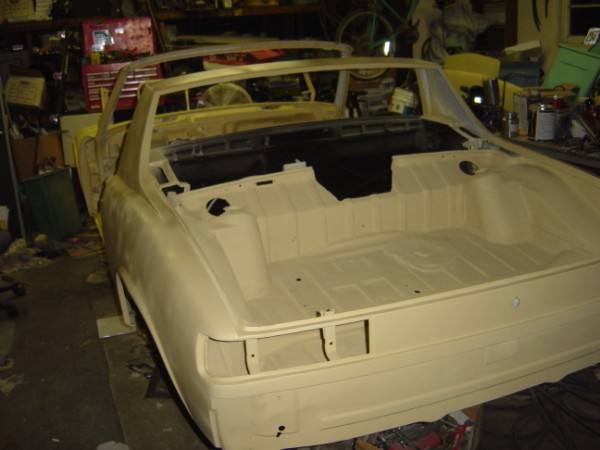
Posted by: JB 914 Jul 23 2007, 01:27 AM
looking good Scott,
Not sure if this will help, but, when i was shooting gelcoat on my boat i had the clogging, spatter problem.
Gelcoat is alot thicker than paint and you have to get the right consistency to thin, it runs to thick it clogs.
after each quart we had another quart of acetone and ran that thru it into a 5 gallon bucket.
maybe you can try that between primer coats. It helped keep the gun clean and clog free.
Posted by: skline Jul 27 2007, 06:00 PM
This is what I am going for, actually, this is a really small image I want to try to target for my sig. It's way too hot to work on my car right now so I am just wasting time.
Attached image(s)
Posted by: skline Jul 27 2007, 06:02 PM
Hehehehehe ![]() It worked!
It worked!
Posted by: sendjonathanmail Jul 27 2007, 09:28 PM
slantnose....nice
Posted by: Lou W Jul 27 2007, 10:36 PM
Scott, it sure is looking good. ![]()
Posted by: Brando Jul 28 2007, 04:50 PM
Too hot to work on your car? What is it ... like 85 down there? I'm gonna be working on mine in the blazing sun and it's 90+ here!
Posted by: skline Jul 28 2007, 09:55 PM
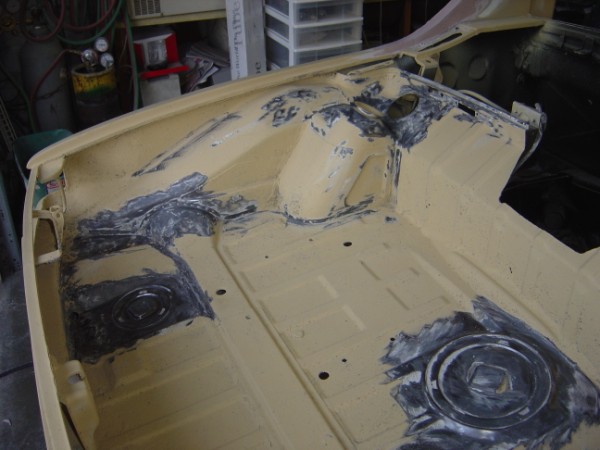
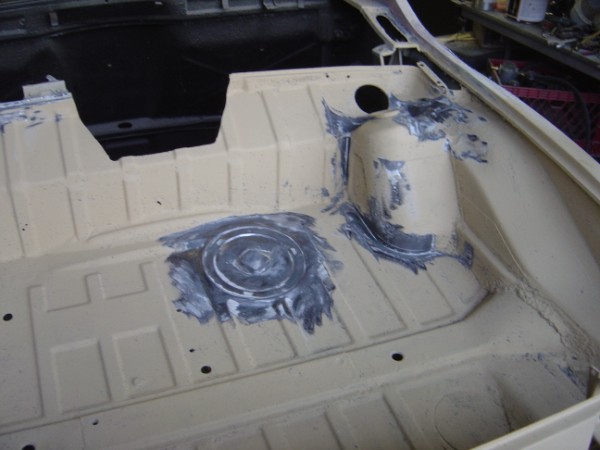
Well, I fired up the fan today and did some work on my car. It got me out of the house for awhile. The dirtiest nastiest job I have had to do so far is removing the seam sealer and undercoating from this car. I think the seam sealer is the worst. I got this 4" wire wheel for my angle grinder and it strips the stuff off really well and fast but the crap goes everywhere and sticks to everything. What a mess it makes. I welded in the little piece that my door jamb was short from my screw up in not measuring before cutting ![]()
I also test fitted the radiator and found out my front end is different than the one this kit is for. This is a 75 and the front of the car is a little different than the 74 and older 914's so the side aluminum pieces will need to be modified a little for the final fitting.
Attached image(s)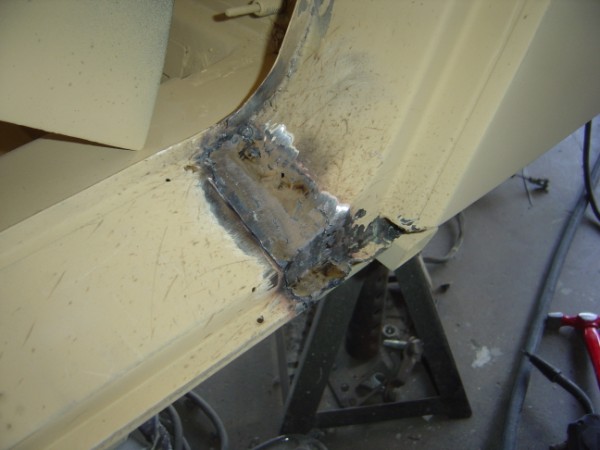
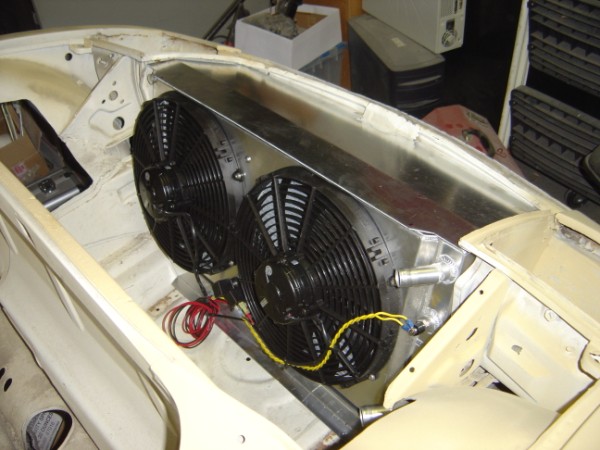
Posted by: skline Aug 1 2007, 02:10 PM
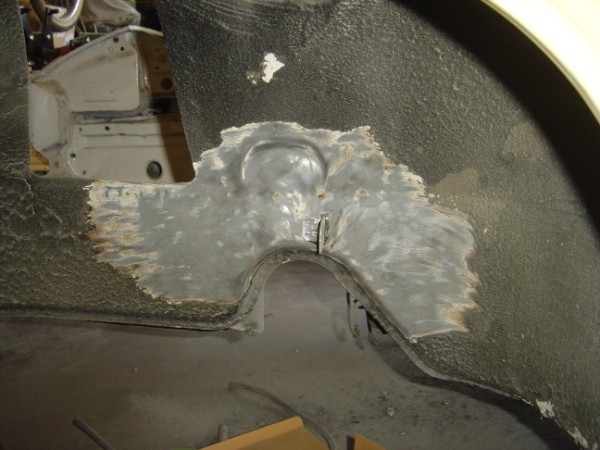
Has anyone else welded these in? They look like they will stiffen up the front pretty good, I just dont want mine to do what Brandons did on him. This just might be the ticket. It is a PIA to do however, Hey Engman! You should cut a notch in the bracket for the brake line guide, it seems to be right where the bracket goes. I notched it with an angle grinder till it fit right. Came out ok, now I just need to grind down the welds and clean it up a little.
Attached image(s)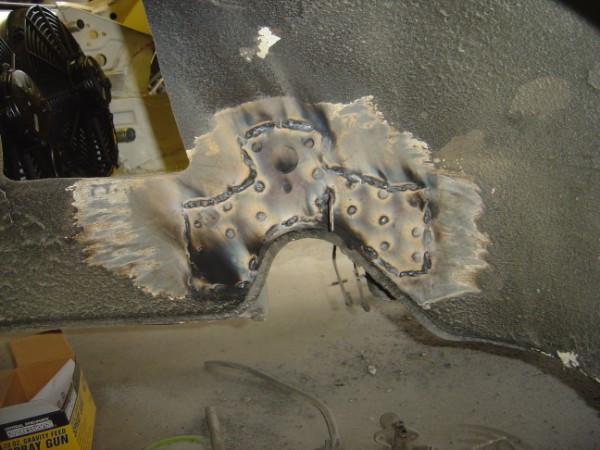
Posted by: skline Aug 22 2007, 06:43 PM
Picked up my rotisserie from Joe Sharp's house yesterday and will be welding it together this week so I can get the car up on it this weekend. That is all the updates for now. Pictures coming when I get the car on the tilter. ![]()
![]()
![]()
Posted by: Engman Aug 22 2007, 07:33 PM
Scott - I considered the notch thing until I measured my two cars - there was a variance of 1/4". Best to cut off, gring smooth and reattach.
Thanks for the thought tho..
Your car is coming along nicely.
M
Posted by: rhodyguy Aug 23 2007, 10:03 AM
nice work scott. the seam sealant comes off in no time with a heat gun and a 1" putty knife. i doubt that tidbit is of much help now.
k
Posted by: skline Aug 23 2007, 10:51 AM
I first tried a heat gun and got impatient and went to the torch, that was a huge mistake and the fumes caused illness. Then I went and bought a wire wheel for the 4" angle grinder and that really made it come off quick. The drawback however, was the mess of crap it threw all over the place. Not that it was hard to clean up but when the grinder throws it all over the place, it is hot and sticky wherever it goes and sticks to everything. I am still cleaning it up everywhere.
Live and learn ![]()
Posted by: rhodyguy Aug 23 2007, 11:03 AM
the old "time saving technique (torch)" saved no time. bummer. that's the chore (heat gun)for the apprentices, paid by the foot not by the hour.
k
Powered by Invision Power Board (http://www.invisionboard.com)
© Invision Power Services (http://www.invisionpower.com)
