Printable Version of Topic
Click here to view this topic in its original format
914World.com _ 914World Garage _ weld critique
Posted by: obscurity Apr 18 2007, 06:59 PM
Just trying to improve my welding before I tackle the car and I had a few questions.
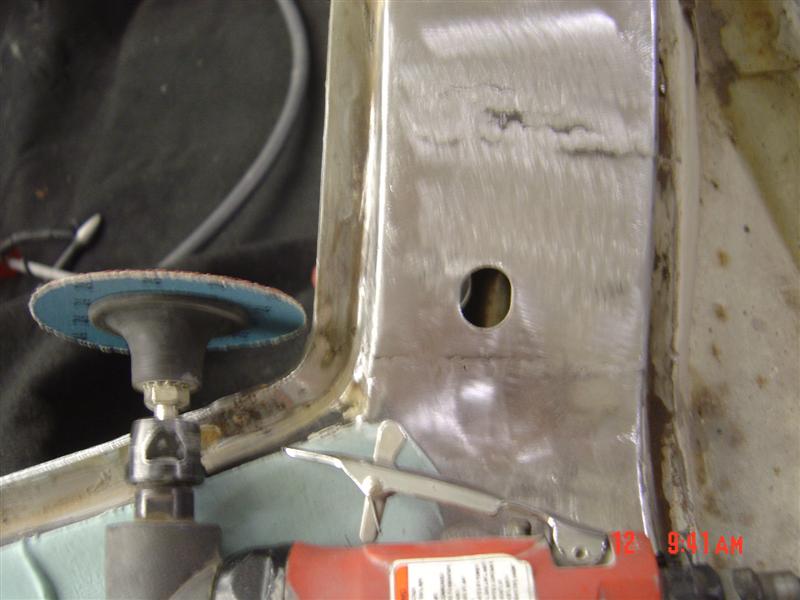
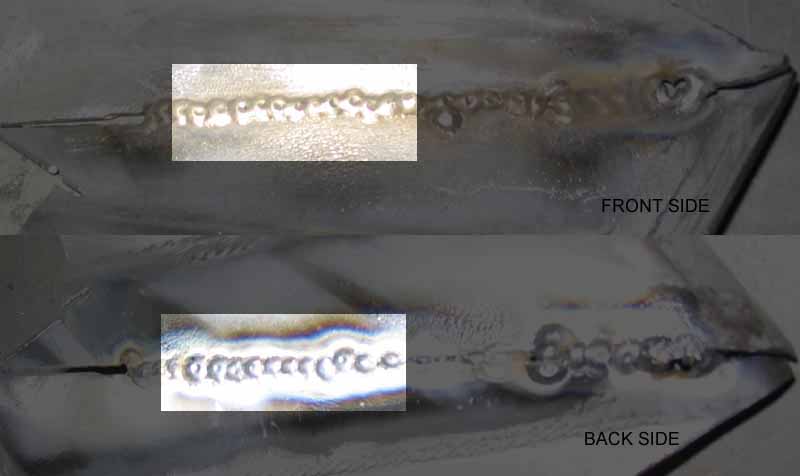
1. what do you think? I know it is pretty messy but it is a world apart from where I started.
2. Once you have blown a hole in the metal how do you go about filling it? I have tried "stitching" across the hole but all I seem to do is move the hole around (fill one area and make more hole in another. It seems this will become a critical skill when I get to the car and the new piece doesn't fit perfectly. I'll need to fill some gaps
3. What are the little pock morks on the top of each weld? Is it to be expected from metal shrinking or should I adjust my technique.
this is both sides of the same weld.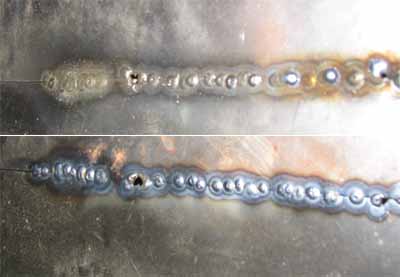
I should mention that I am using a Lincoln Electric (HD special) Mig welder with 75%Ar/25%CO2 gas
Thanks for any pointers,
John
Posted by: Andyrew Apr 18 2007, 07:06 PM
YOu need a copper block or brass or even aluminum. Put it behind the hole and it'll help you fill in the hole.
Also turn down your voltage when your filling in holes.
Another trick is to "isolate" the hole. weld around the hole so you have fresh metal your welding onto to fill.. Hard to describe..
Your welds seem to have great, if not too good of penetration. Try turning down your wire speed and voltage a tad. Your throwing a lot of heat into that metal. Which is fine for structural, but it could warp pannels
Pock marks are air bubbles.. from impurities or inconsistant flow of gas. There just standard with welding spot welds.
Posted by: scotty b Apr 18 2007, 07:18 PM
First off let the metal cool COMPLETELY before trying to fill in the hole. Trying to fill in a "hott" hole will only make it werse. Secondly I don't care for the weld around the hole method as you are heating up the surrounding metal. It werks I just don't like it. I will add my "filling" welds to the existing weld, that way the previous weld takes the heat, that allows you to melt into the hole. I don't have any pics handy but basically position your wire in the center of a previous weld, as the arc begins let it melt into the olod weld a bit then slightly pull into the hole. You will get a "C" shaped weld that will be strong and won't warp the surrounding metal as bad. I actually took some pics of this method the other day at werk to post here but my camera is in the car right now.
Posted by: scotty b Apr 18 2007, 07:28 PM
Something else to note. You will be best off NOT to butt the pieces flush against one another. As you weld the pieces will expand from the heat and will actually buckle. A good judge is to keep a space equal to the wire you are using. I.E. if you are using .023 wire, keep a .023 gap between the panels.
Here is a patch I put in a Barracuda. The cut on the right was an initial cut I decided to change. That is where I show how to fill in a gap.
Attached image(s)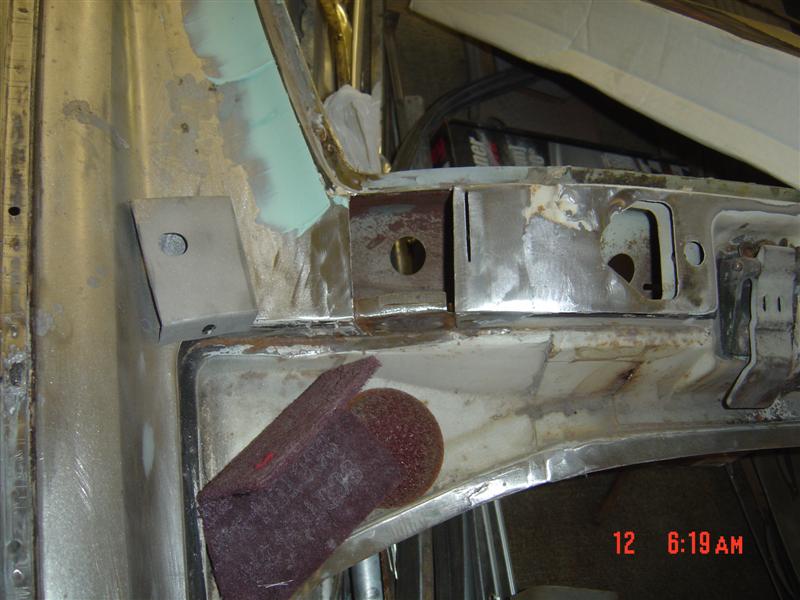
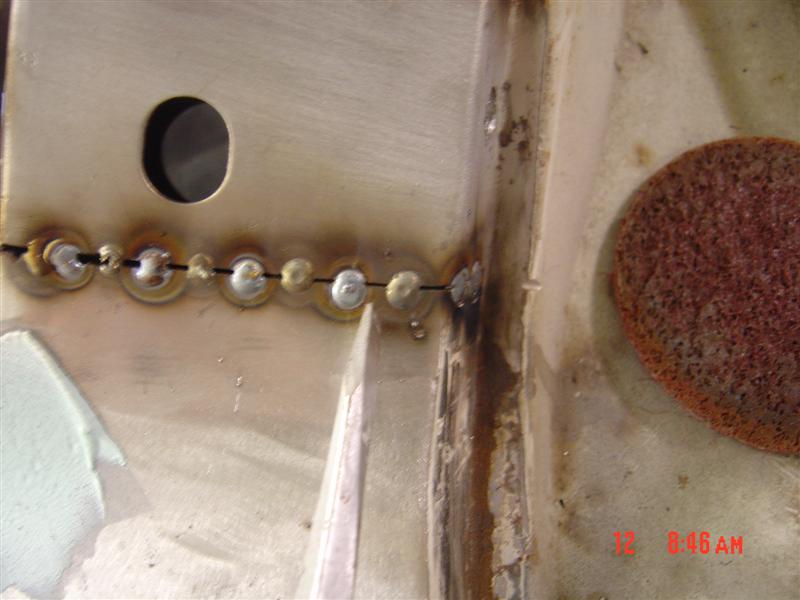
Posted by: scotty b Apr 18 2007, 07:30 PM
Well this poisses me off because the pic came out pretty crappy but I think you can tell what's going on. Like I said keep the electrode in the center of the previous weld and let it melt in.
Attached image(s)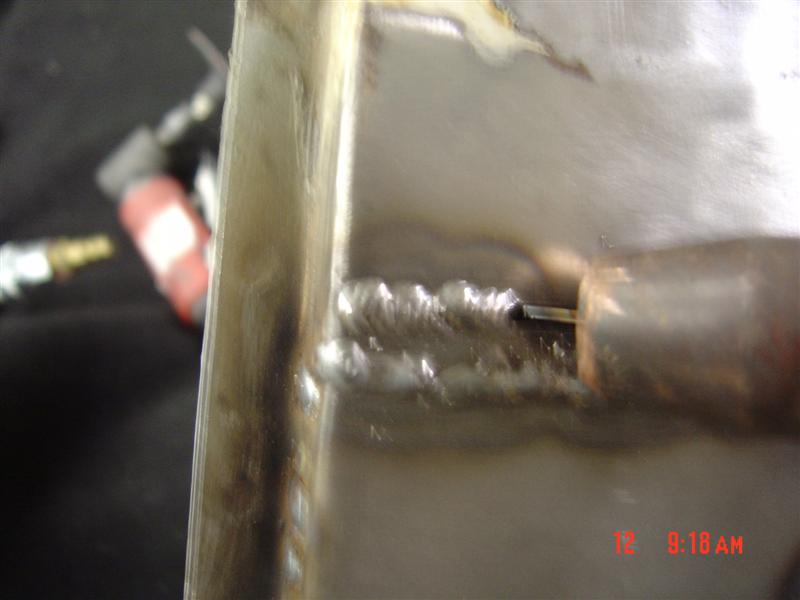
Posted by: scotty b Apr 18 2007, 07:32 PM
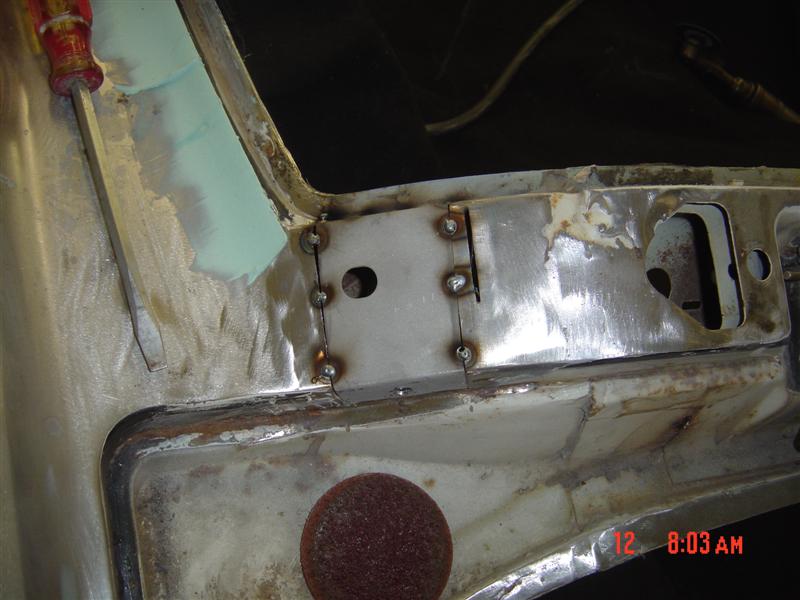
after the wleding I knock the tops off with my cut off tool then die grind with 36 grit
Attached image(s)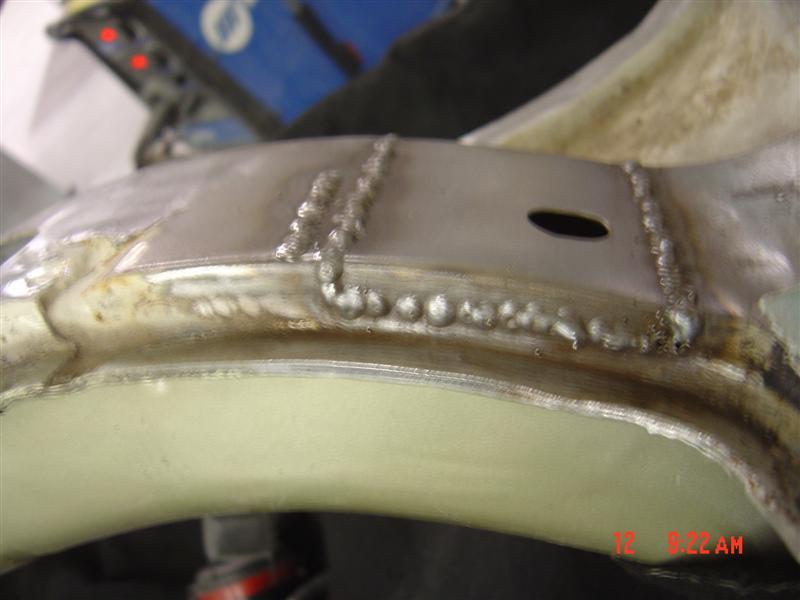


Posted by: scotty b Apr 18 2007, 07:36 PM
You can also tell how little heat I allowed to build up by how close I was to the bondo and it never discolored or lifted ! Be patient !! Get the metal to hot and it WILL warp and it WILL burn through
Posted by: SGB Apr 18 2007, 08:57 PM
Thanks for the info. Very nice work. I appreciate your taking the effort to photograph it and post it here. My welding skills are sub-newbie, so I can really utilize expert (hell, ANY) advice.
Posted by: sww914 Apr 18 2007, 09:07 PM
If you're welding outer body panels, weld 1/4" and then use a blower to cool the metal, do another 1/4" and cool again, otherwise you may warp the #^%& out of it.
Posted by: obscurity Apr 18 2007, 09:27 PM
Thanks for all the replies. tomorrow I will try to weld with a little more gap and play with the voltage.
I will try to update with some progress (if I make any)
Thanks again!
John
Posted by: r_towle Apr 18 2007, 10:39 PM
Turn your voltage down and wire speed down.
Now you can move slower.
When you can draw a bead accros the piece, your there..
Think of it like caulking...you want to be able to have one single weld and be able to drag it like a string...
You need to move your hand slower, and at the current voltage, you will burn through.
Rich
Posted by: obscurity Apr 29 2007, 03:47 PM
Well I practiced a little more today and this is what I got...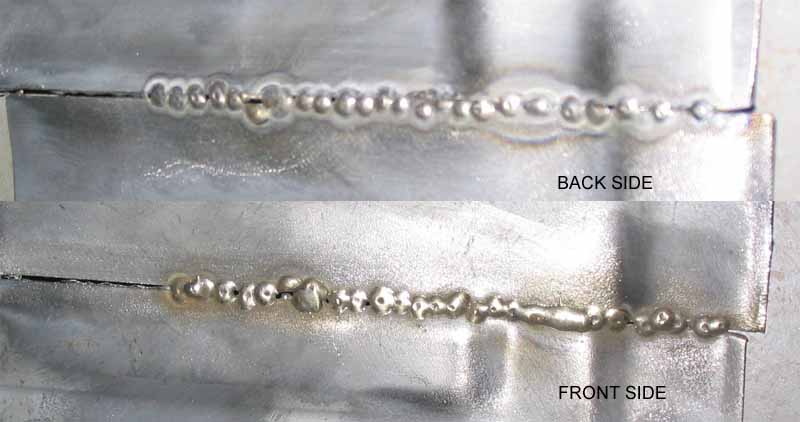
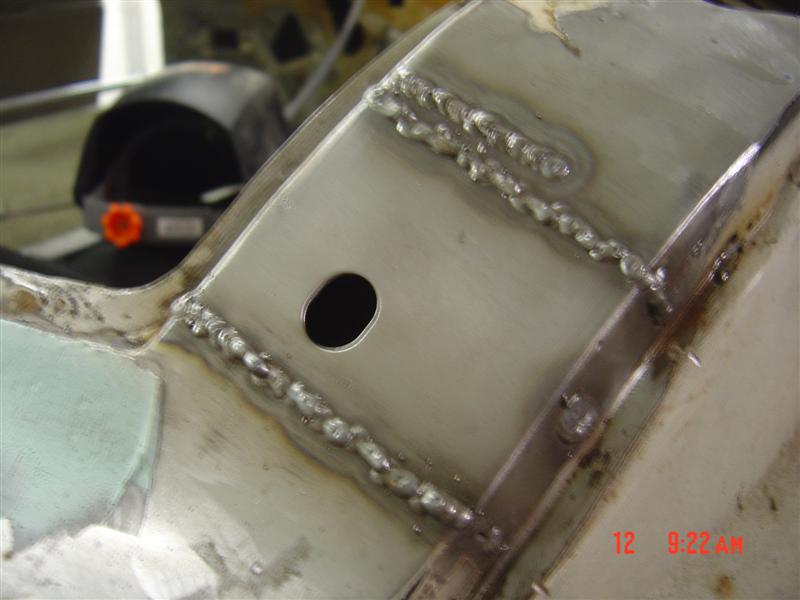
This is still using a spot technique on my welder (Lincoln weldpak 100) the settings are B-3.5. I still need to take one more pass to fill in the holes that are left. Overall I am pretty happy with it but I am concerned to the amount of penetration. I will be doing the long in the engine compartment so I am very concerned with strength.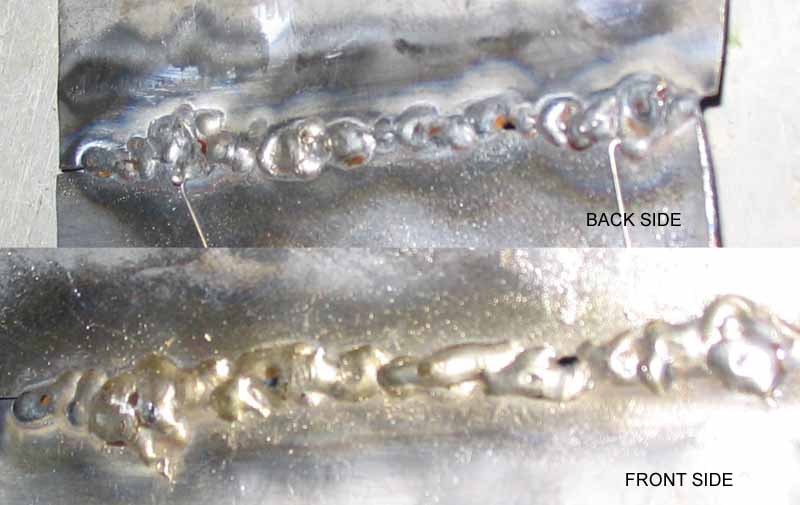
This one is trying to do a series of seams. It is still very ugly. I had a tendancy to burn though periodically and had to stop and fill the holes. The settings are A-3.
Scotty,
I'm not sure I followed your advice closely enough I think I may go out and give it another try.
Anymore other pointers appreciated,
John
Posted by: obscurity Apr 29 2007, 04:40 PM
How about this one? Things went a little off the rails there at the end but nothing a little grind and rework wouldn't fix.
John W
Posted by: 9146986 Apr 29 2007, 06:40 PM
It's all about developing your technique.
More practice! About three more hours, at least. Until you can make better looking welds, you don't need to touch your car with it. You want better looking welds with good penetration, but not too much to grind off.
It looks to me like you've got the wire feed speed too high, which makes for a bigger bead. This will help prevent blowing through, but aslo alot of grinding, and less penetration. You want to melt the two pieces of metal together with as little bead as possible, with the least amount of warpage. Simple right? That's why the three hours of practice.
When I took a TIG welding class, all I did for the first twelve hours was make surface beads. That's it for twelve hours. I'm pretty good with a MIG too.
You are using a real MIG with gas right? No gas, it's not MIG.
Posted by: obscurity Apr 29 2007, 06:54 PM

It's all about developing your technique.
More practice! About three more hours, at least. Until you can make better looking welds, you don't need to touch your car with it. You want better looking welds with good penetration, but not too much to grind off.
It looks to me like you've got the wire feed speed too high, which makes for a bigger bead. This will help prevent blowing through, but aslo alot of grinding, and less penetration. You want to melt the two pieces of metal together with as little bead as possible, with the least amount of warpage. Simple right? That's why the three hours of practice.
When I took a TIG welding class, all I did for the first twelve hours was make surface beads. That's it for twelve hours. I'm pretty good with a MIG too.
You are using a real MIG with gas right? No gas, it's not MIG.
Yes it is MIG with Argon/CO2 mix
I was pretty happy with this section. I thought the penetration was pretty good. You don't think so huh?
The rest is definitely crap and is the result of burning through and then trying to fix it without grinding the high spots off first. I suppose I should try moving the amperage down to "A" and slowing the wire speed down a little more. I don't think I can turn the wire speed down at the higher amp setting and not burn through every time. I suppose I am just getting impatient.
Thanks for the input,
John
Posted by: JPB Apr 29 2007, 07:21 PM
MIG welding sheet metal is a PITA and you should be proud of what ya did. Looks good. I don't know what size wire you are using but .02X wire would be the best. I like ceramic on the back side and they make some that is adhesive on one side. Its a row of small 1X1 blocks and works pretty good. Remember, less weld you deposit, less weld to remove and makes less extra heat to the sheet metal which makes less warpage. When all else fails, BONDO! 
Now if it was me, I'd prefer fusion welding it by TIG 
Posted by: Spoke Apr 29 2007, 07:30 PM
Your welds look pretty good to me. Then again, I suck at welding but it sure is fun.
Check out this nightmare. Luckily, after some grinding it didn't look too bad and a bit of bondo covered everything up.
Attached image(s)
Posted by: JPB Apr 29 2007, 07:39 PM
HOLLY SREAMING BLOOD AND GUTS!!!! Freaking great, graphic and gorry looking resurrection. That is one HELL of a shot bro. Looks like an autopsy from fangoria. Good job!
Posted by: bigkensteele Apr 29 2007, 08:26 PM
You are already better than me, but I will go ahead and throw in my $.02.
I was doing some heavier gauge stuff - wrought iron railing for my deck, and my welds had gone to hell in a handbasket. Turns out my tank was empty, even though my gauge still showed pressure. You should keep a good eye on the tank. Any pointers out there on how to tell when you need a refill of gas?
Posted by: John Apr 29 2007, 08:47 PM
You are already better than me, but I will go ahead and throw in my $.02.
I was doing some heavier gauge stuff - wrought iron railing for my deck, and my welds had gone to hell in a handbasket. Turns out my tank was empty, even though my gauge still showed pressure. You should keep a good eye on the tank. Any pointers out there on how to tell when you need a refill of gas?
I change out my bottle when I run out of gas (no pressure on the gauge).
Do yourself a favor and buy a real regulator next time you are in the welding supply store. It will pay for itself fairly quickly. My original regulator (non adjustable) wasted lots of gas before I found out about adjustable flow rate regulators. I run fairly low flow rate. (just enough to keep good looking welds) I weld where there is little or no breeze so I can get away with doing that. My bottles last much longer now.
YMMV
just my $0.02
Posted by: r_towle Apr 29 2007, 10:21 PM
It's all about developing your technique.
More practice! About three more hours, at least. Until you can make better looking welds, you don't need to touch your car with it. You want better looking welds with good penetration, but not too much to grind off.
It looks to me like you've got the wire feed speed too high, which makes for a bigger bead. This will help prevent blowing through, but aslo alot of grinding, and less penetration. You want to melt the two pieces of metal together with as little bead as possible, with the least amount of warpage. Simple right? That's why the three hours of practice.
When I took a TIG welding class, all I did for the first twelve hours was make surface beads. That's it for twelve hours. I'm pretty good with a MIG too.
You are using a real MIG with gas right? No gas, it's not MIG.
Yes it is MIG with Argon/CO2 mix
I was pretty happy with this section. I thought the penetration was pretty good. You don't think so huh?
The rest is definitely crap and is the result of burning through and then trying to fix it without grinding the high spots off first. I suppose I should try moving the amperage down to "A" and slowing the wire speed down a little more. I don't think I can turn the wire speed down at the higher amp setting and not burn through every time. I suppose I am just getting impatient.
Thanks for the input,
John
You are really almost there.
A little bit slower movement, you will have it.
Once you can control the size of the bead, and how it flows, you will know when you are about to blow through.
Try a few tests, move slower, but back your tip away from the piece a bit more to see what it does...
There is a sweet spot for thin sheet metal where you are farther away from the piece then a 1/8 inch piece, yet you can move at the same speed when welding.
This prevents the blow out, the weld is just a slight bit cooler.
You blow through because you cross the line that turns the metal a workable moldable metal that will flow towards the heat, instead you push just a little bit to far and it turns into a liquid...its a fine line.
I found the final adjustment was me.
I got the hand speed right
I got the wire speed right
Gas was good.
the final adjustment was how far way from the piece I was...just a half inch higher made all the difference in the world...I now can easily weld 16 guage...and before that..it would evaporate, and I would never think of welding such a thin piece...
Keep practicing, try a few new things...your close.
Rich
Posted by: 9146986 Apr 30 2007, 07:27 PM
It's all about developing your technique.
More practice! About three more hours, at least. Until you can make better looking welds, you don't need to touch your car with it. You want better looking welds with good penetration, but not too much to grind off.
It looks to me like you've got the wire feed speed too high, which makes for a bigger bead. This will help prevent blowing through, but aslo alot of grinding, and less penetration. You want to melt the two pieces of metal together with as little bead as possible, with the least amount of warpage. Simple right? That's why the three hours of practice.
When I took a TIG welding class, all I did for the first twelve hours was make surface beads. That's it for twelve hours. I'm pretty good with a MIG too.
You are using a real MIG with gas right? No gas, it's not MIG.
Yes it is MIG with Argon/CO2 mix
I was pretty happy with this section. I thought the penetration was pretty good. You don't think so huh?
The rest is definitely crap and is the result of burning through and then trying to fix it without grinding the high spots off first. I suppose I should try moving the amperage down to "A" and slowing the wire speed down a little more. I don't think I can turn the wire speed down at the higher amp setting and not burn through every time. I suppose I am just getting impatient.
Thanks for the input,
John
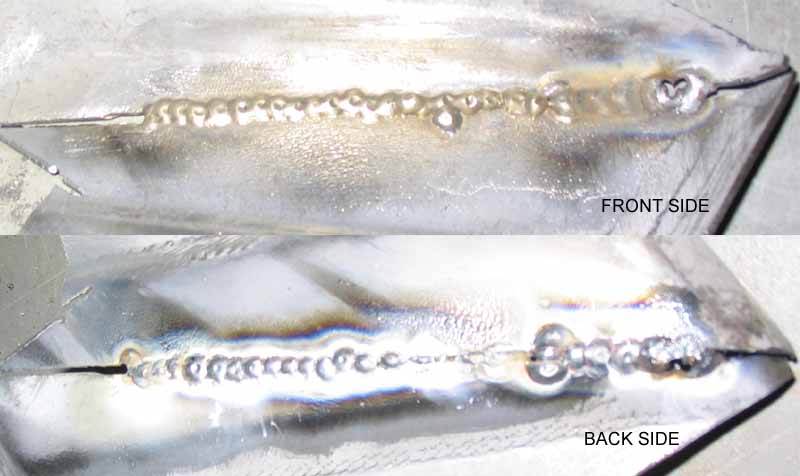
John,
The highlighted section is pretty close! This is what I mean by practice. When 95% of your beads look like what you've done here, then go for it. Tune up and down from where you are now, and be sure to take notes on your settings. See how smooth you can get the beads before blow through. Rich's advice is right on.
Just remember one thing, if you put welds on a car like Spoke, DON'T SHOW PHOTOS!!


 (all in good fun Spoke!)
Posted by: scotty b May 1 2007, 07:47 PM
 the highlighted areas are looking much better. Try and get the spots to overlap just a hair more, and let it burn in a little more. There is a fine line between "burning in" and "burning through" that will come to you with practice. Eventually you will know by the sound of the weld
Powered by Invision Power Board (http://www.invisionboard.com)
© Invision Power Services (http://www.invisionpower.com)