Printable Version of Topic
Click here to view this topic in its original format
914World.com _ 914World Garage _ Just want to share my 914 project
Posted by: nukepipe Jul 3 2007, 11:41 PM
Hi there.
Just want to share my project  .
.
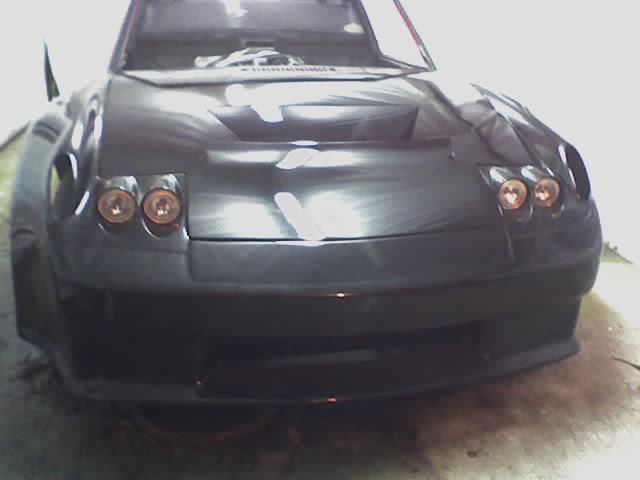
Critics welcome....but be gentle specially with the headlights.
Thanks.... 
http://www.youtube.com/watch?v=tkt9Od6reFw
Posted by: neo914-6 Jul 4 2007, 12:36 AM

 nice ideas...
Posted by: por73914 Jul 4 2007, 01:53 PM

Hi there.
Just want to share my project
. Critics welcome....but be gentle specially with the headlights.
Thanks....
http://www.youtube.com/watch?v=tkt9Od6reFw
I think the headlights are cool could you post a picture of them here? I would be interested in the details!!

![popcorn[1].gif](style_emoticons/default/popcorn[1].gif)
Posted by: JPB Jul 4 2007, 07:58 PM
You are a sick twisted chopper of fine AERT! When I grow up, I wanna be just like you. 
Posted by: nukepipe Jul 4 2007, 09:57 PM
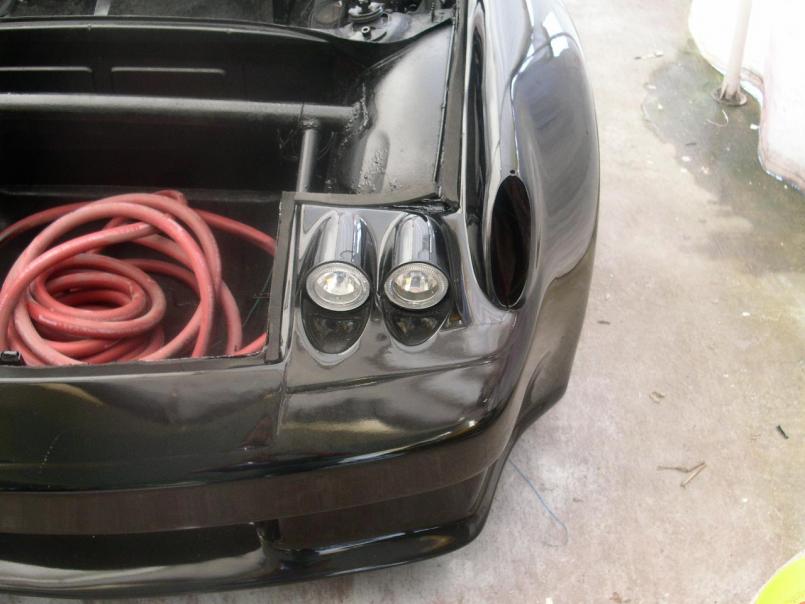
Hi por73914:
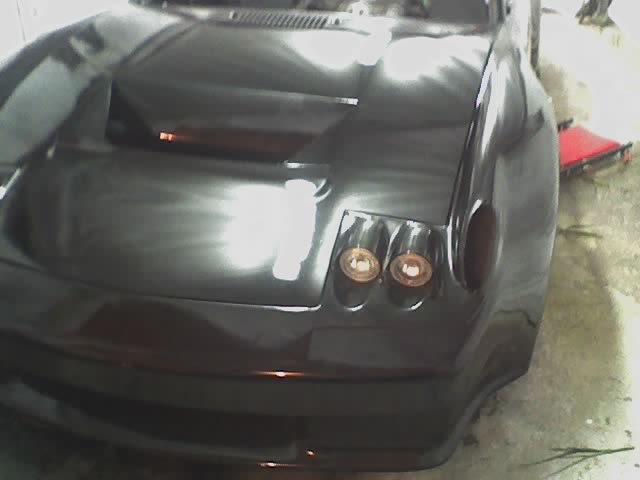
For the headlights I used the convertion kit for the Nissan 240sx or Silvia easy to find on ebay. Then some cutting and shapping to get it fit... see the pics.
Attached thumbnail(s)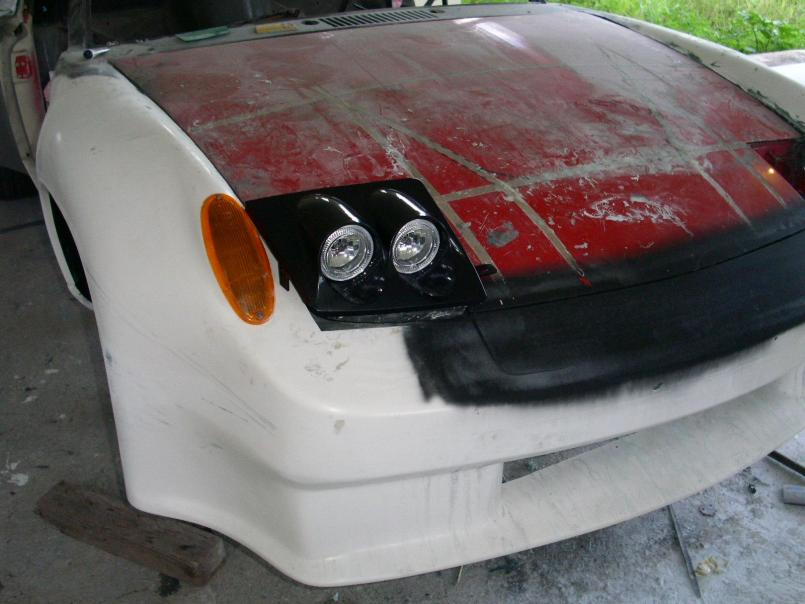
Posted by: nukepipe Jul 4 2007, 09:59 PM
Other.... Hope this help.
Attached thumbnail(s)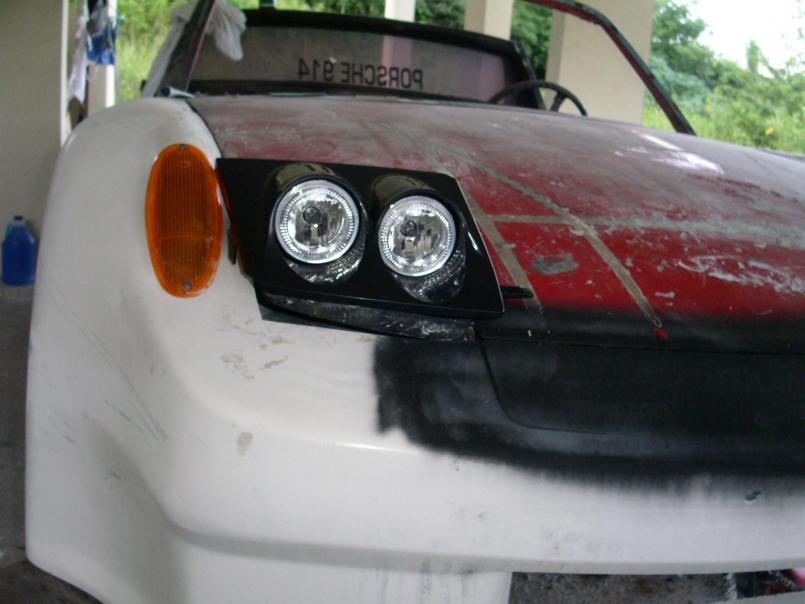
Attached image(s)

Posted by: Eric_Shea Jul 5 2007, 11:45 AM
I'm a traditionalist and I think those are some of the nicest headlight conversions I've seen... I also love the lines on a Sheridan.
Posted by: Kyan Jul 5 2007, 03:17 PM
I have been trying to do the same thing too, but I took the make it myself path about 3 years ago. Can you tell me more about what to look in ebay? I am interested in housing.
Kyan.
Posted by: nocones Jul 5 2007, 07:23 PM
Nicely done!
I've been thinking of this for years and had looked at the RX7/Miata headlight conversion parts but couldn't find anything that fit well. Nice to see someone make this work.
Posted by: nukepipe Jul 5 2007, 09:50 PM
This is a link for example for what I used.
http://cgi.ebay.com/ebaymotors/89-94-NISSAN-240SX-180SX-S13-HALO-CONVERSION-HEADLIGHTS_W0QQcmdZViewItemQQcategoryZ33710QQihZ008QQitemZ180135675221QQrdZ1
Or do a search for nissan 240sx headlights
Hope this help guys..!!!
Posted by: Andyrew Jul 5 2007, 11:31 PM
You have a cool project!!!
Take it from me though.... Dont go over your head...
Finish the headlights, Finish the rest of the body work, Get the suspension all tight, and the engine running right with a nice new carb, Paint the car, and do the rest of your modifications durring the weeknights and drive it durring the weekend...
I am KING of the start a new project....
Posted by: So.Cal.914 Jul 5 2007, 11:49 PM
I like the sheridan body, very cool look. There are a few here, not at home so no pic.
Have fun...
Posted by: nukepipe Apr 4 2008, 10:03 AM
Hi guys..!!!
My 914 it's alive...!!!
Check the video... The smoke coming up it's from the burning headers paint...
http://www.youtube.com/watch?v=khRlIr12M5M
Look for 914 v8 project take 2 on youtube for the other one.
C ya all..!! 
Posted by: SirAndy Apr 4 2008, 12:37 PM
My 914 it's alive...!!!
 that sounds pretty nice ...
got any more pics of the car?
 Andy
Andy
Posted by: McMark Apr 4 2008, 12:43 PM
Very cool! Love to see more pictures!
Posted by: So.Cal.914 Apr 4 2008, 12:45 PM
It's running , Congrats. 
Posted by: r_towle Apr 4 2008, 01:54 PM
Awesome,
I wonder if those headlight would fit in the stock housing and still be able to open and close .....hmmmm
Rich
Posted by: gopack Apr 4 2008, 03:47 PM
I am curious about 2 things:
1) are the headlights aim-able within the housing? If not it seems that the way you trim them could lead to headlights pointing off one way or the other.
2) what size (diameter) are the individual reflectors?
seems like part of that unit could be grafted onto the existing headlight door for a factory look with out all the cutting and shaping (When I try to modify something to fit it usually looks like it was done by a second grader!)
Posted by: nukepipe Apr 4 2008, 11:21 PM
Awesome,
I wonder if those headlight would fit in the stock housing and still be able to open and close .....hmmmm
Rich
Hi there:
You would have to trim them to fit inside... Should look good inside the stock housing.
BTW this is the other video that shows a little the work been done to the body while my friend was timing the engine.
Sorry for the mess on the car... he he he
http://www.youtube.com/watch?v=AAfEjAERWuM
Posted by: nukepipe Apr 4 2008, 11:30 PM
I am curious about 2 things:
1) are the headlights aim-able within the housing? If not it seems that the way you trim them could lead to headlights pointing off one way or the other.
2) what size (diameter) are the individual reflectors?
seems like part of that unit could be grafted onto the existing headlight door for a factory look with out all the cutting and shaping (When I try to modify something to fit it usually looks like it was done by a second grader!)
1) check this video, they are already fixed, they have screw for adjustment and already test them. http://www.youtube.com/watch?v=AAfEjAERWuM
2) I dont have the car here right now but they are about 2" 1/2
Hope this help.
Posted by: nukepipe Sep 15 2008, 04:38 PM
Just some update on my ongoing slow proyect, 4 years by now. Too little time.
Here are som pics.
Enjoy
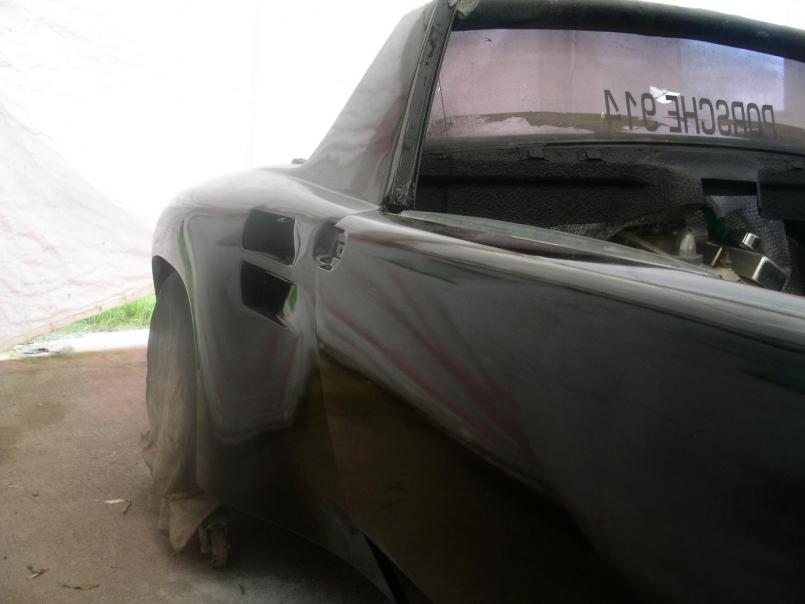
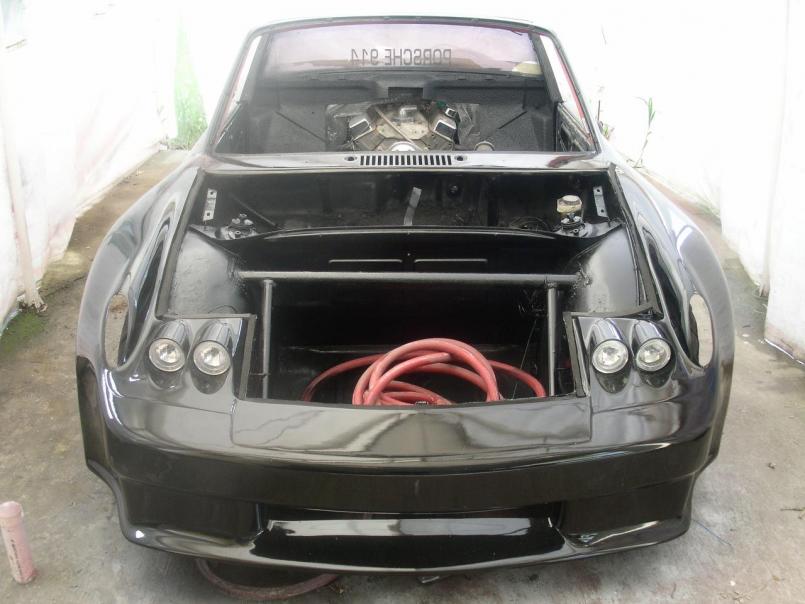
This is the base color.... planning to paint it in dark charcoal gray.
Attached thumbnail(s)
Posted by: nukepipe Sep 15 2008, 04:39 PM
Here some more....
Attached thumbnail(s)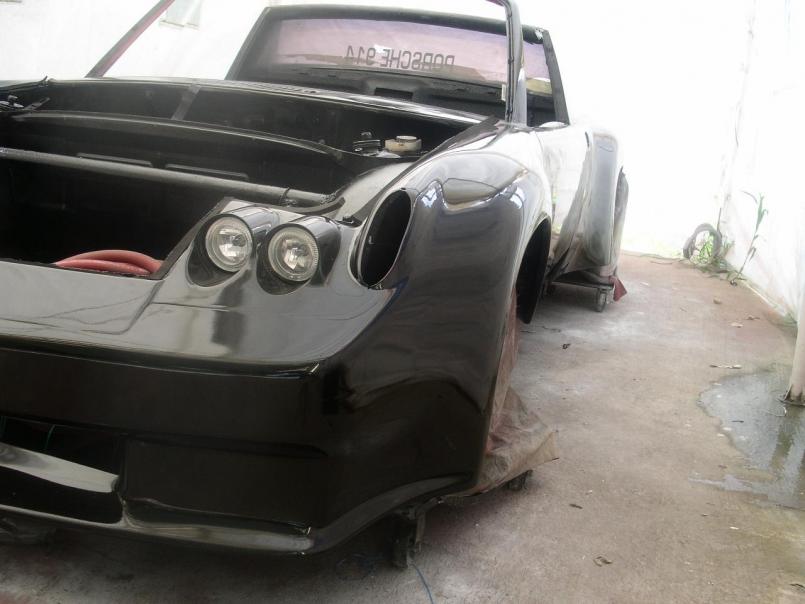

Posted by: nukepipe Sep 15 2008, 04:41 PM
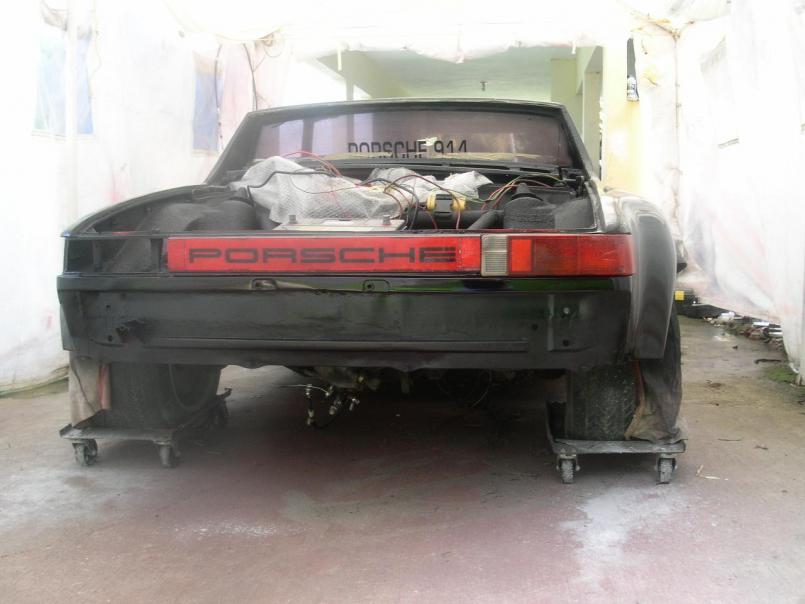
Last ones by now.....
Attached thumbnail(s)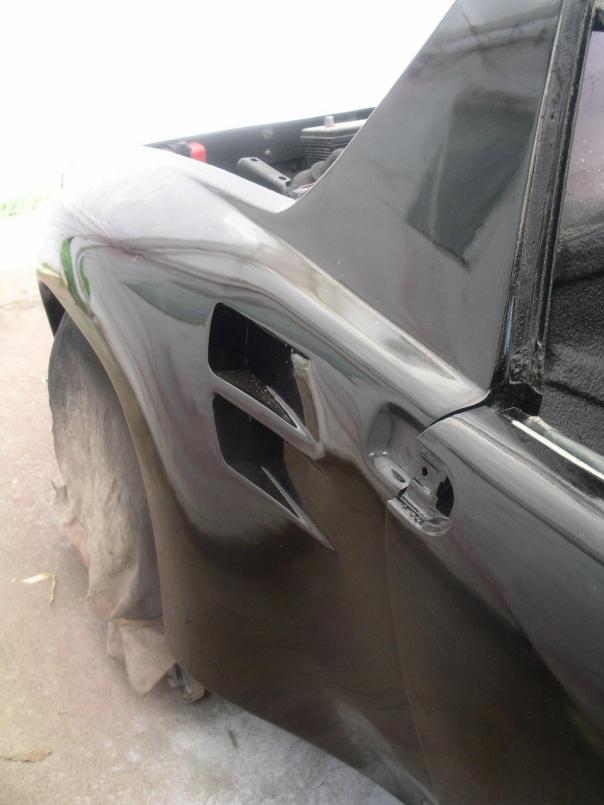
Posted by: tronporsche Sep 17 2008, 02:45 AM
Very nice ! I only looked at this thread. do you already have your rims, what do they look like ? Can't wait to see it when it is done.
Posted by: jd74914 Sep 17 2008, 06:39 AM
The car looks awesome! I really like the rear fender mod. 
Posted by: jc914 Sep 17 2008, 06:44 AM
Its looking very nice I like how the rear end looks
Posted by: So.Cal.914 Sep 17 2008, 06:46 AM
The car looks awesome! I eally lake the rear fender mod.
Don't mind Jim, he got up early...

When I first saw those lights, well...I wasn't a fan. But I must say with the body
mods and paint they are looking pretty Tits.
Power Plant?
Posted by: jd74914 Sep 17 2008, 06:54 AM
 Fixed. Nah, I've been working for a few hours writing a fascinating paper on the electro-chemistry behind fuel cells. . .
Posted by: So.Cal.914 Sep 17 2008, 07:01 AM
Fixed. Nah, I've been working for a few hours writing a fascinating paper on the electro-chemistry behind fuel cells. . . So how long until we have a H2O = 2xH x 0 = power supply?
Posted by: jd74914 Sep 17 2008, 07:23 AM
Err 2*H + O? Not very soon (if ever from non power-critical or fleet vehicle applications ). Too energy intensive/expensive to crack water, though the Army is working on some high temp cells that can run off of junk methane (they pollute though).
At work all H2 is cracked by hydropower at Niagra Falls which is a pretty neat/clean alternative.
Anyways, hyjack over.
Posted by: wbergtho Sep 17 2008, 08:09 AM
I haven't read this thread all the way through...but here is my question. Are you planning on blending the old headlight door into the rest of the body work (to the front bumper and to the outside of each headlight door). Consider doing this...because otherwise it will look like the twin light packs will revolve around or flip up and down. Blending will create a cleaner look as well.
Bill
Posted by: LarryR Sep 17 2008, 08:24 AM
I am curious about 2 things:
1) are the headlights aim-able within the housing? If not it seems that the way you trim them could lead to headlights pointing off one way or the other.
2) what size (diameter) are the individual reflectors?
seems like part of that unit could be grafted onto the existing headlight door for a factory look with out all the cutting and shaping (When I try to modify something to fit it usually looks like it was done by a second grader!)
1) check this video, they are already fixed, they have screw for adjustment and already test them. http://www.youtube.com/watch?v=AAfEjAERWuM
2) I dont have the car here right now but they are about 2" 1/2
Hope this help.
That is pretty sweet! What transmission did you go with? The engine sounds healthy.
Posted by: wbergtho Sep 17 2008, 03:42 PM
I spoke too soon. I have dial up and your pics took a long time to load up. Now I see what you've done to the headlight area. Looks real nice. I also like the rear intakes you made into the Sheridan quarters. Very nice. I did a similar treatment using modified 996TT intakes. What kind of V-8 are you putting in...and how much HP. What trans are you using? Keep posting your progress. It is coming along very well. It took me about 7-8 years to get as far as I have and it still isn't complete. 
Attached image(s)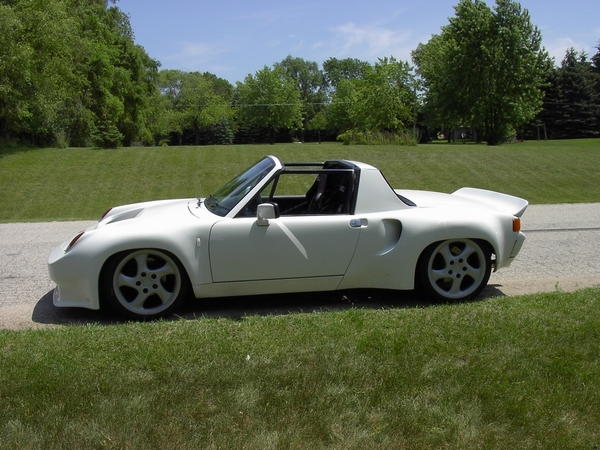
Posted by: 736conver Sep 17 2008, 03:51 PM
I spoke too soon. I have dial up and your pics took a long time to load up. Now I see what you've done to the headlight area. Looks real nice. I also like the rear intakes you made into the Sheridan quarters. Very nice. I did a similar treatment using modified 996TT intakes. What kind of V-8 are you putting in...and how much HP. What trans are you using? Keep posting your progress. It is coming along very well. It took me about 7-8 years to get as far as I have and it still isn't complete.
Hey that yard looks familiar. Wait that pic was takin at my house. Alot of those guys make the grass turn brown with the hot engines. My neighbor thought they were all oil leaks.
Posted by: nukepipe Sep 22 2008, 04:36 PM
Very nice ! I only looked at this thread. do you already have your rims, what do they look like ? Can't wait to see it when it is done.
Sorry did not reply earlier.... About Rims..... What I have now are Mesh BBS from a 930. 15x9" in the front, 15x 11" on the rear. But I'm not gonna stick with those wheels....
Planning to use those for soloracing / A/X
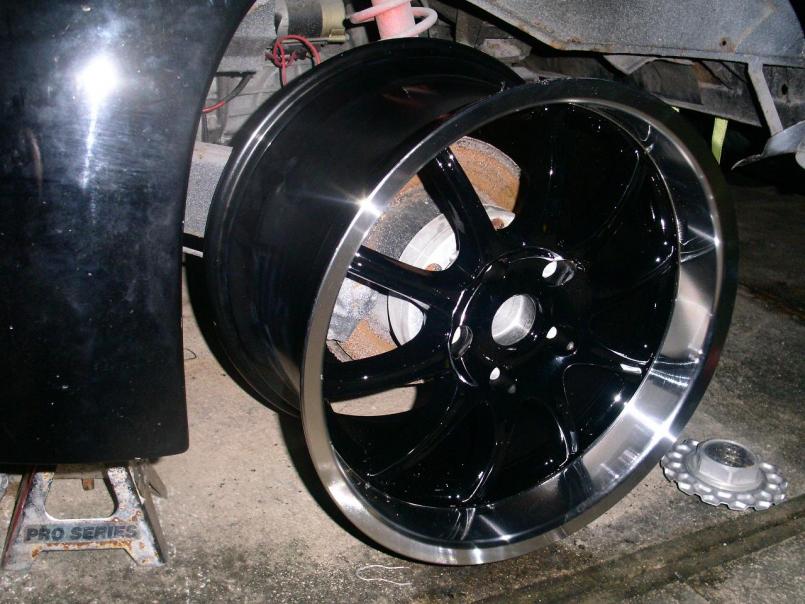
Posted by: nukepipe Sep 22 2008, 04:54 PM
Rear wheels.... not the best picture.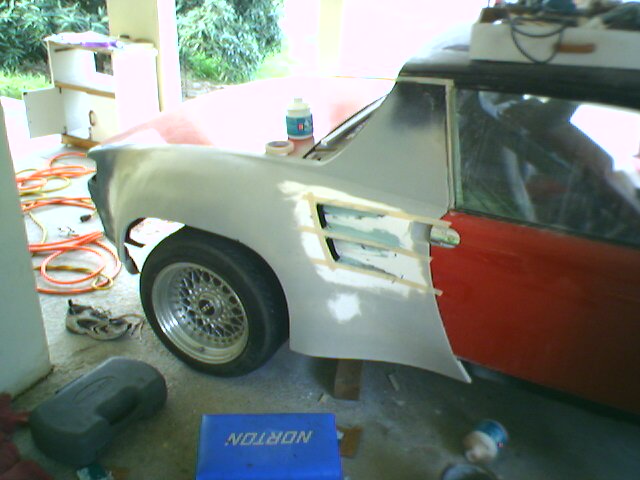
nuther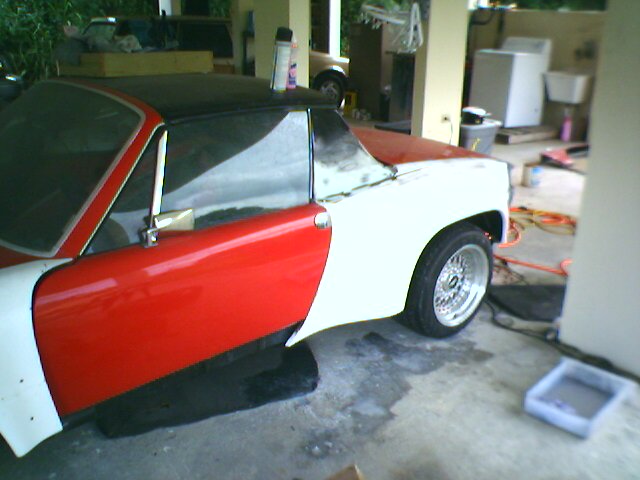
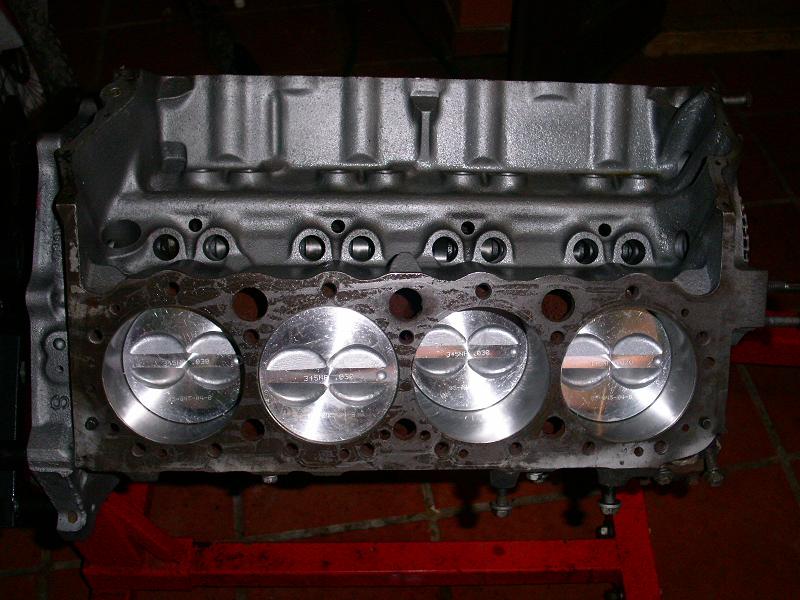
As for the power plant, is a 350, .030 pistons.
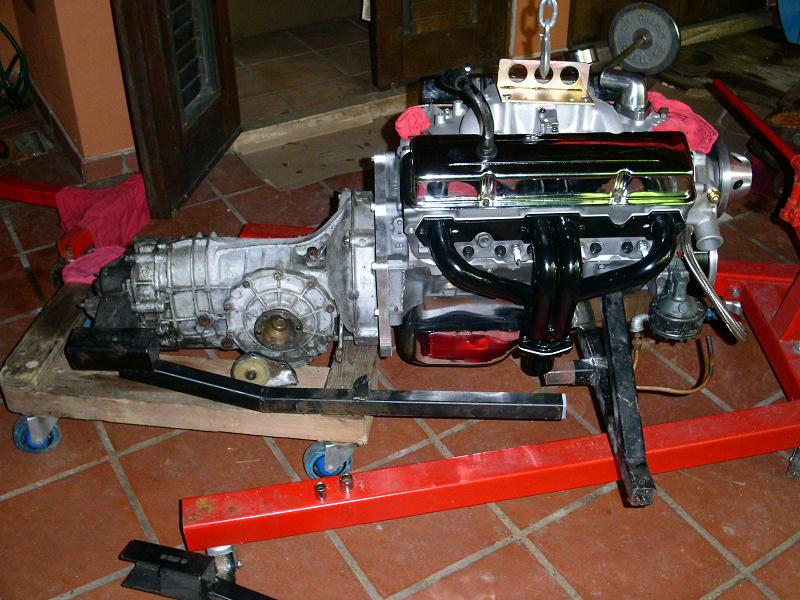
Here's a pic during build.
Stock transmission, it has been very difficult to find one here in the island and don't have a good contact in the continental US. My only resource by now is the evilbay. 
That's it for now. Later will show my HomeDepot Racing cable shifter..... he he he (still working on it)
Posted by: nukepipe Oct 10 2008, 09:39 PM
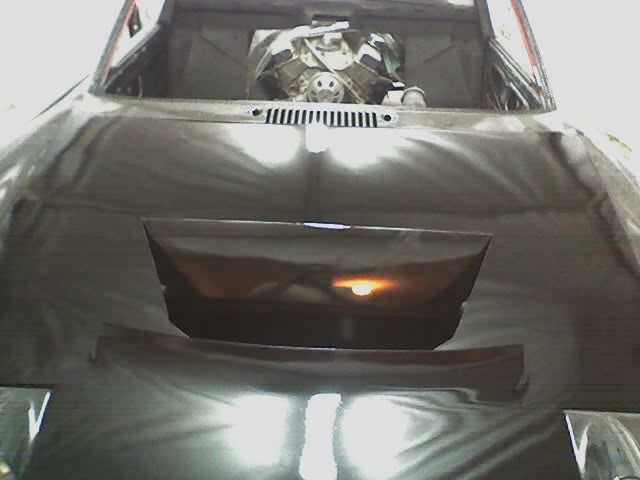
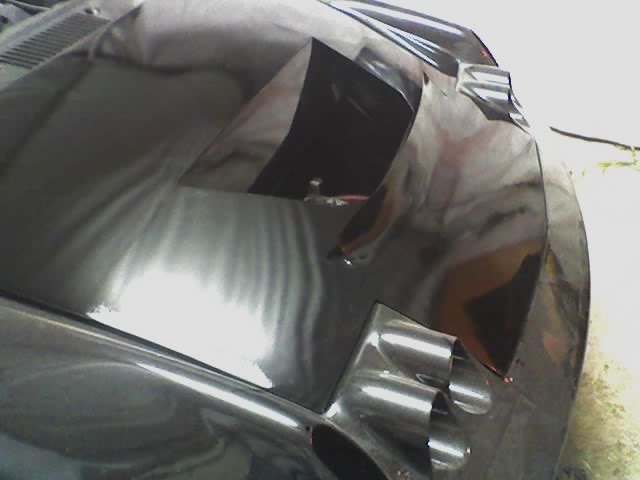
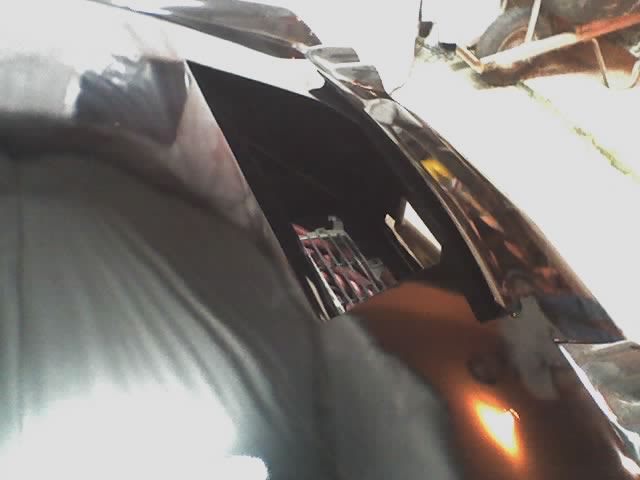
You some update. My friend painted the hood. This is how it looks.... venting trough the hood.
Sorry about the pics (crapy celphone)
Attached image(s)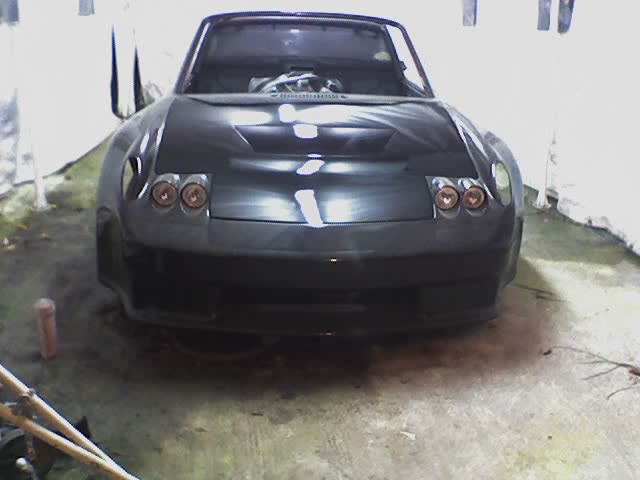
Posted by: nukepipe Dec 29 2008, 10:56 PM
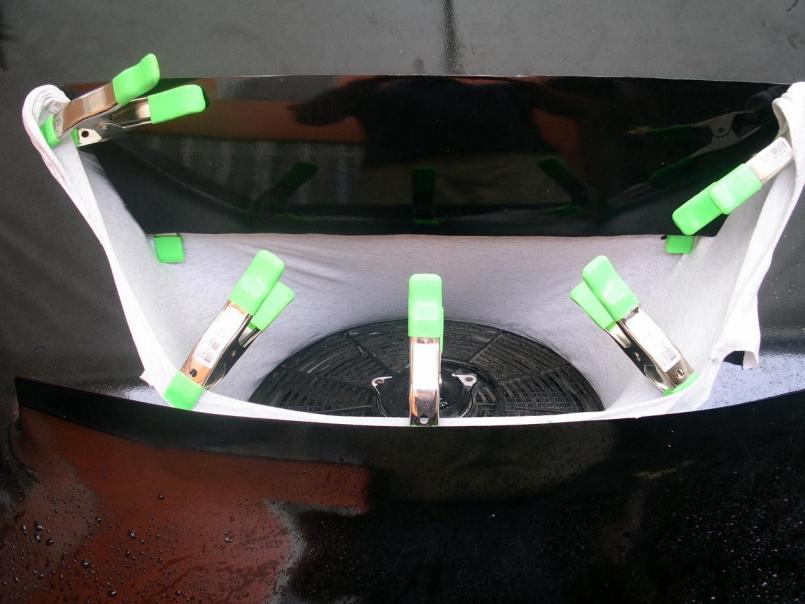
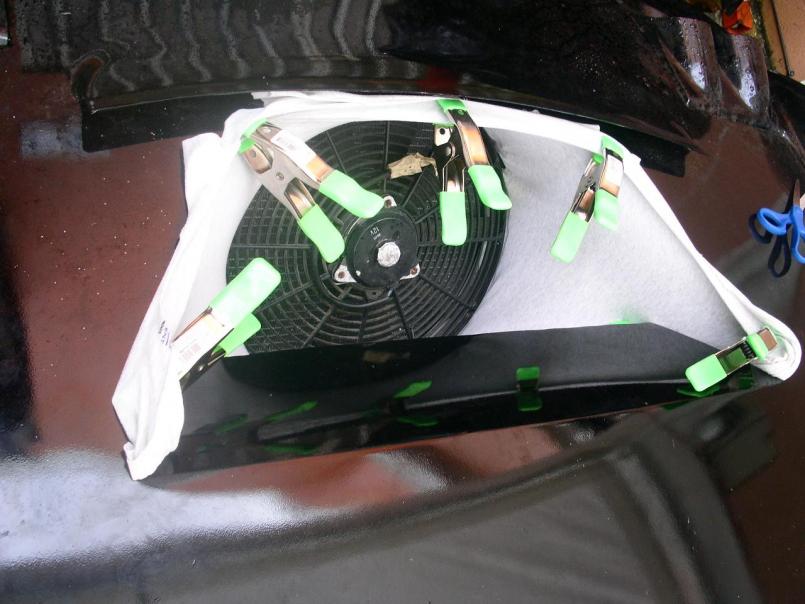
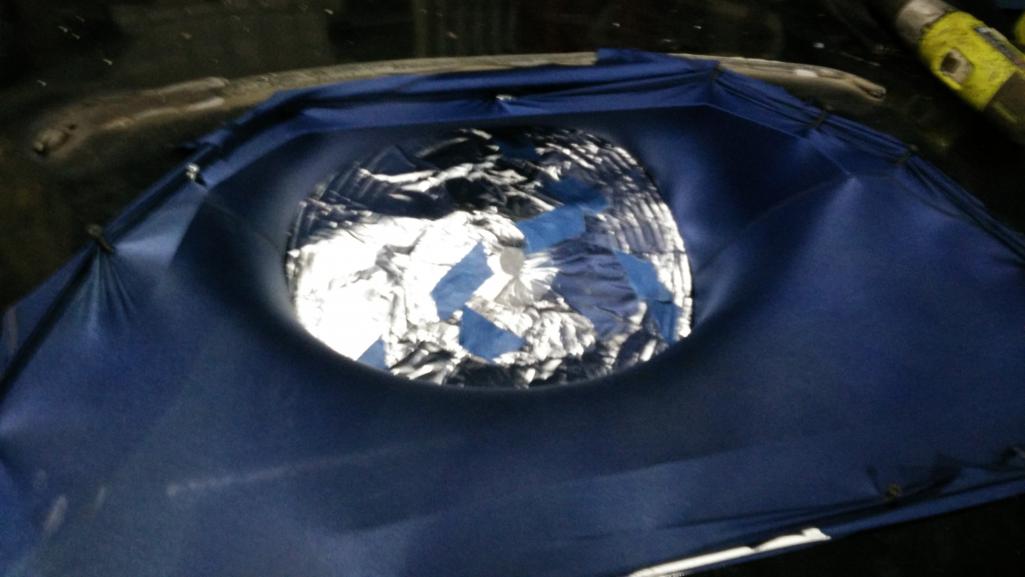
Today I decide to do some work on the hood vent. I took and old cotton shirt and some clamps to make a mold for the future hood vent tunnel?
I Attached the shirt to the radiator fan with some screws. Used the clamps to stretch the shirt and maintain the form I wanted. I applied some marine resin (the one u use for wood, was the only thing available around). I hope this work. Otherwise I would have to use the fiberglass resin or maybe BONDO?
BTW I have to paint the hood again because Im going to do more mods, since I dont like the look, so I dont care right now about if the paint get damage.
I will let you guys know later how its going.
Hope this help for new ideas to the watercooled engine swap guys.
Some pics
Posted by: plymouth37 Dec 29 2008, 11:24 PM
Nice job, you are building one heck of a wicked ride!
Posted by: jcambo7 Dec 29 2008, 11:54 PM
This is going to be one rockin 914 I love what you did with the headlights. They look great. And the sheridan looks real nice too. The eng sounds great and looks great. I cant wait to see what this car looks like when you are finished. 

![]()


Posted by: nukepipe Feb 10 2009, 09:27 PM
Here are some updates... slow progress.
Here is the hood vent almost done. Still some trimming to do and paint.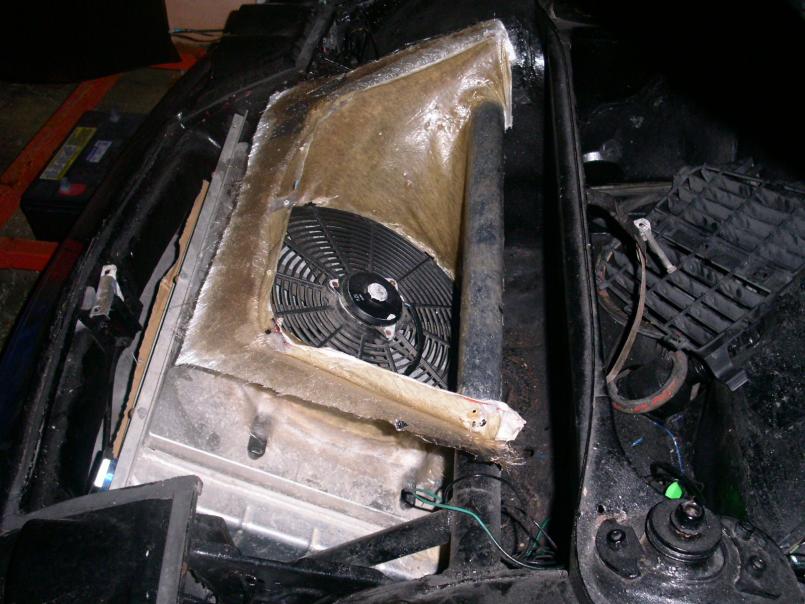
Posted by: nukepipe Feb 10 2009, 09:33 PM
another
From top.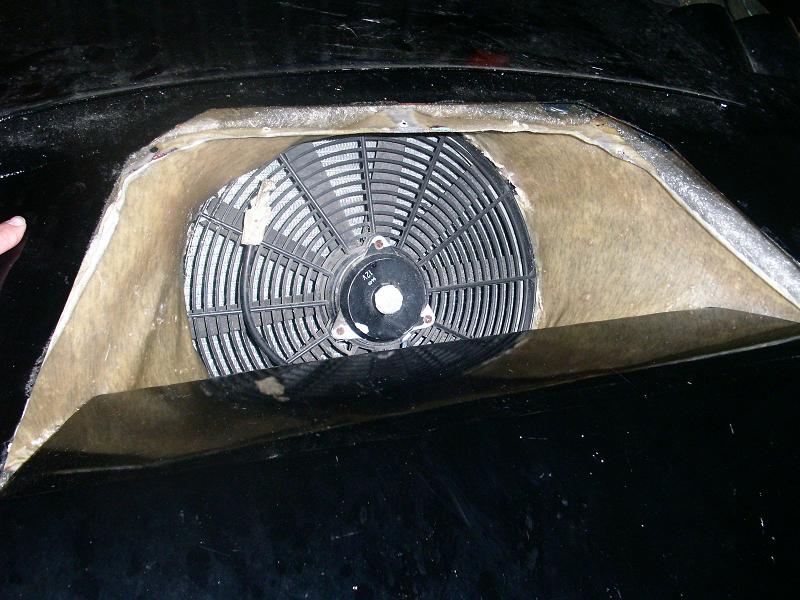
Front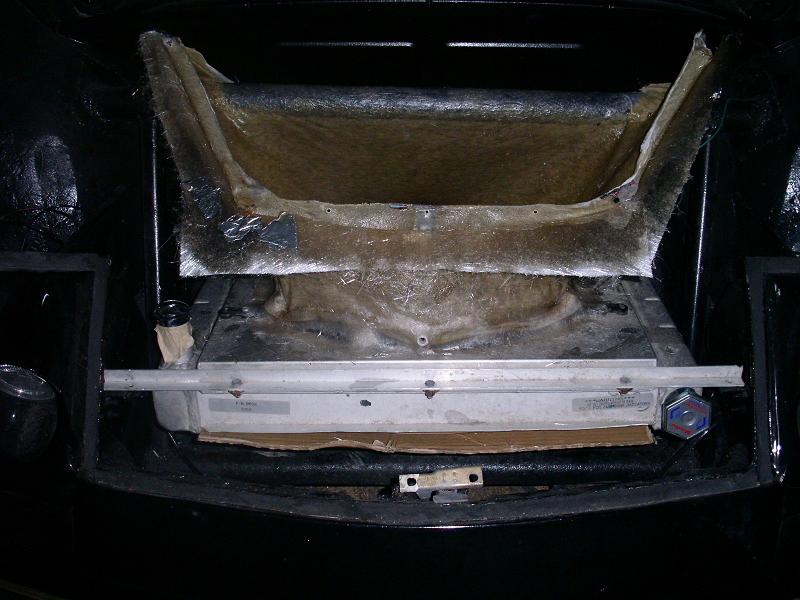
Side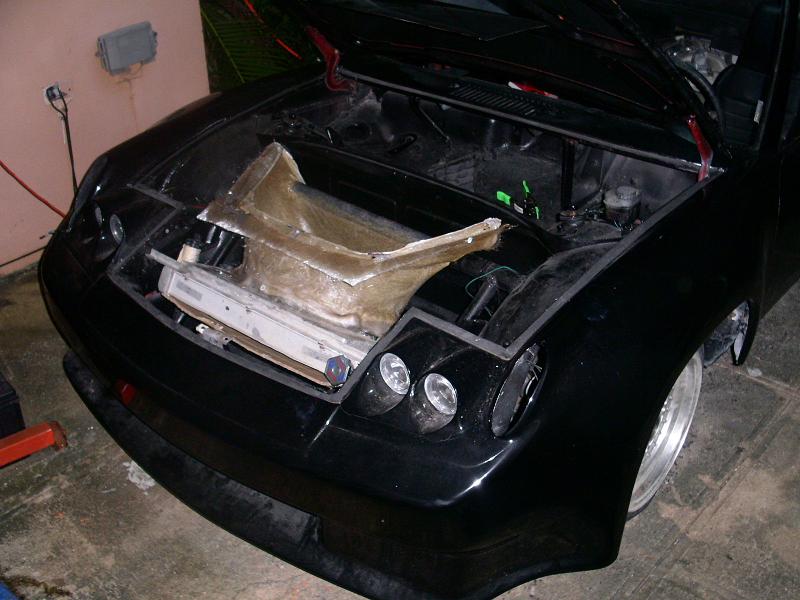
Another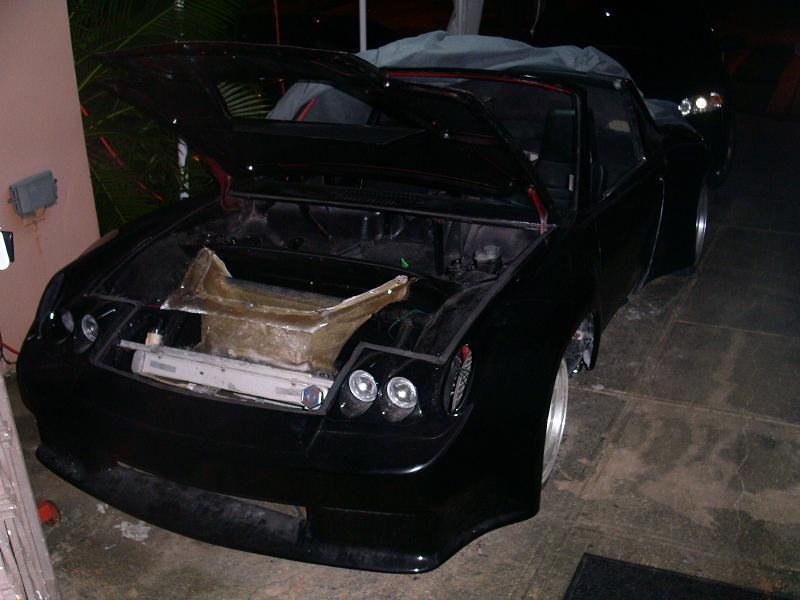
I took this piece and reinforced it. Its weight about 2 pounds, and is very easy to remove and install.
I will take more pics when Im finished with the trimming and paint.
Posted by: nukepipe Feb 10 2009, 09:42 PM
Here are some more pics of what Im being doing.....
Mocking with wheels....
18x11 rear
18x8 front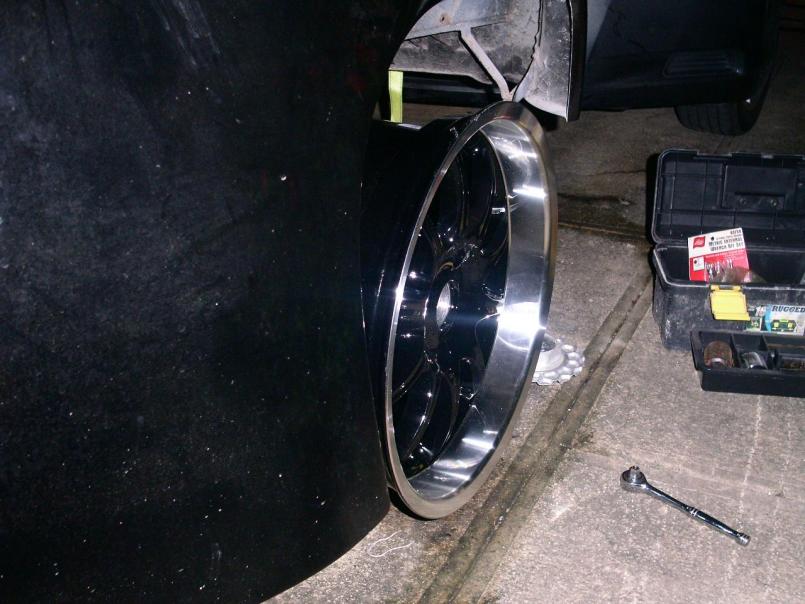
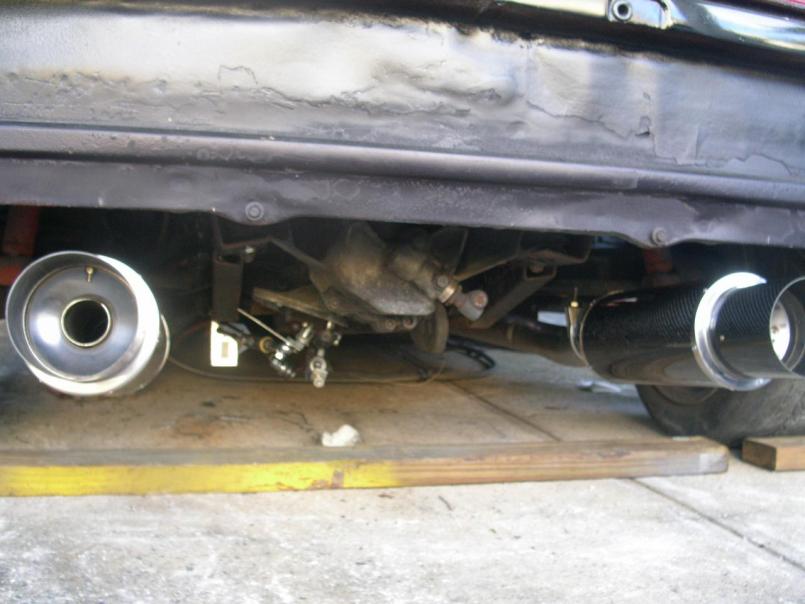
Posted by: nukepipe Feb 10 2009, 09:49 PM
Playing with the exhaust.....
Maybe look to ricer... but you would have to see the finished product.... still working on the rear valance. BTW these are very light and the risk to get burn with these is lower... (always thinking on my kids....)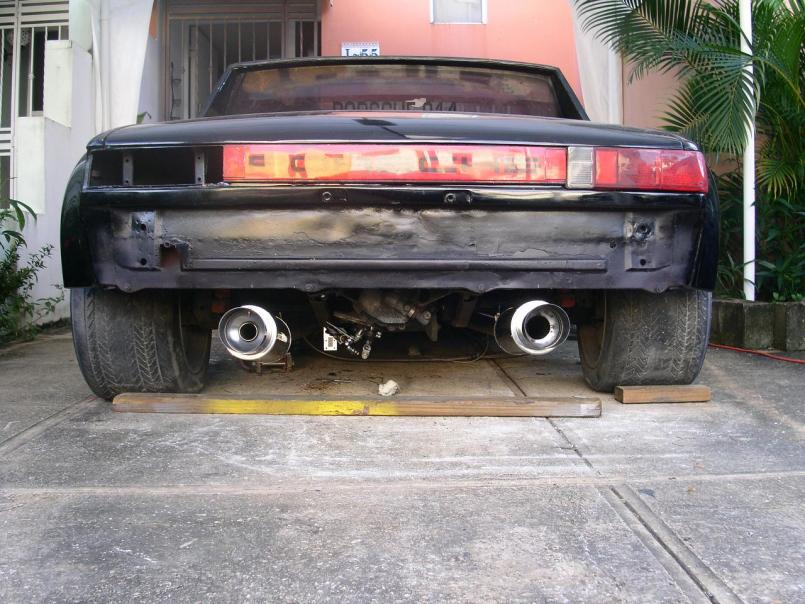
Posted by: nukepipe Feb 10 2009, 09:56 PM
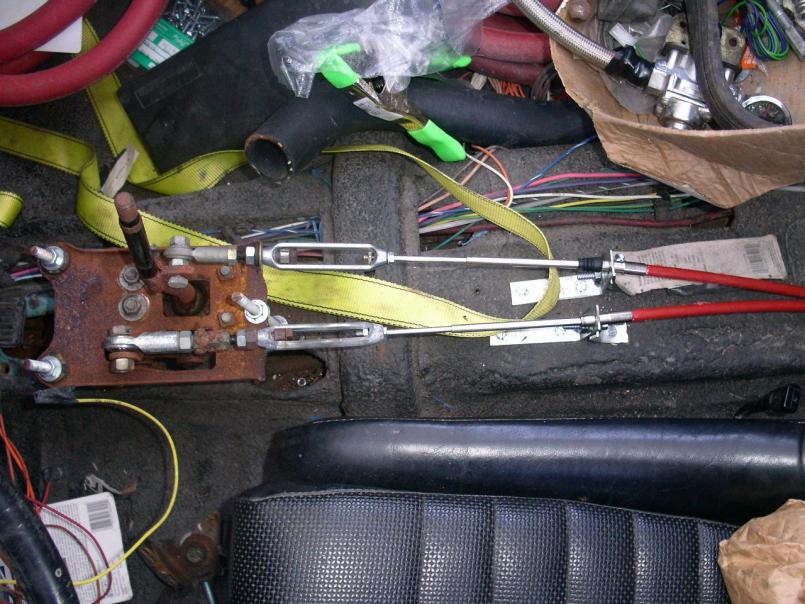
I'm being working in a home made cable shifter... since I dont have access to a machine shop I have to use rudimentary tools and ingenuity to make this work. I still have to reinforce some pieces that Im using to hold the cable on position. But it is doing the work.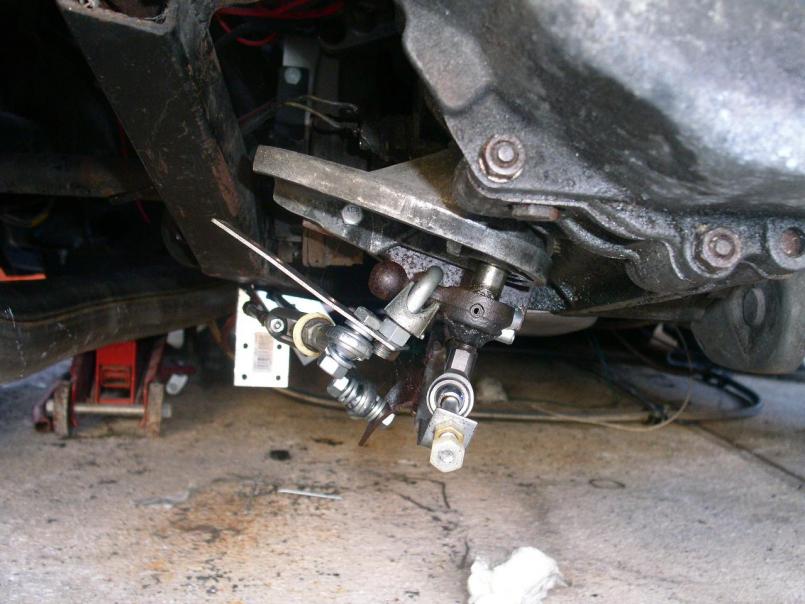
Posted by: slow914 Feb 10 2009, 11:17 PM
I for one think the exhaust is awesome and the ford gt style fan vent is baddass, keep updating
Posted by: So.Cal.914 Feb 10 2009, 11:58 PM
I for one think the exhaust is awesome and the ford gt style fan vent is baddass, keep updating
I also like the way you Macgyvered your cable shifter.
Posted by: wallys914 Jan 24 2010, 01:58 AM
Any updates? I was just thinking why has no one done the import exhaust on a sbc 914?
Then I ran across this...
Posted by: kg6dxn Apr 18 2010, 11:19 AM
What is the latest update on this car?
Posted by: nukepipe Dec 26 2013, 08:08 PM
Time to revive this thread..!!! Haven't post since 2008?
Here we go... I live in a very humid island (not a vagina) and being fighting rust very hard for the last year. Will post lots of pics...
First... This hole was because cat piss!!! Damned CATs!!
Attached thumbnail(s)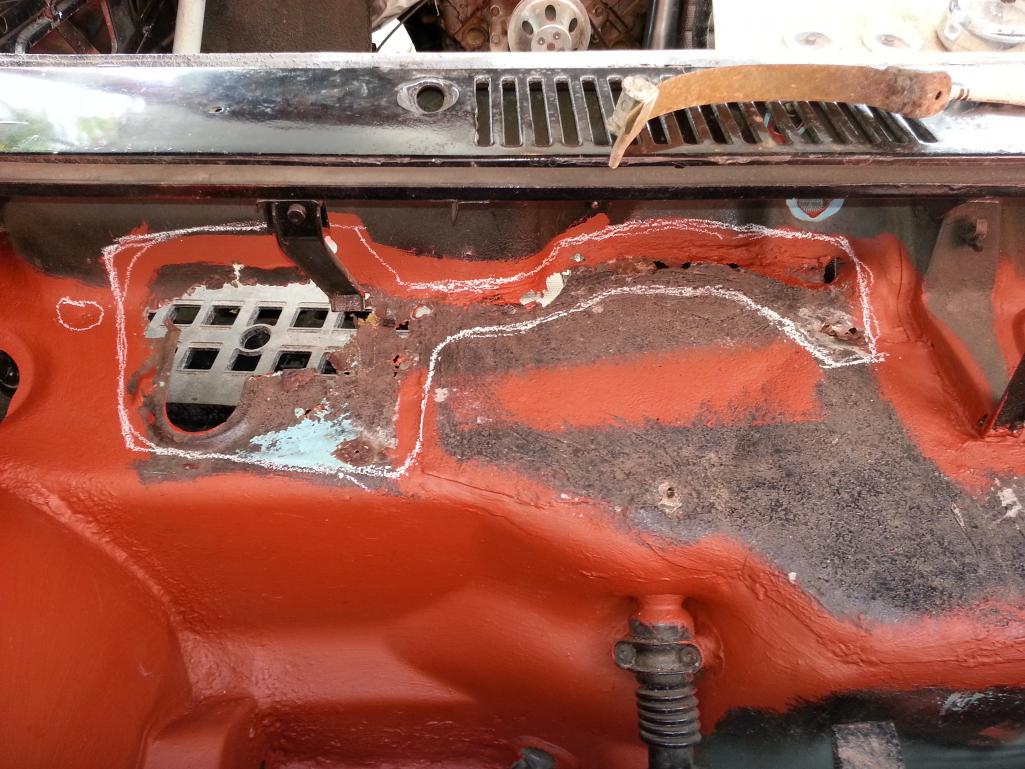
Posted by: nukepipe Dec 26 2013, 08:11 PM
Template
Attached thumbnail(s)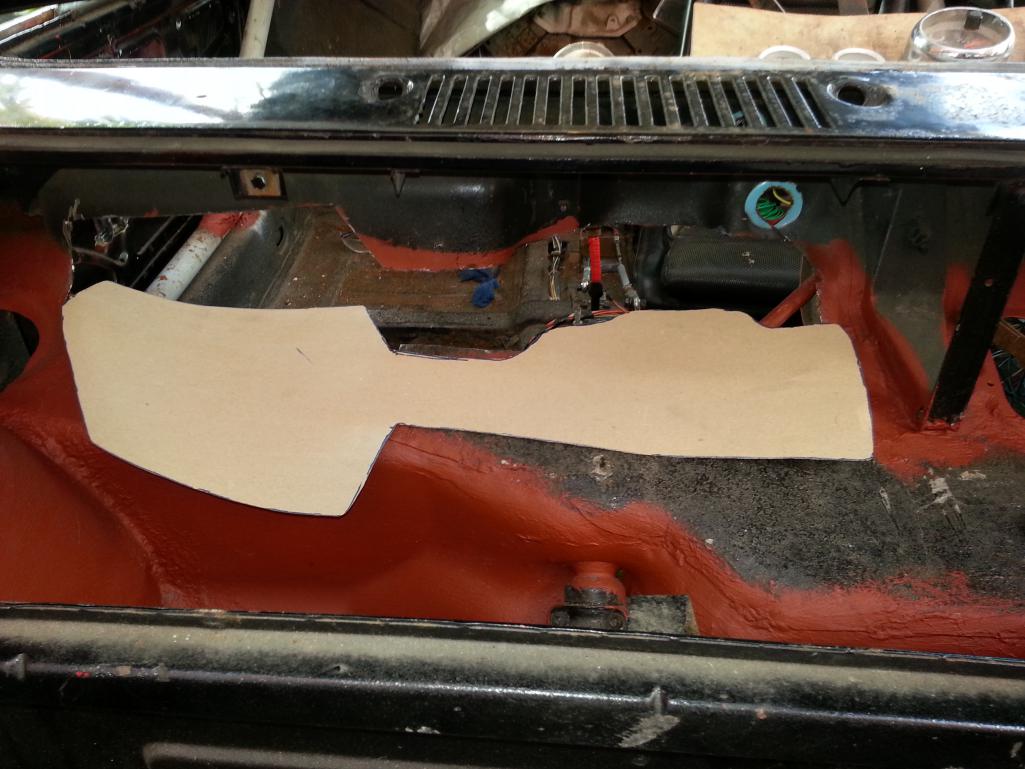
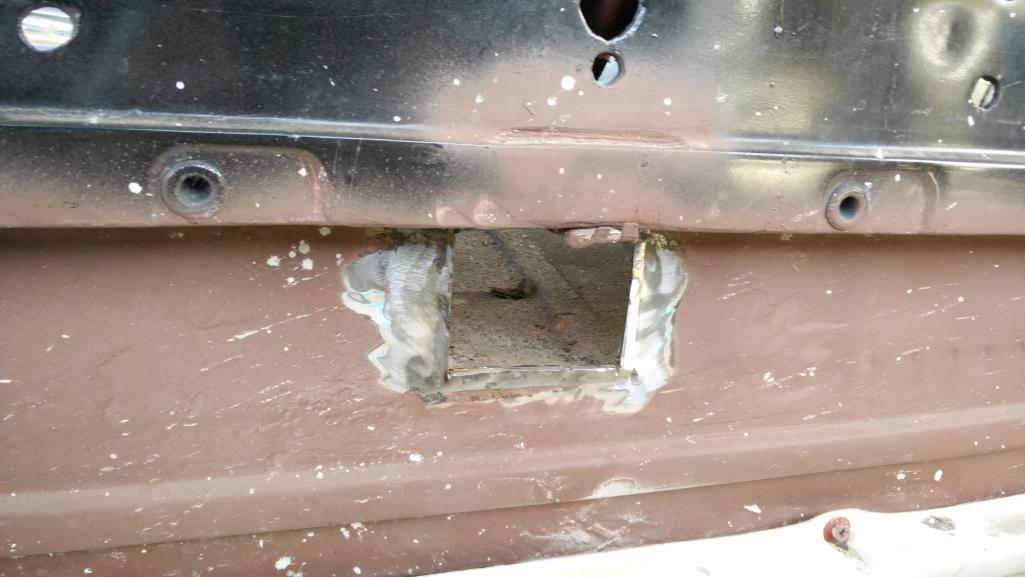
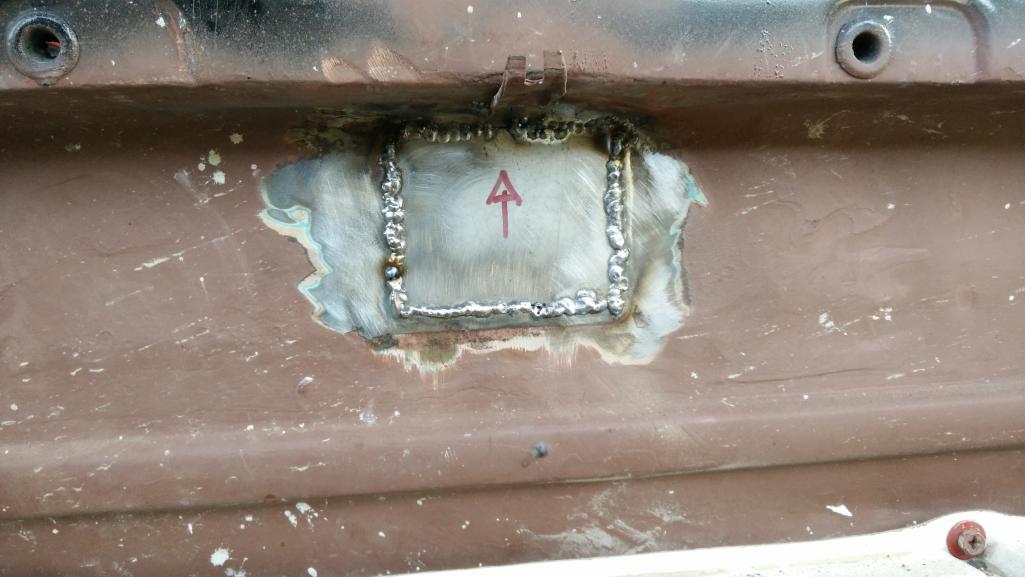
Posted by: nukepipe Dec 26 2013, 08:12 PM
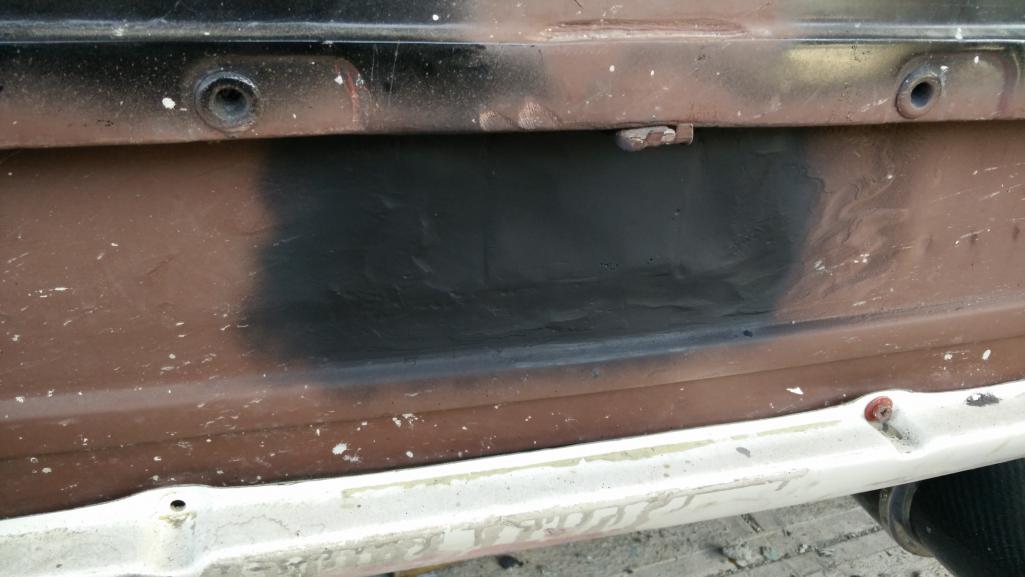
First time doing sheet metal... Was hard not blowing holes!!!
Attached thumbnail(s)
Posted by: nukepipe Dec 26 2013, 08:14 PM
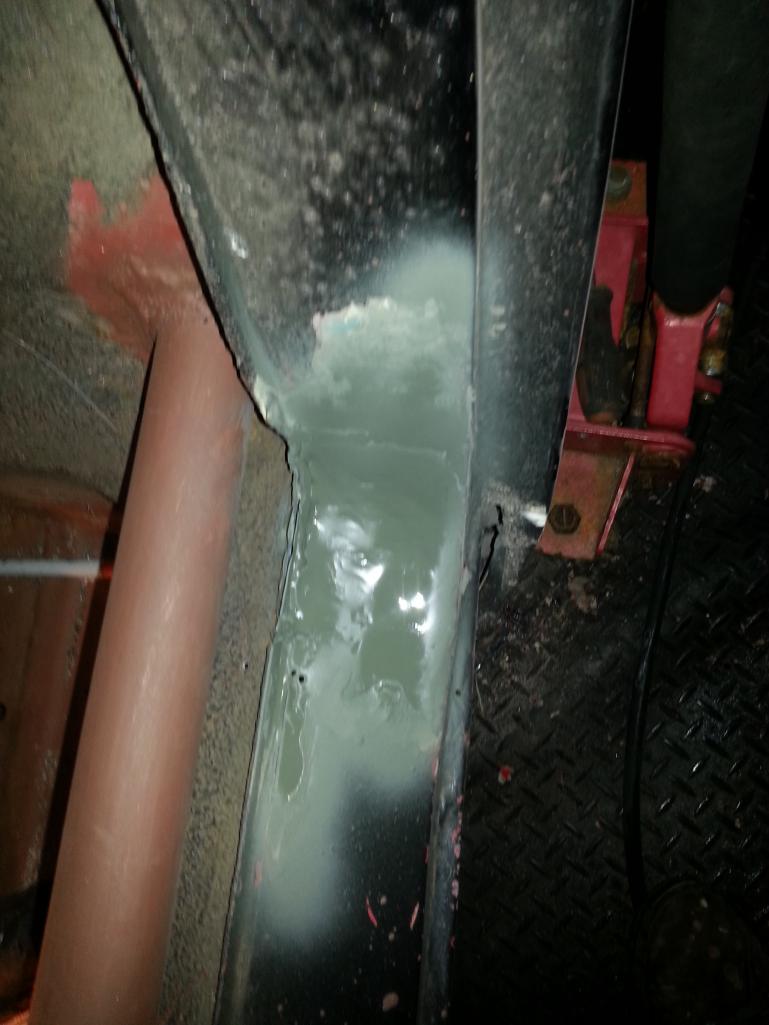
U see the wet spot... Cats fighting back!!!
Attached thumbnail(s)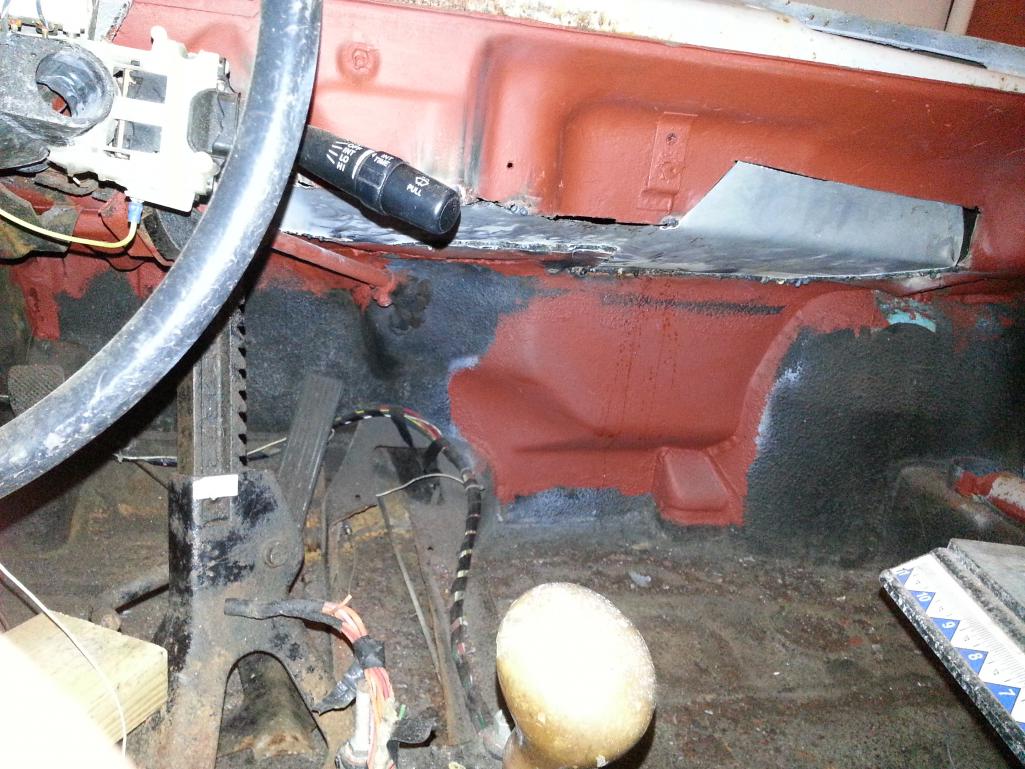
Posted by: nukepipe Dec 26 2013, 08:16 PM
RUST
Attached thumbnail(s)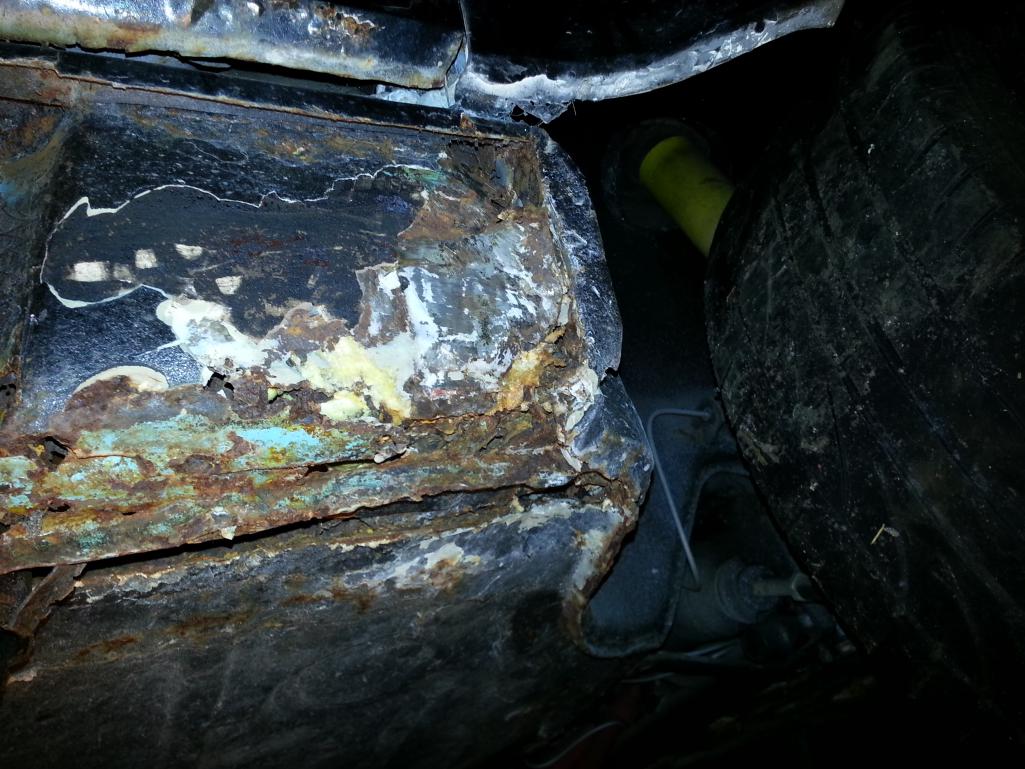
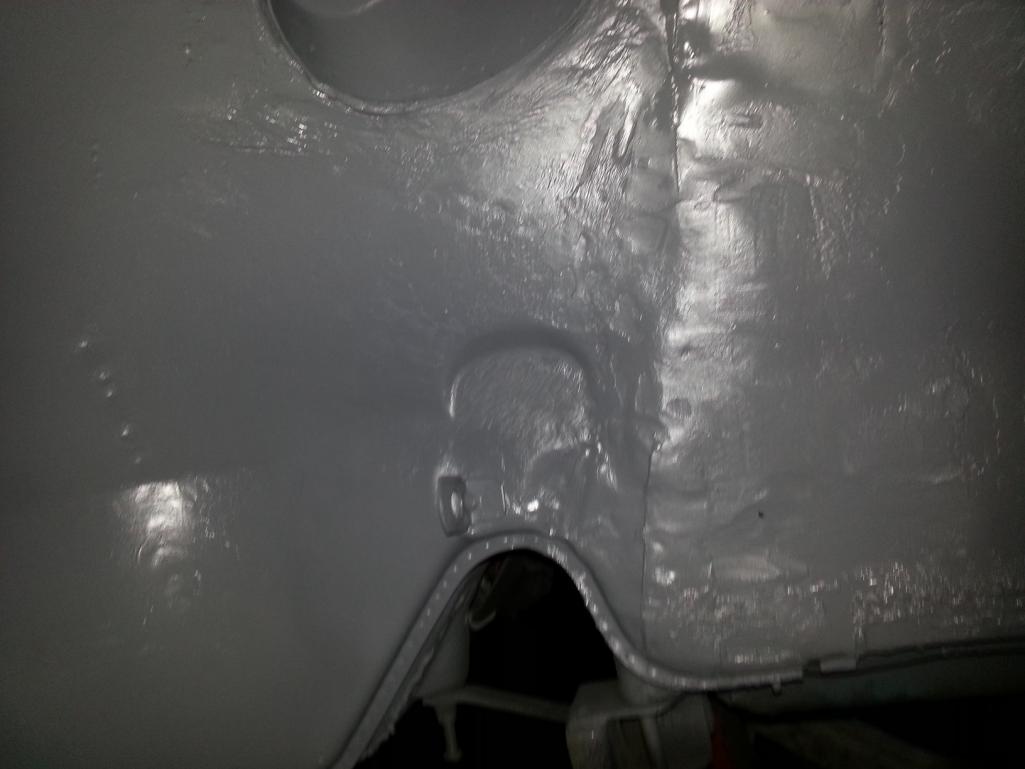
Posted by: nukepipe Dec 26 2013, 08:17 PM
Have to protect everything fast. Otherwise will rust fast.
Attached thumbnail(s)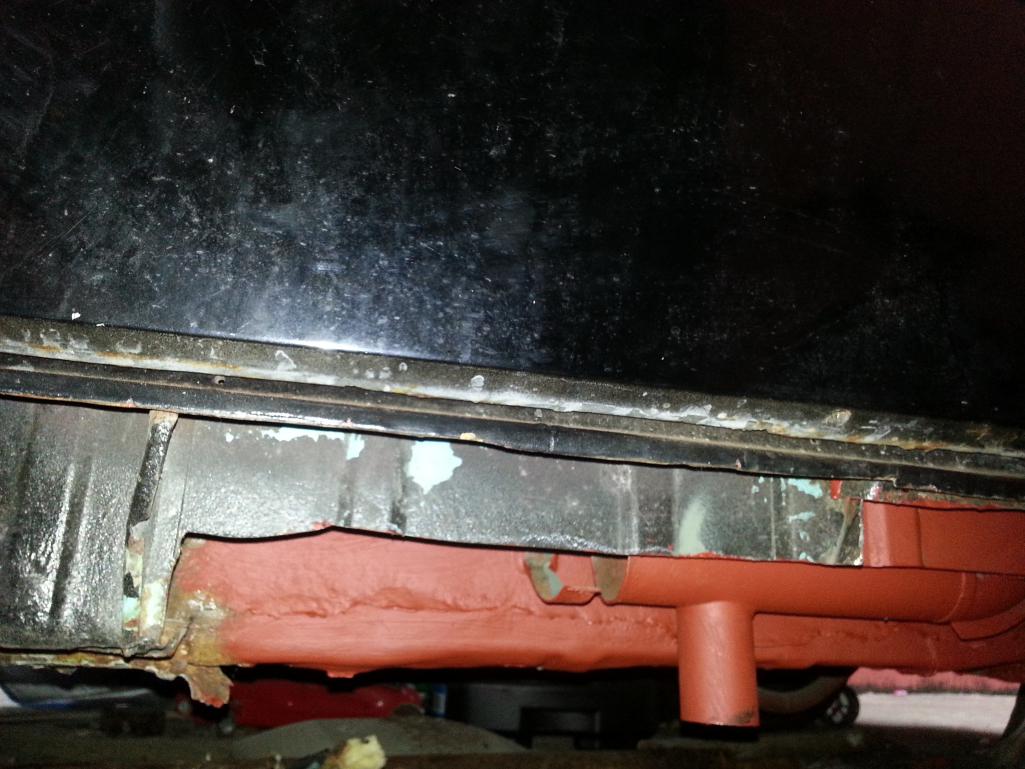
Posted by: nukepipe Dec 26 2013, 08:19 PM
Under the wheel well. Thanks GOD it's a wide body!
Attached thumbnail(s)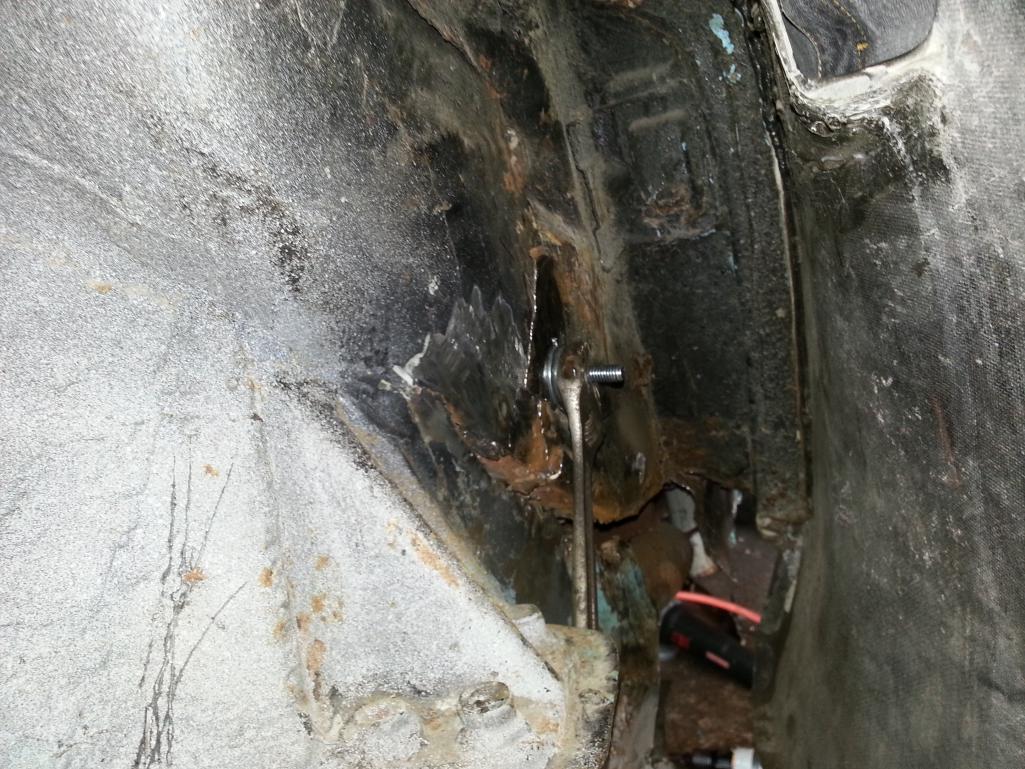
Posted by: nukepipe Dec 26 2013, 08:20 PM
nuther
Attached thumbnail(s)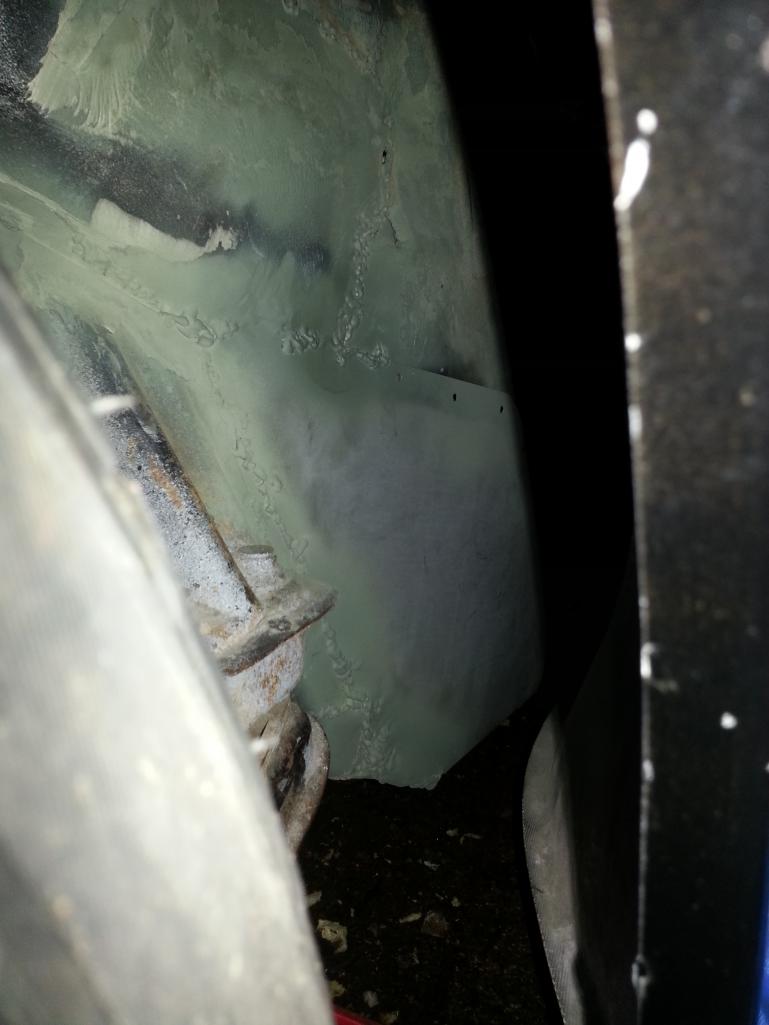
Posted by: nukepipe Dec 26 2013, 08:21 PM
Doing some bending with the home made bending machine.
Attached thumbnail(s)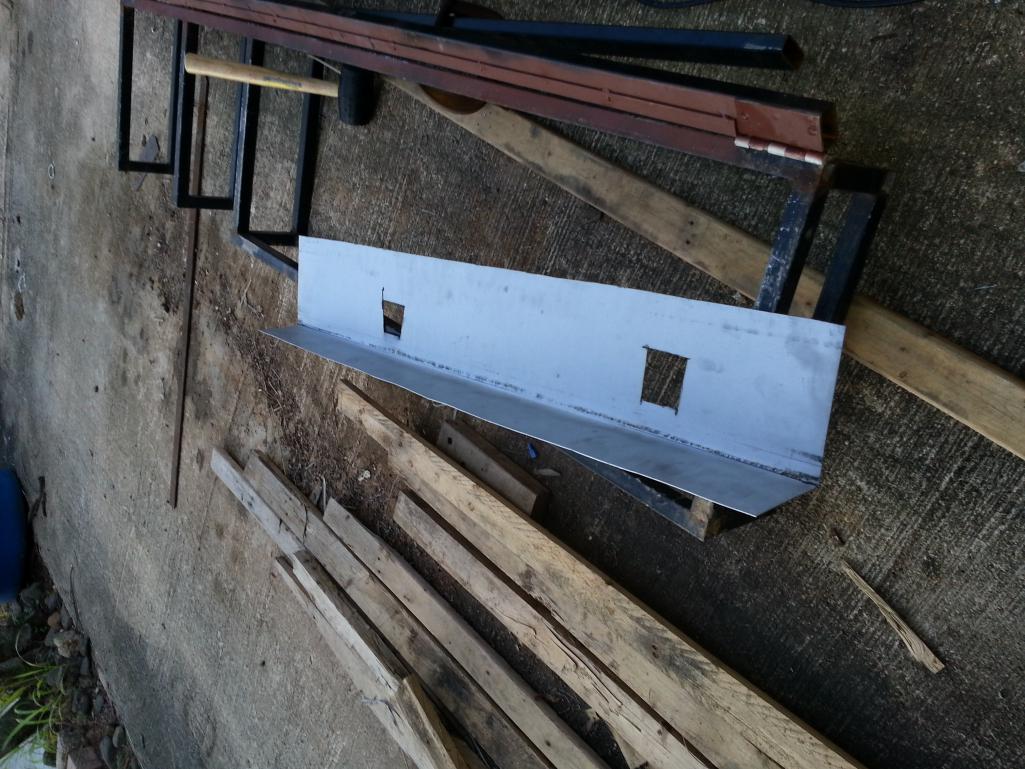
Posted by: nukepipe Dec 26 2013, 08:22 PM
more
Attached thumbnail(s)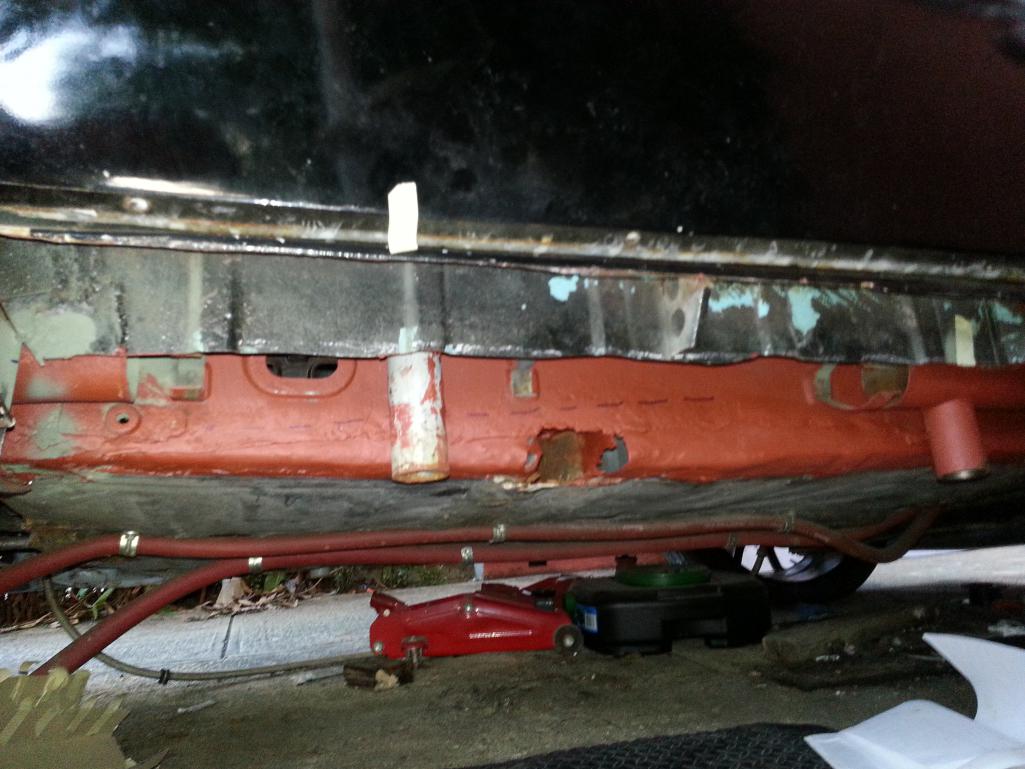
Posted by: nukepipe Dec 26 2013, 08:24 PM
more
Attached thumbnail(s)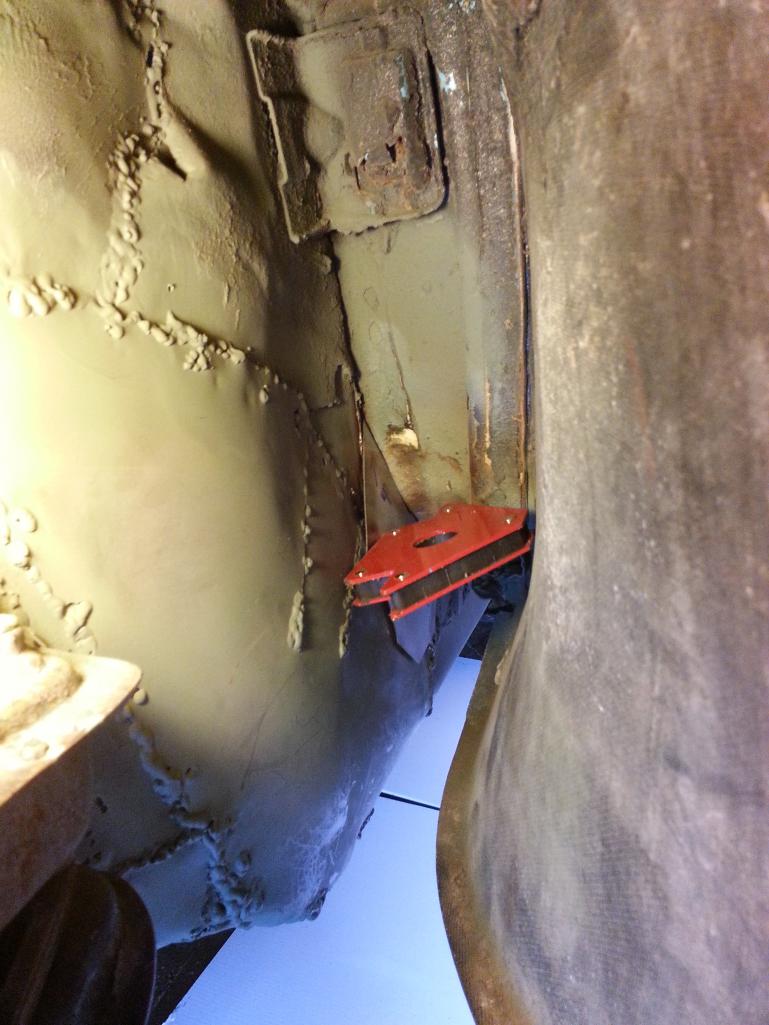
Posted by: nukepipe Dec 26 2013, 08:25 PM
more
Attached thumbnail(s)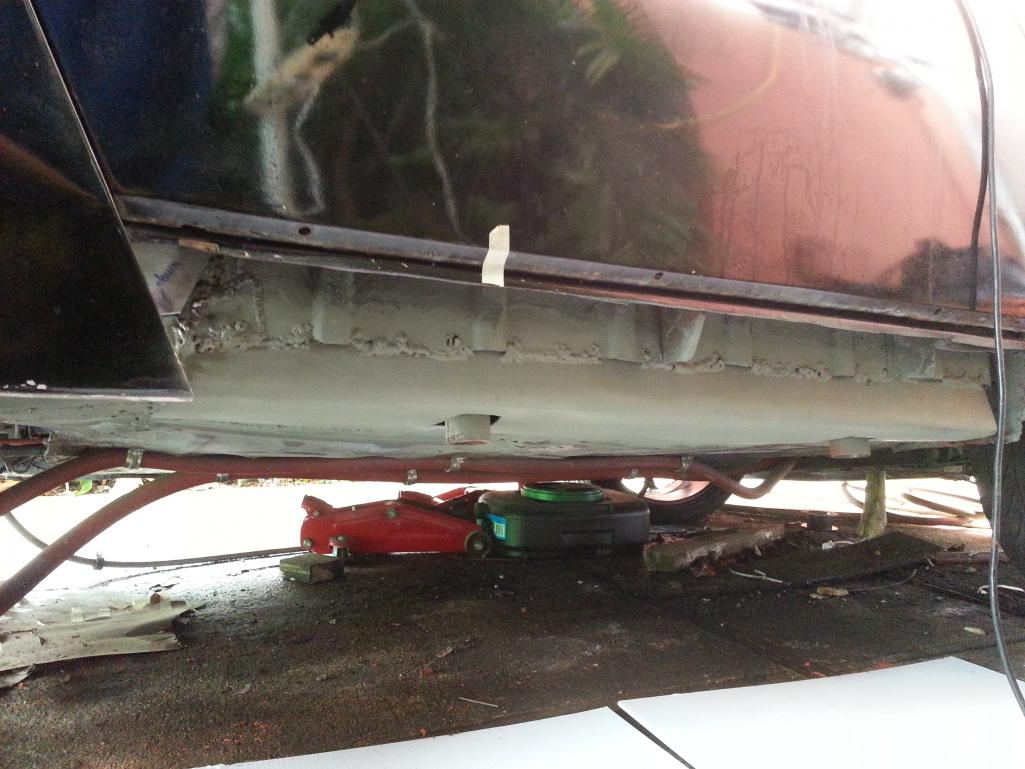
Posted by: nukepipe Dec 26 2013, 08:26 PM
more
Attached thumbnail(s)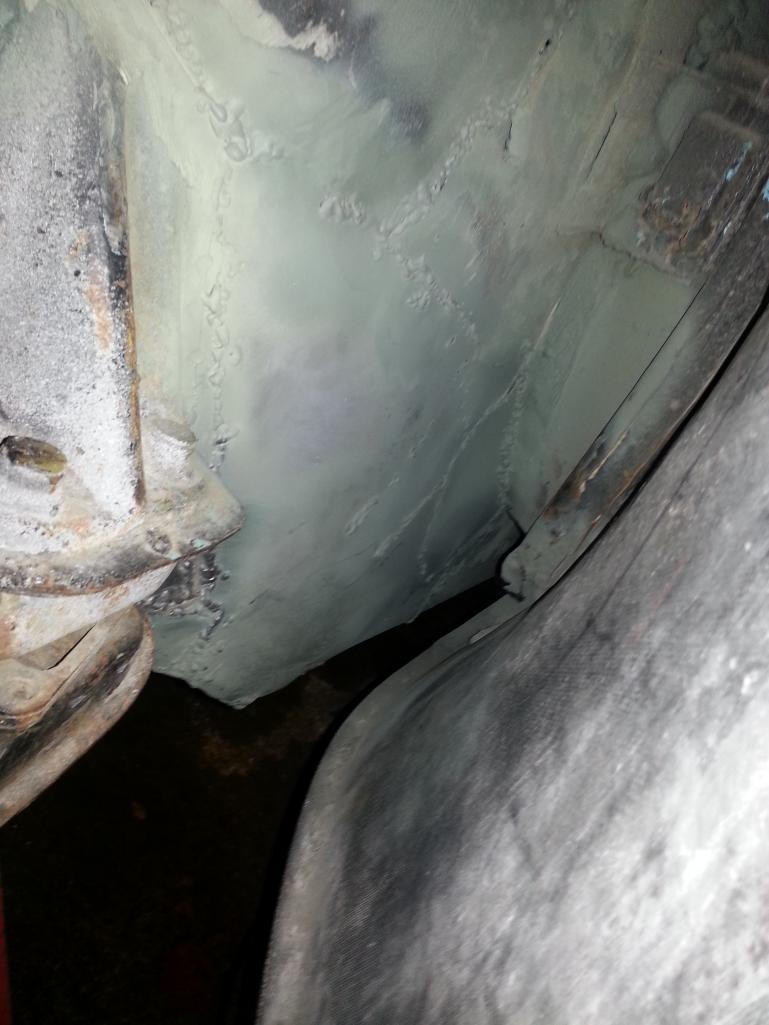
Posted by: nukepipe Dec 26 2013, 08:30 PM
more
Attached thumbnail(s)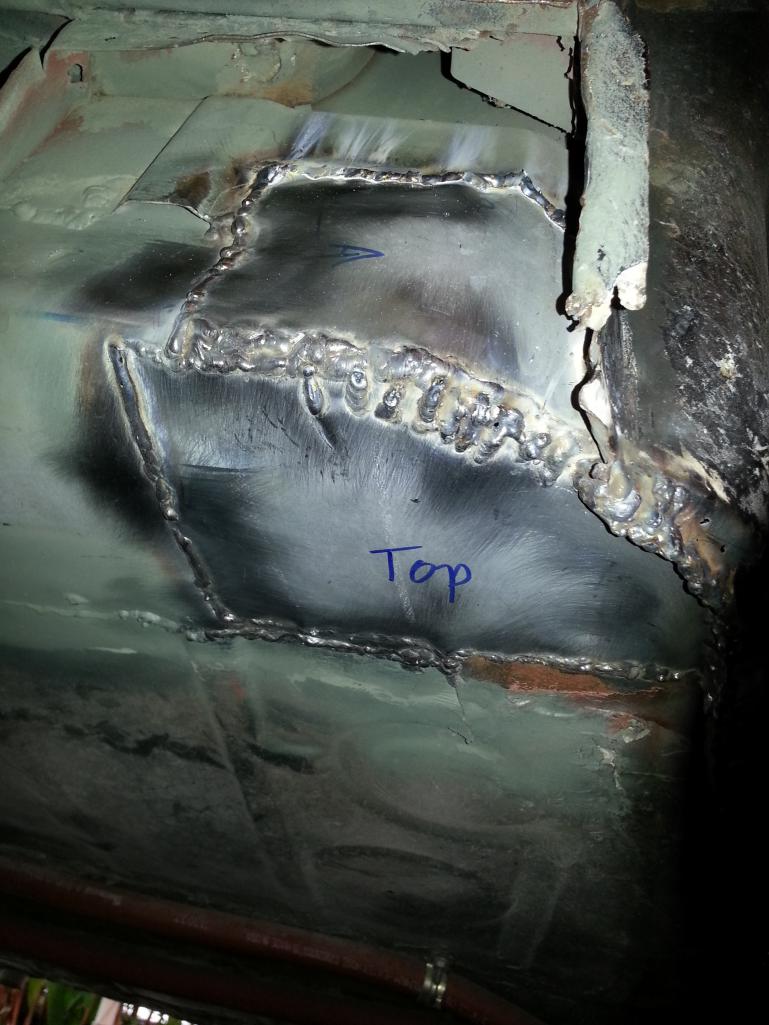
Posted by: nukepipe Dec 26 2013, 08:31 PM
more
Attached thumbnail(s)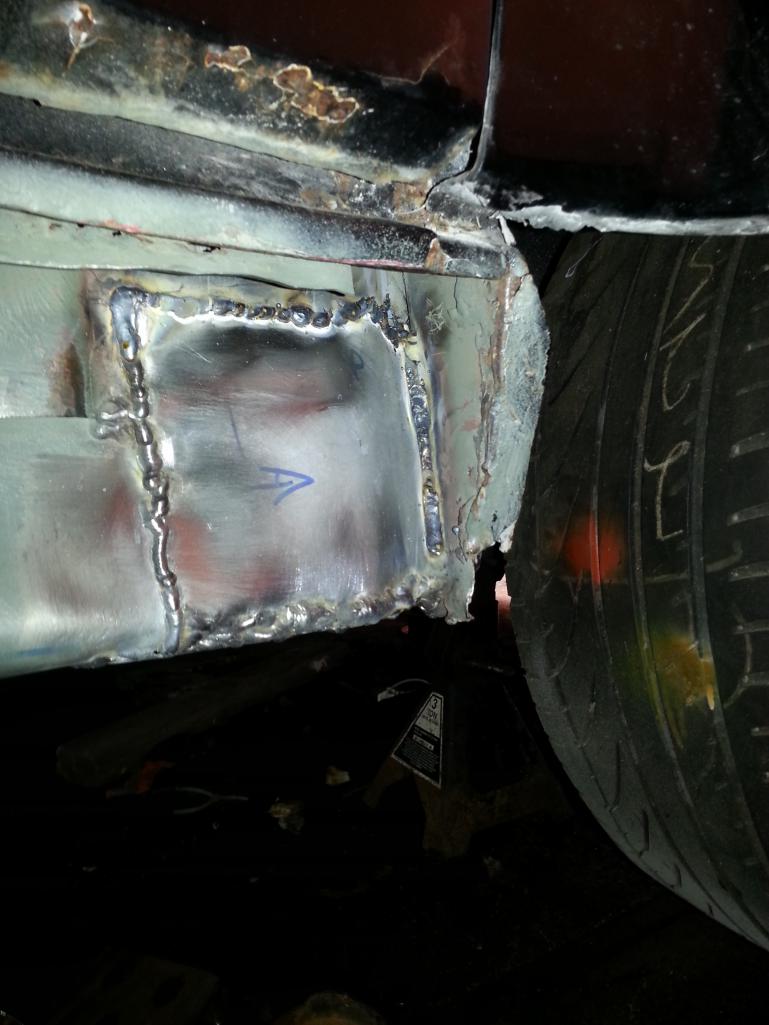
Posted by: nukepipe Dec 26 2013, 08:32 PM
more
Attached thumbnail(s)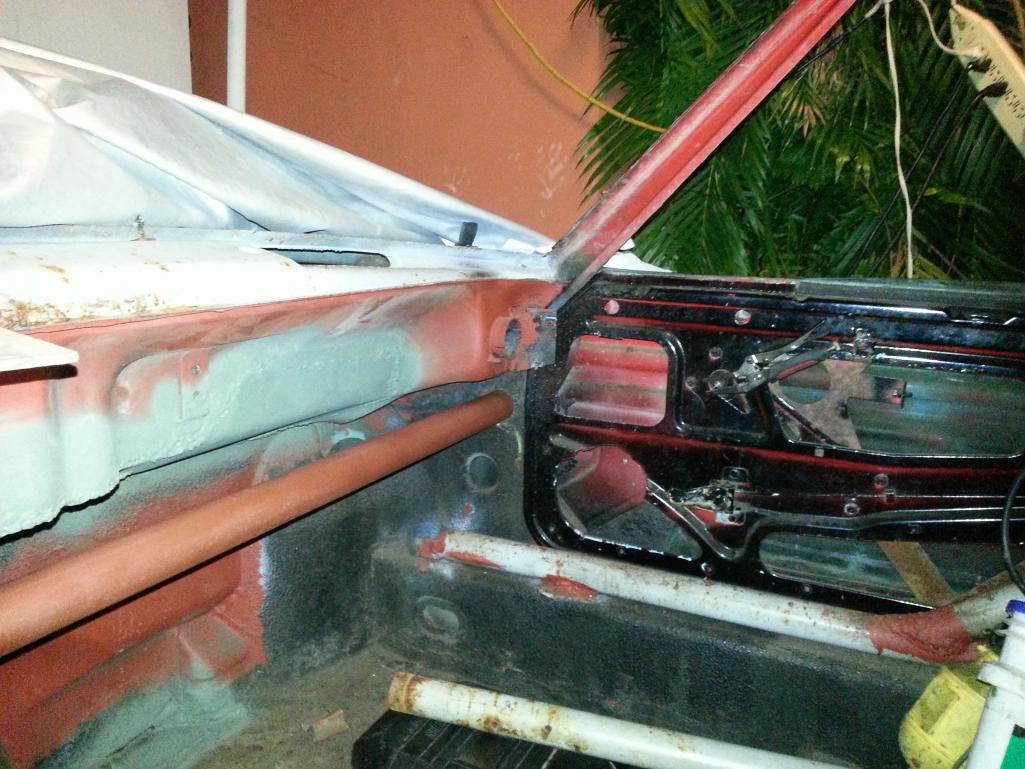
Posted by: nukepipe Dec 26 2013, 08:35 PM
I will take a couple of day just to grind everything off...!!
Attached thumbnail(s)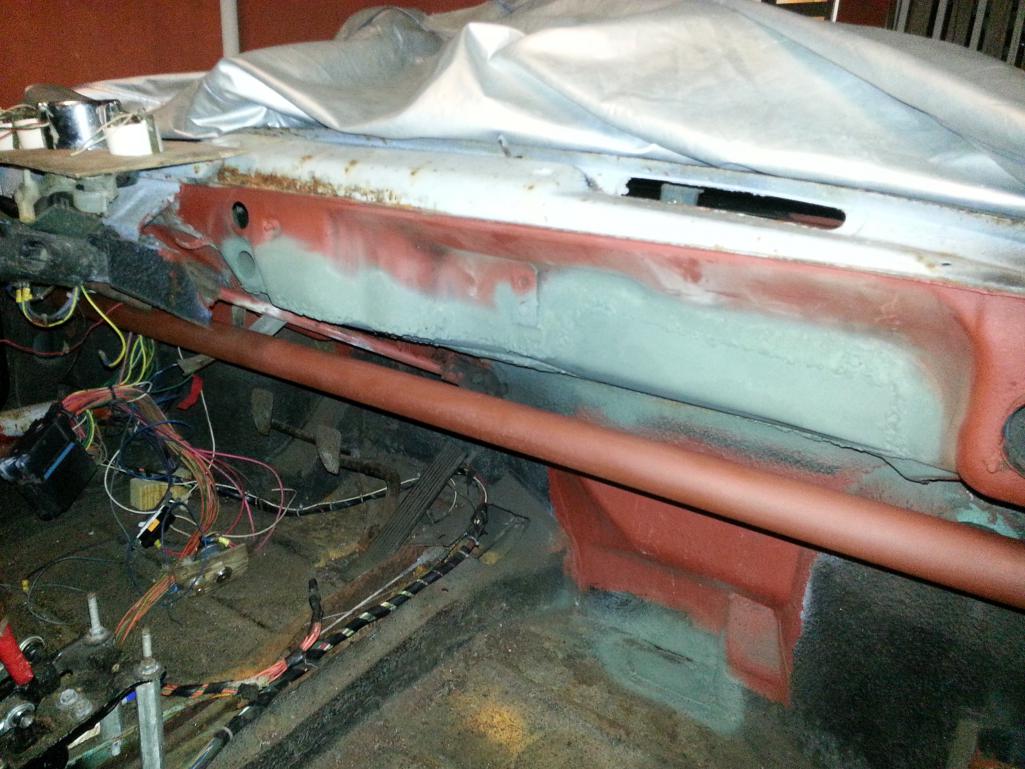
Posted by: nukepipe Dec 26 2013, 08:38 PM
let's fight more rust...
Attached thumbnail(s)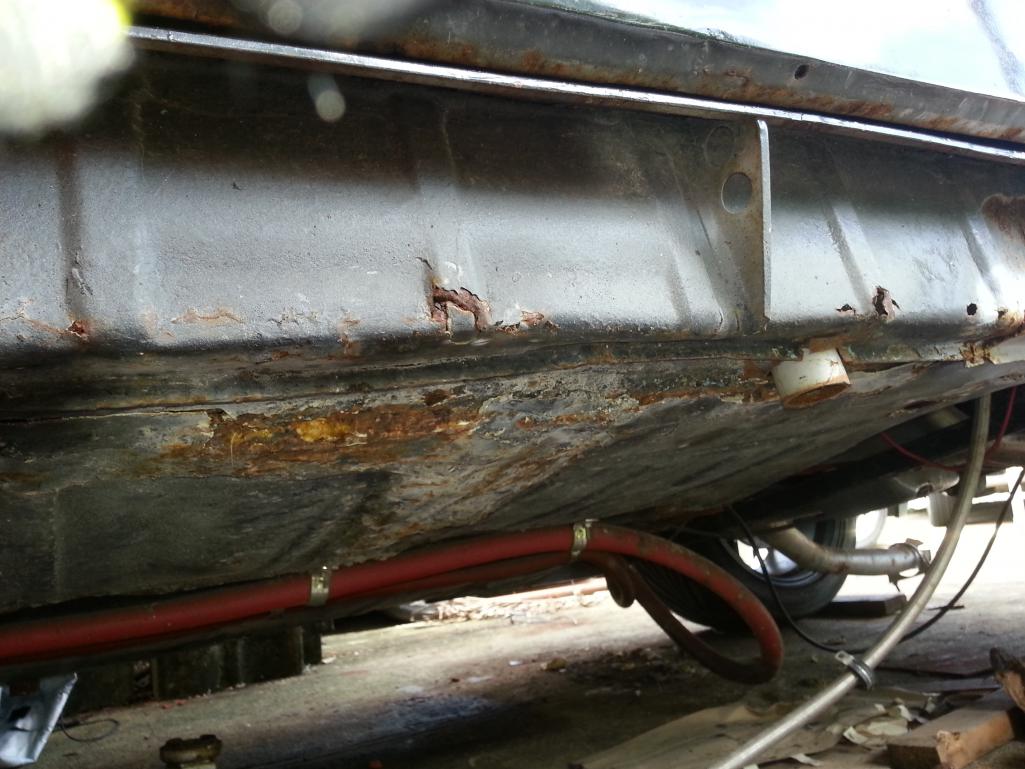
Posted by: nukepipe Dec 26 2013, 08:39 PM
Surprise!!! FOAM!!!!
Attached thumbnail(s)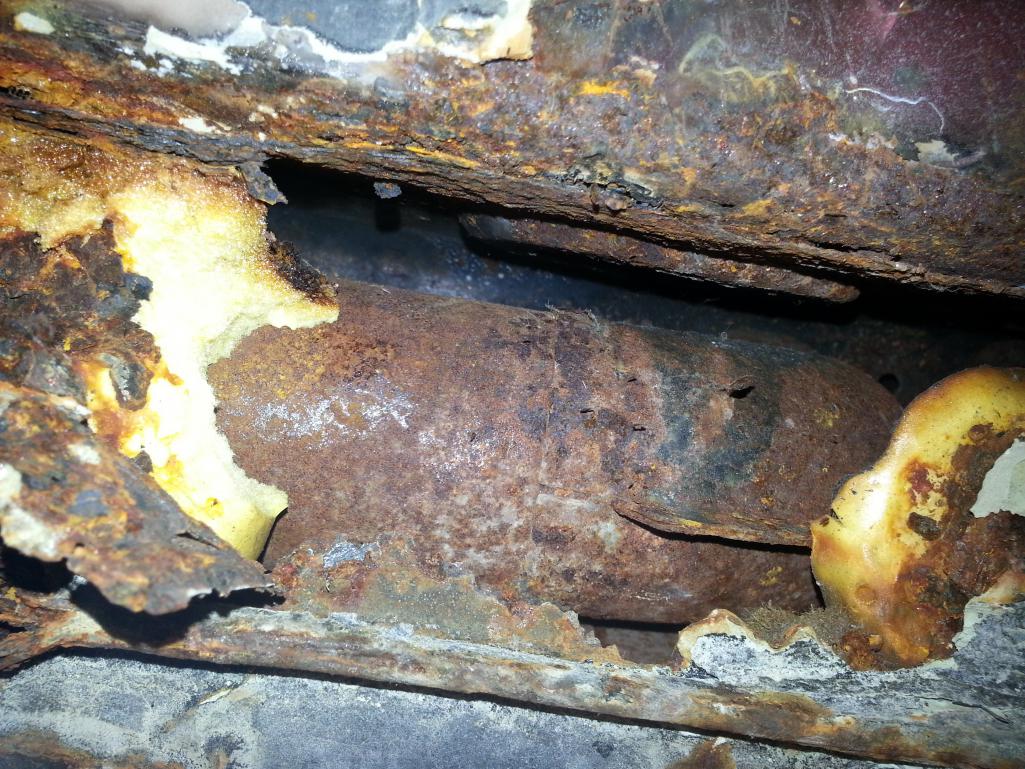
Posted by: nukepipe Dec 26 2013, 08:40 PM
more
Attached thumbnail(s)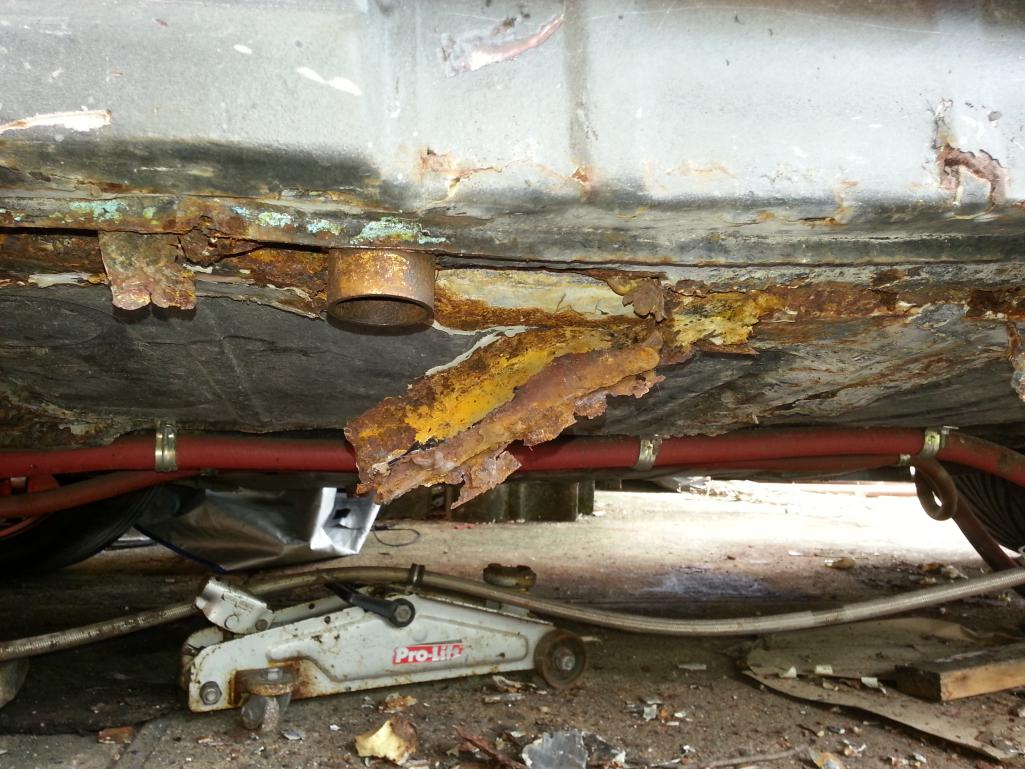
Posted by: nukepipe Dec 26 2013, 08:41 PM
more
Attached thumbnail(s)
Posted by: nukepipe Dec 26 2013, 08:42 PM
more
Attached thumbnail(s)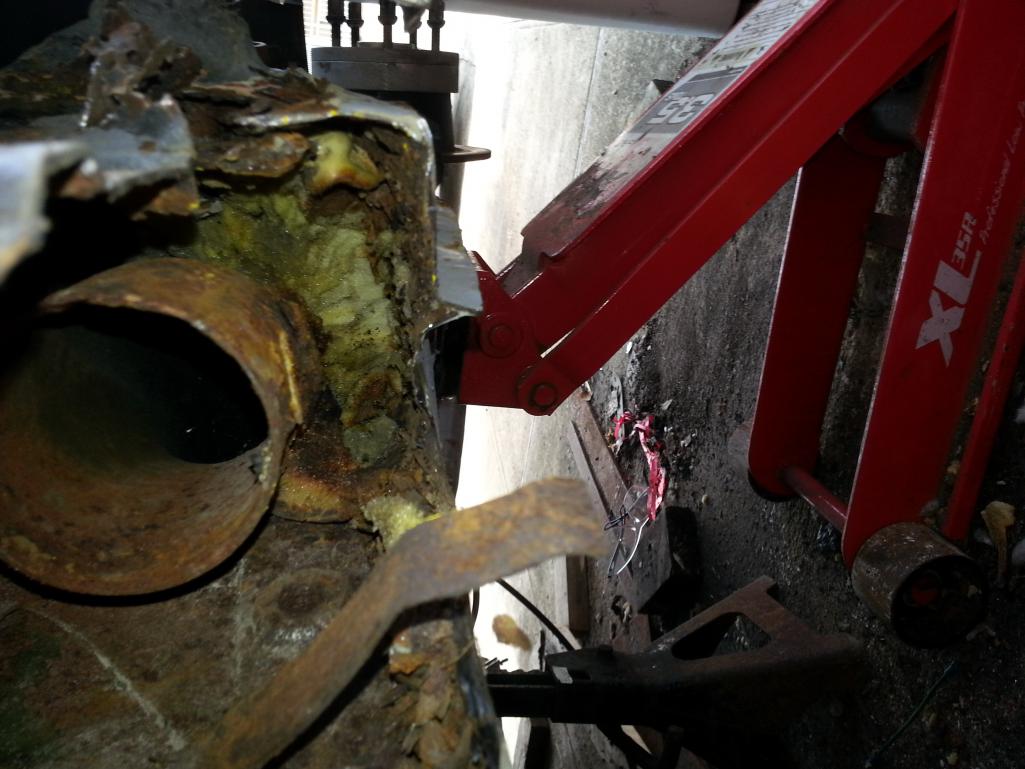
Posted by: nukepipe Dec 26 2013, 08:43 PM
cut, clean and protect...
Attached thumbnail(s)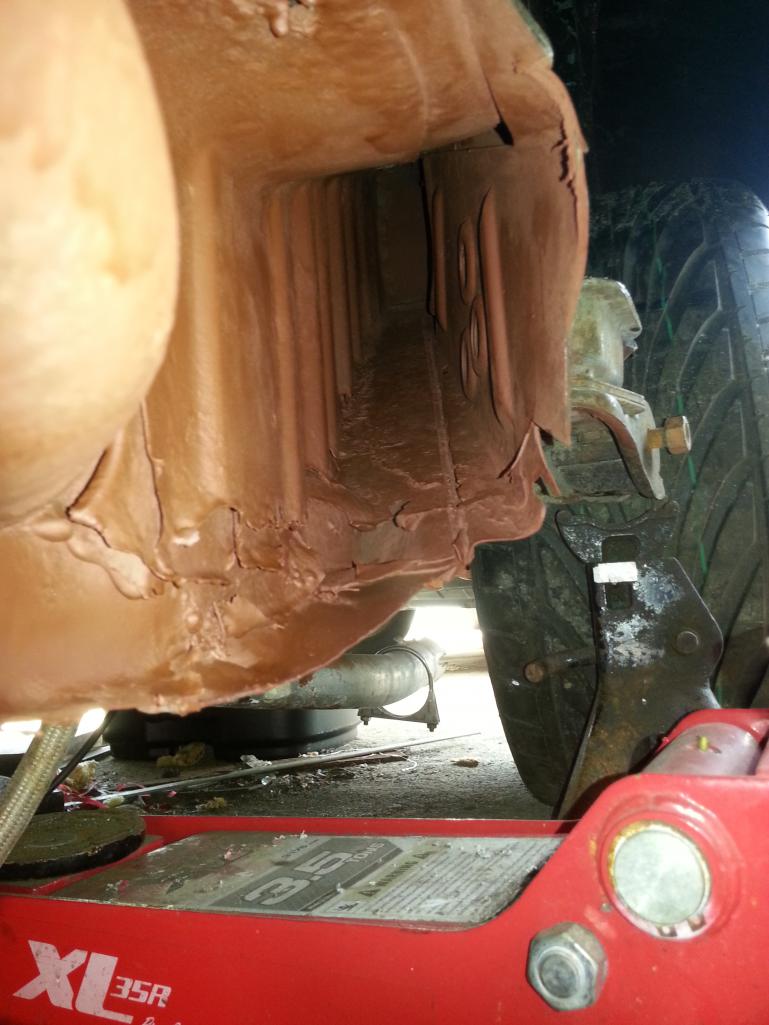
Posted by: nukepipe Dec 26 2013, 08:45 PM
more
Attached thumbnail(s)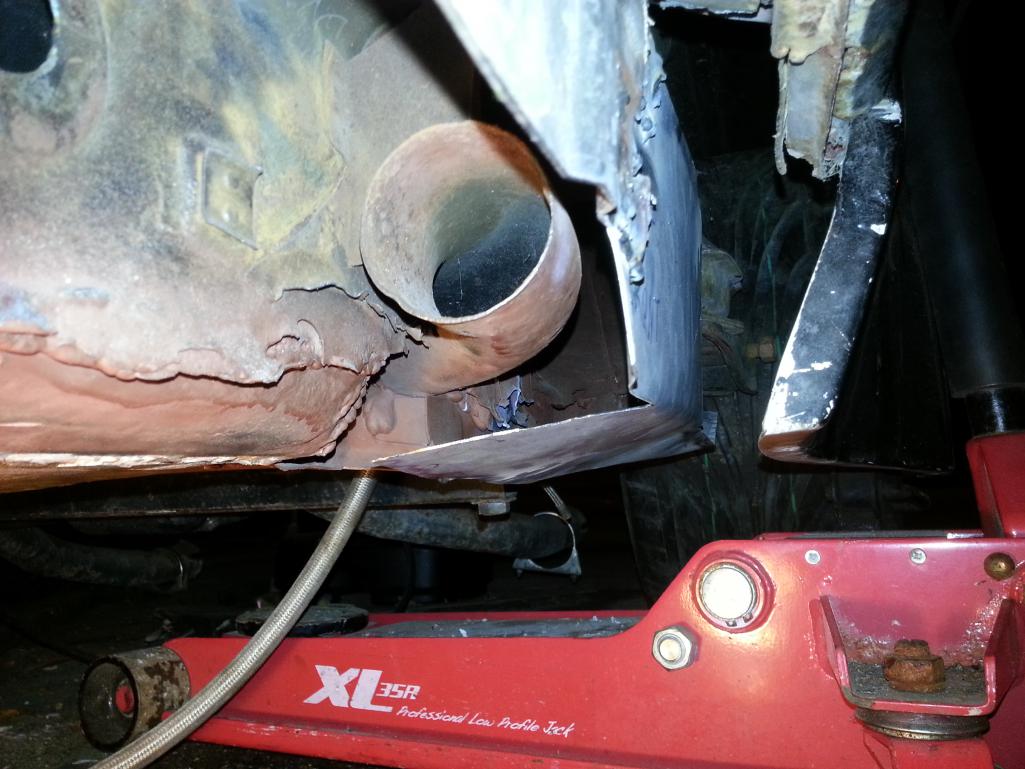
Posted by: nukepipe Dec 26 2013, 08:49 PM
more
Attached thumbnail(s)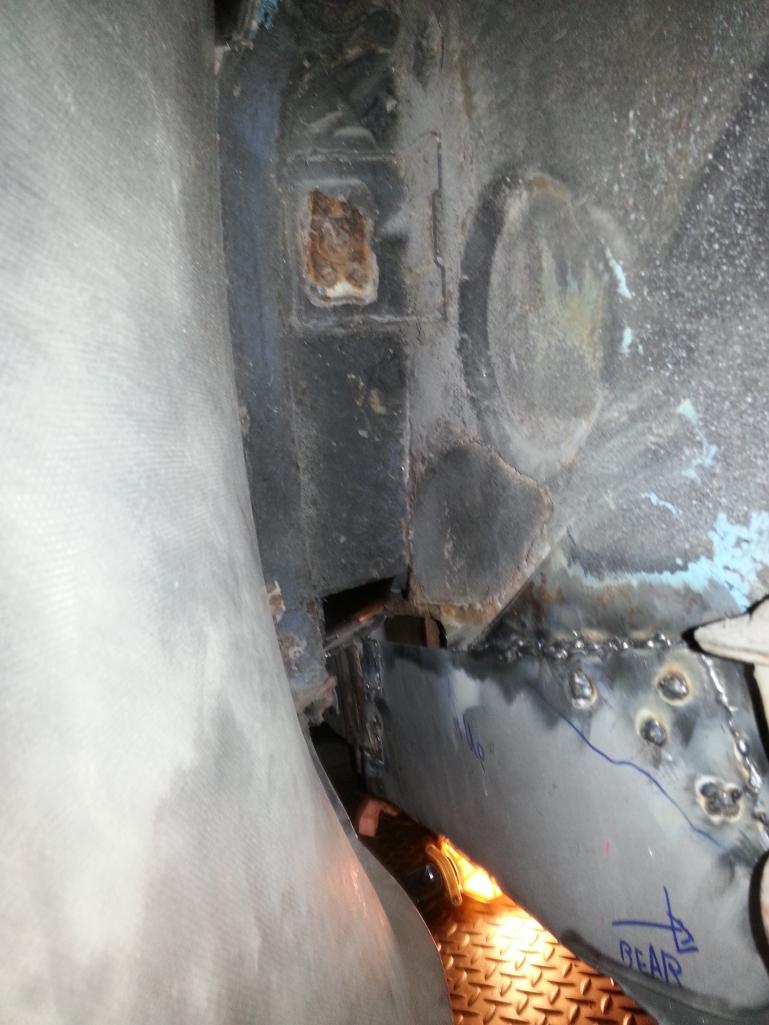
Posted by: nukepipe Dec 26 2013, 08:50 PM
It won't be a show car but will be solid again!!!
Attached thumbnail(s)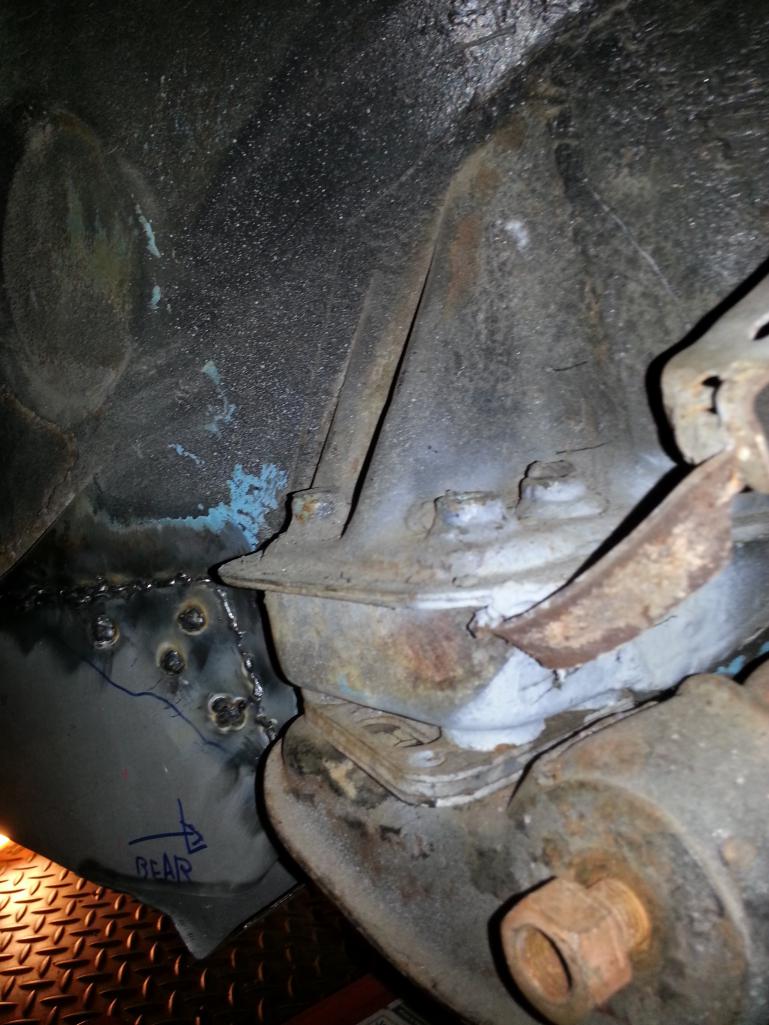
Posted by: nukepipe Dec 26 2013, 08:52 PM
a lot of seam sealing to do....
Attached thumbnail(s)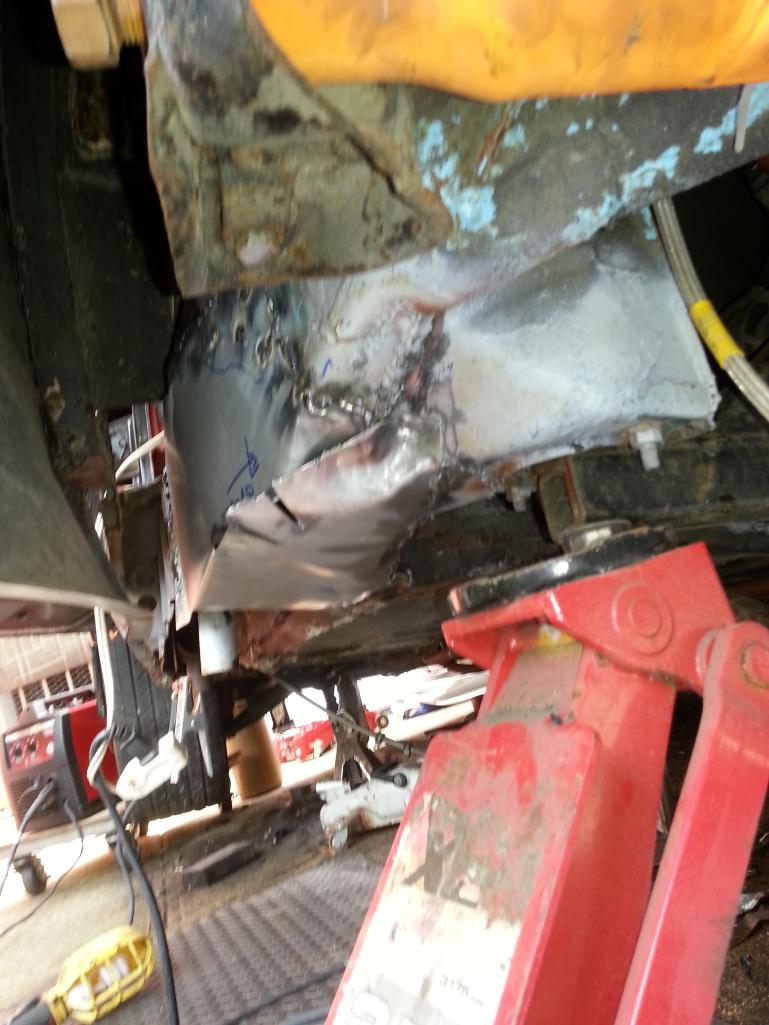
Posted by: nukepipe Dec 26 2013, 08:53 PM
more
Attached thumbnail(s)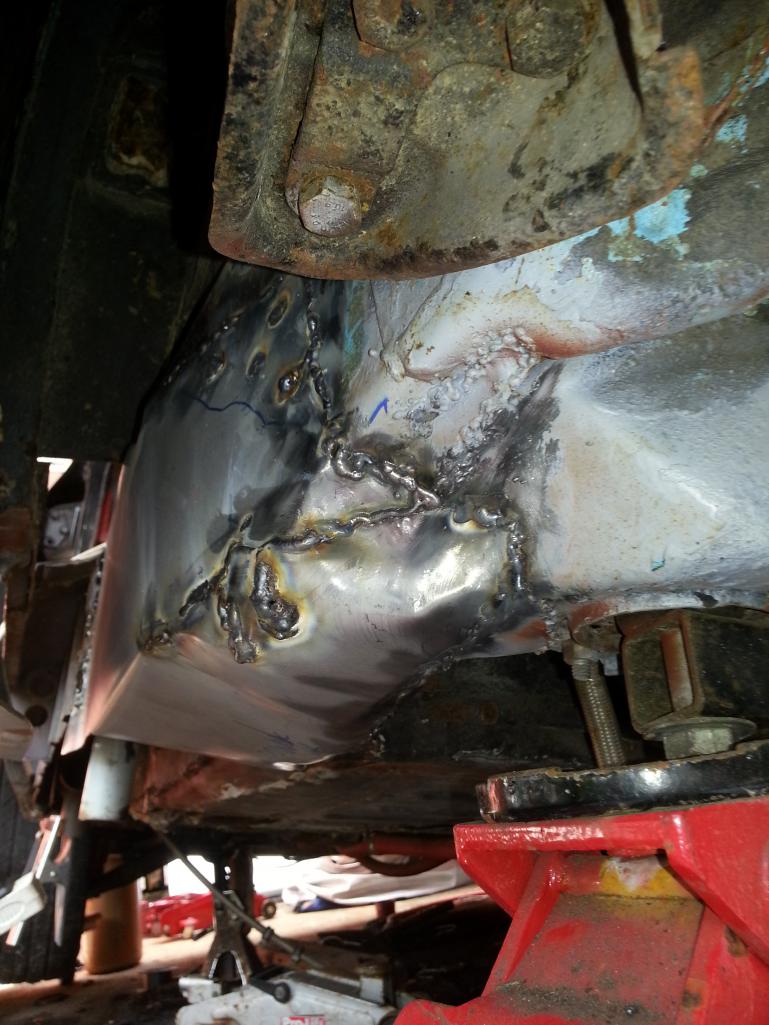
Posted by: JRust Dec 26 2013, 08:54 PM
Wow that is a lot of welding. Hopefully that cage is keeping everything in place for you. While it may not be a show car. You can drive the hell out of it & enjoy every minute of it. Love to see it finished. Keep up the good work
Posted by: nukepipe Dec 26 2013, 08:54 PM
more
Attached thumbnail(s)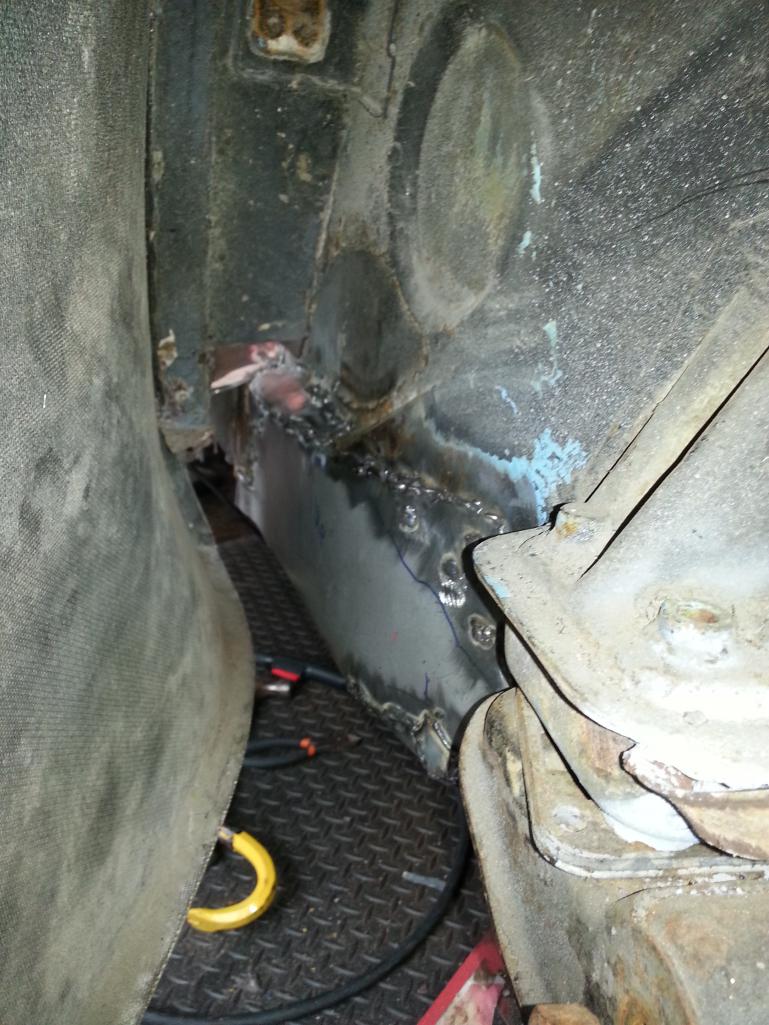
Posted by: nukepipe Dec 26 2013, 08:55 PM
some floor action
Attached thumbnail(s)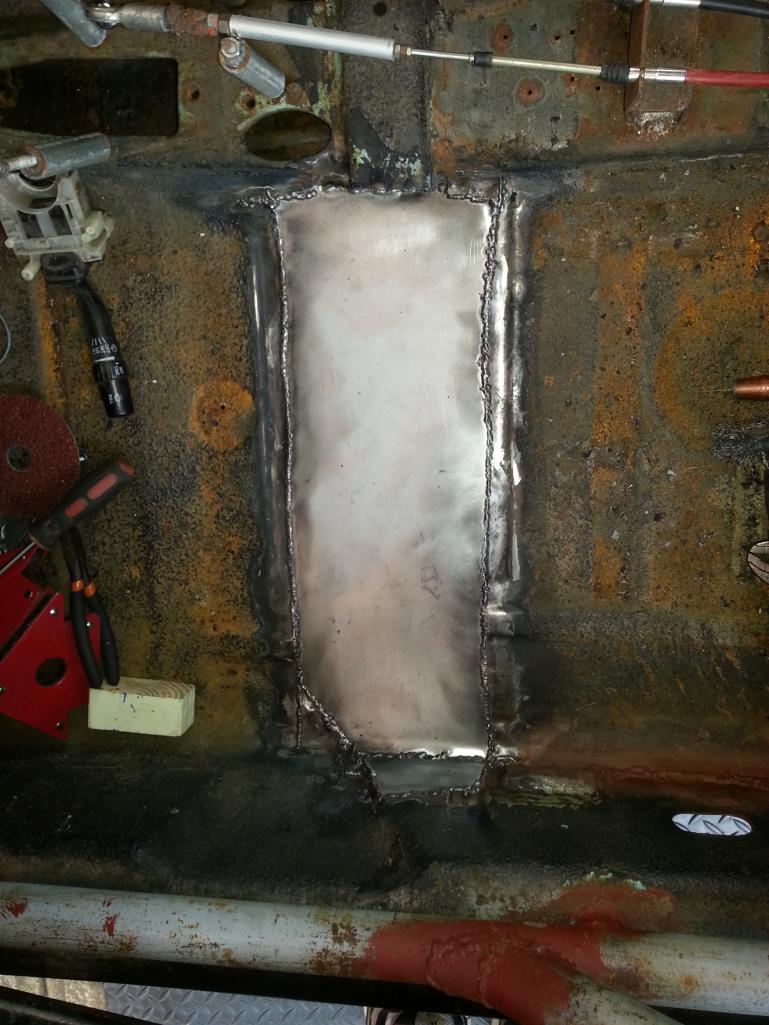
Posted by: nukepipe Dec 26 2013, 08:56 PM
some protection while keep working....
Attached thumbnail(s)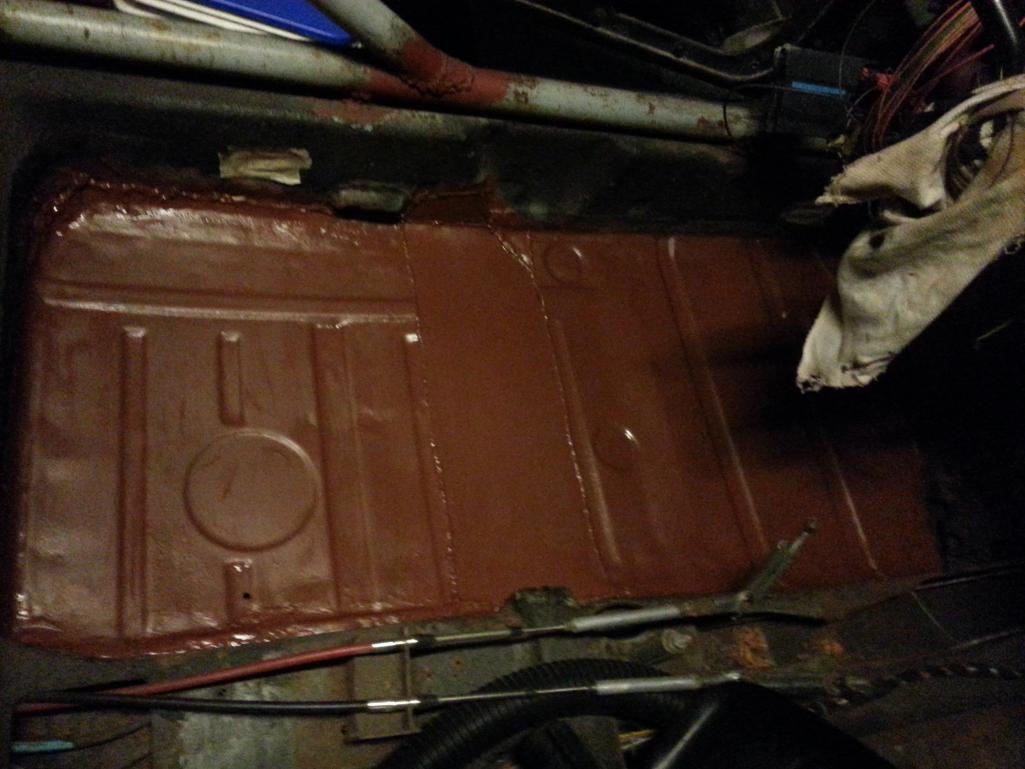
Posted by: nukepipe Dec 26 2013, 08:57 PM
the other side
Attached thumbnail(s)
Posted by: nukepipe Dec 26 2013, 08:58 PM
Center tunnel.... 
Attached thumbnail(s)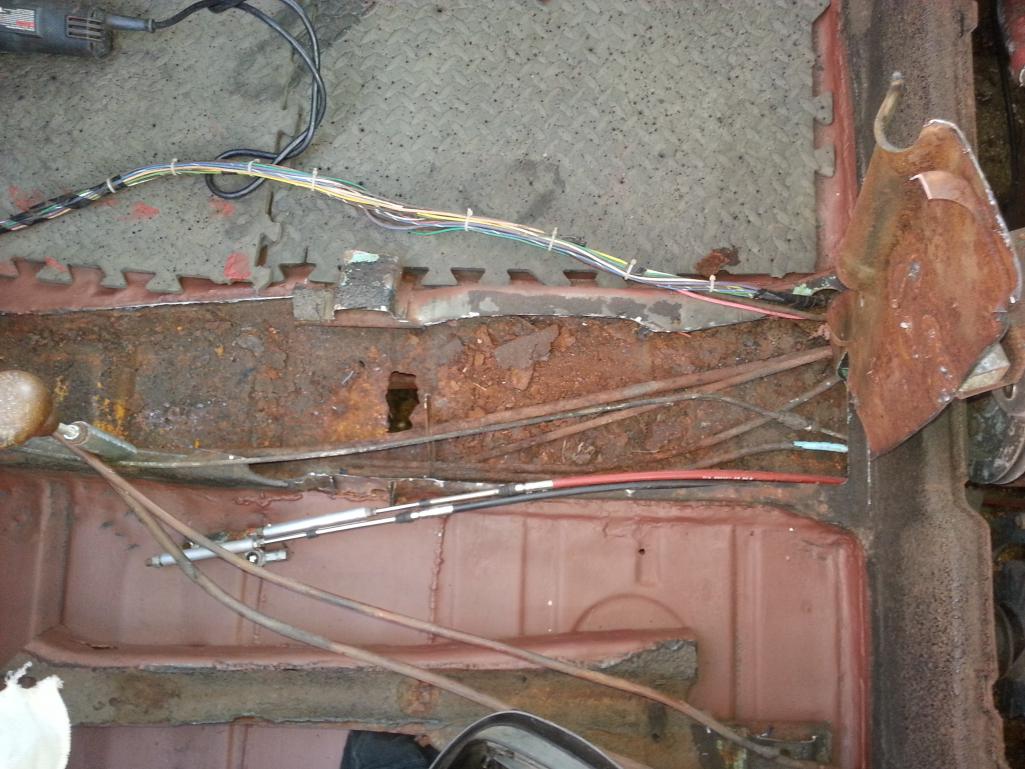
Posted by: nukepipe Dec 26 2013, 09:00 PM
pedals area
Attached thumbnail(s)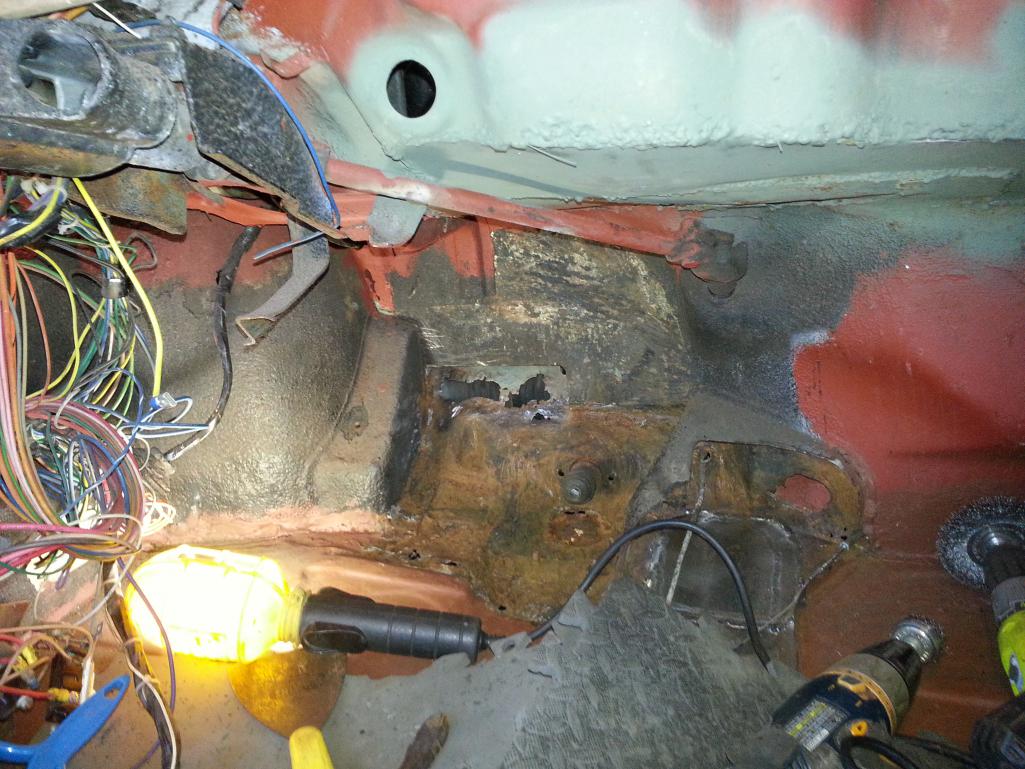
Posted by: nukepipe Dec 26 2013, 09:01 PM
More
Attached thumbnail(s)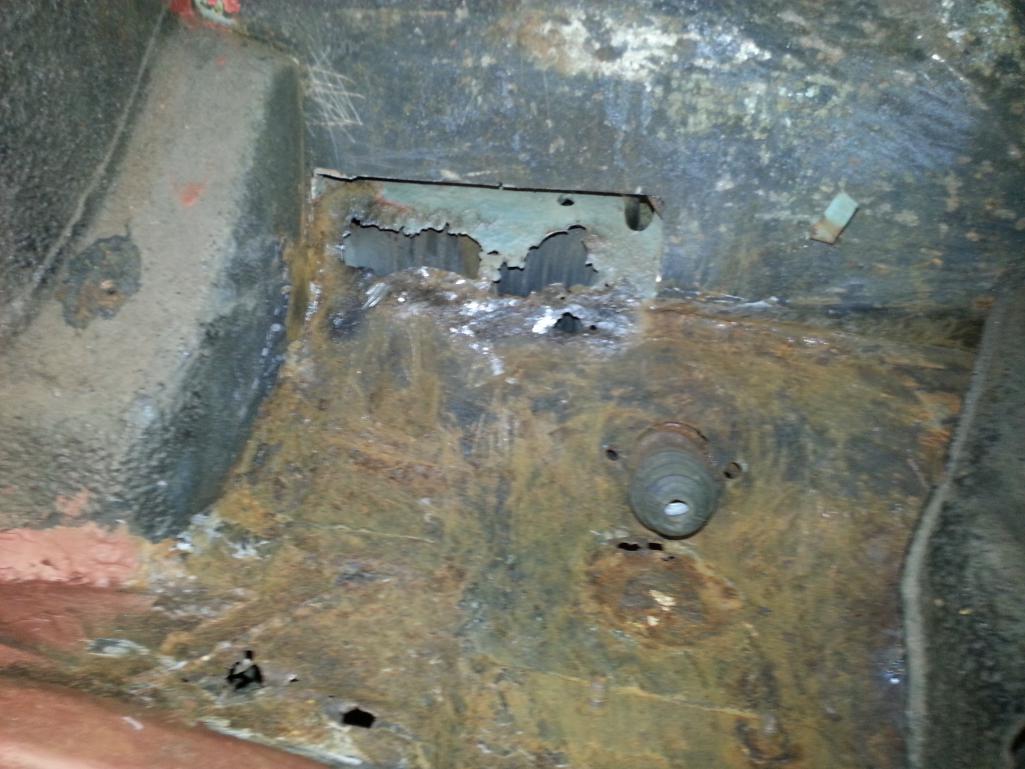
Posted by: nukepipe Dec 26 2013, 09:03 PM
more
Attached thumbnail(s)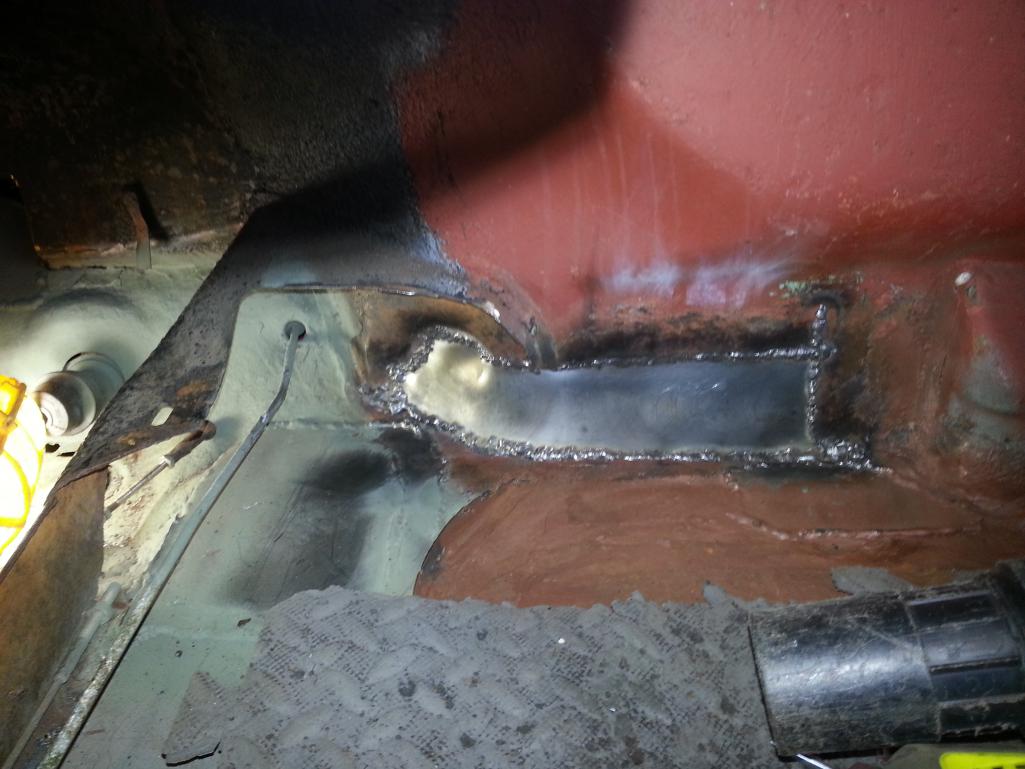
Posted by: nukepipe Dec 26 2013, 09:05 PM
more
Attached thumbnail(s)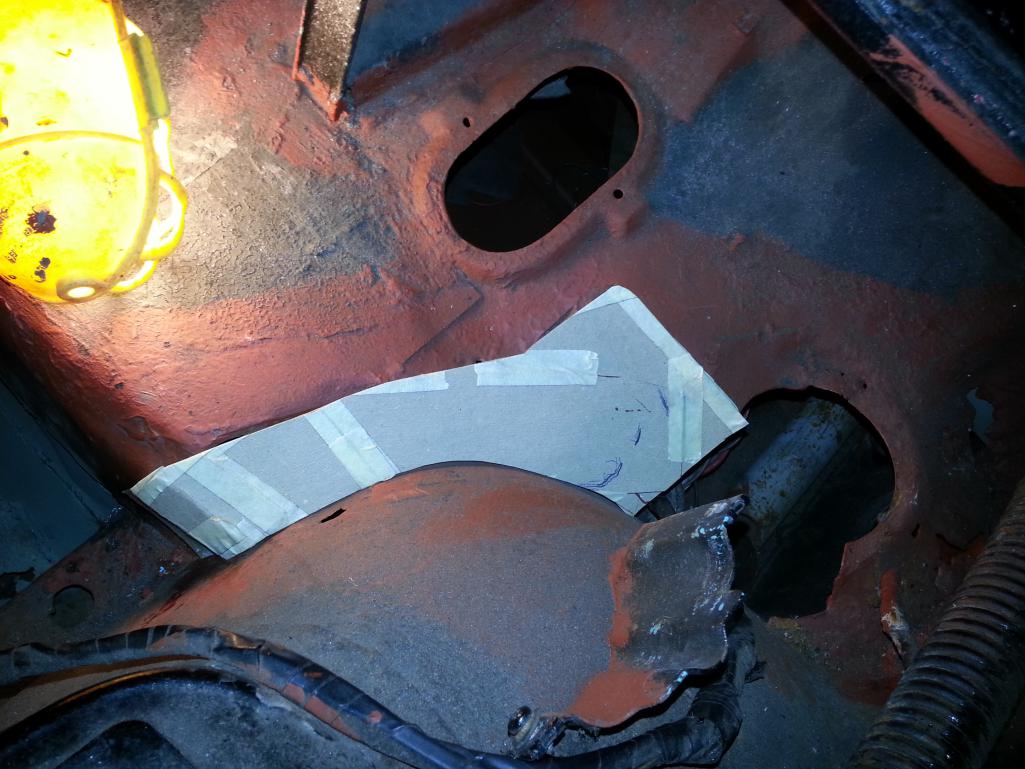
Posted by: nukepipe Dec 26 2013, 09:06 PM
the other long
Attached thumbnail(s)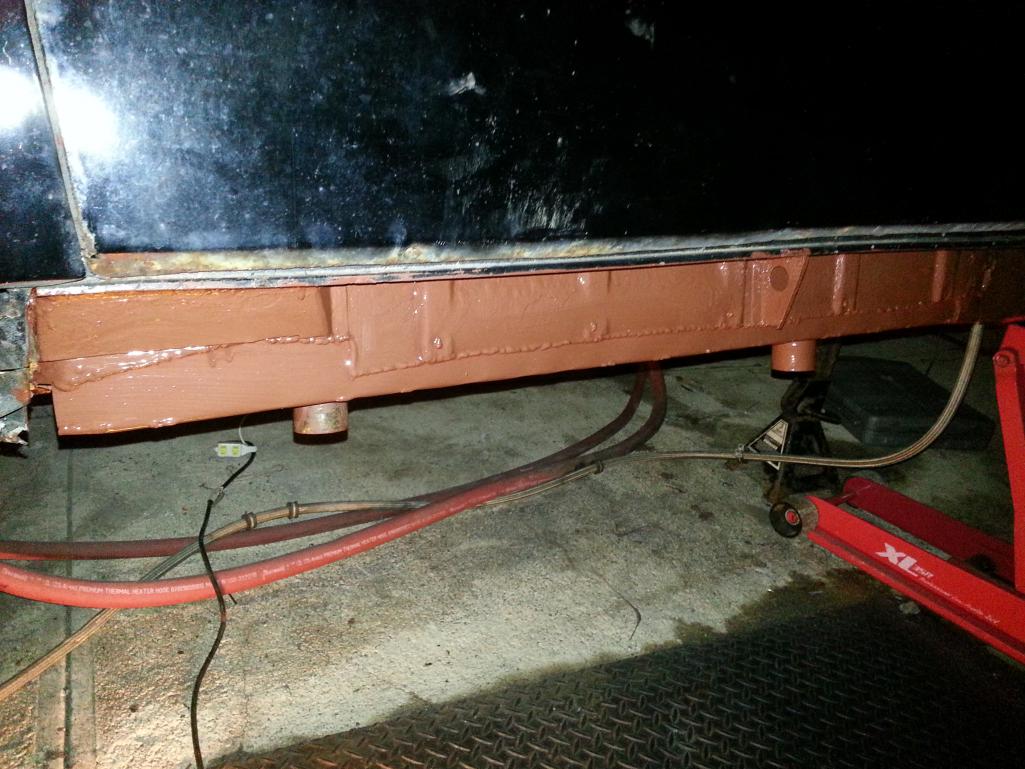
Posted by: nukepipe Dec 26 2013, 09:09 PM
more
Attached thumbnail(s)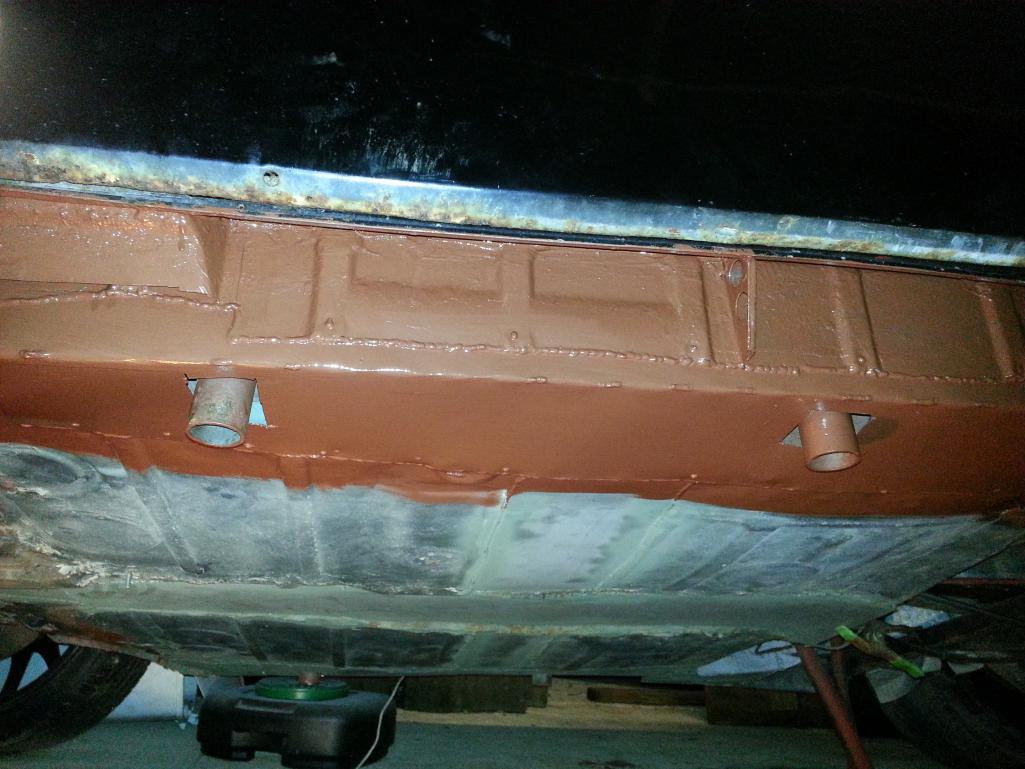
Posted by: nukepipe Dec 26 2013, 09:12 PM
Not in order as you can see....
Attached thumbnail(s)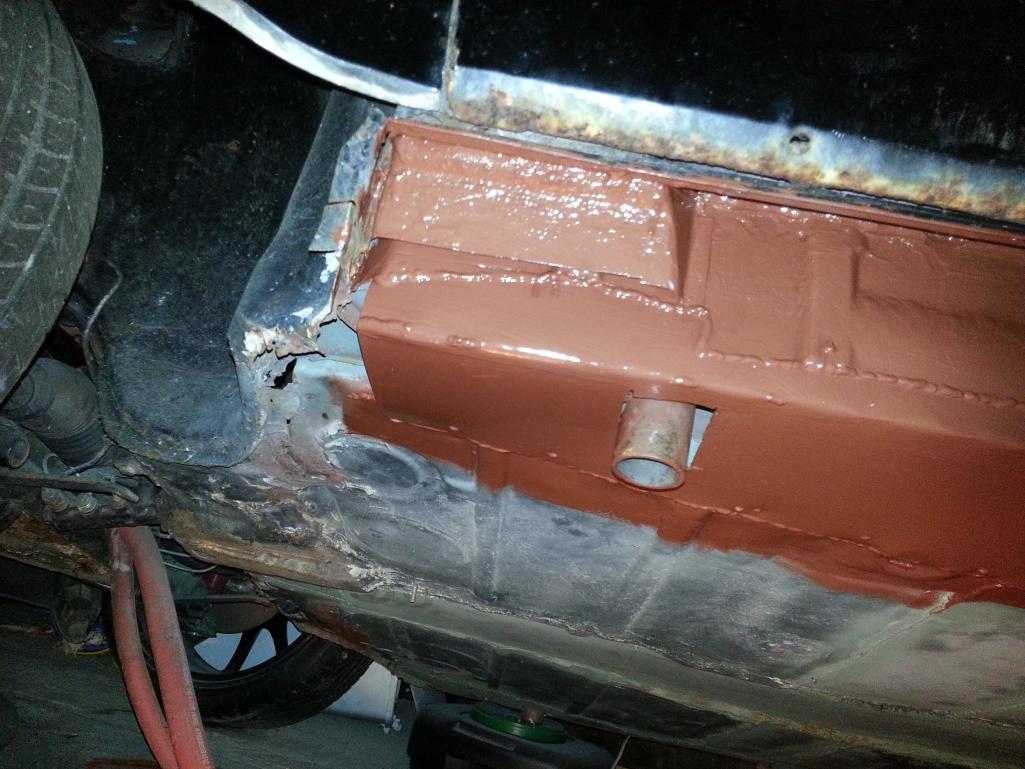
Posted by: nukepipe Dec 26 2013, 09:13 PM
more
Attached thumbnail(s)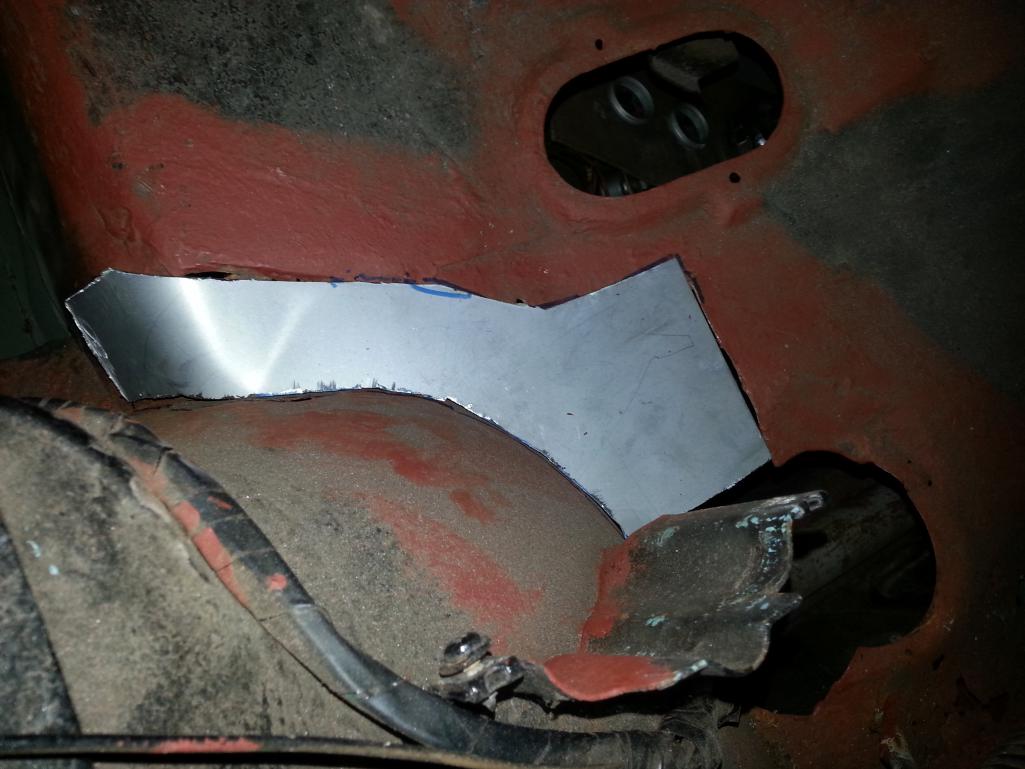
Posted by: nukepipe Dec 26 2013, 09:15 PM
more (these are now my jack points)
Attached thumbnail(s)
Posted by: nukepipe Dec 26 2013, 09:15 PM
more
Attached thumbnail(s)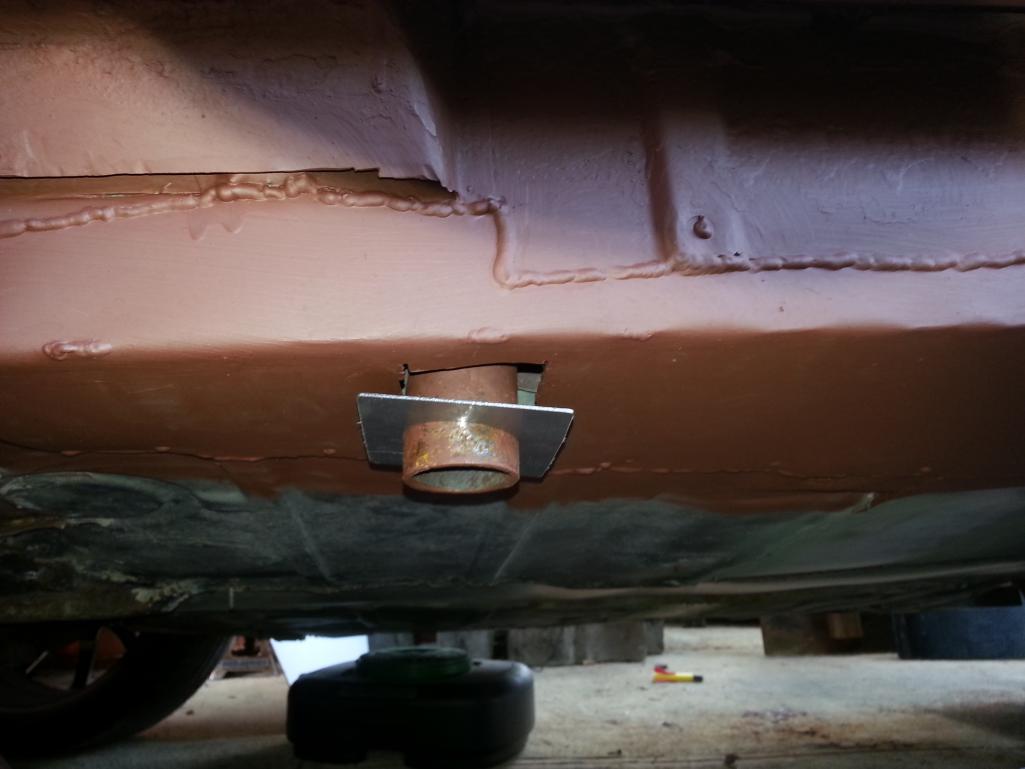
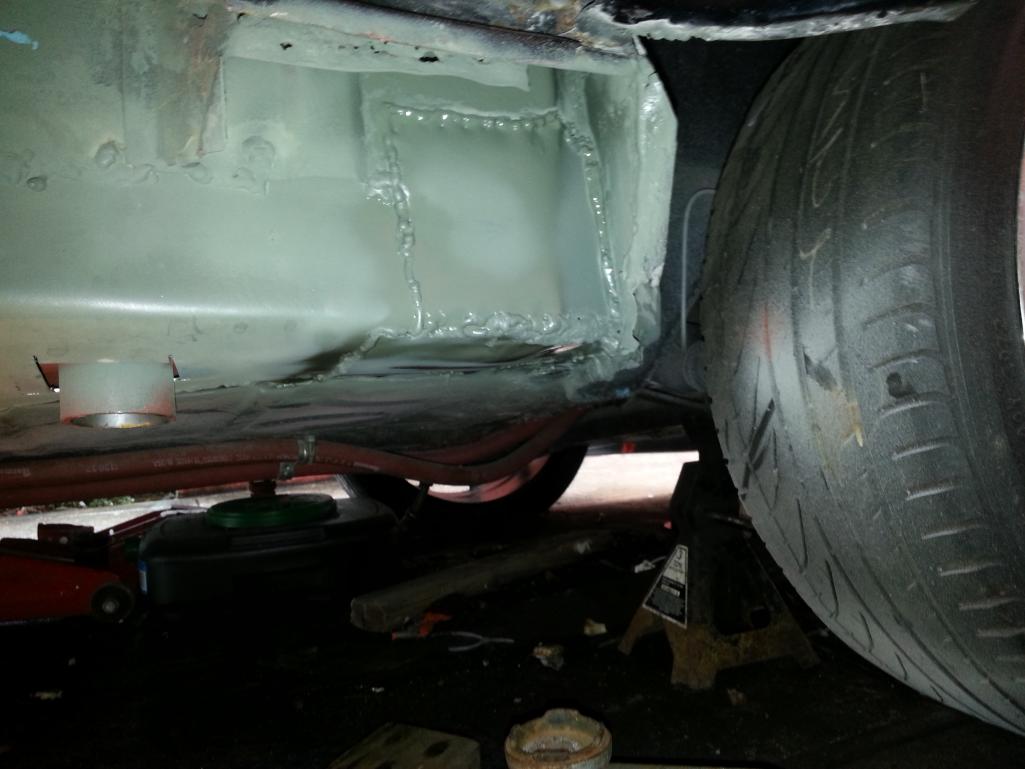
Posted by: nukepipe Dec 26 2013, 09:18 PM
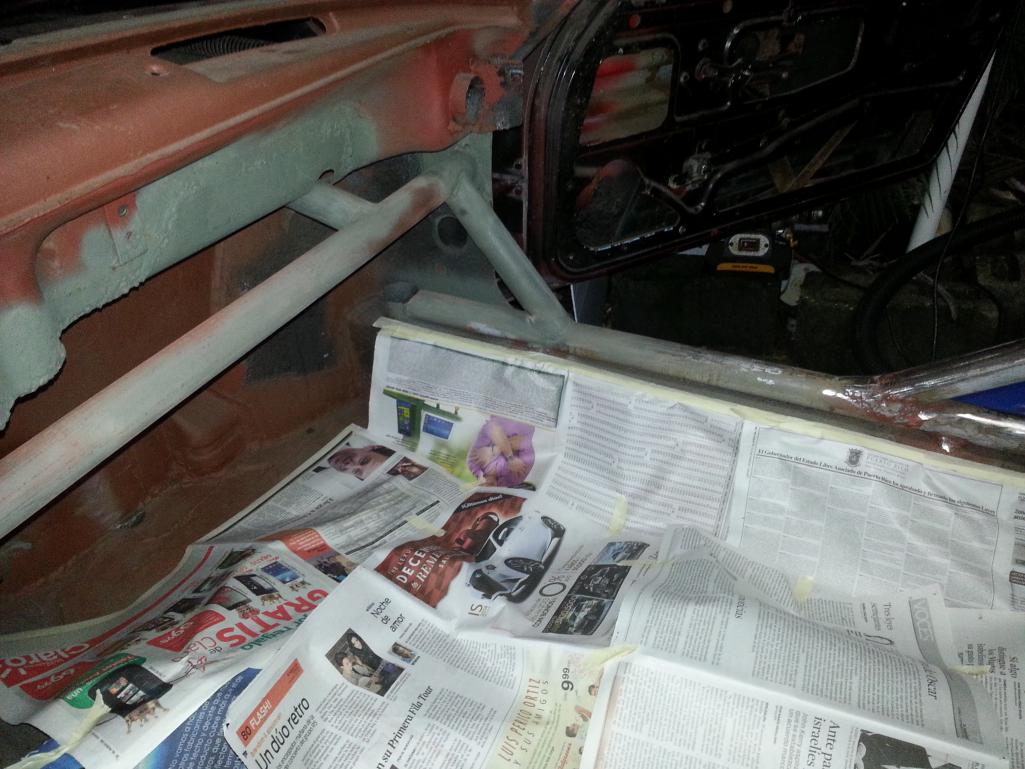
That tube go through the long to the inner tube frame.. as is, add so much rigidity (with the engine on) that the tub doesn't twist at all
Attached thumbnail(s)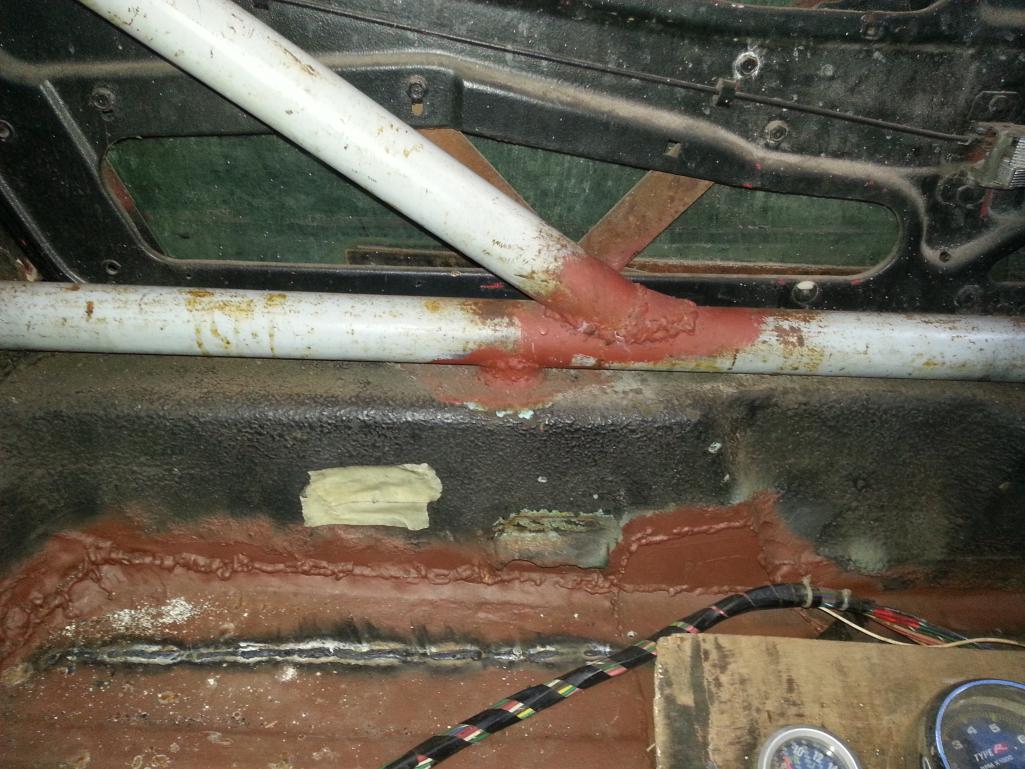
Posted by: nukepipe Dec 26 2013, 09:20 PM
more and some protection
Attached thumbnail(s)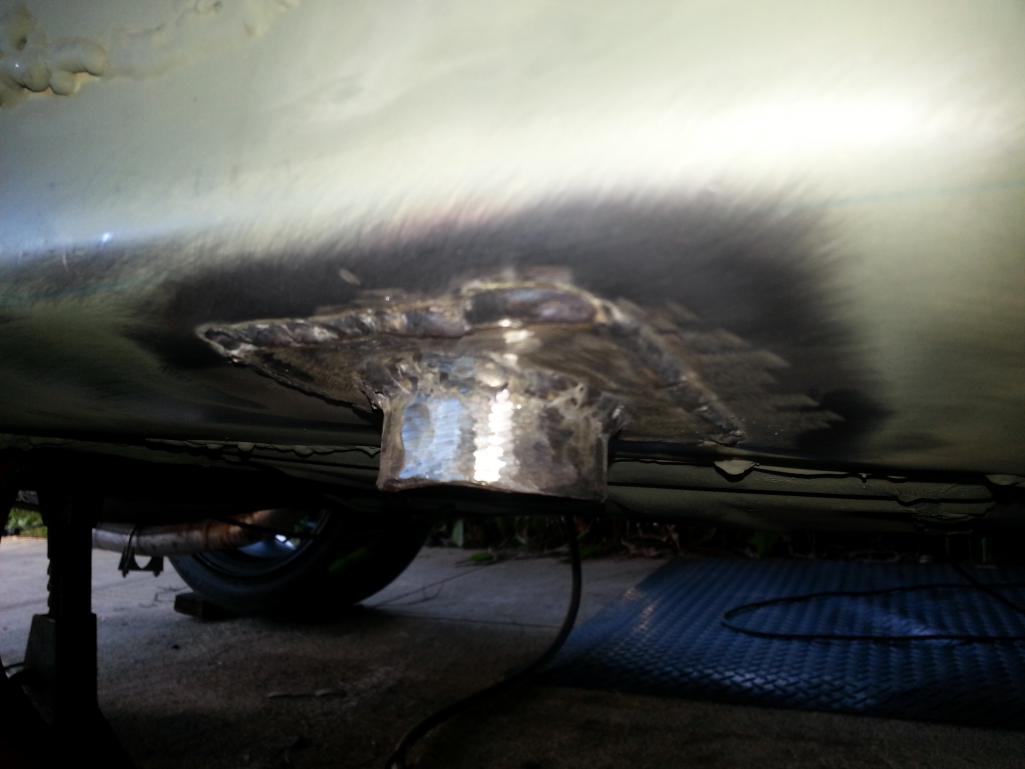
Posted by: nukepipe Dec 26 2013, 09:22 PM
see the tube from the inside?
Attached thumbnail(s)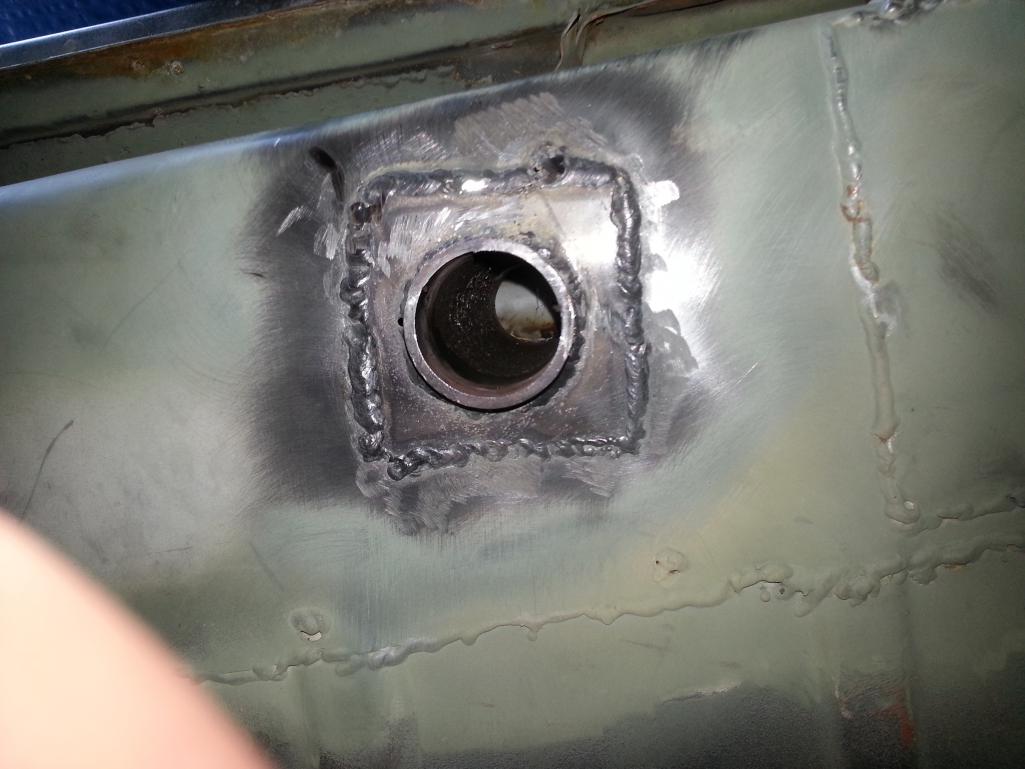
Posted by: nukepipe Dec 26 2013, 09:23 PM
pic of the car
Attached thumbnail(s)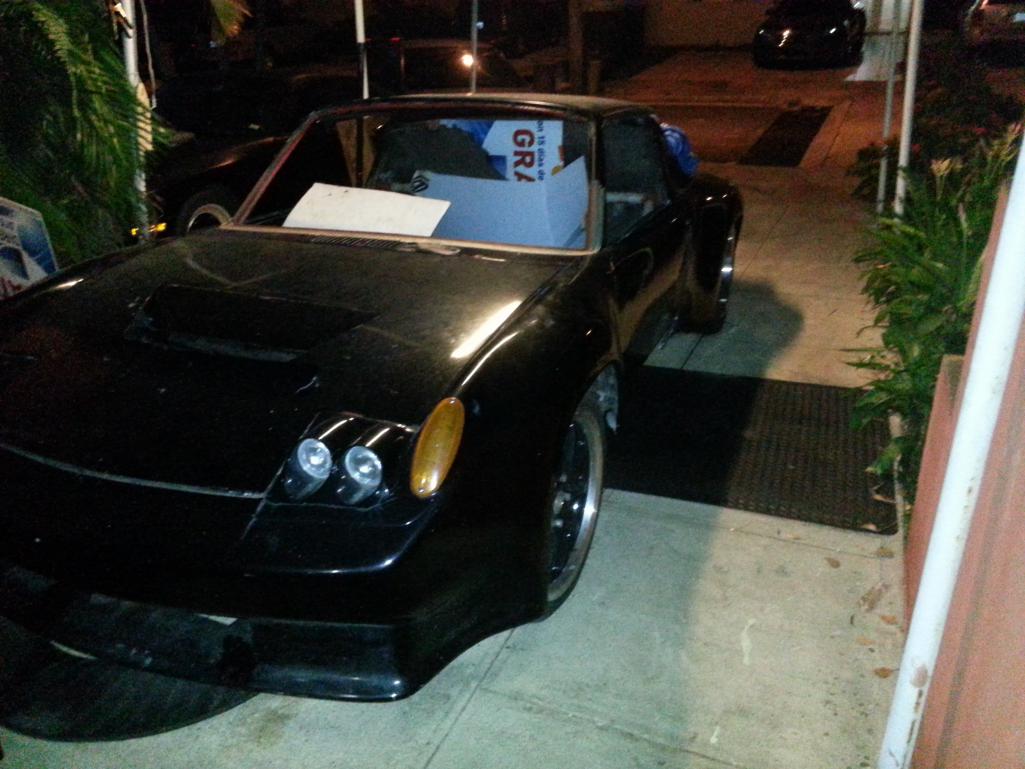
Posted by: nukepipe Dec 26 2013, 09:24 PM
CAT PROTECTION!!! 
Attached thumbnail(s)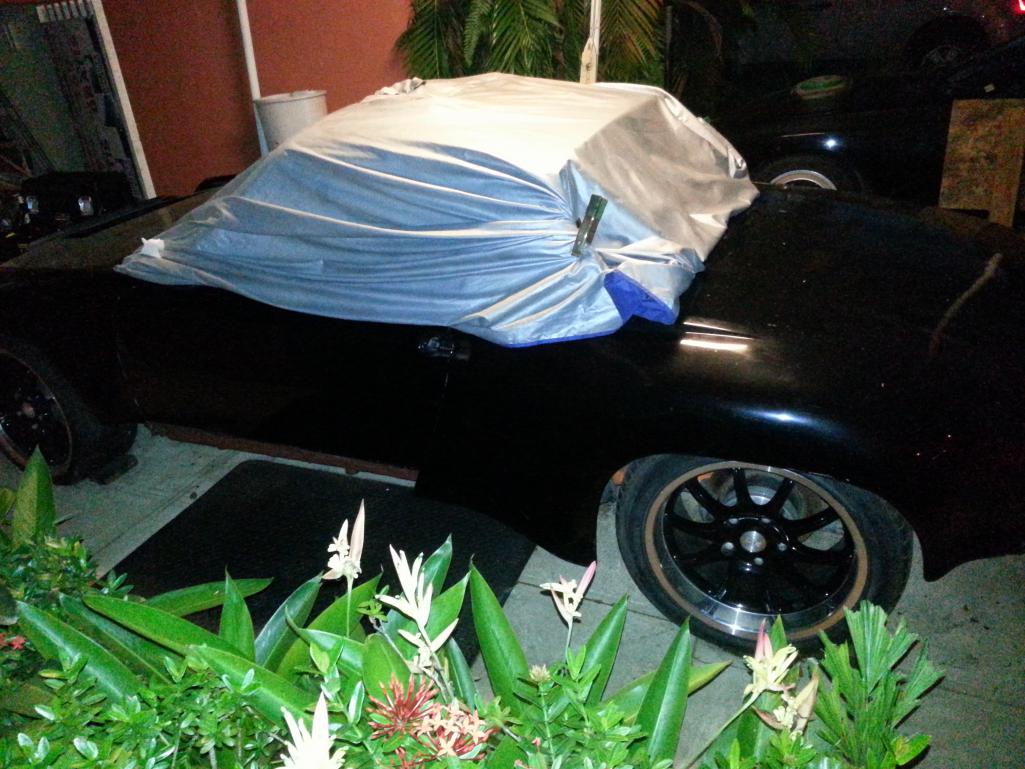
Posted by: nukepipe Dec 26 2013, 09:26 PM
The person that welded these... didn't use gas with the mig welder.... Rust out fast...
Attached thumbnail(s)
Posted by: nukepipe Dec 26 2013, 09:28 PM
Need to do some cutting
Attached thumbnail(s)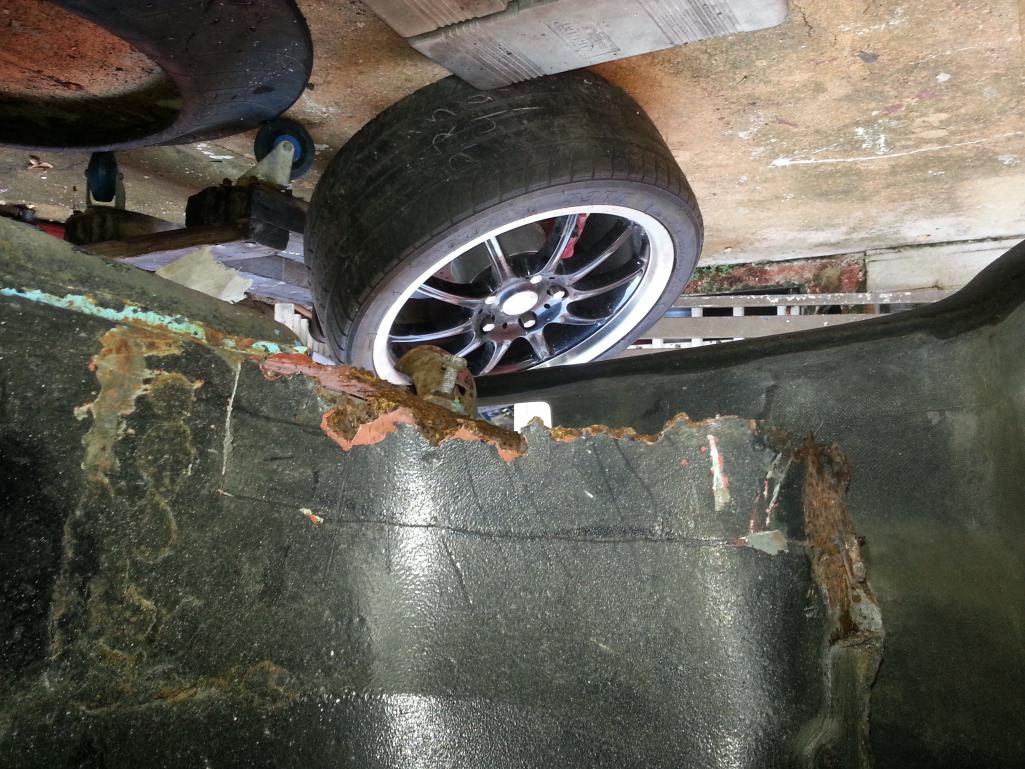
Posted by: nukepipe Dec 26 2013, 09:29 PM
Some reinforcements...
Attached thumbnail(s)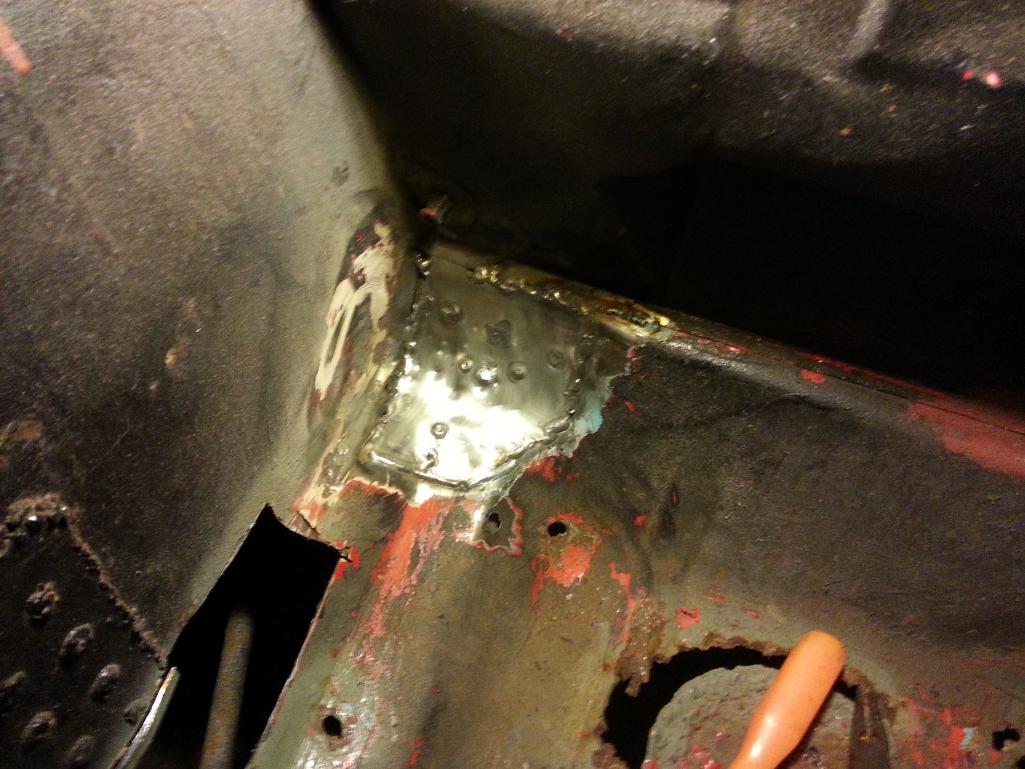
Posted by: nukepipe Dec 26 2013, 09:30 PM
more
Attached thumbnail(s)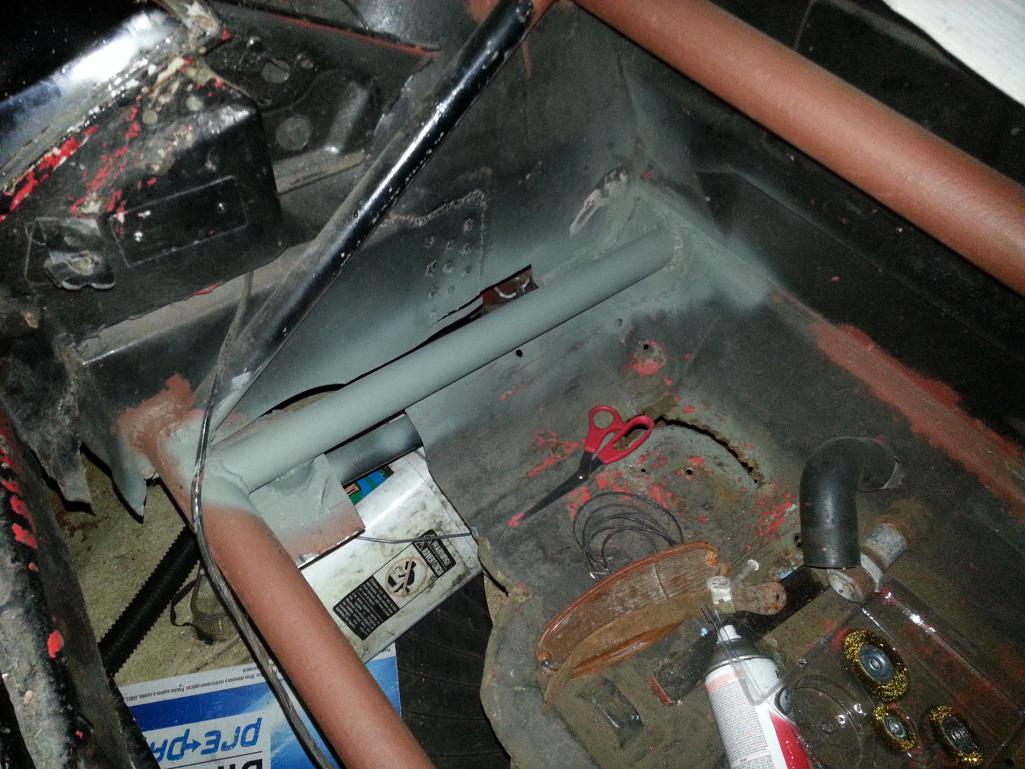
Posted by: nukepipe Dec 26 2013, 09:31 PM
more
Attached thumbnail(s)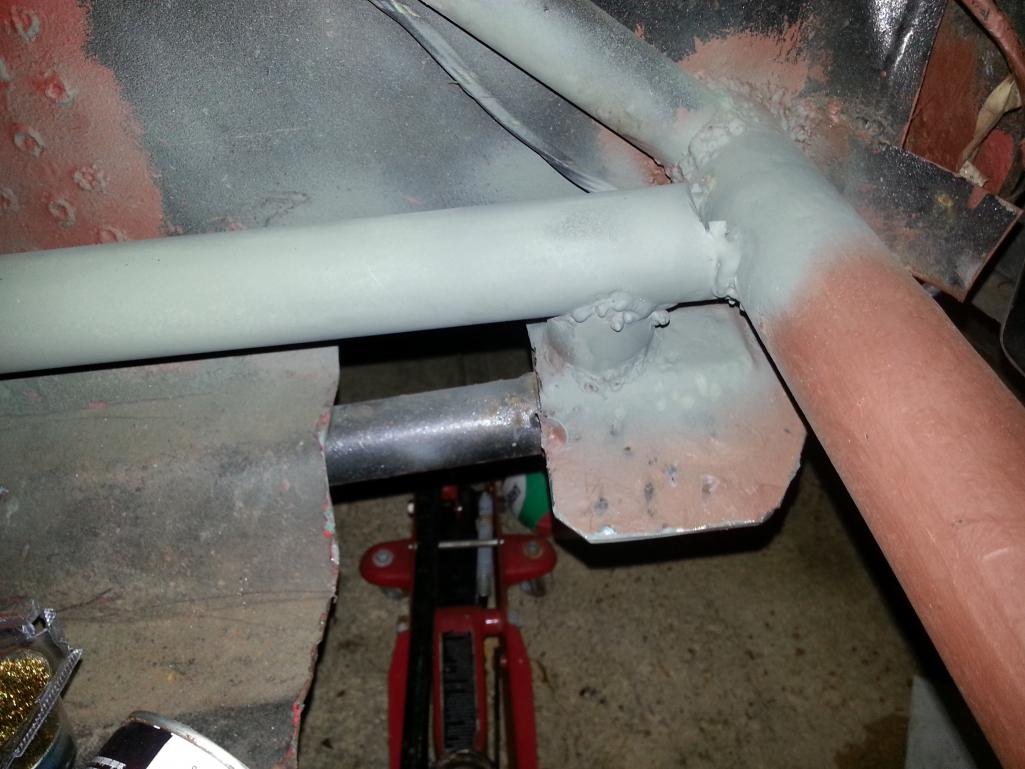
Posted by: nukepipe Dec 26 2013, 09:33 PM
A friend let me use his plasma cutter.... let's do some holes...
Attached thumbnail(s)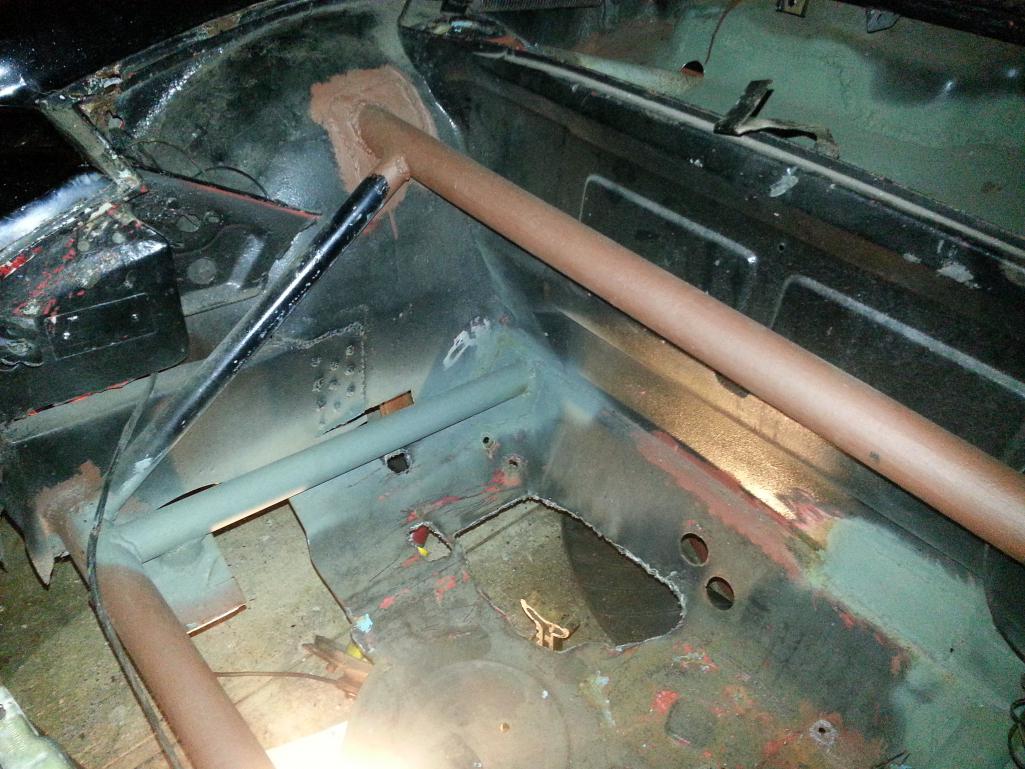
Posted by: nukepipe Dec 26 2013, 09:34 PM
front suspension reinforcement
Attached thumbnail(s)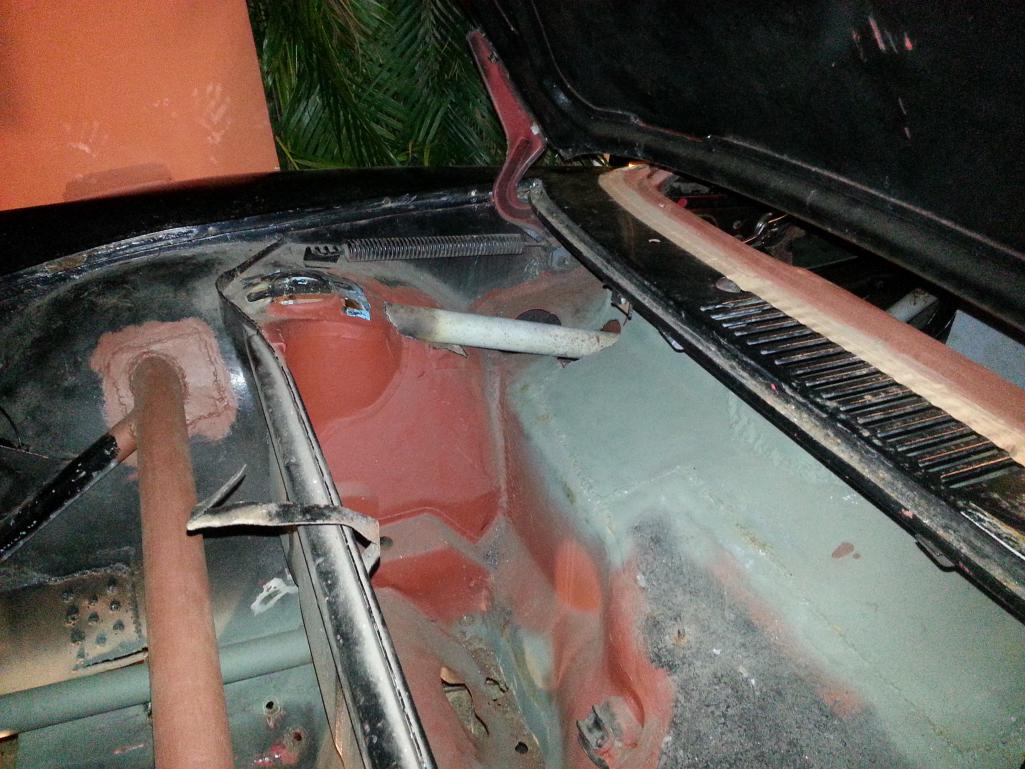
Posted by: nukepipe Dec 26 2013, 09:36 PM
more.. need to clean those tubes...
Attached thumbnail(s)
Posted by: nukepipe Dec 26 2013, 09:38 PM
Dont worry... Im going to clean this mess... 
Attached thumbnail(s)
Posted by: nukepipe Dec 26 2013, 09:41 PM
Dont have a pic of this after I repaired it, but wasn't fun!!!
Attached thumbnail(s)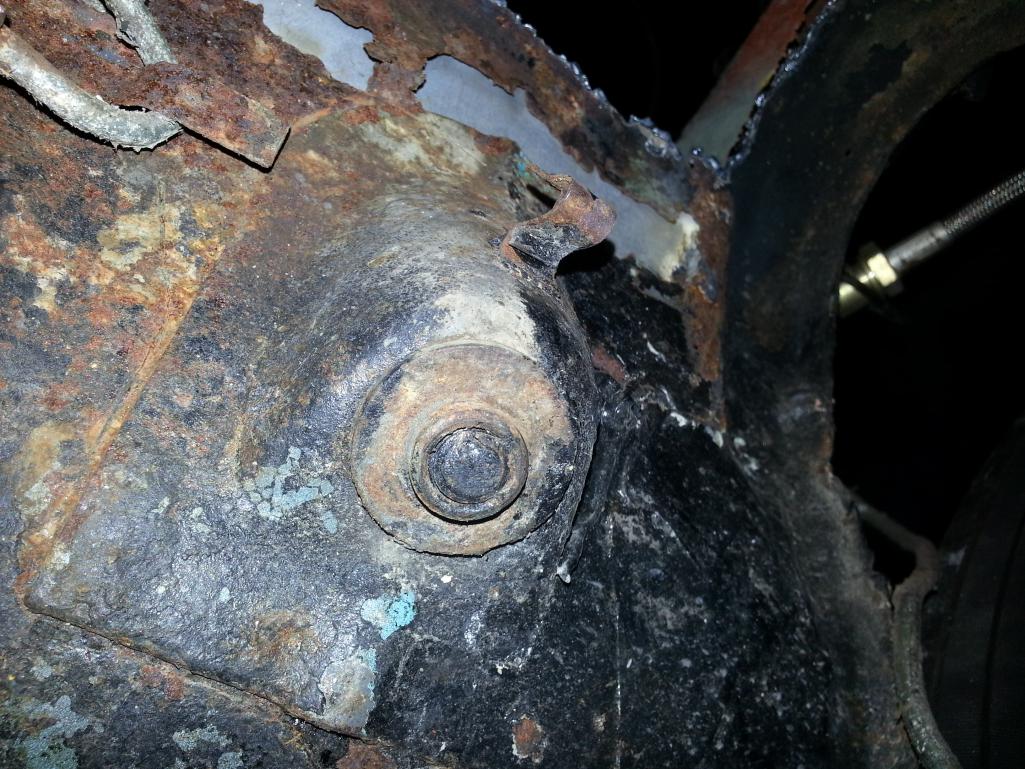
Posted by: nukepipe Dec 26 2013, 09:43 PM
Like it or not I used this to straight the bottom and will wrap sheet metal (high gage) around it.
Attached thumbnail(s)
Posted by: nukepipe Dec 26 2013, 09:44 PM
more
Attached thumbnail(s)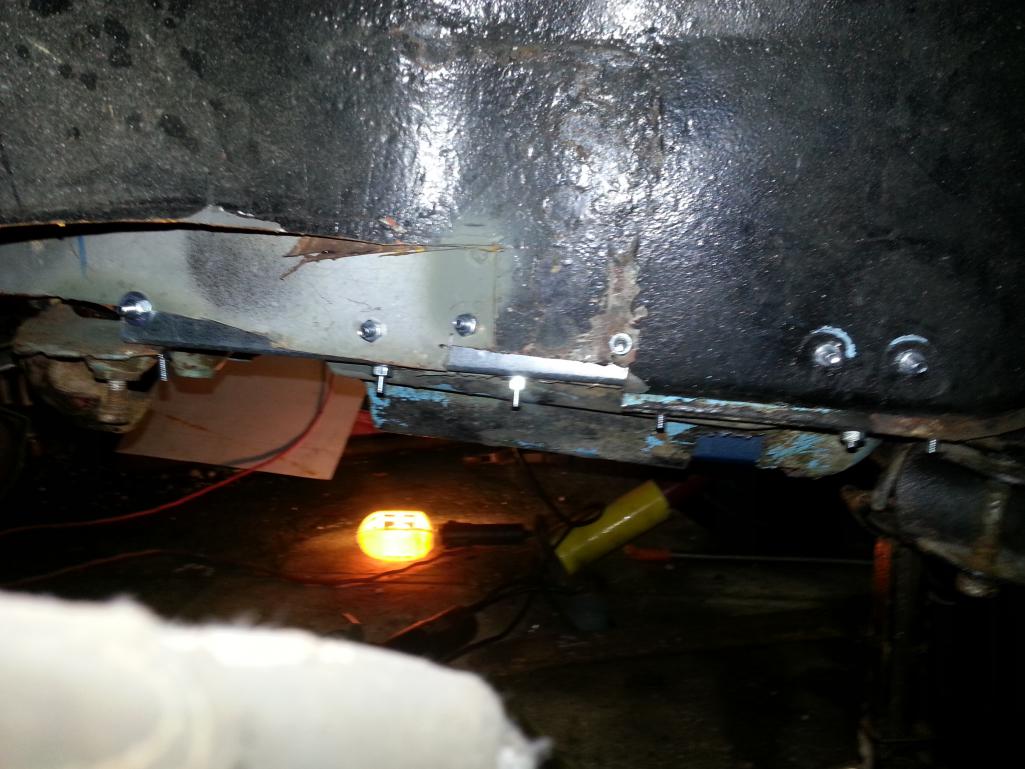
Posted by: nukepipe Dec 26 2013, 09:45 PM
nuther
Attached thumbnail(s)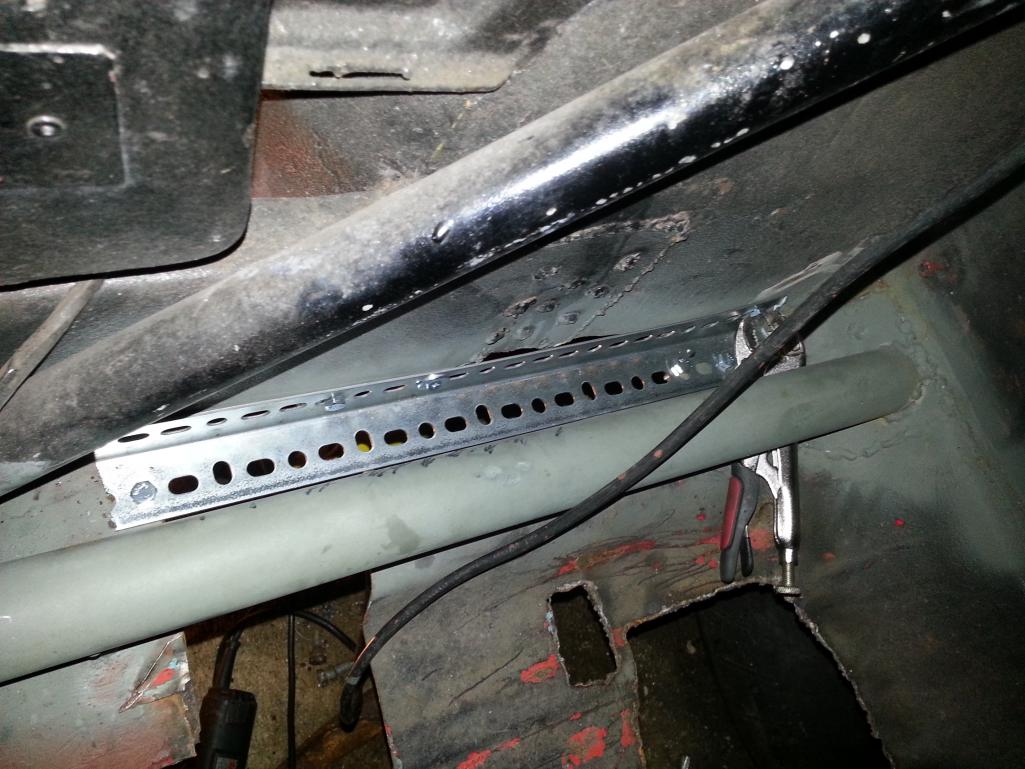
Posted by: nukepipe Dec 26 2013, 09:46 PM
brake area reinforcement.
Attached thumbnail(s)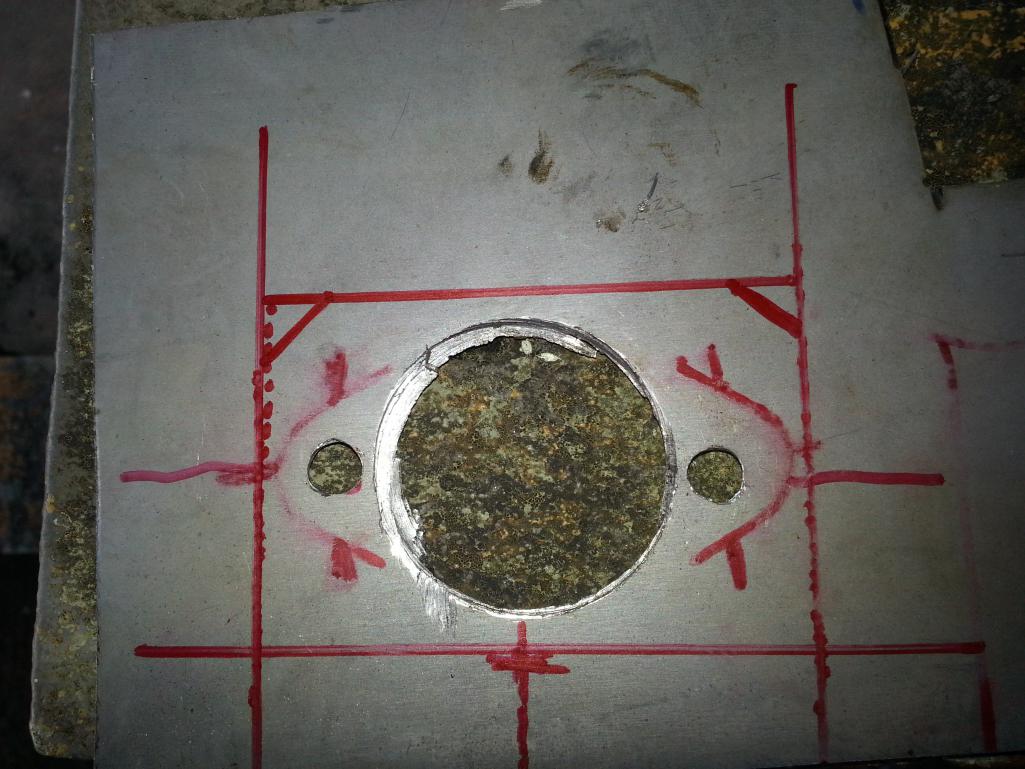
Posted by: nukepipe Dec 26 2013, 09:47 PM
more
Attached thumbnail(s)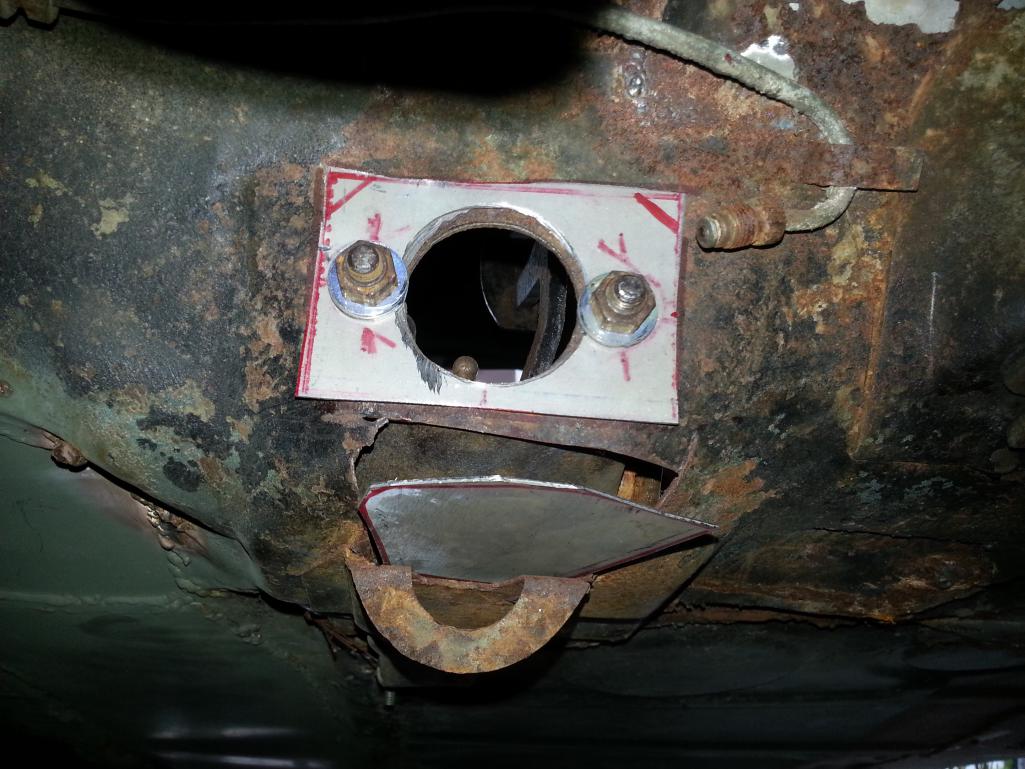
Posted by: nukepipe Dec 26 2013, 09:49 PM
Remove all surface rust and protect it...
Attached thumbnail(s)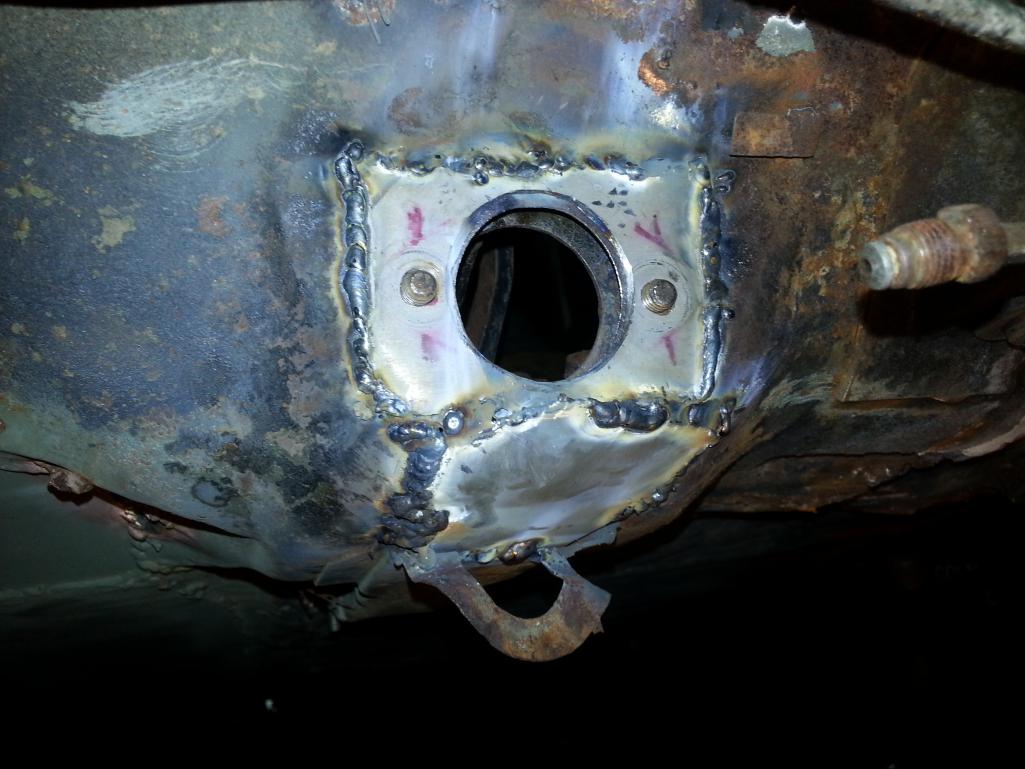
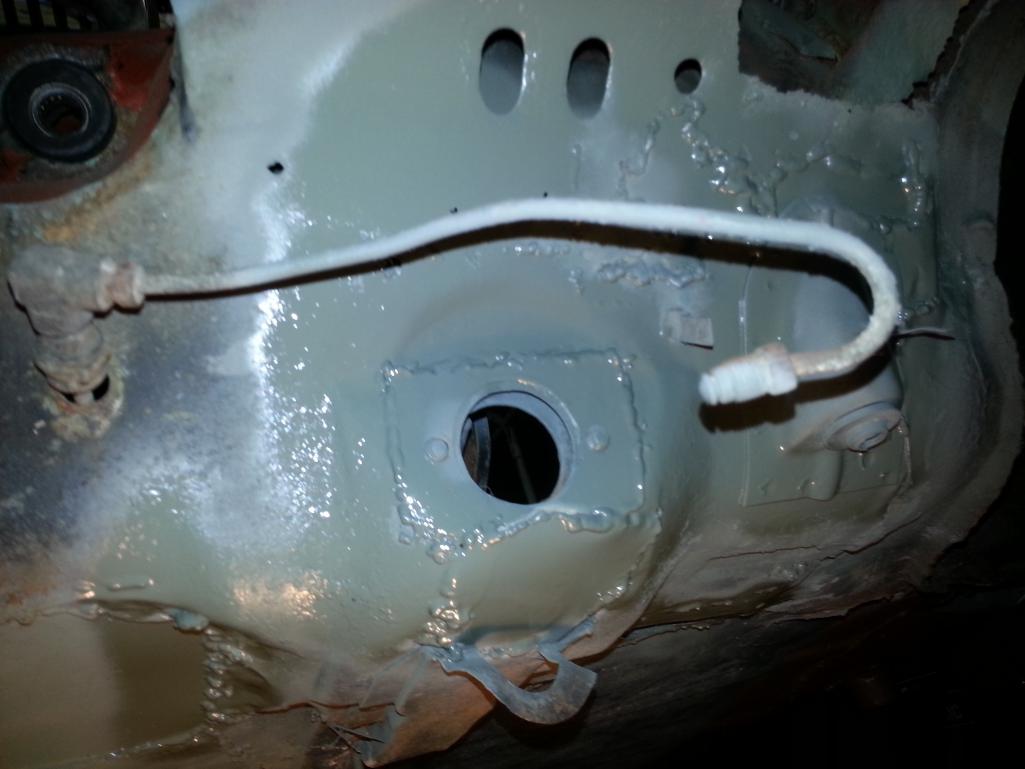
Posted by: nukepipe Dec 26 2013, 09:51 PM
Welding the front trunk bottom...
That's it for now guys... will be posting soon (in about 5 years!!! )
Attached thumbnail(s)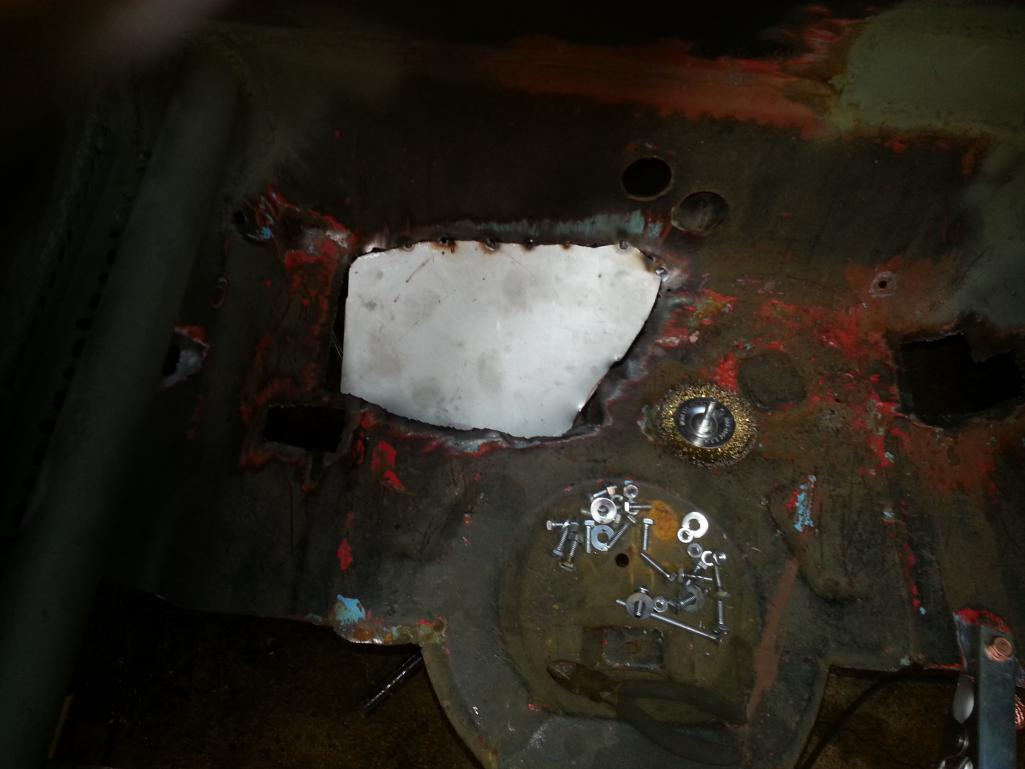
Posted by: effutuo101 Dec 26 2013, 11:25 PM
Keep up the good work! It has come a long way.
Posted by: nukepipe Jan 5 2014, 10:31 PM
Worked yesterday welding the cage. Put the car as starigh I could and started welding all the tubes.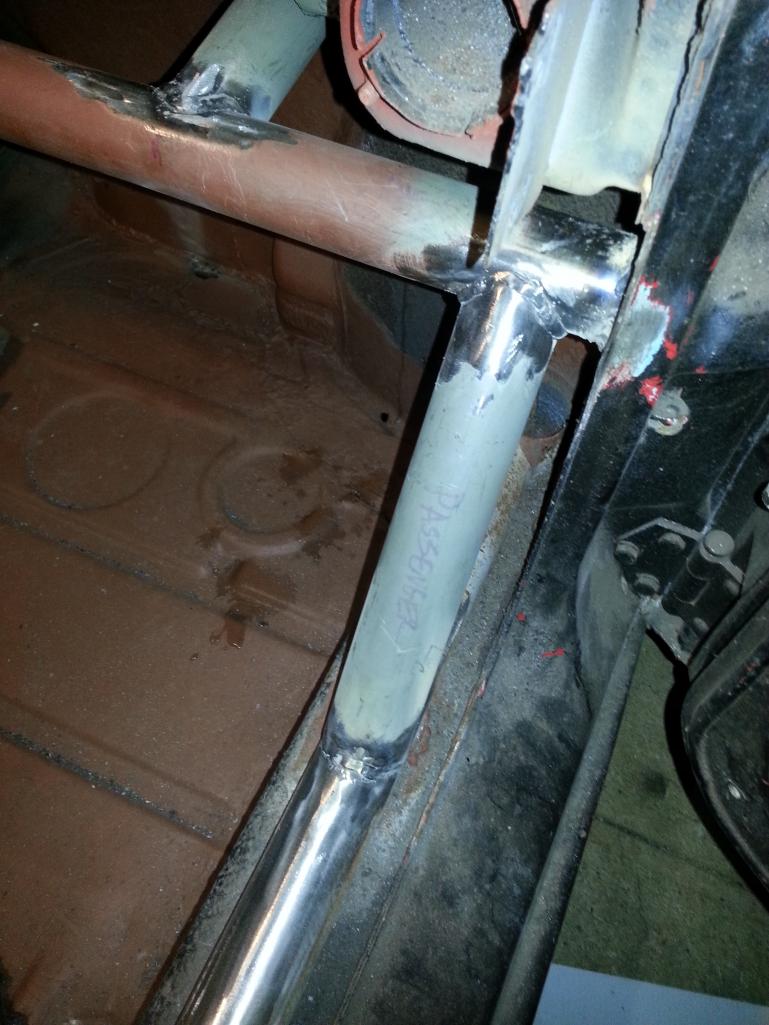
Posted by: nukepipe Jan 5 2014, 10:32 PM
nuther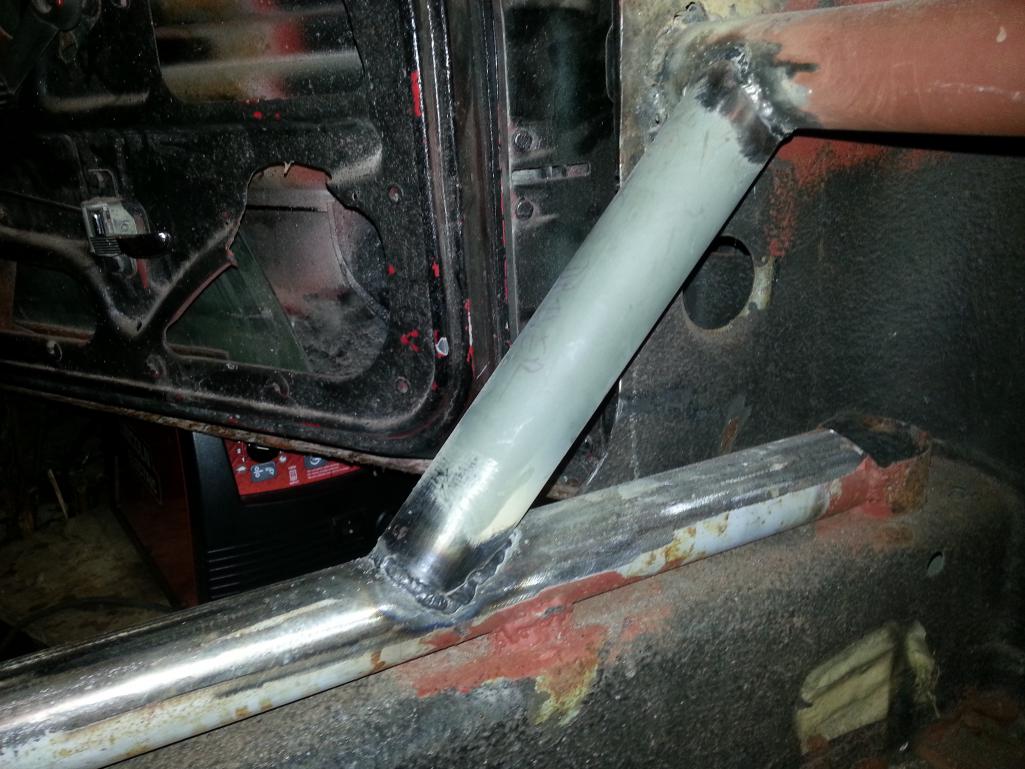
Posted by: nukepipe Jan 5 2014, 10:34 PM
another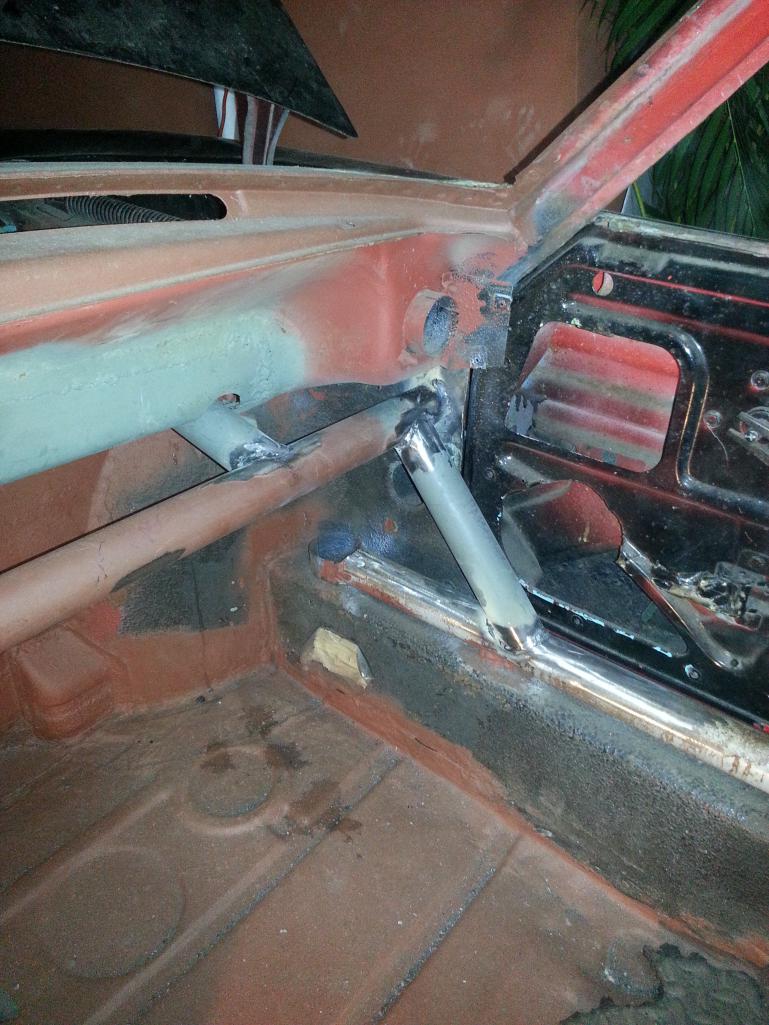
Posted by: nukepipe Jan 5 2014, 10:35 PM
another
Attached thumbnail(s)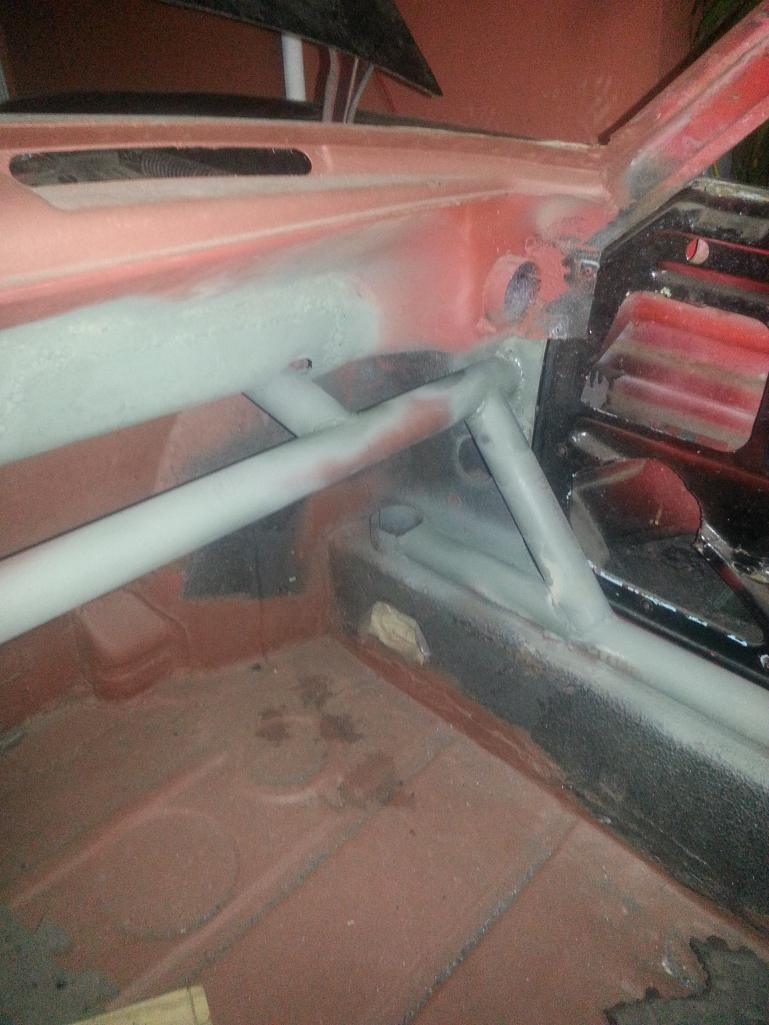
Posted by: nukepipe Jan 5 2014, 10:38 PM
Today I clean some weldings, grind, sand, clean prep and prime.
Posted by: nukepipe Jan 5 2014, 10:40 PM
Wire wheel part of the floor, clean prep and prime.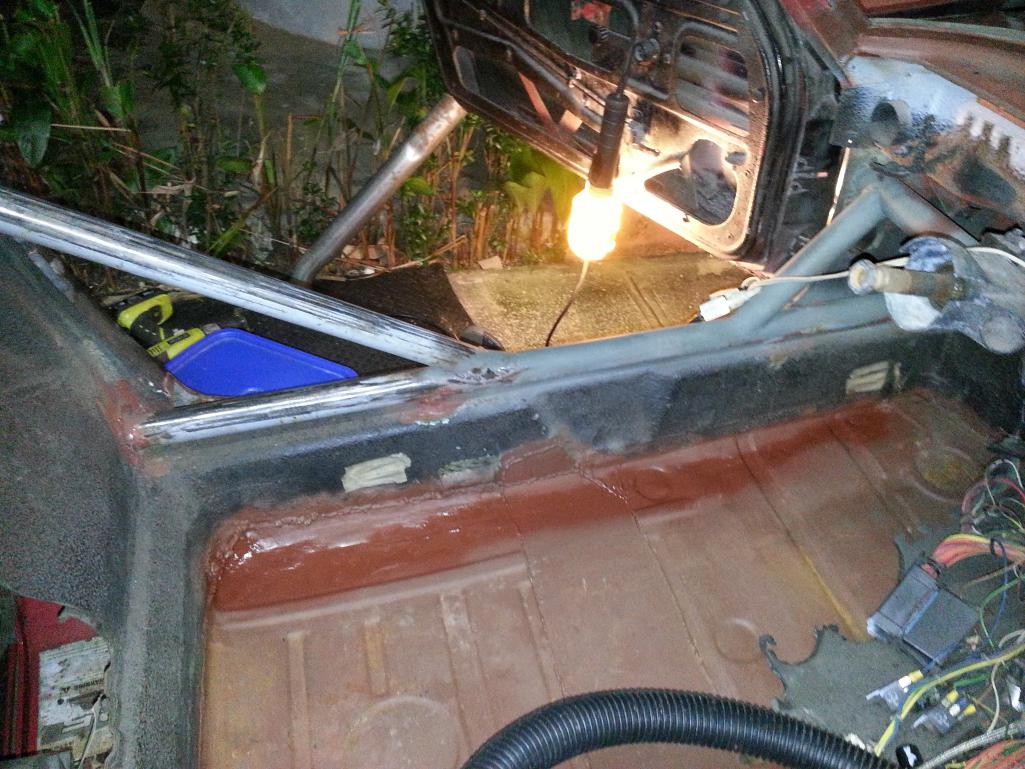
Posted by: nukepipe Jan 5 2014, 10:42 PM
sand the tubes...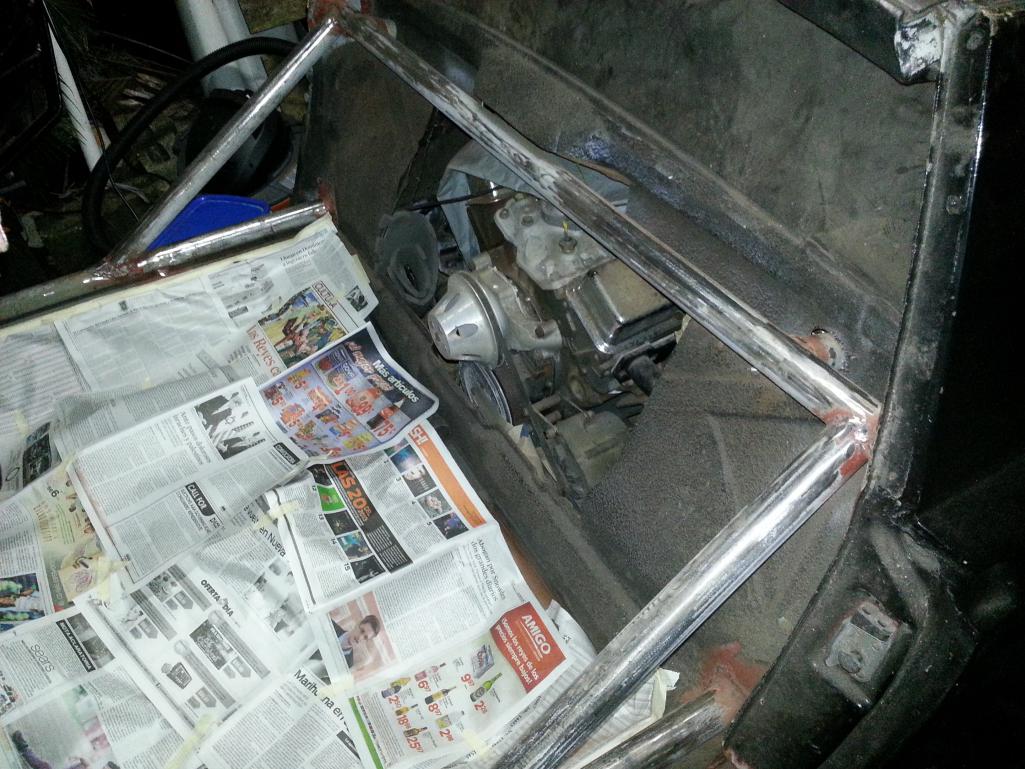
Posted by: nukepipe Jan 5 2014, 10:43 PM
Posted by: nukepipe Jan 5 2014, 10:45 PM
Will sand and give another coat tomorrow.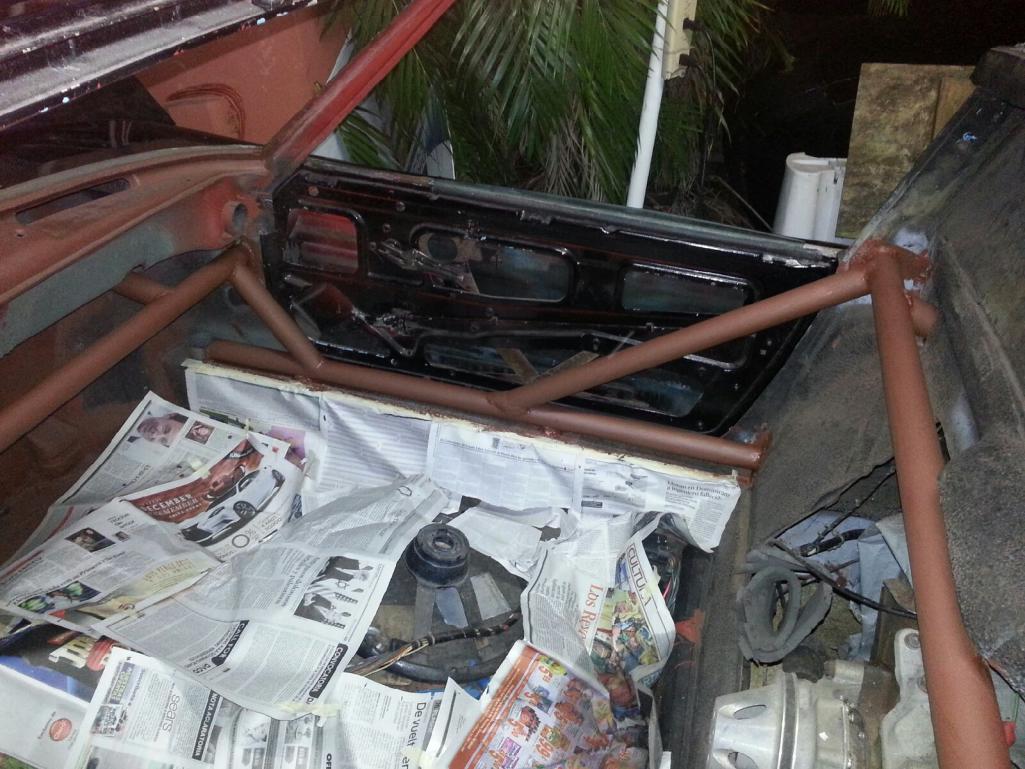
Posted by: nukepipe Jan 5 2014, 10:46 PM
Thats it for now. C u soon...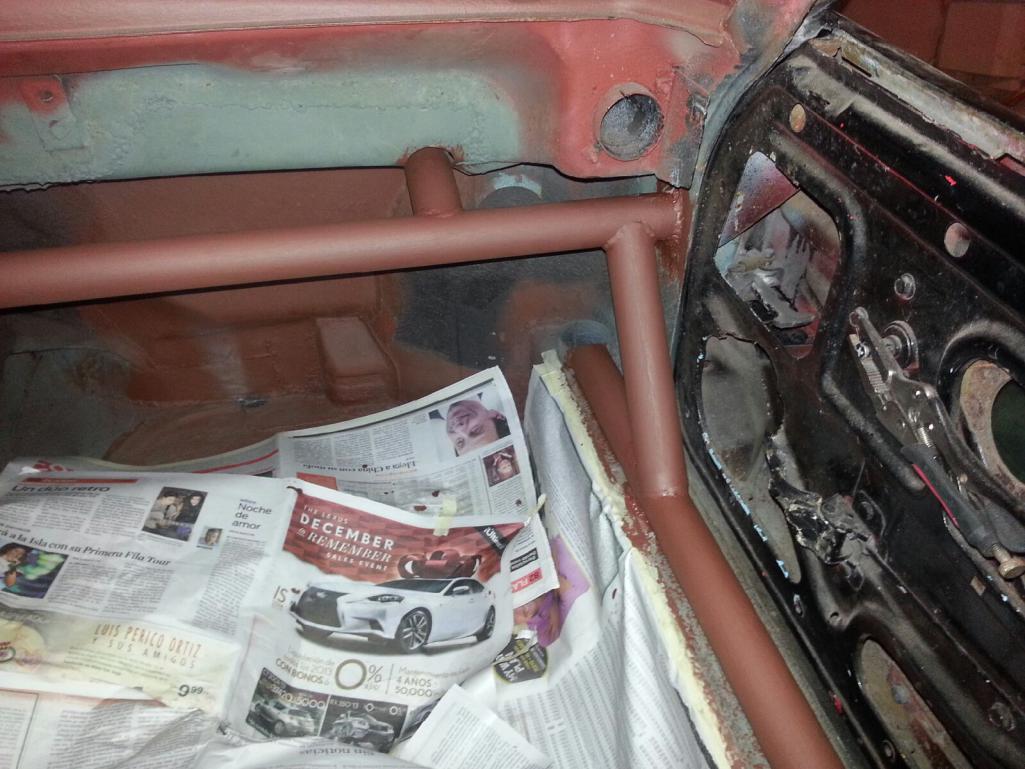
Posted by: drive-ability Jan 5 2014, 10:55 PM
nukepipe,
Wow,
Here's a car that was lost to rust but clearly its been saved ! I commend you
for your effort and commitment. A true car guy ! Please keep the updates
coming.
Posted by: nukepipe Jan 5 2014, 11:33 PM
nukepipe,
Wow,
Here's a car that was lost to rust but clearly its been saved ! I commend you
for your effort and commitment. A true car guy ! Please keep the updates
coming.
Posted by: nukepipe Jan 26 2014, 07:15 PM
Yesterday worked under the driver side. Patching patching and more patching... Did the same in the passenger side...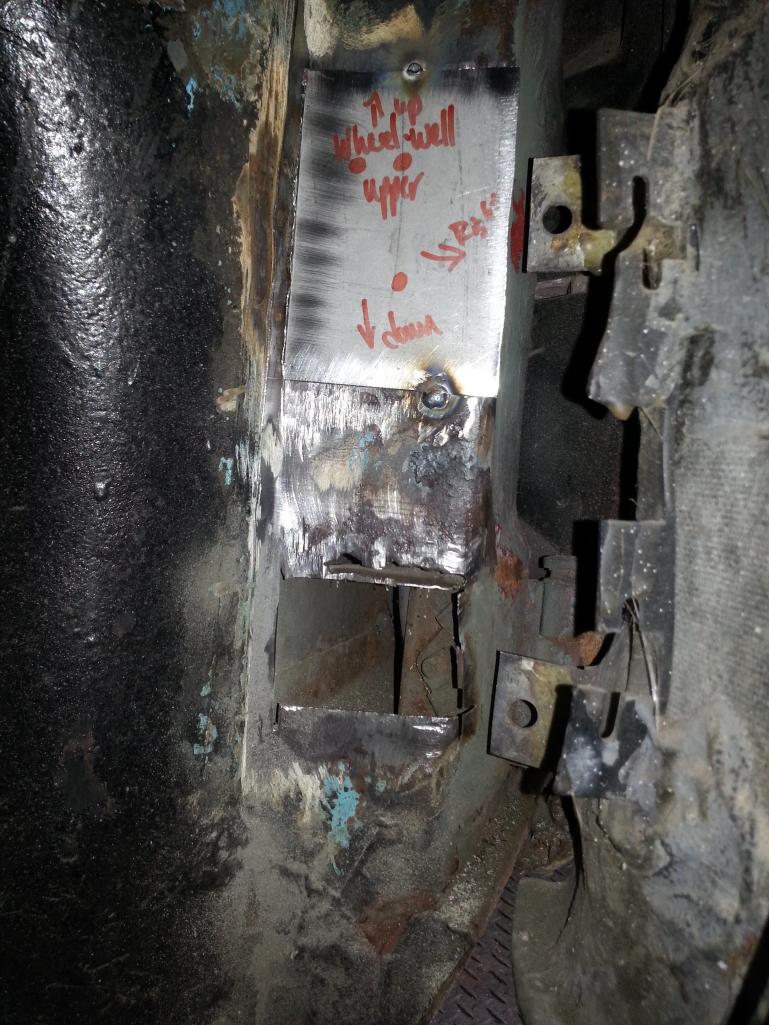
Posted by: nukepipe Jan 26 2014, 07:22 PM
Driver side door jamb.
Attached thumbnail(s)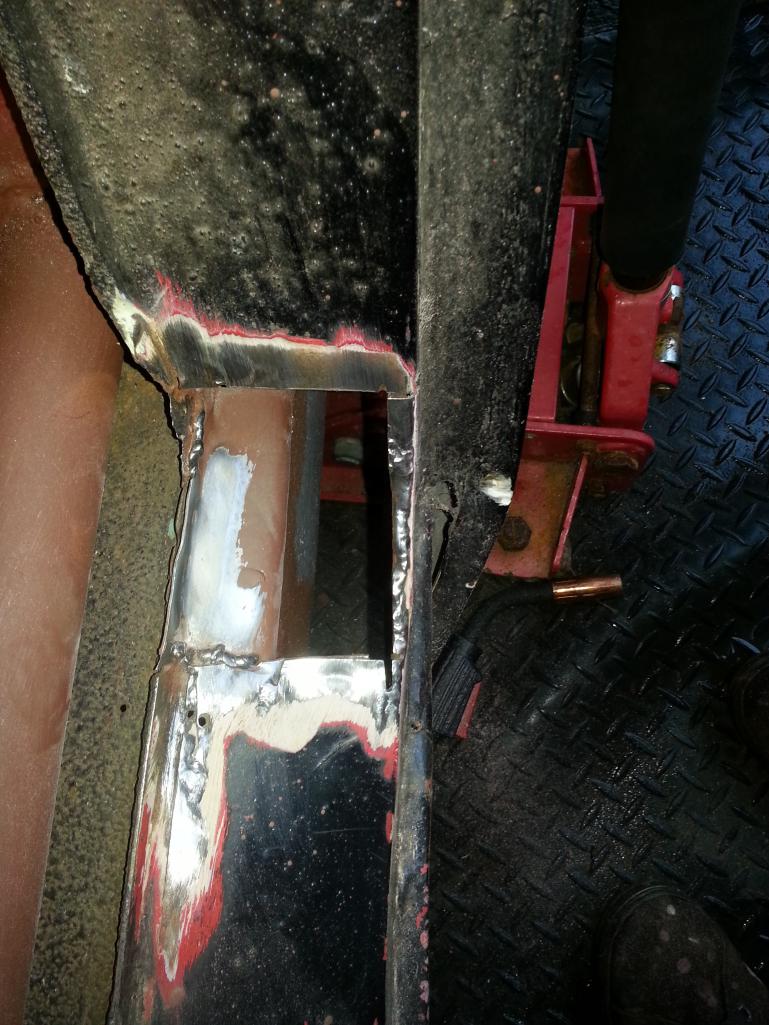
Posted by: nukepipe Jan 26 2014, 07:25 PM
grind off
Attached thumbnail(s)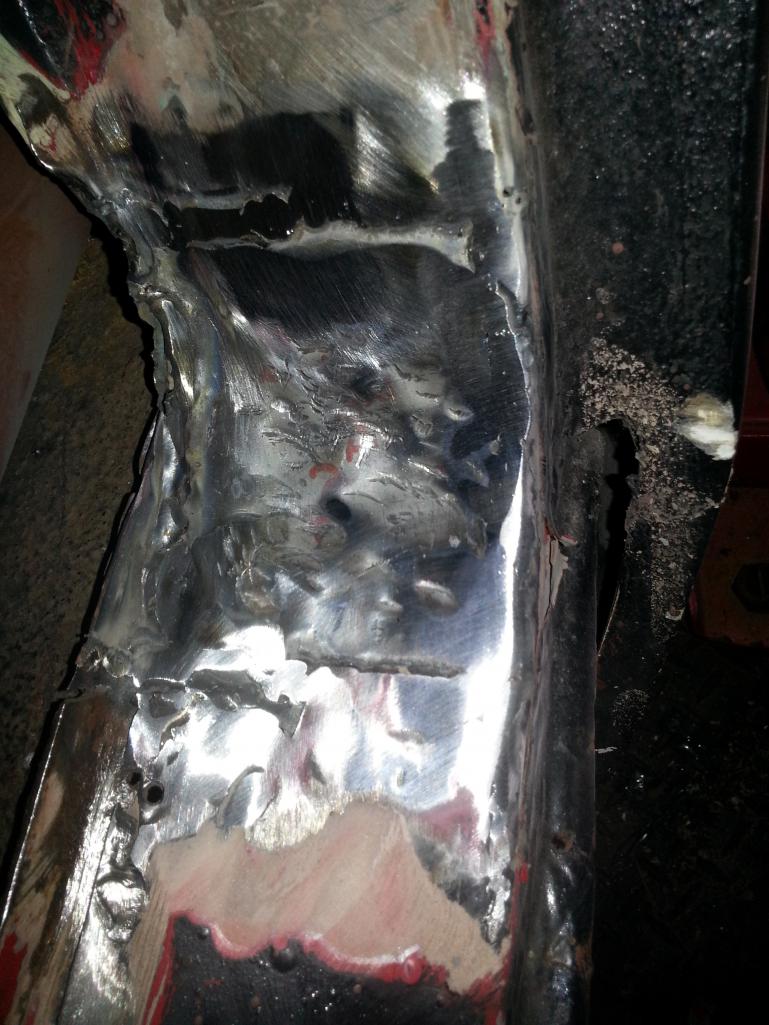
Posted by: nukepipe Jan 26 2014, 07:30 PM
primed... Think this is the last patch.... Will be working during the week with the upper part of the center tunnel. Then will be grinding off all the patch weldings.... wish me luck!!
Attached thumbnail(s)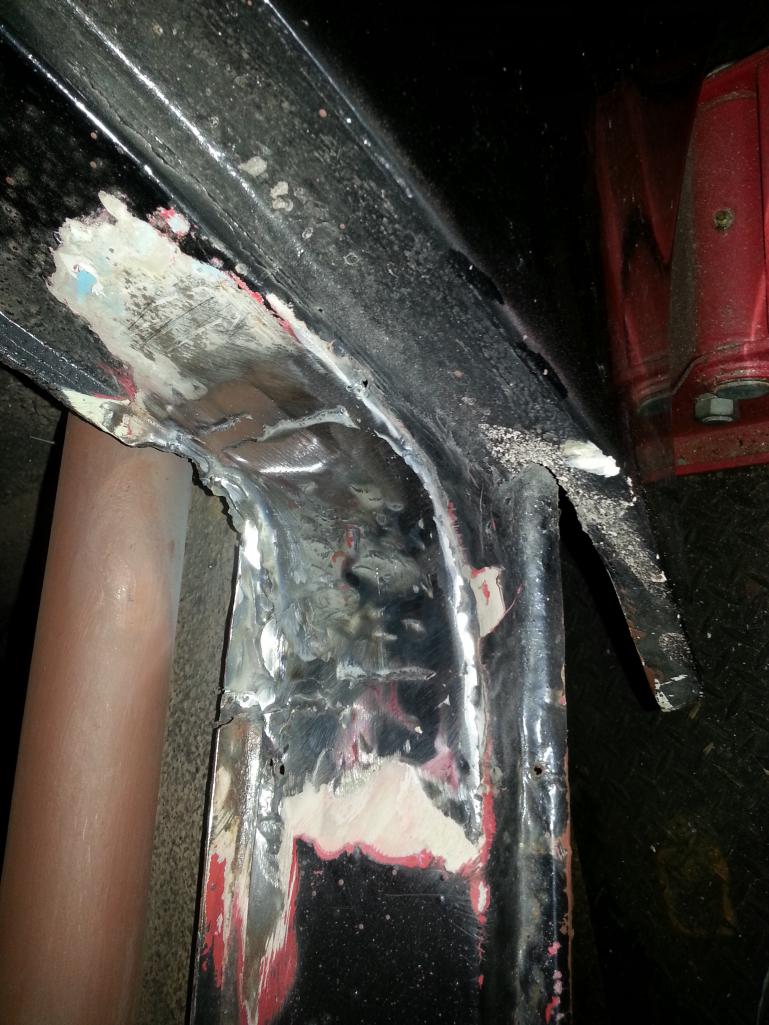
Posted by: nukepipe Jan 26 2014, 07:33 PM
Forgot the front corner, driver side... Till next time...
Attached thumbnail(s)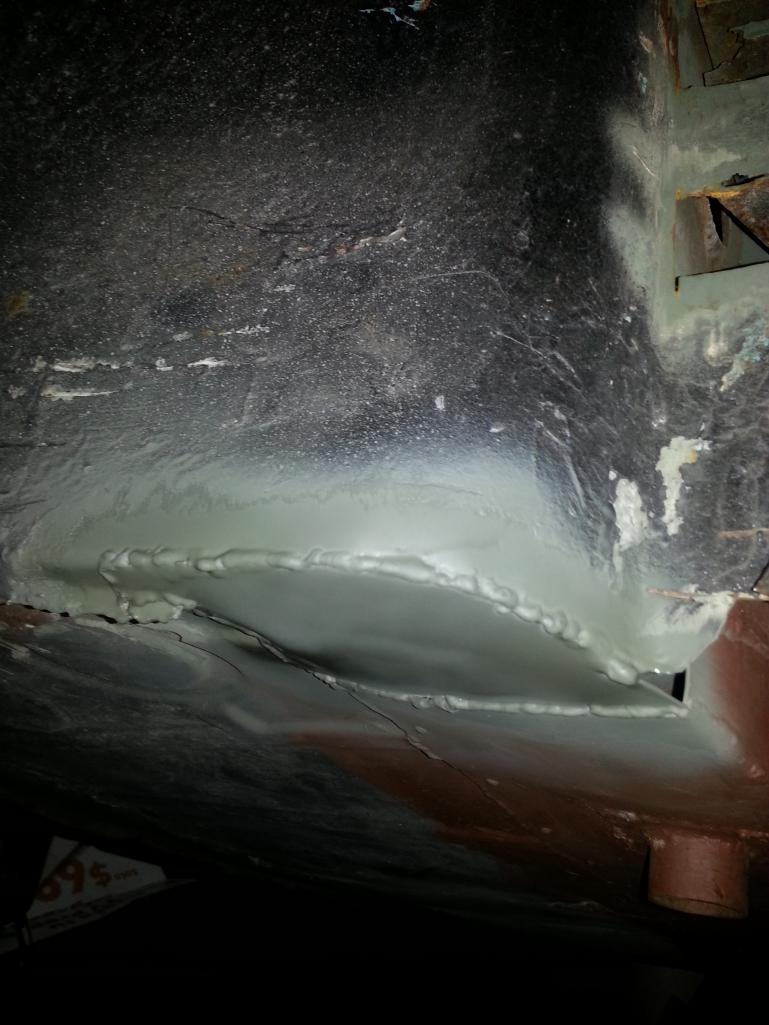
Posted by: nukepipe Feb 2 2014, 08:08 PM
A little update... worked yesterday on the center tunnel.... Getting closer!!!
Posted by: nukepipe Feb 2 2014, 08:10 PM
nuther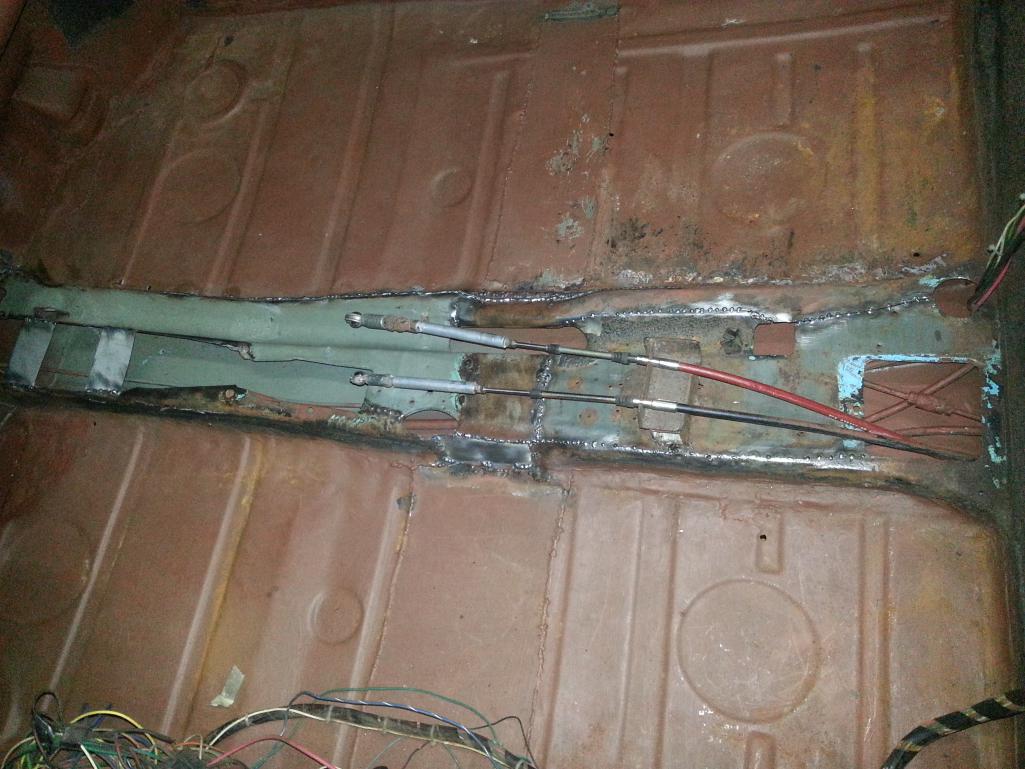
Posted by: nukepipe Feb 2 2014, 08:12 PM
side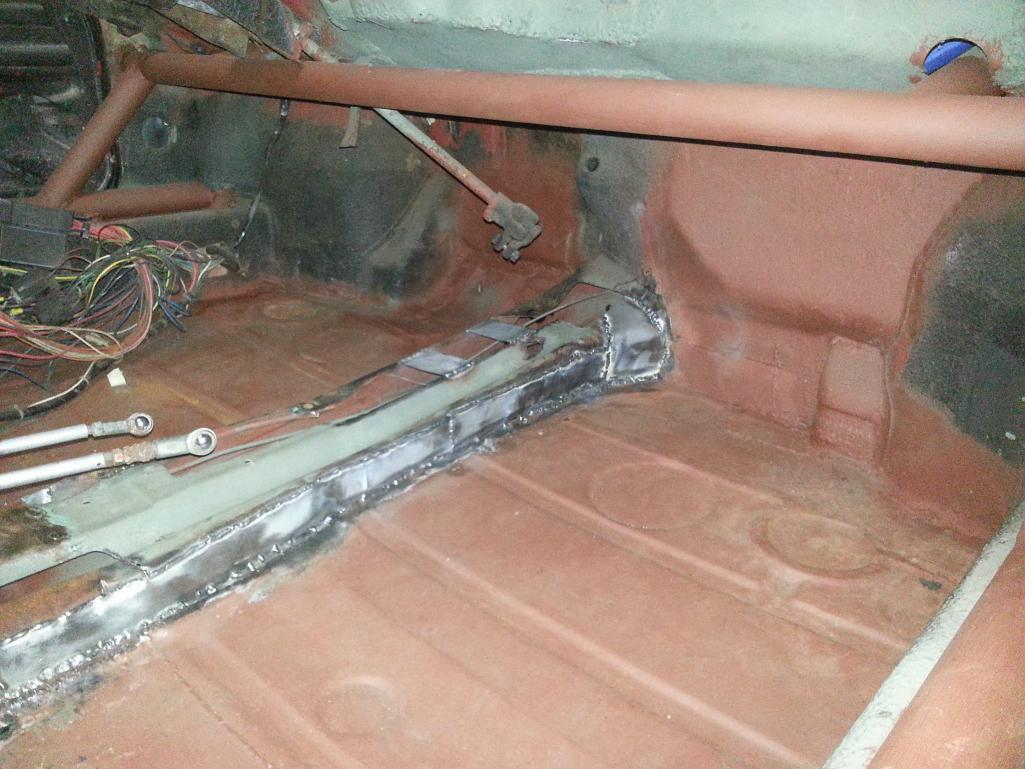
Posted by: nukepipe Feb 2 2014, 08:13 PM
another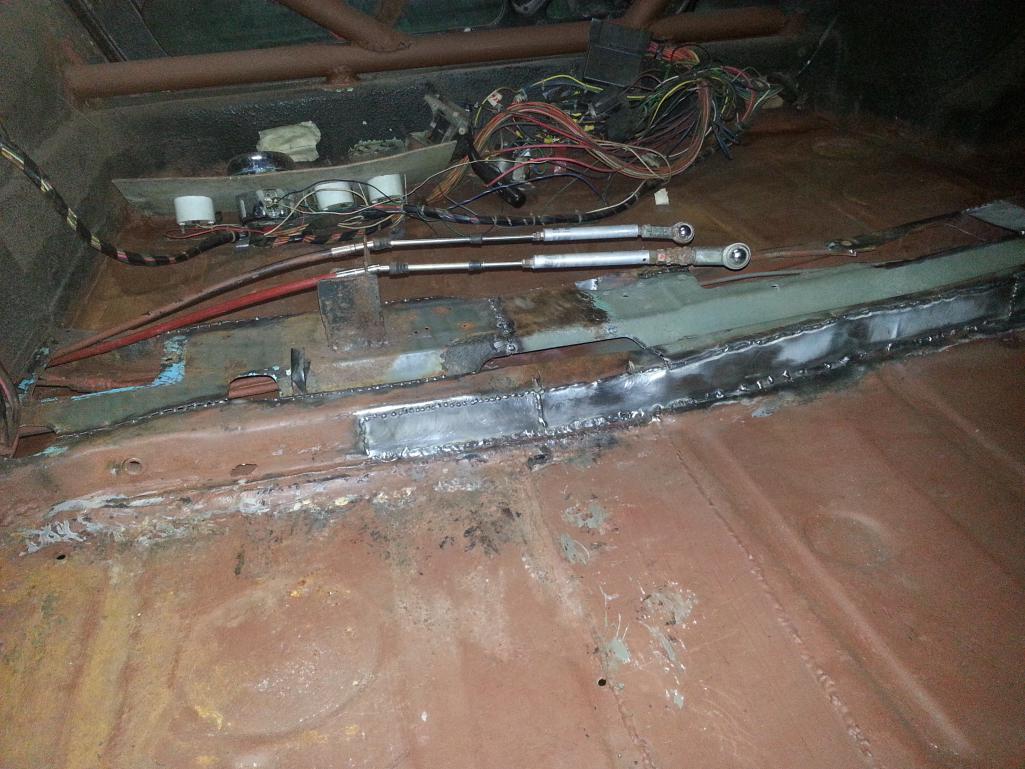
Posted by: nukepipe Feb 2 2014, 08:15 PM
BTW I ain't gonna pass the wires under the tunnel... All wires above for easy access...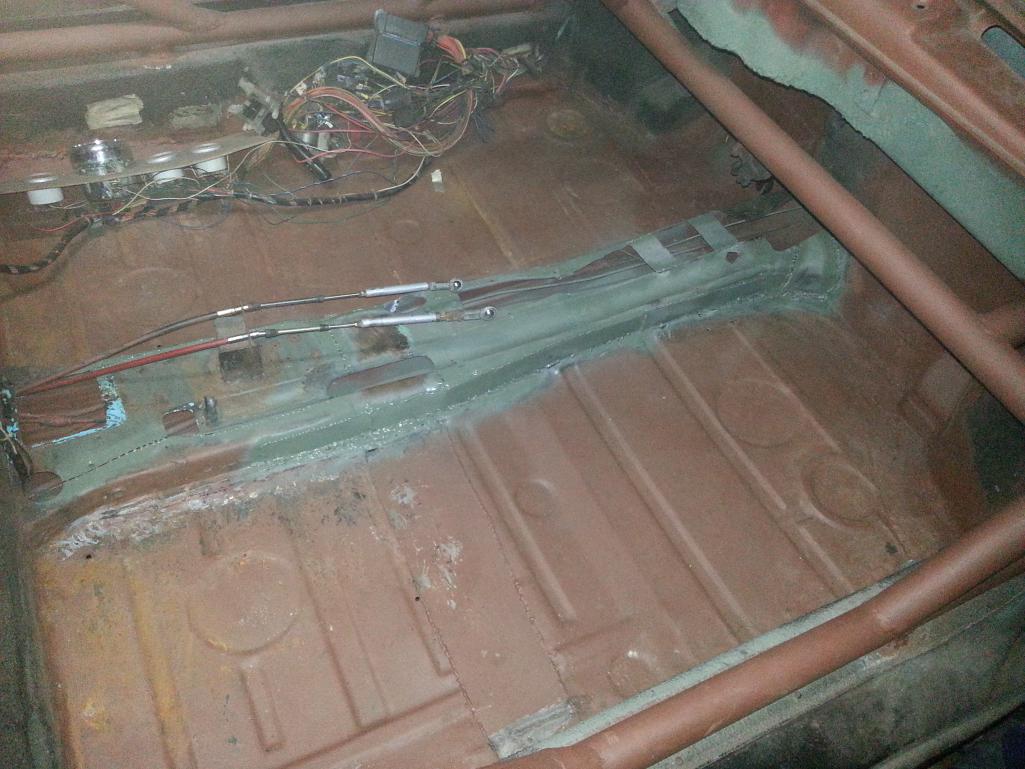
Posted by: nukepipe Feb 15 2014, 10:33 PM
Just a little update.... being working in floor reinforcement and patching some holes in the firewall and in the front trunk....
Attached thumbnail(s)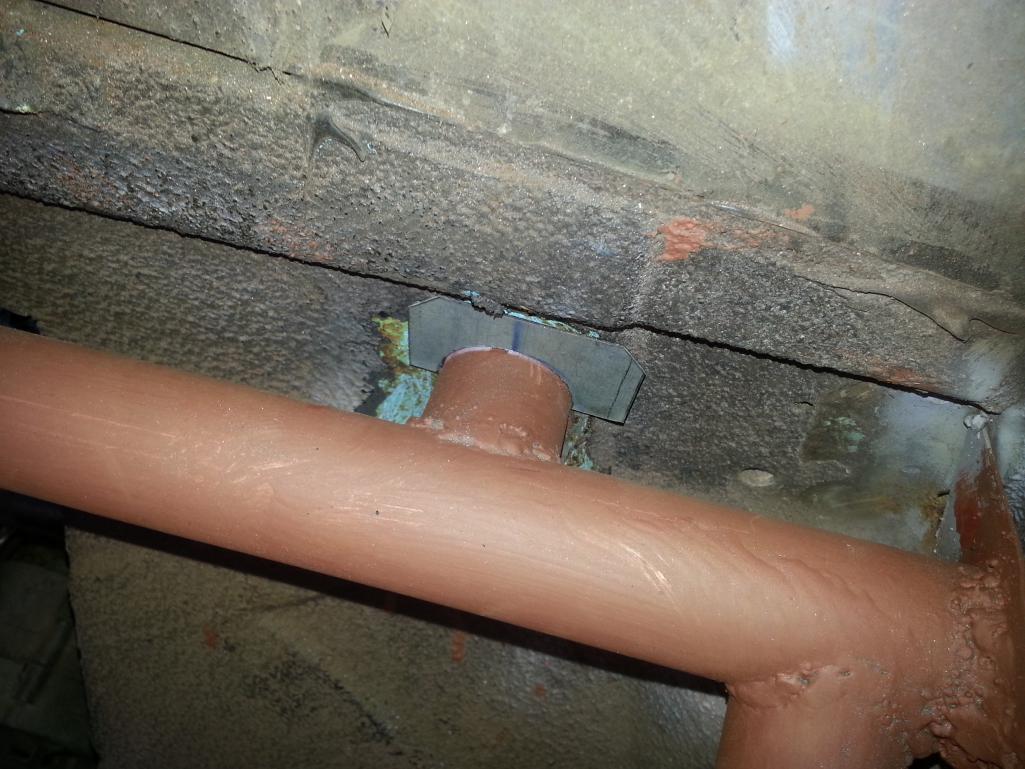
Posted by: nukepipe Feb 15 2014, 10:34 PM
more
Attached thumbnail(s)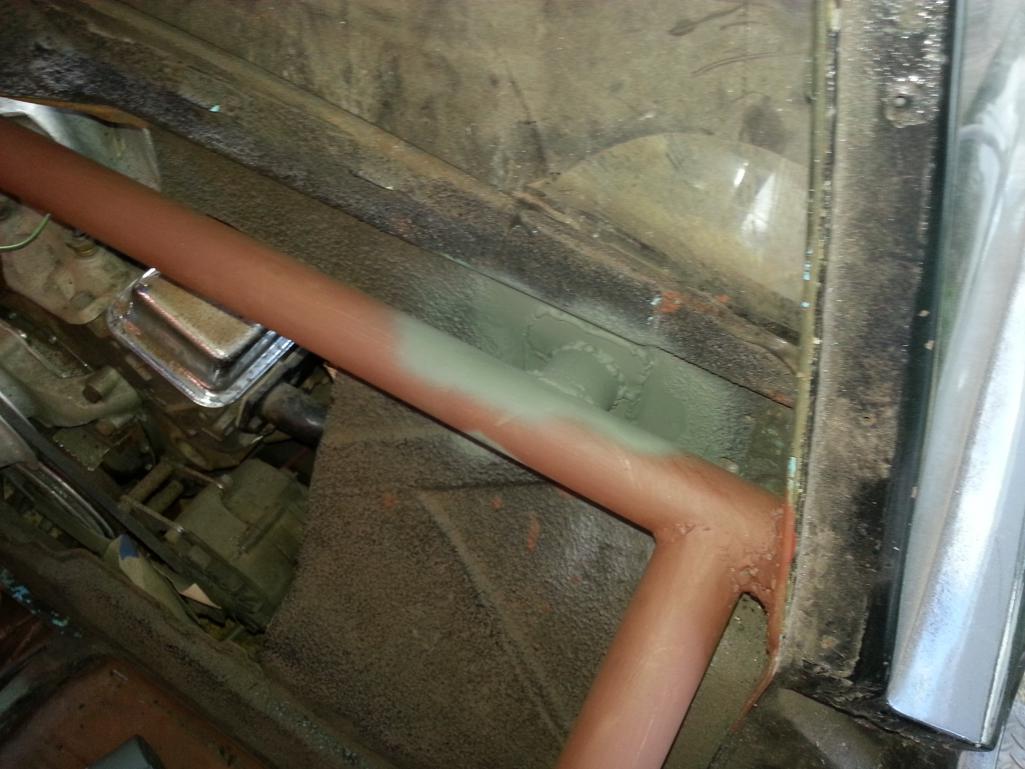
Posted by: nukepipe Feb 15 2014, 10:35 PM
more
Attached thumbnail(s)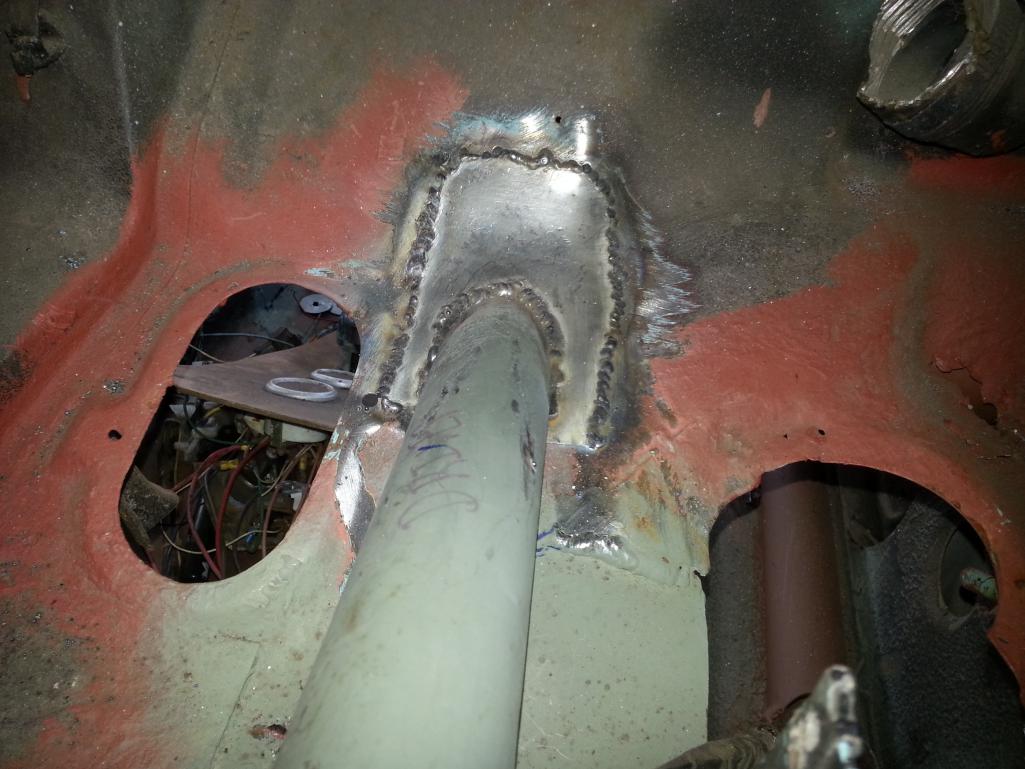
Posted by: nukepipe Feb 15 2014, 10:36 PM
more
Attached thumbnail(s)
Posted by: nukepipe Feb 15 2014, 10:37 PM
New supports for the steering rack
Attached thumbnail(s)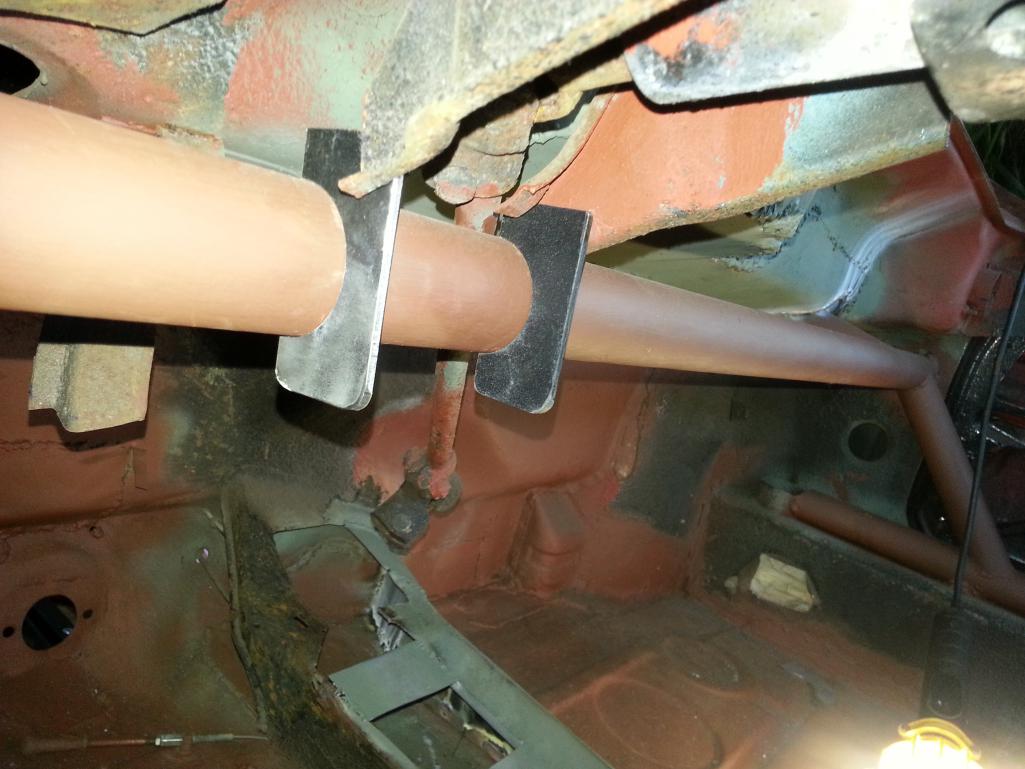
Posted by: nukepipe Feb 15 2014, 10:38 PM
floor reinforcement
Attached thumbnail(s)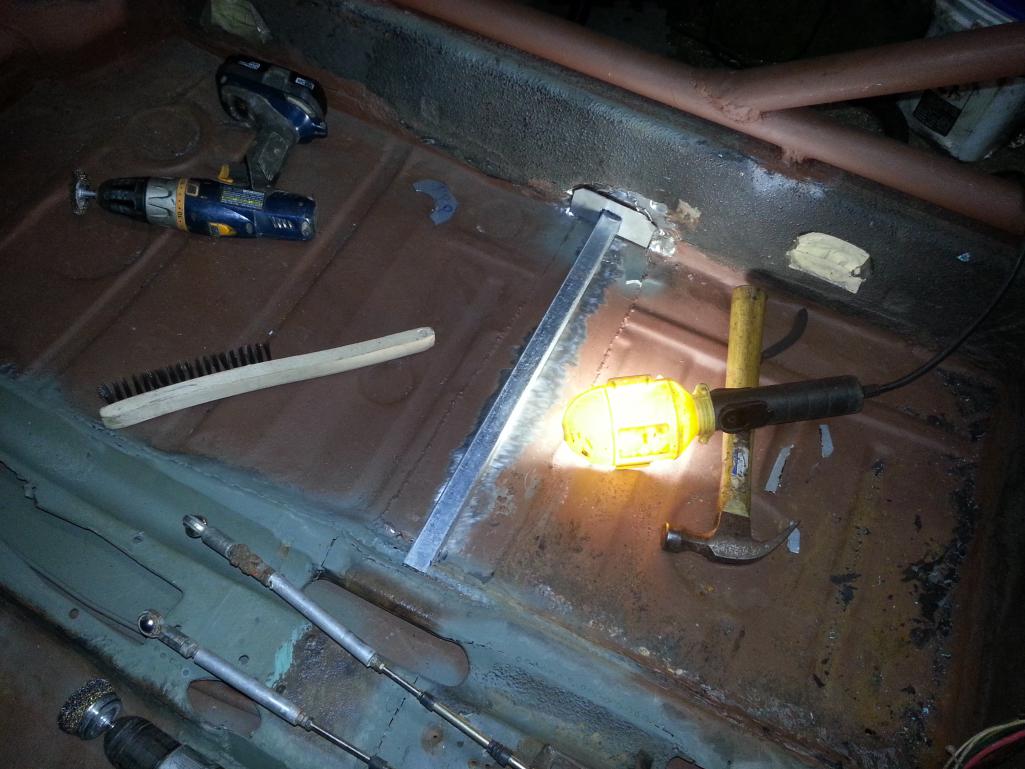
Posted by: nukepipe Feb 15 2014, 10:39 PM
another
Attached thumbnail(s)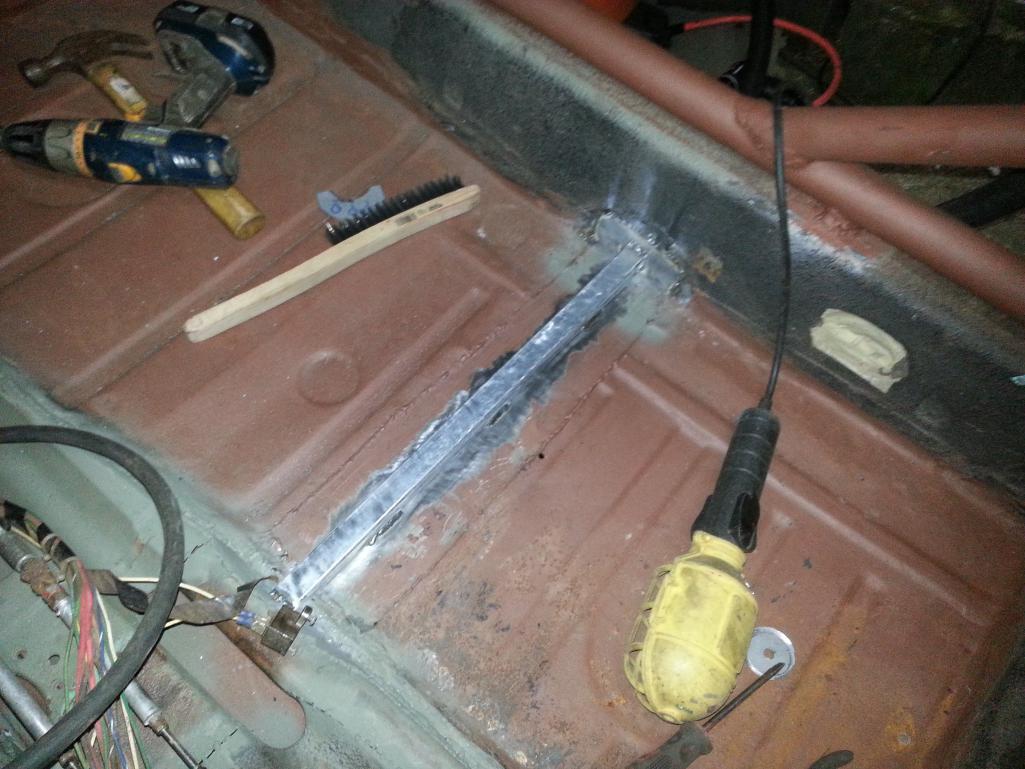
Posted by: nukepipe Feb 15 2014, 10:41 PM
another
Attached thumbnail(s)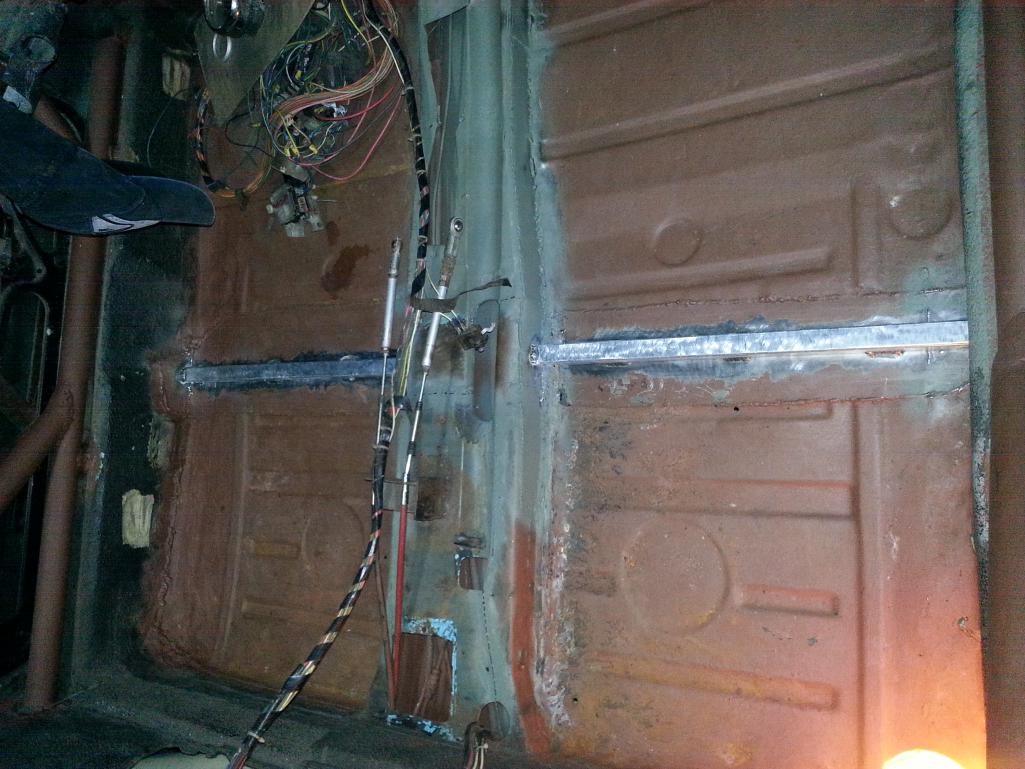
Posted by: nukepipe Feb 15 2014, 10:42 PM
another
Attached thumbnail(s)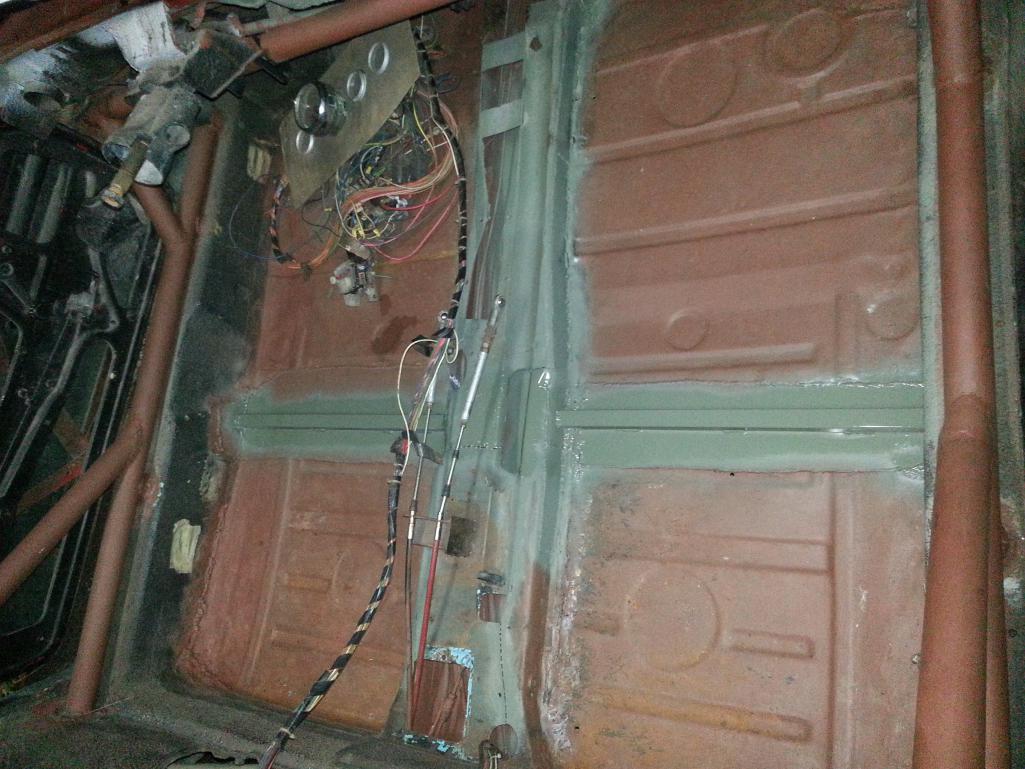
Posted by: nukepipe Feb 15 2014, 10:45 PM
Since I not sure I'm going to use that hole later... I fiberglass it.... and for the other hole (factory hole ) I use a piece of Lexan.
Attached thumbnail(s)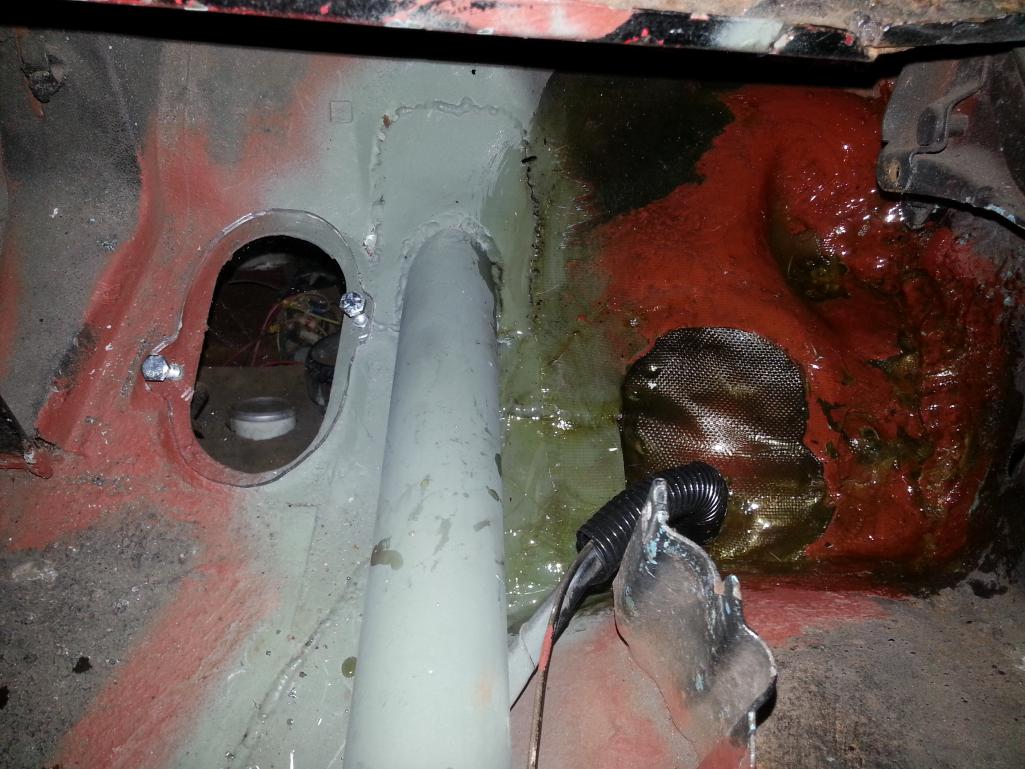
Posted by: nukepipe Feb 15 2014, 10:47 PM
other side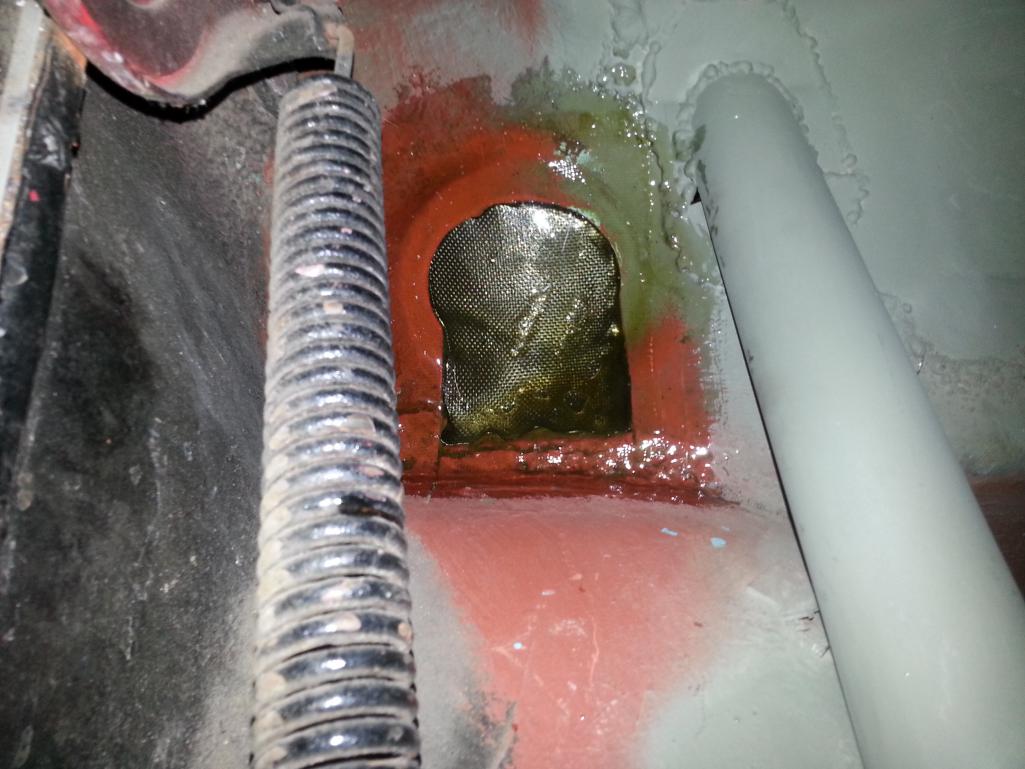
Posted by: nukepipe Feb 15 2014, 10:48 PM
another
Attached thumbnail(s)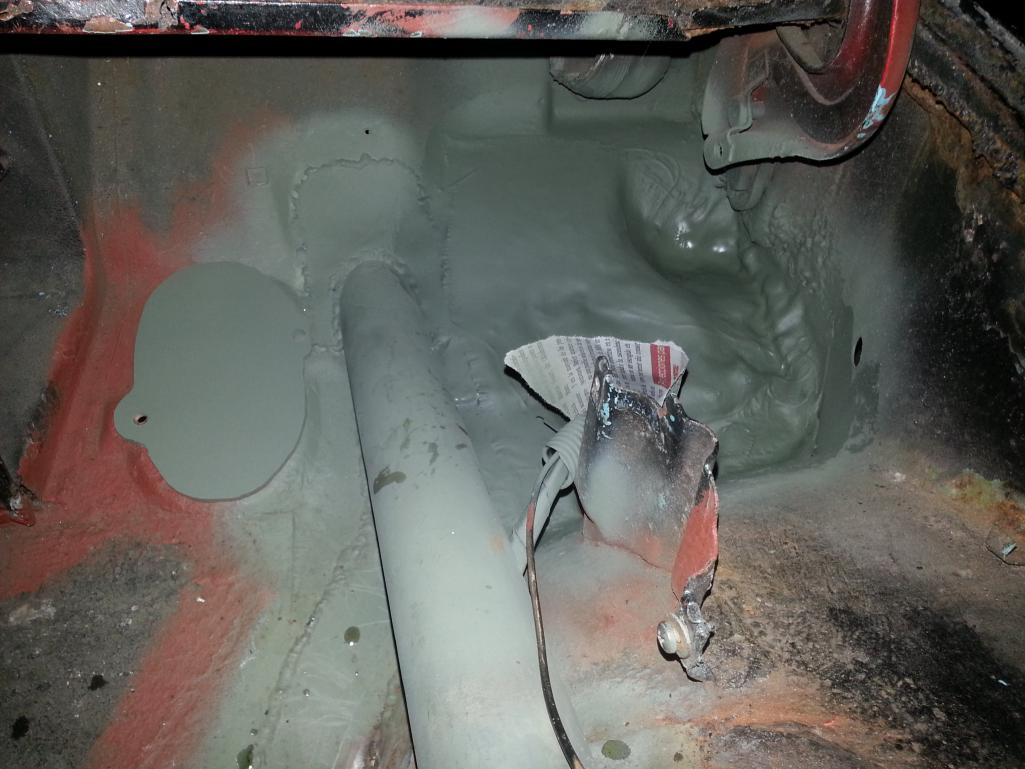
Posted by: nukepipe Feb 15 2014, 10:48 PM
another
Attached thumbnail(s)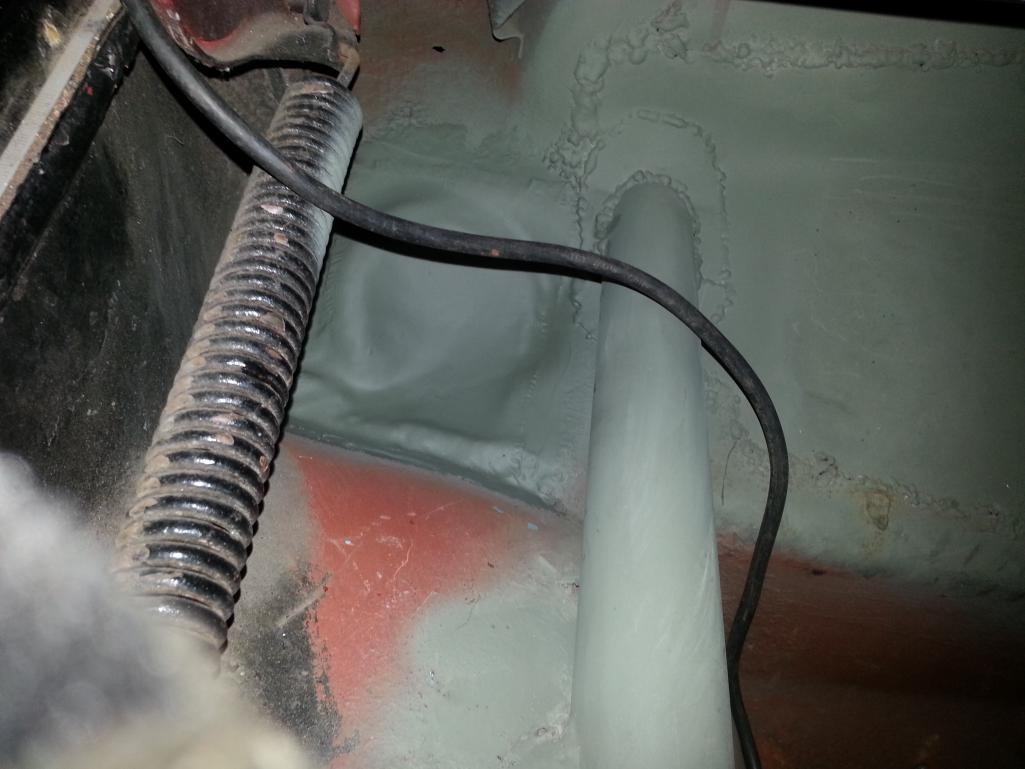
Posted by: nukepipe Feb 15 2014, 10:50 PM
I have to do a lot of grinding!!!! 
Another shot for the rack steering support.
Till the next time!!!
Attached thumbnail(s)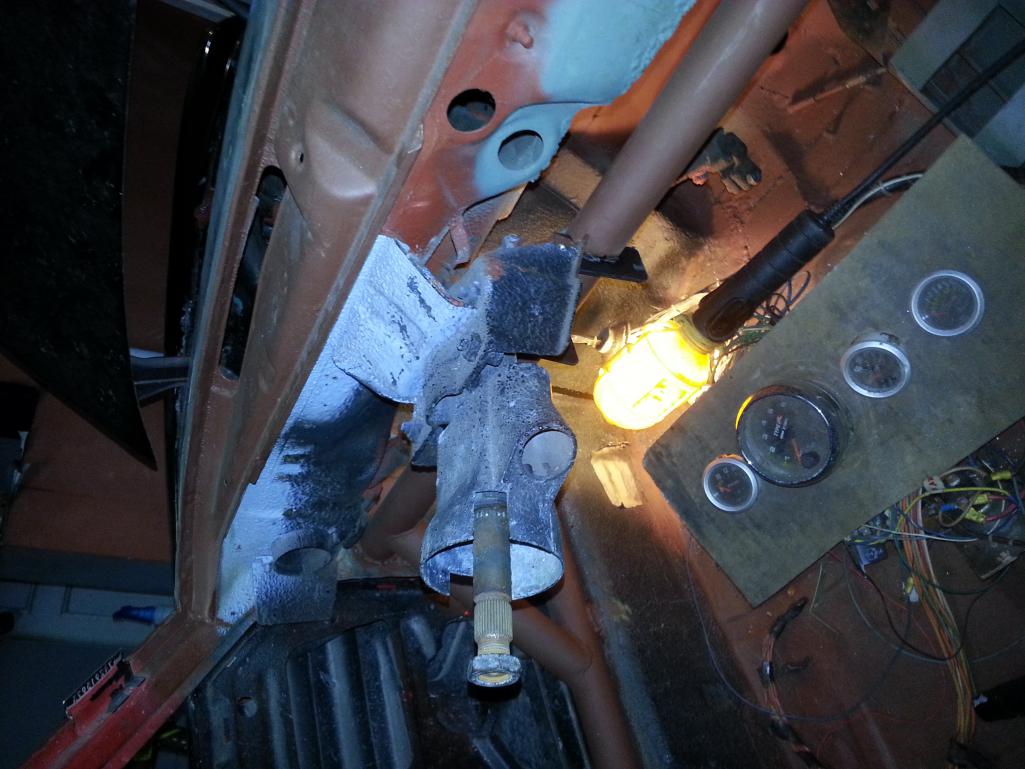
Posted by: nukepipe Feb 24 2014, 07:57 PM
Some update. Started doing some seam sealing.
Attached thumbnail(s)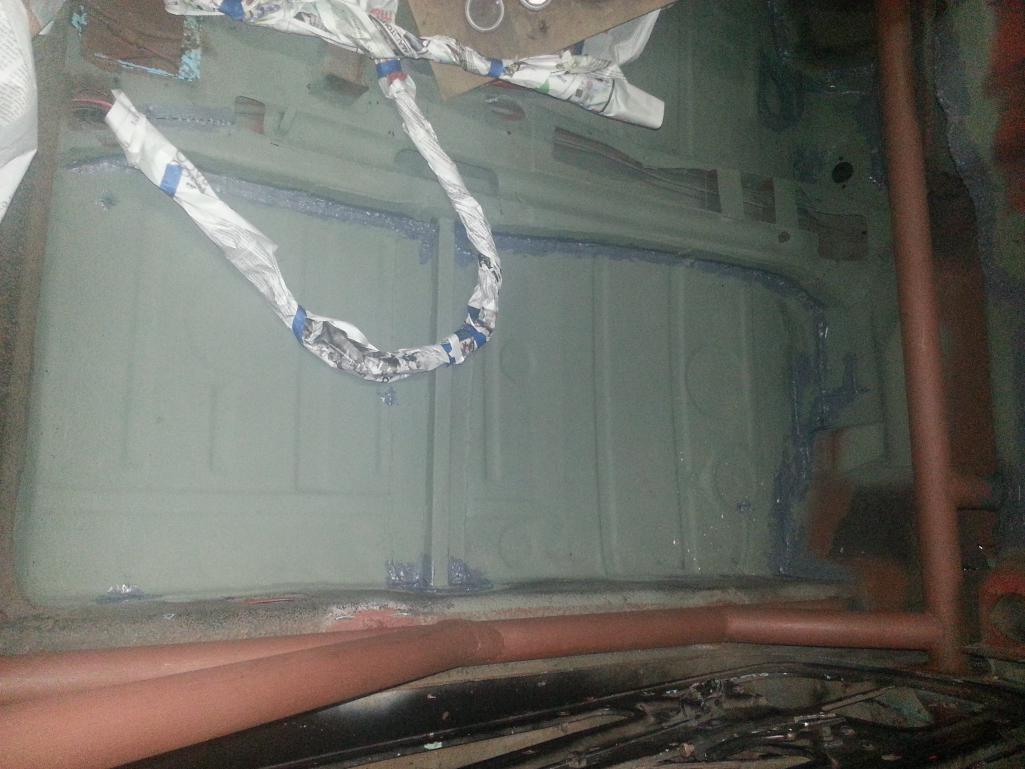
Posted by: nukepipe Feb 24 2014, 07:58 PM
another
Attached thumbnail(s)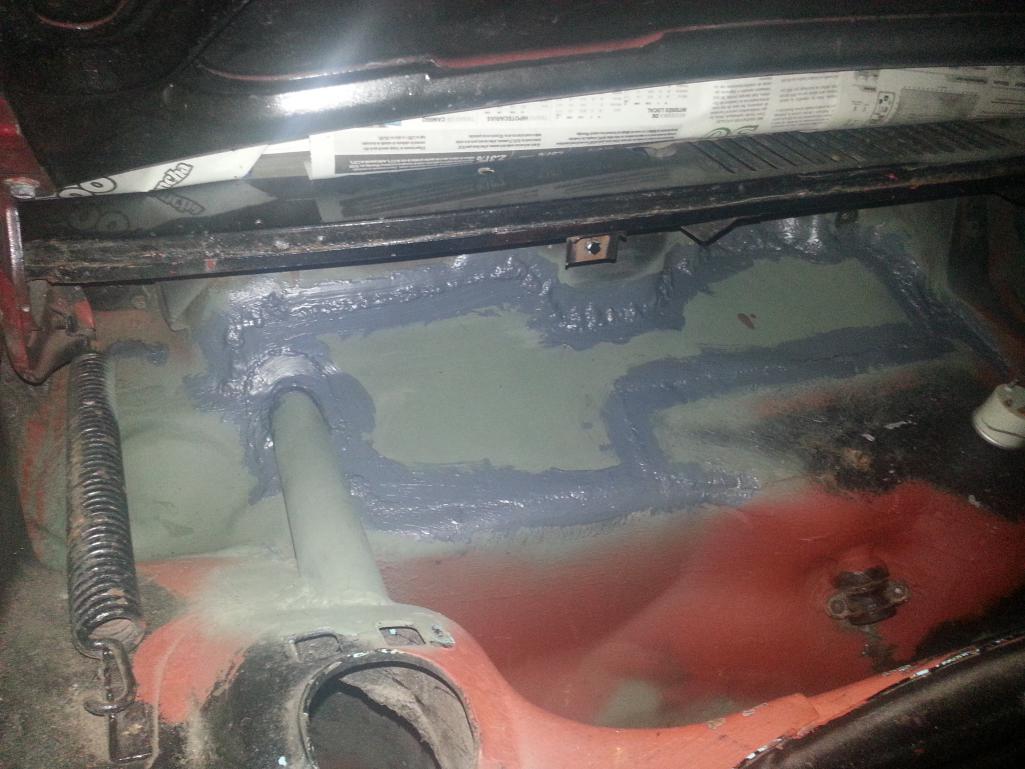
Posted by: nukepipe Feb 24 2014, 07:58 PM
another
Attached thumbnail(s)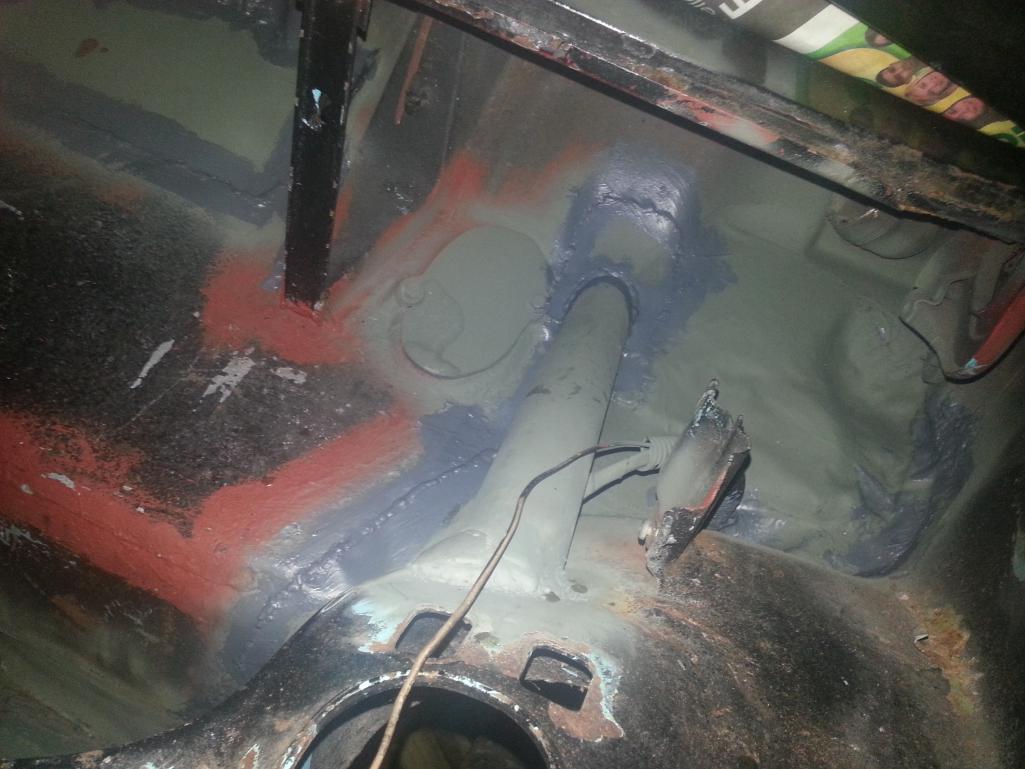
Posted by: nukepipe Feb 24 2014, 08:00 PM
another
Attached thumbnail(s)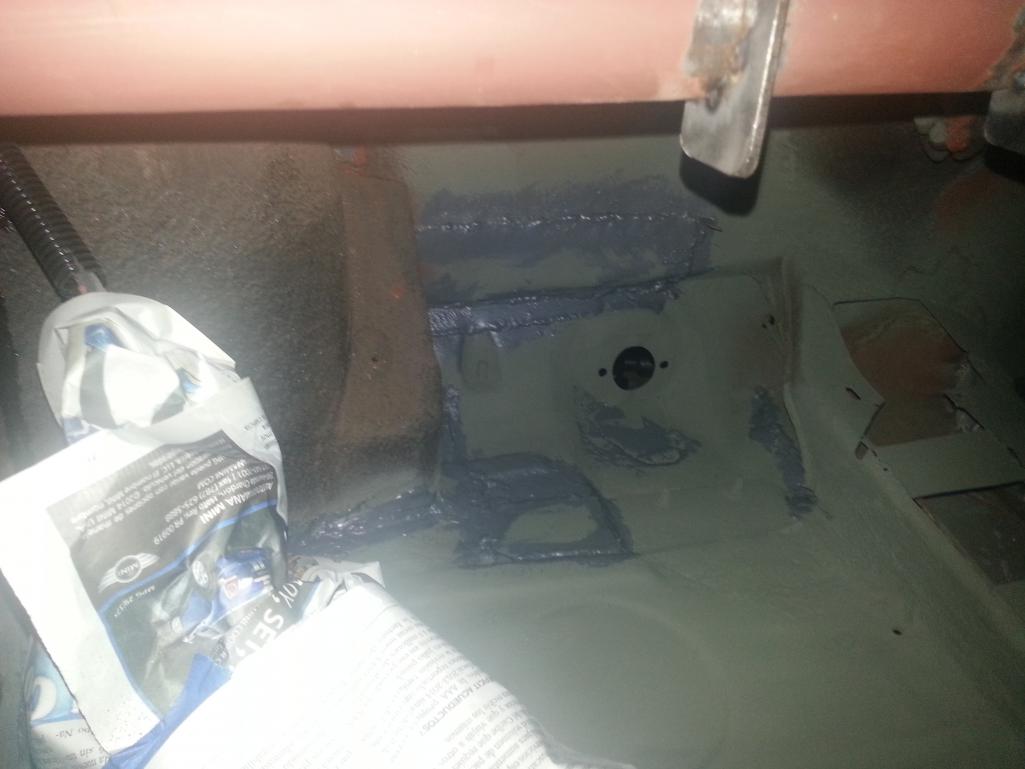
Posted by: nukepipe Feb 24 2014, 08:04 PM
One of my best friends is a R-M distributor and recommend me this epoxy primer Diamont EP569. Found no POR-15 localy.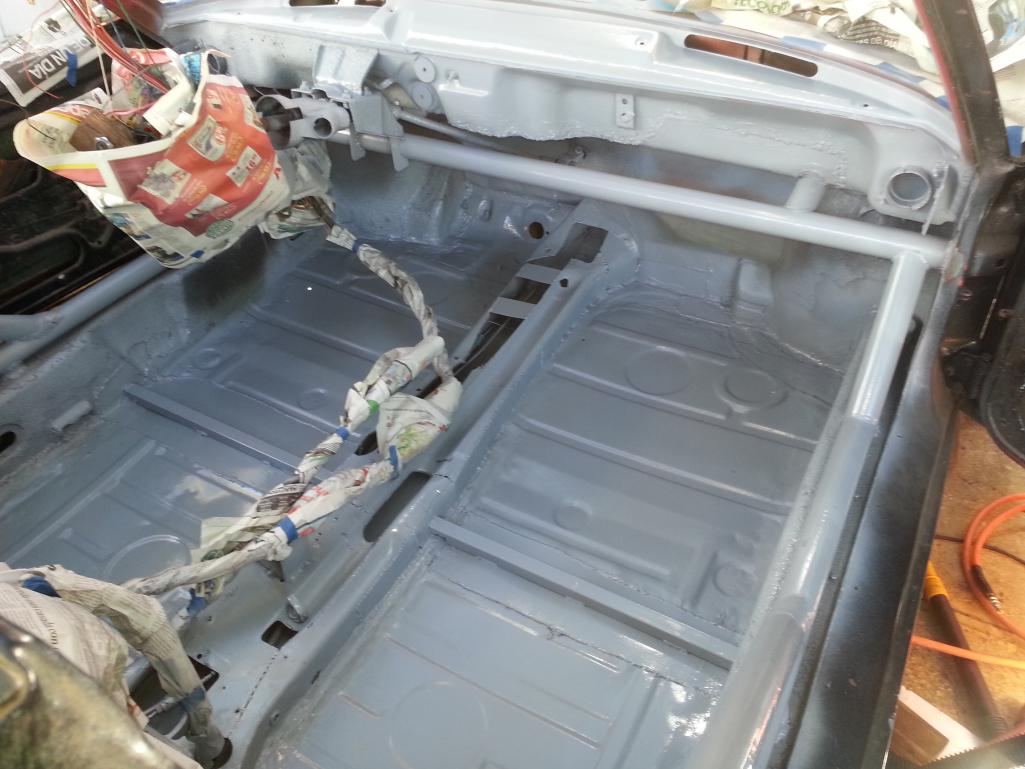
Thats it for now. C u soon!!! 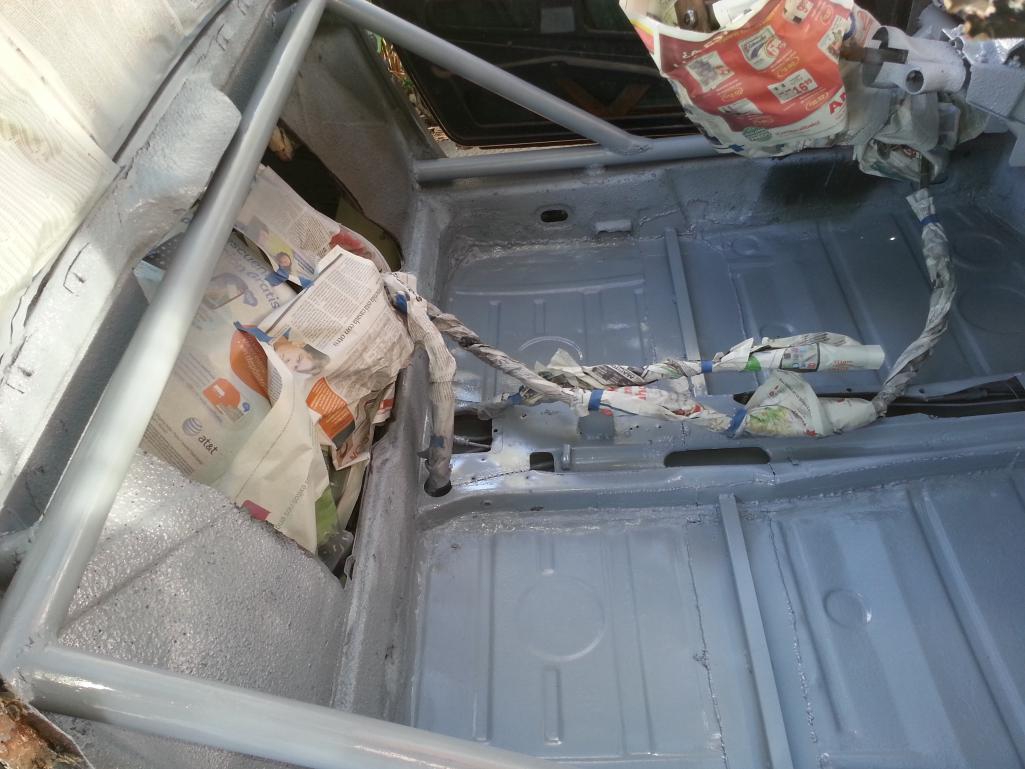
Posted by: nukepipe Apr 16 2014, 07:32 PM
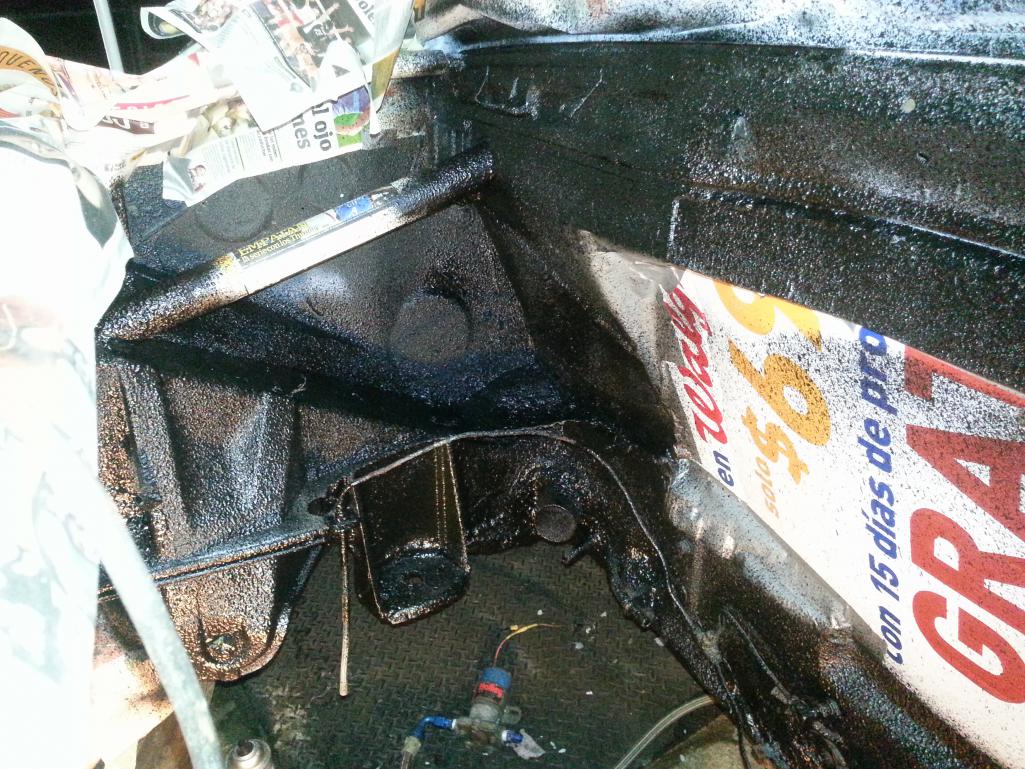
Did some work under the front wheel wells....
Attached thumbnail(s)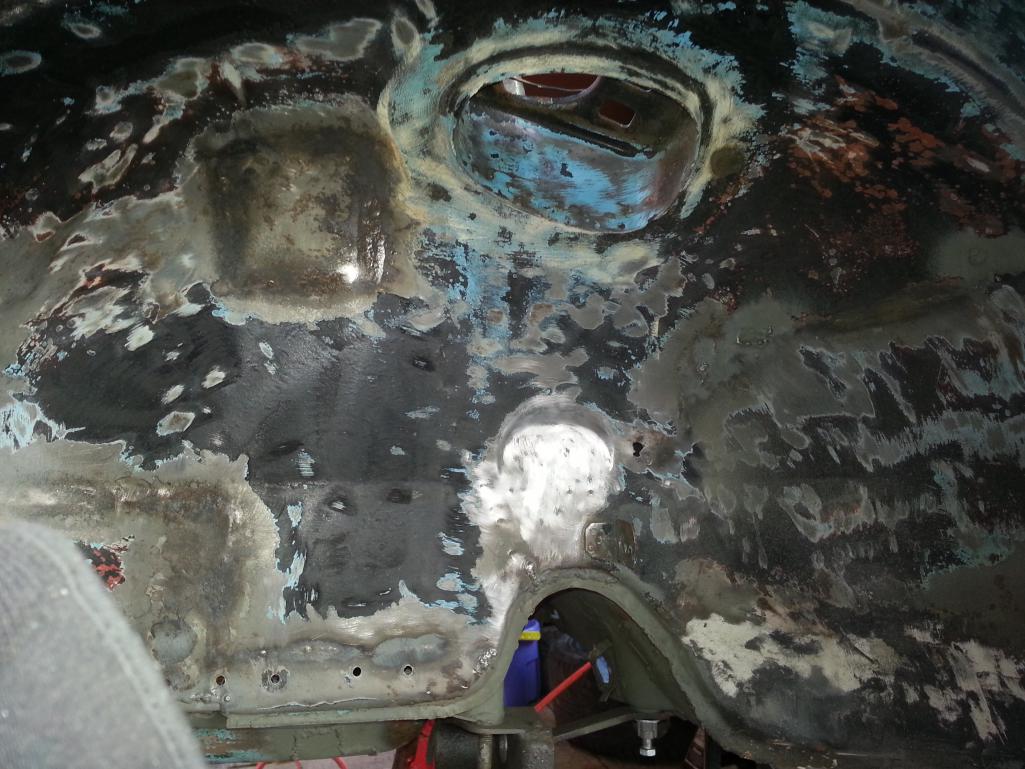
Attached image(s)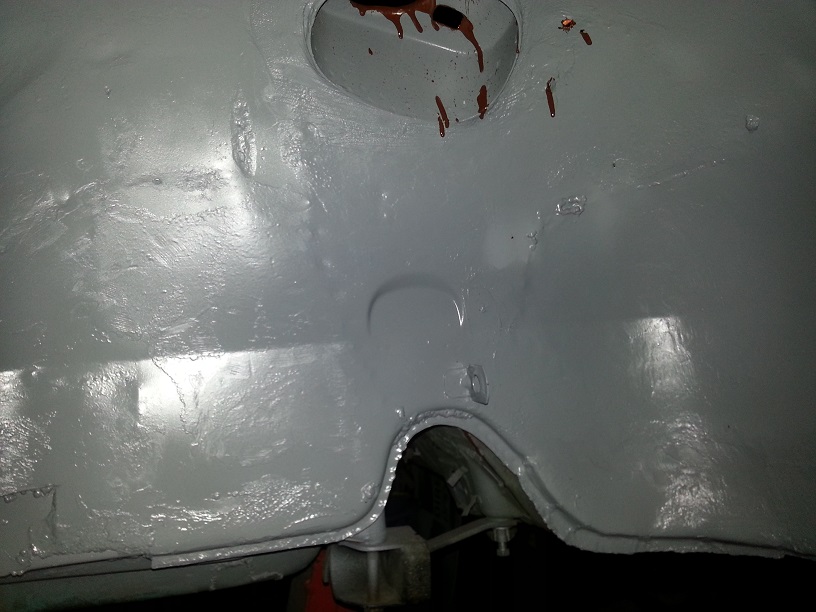
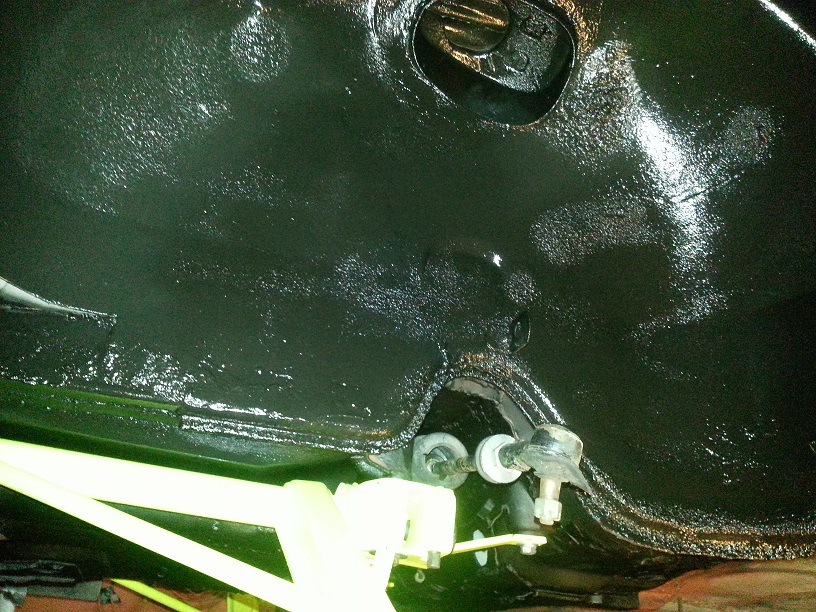
Posted by: nukepipe Apr 16 2014, 07:35 PM
Used under the wheel wells RM Diamont epoxy primer.
In the gas tank bay, used rusty metal primer.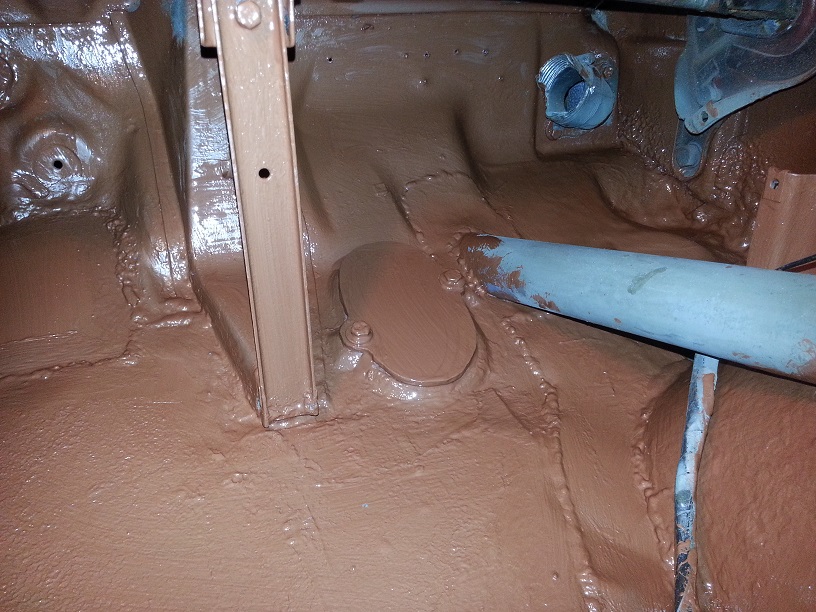
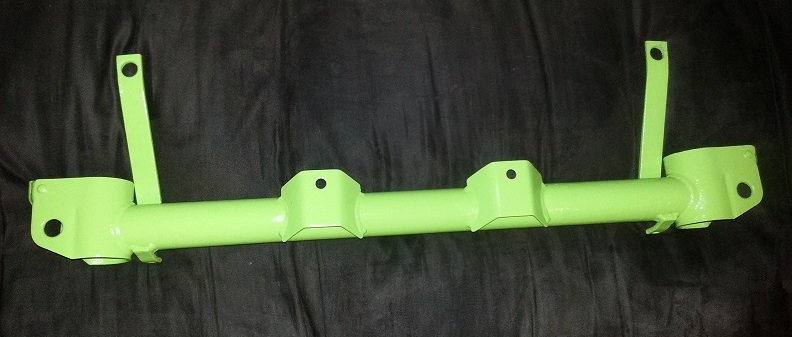
Posted by: nukepipe Apr 16 2014, 07:38 PM
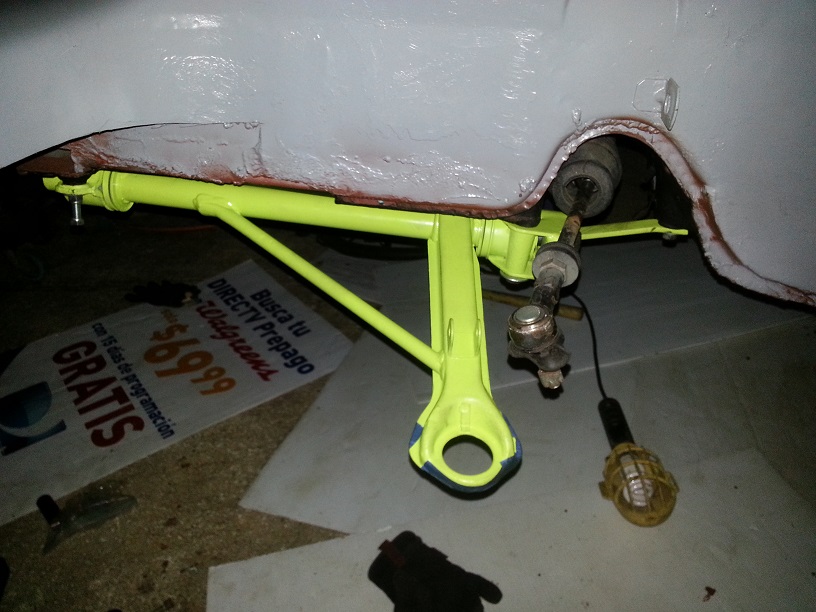
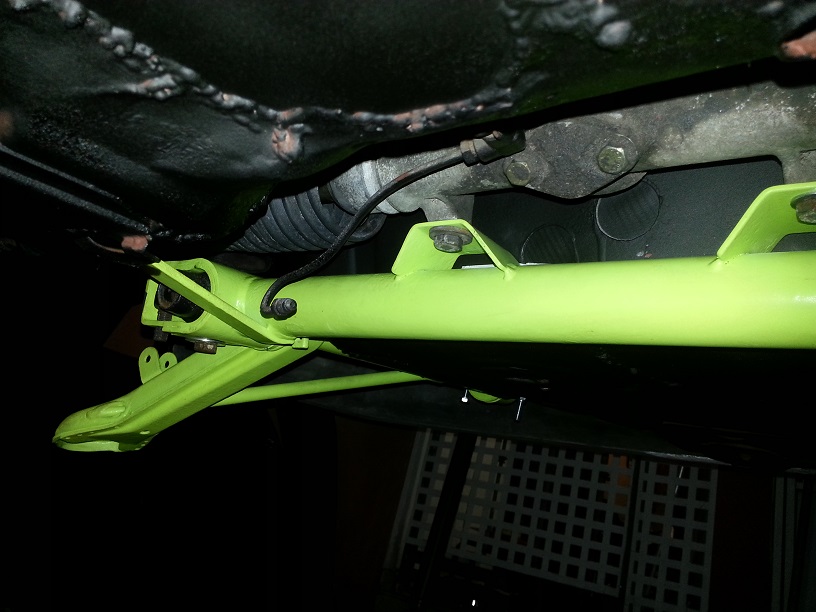
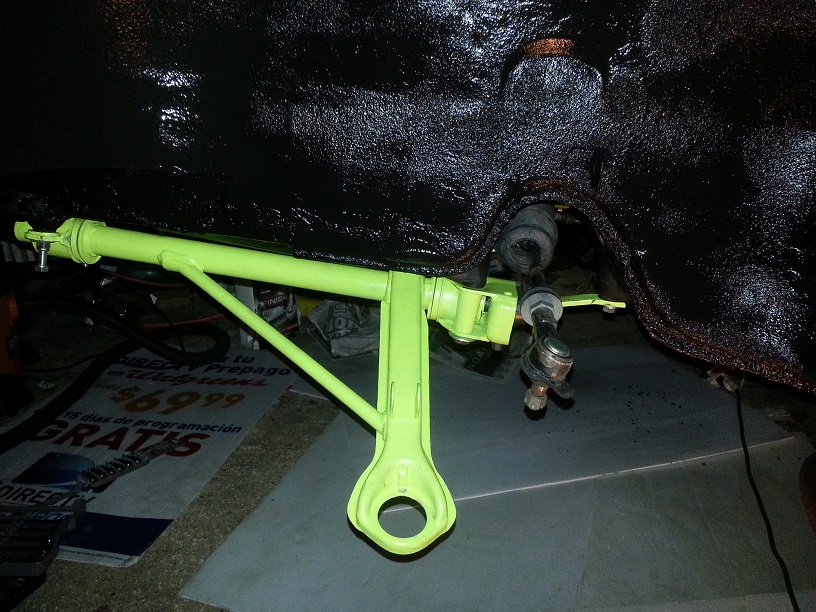
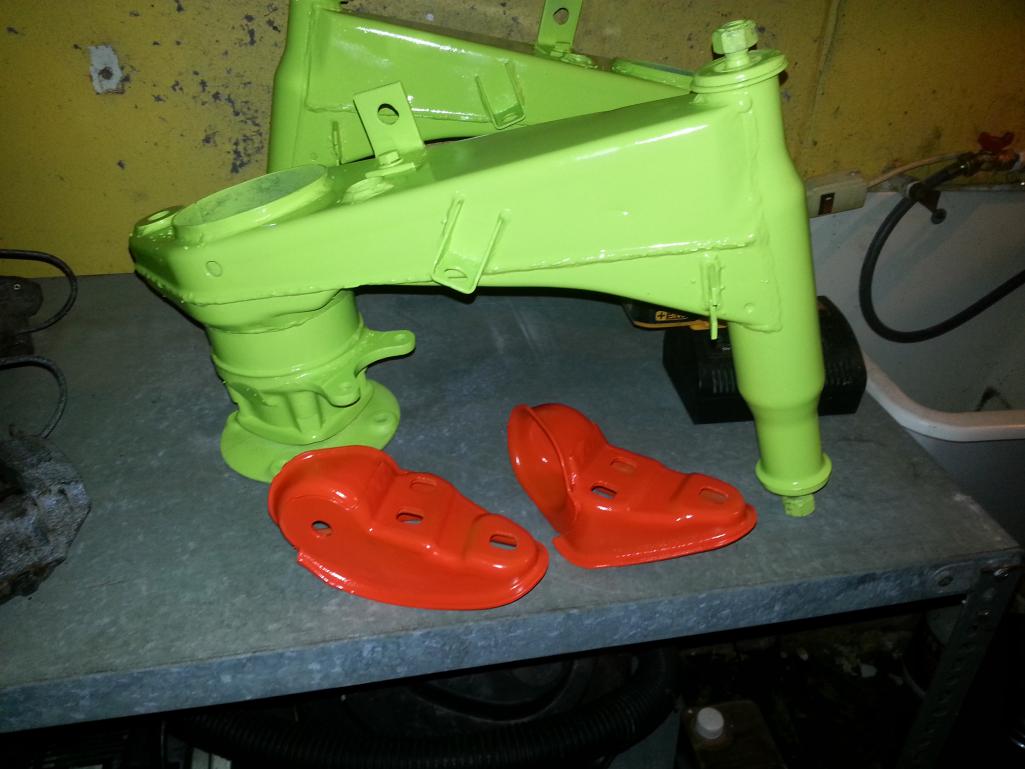
Some suspension.....porn?
My wife wanted this color....key lime green
Attached image(s)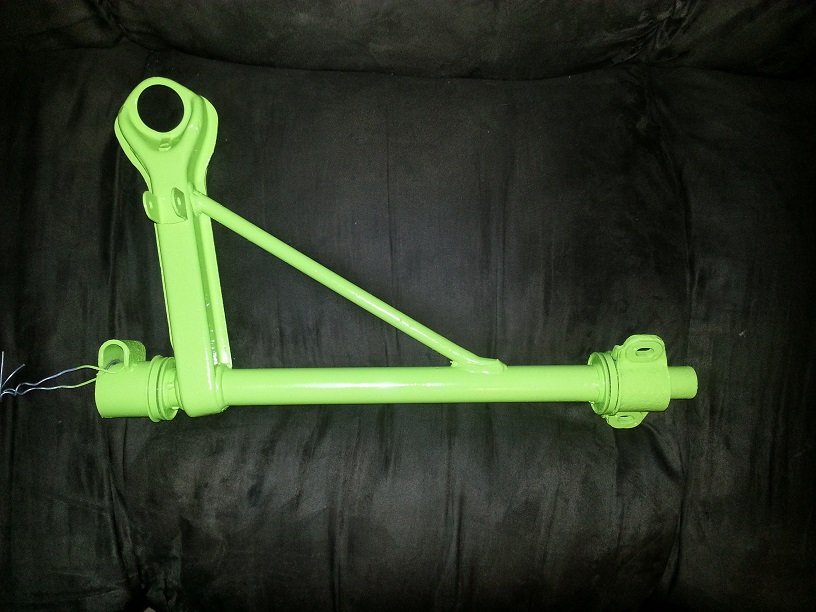
Posted by: nukepipe Apr 16 2014, 07:40 PM
More
Attached image(s)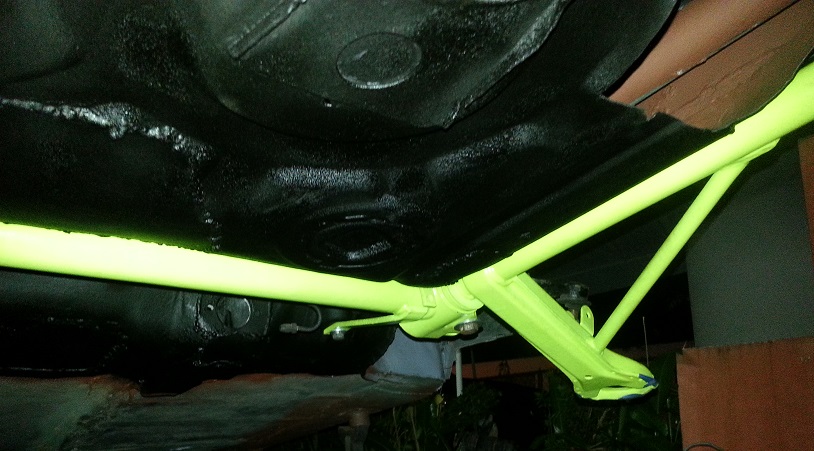
Posted by: nukepipe May 1 2014, 07:11 PM
Working on the rear suspension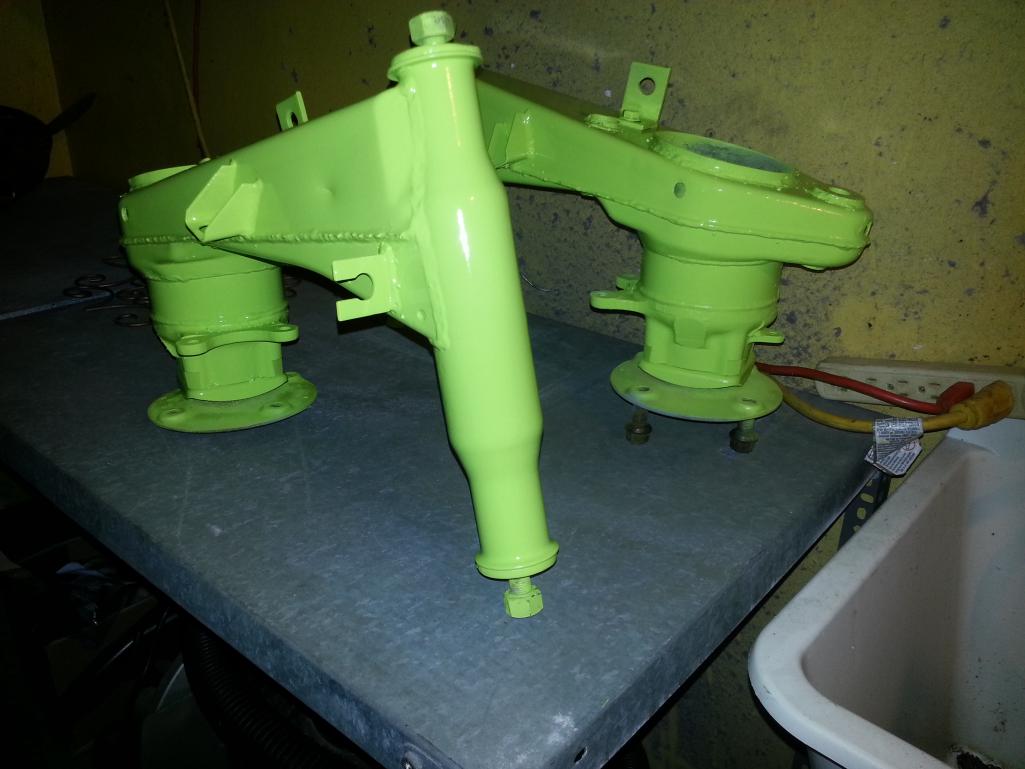
Posted by: nukepipe May 1 2014, 07:13 PM
nuther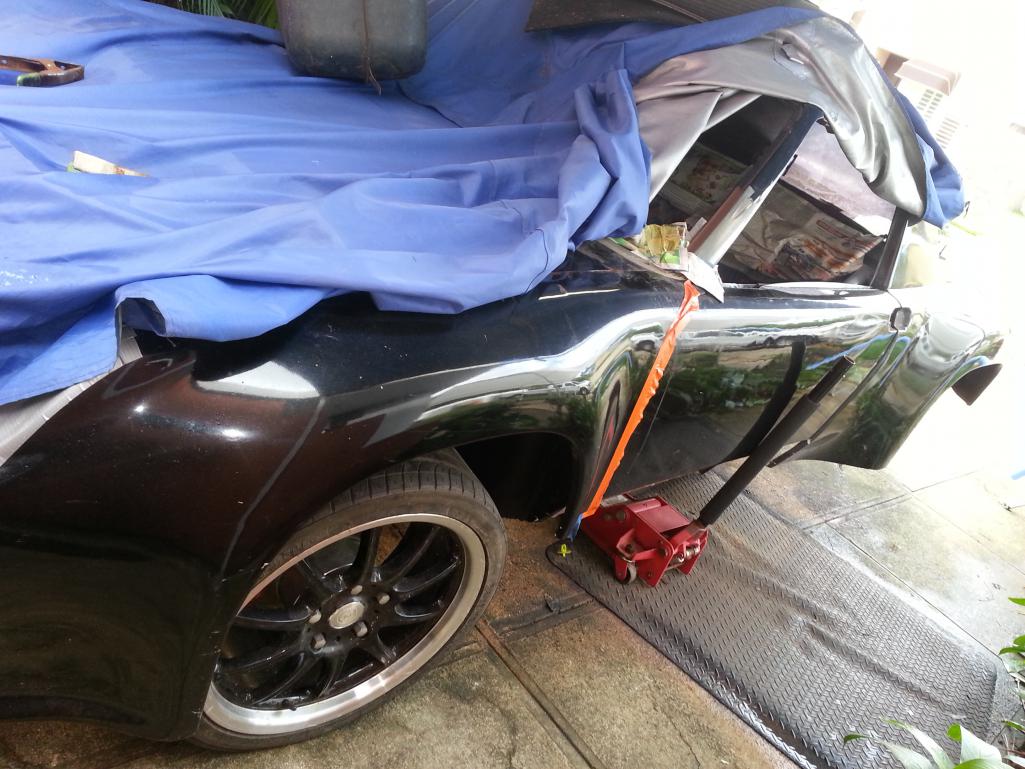
Posted by: r_towle May 1 2014, 07:18 PM
I think you may need more undercoating.....some rust is bleeding through
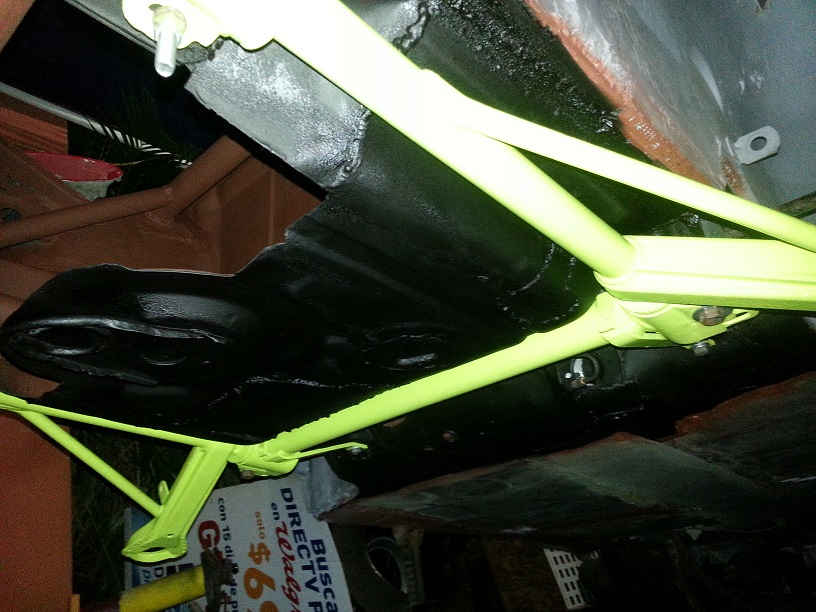
Posted by: nukepipe May 1 2014, 07:23 PM
Working under the rear wheelwell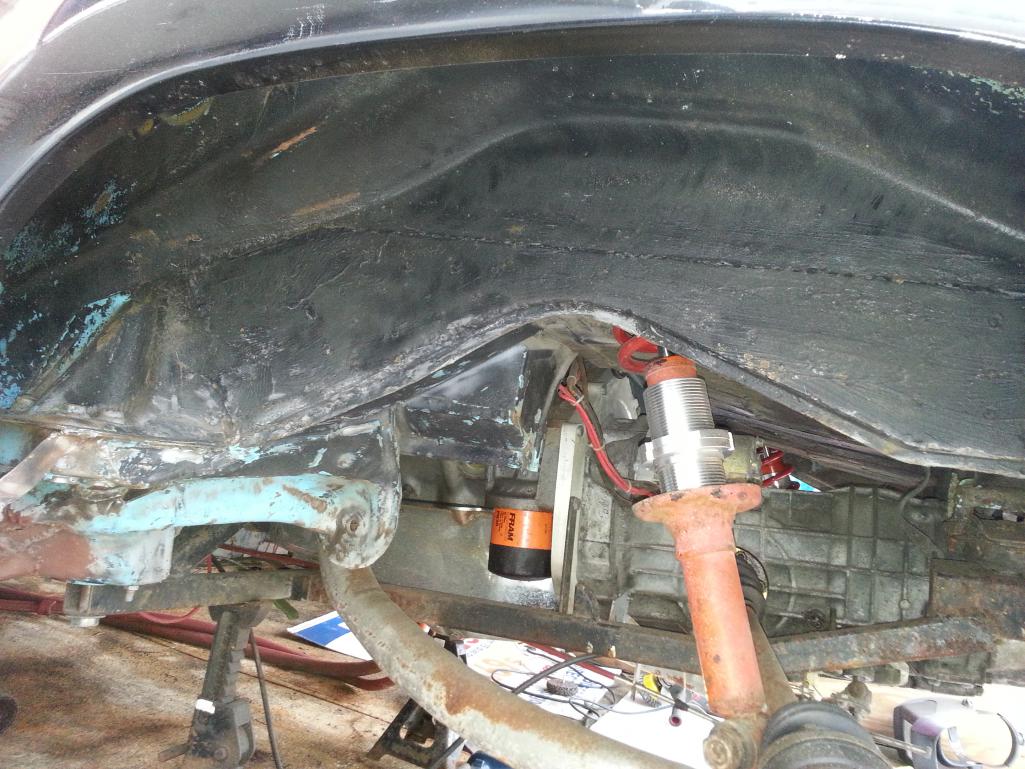
Posted by: nukepipe May 1 2014, 07:24 PM
I think you may need more undercoating.....some rust is bleeding through
Thats the primer.... looks like rust...

Posted by: nukepipe May 1 2014, 07:25 PM
Posted by: nukepipe May 1 2014, 07:28 PM
One of the underliner cans was damage... u cannot imagine how  I was..... Cleaned it again.... coated again...
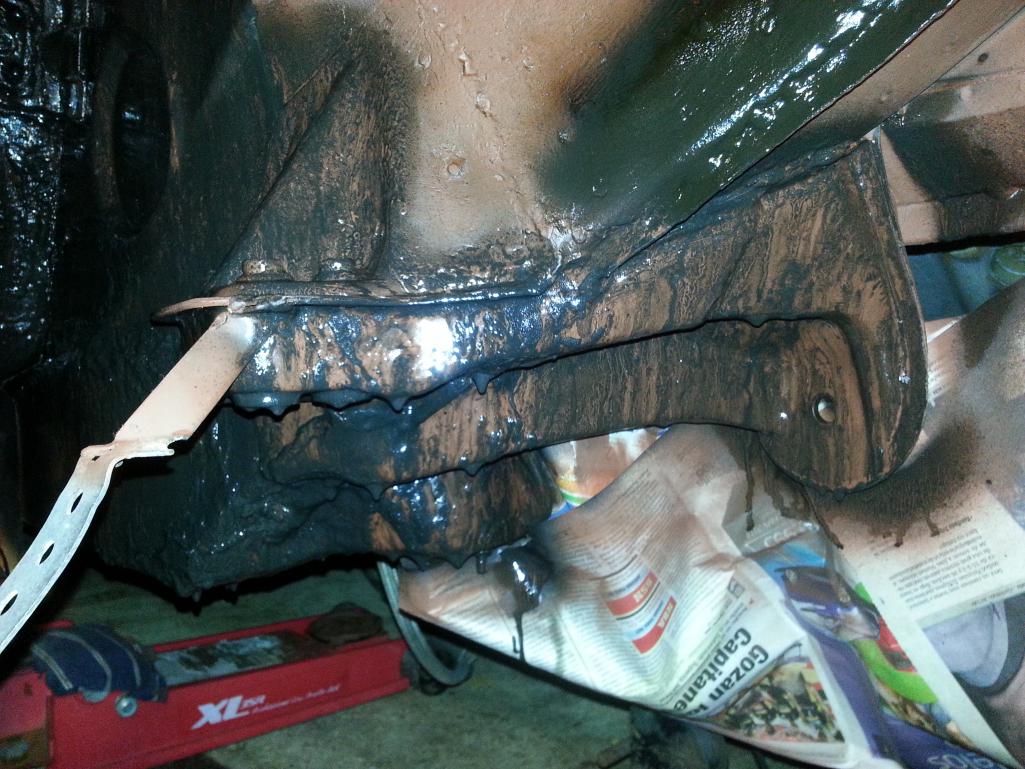
Posted by: Chris H. May 1 2014, 07:30 PM
Gotta hand it to ya man....I would have thrown that thing away about 6 pages ago...maybe right around the "foam" discovery. Nice work. Keep it up! It's gonna be a nice car.
Posted by: nukepipe May 1 2014, 07:31 PM
The other side...the greenish look if because of the flash... I think went great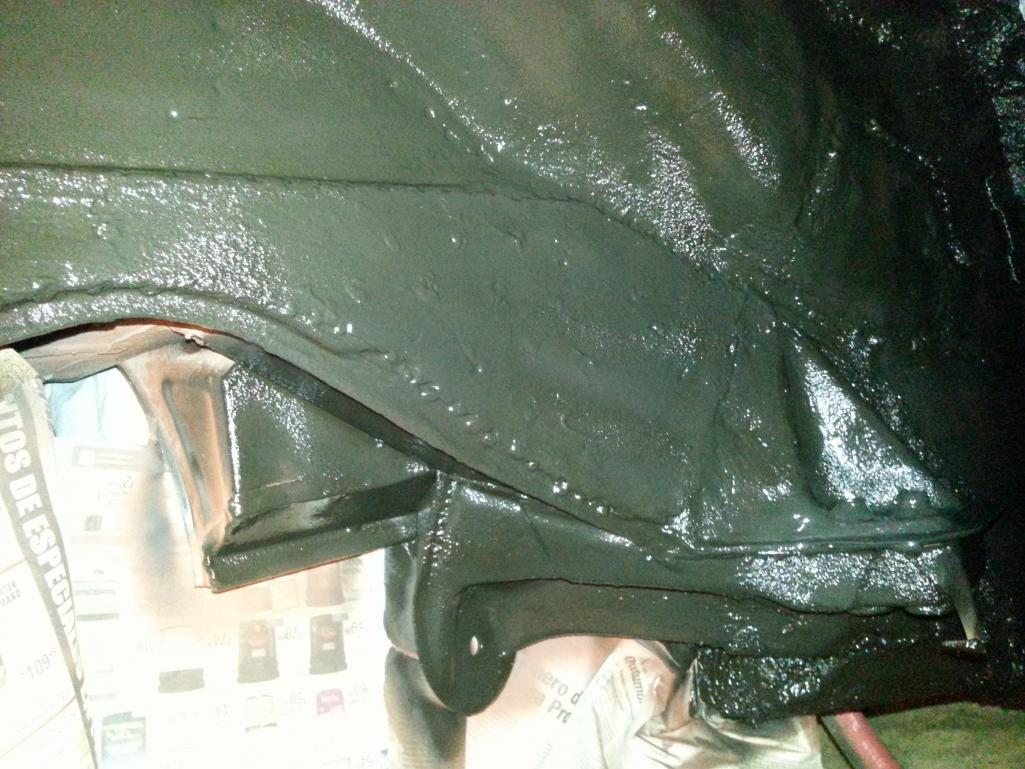
Posted by: nukepipe May 1 2014, 07:39 PM
I want to work during the weekend on the engine bay so I mount everything back, to pullout the engine later.... 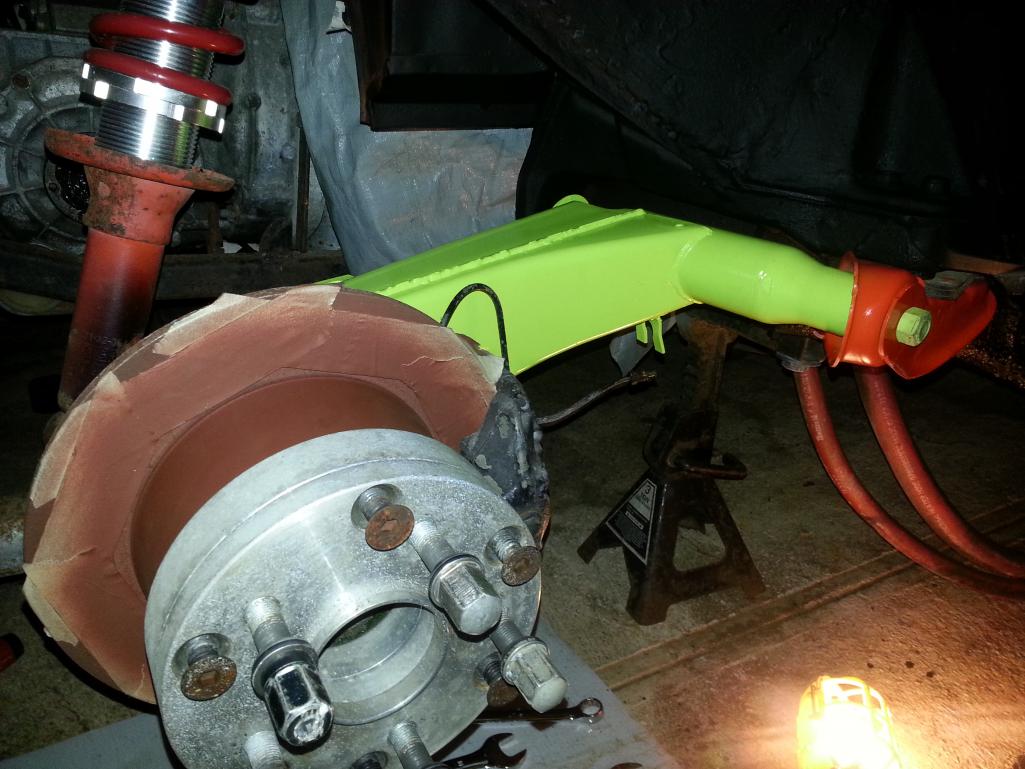
Posted by: nukepipe May 1 2014, 07:41 PM
On jack.......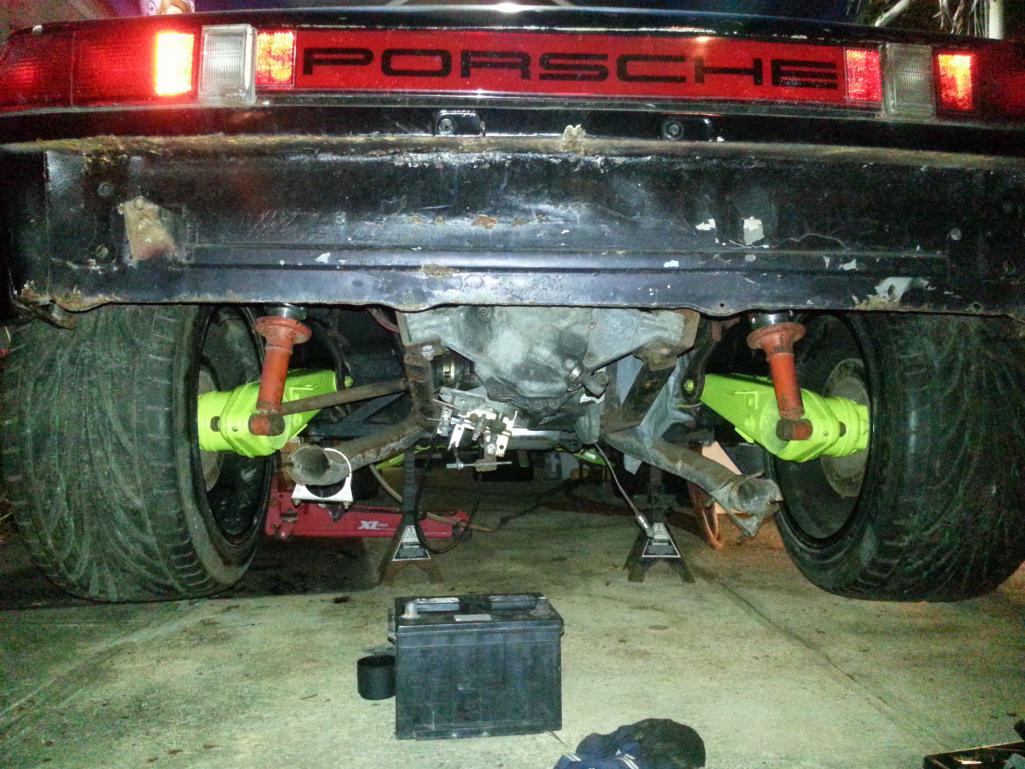
Posted by: nukepipe May 1 2014, 07:42 PM
Off jacks..... I'll be working on her ass this weekend...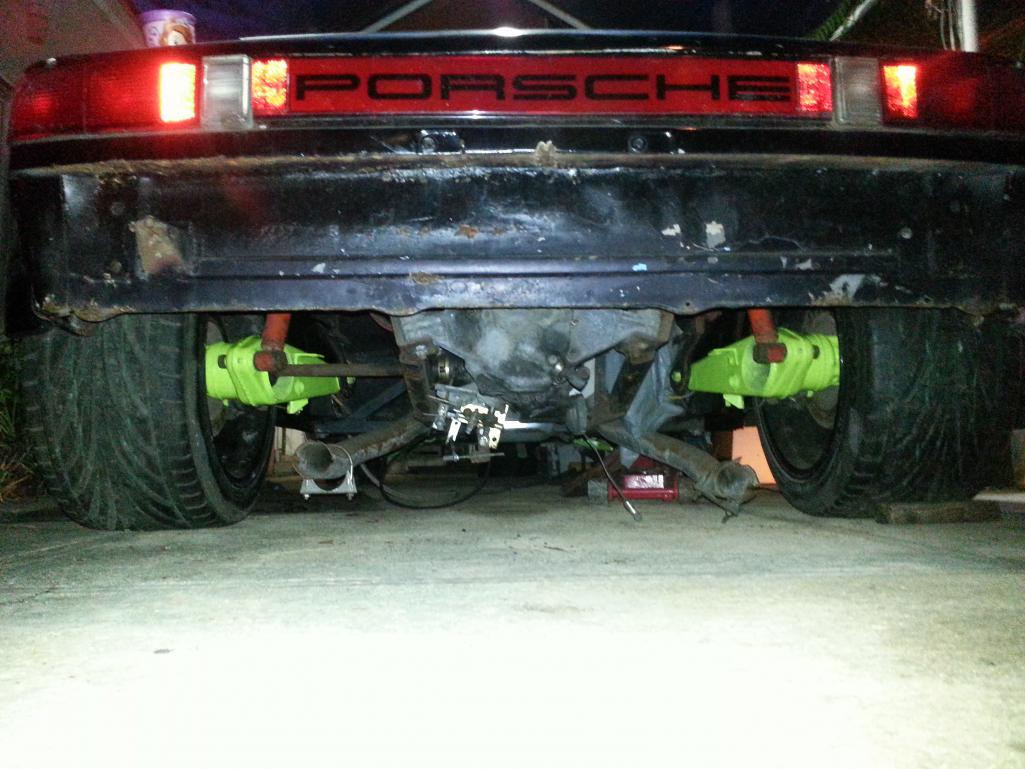
Posted by: nukepipe May 1 2014, 07:45 PM
I like how she seats.... Always showing her rust!!! damn it!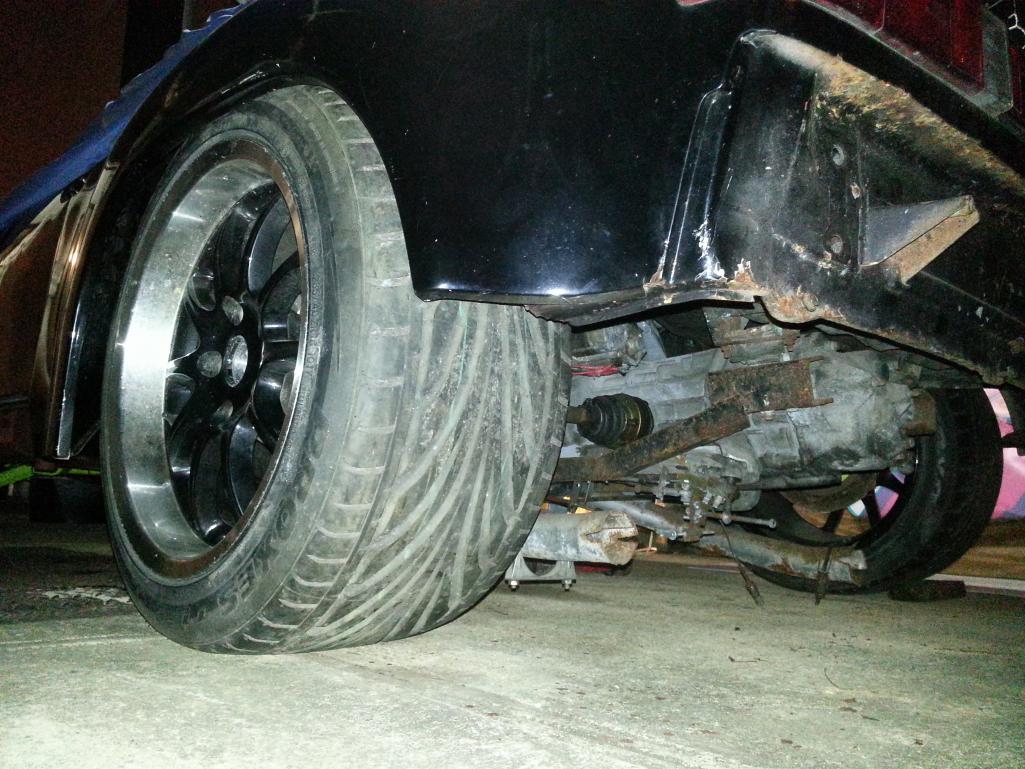
Posted by: nukepipe Jun 30 2014, 08:18 PM
I'm beign doing a lot of stuff... very little time.. here is an update... Pull out the engine so I can clean it, and prepared the engine bay for primer and rubber coating to for sealing and insulation.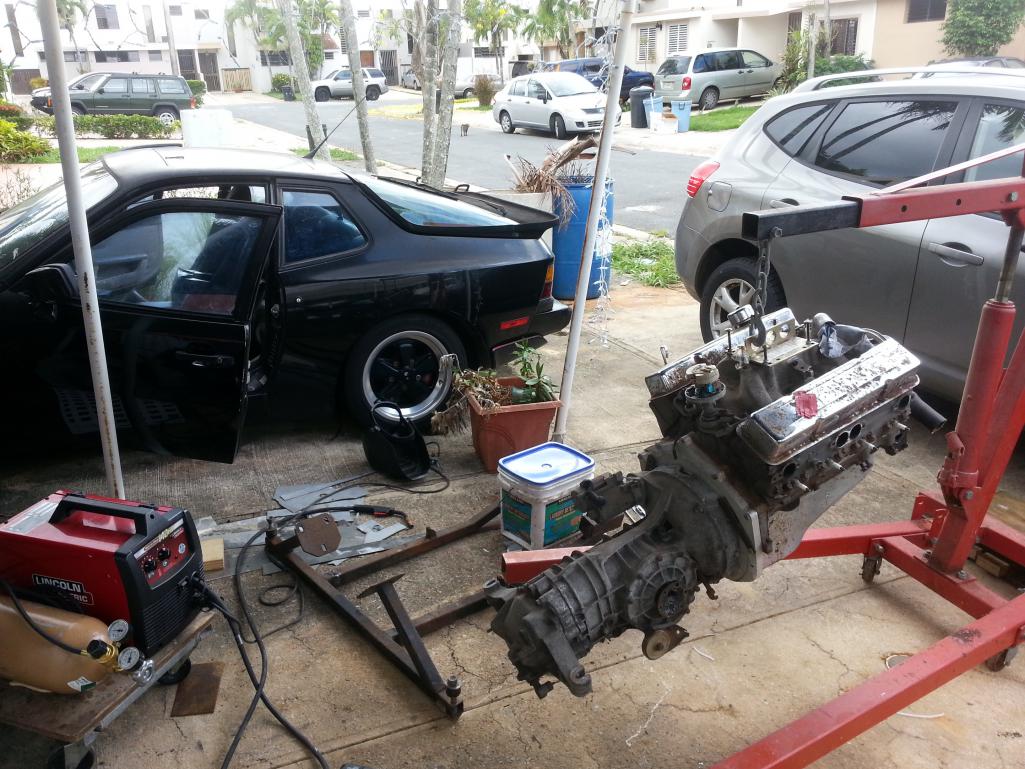
Posted by: nukepipe Jun 30 2014, 08:19 PM
Posted by: nukepipe Jun 30 2014, 08:21 PM
Did another coat to cover was left...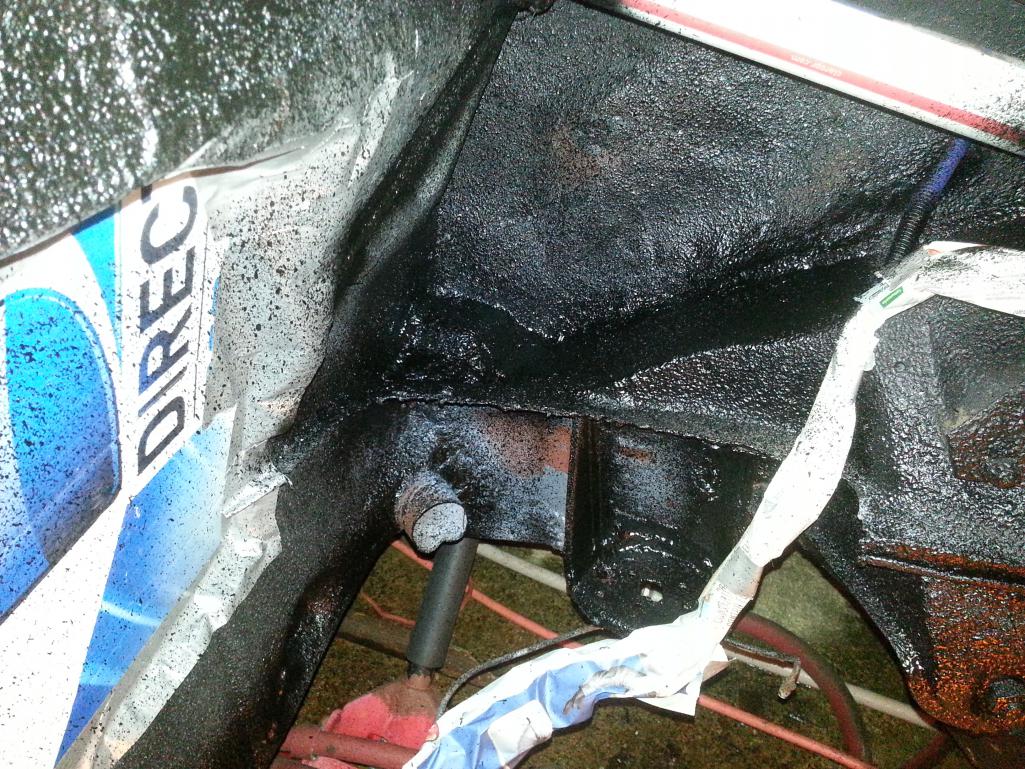
Posted by: nukepipe Jun 30 2014, 08:25 PM
Sand it off all the rust, primed them and painted them...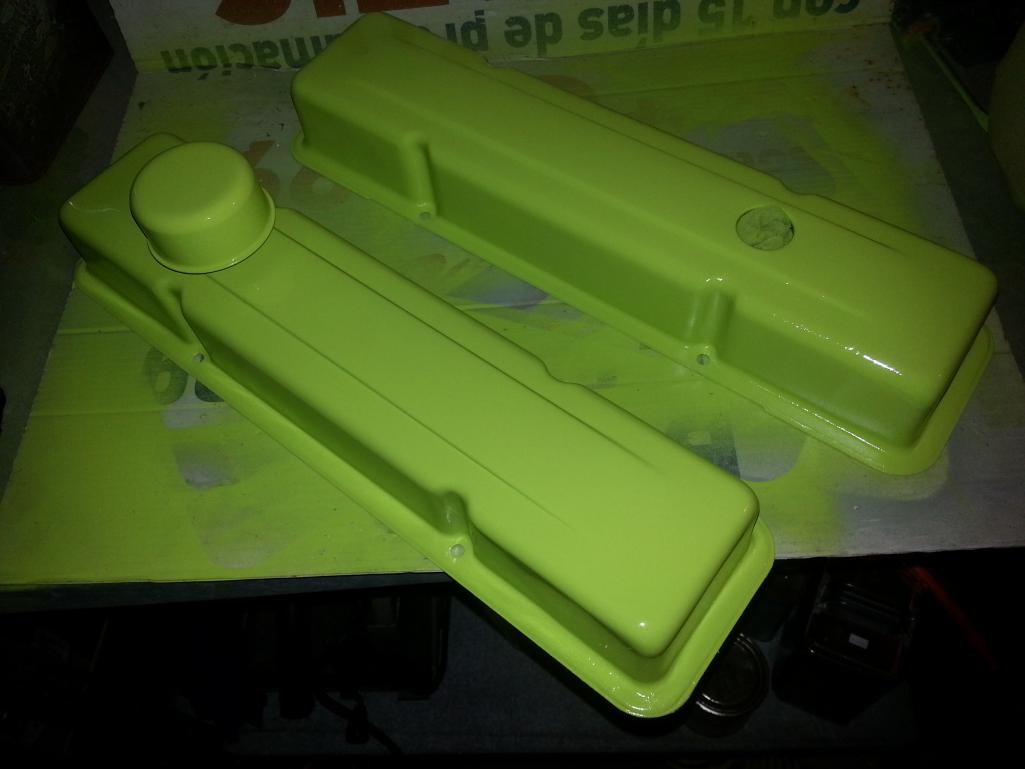
Posted by: nukepipe Jun 30 2014, 08:29 PM
Engine subframe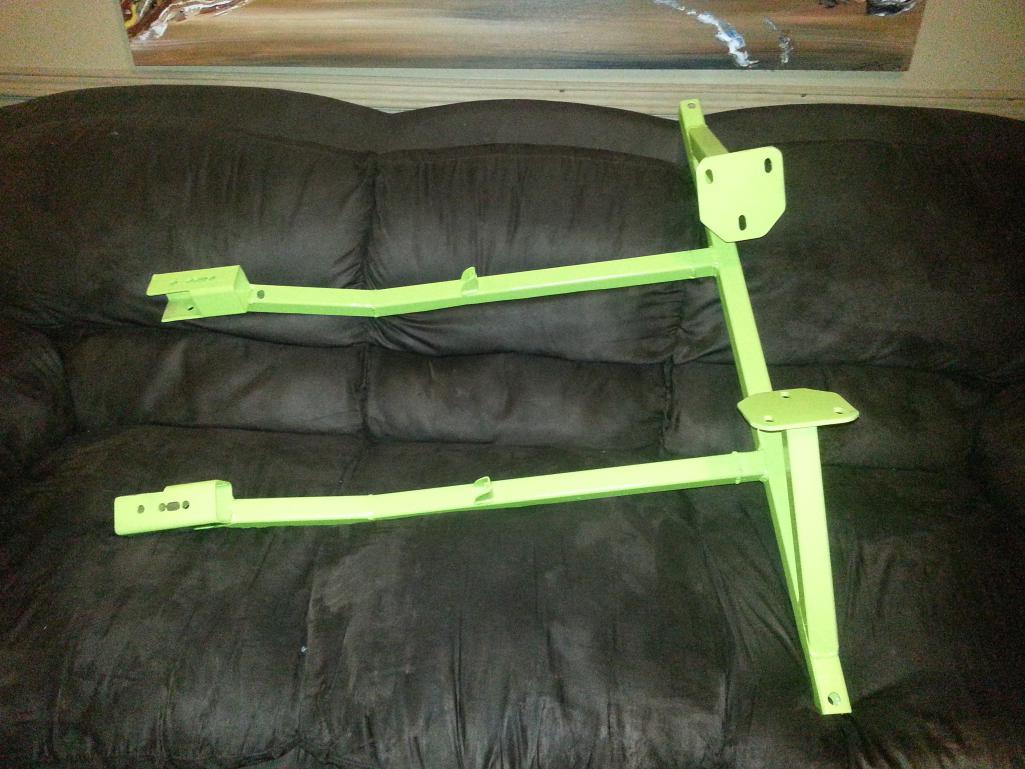
Posted by: nukepipe Jun 30 2014, 08:30 PM
Undercoating....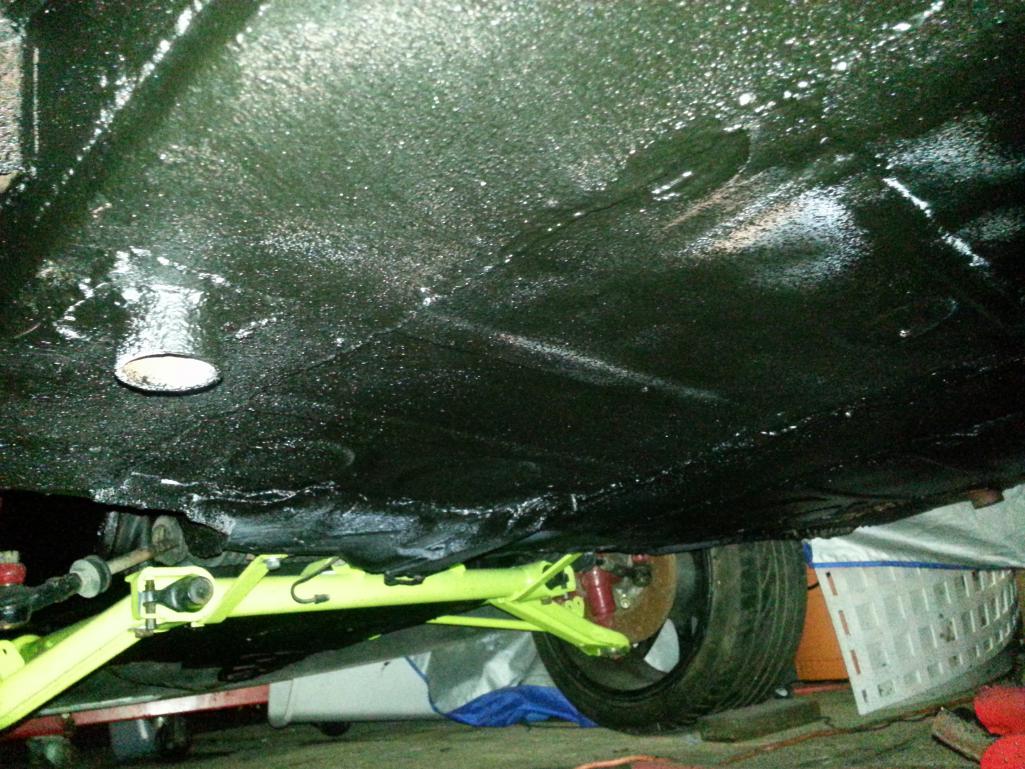
Posted by: nukepipe Jun 30 2014, 08:33 PM
Another primer epoxy coat...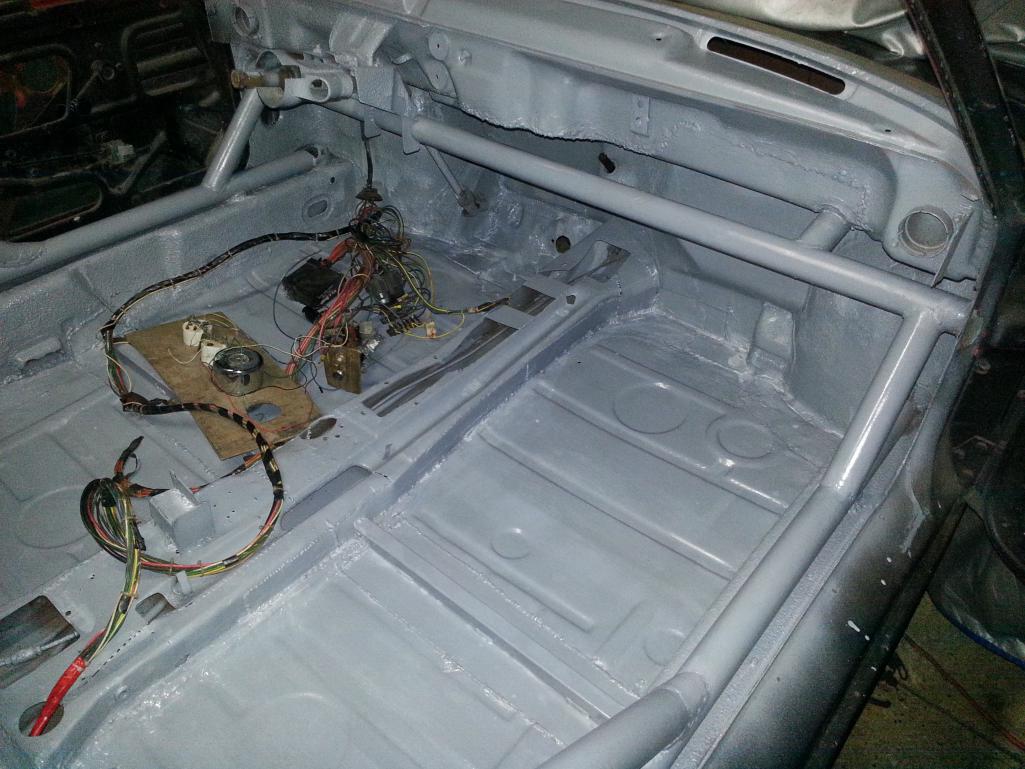
Posted by: nukepipe Jun 30 2014, 08:34 PM
A little cleaning to the engine...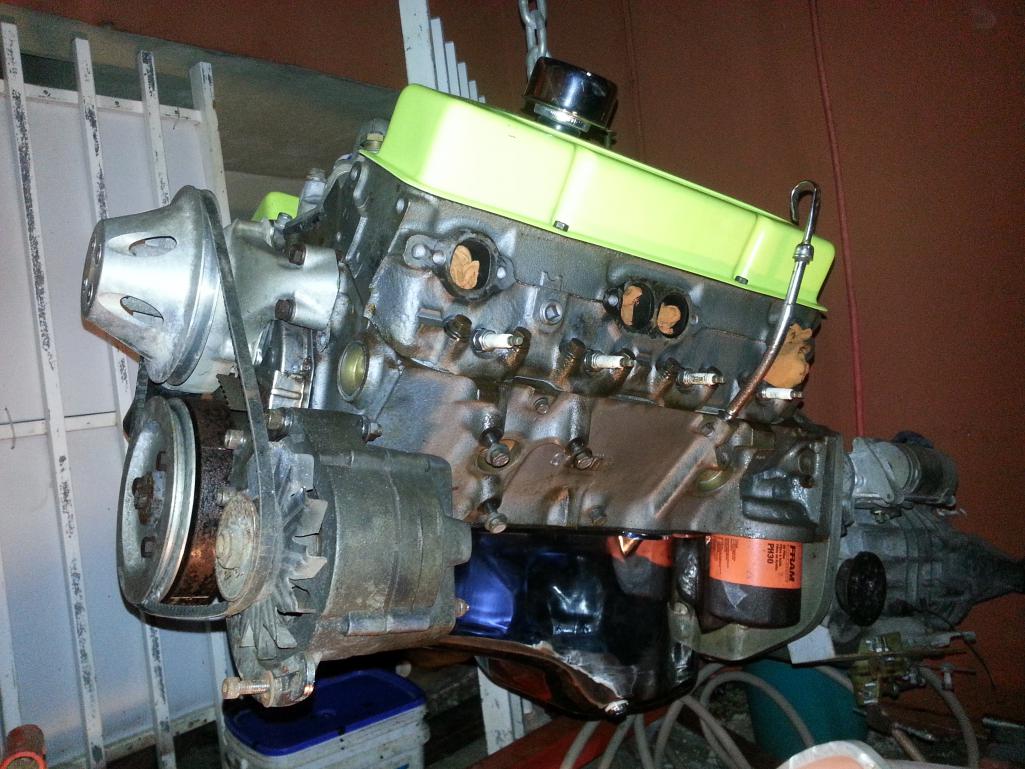
Posted by: nukepipe Jun 30 2014, 08:36 PM
Did all the front brake lines and added an adjustable proportioning valve...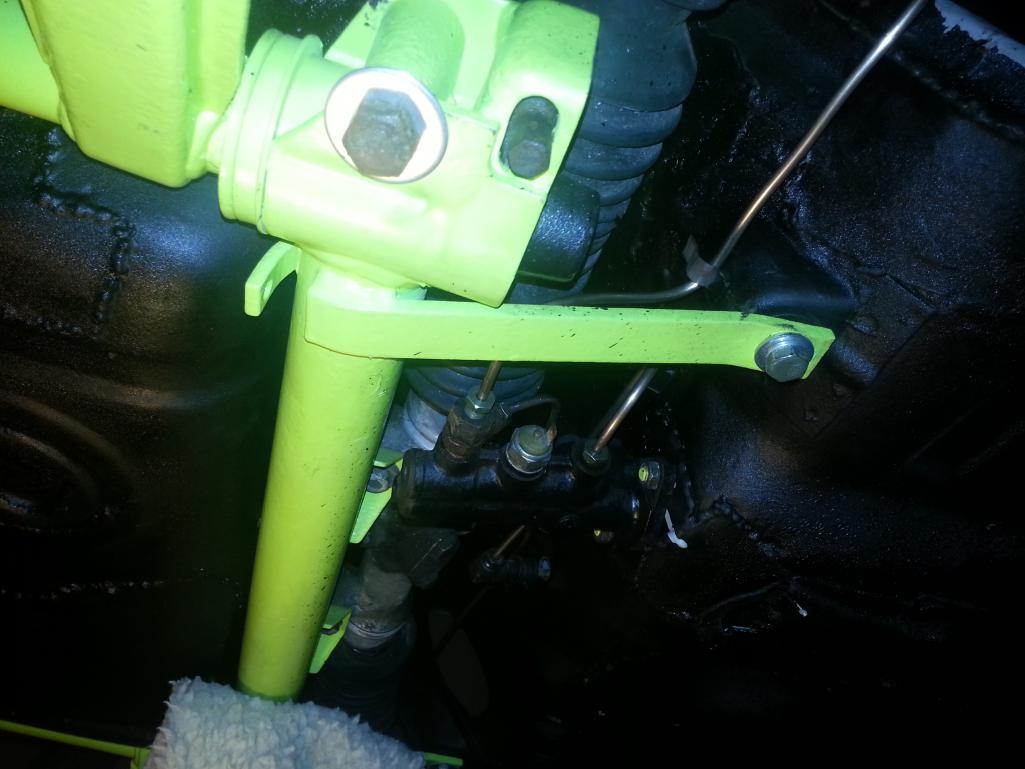
Posted by: nukepipe Jun 30 2014, 08:38 PM
Another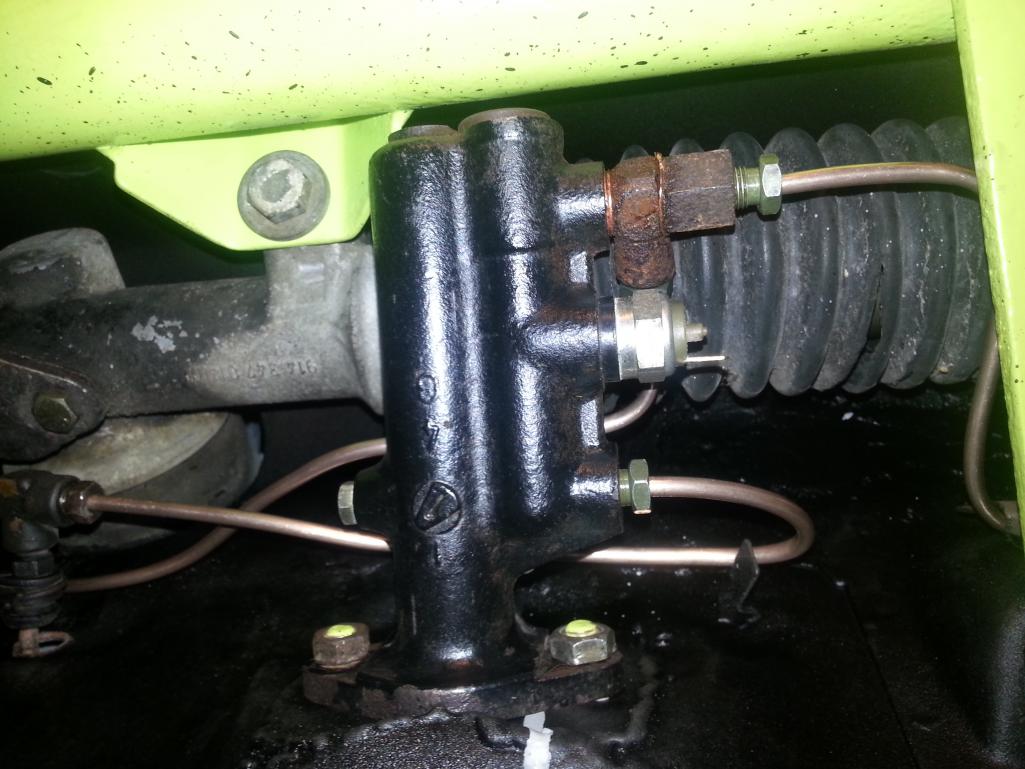
Posted by: nukepipe Jun 30 2014, 08:40 PM
nuther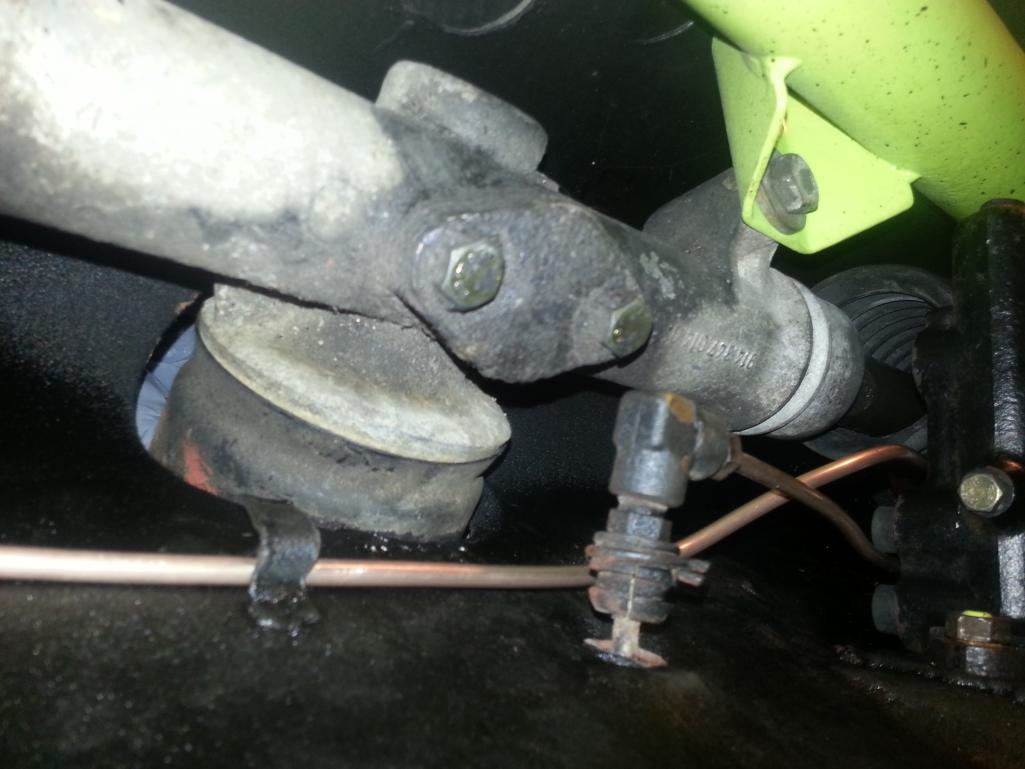
Posted by: nukepipe Jun 30 2014, 08:42 PM
Yes...I need to change that boot....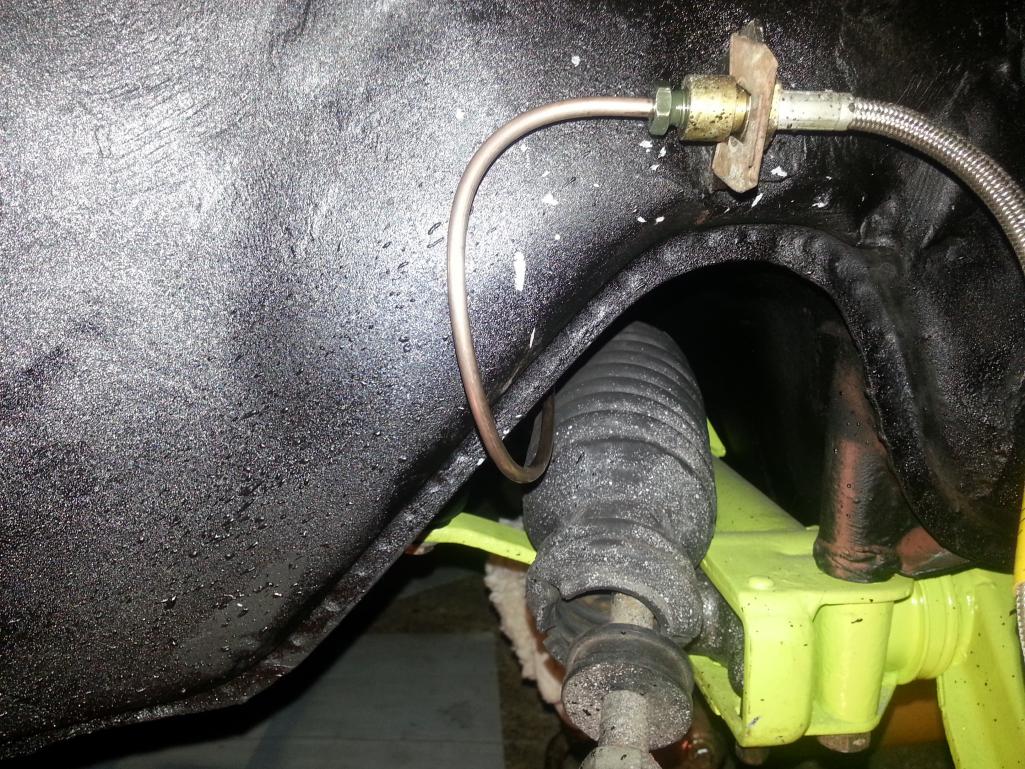
Posted by: nukepipe Jun 30 2014, 08:44 PM
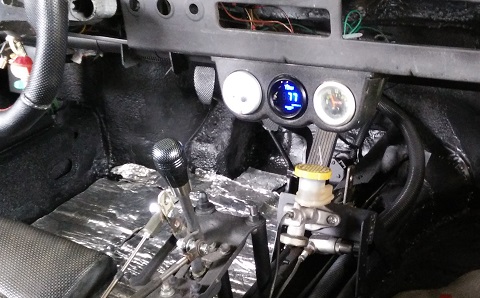
Installed the brake proportioning valve... I think I need to do some more patching on the center tunnel....
Pedal cluster is done!!!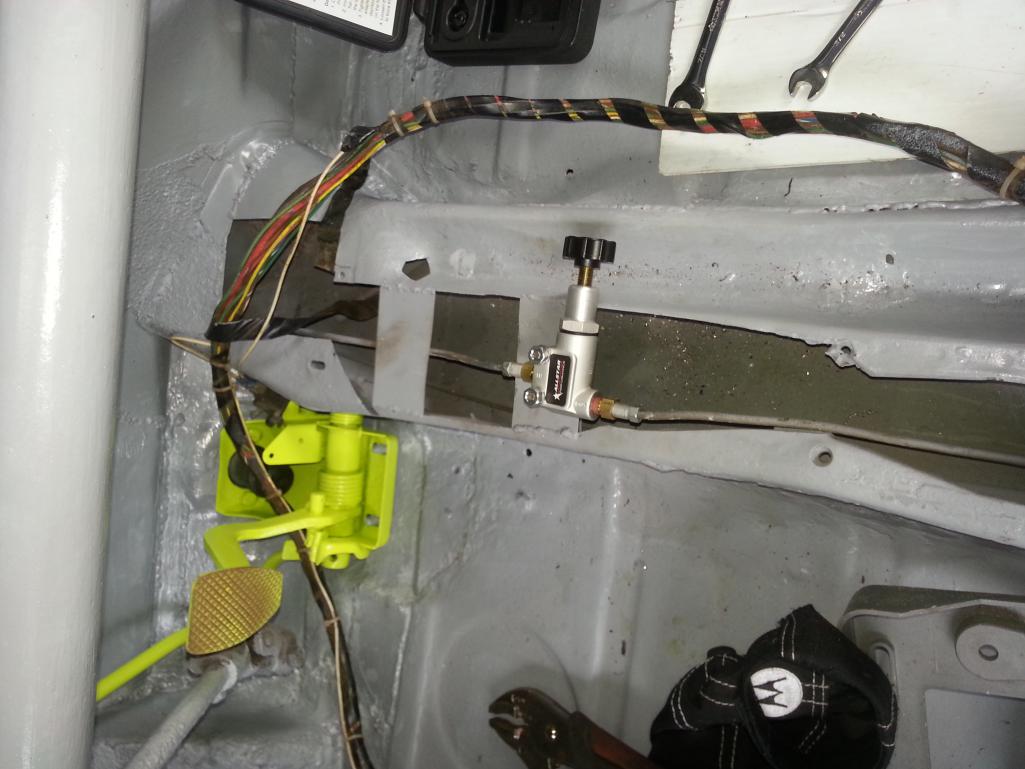
Posted by: nukepipe Jun 30 2014, 08:46 PM
Engine going back in!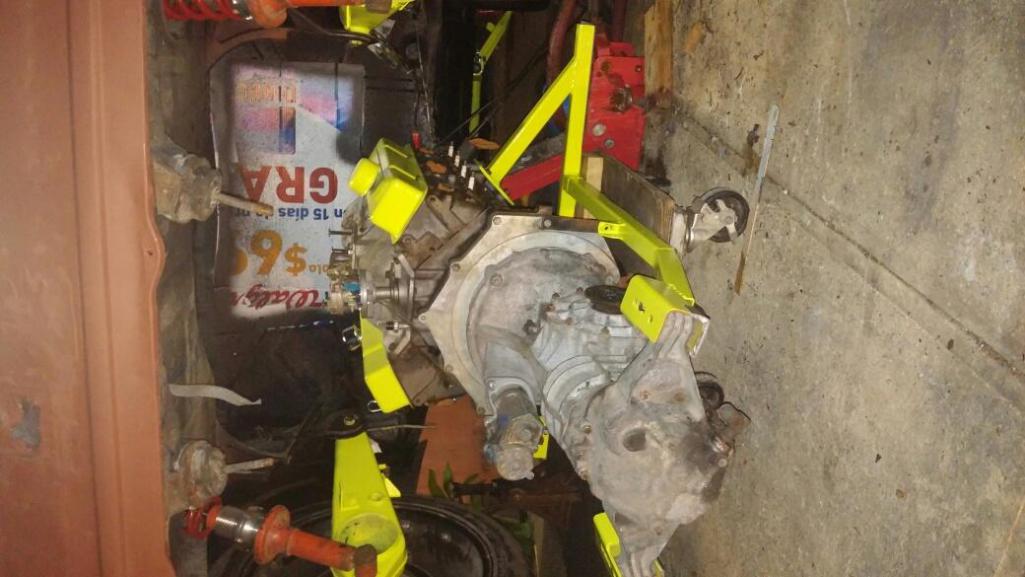
Posted by: nukepipe Jun 30 2014, 08:48 PM
IN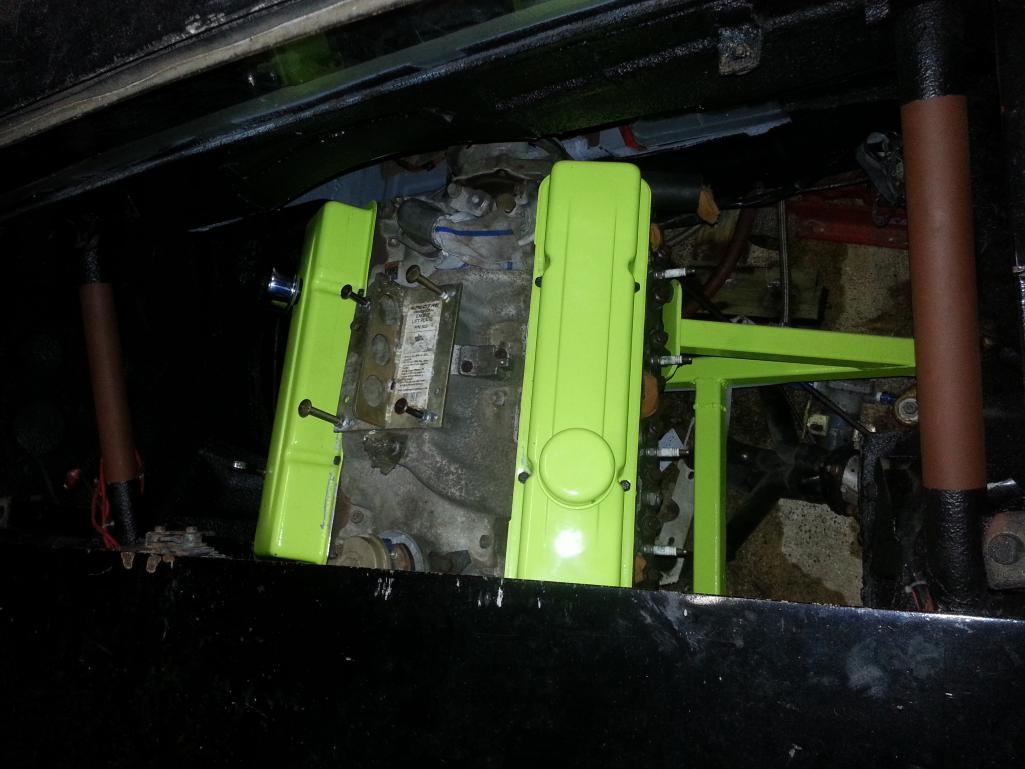
Posted by: nukepipe Jun 30 2014, 08:53 PM
Last one.... I will be working this week hooking up all the wiring, Acc pedal, Shifter. Going to make some modifications to the cable shifter. Also need to change the brake hoses on the 951. See you soon....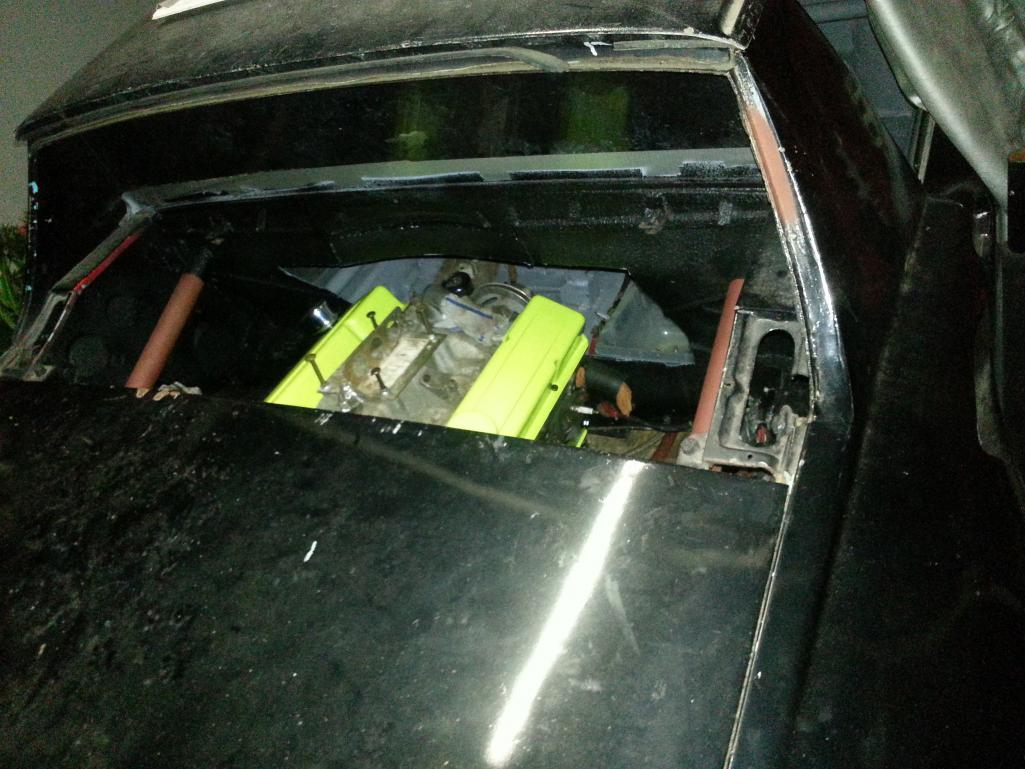
Posted by: nukepipe Nov 3 2014, 11:28 AM
I'm being working with my wiring....
Attached thumbnail(s)
Posted by: nukepipe Nov 3 2014, 11:30 AM
Wiring almost finished....
Attached thumbnail(s)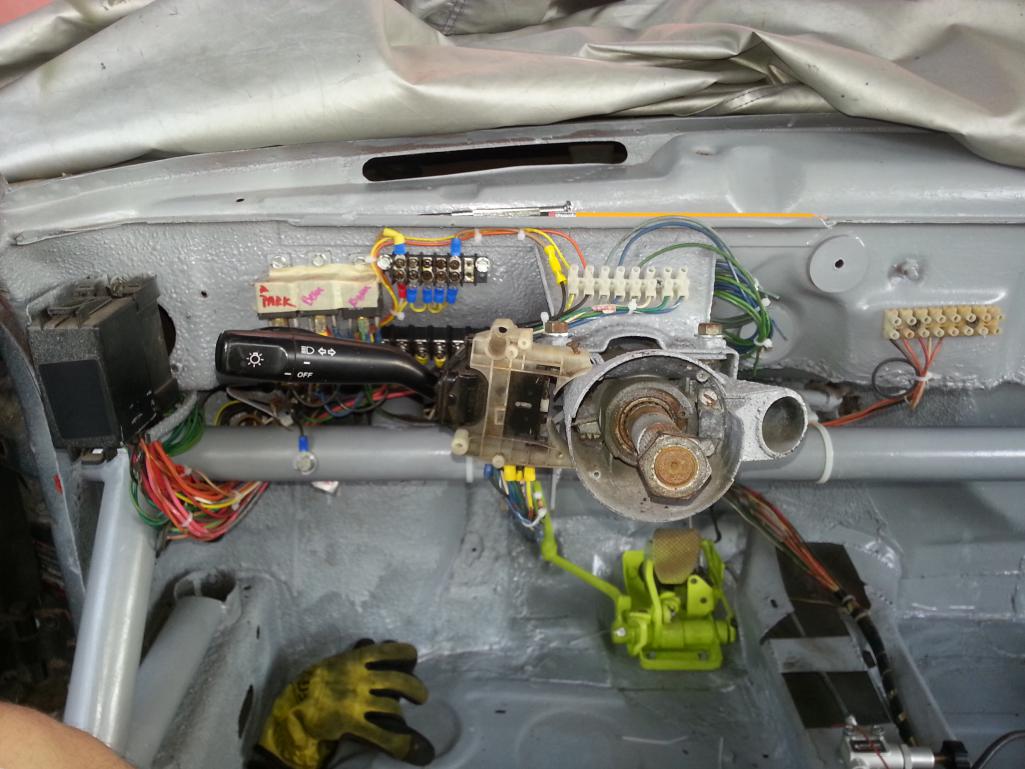
Posted by: nukepipe Nov 3 2014, 11:34 AM
I had to machine a little the outer lib of the hub so it can fit on my 996 brake disks....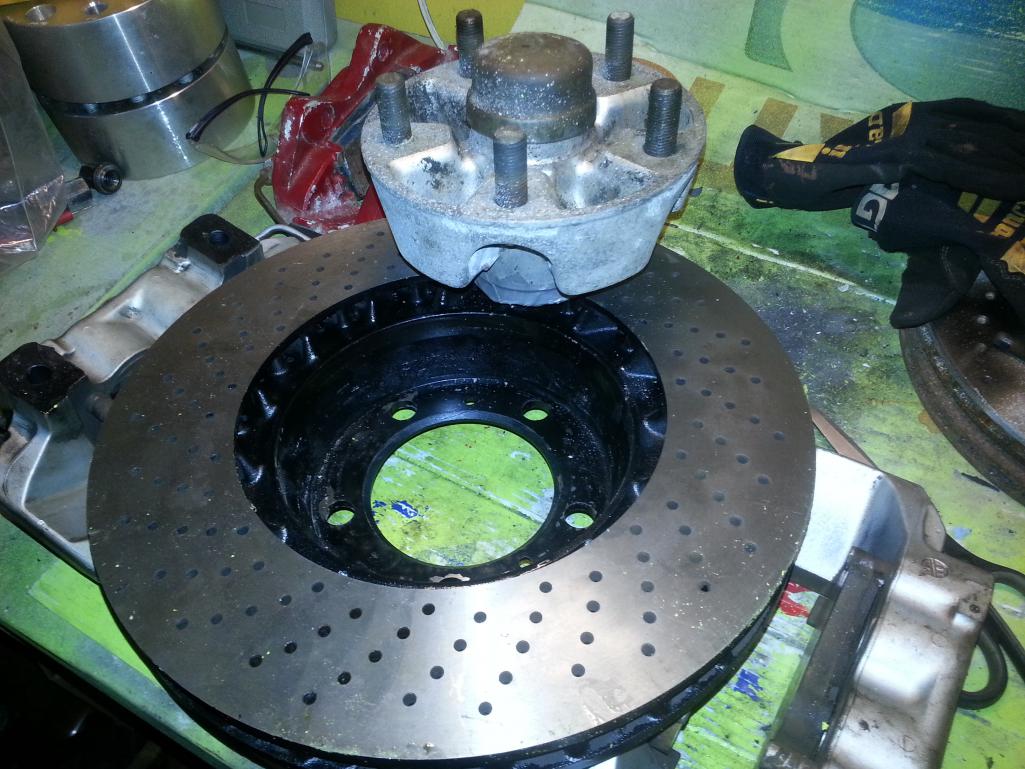
Posted by: nukepipe Nov 3 2014, 11:45 AM
Machined hub.... (Didn't have a side pic)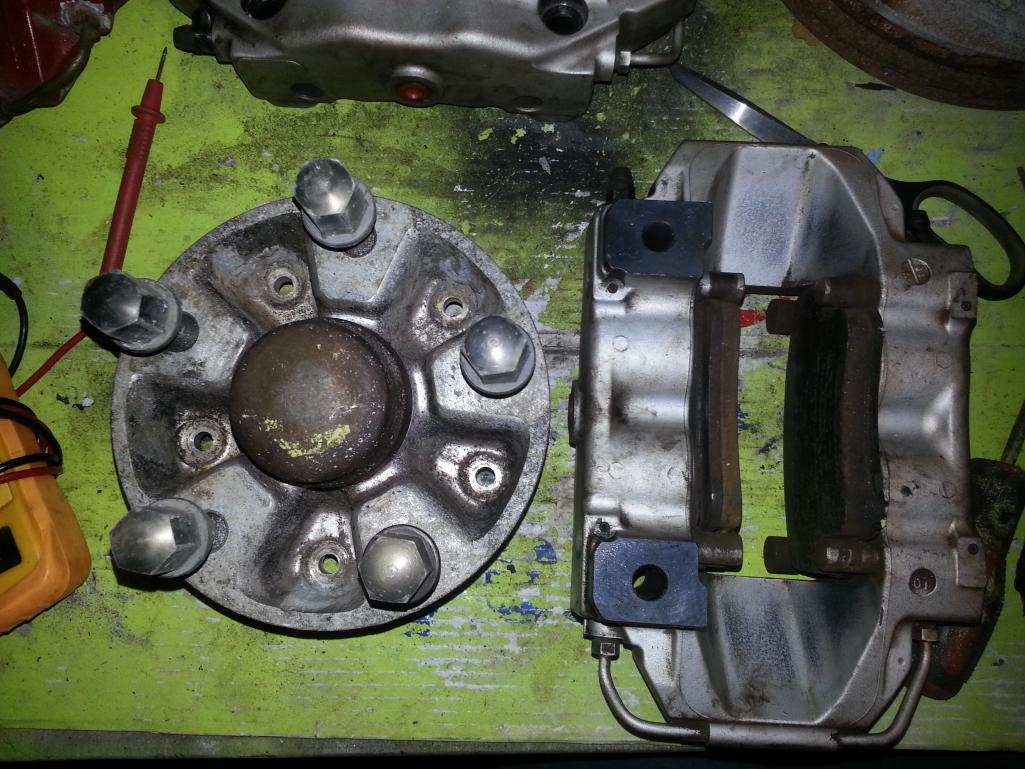
Posted by: nukepipe Nov 3 2014, 11:48 AM
Now the fun begins.... wood prototype... This is the 3" struts...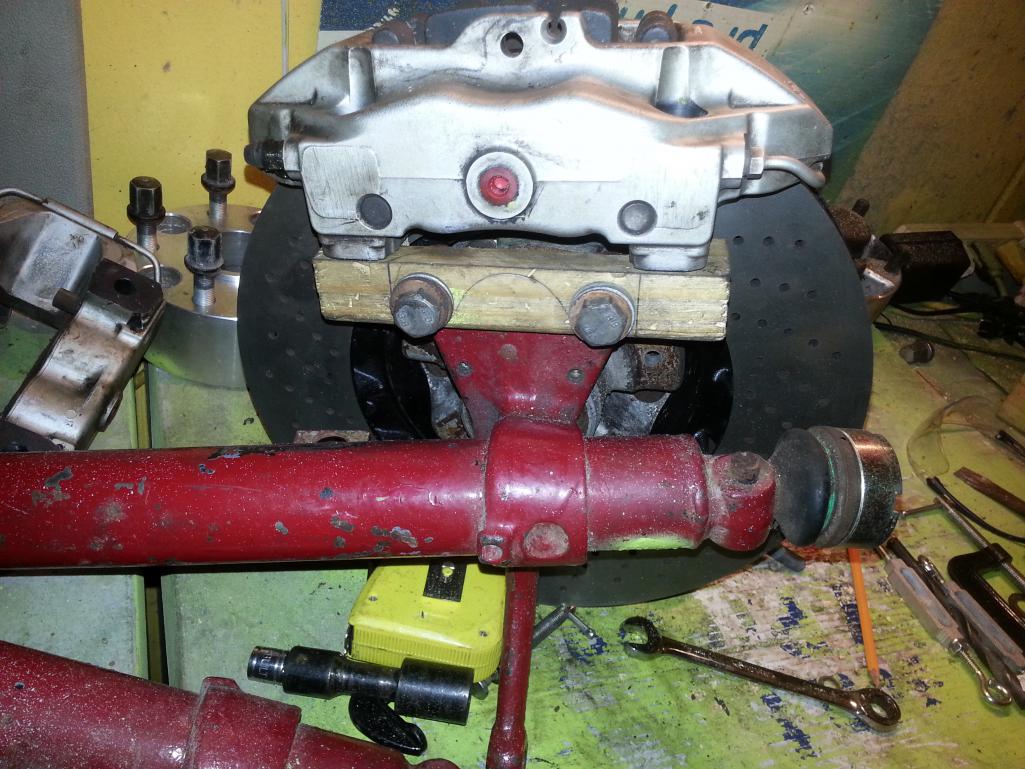
Posted by: nukepipe Nov 3 2014, 11:50 AM
My friend (Mech Eng.) let me use his milling machine..... 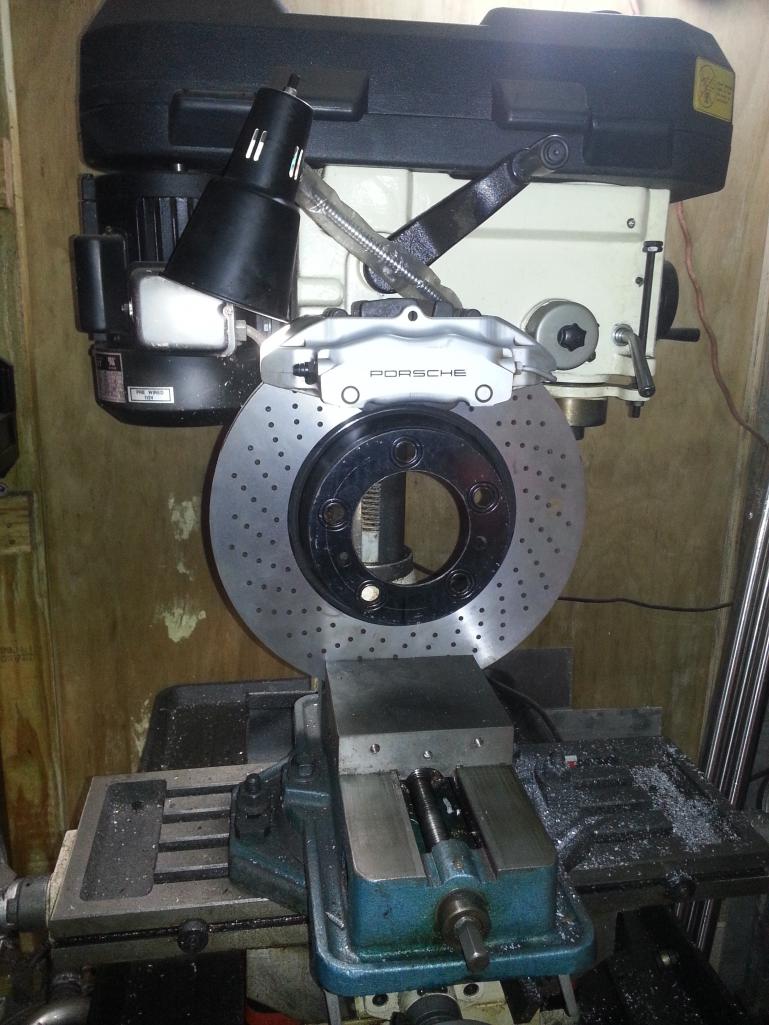
Posted by: nukepipe Nov 3 2014, 11:52 AM
Finishing the raw adapters...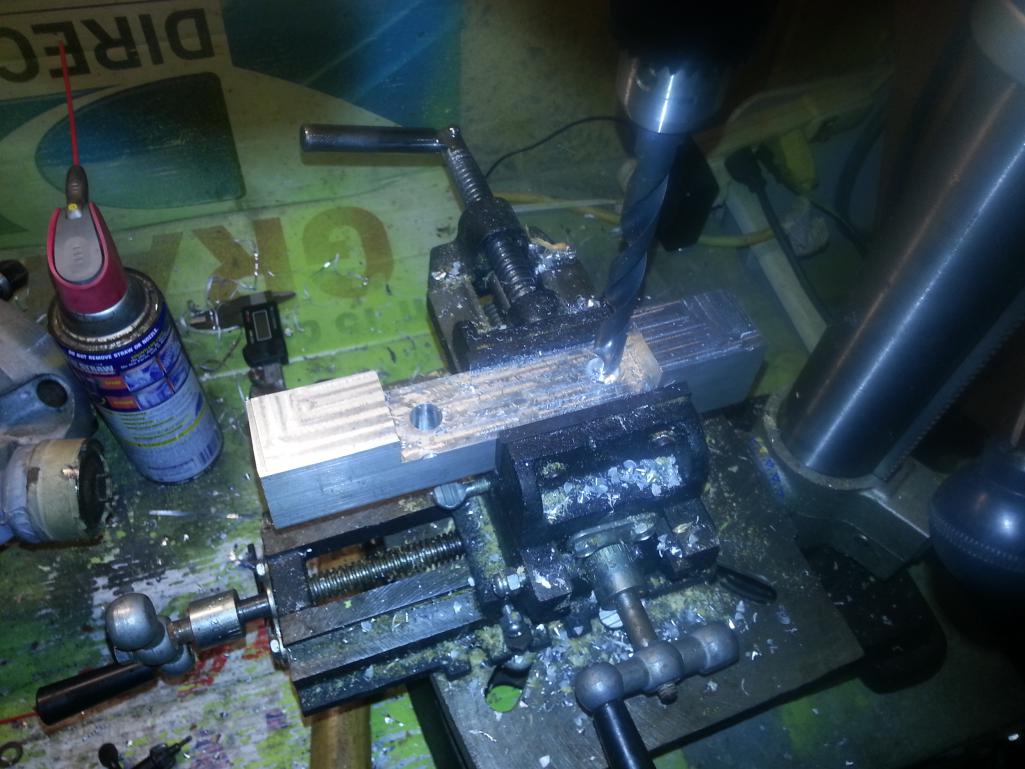
Posted by: nukepipe Nov 3 2014, 11:54 AM
another...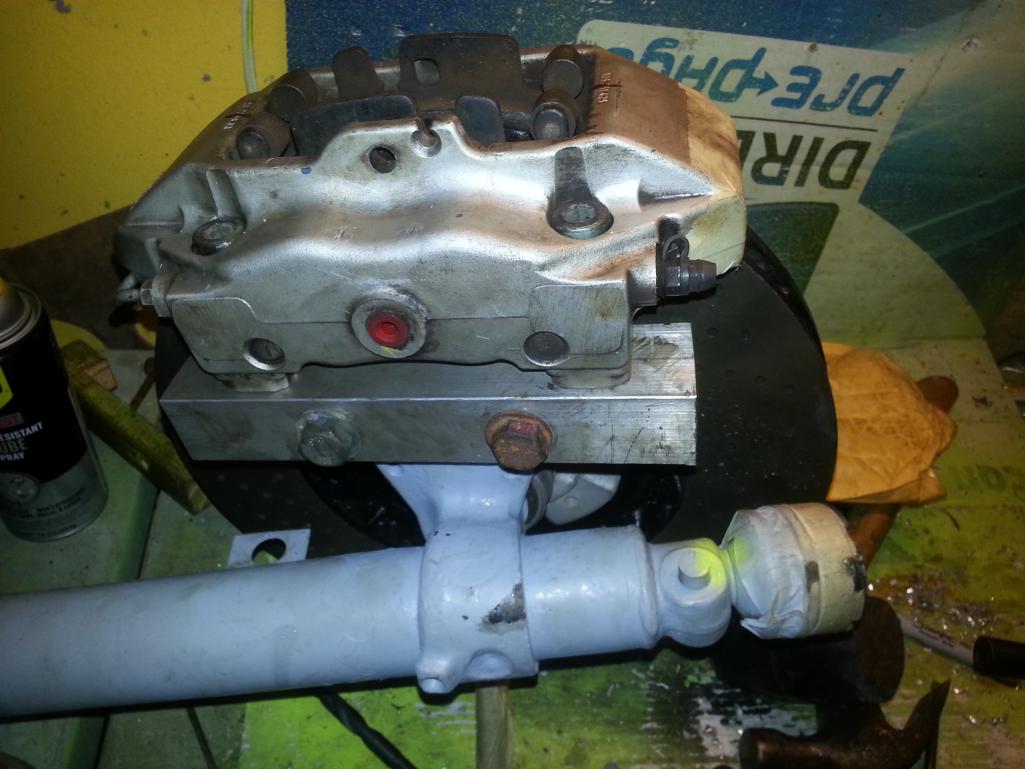
Posted by: nukepipe Nov 3 2014, 11:55 AM
another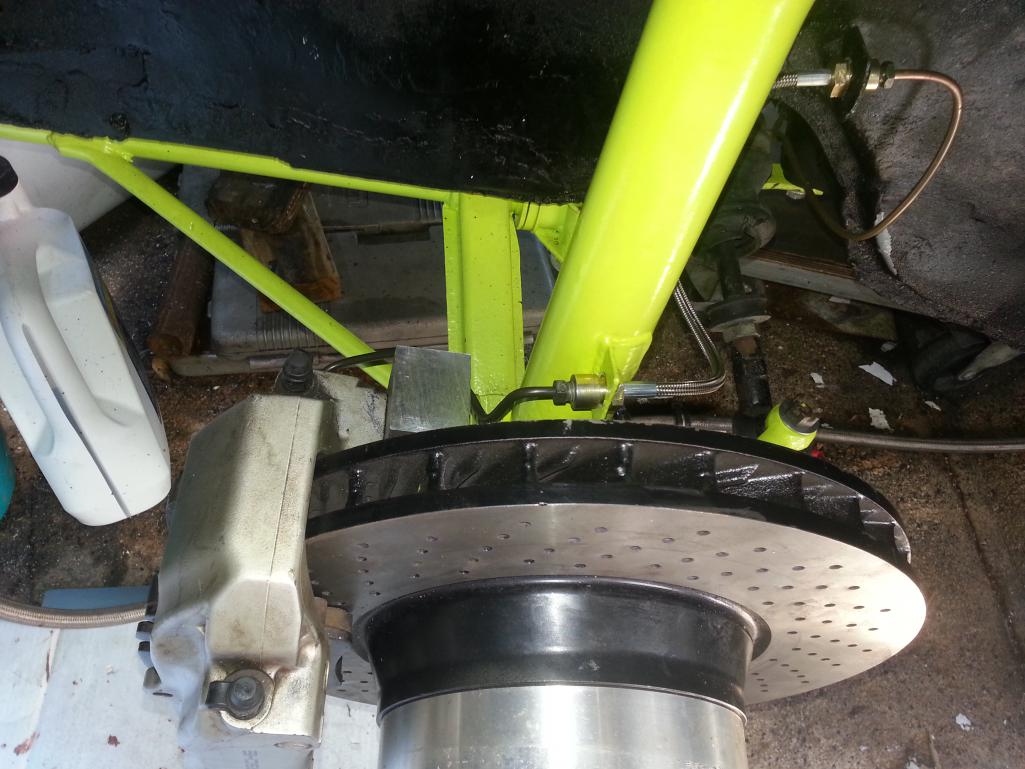
Posted by: nukepipe Nov 3 2014, 11:57 AM
I did paint the struts...
Another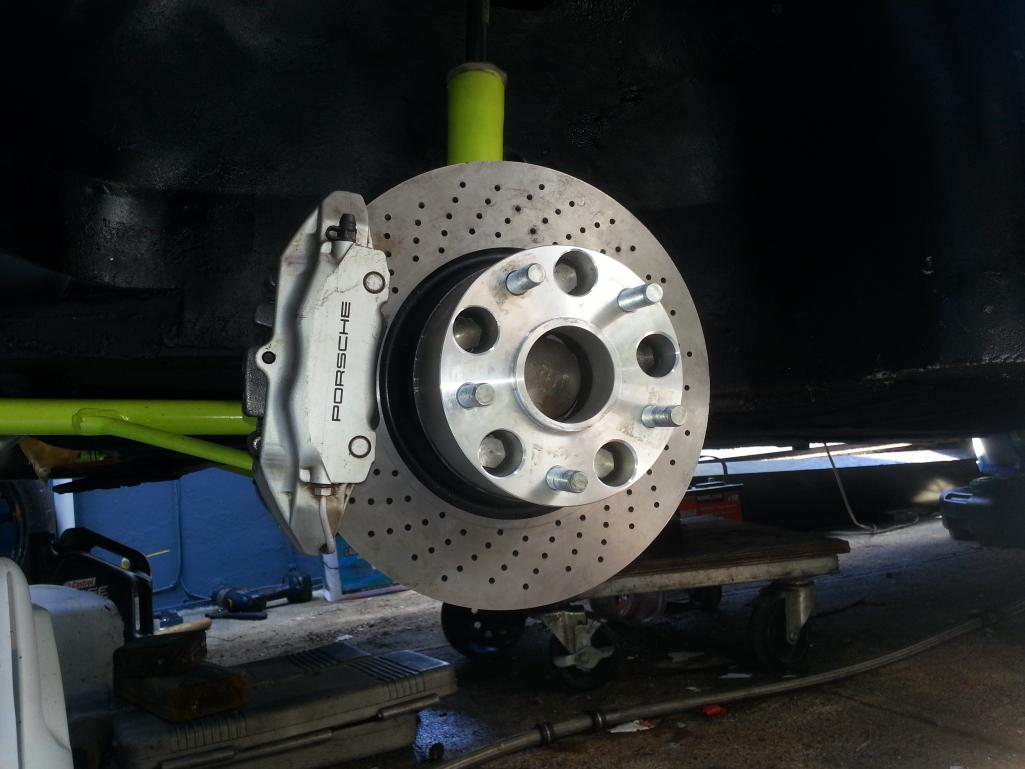
Posted by: nukepipe Nov 3 2014, 12:03 PM
With wheel on (flat tire) 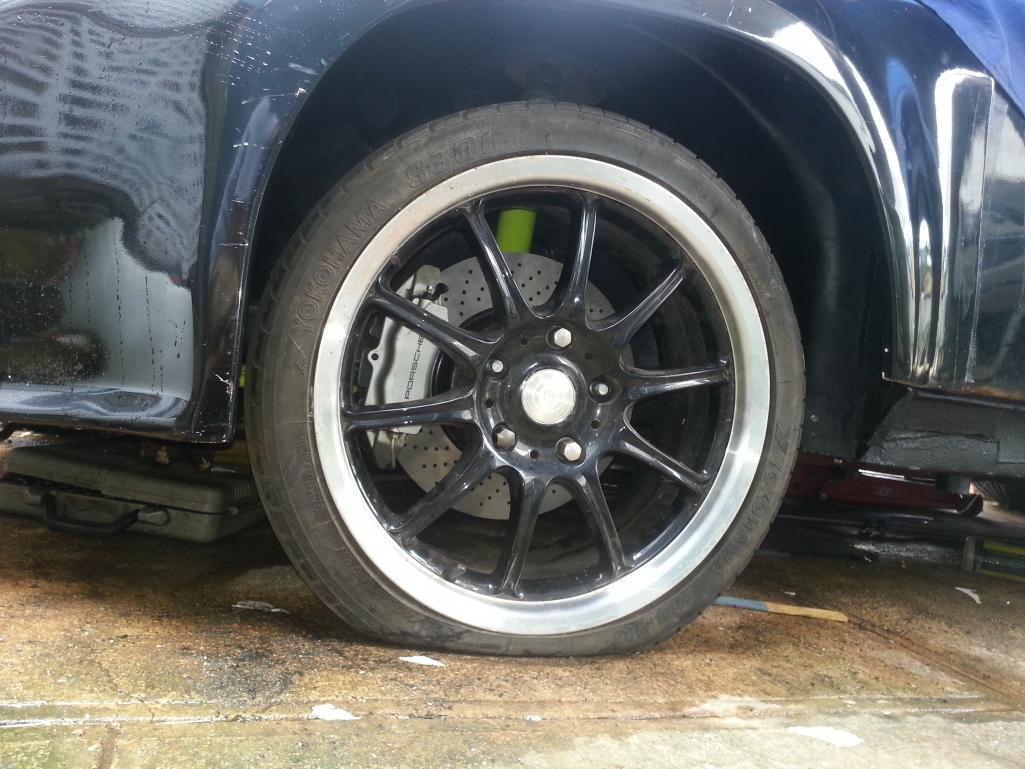
I just saw this the other day at a Toy's r us... 

Posted by: nukepipe Nov 3 2014, 12:06 PM
This showed up at USPS...
The yellow lights are cheap reproductions that I bought on ebay for 10 bucks shipped to Puerto Rico.... Looks nice...but one have a "mosquito" embedded....!!! 
I can not ask more for the price...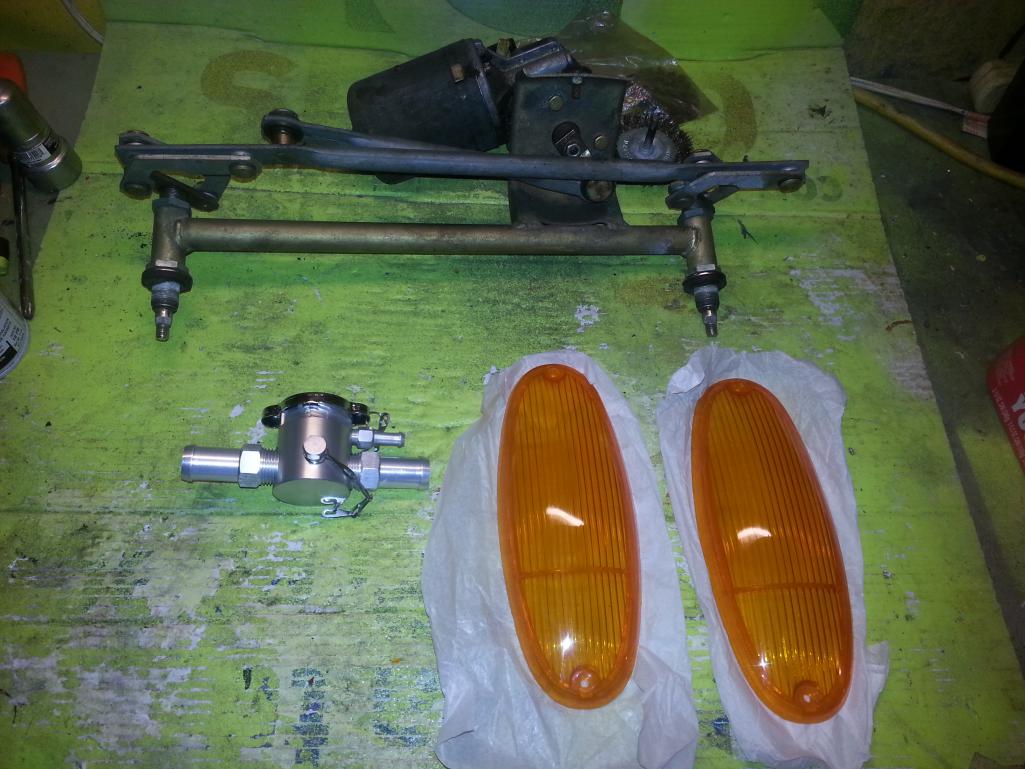
Posted by: nukepipe Nov 3 2014, 12:07 PM
Does anyone have a schematic for the wiper motor?
Posted by: nukepipe Nov 3 2014, 12:08 PM
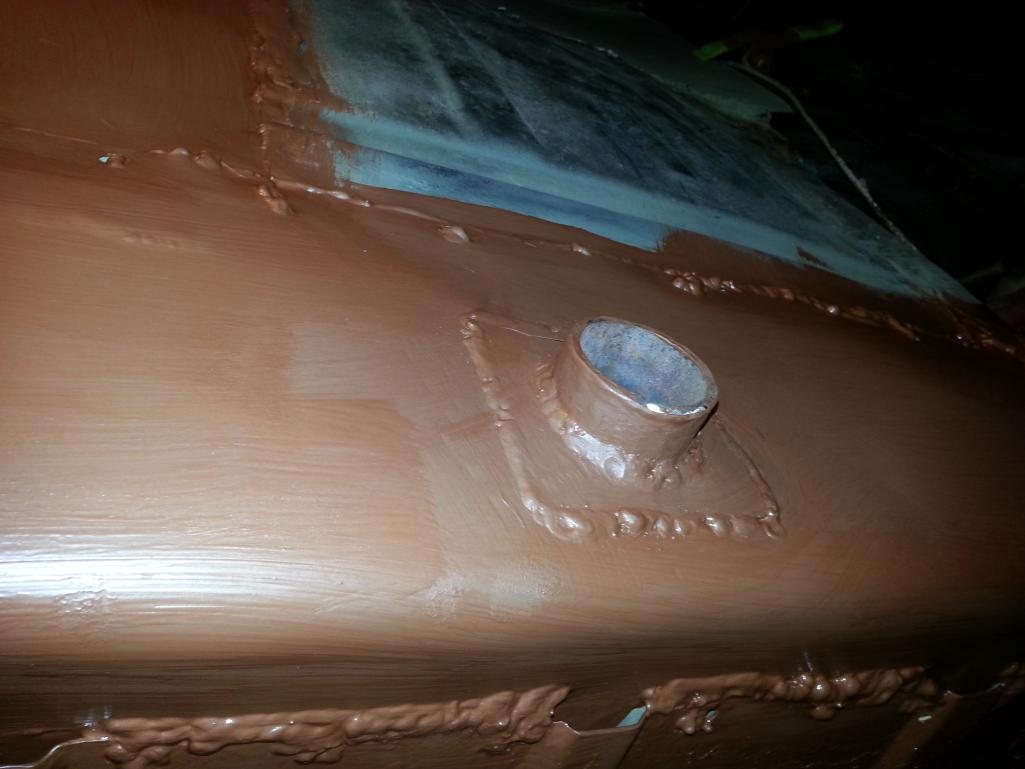
Installed the filler neck....
Attached thumbnail(s)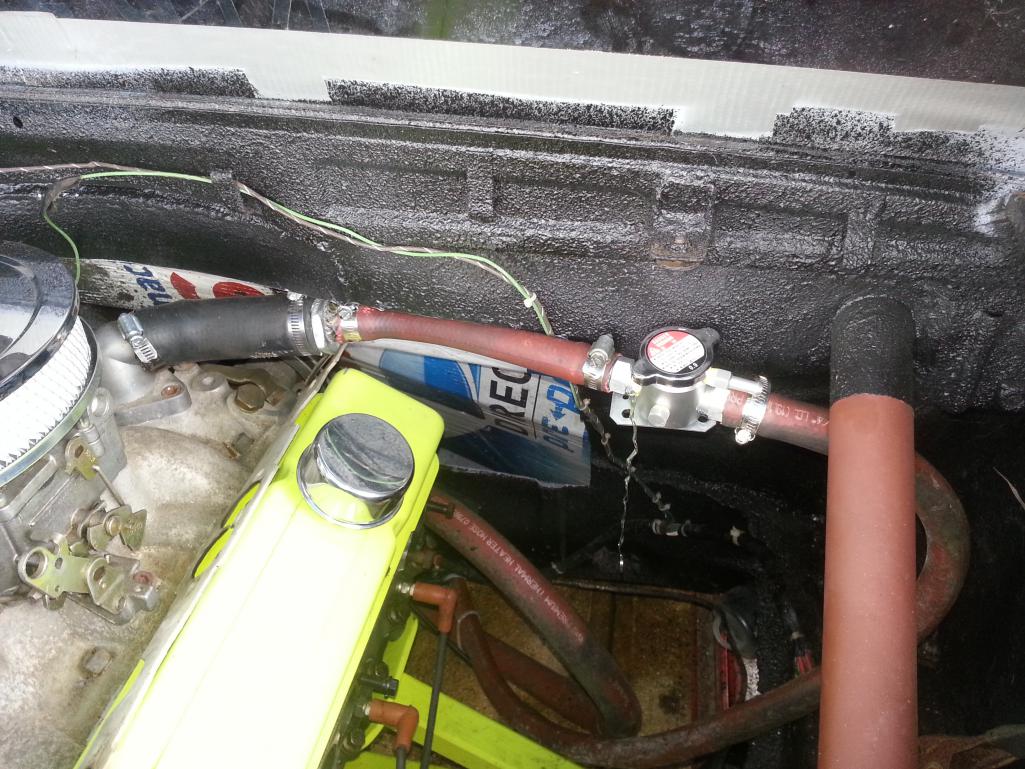
Posted by: nukepipe Nov 3 2014, 12:12 PM
Put a new alternator in... I'm supposed to receive today a new master cylinder since mine was corroded during the waiting years... Will be working on that during this week.
That's it for now... 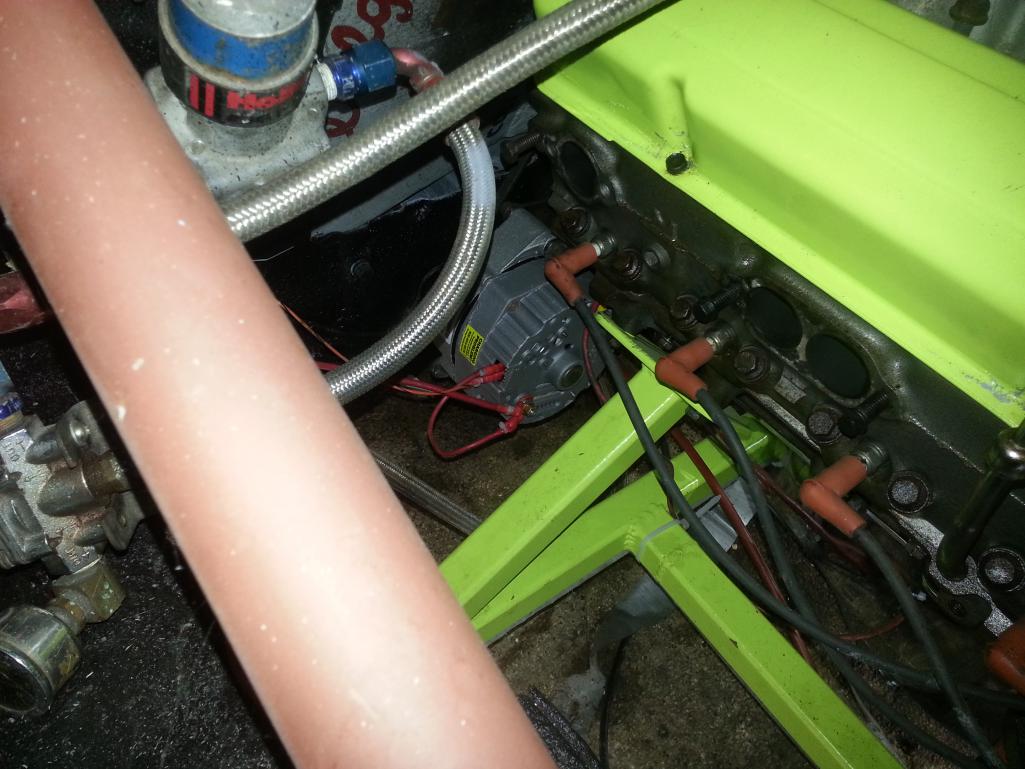
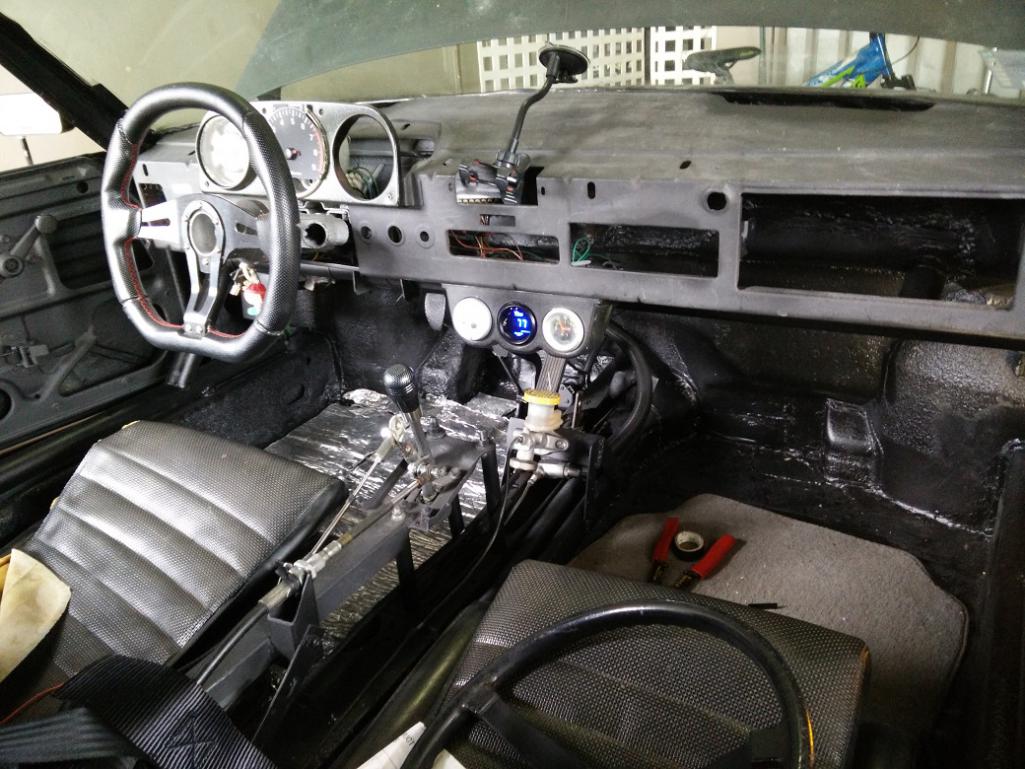
Posted by: nukepipe Jul 31 2015, 08:34 PM
Can't believe I have not post since November 2014, well I being doing some work... there she is...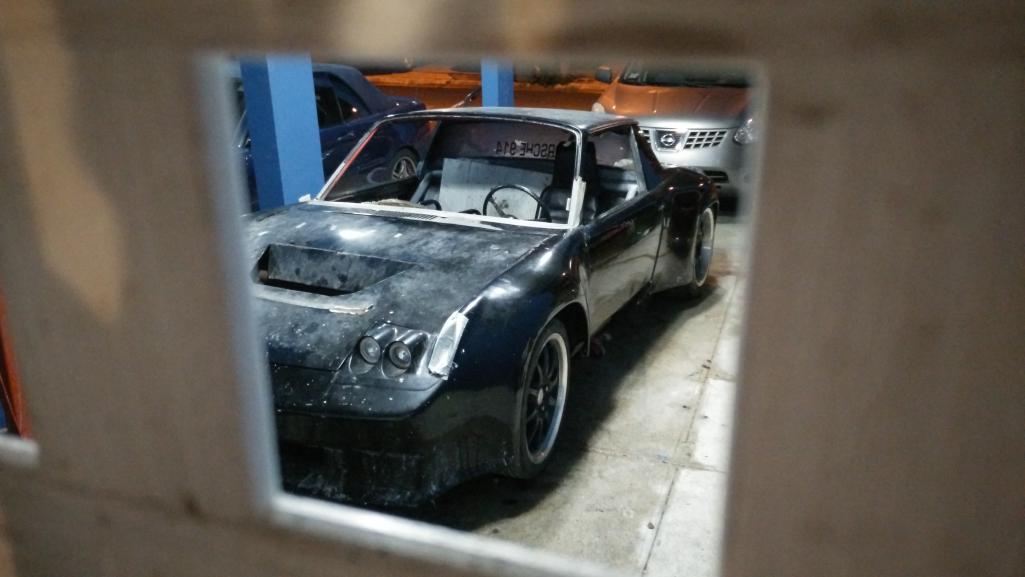
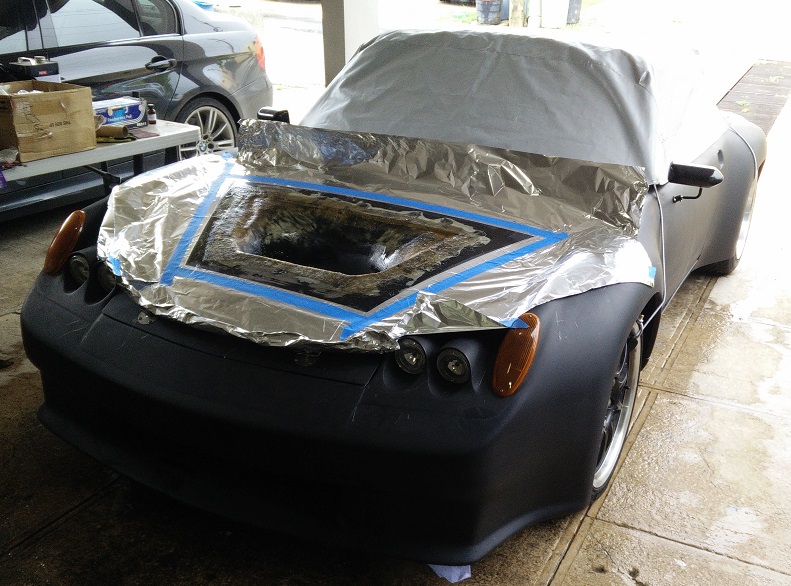
I had to do a cover for the fire walll..... So here you will see what I have done...
Posted by: nukepipe Jul 31 2015, 08:39 PM
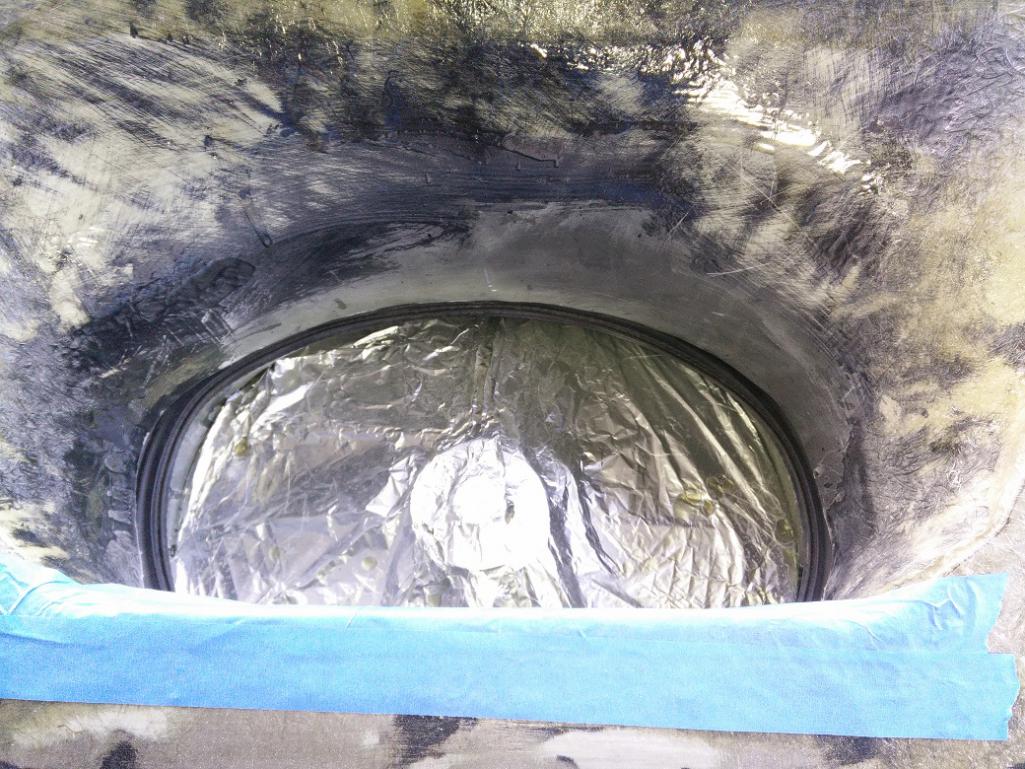
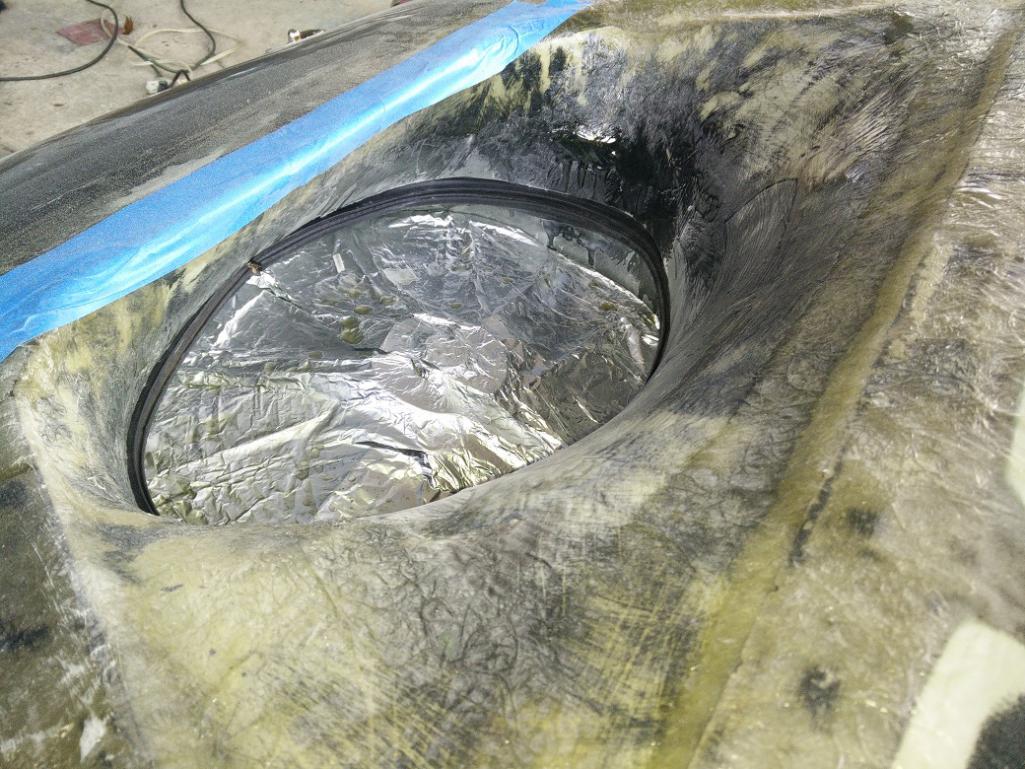
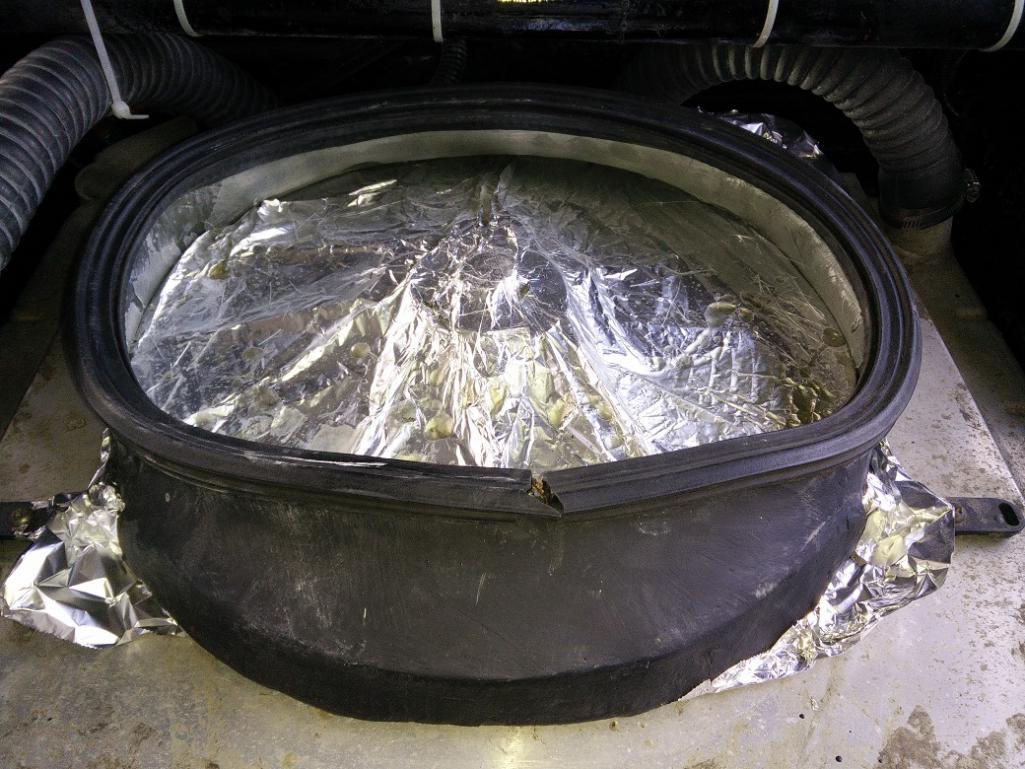
Firewall mold (cast, mould....what ever you call it.....)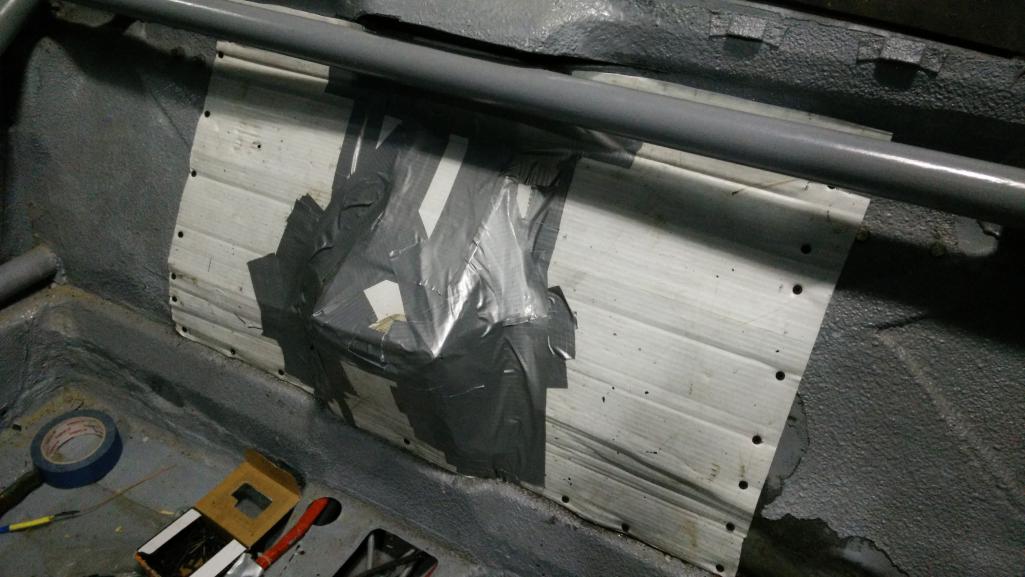
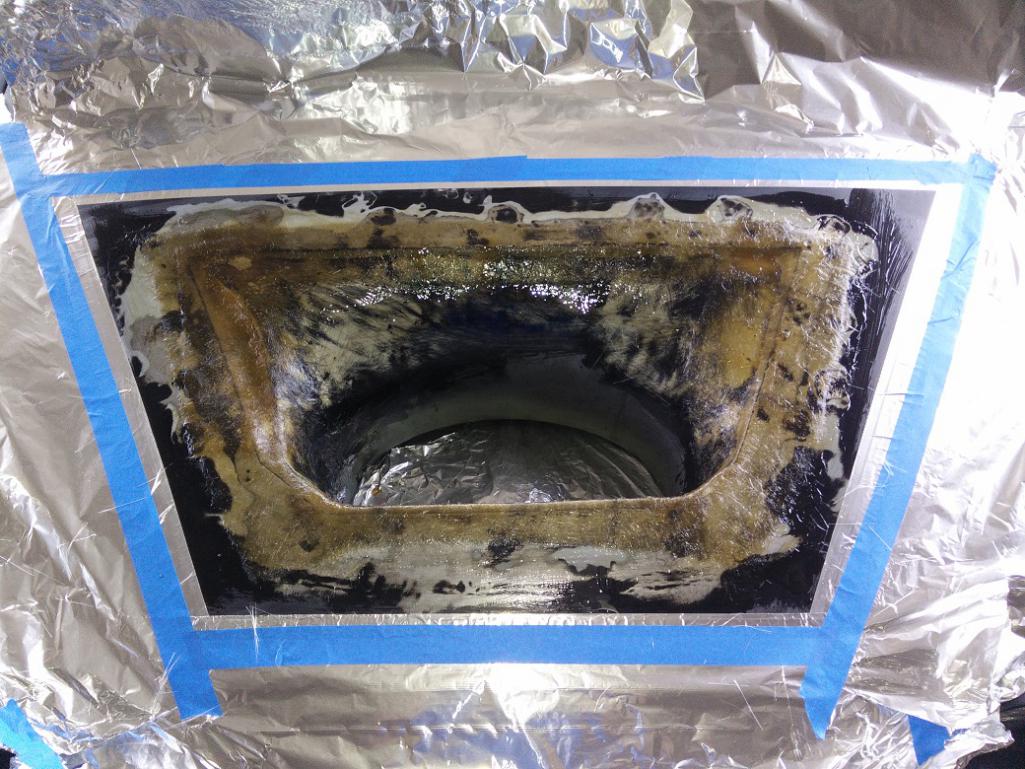
Posted by: nukepipe Jul 31 2015, 08:41 PM
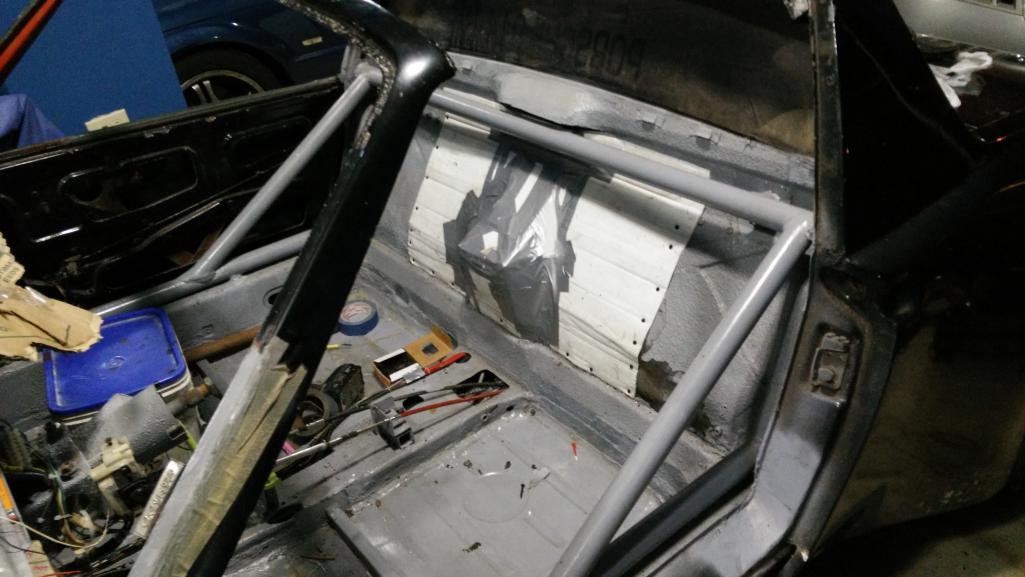
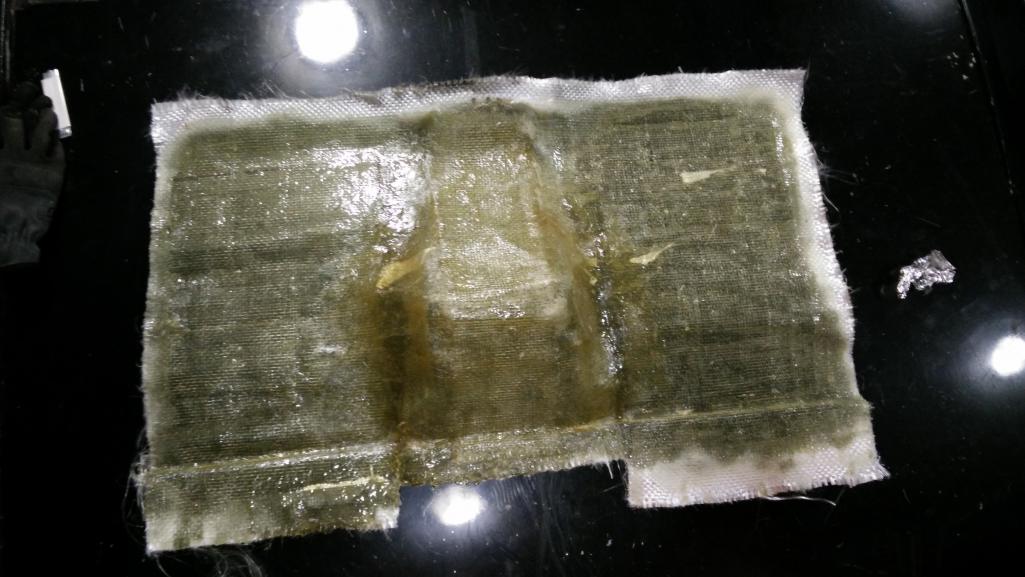
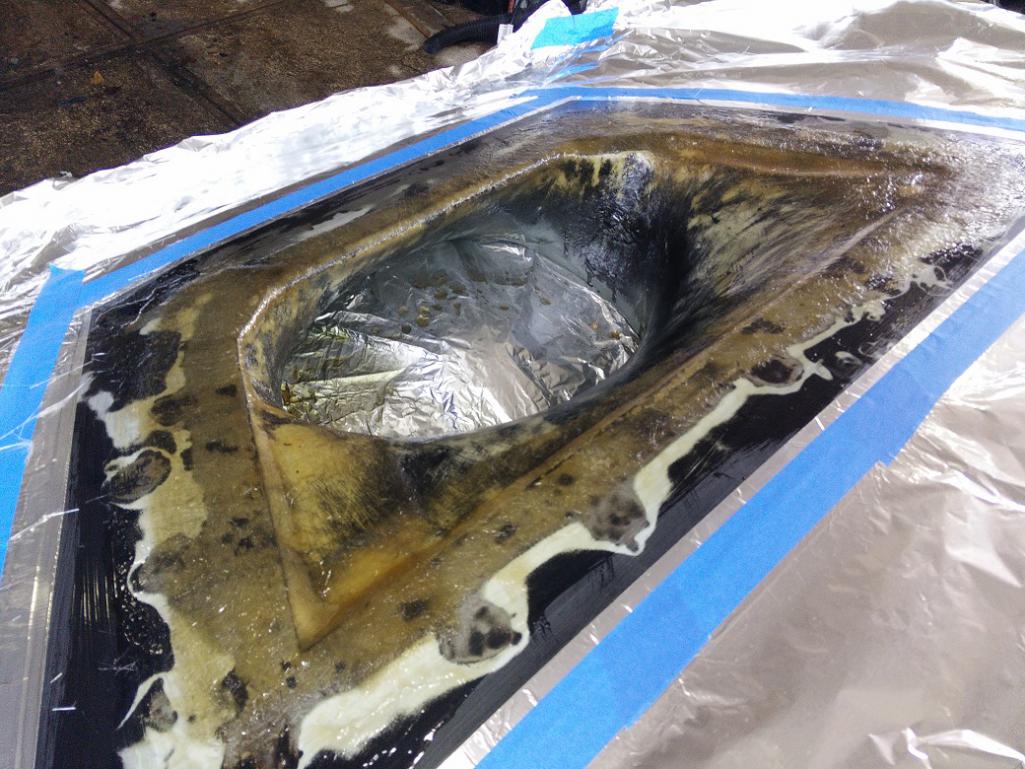
Then I cover everything with aluminum tape.... Covered with resin and lay the fiberglass 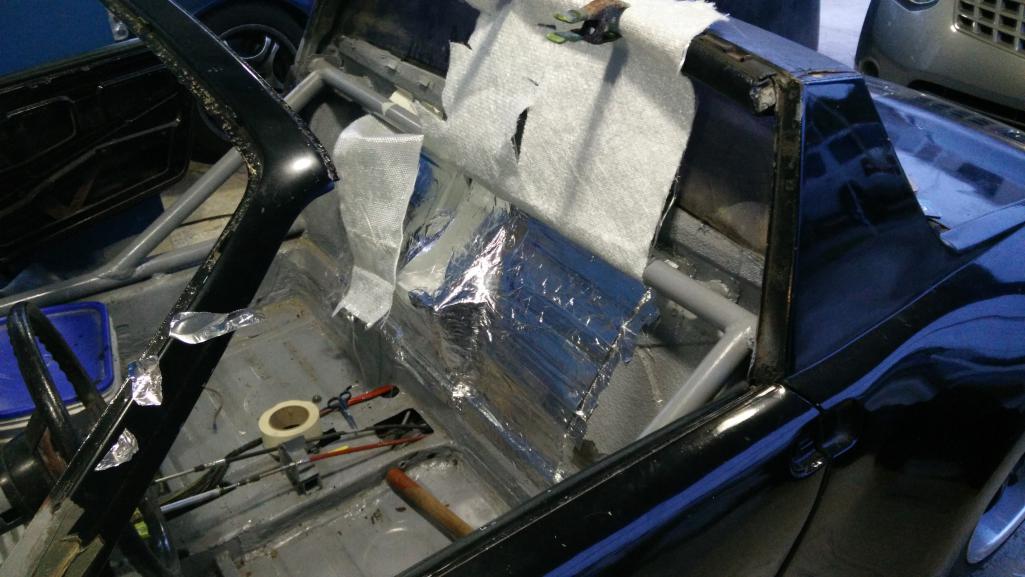
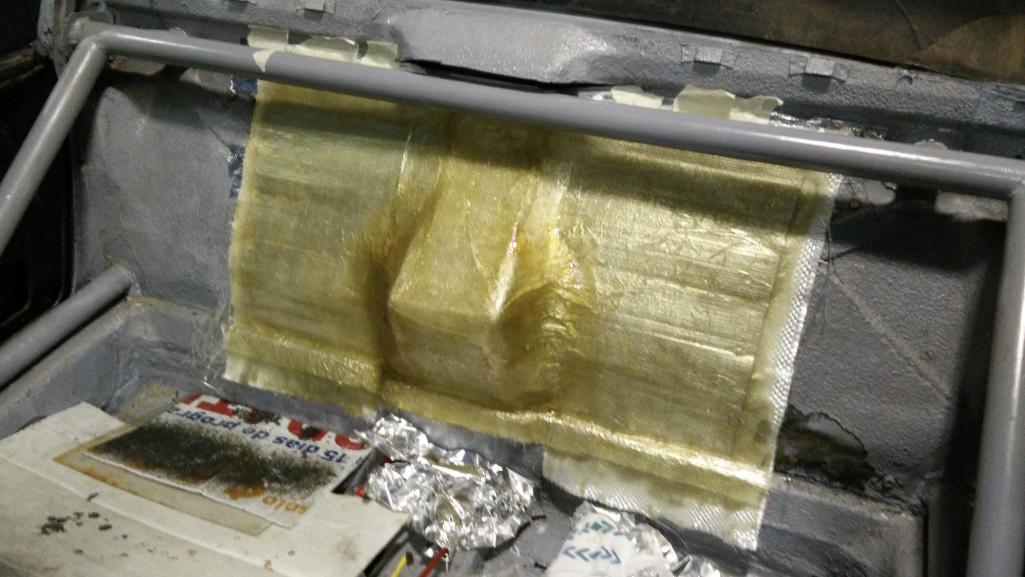
Posted by: nukepipe Jul 31 2015, 08:43 PM
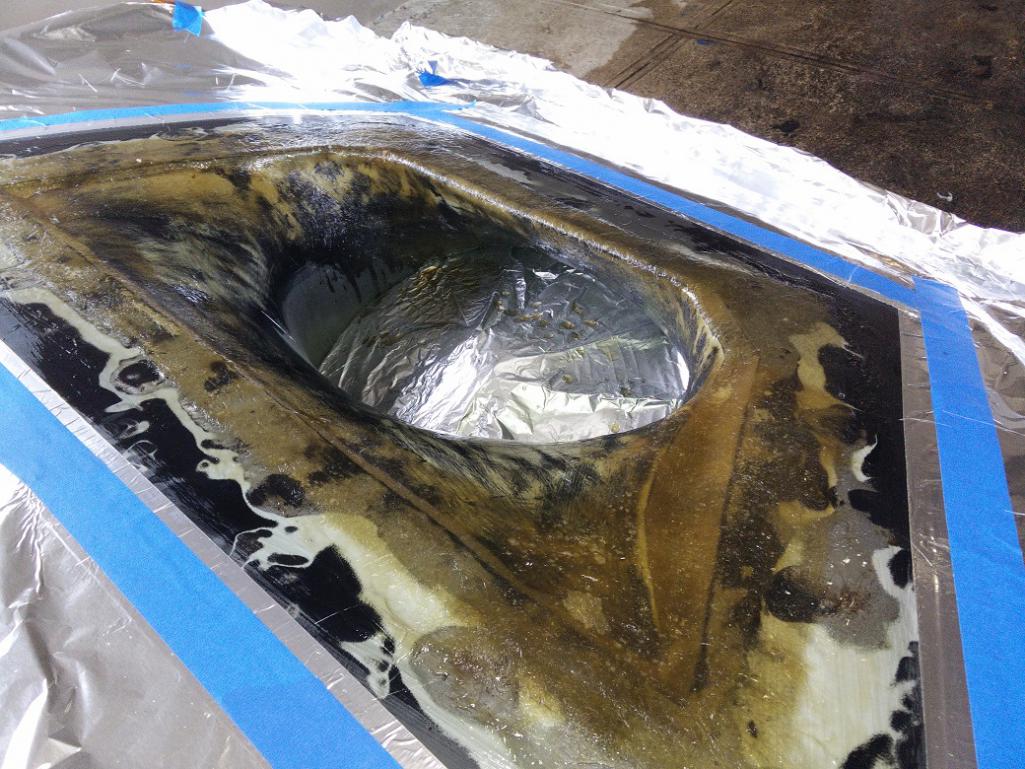
Taking this appart wasn't easy...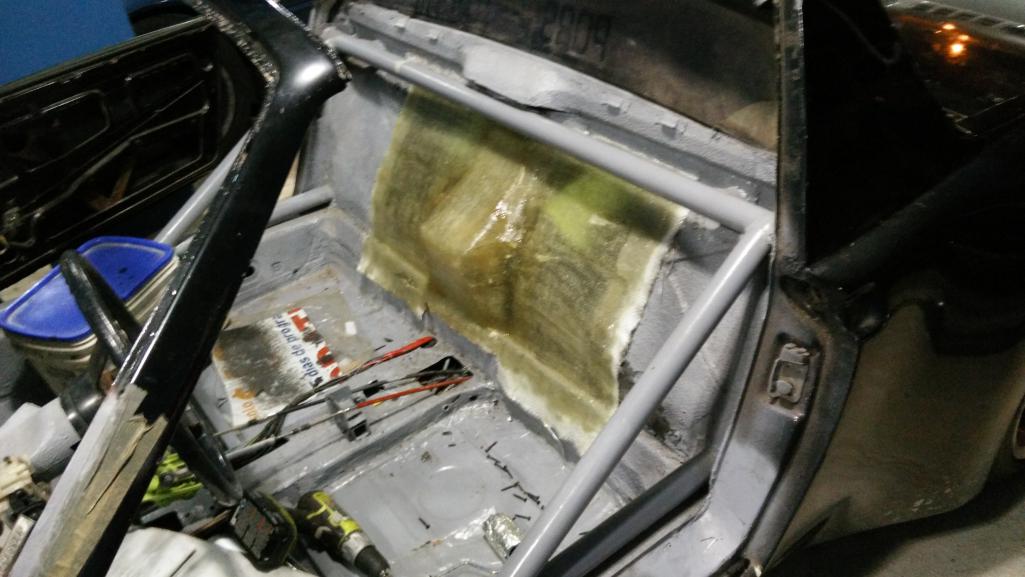
Attached thumbnail(s)
Posted by: nukepipe Jul 31 2015, 08:46 PM
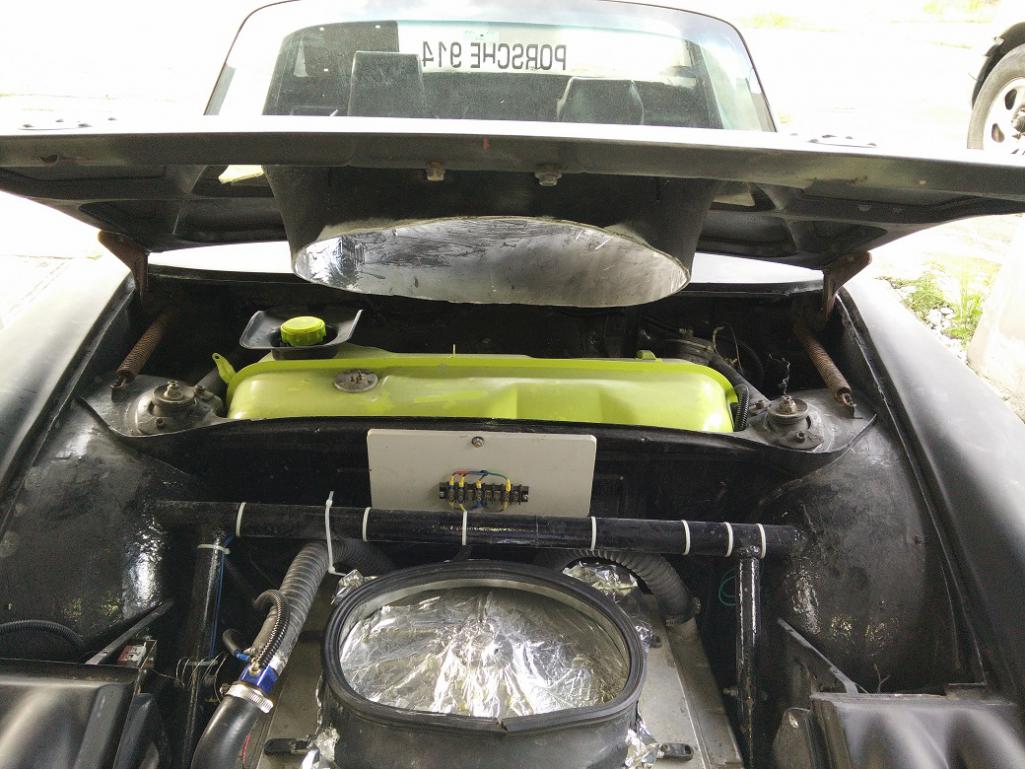
Ready to be trimmed.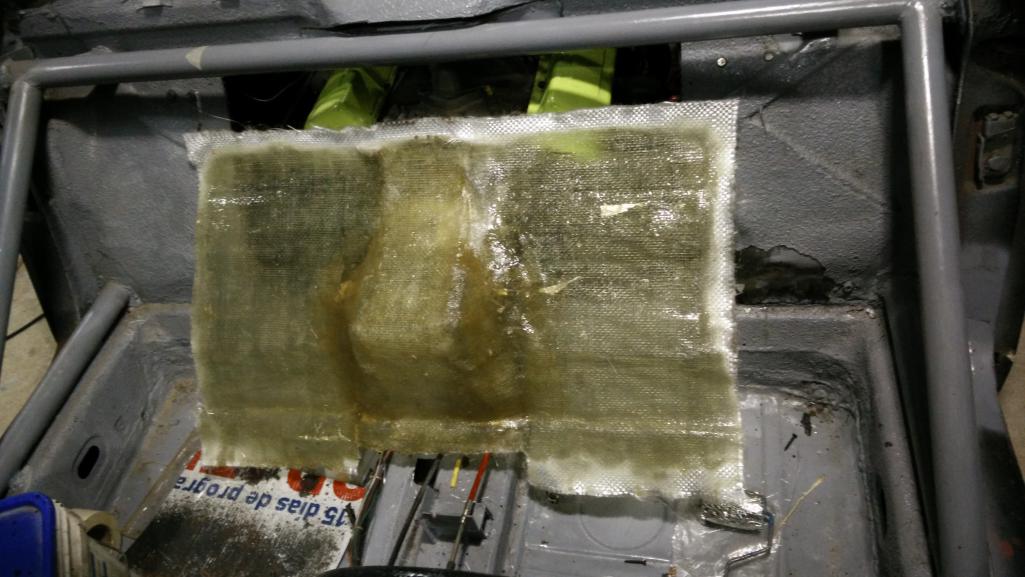
Posted by: nukepipe Jul 31 2015, 08:47 PM
I tested fitted and have more than an inch of space....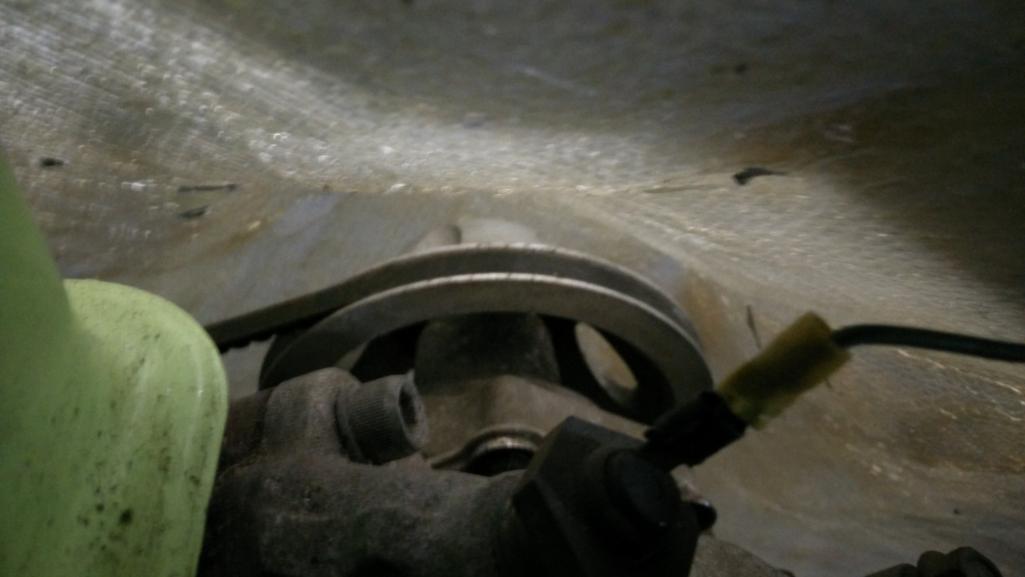
Posted by: nukepipe Jul 31 2015, 08:49 PM
Trimmed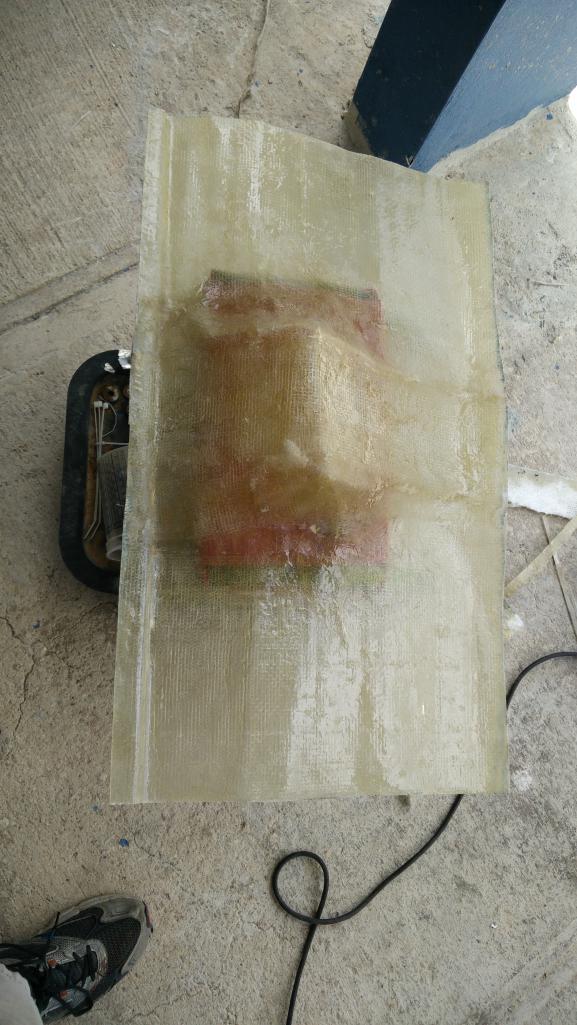
Posted by: nukepipe Jul 31 2015, 08:51 PM
Bondo'ed... painted and cover it....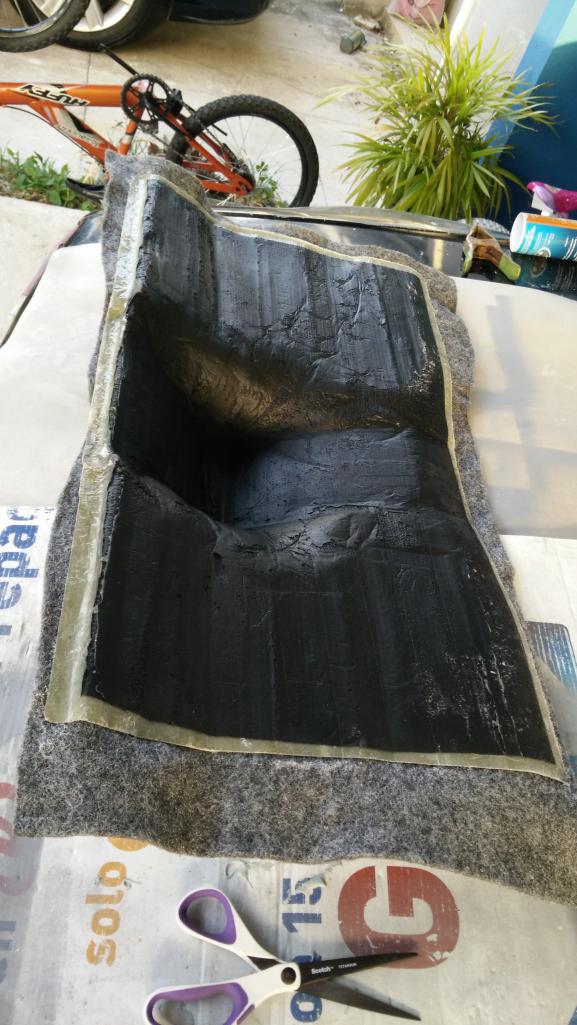
Posted by: nukepipe Jul 31 2015, 08:52 PM
trimmed the fabric...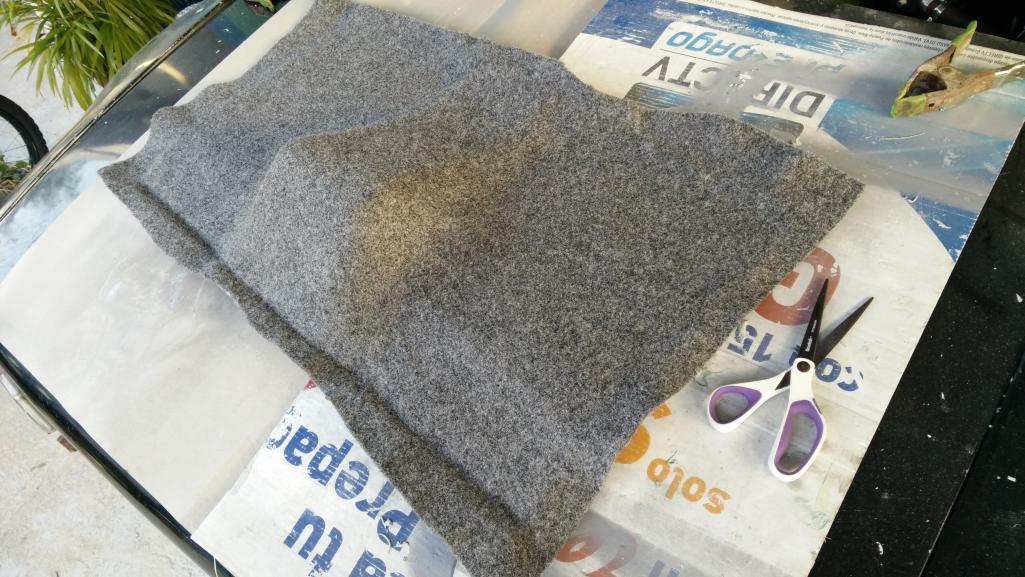
Posted by: nukepipe Jul 31 2015, 08:53 PM
Test fitted...
Very happy with the product...
Posted by: nukepipe Jul 31 2015, 08:56 PM
The worked on a basket for my radiator, using metallic mesh to make the structural form...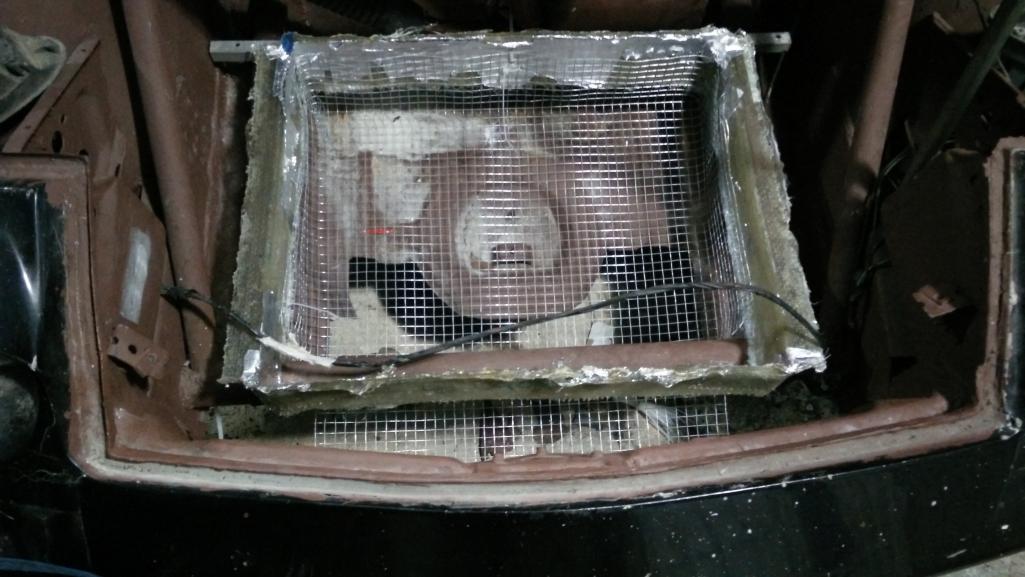
Posted by: nukepipe Jul 31 2015, 08:57 PM
radiator basket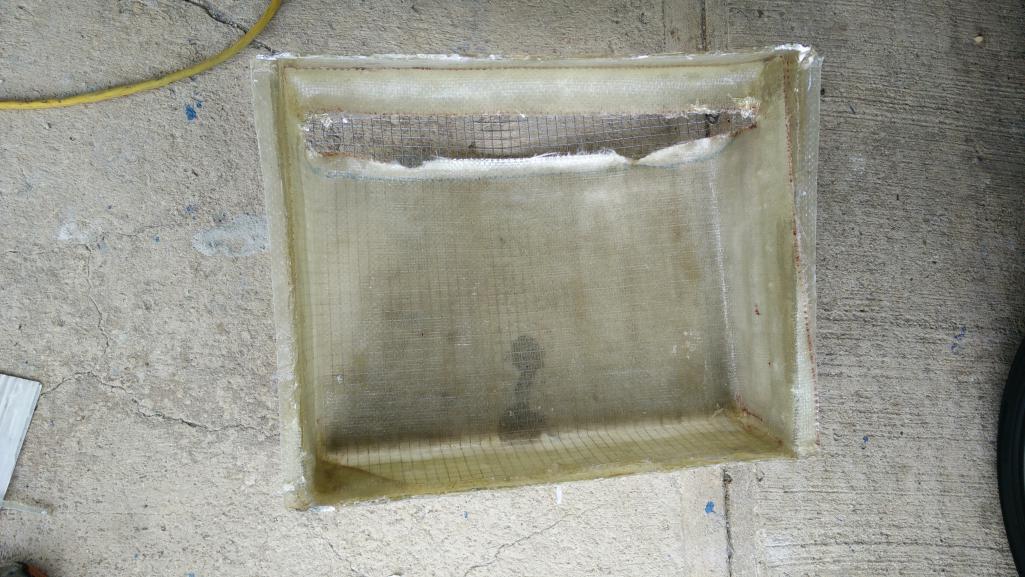
Posted by: nukepipe Jul 31 2015, 08:58 PM
nother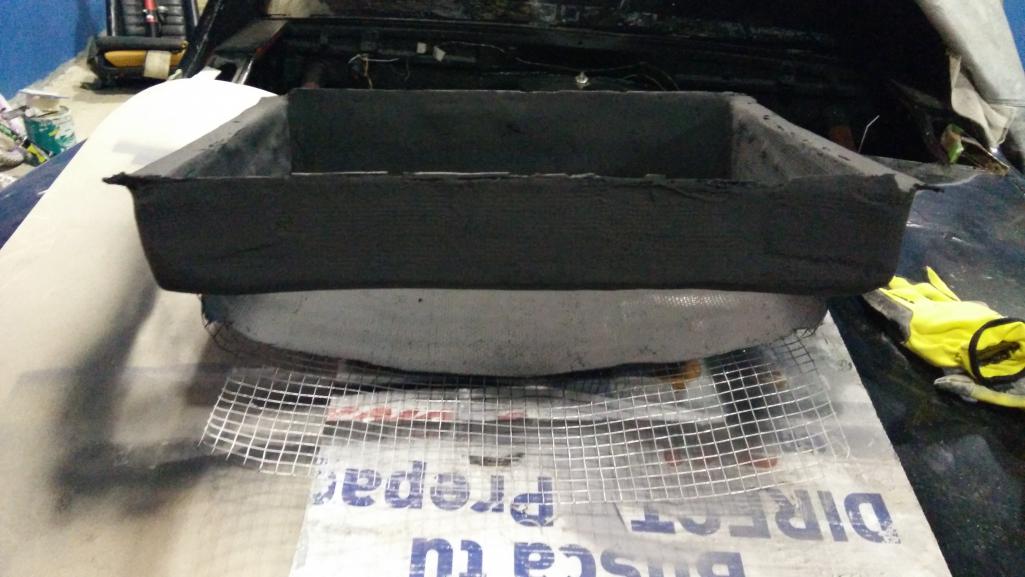
Posted by: nukepipe Jul 31 2015, 09:00 PM
another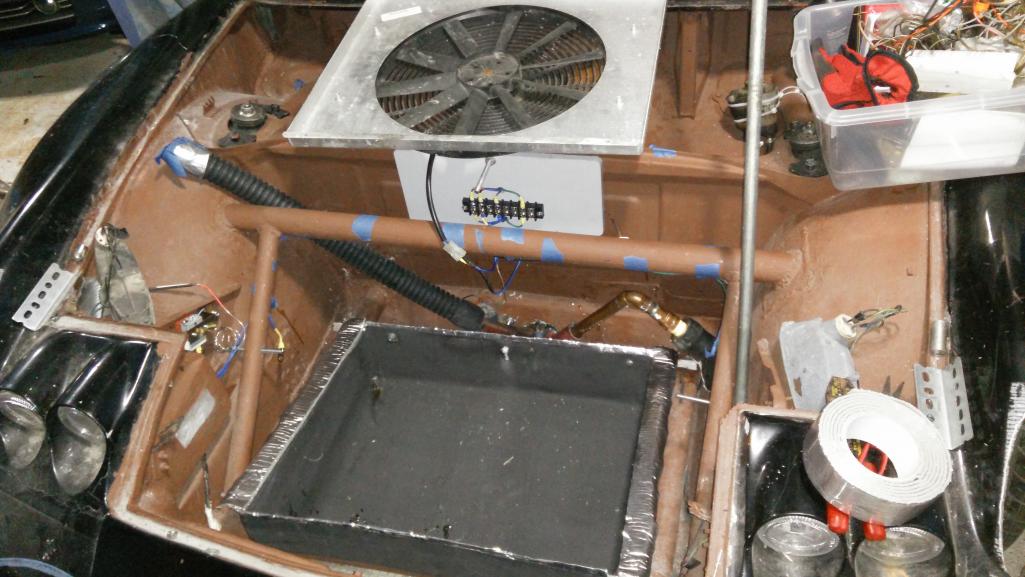
Posted by: nukepipe Jul 31 2015, 09:03 PM
There she is with the radiator on.... all dirty... we are passing with one of the worst dry season in about 10 years... So will be dirty for a couple of months....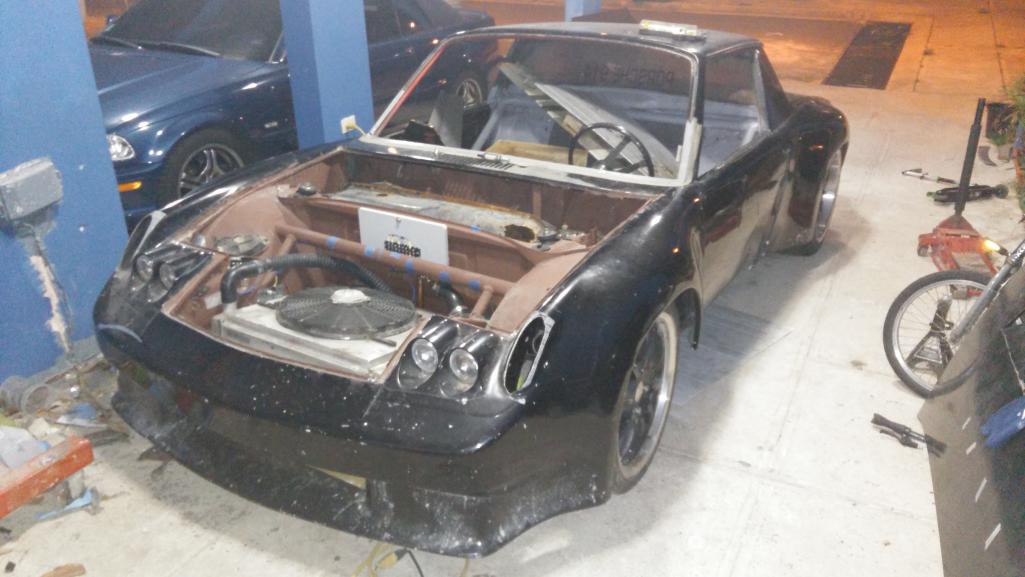
Posted by: nukepipe Jul 31 2015, 09:05 PM
Now.... lets work on the upper exhaust.... I used an old surf shirt Im not using anymore as my mold.... (Quicksilver BTW) 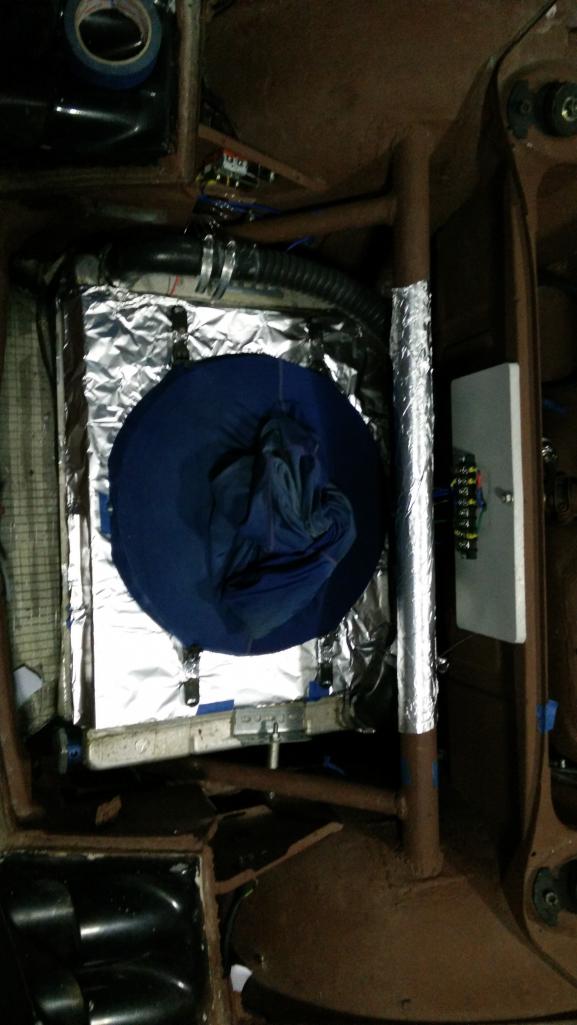
Posted by: nukepipe Jul 31 2015, 09:06 PM
stretch the shirt... and hold it with screws,,,,,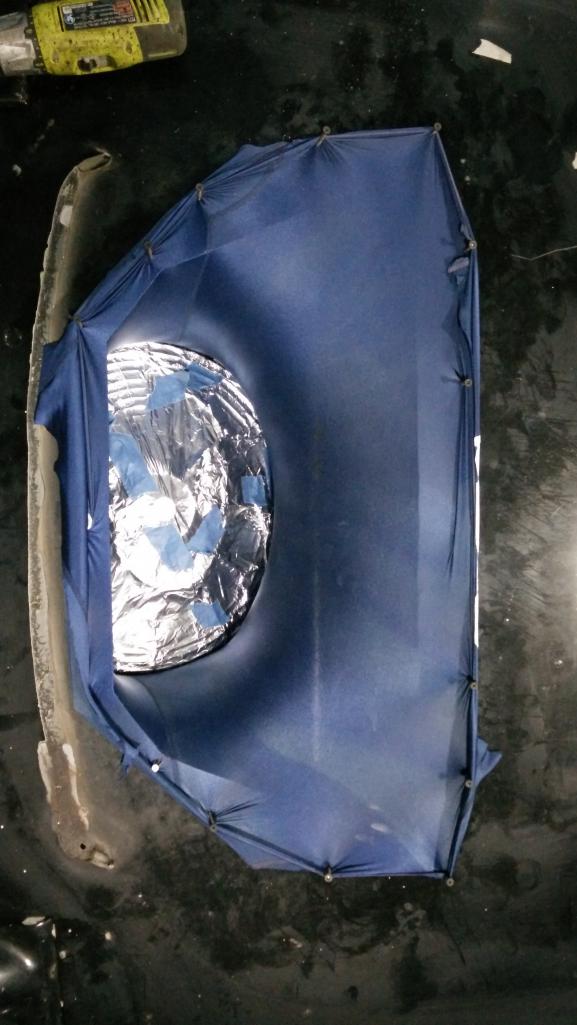
Posted by: nukepipe Jul 31 2015, 09:08 PM
This is how it looks after resin and a single layer of fiberglass on the inside...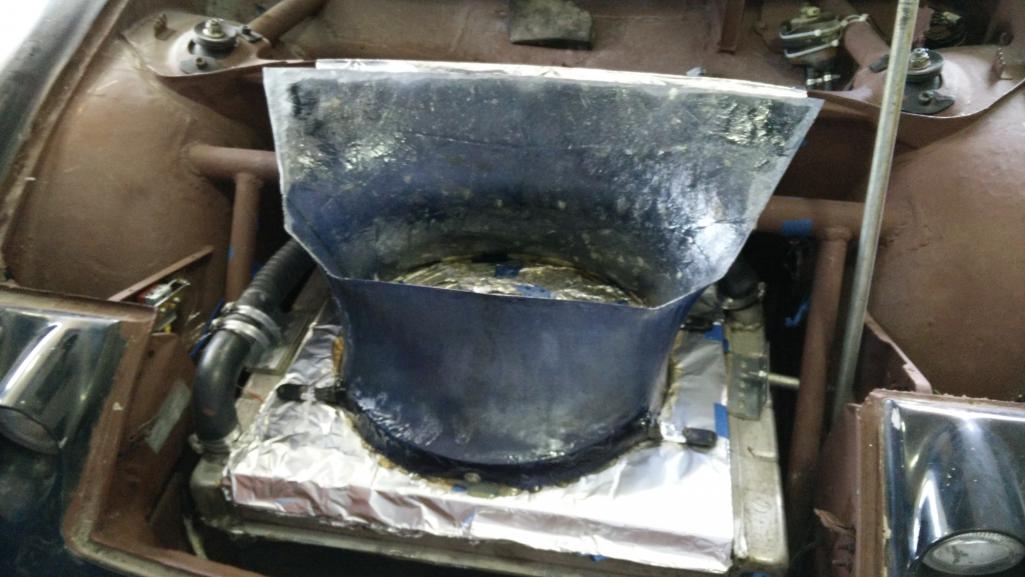

Posted by: nukepipe Jul 31 2015, 09:10 PM
Another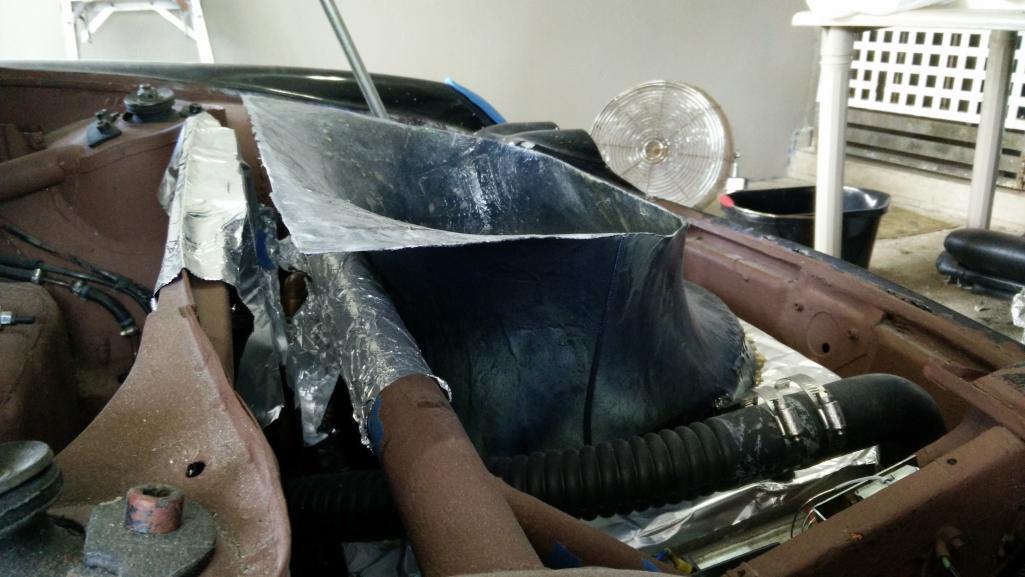
Posted by: nukepipe Jul 31 2015, 09:12 PM
Did external fiberglass layers....
Bondo it, Sorry no pics of the bondo process... But was time consuming!!!!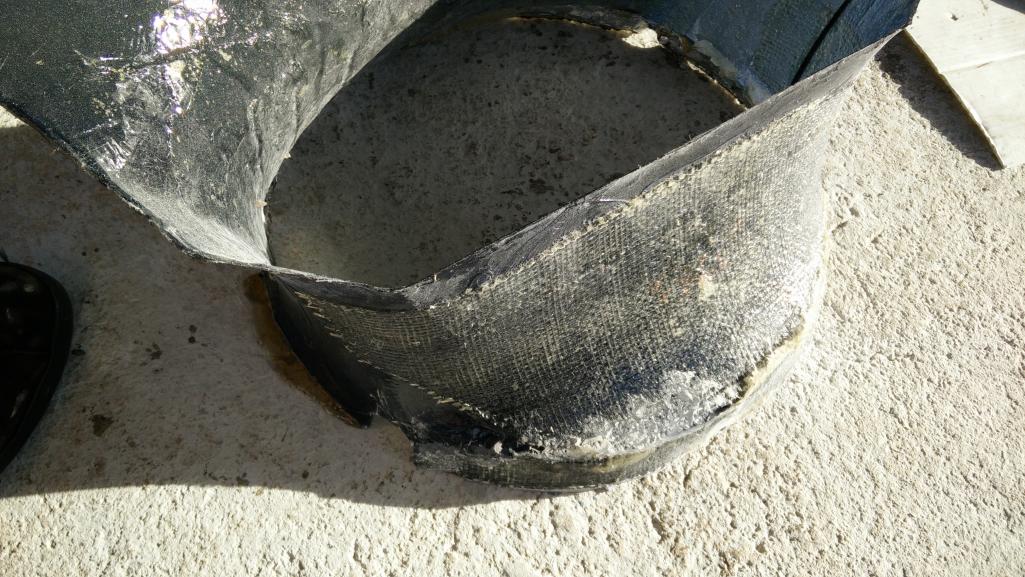
Posted by: nukepipe Jul 31 2015, 09:14 PM
On the car.... I tape it on the car to see if it clears the cross bar... and it did... Im going to fix the radiator fan to this shroud and fix the shroud on the bonnet....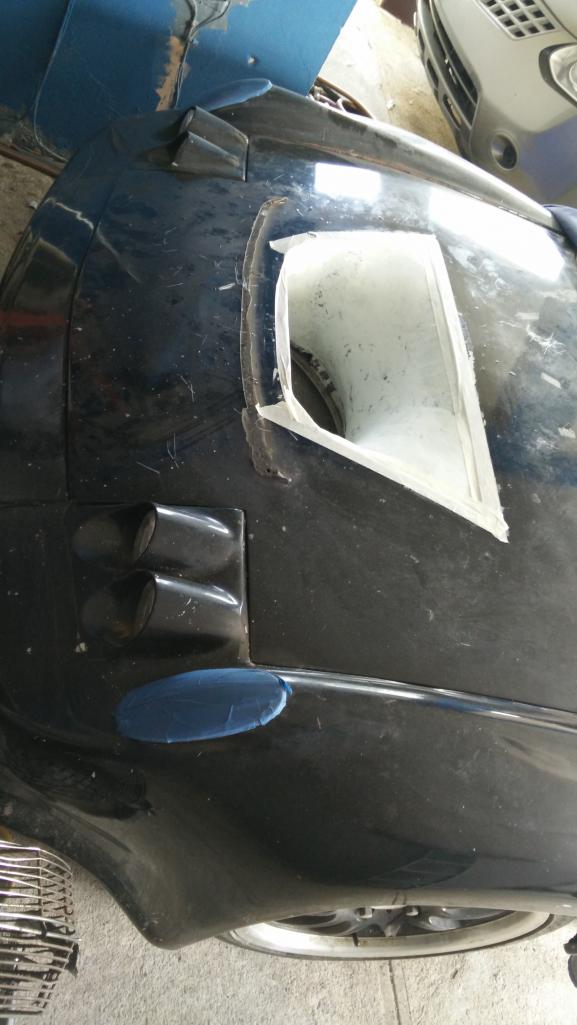
Posted by: nukepipe Jul 31 2015, 09:16 PM
Installed the mufflers also....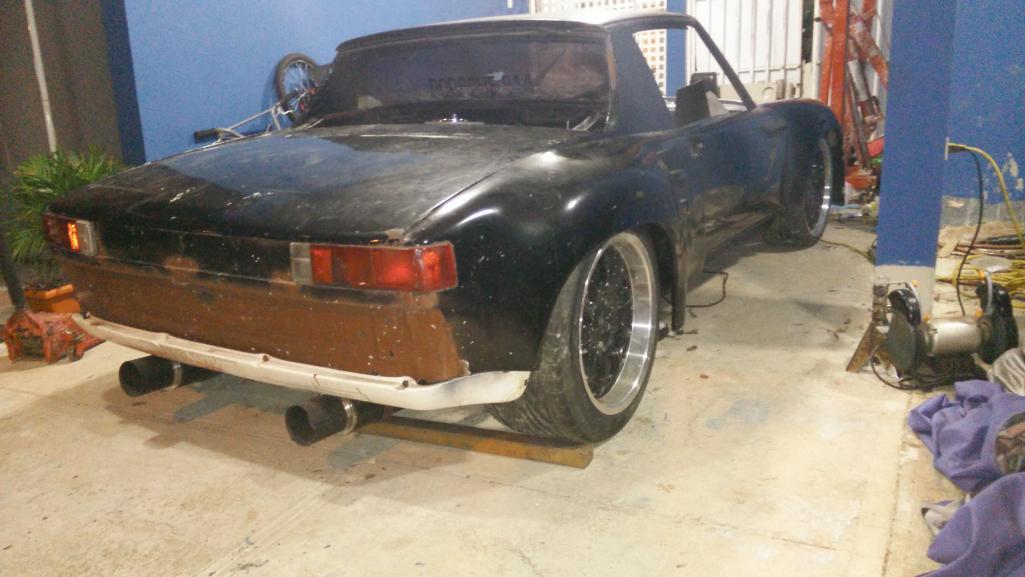
Posted by: nukepipe Jul 31 2015, 09:21 PM
And did the front signal lights wiring and fitment...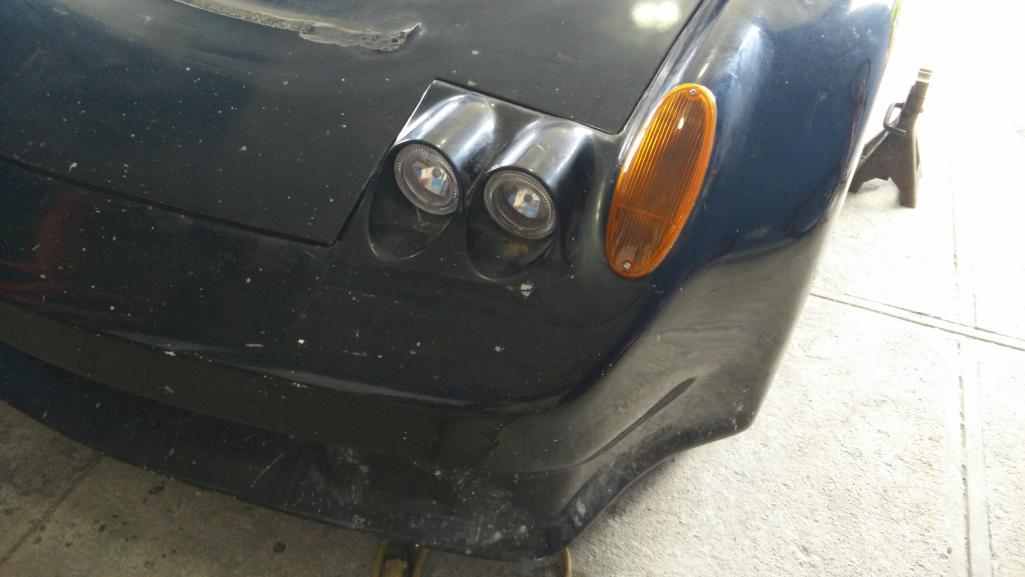
No pics of .... but did relocate the fuel pump to the front (behind the radiator basket).
I will be working this weekend sealing the gas tank with the KBS system, also will be installing the axles.... and some body work to do....
That's all for now....and thanks for watching..>!!!!!!!!!
Posted by: Andyrew Aug 1 2015, 12:25 PM
Great work on the hood vent!
Posted by: nukepipe Sep 17 2015, 07:30 PM
Great work on the hood vent!
Thanks!!!
Posted by: nukepipe Sep 17 2015, 07:40 PM
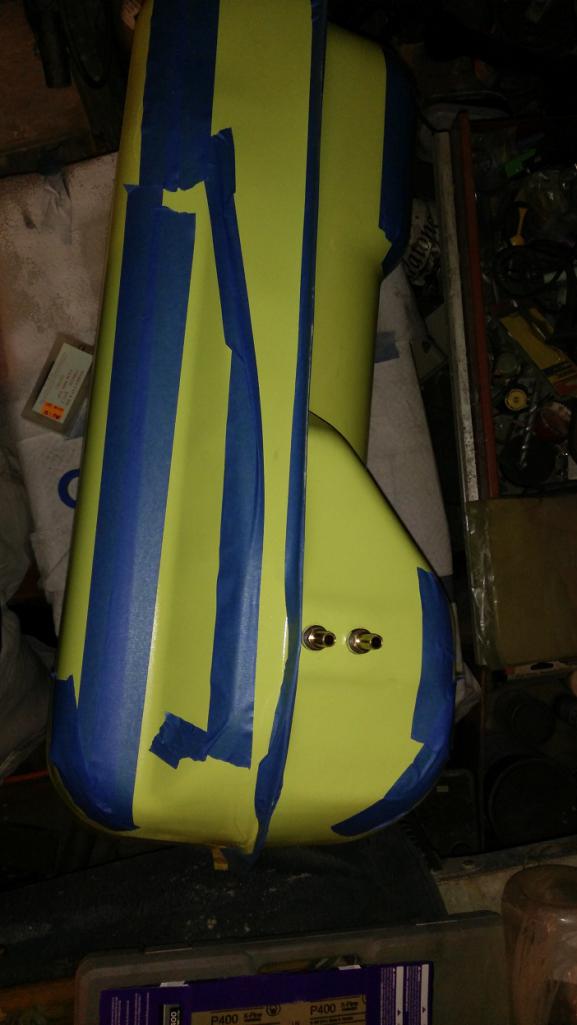
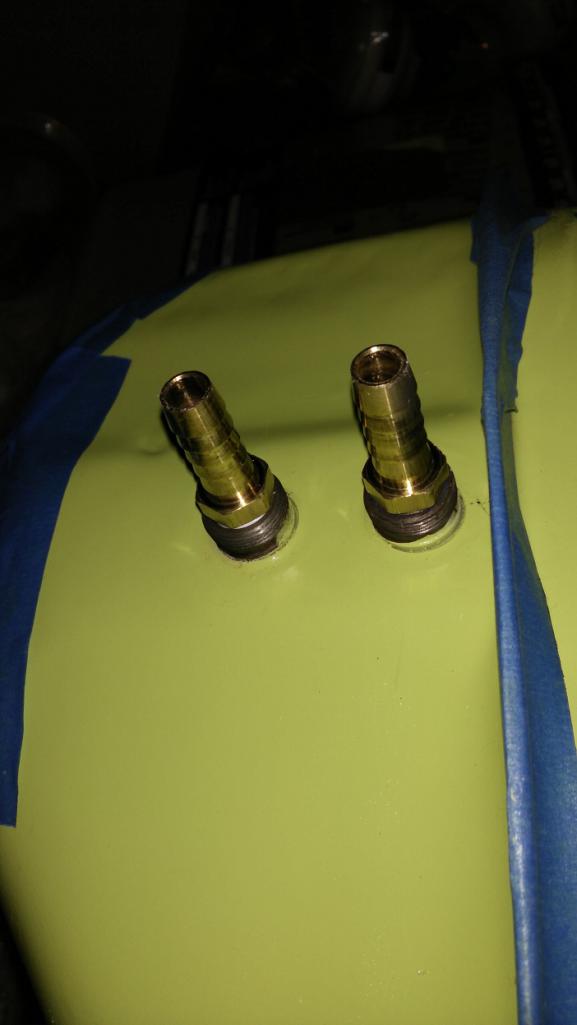
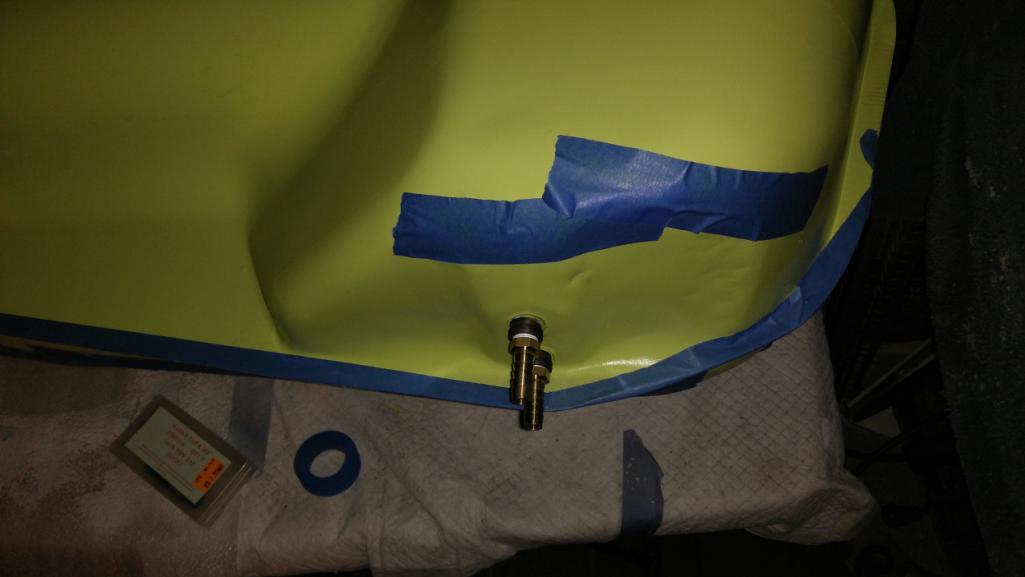
Here are some updates...
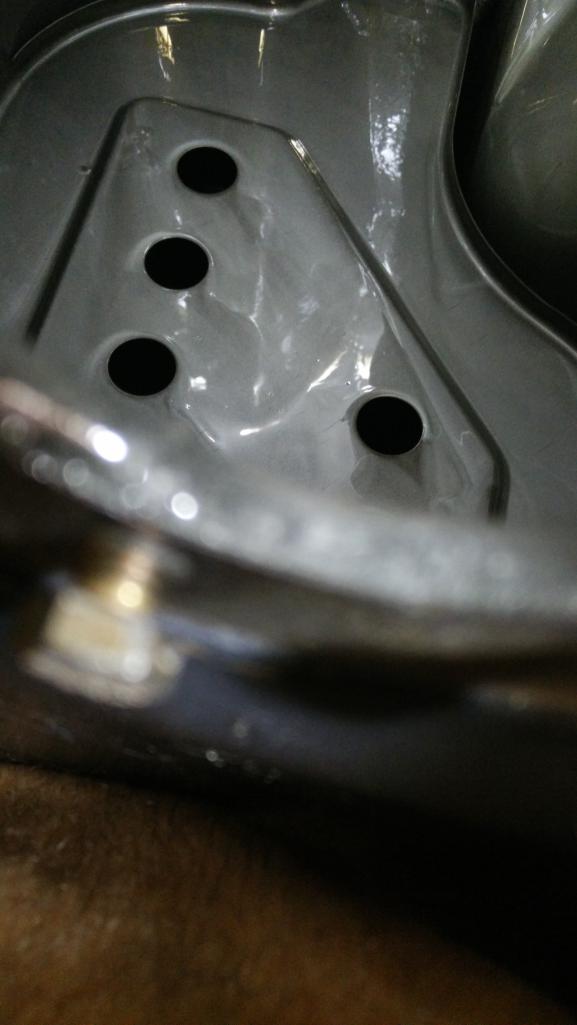
I sealed my gas tank with the KBS product and I'm very satisfied with the results.
Here are some pics from the tank inside: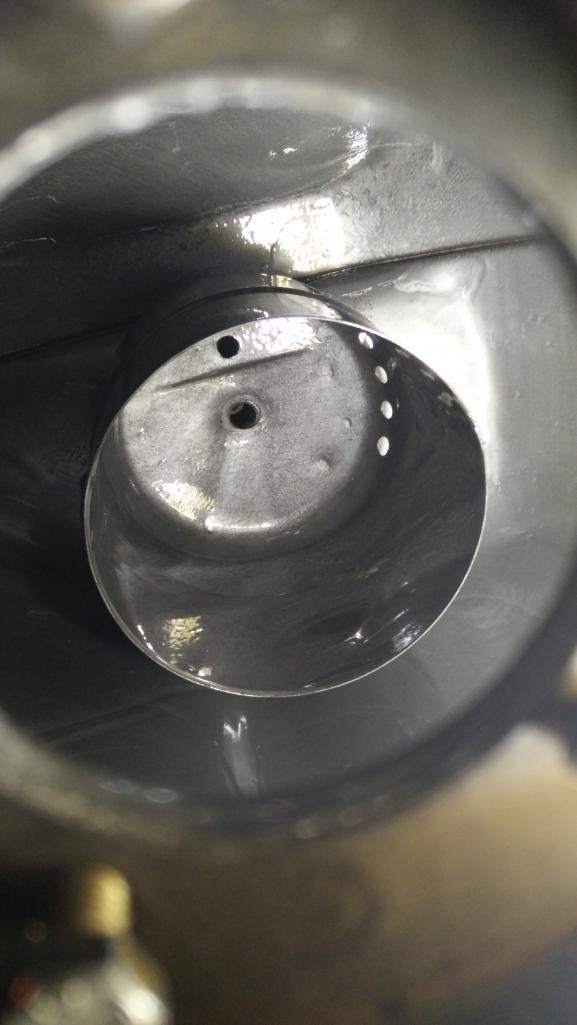
Posted by: nukepipe Sep 17 2015, 07:42 PM
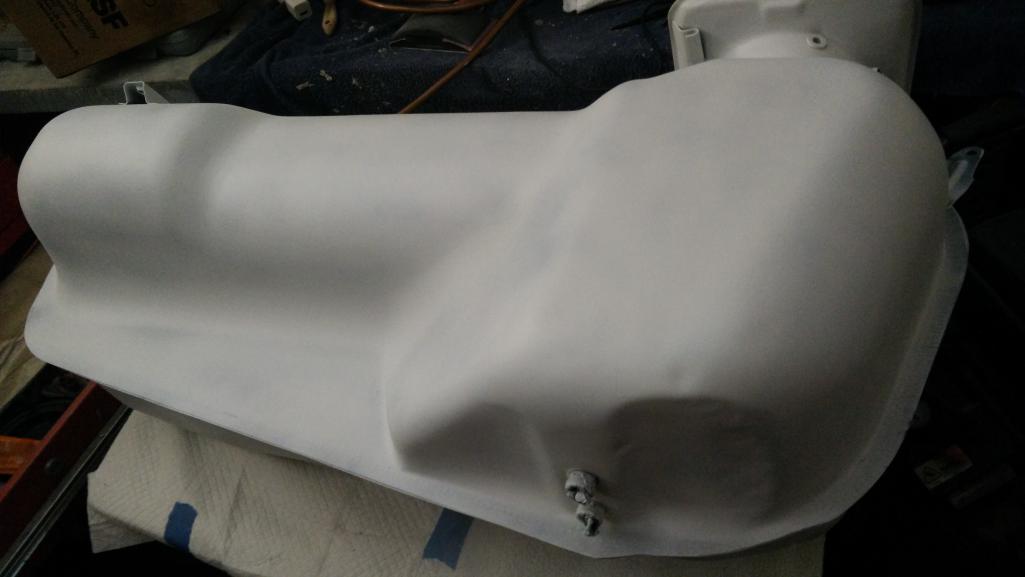
Prepare the tank to be painted.... maybe during the weekend....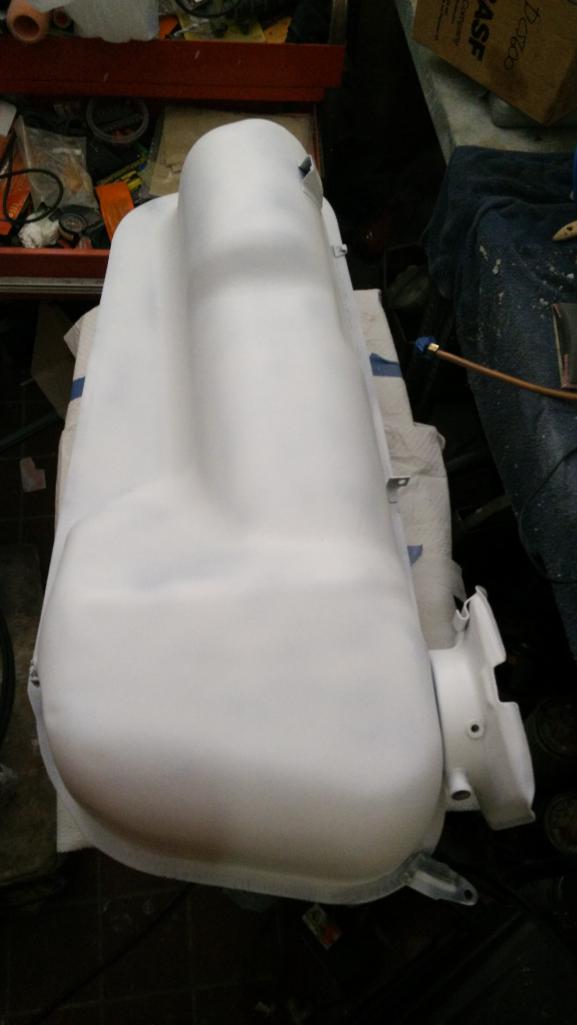
Posted by: nukepipe Sep 17 2015, 07:43 PM
Relocated the fuel pump to the front!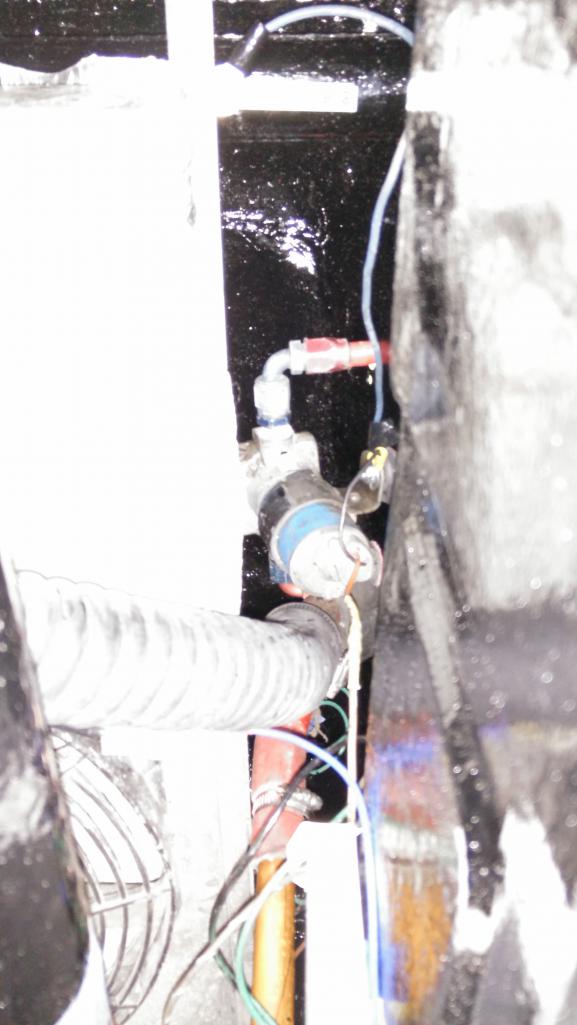
Posted by: nukepipe Sep 17 2015, 07:47 PM
Did all the wiring routing on the front....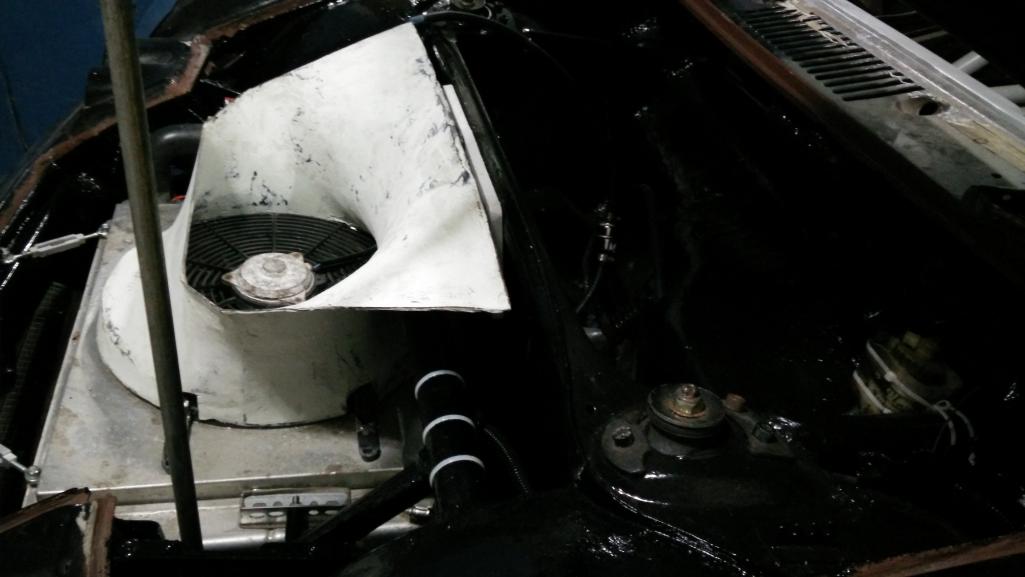
Posted by: nukepipe Sep 17 2015, 07:49 PM
Did some repairs on her back...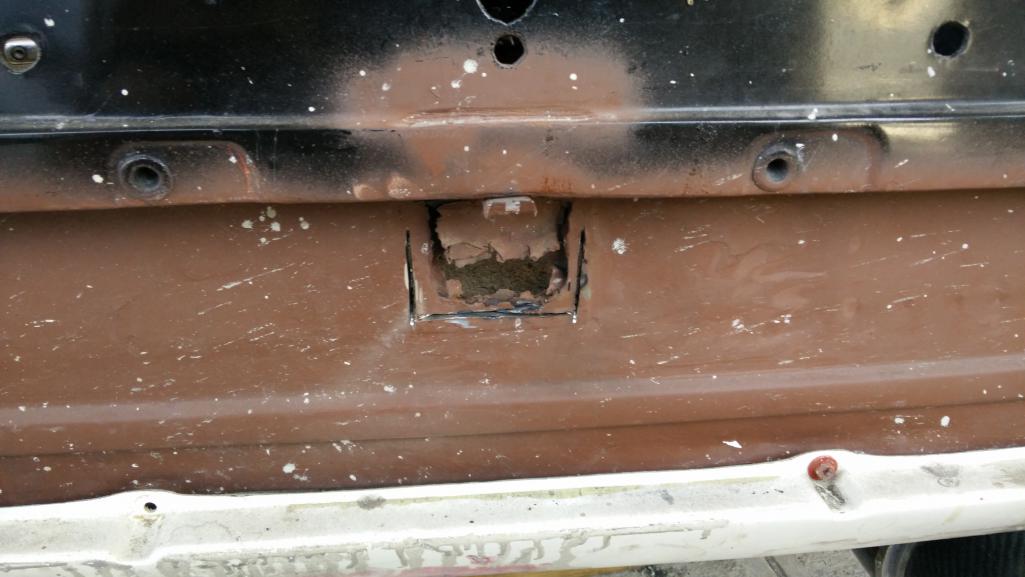
Posted by: nukepipe Sep 17 2015, 07:50 PM
Another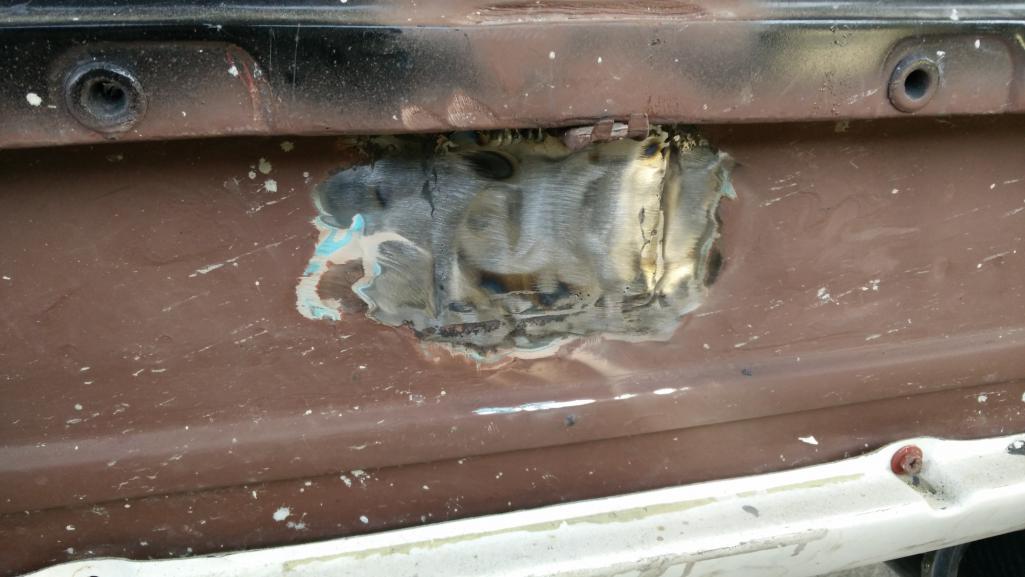
Posted by: nukepipe Sep 17 2015, 07:52 PM
Installed the axles...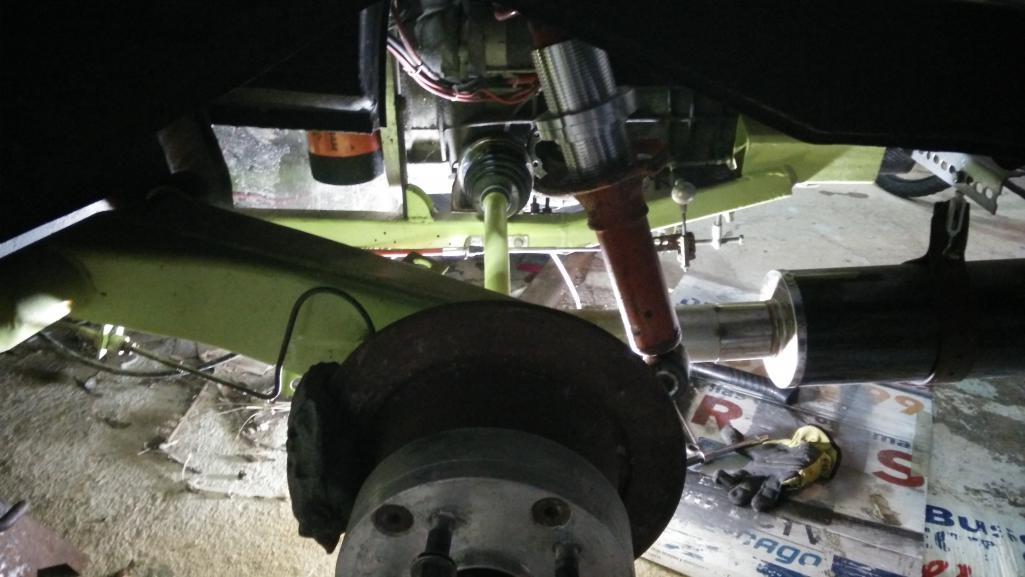
Posted by: nukepipe Sep 17 2015, 07:57 PM
And fire her up...
https://www.youtube.com/watch?v=RPgjQ9a7qvU
I found a leak and there was a puncture on the radiator. It was sitting around for years... no wonder...
Will repair it on the weekend!!!
At least it moves!!!!
Posted by: effutuo101 Sep 18 2015, 06:47 AM
Very nice build!
Posted by: nukepipe May 20 2016, 09:34 PM
Have not post since September 2015, long story short. I found an SVX with a running engine, busted tranny for a thousand bucks.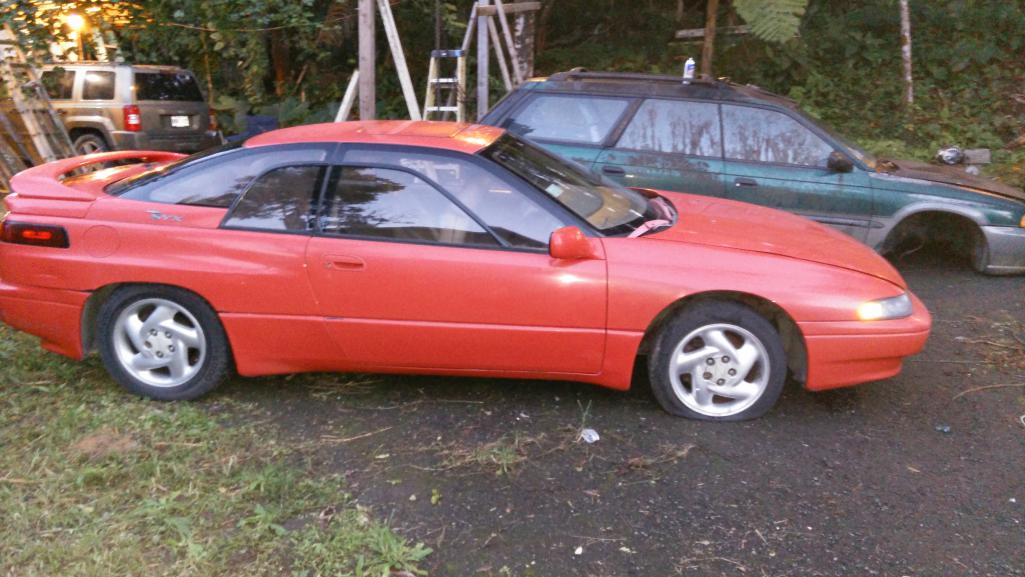
Pulled out the wiring and computer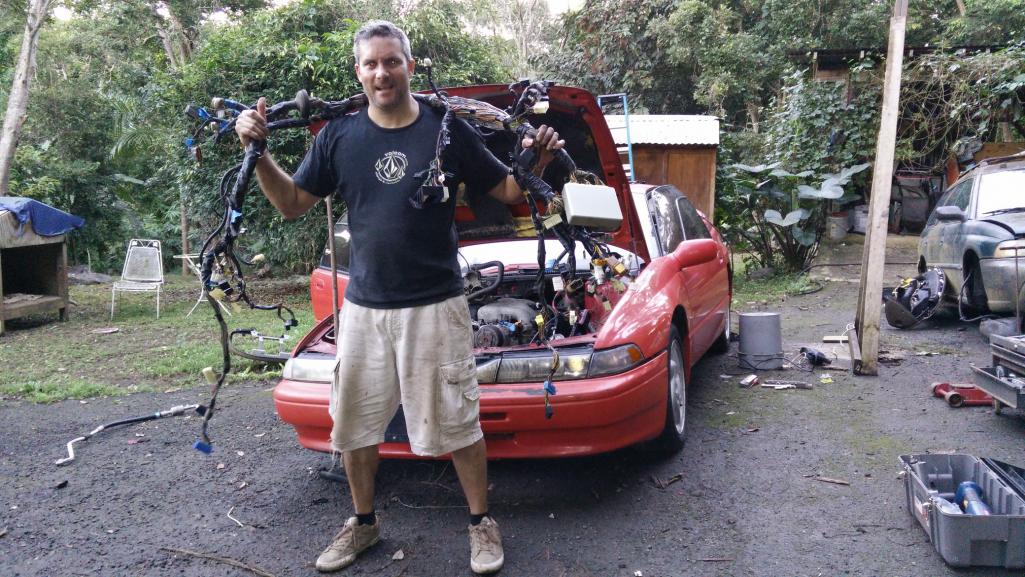
And pulled out the engine.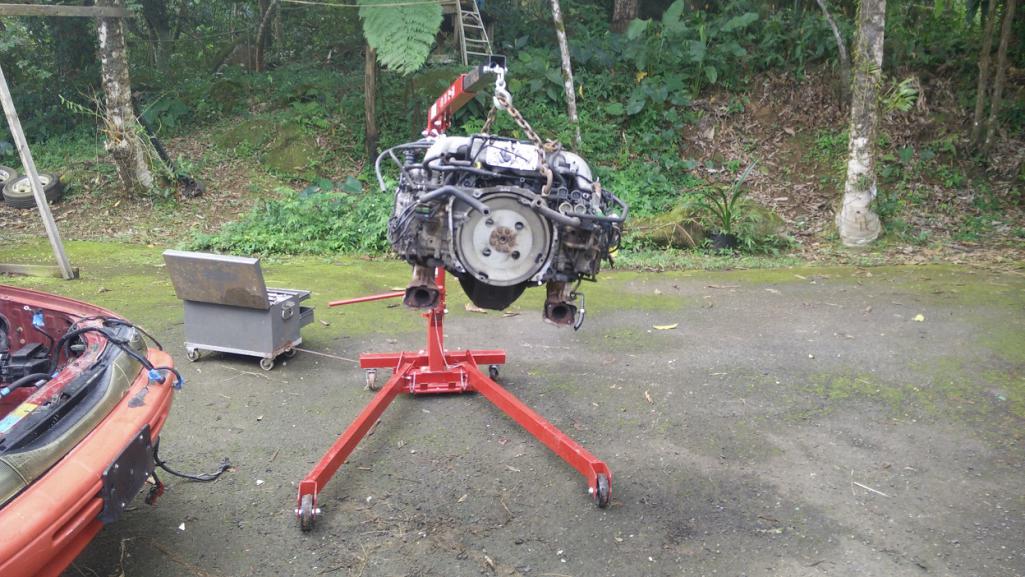
Posted by: nukepipe May 20 2016, 09:44 PM
Now here is where the fun begins... Wiring. It took me 3 day (2 hours daily). I had all the schematics and some internet reference regarding EG33 engine wiring swaps. 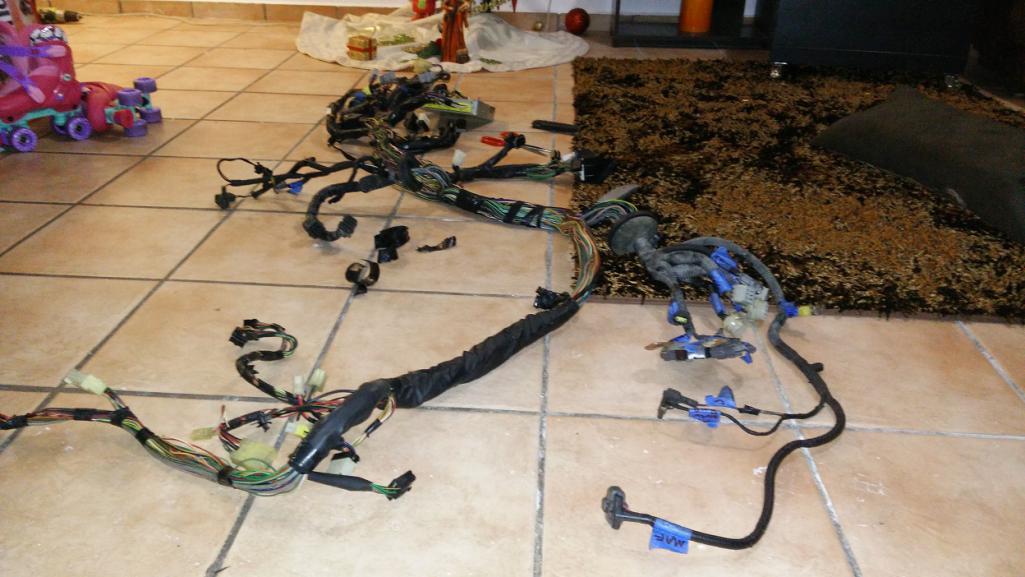
Pulling out all the tape was tedious!!!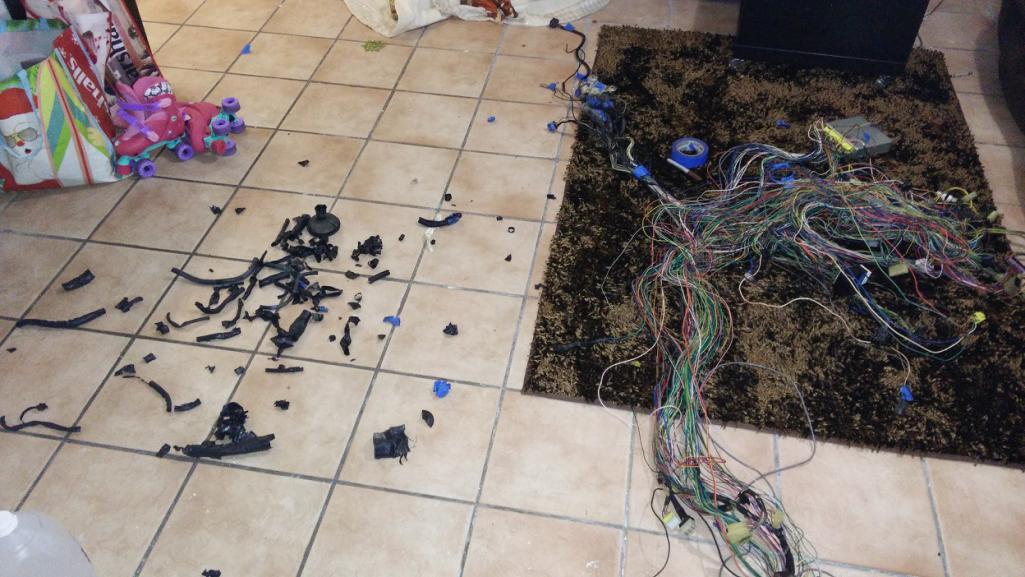
What was removed!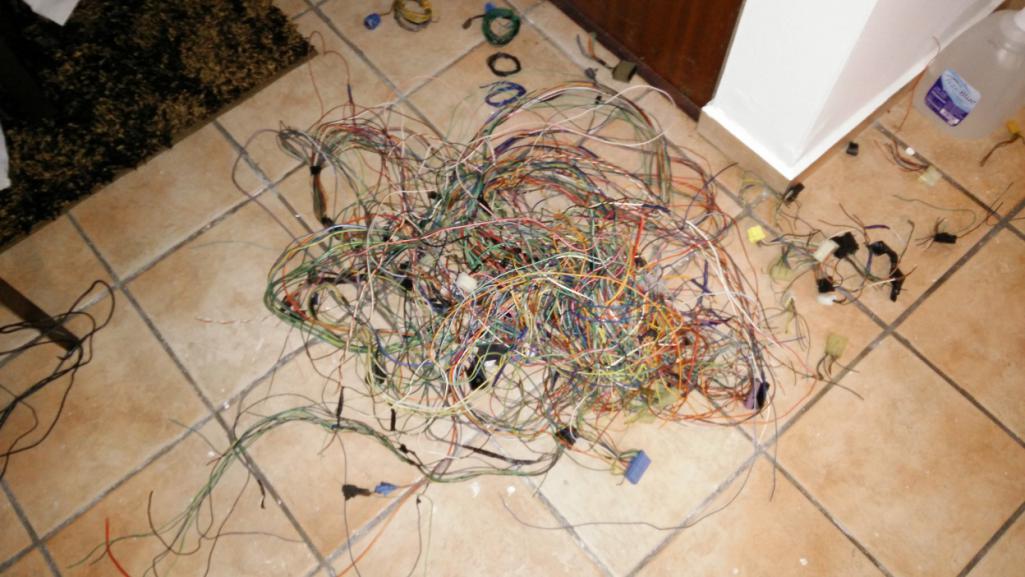
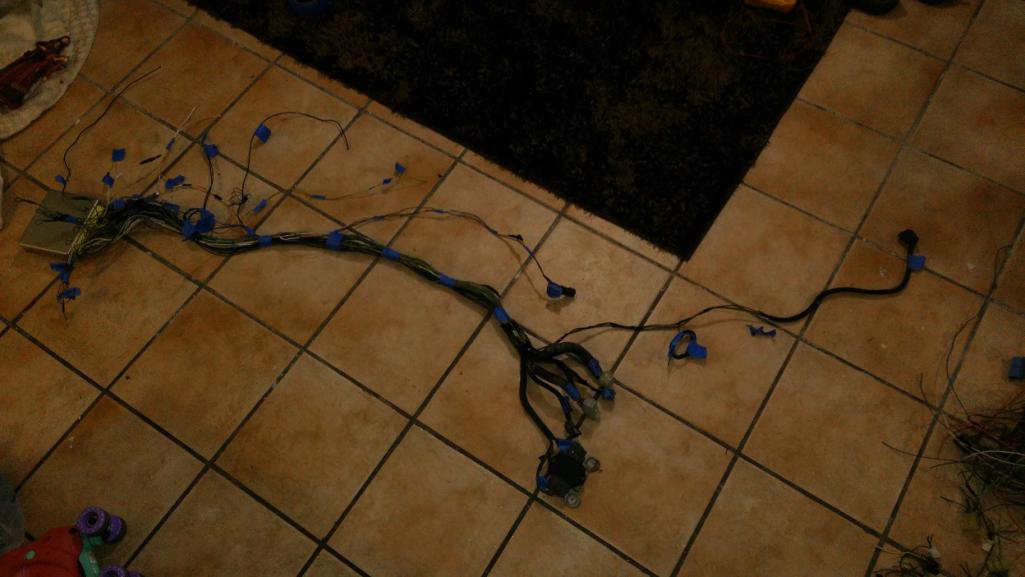
After excess wire was removed.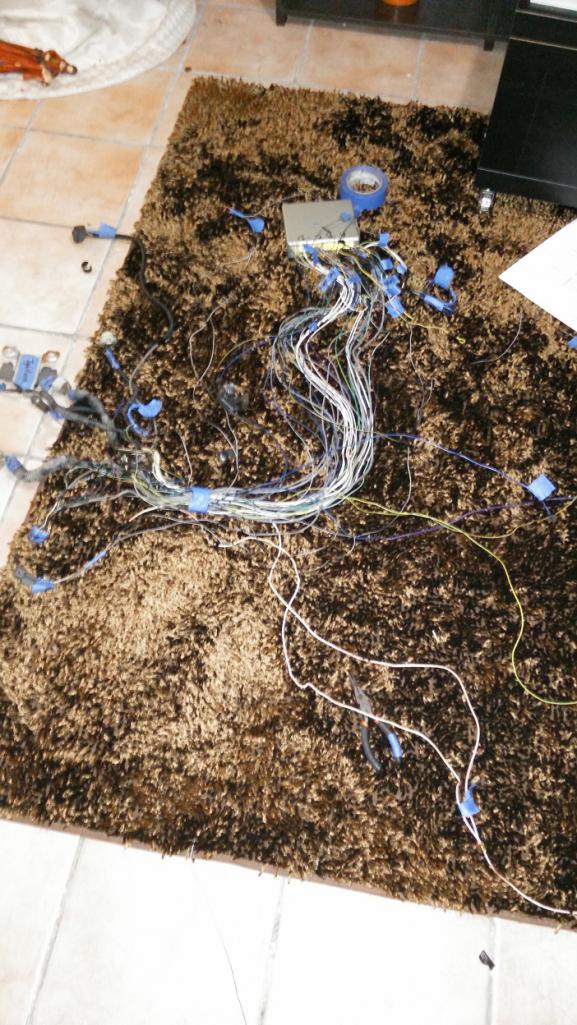
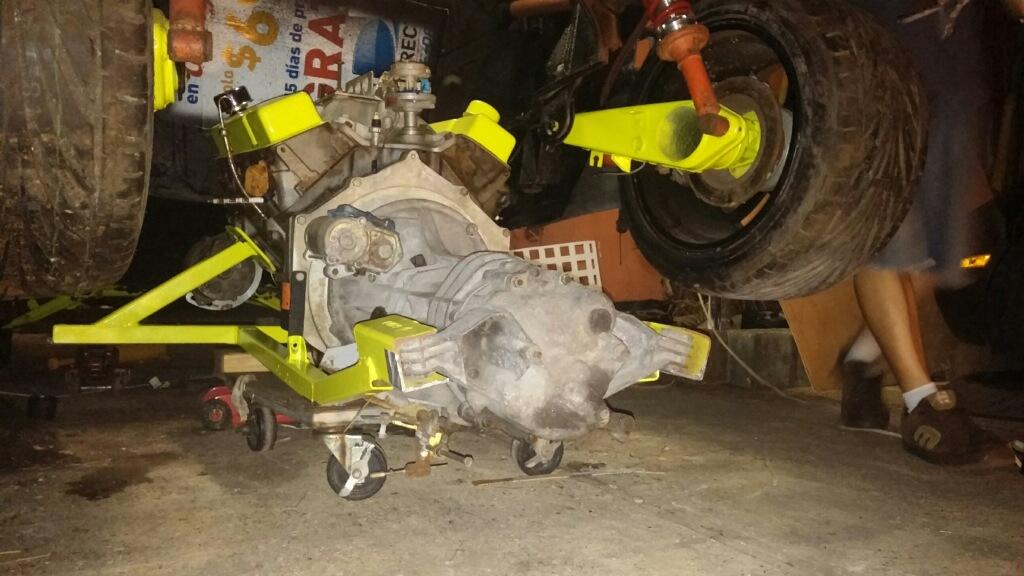
Posted by: nukepipe May 20 2016, 09:56 PM
Engine mount development. I used the old V8 cradle to do this one.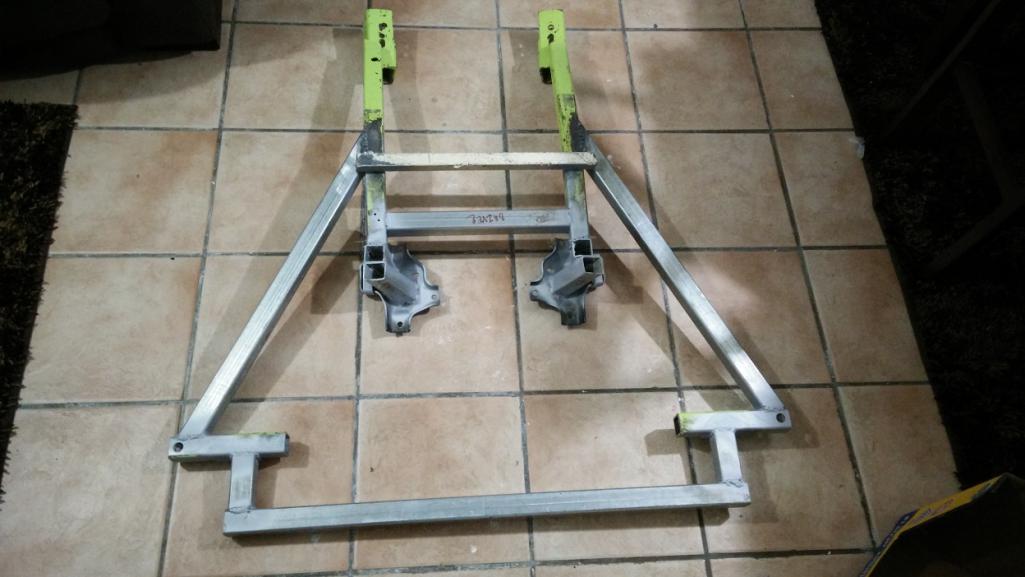
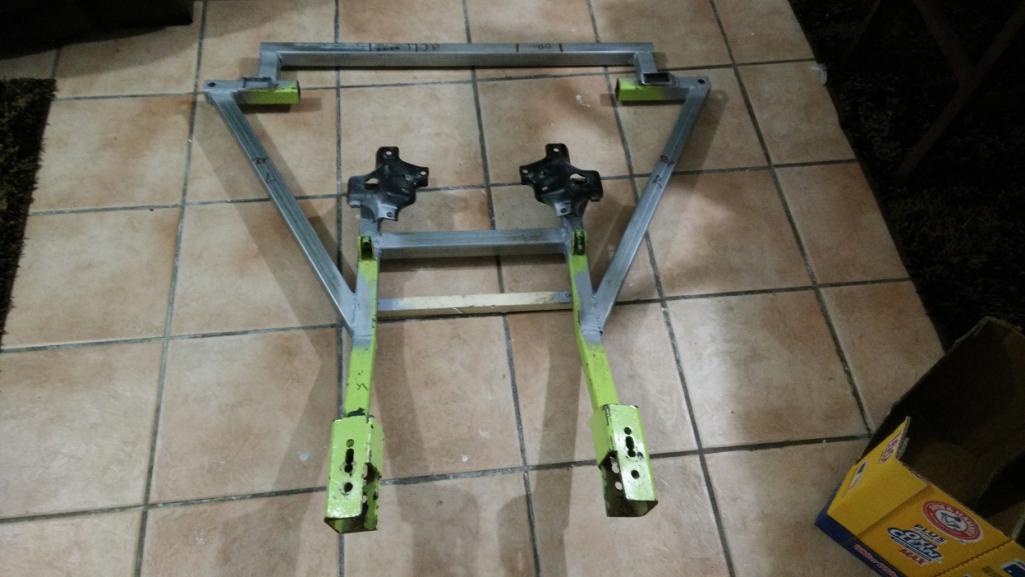
Tranny adapter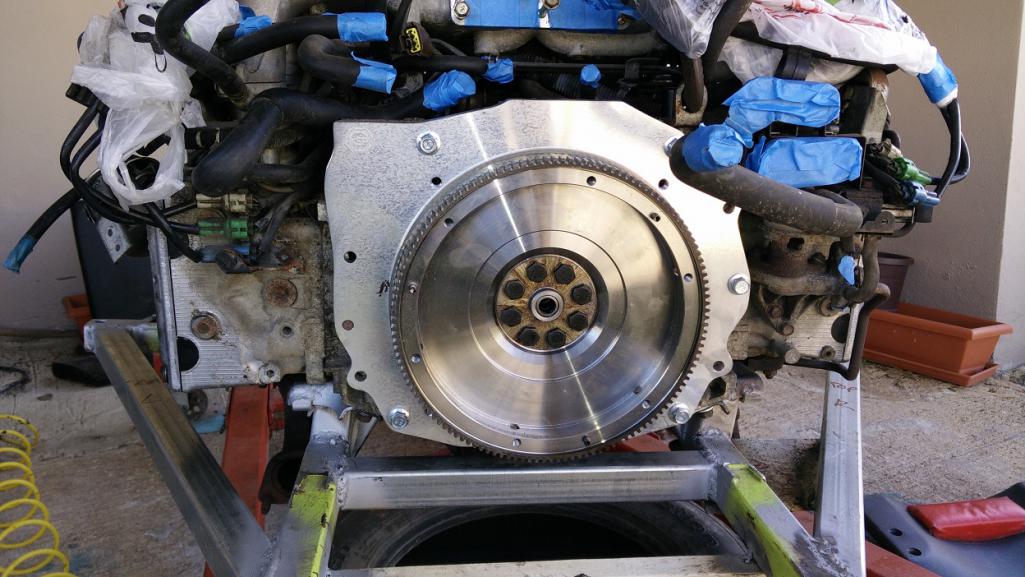
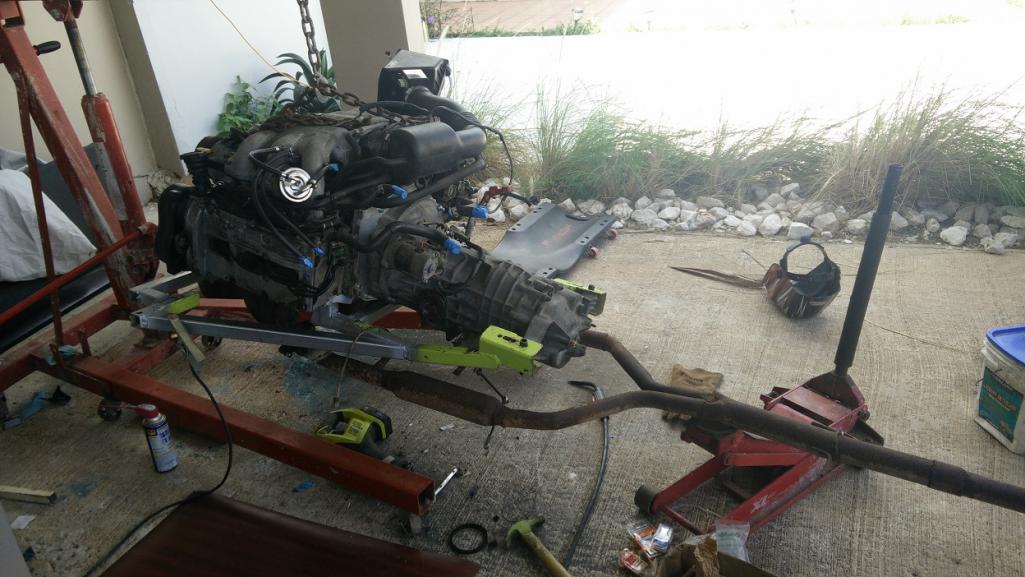
Test stand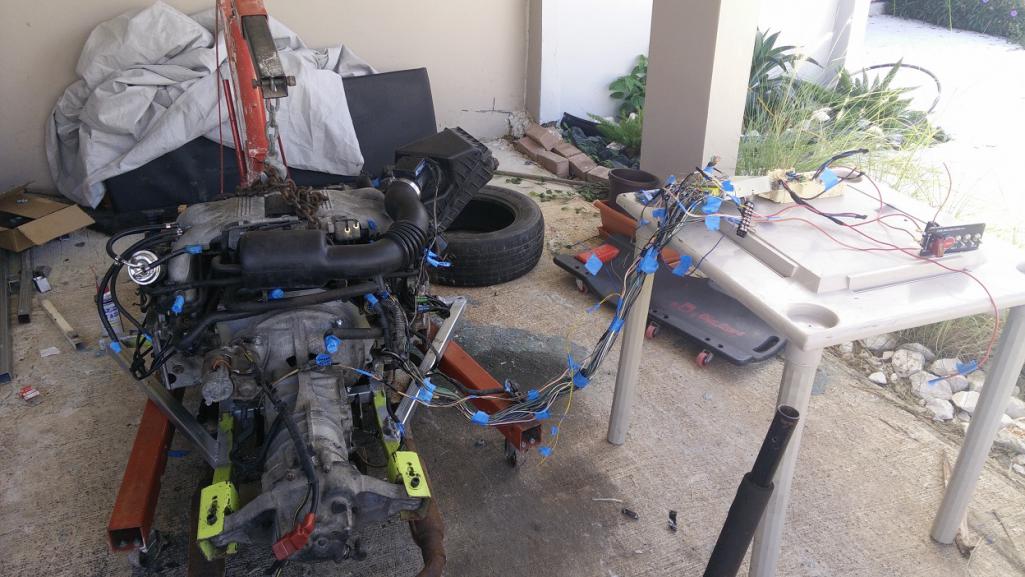
First attempt to start up (with carburator cleaner)
https://youtu.be/WwEpx5VhkyQ
Posted by: nukepipe May 20 2016, 10:06 PM
Fitting the engine....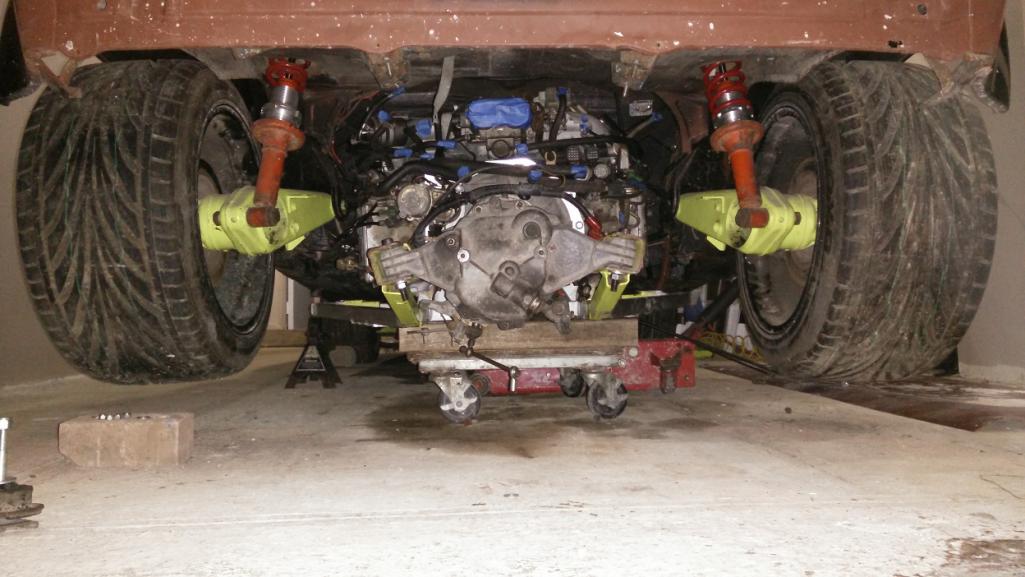
Mounted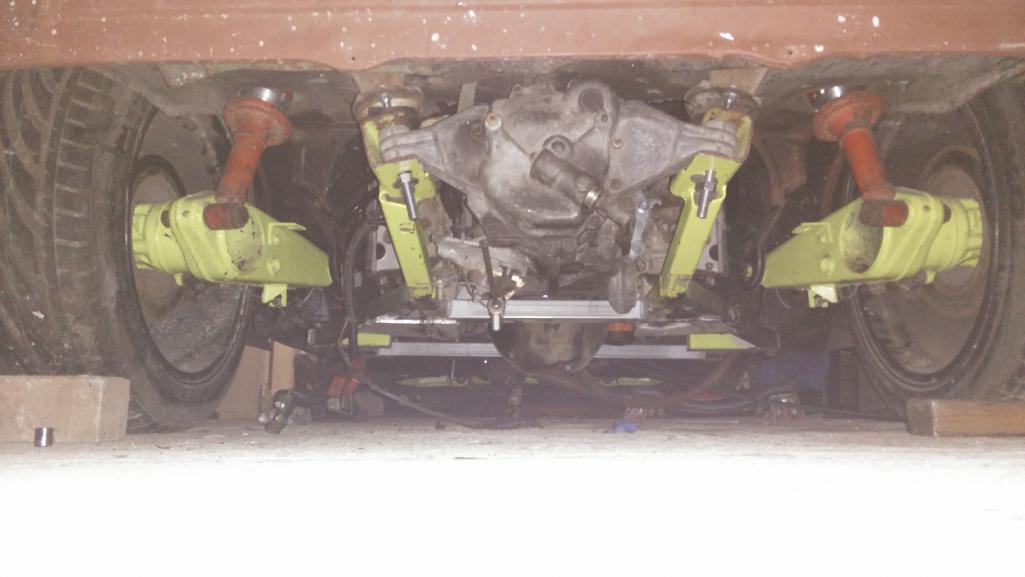
Wiring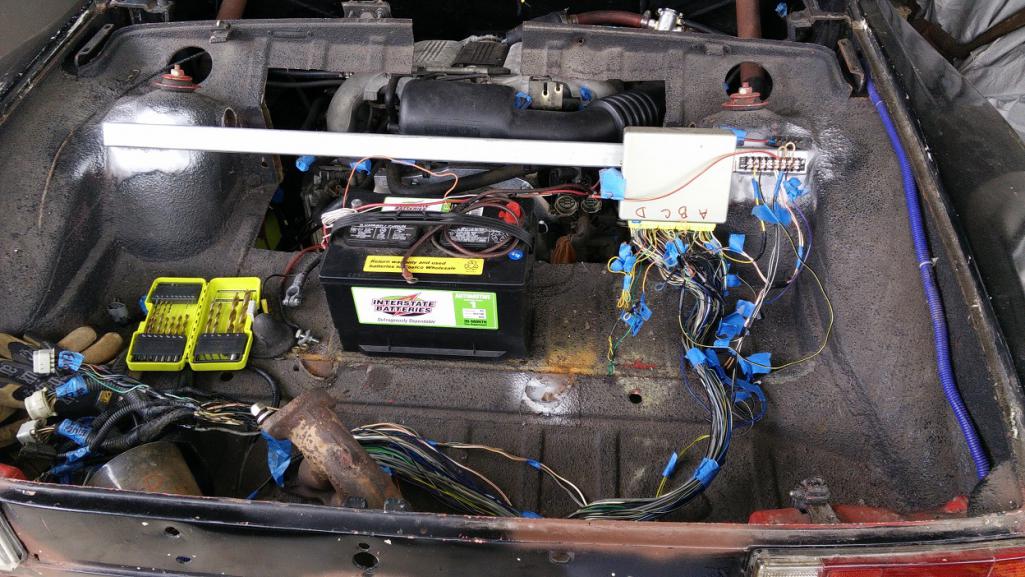
More wiring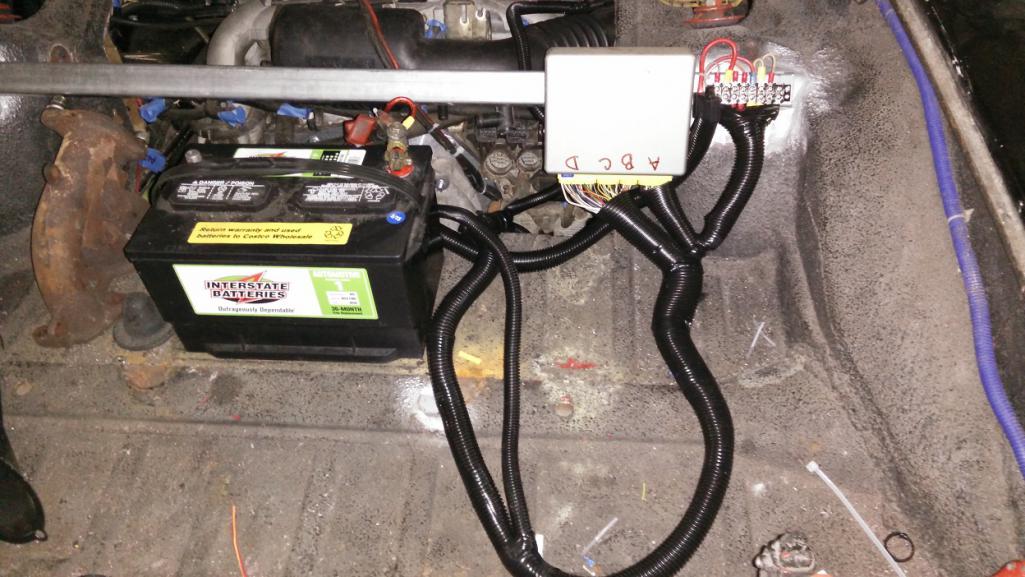
First Time running....
https://www.youtube.com/watch?v=Yn8VEd1jXkg
https://www.youtube.com/watch?v=5FbWeszdqDE
Posted by: nukepipe May 20 2016, 10:11 PM
I'm going to fit the fuel tank tomorrow and do some tunning on the shift cables.
BTW the exhaust is from the original SVX and just for testing purposes....
Some picks of the fuel tank: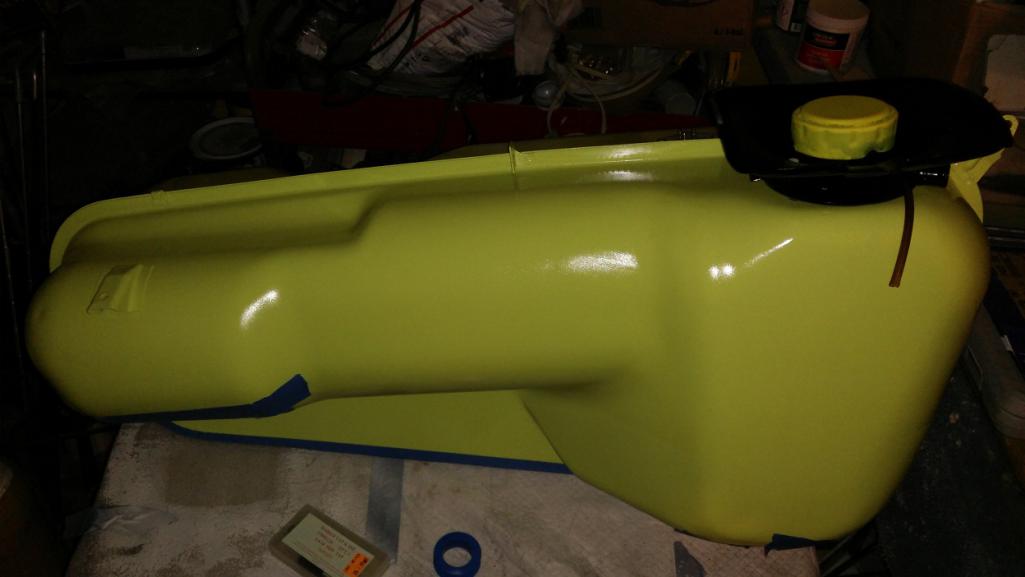
Posted by: 914pipe Jan 4 2017, 10:56 PM
So I had a great deal for a complete drive train of a WRX 2006 and went for it.
Sold all the parts,but the tranny (of course), and started swap from the 901 to the limited WRX tranny.
Here is my thread regarding the AWD to FWD conversion.
http://www.914world.com/bbs2/index.php?showtopic=298248&hl=
Posted by: 914pipe Jan 4 2017, 11:17 PM
Looks like I'm having problems with global limit space and cannot post more pictures... So this is what I done to the car:
1)WRX 2006 limited edition tranny swap.
2) Used the WRX master cylinder for the hydraulic clutch conversion.
3) Setup my shift linkage. Have to do a little modification to the MR2 shifter since the gear selector was an inch short.
4) And went for a test drive. https://youtu.be/Redejr5qza8
That all happens between June 2016 and 1st of 2017 (working on some weekends)
Now will be putting Loctite on all the nuts, exhaust, get new front tires, aligment, paint.... and run the hell out of it!!!!
Attached thumbnail(s)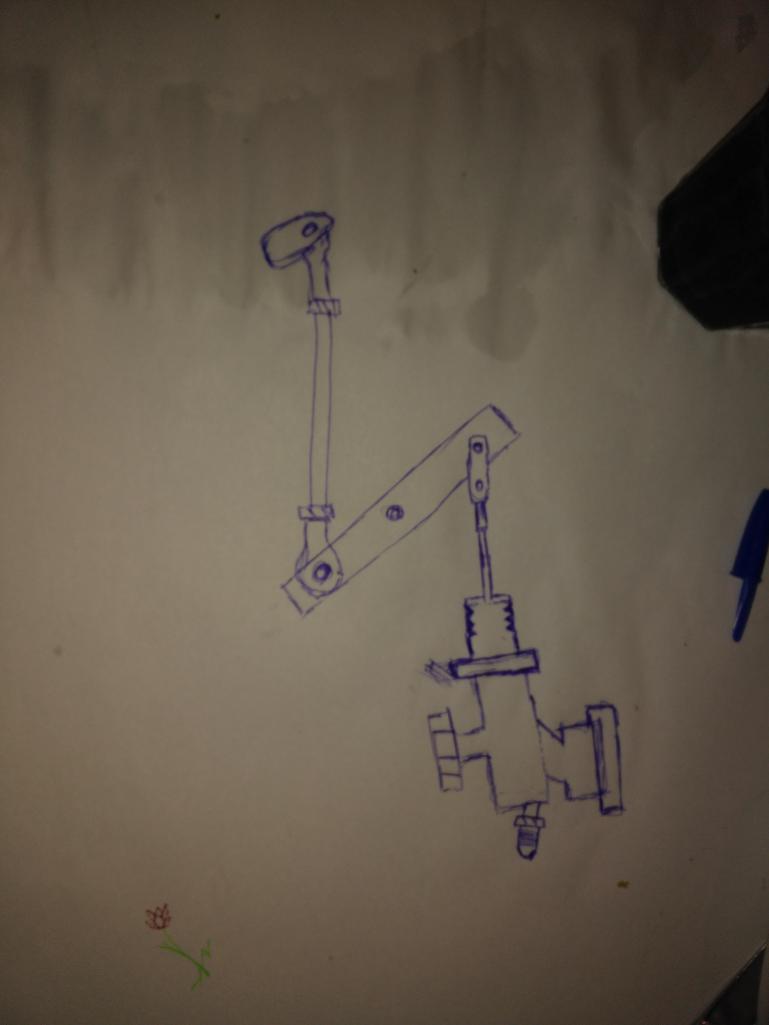
Posted by: 914pipe Apr 14 2017, 09:56 PM
Some short videos.
First time driving with my wife, but she didn’t let me squeeze 3rd gear!!! driving.gif
https://youtu.be/NsUQ_aMiV_A
1st and 2nd then 4th cruising, She still scared...
https://youtu.be/cAiKbMAzVi0
I'm still working on the body, some tweaks, need to add an after market temp sensor and gauge, since I don't trust the one I have now. Still need some alignment. But it's running and shifting gooooood!!!
Pic of a month ago: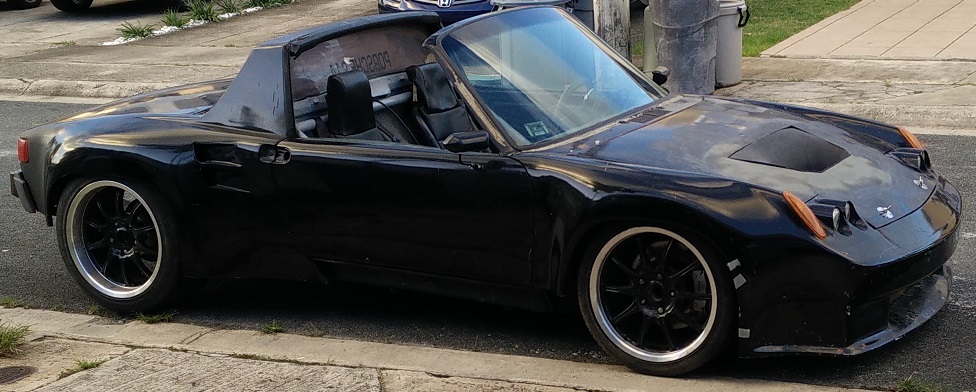
Body work: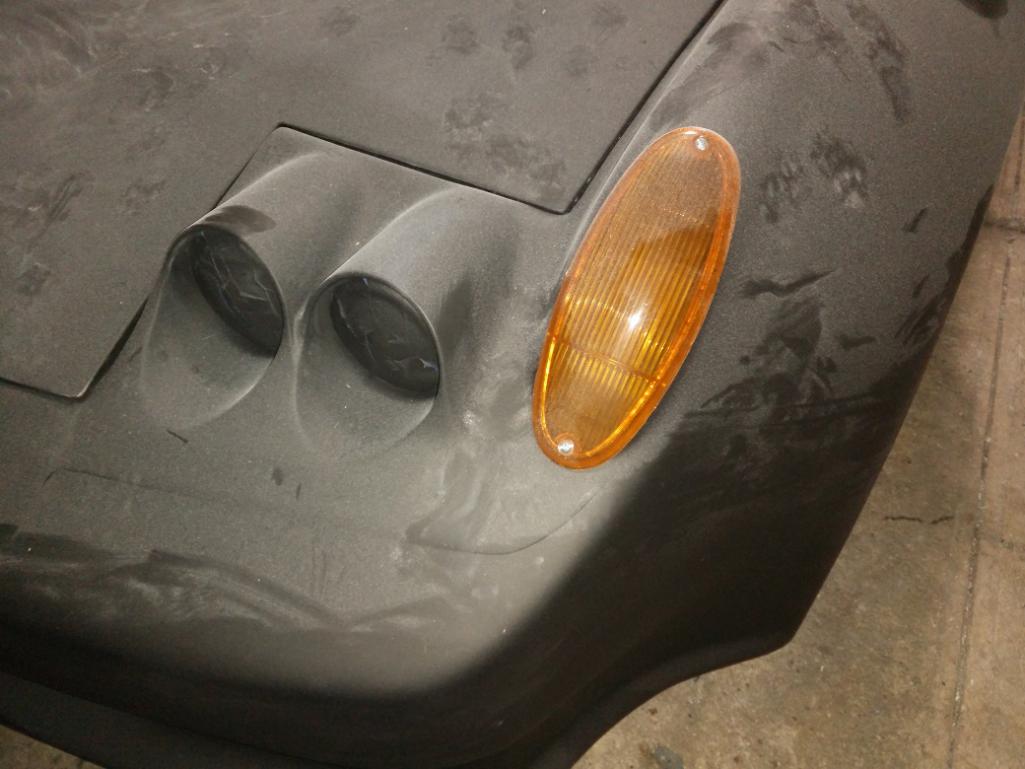
Posted by: r_towle Apr 14 2017, 10:17 PM
Very nice!
Posted by: 914pipe Jun 24 2017, 11:48 PM
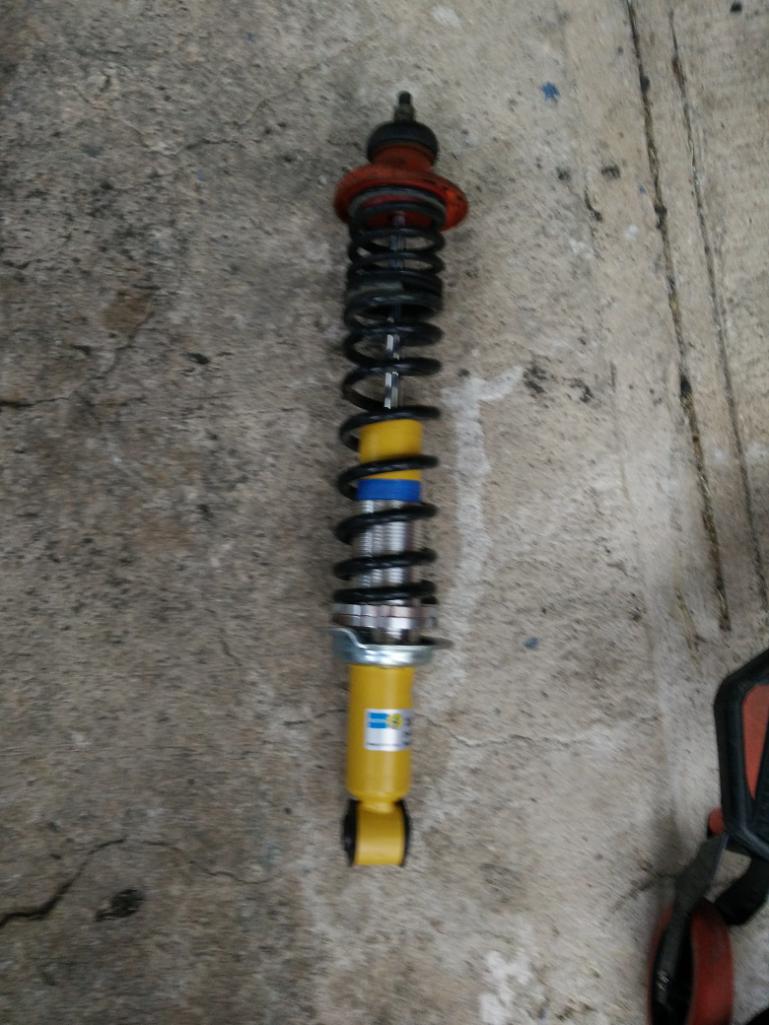
Put these on!!! 10 inch coilovers with spring helpers. Love how it seats!!! Tomorrow......test drive! 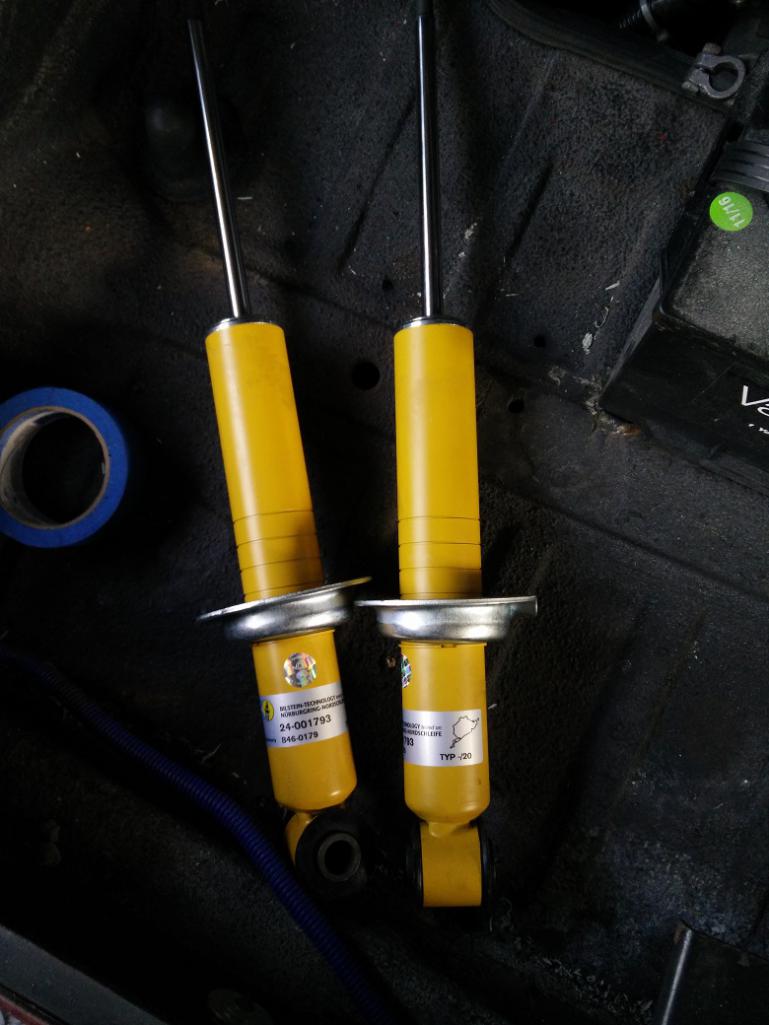
Posted by: mgp4591 Jun 25 2017, 12:06 PM
Your lower spring perches are on upside down...
That said, I love the build! I'm using the EG33 also but in a different configuration and I'm nowhere near your stage of the build but I'm trudging along. Looking really good!
Posted by: 914pipe Jun 29 2017, 06:39 PM
Your lower spring perches are on upside down...
That said, I love the build! I'm using the EG33 also but in a different configuration and I'm nowhere near your stage of the build but I'm trudging along. Looking really good!
True!!!
Posted by: flmont Jun 29 2017, 07:00 PM
did you ever drive the car with the 901 trans,..?? If so, how did the gearing run out,...Iam using a stk 901 with my 33 also ,.?? Thanks Frank
Posted by: 914pipe Jun 29 2017, 10:23 PM
did you ever drive the car with the 901 trans,..?? If so, how did the gearing run out,...Iam using a stk 901 with my 33 also ,.?? Thanks Frank
I did drive the car with the 901, It run good but didn't like the shifting. In very little time I sold the adapter and bought a 2006 WRX tranny, made the cable shifter and it is a complete different animal...... I'm still using the stock outer CV joints and would need to upgrade soon.... I have 11 rear rims with 285 tires... and if I drop the hammer, even rolling, this thing goes sideways...and I know I will brake them soon....
Posted by: flmont Jun 30 2017, 12:33 AM
What did u think of the gear ratio's and did it some pull thru the stk gears, also how was the cruisING speeds ?? Thanks Frank
Posted by: 914pipe Jul 4 2017, 09:58 PM
Installed new Temp Sensor and Gauge. Didn't trust the old one. Bought Fahrenheit and send me Celsius .
Anyway the car never went over 82 C, that is about 180 F. 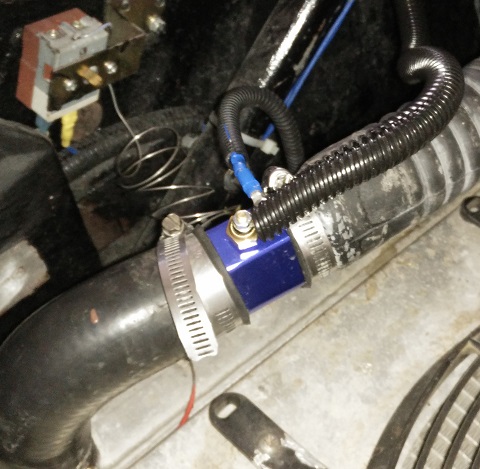
Posted by: Larmo63 Jul 4 2017, 10:58 PM
That cleaned up really well!!!
Good job!
Posted by: 914pipe Jul 23 2017, 10:52 PM
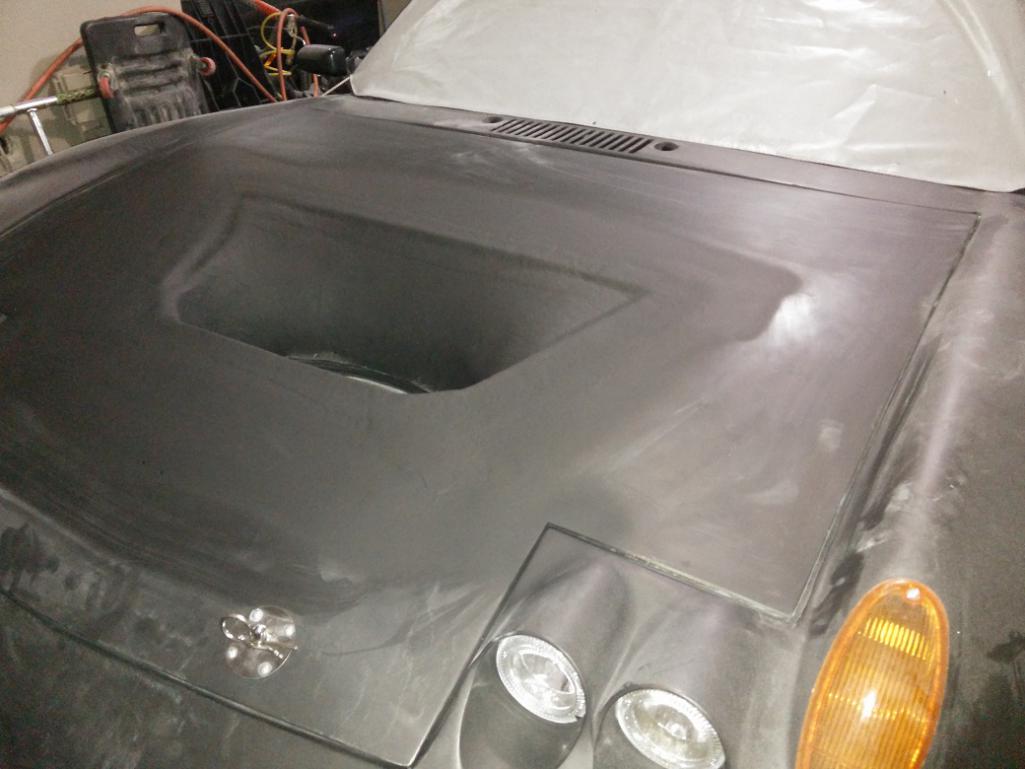
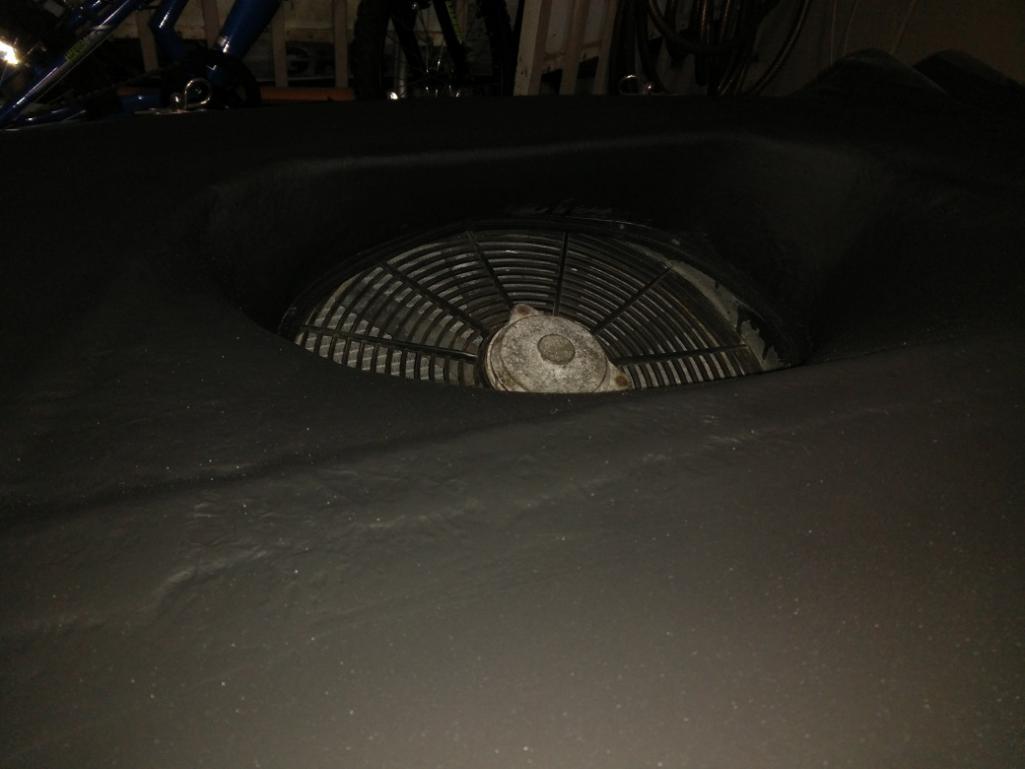
Today I finally decide to work on my hood. The idea was to split in half the vent from the radiator to the hood. Why I needed to do that? Cause if I fix it to the hood it won’t open due to interference of a reinforce tube (pipe). Anyway this is what I end with. Still need to bondo it to make it look better. But is functional for now.
Did I mention I hate to work with fiberglass!!!! 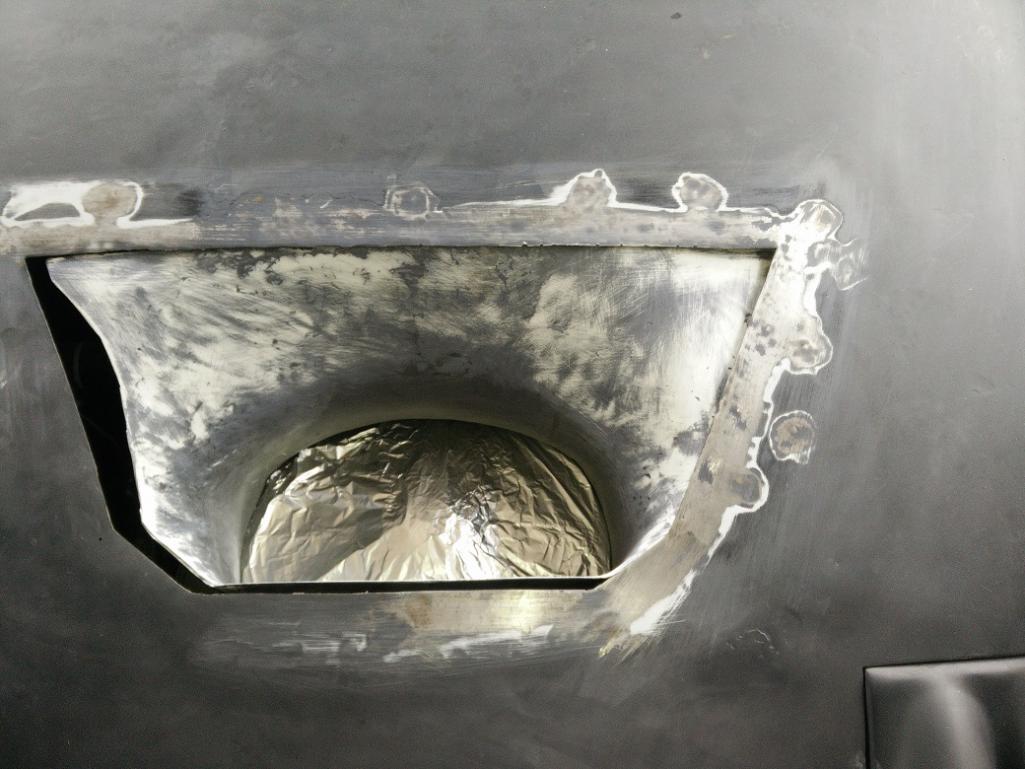
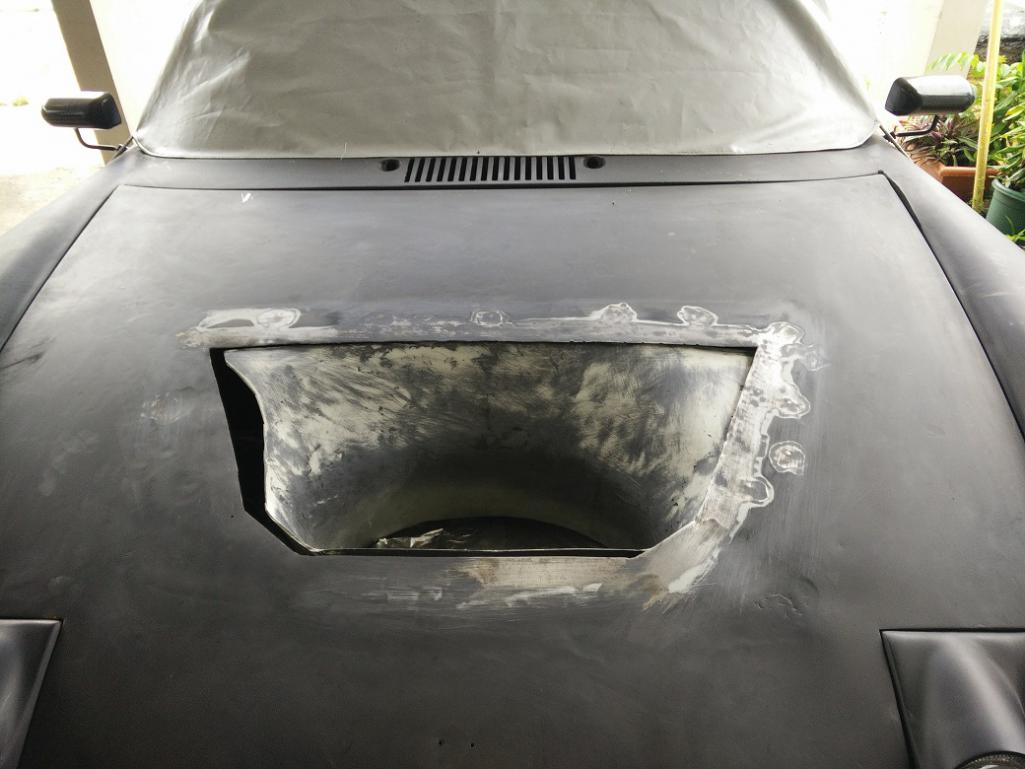
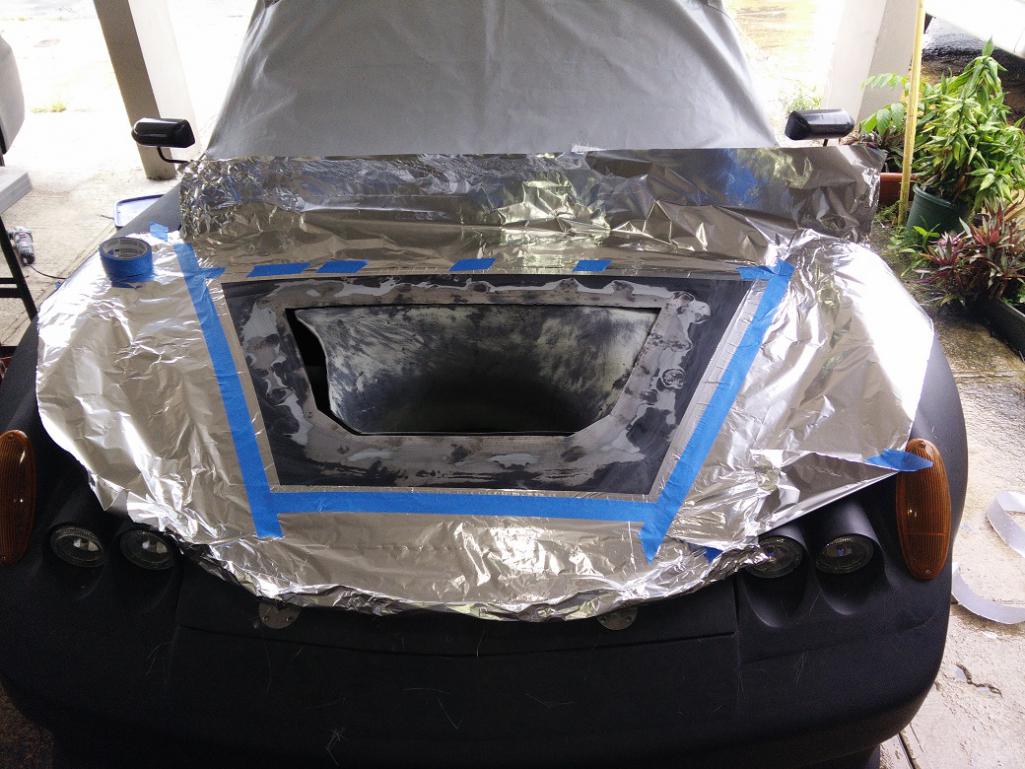
Posted by: 914pipe Jul 23 2017, 10:53 PM
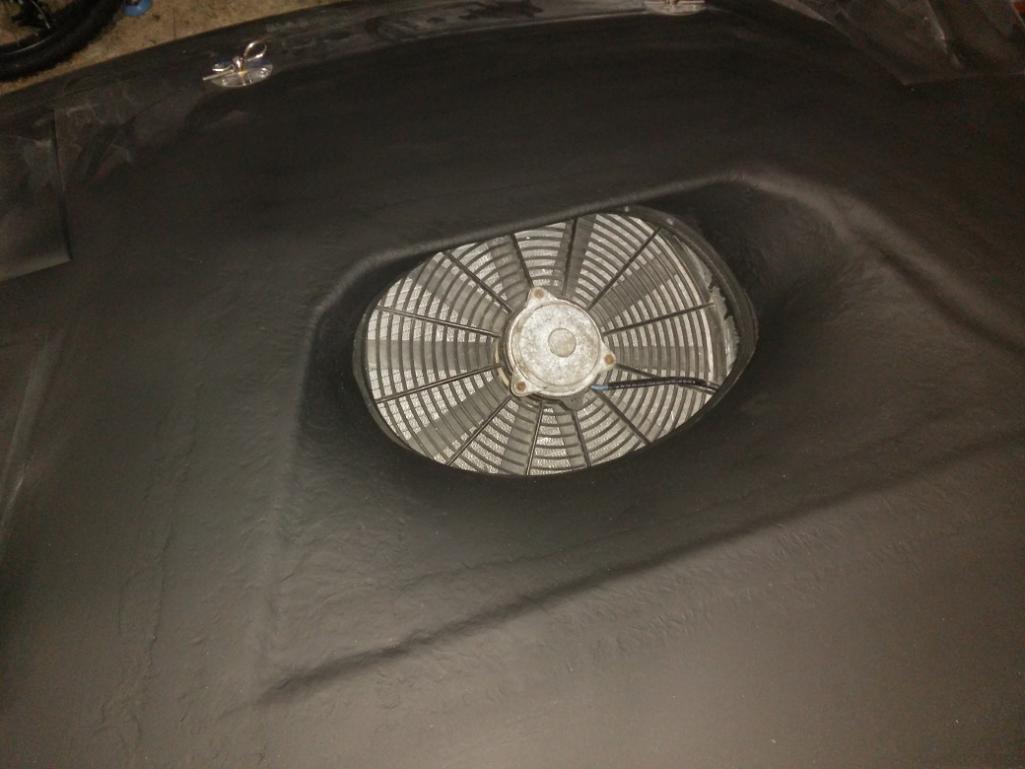
More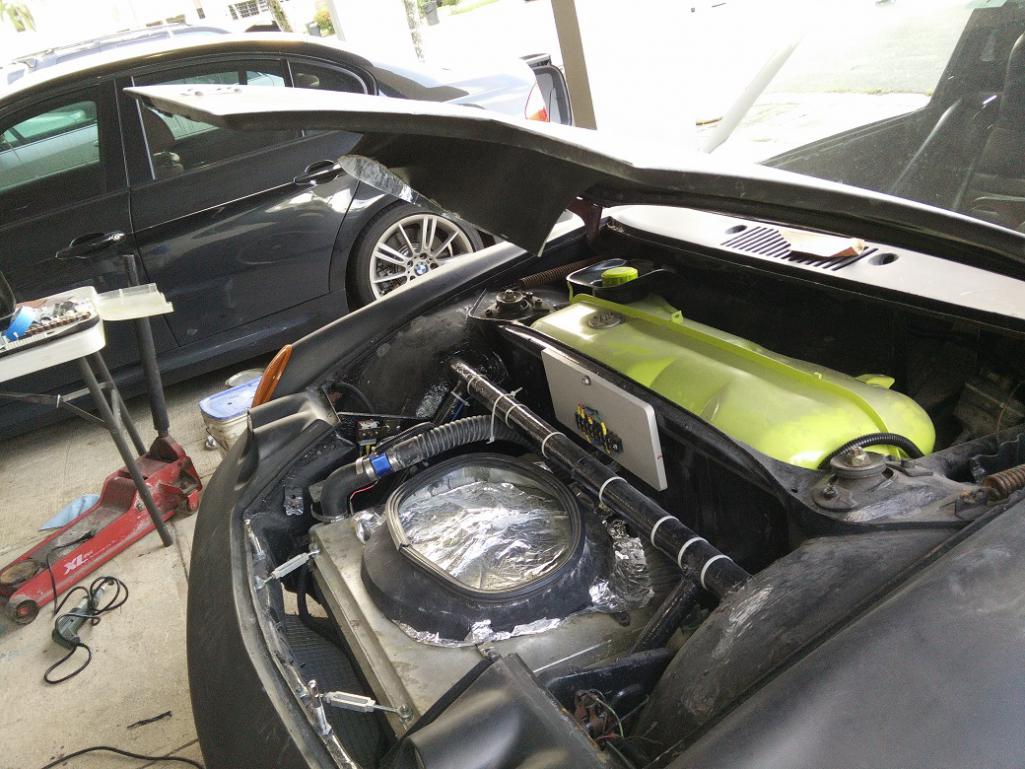
Posted by: ablesnead Jul 24 2017, 04:51 AM
you really don't need a fan much over 25 mile an hour....your installation will actually block flow thru at higher speeds...might be good enough for your street driving though ...
Posted by: Andyrew Jul 24 2017, 10:07 AM
I like it! BUT you need a leading edge on the front of your hood exhaust to promote the venturi effect and get that airflow over the hood to suck air out of the radiator. Doesnt take much. Some kind of lip probaby an inch high would do wonders. 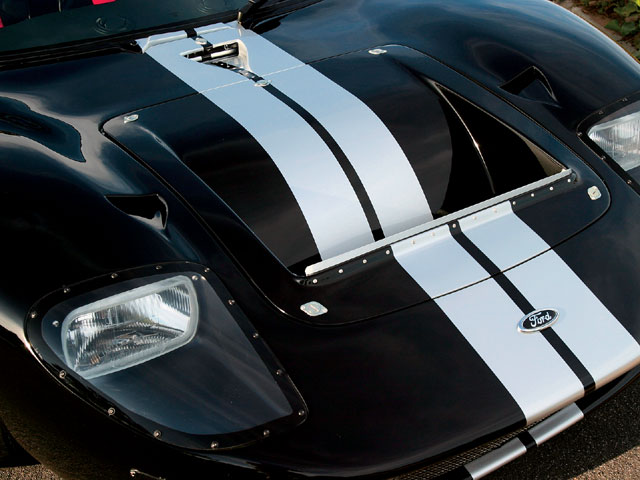
Posted by: mgp4591 Jul 25 2017, 03:06 AM
I like it! BUT you need a leading edge on the front of your hood exhaust to promote the venturi effect and get that airflow over the hood to suck air out of the radiator. Doesnt take much. Some kind of lip probaby an inch high would do wonders.
The Gurney Flap!
Posted by: 914pipe Jul 25 2017, 06:58 PM
you really don't need a fan much over 25 mile an hour....your installation will actually block flow thru at higher speeds...might be good enough for your street driving though ...
I will check on that. Average temperature here during summer is 90 F degrees. I always let the car to get to at least 160 degrees before going for a ride and never goes over 185 F degrees. Haven't taken the car for a trip longer than 30 minutes, so I’ll tell how it went on a longer trip. Thanks!
Posted by: 914pipe Jul 25 2017, 07:09 PM
I like it! BUT you need a leading edge on the front of your hood exhaust to promote the venturi effect and get that airflow over the hood to suck air out of the radiator. Doesnt take much. Some kind of lip probaby an inch high would do wonders.
The Gurney Flap!
I used to have a “leading edge” (you can see it earlier on this threat) but I didn’t like how it turned out, so I rip it off and started from scratch. But yes… I will fab a leading edge.
I was thinking on something like this….but still not sure….
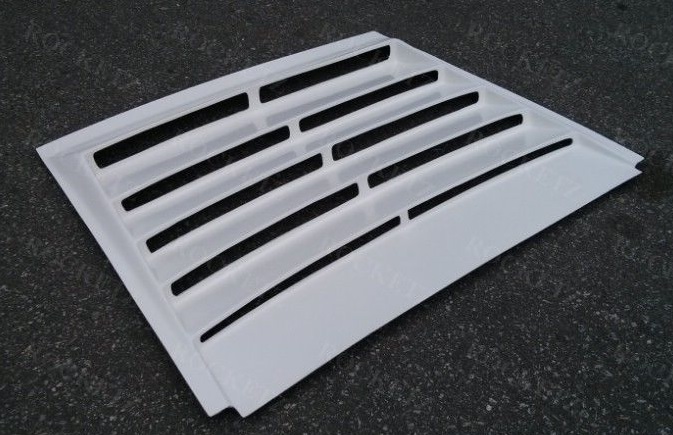
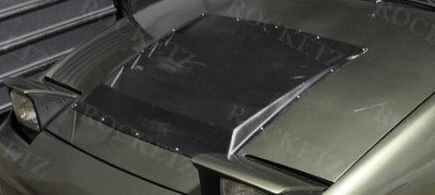
Thanx for the advise.!!
Posted by: Andyrew Jul 25 2017, 08:16 PM
I like it! BUT you need a leading edge on the front of your hood exhaust to promote the venturi effect and get that airflow over the hood to suck air out of the radiator. Doesnt take much. Some kind of lip probaby an inch high would do wonders.
The Gurney Flap!
I used to have a “leading edge” (you can see it earlier on this threat) but I didn’t like how it turned out, so I rip it off and started from scratch. But yes… I will fab a leading edge.
I was thinking on something like this….but still not sure….
Thanx for the advise.!!
I like it! You no longer have a v8 so you wont need maximum cooling so I bet it'll be just fine! Are you going to graft it into your hood?
Posted by: 914pipe Jul 25 2017, 08:28 PM
I might want something removable...
Posted by: 914pipe Jul 25 2017, 08:51 PM
I like it! BUT you need a leading edge on the front of your hood exhaust to promote the venturi effect and get that airflow over the hood to suck air out of the radiator. Doesnt take much. Some kind of lip probaby an inch high would do wonders.
The Gurney Flap!
I used to have a “leading edge” (you can see it earlier on this threat) but I didn’t like how it turned out, so I rip it off and started from scratch. But yes… I will fab a leading edge.
I was thinking on something like this….but still not sure….
Thanx for the advise.!!
I like it! You no longer have a v8 so you wont need maximum cooling so I bet it'll be just fine! Are you going to graft it into your hood?
I might want something removable...
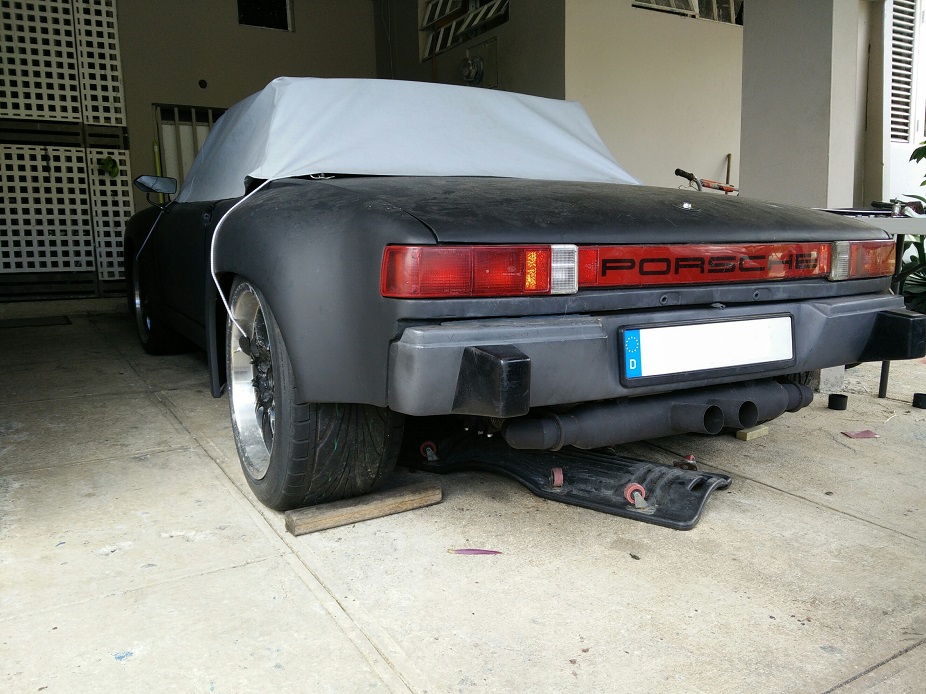
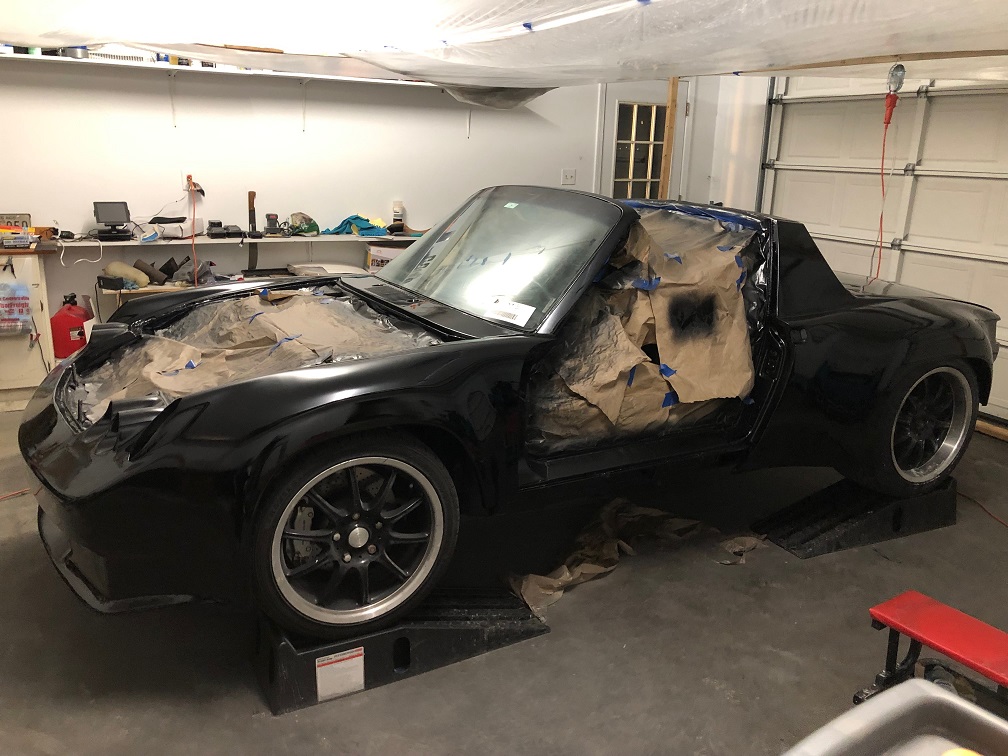
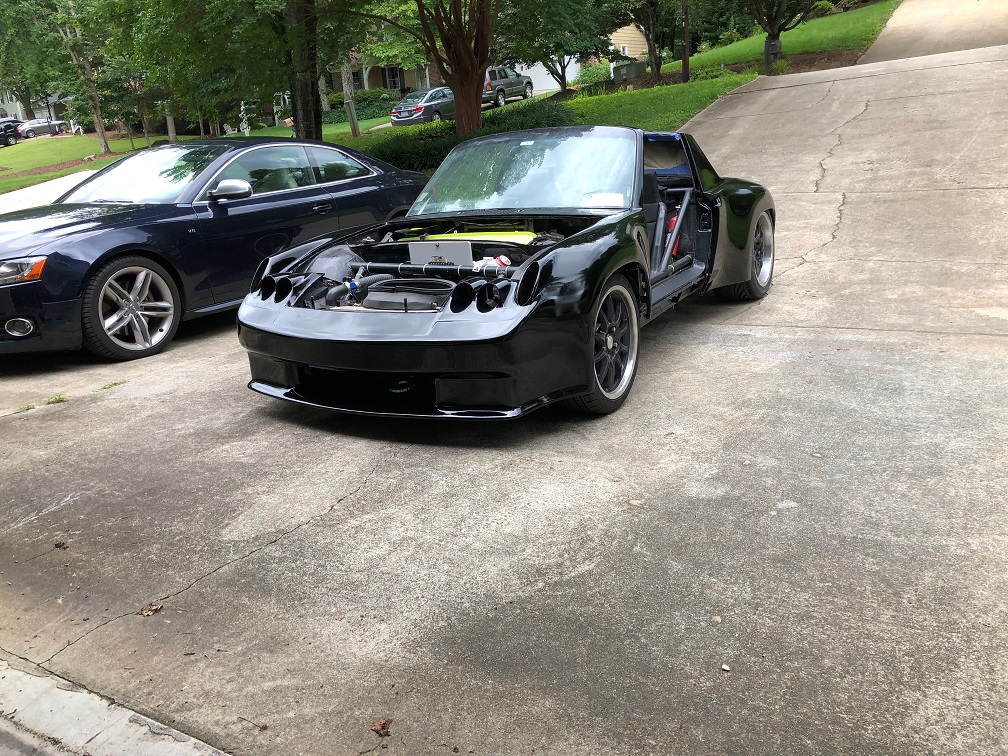
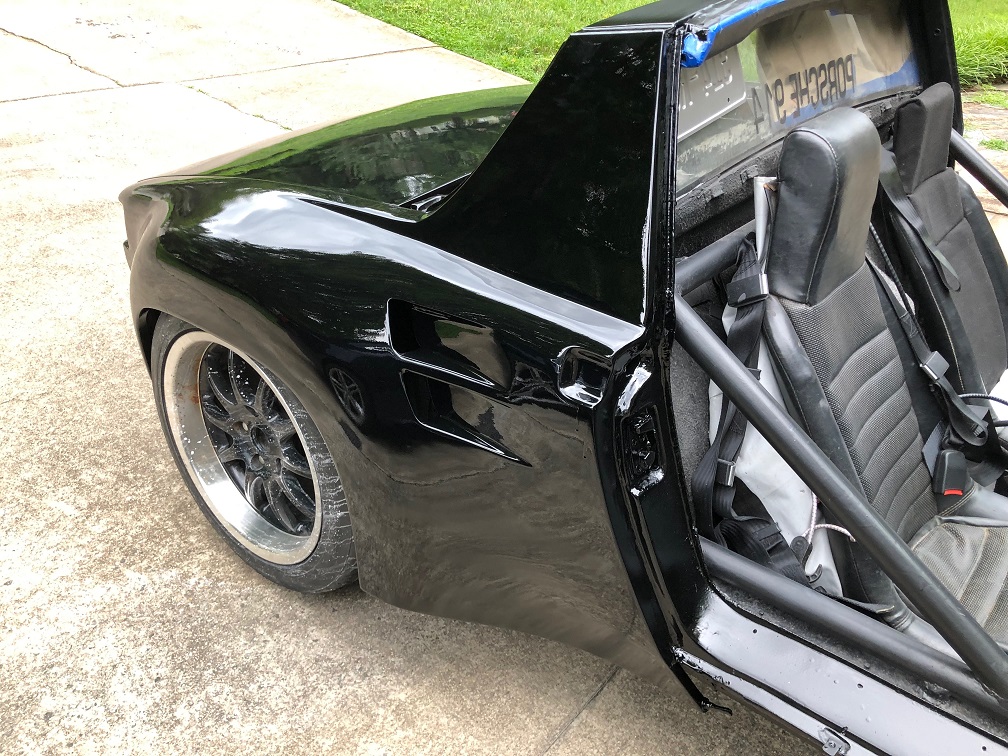
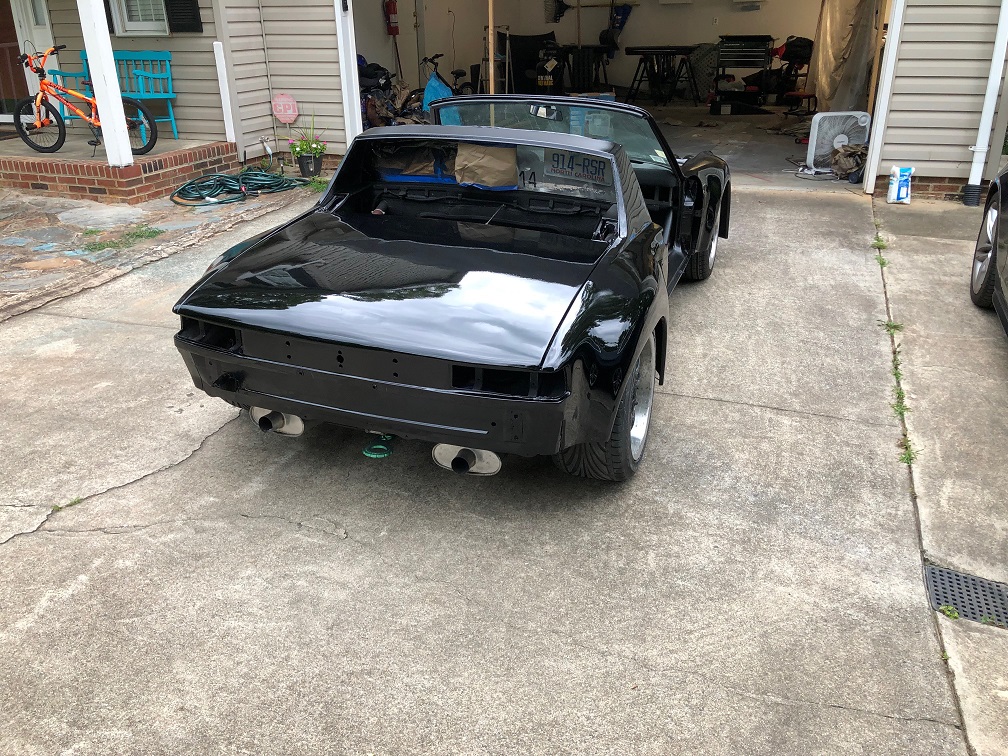
Posted by: 914pipe Jun 22 2019, 09:39 PM
Been a while since I posted!!! I being doing bodywork (that I HATE), sanding and painting.
I still need to work on the hood. I already painted the car but need to fix some orange peels, runs, cut and buff....
My goal is to participate in the Okteenfest that is going to happen about 30 miles from here in September.
Here are some progress pics!!!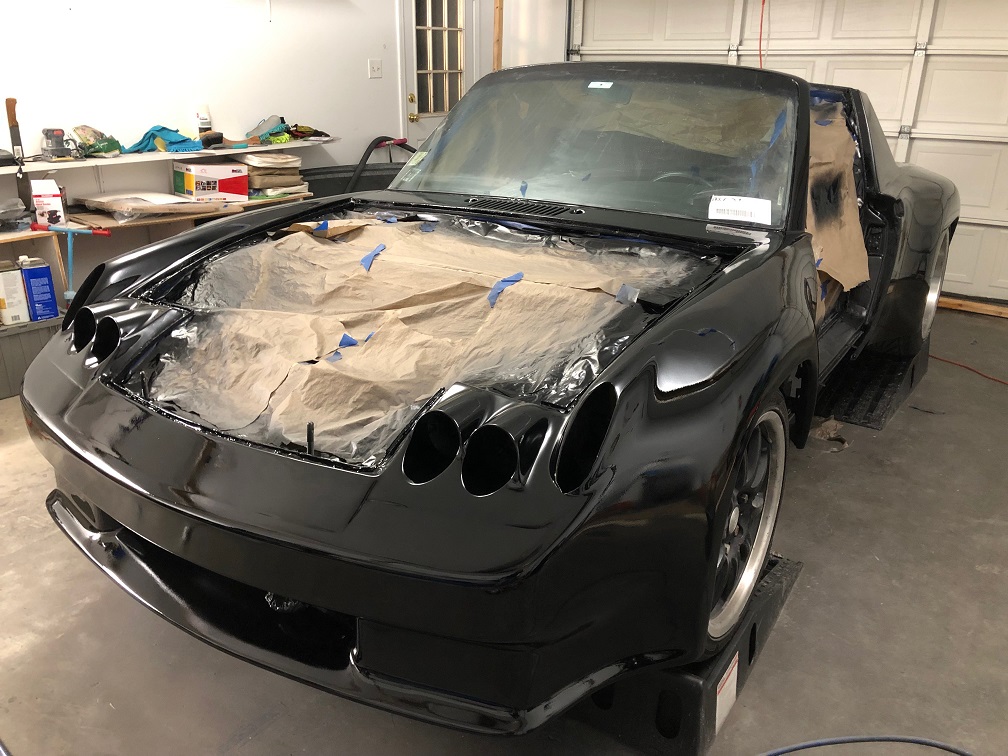


Posted by: Cairo94507 Jun 23 2019, 07:17 AM
Wow - that is going to be a real monster on the road.
Posted by: 76-914 Jun 23 2019, 07:56 AM
I like the look.
Posted by: Andyrew Jun 23 2019, 09:14 AM
Looks great! Congrats!
Posted by: flmont Jun 24 2019, 06:35 PM
Still sporting the EG33..?
Posted by: 914pipe Jun 25 2019, 03:18 PM
Still sporting the EG33..?
Yes Sir! Love that engine!
Posted by: flmont Jun 25 2019, 05:39 PM
Iam really hoping mine works out also,..any upgrades to the motor or did you use that Subi chip or all stk....Thanks Frank
Powered by Invision Power Board (http://www.invisionboard.com)
© Invision Power Services (http://www.invisionpower.com)