Printable Version of Topic
Click here to view this topic in its original format
914World.com _ 914World Garage _ Installed front sway bar
Posted by: DNHunt Dec 15 2003, 07:22 AM
I had to install brackets ad this car only had the appearance group from the factory. Can't wait to try it.
Marked the car before drilling. 
Attached image(s)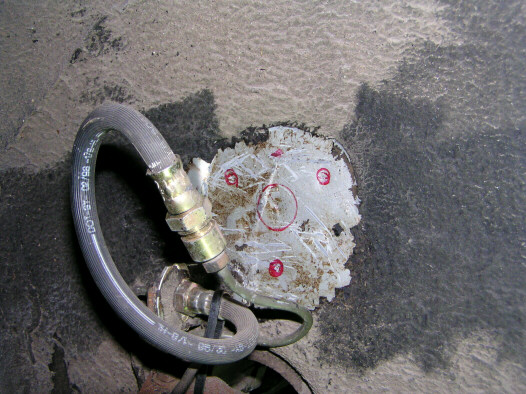
Posted by: DNHunt Dec 15 2003, 07:25 AM
Drilled holes then marked the area to remove from the inside
Attached image(s)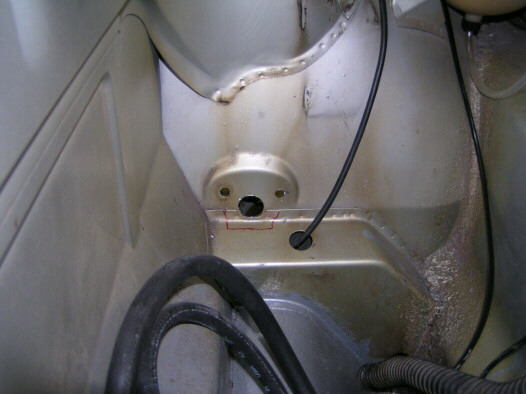
Posted by: DNHunt Dec 15 2003, 07:29 AM
Cut the notch. Not a fun place to grind but with all the practice I had on the rust repair and all the neat wheels and disks board members suggested to me I got it done. Lots of sparks to the face.
Attached image(s)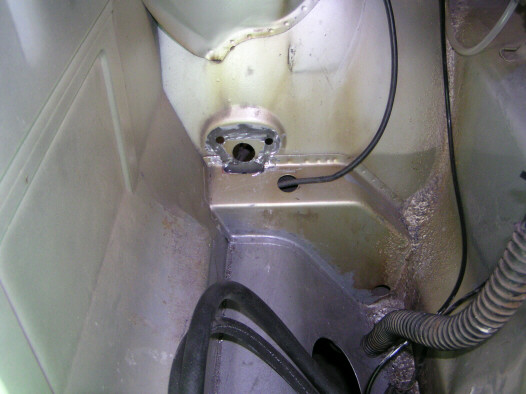
Posted by: DNHunt Dec 15 2003, 07:31 AM
Test fit before welding in the backplates
Attached image(s)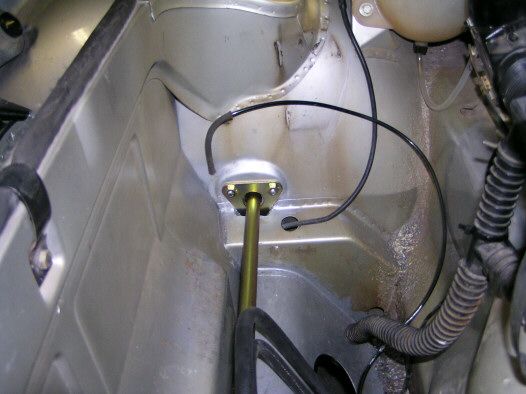
Posted by: DNHunt Dec 15 2003, 07:34 AM
Welded in backplate, treated everything with metal ready and Por 15 (except the mating areas I welded which got weld through primer). 
Attached image(s)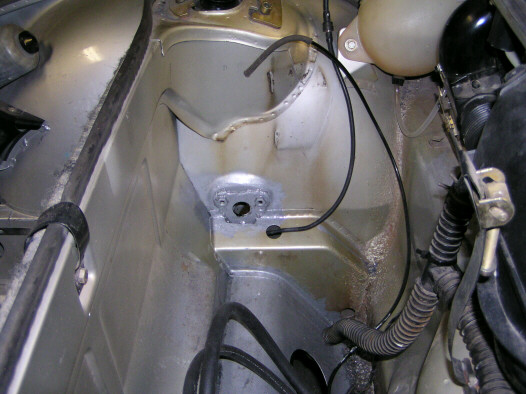
Posted by: DNHunt Dec 15 2003, 07:40 AM
Final install. I used wooden blocks to parallel everything with the car. I checked it against the front bulkhead and the floor. I had to jockey it around in the 1"(well it's now a little bigger than 1") hole a little to line it up. That's why the bar looks off center in the hole.
Attached image(s)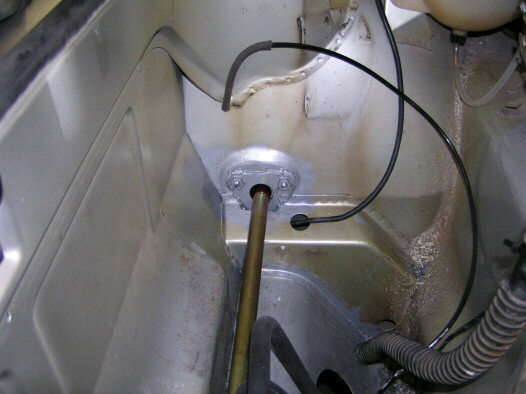
Posted by: DNHunt Dec 15 2003, 07:43 AM
Greased up with lithium grease (red stuff). Now I guess a lube and oil change will really be what it's named. Turns nice and quiet.
Dave 
Attached image(s)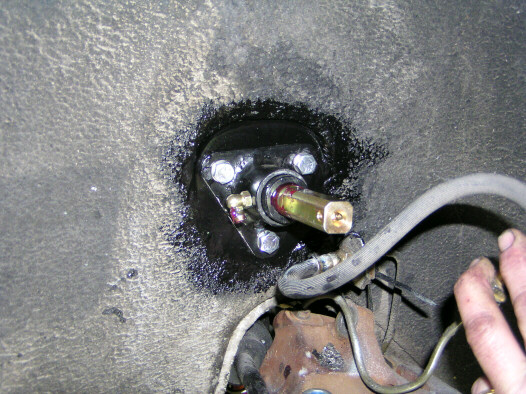
Posted by: maf914 Dec 15 2003, 08:07 AM
Man, Dave, you are getting with the program. Every week you're making progress.
The zerc fitting on the sway bar bushing is a new one. Haven't seen that before. 
Mike
Posted by: rhodyguy Dec 15 2003, 08:08 AM
go, go, go, ddaavvee. insert cheerleader smilley.
kevin
Posted by: DNHunt Dec 15 2003, 08:17 AM
I like grease. Part of my drive way is gravel and with the zerk fittings I can lube it whenever I want. Hopefully, I can flush some of the road dust out kind of like they do with heavy equipment.
Dave
Posted by: Scott Carlberg Dec 15 2003, 04:28 PM
Dave,
nice job, thanks for sharing the photos and 'write-up'. 
What Sway Bar did you use?
Posted by: DNHunt Dec 17 2003, 06:30 PM
More work on the front sway bar install today. I added the u-tabs to A arms
Attached image(s)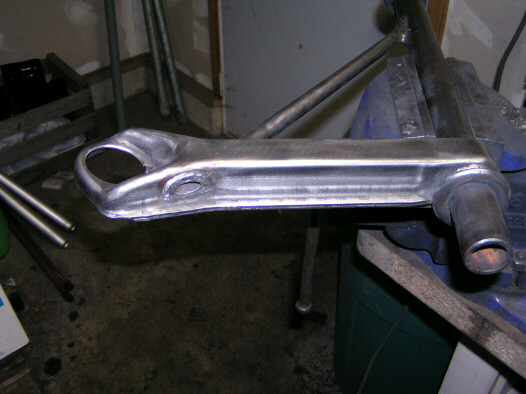
Posted by: DNHunt Dec 17 2003, 06:32 PM
Ready to weld
Attached image(s)
Posted by: DNHunt Dec 17 2003, 06:33 PM
I'm still more of a grinder than a welder but, the u-tab is stuck good.
Dave
Attached image(s)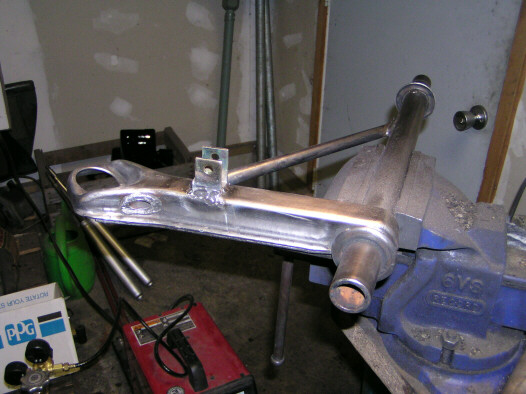
Powered by Invision Power Board (http://www.invisionboard.com)
© Invision Power Services (http://www.invisionpower.com)