Printable Version of Topic
Click here to view this topic in its original format
914World.com _ 914World Garage _ My attempt to stop another source of oil leaks
Posted by: URY914 Jul 30 2007, 12:55 PM
During last weekend's autocross I had a problem with my oil filler cover coming off the “neck” of the engine case. I made the oil filler cover pictured below a few years ago because I didn’t like the stock tin piece and I wanted something with some bling. It never gave me a problem until last weekend but it did leak some oil once an awhile. The problem was the stock bale wire spring didn’t apply enough pressure on the gasket so give a good seal. I thought there must be something else I can do.
Attached thumbnail(s)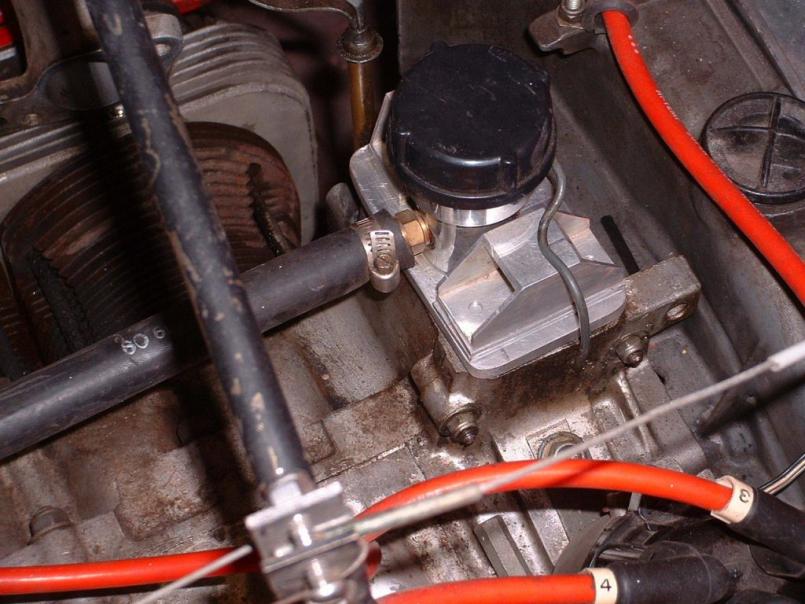
Posted by: URY914 Jul 30 2007, 12:59 PM
I figured if I could bolt a cover to the case, I would tighten the bolts to apply pressure to the gasket. I looked at a spare engine I had and saw the two small 6mm case studs on the right side of the filler neck. All I needed to do is cut and fit a small steel angle to bolt on to those studs. I used a piece of 1/8” x 1” angle and cut/drilled it to fit. It also helped that Jake seemed to have changed these studs out to longer ones because the ones on the spare engine were much shorter. The studs were long enough to get the angle over them and have room for a lock washer and nut.
On the left side of the neck was not as easy as the right side. The dipstick was right next to the neck and there were no studs to use to attach the angle. The dipstick would mean the angle would be much shorter. On my engine Jake has drilled out the small hole where the bale wile spring attaches to the neck. He then installed a bolt with a hole drilled in the head of the bolt to receive the end of the bale wire. The intent I assume would be to spread the bale wire out therefore placing more pressure on the filler neck gasket. I decided to bolt the angle to the case using this hole.
Attached thumbnail(s)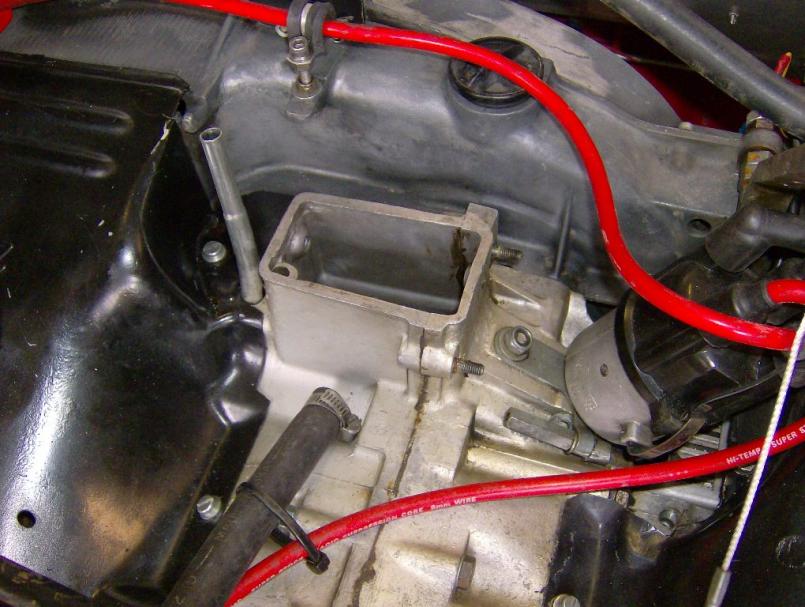
Attached image(s)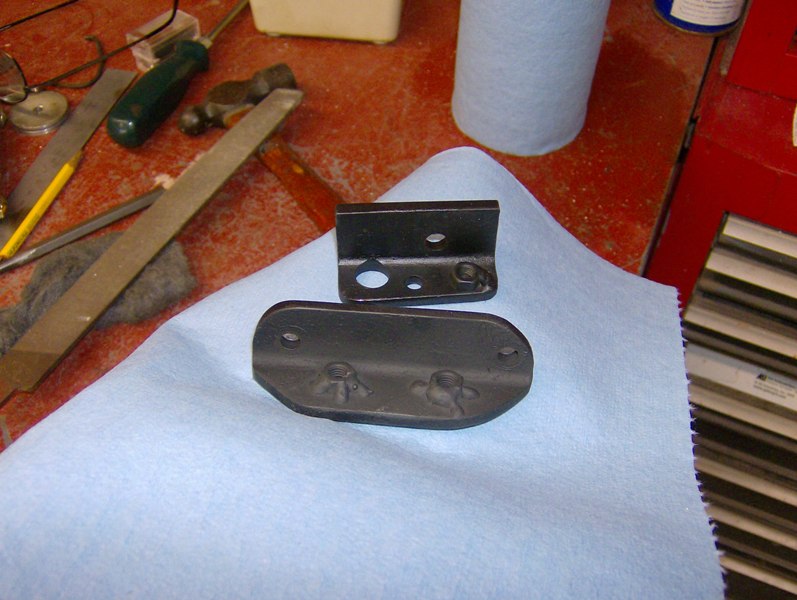
Posted by: 904svo Jul 30 2007, 12:59 PM
From the picture you have there it dosen't look like there a way for the crank to vent. It sounds like the internal pressue is build up and popping off the breather cap.
Posted by: URY914 Jul 30 2007, 01:02 PM
From the picture you have there it dosen't look like there a way for the crank to vent. It sounds like the internal pressue is build up and popping off the breather cap.
What do you think that hose is for?
Posted by: URY914 Jul 30 2007, 01:03 PM
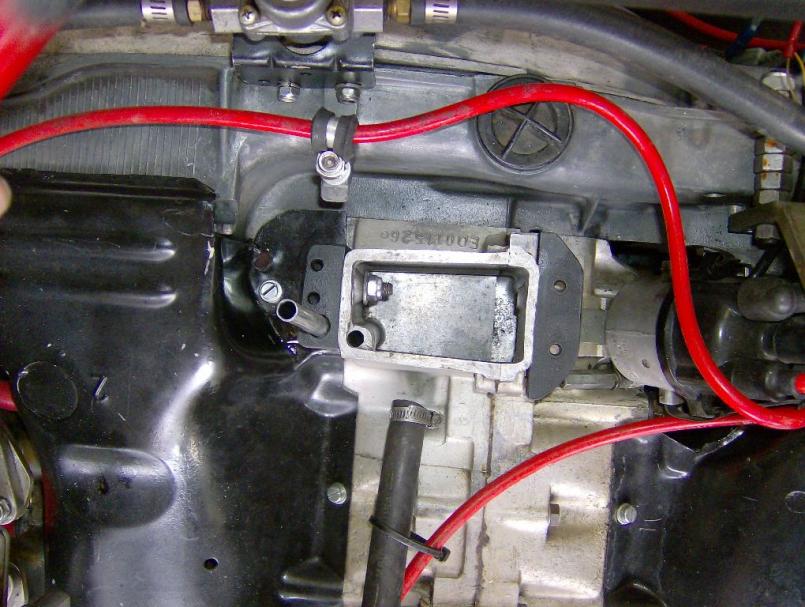
here are the angles bolted to the case.
Attached thumbnail(s)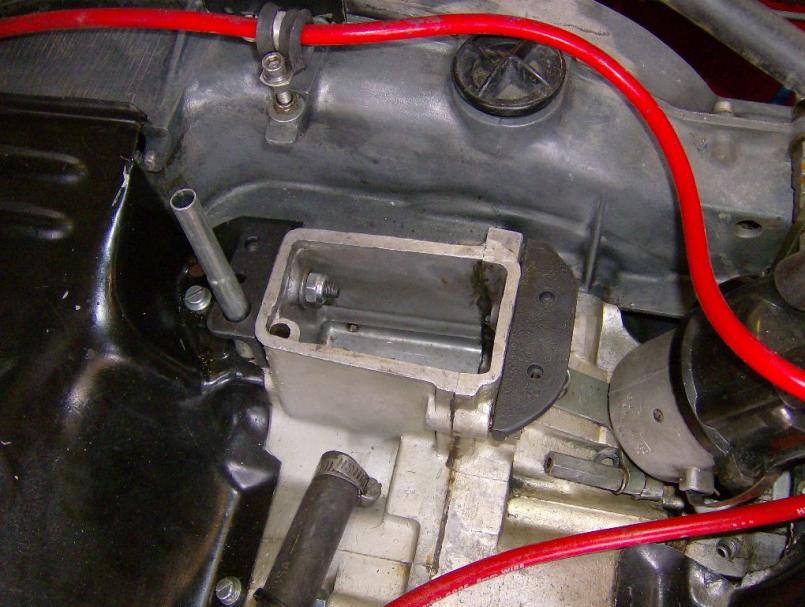
Posted by: URY914 Jul 30 2007, 01:06 PM
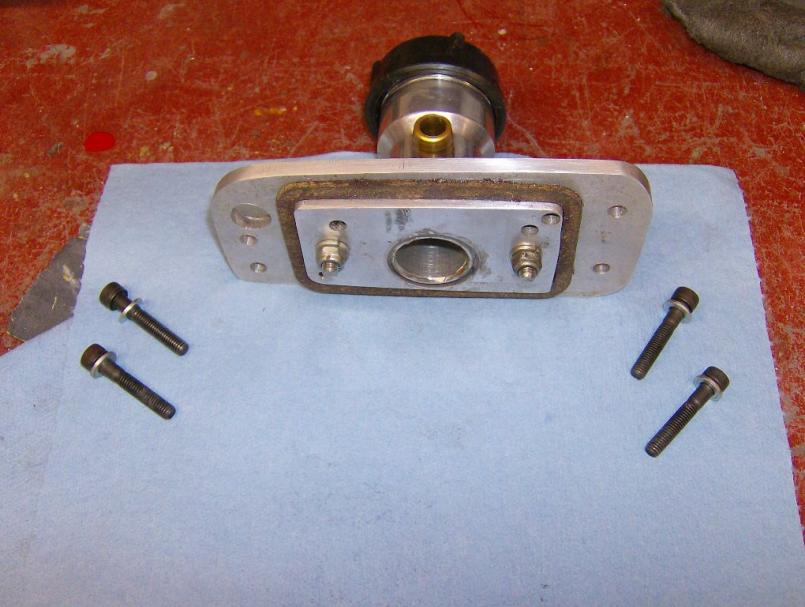
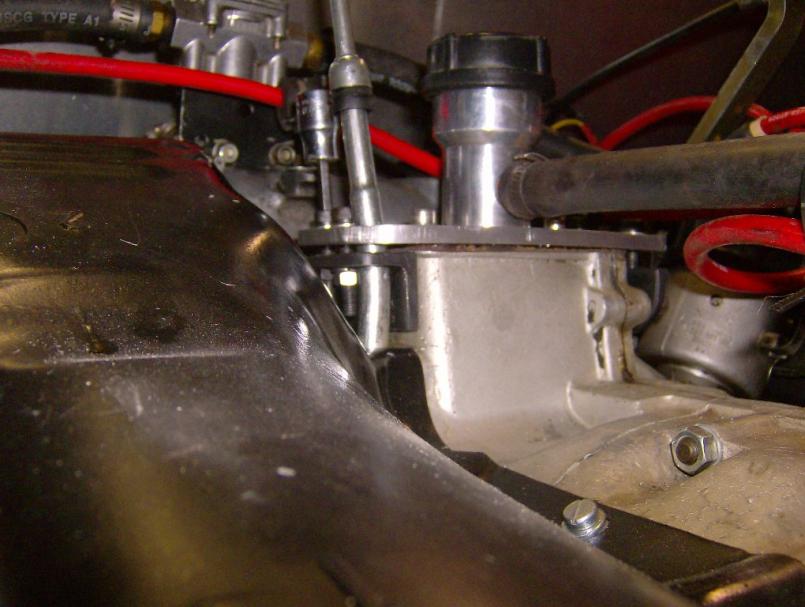
The new filler cover was made from a 1/4” piece of aluminum. I made it so it would cover the neck and by about 3/8” on the front and back sides and wide enough to be bolted to the angles. A hole was drilled for the dipstick. I used JB Weld to epoxy the filler funnel to the aluminum plate. The second picture below shows the gasket installed. A second piece of ¼” aluminum is used to locate the cover on the neck and holds the gasket in place.
Attached thumbnail(s)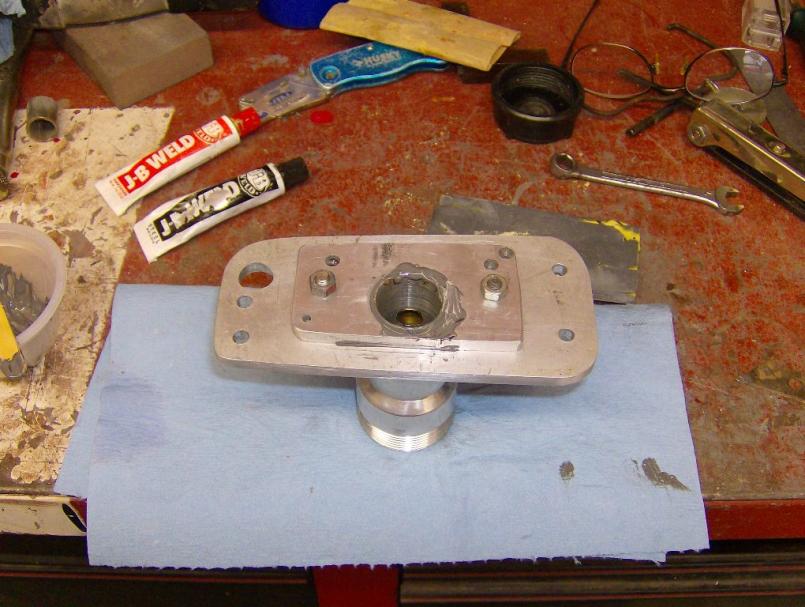
Posted by: URY914 Jul 30 2007, 01:08 PM
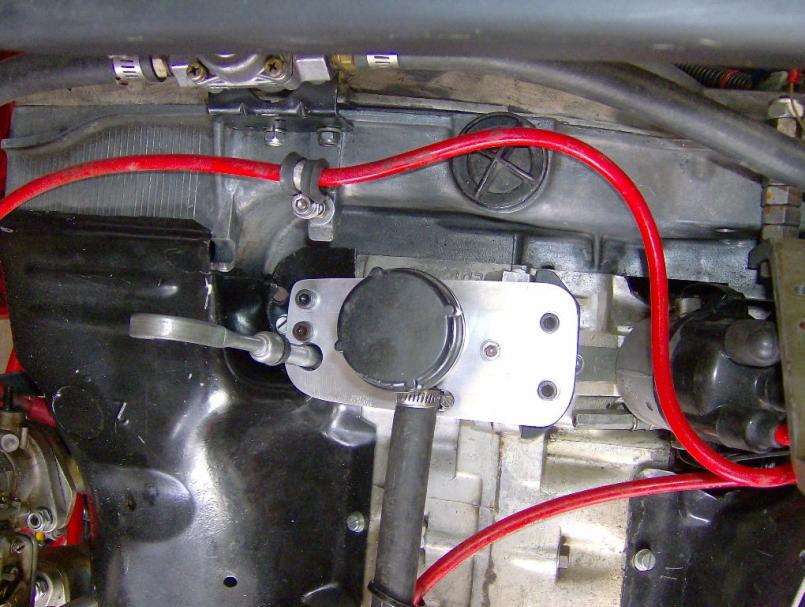
I used socket head cap bolts because they look cool and dirt and engine grime doesn’t stick to them like hex head bolts.
Attached thumbnail(s)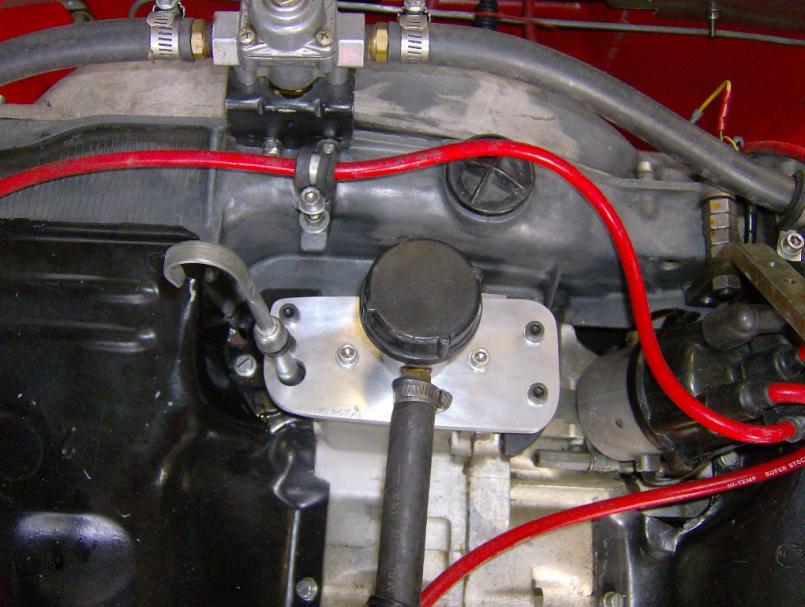
Posted by: URY914 Jul 30 2007, 01:10 PM
I was able to get some shots from the bottom which show the gasket squeezed down tight on the case neck. I’ve adjusted the bolts from the time I took these pictures so that the gasket is tightened down as evenly as possible. The only problem is when I install the engine scoop, you can’t see this piece at all.
Attached thumbnail(s)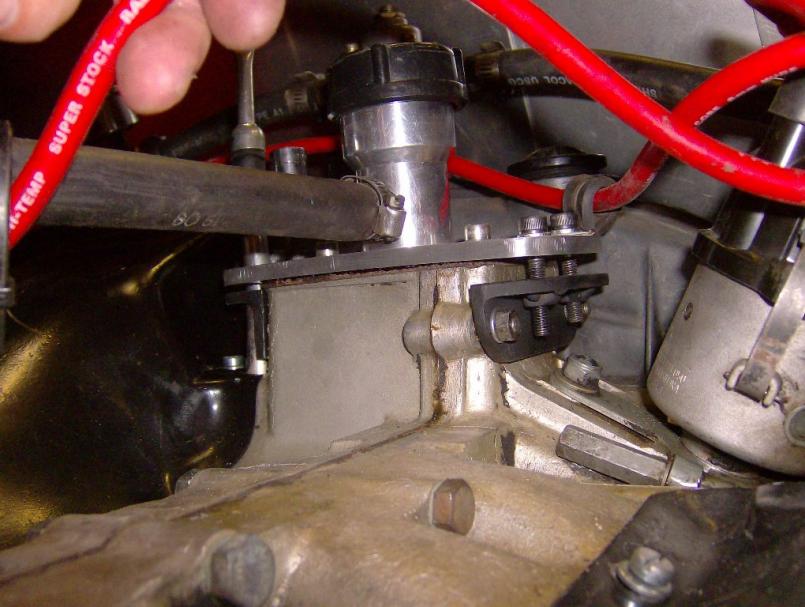
Posted by: Borderline Jul 30 2007, 01:38 PM
Nice work! How much does it weigh?? ![]()
Posted by: URY914 Jul 30 2007, 02:01 PM
Nice work! How much does it weigh??
I knew someone would ask that.
Posted by: SirAndy Jul 30 2007, 02:28 PM
looks good! ![]()
just make sure that nut inside the filler doesn't come lose. that would be ugly ...
![]() Andy
Andy
Posted by: URY914 Jul 30 2007, 02:35 PM
looks good!
just make sure that nut inside the filler doesn't come lose. that would be ugly ...
Yep, I used lock washers and nyloc nuts on the inside.
Posted by: 904svo Jul 30 2007, 04:47 PM
Done.
Where's it venting to the outside air?
Posted by: URY914 Jul 30 2007, 06:15 PM
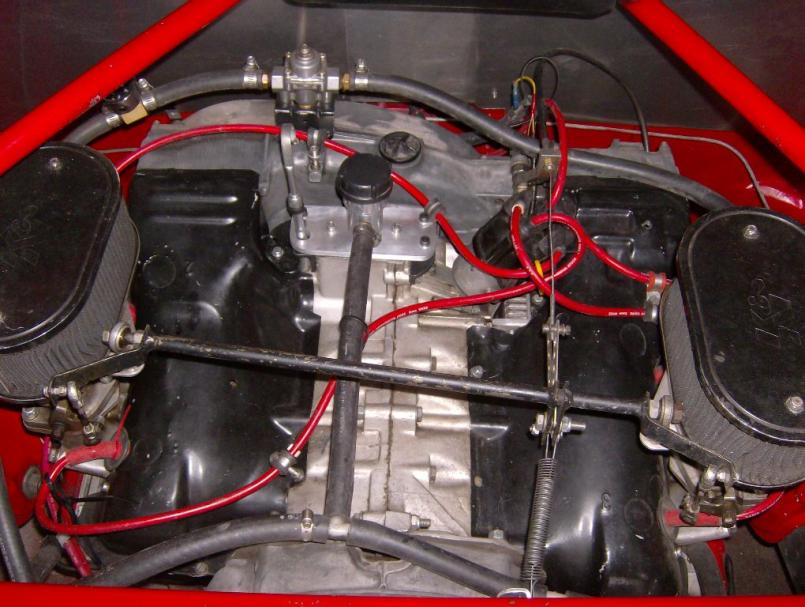
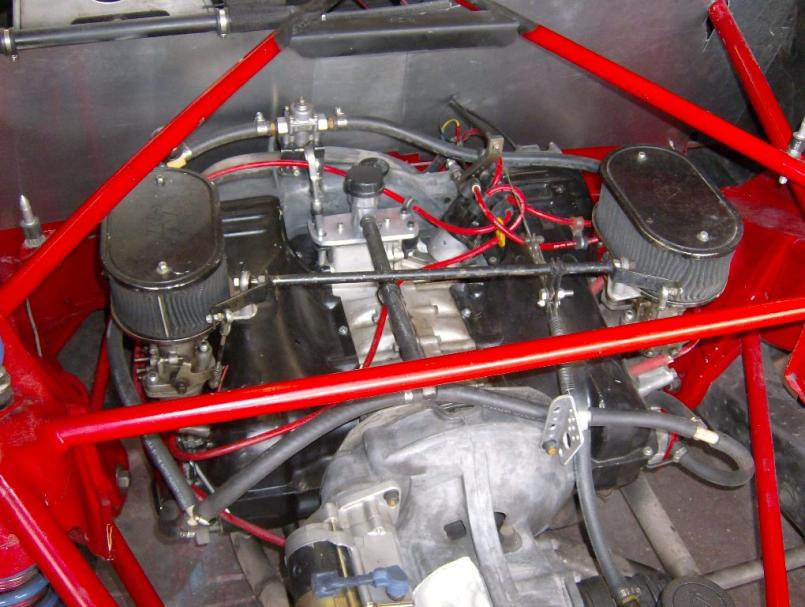
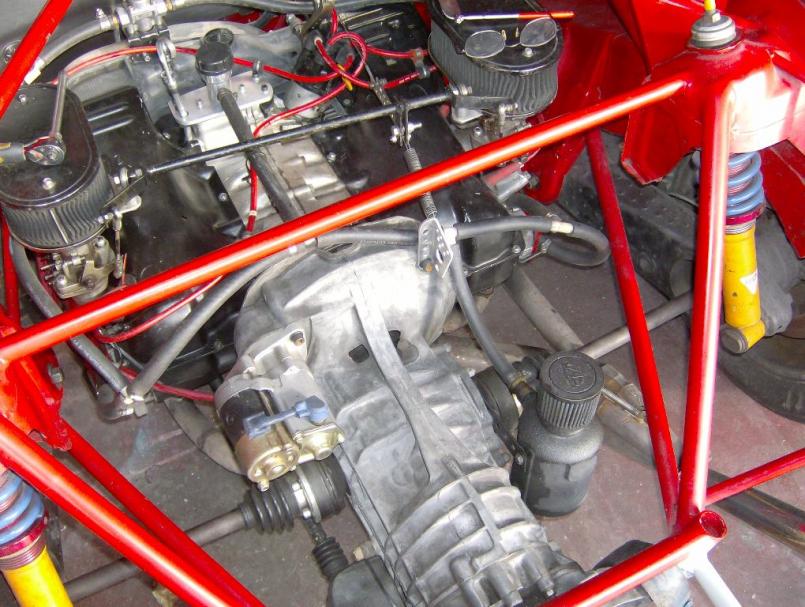
The heads and the oil filler funnel are plumbed to the breather can bolted to the tranny.
Attached thumbnail(s)
Posted by: Cap'n Krusty Jul 30 2007, 07:18 PM
It would appear you've tightened your plate so tight it's warped it, putting too much pressure on the ends, and hardly any in the middle. If I were doing this (and I probably wouldn't), I would have made the angle plates proud of the top of the boss on the case halves (say, 2.3 the thickness of the gasket), and secured it so the gasket would be slightly and evenly crushed. Besides that, I would never misuse JB Weld that way. It has a nasty habit of deteriorating under those conditions.
The Cap'n
Posted by: Jake Raby Jul 30 2007, 07:26 PM
Paul, you really need to ditch that050 and grab a mallory, your down low power gains will be phenomenol and tuning will be much better.
That case breather looks much better than stock, but it needs an even bigger barbed fitting and hose, go up 1/2" if possible...
How has it been running?
Posted by: URY914 Jul 30 2007, 07:39 PM
It would appear you've tightened your plate so tight it's warped it, putting too much pressure on the ends, and hardly any in the middle. If I were doing this (and I probably wouldn't), I would have made the angle plates proud of the top of the boss on the case halves (say, 2.3 the thickness of the gasket), and secured it so the gasket would be slightly and evenly crushed. Besides that, I would never misuse JB Weld that way. It has a nasty habit of deteriorating under those conditions.
The Cap'n
I post #8 I said that I adjusted the bolts to even out the pressure on the gasket after I took the pictures from below.
I was going to try to get the angles just below the top of the neck but lining up and drilling blind holes was sorta difficult. I decided to hold the angles down and use the bolts to adjust the pressure. I have thought of adding washers between the angles and the top plate as spacers so that the plate doesn't warp when tightened.
As far as the JB Weld, I used it before on my first version and never had a problem. I had to use quite a bit of force to break it apart. For now it works just fine.
I wouldn't have expected anything else besides the warmest of regards from The Cap'n.
Posted by: URY914 Jul 30 2007, 07:46 PM
Paul, you really need to ditch that050 and grab a mallory, your down low power gains will be phenomenol and tuning will be much better.
That case breather looks much better than stock, but it needs an even bigger barbed fitting and hose, go up 1/2" if possible...
How has it been running?
I knew I'd catch some shit about the 050.
I used that size fitting 'cause it was already threaded for that size. I can always drill it out and stick in a larger fitting.
It pulls like a freight train. Second gear is like an explosion behind my back.
Posted by: Gint Mar 20 2008, 08:43 PM
I'm getting some ideas from this thread. ![]() Thanks Paul.
Thanks Paul.
I need to find an aluminum welder...
Posted by: rhodyguy Mar 21 2008, 07:37 AM
pretty cool paul. not many things are nicer than the bail giving up and puking up the engine compartment.
k
Powered by Invision Power Board (http://www.invisionboard.com)
© Invision Power Services (http://www.invisionpower.com)

