Printable Version of Topic
Click here to view this topic in its original format
914World.com _ 914World Garage _ Gauge pictures?
Posted by: Steve Thacker Aug 18 2007, 12:09 PM
Hey all,
I searched!... the world over and thought I found truue love , but youuu met another and Pfffft you were gooone. 
Seriously I took out my speedo, tach and other related gauges to do some painting and I did not do the intelligent thing and take a nice digital picture of the lay out.
What was I think'in? 
I searched the Bird and here and could not find a picture. Just the electrical diagrams and I know I need some serious schooling to be able to read those. They don't make a lick of sense to me.
Does anyone have a picture with all the little purty wires and perspective bulb holders in their correct places?

Posted by: Spoke Aug 18 2007, 02:13 PM
I don't have any pics to speak of but getting the wires back shouldn't be too hard. If you haven't already, disconnect the negative terminal of the battery so accidental shorts don't occur when moving the wires.
Process of elimination can get some of the wires back together. For starters, there should be a string of bulbs together. These are illumination bulbs, should go 2 to a gauge.
Brown wires are ground, should go to each gauge.
There should be 2 bulbs together with 3 wires, these are for turnsignals.
Highbeam bulb on tach should be on a white/black wire.
parking light bulb on speedo should be on a white/green wire.
parking brake bulb on gas gauge should have 2 wires, black/white and brown/white.
generator bulb on gas gauge should have 2 wires, red/white and green/red.
alternator bulb on gas gauge should have 2 wires, red/white (same wire as generator bulb) and black wire.
low gas bulb on gas gauge should have 2 wires, red/white (same as as generator bulb) and black wire.
I'm reading these off of my Haynes manual for a '73. Your wires may vary.
Spoke
Posted by: Steve Thacker Aug 20 2007, 06:27 AM
Appreciate it Spoke I'll see if this will get me squared away
Posted by: Lavanaut Aug 20 2007, 03:21 PM
Here's one of my extremely high-tech diagrams.  I'll dig up some pics too.
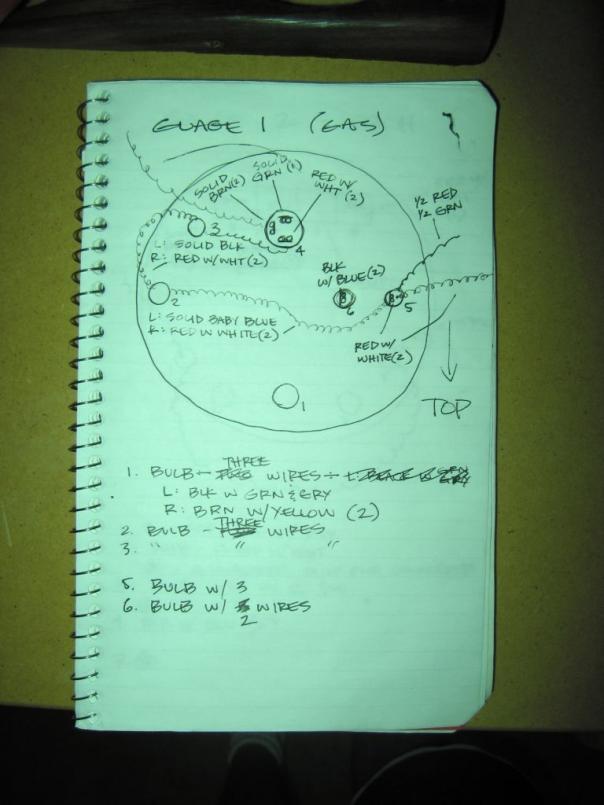
Posted by: Lavanaut Aug 20 2007, 03:24 PM
Not the greatest pics, didn't have my camera in close-up mode it seems. Hopefully these are at least somewhat useful. I've been meaning to do a write-up on this stuff...no time though.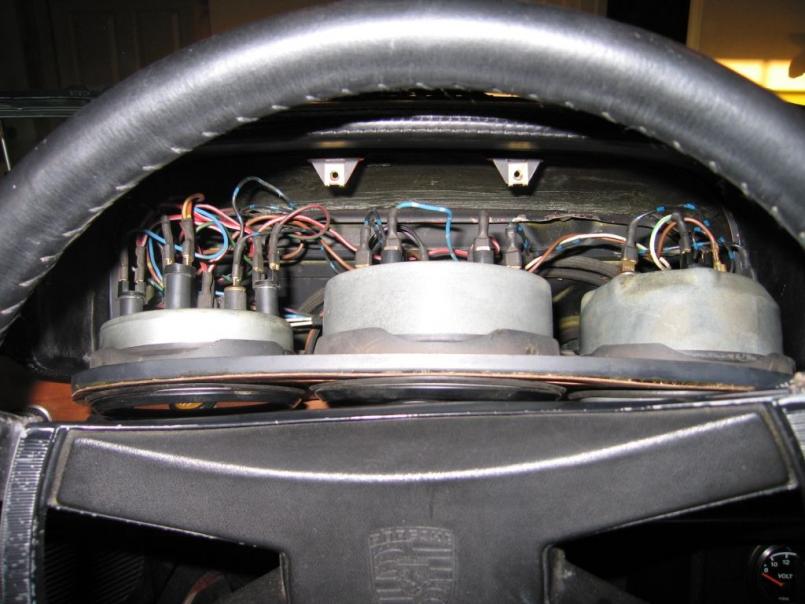
Posted by: Lavanaut Aug 20 2007, 03:25 PM
Another. The goal of my project was to replace the aging (read, "nasty-ass") wood vaneer on the gauge cluster surround (and eventually the dash face, which I'm working on now).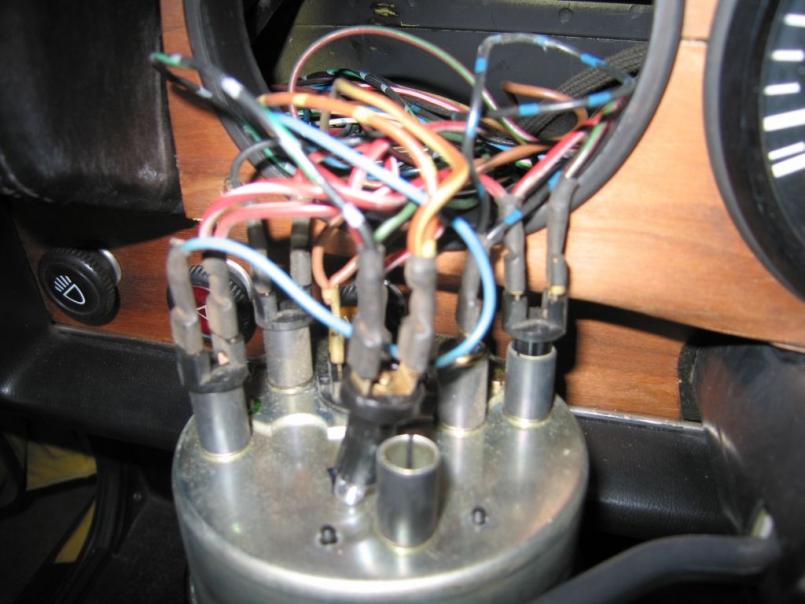
Posted by: Lavanaut Aug 20 2007, 03:26 PM
And another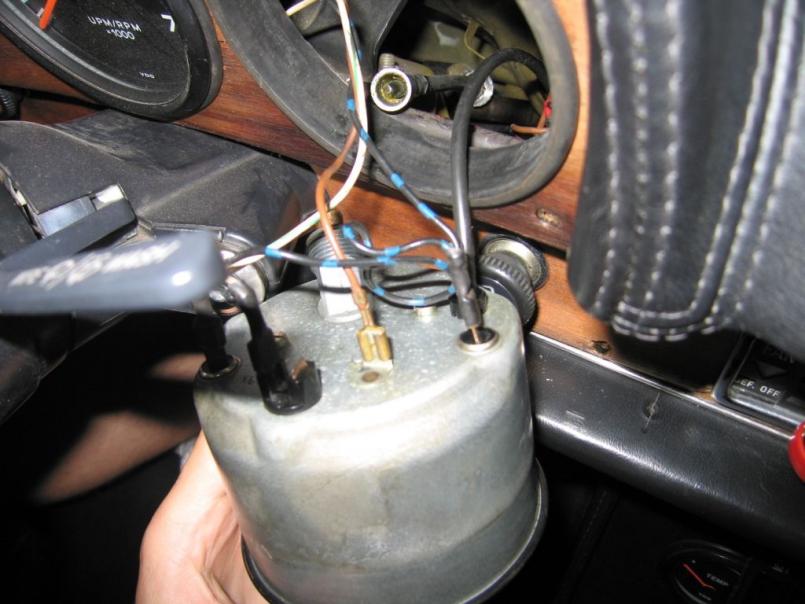
Posted by: Steve Thacker Aug 21 2007, 06:15 AM
I think with what Jerry posted and what you posted with all the lovely photos I can do this thing without hosing something up !!!!
I was afraid I would hook the damn things up wrong and when I pulled the lights on the damn doorbell would ring 
Thank you very much guys I sure appreciate all the help. Once I get this darn thing completed, I'm going to draw up a diagram for us wiring diagram challenged folks.
I may even get it tattooed on my buttocks. 
Powered by Invision Power Board (http://www.invisionboard.com)
© Invision Power Services (http://www.invisionpower.com)