Printable Version of Topic
Click here to view this topic in its original format
914World.com _ 914World Garage _ Rear trunk floor replacement
Posted by: watsonrx13 Sep 26 2007, 06:06 PM
Well, I've done some research on this site, but need some more information. I'm planning to replace the rear trunk floor and noticed McMark's comments on this http://www.914world.com/bbs2/index.php?showtopic=71207
Here's what McMark suggested for replacing the trunk floor...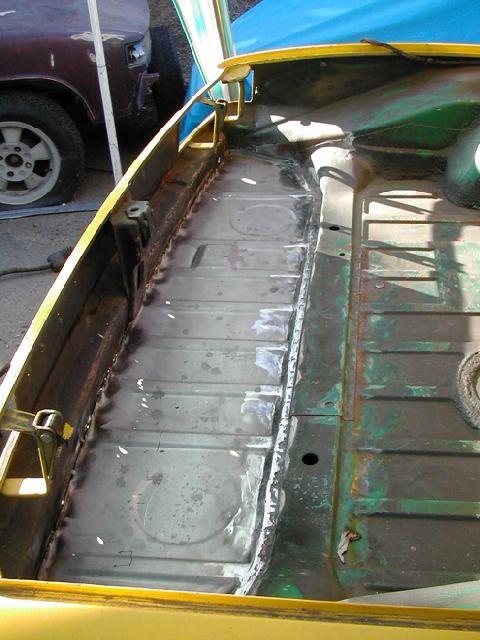
In this picture I'm assuming that McMark cut the existing floor pan just in front of the center structure, then spot welded the replacement on top, like this?
Also, I'm assuming that the sides and the rear section are spot welded to the sides, correct?
Finally, my car has the original factory rear sway bars, I'm assuming I need to remove the sway bars, but how do I remove and reinstall the upper piece that is welded to the floor?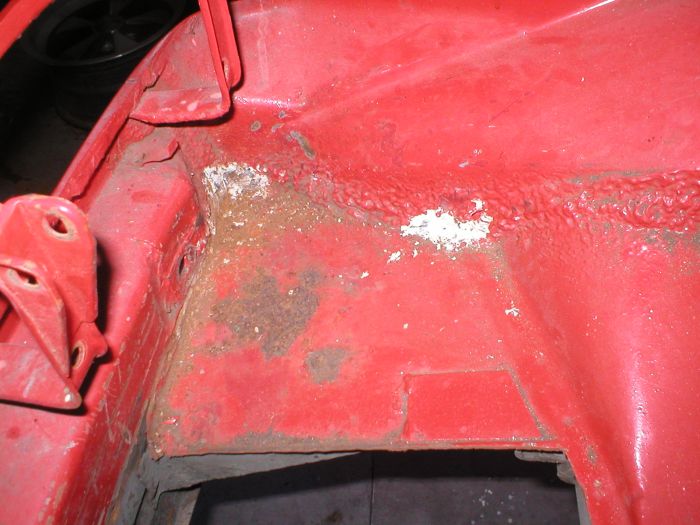
-- Rob
Posted by: dr914@autoatlanta.com Sep 27 2007, 10:57 AM
We drill the spot welds out of the reinforcement so we can put the floor under it and hide most of the welding. Makes a better repair. The latest trunk floors go plenty far forward enough to accomplish this almost invisible repair. We also spot weld the lip around the perimeter and use the wurth seam sealer in the wurth application gun to exactly duplicate the factory motley finish. Ends up looking perfect! (remember that the muffler shield is welded to the pan underneath and on the sixes bolted.
Posted by: McMark Sep 27 2007, 11:32 AM
I cut out the rear trunk piece just like you did. Right behind the spot weld flange on the cross member and then seam welded the replacement piece in and ground the welds smooth. There is no overlapping metal in my repair. That car had no sway bar, but I did have to drill out the spot welds for the tow bracket (you can see it in your picture). That was a PITA. The sides of the replacement pieces are flanged upwards, so you can completely remove the old part and tack weld it to the sides/rear of the trunk.
In your case, you could think about leaving the corners in place (just like you have now) and cutting the sides off the replacement metal. It will save you a lot of time, and would be perfectly acceptable if you're ready to butt weld the pieces together.
If you want to replace the whole piece, you can drill out the spot welds for the tow hook, drill out the welds for the sway bar top brace (flat metal pictured), drill/grind the welds for the sway bar bracket, then remove the rest of the trunk metal. Then weld the new trunk in and then weld all of the bits back on to it. If you did this, buying a new sway bar brace (the flat piece) from Engman would be a good idea, because that piece will probably die when you remove it. 
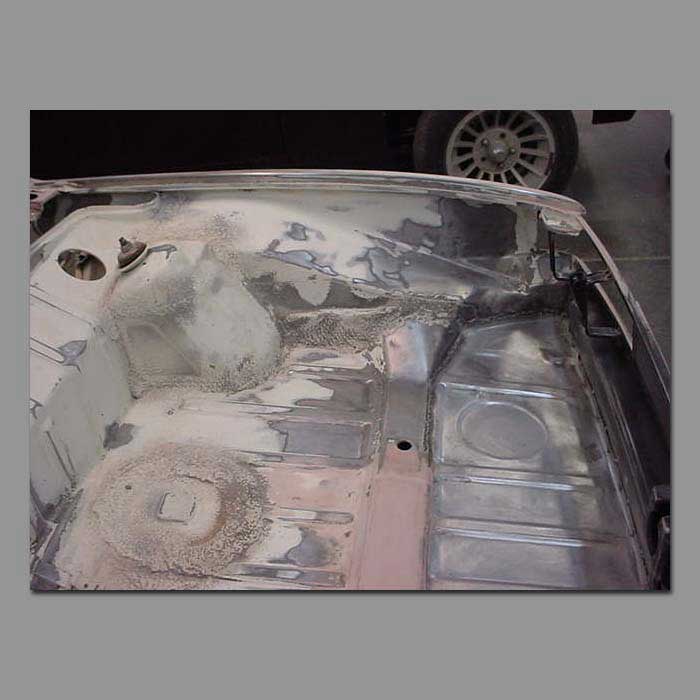
Here are a few more pictures of this repair. I don't have as many as I would like, because I did this when I was just getting started and didn't yet know to take tons of pictures. Note, the first picture isn't the final cut, there is a lot of metal left on the cross brace that was trimmed away.
Attached thumbnail(s)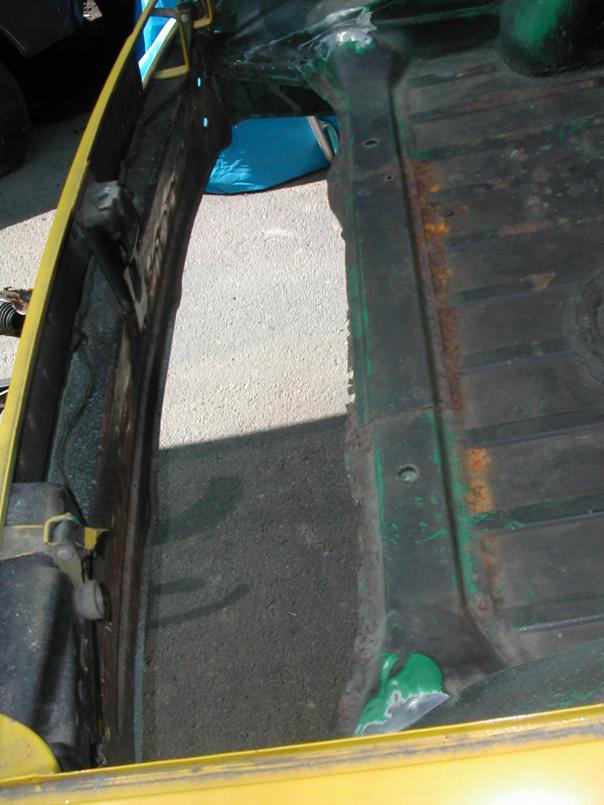

Posted by: watsonrx13 Sep 27 2007, 07:38 PM
George and Mark, thank you very much for your suggestions....
George, are you recommending that I remove the small reinforcing piece? Do I then spot weld the end of the floor to the existing section on the other side of the cross member? Do you have any progress pics you can post to this?
I also found some pics that I had saved (sorry, I don't know who's this is), but this is another option...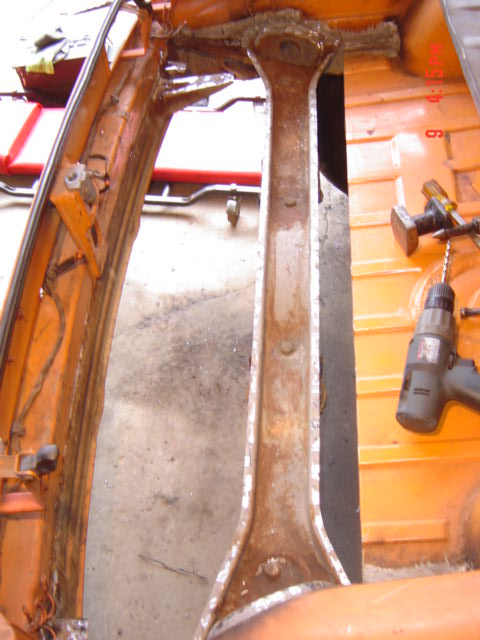
Mark, I'm thinking following your advise and just cut the replacement piece to fit. I have to remove the right side corner, but I'm going to cut around the sway bar bracket, but remove the metal from the bumper brace. I'll butt-weld the part to the end near the cross member and spot weld the sides...
I'll tackle this job this weekend and post the progress pics...
-- Rob
Posted by: dr914@autoatlanta.com Sep 28 2007, 11:31 AM
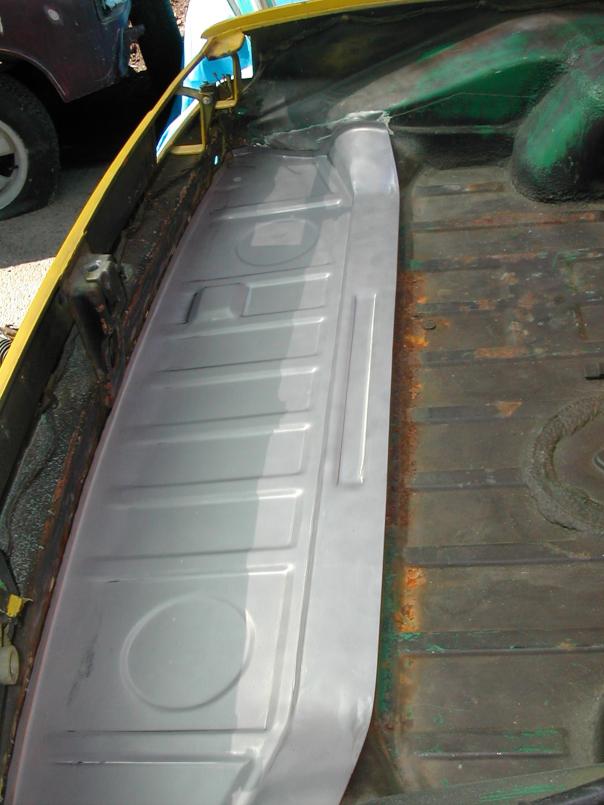
usually we trim this to fit under the reinforcement and seam it there. Our nice piece that we make is shown in the picture. We made it that way for the bad cases when the floor would be rusted in front of the reinforcement. Again welding under the reinforcement is the best way. The pictures show an immaculate job, but they also show the replacement in the worst case scenario.
Posted by: McMark Sep 28 2007, 12:39 PM
Don't remove good metal just because it's part of the replacement piece. The stamping from Restoration Design is not a recommended fix, it's just a piece of metal that covers a lot of territory. Just cut what you need and don't make more work for yourself by removing the cross member top.
Posted by: Vacca Rabite Sep 28 2007, 01:27 PM
Looks nicer then my rear trunk rust fix.
This was just after welding, and before peening the sheet metal to fit the indentations in the trunk.
I just could not bring myself to spend ~$100 when I had some extra sheet metal just sitting there. Ground, seamsealed, and painted - it does not look all that bad - and my car will never be CW. 
Zach
Posted by: davep Sep 28 2007, 01:47 PM
Try to save the body number in that section of the trunk. In any event, be sure to update your car profile with that number so it is not lost.
Posted by: zymurgist Sep 28 2007, 01:50 PM
Looks better than Babydoll's (front) trunk fix, too! But I can jump up and down on it and that's saying something.
Posted by: watsonrx13 Sep 28 2007, 06:21 PM

Try to save the body number in that section of the trunk. In any event, be sure to update your car profile with that number so it is not lost.
Dave, I got this car with the rear trunk floor already removed, so I don't know the body number.
Zach, the PO provided the replacement piece with the purchase of the car.
Mark, I'm definately going to only cut out the sections that are bad. I'll post pics tomorrow showing how I fit the new piece. I've already cut out the passenger's side corner, but I left the metal where the sway bar bracket is welded. I'll be extra careful when I weld in the new piece. I agree, I'm not going to remove the cross member. I noticed that if I removed the cross member, I would still need to butt-weld the new piece beyond, so I've decided to do the butt-welding before it. Pics tomorrow will better show what I'm trying to describe...
George, this is the only pics I found on your web site showing the rear trunk floor replacement. It appears that there is a weld in front of the cross member, going the whole length of the replacement piece.

-- Rob
Posted by: watsonrx13 Sep 28 2007, 06:28 PM
Looks better than Babydoll's (front) trunk fix, too! But I can jump up and down on it and that's saying something.
Ken, here's my replacement of the front trunk floor... Here's the http://www.tampabay914.com/7491420050327.html to my site showing how I did it...
-- Rob
Posted by: davep Sep 28 2007, 07:30 PM
Dave, I got this car with the rear trunk floor already removed, so I don't know the body number.
It should still be on the Karmann badge on the drivers door hinge post. Check it out.
Posted by: scotty b Sep 28 2007, 07:38 PM
George and Mark, thank you very much for your suggestions....
George, are you recommending that I remove the small reinforcing piece? Do I then spot weld the end of the floor to the existing section on the other side of the cross member? Do you have any progress pics you can post to this?
I also found some pics that I had saved (sorry, I don't know who's this is), but this is another option...
Mark, I'm thinking following your advise and just cut the replacement piece to fit. I have to remove the right side corner, but I'm going to cut around the sway bar bracket, but remove the metal from the bumper brace. I'll butt-weld the part to the end near the cross member and spot weld the sides...
I'll tackle this job this weekend and post the progress pics...
-- Rob
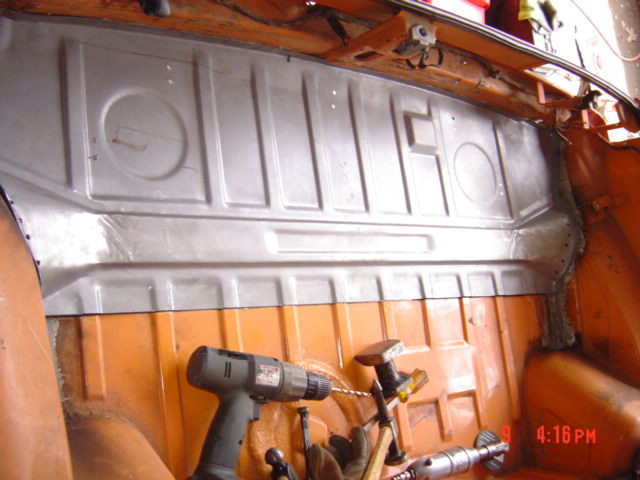
Those are my pics of my dads trunk. I did go that far only because I knew there was rust in the suport and I wanted to take care of it. By welding the complete panel in I am having to weld over all of the strengthening ribs, then grind all of that down and at the same time get it smooth enough not to be obvious. I would not recommend this way for most people. Taint for the faint.......
Posted by: watsonrx13 Sep 29 2007, 05:59 AM
Thanks Scotty for replying... Can you post some progress pics to this thread as you go?
BTW, great job taking your time to do it right.... 
-- Rob
Posted by: scotty b Sep 30 2007, 07:53 AM
Thanks Scotty for replying... Can you post some progress pics to this thread as you go?
BTW, great job taking your time to do it right....
-- Rob
Thanks Rob. I actually have a thread but since I haven't werked on the car in almost ( maybe over ) a year it doesn't come up much

http://www.914world.com/bbs2/index.php?showtopic=26236&hl=progress+pics
Another specifically about the suspension console that visibly looked fine when on the car.
http://www.914world.com/bbs2/index.php?showtopic=52994&hl=when+suspension+consoles+go+bad
Posted by: watsonrx13 Sep 30 2007, 05:31 PM
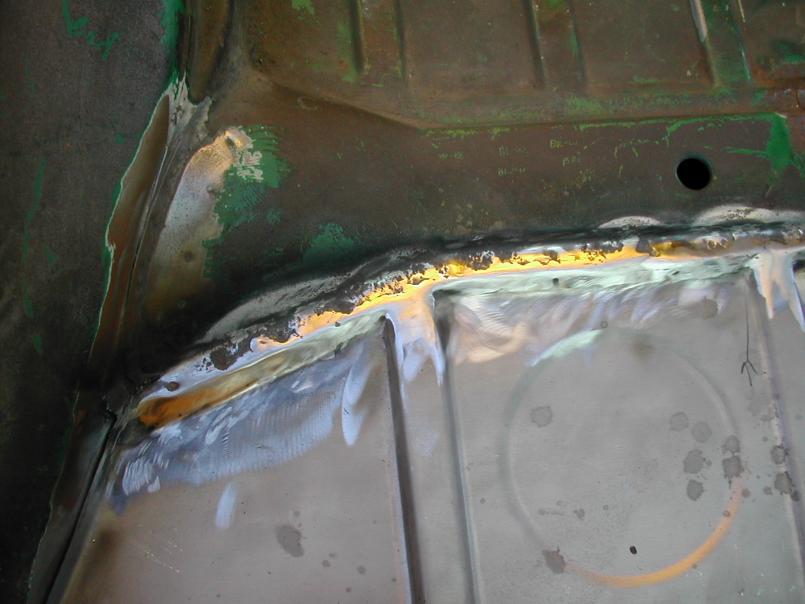
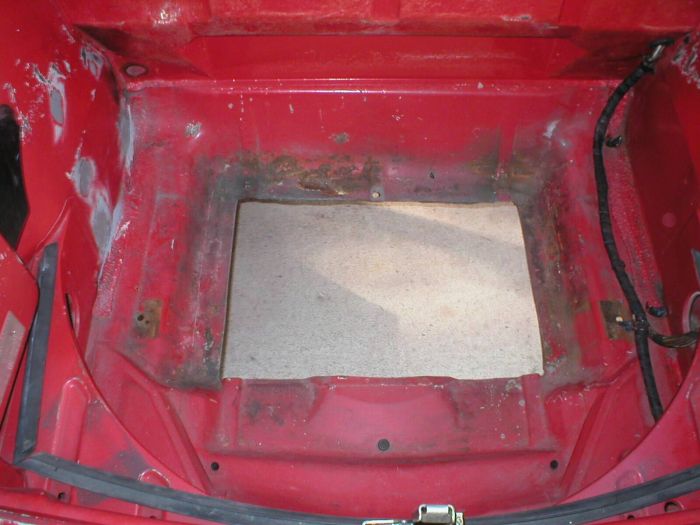
Well, I've spent the entire weekend installing the rear trunk floor. Saturday I cleaned the dirt and grease underneath the car. I also decided to cut out the passenger's side corner, but left the factory installed sway bar bracket. I was also able to cut the replacement panel, trim and tack it into place.
Sunday I spent the entier day butt-welding the side nearest to the cross member and seam welding the sides and back section. I still have to add the seam sealer, then prime and paint...
Thanks again for everyone's suggestions...
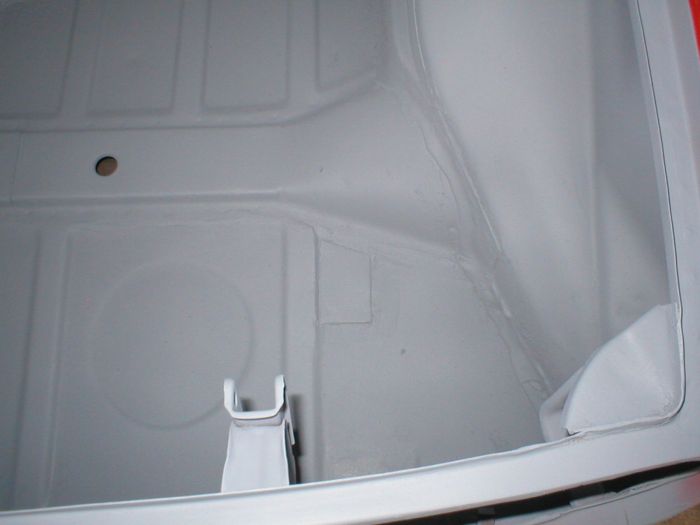
Here's where I cut around the factory sway bar bracket...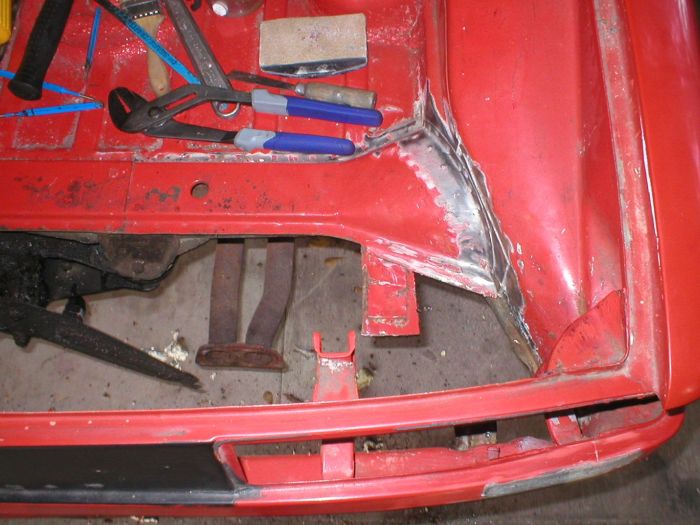
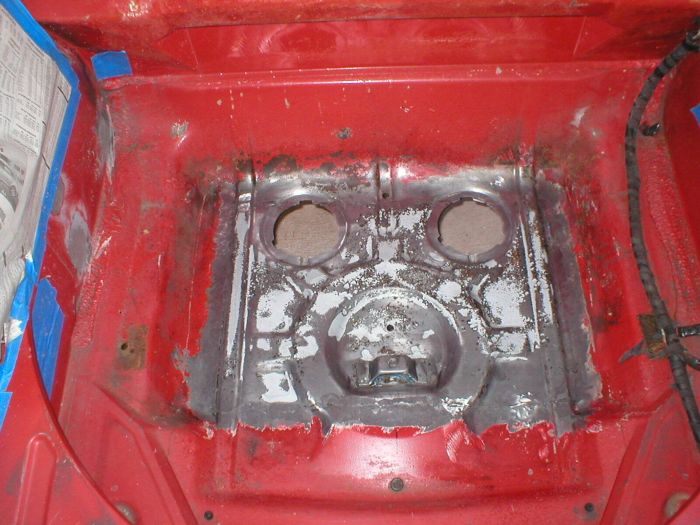
Here's the floor welded into place...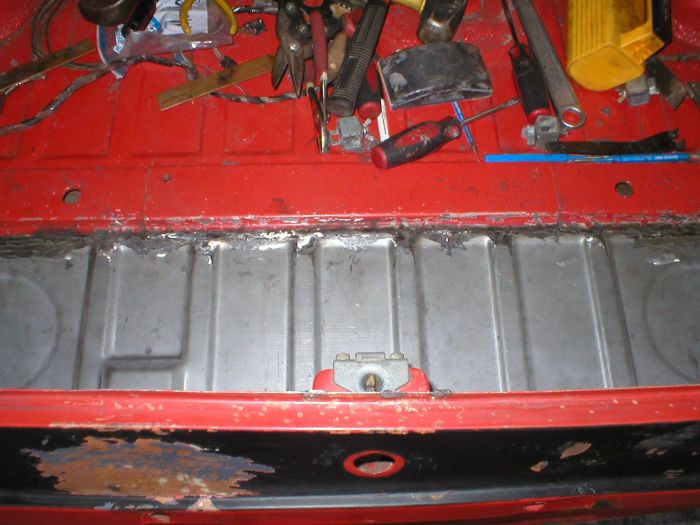
Here's a shot of the floor welded to the factory sway bar bracket...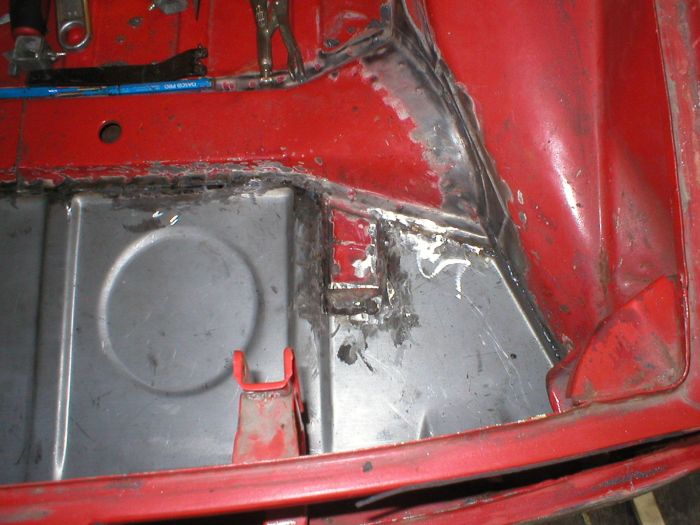
-- Rob
Posted by: computers4kids Oct 1 2007, 12:58 AM
Hi Rob!
Keep us posted how the trunk finally turns out. Unfortunatley, I have the same task ahead of me on my 75 project. I'm going to have to teach my self to weld...one skill I always wanted but never learned.
Mark
Posted by: watsonrx13 Oct 7 2007, 01:07 PM
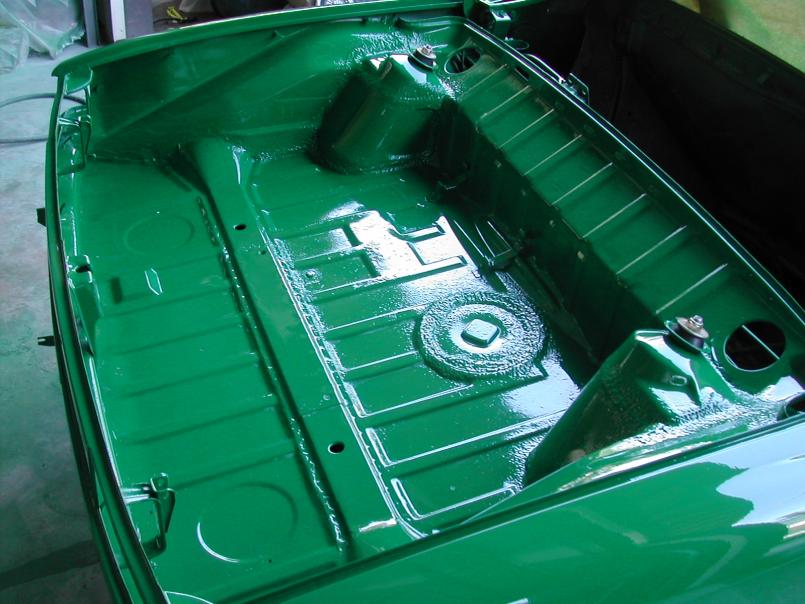
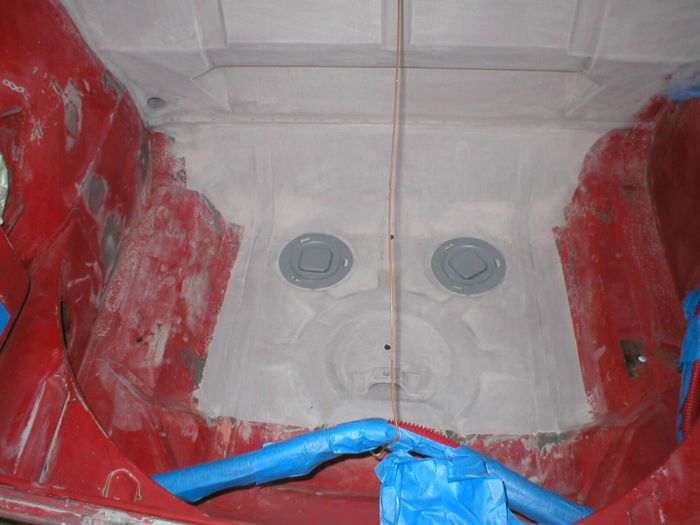
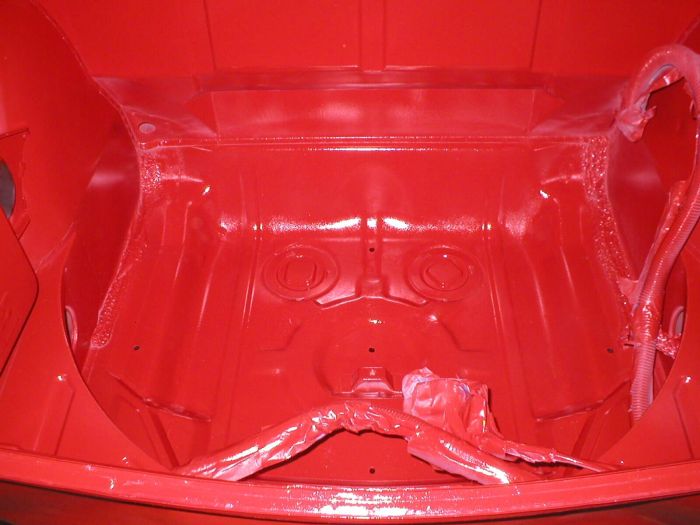
I painted the rear trunk with primer today....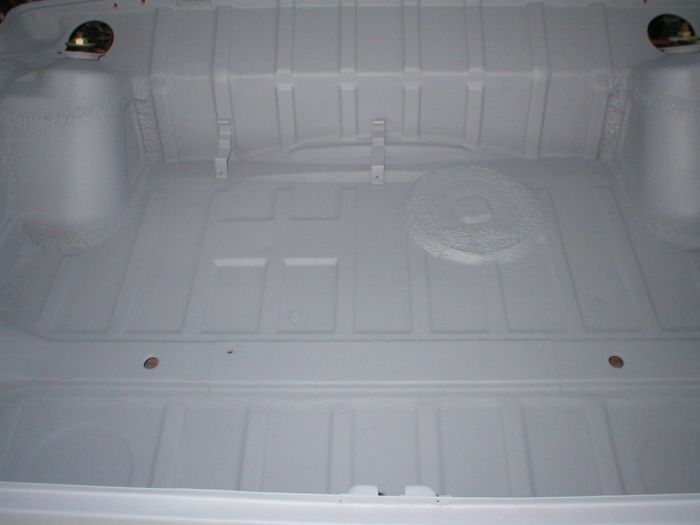
-- Rob
Posted by: 930cabman Aug 5 2023, 04:24 PM
Don't remove good metal just because it's part of the replacement piece. The stamping from Restoration Design is not a recommended fix, it's just a piece of metal that covers a lot of territory. Just cut what you need and don't make more work for yourself by removing the cross member top.
Exactly, the RD piece is not needed in many cases. I have found this to be true with many of their pieces. Leaving original sound metal is the the way
Posted by: URY914 Aug 5 2023, 04:45 PM
Thread dug up from the past. 
Posted by: 930cabman Aug 5 2023, 05:43 PM
Thread dug up from the past.
Yes, great information from those who came before us
Powered by Invision Power Board (http://www.invisionboard.com)
© Invision Power Services (http://www.invisionpower.com)