Printable Version of Topic
Click here to view this topic in its original format
914World.com _ 914World Garage _ Been workin on the car
Posted by: toon1 Sep 27 2007, 08:43 PM
I have bounced back and forth from building the engine to getting stuff painted.
I am building a MASSIVE 1.7  and restoring the engine bay and most of the other areas of the back end. This car has very little rust so patching is minimal.
I'm hesitant to start a resto thead, there have been so many, but here are some pics.
Attached image(s)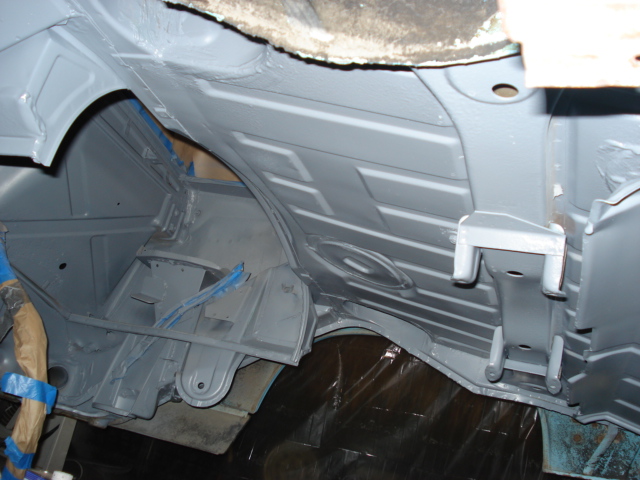
Posted by: toon1 Sep 27 2007, 08:51 PM
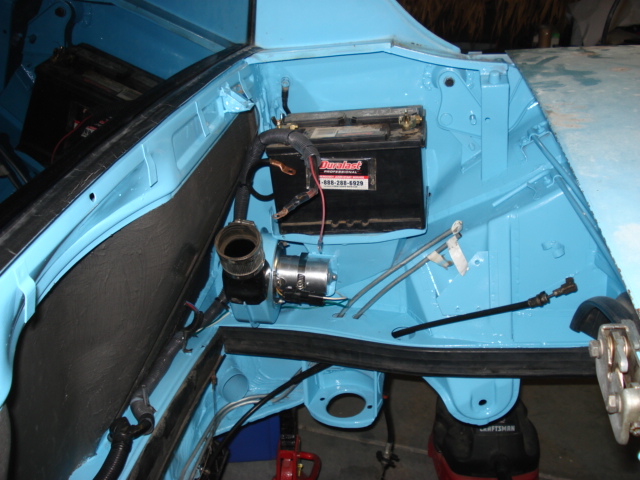
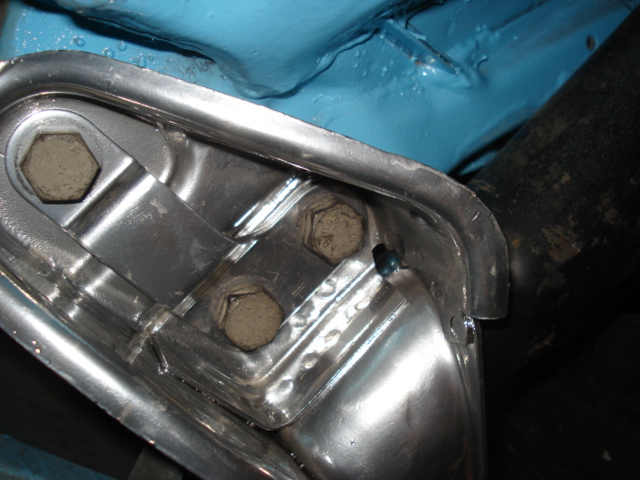
fan shroud, shock , heater shrouds, intake runners, trunk hinges. Engine bay
Attached image(s)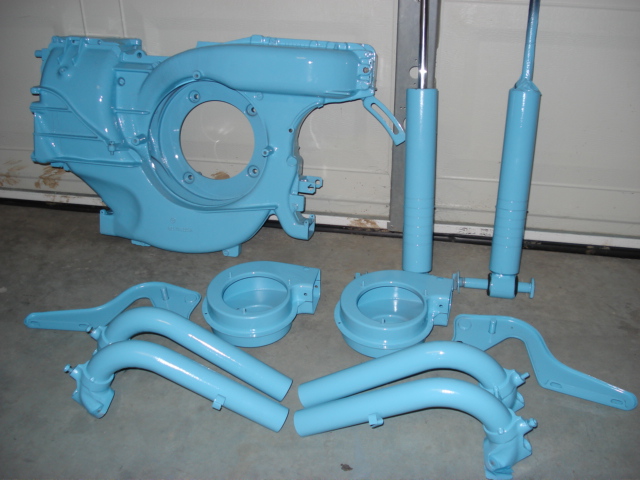
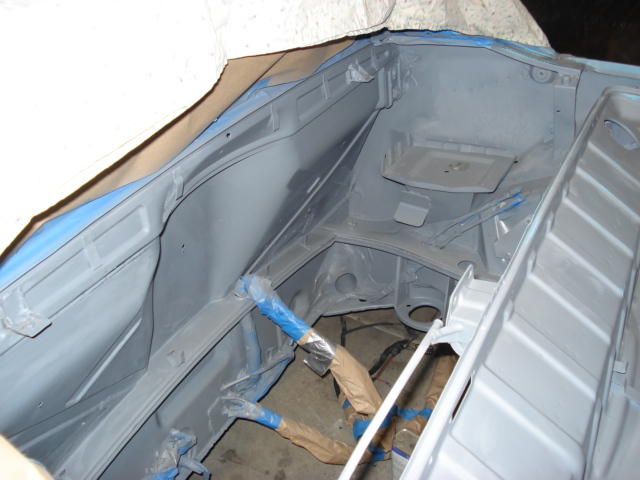
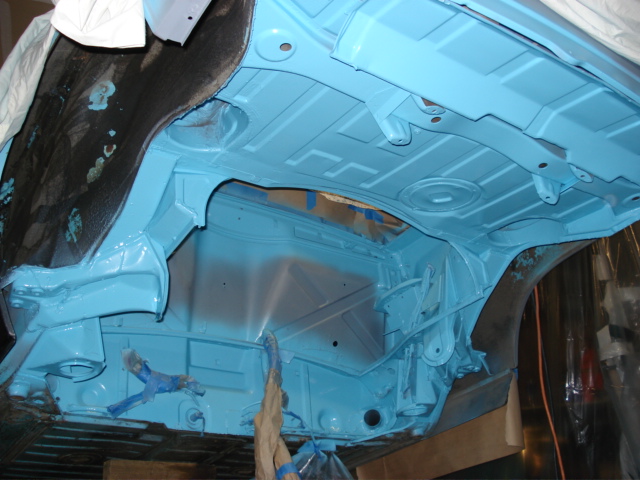
Posted by: toon1 Sep 27 2007, 08:52 PM
2more I left the primer in the middle of the fire wall for a few coats of Quiet car and Dynamat
Attached image(s)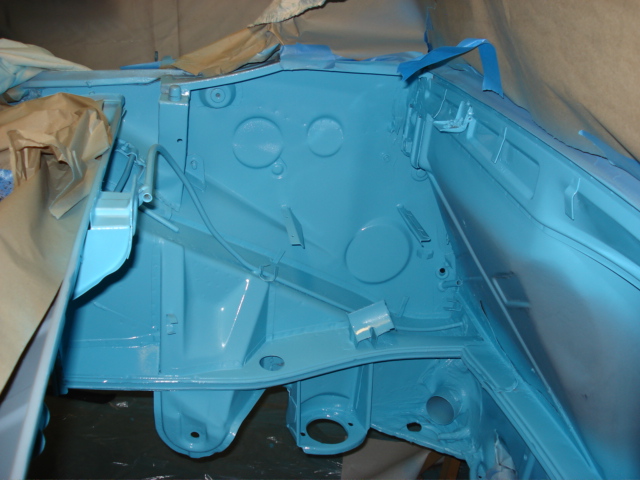
Posted by: rktmn247 Sep 27 2007, 09:08 PM

I'm hesitant to start a resto thead, there have been so many, but here are some pics.
Looks good! Keep it up. I never get tired of looking at teeners being brought back to life. Thanks!
Posted by: brer Sep 27 2007, 11:42 PM


Posted by: toon1 Sep 28 2007, 12:15 AM
thanks guy's, it's fun to see the transformation
Posted by: neo914-6 Sep 28 2007, 12:46 AM
wow, how much prep did you do?
Nice work 
Posted by: Cevan Sep 28 2007, 07:10 AM
More pictures!!!!
Posted by: So.Cal.914 Sep 28 2007, 07:19 AM
Purdy
Isn't painting your struts going to obscure them. I love some of the pics I see here
where the front suspension, highlighted from behind with a light color, strut is one
color and the sway is another (usually plated), caliper, rotor. But thats just me.
Party on Wayne. 
Posted by: woobn8r Sep 28 2007, 07:48 AM
That blue is lookin' pretty cool!...any plans for orange stripes?
Keep up the great work. Those of us that aren't as far along in our projects like to see someone "gettin' it done" so we work harder!!!
More pics please.
Posted by: toon1 Sep 28 2007, 09:10 AM
wow, how much prep did you do?
Nice work
That blue is lookin' pretty cool!...any plans for orange stripes?
Keep up the great work. Those of us that aren't as far along in our projects like to see someone "gettin' it done" so we work harder!!!
More pics please.
I was not a big fan of Oly blue but it's growing on me. It's hard to tell how the color is going to look when you are looking at 15 yr old paint.
I have the inner trunk area primered and a coat of bedliner on the bottom I will take some pics.
Thank's for the kind words guy's, Keith
Posted by: brer Sep 28 2007, 11:12 AM
Aren't those little wire hold down tabs a pain?
I cut myself like 50 time trying to sand in there.
Posted by: toon1 Sep 28 2007, 12:20 PM
yea they are, I got cut a couple times. I was using a sponge type block sander, it helped keep the hands away
Posted by: Rob Ways Sep 28 2007, 01:24 PM
Nice job! I have the same color car that needs the same work right up the street from you in Pleasanton.
How did you suspend the car? what did you use to shoot the paint? is this a garage or shop job?
Posted by: toon1 Sep 28 2007, 02:17 PM
Nice job! I have the same color car that needs the same work right up the street from you in Pleasanton.
How did you suspend the car? what did you use to shoot the paint? is this a garage or shop job?
The car is up on a motorcycle jack. I used a couple of 4x4's to get it up a little higher.
I am using Omni laquer paint. The paint guns where bought at Habor freight. I think I spent a total of $30 on the guns, Cheap! They work good!
I was all done in the garage, I just put up some pastic. When I get to painting the outside I willrent a spray booth.
Posted by: krazykonrad Sep 28 2007, 09:18 PM
Looking good! Are you going to stick with olympia blue or are you gonna go Gulf?
Konrad
Posted by: toon1 Nov 5 2007, 09:52 PM
made some more progress on the engine bay. The engine build has come to a screeching halt.
Here are some pics
made an adapter plate for the 36-1 wheel, and modified the fan housing for the VR sensor. I will take more pics of how the adapter plate and the trigger wheel where modified for Brer's MS file.
The second pic is the VR sensor plug and wire with the mods made to the tin and housing to accept it.
Attached image(s)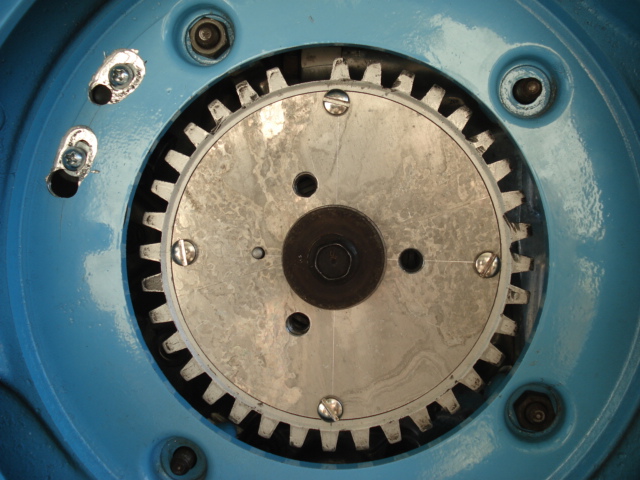

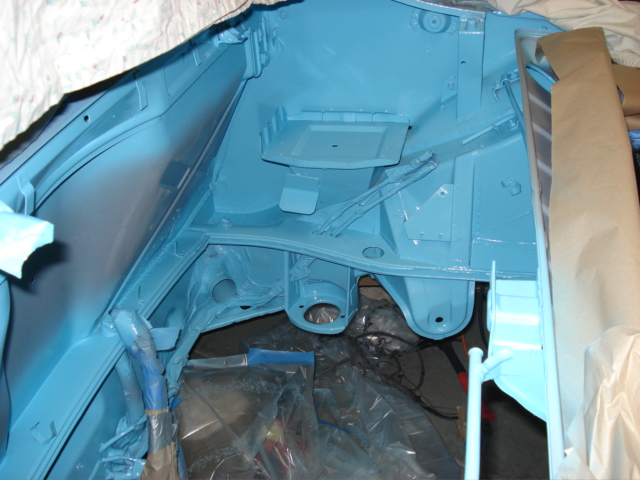
Posted by: toon1 Nov 5 2007, 09:57 PM
two more
The engine bay is close to ready, just a few more things to do. New( to me) e-brake cables where installed and all the old wire harness covering was removed. There is the corrogated stuff over the wires now.
I added a second blower motor, I don't like having to towel the windows when they fog up. The blower motor where completely dissassembled and cleaned. It's unbelievavle how much oil was in those things.
The gray stuff on the firewall is Quit car, about 4 coats. It's neat stuff, water based and east to work with.
There is quite a big difference is the sound of the metal when you knock on it, it feels more solid.
Attached image(s)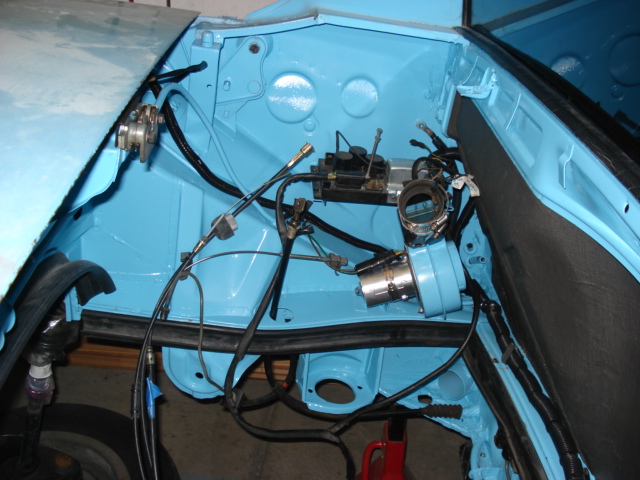
Posted by: toon1 Nov 5 2007, 10:06 PM
more
I installed the Camp 914 trunk shocks today. these are slick and easy to install, took about 1.5 hrs.
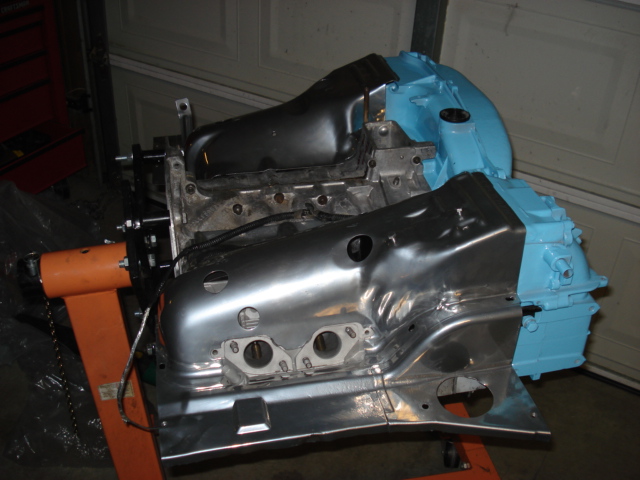
and a pic of the motor, notice the cheezy cool chrome P coated engine tin.
Attached image(s)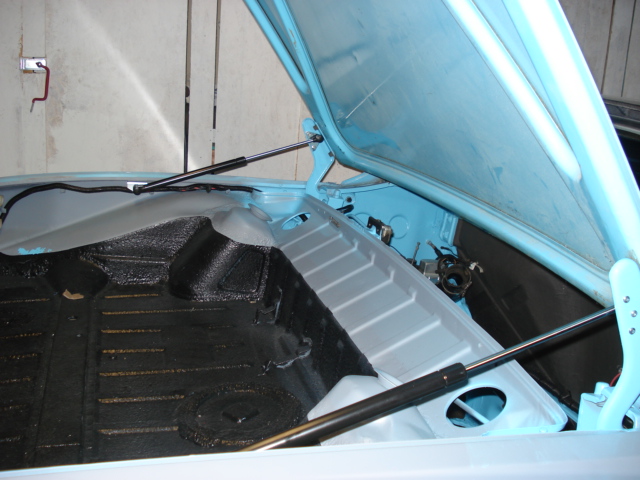
Posted by: Hammy Nov 5 2007, 11:36 PM
Bitchin tin Keith
Posted by: toon1 Nov 5 2007, 11:41 PM
Bitchin tin Keith
Thank's, you know what they say about chrome,
If it don't go, chrome it!
Posted by: craig downs Nov 6 2007, 09:58 PM
I'm  how your engine compartment and under the trunk turned out and its nice to see how it will look when its done. I'm in the process of doing what you did. I've got old undercoating strip now comes the sanding. Never thought about using sponge sanding blocks I'll have to try it.
I was planning on using Quite Car also and wondering how it looks and works. Thanks for input on it.
Posted by: Lou W Nov 6 2007, 10:12 PM
keep the pictures coming, your cars looking great.
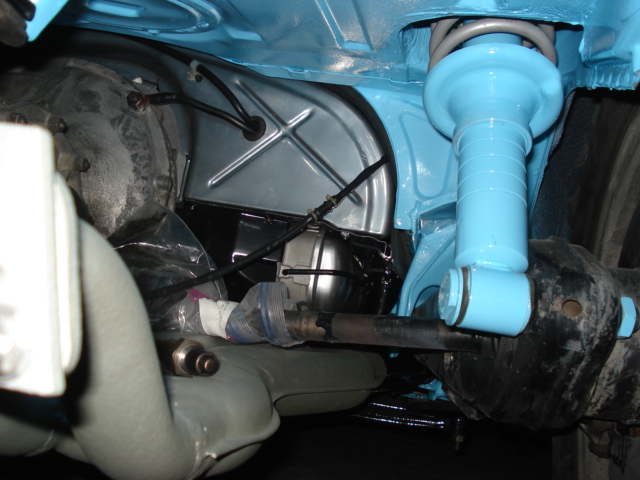
Posted by: brer Nov 7 2007, 11:41 AM
trailing arms black.
Posted by: Aaron Cox Nov 7 2007, 12:32 PM
trailing arms black.
agree

Posted by: toon1 Nov 7 2007, 03:05 PM
Why leave them black? 
Posted by: jd74914 Nov 7 2007, 06:33 PM
I wrote this in your other thread, but it will let all of the other components stand out. and will emphasize the awesome care taken with the rest of the underbody.
PS: this thread makes me with I had painted the bottom of my car 
Posted by: toon1 Nov 7 2007, 10:58 PM
since I added these pics to the wrong post, I will add them again here
Attached image(s)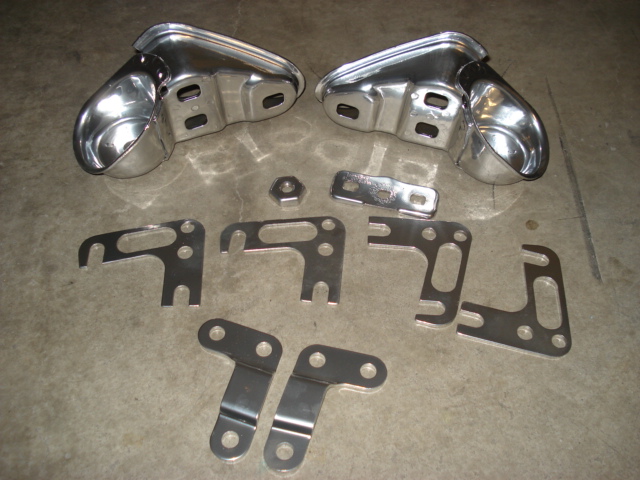
Posted by: toon1 Nov 7 2007, 10:58 PM
one more
Attached image(s)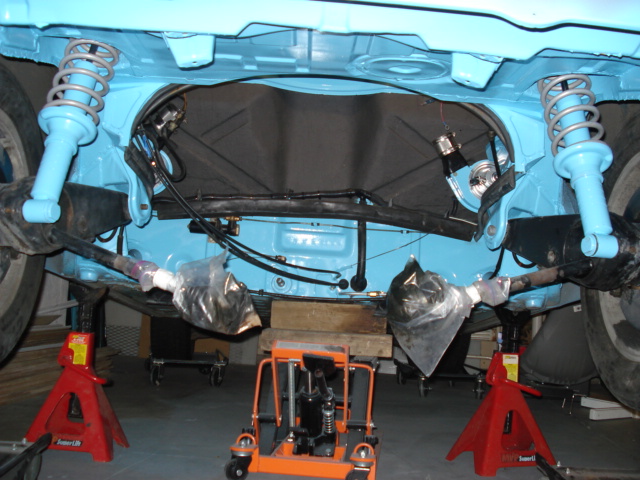
Posted by: toon1 Nov 7 2007, 11:00 PM
guess the part????
Attached image(s)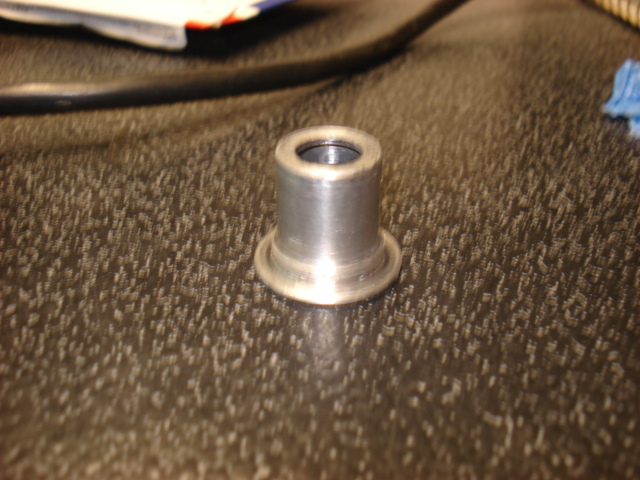
Posted by: brer Nov 8 2007, 02:59 PM
Why leave them black?
contrast the blue paint.
Black is Heavy Metal Dude
Posted by: toon1 Feb 22 2008, 10:17 PM
It's been awhille since I've added anything to the thread.
The engine is finally done! I took the tranny apart also. I was having a hard time shifting from 1st to 2nd. I replaced the 1st gear syncro ring, also the 2nd to third syncro and slider. there was a leak in the front main so I replaced that also.
Here is the tranny and engine together ready for install.
Attached image(s)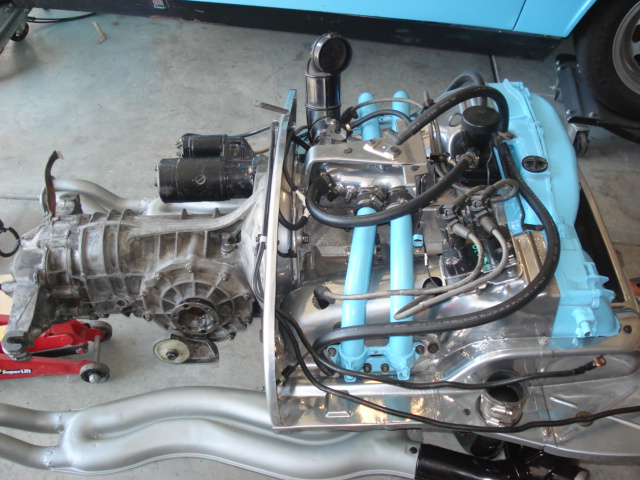
Posted by: toon1 Feb 22 2008, 10:22 PM
A shot of the VAC referanced FP reg and the Ford EDIS coil.
I used the original coil bracket off the ford Escort that all the EDIS eqiup was in. By cutting 1 ear off the top and welding it to the bottom, I was able to use the stock 914 coil mounting holes in the tin.
Attached image(s)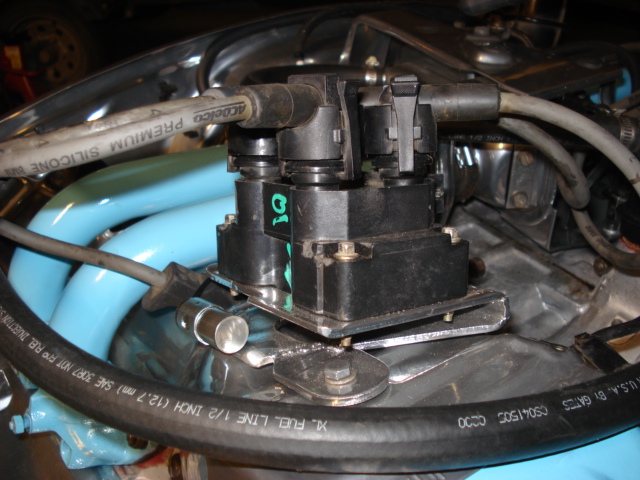
Posted by: toon1 Feb 22 2008, 10:26 PM
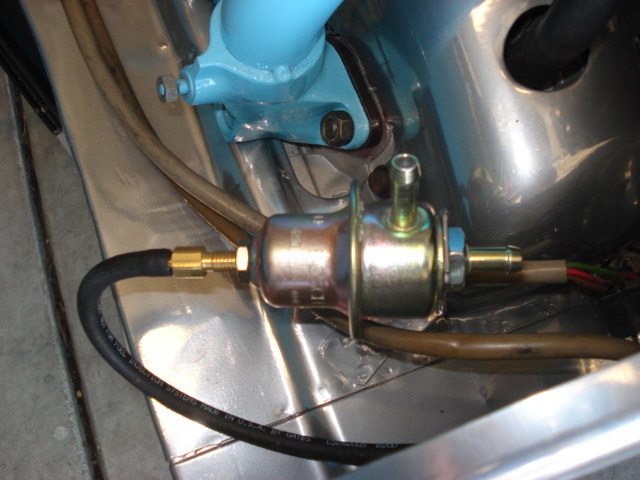
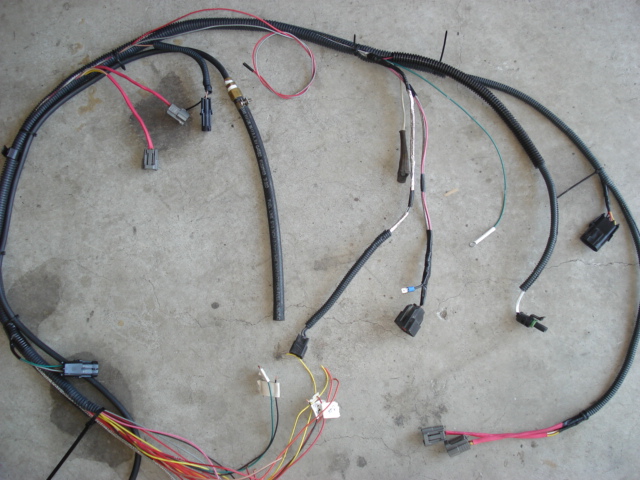
Notice the second batt. cable. I wanted a better ground.
The second pic. id of the inj. harness. If any body want's to know where all the connectors go I will add the description.
Attached image(s)
Posted by: degreeoff Feb 22 2008, 10:27 PM
I'm hesitant to start a resto thead, there have been so many, but here are some pics.
Looks good! Keep it up. I never get tired of looking at teeners being brought back to life. Thanks!
Like the color man!
Posted by: toon1 Feb 22 2008, 10:50 PM
the engine is in!!
Attached image(s)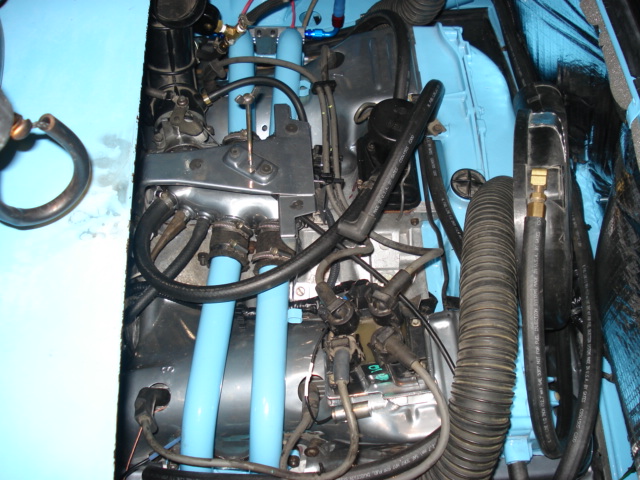
Posted by: toon1 Feb 22 2008, 10:56 PM
Now Just about everyone knows I have been working on a inj. retrofit( if you don't, well I have ).
They are 21lb/hr inj's off a ford Probe. I machined two fuel rails and used -6 AN fittings and 3/8" summit tubing for the feed line. The F.P. reg has 5/16 bfittings on it so it needed to be reduced before the reg. . the return was 6mm back the the hardline to the tank.
Attached image(s)

Posted by: toon1 Feb 22 2008, 11:01 PM
I ran the fuel line along the back of the engine bay wall, above the tin. I had it this way before the rebuild. it keeps things a bit cleaner looking.
The blues is the feed line and the black, return. BTW, 3/8 fuel line is overkill, my bad!!
Attached image(s)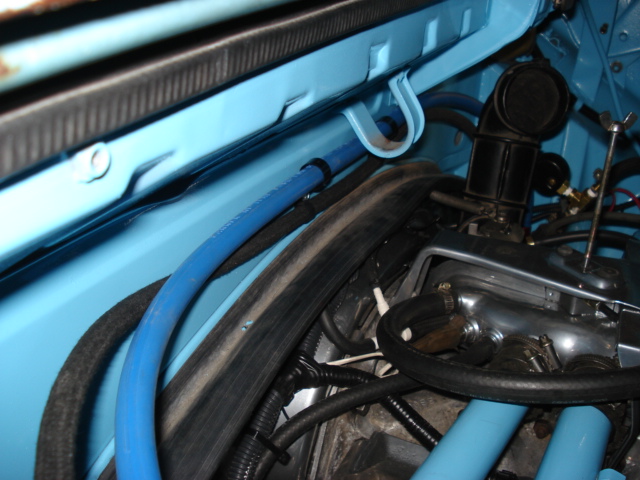
Posted by: toon1 Feb 22 2008, 11:03 PM
Last two for now.
a pic of the 02 sensor controller and where the sensor goint through the tin, twards the back for the exaust.
Attached image(s)
Posted by: Heeltoe914 Feb 22 2008, 11:27 PM
Nice fun work Please doc, the injection system. Can it be tweeked?? What are the limits if any of this system????
Again nice work, Nothing I would every be able to pull off.
Posted by: toon1 Feb 23 2008, 12:08 AM
Nice fun work Please doc, the injection system. Can it be tweeked?? What are the limits if any of this system????
Again nice work, Nothing I would every be able to pull off.
The inj. system is mega squirt so it's completely adjustable.
The reason for using different inj's. are two fold.
1st, to ue a newer inj. the stock 914's are old and most are not is good shape. They are also expensive new. I found these inj's for $10 a piece at pick and pull.
THESE INJ'S WILL NOT WORK WITH THE STOCK F.I. SYSTEM.
2nd: I wanted to run inj's that can put out a bit less cc/min at a higher F.P.. This does 2 things, it lengthens the pulse width of the inj. making idle quality better. the system is now going to be running at 43 p.s.i., great for fuel atomization.
Posted by: AgPete139 Feb 23 2008, 01:54 AM
Looks great! Keep up the good work.
Posted by: Sleepin Feb 23 2008, 04:00 AM
Wow! Very beautiful! Nice to see another 914 that will be around and looking good for a long time to come!
Posted by: toon1 Feb 23 2008, 08:49 AM
Thank's guy's, this one is looking good from the inside only right now.LOL
If I took a pic of the outside you'd say 
I will , hopefully be putting paint on it this year.
Posted by: yarin Feb 23 2008, 10:10 AM
I'm very impressed, keep up the good work!! Nice to see the injector setup working out, let me know what your fuel requirement number end up being. I might use the same injectors later on a 2.0, or maybe bump it up to ~24lb/hr injectors. Regardless, very very clean build! Keep us updated!
Posted by: toon1 Feb 23 2008, 11:39 AM
I'm very impressed, keep up the good work!! Nice to see the injector setup working out, let me know what your fuel requirement number end up being. I might use the same injectors later on a 2.0, or maybe bump it up to ~24lb/hr injectors. Regardless, very very clean build! Keep us updated!
There are plenty of 24lb/hr inj's avail. If you are going to use a fuel rail setup, and have access to a mill, I would strongly suggest getting a 11 or 14mm( depends on the size of the Oring ontop) end mill.
You can get them for about $20. I looked into the step drill but it's too expensive. A mill gives you a much better finish in the bore.
The Req. fuel # came to 12.8
alt inj.
2 squirts
I set the F.P. last night and there are no leaks from the tops of the inj's. at the fuel rail.
The fittings leaked but they just needed to be tightened. I'm not sure if I trust the gauge, the adjustment screw on the press. reg is almost all the way in. I am running 43p.s.i. and the reg. only goes to 45 so it may be right.
I am hoping to fire it up this w/e. Since the 02 correction will not be involved right now, I will hook up the gauge and see what my AFR is. This will tell me if the F.P. is correct or close.
Posted by: brer Feb 23 2008, 11:49 AM
nice work dude.
Powered by Invision Power Board (http://www.invisionboard.com)
© Invision Power Services (http://www.invisionpower.com)