Printable Version of Topic
Click here to view this topic in its original format
914World.com _ 914World Garage _ Orange 75 project
Posted by: my928s4 Nov 25 2007, 03:13 PM
So a couple months back I posted about getting a hold of the http://www.914world.com/bbs2/index.php?act=ST&f=2&t=76292,
feel like I have moved on from that so thought it I would post some pics on progress and I will add to this thread as time (and progress) goes on.
I did not get around to stripping the car down till earlier in the month as I drove my 928 down to Sharktoberfest in LA and I was performing last minute tinkering before the drive.
Anyway back to 914 subject matter, the good news is I have not found too many issues which is a relief and I can start to order parts and make some investment in tools. It is a perfect time of year for indoor projects as it is below freezing all the time now and skiing does not start here till after xmas.
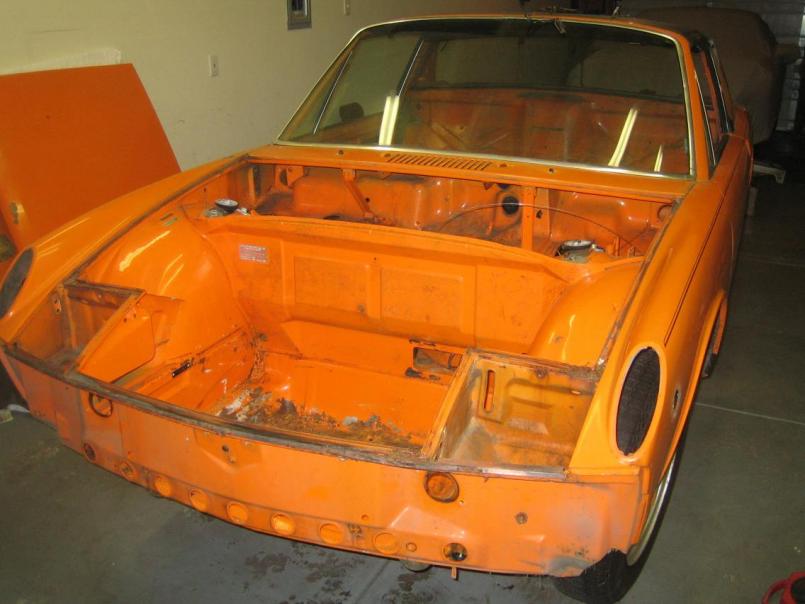
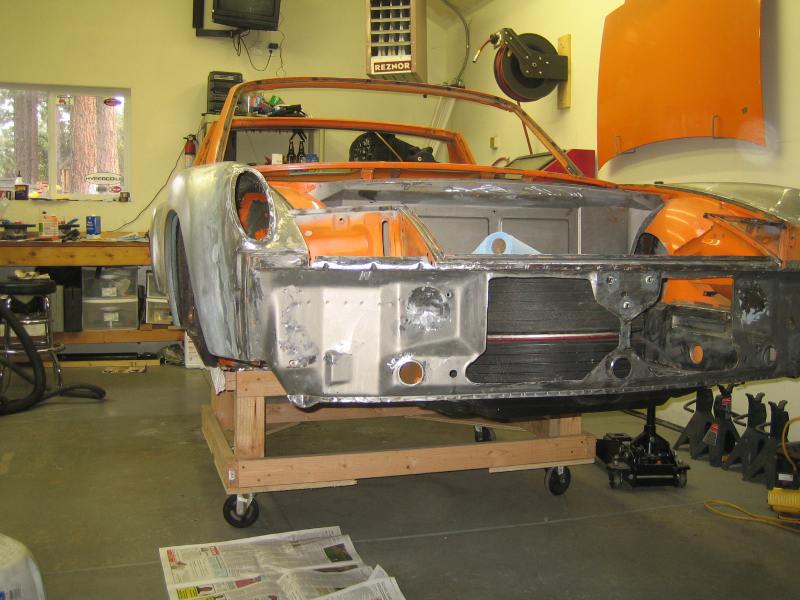
Surface rust and dirt in the front trunk but that is about it, will need to repiar a couple of areas around the hood seal.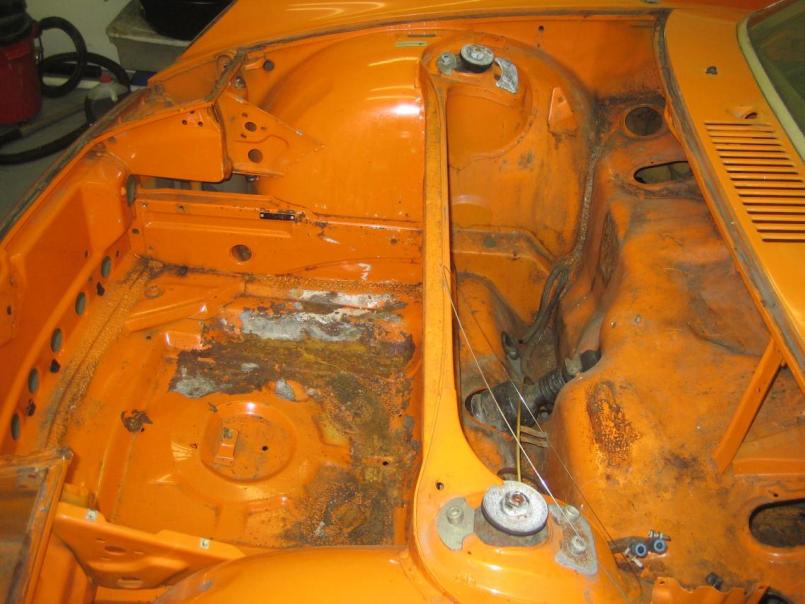

Chris
Posted by: my928s4 Nov 25 2007, 03:16 PM
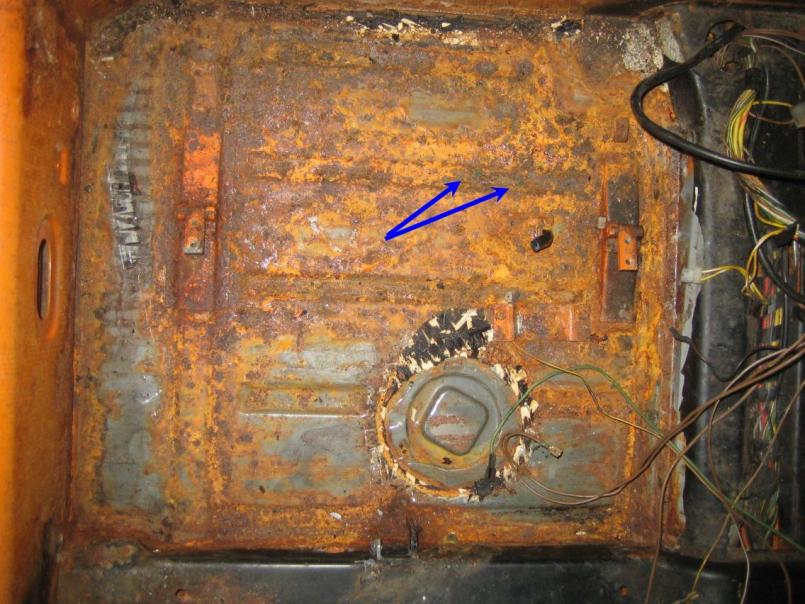
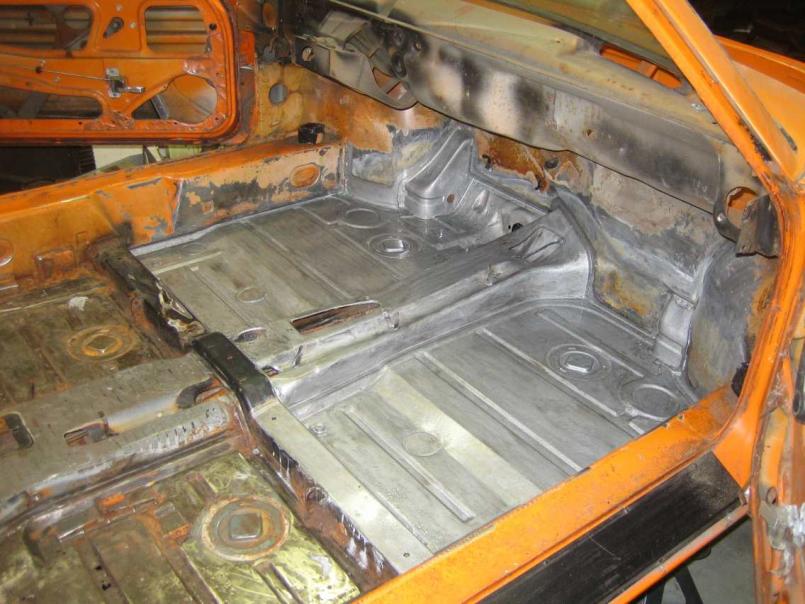
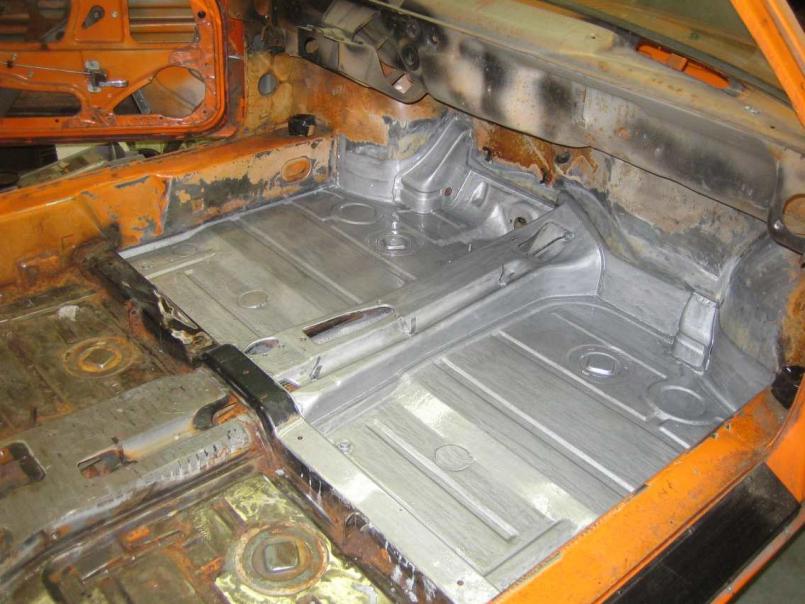
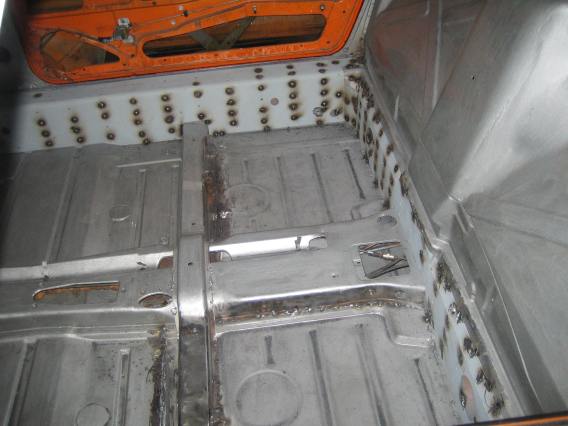
Interior needs a bit more work, car was in Seattle for some time in its life so water had found its way into the interior I guess. Rear pans will need patching, when I clean the area up will see how much good metal there is, right now just a couple of pin holes.
Chris
Posted by: my928s4 Nov 25 2007, 03:20 PM
Some more surface rust around the pedals but everything else seems solid.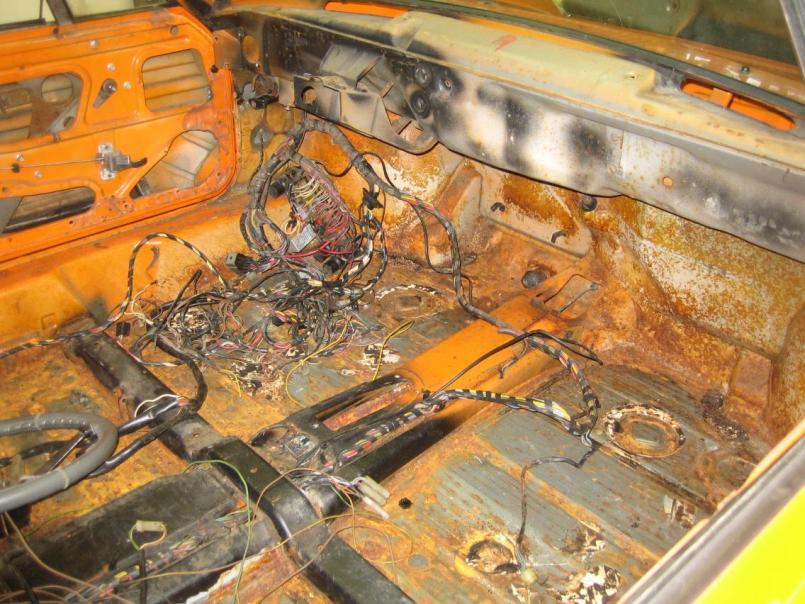
I decided to remove the engine today, I was hoping for help but in the end decided to just do it myself. Could have done with another jack though, the universal joint on the gear shifter linkage could not be disassembled as the grub screw had been rounded by a PO. With the engine bar removed there was just enough room to pull out the whole assembly.
Chris
Posted by: my928s4 Nov 25 2007, 03:24 PM
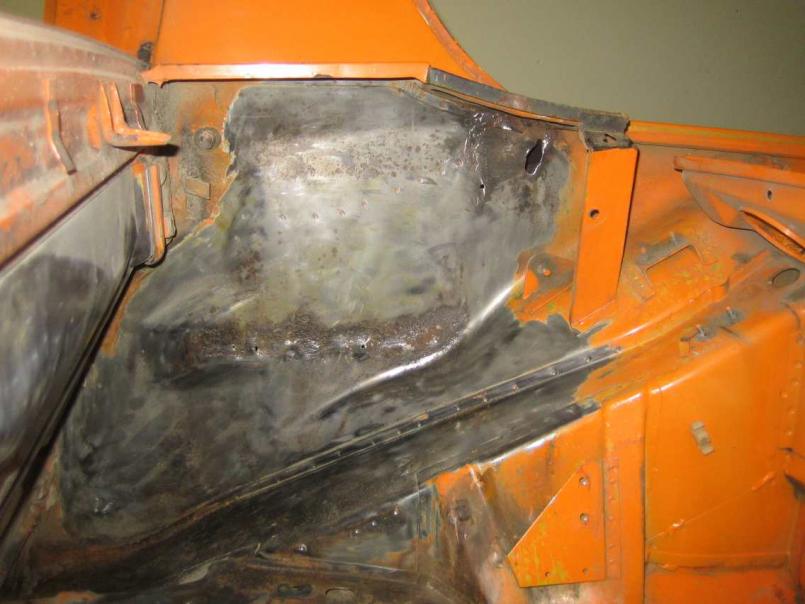
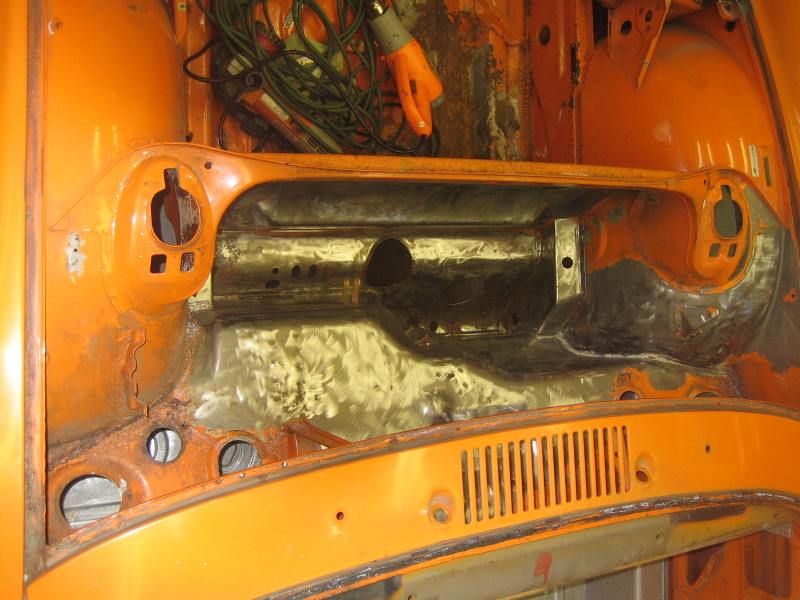
Despite prodigous prodding with a large screwdriver I could not find any weak areas in the hell hole  .
.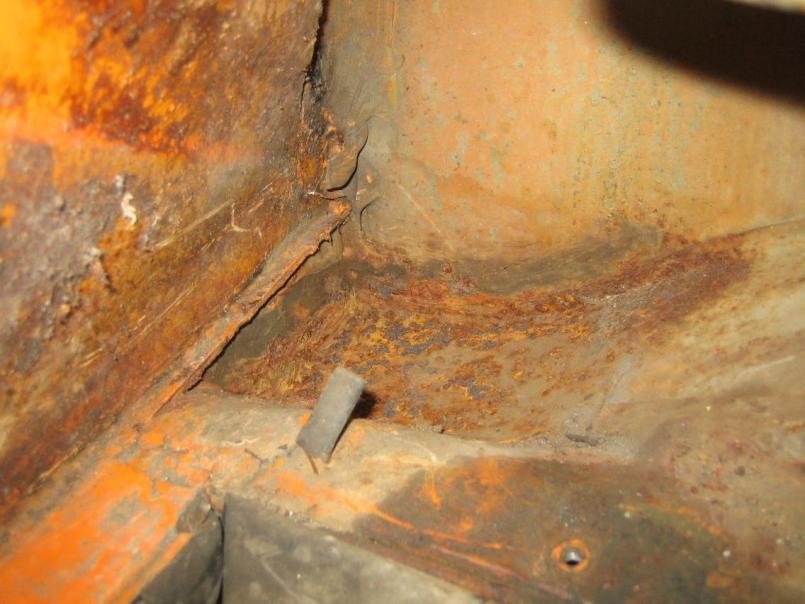
Someone has done a real nice bodge on the passenger side trunk pivot point.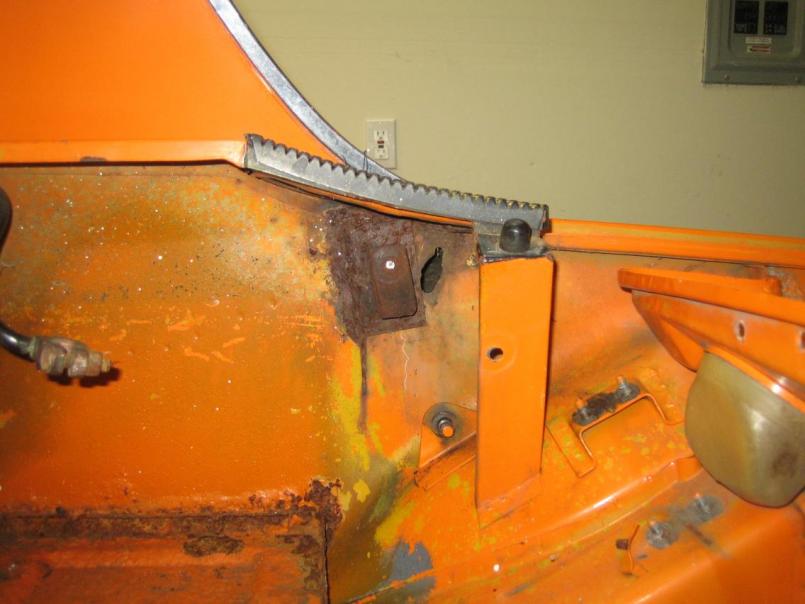
Need to do some more bagging and labelling of parts, remove the wiring harness and some small trim and then comes the messy stuff. Cleaning and metal work.
Chris
Posted by: orthobiz Nov 25 2007, 08:16 PM
I love orange! Keep posting progress and good luck!
Paul
Posted by: Dan (Almaden Valley) Nov 25 2007, 08:23 PM
save the orange cars 
keep up the good work...looks like you have a very solid project so far 
Posted by: 9146FAN Nov 25 2007, 10:04 PM

Orange is the best. Looking good!
Posted by: my928s4 Dec 30 2007, 02:30 PM
OK got a couple of hours in yesterday and today with my angle grinder and associated abrassive attachments, also made some progress in the engine bay but more on that tomorrow.
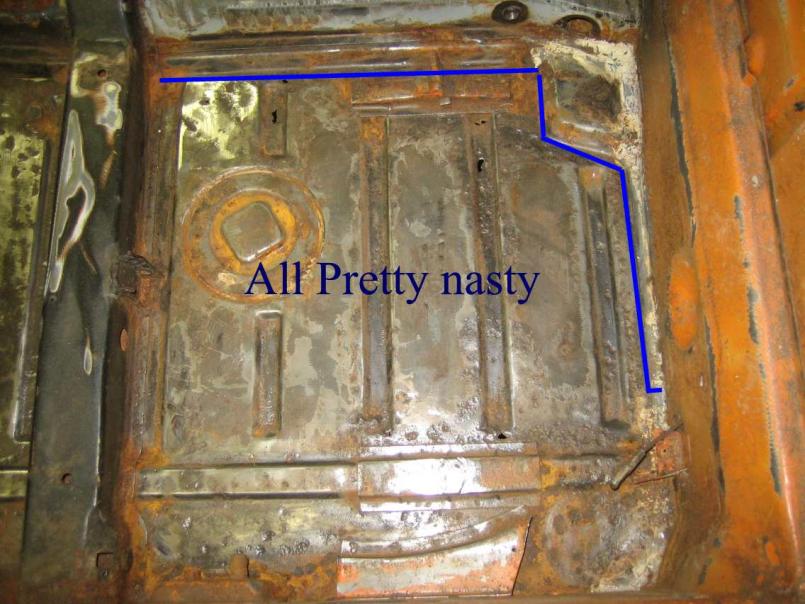
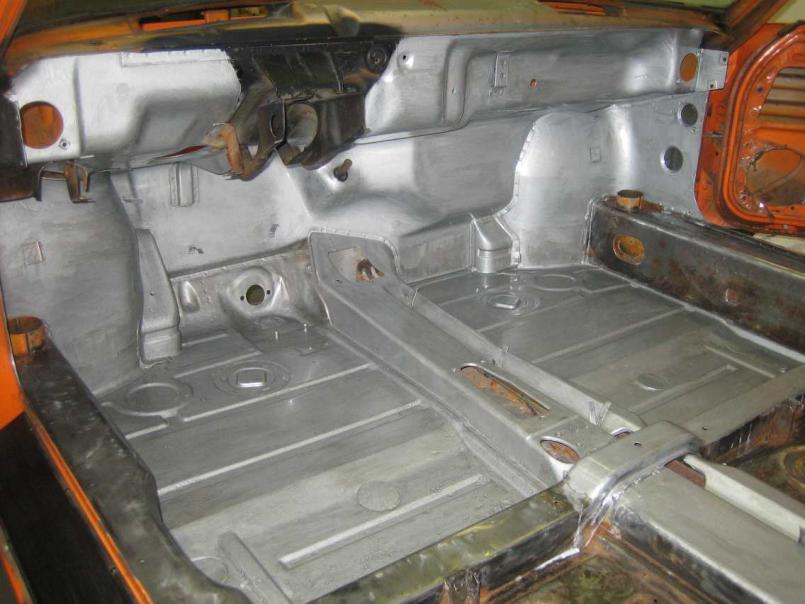
So after digging in deeper there are more holes than I thought, the metal in the rear pans is pretty thin although most of the metal around the edges is good except the passenger rear quarter.
Some of the front of the drivers side pan is not so good but the majority is OK, front of the passenger is all good. Nice and shiny.
All of this rot was from the inside, so a leaky cabin over the years was the culprit.
Should I order front and back pans? Replace all of the rear and just the bit of the drivers side front that needs it? Just wondering what some of you have done.
The ugly.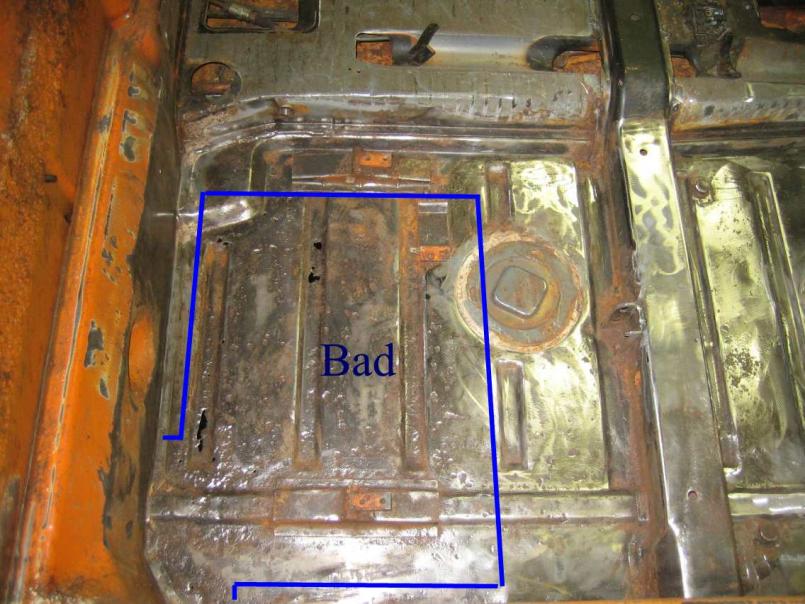
Posted by: my928s4 Dec 30 2007, 02:35 PM
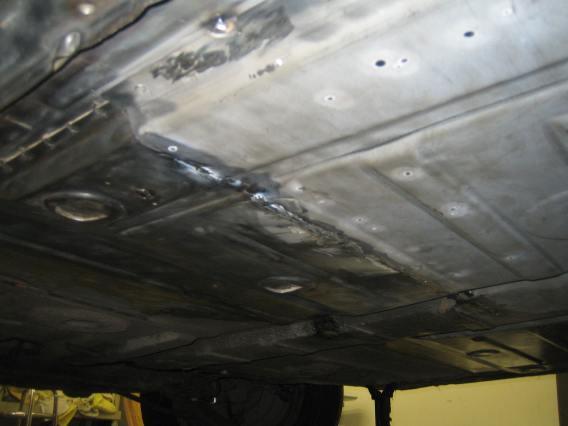
The bad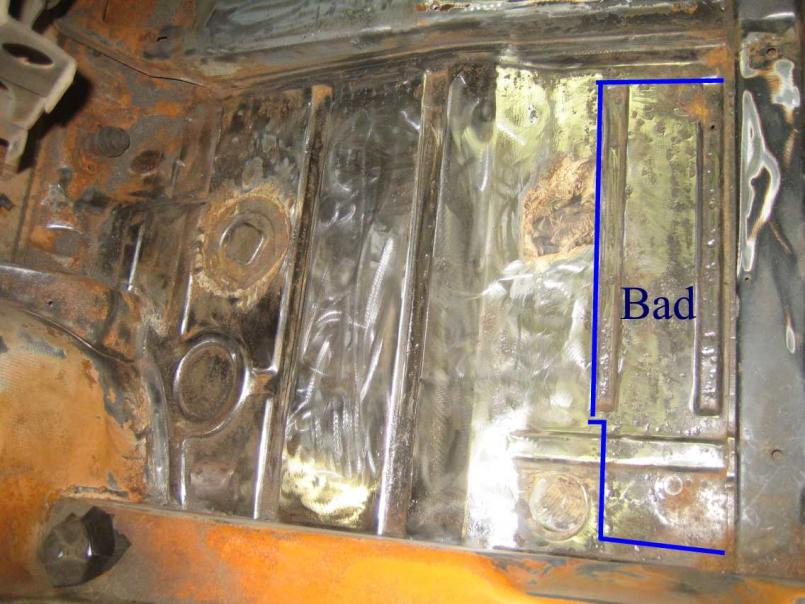
The good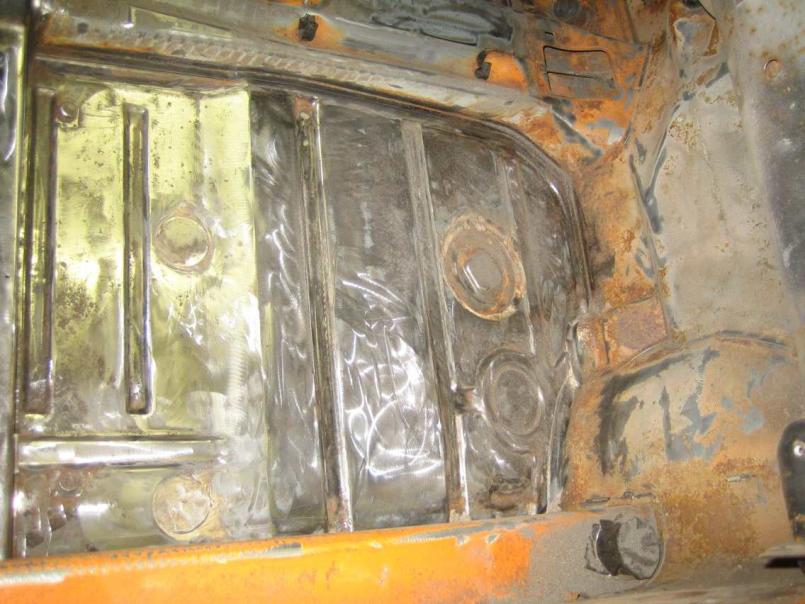
Posted by: my928s4 Dec 30 2007, 02:37 PM
Messed up.
Posted by: scotty b Dec 30 2007, 05:18 PM
rear pan section is definitely needed. IMHO that small area in front of the seat mount does not warrant a new pan section. You picture doesn't show any real damage there and I would recommend at the most making a small piece of metal to replace there instead of the cost and werk of a pan section.
Posted by: my928s4 Dec 30 2007, 07:13 PM

rear pan section is definitely needed. IMHO that small area in front of the seat mount does not warrant a new pan section. You picture doesn't show any real damage there and I would recommend at the most making a small piece of metal to replace there instead of the cost and werk of a pan section.
Thanks Scott, appreciate the input. There are two small pin holes in the front pan and the rest of the metal in the first indent is pretty thin but as you suggest it does seem a waste to get a new front pan for that small area.
Posted by: my928s4 Dec 30 2007, 09:17 PM
rear pan section is definitely needed. IMHO that small area in front of the seat mount does not warrant a new pan section. You picture doesn't show any real damage there and I would recommend at the most making a small piece of metal to replace there instead of the cost and werk of a pan section.
Thanks for the feedback, I tend to agree a complete front pan seems a little extreme for that small patch. Just wanted to check, there are a couple of small holes and the metal is pretty thin in that area.
Posted by: McMark Dec 30 2007, 10:59 PM
I would section in the rear pan, not do a complete job. Removal is a PITA and it would be better to just leave enough to butt weld the whole section.
Posted by: my928s4 Jan 13 2008, 05:51 PM
So while making progress with the grinder and wire brush is the right thing to do it can sometimes get a bit depressing finding more areas that need work so I decided to do something that looked like forward progress.
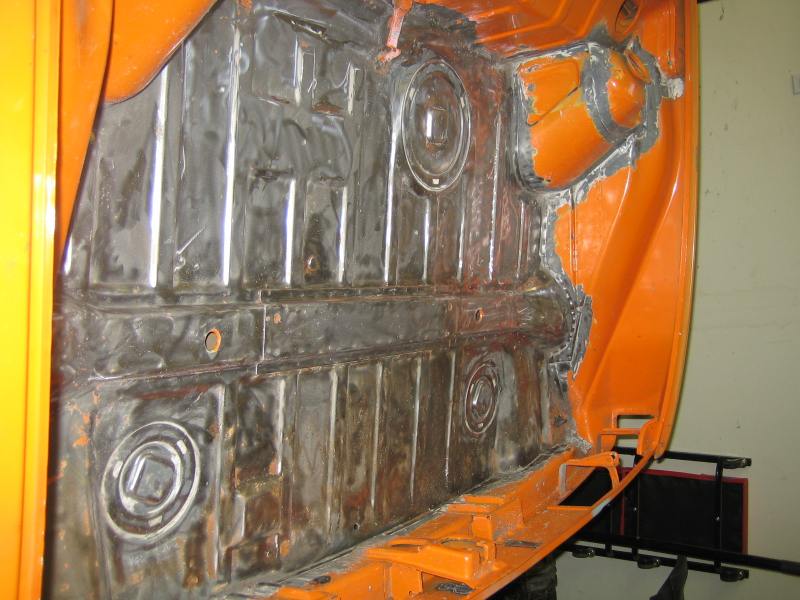
I have been reading a lot of the archived threads on rust prevention and if I had the equipment I would use epoxy primer, but I don't (yet) so I bought a POR15 starter kit and thought I would try it out. I used the Marine Clean on the front pan area followed by the Metal Ready and that was fairly painless.
Pan after Marine Clean and Metal Ready
I then followed with the first coat of POR-15 Silver.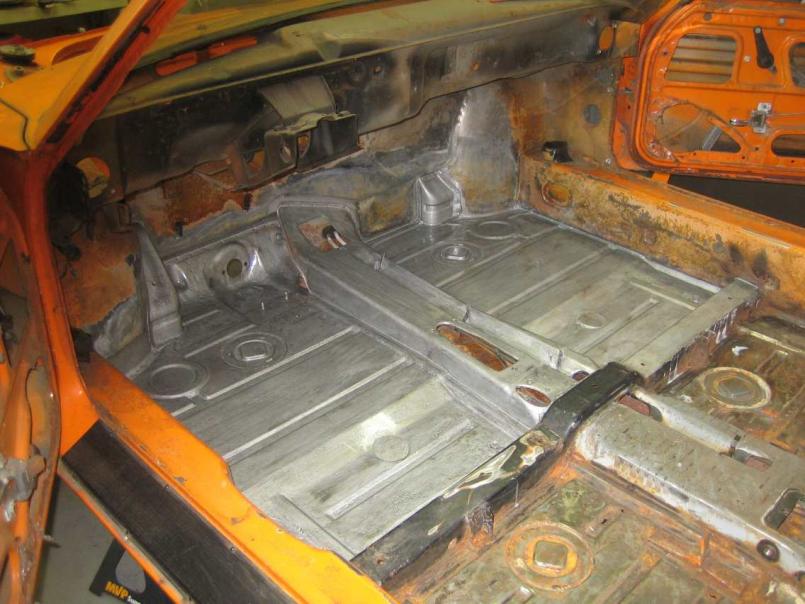
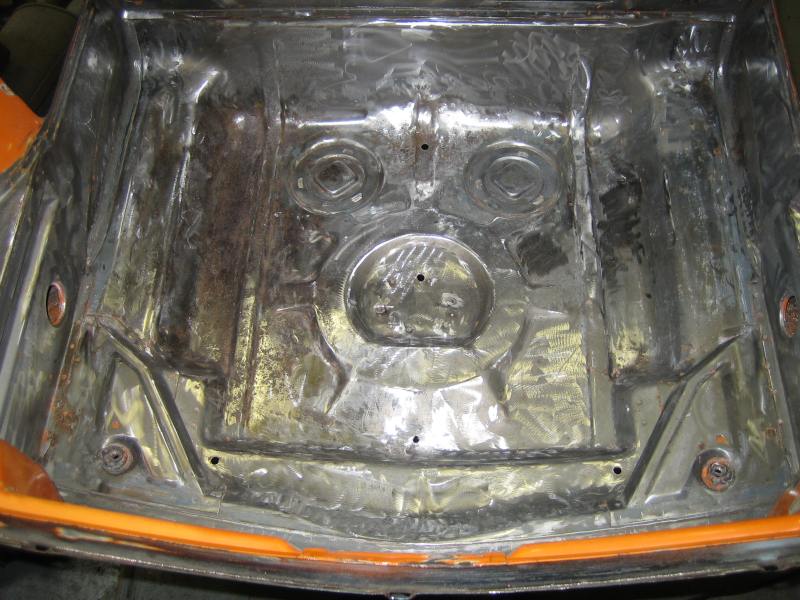
Posted by: my928s4 Jan 13 2008, 05:55 PM
And then a 2nd coat, looked pretty good so I will finish of the interior with this followed by primer and color later.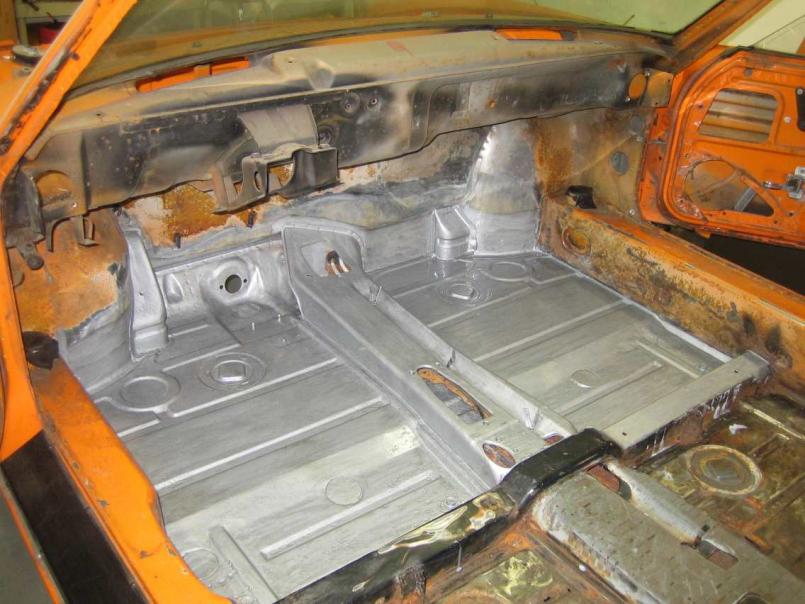
Posted by: my928s4 Jan 13 2008, 05:59 PM
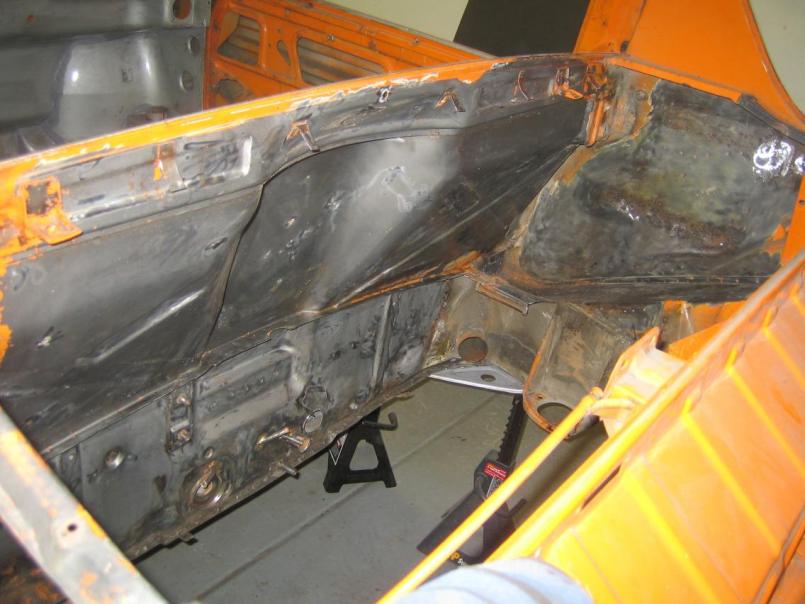
OK, couple of questions.
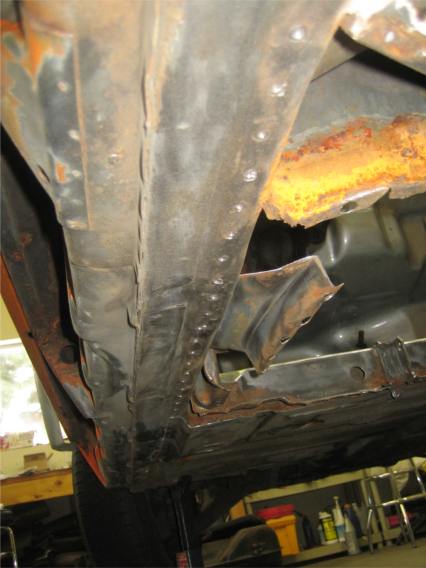
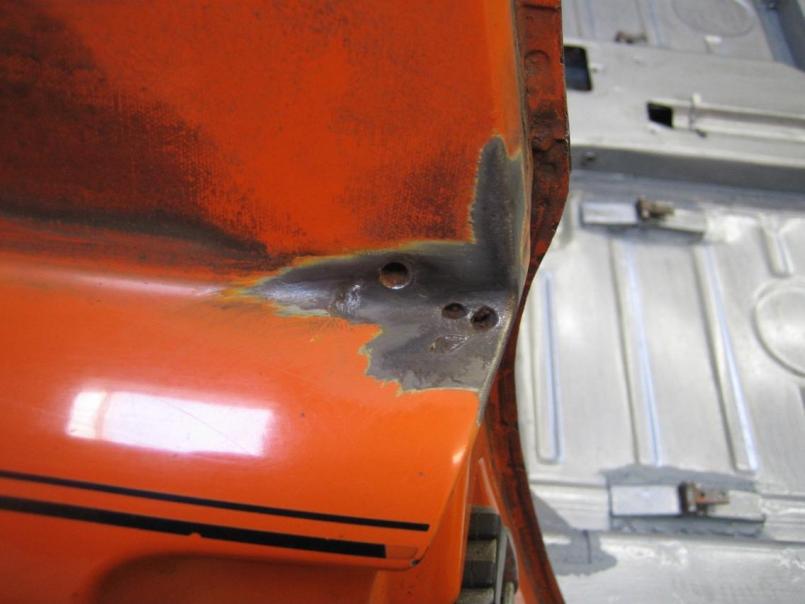
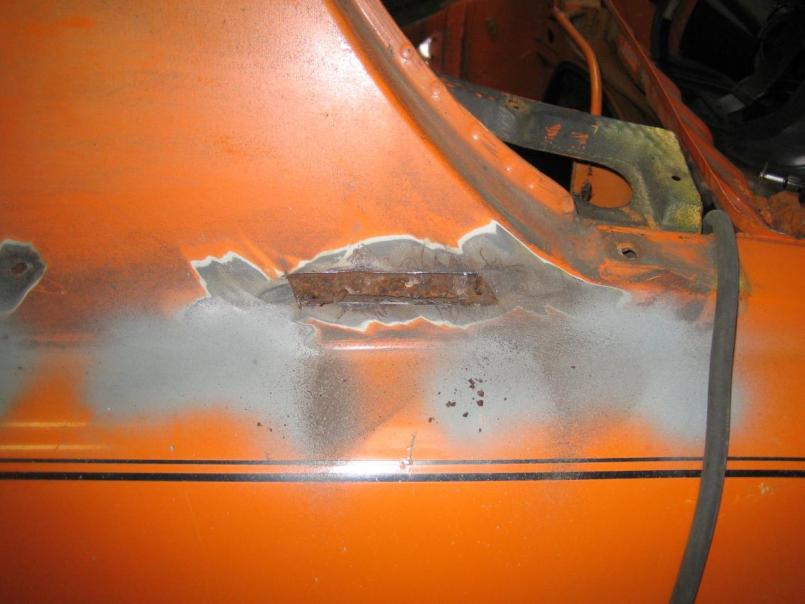
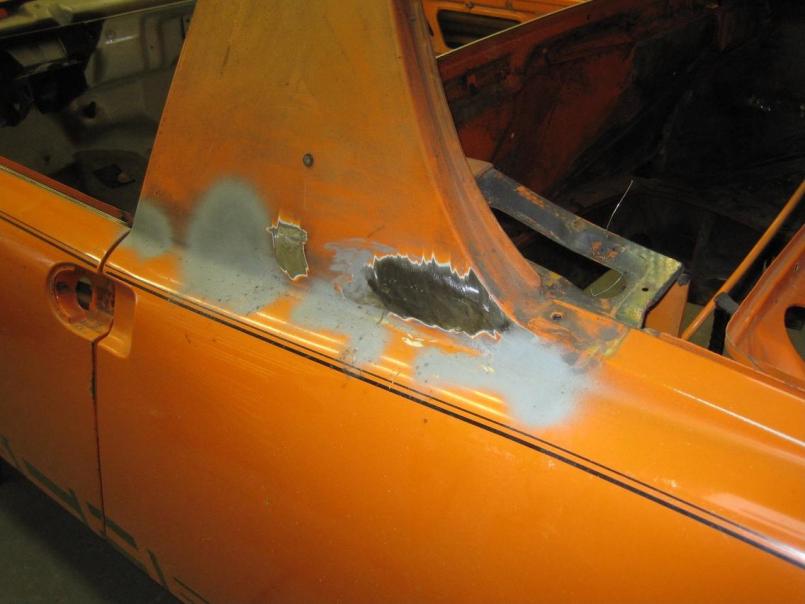
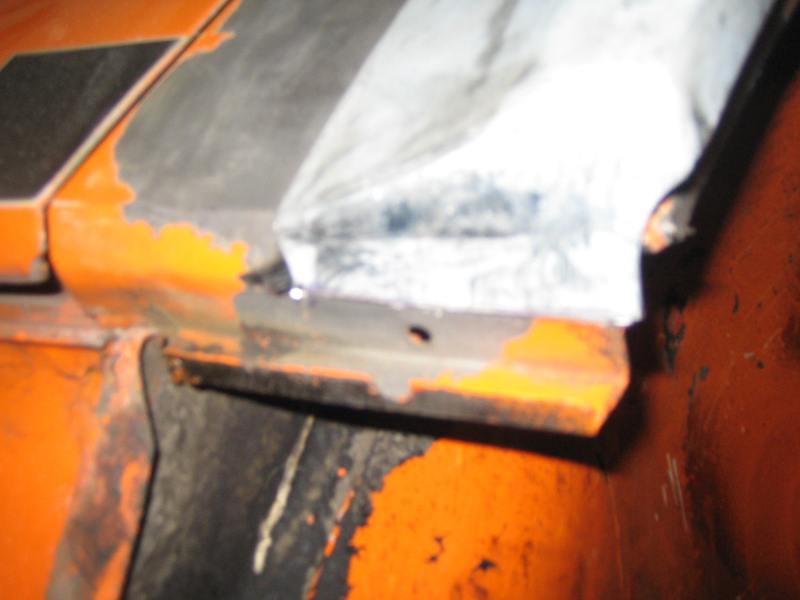
What should I do with the driver side jack post? This area looks to be lacking in rust but metal fatigue seems to be an issue, any suggestions? I searched the archives and there did not seem to be an easy way to gain access to the upper portion of the jack post to remove. Maybe I am missing something obvious.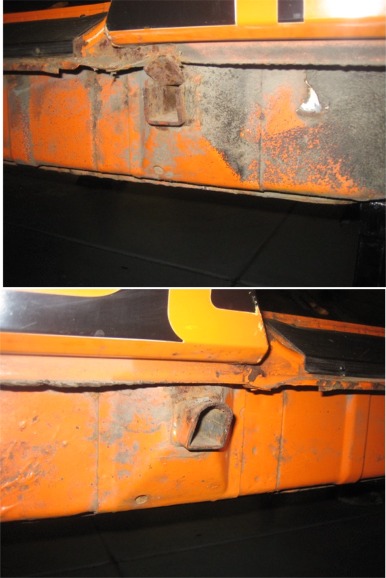
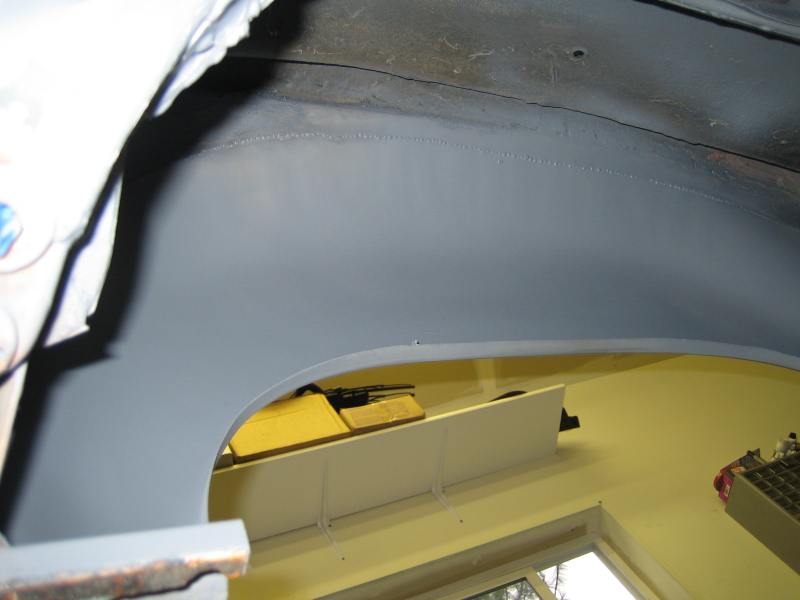
Drivers side sail panel, no doubt this looks a lot worse underneath, do I need to replace the whole part of just cut out the bit that needs replacing?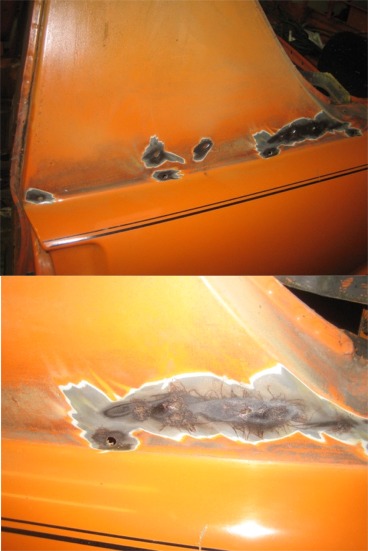
Next week I am going to pick up my welder, order the rear floor panel and Engman kit. Should keep me busy for a while.
Posted by: scotty b Jan 13 2008, 06:48 PM
IMO the jack post should ALWAYS be cut out as they tend to rust from the inside and you can't see what is going on until it is to late. Drill out the spot welds and if all is good, treat it and re-weld the metal back in using the original spot weld holes. Floor is looking good !! 
Posted by: finstermojo Jan 13 2008, 08:12 PM
When i did my resto and did the same thing you are doing i had mixed results with the POR15 and stopped using it sometimes it would peel right off like a sheet of paper and with more research i found it happed to others too. I found Rust Bullet and sprayed the entire underneath of my car with it and it was 100 times better it flowed better dried better and is so much more reliable without having to go through the process that you have to go through with POR15 I live on the ocean and everything rusts around here and i started using this on everything and it works great. Ive used them both and Rust bullet is simpler and better. I once had a can dry up on me and the paint was like steel . The other part about it is you can paint on top of it without the hassle
http://www.rustbullet.com/index.htm?source=Yahoo&OVRAW=rust%20bullet&OVKEY=rust%20bullet&OVMTC=standard&OVADID=9653498011&OVKWID=4205382011
Posted by: my928s4 Jan 14 2008, 08:36 AM
IMO the jack post should ALWAYS be cut out as they tend to rust from the inside and you can't see what is going on until it is to late. Drill out the spot welds and if all is good, treat it and re-weld the metal back in using the original spot weld holes. Floor is looking good !!
OK, I guess I can decide if I want to delete them permanently as well. So how do you get access to the spot weld at the top of the plate?
Posted by: my928s4 Jan 14 2008, 08:40 AM
When i did my resto and did the same thing you are doing i had mixed results with the POR15 and stopped using it sometimes it would peel right off like a sheet of paper and with more research i found it happed to others too.
Interesting thanks, the more I read about a particular rust protection product the more I became disillusioned with it, there was always something negative and I decided no matter what I chose it was a compromise. Your experience is a bummer and I sure hope mine does not turn out that way .... time will tell.
As I said if I had the apparatus I would epoxy prime, maybe by the time I get to the underside we will have to see.
Posted by: my928s4 Jan 27 2008, 11:44 AM
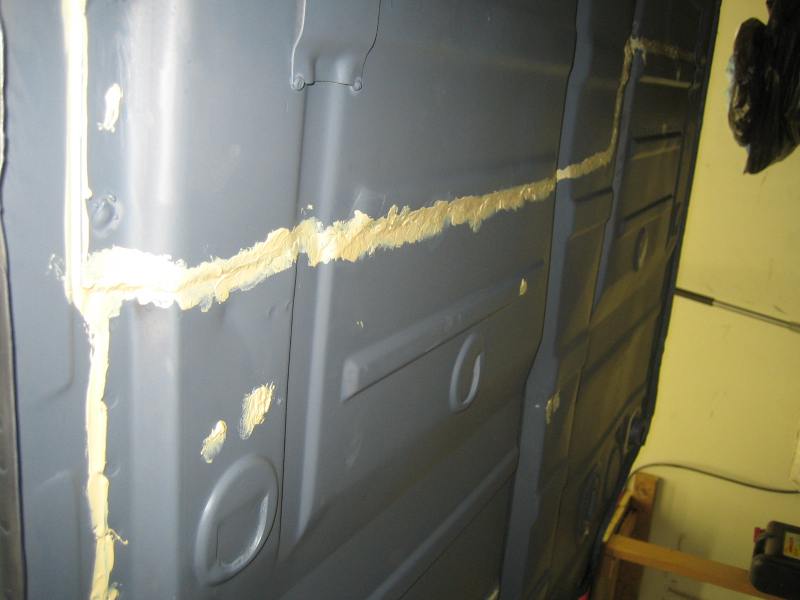
Still waiting for the rear pan (should be here next week) so worked on removing the rest of the paint from the rear bulkhead and then prepping and painting. I left where the Engman kit will go unpainted and I need to get some weld thru primer on those surfaces.
Need to get some gas for the welder too.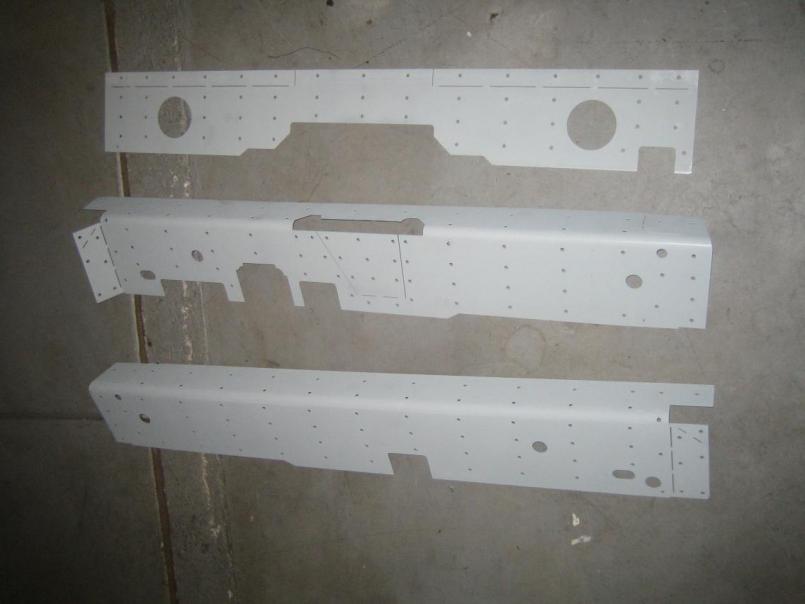
Posted by: Root_Werks Jan 27 2008, 06:54 PM
I have seen many-o-914's and your's is not that bad at all. Little rust fixing and it'll be good to go. Can't wait to see this one come together!
Posted by: my928s4 Jan 27 2008, 07:24 PM
I have seen many-o-914's and your's is not that bad at all. Little rust fixing and it'll be good to go. Can't wait to see this one come together!
Yep Dan I agree, progress is a little slow as this is an area I have little experience on a car I am unfamiliar with but then that is all part of the challenge. When I eventually get past the bodywork things should go a little quicker.
Chris
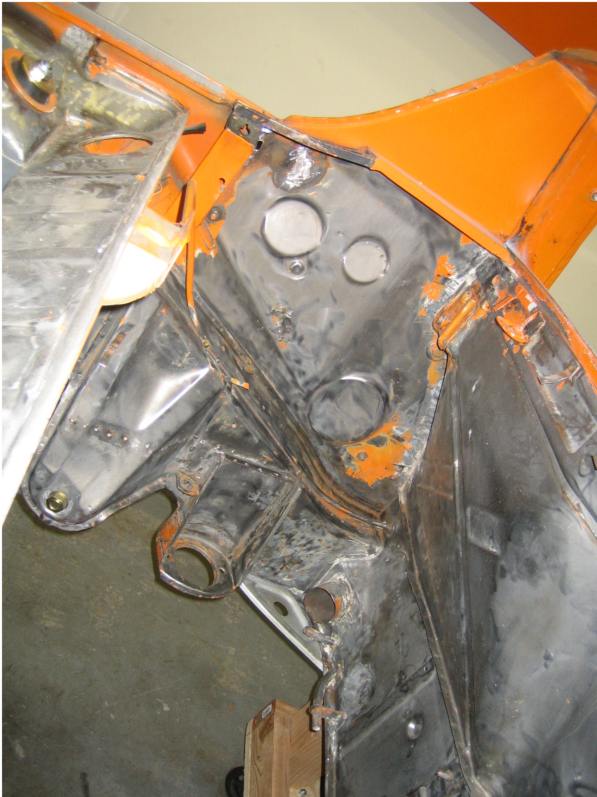
Posted by: my928s4 Jan 27 2008, 07:31 PM
Cleaned up the battery area in the engine bay when I wasn't shovelling snow today. So far I don't see anything to worry about, took some time to remove the amateur trunk pivot that thing had a lot of weld on it.
After the interior this will be the next area that gets attended too.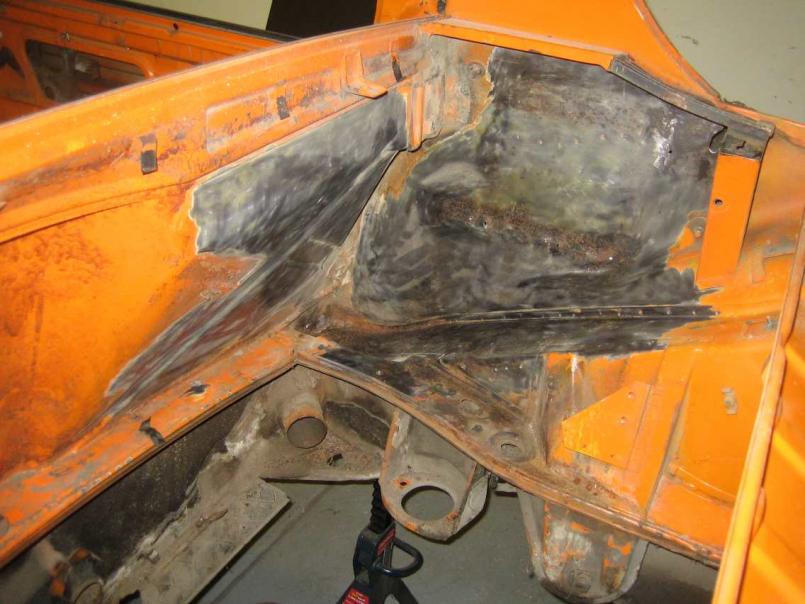
Posted by: bandjoey Jan 27 2008, 08:25 PM
In the Jan 13 post you've just finished cleaning the pans before the por15 treatment. What did you use to cut out and clean up the soundproofing glued to the floor? Great job..Can't wait to see the car in paint.
Posted by: my928s4 Jan 27 2008, 10:17 PM
In the Jan 13 post you've just finished cleaning the pans before the por15 treatment. What did you use to cut out and clean up the soundproofing glued to the floor? Great job..Can't wait to see the car in paint.
Heat gun and 1" wood chisel seems to be the consensus on that one and it works pretty good, heat up the surrounding area and then right where you want to work with the chisel. That worked for me, takes a couple of hours and comes off especially easy where there is rust underneath.
Paint seems like such a long way of some times !!!
Posted by: my928s4 Feb 3 2008, 09:08 PM
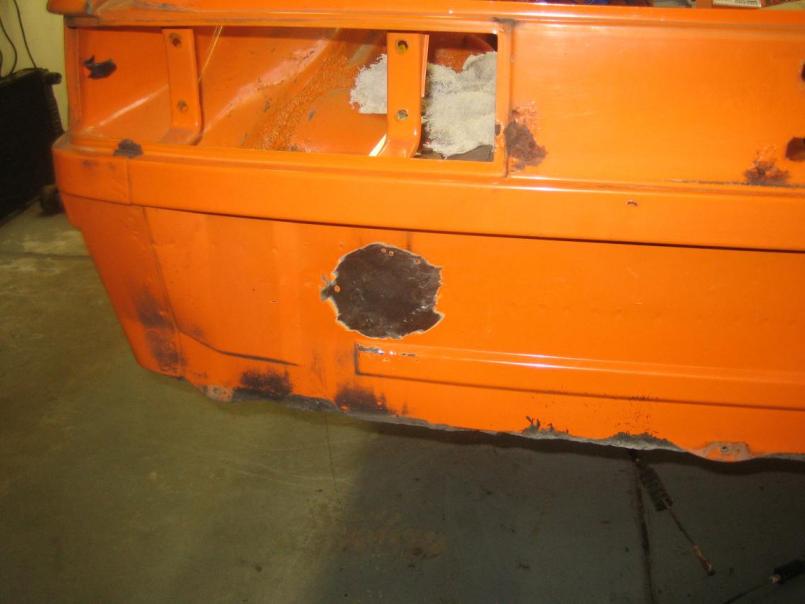
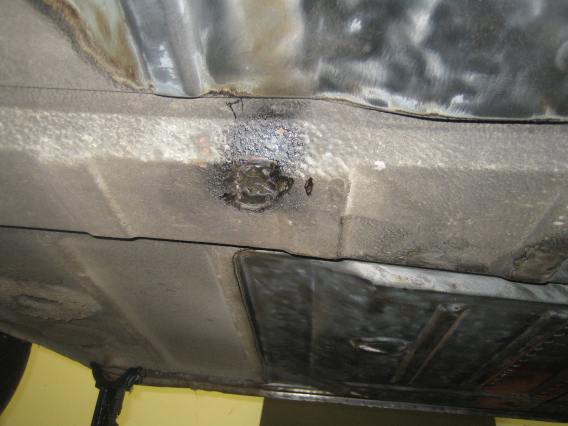
OK so still waiting for the floor panel so I decided that since I bought some gas for my new welder I should put it to good use. Naturally I practiced on scraps for a few hours but could felt that it would be good to try on an area of the car that is well hidden.
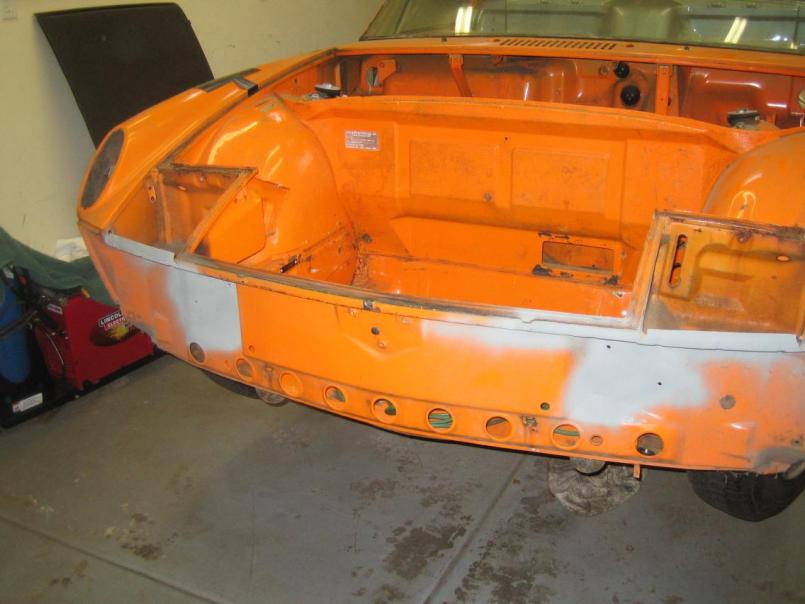
So I chose to plug the rear bumper shock holes.
Here is a pic of my welding machine, a Miller was a little rich for my blood and after reading everyone elses experience this seem like s good compromise.
Posted by: my928s4 Feb 3 2008, 09:09 PM
OK so still waiting for the floor panel so I decided that since I bought some gas for my new welder I should put it to good use. Naturally I practiced on scraps for a few hours but could felt that it would be good to try on an area of the car that is well hidden.
So I chose to plug the rear bumper shock holes.
Here is a pic of my welding machine, a Miller was a little rich for my blood and after reading everyone elses experience this seem like s good compromise.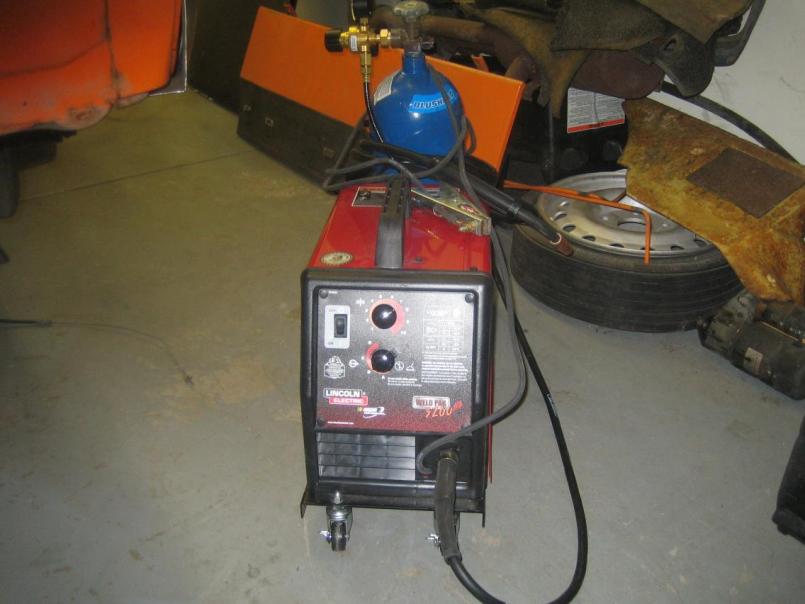
I prepped the area and cut out a patch.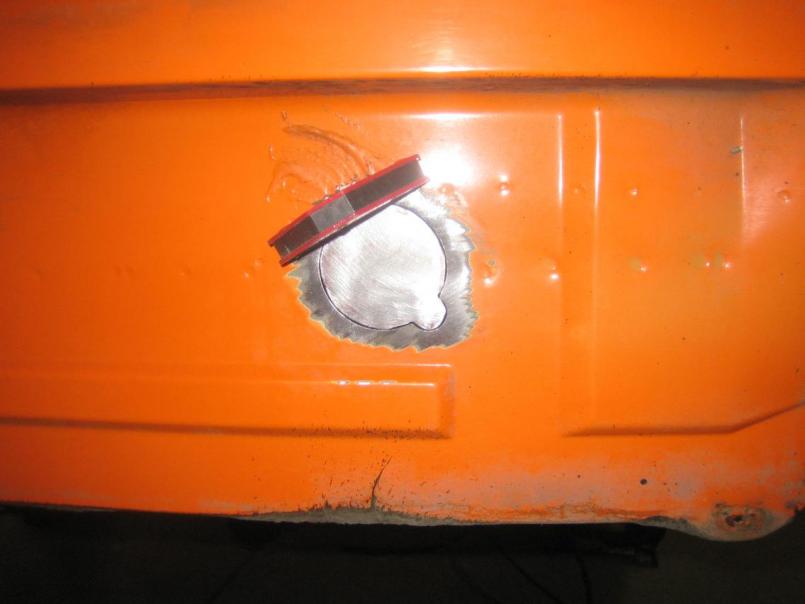
Then tack welded into place.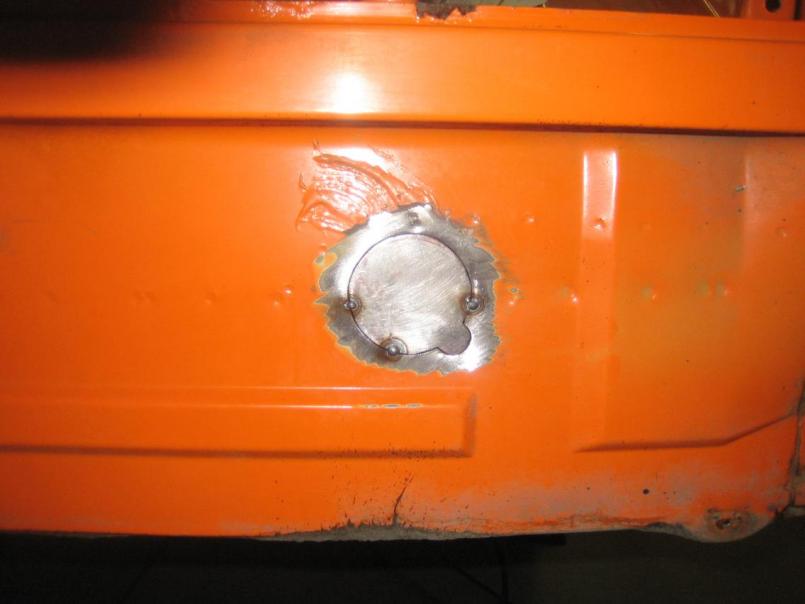
I was worried about running a bead and heating up the panel too much so I laid multiple tacks. Problem with this is after two or so rounds of tacks I end up with a few tiny pin holes. Is this the right way to do this or should I lay small beads moving around and allowing the panel to cool ??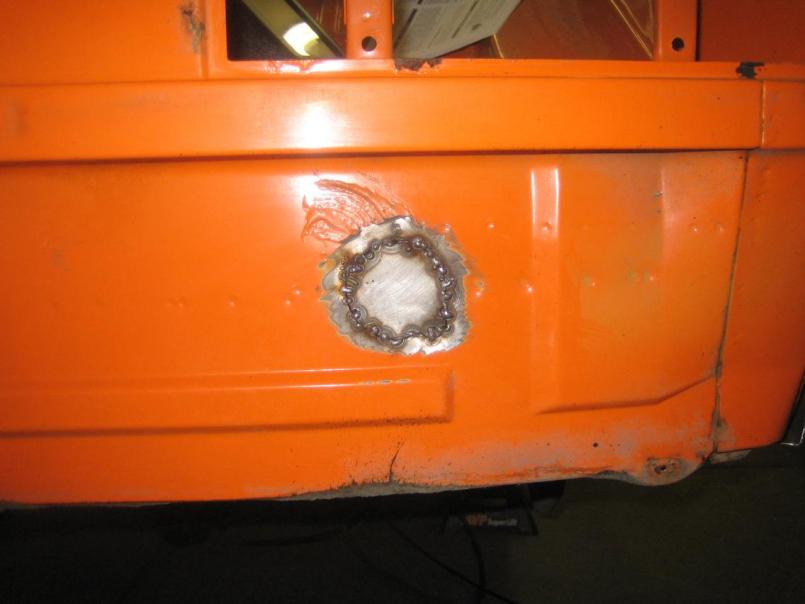
Posted by: my928s4 Feb 3 2008, 09:13 PM
Here are the two holes after grinding.
Attached thumbnail(s)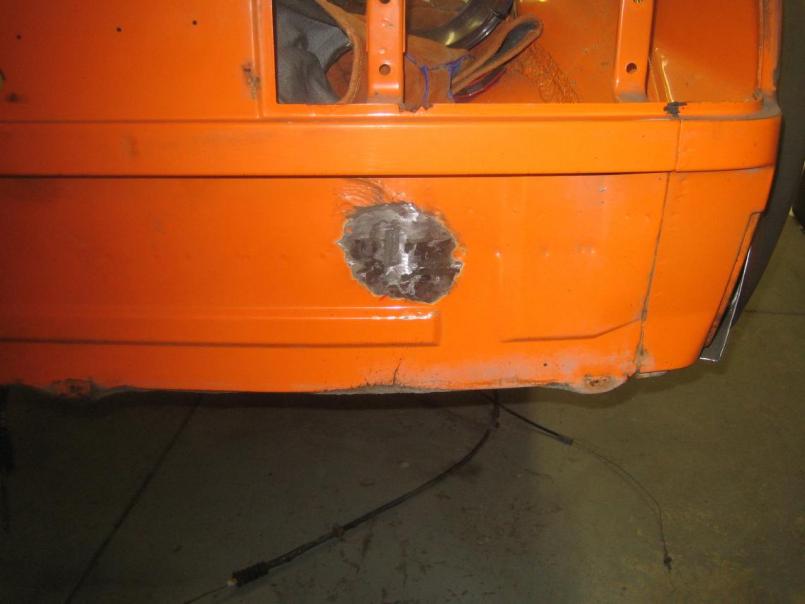
Posted by: Van Feb 3 2008, 09:25 PM
Your heat range on the welder (amps) might be set too high if you are consistantly burning through the metal. (You may also be able to turn up your wire speed a little bit - the same amps with more wire will give you a little less penetration.)
After tacking, I suggest you make 1/2" or 3/4" long beads alternating on opposit sides until your weld is complete.
Great looking project. Keep us up to date!
p.s. are you thinking of doing any seam welding? Especially around the rear suspension box sections? How about a GT stiffening kit?
Posted by: my928s4 Feb 9 2008, 04:50 PM
So bumper shock holes are now done, last one went sooo much better than the 1st one 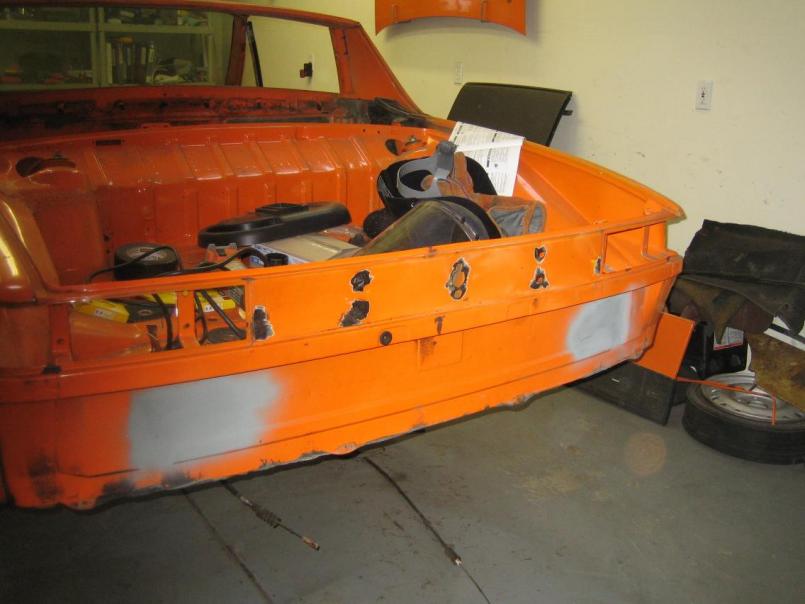
Also patched some thin metal on the inside, could not get the grinder to the weld at the bottom.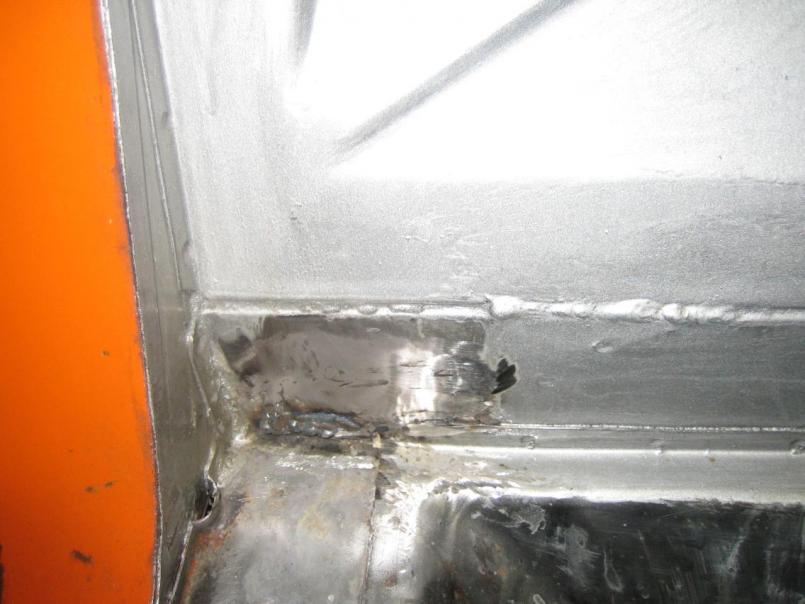
Posted by: my928s4 Feb 9 2008, 04:53 PM
OK now onto the BIG job of the day, the floor pan removal. Wonder how much you would have to pay to have someone do this? A lot me thinks.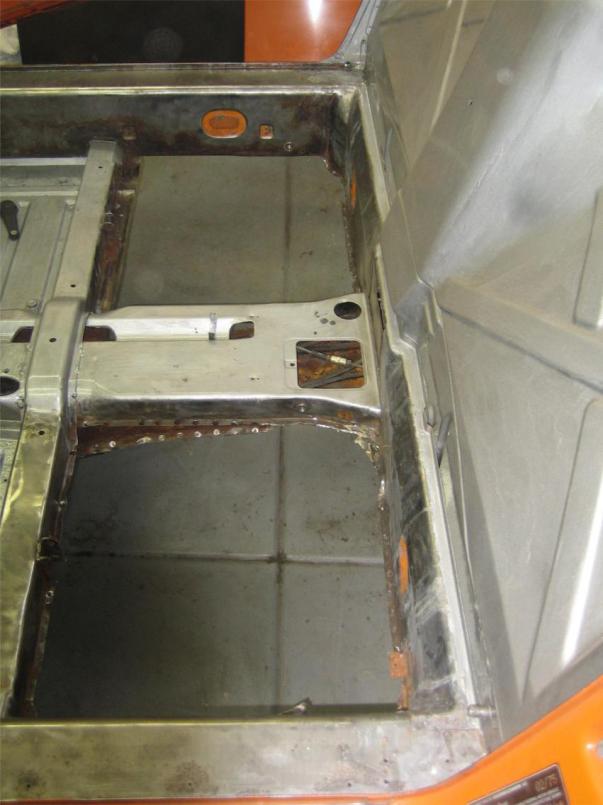
I ran out of steam so I cut out the big pieces and left the center section for another day, someone has seam welded the rear center and at that point I decided to call it quits till tomorrow.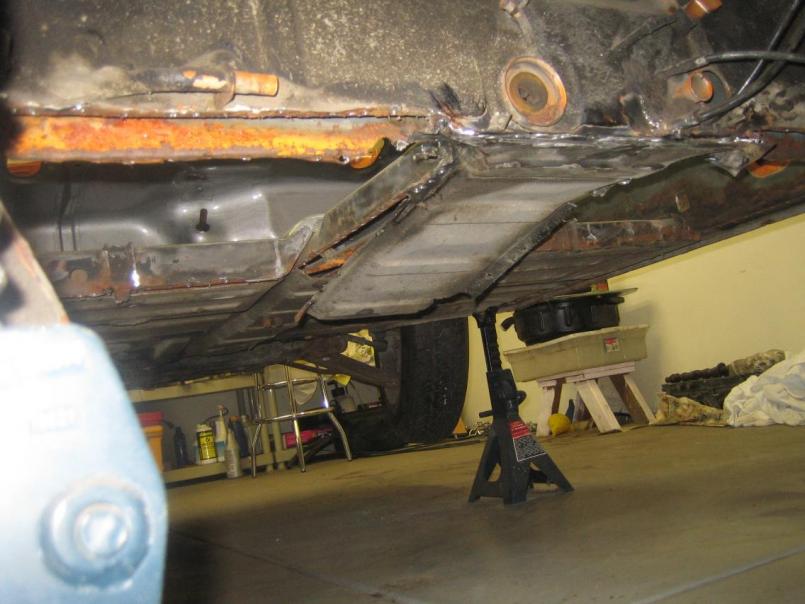
New floor pan arrived Friday but there is plenty of clean up before that goes in.
Posted by: my928s4 Feb 10 2008, 04:44 PM
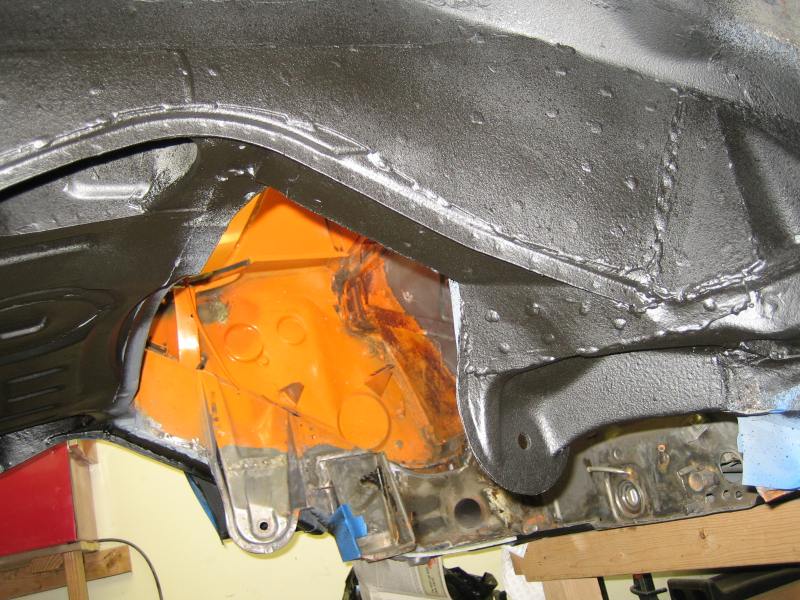
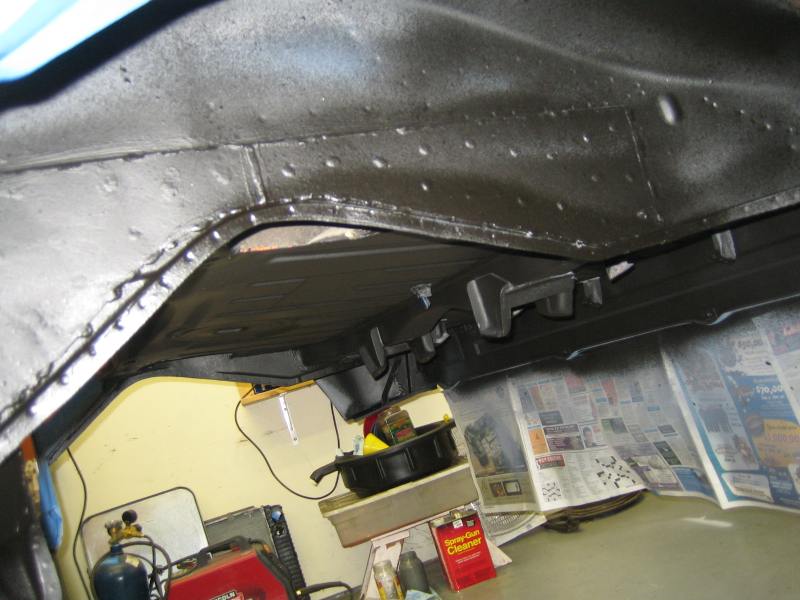
Got the wire wheel attachment on the grinder and decided to check out the state of the surfaces this morning, longs look great and most of the rust is superficial so that is good.
Decided I might as well clean up the underside and most of the undercoating and paint came of pretty easy, thinking another 3-4 messy hours and it will be done.
Here are the longs.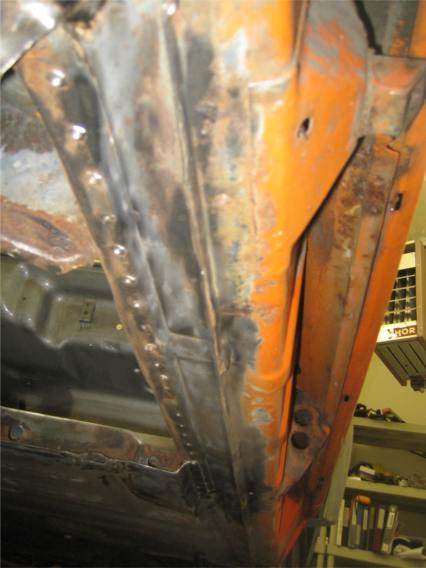
One thing about replacing the rear floor pan is the jack posts cover the rear corners, I could have removed them and re-used but new ones would be better.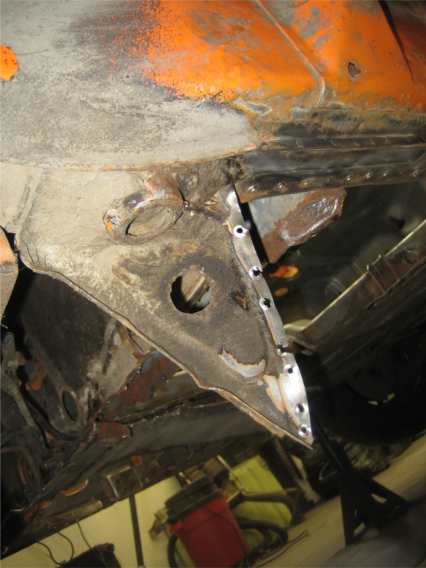
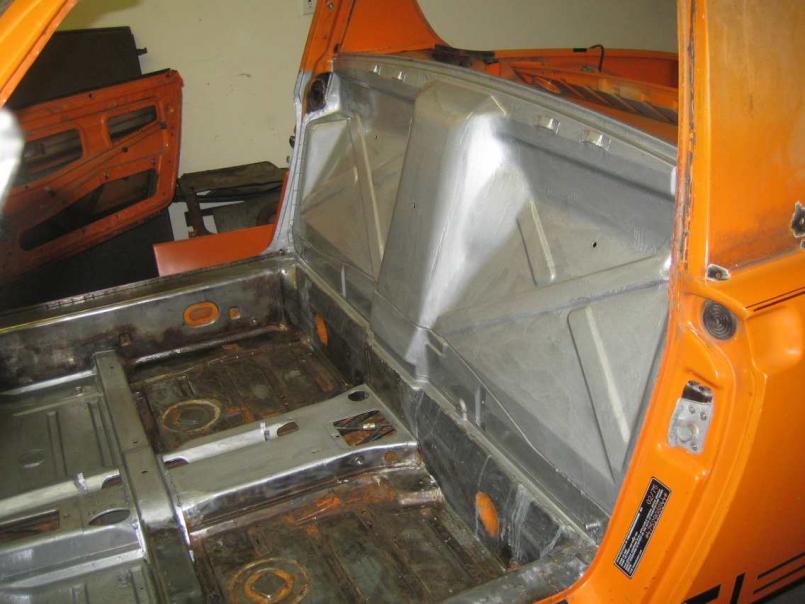
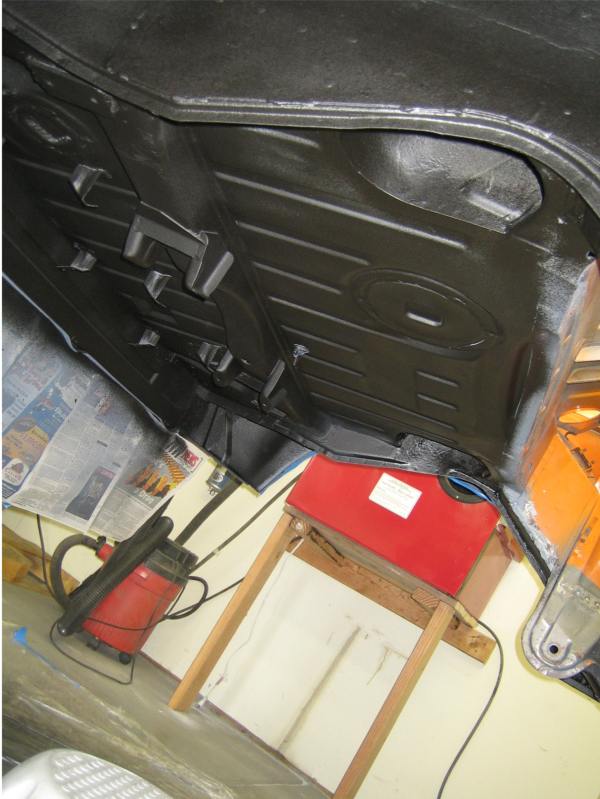
Here is a shot looking into the rear bulkhead.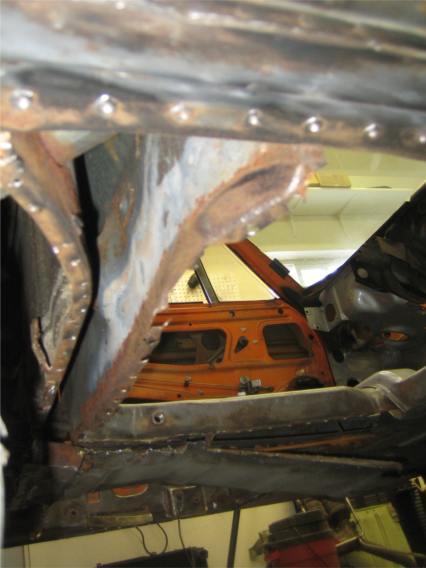
Posted by: my928s4 Feb 17 2008, 09:22 PM
Another weekend lying mainly under the car, I thought I would be welding in the pan but POR15ing the areas which will hopefully never see the light of day again took some time.
The new pan actually covered a lot more area than I thought so I extended the drivers side cut a bit more which of course necessitated another 30 or spot welds to drill.
Here is a pic of how a new pan will look at some point ..., this is the fit where I marked out the cut lines.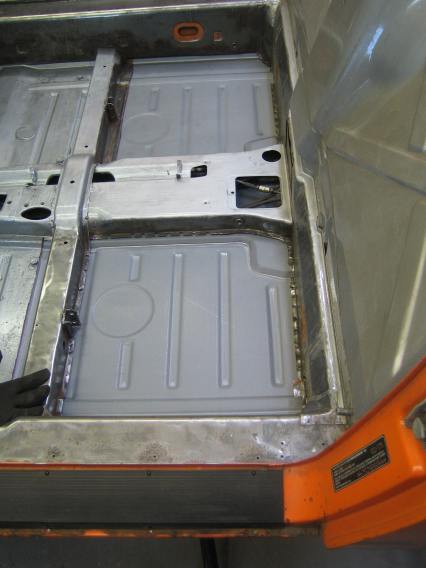
I found this the best method to support the panfor a snug fit and check for high and low points.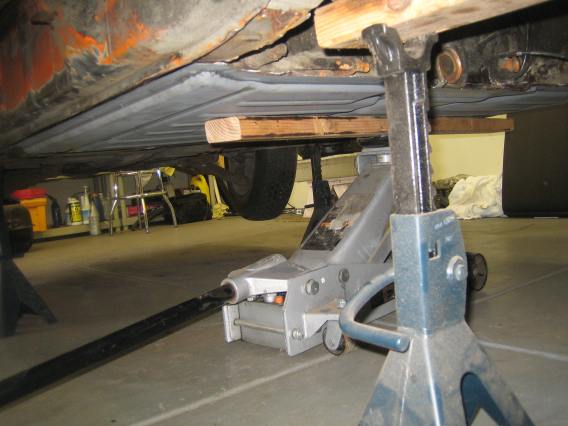
I did get sidetracked with undoing a PO clutch tube reinforcement which while effective did take away 1" of ground clearance. It was basically a threaded u tube with 4 nuts on each side. Here is a pic of the pieces I removed, I had to angle grind the loop off.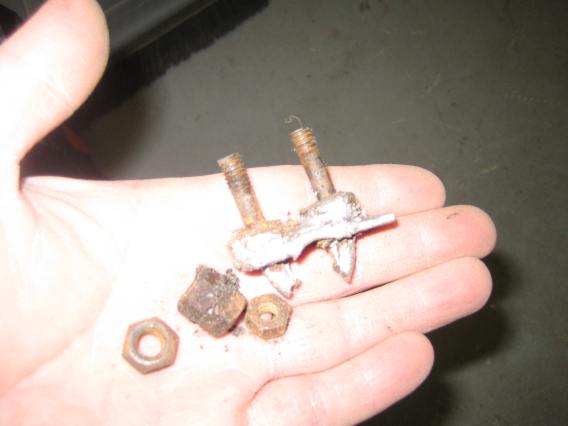
I fabricated a piece of metal around the tube much like the original (which is still on the tube futher forward), I used the holes left by the PO mod to weld the bracket to the floor. No judging on the top welds though please.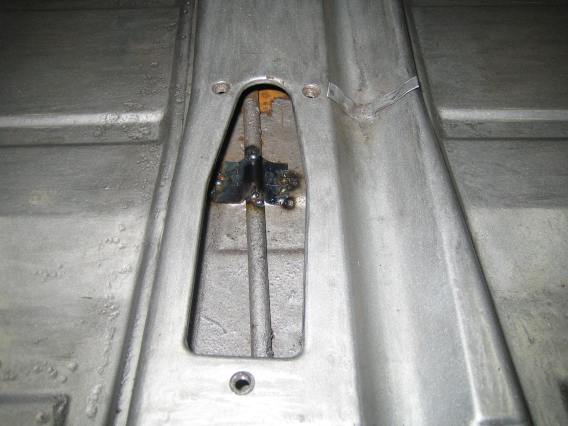
The tube had been welded at the rear so while the floor was out I welded a small plate to the inside of the bulkhead too.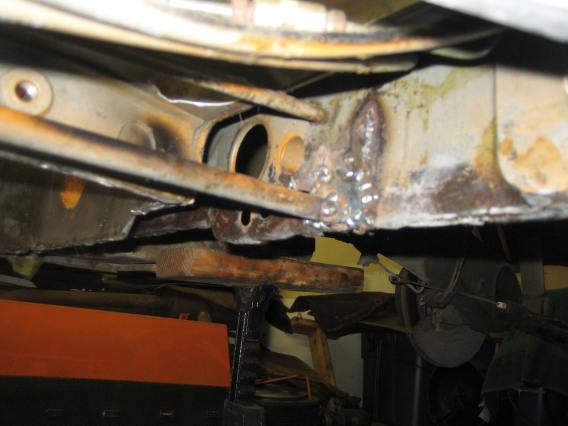
Posted by: my928s4 Feb 17 2008, 09:25 PM
I ordered some seat mount hinges from restoration design which are on back order but I did manage to remove the old seat brackets and clean up the assemblies. Apart from one hinge which was broken these look salvagable so I need to give Bill a call. I need to order the two rear jack points anyway.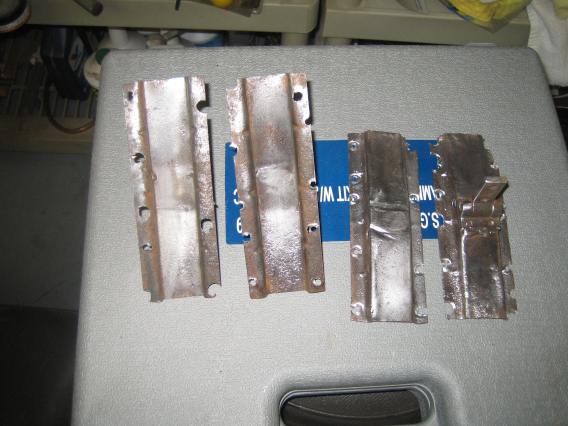
As an aside I made my first visit to the local paint store, I was after some weld thru primer and brushable seam sealer, the people in their could not have been more helpful so they will be seeing me again for my future needs.
Posted by: jim912928 Feb 17 2008, 10:24 PM
Excellent progress!
Posted by: my928s4 Feb 24 2008, 06:39 PM
OK, spent some serious time on the car yesterday and a lot less today as a disagreement between the angle grinder and a finger (tight corner and gloves not thick enough) meant 4 hours at urgent care and two stitches.
Anyway the floor pans are in, the seat rail re-enforcement still need to go in as well as the seat mounting points but I thought I would put the Engman kit in before that.
Welding under the car is interesting, took me a while to get the right settings and technique on the welder. This week I ran out of gas AND wire although a more competant user would no doubt have consumed vastly less of both.
I was hoping to get all the welding done today and then start prepping for some paint, ha, best laid plans.
Here is a pic of the inside, and underside of the new pan.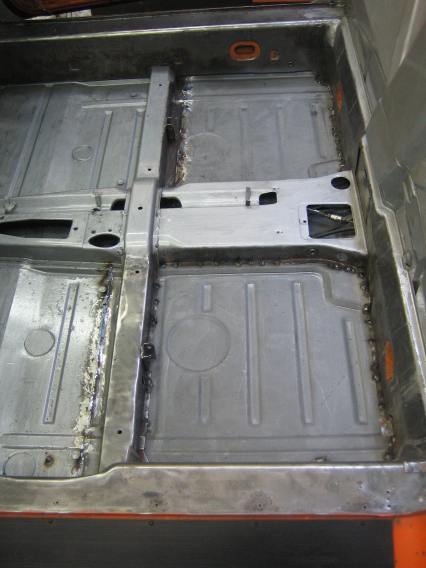
I then sprayed where the Engman kit goes with weld thru primer (anyone spot the access hatch a previous owner thought might be a good idea?).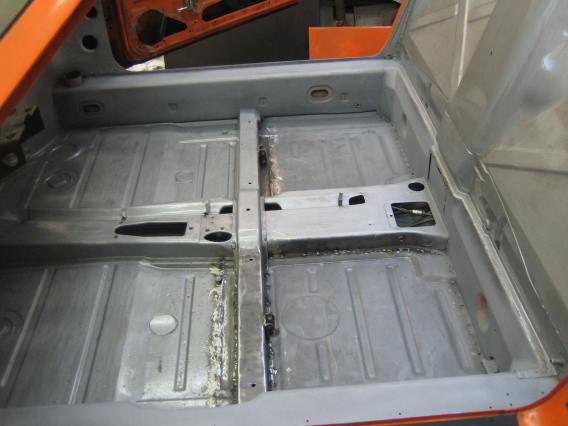
I spent quite a while getting the fit of the drivers side right, the inner long is far from square and I did the best I could to get it to metal to match the contours before I started welding. I thought the passenger side was better but I should have spent more time with it.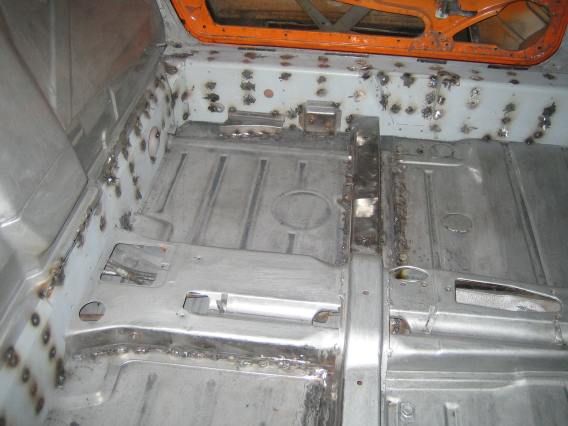
I was taking a break from welding to do some grinding, anyway it is coming on and hopefully I will get some eve time in this week.
Posted by: my928s4 May 24 2008, 10:11 PM
Well it has been a while, had a never ending honeydo list and some work to do on the 928 but finally got back to it.
Interior is pretty much completed for now, need some primer and paint and one seat hinge but no rush on those. I also stripped all parts from the doors except the latch and removed the windshield.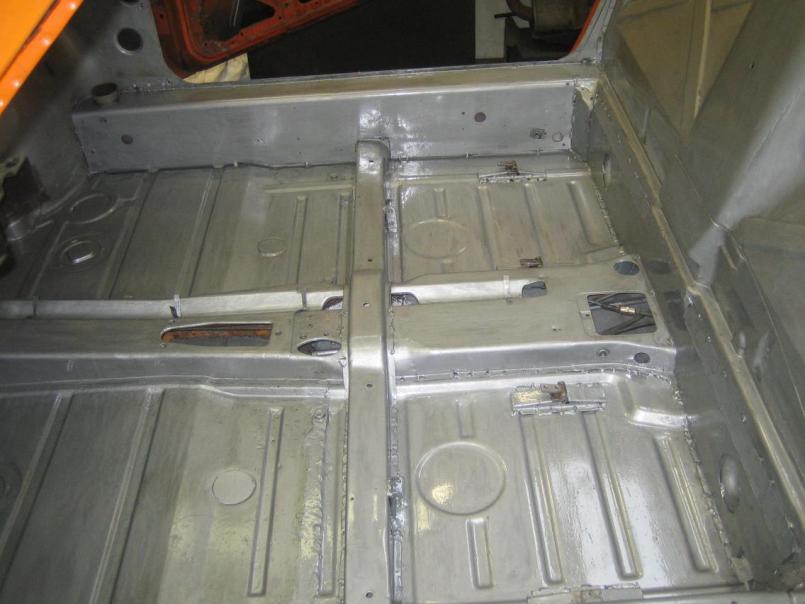
This weekend I started filling some holes on the body, first up the rear trunk lock and reflector holes.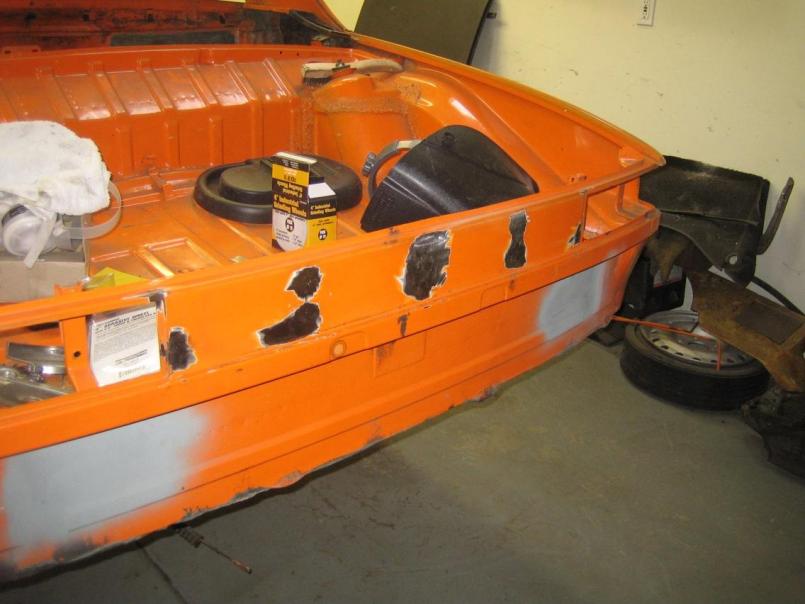
Next side marker lights, my welds are getting better, still a long way to go but I spend less time grinding now.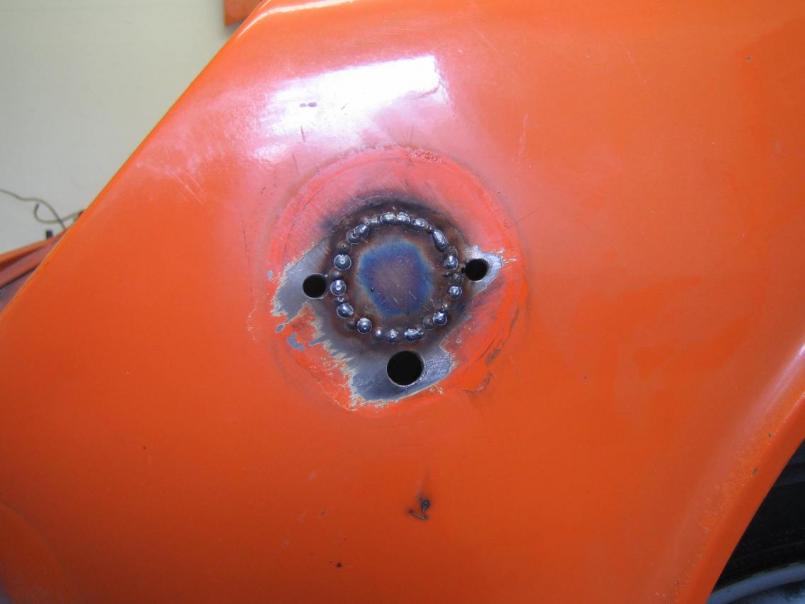
Posted by: my928s4 May 24 2008, 10:13 PM
After grinding and 120 grit sander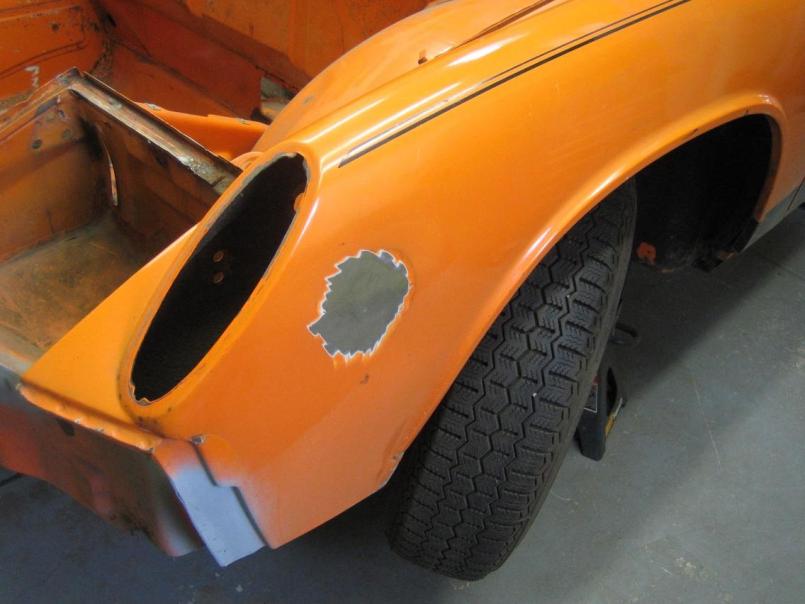
Passenger side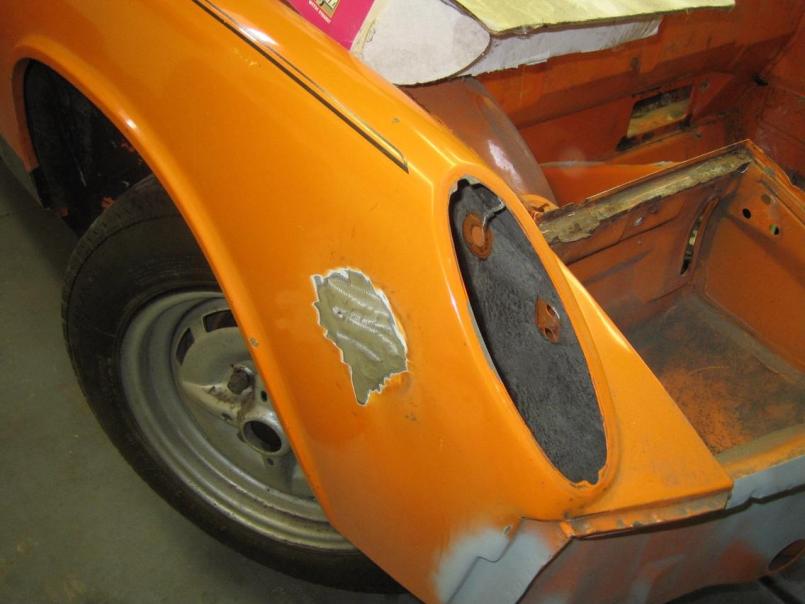
Pic of me concentrating hard, I picked up the helmet last week from Northern tools, auto darkening makes life a lot easier.
Posted by: my928s4 May 24 2008, 10:17 PM
Antenna hole, this one did not come out as well ... I should have stopped for lunch, think blood sugar was low. Yeah I know excuses, excuses ...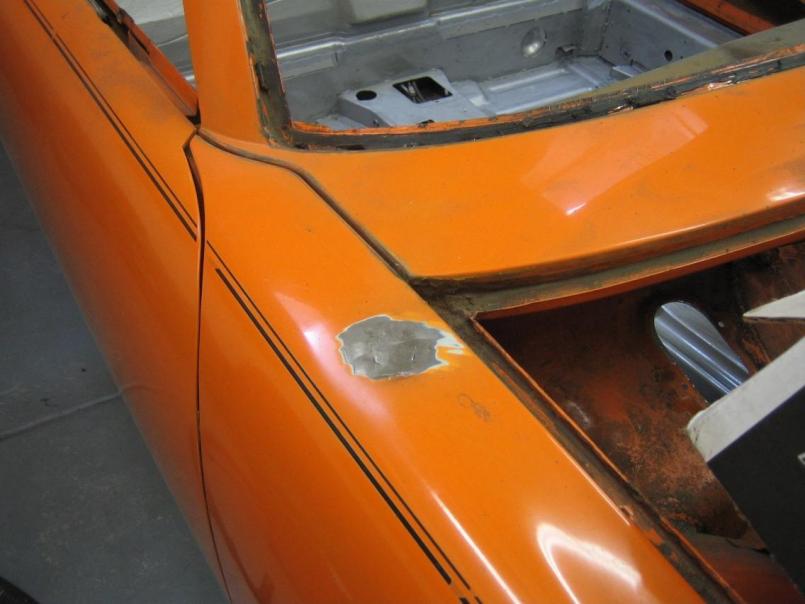
Next up the sail panels, found some rust holes by the passenger door, will do something with those later.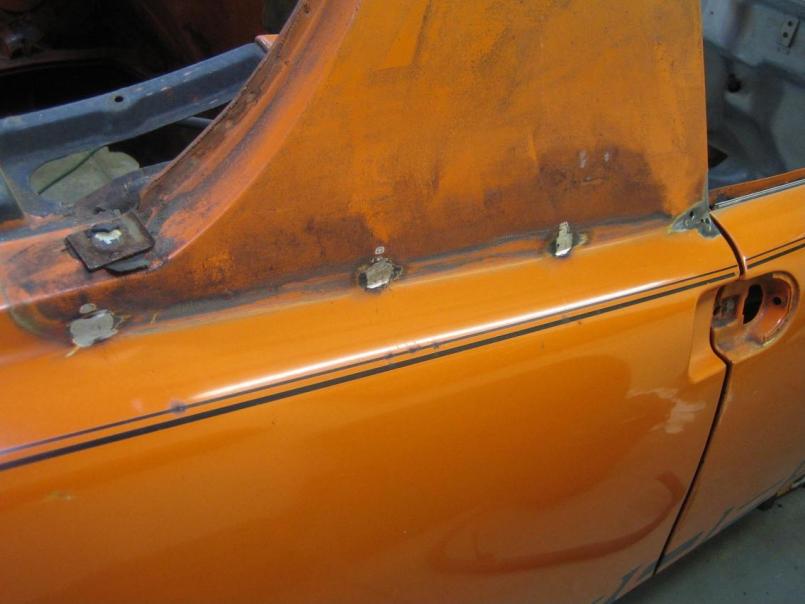
Posted by: my928s4 May 24 2008, 10:20 PM
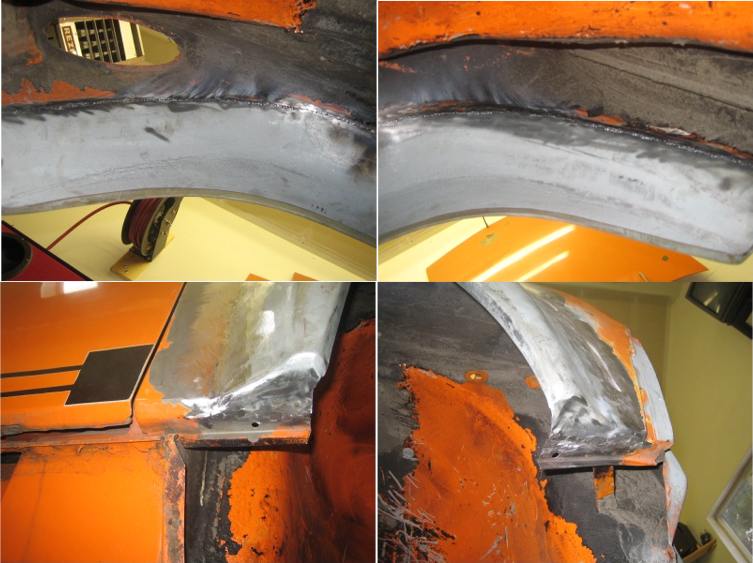
Finally the drivers side, I posted pics of the rust earlier in the thread, I cut out the offending areas and welded in new metal being careful with the heat so as not to warp the panels.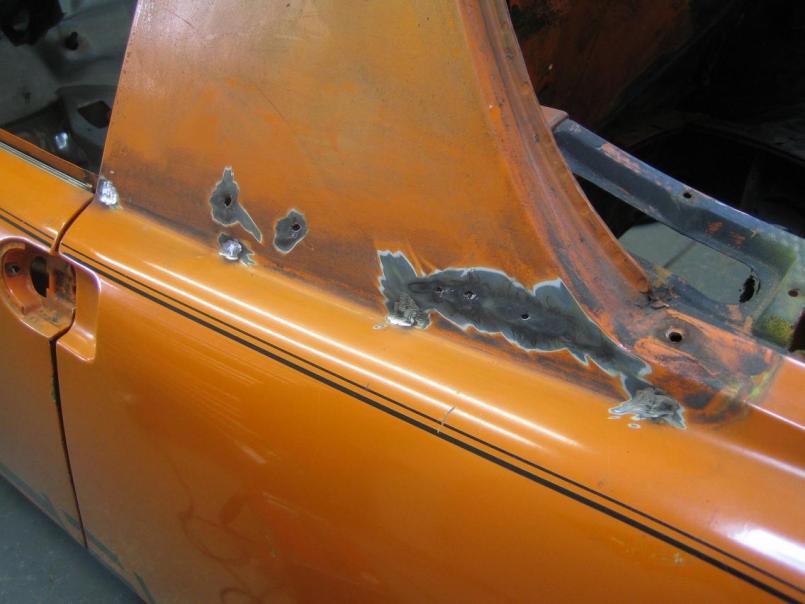
Next up I need to attach the seat rail enforcements under the car on the new floor panel, need to buy that compressor too .....
Posted by: my928s4 Oct 26 2008, 11:05 AM
It has been a while, this summer I spent doing other things outside and playing with my new toy, a Kawasaki Versys. I did purchase a 60gallon 220V compressor though which will be getting plenty of use this Winter.
I bought the GT chassis kit of Ebay (Desert Hybrids) and have been making some progress, the pieces must have been made for earlier years because the fit on some pieces is terrible.
I was planning on removing all the underseal but the stuff is so well adhered that I figure it can be left alone, after trying wire wheels and chemicals the best tool is the heat gun and a scraper.
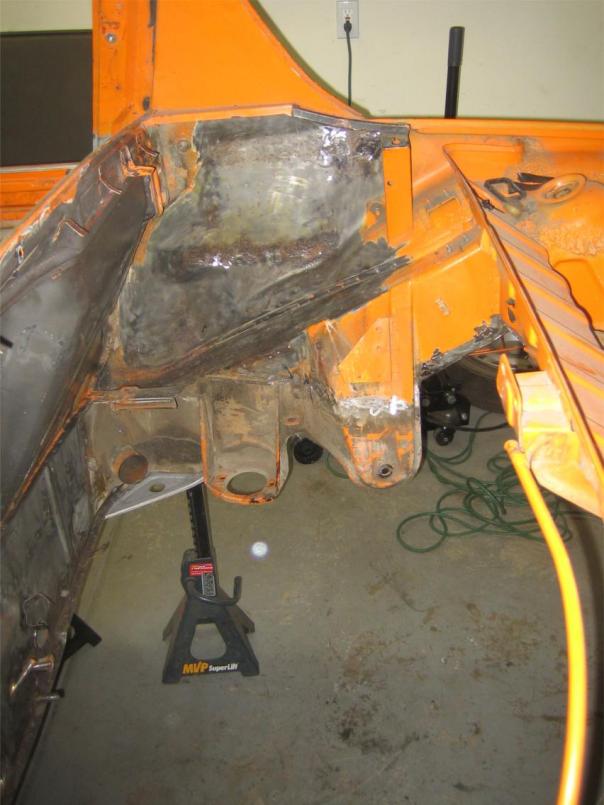
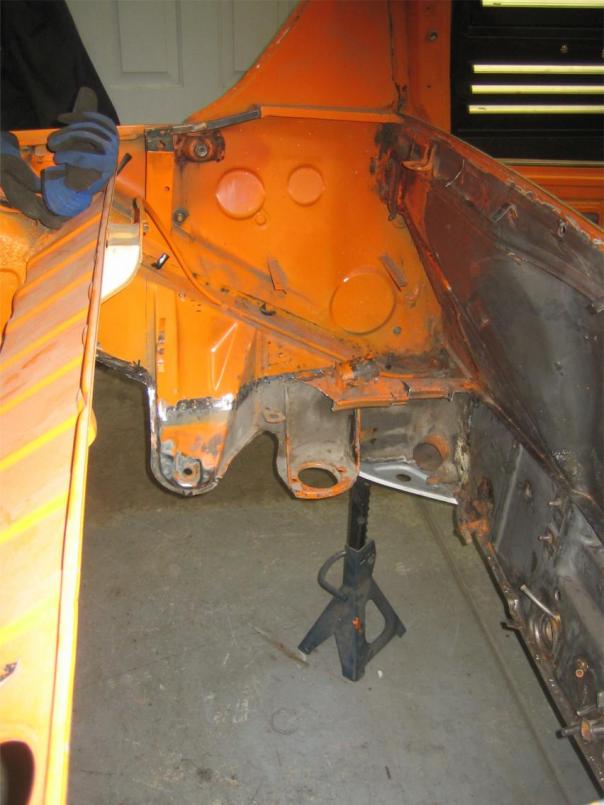
As you can see below the jacking posts were junk.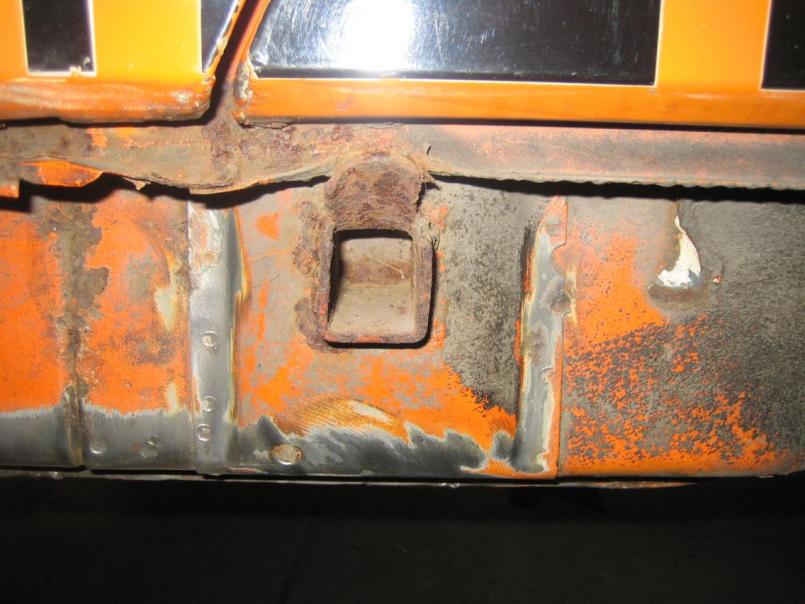
Here you can see the damage done, it had ripped and left holes in the long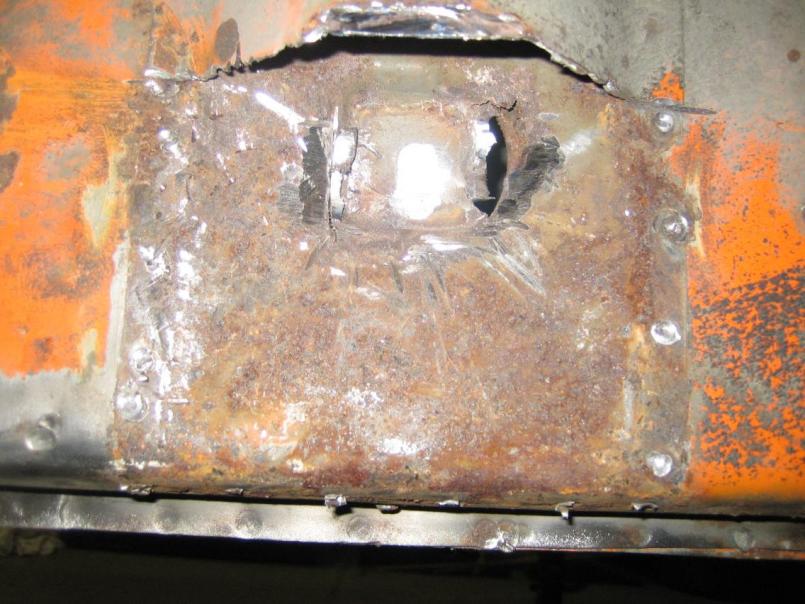
I actually bought the replacement parts but decided I would do the delete option instead. Here you can see I welded a plate over the old jack post area and the lower part of the GT kit fitted.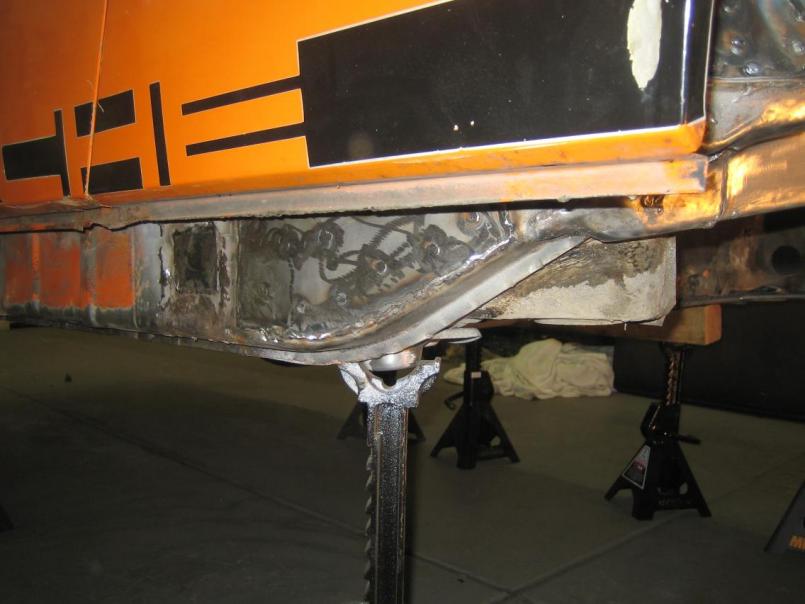
Posted by: my928s4 Oct 26 2008, 11:09 AM
Two new rear jack points were welded in.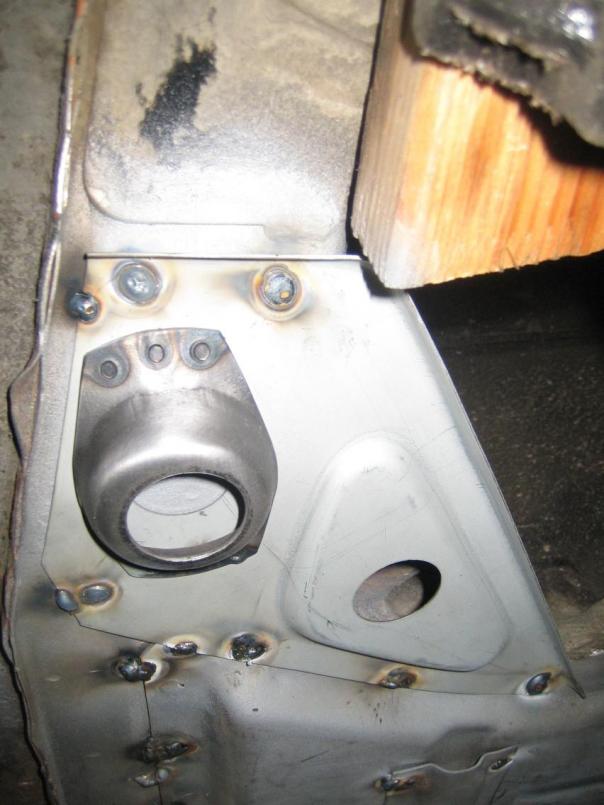
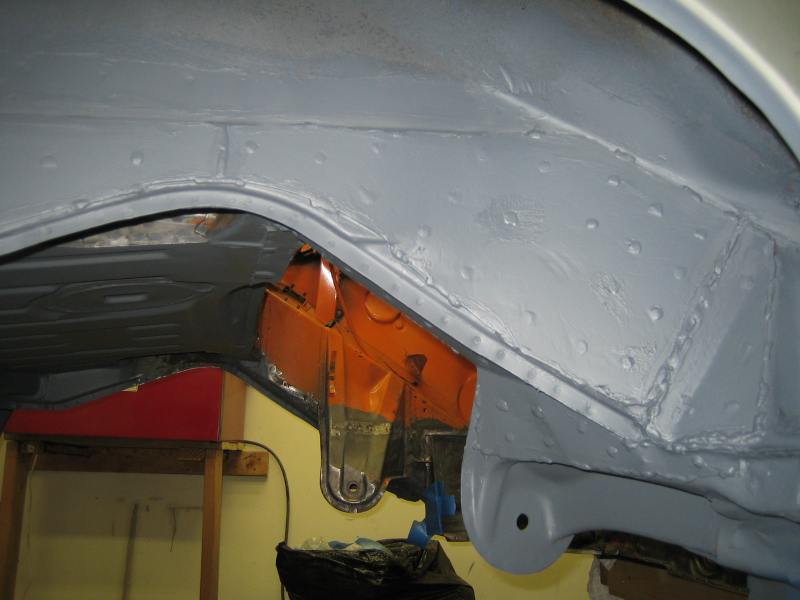
Here you can see prep for the passenger side for the GT stiffener kit, after scraping some citrus paint stripped does the rest.
Here is some welding complete on the drivers side.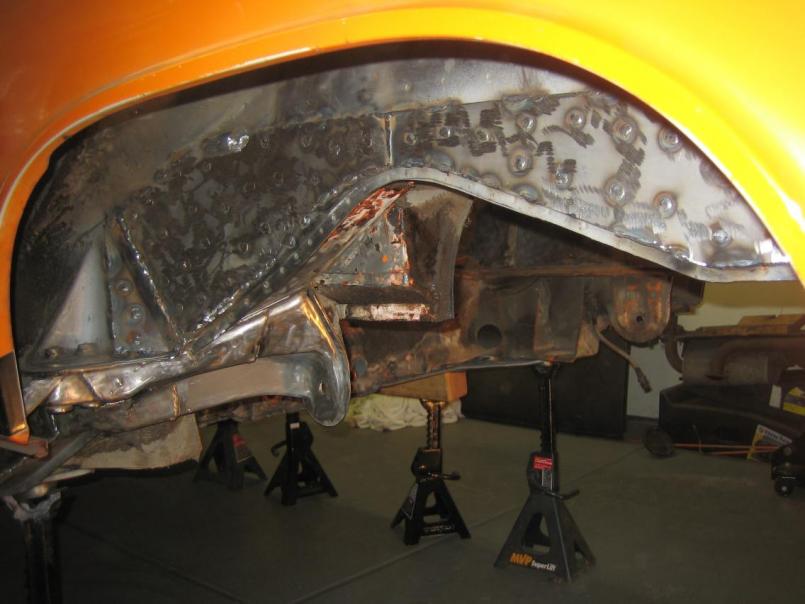
Next is the rear stablalizer mounts and front stablalizer brackets.
Posted by: plymouth37 Oct 26 2008, 12:32 PM
Nice project! You are well on your way to a great car. Keep up the good work!
Posted by: Gint Oct 26 2008, 12:51 PM
You're doing some nice work there. Keep at it... 
Posted by: my928s4 Oct 27 2008, 11:08 PM
Thanks for the words of encouragement, learning a lot here.
I thought I would add these photos of the passenger side of the GT kit, I put these two pieces on tonight and one thing I learnt from the drivers side is to use a few more screws to hold the pieces tight ... this made the whole process a lot easier.
Paint stripper worked great and the environmentaly friendly citrus fumes are not bad at all  honest.
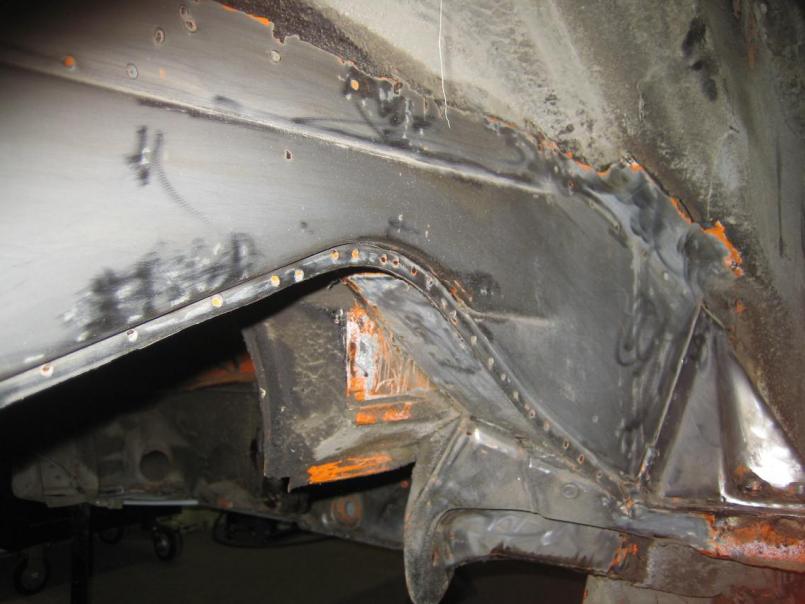
Pieces attached with screws and I trimmed these two parts while fitted.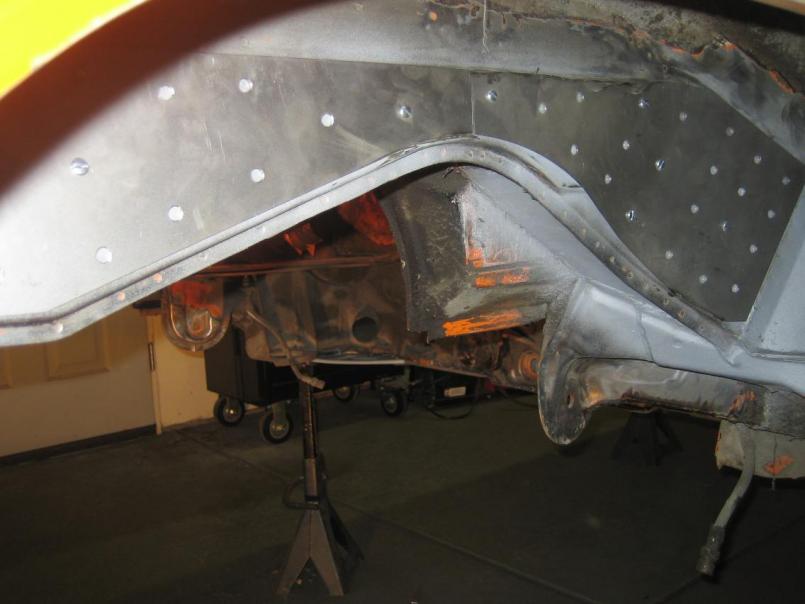
Would not have shown this pic when i started, my welds before use of the grinder, must have the welder dialed in about right for this job. Even the weld thru primer which sometimes gives me grief seemed to behave. There are a couple of ugly ones in there but its getting better ... honest.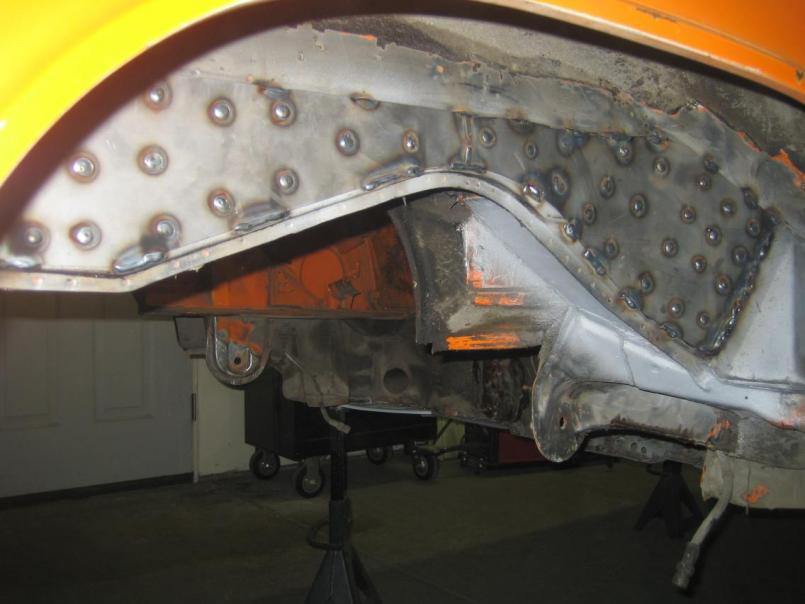
One thing I am still working on is akward and tight angles, burnt quite a few holes in my socks because I had dripping welds trying to weld the piece that supports the suspension ear.
I will finish this side tomorrow and then onto the front sway bar mounts.
Posted by: 9146986 Oct 28 2008, 12:10 AM
After you tack the perimeter of the stiffening plate, you can use an awl to scratch the paint off in the holes. It helps.
Posted by: charliew Oct 28 2008, 12:47 AM
Your work looks really good for your experience level. Hot metal in the socks is tough. A pair of wolverines boots would help. Harbor Freight has a cheap leather apron. If you can find a metal salvage yard, you might look for some pieces of copper. I have some 3/8 thick 4x4 square copper plates that I put behind single wall panels and weld holes up against the copper plates. The wire won't stick to the copper and the back side is flat when you finnish. Eastwood has some expensive copper helpers that are magnetic. Some weld through primers can be removed with laquer thinner. You can use a qtip with laquer thinner to clean out the holes in the stiffeners, it dosen't take but a second for each hole. Also you may not think you need it but Eastwood has a long air powered 4 inch cutoff wheel tool that is real handy. I use the 1/16 thick wheels on everything from metal to fiberglass. It would be a good xmas present for your wife. A carbide burr on a air tool will get in the corners on the welds. Restomotive also sells a Tiecoat primer that will stick to the por15. It's babyblue so you might want to paint over it. It's hard to get normal paint and glue to stick to por15.
I am wondering if the Engman kit made the door gaps change any.
I think it should be against the law to have that much fun by yourself.
Posted by: Cheapsnake Oct 28 2008, 09:56 AM
Very nice work there and an inspiration to those of us who are about to embark on the journey. A special thanks for the progress pictures and insights. Stuff like that is gold.
Tom
Posted by: blabla914 Oct 28 2008, 12:02 PM
good looking work. Lots of hard, dirty work to make those picts. One bit of advice I will give is reconsider your decision to delete the stock jack points. If you plan to run the car low, they are VERY handy. My first 914 had them deleted and I'll never do another without the jack points. My current car runs about 5 3/4" under the rockers. Even my relatively low profile Lincoln jack will not get under. Forget about your average craftsman jack. I use one of those thingys you put in the stock jack point and jack off of that. The stock jack also works very well if you get a flat on the road.
Perhaps others will disagree, but if you have the parts put the jack points on. You should be able to trim the tube and weld it right to the plate you have put on and then put the cover on. That's how I did mine.
Kelly
Posted by: bandjoey Oct 28 2008, 10:53 PM
Now that it's many moons since the first coat of por15.....what's the scratch and dent hardness of the por in the pans and how's it holding up? Have you picked out a primer that's recommended with por?
Thanks for letting me pick your brain. You're doing a Great job. I'm about 60 days behind you on a car that should have been finished a year ago. Funny how these drag on when wife and kids interfere with real man's work! Thanks Bill
Posted by: my928s4 Oct 29 2008, 07:59 AM
After you tack the perimeter of the stiffening plate, you can use an awl to scratch the paint off in the holes. It helps.
Never thought about removing the primer in the holes, makes sense now though!! I always thought 'weld thru' meant exactly that but sometimes I find it gives me more problems than I was expecting.
Your work looks really good for your experience level. Hot metal in the socks is tough. A pair of wolverines boots would help. Harbor Freight has a cheap leather apron. If you can find a metal salvage yard, you might look for some pieces of copper. I have some 3/8 thick 4x4 square copper plates that I put behind single wall panels and weld holes up against the copper plates. The wire won't stick to the copper and the back side is flat when you finnish. Eastwood has some expensive copper helpers that are magnetic. Some weld through primers can be removed with laquer thinner. You can use a qtip with laquer thinner to clean out the holes in the stiffeners, it dosen't take but a second for each hole. Also you may not think you need it but Eastwood has a long air powered 4 inch cutoff wheel tool that is real handy. I use the 1/16 thick wheels on everything from metal to fiberglass. It would be a good xmas present for your wife. A carbide burr on a air tool will get in the corners on the welds. Restomotive also sells a Tiecoat primer that will stick to the por15. It's babyblue so you might want to paint over it. It's hard to get normal paint and glue to stick to por15.
I am wondering if the Engman kit made the door gaps change any.
I think it should be against the law to have that much fun by yourself.
Great info. Looking back I wish I had used something like the copper spoon, I think one of these is mandatory for the GT fenders. I looked up the extended grinder and the carbide burr, thankyou, it is amazing what tools are out there to make life easier.
Very nice work there and an inspiration to those of us who are about to embark on the journey. A special thanks for the progress pictures and insights. Stuff like that is gold.
Tom
Thanks Tom, messages like yours and others also help keep me motivated when things don't go so well!
good looking work. Lots of hard, dirty work to make those picts. One bit of advice I will give is reconsider your decision to delete the stock jack points. If you plan to run the car low, they are VERY handy. My first 914 had them deleted and I'll never do another without the jack points. My current car runs about 5 3/4" under the rockers. Even my relatively low profile Lincoln jack will not get under. Forget about your average craftsman jack. I use one of those thingys you put in the stock jack point and jack off of that. The stock jack also works very well if you get a flat on the road.
Perhaps others will disagree, but if you have the parts put the jack points on. You should be able to trim the tube and weld it right to the plate you have put on and then put the cover on. That's how I did mine.
Kelly
Good point on the jack post delete, will think about that one, if only they made the upper half of the jack point easier to access.
Now that it's many moons since the first coat of por15.....what's the scratch and dent hardness of the por in the pans and how's it holding up? Have you picked out a primer that's recommended with por?
Thanks for letting me pick your brain. You're doing a Great job. I'm about 60 days behind you on a car that should have been finished a year ago. Funny how these drag on when wife and kids interfere with real man's work! Thanks Bill
The POR15 seems to be holding up fine and has adhered really well to the metal, there were lots of opinions on the stuff but I think like everything else prep is key.
As Charlie mentioned above the people who make POR15 also make tricoat primer to use with it, I will be trying that out later, everywhere else will get epoxy primer.
Posted by: watsonrx13 Oct 29 2008, 12:33 PM
BTW, if you can't find the copper plate, go to LOWES/HD and in the plumbing dept get the copper pipes. Go home and pound them flat. It's cheaper and quicker than trying to find the copper plates...
-- Rob
Posted by: my928s4 Nov 2 2008, 06:36 PM
After removing the undercoating I printed the template from the Pelican write up and placed it as best as I could. The second side was more accurate (i.e. more level) but not too different. I then drilled pilot holes and the larger holes with one of those step drills.
Inside I cut the metal parallel and then find I ran out of those small dremel blades to do the rest. I decided to wait on welding the brackets in place till I actually get the stabalizer just incase something needs adjusting. Nothing worse than removing welded parts after you have put them on.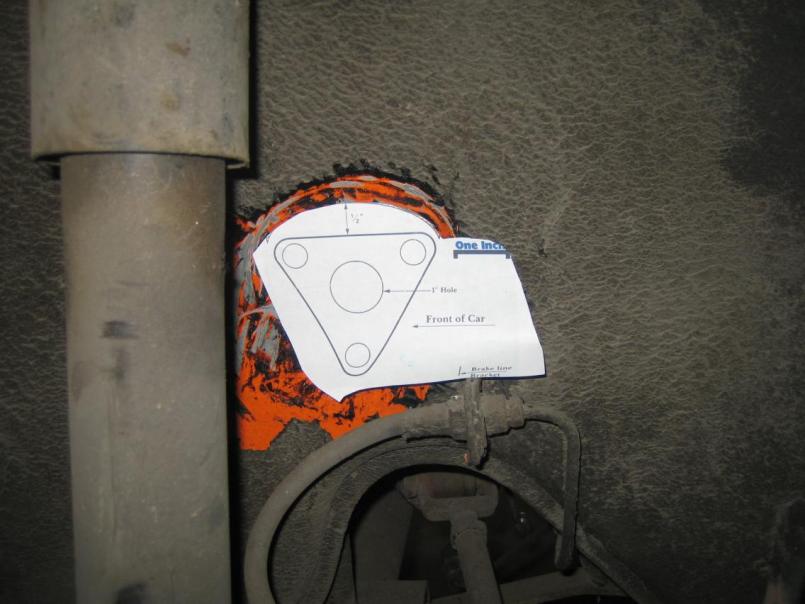
Next I started to remove some of the engine bay sheet metal which the Subie engine will not need, I was partly motivated to do this so I could get a better weld on part of the GT kit at the same time. While I was there I removed the underseal (getting better at it with the heat gun too) on the lower section and then got some paint stripper and cleaned it up.
Attached thumbnail(s)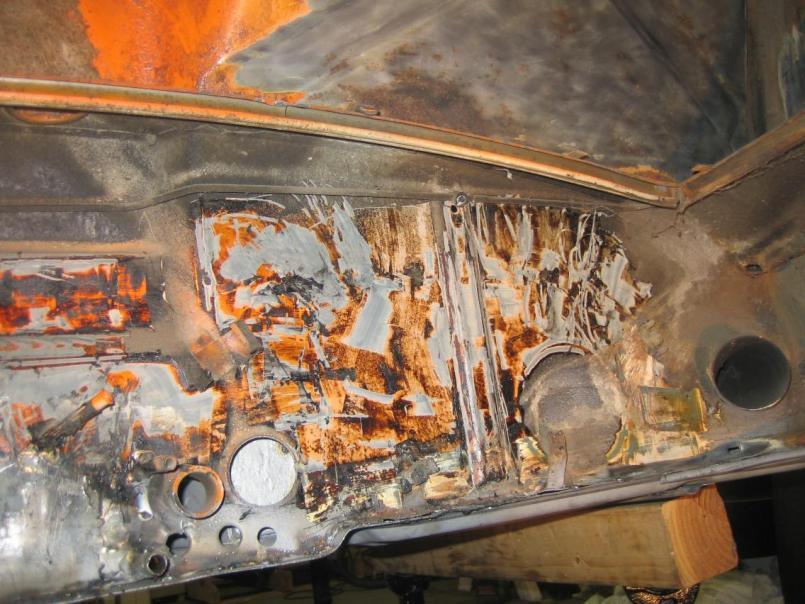
Posted by: my928s4 Nov 2 2008, 06:39 PM
Last but not least I removed the front suspension, see where the bend on the control arm is? I think this was me  when I tied the car down on the trailer .... I think with the aid of a press I can straighten it out. Thoughts?
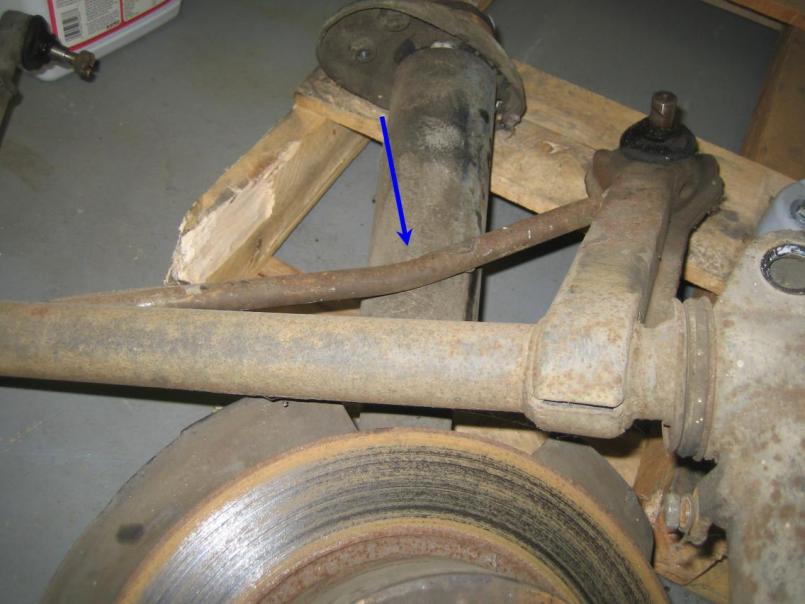
Posted by: bigkensteele Nov 2 2008, 11:02 PM
Please tell me that you are independently wealthy, unemployed, and without wife and kids. I have a '75 in similar condition (when you started) that I have had for almost 10 years. I probably had about 15 hours to work on it in that time.
Fantastic work - you are keeping my vision alive and the motivation building!
Ken
Posted by: my928s4 Nov 29 2008, 01:24 PM
Please tell me that you are independently wealthy, unemployed, and without wife and kids. I have a '75 in similar condition (when you started) that I have had for almost 10 years. I probably had about 15 hours to work on it in that time.
Fantastic work - you are keeping my vision alive and the motivation building!
Ken
Pretty much no to all of the above, if you keep chipping away say an hour every evening when you can it is amazing what progress you can make. Tough when you leave it for a while ... well that is my story.
Chris
Posted by: my928s4 Nov 29 2008, 01:32 PM
I was going to leave most of the underside which I had not touched, then I found that in a lot of places the underseal was pretty thin and just scraped off with little heat and in some cases just pealed away. So I got sidetracked from where I was at and started the messy and time consuming job of cleaning the underside.
For the moment I am thinking epoxy primer and then coat with some tintable bedliner, anyone have any experience with the bedliner?
Here is the underside after I removed the underseal and ready for some stripper.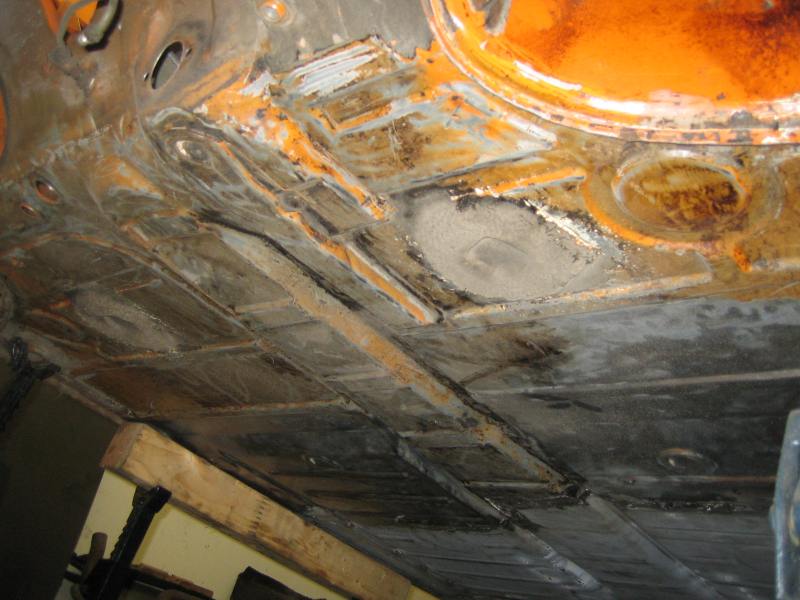
After final clean up, little bit more to do around the rear a-arm mount but apart from that, pretty much done.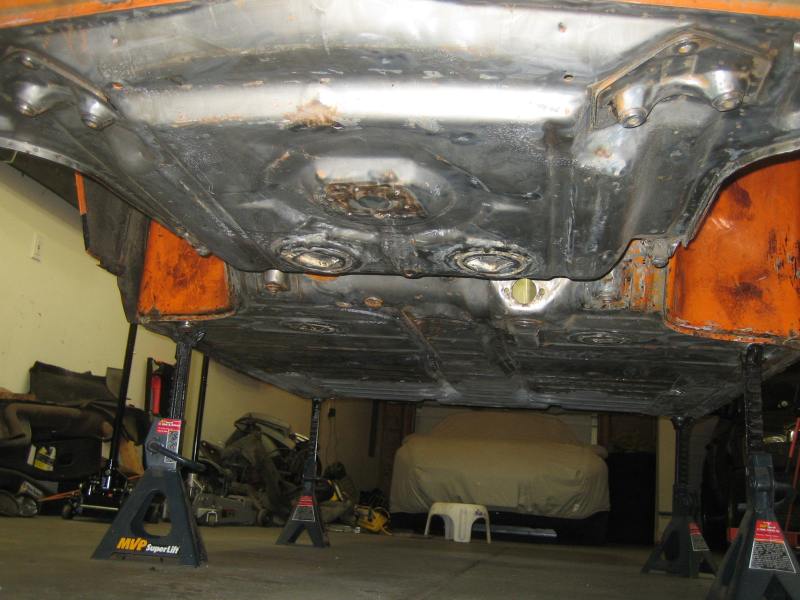
Now started on rear and this area is turning out to be more work as the underseal is in general thicker. Before: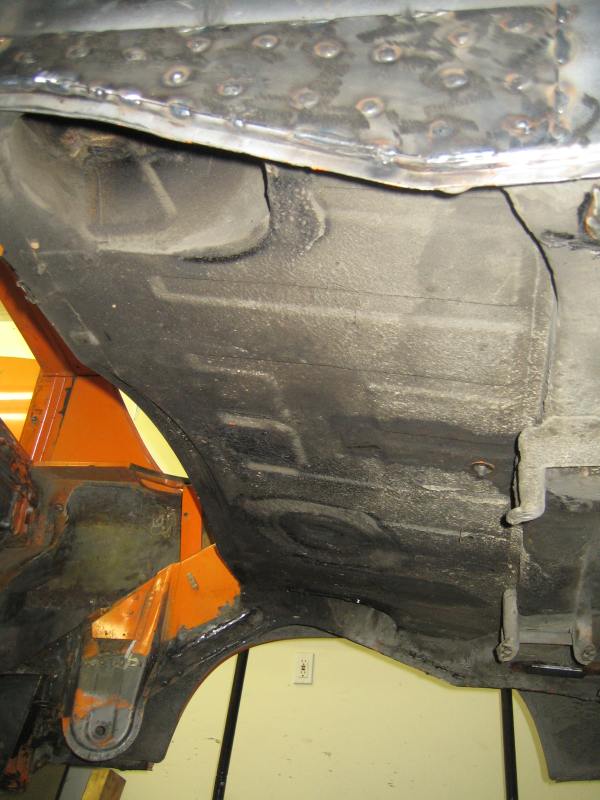
After removing some of the underseal, taking a break now to rally some more enthusiasm.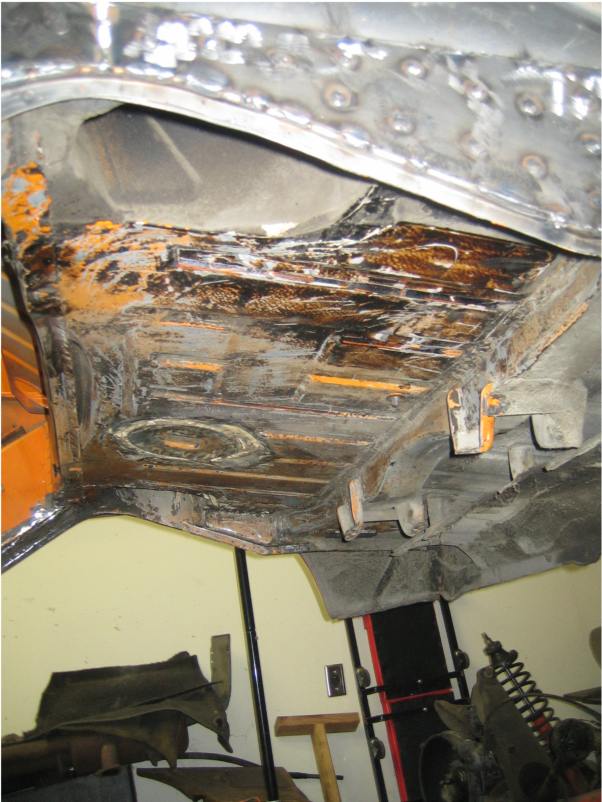
Posted by: Todd Enlund Nov 29 2008, 02:34 PM
Last but not least I removed the front suspension, see where the bend on the control arm is? I think this was me
when I tied the car down on the trailer .... I think with the aid of a press I can straighten it out. Thoughts?Nice work!
For peace of mind, I'd find another control arm. They are cheap when you consider how much work you've put into the rest of the car. There should be plenty of them around from guys that have parted cars installed 911 arms.
I've got a welder and a pan on the way, so I'll be doing the same thing soon...
Posted by: 3d914 Nov 29 2008, 03:49 PM
Chris,
Excellent job, and you're making great progress. I have all of the above responsibilities (plus school) and haven't made near the progress you have. Good job. Plus I keep getting distracted building the V6 engine I'm planning to install.
I am curious about a couple of things. What type of citrus paint remover are you using? I tried one of the Por products - it works OK, but not great. Plus it has nasty fumes.
Also, where did you find the replacement rear jack points? I need to replace both mine too. I think the PO - or whoever stole the car then - ran this thing over numerous parking curbs or something.
Keep up the great job!
Enjoy!
Posted by: my928s4 Nov 29 2008, 04:49 PM
I am curious about a couple of things. What type of citrus paint remover are you using? I tried one of the Por products - it works OK, but not great. Plus it has nasty fumes.
Also, where did you find the replacement rear jack points? I need to replace both mine too. I think the PO - or whoever stole the car then - ran this thing over numerous parking curbs or something.
Citrus paint remover is "Citrastrip" from HomeDepot, I got luckyI guess as it works great on paint and the fumes are OK. Comes in a spray can and is inexpensive to boot. Will not work on undercoat though.
Rear jack points are from RestorationDesign.
Good luck with your project !
Cheers
Chris
Posted by: Lou W Nov 29 2008, 11:42 PM
Chris,
You're doing a great job, keep up the good work and keep posting pictures. 
Posted by: my928s4 Feb 7 2009, 10:25 PM
Another long break but work has been progressing, sometimes prepping areas of the car takes a while.
I finally removed most of the underseal and primer from the rear underside, I drilled out the spot welds for the heat shield and am glad I removed it. There was some surface rust under there and needless to say the area was devoid of underseal. Still needs a final going over but 99% there.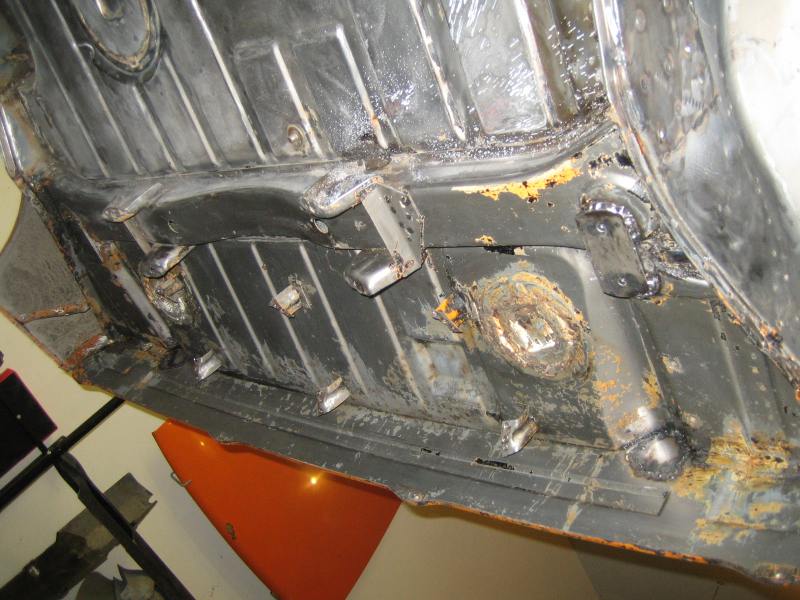
Next I attacked the trunk area, rust looked much worse once I got rid of the paint but no holes so that is good. Interesting that paint is much harder to strip and remove when it is covering corroded metal.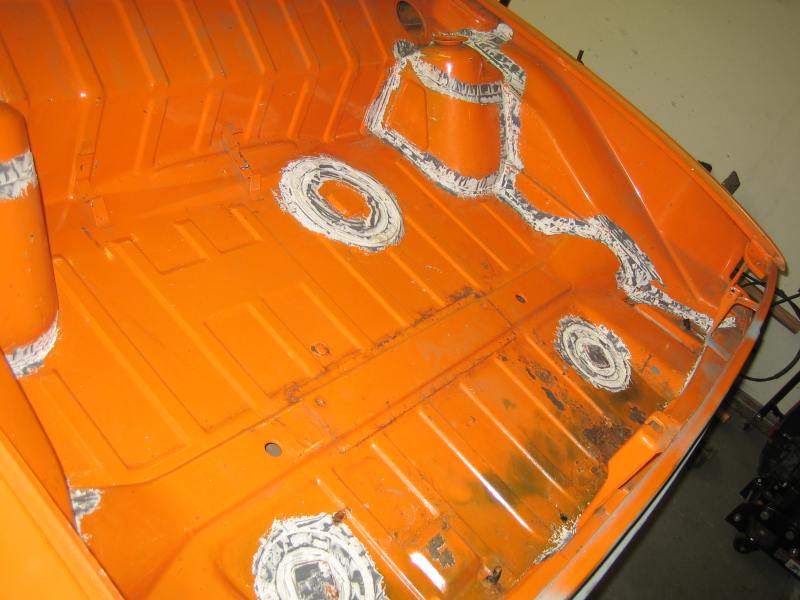
Next onto the front and under the fuel tank, it is a bear to clean that area up and been through most of my tool kit to get it like you see below. First pic shows the corrosion after paint stripper and the second pic is after wire wheels and abrasives.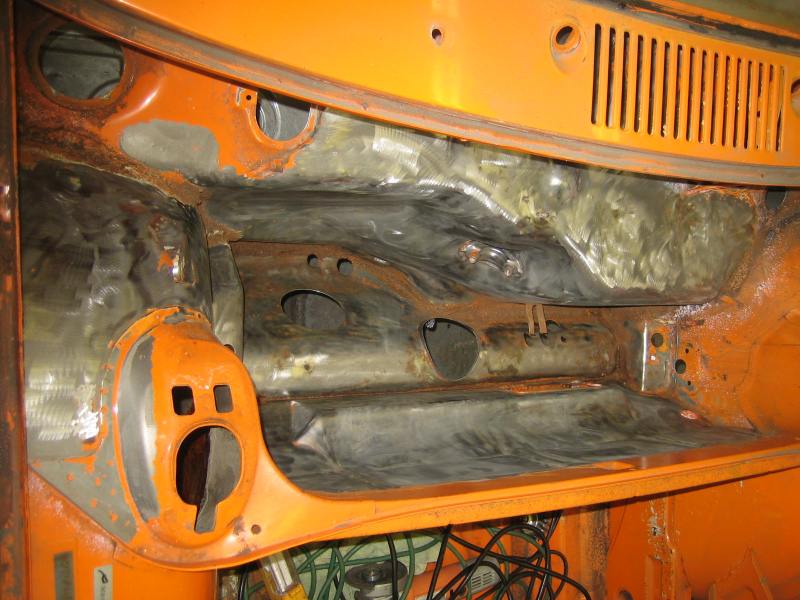
Posted by: sendjonathanmail Feb 7 2009, 10:33 PM
Looking good man, keep the pics and the progress coming.
Posted by: my928s4 Feb 7 2009, 10:36 PM
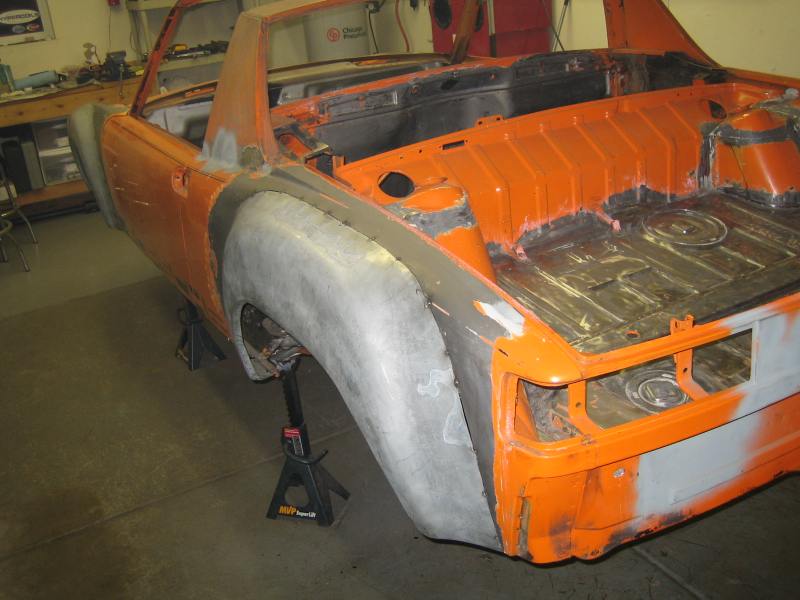
So this week I decided to attach the flares as I now hvae the GT rockers, started on the passenger side front as I figured that the second side would inevitably be an improvement over the first. That way every time I walk up to the drivers door I will see less mistakes ... well that is the hope.
There are plenty of other threads with more talented individuals showing how to put the flares on so I will spare you the amatuerism. To get the flares snug before major cutting I removed slots on either side so the bottoms of the flare would slide in. Second pic is bit blurry but you get the idea.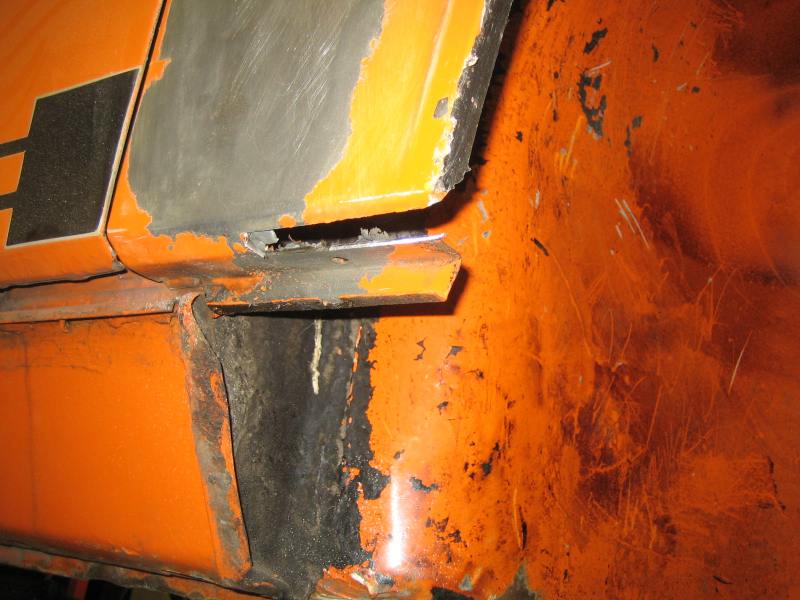
Then I got the jig saw out and started to tack weld, my mistake on the first one was to align both bottom edges and then work my way up either side so the top was the last. Big mistake, don't anyone else do that. I made it work and in the end I am sure no-one will ever know but I created some work for myself.
Here is the passenger side front tacked.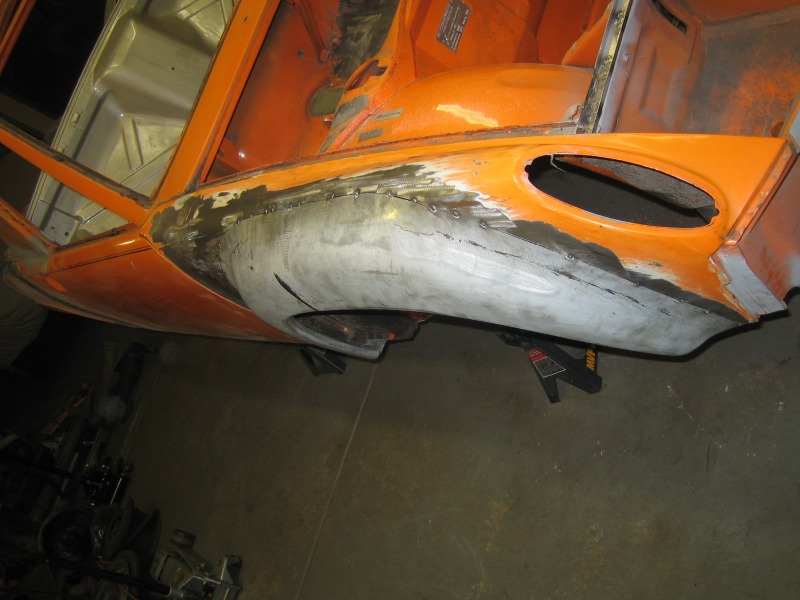
Drivers front is much better, right now I am just tack welding them all on and will do the finish later. I found that 2 hours at a time was just about right to avoid getting frustrated and just taking my time.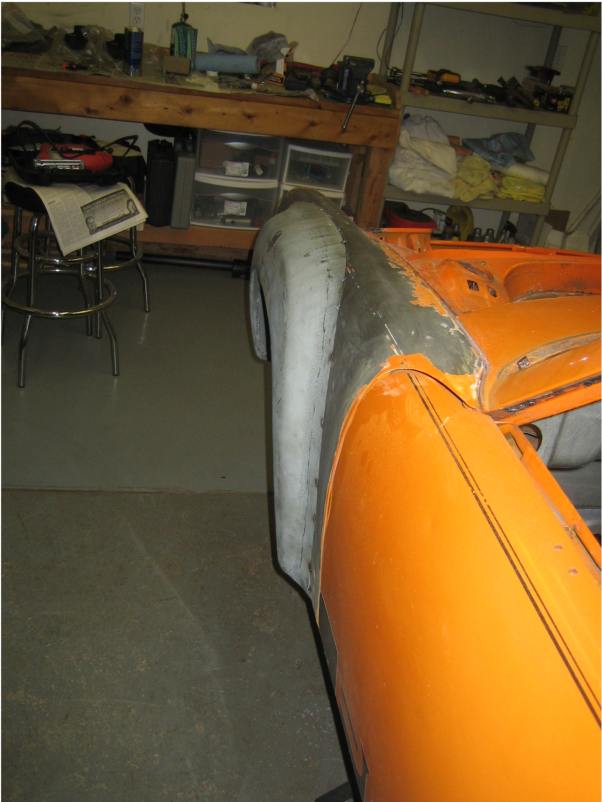
I now have the passenger rear mounted and ready to be completed tomorrow.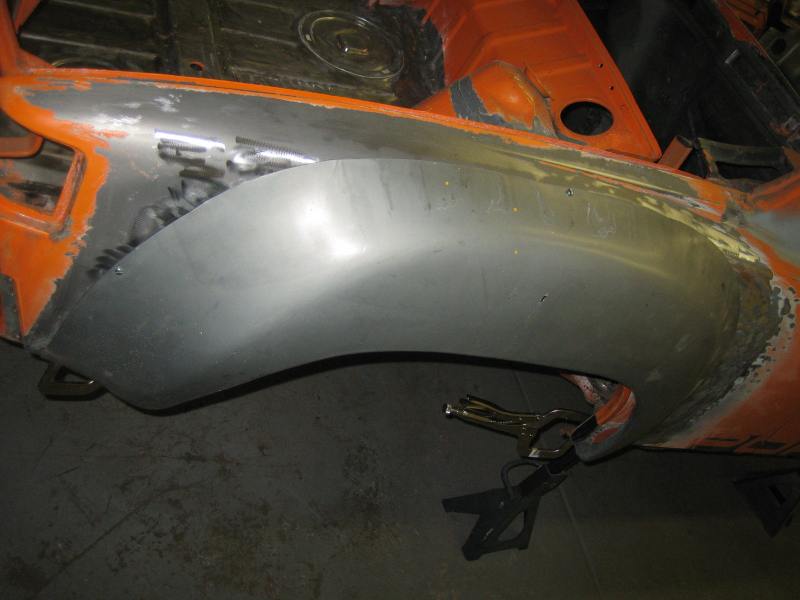
I also found out that the drives side rocker is over 1/2" shorter than the passenger side so that will need some modification in the future.
Posted by: my928s4 Feb 7 2009, 10:40 PM
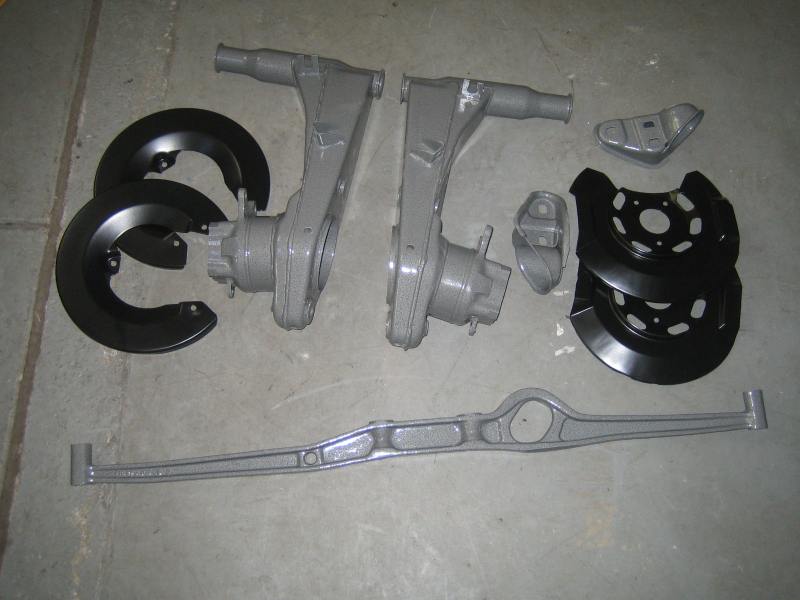
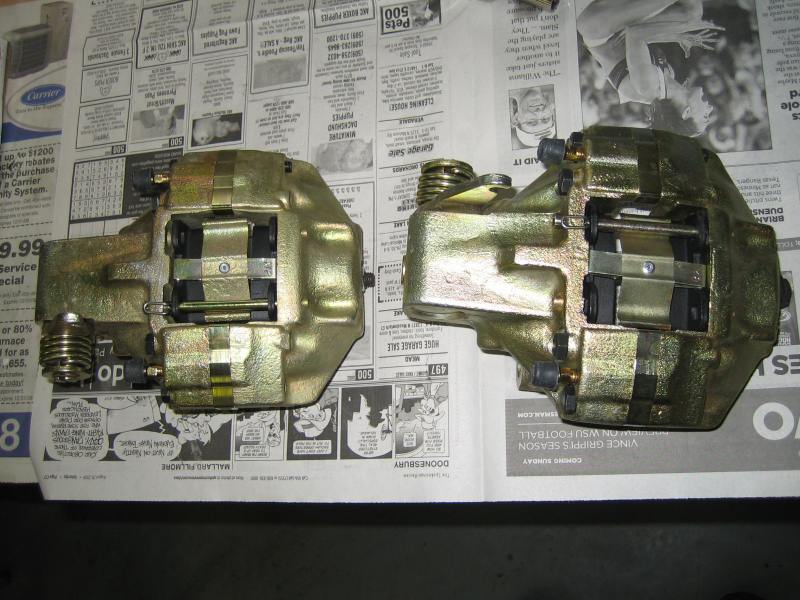
I bought a HF blasting cabinet and have been cleaning up all kinds of stuff.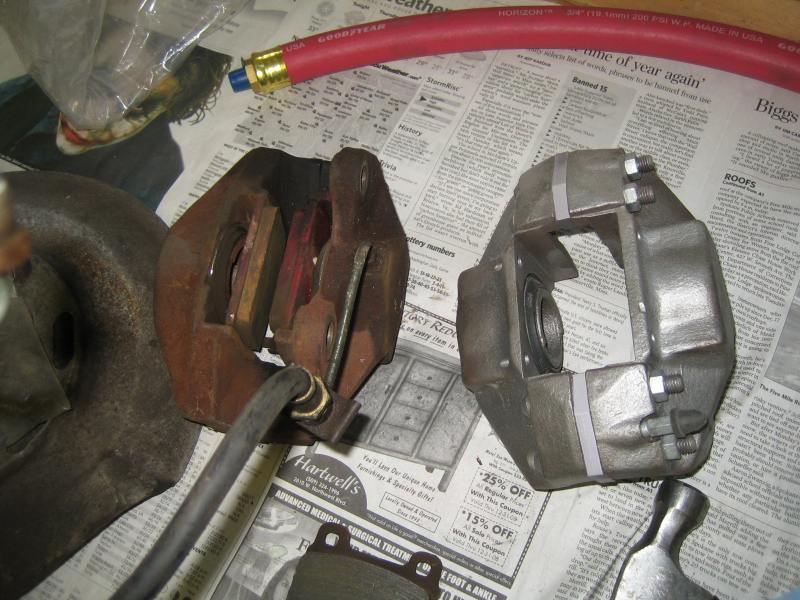
Above shows an 'M' caliper before and after, I also cleaned up the a-arms and have those and the x-member at the powder coaters.
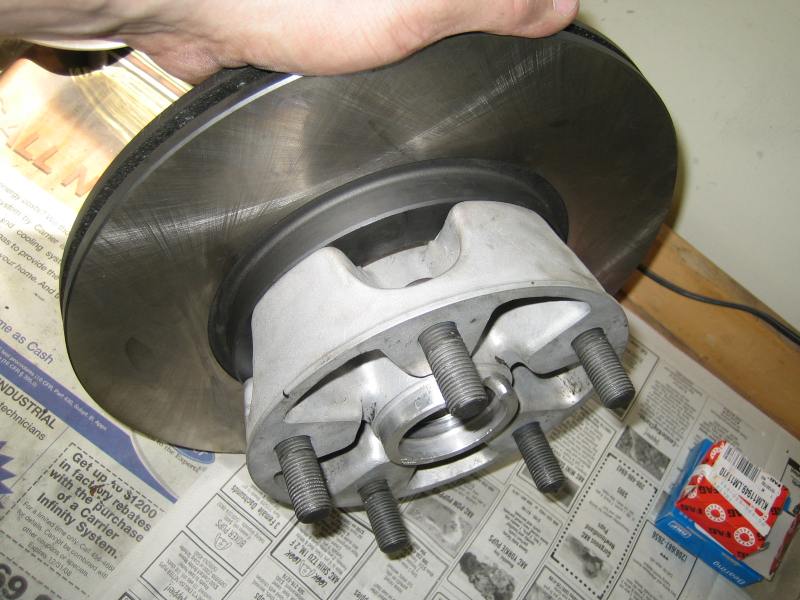
I also procurred some late rear calipers and SC hubs.
Fingers crossed I may have some 3.5" struts in the next few weeks.
Posted by: PanelBilly Feb 8 2009, 01:35 AM
You've been busy. Looks good.
Posted by: Todd Enlund Feb 8 2009, 02:14 AM
So this week I decided to attach the flares as I now hvae the GT rockers, started on the passenger side front as I figured that the second side would inevitably be an improvement over the first. That way every time I walk up to the drivers door I will see less mistakes ... well that is the hope.
Good plan!
Posted by: sixaddict Feb 8 2009, 04:05 AM
Thanks for post on rust bullet info. I asked a well known Porsche resto guy about por15 and he never said anything bad but rather recommended other products...Not sure you all know this but por15 must be painted over in a very short time or bond is flawed ...trust me I haev experienced it. i have also had people say por is just not reliable. Have it on one interior and painted over quickly but you must be ready to go ...(not the way most of us do things though).
Any more info would be helpful for me..
TOT
When i did my resto and did the same thing you are doing i had mixed results with the POR15 and stopped using it sometimes it would peel right off like a sheet of paper and with more research i found it happed to others too. I found Rust Bullet and sprayed the entire underneath of my car with it and it was 100 times better it flowed better dried better and is so much more reliable without having to go through the process that you have to go through with POR15 I live on the ocean and everything rusts around here and i started using this on everything and it works great. Ive used them both and Rust bullet is simpler and better. I once had a can dry up on me and the paint was like steel . The other part about it is you can paint on top of it without the hassle
http://www.rustbullet.com/index.htm?source=Yahoo&OVRAW=rust%20bullet&OVKEY=rust%20bullet&OVMTC=standard&OVADID=9653498011&OVKWID=4205382011
Posted by: my928s4 Feb 12 2009, 09:12 PM
Thanks for post on rust bullet info. I asked a well known Porsche resto guy about por15 and he never said anything bad but rather recommended other products...Not sure you all know this but por15 must be painted over in a very short time or bond is flawed ...trust me I haev experienced it. i have also had people say por is just not reliable. Have it on one interior and painted over quickly but you must be ready to go ...(not the way most of us do things though).
Any more info would be helpful for me..
TOT
I will be covering with Triprimer in the next couple of weeks, hopefully all will be well. Have been hanging out at www.autobodystore.com and seems zerorust is in favor there, evidently more forgiving.
Posted by: my928s4 Feb 12 2009, 09:17 PM
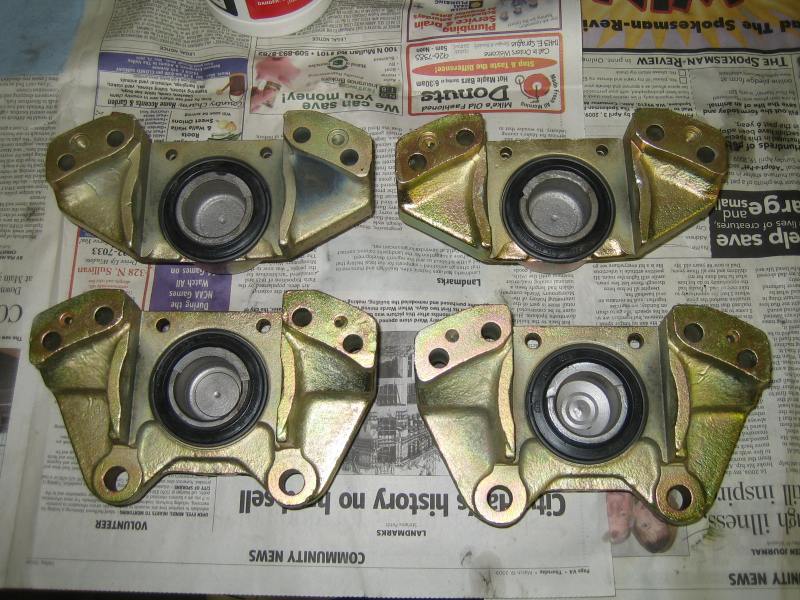
OK, finished tack welding the rear flares. 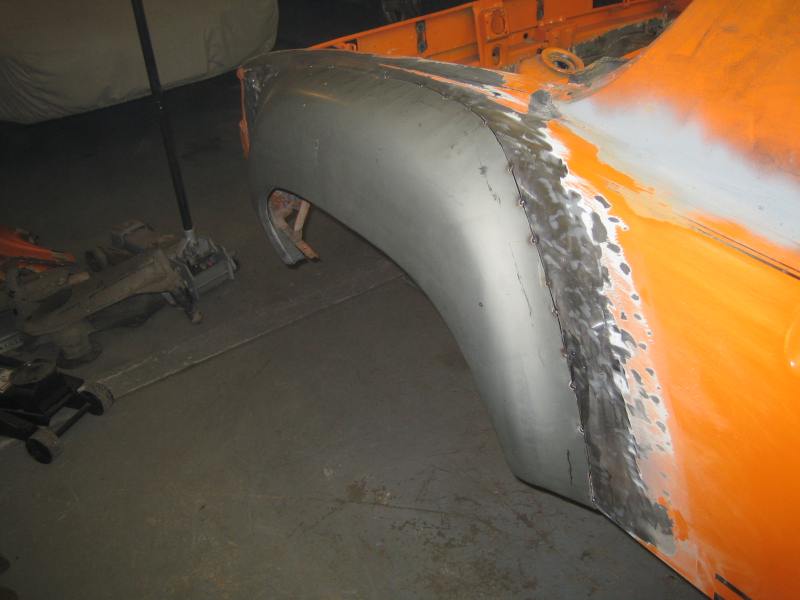
Got my powder coated front parts back, makes a change to see some nice shiny parts for sure !! Makes you think this thing might go back together at some point.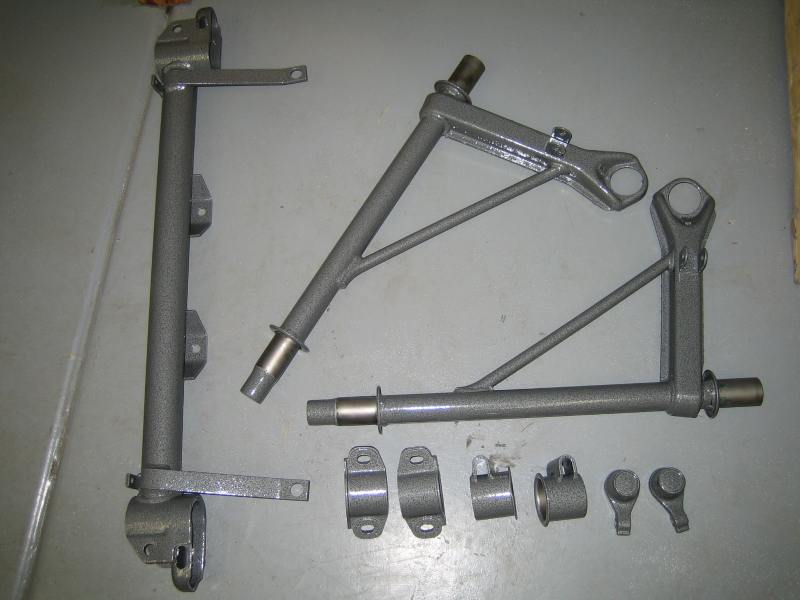
Calipers are ready for disassembly and some plating, I think I have enough parts to make it worth a visit to the platers now.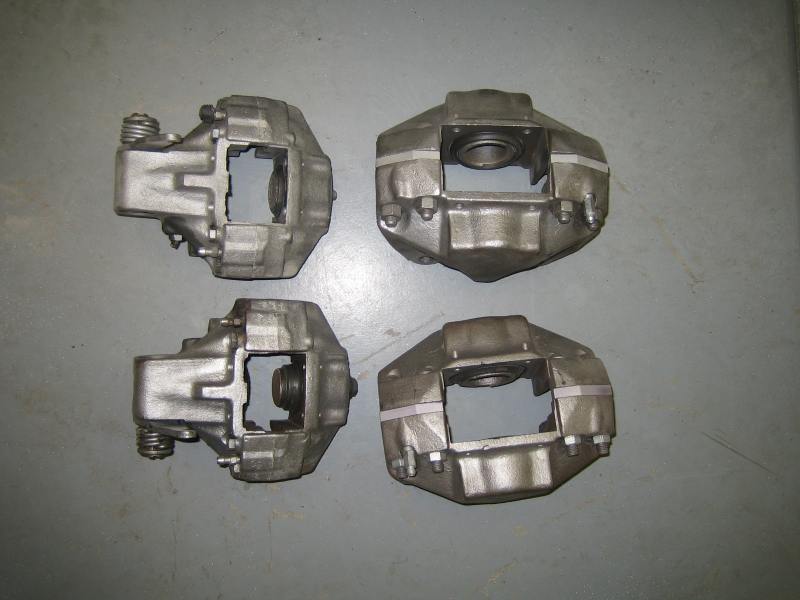
OK, now to some hammer and dolly work and finish welding on the flares.
Posted by: my928s4 Feb 22 2009, 05:23 PM
I am finished (or hope I am) welding on the 1st flare, posting mainly to see if there is anything I am not doing correctly so I do no propogate my mistakes onto the next one.
At this moment in time my next step with this flare is to add some filler, this is what I plan on using for the first step.
http://autobodystore.net/Merchant2/merchant.mvc?Screen=PROD&Product_Code=D642&Category_Code=FM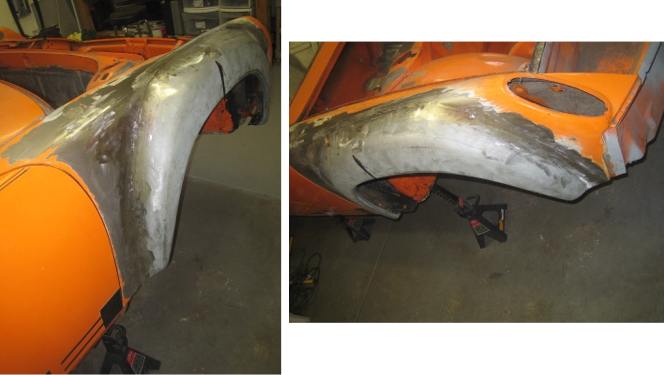
Posted by: charliew Feb 26 2009, 11:26 PM
POR 15 has a tiecoat primer, it's baby blue colored, that can be put over POR15 and it works good to get other paint to adhere. The problem with that is is more cost involved to use their products. If I were doing those flares I would epoxy primer the welded areas before applying the filler. You can't hammer epoxy primer off of well prepared clean metal. The welds will be sealed and if there are any pin holes they might also be sealed to stop the rust from starting under the filler and bubbling it after a few years.
Posted by: my928s4 Mar 15 2009, 01:05 PM
POR 15 has a tiecoat primer, it's baby blue colored, that can be put over POR15 and it works good to get other paint to adhere. The problem with that is is more cost involved to use their products. If I were doing those flares I would epoxy primer the welded areas before applying the filler. You can't hammer epoxy primer off of well prepared clean metal. The welds will be sealed and if there are any pin holes they might also be sealed to stop the rust from starting under the filler and bubbling it after a few years.
I have the tiecoat primer for the inside and I agree all the steps are a PIA but if you do not have a compressor and spray gun then it is a good alternative.
Posted by: my928s4 Mar 15 2009, 01:13 PM
Got some parts plated, calipers came out crap so are on their way to Eric.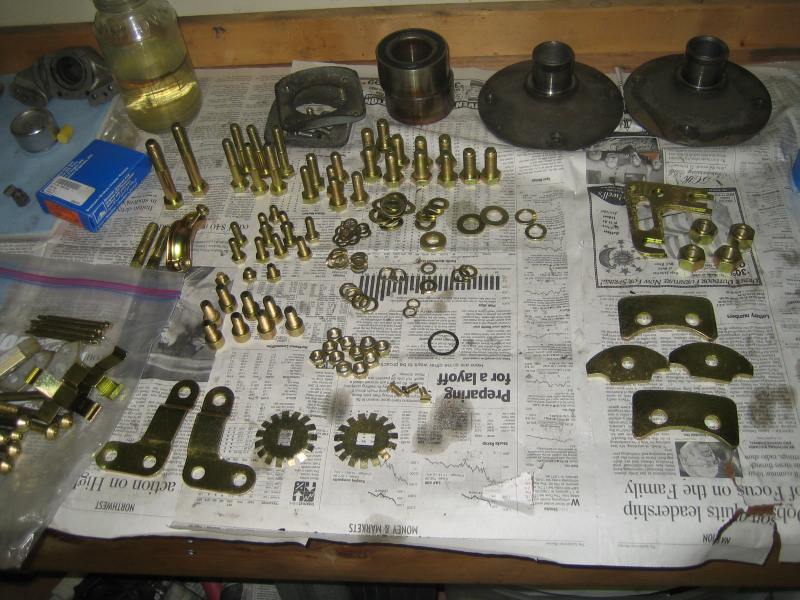
Finally decided it was time to unpack the spray gun and all of the associated gear and give it a go. I bought the DeVilbiss Finishline 3 for primer use with the cup liner kit for easy clean up. Epoxy sprayed on great, two wet coats as advertised, jsut did under the front trunk to get the feel.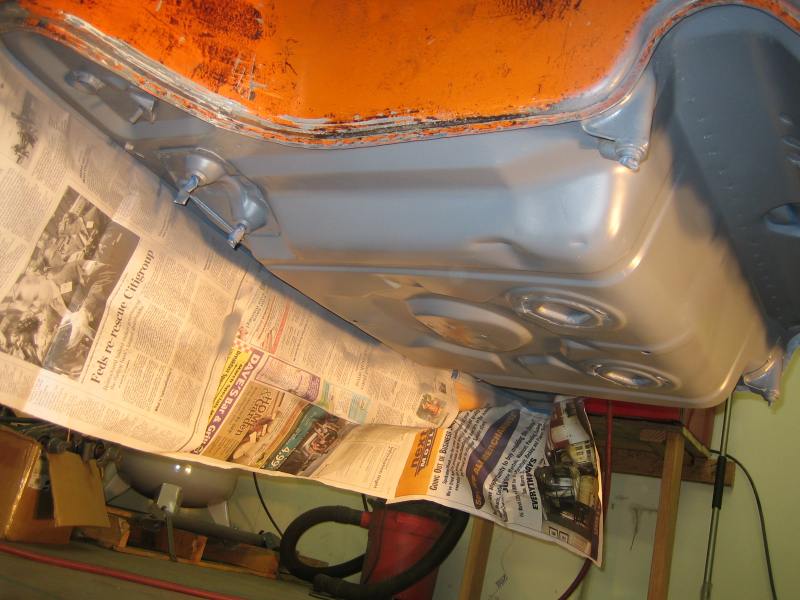
Funny every time you do something on the car you always go one step too far, should have quit with the Epoxy while I was ahead. Got out the 3M Schutz and applicator gun and thought this would be the easy bit ... noooo. This stuff is messy, it is up there with CV grease IMO. Anyway I tried a patch and it came out way to rough a finish, no change in pressure had an effect and then I realized it is probably gravity working against me as this is supposed to be sprayed horizontal with the applicator gun. I am thinking I should have bought the cans.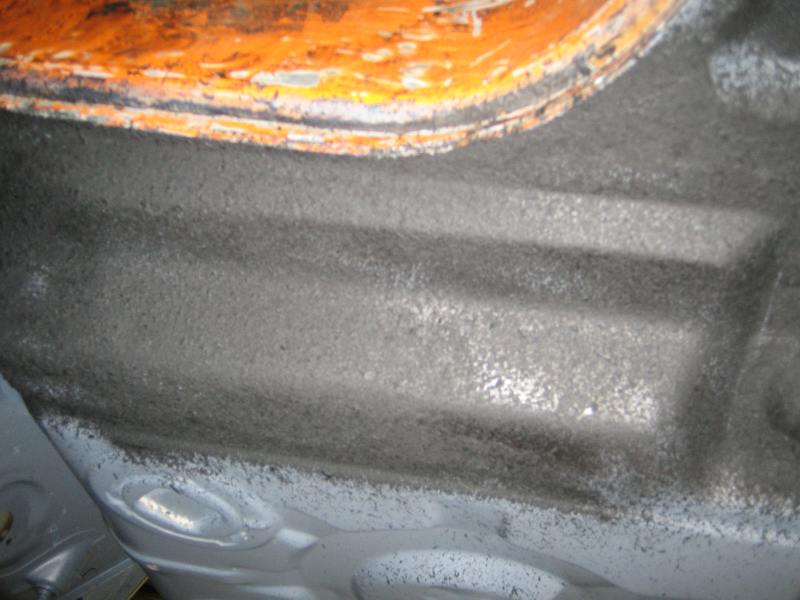
Posted by: my928s4 Mar 15 2009, 01:17 PM
Still working on the fenders, got the third (passenger rear) pretty much completed now. A dent in the rear made this a little trickier but getting better, next to get some filler.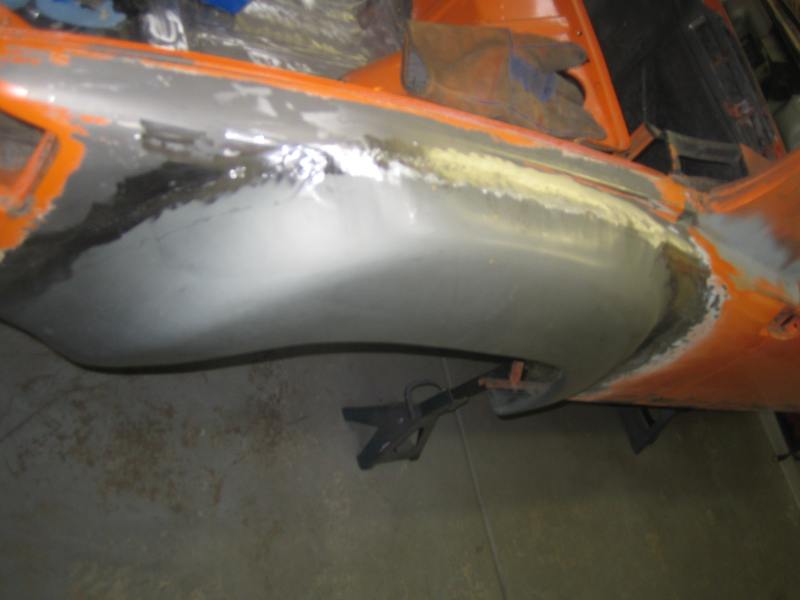
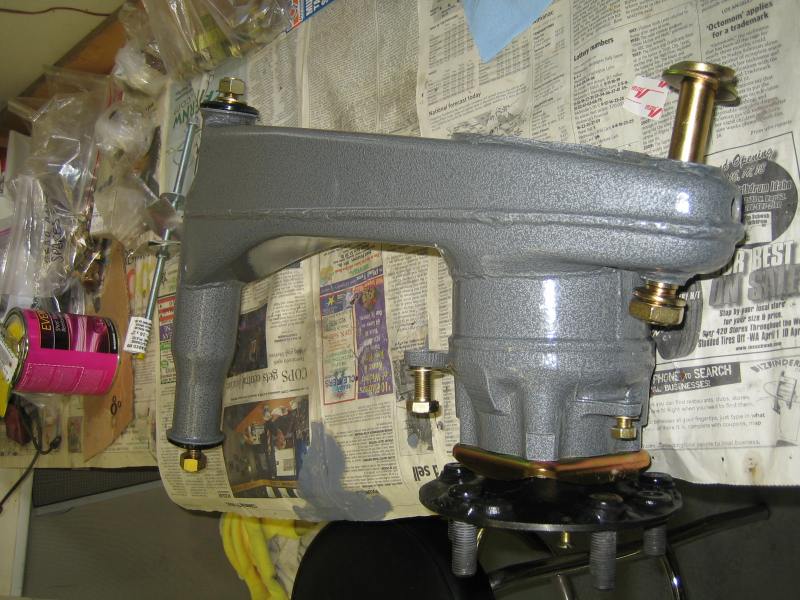
Dismantled and cleaned the rear trialing arm as best I could, this is ready to head off to the powder coaters with the same finish as the front a-arms. Hubs, bearings and bushings ordered from Eric.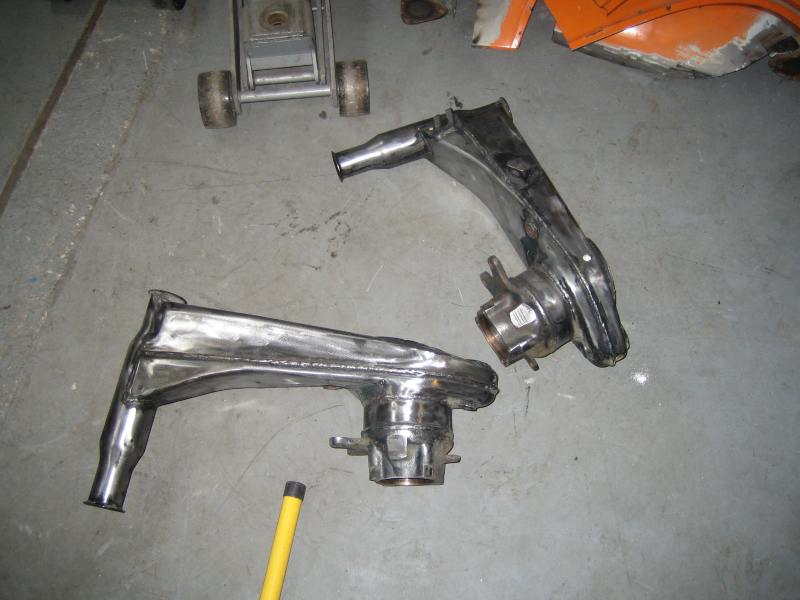
Front arms are now rebuilt and ready for assembly at some point in the future.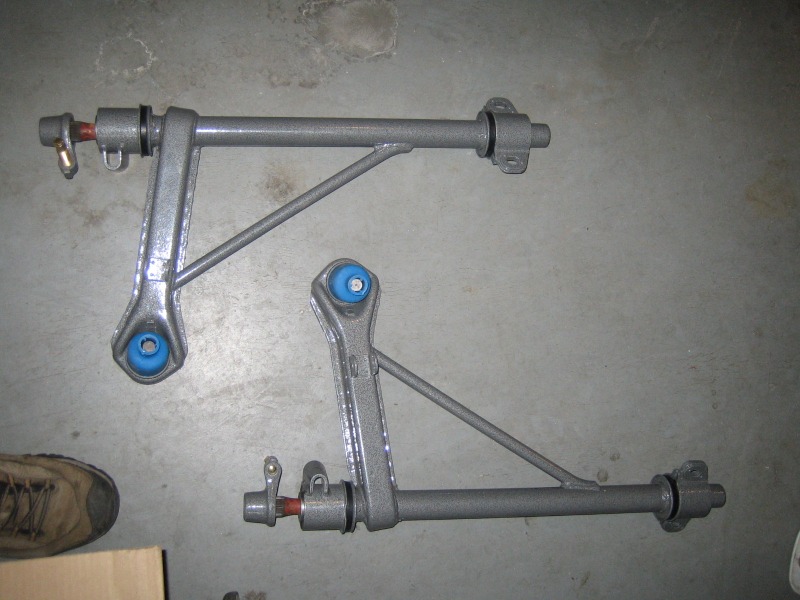
Now have some 3.5" struts (thanks Jeff !), they sure are purty, just need some shocks ($$$$) and a sway bar.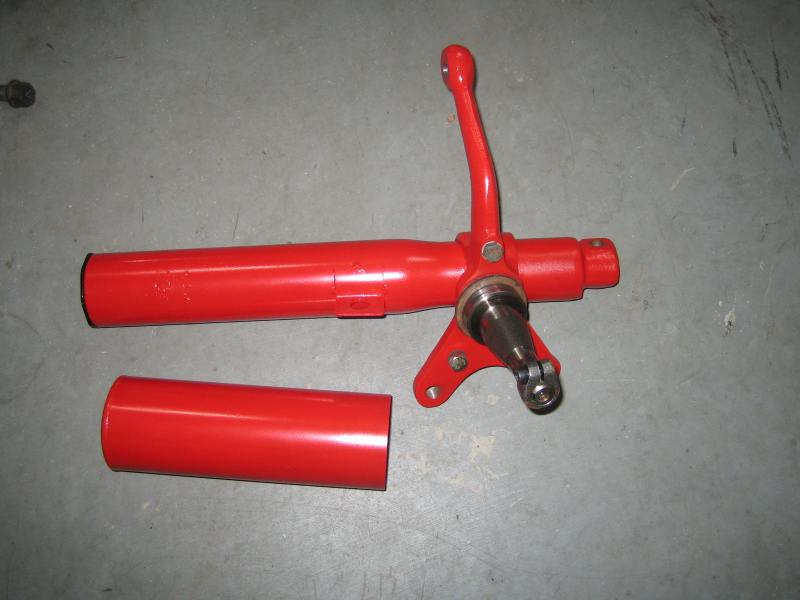
Posted by: charliew Mar 15 2009, 11:52 PM
One things for sure Chris, you aren't afraid of work. That upside down scraping and stripping and wirewheeling is hard work. I've done several bottoms, dune buggys, vw sedans, jeep and chev pickups, international harvestor scouts and such and it doesn't get easier with each one.
I think I will try a rotisserie I built a few years ago on the 914. I'm almost 65 and maybe it will finally get easier if I go that way.
One thing though the 914 is also the smallest car I've ever done, maybe that will also help.
Posted by: al weidman Mar 16 2009, 09:00 PM
Chris, I have the HF bead blast cabinet and am using glass beads but do not clean up near as nice as yours. What media are you using? Al.
Posted by: my928s4 Mar 16 2009, 09:42 PM
One things for sure Chris, you aren't afraid of work. That upside down scraping and stripping and wirewheeling is hard work. I've done several bottoms, dune buggys, vw sedans, jeep and chev pickups, international harvestor scouts and such and it doesn't get easier with each one.
I think I will try a rotisserie I built a few years ago on the 914. I'm almost 65 and maybe it will finally get easier if I go that way.
I think a rotisserie would be a great idea, no doubt. Work smarter not harder, right ?!
Chris, I have the HF bead blast cabinet and am using glass beads but do not clean up near as nice as yours. What media are you using? Al.
Al, I use the same stuff you probably do http://www.harborfreight.com/cpi/ctaf/displayitem.taf?Itemnumber=46426 although the ability of the cabinet to keep the stuff inside is limited. I really need to empty it and seal it. For a while I did suffer from a lot of dust then read that >80psi just turns the beads to dust, turning down to 70 worked much better.
Posted by: al weidman Mar 16 2009, 09:46 PM
Chris, I also got the small vacuum system from HF and it works great. Keeps the cabinet clear and you can see what you are doing. Al.
Posted by: 914Tom Mar 17 2009, 03:16 AM
![popcorn[1].gif](style_emoticons/default/popcorn[1].gif)
Posted by: nsr-jamie Mar 17 2009, 05:42 AM
I love this post!! Awesome!! Keep it up bro!! Love to watch the progress you are doing! Cheers
Posted by: Phoenix914 Mar 17 2009, 07:10 AM
I just read through this entire thread. What a fantastic job you're doing! Very inspirational. I did a lot of work to my car, but nowhere near as involved as what you've done. Keep the pictures coming.
Posted by: my928s4 Mar 20 2009, 07:08 AM
Went back to the local paint and supply shop and picked up some filler as well as some rattle can underseal.
I think this filler is a little overkill but the idea is to seal up the weld and then cover with normal filler. For that step I am going to wait and perform that operation outside, good excuse to catch somes sun (we actually saw 50F yesterday) and the dust stays outside.
Also making enquiries to see if I can get someone to come around and soda blast the rest of the bodywork that I have not gotten too.
This is the filler I used: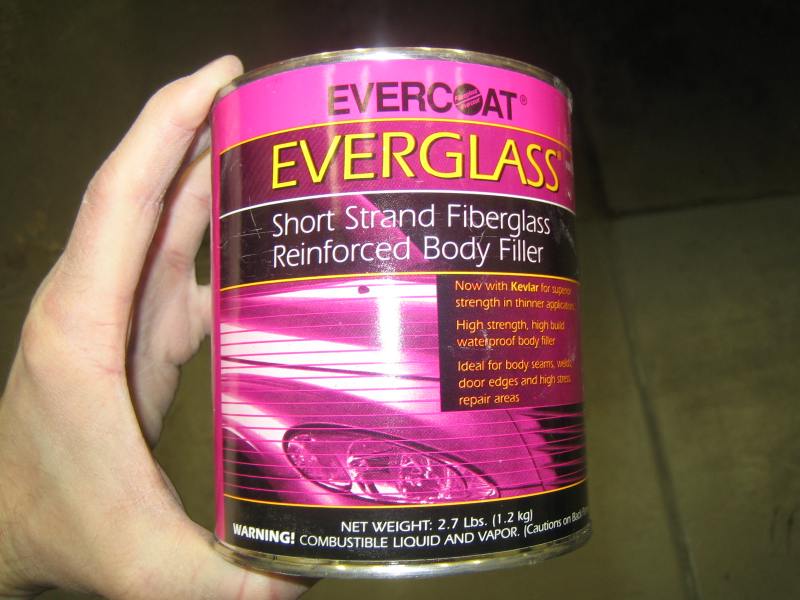
Here are the results
Posted by: my928s4 Mar 20 2009, 07:12 AM
After the failed experiment with the Schutz I bought some 3M underseal, they did not have Schutz in a can and evidently this is nearly the same stuff ...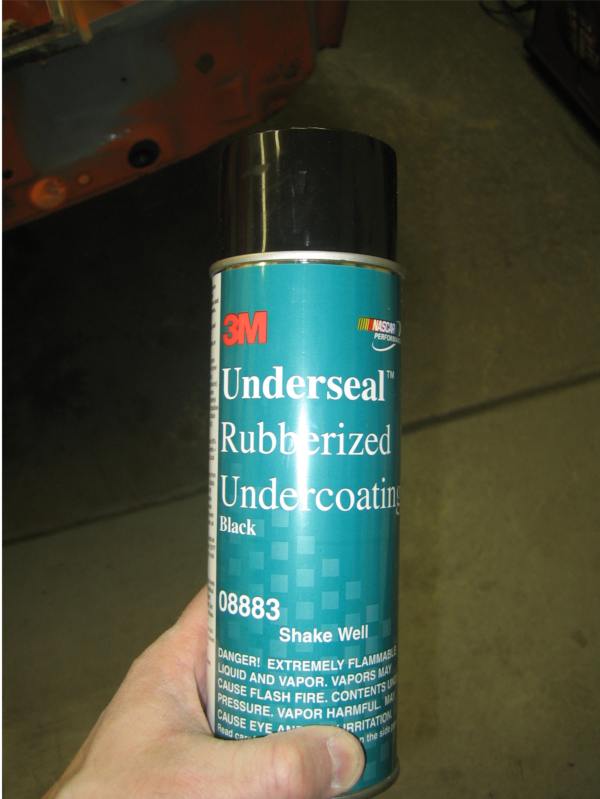
Well it went on much better but still a messy operation. I covered the floor in plastic and the key is to spray it on lightly in multilple coats, you could do it in one session but that means crawling over the mess on the floor so 3 evenings worked better.
Posted by: Kansas 914 Mar 20 2009, 07:20 AM
After the failed experiment with the Schutz I bought some 3M underseal, they did not have Schutz in a can and evidently this is nearly the same stuff ...
Well it went on much better but still a messy operation. I covered the floor in plastic and the key is to spray it on lightly in multilple coats, you could do it in one session but that means crawling over the mess on the floor so 3 evenings worked better.
Quite the inspiration to say the least. I am following this thread and have subscribed to it.
How many cans did you use to coat the underside? Do you plan on using this in the engine bay (I have seen it done recently or with LineX)?
Cheers!
Posted by: dakotaewing Mar 20 2009, 09:01 AM
I'll be doing the same with my project shortly, but I won't be using the rubberized product, as it appears to come off to easily for what I want-
Posted by: 914Tom Mar 20 2009, 11:05 AM
why not apply a PVC coat and paint the underside and wheelhouses in carcolor ? (orange) ...
Posted by: my928s4 Mar 20 2009, 11:50 AM
How many cans did you use to coat the underside? Do you plan on using this in the engine bay (I have seen it done recently or with LineX)?
Cheers!
Hi Mike, it took about one can for the area you see in the photo and at that point there was more left but the can is useless as the top is pretty much gummed up. Aim is to paint the engine bay.
I'll be doing the same with my project shortly, but I won't be using the rubberized product, as it appears to come off to easily for what I want-
Yep there are many solutions to work with, if I had the car on a rotisserie I would have gone another route. Also the car will be fair weather so I believe what I am doing should be good enough. Only time will tell.
why not apply a PVC coat and paint the underside and wheelhouses in carcolor ? (orange) ...
I am not yet decided on the wheel wells but some of the old undercoating is very well adhered which will mean undercoating again. I was originally hoping to have body color on the underside and wheel wells but looking at other projects I thought the undercoat looked good.
Posted by: my928s4 Apr 19 2009, 02:24 PM
Well not too much to report, I took a 3 week break while we had visitors and took a vacation. I am nearly complete on welding the fenders, just another hour or so on the drivers side rear and should be done, I was going to finish yesterday and then ran out of welding wire.
I have been receiving boxes of goodies though, the re-plated calipers from Eric looked great and they also came with new rear bearings and 5 lug rear hubs. I am picking some more parts up from the powder coaters next week so I can start putting the rear arm back together.
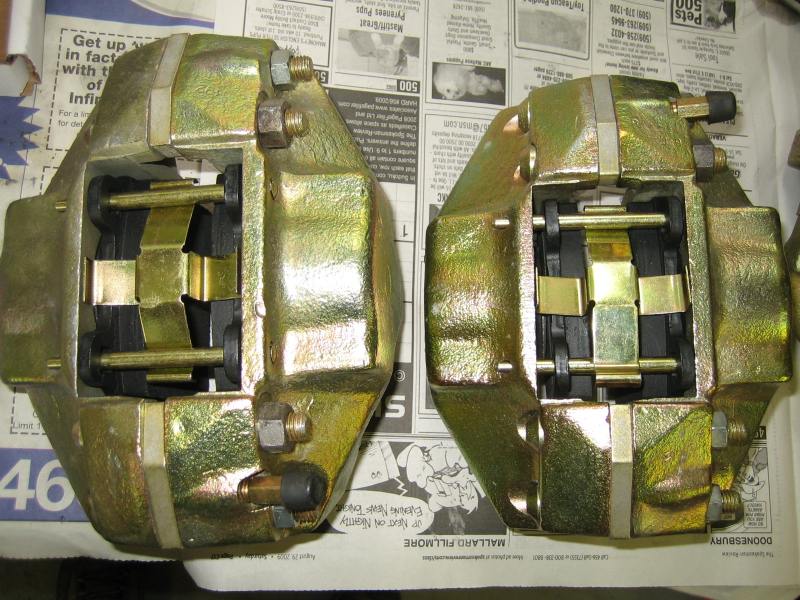
Couple of pics of the front calipers, once I have some of the small seals I can put the halves back together. Still waiting on rebuild kit for the rears but they look just as good.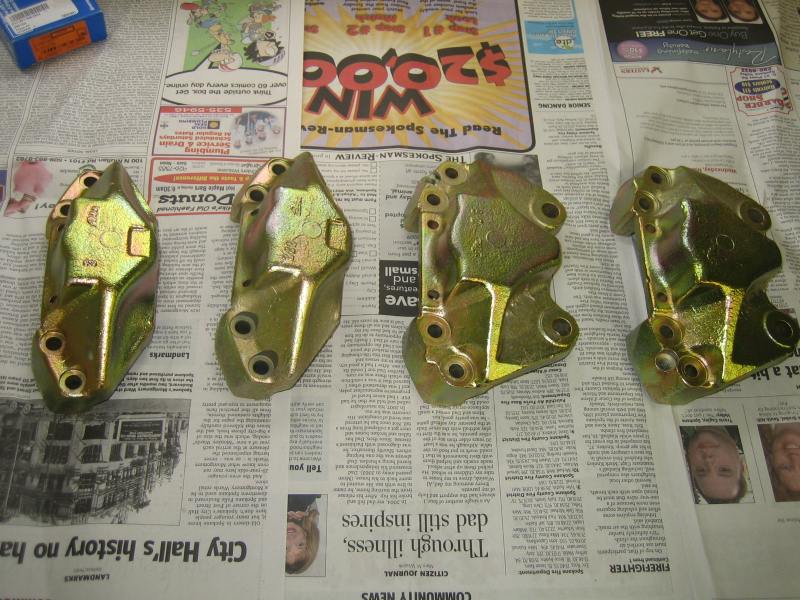
This weekend I finished the priming more of the underside.
1st coat epoxy primer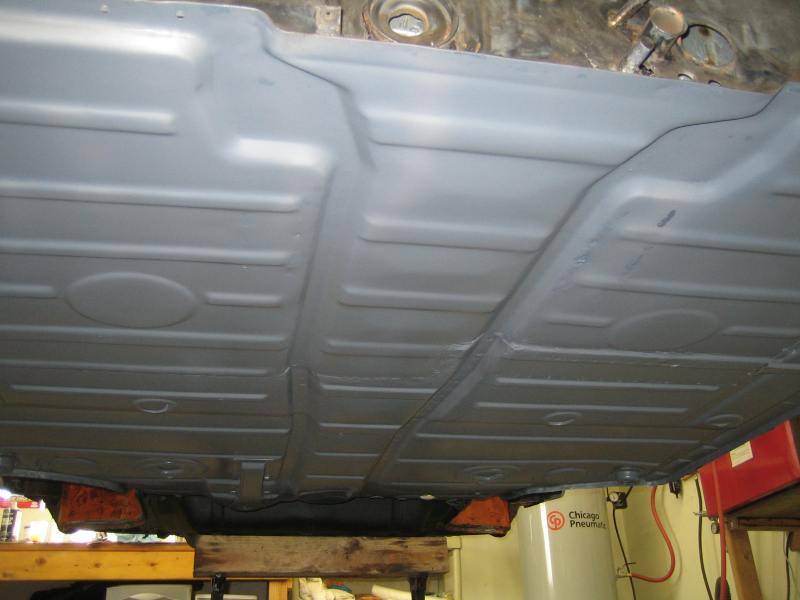
Then apply seam sealer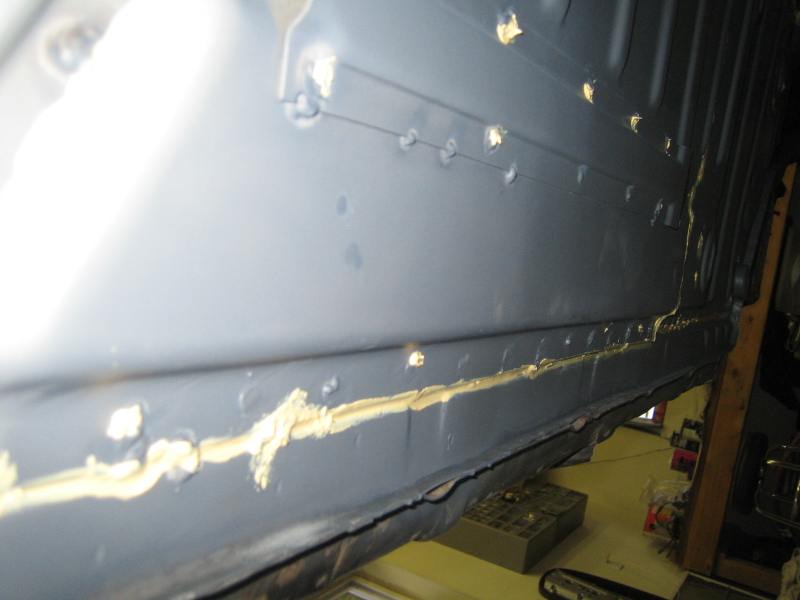
And add a second coat of Epoxy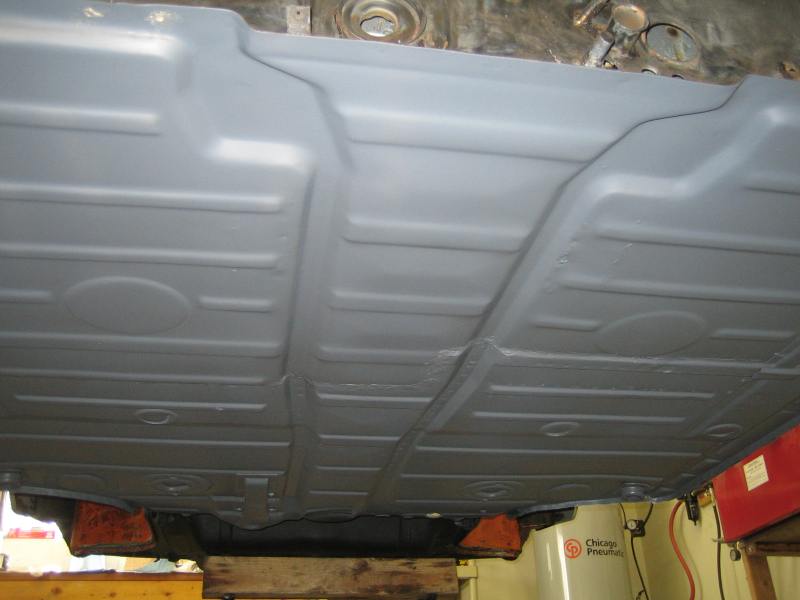
Now ready for underseal.
Posted by: charliew Apr 19 2009, 05:19 PM
You might want to check out a caliper rebuild thread. Your pistons are not positioned in the correct orientation. The missing part of the piston rim faces the incoming part of the rotor when it is mounted on it's proper side. 20 degrees is the term they use when positioning each individual side. Wes V has a good thread and I'm sure there are others.
Posted by: my928s4 Apr 20 2009, 09:03 AM
You might want to check out a caliper rebuild thread. Your pistons are not positioned in the correct orientation. The missing part of the piston rim faces the incoming part of the rotor when it is mounted on it's proper side. 20 degrees is the term they use when positioning each individual side. Wes V has a good thread and I'm sure there are others.
You are correct, found this pic on Pelican.
Posted by: MDG Apr 20 2009, 04:43 PM
Chris, just finished reading through this thread; that is some inspired work - can't wait to see more.
m.
Posted by: my928s4 Apr 20 2009, 06:52 PM
Chris, just finished reading through this thread; that is some inspired work - can't wait to see more.
m.
Thanks, inspired by brilliance or madness
I do have to wonder at times.Anyway got these back from the powder coaters today, they did an excellent job. I had the brake protective plate done in black rather than plated like OEM, I am not after originality and the plating does not seem to hold up well on this part.
Posted by: my928s4 Apr 25 2009, 04:43 PM
At last the lowest part of the car is done, the 2nd and 3rd can of underseal worked waaay better than the 1st, much easier to apply. Two coats and about 1.5 cans to do the floor pan.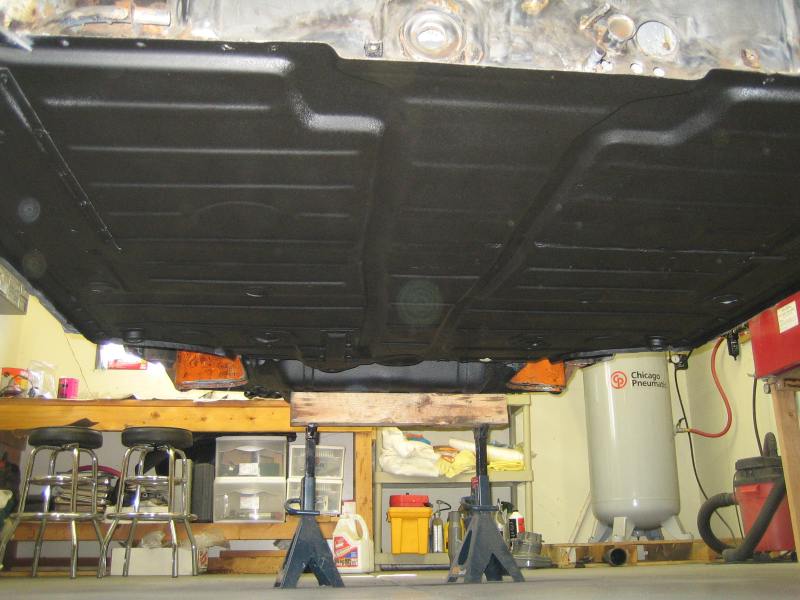
I added the following because someone posted and asked if this happened to others, you do your best to align everything but when you get to the finishing the bottom of the flare it doesn't align quite right. In total this happened to me twice and is no doubt because I did not pay enough care and attention and I am a novice.
So the bottom was hanging maybe 3mm or so too low, first thing to do is cut off the bottom edge.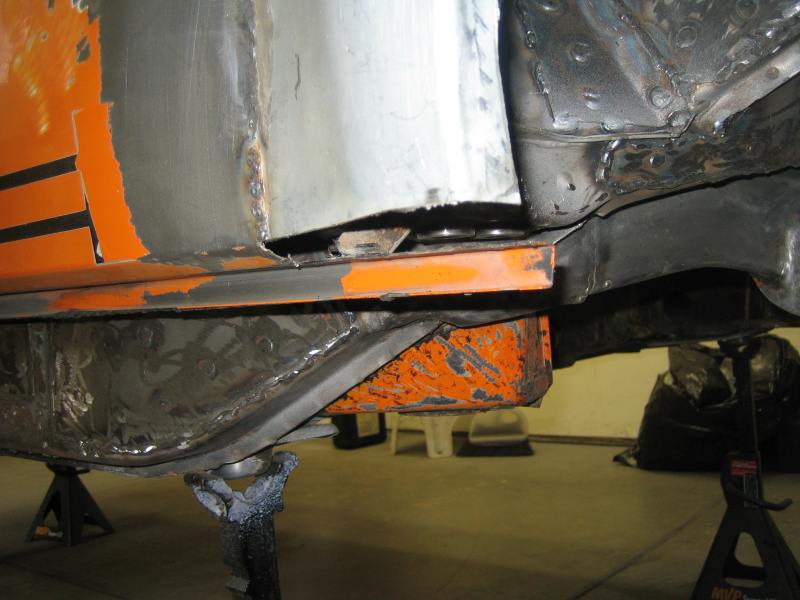
Align up the removed part to the remanents of the old fender (i.e the bottom), draw line and remove sliver of material.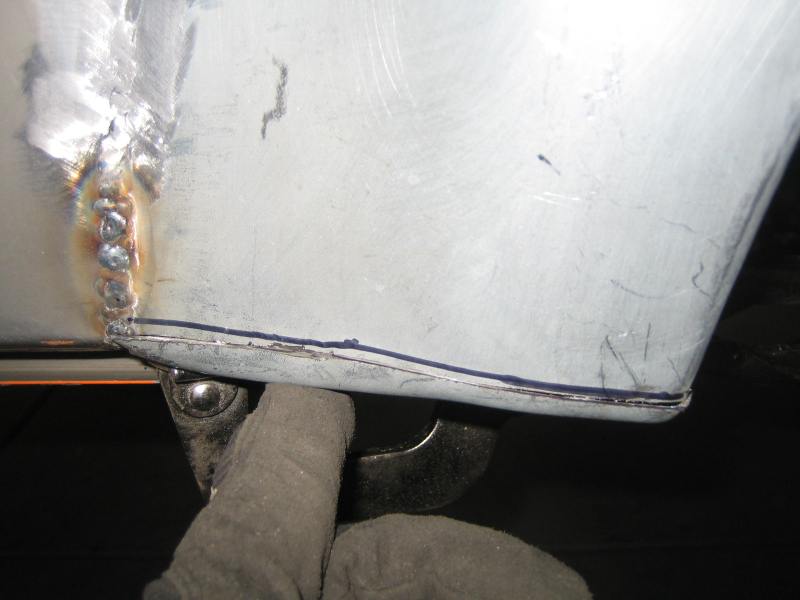
Make adjustments where needed and get the part to fit as good as possible, tack into place.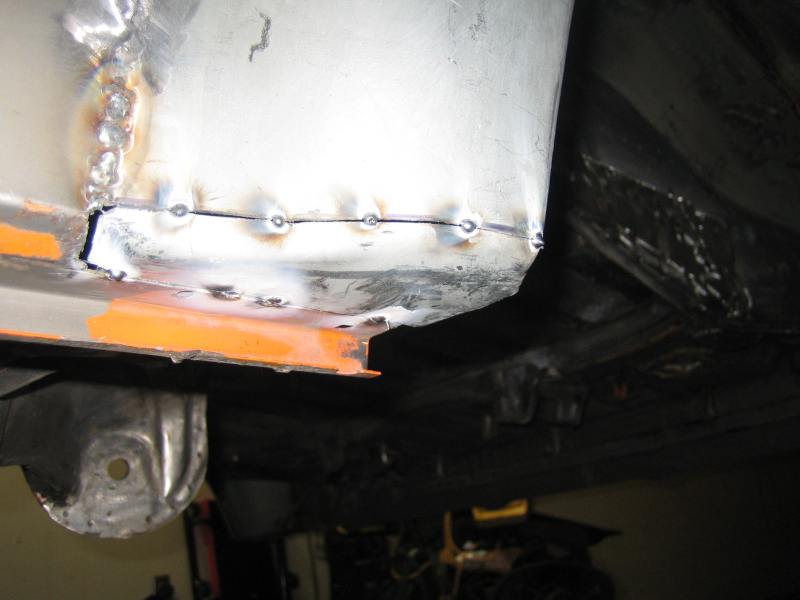
Complete welds and grind/finish.
Posted by: Lou W Apr 25 2009, 08:34 PM
Sure looking good, very nice job.
Posted by: Slider Apr 25 2009, 10:13 PM
Nice job Chris, keep up the good work you are an inspiration.
 Cheers!
Posted by: charliew Apr 26 2009, 09:39 PM
I held my fg rocker from aa up to my 75 body and I can't decide how to get a small gap at the joint of the flare and also work with the bevel on the bottom of the body, that seems to be a tough fit. It really looks like the fg rockers need to be straighter down more than angled in at the bottom edge.
Posted by: my928s4 May 5 2009, 07:01 PM
Not too much going on but took some parts to the platers and cleaned up the garage a bit. I wanted to make the body movable so I could do some of the filler work outside, off to Homedepot for some wood which is not my best medium. Anyway made up a dolly which sits nicely on the finished underbody.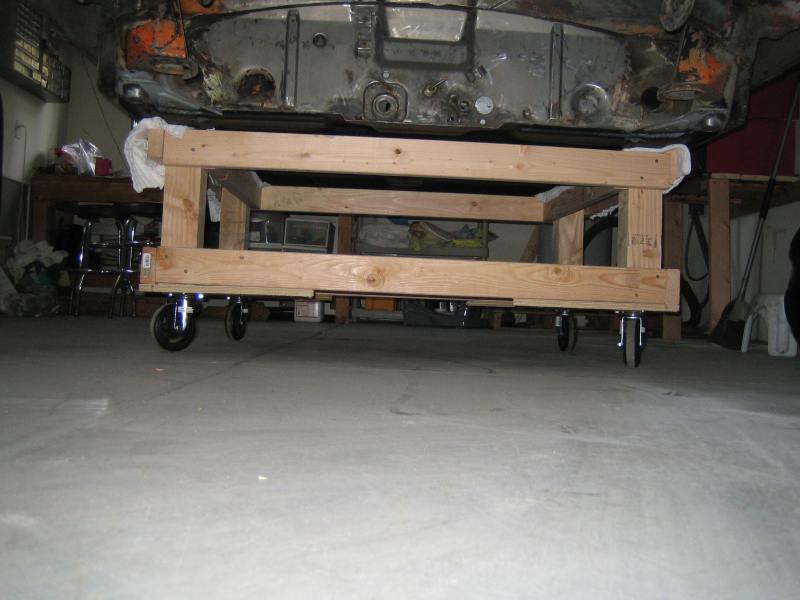
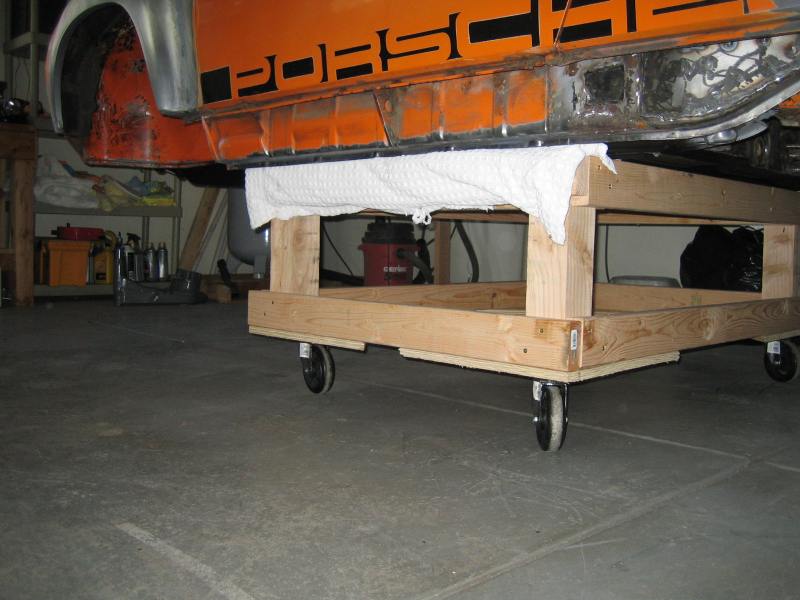
Seems to work OK and pretty stable, will see how it works in the coming weeks. Got a 928 track day this weekend and the wife wants me to refinish one of the bathrooms so May not going to be a stellar month for progress.
Posted by: maf914 May 6 2009, 02:20 PM
Chris,
Great looking work. Your resto thread ranks with the best of them.
Were you a novice at welding before you started? That is a skill you must have to do the work you are doing.
My real question is do you think you should have used a rotisserie? If I were ever attempt a project like yours, I know my back (herniated disc) wouldn't be up to the squatting, crawling, bending, etc. of working under the car. I know a rotisserie doesn't make the project easy, but access is much improved. And once you finish I assume there will always be someone out there that wants a rotisserie for their project.
Posted by: maf914 May 6 2009, 02:25 PM
I held my fg rocker from aa up to my 75 body and I can't decide how to get a small gap at the joint of the flare and also work with the bevel on the bottom of the body, that seems to be a tough fit. It really looks like the fg rockers need to be straighter down more than angled in at the bottom edge.
Charlie,
Are these the new flared factory replicas from Automobile Atlanta that George was telling us about. If so, how is the quality? Straight, square, symmetrical? I haven't heard anyone comment on them yet. Thanks.

Posted by: my928s4 May 6 2009, 03:52 PM
My real question is do you think you should have used a rotisserie? If I were ever attempt a project like yours, I know my back (herniated disc) wouldn't be up to the squatting, crawling, bending, etc. of working under the car. I know a rotisserie doesn't make the project easy, but access is much improved. And once you finish I assume there will always be someone out there that wants a rotisserie for their project.
No question about it, looking back if I knew then what I know now I would have made a rotisserie. I am too old for this s*** is what I think when I am on my back trying to get things done.
I have the AA flares, they are pretty good although one side is shorter than the other. I need to trim the excess and do a final fit check, will post pics.
Posted by: charliew May 11 2009, 10:52 PM
I think the aa flares are pretty good but they damn sure don't fall in place. I got my flares and rockers about a year ago. The rockers are nowhere near a good fit with the bulges on the flares. It takes a lot of imagination to figgure out how to make the transition of the steel flare make a smooth joint with the rocker. Under the quarter and bottom of the door is the 45 edge that the flares don't have so it's f*****g magic at the bottom of the flare. The rocker has way too much sticking out to fit the flare of the steel.
I think George covered this on his flare how to instructions.
Thats why they call it sheetmetal work I guess. And fg work.
I find myself now looking at every picture of a flared car I come across to see how that particular car's rocker fit's.
Posted by: Kansas 914 Jun 14 2009, 10:19 AM
Here is a pic of my welding machine, a Miller was a little rich for my blood and after reading everyone elses experience this seem like s good compromise.
I will be using the same welder on the same part of the floorpans. I have no wire welding experience - so if can pick your brain a little...
Do you remember amperage and wire feed speed? I need a starting place.
Your project continues educate and inspire!
Cheers!
Posted by: my928s4 Jun 15 2009, 10:06 PM
I will be using the same welder on the same part of the floorpans. I have no wire welding experience - so if can pick your brain a little...
Do you remember amperage and wire feed speed? I need a starting place.
Your project continues educate and inspire!
Cheers!
Hi Mike
Hope this is of some use, I wrote some settings down but the scrap of paper is nowhere to be found. For 80% of the time setting B between 4 and 6 will suffice, same wire speed in setting C will be needed to bite into the longs. I occasionally use A on a higher wire speed when the metal gets thin.
For welding upside down you will need a higher wire speed than if welding in a more normal position.
Hope that is of some use, good luck with your project and post pics for the rest of use to see your handywork!
Posted by: my928s4 Jun 15 2009, 10:13 PM
Starting to make some progress again, our track day was a blast and you can see pics http://www.928s4.com/TA/spokane_ta_xvii_may_2009.htm if you are interested. Also tiling the bathroom so nearly done there (or at least good enough to be allowed back into the garage .....).
Got some more parts back from the platers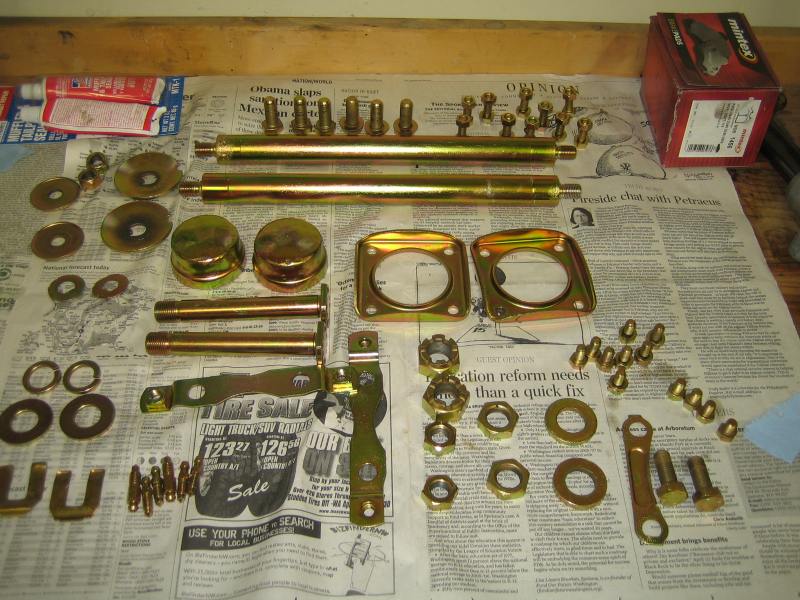
Pressed the wheel bearings in, forgot to tell the powder coater NOT to paint in the shock bolt hole ... someone at work is reaming that out and then I can press in the hubs and new bushings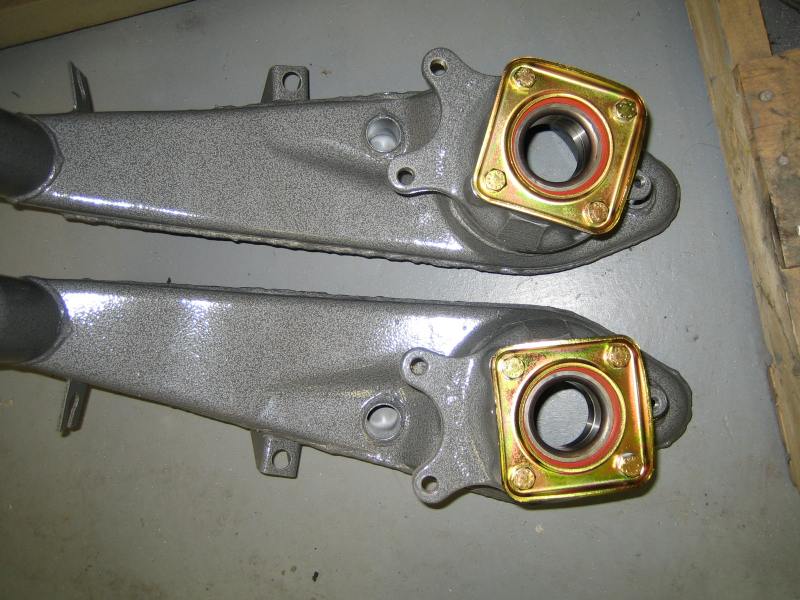
Talking about bushings I just finished tweaking these to fit, many thanks to Eric for parts and advice as and when needed, awesome service. I rebuilt the rear brakes just need to save up for the V caliper kit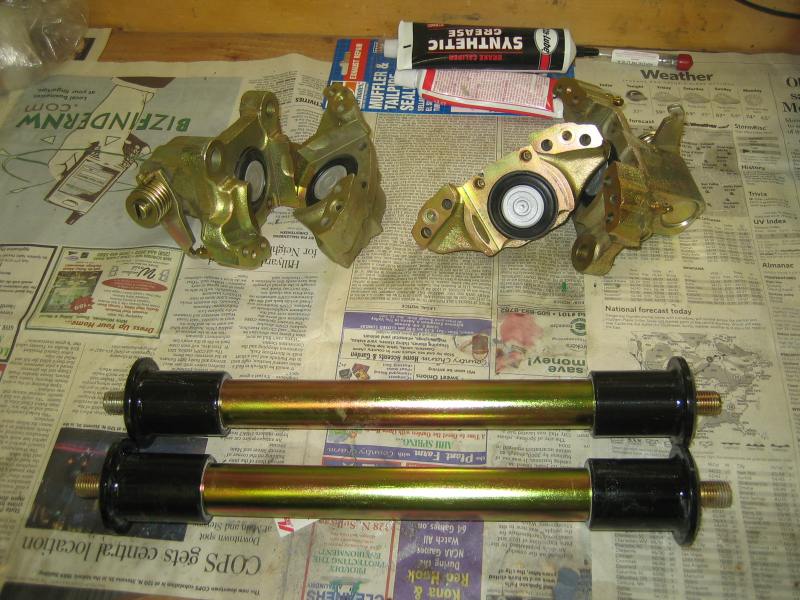
Posted by: my928s4 Jun 19 2009, 08:04 PM
With the shock bolt holes cleared of powder coat I pressed in the 5 bolt hubs with the use of some 3/8" thread plus nuts and washers. Also placed the hubs in the freezer to assist with the effort.
Greased the bushings and put those in also, I need to drill and tap for zerks but could not find the ones I wanted locally so will have to wait for my next McMaster order.
Anyway another minor project complete, these go to the basement to await fitting to the chassis at some (hopefully not too distant) date.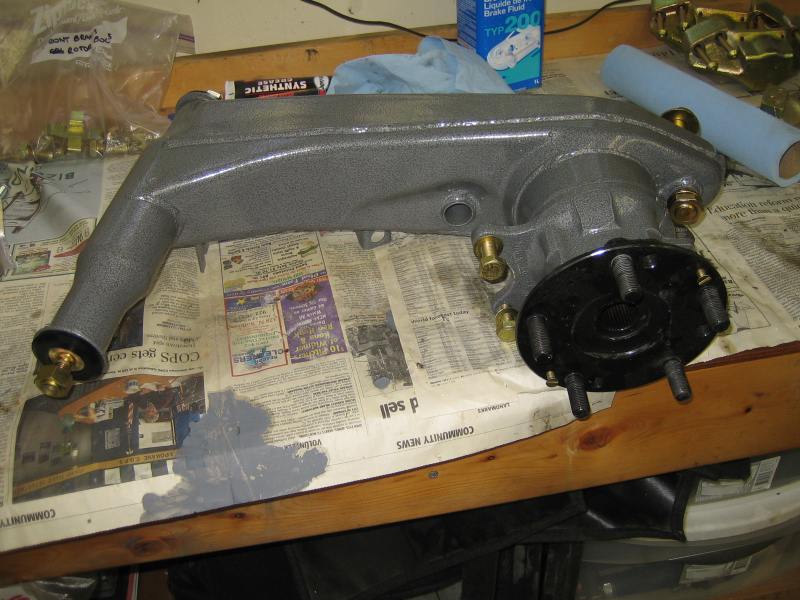
Posted by: my928s4 Jun 21 2009, 10:23 PM
Nothing major today as I started to re-organize a bit, I decided it is time I started making a parts list. Up to this point I have been winging it, not quite sure why but one reason could be I don't want to get distracted by the $$. I have some big ticket items (Koni shocks, front sway bar and wheels/tires) coming up but got to face the facts sooner or later. My spreadsheet is growing ....
I dismantled the axles, it was a messy job but now have the CV joints bagged and ready for cleaning and re-greasing at a later date.
Earlier in this thread somone had mentioned that a carbide burr would be a good idea so on my last Mcmaster order I bought one, now I wonder how I did without it. For cleaning up in those hard to reach places this thing rocks.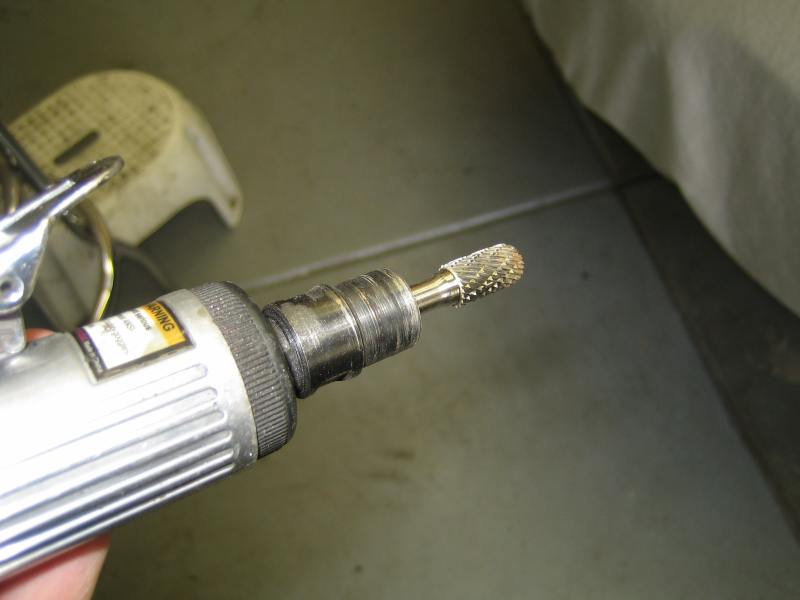
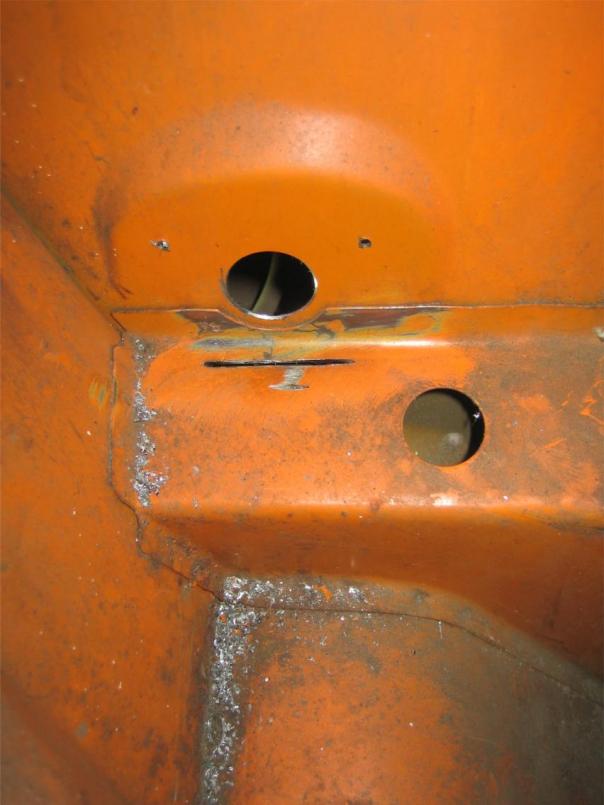
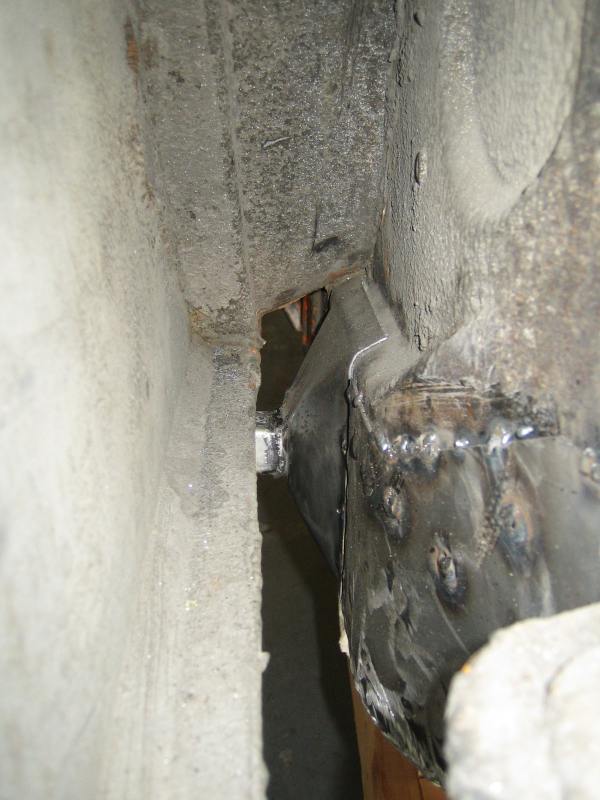
I used it to great effect to remove the remanents of the jack post welds, I was going to do the delete thing but decided I would put them back in. I had to weld a plate over the recess where the tube locates on the drivers side, the following is a picture from Richard's site which was very useful.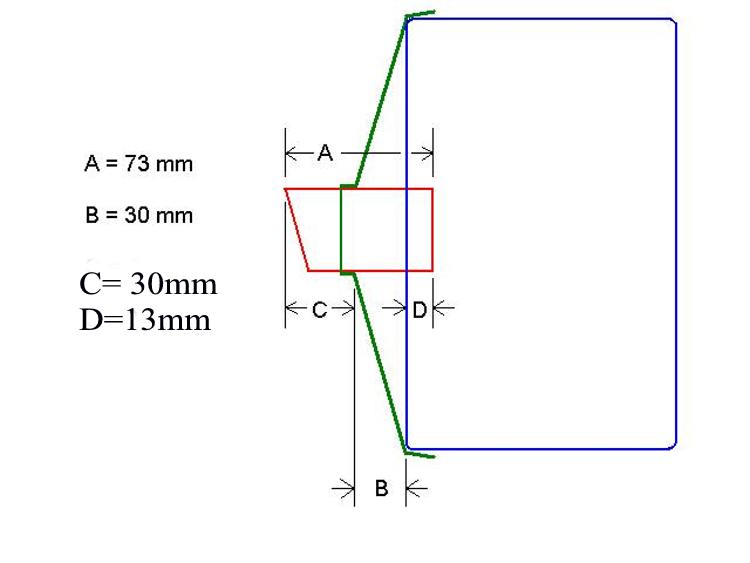
I removed 7mm from the post and welded it in place.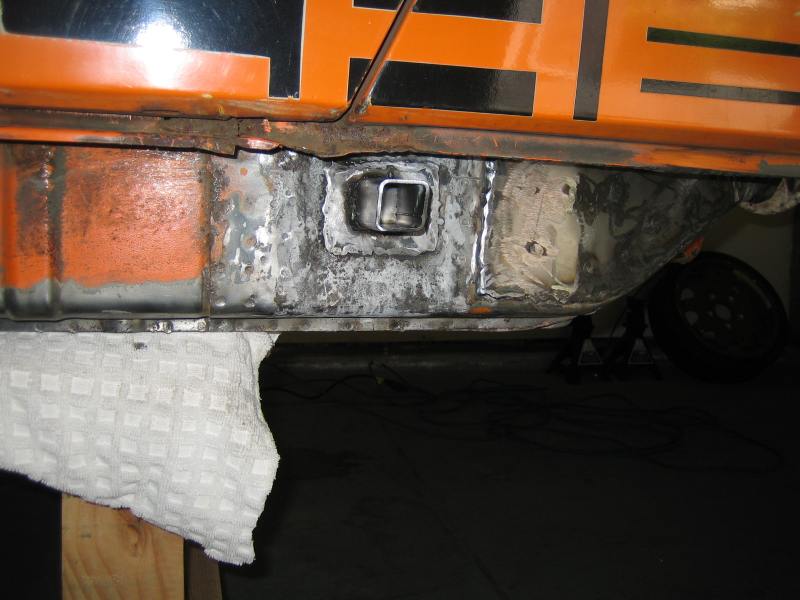
Passenger side was easier although this pic came out looking like it is askew but it looks alright to the naked eye, honest.
Decided to use up some of my POR-15 stock to treat the area which will be sealed off. Now for the surpise part, with the tube located into position the cover plate will no longer fit over the tube and against the chassis rail .... this was a good point to go take a break and watch the British GP.
Rather than use a BFH (tempting) I cut two small diagonal slits on the cover plate and bent the area out temporarily to allow the plate to fit, with the cover screwed into place a tap with a screwdriver and hammer and all is good. I can weld up the slits when I weld the plate into place tomorrow.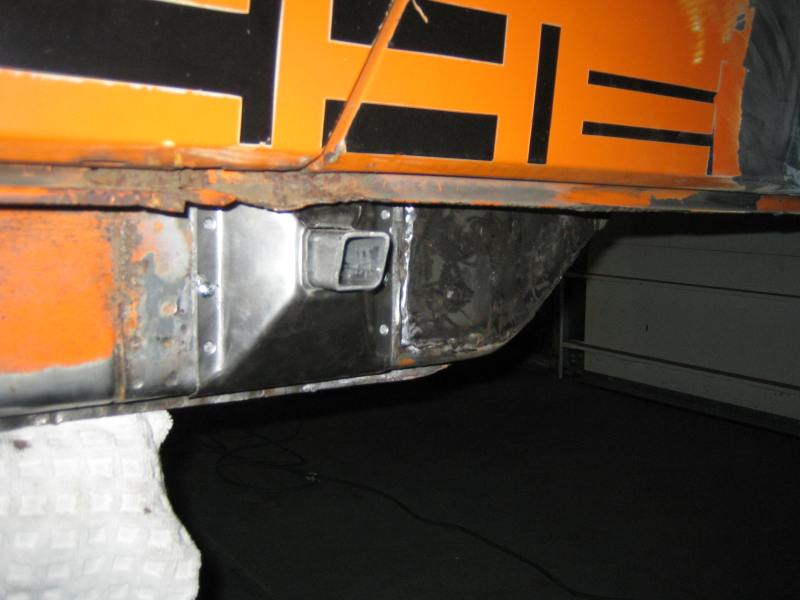
Posted by: my928s4 Jul 5 2009, 04:12 PM
Finished up the welds on the jack posts, apart from some minor issues on getting a nice weld on the tube these went on OK. Took a shot of the inside of the wheel well so you can how flush this part sits, nice.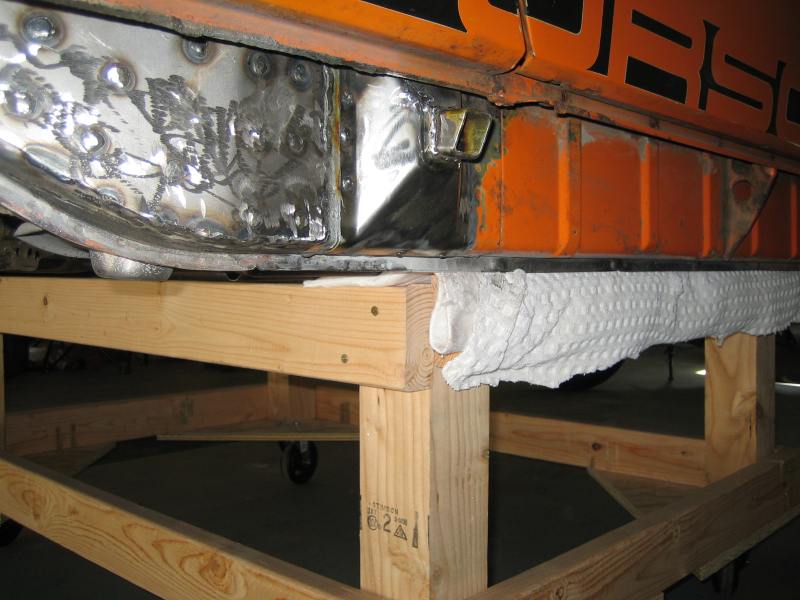
I also welded the front sway bar supports in place, note to self, do a better job of cleaning weld thru primer from the area.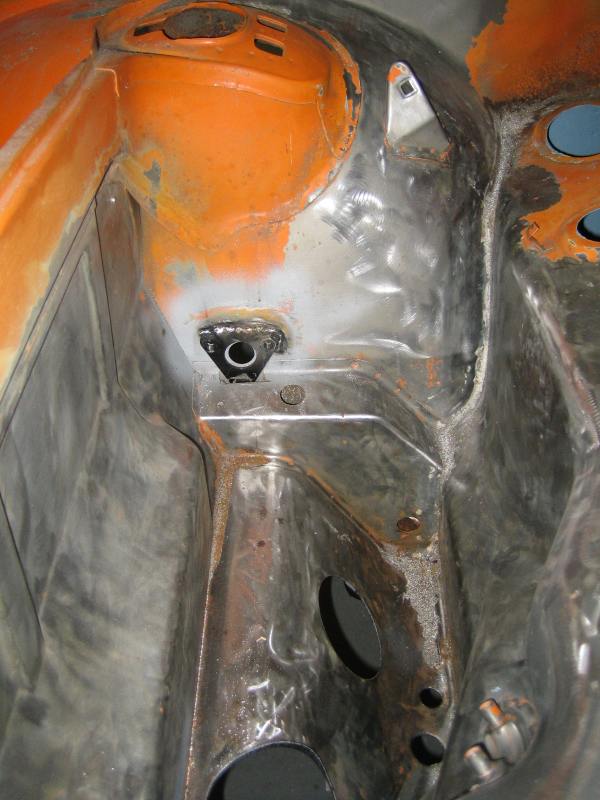
I boughts some Etch Primer and Tri Primer for the interior a while ago, yesterday I rolled the car out into the fresh air and cleaned the wheel wells and used compressed air to blow the accummulated dust out from everywhere. With that done the interior was in a better state to be worked on.
Etch Primer (one coat as it used the whole can).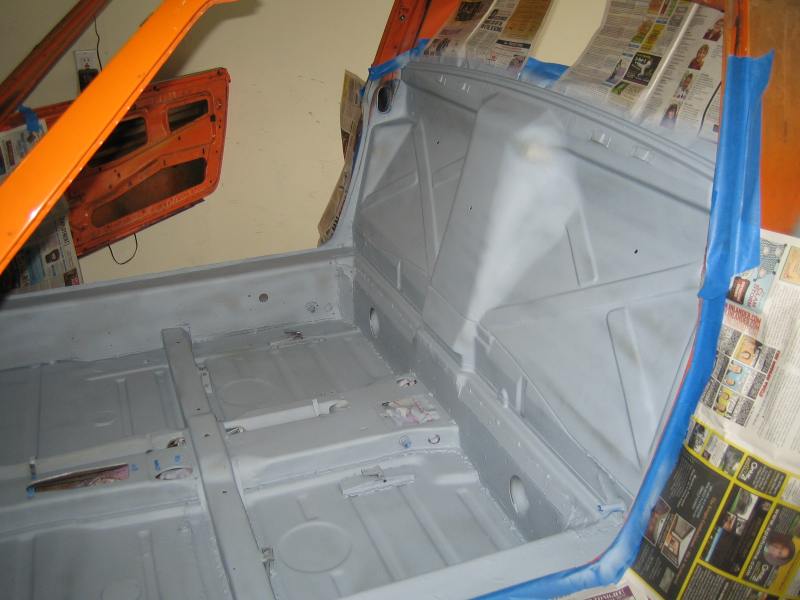
And then the tri-coat, 'all' this needs is some sanding and then color ....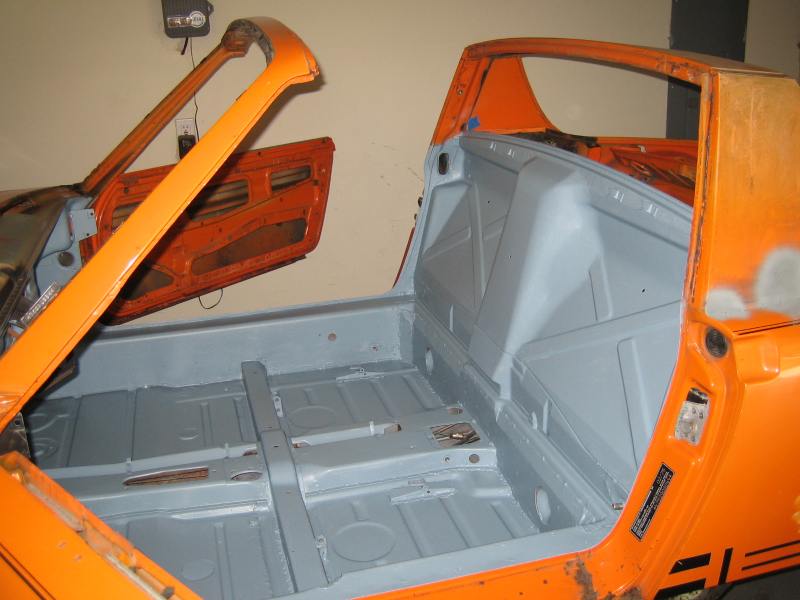

Posted by: my928s4 Aug 29 2009, 04:13 PM
This summer sure has flown by, trying to finish up the underside and my next goal is to get the rear suspension together and then the front ... then maybe get this project onto some wheels.
Same process on the rear as the rest, epoxy primer, seam sealant, epoxy primer and then underseal. My last can of underseal didn't quite do the job so need to go get another can Monday, bummer, as I was hoping to put the rear suspension together tomorrow.
Oh well will prep my gearbox for the rebuild clinic instead.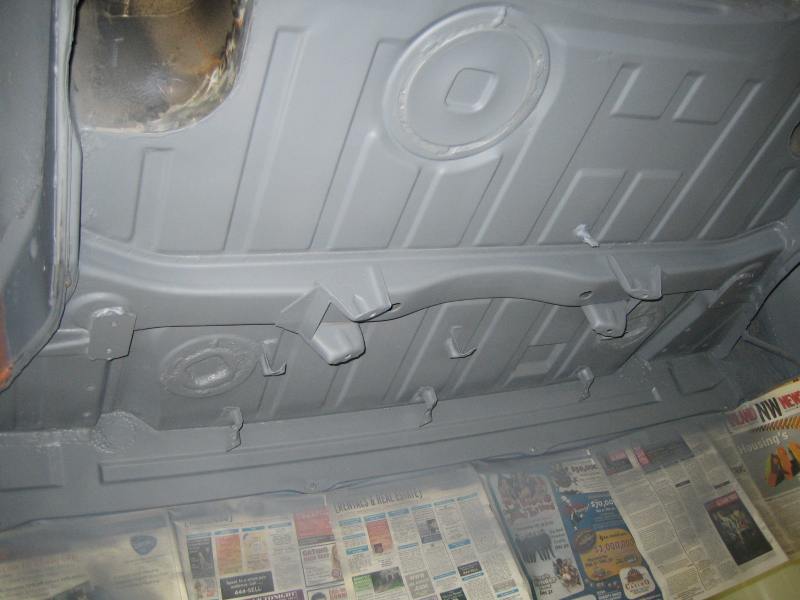
Posted by: my928s4 Aug 29 2009, 04:17 PM
Got my v-caliper kit so can finally finish off the rear calipers, got Porterfield pads for front and back. Thanks Eric !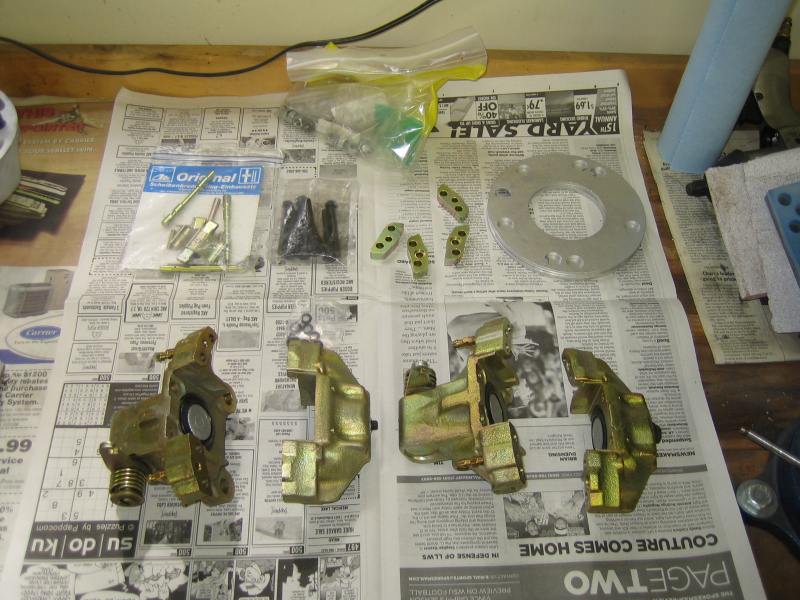
Put my Koni shocks and coil over kit together, does this look right?? I think this is the right mix of original and aftermarket parts ....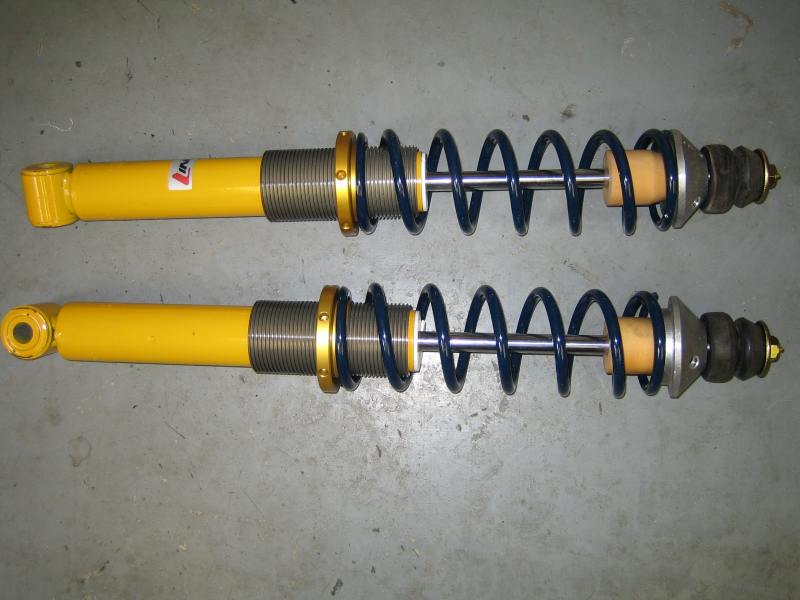
Finally cleaned up the front hubs and put new bearings in, wife doesn't even bat an eyelid when I put parts in the oven ....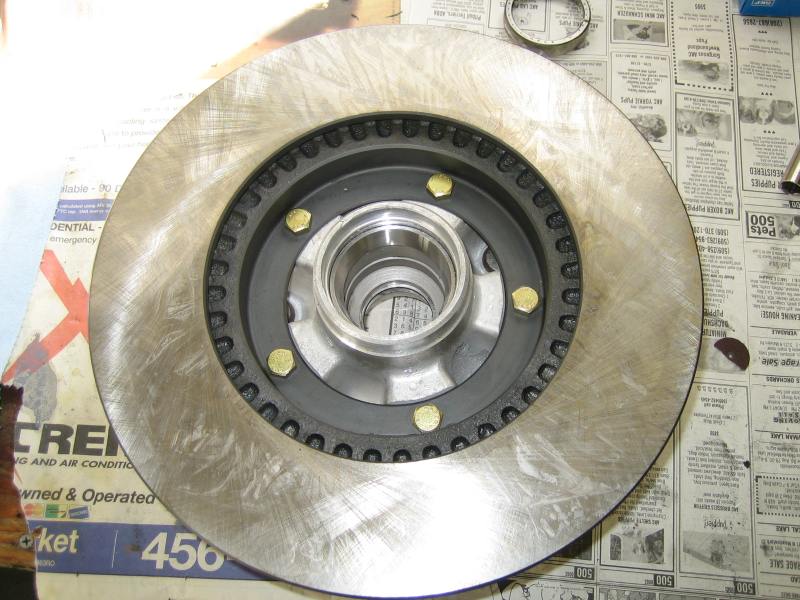
Posted by: 993inNC Aug 29 2009, 06:00 PM
as a newbie to both here and 914's (and welding), I have to say you're project looks to be coming along well. You're doing a great job, and I only hope i have the patience to carry through as you have, on my 75. Today was more stripping of the interior. I know I don't have the patience to grind like you have so i'm going to have mine blasted to get it all clean before starting the panel replacement process.
Keep up the great work!
Posted by: lotus_65 Aug 29 2009, 06:42 PM
this thread is

BOMB
Posted by: my928s4 Sep 5 2009, 09:33 AM
It felt really good to bolt on some parts so thought I would share, next will be the front but first I need to clean up my gearbox for next weekends tranny clinic.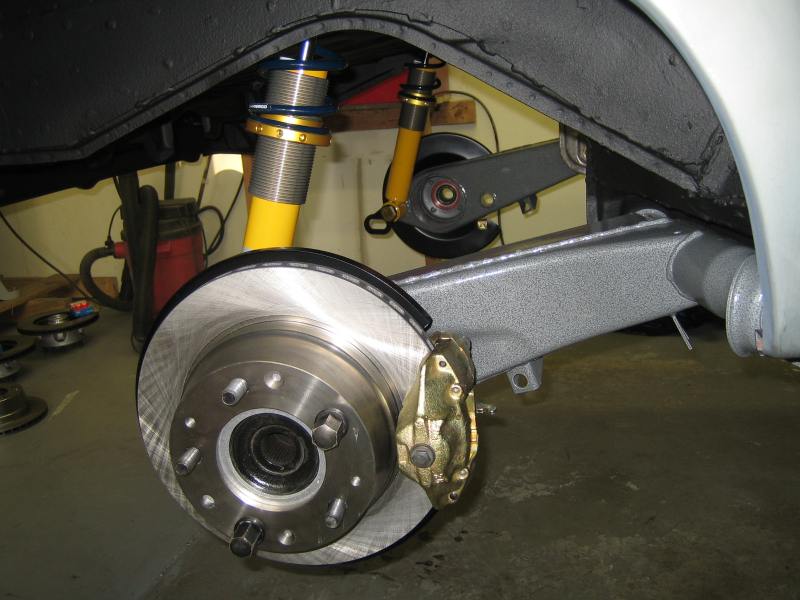
Posted by: my928s4 Sep 7 2009, 04:55 PM
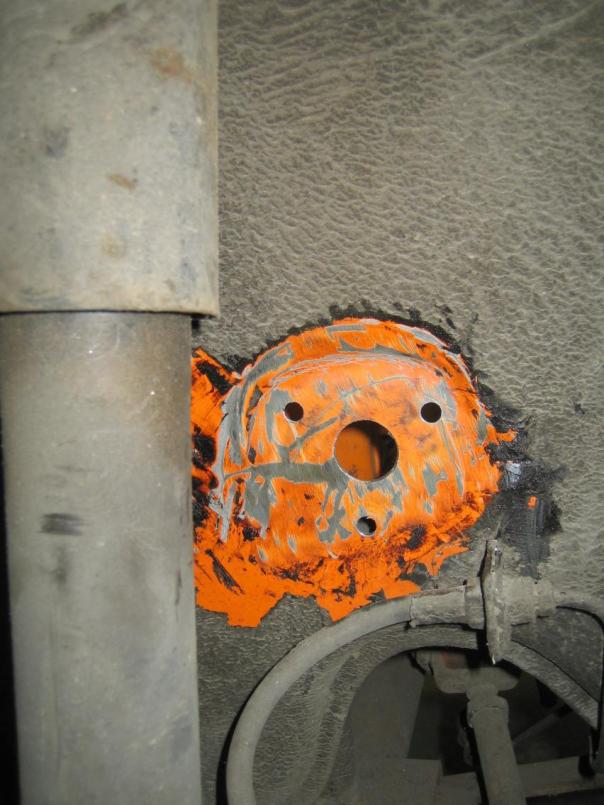
Well I had some spare time today and before I did the finish work on the front wheel wells I wanted to cut the holes for cooling outlet and while I am in there might as well cut the holes for the radiator.
Got some useful pics from the Anklebiter thread, because mine is a 75 I have the reinforcement that spans usually where you would cut in the wheel well. Decided I wanted to keep that and I hope the hole I cut will suffice for cooling, we shall see some distant time in the future.
For the front:
First I marked of the area I wanted to cut with a sharpie.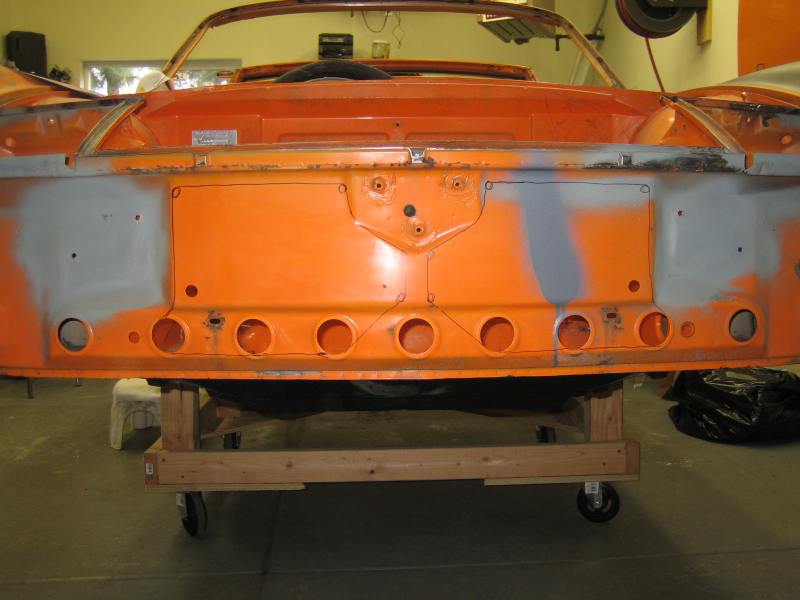
Then drilled holes on the 90degree corners.
Finally cut out the metal, still needs some finish work.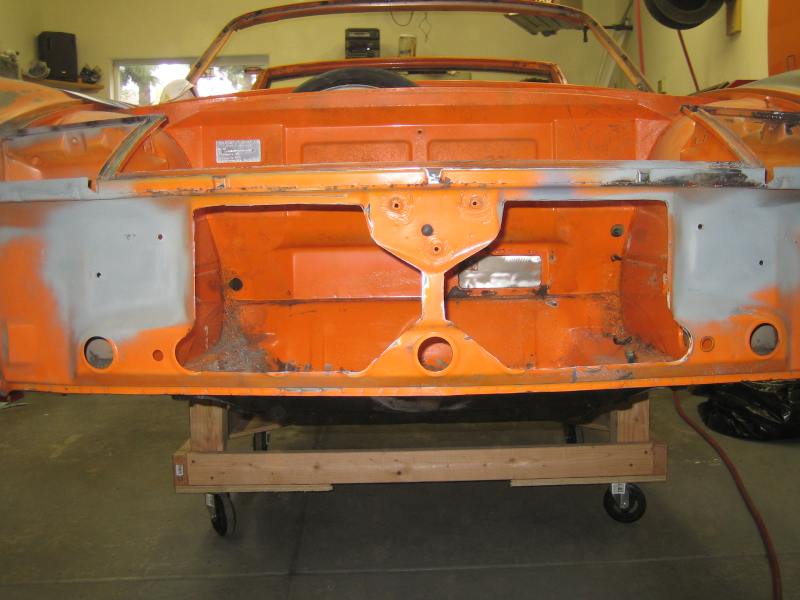
On the wheel wells I made a carboard template so that both sides were pretty much the same. Then followed the above procedure again. Finished hole.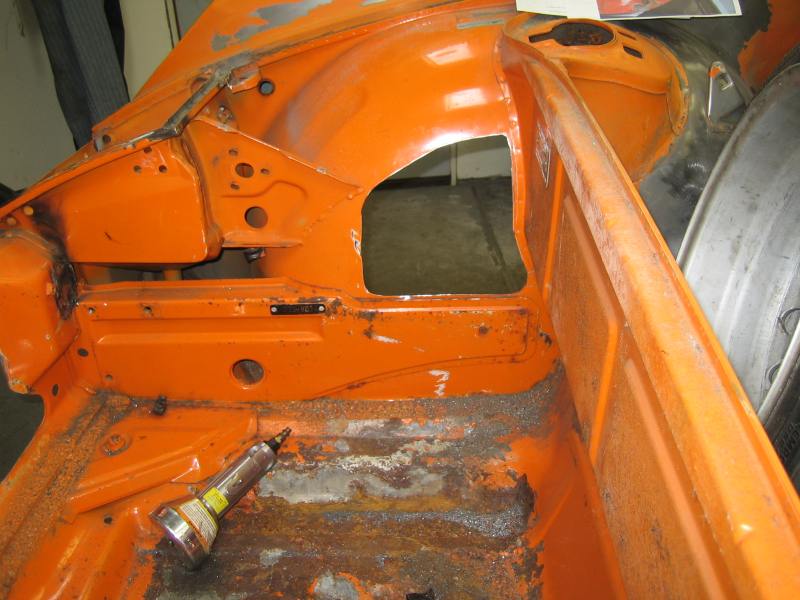
I have not attacked the front trunk but that is next, it has some rust that needs removal but I got the worst off, been a while since I used the wire wheel and grinder!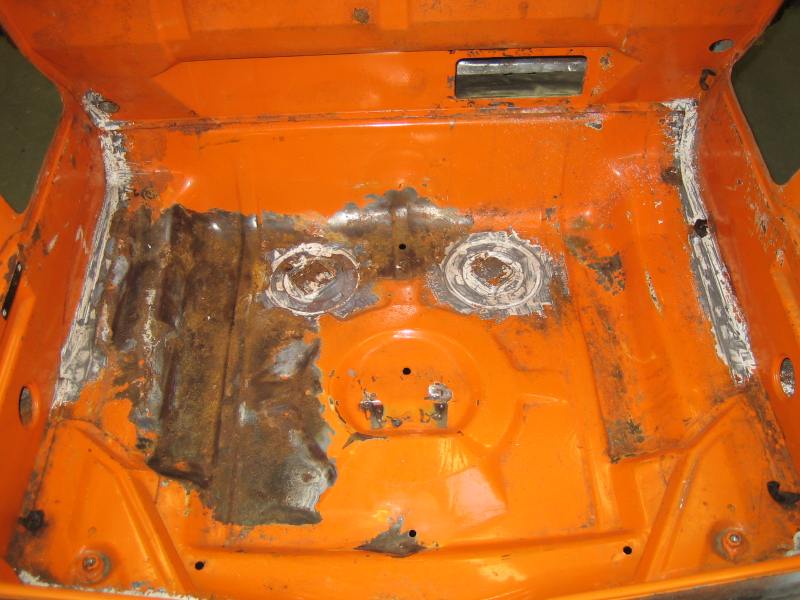
Posted by: Zaney Sep 9 2009, 03:21 PM
Looks great! 
What kind of engine is going back in? Suby?
Posted by: my928s4 Sep 9 2009, 03:47 PM
Looks great!
What kind of engine is going back in? Suby?
Hey thanks!
Yes a Suby, still mulling over whether to go with the pre or post 2005 WRX motor, that is a decision for sometime next year and will depend on what is available at the time.
Posted by: my928s4 Oct 18 2009, 07:18 PM
Over the last few weeks it has been one of those phases where you work on a bunch of stuff but there is not much to show for all the effort.
My gearbox is now sitting pretty after the PNW rebuild clinic, maybe one day it will have something to hook up to but great to have that done for sure.
I cleaned up the front trunk area, there were various superficial areas of rust and under the paint you only find more. I will take a picture next time, where there is a tiny pin hole through the paint to metal, under the paint is a spider web of rust which you would never have guessed. This was especially true under the front indicator where the paint looked good but stone chips mean that underneath was a nice area of rust.
Front trunk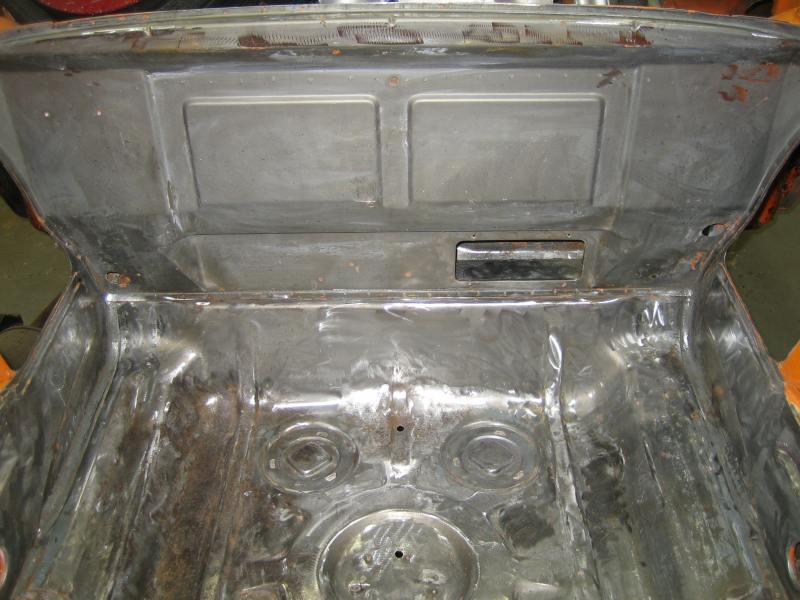
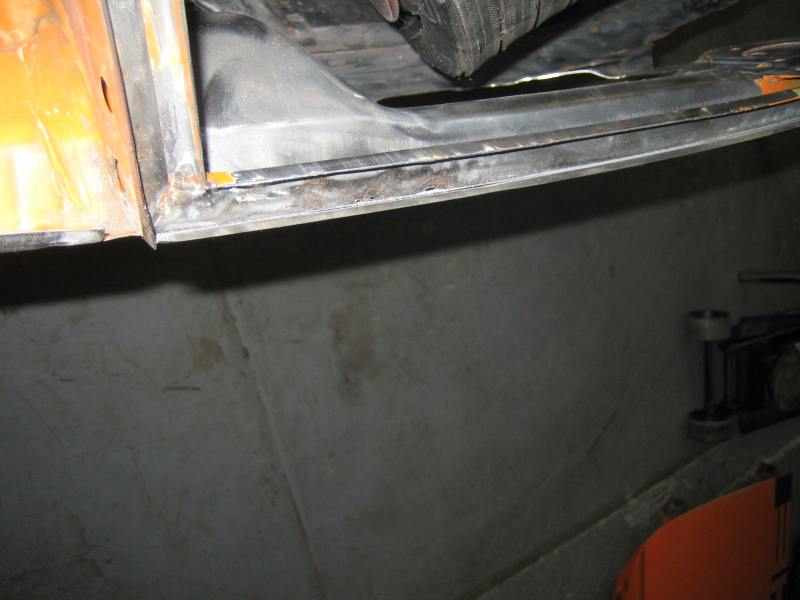
Front valence, when I did the metal mods for the chrome bumper retrofit I left a lip on the front edge but on closer inspection the surface of the metal underneath did not look too good. I am glad I removed it as it took a lot of clean up but now I need to weld a strip back on.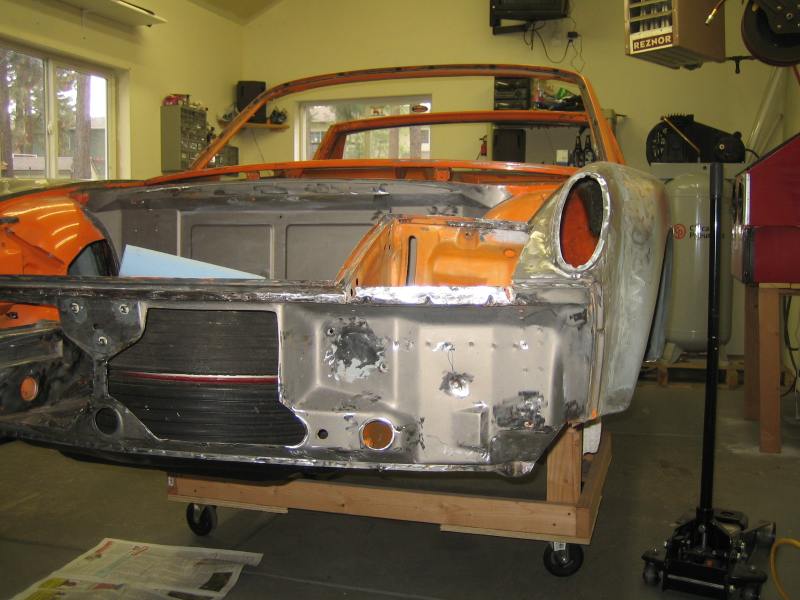
Started prepping the front wheel wells so I can primer and undercoat like the rear, just stripping where the original undercoat was not well adhered. This is what it looked like after the first application of the stripper, one more and should be good to go.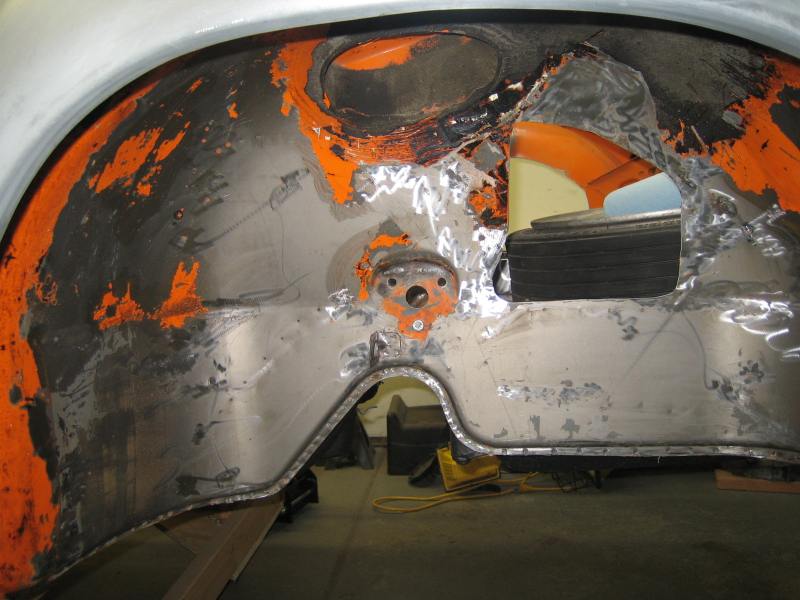
Posted by: my928s4 Oct 25 2009, 05:38 PM
Last time I mentioned how the rust spreads under the paint, well got a good shot this week before I sanded away the rust. This is what a small hole in the paints does to the metal underneath.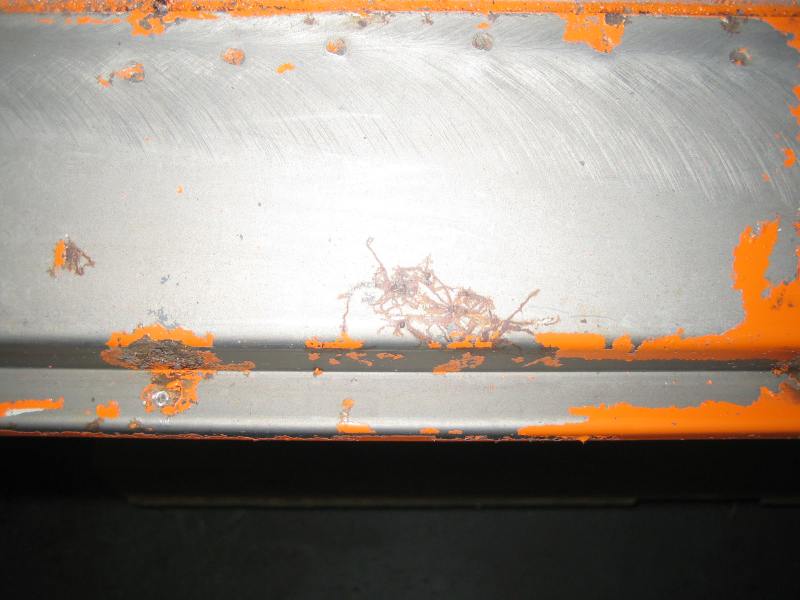
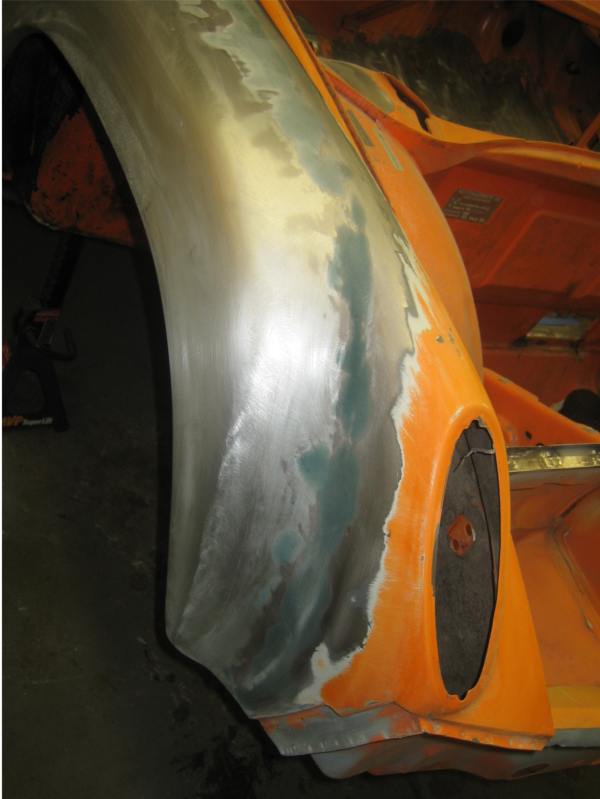
I started removing the rest of the paint from the passenger rear quarter and decided I ought to look in the door jams. Definitely some surface rust so lets get rid of the paint and see what we have. Hmmm 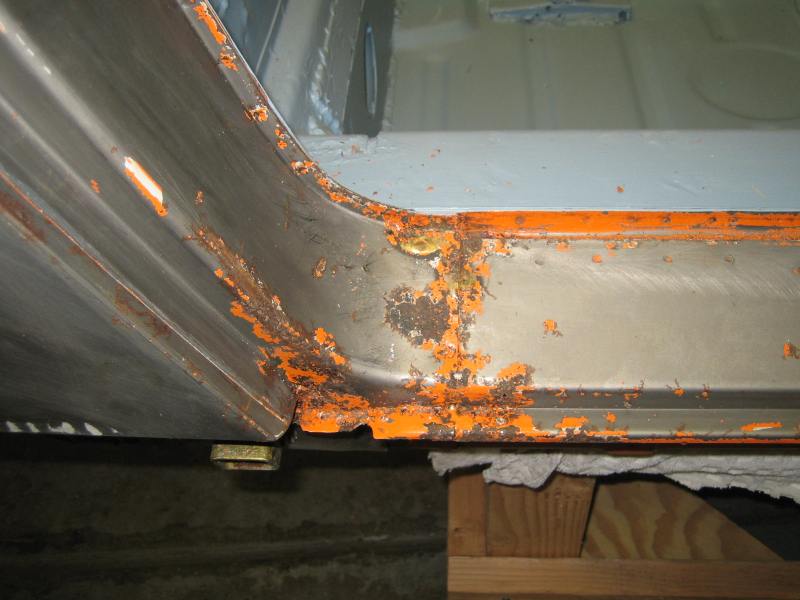
After more thorough prep you can see some small holes that are going to need some attention.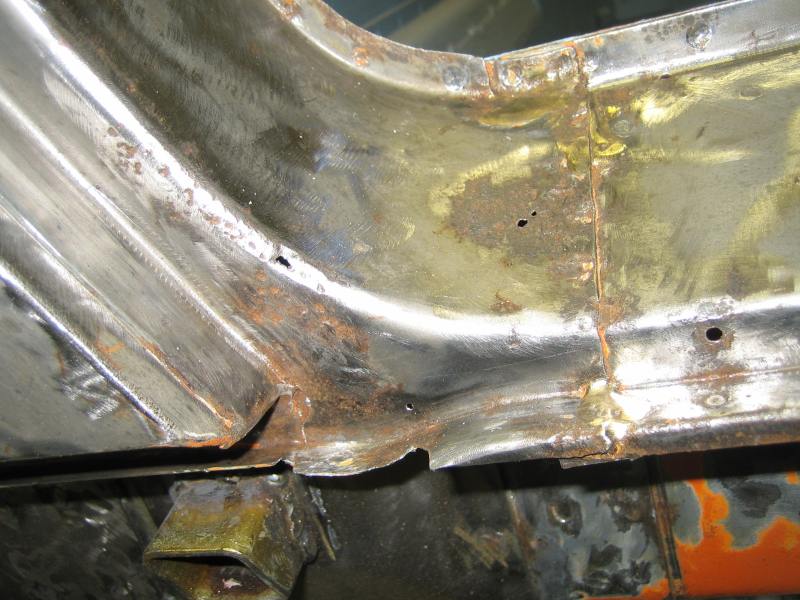
Before I get the welder out might as well remove the door and keep on stripping to finish off the passenger side of the car.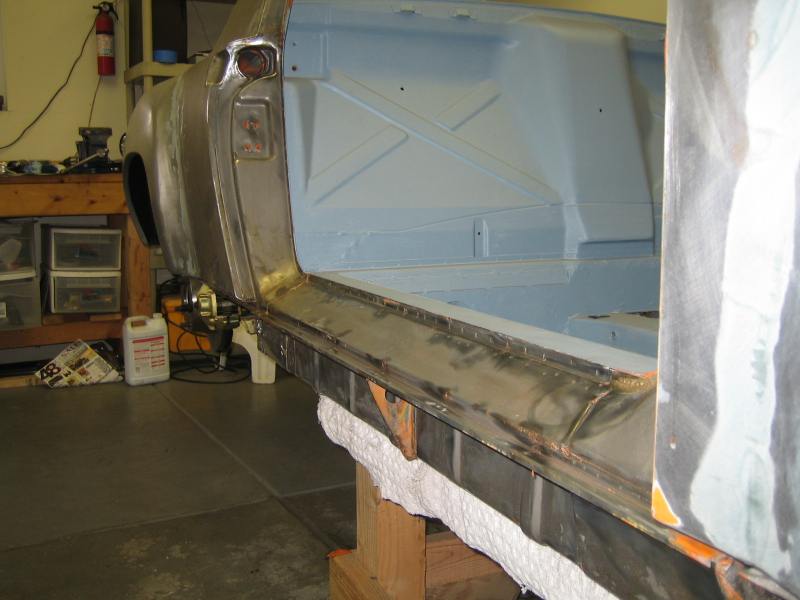
I just need to get under the sill and then done.
Finished off the driver front wheel well too.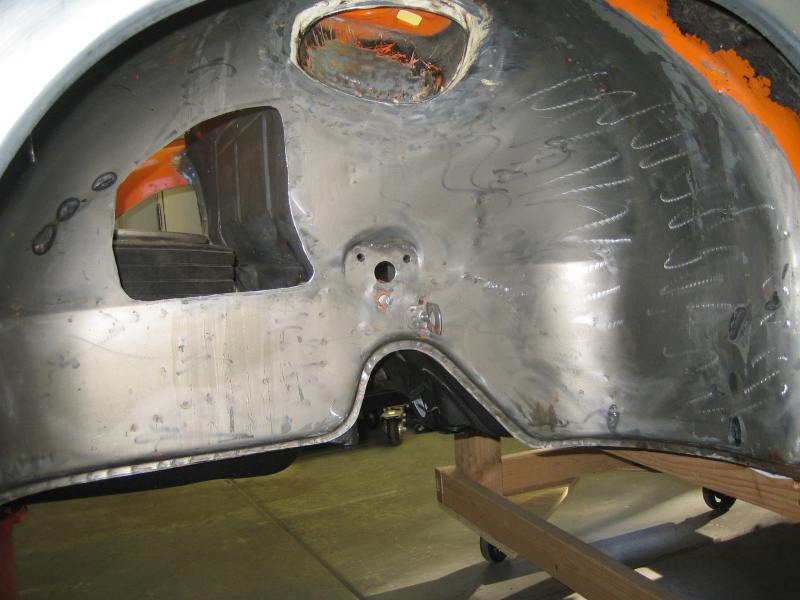
If I can patch the holes without too many problems I am thinking bondo next and then some primer.
Posted by: my928s4 Nov 9 2009, 10:15 PM
More bits and pieces, keep chipping away.
Welded in a patch to replace the rusted area in the door jamb and welded up the small holes.
So I got a little over zealous with removing brackets, looking at how the front trunk shocks mount and they use the bracket where the spring used to mount ... oooppps. So made a couple of brackets and welded back on.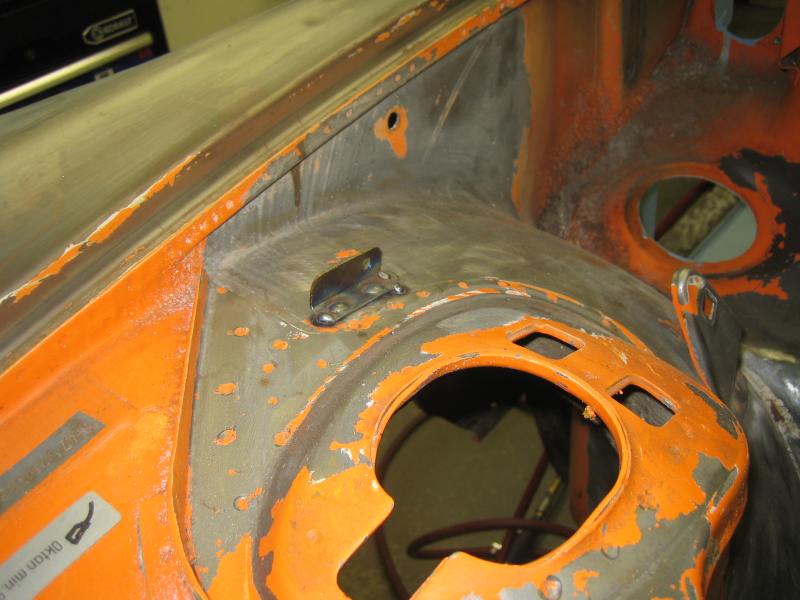
My spray gun came with a fairly large cannister which was a PIA when trying to get into smaller areas, went to the local supply store and they came up with this solution which works great. Not only does it make nooks and crannys more accessible cleanup is easier too!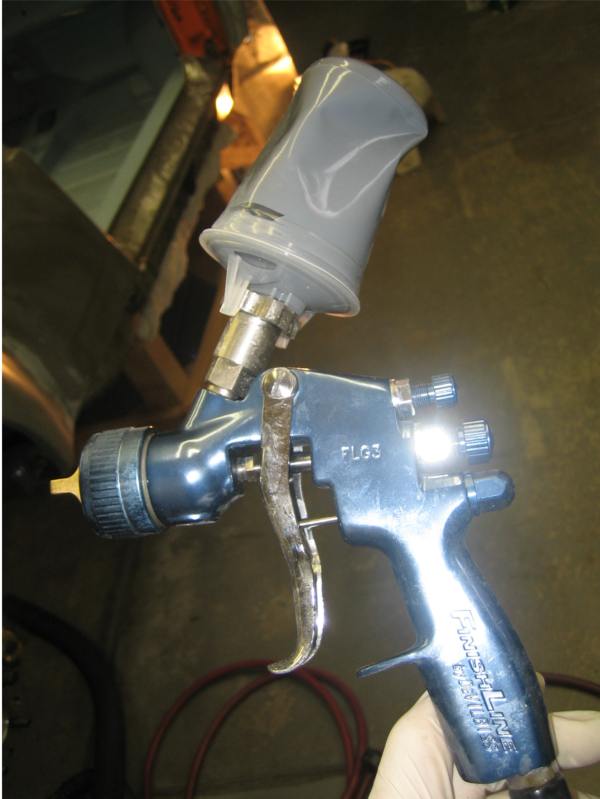
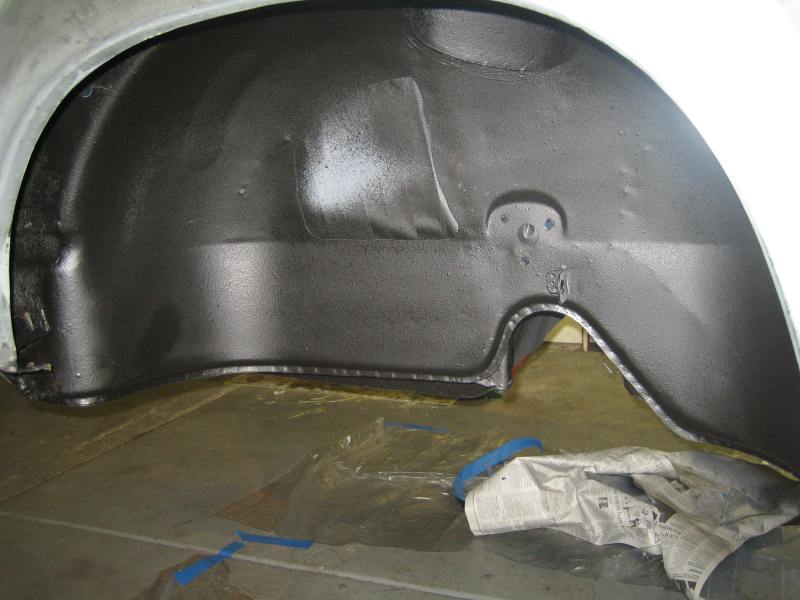
Front wheel wells are finished, same old routine, epoxy primer, seam sealer, epoxy primer and undercoat.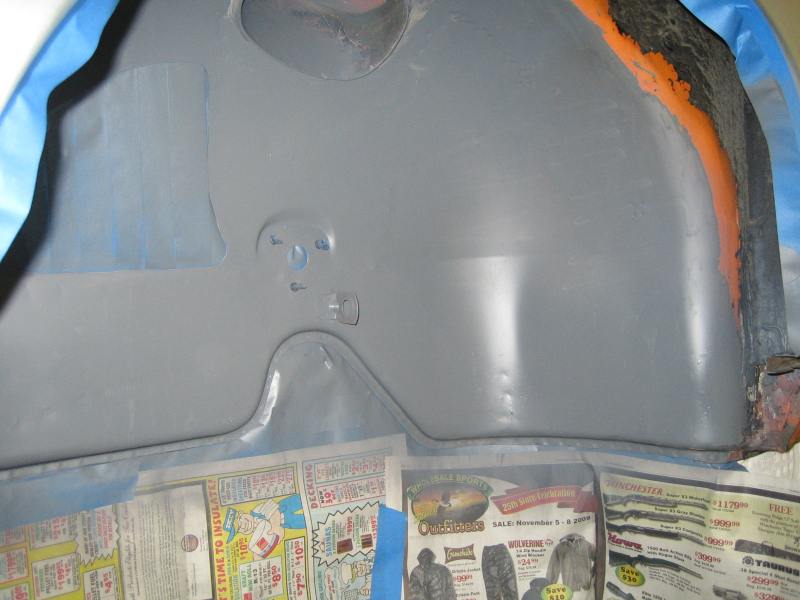
Been stripping small areas at a time while working on other jobs, found it easier this way. Leave the stripper for 24hours then remove loose paint, use paint thinner to clean and then wire wheel any small areas.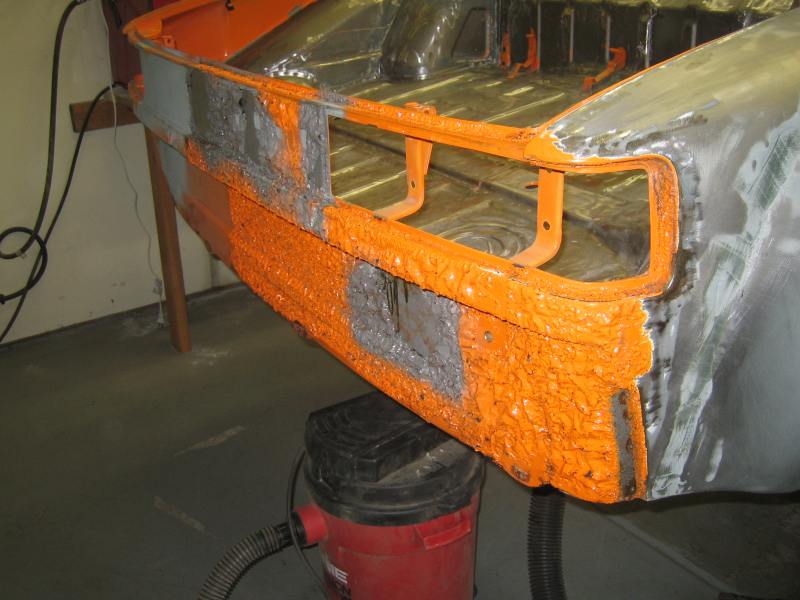

Posted by: Socalandy Nov 10 2009, 12:00 AM
Bad ass!!! Your getting me fired up to start on my -6 car
Great work
Posted by: charliew Nov 10 2009, 09:31 AM
Great work. Those little spiders are not to visable until the paint is removed. The rust under the doorjamb will be a lot worse on the bottomside, thats where it started and finally came through the top side. The only thing is I would have put a black top coat, even if it is just industrial enamel, over the primer in the wheelwells to seal the pores in the primer. Then the under coat. Epoxy primer is great stuff but it will be better sealed with a top coat. Rockguard is also a good coating in the wheelwells to cushion the rocks impact. It's probably not a big deal though as I've used dp90 on the aluminum sill trim pieces on a hunting jeep truck and it has held up well by itself.
Touch up guns are great for the tight areas. Turn the fan way down and move back about twice as far as normal and don't spray in one spot and you won't need to get as close in to the area you are trying to cover. You can spray a area the size of a quarter with low pressure, although thats not really necessary in most cases. Thats what you will need up under the battery tray if you have it already installed.
Primer first before the bondo. Primer sticks way better and seals way better than bondo. Primer bondo and more primer.
Posted by: my928s4 Nov 10 2009, 10:17 AM
Great work. Those little spiders are not to visable until the paint is removed. The rust under the doorjamb will be a lot worse on the bottomside, thats where it started and finally came through the top side.
Primer first before the bondo. Primer sticks way better and seals way better than bondo. Primer bondo and more primer.
Hi Charlie, good advice as usual. I cleaned up the area under the sill so hopefully if I can get both sides prepped and sealed it should keep the rust at bay for a while.
On the bondo v primer and which comes first I have read conflicting stories on that one. Here http://autobodystore.com/filler_&_epoxy.shtml they did an experiment and the bondo adhered much better to bare metal than primer.
Posted by: charliew Nov 10 2009, 05:05 PM
I promise you the primer will stop rust from forming under the bondo much better than just the filler over the bare metal. I'm a old guy and have been fighting rust for 40 years. Almost that long on the same cars. Filler is porous and moisture can get under it. Kitty hare is a long or short strand filler that is supposed to be waterproof but it's harder to get smooth and work with. It's great for strength and stiffness but not the easiest to get on without small voids and holes. I use it where the metal will be under vibration or in a twisting area to keep it in place but it has to be top coated with a regular type filler to get the pin holes filled in.
My 75 914 also has some rust in the sill area, thats why I mentioned about under the bottom. It also has a small hole up by the inner latch support where dirt must have set for awhile. My car is a CO. and WY. car so it's been in a low humidity area most of it's life and it's still got some rust.
I agree filler adheres well to bare metal especially if it has a texture to it but that doesn't keep the moisture from forming under it and causing a rust bubble. Who's to say how much moisture gets in filler as you mix and spread it.
Posted by: my928s4 Dec 13 2009, 12:08 PM
Between family visiting over thanksgiving and frigid weather progress has been slowed.
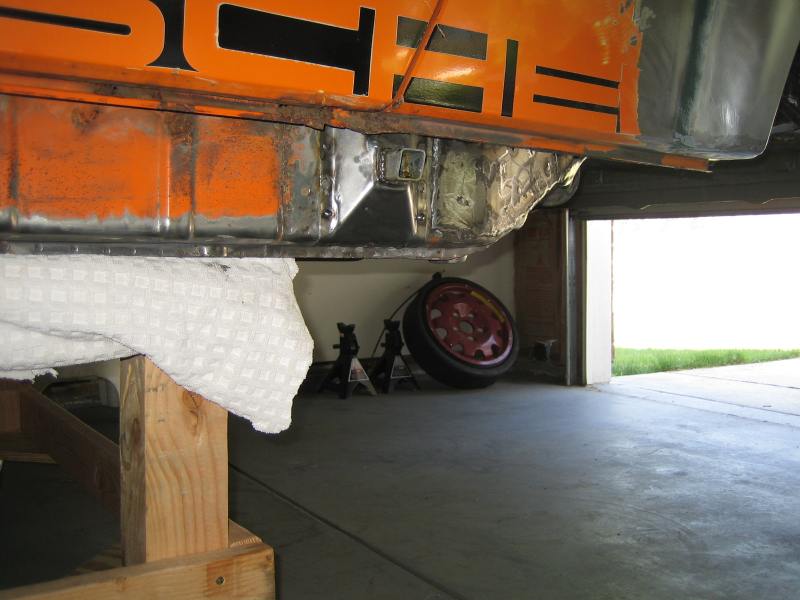
Cleaned up the engine bay area some more, one hole to weld on the drivers side hinge but looking ready for some primer.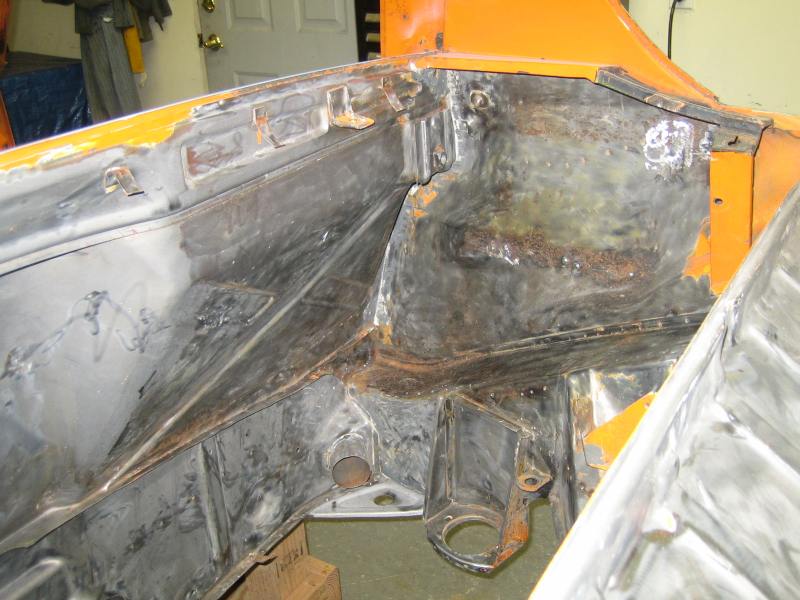
I welded on the front trunk lip, a workmate had a few made up so if anyone wants one let me know, yours for the cost of shipping. (BTW the wheels in the trunk are there to help balance the chassis which got rear heavy when I put the rear suspension on.)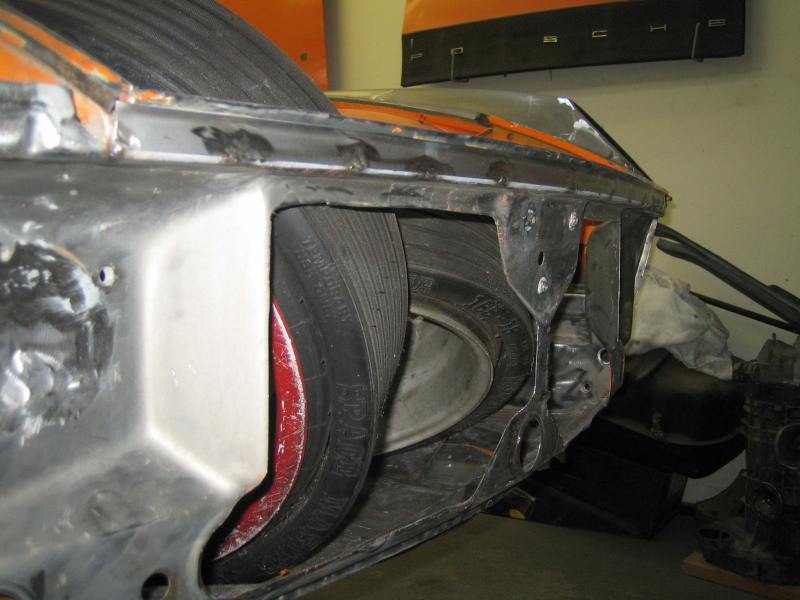
Posted by: my928s4 Dec 13 2009, 12:20 PM
So this is where I have been on the learning curve, it is like the welding, practice, practice, practice.
I went with the Rage Extreme, which seems to work for me. All I had to begin with was 80grit and progress was slow so I thought I need some air tools but after doing some reading air tools and a beginer can be a negative on filler so I went and got some 40grit. Mucho better, knock it down with 40grit and then hit with 80.
It took me a long time to get a 'feel' for where to add filler and how much, it seemed I always had a high point or edge that felt wrong. There must be 10 or so applications on the rear where I started, I am on my 3rd on the front which is not finished but much better than the rear.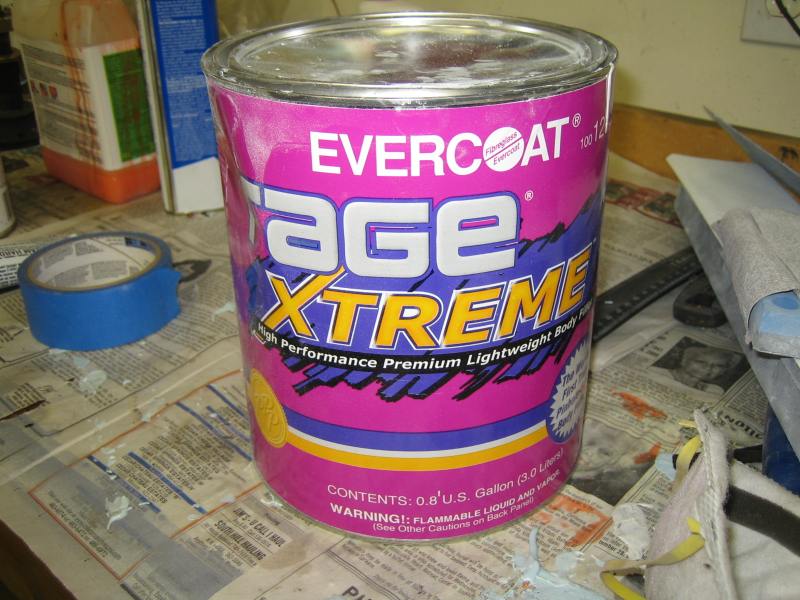
I bought a few blocks but these are the ones I have ended up using so far.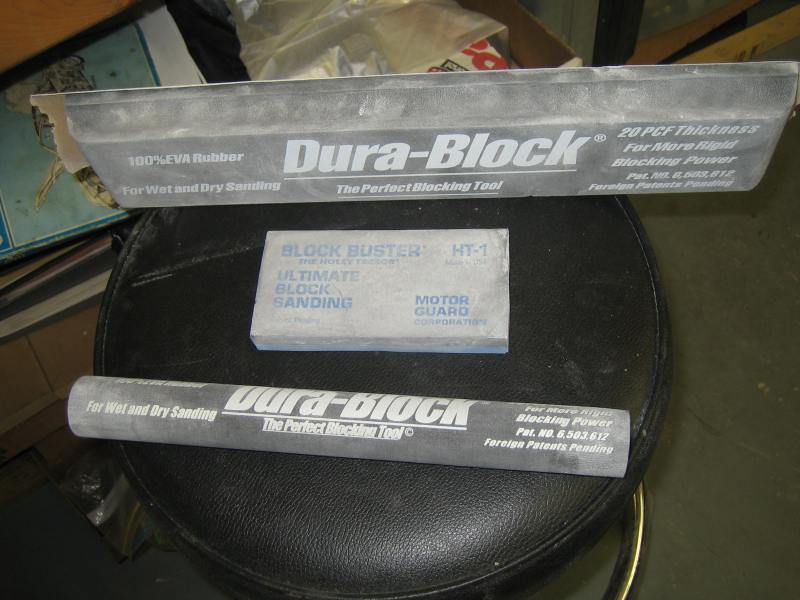
I have found 2-3hours at a time and best to walk away, after a break you tend to critque the work more.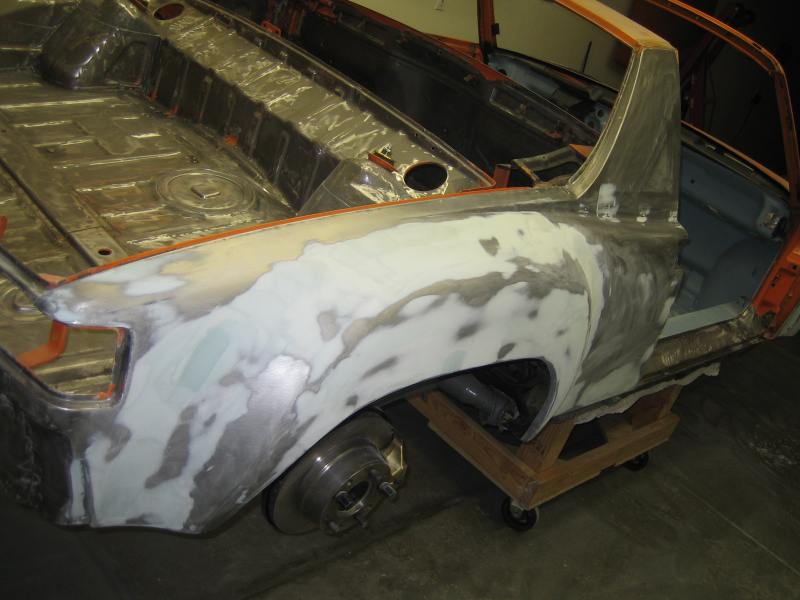
After reviewing my fiber glass GT rocker panels and trial fitting a number of times I have given up on them. Even though once side lines up pretty well they fit like crap. My plan right now is to modify the original metal ones.
Posted by: scotty b Dec 13 2009, 12:25 PM
FWIW. One of the reasons rust will form under bondo more so than under primer is that when you mix the bondo there is a chemical reaction that produces heat. This is easy to tell just by placing your hand on it as it begins to set up. Knowing this, you are applying a heat producing chemical reaction directly to cold, bare steel. Sweat happens when heat and cold are combined. Simple science. Granted, in this day and age most of these cars will be kept inddors, and pamperd, but your best bet is still to prime ( etch prime ) and seal first, THEN do your bondo work. Yes it is more work, yes it is more materials, yes it is much better
Posted by: my928s4 Dec 13 2009, 01:25 PM
FWIW. One of the reasons rust will form under bondo more so than under primer is that when you mix the bondo there is a chemical reaction that produces heat. This is easy to tell just by placing your hand on it as it begins to set up. Knowing this, you are applying a heat producing chemical reaction directly to cold, bare steel. Sweat happens when heat and cold are combined. Simple science. Granted, in this day and age most of these cars will be kept inddors, and pamperd, but your best bet is still to prime ( etch prime ) and seal first, THEN do your bondo work. Yes it is more work, yes it is more materials, yes it is much better
You are the master
 so no argument here, hopefully others can learn how not do it. From my point of view the cost of extra materials and work is not an issue, just got to go through the learning curve.
Posted by: Gint Dec 13 2009, 01:29 PM
Thanks for posting the pics of your progess.
Posted by: jd74914 Dec 13 2009, 01:36 PM
The car is looking great Chris!
Posted by: my928s4 Jan 9 2010, 05:17 PM
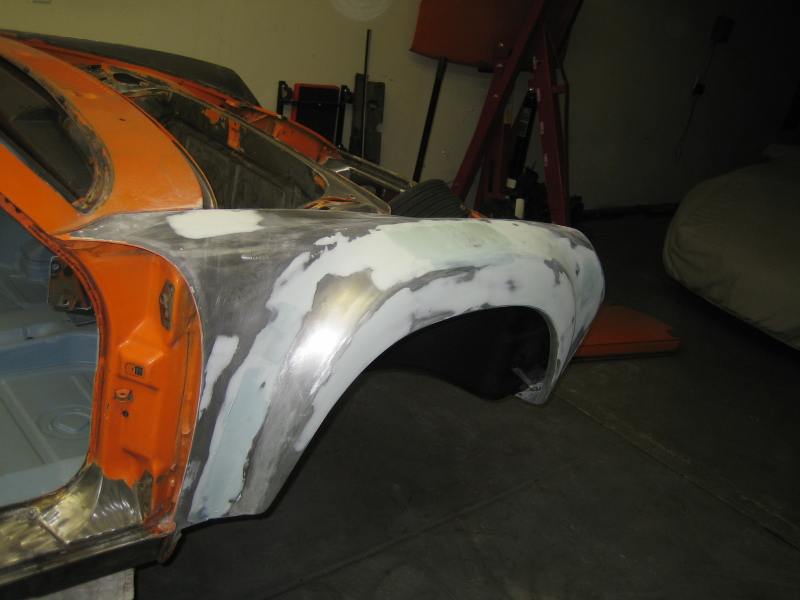
So first pass on the bondo is complete on all 4 fenders, went to the body shop and bought some epoxy and 2K high build primer. On the first visit I bought grey epoxy and then thought how am I going to tell if I sand through the 2K? Went back and bought some white ....
I put two coats of the Epoxy on the passenger rear fender, I figured no point in screwing up a large area all in one go so start small. Going to let this cure till tomorrow even though it say 30 mins is OK then spray on the 2K. I can already see imperfections that need work but it looks great to see a uniform color over the area!!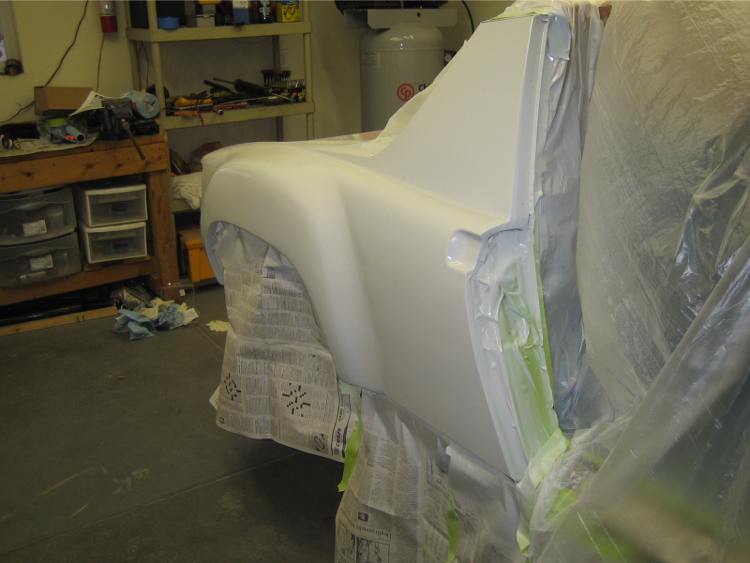
Posted by: my928s4 Jan 10 2010, 01:36 PM
OK got the 2K is on, was a little gun shy on the first 2 coats but you can spray this stuff on thick. I can really see the problem areas now, leave this for a couple of days and then I will start sanding and fixing the issues.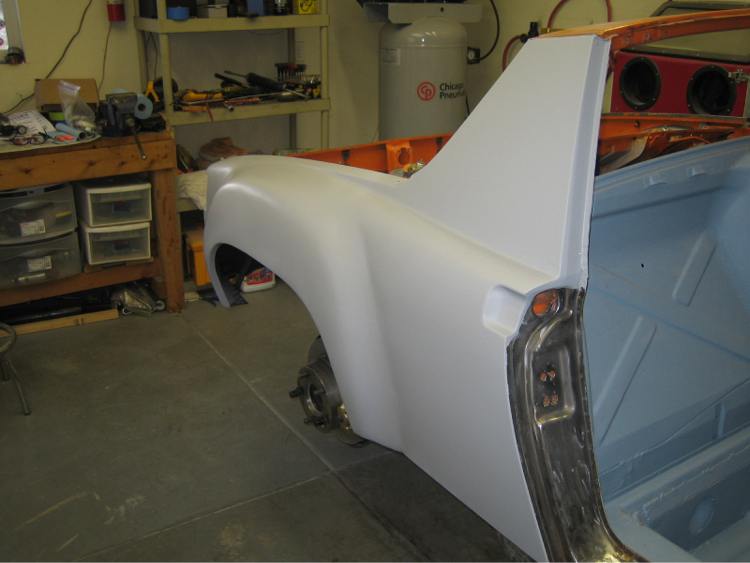
Posted by: scotty b Jan 10 2010, 03:48 PM
looking good mang
Posted by: my928s4 Jan 23 2010, 03:27 PM
Thanks Scotty, yes looking more like a car now too.
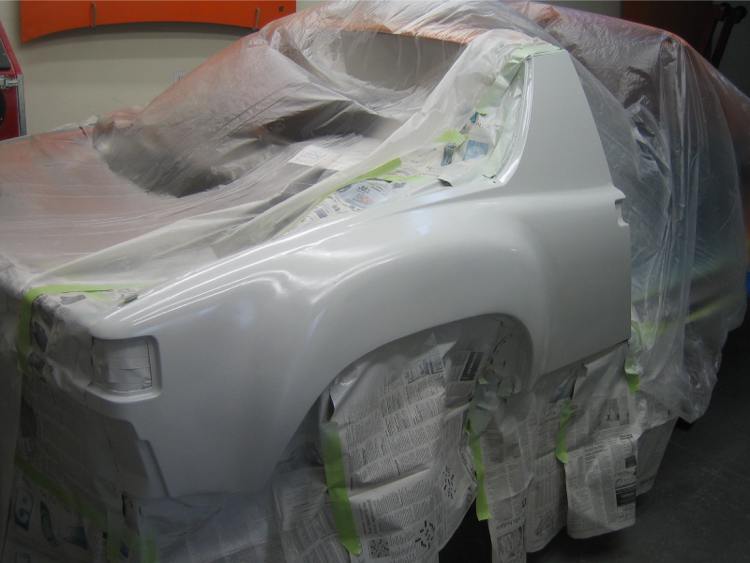
Been working on both passenger fenders, you can see from the earlier shots of the rear fender the shadow on the leading edge of the flare. Well 2K primer is not going to be able to sort that so back to filler, there were a couple of other smaller areas that needed attention too. I am hoping another shot of 2K and some sanding and these are done.
Was going to start the drivers side and rear but I am running low on the 2K and the store shuts early on Sat. Oh well next weekend.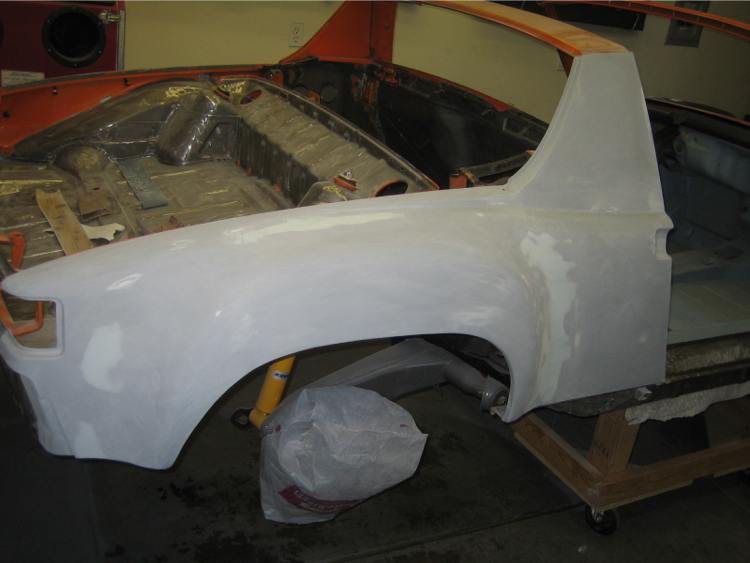
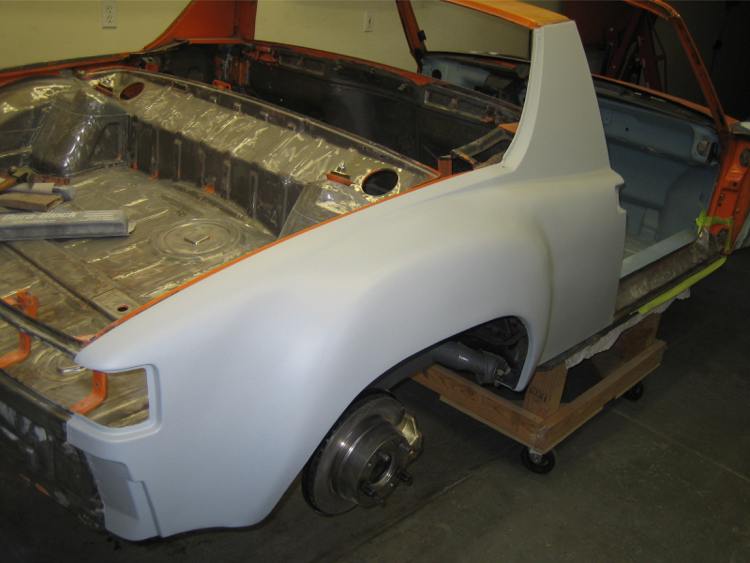
Posted by: my928s4 Feb 1 2010, 08:30 AM
Last weekend sucked, I was admiring how good the rear fender looked and saw what I thought was a dog hair. Further examination showed it to be a crack, a little prying and this is the result.
To say I was pissed is an understatement, eventually summoned courage to ask those with some experience what had gone wrong. The 1st and 2nd Epoxy layers did not attach, I was not expecting any issue with the Epoxy .... garage was at 65F, I recoated within 24hours and I let it sit in the pot 15mins before using. I must have screwed up mixing the hardener or something is all I or anyone else can think off.
With mild heat the rest came of in a couple of hours which made less mess than sanding.
The passenger front fender is fine, glad I did one fender at a time to begin with as hopefully I isolated the problem.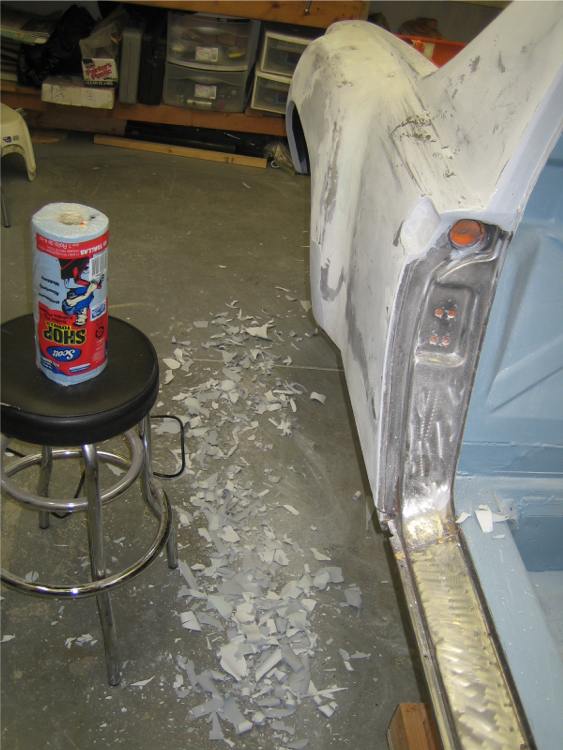
Some sanding and filler to patch up some damage I did with the scraper.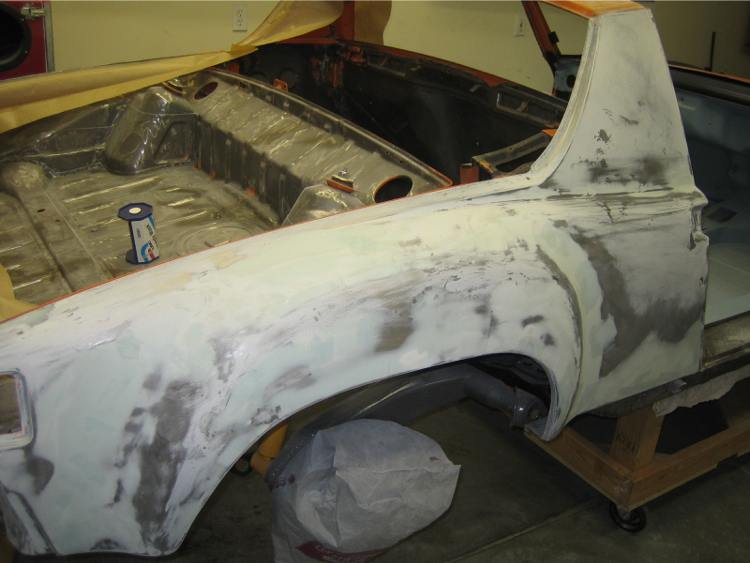
Yesterday I heated the garage up to 70F, the wife complained it was warmer in the garage than in the house .... I put just a single layer of Epoxy on this time as 2 was mentioned as overkill. Followed up with 3 layers of 2K.
After 20 mins the 2K was gumming up my gun, did not have this issue before but then the garage was warmer this time. This is where the car is at now, going to England this coming weekend so I am happy to leave the car like this before I go. 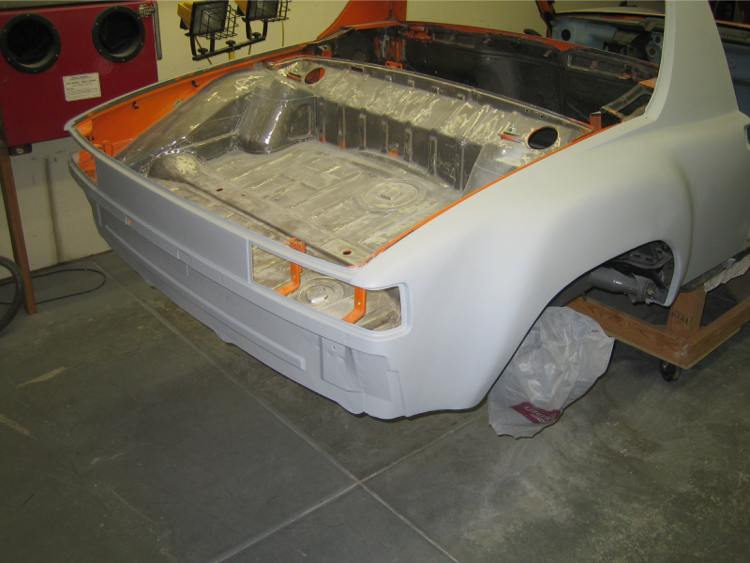
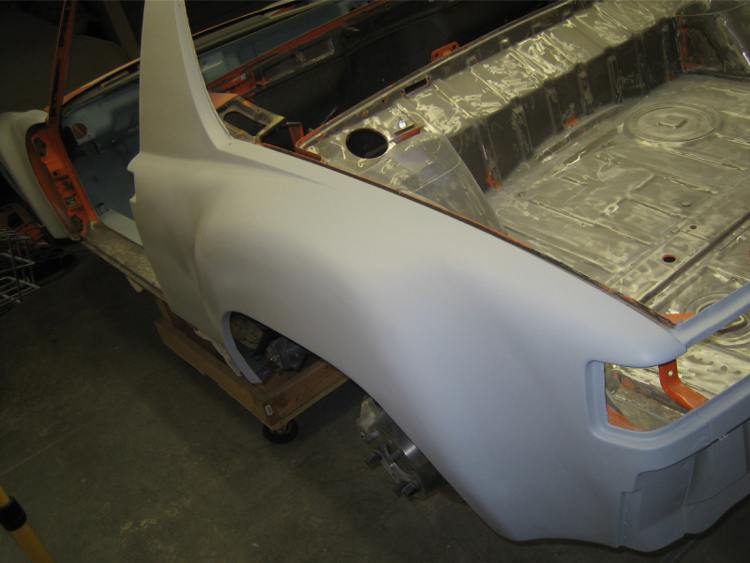
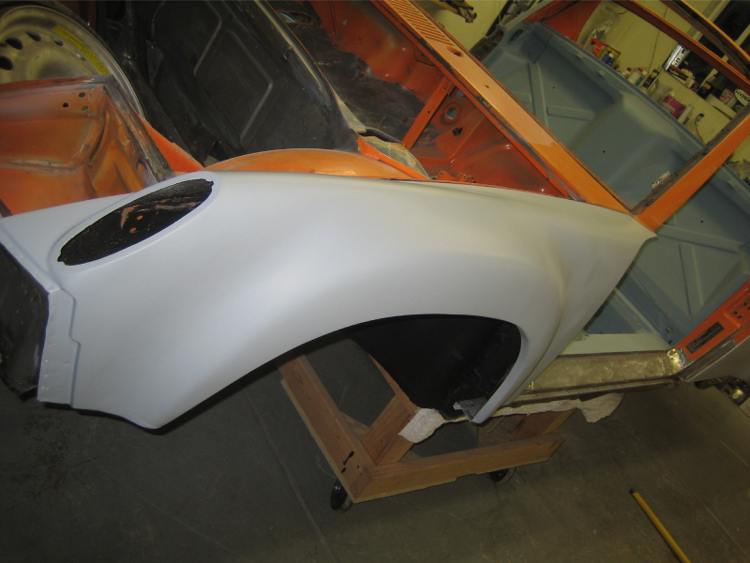
Posted by: my928s4 Mar 7 2010, 08:25 PM
OK back from vacation and we have unseasonably warm weather so cleaned up the garage and wheeled the car outside and used compressed air to create a dust cloud cleaning up all the winters remanents from the car.
When I was cleaning up the drivers sill plate there was a lot of pitting and small rust holes, I figured easier to just replace with a new part. It came in the mail along with two Koni Sport front struts, been too long since the last parts package .. gotta love car parts in the mail
OK so this must be the easiest piece of spot welded metal I have removed, every drilled weld popped with very little persuasion.
Looked like this after removal, note I left the leading edge of the sill on the car, nothing wrong with it and easy to cut here with the new metal.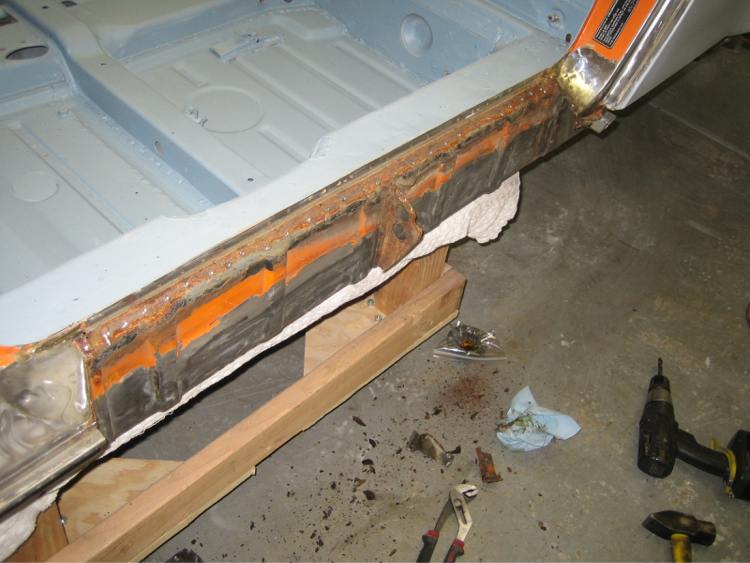
After some cleanup :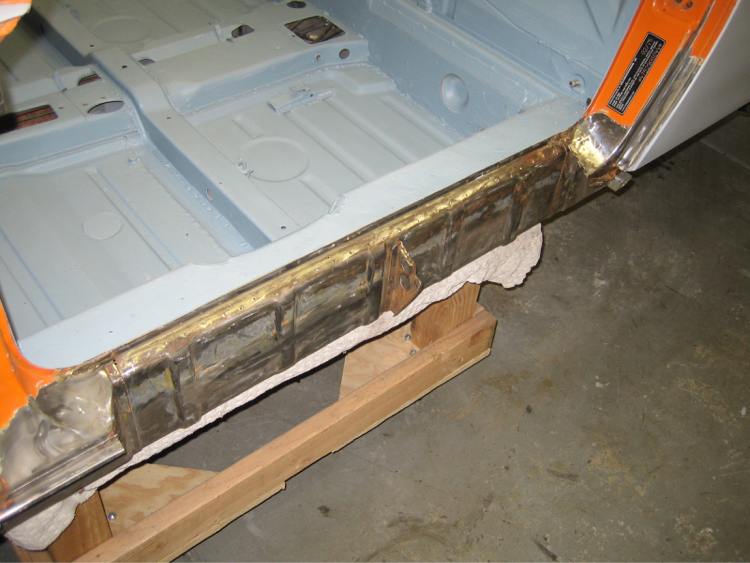
Note I also left the original angle support, just cleaned off the surface rust. Some weld thru primer: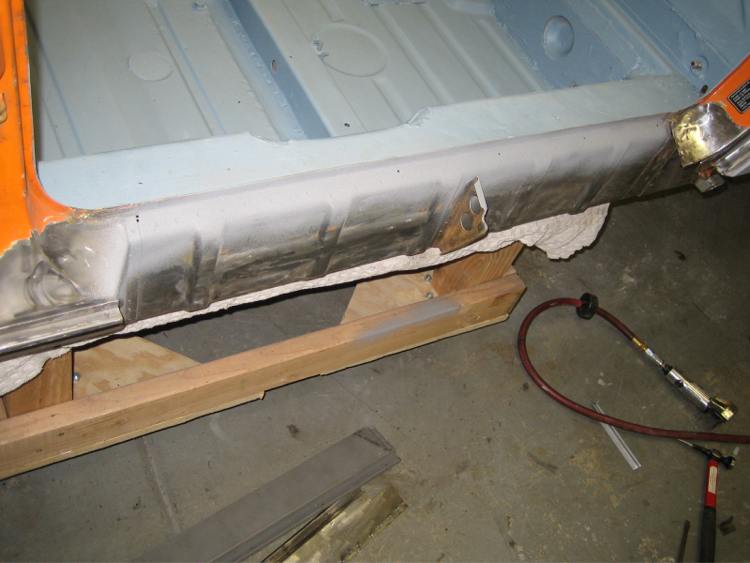
Here you can see where I had to remove some corrosion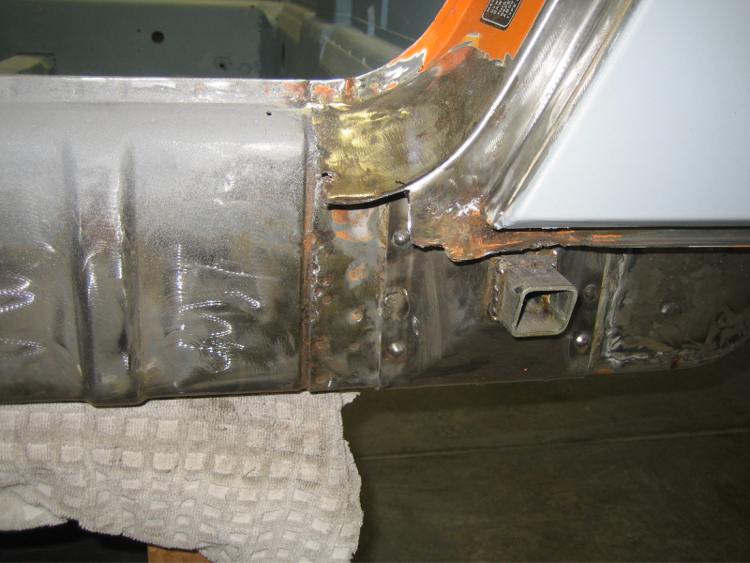
New sill welded on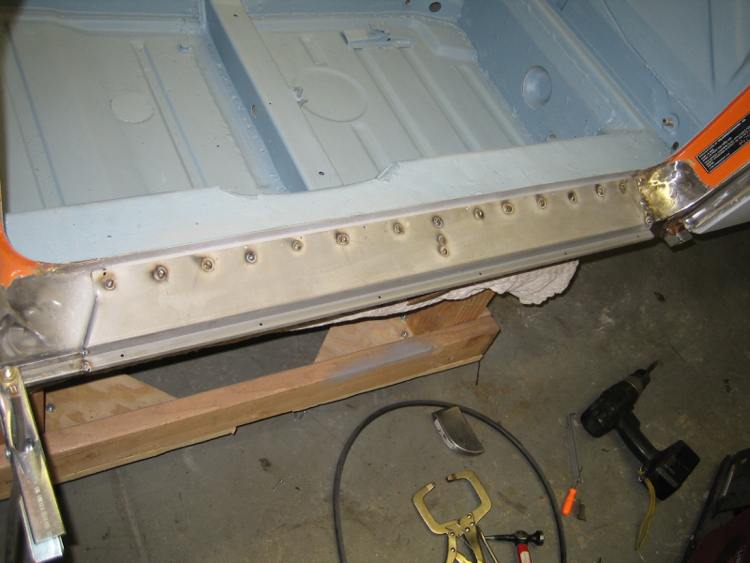
Patch tacked in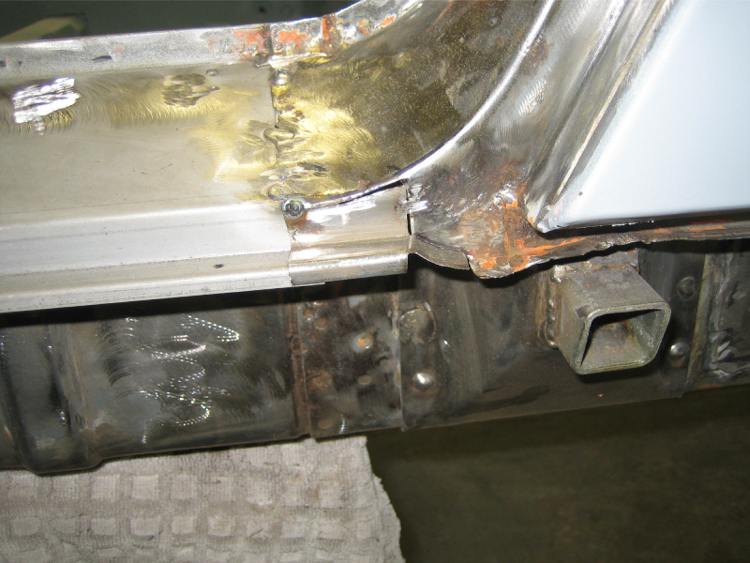
Complete, looks like I need to clean the cameral lens.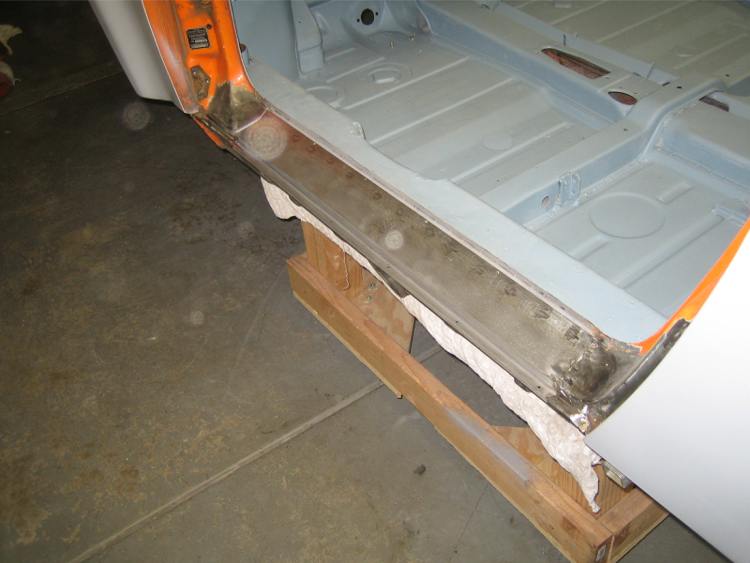
I have two small welding jobs to do, one in the engine compartment where the drivers side trunk mount used to be and one in the front in the u-channel for the hood seal.
Once those are done time for some primer and paint on the interior sections.
Posted by: my928s4 Mar 28 2010, 11:51 AM
Here is the Epoxy and 2K primer I have been using, checked back and I don't think I listed them.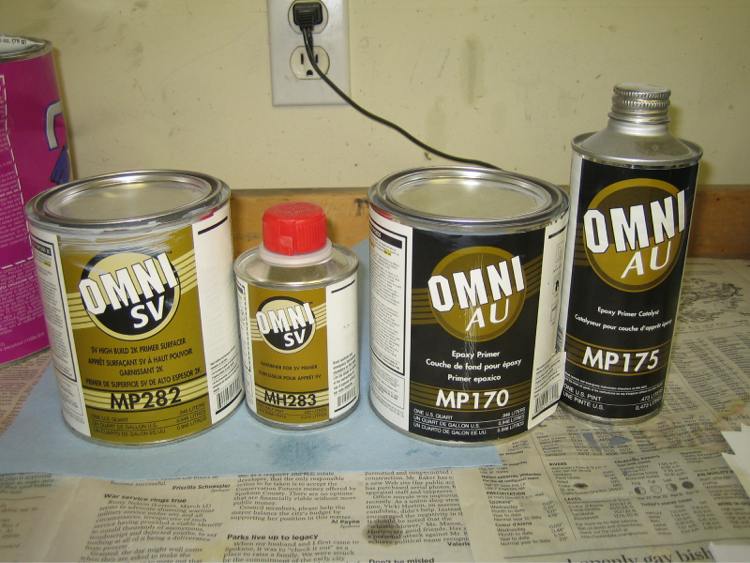
I want to get the front suspension hooked up but I need to finish the bulkhead area so I went to the supply store to buy some color. Evidently this is the last of the pigment they have in this color but hopefully this is enough for the interior and jambs. Also picked up a small gun for the color.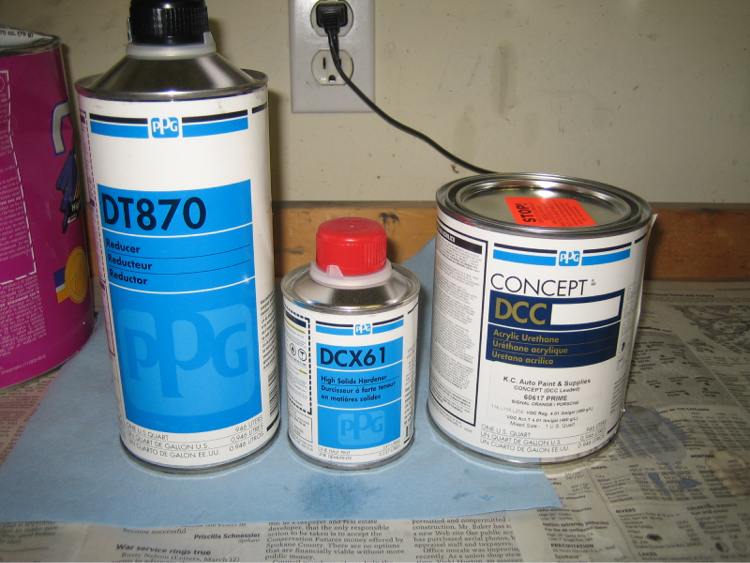
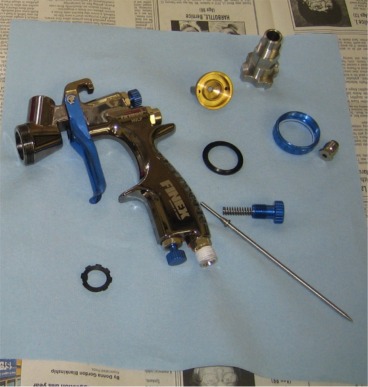
Used the same disposable cups as I did on the primer gun to assist with the small areas and help spray inverted. Well note to self, don't knock the cup against a surface while painting upside down ... it knocks the cup off. Luckily it spilt mainly on the bottom but it left a few drips. Not so much of a problem in this area, there was even a drip line from the factory. Just annoying, bn more careful next time.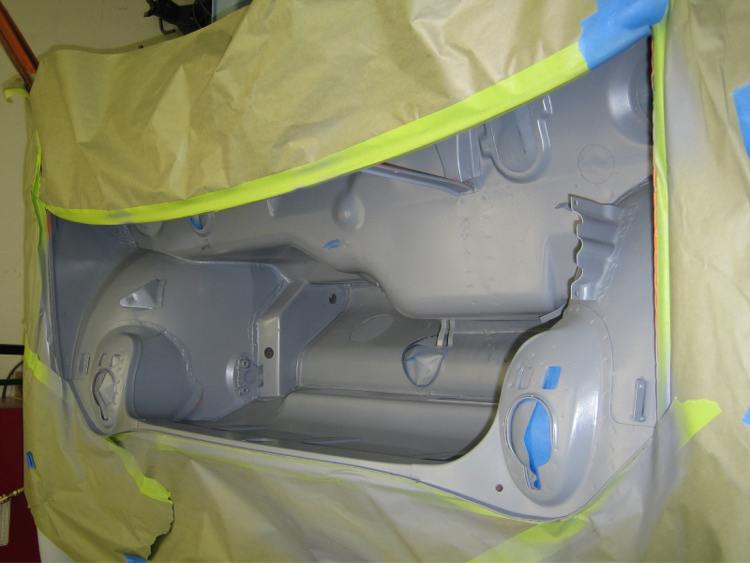
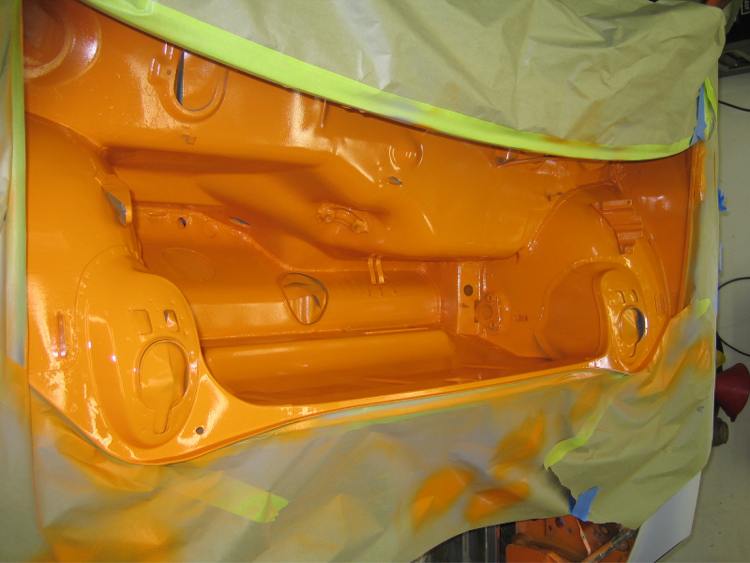
Posted by: Jon Fernandes Mar 28 2010, 12:15 PM
Nice!
Posted by: Silverstreak Apr 3 2010, 03:26 PM
Fantastic work so far! You sir are a hero. An inspiration to me to just get out and get on with it! I like your systematic way of tackling jobs a little bit at a time making sure to do it right without getting worn out and frustrated i.e. taking breaks to watch F1. Can't wait to get one started myself and plan on using your posts for reference. Thanks for the confidence.
Posted by: my928s4 Apr 3 2010, 06:37 PM
Fantastic work so far! You sir are a hero. An inspiration to me to just get out and get on with it! I like your systematic way of tackling jobs a little bit at a time making sure to do it right without getting worn out and frustrated i.e. taking breaks to watch F1. Can't wait to get one started myself and plan on using your posts for reference. Thanks for the confidence.
Kind words, thankyou, feedback from you and everyone else keeps me motivated also
Yes I find the need to take a break once in a while, keeps the sanity.
Posted by: my928s4 Apr 3 2010, 06:43 PM
So the goal of assembling the front suspension was squashed when I needed different struts and I find this week they are on backorder till the end of April  I assembled what I could which is enough to balance the car on the trolley so I can ditch the spare wheels in the trunk.
Looks empty in here, needs a sway bar for sure!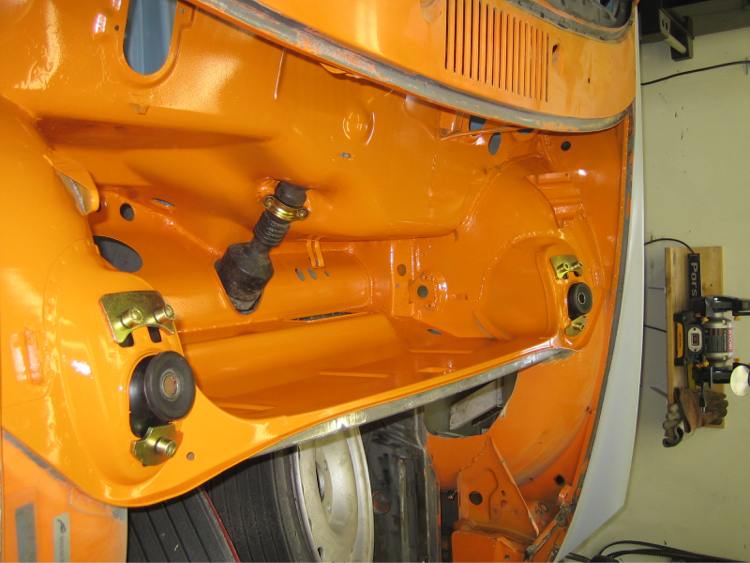
It was nice to get these parts out of the basement and onto the car!!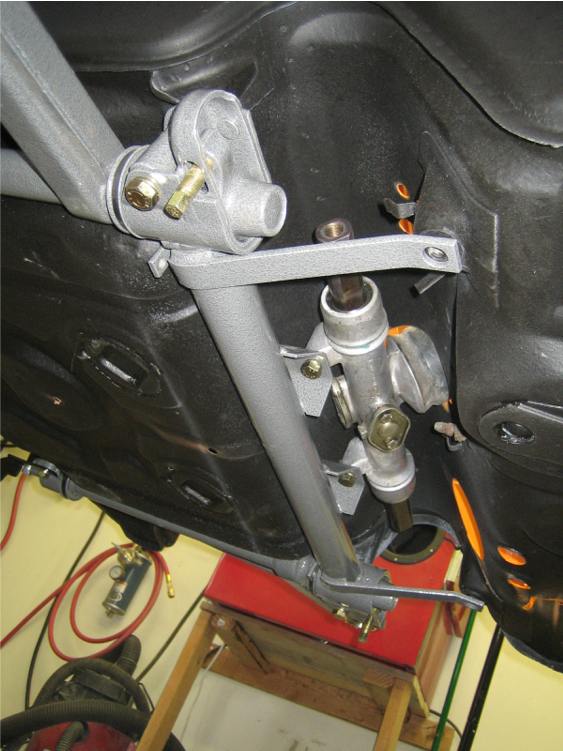
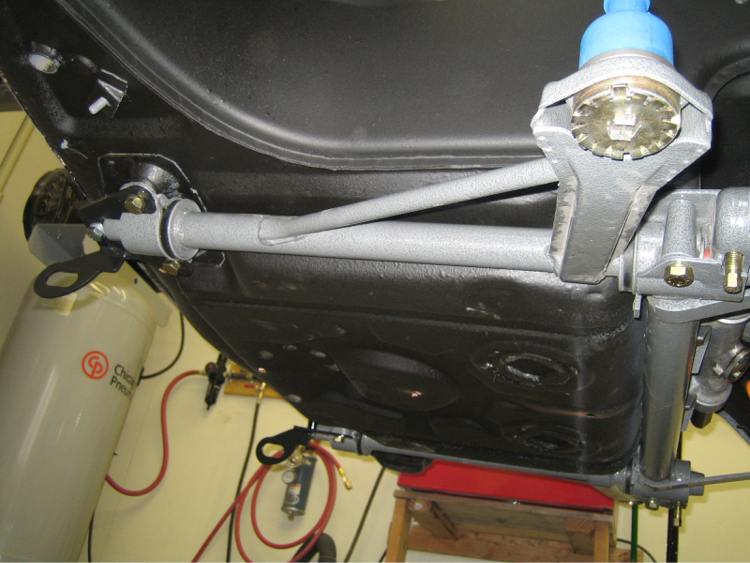
Spent time today prepping the trunk for paint, still needs more elbow grease but coming along.
My new goals are to get the front trunk and engine bay complete, if I can get that done by end of April then when i get the suspension in I can think about getting the brakes hooked up. We shall see.....
Posted by: my928s4 Apr 24 2010, 05:24 PM
Getting the hang of the new gun and the color, certainly lots of difficult areas to get good coverage on. 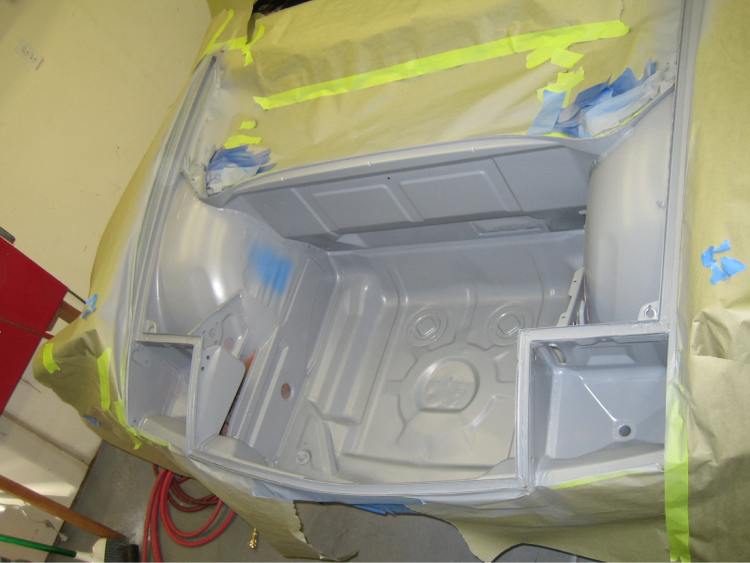
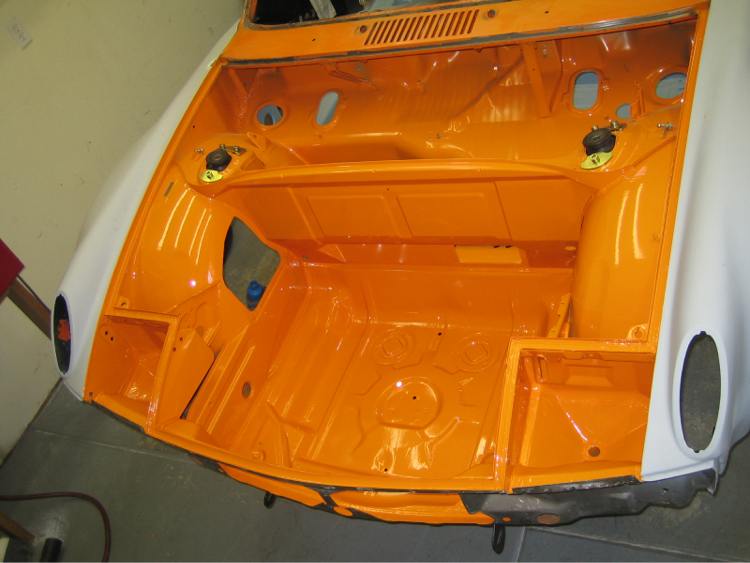
I have the rear shox kit so I can weld in the brackets, next up is the engine bay and rear trunk.
Posted by: my928s4 May 8 2010, 01:23 PM
Rear trunk and engine bay painted, thinking how nice it must be to spray some flat panels ... running low on paint though. After I used the last of the toner they had I went back and they are going to try and get it from another store rather than try and match with the new unleaded formula.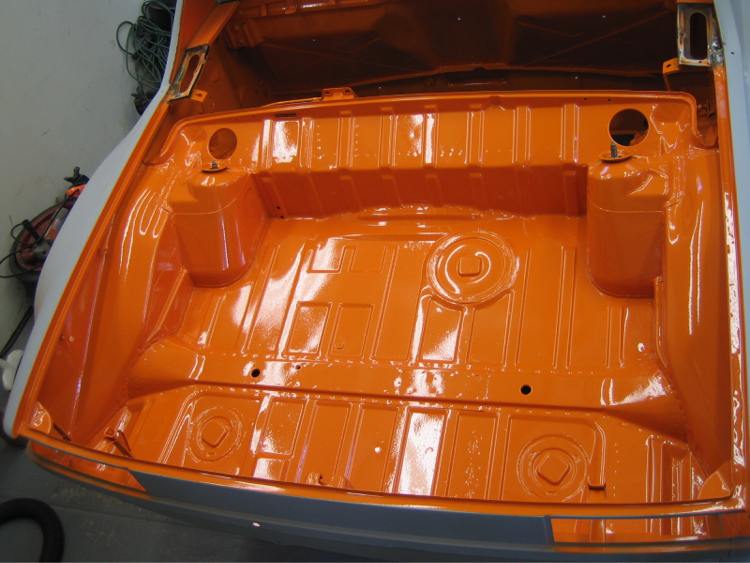
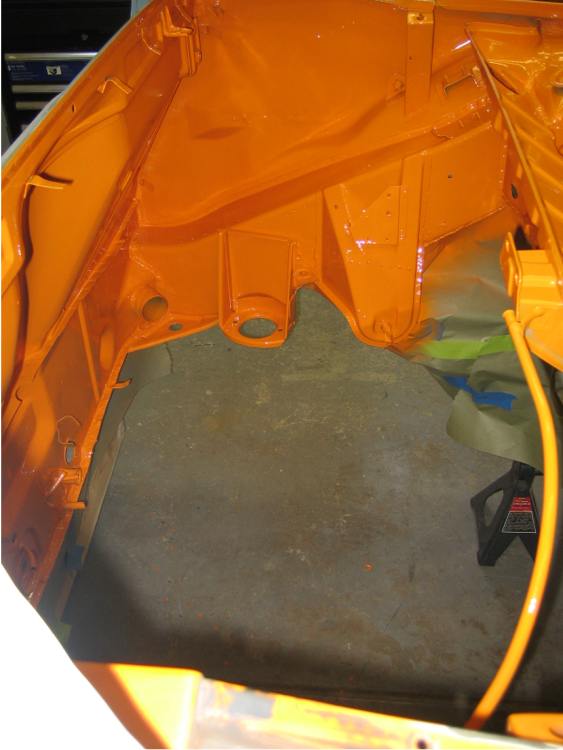
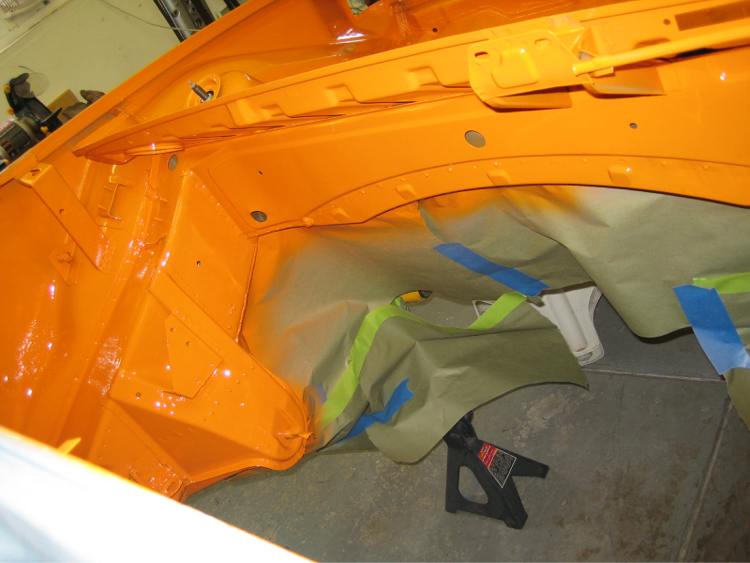
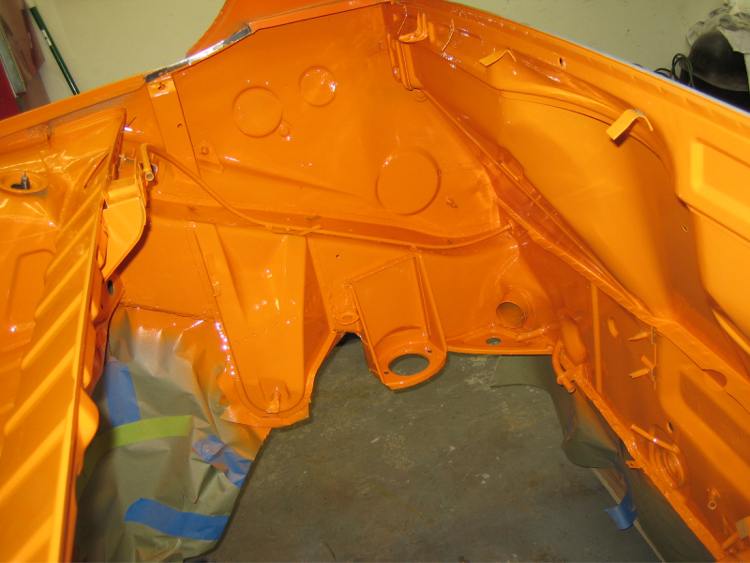
Going to be out of town for a bit so nice to make a bit more progress.
Posted by: Root_Werks May 10 2010, 03:28 PM
L20E, so pretty!
Posted by: my928s4 May 11 2010, 08:16 PM
So finally got the correct Koni inserts for my Koni struts yesterday, was thinking I should wait to assemble but could not resist doing something with the new parts. All went together great except for the backing plate, I thought there was something wrong as it interfered with the rotor. After messing around for an hour finally figured out they were just bent, bit of tweaking and all is good.
Just need some tie rod ends and some wheels and it wil be a roller !!
When I was over at Renegade a couple of weeks back they had a car with the 17" Fuchs and they looked great, on my shopping list.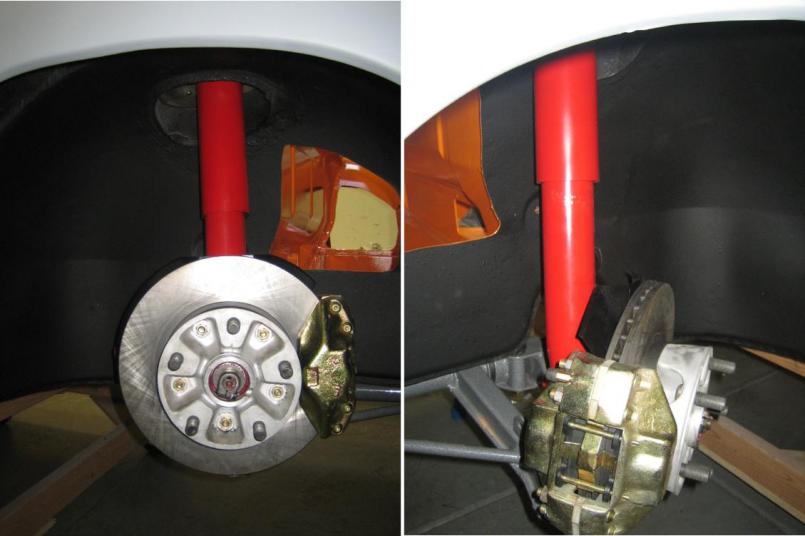
Posted by: my928s4 Jun 20 2010, 03:18 PM
Been out of town on a couple of trips so not much progress until this weekend, off on vacation in a couple of weeks too so good time to get some work on the car done!
I purchased some weld in nutserts for the foglamp, worked out pretty well and with those in place I could paint the front valance.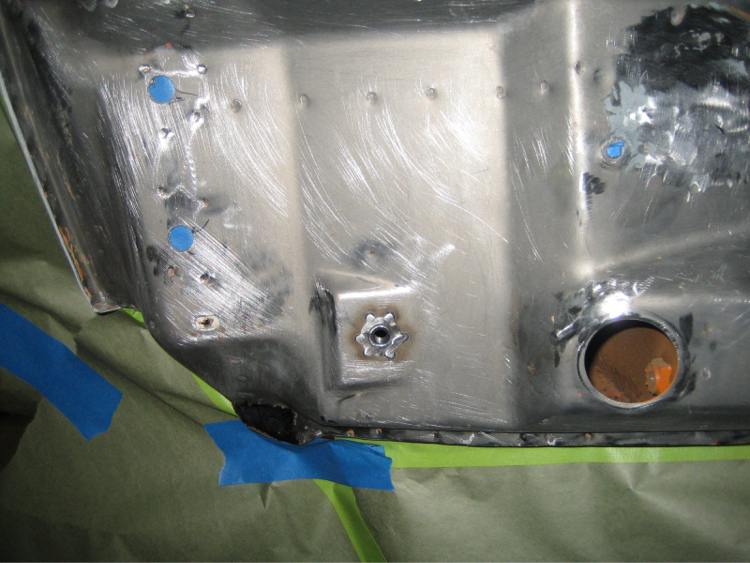
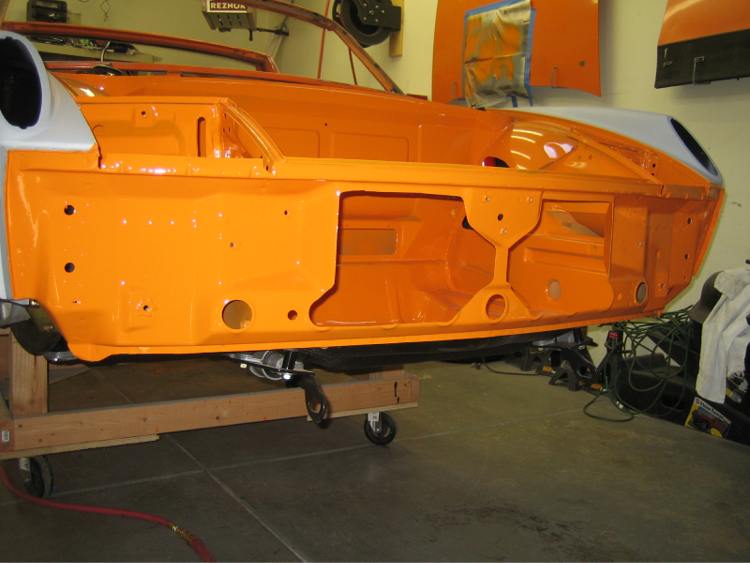
Also painted the passenger side door opening and the lower valance, finally getting the hang of the smaller gun so I can lay the paint on smooth without running.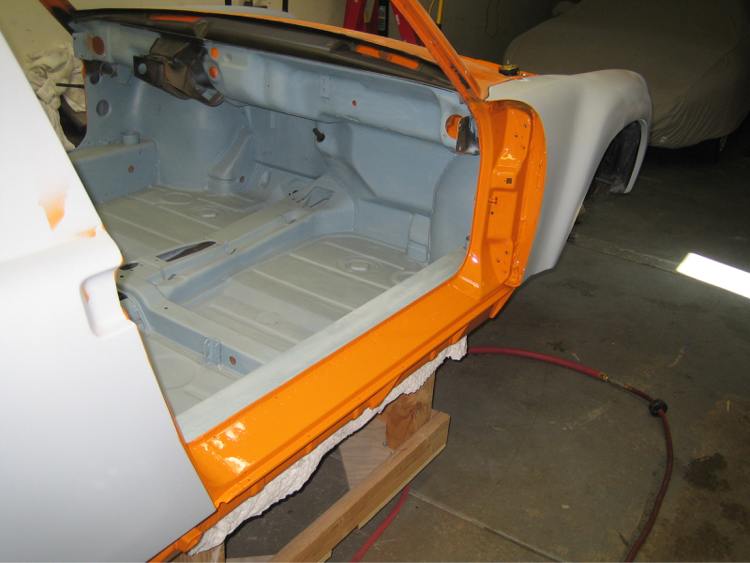
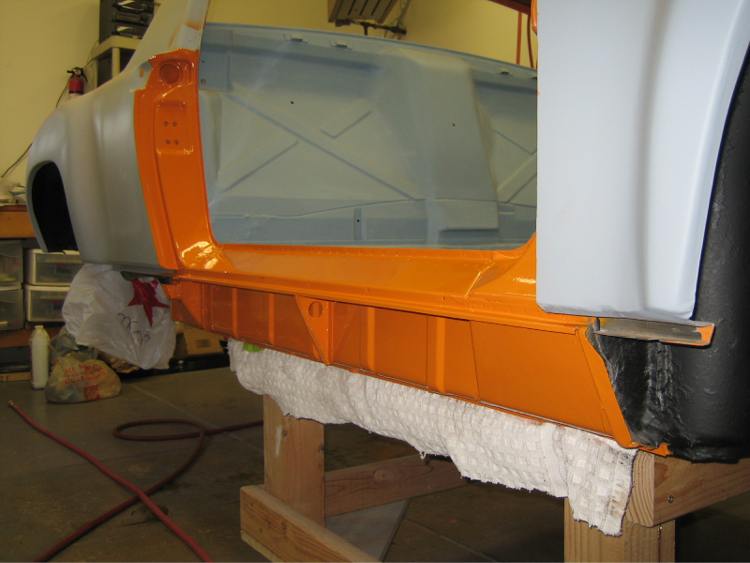
While I was picking up more orange from the paint ship I bought some satin black, thought it would do for the interior, gas tank, rocker covers and other sundries.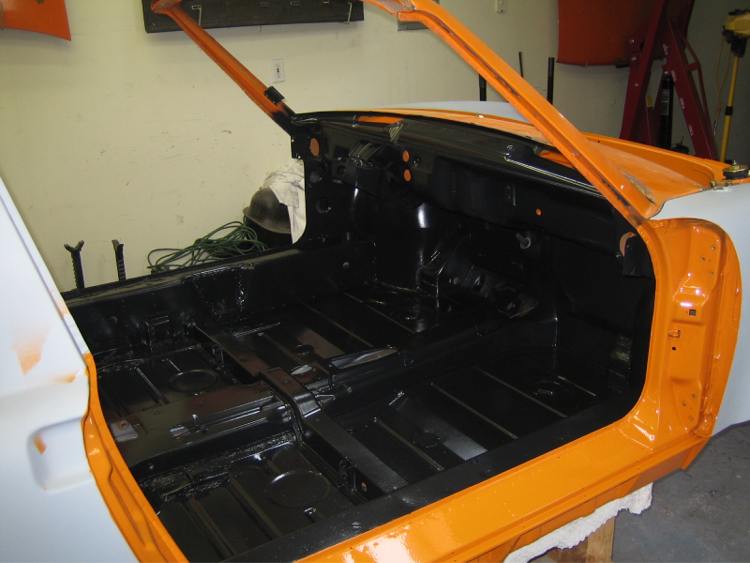
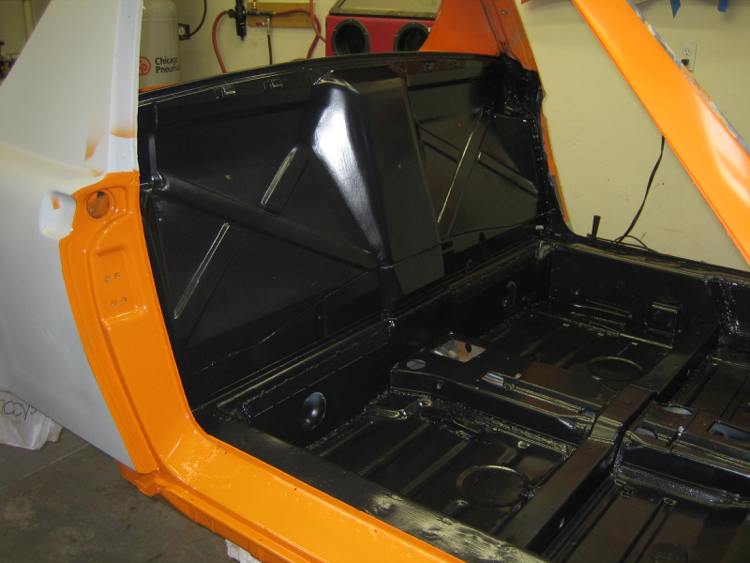
Got some parts on order but my next goal is to get the brake system all hooked up, I have the replacement hard lines which should be fun. Hopefully I can work out where the old lines went, been a while since I removed them!!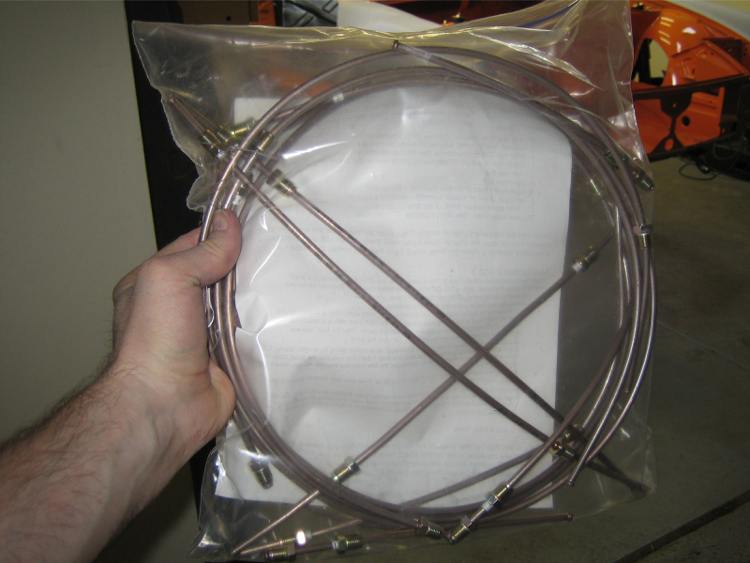
Posted by: my928s4 Aug 14 2010, 05:24 PM
It has been a while, lots of smaller projects going on with the car which compete with vacations and projects around the house.
Finished re-bushing the pedal cluster, I got lucky with the pin, considering the condition I thought I was in for a fight but couple of taps with a BFH and it all came apart.
Before: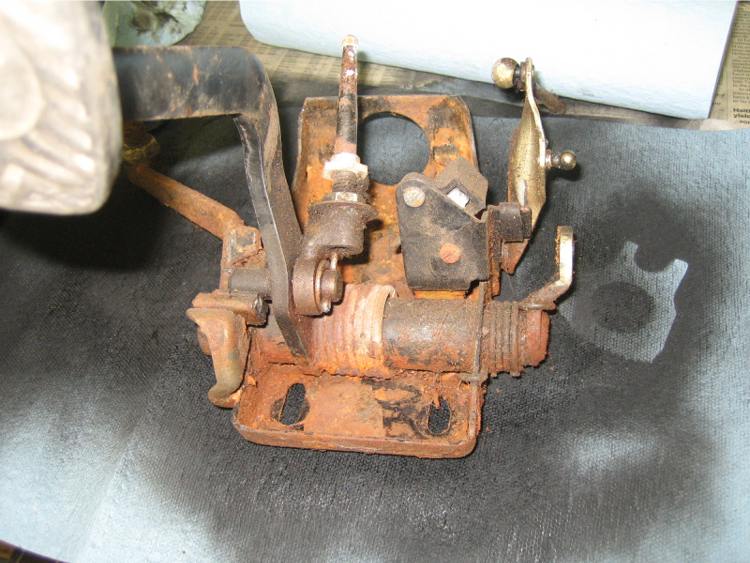
After: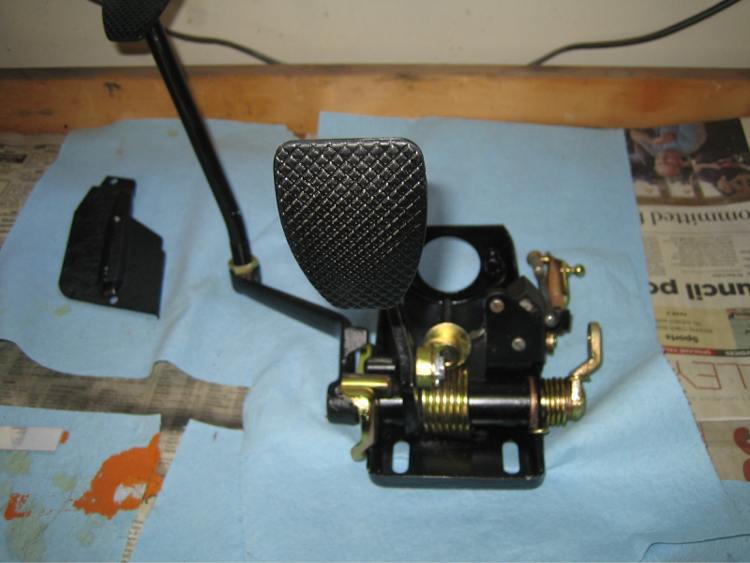
I also took apart the shifter and replaced the upper sleeve, otherwise apart from cleaning it all looked pretty good.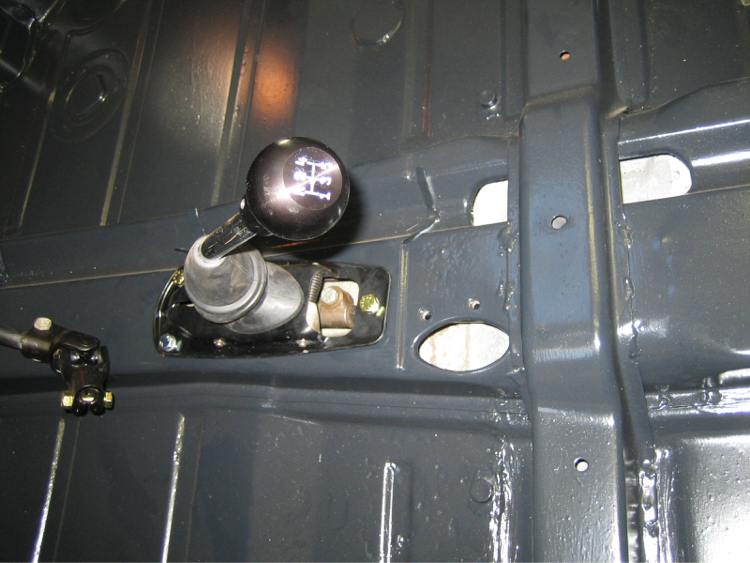
Getting the brake system operational has been a goal for a while, it is all pretty much together and am waiting on the bulkhead grommets for the tubes from the resorvoir. Seems they are on backorder for the moment, once I have those I can finish.
Handbrake assembly in: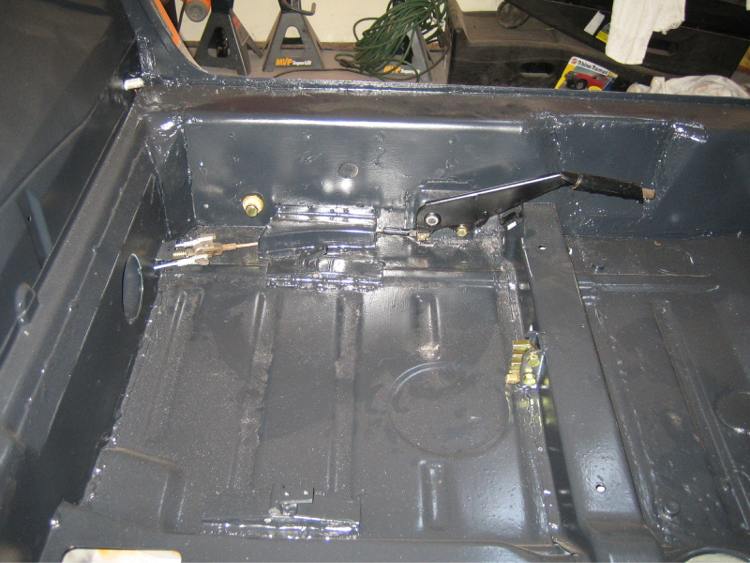
Handbrake cable and rear brake tubes hooked up: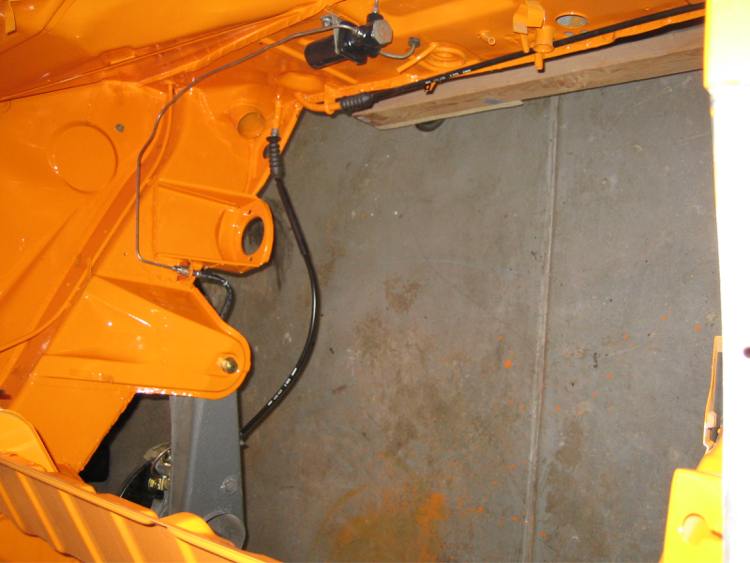
Painted the rocker panel on the drivers side: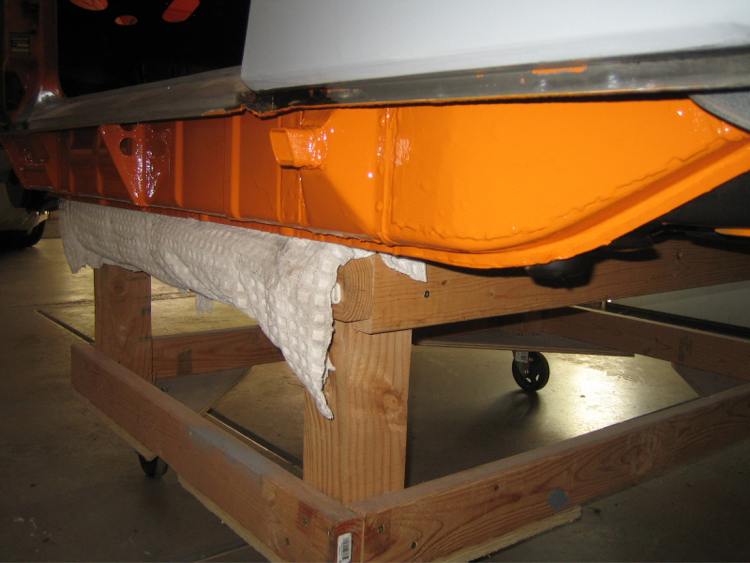
Started work on the doors, all stripped of hardware except the lower hinge which is proving resilient. Was going to get these blasted but had some left over stripper so what the hell.
Posted by: my928s4 Aug 16 2010, 08:12 PM
So had to add this photo, some parts make it feel like you actually have a car rather than a bunch of parts and the addition of the steering wheel did it for me. I was waiting on a new upper steering column bearing which arrived tonight, I had managed to get the lower bearing from a local retailer. Both of the bearings were toast.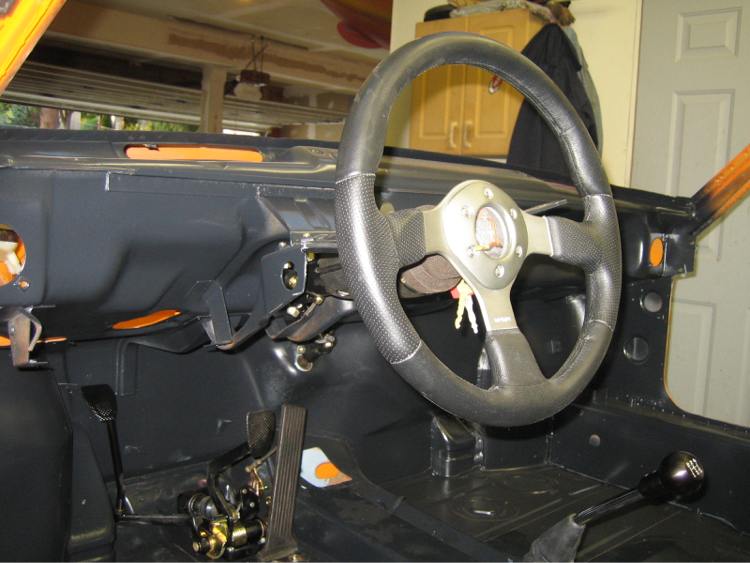
I ordered the spring (Item No 7 in the pic below) as I thought I mine was missing but it did not seem to fit. Any ideas?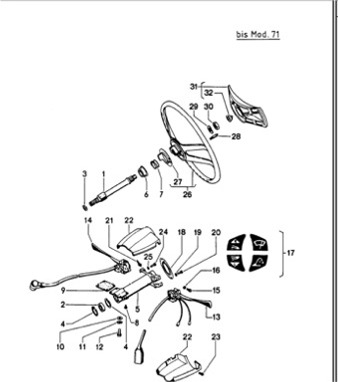
Posted by: my928s4 Aug 29 2010, 06:57 PM
I was cleaning up the seat brackets, thinking just a quick clean would be OK, ended up dismantling and prepping parts for paint and plating. This thing is a disease ...
Also tried bleeding the brakes but fluid leaked from where the front brakes go to the master cylinder, I had 2x12mm copper seals and one needs to be a 10mm. Back to waiting for parts.
So the progress on the doors in these pics shows a day an half worth of work, my arms and fingers hurt but at least I spent the time outside. Perfect weather and the dust isn't in the garage.
As you can see I managed to get one of the bottom hinges off, the last one is being real stubborn, I think an air hammer might work.
Drivers door had more rust at the bottom then the passenger and a couple of places need a bit of welding where the arm rest attaches as the metal is fractured.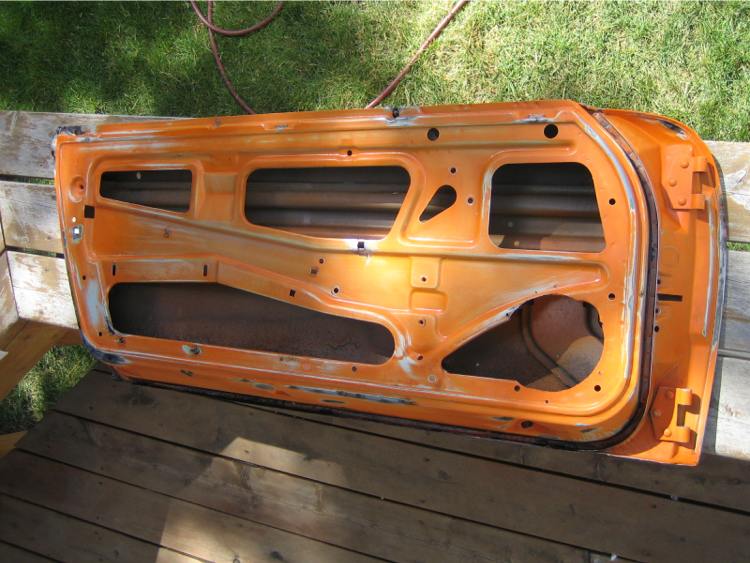
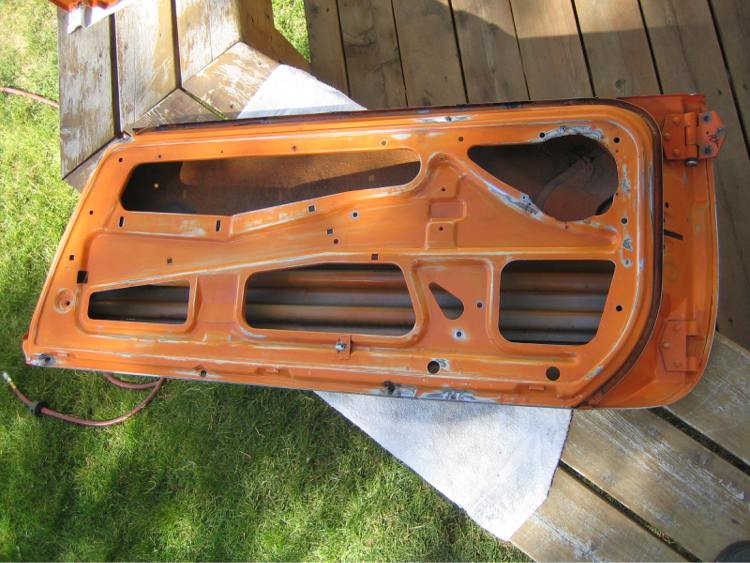
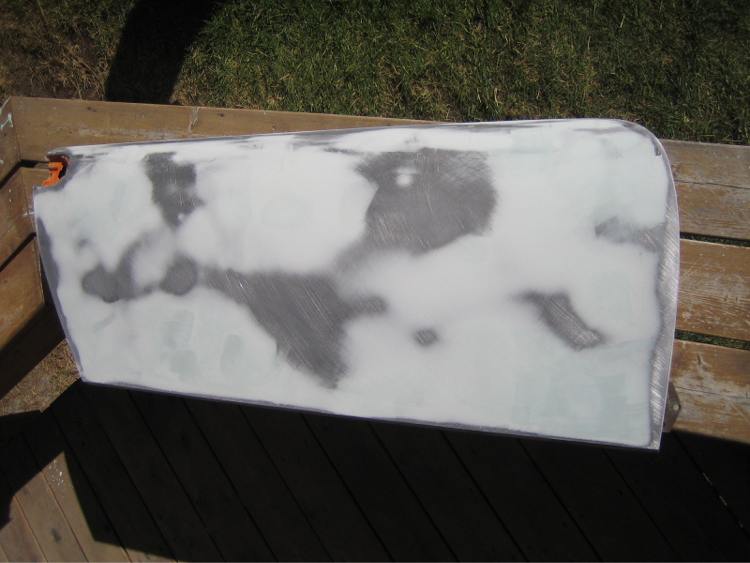
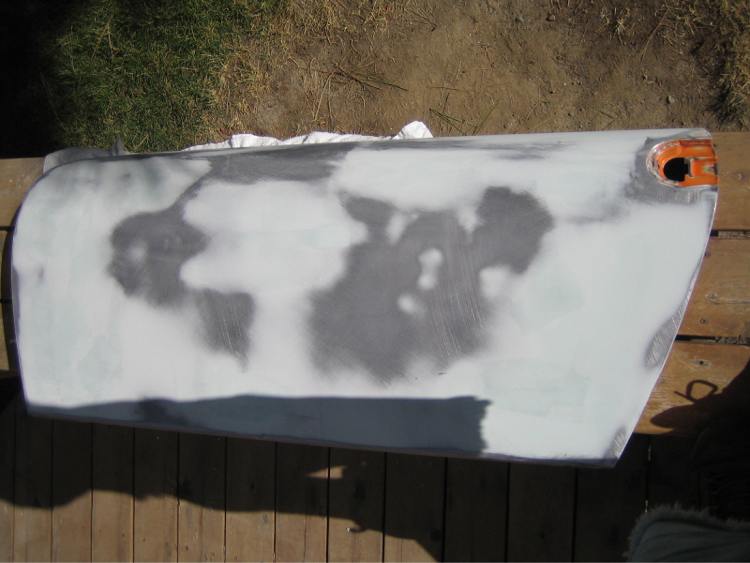
Posted by: Black22 Aug 29 2010, 09:44 PM
First...I'm not a fan of Orange. That being said, that car IS and is GOING to be BEAUTIFUL! WOW! I wish I had the space, time and $$$$ to go that deep into rest. You should be very proud! Tired but proud! Great work. I'll be watching this until your done. I'm jealous.
Posted by: my928s4 Sep 17 2010, 09:04 PM
First...I'm not a fan of Orange. That being said, that car IS and is GOING to be BEAUTIFUL! WOW! I wish I had the space, time and $$$$ to go that deep into rest. You should be very proud! Tired but proud! Great work. I'll be watching this until your done. I'm jealous.
Thanks, still have to wonder sometimes whether it is ever going to get done, be nice to
 but still got my imagination.
Posted by: my928s4 Sep 17 2010, 09:10 PM
Finally got the brakes to a point where they are not bad, still some air in there but good enough for now. Took an AGE to get some of the air out, the long tube method is the way to go .... the wife and kids were taking a beating.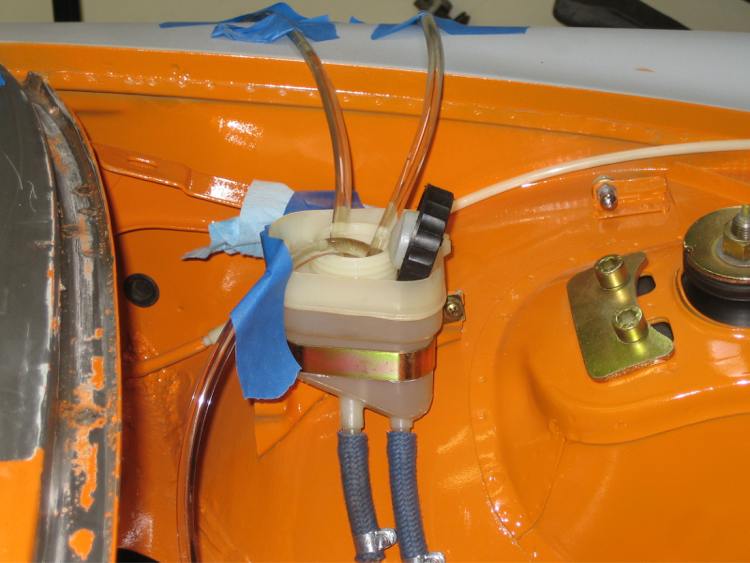
Also rebuilt the CV joints, one is toast though, nasty wear mark. Remember regreasing the ones on the 928 and all the mess, same all over again!
Can see the wear mark below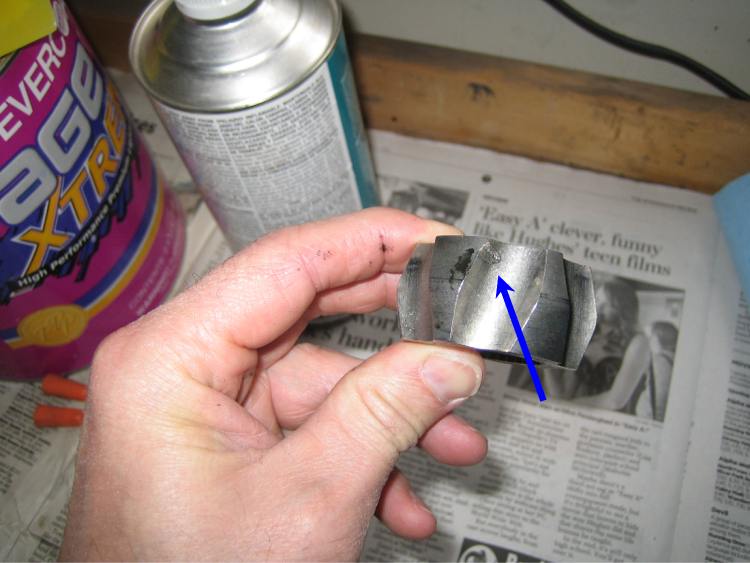
Got a nice package Wednesday, my 17" replica Fuchs arrived.
Rears fit great
Going to need spacers at the front though, 1.5".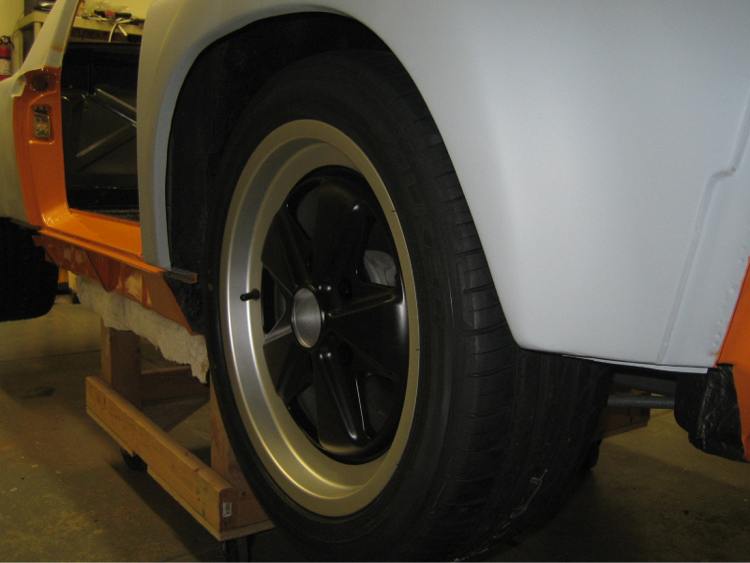
Good news is that the tire to fender gaps are the same from side to side, was worried that those fenders may have had some variability but looks like I am good as far as that goes.
Posted by: Derek Seymour Sep 17 2010, 11:05 PM
Why is this website the shit?
Example A your honor.

Posted by: arkitect Sep 18 2010, 01:03 AM
Chris,
Great pics and description, your car is looking better than new, excellant job.
Dave
Posted by: charliew Sep 18 2010, 05:36 AM
Nice job and good attention to detail.
Posted by: my928s4 Sep 26 2010, 01:44 PM
Thanks for all the comments, it helps keep progress going!
Found some Dynamat I had left over from when I did the 928 so decided to use it and clear some shelf space!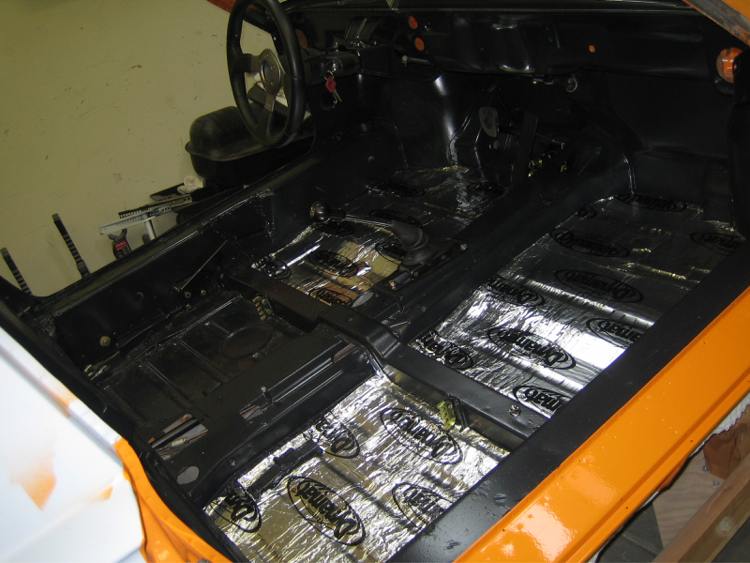
Looks like we have one last week of good weather before fall hits us so decided to get some painting done while we are still above 70F.
First job was to clean out the windscreen channel, the black sealant is tough but a few application of paintstripper and then the wire wheel did the job. Sealed the rusty areas with a suitable converter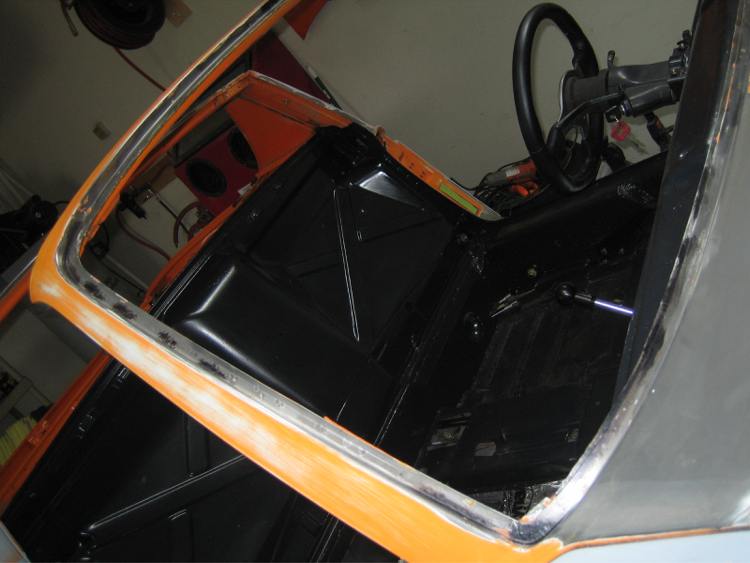
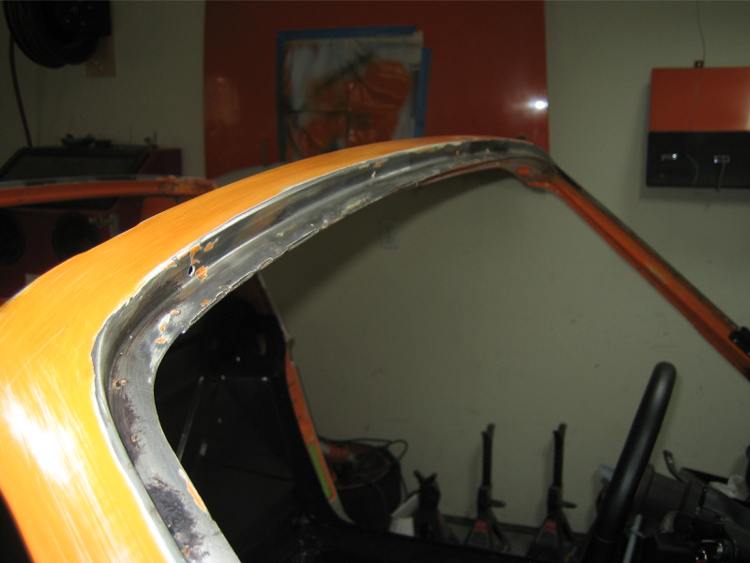
Epoxy and 2K Primer finished the job.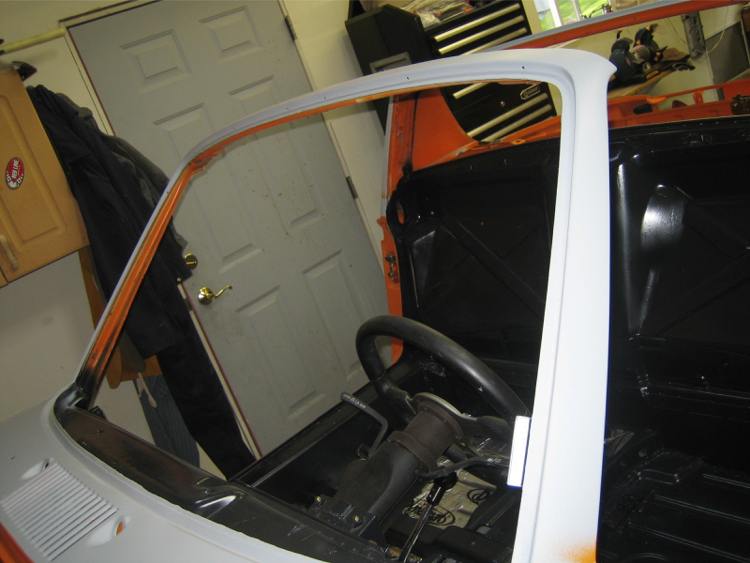
Out with the epoxy and paint for the inside of the doors, the outside also got a final coat of 2K primer.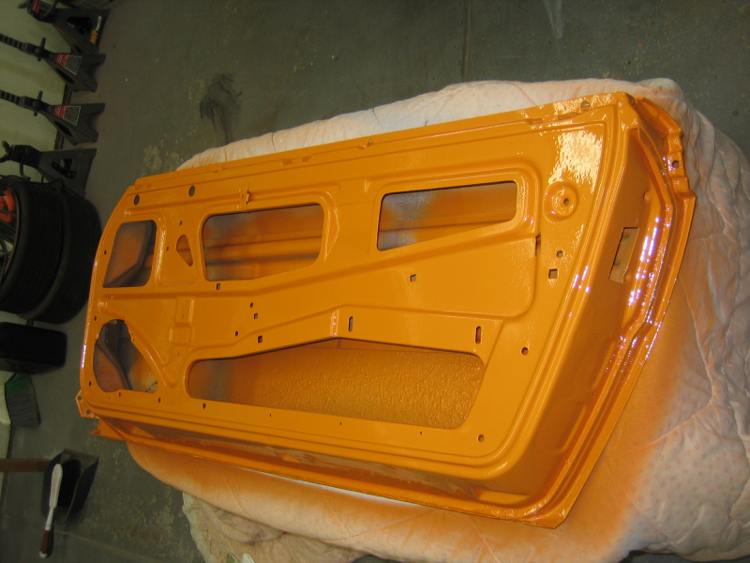
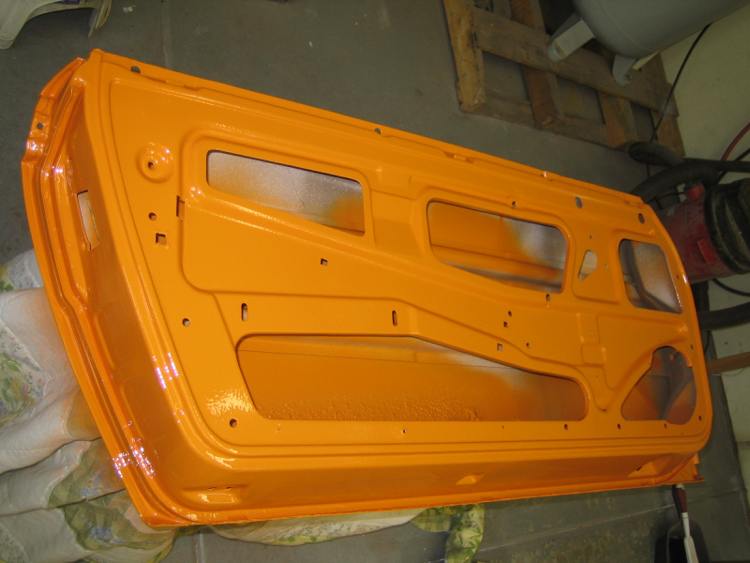
Also painted the seal channel in front of the windscreen.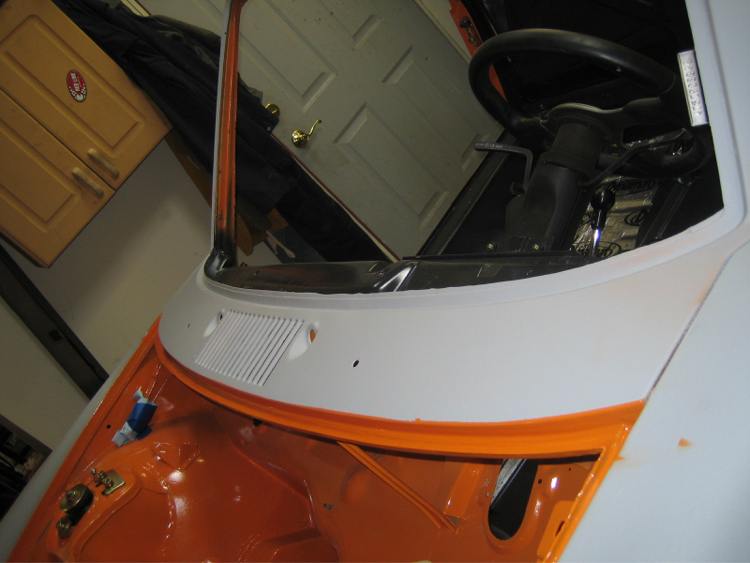
Finally painted the drivers side door jamb, decided to mask the VIN sticker, came out OK except for some minor bleeding which I will see if I can remove. If not no big deal.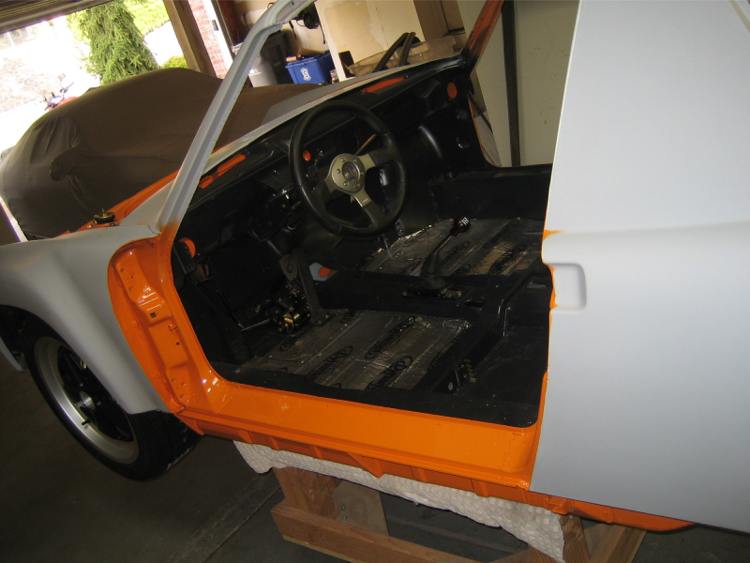
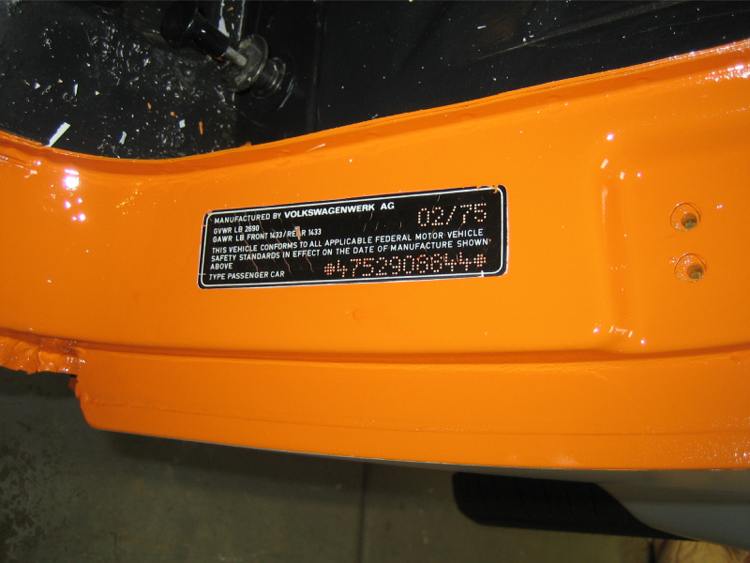
Posted by: Cj Honeycutt Sep 26 2010, 02:23 PM
Looks like you got yourself a real project... good luck
Posted by: Root_Werks Sep 27 2010, 08:36 AM
Nice to see some pictures.
Love how detailed you are getting inside the doors, trunks etc.
Looks great!
Posted by: andrewb Sep 27 2010, 10:05 AM
Love what you're doing Chris, I'm right behind you.
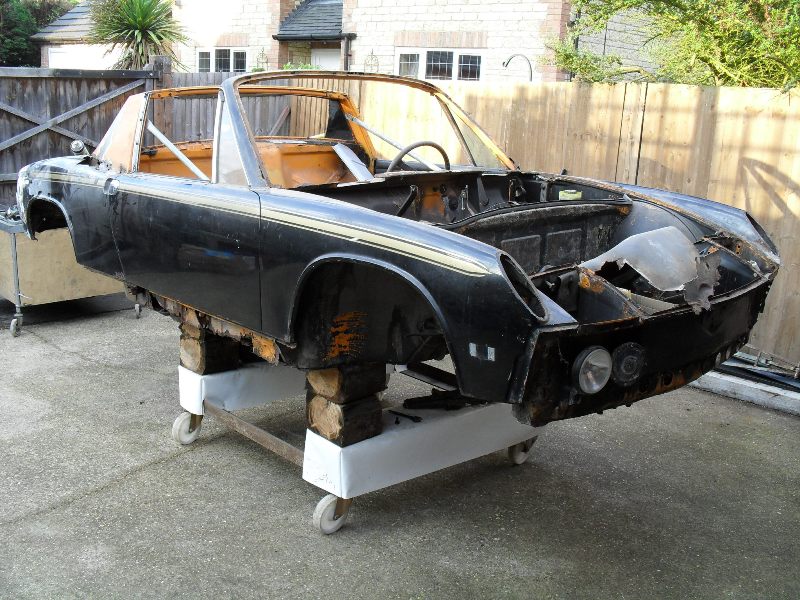
For years I've been looking at my car and thinking it was all too much but now -a little bit at a time - I've starting doing things. What I like about your thread is that I keep 'seeing' my car and 'my' bits of rust in your pictures - it's that damned orange paint -which I'm also removing bit by bit but I won't be putting it back.
I have a question - those little 'rust spiders' - what do you do with them ? 
I've been giving them a hard time with a wire brush on an angle grinder until there's not much more than a bit of discolouration but I'm now wondering whether I should keep going till even that has gone. What do you reckon ? If I don't get rid completely will they come back ?
Cheers, Andrew
PS Where did you visit in England ?
Posted by: my928s4 Sep 27 2010, 11:32 AM
I have a question - those little 'rust spiders' - what do you do with them ?
I've been giving them a hard time with a wire brush on an angle grinder until there's not much more than a bit of discolouration but I'm now wondering whether I should keep going till even that has gone. What do you reckon ? If I don't get rid completely will they come back ?
Cheers, Andrew
PS Where did you visit in England ?
Hi Andrew
To keep the Orange was decided by my teenage daughters, they thought the color was right for the look. Who I am to argue ....
It is hard to get all of the rust without sandblasting, a wire brush and then hitting with some 80grit is what I do followed up with some kind of rust converter if there is any resilient rust residue. IMO this works for our dry climate, others may have better options for your wetland environment
I am an expat, my home area is Bucks so usually where I end up visiting family and friends. Where are you located?
Cheers indeed and good luck with your project!
Posted by: my928s4 Oct 4 2010, 09:45 PM
Pulled the hood of the garage wall, been there for a while ... decided I might as well get the hood and trunk to the same point as the doors. Out with the paint stripper ...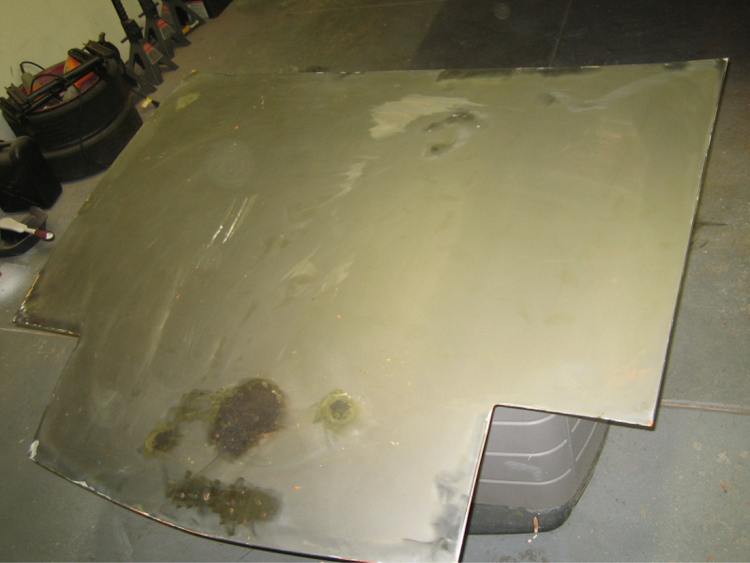
Wire brush shows some thin metal and holes. The round holes are where someone had a Porsche badge.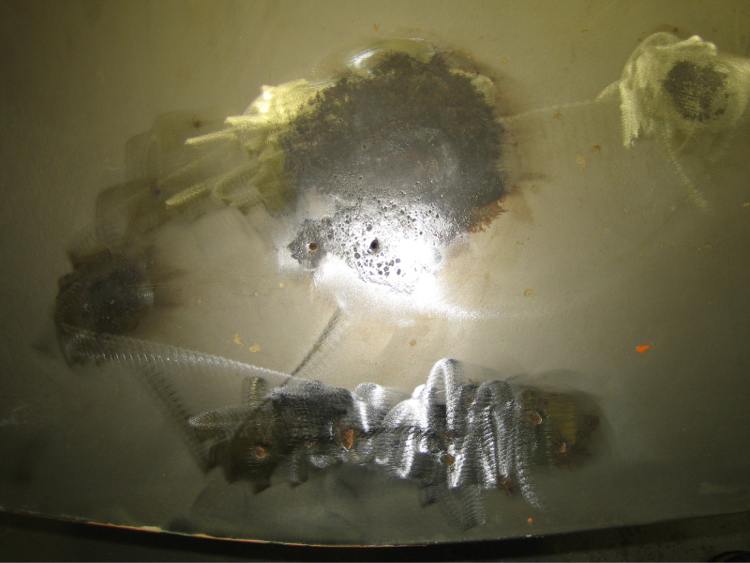
Time to get out the cutting wheel, some hard rust encrusted foam.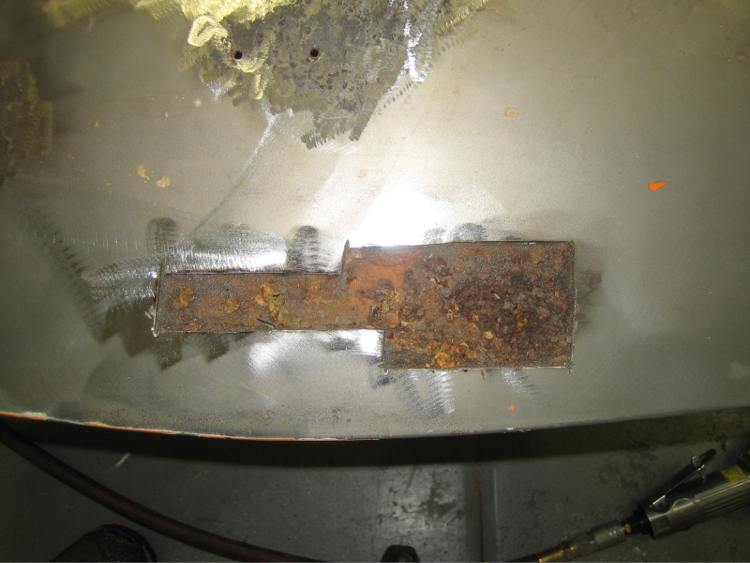
After much mess there is some metal in there !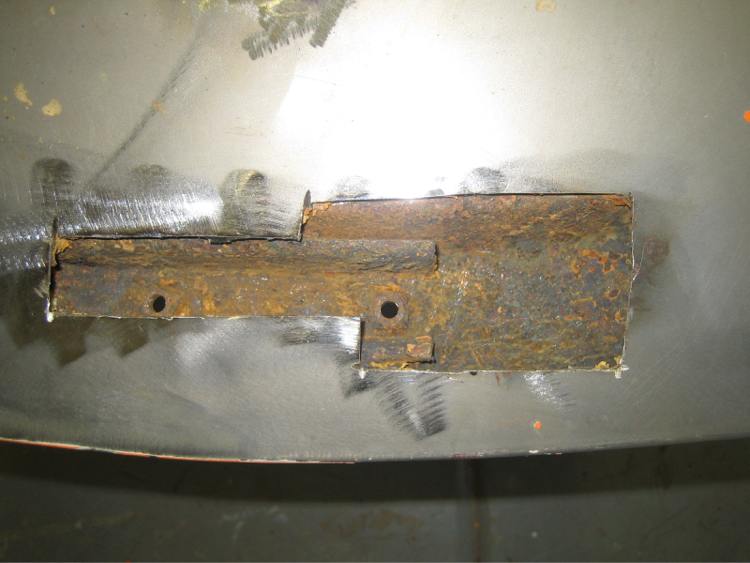
Sanded and the rust that I can't remove with the grinder gets rust inhibitor.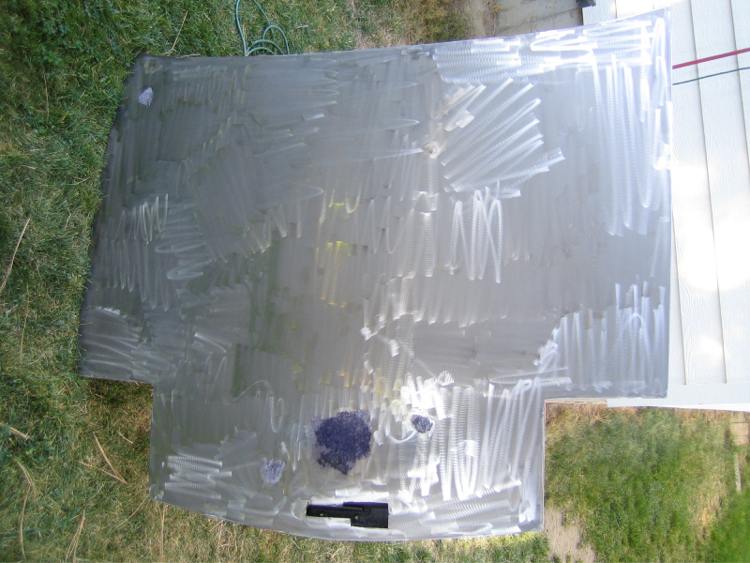
Backside looks pretty good after a rub down.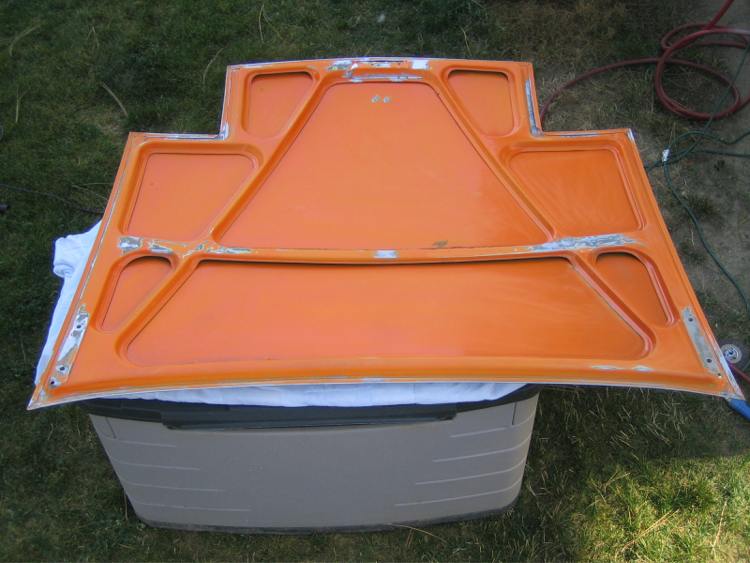
Now to get the trunk to the same level, then out with the welder.
1.5" front spacers arrived in the mail today, just about perfect fit.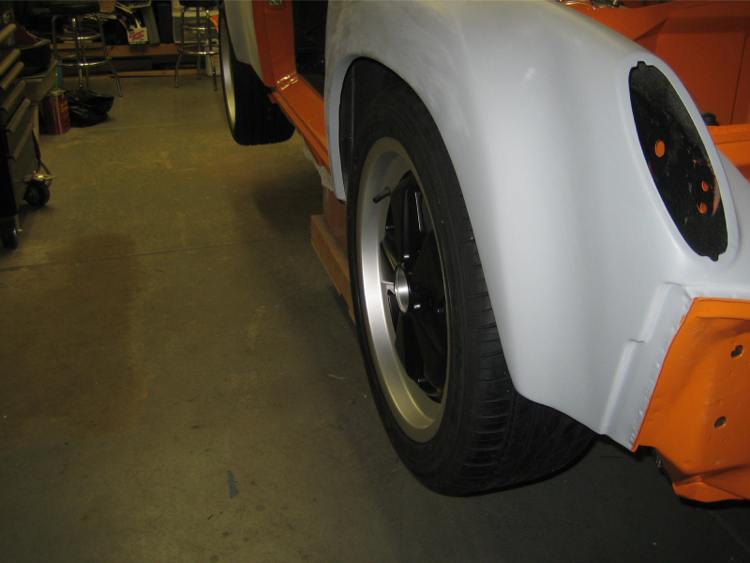
Posted by: Root_Werks Oct 5 2010, 08:42 AM
I like the spacing on the wheels, looks really good.
It's amazing were rust will hide on 914's. That hood is a really good example of the rust monster.
Posted by: my928s4 Oct 10 2010, 01:47 PM
So started work on the trunk, stripped and sanded.
Trunk used to have a rack on it at one time, need to weld those holes up. The supports for the rack were still attached to the trunk, if anyone wants them let me know, just pay shipping.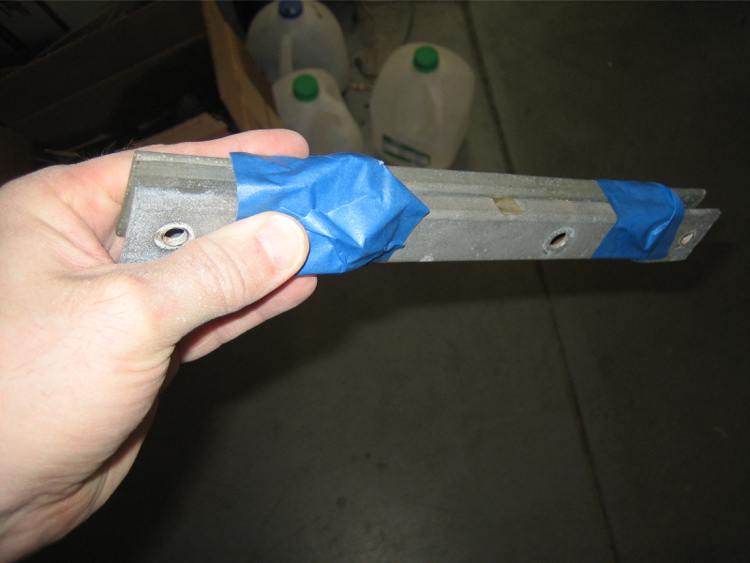
There was a patch of rust on the trunk where it looked like the paint had been gone some time. After sanding sure enough there were some holes.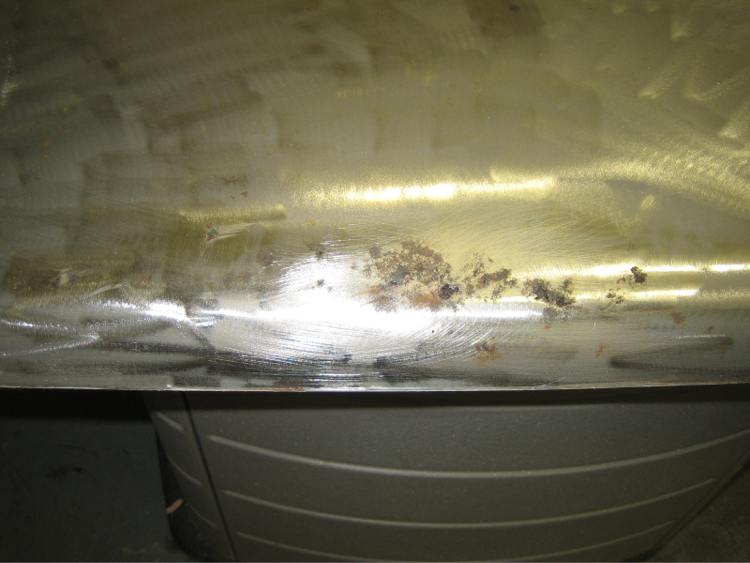
Like the hood decided it might as well be cut out, got some holes on the other side also. If this is anything like the hood it is going to be a bear to weld, 3 dimensional plus warpage .... hmmmm. Ok save this one for anther day.
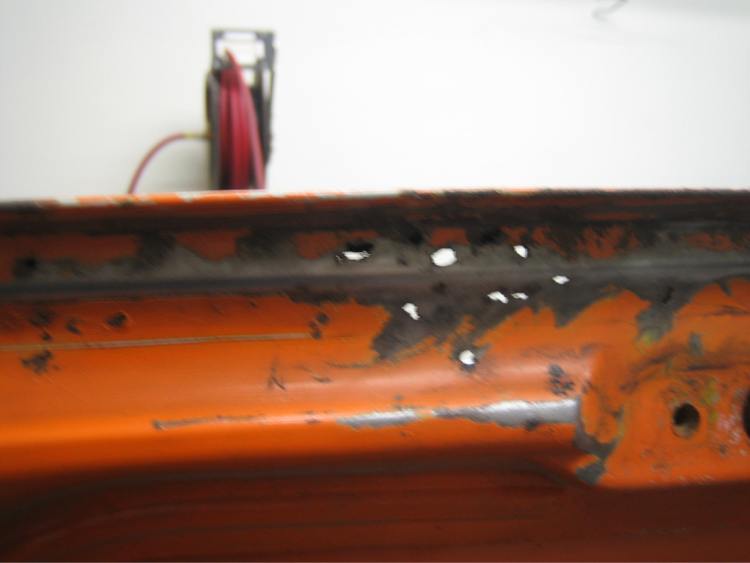
Back to the hood, first coat of filler sanded, my arms were hanging off after this and had to watch sweat from dripping on the filler. to you professional bodywork guys.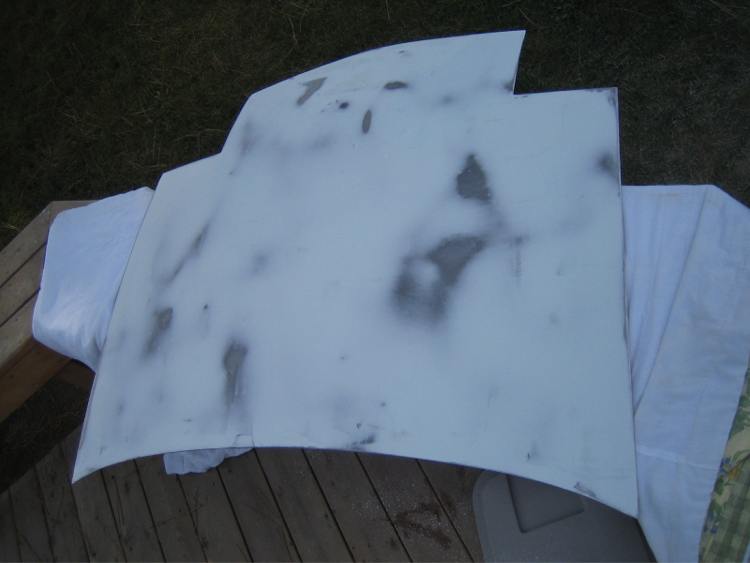
4 or so filler applications later time to epoxy and 2K ready for some more sanding later. Going to be gone next couple of weekends, proably good time to take a break from sanding 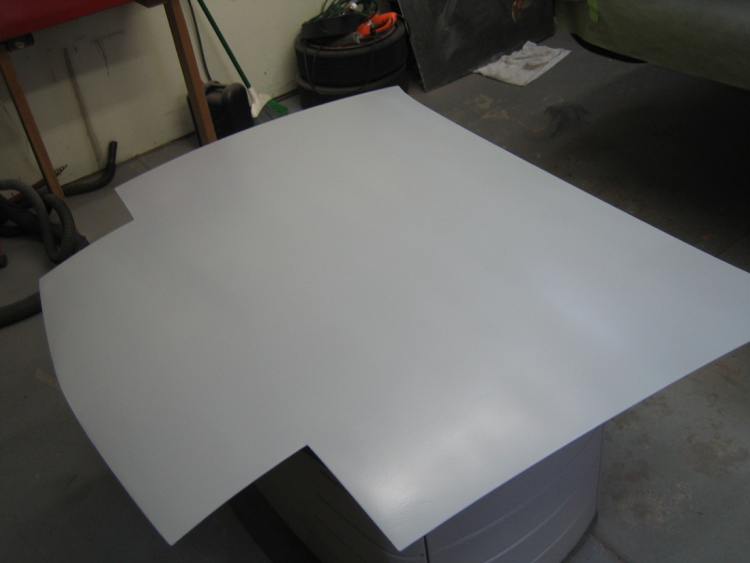
Posted by: banksyinoz Oct 29 2010, 11:38 PM
Thankyou
Your thread has reinspired me to get back to restoring my 76
Many thanks from Brisbane Australia
Posted by: my928s4 Nov 20 2010, 04:41 PM
So the front trunk lid is done with sanding, just need to paint the underside but am going to do that when the rear trunk is ready. I am out of filler so stalled on bodywork right now.
This week I finally managed to get the pins for the rear handbrake cable, trick was to use this part number 999-166-010-02-OEM which is the pin for the handbrake body. The one noted in PET for the cable is unobtanium.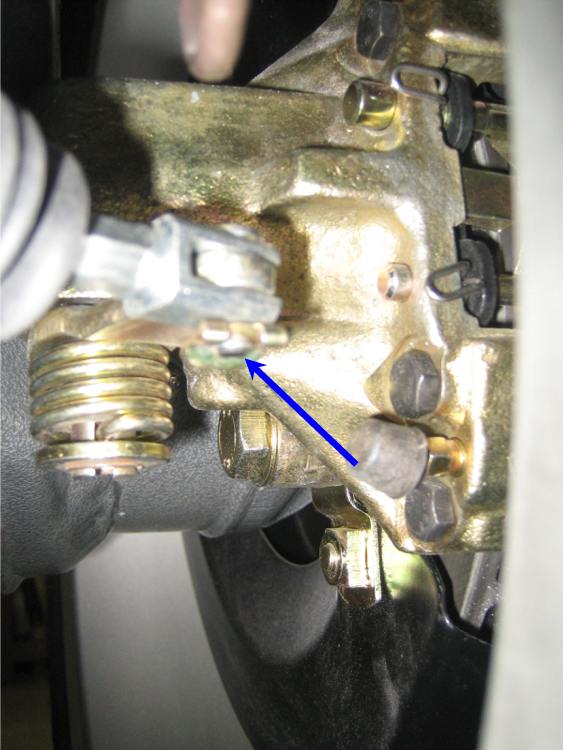
Now I have a handbrake I decided to get the car of the trolley and onto its wheels, been a LONG time since it was on the ground so I took the liberty of taking some pictures.
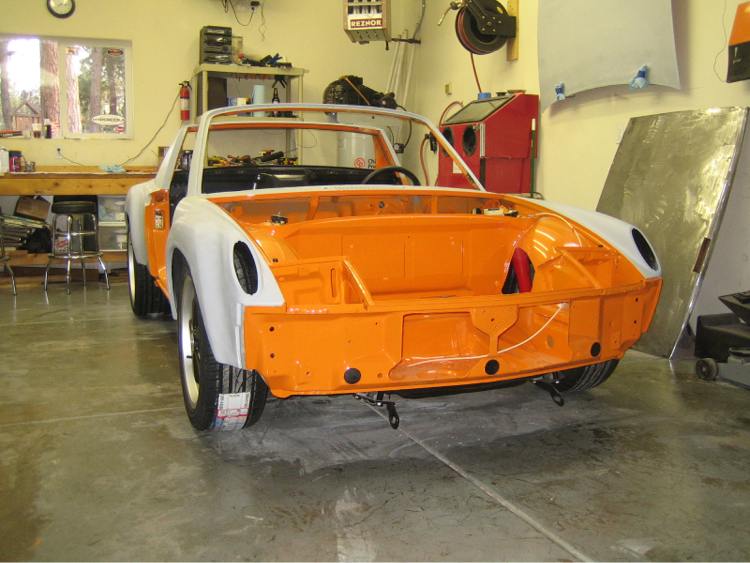
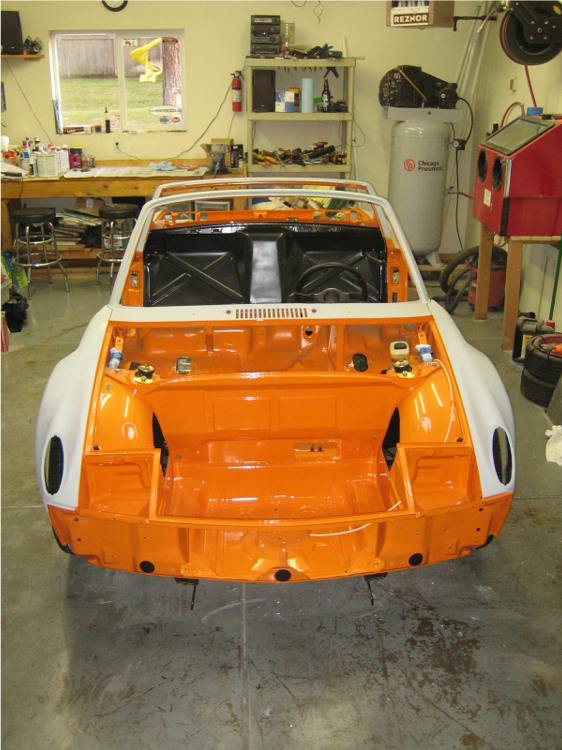
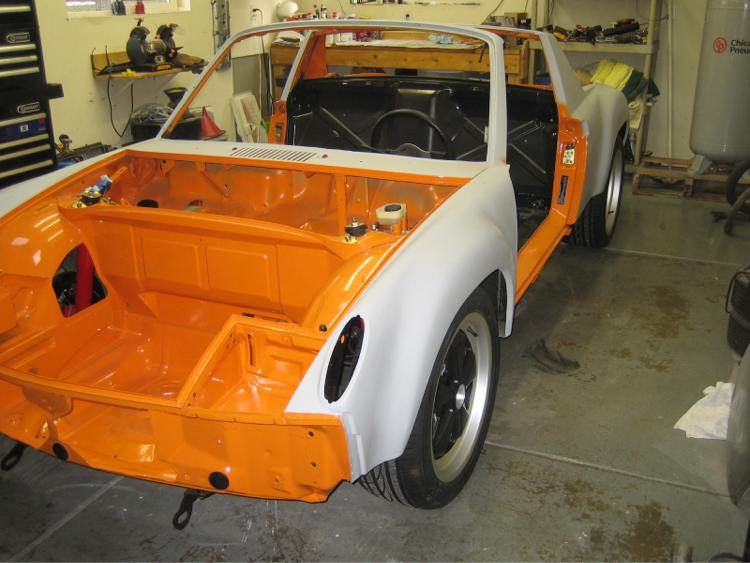
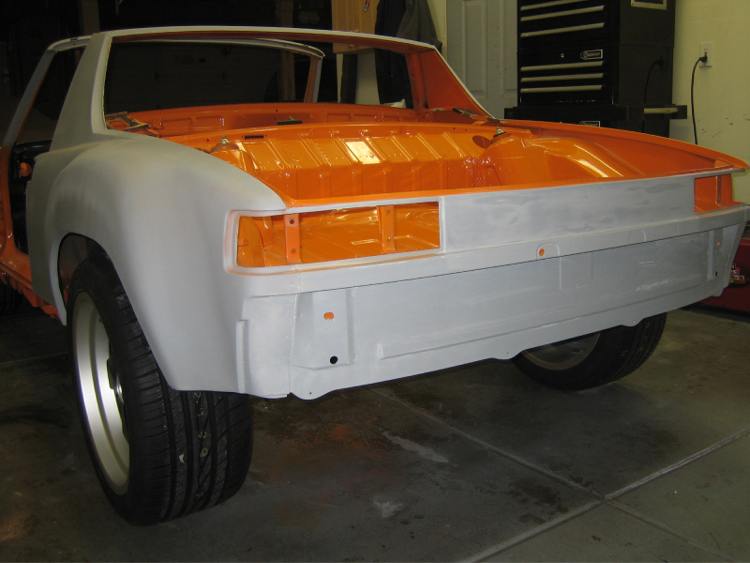
Posted by: my928s4 Dec 11 2010, 09:14 PM
Got some time in the garage today, good to tidy up some odds and ends.
I am hoping this is my last batch of plating, I went through all my boxes and bags of parts and tried to find every last part that I might want to get plated.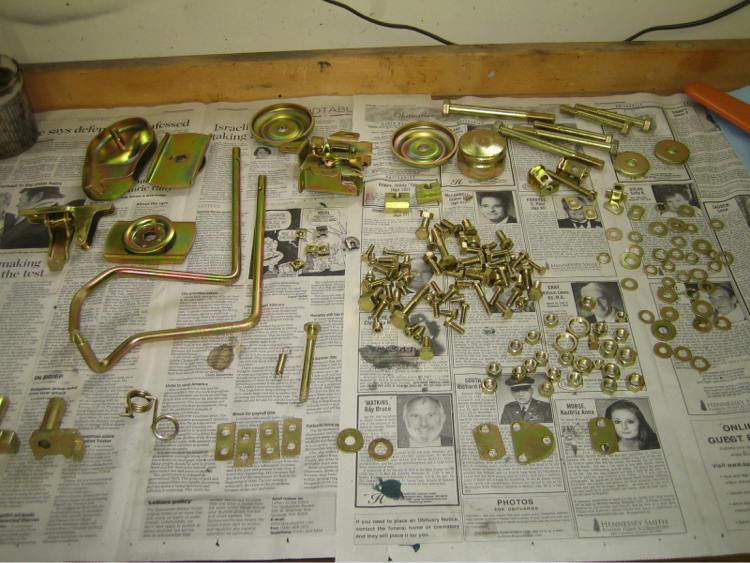
Now I can finish of the seat rails, lost one roll pin trying to get the spring back on but otherwise went OK.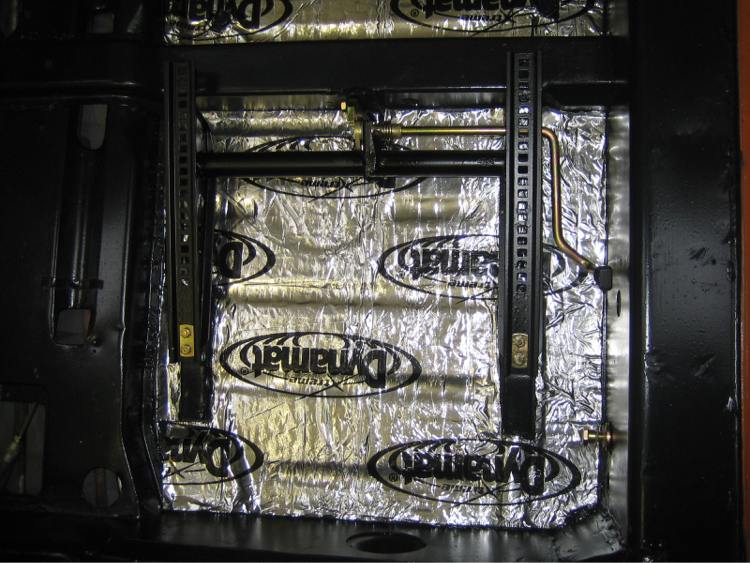
Added the SS fuel lines from Tangering Racing, gave up with trying to use the tie down tabs in the tunnel though. Just tie wrapped them together and that seems to work.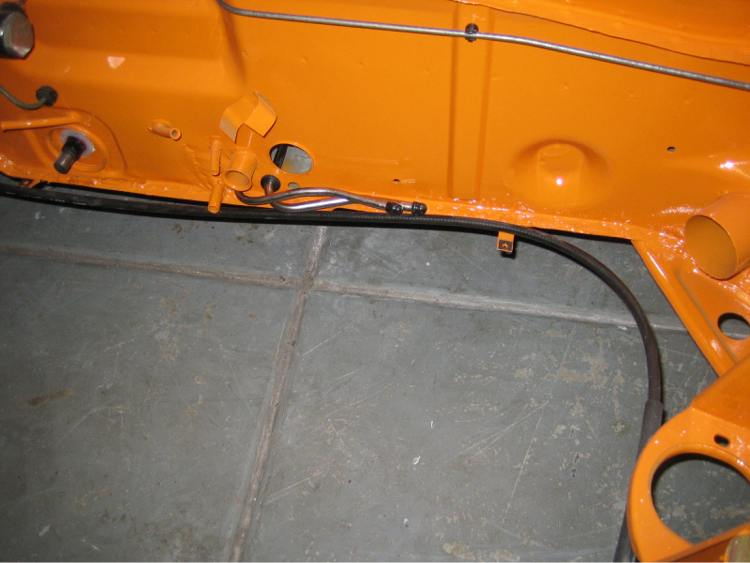
Also got the sway bar finally, been on back order since August.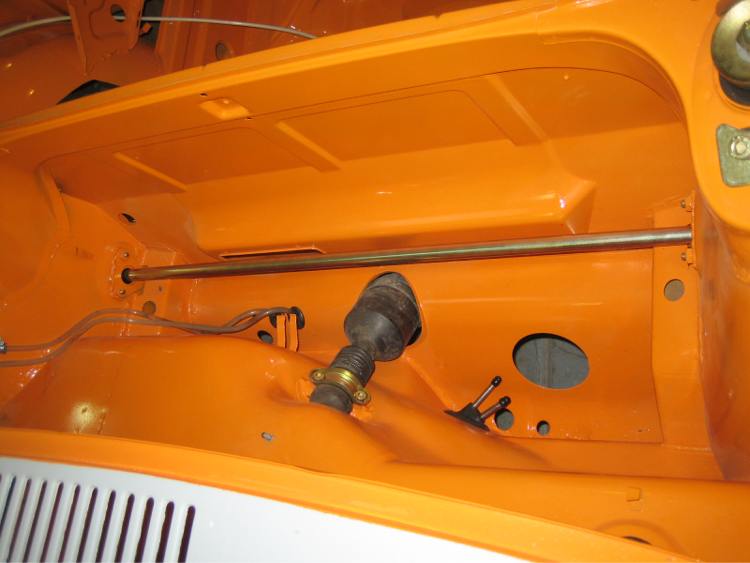
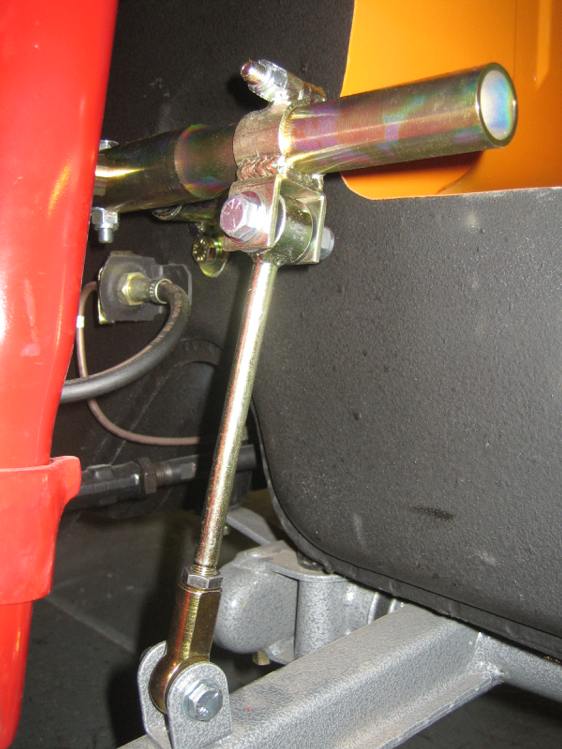
OK, now I can sit in the car and make vrooom vrooom noises .... OK maybe not but definitely makes it easier to have someone sit in and steer while moving in and out of the garage.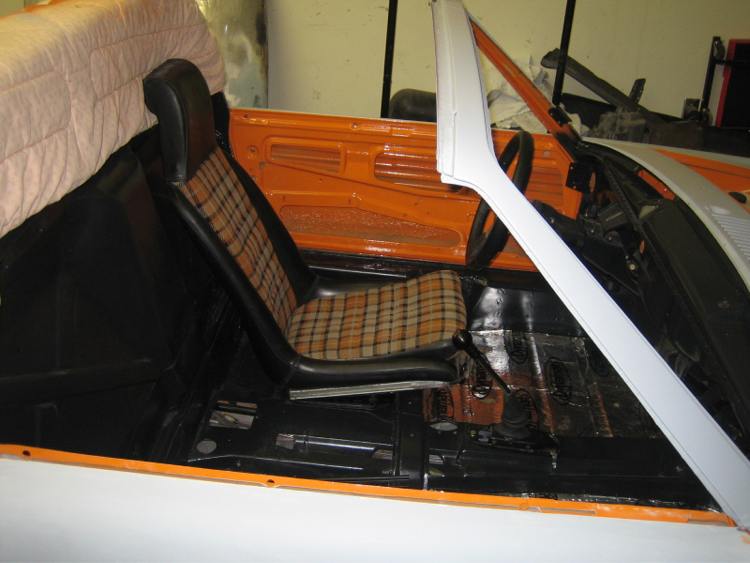
Put the doors back on, everything still lines up OK! Sure glad I drilled a hole in each hinge to align it all back up.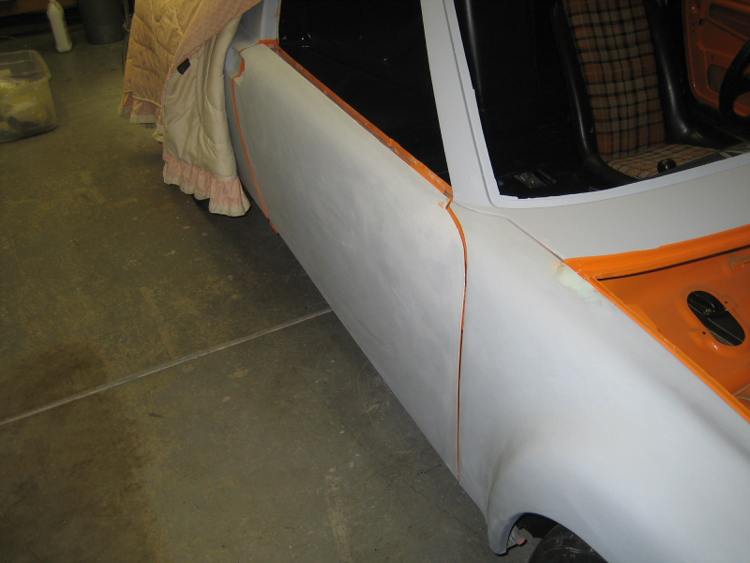
Posted by: FourBlades Dec 12 2010, 09:16 AM
Your car is looking good!
That color will look great with the flares.
John
Posted by: scott_in_nh Dec 12 2010, 05:00 PM
I just read this entire thread at once - great stuff!
As a newbie looking at possibly purchasing my 1st 914, your well lit photos and fully dismantled car has really helped me understand where to look for rust on any prospective purchase.
Good luck - I will be following your progress!
Posted by: my928s4 Dec 19 2010, 07:23 PM
Your car is looking good!
That color will look great with the flares.
John
Thanks John, coming from you that means a lot. I envy you in that you have your 1st project back on the road already!
Posted by: my928s4 Dec 19 2010, 07:25 PM
I just read this entire thread at once - great stuff!
As a newbie looking at possibly purchasing my 1st 914, your well lit photos and fully dismantled car has really helped me understand where to look for rust on any prospective purchase.
Good luck - I will be following your progress!
Thanks but lots of great 914 project pages on this site and a wealth of knowledge.
Posted by: my928s4 Dec 19 2010, 07:31 PM
OK got the Engman pedal board fitted, need to find a rubber stop for the clutch though. Looks like a bicycle brake pad might work.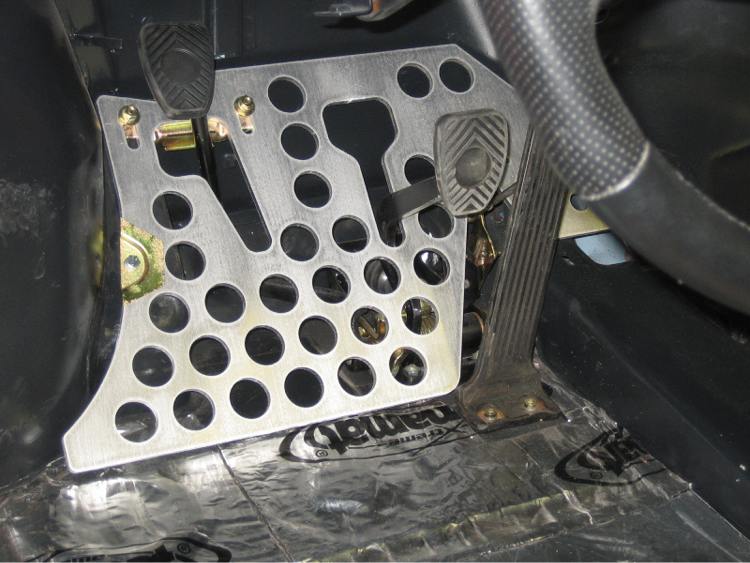
Got the window rubber from Mikey on the group buy, will be a while before they get fitted but I did use the roller and put the window mechanism back together.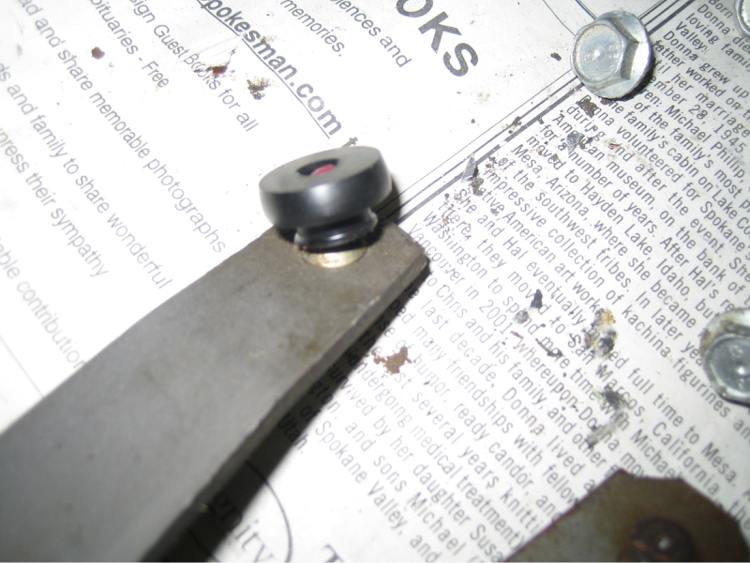
It is damn cold outside but wanted to get the front trunk together, turned up the heat in the garage on got some primer on.
And then paint, tried to get it back on the car alone but had to give up and ask the wife for help!.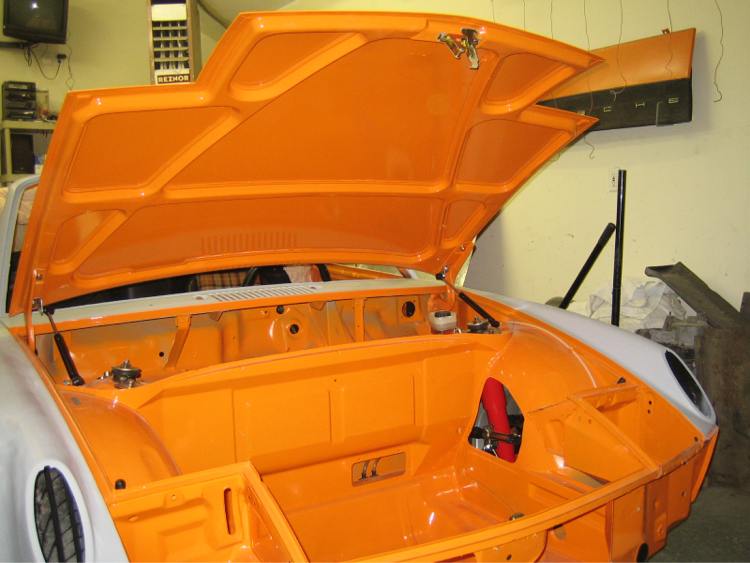
Closed.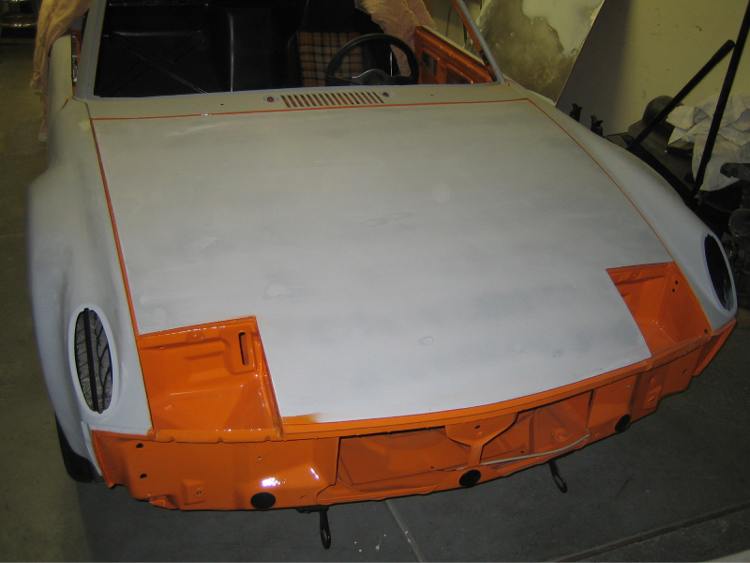
As per my question on another post, it does hit the hood but only just. Looks like I need a washer on the top of the strut to reduce the height of the threaded portion.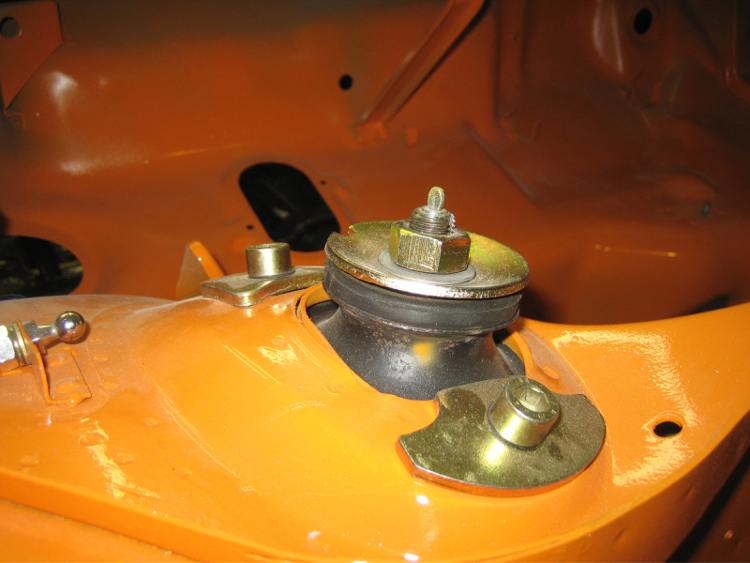
Posted by: porsche_dreamer Jan 12 2011, 12:46 PM
Any updates?
Posted by: my928s4 Jan 16 2011, 08:31 AM
Any updates?
What with the Xmas Holidays, a vacation to some warmer weather the answer is no not much! Also the 928 needs some work before the Spring so that may force another break.
I did get a nice package just after Xmas.
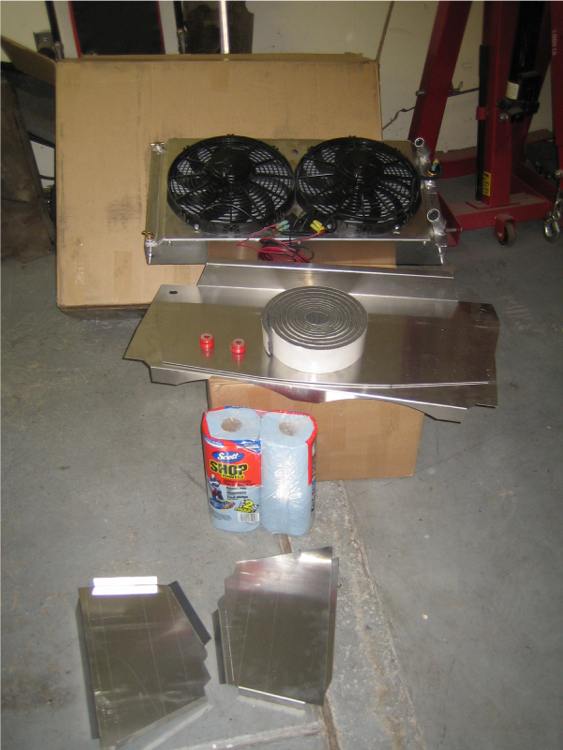
This is the Renegade cooling system and I also bought the hoses, I played around with it for a while and the only issue I see is the side plates will need to be modified. Looks like they are made for the pre-75 cars.
Also going to see if I can get some nutcerts and use those rather than sheet metal screws or rivets. Also thinking powder coating in black. We shall see.
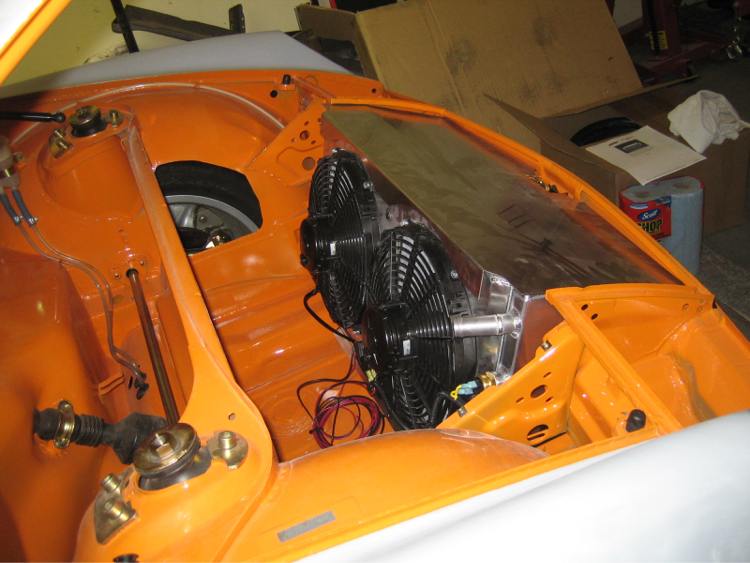
Bought some washers to sought out the clearance issue with the top of the struts and the hood. Sorted now and the hood latches shut nicely.
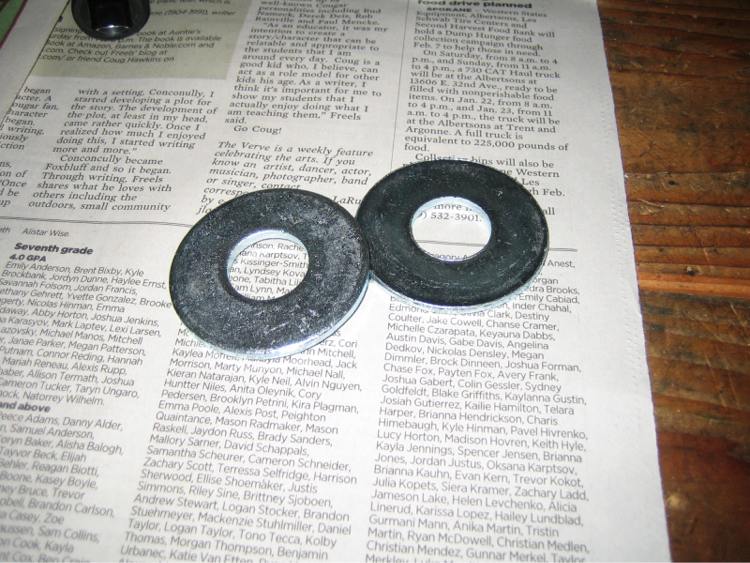
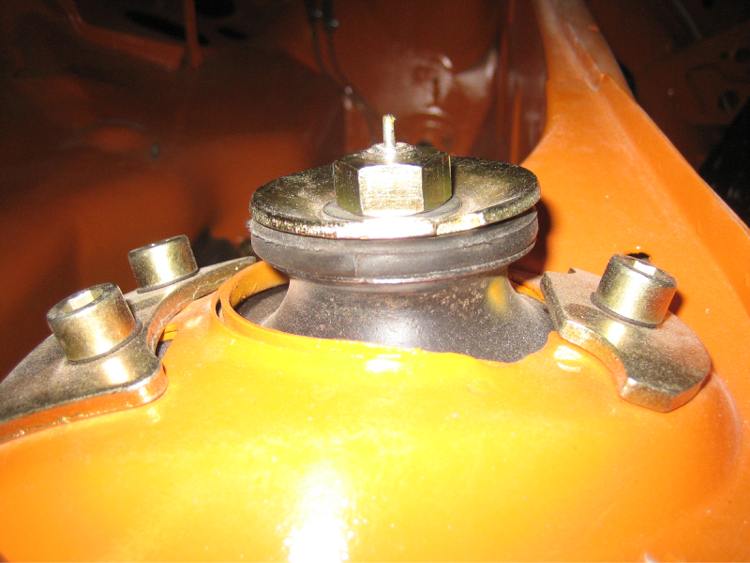
Posted by: my928s4 Jan 16 2011, 06:47 PM
For some reason it was unseasonably warm so I took the opportunity to finish up the filler work on the rear trunk. Took me most of the day and am glad this is done.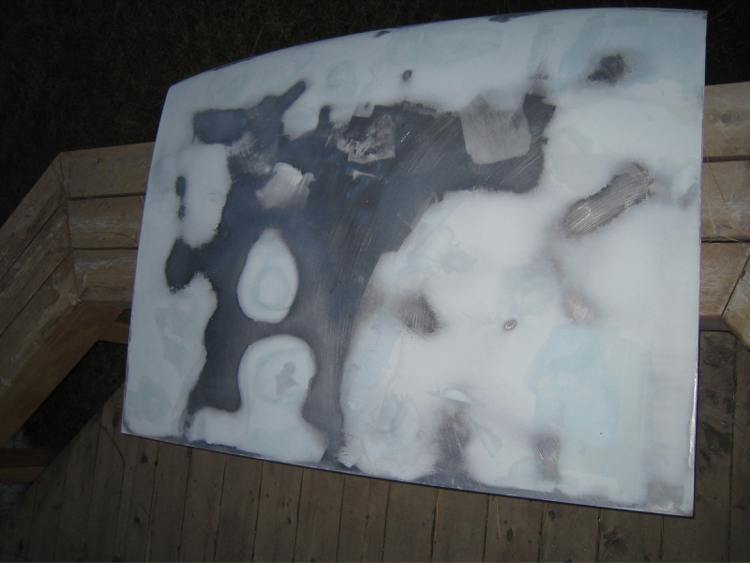
Posted by: FourBlades Jan 16 2011, 07:28 PM
Your car is looking good!
That color will look great with the flares.
John
Thanks John, coming from you that means a lot. I envy you in that you have your 1st project back on the road already!
Dude I just re-read your whole thread and you are the man! You have come
so far on this car it is amazing.
You will not regret the work once you are driving your car. I still get a load of
satisfaction every time I turn the key.
John
Posted by: barada Jan 23 2011, 05:00 PM
Your car is looking good!
That color will look great with the flares.
John
Thanks John, coming from you that means a lot. I envy you in that you have your 1st project back on the road already!
Dude I just re-read your whole thread and you are the man! You have come
so far on this car it is amazing.
You will not regret the work once you are driving your car. I still get a load of
satisfaction every time I turn the key.
John
Any updates? Love following this build
Posted by: my928s4 Feb 6 2011, 01:48 PM
Not too much to update and some back tracking but that is the way it goes sometimes, I was never happy with the rubber coupling after putting in the rack spacers. Seemed to put stress on the shaft where it clamps to the body in the fuel tank area.
Also I bought the PP bushing for the front A-arms a long time ago, never liked them, squeaky and stiff which might improve with usage but that is not going to happen just yet. Decided to buy the ones Eric started selling.
Here is the old donut, looks OK from this angle.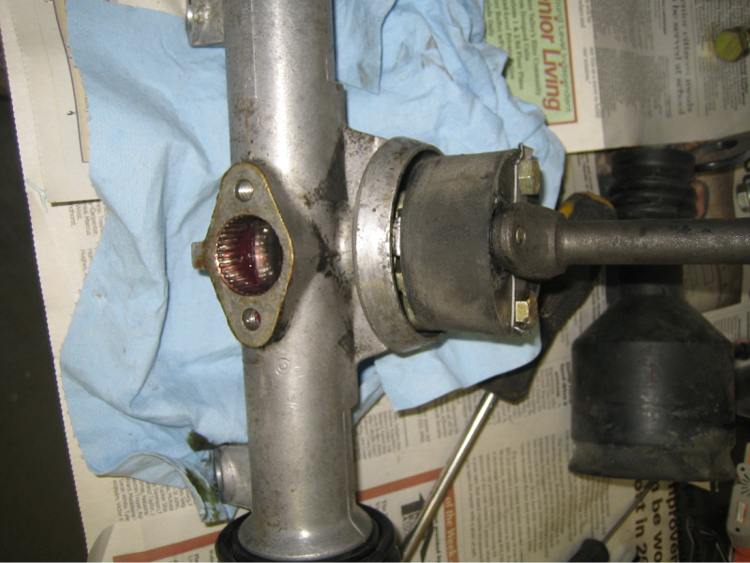
Once removed the holes had significant wear, talk about slop around the bushings.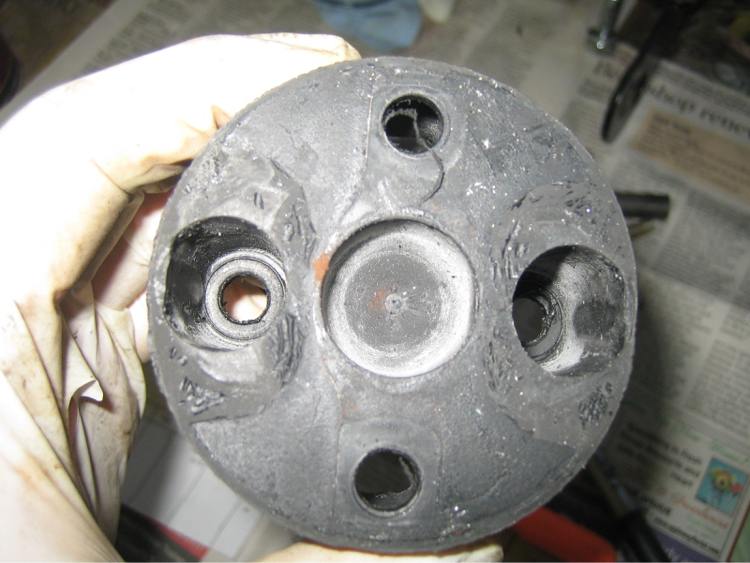
New Delrin part, sweet.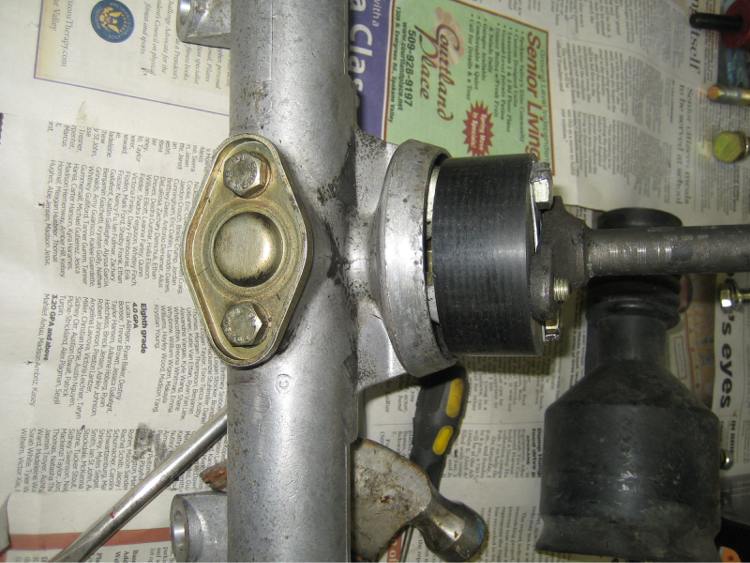
Decided to wet sand with 400grit the passenger fender, only have a two small low areas. Once that is done the whole passenger side of the car is good to go.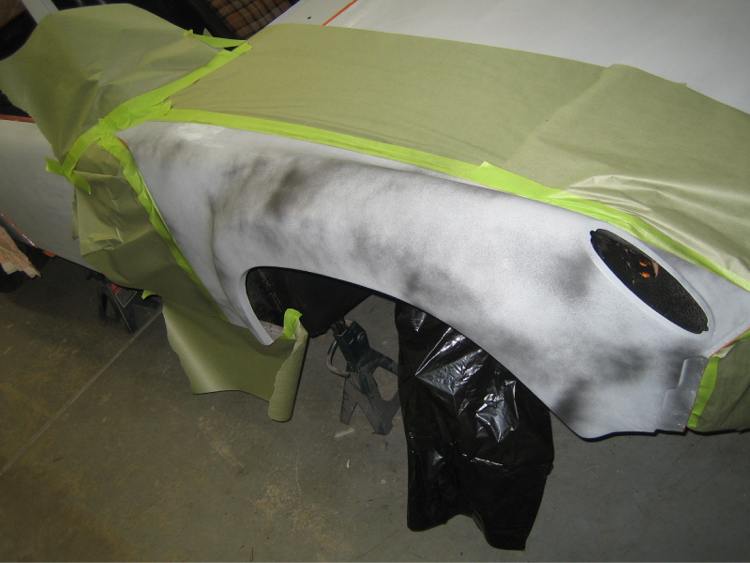
Been putting of spraying primer as I had run out of gun cleaner, got some yesterday and Epoxy and 2K'd the rear trunk lid. Sand that next weekend.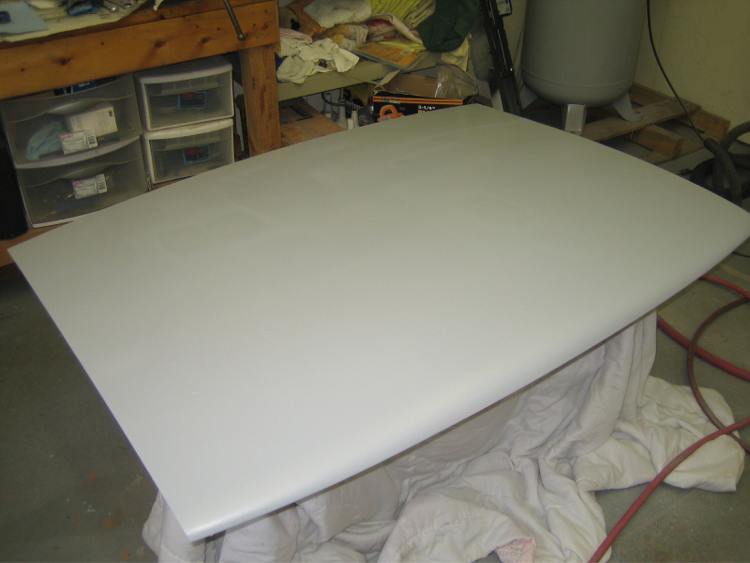
Posted by: Root_Werks Feb 11 2011, 02:29 PM
Looks like you're close to color on the fenders, cool!
Posted by: speed metal army Feb 11 2011, 11:07 PM
This looks super.Nice work.
Posted by: Hontec Feb 12 2011, 07:50 AM
Damn, that's a lot of nice work you put down there! respect..
Posted by: my928s4 Mar 19 2011, 05:18 PM
Been a while since the last update but finally made some progress, trying to remove the old PP bushings from the front a-arms I gave in and purchased a HF press. Should have done it a long while ago, talk about making your life easier.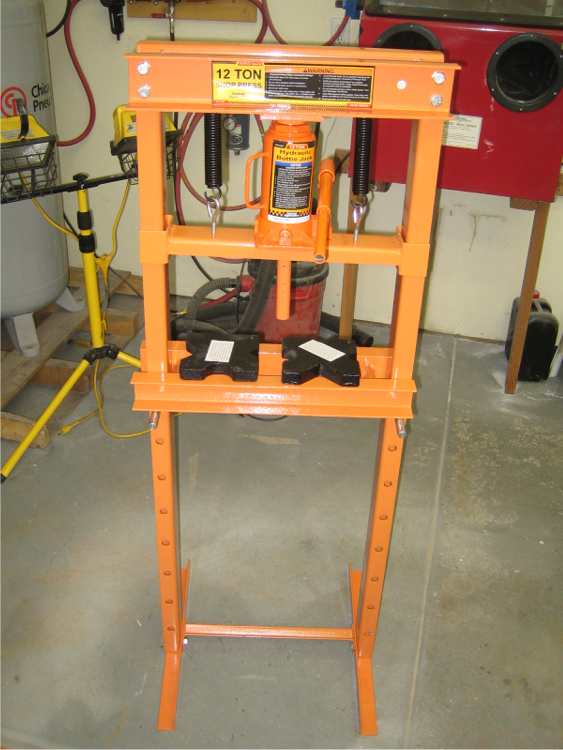
Putting the new PMB bushings in was interesting, first couple of tries the bushings were not hot enough but once I had that figured out it was plain sailing. A-arms move nicely now, glad I took it all apart to change them.
Finally the rear trunk came together, this panel required the most work of any so far. Just when I thought I had it I would find another low spot ... once I got it where I wanted adding color on the inside was easy.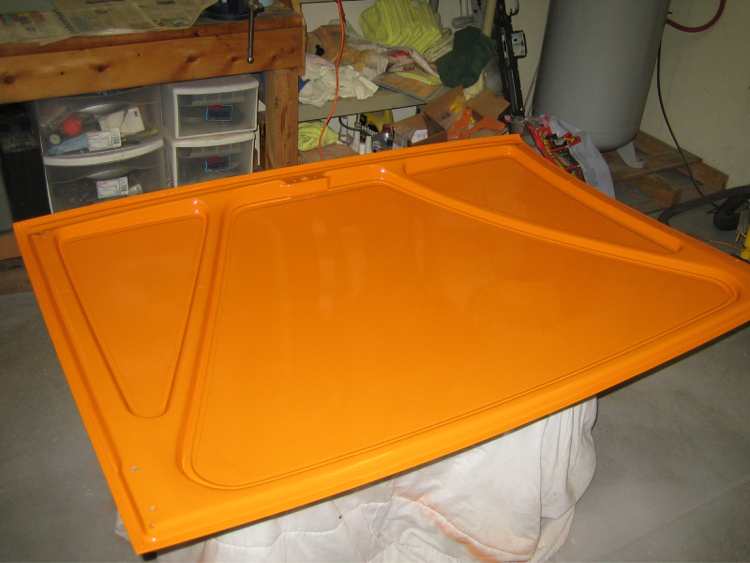
Also got to fit my J West trunk hinges, fiddly getting everything lined up as the old brackets were gone so no reference point. They work great.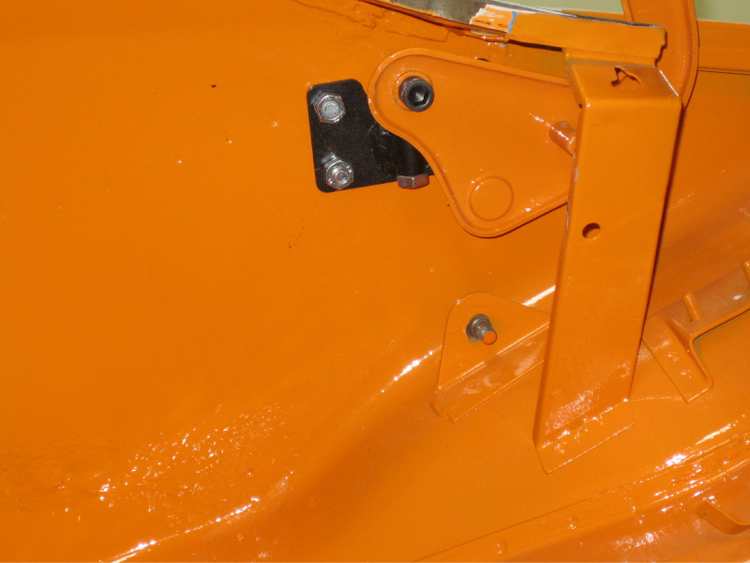
Last bit was to add the shox kit.
One rear corner is not quite where I want it but will leave that for another day, nice to get another part on the car.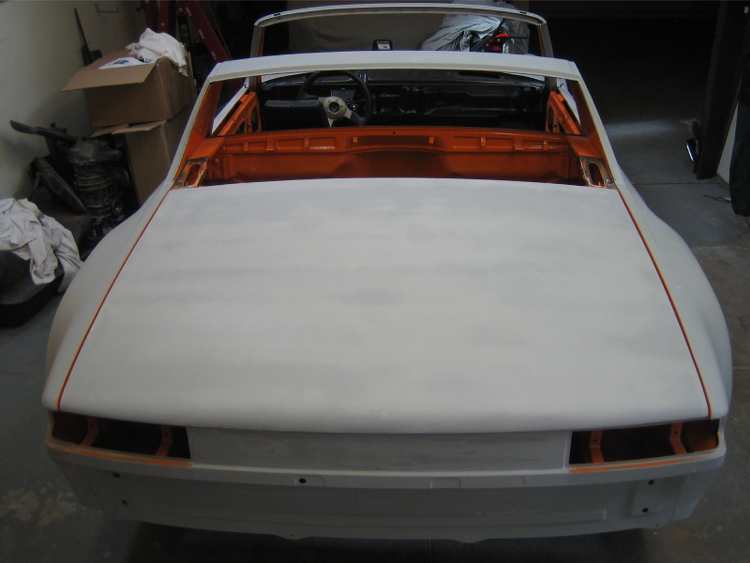
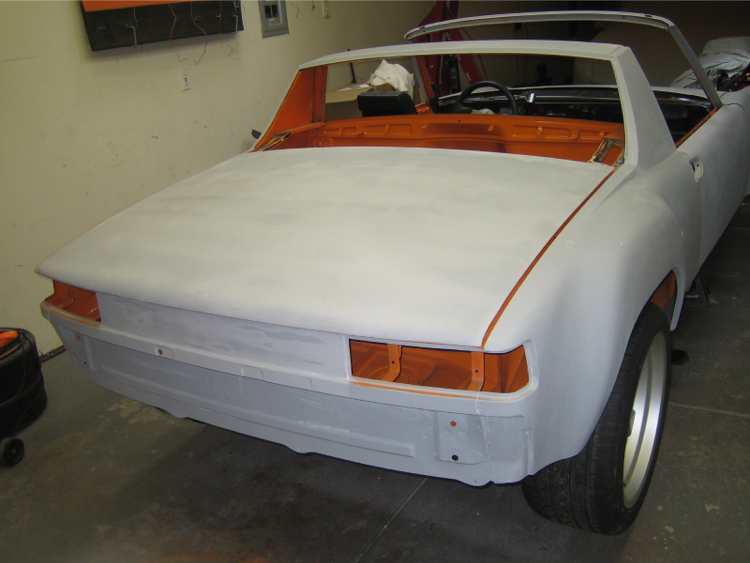
Next I need to work on that radiator and hoses.
Posted by: my928s4 Apr 23 2011, 11:24 AM
It has been a while but sometimes the project takes second priority, started looking for some small items to complete to get back in the game. Fished out the headlight assemblies, pretty nasty. Was thinking I would strip and paint but my sandblaster had a hard time with some of the pitted rust so took it down to the powder coaters and let them deal with it.
Before :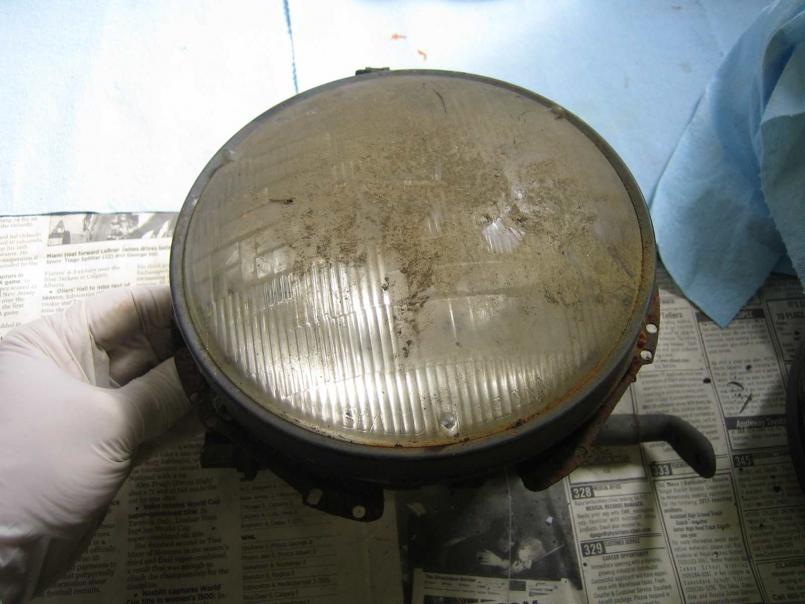
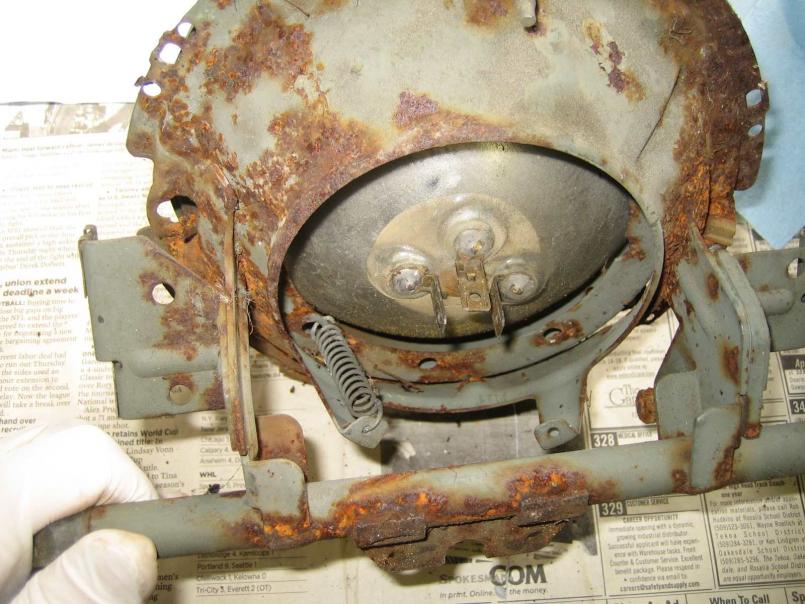
After, and yes those are the same sealed beam lights, those cleaned up nice.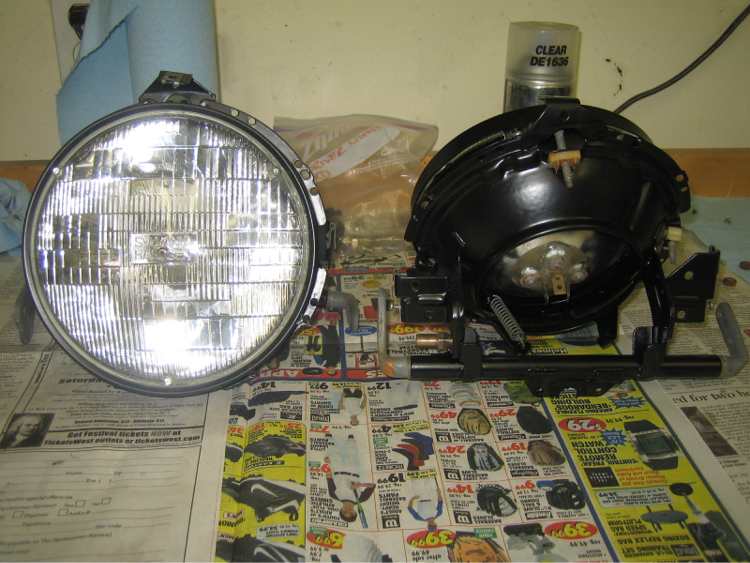
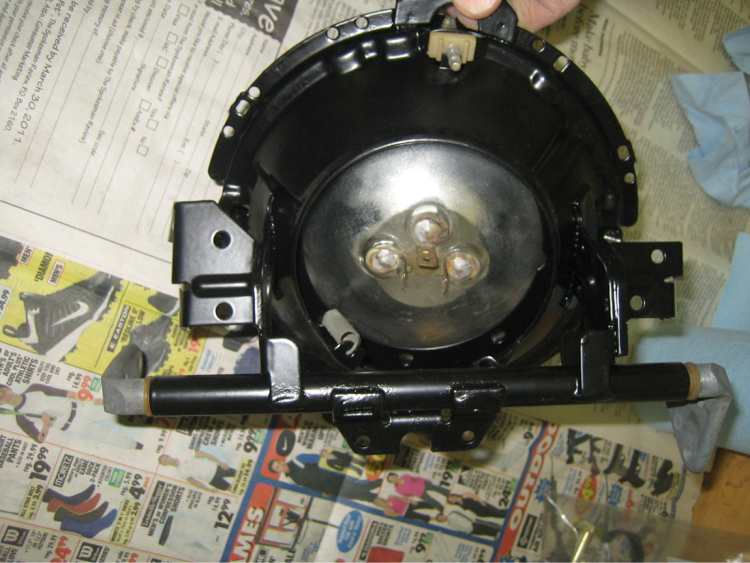
Posted by: my928s4 Apr 23 2011, 11:27 AM
Also got the raidator brackets powder coated at the same time, I bolted the bottom panel in, riveted the side panels to the bottom and then put fastners so the side top panel can screw to the sides.
Next on the todo list is to route the radiator hoses.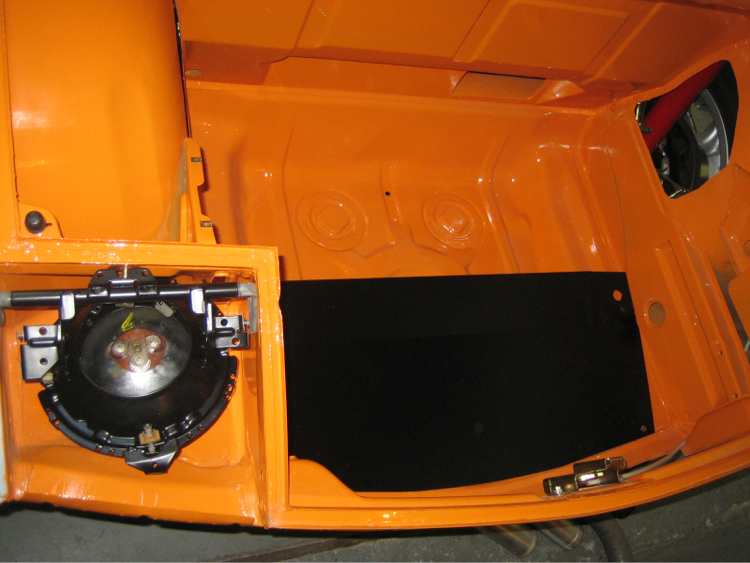
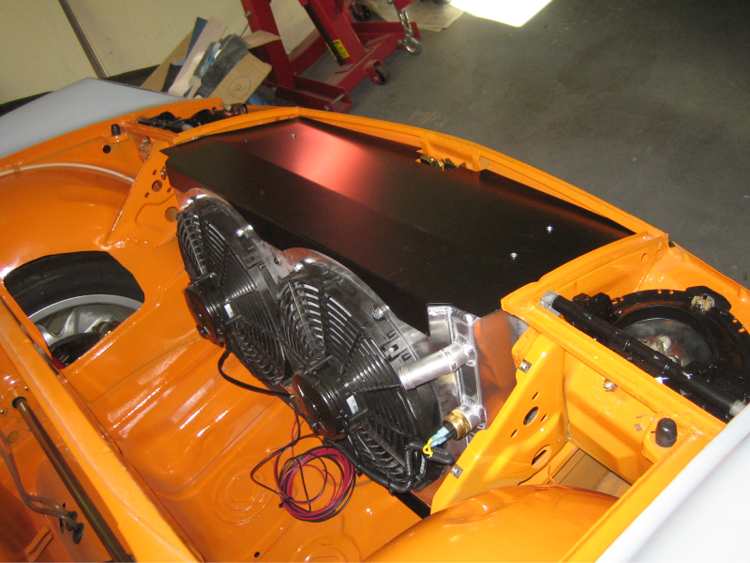

Posted by: rohar Apr 23 2011, 11:33 AM
That thing is REALLY coming along! Wish I could say the same about mine. Who's doing your powder coating? I'm gonna need a local shop shortly.
BTW. This car is the reason I've got quarts and quarts of orange paint on the shelf that will never be used. Can't have two of them in the same town, it'd be like two girls showing up to the prom in the same dress 
Posted by: rwilner Apr 23 2011, 11:34 AM
After, and yes those are the same sealed beam lights, those cleaned up nice.
I don't believe you.
Posted by: my928s4 Apr 23 2011, 12:47 PM
That thing is REALLY coming along! Wish I could say the same about mine. Who's doing your powder coating? I'm gonna need a local shop shortly.
BTW. This car is the reason I've got quarts and quarts of orange paint on the shelf that will never be used. Can't have two of them in the same town, it'd be like two girls showing up to the prom in the same dress
Thanks!
PowderTech out in the industrial estate, really nice to deal with and great value.
So if not orange for you then what !
Posted by: rohar Apr 23 2011, 01:13 PM
That thing is REALLY coming along! Wish I could say the same about mine. Who's doing your powder coating? I'm gonna need a local shop shortly.
BTW. This car is the reason I've got quarts and quarts of orange paint on the shelf that will never be used. Can't have two of them in the same town, it'd be like two girls showing up to the prom in the same dress
Thanks!
PowderTech out in the industrial estate, really nice to deal with and great value.
So if not orange for you then what !
I'm leaning to a slightly more modern, dechromed creamsicle-esque nightmare.
All the fabrication and hardware will probably be blaze orange though, gotta do something with all this!
Posted by: my928s4 May 29 2011, 07:28 PM
Still chipping away at the smaller stuff, I got the exhaust heat shield powder coated after I filled in some holes from drilling out the spot welds. I left one hole per bracket and then used that to bolt the heatshield back on.
This is the heatshield and steering rack shield after cleaning, will need to wait to get the rack shield painted until I have routed the coolant lines and put in an appropriate notch.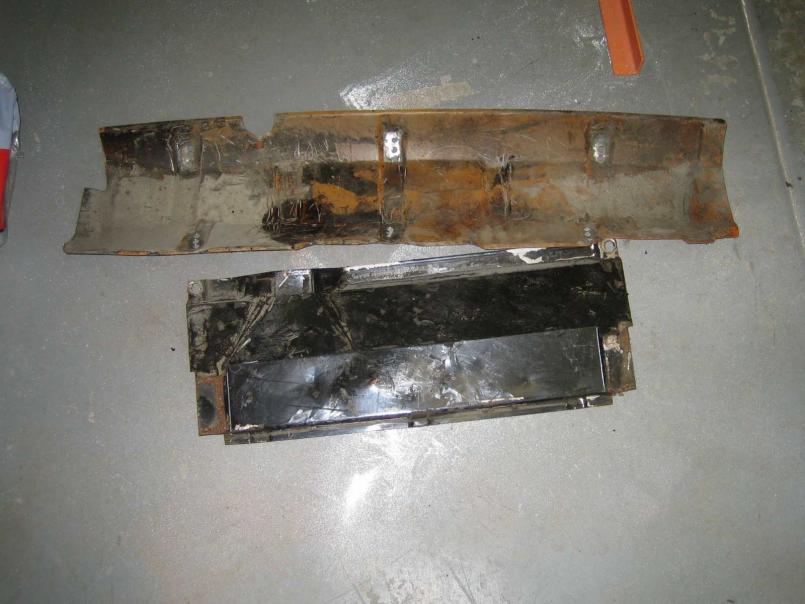
Heat shield fitted to car, dusty prints sure show up well ...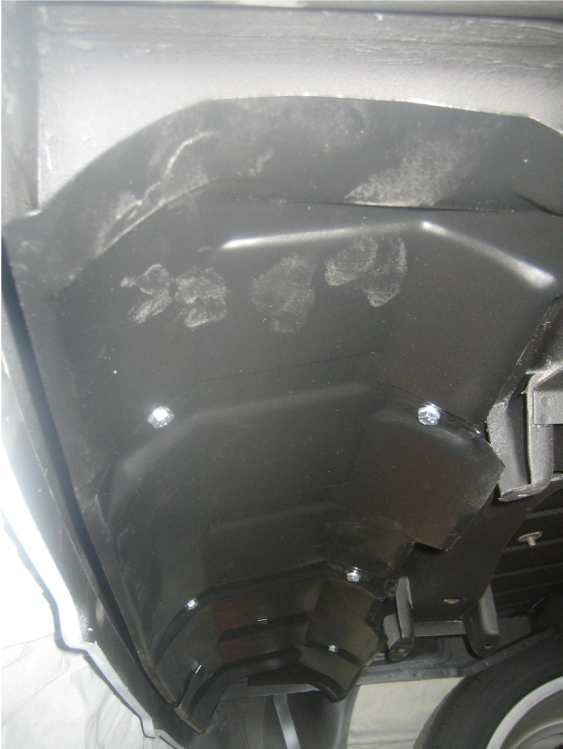
Got some plated parts back and was waiting for the cam on the headlight mechanism, so with that back I put the motor assembly on the headlights.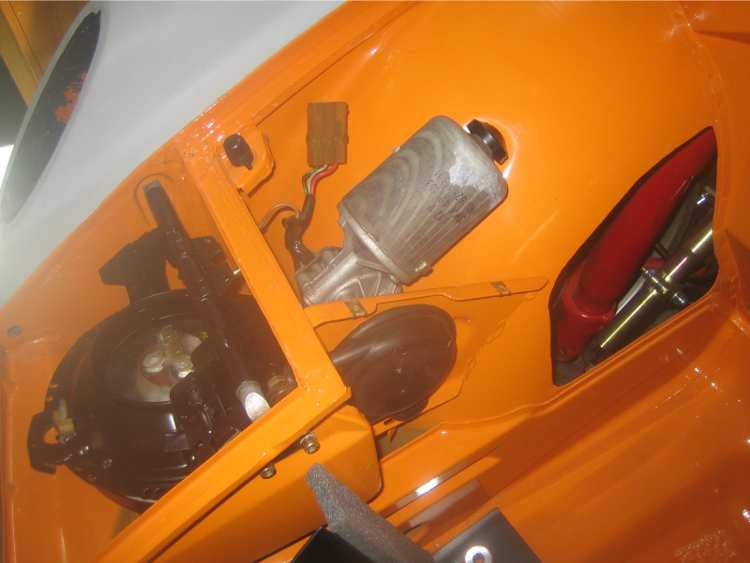
I was going to start wiring up the front trunk area and then realised that the 914 wiring loom is all one and not seperate sections, going to think about whether I want to rewire the whole car or not.
Posted by: CrashDown May 29 2011, 07:59 PM
What an awesome goddamn build this is........
Posted by: uncle smokey Oct 1 2011, 04:36 PM
I just read the whole thing, awesome job. Any updates?
Posted by: my928s4 Oct 29 2011, 10:30 AM
Wow, it has been a while but finally getting back to it. The 928 needed some love which culminated in a 3,000 mile round trip down to LA, started with replacing the gearbox and then I got sidetracked with WYAIT items including powder coating and refurbing the rear axle assembly. I mention this because having done the same with the rear of the 914 items such as rear wheel bearings on the 928 was much less ardous. Although I did invest in a press this time, wish I had done that with the 914 .. lesson learned I guess.
Here is a pic of the 928 assembly shortly before going back in the car.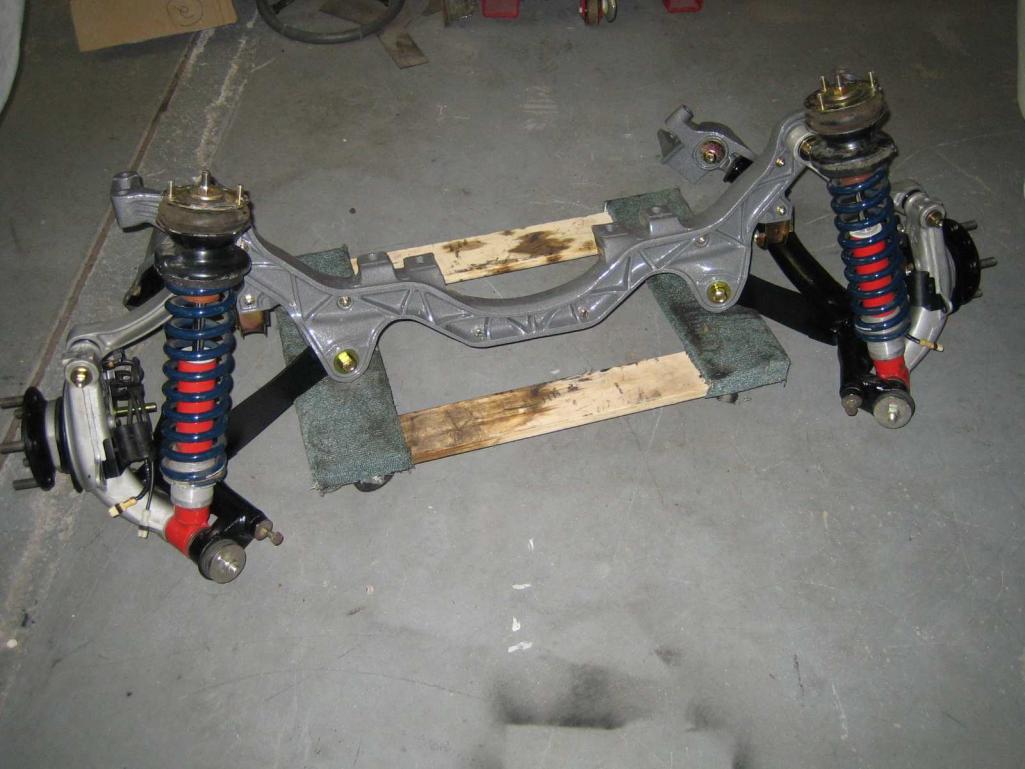
Alright back to the 914, so I bought some more Dynamat to finish of what I started a while back with some left overs. I could have put more in the interior but decided this is good enough, I am certainly not expecting this car to be quiet but I don't want that tin can feeling either. Will be a while before it gets put to the test but something easy to do to get back in the swing of things.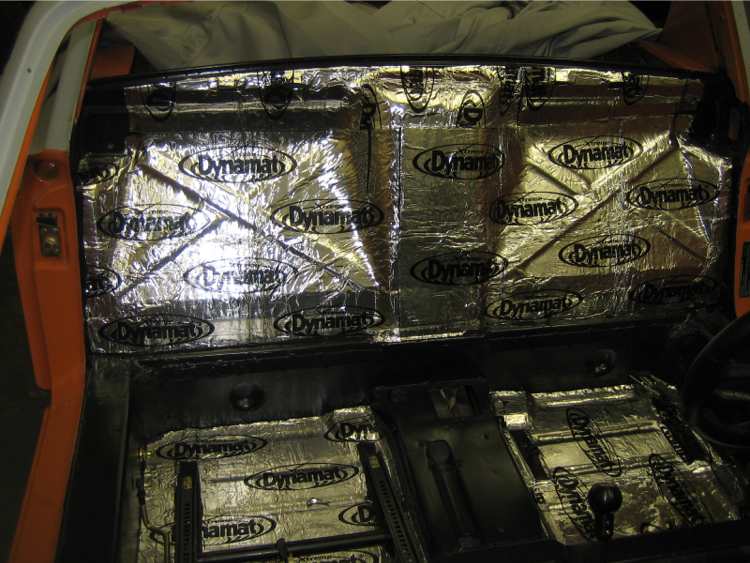
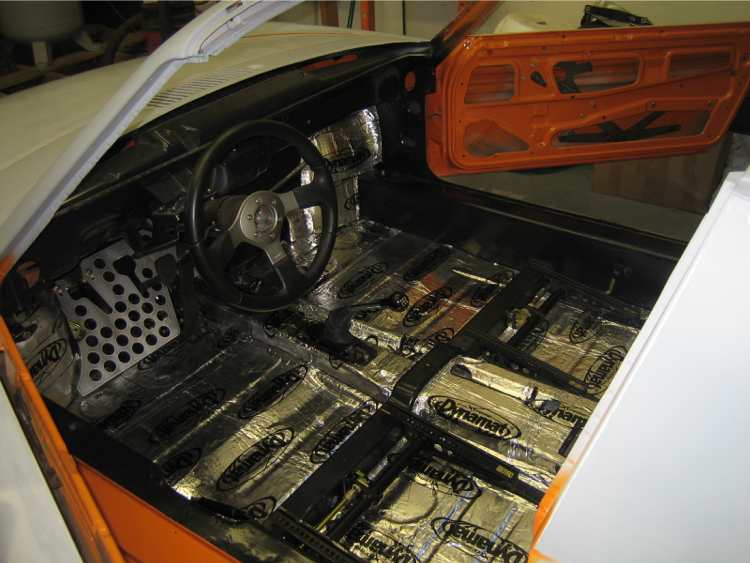
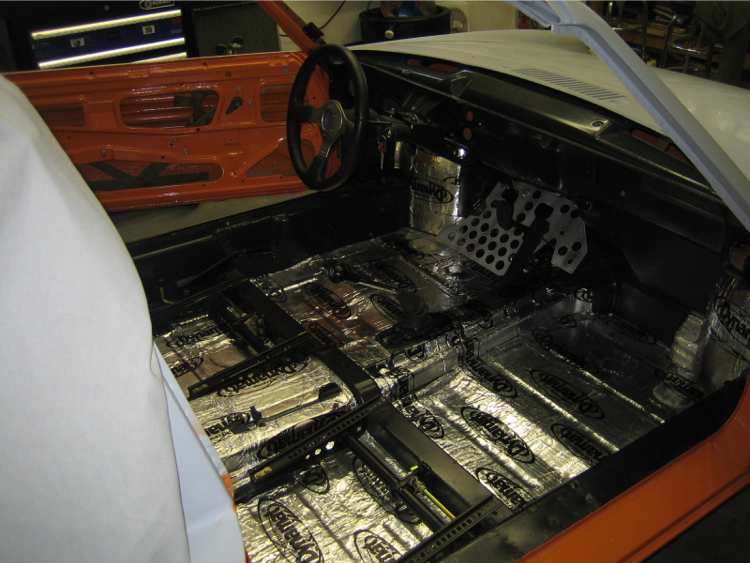
Posted by: Rod Oct 29 2011, 12:28 PM
Good work on the deadening, looks like a great job - BUT you need MLV on top of that dynamite to stop road noise and engine noise getting through. I think from memory that the Dynamat product is called Dynaliner..
Its a vinyl product - which stops sounds dead, dynamat will just stop your panels sounding dead when you tap them rather than ring out..
Posted by: my928s4 Nov 13 2011, 02:15 PM
Finally got the parts I needed to get this done, nothing uncoventional here just following the majority in routing the lines under the car in the recesses along the tunnel.
I will say that with the car on stands this was quite the workout with drilling and rivetting, my arms are still shaking.
I drilled pilot holes from under the car into the front trunk first.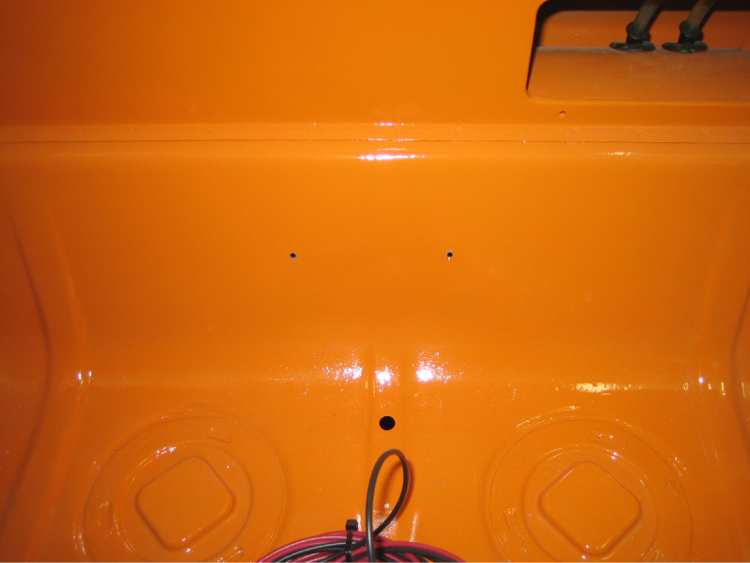
Then used the hole saw from inside the trunk, at Renegade I saw them drill from the underside but decided I preferred it this way as I had more room. Smaller hole was done with cheap Harbor Freight item, you get what you pay for ...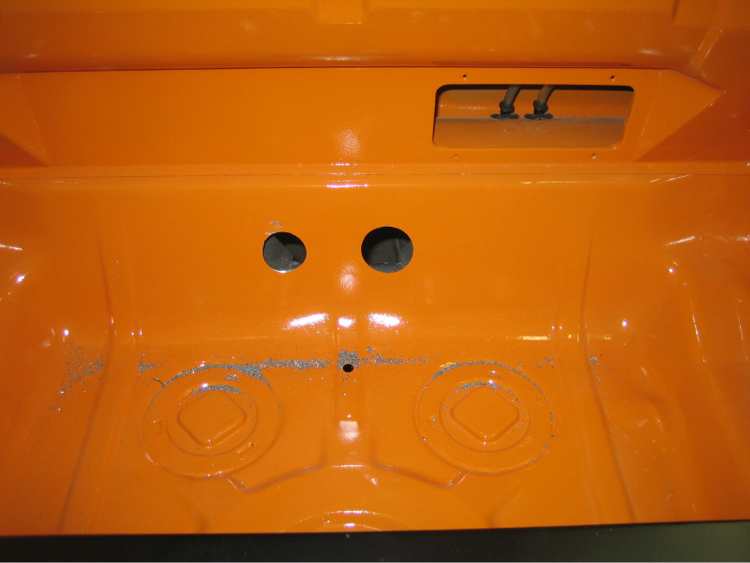
Front trunk looking good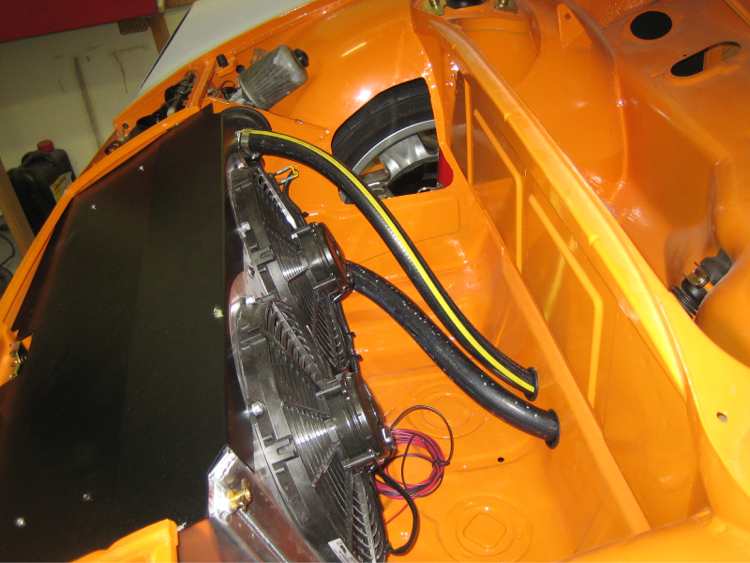
Started at front and then attached the brackets towards the rear, I bought the brackets from McMaster and they were good quality. Due to uneveness of the floor the cheaper brackets from HomeDepot may have been a better option as I needed a vice to modify the brackets.
Used the axle stands to help support the hose.
All done for now, I need one more bracket for each hose at the rear but waiting on engine install for that.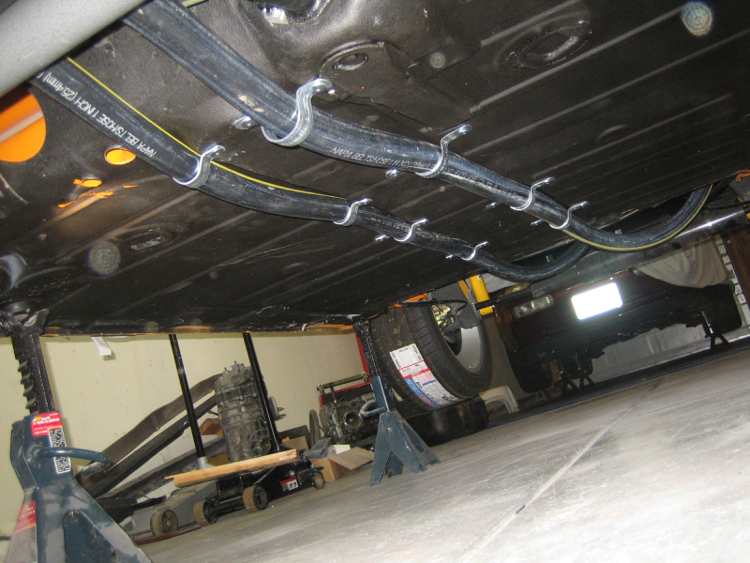
Plenty of extra hose !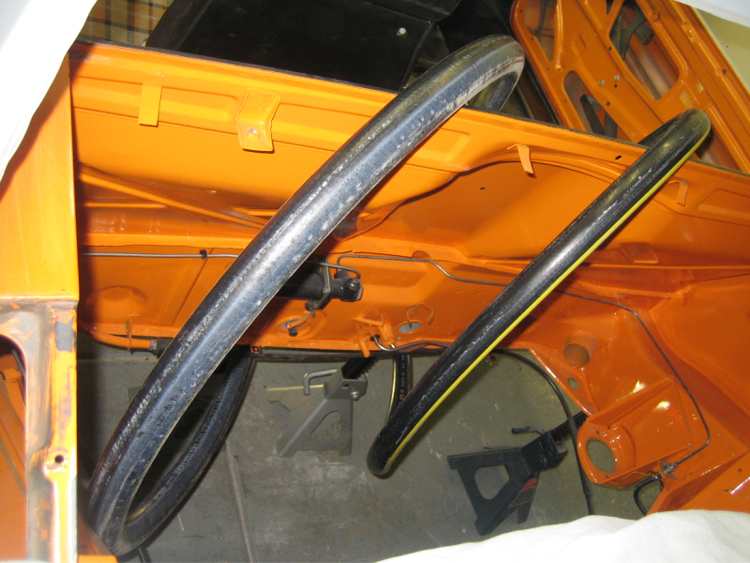
Posted by: rohar Nov 13 2011, 02:35 PM
WOOT! That's a hell of a challenge to clear!
Still pissed you took my color
Posted by: my928s4 Jan 2 2012, 09:25 PM
OK time to make some progress, with some free time yesterday I decided to get back into the swing of things and decided that sooner or later I need to put the wiring harness back in the car. Was reluctant at first because I was unsure about what would end up being redone, well figured that most of the chassis harness was still needed and any additions can always be added later.
Oh, I also modified the metal pan that sits below the rack for the cooling pipes, stripped and is now at the powder coaters.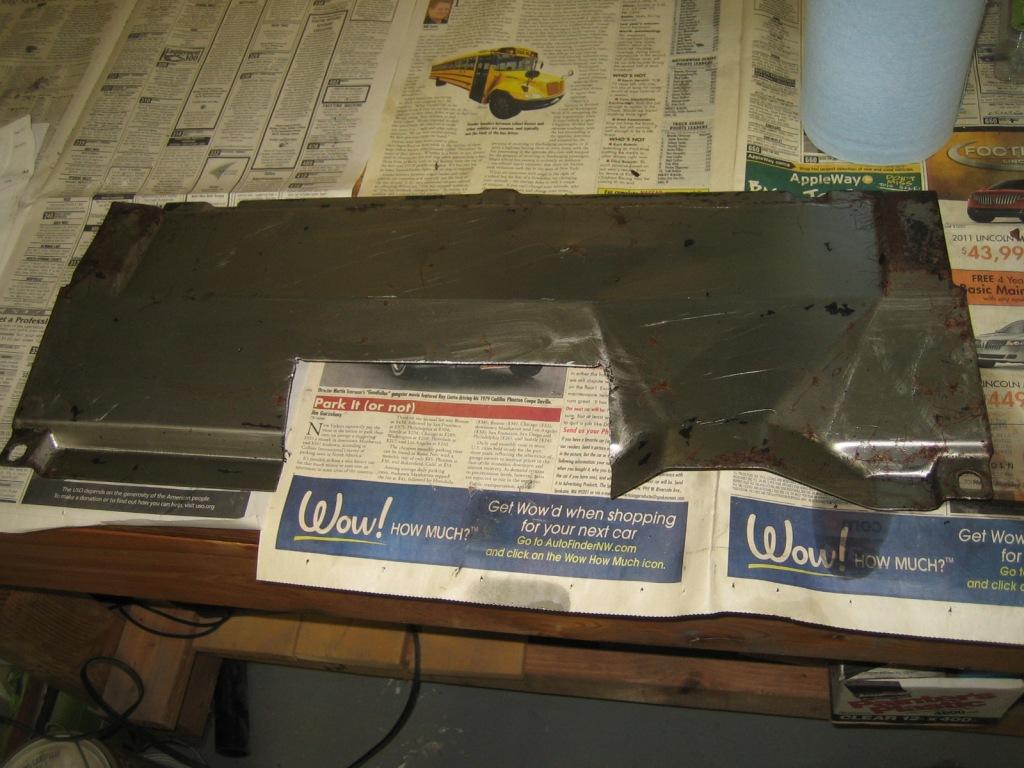
Started by cleaning and making some repairs on the harness from the bulk head forward, most of it was in surprisingly good shape. I need to get some harness fasteners in a few places, glad I took lots of photos when I dis assembled but wish I had taken more .....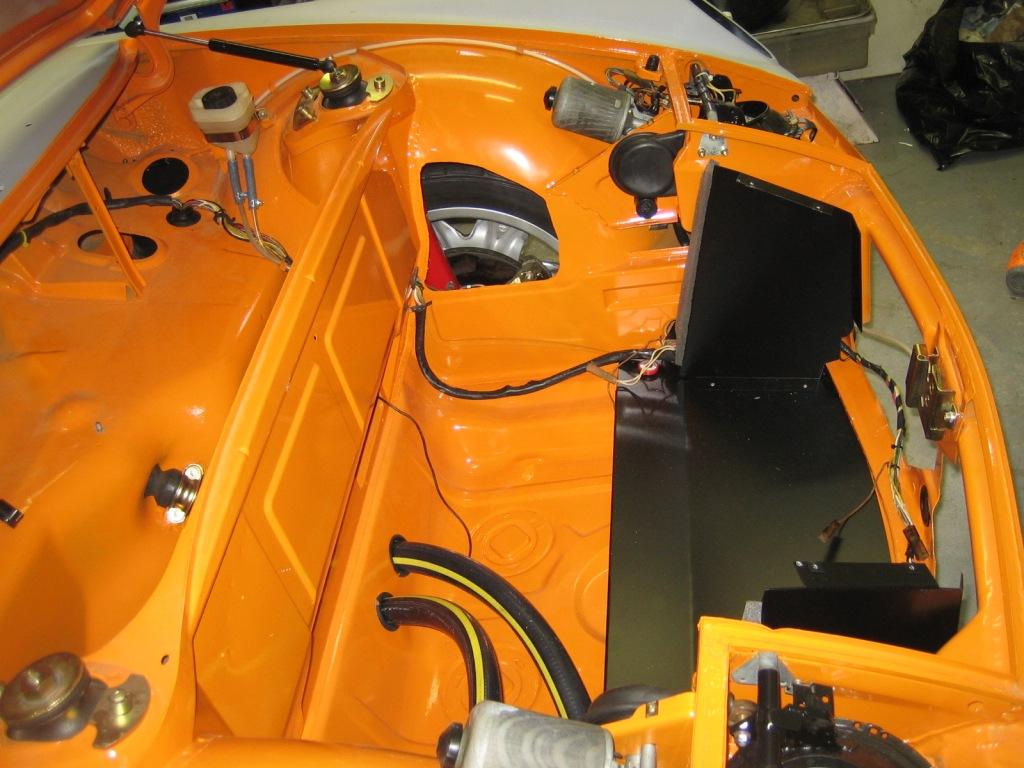
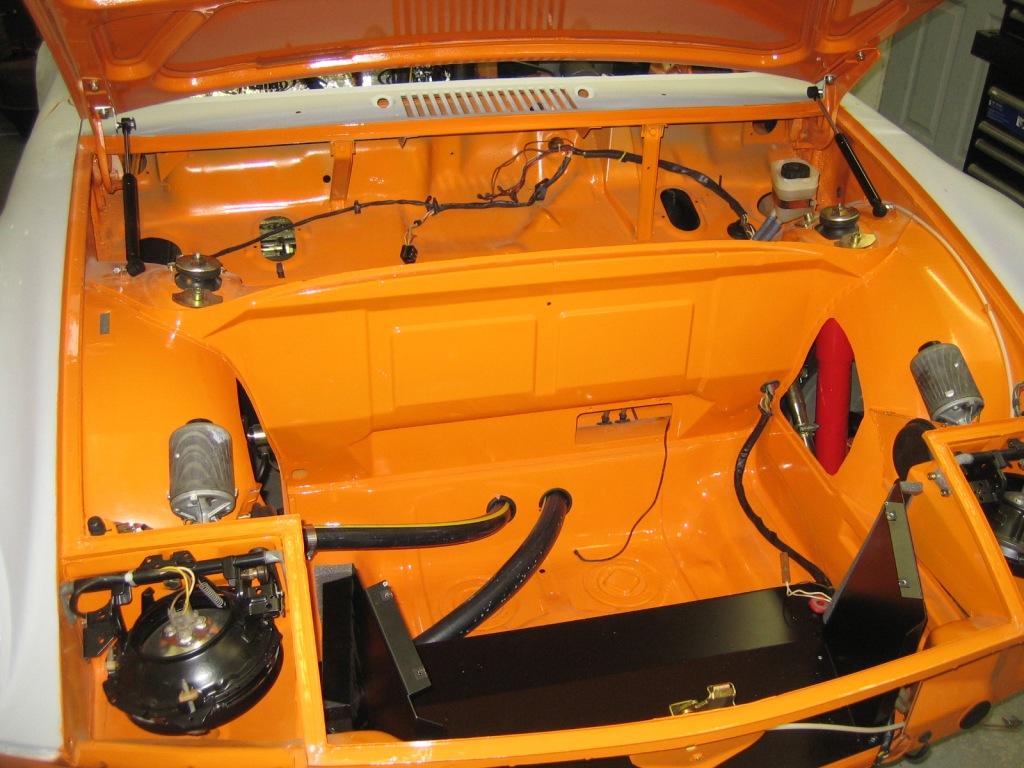
I was going to take a break here but decided to keep going, ordered a new fuse panel from Jwest, the old one is toasty. I pulled some owner added extra wiring that had been added over the years also.
OK need to get the dash back in, hmmm looks like crap so stripped the old vinyl and foam whose adhesive was a bear to remove. Guessing in 1975 they did not worry about ecological goodness in their chemicals. I did discover Hans's signature though.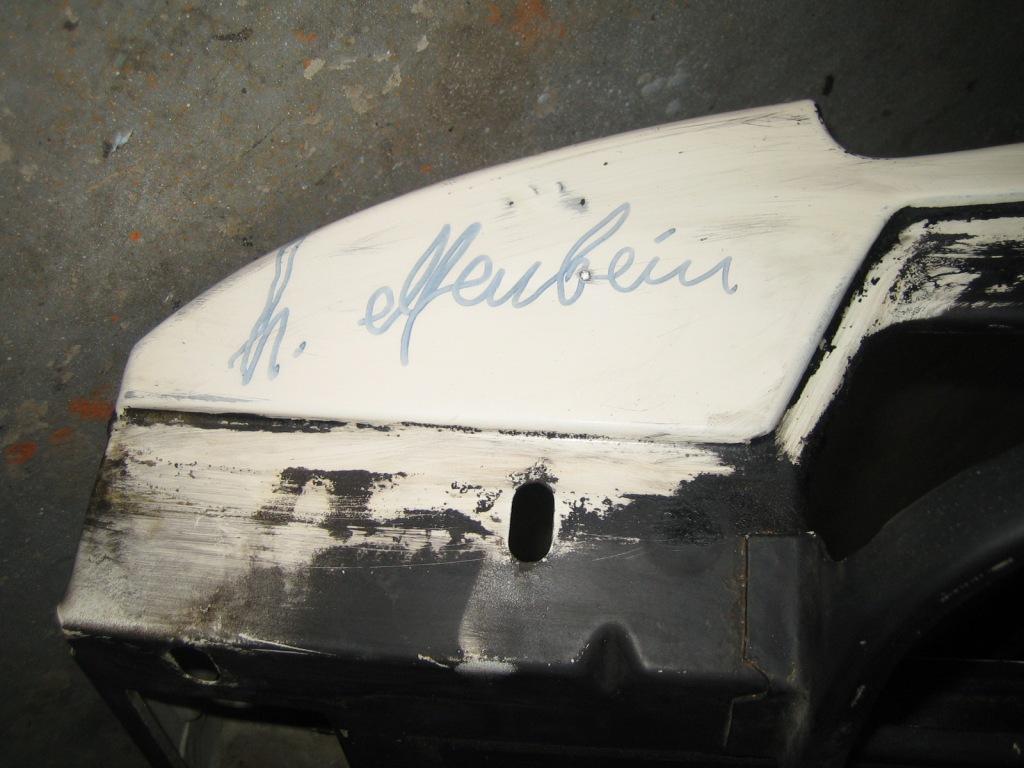
Sanded and prepped for paint.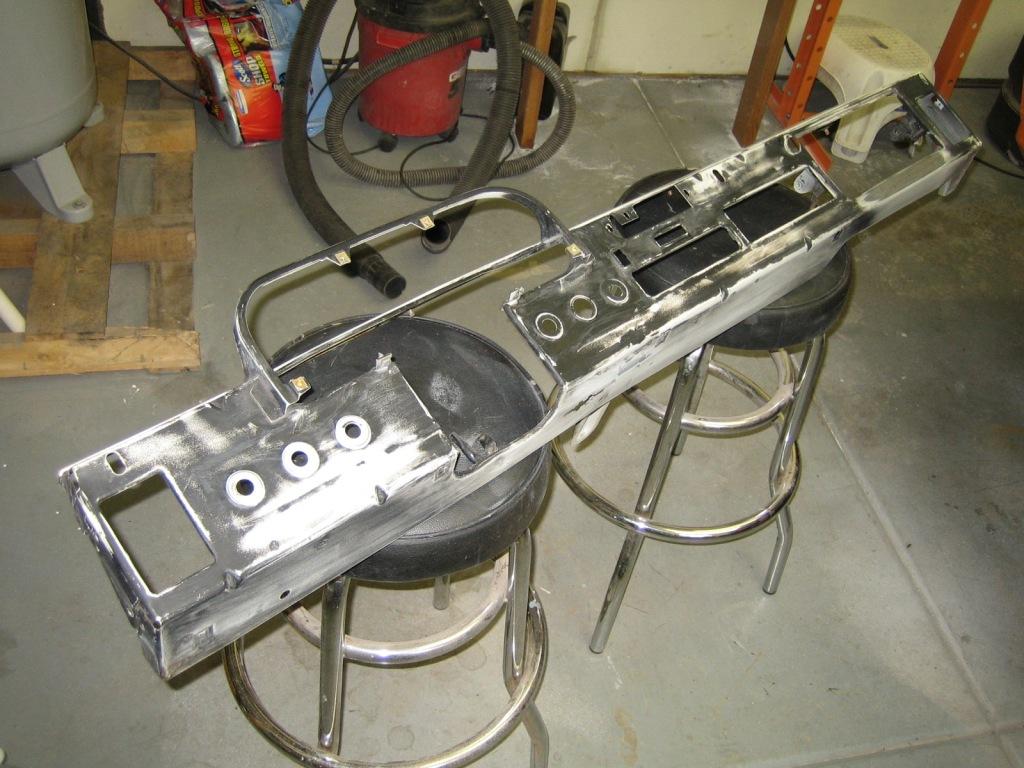
One rattle can later.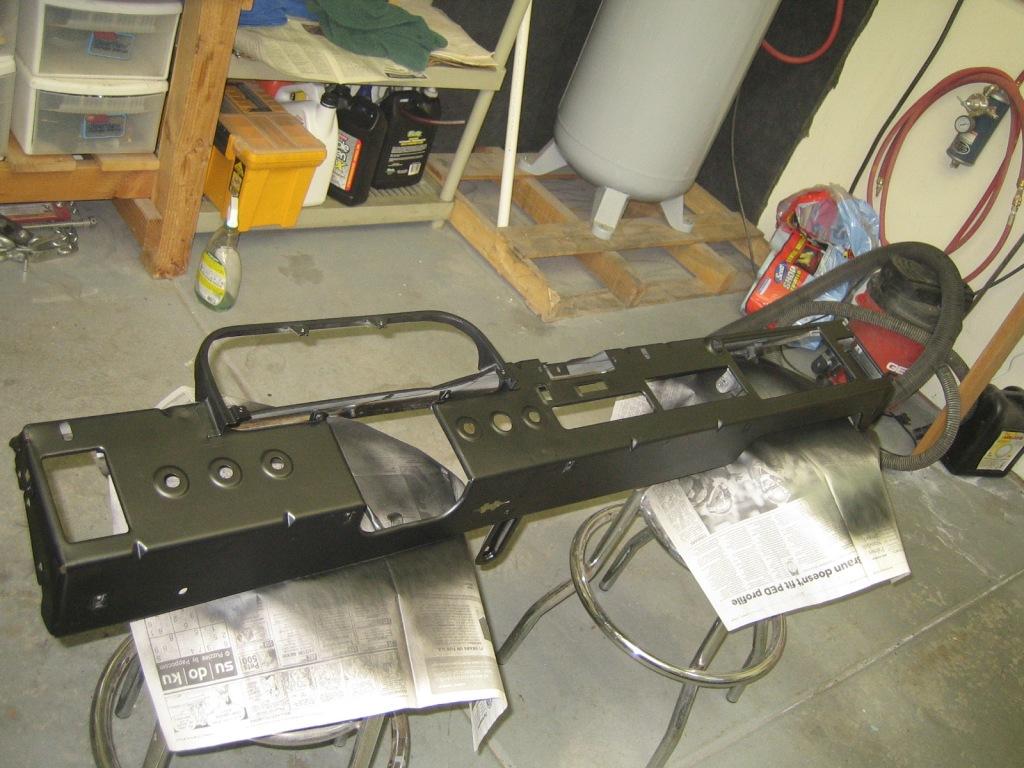
Adding back in the switch's I realized the wires for the front fogs and rear demister were some of the PO wiring, will have to figure that out later. This is where I stopped, also realized this roller came without the engine bay relay panel also.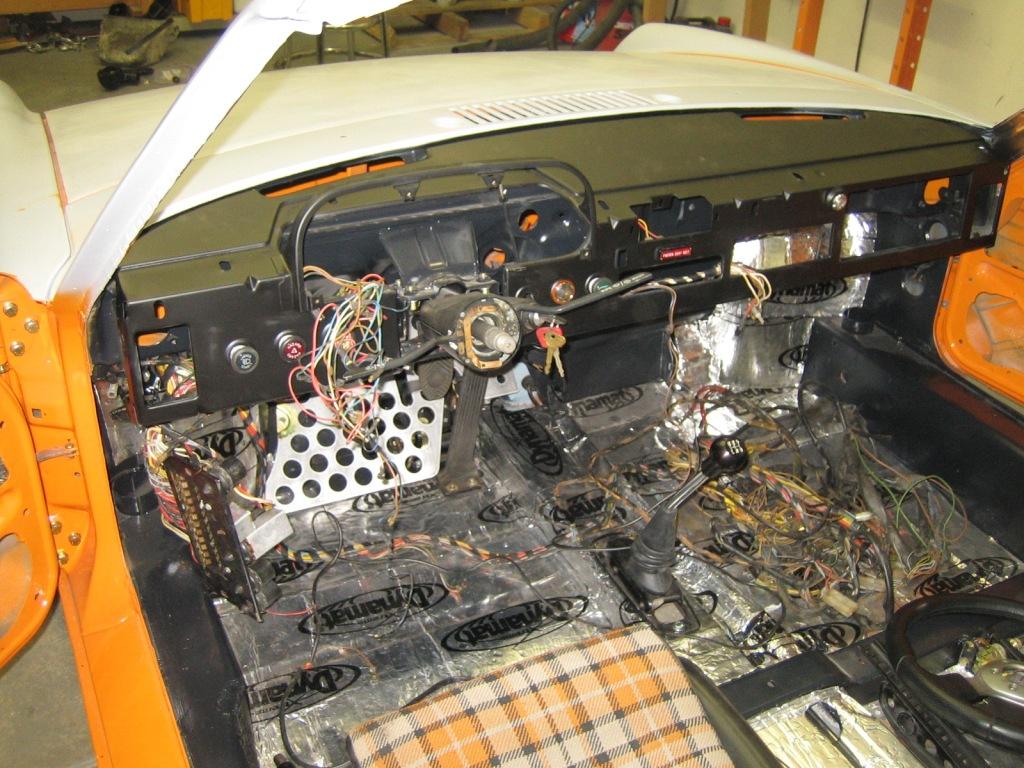
I have the Haynes manual wiring diagram but it is missing plenty of circuits for the 75 MY. A pain when you cannot remember where a couple of wires went.
Posted by: my928s4 Jan 7 2012, 08:56 PM
I ordered a bunch of small parts this week for the electrical but nothing arrived , hopefully next week I can finish it all off. Anyway this had all taken longer than I expected, mainly because when I think I am done I come up with something to add or modify or I re-read the wiring diagram and figure something else out.
Last time I mentioned i did not have the engine bay relay box, well I have now worked out I do not need it so that is good! More on that in a bit.
Spent quite a bit of time tidying the loom up where I could, considering it is nearly 30years old the majority was pretty good. A good example was the tail light wiring in the trunk, cleaned off all the rust stains, removed the tape and put some heat shrink on.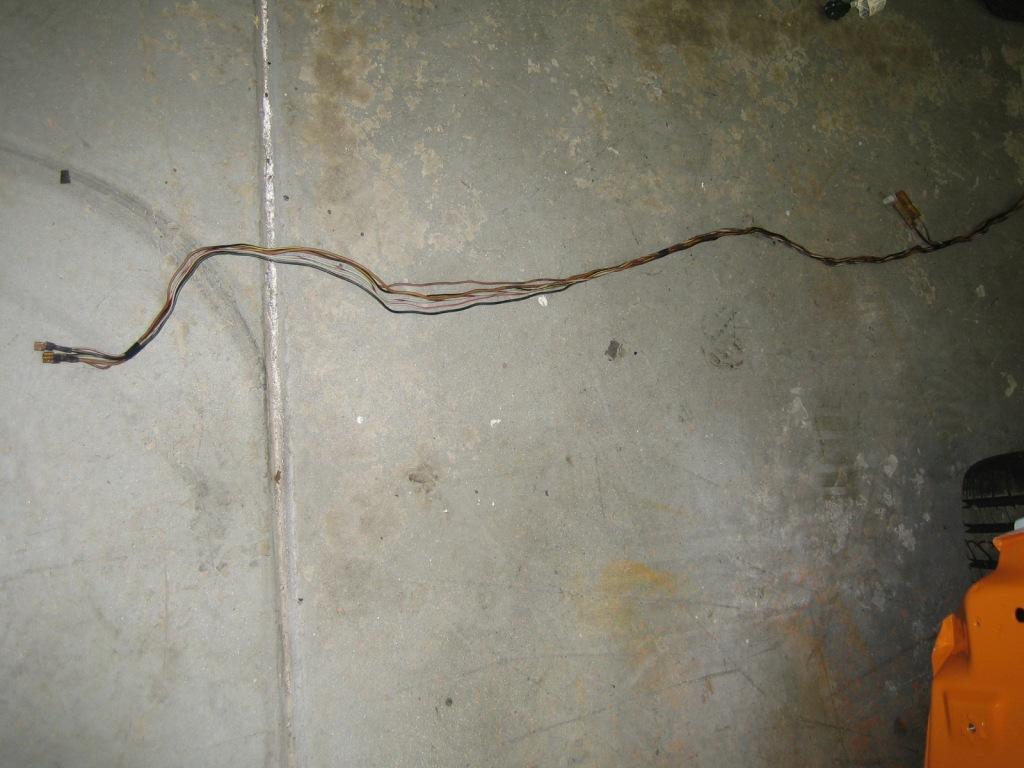
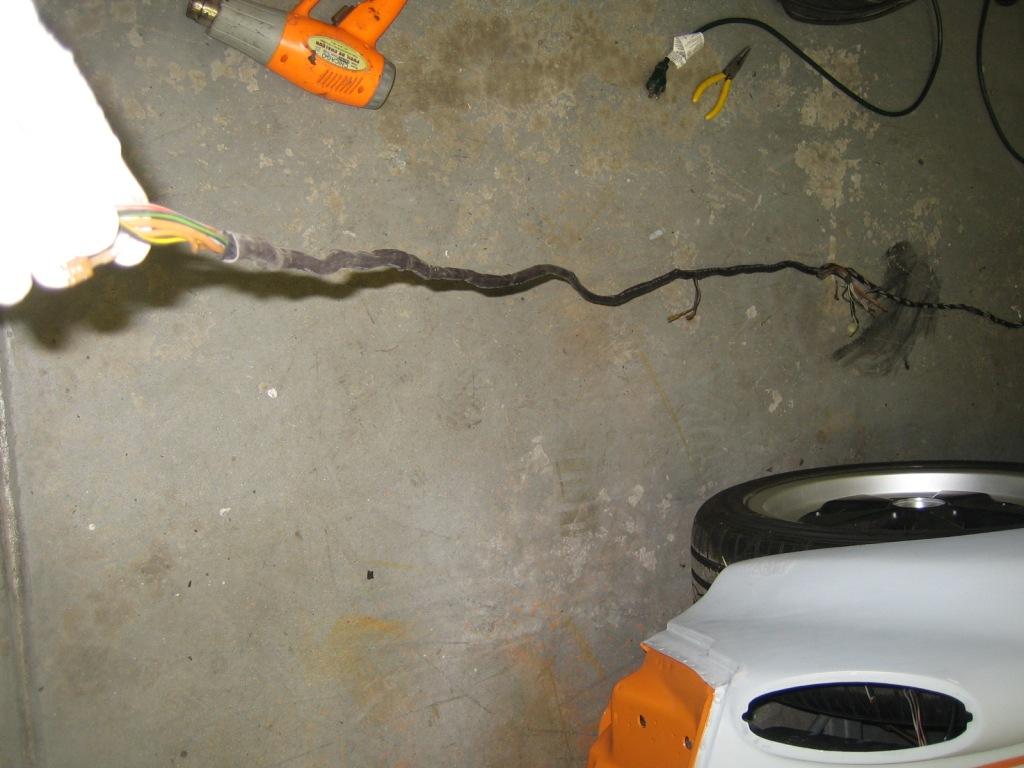
I pulled the harness through to the engine bay and then thought it might be a good idea to feed through a couple more power feeds, one for the radio/amp and another for the cooling fans. Maybe overkill but better than overloading old circuits. Also added one more signal wire, going to get the Quad gauge, with Water Temp, Oil Temp, Volts, Fuel I needed to add a wire for Water. Well I need to pull the harness back through to get the extra wires through, pain but it worked out OK in the end.
Oh, battery is going to be in the rear trunk.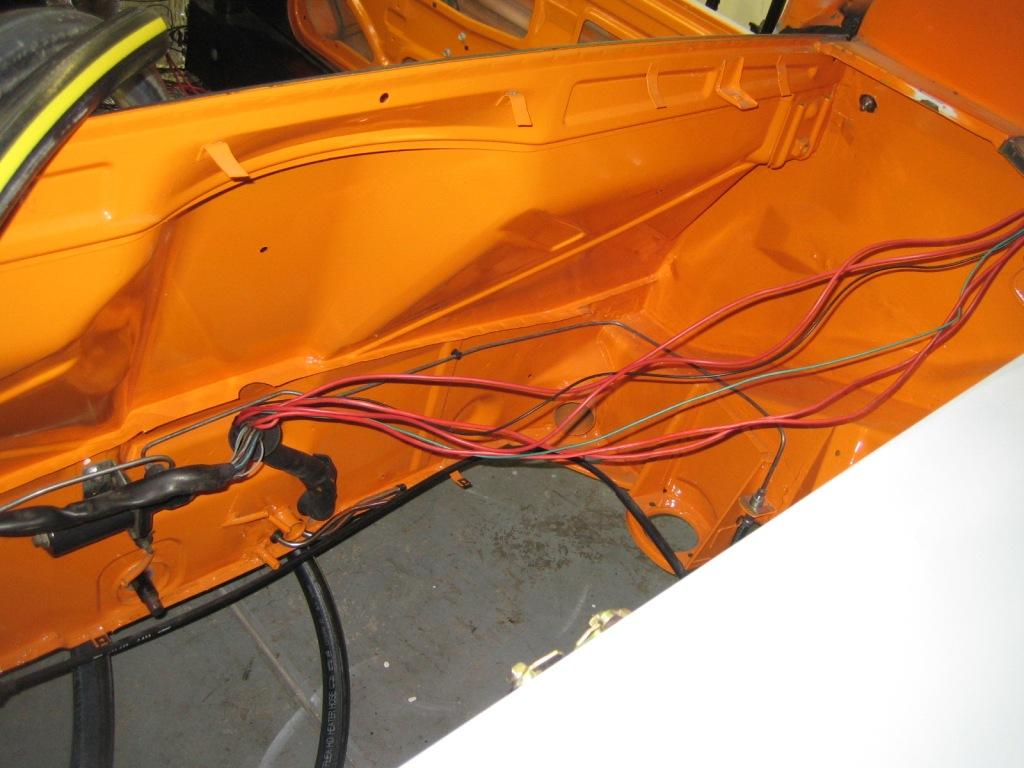
Here is the pile with all the wires removed from the harness, I could have just left them but WYAIT seemed worth tidying up.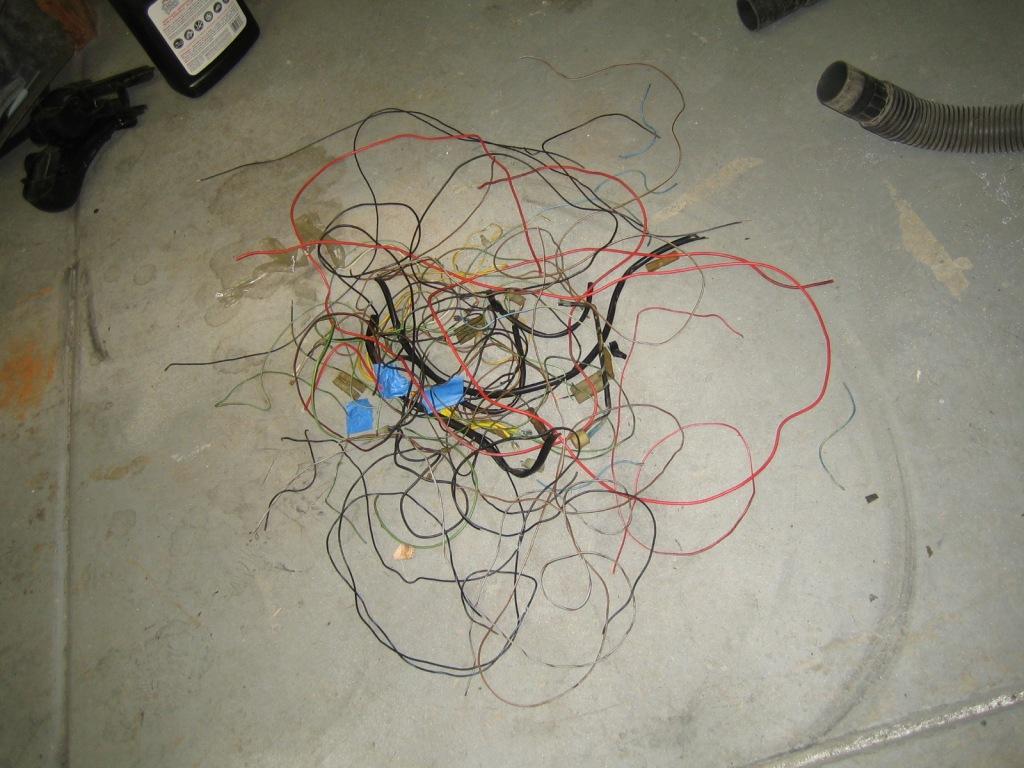
Ditched the rear dome light and going to add this LED lighting under the dash.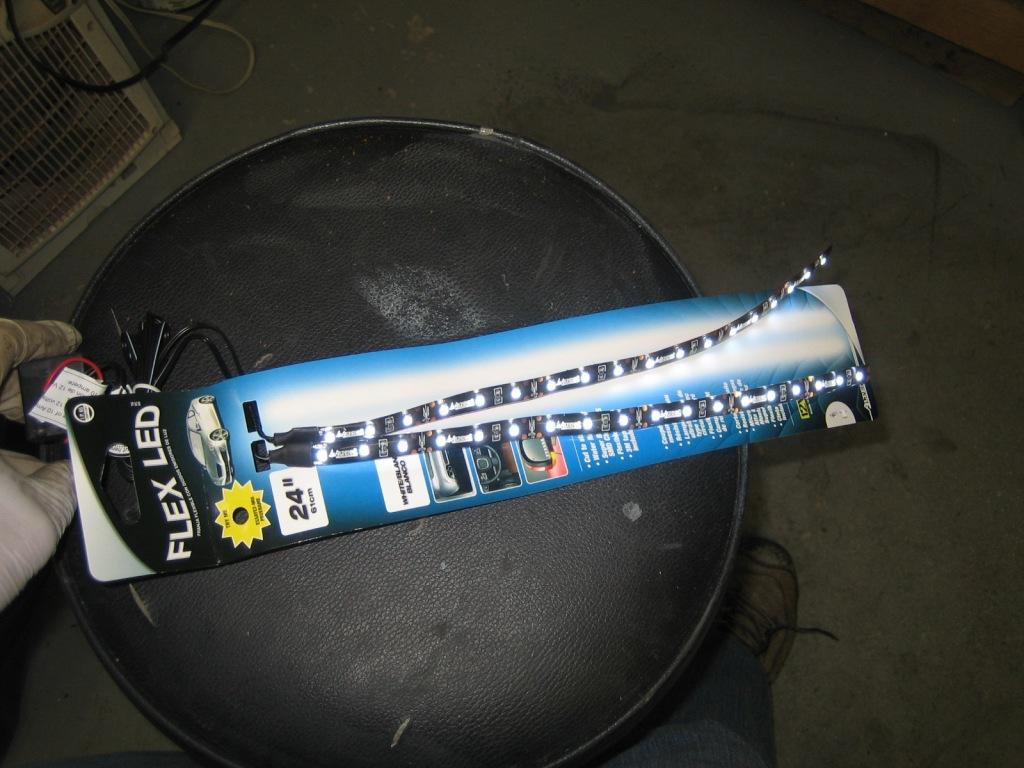
So my old door switches were toast and I threw them out when I dismantled, the handbrake switch was pretty nasty also. Can't be much to replace, bloody hell, $15 and another $5 for the gasket! That was a shock, found some Audi ones that would work then came across these from MAMotorworks, $3.99 that is more like it ...
There were 2 mystery connectors, one in the trunk and another on the floor by the bulkhead, I trawled the wiring diagrams but they don't exist so presume maybe for rear foglamp or something? In the rear there is blue/yellow (signal), black (power) and brown (ground), inside the same wires and also the blue generator charge signal. The Blue/Yellow continues to the dash. I commandeered the blue/yellow for oil temp and removed or bypassed everything else.
Rear Trunk connector: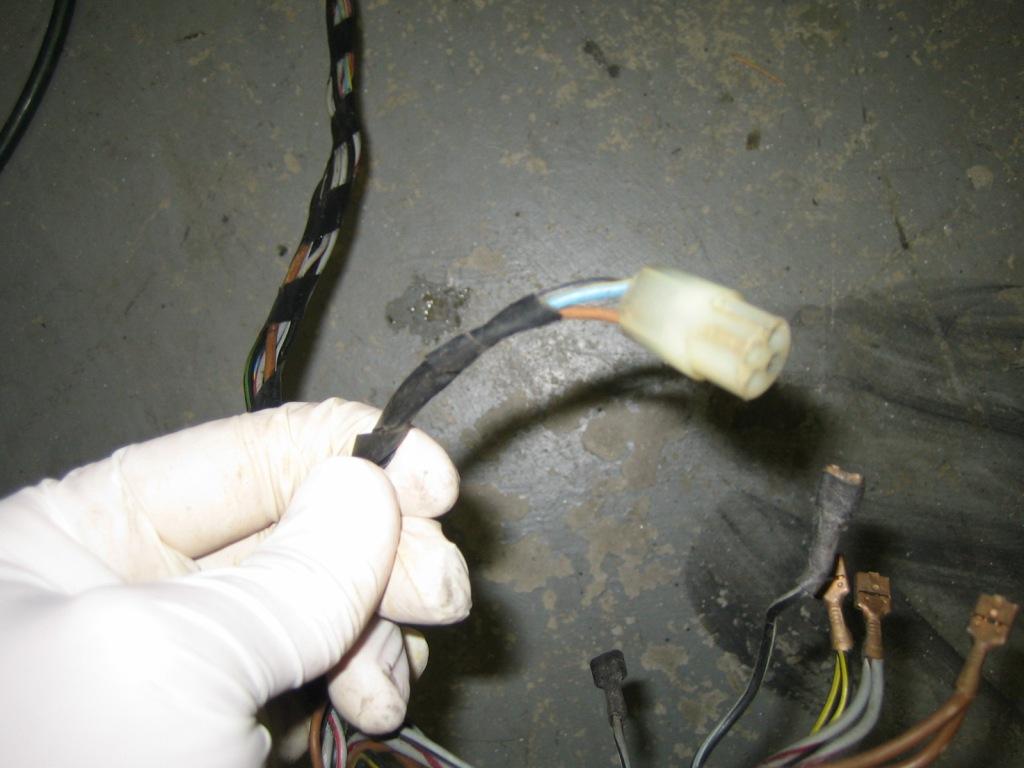
Inside connector: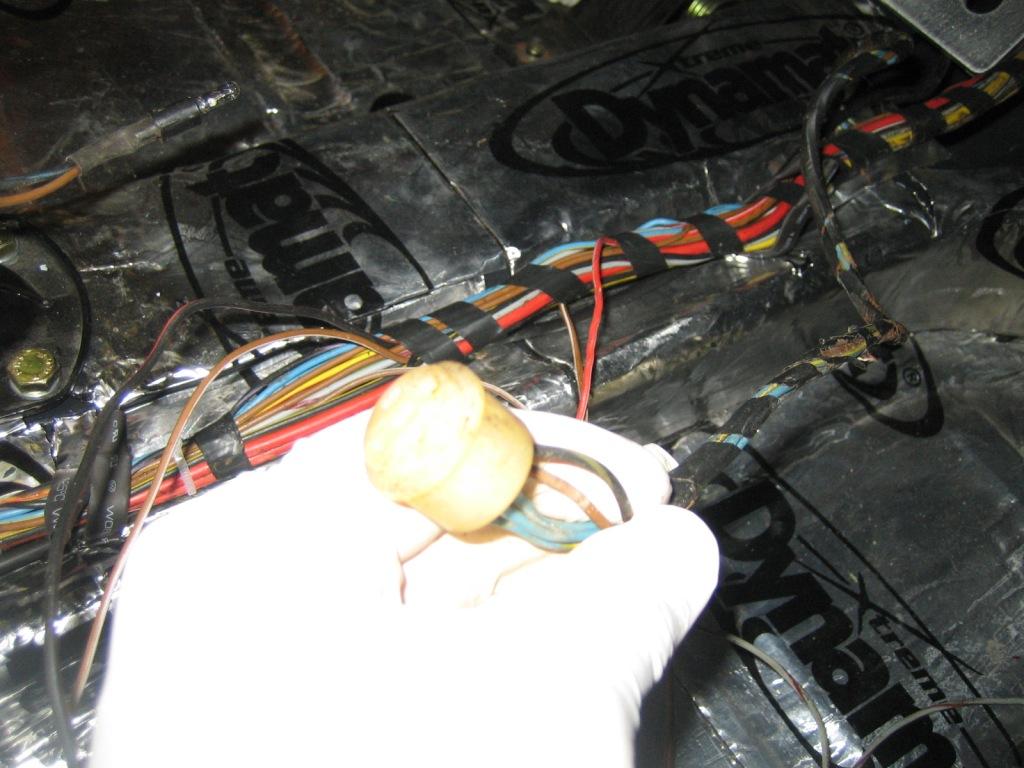
Inside the engine bay where the harness connects to the relay box I removed what was not needed and will need to connectorize the others to the Suby engine harness.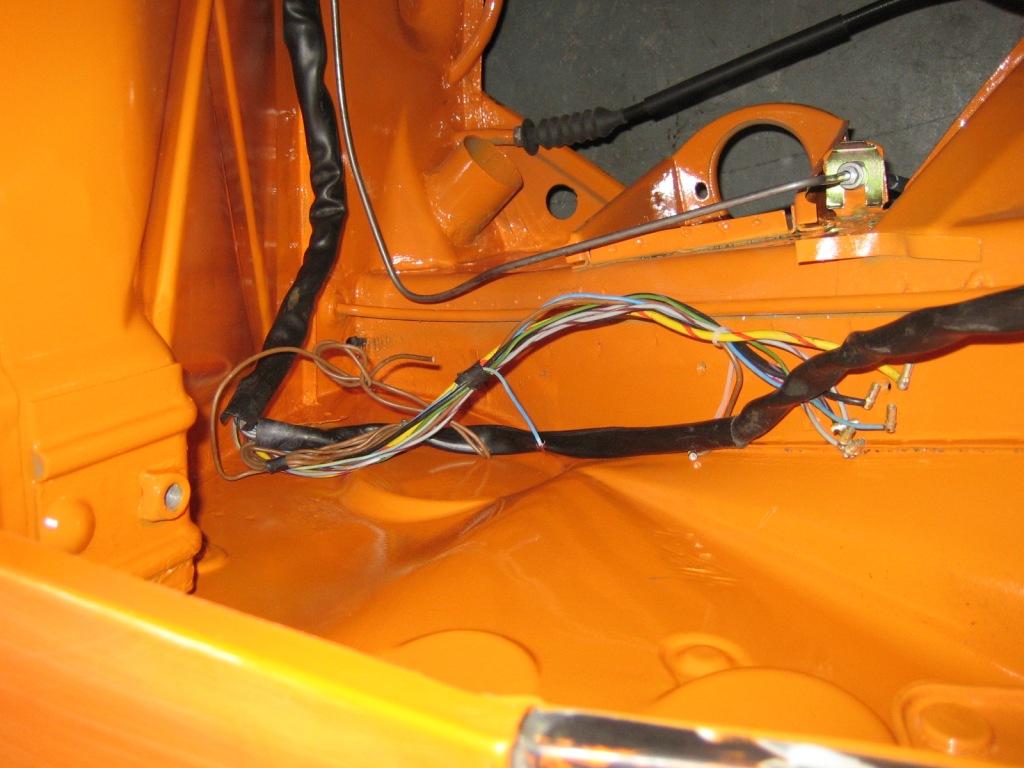
So the interior is coming along nicely, need to tidy up the fuse box area but will wait for the new one to arrive. Wires on the seat are for
- 1 Fuel Pump, ECU will be under the passenger seat
- 2 Rear Defog (I don't need it but what the hell), will put relay under passenger seat
- 3 Seatbelt light, will wire this up to drivers belt
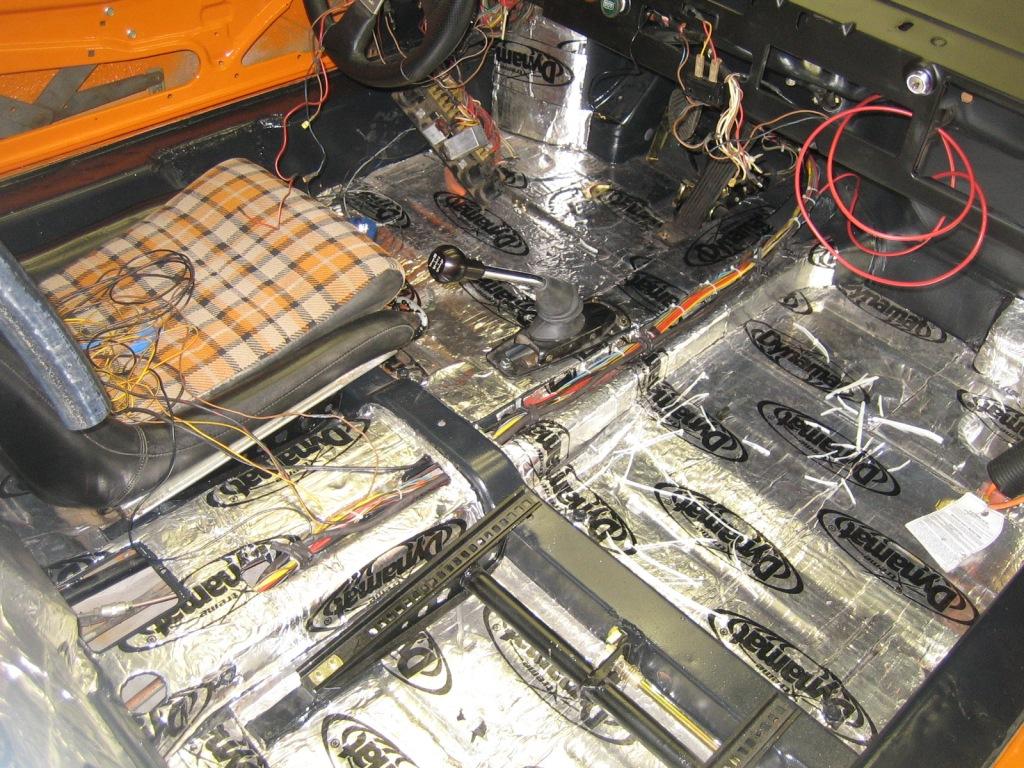
Posted by: rohar Jan 7 2012, 09:27 PM
Yay, more progress. I'm pulling the entire harness out off mine and going aftermarket for most of it. If you need to canibalize any connectors, let me know. I'm in the neighborhood. I'll pm my phone #.
Posted by: Lennies914 Jan 7 2012, 09:55 PM
The one mystery connector in the trunk was for the 02 sensor.
Posted by: OllieG Jan 12 2012, 03:30 AM
This is a great thread...really useful for novices like me, thanks alot! I'm in the early stages of a 6cyl resto/conversion, about to strip the underside, and will also be welding flares on shortly.
The epoxy primer you used for the underside - is that a 2pk epoxy? If so, what breathing mask did you use? I've read for 2pk paints you really need an air fed respirator..what do you think?
You said in an earlier post that you made a mistake with one of the flares by fixing the bottoms first and working up from both sides - what went wrong when you did it this way? How did you do it in the end so it worked out...?
Cheers.
Posted by: my928s4 Jan 12 2012, 08:29 AM
The one mystery connector in the trunk was for the 02 sensor.
That makes sense and then the interior connector was for the O2 counter.
Posted by: my928s4 Jan 12 2012, 08:36 AM
This is a great thread...really useful for novices like me, thanks alot! I'm in the early stages of a 6cyl resto/conversion, about to strip the underside, and will also be welding flares on shortly.
The epoxy primer you used for the underside - is that a 2pk epoxy? If so, what breathing mask did you use? I've read for 2pk paints you really need an air fed respirator..what do you think?
You said in an earlier post that you made a mistake with one of the flares by fixing the bottoms first and working up from both sides - what went wrong when you did it this way? How did you do it in the end so it worked out...?
Cheers.

Glad you found the thread useful, there is a lot of data here which has proved invaluable to me and if I can do my bit to help others then that is great.
Yes Epoxy is 2K, the one from Eastwood which I used on the underside contained no iscyanates but even so I used a respirator although not an air fed.
By starting welding at the bottom of the flares I ended up with excess material at the top, not a good situation. You should check out other posts on flare installation also, lots of good info out there.
Posted by: my928s4 Jan 12 2012, 08:46 AM
I have been scouring my storage bins for parts not seen for a couple of years, I want to get as much of the electrical components hooked up for testing even if this is temporary. Anyway dug out the fresh air fan assembly, full of old crud and was stiff to turn by hand, thought the motor spindle was bent ....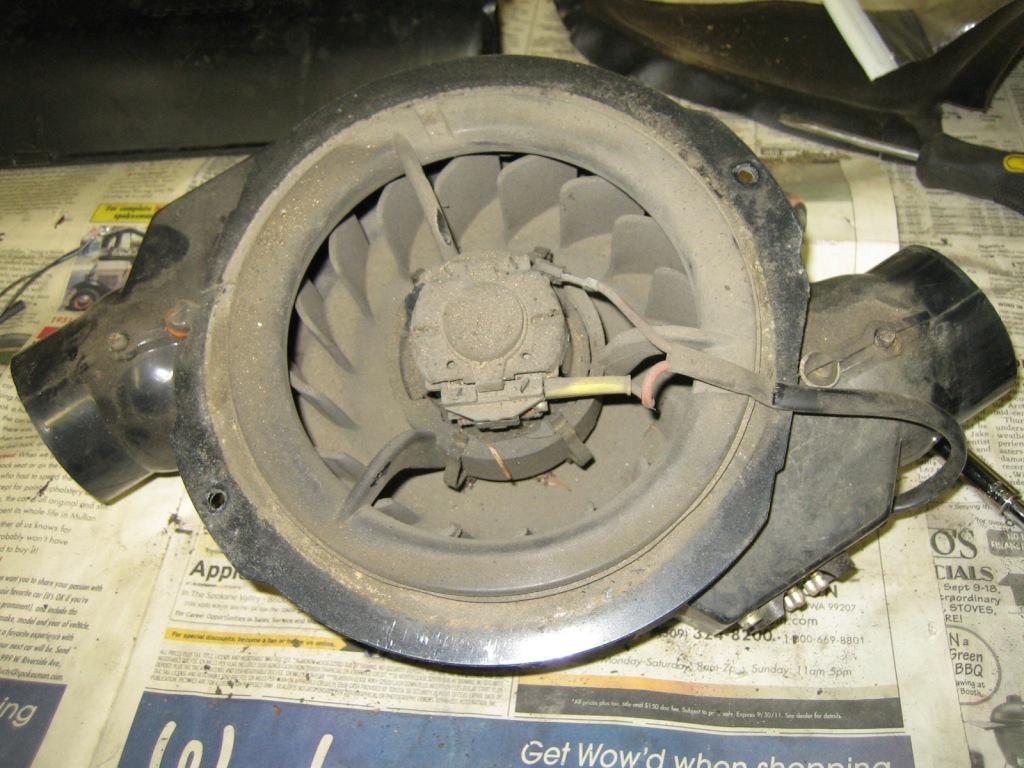
but turned out this plastic part is trashed, looks like I need to look for a new assembly.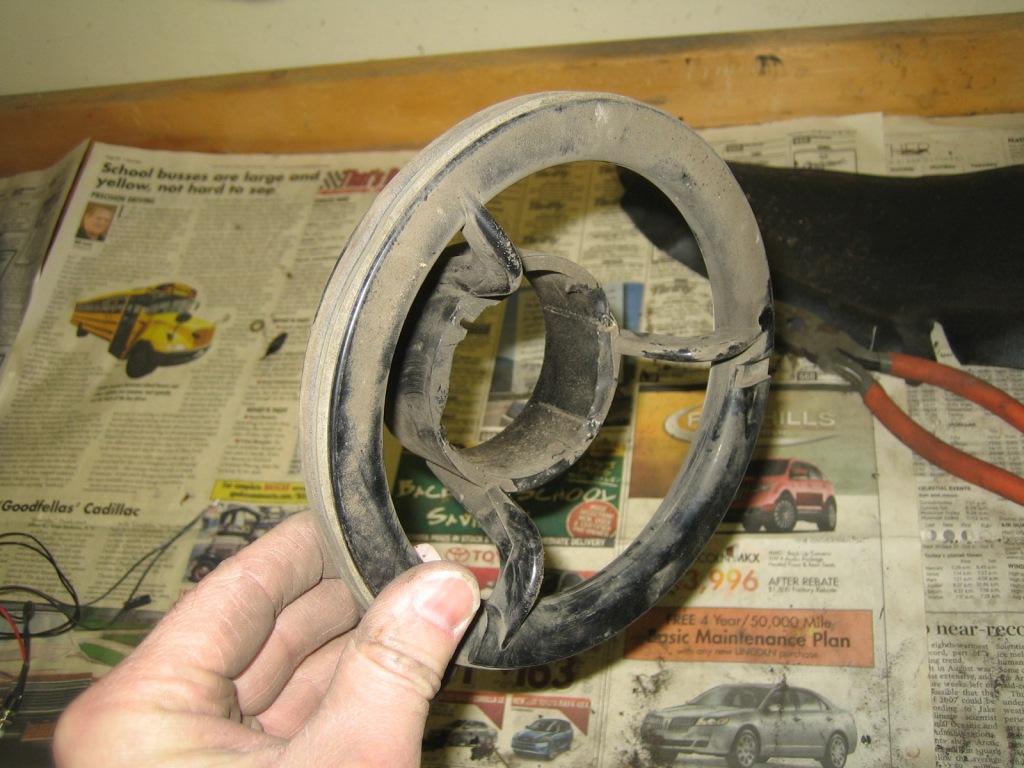
Put the instruments back in, most of the bulbs were toast, found most locally but will need to order some. Intend to get these rebuilt but they will do for now.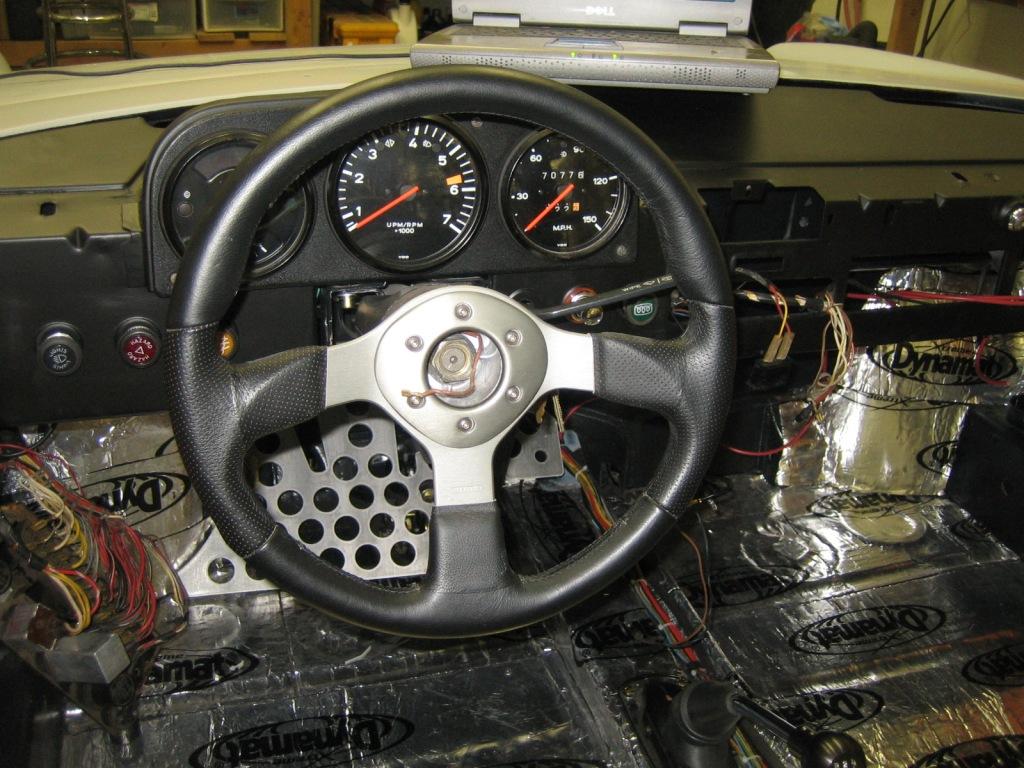
Got my Jwest fuse panel!!, despite the post office bet attempt to lose it. Wires are tight in this area and took some manipulation to get it all in order. I only needed one piggy back connector for the rear defog.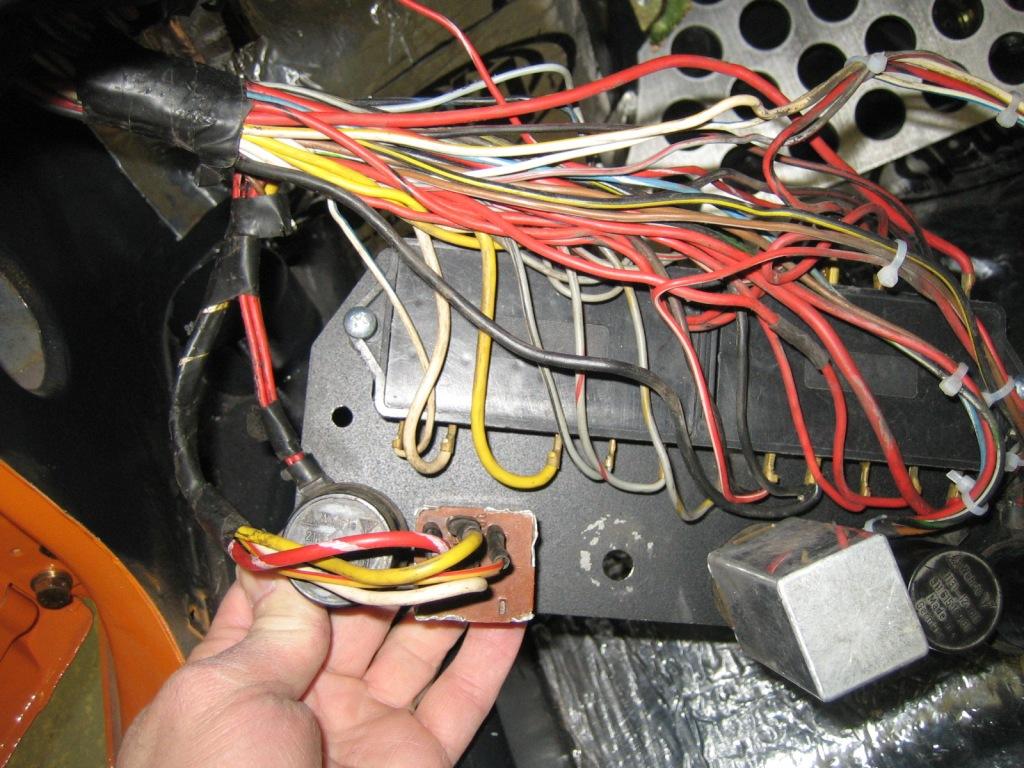
What eventually held up the panel from going in was this relay, it is not the right one and sits upright. Needs to lie on its side.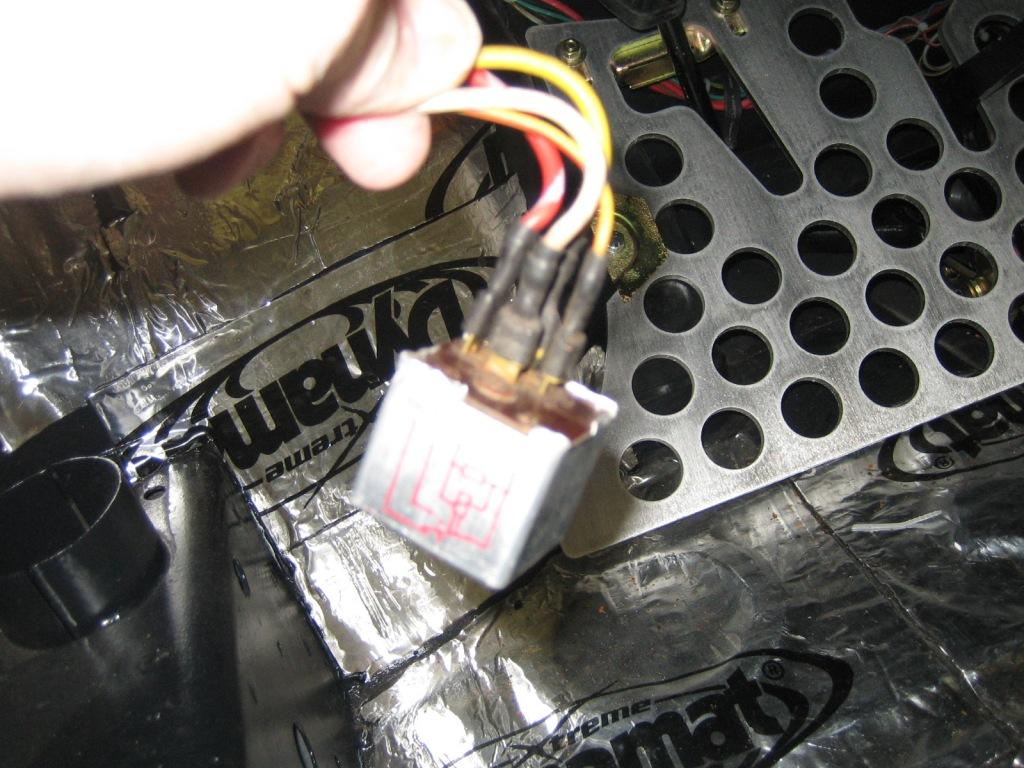
All in and looking good.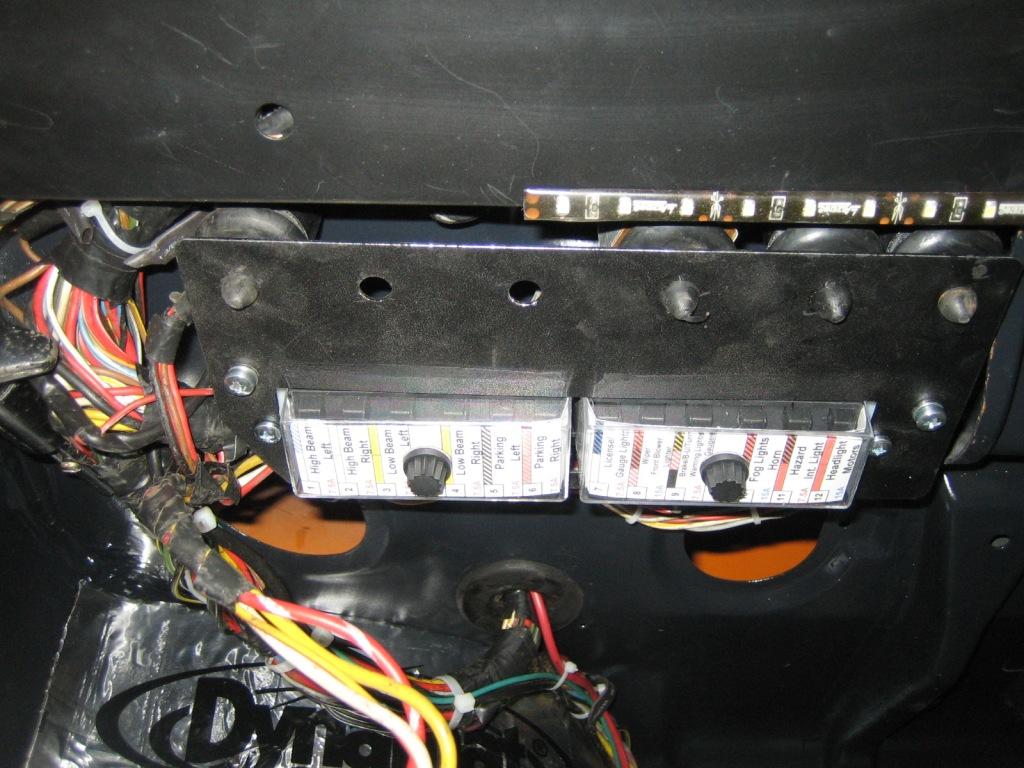
Posted by: sawtooth Jan 12 2012, 10:00 AM
Wow Chris, nice project. Not sure how I missed this one, fantastic work. Love your decisions to go flared and suby, doesn't get any better.
Posted by: OU8AVW Jan 12 2012, 02:39 PM
Just got my stoke on.....
Thanks
Mike-
Posted by: my928s4 Jan 15 2012, 06:11 PM
Got the undertray back from the powder coaters, managed to re-use my old seals for now with some extra added around the cut out for the coolant pipes.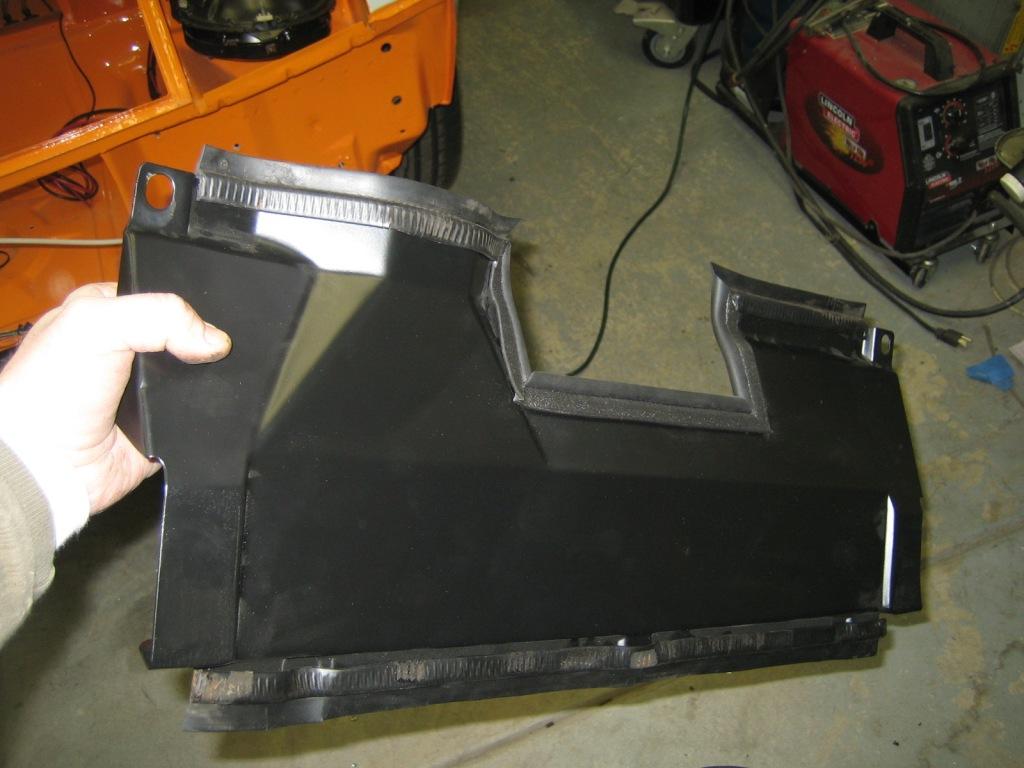
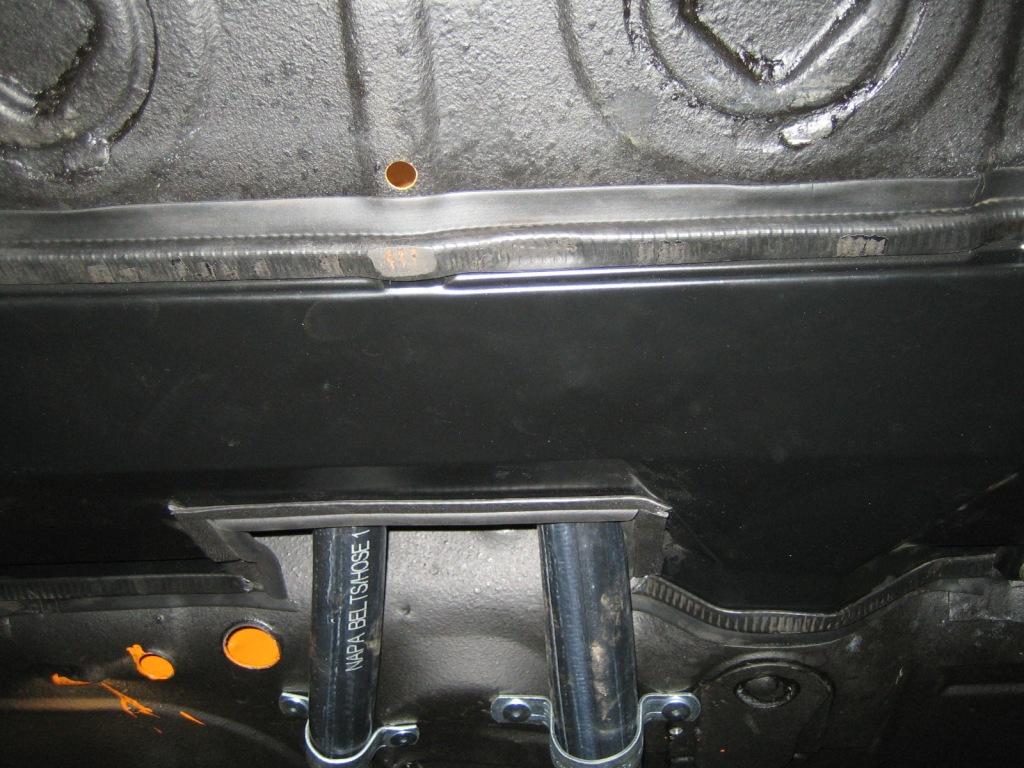
Decided to tidy up the wiring in the front trunk and be done with it, I bought these tie-wraps to hold the loom where the old metal clips had broken off. Worked well, will use these in the engine bay also.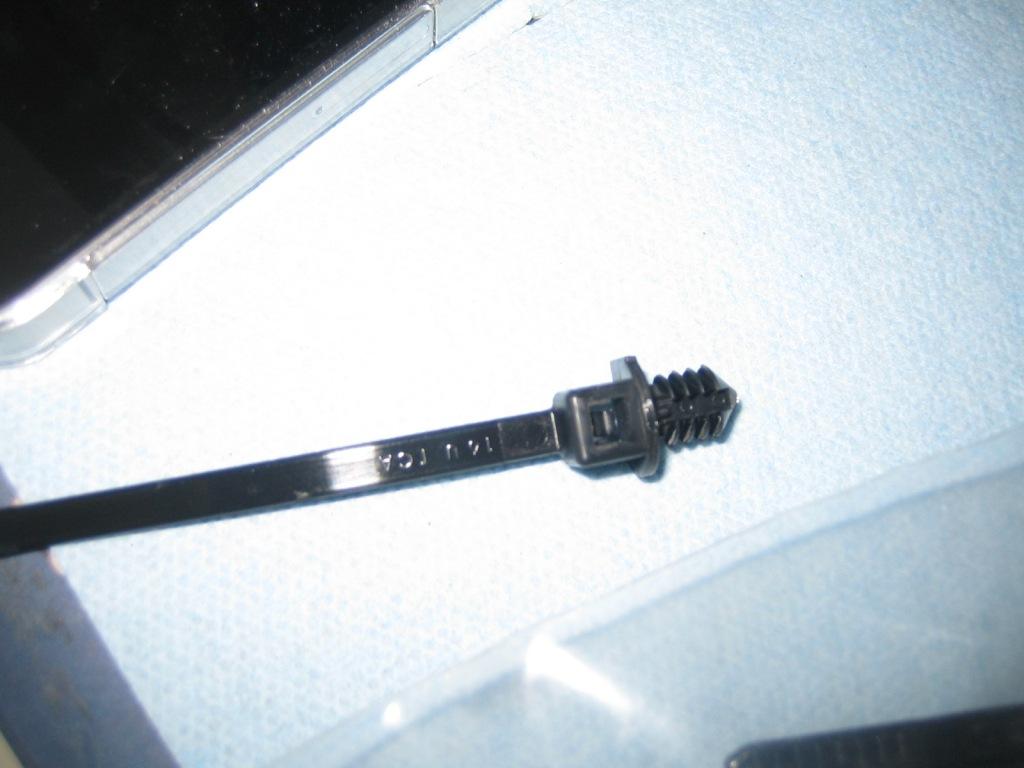
Had to remove the radiator (again) but hopefully it can stay in for a while now. Pretty pleased with how the wiring turned out, just need to add a connector for the radiator fans.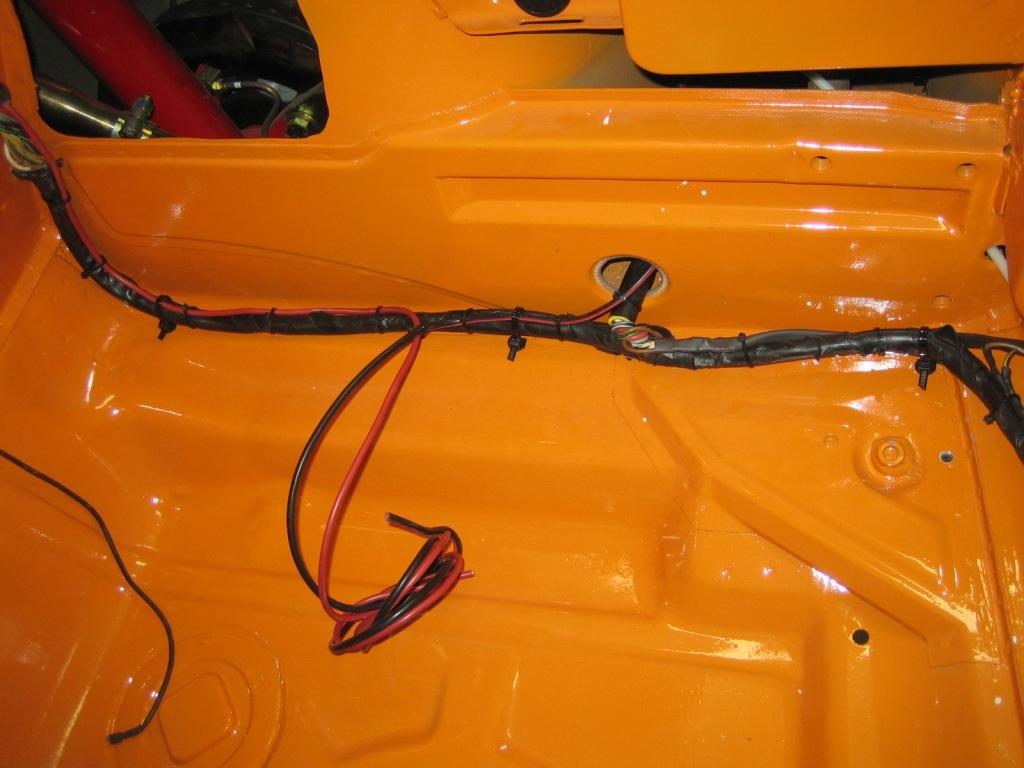
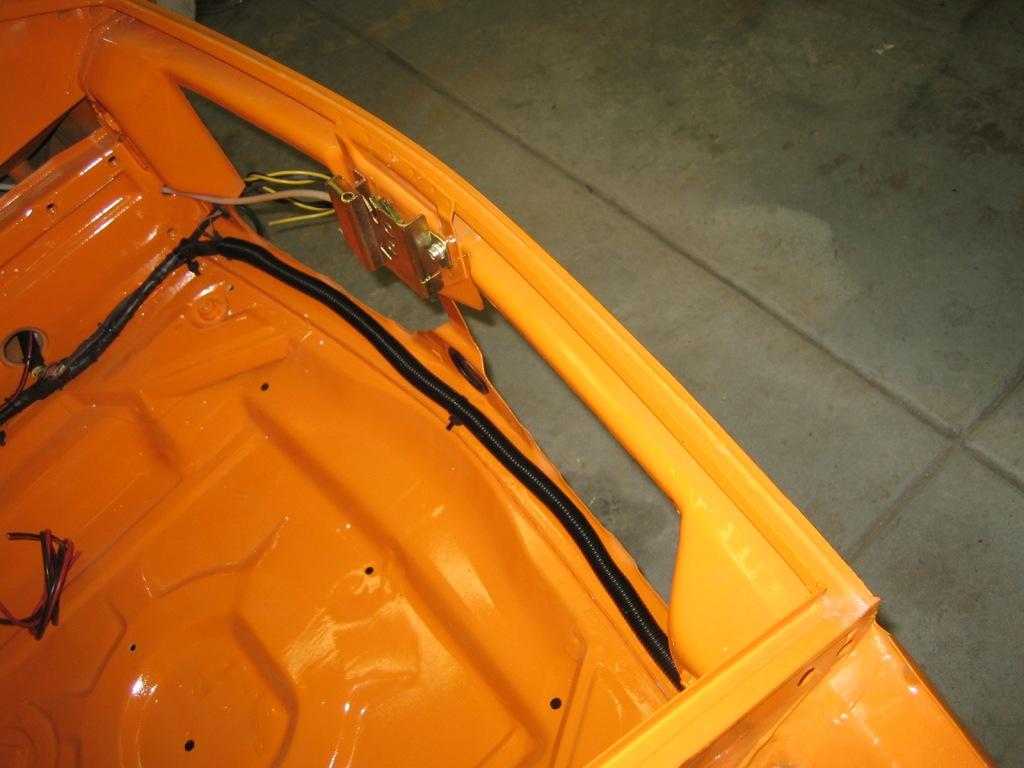
Added this just to show the wiring for the driving lights.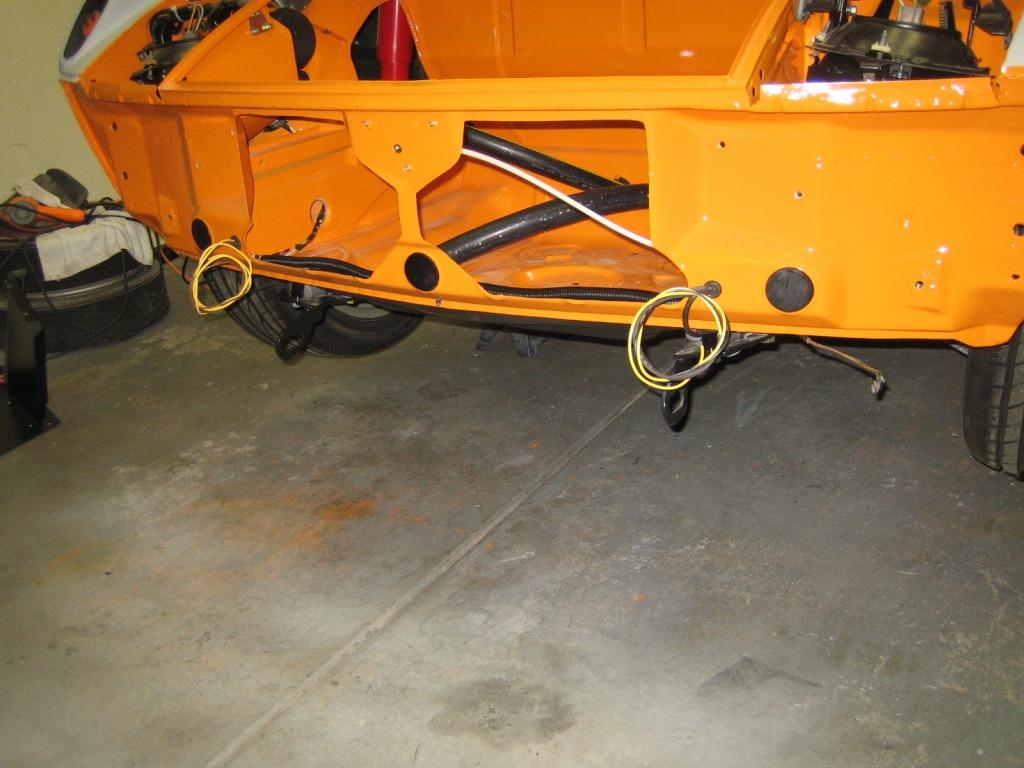
Well this is where I went backwards, have not been happy with the brackets I added for the hood shocks for a while and with my head in the trunk recently I finally had enough. They really were not up to the task, so drilled out the welds and removed, will need to touch up the paint at some point but not today.
Here you can see my first attempt at a replacement, thicker metal but equally not up to the task. Served as a good template for the next candidate though.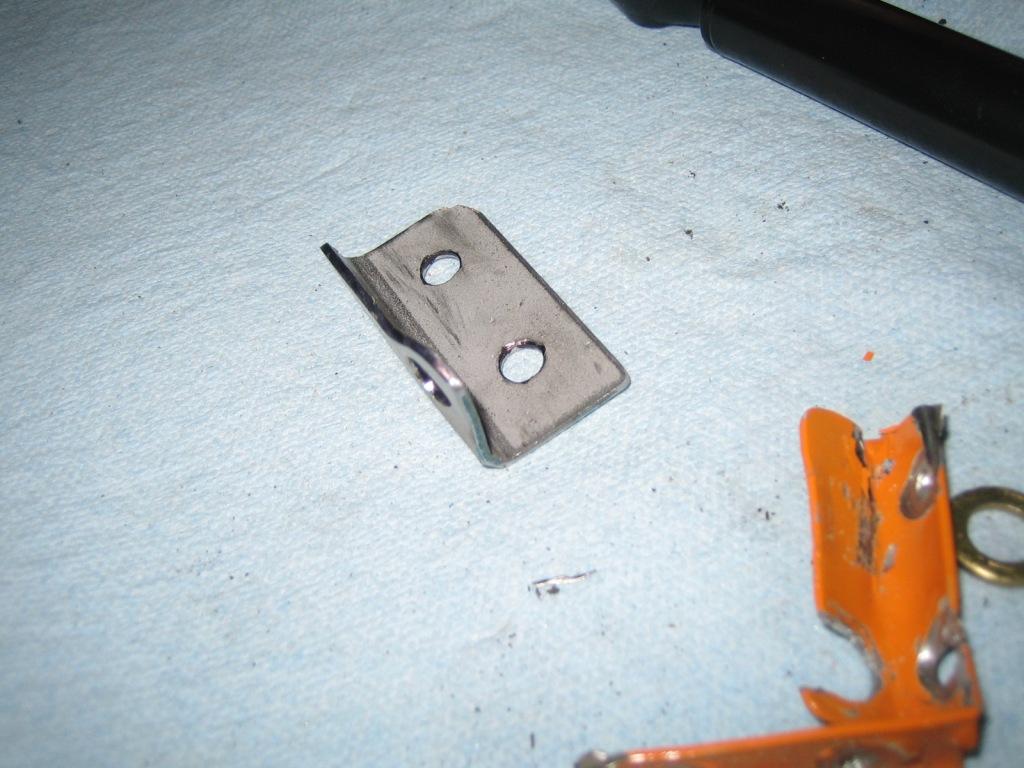
Well this angle iron ought to do the job then, you can see my original wimpy brackets next to it.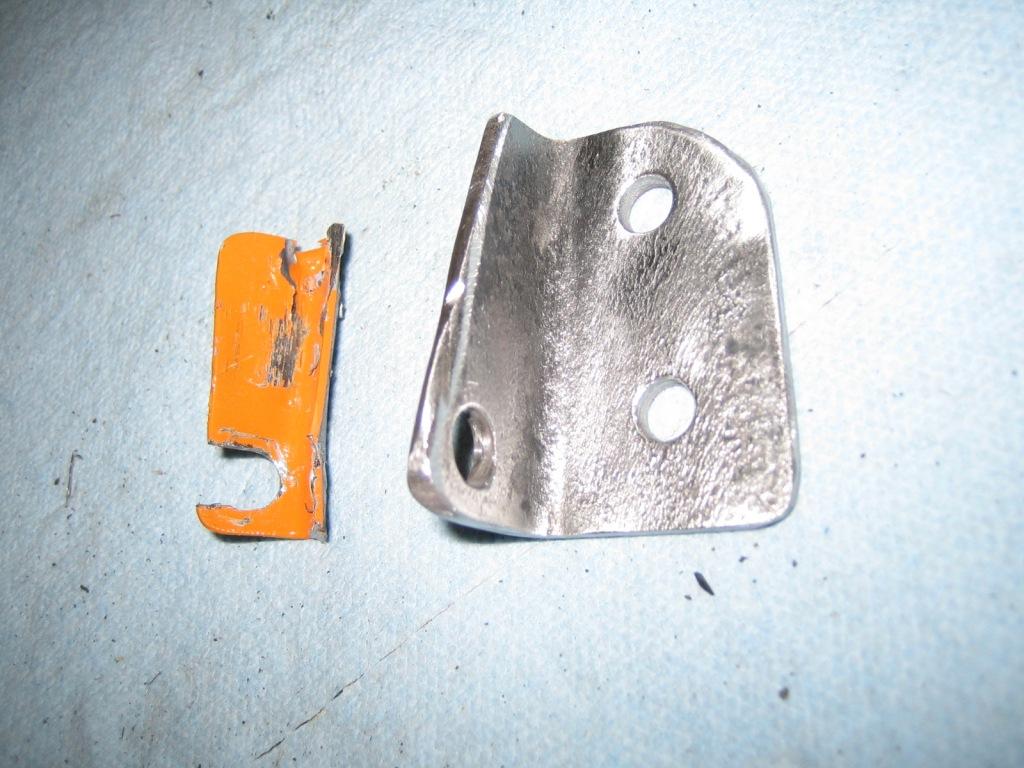
And fitted to the car, worked a treat and then did the same for the other side.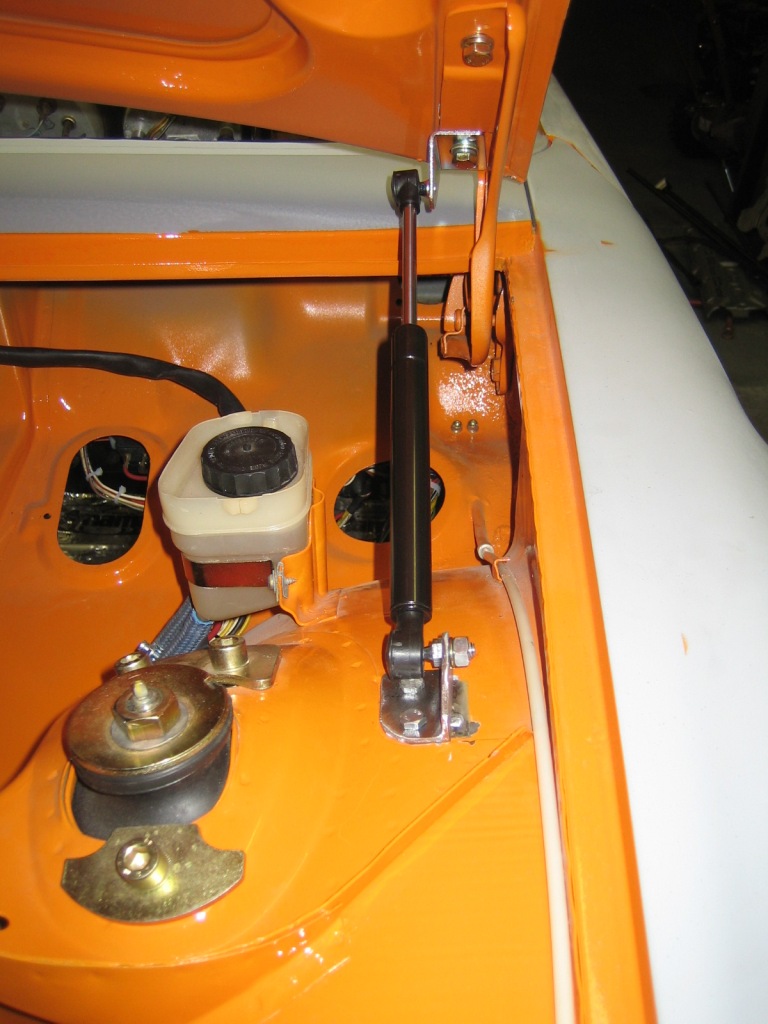
Posted by: my928s4 Jan 22 2012, 06:37 PM
Friday this came on the delivery truck: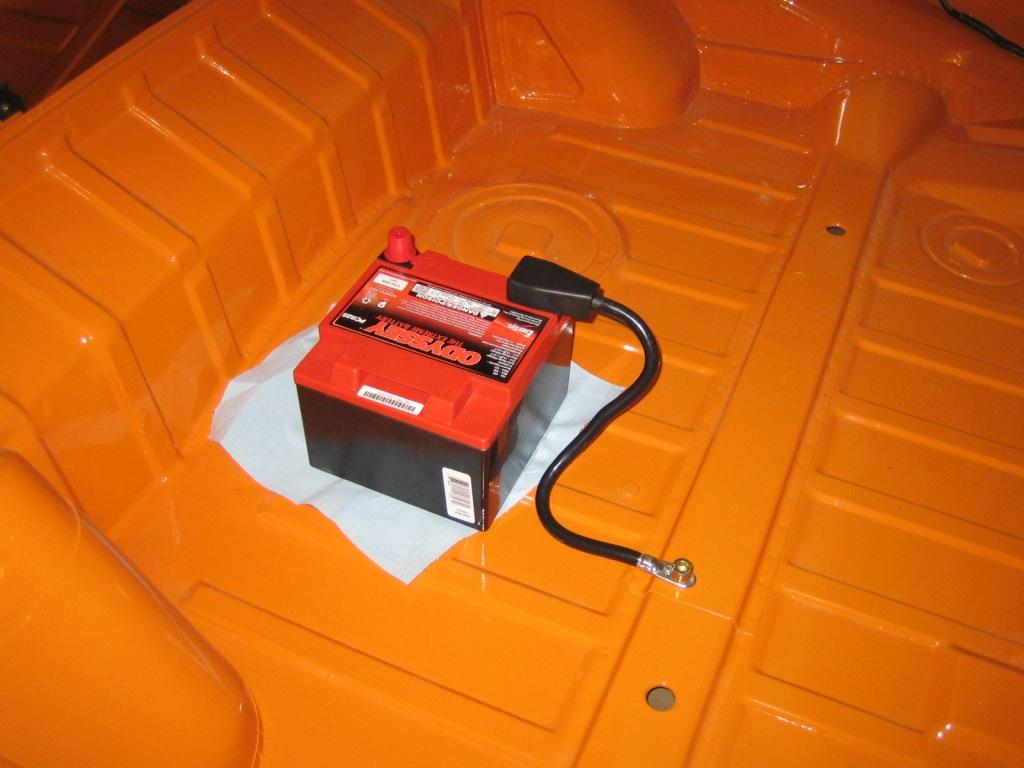
I also ordered the welded support tray, it will get powder coated and then bolted to the trunk floor but this was good enough to start playing.
So I spent the rest of the weekend debugging all of the electrics, remembering this was a roller so this is the first time it has seen voltage in my hands. I got the headlight motors adjusted but despite tracking all the wires they remained up in the off position and down when turned on so I reversed the wires at the 3 way connector and left it at that.
The Headlight dimmer relay is toast and the brake warning light comes on when the handbrake is off. I am pretty sure that is related to the brake warning switch on the master cylinder but why that should be activated as it is new I have not figured out.
There are two components I have not tested, the wiper and blower motors, something for next week when I get some used parts delivered.
My fuel level sender was stuck, removing it showed why: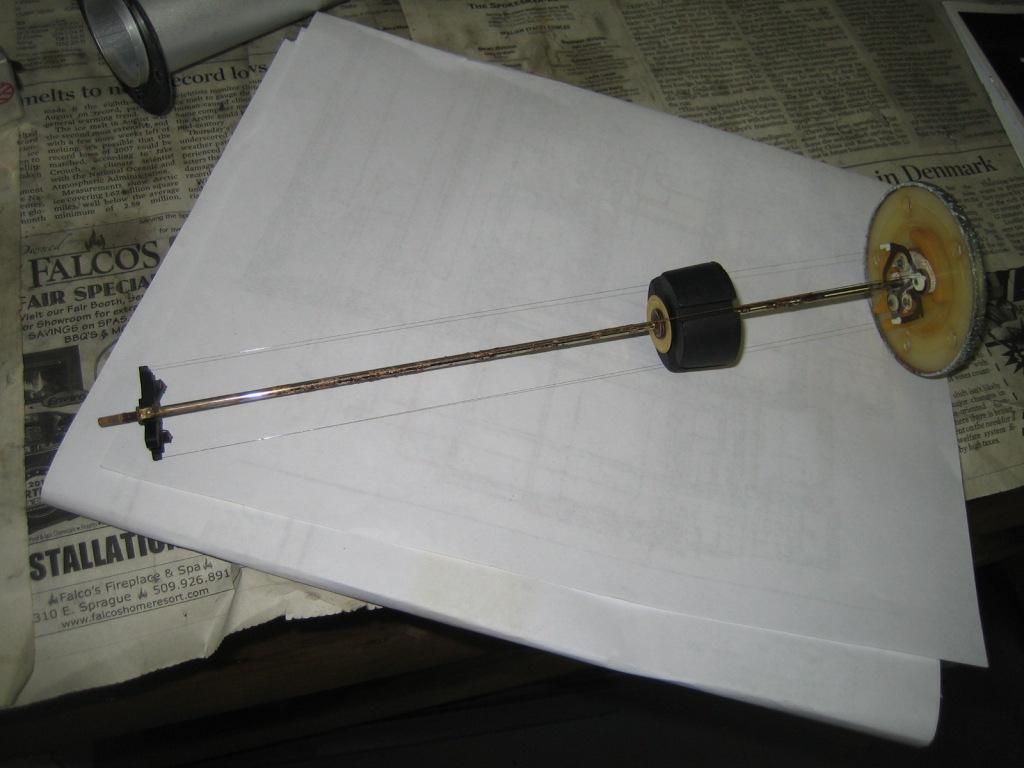
Rust on the shaft, cleaned it all up and works great.
OK, some of you might get a laugh out of this, so here is the starter motor that came with the car.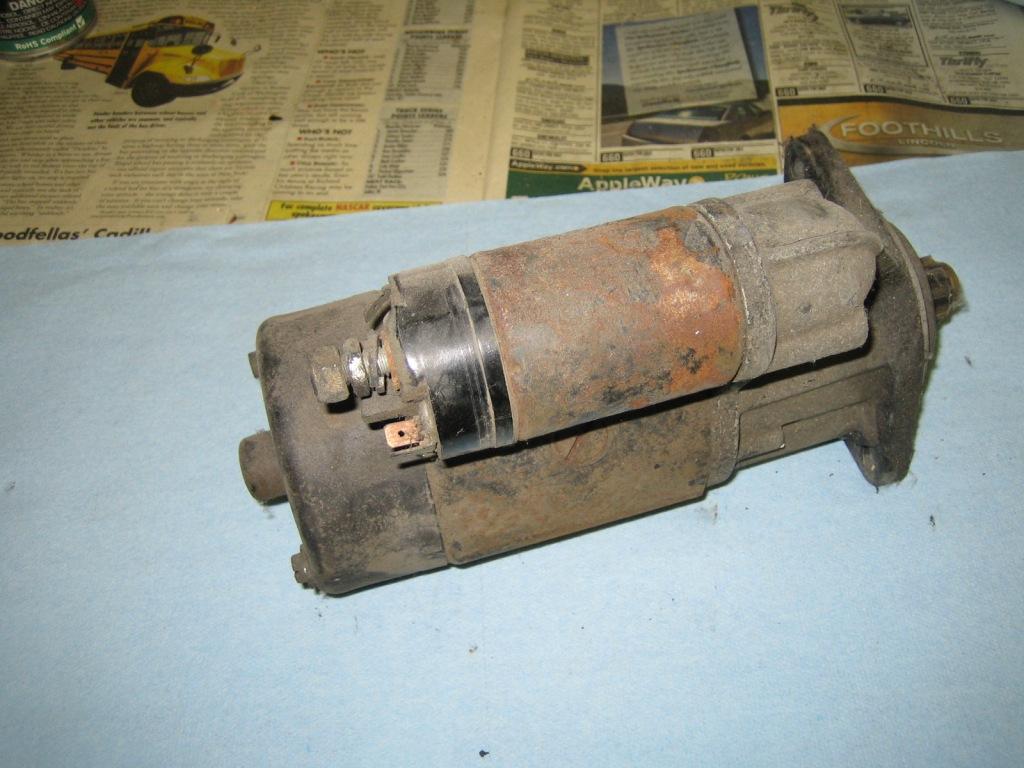
Thought it might be fun to dismantle and rebuild, well once I took it apart and looked at the cost of replacement parts ... yep forget it, just buy a new one. It had a rebuilt sticker on it anyway so it had a good life.
Last thing I did today was put on the new basket weave dash face, reason for doing this was so can put all the electrical in, hopefully for good. New material (thanks Morph) covers way more than you need and when the dash top goes on should look pretty smart.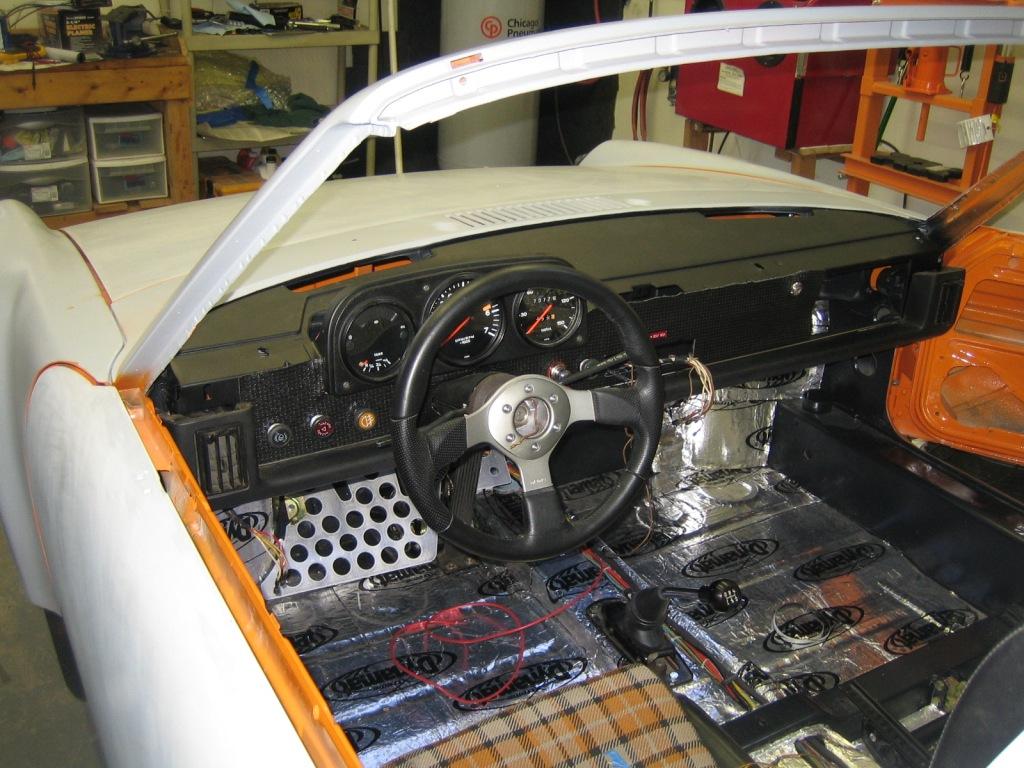
Posted by: rohar Jan 23 2012, 09:18 AM
Hey Chris, I've got a couple of working starters over here that I'll never use. Yours if you want them
Posted by: rwilner Jan 23 2012, 09:21 AM
You gotta put a rennshift in that thing, and also Chris Foley's shift linkage!
Posted by: my928s4 Jan 29 2012, 06:47 PM
Hey Chris, I've got a couple of working starters over here that I'll never use. Yours if you want them
Perfect, thanks Rob I will give you a call.
Posted by: my928s4 Jan 29 2012, 07:00 PM
Ok so just more odds and ends, I put a remote fuse block in the trunk to feed the 12V sources for everything but the engine. I ran out of heatshrink otherwise I would have finished the routing for those power feeds.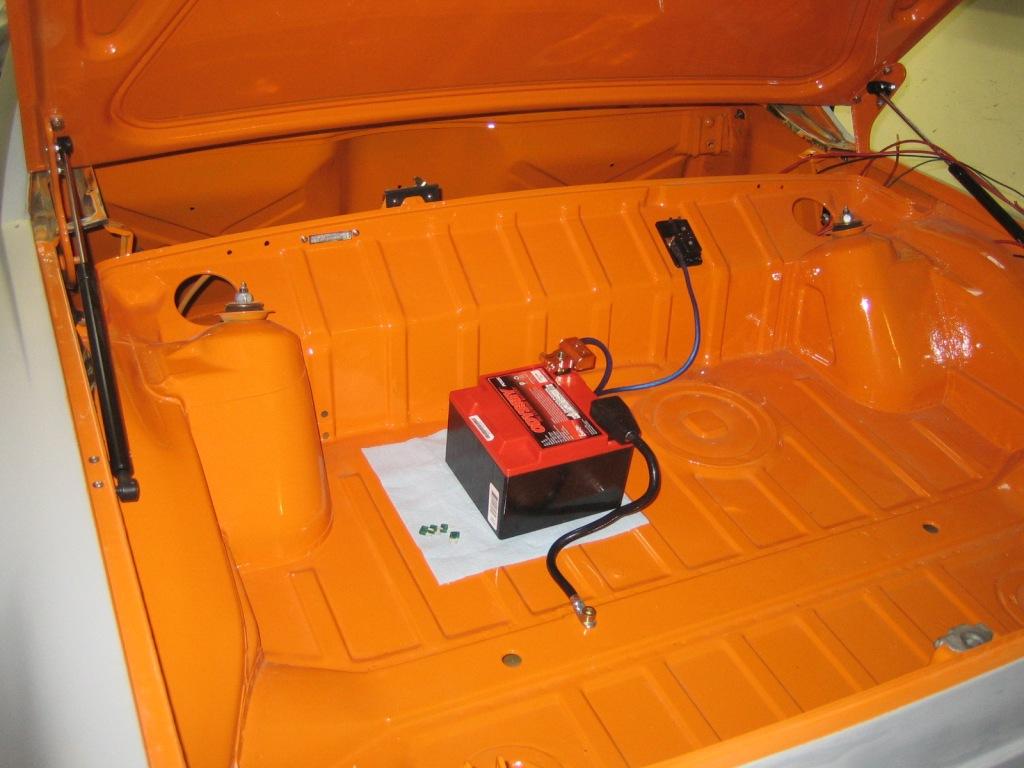
I wanted to get the blower motor hooked up and the fan controls installed in the dash, got some used parts in the mail including a blower assembly with a bad motor. Found the broken plastic part and swapped it over, otherwise everything else in my old assembly seemed to be in better shape. Looks presentable after a good clean.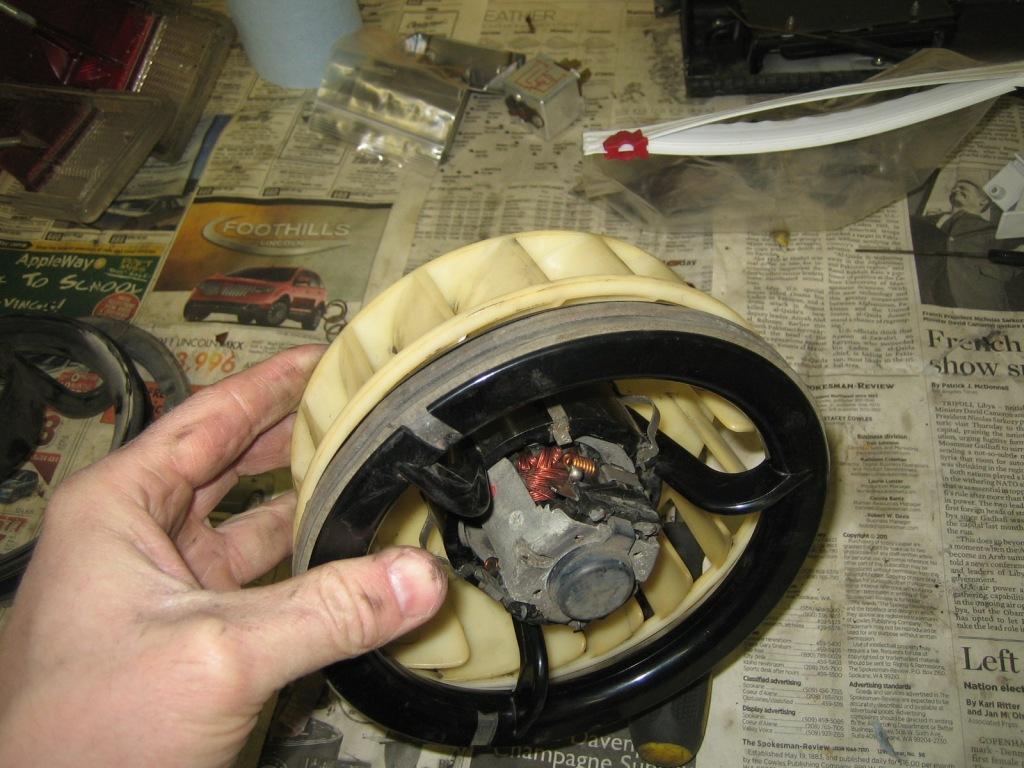
I cleaned the fan control assembly and was about to put it back in the car but could not do it.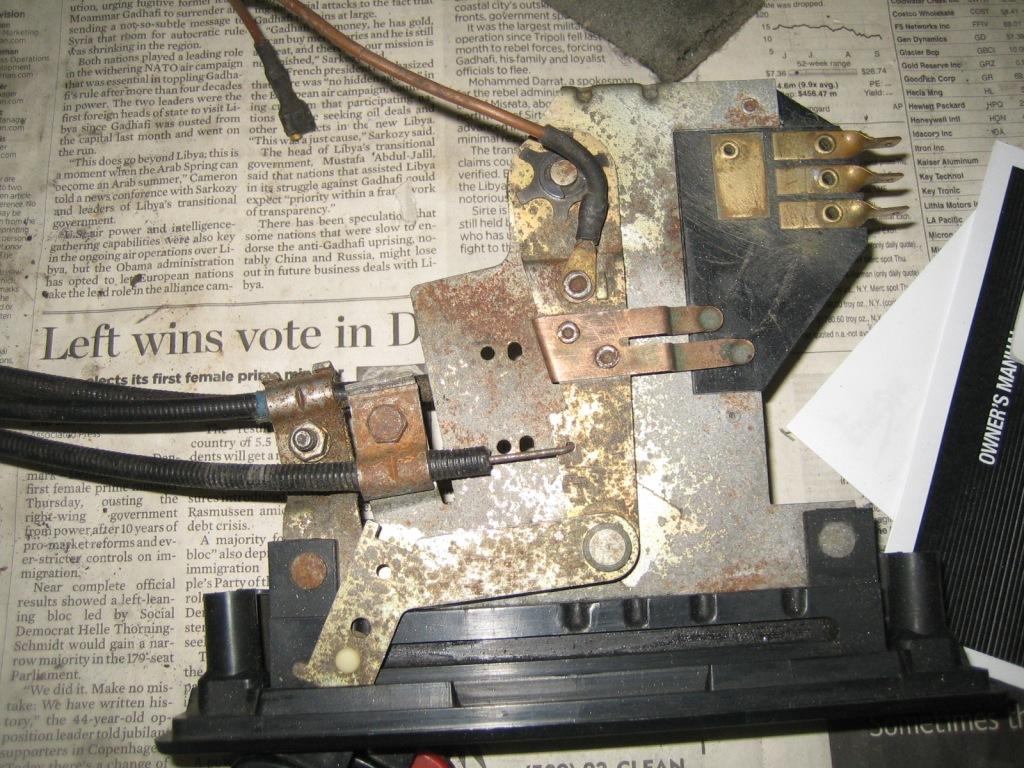
I disassembled and sand blasted off the corrosion, sure plating it would have been the best but I don't have a large batch of parts to take down so decided to paint instead. Used some etch primer and stain black.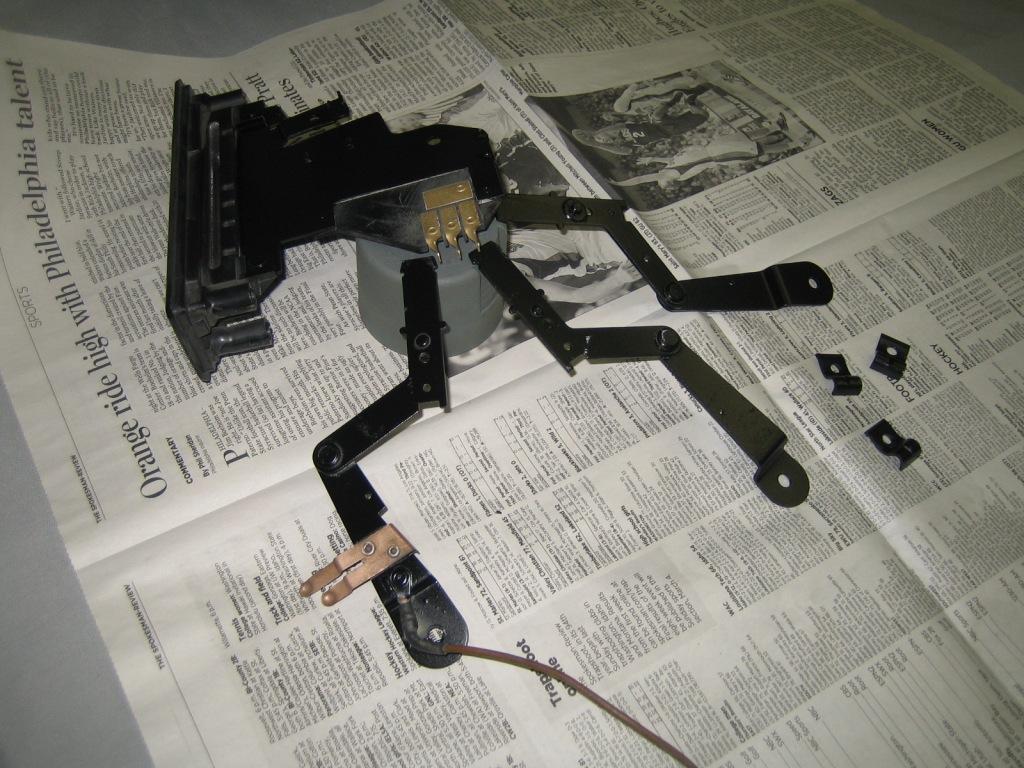
All back together, with some new grease the sliders work pretty good too.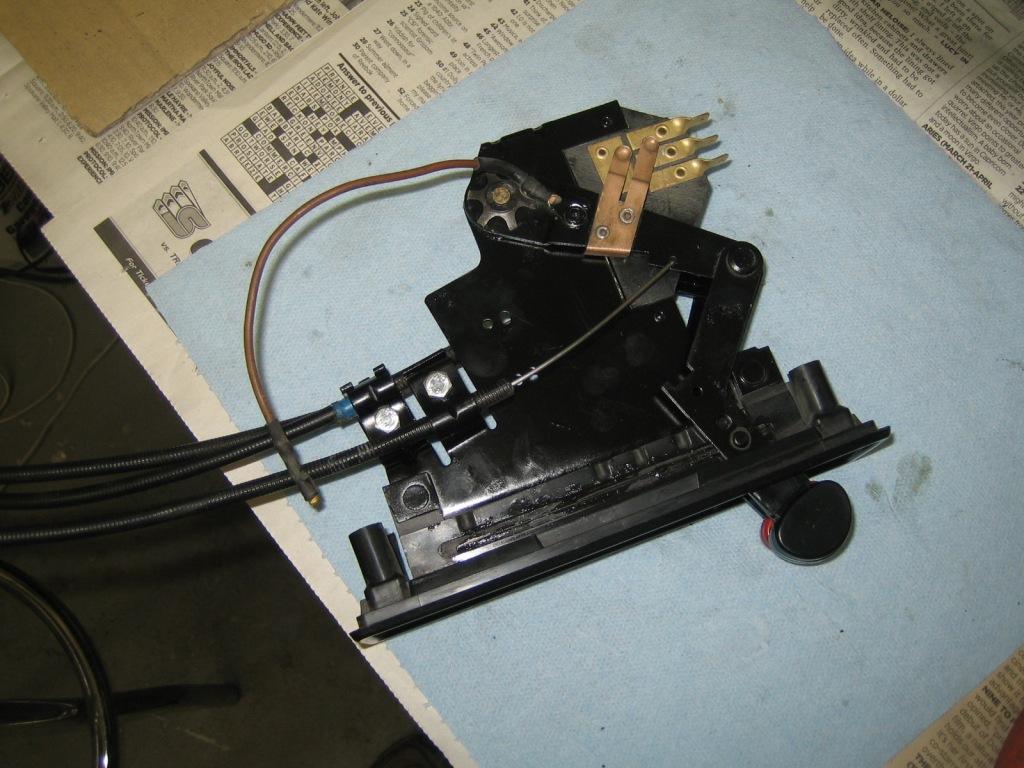
This flapper looked past its best too.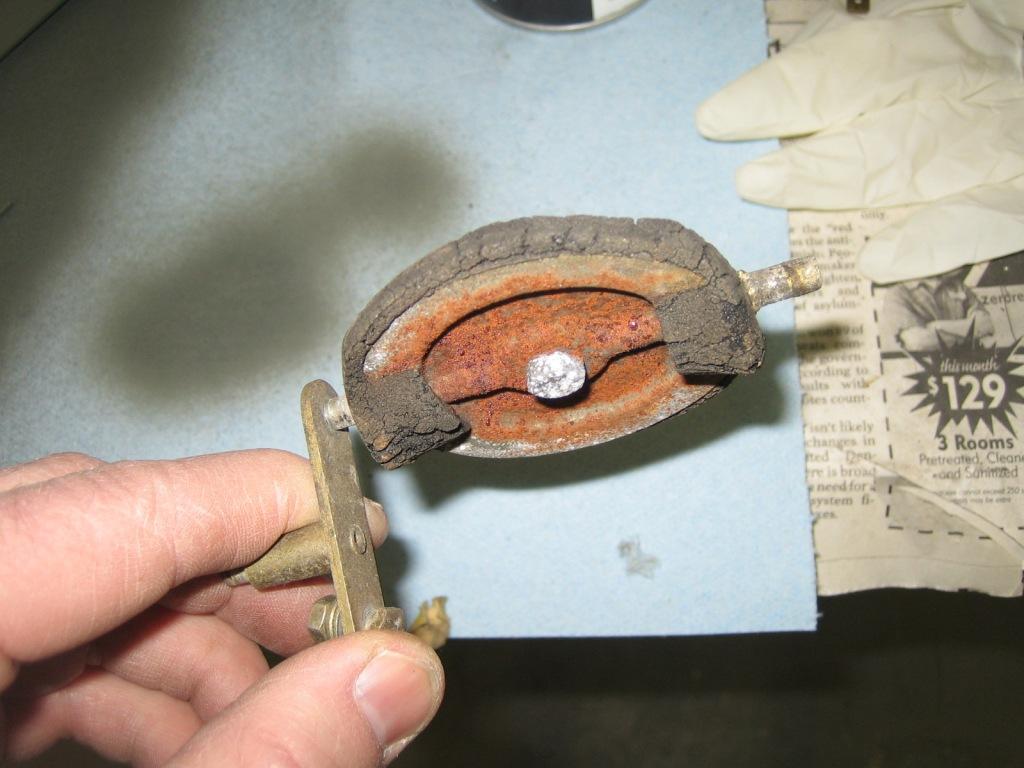
Same treatment and I made some new gaskets with some foam from the local hobby shop.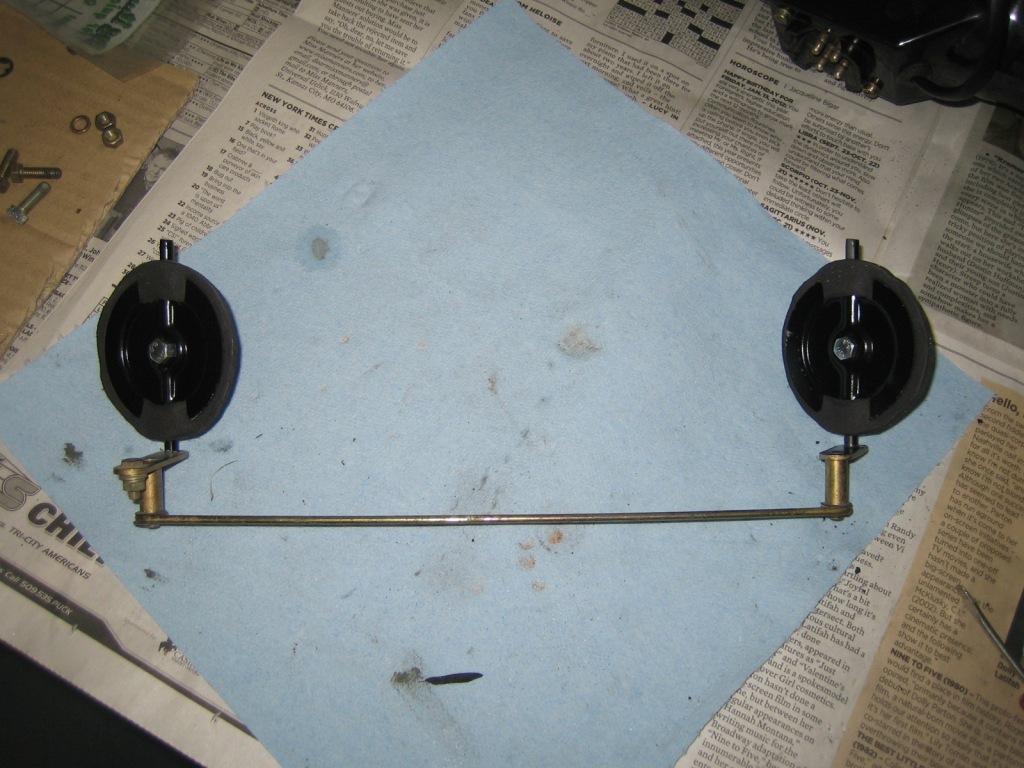
Blower motor all back together and with the controls hooked up in the dash it works just fine. Can now put away for later.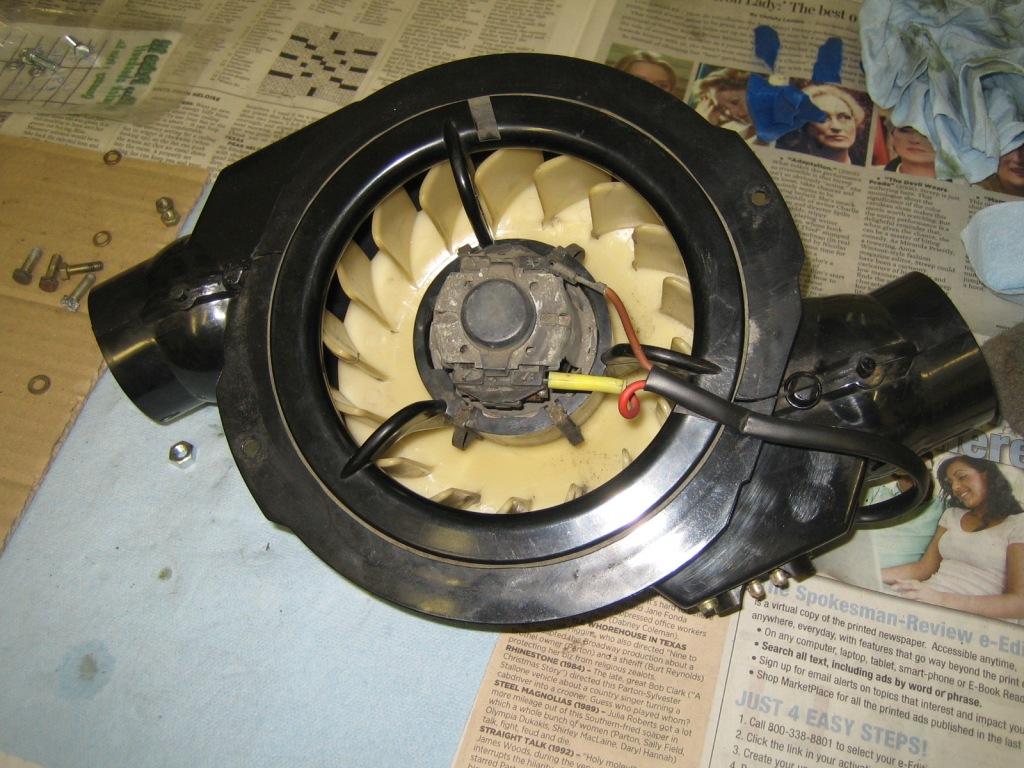
Also re-sprayed the glove box door and covered with new material.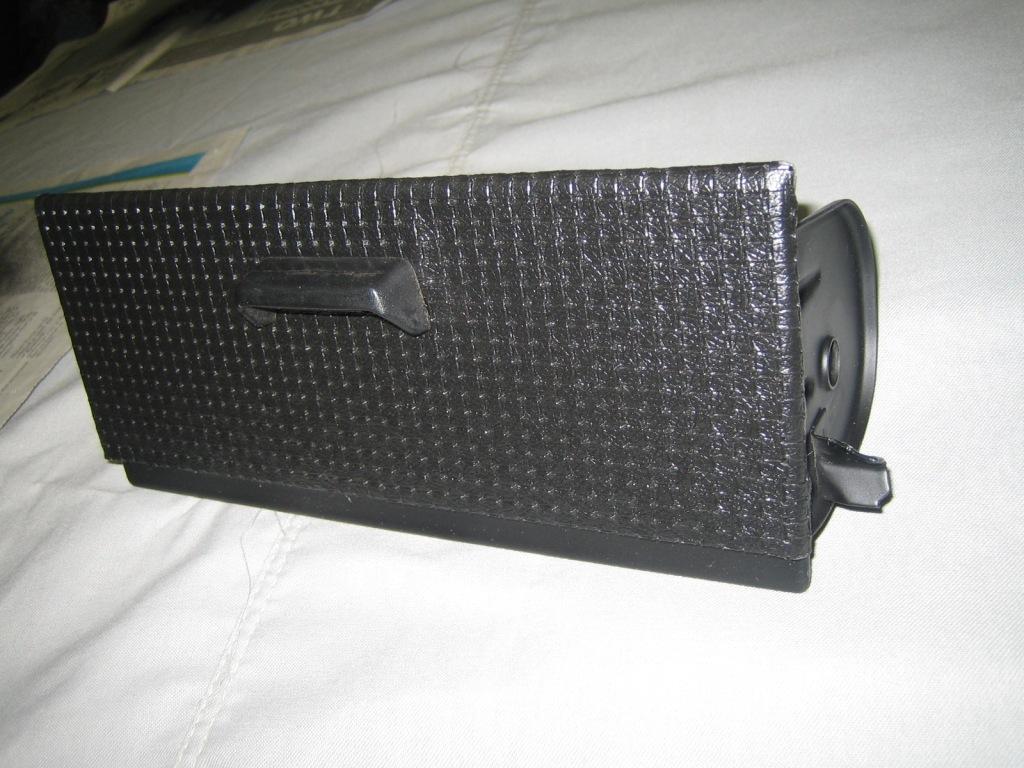
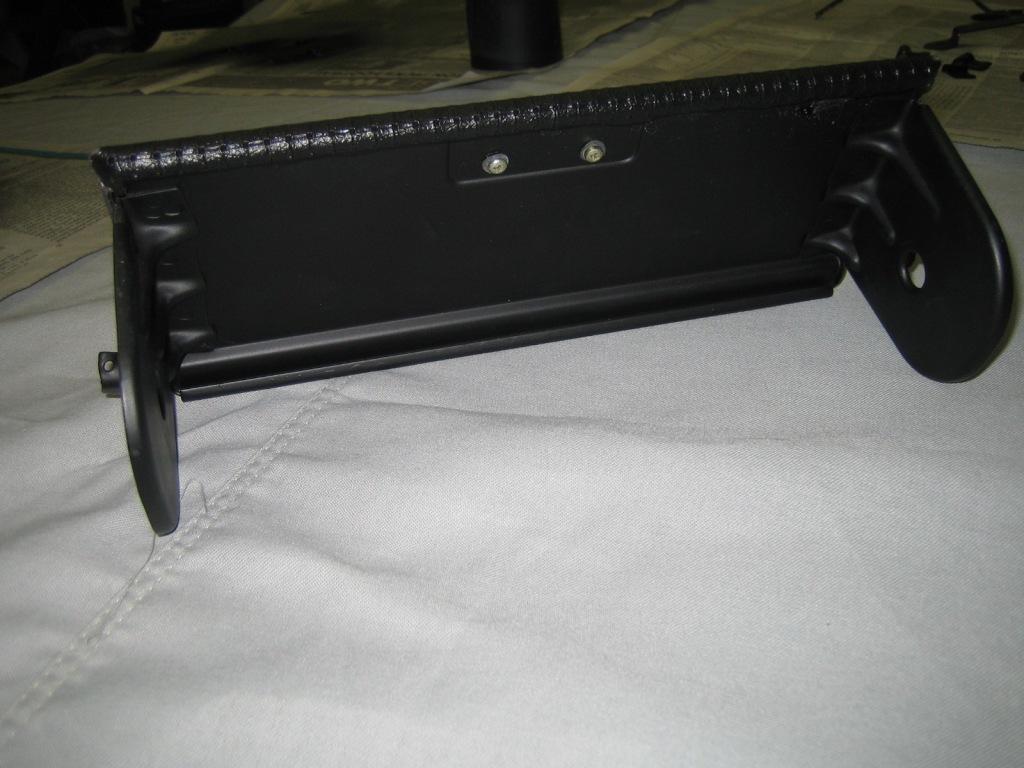
Posted by: my928s4 Apr 15 2012, 07:51 PM
So last week I found an engine, decent WRX motors are hard to come by these days. 3 years ago they were everywhere, anyway hopefully be delivered next week which got me motivated to get going on other tasks.
I have had the gas tank stripped of parts and was waiting to get it cleaned at a local radiator company, however, only one place now carries out that work near me and they are a pain to get to and only open weekdays. So decided to pick up some Marine Clean and got rid of all the varnish on the inside, there is some surface rust here and there but decided not to seal the inside.
Onto the outside, sanded down some rust spots and cleaned up the outside. Worst rust was where the tank rested on one of those carpet pads.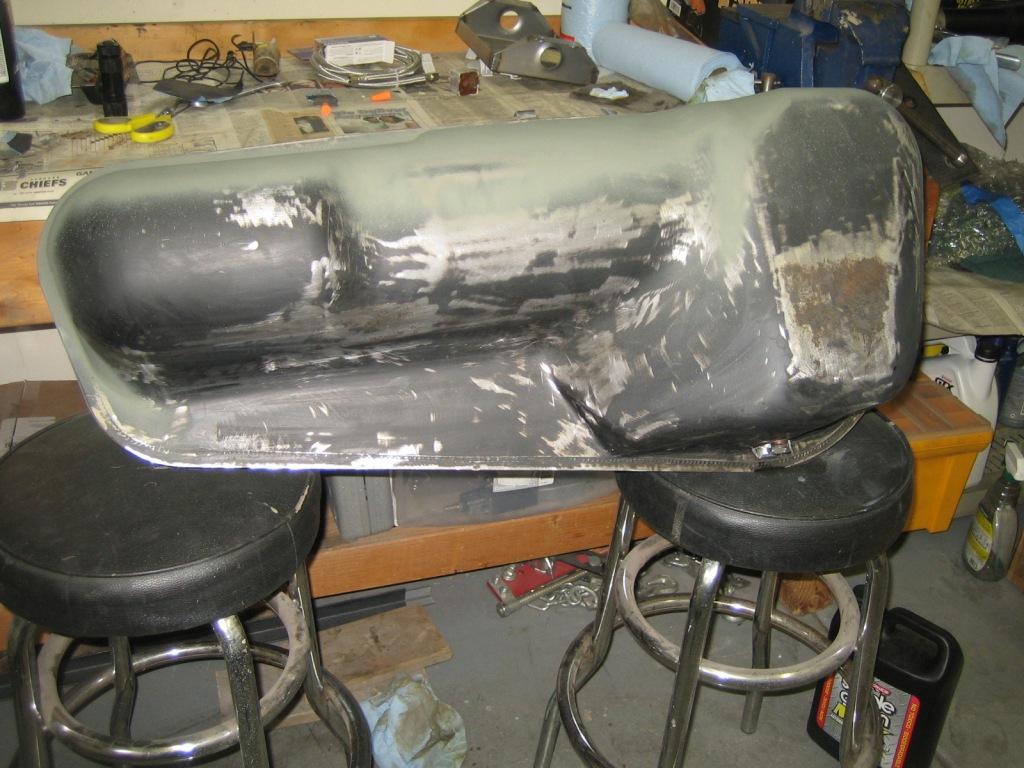
Good coat of etching primer.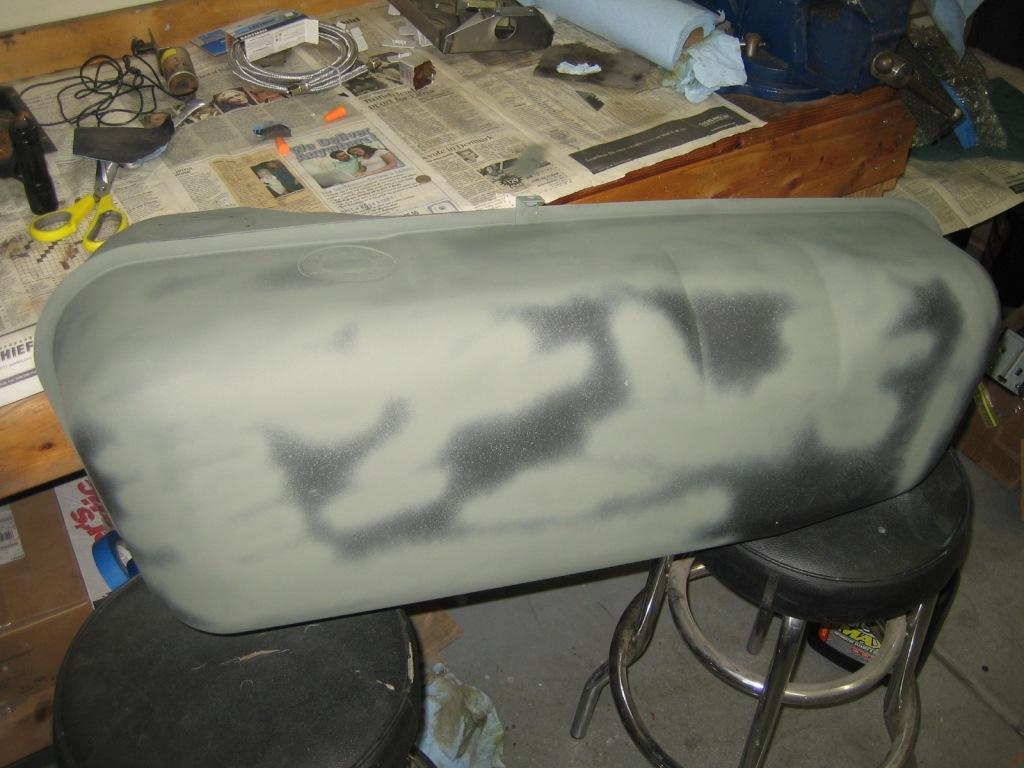
Was going to get out the paint gun but decided to rattle it, took two cans and some flattening out but came out pretty good.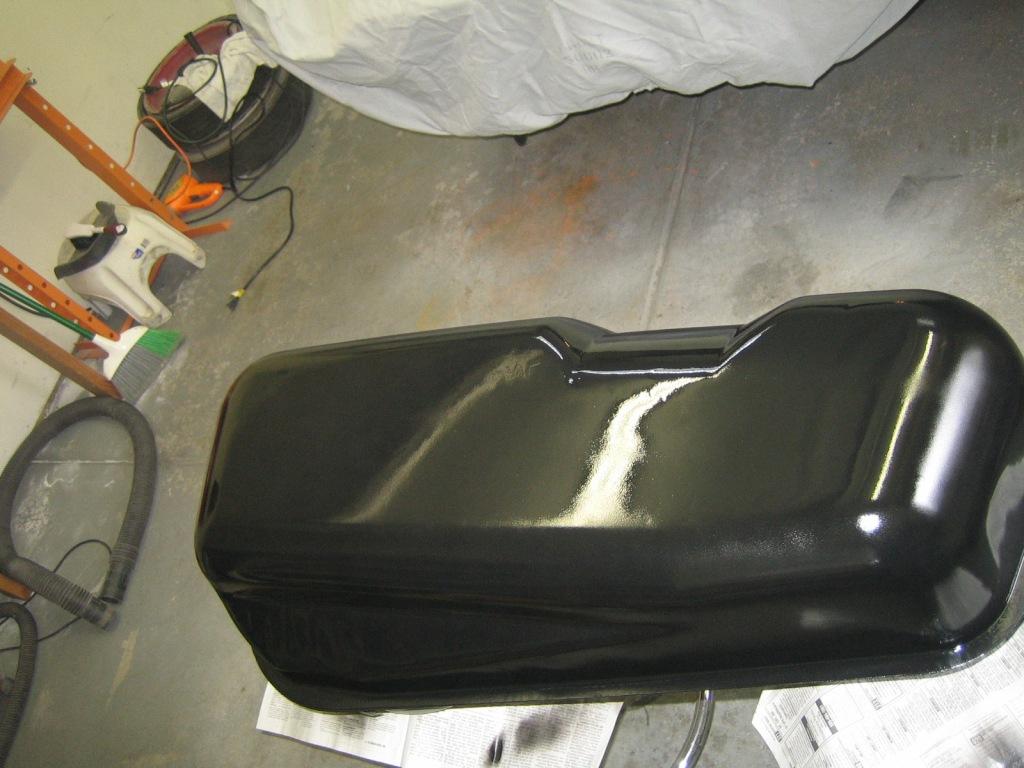
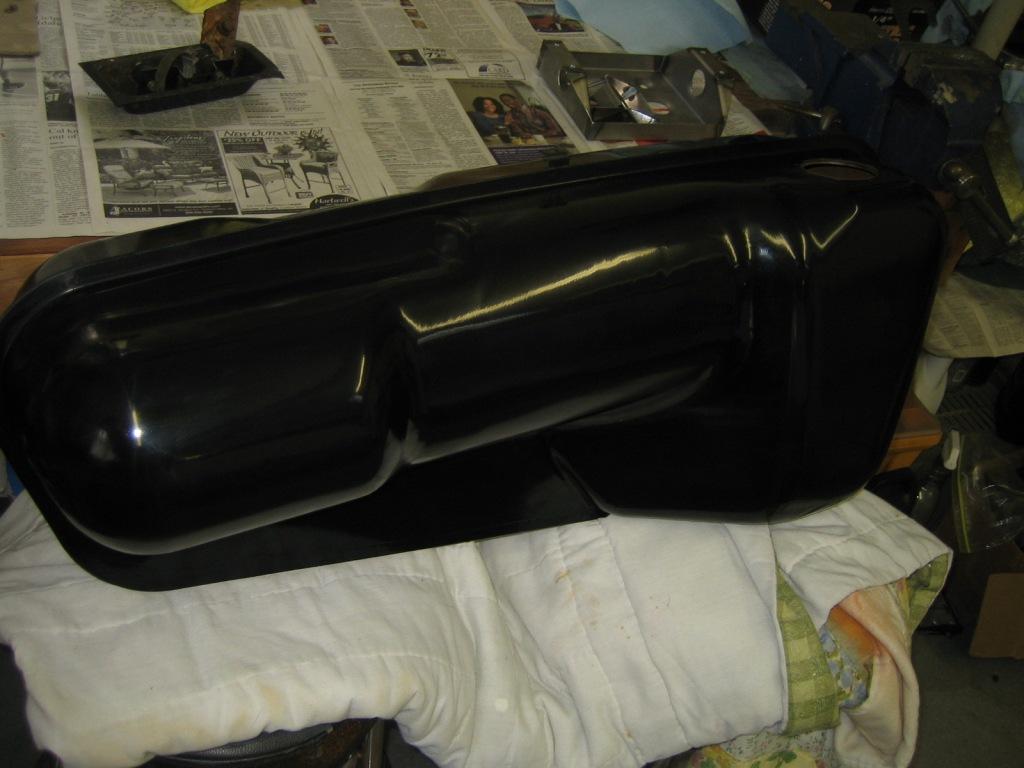
Need to order a fuel pump, hose etc ... and then this baby can go in. One less item cluttering up garage space .....
Posted by: my928s4 Apr 17 2012, 09:03 PM
Nothing like a big package of car parts, just like Christmas. So here it is, a 2006 EJ205 JDM AVCS motor from a Forester. 26,000 miler.
Good news is that it has a cable not electronic throttle, less hassle.
Need to get a harness and then figure out the wiring, now waiting on that cradle from Ian and we can make some serious progress!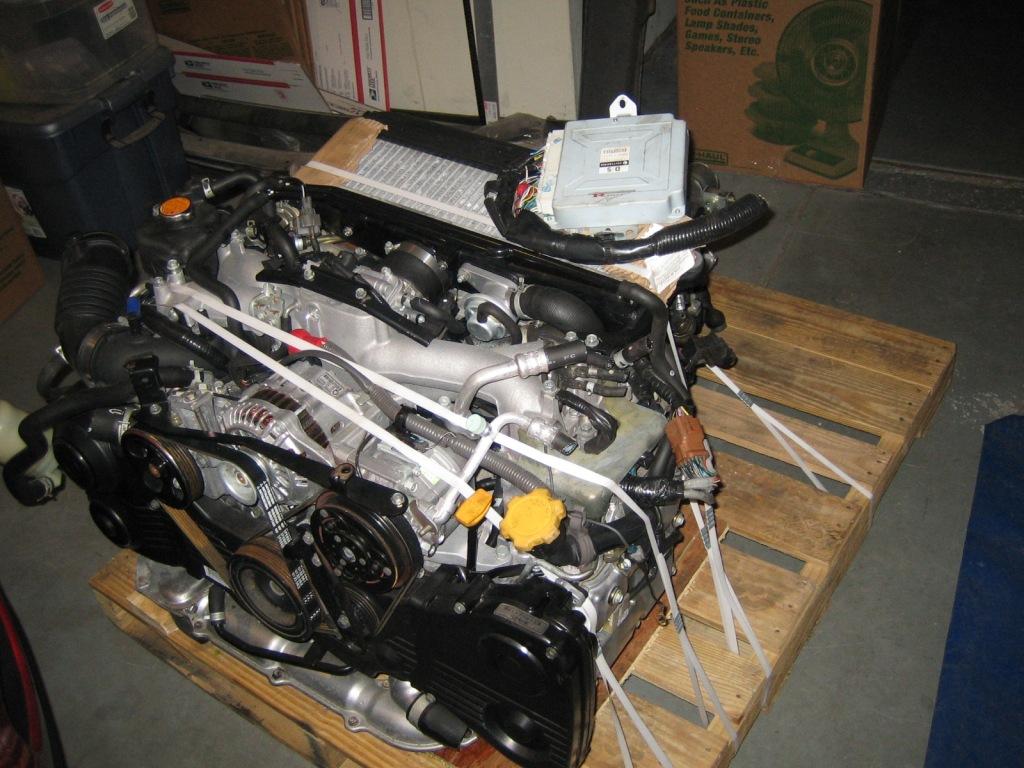

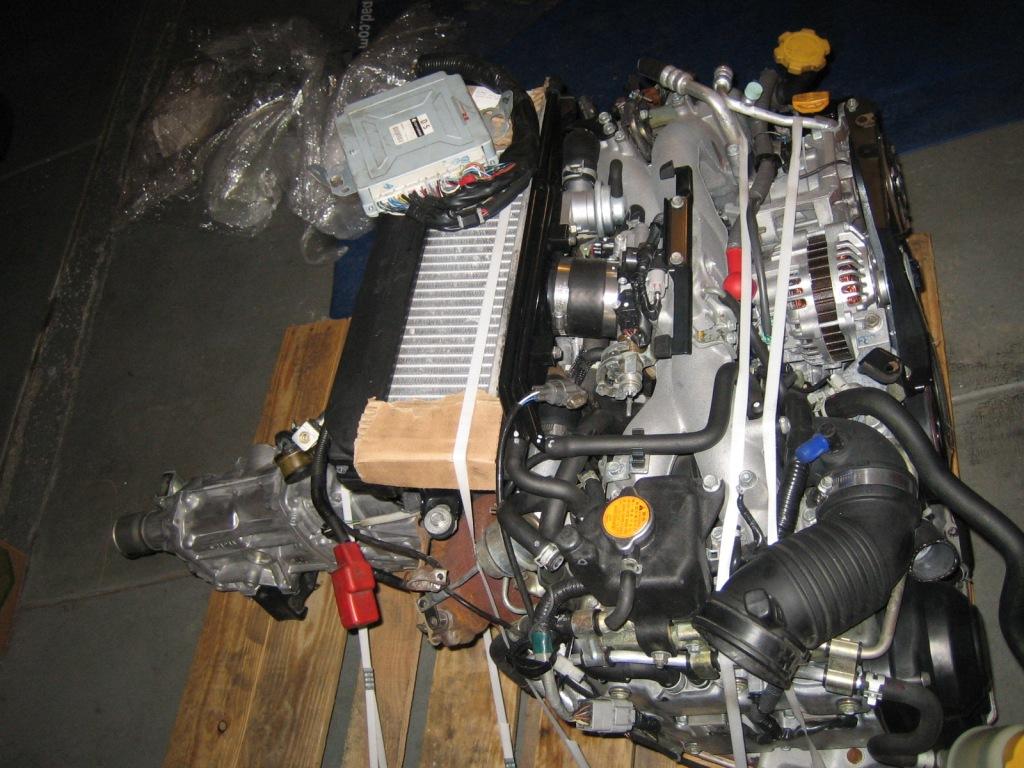
Posted by: OllieG Apr 18 2012, 02:35 AM
Very cool...what sort of horsepower do you get out of that engine? It's the same engine as the Impreza WRX right?
I was driving a 350hp Impreza on a rally track last weekend, great fun but very front heavy and lots of understeer. Should be beautifully balanced in the 914...and ofcourse will go like an absolute rocket!
Nice one....
Ollie.
Posted by: my928s4 Jun 9 2012, 09:33 PM
Seeing as Ian's Subaru Engine Cradle will be delayed I started work on the harness, I bought a US 2003 WRX bulkhead harness which has most of what you need except for the fuel pump controller and pigtail harness. Unfortunately when I bought the controller I forgot to ask for the pigtail ...aaaaghhhh. Learn as you go.
If you need the two main connectors to the engine harness, well they are located on the 'Front' harness. Luckily when the Japanese cut the cables removing the engine harness they cut leaving me a few inch's of cable I can use to hook up to the bulkhead harness.
Also as this engine has AVCS I need to modify to support that, good new is others have been here before me and instructions are out there on the web.
I am going to get the sensor board from small car performance also, however decided against their wiring diagram package although it would have come in handy. The harness is big and has lots of crap you do not need, however, removing what you don't need is a BIG frickin job. I have put way more hours in this than I thought I would need to.
Here is the pile of stuff you do not need: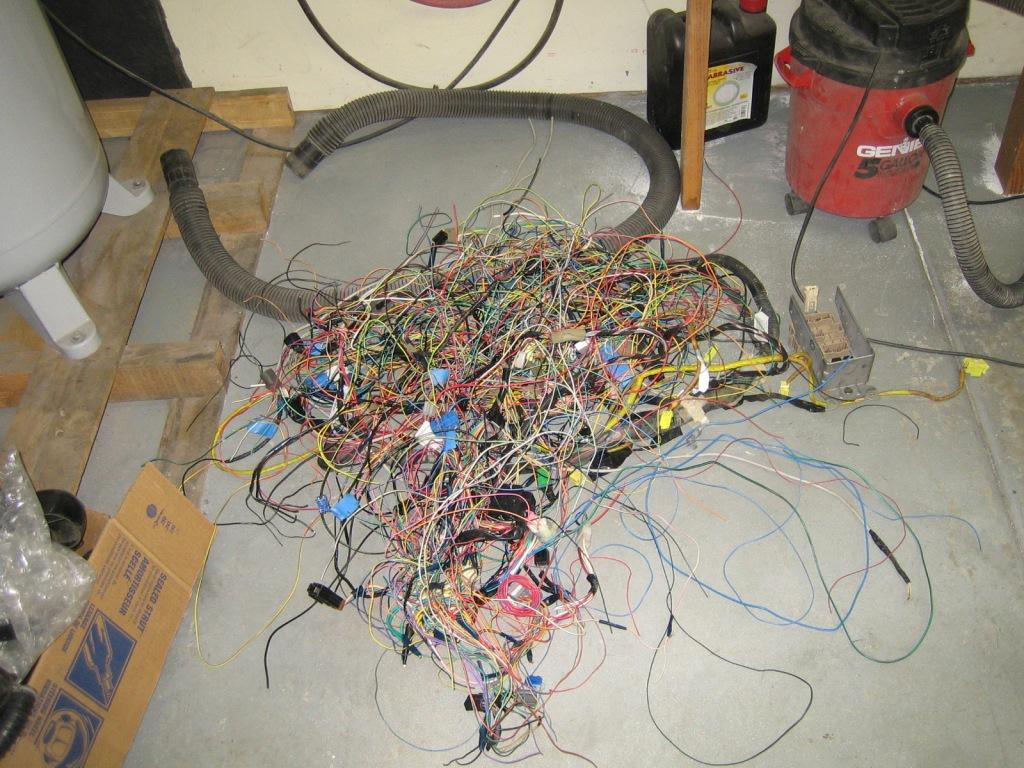
This is what I am left with, bar a couple of wires everything is labelled, now I can separate it all and start mocking up how I want it laid out, how to hook up to the 914 harness, power etc ... I am hoping this is half way there ....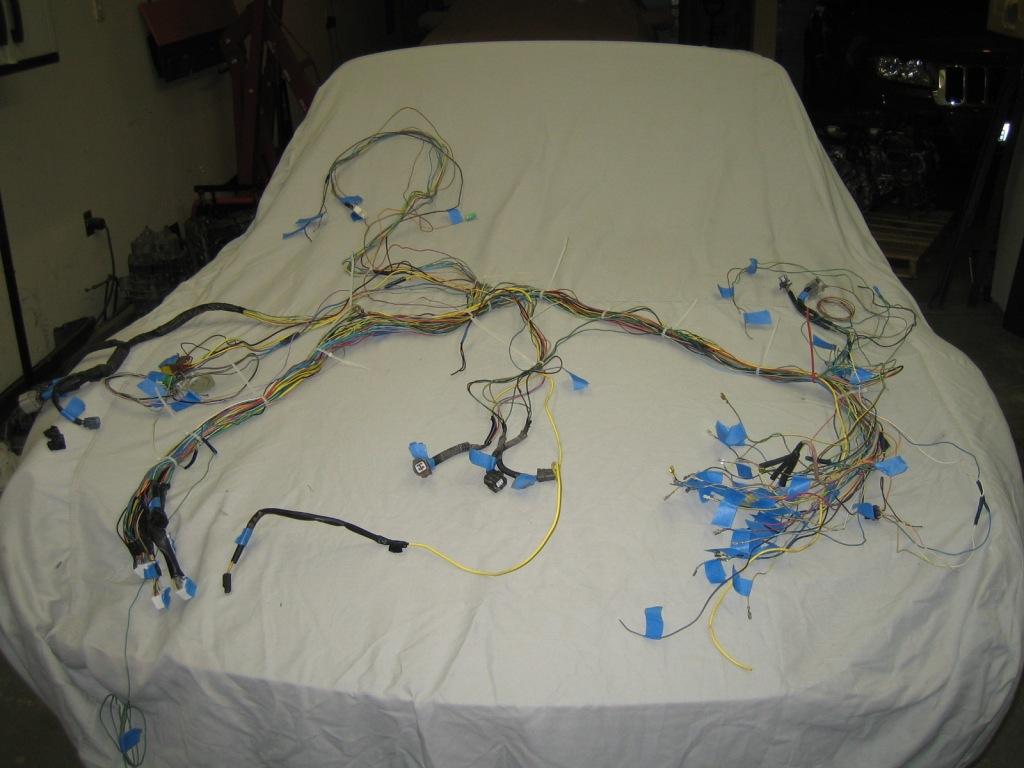
Posted by: Zaney Jun 9 2012, 11:05 PM
Nice job!
I feel your pain about pairing down the Suby wiring harness! I had to troubleshoot mine a few times to get it smoothed out. But, very satisfying after it is finished!
Awesome car BTW!
Cheers! 
Nate
Posted by: abnrdo Jun 10 2012, 05:52 AM
Just plain awesome!! More motivation to get working on mine when I get home.
I am way far behind!
Before you know it you will be
Great work!!
Cheers,
Jim
Posted by: my928s4 Aug 3 2012, 10:13 PM
Well looks like the engine cradle may make an appearance this month so got me motivated to digging in again inbetween other summer activities.
So I knew I needed to modify my gauges and always liked the Quad setup (see below) and other mods that http://www.newvintageusa.com/bigmarkdesigngauges.html advertise, so was already to dump some wonga and get them on order. 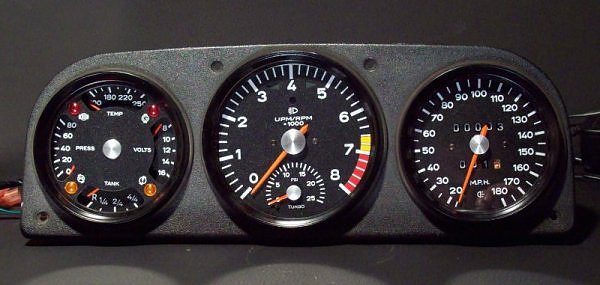
Well was told pretty promptly that they are too busy for this kind of work I know it can be hard to tie down body shops but in this day and age pretty surprised to hear that from others. Well good luck to them.
So looked into doing the same mods myself and it would a) be a bunch of work and b) would cost about the same. While searching for parts to do this I came across another option, these gauges from Speedhut. Sure you lose some of the Porsche originality but I am already way down that path with other stuff anyway, I just don't want it to look tacky/cheap.
So before:
And with a little cut and paste to simulate ... the after: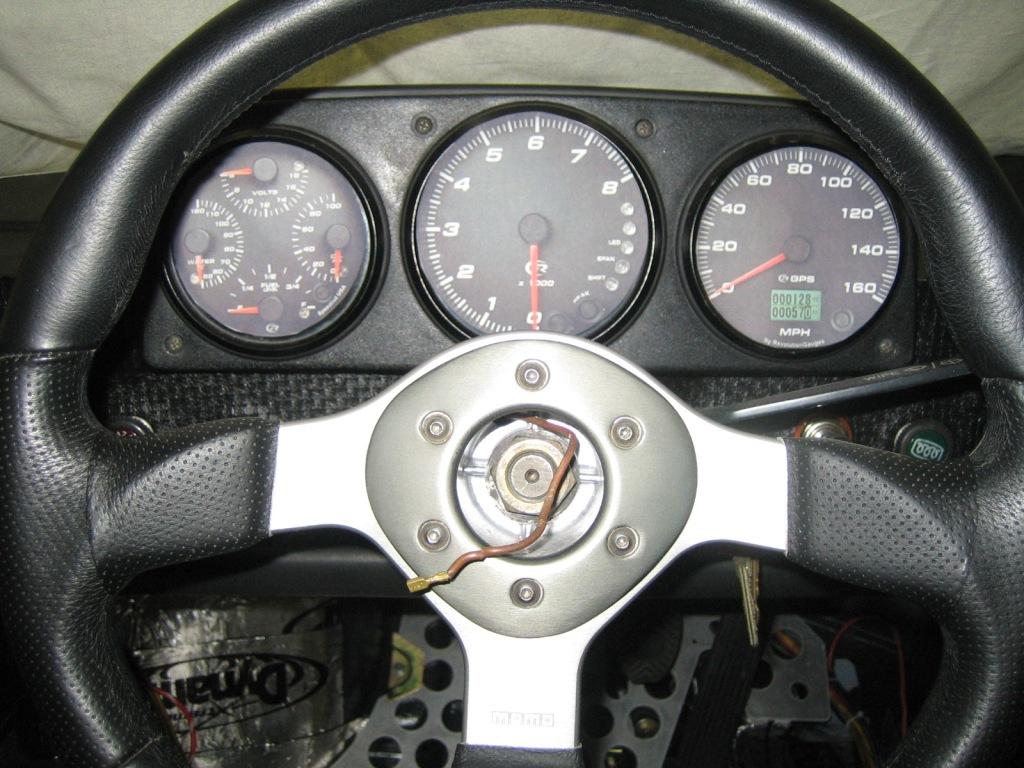
Some advantages, no speedo cable or wire to hook up. Fuel gauge will work with 914 sender unit, Water temp and oil pressure will require their sensors but then so would the VDO gauges. Nightime red back glow would look way cool.
Oh and these gauges are pretty shallow freeing up some wiring room.
Anyway just wondered what you guys thought, must admit I am 90% there.
Posted by: Zaney Aug 3 2012, 10:30 PM
Here is Sawtooth's car build with those exact gauges!
I will do the same in the future.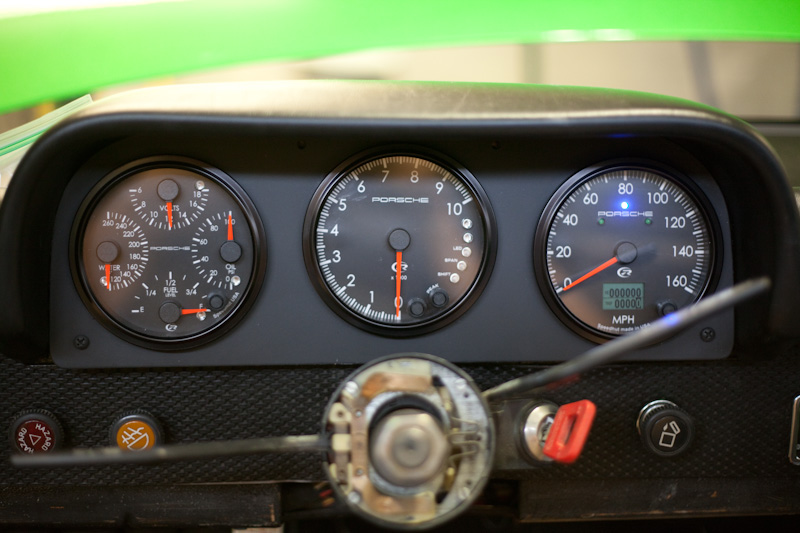
Posted by: my928s4 Aug 3 2012, 11:05 PM
Here is Sawtooth's car build with those exact gauges!
I will do the same in the future.
Too damn funny, well that pretty much seals it.
Thanks Nate.
Posted by: my928s4 Aug 24 2012, 02:48 PM
Got my fuel pump, a Walbro GSL-392, need to find a suitable filter and then I can plumb up the fuel tank. Going to put it in the stock pump location.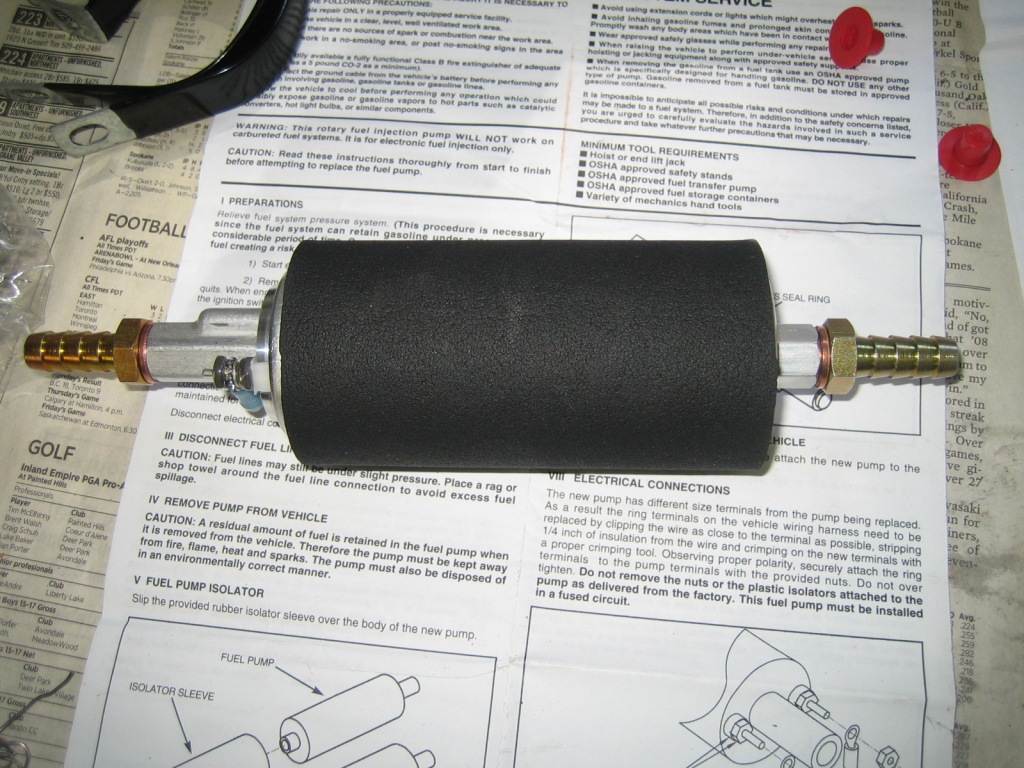
Well the UPS truck came today with my Gauge package, Speedhut were great to deal with and the look is exactly what I was after. I had the 914-WRX logo in all 3 gauges but it made the quad and speedo cluttered so I just left it in the tach.
Quad gauge has metric water temp and oil pressure, just like the German's would do it.
Tach is 0.5" larger than the quad and speedo but it still slightly smaller than OEM, also added a redline in the tach.
Was able to use the standard mount with a bit of fettling, now for some wiring.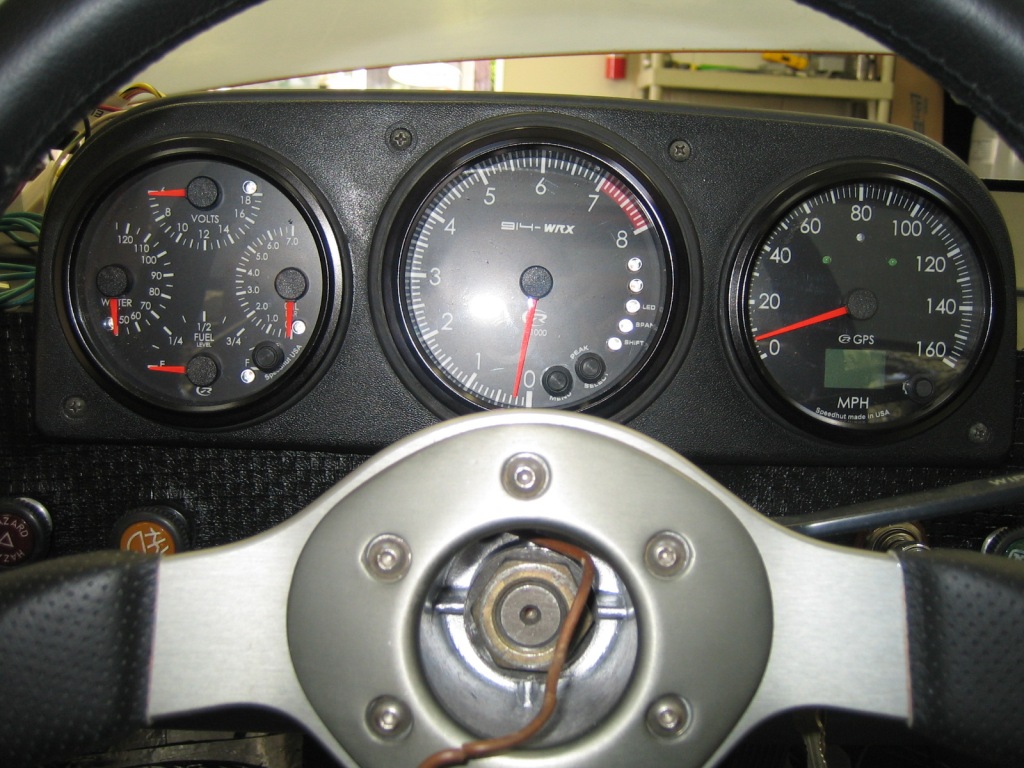
Posted by: my928s4 Aug 24 2012, 10:52 PM
And here is a night time shot, actually not too bad to wire except for the water temp and oil pressure sensor all is done. Even calibrated the fuel gauge.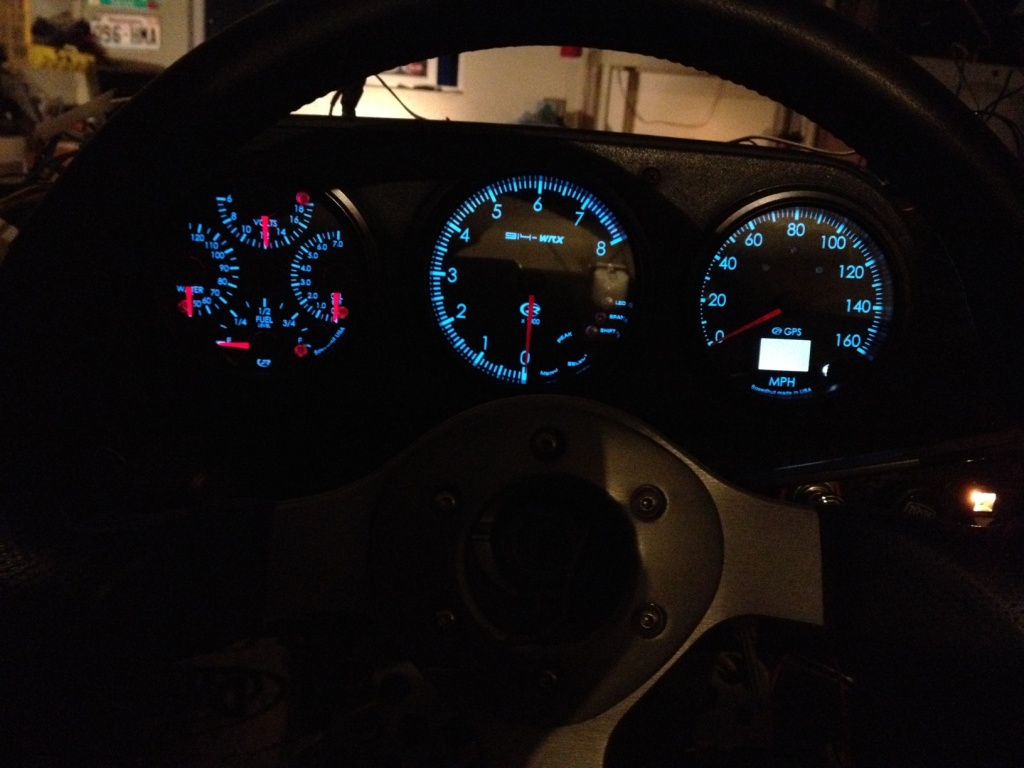
Posted by: bembry Aug 25 2012, 07:44 AM
Damn--I'm usually not a fan of aftermarket gauges folks stick in 914s, but those look terrific! Just a great project through and though.
Posted by: FourBlades Aug 25 2012, 11:32 AM
Like the gauges.
That is a clean looking engine you found!
Great project.
John
Posted by: mepstein Aug 25 2012, 01:53 PM
Really like the gps speedo.
Posted by: my928s4 Sep 5 2012, 09:19 PM
So the package from Ian arrived today!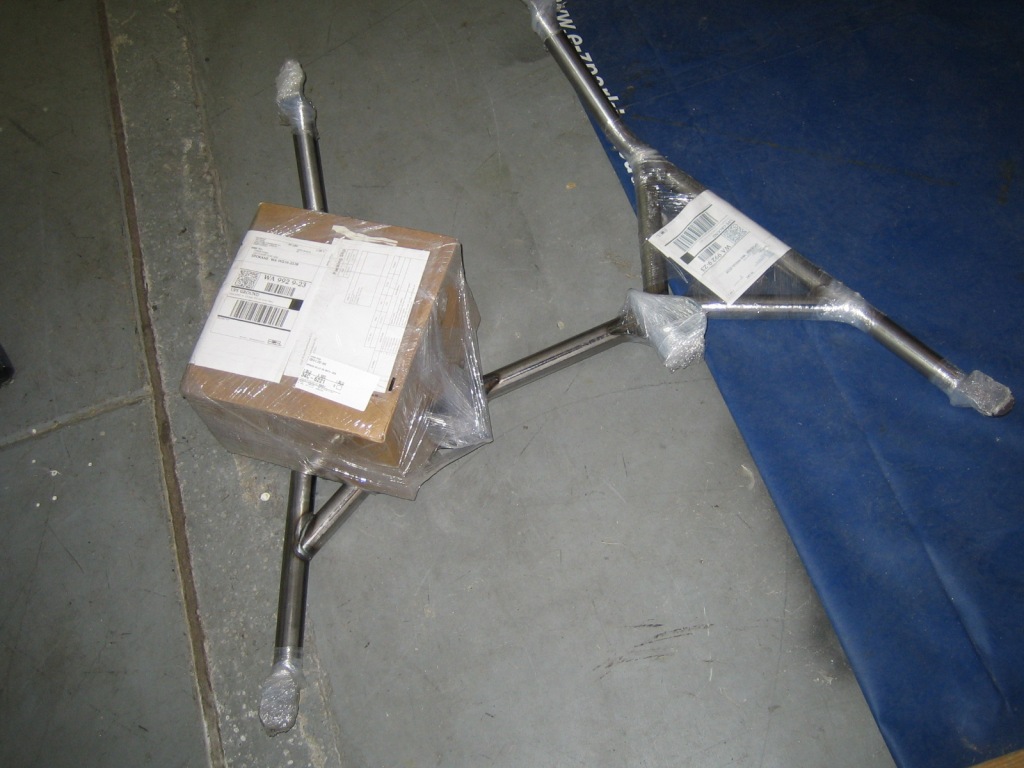
Parts inside the box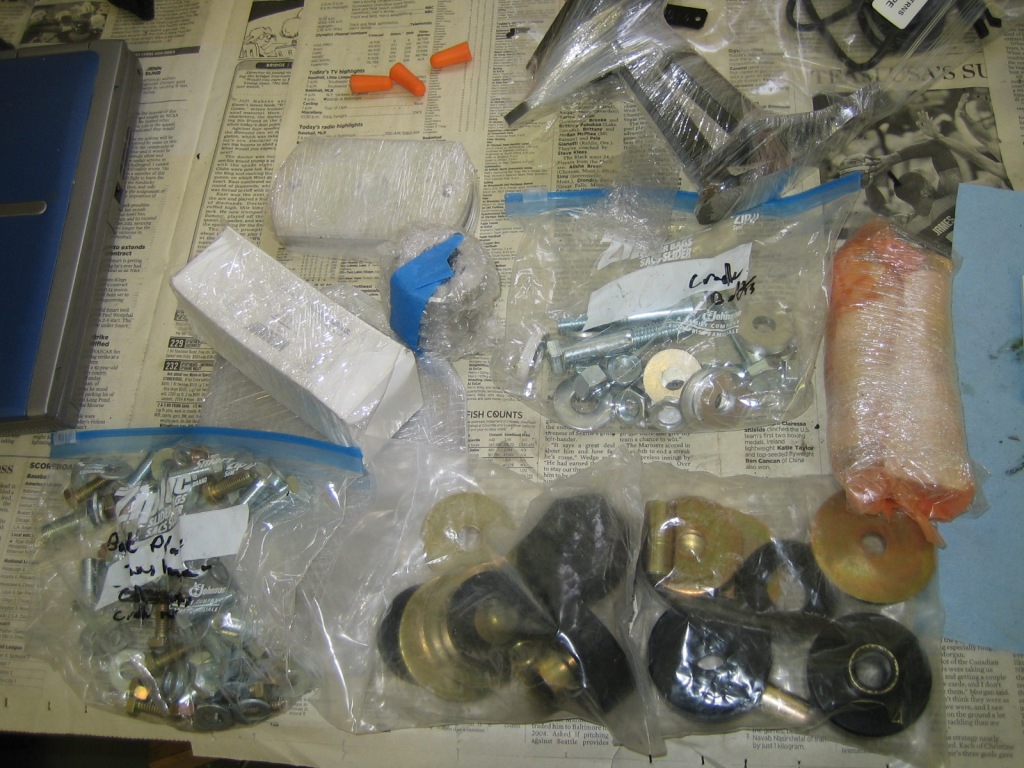
Placed the mounting plates on the old engine mount and transmission mount.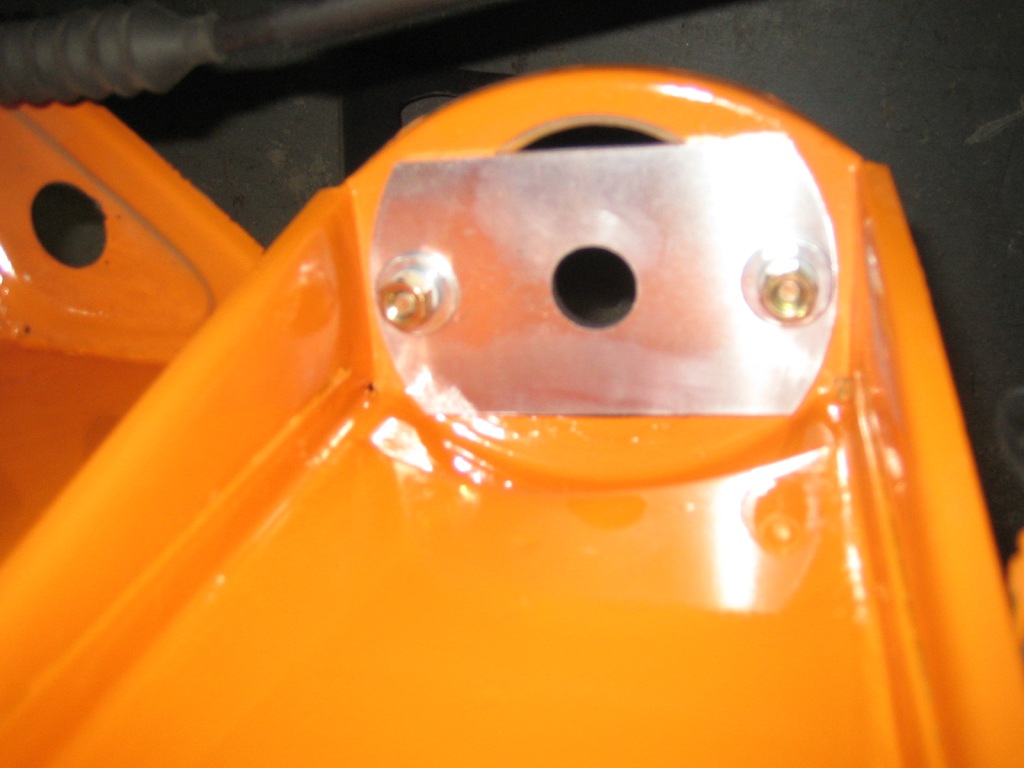
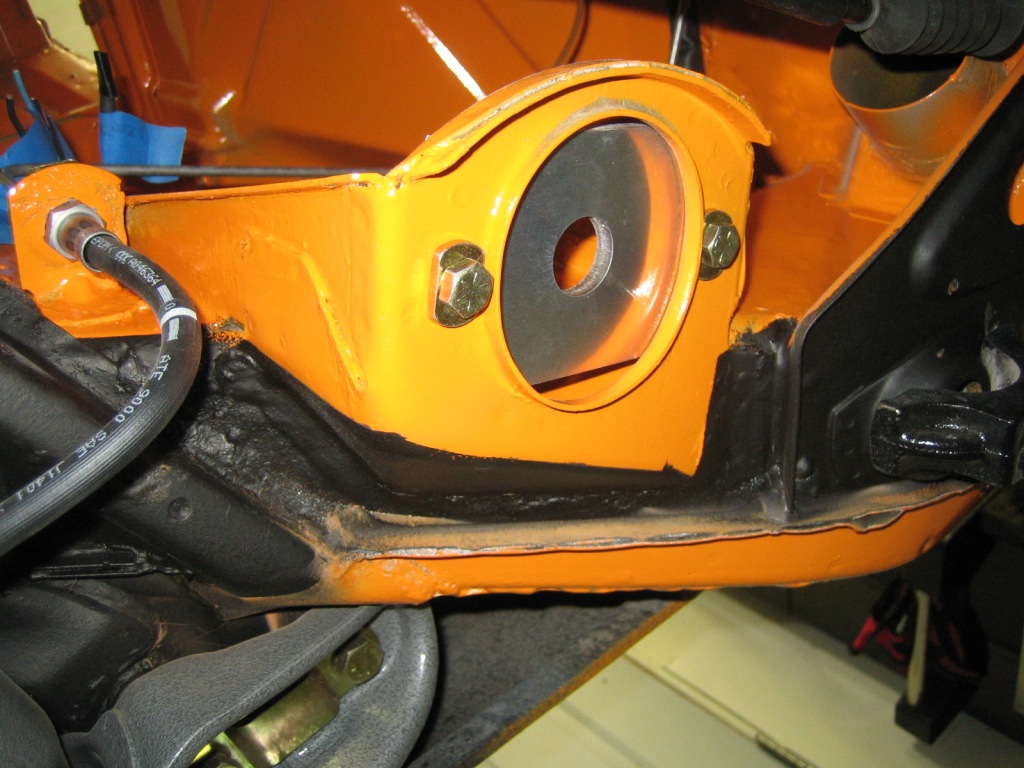
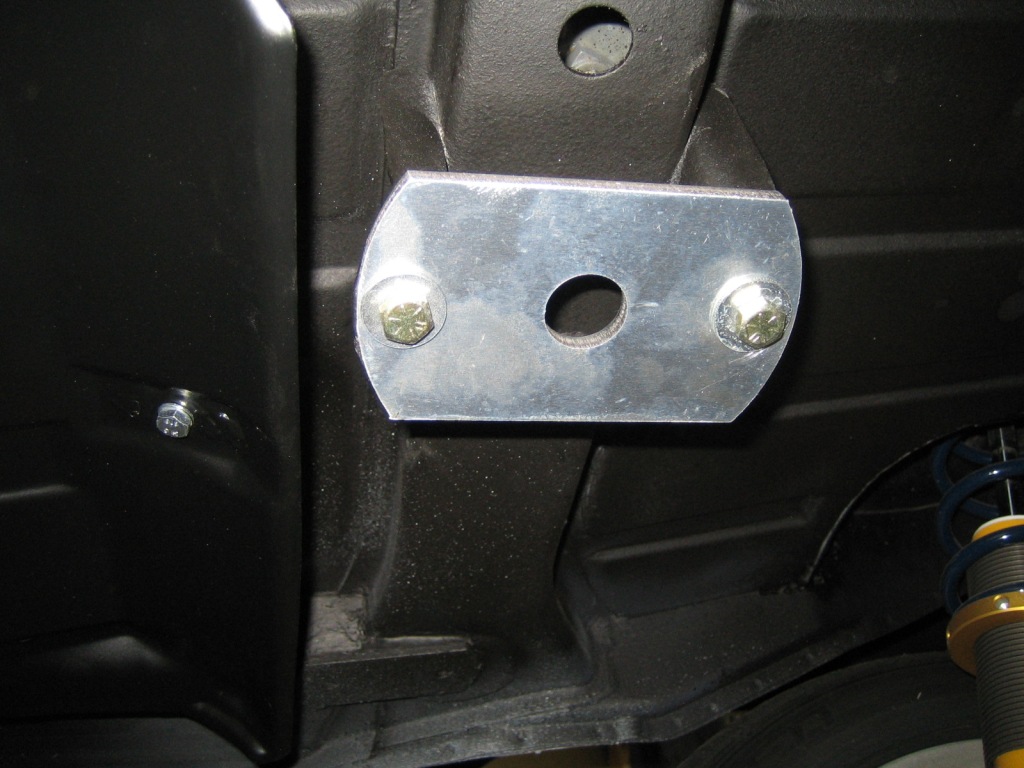
After much hassle with the engine hoist I got the engine on the dolly and the cradle mounted, encountered my first issue. I did not have the 10mm nuts for the Subaru Engine mount, I went through all my stash of parts but the nuts I found were the wrong thread pitch. At that point I was limited to how far I could get, will have another crack later in the week.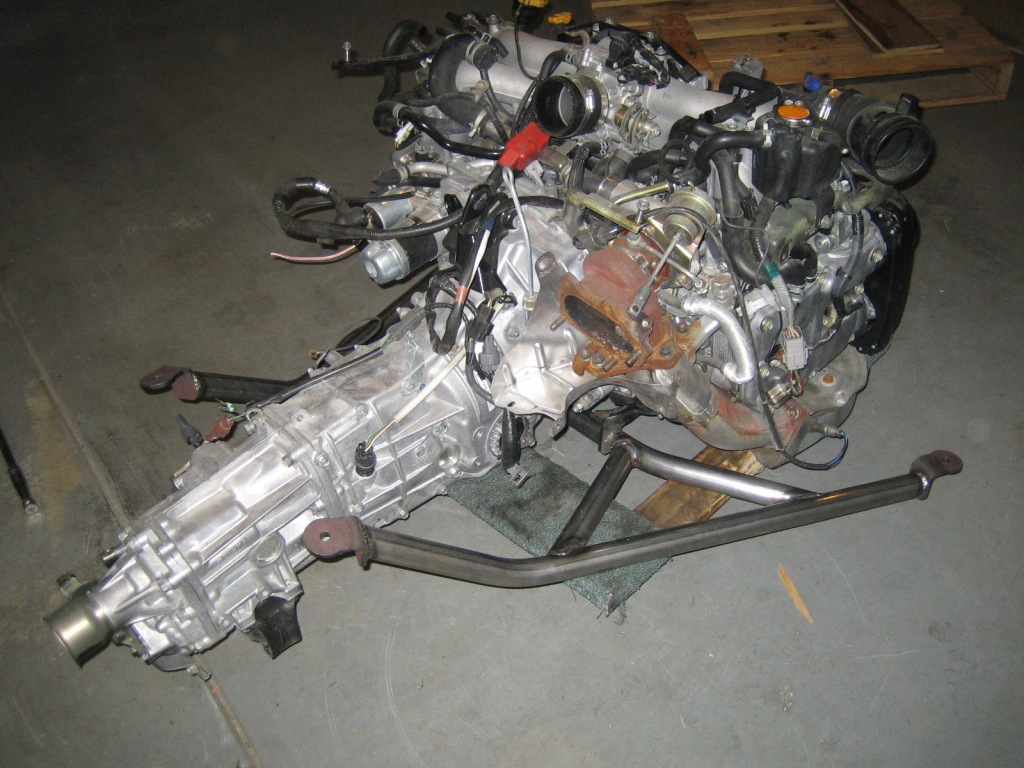
Transmission brackets on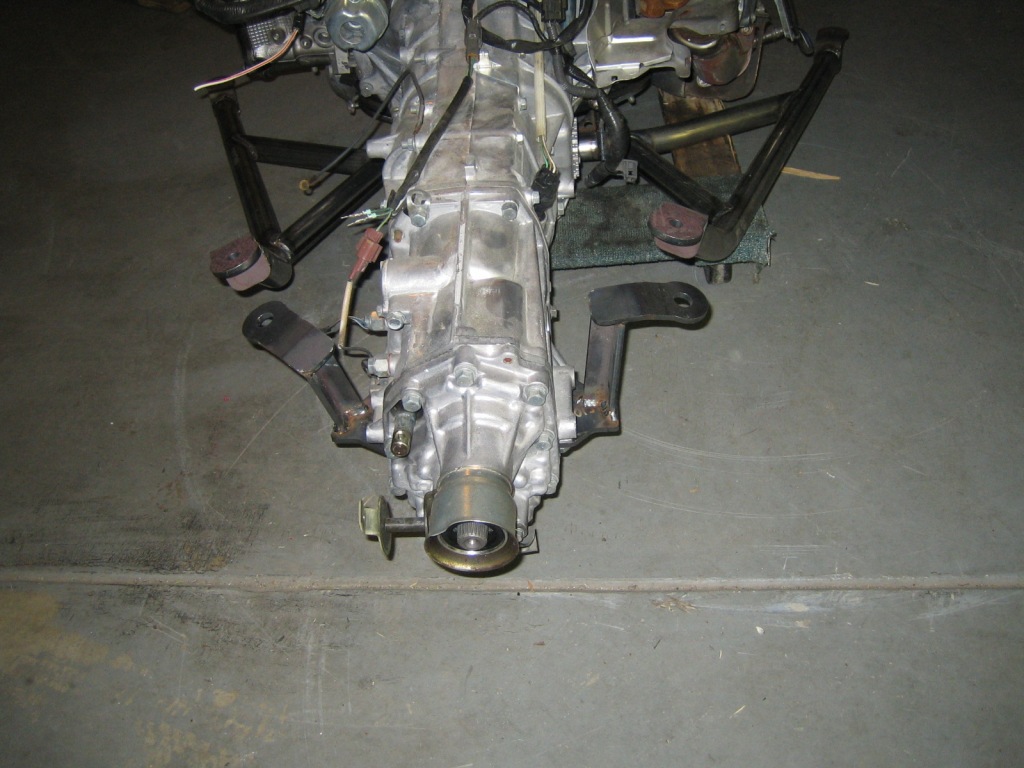
Took the rear of the transmission off, can see the nut that has to be removed to put in the adapter to lock into 2WD mode. 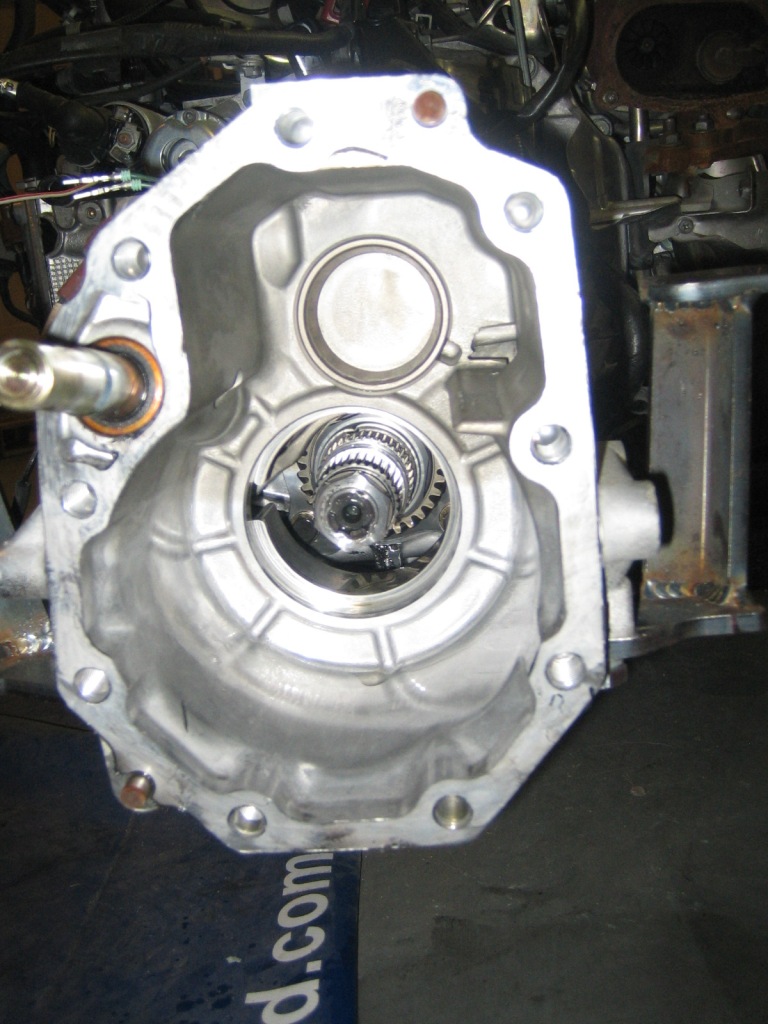
Here are the parts to be discarded.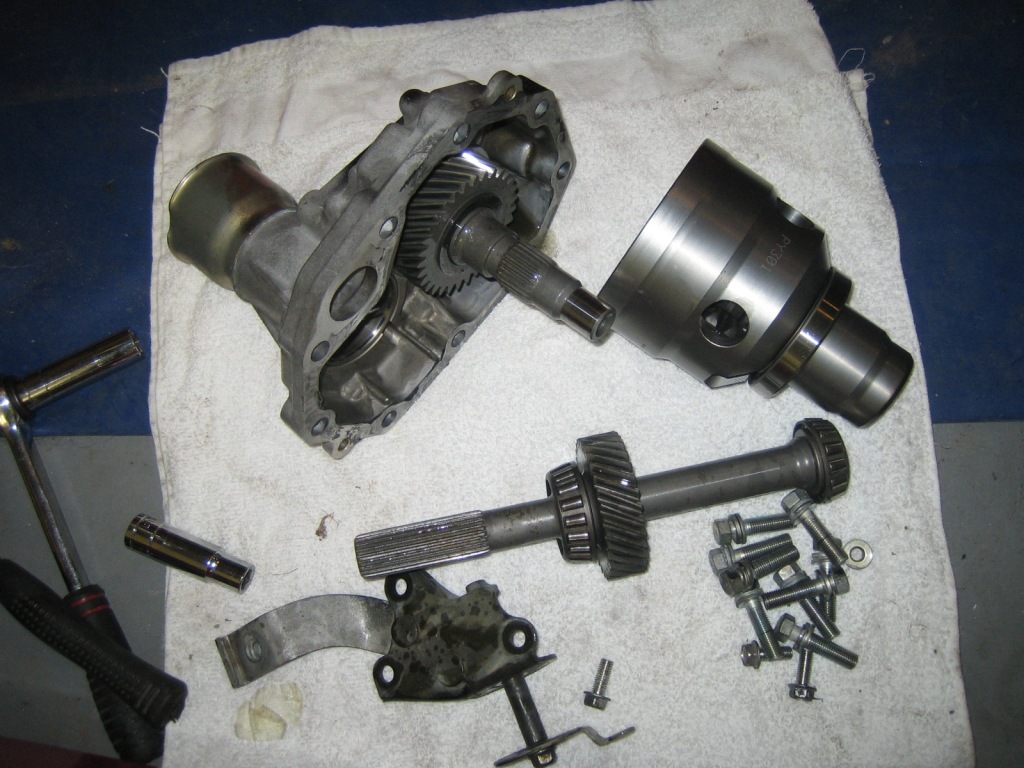
Looking forward to getting the engine/transmission in so I can mock up all the odds and ends.
At the weekend I also managed to get the fuel pump/filter and lines hooked up at the front.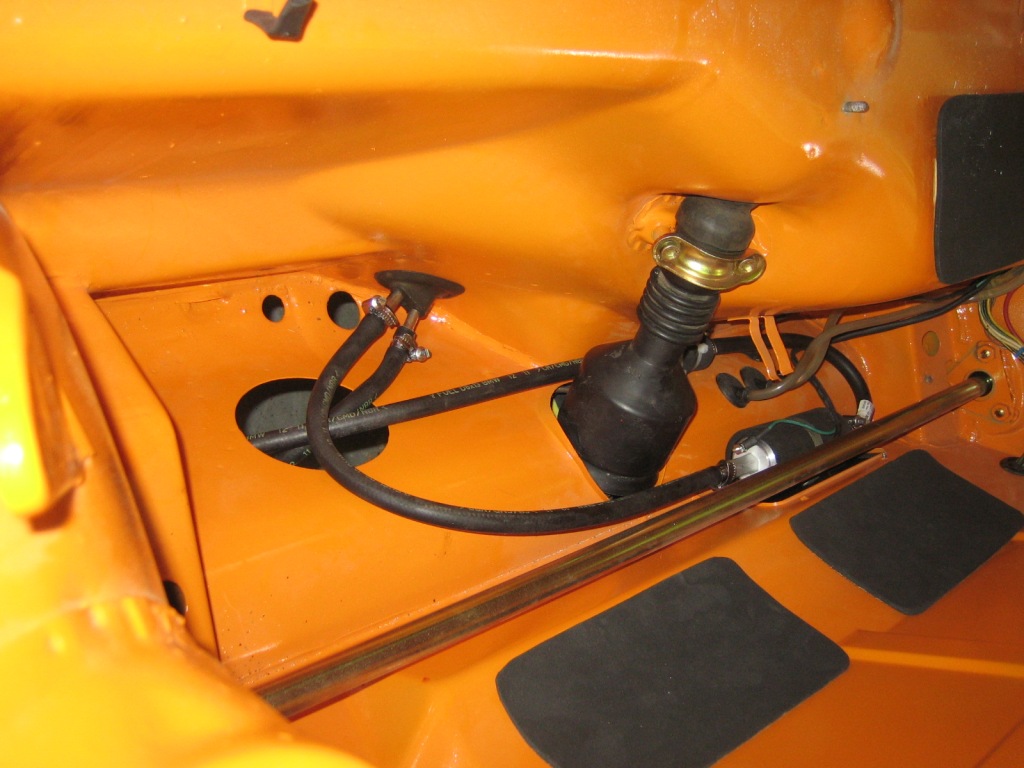
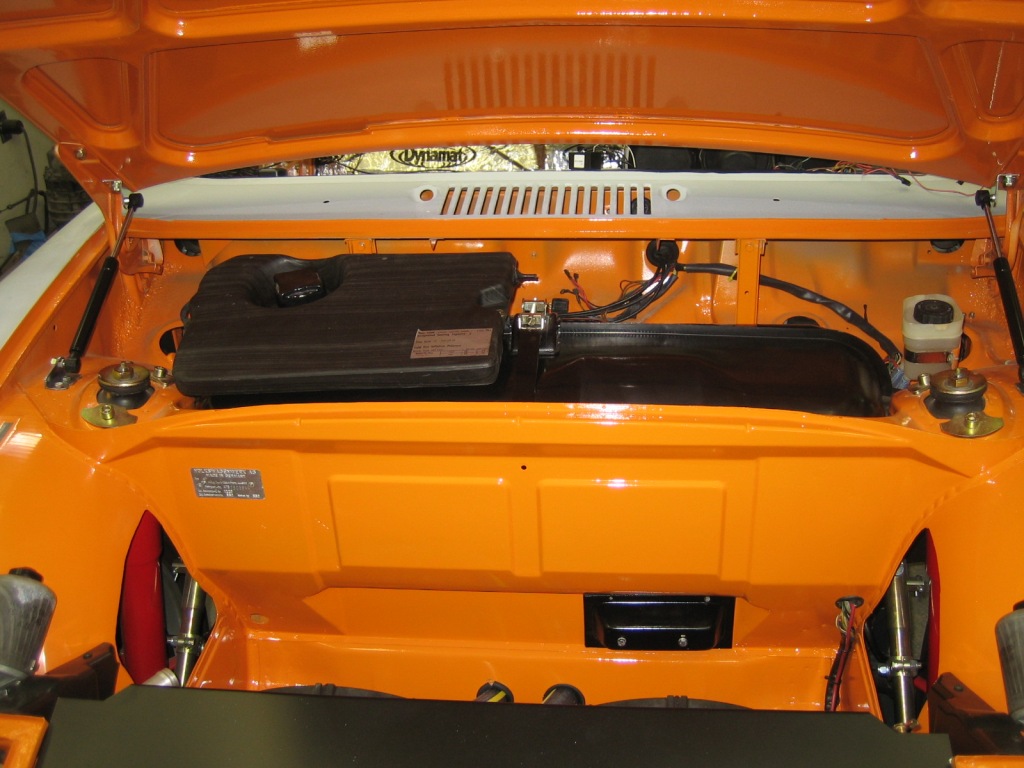
Posted by: IM101 Sep 6 2012, 02:25 AM
WOW! this is the first time I've looked at this build, man impressive! hah, sorry to make you wait on the cradle, hope it'll be worth it.
Just another build that I'm proud to be a small part of.
Again, I know i have not put any instructions up yet so please feel free to call me if you have anyquestions with the assembly.
Ian
PS. I think i will just make the 10mm nuts a part of the kit as it seems that may not always come with the stock mounts.
Posted by: Cupomeat Sep 6 2012, 04:38 PM
Damn impressive!
I also found this thread for the first time and am really impressed and inspired!
Posted by: Chris H. Sep 7 2012, 06:44 AM
Looking really good Chris. What a top notch build.
That settles it, I gotta scrounge the cash for the subie kit from Ian. looks like high quality stuff.
Posted by: my928s4 Sep 8 2012, 11:37 AM
So classic case of when frustrated and tired leave it and come back later, worked for a few hours last night on cutting out the rear trunk and getting the engine in place. I got the engine of the pallet and on a dolley and was using the jacks and a hoist to place the engine. Well could not get it right, slept on it and in 30mins this morning it was all buttoned up.
Cutting the rear trunk was like taking a step back but will be worth it, I have seen someone else do a nice panel which looks stockish. Be nice to use the welder again!
As you can see plenty of room up front.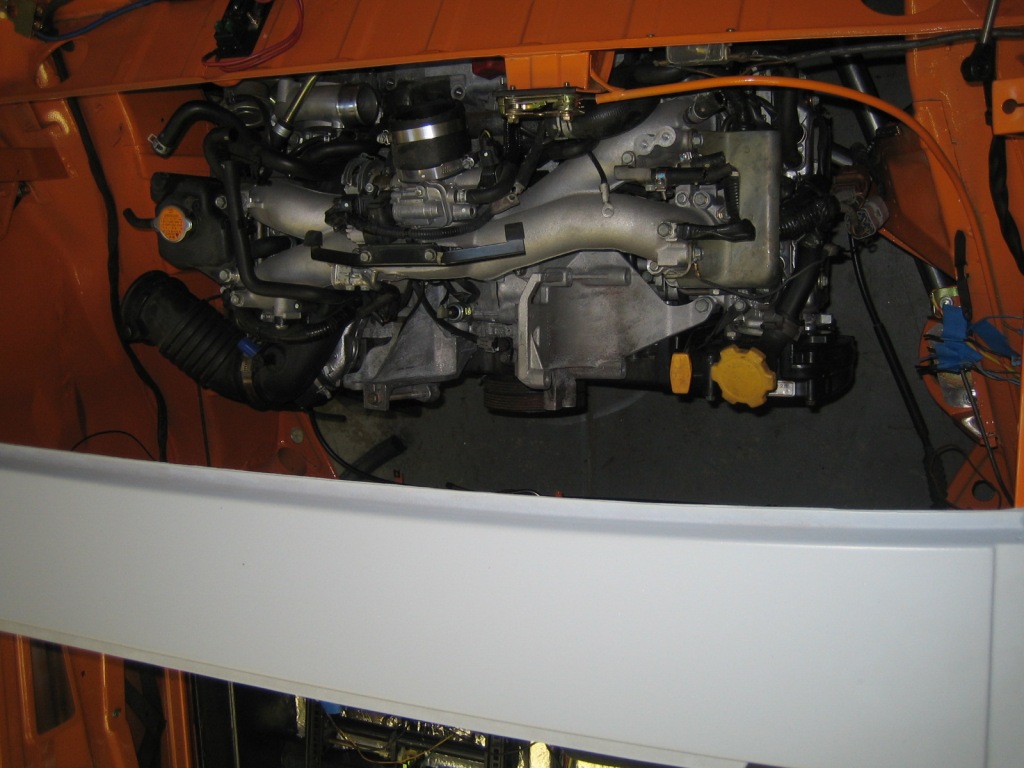
Nice big opening for access, at least for now. You can see the turbo is the biggest interference.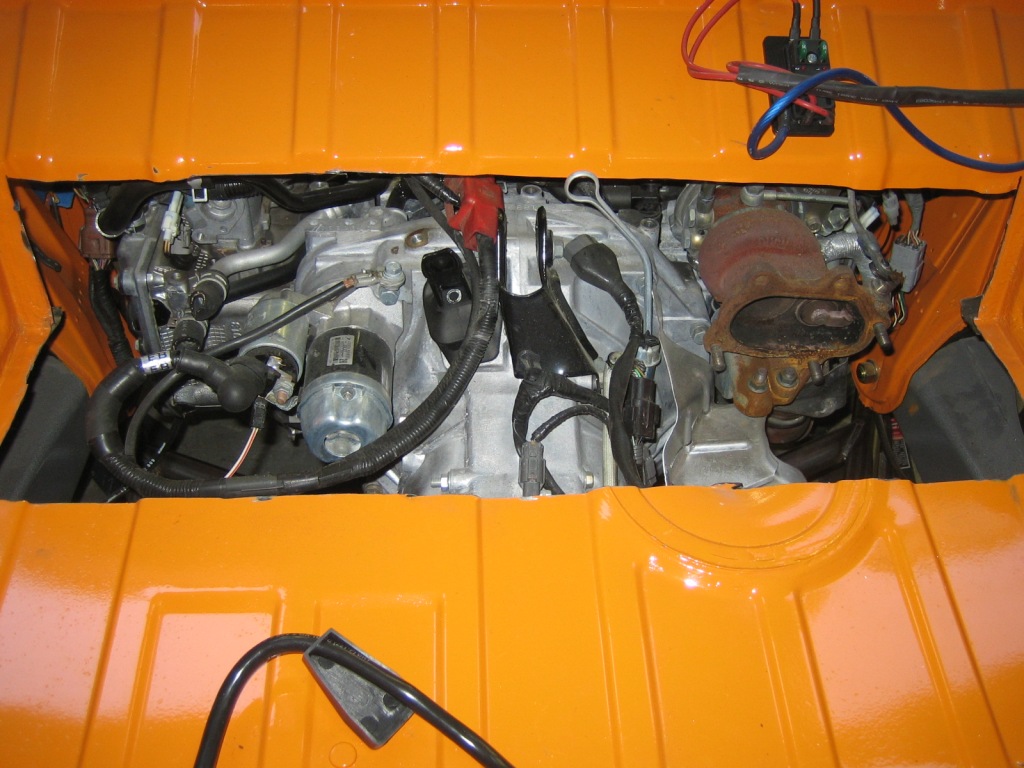
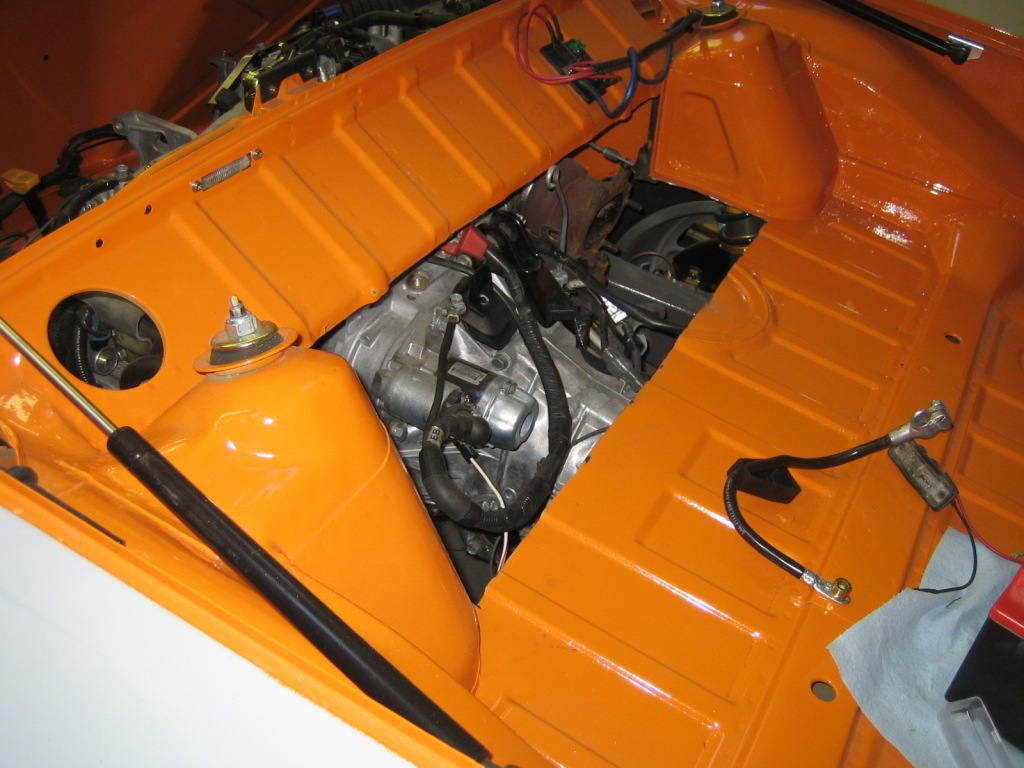
Underside shot, pretty tight at the back but it all fits, nice setup, kudos to Ian for that.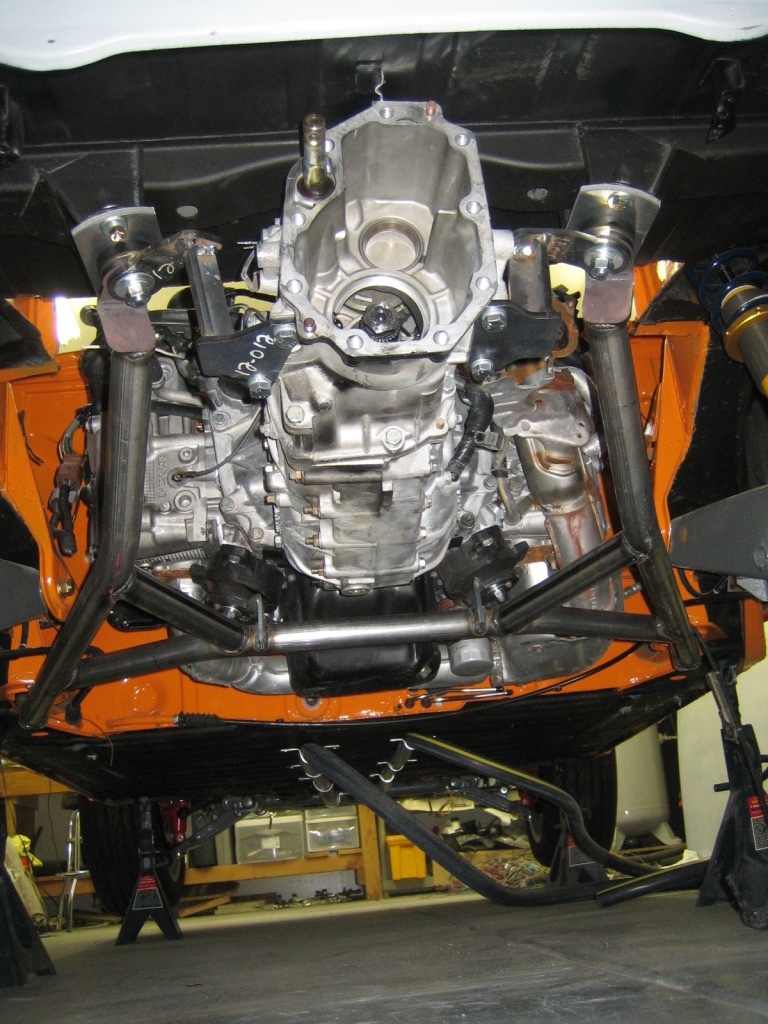
Coolant lines and routing is going to be one of the easier tasks.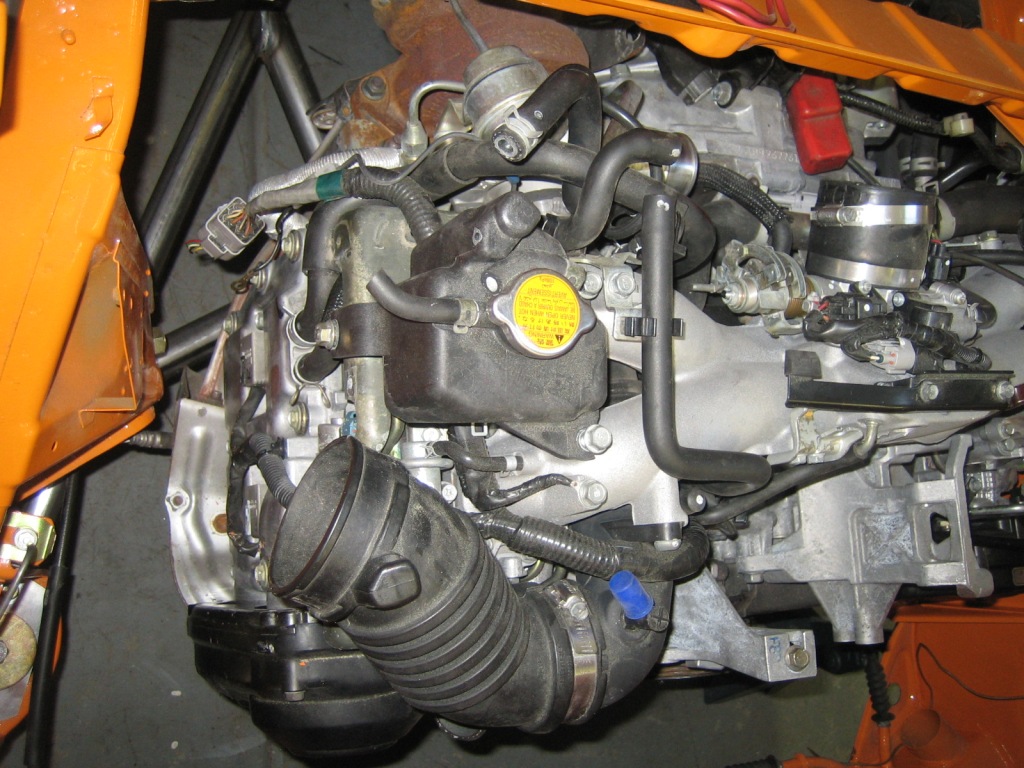
Noticed once I had the engine of the pallet that the sump is pretty dinged up, will need to fix that later.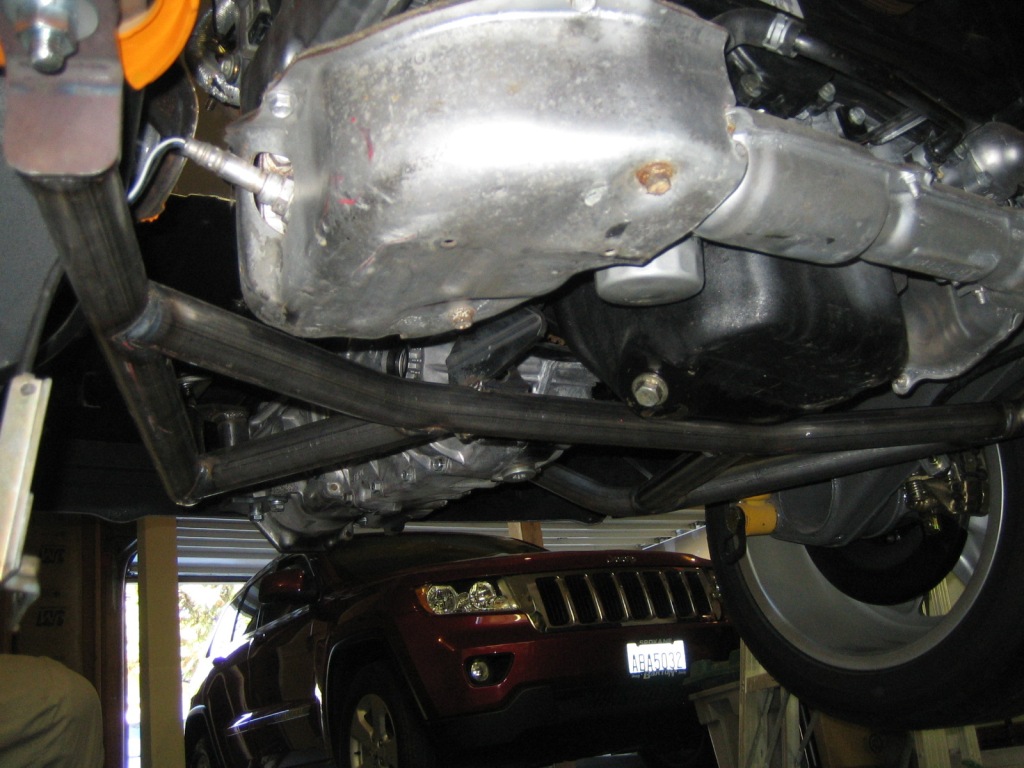
Heading out of town for a few days so going to take the time to work out the todo list and what parts I need to buy, would like to get everything mocked up and running without taking the engine out 5 times. Can but hope, that way it would only need to come out once to get everything powdercoated.
Posted by: jimkelly Sep 10 2012, 05:09 AM
sweet
here is a pic of dbcooper's rear trunk - seems like this will leave enough room for a spare tire?
and his thread...
http://www.914world.com/bbs2/index.php?showtopic=102887
Attached image(s)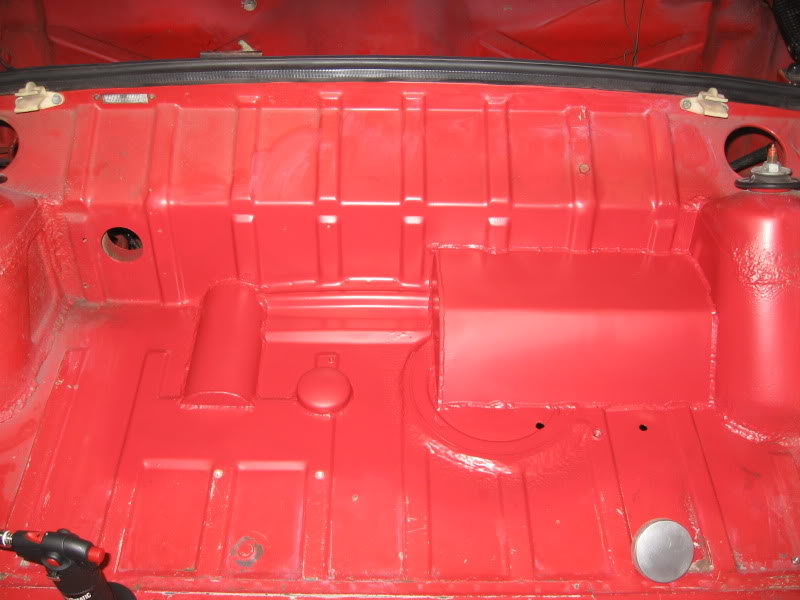
Posted by: my928s4 Sep 10 2012, 06:52 AM
OK found the pic, here is the trunk modification I am going to try and implement. Might be a while though as having the improved access is big benefit until I get everything sorted.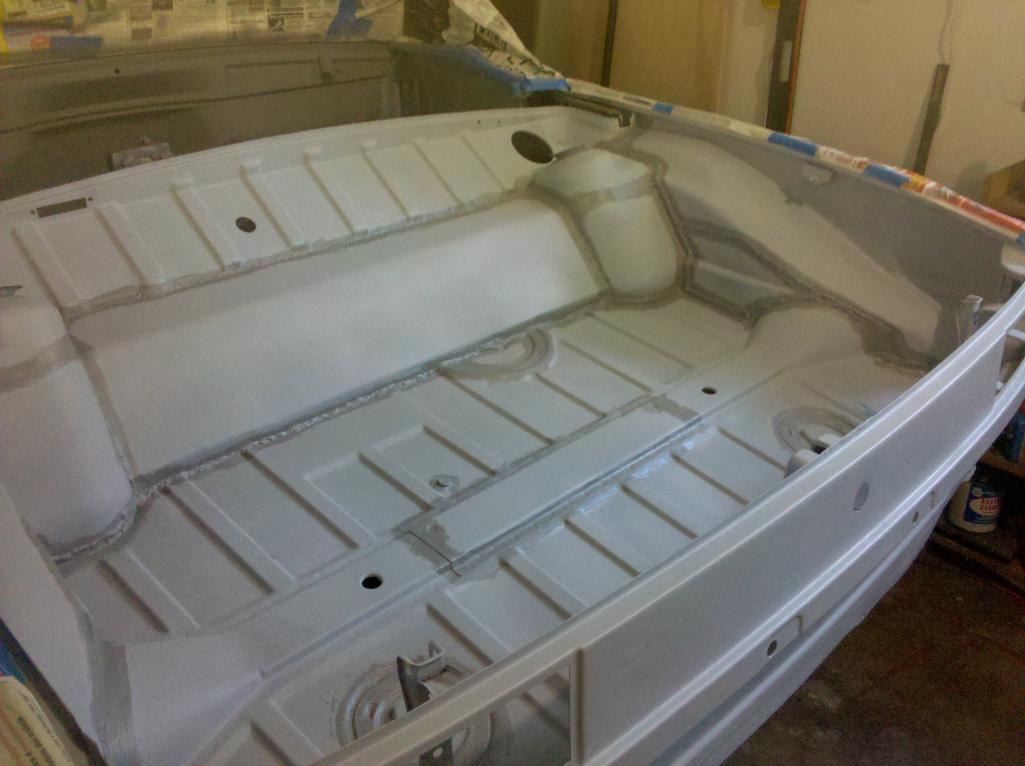
Posted by: my928s4 Sep 19 2012, 08:21 PM
Managed to get qIan's 2WD adapter fitted to the transmission and the rear cover bolted on.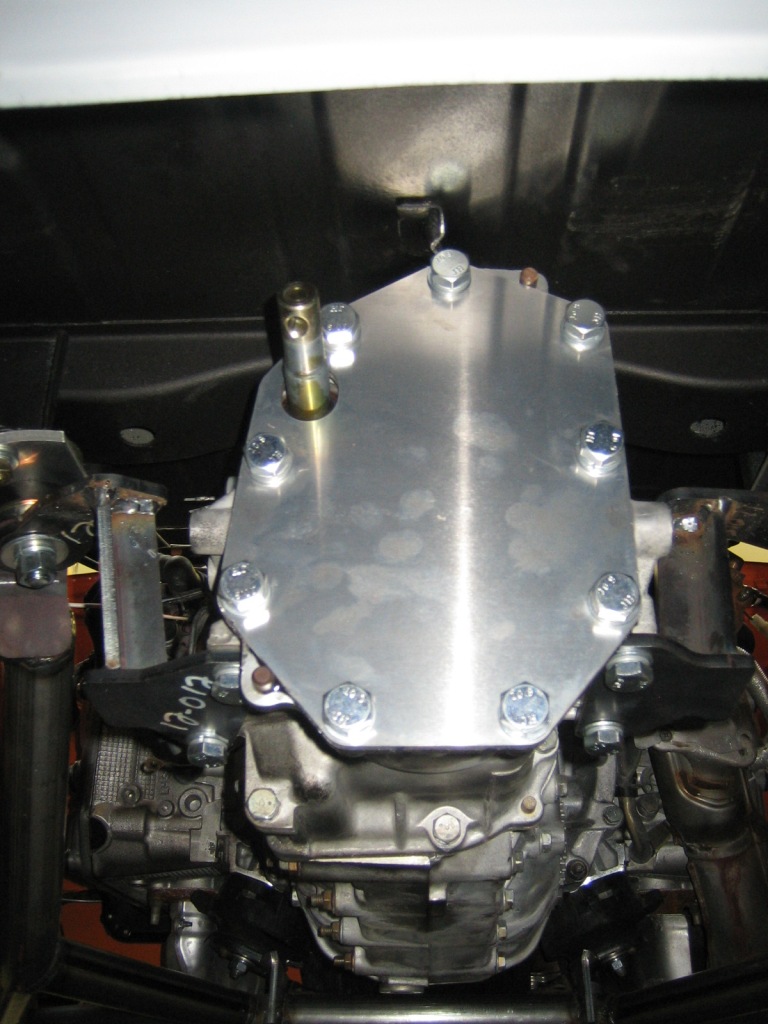
Next decided to get the harness on the car and start hooking all the connections up including the modifications to get the AVCS wired up. I liked the idea of having the ECU under the passenger seat so drilled hole in the firewall to allow that.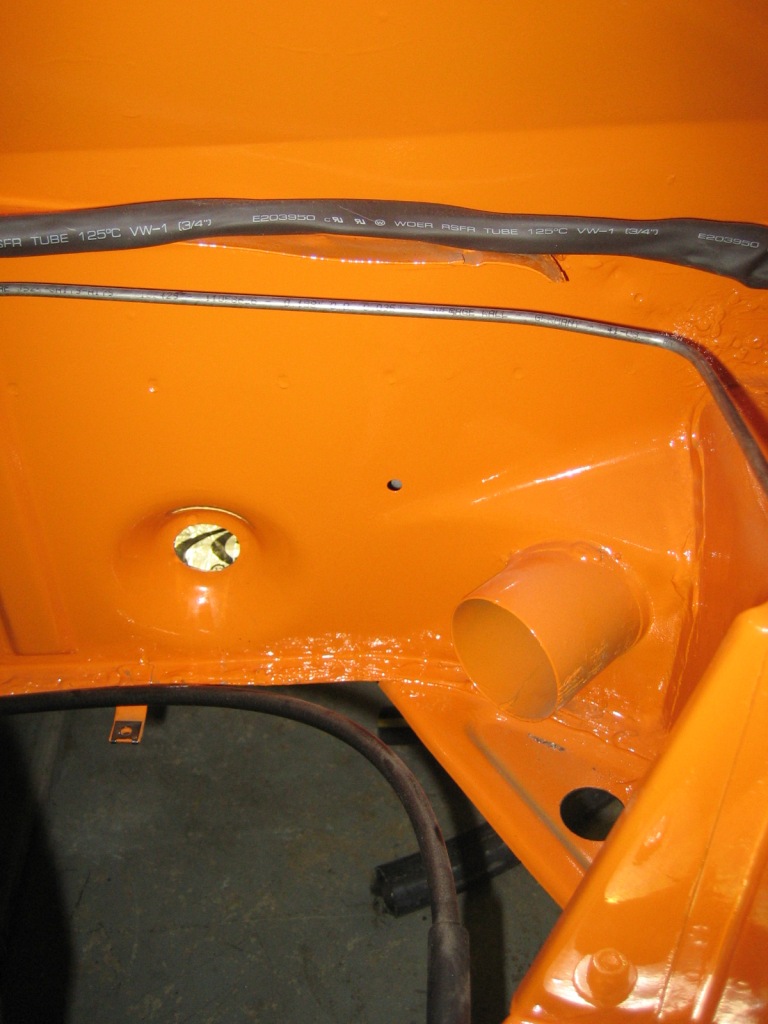
I thought I had completed a lot of the harness work but laying it out on the engine proved there was more to be done, seems to take forever. However, getting close.
Can see where I added connectors to join to the 914 harness, for now just using cable ties, will wrap and protect once I know I have it all right ...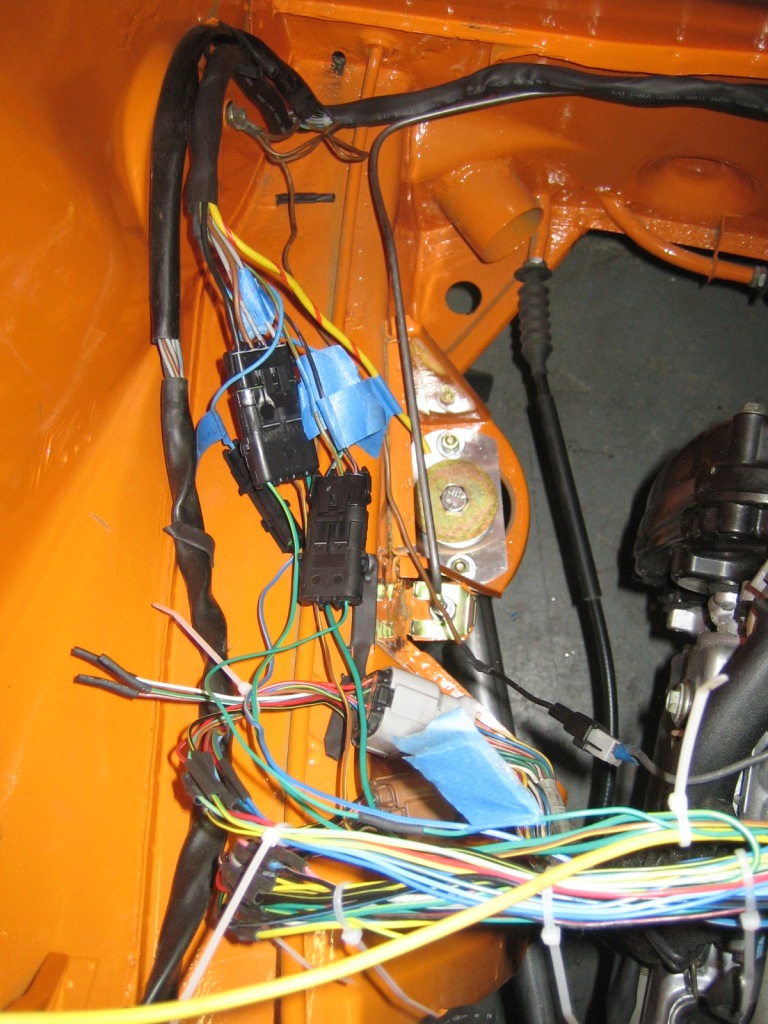
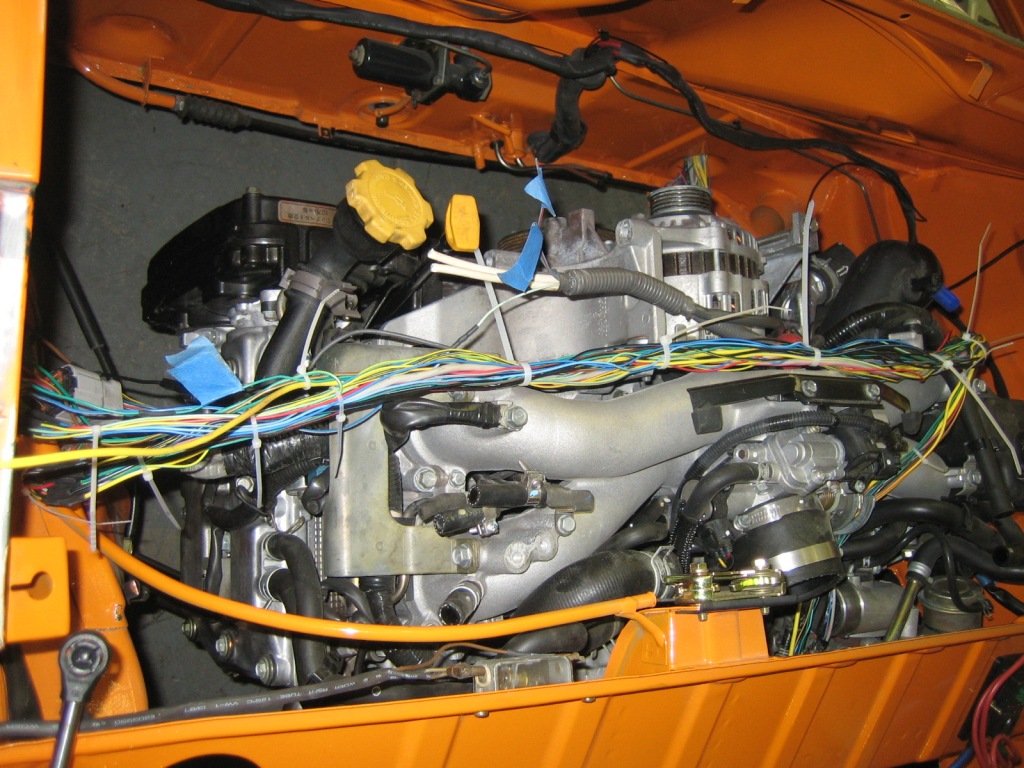
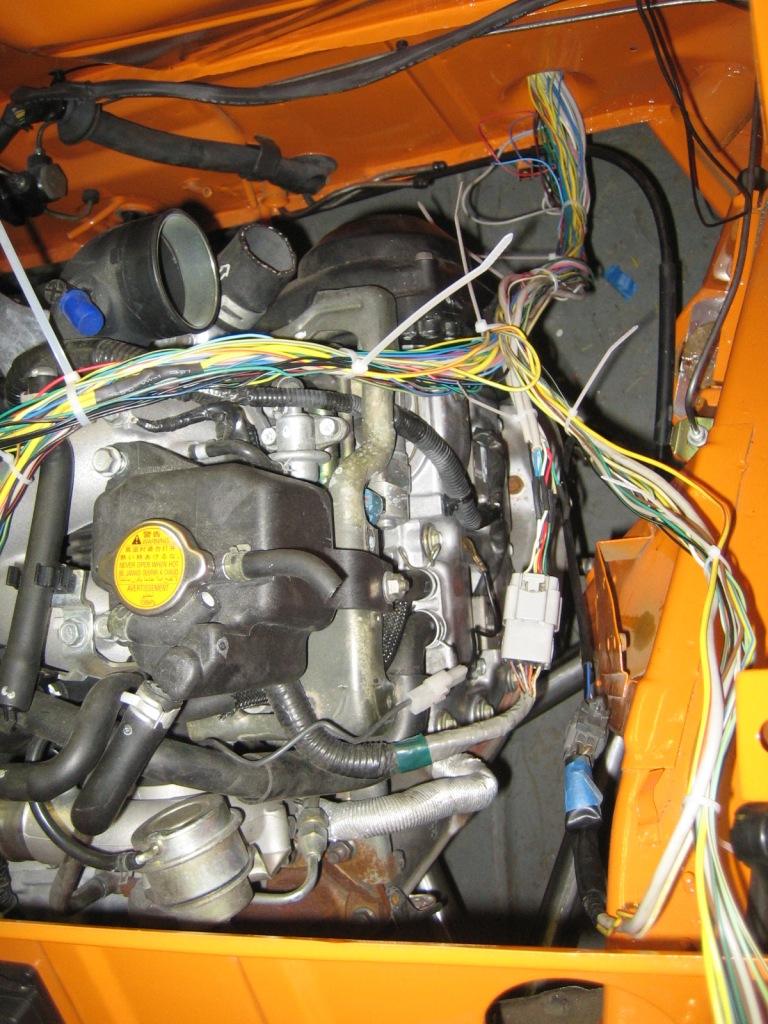
So once I tidy this lot up I will be ready for a power on test ...
Posted by: jimkelly Sep 23 2012, 06:38 PM
question and comment ...
does subaru need a return fuel line back to tank?
since you are using a stock subaru ecu - i assume you will be faking some signals to the ecu?
tony's thread says he planned to fake several signals to ecu...
http://www.914world.com/bbs2/index.php?showtopic=31579&st=100
(see post #109)
Fuel level sender (0.12 to 4.95 volts)
Fuel Temp sender (2.5 to 3.8 volts)
Fuel Tank Pressure sender (2.3 to 2.7 volts)
Rear O2 sensor signal (0 - 0.9 volts)
Neutral position sensor (+12 in neutral, 0 when in gear)
Rear O2 heater sensor signal (0-1.0 volts)
Power Steering oil pressure sender (open/close)
thanks
jim
Posted by: my928s4 Sep 24 2012, 08:12 AM
question and comment ...
does subaru need a return fuel line back to tank?
since you are using a stock subaru ecu - i assume you will be faking some signals to the ecu?
tony's thread says he planned to fake several signals to ecu...
http://www.914world.com/bbs2/index.php?showtopic=31579&st=100
(see post #109)
Fuel level sender (0.12 to 4.95 volts)
Fuel Temp sender (2.5 to 3.8 volts)
Fuel Tank Pressure sender (2.3 to 2.7 volts)
Rear O2 sensor signal (0 - 0.9 volts)
Neutral position sensor (+12 in neutral, 0 when in gear)
Rear O2 heater sensor signal (0-1.0 volts)
Power Steering oil pressure sender (open/close)
thanks
jim
Hi Jim
Yes the Subaru requires a return line, also has a vent line which I have not figured out yet. Hopefully just plug.
As for sensors although I completed the wiring and powered it all up I have yet to start the engine so I am sure there will be sensor issues ahead but I bought the interface board from small car performance. It had inputs for the radiator fans, fuel tank level, pressure and temp + two more for valves (Iforge which).
My engine and ECU are JDS and it seems they came without rear O2 sensor and exhaust gas temp sensor evidently.
I bought a cheap OBII reader from HF just to see if the ECu was alive, I plan to invest in http://www.romraider.com/ as the engine will definitely need some tuning changes.
Hope this helps.
Chris
Posted by: jimkelly Sep 24 2012, 04:55 PM
these guys seem to offer a way to fake 2 ecu sensor inputs?
Simulators for Subaru VSS Sensor and Rear Oxygen Sensor Signal...
http://www.enginewiring.com/catalog.htm#Featured
thanks!
jim
Posted by: Hydra. Sep 25 2012, 01:07 AM
Car will run fine without a rear O2 signal, you can (permanently) turn off the resulting CEL with a software reflash. In fact you can turn off almost any CEL with a reflash...
Posted by: my928s4 Sep 29 2012, 05:12 PM
Well the ECU is all hooked up, powered up and I can do some interrogation with the OBD II scanner so it is alive. I also turned the engine over from the ignition which was pretty cool. Still some tidy up to do with the wires but that can wait until we get this baby started and running.
Decided to remove the intake, I need to add the oil pressure and water temp sensors so it made sense and I also wanted to find out which fuel port was in and out. Not too bad of a job once you know where all the connections are.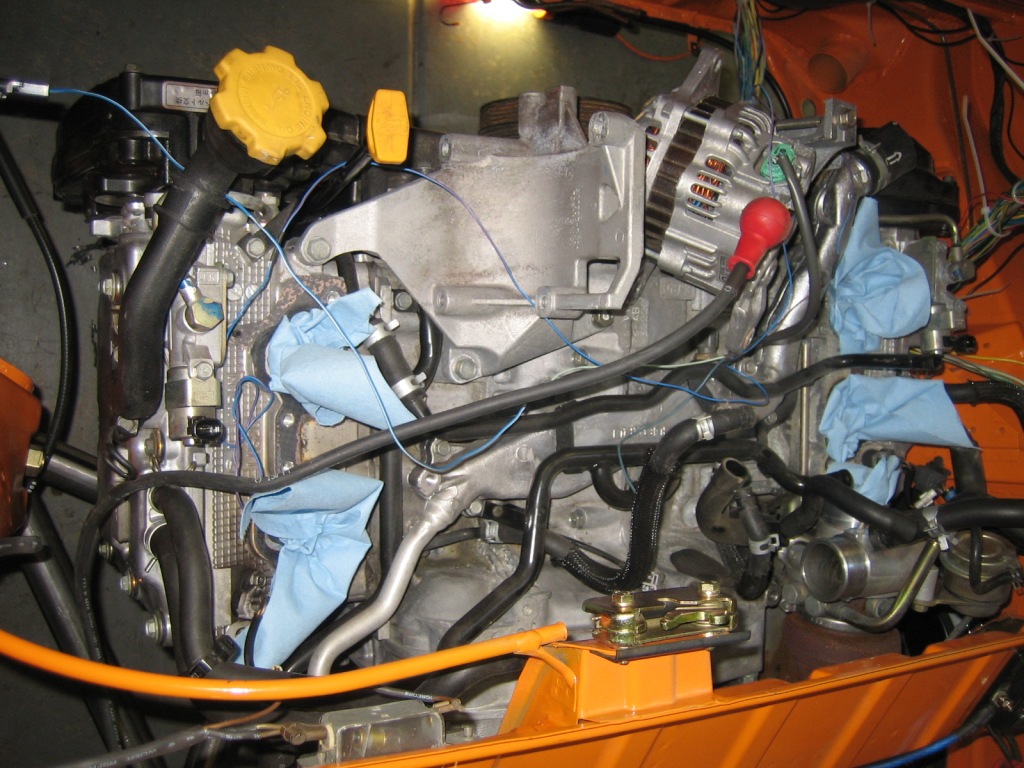
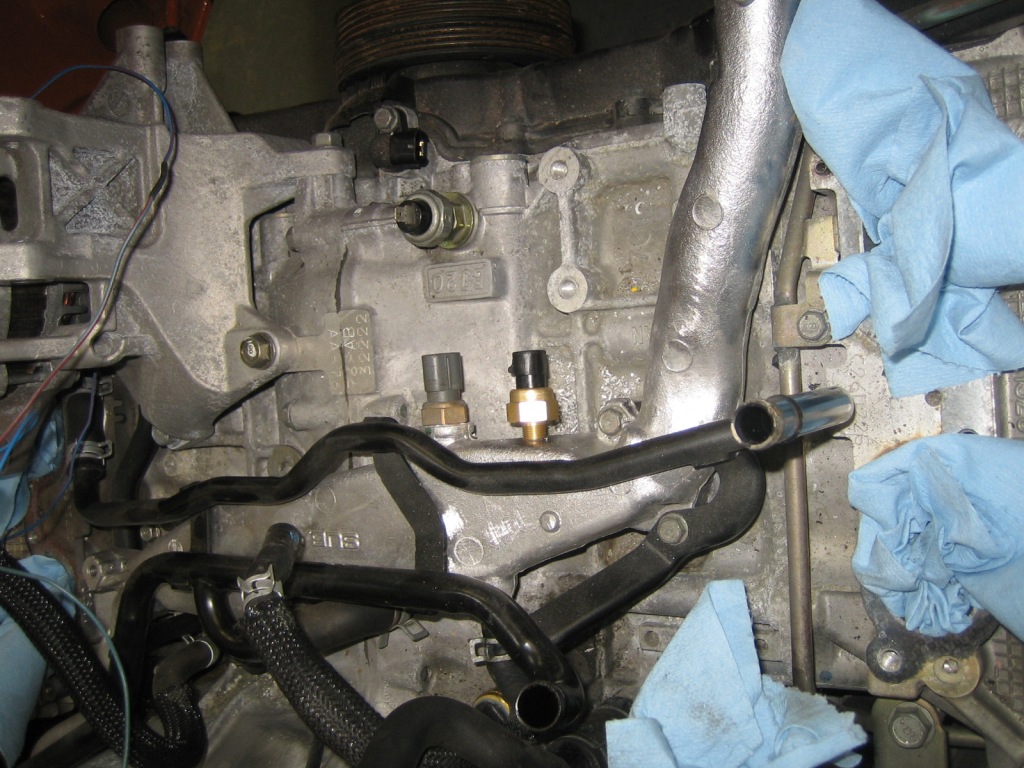
Unfortunately I need the old coolant sensor for the ECU and the gauge part of the sensor is not compatible with the new gauge. So I drilled a hole in the bridge and added the new sensor.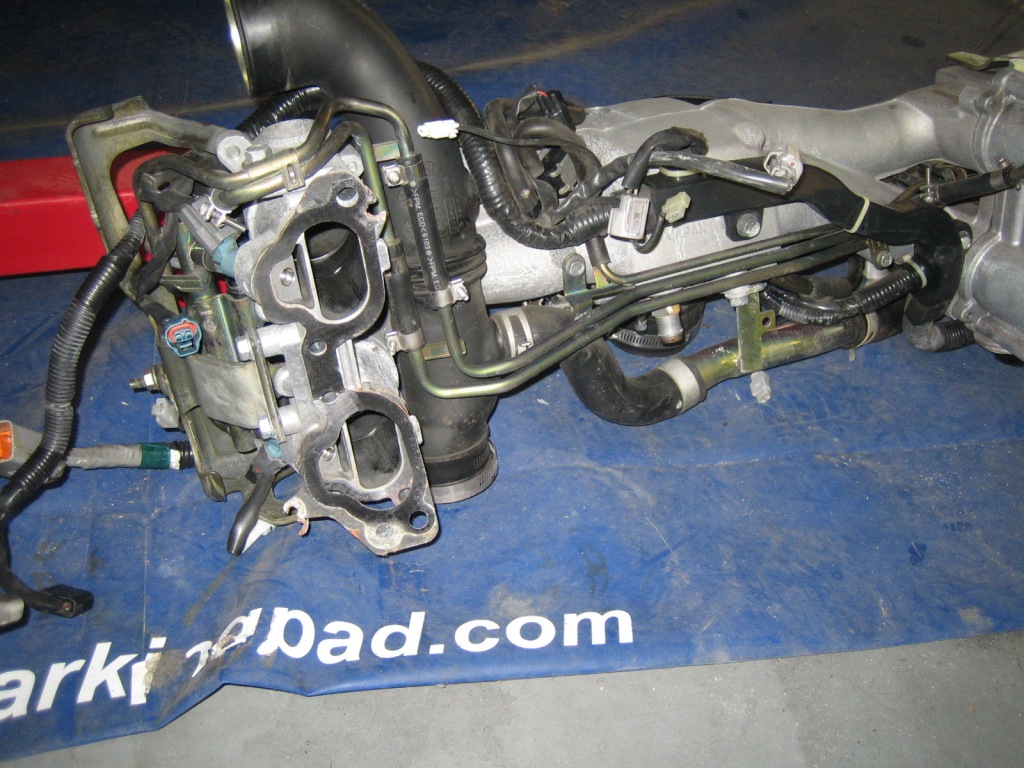
I was just going to replace the old oil pressure sender with the new one but there is limited height between it and the alternator. There is another port at the rear of the engine which has an alan keyed bung, I bought the Subaru adapter (cheap) to screw in where the bung was.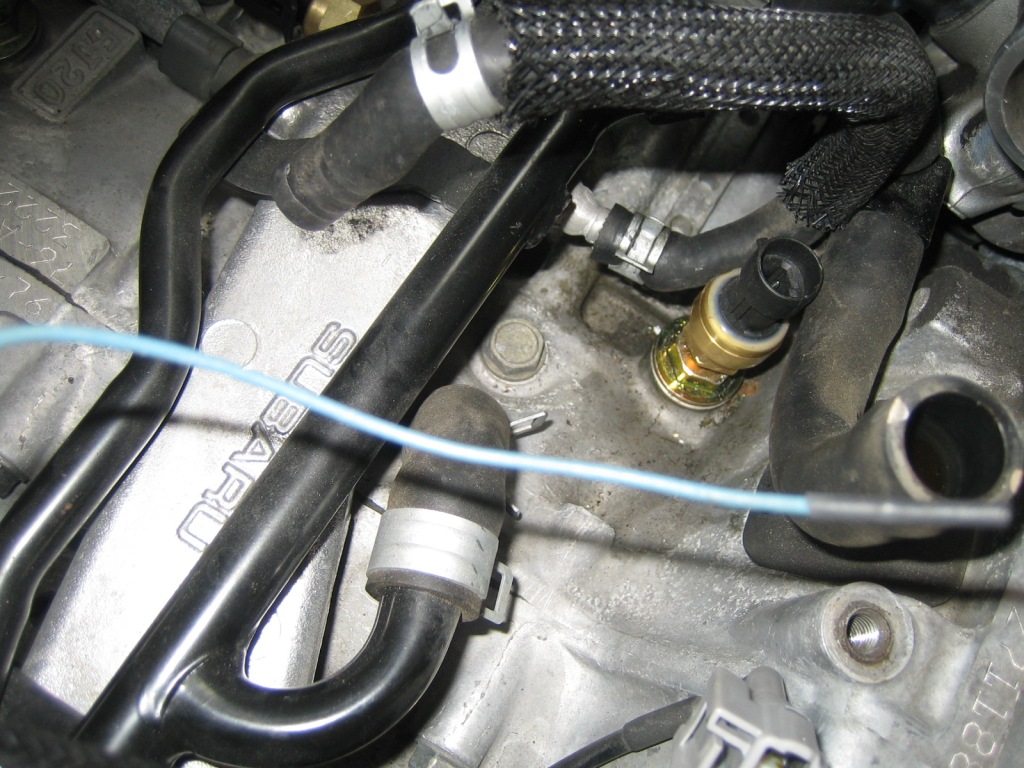
I thought removing the oil pan to fix the dent was going to be easy but someone had replaced the pan before and used a very effective liquid gasket. Took forever to prize the sump off AND clean both surfaces, removing all of the dent proved impossible because of the baffling but I did fix the area around the pickup with the aid of a press. Back on with a rubber gasket and also put on a new oil filter (makes me think I am getting close to the big day if nothing else)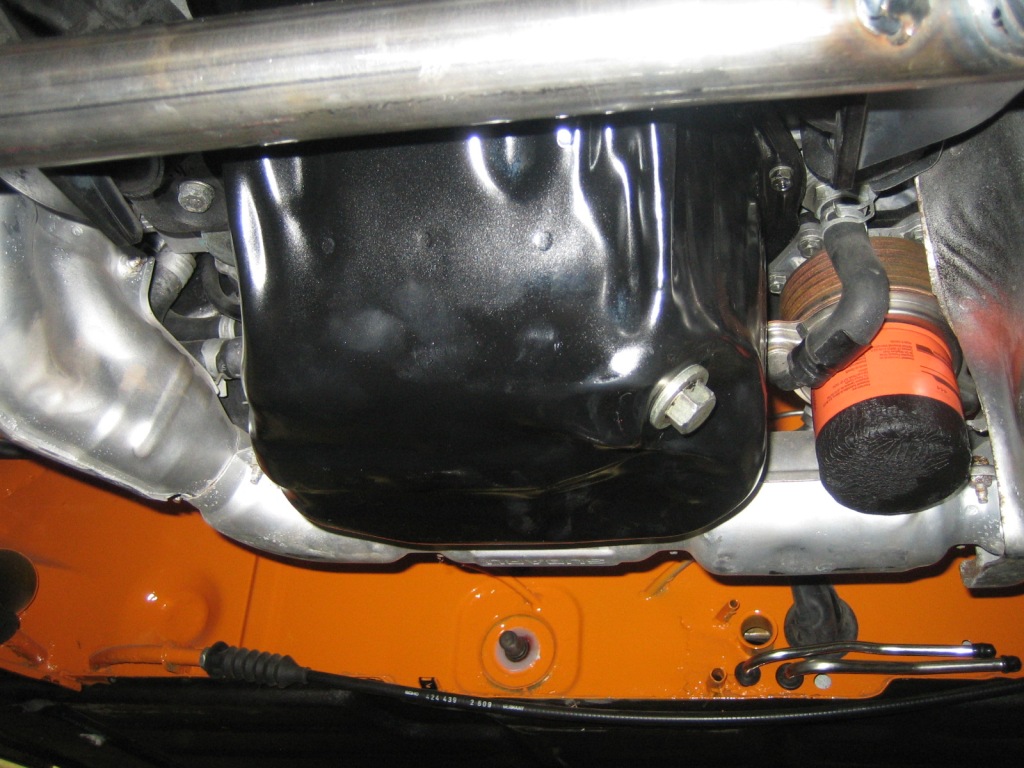
My Subaru drive shafts arrived, so already to modify once Ian get his shafts complete.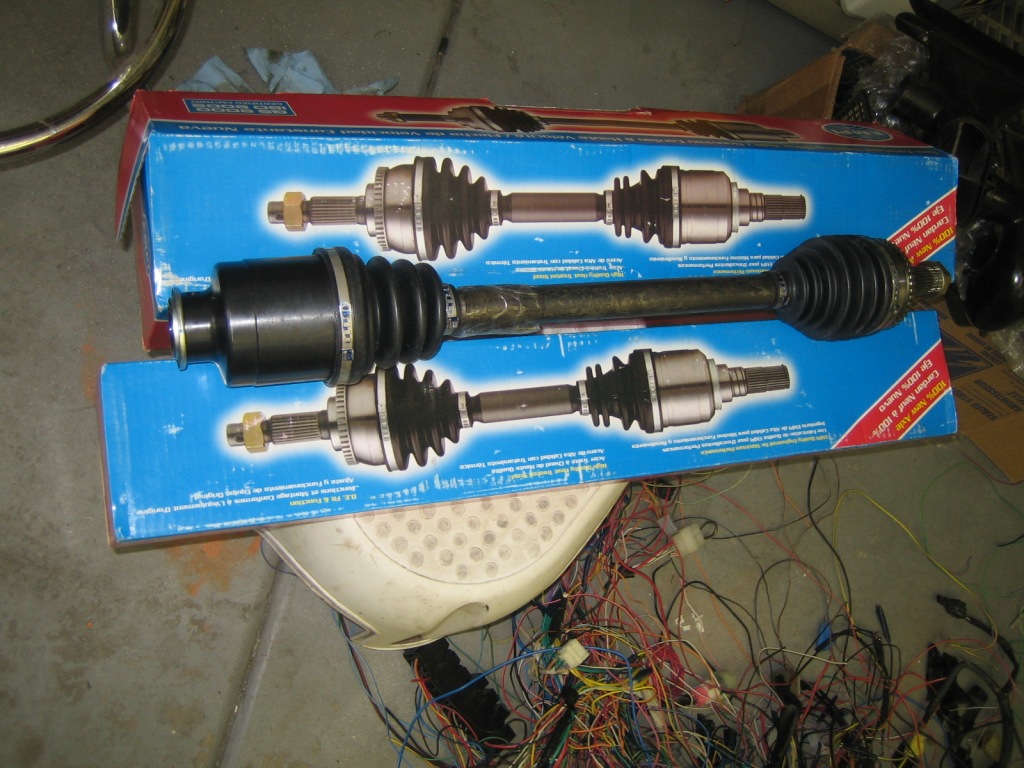
Also picked up the wastegate solenoid and it associated plumbing with the restrictor pill, not sure why this was removed from the engine but it was.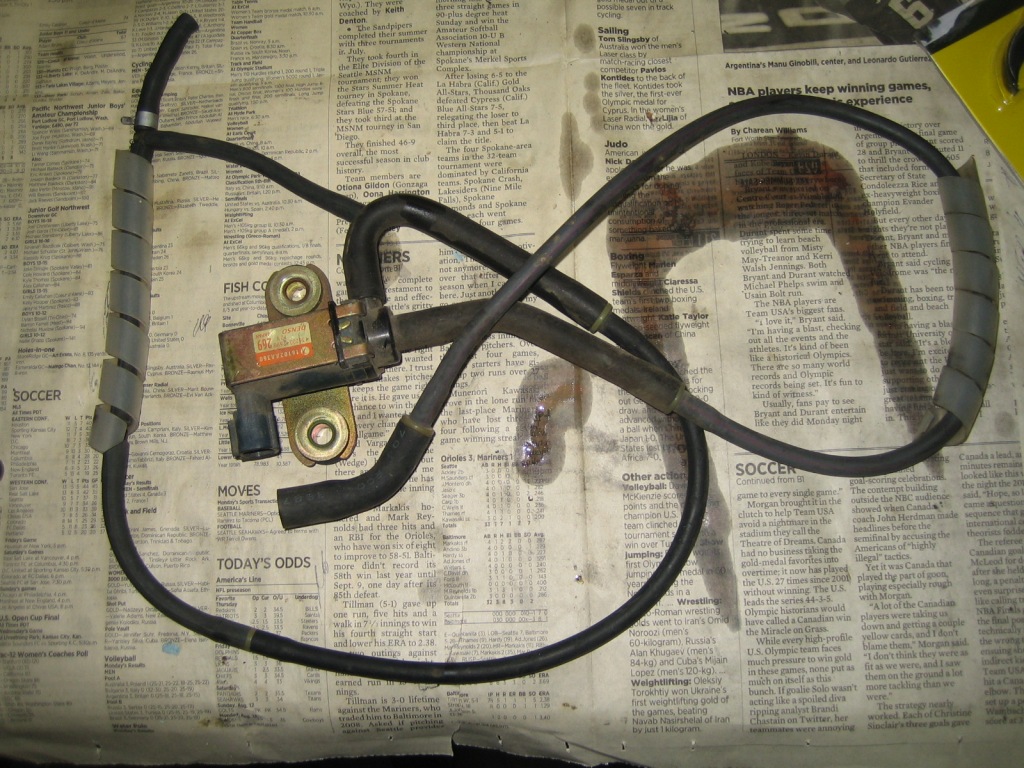
Posted by: Porcharu Sep 30 2012, 12:28 PM
How is the oil pan clearance? I spoke with Ian a few weeks ago and he said the pan hangs down about 1-1/2" below the floor (or the cradle - I forgot.)
BTW after talking to Ian for a while I am not only purchasing some of his parts I have offered him any help in any way I can to help him make this a success.
Steve
Posted by: my928s4 Oct 6 2012, 10:54 PM
How is the oil pan clearance? I spoke with Ian a few weeks ago and he said the pan hangs down about 1-1/2" below the floor (or the cradle - I forgot.)
Steve
Hi Steve
Yep about an inch below the cradle.
Posted by: my928s4 Oct 6 2012, 11:03 PM
Got some parts this week, I got the flange for the turbo of Ebay and the 3" tube and muffler from Summit. Actually ordered way more tube than I needed but it was pretty inexpensive.
I think this is going to be a little loud but will be good enough to get things going.
A bandsaw would have made this job a lot easier!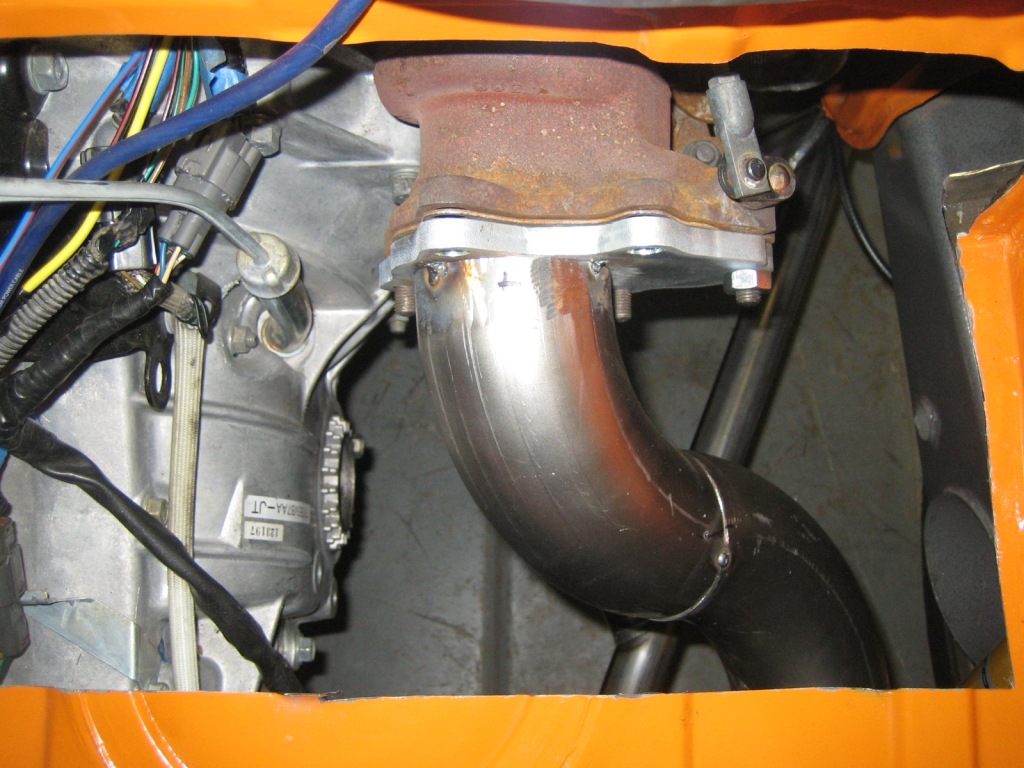
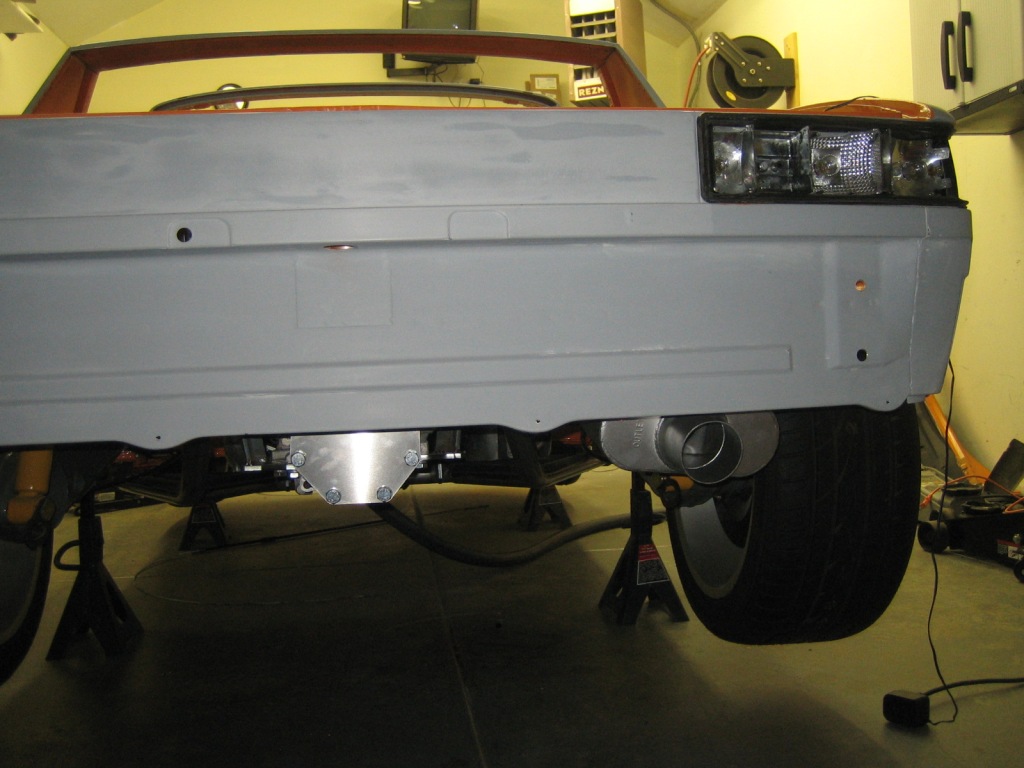
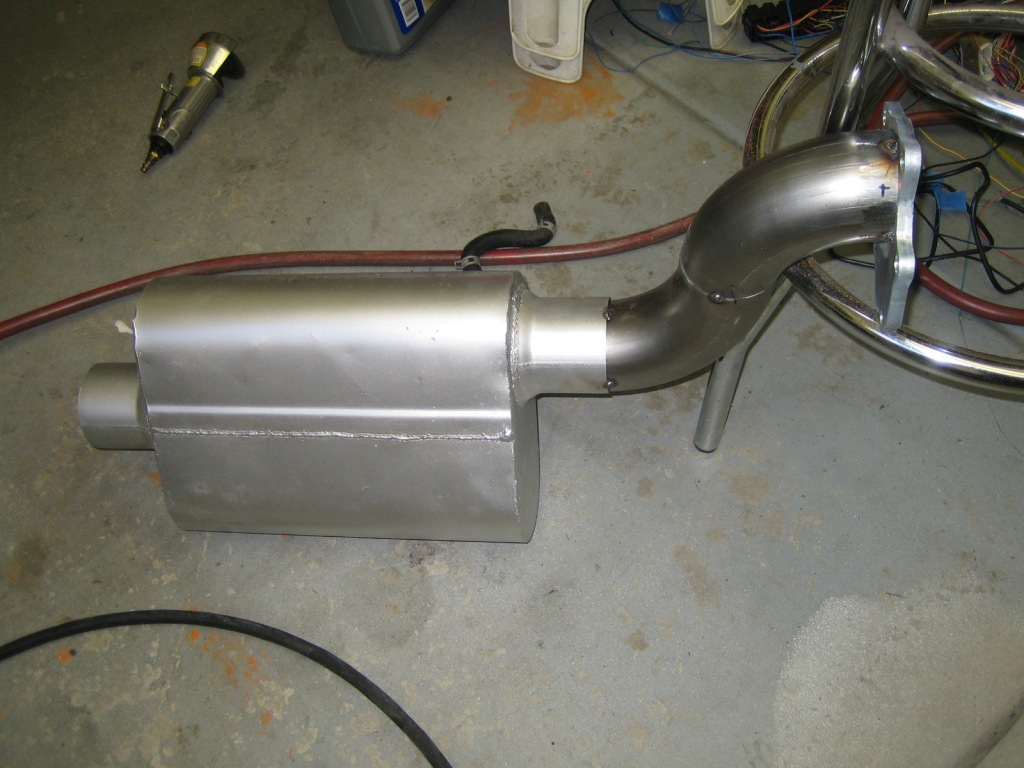
Need to fabricate a hanger and get some kind of exhaust tip, 3" looks a little ricey but minor issue for now.
Going to leave it tacked for now, just incase I feel the need to modify something in the next couple of weeks.
I have the coolant adapters from RH, so tomorrow coolant pipes hooked up!
Posted by: rohar Oct 6 2012, 11:21 PM
It's comming along nicely. If you've got some time, stop by the track tomorrow. I'm fielding the Teutonic Turd and there's a lot of great people to meet out there.
Posted by: charliew Oct 7 2012, 03:20 PM
My advice is a little late but did you look at the pickup real close to see if the pan contacted it when it was dented in? The pickups seem to be easily cracked where they are brazed or silver soldered on the flange where they bolt on the block. The pan to pickup clearance is real close when it's all stock and it doesn't take much to bump the pickup. Nasioc has a few threads on the cracked pickup. I have added a brace on all the pickups we are using at my house to try and stop any vibration.
Also while the intake is off is a good time to do a delete on the tgvs for better airflow in the intake. I actually don't see any shaft or connectors for tgvs so it must not have them. Pretty neat.
Also while I was studying your pictures there is a sensor it appears on the back side of the drivers side head in the oil gallery. This is new to me. I'm trying to remember and I think that oil gallery is restricted with a orfice to reduce the oil to the heads, I'm wondering if it is a low oil pressure feedback safety thing to the ecu. To clean the oil gallerys on the heads you have to tap the orfice out and put it back in and it only goes one way out of the gallery, it fits against a shoulder in the gallery. You have to remove the 1/8 plugs on either end of the head to do this. I think it is in the front on the drivers side and the rear on the pass side as the turbo gets its oil on the pass side. I'm pretty sure that new sensor not there on the 04 sti of my sons, we have had it apart a couple of times. It might also just be a jdm thing.
I also wonder if this is a jdm motor if it has higher compression like the older jdm motors, if so it will need better fuel but it also will be higher horsepower than the usdm version.
Posted by: my928s4 Oct 7 2012, 06:34 PM
It's comming along nicely. If you've got some time, stop by the track tomorrow. I'm fielding the Teutonic Turd and there's a lot of great people to meet out there.
Could not make it happen today but you chose perfect weather! Were you out with Scott Adere and gang?
My advice is a little late but did you look at the pickup real close to see if the pan contacted it when it was dented in? The pickups seem to be easily cracked where they are brazed or silver soldered on the flange where they bolt on the block. The pan to pickup clearance is real close when it's all stock and it doesn't take much to bump the pickup. Nasioc has a few threads on the cracked pickup. I have added a brace on all the pickups we are using at my house to try and stop any vibration.
You may well be right on the pickup, I checked to make sure the brace was straight but did not check the joint for cracks, I was cranking the engine yesterday and did not see oil pressure so looks like sump will come off again.
See the attached pic for the location for the rear sensor, this was from NASIOC.
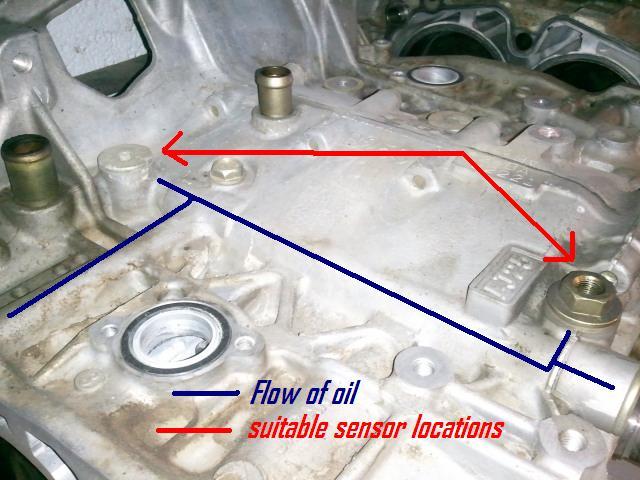
Posted by: my928s4 Oct 7 2012, 06:38 PM
While picking up some hose clamps from Autozone I picked up the parts to cobble together an intake. One more thing of the list.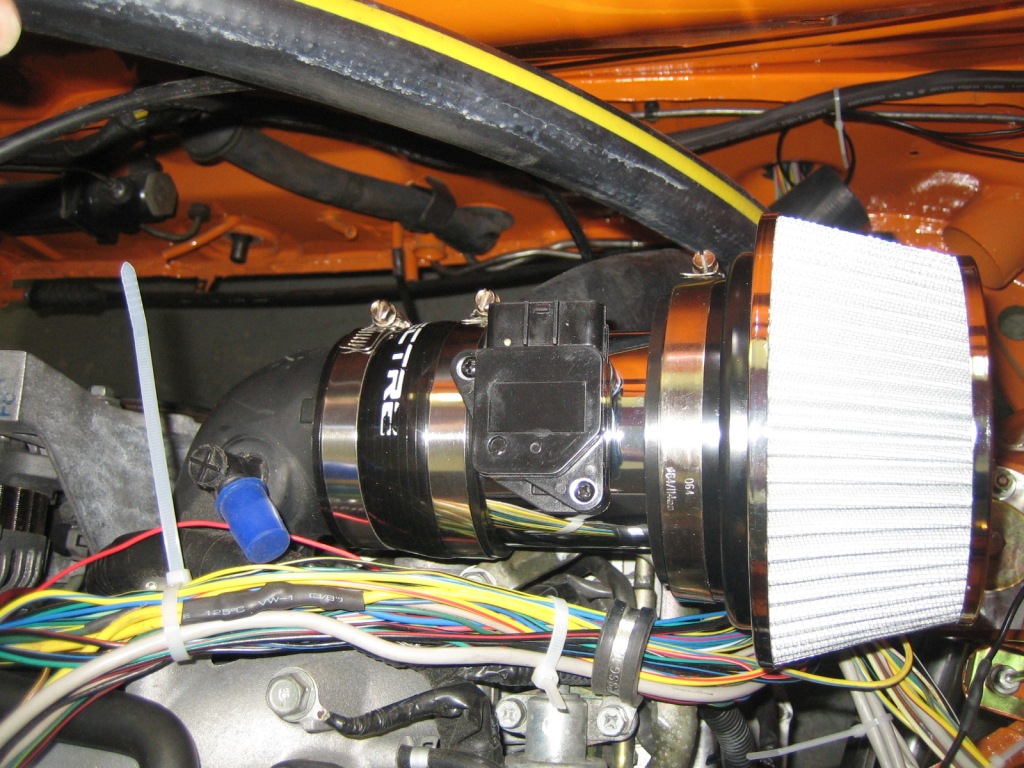
Hooked up the coolant lines from engine to radiator, RH adapters are actually nice parts and not too spendy either.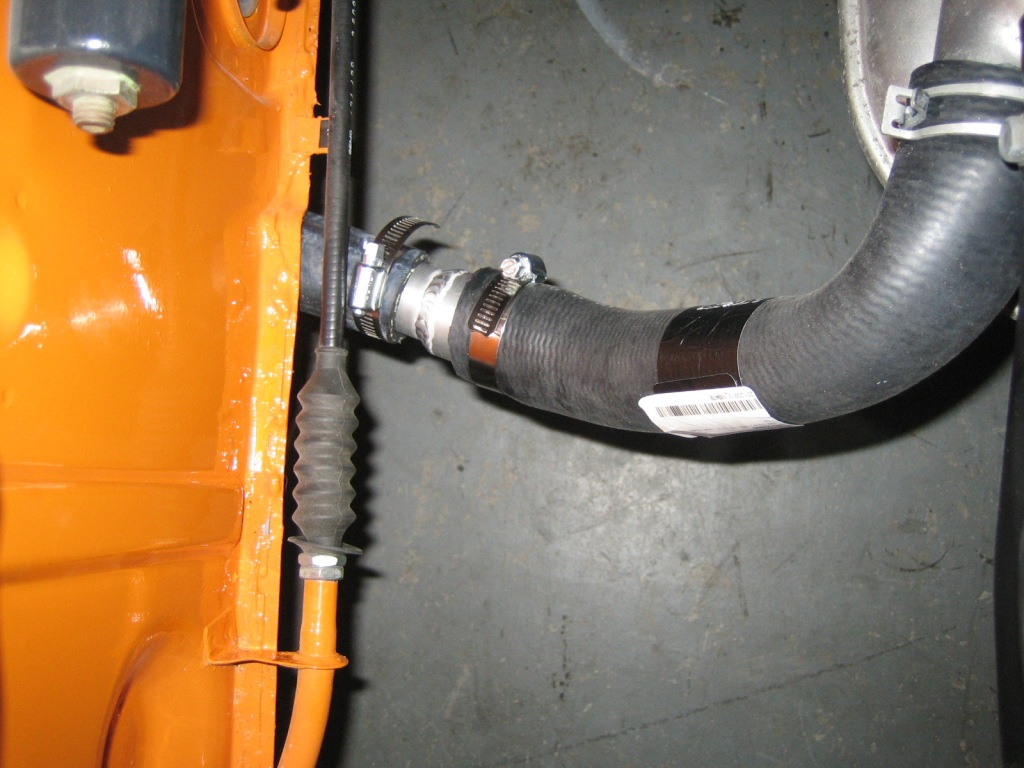
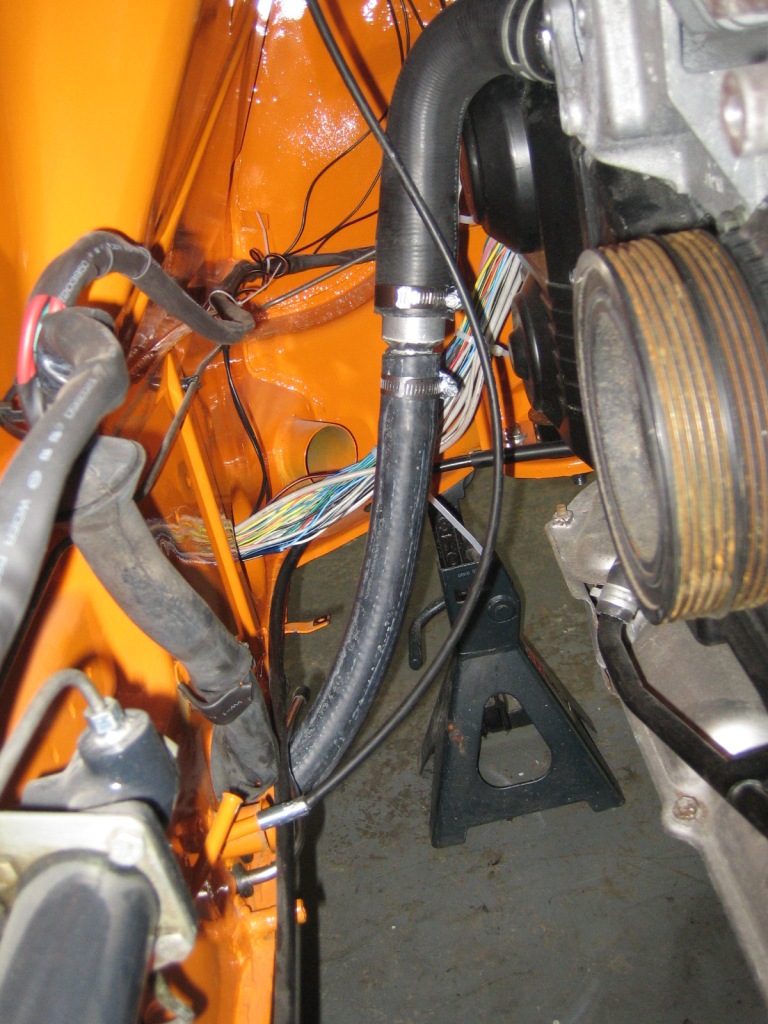
Shot under the car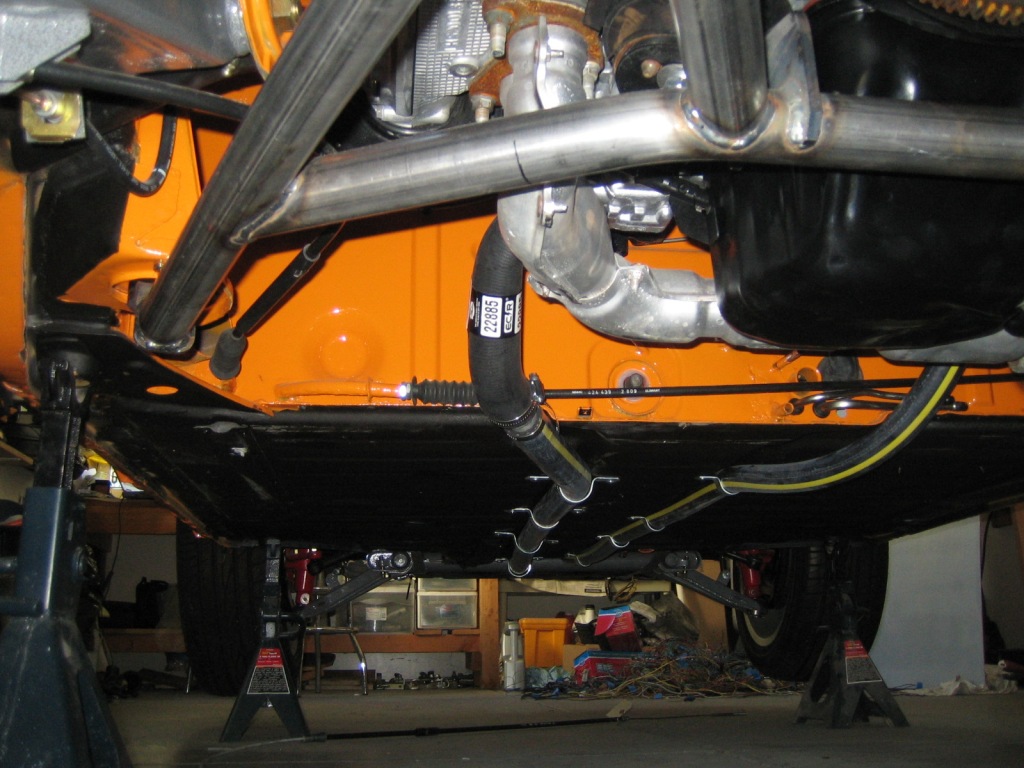
Also hooked up the accelerator cable, standard cable works with some minor mods, still a little long but it does the job.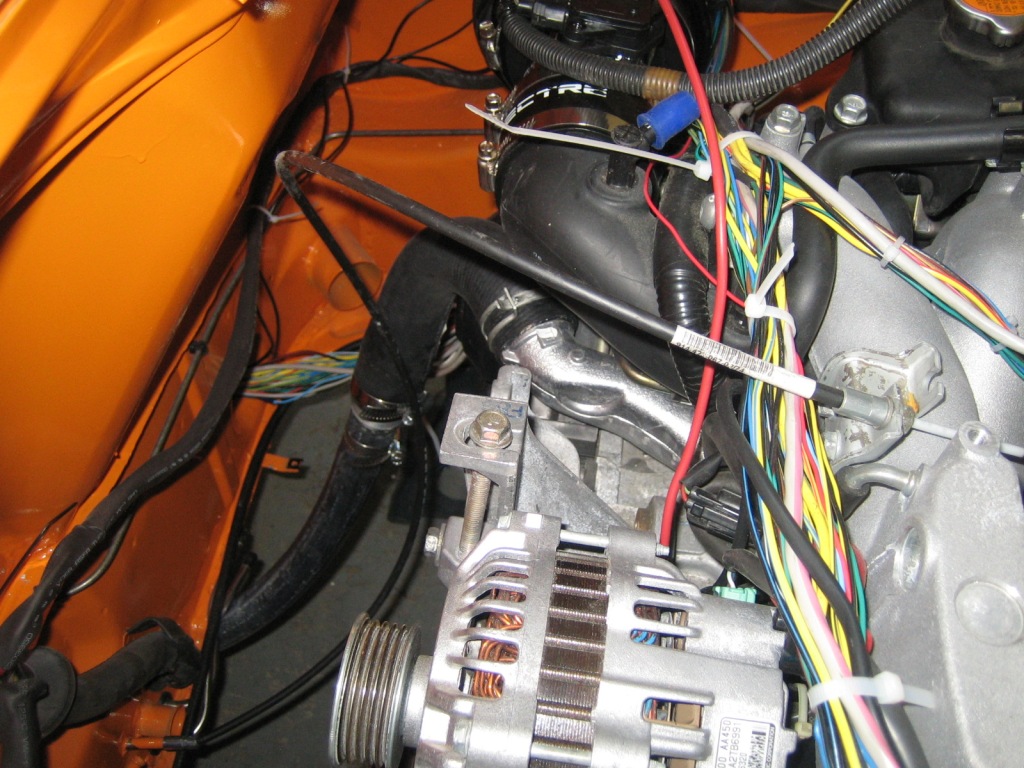
Also checked out the clutch cable, again looks like it will work but it needs to be longer, once I have the details will have Terry Cable make me one.
Posted by: Chris H. Oct 7 2012, 07:26 PM
You're getting close Chris! Looking good... Your comment, "I think it's going to be a little loud" might be an understatement...  But loud is good!
Posted by: charliew Oct 7 2012, 08:13 PM
Chris make sure the map sensor is turned the right direction. One time after reinstalling my sons motor on an all nighter we put a different aircleaner and cold air intake on that I made and got it turned around and it wouldn't even idle. He got on nasioc and figgured it out while I rested on the couch that morning. Also try to check the cfm requirements on that aircleaner you probably need at least 500 cfm. For each 1hp you need 1.45 cfm. I bet that motor is at least 260 hp. Also slow cranking will make it hard to get the oil up in the pump if it has drained down for a long while. The rear of the motor like you have it, is the best place to get a accurate oil pressure reading because it's after the rods. Also make sure the knock sensor is torqued to the correct specs or you may get knock errors prematurely.
Posted by: rohar Oct 8 2012, 12:09 PM
It's comming along nicely. If you've got some time, stop by the track tomorrow. I'm fielding the Teutonic Turd and there's a lot of great people to meet out there.
Could not make it happen today but you chose perfect weather! Were you out with Scott Adere and gang?
Yup, had a friend that needed to learn to drive and a new track car that needed shaking down. It was an amazing weekend. Scott knows how to put an event together.
Posted by: jimkelly Oct 8 2012, 01:01 PM
questions?
1- are these what renegade calls - coolant hose adaptors - and sells two for $39?
2- the two large ID hoses you have connected to your engine - did you source them yourself or are they part of renegades cooling system offering?
thanks
jim
Attached image(s)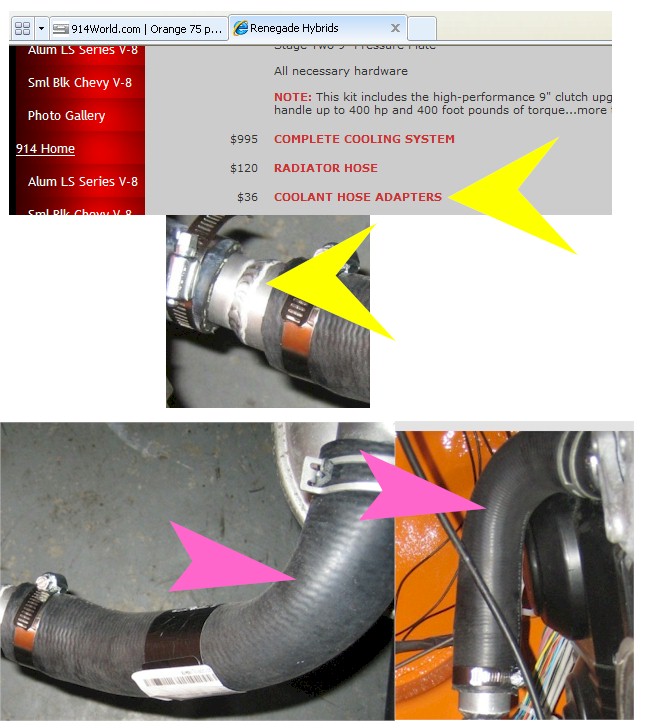
Posted by: BIGKAT_83 Oct 8 2012, 01:39 PM
here's the place to get hose adapters.http://www.jagsthatrun.com/Pages/Parts_Cooling_TransHoseSplicers.html. Ive ordered from them a few times and have been very happy with the service and product. After you buy more than 5 the price drops to $10 each.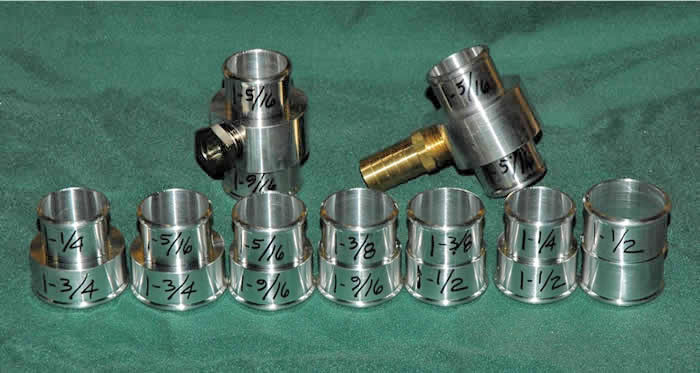
Bob
Posted by: my928s4 Oct 8 2012, 01:42 PM
questions?
1- are these what renegade calls - coolant hose adapters - and sells two for $39?
Yes that be them, if you can weld aluminum and have the right diameter stock you could do it yourself. They are also flanged at the ends.
Those are the OEM Subaru hoses which I bought, the lower one can be used as is, the upper needs to be cut short to remove a 90degree bend.
Hope that helps!
Posted by: my928s4 Oct 19 2012, 06:30 PM
Once I put in a larger fuse for the fuel pump and connected the fuel lines up the right way we were in business!!!!
https://www.youtube.com/watch?v=FUDZEHq6mwA
Man that was quite the rush, daughter even got some fuel spray over her when I disconnected the fuel line and not even phased.
Don't examine the intercooler plumbing too closely, that definitely needs work.
Posted by: my928s4 Oct 28 2012, 10:44 AM
Been tidying up odds and ends and getting more familiar with the engine, after the start last week the fittings on the gas tank started to leak, I knew those old alloy nuts were border line and after I tried to tighten one more time one of them was too far gone. Was tempted with the AN fitting adapters from the VW site but in the end just ordered new nuts from AutoAtlanta. Fitted and now no more gas smell in the garage.
ECU was also throwing some codes, had a couple of the AVCS wires wrong and once that was corrected I am just left with the Rear O2 sensor code which as I do not have one yet seems reasonable.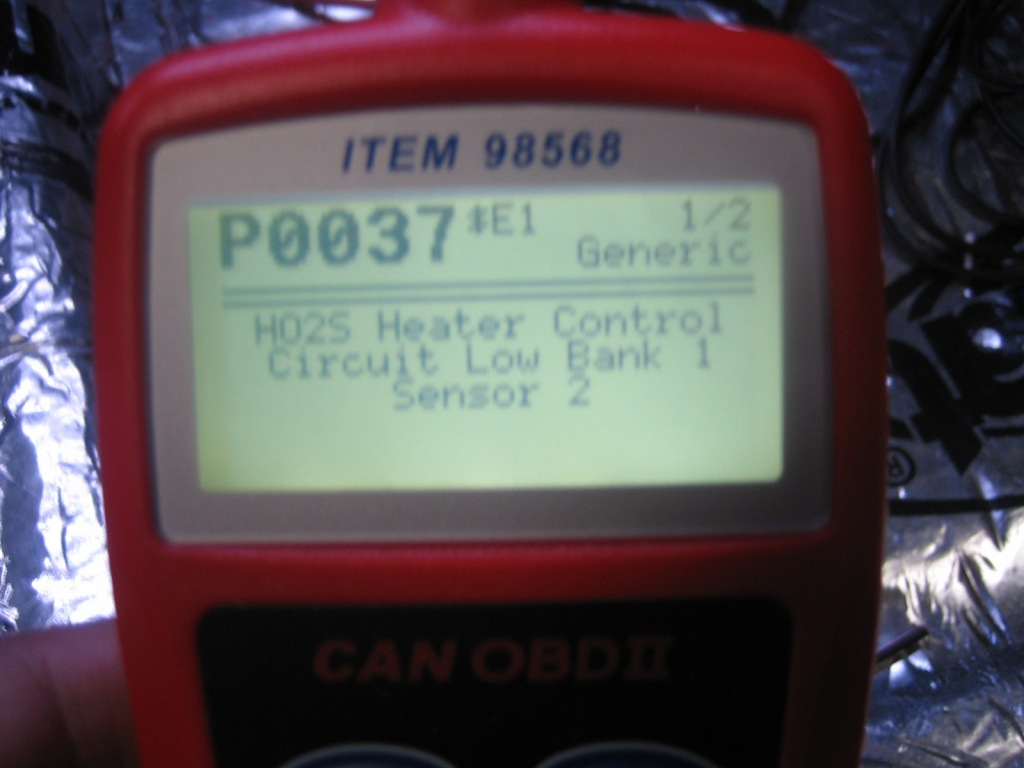
Finally got the cooling system bled, that was a royal pain, I raised the rear of the car and the final tip which was on this sight to fill from the hose (see pic below) on the throttle body got it done.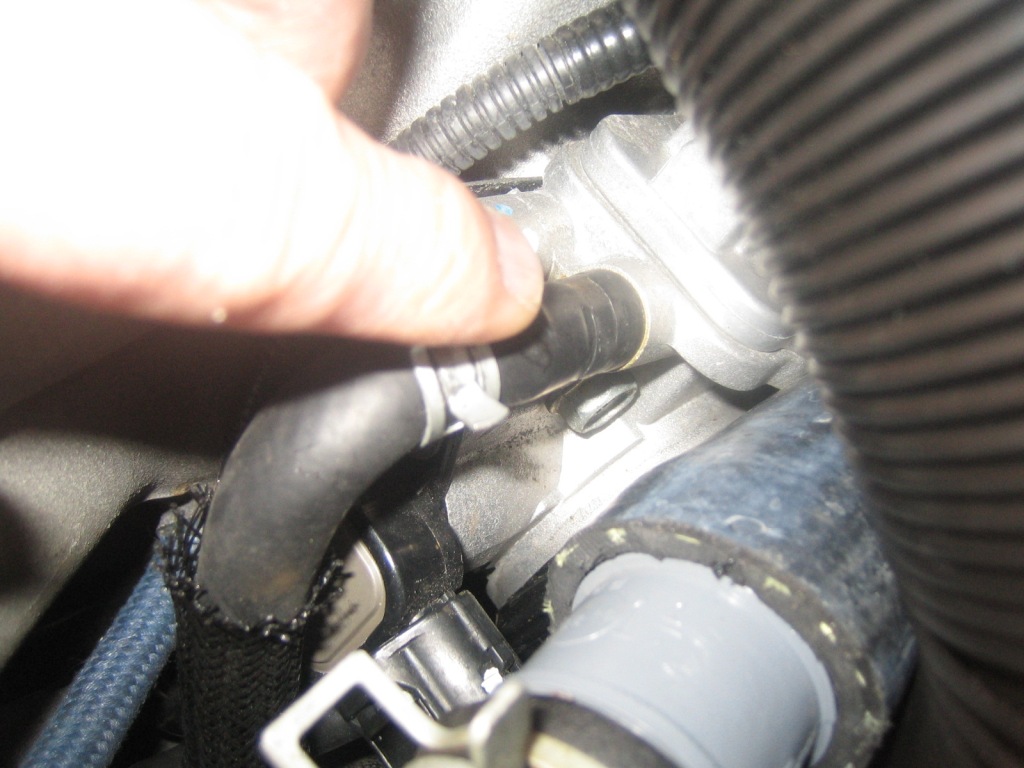
Plugged the purge line on the intake, this corrected an erratic idle when it was open.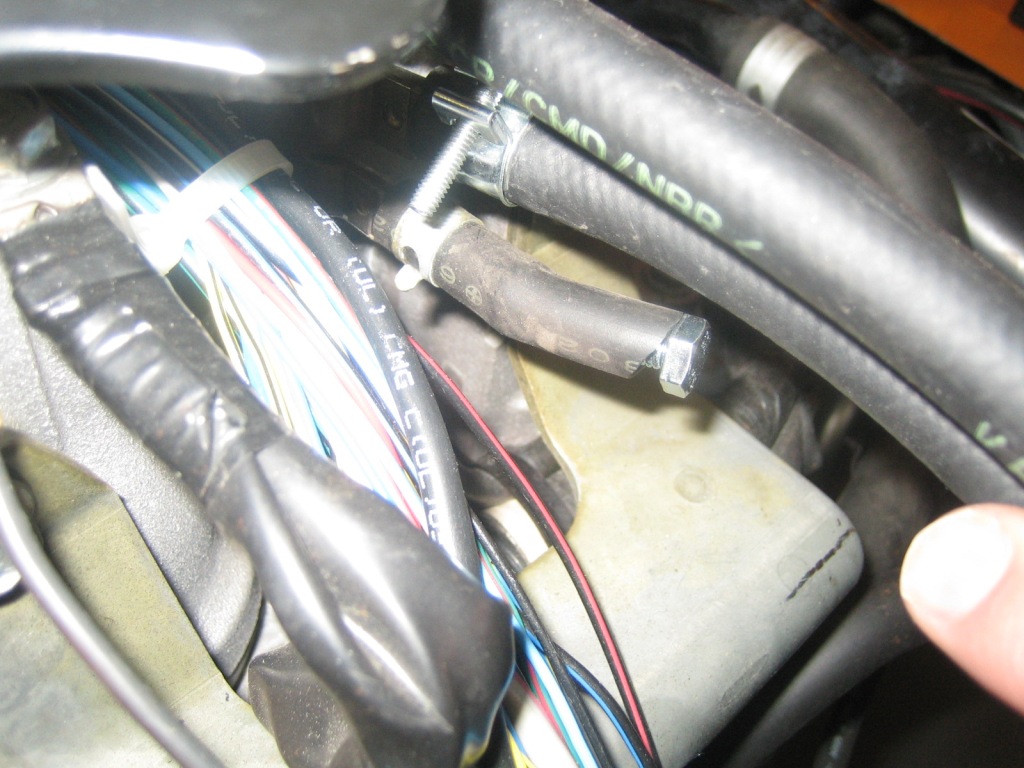
Here you can see oil pressure when cold, low fuel level is a tad bright ....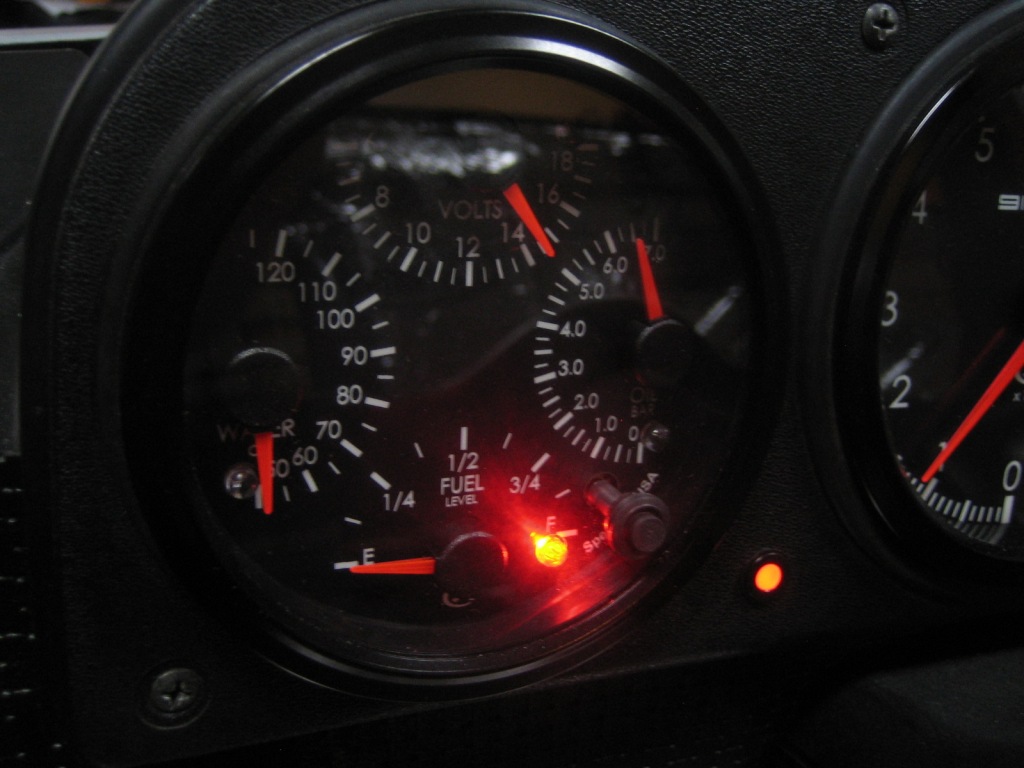
And here are readings of gauges when warm, engine temp stays in 85-90 range (now system is air free ...). 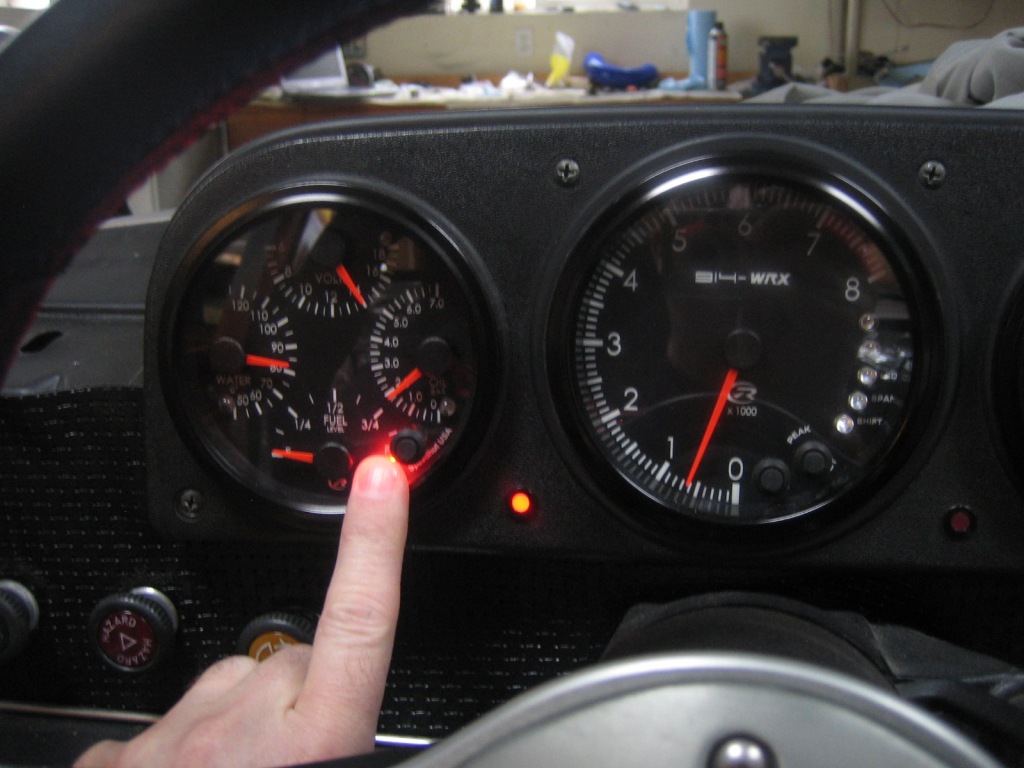
I still have the charge lamp lit, pretty sure this is because I have an LED not a bulb, need to fix that.
Also need to plumb in wastegate solenoid, weld an O2 bung in the exhaust and get that intake plumbing sorted.
Posted by: rohar Oct 28 2012, 11:40 AM
Crap, whole lots of progress! I should probably get out to the shop and make some progress. Compared to you I'm making the Spokane contingent look bad.
Posted by: 3d914 Oct 28 2012, 11:12 PM
Chris, great thread to follow. Keep it up - you're almost there.
Posted by: charliew Oct 29 2012, 08:22 AM
This is a great informative thread. You and others have covered lots of obstacles. You have made it a lot easier for us lagging behind folks. That o2 sensor error is the heater side of the o2 it seems to be saying. You probably could use a resistor or just hook the o2 sensor up to clear it until you get romraider going. I would be surprised if subaru uses a light to trigger the charging like a gm alternator though. Have you figgured out if the fuel pressure control is pulse width modulated on the suby control circuit? Or did you just hook up the pump to 12 vdc I guess. The sti of my son's car has lower pressure at idle and higher pressure under boost.
Posted by: my928s4 Oct 29 2012, 09:09 AM
I would be surprised if subaru uses a light to trigger the charging like a gm alternator though. Have you figgured out if the fuel pressure control is pulse width modulated on the suby control circuit? Or did you just hook up the pump to 12 vdc I guess. The sti of my son's car has lower pressure at idle and higher pressure under boost.
I would be surprised too on the alternator, low priority but hopefully get to look at it soon. Also on the alternator it is tough to get a short enough belt, need 28" and locally the nearest was over 29" but found one on the internet.
I used the WRX fuel pump controller, I have not put a scope on it but presume it operates as it should .....
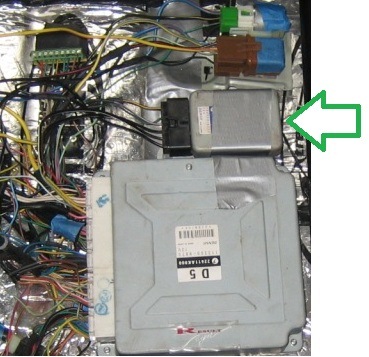
Posted by: Zaney Oct 29 2012, 03:50 PM
Chris,
I had the same error code pop up on my scanner too. If you have a way to turn it off (RomRaider) it doesn't hurt anything. That is what my Suby shop guys said  ) As long as you do not have to take it through emissions...
Just remember, it is licensed as a 1975 914
I am impressed in all of the detail you put in the car!
Hope to see it at WCC 13!!!
Cheers!
Nate
Posted by: my928s4 Nov 10 2012, 05:55 PM
So had some fun with the ECU today, got my Tactrix device so I can hook up the OBD to the laptop. It works great, just as well as there is no user manual for this thing not even to say what the LED's are for.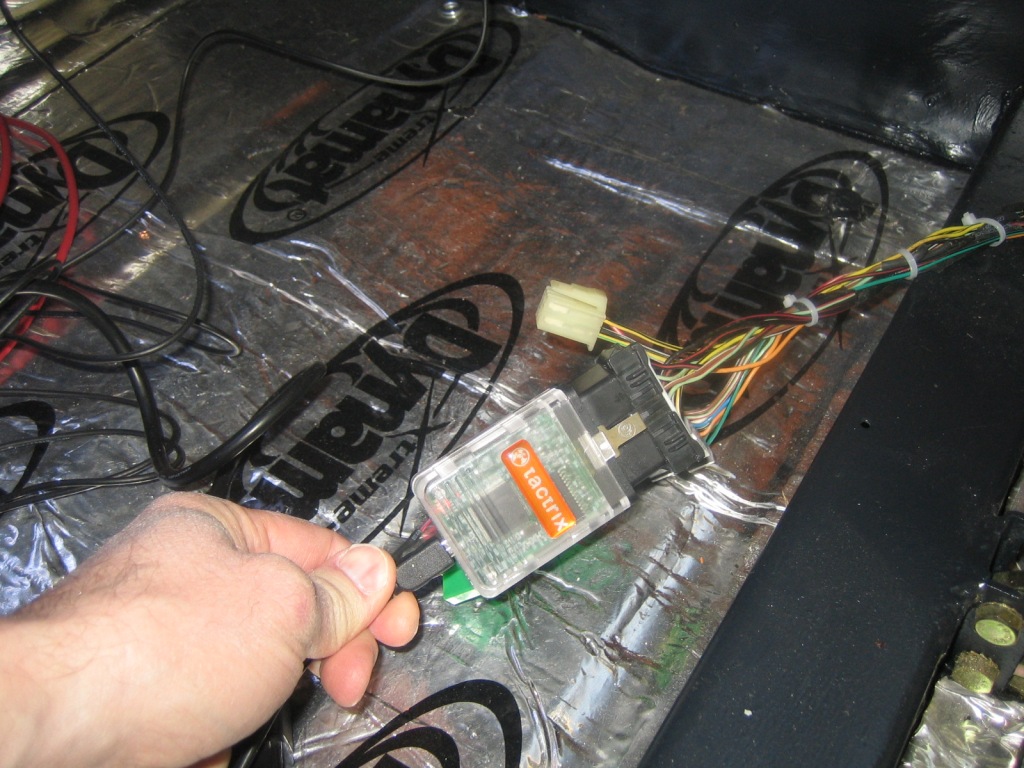
So I tried a few times to connect with no luck, need to make sure the flash connector and test connector are hooked up then hit 'OK' on the screen at the same time you turn the ignition on. A brief moment of jubilation was to be had before I found out that my image was not supported .... I had to download a hex reader to find the image code was A4RI400I. After searching I found there was an A4RI401I variant that was supported.
Now all I needed was the A4RI401I ROM image, sure enough someone has hosted that on the RomRaider forum. OK now comes the keep your fingers crossed part, downloading the new image... well it worked out OK and the engine started afterwards! Result.
Below is a screenshot of the EcuFlash SW you need to read and write to the ECU with.
Here is a shot of the RomRaider where you can modify the image then use EcuFlash to download.
The following is the best part and that is the real time logger part of RomRaider which with a wideband o2 sensor should give me the ability to tweak some parameters or if nothing else help me debug issues. 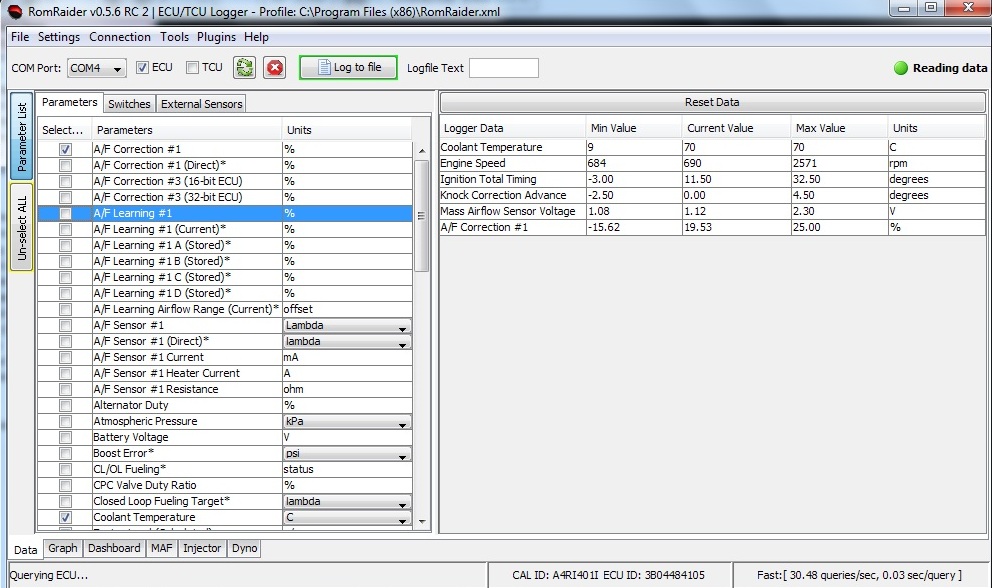
Neat to get this working.
Posted by: charliew Nov 11 2012, 10:55 AM
I forwarded this thread to my son and called him to ask if he could help make this any easier. He is driving back from alabama from the a&m game now but he said he would look at it when he gets time. He wasn't to the miss border yet so it may not be today.
Posted by: IM101 Jan 5 2013, 01:56 AM
Chris! the axles are finally in! they will be headed your way Monday!
Posted by: my928s4 Feb 3 2013, 05:27 PM
Chris! the axles are finally in! they will be headed your way Monday!
Finally got around to assembling, the EMPI shafts were the wrong spline count, who would have thought they would make them different to OEM ... oh well some used ones should be on their way this week.
I did transfer the 914 ends onto the new shafts, once the Subie ends come I can get them mounted.
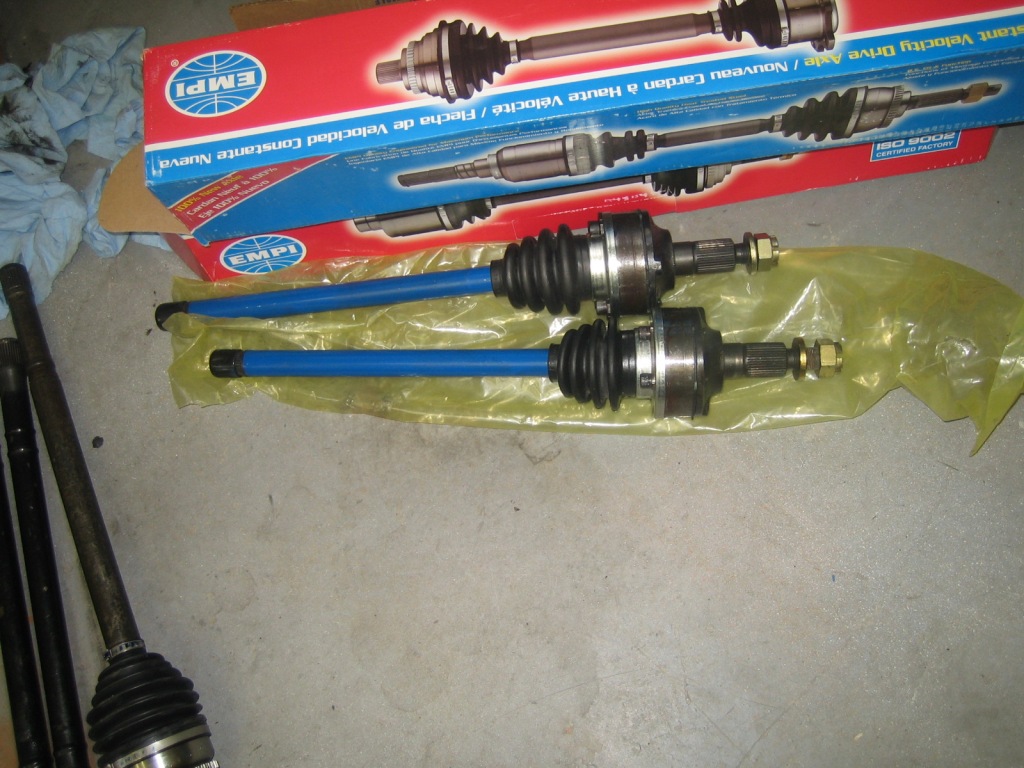
I also read that I may need to add an extra couple of quarts to the gearbox to replace the left over volume from all the parts removed ... makes sense, I guess someone was having problems with bearing noise with the conversion.
Posted by: ruby914 Feb 15 2013, 03:00 AM
Wow Chris,
I haven't seen what you've been up to in a long time, great progress!
All your work is so clean and I love the orange.
I see you got the Romraider and Ecuflash fired up. That is so nice to just turn off the codes that don't apply. Later, you can take it out and log some runs.
I look forward to see that first drive.
Posted by: Chris H. Feb 15 2013, 06:43 AM
Thanks for the heads up on those CV's...almost bought a set of EMPIs myself. Better buy some used ones from NASIOC.....
Posted by: my928s4 Feb 15 2013, 09:41 PM
Wow Chris,
I haven't seen what you've been up to in a long time, great progress!
All your work is so clean and I love the orange.
I see you got the Romraider and Ecuflash fired up. That is so nice to just turn off the codes that don't apply. Later, you can take it out and log some runs.
I look forward to see that first drive.
Thanks for the feedback, on the drive ... you and me both!
Posted by: my928s4 Feb 15 2013, 09:45 PM
Thanks for the heads up on those CV's...almost bought a set of EMPIs myself. Better buy some used ones from NASIOC.....
Well glad I saved you from the same fate.
I got my used parts today, here are the used OEM
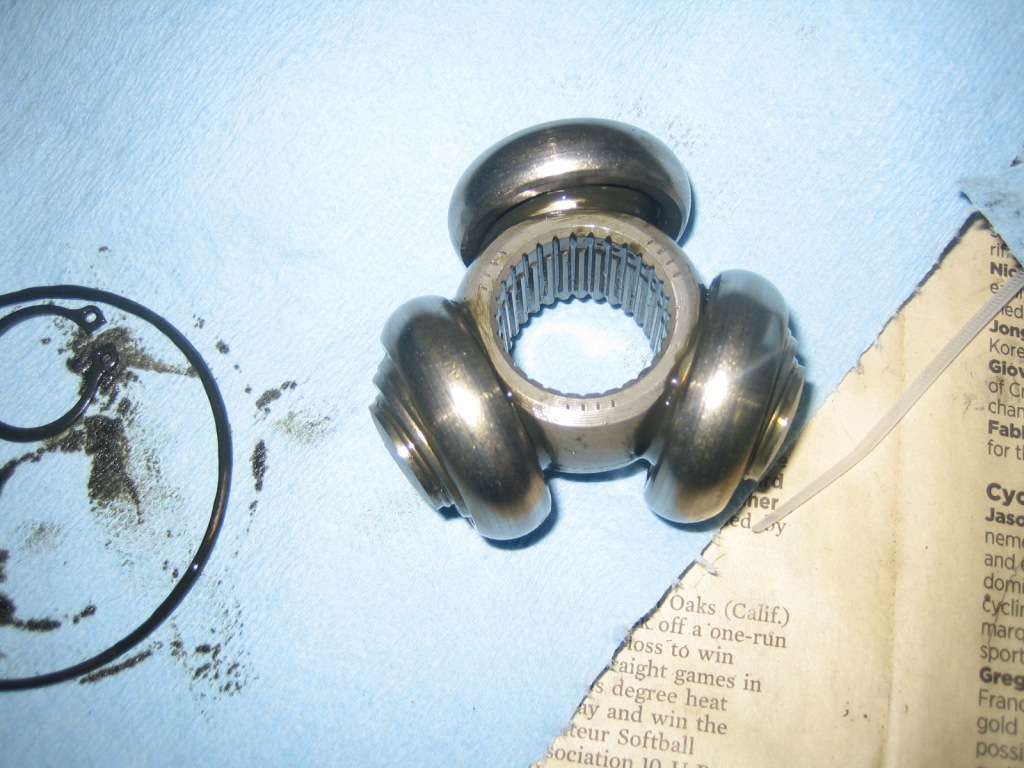
And here are the EMPI's, very similar construction to the Porsche ones.
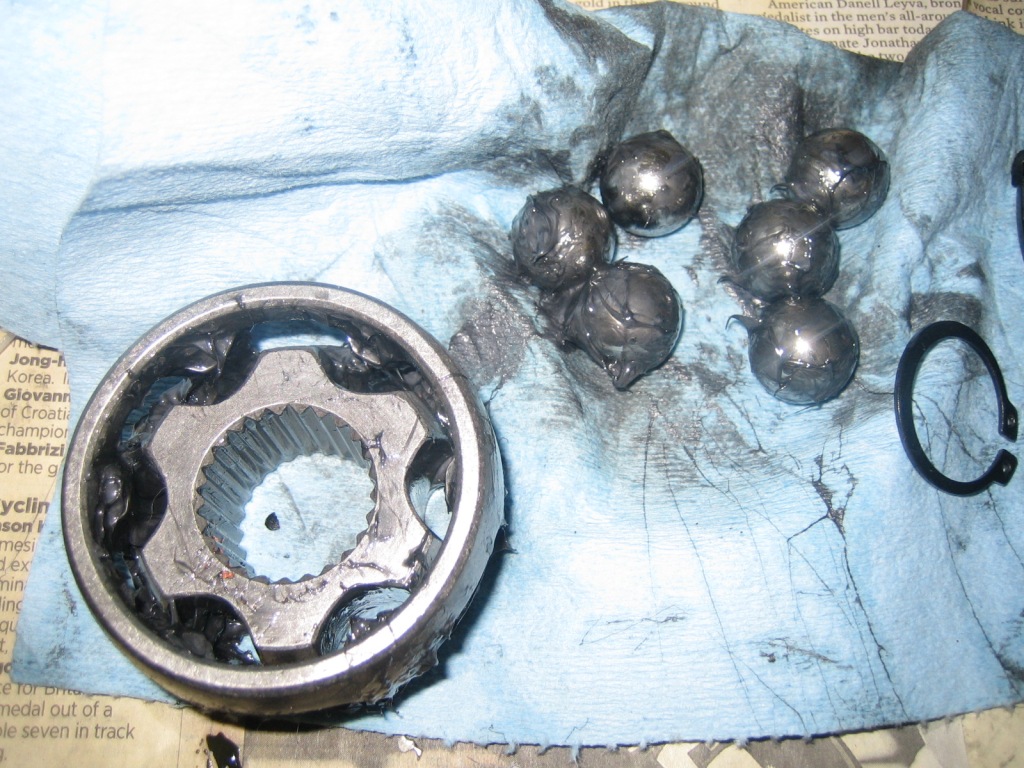
I will get some grease, boots, clean up the old casings and get these assembled and on the car.
Earlier in the week my little helper was installed. Wish I had got this earlier on, would have made all the work to the underside soooo much easier.
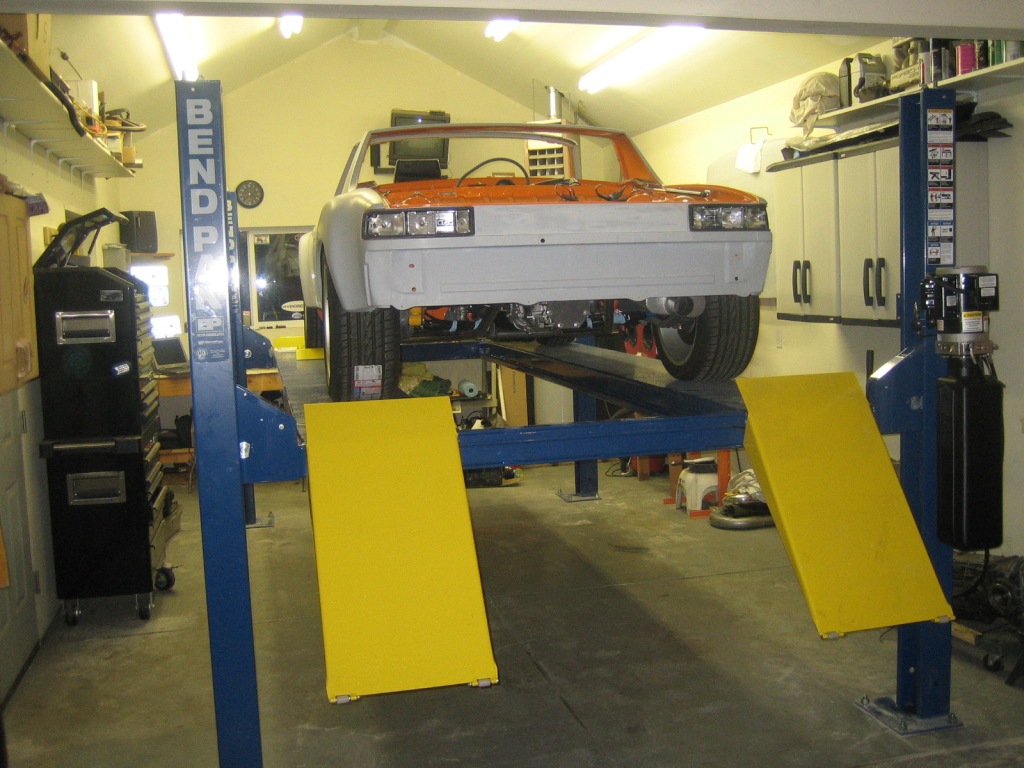
An underside shot just because I could.
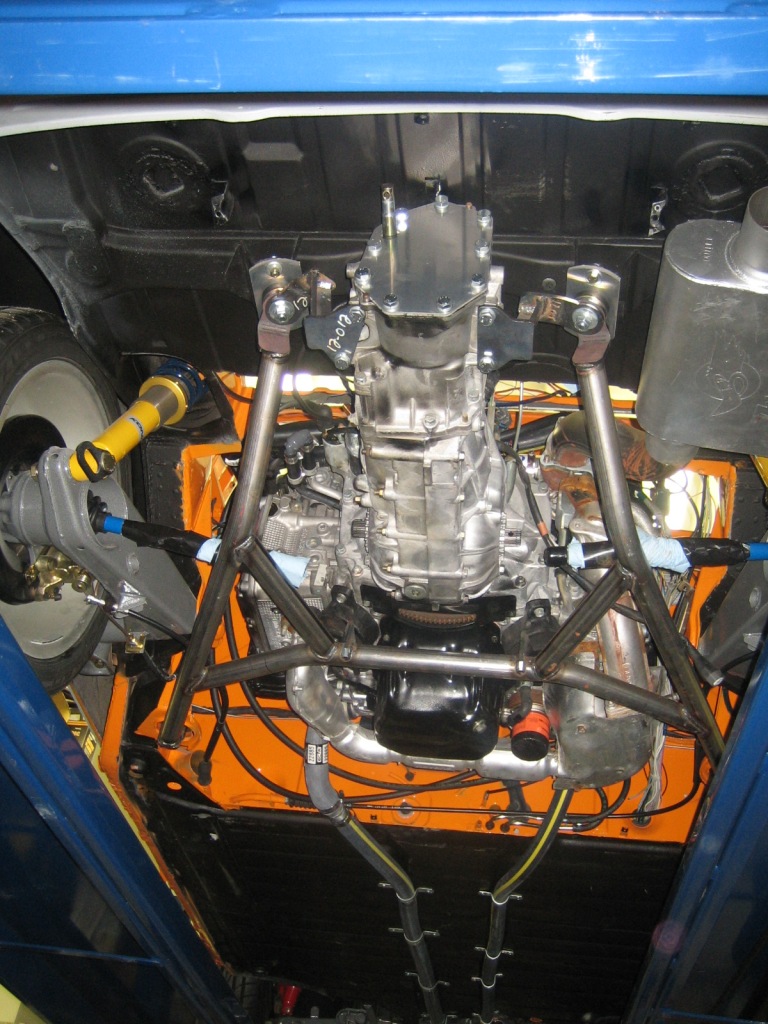
Posted by: my928s4 Feb 25 2013, 09:36 PM
Was waiting on the new boots before assembling, came into local parts store yesterday and with the car on the lift took no time to remove from the car, place the Subie end on, grease and reassemble then put back on the car.
Boot clamps that came with the boot kit were useless so need to get some better one.
Now I can figure out the clutch cable routing, mock up a bracket and then order the new clutch cable with modified length.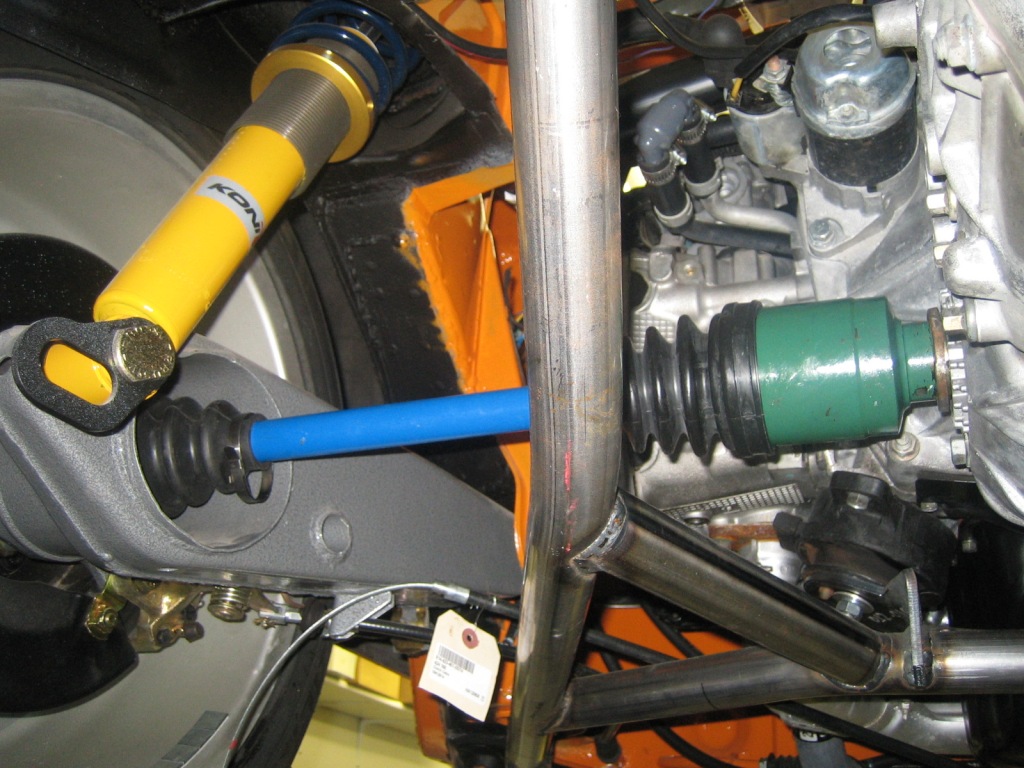
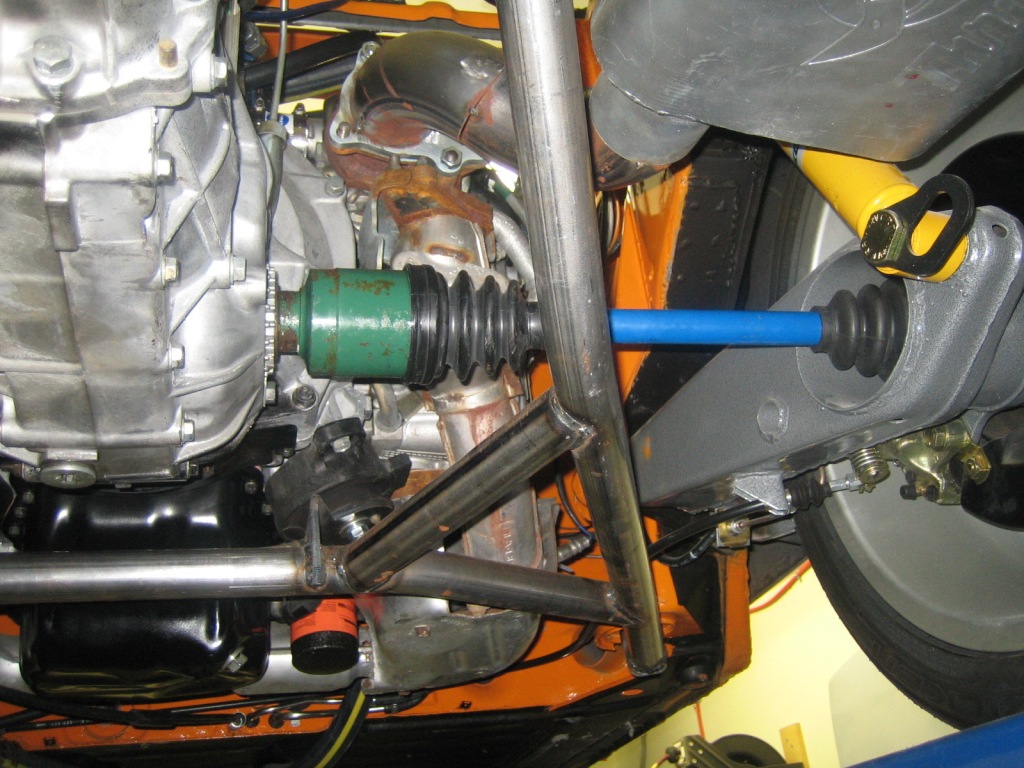
Posted by: Type 47 Jul 7 2013, 08:19 PM
In the "914 info" section under paint codes it shows there is no Signal Orange for MY 1975...obviously there was in 75' Is yours an early 75?
Posted by: Cupomeat Jul 8 2013, 11:59 AM
In the "914 info" section under paint codes it shows there is no Signal Orange for MY 1975...obviously there was in 75' Is yours an early 75?
My 75 is Nepal orange L20C and it looks pretty close to what his car has ended up being, perhaps a little darker.
Posted by: Zaney Aug 7 2013, 10:56 PM
It's comming along nicely. If you've got some time, stop by the track tomorrow. I'm fielding the Teutonic Turd and there's a lot of great people to meet out there.
Could not make it happen today but you chose perfect weather! Were you out with Scott Adere and gang?
My advice is a little late but did you look at the pickup real close to see if the pan contacted it when it was dented in? The pickups seem to be easily cracked where they are brazed or silver soldered on the flange where they bolt on the block. The pan to pickup clearance is real close when it's all stock and it doesn't take much to bump the pickup. Nasioc has a few threads on the cracked pickup. I have added a brace on all the pickups we are using at my house to try and stop any vibration.
You may well be right on the pickup, I checked to make sure the brace was straight but did not check the joint for cracks, I was cranking the engine yesterday and did not see oil pressure so looks like sump will come off again.
See the attached pic for the location for the rear sensor, this was from NASIOC.
Chris,
What was the final verdict in the location of the SPEEDHUT Oil pressure sensor location?
I am trying to figure out how to install mine.
Please elaborate if you can about what you did and if you have any pics?
The car looks awesome BTW!
Nate
Posted by: my928s4 Aug 8 2013, 11:13 AM
Chris,
What was the final verdict in the location of the SPEEDHUT Oil pressure sensor location?
I am trying to figure out how to install mine.
Please elaborate if you can about what you did and if you have any pics?
The car looks awesome BTW!
Nate
Thanks Nate wish I had made more progress but will get back to it this fall, need to sort clutch cable and still waiting on a shifter solution!!
On the oil pressure it was fine I just needed the engine to start, cranking did not budge the oil pressure for whatever reason. So the Speedhut sensor works fine, will see if I have more pictures of the sensor tonight.
Update: See post 239 for the picture of the oil pressure sender.
Posted by: CptTripps Aug 16 2013, 10:20 AM
Holy mother of crap is this a good thread.
I'm about to do another 914, and definitely doing a Subie this time. I don't know about all the body panel work though. I'm 1/2 tempted to order fiberglass replacements for all 4 corners, as well as the hood and trunk. For the $1,500 it'll cost me, that's a lot of time/energy I WON'T have to worry about this time.
Thanks for the thread. I know it's a ton of work, and can appreciate finding "one more thing" to do before you finish with a section.
Posted by: Cupomeat Aug 16 2013, 10:27 AM
LOVE THIS THREAD but one question:
Are you going to pull the engine cradle and paint it, or are you leaving it raw for a reason?
Posted by: CptTripps Jan 15 2014, 02:57 PM

Any updates?
Posted by: my928s4 Jan 19 2014, 01:03 PM
OK time to make some progress with this project, I spent most of last year distracted with another car which is somewhat of a relation to the 914. Did a Euro delivery and had a blast, at the moment it makes working on the 914 a little more difficult as the garage is somewhat tight for space but with some dry weather I can shuffle things around.
So yesterday I dropped the engine, sucks to have to go backwards but I need to get the cradle powder coated and finish up the sheet metal after I cut the opening in the trunk. Also need to permanently route the fuel lines and tidy up the wiring plus a bunch of other things. I made a list yesterday, that helps.
OK Engine out. Only took an hour or so, hope it goes back it as easily.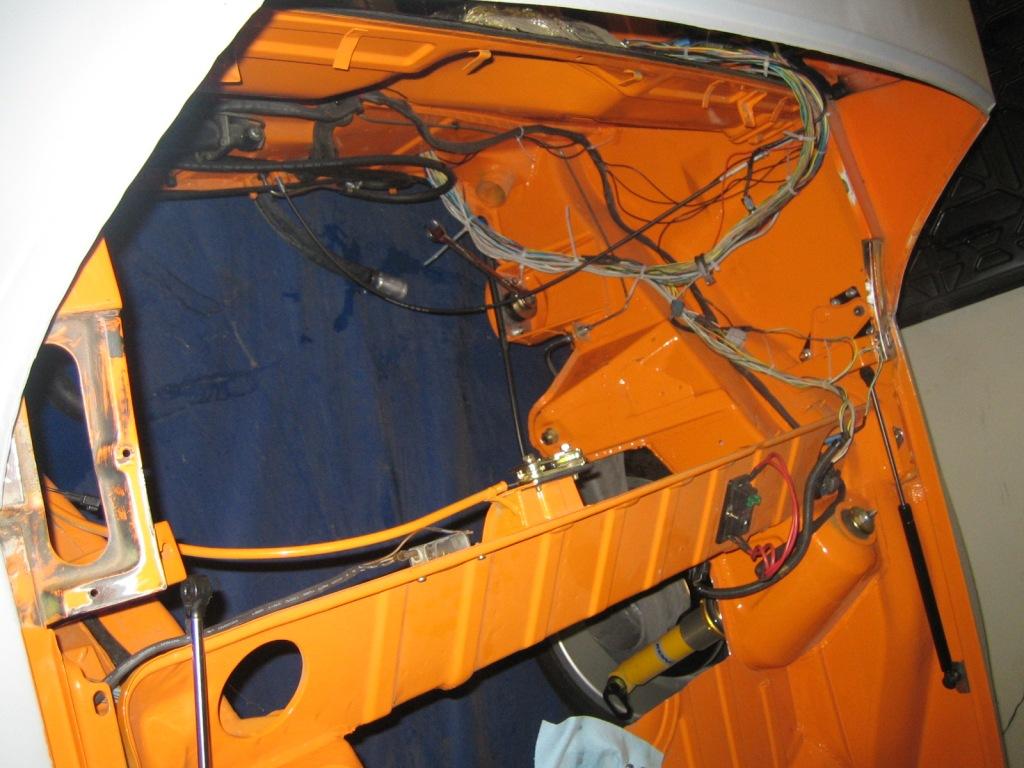
This is how I left the outer corners in the trunk, pretty rough cut.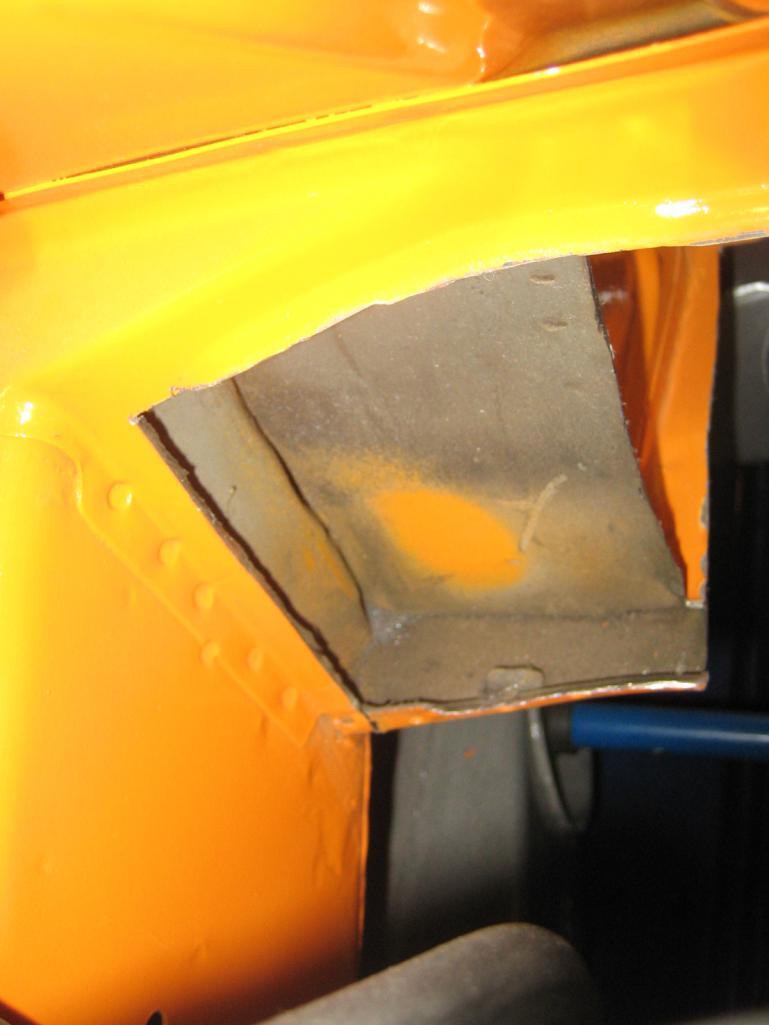
And after I cleaned it up a bit.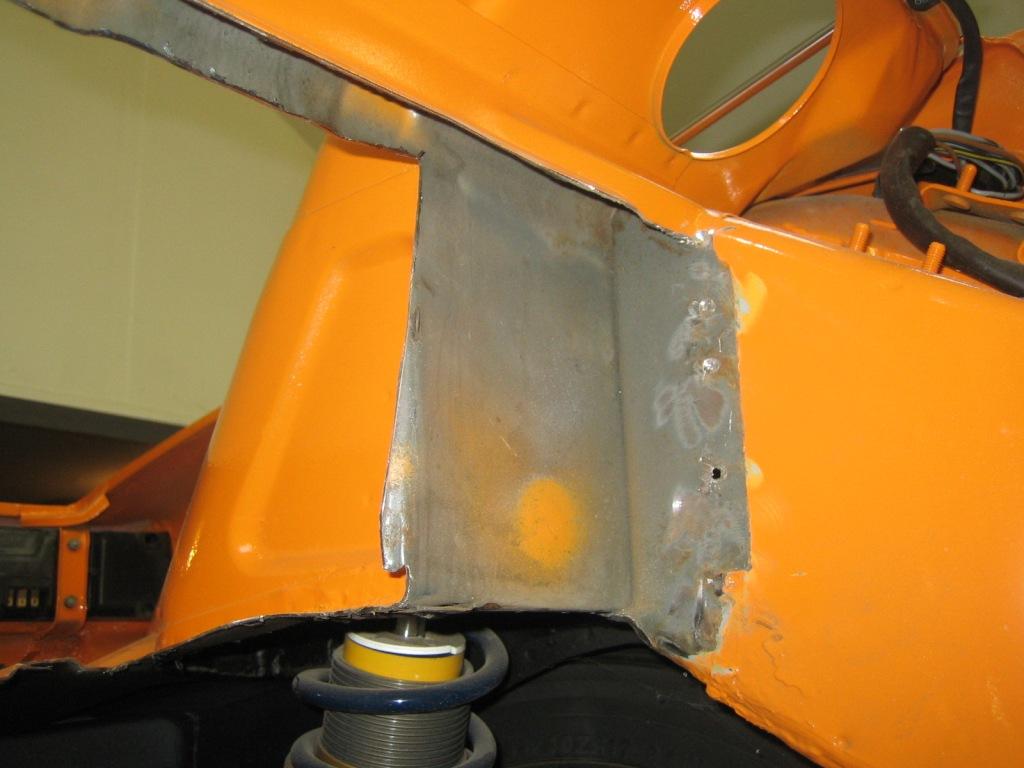
Now I need to figure out the best way to close all of this up, I am temped to have a removable access panel in the trunk just in case.
A small start but feels got the enthusiasm going especially with Ian's cable shifter making progress!
Posted by: CptTripps Jan 20 2014, 08:21 PM
Great build.
I've got all the same stuff from Ian, so I'm using this as a reference on how to put everything together. ;-)
I'm back and forth on how much to cut out of the trunk, and if I leave an access port. I'm also not sure if I flip the intake manifold.
Carry on...
Oh, and that's a bad-ass Cayman!
Posted by: my928s4 Jan 25 2014, 06:38 PM
Well the powder coating company was on form, dropped off parts Monday ready to pick up Wednesday, great service. Even mentioned he had not seen me for a while and then we talked car stuff for another 20mins.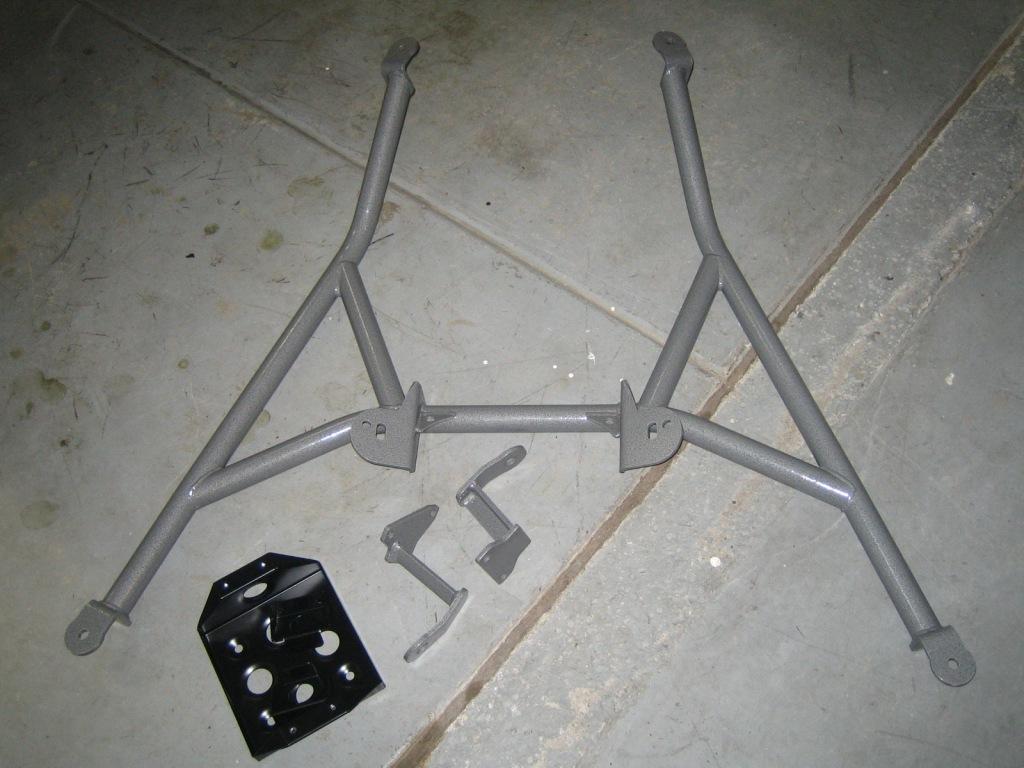
Got the boost gauge mounted under the dash, the PTFE tubing they give out in the kit is less impressive so might find a better solution. I could have got the boost added to the speedo looking back but too late for that now.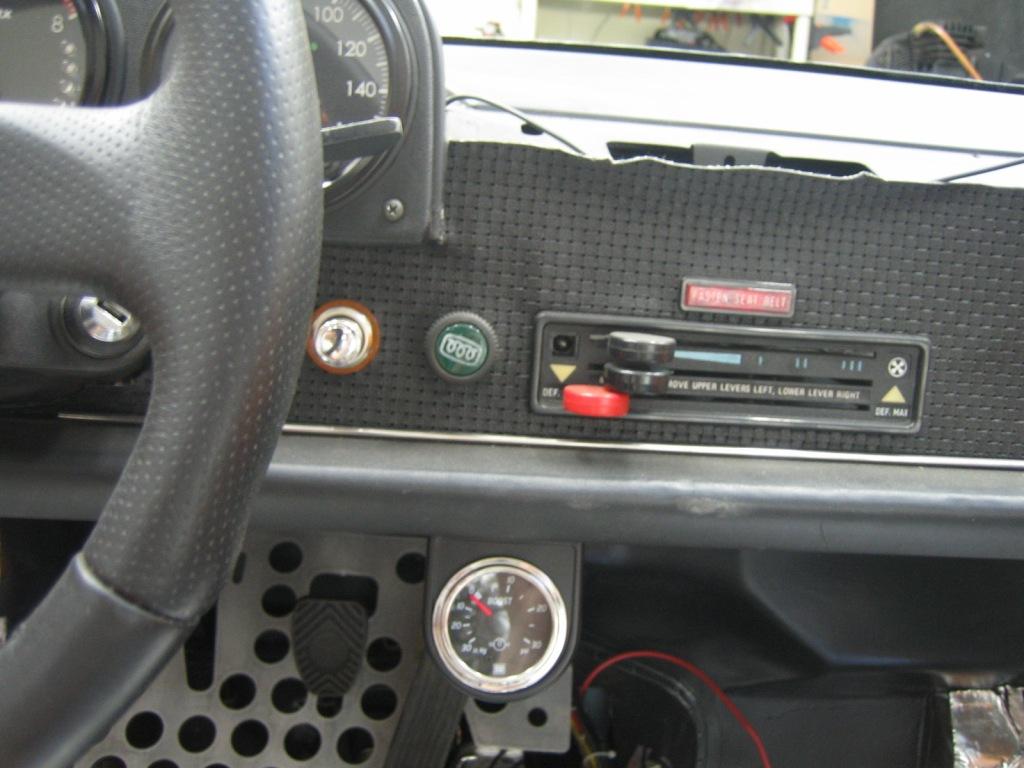
Mounted the metal fuel lines against the bulk head, got these from a local place last year, comes with push fit connections and the right type of hose.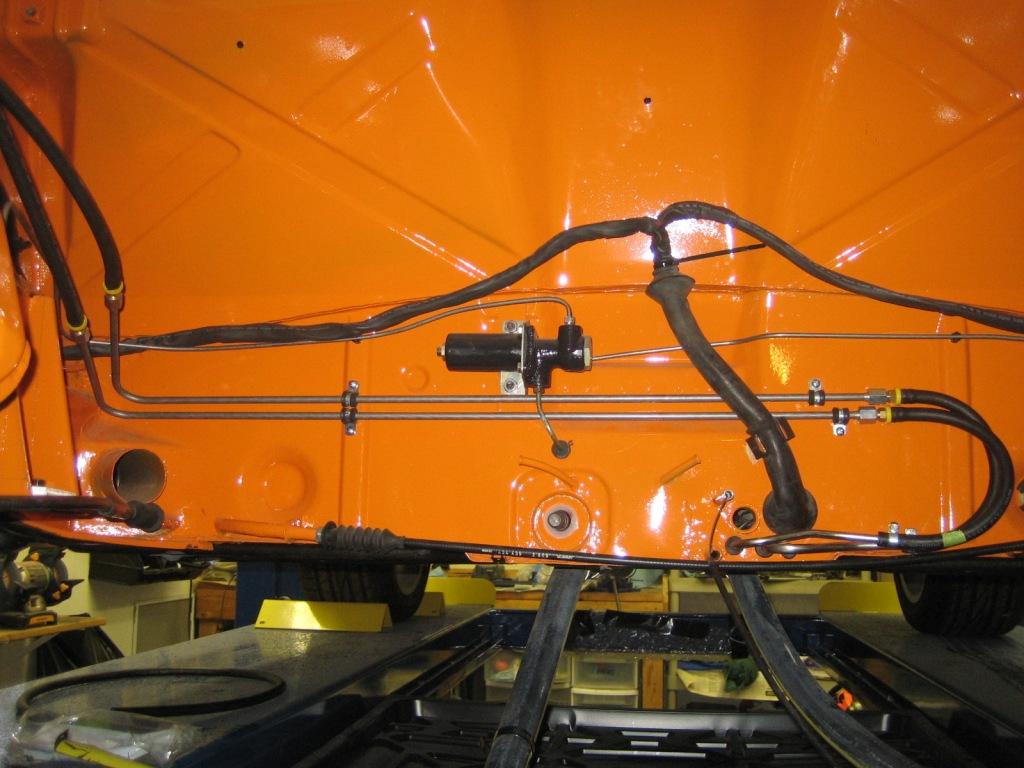
Started some fabrication on the rear trunk but need some metal supplies, also got some o-rings for the welder, was having issues with intermittent gas flow and found a pinched o-ring.
Posted by: my928s4 Jan 26 2014, 06:49 PM
Having put now o-rings in the welder the thing works like a champ, it made a bit of a dogs dinner out of my exhaust welds the way it was before. Now can only blame myself for crappy welds and I am definitely rusty.
OK so wanted to support the trunk somehow plus provide an edge to bolt an access panel. Used some angle I had and the thing is rock solid, no need to seam weld this so just tacked in various places and will seam sill it to finish it off.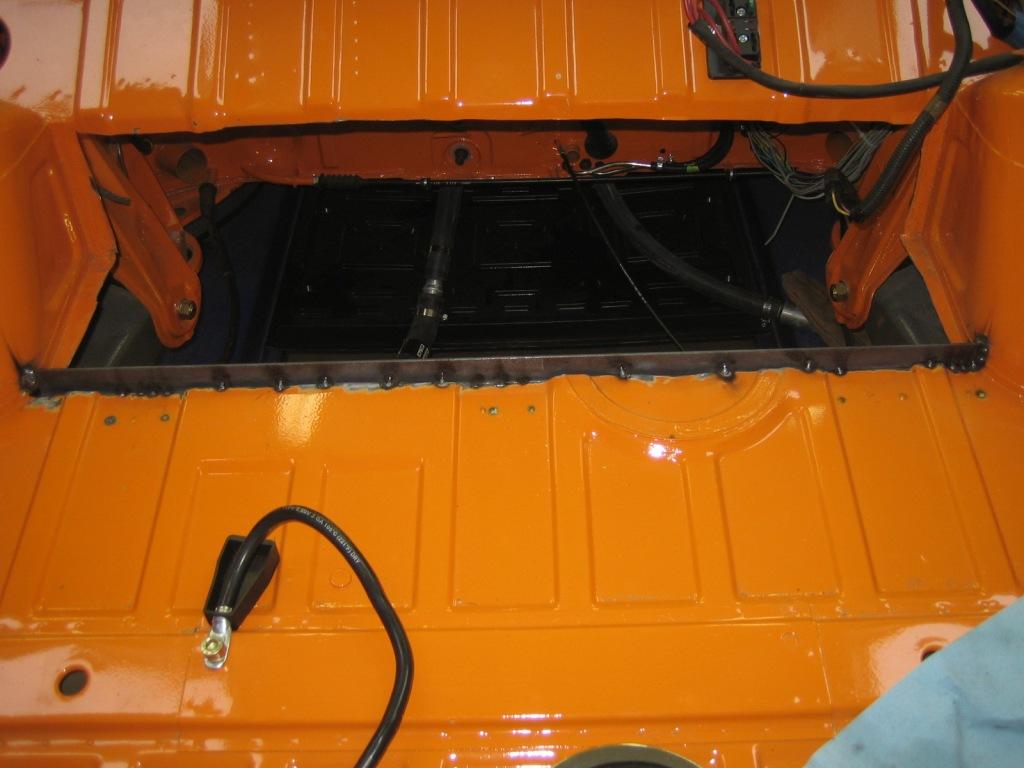
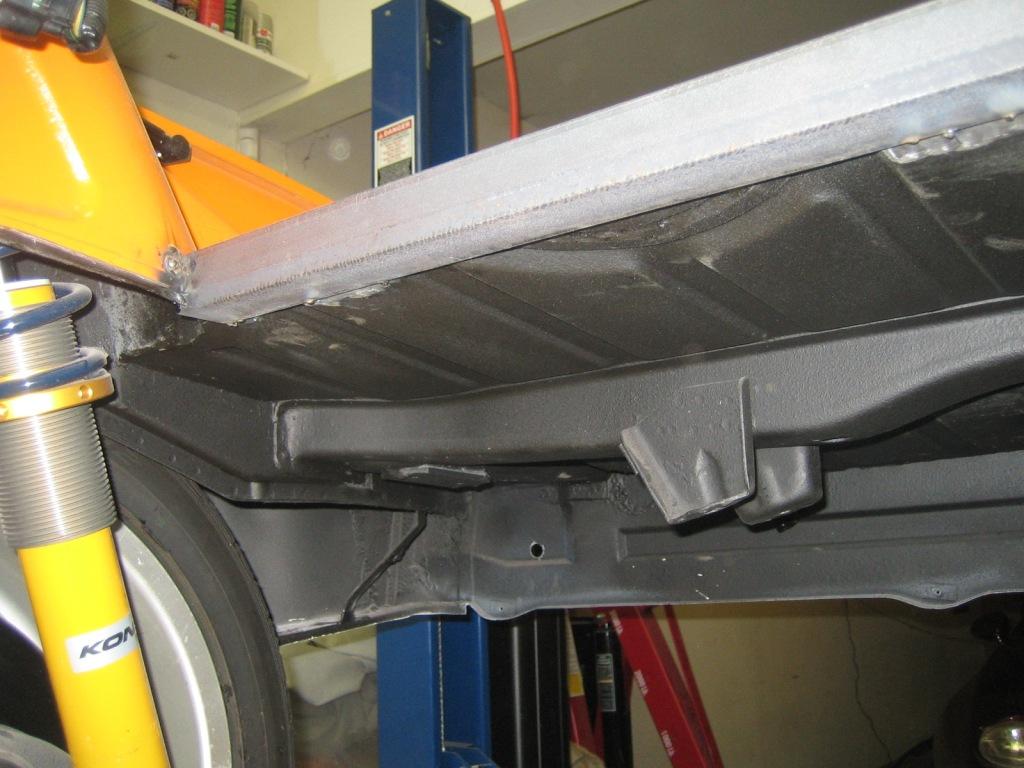
So I wanted to box in the corners in the engine bay, did not come out as nicely as I had hoped but once all buttoned up no one will see it.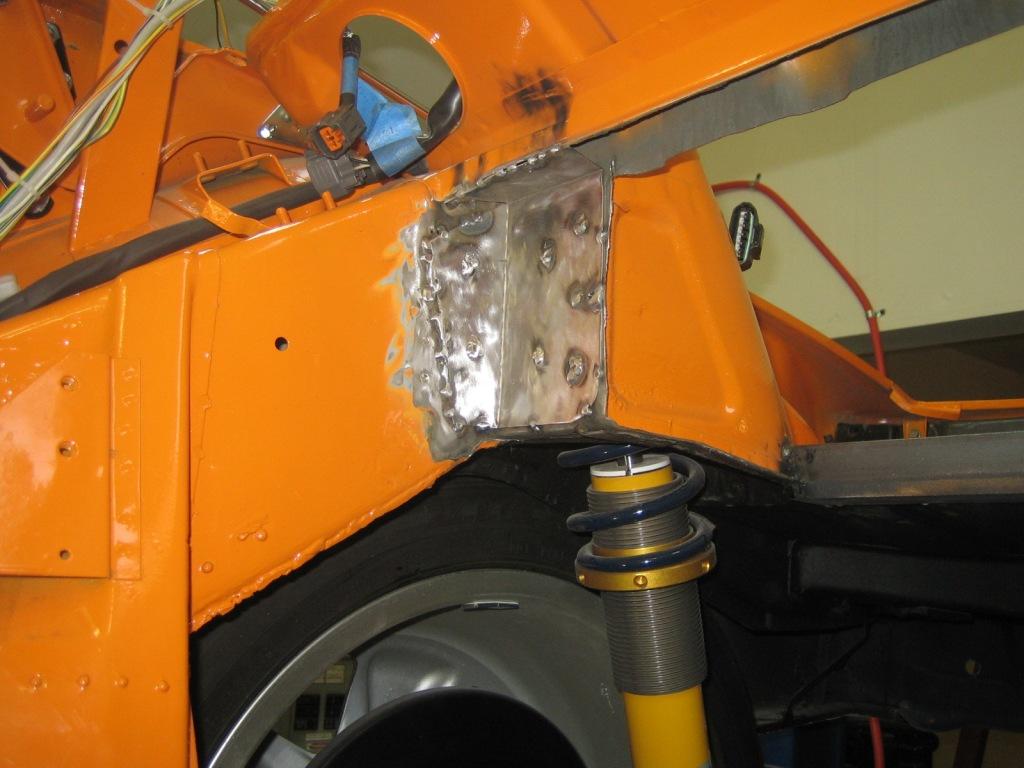
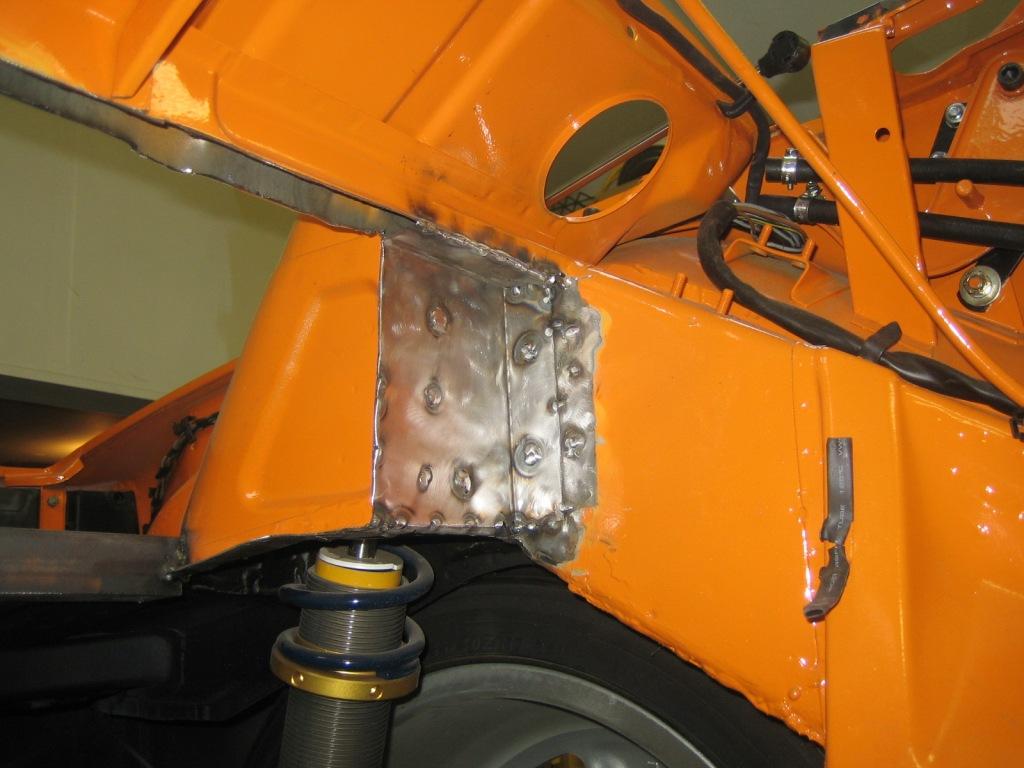
Next I need to add a flat piece to tie the two panels together and provide an edge on the side.
Posted by: CptTripps Jan 27 2014, 12:38 AM
I'm watching how much you're cutting out, so I can see how much I'll have to do too.
I had the idea to make a removable cover, with a pieceunderneath on a hinge. That'd let me keep the computer and such in the trunk. Not sure though.
Great progress. Keep at it!
Posted by: my928s4 Jun 14 2014, 02:21 PM
OK another long break, arrival of shifter cables has got me motivated again. Finished up the sheet metal in the engine bay, added a top support to anchor the removable panel which I will work on later. With restricted access and all the extra plumbing on the WRX I did not want to loose this opening.
Primed painted and undersealed so can let that dry for a while, also mounted the battery tray.
Nice to see some hydraulic clutch solutions in the other subaru threads so I will be working on that this week and then get the engine back in.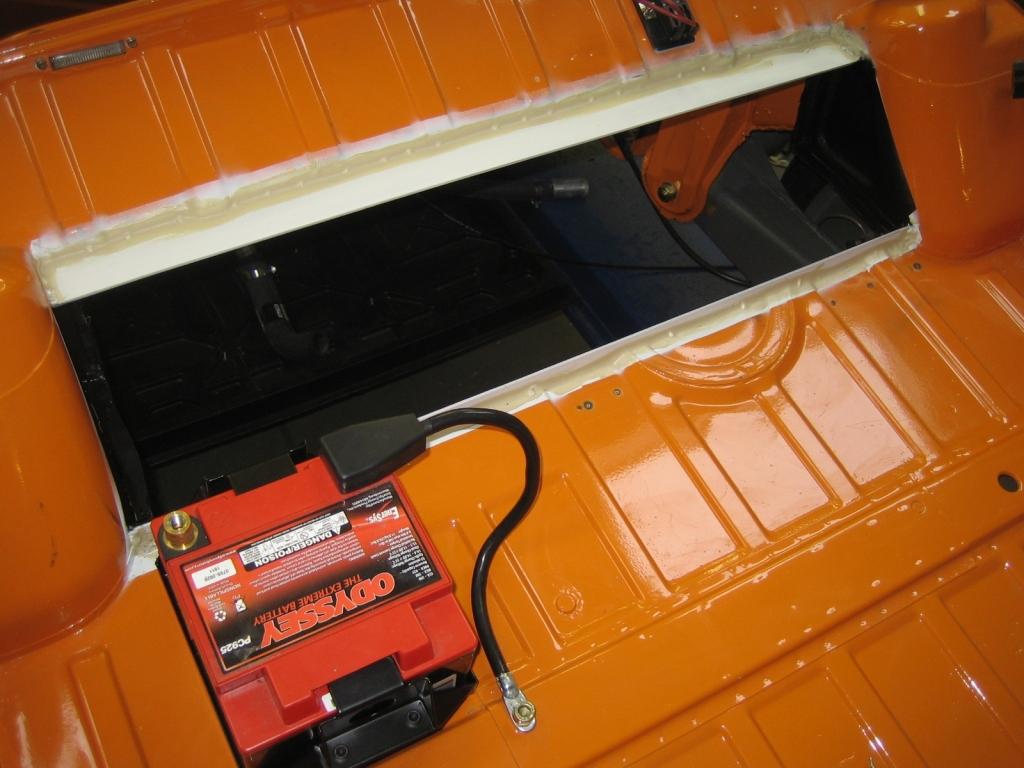
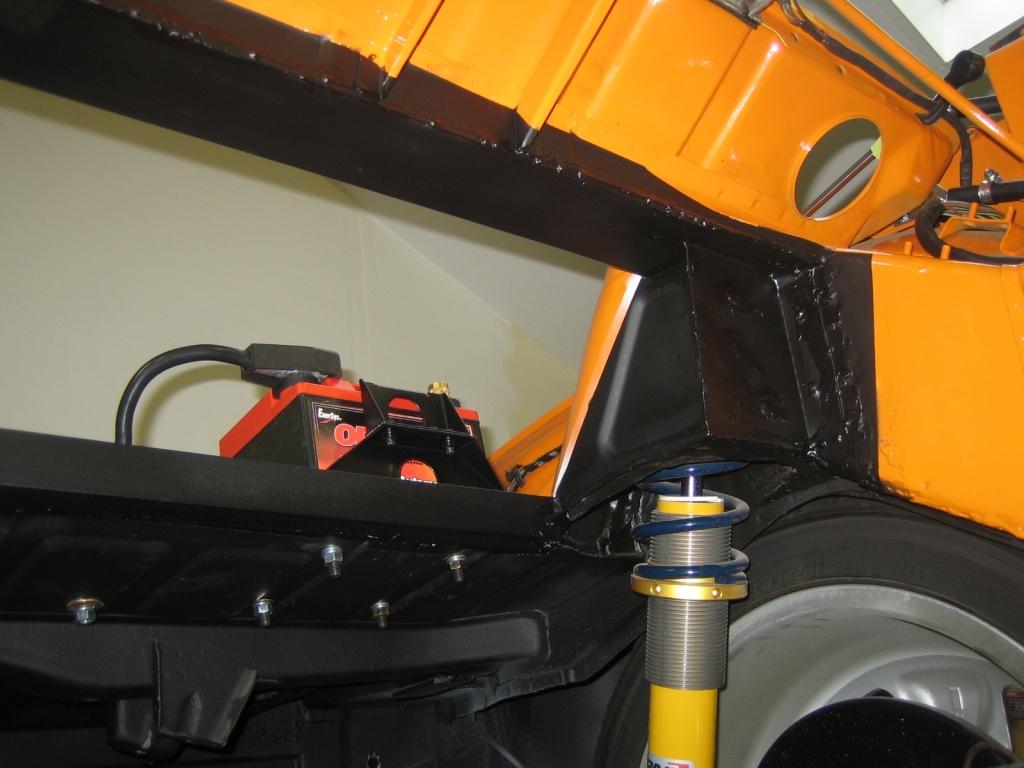
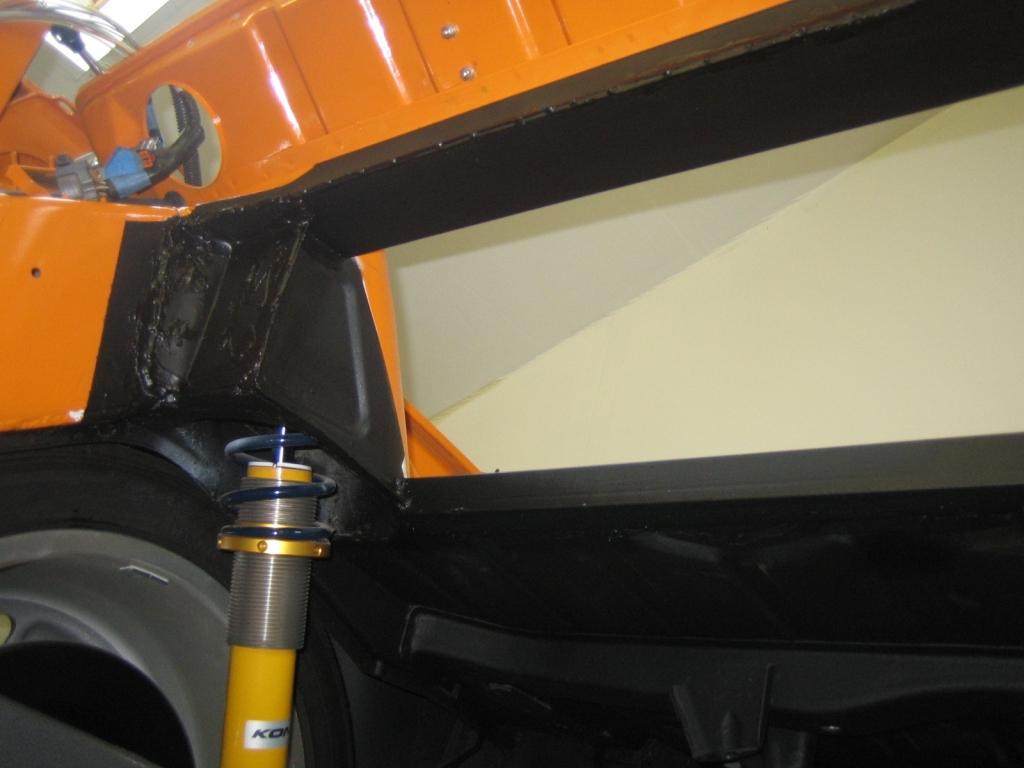
Posted by: my928s4 Jun 17 2014, 08:46 AM
I was originally going to modify the Subaru clutch for a cable but with recent excellent solutions posted by others for the hydraulic setup I am going down that route.
Willwood setup is on its way but I am pretty sure I don't have room for it as my coolant house is in that area, the Civic unit is much more compact and I think it will work. Later this week when I get back in the garage I will know for sure.
Someone at work was kind enough to make the bracket I need, the Clevis joint that came with the Civic unit may need to be replaced with one that has more reach also.
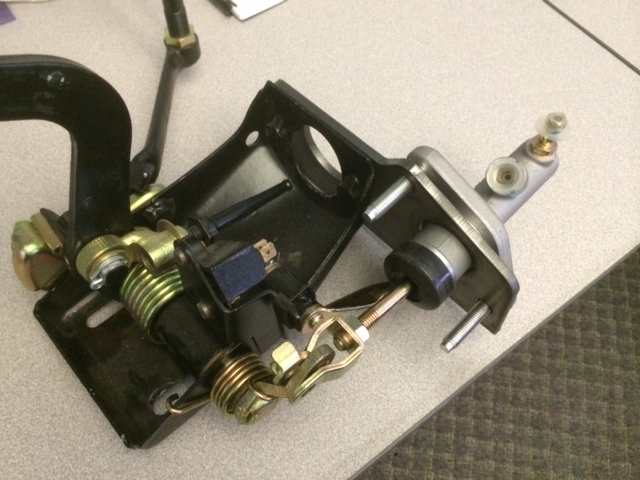
Posted by: Chris H. Jun 17 2014, 09:31 AM
Looks nice Chris! The Civic master will definitely work, Bob has used it. What size are the threads on that? This is the clevis we used on the Wilwood:
http://www.jegs.com/webapp/wcs/stores/servlet/KeywordSearchCmd?storeId=10001&catalogId=10002&langId=-1&Ntk=all&Jnar=0&itemPerPage=60&Ne=1%2B2%2B3%2B13%2B1147708&searchTerm=555-64323
It's 5/16...
Posted by: my928s4 Jun 17 2014, 10:07 AM
Looks nice Chris! The Civic master will definitely work, Bob has used it. What size are the threads on that? This is the clevis we used on the Wilwood:
http://www.jegs.com/webapp/wcs/stores/servlet/KeywordSearchCmd?storeId=10001&catalogId=10002&langId=-1&Ntk=all&Jnar=0&itemPerPage=60&Ne=1%2B2%2B3%2B13%2B1147708&searchTerm=555-64323
It's 5/16...
Thanks!, the Civic is M8 so this might work
http://www.mcmaster.com/#2448k48/=sg63uy
Posted by: my928s4 Jul 4 2014, 06:57 PM
Got the new clevis and looks like it will be better than the one that came with the Slave.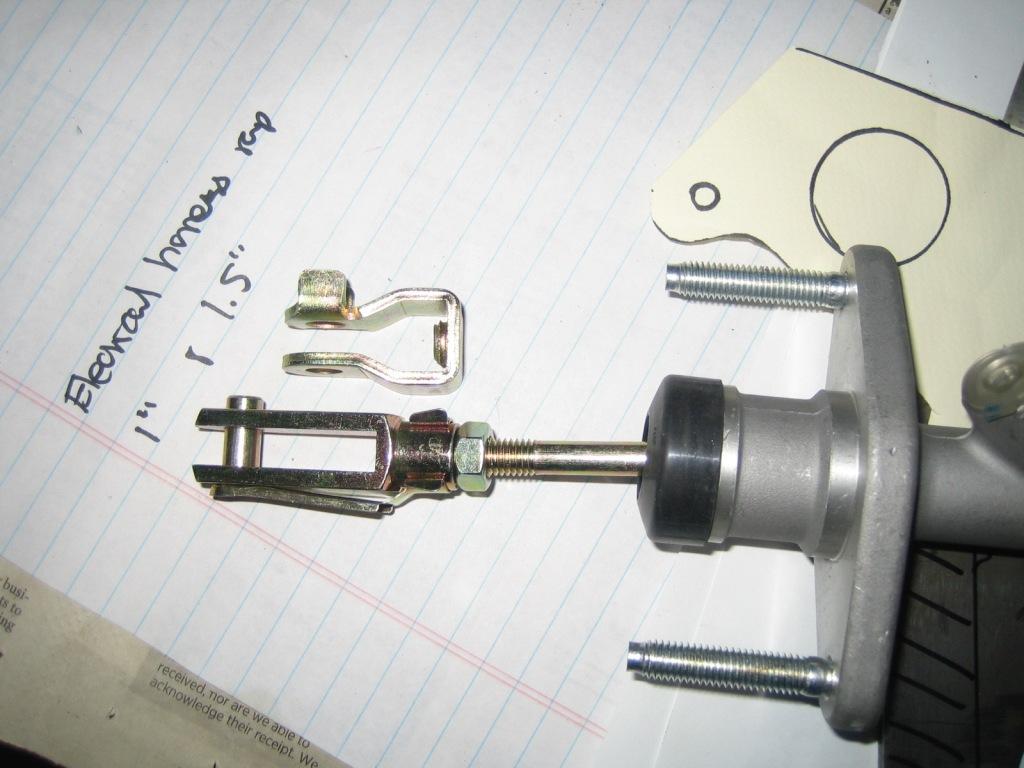
That is the good news, bad news is that the bracket I have will not work, the clearance with the coolant hose is making this a challenge. I mocked up a template.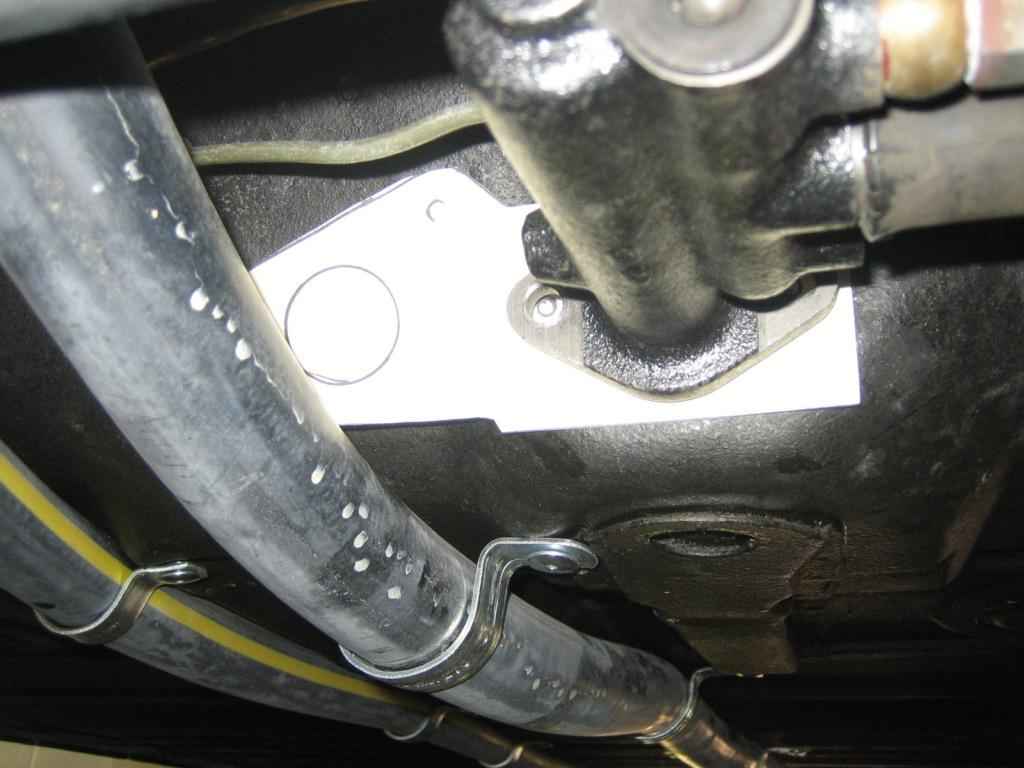
I need to rotate the master cylinder clockwise by a few degrees so the lower mounting hole is raised.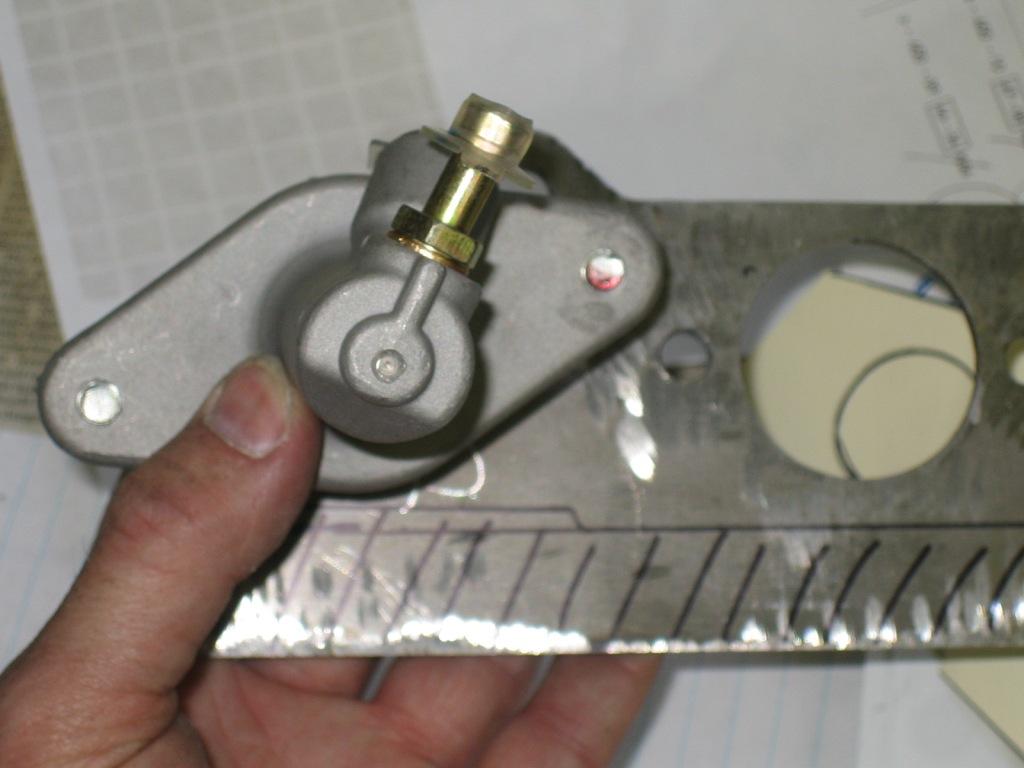
You can see the how much material needs to be removed on the next bracket compared to the one I have.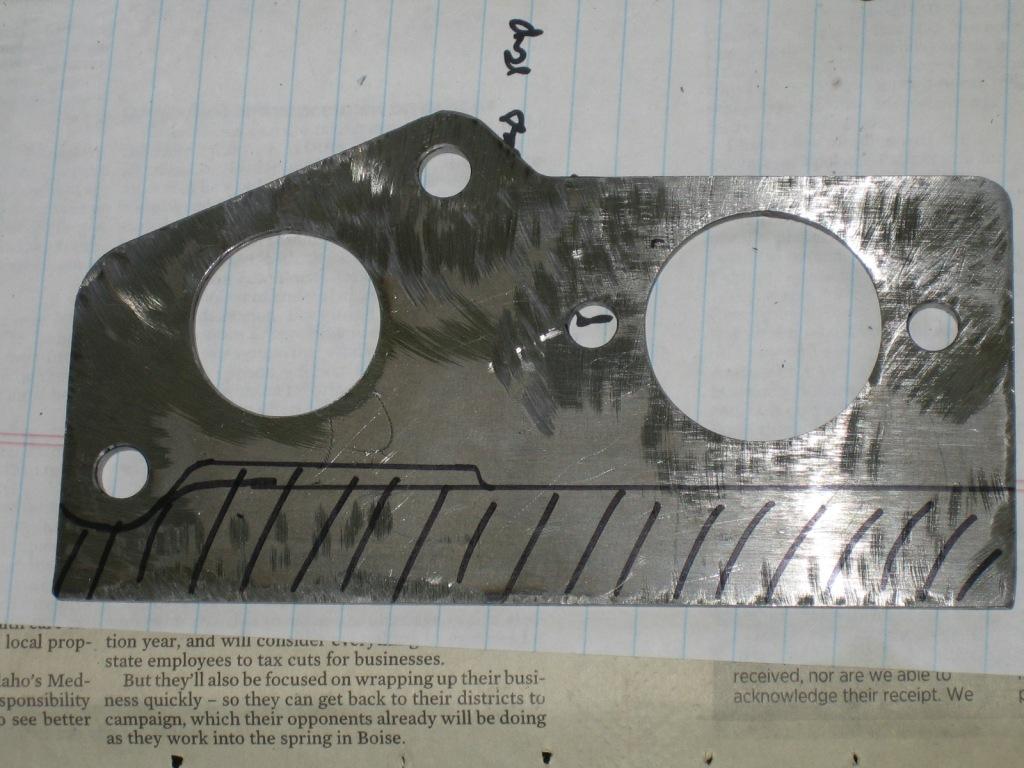
I have the engine harness all wrapped now, engine can go back in which will tidy up the clutter on the garage floor.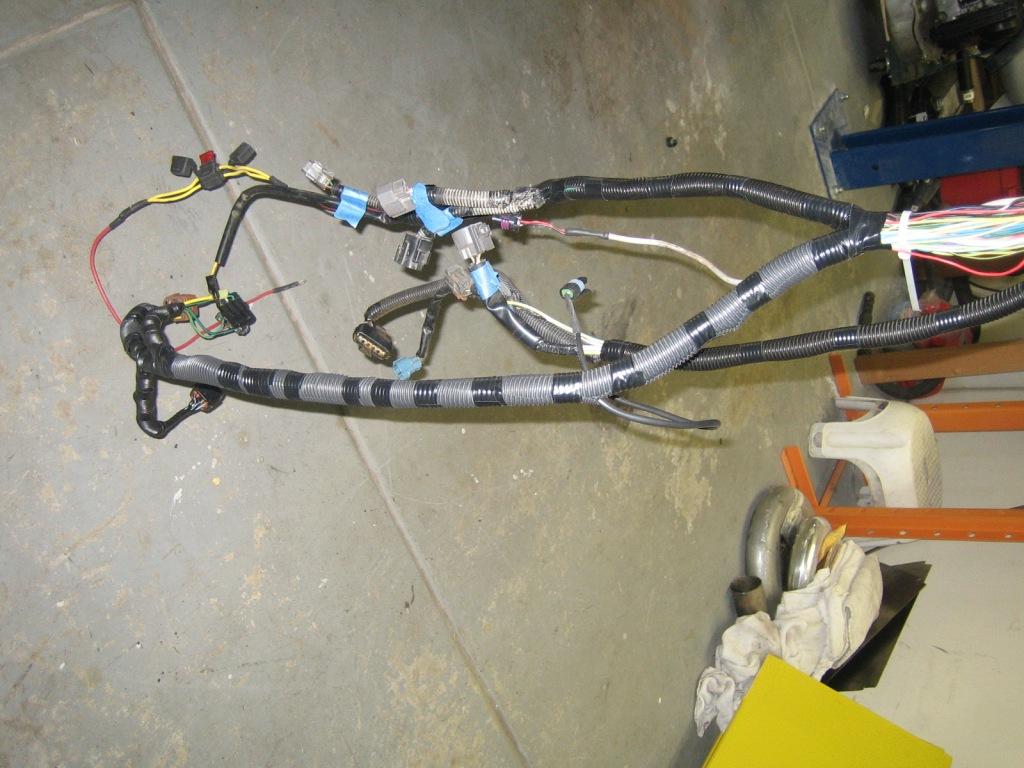
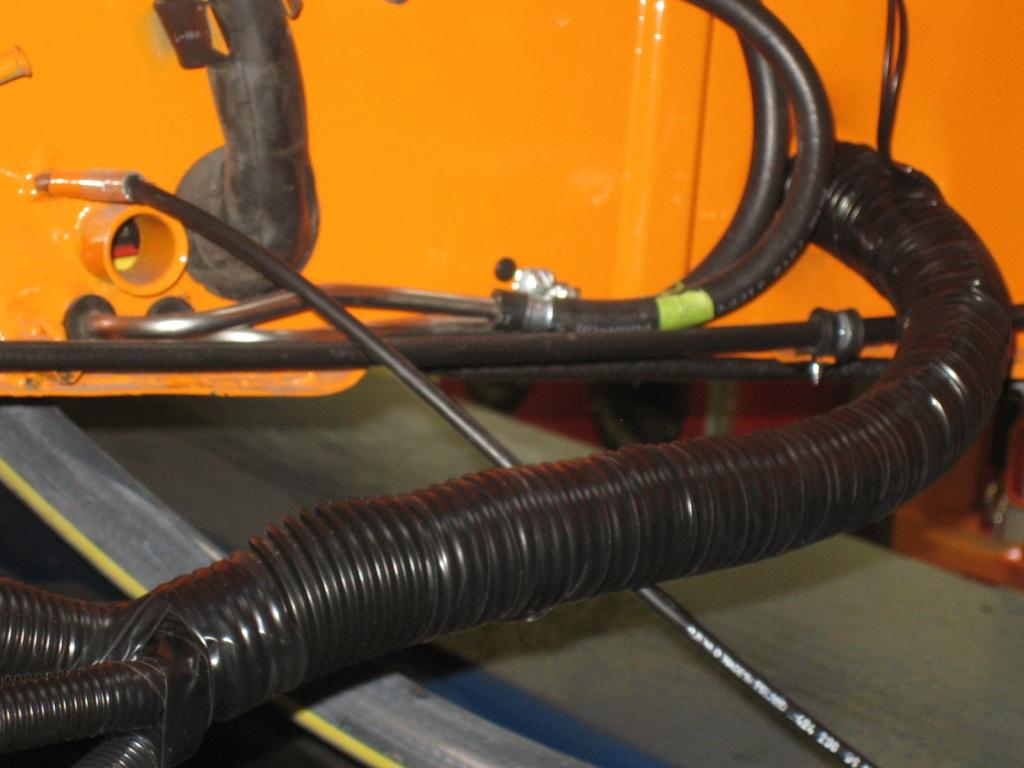
Have been looking for a while for tight radius 180 degree silicone hose for the intercooler connection but no luck, however, found these Cobra heads which will do the job nicely (need to trim the pipe obviously).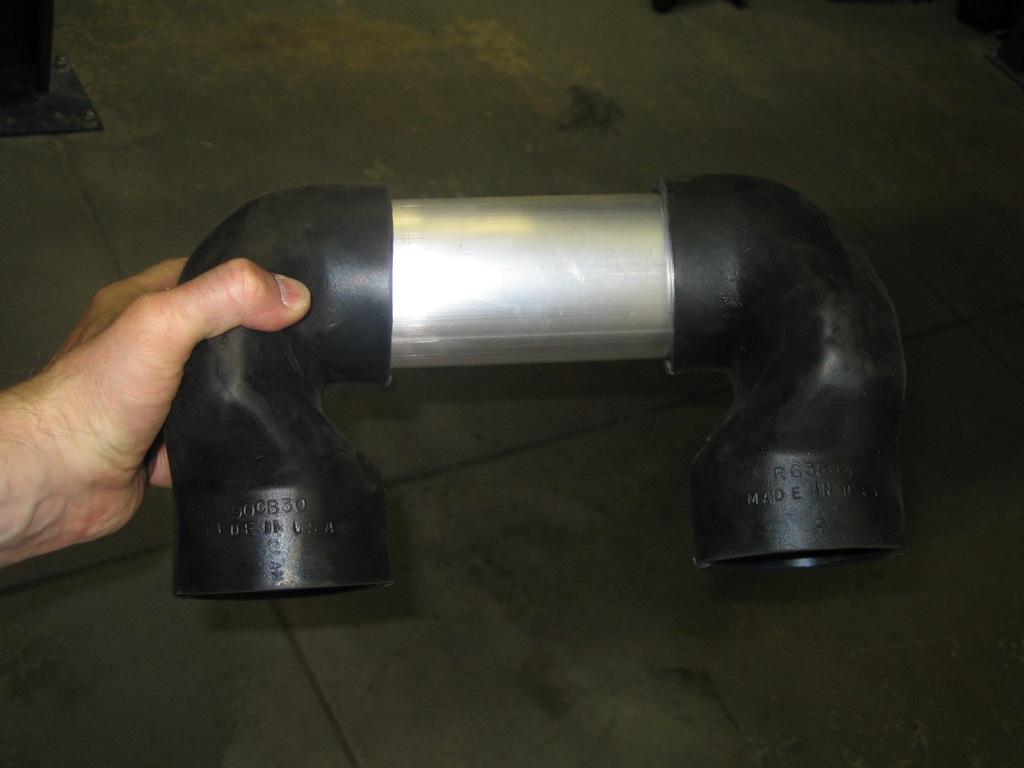
Posted by: my928s4 Jul 7 2014, 09:25 PM
Got the engine back in, hot sticky weather here so waited till the evening but feels good to have it back together. Just bolted in for now, will get it all hooked up next time.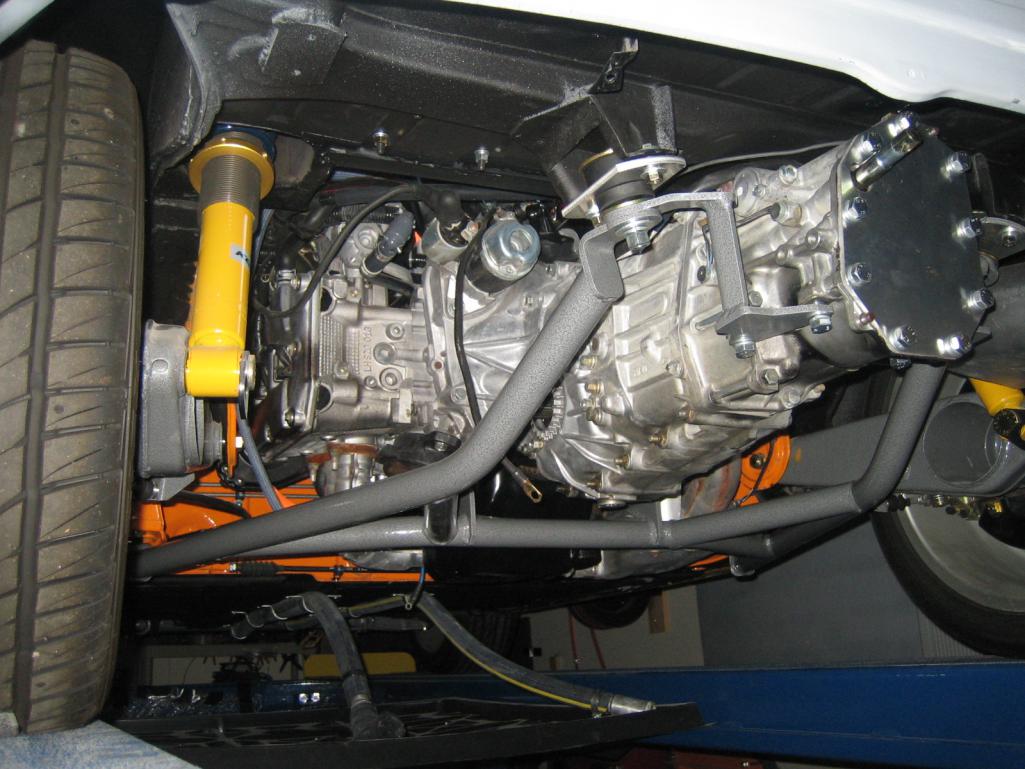
Clutch Master Bracket #3, I think this one is going to work. Fingers crossed.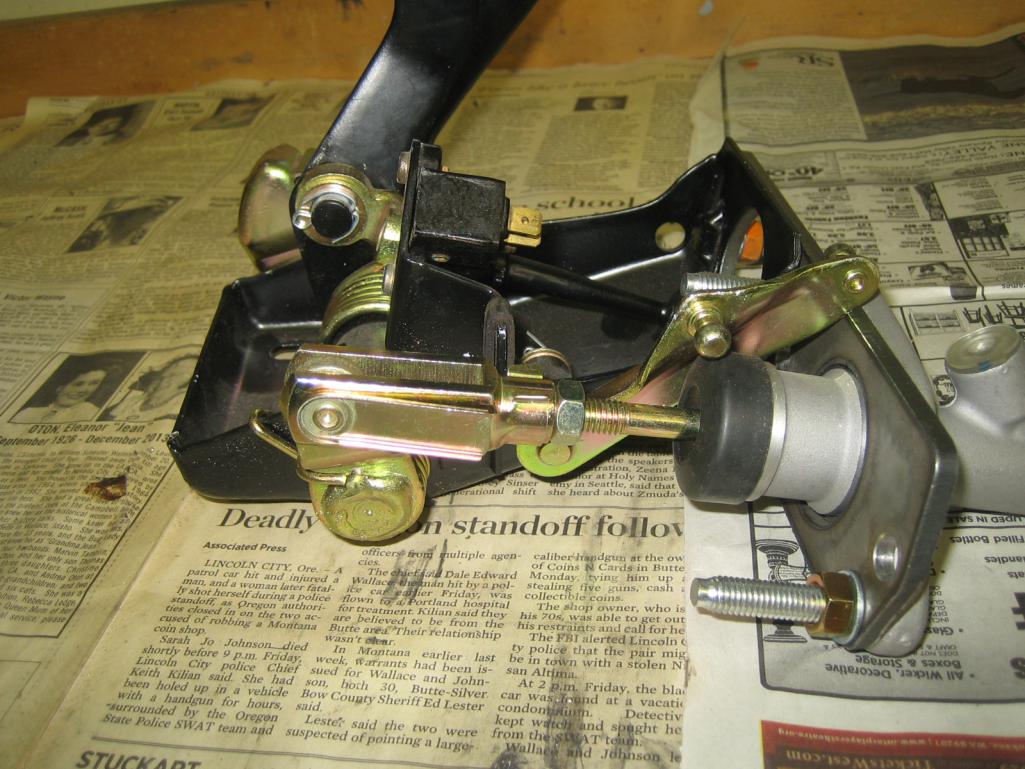
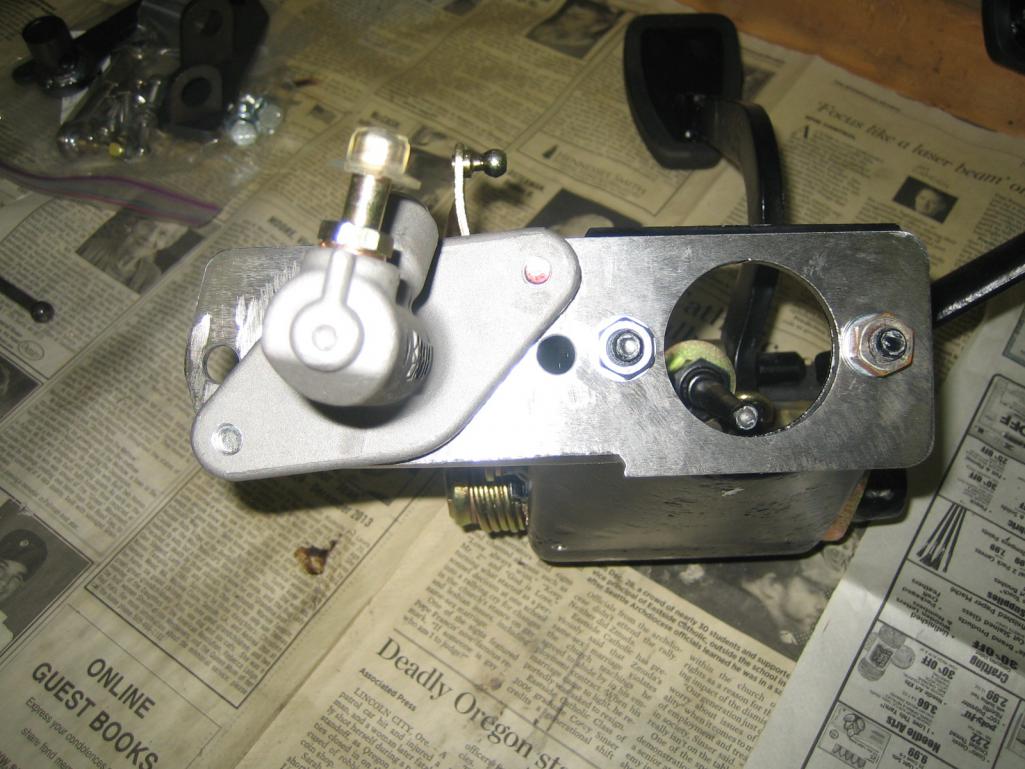
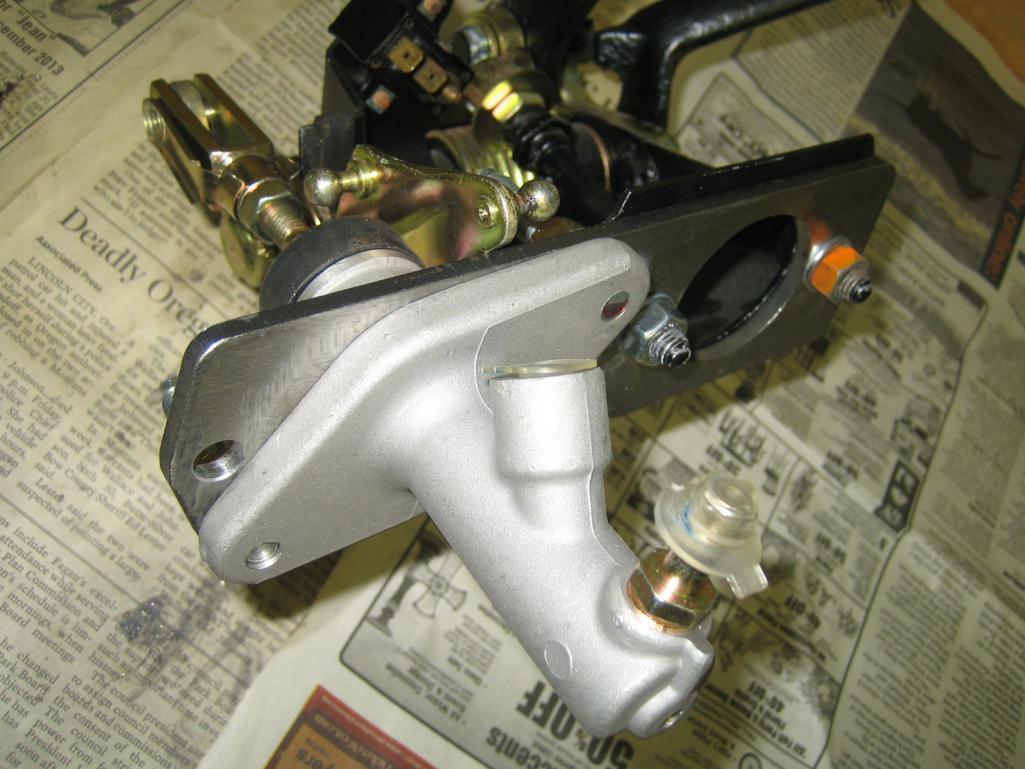
Posted by: my928s4 Sep 9 2015, 02:43 PM
My situation has changed and after this project has languished for too long maybe someone else can finish it off. I cannot tell you how much I enjoyed getting it to this point (priceless) and how saddened I am not to be able to finish it but sometimes you have to move on and I hope I bought some entertainment to the people who have followed this.
http://www.914world.com/bbs2/index.php?showtopic=78501
Posted by: Chris H. Sep 9 2015, 09:09 PM
Sorry to see you go Chris. Top notch build. Great job, really enjoyed following it. Hope it's finished to the same high quality standards.
Posted by: flmont Sep 9 2015, 09:47 PM
Ah,..Thats a damn shame,..the work on this car is unbelievable to say the least,..and I wish, I could have seen it completed myself...!!!
Would have been gorgeous ..!!!
Posted by: flmont Sep 9 2015, 09:49 PM
And I have learned a few things aswell,....Thanks ,..928,...Frank
Posted by: Mowog4 Jun 8 2016, 05:16 PM
I am the new owner of Chris's 914 Subie conversion. I have started getting a bit more active on the board doing some research and developing a plan. The current plan is to put the car in the body shop for some block sanding, chassis stiffening and paint. It is going in the first week of July and is expected back six weeks later. Chris had painted the trunks, engine compartment and jams in orange (I believe L20-E). I will paint he car the same color with a touch of pearl, it'll look good in the sun.
During paint, I am figuring out an air conditioning and heat system, (I live in the desert). I have been kicking around some ideas with some people on another thread, it looks doable. While in paint, I will also send the seats out to get upholstered and order the interior bits.
When the car gets out of paint, it is going to a local Subaru WRX tuner. A couple of weeks ago I flew over to SoCal to look at Gary Scott's Lamborghini Verde Ithica Green 914. His car is flawless, it looks like a car done by one of the tv shows. Anyway, Gary was kind enough to share with me the build sheet an I am using the same tuner that did his engine. I will be upgrading the turbo and intercooler, I am looking to get 250-300 hp at the wheels.
Anyway, that is a status on the car. I am pretty excited about it, Chris is a great craftsman, I expect this car to be a really nice drIver.
Ed
Posted by: Mueller Jun 8 2016, 05:20 PM
I am the new owner of Chris's 914 Subie conversion. I have started getting a bit more active on the board doing some research and developing a plan. The current plan is to put the car in the body shop for some block sanding, chassis stiffening and paint. It is going in the first week of July and is expected back six weeks later. Chris had painted the trunks, engine compartment and jams in orange (I believe L20-E). I will paint he car the same color with a touch of pearl, it'll look good in the sun.
During paint, I am figuring out an air conditioning and heat system, (I live in the desert). I have been kicking around some ideas with some people on another thread, it looks doable. While in paint, I will also send the seats out to get upholstered and order the interior bits.
When the car gets out of paint, it is going to a local Subaru WRX tuner. A couple of weeks ago I flew over to SoCal to look at Gary Scott's Lamborghini Verde Ithica Green 914. His car is flawless, it looks like a car done by one of the tv shows. Anyway, Gary was kind enough to share with me the build sheet an I am using the same tuner that did his engine. I will be upgrading the turbo and intercooler, I am looking to get 250-300 hp at the wheels.
Anyway, that is a status on the car. I am pretty excited about it, Chris is a great craftsman, I expect this car to be a really nice drIver.
Ed
Congrats, great start for a project there!
If Gary has that sweet green GT flared Subaru conversion I think you are talking about I have only seen pictures of it and I am impressed!
Posted by: Mowog4 Jun 8 2016, 05:38 PM
[/quote]
Congrats, great start for a project there!
If Gary has that sweet green GT flared Subaru conversion I think you are talking about I have only seen pictures of it and I am impressed!
[/quote]
Gary's car is amazing, the build is flawless, I was blown away by the quality of the car. Made me want to fly home and build something as cool. To top it off, Gary is a great guy. We stoop in a parking lot talking cars for a couple of hours. While standing there people driving by would give the thumbs up, and a couple people stopped to look at it.
Posted by: matthepcat Jun 8 2016, 10:51 PM
Congrats Ed. Glad this car is in the right hands of a motivated enthusiast!
Let's see some photos of your Bugeye and Mini!!
Posted by: Mowog4 Aug 4 2016, 08:11 PM
Just got the car back from paint. It is L30E which I put a pearl mid-coat into. I have six boxes which just showed up from 914 rubber with a whole bunch of interior parts in it. Next steps are interior installation, I am installing a larger intercooler and a bigger turbo. Sometime in the next couple of weeks the car will head to the dyno shop to get the car running.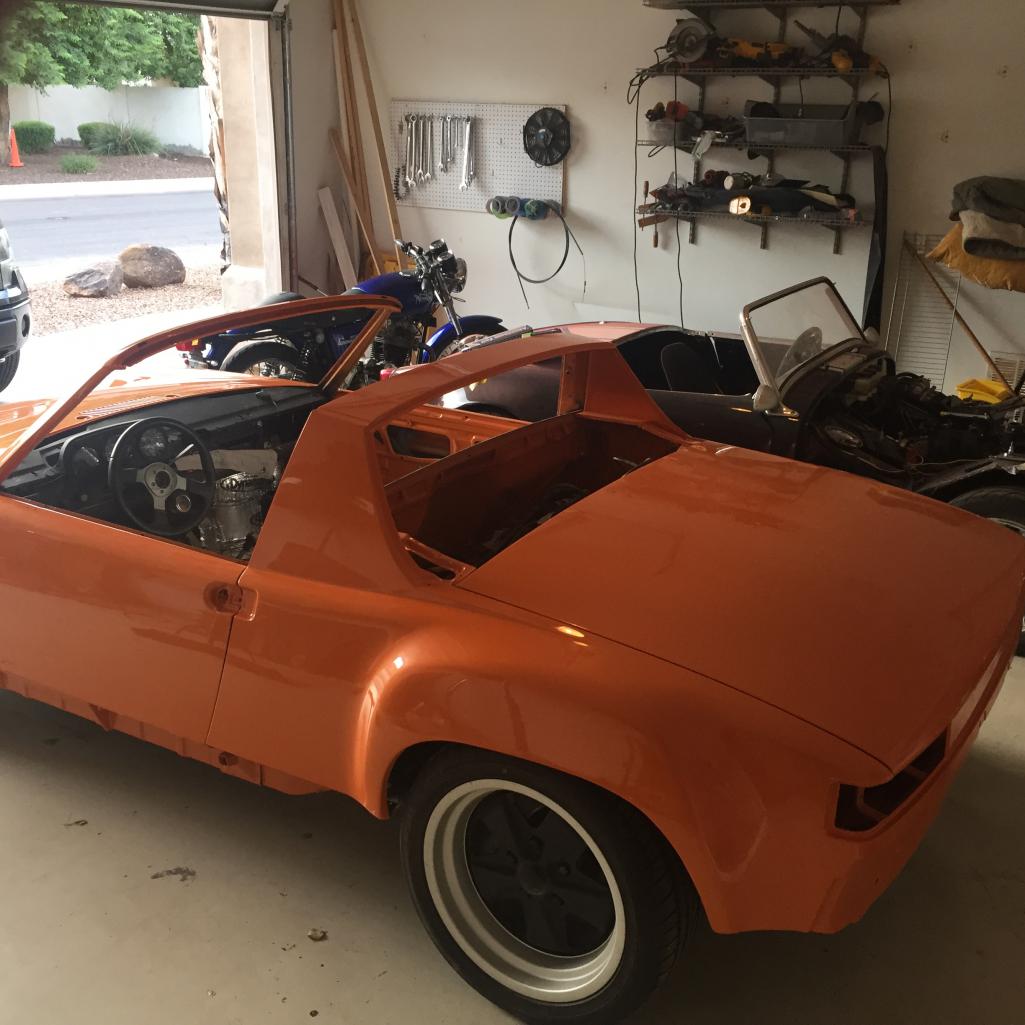
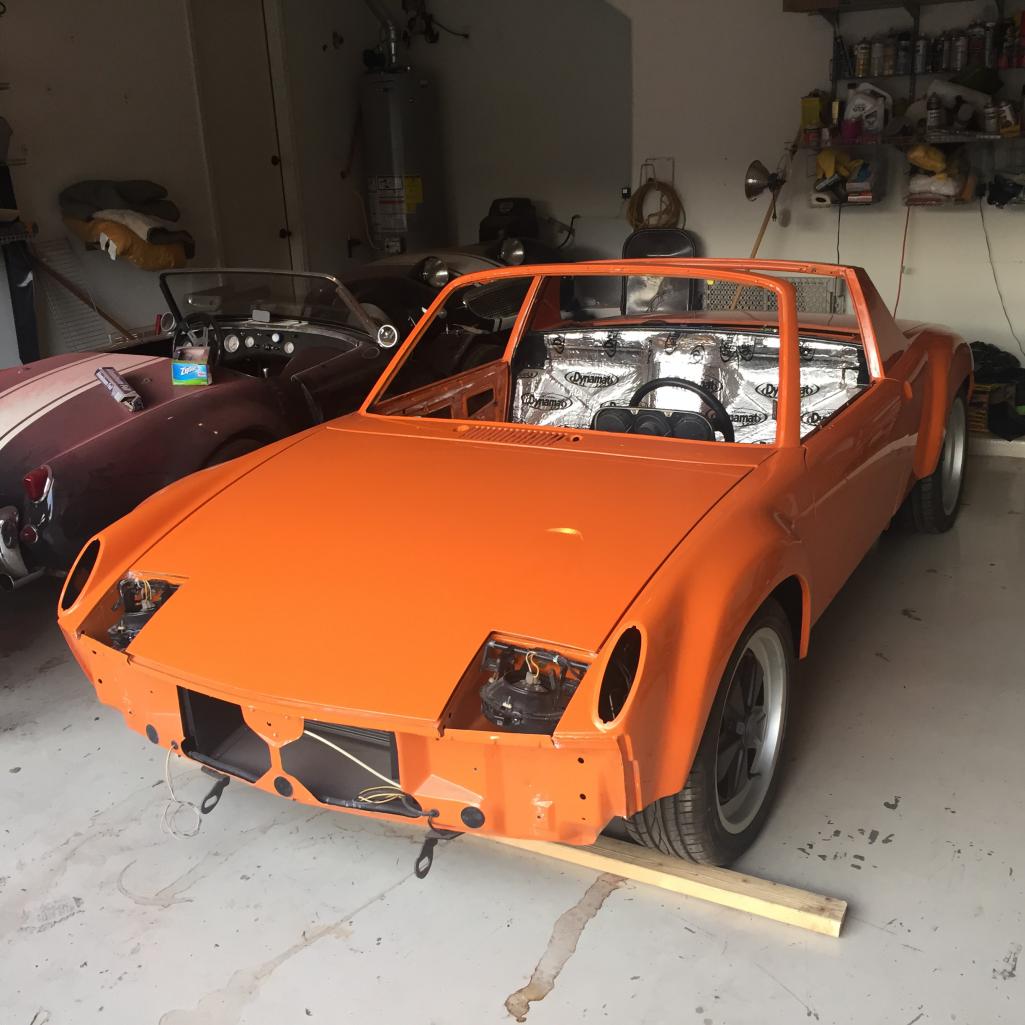
Posted by: injunmort Aug 4 2016, 08:42 PM
good luck with the project and nice commando in the background
Posted by: Mowog4 Aug 4 2016, 08:53 PM
I have a love-hate relationship with my Norton. When it is good it is great, when it has mid-seventies electrical issues I usually end up walking home
good luck with the project and nice commando in the background
Posted by: injunmort Aug 4 2016, 09:12 PM
long time norton owner, walked home once. do you work on it or farm it out?
Posted by: Mowog4 Aug 4 2016, 09:42 PM
I work on it myself, it is actually a pretty good bike. I have completely rebuilt it, its weakest point is the brakes. They are awful. I mostly just take it on short rides with friends who also have vintage bikes. Mostly I ride a BMW S1000R which is a pretty great bike, but lacks soul.
long time norton owner, walked home once. do you work on it or farm it out?
Posted by: matthepcat Aug 9 2016, 04:25 PM
Ed,
The car is looking great painted. Very excited to see it come together and run.
You mentioned you plan to run a larger turbo & I assume injectors. Have you picked out a turbo yet?
Having followed this thread with the previous owner, I also suggest fabricating a new downpipe from the turbo with a bellmouth or divorced wastegate pipe.
Posted by: Mowog4 Aug 9 2016, 06:17 PM
Ed,
The car is looking great painted. Very excited to see it come together and run.
You mentioned you plan to run a larger turbo & I assume injectors. Have you picked out a turbo yet?
Having followed this thread with the previous owner, I also suggest fabricating a new downpipe from the turbo with a bellmouth or divorced wastegate pipe.
Hey Matt
Hope all is well. I have a Subie tuner near me, he is suggesting a VF23 Hybrid, which runs a different impeller. No need for different injectors, I am going for a pretty modest gain. I am thinking around 275HP to the wheels. The agree with the downpipe, it is on the list
Posted by: matthepcat Aug 9 2016, 07:44 PM
Cool. The stock injectors are 550cc on that motor I believe. If you plan to run anything over 325HP (which you are close if you are looking for 275 at the wheels) then you might need more fuel. Could be worth a larger injector for the possibility you want more oomph....which you will eventually.
Ed,
The car is looking great painted. Very excited to see it come together and run.
You mentioned you plan to run a larger turbo & I assume injectors. Have you picked out a turbo yet?
Having followed this thread with the previous owner, I also suggest fabricating a new downpipe from the turbo with a bellmouth or divorced wastegate pipe.
Hey Matt
Hope all is well. I have a Subie tuner near me, he is suggesting a VF23 Hybrid, which runs a different impeller. No need for different injectors, I am going for a pretty modest gain. I am thinking around 275HP to the wheels. The agree with the downpipe, it is on the list
Posted by: Mowog4 Aug 9 2016, 08:15 PM
Cool. The stock injectors are 550cc on that motor I believe. If you plan to run anything over 325HP (which you are close if you are looking for 275 at the wheels) then you might need more fuel. Could be worth a larger injector for the possibility you want more oomph....which you will eventually.
Ed,
The car is looking great painted. Very excited to see it come together and run.
You mentioned you plan to run a larger turbo & I assume injectors. Have you picked out a turbo yet?
Having followed this thread with the previous owner, I also suggest fabricating a new downpipe from the turbo with a bellmouth or divorced wastegate pipe.
Hey Matt
Hope all is well. I have a Subie tuner near me, he is suggesting a VF23 Hybrid, which runs a different impeller. No need for different injectors, I am going for a pretty modest gain. I am thinking around 275HP to the wheels. The agree with the downpipe, it is on the list
I don't think the injectors are going to be my limiting factor, I am more concerned about cooling the air as getting airflow through the intercooler, and placing the intercooler for that matter, are going to be challenges which may make 250RWHP more realistic, Once I get it running I can switch injectors, especially if I ultimately end up with a water to air intercooler. What my real plan entails is dropping it off to the tuner and letting him figure it out. It will get a bellmouth down pipe immediately.
In addition to those performance thoughts taxing my minimalist brain, I am knee deep in evaporator air conditioner parts so I can drive the car year around here.
Posted by: vin man Aug 29 2016, 02:25 PM
Great project and nice meeting you Ed. I needed to subscribe to this build to get info for my own subaru conversion!
Posted by: Mowog4 Aug 29 2016, 04:33 PM
Great project and nice meeting you Ed. I needed to subscribe to this build to get info for my own subaru conversion!
Vin
Mine is going in to mount the larger intercooler and exhaust next week, am expecting it to go to the dyno guy the following week. Once they are taken care of it is time to assemble. Just got the seats back from the upholstery guy, so I am almost there on parts. Looking forward to driving it.
Ed
Posted by: vin man Jan 22 2017, 06:10 PM
Mine is going in to mount the larger intercooler and exhaust next week, am expecting it to go to the dyno guy the following week. Once they are taken care of it is time to assemble. Just got the seats back from the upholstery guy, so I am almost there on parts. Looking forward to driving it.
Ed
How's the progress coming Ed?
Posted by: Mowog4 Jan 22 2017, 08:07 PM
Mine is going in to mount the larger intercooler and exhaust next week, am expecting it to go to the dyno guy the following week. Once they are taken care of it is time to assemble. Just got the seats back from the upholstery guy, so I am almost there on parts. Looking forward to driving it.
Ed
How's the progress coming Ed?
Progress is being made, although not as quickly as I would like. The inter cooler plumbing is done, installed, taken apart and at powder coating. Exhaust is at the ceramic coaster. The AC Condensor is at the fab guy having mounts welded on to the radiator. I am finishing up the evaporator, it is going under the cowl. I am notching the gas tank to get it all to fit. Getting the bumpers back from the chrome guy tomorrow.
I am moving along. How are you doing with yours?
Posted by: Mowog4 Feb 11 2017, 06:59 PM
Finally got the intercooler plumbing back from the powdercoater, got it mocked up. 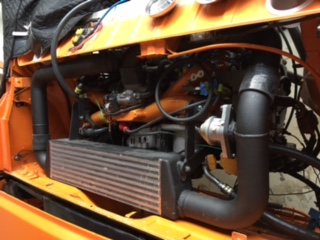
Just picked up my bumpers from the plater, I am in the process of building the grill for it, then I will be attaching them next weekend.
Posted by: vin man Feb 12 2017, 10:02 AM
Finally got the intercooler plumbing back from the powdercoater, got it mocked up.
Just picked up my bumpers from the plater, I am in the process of building the grill for it, then I will be attaching them next weekend.
Glad to see the progress. Looking forward to seeing it on the road!
Posted by: matthepcat Feb 12 2017, 11:25 AM
Looks great, have any picture of the completed paint job?
Cheers
Posted by: JRust Feb 11 2018, 10:22 AM
Anything new? You got this bad boy on the road yet? Love to see it at Route 66 this year
Posted by: Mowog4 Feb 11 2018, 09:39 PM
Anything new? You got this bad boy on the road yet? Love to see it at Route 66 this year
I am bleeding the cooling system tonight, I finished up the Hydraulic clutch ( needs to be bled), I am waiting on a fuel tank fitting.
It will be at Route 66 run.
Posted by: Mowog4 Feb 11 2018, 10:01 PM
i Am trying to figure out what throttle cable stop to use on the Susie throttle body. any suggestions?
Powered by Invision Power Board (http://www.invisionboard.com)
© Invision Power Services (http://www.invisionpower.com)