Printable Version of Topic
Click here to view this topic in its original format
914World.com _ 914World Garage _ Starting a 1973 restoration
Posted by: FourBlades Dec 15 2007, 02:02 PM
Hello 914 World Members!
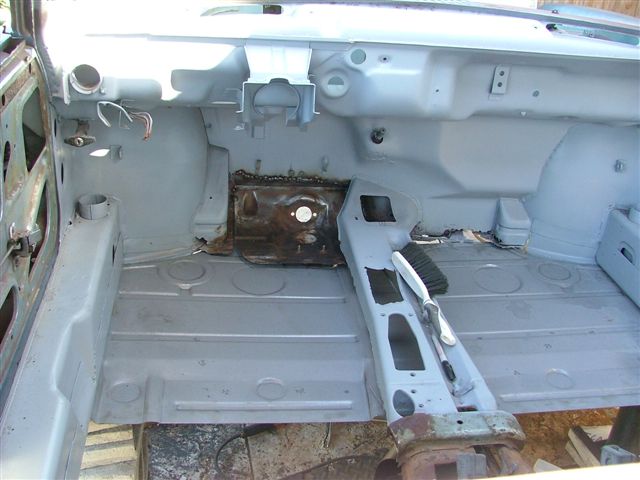
I am starting on restoring a $500 914 that was left in a field for several years with no windshield. The car belonged to the POs older brother and thus has sentimental value. The sold it to me on the condition that I not part it out. I was looking for a project so this was fine with me. This is my first restoration project so I figured I would learn a lot 
The car is a mixture of really good sections, appears to have suffered no major accidents, is straight, never been repainted--but it has totally rusted out floors and hell hole. All the suspension mounting points are not rusted. The door gaps are all even and good. If I can replace the floors, I think it will be a good straight car. Many small parts were stolen while it was "stored" and the wiring loom is a complete loss.
Thanks for any comments...John
Posted by: FourBlades Dec 15 2007, 02:09 PM
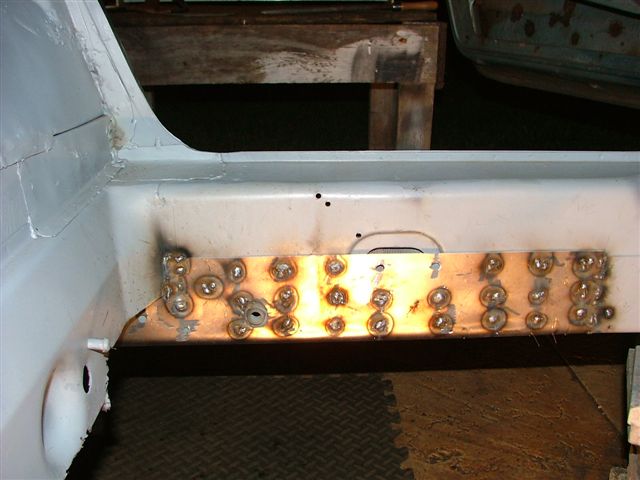
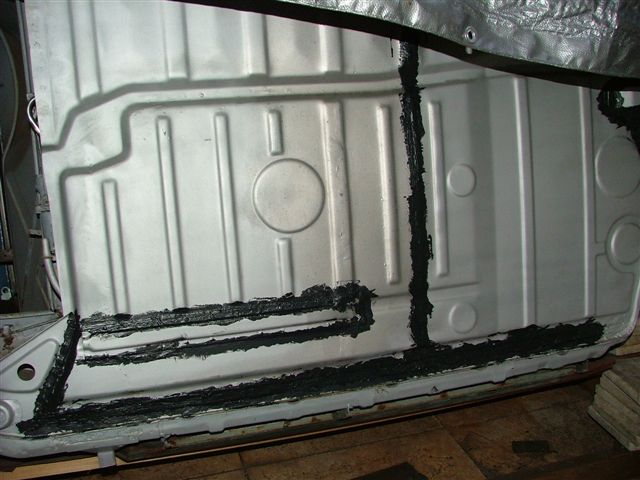
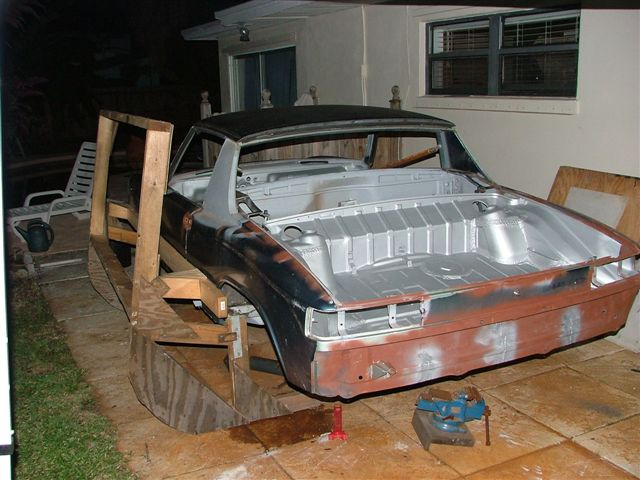
Some pictures in my restoration "garage".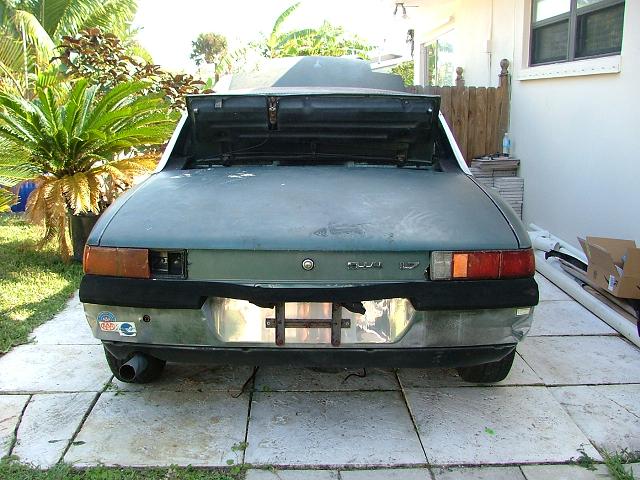
Posted by: David_S Dec 15 2007, 02:13 PM

Hello 914 World Members!
I am starting on restoring a $500 914 that was left in a field for several years with no windshield. The car belonged to the POs older brother and thus has sentimental value. The sold it to me on the condition that I not part it out. I was looking for a project so this was fine with me. This is my first restoration project so I figured I would learn a lot

Hmmmm that sounds soooo familiar to me !! My 73 was picked up from a guy that drove it for a couple of years without a windshield in it. It sat outside for about 5 years before I got it. Stick with it and it will make a great project if it isn't too badly rusted !!
Posted by: Joe Owensby Dec 15 2007, 03:09 PM
Start digging into it to see how bad the rust is. Heat the floorboard tar with a hot air gun and scrape it out. Then you can see how much damage has been done. Look at the longs to make sure the rust isn't up into them. Also look at the hell hole area below the battery.
I left my car outside for many years. Unknown to me, the rear window had come unglued and allowed water to enter the car. I ended up replacing the floorboard, and lower portions of the rear firewalls. The Longs were OK. I had taken care of the battery acid many years earlier, so my hell hole was not rusted through. The rear firewall inslulation had accumulated water , and the lower firewall was rusted. i cut it out and replaced it. I replaced the floorpan with one from AA. I wanted mine to be real nice, so I replaced a lot of stuff that would have been OK , just not as nice. Repair is much easier to do on a Rotiserrie. I have been working on it for just over 2 years. Lots of time spent, and a few $'s just to get it back to almost new. Almost everything on it had a little rust somewhere so i ended up cleaning almost everything up and re-painting it all. So far, it looks great. I will post photos soon. If you are prepared to do the work, you should be able to get a good car. Good luck, JoeO
Posted by: roadster fan Dec 15 2007, 03:16 PM
Dig In, and see what you have. The undercoating on my '73 started falling off so I removed it all. Some guys spray with products to protect the insides of the wheels wells from rocks, others prime and paint with the rest of the car.
I noticed you live in Brevard, FL.....those are my old stomping grounds. I lived in Satellite Beach and went to school at BCC. Nice area.
Good luck with the start of your project, you found the right place for help and encouragement along the way.
Jim
Posted by: Chuck Dec 15 2007, 03:42 PM
As Yogi would say, its deja vu all over again. I picked up a '73 last April. Previous owner had not driven the car in over 15 years and had let it sit. Rear window leaked. Rear floorpan is rusted and a complete floor replacement will occur. Lower inner firewall is also rusted and needs work. Hell hole is pretty bad and will need to do some metal replacement on the inner and outer longs. But . . .
Original paint. No accidents. Door gaps are good. Car is straight. Will be doing a complete restoration and a 6 conversion. PO had undercoated the inner fender wells as well. A lot of the undercoating is now flaking off. I'm stripping the complete car to bare metal as part of the resto.
Welcome to the madness. 
Posted by: FourBlades Dec 15 2007, 10:15 PM
Thanks for the encouragement. I can see this is a road many of you have taken already. It looks like the floor pan is a total loss. I pried up a lot of the tar and the floor is basically falling out. The lower, inner edges of the longs are rusted through, the rest is not too bad.
It is finally cool enough down here in FL to work outside and be somewhat comfortable. Brevard county is nice but you get tired of the humidity all the time.
If the inside edge of the longs are rusted out (the part closest to the cabin) and the floor pan needs replacing, should I replace the floor pan first and then patch the longs or the other way around? I assume the floor pan is spot welded to the bottom of the inner long, right?
Posted by: FourBlades Dec 15 2007, 10:18 PM
As Yogi would say, its deja vu all over again. I picked up a '73 last April. Previous owner had not driven the car in over 15 years and had let it sit. Rear window leaked. Rear floorpan is rusted and a complete floor replacement will occur. Lower inner firewall is also rusted and needs work. Hell hole is pretty bad and will need to do some metal replacement on the inner and outer longs. But . . .
Original paint. No accidents. Door gaps are good. Car is straight. Will be doing a complete restoration and a 6 conversion. PO had undercoated the inner fender wells as well. A lot of the undercoating is now flaking off. I'm stripping the complete car to bare metal as part of the resto.
Welcome to the madness.
I think I will take off the undercoating as well. Any tips on how to remove what is left of the edges of the floor pan? Is this a matter of drilling out spot welds and peeling it off with an air chisel?
What size six are you thinking of putting in? I have not decided on a motor yet, but would like lots of torque for AX, maybe a big type 4.
Posted by: Chuck Dec 15 2007, 10:20 PM
You're correct. The floorpan is spot welded to the longs. You'll need to patch and repair the longs before you weld in the new floorpan.
Posted by: swl Dec 16 2007, 07:46 AM
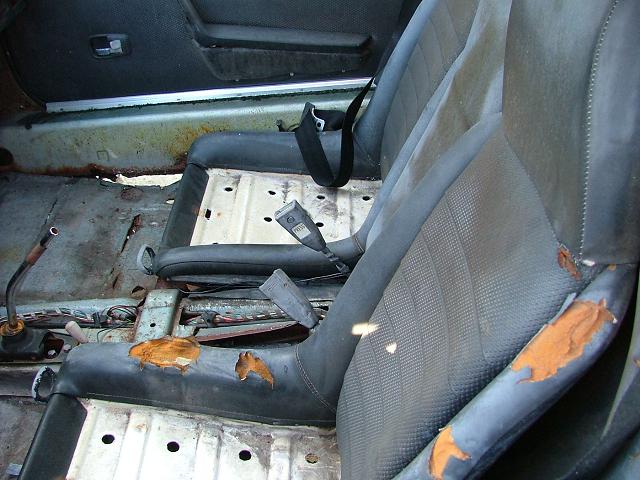
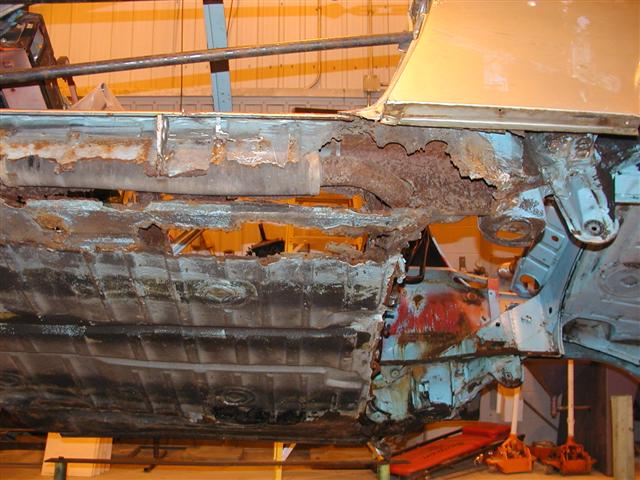
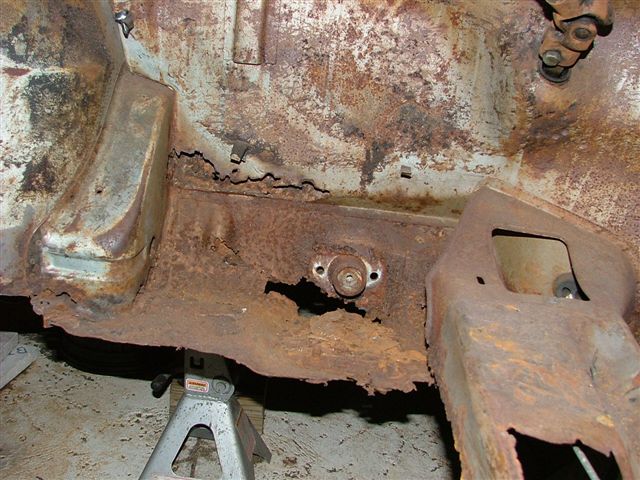
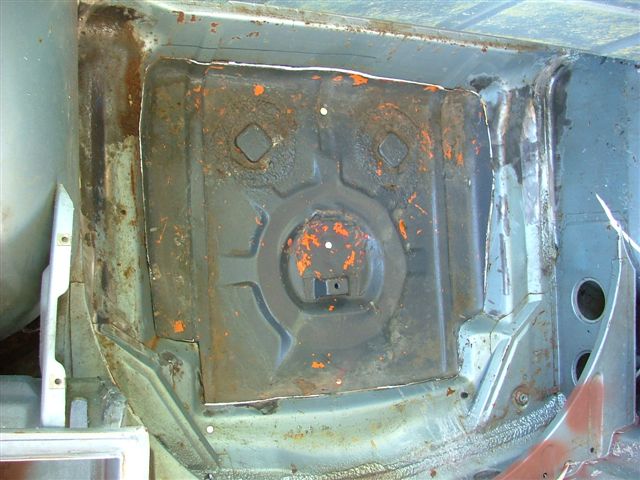
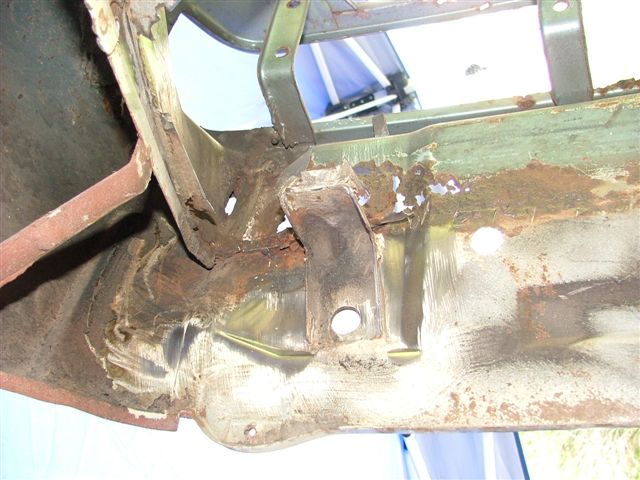
I hate to be a spoil sport but that interior picture tells me you have more than floor board problems. The longs are badly rusted at the bottom and if the pattern is the same as mine then the rust started inside and there is no steel left down there. It can be repaired - see the thread 'digging into hell'. I think it is now in the classics.
Get out your ice pick and go poking around. Look at the outer longs as well particularly passenger side rear.
Posted by: FourBlades Dec 16 2007, 09:40 AM
I hate to be a spoil sport but that interior picture tells me you have more than floor board problems. The longs are badly rusted at the bottom and if the pattern is the same as mine then the rust started inside and there is no steel left down there. It can be repaired - see the thread 'digging into hell'. I think it is now in the classics.
Get out your ice pick and go poking around. Look at the outer longs as well particularly passenger side rear.
Yes, you are right. The inside part of both longs are rusted through. Strangely, the outside longs are in good shape except at the front and back ends. Passenger rear is in bad shape, I guess from hell hole rust through.

I read your "digging into hell" thread, great stuff for someone who has the same problems to solve.

Posted by: swl Dec 16 2007, 03:48 PM
Just for the record that wasn't me on the digging into hell thread. That was michelko from Germany. I just wish I had the skills and patience that he has!
I had to accept that my car was beyond my ability to restore. I went out and bought another project with a strong frame - lot cheaper in the long run. Took a lot of soul searching to make that decision. I had that car since college days.
Without doubt the passenger rear is from the battery acid. You will probably find more of the same behind the passenger seat on the firewall.
.
Posted by: Chuck Dec 16 2007, 05:34 PM
If you decide to go the big 4 route check out Jake Raby. If you want to autocross your car, the 4 is probably your best choice - others here may disagree. A number of Jake's combos put out as much hp and torque as some sixes and you save weight. Run a search here for Jake's stuff or visit his site at www.aircooledtechnology.com
My car will be just a street car. I was going to go 4 until I located a nice 3.2 six. Now, the 4 will be saved for a future Spyder project.
Posted by: Jake Raby Dec 17 2007, 07:58 AM
What size six are you thinking of putting in? I have not decided on a motor yet, but would like lots of torque for AX, maybe a big type 4.
If you decide to go the big 4 route check out Jake Raby. If you want to autocross your car, the 4 is probably your best choice - others here may disagree. A number of Jake's combos put out as much hp and torque as some sixes and you save weight. Run a search here for Jake's stuff or visit his site at www.aircooledtechnology.com
My car will be just a street car. I was going to go 4 until I located a nice 3.2 six. Now, the 4 will be saved for a future Spyder project.
Yep, if a powerful lightweight, nimble car is to be in the future feel free to yell at me!
We now have 200HP in kit form and 225 in Turnkey form..
On pump gas.
Posted by: FourBlades Jan 17 2008, 06:38 PM
Thanks guys, I am seriously interested in a 2270 4 cylinder or maybe McMark's
$5000 special...
I need to post some progress pictures because I am getting the longs and hell hole into shape. Soon it will be time to get a motor ordered so it will be ready when I am.
I am undecided about 4 lug versus 5 lug. I need to decide so I can get my brakes calipers rebuilt and buy some new rotors.
It would help if it would quit raining here in Florida, this is supposed to be the dry season
John
Attached image(s)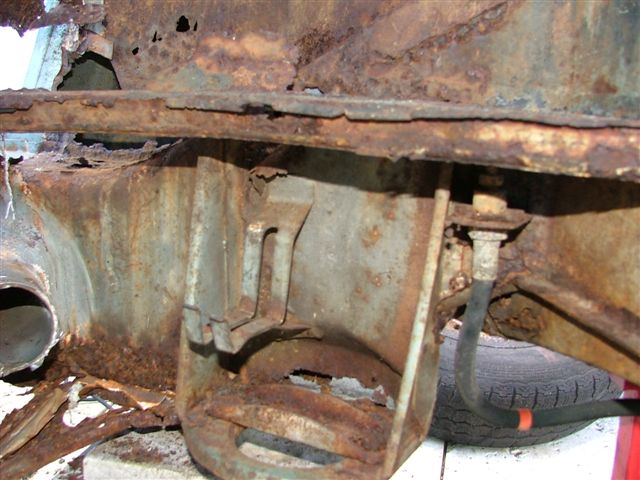
Posted by: FourBlades Jan 17 2008, 06:43 PM
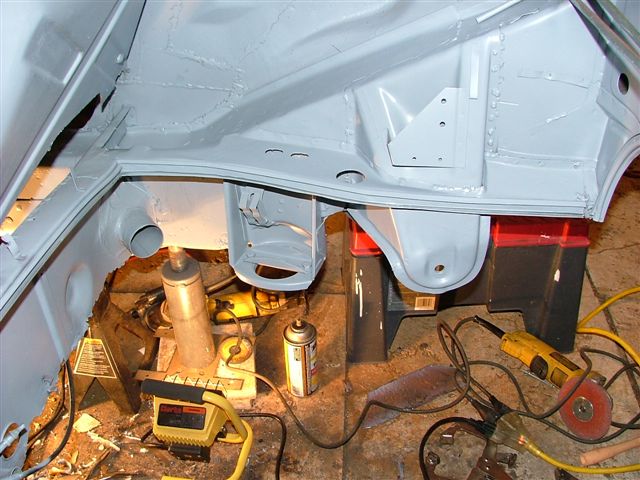
Cleaned to good metal, primed, patched and added home brewed 16 guage hell hole/long stiffener. I primed it right after this shot but the shiny metal looks nice after all the rust.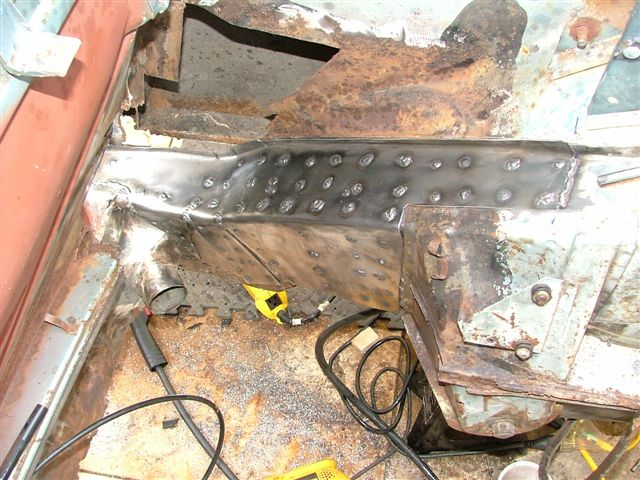
McMark is sending me a new motor mount.
Now I need to determine if I need a new suspension console as well.
Posted by: tracks914 Jan 17 2008, 07:36 PM
Nice work, I think you will do well.
I just did a chassis in worse shape than "diggin into hell". I didn't do it for sentimental reasons, or financial reasons, I only did it so that I could say I did.
Good luck and email me if you need long distance advice on anything.
Posted by: swl Jan 18 2008, 03:10 PM
Indeed that was one awful looking chassis you brought back to life Doug.
You want to do it again - got just the car for you lol
Posted by: FourBlades Jan 18 2008, 08:13 PM
Thanks Doug, I will most likely be asking for advice. "Digging into hell" is one of my favorite threads along with "Bringing out the dead". I have learned so much from this board.
Where is Timmins? I spent a lot of time in Ontario and have relatives in Ottawa. Canada is a great country for a lot of reasons but just too cold for too long.
John
Posted by: FourBlades Feb 2 2008, 07:44 PM
Hell hole finally makes it to primer heaven! I don't like the look of the welds sticking up but I would rather not weaken it with too much grinding.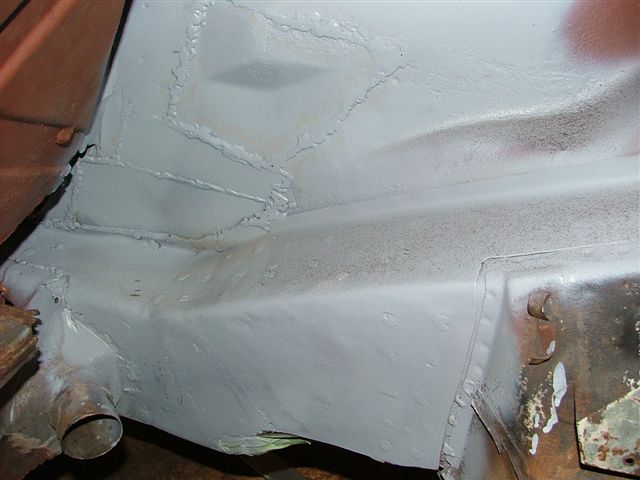
Outside of long patched up and new jack hole stuff. Not sure I stuck the jack hole tube out far enough, I don't want to have to weld on an extension. Should I weld the end of the jack hole tube to the jack hole cover?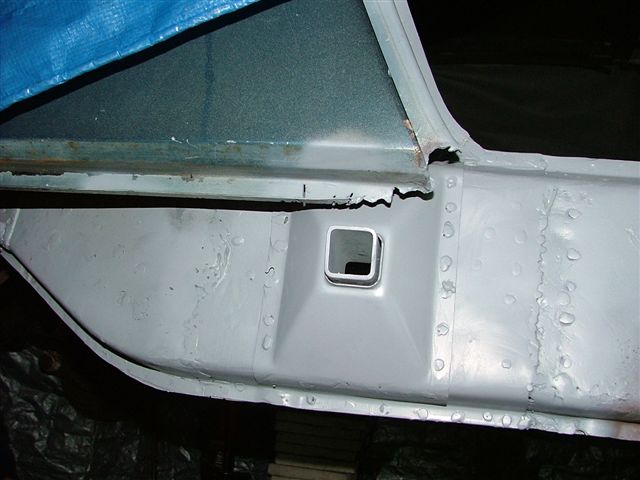
Still need to weld on a new motor mount and probably need to replace my suspension console. The bottom of it is pretty much crumbling with rust.
John
Posted by: SirAndy Feb 2 2008, 07:46 PM
nice progress! 
did 'ya add the VIN to our database?
http://www.914world.com/bbs2/index.php?act=membervins
 Andy
Andy
Posted by: FourBlades Feb 2 2008, 07:56 PM
Cut rust out of front of passenger long. Notice there are three layers of metal in this area. A flat piece that is the continuation of the passenger inner footwell that curves around the front wheel then goes straight back down the long for 7 inches or so. The wrongly named inner long covers this, followed by a box like section that continues the door jam down to the bottom of the long.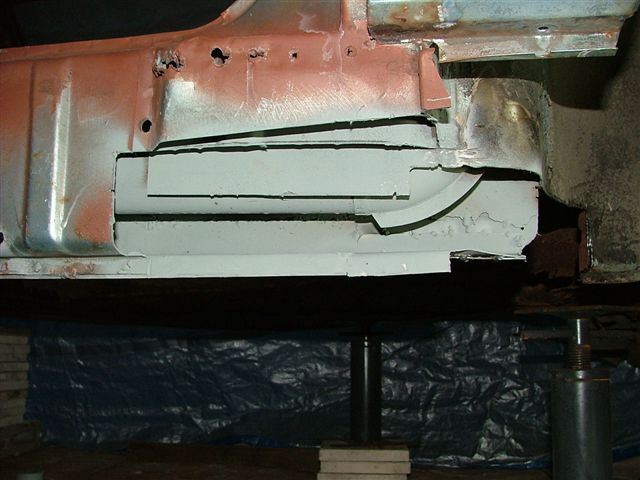
Could not find the curved inner footwell section anywhere so I hammer formed one on a hardwood mold. I cheated and welded the strip for the bottom pinch weld instead of trying to get the sheet metal to flow in all the directions needed. By carefully tracing the curve of the inner fender well before making my mold it actually fits pretty well. Also made a section to continue the inner most layer of metal down to the bottom of the long.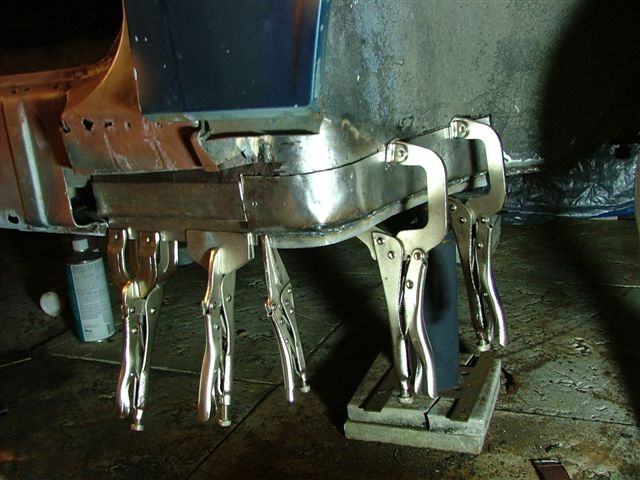
Weld this up and keep chugging. My goal is to be driving this sucker by my birthday in August. I'm probably dreaming...
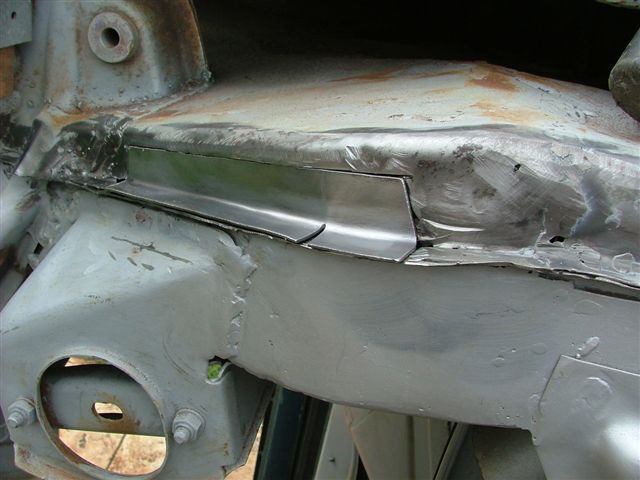
Posted by: FourBlades Feb 2 2008, 08:03 PM
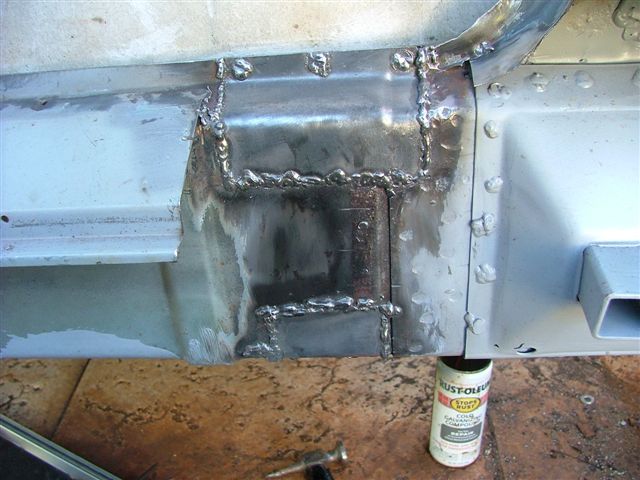
Innermost sheet metal welded in.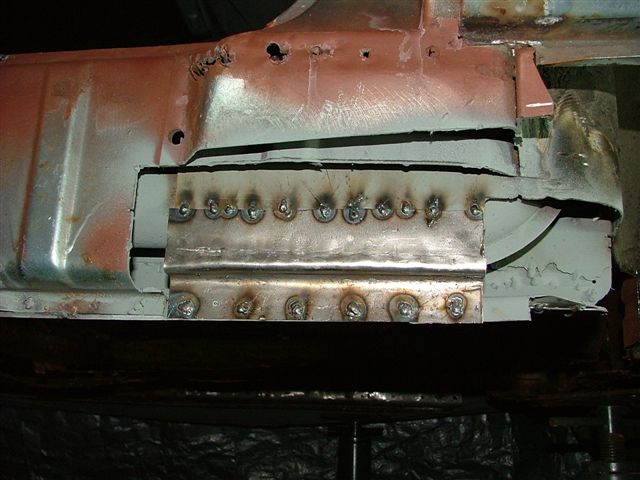
Sleeving the inner long patch. You can see the innermost patch has been ground and primed. The hammer formed footwell patch has been welded in, ground (somewhat) and primed. I hate grinding...I love welding.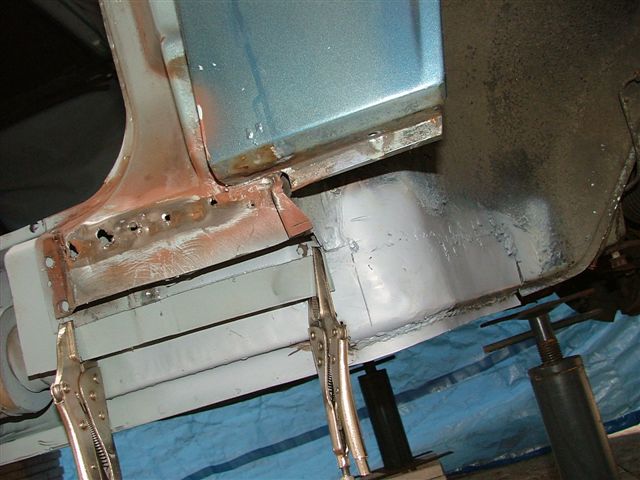
Section of a Restoration Design inner long panel comes next.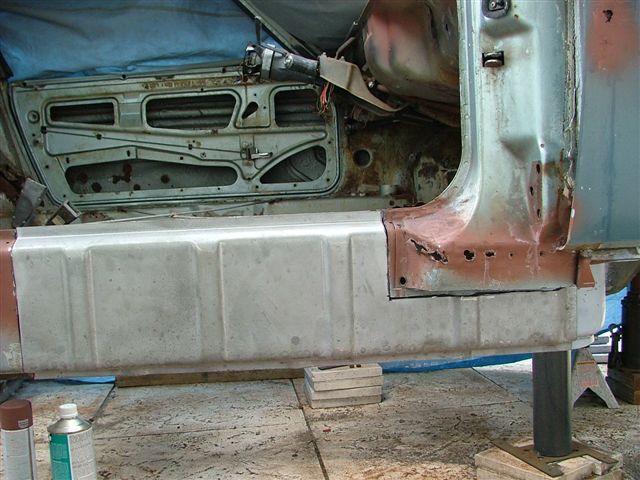
Ready for the hole puncher and some rosette welding.
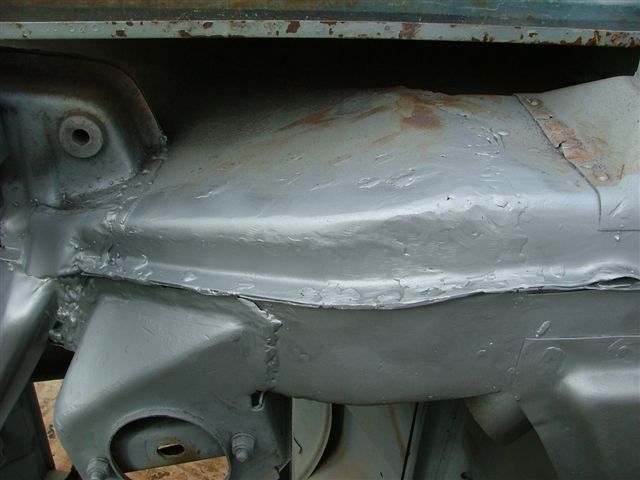
Posted by: FourBlades Feb 2 2008, 08:10 PM
Welded and cleaned. Nothing better than shiny new welds. You can see the rosette welds for the sleeving I did on the rear section of the inner long patch. 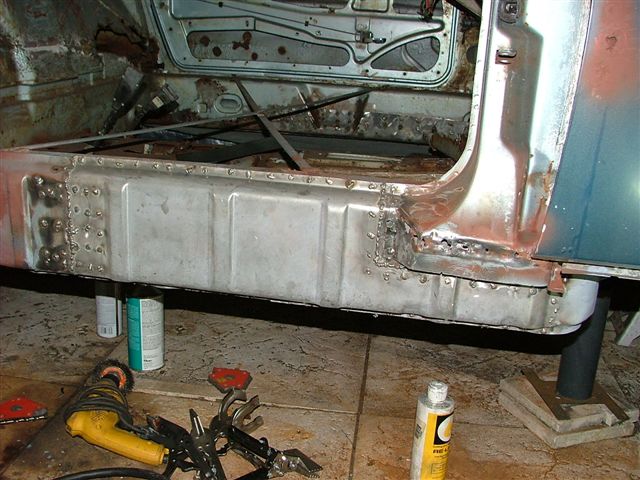
Last of the three layers is the box at the bottom of the door jam. I hammer formed this, welded, ground, and primed it. Didn't take any intermediate pictures for some reason.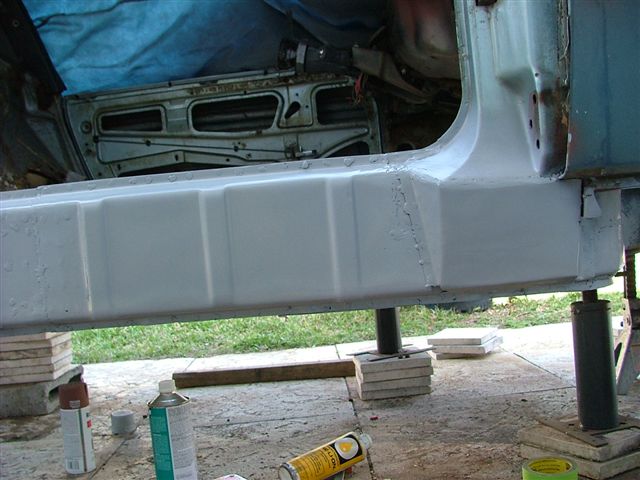
The work in these last three posts took about all my spare time for the last three weeks. Still some odds and ends to do on this side but I am starting to feel I am getting there. Other side is not nearly as bad at the back, just as bad at the front.
John
Posted by: FourBlades Feb 2 2008, 08:15 PM
VIN number added to 914 World database. I'll add the other numbers next time I work on the car.
Posted by: FourBlades Feb 2 2008, 08:22 PM
Note that I use weldable primer on anything that will get direct welds later on. I use etching primer on stuff that will be painted and not welded on. The weldable primer I am using is mostly zinc and I don't think it is any good under regular primer or paint.
It takes some planning to make sure everything is protected the right way (I hope) before it gets sealed up. I am trying to follow the practices used by some of the rust repair gods on this board.
Now its time for a 
Posted by: Bartlett 914 Feb 3 2008, 10:03 AM
Looks pretty good. Keep up the nice work and keep us posted with pictures. 
Posted by: rjames Feb 3 2008, 12:57 PM
Looking great!
And I couldn't agree more:
grinding = sucks, welding = fun.
Posted by: tracks914 Feb 3 2008, 04:16 PM
Thanks Doug, I will most likely be asking for advice. "Digging into hell" is one of my favorite threads along with "Bringing out the dead". I have learned so much from this board.
Where is Timmins? I spent a lot of time in Ontario and have relatives in Ottawa. Canada is a great country for a lot of reasons but just too cold for too long.
John
John
It looks like its coming good.
Timmins is about 500 miles NE of Ottawa and 500 miles N of Toronto.
My DD is asleep until May but that gives me the winter to work on my project car.
Here are some pictures to give you inspiration. One less than a year ago during the body reconstruction and one current about 3 weeks ago.
As soon as I can figure out how to put a 130 picture PP Presentation on my blog you can see the entire restoration up to today.
Attached image(s)
Posted by: sendjonathanmail Feb 3 2008, 05:16 PM
Wow Doug, that was some serious rust. Lookin' good!
Posted by: FourBlades Feb 3 2008, 09:51 PM
Man Doug, looks like the heater tube was the only thing keeping that car together... It is looking good now.
I have been grinding using 7 inch 36 grit sanding disks for rough work. The first few minutes of a new disk they really remove metal. I use a 5 inch 36 grit for more careful stuff. Is there any faster/easier way to do it?
It took me a while to figure out the importance of cutting oil when drilling spot welds. Bits sure last a lot longer using the oil.
Soon I will have to rebuild my tunnel. All the tubes that go through it are rusted solid. I have the back half of a tunnel from another board member.
Does anyone know what the tubes in the tunnel are made of and what diameter they are? Where would you get replacements?
John
Posted by: jd74914 Feb 3 2008, 10:06 PM
McMaster Carr should have the right size tubing (since they have everyone one could ever want). www.mcmaster.com
You might want to ask Jeff Hail. In his thread he replaces the tubes inside his longs.
Posted by: FourBlades Feb 22 2008, 06:44 PM
Fixing the driver side footwell and long. It is missing the front of the inner fender
and most of the end of the long.
Made a hammer form to make a replacement for the curved part at the bottom
of the inner fender. I used the same form on the passenger side by routing a
curve into both sides of the form. The form is made from scrap hardwood that
was cut to match the shape of the curve of the fender. I screwed the metal piece
to the form in three places to hold it while hammering it into shape. I welded a
strip to the bottom to form the pinch weld with the bottom of the floor and with the
end of the long. It got a little toasted during the welding, but it kept the new
piece in the right shape until the welding cooled. 
Hammer formed part welded to the inner fender.
Hammer form held up to the part it was used to make. The new metal piece
was hammered around the bottom lip of the form. The passenger side was
fixed using a piece hammered around the top of the form.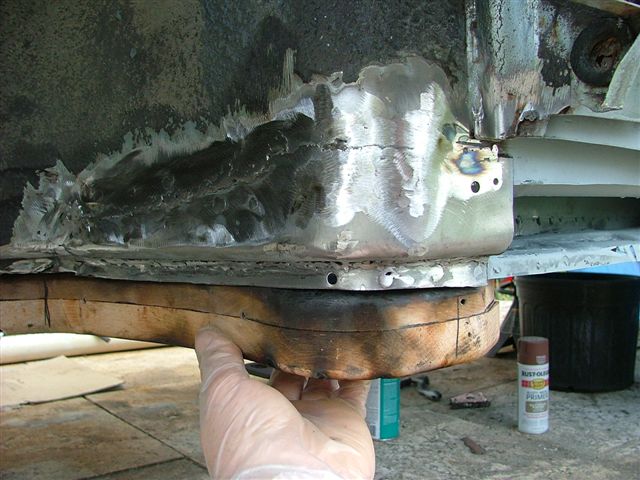
Attached image(s)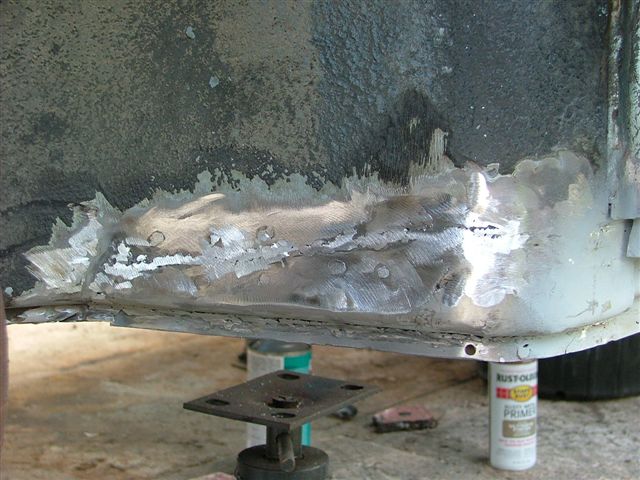
Posted by: FourBlades Feb 22 2008, 06:53 PM
 Peeling the rust bucket onion
The end of the driver long does not look too bad on the outside. Just some rust holes and surface rust???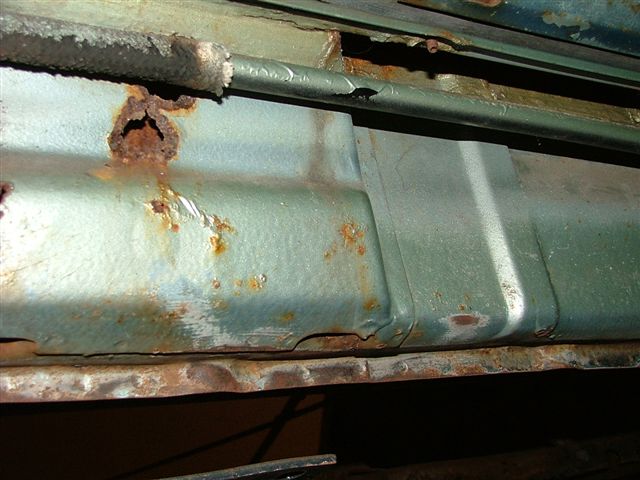
Cutting off the outer most layer reveals load of rust.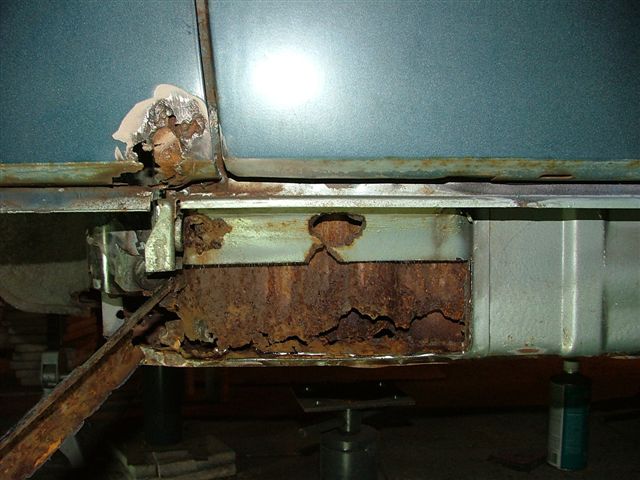
Cutting off the next layer reveals yet more rust, mostly at the bottom of the long.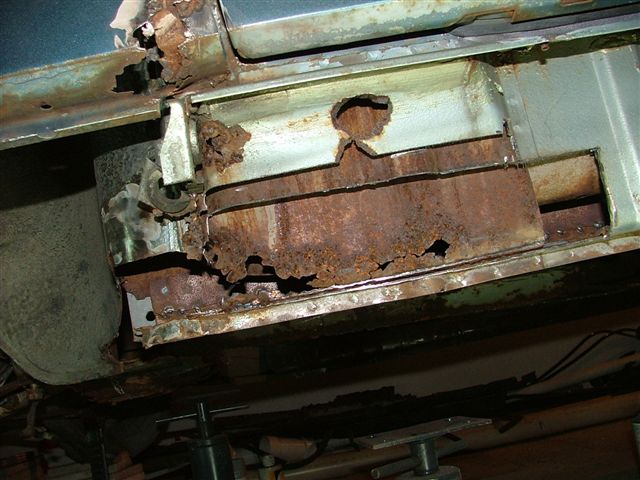
Clean all the rust, use metal prep and prime all the layers and innards. Also welded on the hammer formed fender patch.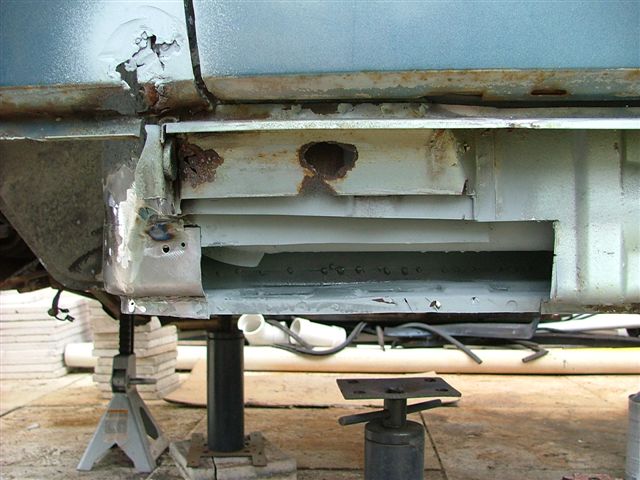
Posted by: FourBlades Feb 22 2008, 06:58 PM
Rebuilding the first layer of the onion.
Made a patch for the innermost layer.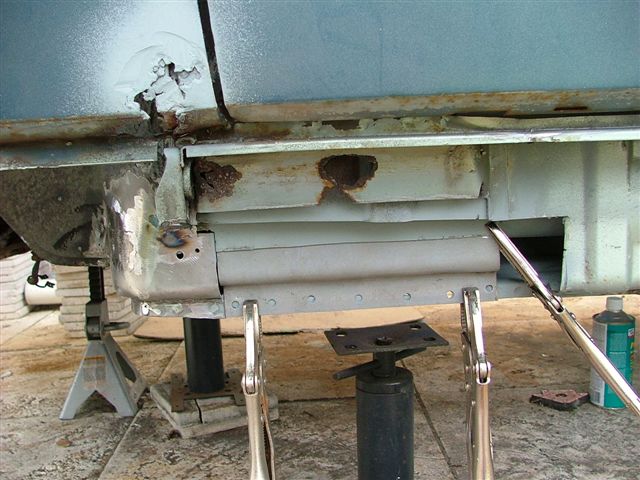
Welded the patch.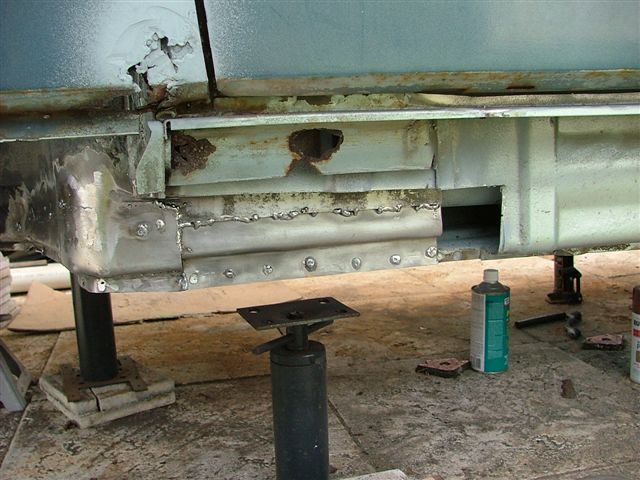
Grind down and prime the innermost layer.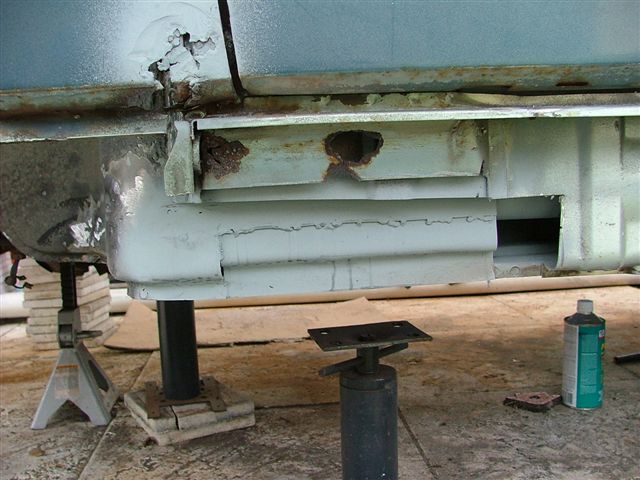
Posted by: FourBlades Feb 22 2008, 07:14 PM
Rebuilding the second layer of the onion.
Made a patch using the end of a restoration design inner long. I used the top
of the end to make a sleeve to make welding the patch on easier. Here you
can see the sleeve which has been rosette welded in place in the top of the hole.
Because the sleeve was made from the top of the patch, it fits perfectly and
takes little time to make.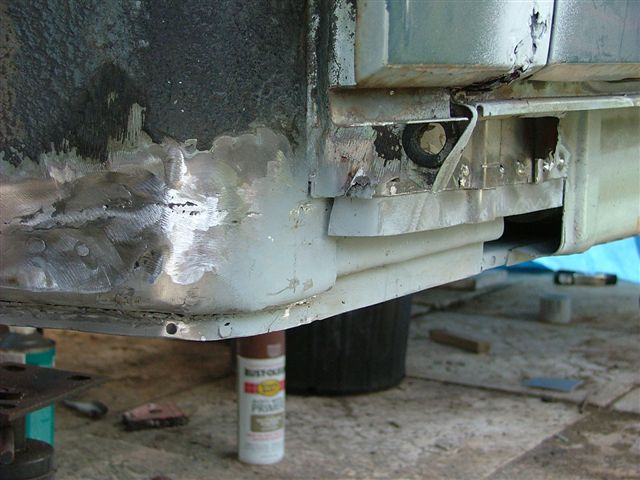
Here is the patch itself. I punched holes for rosette welding, which is way
faster and neater than drilling. A $20 hand operated metal hole puncher
is a cheap way to save some time.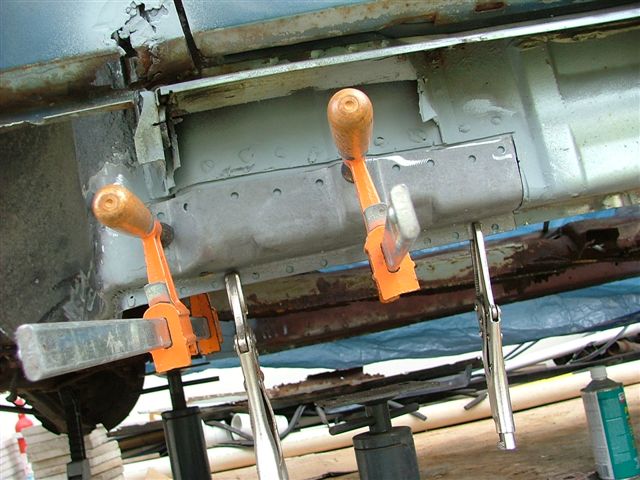
Welded, ground, and primed. I hate to grind too much and weaken the whole
repair just to get a perfectly flat surface. Maybe some all-metal filler to smooth
it out???-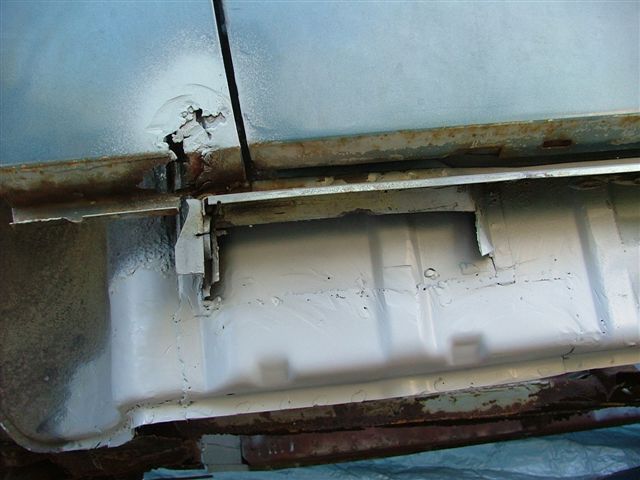
Not perfect, but better than the rusty, gaping hole.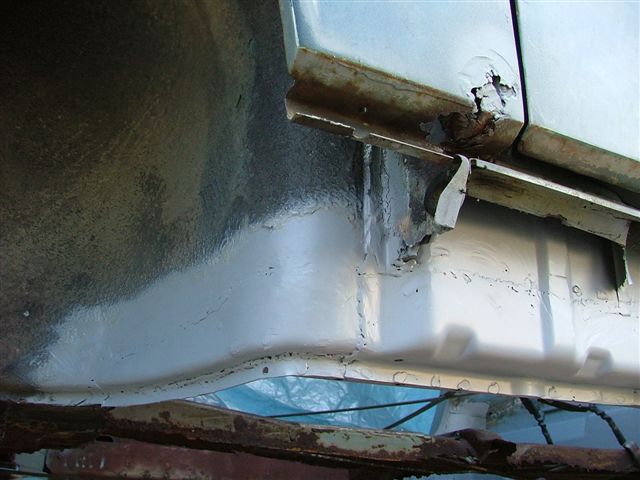
Still one layer left to go, the box section at the bottom of the door post, which will have to wait for later...
Posted by: FourBlades Feb 22 2008, 07:38 PM
Now I have this pristine pedal and brake master cylinder area to look forward to fixing. 
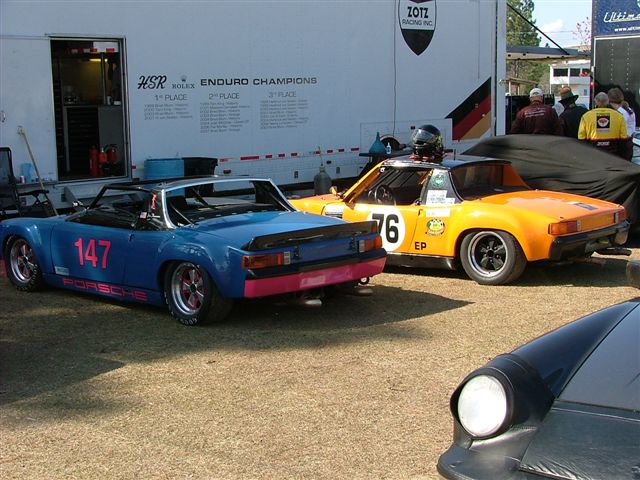
But first, some pictures from Roebling Road driver's education last weekend.
There were several very fast race prepped 914s howling around the track.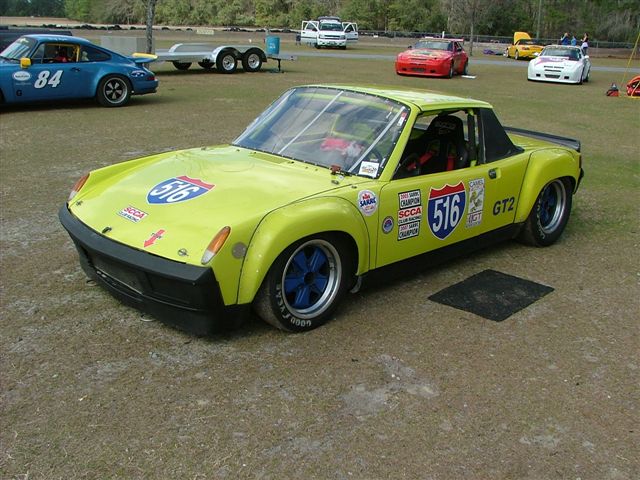
The yellow car was fastest everywhere except the main straight, and appeared
to me to be pulling away from the two Carrera GTs that were out. I never saw
any car pass this car all weekend including the 997 turbos, 997 GT3s, 997 RSs.
This 914 was definitely the loudest car there. The owners told me they had
$100,000 into it and were selling it for somewhere around $40,000 after winning
two SARRC championships with it. Too bad I blew all my funds on pork rinds,
beer and 914 parts already... 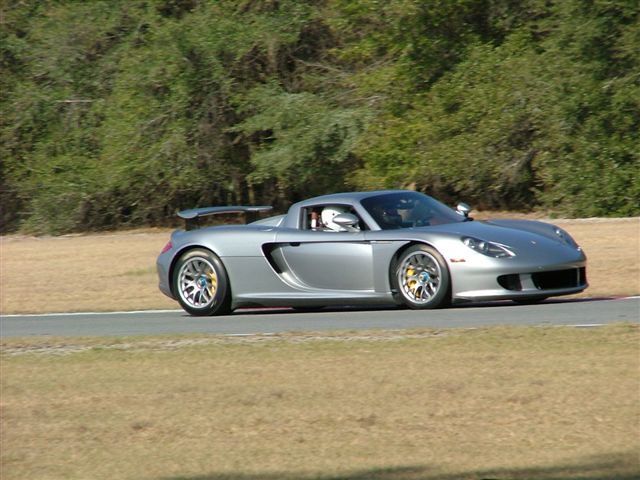
Posted by: FourBlades Feb 22 2008, 07:41 PM
Afew more gratuitous Roebling pictures...
Now it is back to work...
John
Posted by: FourBlades Mar 14 2008, 08:16 PM
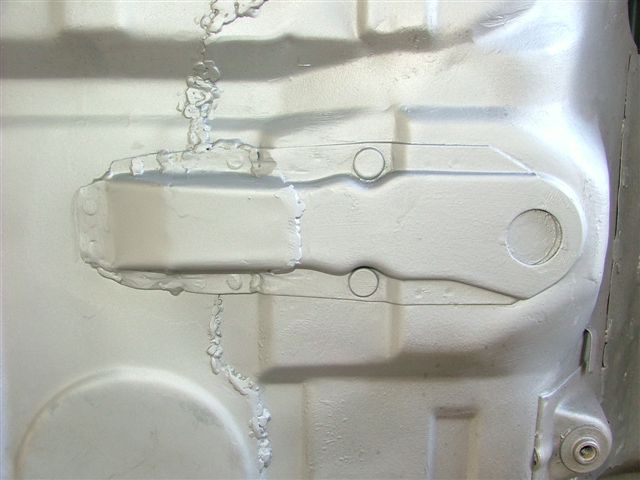
Welded on a patch to the lower part of the passenger side firewall.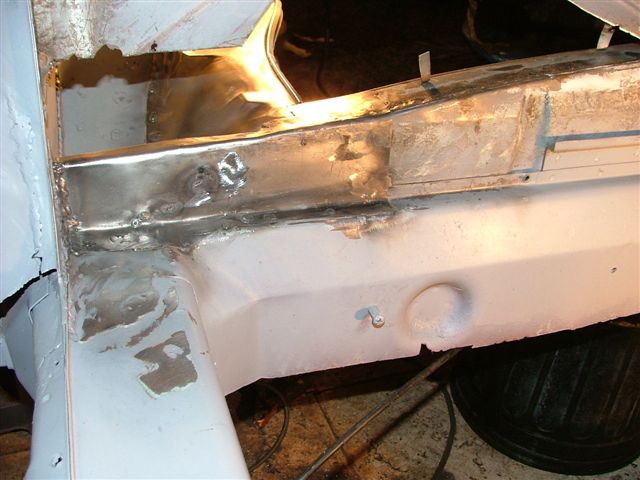
Replaced the passenger suspension console. I found it to be a pain to get
the old one off. There was some kind of reinforcing plate welded between the
inner and outer rear suspension consoles, is this normal?
I also welded on the pristine motor mount sent to me by McMark.
Last, I welded on a new engine tray. I should have taken more
intermediate pictures. 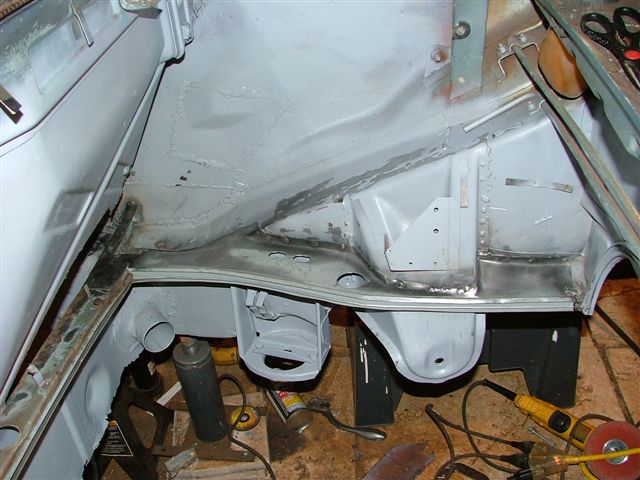
Now my engine bay is starting to look somewhat decent on this side.
Posted by: FourBlades Mar 14 2008, 08:21 PM
Now it is time to fix the "Heck Hole" which is like the Hell Hole only on
the driver's side. It is not as bad as the Hell Hole, thus the name.
Today I have a work crew to help me out:
Heck Hole after lots of grinding, cleaning and some metal ready.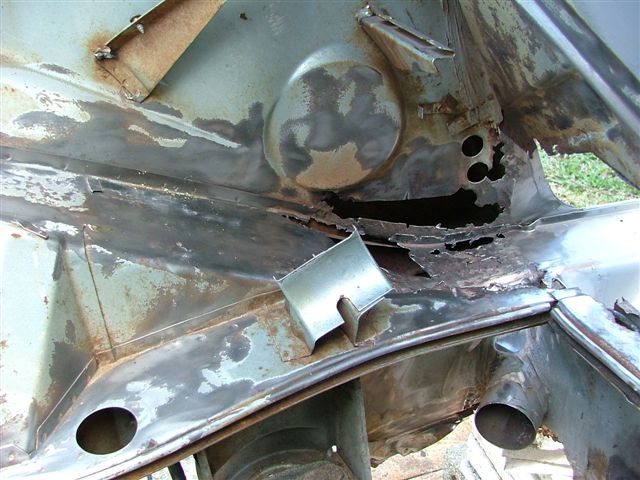
Made a template for a large 16 gauge patch.
Next I will weld the patch on and fix the firewall.
Posted by: Van Mar 14 2008, 08:38 PM
Fantastic work!
Posted by: FourBlades Mar 19 2008, 06:02 PM
Thanks Van, but I am really just an amateur at this. I could never have done anything without all the information and especially photo sequences on 914 world.
John
Posted by: TINCAN914 Mar 19 2008, 06:37 PM
 Keep it up..
Posted by: charliew Mar 26 2008, 01:04 PM
John good work. I have used por 15 for many years and some of it has come back to haunt me. Several years ago I got a 79 jeep J10 in pretty bad shape an redid it for hunting. I sand blasted the entire outside below the windows and under the bottom with all of the front end off. I sprayed por 15 on everything. I then used a light blue primer they also sold to be a coating I could paint over. I didn't use the blue primer under the wheel wells just the por15. Now it appears after about 6 years the undercoat I put over the por 15 has come off and some of the por15 has gotten beat off from rocks or just came off. This has only showed up on the front and rear wheel wells. I used a rubber undercoat. I am going to do it over but I will use PPG black epoxy non sanding primer this time and re apply the rubber under coat. I think it is too hard to get por 15 to take top coats. It is very durable but there might be a better rust sealer and base coat. I may try the eastwood products on the 914.
Just my experience.
Charliew
Posted by: sean_v8_914 Mar 26 2008, 01:25 PM
you guys are true 914 champions.
the POR 15 needs to be primmered while its still tacky. nothing will adhere to it once its cured. POR15 has poor adhesion to smooth metal
Posted by: Richard Casto Mar 26 2008, 03:41 PM
John,
Great work. It is nice to see someone save a car that many people would say is not worth the trouble and would just cut up. There is only a finite number of these cars.
I am doing some repair to similar areas on my car, but mine is not in as bad as shape as yours.
Richard
Posted by: FourBlades Mar 27 2008, 08:36 PM
Thanks for all the responses. Its nice to know I am not the only crazy person
out here. I believe the 914 will go the way of the 356 and early 911, i.e. people will realize what a cool car they are and stop cutting up any but badly wrecked ones. With some modern upgrades not available when they were new these cars can whale on nearly anything through the turns...see my Roebling post about 914 versus Carrera GT.
I have heard a lot of mixed reviews about POR 15 as well. I most wire wheel away all the rust, then wash with paint prep solution, then spray on metal ready, then wipe with a moist shop towel, and then finally spray on Eastwood etching primer. I will cover this with a few coats of some compatible sealer before painting. I intend to talk to Eastwood folks about what I should use. If I can't get all the rust off with the wire wheel, I usually use a rust desolving product, clean with water and then metal ready, etc. If I am going to weld a patch or part, I paint the inside with high zinc weldable primer. I sprayed that liberally inside my longs after the metal ready rather than POR 15. I did not open up the longs enough to paint them all so I just blasted the zinc primer (which you are not supposed to paint over) down from each side. It took my car 35 years to get
as rusty as it did, including many years with no windshield sitting a few miles from the ocean.
I think the inside of the longs were originally galvanized, and where there was no water standing, they looked pretty much new. I have seam welded the top edge of any patches I put on and will liberally seam seal them to keep water from getting back inside (which caused the rust problems in the first place). I plan to weld up all the holes in the roll bar, use painted sail panels instead of vinyl and generally get rid of any potential holes in the metal were water can get in and cause further problems. I left the drain holes in the bottom of the longs. I may even weld up the cowl solid to the fenders. Its not like you can unscrew the fenders and remove them like you can on some other cars. That seam appears to be little more than a place for water to get in an rust the front part of your doors and longs.
As an experiment, I painted a piece of new steel with the high zinc primer and left it outside for a month or so. I live about 1000 feet from the ocean so its pretty damn salty here. A brand new (cheap) gas grill is transformed into a pile of rusty metal in about 2 years (no kidding).
So far there is a little surface rust on the metal where I scratched it by accident but other pieces I did not treat have 1 mm of crusty rust on them. If I get ambitious I may do a test with some of the common rust treatments to see what happens.
Sorry for the long winded speach but rust is on my mind every time I work on my car. If I don't go through the rust fighting ritual on any bare metal at the end of each session, the metal has a good coat of surface rust in 2 or 3 days...
John
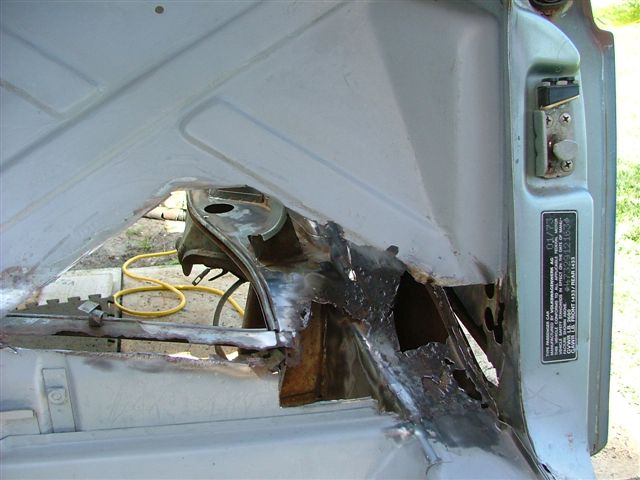
Posted by: FourBlades Mar 31 2008, 08:31 PM
Fixing the driver's side jacking point. I cut off the lower part of the fender to be able to get to this area. I hated to do it, but it is really the only way to fix this right. I hope I can weld it back on without pretzeling my whole fender. Cut out all the rusted areas, and after much grinding, wire wheeling, and metal ready it looked like this.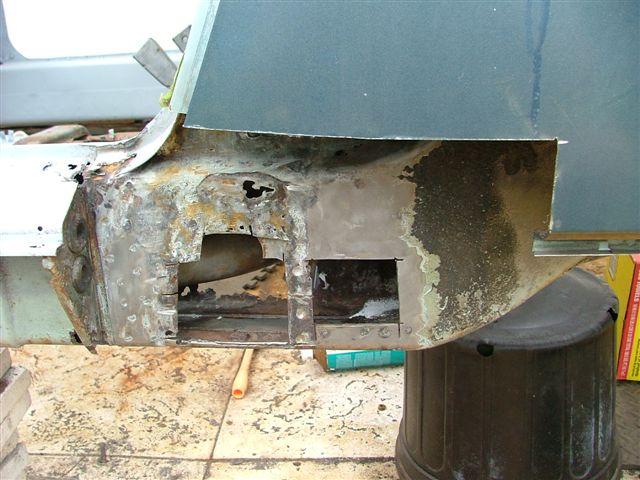
Welded on some 16 gauge patches. I always coat the back of patches with high zinc weldable primer. 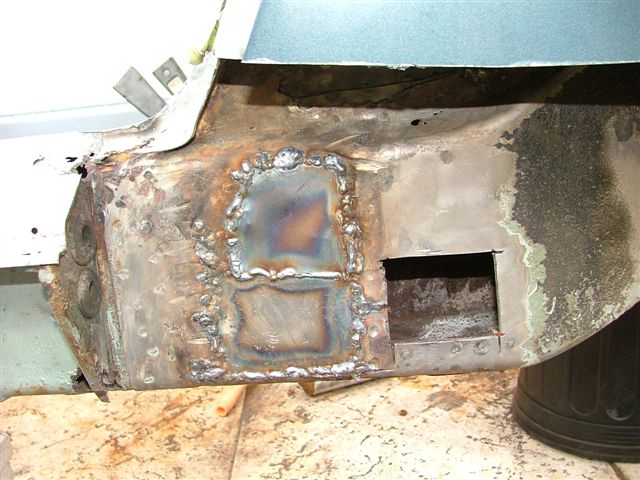
Welded a new jacking tube onto the patch and then welded a new jack plate over it. Welded a patch over the other hole. You can see some seam welded repairs at the top where I fixed some holes in the engine compartment above the long.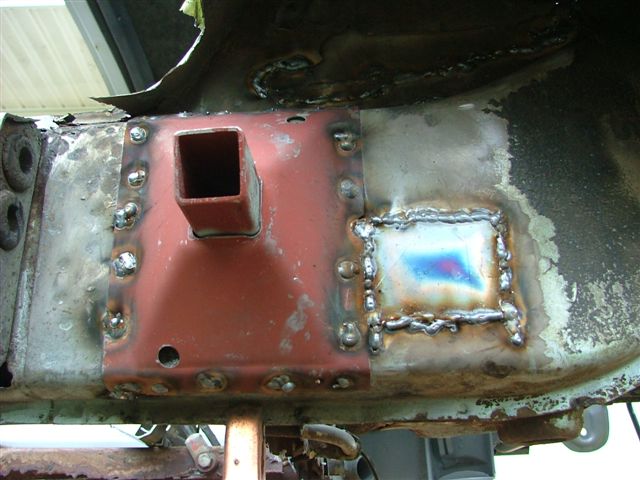
Ground as much as I could stand it and primed. 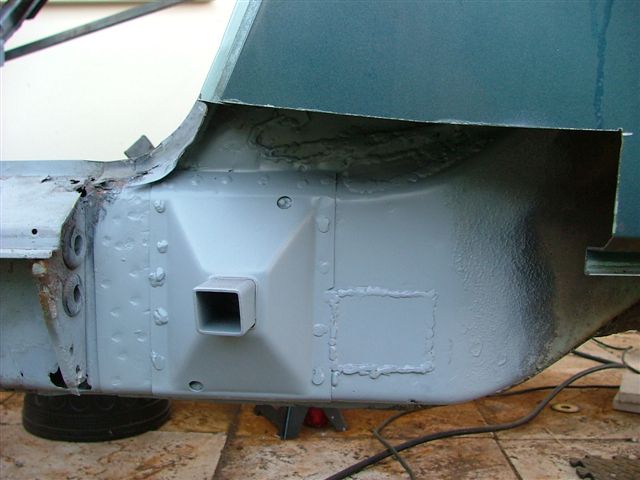
I have a new set of door sills to put on. AA is out of sill triangles or I would tackle this now. I could make some but I would rather just get the ones I already ordered than spend time on it.
Posted by: SirAndy Mar 31 2008, 08:38 PM
Posted by: FourBlades Mar 31 2008, 08:44 PM
One more major longitudinal problem to fix. Made a home brewed "lower inner long patch" out of 16 guage steel. I say lower because mine wrap around the lower part of the long, unlike the Engman and other long kits that wrap around the upper part. This works because I have no floors on my car. I realize this will lower my floors by one fourteenth of an inch.
There are some waves in the lower side of the longs that fit the factory floor pan edge. I will have to flatten my floor pans in these areas to fit the now flat bottom of my longs. We'll see if this is a big problem or not pretty soon. 
I can also add an upper long kit cut off half way down to meet with my lower kit later if I want to.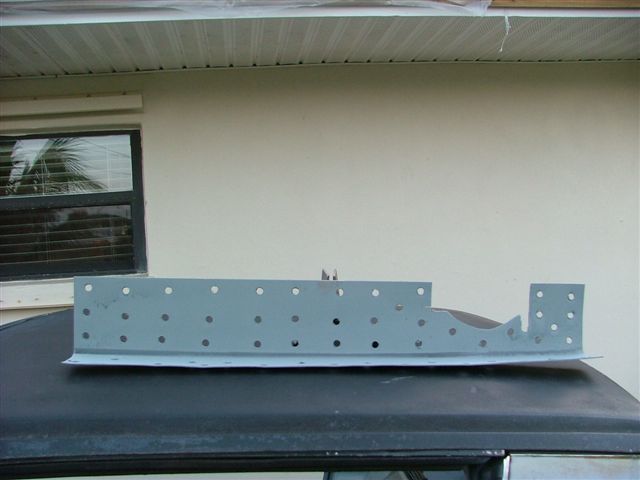
Welded it on. The weird shape allows it to fit around the firewall and the heater tube. I welded it to the heater tube pretty solidly. You can also see some patches I made to my firewall. The entire firewall and engine bay is pretty much done at this point. 
Posted by: FourBlades Mar 31 2008, 09:06 PM
I got a rear half of a tunnel plus cross member from a 914 world member. I started de-spotting it from the chunk they sent me and cleaning it up. Here is where it goes on the rear floor pan. I had to research just what is supposed to be inside a 914 tunnel because mine was mostly rust and mummified lizards.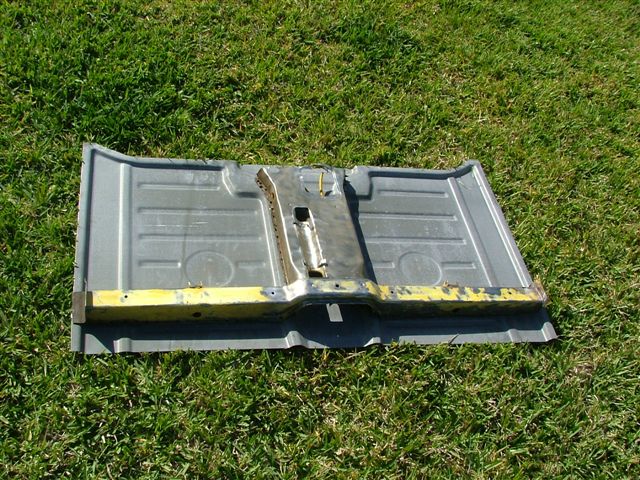
Moved on to fixing the front of the passenger area. It used to look like this: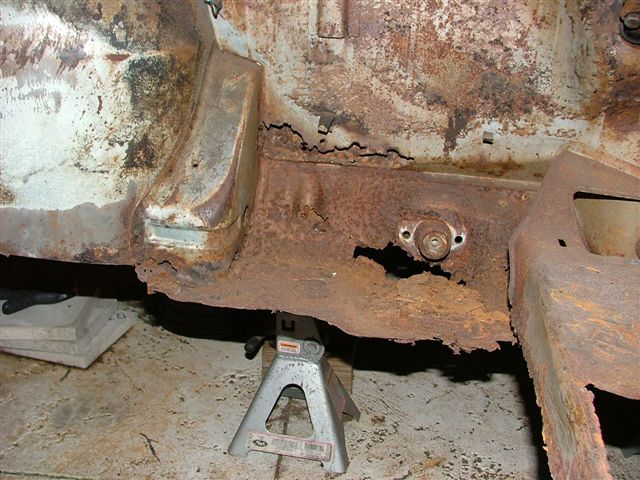
I got tired of how nasty the whole interior was so I spent a few hours with a wire wheel, brake cleaner, and metal ready. Then I primed it all. I highly recommend you do this because it will stop your car from rusting any more and it looks so much more like you are getting somewhere.
I got a pedal area cut out of a wreck from another 914 world member and welded it into position. Then I test fit the front part of the floor pan!!!! 
The floor pan fit perfectly around the hammer formed front fender parts I made a while back, which I consider a minor miracle.
I am going to cut out the tunnel and fix it in the comfort of my garage then weld it back in. I plan to use stainless tubing for all those tubes and weld them to supports more frequently than Porsche did, so they don't break off.
Fixing the tunnel out of the car means I can put the floor pans on soon, which will make this seem much more like a car. Now its time for some
Posted by: solex Mar 31 2008, 09:18 PM
John,
I''m impressed not only do you have great skill but incredible patience Nice work gives me motivation to continue...
Dan
Posted by: FourBlades Mar 31 2008, 09:26 PM
Thanks Dan. I'm telling you, it really helps mentally to make part of the car look good. I also cleaned up and primed the engine bay and the difference is amazing. It looks so much less like a rust bucket. I also try to pick one thing to get done each time I work on it and not add up how many are still left.
John
Posted by: FourBlades Apr 8 2008, 07:29 PM
Two big milestones today. Finished off a 10 pound spool of MIG wire I started with this project. Probably 8.5 pounds of it is now dust I ground off. My yard is really dark green around my work area, all that iron dust seems to be helping it.
Started welding in the front floor pan today!!! Got a bunch a holes to fill in around the gas tank area. I am thinking of rolling the car over on its top to do it like I saw someone else on this board do. 
Trying to get the front struts out, the damn taper pin at the bottom is stuck big time. I soaked it in PB blaster and will take the air chisel to it tommorrow.
Tired of getting beaten by Caymans at the autocross, can't wait to get my teener
on the road. Got a very nice engine in the works.
I know that this thread is worthless without pictures so I will get some soon...
Posted by: Sleepin Apr 8 2008, 11:37 PM
Great work! I really enjoyed the read so far!
Posted by: jbyron Apr 9 2008, 10:11 AM
Wow! Very educational. Keep up the good work!
Posted by: FourBlades Apr 13 2008, 06:15 PM
Flip Your 914 the CSOB Way
I got fed up with working on the ground under my 914 so I decided to do
something about it. I remembered a B&W photo showing a framework
used in the olden days to flip a car and decided to build my own. I drew
a careful scale drawing with extensive engineering analysis. Notice how
I indicated where the Center of Gravity of the flipped car would end up.
The computer enhanced drawing shows the car (to scale) in light blue.
The key joint is indicated in scribbled shading. I also did a detailed study
of the joint needed when frame members met in all three dimensions.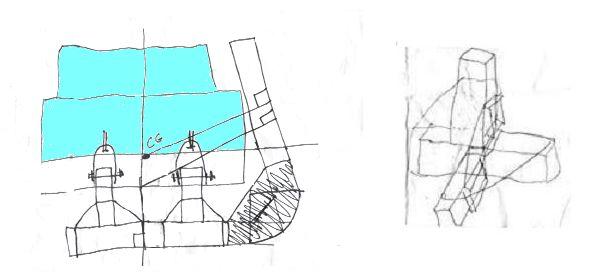
I decided the framework had to be 10 degrees from vertical so that it
would be stable in either position and not show any unhealthy tendency
to flip back unexpectedly. The key joint is between the flat and flipped
parts of the frame. I made it round to make it easier to roll the car from
one state to another. I briefly toyed with the idea of an octagonal frame
with the car inside, however, scrap 2x4s on hand were limited.
Here is how the key joint is made: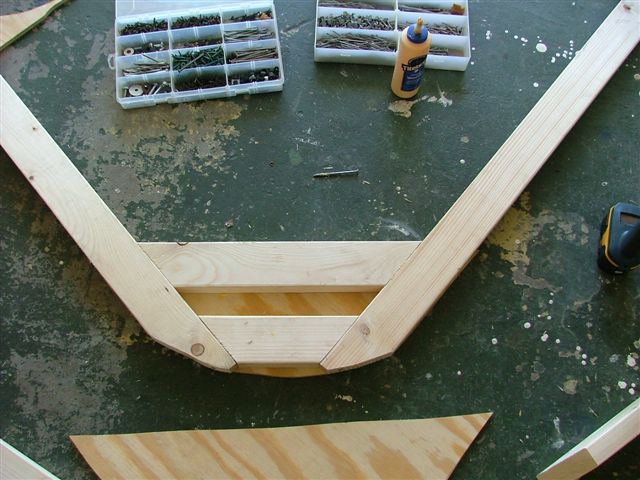
After making two of the key joint I got started putting it together. I leveled
the two ground frame members and then bolted them to the front and rear
suspension mounting points using equal length legs. I noticed my tub is
about 1/4 inch twisted along its length. After that, I added additional support
and frame members, bracing them with plywood triangles. This stage was
part planning, part organic growth, and part paranoia over the whole thing
collapsing.
For those wishing to build a similar structure, the dimensions are:
Length : whatever a 2x4 stud is (I think 93" because of the floor and top plates)
Width: about 53" and 3 of those really little marks
Height: 4 notches on those big ass sears jack stands on the rear, less on the front
Anyway, I got it all together and started jacking up the side.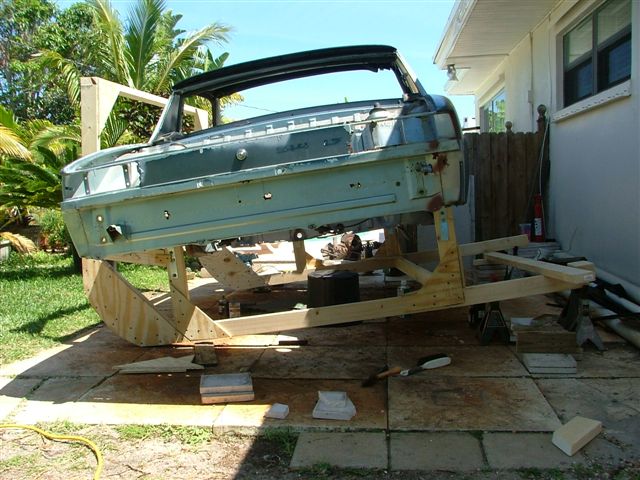
Here is a detail shot of the framework. Not sure it is elegant or minimal but
it is surprisingly rigid and I did not run out of screws.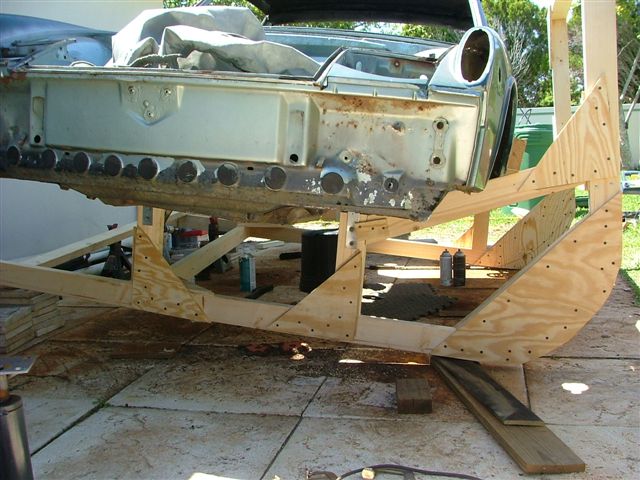
More frame details. Notice the 2x4 used to lever the frame higher and
higher. Levering one end off the ground did not cause the other to sag
noticebly. I don't know if that is a testament to the 914 rigidity or to my
framework. My 3 dimensional joint study pays off...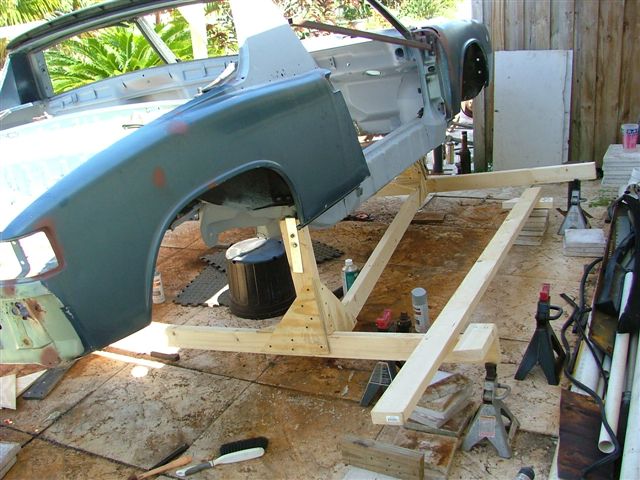
Posted by: FourBlades Apr 13 2008, 06:21 PM
Flip Your 914 Part Deux
When the car was tipped about 40 degrees it started to get very light.
At this point I figured I would see what happened if I pushed it the rest
of the way by hand.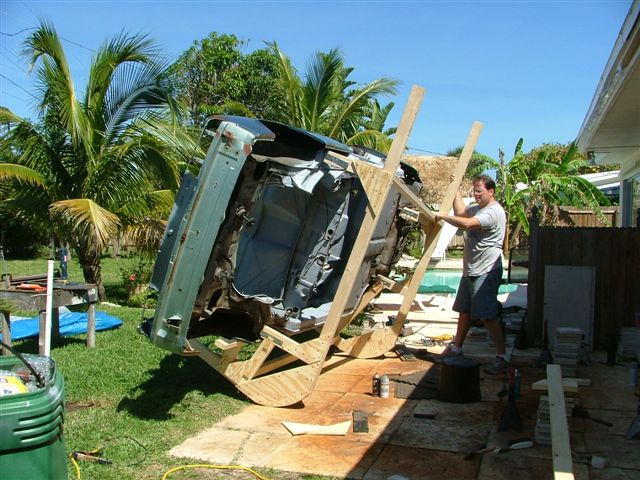
Tipping it the rest of the way was much like using a large dolly to move
a filing cabinet. It is easy to get it back to the balancing point but going
back to flat from there it gets really heavy.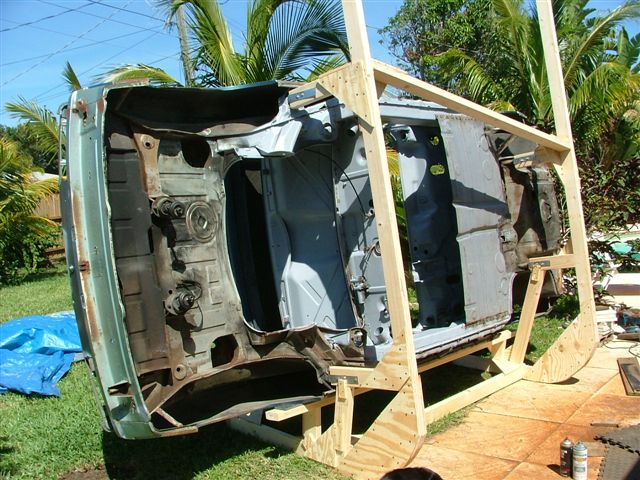
Thanks to careful calculations and planning it all worked out. 
Looking forward to finishing the floor in a more vertical position.
John
Posted by: slow914 Apr 13 2008, 06:50 PM
dude, that is badass
Posted by: FourBlades Apr 13 2008, 06:59 PM
No, it is cheap ass! I think this cost about $50. But I'm glad you liked it.
Posted by: Bartlett 914 Apr 14 2008, 09:04 AM
Looks pretty good. My car is on a rotisserie. It is a lot more versatile but your solution looks like it will be more than enough to change the pans. I can't imagine doing the pans on my back looking up. I am sure you will be able to do a good job on the pans and tunnel work.
Posted by: FourBlades Apr 15 2008, 08:13 AM
Mark,
My motivation for doing it this way was to avoid spending $1000 on a rotisserie and use materials I mostly had already. I welded on the front part of the pans the old fashion way and it was hard to get good welds. I have fixed some problems in the steering rack area already that would have been a real pain with the car the normal way.
John
Posted by: Gint Apr 15 2008, 08:21 PM
That's kickass! Thanks for posting that.
Posted by: TROJANMAN Apr 15 2008, 08:38 PM
Flip Your 914 Part Deux
It's like a 914 Rocking Chair.............Cool
Posted by: tracks914 Apr 15 2008, 09:14 PM
That's just insane!!! For the 914 world that is definitely the best/cheapest rotisserie I have ever seen. I love it.
BTW good work on the car.
Posted by: ericread Apr 16 2008, 12:15 AM
Flip Your 914 Part Deux
It's like a 914 Rocking Chair.............Cool
 A 914 rocking chair. Sounds like a good idea for some of us older owners.
Posted by: McMark Apr 16 2008, 02:16 AM
Either way you were gonna be famous. This way you're famous for making a wooden 'rotisserie'. The other way, your picture gets passed around the internet for a week of the guy who purposefully flipped his car and crushed it.
I'm really glad it worked out, and that's a bad-ass rig! This thread has taught me that I need to think more in wood, and not confine myself to metal. I would have never thought of what you did.
CHEERS!
Posted by: tdgray Apr 16 2008, 08:28 AM
Congrats... now there is thinking outside the box. WELL DONE!
Posted by: Eric_Shea Apr 16 2008, 09:12 AM
Way to go... cool thread!
Posted by: FourBlades Apr 16 2008, 12:45 PM
Wow, thanks everyone. I'm glad people liked the idea. I was a little worried the
whole thing would collapse and I would be digging a big hole to bury the
wreckage. 914, what 914? 
I used to do a lot of wood working, like building accoustic guitars, so making
stuff from wood is like second nature to me. I really like welding and working
with metal now though, it is so much stronger and you can weld more metal back
on if you cut off too much. Can't do that with wood.
John
Posted by: Eric_Shea Apr 16 2008, 02:17 PM
with metal now though, it is so much stronger and you can weld more metal back
on if you cut off too much. Can't do that with wood.
Make me a Resonator!
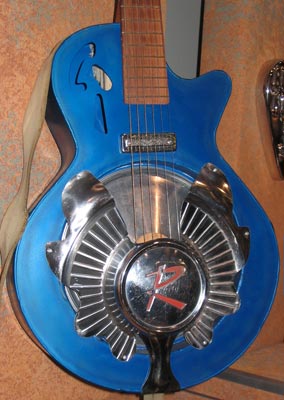
Posted by: FourBlades Apr 16 2008, 10:28 PM
Eric,
I can make you a Dobro style guitar with a chrome 914 hubcap for the resonator
cone. It would probably be a disaster sonically, but it would look really
cool.
John
Posted by: FourBlades Apr 25 2008, 12:03 PM
Finished welding on the floor pans and primed them. Cleaned up a lot of little
holes and imperfections that were noticeable with the car on its side.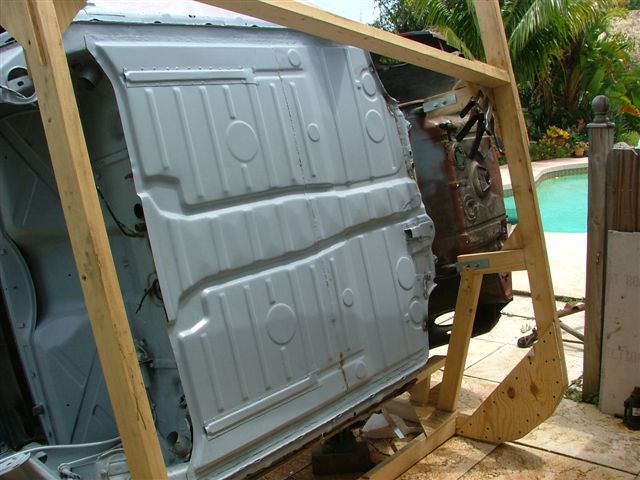
Spent some time cleaning the back of the engine bay and underside of the
rear trunk while I have the car this way.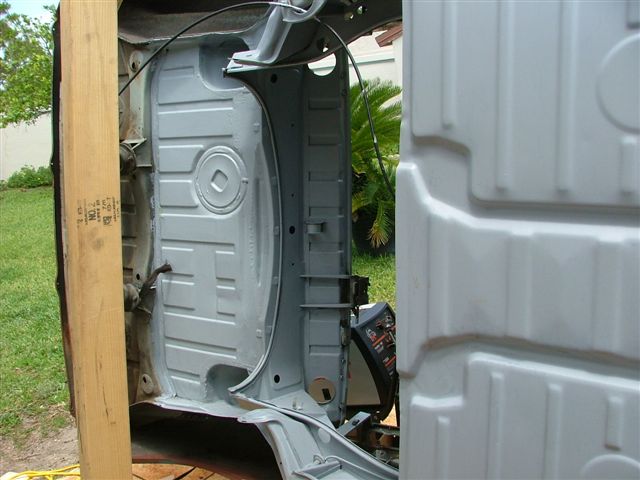
Moved on to finishing the front of the passenger area. All the lower 2" of
this area was rusted to nothing. I made 11 separate patches to fix all
this, some a while back and some today. A few of the patches are inside
the gas tank area so you can't see them all here. The car looks like a jigsaw
puzzle in a lot of places now.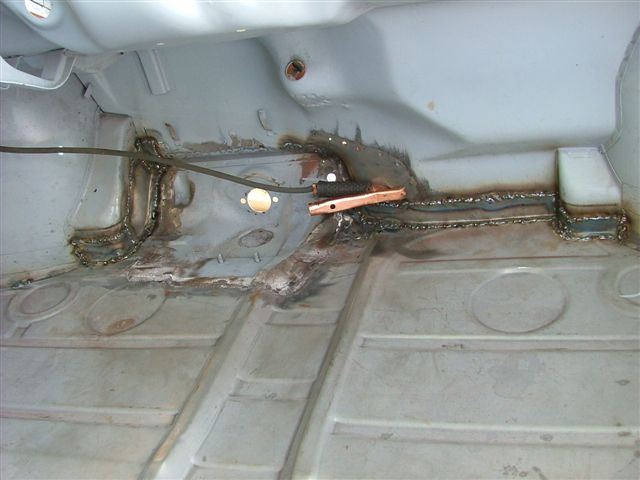
After grinding and priming this I will start rebuilding the tunnel. Thanks to
Jeff Hail's awesome post on this I think I have some idea what to do. I also
ordered some chromoly tubing from McMaster for this purpose.
This article is also very useful in figuring out what all those tubes are for:
http://www.pelicanparts.com/techarticles/914_center_tunnel/911_center_tunnel.htm
I got front and rear trunk sections from PorscheAddic. He went way above
and beyond the call of duty cutting way around the trunks to make sure I had
enough metal. The pieces arrived in two coffin sized boxes with about 10
layers of cardboard added on. Great guy...thanks again.
John
Posted by: FourBlades Apr 26 2008, 05:44 PM
Primed front of passenger compartment and floor pan: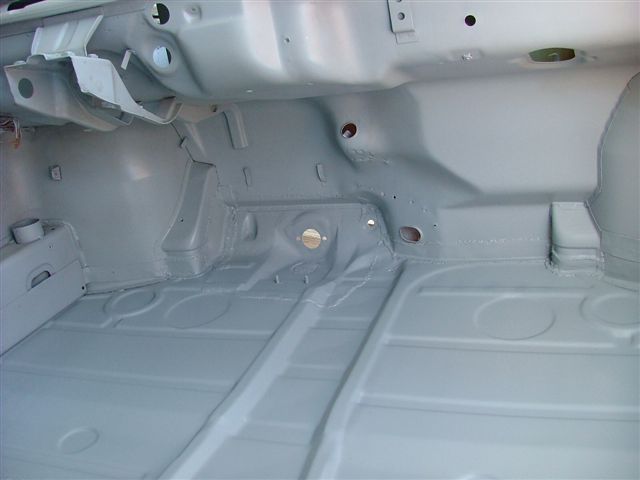
Nice....
Posted by: McMark Apr 27 2008, 01:22 AM
Lookin' GREAT!!!!
Posted by: swl Apr 27 2008, 07:07 AM
Just freakin' awesome. I'm so impressed with guys like you, michelko, tracks914, freezing914 et al who have the patience and skill to bring rotted chassis back to life. Makes me feel inadequate too but I can live with that
Posted by: scotty b Apr 27 2008, 09:50 AM
 That's awesome !!! I 've seen some pretty coolrotisseries before and even that style in metal but something about the wood just makes it kinda medieval So do your neighbors still talk to you....without using "hand gestures " ?Keep it up........and on the side
Posted by: FourBlades Apr 27 2008, 07:42 PM
Thanks Scotty, you should see the ballista I built in my front yard. It really
helps stop the neighbors from complaining too much about the noise.
Time to fix the front trunk. I would not trust this thing the way it is with a
case of beer, even light beer.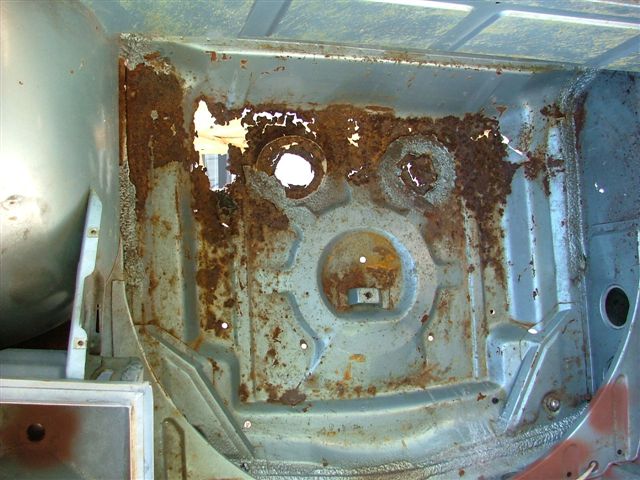
The battle lines are drawn. Nothing can withstand the knotted wire wheel
(with the green center). <Imagine grinder smilie here>
Grind the questionable areas until good metal is found. This helps determine
how much needs to be cut out.
Draw lines around what needs to go and cut it out.
Posted by: FourBlades Apr 27 2008, 08:03 PM
Cut out the front trunk. About now you start wondering if this is such a good
idea and if you really know what the hell you are doing. 
Cut the center out of the old piece (left side of picture) so it will lay flat on
top of the new trunk section and then carefully draw around it. The cutting
wheel cuts a kerf about two of them teeny ruler marks wide so draw the cut line
a little wide around the edge of the old piece. It is easier to cut more later than
to fill in a big gap with the welder.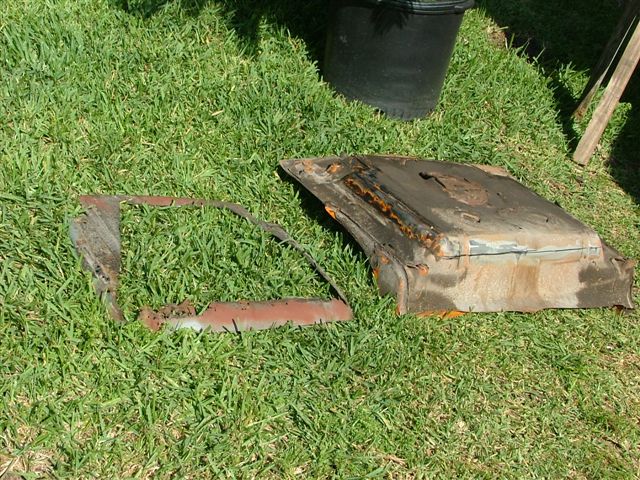
The new piece actually fits pretty well. A little trimming here and there and it
is good to go. I have learned not to try to perfect the fit of a patch. Otherwise
you start out with big patch that is pretty close and you keep trimming it and
trimming it and it is always too short no matter how much you cut off. 
Cleaned the edges to bare metal on both sides. Tack welded the corners, then
the middles, then in between. Then the cycle repeats itself until the tacks are an
inch or so apart. It is easier to hammer a patch to fit once it is partly tacked on.
Once part of a patch is held rigidly by welding the other parts bend easily with
the hammer.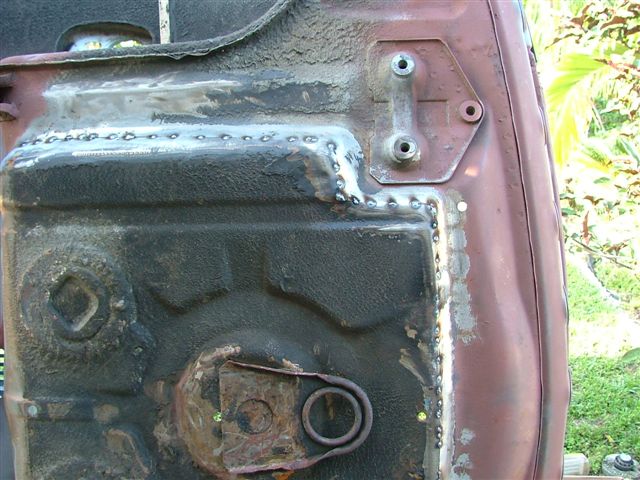
Posted by: FourBlades Apr 27 2008, 08:07 PM
Seam welded in between the tacks on the new front trunk. Jumped around from
one edge to the other frequently and took a few breaks to let it cool off. 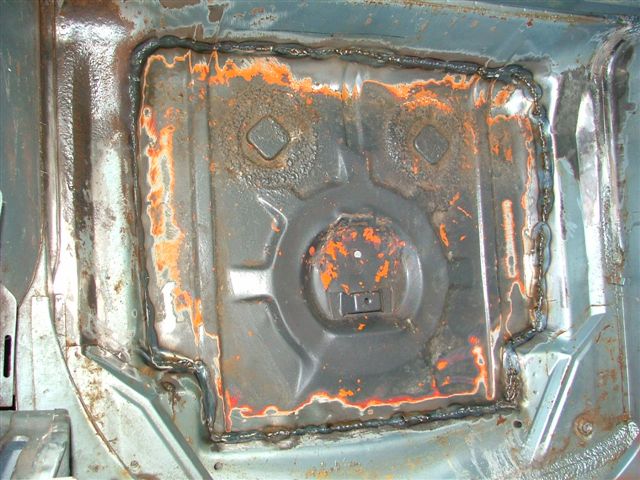
It actually looks pretty good. Total time about 4 hours. Next session a little
grinding and priming should do it. The rear trunk is much more complicated
and will be much harder.
John
Posted by: ericread Apr 27 2008, 08:40 PM
AMAZING JOB!!!
Keep up the good work! 
Posted by: FourBlades May 29 2008, 08:11 PM
Building the armageddon proof clutch tube!!!
I have heard too many horror stories of people's clutch tubes failing while
far from home so I decided to go big on my replacement tube.
Ok, so that was a joke. McMaster kind of overdid it on the tube size
that I ordered. This one looks like a good barrel for my 75 caliber sniper rifle
project.
After getting the correct tube sizes, I started piecing the tunnel together. I had
a good rear section from another board member and I welded it to what is left
of my front section.
Posted by: FourBlades May 29 2008, 08:23 PM
Took me a while to figure out what tubes and cables came out where in
the engine bay. This is what I came up with.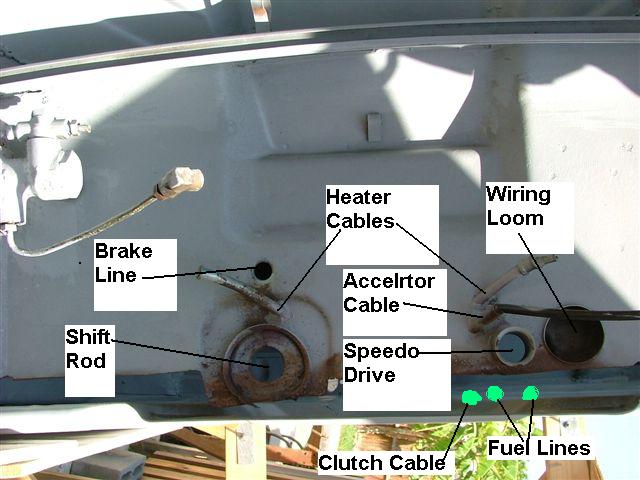
The bottom of my outer fire wall was rusted to nothing adding to the
confusion. After test fitting the tunnel plus clutch, accelerator and
shift rod, it looked like this.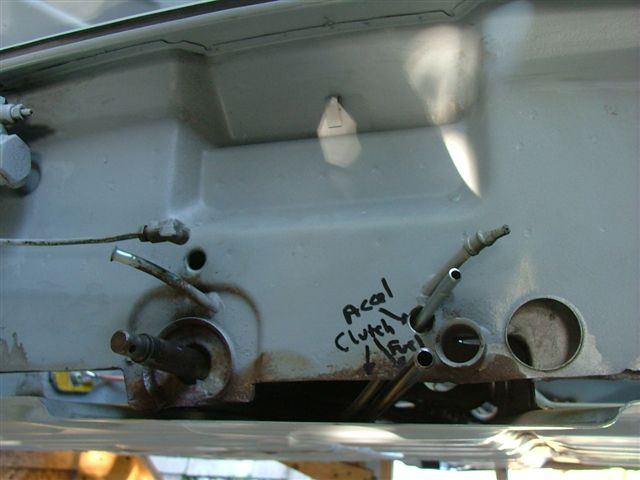
Then I checked to make sure the shift rod did not contact the tubes in
any of the gear positions. I also did not fit the heater tubes at this time
because I am using a tangerine header system without heat exchangers.
This is a view up the tunnel from the engine bay. The shift rod is in the
upper left and the tubes for the clutch and accelerator curve across
the bottom.
When I was convinced it all fit right, I mostly welded the tunnel in. This
feels like a big milestone for some reason, many more to go.
John
Posted by: Bartlett 914 May 30 2008, 08:41 AM
John you make these things look easy. I did the same thing only from the underside of the car. I know there is a lot of work in this. Looks good!
Posted by: Richard Casto May 30 2008, 08:49 AM
John,
Keep it up! I love this thread. But it also makes me feel bad for not working on my car more and updating my progress thread.
Richard
Posted by: FourBlades Jun 2 2008, 05:06 PM
John,
Keep it up! I love this thread.
But it also makes me feel bad for not working on my car more and updating my progress thread. Richard
You were on a serious roll in your thread and blog, Richard. We all want to
see what you have been up to lately. You are through the tear down and
rust clean up, now the fun part, welding stuff on starts. I try to pick one or
two pieces of metal to put on in a session as a way of motivating myself.
I try not to tackle too large a project or I tend to procrastinate.
John
Posted by: Slider Jun 2 2008, 07:48 PM
Nice Job!
Im glad to see someone bringing another one back from the dead..
Posted by: FourBlades Jun 11 2008, 09:18 PM
More work on the tunnel for welding porn fans. Bottom edges of the tunnel
where it meets the floor were rusted out. Made some L shaped patches to
bridge this gap. I have made 3 of the 5 needed to complete this repair. Here
is patch number 3.
Clamped the patch in place.
Plug welded through the holes. Some welds turned out smooth and flat and
some turn into big globs metal that are a pain to grind down. All were prepared
the same way so there is something to this art that eludes me still. I noticed
that using higher voltage tends to make welds that lay flat, while lower voltage
tends to make high, globby welds.
One more gap on the side of the tunnel to go.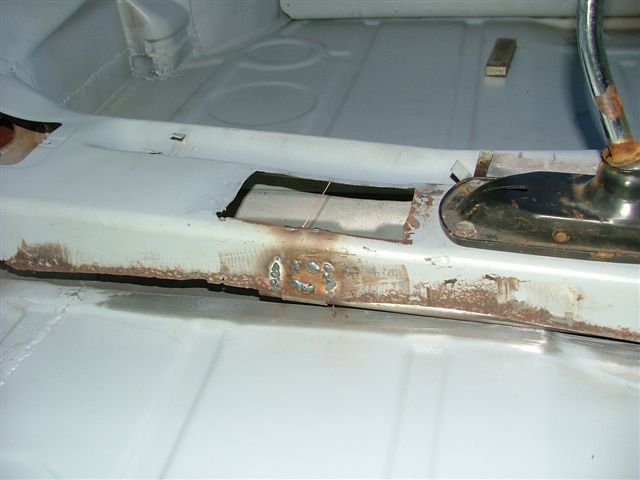
Summer time here in America's wang (Florida) means more than just another
embarrassing election fiasco, it is light until later in the evening but it is also
stinking hot and humid. You gotta love to sweat if you live here.
Took me 2 hours to get all my tools out, make the patch, weld it on, and put
everything away. It feels very satisfying once you are done, especially after
a difficult day at work.
John
Posted by: craig downs Jun 12 2008, 12:36 AM
Awesome work
I'm glad I didn't have to go thru what your going thru. Its funny how this car had sentimental value to the POs and just left it to rot out in the middle of a field.
Posted by: FourBlades Jun 12 2008, 07:49 AM
It does not make a lot of sense. I wish they had covered it with a tarp at least.
I think they put off restoring it for so long that it became a hopeless case. Then
they sold it to the first unsuspecting fool to come along, which would be me.
I wanted to fix this car to learn how to do it, and I have learned a lot. I also
learned that I would not restore a car this bad again unless I was retired and
had plenty of time to do it. I am getting so impatient to have a 914 to drive that
I may just buy a decent one and keep it until this one is done.
John
Posted by: 914Tom Jun 12 2008, 02:22 PM
great motivation to get my lacy butt off the coutch
and out in the garage to my 76 who needs still some
Thank you
Posted by: FourBlades Jun 12 2008, 05:12 PM
All right, 914Tom, lets see some pictures of your car!!!
John
Posted by: Eric_Shea Jun 12 2008, 06:58 PM
Ut-ummm... 
All this welding seems to be taking valuable time away from necessary projects! 
Posted by: FourBlades Jun 12 2008, 09:09 PM
That is freaking crazy. How big a tire can you fit on that rim???
I can't do anything anyway without the appropriate hub cap.
Here's what I was working on before 914 fever hit.
The archtop was made from a sign off an old building that was torn down.
The other is the body of a bookmatched zebrawood accoustic. Zebrawood
is a real pain to resaw and bend, but it looks great and is harder than
rosewood. It would make a resonator so biting and bluesy it would
make the sun cry and the moon howl. If only I had time...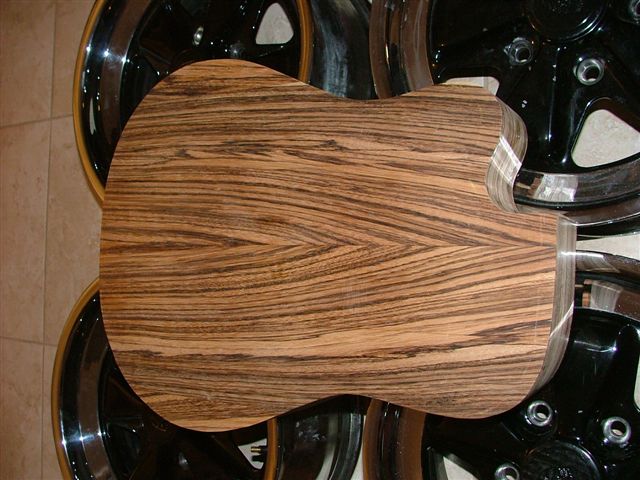
Aaaaaa, it wouldn't be very traditional anyway...
Posted by: Eric_Shea Jun 12 2008, 10:27 PM
Awesome
I've always loved Zebra.
Posted by: 914Tom Jun 14 2008, 06:43 AM
OK, here is my projekt.
bough it winter 2003-2004.
http://img107.imageshack.us/my.php?image=img0002nk8.jpg
the door sack is result of an bend a-pillar,
the left trunk hinge was broken as you can see,
no motor in and lot of rust.
http://img221.imageshack.us/my.php?image=img0011ig7.jpg
the left an right outer rocker was gone, the inner was rotten to a high of 5cm.
http://img127.imageshack.us/my.php?image=img0086rn4.jpg
http://img129.imageshack.us/my.php?image=img0019po7.jpg
now, the underside ist ready weldet, and prepered with undercoat.
at this time all the underside ist coverd witch shiny orange.
the car is level again and the fenders are waiting for getting weldet on.
still a long way to go.
yesterday i pached the left door.
http://img129.imageshack.us/my.php?image=img0019po7.jpg
http://img177.imageshack.us/my.php?image=img0124ui4.jpg
the slow progress is result of my little girl who was born in 2004 an a babyboy in mar 2007.
so only 1/2 day a week (if it comes high) is available for the teener .
so long, 
TOM
Posted by: FourBlades Jun 14 2008, 10:58 AM
Tom,
Great work! Looks like you are making some good progress. Maybe someone
has a door post from a wrecked car for you. Seems like it would be hard to
repair that area otherwise.
You should start your own progress thread so we can see what you are doing.
Good luck...John
Posted by: FourBlades Jul 7 2008, 08:18 PM
Got some rebuilt calipers recently from Eric Shea.
MMMM, tasty!!!
Eric's calipers are a thing of beauty and very reasonably priced, although
there is a $100 core charge per foo foo dog.
John
Posted by: FourBlades Jul 7 2008, 08:35 PM
Closing up the firewall. I salvaged the e-brake tubes from an old firewall by
cutting out some sheet metal around them on the inside and outside walls.
Here is the inside section.
Did a hideous job of welding the outer piece in. Not sure why the welds came
out so badly. Also made a small patch for the left side.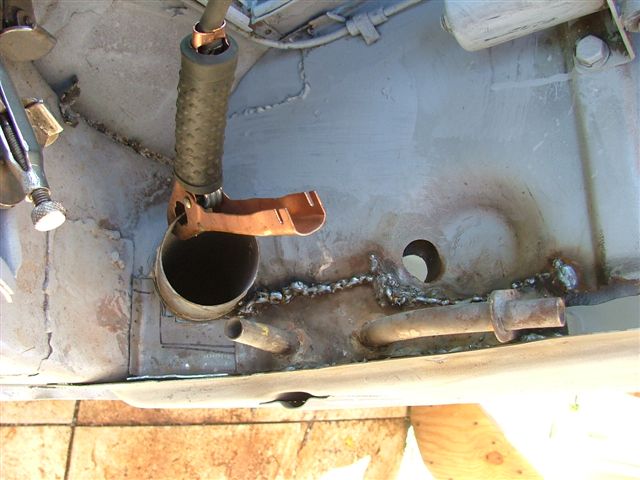
Made a patch for the passenger firewall section.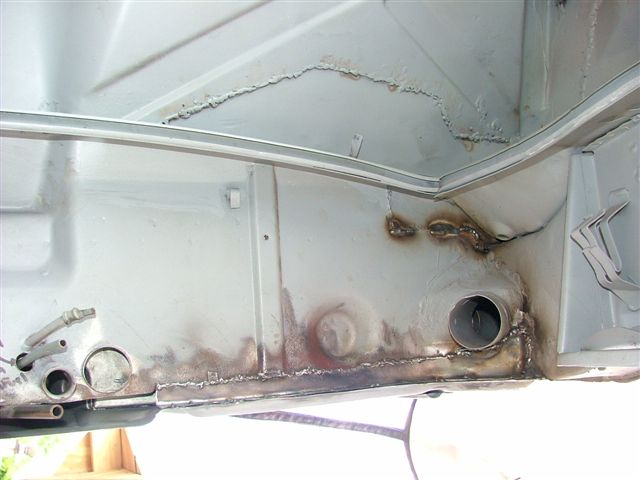
These welds turned out better. It ended up taking 9 separate patches
to complete close up the inside and outside of the firewall and the result
would make Mary Shelley proud.
This is definitely a case where I would have been better off just buying the inner
and outer repro pieces from Auto Atlanta. The hassle of drilling out all the spot
welds to get the fragements of the old crap out would have been less than all the
careful cutting and fitting I had to do for a look that will never pass for factory.
The more I work on this, the more I want the sheet metal repairs to be close
to original.
Posted by: FourBlades Jul 7 2008, 08:46 PM
Inside of the firewall.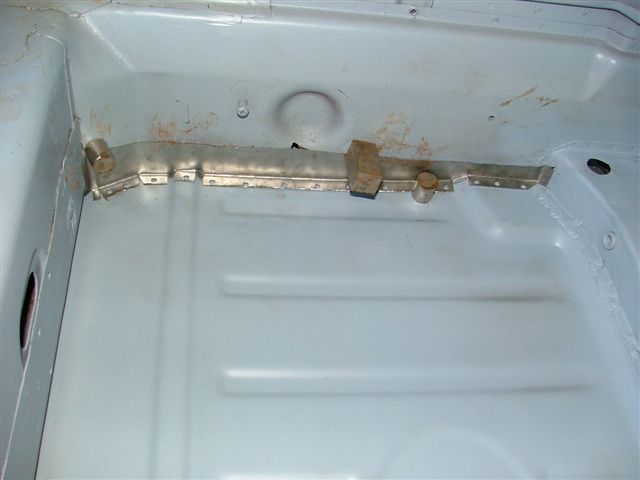
Firewall and tunnel sprayed with Eastwood silver rust encapsulator.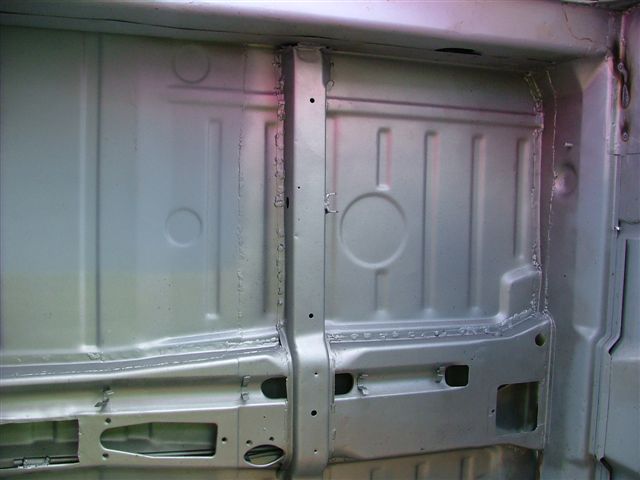
Almost done with the chassis work. Then its on to cosmetic sheet
metal. The last post not withstanding I am tempted to make this
thing into a rat rod and spray matte black primer over the rest of
the rust and holes and be done with it...
John
Posted by: FourBlades Jul 17 2008, 02:21 PM
I want to keep an eye on the tune and health of my engine so I am
thinking of running some additional gauges. I am getting a Raby
2270 built by McMark and want to keep it in good shape.
I am thinking of using a wide band air fuel gauge, a cylinder head
temperature gauge, an oil temperature gauge, and an oil pressure
gauge. Because this will be a street/AX/DE car and I live in Florida
I think the temperatures need watching.
There is no VDO WB AF gauge, so I will probably buy autometer guages
(or something) that are close to the VDO look. I will probably mount them
on a home brewed center console.
Any suggestions or ideas would help me out because I am just starting
to work on my gauge approach.
John
Posted by: FourBlades Aug 19 2008, 02:25 PM
Its another beautiful day in the Sun Shine State. 
Just right for working on my 914 in my outdoor "garage". I hope my 914 rocker
does not tip over, I have weighted the framework with bags of blasting media and
some paving stones. The eye is forecast to pass right over my house with 65 mph
winds. Maybe I will go to the beach instead of working on my car. 
John
Posted by: Eric_Shea Aug 19 2008, 04:03 PM
Stay dry and keep the wood side down! 
Arms make it? 4 packages from thee arrived yesterday. 
Posted by: FourBlades Aug 19 2008, 08:02 PM
Eric,
Yes, thanks I got the arms last week. They look fantastic. I have the
cores boxed up and will send later this week. So far this storm has been
no big deal here, just a lot of rain.
John
Posted by: 914rhatt Aug 19 2008, 11:12 PM
WOW!!!! I just wanted to say thatwas remarkable....I have had two 914 for years one I drove for only a few years and the other I got as a donor car for the driver...I started to get my driver back on the road a few weeks ago and was kind of getting depressed with the rust...(Mind you nothing like what you were showing..) but still a bit...you have given me new energy to get mine back on the road...it has been setting for 18 years until a few weeks ago...Thanks for all the pic's and the inspirationto go on....
Posted by: FourBlades Aug 20 2008, 10:59 AM
Good luck! 90% of it is keeping your motivation going, that and:
Everything I needed to know, I learned from 914World.
John
Posted by: FourBlades Sep 17 2008, 05:58 PM
OK, I'm back. I have made a buncha progress that I will be posting but lately
I have been busy with a lot of stuff that is no where near as important as my
914. I cut out some metal from the bottom of the long that was rusted very
thin, made an 18 gauge patch and welded it in.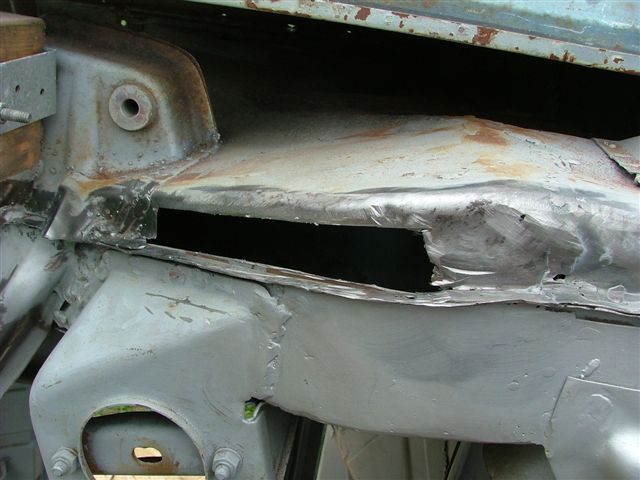
Posted by: FourBlades Sep 17 2008, 06:04 PM
I replaced one of the inner suspension consoles and finally got around to replacing
the 18 guage reinforcing plates that join the inner and outer sections. The inside
and outside pieces of the pinch weld at the bottom of the long have gaps in
between each spot weld. Like the forces on the suspension console halves
have been trying to pull the long apart. You can see the gaps in the middle of
the left side of the picture. 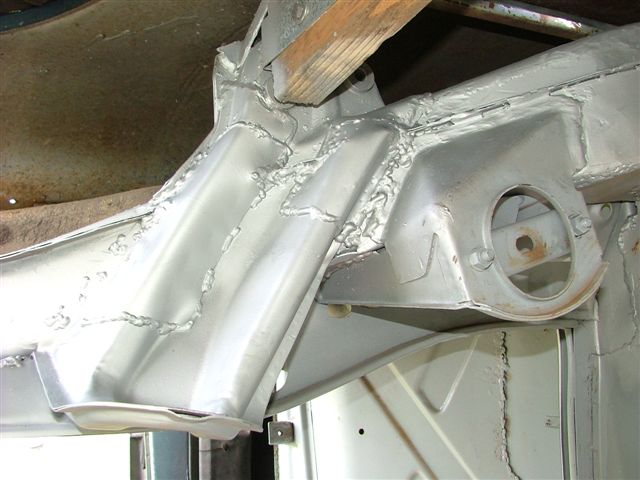
Posted by: FourBlades Sep 17 2008, 06:18 PM
The boxed reinforcement of the floor under my pedal area was cut off so I made
a reinforcing section from 18 guage and welded it on. Not sure if I over did it here
but I think having a pedal box that does not flex is a Good Thing. 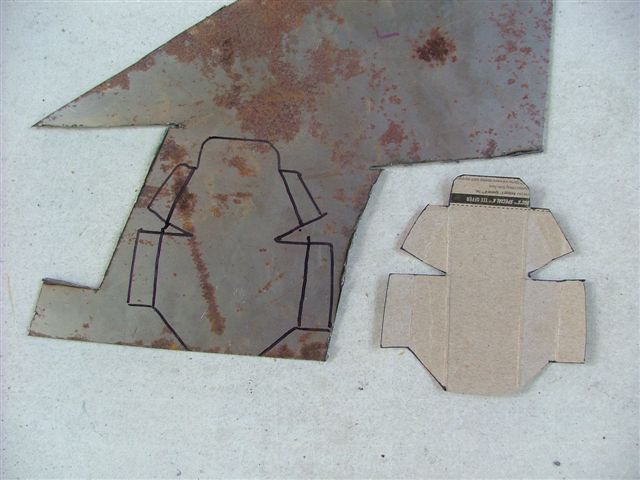
I also welded on the seat attachments. I determined where to put these pieces
by temporarily screwing seat tracks onto them and installing the tilt adjustment
combs. I could actually put seats in my 914 now and not have them fall through
onto the ground. Not sure I can handle this...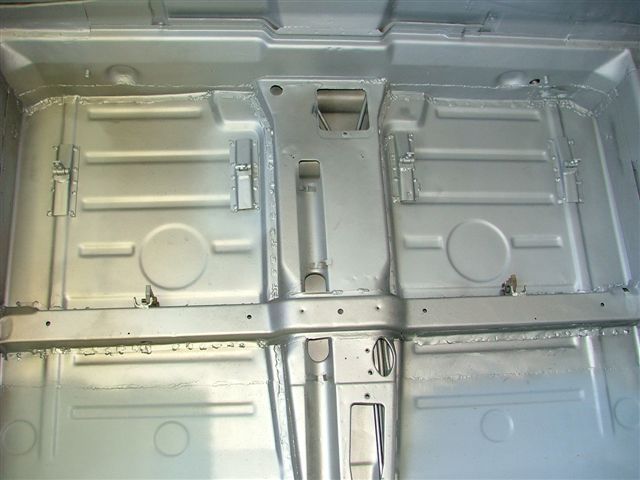
I'm trying to finish up everything that needs to get welded to the floor, so I can
finish painting, seam sealing and undercoating it and turn my car back the way
Porsche intended it to be. I need to do this before my "rotisserie" rots....
John
Posted by: heavydriver Sep 18 2008, 12:08 PM
Will you be available for some consultationsin the near future ?????? 
Posted by: FourBlades Sep 18 2008, 12:29 PM
Sure, what do you have in mind? Realize that I am no expert, just some guy
who learned a buncha stuff by reading about it and trying it out...
John
Posted by: carr914 Sep 18 2008, 02:50 PM
He wants to learn how to keep termites away.
Your projects looking good.
T.C.
Posted by: FourBlades Sep 18 2008, 05:32 PM
> He wants to learn how to keep termites away.
I am seriously worried about the wood rotting soon. I should have
painted it.
If you are doing a big build thrash and BBQ I may be able to trek
over and help out. I am sure I will learn some stuff...
John
Posted by: FourBlades Sep 18 2008, 08:05 PM
Time to replace the rusty rear trunk. 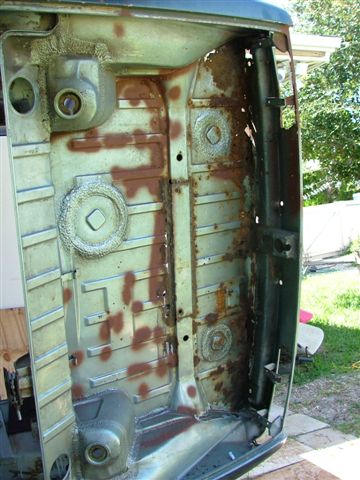
First I need to cure a painful case of 914 trunk inner tit rot. 
There are actually about six holes that need to be cut out and replaced on the
rear whatever the ass panel of the car is called.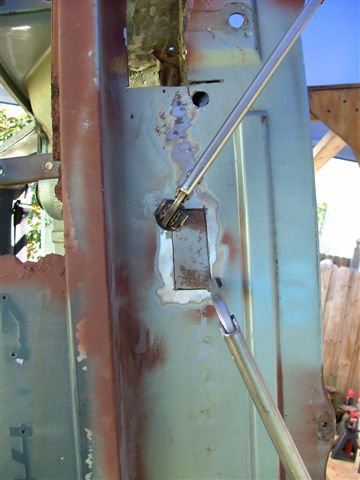
Posted by: FourBlades Sep 18 2008, 08:13 PM
Got five of the holes welded up and somewhat ground down.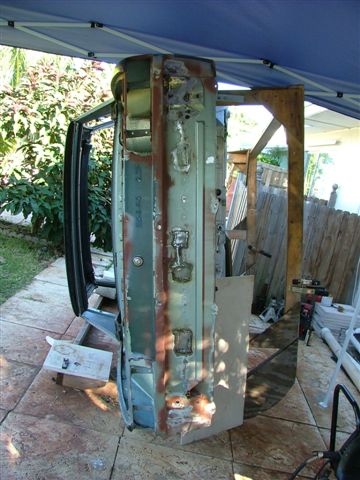
I decided to stop grinding when my neighbor started hurling good size
coconuts in "support" of my project. While they make a good pina colada,
they leave dents that I will have to pound out later...
Test fit my replacement panel which should make a "nearly invisible repair"
as they say. See if you can spot the new panel. 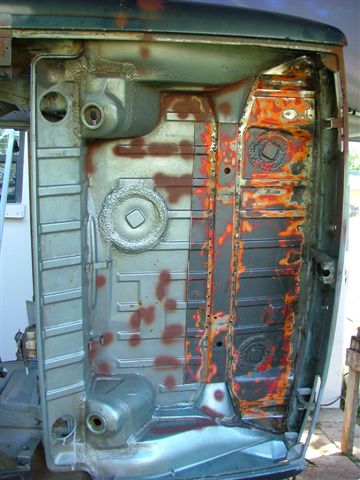
I really need to start drinking more... 
John
Posted by: FourBlades Sep 19 2008, 05:39 PM
Spare suspension mounts for ConeDodger. Threads look ok.
Is this what you are looking for?
John
Posted by: ConeDodger Sep 21 2008, 02:30 AM
Spare suspension mounts for ConeDodger. Threads look ok.
Is this what you are looking for?
John
John,
The passenger side single one is the animal I need. The three hole jobs secure the front. I appreciate it...
Rob
Posted by: Root_Werks Sep 22 2008, 09:36 AM
Holy mother of someone getting something done!
Man, I need to get to work on my own little 914. 
Posted by: jc914 Sep 22 2008, 09:42 AM
Great work on restoring that's what i need to do to mine.
Posted by: steve1rob2 Sep 28 2008, 01:54 AM
Absolutely incredible job and a great read! I will come down and check it out in a week or two.
Don't throw that rotisserie away. Maybe I can convert it for my project. Or at least copy the design.
Steve
86 Carrera Targa
73T Targa
73 2.0 914 (Prior)
Posted by: FourBlades Sep 28 2008, 07:38 PM
Steve,
I think you could salvage the two main "L" sections and adapt them to your
project, no problem. I'm trying to finish up the underside so I can get my car
back on its own feet again. Lets get together soon.
John
Posted by: FourBlades Sep 28 2008, 09:23 PM
Welded in and painted the rear trunk.
Started seam sealing the trunks and bottom of the car.
Once it is all seam sealed, I am going to paint it with two
more layers of eastwood rust encapsulator and then undercoat
it. I hope this will keep it from rusting for a long time.
John
Posted by: FourBlades Oct 3 2008, 06:31 PM
Rust encapsulator, seam sealer, 2 more coats of rust encapsulator, 2 coats of
rubberized undercoating. 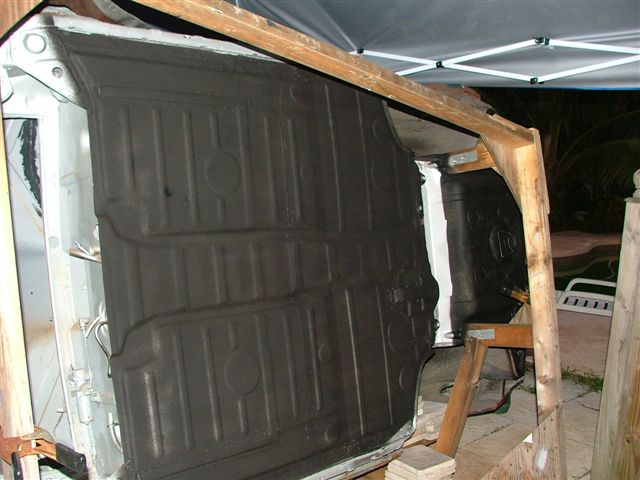
Going to install brake master cylinder, some brake lines, steering rack,
front jacking donuts, then its time to flip it back to normal mode.
John
Posted by: southernmost914 Oct 3 2008, 07:41 PM
Awsome! Funny how in Florida you do most of your work in the summer(afternoon rain, storms). I grew up in M.I. , Hampton homes just North of 520. I know every road in Brevard county. You got skills, ROCK ON!
Steve
Posted by: jc914 Oct 4 2008, 08:29 AM
You are doing a great job. Very impressive restoration
Posted by: FourBlades Oct 16 2008, 08:10 PM
Thanks for the feedback guys.
Big news today. I welded on the front jacking donuts and flipped the car back
to normal side down!!!
Wow, it looks weird this way after so long on its side. Flipping it back was a little
hairy because it gets really heavy past the balancing point. I screwed a long
2x4 on to provide leverage and carefully eased it down.
I you are [A] building a wood rotisserie in your backyard [B] planning to use
it for more than a few months, and [C] pretty much considered insane by your
friends, then you really should paint the rotisserie because the plywood
reinforcements will rot and weaken in 3 or 4 months, and plan ahead when tipping
the car back because if it gets away from you it will crash down big time. You
need to use leverage and caution because without 4 or 5 friends you can't
muscle a 350 pound car body.
Now I in the home stretch, only 77 items on my to do list and $3500 more
parts on my buy list. I am so glad I saved money on my car insurance
because restoring a $500 car is not a big money maker.
It is amazing how much a 914 costs when you buy every single part
except the (rusty) tub one by one. Find a car with the vast majority of the
parts in useable condition if you want to be a CSOB.
Seriously, I am getting really excited about getting this thing on the road.
John
Posted by: jc914 Oct 16 2008, 09:43 PM
Once again Great job John. I am glad you were able to get it back down without any damage. It is looking good. 
Posted by: sean_v8_914 Oct 16 2008, 11:16 PM
wow!
my hell hole repairs suddenly seem so trivial
Posted by: dlee6204 Oct 16 2008, 11:28 PM
I've watched this build from the beginning and I'm even starting to get excited! Keep up the good work!
Posted by: FourBlades Oct 17 2008, 07:11 AM
Thanks for the good words, it keeps me motivated.
I REALLY wanted to make the Rocket City Ramble this year but it was not to be.
I'm gonna make next year's east coast event if I have haul my 914 there in a
dump truck...
John
Posted by: FourBlades Oct 19 2008, 06:34 PM
Finishing the passenger door sills. Welded on the support triangles. Used the
sill plate to line up the triangles properly.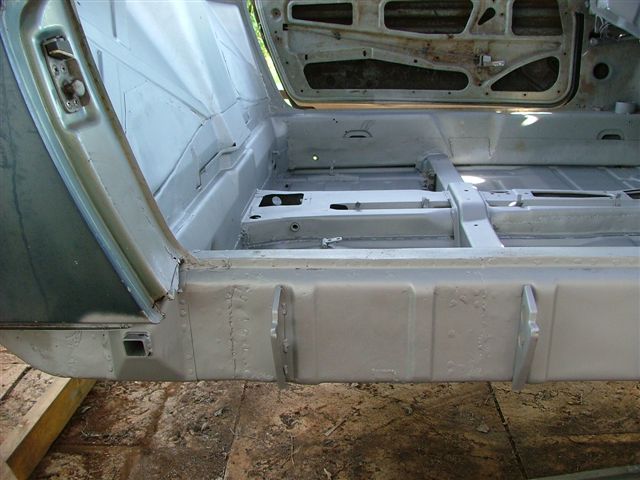
Added the sill plate. Now I have to close the hole between the sill
plate the door jamb. Trim off the rusty edges.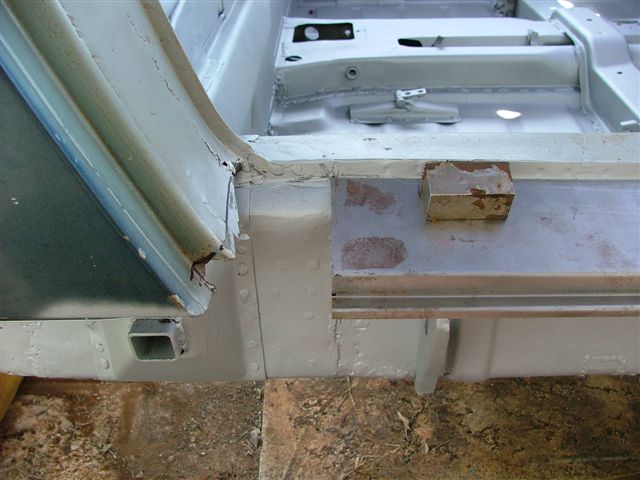
Patched it using two separate pieces of metal to avoid having to make such
a complex shape in one piece.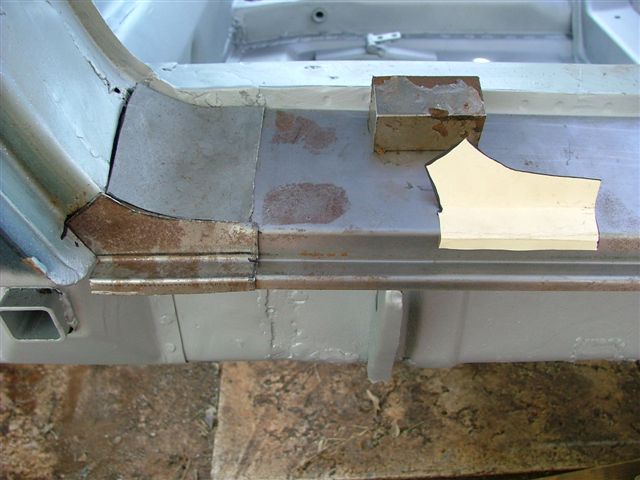
Weld it up and grind it. It ain't purty but it is solid.
Passenger side is done.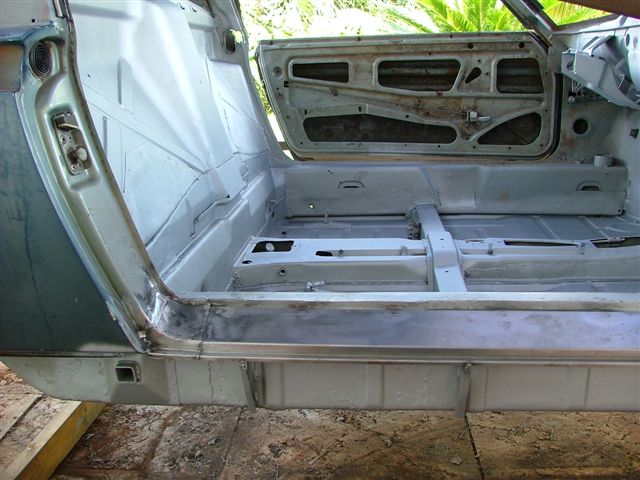
John
Posted by: FourBlades Oct 19 2008, 06:58 PM
Now I have this to look forward to fixing. 
The inside where the door vent comes out is almost as pretty. Anyone got
any ideas about the easy way to fix this???
For now, it is time...
John
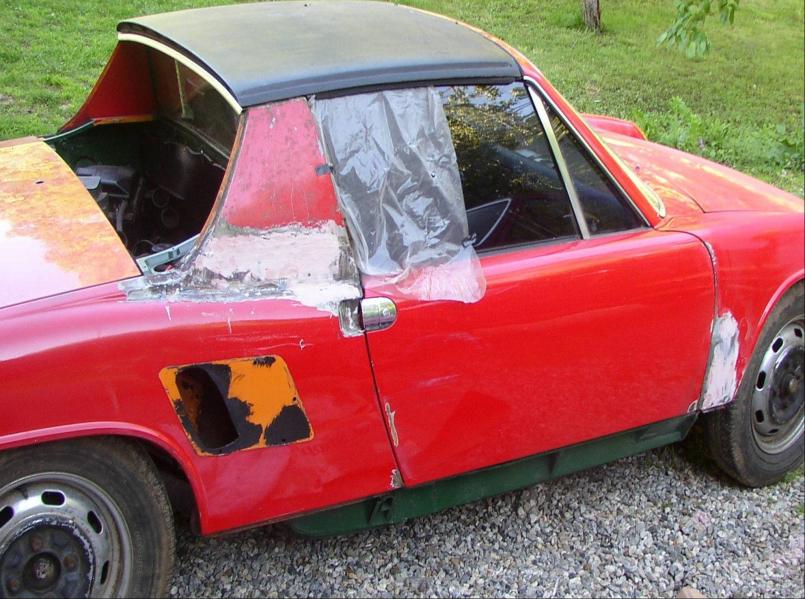
Posted by: FourBlades Oct 20 2008, 07:55 PM
I broke down and ordered the Auto Atlanta sail panel to fix the outside of
that nasty rust hole in the previous post.
Fixing the driver's side door sill. Still have some major rust areas to fix.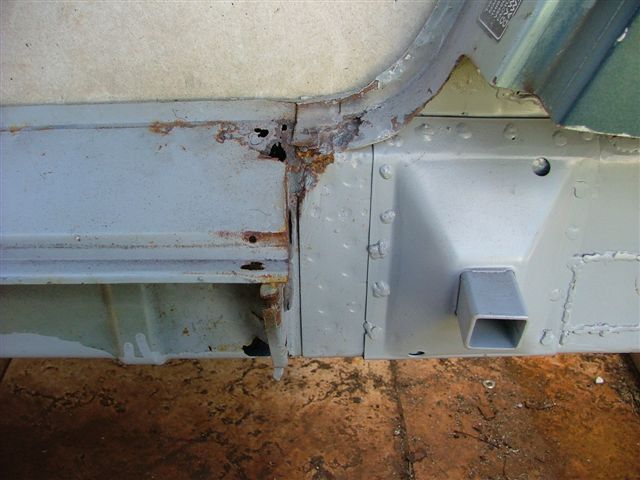
Cut out the rusty parts and clean it up. I don't know about you but I hate drilling
out spot welds, so I am using a new trick I read about in a book. First, cut away
the majority of the panel being removed. This leaves a strip of metal that is spot
welded to the other panel. Use a wire wheel to clean the strip and reveal where
the spot welds are. Then use a grinder to cut through just the panel being
removed in between each spot weld. Then the situation looks like this:
Now take some major end nippers and grab hold of each piece of the strip. By
squeezing down and then twisting it is easy to break off each piece of the strip
one by one.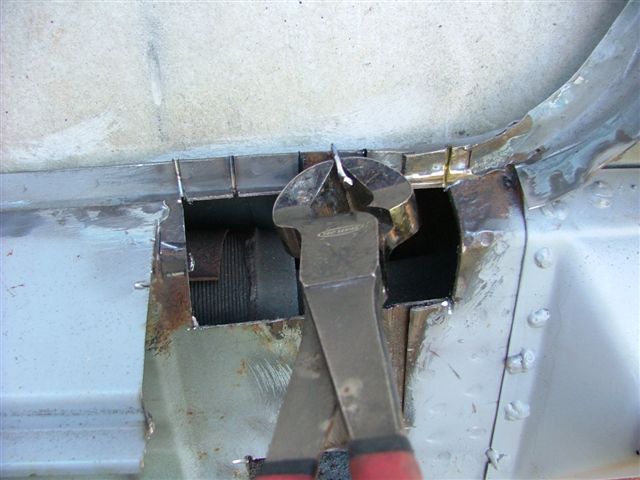
The end nippers are great because they get under the ends of the strip easily.
Only the very small spot weld area is actually attached to the other panel making
it easy to remove the pieces.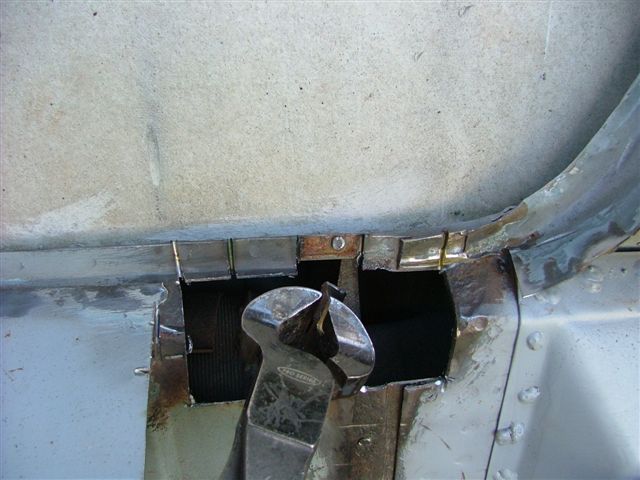
I find this method is faster and less annoying than drilling out each weld. It also
really helps to cut out the majority of the panel first whether you are drilling or
twisting the rest off. Then use a grinder to remove the spot weld stubs.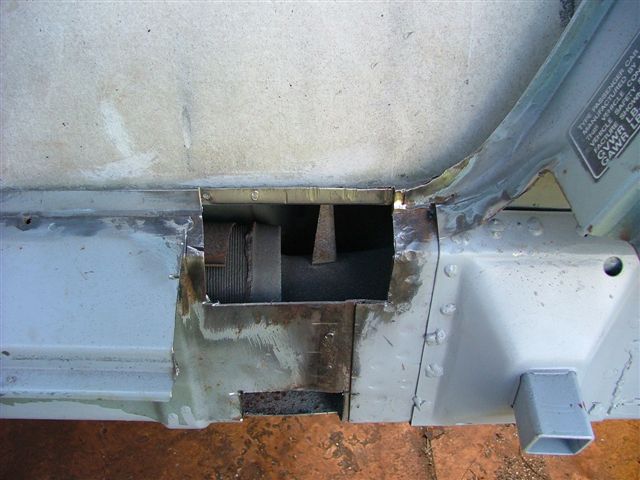
Saves me lots of time and iritation.
Posted by: FourBlades Oct 20 2008, 08:13 PM
Continue fixing the drivers door sill area. Made some patches for the holes using
left over long replacement panel. This makes fitting the patches very easy.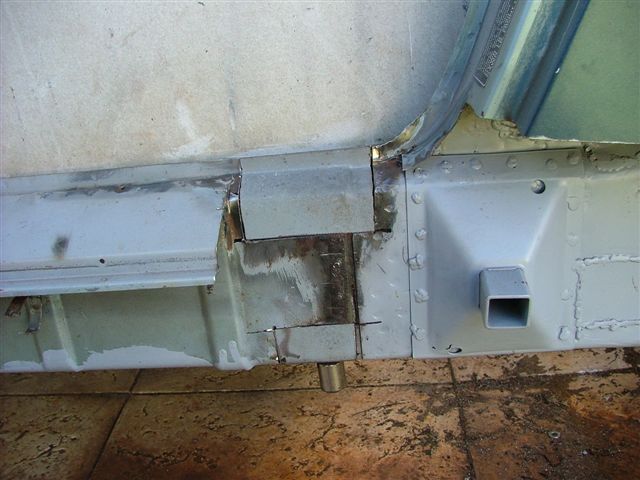
Took some time grinding down all the welds in this area. Made a patch for the
sill. Put back the chunk of fender I cut away months ago while fixing the heck
hole.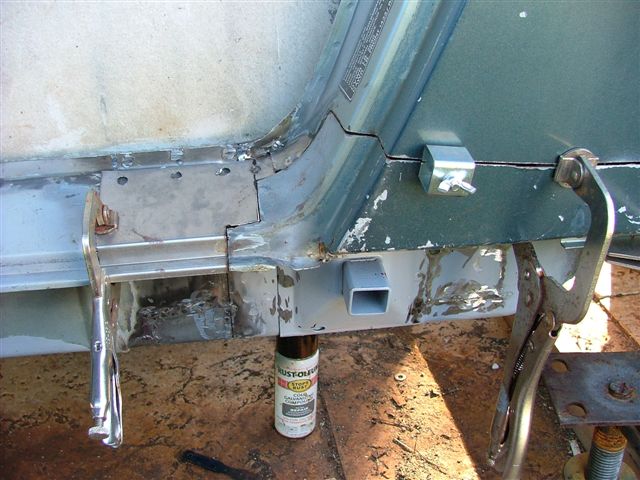
Carefully welded it all up. Tried to go slow and not warp the fender. It looks
pretty good, maybe bowed out a tiny bit. I'll need to grind it down carefully
too so as not to over heat it. 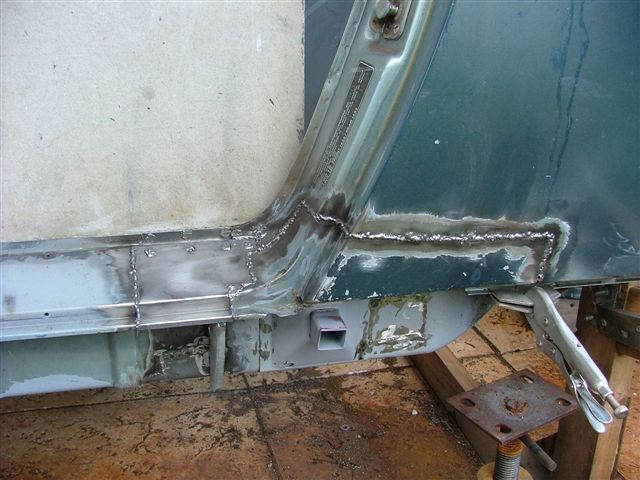
I think this leaves six rusty areas to fix.
Driver side sail panel. 
Driver side lower door jamb.
Driver side cowl to fender joint. 
Passenger side cowl to fender joint. 
Front trunk rain gutters.
Rear trunk tail light openings.
Each one will probably take 3-5 hours to fix.
One more month and it will have been a year.
John
Posted by: jd74914 Oct 20 2008, 08:38 PM
I broke down and ordered the Auto Atlanta sail panel to fix the outside of
that nasty rust hole in the previous post.
. . .
Saves me lots of time and iritation.
Pansy.
Just kidding! The car looks great.
Posted by: FourBlades Oct 20 2008, 08:46 PM
Jim, That is some nasty sail panel rust! Did you make your own patch
for that??? Those are some interesting looking side vents...
John
Posted by: jd74914 Oct 20 2008, 09:13 PM
Yep, I made all of my own patches (the other side looked like that too, except its entire door handle recess was gone). I'm only 20, and at that time (well, currently too) had much more time than money, and not buying replacement stamping was a great way for me to save. It was also a great experience in metal working.
The side vents were added by someone in the 80s; probably well before I was born. I'm not their biggest fan, but I do like their uniqueness. What you see is just a cutout. They have a "cover thingie" that bolts on over it and gives them definition.
Jim
Posted by: FourBlades Oct 21 2008, 07:30 AM
Jim,
Looks like you did a nice job fixing those holes. I like to make my own patches
but I guess I am getting impatient to be done with the body work. My new
engine is collecting dust in my bedroom right now, I want to see it in the car...
John
Posted by: Root_Werks Oct 21 2008, 08:21 AM
I will not wine about the rust on my 914 ever again, I will not wine about the rust in my 914 again....
Seriuosly, great work! I love keeping up on this thread.
Posted by: jd74914 Oct 21 2008, 02:52 PM
Jim,
Looks like you did a nice job fixing those holes. I like to make my own patches
but I guess I am getting impatient to be done with the body work. My new
engine is collecting dust in my bedroom right now, I want to see it in the car...
John
That sentiment is easy to sympathize with.
Posted by: FourBlades Nov 3 2008, 07:53 PM
Mig Welding Where Angels Fear to Tread - The First Day
Started working on fixing the driver side cowl and front fender joint. This seems
like a complex part of the car where a bunch of different panels come together.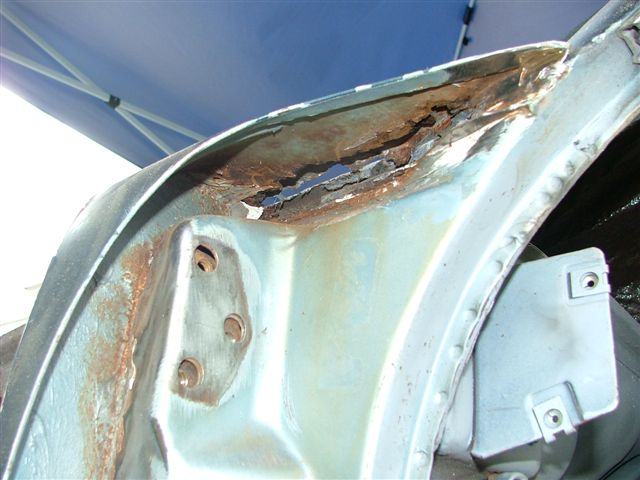
Bottom of the door pillar is also rusted out.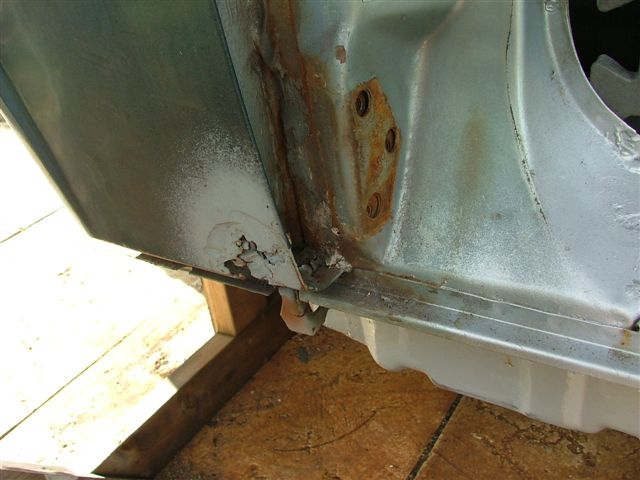
Cut off most of the fender to see what was going on.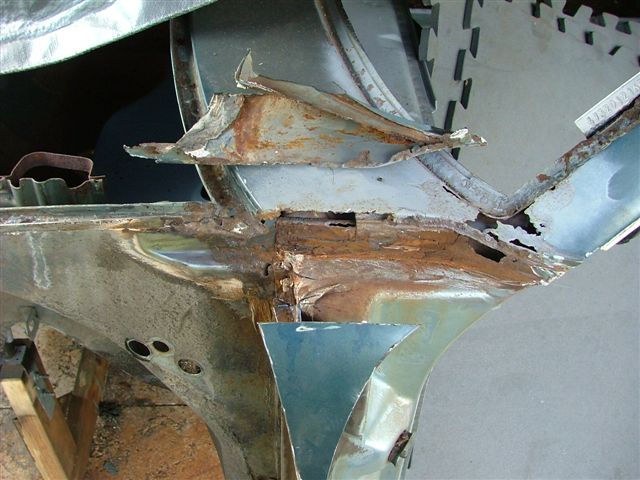
Clean it up and cut away the bad parts. Hit it with some metal ready.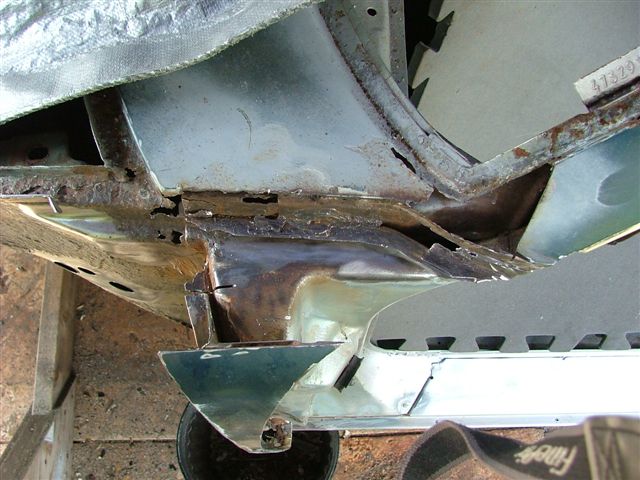
Rebuild the area from the inside out. I am not completely sure how these
panels went together. I was really torn between retaining the drain (rust)
channel between the fender and the cowl and just welding it all up solid.
Some people say you car will crack there if you weld it solid.
First patch going on.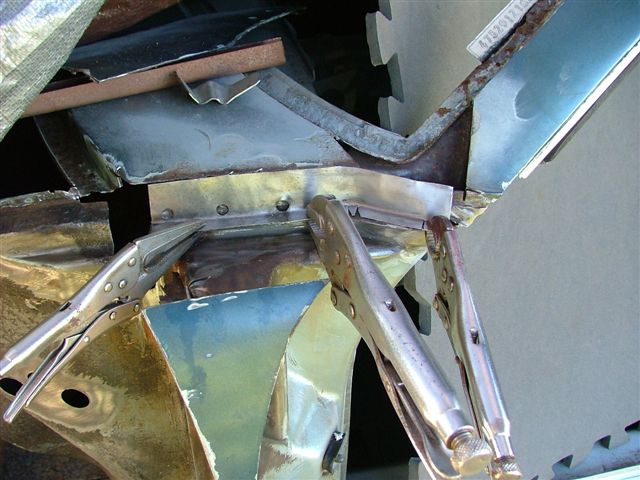
Posted by: FourBlades Nov 3 2008, 08:00 PM
First two patches welded on. 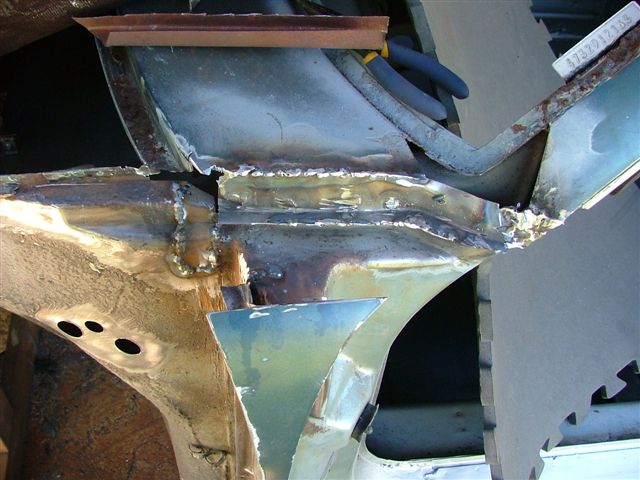
A patch made from a windshield surround a board member used to protect a
windshield they shipped to me. The irony is the windshield metal from the cut
up donor car is far better than the rust bucket I am rebuilding.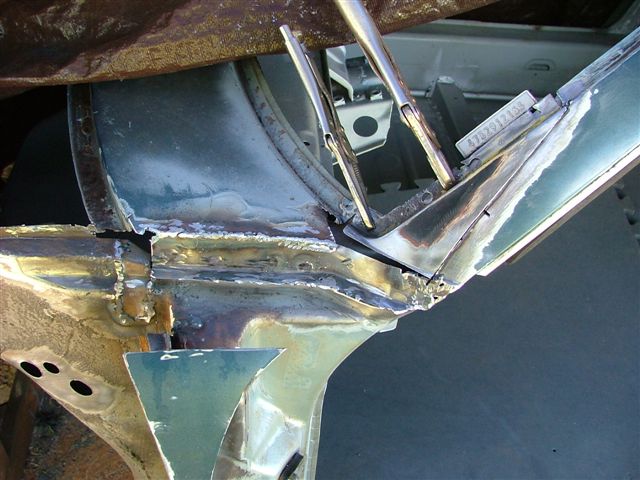
More patches for the windshield surround. 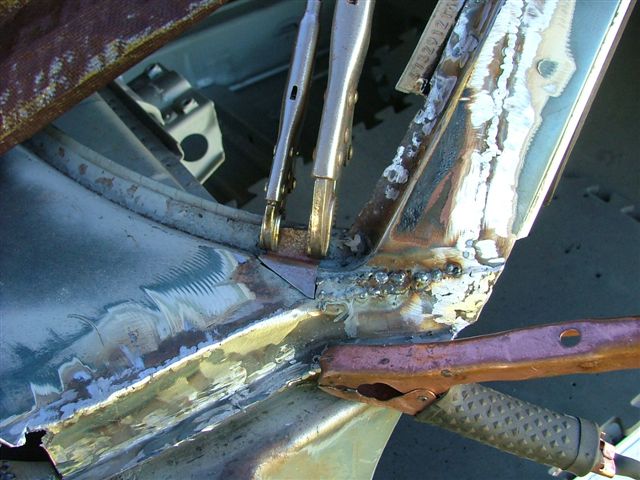
Still more patches to the rain gutter and front corner of the cowl.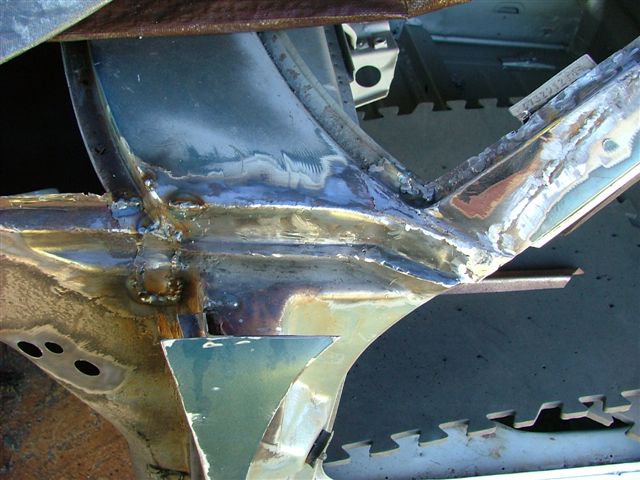
Posted by: FourBlades Nov 3 2008, 08:11 PM
Rebuilding the rain gutter had me really stumped for a while. There was nothing
left of the original metal on my car to look at as a pattern. I decided to weld on
some pieces to form the gutter and then weld the fender to them. I don't see how
Porsche ever spot welded this area together because I can't see how they
accessed both sides???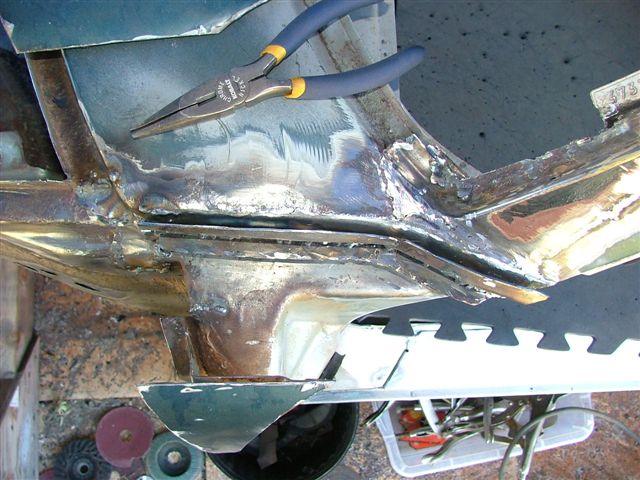
Here is how the fender will sit. It will be seam welded to the top of the gutter
pieces. I need to make sure the body lines from the hood to the fender and
cowl are all correct. 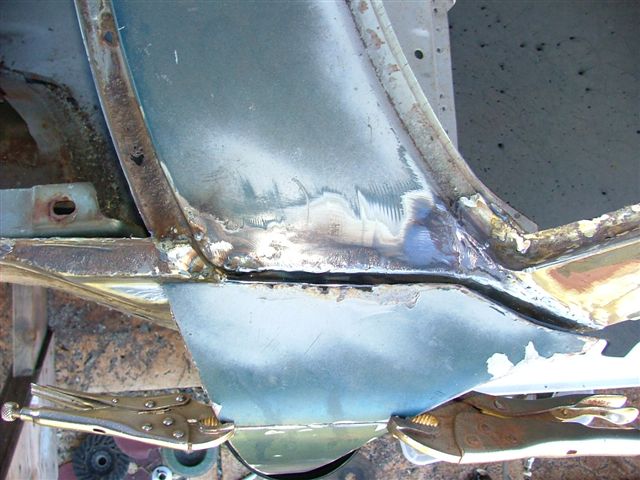
This far took me about six hours. At least an hour was just trying to figure
out how to proceed.
I think this repair might end up being a tenth of a point deduction in a concours.
I may have to give up my dream of a Pebble Beach Best of Show Trophy...
John
Posted by: sendjonathanmail Nov 3 2008, 08:33 PM
Posted by: FourBlades Nov 24 2008, 08:37 PM
Fixing the cowl and fender - The Second Day
While I was in there with the fender cut off, I made a reinforcing plate for the
anti-roll bar mount, rewelded the brake line clip, and seam sealed it.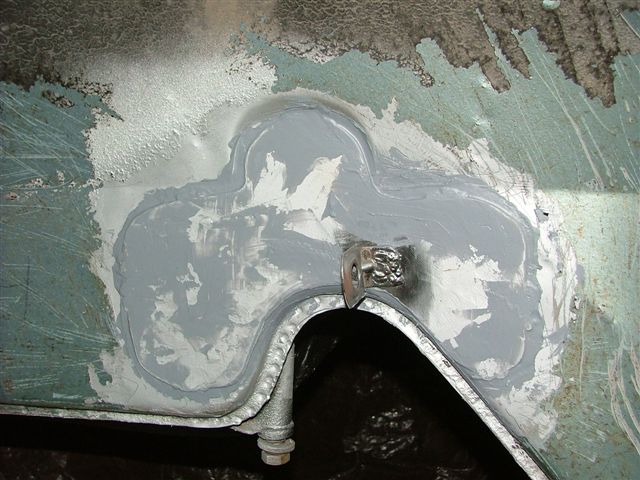
Made up some replacement hood channels.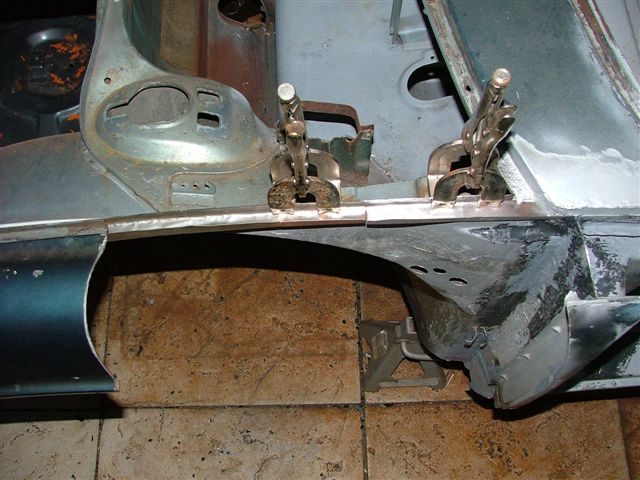
Welded them on.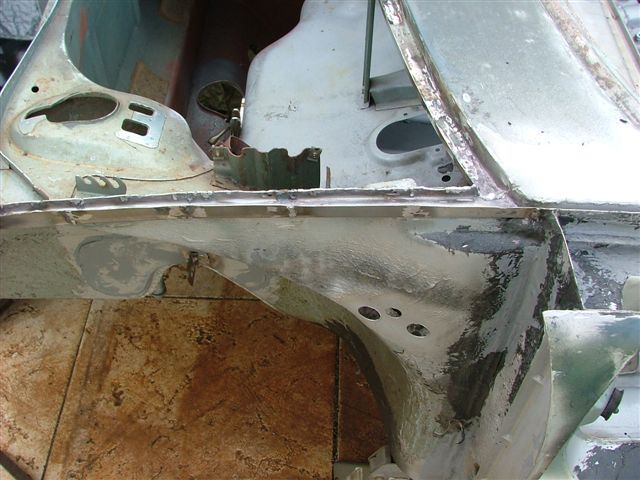
Tacked the fender pieces back in place.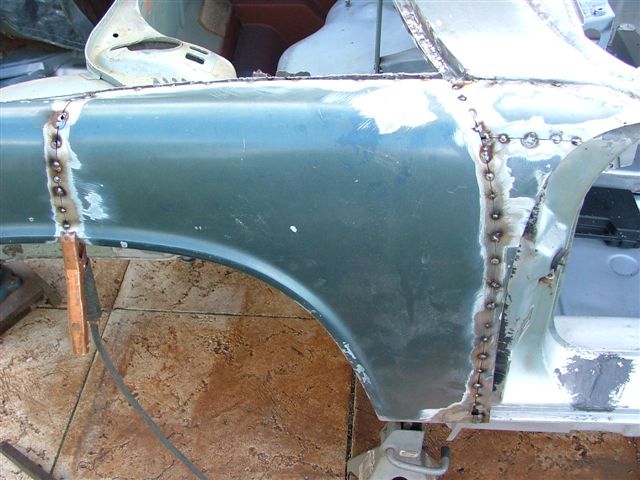
Added tacks little by little until they were solidly welded, then ground it down.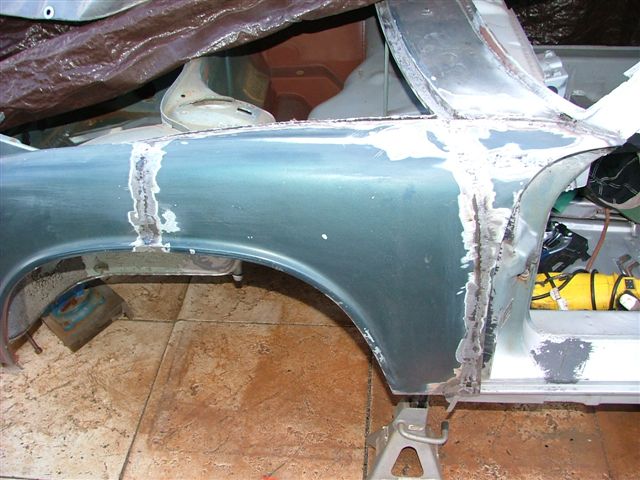
After I put on 40 coats of hand rubbed bondo it will be a 10 footer.
The whole cowl and fender repair took about 20 hours spread over multiple days.
John
Posted by: rick 918-S Nov 24 2008, 08:41 PM
Keep em comin! ![popcorn[1].gif](style_emoticons/default/popcorn[1].gif)
Posted by: jc914 Nov 24 2008, 08:46 PM
Posted by: FourBlades Nov 24 2008, 08:57 PM
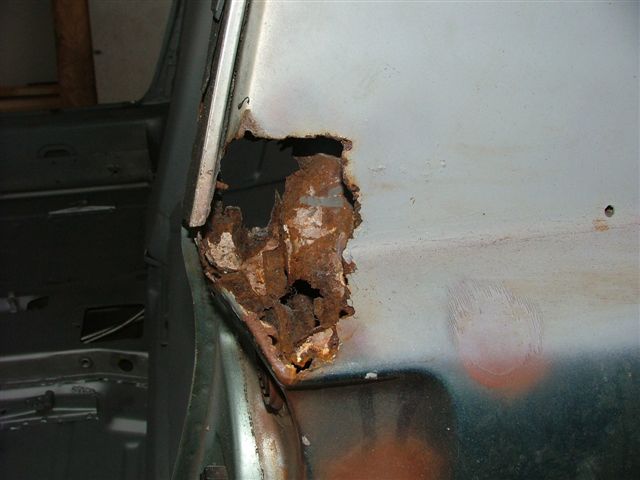
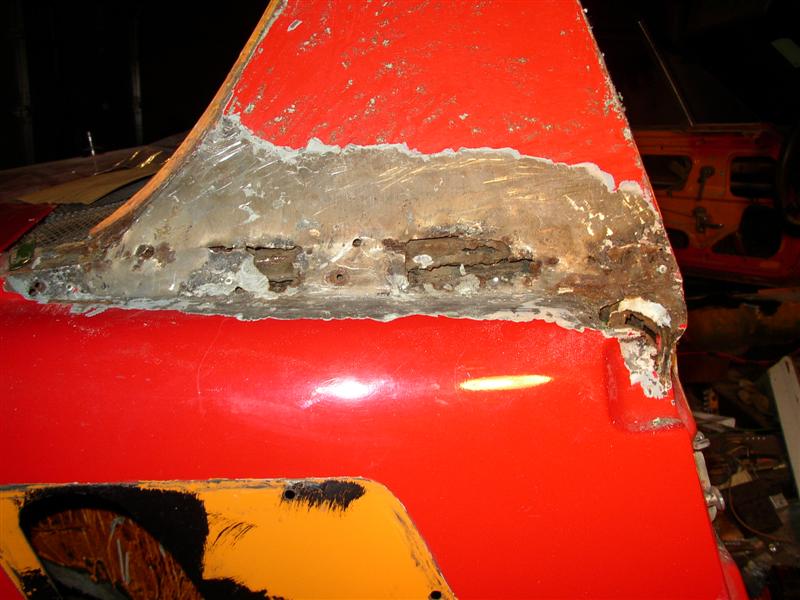
Fixing the driver's sail panel. This hole provides a little too much ventilation. 
Cut away all the rusty stuff. Unfortunately the metal tube connecting the door
vent to the interior vent was rusted to nothing. I decided to weld up the driver
side interior vent and lose what was left of the tube. I will keep the door vent
but seal it up just to keep a little more stock look. You can see two patches I
made and welded to the interior.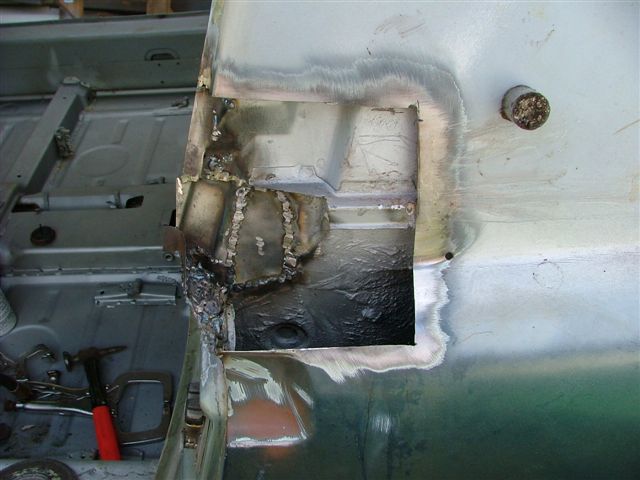
Fitting a piece of the AA sail panel. This is a tricky area to get to fit right.
Somehow I screwed up on fitting this patch and left a big gap.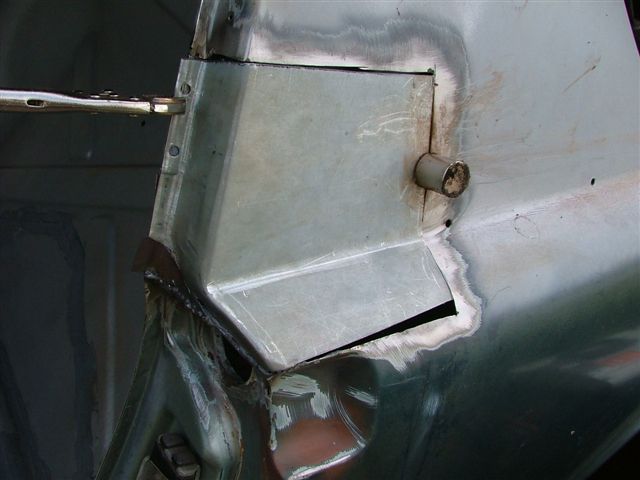
Welded up and ground down. Still needs some more smoothing. I also welded
up all the trim (rust) holes. I plan to glue on any trim to avoid these leaks.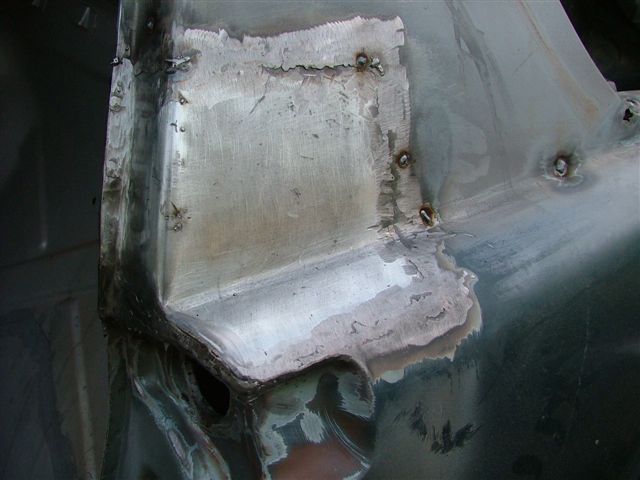
The area above the door vent was pretty thin. I built it up from the top using
weld beads. I backed it up from the outside with pieces of copper sheet. This
is going to need more work to look decent.
Making these weird shaped, little patches is very time consuming. I'd much rather
weld up a hell hole or plug weld an inner long replacement.
John
Posted by: RiqueMar Nov 25 2008, 02:44 PM
I assume it's not gonna be a GT then
Posted by: FourBlades Nov 25 2008, 09:32 PM
That is right. I was debating joining the group buy for flares but I want to get it on
the road, and I am ready to move on from bodywork. Maybe later.
I have 6x16 fuchs and was thinking of 205/50s to be sure they will fit.
I have a pair of 7x16 fuchs I could use on the rear. Gonna order tires this
week so I need to decide what brand and size to buy.
John
Posted by: FourBlades Nov 29 2008, 07:56 PM
These pictures are from the one year anniversery of this restoration!!!
I estimate it has taken me 250 hours to fix all the bodywork
issues so far. I think I have about 15 hours left!! I guess half the time was
spent with brake cleaner, wire wheels, torch, scrapers, and paint remover on
cleaning out rust, seam sealer, undercoating, dirt and oil. Next car I plan to
soda blast or dip to reduce the sheer grunt work required. Also used up my
second 10 pound roll of mig wire.
Fixing the passenger side cowl and fender. Cleaned it up and cut out the rusted
metal. When I got the car I sprayed the rusty areas with rustoleum rusty metal
primer. No cleaning or anything first. It did a good job of preventing the rust
from getting any worse over the last year.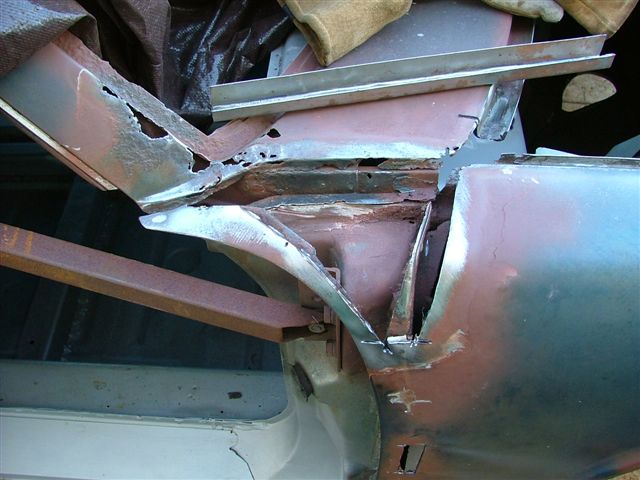
Patched up the hood channels.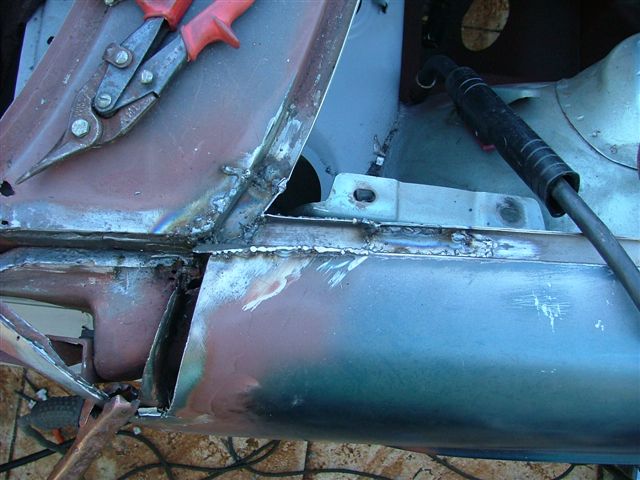
Patched the side of the cowl.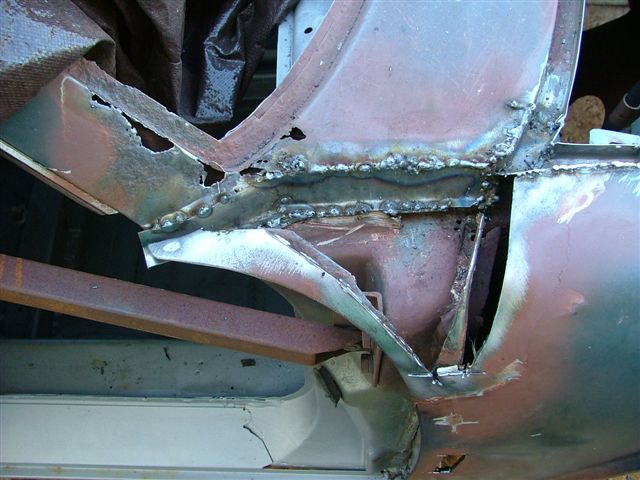
Patched the windshield surround and ground it all up.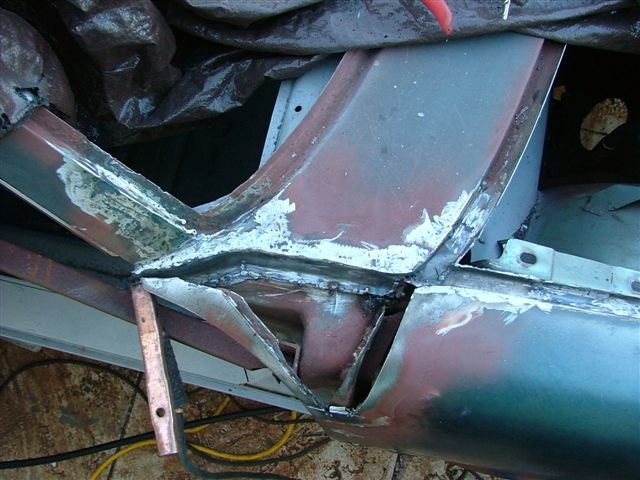
Started making a patch for the fender and ran out of gas for the day.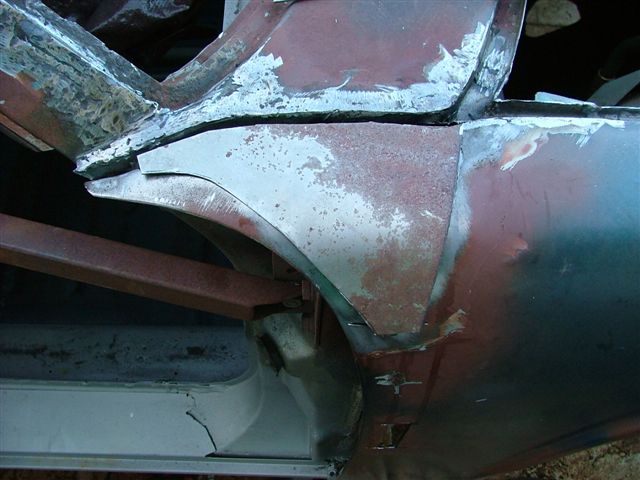
I know there is a right way to attach a fender to a 914 and I am pretty sure
that this is not it...
John
Posted by: FourBlades Nov 30 2008, 06:26 PM
Cleaning up a few last areas. Welded on the last bits of the tunnel.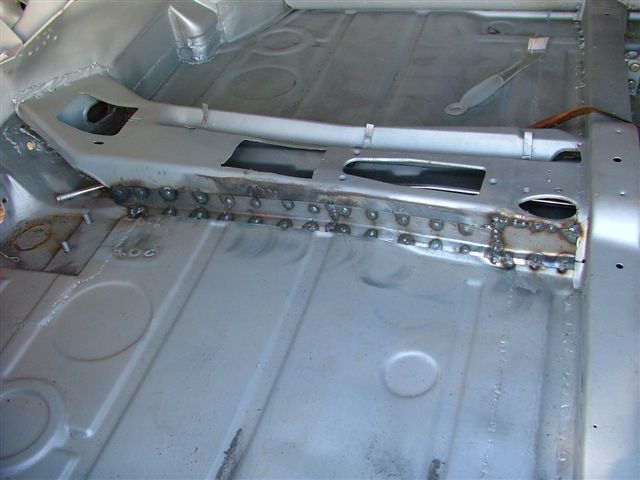
Cut the rust out of the passenger headlight bucket.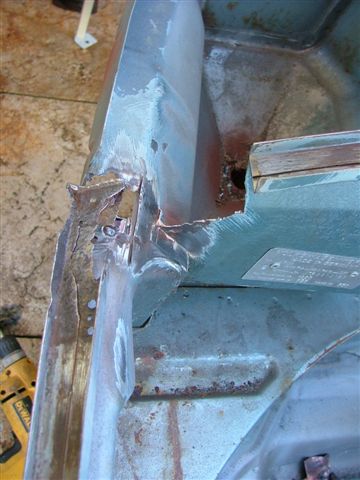
Pass me another f-ing clamp.
Weld up the rain gutter using a piece of copper backing behind it.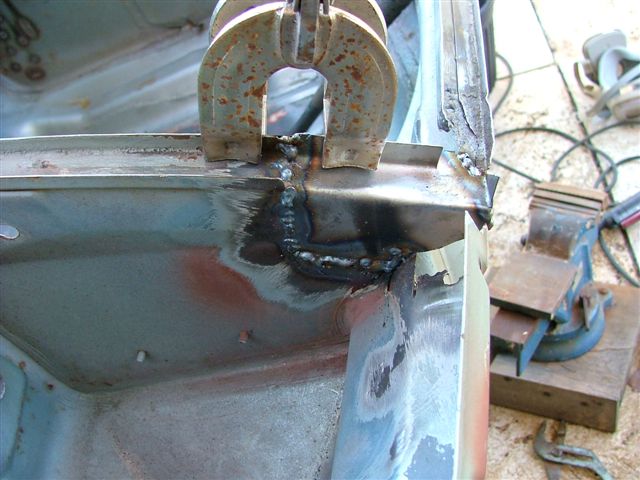
Grind the welds so far.
Weld on a patch on the bottom of the hole.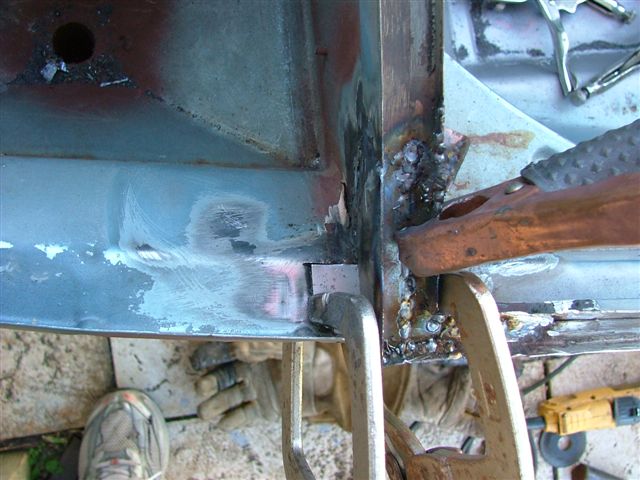
Grind it kinda smooth.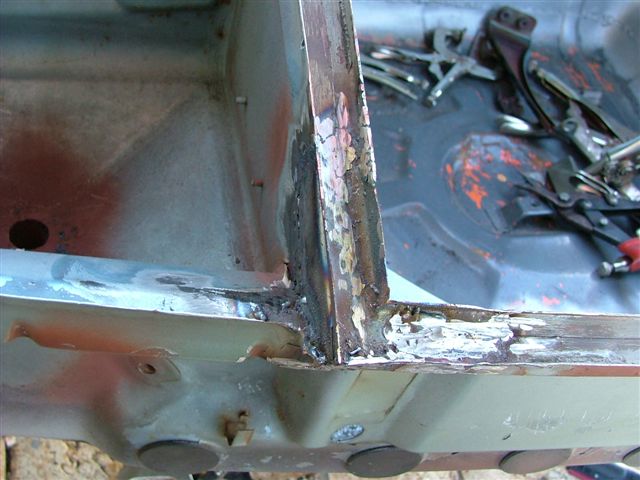
Almost time to get out the wagner power painter and a gallon of exterior latex...
John
Posted by: FourBlades Dec 25 2008, 06:53 AM
Merry Christmas to all!!!
I've been working on adding an Engman kit to my car. Still some grinding and
painting left to go. I also added the e-brake parts. This car is heading more
in the direction of a street and occasional AX car due to some new developments.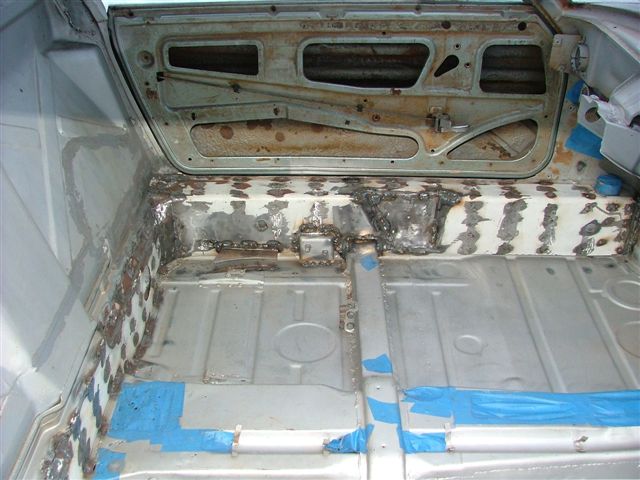
It looks like I am getting a major 914 related present this year courtesy of T.C.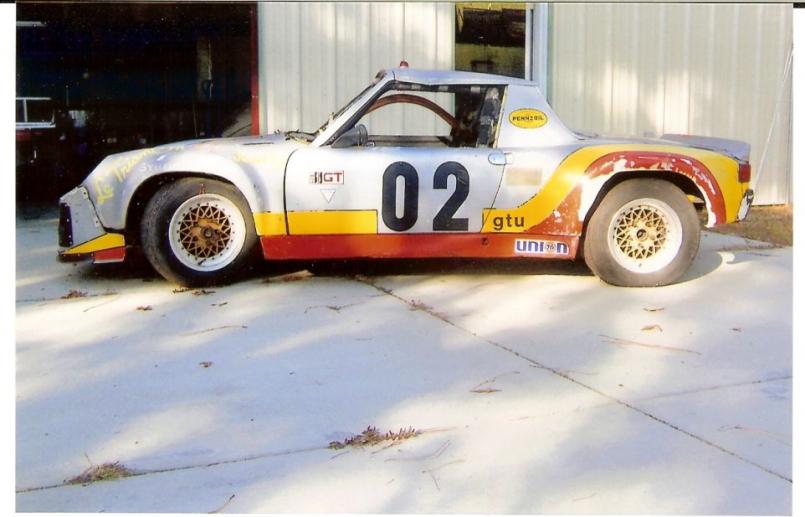
Stay tuned for the build thread.
John
Posted by: rick 918-S Dec 25 2008, 07:57 AM
I was wondering who bought that car.
Posted by: degreeoff Dec 25 2008, 09:04 AM
John, you really had you work CUT out for you.......I am amazed that you went through the effort? BUT merry Christmas and you have done a hell of a job!
Josh
Posted by: FourBlades Dec 25 2008, 10:06 AM
Hey thanks Josh. I guess I really did not know quite the extent of work that
would be required, but I wanted to do it to learn how to restore a car. The
longer I have been involved in the 914 madness the more I realized these
cars are worth saving. The encouragement from 914 world has been key
to keeping motivated.
This new project is exactly what I dreamed of doing in terms of restoration,
so all the work on my first project will pay off. I plan to finish my first car
before really digging into the new one, but I doubt I can resist doing
some fiddling around with it. I plan to do a series of detailed pictures
once the car is here. I am going to need lots of advice from board
members on what to do and will really document the whole process.
John
Posted by: jimkelly Dec 29 2008, 08:41 AM
is this NOT a classic thread ??
jim
Posted by: FourBlades Jan 11 2009, 01:07 PM
Finishing the passenger side fender today. Welded on a patch.
Ground it down.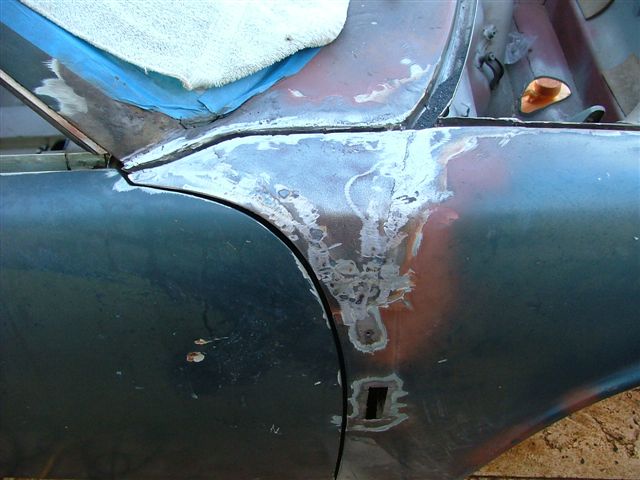
Just some little stuff left...
John
Posted by: pktzygt Jan 11 2009, 01:23 PM
Very impressive. Just this morning I was getting welder buying advice from a welder in the shipyard I am stationed at. I think I'll start with the rear trunk floor. I hope someday not to be afraid of doing work like the stuff you are doing.
Posted by: FourBlades Jan 11 2009, 08:02 PM
I started welding up the holes for the sail panel trim. Wire wheeling revealed
some rust issues once the paint came off. Doesn't look too bad from the outside,
just a few little holes: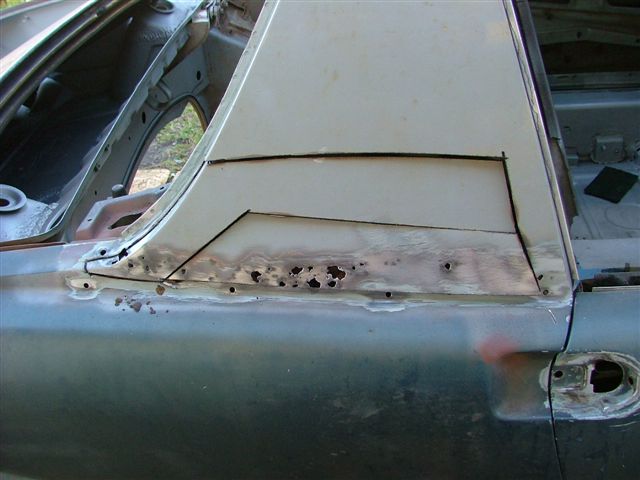
Open it up and see why people say 914s rust from the inside out.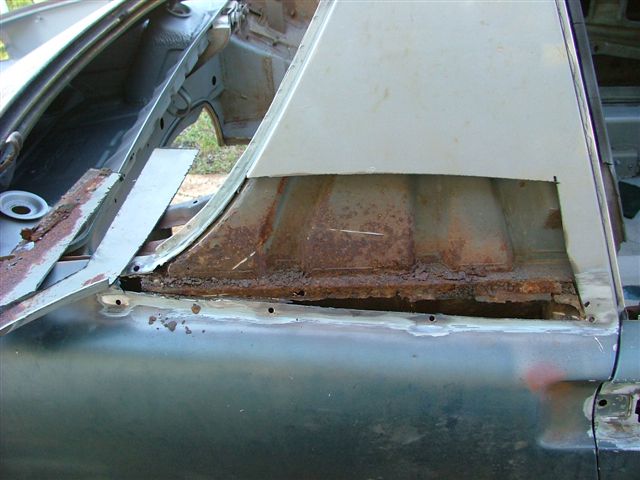
Cleaned it up, not too bad. I'll have to fix this another day. This area seems
designed to trap dirt and water thrown up by the rear wheels and cause rust.
Porsche could have designed a better way to seal up this area. The foam they
sprayed in here was where the rust was the worst.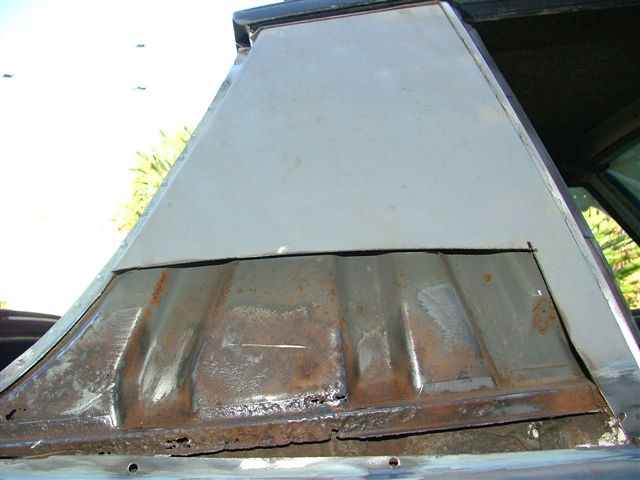
There always seems to be just one more rust hole...
John
Posted by: FourBlades Jan 18 2009, 04:15 PM
Had a few minutes today to weld up the passenger sail.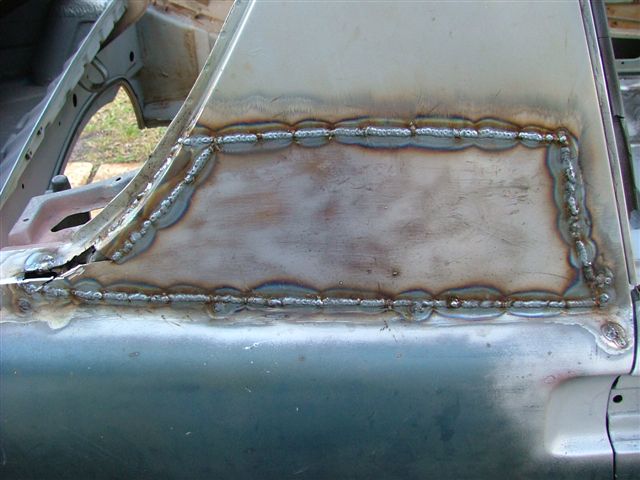
Still needs another small patch.
John
Posted by: FourBlades Feb 3 2009, 05:32 PM
The cleanup continues. Ground the passenger sail panel.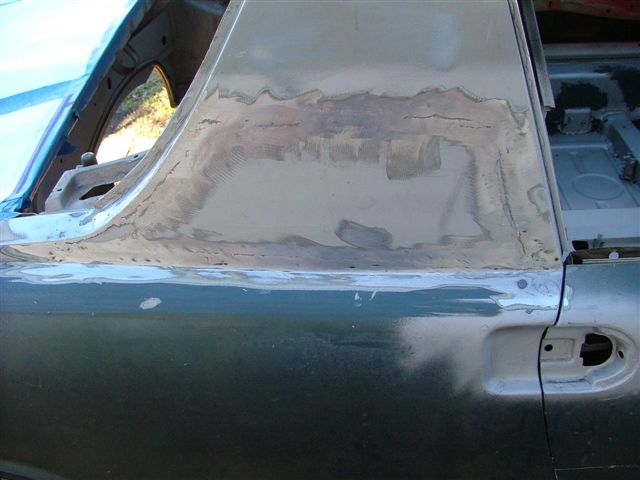
Seam sealed the engine bay and passenger area. I really globbed the sealer on.
The so called brushable sealer is really a pain to put on neatly.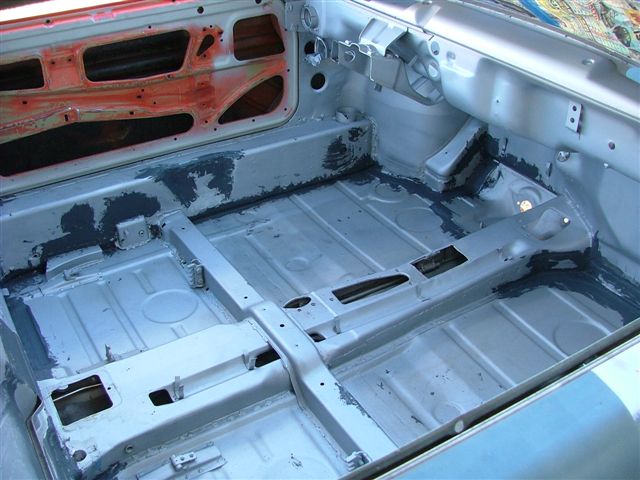
Posted by: FourBlades Feb 3 2009, 05:37 PM
Fitted the really nice door I got from SMG914. Thanks man, I wish you had a
passenger door to match it. I am going to have to weld a bunch of holes
in the skin of my passenger door. 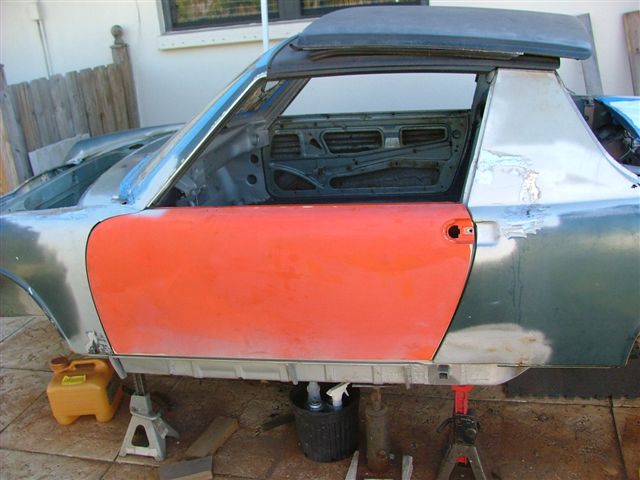
Removed all the last bits of trim to get ready for painting!!! Gonna have some
time off work here soon and I want to get this thing painted. 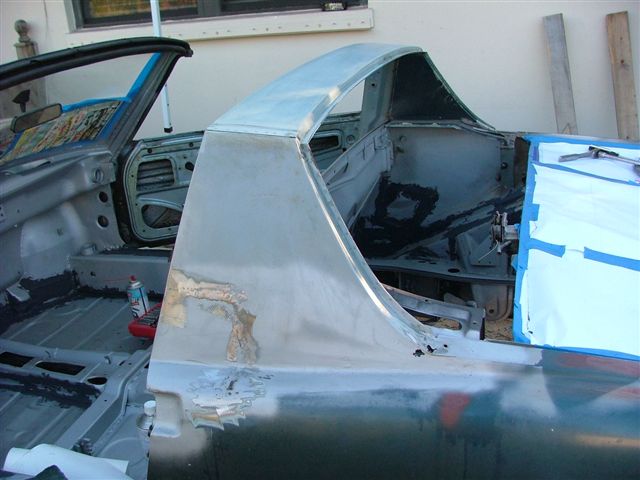
I have a buncha questions about painting I will post in a different thread.
John
Posted by: AgPete139 Feb 4 2009, 11:36 PM
Wow, and wow. Projects like these inspire me...nice job, man. You'll have patience with the rusting. Wow. Keep it up!
Pete
Posted by: FourBlades Feb 6 2009, 05:08 PM
Spent 6 hours today fixing my passenger door. I sand blasted the inside as much
as I could to remove all the rust. There were 5 areas which had rusted through.
The PO thoughtfully fixed this hole by putting on a layer of plastic tape and then
painting over it.
Any newbie knows you need at least 2 layers of tape for it to be considered a
permanent repair.
Remember this when you are inspecting that newly painted car that is for sale.
This atrocity was actually pretty well hidden unless you looked for it.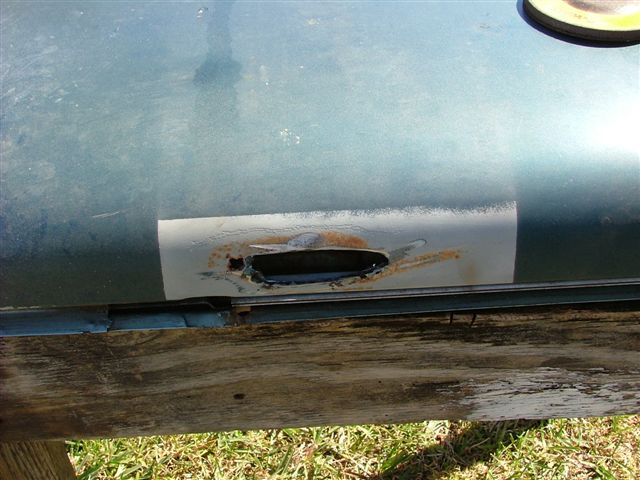
I hope it does not hurt the "originality" of the car by not repairing it again with
tape, but I thought maybe metal would be better.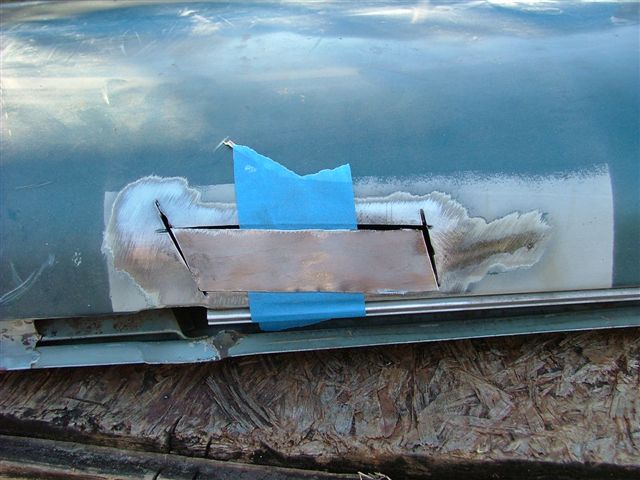
Using tape behind the patch helps hold it flush. This works better than taping
on the top of the patch because the mig wire just pushes the patch off the tape
that way. Welded and ground it down.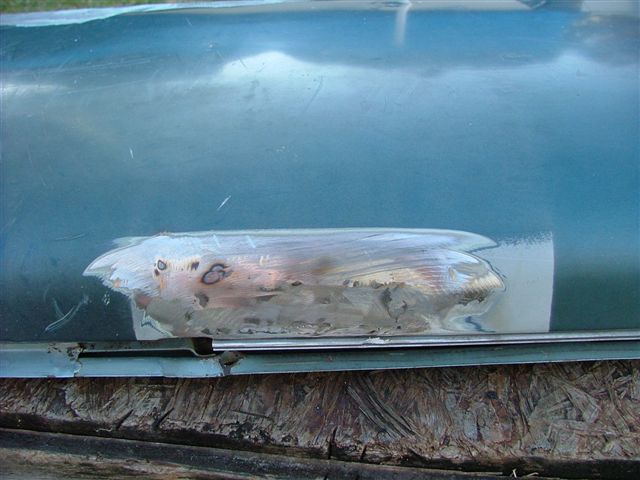
Fixing some other holes.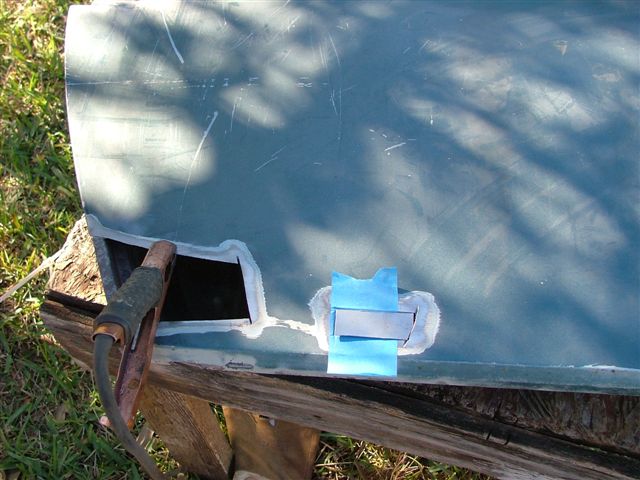
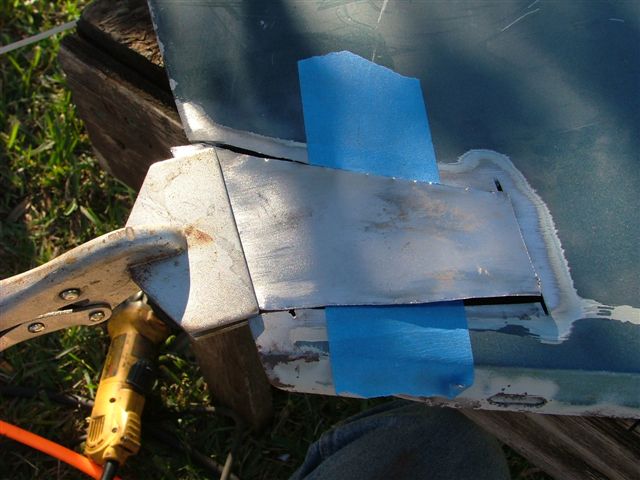
Ground them.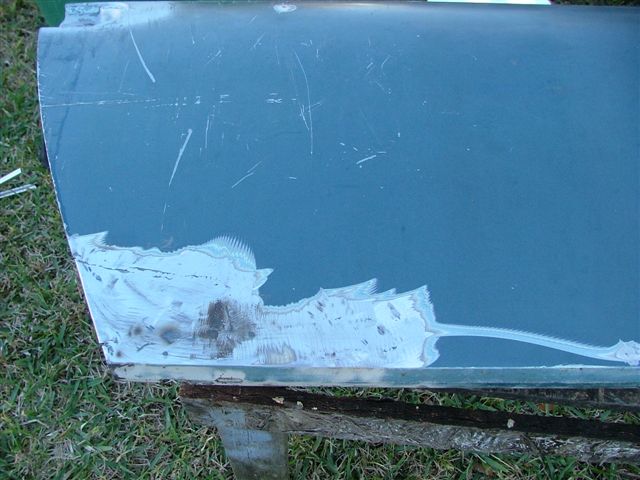
I was using an air gun to cool the welds as I went, but I must have overheated
the door skin because I ended up warping it nicely. There are a couple high
spots and one big oil canned spot. I tried shrinking it with a propane torch and
wet rag but it did not help much.
So how do I shrink these spots?
John
Posted by: rjames Feb 6 2009, 07:04 PM
Metal shinking disc? At least I've seen it done that way in other restos.
Just found a link: http://www.914world.com/bbs2/index.php?showtopic=86004
One question, which will undoubtedly show my ignorance- What dictates when seam sealer should be used?
Posted by: sean_v8_914 Feb 7 2009, 11:52 AM
that link just cost me an hour
Posted by: FourBlades Feb 7 2009, 05:32 PM
Those shrinking disks scare me. I have heard of them exploding and cutting
people up badly. Maybe that is just me being paranoid.
I tried using acetylene and managed to remove the oil canning (think pressing in
on the metal and it snapping back out) but could not completely flatten it. This
is partly because you can't get to the back of the panel due to the door beams
but mostly due to the fact that I don't know what I am doing.
Seam sealer: I believe you use it on all welded seams except the outside skin
of the car. The layers of the paint job should protect these seams from water.
John
Posted by: jc914 Feb 7 2009, 06:11 PM
I keep on looking at your post once again amazing work
Posted by: FourBlades Feb 8 2009, 04:43 PM
Passenger tail light opening was horribly rusted. I cut it out and made a
replacement piece. This took a hour or so to make using the flimsy little
brake I have. 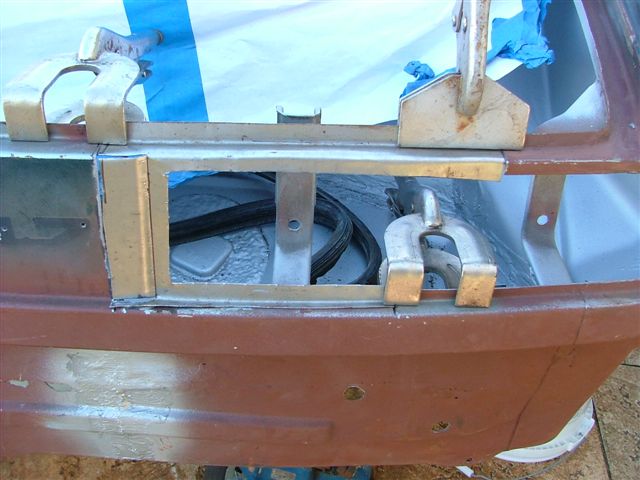
Clamped a piece of flattened, copper pipe behind the seam. I really tried to
weld slowly to avoid warping this thin sheet metal.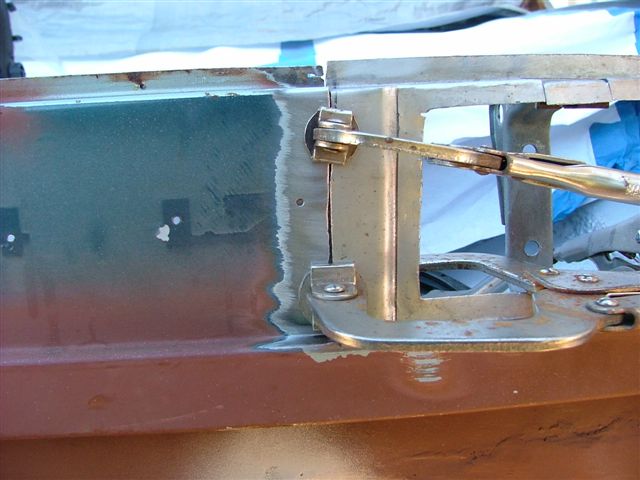
Put on a few tacks, stop, take a picture, wait a while.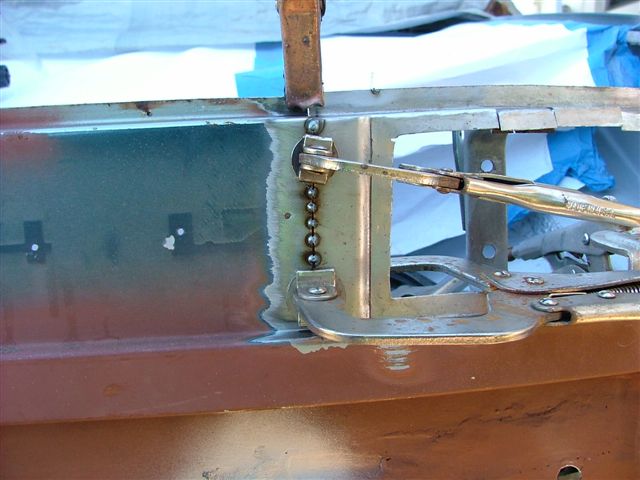
Keep on until it is fully welded.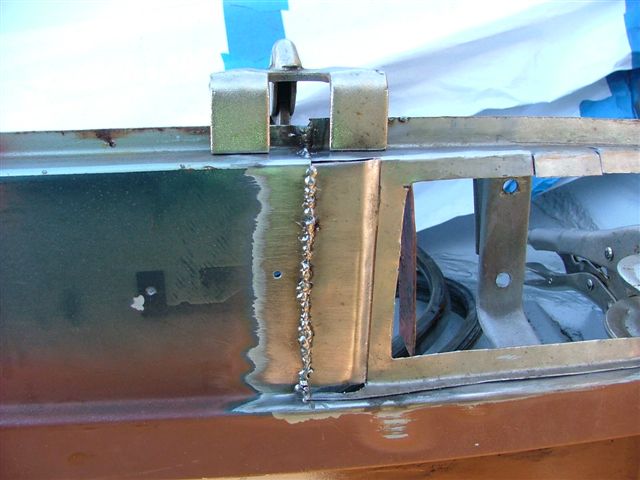
Slowly welded the rest. Using a copper backer makes a really big difference.
I like to use a lot of clamps to also take up some of the heat.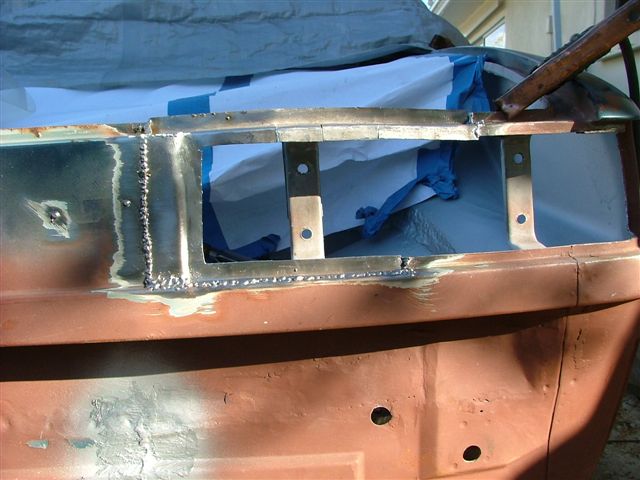
Test fit the tail light. I needed to do some trimming and hammering to make
it fit like this. 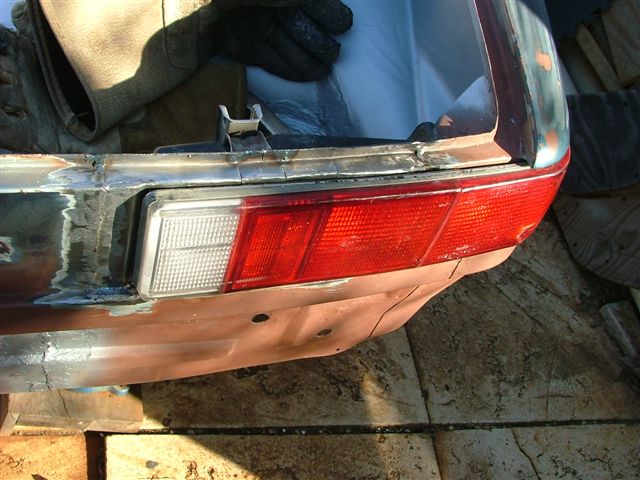
Painted and ready to rust out all over again.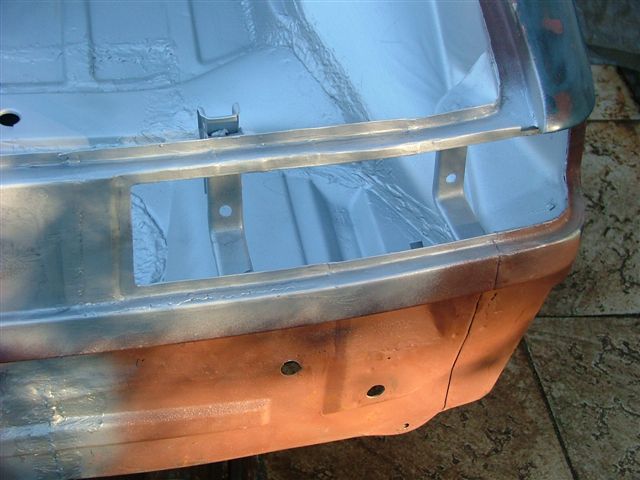
John
Posted by: MDG Feb 8 2009, 04:49 PM
"Painted and ready to rust out all over again."
if it does, with your skills the rust won't stand a chance. This project is an inspiration - fantastic stuff man!
mike
Posted by: FourBlades Feb 11 2009, 09:16 PM
You call this a rust spot??? Pfffftttt!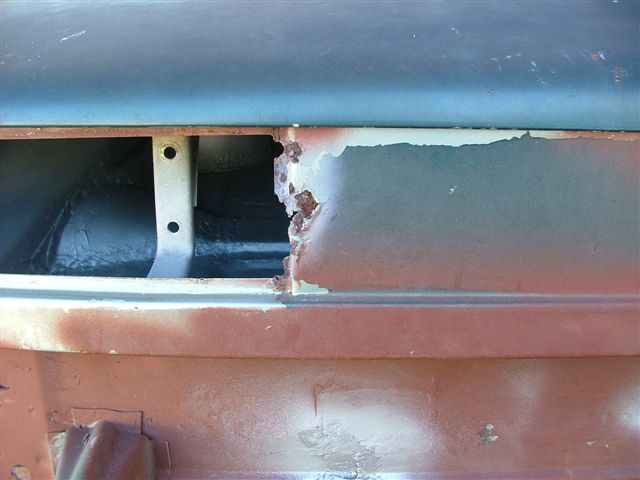
I guess I have to fix it...
All welded and grounded up. Checking the tail light fit.
Wow, the tail lights and trunk lid still fit.
Now working on stripping the old paint and troweling on the bondo.
If you are using crumpled up newspaper to fill in a dent, does it matter if you
are using those shiny ad inserts or is only regular news print considered a
concours repair?
Ha ha, ok, so that was a joke, I know you should only use Road and Track
magazines.
John
Posted by: MDG Feb 11 2009, 09:58 PM
not only does your work continue to amaze . . .
it appears you've trained your car to levitate
huh, could this be the end of jackstands!?!
Posted by: FourBlades Feb 12 2009, 08:54 AM
Ha ha, Michael, actually it looks high because I got it sitting on 22s.
How has TO been this winter? I love Ontario but its a little too cold for me...
John
Posted by: MDG Feb 12 2009, 09:55 AM
Ha ha, Michael, actually it looks high because I got it sitting on 22s.
How has TO been this winter? I love Ontario but its a little too cold for me...
John
hey John, had a ton of snow in January - more than usual for this area. Now it's typical February slop; mid 40's - rain/snow/rain . . . it's one big puddle - at least it'll help wash away some of the salt
my dad is down in Naples - lucky bastard.
your car is coming together great!
m.
Posted by: carr914 Feb 12 2009, 10:19 AM
Fitted the really nice door I got from SMG914. Thanks man, I wish you had a
passenger door to match it.
I am going to have to weld a bunch of holesin the skin of my passenger door.
John
That's because I beat you to the passenger door. It's on my Six. So we have another connection.
T.C.
you can just see the Tangerine door in my Signal Orange car in this pic
Posted by: PanelBilly Feb 12 2009, 11:58 AM
Your making me want to start another project, The stage you in is so much fun. Turning old into new, its like art with metal.
Sigh, I guess I need to finish the two cars I have in the shop first.
Posted by: FourBlades Feb 12 2009, 04:22 PM
This is a fun stage. Its only taken 15 months of work to get here too.
T.C. if you wake up one morning and your passenger door is gone then you
will have a pretty good idea where it went. Seriously, the door Steve gave me
is almost too nice for my Frankenfourteen.
I refurbished my old passenger door. It took about 4 or 5 hours and about
a gallon of bondo to smooth it out, ok, maybe a quart. This is the
door I was welding on a few days ago.
I used my new fuji turbine sprayer for the first time and managed to put a
nicely orange peeled couple coats of epoxy primer on it.
Here it is resting on the IMSA car to keep it out of the weather. It looks better
in the picture than in reality.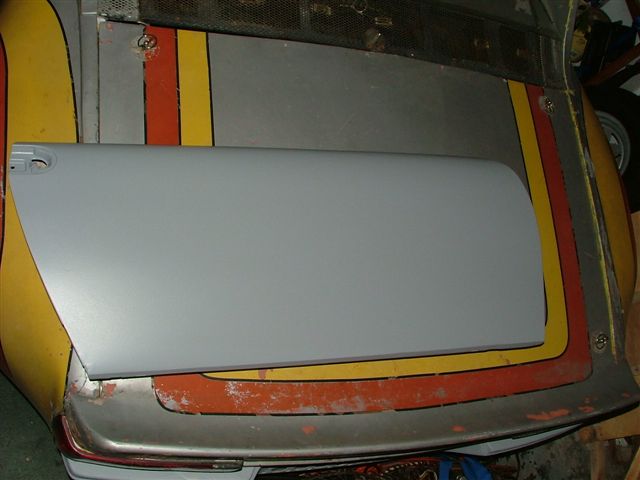
John
Posted by: ConeDodger Feb 15 2009, 11:01 AM
Ummmmm Wow! (slinks away in shame)
Posted by: jimkelly Feb 15 2009, 03:57 PM
Posted by: FourBlades Feb 17 2009, 07:20 PM
I know you all won't believe this but it turns out my rear trunk lid has rust!
See for yourself.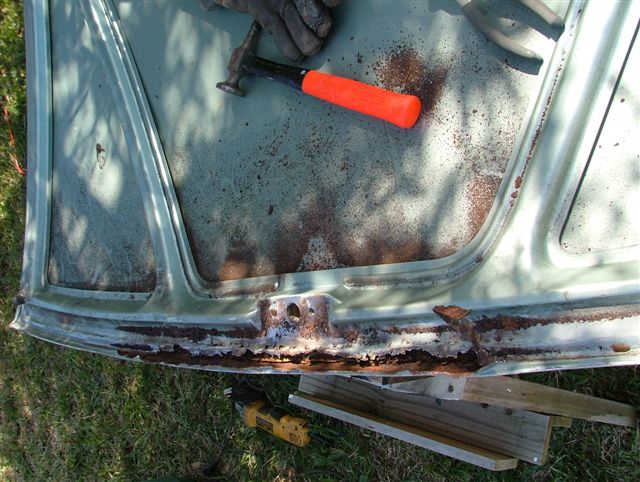
Oh boy, more rust repair. I did discover one pretty cool thing though, which
you will see in a minute.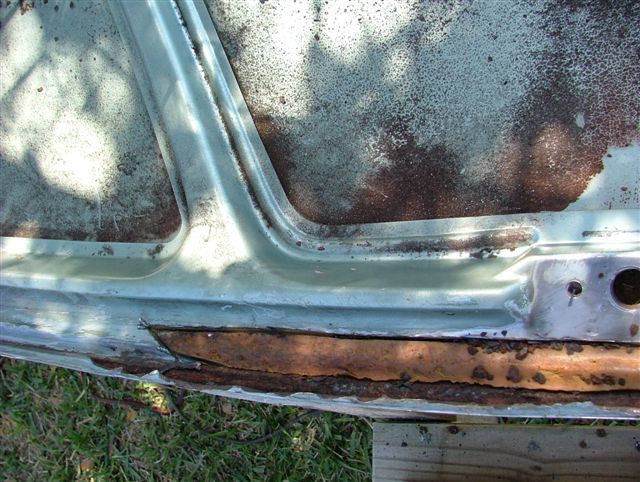
The ribs on the trunk are full of foam (that is not the cool thing). I guess it must
be there to stop the ribs from rattling or to collect water so the lid rusts out.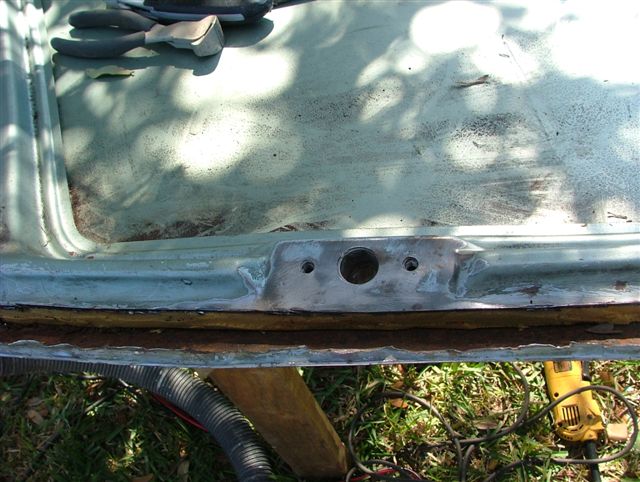
Cut out the foam. OK, here is the cool part. Earlier I had used aircraft stripper
to remove the paint from the outside of the lid. It took about 4 applications to
get rid of all the layers of paint, primer, and bondo.
There is a pretty big dent in the lid, which some one had fixed with bondo. They
had obviously sanded a large area around the repair. This took off the layer
of galvanizing that the manufacturer had applied (lighter areas in the
picture). By stripping the paint chemically most of the galvanizing is still there
(the dark areas).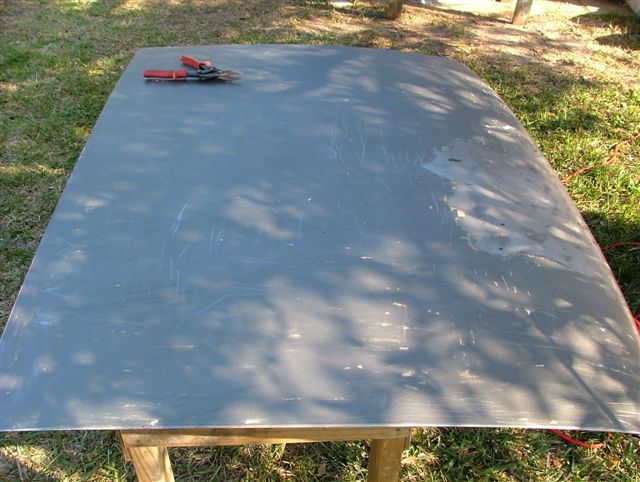
I was looking closely at the panel while cleaning it and I noticed this cool thing:
There is a barely visible crest in the galvanizing that was put there by the
manufacturer. It looks like the initials "SWR" with a shield and a boat or
something. I can't guess what company this must be, I am sure someone
on the World knows???
John
Posted by: FourBlades Feb 17 2009, 07:36 PM
OK, so now to fix the trunk lid. You need to remember that the edge of the trunk
is curved. Pretty much everything everywhere on a car is curved in some way.
To make a patch that fits I bent a piece of steel rod into the right shape. 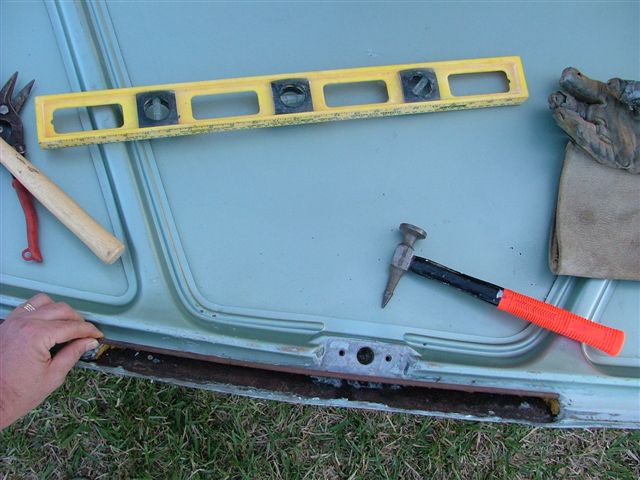
Then I transferred this curve to the metal. Please ignore the first patch that
I made that you can see in the picture that is straight and does not fit at all.
Doh! 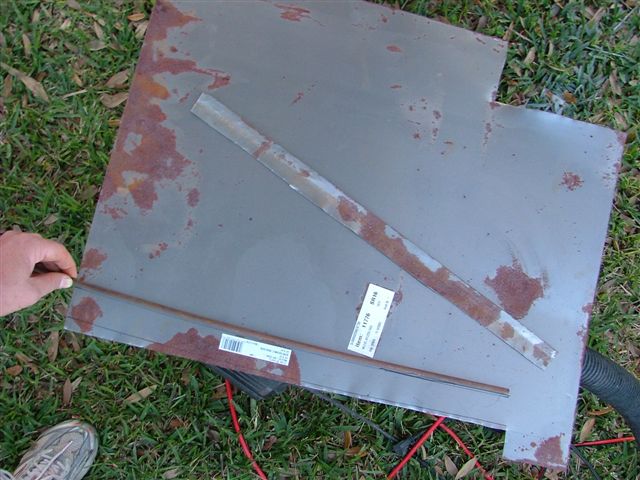
The trunk rib has a ridge in it lengthwise that I wanted to reproduce for an
undetectable, concours repair. Cough.
Using a leather bag filled with #16 birdshot, form the ridge by pounding the
steel rod used earlier to create the desired shape. Remember to use the
suede side of the bag to reproduce the wavy, factory texture.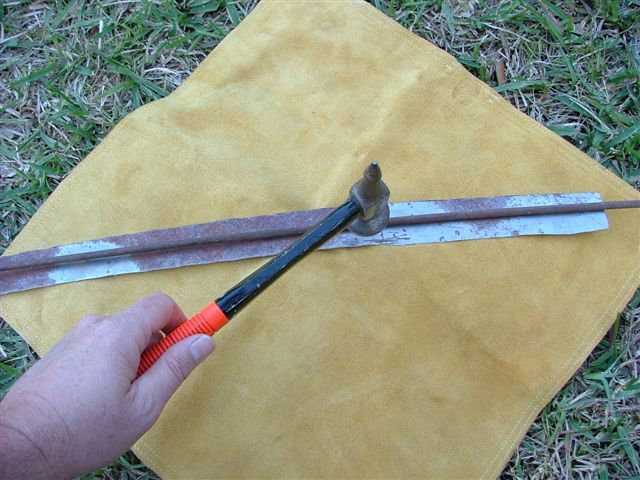
OK, so that is all total bullshit that I made up. I don't have any bird shot
and I have no idea where that leather came from. The real way you
do it is find some soft sand (pretty much anywhere in Florida) and pound
on it on the ground.
Test fit the patch.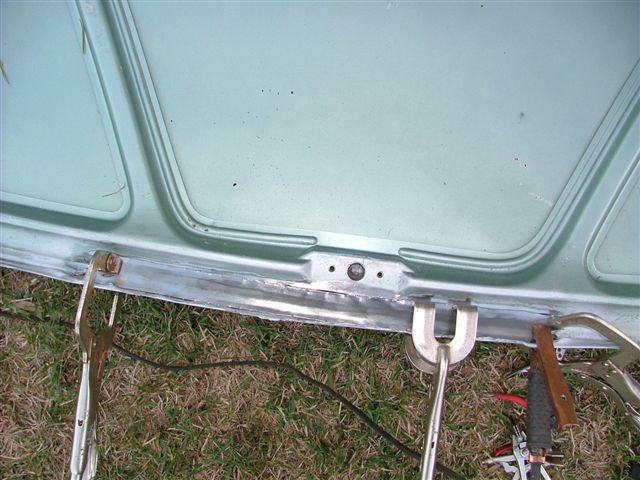
Weld it up. It is getting dark so we'll see tomorrow how well the repair
turned out.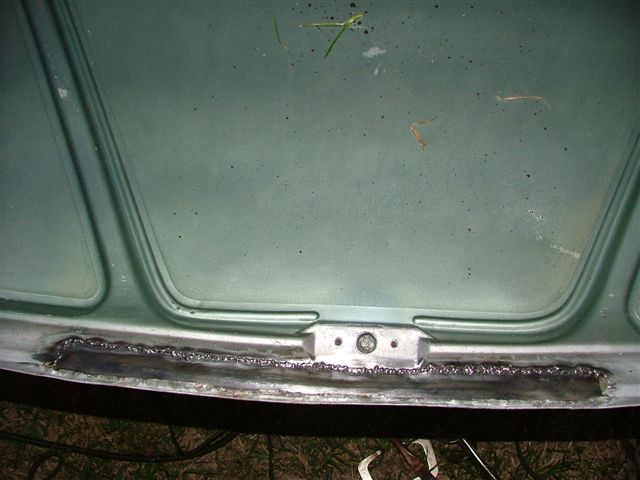
So my question to the gurus is, how do you apply bondo and sand out the
waves in your panels without taking off the galvanizing? Do you prime it
first and then bondo and sand it?
John
Posted by: scotty b Feb 17 2009, 07:46 PM
Scuff it good. Prime it, sand the rimer to get some good scratches, apply bondo. Make certain you neutralize that panel VERY WELL before you do anything. Stripper residue WILL come back and it may be well after the car has been painted !!
Posted by: FourBlades Feb 17 2009, 08:11 PM
OK, thanks Scotty. I was going to wash it with simple green, water, and finally
paint prep. I had forgotten about the dangers of stripper under your paint.
John
Posted by: kwales Feb 17 2009, 08:25 PM
Dang,
You did the trunk the hard way....
Got tired of being bitten by the sharp little rust teeth hiding under trunk every time I opened it
So, took a screwdriver, spread the fold open to expose the rust bubbles and took it to the local metal dip refinishers....
They burned out the foam, and dipped the lid in their car sized tank and it came out spotless from their electrical rust removal process...
All I had to do was bang the lid with a rubber mallet to get the neutralized rust to break loose and fall out, recrimped the fold and welded a patch into a small hole....
Poured ospho under the reinforcement to wick into the seams at the folds and primed that puppy.
Wherabouts in Brevard are you?
I went to FIT, married a local redhead and lived in Indiatlantic a half a block from the beach. And of course, did 3 years of purgatory at Harris.
Ken
Posted by: FourBlades Feb 18 2009, 06:53 AM
Ken,
Next time I will do it your way. I am convinced dipping or blasting a rust bucket
car would save 100s of hours of tedious cleaning. Right now I am in get it done
now mode so I can paint this sucker and start putting it back together.
I live in Melbourne Beach, probably within a few miles of your old place.
Done my time at Harris as well.
John
Posted by: FourBlades Feb 18 2009, 06:45 PM
Nothing like a tree full of primed panels. I did both doors and both trunk lids
today. I can see why paint jobs cost what they do. All the tedious cleaning
and sanding to get a good coat. It is super satisfying though when you get to
the last 1% of the work, the spraying. 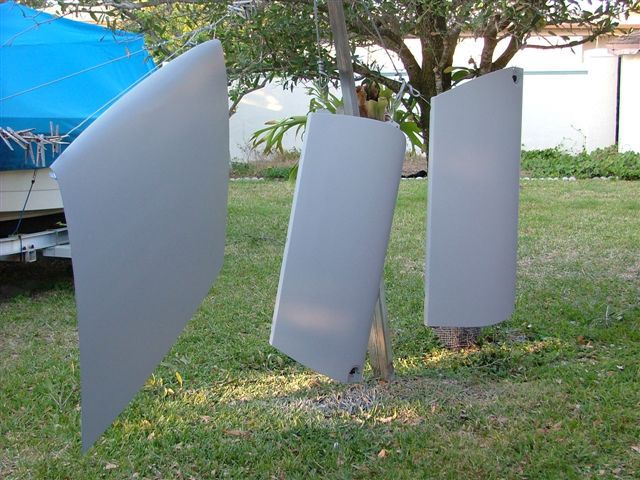
I primed this in the morning, sanded it in the afternoon and sprayed on two
more primer coats. I have never painted a car before so I have a lot to
learn. I did get less orange peel by turning down the paint amount. I am
sure when I do the color coat it will look like crap the first few times. It is
hard to keep the gun moving the same speed and the same distance from
the panel. I also got no paint on the bottom edge. 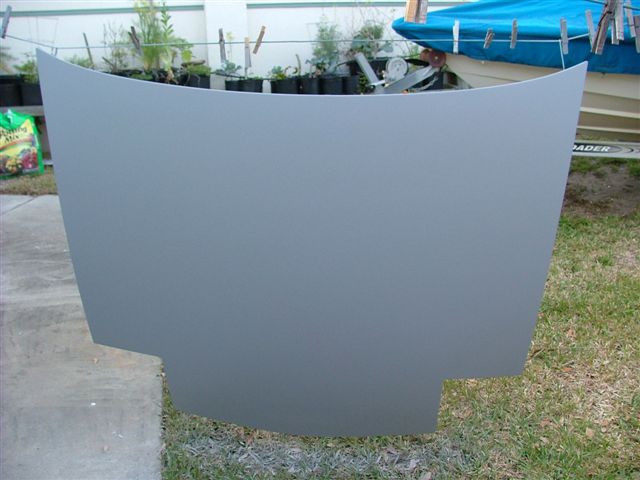
I am using two part epoxy primer. Is this waterproof? Will it rust if I leave
outside under a car cover?
Overall I am really stoked about doing this.
John
Posted by: roadster fan Feb 24 2009, 05:00 PM
I am using two part epoxy primer. Is this waterproof? Will it rust if I leave
outside under a car cover?
Overall I am really stoked about doing this.
John
[/quote]
I had a 6"x4" repair on an old truck sprayed with two part epoxy primer and after 4 years it looked exactly the same as the day it was sprayed. oh and it was on the top of the truck roof at the windshield, always parked outside in all weather.
You should be ok if you keep it covered, but your climate is different than mine (humidity )
Jim
Posted by: toon1 Feb 24 2009, 07:03 PM
Scuff it good. Prime it, sand the rimer to get some good scratches, apply bondo. Make certain you neutralize that panel VERY WELL before you do anything. Stripper residue WILL come back and it may be well after the car has been painted !!
I'm using stripper also, what is the best way to make sure the panels are clean?
Posted by: FourBlades Feb 25 2009, 04:35 PM
Jim, if your repair lasted 4 years mine should be good a week or so until I get
the color sprayed on it.
After stripping (4 or 5 applications) I washed it several times with water and a
scotch brite pad, then water on clean rags. Then I sprayed it liberally with metal
ready (until it was dripping off) and left it for 2-3 hours to etch. I washed the
metal ready off with water a few times, then used paint prep. A really time
consuming and messy process, but quiet. I did not want to make all the noise
that power sanding the whole car would have. Read somewhere that covering
the stripper with plastic wrap keeps it from drying out and might make it remove
more layers per application. Gonna try that.
Primer...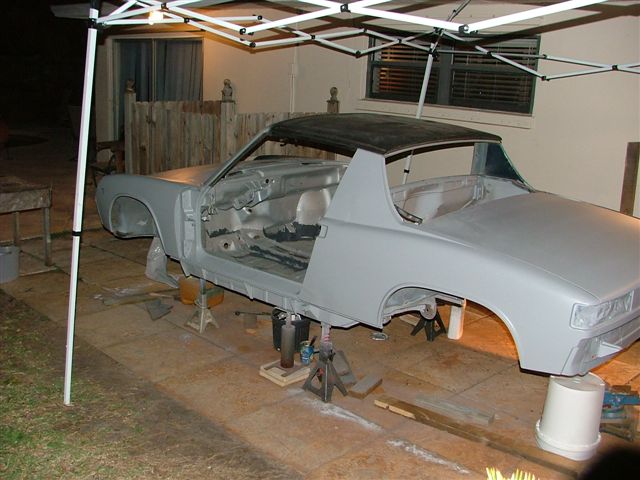
John
Posted by: al weidman Feb 26 2009, 05:52 PM
I know you have started on your IMSA car, but please don't leave us hanging on this one. At least let us know what your plans are. You have done an inspiring job on this and I plan to get right out there on my Calif. rust bucket. I was going to use it for a parts until I saw your project. My car has some rust in the trunks and floors but that's it. You've made mine into a keeper and I am inspired to bring another one back. Al.
Posted by: ConeDodger Feb 26 2009, 06:13 PM
I know you have started on your IMSA car, but please don't leave us hanging on this one. At least let us know what your plans are. You have done an inspiring job on this and I plan to get right out there on my Calif. rust bucket. I was going to use it for a parts until I saw your project. My car has some rust in the trunks and floors but that's it. You've made mine into a keeper and I am inspired to bring another one back. Al.
John,
If you know anything of the work of Al and/or his brother Harvey, you have just recieved high praise indeed... Great project.
Posted by: FourBlades Feb 26 2009, 11:04 PM
Hey thanks Al and Rob. Don't worry, the Rockin 914 comes first before any
serious work on the IMSA car. I was out there this evening stripping more paint
and hope to maybe (cross fingers) shoot some color on it this weekend!!!
With the parts available or with the serious patience about any 914 that is still
in one piece can be saved. Look at Veltror's car....
I think the Rockin 914 will live up to its name with a Raby 2270, Tangerine Racing
headers and exhaust, McMark's FreeMotion suspension, Eric's rebuilt M calipers,
Engman's long kit, etc. etc. I can't wait to get it on the road.
John
Posted by: FourBlades Mar 1 2009, 06:47 PM
Got most of the inside and outside primed and then ran out of primer. Doh!
Tried on one of the fiberglass rocker panels just for fun. Fits well.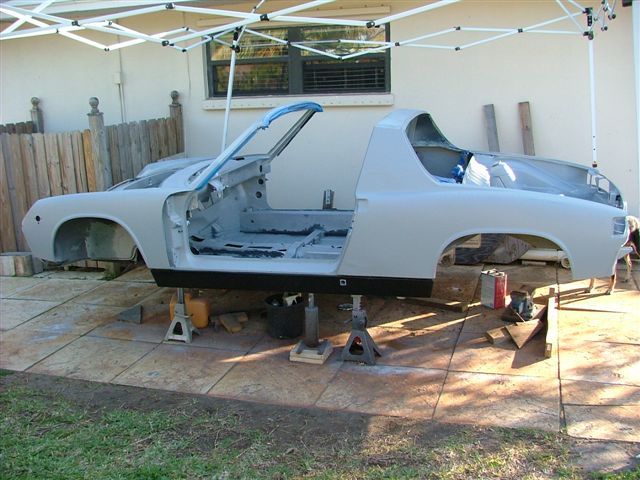
I have to confess that I was too lazy to strip the wheel wells of their old
undercoating. I'll make that a project for once the car is a driver.
Forgot to remove the trunk lock, dang it. At least I have loads of experience
in stripping paint off of things. 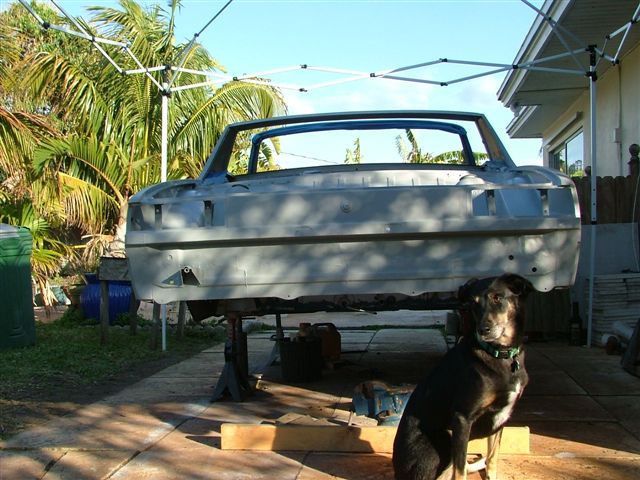
John
Posted by: jc914 Mar 1 2009, 07:02 PM
Once again Great JOB
Posted by: stepuptotheMike Mar 1 2009, 08:33 PM
will the chemical stripper remove the old undercoating? or will you have to wire wheel/sand it?
Mike
Posted by: FourBlades Mar 2 2009, 07:40 AM
Mike,
Some of it is just flaking off by itself. The new undercoating I put on was easy to
get off with stripper, not sure about the old stuff. I am just over the whole
cleaning and sanding thing right now. Probably should do it now but what the
heck, this is a hobby not a job.
John
Posted by: FourBlades Mar 8 2009, 05:29 PM
The first shot of color. Adriatic Blue: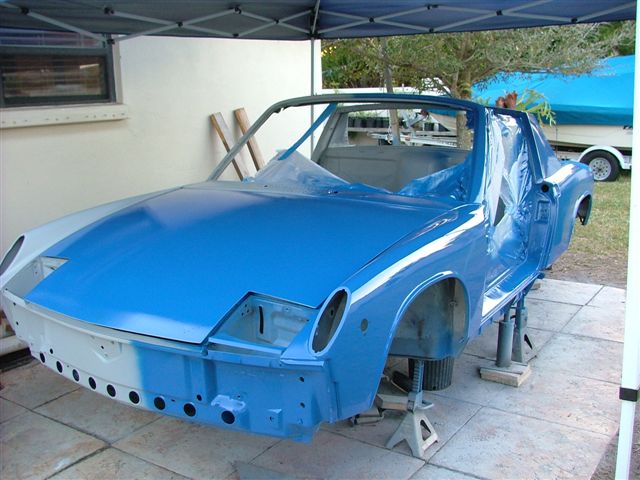
It looks much better in the picture than it really is. Lots of little scratches that
did not show up in the primer. Assorted dust and bugs. One big bump on the
sail panel that I did not notice until there was some gloss to reflect light.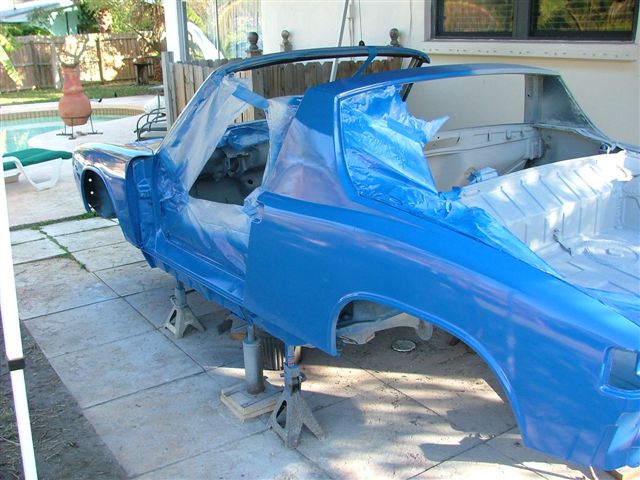
Now that I am over the initial desire to see some color on the car I can take my
time and sand this out more before trying again. The hood is actually not too
bad because I wet sanded it more than the car.
I probably should have painted the interior first, but what the hell. This is
supposed to be a learning experience, and I learned a lot of things not to
do next time.
John
Posted by: MDG Mar 8 2009, 06:00 PM
Adriatic Blue
Posted by: dlee6204 Mar 8 2009, 06:04 PM
Its looking good!
Posted by: jc914 Mar 8 2009, 06:09 PM
Incredible work once again 
Posted by: FourBlades Mar 14 2009, 04:26 PM
Three coats of color laid on! 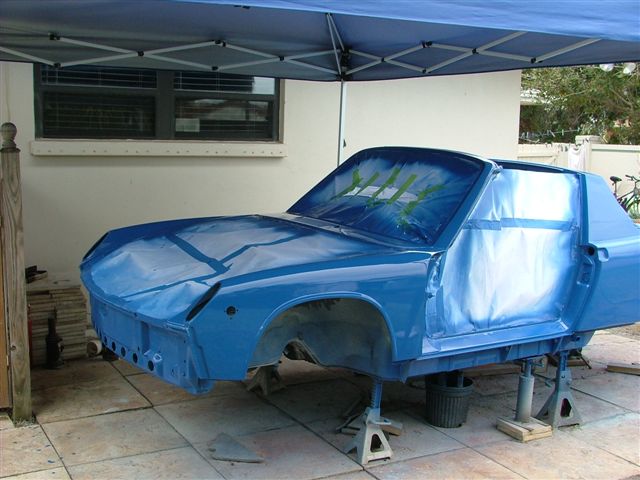
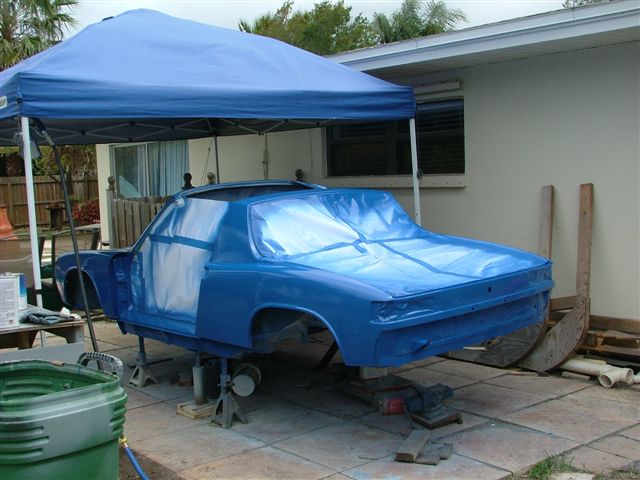
Here I am in my Sunday best finishing the last coat. I have a supplied air
respirator and I put the air pump inside my garage and mostly close the door.
The flow of air helps keep you cool and you don't smell the paint at all. This
set up was about $500 on ebay but worth it for saving your health.
I realized when I was done that I had painted my feet pretty well...
The paint looks pretty good to me. A few small drips and not many dust spots.
I wet down the whole area before starting. Still have to paint the doors and the
interior.
John
Posted by: ssstikircr Mar 14 2009, 04:51 PM
Looks GREAT so far!!!
Posted by: carr914 Mar 14 2009, 05:13 PM
From a throw-away 914 to this far is amazing John. I'm truly glad that you have the IMSA car- it's definately in the right hands.
T.C.
Posted by: al weidman Mar 16 2009, 04:41 PM
John, as you can see, there are allot of us that have seen what you have accomplished and have been inspired to tackle our own projects. I too have some front hood channel and headlight channel to repair, where the rubber moulding fits. What gauge metel did you use for your fabrication? Thanks, and be sure to keep us involved on your interior and motor installation, that 2270 is really going to scoot. Al.
Posted by: FourBlades Mar 16 2009, 06:25 PM
Hey Al, thanks for the good words. I used 22 gauge steel for all the channels.
I think the original might be more like 20, but its close.
I used a small brake to make up sections of channel to repair the problem areas,
cut out the bad parts, then carefully tacked the new piece in. Keep adding tacks
until they overlap, work slowly so it does not warp. The hardest part I found was
smoothing the welds where the ends of the channel joined the original metal.
It is not too hard, just time consuming.
This would be an easy job if you had a spot welder and a brake. You could just
replicate exactly how Porsche did it.
The truth is that keeping this thread has really helped to keep me motivated. If
I did not have a way of sharing this and getting comments from people I think I
would have quit a long time ago. Starting a thread is a great way to motivate
yourself to keep working, hint hint.
John
Posted by: dlee6204 Mar 16 2009, 07:25 PM
You get motivated. We get motivated. We all get motivated. It's a win-win situation for everybody! You have done some amazing work on the car so far. I was never really a fan of the adriatic blue until I saw it on your car... now I can't take my eyes off it! Great job!
Posted by: pjf Mar 22 2009, 07:53 AM
Great job! My apologies if you have already mentioned these things but I was wondering where you got the fiberglass rockers and also what brand primer and paint are you using?
Posted by: FourBlades Mar 23 2009, 09:06 AM
I bought the rockers on ebay. I will have to try to dig up the seller's name when
I am at home.
I am using Dimension single stage paint from Sherwin Williams, over their
two part epoxy primer. I wanted single stage to make repairing chips and
dings from track use easier. I picked Sherwin Williams because they are
10 minutes from my house. They make paint that is resold by other people
including NAPA. The primer is about $50 a gallon including both parts.
The adriatic blue acrylic enamel is $200 a gallon when you include reducer and
hardener. Other colors can be a lot more, like yellow is about $700 a gallon!
Yellow may be faster, but speed clearly costs money.
John
Posted by: ConeDodger Mar 23 2009, 09:20 AM
Nice work John! Color is so exciting. Now for the reassembly!
Posted by: FourBlades Mar 23 2009, 09:24 AM
Thanks Rob. I can't wait to put parts on instead of taking them off.
I am sure I will have tons of questions for everyone...
John
Posted by: pjf Mar 23 2009, 08:19 PM
Thanks for the paint info. If you have the Ebay seller of the rockers that would be great. Fit and finish good? I've read on other threads that rockers don't always fit as they should.
Posted by: FourBlades Mar 25 2009, 07:35 PM
The ebay seller's id was zero-kewl914. Hope its ok to post this.
The panels fit really well and the jacking holes are in the right places.
I have been slammed with work and visitors for a while, but I will post
some close up pictures when I get a chance to fit them.
I notice he has nothing for sale right now, maybe check in a few days.
John
Posted by: jcambo7 Mar 26 2009, 02:37 AM
Looking great.
Posted by: FourBlades Apr 2 2009, 07:36 PM
Getting ready to paint the interior. It is critical to have a clean and well
organized work area, free from extraneous dirt and debris as illustrated
here.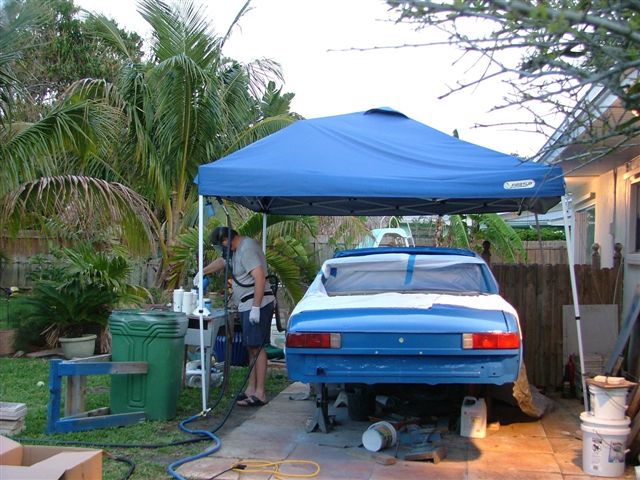
Painting! Bought a set of 8 ounce cups that make maneuvering the paint gun
in tight areas much easier. I also bought a very light and flexible air line that
runs the last six feet to the gun. Between the two you are holding less
weight due to much less paint and lighter hose.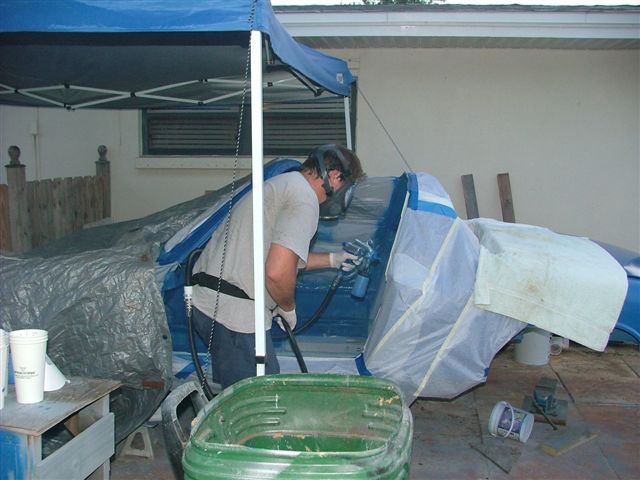
Chemistry set for big kids. Buying 100 disposable cups with measuring
lines printed inside really helps as well.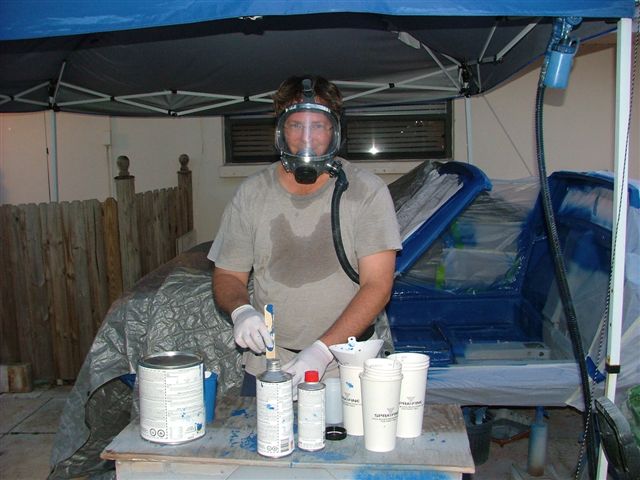
Painted!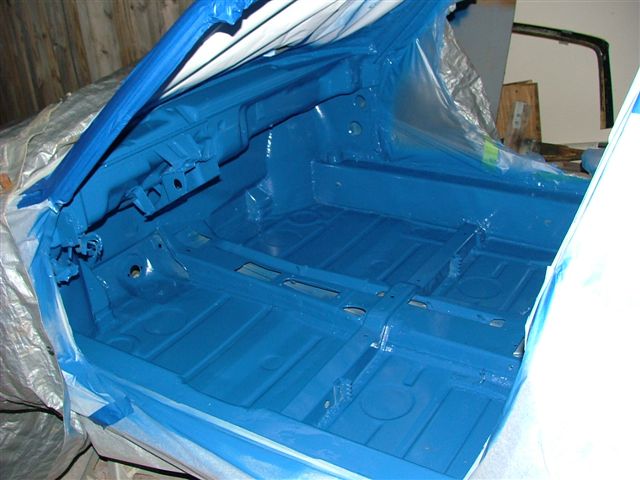
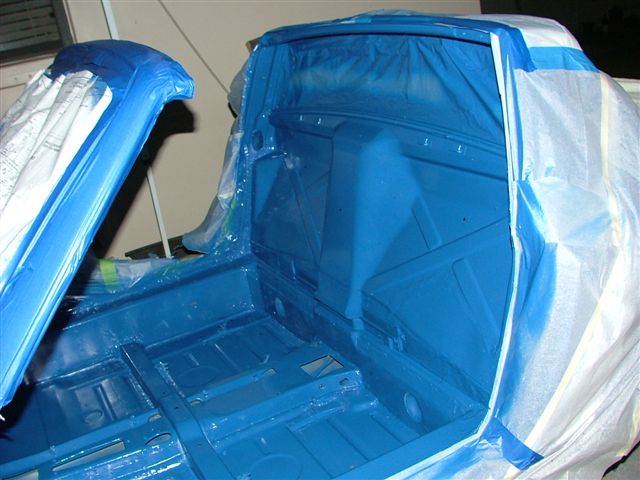
Getting dark so I rigged some big lights to help do the third coat. Feeling
pretty smug about now when every freaking bug in the neighborhood decides
to show up and land in my new paint.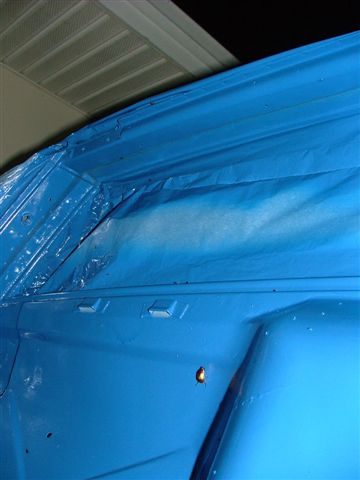
Last major area to paint is the engine bay.
Posted by: FourBlades May 4 2009, 06:51 PM
Putting the FreeMotion (roller bearing) front suspension pieces on. This is pretty
easy to put together. I used a large wood working vise to press the bearings into
the sleaves that go on the control arms. Very cool kit, I want one for the rear
suspension now...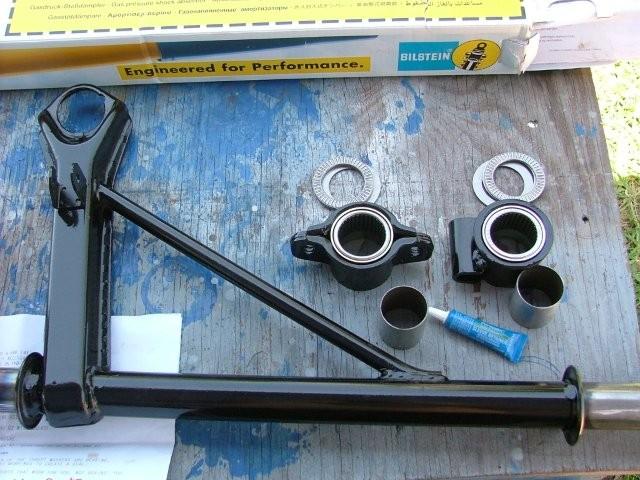
Put on the control arm and stock anti roll bar. 
Control arms move up and down with no resistance at all when the anti roll bar
is not attached. Got delrin bushings for the roll bar but it adds a lot of resistance
to moving the control arm.
Adding a new ball joint and nut using the special tool. I got the old nuts off by
cutting most of the way through them with a dremel tool, being careful not to
touch the control arm itself. Then used a 28 inch pipe wrench. It helps to try
the pipe wrench from different angles around the nut. If you are willing to sacrifice
the nut, it is not too hard to get it off without the special tool, took me maybe 10
minutes per side. I don't see any easy way to torque the new one on to 194 ft/lbs
(IIRC) without the special tool or some home brewed equivalent. $10 per new
nut and $50 for the tool will save you a lot of irritation if you have the dough.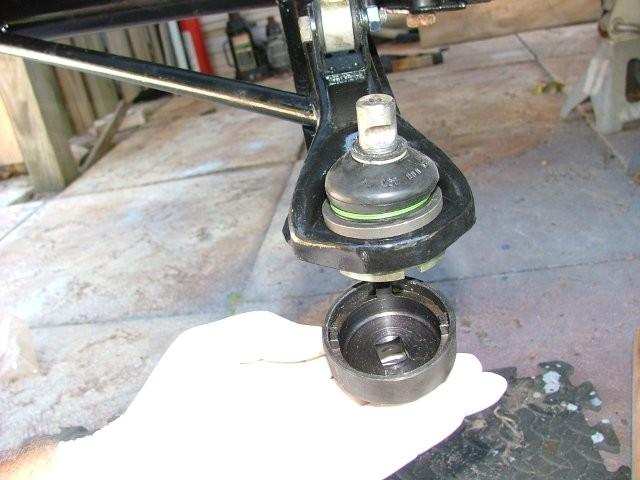
Added new Bilstein shocks to early 911 struts.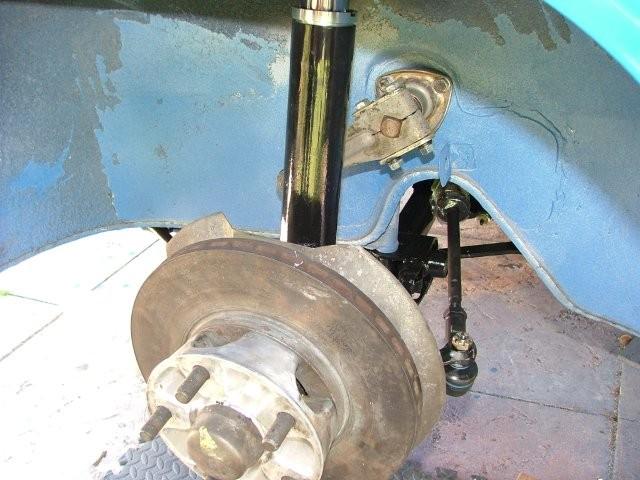
The first wheels and tires on this car since November 2007!!!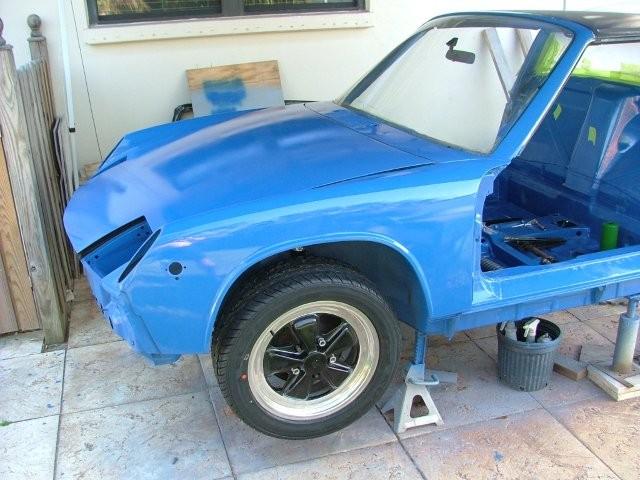
Shouldn't be more than a few years now until its a driver again.
John
Posted by: McMark May 4 2009, 07:22 PM
Yeah! That FreeMotion setup is nice, eh?! I'm waiting for my 6000 mile test set of FreeMotion rears to come back so I can pull them apart and see what they look like.
If there are no issues, then I'll have them for sale.
Posted by: FourBlades May 4 2009, 07:32 PM
Mark,
That is cool, looking forward to it. The friction involved in rubber bushings is
really obvious when attaching the control arm to the anti roll bar. I greased
up the delrin bearings in all the anti roll bar bushings and it still takes much more
force to move it than I would have thought.
John
Posted by: MrKona May 4 2009, 07:38 PM
Great thread! What size Fuchs wheel is that? What size tire? By the way, I like the look of the black Fuchs. It's what I plan to go with for my five-lug conversion.
Posted by: bcheney May 4 2009, 07:54 PM
Nice looking work John. That color is awesome! You are really doing a great job with that car. I hope to stop by and see it sometime. My father in law lives in Indialantic on Coral Way West.
Brian
Posted by: FourBlades May 4 2009, 07:56 PM
Hey Bryan,
Those are 16x6 wheels with 205/50 R16 tires (Kumhos).
I have the same size for the rears.
Looks like the fronts will fit, we'll see with the rears.
John
Posted by: FourBlades May 5 2009, 07:13 PM
Hey Brian from Orlando, PM me when you will be in the area, you are welcome
to come over.
I painted my engine bay with eastwood silver rust encapsulator. I like the
way it looks and may just leave it this way. I could also paint it body color,
what do people think? I still have to paint the inside of the sail panels.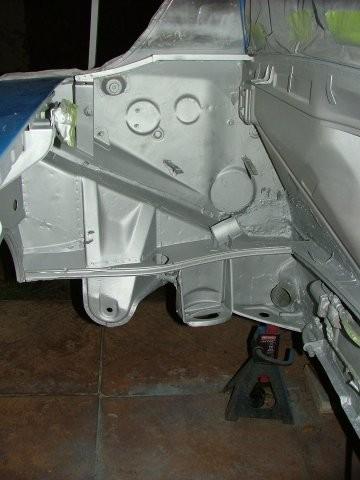
I also thought I would show the lazy SOB way to mount your front anti sway
bar. To get access to the lowest bolt on the bushing retainer, you have to cut
away a little piece of the inside of the gas tank area. Most people cut a slot
so that the backup nut plate can fit down to the lowest bolt. Because I welded
a large reinforcing plate to the outside of the fender well I was just using washers
and nuts on the inside. I already had my 1 inch hole saw out to cut the holes
for the anti roll bar itself, so I used it to cut a hole to access the lowest nut.
Very easy.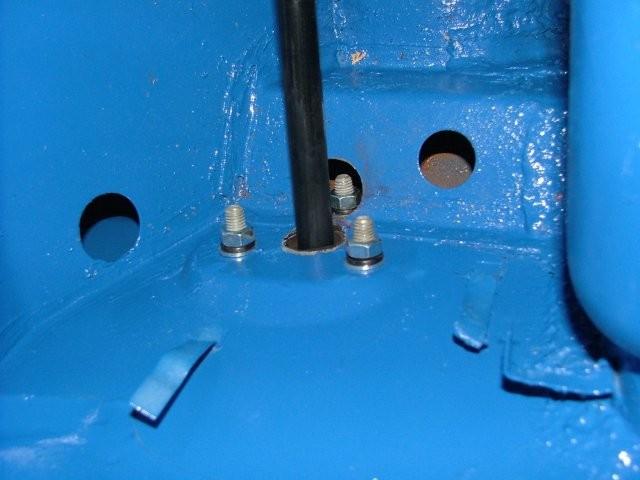
John
Posted by: Lou W May 5 2009, 08:23 PM
to come over.
I painted my engine bay with eastwood silver rust encapsulator. I like the
way it looks and may just leave it this way. I could also paint it body color,
what do people think? I still have to paint the inside of the sail panels.
John
You'll have to paint over the rust encapsulator, it turns yellowish if you don't. Stuff works great, used it on my car.
Posted by: FourBlades May 5 2009, 09:13 PM
I did not know that, Lou, thanks for telling me. I guess it will get Adriatic Blue
like the rest of the car. I have noticed that the silver rust encapsulator is pretty
easy to mark if you scrape a piece of metal over it.
John
Posted by: charliew May 6 2009, 11:57 AM
I also painted a vw rear suspension with the silver por 15 and it would come off on me and kinda leave a dull mark. Alot of silver paints are like the paint that is used on the big propane tanks, in that it is easy to rub off on you, but it won't all come off it's just the way the paint is. Kinda crappy but thats the way the paint is made. Also be sure to check how to top coat the eastwood paint to make the next coat adhear good, On the por 15 you have to use a tiecoat primer over por15 to get other paints to stick. Por 15 is also not uv resistant, it turns all kinds of funny shades in the sun. Kinda like oil on water look.
Posted by: FourBlades May 6 2009, 02:03 PM
Charlie,
The eastwood paint claims to be UV resistant. Have not tested that
myself. It is also compatible with a lot of different top coats. I have put my
catalyzed enamel over it and it seems to stick well. I wish it was harder and
more mark resistant because I like the silver look.
John
Posted by: MDG May 6 2009, 02:06 PM
The Adriatic is looking fantastic, John. I lost the thread but I was wondering how you made out on the door gap issue? Hope it worked out.
mike
Posted by: FourBlades May 6 2009, 04:20 PM
I got a lot of good suggestions on what to do about it. I guess I chickened out.
If I can get the door glass to seal well and the car aligns ok then I don't want
to do anything drastic to it. It either of those don't work I may take it a local
place with a frame machine and see what they can do.
I am afraid to make it worse given my lack of experience.
Worst case, I cut off the longs and redo them paying much more attention
to lining up the door and windshield.
It would not take nearly as long if I did it again...but that is a last resort.
John
Posted by: FourBlades May 31 2009, 09:28 PM
How to ruin a door lock cylinder PO stye: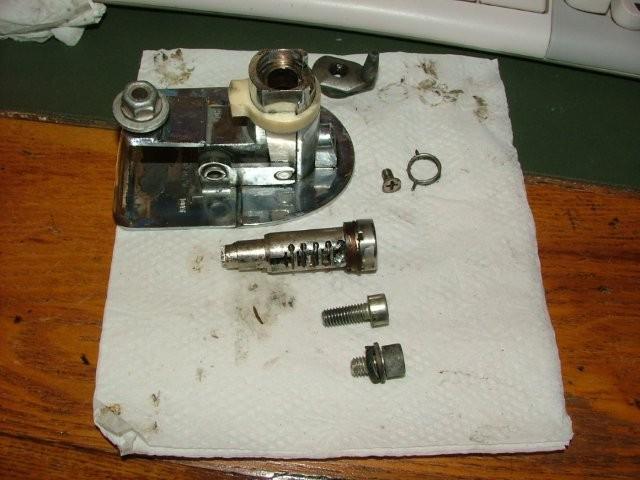
Was working on rekeying all my locks, so I took the door cylinder out.
Hmm, no wonder this door handle was screwed up. 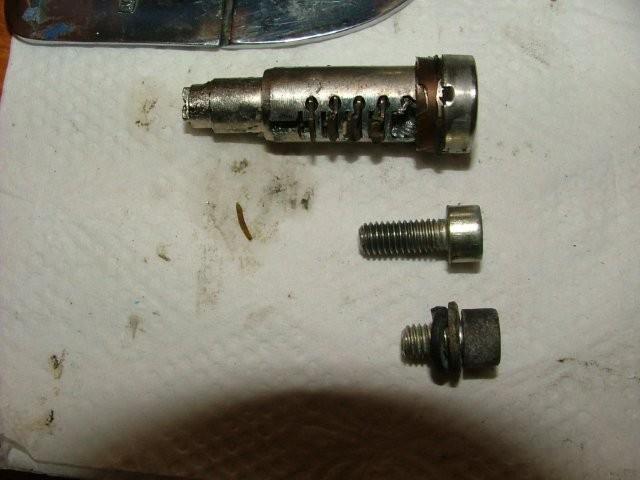
The PO used a bolt that was too long and it dug a hole in the cylinder. Somewhere
along the way all the wafers for the tumblers got bent over. The long bolt was
screwed in there tight. The shorter bolt is the correct length (I believe).
Fortunately, I have a whole set of new cylinders I got from MarkB, so I just
replaced the damaged cylinder.
John
Posted by: FourBlades May 31 2009, 09:39 PM
I've been working on reassembling the car. I got the passenger door put back
together and on the car. The glass actually fits pretty well when the window is
rolled up. The targa top also fits easily so I think the windshield frame to targa
bar gap is ok. Maybe the door gap issue is just sheet metal and not warped
car... (fingers crossed smiley).
I am working on the wiring harness. I unwrapped and cleaned it section by
section using electrical parts cleaner (spray can). I rewrapped it with PVC
electrical tape. I know this is not standard, but I hope it lasts better than the
cloth tape, that was rotting and falling apart.
I am going to try assembling the dash, switches, guages, heater controls and
make all the wiring harness connections off the car and then put the whole
thing in as one unit. This would be easier than making all the connections
lying on the floor of the car and reaching up under the dash. Not sure this
will work, but if it does it will be much easier and I can do it inside with AC.
Here is my neatly organized dash project.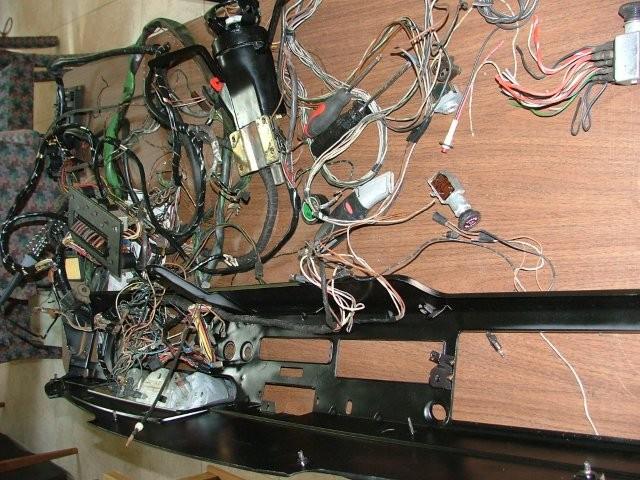
I have been cleaning and painting all the little pieces which is very time
consuming but is coming along. Lots of people have been helping me out
with parts that were missing from this car. I keep thinking I have everything
unil I get to the next section...
John
Posted by: strawman Jun 1 2009, 09:07 PM
Hi John --
Keep up the good work! You're an inspiration to me and my basket case project. I can't wait to get to reassembly stage...
Geoff
Posted by: FourBlades Jun 1 2009, 09:47 PM
Geoff,
Just keep plugging a little every week. It is a real rush when
you stop taking stuff off the car and start putting it back.
Every new bit you put on feels great.
John
Posted by: FourBlades Jun 10 2009, 08:36 PM
Passenger door glass looks like it will seal ok once I get all the new rubber put
on. Maybe the narrow door gap is just sheet metal related. :wishful thinking smiley: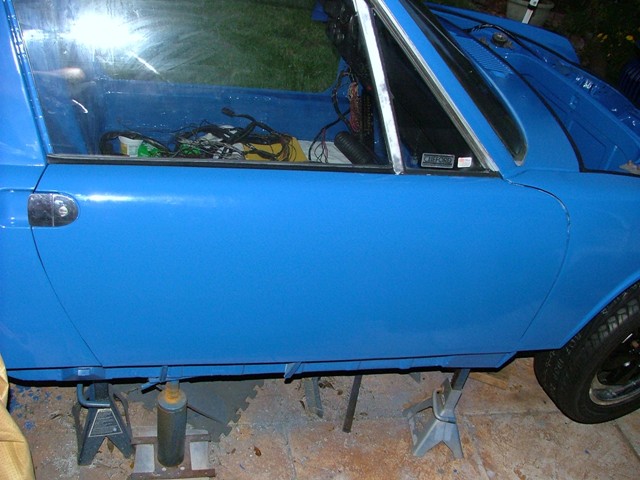
Got my dash set up based on advice from the world members.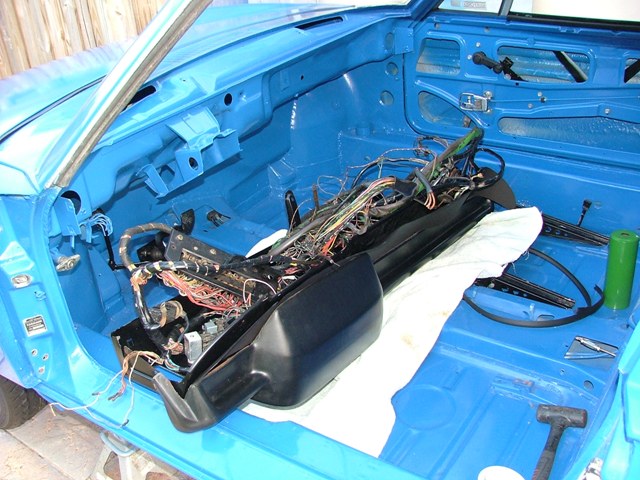
Dash installed, windshield not glued in yet, nor is dash to windshield seal.
It looks freaking cool to have a dash and instruments.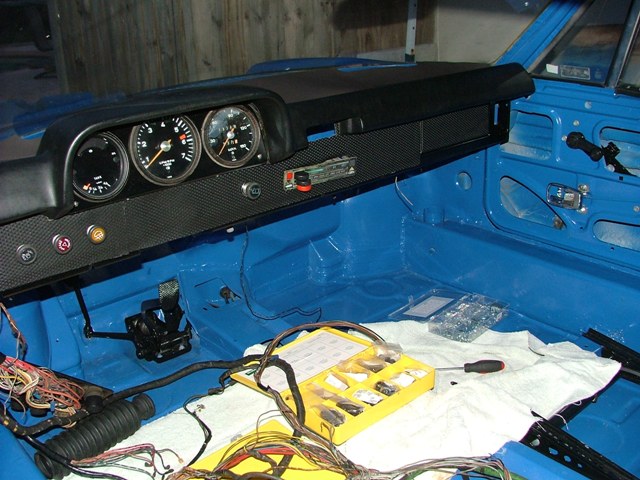
It took me a long time to get here because the wiring harness had me intimidated
for a while. I hope I wired the switches and instruments right. Not even sure the
instruments or relays work. Debugging this should be real fun.
Started fishing the front end wiring harness.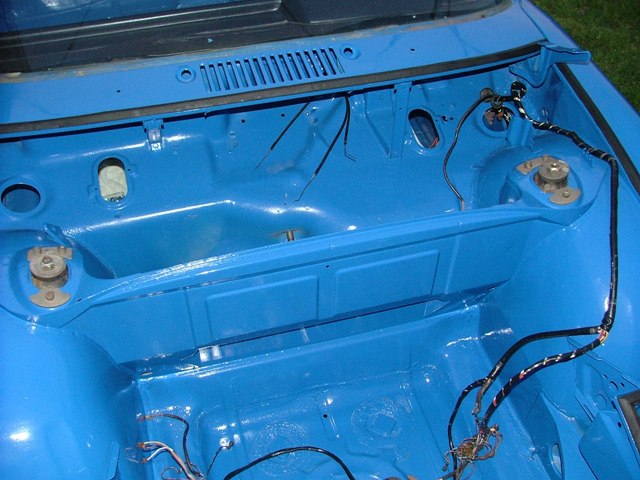
Next I will put in the steering and do a rough alignment. I could actually get
it off jackstands then and onto its own wheels. I know it is sacrilege to say that
about a 914 so please don't tell anyone.
John
Posted by: degreeoff Jun 10 2009, 09:12 PM
![shocked[1].gif](style_emoticons/default/shocked[1].gif) she's a beauty man looks great!
she's a beauty man looks great!
Posted by: ConeDodger Jun 11 2009, 08:38 AM
Very nice John...
Posted by: jc914 Jun 11 2009, 07:41 PM
GREAT JOB AGAIN
Posted by: Wilhelm Jun 11 2009, 07:55 PM
Great Job! Where do you get the time? I've done nothing substantial for a month!
Posted by: FourBlades Jul 26 2009, 07:05 PM
Show us your tit! 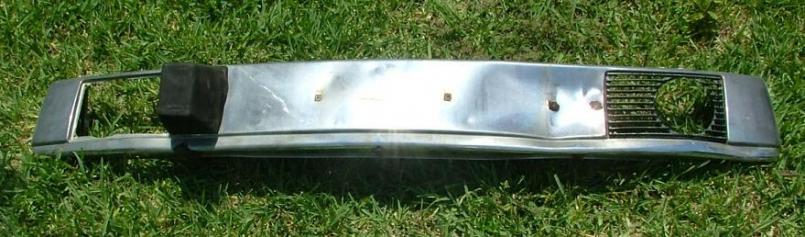
At least it has a nice, flaky fog light cover.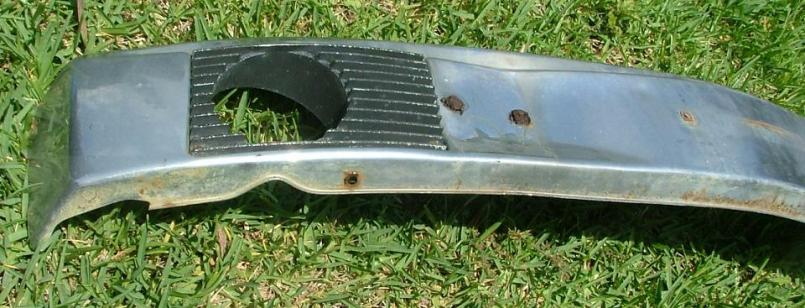
A pretty rusty back.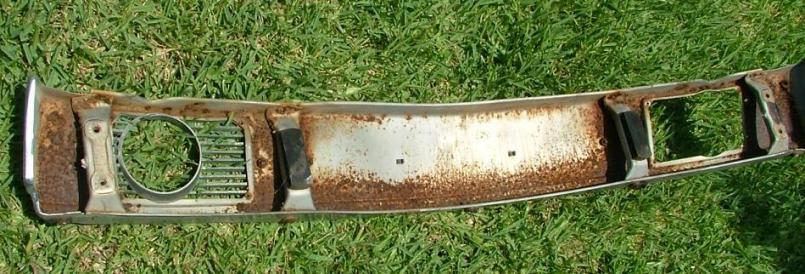
Some serious BFH work was required. Cut off all the old bolts. Derusted and
painted the inside.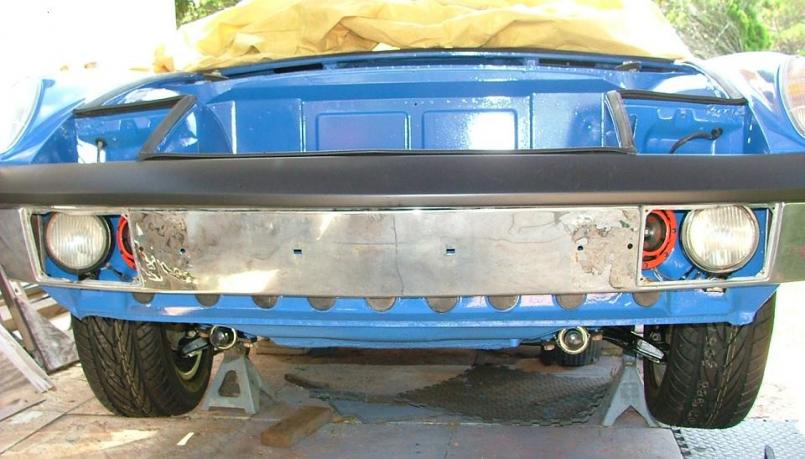
It looks pretty scruffy but is passable for a hot rod. I am too over budget at this
point to rechrome it. I just want to get it running, and then I can tweak it more.
John
Posted by: sendjonathanmail Jul 26 2009, 07:17 PM
Looking good John. Maybe repaint the bumper with that chrome paint that someone else on here used for their bumper. I forget the manufacturer, but its a cheap alternative to getting it rechromed and it looks nice.
Posted by: FourBlades Jul 26 2009, 07:35 PM
Putting in the Engman fuse panel. This is a really nicely made piece and it is pretty
easy to put in. It took less than an hour altogether. All the wiring issue threads
convinced me this was a must have upgrade. First push the relays off the board.
Then label the first row of wires with the provided stickers. 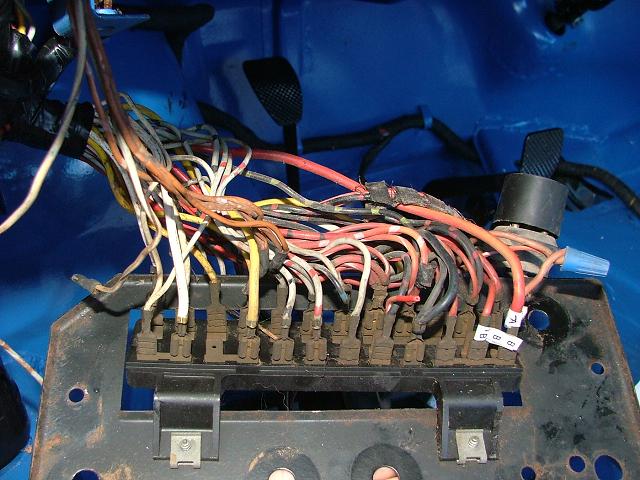
Pulled off the first row of wires and labeled the second row. The key is to work
carefully and systematically, but it really is not hard. You can tell which way
the boards go from looking at which terminals are double and which are single.
Notice the first two on the right have two sets of terminals. None of my second
set of terminals had anything plugged in to it, I wonder if these are for options?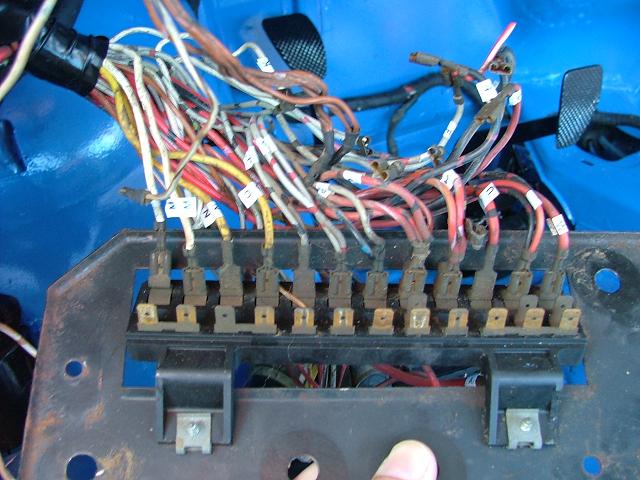
Pull off the second row of wires.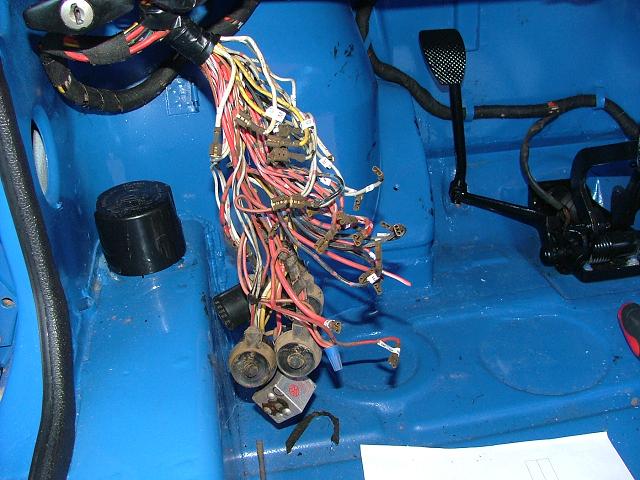
Tested each relay while I had them handy. Touching the terminals with a 9v
battery you should here a clicking sound. The two terminals in question are
those closest to the pin that is by itself. This does not guarantee the relay will
work, but if it does not click, then the relay is bad.
Start putting on the second row of wires first. 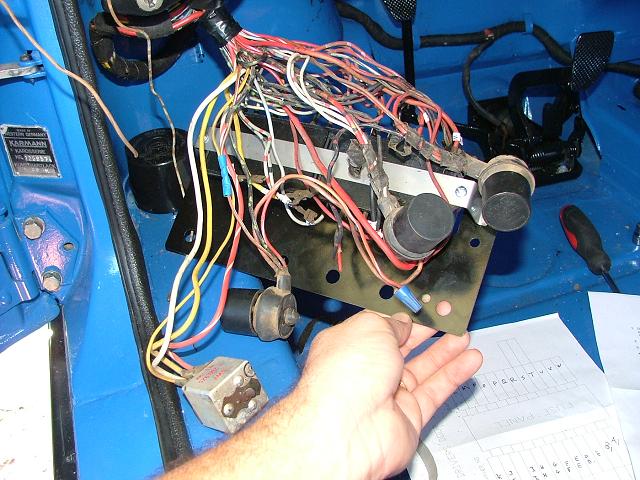
To get the first row of wires on I had to untangle and reroute some of the wires.
I had to untangle the relay wires as well. At first it looked like they would not
all reach but with a little fiddling around you see there is more than enough wire
length. Just one relay left to put in.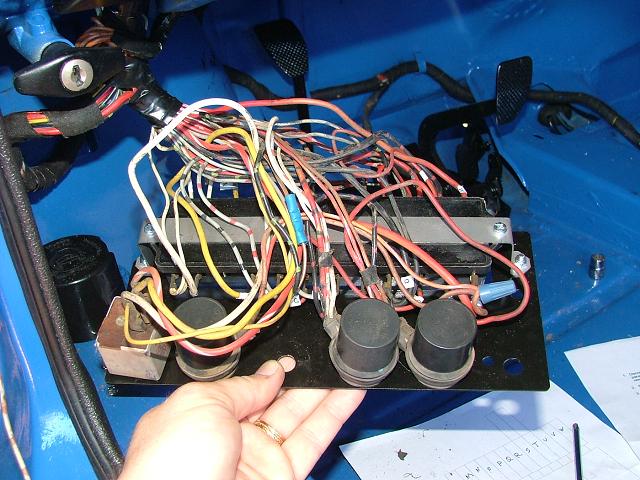
Put the panel in place. It looks backwards and maybe it is, but it fits better this
way with how I installed my wiring harness. 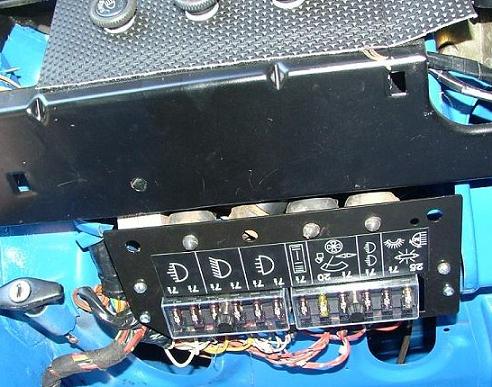
I hope to finish up the last few wiring connections around the car and put in a
battery soon.
John
Posted by: sixnotfour Jul 26 2009, 08:14 PM
Great Job !!
IMSAIMSAIMSA
Posted by: FourBlades Jul 27 2009, 07:00 PM
I here ya man, I am anxious to get back to the IMSA car...
John
Posted by: netbanshee Jul 27 2009, 10:56 PM
John,
Excellent job so far! I only happened upon this thread now, but have definitely given it a good once over. Many a man would have gotten frustrated with the amount of work you had ahead of you.
And that said, you're so close. I'm looking forward to the next few weeks / months.
I did a decent restore job with my pops that ended somewhat tragically, but in the end, I found myself with a fine 70 914. Good work, no matter what the circumstances, pays off in the end.
Flickr reference:
http://www.flickr.com/photos/netbanshee/sets/1076179/
Cheers,
Sean
Posted by: FourBlades Jul 28 2009, 07:22 AM
Hey thanks Sean. I really enjoyed the welding and metal work. I am not so
fond of all the fiddling around with reassembling everything.
The fire you suffered totally sucks. You were making great progress.
That looks like a sweet 1970 914 though.
John
Posted by: FourBlades Aug 1 2009, 07:58 PM
I spent all day fixing my rear trunk hinges and installing a camp 914 shock
kit. The shock kit is excellent and a piece of cake to install. The trunk hinges
were a pain because one was broken off and the other had the shoulder bolt
broken off in it. I only had one replacement shoulder bolt so I found a 10.9
bolt from my stash that had the right amount of shoulder and threads.
Welded a thick washer to the replacement trunk hinge mounting thingee.
The bolt will get trimmed to length later. Here is how this is going to work.
Welded the lock nut to the back of the thingee so that I did not have to get
a wrench back there to hold it. Melted the nylon insert unfortunately. 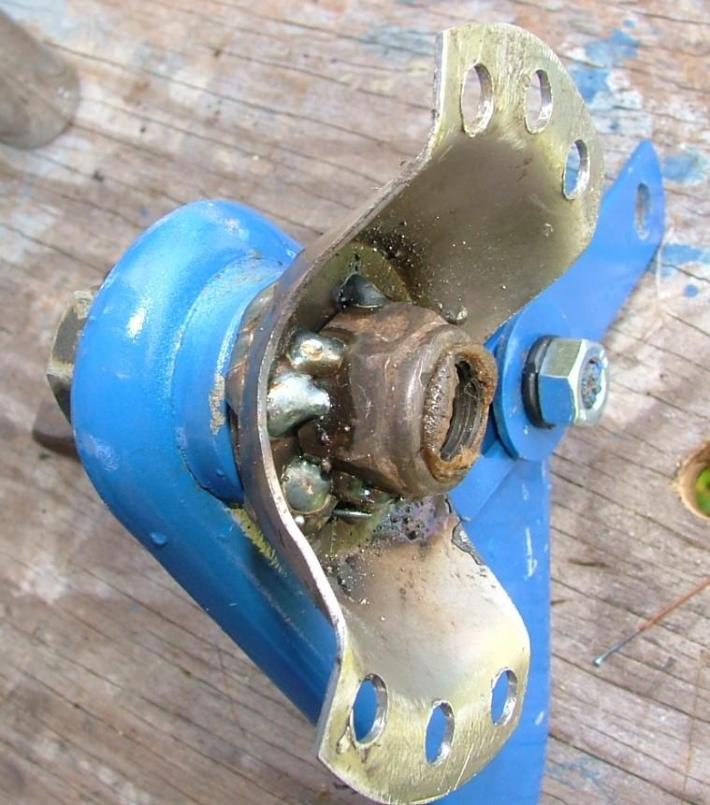
Sanded off the paint in the weld area using a detail sander. This is slow but easy
to control and not as messy as a wire wheel.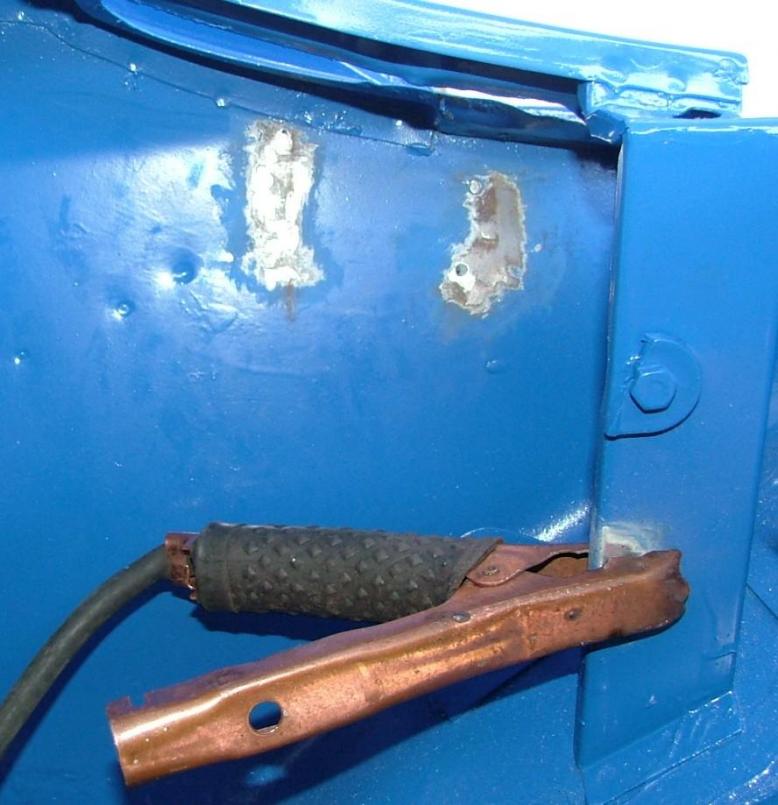
I located the position for the new thingee by finding the old spot welds. I also
compared it by eye to the other side. This is not that hard and my trunk lid fit
and closes well.
Posted by: FourBlades Aug 1 2009, 08:21 PM
Welded the replacement thingee on. I think my approach will be stronger than
the stock shoulder bolt, which necks down to an m8 or so, whereas I am using
an m12 through its whole length. Greased all the moving parts of both hinges
with white lithium grease.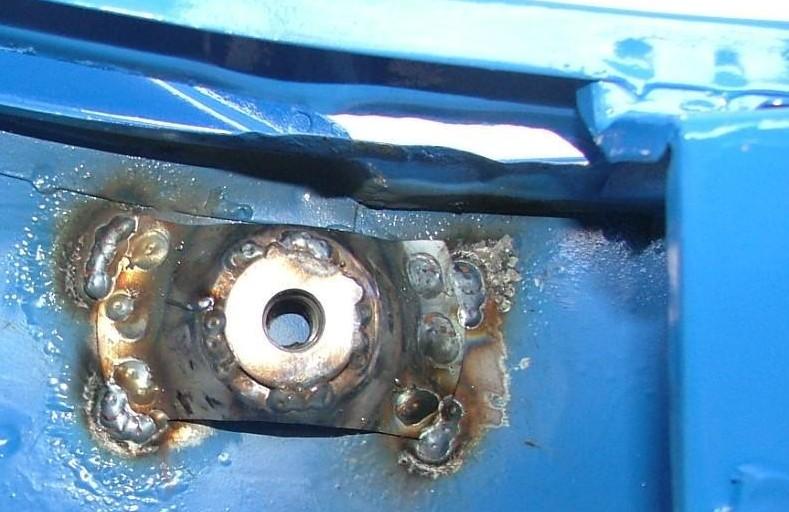
Drilled out and retapped the other side hinge. I also sanded the paint off and
welded the edges of the hinge mount to prevent it from breaking off down the
road. Down the road, get it? 
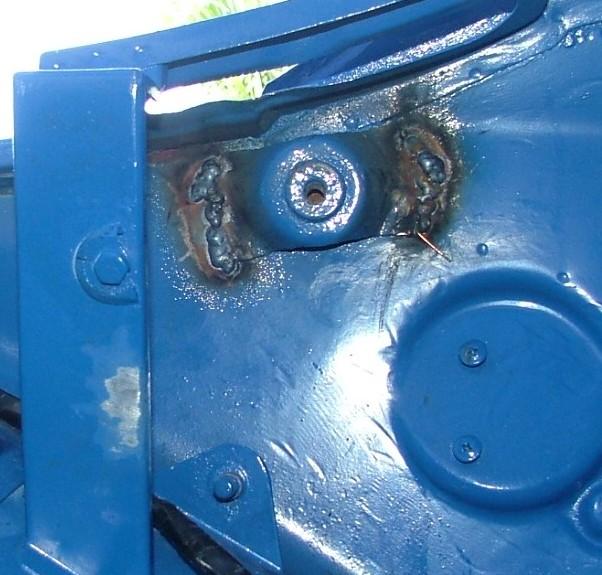
More pictures and incredibly bad humor tomorrow. Must be the effects of too
much welding smoke, phosgene gas, and zinc fumes.
John
Posted by: my928s4 Aug 1 2009, 08:55 PM
John
As always great progress, yours is much nearer being on the road than mine!
Like you my trunk hinge mounts were toast, any reason why you did not go with the http://www.jwesteng.com/porsche/914/pivot.htm Pivots?
Cheers
Posted by: FourBlades Aug 2 2009, 10:10 AM
Hey John, I did not know Jwest had pivots for the rear trunk. I bought the
replacement stock parts a long time ago. When I realized yesterday I was
short one shoulder bolt I just decided to improvise rather than stop working
and wait to order more parts. I am kind of in get it on the road ASAP mode
now...
John
Posted by: FourBlades Aug 19 2009, 08:06 PM
Opened up the transmission that came with the car so Dr. Evil can see if it looks
ok to rebuild at the Atlanta clinic. The box was covered in thick, nasty oil that had
to be chipped off, but inside it looks really good to me. Of course, I have only
the faintest idea what to look for. 
Getting it apart and putting it back together was pretty simple following the
instructions on the doctor's web pages.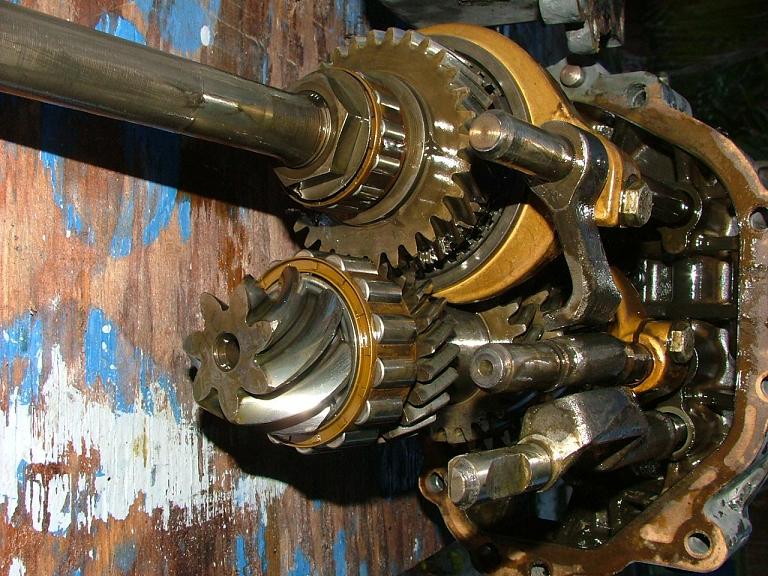
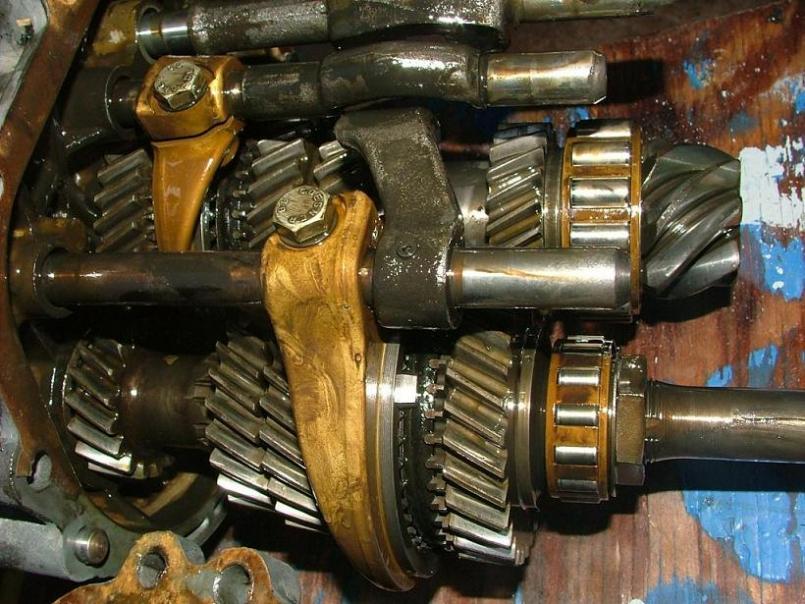
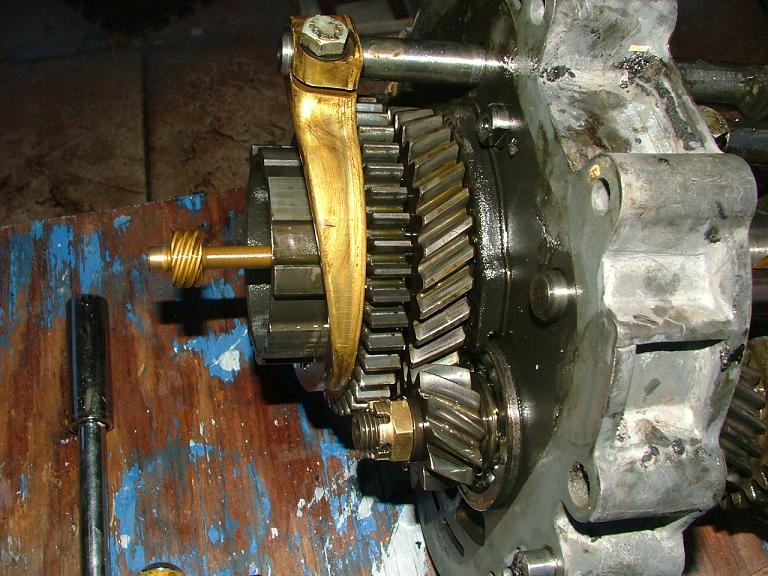
When you think of all the precisely machined and hardened parts and all the
little bearings and polished shafts in there it is a pretty amazing piece of
engineering. The tail cone looks like it will weigh 10 pounds but it is only
2 pounds or so, I guess it is magnesium. Not bad for a 40 year old design.
You can't help but be impressed with the quality of the parts.
John
Posted by: FourBlades Aug 19 2009, 08:10 PM
More pictures of the transmission.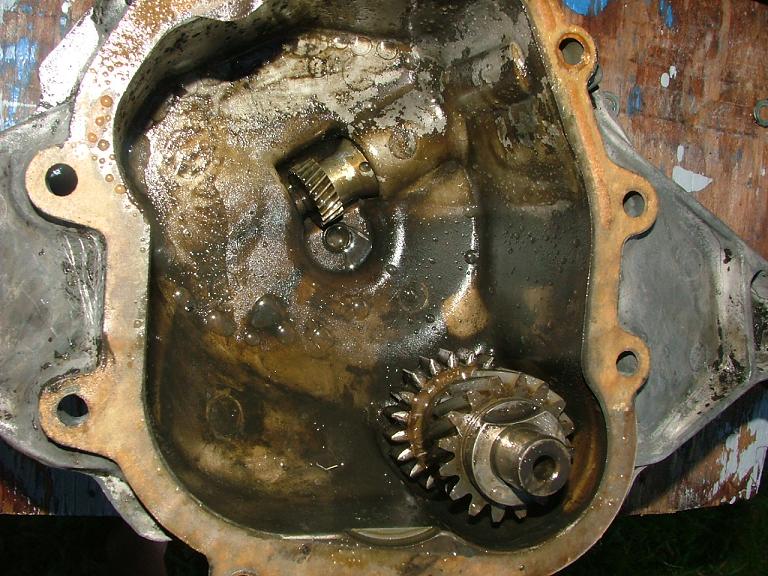
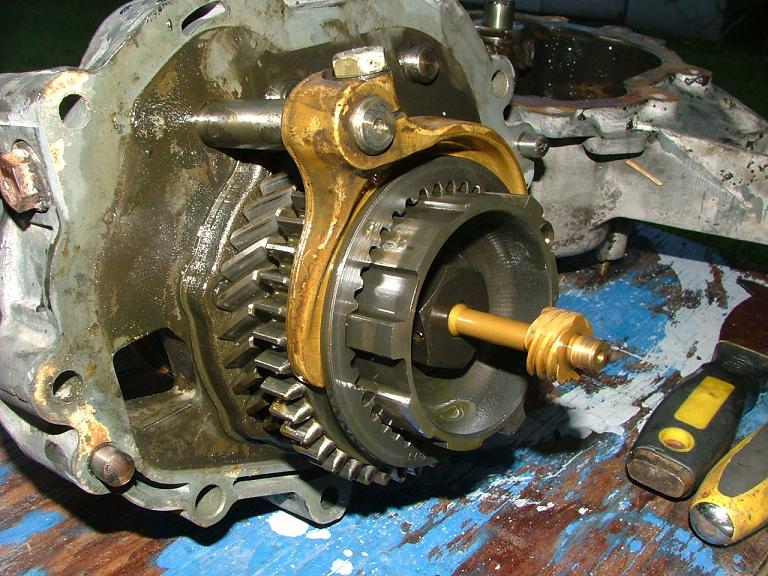
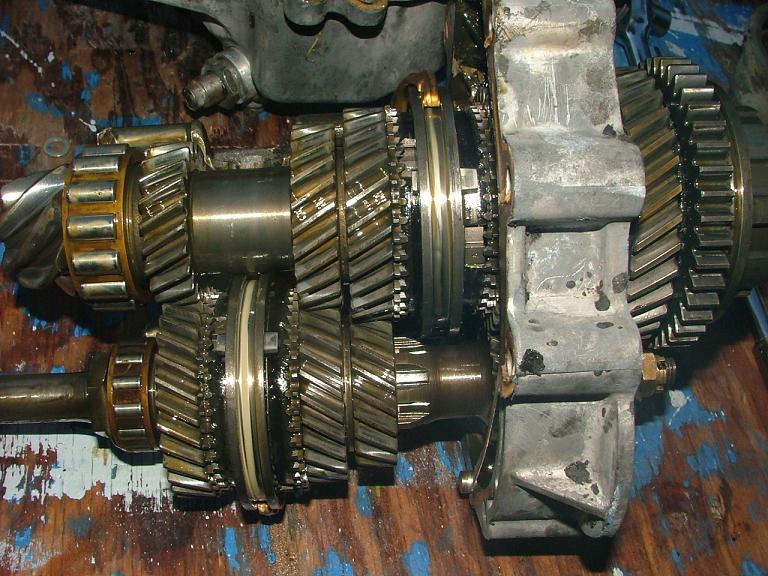
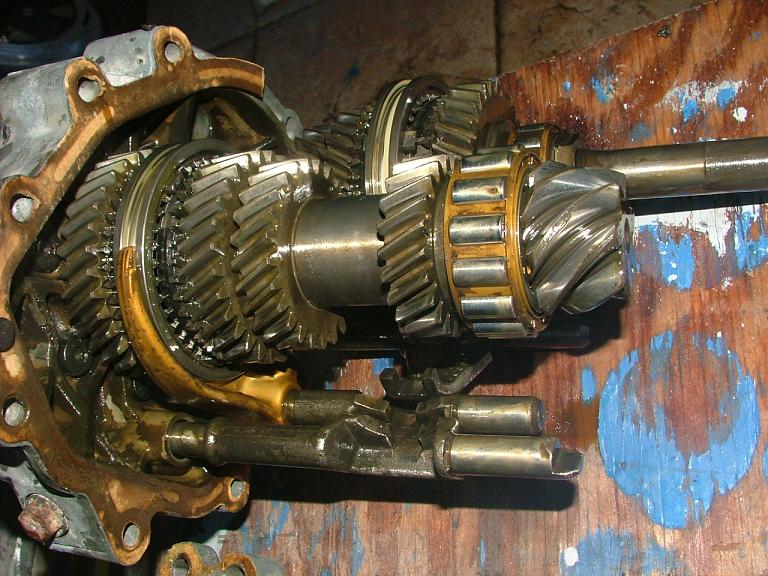
That is it for now.
John
Posted by: bcheney Aug 19 2009, 09:05 PM
John,
You are doing a great job on that teener!!...I would love to stop by and see you. I hope to be in Melbourne soon. I"ll give you a call.
Posted by: FourBlades Aug 21 2009, 02:46 PM
Brian,
Sounds good, pick a date and time and PM me. I should be home this
weekend.
Bring your teener if it is drivable...
John
Posted by: 993inNC Aug 21 2009, 06:14 PM
Got to say, being new both here and back into the 914 thing after 20 years of not having one...........and being new to the welding/resto thing, I do believe you may be my newest hero. Amazing undertaking no less in the oppressive heat of florida! I'm going to feel like a complete puss now for doing hopefully what turns out to be a fraction of what you had to do, but on a lift in a climate controlled garage.
So to you sir
Posted by: FourBlades Aug 21 2009, 10:15 PM
Thanks man, I have learned from the masters on this board, nothing else like
it anywhere.
I've wanted to do this for so long I decided not to let any practical considerations
get in the way, and usually things have worked out. That and I jump in the pool
every 30 minutes or so when it is hot.
I dream of working in AC and considered converting my dining room into a
workshop. I have had my Raby/McMark 2270 engine sitting in my bedroom
for 6 months but taking over the dining room was the limit for my wife so
I've had to embrace the sweat...
John
Posted by: carr914 Aug 22 2009, 04:09 AM
Brian,
Bring your teener if it is drivable...
John, Looking good, hopefully it will road worthy soon, so your attention can go to the IMSA car
T.C.
Posted by: 993inNC Aug 22 2009, 07:02 AM
Thanks man, I have learned from the masters on this board, nothing else like
it anywhere.
I've wanted to do this for so long I decided not to let any practical considerations
get in the way, and usually things have worked out. That and I jump in the pool
every 30 minutes or so when it is hot.
I dream of working in AC and considered converting my dining room into a
workshop. I have had my Raby/McMark 2270 engine sitting in my bedroom
for 6 months but taking over the dining room was the limit for my wife so
I've had to embrace the sweat...
John
You've got nerve brother I'll give you that! My wife is pretty forgiving, but never would I get away with storing parts in the house, wow
I'm looking forward to jumping into mine. I don't think I'll get to my newly found rust until next year's summer season. I want to get mine back into a driveable condition first with everything working so I know everything works before I completely strip it down to bare bones.
Posted by: FourBlades Aug 29 2009, 10:16 PM
Welded in reinforcements for shoulder harnesses. I placed these an inch below
shoulder level according to the directions from G-force. I also looked at Schroth's
excellent guide to installing harnesses (on their website).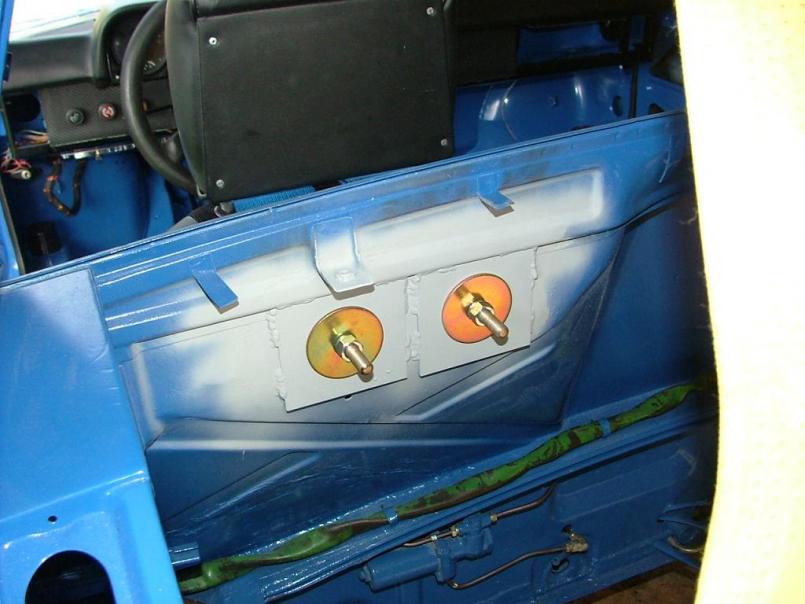
Not totally sure about running the belts through the head rest supports. They
feel ok when belted up. I was worried they would pinch at the neck but they
feel like they sit in the right place when worn.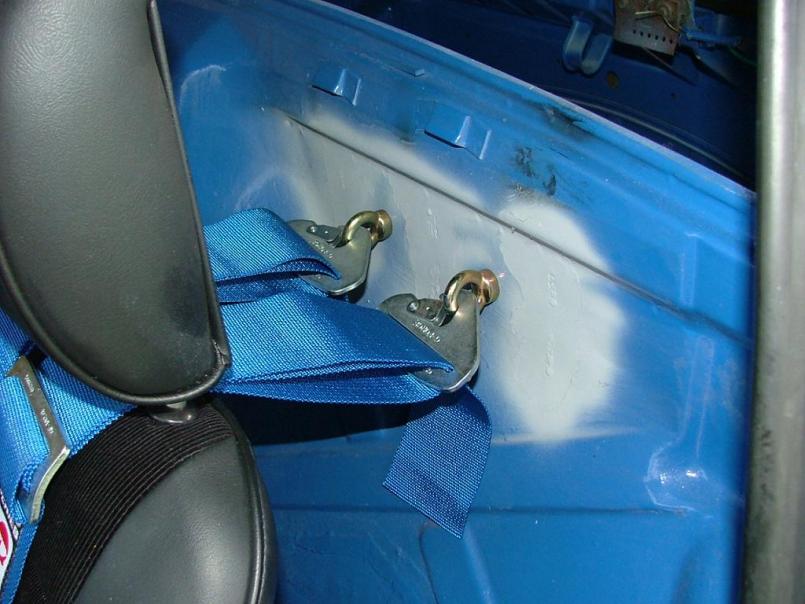
These seats came from Camp 914. They are very comfortable and well made
and were cheaper than listed on their website. 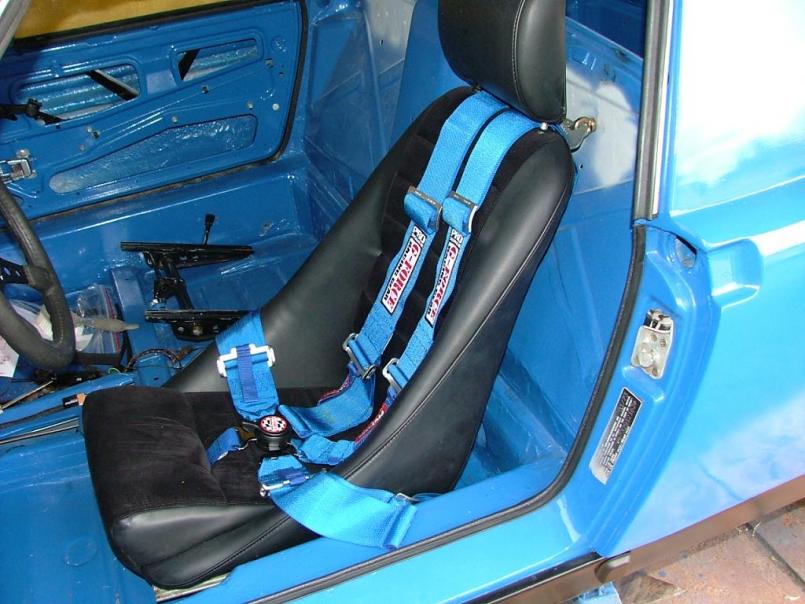
I am going to the Atlanta tranny clinic with Dr. Evil. You could really take that
statement the wrong way if you did not know the context.
John
Posted by: FourBlades Sep 5 2009, 07:22 PM
So I was wondering if my fuel tank really needed to be refurbed or if it was good
enough as is. It looks pretty much cherry on the outside (not the one that came
with my car, that one has rust through holes). Shaking it made sounds like rust
flakes rattling around. Dumping out and vacuuming up the rust
flakes yielded this pile: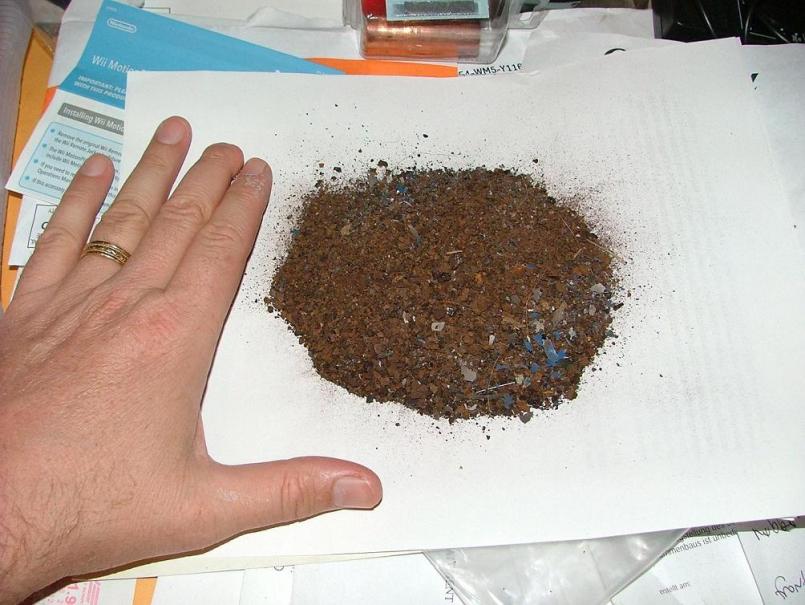
Hmmm, maybe I do need to redo it. Liberally sprayed freeze off on both nipples
(yes this is 914 world and not THAT forum). Both nipple tubes were basically
packed solid with rust. Some PO also used steel washers on the nipples. The
filter sock was in place and not looking too bad.
Hard to see it but the tube is full of packed in rust flakes and dust. I would not
have gotten much fuel out or back into the tank through these.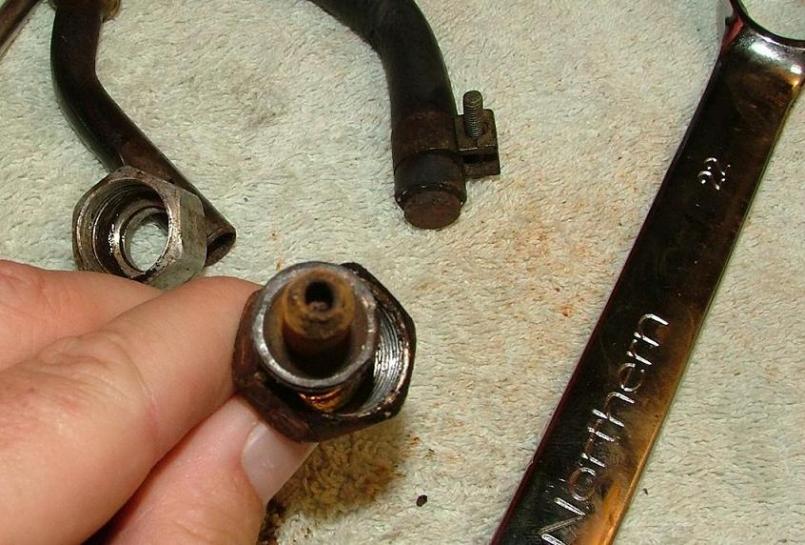
One nut did not want to come off easily, and left aluminum bonded to the
steel threads. This ruined one of the nuts, but luckily I ordered new ones
from AA. I would not be surprised if you ruin both nuts trying to remove
them, so get new ones before you start.
Not having a die this size, I rinsed the tank out with warm soapy water and
then heated the offending threads with MAPP. I think the different expansion
rates of aluminum and steel did the trick because I was able to pick all the
aluminum out of the threads cleanly after that with an awl.
I used the Eastwood fuel tank kit to derust and recoat the tank. Pretty easy
but messy and involves lots of nasty chemicals. Pictures tomorrow once it dries.
So to recap, I twisted off both nuts, and broke one in the process, then sprayed
freeze off on both nipples, then burnt one nipple with a torch. And my wife
complains that 914 work is boring...
John
Posted by: McMark Sep 5 2009, 10:34 PM
Nice save! 
Posted by: FourBlades Oct 24 2009, 09:14 PM
Inside of gas tank after using Eastwood kit. The final coat is a thick, white
liquid that hardens to a rubbery consistency overnight.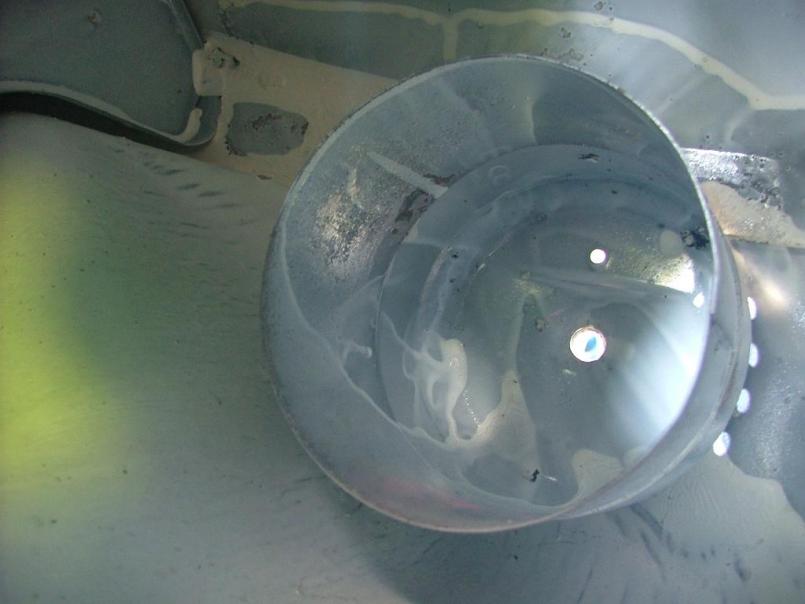
Putting in the windshield I must not have cleaned it enough or did not get a good
suction on the glass with the gripper because the glass dropped off and broke.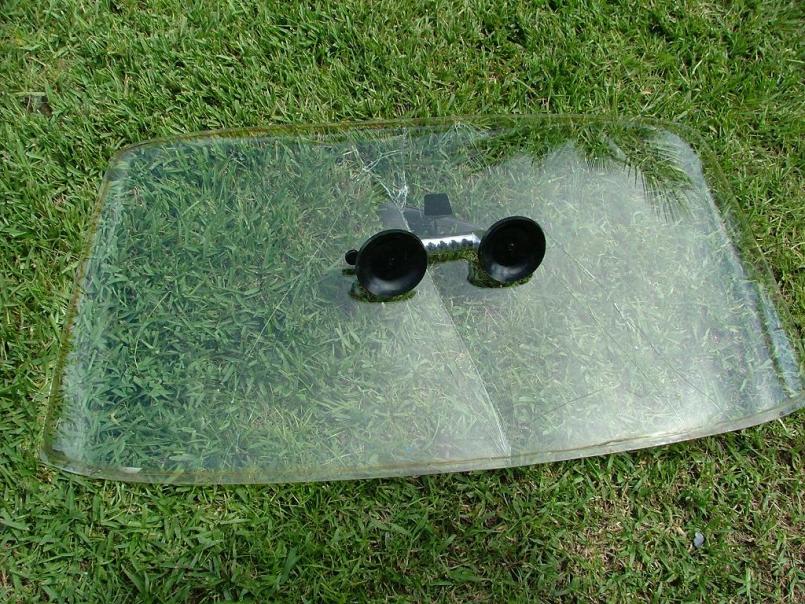
I had another windshield on hand, so being more careful the second time I lined
it up using tape lines and stuck it into the butyl tape. Not too hard, but next time
I would put the butyl tape right up to the inside edge of the windshield lip.
Otherwise it squishes out around the edge of the windshield more than it
probably should.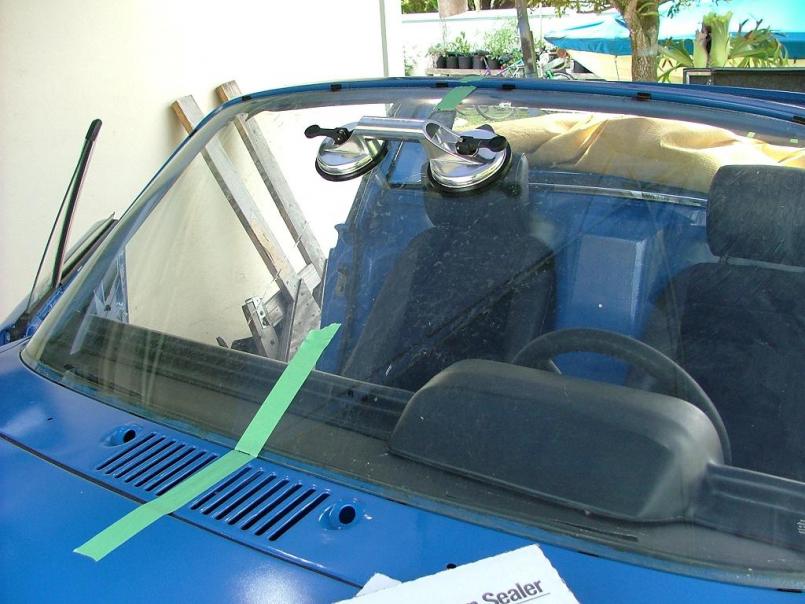
Posted by: FourBlades Oct 24 2009, 09:17 PM
Windshield and trim in. Need to find the corner clips. 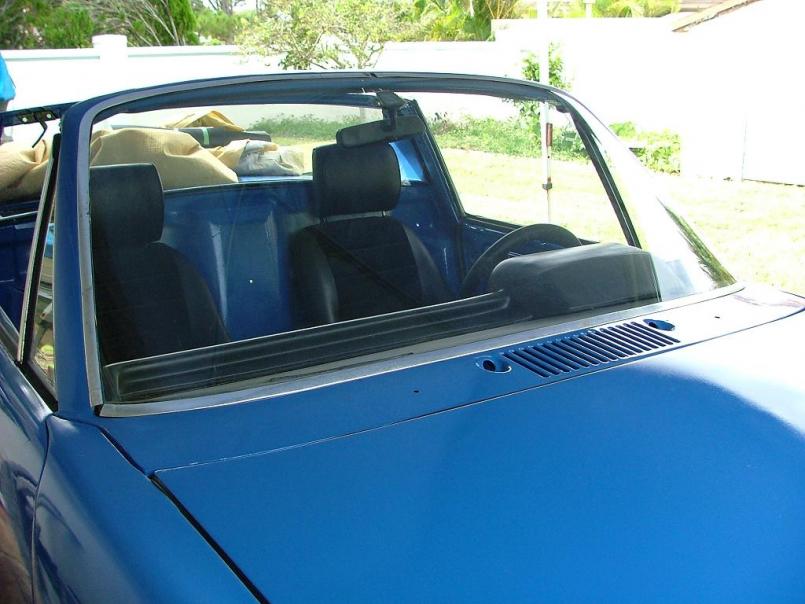
Rear windshield installation is a piece of cake compared to the front. Again, put
the butyl tape right on the inside edge of the lip so it does not squish out the sides.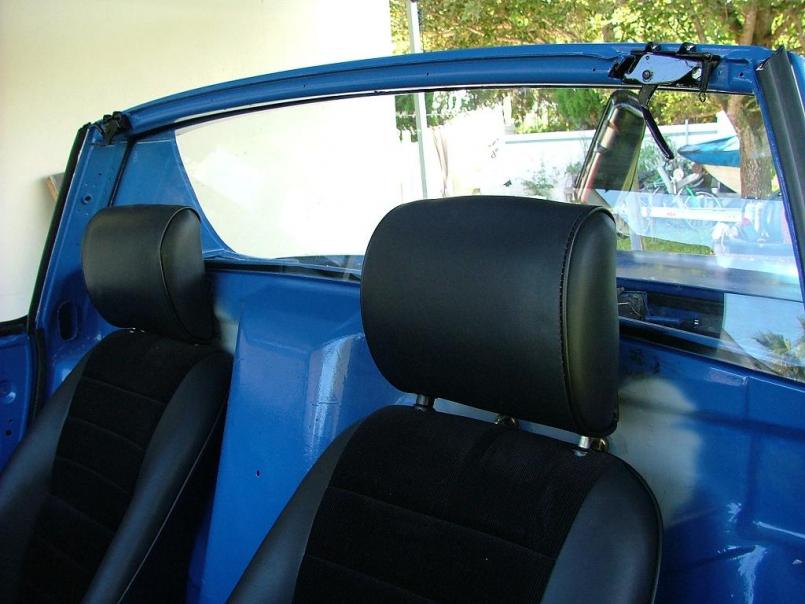
John
Posted by: FourBlades Oct 24 2009, 09:26 PM
Went to the Evil Werks transmission clinic. Taking apart the 901 is surpisingly
easy, and of course, assembly is the reverse of disassembly. 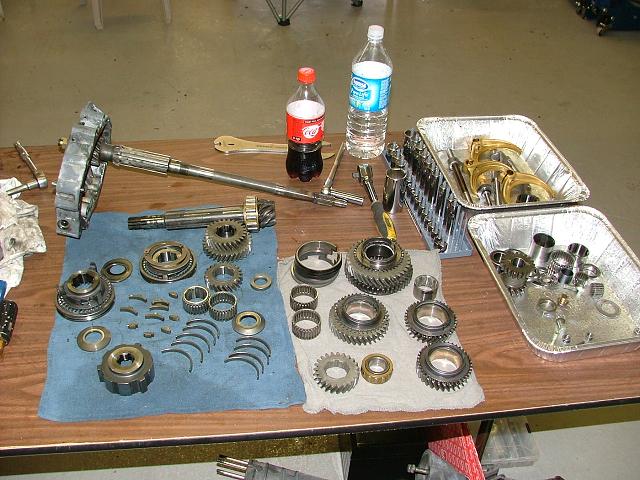
Start looking for pieces that fit and slide them on.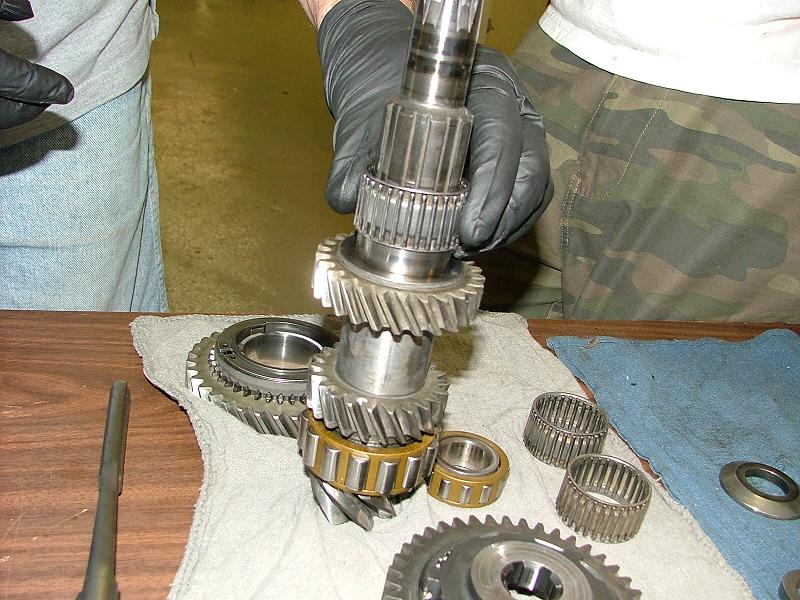
Keep going, this looks like it might belong here.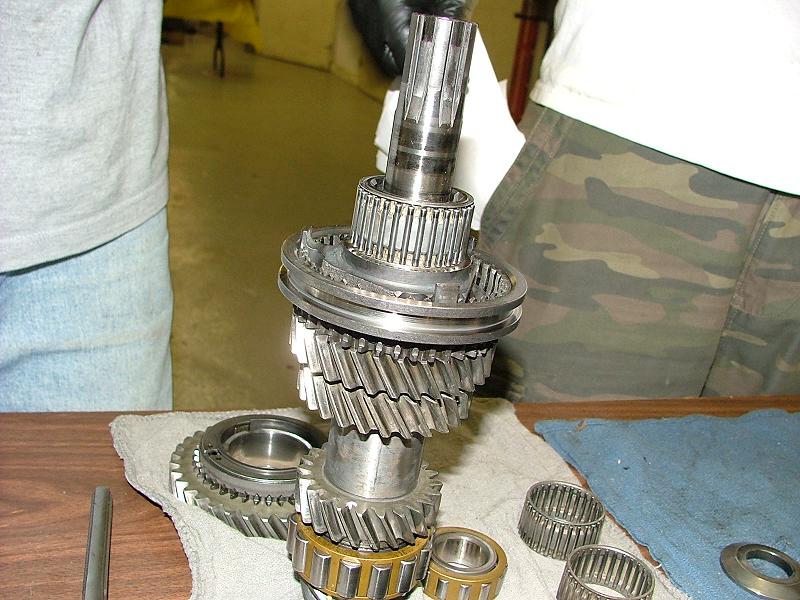
Only a few unimportant looking parts were left over.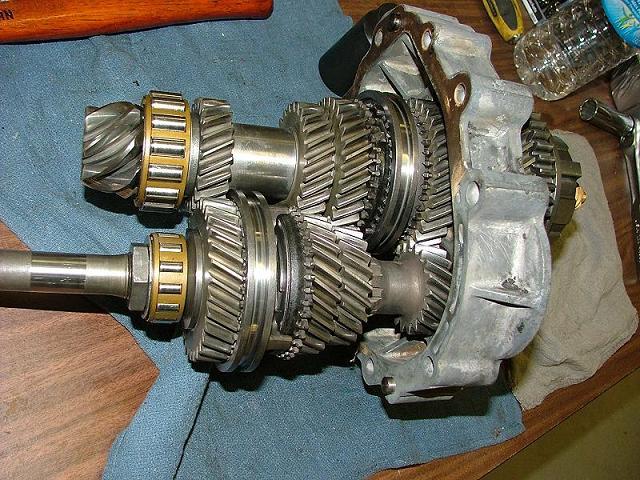
Nearly done, just need to add the cod piece.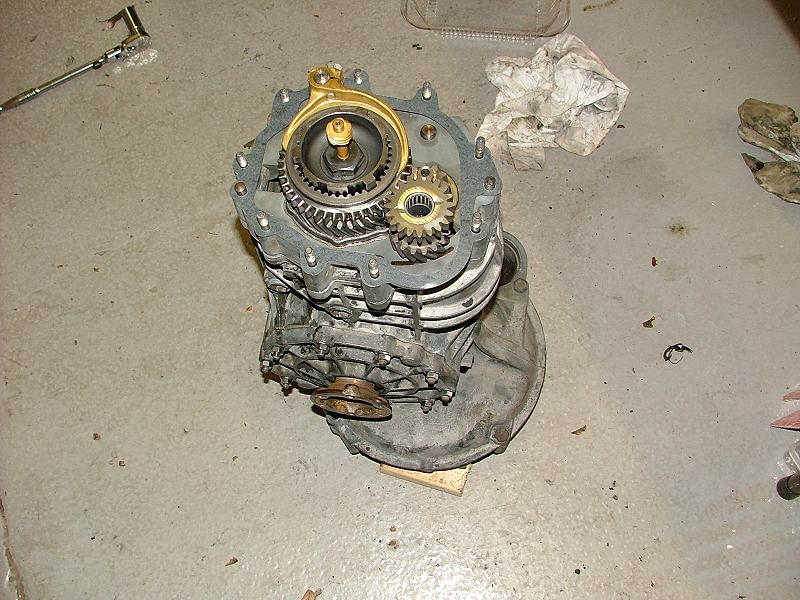
Sweet. Now it just needs an engine.
John
Posted by: FourBlades Oct 24 2009, 09:33 PM
There comes a time in every restoration when your engine must find a transmission to mate with and leave the security of the living room.
Now I just need to figure out how to wire it up, set timing, synch the carbs, and
maybe attach a car to it.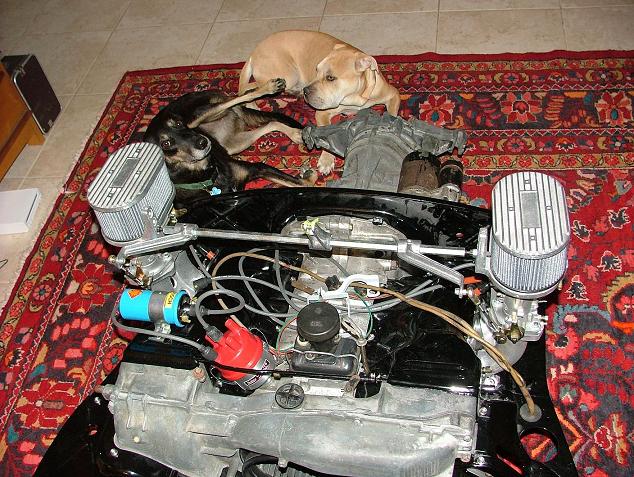
John
Posted by: steveherman Oct 24 2009, 10:24 PM
HOLY CRAP!
I can wait to come up there.
that is awesome and completely insane.
there is no way i could fathom that amount of work.
Posted by: 914Tom Oct 25 2009, 05:02 AM
hi john,
are this carbs dellorto or weber ?
TOM
(my wife will def. KILL me if i try to get the motor in the living room, or even the house)
Posted by: FourBlades Oct 25 2009, 09:19 AM
Tom,
Those are EMPI copies of Webers that I got from Jake Raby. They are really
nicely made and supposed to fix some problems with the old Webers.
Steve,
Come on over and bring some wrenches, got a lot of work left to do.
John
Posted by: carr914 Oct 25 2009, 10:11 AM
John, I didn't know that you had a Raby/McMark, much less have it in the Living Room
T.C.
Posted by: Gint Oct 25 2009, 10:22 AM
My wife is used to it!
Come on over and bring some wrenches, got a lot of work left to do.
Careful, you'll scare the poor guy off.
Killer progress. Getting closer all the time. Expect to be driving by Spring? Not that that matters in Florida.
Posted by: FourBlades Oct 25 2009, 06:39 PM
Hauling the engine out of the house.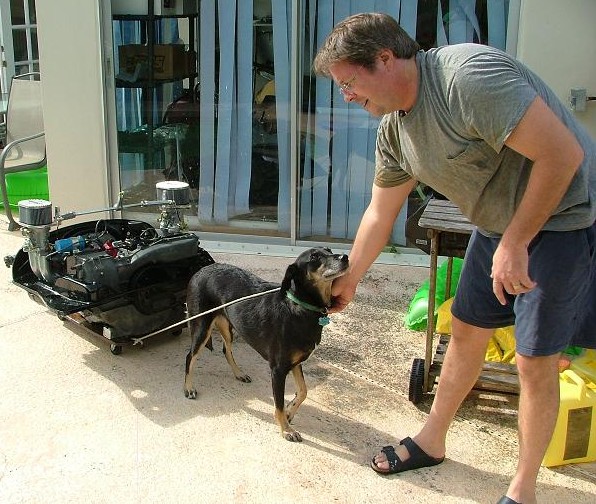
Getting ready to stuff it back in the car.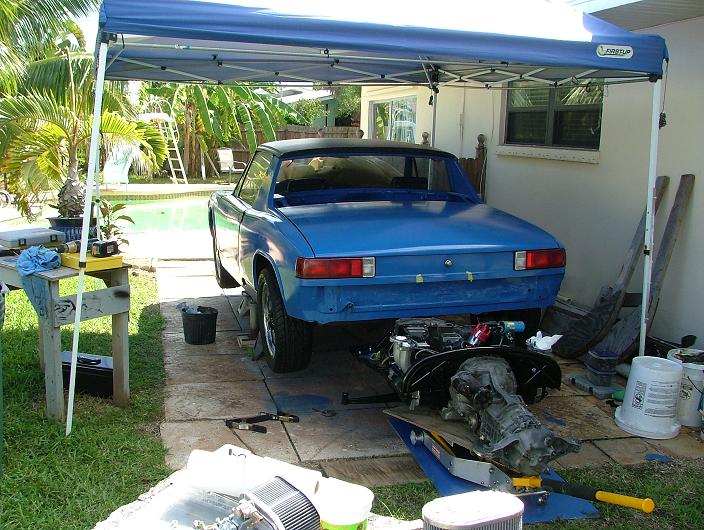
Using a motorcycle jack to lift it up.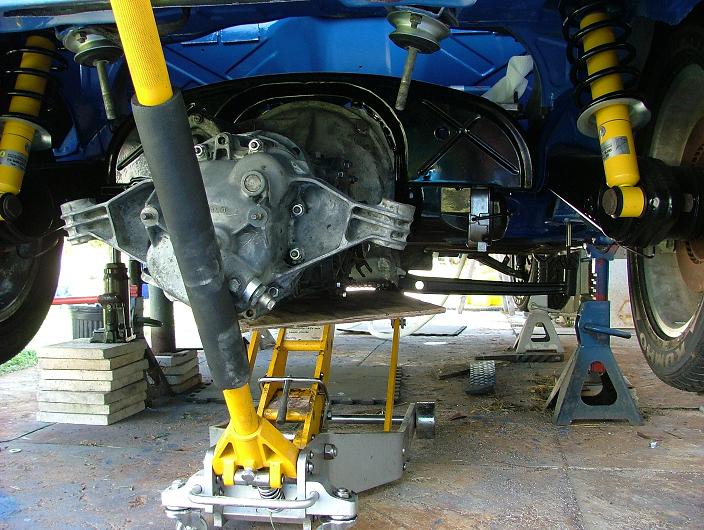
Using a second jack to lift the transmission. I ended up taking the transmission
mounts off the car and put them on the transmission. Then lifted the transmission
into place and bolted the mounts back onto the car. Because of the angle of the
mounting bolts, I could not just lift the transmission straight up. 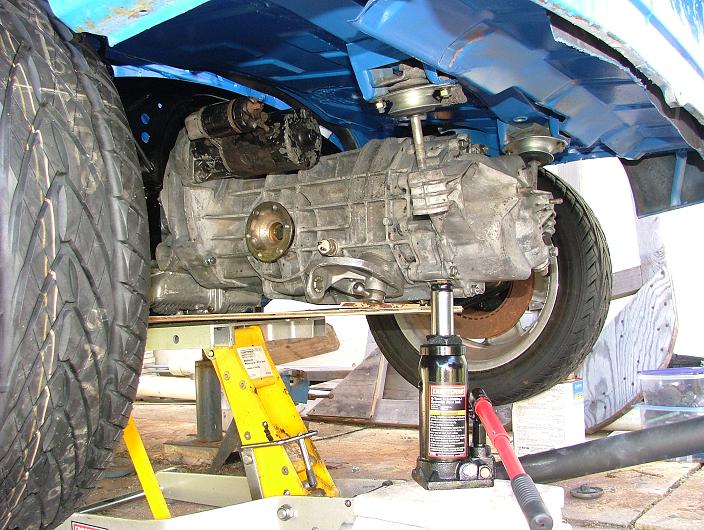
Not sure this is the concours way to do it, but it worked for me.
Posted by: FourBlades Oct 25 2009, 06:43 PM
Engine is almost in there.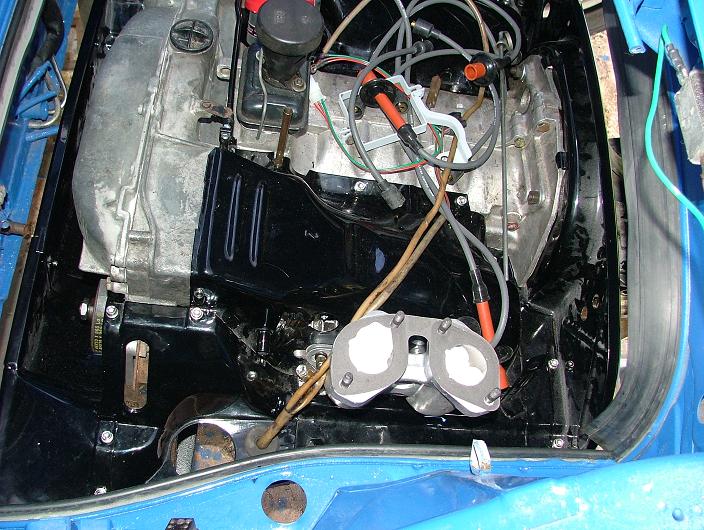
Engine is bolted in!!!
Hooked up the shift rods and gear shift lever. Also put in all new bushings.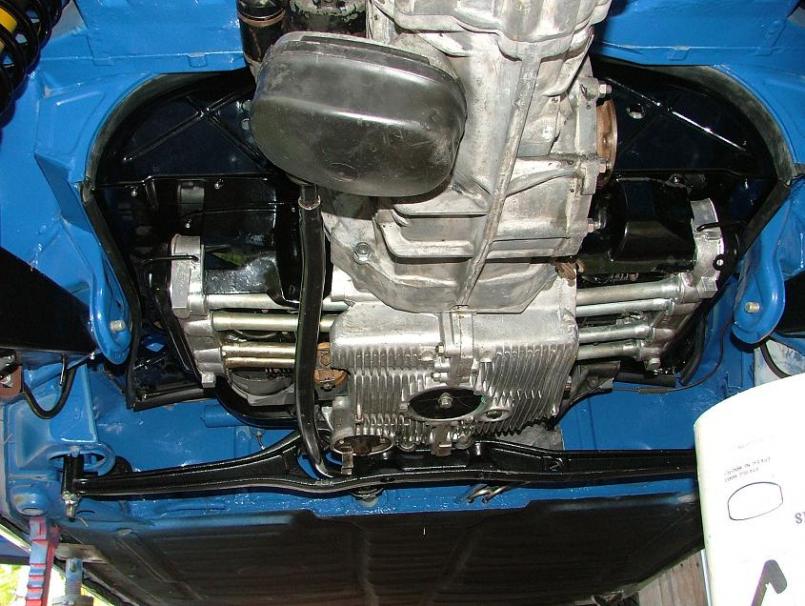
Still have to connect the fuel lines and the other controls. I think its time to stop
milking this restoration and gitter done.
John
Posted by: carr914 Oct 25 2009, 06:52 PM
Damn John, you and that dog are quick workers.
It looks like the nuts are not on your control arm threads - I'd hate for you to lose your suspension the 1st trip around the block.
T.C.
Posted by: FourBlades Oct 25 2009, 07:06 PM
TC,
She is a special, German service dog, bred for the ability to read metric sizes.
Thanks for pointing out the missing nuts. Those are a special, thin locking nut
I believe, I must have them somewhere...
Speaking of nuts, how much thread do you need to have sticking out of the
wheel for your lug nuts to grip? I am worried by wheel studs are too short.
I have some steel nuts and the thread only goes about half way into the nuts.
John
Posted by: sean_v8_914 Oct 26 2009, 09:46 AM
1.5 x thread dia
Posted by: FourBlades Nov 26 2009, 01:08 PM
Front bumper with Auto Atlanta front fiberglass valence. This part comes with nice
gloss gel coat and fit perfectly right off the bat. George let me buy the first one
they received when I was at the transmission clinic. The back of this valence
is smoother than the front of the other fiberglass one I bought on ebay. It would
probably fit even better if my front bumper had not been dented extensively
and then straightened by me with a BFG.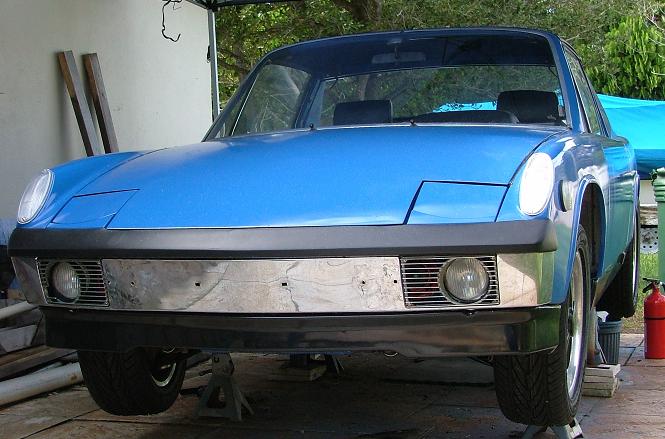
Rear bumper with my new license plate! Whoo hoo! It took me about 18 months
to get a clear title and registration for this car. The DAPO lost the title and jerked
me around about it for about 12 months, then moved out of state. What a freaking
douche. I really need to go back and edit post #1 to tell the real story of this idiot
and his BS lies. I'll tell ya how I took care of the title problem sometime, it is
really not that hard, just cost about $500.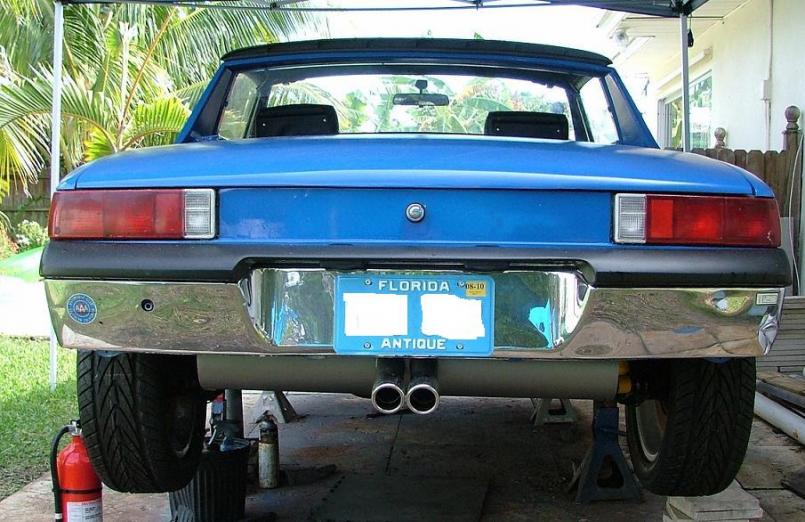
John
Posted by: FourBlades Nov 26 2009, 01:19 PM
Put in the tangerine racing exhaust and headers. These parts are like a work of
art. I had them ceramic coated silver and they just look awesome. 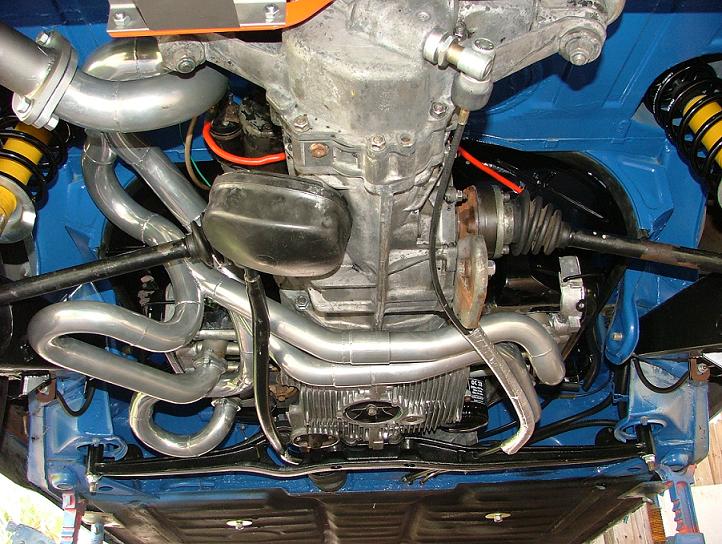
You can see the muffler in the previous post. I wanted the twin tips and will have
to adjust my rear valence to fit them. I also put in my drive shafts. Here is a tip:
put in the drive shafts before putting in the shift rod and exhaust. I did mine in the
wrong order and had to pull them off and put them on again.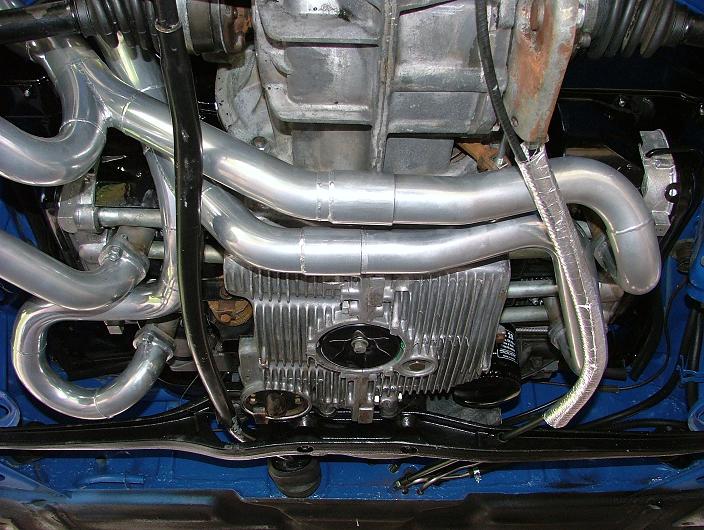
I could stare at those headers all day.
Now I am on turkey duty because my wife works all day today. It is much easier
to prepare a turkey than to rebuilt CV joints on your drive shafts. That must be
the messiest job on a 914. I ended up throwing away the shirt I was wearing that
day. I had to go to 4 autoparts stores before I found one with the proper moly
grease, so don't assume it is easy to get. The parts geeks told me to just buy new
axles assemblies because they are like $70 for most new cars. Yeah,
but how much is a new computer for your beemer i-drive system???
John
Posted by: MDG Nov 26 2009, 05:08 PM
Excellent, John!!
Every time I look at this thread I'm reminded of how much I love Adriatic Blue.
and Happy Thanksgiving!
mike
Posted by: oldschool Nov 26 2009, 06:13 PM
is a advantage to the antique plates?
Posted by: smg914 Nov 27 2009, 01:10 AM
When transferring a title and purchasing new tags in Florida for a car 25 years old or older, with antique plates the initial cost is considerably less then the standard Florida plates or any of the personalized plates and when renewal time comes around they are considerably less cost again.
Posted by: nsr-jamie Nov 27 2009, 06:09 AM
I love this thread, its amazing all the work you have done and has been an inspriration...I just spent the last hour going through this whole thread from the very beginning...and that Tangerine exhaust is just killer, exactly what I want for my car....thank you !!!!!!!!!!!!!!
Posted by: Justin Fischer Nov 27 2009, 08:27 AM
Great Thread! Awesome progress. The adriatic blue is probably my favorite 914 color behind signal orange...
Posted by: 'Cause Nov 27 2009, 09:29 AM
I could of missed it but, I didn't see a transmission ground strap?
Posted by: sean_v8_914 Nov 27 2009, 11:56 AM
rock on John!!! vroom
Posted by: FourBlades Nov 28 2009, 10:50 AM
Thanks guys for the positive comments. I do have a ground strap on the tranny
but something is wrong electrically. I tried the smoke test yesterday with a 5 amp
fuse in line and nothing melted! Lights and flashers are working! Put the battery
in directly and no fuel pump and no starter, though. I will have to track
those down.
I spent most of the day yesterday torquing the front and rear suspension to
specs. I did an eyeball alignment but will need to wait until it is on the ground
to set the ride height and do a tape measure front end alignment. Once it is
running it will go to a Porsche specialist here for a real alignment.
Still left to do is mounting the remote oil filter console. That will be fun with
the engine in the car because the fittings are on the front of the motor. I guess
I have to cut off part of the engine mount to make room to get the oil line
in, I am thinking air saw? Bleed the brakes and add fluids and in theory, the car
would be drivable after that!!!
Here is the easiest way to get a title for your car if it was lost.
http://www.mainelytitles.com/
This process requires the police to come out and verify the VIN and sign some
forms for you. They also check with National Crime Information Center (NCIC),
so if your car is stolen then you will find out right then.
You need to have a notarized bill of sale from the PO, so when you buy a car with
no title, make sure you get a bill of sale and have it notarized. There are forms
on line for a bill of sale for different states.
You need to have proof of insurance. Mainely Titles charges about $350 depending
on the age of the car. I think most 914s would be the same. Cars from the 90s
and up can cost $1000 to title.
Maine has very liberal laws when it comes to retitling cars. I think this is a money
maker for the state. They do some pretty thorough checking and then bam, you
get a Maine license plate and registration in the mail. No title yet because Maine
(and some other states) do not issue titles on older cars.
Then you take the Maine registration and plate to the FL DMV and they tell you that
you need a Police inspection of the VIN (Deja Vu all over again). I live about 5
minutes from the local shop so they come over again and sign the paperwork.
Back to the DMV, where for $160 dollars they will transfer your out of state plates
and issue you a Florida title. For about $35 they will give you an antique plate,
so I went for that. Altogether the process takes six months and is a pain but
then you have a clean title in hand as they say. With some other fees this cost
more than the $500 I paid for the car originally, but it was so worth it.
I don't recommend buying cars without titles mostly because they could
be stolen and then you are out your money and have some explaining to do to
the police. I believed the DAMOFOPO who sold me my car when he said he had
the title and just had to find it. Later he said, no the salvage yard I bought it from
has the title. No the guy who owned the yard died and his widow has the title.
No, I am moving out of state and working on a secret, undercover government
program that I can't tell you about. No shit, he acually told me that just before
dissappearing for good. I figured, OK, without a title I can still spend a few
hundred, maybe a thousand getting this car running and then AX and DE it so I
come out a winner anyway.
John
Posted by: FourBlades Feb 28 2010, 07:12 PM
I am surprised my saga of how to get a title did not get any responses.
You all are way too polite to not point out what a dumb ass I was to buy such a
rusty piece of sh*t not even a parts car that also did not even have a title. I wish
I could say it was all part of the plan from the start.
I have been busy trying to finish up a lot of little stuff and have not taken the
time to post much. First off, the car made it back to its own wheels almost
two years to the day from going on jack stands (this was back in December).
I think it looks pretty good.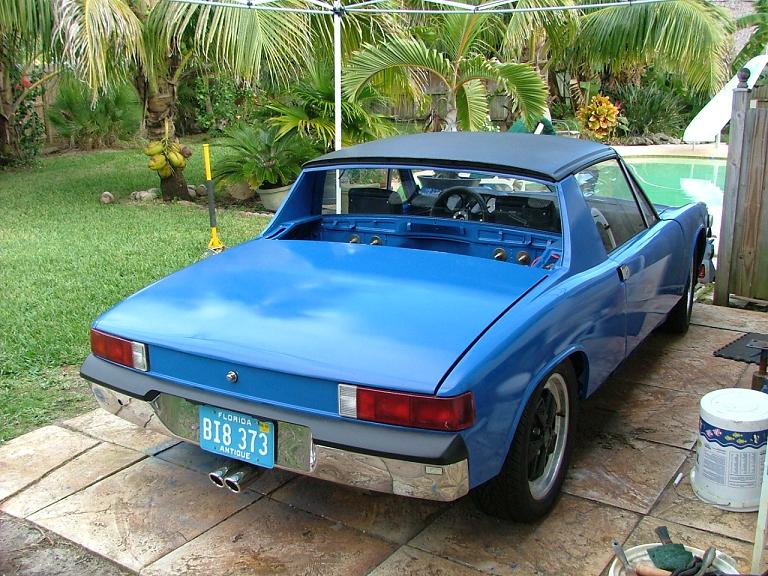
I forgot about the engine cover when I originally painted the car, and now that the
engine is in it seemed like a good idea. The little side grills next to the engine
cover were the first parts I "restored" so it was cool putting them back on.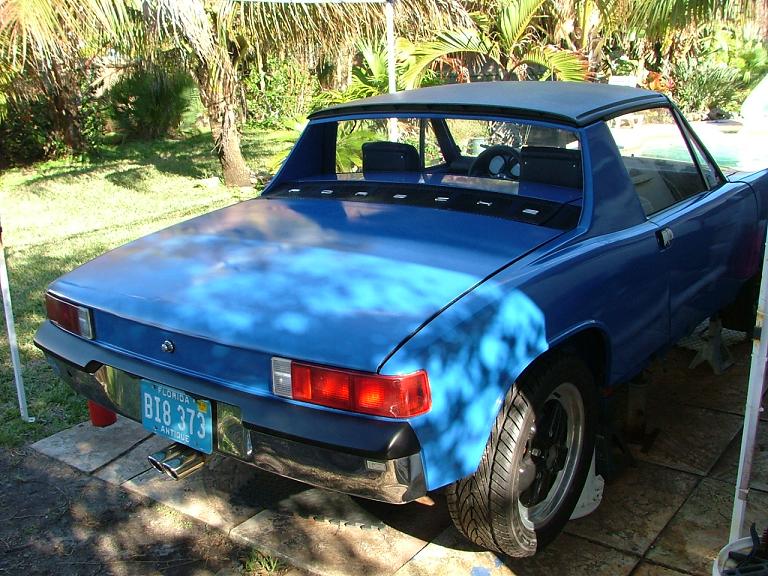
John
Posted by: FourBlades Feb 28 2010, 07:26 PM
First engine start today!!!
http://www.youtube.com/watch?v=xdbObtVw6YU
It took me weeks of fiddling around to get it to run for several reasons.
First off, when you refurb your gas tank using one of those kits, rinse the tank out
with gas a few times after the rubber coating has dried! I followed the directions
to the letter but they did not mention this last step. As a result, there was a lot
of debris in the tank that quickly clogged the fuel filter in front of my pump.
I had to pull my tank, rinse it, and then run a lot of good fuel through to clean
everything out. Some of the debris was small enough to go through two filters
and that shit does not burn.
Second, the idea of recirculating fuel from your carbs back to your tank is a bad
one. I installed two clear fuel filters, one in front of each carb so I could see if
I was getting fuel. While I had the recirculating setup installed, the air never
cleared out of the filters and I suspect fuel pressure was nil. I removed the
recirculating lines and the filters immediately filled up and the car started.
I also had some trouble timing the engine right until Mark gave me some
pointers. Also lots of good help from Jake Raby and Blake Meredith.
We took the car around my block three times to celebrate. The transmission
I rebuilt under Dr. Evil's watchful eye worked great. I used reverse, first,
second and third with no problems, no grinding, no wondering what gear you
are in. Freaking day of miracles. I went out and bought 50 lotto tickets right
after that.
Lots of sissy little details left to finish like rearview mirrors, head lights that
work, carpet, and not having wiring hanging in your lap as you drive.
John
Posted by: McMark Feb 28 2010, 07:53 PM
Awesome! Drive it out to the WCR.
Posted by: watsonrx13 Feb 28 2010, 07:55 PM
Looks great John, congratulations...
-- Rob
Posted by: SirAndy Feb 28 2010, 08:07 PM
Second, the idea of recirculating fuel from your carbs back to your tank is a bad
one. I installed two clear fuel filters, one in front of each carb so I could see if
I was getting fuel. While I had the recirculating setup installed, the air never
cleared out of the filters and I suspect fuel pressure was nil. I removed the
recirculating lines and the filters immediately filled up and the car started.
No, the idea is sound.

However, you need a fuel pressure regulator after the carbs to keep the pressure to the carbs steady. Otherwise, the pressure just bleeds off through the return line.
Andy
Posted by: URY914 Feb 28 2010, 08:29 PM
Great job, John.
Posted by: Gint Feb 28 2010, 10:03 PM
Looks fantastic!
Posted by: wayne1234 Feb 28 2010, 11:35 PM
Looks good, you have done alot of work to your baby, I have knida been loosly keeping track of how many hours I have spent with my other girl,I sometimes will add into my post this took x amount of hours,,, how many hours you figure you have into it so far???
Posted by: Kirmizi Feb 28 2010, 11:55 PM
Well Done!
Mike
Posted by: Eric_Shea Mar 1 2010, 12:30 AM
Great job John.
Posted by: jcambo7 Mar 1 2010, 04:17 AM
Congrats man. This build is amazing and was great to follow. 
Posted by: FourBlades Mar 1 2010, 06:10 AM
Thanks everyone for the comments.
This has taken about 120 weeks at an average of 5 hours per week. Some weeks
I did nothing and other weeks I did a lot, so I think this is probably pretty close.
That makes about 600 hours so far.
John
Posted by: MDG Mar 1 2010, 06:45 AM
Great, John!
Posted by: bcheney Mar 1 2010, 06:50 AM
John,
I was thinking about your progress on the car just the other day. It really looks great. Congrats! Your patience, enthusiasm and skill have paid off. Can't wait to see it in person. I'll give you a call the next time we are in Indialantic.
Brian
Posted by: FourBlades Mar 1 2010, 07:45 PM
Hey Brian,
Next time you are over we can actually drive a 914 instead of just admiring
them sitting on jack stands.
John
Posted by: oz371 Mar 1 2010, 08:28 PM
Awesome work, Awesome thread!!!
Posted by: FourBlades Mar 6 2010, 06:28 AM
Starting the balancing and tuning process for my carbs. I noticed that CB
performance sells a kit to relocate the throttle spring on the left side carb so that
both carbs have the spring on the front (of the car) side. This is supposed to even
out tension on the cross bar.
Is anyone using this or is this a recommended thing?
John
http://www.cbperformance.com/catalog.asp?ProductID=551
Posted by: McMark Mar 6 2010, 09:22 AM
Syncing and tuning the carbs is a slow, methodical, and iterative process. You're going to go through everything more than once. Just accept it now.
If you want a type rundown of my process, let me know and I'll start the fingers working on it. 
Posted by: FourBlades Mar 6 2010, 09:35 AM
Yes, please on the procedure!
I have the syncrometer tool. I have an LC-1 wideband AFR I need to install.
Anyone using the CB Performance weblink???
Where do people get their CHT and EGT sensors?
John
Posted by: oz371 Mar 6 2010, 12:18 PM
There comes a time in every restoration when your engine must find a transmission to mate with and leave the security of the living room.
Now I just need to figure out how to wire it up, set timing, synch the carbs, and
maybe attach a car to it.
John
In the Living room? Really?!?!? You are my Idol.
Posted by: carr914 Mar 6 2010, 03:39 PM
Looking Very Good
About a car without Title I agree. When I got #673, it came with a (really) Rust Free 71 914-4 ( from Albany New York, originally) The DAPO ( the guy that said I ruined #673) would not give me the Title for for the 71. I sold it for $500 as a Bill of Sale racecar. I later saw the car here on the F/S Classifieds with a $4k paint job. I asked the guy if he hadn't gotten a Title - "No, it is supposed to be easy here". Here like in Florida? Where cars go out of ports everyday?.
Now get to the IMSA car
T.C.
Posted by: FourBlades Mar 6 2010, 04:21 PM
> About a car without Title I agree. When I got #673, it came with a (really) Rust
> Free 71 914-4 ( from Albany New York, originally) The DAPO ( the guy that said
> I ruined #673) would not give me the Title for for the 71. I sold it for $500 as a
> Bill of Sale racecar. I later saw the car here on the F/S Classifieds with a $4k
> paint job. I asked the guy if he hadn't gotten a Title - "No, it is supposed to be
> easy here". Here like in Florida? Where cars go out of ports everyday?.
I ended up getting a Maine title and transferring it to Florida. Getting a Florida
title seemed like a non-starter unless you know a shop or a towing service
that can put a lien on it.
> Now get to the IMSA car
I am back to buying parts for the IMSA car. I found a local soda blaster that
should be able to save me a lot of time. The big thing I need is an engine
that is reasonable $$$. I did some cleaning of floor tar and window bead the
other day and it felt good.
Driving the Rockin 914 today, the idle kept getting faster and faster. Would
having a vacuum leak in the intake manifold gaskets cause that? Looking at
Mark's post lately about how crooked the plates were on a new set of manifolds
has me worried.
John
Posted by: McMark Mar 6 2010, 05:18 PM
John,
Definitely check those manifolds. I don't think anything was done to them, but better safe than sorry. Plus you'll be starting over on the sync anyway.
Syncing (somewhat abridged)
0. You want the motor nice and warm, because heat expansion can affect these settings.
1. Remove the linkage. Seat the air bypass screws completely (next to the idle mixture screws, 8mm lock nut). With the motor idling, check the airflow on both throats. Back out the air bypass screw on the throat that is flowing less air. Once the two throats are matched, tighten the lock nuts and double check. Now repeat on the other carb, but don't try and match the air flow on both carbs. This step just equalizes the individual carbs and must be done correctly before moving on.
2. Using the idle adjustment screws (by the linkage, not the mixture screws) to match the air flow between the carbs. You'll also want to get it roughly idling at the correct speed.
3. Now reconnect the linkage with the motor idling, and make sure that your linkage doesn't change things. Adjust your drop links as necessary to maintain the correct airflow. You don't want your linkage holding anything open when it shouldn't.
4. Shut down the motor and check that both carbs are hitting WOT at the same time (or at all). You may have to adjust the location of the arm on the hex bar in order to get both idle and WOT at the same time. Don't worry about if you drop links are vertical or equal length or anything else like that. If you're getting idle and WOT at precisely the same time, then that's perfection.
5. Restart the motor and check the idle airflows and check the airflows off idle (what RPM doesn't really matter, but you'll need to have someone help hold the RPM up). Any discrepancy here must be adjusted out in the linkage geometry. Expect to go back and forth on the linkage geometry for an hour or so.
6. Double check all of the airflows on all four throats at idle. And NOW you can start playing around with idle mixture screws to clean up the idle.
7. Triple check the airflows on all four throats and if they're off, go back to step 4.
If your idle airflows, off-idle airflows, linkage geometry (hitting idle and WOT), and idle feel/sound/vibe/mixture are all right, you can test drive it and see how that all feels and then start another round of tweaking. As much as you want it to be over quick, you'll get much more positive results by really digging in, assuming nothing, and triple checking everything.
Good luck!
Posted by: FourBlades Mar 6 2010, 05:43 PM
Thanks Mark, that is really helpful.
I'm gonna start in on it tomorrow.
My manifolds came from Jake so I'll check with him if they trued them up.
I may just need to tighten the nuts on the engine and carb up.
John
Posted by: dr.wood.2000 Mar 6 2010, 09:41 PM
WOW Is all I can say. You did a great job and have given me alot of info in my rebuild my rust bucket. Congrats!
Posted by: FourBlades Mar 7 2010, 04:18 PM
I retorqued the intake manifold and carb nuts and brought the idle down a lot.
Then I played with the linkage bar arms and got it idling pretty smooth at about
900 rpm. I compared my timing light against my tachometer and my tach is
actually working and fairly accurate. Each cylinder showed 910-930 rpm on
my timing light. Camera is dead so no pictures.
Bled my front brakes again and had zero air bubbles. Brakes are a little weak.
I can't come close to locking the tires up. There must be air in the rears still
or WTF?
Had my first break down!!! Wife and I went out for a drive and she was bitching
about stopping to get gas. 30 seconds later, car dies like it ran out of gas. I
walk down street, get gas can, still won't run. Open engine and the jumper I was
using to power my fuel pump had come off. Put it back on, car fires right up and
we go home. Wife still sure we ran out of gas. Its possible two things could
have hit me at once.
Not sure why I am getting no fuel pump signal. I have a brand new ignition
switch. I am thinking something wrong on my engine relay board.
John
Posted by: FourBlades Mar 23 2010, 11:45 AM
I switched out my relay board for another one I had. Now I am getting a fuel
pump signal and some other stuff is working.
My brand new alternator is dead. I had noticed the posts about new Bosch
alternators shorting to the 914 alternator cover. I was confused about which
bolt was shorting. The longer bolt on mine has a rubber cover so I though it
was ok. It is the other bolt that shorted. I swapped alternators with another
car and my alternator started working.
Now I wonder if I can replace the diodes in the alternator I killed? Does anyone
know if this is possible or what the specs on the diodes are? I have a multimeter
with a diode test feature but I have no idea what it is telling me.
Still fiddling with getting my horn and headlights working.
John
Posted by: kwales Mar 23 2010, 01:32 PM
Yup, diode replacement is easy if you have the right ones. For parts that old, the the part number might be on them
If my memory serves, the diodes have a hex base and screw in and out.
There's a section on diode checking in the factory manual.
Hope that helps,
Ken
Posted by: FourBlades Mar 23 2010, 03:13 PM
Thanks Ken, I will check it out in the factory manual.
Maybe someone here knows a replacement diode that will work?
John
Posted by: RobW Mar 24 2010, 07:37 AM
Awesome build!
Posted by: Zaney Mar 26 2010, 10:24 AM
Great Job John!
See your build come to a Happy Ending makes me want to finish my Suby Conversion NOW! (Except, I am being good and saving money rather than using the plastic )
Now give yourself a moment to step back and admire the teener before diving into the Racecar!
Cheers!
Nate
Posted by: Phoenix 914-6GT Mar 26 2010, 10:30 AM
Wow, I didn't see that you finished it . Nice work John. This is simply amazing that you were able to bring this back from where it was.
Posted by: kwales Mar 26 2010, 11:19 AM
Sorry for the delay, I've been out of town.
Open that puppy up. If memory serves from my alternator rebuild, there was a part number printed on or stamped into the diode. Diodes are one way doors and pretty easy to check.
Connect one way across the diode and the the meter should show a very low resistance. Connected the other way across the diode, it should show a very high resistance. If it is the same, the diode is an open door - aka piece of junk.
And, diodes are like playing horseshoes- close counts. It's probably a safe bet that any diode that mounts in the hole and is for an automobile alternator will work. Got a scrap VW alternator in a junkyard down there???
Do clip a heat sink to the solder area to prevent heat damage to the diode when soldering. On stereos and the like, I steal one of my wife's hair clips. For this, needle nose pliers (or a connector crimper) and a rubber band would suffice.
Posted by: FourBlades Mar 26 2010, 07:33 PM
Thanks for the tips, Ken, I will open it up and see what is going on.
I still have to finish the interior and do some tweaking, still some eletrical issues.
My brother is visiting and we took the first ride with the top off, awesome.
The Tangerine header and muffler are on the loud side for a street car but sound
really nice.
I am talking to a soda blaster about doing the IMSA car, I hope to tear into it
big time next month.
John
Posted by: McMark Mar 26 2010, 07:39 PM
Ya know....
You talked about photography awhile back. Why don't you post some more recent pictures.
Last time you posted pictures was under an Easy-Up. Give us some proof it's moved. 
Posted by: FourBlades Mar 28 2010, 06:46 PM
First time out of the backyard!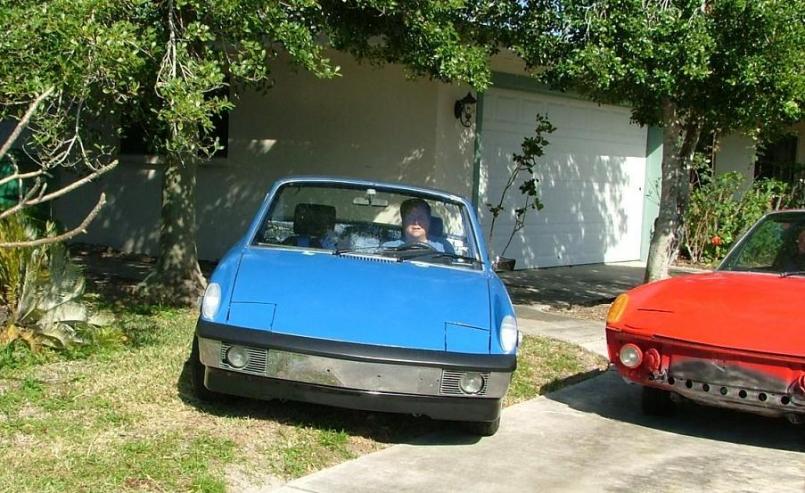
On the shore of the Indian River.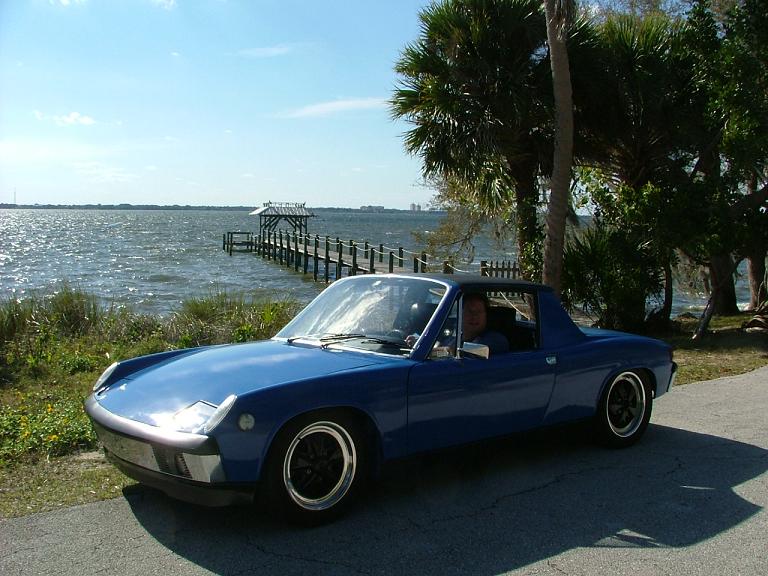
I need to seriously start carb tuning. The motor does not make nearly the power
I know it can. My oil pressure is over 80 psi on startup, I need to check it when
it is warmed up. I may go to a 150 psi sender and gauge.
I can take my hands off the wheel at 35 mph and the car goes totally straight. I
have only done an eyeball alignment so I am pretty stoked. I was worried the
car would be bent up from all the welding. I plan to get a Porsche dealer
alignment soon.
Those are 6x16" real fuchs with 205 kuhmo tires. The rears fit with 1/2 inch or more
of clearance. I think the fronts rub at full lock. These bigger wheels and tires
make the car more modern and aggressive looking in a way I like a lot. With
Bilstein shocks and 180# springs it is very comfortable, not harsh at all.
I want to take some really good pictures when it is a little more finished.
John
Posted by: Gint Mar 28 2010, 07:34 PM
Looks great!
Posted by: dlee6204 Mar 28 2010, 07:59 PM
 The car looks AWESOME!
Posted by: McMark Mar 28 2010, 08:26 PM
Posted by: RiqueMar Mar 29 2010, 08:43 PM
So I guess this means we will see you out here for WCR, right? Yeah, thats what I thought!
Posted by: watsonrx13 Mar 30 2010, 05:07 AM
Great job John....
-- Rob
Posted by: FourBlades Mar 30 2010, 08:38 PM
So I guess this means we will see you out here for WCR, right? Yeah, thats what I thought!
I would love to do that but it would be even crazier than restoring the car in
the first place.
John
Posted by: arkitect Mar 30 2010, 10:30 PM
John,
Cool job, you are definitely determined. I am currently working on a 70 teener project with its share of rust issues.
I like your roll over wood device you made to work on the floor pan. Been thinking of making a rotieserie (sp?) but don't know with the long damage would cause additional problems from spinning it. With a roll over frame probably put a lot less stress on the body.
Hopefully I can achieve the same level of success as you.
Dave
Posted by: FourBlades Apr 1 2010, 06:48 PM
I am having a problem with my new 80 PSI VDO oil pressure gauge. I have the
matching 80 PSI sender with two terminals. I have the sender grounded. I have
the gauge grounded. I have switched power to the gauge. I have tried both of the
terminals on the sender. Either one causes the gauge to bury the needle past
80 PSI and never come back until I disconnect everything. So is this gauge or
sended just f-ed up? I think the sender is reading 245 ohms with the engine off,
did not get a reading with it running. I used the 4500 PSI grease gun extension.
What am I doing wrong?
I also measured each of the barrels of my carbs with a synchronometer. With
the car warmed up and a steady 1100 rpm idle, each barrel reads 11 mystery
units steady. I am guessing Blake balanced these before sending them to me
from Jake's. I need to start dinking with my cross bar linkage next.
I smell a sweet exhaust smell around the car after idling for a while. I think
this means it is running rich, right?
John
Posted by: FourBlades Apr 3 2010, 06:17 PM
No one has any idea why my oil pressure gauge is not working? Do I need to
ground the gauge and the sender to the same place? Some gauges measure
the voltage difference in a way that requires all the grounds to be at the same
level.
Drove the car with a friend today and had a great time. I think the engine is
making more power the more I drive it and follow the break in procedure of
varying the RPM as much as possible.
John
Posted by: silver74insocal Apr 3 2010, 08:30 PM
if you measure the continuity between the 2 grounds and you see a short, there is no difference in them. seems weird to me that both the gauge and the sender are grounded, check the wiring diagram that came with the system
if not point me to it on the internet and we ll get it figured out. Dave
Posted by: FourBlades Apr 13 2010, 07:44 PM
My engine was not making the kind of power I expected it should. Someone
suggested I try pulling each plug wire one by one to make sure all 4 cylinders
were firing. I am thinking, yeah right, but sure as hell only 2 cylinders were
firing, and on the same side of the car!!! The engine has about the same power
on 2 cylinders as my stock 1.8 has on 4...
I read on the world about someone having the same problem, where one side of
their engine was firing and the other wasn't. They switched their carbs
from one side to the other and the problem moved from one side of the engine
to the other. I spent an hour or so this evening doing the same thing and
had the same result!!!
Now the other side of my engine is firing and sounding pretty good while
the formerly working side is doing nothing.
To me, this means the problem is a clogged carb. I pulled some of the jets
and sprayed liberal carb cleaner everywhere but still got nothing.
Tomorrow I will take the whole carb apart and clean it. I noticed the float
bowl area was coated with some kind of white, spongy crap. These carbs
sat for 12 months after being test run, so I guess there is varnish
or residue somewhere in there that keeps them from flowing any fuel during
idle and part throttle application.
The accelerator pumps do shoot fuel on WOT so some fuel is getting in
there.
Anyone have any tips on how to clean this type of carb and which passages
must be clogged to get no fire at all in the two cylinders? I have two weber
books but you all must know some good tips.
Thanks...John
Posted by: 914Tom Apr 14 2010, 12:41 AM
hi john,
before you fiddle with the carb.
when your car is running for a while, take the sparkplug on the 'not firing' side out and look at it.
if wet, i think you should better interchange the sparkplug's and wires, maybe you have a ignition issue ?!
have you look the distributor cap, is the inside OK, maybe the contacts ar rotten out or the are green, this means also no spark ?
my 2c about, 1 hope to get my teener running next summer..
TOM
Posted by: FourBlades Apr 14 2010, 03:33 AM
Tom,
I'll check all those things out, I did not think of that.
John
Posted by: Racer Chris Apr 14 2010, 05:07 AM
Maybe a stuck float in the carb that isn't working.
Better stuck closed than open though.
Weird that it lets enough fuel in to operate the pump jets but doesn't flow freely.
You can usually fix a stuck float with the carb in place. Unscrew the top plate and lift it up so you can see/feel that the float moves up and down, then screw it back down and re-test.
Posted by: FourBlades Apr 14 2010, 08:25 AM
Chris,
I'll check the float valve out. That is a good idea. I pulled out all the jets and
unclogged them. The big ones on the top were righteously clogged but the
others looked ok. Still nothing.
I wonder if just enough fuel bleeds by the float valve to work the accelerator pump occasionally but not enough to get siphoned constantly into the venturi?
I think the float valve inlet is mostly clogged.
John
Posted by: McMark Apr 14 2010, 09:51 AM
You should probably take both apart and clean them. If there's corrosion crap that clogged up one, chances are the other one is possible as well. Better to put in a few hours now, and avoid days of headaches later.
Get a couple of tinfoil roasting pans from the grocery store and you have a nice clean place to put all the little parts as you work. You just need to pull all the jets out and the cover off and spend some time squirting carb cleaner down all the jets and orifices.
Posted by: FourBlades Apr 14 2010, 11:21 AM
I am going to go through both carbs one at a time as you suggest. It is really
rather surprising that one is working and the other is not.
John
Posted by: FourBlades Apr 16 2010, 12:38 PM
Got both carbs working and went for a short drive.
OMG....grin meter is pegged. This is one powerful motor...
Gonna go through the other carb now and get it balanced.
John
Posted by: McMark Apr 16 2010, 01:03 PM
SWEEEET!
Posted by: 914Tom Apr 17 2010, 12:55 AM
SWEEEET!
congratulation.
Posted by: FourBlades Apr 24 2010, 02:40 PM
Finally had time to go through both carbs completely. I found that the float on
the side that was idling better was set at 1 mm instead of 11!!! The other carb
was not idling well most of the time until I corrected this. The carb with the
high float was running rich and preventing the other carb from idling at all
unless I set the idle really high. Setting the float levels of both carbs to 11
allowed them to both idle at the same RPM.
I also cleaned and blew out all the passages in both carbs, put in new gaskets,
and reset all the screws to the recommended starting points. I am learning a lot
about IDFs, I think I took the one apart about 3 times before I found the problem
was really with the carb I thought was working better. If the carbs had worked
perfectly out of the box I would not have learned anything at all about them so
it was worth all the fooling around.
Now the car idles much better and pulls even harder.
There is a little flat spot between idling and open throttle, but not bad. One it gets
on the open throttle it pulls very strong. I uploaded another video. It is not great
but it gives some idea how it sounds.
https://www.youtube.com/watch?v=BnbSE7vNqJ4
John
Posted by: McMark Apr 24 2010, 02:49 PM
Yeah, the floats always seem to get f-d up during shipping. I suspect lots of bouncing with no fuel in the bowl to absorb the jolt.
Cool video! (I embedded it for you)
Posted by: FourBlades Apr 24 2010, 03:04 PM
Yeah, the floats always seem to get f-d up during shipping. I suspect lots of bouncing with no fuel in the bowl to absorb the jolt.
Cool video! (I embedded it for you)
Thanks for embedding the video.
I guess lesson learned is always clean and go through new carbs before putting
them on the car. Now I can actually try to balance their air flow.
John
Posted by: corsepervita Apr 24 2010, 03:04 PM
I just went through all 18 pages of this thread. I have to say I am just impressed by the dedication to getting the car back on it's feet. Most people I've seen that go for "resto projects" like this end up ripping it apart, see the rust and would go "OMG. Nevermind... taking this to the scrap yard."
But to see it go through all of that work, get put back together and restored back to working condition and get the treatment it has, that is very impressive. Great job. I bet it's the best feeling in the world to look back on those pictures and now go drive it and know you did that all yourself. Good job.
PS: This thread makes me wish I had a welder.
Posted by: FourBlades Apr 24 2010, 03:27 PM
I just went through all 18 pages of this thread. I have to say I am just impressed by the dedication to getting the car back on it's feet. Most people I've seen that go for "resto projects" like this end up ripping it apart, see the rust and would go "OMG. Nevermind... taking this to the scrap yard."
But to see it go through all of that work, get put back together and restored back to working condition and get the treatment it has, that is very impressive. Great job. I bet it's the best feeling in the world to look back on those pictures and now go drive it and know you did that all yourself. Good job.
PS: This thread makes me wish I had a welder.
Its funny you say that, I was just going over some unposted pictures of the car
when it was really bad. Each little bit that you do is satisfying and motivates
you to keep going. When I flipped the car on the rocker, I thought I was nearly
done. That was 2 years and 2 weeks ago.

Mmmm...
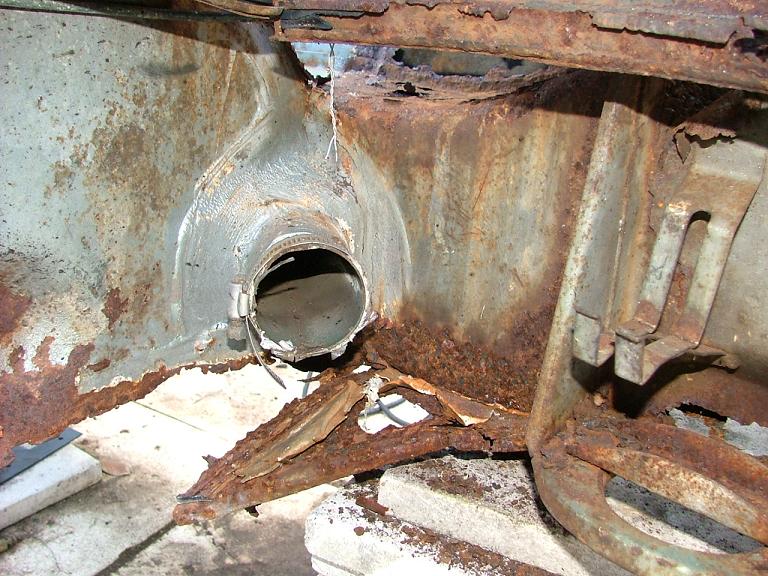
Geeeeez...
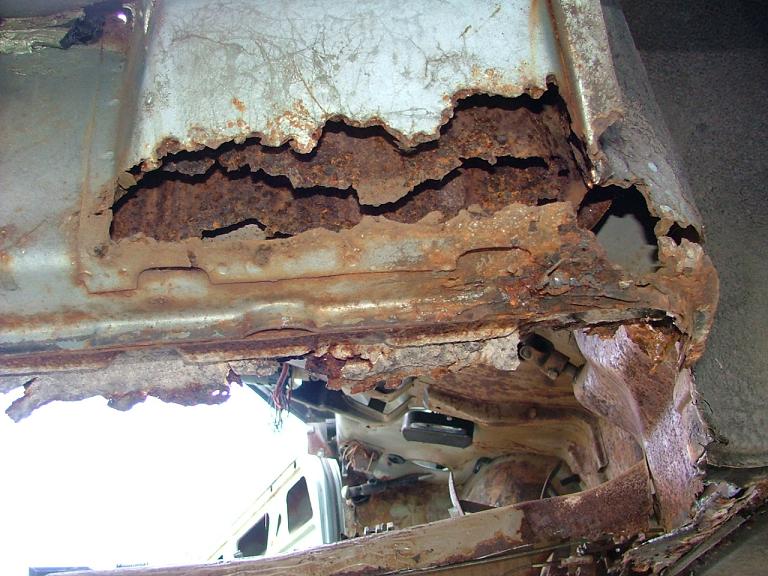
I wanted to learn to restore a car more than I just wanted a car to drive. I was
thinking of making this a hobby business when I can scale back from working full
time. I think I could do it all over in 12 months or less now. I will find out because
I am starting on the IMSA car full bore soon.
John
Posted by: corsepervita Apr 24 2010, 03:32 PM
Yeah that's quite a piece of work you had on your hands. My 924 has gone through similar issues, though the rust is not nearly on the level you are experiencing. I've had to cut out a lot of things, grind down others. It's come a long way. Feels good to do your own work indeed. Hats off to you my friend, that's a lot of work.
Posted by: FourBlades Aug 22 2010, 09:36 AM
Took the car to its first event, a BBQ at the local 356 restoration shop.
I took along a notebook of photos from the restoration. People really liked the
car and many said they had 914s years ago and regretted selling them. Several
people wanted to know when I was opening a 914 shop so I could fix their cars. 
Still have a lot of little cosmetic thigs to finish up. Also working on getting the
ride height and alignment set up right. I already have visions of tarret enginerring
sway bars, camber plates, etc.
John
Posted by: RobW Aug 22 2010, 09:55 AM
Looks fantastic... thanks for saving one!
Posted by: steveherman Aug 22 2010, 10:20 AM
time for a trip over there in my 914.
Posted by: FourBlades Aug 22 2010, 01:49 PM
I'd love to see your car Steve.
Maybe when it cools off a little more...
John
Posted by: carr914 Aug 22 2010, 02:50 PM
So what's up with my old IMSA car?
Posted by: FourBlades Sep 11 2010, 12:37 PM
Had an oh sh*t! moment today. I had my car all warmed up and decided to take
a run over the causeway here that includes a half mile climb to the top of a tall
bridge. I was approaching triple digits in fourth gear with my 2270 pulling
really hard when suddenly there was a very loud metallic banging and cracking
sound!
I slowed down and was wondering what the hell had broken when I see my
top windshield molding flashing behind me before disappearing into the Indian
River. The damn thing parted company with the loudest freaking noise! I
thought my crankshaft must have broken.
When I got home, there were no scratches or damage to the car anywhere. I
had my windshield replaced by Safelite a few days before due to a large crack
in the old one that was getting bigger all the time. The guy did a great and fast
job (for a reasonable $388 installed in my driveway) but a little adhesive got
around the clips keeping the trim on. Something to watch for if you replace your
windshield.
I guess I'll be going to the black, rubber molding after this...
John
Posted by: FourBlades Oct 1 2010, 06:31 PM
Started playing with my Go Pro camera. This is a long and pretty boring video of
a drive around my neighborhood with my dog. I am really impressed with the
quality of the video and the small size of the camera. My engine is a lot louder
than it seems from watching the video. I used the open back for shooting this
so I thought the engine sound would be louder. Thanks a lot to Shoe for doing
these group buys.
https://www.youtube.com/watch?v=BPtWzQZyylw
I will make videos of more exciting roads when I get a chance.
John
Posted by: trojanhorsepower Oct 1 2010, 06:42 PM
That's the closest that I have been to a ride in a 914!
Looks like fun.
Posted by: FourBlades Oct 1 2010, 06:55 PM
I'm telling you, just driving around at sane speeds is fun in one of these cars.
You are so much more involved in steering, shifting, and the engine sound than in
super quiet modern cars.
More like riding a Harley than driving a Lexus.
John
Posted by: BarberDave Oct 2 2010, 11:51 AM
You are a inspiration, us old guys don't have a thing to worry about who will be there to move this sport forward in the next years. It's in very good hands .
 Dave
Dave
Posted by: Cairo94507 Oct 2 2010, 01:09 PM
You are so much more involved in steering, shifting, and the engine sound than in super quiet modern cars.
John
I could not agree more. Last weekend "Elmonte" came over in his white 914-6 with GT flairs and the top off. We went for a nice ride and he let me drive his baby. I was totally in love all over again and can't wait to get mine rolling down the road so I can enjoy the driving experience. Thank you again Elmonte (Chris).
Posted by: FourBlades Oct 3 2010, 08:10 AM
This short video has better sound. It starts with the camera inside stuck on the
back window, then goes to outside on the engine cover, then on to the roll bar
with the top off.
https://www.youtube.com/watch?v=_c9eK5Mf9dA
John
Posted by: FourBlades Mar 29 2013, 08:47 PM
The walking dead thread rides again.
I really should try to keep this thread updated a little better.
Let's see, I went to an autocross for the first time and my carbs clogged up after 2 runs , took the car to a local PCA car show, Joe from Series9 installed Electromotive fuel injection from Clewett Engineering with ITBs , Joe powdercoated my Florida corroded Fuchs and added an external oil cooler , I got a Rennshift , I figured out why my GTS seats don't slide, am taking the car to its first DE at Sebring in 3 weeks, and I finally bedded in my porterfield pads.
I was never happy with my braking even though I have newly restored A calipers on the front, V calipers on the rear, new master cylinder and brace, and porterfield s4 pads. I could never lock up my wheels no matter how hard I applied the brakes.
I pm-ed back and forth with Eric Shea a bunch of times going over possible problems and he figured I had never bedded the pads in sufficiently. I tried bedding them a long time ago but did not bother finding a road where I could really do it right.
So I took Eric's advice and went out to a deserted industrial area with a couple of mile long access roads. I did 5 hard stops from 60 to 10 mph with no lock up no matter how hard I pushed. On the 6th try I totally locked the fronts with hard pedal pressure. I did a few more stops trying to go just short of locking up, then drove around for 15 minutes to cool them off. Now I can lock the front wheels up even when cold no problem. I kept the standard pressure regulator and it seems to be working because my rear wheels never lock.
Hope this helps someone.
Thanks Eric!
John
Posted by: Cupomeat Mar 30 2013, 11:30 AM
Wow, for some reason I had never read this thread, but wanted to say a few things;
1. Wow, what an incredible project and a fantastic job you have done! Congrats!!!
2. Loved the humor, like the leather bag with 28# shot, etc. VERY funny
3. Thank you for saving a 914
Fantastic!!!
Posted by: Racer Chris Mar 30 2013, 08:06 PM
I kept the standard pressure regulator and it seems to be working because my rear wheels never lock.
I've shimmed my regulator spring 1/4" and still can't lock up the rears.
Posted by: ThePaintedMan Apr 21 2013, 06:09 PM
I'm going to bump this to the top for John, as we had an interesting weekend. He took his car on track for the first time at Sebring and I think he had a blast (while it was running). We battled some issues the whole weekend, most concerning was a breather tube that wouldn't stay put on the head vents. The final Saturday session John got "meatballed" for dropping oil. We realized the head vent was spewing oil all over the engine bay. I was able to get it fixed this morning with a smaller diameter hose, and John did most of the afternoon session. Unfortunately he was seeing some wicked oil temperatures, which I think means he needs to look into a good front-mounted cooler for this car. The Raby engine is so big and bad, it just completely overcomes the small cooler that Joe O'Brien installed. Even worse, when John pulled his car off of the track and came back into the pits, the car quit running in pit lane. We suspect the Electromotive ECU that Joe installed died. Perhaps got too hot. I dunno. I'll let John elaborate - he should have some cool video and pictures in the next couple days.
His car is FAST. I got a chance to drive it - it's killer! I had a hard time not slipping the clutch upon acceleration. All in all, a success John. Your car has come a very long way!
Posted by: FourBlades Apr 21 2013, 06:24 PM
Thanks George and Marc for helping me get the car out and working this weekend.
From this five years ago: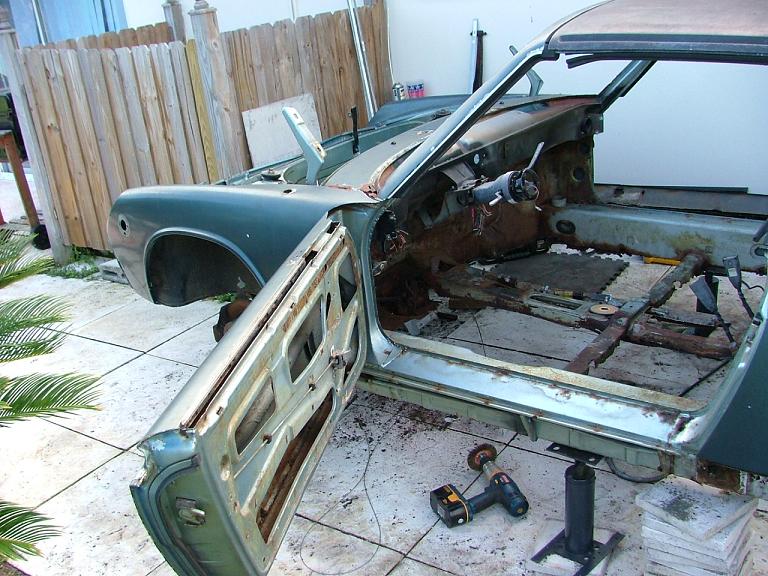
To this weekend:
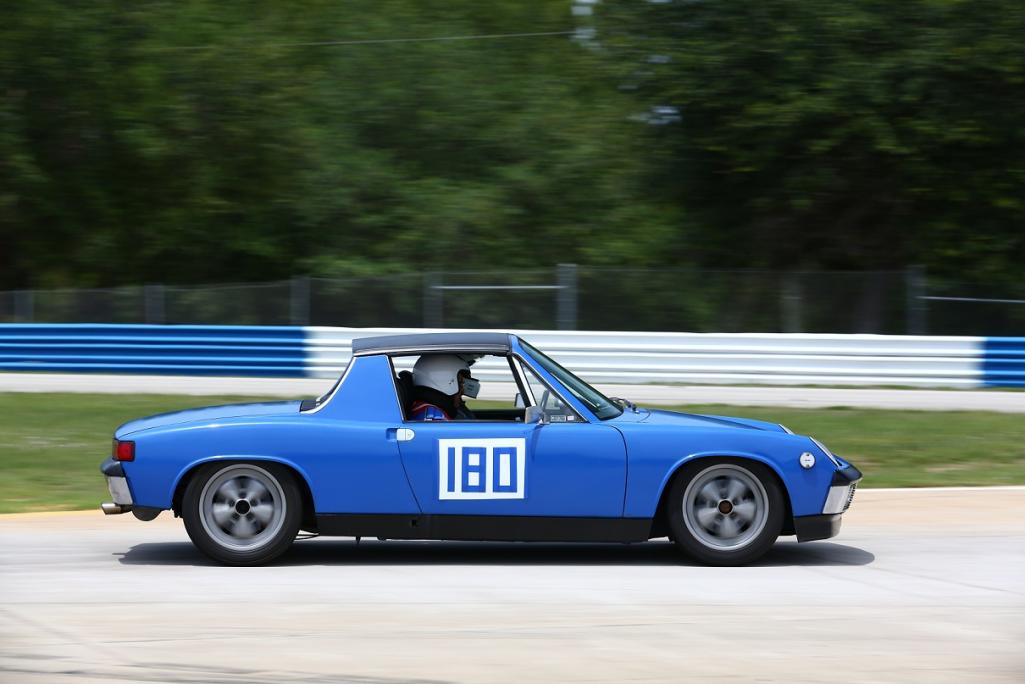
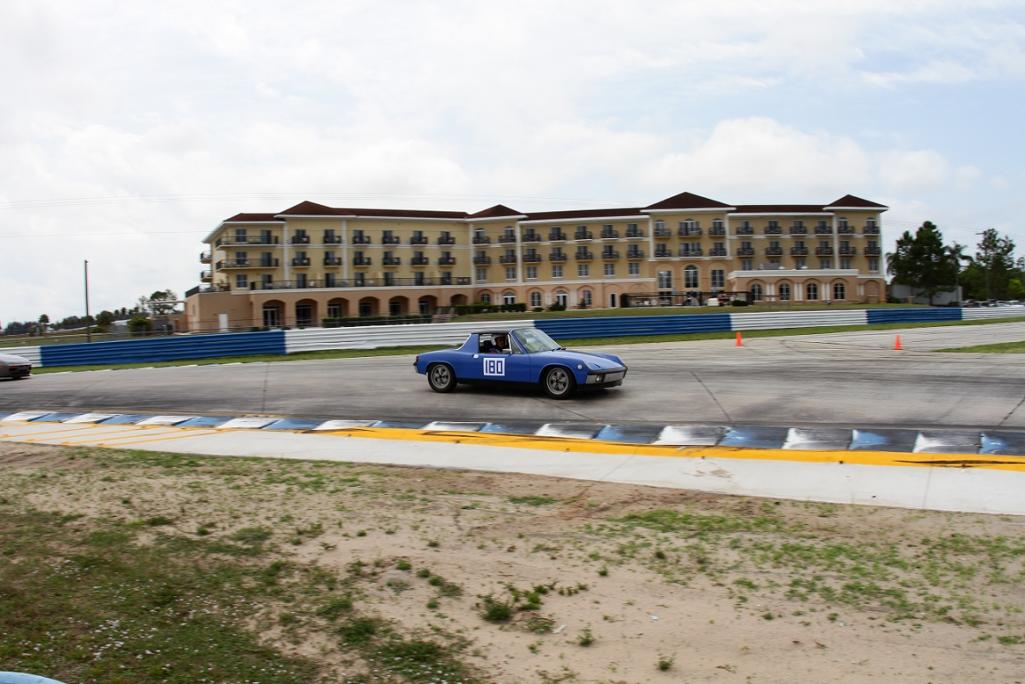
Totally beat now...
John
Posted by: carr914 Apr 21 2013, 08:10 PM
I know that Instructor - Hopefully I will down there in a few weeks
Posted by: ThePaintedMan Apr 22 2013, 05:30 AM
Great pics John! Like I said, the car has come a very long way and you should be proud. But from what I heard this weekend, the driver has too. I think you'll get promoted next time out man. I had a great weekend - thanks for letting us hang out with you bud.
Posted by: FourBlades May 3 2013, 04:49 PM
Car is running again!
A few minutes talking to electromotive tec support revealed that my firmware was erased. I was able to reload it from my computer and the car fired back up and was running normally again. They felt being in a sealed trunk on a 90 degree day and running 30 minutes of laps might have lead to it overheating.
Need to look into some way to keep the ECU cooler.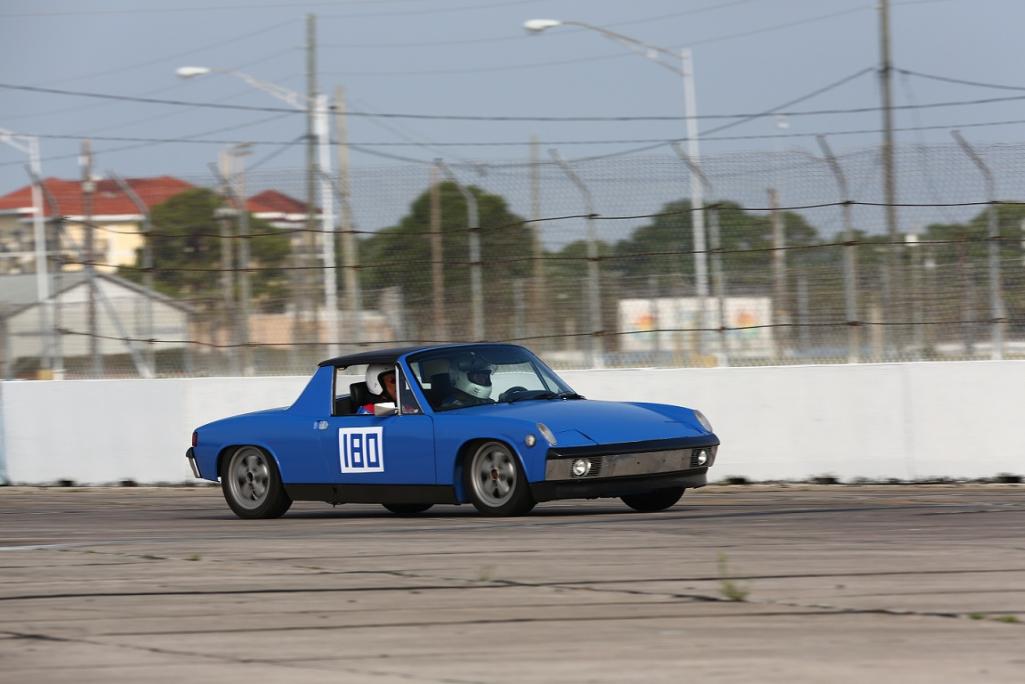
John
Posted by: FourBlades May 3 2013, 05:29 PM
I noticed my alternator light is on and my gauges that are electrical powered are all dead.
I think my battery may be dying. It is a cheap battery that is four years old that has sat unused for weeks and months at a time.
This may be the real cause of my ECU problems.
I need to pick up an optima or oddessey battery after reading about which is better.
John
Posted by: carr914 May 3 2013, 05:31 PM
John, I will be at Sebring next weekend. George & I will bring 2 GoPro Cameras to Video everything
T.C.
Posted by: kg6dxn May 3 2013, 07:11 PM
I mounted my Haltech in the trunk on a big piece of 1/8" sheet aluminum. I put stand offs to elevate the aluminum from the firewall. Seemed to work good. Never overheated the ECU. Basically it was a giant heat sink.
Posted by: FourBlades May 3 2013, 08:16 PM
I think we will do something to make sure it stays cooler.
Maybe put some heat recording stickers on it to see how hot it gets.
I am going diving in the keys at the next Sebring DE so I will miss you guys.
John
Posted by: JamesM May 4 2013, 09:02 AM
I noticed my alternator light is on and my gauges that are electrical powered are all dead.
I think my battery may be dying. It is a cheap battery that is four years old that has sat unused for weeks and months at a time.
This may be the real cause of my ECU problems.
I need to pick up an optima or oddessey battery after reading about which is better.
John
I will save you some time... Odyssey. I used to get Optimas but the quality doesent seem to be what it used to be. As a bonus, even with the larger Odyssey 925 you are still about 1/2 the weight of the Optima.
Posted by: FourBlades May 4 2013, 01:25 PM
Thanks James!
I knew one was generally reckoned to be better.
John
Posted by: ThePaintedMan May 7 2013, 06:57 AM
Way cool John! So glad you got it fixed. I think you were right - it was probably related more to that fuse blowing, but only Joe knows how it was all wired. It might not be a bad idea to figure out a way to provide some direct cooling to the ECU though. Initially I had imagined some CPU fans, but some kind of vent to the trunk would probably do the trick as well.
Posted by: jimkelly Aug 5 2013, 03:38 PM
I had no idea you were painting over the OG paint.
that is a nice blue, I am now considering it for my car.
jim
Posted by: uncle smokey Aug 5 2013, 08:10 PM
Just spent my night reading through this. Absolutely incredible job.
Posted by: ThePaintedMan Aug 5 2013, 08:14 PM
John is a helluva guy to boot. He's out of town now, but I'm sure he'll respond when he has the chance.
Posted by: AfricanHijinx Aug 14 2013, 02:13 PM
great job putting that thing back together. the car looks fantastic
Posted by: FourBlades Aug 14 2013, 08:18 PM
Thanks guys.
Now that Joe has the engine running really well I need to do some serious cosmetic improvements. My first time paint job needs some redos, some color sanding, and some polishing.
I never get tired of just going for a 15 minute drive around town if that's all I have time for.
John
Posted by: FourBlades Feb 1 2014, 10:05 PM
Do you think Porsches are getting bigger all the time?
The wheels on the Panamera are almost taller than the top of my 914 fenders.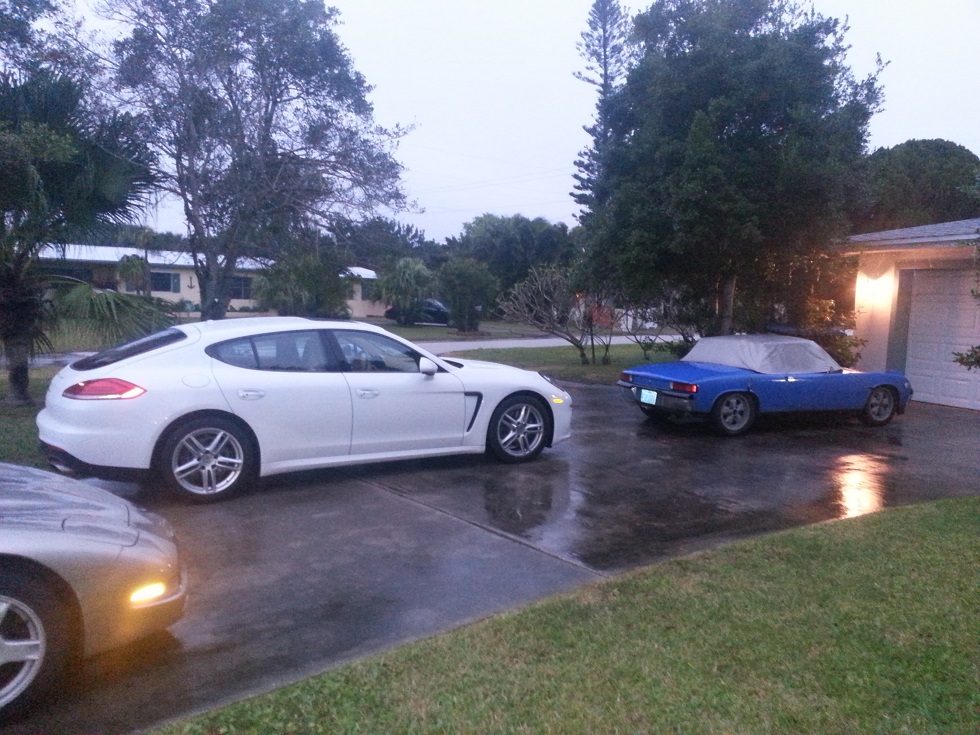
This thing has more controls than the space shuttle.
I like the dynamic ride height feature. It just needs to hop.
This is a loaner car while my 911 is being worked on.
John
Posted by: cary Feb 2 2014, 02:27 PM
I don't like the look of the welds sticking up but I would rather not weaken it with too much grinding.
John
Wholly crap ................ I haven't read this thread all the way thru before.
John your car makes my project look like a new car that might have got rained on a bit. LOL.
I have a tendency to over grind .....................
I keep seeing Jeff Hails re welded rear fender where the weld disappeared.
I'm on page #8. Great work ..............
Then you make me feel bad about not shooting primer as I'm going.
As soon as we get up to 55 degrees I'll start shooting some primer to make it look like I'm making progress.
Posted by: FourBlades Feb 4 2014, 08:53 PM
Cary,
You and your super in law are doing a killer job.
I really enjoy reading your thread.
Its amazing what a little primer will do for making you feel like you are getting somewhere. I recommend it for that reason alone.
I think you really only need to metal finish welds on the outside panels. A lot of the other welds will get covered in seam sealer and not be visible. I did a lot of grinding before figuring that out.
John
Posted by: FourBlades Mar 7 2014, 09:48 PM
Got my car weighed by Joe Sharp at the Tropical Ramble last fall. Joe is just an
all around exemplary human being. 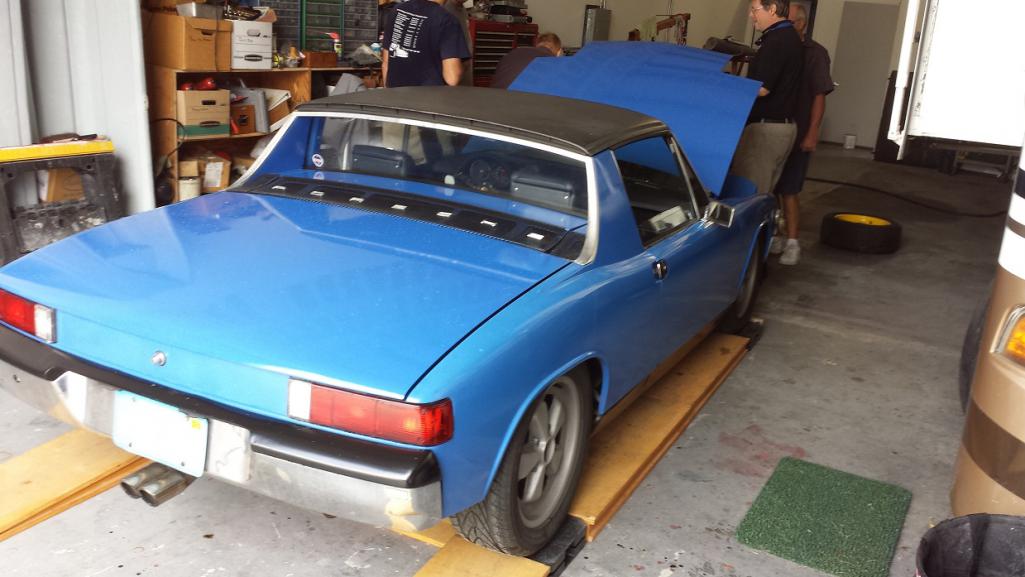
Car weighs in at 2028 pounds with 1010 and 1018 cross weights. Very happy
with the weight and the alignment done for me by Porsche of Melbourne.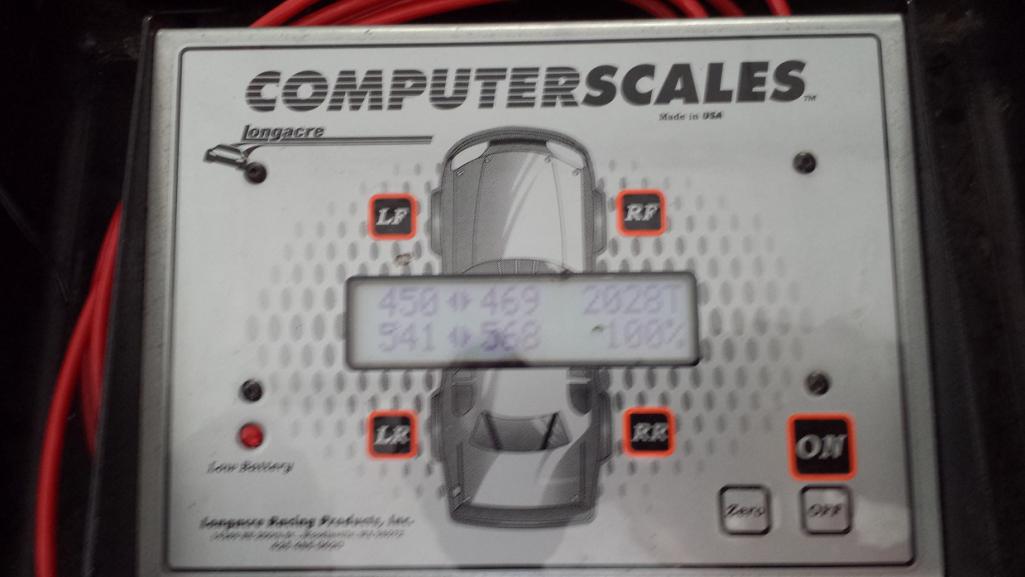
Just wanted to add this to the ongoing story of the car.
Today I did one of the best upgrades ever for my car for the money. I spent 15
minutes and replaced my old rear targa seal with Mark's new and improved one with
the fuzzy seal. Gone are 95% of the mysterious squeaks and creaks while driving
the car. I was starting to think my rear shocks were sticking or something was
rubbing in my rear suspension when all along it was the freaking top. I have had
the rubber tubing on the rear latch posts for years and still got creaks like crazy.
Do yourself a favor and install one of these.
http://shop.914rubber.com/914-Rear-targa-seal-with-fuzzey-New-and-improved-OEM-profile-914RTS-N.htm
John
Posted by: FourBlades May 19 2014, 07:27 PM
Still had a few last creaks and squeaks coming from the rear of the car that were
very annoying. Getting the new fuzzy top eliminated most of them but not all.
Just to be sure, I tried taking the top off and driving, no change. My rocker panels
were a little loose so I tightened them up with a few more screws, no change. It
sounded like my engine cover was creaking so I drove around with it taped open
with a big piece of foam to cushion it, no change.
Finally, I took the rear wheels off and remembered I have grease zerks in the rear
trailing arms. Once I found my grease gun and got it working again I greased all
4 zerks like crazy. With the top back on, the engine cover closed, there are no more
annoying creaks and groans at all! I think this is a custom setup I got from PMB, not
sure the zerks or need for greasing is stock. It has probably been 4 years since I
last greased them.
It is so nice to drive around over bumps and around corners without any annoying
sounds to distract from the rumble of the engine. It may be my imagination but
I swear the handling is better, maybe some serious sticktion was happening in the
rear arms?
John
Posted by: FourBlades Oct 28 2014, 08:32 PM
It was a nice cool day so I decided to tackle some new rust spots on my door that have been getting steadily worse.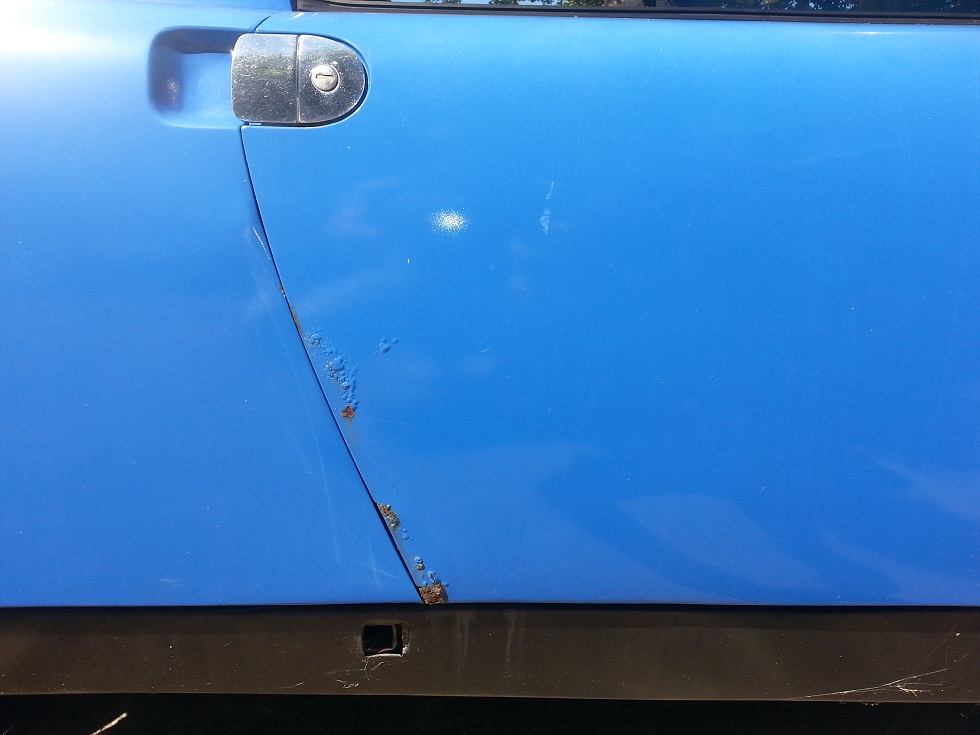
Took off the door and took it apart. Got out the spot blaster.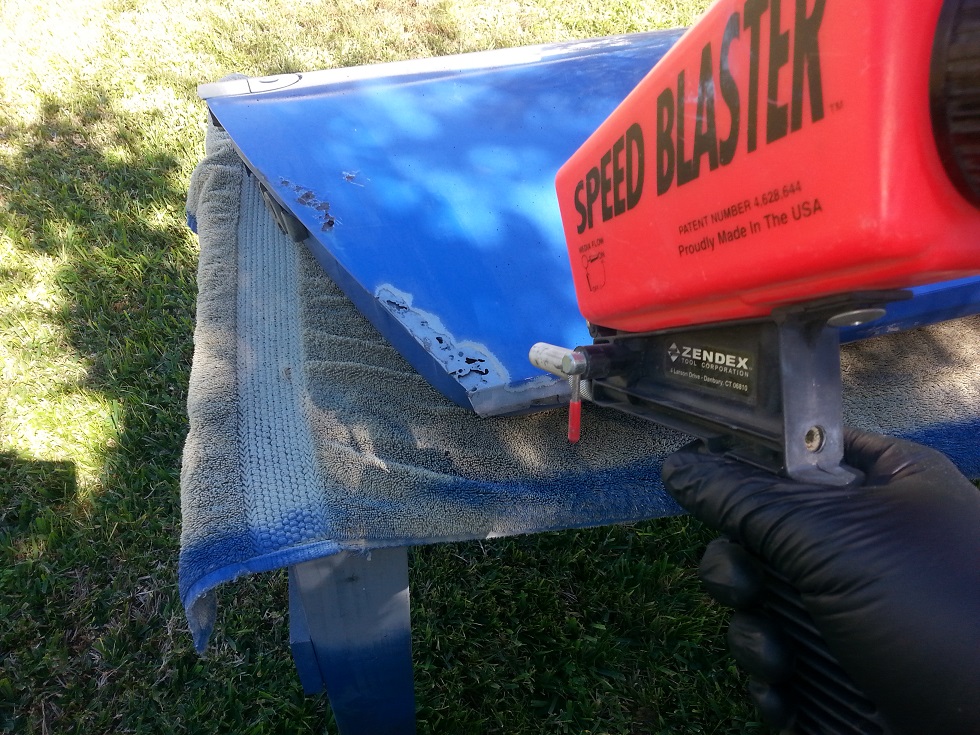
Rusted through in several places. 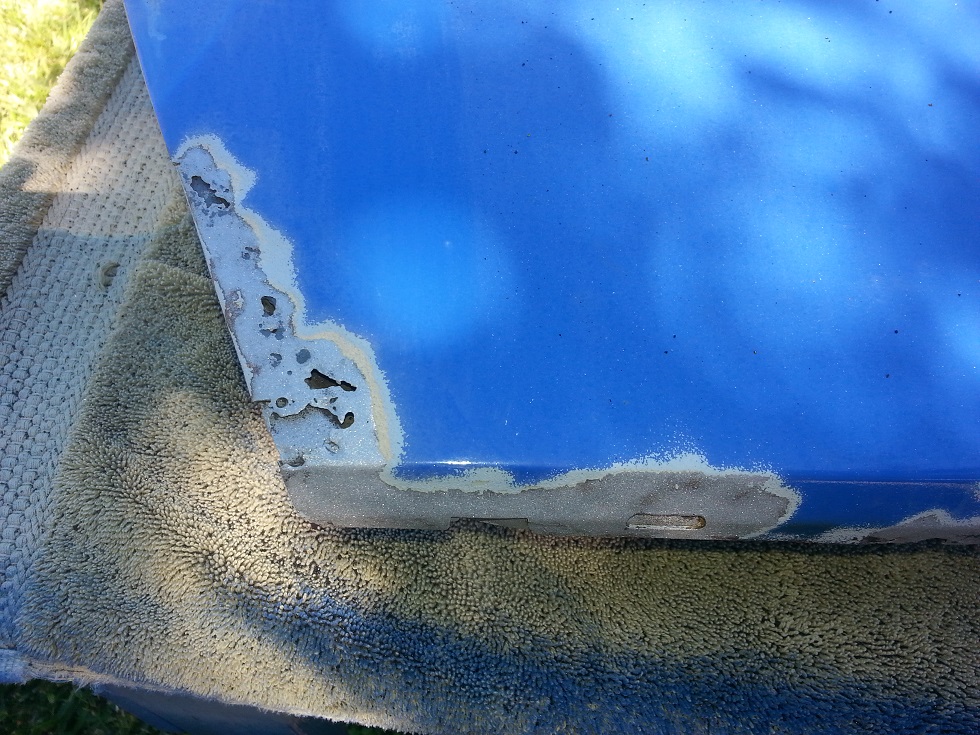
Started cutting out the bad stuff.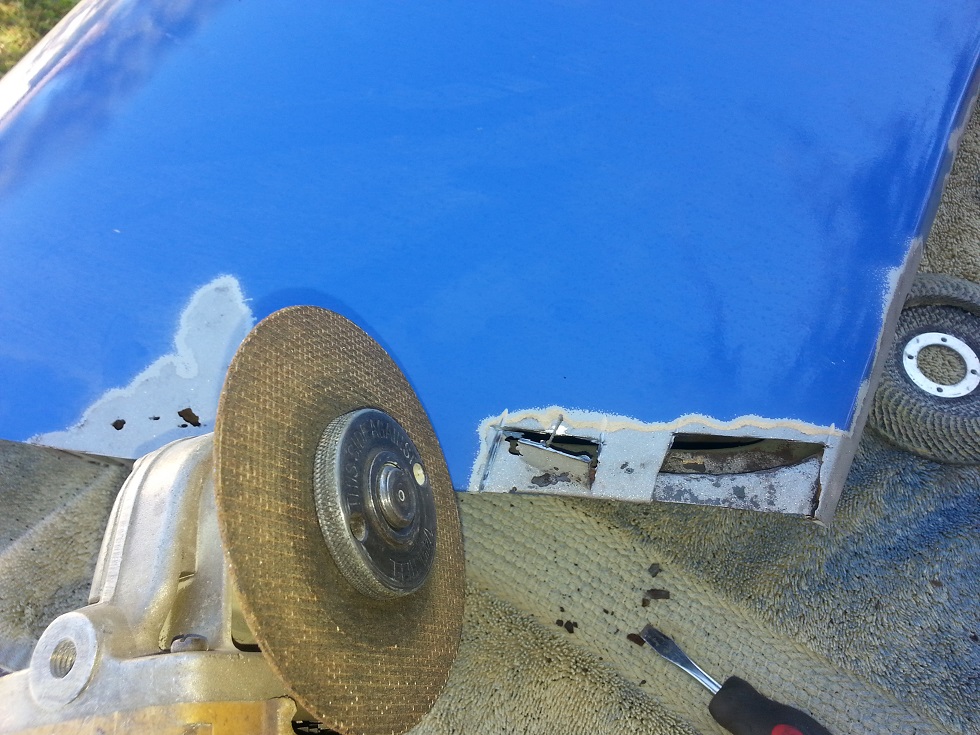
Ready for some patches.
Welded and cleaned up with the blaster. A little spot blaster is so much faster and easier than wire wheeling. I think it gets into the tiny crevices better too.
The spot blaster is only good for small areas. You would go insane trying to strip even one whole door with it.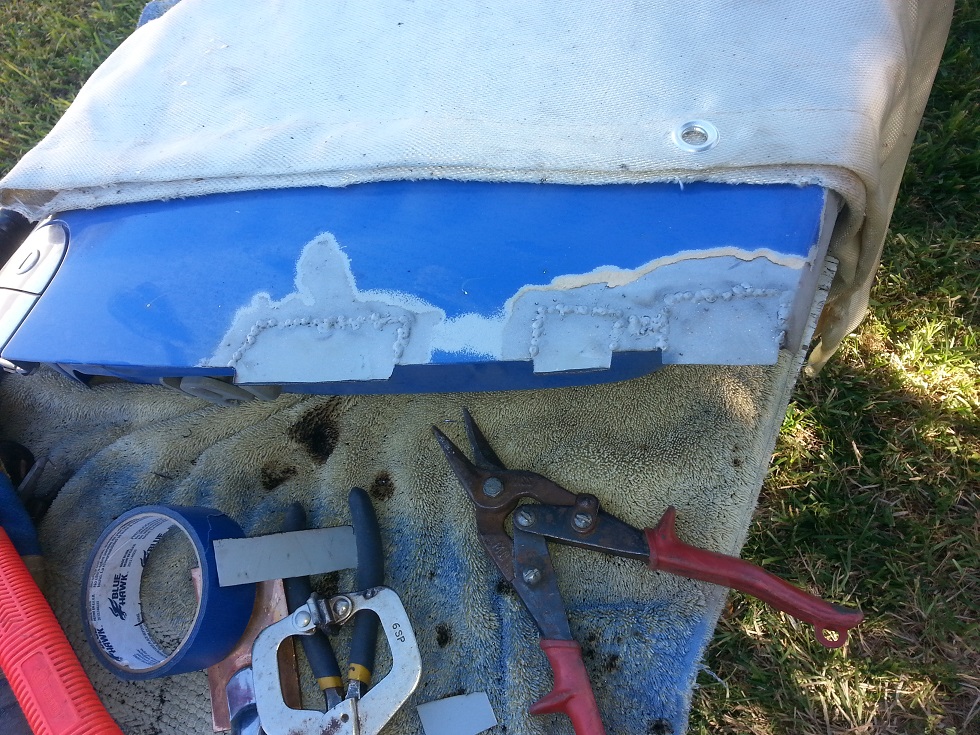
Sprayed some primer for now.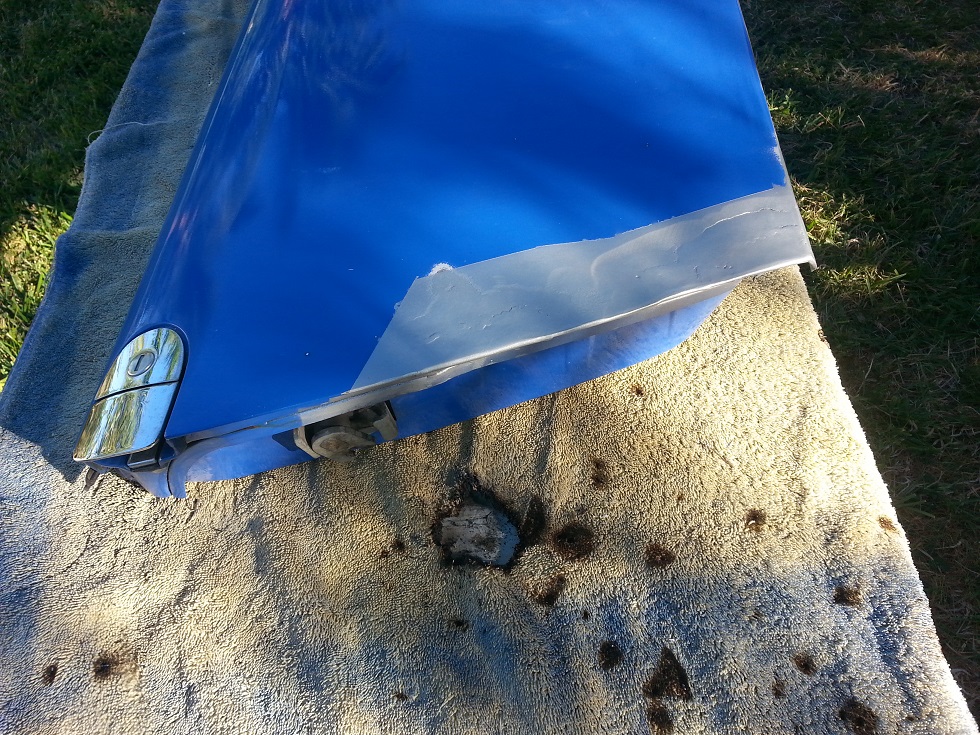
Back together and on the car. I will body work it and respray the whole door later. The door edge shape needs some work.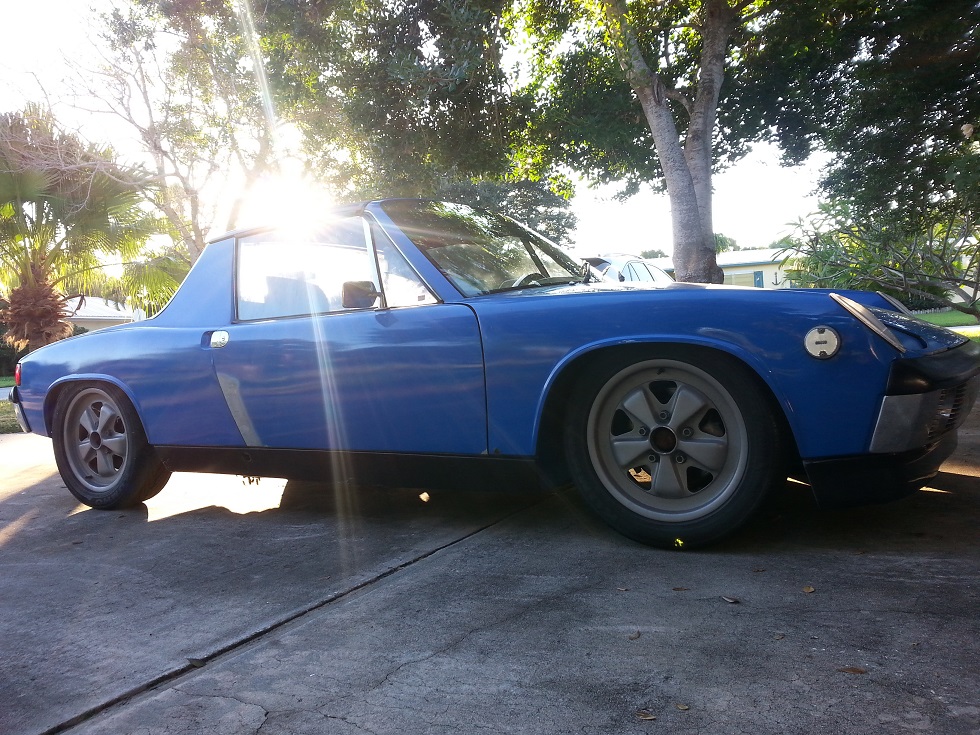
This took about 4 hours altogether. The rust came through from the inside of the door because I neglected to prime the inside of the door skin everywhere.
These spots are behind the door impact bars that are in later doors and I just never got enough paint back there. Sprayed a crap load in there this time so hopefully no repeats.
The patches I did to other parts of the door skin way back are still good on both sides.
John
Posted by: FourBlades Aug 3 2019, 02:11 PM
Wow, five years later and you can multiply those little rust holes by 10...
I am working on fixing it all and have it primed and starting to block sand.
I got a new garage as well...this one has A/C.
John
Powered by Invision Power Board (http://www.invisionboard.com)
© Invision Power Services (http://www.invisionpower.com)