Printable Version of Topic
Click here to view this topic in its original format
914World.com _ 914World Garage _ OT: 914's are not the only thing that rust
Posted by: rick 918-S Feb 6 2008, 07:59 PM
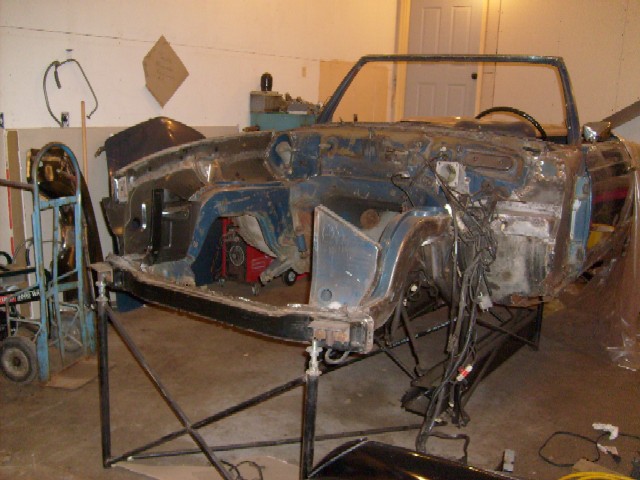
I started out to help a friend with some rust repair on his Mercedes. Things got a little out of hand.
I started on this car last year but had to put it on hold. I worked all summer, fall and early winter out of town.
Attached image(s)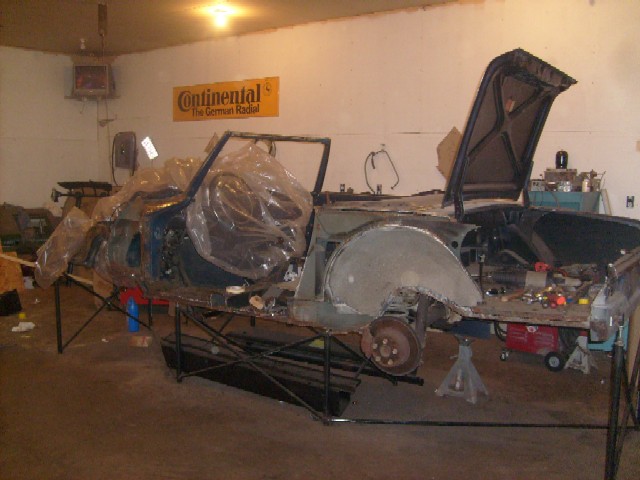
Posted by: richardmosselman Feb 6 2008, 08:00 PM
190 SL? R
Posted by: rick 918-S Feb 6 2008, 08:11 PM
So I'm back at it now.
Attached image(s)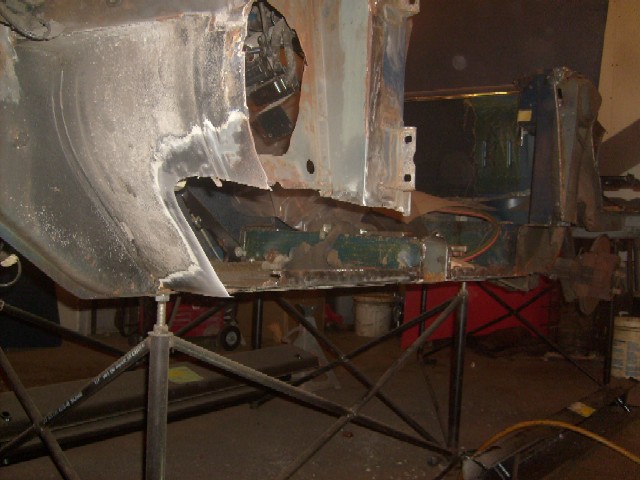
Posted by: rick 918-S Feb 6 2008, 08:12 PM
rear frame rail
Attached image(s)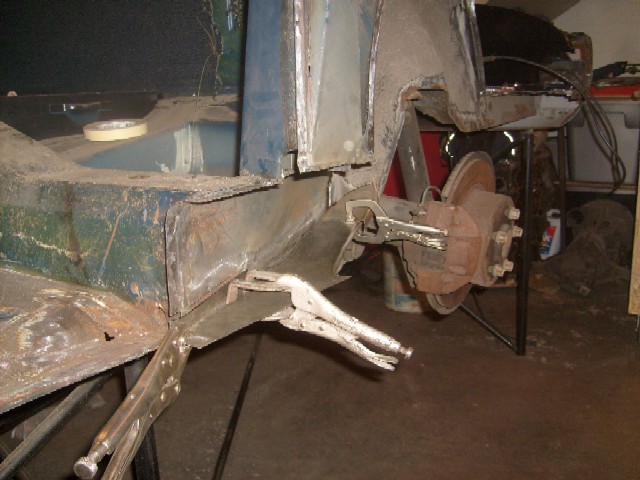
Posted by: ws91420 Feb 6 2008, 08:14 PM
Hey Rick did you finish the Healy w/ the Suzuki drivetrain?
Posted by: rick 918-S Feb 6 2008, 08:19 PM

Hey Rick did you finish the Healy w/ the Suzuki drivetrain?
Sadly, another project on hold for work.
Posted by: rick 918-S Feb 6 2008, 08:27 PM
Repaired the lower inner wheel house put the spot welds back on the lower edge as they were.
Fit to the new outer wheel house ready for the frame rail install.
Attached image(s)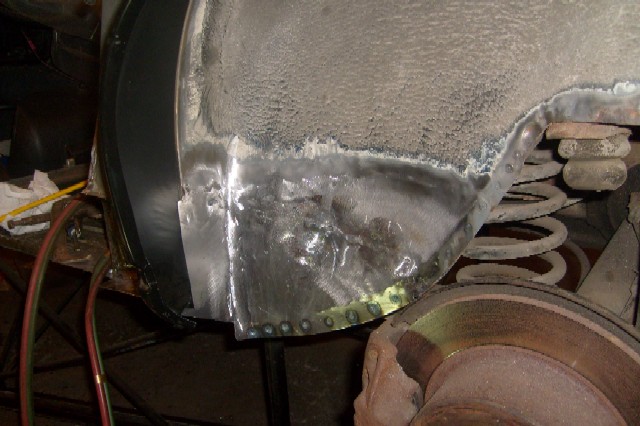
Posted by: rick 918-S Feb 6 2008, 08:30 PM
190 SL? R
1970 280 SL
Posted by: r_towle Feb 6 2008, 08:44 PM
did you make the hammer stand? If so, please explain.
And its use.
IC you use a torch, why?
I got more, but I will keep it short for now.
Rich
Posted by: iamchappy Feb 6 2008, 08:45 PM
You are sick............
Posted by: rick 918-S Feb 6 2008, 09:36 PM
did you make the hammer stand? If so, please explain.
And its use.
IC you use a torch, why?
I got more, but I will keep it short for now.
Rich
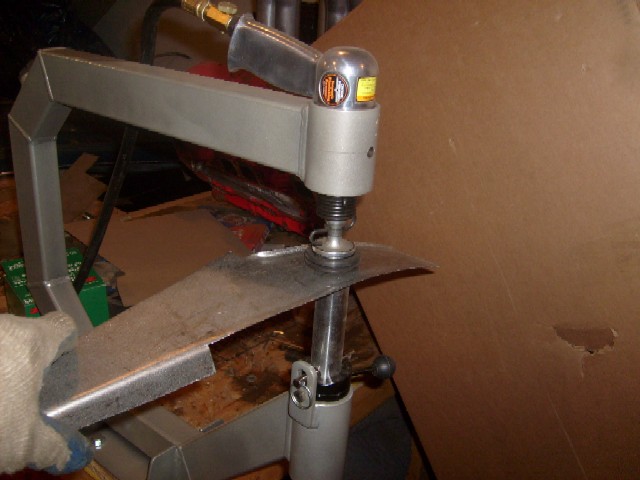
The stand you are refering to is a planishing hammer sold by harbor frieght. The lower anvils that come with the unit have verying radius' for curving sheet metel. I also cut the head off a shrinking hammer and use it in the planisher to flatten stuff out.
Torch is for shrinking, anniling and gas welding. Sometimes the metal will work harden so you need to soften it back up. Some of the panels on this car have obvious gas welds on them. I have to replicate the look.
Ask away.
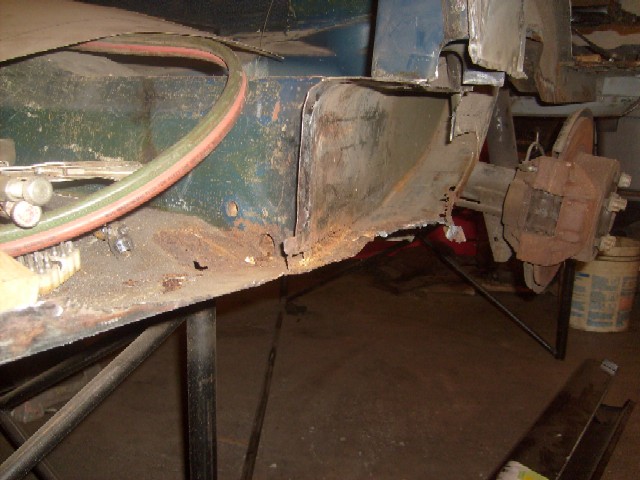
BTW: once the rails (the rockers in this car are actually the structural rails) are back in the rest of the car comes apart to the shell for blasting. I have it set up on a jig now so I have to get the rails back in before it comes off the jig.
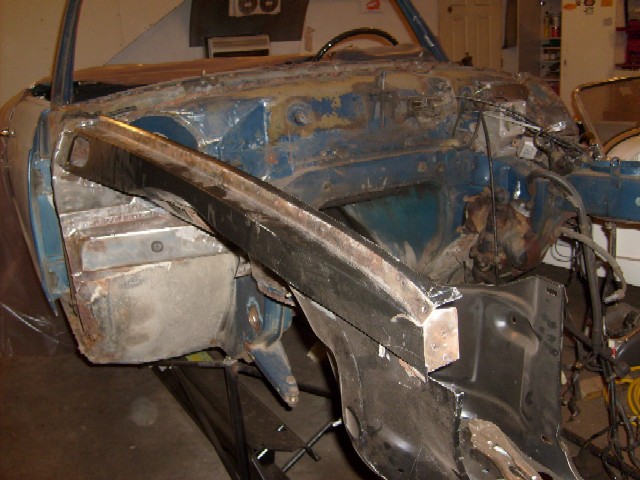
This car had the front shroud (fenders,nose panel, and wiper panel) as well as both quarters replaced probably when it was near new. they were brazed back on. Every place where the brazing was done rusted real bad!
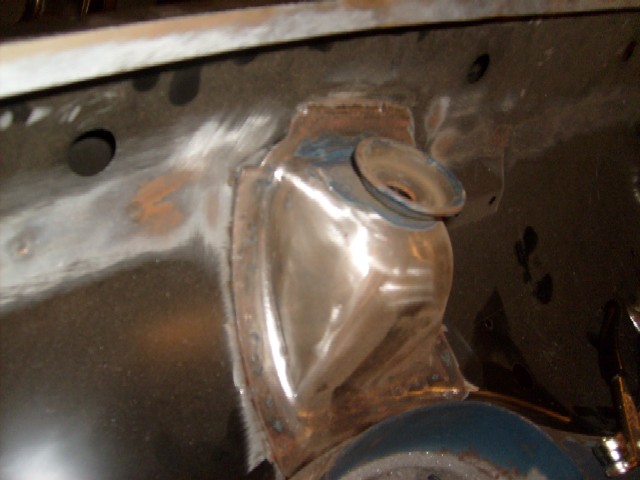
This is the front...
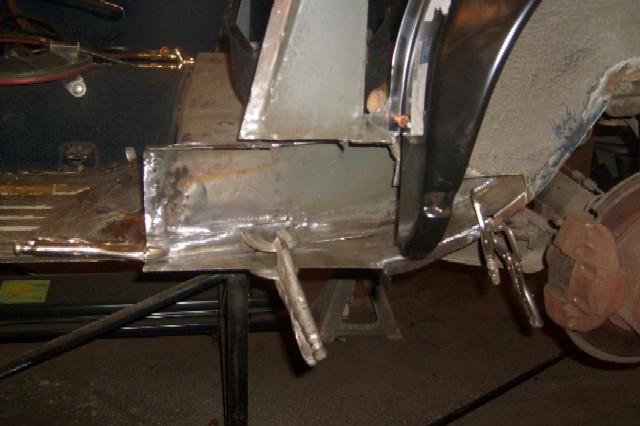
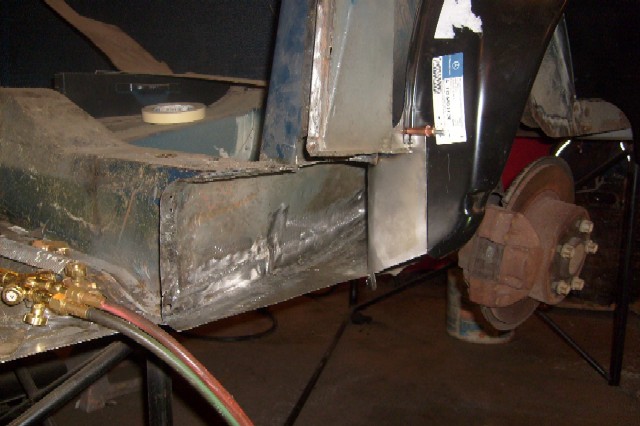
 It's getting new inner structure. I had to assemble the inner panel and the upper boxed rail. I have a spot welder to replicate the factory welds. I transfered the shock mount from the old panel to the new. Notice the weld bead across the top like the factory and the spot welds on the verticals.
Attached image(s)
Posted by: JmuRiz Feb 7 2008, 09:02 AM
190 SL? R
1970 280 SL
OK now I'm scared to start digging into my '74 280C...thanks a lot for making me nervous, haha.
Posted by: rick 918-S Feb 7 2008, 09:19 AM
190 SL? R
1970 280 SL
OK now I'm scared to start digging into my '74 280C...thanks a lot for making me nervous, haha.
These old Mercedes rust worse than any 914. And their method of assembly is less than friendly. In order to drop the engine out the bottom still bolted to the "K" member, you still need to dis-assemble the top end of the engine. You have to remove so many parts you may as well strip everything out and start from scratch. Even the transmission mounts have a certain way they need to be dis-assembled in order to access the shifter and drive shaft....
 Imagine Rube Goldberg building a ship in a bottle...
Posted by: r_towle Feb 7 2008, 04:56 PM
The jig that you built.
Is that custom built for that car, or is it a universal table that can be reset for different sizes?
Here is my dilema.
I have a 356 that the front suspension was cut out.
The rear torsion tube was cut out.
I have both parts and all the chassis measurements.
I want to build a "jig" that I can pull down and push up the unibody with so I can get it and keep it square as I weld all the stuff back in.
I like the use of threaded rod, same Idea I was going to use.
At the end of the day, I would like it on rollers, so I will be building the lower portion of the jig similar to a steel truss to make it super rigid and strong enough to pull the car down and push it up...hopefully.
I guess I would rather not build a jig that is specific for this car because as you know I have a few ideas and projects that are on deck and a decent universal jig would be a better investment of my time in the long run.
So, any suggestions?
Rich
Posted by: neo914-6 Feb 7 2008, 05:39 PM
 great work Rick!
I wanted to buy an English Wheel (<$300) at HF but I have no room and limited funds... 
Posted by: rick 918-S Feb 7 2008, 07:22 PM
The jig that you built.
Is that custom built for that car, or is it a universal table that can be reset for different sizes?
Here is my dilema.
I have a 356 that the front suspension was cut out.
The rear torsion tube was cut out.
I have both parts and all the chassis measurements.
I want to build a "jig" that I can pull down and push up the unibody with so I can get it and keep it square as I weld all the stuff back in.
I like the use of threaded rod, same Idea I was going to use.
At the end of the day, I would like it on rollers, so I will be building the lower portion of the jig similar to a steel truss to make it super rigid and strong enough to pull the car down and push it up...hopefully.
I guess I would rather not build a jig that is specific for this car because as you know I have a few ideas and projects that are on deck and a decent universal jig would be a better investment of my time in the long run.
So, any suggestions?
Rich
This jig is only for this car. It has very limited push/pull capability, really only a support system to prevent sag.
You should see if anyone has an old Cellette bench collection dust near you. There is one here local to me but I don't have a barn....
 ...yet.
You could always build a simple chassis jig from a couple of salvage "I" beams. More than one way to skin a car.
Posted by: scotty b Feb 7 2008, 07:25 PM
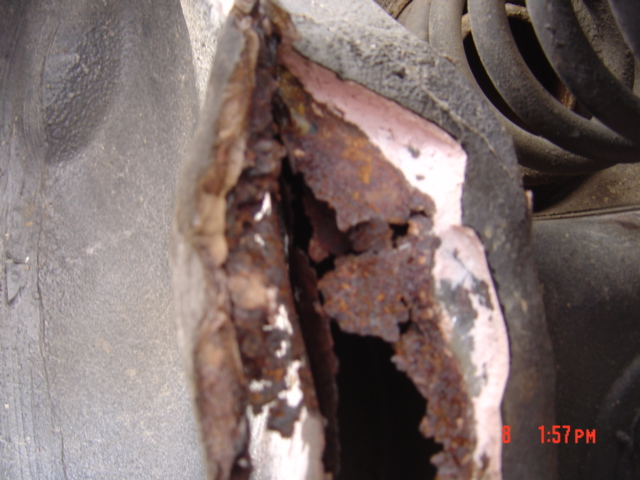
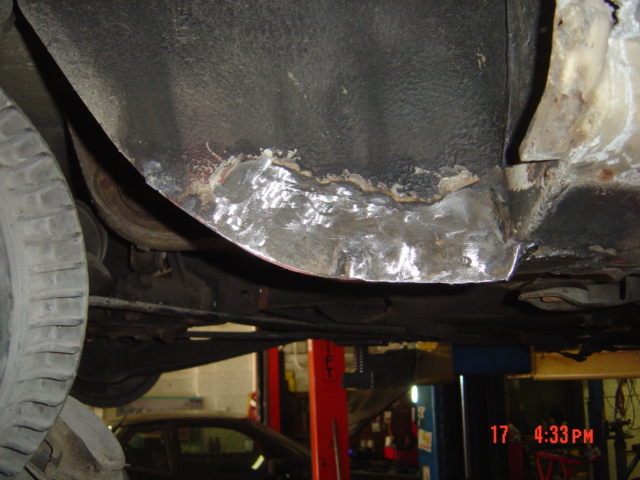
You ain't kidding brother ! This is a customers 230 SEL I did a couple years ago. When I called him over to see what I fopund the look on his face was....well obvious. His wife had been driving on this for 25+ years.All the shiney is NEW metal. The whole frame rail was GONE and had been "repaired " with coat hanger and bondo in the 70's. First is the inside of the rear wheel well when I got started. Also note this car had already been smoothed and painted, so I had to do this plus replace front floor pans on a show winner that was otherwise DONE.
Attached image(s)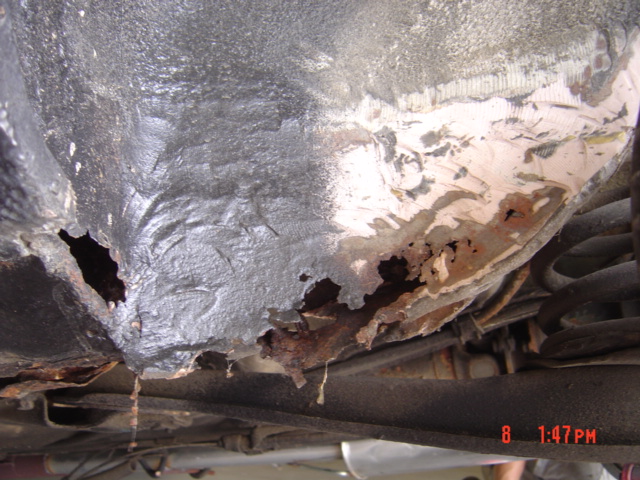
Posted by: scotty b Feb 7 2008, 07:28 PM
Dr side cut out and etched and new piece in
Attached image(s)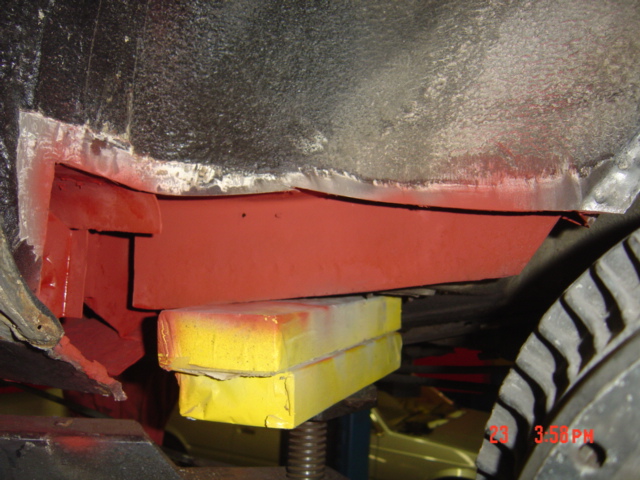
Posted by: scotty b Feb 7 2008, 07:29 PM
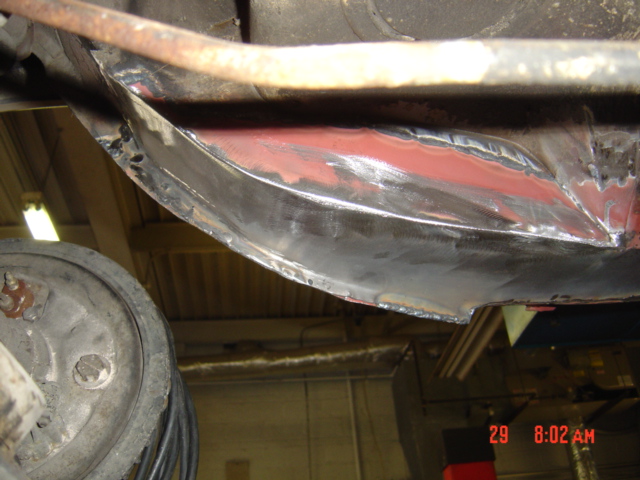
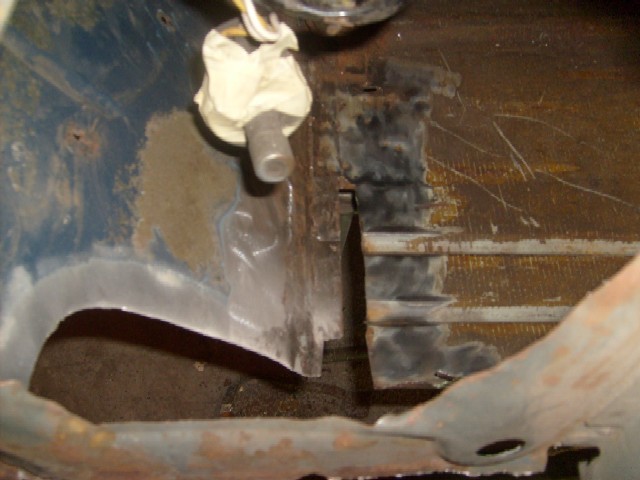
Passenger side was not much better
Attached image(s)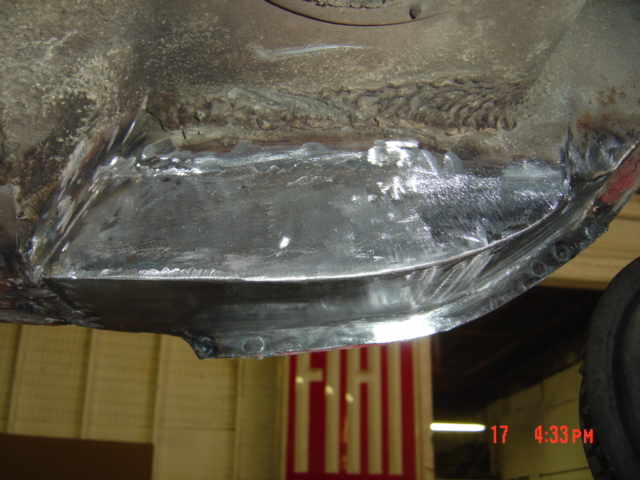
Posted by: scotty b Feb 7 2008, 07:32 PM
This is the only pic I have of the top side, and this was BEFORE I started the repair. Sorry to hi-jack Rick. I thought it was appropriate though 
Attached image(s)
Posted by: rick 918-S Feb 7 2008, 10:04 PM
No worries Scotty! That is exactly the same section I'm doing. Here's the front floor.
Attached image(s)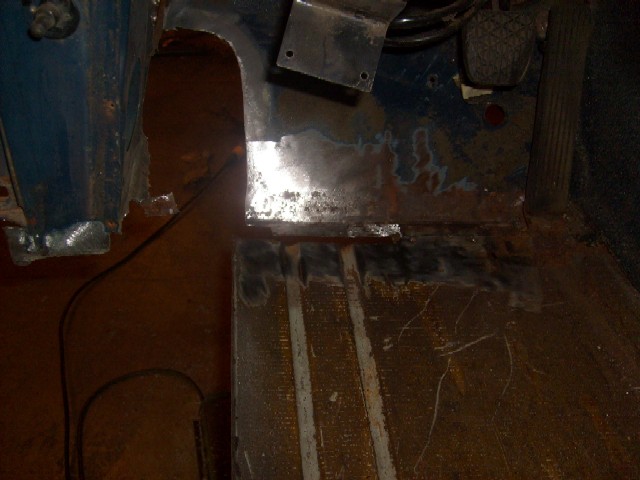

Posted by: rick 918-S Feb 7 2008, 10:19 PM
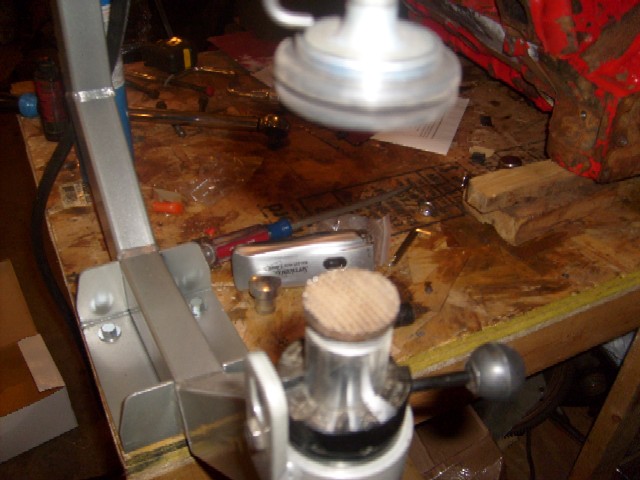
Hey Rich, Here's my hammer. I modified with this shrinking hammer. It doesn't do much but it will smooth sharp dings and edges.
Attached image(s)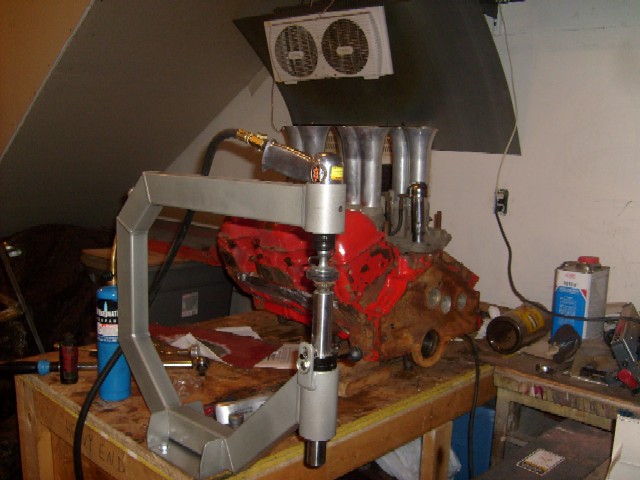
Posted by: scotty b Feb 9 2008, 09:08 AM
Rick if you're interested in building a larger hammer there WAS ( I can't seem to find him now  ) a guy on E-bay that sells a C.P. style hammer with the mounting bracket for around 750.00 I have been looking at several options and he has the best price, but doesn't state which size air unit it is. A friend of mine got one of them and it was a pretty nice unit. I am, planning on building one similar to this when I get a little more room. If you're interested, I also have the specs on building the holding bracket from a metal shaper.org member from a while back.
Attached image(s)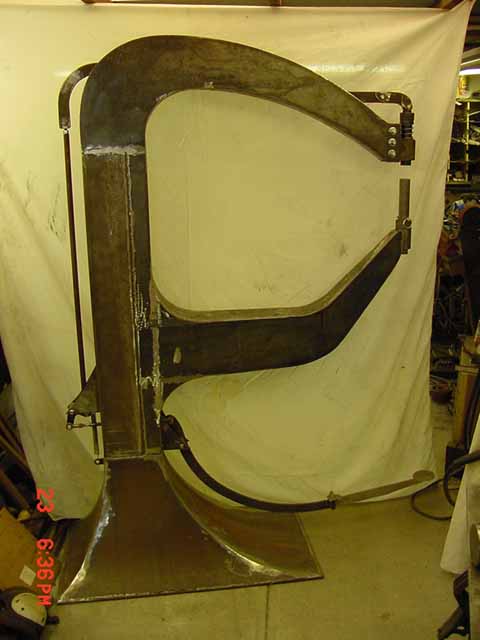
Posted by: kwales Feb 9 2008, 09:16 AM
Rick,
I won't screw around with a shrinking hammer any more.
Get one of John Kelly's shrinking disks.
Ken
Posted by: scotty b Feb 9 2008, 09:19 AM
Rick,
I won't screw around with a shrinking hammer any more.
Get one of John Kelly's shrinking disks.
Ken
Different tools CAN do different jobs. Larger hammers like the one I posted above will do more than a shrinking disc ever can. Not to diminish the usefulness of the disc at all though.
Here is the Ebay hammer and bracket if interested.
http://cgi.ebay.com/Chicago-Pneumatic-Planishing-Hammer-Complete-Power- Unit_W0QQitemZ310021302640QQihZ021QQcategoryZ109559QQssPageNameZWDVWQQrdZ1QQcmdZ
ViewItem
Posted by: rick 918-S Feb 9 2008, 03:31 PM
Rick,
I won't screw around with a shrinking hammer any more.
Get one of John Kelly's shrinking disks.
Ken
Different tools CAN do different jobs. Larger hammers like the one I posted above will do more than a shrinking disc ever can. Not to diminish the usefulness of the disc at all though.
Here is the Ebay hammer and bracket if interested.
http://cgi.ebay.com/Chicago-Pneumatic-Planishing-Hammer-Complete-Power- Unit_W0QQitemZ310021302640QQihZ021QQcategoryZ109559QQssPageNameZWDVWQQrdZ1QQcmdZ
ViewItem
Yes, different tool. The planishing station is for hand work. Panels you can hold. The disk is nice when you have a panel mounted on the car. My space is limited. I also have in floor heat so I don't really have a way to secure large equipment. When I build my next shop I plan on leaving an area where I can drill anchors into the floor.
No comments on the stacked "W" on the bench...
Posted by: r_towle Feb 9 2008, 03:40 PM
I liked the stacks...look cool.
For your floor...ask the local highway department where to get a 4*8 plate of 1/2 inch steel...
It wont budge, you can weld tabs to it and bolt to that..
It will heat up just like the floor, even better so it wont be cold.
Getting it in the door will be fun, but it will work.
I wish I had a heated floor...
I am considering doing a jig like Gary Emory uses.
Its two octaganal hoops that go around the car.
Sounds odd, but take a look
Once you bolt it all together and bolt it to the car you can turn the car on its side, on its back etc...and you can move it all around the shop.
Its universal (kinda) so I could use it for different chassis setups.
The Used Cellette....talk to me..is it for sale?
What Jigs come with it?
I do have room.
We could share it...happy to meet in the middle once a year and trade it for our projects..
Rich
Posted by: r_towle Feb 13 2008, 10:59 PM
http://emorymotorsports.com/index.php?option=com_content&task=view&id=78&Itemid=109
Powered by Invision Power Board (http://www.invisionboard.com)
© Invision Power Services (http://www.invisionpower.com)