Printable Version of Topic
Click here to view this topic in its original format
914World.com _ 914World Garage _ 914 engine build
Posted by: Van Feb 21 2008, 02:28 PM
I am enbarking on an engine rebuild - doing a RAT 2270.
I've been taking detailed pictures and posting them http://www.ephotomotion.com/914engine.
So far I've take it all apart. Now I'm doing lots of cleaning and ordering parts (and waiting for them to show up).
Enjoy!
teaser:
Attached image(s)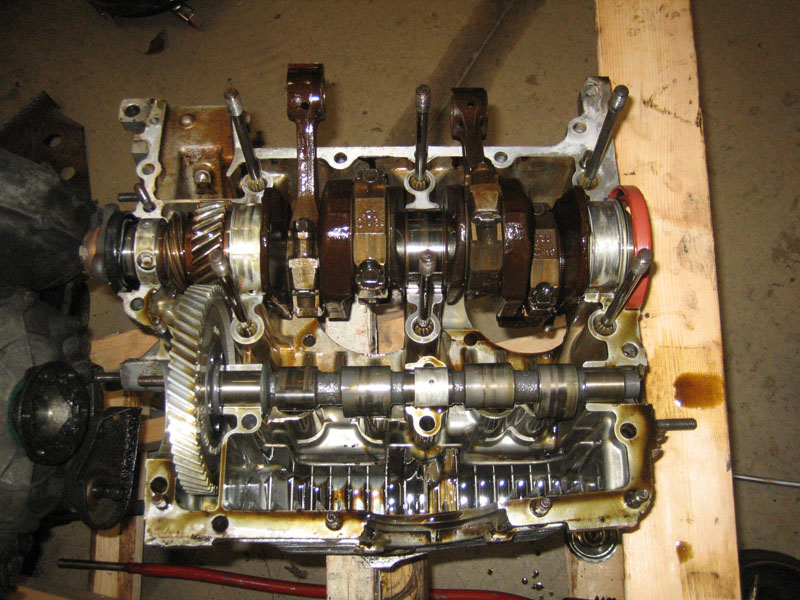
Posted by: johannes Feb 21 2008, 03:44 PM
Very informative ! ...
I like it !

Posted by: purple Feb 21 2008, 03:52 PM
Very nice! I wouldnt have done it any differently!
I feel like I'm watching the Raby video in picture detail form. This is awesome! Thanks!
Posted by: Sleepin Feb 21 2008, 03:55 PM
Very cool!
Posted by: Van Feb 21 2008, 09:58 PM
Thanks for the positive comments, guys!
Posted by: yarin Feb 22 2008, 09:11 AM

Thanks for the positive comments, guys!
It's a bit of a drive for me (70 miles), but I'd like to come by and see your build sometime soon. I'd like to build a motor sometime, possibly next summer and could use a hands on view.
Posted by: greybeard50 Feb 22 2008, 09:37 AM
Excellent pictures!
Be sure to do the oil galley plug R&R as per the Raby site. Start with a clean motor!
Posted by: race914 Feb 22 2008, 09:53 AM
Fantastic picture gallery of your effort
Anxious to follow your project!
Posted by: Jake Raby Feb 22 2008, 10:29 AM
Van looks great!!
Just make sure not to reuse those copper head nuts at rebuild time :-)
Thanks for your parts orders!!!
Posted by: Van Feb 23 2008, 10:06 PM
I got to do a little work this weekend on my project. I've done the oil galley plug update (I'm tryin' to do this right, Greybeard!) and started cleaning the case halves.
Now I just need to spend some time scrubbing the other case half (it's pretty boring work - standing in the laundry room with half an engine in the utility sink...)
Anyhow, http://www.ephotomotion.com/914engine/
Oh, Jake, will you give me some advanced notice before the heads ship? I'd like to add new valve keepers and those head nuts you recommend replacing to the order (and maybe cylinder shims, too).
Posted by: orange914 Feb 23 2008, 10:33 PM
nice picture documentary 
Posted by: AgPete139 Feb 24 2008, 04:53 AM
Thanks for the positive comments, guys!
It's a bit of a drive for me (70 miles), but I'd like to come by and see your build sometime soon. I'd like to build a motor sometime, possibly next summer and could use a hands on view.
70 miles per drive just makes it to the next city in Texas! But seriously, that's about an hour drive, not bad at all.
I like the photos and the organization form the pain page. Looks good, and keep up the neat work!
Pete
Posted by: pete914 Feb 24 2008, 09:16 AM
Sweet!! Very informative
Posted by: Jake Raby Feb 24 2008, 09:10 PM
I got to do a little work this weekend on my project. I've done the oil galley plug update (I'm tryin' to do this right, Greybeard!) and started cleaning the case halves.
Now I just need to spend some time scrubbing the other case half (it's pretty boring work - standing in the laundry room with half an engine in the utility sink...)
Anyhow, http://www.ephotomotion.com/914engine/
Oh, Jake, will you give me some advanced notice before the heads ship? I'd like to add new valve keepers and those head nuts you recommend replacing to the order (and maybe cylinder shims, too).
New valve keepers (ground) are included with our heads, as well as all new hardware...
Posted by: Van Feb 24 2008, 09:29 PM
Oh, Jake, will you give me some advanced notice before the heads ship? I'd like to add new valve keepers and those head nuts you recommend replacing to the order (and maybe cylinder shims, too).
New valve keepers (ground) are included with our heads, as well as all new hardware...
Then do you need the valve springs and retainers (from the cam kit) back for the heads? Or do I put that together myself?
Thanks again!
-Van
Posted by: auerbach Feb 24 2008, 09:44 PM
Van, the thread is extremely interesting. Any idea how many hours you have into the rebuild?
Posted by: Van Feb 25 2008, 02:00 PM
Van, the thread is extremely interesting. Any idea how many hours you have into the rebuild?
Boy, that's really hard to calculate... First, most of my time chunks are very little blocks - like 15 to 30 minutes.
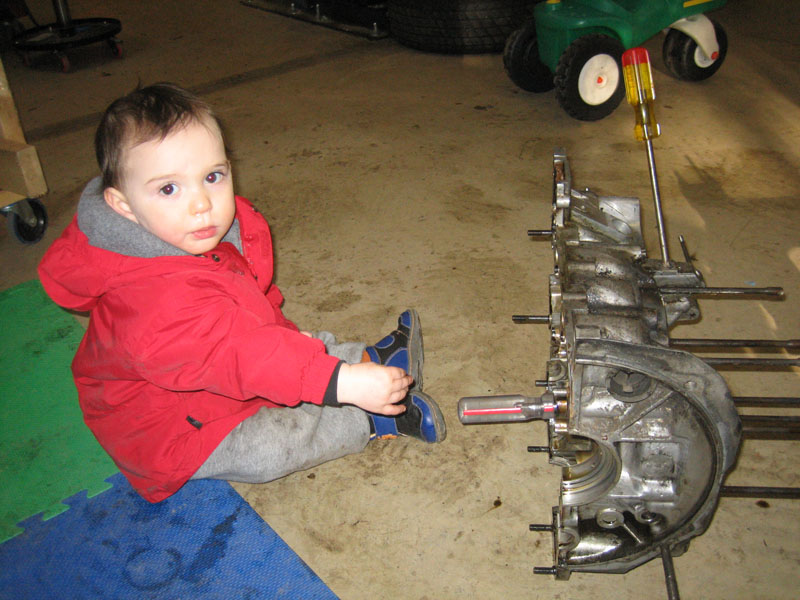
Then, to make matters worse, I'm usually "monitoring" my little kids while they play in the garage. (e.g. I get the long block onto the engine stand, then have to push the 1 year old around on a tricycle - then give the 3 year old a ride on the hand truck, then remove the valve covers...)
Every once in a while Mamma will take the kids somewhere on the weekend and I'll have a few hours to myself to work.

But, for the sake of argument, let's say I've been working on it for the last 6 weeks at 2 or 3 hours a week. That makes it 12 to 18 hours so far - which sounds about right. If I had full time to devote to this, it would be half the time.
Here's my littlest helper:
Attached image(s)
Posted by: auerbach Feb 25 2008, 11:01 PM
Are those Pilottis he's wearing?
Posted by: Van Feb 26 2008, 07:33 AM
Are those Pilottis he's wearing?
We're not that trendy.
 They're Robeez - toddler shoes.
Posted by: Van Mar 24 2008, 08:12 AM
New updates!
I've made a sensor bracket for an Electromotive ignition system, made my new TDC mark on the fan and sent all of the rotating stuff to be ballanced.
Updates here: http://www.ephotomotion.com/914engine
Posted by: purple Mar 24 2008, 08:26 AM
I'm still in awe of this website... truly awesome work!
I had no idea the engine was 70 lbs of rotating mass! amazing!
Posted by: Van Mar 24 2008, 09:28 AM
I had no idea the engine was 70 lbs of rotating mass! amazing!
Neither did I! Imagine my surprise when I "hefted" that box onto the scale and it was 72 lbs. I'm sure I'm going to have one pissed-off UPS man!
Posted by: cuca914 Mar 24 2008, 12:34 PM
Wow! Amazing insight into the beginnings of an engine rebuild! Thanks for putting so much time into your process - the website is awesome! It definitely offers some better understanding of how these engines work.
Now I really can't wait for my RAT Type IV Rebuild DVD to arrive!
Posted by: Van Apr 8 2008, 09:11 AM
I've made a little more progress. I did a little grinding in the case and got my camshaft all ready.
Here's the link to my http://www.ephotomotion.com/914engine/
I got all of my rotating parts back from Jake - when time allows, I'll try to move onto ASSEMBLY!
(there is also a little bonus on the web page - some rust/sheetmetal repair)
Posted by: root Apr 8 2008, 11:47 AM
Van You 'da MAN! 
Posted by: ConeDodger Apr 8 2008, 11:58 AM
Wow! Amazing insight into the beginnings of an engine rebuild! Thanks for putting so much time into your process - the website is awesome! It definitely offers some better understanding of how these engines work.
Now I really can't wait for my RAT Type IV Rebuild DVD to arrive!
When I ordered my kit I contacted Rebecca at the Type IV Store and she sent the video out early. It is part of the kit but I wanted it so I could "study for the test".
 I must have watched that thing about 20 times before the FedEx guy pulled in my driveway.
Posted by: Van Apr 28 2008, 09:16 AM
I've added some updates to my website: http://www.ephotomotion.com/914engine
Mostly measuring and dry assembly - I've found a few more things that need to be tweaked. I also posted some pictures of the new heads!
Posted by: Phoenix914 Apr 28 2008, 11:28 AM
Fantastic info! Thanks for taking the time to put this together.
Posted by: purple Apr 28 2008, 11:33 AM
Very nice! I'm glad to see all the things i'm learning just looking at your guide. For instance I learned:
do not buy brazillian rod bearings! OMG! is that maybe why all your connecting rods had differing lengths and were not clearing the cam lobes? Maybe you dont need to have them machined if that's the case?
purple
Posted by: Van Apr 28 2008, 12:40 PM
Very nice! I'm glad to see all the things i'm learning just looking at your guide. For instance I learned:
do not buy brazillian rod bearings! OMG! is that maybe why all your connecting rods had differing lengths and were not clearing the cam lobes? Maybe you dont need to have them machined if that's the case?
purple
Glad you guys like it!
For what it's worth, the Brazillian crank bearings were spot on...
As for the rods, they are manufactured in china - they are steel castings that then have the bores (for the small end and the large end) machined into them. The issue is the consistancy of the castings and the consistancy of fixturing the blanks for the machining process (like a metal chip between the vice or fixture and the part). The bore sizes are correct and the distance between bores is correct.
In my situation, tweakin the rods is the best thing to do. It might not have been an issue if I was using high-end rods (like Carillo or Pauter).
If Jake reads this, he'll also add that one of the advantages to his complete kit engines is he takes care of any of these fit issues before it ships to you. (If that makes a sale, do I get a commision?)

Posted by: Jake Raby Apr 28 2008, 12:43 PM
We are clearancing his rods now, the bearings had nothing to do with it..
The only way to avoid hitting snags like Van has encountered is to buy a full engine kit with our prep work, then there is no chance of having these issues. Van decided to travel the road as a lone soldier, we sold him several parts, but he didn't get a full kit.. we did the best we could to make sure he didn't hit issues with compatability, but there is no substitution for a kit..
Posted by: Jake Raby Apr 28 2008, 12:54 PM
BTW-from time to time people will venture down the path that Van has, when they do we try our best to make the buiild as smooth as we can for them, eliminating guess work as much as possible. Before my store opened compatible parts for the TIV could not be boight over the counter, if thiswere then Van would have already went through 3 camshafts and 3-4 sets of rods before he got the parts to "clear" each other....
Been there, done that and try to keep the issue from haunting others.. Thge process can be easy or difficult, its only dependant upon the decisions the customer makes...
Incompatible parts have been the number one issue that has kept the TIV engine filled with ups and downs since its conception.
Posted by: jasons Apr 28 2008, 01:11 PM
Which rod journal (2.0, Type1, Chevy) are you using? Is the cam reduced base circle?
Posted by: Jake Raby Apr 28 2008, 01:20 PM
Yes, the cam is one of my reduced base circle versions. The idea is not to reduce the base circle to much, effecting lifter bore integrity/ wear.
It is very easy to compromise lonvgevity to gain clearance. My theory is to take just the right amount of material from the components to reduce compromise.
Its all in the combo.
Posted by: jasons Apr 29 2008, 10:44 AM
Interesting.... So, I would still like to know the rod journal size. I'm guessing 2.0 since you used the Chinese rods. Also what length rod, 5.325?
Posted by: Van Jul 8 2008, 12:41 PM
Jasons, the rod journals are Type 1 - 5.4" beam, I believe.
Well, a few months have passed where I've done absolutely nothing on my poor engine...
But I did get to spend about 2 hours over the holiday weekend tinkering.
I made an adjustable pushrod and modified one side of the engine tin. http://www.ephotomotion.com/914engine/index.htm
With work, family obligations, household chores and the occasional track day, I don't know when I'll get to do more... 
But when I do, I'll take pictures and update the site!
Posted by: Jake Raby Jul 8 2008, 03:25 PM
Rod journals are TI 1600, 2.165 diameter.
This combo is based on my generation 1 2270 and has incredible longevity.
Posted by: 396 Jul 12 2008, 05:05 PM
Great stuff...thinking building my 1.8 with 96mms.
I've never built nor opened a type 4 before.. so a BIG THANK you!
Posted by: LarryR Jul 12 2008, 10:02 PM
Very nice write up. It actually makes me glad that I decided to stay with a type IV for my 914. Really straight forward engine.
Good choice with the 2270 I have only heard good things about those.
Posted by: Van Sep 29 2008, 09:07 PM
Howdy gang! It's been a busy summer - I hope it's been going well for everyone.
Mine's been spent traveling, spending time with the family, earning money at my day job, and a little racing. My 914 engine has been sitting gathering dust.
Luckily, I had some free time over the weekend, so I started working on the engine again. I've figured out my valve geometry, valve clearances and deck heights - and updated my website.
http://www.ephotomotion.com/914engine
Enjoy!
Posted by: Van Oct 13 2008, 09:07 PM
I'm slowly making progress! http://www.ephotomotion.com/914engine
My pushrods are cut and I'm happy with the results.
I even lapped my cylinders to the heads.
Posted by: Jake Raby Oct 13 2008, 09:24 PM
Awesome progress! I really appreciate your detail.
I wish someone with one of my kits would do this...
Posted by: johannes Oct 14 2008, 02:31 PM
Awesome progress! I really appreciate your detail.
I wish someone with one of my kits would do this...
Isn't your kit delivered with a DVD ?

Posted by: Van Nov 16 2009, 09:28 AM
So, it's been a while... But I've gotten back on this project.
I've got the short-block built! See here: http://www.ephotomotion.com/914engine/page32.html
Posted by: Van Nov 25 2009, 07:28 AM
Even more completed:
2 new pages (each with video!)
http://www.ephotomotion.com/914engine/page33.html
http://www.ephotomotion.com/914engine/page34.html
Enjoy!
Posted by: type47 Nov 25 2009, 08:00 AM
Quite excellent!! I did notice 2 things that I'd like to ask about. First, I noticed that you put the oil ring on the piston after inserting the wrist pin. Is that particular to the set of pistons you used? I remember putting all the rings on the piston before connecting to the connecting rod but that was with stock motors. Second, I noticed that you didn't bring each cylinder up to TDC for that cylinder when installing the rocker arms. I thought that you didn't want valve spring pressure against the rocker arms when torquing up the arms. Just casual thoughts from a novice.
Posted by: Van Nov 25 2009, 08:29 AM
Quite excellent!! I did notice 2 things that I'd like to ask about. First, I noticed that you put the oil ring on the piston after inserting the wrist pin. Is that particular to the set of pistons you used? I remember putting all the rings on the piston before connecting to the connecting rod but that was with stock motors. Second, I noticed that you didn't bring each cylinder up to TDC for that cylinder when installing the rocker arms. I thought that you didn't want valve spring pressure against the rocker arms when torquing up the arms. Just casual thoughts from a novice.
On those particular pistons, the oil ring groove intersects with the wrist pin hole. I had no choice but to put the oil rings on after the wrist pins.
As for the rockers, interesting point - I didn't think about that. Those heads have a M8 stud - not the usual M7 stud. So I torqued them to 14 ft/lbs. I still have to adjust the rockers, so when each one is at the compression stroke, I'll double check my torque.
Posted by: Cevan Nov 25 2009, 07:00 PM
Excellent!!  I'll be doing that this winter. I love the videos.
Where did you get the rods?
I'll do a video for cleaning the case. 
Posted by: Van Dec 15 2009, 01:50 PM
Where did you get the rods?
I believe I located them from the Samba website. Jake also stock them.
For those interested, I've added 3 more pages to my website: http://www.ephotomotion.com/914engine
The highlight of my updates: another video - putting on the engine tin http://www.youtube.com/watch?v=QeACshQJcHc
Posted by: MDG Dec 15 2009, 02:39 PM
Great job! Must be a satisfying feeling to be getting so close.
Also, for the first minute of that vid I was stupified that you had discovered how to clone yourself!?! Holy Crap, I thought, that is amazing!
Then I read how your dad was visiting and you put him to work . . .
ah well, it was pretty cool for awhile. Good luck with the home stretch.
mike
Posted by: enikolayev Jan 27 2010, 02:04 AM
Most detailed "how to" i have ever seen, thanks.
I don't think you mentioned your bearing clearances though. I'm in the process of rebuilding a 1.8 and have no idea what the spec should be.
Posted by: Van Jan 27 2010, 03:32 PM
Most detailed "how to" i have ever seen, thanks.
I don't think you mentioned your bearing clearances though. I'm in the process of rebuilding a 1.8 and have no idea what the spec should be.
I did not use plasti-gauge or anything. But I did measure the thickness of the old and new bearings with a dial caliper, and they were essentially identical.
And, after assembling each component, the "feel" of the play and drag "felt" about right.
Hope that helps!
Posted by: tat2dphreak Jan 27 2010, 03:41 PM
great info! thanks for taking the time to do this
Posted by: Brent Jan 28 2010, 03:14 PM
This is fantastic!
Posted by: Van Mar 15 2010, 06:36 AM
I had a really great day yesterday... Started the engine for the first time! She fired right up!
More details and video here: http://www.ephotomotion.com/914engine/page44.html
(And, for those too lazy to click...)
https://www.youtube.com/watch?v=TQRiGPX2pi0
Posted by: Phoenix914 Mar 15 2010, 07:49 AM
Fantastic! Your test stand is great. Good job, Van, and thanks for documenting your project for us.
Posted by: MDG Mar 15 2010, 10:38 AM
That's got to be satisfying Congratulations. I've been following your build on this for some time - great stuff.
mike
Posted by: jeffdon Mar 15 2010, 11:04 AM
Congrats!
Fired mine on the stand for the first time on March 1.
Now its time to get the engine bay prepped and painted, and the motor back in!
Your website has been an inspiration and wealth of info.
Posted by: tat2dphreak Mar 15 2010, 11:45 AM
grats! sounds great!! thanks again for the great documentation of the build
Posted by: Cevan Mar 15 2010, 11:51 AM
Great job!!
Question: Are you using a rotary style pump? If so, did you have any issues with it sucking gas out of the gas can?
Posted by: Van Mar 15 2010, 01:20 PM
Question: Are you using a rotary style pump? If so, did you have any issues with it sucking gas out of the gas can?
Yeah, I'm using one of these http://www.summitracing.com/parts/CRT-P4070/:
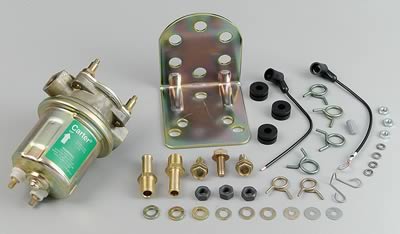
No problems pulling gas out of the can (but then it's a pretty short distance...)
Posted by: RobW Mar 15 2010, 10:03 PM
Way to go! Awesome! and inspiring!
Posted by: Van Sep 16 2010, 06:03 PM
After way too long, I'm back on this project.
Here's a teaser pic...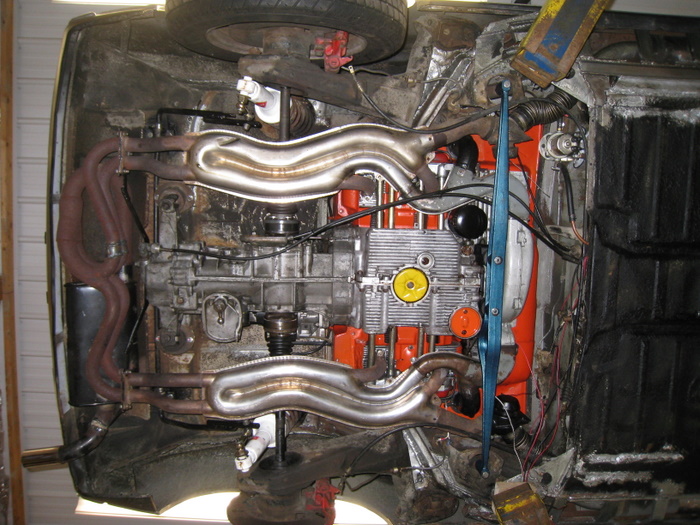
I still have to connect the throttle linkage and shift linkage. And I have a little bit more wiring to do. And I have to put the carpet and seats back in...
Posted by: Van Sep 17 2010, 05:29 AM
I've updated my http://www.ephotomotion.com/914engine/page46.html (with a video!).
Enjoy!
Posted by: angerosa Sep 17 2010, 12:34 PM
Very nice! Congrats!
Posted by: JmuRiz Sep 17 2010, 01:36 PM
Looks great!
BTW what kind/size lift do you have. My garage isn't nearly that large so I'm on the fence between if I have the space for a 2-post with some sort of drive/on modification for parking/storing, or if I should just go 4-post with bridge jacks (can't do engine drops with that though :-( )
Posted by: Van Sep 17 2010, 03:23 PM
Looks great!
BTW what kind/size lift do you have. My garage isn't nearly that large so I'm on the fence between if I have the space for a 2-post with some sort of drive/on modification for parking/storing, or if I should just go 4-post with bridge jacks (can't do engine drops with that though :-( )
My lift is a Rotary 2 post. 7000 lb capacity and needs a 12' ceiling. I bought it used for $1200 - and it has been, hands down, the most useful tool I own.
Have you heard of Maxjax? http://www.maxjaxusa.com/
It's a 1/2 height 2 post lift. The lift posts have wheels and handles like a hand truck - you can unbolt it from the anchors in the floor and roll it out of the way. A great solution for people with smaller garages (although it doesn't make the price any less
).
Posted by: Van Nov 18 2010, 05:12 PM
I have a video of my first drive:
https://www.youtube.com/watch?v=_MusrmXCHdY
And details on my website of what it was like and the next steps:
http://www.ephotomotion.com/914engine/page49.html
Now I have to schedule some dyno time and get some numbers for everyone!!
Posted by: JmuRiz Nov 23 2010, 01:17 PM
Awesome work, kudos and have fun tuning.
Posted by: 914rat Nov 23 2010, 02:51 PM
Can"t wait to see your Dyno #'s.My guess would be 150-160 HP and 160 lbft. torque.
Powered by Invision Power Board (http://www.invisionboard.com)
© Invision Power Services (http://www.invisionpower.com)