Printable Version of Topic
Click here to view this topic in its original format
914World.com _ 914World Garage _ ...but I don't think it leaked oil!
Posted by: 9146986 Apr 1 2008, 12:59 PM
I'm doing an engine swap for a customer. Also on the work list is cleaning the engine, painting the tin, and re-sealing (new fr & rr main seals, prt seals, oil cooler seals, re-epoxy the oil galley plugs). Here's what I found when I got to the prt seals 
Attached image(s)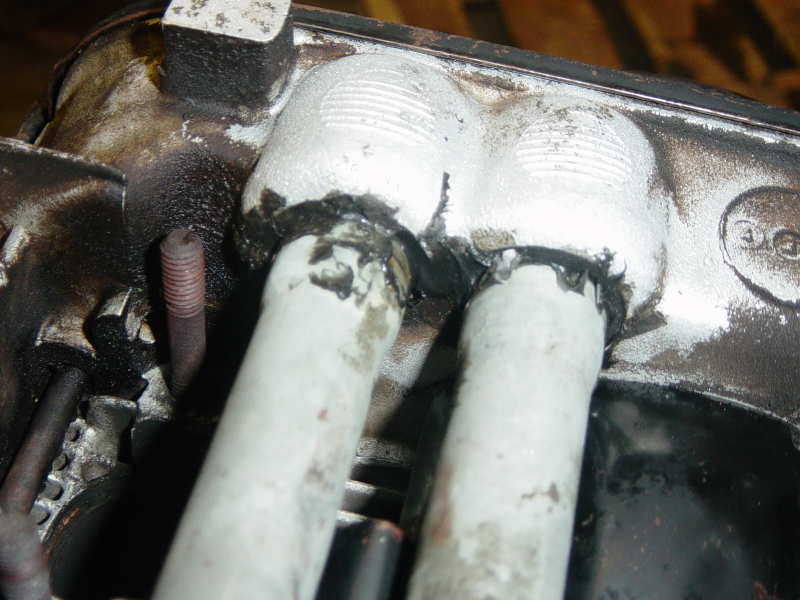
Posted by: 9146986 Apr 1 2008, 01:01 PM
I used a dental pick to carefully remove all traces of silicone sealant.
Attached image(s)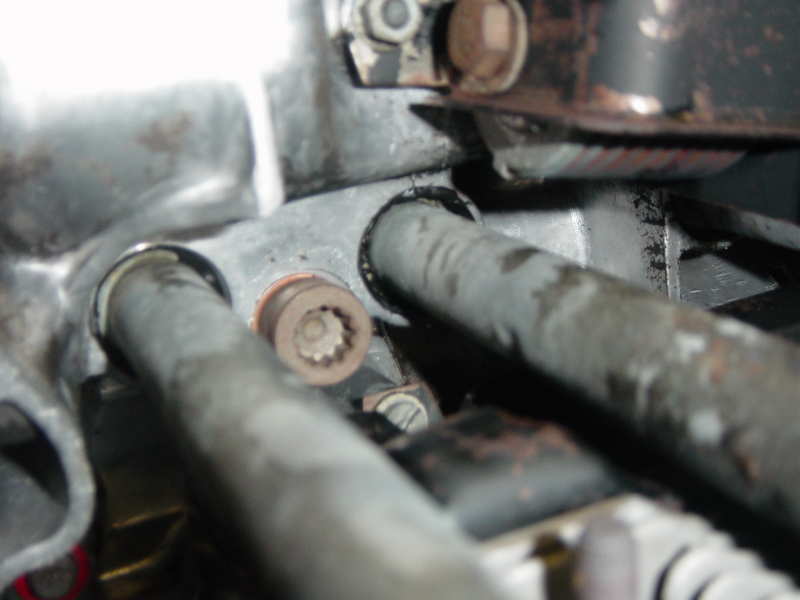
Posted by: 9146986 Apr 1 2008, 01:03 PM
Plenty O silicone.
Attached image(s)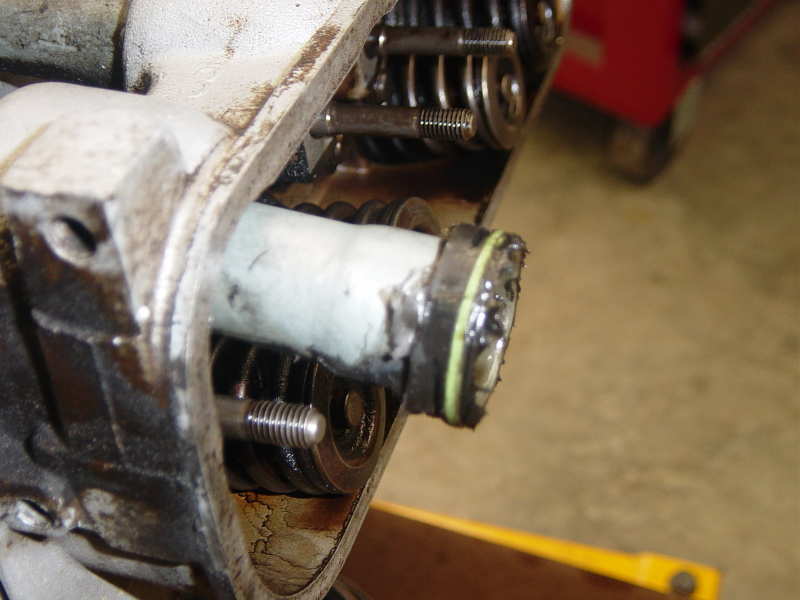
Posted by: dbgriffith75 Apr 1 2008, 01:03 PM
That's a genuine case of "half-assed mechanic" if I ever saw one... and I've seen a lot of that in my day.
Either that or the guy that put 'em in was leary of oil leaks anyway and gooped 'em just to be on the safe side. What did it look like when you got it apart? Were the seals actually there?
Posted by: 9146986 Apr 1 2008, 01:05 PM
Here's one side of the tubes removed.
Attached image(s)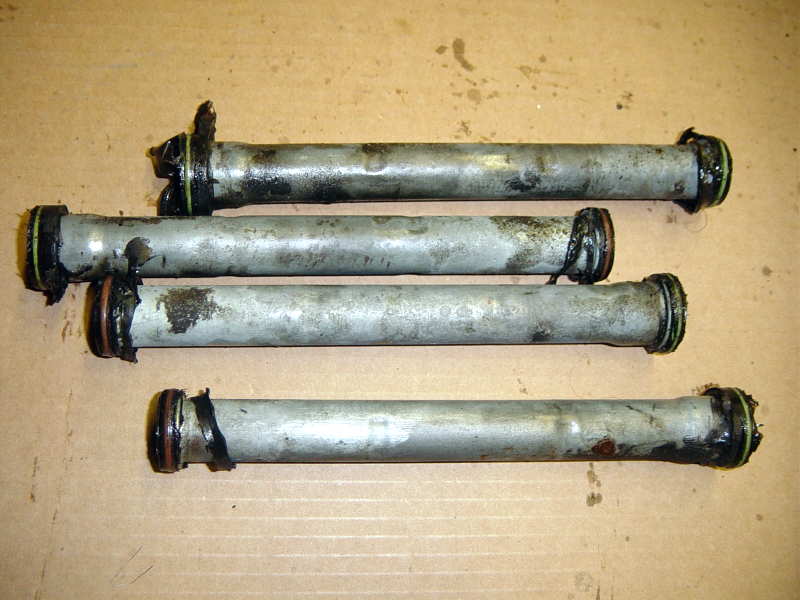
Posted by: 9146986 Apr 1 2008, 01:09 PM
Probably enough silicone here for a boob job! At least they used the right kind of seals.
Attached image(s)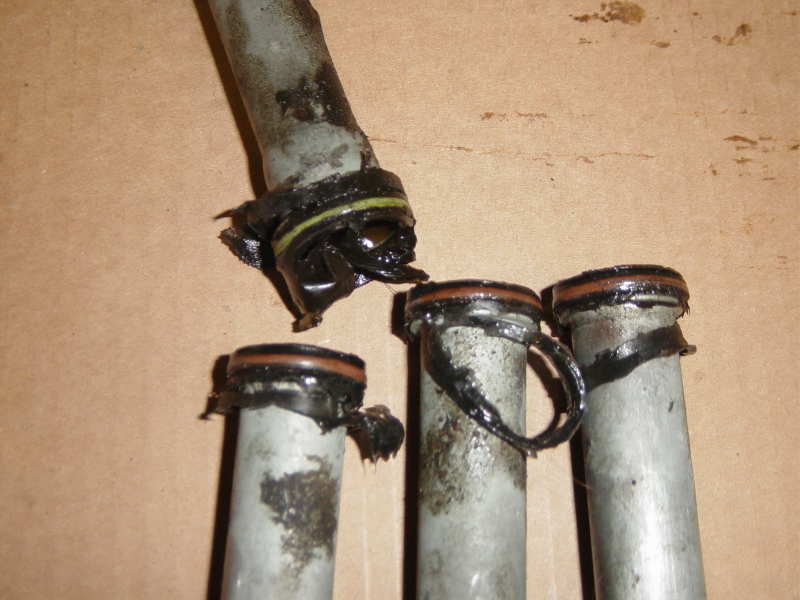
Posted by: purple Apr 1 2008, 01:10 PM
hehe, mine looked like that at the head side on the passenger side....
what a pain to get rid of all that, because the new rings wont seat right if there is but a trace of it left.
Posted by: rhodyguy Apr 1 2008, 01:57 PM
in an old HOTVWs writeup on a t-4, mark stevens is shown 'ramping' the head side of the tubes inside the valve cover area with rtv. never saw the point to the mess.
k
Posted by: sww914 Apr 1 2008, 03:26 PM
Were they leaking? 
Posted by: stateofidleness Apr 1 2008, 03:50 PM
should've made this into a picture how-to for prt seal replacement 
still waiting on one...
some of us noobs need pictures lol
Posted by: 9146986 Apr 1 2008, 04:50 PM
One reputable engine builder I know recommends a little red RTV on the head O rings, but I went with Jake's recommendation of using Loctite 565.
The thing that I always do is clean up the bores with scotchbrite. I jamb pieces of Kimwipes down the lifter bores to keep abrasive from getting into the engine, and then take cut a small piece of scotchbrite and rub the bores clean with a radial motion. The outer bores are much easier than the inners of course.
I have also found that the handle end my Craftsman screwdriver fits perfectly into the outboard end of the tube, and along with a 21mm open end wrench in the slot of the tube I can guide it into position without scraping or ruining the O ring.
Powered by Invision Power Board (http://www.invisionboard.com)
© Invision Power Services (http://www.invisionpower.com)