Printable Version of Topic
Click here to view this topic in its original format
914World.com _ 914World Garage _ The Doc's tranny waggin'
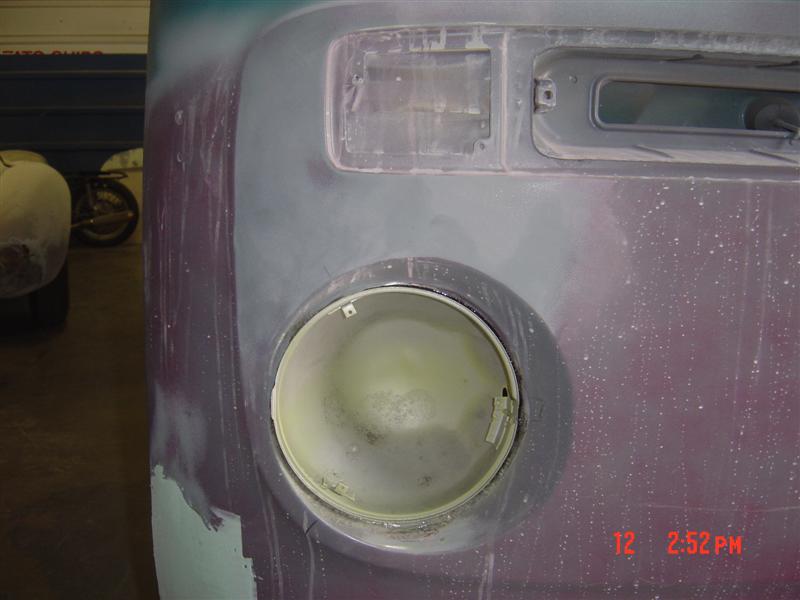
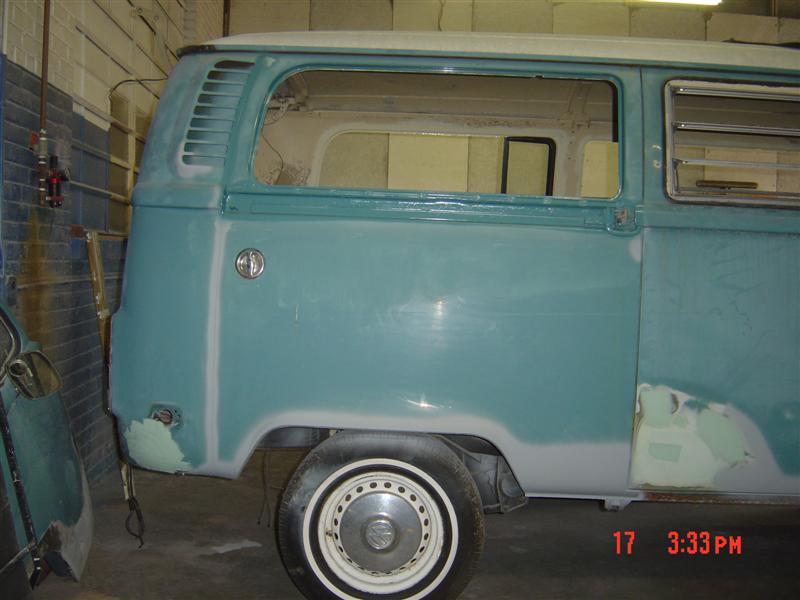
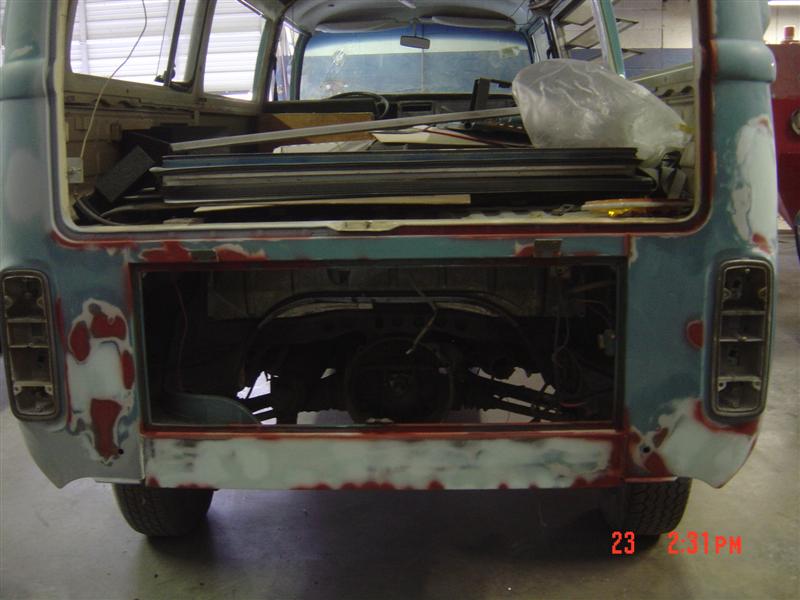
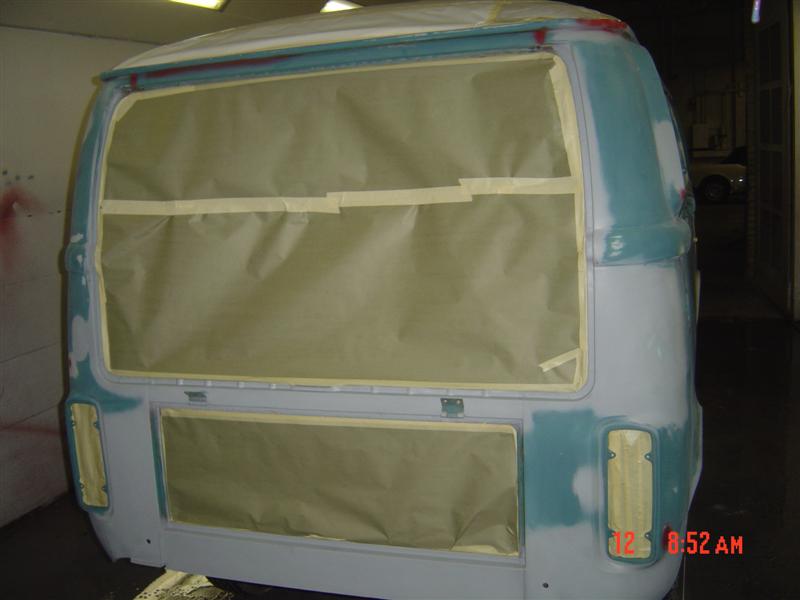
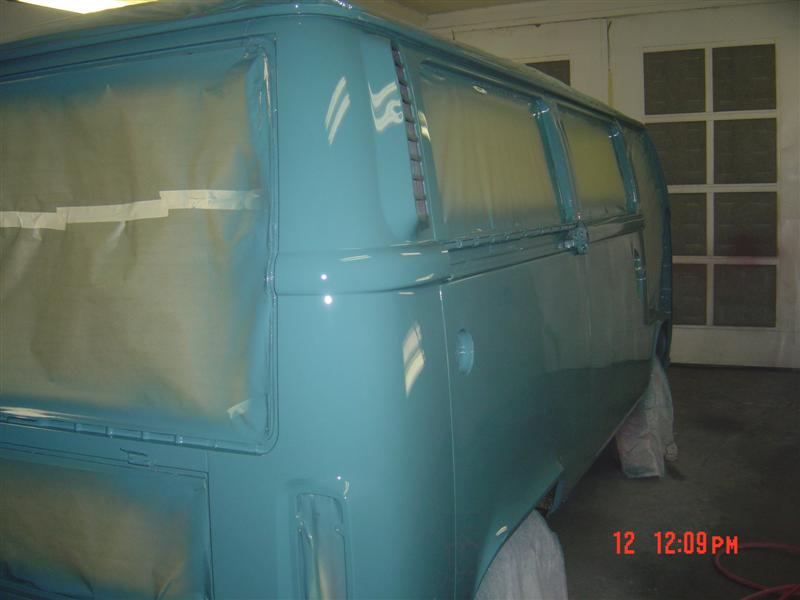
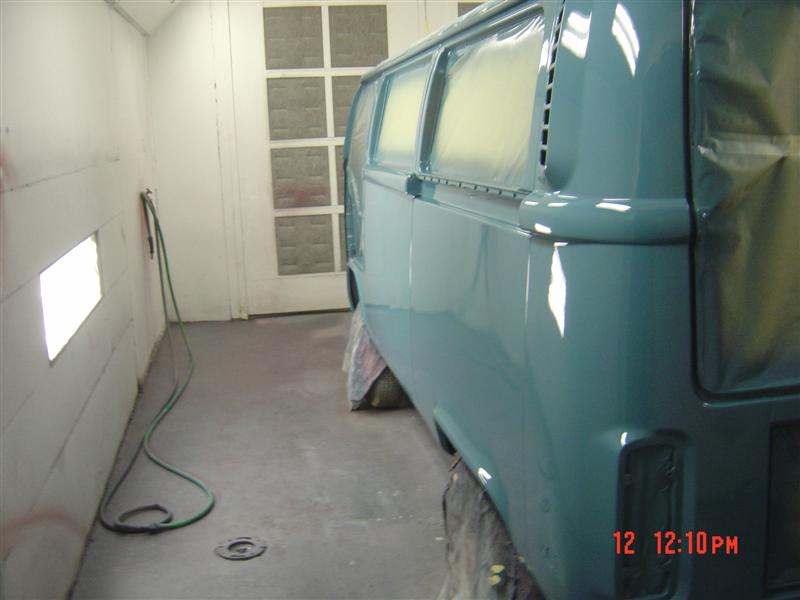
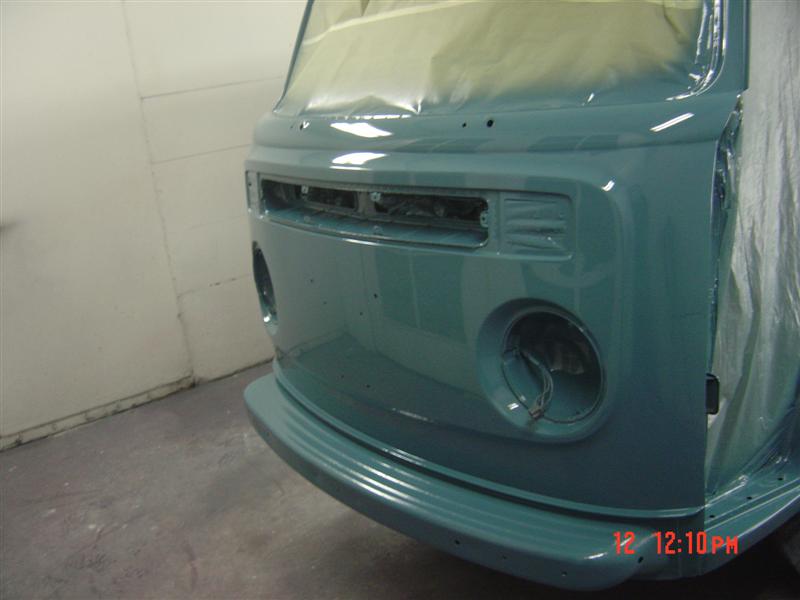
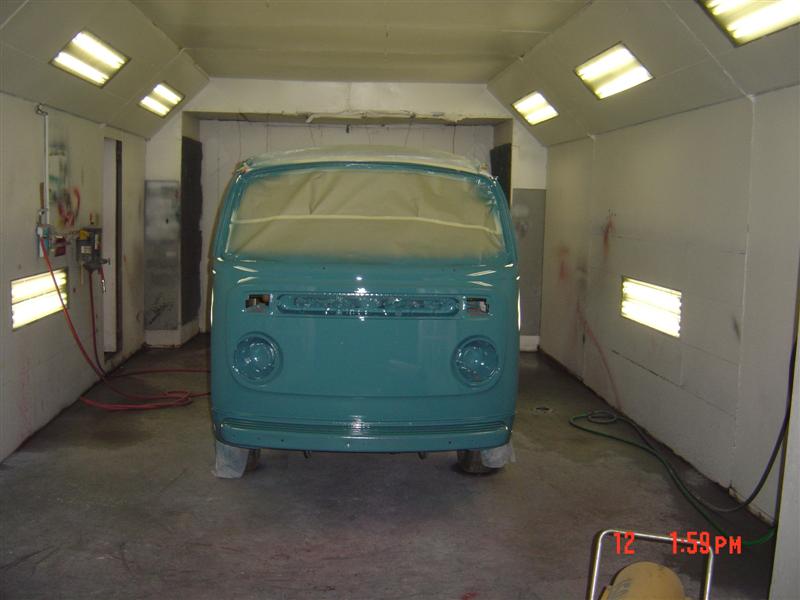
Posted by: scotty b Apr 9 2008, 07:30 PM
Or
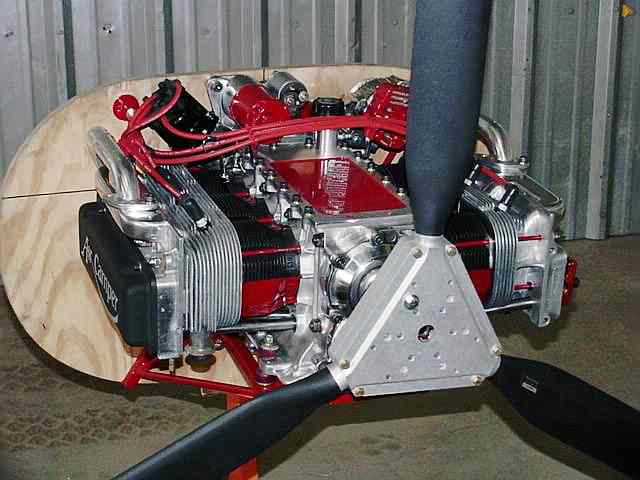
Dr.Evil's CAMPERVERSION
Attached image(s)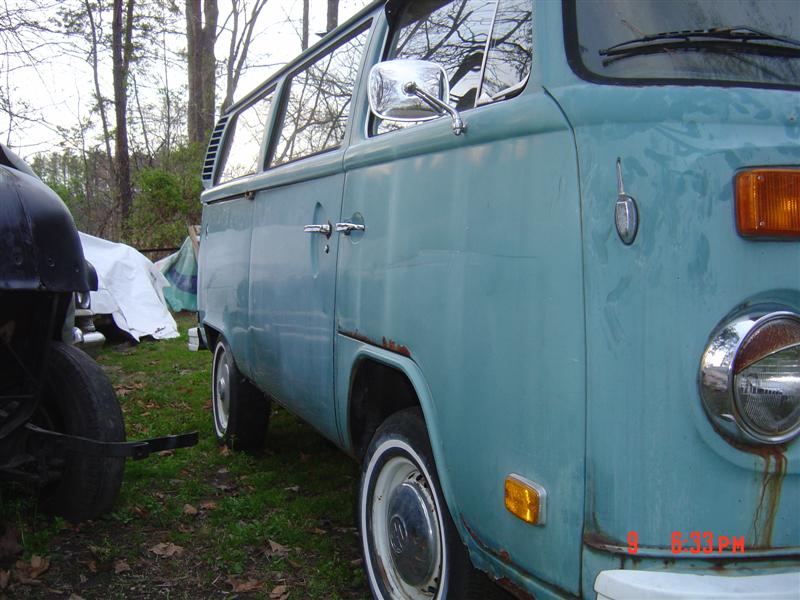
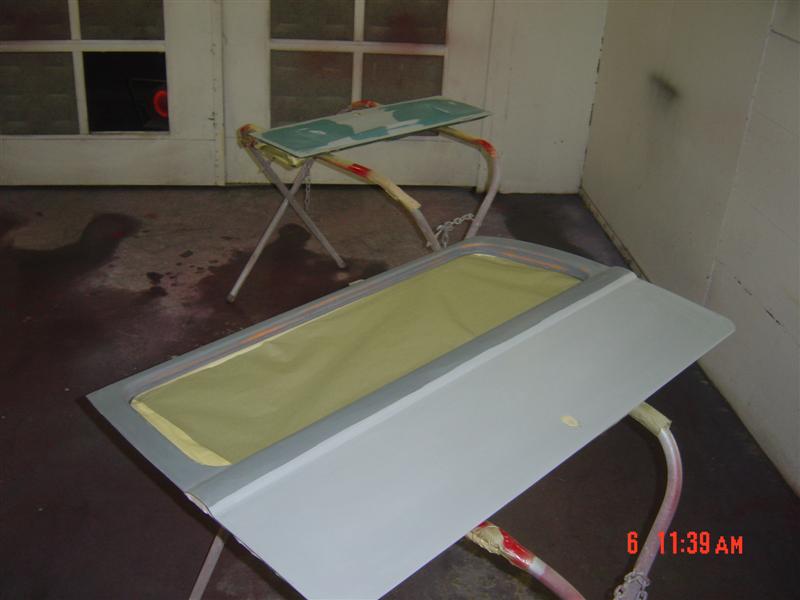
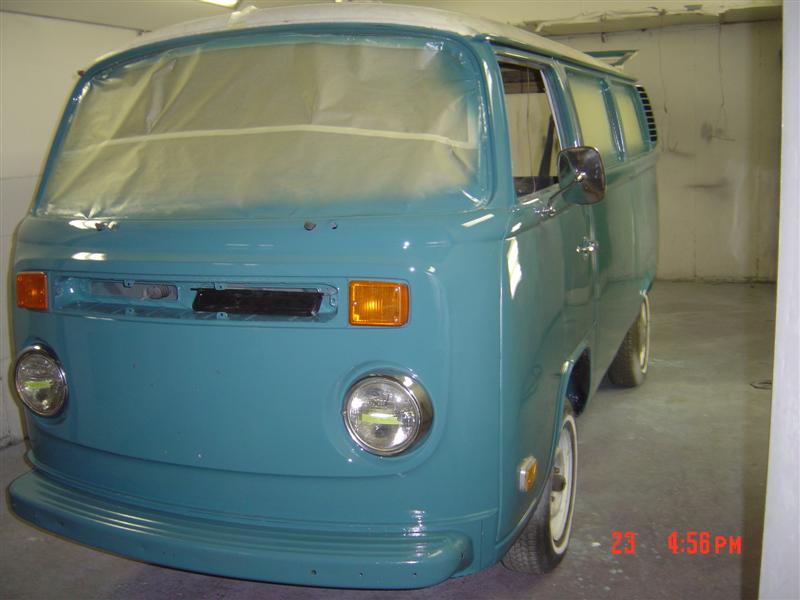
Posted by: scotty b Apr 9 2008, 07:32 PM

Attached image(s)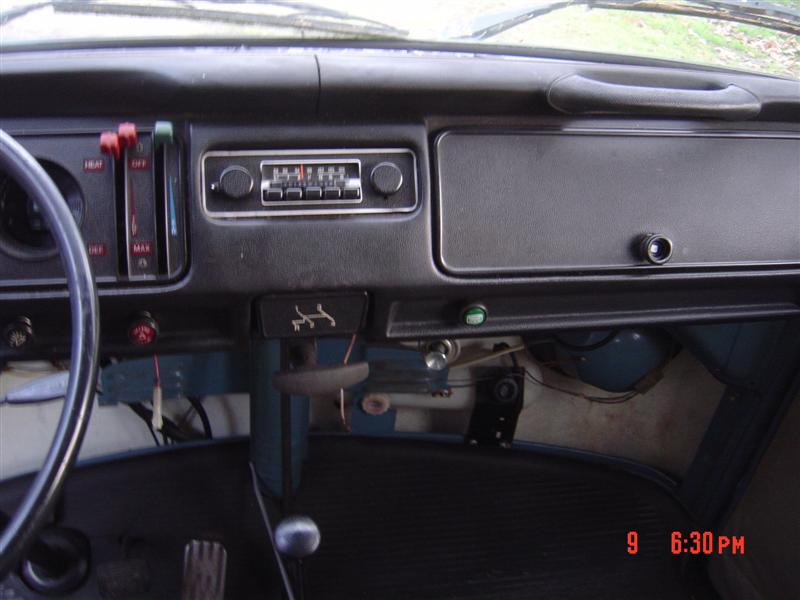

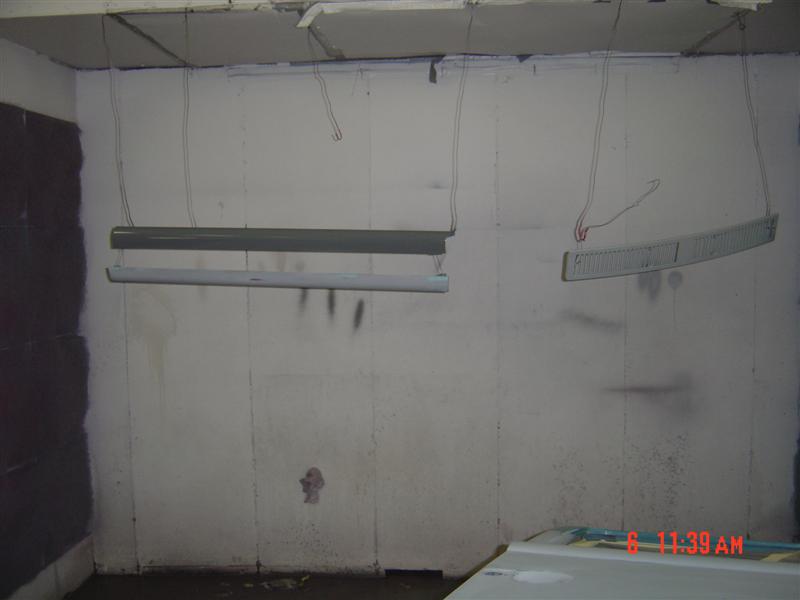
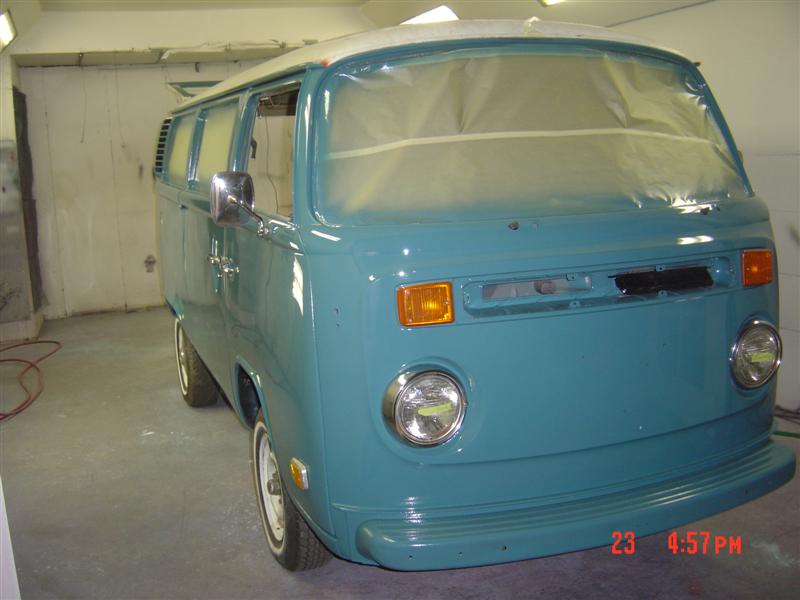
Posted by: scotty b Apr 9 2008, 07:34 PM

Attached image(s)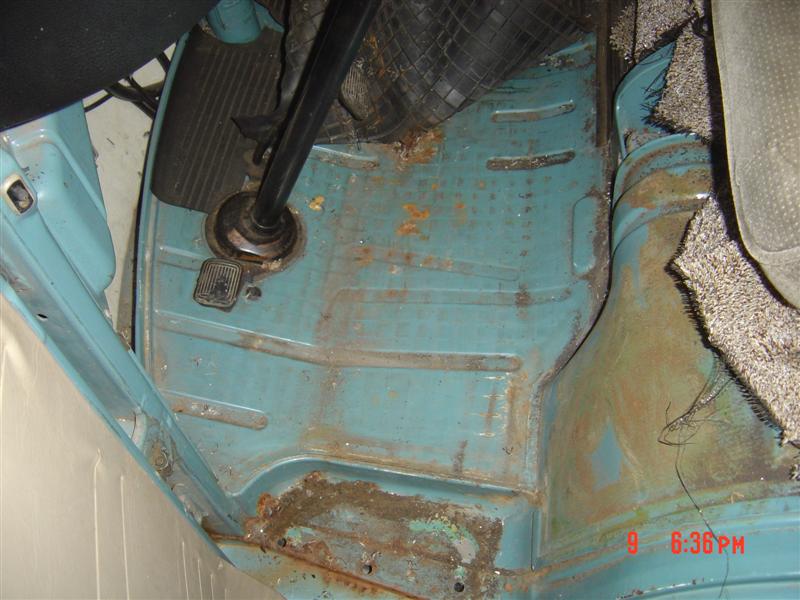
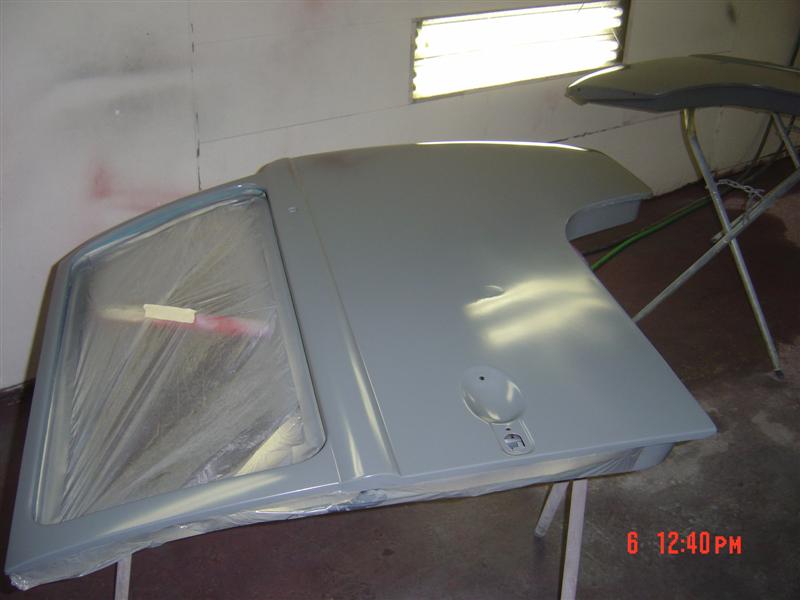
Posted by: scotty b Apr 9 2008, 07:35 PM

Attached image(s)
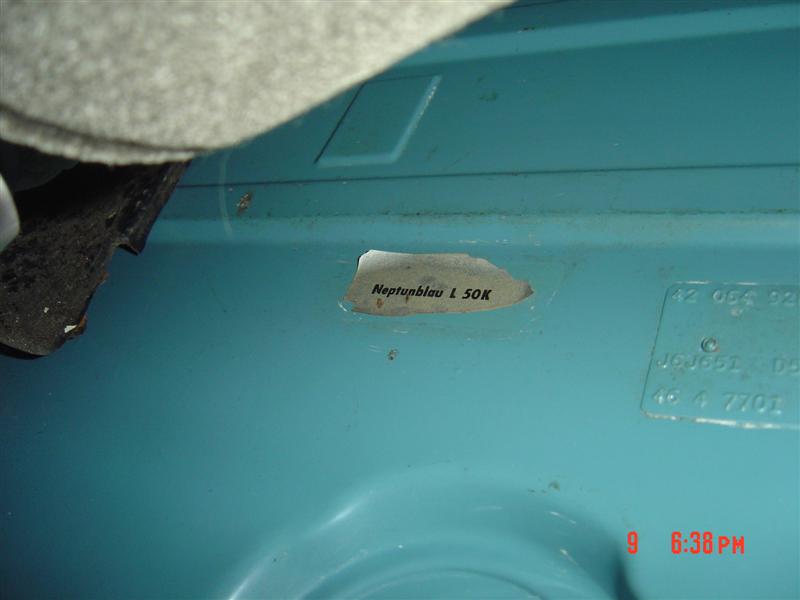
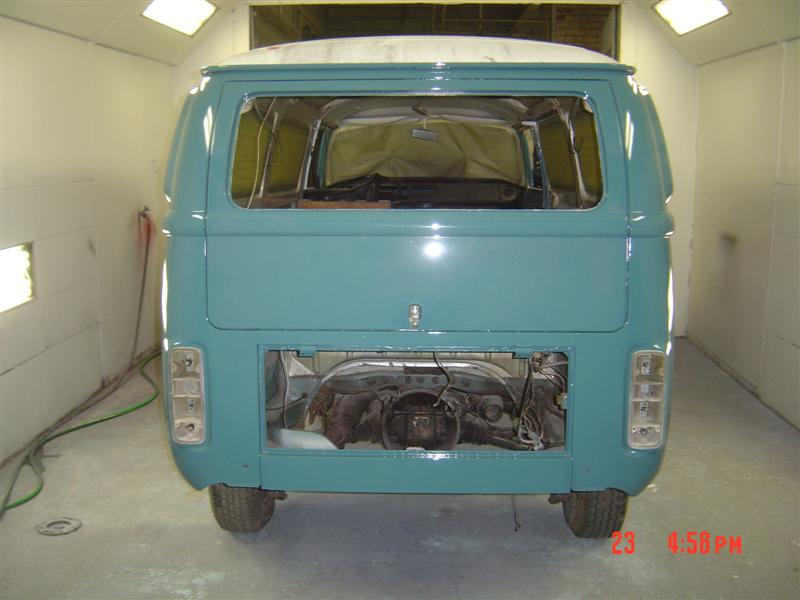
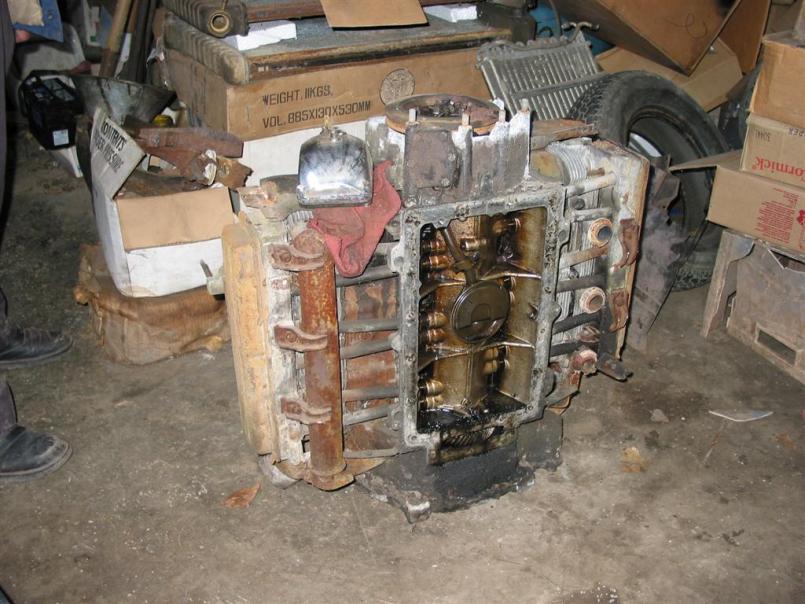
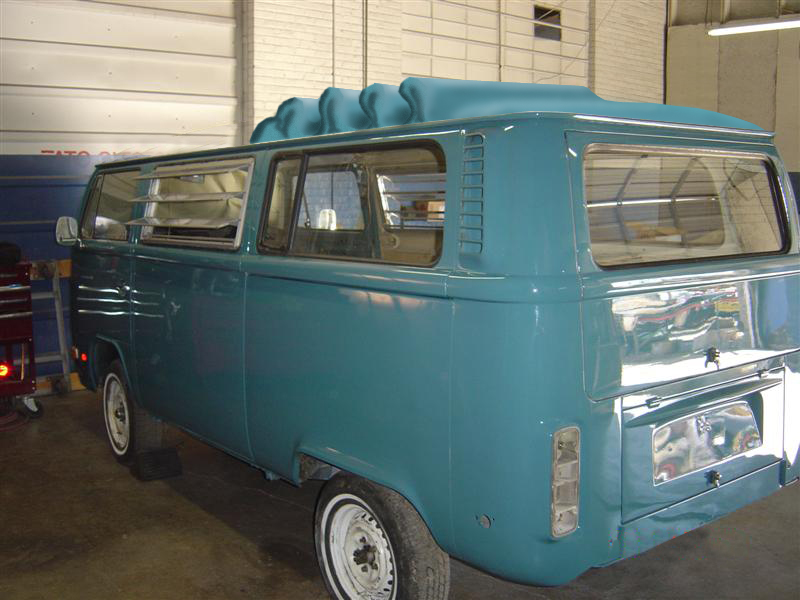
Posted by: scotty b Apr 9 2008, 07:38 PM
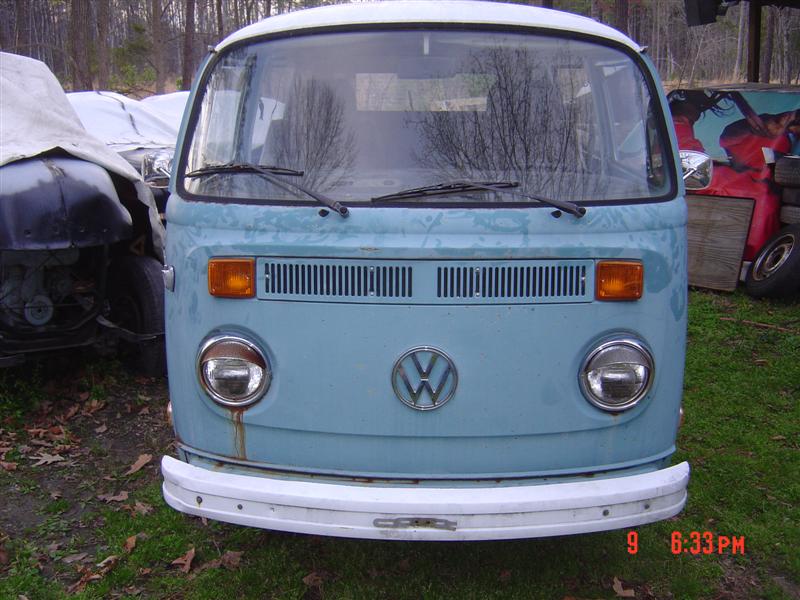
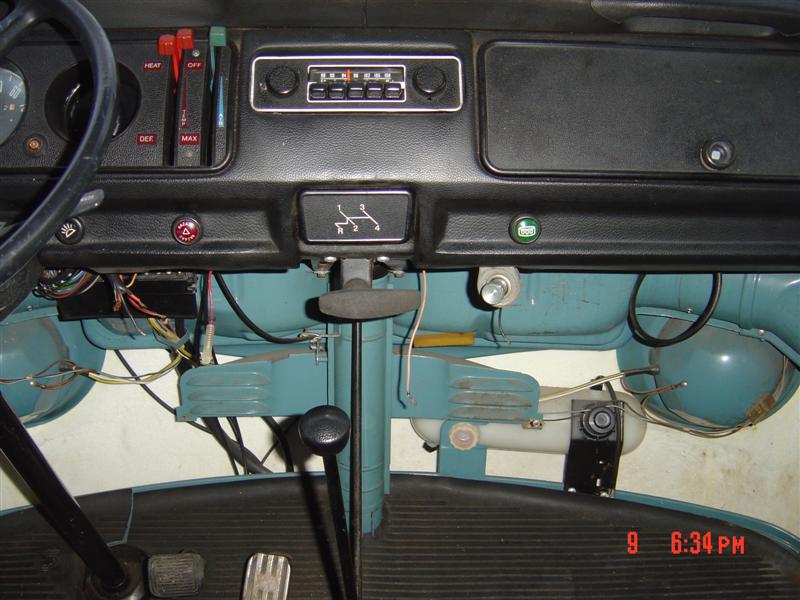
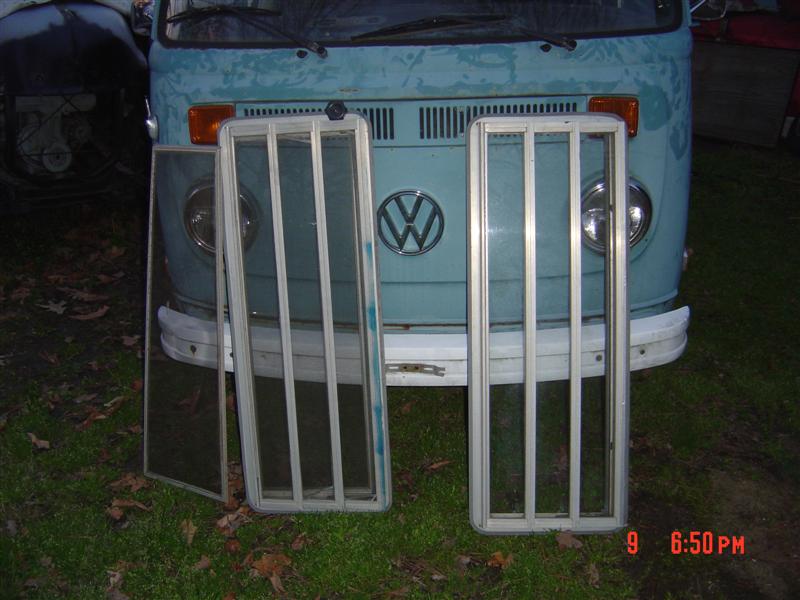
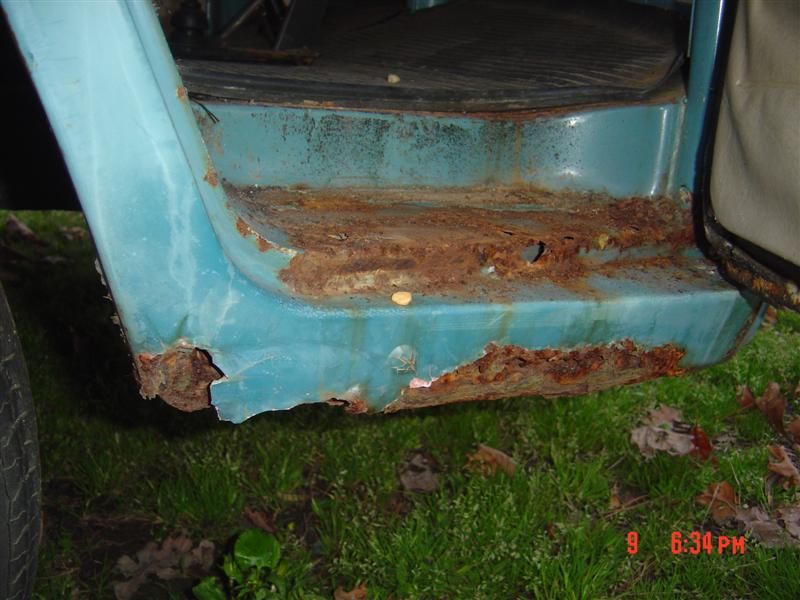
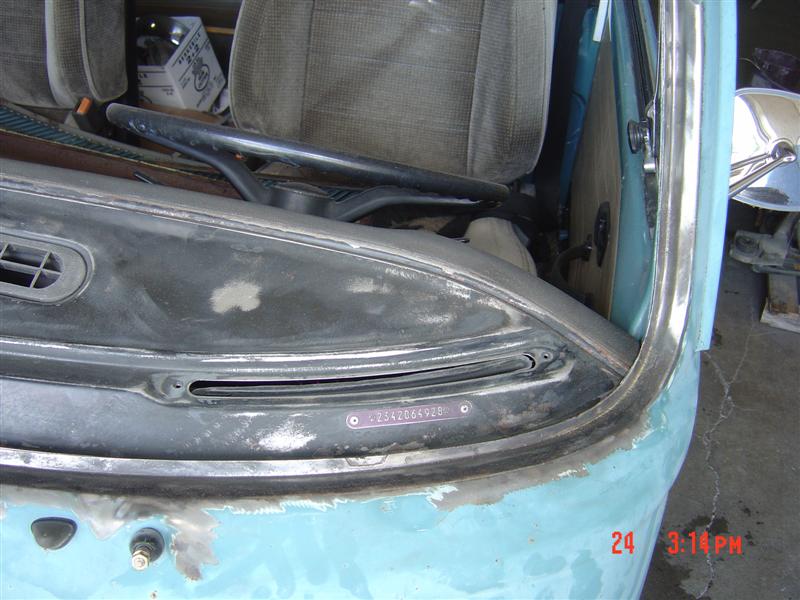
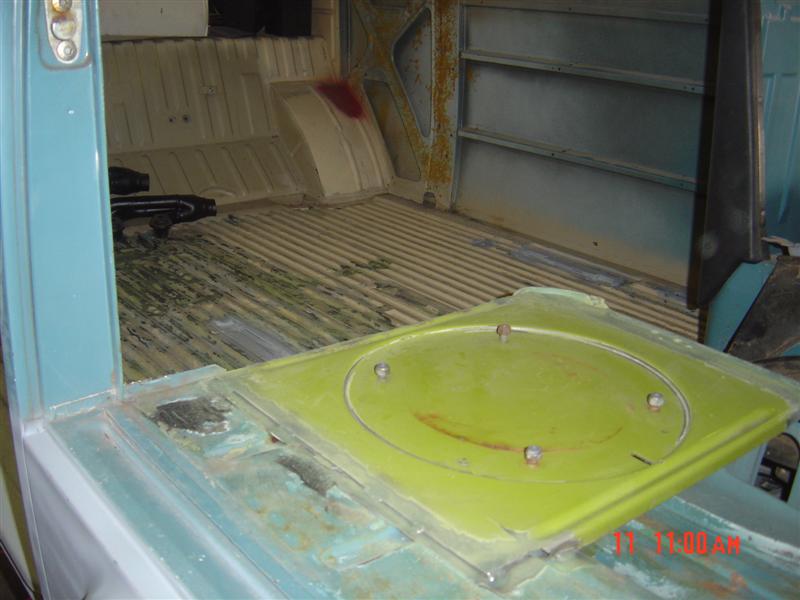
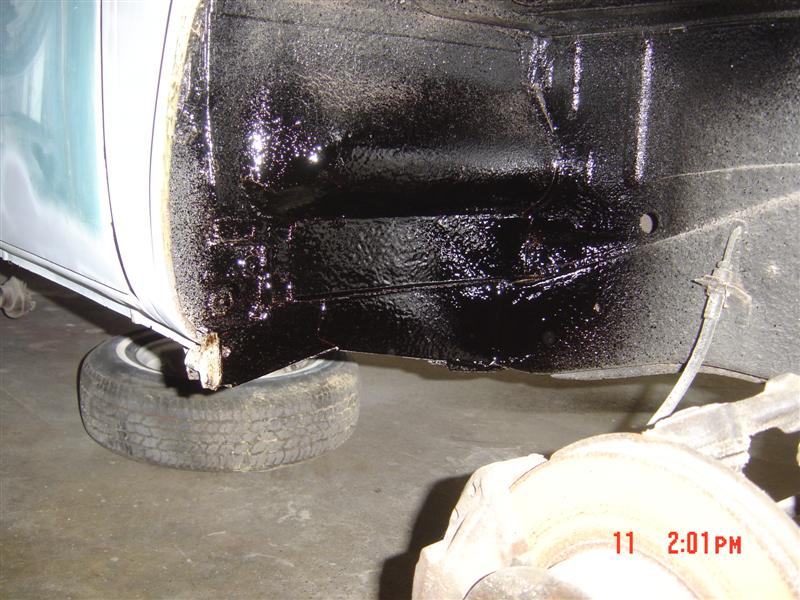
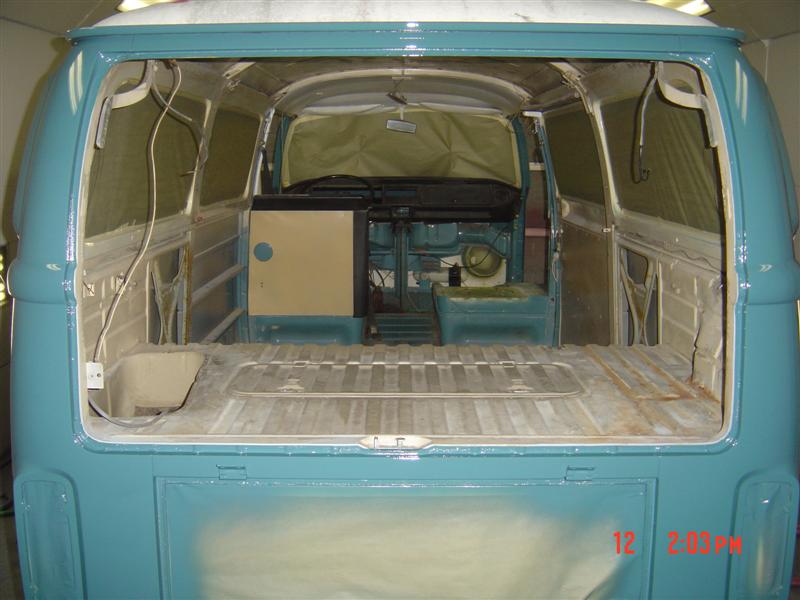
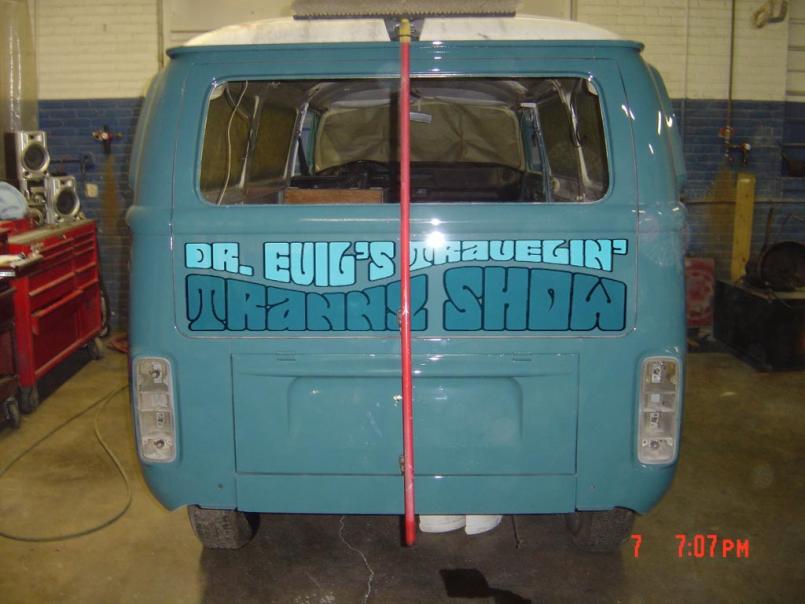
Just to confrim it is indeed a real vw bus. AND proof it is a true TRANNY waggin 
Attached image(s)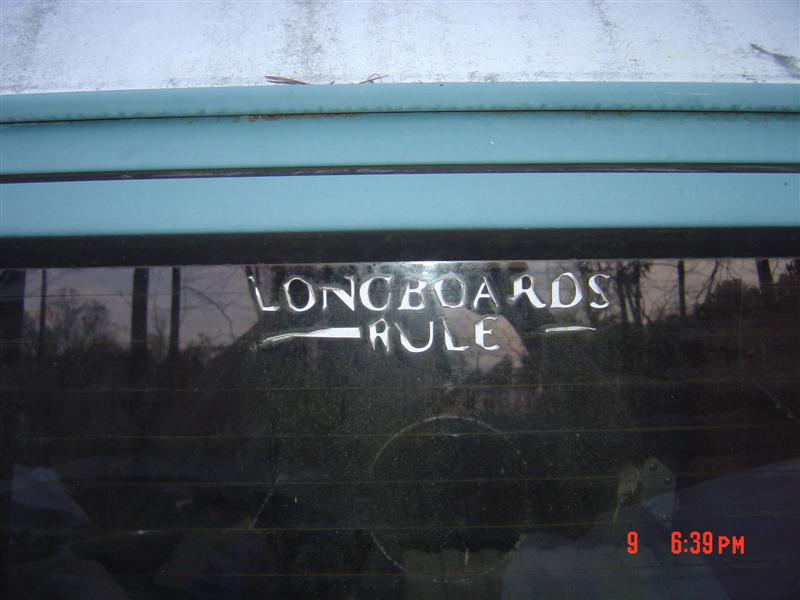

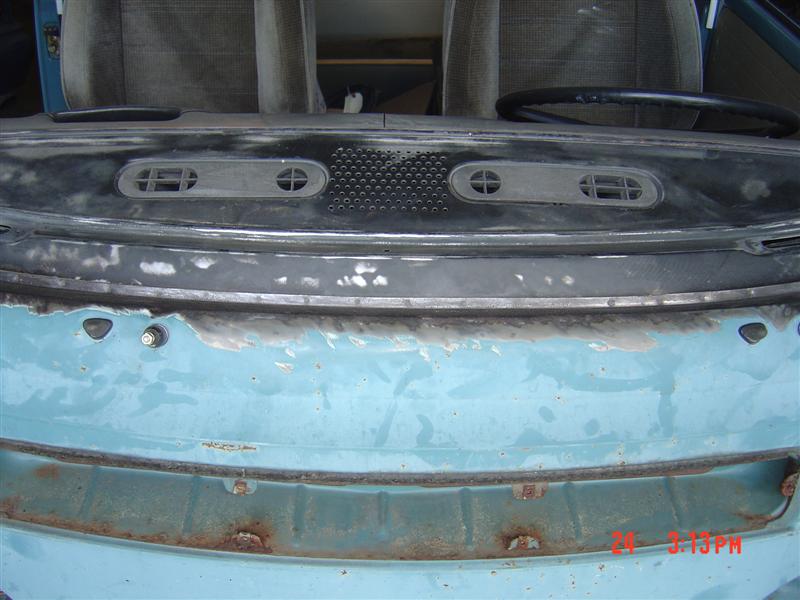
Posted by: George H. Apr 9 2008, 07:40 PM
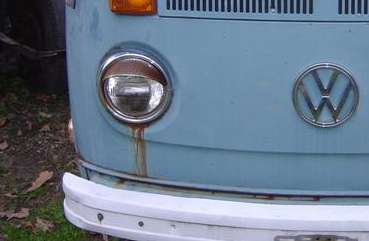
Tears of rust it is related to the 914
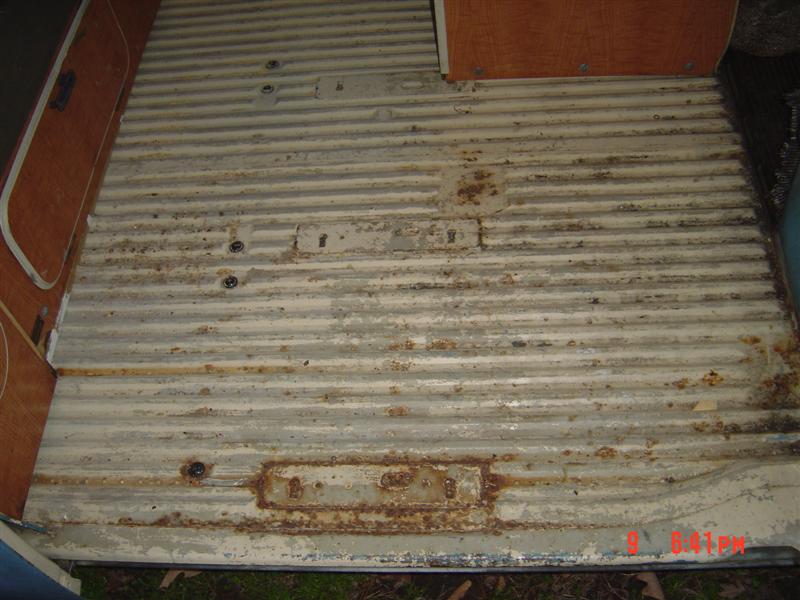
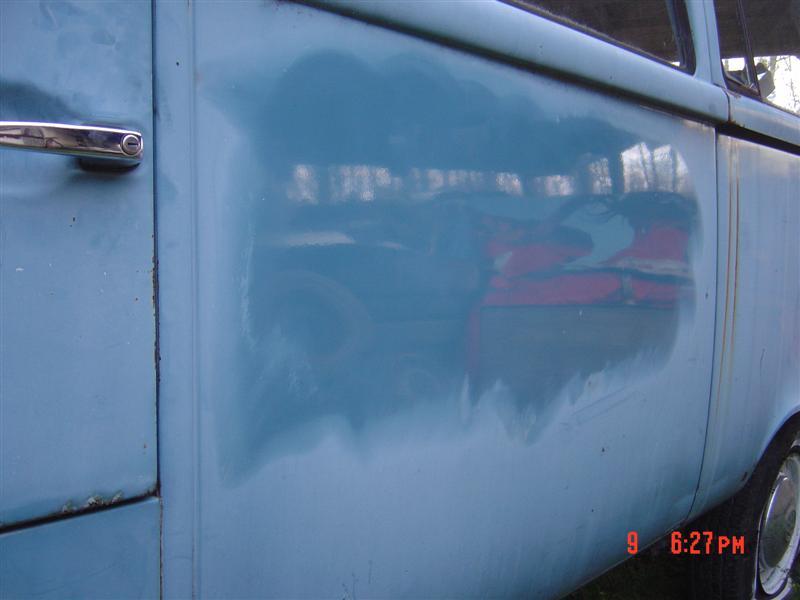
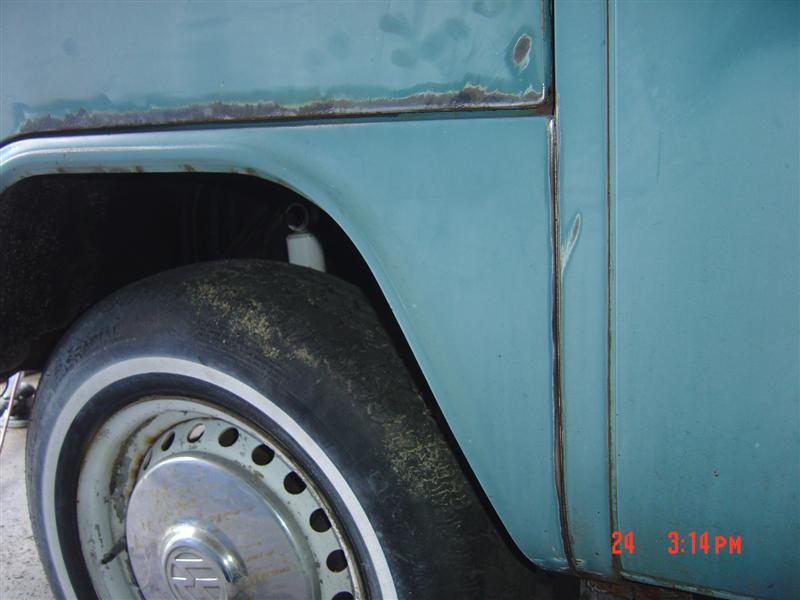
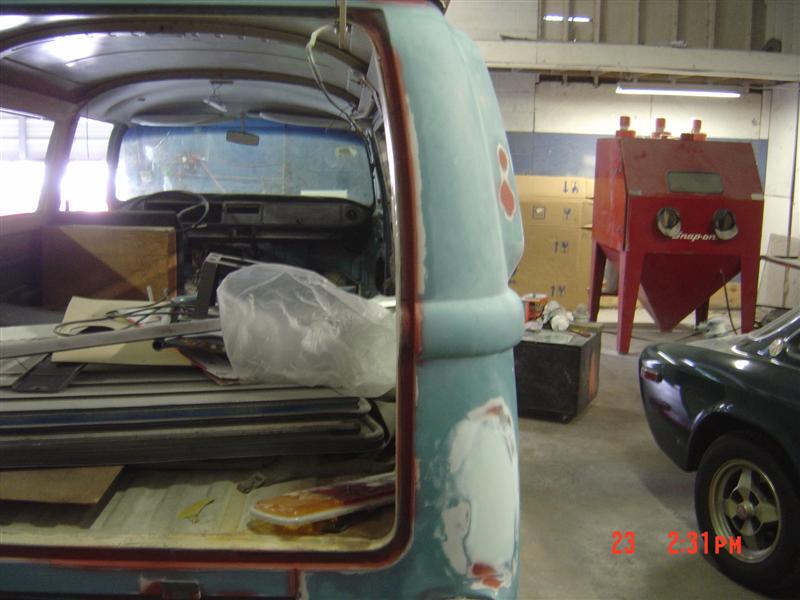
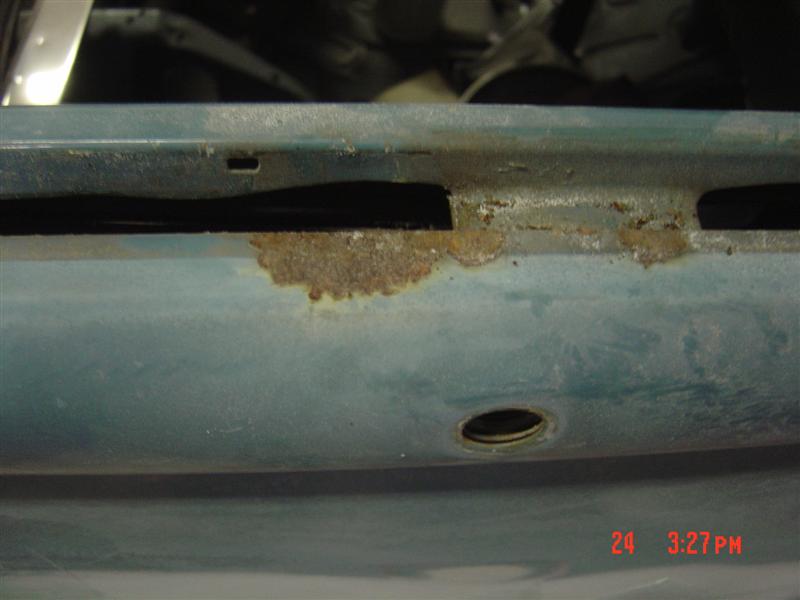
Posted by: scotty b Apr 9 2008, 07:40 PM
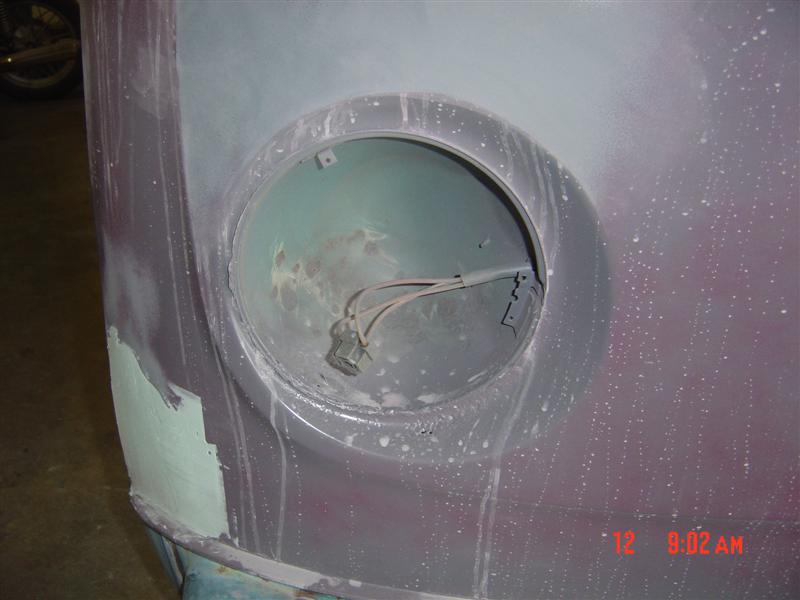
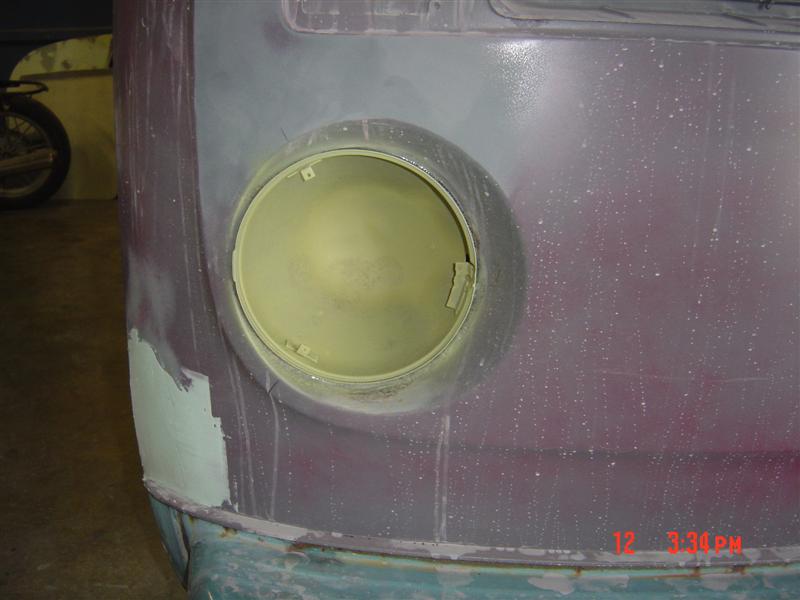
About 1.5 minutes with the buffer It has now been marked and shall never leave. Worst rust spot, there are a few other very small spots but this is by far the worst 
Attached image(s)
Posted by: scotty b Apr 9 2008, 07:42 PM
End result will be something along these lines ![popcorn[1].gif](style_emoticons/default/popcorn[1].gif)
Attached image(s)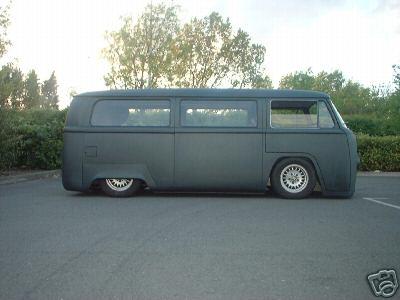

Posted by: scotty b Apr 9 2008, 07:52 PM

Tears of rust it is related to the 914
I like that
Should be Mike's new avatar 
Posted by: rick 918-S Apr 9 2008, 09:26 PM
I've replaced those dog leg sections b4. 


Posted by: Bleyseng Apr 9 2008, 10:46 PM
sumthin like this!
Attached image(s)
Posted by: roadster fan Apr 10 2008, 03:19 AM
AND proof it is a true TRANNY waggin
 you are killin me!
Posted by: type11969 Apr 10 2008, 08:44 AM
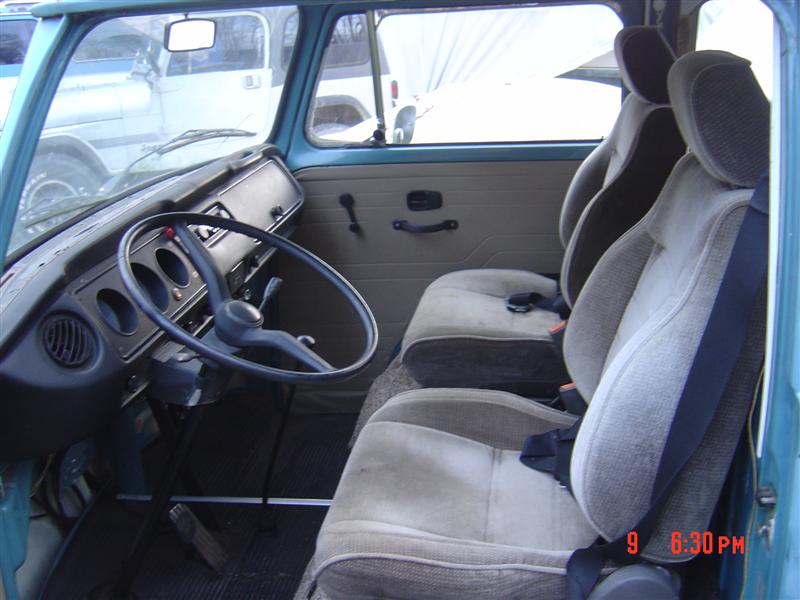
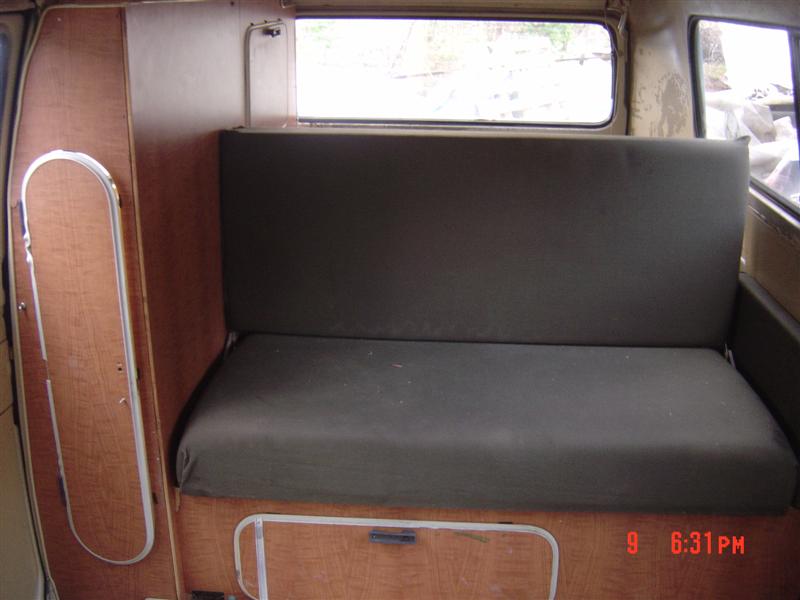
Jealous of those seats, look way more comfortable than the stock ones in my 76.
Posted by: Dr Evil Apr 10 2008, 09:15 AM
Boo ya! Scotty, thanks for the eval and all of the work you have done so far. That paint is not bad at all.
Posted by: Dr Evil Apr 10 2008, 09:16 AM
Oh ya, I was thinking rust tears when I saw that pic, too.
Posted by: degreeoff Apr 10 2008, 10:09 AM
Rock on MAN!! I may have to follow suit...I had 2 @ 1972 buses...one was a camper and one an original owner 42k mile that had sat for years! Its most exelent feature was a sunroof the size of the superdome unto which we (unamed huligans from my youth) would launch water ballons out of while driving the strip @ VA beach!!!
Posted by: purple Apr 10 2008, 11:50 AM
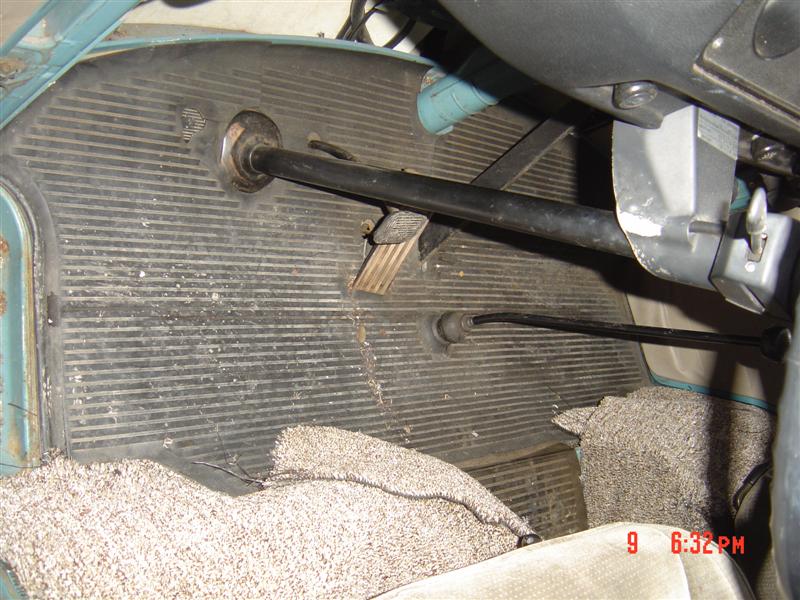
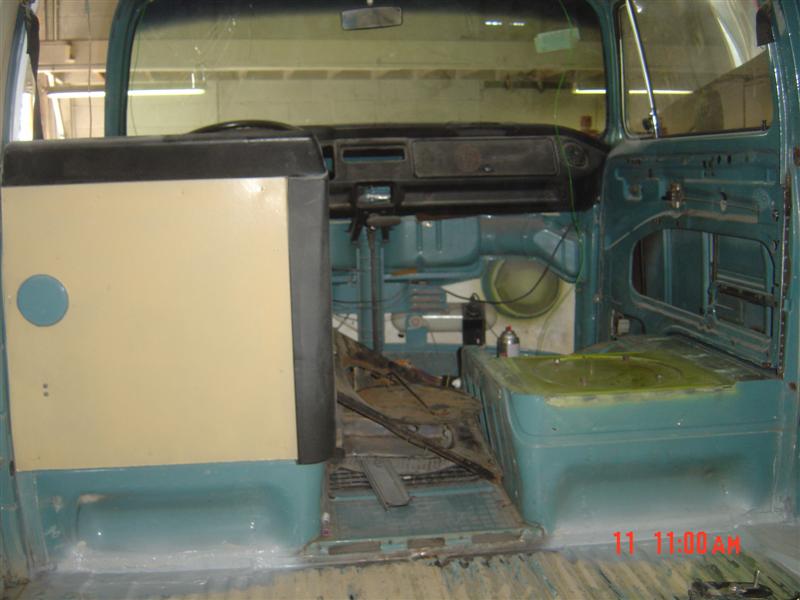
Am I missing something?
If you have a 4 on the floor shifter, where is the clutch?
Is it a 'sportmatic' ?
Me's confusalated!
Posted by: type11969 Apr 10 2008, 11:56 AM
thought the same thing then saw that it was just depressed to the floor and under the floor mat in that one pick. You can see it with the mat removed. Cable must not be connected.
Posted by: tdgray Apr 10 2008, 12:08 PM
Looks pretty good... ahhh brings back memories 
Posted by: Dr Evil Apr 10 2008, 12:11 PM
I hope that is it. The tranny is supposed to be in it still.
Posted by: type11969 Apr 10 2008, 12:14 PM
maybe they installed the pressure plate backwards so you now have to pull up on the clutch pedal to disengage it.
Posted by: Wilhelm Apr 10 2008, 12:22 PM
Be perfect with a 5.3 litre SBC!!!!!!
Posted by: Dr Evil Apr 10 2008, 12:29 PM
He said that it needed either an ig switch or the whole key part. Which is it, do you know, Scotty?
Posted by: scotty b Apr 10 2008, 08:08 PM
P.O. disconnected the cable when he removed the engine. Tranny is there.
I am assuming the switch is bad.The tumbler feels fine, key turns to all positions so I'm assuming the electrical portion is bad. Let me look into it some more before buying one.
Posted by: Dr Evil Apr 10 2008, 08:26 PM
Thats good news because the switch is cheap and readily available
Posted by: Dr Evil Apr 12 2008, 08:37 PM
This should be marked OT! 

So, I have already purchased the required parts as per Scotty's recommendation. Total; $175 with shipping. Man these parts are cheap. 
I got both outer rockers, inner and outer lower step for the right side front, front, rear, and 2 side window seals, and an ig switch ($6).
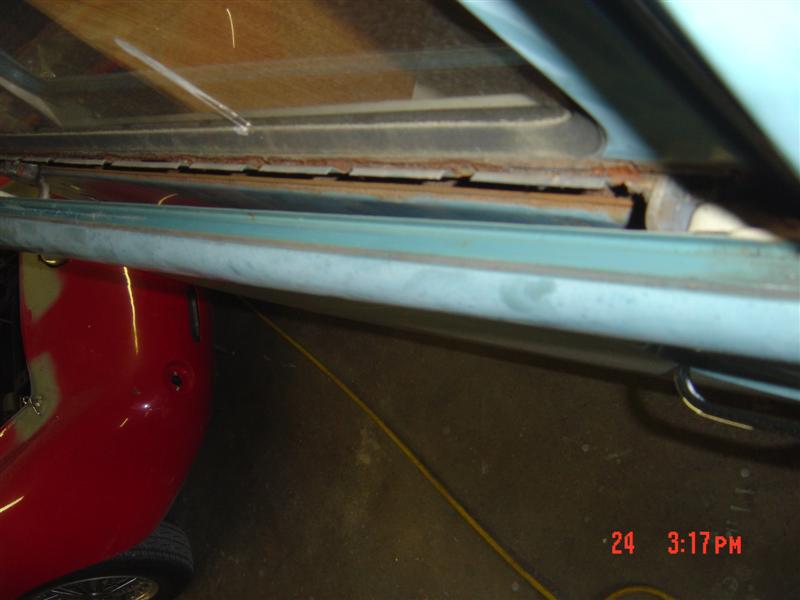
Posted by: scotty b May 26 2008, 01:58 PM
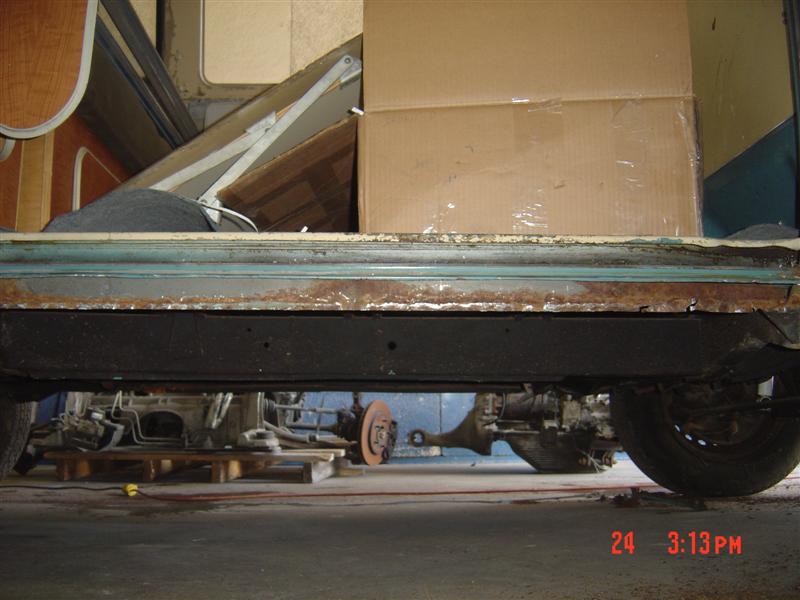
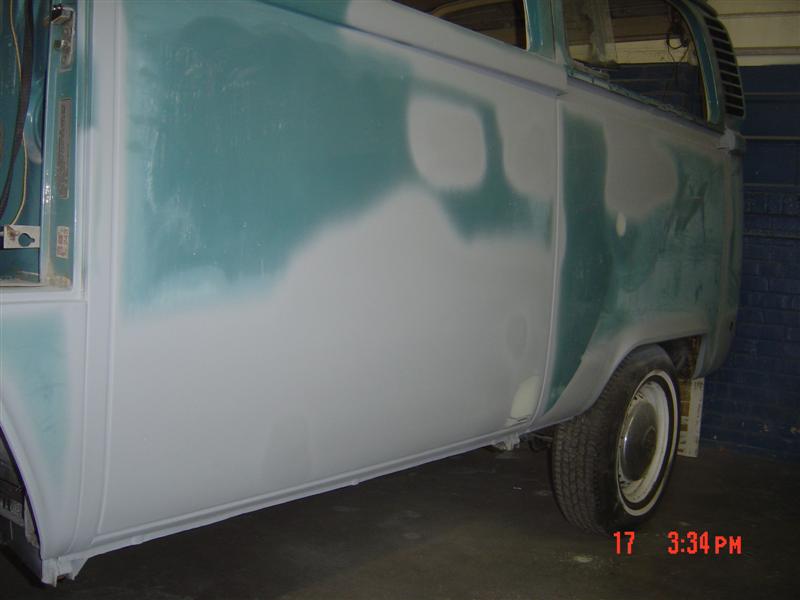
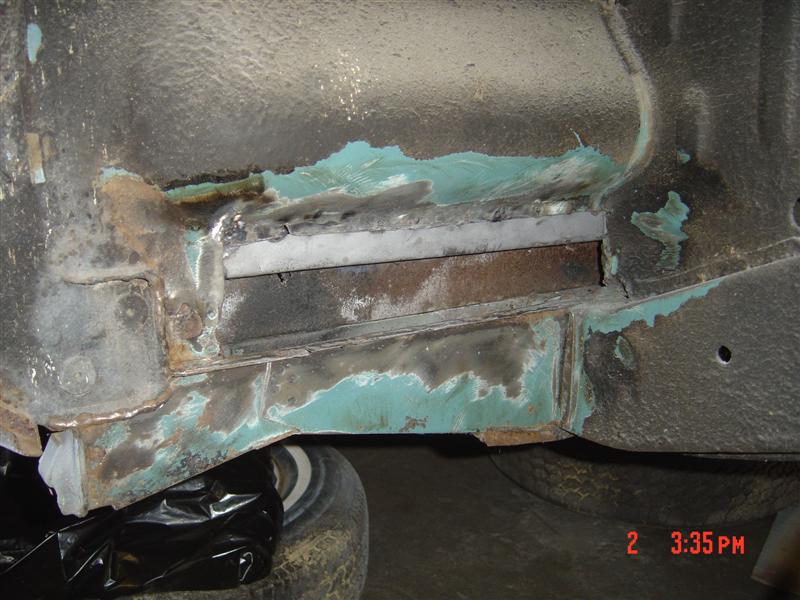
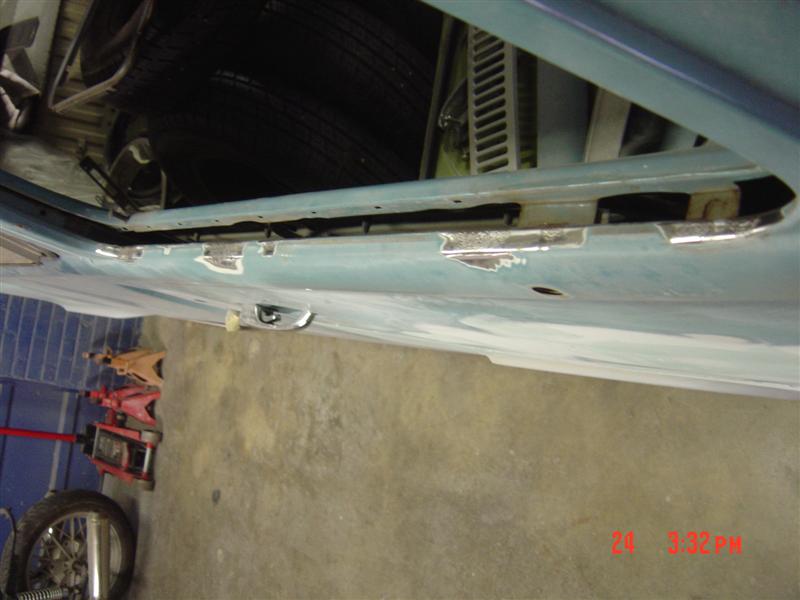
So Mike came down this weekend and we spent about 6 hours on the bus Saturday. While I cut out rot and started repairing, Mike stripped arpound all of the window frames and the seams between body panels. I actually got the passengers side repaired but forgot to take a pic. I did not use the replacement pice as the stamping quality was complete shit  Passenger rocker needs to be bowed a bit to fit correctly and the drivers rocker turned out to be much wwrse then expected. Needs the wholle inner rocker as well.
Attached image(s)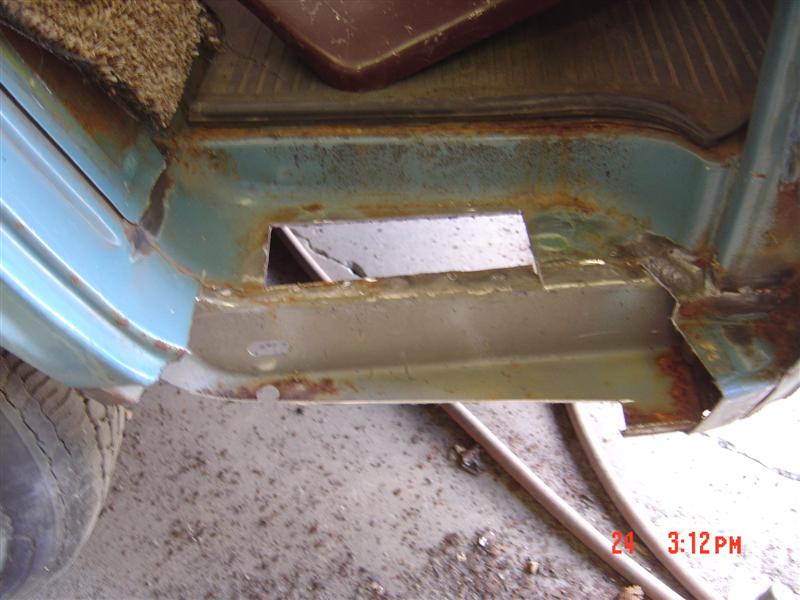
Posted by: scotty b May 26 2008, 01:59 PM
Mo
Attached image(s)
Posted by: scotty b May 26 2008, 02:01 PM
Later we went out with 2 of his friends in town and went out for sushi where he let it be known that he recent;ly learned what anal ease is for and that the sushi did not taste like rotten semen 
Attached image(s)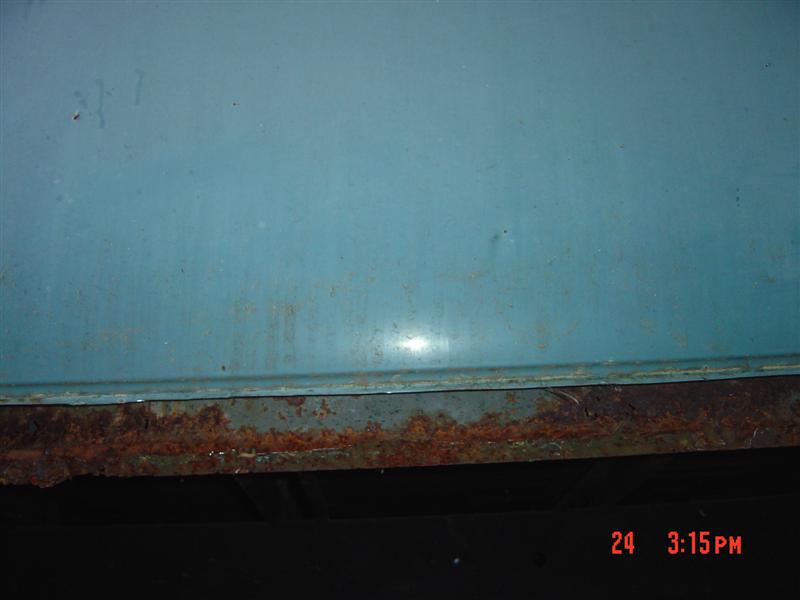


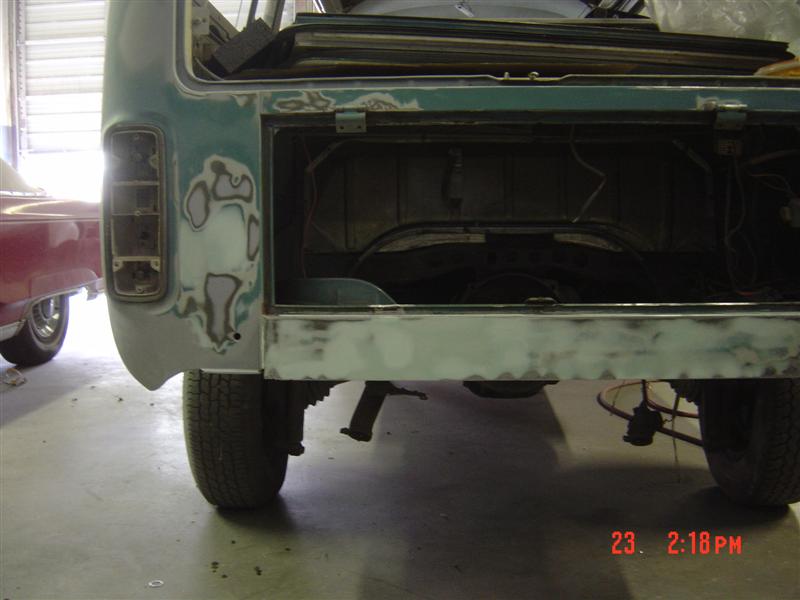
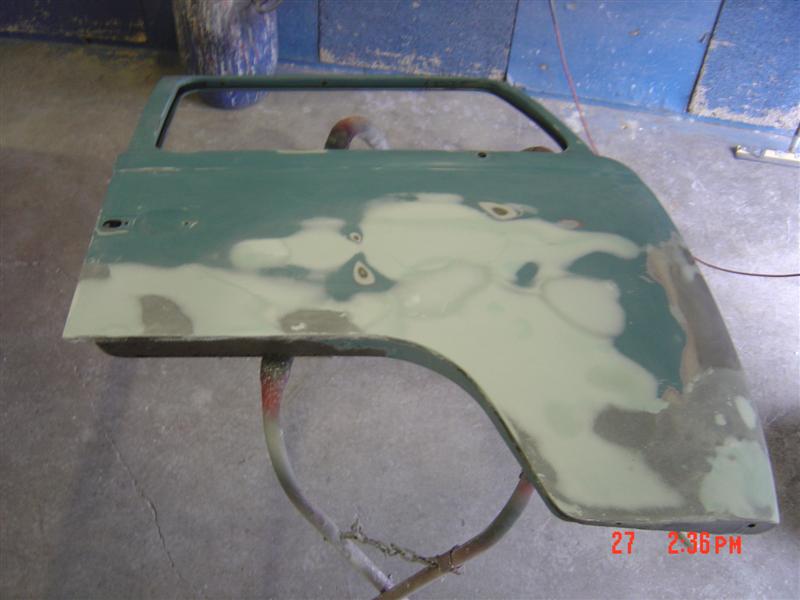
Posted by: scotty b May 26 2008, 02:03 PM
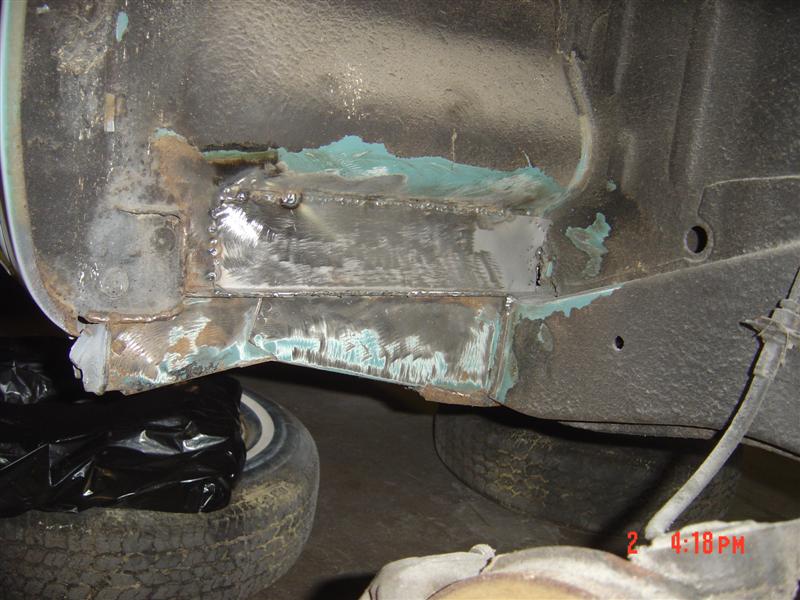
and the offending patch. I may be single and I may not get laid but at least I am not familiar with the flavor of rotten spoog, or any other spoog for that matter. Sunday Mike met me back at the shop with PHO in hand and we got a good start on wiring my motorcycle then went to my house and got my dads tranny 75% done, then I bitched out on a cookout his friends were having in order to take care of laundry and bills 
Attached image(s)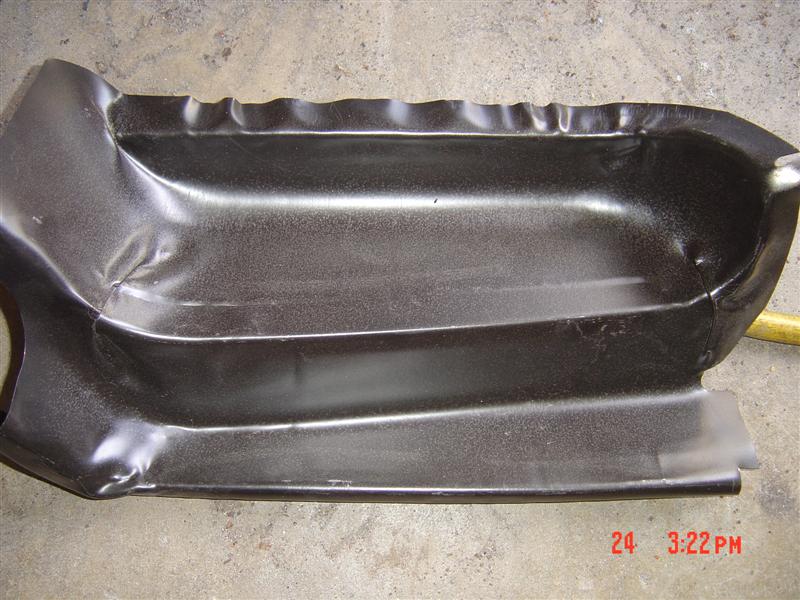
Posted by: brer May 26 2008, 03:05 PM
wow, is that a repair panel?? who makes those?
I do see one major problem though.
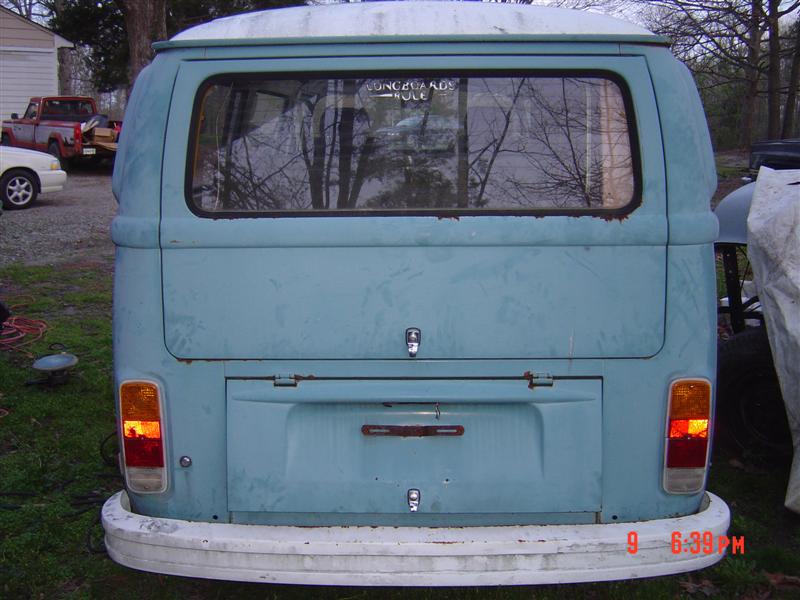
Longboards do not rule.
Posted by: scotty b May 26 2008, 05:40 PM
wow, is that a repair panel?? who makes those?
I do see one major problem though.
Longboards do not rule.
Um yes they do
I forget the name of the repro company. Appeared to be Swedish or Scandinavian name. Mike got them from the Bus Depot who has a good rep, so it is probably the same panel most places carry.
 The part itself was 18 gauge so it wasn't cheapo thickness just a half assed stamping. Once I got the outer pice off and saw the majoruty of the insdie was good it just didn't seem to be worth getting the repro part to fit right.
Posted by: Dr Evil May 26 2008, 10:06 PM
Har har Scottmunch 
It was fun hanging out this weekend. I wish we lived closer so I could help you out with your other projects. You missed out last night, drunken rockband and I was singing
Posted by: brer May 27 2008, 12:56 AM
You missed a nice SD bbq Mike.
Don Traver and Sean came round and we did a proper west coast tri-tip roast up.
24hr soaked beans and Kelly's patented olive oil roasted potaters. Nice, but sure wish we had at least 2 more booties to fill the extra seats.
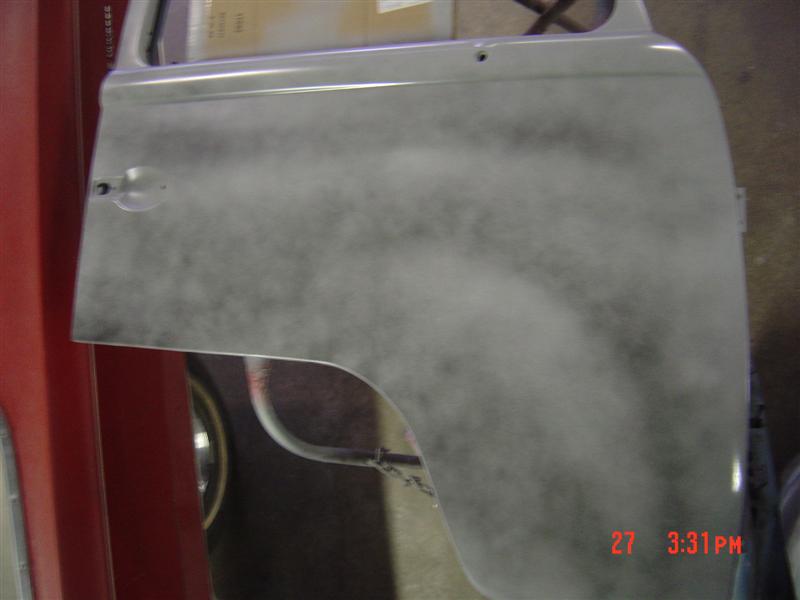
Always loved that Blue Color..
Attached image(s)
Posted by: Vacca Rabite May 27 2008, 07:56 AM
Har har Scottmunch
It was fun hanging out this weekend. I wish we lived closer so I could help you out with your other projects. You missed out last night, drunken rockband and I was singing
Ahh Rockband. One of my favorite things to do while drunk.
Zach
Posted by: zymurgist May 27 2008, 11:23 AM
Har har Scottmunch
It was fun hanging out this weekend. I wish we lived closer so I could help you out with your other projects. You missed out last night, drunken rockband and I was singing
Ahh Rockband. One of my favorite things to do while drunk.
Zach
You get drunk and do rockbands? Is Erin cool with this?
Posted by: Vacca Rabite May 27 2008, 01:45 PM
Har har Scottmunch
It was fun hanging out this weekend. I wish we lived closer so I could help you out with your other projects. You missed out last night, drunken rockband and I was singing
Ahh Rockband. One of my favorite things to do while drunk.
Zach
You get drunk and do rockbands? Is Erin cool with this?
Hey man, don't knock it till you've tried it!
The game is seriously fun. Like, addicting.
Zach
Posted by: scotty b May 27 2008, 06:37 PM
Har har Scottmunch
It was fun hanging out this weekend. I wish we lived closer so I could help you out with your other projects. You missed out last night, drunken rockband and I was singing
Um yeah
More than a feelin Holmes


Posted by: stepuptotheMike Jun 2 2008, 04:00 PM
Saw this one while roamingst the net.... thought of the good dr.
http://www.hymanltd.com/search/Details.asp?stockno=3778&recordCount=64
-Mike
Posted by: Brett W Jun 2 2008, 08:59 PM
Don't you love having you knees as the front line of defense in a head on collision?
Posted by: Dr Evil Jun 2 2008, 09:28 PM
Most cars go under the bumper 
Posted by: scotty b Jun 29 2008, 06:08 PM
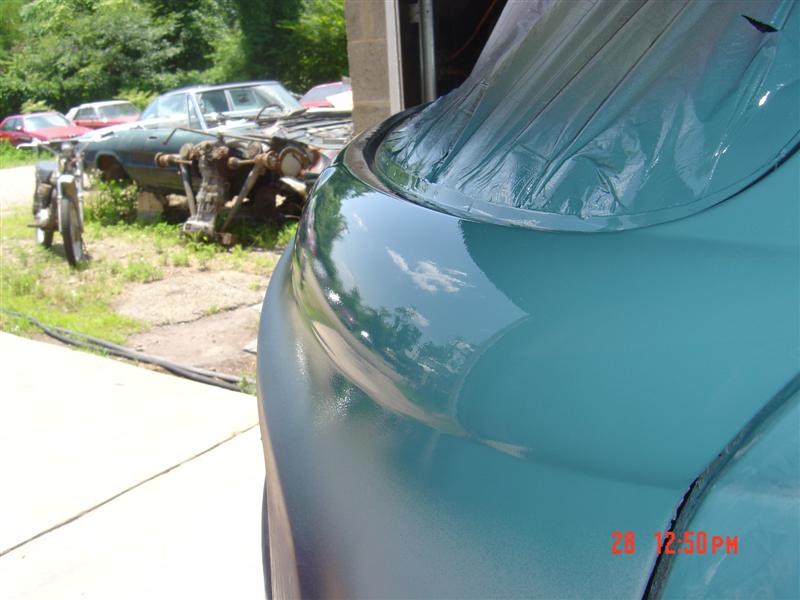
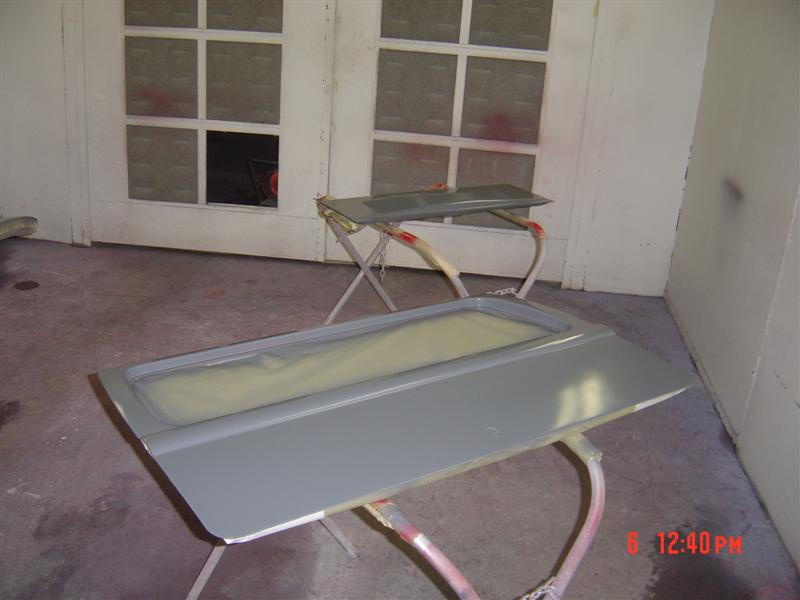
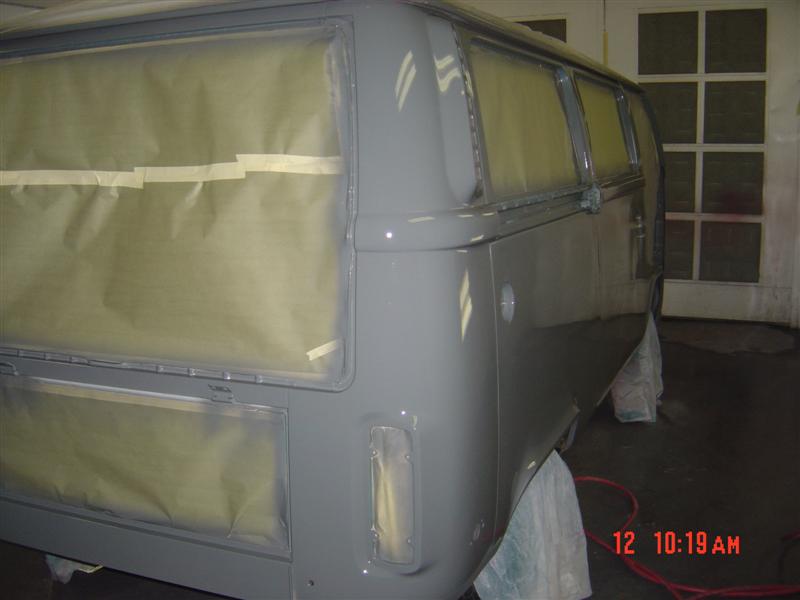
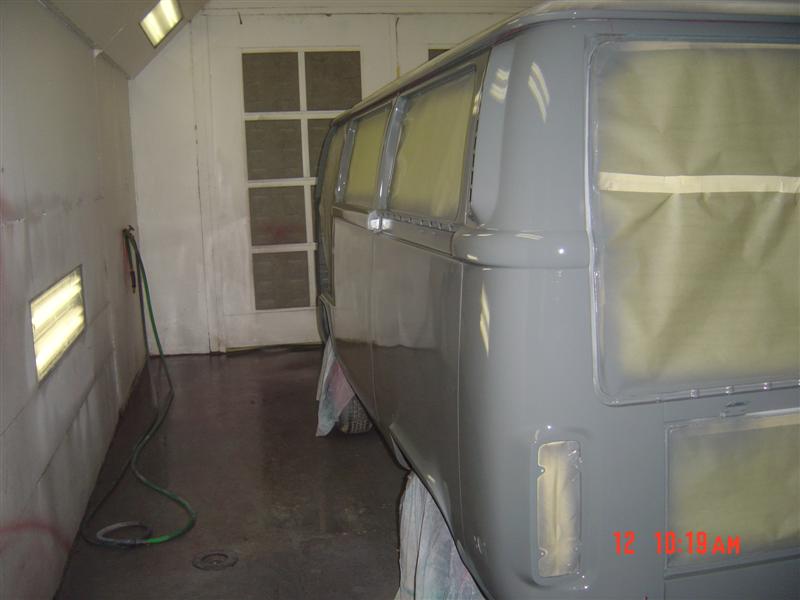
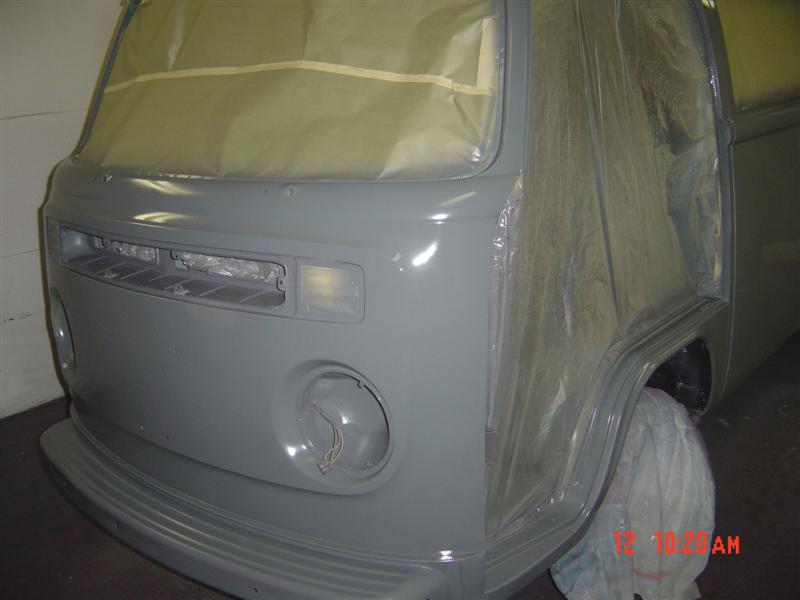
Happy something day Mike Striped, etched, primed, blocked, sealed, painted
Attached image(s)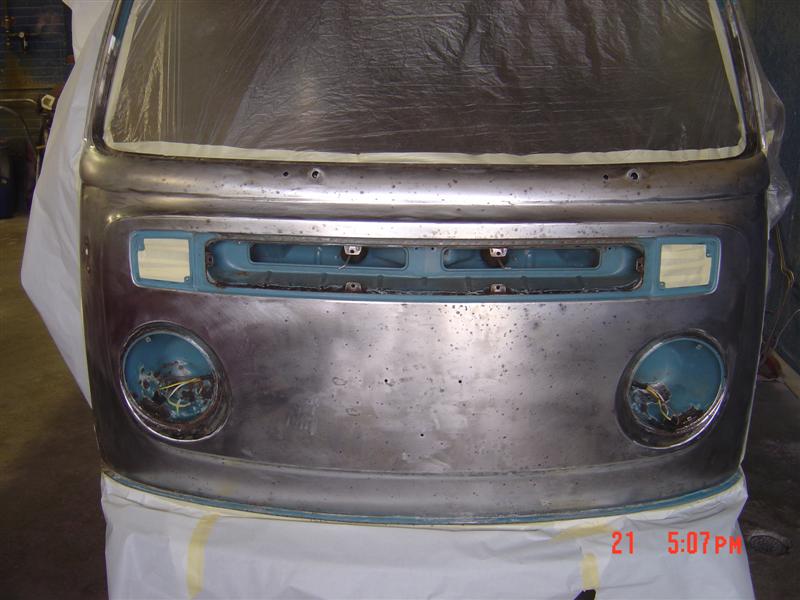
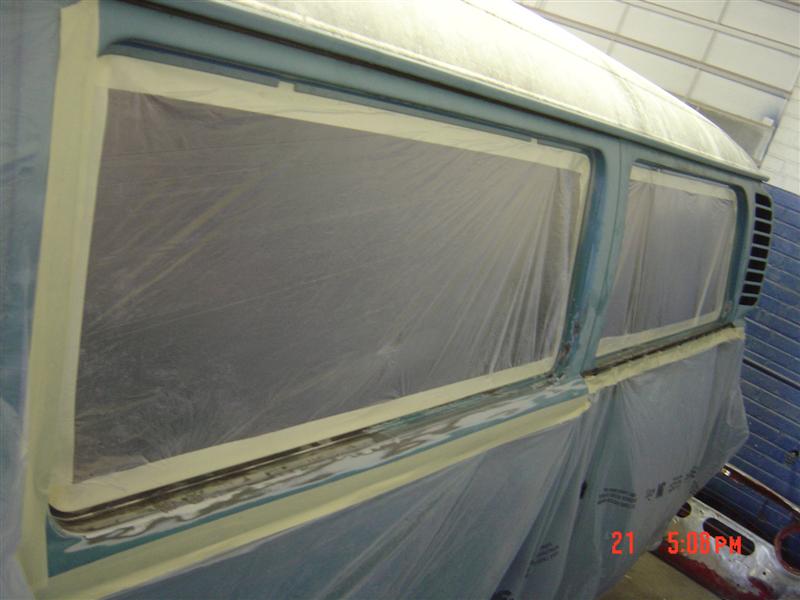

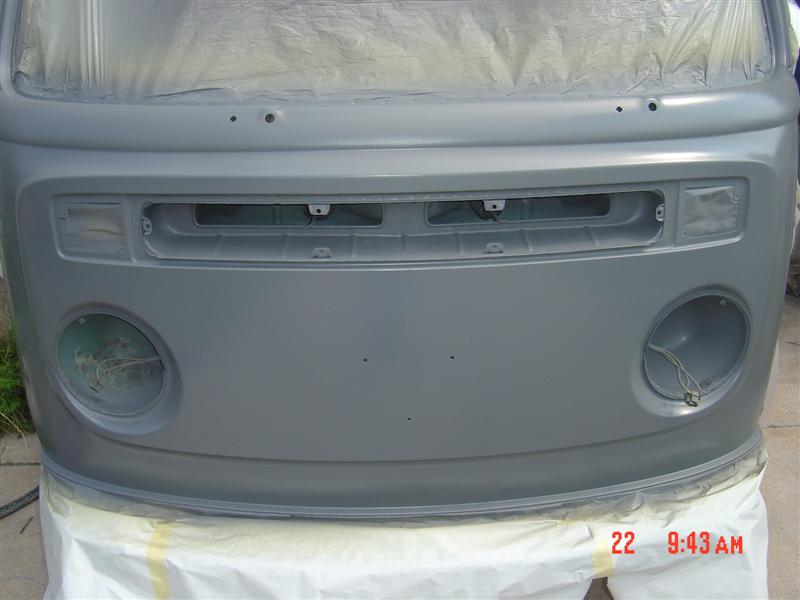
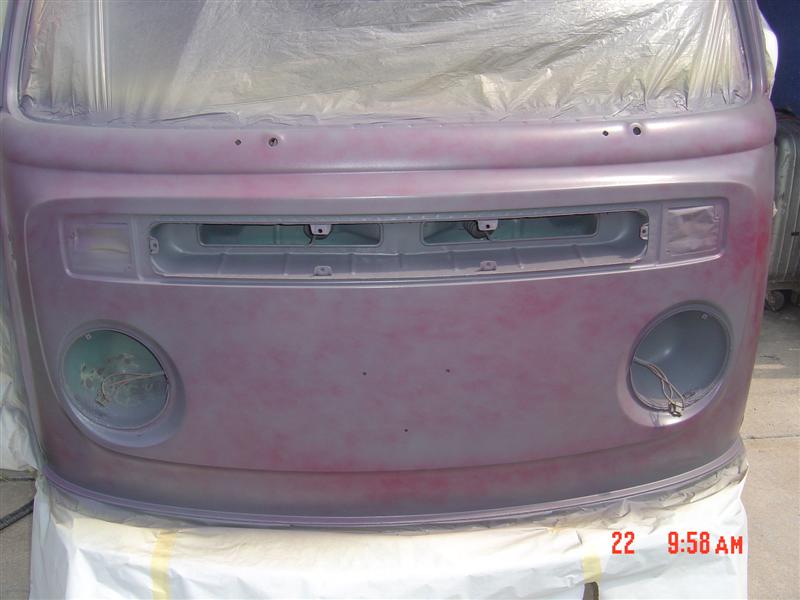
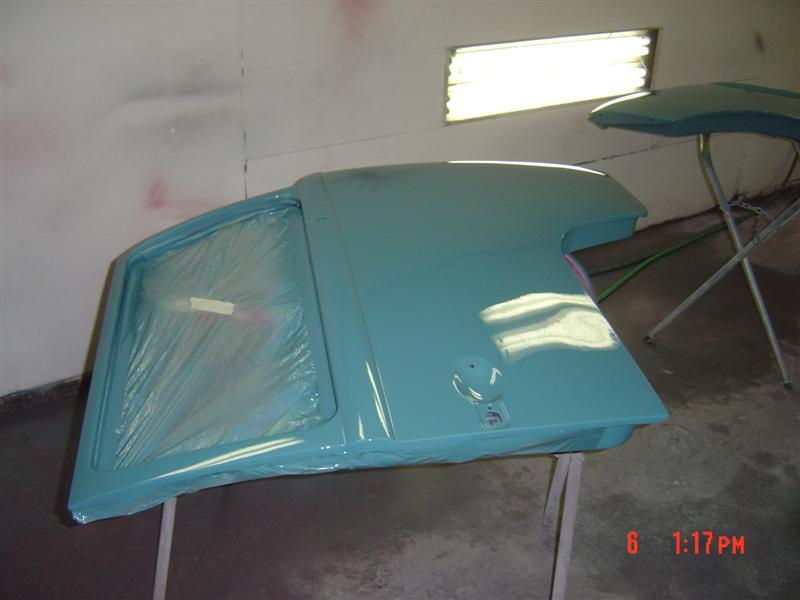
Posted by: scotty b Jun 29 2008, 06:11 PM
squirt squirt
Attached image(s)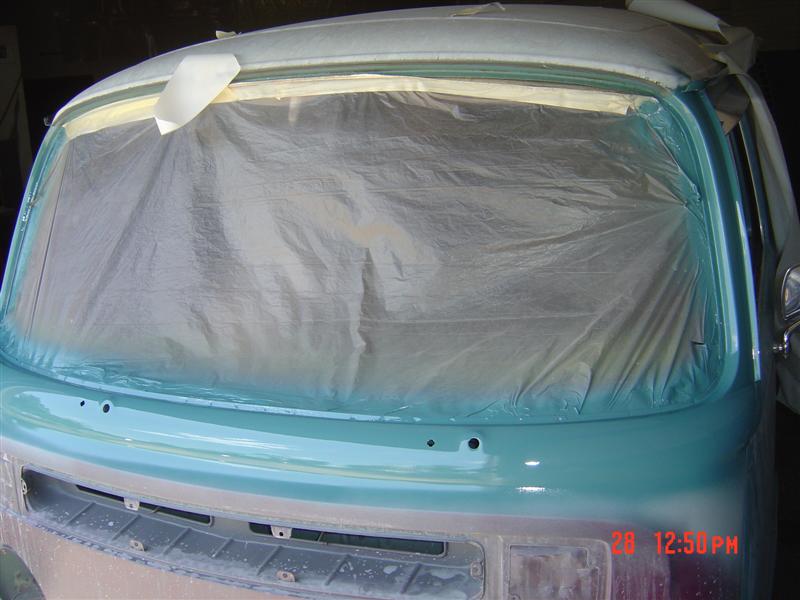
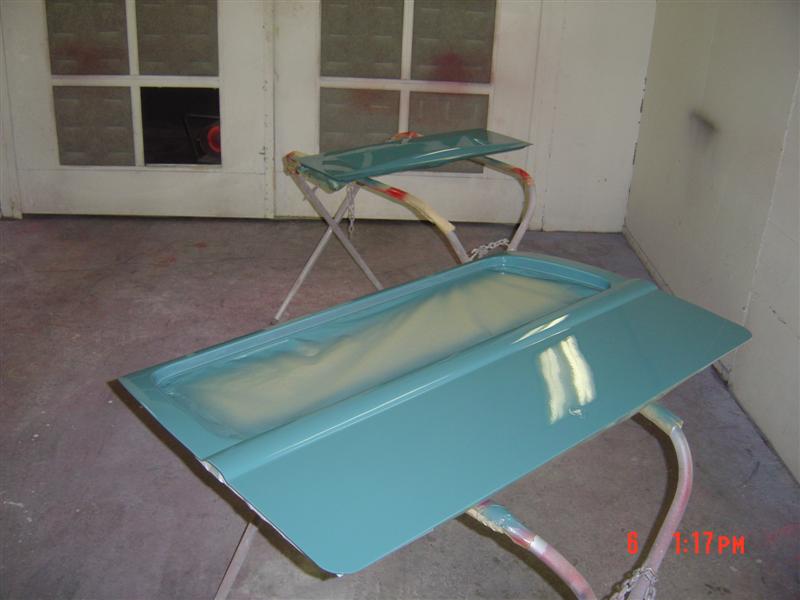
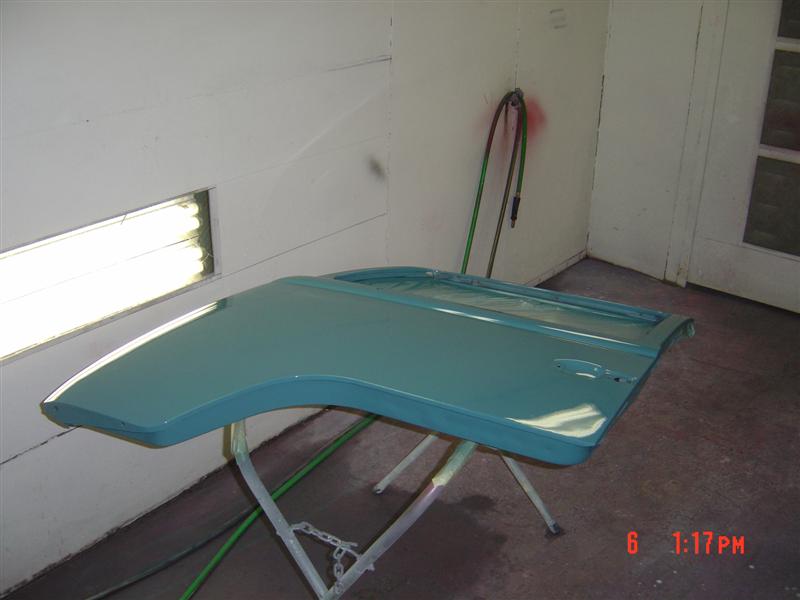
Posted by: scotty b Jun 29 2008, 06:12 PM
Last
Attached image(s)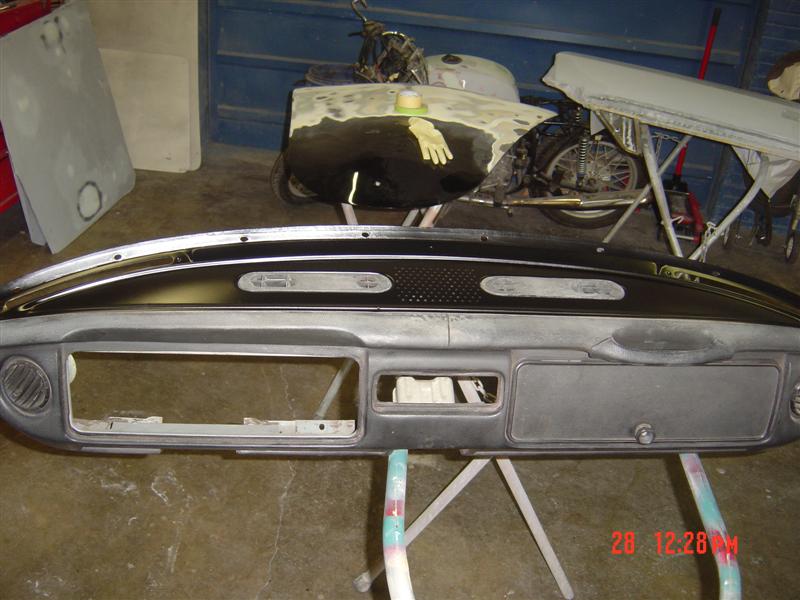
Posted by: Dr Evil Jun 29 2008, 09:39 PM
Thanks man! Did you get the headlight bucket and the check yet? It went out USPS I think (Heidi shipped it for me). That is looking awesome. I better get hot on building this engine.
Posted by: Dr Evil Jun 29 2008, 09:40 PM
Did you get the spare tire mount in the last shipment? I need to ordered one? Probably a good time to install it, no?
Posted by: Phoenix 914-6GT Jun 30 2008, 12:13 AM
Looks awesome.... Your going to have a sweet looking ride Mike. Nice work... er, werk Scotty
Posted by: scotty b Jun 30 2008, 06:32 AM
Yeah Mike I got the bucket and the $$ and the tire mount. Test fit the mount, but haven't drilled the holes yet. I keep hoping you'll change your mind on it  Those spare tires look like an old burned out decrepit a-hole should be driving the bus, but if that's the look you want You need a fishing hat full of lures to fit the bill. Bus w/spare, pipe, fishing hat, coverd in blood
Posted by: type11969 Jun 30 2008, 08:45 AM
Mike, did you get the spare tire mount that has supports that run down to the bumper? If not, you are going to mess up that paint and any body work on the front end. Actually either way you probably will, but the mount that has supports running down to the bumper is much better in terms of messing up the ft end. I dig having the spare up front for a bunch of reasons, extra protection, extra space, but the biggest right now is to cover up the dents/paint scuffs from having the tire mounted up there for so many years.
If you want to save some cash you can return the front mount you just bought and I can send you the old ft mount I have that mounted to just the skin (I got one that ties in to the bumper). Its a little rusty but will clean up fine.
-Chris
Posted by: scotty b Jun 30 2008, 08:05 PM
Chris he did NOT get one with bumper supports and I am worried about this one mangling the front end. It only mounts with 3 - 1/4" bolts. Unfortunately I have already opend the package so it can'y be returned. 
Posted by: Dr Evil Jun 30 2008, 08:42 PM
It was only $14 for the mount so no biggie. Where do I get the supportive mount for larger breasts, er, tires?
Posted by: scotty b Jun 30 2008, 08:47 PM
Hey Chris can you gat a pic of yours that has the supports ? Might not be too hard to make
Posted by: type11969 Jun 30 2008, 09:41 PM
http://www2.cip1.com/ProductDetails.asp?ProductCode=C27%2DJ12975
Pricey for a bunch of fuchin flatbar but couldn't find anyone to get me dimensions on the samba. Plus the singleboob that sticks out that the tire mounts on doesn't stick out far enough for the tire to not rub on the paint. My paint sucks so I don't care. If you don't need it right away, I can totally get you some dimensions and recommended mods. I'm going to quit my job on the 11th and not start classes until sept 22nd so I'll have some free time. Hell I can build up a CAD model and make prints. Start fabbing and undercut CIP. Or you might be able to just wing it. I'll try to nab some pics this weekend.
One of the clutch additions of this mount, along with the tie in to the bumper, are the two bars that tie in two each of the 4 mounting holes through the nose together. They mount on the inside of the bus, taking more of the stress off the skin.
I also like that it mounts the tire "shiney side out" so you can put a hubcap on it. The other ones mount the wheel backwards.
-Chris
Posted by: Dr Evil Jun 30 2008, 10:14 PM
Sweet! How hard would it be to put some spacers and bigger bolts on it to keep it off of the paint? Just for the tire mounting bolts, not the rig itself. I would want to put some rubber gasket between the metal and the nose, too.
That aint too bad if it is stainless of galvanized.
What do you think, Scott, buy or build?
Posted by: type11969 Jun 30 2008, 10:30 PM
It is cad plated. I put rubber gasket material between all 6 mounting locations and between the back bars and the inside of the nose skin. Inevitably those areas of the nose skin are still going to flatten to follow the contour of the tire mount. If I did give a shit about the front of my bus I'd probably try to profile the areas where the mount touches the nose skin in hopes of minimizing the dents, but I think it will still be unavoiable.
As for spacing the tire further out, they way they have it the bottom inside sidewall of the tire touches the part of the mount that runs to the bumper before the wheel is fully seated on the mount. This kicks the top side in towards the bus and up against the paint. As you further tighten the wheel down, you just bend the wheel so I threw some washers in there to avoid it. A kind of crappy product. It may rely partially on having the tire rest on the paint, the old style mounts definitely did, I didn't think these had to though. Never messed with spacing it out further. It might be worth a shot, this mount is way more robust by itself than the old style one.
-Chris
Posted by: zymurgist Jul 1 2008, 12:50 PM
Why not just leave the spare tire off altogether and get AAA?
Posted by: scotty b Jul 1 2008, 07:48 PM
Not much there to be fabbed I can probably use the mount you alreadt bought as the front piece that the tire actually bolts to.
Posted by: Dr Evil Jul 1 2008, 08:07 PM
Right on. Can it be made out of stainless?
Posted by: scotty b Jul 1 2008, 08:10 PM
Right on. Can it be made out of stainless?
If'n yer buyin it. Or I could do it in non stainless and get it powder coated for about 30.00 Yer call holmes.

Posted by: Dr Evil Jul 1 2008, 08:22 PM
The price is pretty negligible between the two, no? What would stainless cost me?
Posted by: scotty b Jul 1 2008, 08:55 PM
The price is pretty negligible between the two, no? What would stainless cost me?
Just a guess ?? Close to 60.00 ? I haven't bought any s.s. in a while so I'm not sure what the price is like right now. 1/2" flat stock, 1/8 - 3/16" thick should be fine for it
Posted by: Dr Evil Jul 1 2008, 09:28 PM
Scott, I have full confidence in your decision regarding this. If you think powder coat is good enough, then so be it Just let me know. I aint gonna question your wisdom on this body type o stuff.
Posted by: type11969 Jul 2 2008, 08:18 AM
Not much there to be fabbed
I can probably use the mount you alreadt bought as the front piece that the tire actually bolts to.Good call. I'd use some larger fasteners than those 1/4"ers if you aren't going to weld that already purchased mount to the stuff you are fabbing.
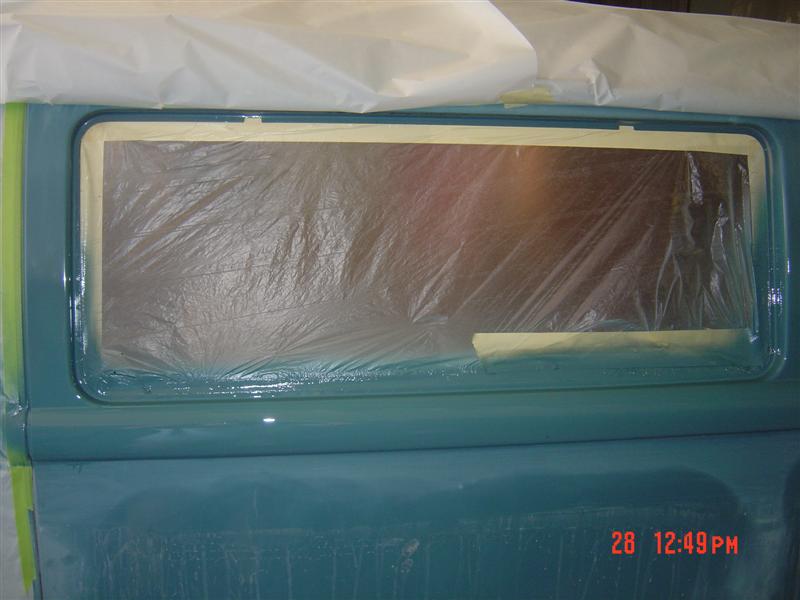
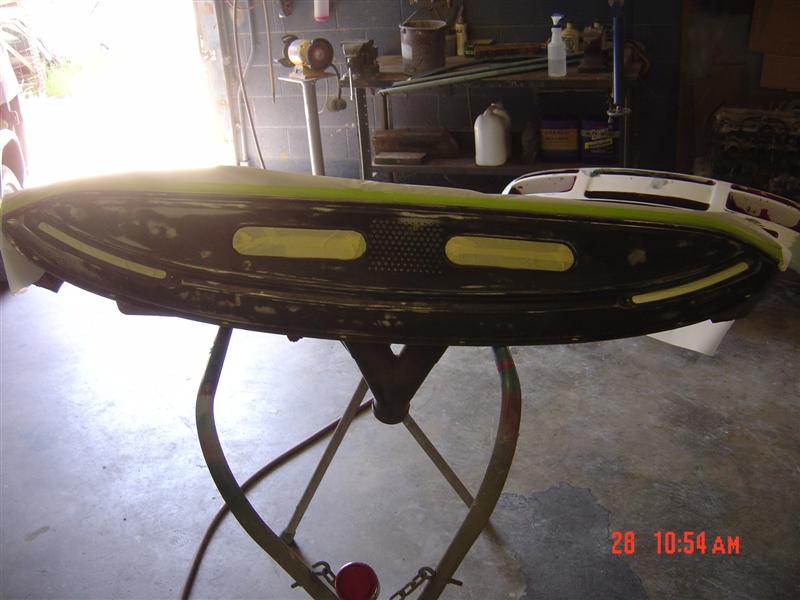
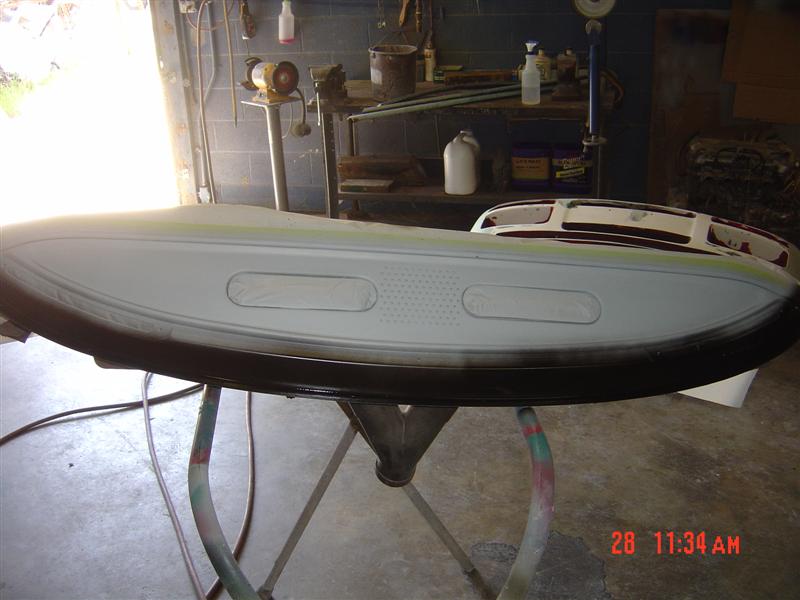
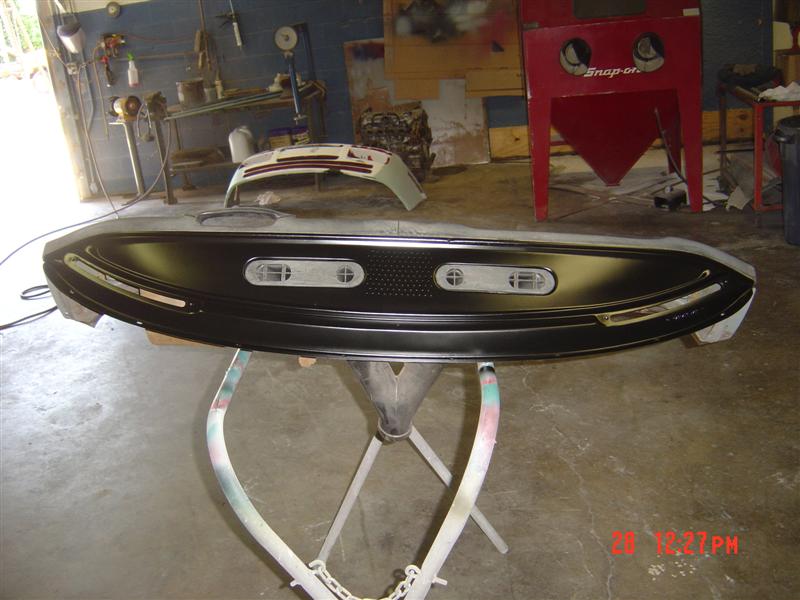
Posted by: scotty b Jul 13 2008, 04:12 PM
mo dun dis week
Attached image(s)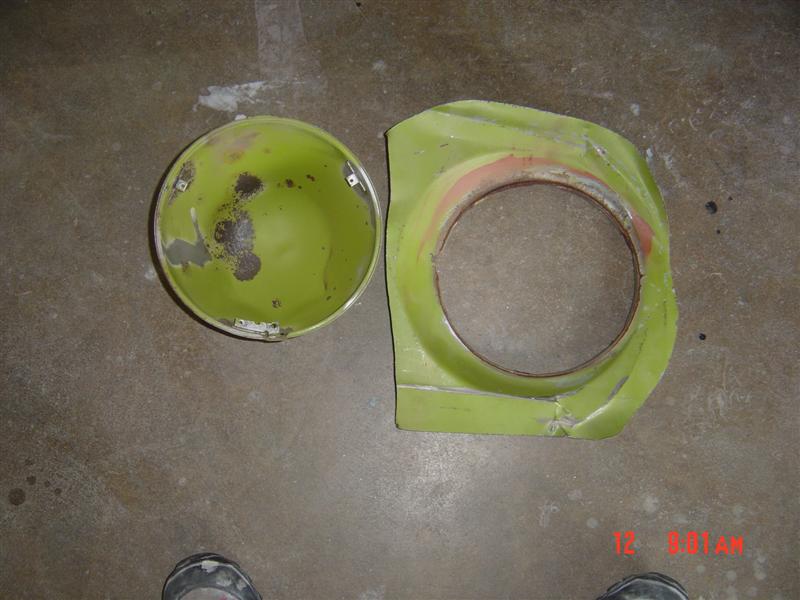
Posted by: scotty b Jul 13 2008, 04:14 PM
Mike these are the two factory holes I asked you about. You can see the two oversized ones I filled and the other two smaller ones. Whatchu wan dun wit dem mon ?
Attached image(s)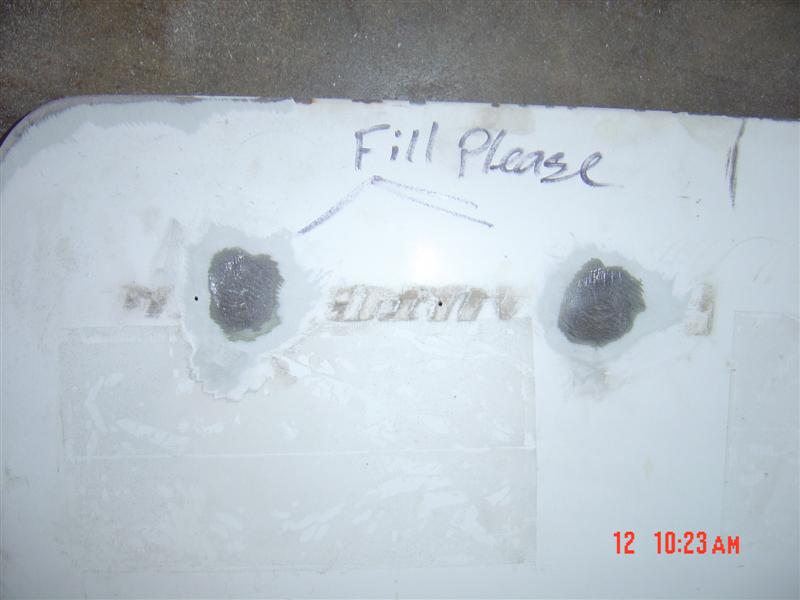
Posted by: Dr Evil Jul 13 2008, 05:02 PM
Might as well fill all the holes. I will use adhesive to mount anything to the door in the future.
Thanks man, looking great! 
Posted by: Dr Evil Jul 28 2008, 09:57 PM
Update from the machine shop today: cylinders have been cut down, block has been bored, current crank will need to be ground and I will see if my other one is better.
They admittedly said that they are not setting any records for getting this done, but they are hooking me up and doing it between better paying jobs.
Still needed to be done:
- Heads
- Rods
- Pistons
- Crank
Posted by: Justinp71 Jul 28 2008, 11:07 PM
Oh you should just put the 2.7 six in it....lol
Posted by: scotty b Sep 17 2008, 07:02 PM
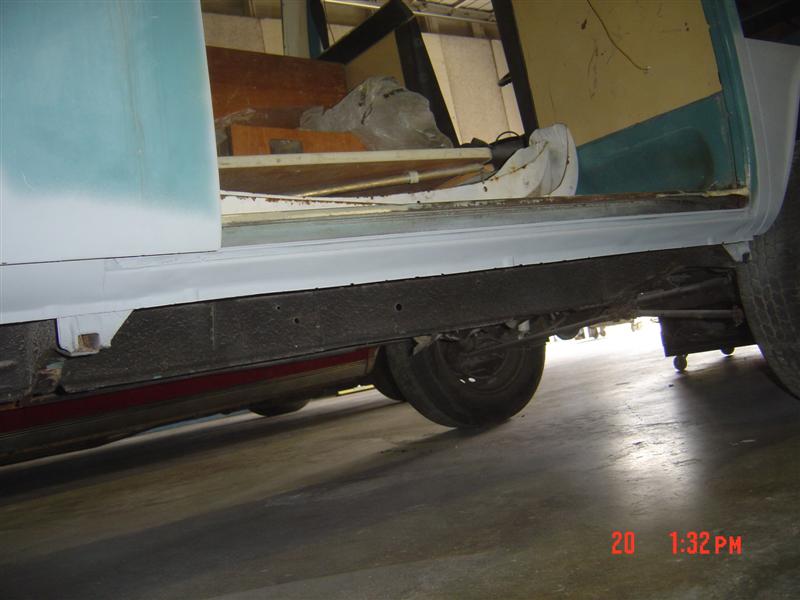
Nothing exciting here, the Doc just needed a " fix " as he put it. Driver side rockers are done, entry step on pass side is done, almost all of the rust spots have been taken to bare metal, etched and primed, some dents are being filled, some are not rear pass window frame is painted. I'm still going to strip under the gutter since it is a bit crappy looking in several spots, so that will be primed and the back hatch is ready to wet sand and paint. Pass outer rocker will probably go on this weekend and I'll try to finish up the welding on the inside
Attached image(s)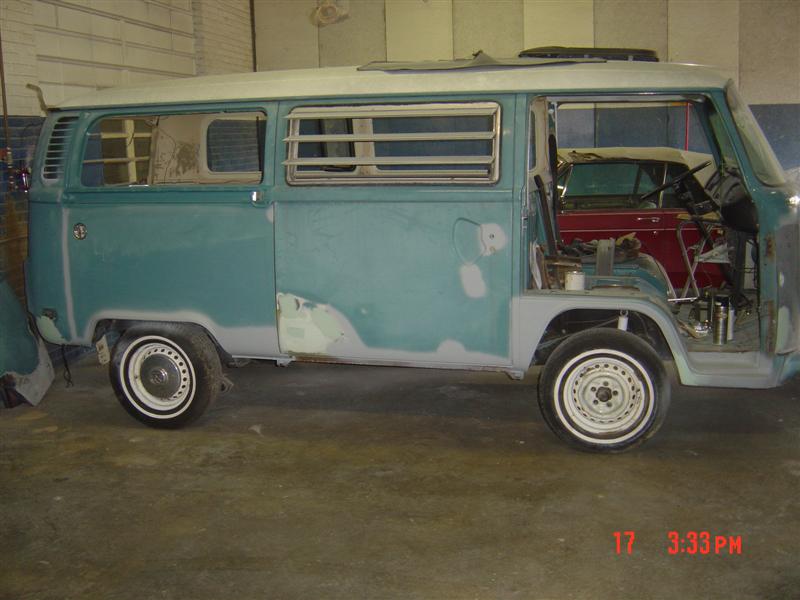
Posted by: Dr Evil Sep 17 2008, 07:29 PM
Too bad that louvered window has to come back out to have the metal under there painted since it is bare
Did my tires show up?
Posted by: ws91420 Sep 17 2008, 07:45 PM
How much is going to have to be fabbed up for mounting the engine and tranny.
Posted by: type11969 Sep 17 2008, 08:13 PM
Wolfsburg west sells the complete seal kit for those lovered windows, only about 32 bucks. Includes the individual pane seals, etc. It is the correct gray color, not that it is a big deal. I just installed a new black one like it seems you have, it was a total bitch to get in. My guess is the Wolfsburg West one is much easier to deal with.
What color are you going to paint the wheels? I'm digging the satin black I did up on mine: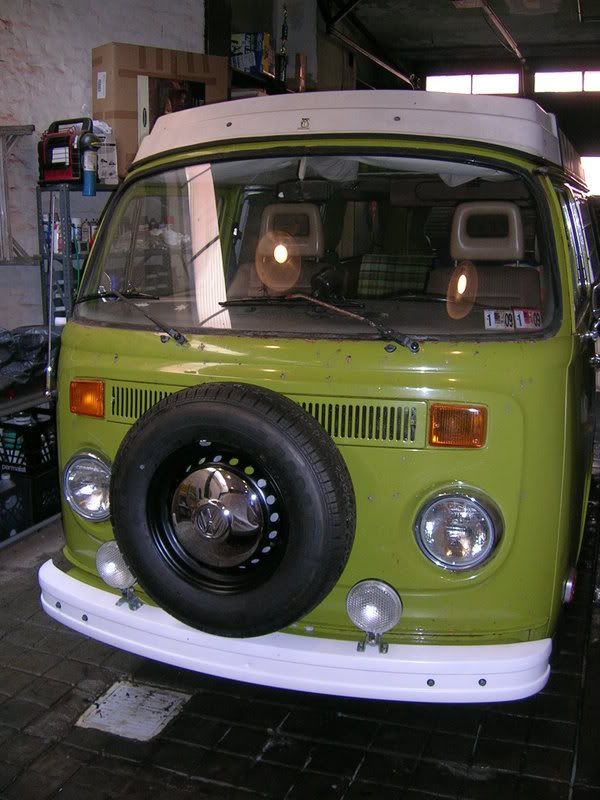
Posted by: Dr Evil Sep 18 2008, 06:06 AM
Too bad that louvered window has to come back out to have the metal under there painted since it is bare
Did my tires show up?
Almost nothing. I have a bar that mounts the engine to the original mounts, and a mount that mounts the tranny to an early VW tranny mount that will need to be installed. Other than that it is just getting the shifter cable and lever mounted correctly.
As for the wheels, that is exactly the color I am going to use.
Posted by: Dr Evil Sep 18 2008, 06:12 AM
Oh ya, the latest with the machine shop: all they have left to do is open the small end of the rods, and cut the heads...supposedly. The guy didnt know how far down to cut the heads.....but he didnt call me to ask. I told him to open them up at the same depth since with the aircooled set up you adjust at the bottom of the barrel. I could have had cheap, or I could have had fast, not both.
Posted by: Dr Evil Sep 18 2008, 04:06 PM
Latest with the machine shop; all that is left to do, supposedly, is to drill the holes in the barrel fins for the head studs to pass through....Hopefully next week.
Posted by: scotty b Sep 18 2008, 06:13 PM
Hey Chris if you get a chance copuld you take off your tire and get me a pic of the mount ? Mike got the better style, but before I start blindly drilling holes I'd like to have some idea of where the " feet " should be sitting.
Mike no the tires haven't shown up.Did you have them shipped to the house or the shop ?
Got a little more bondo work done today and got the pass rocker fitted and ready to weld in. Goor thing you said want the wheels black, I was gonna surprise you and do them white when I get the tires mounted
Posted by: type11969 Sep 18 2008, 06:43 PM
PM me next week to remind me, won't have time until then. In the meantime, this is what I did (didn't have instructions). I found the center of the bumper using the mounting bolts. I then centered the bracket mounts that go on the bumper around this line. Then I slid the bracket back to the front skin of the bus until it was touching the skin at all the mounts. Double checked distance from the upper mounts to the grill and a centerline from the grill, marked the holes, drilled, made some rubber pads for the mounts, bolted it on. Getting the backing bars on in the cabin is kind of a pain (access to the upper skin attachment is tough) , but I made the lower skin attachment first, tightened the bolt enough that when I spun the bar up towards the upper skin attachment point, friction kept the bar from falling back down. I could then fish the bar into position and install the upper mount bolts. It will make sense when you get to it.
My front is dented/screwed up anyway so I'm not sure how great the positioning is in the end.
-Chris
Hey Chris if you get a chance copuld you take off your tire and get me a pic of the mount ? Mike got the better style, but before I start blindly drilling holes I'd like to have some idea of where the " feet " should be sitting.
Mike no the tires haven't shown up.Did you have them shipped to the house or the shop ?
Got a little more bondo work done today and got the pass rocker fitted and ready to weld in.
Goor thing you said want the wheels black, I was gonna surprise you and do them white when I get the tires mounted Posted by: helios Sep 18 2008, 07:23 PM
This build has me rethinking the old bays. I would love a split, but they are more money than I care to spend at the moment. Love it. Keep it up! 
Posted by: Dr Evil Sep 18 2008, 08:00 PM
Scotty, yer awesome
I had the tires sent to your house.....maybe they didnt ship them because they were waiting to get my OK to upcharge the actual shipping from what they quoted.
I'll let ya know.
Posted by: ws91420 Sep 18 2008, 08:12 PM
So any work being done on the teener yet?
Posted by: scotty b Sep 19 2008, 10:51 PM
So any work being done on the teener yet?
Bus first, my bike 2nd ( briefly ) then Mike's 914
Posted by: Dr Evil Sep 20 2008, 12:06 PM
Ya, I need the bus first. That and Scotty is gonna want actual cash money to do the 914
Posted by: scotty b Sep 21 2008, 09:53 AM
Rockers in and primed Pretty much finished up the last two bondo spots on the body. ALMOST ready to wet sand and shoot this boat. Still have the holes in the inner wheel wells to repair ( sometime this week ) and a few spots on the rear.
Where's my split ??
Attached image(s)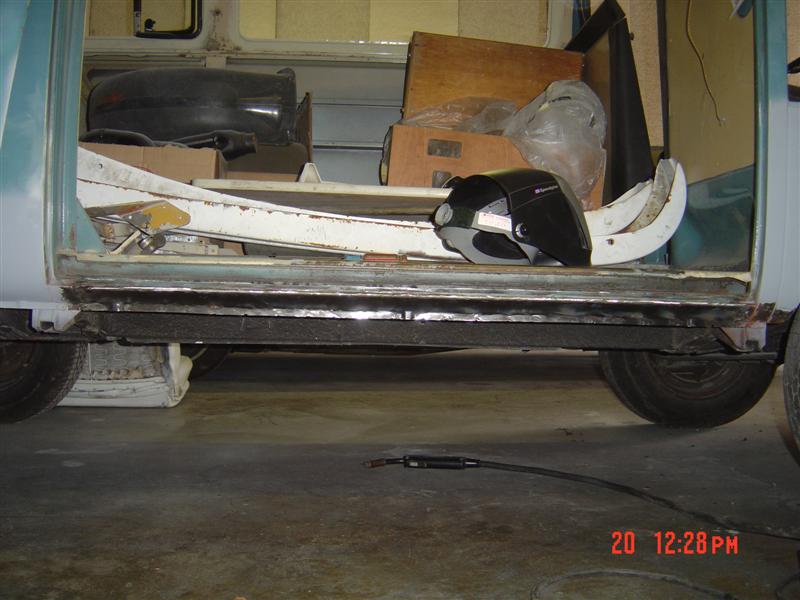
Posted by: Dr Evil Sep 21 2008, 10:33 AM
Strong work, man!
I am still waiting for a time to meet with my friend to get some pics. IT aint going no where so far as I know. The guy is goign to have to clean out the whole barn to get it out and I dont think he is in a hurry.
Posted by: type11969 Sep 21 2008, 08:09 PM
You still putting the fiberglass top on?
Posted by: Dr Evil Sep 21 2008, 08:26 PM
Yup, but that is going to be later as I need time to go down and drill out days worth of spot welds so I am told.
Posted by: scotty b Oct 11 2008, 10:34 PM
Now ju seez it....now ju don
Attached image(s)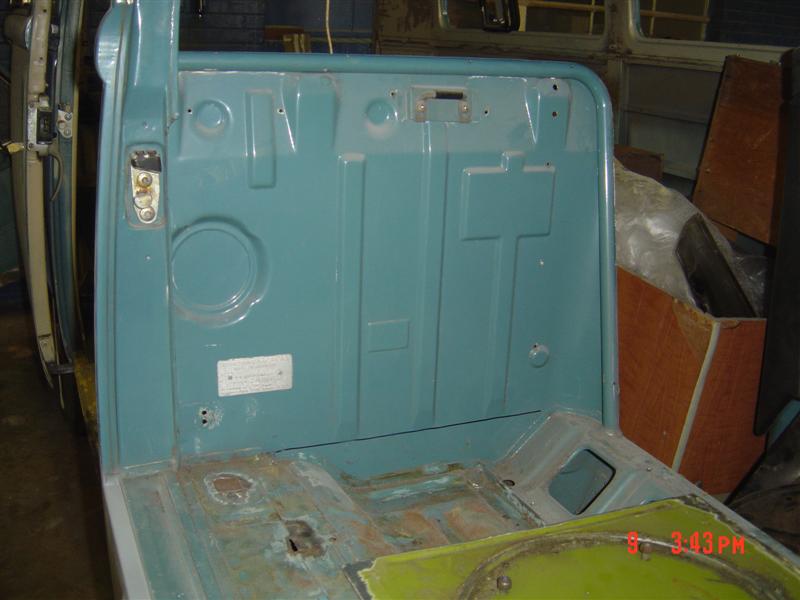
Posted by: scotty b Oct 11 2008, 10:37 PM
Got a bit done on my scooter tonight too Beer+ nice weather + Social D, Johnny Cash and Tool make Scotty productive ....and inibriated 
BTW Blue Moons fall brew is good shit
Posted by: Dr Evil Oct 11 2008, 11:31 PM
Aw yeah! BTW, there is supposed to be a triangular piece in place of the wall that was removed. Exciting stuff, glad you got some work done on the scooter.
Posted by: type11969 Oct 11 2008, 11:51 PM
Indeed there is . . . and it is an excellent place to mount a bottle opener.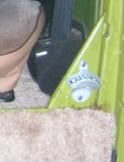
Looking good btw
Posted by: Dr Evil Oct 12 2008, 12:11 AM
Damn, we are all up late.
Posted by: type11969 Oct 12 2008, 12:14 AM
1am late?
Posted by: Dr Evil Oct 12 2008, 12:17 AM
For most of these stiffs I am alone tonight as the woman has gone to CA to start the countdown to the wedding on Sat. I am one martini in and looking for the bed.
Posted by: scotty b Oct 12 2008, 09:18 AM
Aw yeah! BTW, there is supposed to be a triangular piece in place of the wall that was removed. Exciting stuff, glad you got some work done on the scooter.
Mike I saw no need for that piece to be there. It really wouldn't provide any bracing
If you want I could make something up pretty easily though. Let me know
Posted by: type11969 Oct 12 2008, 10:31 AM
I dunno, the piece VW put in there is pretty damn thick. 3/16 maybe. I could see that gusset distributing stresses in that sharp corner better when the whole bus twists along its length (ehh, maybe in a turn with a lot of stuff in it), you were carrying stuff on your roof (not likely with that camper top), or if the side of your bus was greeted with something non-forgiving (hmmm ).
Personally I wouldn't second guess VW on it.
Posted by: Dr Evil Oct 12 2008, 12:38 PM

Me neither. Plus, it is a good place for a bottle opener.
Posted by: scotty b Oct 12 2008, 01:43 PM
Consider it done. Chris if you get a chance could you get me some measurements on the piece ? Height, width, etc Thanks
Posted by: type11969 Oct 12 2008, 04:47 PM
About 175mm tall, 55mm across the base, 2.3mm thk (okay, so 3/16" was an exaggeration), and a 10mm wide lip folded 90 degress over on the hypotenuse towards the front of the car.
Let me know if you need some pics
-Chris
Posted by: scotty b Oct 12 2008, 05:25 PM
About 175mm tall, 55mm across the base, 2.3mm thk (okay, so 3/16" was an exaggeration), and a 10mm wide lip folded 90 degress over on the hypotenuse towards the front of the car.
Let me know if you need some pics
-Chris
 mm's and hypontenuse ? Where the hell do you think you are ? Some sort of British social club ??
 Thanks Chris
Posted by: Dr Evil Oct 12 2008, 05:52 PM
Update on my end:
Engine - the shop would have been done with the engine this week except for one unforeseen problem that was of my creation. The valve springs were too big for their seats and keepers and this led me to think I had the wrong springs.....nope The special heads that I got and that were advertised as 110 heads were in fact 80-90hp low compression heads. I thought this was gonna be a problem, but I had them CC one of the pockets and at 46cc it is within my limits as I need 60-64cc in the chamber when done for a 9:1-9.4:1 CR. I also found that the guy with the corvair aviation site used the same heads with good results. All that needs to be done to the heads now is to have the valve seats opened up for the bigger springs. More waiting
Carb - I am awaiting some pieces on my carb still, but I am about done with its rebuild today and it is looking good. I really enjoyed rebuilding it and saved a bunch of cash.
Tranny - all I have left to do on the tranny is to clean out and reseal the diff. I did the auto part very easily and saved another grip of money. This is the first auto I have rebuilt and I must say it was very easy and like the carb it was very enjoyable. The rebuild kit was like $150
Next I need to get the damn engine parts so I can clean them up and start the assembly process. This will likely take me into Dec as I am going to be in York for the month of Nov. If you get hurt in York in Nov, look me up in the ED at the hospital
Posted by: root Oct 12 2008, 07:19 PM
Eh! I sent out the keepers and caps usps on Friday.
Let me know when they arrive so I do worry. 
Posted by: Dr Evil Oct 12 2008, 07:52 PM
I need to remove the ones from the core head I have here as well. I bet they are here tomorrow.
Posted by: Dr Evil Oct 12 2008, 10:40 PM
Ah, I didnt check the mail yesterday and when I did tonight my electric choke kit and electric carb kit were in! I already assembled the electric carb it and modified the supplied metering block One nice thing about Noel not being here, I am doing this on the living room table
Posted by: Dr Evil Oct 15 2008, 10:12 PM
I picked up my engine block, rods, and cylinders today when I dropped off my valve hardware. I would have taken pics, but Noel took the camera. All that is left is for them is to assemble the heads, trim the piston skirts (mini skirts)  and grind the crank.
Posted by: Root_Werks Oct 16 2008, 08:52 AM
Love this thread! I can't wait to see more progress. 
Posted by: jd74914 Oct 16 2008, 09:11 AM
Mike I know you are using VW stuff to build this engine, is there an online guide as to what is close or does it just come down to a bunch of measuring, machining, and finding parts? A friend wants to do this and we're really just looking for an easy guide. Figuring it outs not a problem, it just takes some more time.
It sounds like you are using a stock crank, cut down VW Cylinders and VW rods?
Posted by: scotty b Oct 30 2008, 06:49 PM
GETTING CLOSE !! As Mike knows but non of you do, this isn't a " perfect " jopb by any means BUT it will be a pretty damn nuce ride for our boy. I have taken care of the major rust and the major dents. In theese pics you wil see some red/brown porimer. These are spots that had pretty bad pitting but now detrementaly thin metal. I couldn't warrent sandblasting these small spots so I cleanes them, gace then a coat of Ospho and then use some Spies etch primer whic also acts as a rust neutralizer. Just so Mike doesn't worry there were no signs of rust after I cleaned the metal, I just wanted to make double certain it was protected Oh and you also got Spies sealer on top of that, all foprm my personal stash
Attached image(s)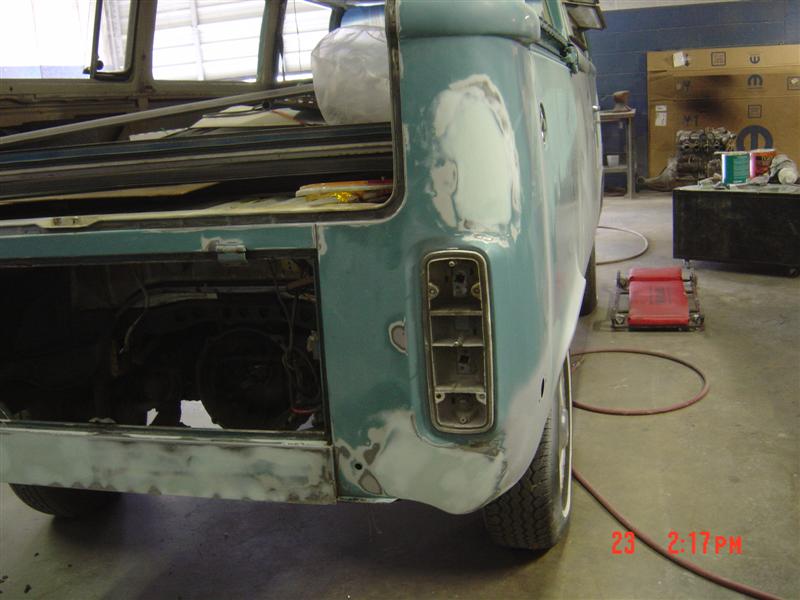
Posted by: scotty b Oct 30 2008, 06:51 PM
Pretty much all that is left is the drivers dood, the support brace insdie ( where I cut out for the pass swivel ) and then wet sand the whole lower body, then PAINT !
Attached image(s)
Posted by: Dr Evil Oct 30 2008, 07:06 PM
I dare anyone to try and get Scotty to do a half assed job. I tried and he has gone wayyyy past what I was expecting, but he cant just do a bare minimum. That is looking great.
Jim D,
Here is a good link to get some of your corvair questions answered:
http://home.hiwaay.net/~langford/corvair/trial_assy.html
Search around on his page and you will find lots of info.
Posted by: type11969 Oct 30 2008, 08:03 PM
Looks great!
Posted by: r_towle Oct 30 2008, 08:19 PM
Just make sure its the color that is correct....
Rich
Posted by: scotty b Oct 30 2008, 09:43 PM
Just make sure its the color that is correct....
Rich
 Actually Rich I haven't told Mike but I'm going with a nice rootbeer metallic and a 3 color ( white yellow orange ) nike swoosh down the side
 BTW I talked to Tom today, Thank you
Posted by: r_towle Oct 30 2008, 10:30 PM
Just make sure its the color that is correct....
Rich
Actually Rich I haven't told Mike but I'm going with a nice rootbeer metallic and a 3 color ( white yellow orange ) nike swoosh down the side BTW I talked to Tom today, Thank you
Dont you have like 4 gallons of "ferrari red" left over that is not exactly the right shade....that would look awesome really
Rich
Posted by: Root_Werks Oct 31 2008, 08:26 AM
Oh man, I can't wait to see some color on this one!
Posted by: jd74914 Oct 31 2008, 10:46 AM
I dare anyone to try and get Scotty to do a half assed job. I tried and he has gone wayyyy past what I was expecting, but he cant just do a bare minimum. That is looking great. Jim D,
Here is a good link to get some of your corvair questions answered:
http://home.hiwaay.net/~langford/corvair/trial_assy.html
Search around on his page and you will find lots of info.
Thanks man.
Posted by: Spoke Oct 31 2008, 03:31 PM
Awesome job, Scotty. Can't wait to see paint on it.
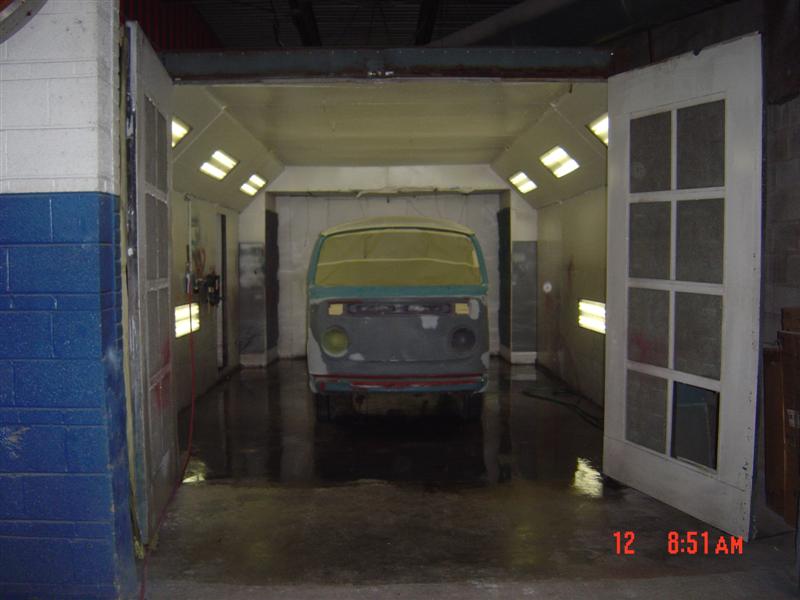
Posted by: scotty b Dec 7 2008, 05:50 PM
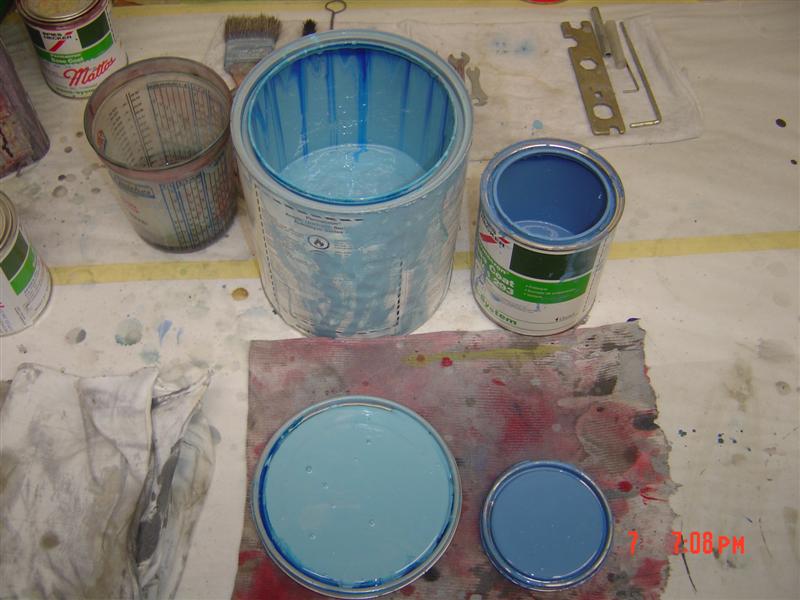
1 coat of sealer + 2 coats of color and Bobs yer uncle
Attached image(s)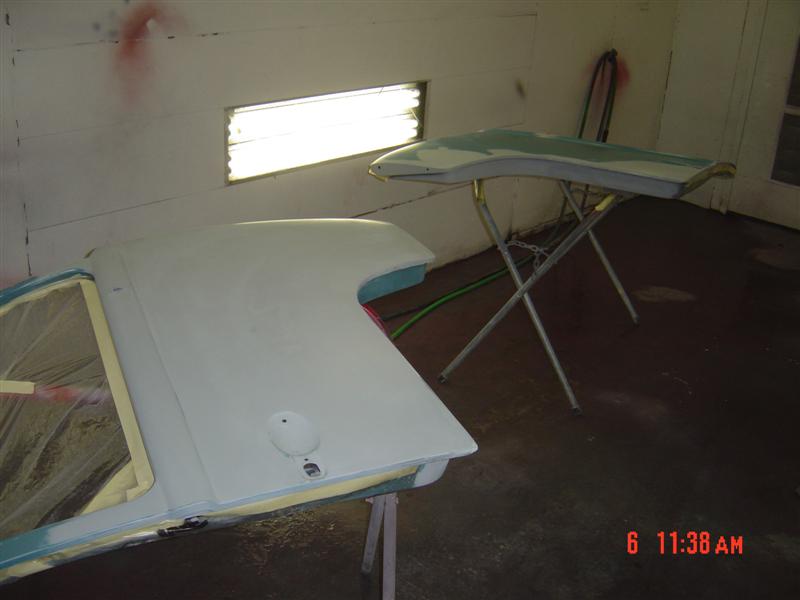
Posted by: scotty b Dec 7 2008, 05:53 PM
Hoping to do the body this coming week, if not it will be the following. I also will probably sand and re-shot the passengers door. For the last 2 weeks I keep getting ALOT of large pices of trash in most of what I have painted. Not sure where it's coming from but I need to track it down. The passenger door just got a sh*t load of crap in it, paint actually laid down alot better than the pics show, looks pretty much like a factory job other than the trash in it
Posted by: r_towle Dec 7 2008, 06:19 PM
Hoping to do the body this coming week, if not it will be the following. I also will probably sand and re-shot the passengers door. For the last 2 weeks I keep getting ALOT of large pices of trash in most of what I have painted. Not sure where it's coming from but I need to track it down. The passenger door just got a sh*t load of crap in it, paint actually laid down alot better than the pics show, looks pretty much like a factory job other than the trash in it
Stop smoking while your spraying...its picking up the ashes...
Seriously...change out your hoses, uncouple any hard lines and blow all the shit out. It settles in the lower bends and corners of the hard pipes...
Its rust in the pipes...BTDT..
If copper, it corrodes inside...BTDT...
I ended up finding some male/female disconnects for the copper that I had to sweat in the system so I can take it all apart once a year and blow all the shit out...
Seems a compressor creates shit from the reaction of compressing the air...no idea how.
Rich
Posted by: scotty b Dec 7 2008, 06:30 PM
I drink when I paint, I don't smoke until afterwards, it's a celebratory thing 
I keep all that clean, new hose and fittings yearly, dessicant evry 3-6 months. I have a feeling it is coming from the door filters, didn't happen until I had to start putting the heater outside the booth, first 2 times it was big hard chunks of something that had obviously floated down onto the panel, this time it is much smaller particles but still larger then the normal dust that happens. I take one filter out of the door for the heater to blow through, but I think some booth maintanence is in order. I have neglected the booth as a whole lately. It's OLD and VERY drafty. I have always had a problem with trash, due to the booths age, and wear, just not this bad until now.
Posted by: Dr Evil Dec 7 2008, 07:49 PM
Oooooo How cold is it there. It was 28 here and I stayed in the garage as long as I could today filling bolt orders. ffffffffuching cold.
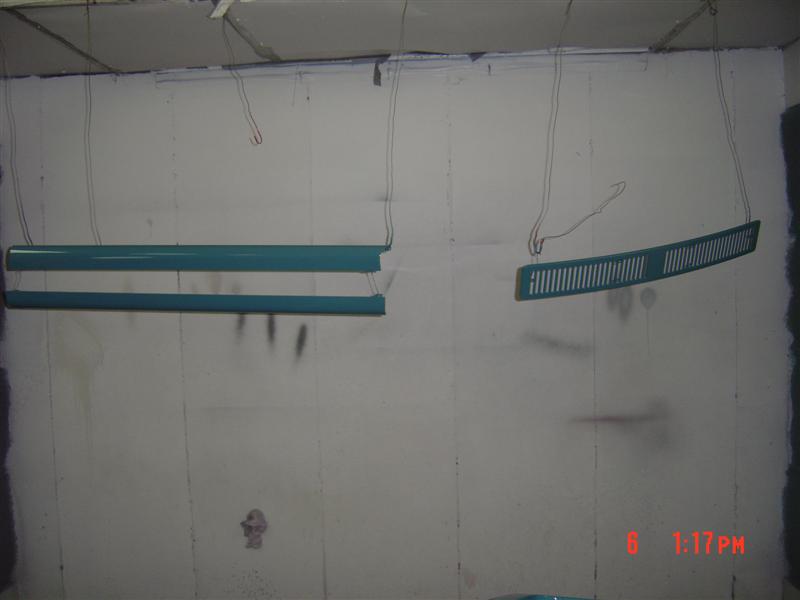
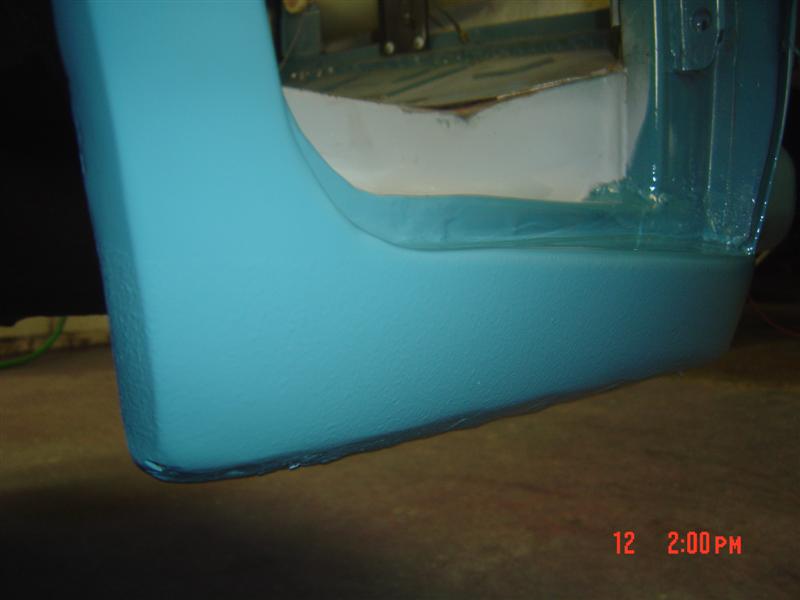
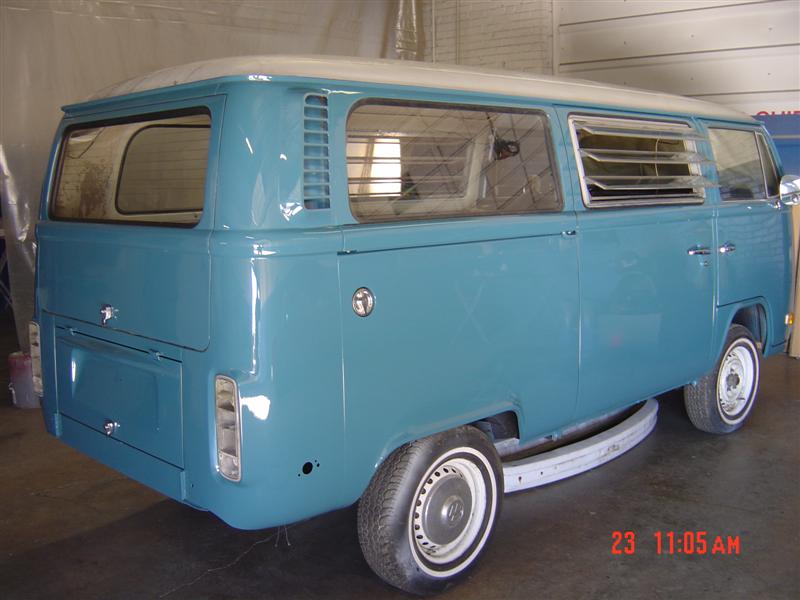
Posted by: scotty b Dec 12 2008, 06:32 PM
Phase 1 is now ( almost ) complete
Attached image(s)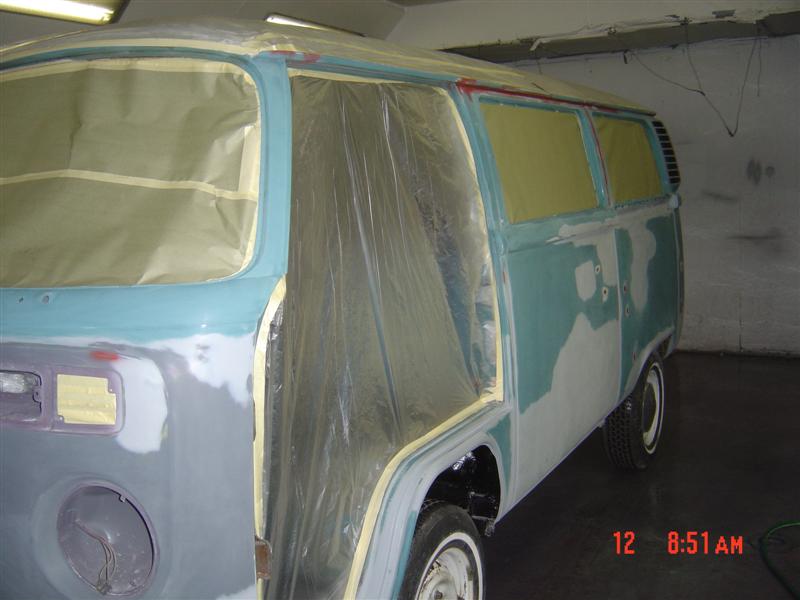
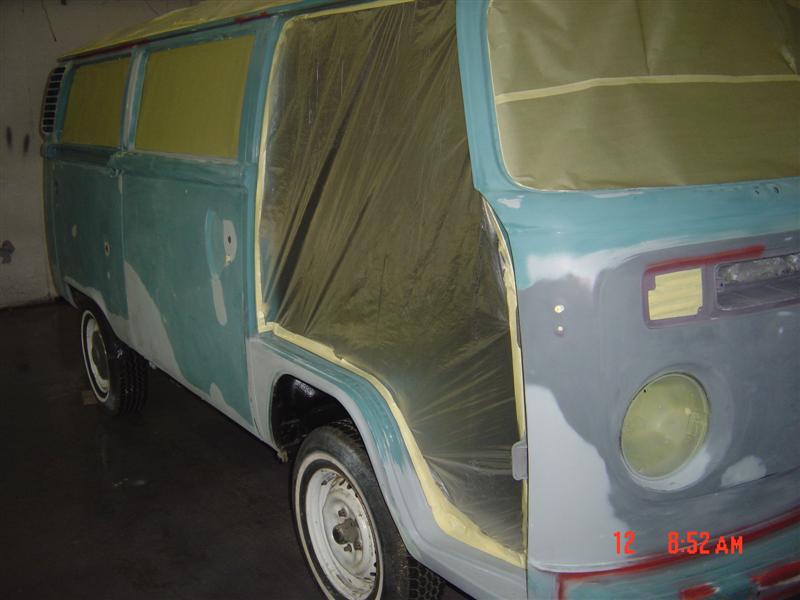
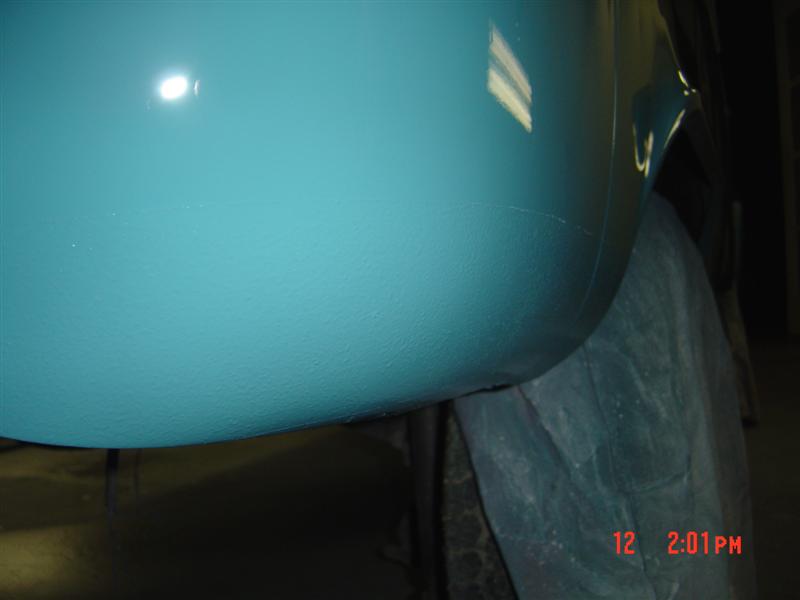
Posted by: scotty b Dec 12 2008, 06:35 PM
I took the liberty of coating the lower 3-ish inches with rock gaurd to help protect it from road hazards. I tried to get a couple close pics so you can see what I'm talking about.
Attached image(s)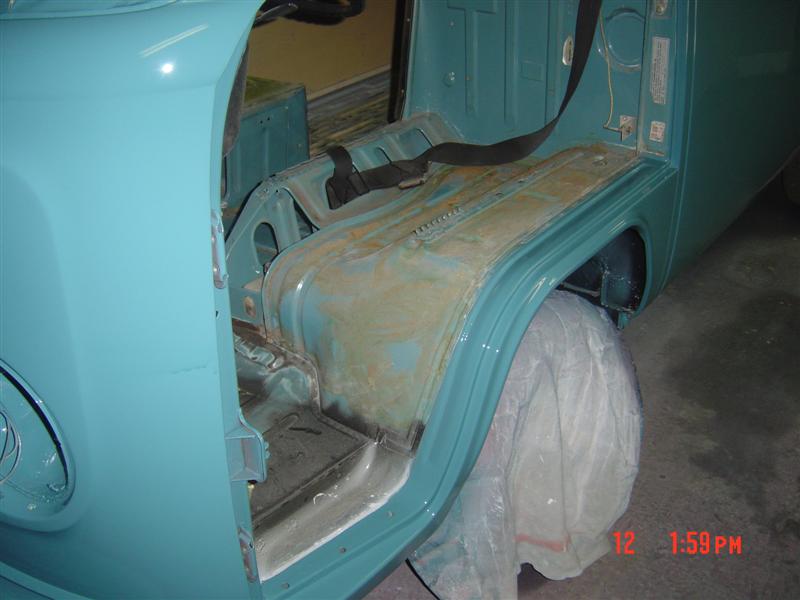
Posted by: Dr Evil Dec 12 2008, 06:43 PM
Holy crap! Thats way too nice for me
Sorry I couldnt stop by yesterday. After the 9 hour test, the 5 hour drive home in the rain could not wait. Then I watched 2 movies and went to bed at 3am....trying to reset my clock for my shift tonight from 11p-7a
I am STILL working on getting the engine parts together I think I finally got the valve locks thing worked out which will be a major last piece.
Posted by: scotty b Dec 12 2008, 06:46 PM
N osweat, I was actually taping it up when you called, by the time I got yuor meaage you wre probably an hour away. Don't say it's to nice yet....you haven't seen it in person Trust me it still has dents and ripples in it I'm gonna re-paint both doors most likely as the body came out really clean and the doors had all the trash I was bitching about. Drivers isn't to bad but the pass DEFINITLY needs to be sanded dwon and re-shot. I can't let but so much go
So how'd the test go ?????
Posted by: Dr Evil Dec 12 2008, 06:55 PM
The test was too long to gauge. I have no idea what it feels like to pass the second step of the licensing exam, I hope to never know what it feels like to fail it. My brain was like mush. It was really tricky in that the questions would give you a portrait of a patient, you would have to figure out what the condition was, and then they would ask you some obscure question about the condition. So, if you didnt figure out the correct condition, or know that obscure detail, you were screwed. I have been doing practice tests for about 2 mo so I was kind of used to it. I am off after next Fri and can schedule a trip down with parts, etc.
Posted by: plas76targa Dec 12 2008, 07:11 PM
Hey Mike, give me call before you head down to scott's .. If I can get away and you guys don't mind the company ..
Posted by: Phoenix 914-6GT Dec 12 2008, 07:23 PM
Wow Scotty, that looks amazing. Doc, your going to have one sweet bus
Posted by: Dr Evil Dec 12 2008, 07:31 PM
Hey Mike, give me call before you head down to scott's .. If I can get away and you guys don't mind the company ..
I thought about stopping by yesterday on my way home, but I just wanted to get home.
I would likely go down from more than a day, but I wouldnt mind your company
Posted by: rick 918-S Dec 12 2008, 07:37 PM
Nice work. 
Posted by: type11969 Dec 12 2008, 08:29 PM
Looks sweet!
Posted by: r_towle Dec 12 2008, 10:05 PM
Nice job Scotty
Rich
Posted by: Spoke Dec 12 2008, 11:38 PM
![shocked[1].gif](style_emoticons/default/shocked[1].gif)
Very nice Scotty.
Posted by: Dr Evil Dec 13 2008, 11:37 PM
I cant stop looking at the pics
Posted by: degreeoff Dec 14 2008, 07:13 AM
dude .......... need I say more? The memory of my fallen baby...sniff snifff.....
BTW I wrecked mine into a pole that did not move @ 40 mph and the bus faired well
BTW I used to love the original front seats as you could pop em out and take em to the camp site and use em as seats around the fire!!! I remember the last time.......and the US Marshal that busted us smokin dope....LOL lost my favorite double chamber bong that way.....those WERE the days
Posted by: Vacca Rabite Dec 14 2008, 07:50 AM
So, what color RUSTOLEUM is that, and which kind of foam rollers were you using?
Zach
Posted by: So.Cal.914 Dec 14 2008, 07:54 AM
Posted by: scotty b Dec 14 2008, 09:03 AM
So, what color RUSTOLEUM is that, and which kind of foam rollers were you using?
Zach
Color is called ocean mist blue and I don't use rollers. Brushes with a proper technique ( ancient Chinese secret ) can be almost undetectable, except for when you lose a bristle in the paint or drop it on the ground and keep going.

Posted by: scotty b Dec 25 2008, 04:01 PM
Did some booth maintenence, re-shot the pass door, came out MUCH cleaner this time Spent a couple late afternoons bolting it back together. Just need to get the glass in so it can get parked in the woods
Attached image(s)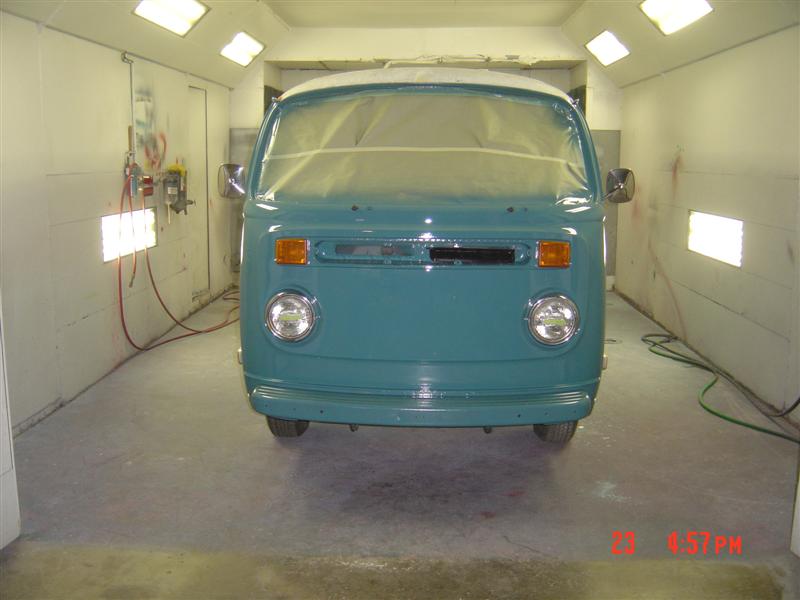
Posted by: r_towle Dec 25 2008, 05:46 PM
Alive and well, it now lives to ROT another day.
RIch
Posted by: type11969 Dec 25 2008, 07:14 PM
http://images3.wikia.nocookie.net/bttf/images/thumb/d/d8/Libyans_mall.jpg/250px-Libyans_mall.jpg
All you need now is a shoddy bomb full of used pinball machine parts . . .
Well and the white paint to drop a bit lower.
Watch out for those Deloreans
Posted by: Dr Evil Dec 31 2008, 01:13 PM
Haha, "derka derka derka!"
Posted by: Shade Tree Dec 31 2008, 01:21 PM
Jealous of those seats, look way more comfortable than the stock ones in my 76.
If you don't have a walk through, back seats from a vw gti make really great bench seats in the front of a bus. I had a leather gti rear seat in the front of my '66. Front mounts are on the seat but you have to make the rear ones.
Posted by: Dr Evil Dec 31 2008, 01:36 PM
I chucked the Hon-duh seats that were in the bus. Too thick and ugly/dirty. Since I have access to 914 seats and have seen them installed, I am putting 914 seats in first. I will be removing and selling the stock seat covers for the rear and bunk as I will have custom ones made by my mother. They are in great shape, too.
Posted by: maf914 Jan 3 2009, 03:57 PM
Nice work, Scotty!
I was watching a Charlie's Angels movie on HBO yesterday (yeah, I know, but it was a slow day and they're really not bad looking ) and there was a scene where a car goes flying through the air and lands on a VW bus. Was that really necessary? These film makers were obviously not bus people. What a shame.
Posted by: Dr Evil Jan 4 2009, 11:40 PM
I remember that scene, and that it pissed me off
I figure I will start making my engine progress/regress notes in this thread as well as I can more easily find it and it is all in one place.
This weekend I checked the clearance on my my crank and rods and they were within limits.
Then I balanced my rods...or am half way through. Top ends were done and had a spread of 11g which is pretty crappy. Now they are all within 1g which is the limit of my equipment. I stopped with doing the bottom ends because I needed to check clearances within the case between the bottoms and the opposing parts. I figured if I needed to remove material from the bottoms then balancing them before this step would be worthless.
Checking clearance on the inner workings of the engine required the placement of two rods, pistons and cylinders. Putting the pistons in the cylinders was a bitch, but I was patient and managed to not break any of the rings. Clearance looks good for the 1st two rods and pistons. I need to remove a small amount of material from #2, but no biggie.
It was getting late and I was getting clumsy so I called it a night. Next I need to do the other 4 cyls, finish clearancing any little bits, disassemble everything and clean, then reassemble. Thats all
I knew I was getting clumsy when I knocked a p/c and rod set off the bench, but luckily it only chipped the skirt in a way that could be managed...gotta be more careful.
Posted by: Dr Evil Jan 6 2009, 01:01 PM
Last night I did the rest of the clearance check and all looked good. I did notice that the cylinders were not turned down enough which left me with a .15" deck height. Kinda big, no? No worries, I will have the shop turn them down a little more once I get the heads and CC them so I can calculate the amount to be turned. Kinda sucks because it is gonna hold up assembly of the short block, but what ever.
Regarding the heads, I ordered the valve locks off line and the dealer told me Clevite doesnt make them anymore, but that he had a Melling part that matched. That turned out to be BS as the parts he sold me were 3/8 not 11/32. Only out $12 I decide to buy from a place that knows Corvairs, Corvair Ranch which is about 1.5 hrs away from me. I hope the locks will be here tomorrow and I can drop them off. With any luck I can pick up the heads on Thurs and start CCing them. Then, it is off to clean and assemble.
Posted by: scotty b Jan 6 2009, 09:34 PM
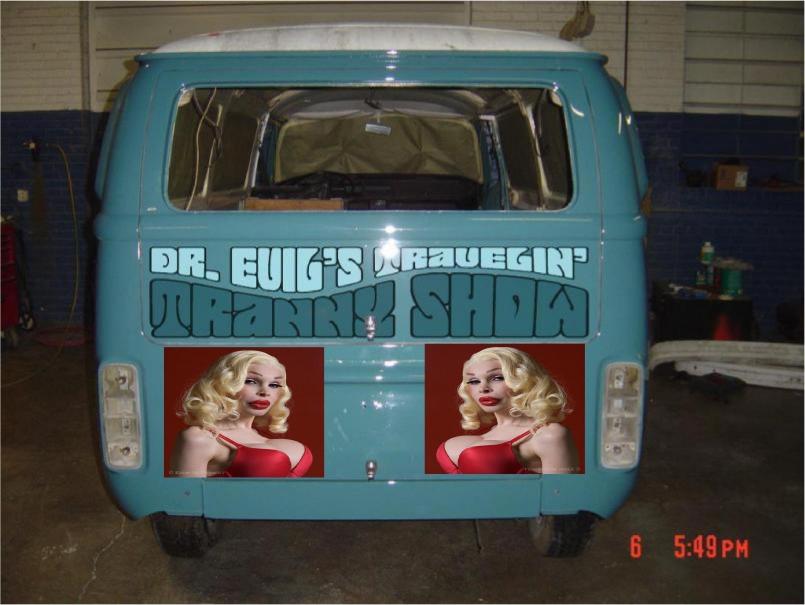
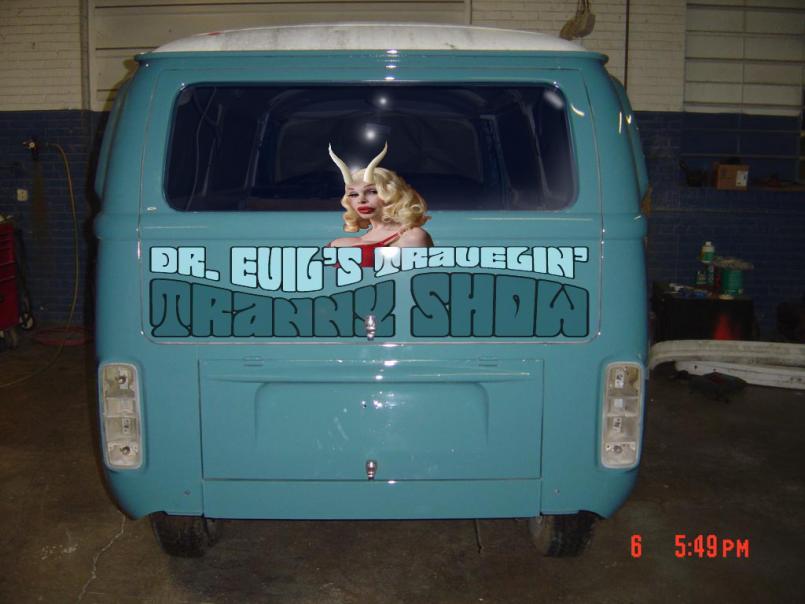
SOOOOooo now for the surprise. Mike has had no idea what I have had up my sleeve and I just hope this doesn't backfire. But I just couldn't resist it
I now presnt to ytou all. The OFFICIAL tranny waggin
Attached thumbnail(s)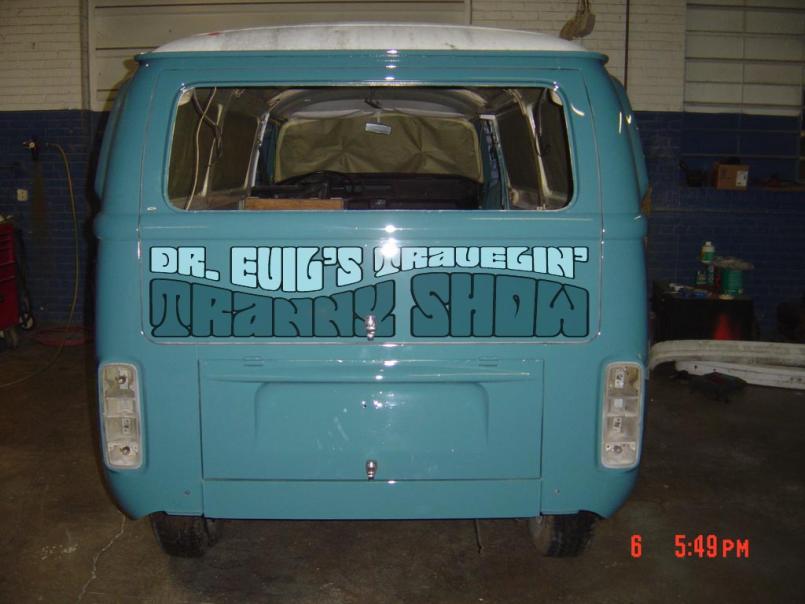
Posted by: Dr Evil Jan 6 2009, 09:40 PM
Oh HELL NO! Nothing a roller and some Rustoleum wont fix Nice photoshop job.
Posted by: r_towle Jan 6 2009, 09:58 PM
That is awesome...do the sides also...really big.
I think you might want to pinstripe that in pink...
Doc, go find an Agway store or a big horse supply store.
Buy a stall mat...its 5/8 thick rubber and all your stuff will bounce.
Keeps your feet warm also.
Rich
Posted by: scotty b Jan 6 2009, 10:08 PM
That is awesome...do the sides also...really big.
I think you might want to pinstripe that in pink...
Doc, go find an Agway store or a big horse supply store.
Buy a stall mat...its 5/8 thick rubber and all your stuff will bounce.
Keeps your feet warm also.
Rich
I was thinking about a set of those truck balls in pink hanging under the bumper
Posted by: Dr Evil Jan 6 2009, 10:36 PM
Noel thinks this is for real
Posted by: r_towle Jan 6 2009, 11:27 PM
It is for real...
He just needs to add some pinstripping...the truck balls for sure and the frilly pink curtains and you will be pricilla queen of the desert.
Rich
Posted by: Dr Evil Jan 7 2009, 12:05 AM
Nope, not real.
Posted by: Vacca Rabite Jan 7 2009, 01:00 AM
Come on, be real. Really real. Real real real.
Zach
Posted by: Dr Evil Jan 7 2009, 02:04 AM
Dang Zach, you are up late. Me too, obviously.
Posted by: Wilhelm Jan 7 2009, 06:06 AM
Reminds me of this: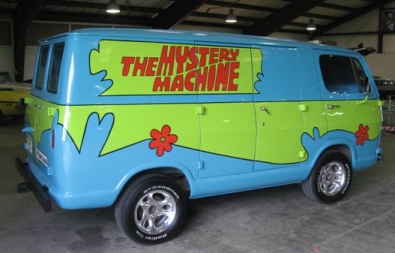
Posted by: degreeoff Jan 7 2009, 06:23 AM
Dude! That rocks!...minus the transvestite pics....keeps people wondering? Maybe a small 914 transmission logo lower right corner...
I think it would be a great idea....but then again I am kinda sick like that.
Posted by: scotty b Jan 7 2009, 08:03 PM
Nope, not real.
.........................
Attached thumbnail(s)
Attached image(s)
Posted by: Phoenix 914-6GT Jan 7 2009, 08:12 PM
Posted by: George H. Jan 7 2009, 08:15 PM
Great work Scotty
Posted by: ericread Jan 7 2009, 08:21 PM
You are going to be such a hit in San Francisco!!!
Posted by: Vacca Rabite Jan 7 2009, 08:31 PM
YES!
Its official. I have a man-crush on scotty b.
Zach
Posted by: scotty b Jan 7 2009, 08:32 PM
YES!
Its official. I have a man-crush on scottyb.
Zach


Posted by: Wilhelm Jan 7 2009, 08:38 PM
YES!
Its official. I have a man-crush on scotty b.
Zach
So.... Maybe this is appropriate after all.........
Posted by: scotty b Jan 7 2009, 08:39 PM
Oh my god I just tasted a little vomit when I laughed
Posted by: scottb Jan 7 2009, 08:41 PM
too funny!
great work!
Posted by: degreeoff Jan 7 2009, 08:57 PM
Um that looks real to me........LMFAOROTF! Get that Beaaaatch ready for Hershy.......!!
Posted by: jsayre914 Jan 7 2009, 09:40 PM
Looks great to me. I vote for a tranny decal on the rear glass
Posted by: Dr Evil Jan 7 2009, 10:36 PM
Oh fuck. I will paint over that, you know
Posted by: degreeoff Jan 8 2009, 07:27 AM
Mike.....If you put your evilworks logo below the paint work you will be cool and its a great gimick!
Awww man it rocks! Where's your spirit? Besides are you not a happily MARRIED (to a WOMAN)???
Posted by: Vacca Rabite Jan 8 2009, 07:31 AM
YES!
Its official. I have a man-crush on scottyb.
Zach
You flinched. You owe me a beer!
Lol.
Zach
Posted by: So.Cal.914 Jan 8 2009, 09:29 AM
Posted by: Dr Evil Jan 8 2009, 10:28 AM
Yes, I am married to a woman, but the people on the road, in the parking lots, etc dont know that.
If I had a finished Logo, that would be sick to have on the back, maybe. I will get busy on finishing it.
Posted by: So.Cal.914 Jan 8 2009, 11:35 AM
Looks great to me. I vote for a tranny decal on the rear glass
If I had a finished Logo, that would be sick to have on the back, maybe. I will get busy on finishing it.
Finished it...
Posted by: Spoke Jan 8 2009, 11:38 AM
With those emblems, lets hope no one will "rear end" you...
Posted by: Dr Evil Jan 8 2009, 11:49 AM
AAAAAAAAAAAAAAAAAAAAAAAAAAAHHHHHHHHHHHHHHHHHHHHHHHHHHH! Man, thats ugly.
Posted by: Spoke Jan 8 2009, 12:03 PM
Of course I meant rear end your bus. That is one sweet ride.
Posted by: Wilhelm Jan 8 2009, 01:08 PM
All kidding aside, I hope my bodywork and paint is a measureable fraction of this. Though this is a crappy representation, maybe a pinstriped line drawing of the exploded view of a transmission directly onto the base paint would be cool.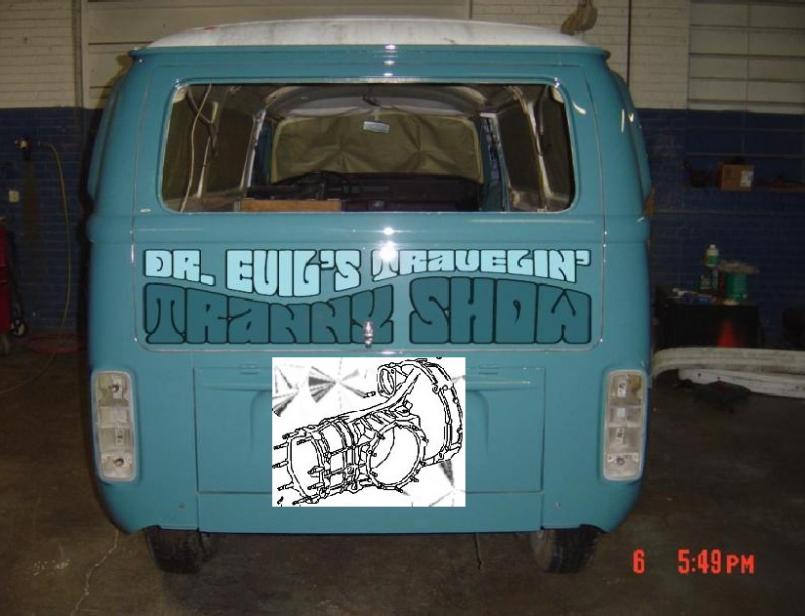
Posted by: Dr Evil Jan 8 2009, 01:29 PM
You guys, this is not really going to be used to haul trannies. It is going to be used to camp and tom my 914 to events that are overnight and such. Tranny+2 beds = wrong impression
Posted by: Solo914 Jan 8 2009, 01:38 PM
You guys, this is not really going to be used to haul trannies. It is going to be used to camp and tom my 914 to events that are overnight and such. Tranny+2 beds = wrong impression
I have never heard the word tranny used so many times as used in this thread...hahahahahah
Tranny tranny tranny tranny tranny tranny tranny tranny tranny tranny tranny
Kyle
ps: tranny
Posted by: degreeoff Jan 8 2009, 02:16 PM
Well I for one think you should be PROUD of your work with Trannies....you worked well with mine! Hell I even have a spare tranny just in case my ole gal decides to leave me.....
Posted by: Eric_Shea Jan 8 2009, 03:17 PM

Posted by: Dr Evil Jan 8 2009, 03:32 PM
Asshole
Hey Scotty, I just talked to my bud with the split window connection and he is gonna give me the info for you tomorrow.
Posted by: So.Cal.914 Jan 8 2009, 05:21 PM
AAAAAAAAAAAAAAAAAAAAAAAAAAAHHHHHHHHHHHHHHHHHHHHHHHHHHH! Man, thats ugly.
LOL
I like this:

Posted by: Phoenix 914-6GT Jan 8 2009, 05:30 PM
That looks more like DREVIL with the spacing
Posted by: So.Cal.914 Jan 8 2009, 05:51 PM
That looks more like DREVIL with the spacing
Critic's

Posted by: Phoenix 914-6GT Jan 8 2009, 06:21 PM
Much better
Posted by: Dr Evil Jan 8 2009, 07:48 PM
Why not put this on there while you are at it 
Attached image(s)
Posted by: Phoenix 914-6GT Jan 8 2009, 07:52 PM
I just woke my son with laughing at that one....
Posted by: Dr Evil Jan 8 2009, 08:23 PM
Back on topic:
I am buried by projects, now. I just got half way through rebuilding a transmission for a customer in Italy Yes, I do international jobs as well. I'll be finishing it tomorrow.
My parts for my BMW R90 are now here so I can reinstall the right cylinder.
And, I just finished clearancing my piston skirts to clear my rod bolt ends. Now I need to balance the big ends of my rods. After all that, and when I get a verdict on my bearings, I can start the assembly process. However, I will still need to get about .178 turned off of the jugs. Not in a hurry, I dont want to do this more than once in a 10yr span.
Posted by: stephenaki Jan 9 2009, 02:36 AM
That looks more like DREVIL with the spacing
Critic's
Can I get that in a T-shirt? How the heck to you get all your studying in with everything else your doing?
Posted by: Dr Evil Jan 9 2009, 09:16 AM
I have no idea how I do it. Its easier in the last 2 years of med school, though. Its clinical work instead of class work. There is a thread in the Sandbox dealing with the future EvilWerks logo. I hope to have shirts made with it in the future
Posted by: scotty b Jan 9 2009, 08:33 PM
http://s109.photobucket.com/albums/n54/iznacal_pr/?action=view¤t=ZAPPED.flv
Posted by: r_towle Jan 9 2009, 11:11 PM
Asshole
Hey Scotty, I just talked to my bud with the split window connection and he is gonna give me the info for you tomorrow.
Careful calling names...might get you bitch slapped... like I did cause I was acting like a dick. (oh wait, you weren't acting like a dick)
ScottyB...on the split stuff...dont forget a roof clip....
Rich
Posted by: Dr Evil Jan 9 2009, 11:15 PM
The splitty is a whole roller, not for parts.
Posted by: r_towle Jan 9 2009, 11:16 PM
The splitty is a whole roller, not for parts.
bus or bug?
Rich
Posted by: Dr Evil Jan 9 2009, 11:47 PM
Split panel van
Posted by: scotty b Jan 11 2009, 03:44 PM
Alright, the cat is out of the bag. IT'S A FAKE !!
I had talked to Todd Endlund a while back about playing a joke on Mike, but as it worked out, Mike came to Richmond a couple of times and it wasn't convenient for Todd to do the photoshop work and make it believeable ( time span wise ) so I dropped the idea all together. WELL when I put up the pics of the bus painted, Todd ( unbeknownst to me ) went right to work and instead of putting the logo on the side, he put it on the back. I got home one day last week and he had sent me the first pic. I then re-took some pics from angles when Mike wasn't buying it, and upon looking at the paint shelf I saw 2 cans of paint almost the identical color to the photoshop job...I couldn't resist making it even more convincing.
Todd and I were going to let this run until Mike came down with the 914, but he won't be making it, so I told him yesterday about the fake job. I think he was beginning to question his own sexuality over this whole thing
So there you have it, my brainchild and Todd's photoshop skills made the Doc a homophobe
Let it be known, Todd is the photoshop king! ALL HAIL !!!!
Posted by: Phoenix 914-6GT Jan 11 2009, 04:40 PM
Posted by: Vacca Rabite Jan 11 2009, 06:59 PM
Bump for a new page and demoted awesomeness.
Zach
Posted by: Dr Evil Jan 18 2009, 08:24 PM
Tonight's update, finished clearancing and balancing the big end of the rods. I needed to remove a little more material from the rod end caps to get my min .060" clearance from the opposing stuff. Then, I balanced the large ends to within 1g which is the limit of my gear. They were off a max of 6g so I am happier with where they are now
Next before assembly, I am waiting for my friend to snag me some pipettes from her lab so I can CC the heads. Once CCed, I will have the barrels turned to the correct depth for the CR that I calculate. I cant wait, it will be assembly time after this step! I will be cleaning the case really well, again, before the assembly.
Posted by: Wilhelm Jan 18 2009, 08:58 PM
If you can't find pipets, I'll bet you can snag some syringes which seem to work fairly well.
Posted by: Todd Enlund Jan 18 2009, 09:00 PM
Next before assembly, I am waiting for my friend to snag me some pipettes from her lab so I can CC the heads.
I got a plastic burette off eBay from some place in Houston for less than $20. Much easier than using pipettes. Of course, free is a good price...
Posted by: Dr Evil Jan 18 2009, 09:12 PM
Ha, I have 10ml and 60ml syringes and totally forgot about them. The pipettes are actually easy to use, but the syringes will work. Duh...
Posted by: r_towle Jan 18 2009, 09:26 PM
CVS sells syringes for dosing babies...they cost like 3-4 bucks.
100cc in one cc marks.
Use tranny fluid...it bubbles less and its easy to see.
Rich
Posted by: jsayre914 Jan 18 2009, 09:39 PM
this thread has it all...
trannys
pipes
syringes
whats next?
Posted by: So.Cal.914 Jan 18 2009, 10:51 PM
this thread has it all...
trannys
pipes
syringes
whats next?
And Dr. Frankenvair.
Posted by: Dr Evil Jan 20 2009, 12:09 PM
Every time I have needed machine work 3 things have happened: 1) Things took waayyy longer than they were supposed to. 2) I made friends with the machinests. 3) I got a smoking deal onteh work
I just got back from the machine shop and they only charged me $1200 for all ofthe work He said it was morelike $1800, but he felt bad about the time. The places that do this conversion normally charge in the area of $2500 and that doesnt include the large amount of head work I had them do. It pays to be nice
Posted by: So.Cal.914 Jan 20 2009, 12:25 PM
Please take lots of pic's.
Posted by: FourBlades Jan 20 2009, 12:57 PM
this thread has it all...
trannys
pipes
syringes
whats next?
Now you can add paying for a lot of head work to the list...
Posted by: Dr Evil Jan 22 2009, 07:12 PM
Good news! I was working out the parameters to see what I needed to adjust for the CR and after I added in .040" copper head gaskets, I need nothing The deck height was remarkably right on. $40 for the gaskets and they are on their way This weekend should prove to be productive.
Posted by: Dr Evil Jan 22 2009, 10:32 PM
Spent an hour out there tonight balancing the pistons. Enough is enough, time to clean the case for the last time and start putting the parts in.
Posted by: scotty b Jan 23 2009, 06:37 PM
Windshield will be here Monday.
Attached image(s)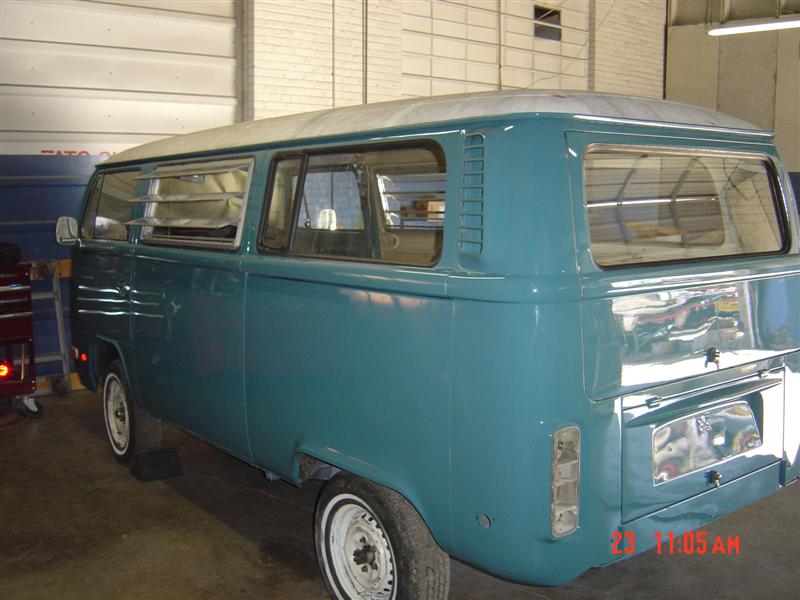
Posted by: type11969 Jan 23 2009, 06:40 PM
Looks sweet! Where did you find the windshield? Did you find one that was completely clear or does it have the tint across the top?
Posted by: scotty b Jan 23 2009, 06:46 PM
Looks sweet! Where did you find the windshield? Did you find one that was completely clear or does it have the tint across the top?
Glass shop we use occassionaly is getting it for me. I don't know if it is tinted or not. I honestly didn't even think about that
Posted by: type11969 Jan 23 2009, 06:49 PM
Cost? Might want to ask about the tint, I've heard complaints about it from taller bus drivers, apparently the tint comes down far enough that they are looking through it all the time when driving.
But I've also heard that it is tough to get anything else new.
Posted by: scotty b Jan 23 2009, 07:18 PM
Cost? Might want to ask about the tint, I've heard complaints about it from taller bus drivers, apparently the tint comes down far enough that they are looking through it all the time when driving.
But I've also heard that it is tough to get anything else new.
175.00, I'll find out Monday about the tint I guess, hopefully Mike won't
Posted by: r_towle Jan 23 2009, 08:01 PM
What is the plan for the roof?
Rich
Posted by: scotty b Jan 23 2009, 08:10 PM
What is the plan for the roof?
Rich
Roof will be done at a later date. For now it ( the bus ) will go back to the house until Mike is ready to put the engine in. That way he can drive it with the fixed roof so I can get the 914 done, make some $$$ and prepare myself for the roof " project " It really won't be that bad I just need to get some other things out of the way first, and he can enjoy the bus sooner.
Posted by: r_towle Jan 23 2009, 08:30 PM
What is the plan for the roof?
Rich
Roof will be done at a later date. For now it ( the bus ) will go back to the house until Mike is ready to put the engine in. That way he can drive it with the fixed roof so I can get the 914 done, make some $$$ and prepare myself for the roof " project " It really won't be that bad I just need to get some other things out of the way first, and he can enjoy the bus sooner.
Besides that, it clashes with all the little Italian red....
Cool job, get Mike to finish up that motor...we are having a spring thaw today...
Rich
Posted by: Dr Evil Jan 23 2009, 09:27 PM
NICE! That is great man! Did you put the glass in or did you get that guy to come and do it?
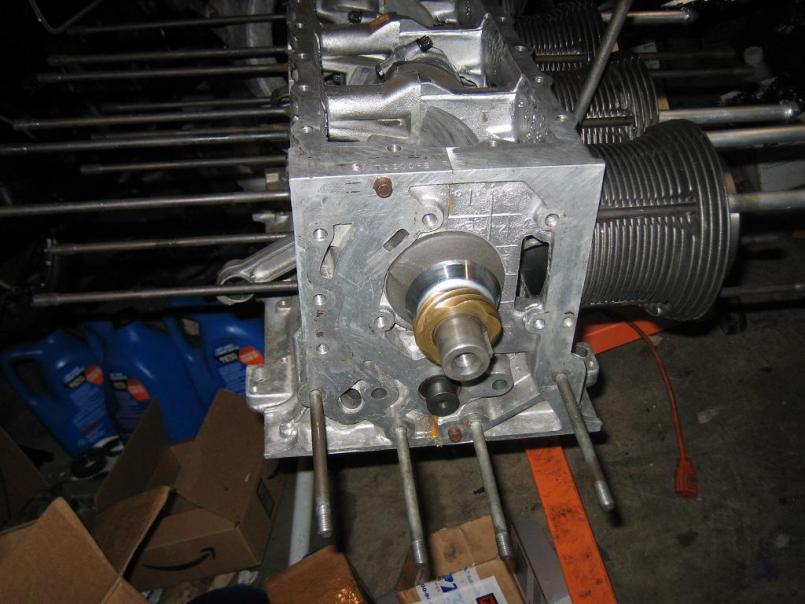
RE the engine: I got the lower end started tonight. The case halves are together with the crank and cam, and the bellhousing is installed. The crank moves free and all looks to be going well. I have it mounted on the stand. I cant wait until tomorrow to do some more Gonna CC the heads.
I want the bus to drive to Hershey
Posted by: scotty b Jan 23 2009, 10:21 PM
I did it. I couldn't remember who the hell it was. I went by the Old Volks home, because I thought for sure it was him, he said it wasn't. Aren helped with the back hatch and the jealouse windows. I got the two side rears by myself. It was a lot easier then it sounds. Fuch those jealouse windows though. Never again for this white boy
Posted by: Dr Evil Jan 23 2009, 11:09 PM
I guess it is too late to ask you to tint the windows for me?
Posted by: Dr Evil Jan 25 2009, 10:25 PM
Tonight I finished the piston balancing and started fooling with the heads. The pistons had a range of 4g and took some work to get within 1g of each other. I did it because I wanted to, not because it needed it. Its not like I am racing this bus. What was a PITA was that the pistons come with the rings already installed and I had to take them all off, but it was easy and I didnt break any...yet.
I started smoothing out the heads tonight as well. Since the heads have been opened up to accept the wider jugs I am left with a nice step with a sharp edge to possibly cause preignition. I took a dremel and sanding wheel and gently smoothed these surfaces finishing up with some sand paper. It is looking good I was smart and had the top of one of my spare cylinders that was damaged in shipping cut off so I could use it to protect the seating surface while I sand. One head done and one to go. I need to pick up some small files so I can deflash the head fins. I though I had a set, but I cant find them and they are $3 at Harbor Freight. It is possible that this will be mostly together by the end of the week
Posted by: Dr Evil Jan 31 2009, 07:30 PM
CRAP! So, I was cleaning up my cylinders and pistons to put them on the engine and get a final read on the deck height when I noticed that the cylinder that I previously dropped was damaged more than I originally thought I thought I just chipped the skirt, but on closer inspection the whole base had a crack that was hard to see. Looks like I will need a new cylinder....and to have it worked Just another set back, at least it is a minor one and I found it in time.
Posted by: Dr Evil Feb 5 2009, 11:10 PM
Got the rod bearing in today and installed. Still waiting on the replacement cylinder so I can get it machined, then it is time to assemble. I have been working the heads today; deflashing the fins and passages, smoothing sharp edges in the chambers, and CCing the heads. Almost done with the heads.
I need to start adding pics so people wont be so board with this thread
Posted by: type11969 Feb 6 2009, 06:52 AM
punster
Posted by: GS Guy Feb 6 2009, 12:03 PM
All sounds pretty cool Doc! A rebuild on the "other" air cooled -6....
You might give a quick email to Steve at Rear Engine Specialists to see what "licks" he'd recommend on doing a home port-job on the heads (and any other recommendations he might give overall). Steve's a super nice guy and been into those engines for a long... long.... time.
http://www.rearenginespecialists.com/
Now show us some pics!! Are you staying with the Rochesters? or going 4bbl? Headers?
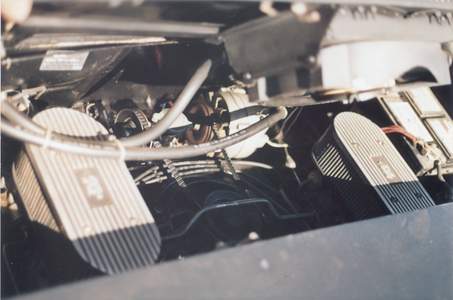
FWIW, Steve put this beauty together:
...for fellow buggy nut Chuck R.
Cheers,
Jeff
Posted by: Dr Evil Feb 6 2009, 12:39 PM
Hey Jeff,
I am going 4bbl with electrically adjustable jets. I am also running headers. I am not juicing this thing as much as possible, I am actually keeping the CR to 7.2-7.4:1 so I can run low octane and still get enough oomph out of the engine. I also am using some worked over old style 80hp heads that have extra intake ports added (came that way) and stainless valves. I'll get some pics in a few days....I am going to be at Zachs for most of the weekend working on his 914.
Posted by: Dr Evil Feb 7 2009, 11:33 PM
Looking at the pics again and the roof looks really bad compared to the rest of it
Posted by: Dr Evil Feb 8 2009, 09:37 PM
OK my hungering masses, some engine pics as promised
Attached thumbnail(s)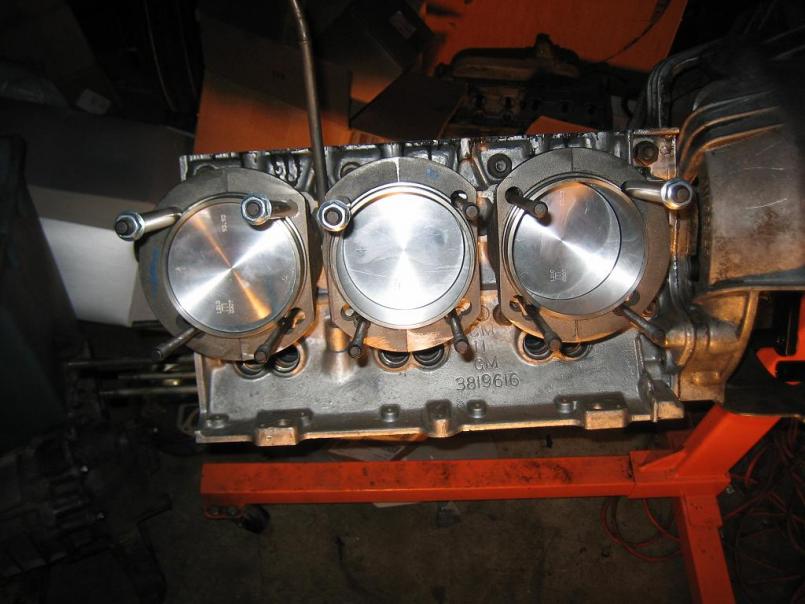
Attached image(s)
Posted by: sixnotfour Feb 8 2009, 09:43 PM
Enjoy the no maintenance hydraulic lifters.
6cyl air cooled /flat fan = cool
Posted by: r_towle Feb 8 2009, 10:18 PM
Looking at the pics again and the roof looks really bad compared to the rest of it
Send him another check...
Get r done.
Rich
Posted by: r_towle Feb 8 2009, 10:20 PM
I am in lust for a case design like that...
WOW...never saw an open one before...
Rich
Posted by: maf914 Feb 9 2009, 01:46 PM
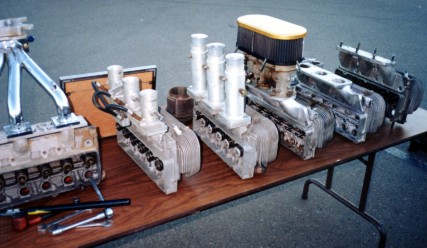
That is the first time I have seen the Corvair intake manifold. Two runners into the manifold then three intake ports. Doesn't look very efficient. One question: Why did they do that?
I think I've heard that people cut off the manifold to fit triple throat Webers. From Jeffs phot it looks like you could fit a dual throat Weber if you had a suitable manifold. 
And that engine case sure looks different form a VW/Porsche case. Very square looking. Interesting.
Posted by: Thomas J Bliznik Feb 9 2009, 03:28 PM
I am in lust for a case design like that...
WOW...never saw an open one before...
Rich
Hi Guys,
I thought I would throw in some Corvair pictures I took back in March 2005 just before they sent all this stuff to the dumpster. It's gone!!
Tom
Attached thumbnail(s)
Attached image(s)

Posted by: sixnotfour Feb 9 2009, 03:38 PM
I had a bored 140 with 3bbl 40ida weber carbs custom headers, roller rockers all the OTTO stuff bla bla . It took 2 years to finally sell it to someone back east. If you look at corvair heads funny the seats will fall out.
Gone but not forgotten, fun cheap cars in the late 70's.
Posted by: Thomas J Bliznik Feb 9 2009, 03:54 PM
I had a bored 140 with 3bbl 40ida weber carbs custom headers, roller rockers all the OTTO stuff bla bla . It took 2 years to finally sell it to someone back east. If you look at corvair heads funny the seats will fall out.
Gone but not forgotten, fun cheap cars in the late 70's.
Corvair motors with auto transmissions find their way into strange places.

Dr. Evil, Really enjoying this forum.
tom
Attached image(s)
Posted by: Dr Evil Feb 9 2009, 04:18 PM
I had a bored 140 with 3bbl 40ida weber carbs custom headers, roller rockers all the OTTO stuff bla bla . It took 2 years to finally sell it to someone back east. If you look at corvair heads funny the seats will fall out.
Gone but not forgotten, fun cheap cars in the late 70's.
140 heads have seat problems, similar to our 2.0 heads and for the same reason, not much metal between the valve seats. There are many fixes, mainly you just need to install the seats correctly with .030 crush for one. I chose the 110 heads because I wanted low end, off the line, and less worry about dropping seats. I actually am using 80hp heads, but the valves are the same and I have done some chamber tweaking. I have not spent too much on this and can do upgrades later if I want.
My first engine I was doing like this for a 914 got to kit stage with all the parts, it sold easily and I made money.
The heads are the week link without a doubt, but they can be worked pretty easily. They cant be too bad, they are coveted and used in home built planes often.
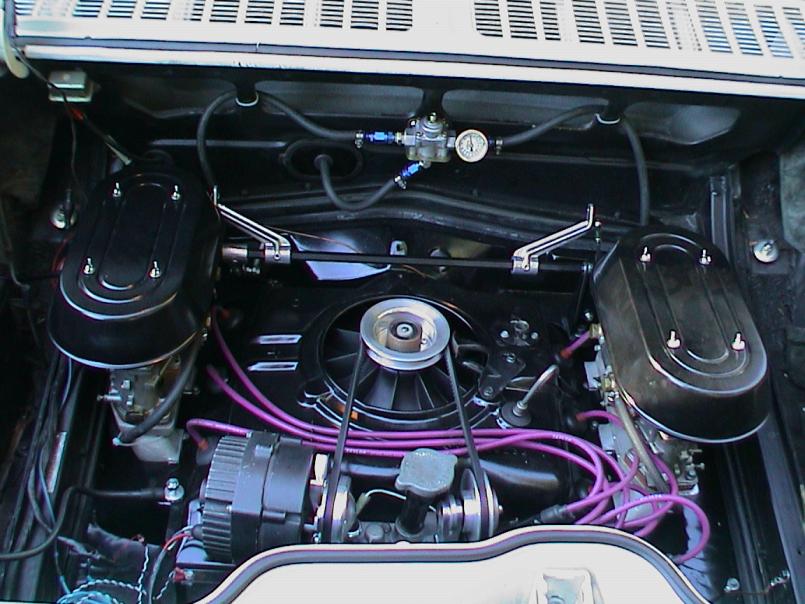
Reworked heads
In a teener
With tripple webbers
Attached image(s)

Posted by: Dr Evil Feb 9 2009, 04:23 PM
Looking at the pics again and the roof looks really bad compared to the rest of it
Send him another check...
Get r done.
Rich
He isnt doing the top because we are going to cut it off and put the camper top on
Posted by: sixnotfour Feb 9 2009, 04:37 PM
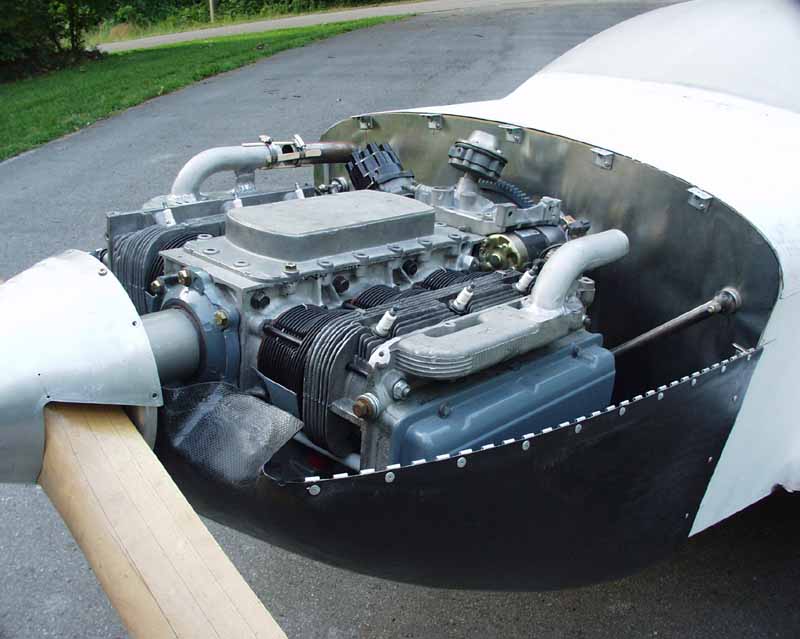
Hey that top picture is from starr cook, off road racer .
Wallin Piper was making some individaul heads for the vairs and starr has like the only finished set.
Dont get me wrong DR. I have had plenty of success with em just noting the weak link, When you could buy a whole 64 turbo spyder car for 150.00 dollars those head mods were out of the question.
Back in the day.
Posted by: Dr Evil Feb 9 2009, 04:42 PM
Ya, those heads are off of Starr's old web site. He still makes stuff and sells it on ebay. He has skills, but is kind of an arrogant SOB
Here is where I will likely end up with mine, 6 runners with one 4bbl
Attached image(s)
Posted by: So.Cal.914 Feb 9 2009, 05:39 PM
He isnt doing the top because we are going to cut it off and put the
Posted by: GS Guy Feb 9 2009, 05:40 PM
Hey Doc - according to what I've read - and this may be similar to the T4 engine, it's way too easy to get extra fuel into the 'Vair, even without doing much headwork. The key to making power is cleaning up the exhaust flow out of the heads. This requires angle-cut ports and special outlet tubes. Without that, it's basically bottle-necked. That's one reason I bagged putting the 'Vair into my buggy - way too easy to get into a couple grand into just headwork to get into the 200+hp club.
Your engine should make tons of torque though, should be perfect for the Bus!
Jeff
Posted by: Dr Evil Feb 9 2009, 05:44 PM
Jeff,
do you recognize that case? It was yours once. The heads can be done for not too much if you have friends I have Root to do my head welding and working and my contacts at Feaser's machine shop in Hbg.
Paul, no. Neat, but no.
Posted by: scotty b Feb 9 2009, 06:38 PM
Looking at the pics again and the roof looks really bad compared to the rest of it
Send him another check...
Get r done.
Rich
ANOTHER check who the hell got the first one??
Posted by: Dr Evil Feb 9 2009, 06:48 PM
Looking at the pics again and the roof looks really bad compared to the rest of it
Send him another check...
Get r done.
Rich
ANOTHER check who the hell got the first one??
Back to work!
![whip[1].gif](style_emoticons/default/whip[1].gif)
Posted by: MDG Feb 9 2009, 07:11 PM
He isnt doing the top because we are going to cut it off and put the
that's looks like a trip to the hairdresser that went wrong. I think Bo Derek used to have hair like that . . .
excellent job on this so far
m.
Posted by: scotty b Feb 9 2009, 07:13 PM
[quote name='Dr Evil' date='Feb 9 2009, 04:48 PM' post='1132115'] --><div class='quotetop'>QUOTE(scotty b @ Feb 9 2009, 07:38 PM) </div><div class='quotemain'><!--quotec-->
[quote name='r_towle' post='1131820' date='Feb 8 2009, 08:18 PM']
[quote name='Dr Evil' post='1131513' date='Feb 8 2009, 12:33 AM']
Looking at the pics again and the roof looks really bad compared to the rest of it
[/quote]
Send him another check...
Get r done.
Rich
[/quote]
ANOTHER check who the hell got the first one??
[/quote]
Back to work!
[/quote]
Just got home from it Glass guys can't find a PPG SO they said judging from what they saw, AND what they know of PPG glass they think this one is a little large and took it back today to grind the edges down. They will be coming back in a day or 2 to re-try it. He also said the buses originally had a " toothed " piece that clamped onto the frame lip, inside the rubber and that helped to keep it put when installing and afterwards, but usually people tossed it the first time they changed the glass. I never saw any such creature on your original glass, nor have I seen any such creature on a bug I just want this damned thing in already I'm bringing the 914 over next weekend whether the bus is there or not. I need to get started on it. Maybe I'll just shove the bus out back for the bums to sleep in
Posted by: So.Cal.914 Feb 9 2009, 07:21 PM
He isnt doing the top because we are going to cut it off and put the
that's looks like a trip to the hairdresser that went wrong. I think Bo Derek used to have hair like that . . .
excellent job on this so far
m.
Well I guess he told me...
Posted by: scotty b Feb 9 2009, 07:38 PM
You got called out by the newbie HAHA
Attached image(s)
Posted by: MDG Feb 9 2009, 07:41 PM
[/quote]
Well I guess he told me...
[/quote]
didn't mean that as a comment on your photo chops - your skills are obvious
wish I could do that
m
Posted by: MDG Feb 9 2009, 07:48 PM
You got called out by the newbie HAHA
well, um, I didn't realize that was an official design submission
newbie, boobie, it's all good. Happy to be here
m.
Posted by: scotty b Feb 9 2009, 07:49 PM
didn't mean that as a comment on your photo chops - your skills are obvious
wish I could do that
m
It's o.k. he's kind of special to us. We keep him full of french fried taters, and he stays happy. But if we run out of mustard you better watch your arse.
Posted by: So.Cal.914 Feb 9 2009, 09:56 PM
'Reckon I'll have me some of the big 'uns. 
Posted by: Dr Evil Feb 13 2009, 05:26 PM
Update: So I tried to CC my heads using a large 60cc syringe from work (dont worry, they are disposable), it was way too difficult to get the thing to work accurately as it was too big and dribbled too much (I know many of you heard that before). I got one of my friends to snag me some pipettes from her lab, but she only had 5ml pipettes so it took a little longer to fill each chamber. One head turned out to be all 58cc, the other head was 56, 79, 60cc. This sucked as my CR with these volumes would be about 7 or even lower. Soooo, I dropped the heads back off at the machine shop today so they could cut them down .055". They are not fast, though, so I hope it doesnt take too long
Meanwhile, I am waiting on my .040" copper head gaskets which supposedly shipped yesterday.....5 days after they were supposed to. WTF is the deal with these gaskets? Everyone offers them, no one stocks them.
I also am still waiting on the machine shop to clean up my oil pump housing, and finishing my other barrel. I cant do anything more on teh engine until the rest of this stuff is done......
Posted by: degreeoff Feb 13 2009, 05:44 PM
That is the first time I have seen the Corvair intake manifold. Two runners into the manifold then three intake ports. Doesn't look very efficient. One question: Why did they do that?
I think I've heard that people cut off the manifold to fit triple throat Webers. From Jeffs phot it looks like you could fit a dual throat Weber if you had a suitable manifold.
And that engine case sure looks different form a VW/Porsche case. Very square looking. Interesting.
NOT that I am dising
 the effort or engine but it sure makes you appreciate the German counterpart!
Posted by: Dr Evil Feb 13 2009, 05:49 PM
Nothing wrong with the stock engine, mine is a little modified and with any modified engine there comes some tweaking.
Posted by: So.Cal.914 Feb 13 2009, 06:35 PM
In a way the case reminds me of a ferrari case I saw apart.
This one is a working model, 8hp at 10,500 rpm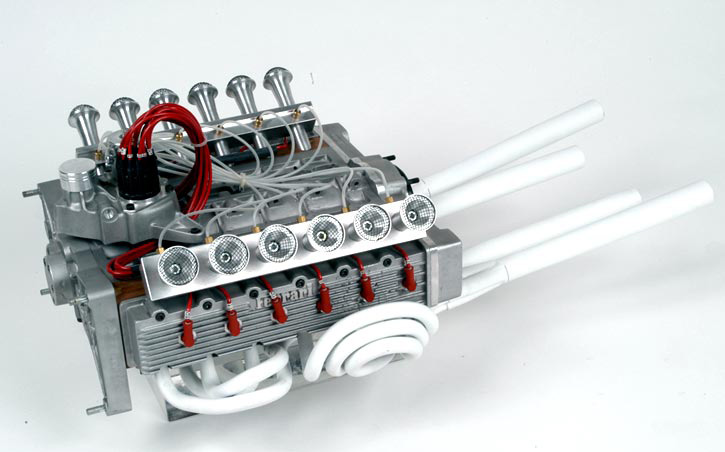
Posted by: Dr Evil Feb 14 2009, 11:20 AM
What is it with these damn parts monkies!? Sooo, after sending back the wrong sets of head gaskets that a previous idiot sent me, on my dime, I ordered a set off of a seller on Ebay, through Ebay for protection purposes. This seller is one I recognized from my home town of La Mesa, CA so I felt confident with the order. I order TWO sets of head gaskets, they were supposed to be shipped when paid and I paid immediately. 5 days later they ship. They get here today.....well, one set gets here today Idiots didnt read their own damn invoice where I ordered 2 sets. Lets see how they deal with this problem. At least I dont need them right away now, but it may be another week or so before I get the second set in
Posted by: Dr Evil Feb 14 2009, 11:26 AM
Dang, already got an email back apologizing for the mix up and promising to send another set out ASAP. Lets see how it plays out. SO far, they already have better customer service skills.
Posted by: Dr Evil Feb 21 2009, 11:31 AM
So, tires.... For VW buses, tires are often a PITA to find. Correct ones, that is. The tires need to be higher load and thicker sidewall. Using regular passenger tires is a dangerous gamble. The original tires had a weird size designation - 185R14C. Notice there is no aspect ratio. The "C" stands for commercial and means that there are at least 6 or 8 (I forget) plys in the side wall. Finding these tires is a bitch and they tend to be about $75 ea from the bus vendors. However, if you know the parameters for the load rating you can find regular tires with an RF or XL rating which stands for reinforced. The min parameters to shoot for are:
* Size: 205/70R14 97R
* Load Range 97
* Max Load Capacity: 1580 lbs
* Max Inflation Pressure:: 40 psi
With these data it is much easier to find tires. I am considering these at $58 ea from the Tire rack.
http://www.tirerack.com/tires/tires.jsp?tireMake=General&tireModel=Altimax+RT&partnum=07TR4AMAXRTXL&vehicleSearch=false&fromCompare1=yes&place=4
However, Scotty is a professional and has hook ups and I will see if he can score me some tires that are as good as these at a 1653# rating for less
Posted by: type11969 Feb 21 2009, 12:01 PM
Mike - you've obvously done more research in to this than I have but I'm not sure that just because the load rating is the same that the tires are created equal. Only reason I bring this up is because the bus can be a handful to drive on a windy day even with the right tires, without is a total pain. The heavy duty sidewall of the commercial tires help alot to reduce this. It would suck to save a bit on tires, get them on your bus, only to find out that it is a total stain to drive in the wind, all I am saying . . .
Sway bar helps too, rear sway is supposed to also but then makes corning a bit more of a bitch.
-Chris
Posted by: Dr Evil Feb 21 2009, 12:11 PM
Here is a great source of info on the subject. You will notice that the heavier vanagons use the size I mentioned, and there is an explanation that addresses the valid concerns you bring up.
http://www.roadhaus.com/tires/guideline.html
Posted by: type11969 Feb 21 2009, 12:18 PM
Okay, cool. I remember my rents were convinced back in the day to use passenger car tires on their syncro vanagon . . . tires were popping all the time. No inets to tell them otherwise back in 86! Finally someone knew what was going on and told them to put truck tires on, they were not happy with the price tag.
Posted by: Dr Evil Mar 4 2009, 07:53 PM
The latest: I tried, unsuccessfully, to tow the bus home from Scotty's, but no dice just yet. I just bought 5 tires for it for $346 shipped
Posted by: crash914 Mar 4 2009, 08:24 PM
Can you say "trailer?"
I knew you could
Posted by: Dr Evil Mar 4 2009, 08:37 PM
The only thing is that after driving 4+ hours down and picking the trailer up at your house, followed by 4+ hours back to my house, followed by a few hours to your house to return the trailer, followed by a return trip..... Yikes. I am looking for the easiest way and the $30 tow dolly may be a better bet, but I am not sold on the idea yet
Posted by: Phoenix 914-6GT Mar 4 2009, 08:47 PM
Can't wait to see it all together I'm excited for ya Mike. Love the new avitar too
Posted by: Dr Evil Mar 10 2009, 05:01 PM
Well, the engine parts are STILL awaiting treatment. Hopefully this week, Fri. But, to show that I am dedicated to having the bus done soon, I insured it today and will register it tomorrow or Thurs I hate paying insurance on non-op cars
Posted by: Vacca Rabite Mar 10 2009, 05:06 PM
I am on the phone with insurance trying to get my 914 insured as I type this.
How are you going to get the bus to the title shop? Are they allowing pictures of the vin, or are you towing?
Zach
Posted by: scotty b Mar 10 2009, 05:06 PM
New tires are on the bus. I left my camera in the 944 yesterday and forgot to take it this morning ( drove Vulva today ) so I don have no pix mang
Posted by: Dr Evil Mar 10 2009, 06:55 PM
I think white would look better on the wheels instead of black
Zach, the big DMV office here in Harrisburg is not only fast, but they dont accept the VIN rubbing. They only accept pictures. I forgot I need the VIN pic so I guess I will be registering it next week after I pick it up.
Scott, is it ready for pickup? I can get it as soon as Thurs.
Posted by: Vacca Rabite Mar 10 2009, 07:05 PM
I am probably going to take a day off in the very near future to run up the the Harrisburg DMV office then. My insurance is bought for the 914. $14K agreed value. Should have the insurance cards in my email box tomorrow.
The shop near me wants to see the physical car since I bought it out of state.
Zach
Posted by: Dr Evil Mar 10 2009, 07:44 PM
I dont even think that the Harrisburg office has people to come out. The whole visual verification thing is the job of the vehicle inspector at the shop.
Posted by: scotty b Mar 10 2009, 07:47 PM
Ready for pickup captain. Unbroken glass still not in but rolling stock is fine for the trip.
Posted by: Dr Evil Mar 10 2009, 09:39 PM
The seal is on the way to your house, but I can always have you ship it here. I am gonna plan for Thurs for a quick turn around
Thanks for the hard work Scotty, the pics are not even close to how awesome this bus is I was hoping to finish it down there so you could be in it for he first ride, but I guess I will have to have someone else push it back
Posted by: Dr Evil Mar 11 2009, 03:43 PM
UHaul is reserved for tomorrow at 9am and then I am on the road. No time for messing around, in and out, no one gets hurt (thats what she said ). I need to get back before late night.
Posted by: crash914 Mar 11 2009, 03:48 PM
hope it all goes well....
Posted by: scotty b Mar 11 2009, 04:55 PM
Blasted the fronts, etched, sealed and blakced out. I hit the backsides lightly and just gave them a coat of black.
Attached image(s)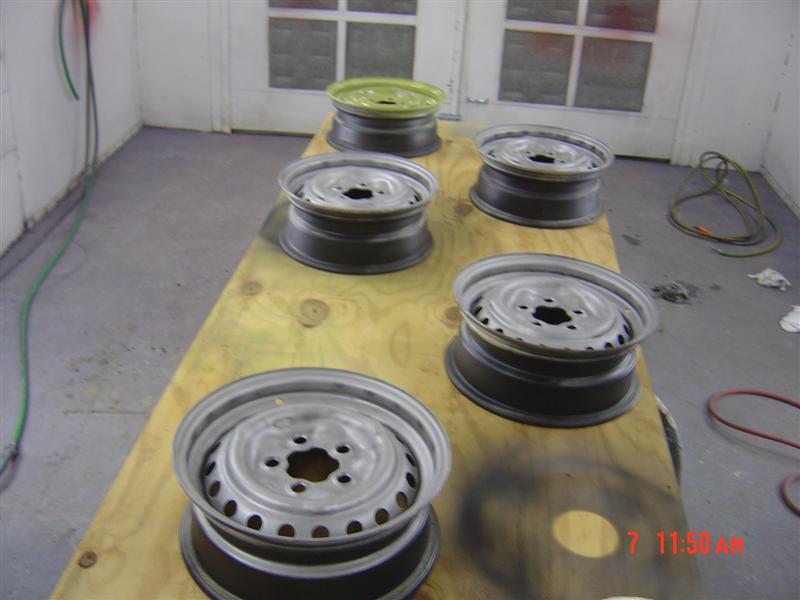
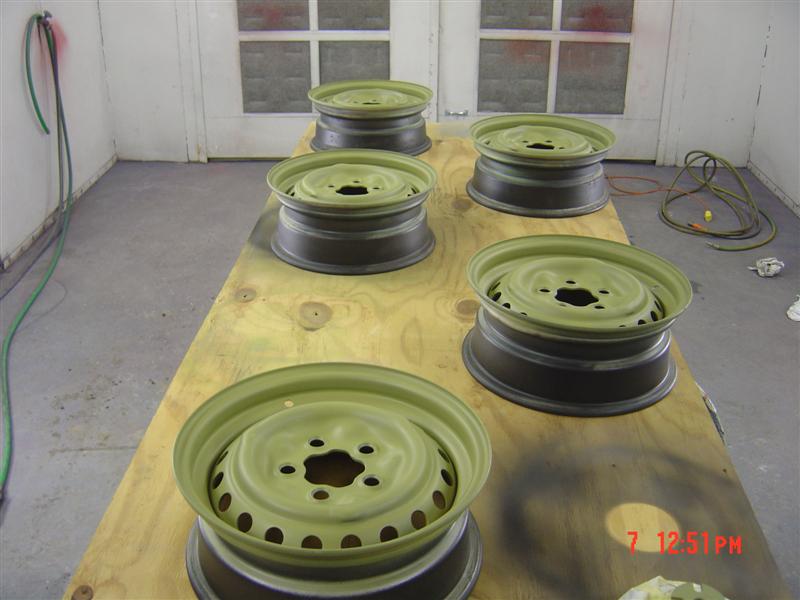
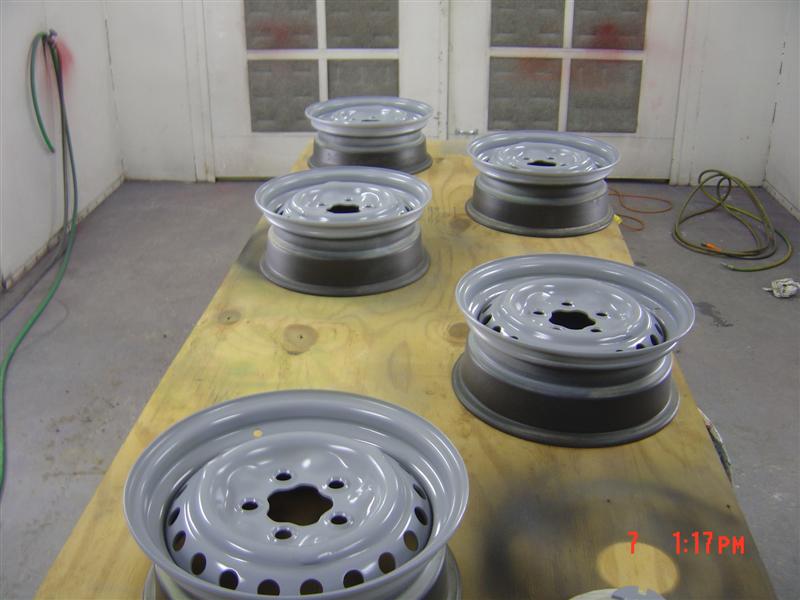
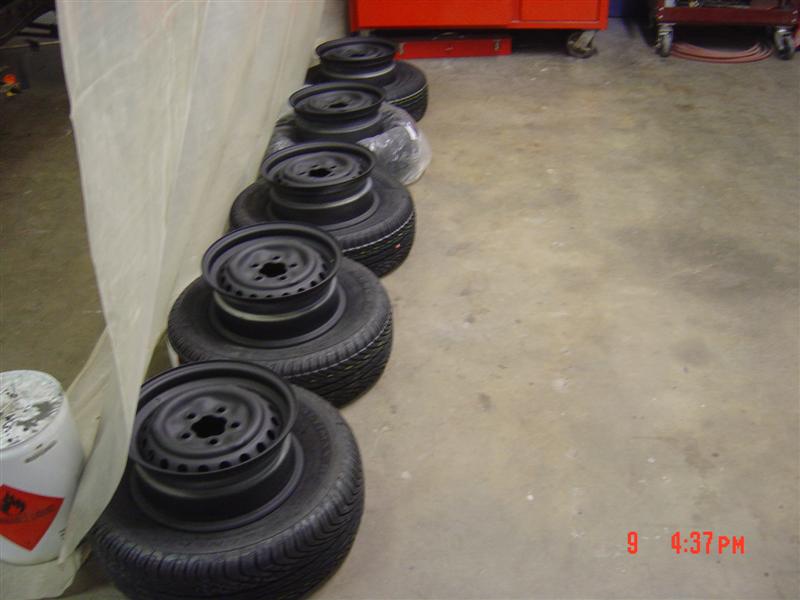
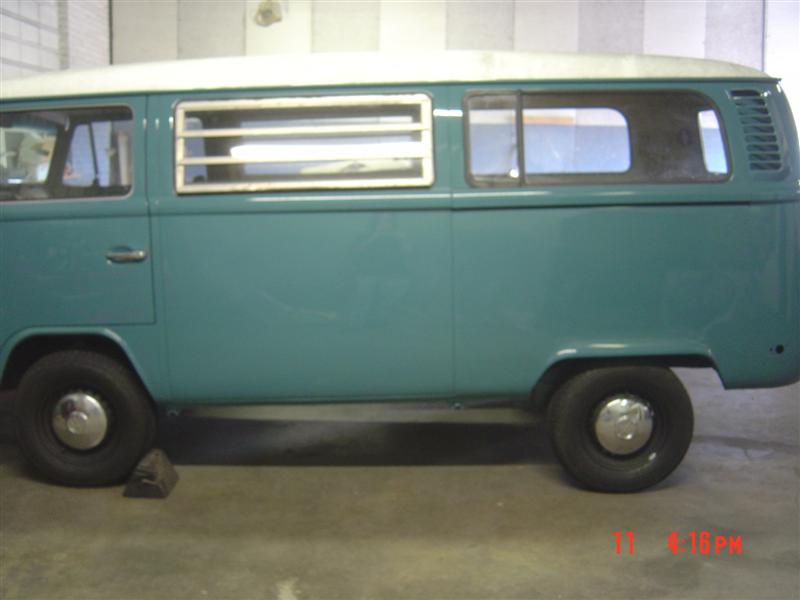
Posted by: type11969 Mar 11 2009, 06:09 PM
Nice
Posted by: sendjonathanmail Mar 11 2009, 08:01 PM
Nice! Good luck bringing it home.
Posted by: Dr Evil Mar 11 2009, 08:29 PM
Oooo, BOING! Cant wait to get the damn thing driving. I hope the machine shop is done with my stuff by Fri.
Posted by: Dr Evil Mar 12 2009, 09:20 PM
Soooooo, I am finally home from picking up the bus and dropping it off. I left at 0830 If there was a wrong turn to be made or a traffic jam to find, I was there! How do I end this adventure? Well, cop a squat and I will tell you.
I get to Zach's house, he is not home and his wife is busy with the spawn. Soo, I have to unload the bus my self.....on his VERY sloped driveway. Oh ya, Scotty disarmed the breaks. I cant forget to tell ya'll that point. Anyway, I am at a 45* to Zach's garage with the bus, my VUE is in his grass, I have the wheels chocked, and I pull forward with the the VUE thus pulling the bus off of the trailer.....and it rolls over the chocks and slowly heads for Zach's garage door. I manage to throw the VUE in park, and run to the bus and slow its roll.......into Zach's garage door Mostly it looks like the door paint transferred to the bus' corner. It will likely buff out Zach's door was only bent a little, I pushed it back out and got out of there before the wife came out and wondered what happened It still went up and down fine, and it wasnt perfect to begin with, but I will be back to beat it back to a better looking form
What a friggen day
Posted by: Vacca Rabite Mar 13 2009, 08:02 AM
When I gave you permission to put the bus into my garage, I intended for you to open the door first. Dork.
I'll have to to a little more massaging to it this weekend. It opens fine but binds when closing. Right now I have it off the motor, as it was jamming at the top. No biggie.
Does the bus have any brakes at all? I'd like to swing it around so it is more even with the top of the drive. It will keep Erin happy if it is more orderly.
Zach
Posted by: Dr Evil Mar 13 2009, 08:13 AM
No brakes. The pads separated from the metal and locked the wheels so Scotty had to remove them. I will be replacing all of the brakes on it soon. I can come over when ever you want to move the bus around and fix your door. I only have plans tonight, other than that I am available. I also forgot to drop off my new windshield that is still in my car
Posted by: Dr Evil Mar 13 2009, 09:54 AM
The parts are supposedly done at the shop, which just happens to be on the way to Zach's house, so I will stop by and drop off the windshield, and massage the door into a more functional arrangement So much shame 
Posted by: Vacca Rabite Mar 13 2009, 10:58 AM
The parts are supposedly done at the shop, which just happens to be on the way to Zach's house, so I will stop by and drop off the windshield, and massage the door into a more functional arrangement
So much shame What time do you think you will get to my place?
Zach
Posted by: jimkelly Mar 13 2009, 03:24 PM
scotty - i hope you break that thing in right with some local sweety - BEFORE - you give it back to mikey ; )
Posted by: Vacca Rabite Mar 13 2009, 03:44 PM
scotty - i hope you break that thing in right with some local sweety - BEFORE - you give it back to mikey ; )
I'ts already in my driveway.
But tomorrow IS International Steak and a BJ Day. Hrm, wonder if we can pass the baby off to the grandparents and get some hippy love'n.
Zach
Posted by: Dr Evil Mar 13 2009, 04:22 PM
The door is "fixed"
Good news on the bus, I pulled the tank to see about getting it coated and the inside looks brand new and the fule level sender is brand new Score!
All of the engine parts are done now... I think I will be in the garage late tonight putting things on other things
Posted by: Dr Evil Mar 15 2009, 12:08 AM
With the heads back from the shop and turned down to my calculated seat height, it was time to finish the heads; smooth the seating edges, CC and adjust as necessary.
You can see the sharp edges left by the machining. These edges are a great place for heat to build up and cause preignition.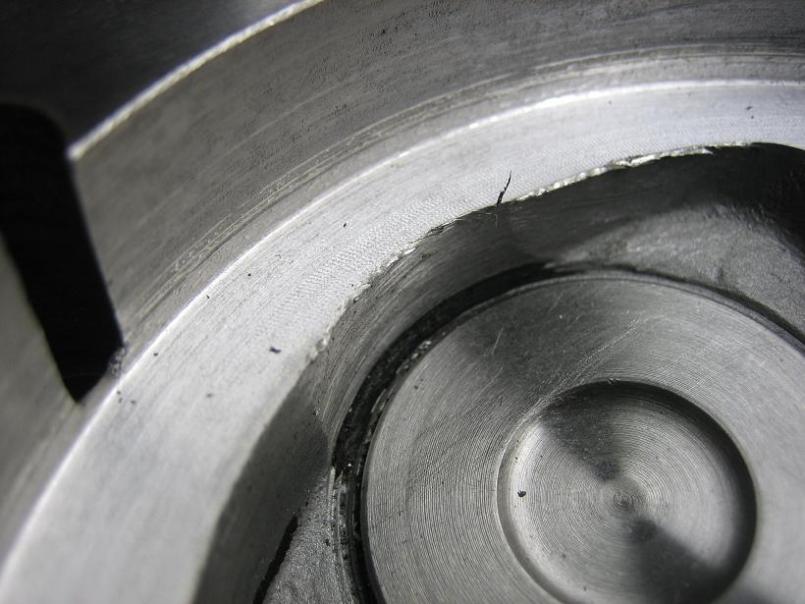
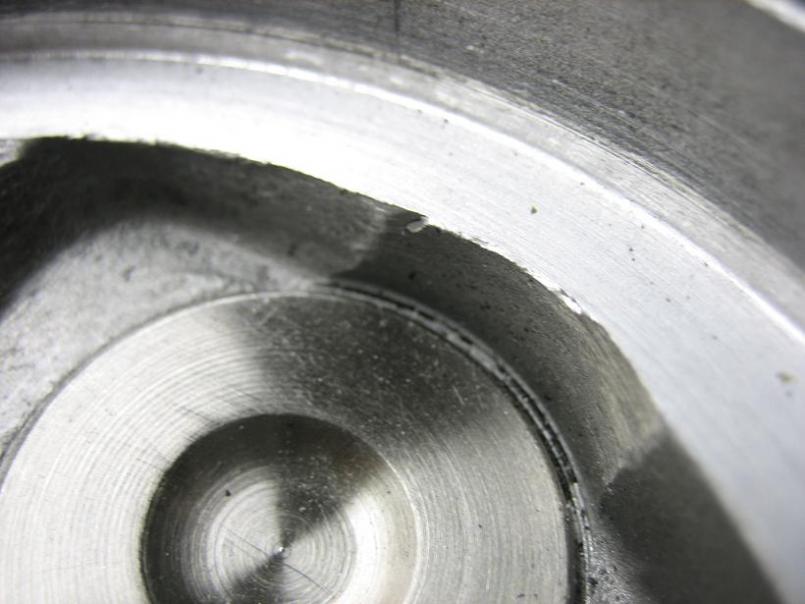
Here are the smoothed edges.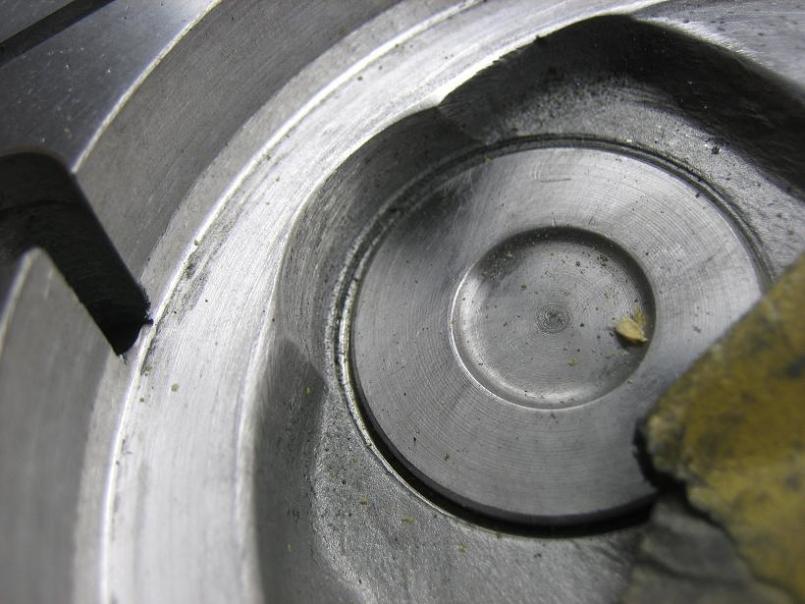
Here are the pics of me CCing the chambers. All was good as they were within 1cc or less, between 47-48cc for a CR of 7.5-7.6:1 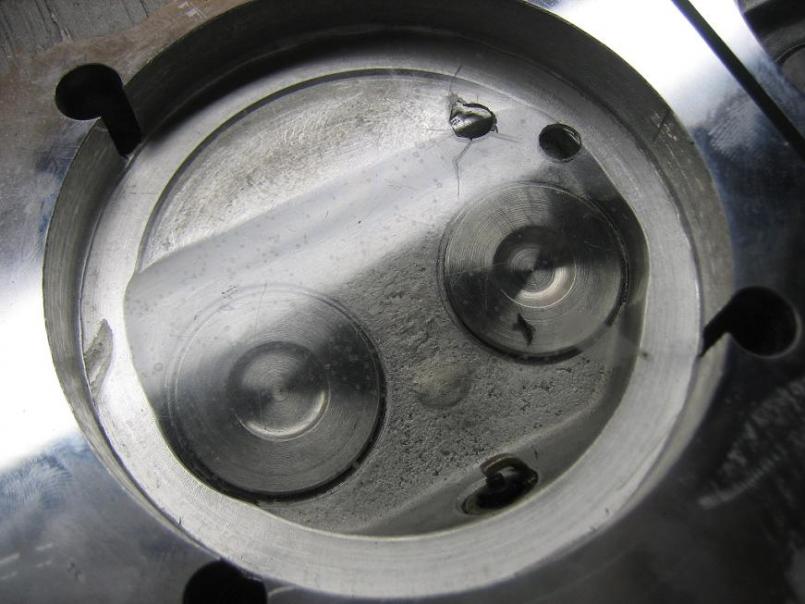
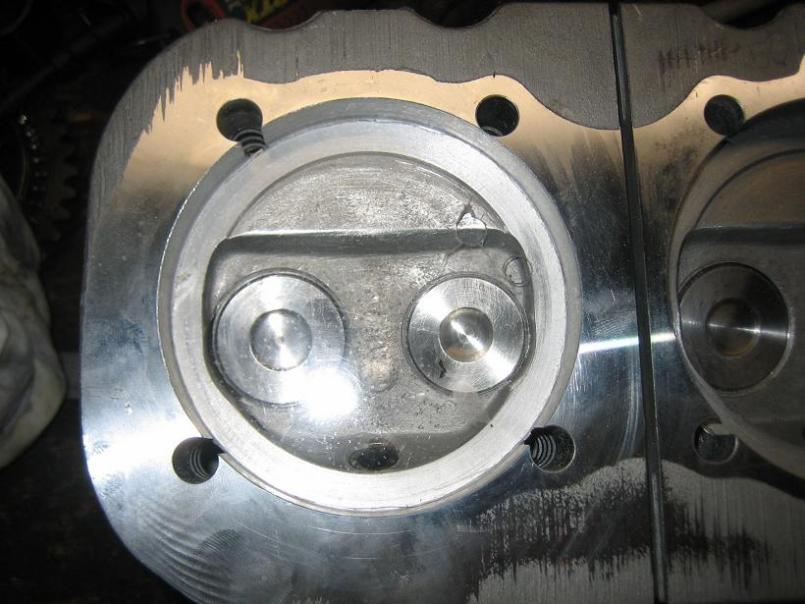
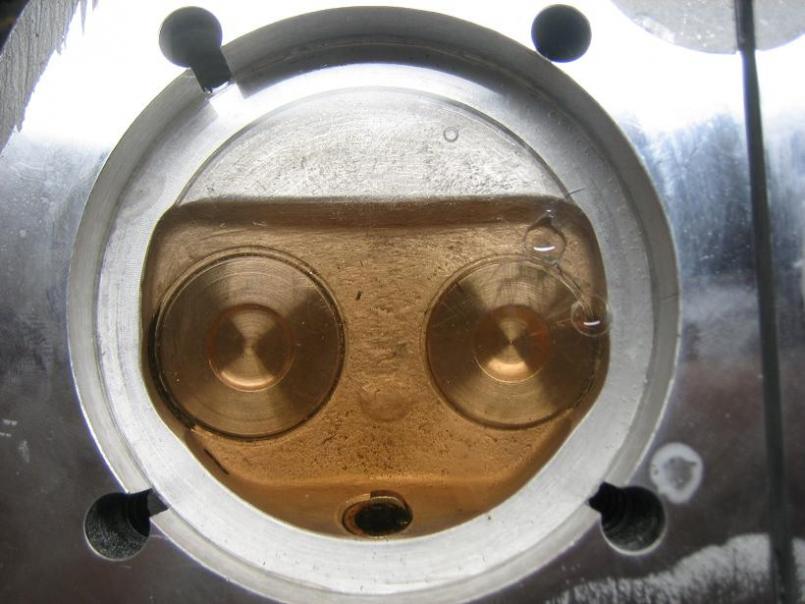
I got one of the heads on and things are progressing along nicely. This engine is pretty darn easy to assemble.
Posted by: scotty b Mar 15 2009, 07:30 AM
So uh what exactly what is up with that crack ithe first pic and those " plugs " in the others ?
Posted by: ws91420 Mar 15 2009, 07:33 AM
I looked at that too Scott. The cracks are in the plexiglass disc he was using to cc the heads.
Posted by: scotty b Mar 15 2009, 08:15 AM
I looked at that too Scott. The cracks are in the plexiglass disc he was using to cc the heads.
O.K. I see them in most pics but the one in that very first pic sure looks like it is in the head. Is my eyesight that off ?
Posted by: ws91420 Mar 15 2009, 08:47 AM
No. It took me several looks before I realized what it was.
Posted by: Vacca Rabite Mar 15 2009, 09:43 AM
I think that is a bit of shaving from the machine shop. Its gone in the "smoothed" picture.
Zach
Posted by: Dr Evil Mar 15 2009, 02:27 PM
Zach gets the prize The pics are sometimes staged as I tend to get focused in my work and miss photo ops. In the pics you can see a piece of debris in the chamber that I removed after the pic as well. I'll try to get a pic posted of 1/2 of the engine done I have to read a whole book for tomorrows class....I started it at noon (doh).
Posted by: Dr Evil Mar 15 2009, 09:03 PM
Here are 3 pics of the head installed
Attached thumbnail(s)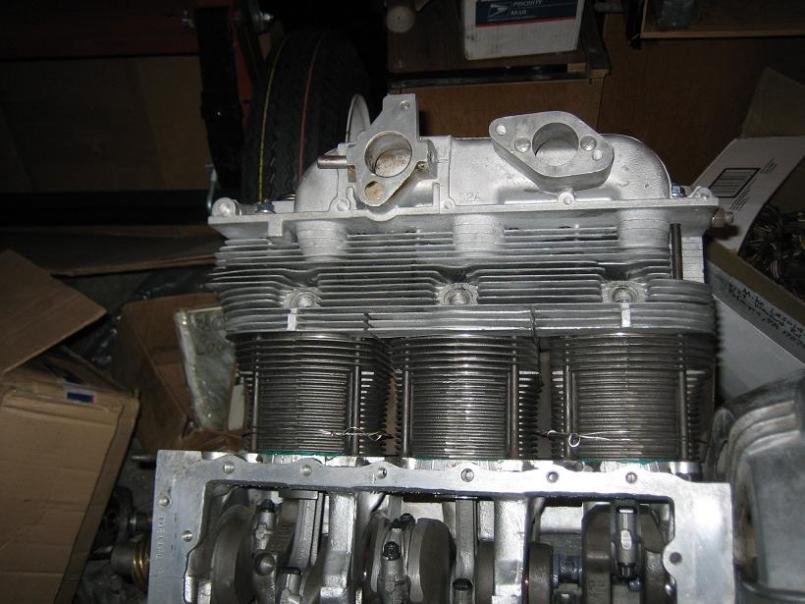
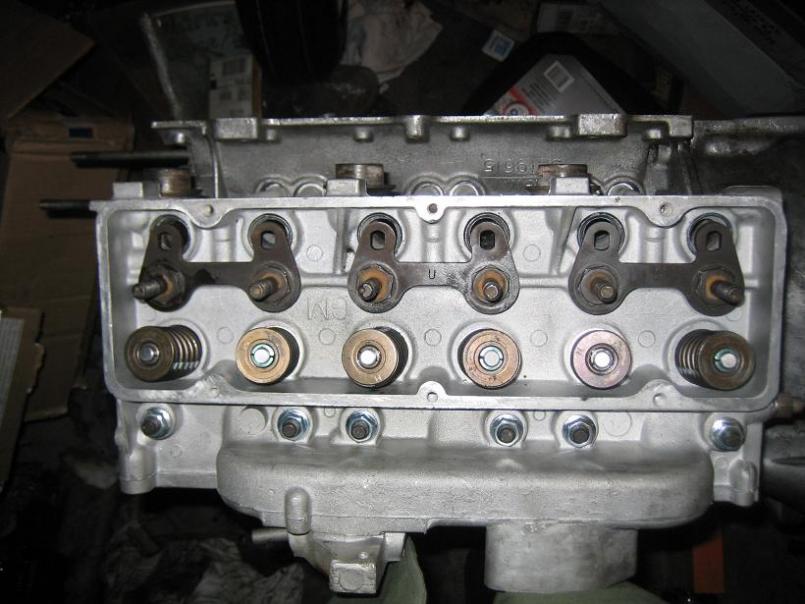
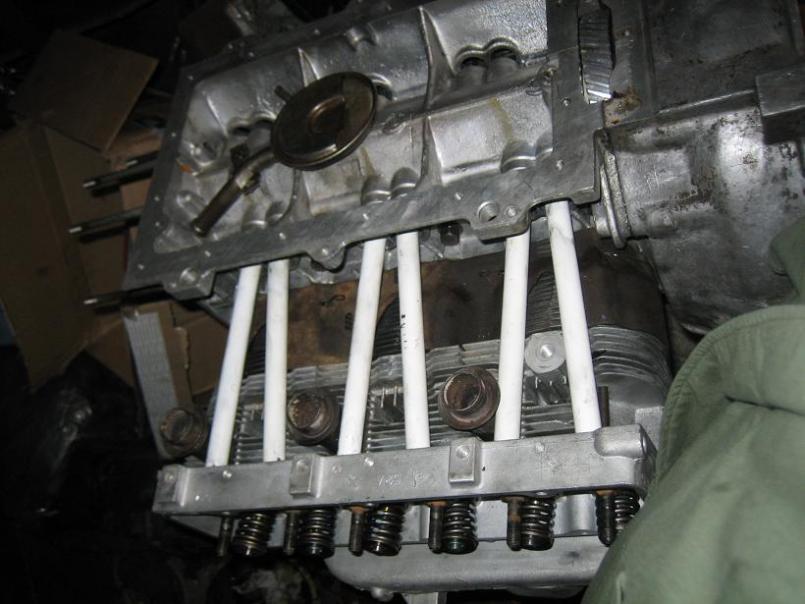
Posted by: Dr Evil Mar 18 2009, 05:42 PM
The latest. The heads are on, the top cover is on, the oil pan is on Last to do is put the rear cover on with the oil pump, and then figure out the valve train geometry.
Attached thumbnail(s)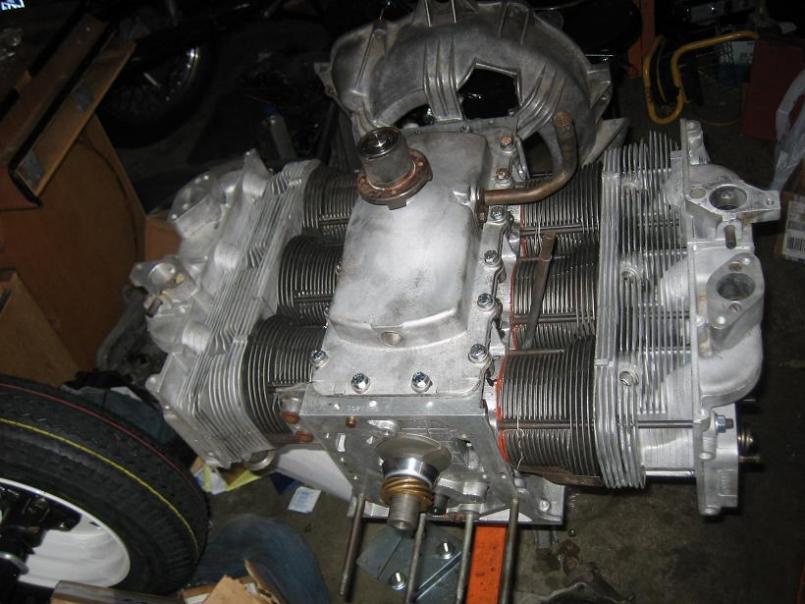
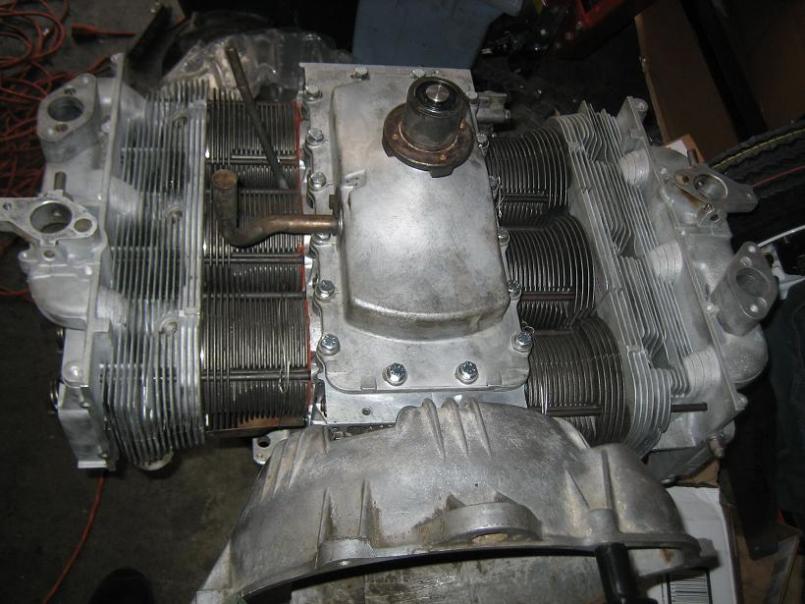
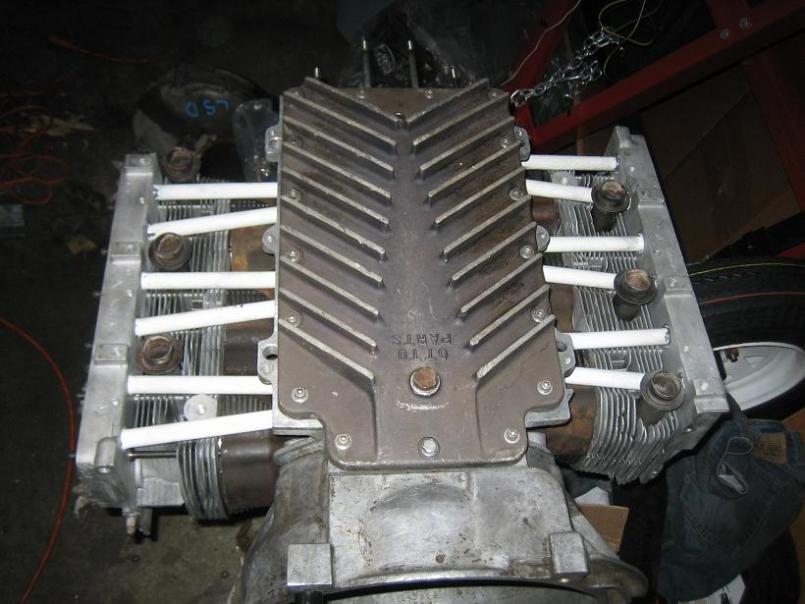
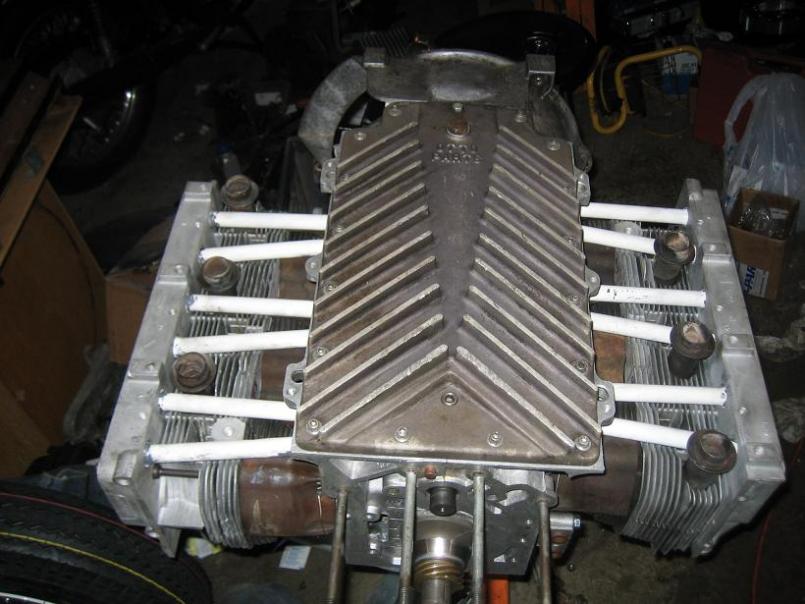
Posted by: sixnotfour Mar 18 2009, 05:52 PM
The inside off the OTTO pans are pretty slick.
too bad you diidnt take a pic.
sorta makes me miss the corvair days, 150 dollar cars
Posted by: Dr Evil Mar 18 2009, 06:48 PM
Inside the pan was all cup and nipples
Posted by: type11969 Mar 18 2009, 06:52 PM
That thing is rad!
Posted by: Dr Evil Mar 26 2009, 04:05 PM
Changed plans today when I found I could pick up a set of vanagon seats for $50. This also means I need to have the swivel changed from the stocker one that is in there, and I need to go cut out the seat rails from the vanagon for the drivers side and have them welded in. Looks like Zach is going to be busy
I tripped down to Corvair Ranch to get the last little parts for the engine today. The engine should be ready to run....now I need to get the bus ready.
pics to come
Posted by: Vacca Rabite Mar 26 2009, 04:17 PM
I am going to be swamped Friday and Saturday. Sunday may be free, or not depending on what Erin has planned. Lets get the battery tray cut out and welded in before we worry about seat mounts. I want to hear that corvair engine run.
Zach
Posted by: Dr Evil Mar 26 2009, 04:20 PM
I am going to be swamped Friday and Saturday. Sunday may be free, or not depending on what Erin has planned. Lets get the battery tray cut out and welded in before we worry about seat mounts. I want to hear that corvair engine run.
Zach
I need to get the engine too you first. I would like to get this wrapped up by next weekend before I am doing internal medicine again.
I rebuilt the calipers and front hubs, the gas tank is almost painted and I swung by your house today to get some more parts and drop off the battery tray (its int he bus). I should have the bumper mounts, front under shield, and gas tank cover repainted by this weekend.
Posted by: Vacca Rabite Mar 26 2009, 04:49 PM
Bah.
Slap the engine on my testing stand. We can go to town.
Run it from my remote starter/tac board. It will be awesome. Glorious. Come on, you KNOW you want to validate all the work you have been doing this past 2 weeks.
And more fun the getting rust in my eyes from chopping out yer rusty ass battery tray.
Zach
Posted by: Dr Evil Mar 26 2009, 05:02 PM
I just need to figure out how to get it to your house. I wont have time to get the trailer registered this week. Maybe next week. Engine start on the test stand is what I am hoping for I may need a hand getting it off of my stand as well, maybe someone local I know can help with the lifting.
Posted by: Vacca Rabite Mar 26 2009, 05:19 PM
Trailer not needed. Make some runners out of 2x4s and throw it in the back of the lesbomobile, er, forrester. That is how I was able to move my engine around.
Zach
Posted by: Vacca Rabite Mar 26 2009, 05:25 PM
Not that I don't want you to get the trailer up and on the road. I'll need it to get my monster truck tires to and from the shop that will mount them on the split ring wheels.
Zach
Posted by: Dr Evil Mar 26 2009, 05:48 PM
I'll go buy the 4x8 sheet for it tomorrow maybe. I have the big ass transmission to bring down, the seats and the engine.
Posted by: type11969 Mar 26 2009, 06:24 PM
Mike
I know you are on the samba but have you read about the vanagon seat swap? I think it puts taller guys up too high. I guess just don't ditch the stock stuff. 50 for those seats is a deal
Posted by: Dr Evil Mar 26 2009, 06:44 PM
I did read the samba stuff and IIRC the later vanagon seats arent as bad. However, I am not above chopping the seat frame I am gonna see about recovering the seats. I dont have the stock seats so no real loss. I was going to do the 914 seat thing.
I just got back from Lowes with the 4x8 sheet
Posted by: type11969 Mar 26 2009, 07:04 PM
Ahh, I see, game on
Posted by: Dr Evil Mar 26 2009, 09:31 PM
 Mmmm, engine pics
All I have left to do on the engine is modify the oil cooler mount and install the dizzy. The install the cooling tin and fire it up.
Attached thumbnail(s)
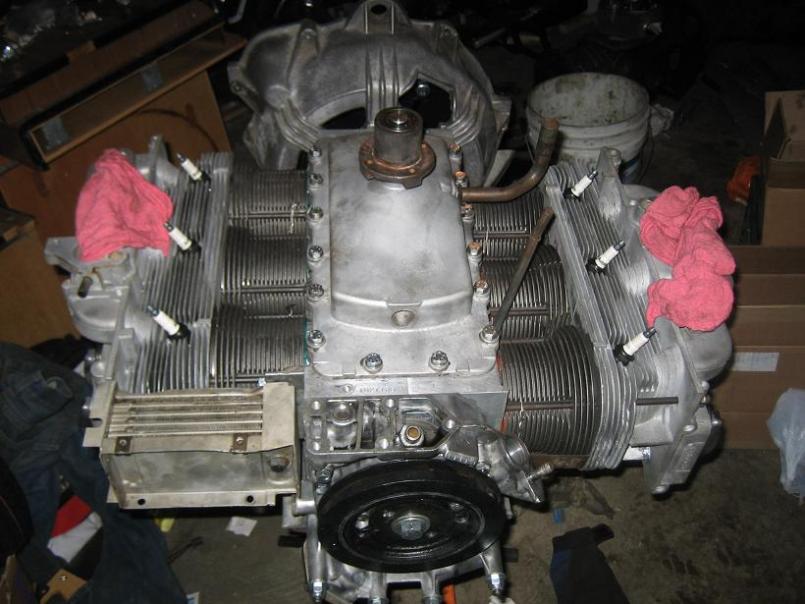
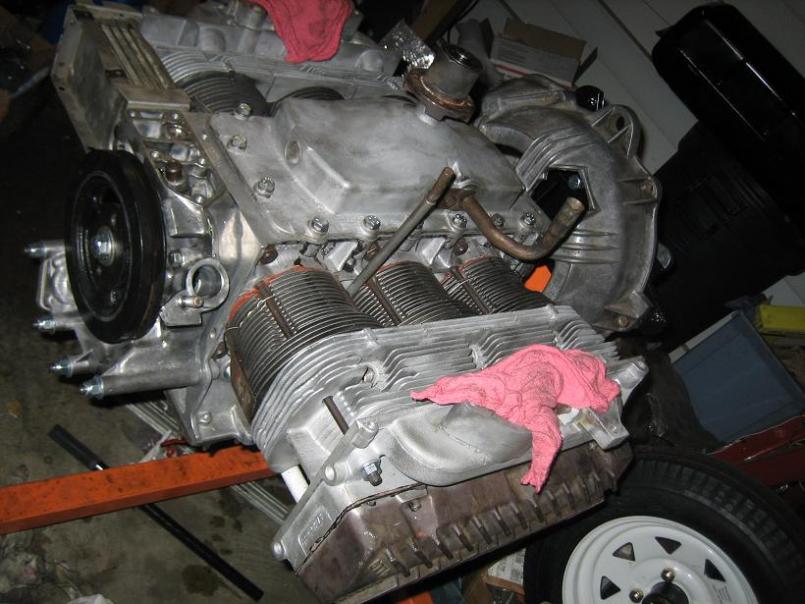

Posted by: So.Cal.914 Mar 26 2009, 10:07 PM
Pretty Cool Mike.
Posted by: Vacca Rabite Mar 27 2009, 07:40 AM
I am going to *TRY* and get over to Harbor Freight today and get a bag of aluminum oxide for my siphon blaster. That should let us know right quick where the rust ends and good metal starts in your battery tray. Can't weld to rust, after all.
Zach
Posted by: Dr Evil Mar 28 2009, 09:32 AM
I found a good source for new retractable seat belts here:
www.autoloc.com
$60 ea, best price in town and they come in a variety of colors They also sell a freight train horn
The belts showed up today
Posted by: Vacca Rabite Mar 28 2009, 12:36 PM
I bought a 45 pound container of 70 grit aluminum oxide and a tarp to put under the bus so I can recycle it. But it is too wet to blast right now, and likely tomorrow as well.
I think that Erin is going to have me on baby duty in the afternoon, but I may be free in the morning.
Zach
Posted by: Dr Evil Mar 29 2009, 09:23 AM
Hey Zach,
I am getting fitted for a tux today at noon and will try to stop by after. No promises so no busting your ass on my behalf.
Re: the tray, maybe we can just cut back to the no rusted metal as we had planned, and if enough is left we can rivet the new tray in place and seal it. This has been done many times by other bus owners on the Samba, and was received well. I am just trying to preserve the paint...but Scotty said he could fix it.
Posted by: Vacca Rabite Mar 29 2009, 09:44 AM
I'm not sure of how the new tray fits in. There is a LOT of rusty metal in there. Even if we cut out the bad stuff, there will still be grinding or blasting that needs to be done before we bolt of weld the new tray in. Otherwise, we will be putting good metal over bad.
I'm on baby duty for a while today, so I may or may not be free if you come over. No promises on my part either.
Zach
Posted by: Dr Evil Apr 3 2009, 09:29 AM
Yesterday I installed the front calipers I rebuilt with the Pagid pads, installed the hubs with new bearings and seals, new front brake lines, and new front shox.
I sent out the skins of my vanagon seats to my Mom today. She said she would get them done fast for me. I will have pics when they are done.
Things that must be done before it gets on the road:
- I need to get the new front seal from Scotty so I can install the new windshield.
- Welding in tranny mount
- Welding in battery tray
- Welding in seat brackets
The engine is essentially finished, I need to get it down to Zachs, but there are soo many hoops to jump through to get my trailer registered.
Posted by: Dr Evil Apr 11 2009, 06:06 PM
Today was a great day, and not just because I wasnt working in the damn hospital I scored a set of slider center windows for my bus, normally $75-120ea for $30 a set and they were within driving distance. Since I had to go towards MD I figured I would drop off some things at Zach's house....like my engine I put it in the back of my VUE by myself and took it out by myself....and now my back hurts Getting it out was easier than putting it in the car.
So the list of critical things that must be done before I can drive it are:
- Weld up intake manifolds (Zach)
- Remove old seat tracks and mounts in front and weld in the new ones (Zach)
- Brakes (Me)
- Axles and CVs (Me)
- Tranny mount welded in (Zach)
- Battery tray welded in (Zach)
- Cooling tin for the engine designed and welded up (Zach and I)
- Reinstall the dash stuff with the shifter (Me)
That should about do it, plus some little things here and there. I wonder if Zach realizes what I got him into 
Posted by: Vacca Rabite Apr 11 2009, 08:38 PM
The engine looks awesome. I was implressed that you got it into the garage alone.
Zach
Posted by: Dr Evil Apr 11 2009, 08:46 PM
Noel TRIED to help. She is pretty, but not stout. She basically screamed, "Oh my God!" every time she thought I would hit your car with it
Posted by: Dr Evil Apr 11 2009, 09:01 PM
Dang, I forgot to post a pic of the semi finished engine
Attached thumbnail(s)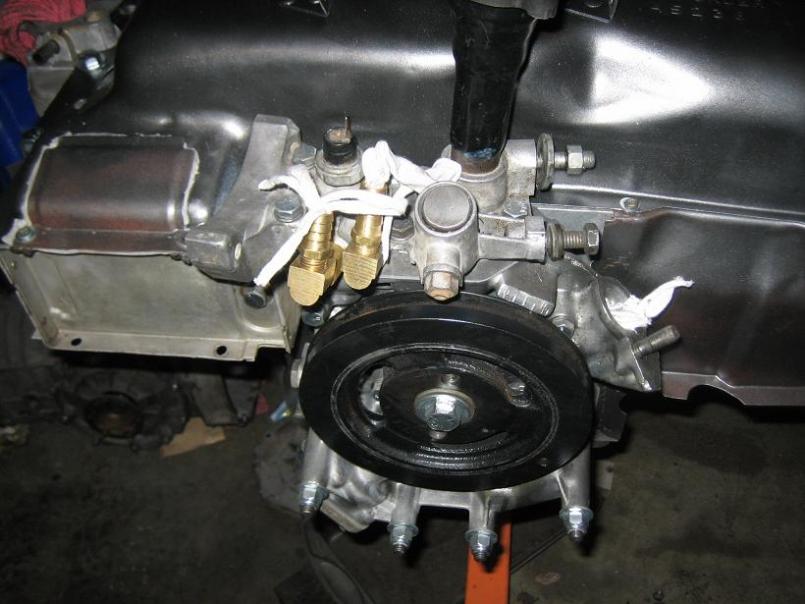
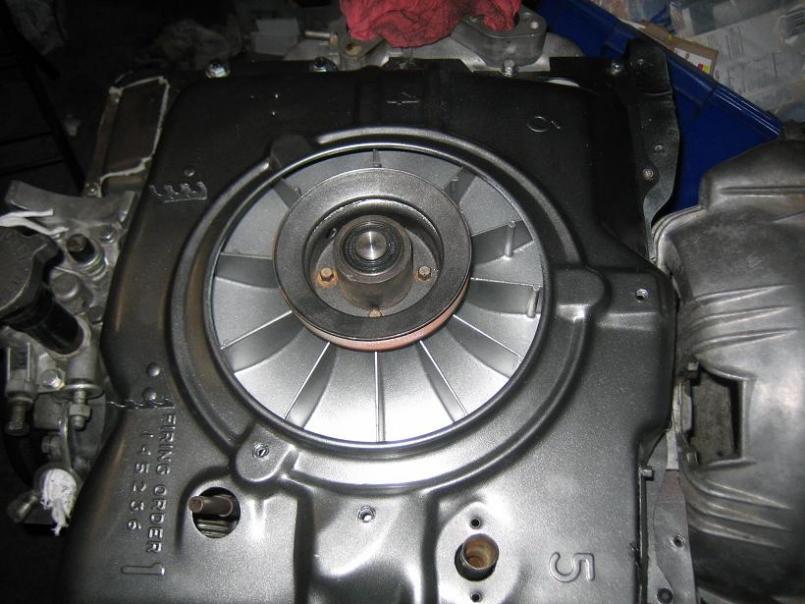
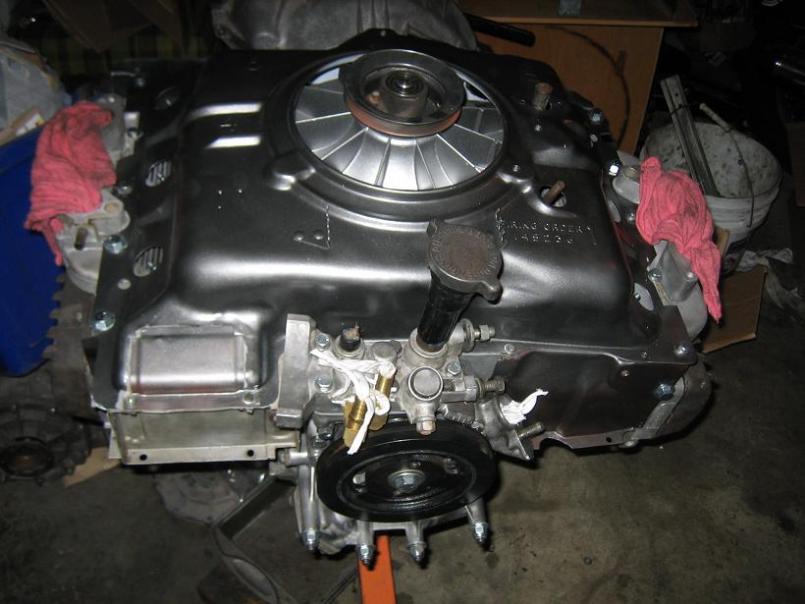
Posted by: charliew Apr 11 2009, 09:47 PM
It would be easier to recognize if it had a spare tire over it.
Posted by: Dr Evil Apr 23 2009, 06:16 PM
Last time I was over at Zach's I had a chance to take pics of my goof up with the bus. Enjoy
Attached thumbnail(s)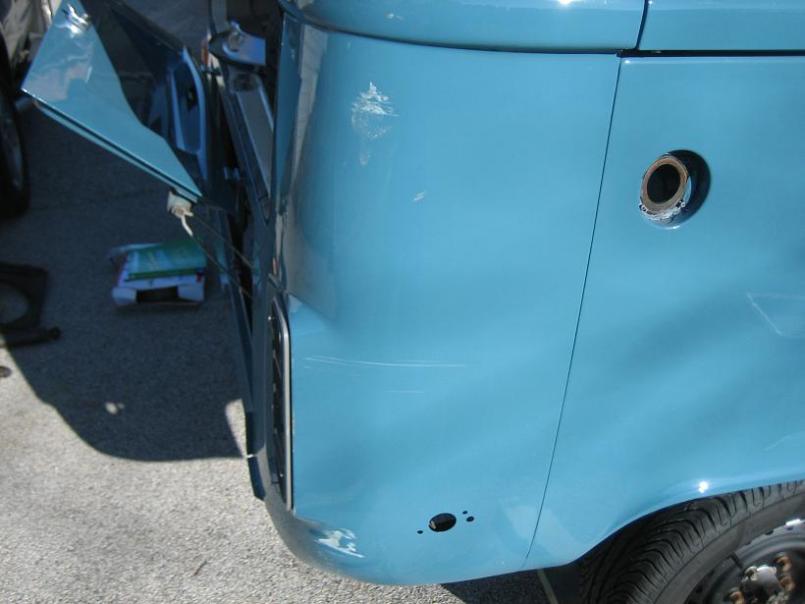
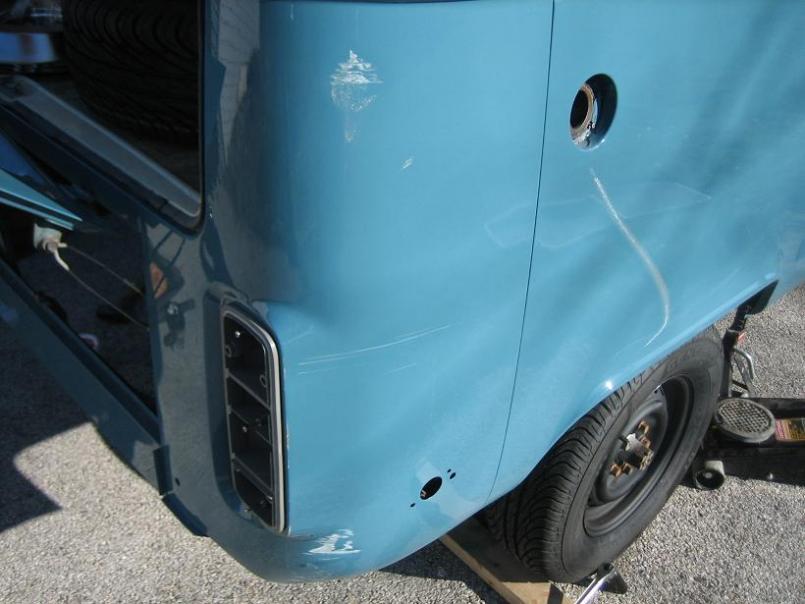

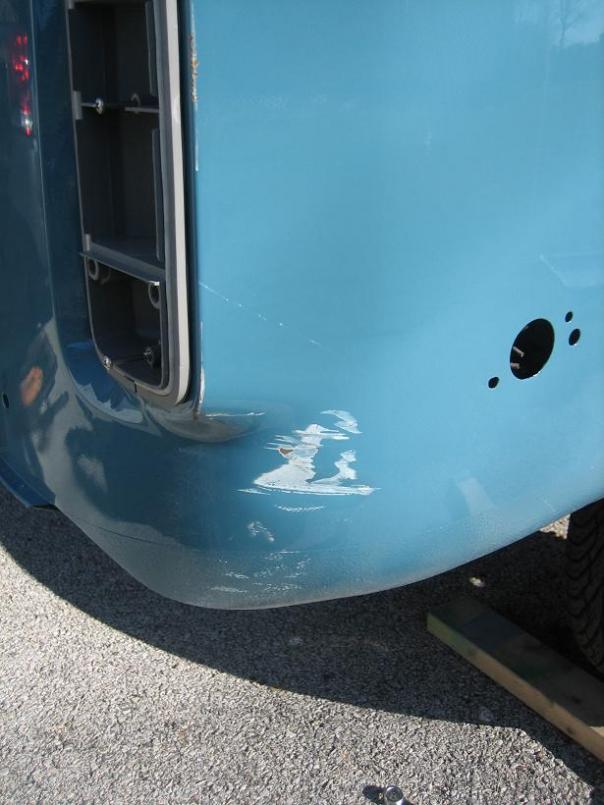

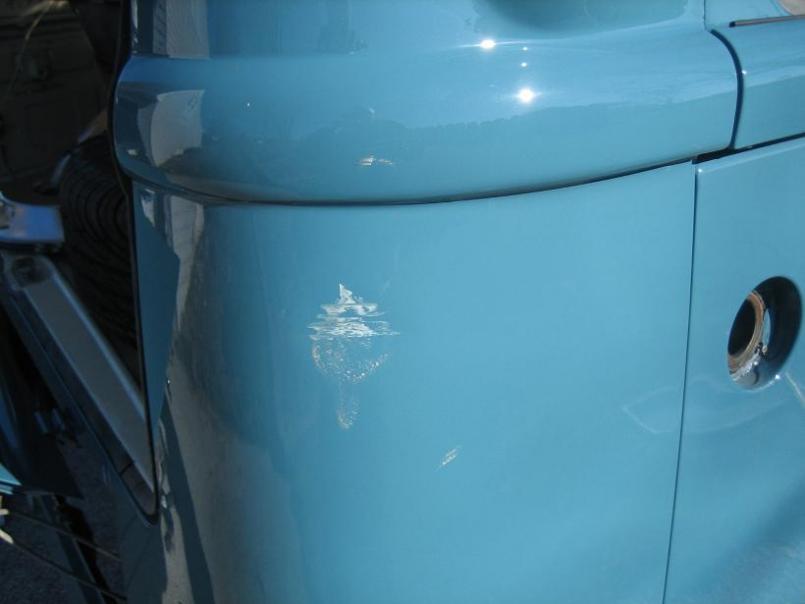
Posted by: Dr Evil Apr 23 2009, 06:19 PM
Here is me eyeballing the seat rails I will be installing.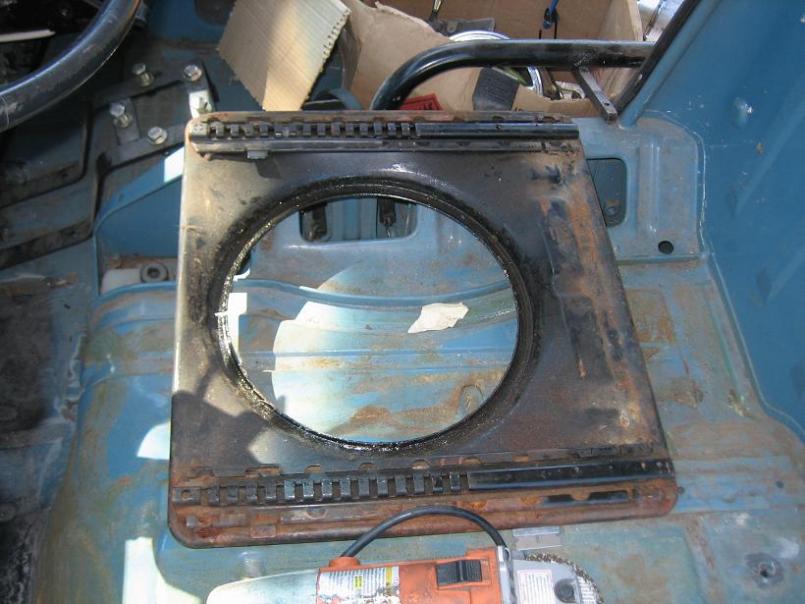
Here are the slider windows, which are hard to find, and tend to go for about $175-200 a pair, that I scored for $30
Attached thumbnail(s)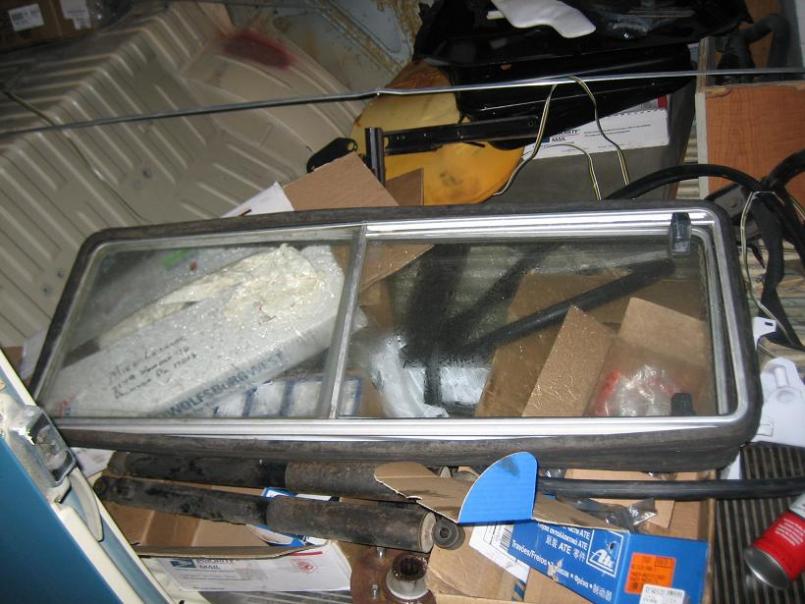
Posted by: Dr Evil Apr 23 2009, 06:21 PM
After grinding for a while, my Harbor Freight grinder finally gave up the ghost I got another < $20
Attached thumbnail(s)
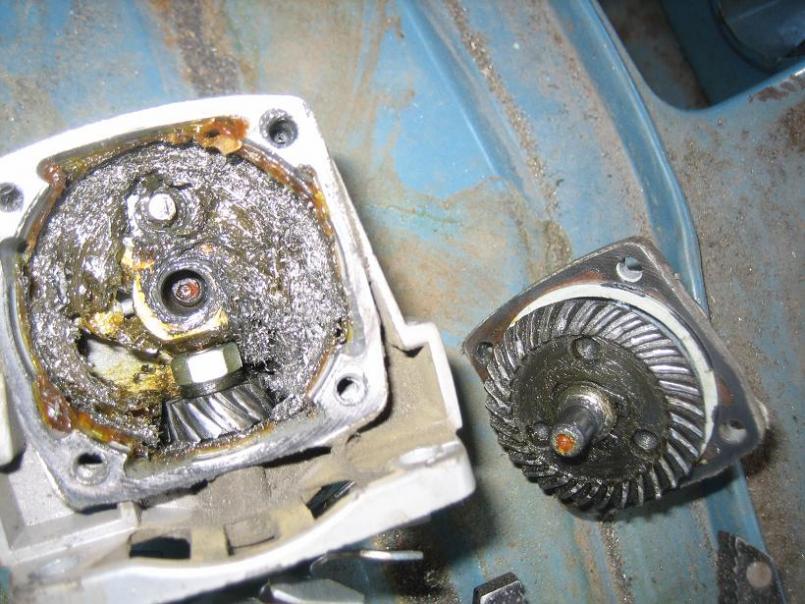
Posted by: Randal Apr 24 2009, 03:20 PM
After grinding for a while, my Harbor Freight grinder finally gave up the ghost
I got another < $20 How many hours did you get with that puppy?
Sorry to see the pictures of the goof up, but don't feel alone. I essentially did the same thing with my car, but instead of a garage door I had my old GMC (read built like a tank) in the street - my run away car, accelerating down the trailer ramp, hit (the truck) right in the middle of the 914's left rear tail light.
No amount of foot braking worked.
I was sure I had that car in gear.
Posted by: Dr Evil Apr 25 2009, 04:40 AM
Not sure how many hours, but I have about 7 years of hard work on it Not bad as I originally paid $10 from HF on sale.
Posted by: seanery Apr 27 2009, 03:22 PM
Nice thread!
Posted by: roundboy914 Jun 1 2009, 09:02 PM
This is for some strange reason, my favorite thread, and the lack of updates is killin' me. I love these buses, and i need to see updates on this, or i am going to end up with one of my own!
Posted by: Bleyseng Jun 1 2009, 11:02 PM
This is for some strange reason, my favorite thread, and the lack of updates is killin' me. I love these buses, and i need to see updates on this, or i am going to end up with one of my own!
Yeah Matt, buses suck up money as fast as a 914 plus you can use leftover 914 engine parts in the bus.
Posted by: type11969 Jun 2 2009, 06:35 AM
You forgot about time. They suck up just as much time too!
Thread hijack, Bleyseng, did you backdate your exhaust with that camper special? Mine should be gonig in sometime soon, still running the stock setup, just curious what others have done.
-Chris
Posted by: Dr Evil Jun 2 2009, 07:22 AM
The lack of update is killing me too, but I have one week of actual work left in school until I am off for the year (so to speak).
The latest:
- I got some center side slider windows for $30 (friggen steal!) that are in great shape, including the seals. I have attempted to tint them myself (cost $40) and am satisfied with the results (not perfect).
- Zach adjusted and welded up the manifold for the 4bbl to my engine. It needs to be ground down, leak checked and painted still.
- I have almost finished replacing the rear bearings, brake backing plates, brakes and drums, but on the pass side the outer bearing wont go in and on the drive side I need to cut the old backing plate off where the parking brake goes in (rusted together).
- I gave up on finding a better set of bumpers so I started to straighten mine with my primitive tools and lack of skills. The front looks pretty good. I filled the small irregularities with quick steel and will finish it with either JB weld or bondo finishing filler.
- The steering assembly is almost all out as I needed (wanted) to replace the coupler for the box. The box has way too much play in it as I can easily turn it about 90* with my two fingers at the box before getting any resistance. I found a spare a while ago in anticipation of this for cheap and am going to see about changing it vs adjusting it.
- I have started to sand the engine bay and fuel tank bay but quickly decided I need to power wash the whole thing to find where the paint is and where the rust is. I will do this when I am done with the bearings so I can protect the bores/bearings that are not fully sealed.
I think that is it.
This weekend I would like to install the master cylinder since I go the new brake line grommets in the mail for the inter reservoir hose. Then, I will finish the brakes so it can be moved around a bit easier. I have the new seals for the side windows so I will swap those to keep the rain out as the louvered ones are crappy on my bus. I will be selling the new louvered window seals, though.
Posted by: type11969 Jun 2 2009, 08:36 AM
Mike-
I had good luck with adjusting the box, whatever you do (and you may have read this already), don't buy one of the new boxes available. Allegedly they arrive with just about as much slop as worn out german boxes. You had to pull the whole assembly to get to the coupler? That sucks. I guess they changed it between 74 and 76.
Oh yeah, check the splines with your rear wheels apart. Someone didn't torque my axle nuts at some point and the splines were nicely worn. No amount of torquing on the axle nut would keep that joint tight.
-Chris
Posted by: Vacca Rabite Jun 2 2009, 11:03 AM
Your wheel bearing is still in the freezer. bring it out in a small cooler with ice packs and I bet you will be able to get it in. You know where the hidden house key is, right?
Heat up the place it fits in with my MAPP torch first.
Zach
Posted by: Dr Evil Jun 2 2009, 12:15 PM
I may just be able to remove the bearing housing section of the lower arm and do it on the bench. I thought not, but think I may have thought wrongly. Ya know?
Chris,
I already have a good used steering house that I picked up for $30. It is it is tight, but I will attempt an adjust on my current one. I did read about the TRW ones and they seem to be poo or a gamble at best.
The steering collumn was not hard to remove for the most part, but the nest of frayed and loose wires makes me think I will be doing some rewiring after I install the steering gear.
really, it is all about the engine. If that runs and the tranny works then all will be gravy. If not, then suck is the word.
Zach, ya'll gonna be around this weekend? Noel wants to come down as well.
Slowly but surely.
Posted by: Vacca Rabite Jun 2 2009, 12:37 PM
Erin and I are going to go biking on Saturday morning. Aside from that, we should be around. Might want to have Noel contact Erin though, so that the girls know each other's plans.
Zach
Posted by: Dr Evil Jun 6 2009, 11:26 PM
A great and productive day at Casa Rabite today.
- Installed the damn outer rear bearing, and inner bearing with seals. All assembled and happy for now
- All the rear brakes are on
- Pressure washed the engine bay in expectation for prep and paint
- Adjusted steering box and it is much better now
- Half way installed new steering coupler bushing (I need two more nuts...that sounds bad)
- Cleaned out the upper brake reservoir and will be installing the master cylinder tomorrow.
- Engine is on the furniture dolly now and will be mated to the tranny soon for anticipation of run up. There will be pics of this, dont worry
Today, the bus was cleaned and ended up on its own 4 wheels. Finally, making some progress.
Posted by: Vacca Rabite Jun 7 2009, 10:15 AM
I'll be around again today after all. Stayed up late watching a movie, so biking did not happen. Sleep was more important.
I just have to cut the grass, and then my afternoon is free.
Zach
Posted by: type11969 Jun 7 2009, 11:24 AM
Pics?
Posted by: Vacca Rabite Jun 7 2009, 01:22 PM
Pics?
I'll try and take some and post them. I ended up being swamped today. about to head out the door to help my FIL move stuff out of his basement.
Zach
Posted by: roundboy914 Jul 3 2009, 11:07 AM
all the way down on page 12??? WTF - i am in need of an update - this project is the best!
Posted by: Dr Evil Jul 3 2009, 11:44 AM
Next week will be the offensive with pics. I would like to get the engine running on the engine stand and get the bus ready to stab the engine
Posted by: roundboy914 Jul 6 2009, 10:17 PM
coolio - much appreciated.
Posted by: ghuff Jul 6 2009, 10:42 PM
It is not a air cooled bus build thread without pictures of the crumbling and dusty or moldy bag of pot you find.
Occasionally you can substitute pot for old blotter lsd.
"Why is this picture of the grateful dead cut up into tiny squares............. shit I have been holding this in my bare hands for the past 15 minutes absorbing it..."
Posted by: Dr Evil Jul 6 2009, 10:49 PM
Na, it was stripped. Any contraband would have been confiscated by Scotty B
Today I took a few hours to install the gas tank and to cut out the battery tray. I need to take the camera with me tomorrow as this took time and is boring as hell to read about without pics
I need to go do some work in the garage still. My time-sert kit showed up
Posted by: Vacca Rabite Jul 10 2009, 06:49 PM
Some pics from work completed today.
Work is still being completed, as Mike is out there still...
Evil loves his bus. REALLY loves his bus.
Zach's used car lot...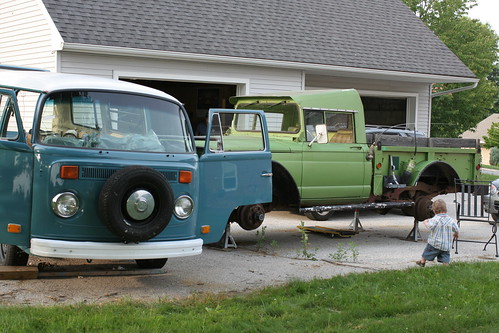
Theo and the EvilBus.
(this is my new computer background too. )
Zach
Posted by: Dr Evil Jul 13 2009, 08:21 PM
Yesterday, I attempted to install my flex plate onto my crank with the 6 special bolts I bought only to find out that one of the bolts was the wrong size. On a Sun, I was SOL. So, I decided to try to install my alternator. This required me to get a socket head bolt as there is no room for a socket on the inboard bolt. Of course, Zach doesnt have any standard hex keys that I could use so I gave up and went to Joe's for some food.
Today I tried to rectify the bolt situation and to get a few odds and ends at the corvair junk yard (Corvair ranch). No problem, I got the right bolt, some intake gaskets that I will need, measured a stock dip stick to mark my aftermarket one correctly, and got a few small free pieces. Feeling triumphant, I head over to Zach's to finally assemble my tranz, torque converter and engine together......or so I thought. I get the flex plate on and go to pick up my TC only to see that one of the three special captive nuts was missing (damnit!). Defeated again. So, I will be going out to the yard again tomorrow.....1 hour there, 1 hour to Zach's, 1 hour to home. Good thing I am unemployed.
So, since I had some newly free time I decided to remove Zach's tranz, clutch and flywheel to install the o-ring on the flywheel Zach forgot. Then I installed the flywheel and clutch, then I installed the squirrel cage, fan belt, tensioned it, installed the front tin, transmission, and then installed the whole works in the car. At least his engine and tranz is out of my way now More room for me to attempt working on mine.
With any luck, we will be attempting to install the engine into the bus this Sat. The next hard part I see is the creation of the special engine tin from the corvair engine to the bus.
Posted by: Phoenix 914-6GT Jul 14 2009, 01:19 AM
Nice work Mike. Keep it up. You will get it done in no time and get to enjoy it finally.
Posted by: Vacca Rabite Jul 14 2009, 08:56 AM
So, since I had some newly free time I decided to remove Zach's tranz, clutch and flywheel to install the o-ring on the flywheel Zach forgot. Then I installed the flywheel and clutch, then I installed the squirrel cage, fan belt, tensioned it, installed the front tin, transmission, and then installed the whole works in the car. At least his engine and tranz is out of my way now
More room for me to attempt working on mine. Damn!! I was so tired when I got home from class last night I did not even look.
I took a sick day to day to let allergy meds start working. Yesterday my eyes literally started swelling shut... Guess all the rain last month put my spring allergies off till summer...
With any luck, we will be attempting to install the engine into the bus this Sat. The next hard part I see is the creation of the special engine tin from the corvair engine to the bus.
I see no reason why not. With the engine in, we can make templates from cardboard, and then either make tin from 24 guage steel, or get fancy and have them made from fiberglass. Pick up a nibbler from Harbor Freight, and we will be able to make nice cuts in 24g all day long. I don't have a flanger, but we can make one easy enough if we keep our flanges to 5 or six inches long. Just weld some steel bars to a pair of vice-grips. Easy!
Zach
Posted by: Dr Evil Jul 14 2009, 09:12 AM
I have the stock bus tin we can start with and will be picking up the stock outer tin for the corvair engine today as it looks like a better starting point (all flat).
Posted by: Vacca Rabite Jul 14 2009, 07:38 PM
Tonight we (by we, I mean that I made dinner and solved Evil's engine binding issue while Evil did all the work) got the transmission mated to the engine, got the starter on, the belt on... Sucker is ready to get bolted into the bus!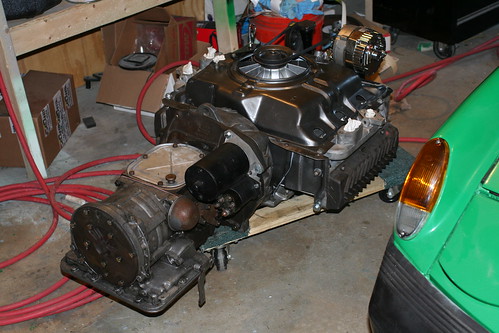
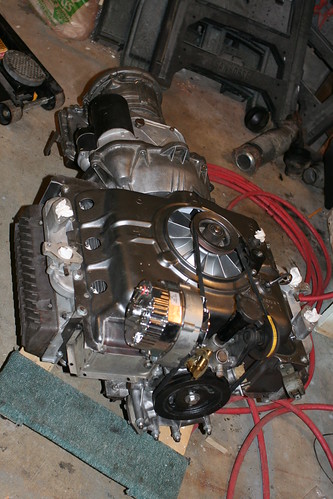
Zach
Posted by: type11969 Jul 14 2009, 08:43 PM
Damn that thing looks rad!
Posted by: zymurgist Jul 15 2009, 06:20 AM
Chrome alternator... nice touch. I don't even have that in the Corvette.
Posted by: Dr Evil Jul 15 2009, 09:51 AM
I could care less that it is chrome, it is a 100A alt vs the stock 30A unit
Posted by: zymurgist Jul 15 2009, 10:20 AM
I was thinking of getting a Powermaster alternator for the Corvette, thinking that my stereo was depleting the battery... but after I had the starter rebuilt, the battery drain problem went away, so I'm still running the generic auto-parts-store alternator in the Shark.
You gotta admit, though, chrome is cool.
Posted by: Dr Evil Jul 15 2009, 12:06 PM
Well, ya. I mean, I dont hate that it is chrome
Posted by: jsayre914 Jul 15 2009, 12:19 PM
I get to drive the bus on Saturday right??
or at least Zachs car
is there anything drivable in that yard???

Posted by: Dr Evil Jul 15 2009, 05:08 PM
Zachs new riding lawn mower
Posted by: turboman808 Jul 15 2009, 05:12 PM
Zach
I really love that fan setup. To bad you couldn't make something like that using a 911 fan alternator setup. Make the engine looks slick as can be. Sure I have seen it done but not sure if anyone makes a kit.
Posted by: rick 918-S Jul 15 2009, 05:26 PM
I like the way you used the old George Forman gilles  . No really I like the valve covers.
Posted by: Vacca Rabite Jul 15 2009, 07:32 PM
I get to drive the bus on Saturday right??
or at least Zachs car
is there anything drivable in that yard???
Maybe my car. We will be running the engine for break in of the new cam, and balancing carbs and setting timing.
When that is done, assuming nothing breaks and we have good oil pressure, we should be able to drive the car.
Or, yeah, we can play with my riding mower.
Zach
Posted by: Spoke Jul 15 2009, 10:16 PM
Corvair engines are cool. I really like the down the middle fan arrangement. The bus will giddy-up and go with a Corvair engine. What induction are you using for the engine?
This one uses triple carbs, I think they are webers. Estimated HP is about 275.
Attached image(s)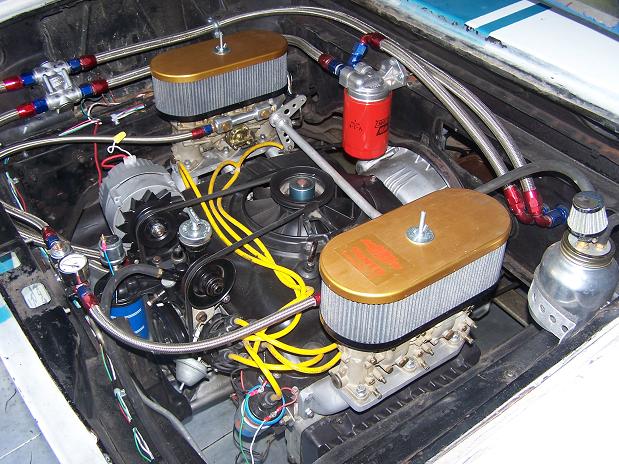


Posted by: Dr Evil Jul 15 2009, 10:28 PM
I am using a Holley 4bbl 390 cfm carb on an adapter with a Holley dial-a-mile electrically adjustable jet system I need to get an O2 meter so I can adjust my jets more precisely on the fly
My engine is 3.1L since I used 2.0L Type I p/c from a VW. It will move the bus and did not cost me an arm and a leg.
Posted by: ThinAir Jul 15 2009, 10:37 PM
--><div class='quotetop'>QUOTE(scotty b @ Apr 9 2008, 06:42 PM) </div><div class='quotemain'><!--quotec-->
End result will be something along these lines
[/quote]
Well I was right there with you - until I saw this. I still wish I had my '69 camper bus that had that same interior. I guess I'm a bit of a purist when it comes to split-window and bay-window busses. Last night I stumbled upon "Pimp My Ride" and saw what they did to a split-window. I just about puked.
Edit - Oops! I'm late the party as usual and didn't look to see how long this project has been going on. I like the paint. Looks real nice. You mentioned a camper top - it's a long way to Arizona, but I've got a free top from a 77 Westy if you want it!
Posted by: Dr Evil Jul 15 2009, 11:16 PM
Thanks, Ernie. I already have a top waiting at Scotty's. As soon as the bus is able to drive to VA on its own, it will be worthy of the extra work needed to put the top on. Scott was smart to stop where he did thus creating that inherent requirement
Posted by: Dr Evil Aug 2 2009, 01:09 AM
Today was very productive I had to modify the front mount a little more to get the drive train more forward so the starter would miss the rear cross bar, and my engineering actually worked! Now the engine in where it will live and is ready for the tin and engine bar to be mocked up after the exhaust is hung.
First is the plate I made to utilize the newer stock front mount on my bus. The mount setup originally had the spacers shown. They turned out to be to big and I had to shorten everything up so the starter would clear the cross bar. Arrows depict the space I shortened.
Engine on approach 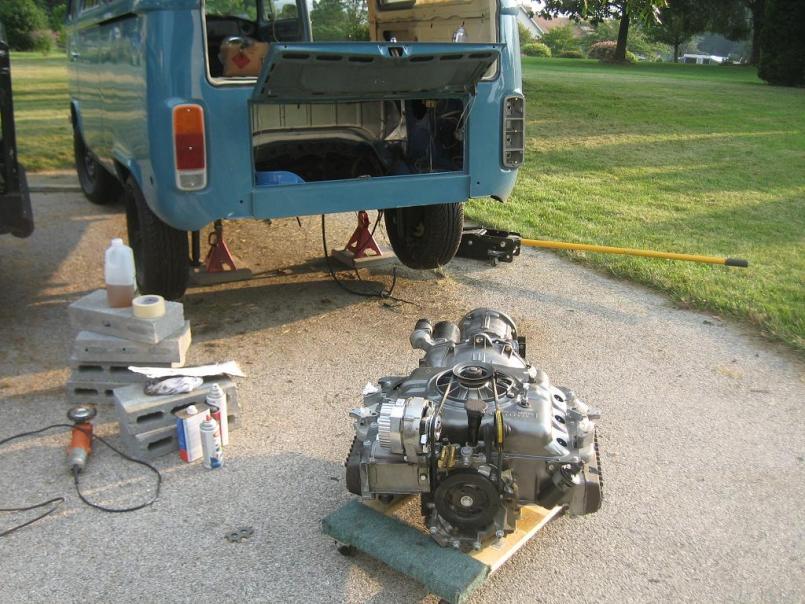
Engine under bus 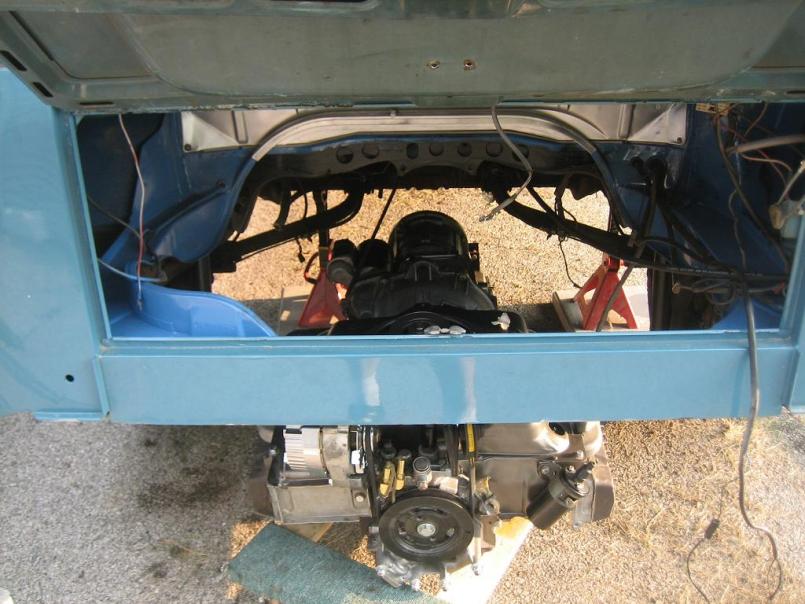
Posted by: Dr Evil Aug 2 2009, 01:13 AM
Under bus 2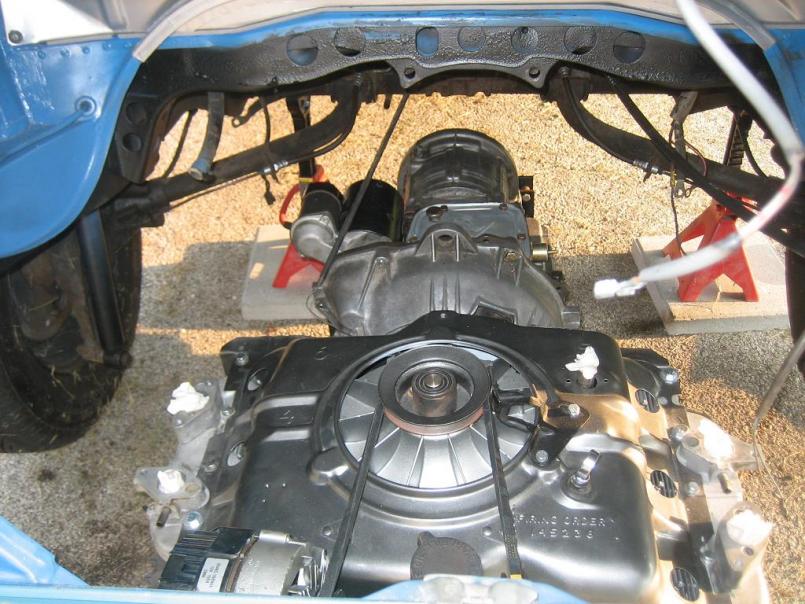
Engine rising using my patent pending cinder block engine elevation system 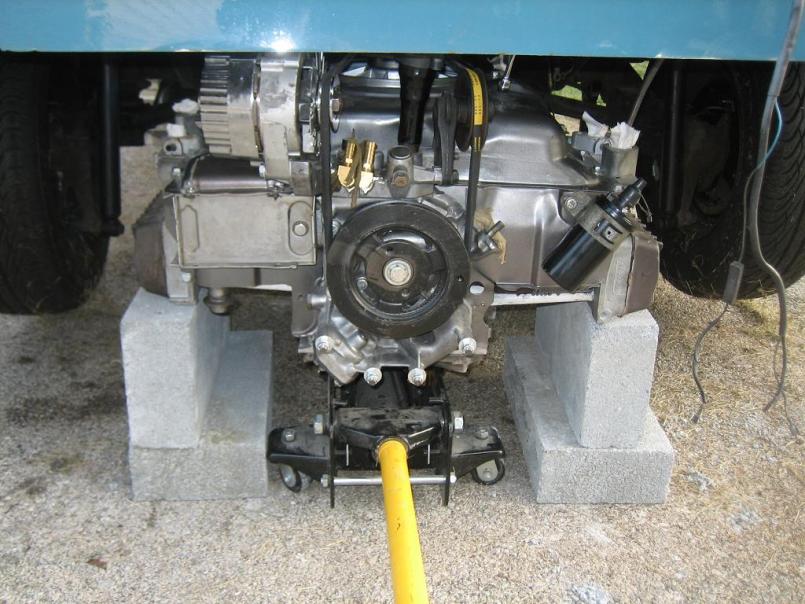
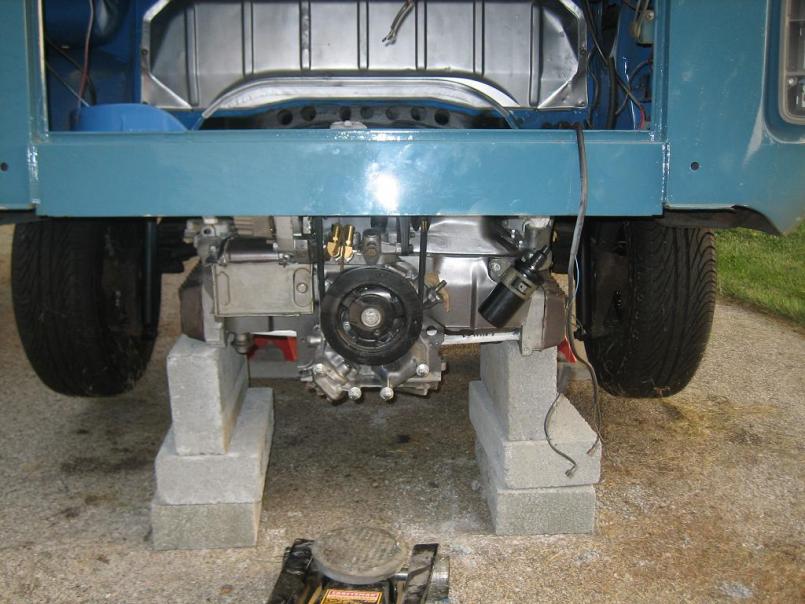
Posted by: Dr Evil Aug 2 2009, 01:21 AM
Here is a pic of the starter clearance issue. You can see the nose cone of the solenoid on the left where it can interfere with the cross bar.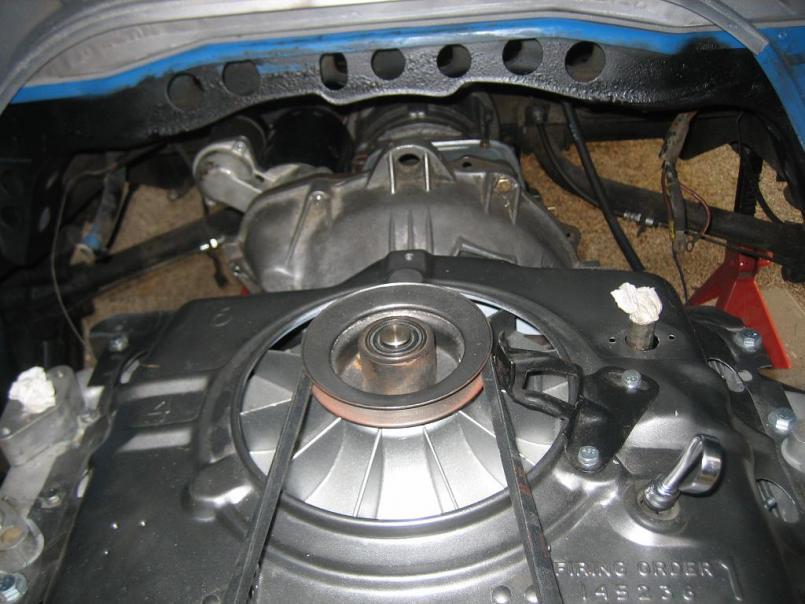
Here is the front mount mounted after I modified it for the last time 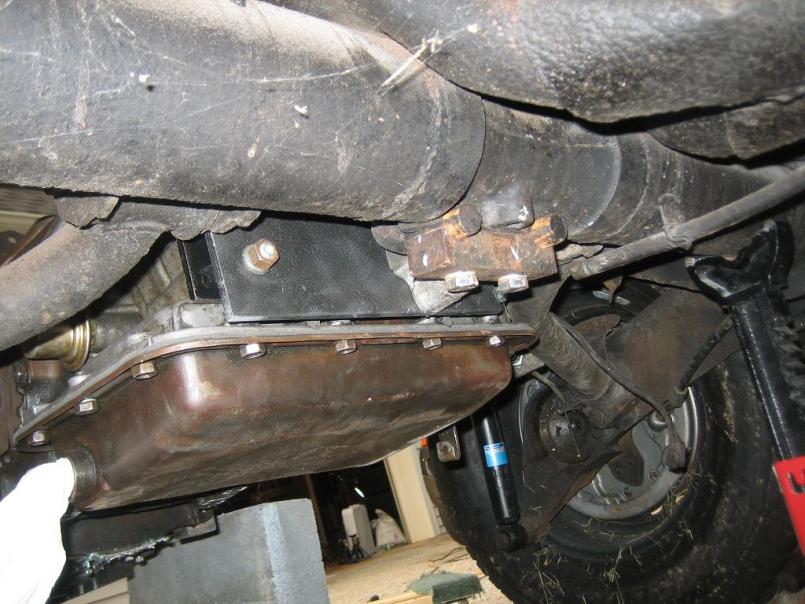
Engine up under driver side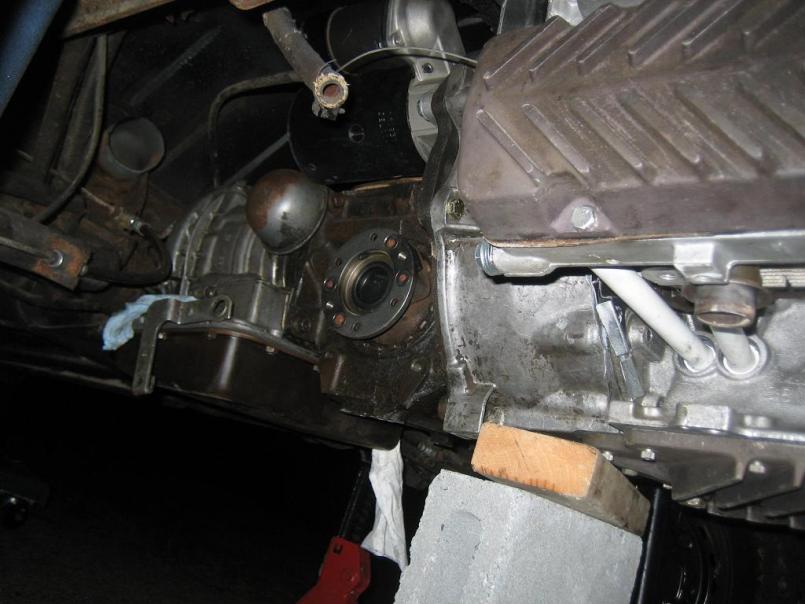
Posted by: Dr Evil Aug 2 2009, 01:25 AM
More under pics 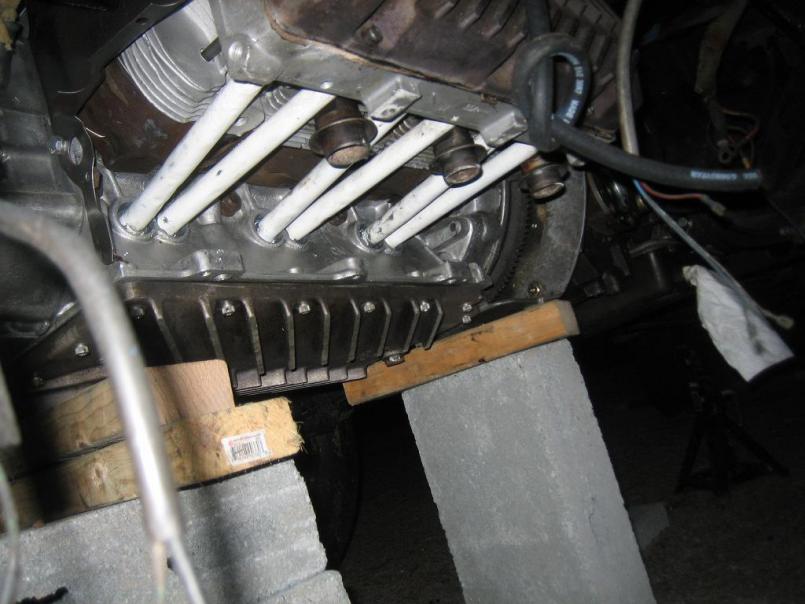
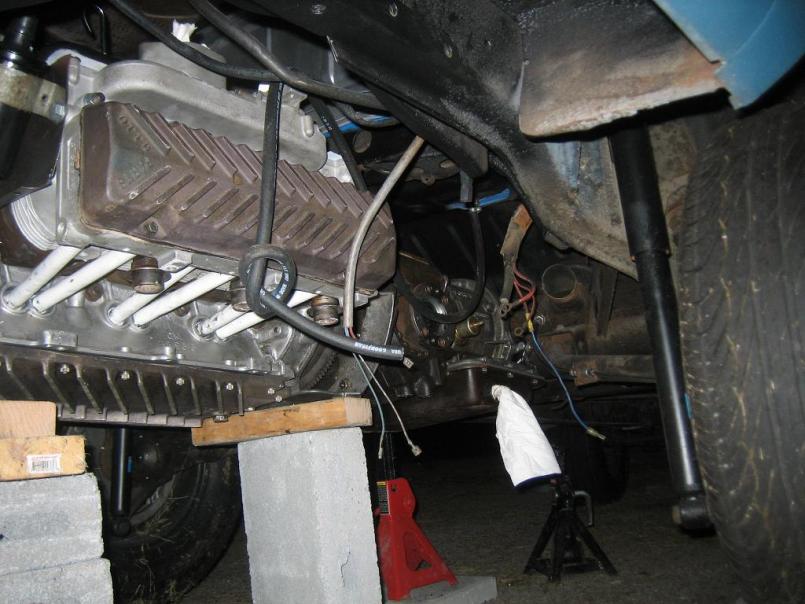
Engine in! Sort of 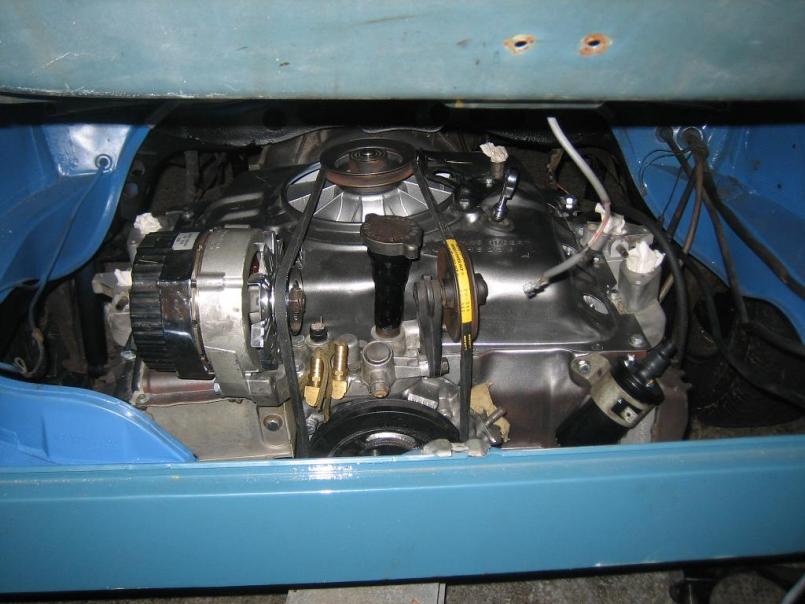
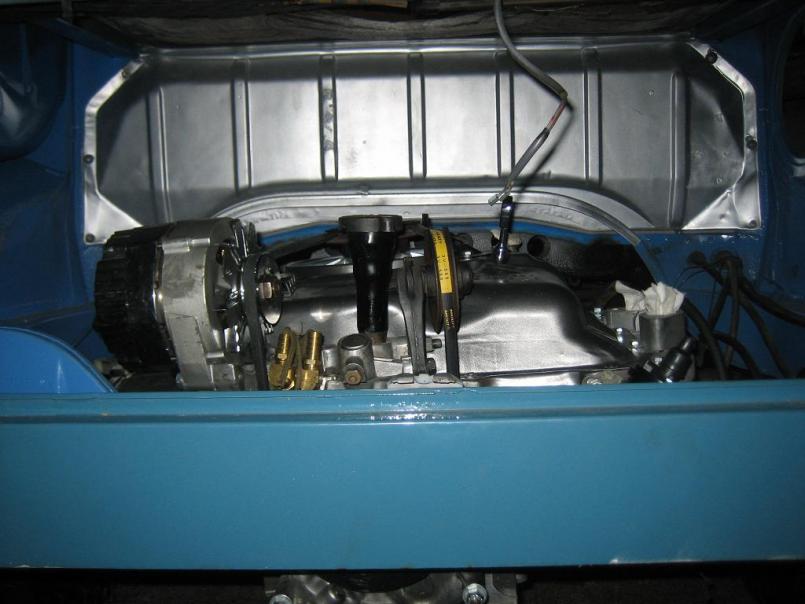
Posted by: Dr Evil Aug 2 2009, 01:28 AM
Ta da! This is where it will stay as it can not go any further up as the bell housing hits the rear frame bar.
Bell housing bar interference.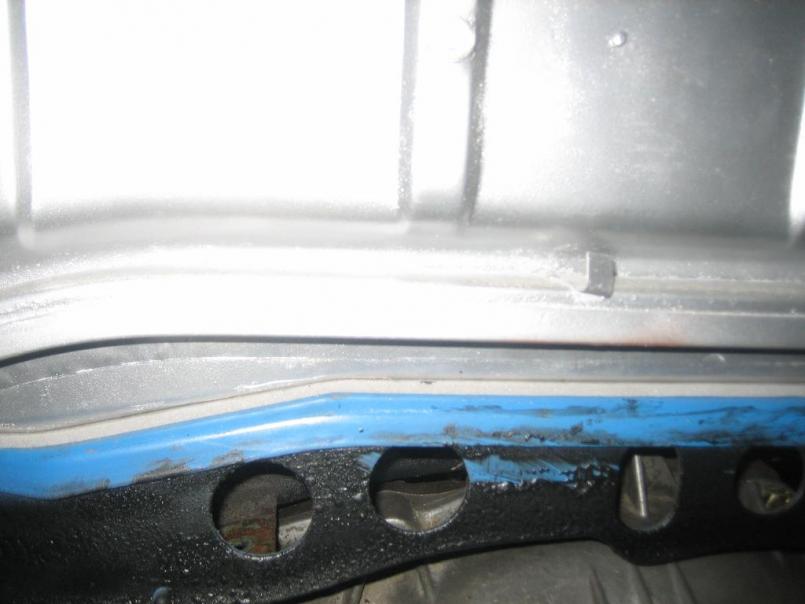
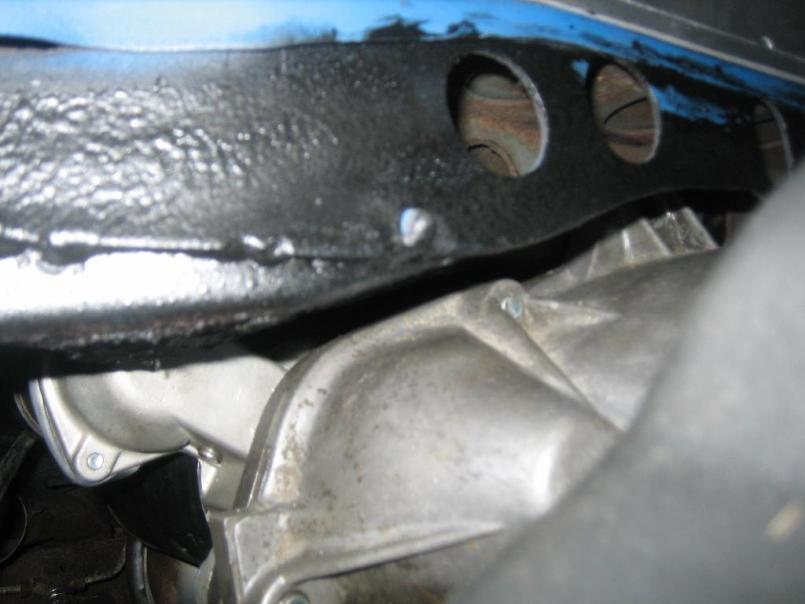
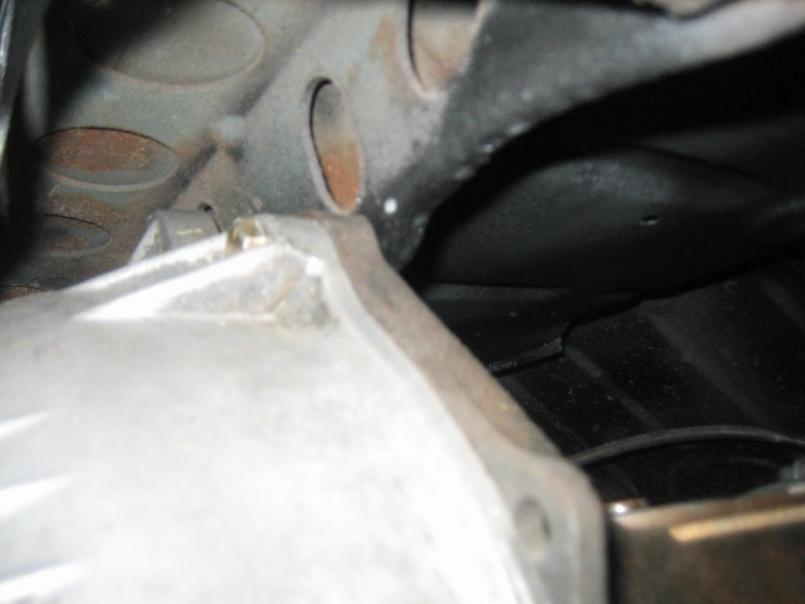
Posted by: Dr Evil Aug 2 2009, 01:30 AM
I may attempt to modify the front mount one more time to place the mount higher on the plate and lower the front so the engine may be able to sit a little higher. I need to compare with the pics I have of other conversions.
Posted by: Dr Evil Aug 2 2009, 01:34 AM
It looks like I can flip the front mount and gain some wiggle room. Tomorrow.
Posted by: Dr Evil Aug 2 2009, 01:36 AM
Engine height looks to be about right, though, compared to this excellent example.
Attached thumbnail(s)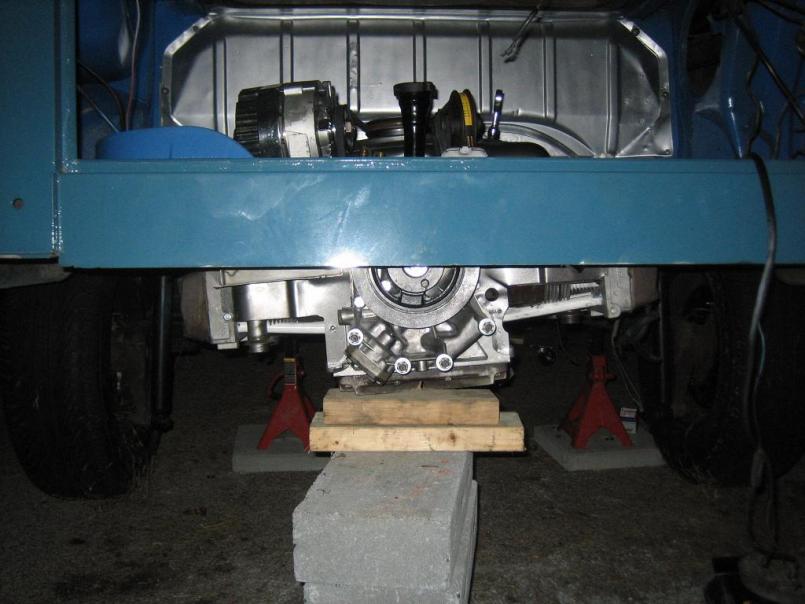
Attached image(s)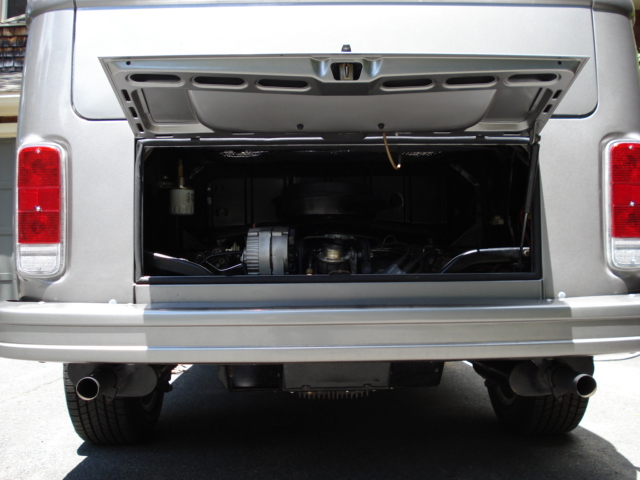
Posted by: scotty b Aug 2 2009, 12:06 PM
SWEEEEEET !! Nice to see this. Soon you and Zaychk will be scooting around Pa in both your rides
Posted by: jsayre914 Aug 2 2009, 12:32 PM
Engine height looks to be about right, though, compared to this excellent example.
I Forsee a problem...
Attached image(s)
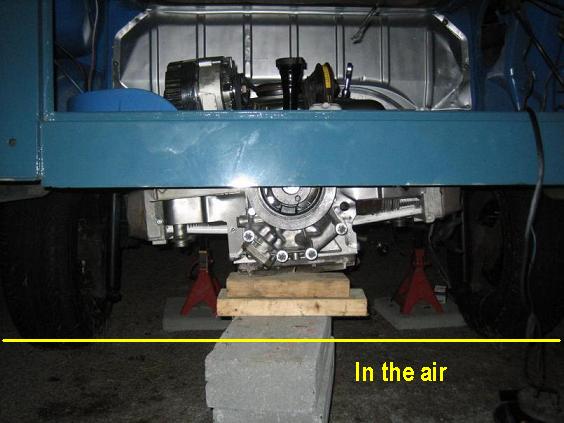
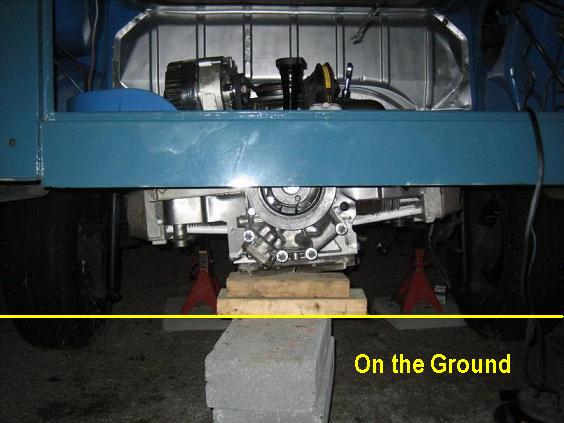
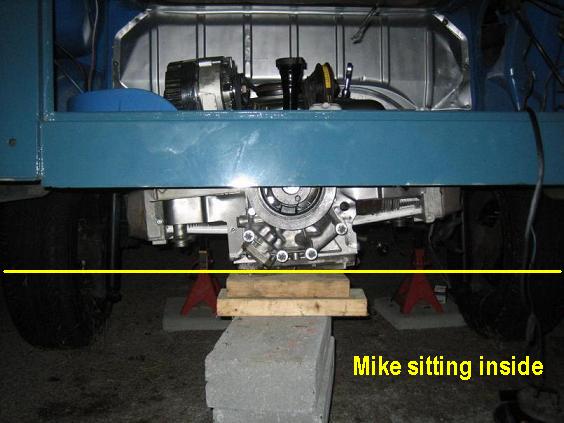
Posted by: Vacca Rabite Aug 2 2009, 12:41 PM
Engine height looks to be about right, though, compared to this excellent example.
I Forsee a problem...
What, you did not actually think we would drive it do you? This is just another installment of my redneck yard art.
Zach
Posted by: Dr Evil Aug 2 2009, 12:49 PM
Reverse entropy does not require that it move under its own power, only that all parts eventually be assembled in one lump
Posted by: Dr Evil Aug 2 2009, 12:50 PM
We can always put rollers under the cinder blocks
Posted by: r_towle Aug 2 2009, 01:13 PM
seems like there must be a better starter motor solution.
Given all the conversions that must have happened back in the day, I bet someone figured out how to clock the starter motor to lean the solenoid down at 7 oclock instead of its current position at 11 oclock.
Rich
Posted by: Dr Evil Aug 2 2009, 01:29 PM
The starter is a non-issue now. The limiting factor is the contact of the bell housing with the cross brace. There are mini starters for the corvair, but they are like $700, which is fricken ridiculous. By lowering the nose of the tranny, I can raise the rear of the engine a little more.
Posted by: Vacca Rabite Aug 2 2009, 02:45 PM
I kinda doubt that it is going to be an issue either way. Its not going to be an off road vehicle. The rear suspension may need to get beefed up a little though.
Zach
Posted by: r_towle Aug 2 2009, 03:11 PM
Do you really need that whole cross member?
Could it be modified and beefed up with thicker steel?
Posted by: Vacca Rabite Aug 2 2009, 04:08 PM
Do you really need that whole cross member?
Could it be modified and beefed up with thicker steel?
This was my thought was well.
Run square tube under the chassis and drop down to weld into the wall. Cut out what does not fit. Bet we could find another inch or so.
Zach
Posted by: Dr Evil Aug 2 2009, 04:23 PM
I'll be by later most likely to mess with it. We will see how much more room I can get and what options are available
Posted by: rick 918-S Aug 2 2009, 08:02 PM
Anyone can build a stock van, it takes a real man to cut one up.
Posted by: Vacca Rabite Aug 2 2009, 08:55 PM
I have been stuck indoors doing homework, but I heard cutting outside. I suppose I should go take a look-see.
Zach
Posted by: rick 918-S Aug 2 2009, 09:14 PM
I have been stuck indoors doing homework, but I heard cutting outside. I suppose I should go take a look-see.
Zach
Bring a camera!
Posted by: Dr Evil Aug 2 2009, 11:36 PM
Yup, I flipped the front mount to lower the front of the drive train, cut the eye off of the bell housing (like I am ever going to use a cherry picker with this), and cut the offending metal after determining it was not a structural part of the bus so much as it was a part for the original tranz to hang from. It worked well See for yourself.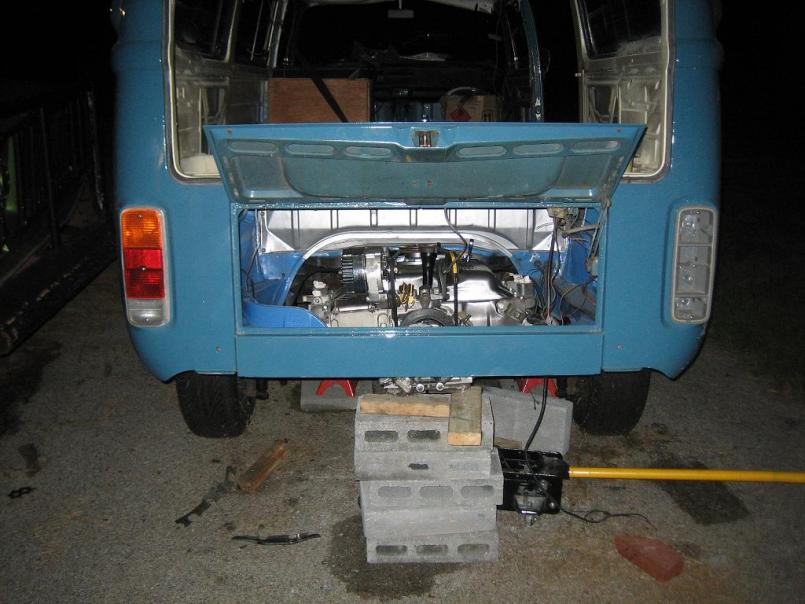
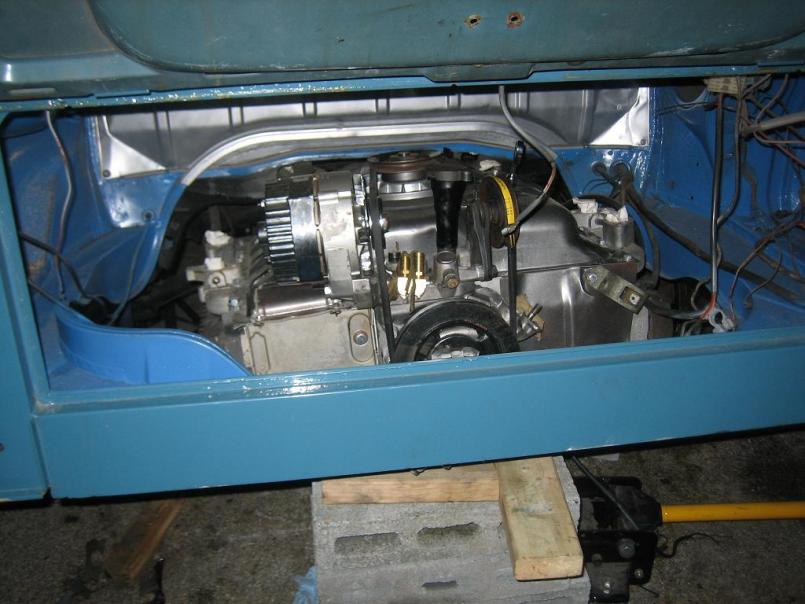
Flipped front mount.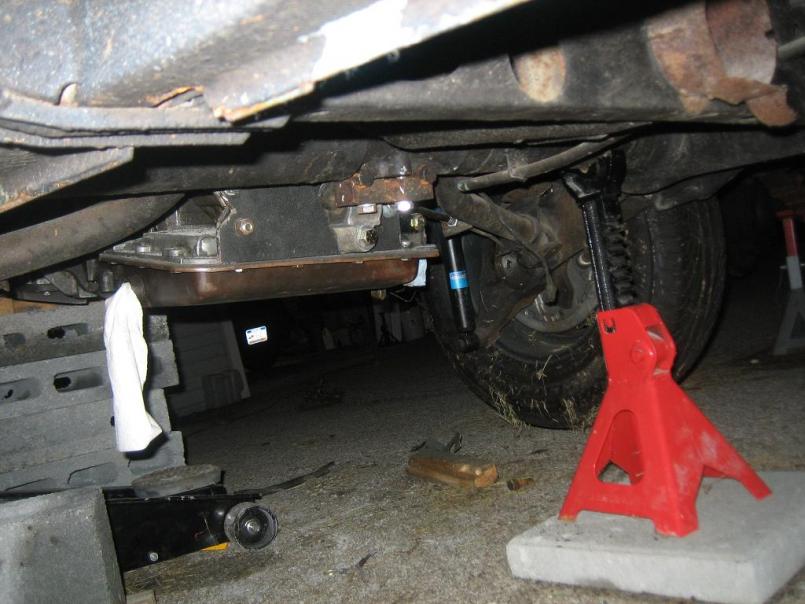
Yellow arrow is where the eye was for the picker, orange is where the offending metal was removed. It was hard to cut (emotionally), but it had to be done.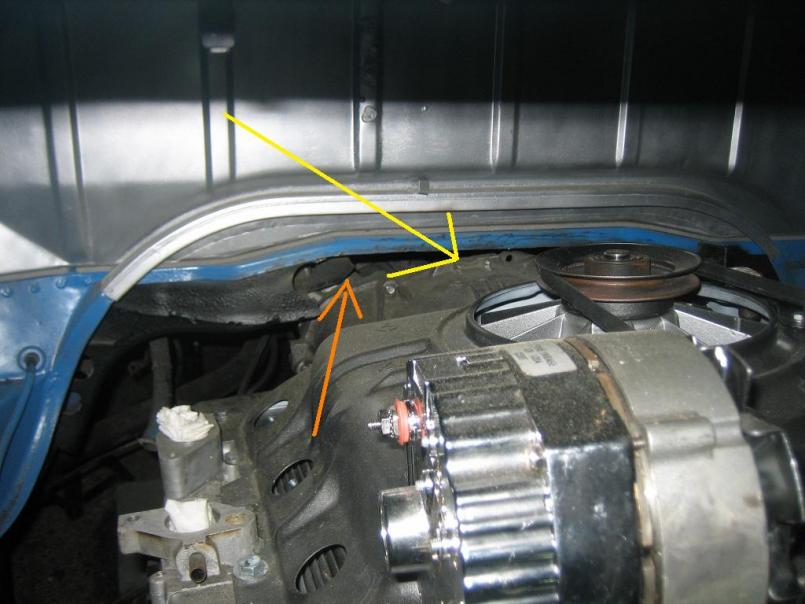
Posted by: Dr Evil Aug 2 2009, 11:38 PM
Here is one of the headers mounted.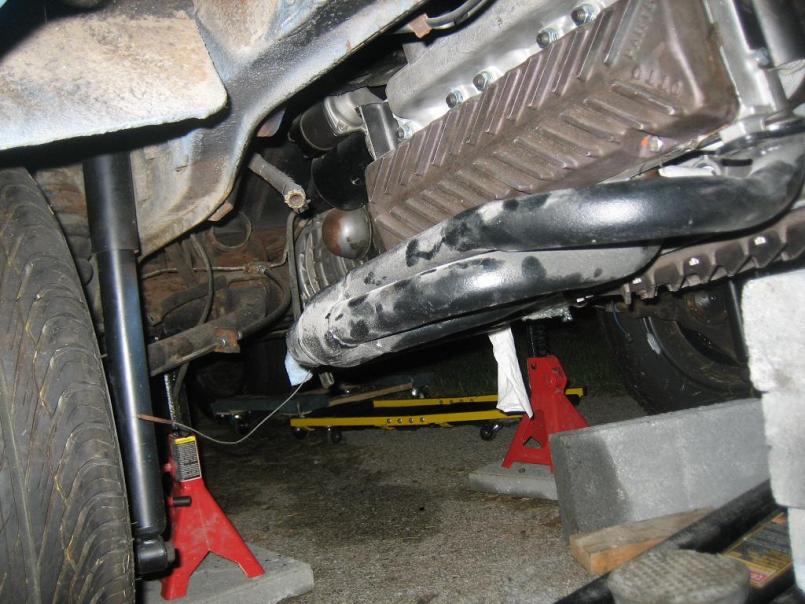
Posted by: zymurgist Aug 3 2009, 05:58 AM
I love it when a plan comes together.
Posted by: Dr Evil Aug 3 2009, 08:27 AM
Attached image(s)
Posted by: Vacca Rabite Aug 3 2009, 08:38 AM
Why do you have your headers bolted on facing forward? Don't you want them facing aft? Or does the rest of the exhust go forward and then loop back?
Zach
Posted by: Dr Evil Aug 3 2009, 08:41 AM
Why do you have your headers bolted on facing forward? Don't you want them facing aft? Or does the rest of the exhust go forward and then loop back?
Zach
Ding ding, give that guy a cigar! If I face them aft the opening of the collector is at the same level as my bumper. LOUD. It has to have a 180 U installed. I forgot when talking about the O2 sensor placement. This will make it easier.
Posted by: Vacca Rabite Aug 7 2009, 06:40 PM
Anyway, I just had the most amazing thing happen.
I am eating dinner with the fam, and there is a knock on the door. I see a red shirt and figure it is either Mike coming over to work on the bus, or the Pizza guy forgot something when he dropped off dinner.
I really could not have been more wrong.
Elvis was at my door. No, really. Complete with a pink silk shirt with big collar, unbuttoned to mid chest showing off thick gold chains. His sideburns were superb, though his pompadore was a little long at the back. I went to shake his hand, and Elvis swung his hips and thrust out his arm, practiced to the point of being natural. I was a little thrown by the slightly too tight dockers, but even Elvis wears dockers, right?!
Elvis was REALLY excited. He wanted to buy the bus. He wanted to buy the Evil Bus - RIGHT NOW. He was driving down the road in his beat up pickup (complete with a plywood billboard bolted to the back that stated the he bought property - even Elvis has to work...). Any way, Elvis was driving down the road, a road he said he does not usually travel by, when he saw the Jeep and the Bus. He had to stop. He had to have the bus.
I would like to say that Elvis is also a cat guy. He was thrilled to see two of my cats meowing at him through the window, and went to great lengths to tell me about how he loves cats. It makes sense, really. Elvis always got a lot of pussy.
Anyhow, I gave Elvis the bus tour. He tried to tell me that is name was really Bob Neal, that he would trade his services as a plumber for the bus, but I know its just Elvis's cover.
Elvis then asked if I would be taking the bus to Bug Out in Virginia next month. Sadly, I said I did not think it would be ready yet. Elvis was impressed with the engine swap, but admitted he was not a mechanical guy.
Elvis was also really interested in guys making tricycles out of VWs, but I did not know of any off the top of my head.
I said I needed to get back to dinner with my family, and Elvis understood. He swung his hips, gave me the double finger guns and a hearty "Thank you, thank you very much for taking time to tell me about the bus. God Bless." Elvis got back into his pickup, and drove of into the sunset.
This may be the most amazing encounter that I have had on account of the vehicles in my driveway.
Zach
PS - I really hope the Bus is still here tomorrow morning...
Cliff notes - Elvis stopped by to buy Mikes Bus.
Posted by: Thomas J Bliznik Aug 7 2009, 07:09 PM
Zach, I am worried about you.
This is very hard to believe.  Did you get a picture????
Tom
Posted by: Vacca Rabite Aug 7 2009, 07:18 PM
Zach, I am worried about you.
This is very hard to believe.
Did you get a picture???? Tom
No. I wish that I had though. It was mind boggling - I was just not prepared for what waited outside my door.
Elvis was a really nice guy.
Zach
Posted by: Vacca Rabite Aug 7 2009, 07:20 PM
This story is too amazing to be lost at the end of page 4 where no one will see it. I HATE being the last post on a page. Especially when it is THIS EPIC!
Anyway, I just had the most amazing thing happen.
I am eating dinner with the fam, and there is a knock on the door. I see a red shirt and figure it is either Mike coming over to work on the bus, or the Pizza guy forgot something when he dropped off dinner.
I really could not have been more wrong.
Elvis was at my door. No, really. Complete with a pink silk shirt with big collar, unbuttoned to mid chest showing off thick gold chains. His sideburns were superb, though his pompadore was a little long at the back. I went to shake his hand, and Elvis swung his hips and thrust out his arm, practiced to the point of being natural. I was a little thrown by the slightly too tight dockers, but even Elvis wears dockers, right?!
Elvis was REALLY excited. He wanted to buy the bus. He wanted to buy the Evil Bus - RIGHT NOW. He was driving down the road in his beat up pickup (complete with a plywood billboard bolted to the back that stated the he bought property - even Elvis has to work...). Any way, Elvis was driving down the road, a road he said he does not usually travel by, when he saw the Jeep and the Bus. He had to stop. He had to have the bus.
I would like to say that Elvis is also a cat guy. He was thrilled to see two of my cats meowing at him through the window, and went to great lengths to tell me about how he loves cats. It makes sense, really. Elvis always got a lot of pussy.
Anyhow, I gave Elvis the bus tour. He tried to tell me that is name was really Bob Neal, that he would trade his services as a plumber for the bus, but I know its just Elvis's cover.
Elvis then asked if I would be taking the bus to Bug Out in Virginia next month. Sadly, I said I did not think it would be ready yet. Elvis was impressed with the engine swap, but admitted he was not a mechanical guy.
Elvis was also really interested in guys making tricycles out of VWs, but I did not know of any off the top of my head.
I said I needed to get back to dinner with my family, and Elvis understood. He swung his hips, gave me the double finger guns and a hearty "Thank you, thank you very much for taking time to tell me about the bus. God Bless." Elvis got back into his pickup, and drove of into the sunset.
This may be the most amazing encounter that I have had on account of the vehicles in my driveway.
Zach
PS - I really hope the Bus is still here tomorrow morning...
Cliff notes - Elvis stopped by to buy Mikes Bus.
Posted by: MDG Aug 7 2009, 07:55 PM
I knew Elvis was hanging around Pennsylvania.
I knew it!
is he still fat?
Posted by: Vacca Rabite Aug 7 2009, 08:26 PM
is he still fat?
Yes, but not overly so.
Zach
Posted by: Dr Evil Aug 7 2009, 10:56 PM

Posted by: zymurgist Aug 8 2009, 11:11 AM
Elvis is everywhere
Elvis is everything
Elvis is everybody
Elvis is still the King
http://www.youtube.com/watch?v=e_hkIN38qnY
Posted by: Vacca Rabite Aug 8 2009, 06:44 PM
Michael J Fox is the Anti Elvis!
Posted by: Dr Evil Aug 8 2009, 07:16 PM
You leave shaky alone!
Posted by: zymurgist Aug 8 2009, 08:32 PM
To be fair, Mojo recorded that song well before MJ Fox had any signs of Parkinson's.
I'd bet that if he performs the song today, the Anti Elvis is somebody like Simon Cowell.
Posted by: jsayre914 Aug 9 2009, 10:57 AM
were you eating the mushrooms that were growing next to your garden.
I TOLD YOU NOT TO EAT THOSE !!!
Posted by: scottb Aug 9 2009, 03:31 PM
mojo has mucho elvis in him... along with beer, scotch, amphetamines, LSD, orange soda and i think some raid....
Posted by: zymurgist Aug 9 2009, 04:48 PM
DON'T. EAT. THE BROWN. ACID.
Posted by: jimtab Aug 9 2009, 04:52 PM
I think Mojo's best song is Don Henley must die (don't let him get back together with Glen Frey.) Although it was funny when Don Henley came up and sang it with him at a concert.....I still don't really like DH though....and yeah, I know, he speaks soooo well of me......yada, yada....
Posted by: Vacca Rabite Aug 26 2009, 09:32 PM
Pics of Bus progress from tonight. I'll let Evil explain what everything is.
Overspray, but otherwise nice looking hatch panel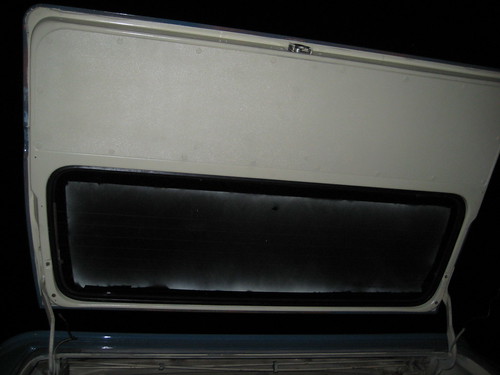
Barn door panel in, with sound proofing behind.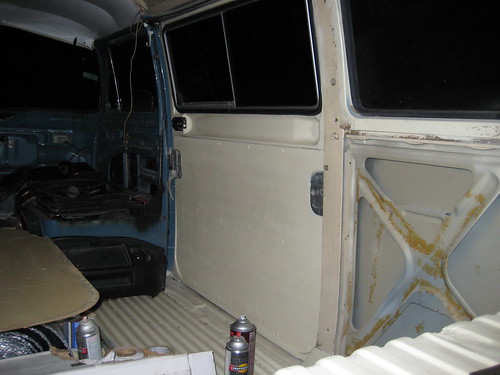
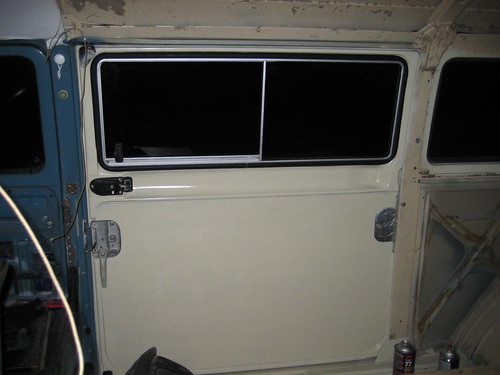
Fabbing up the engine mount bar.
This took several days of creative thought before we started welding htis evening. Went through about 9 other ideas before we came up on this super simple and STRONG one. Mike can tell more.
[http://farm4.static.flickr.com/3519/3860196233_4dcec92c39.jpg[/img]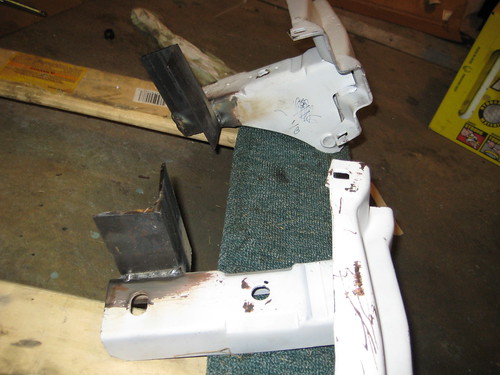
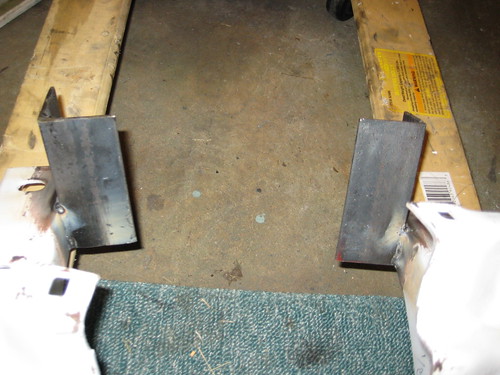
Oh, and the Evil Bus will be getting side pipes. Its going to be bad assed!
Zach
Posted by: Dr Evil Aug 26 2009, 10:18 PM
Yup, Zach came up with the smart and kick ass looking idea to run the mufflers up forward, since that is where the headers point out anyway, and have the pipes point out in front of the rear wheels like a hot rod. This looks cool and frees up a lot of space in the rear.
The engine bar will be attached to the bumper mounts with an addition of a large bolt on each side. More to come later on this....I hope tomorrow
The door and hatch were painted and ABS panels were installed after I laid down sound dampener and insulation.
Posted by: jsayre914 Aug 27 2009, 06:33 PM
Why not bring the pipes through the cabin and add a little more chrome, if your going for the hotrod look??
see pic.
Attached image(s)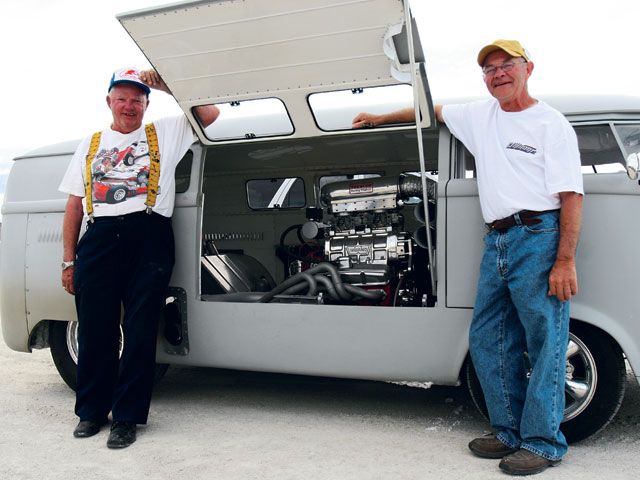
Posted by: Dr Evil Aug 27 2009, 11:03 PM
Function ----- form
Here are the progress pics from tonight. The mount we devised utilizes the original tranny mount rubber pucks. The yellow arrow depicts where a 13mm bolt will be added to strengthen the mount to the frame.
Attached thumbnail(s)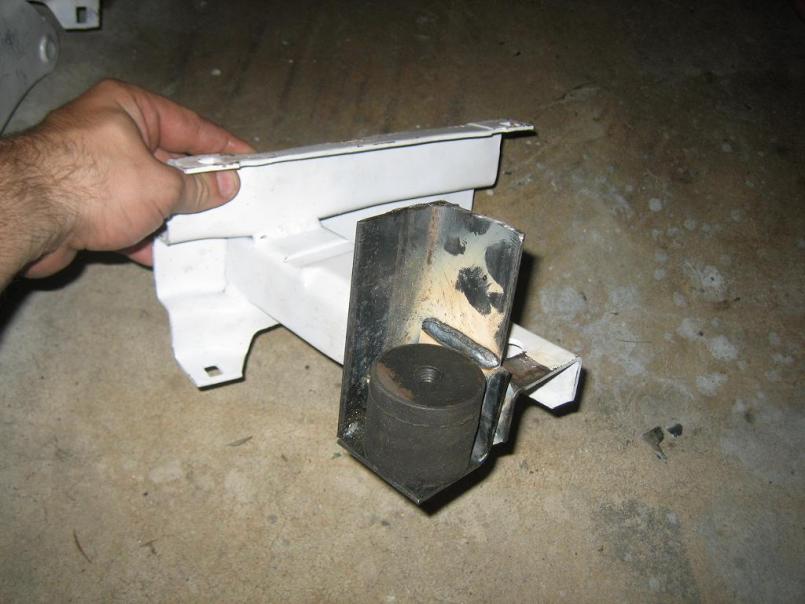
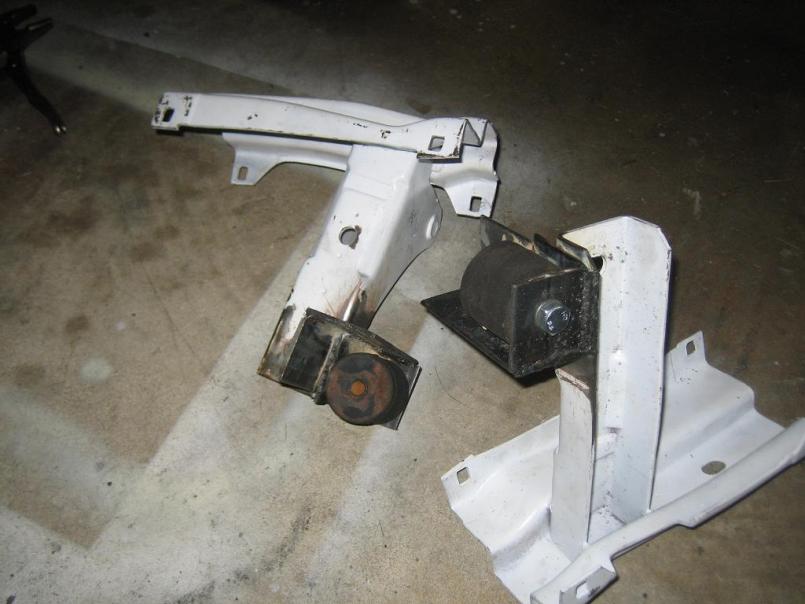
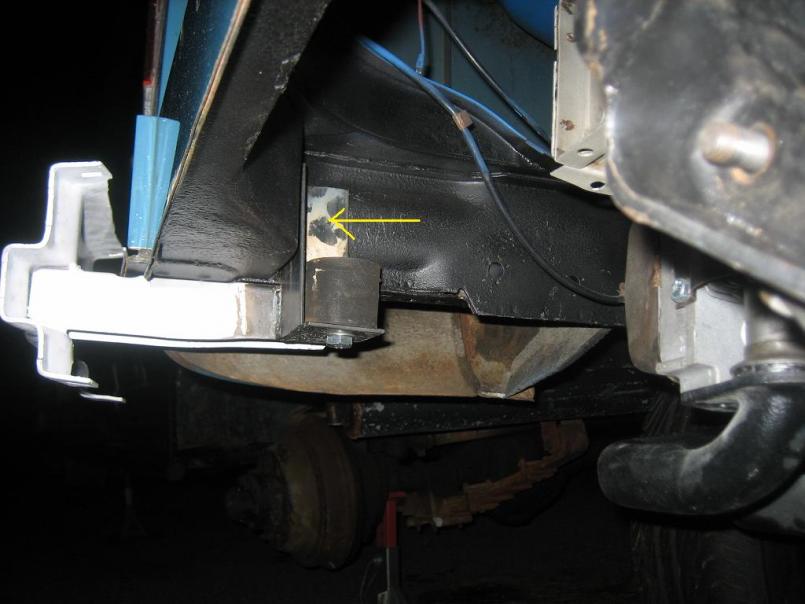
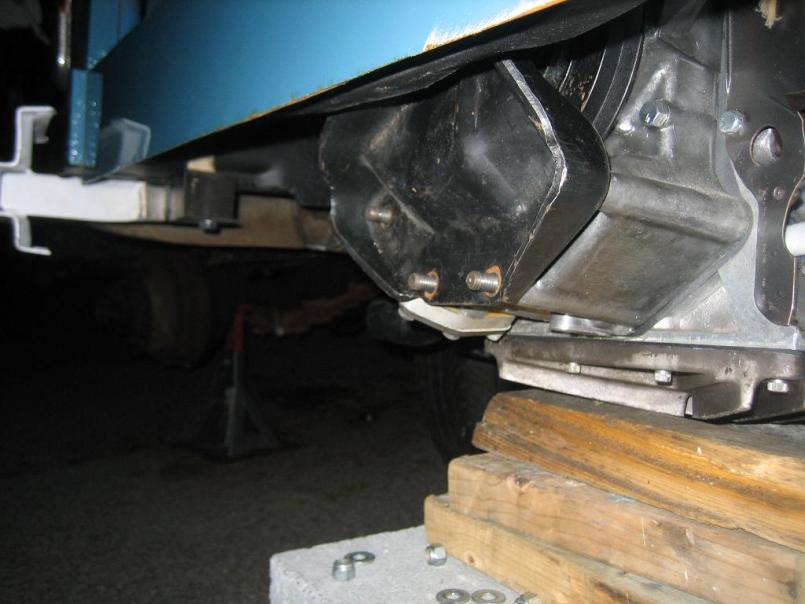

Posted by: Dr Evil Aug 27 2009, 11:04 PM
S'more
Attached thumbnail(s)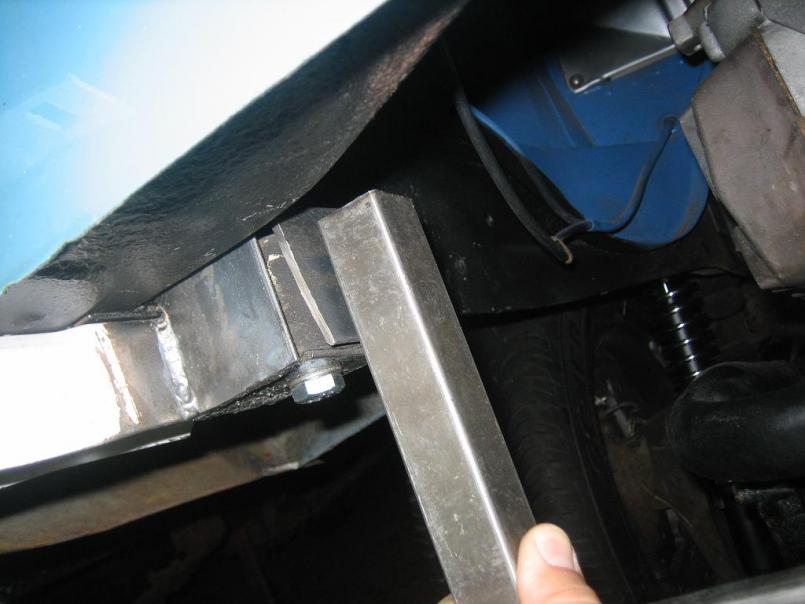
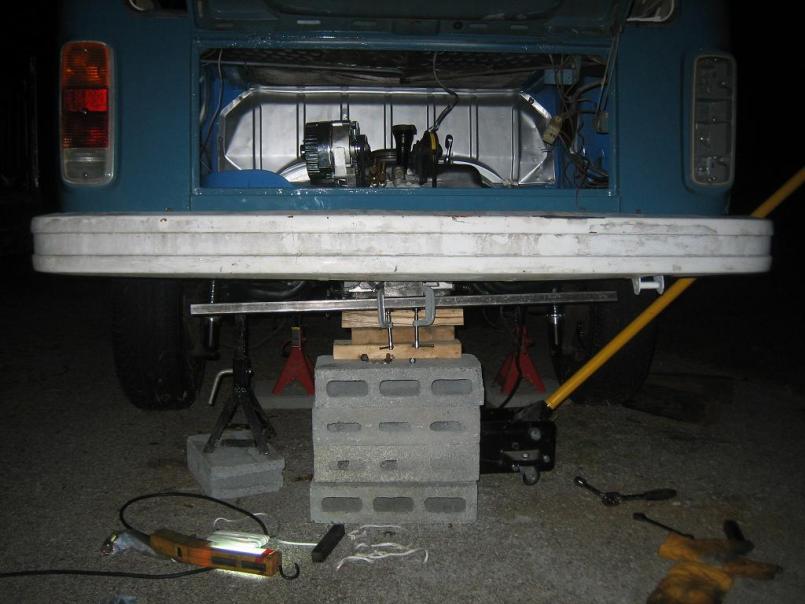
Posted by: Vacca Rabite Aug 28 2009, 07:43 AM
In the last picture, the engine is sitting cockeyed. That will be leveled when we are all said and done.
Also the clamps are there just until the super glue dries to join the metal bits together. They will be taken off before we bolt the engine on.
Zach
Posted by: jsayre914 Aug 28 2009, 10:36 AM
In the last picture, the engine is sitting cockeyed. That will be leveled when we are all said and done.
Also the clamps are there just until the super glue dries to join the metal bits together. They will be taken off before we bolt the engine on.
Zach
is that the same super glue i used on my glasses the other night
Posted by: Vacca Rabite Aug 28 2009, 12:46 PM
is that the same super glue i used on my glasses the other night
maybe.
Its what I could find first. Since its an engine mount we wanted to use something really strong, that was also fast drying. It was about to start raining so we did not want anything that would still be setting up once the rain hit.
Zach
Posted by: kwales Aug 29 2009, 11:12 AM
Mmmm.... superglue......
Stuff scares me. It's ok in tension, but one hit from the side (shear load) and it all lets go......
Super clean surfaces, aircraft structural epoxy and a rivet or 2 to squeeze the parts together to thin out the glue is the best bet. But, if you glue steel, the rust can separate the glue joint later....
Welding gud.
Posted by: Vacca Rabite Aug 29 2009, 11:22 AM
Mmmm.... superglue......
Stuff scares me. It's ok in tension, but one hit from the side (shear load) and it all lets go......
Super clean surfaces, aircraft structural epoxy and a rivet or 2 to squeeze the parts together to thin out the glue is the best bet. But, if you glue steel, the rust can separate the glue joint later....
Welding gud.
FINALLY
I have been waiting for someone to bite on that for days! I was hoping for a full on "ARE YOU CRAZY" but I'll take what I can get.It will be welded. No glue.
Zach
Posted by: kwales Aug 29 2009, 11:24 AM
Did Elvis help with the glue?
I hear he uses it to keep his hair in place....
Posted by: Dr Evil Aug 29 2009, 11:35 PM
Tonight Zach hooked it up. We both decided that we wanted the bar to be bent so I busted out the trigonometry and got pretty close to perfect. We will finish it up tomorrow
Attached thumbnail(s)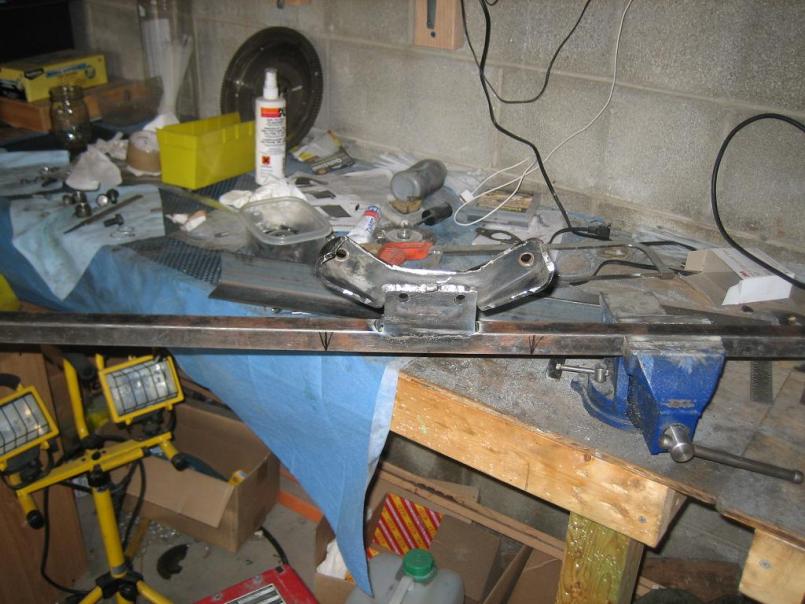
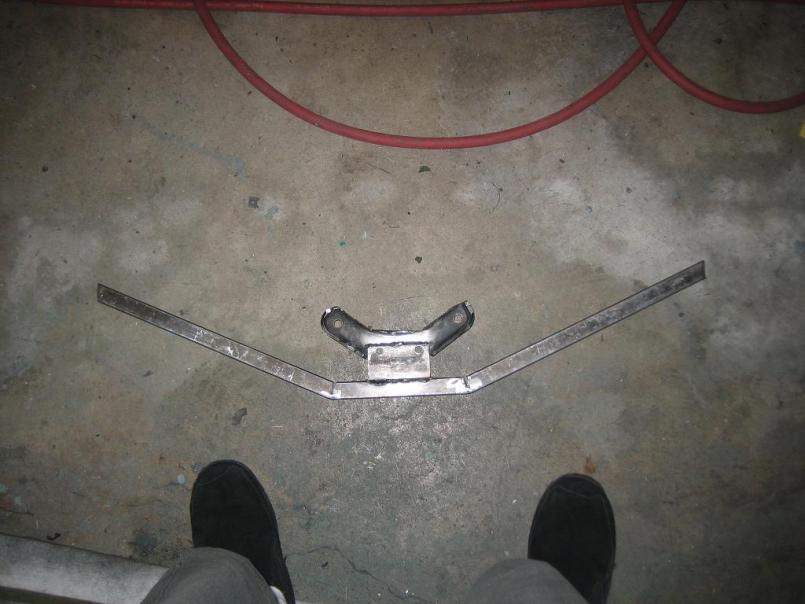
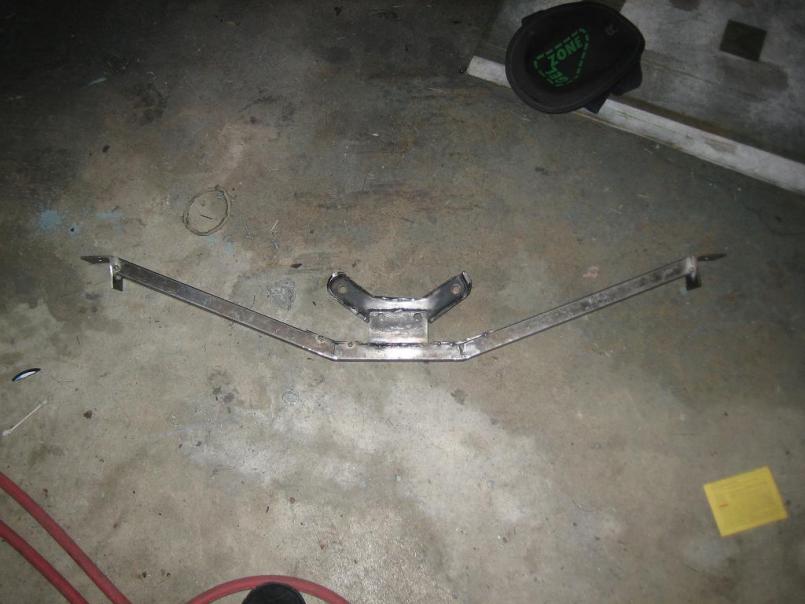
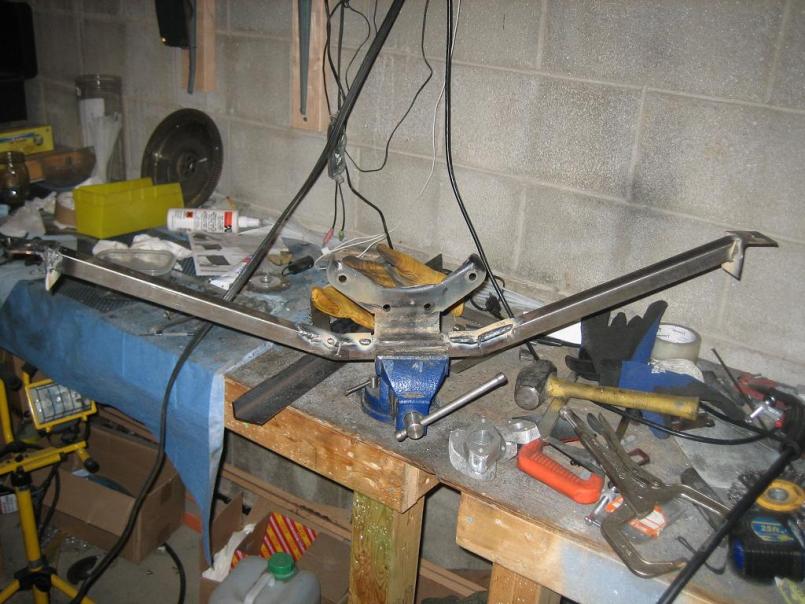
Posted by: jsayre914 Aug 30 2009, 03:19 PM
That looks sweet.
Very nice job guys. Now what, little rustoliem and bolt it in there.?
Posted by: Vacca Rabite Aug 30 2009, 07:20 PM
Little more welding yet.
I want to reinforce the mounting plates and also the cut area- fully box that part in.
Mike cut the pieces tonight after we got back from the pool, but I was too wiped to start welding. I'll KO that tomorrow after work.
Zach
Posted by: r_towle Aug 30 2009, 07:41 PM
Is that bar stong enough?
Possibly add an upper section to make it like a truss???
Seems a little small/thin???
Rich
Posted by: Dr Evil Aug 30 2009, 08:22 PM
We are considering a truss, but we also consider it over done at that point. Not that being over engineered is a reason we consider for stopping
Posted by: Vacca Rabite Aug 30 2009, 09:13 PM
This is what I would like to add.
We have the metal sitting in my shop.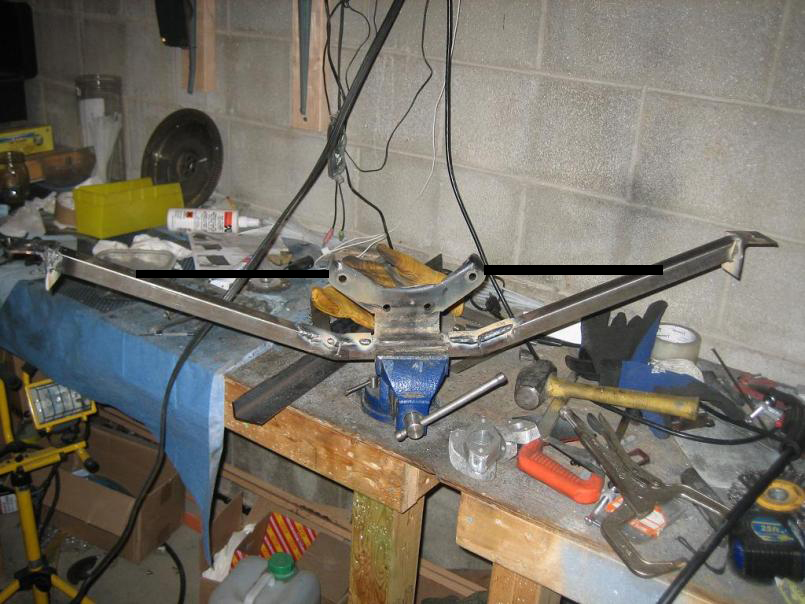
Does not add complexity, really. Does add strength.
It is probably not needed. But I'd rather over do it.
Zach
Posted by: Dr Evil Aug 30 2009, 09:49 PM
We already have the metal ready for adding in the darkened areas of the pic
Attached image(s)
Posted by: degreeoff Aug 30 2009, 10:18 PM
looks sweet guy's, I feel very gud about that holding up based on you're pics . NOT that I am endorsing and or warrenting anything agaianst breakage.......LOL
Posted by: Vacca Rabite Aug 31 2009, 07:15 AM
Yah, tonight as soon as I get home I have a lot of welding to do. The good news is I get to do the fun parts (welding) and then hand it off to mike for grinding and painting (the unfun parts )
Zach
Posted by: Cupomeat Aug 31 2009, 01:33 PM
Mmmm.... superglue......
Stuff scares me. It's ok in tension, but one hit from the side (shear load) and it all lets go......
Super clean surfaces, aircraft structural epoxy and a rivet or 2 to squeeze the parts together to thin out the glue is the best bet. But, if you glue steel, the rust can separate the glue joint later....
Welding gud.
FINALLY
I have been waiting for someone to bite on that for days! I was hoping for a full on "ARE YOU CRAZY" but I'll take what I can get.It will be welded. No glue.
Zach
Why not just use JB Weld?
...not serious...
Posted by: Dr Evil Sep 1 2009, 11:42 PM
Tonight was victorious! We mounted the engine bar and hing the engine....then we decided it needed the extra bracing The finished product looks bad ass! The engine is in, hanging and this is the best conversion like this that I have ever seen thanks to Zach's help and willingness to go the extra mile The bus has landed!
Attached thumbnail(s)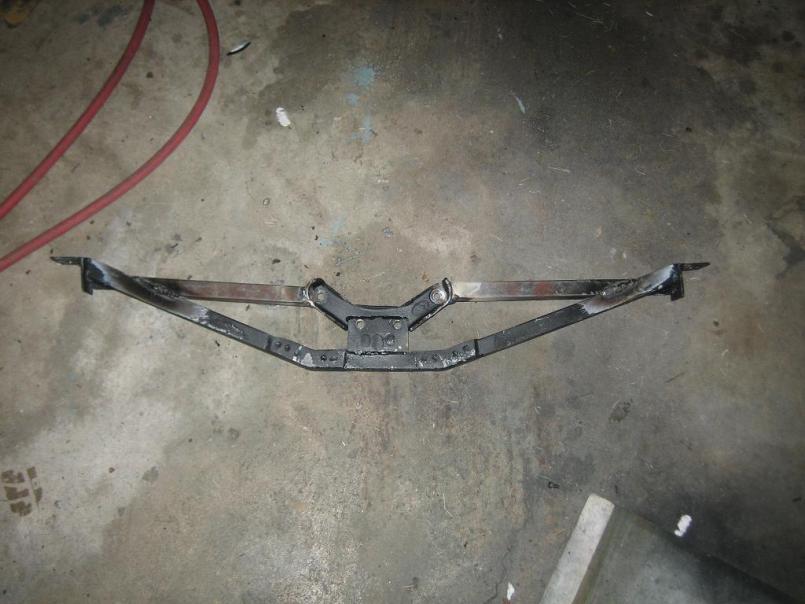
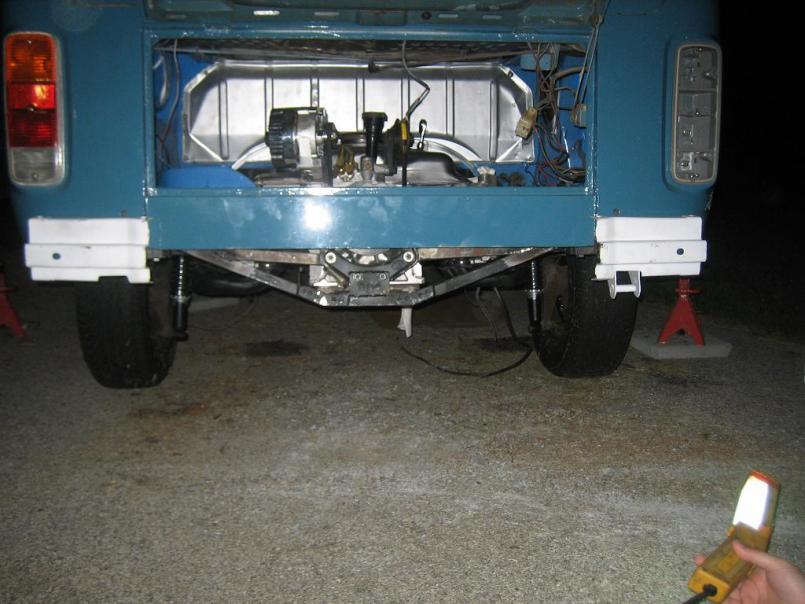

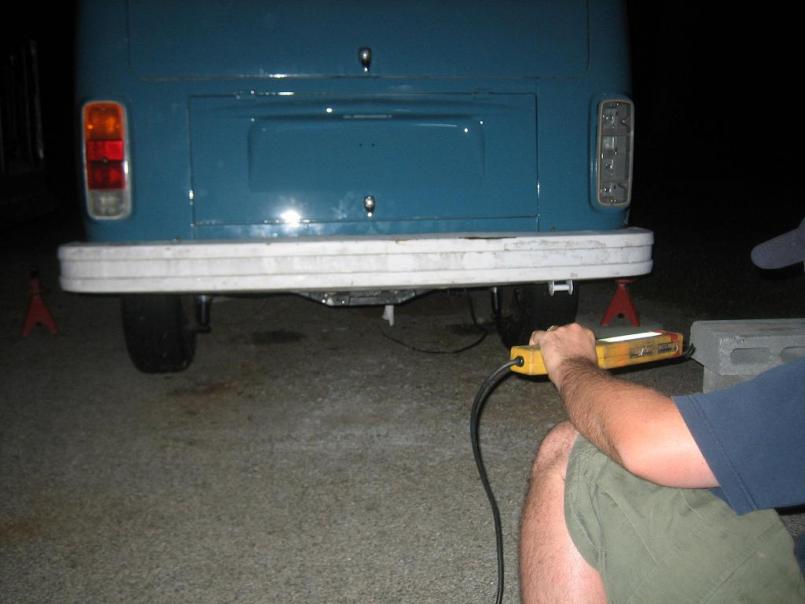
Posted by: zymurgist Sep 2 2009, 06:21 AM
Nice job!
Now get thee to a powder coater.
Posted by: Vacca Rabite Sep 2 2009, 07:45 AM
When you dropped the bus last night and the drivers side shocks and springs compressed and bounced a little and there was NO movement or flex in the engine and bar? Yeah, that felt good.
Zach
Posted by: Dr Evil Sep 3 2009, 01:17 AM
I keep looking at the pics and smiling
Posted by: type11969 Sep 3 2009, 08:41 AM
Looks awesome, estimate until you fire her off? I hope there will be video documentation!
Posted by: Vacca Rabite Sep 3 2009, 08:58 AM
I've been thinking about the cooling tin.
If we mock the tin out of some of the cardboard around my shop, we can then make templates to be cut out of 24g sheet steel.
Its not structural, so using thin metal will allow us to make whatever bends need to be made. We can make a brake using my vise and some of the spare stock we have on hand.
I don't think this is going to be a big deal. At all.
Zach
Posted by: degreeoff Sep 3 2009, 09:01 AM
Looks awesome, estimate until you fire her off? I hope there will be video documentation!
Make it this weekend....! I will drive up to see!

Posted by: Vacca Rabite Sep 3 2009, 09:01 AM
Looks awesome, estimate until you fire her off? I hope there will be video documentation!
As long as I am there, there will be. If he fires it while I am in class, he is on his own.
We need to get the carb and induction in place, and tin made. Attach a battery, and ignition bits. Then start it and run in the cam.
Zach
Posted by: Vacca Rabite Sep 3 2009, 09:03 AM
Looks awesome, estimate until you fire her off? I hope there will be video documentation!
Make it this weekend....! I will drive up to see!
But... I'll be away. You can't have a party at my house if I'm not there. That just wouldn't be fair!
(if you do it, get my 914 perfect while you are there...
)Zach
Posted by: Dr Evil Sep 3 2009, 09:41 AM
I dont have an estimate of when the quickening will occur. I am currently applying to residencies, starting 2 more MPH classes, and getting ready for my national tour so time is tight. We shall see....
Zach, for the tin I think that the stock corvair tin will fit in the bay as it is flat and small. Then we just need to start cutting the stock bus tin until we get it to match. Then, weld the two together. If I can make it down today I will get started on that...I need to get more cutting disks
Do you know where we can get some stock bent pipe to just make different length runners for the carb???
Posted by: Dr Evil Sep 3 2009, 04:29 PM
So today I managed to start another part of the program, the instrument panel. I wanted a tach because the blank spot in the stock panel drives me nuts. So, I have make the 914 stuff fit. The speedo is for mock up only. I will be sourcing a 120mph silver buttoned one for the final set.
Attached thumbnail(s)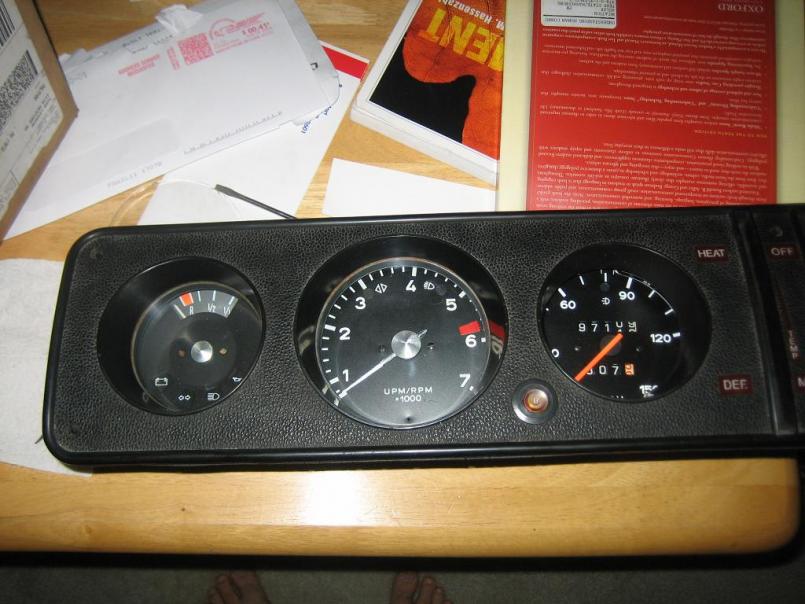
Posted by: markb Sep 3 2009, 04:35 PM
This is what we did in the ThunderBus.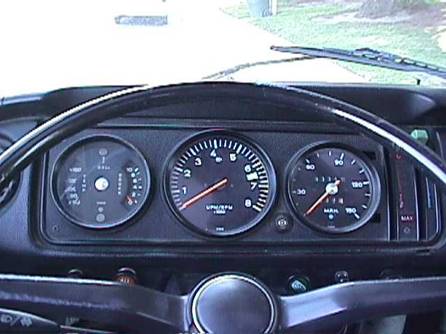
Posted by: zymurgist Sep 3 2009, 04:37 PM
Posted by: Dr Evil Sep 3 2009, 04:56 PM
Ya, I saw the thunderbus one and thought I could do it differently
Posted by: Dr Evil Sep 24 2009, 01:22 AM
Since I am up here and my bus is an hour away in at a place that it would be unkind to work at odd hours, I decided to finish my gauge cluster
First I gutted a 911 tach and carved up the case to fit into the stock cluster. It fits PERFECT! Crazy how lucky that was.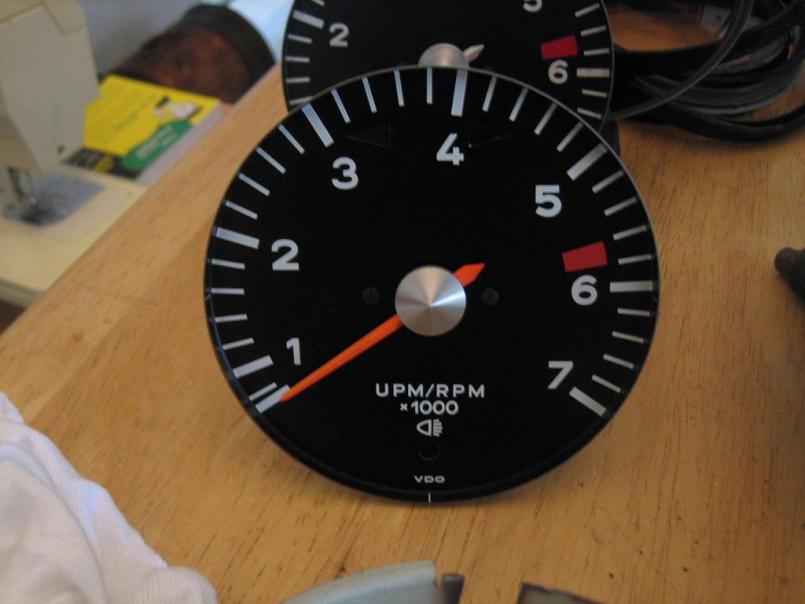
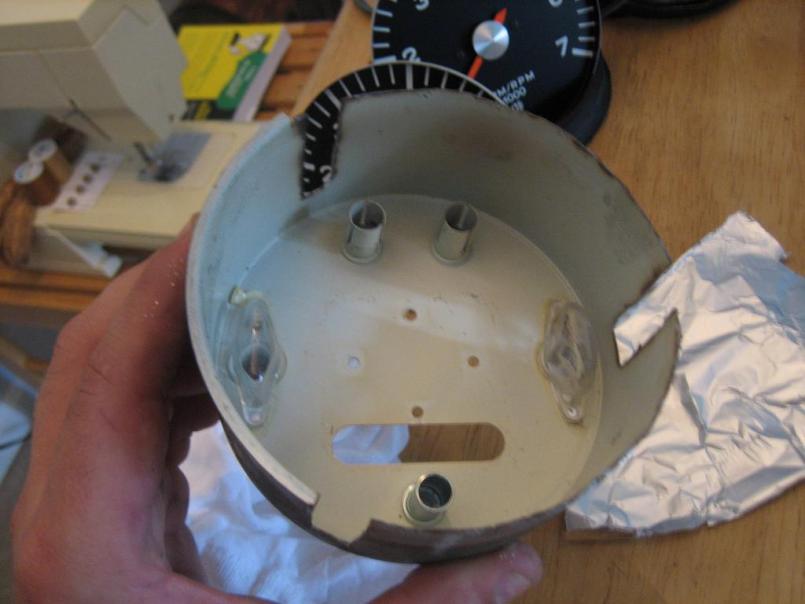
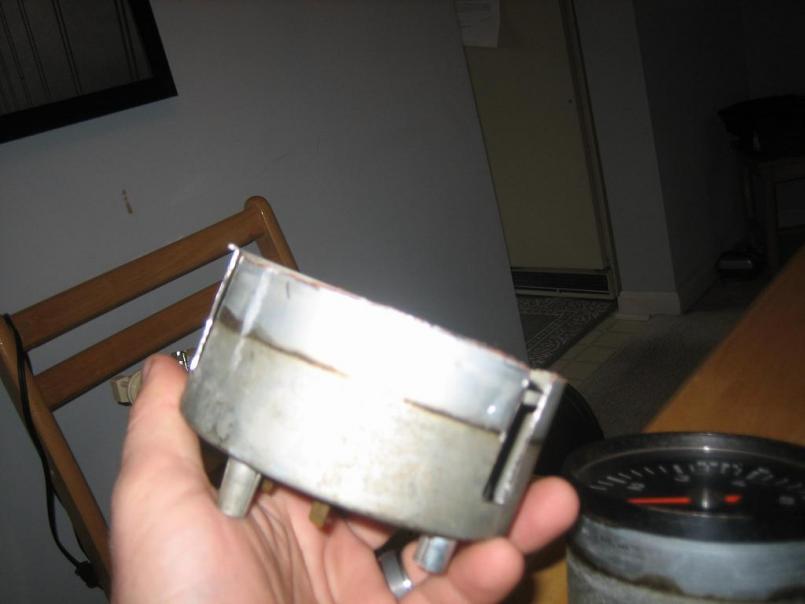
I repainted the inside of the housing.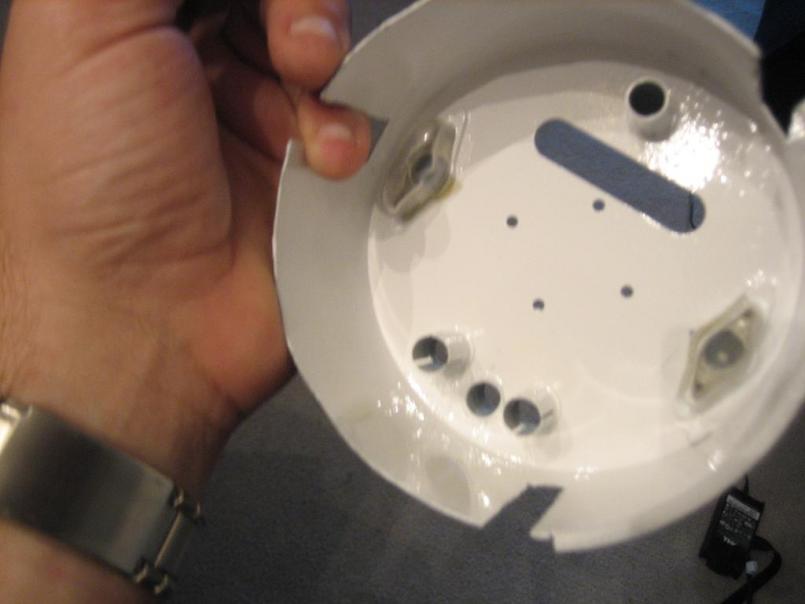
Then I painted the tach and speedo needles.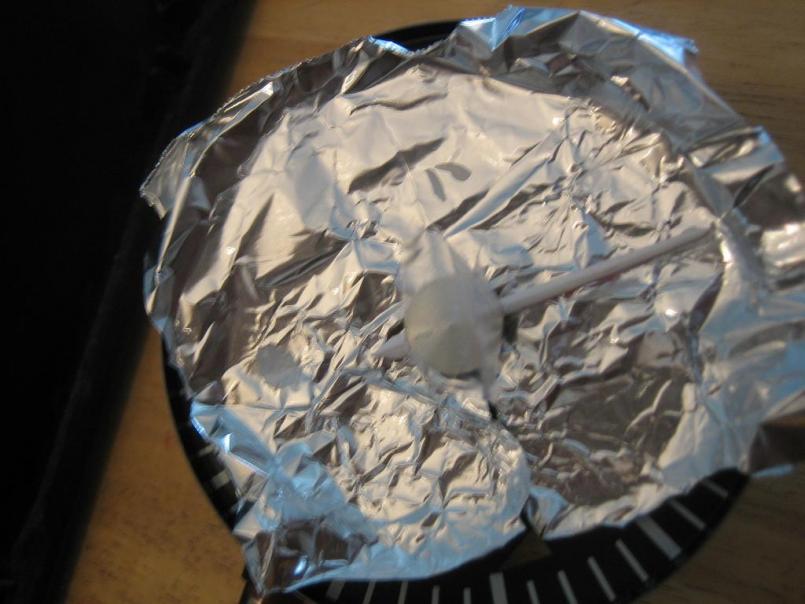
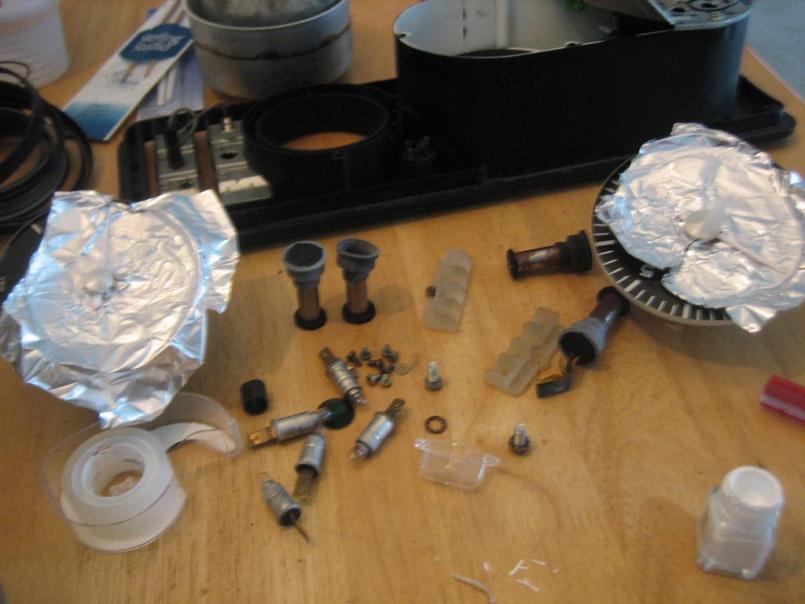
Notice the extra light bung I added in the tach housing in the 12 o'clock position
Posted by: Dr Evil Sep 24 2009, 01:27 AM
Here are the needles post paint.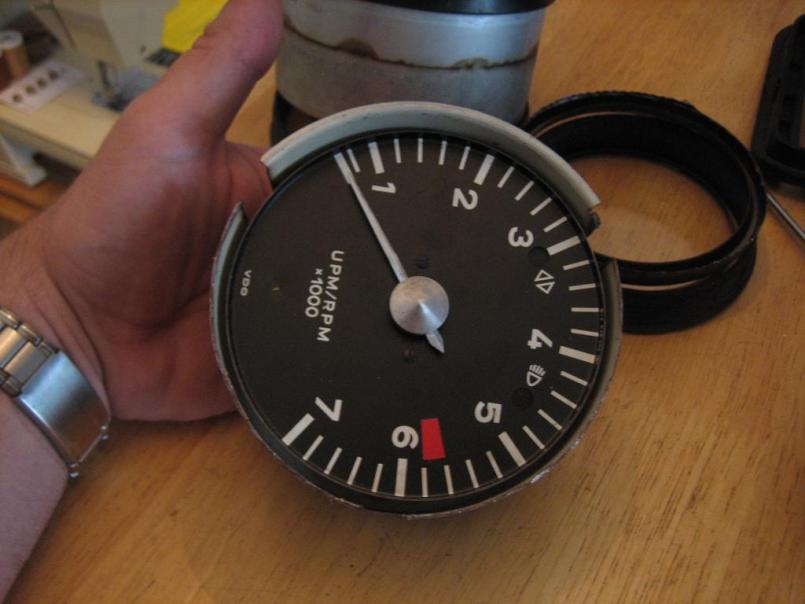
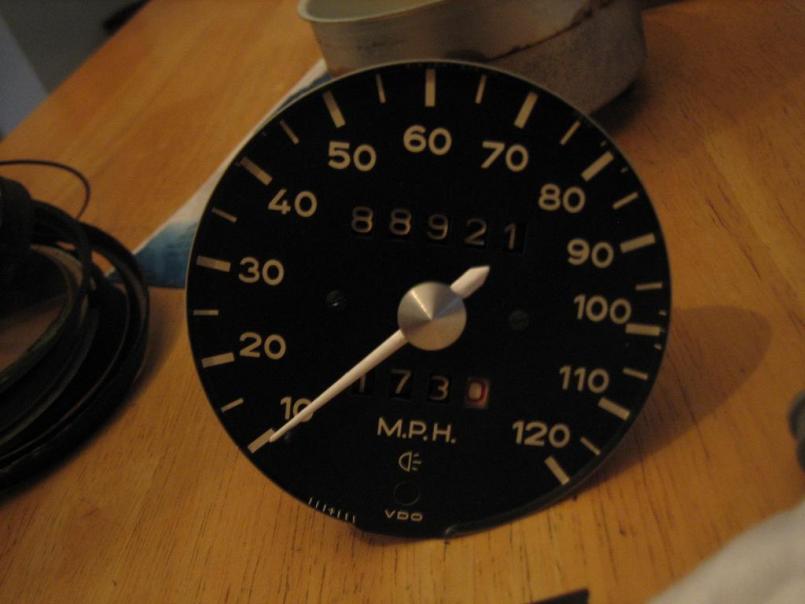
Here is the tach seated in the assembly.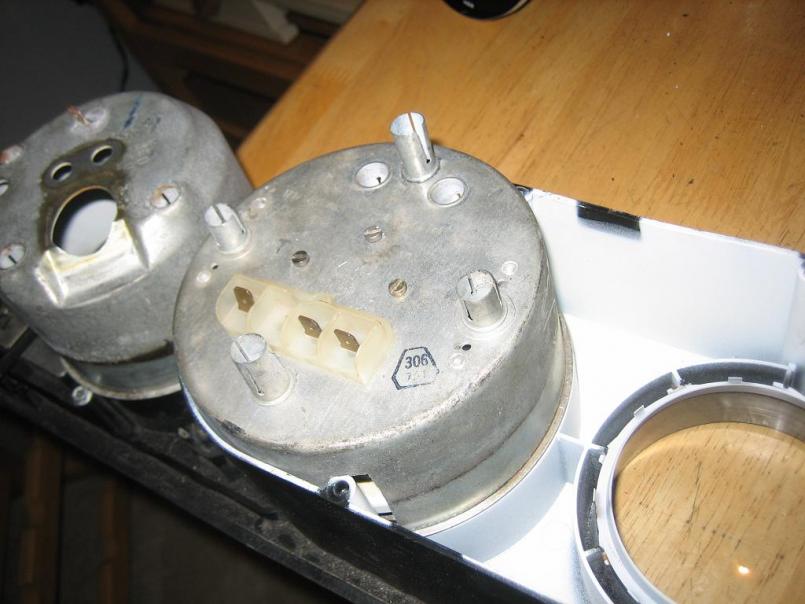
An extra wire to keep it in place, though it is not needed.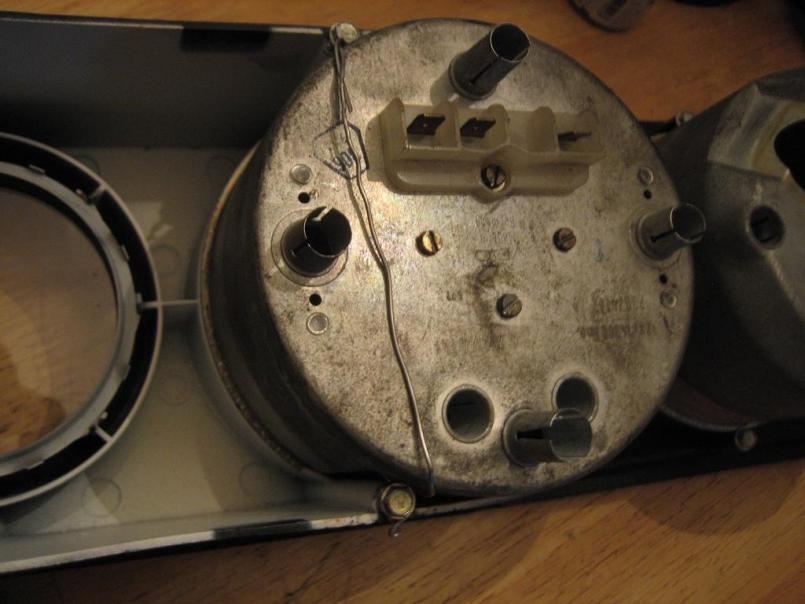
For the speedo I just needed to remove the metal lip on the side.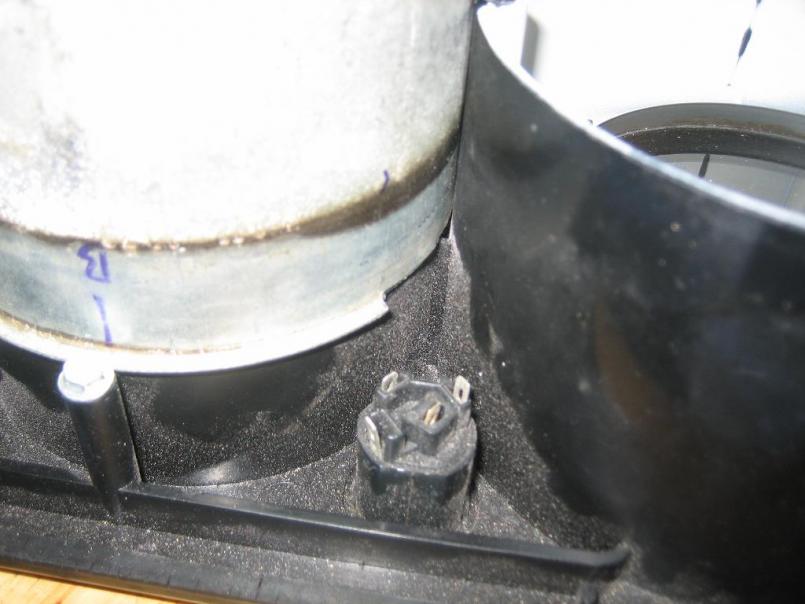
Posted by: Dr Evil Sep 24 2009, 01:32 AM
The speedo glass fit perfectly in the empty spot on the cluster.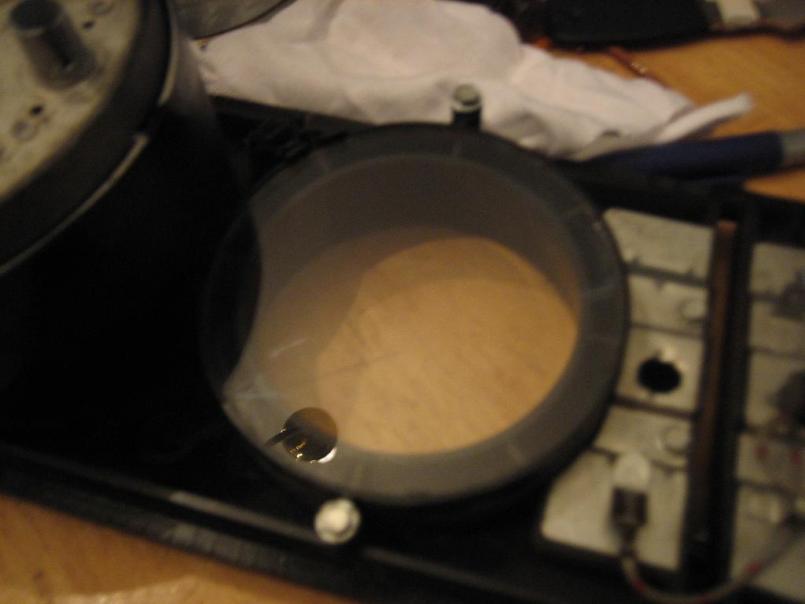
Here is the speedo seated and wired in place, with the rest of the cluster. The wide electrical tape is only necessary to hold the speedo steady. The whole assembly is stout.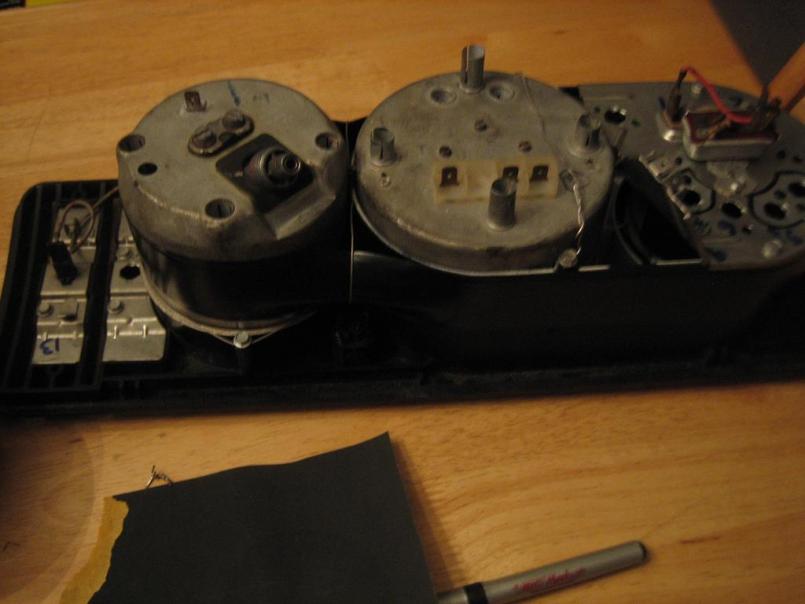
Here are the cluster pics. I blacked out the head light and turn signal indicators inthe left cluster gauge since I will use the ones on the tach.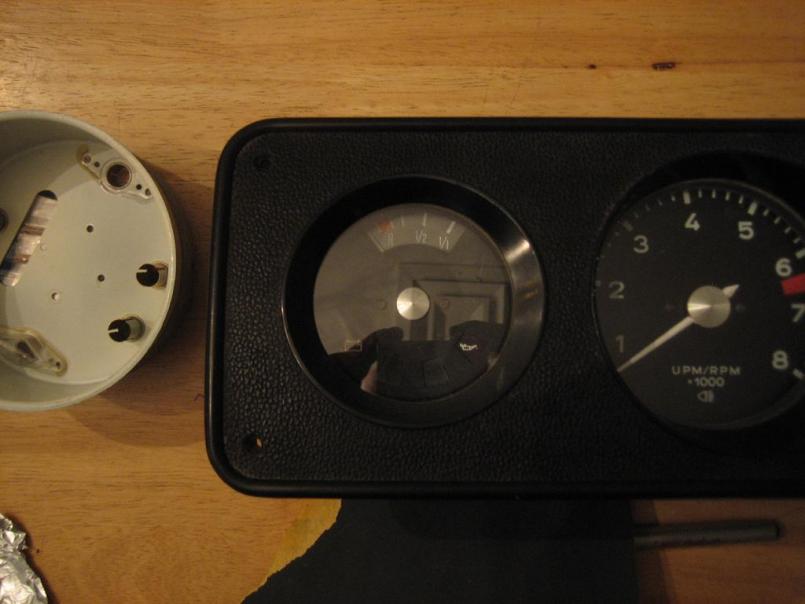
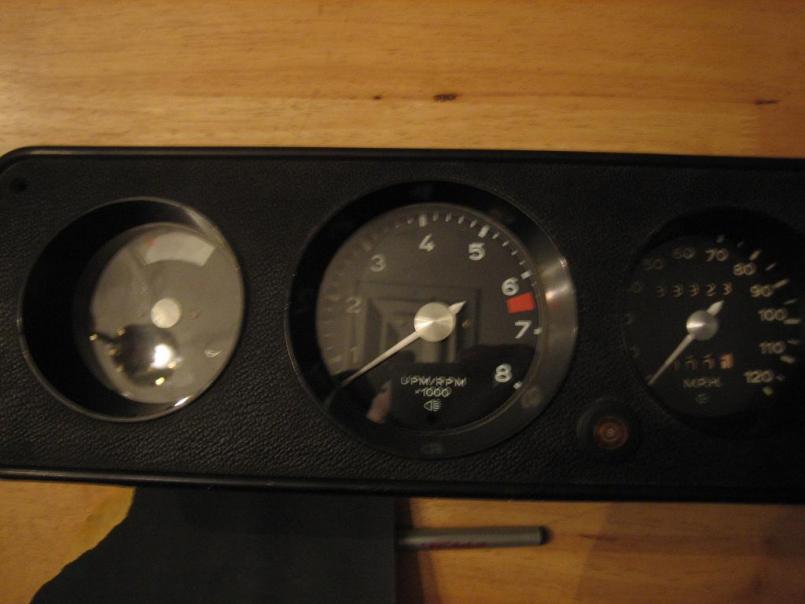
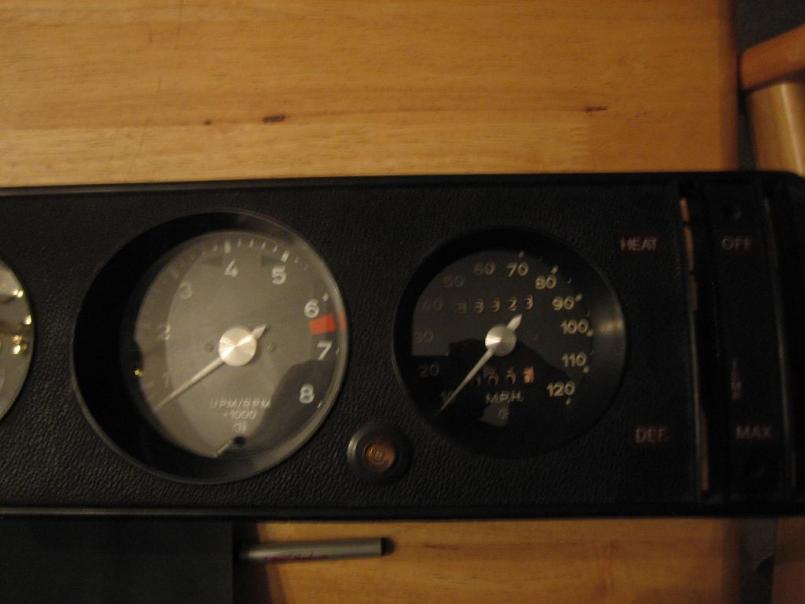
And here are the painted needles of the oil T and P gauges. I dont like red needles, obviously. The blue LEDs work better with the white. 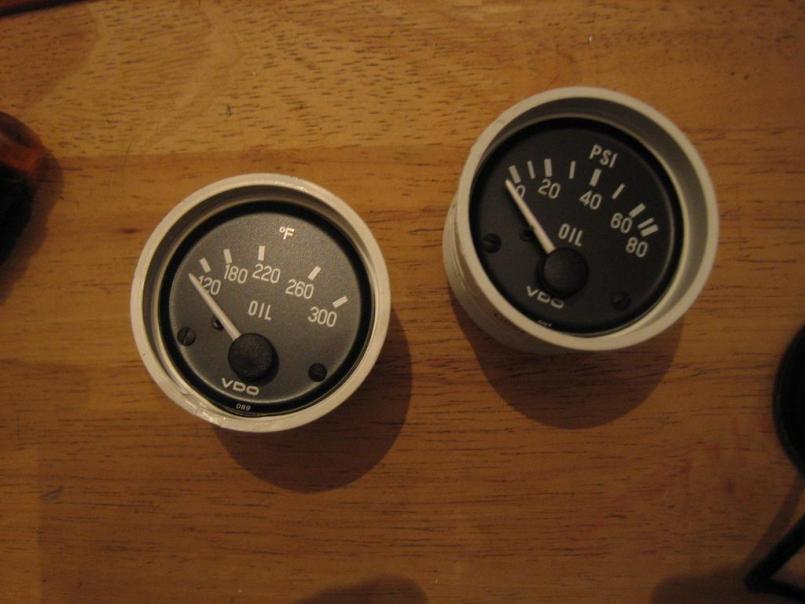
Posted by: Todd Enlund Sep 24 2009, 02:13 AM
Doc, you missed it... I passed a split window single cab on the Interstate on the way to class today.
Posted by: zymurgist Sep 24 2009, 05:58 AM
Nice mods.
You should have painted the inside fluorescent orange, though. Nothing cooler than red instrument lighting.
Posted by: Dr Evil Sep 24 2009, 08:25 PM
No red
Posted by: zymurgist Sep 25 2009, 05:43 AM
Red instruments look great in a 2006 Acura.
Also in classic Trans Ams.
Posted by: scotty b Sep 25 2009, 07:55 PM
Red instruments look great in a 2006 Acura.
Also in classic Trans Ams.
but not on necks
Posted by: Vacca Rabite Sep 29 2009, 08:13 PM
Hey Scotty, dunno what yer boys down south were doing with all those busted windshields. But us northern boys got it in the first time w/o busting it up in the process.
Also, we moved the bus into my project bay of the garage tonight. My home has just been *slightly* de-redneckified. I'm down to only 1 non-operational vehicle up on blocks in my driveway! YAY!!!
Zach
Posted by: scotty b Sep 29 2009, 08:20 PM
Head hung in shame....or maybe it was the different seal........
Posted by: Dr Evil Sep 29 2009, 10:05 PM
Yup, after the first two attempts it went in the first time without any issue
Posted by: Vacca Rabite Sep 30 2009, 08:13 AM
Yup, after the first two attempts it went in the first time without any issue
I thought you agreed that we would uphold our masterful superiority for a few days before admitting that we had to take it out twice before getting it in right. Jerk.
But, we did get it mounted w/o breaking anything. A plus.
Zach
Posted by: type11969 Sep 30 2009, 08:57 AM
Good work, now I know who to contact when I gotta swap my windshield out!
-Chris
Posted by: Dr Evil Sep 30 2009, 10:46 AM
Yup, after the first two attempts it went in the first time without any issue
I thought you agreed that we would uphold our masterful superiority for a few days before admitting that we had to take it out twice before getting it in right. Jerk.
But, we did get it mounted w/o breaking anything. A plus.
Zach
That was until Scotty conceded by hanging his head in shame so fast.
It is true, as soon as we high-fived I told Zach to post that is went in easily the first time just to mess with Scotty.
Posted by: Dr Evil Sep 30 2009, 12:49 PM
Zach, I am surprised you didnt mention the PB blaster incident
Posted by: Vacca Rabite Sep 30 2009, 01:35 PM
Zach, I am surprised you didnt mention the PB blaster incident
I had forgotten that you tried (twice) to huff PB blaster and spray paint with your ass.

Zach
Posted by: Dr Evil Sep 30 2009, 02:06 PM
PB blaster is like a fart silencer when added to the cheeks.
Posted by: zymurgist Sep 30 2009, 02:21 PM
PB blaster is like a fart silencer when added to the cheeks.

Posted by: Dr Evil Sep 30 2009, 11:38 PM
When we constructed the bar we were considerate that the engine not hang too low so as not to be exposed to anything. I think we are close if not better
Attached thumbnail(s)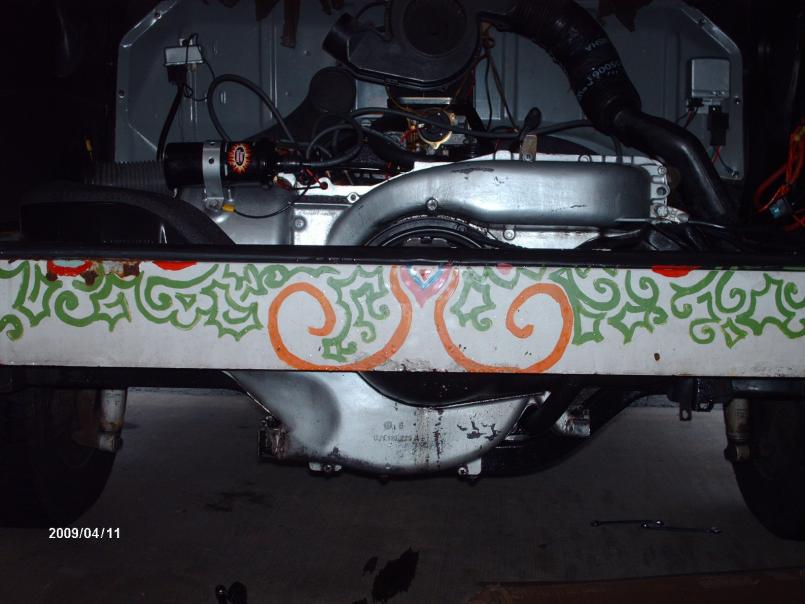

Posted by: Vacca Rabite Oct 1 2009, 08:26 AM
There is no doubt that we are better. The T4 pick is with bumper on. Yours is with bumper off. When we mounted the bumper on your bus, we could only see the very bottom of the bar. On the T4 bus, you see 1/2 the engine.
We bought ~4 extra ground clearance.
Zach
Posted by: type11969 Oct 1 2009, 09:03 AM
Really? Think that top pic is sans bumper. Nice work regardless though.
Posted by: Dr Evil Oct 1 2009, 12:09 PM
Ya, top pic is no bumper as well.
Posted by: Vacca Rabite Oct 1 2009, 07:15 PM
Huh. It being painted threw me. Now that I look closer, there is no bumper (only ZOOL)
Zach
Posted by: Leo Imperial Oct 18 2009, 08:22 AM
 Hi
Hi
Posted by: Dr Evil Oct 18 2009, 11:31 AM
Who are you?
Posted by: plas76targa Oct 18 2009, 12:39 PM
Who are you?
I'll second that! Who is that guy?
Posted by: jsayre914 Oct 18 2009, 01:29 PM
Who are you?
what if none of us are who we thought we were, if we were not who we are.
Posted by: Vacca Rabite Oct 18 2009, 02:25 PM
Hey Mike, are you done fixing other peoples stuff enough to come work on yours again? I am going to need to put the 914 in the project bay before the snows come, so I figure you have ~ a month before the bus get evicted outside again. Both dailys need to be garaged for the winter - I HATE scraping windshields in the morning. :-)
Posted by: Leo Imperial Oct 19 2009, 08:40 PM
Sorry wrong website.
Posted by: Vacca Rabite Oct 19 2009, 09:16 PM
Sorry wrong website.
Nonsence!
Posted by: Dr Evil Oct 19 2009, 09:38 PM
Awe, Leo  We were just funning you. Dont leave
Zach, I am busy this week with interviews, this weekend with rebuilds. Trust me, any time I get to work on it I will be there.
Posted by: Vacca Rabite Oct 19 2009, 09:43 PM
Awe, Leo
We were just funning you. Dont leave Zach, I am busy this week with interviews, this weekend with rebuilds. Trust me, any time I get to work on it I will be there.
Take your time. Till the Subaru is working again
 I have to drive the 914 anyway. Tomorrow is going to be COLD.
But I need to get both dailys in the garage before snow comes, so you probably have ~ a month or so. I'm also crazy busy right now, so I understand not having the time...
Zach
Posted by: Dr Evil Oct 19 2009, 09:45 PM
Ya, I am in Altoona right now for an interview in the AM. Wed I interview in Hershey, Thurs-Fri I interview in Beaver Falls. This week is hosed for work.
Posted by: Dr Evil Oct 20 2009, 08:47 PM
I think I will steal away to do some bus work this weekend.
Posted by: Vacca Rabite Oct 20 2009, 09:34 PM
I'll be out Saturday running a bachelor party. Sunday I will be home, but buried in homework. You are welcome to come over either day (or friday as well) and I will try to make myself available.
Zach
Posted by: Dr Evil Oct 21 2009, 01:53 PM
I wont need your help exactly. I will try to finish fit the tin and maybe even mock it up for welding so if you get time you can just tack it all together for me. The only other thing I will definitely need you for is the exhaust.
Posted by: jsayre914 Oct 21 2009, 02:04 PM
Take your time. Till the Subaru is working again
I have to drive the 914 anyway. Zach
what happend this time?? didnt you just put bookoo money into that suby??
Posted by: Dr Evil Oct 21 2009, 02:09 PM
Ya, what is wrong with it now??? Something I/we can fix at your house?
Posted by: jsayre914 Oct 21 2009, 02:19 PM
Ya, what is wrong with it now??? Something I/we can fix at your house?
i got somthin you can fix at my house
Posted by: Dr Evil Oct 21 2009, 02:21 PM
Take a number
Posted by: Vacca Rabite Oct 21 2009, 04:02 PM
Take your time. Till the Subaru is working again
I have to drive the 914 anyway. Zach
what happend this time?? didnt you just put bookoo money into that suby??
Yup. 4K for an engine rebuild in Feb.
Cylinder three is misfiring under load. (code P030)
Possible problems:
*clogged/dripping/malfunctioning injector
*malfunctioning ignition (bad coil pack, bad wire, bad and or fouled plug)
*Mechanical problem (bring money - F that sell the car.)
*valve adjustment.
Time I have to deal with it:
*Zero.
Goes into Stans Subaru out on 24 tomorrow at 8am. Hope it makes it there...
I'll get a loaner from Stans while my car is in the shop. In the mean time I have been driving my 914. It needs some more tuning, but I am at the end of my knowledge base - and don't want to futz with it more until I get my IDF 40s to rebuild.
Mike, I can weld for you in between papers. I have two of them due next week (mon and wed.)
Hell, I'm in for it just to sit and BS about crap that is not family/work/school.Have I mentioned lately how ready I am to be done with freak'n school. I want my life back
Zach
Posted by: Dr Evil Oct 21 2009, 06:39 PM
Your bitching to me....ME about school? If you want sympathy look in the dictionary between "shit" and "syphilis". Ya pansy
Posted by: type11969 Oct 22 2009, 12:28 AM
Can I get in on the bellyaching? Adv dynamics and theory of elasticity round out my weekends nicely.
Posted by: Vacca Rabite Oct 22 2009, 09:22 AM
Woohoo! I heard from Stan's that my scoob is going to be a cheap fix, and I will have it back today.
Now, so long as I don't get the errant digit today at my physical, I have very little to be upset over.
Zach
Posted by: Dr Evil Oct 22 2009, 09:34 AM
Ooo, a physical. Cold hands = warm hearted doc, remember
Posted by: Dr Evil Oct 26 2009, 08:13 PM
Back on topic
Today I managed to install the dash and prep and paint the area where the rear seat goes in hopes of installing it to get it out of the way. I am hesitant to do the engine tin on my own. It daunting and I didnt want to make noise since Erin was home. Let see if I get time tomorrow after I do some transmission work.
Posted by: Vacca Rabite Oct 26 2009, 08:36 PM
I'll be around tomorrow (theo duty). I just got home (out of class early) and I am sorry I missed you today. Would have been nice if I even just got home in time to say hi. I am feeling a bit more hermit like then usual today.
I hope that you understand that you can move the mower out of the way while you are working. Right now things are packed in pretty tight while I try and make room for Erin's Pruis. I actually had the bay cleared when Erin wanted more stuff stored in the garage that I need to find a home for.
I'd really like to get the tin made up before the bus moves back outside as it will be easier welding in the garage. No extension cord voltage drops.
Zach
Posted by: Dr Evil Oct 26 2009, 08:44 PM
Ya, I moved the mower originally.....but then I looked in the engine bay and though, "fuck this" and went to do the quiet work of dash install.
The mower can fit under the stairs once I get my VW gear box out of there. I have a buyer, but I need to know what it weighs. Over 100# and I can not ship it. I need to pick it up tomorrow and clean out under your stairs.
I bought you a screw driver set from HF so I dont have to go searching for bits any more Your welcome. I cleaned the garage a little today as well.
I figure tomorrow I can stop by Joe's and help him put his heads on, after that he wont need me, and then stop down to pick up the spare gear box.
Question, do you think you have room for my big bike in your garage? I need it out of my small garage and it is just taking up space. It is an easy fit into a small space in your garage.
Posted by: Dr Evil Oct 26 2009, 08:47 PM
I like that when I look at the bottom to see who is viewing this thread, I know and have met 5 out of 6 of you
Posted by: type11969 Oct 26 2009, 08:52 PM
Posted by: Vacca Rabite Oct 26 2009, 08:54 PM
Once the 914 moves into the project bay I will have room for your BMW in the garage. It has to live in the project bay - too much other stuff in the parking bay.
Bike could go under the stairs, if that got orged a little better. I don't want to put it in the parking bay as Erin tends to bump into things when parking.... (which is why tires are in front of the air compressor, and my 914 is in front of the trailer).
Once the 914 is in the project bay again, I'll have a bit more room to store stuff. By spring I hope to be able to move my truck around to get in and out of the project area easier.
Zach
Posted by: Leo Imperial Oct 26 2009, 08:57 PM
Yeah well mine was off the road for 2 years and now its back and you are still building this monster??? OK OK it is pretty I will give you that but Brah come on you need to start enjoying!
Oh and Hi Chris. The 2073 rocks and I can fly at 80 without issue.
Posted by: scotty b Oct 26 2009, 09:01 PM
I like that when I look at the bottom to see who is viewing this thread, I know and have met 5 out of 6 of you
Yeah and those 5 have all probably worked on this abortion of a vehicle
Posted by: Dr Evil Oct 26 2009, 09:02 PM
Coolio
Posted by: Vacca Rabite Oct 26 2009, 09:13 PM
Its cool. We will need to rethink things if your registered vehicles equal mine, though. Counting the trailer and the eventual BMW we are at a 4:3 ratio.
Honestly, so long as I can move my stuff around, Erin does not complain too loudly and the neighbors don't start bugging me, it does not bother me.
Zach
Posted by: scotty b Oct 26 2009, 09:14 PM
Coolio
HUH ??
Attached image(s)

Posted by: type11969 Oct 26 2009, 09:35 PM
Yeah well mine was off the road for 2 years and now its back and you are still building this monster??? OK OK it is pretty I will give you that but Brah come on you need to start enjoying!
Oh and Hi Chris. The 2073 rocks and I can fly at 80 without issue.
Why hello sir. Nice work, I'll be interested to hear how it does in the 914. Got a head temp gauge on it? Oil temp? Curious what the temps are like pushing the bus around. Are you running 2.0 heads?
I bit the bullet and got a camper special for my westy. Expensive, yes, but it was the best compromise of time off the road and cost. I generally cruise in the 70-75 range unless I am by myself. Any faster than 75 and the passengers start to complain about noise! Gotta do some insulation work . . .
East Coast Camping expedition next summer?
Posted by: Dr Evil Oct 26 2009, 09:52 PM
I am down to camp. I will tow mine there
Posted by: Leo Imperial Oct 27 2009, 12:47 AM
Still in the process of getting everything dialed in. I'll let you know the temps once all set. Now I have an itch for a new set of gauges alla Evil. Damn that looks good and I have a set, but not the Evil touch
Camping is a damn good idea. Planning on a few trips this coming year. Should be booking a week in Montauk in the next few days/weeks. Hither Hills on the beach, it's an awesome place. Books up months in advance. Visitors will be welcome.
Also want to head to the North and West within NY state for a multiple stop trip.
Flanders is another not to be forgotten
Mike you gotta get that bad boy rollin under it's own power!
Posted by: jimtab Oct 27 2009, 09:44 PM
Yeah well mine was off the road for 2 years and now its back and you are still building this monster??? OK OK it is pretty I will give you that but Brah come on you need to start enjoying!
Oh and Hi Chris. The 2073 rocks and I can fly at 80 without issue.
LEO! How the hell are you....I haven't seen your name in a while....still loving and livin' on the East coast?
Posted by: Leo Imperial Oct 29 2009, 07:24 PM
Yeah well mine was off the road for 2 years and now its back and you are still building this monster??? OK OK it is pretty I will give you that but Brah come on you need to start enjoying!
Oh and Hi Chris. The 2073 rocks and I can fly at 80 without issue.
LEO! How the hell are you....I haven't seen your name in a while....still loving and livin' on the East coast?
Yo Jim! Lovin it like you can't imagine.... Why you got a job for me?
Posted by: jimtab Oct 30 2009, 08:33 PM
Yeah well mine was off the road for 2 years and now its back and you are still building this monster??? OK OK it is pretty I will give you that but Brah come on you need to start enjoying!
Oh and Hi Chris. The 2073 rocks and I can fly at 80 without issue.
LEO! How the hell are you....I haven't seen your name in a while....still loving and livin' on the East coast?
Yo Jim! Lovin it like you can't imagine.... Why you got a job for me?
Sure, you want to work in a Commercial/Industrial Hardware Store starting at about 10-12/hr?? I didn't think so. We may get to see you next summer when I drive the teener to the East Coast after I retire, always wanted to do it and I'm gonna. Many folks to see and visit, and I want to get to see the Canadian Maritimes, maybe catch the Targa Newfoundland or something....may squat in N. Mass. for a month or so to see the autumn....etc. As long as my 201K doesn't become a 101K.....
Posted by: Dr Evil Oct 31 2009, 01:11 AM
Alright you two homos, take your love fest off line and stop messing up my build thread 
Here are some pics I had not posted yet. Between interviews and rebuilding gear boxes I have had no time for the bus. Hopefully soon......before the snow falls.
Attached thumbnail(s)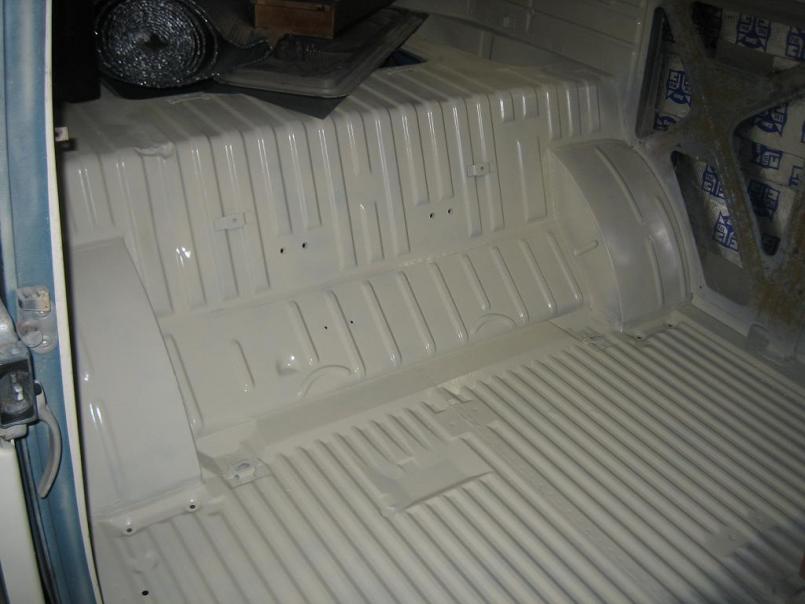
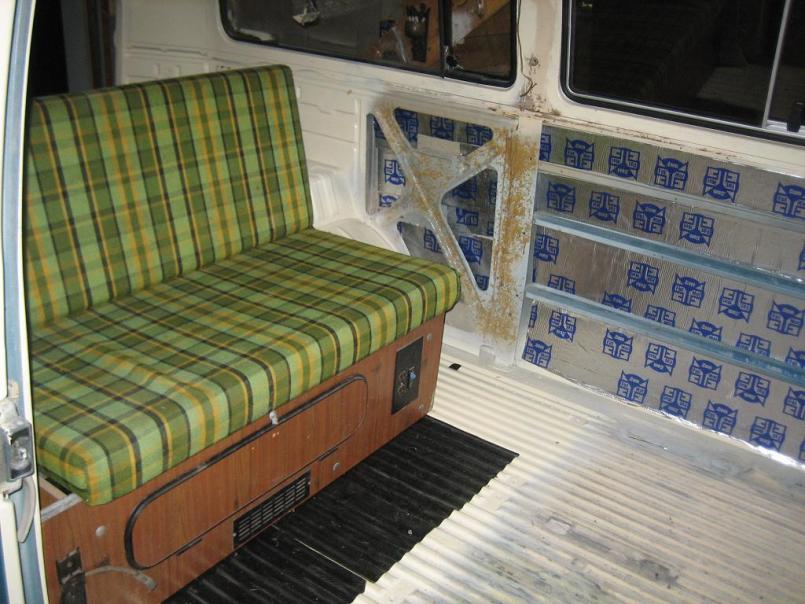
Posted by: plas76targa Oct 31 2009, 04:04 PM
Mike - wassat sound deadin' material you used? (fergive me if I missed that in an earlier post)
Posted by: Dr Evil Nov 1 2009, 12:27 AM
I am using a few things. The black sheets are a brand that I forget and the wrappers are at Zach's. The silver stuff is Fatmat and I am putting in some silver bubble wrap over that.
Posted by: Leo Imperial Nov 1 2009, 11:52 AM
Nice work. Gonna be quiet in there. I have opted not to install any in mine. With 3 kids it gives Liz and I a nice ride. On the highway we can only hear each other and not the kids.
Posted by: Dr Evil Nov 18 2009, 05:15 PM
So, I managed to get away for a few hours yesterday to move my bus out of Zach's garage so he could put his car in there. The sticking point on this conversion has been the engine tin as I wanted to make an elegant set that mated perfectly from the engine to the original curvy-assed lines on the bus. I hereby officially concede that I will not do this. What a PITA to do and it would take more man hours than the rest of the damn bus. So, I am giving in a cutting the drivers side flush and making simple, effective, quick engine tin....when I get time I will just be using 22GA steel, cut off disks and some tin snips. All me, no need for help, no need for an engineering degree. I feel better already
The next step is to drop the engine again so that I can finish up the engine bay, mounts, etc. Then install the engine, make the tine, put the wires, cables, etc up to the heart and then turn the key and poop myself.
Posted by: jsayre914 Nov 18 2009, 05:46 PM
Glad to hear it Mike. Anything I can do to help. parts to clean up etc. My garage is way too clean latley.
Posted by: type11969 Nov 18 2009, 06:09 PM
Only thing that could suck is the vin stamped in the metal you might be suggesting to cut out
Posted by: Dr Evil Nov 18 2009, 06:23 PM
Ya, I have been thinking about that. I think I can make a work around for it. I dont want to cut and move it. That would look suspicious.
Joe, you are never free to help out man. You have kids, dogs, wife.
Posted by: shoguneagle Dec 4 2009, 10:41 AM
How come you people are not working on and updating this thread???? I need my daily "reading room" material to keep updated in the world. Retirement and cold weather are pure hell when you do not get the "proper reading room material". Get back out there in the "cold weather" and keep an "old man" happy!!!
Seriously, enjoy reading the thread and the accomplishments that are being made. It should be noted that these activities are being done by people with outside, pressure commitments. I do enjoy the antics and comments to those who are accomplishing their work, education, family, and hobby involvements.
Now, get back out in the cold (probably snow by now) and get me some more "reading room material".
In other words, keep up the good work and providing us "outsiders" with entertainment.
Steve Hurt
Posted by: Vacca Rabite Dec 4 2009, 06:00 PM
Well, mainly as we are all slammed with school and work, and don't have time to go out and play with the cars in my backyard.
By the way, Mike. Take note. My semester is OVER on Wednesday!!!!!!!!!!!!111!!!1one!
So, in theory at least, I'll be less stressed at at home every night to help out. No more classes till the Second week of January.
Zach
Posted by: Dr Evil Dec 7 2009, 11:29 PM
I am sad to see snow upon my return to the East. I was hoping to have it running by now. But, I am back from my trip and ready to rock. I end my semester on Dec 20 and will be even more involved. Any spare time that I am not studying or building boxes for customers will be spent with the bus I have 3 boxes to catch up on.
Posted by: Dr Evil Dec 8 2009, 09:58 PM
Well, I made it down this early evening and got a few things done. I started cutting out the engine tin and it is looking very promising. I need to get the engine back in the car for fitment. Also, I cleaned up and painted the intake runners. I tried to use MAP gas and a braising rod to fill in any defects in the inside of the tubes, but after several attempts I gave up and figured that they were fine and I was being too particular about everything. I bought some wiring stuff to make a harness that will fit my engine and the buses harness. I also painted the bumper mounts so that they are ready to go on and are protected from rusting. It was cold, but the propane heater kept the garage livable and the paint warm enough to dry. The weather is supposed to turn to kaka tonight. That was it for now.
Posted by: rick 918-S Dec 8 2009, 10:03 PM
Posted by: Dr Evil Dec 8 2009, 10:13 PM
Ya, ya. I know. I didnt feel like it. It really was miserable working in that garage in the cold alone in the silence I forgot my iPod. I hate winter....
Posted by: Vacca Rabite Dec 9 2009, 08:18 AM
Ya, ya. I know. I didnt feel like it. It really was miserable working in that garage in the cold alone in the silence
I forgot my iPod. I hate winter....You were over last night?
Dang, I did not know. I usually notice you drive up.
On the other hand, Theo was sick and cranky, and I got some decorations up inside, so maybe it was best that I did not notice. Would have rather been playing with cars instead of screaming toddlers with ear infections.
Zach
Posted by: zymurgist Dec 9 2009, 08:43 AM
I have a propane heater if y'all need it. It's the kind that looks like a long tube and you point it where you want the heat.
Posted by: Dr Evil Dec 9 2009, 01:09 PM
Zach has a propane heater that I used. It was fine, but I had to divert it to the parts to be painted
Zach, I am surprised you didnt hear me. I was using air tools and your compressor kept going off. You must have some good sound insulation I was there from 4pm to 8:45.
Maybe more on Thurs.
Posted by: Vacca Rabite Dec 9 2009, 01:46 PM
Zach has a propane heater that I used. It was fine, but I had to divert it to the parts to be painted
Oh! Cool, that means it works.
Zach, I am surprised you didnt hear me. I was using air tools and your compressor kept going off. You must have some good sound insulation
I was there from 4pm to 8:45.Had to be after 4 when you got there, as I got home at 4:20.
Pretty much Erin pressed me right into service with Theo. He only seemed to be not screaming last night when I let him use me as a jungle gym. Poor guy, I hope he is having a better day today.
Still, I can't believe that I totally never realized that you were here.
Say hi next time, if only so I don't feel like a doofus when I find out the next day I had company while I was home.Zach
Posted by: zymurgist Dec 9 2009, 01:57 PM
maybe you shouldn't have stopped for 420
Posted by: Dr Evil Dec 9 2009, 02:29 PM
I figure that I am over there on my schedule, not yours so I dont want to bother ya'll by knocking on the door if you are having some family time, etc. I go there at 4:30ish.
Posted by: Vacca Rabite Dec 9 2009, 04:03 PM
Dude, we are friends. If I'm busy, I'll kindly tell you to fuck off for a few minutes (or hours, etc) until I am unbusy.
If my car is in the drive, it is safe to say hello.
I'll be around tomorrow afternoon, maybe friday afternoon too. I think.
Zach
Posted by: Dr Evil Dec 9 2009, 04:11 PM
I am planning around weather, school, and work. Tomorrows forecast seems reasonable for work outside on the bus (wiring). I need to see if I can get some gear boxes done tonight I need the room and one of them peed all over the place I tell them to empty them first, that is my only request, and still I get full ones the fuck up my shit
Posted by: Dr Evil Dec 9 2009, 04:12 PM
Oh, I did try to call you from the garage...
Posted by: jsayre914 Dec 9 2009, 05:29 PM
and one of them peed all over the place
I tell them to empty them first, that is my only request, and still I get full ones the fuck up my shit I had a cat that peed all over my shit once
Posted by: zymurgist Dec 9 2009, 05:38 PM
and one of them peed all over the place
I tell them to empty them first, that is my only request, and still I get full ones the fuck up my shit I had a cat that peed all over my shit once
Once.

Posted by: Dr Evil Dec 10 2009, 02:23 AM
I did use cat litter to clean it all up
Posted by: plas76targa Dec 10 2009, 08:42 AM
Boy I wish K and I had bought the house in Gettysburg. At least I would have been another 45 minutes closer and you'd have one more 914 nut hanging around.
OT - thinking about having a holiday gathering. You guy's interested?
Posted by: zymurgist Dec 10 2009, 09:41 AM
Depends on when. I am out of here on the 18th so I probably won't make it.
Posted by: Vacca Rabite Dec 10 2009, 10:02 AM
Boy I wish K and I had bought the house in Gettysburg. At least I would have been another 45 minutes closer and you'd have one more 914 nut hanging around.
OT - thinking about having a holiday gathering. You guy's interected?
Interested. Yep- but no promises that we would be able to show. We would try, though - you know how holidays can get...
Zach
Posted by: Dr Evil Dec 10 2009, 11:47 AM
interested
Posted by: zymurgist Dec 10 2009, 12:09 PM
Hey Matt, if you do this while I'm out of town, can I drop off a transmission at your house for Mike?
Posted by: Dr Evil Dec 10 2009, 02:12 PM
Hey Matt, if you do this while I'm out of town, can I drop off a transmission at your house for Mike?
But then you wont be able to see your new motorcycle
Posted by: zymurgist Dec 10 2009, 02:25 PM
LOL. Well, I was only thinking about getting the transmission to you as quickly as possible (but realizing that you'd be unlikely to get to it over the holidays anyway). I can run it up, but it's looking more like early next year at this point.
Posted by: crash914 Dec 10 2009, 04:42 PM
Yep, lets have a holiday meeting.....
Posted by: Vacca Rabite Dec 11 2009, 09:13 AM
During a manic cleaning session (yes, I was cleaning my garage to avoid actually doing meaning full work on my winter 914 project list. it was *really* cold in my shop, and I did not want to start running more sound proofing until I warmed up some...) Mike was walking around my garage losing things, and I would go and find them a few mintues later. This is noteworthy, as it USUALLY goes the other way around. But, I found his mug of hot cocco, and the corviar carburator that has been lost in plain site since around August. Mike was able to find the intake manifold that he lost, but only because I had not gotten that that side of my shop yet.
Also, I (who knows very little of auto electrical craftsmanship, and what I know I learned from Mike) was able to decipher the starter wiring diagram before before he was!
Yes, I am gloating. Suck it!
The painted silver intake runners look awesome, and the rear and side tins are in - though they may need dome final trimming. We need to get the engine bar cleaned and coated so we can rehang the engine to make the front tins.
Zach
Posted by: Dr Evil Dec 11 2009, 12:56 PM
Even a broken clock is right 2x a day
Posted by: Dr Evil Dec 16 2009, 04:02 PM
Here are the latest pics of the carb mated to the engine. I made a carb mount for it from e plate steel and a hand held dremel ('caus I rock). I need to make a bell crank assembly to transfer the motion of throttle cable pull from the left of the engine to the right. Not an issue as the parts showed up today. I will need Zach to do a small bit of welding, but after I get that set up we should be able to run the engine on the test stand
Attached thumbnail(s)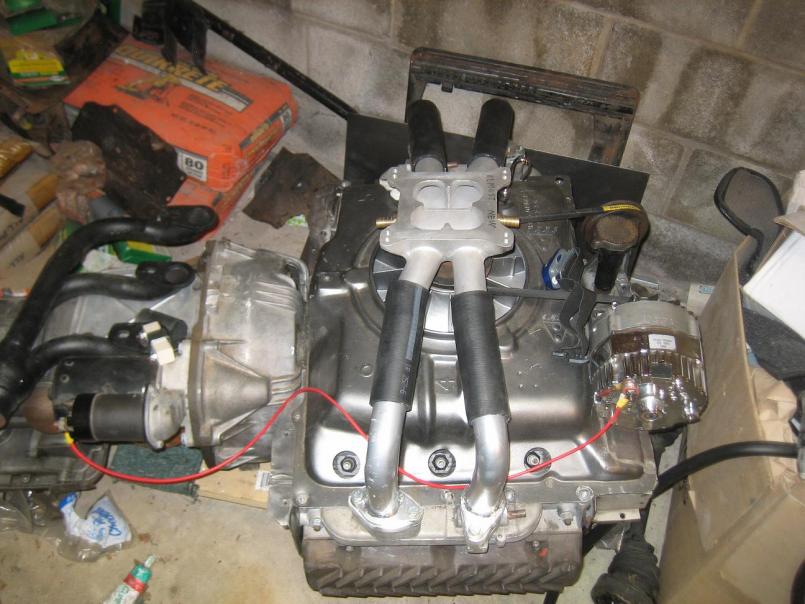
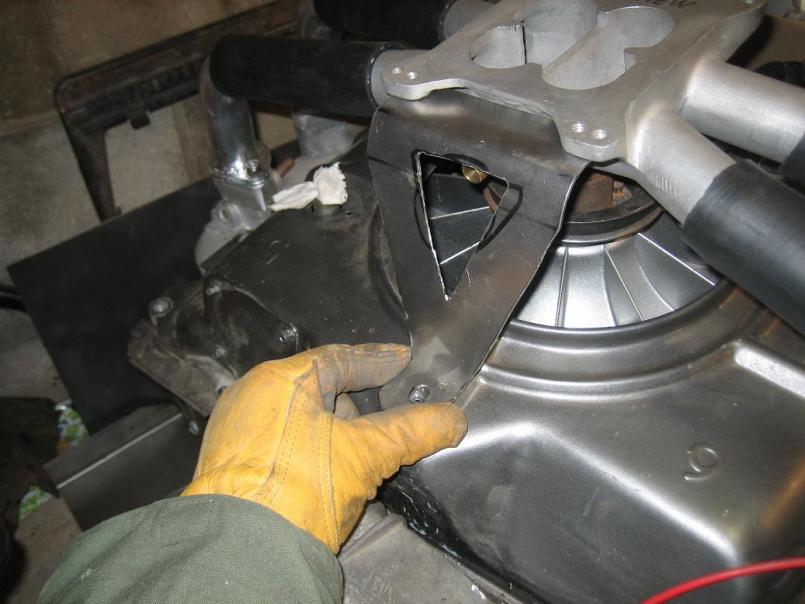
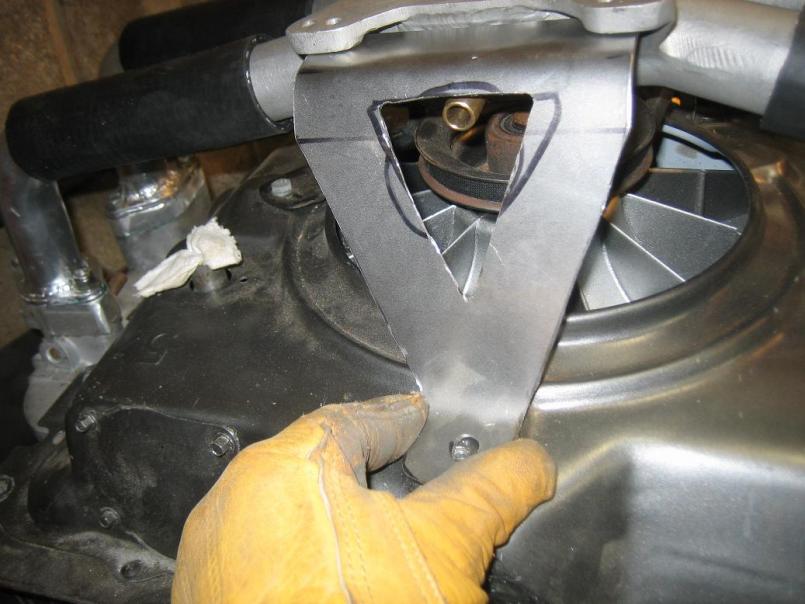
Posted by: Dr Evil Dec 16 2009, 04:04 PM
And some more trial fitting and final fitting.
Attached thumbnail(s)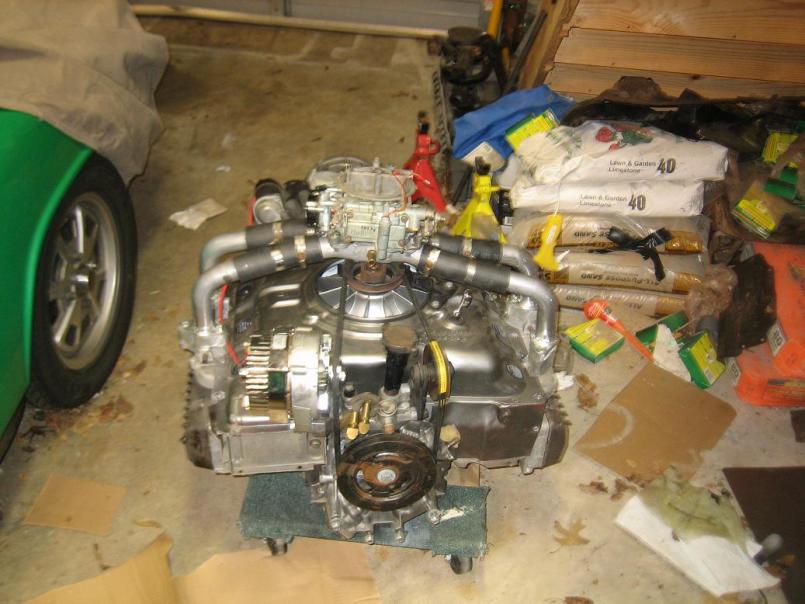
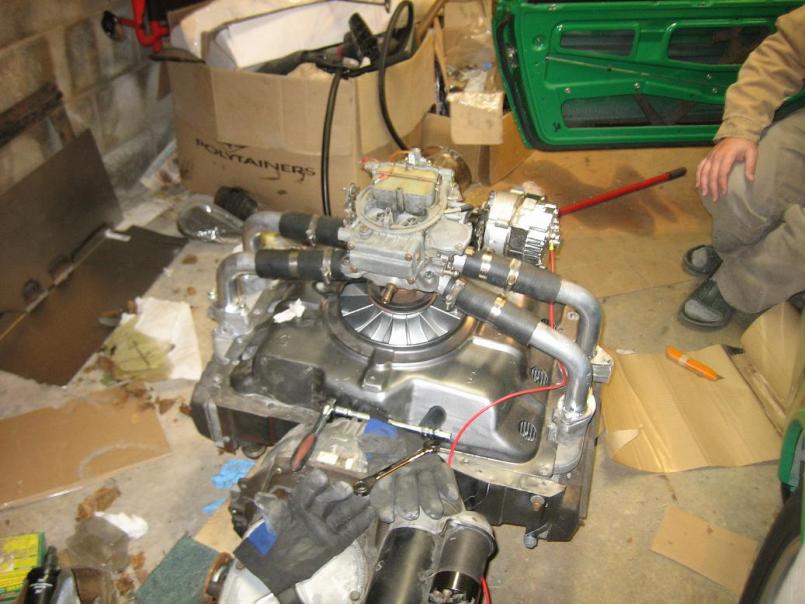
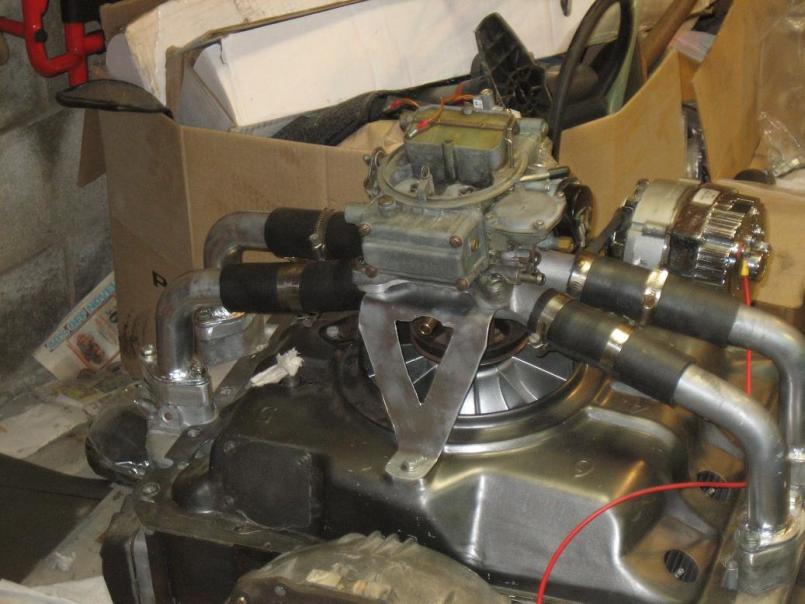
Posted by: Vacca Rabite Dec 19 2009, 11:09 AM

It is snowing like mad today. But so cold and windy that it won't stick to anything to windward. No snow of the roof of the bus or truck (and very little on the windward slope of my driveway.)
What I thought was cool was how the wind was swirling into the bed of my truck. Even the bed has been mostly swept free of snow. Where the wind cant reach, though, the snow is all the way to the top of the tail gate. No higher, though, as then the wind gets it and blows it away.
Zach
Posted by: Dr Evil Dec 19 2009, 11:13 AM
It was supposed to be in my driveway by now
Posted by: Vacca Rabite Dec 19 2009, 11:21 AM
It was supposed to be in my driveway by nowI don't think either of us thought that was going to actually happen. I think that Spring is a realistic goal. But getting it done before the first snow was not going to happen while we were both beating our heads in with work and school.
I will need it to move before summer, though. I am going to need to put the 3/4 ton chevy there that will be donating its engine and 12 volt bits to the 715. I think 3 non-ops in my drive would cause Erin to beat me.
Zach
Posted by: zymurgist Dec 19 2009, 11:25 AM
Nice picture Zach.
I think I'll stroll outside in shorts and bare feet in your honor.
Posted by: Vacca Rabite Dec 19 2009, 11:29 AM
IN the past 20 minutes since I took that picture, the wind has died. Everything that was bare has been coated with about 1/2 inch of snow, and building QUICK.
It really is quite amazing. If the wind come back, it will be interesting to see if it all blows away again, or if it sticks.
Ken, you should be in the middle of this here storm. You aren't getting anything?
Posted by: zymurgist Dec 19 2009, 11:31 AM
Not in Lake Worth, Florida, I'm not!
Posted by: Dr Evil Dec 19 2009, 11:34 AM
I did think that it would be done. If it were not for the 1hr commute, the classes and you and Joe needing your cars fixed it would be done. It is damn close now. Once I get the linkage sorted out we can run it That will be a good day. Also, if I didnt waste so much time trying to figure out the tin. That was a bad idea that cost me at least a month. I was considering coming over today to work, but I may just stay in my shop and finish the last 2 gear boxes I have to ship.
Posted by: Vacca Rabite Dec 19 2009, 11:39 AM
Mike, stay home. It is not pleasant driving around here right now, and it is butt ass cold. Nothing has yet to be plowed, and it supposed to keep coming down unit about 2AM.
Posted by: crash914 Dec 19 2009, 11:43 AM
yep, got a foot or so here.....big drifts....sucks, stay inside...
Posted by: Spoke Dec 19 2009, 12:18 PM
It just started snowing right now. I took the 911 out for a spin earlier today. There's too much crap on the road right now to have fun.
I had the 911 out a couple of nights ago on one of my favorite roads and ran over some "anti-skid material" more commonly known as sand and dirt and did a 4 wheel slide around a turn. Scared the shit out of me.
Posted by: Vacca Rabite Dec 19 2009, 07:30 PM
When I went out to shovel the drive today we had 17 inches (drifts were well over 2 feet.).
By the time I got done shoveling, I looked back up the drive and there was another inch at the top. Just went inside for dinner. Soon I will be posting in the after dark drunk thread.
If you look, the snow is up to the spare tire on the bus. And the drifts are taller then the wheel arches.
Zach
Posted by: scotty b Dec 19 2009, 08:49 PM
Nice driveway tree Zach 
Posted by: jsayre914 Dec 19 2009, 09:59 PM
If it were not for you and Joe needing your cars fixed it would be done.
Thanks Mike.
Posted by: Dr Evil Dec 19 2009, 10:37 PM
Eh, I tried to fix a customers tranz and then went for a ride to test out the suby. I was drifting into every turn using the hand brake It was fun. I dont think I would have the bus out in this weather so I dont feel bad about it not running yet. This is one of the best storms I have seen in my almost 5 years out here
Posted by: plas76targa Dec 20 2009, 06:05 AM
Hi guys! Mike you can blame me for the small snowfall in recent years, as I was not looking forward to shoveling our long drive way. My back feels this way about shoveling snow  Ended up using the neighbors snow blower. still not done yet either. Darn snow has moved the satelite dish too!
Posted by: scotty b Dec 20 2009, 07:14 AM
Eh, I tried to fix a customers tranz and then went for a ride to test out the suby. I was drifting into every turn using the hand brake
It was fun. I dont think I would have the bus out in this weather so I dont feel bad about it not running yet. This is one of the best storms I have seen in my almost 5 years out here WATCH OUT FOR THE TELE POLE !!!! :
Posted by: Dr Evil Dec 22 2009, 12:06 AM
Yuck Fou
Today ROCKED in the garage! I designed and built, from scratch, with no help, a very complicated throttle linkage system that WORKS! I did not bring my camera, but I will tomorrow. This was the last major hurtle in the design phase. The rest is looking to be straight forward The linkage is the shit!
I used a section of 1/2" x 12" black pipe, some 1/2od x 3/8 id bushings, some 3/8" rolled steel rod, and some flat stock. The rods I used are 3/16" rolled steel and all ends terminate at quick release ball clevises
You'll see. Tomorrow night, hopefully
Posted by: Vacca Rabite Dec 22 2009, 01:40 PM
It is pretty cool. While he was doing that, I fixed my snow blower. We better get more snow, or I am going to be pissed.
Oh, and Mike has now seen the wonders of a welder. He has gone from fear to "Look! I did it myself! I'm so getting one of these..."
Zach
Posted by: Dr Evil Dec 23 2009, 01:47 AM
I tried to take pics of the linkage setup, but my lovely wife did not charge the camera battery....which I found out after I arrived at Zach's, an hour away
I worked out my frustrations by using Zach's snow blower to do the rest of his drive way and subsequently fill the back of his truck with the snow.
Posted by: scotty b Dec 23 2009, 06:52 AM
I worked out my frustrations by using Zach's snow blower to do the rest of his drive way and subsequently fill the back of his truck with the snow.
Good for traction
...............On a running driving vehicle
Posted by: Vacca Rabite Dec 23 2009, 07:01 AM
I worked out my frustrations by using Zach's snow blower to do the rest of his drive way and subsequently fill the back of his truck with the snow.
Good for traction
...............On a running driving vehicle Yes. It was rock hard ice by the time I walked out there to see if he had really filled up my bed with snow. It should melt off sometime around June.
Zach
Posted by: Dr Evil Dec 23 2009, 02:04 PM
I worked out my frustrations by using Zach's snow blower to do the rest of his drive way and subsequently fill the back of his truck with the snow.
Good for traction
...............On a running driving vehicle Twas necessary because the snow was between my bus and the garage where my engine is currently.
plick
Posted by: Dr Evil Dec 23 2009, 02:04 PM
Zach, hows about some pics of my linkage?
Posted by: Vacca Rabite Dec 23 2009, 06:17 PM
If I can get out to the garage tonight, I'll get some. Spent most of today
Been too long. I love shooting in the snow.
Zach
Posted by: zymurgist Dec 23 2009, 06:30 PM
If I can get out to the garage tonight, I'll get some.
bow chicka bow wow
Posted by: Dr Evil Dec 31 2009, 12:31 AM
How about some new year's eve engine porn? Since Scotty B has seen fit to grace us with his benevolent presence this new years eve/day, Zach and I figured that we should do something special to commemorate this momentous occasion. We will attempt to fire up the engine later today! Enough with the $.50 words. I busted my hump to get the engine ready to run tonight and I can not think of any reason not to hook up a battery, fuel and see if we can get it to make noise
What was done today:
- Installed and static timed dizzy with Fireball optic ignition
- Installed coil, ballast resistor, wires
- Set up fuel pump
- Connected electrically adjustable jet fuel harness (this ought to be interesting)
- Clamped some of the oil lines down (I need 2 more hose clamps)
- Installed auto tranny filler tube after straightening it out (had to change curve to work with engine tin location)
- Drilled hole in air cleaner bottom and installed nipple for PCV input (Zach did this)
Tomorrow to do:
- oil filter
- Hose clamps for oil lines and PCV hose
- PCV install (I need to find one that can be modified to work in my application)
- Fluids
- turn key and smile (?)
And now some pics
This is the linkage on the transmission. I changed the direction of the bend and made it a specific length to convert the 1 1/8" of cable pull into the 2 3/8" of throttle lever play at the carb.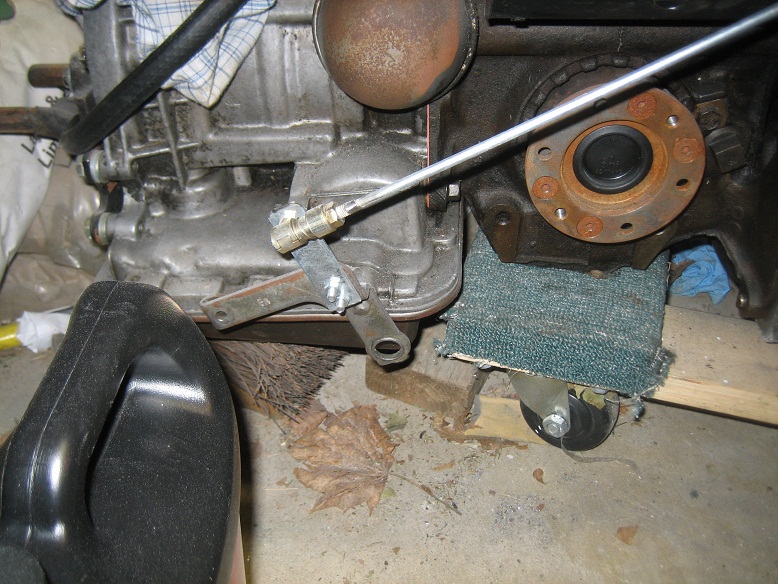
The second link. I used a 1/2" ID x 12" section of black pipe and some brass bushings for the pulley housing.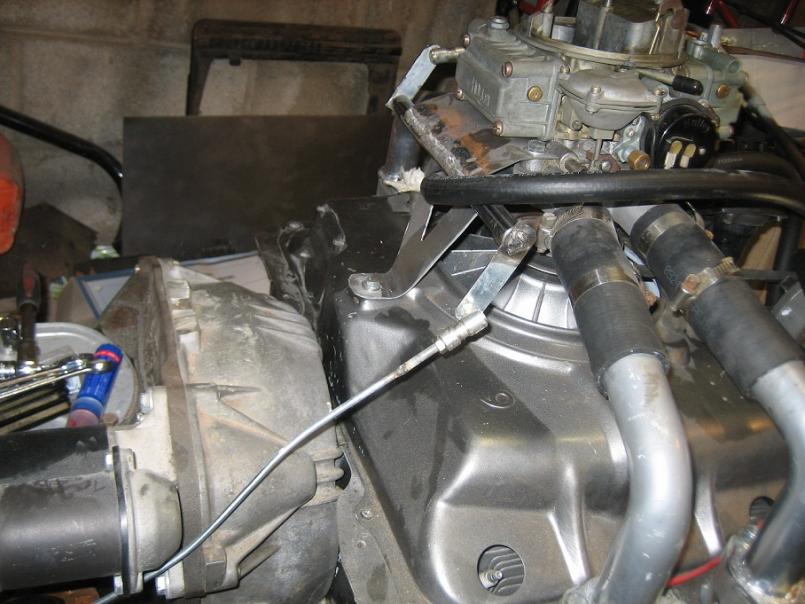
Posted by: Dr Evil Dec 31 2009, 12:33 AM
Links 1 and 2 connected and full open.
Attached image(s)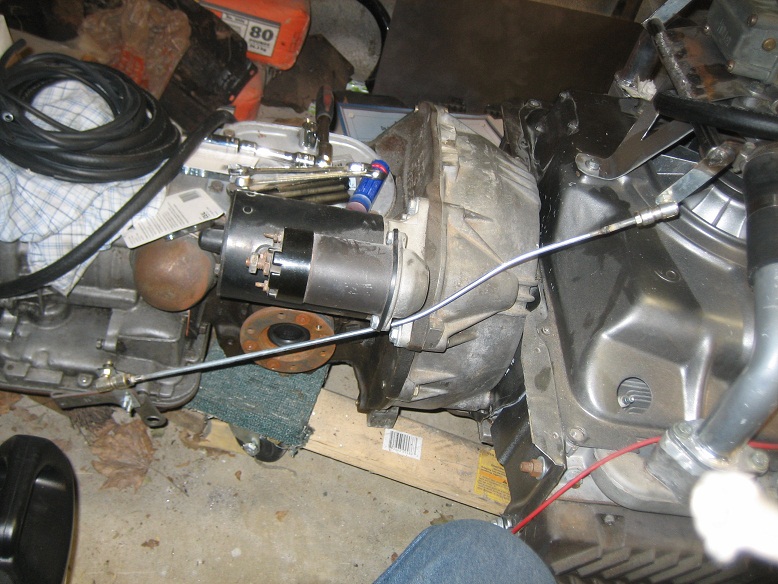
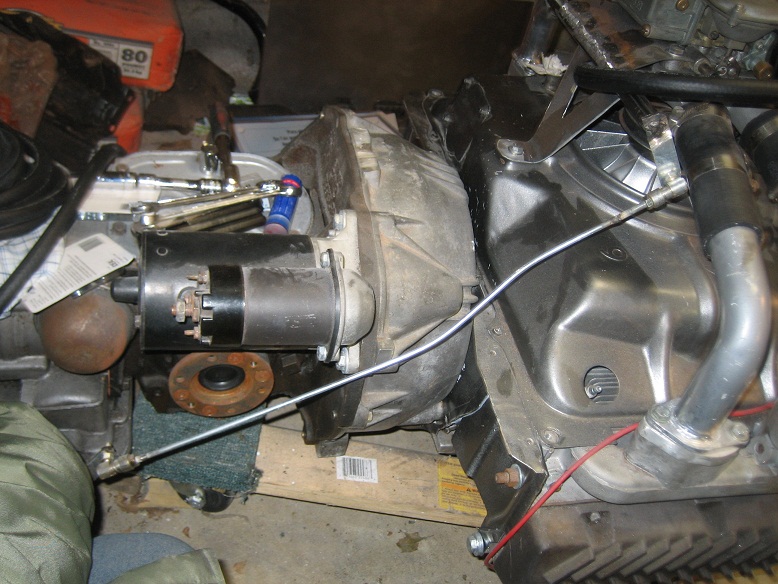
Posted by: Dr Evil Dec 31 2009, 12:36 AM
Links 2-3 closed.
Attached image(s)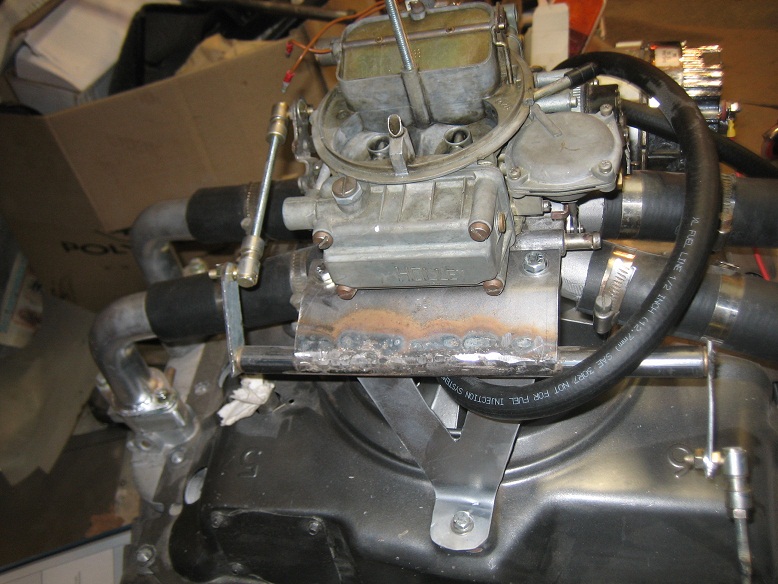

Posted by: Dr Evil Dec 31 2009, 12:38 AM
Link 2-3 full open.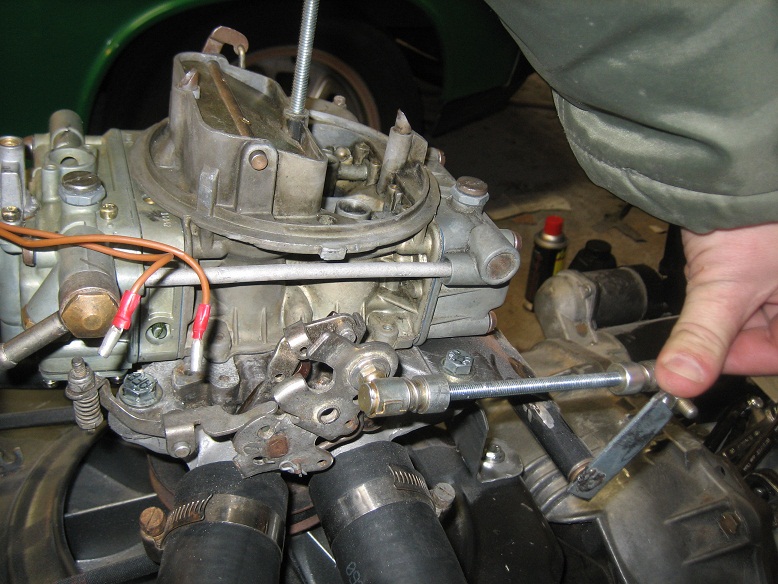
An enthusiastic and frozen Zach looks at the newly installed air cleaner 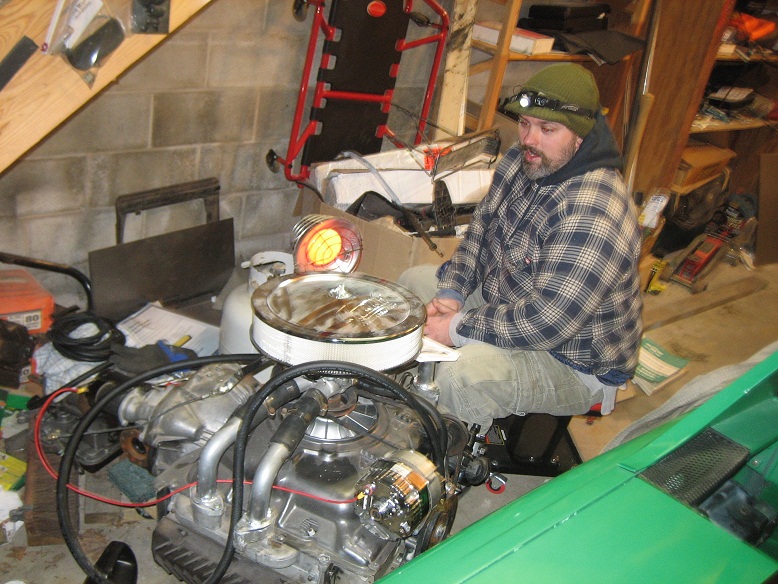
Posted by: Dr Evil Dec 31 2009, 12:40 AM
Some close ups of the electrically controlled fuel jet system, Dial a Mile from Holley.
Attached image(s)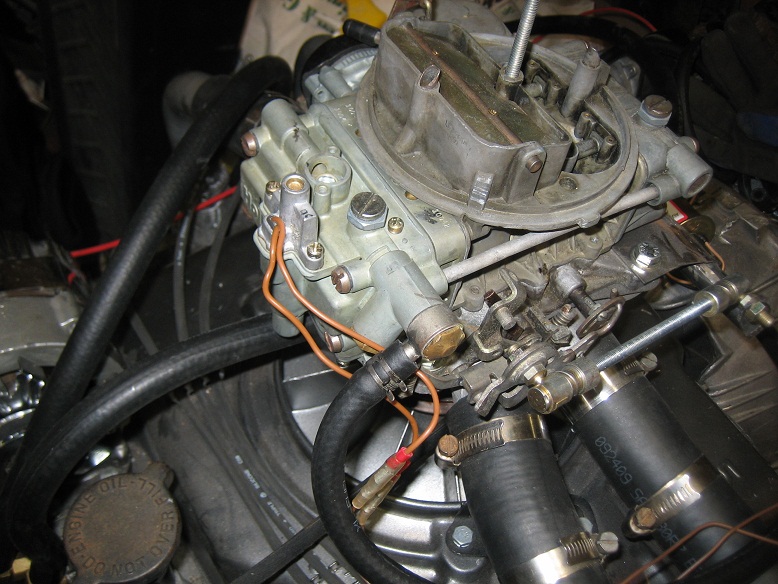
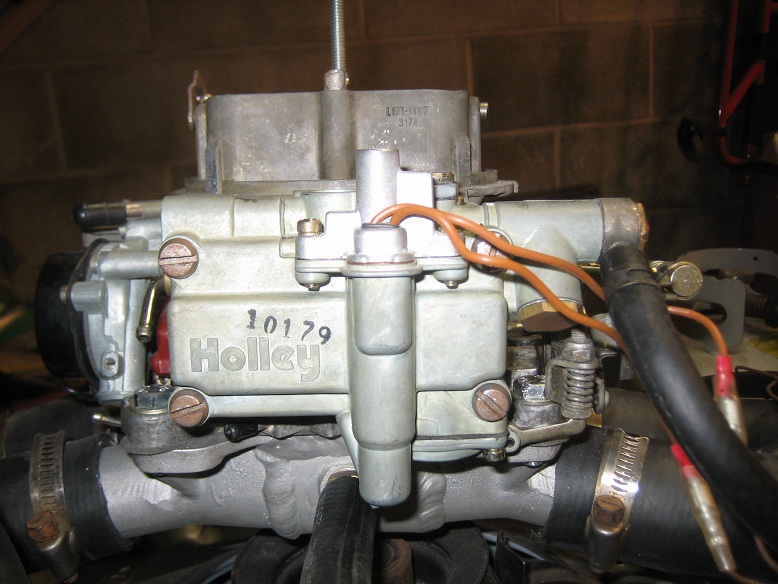
Posted by: Dr Evil Dec 31 2009, 12:42 AM
And finally, the engine almost ready to run on the dolly
Attached image(s)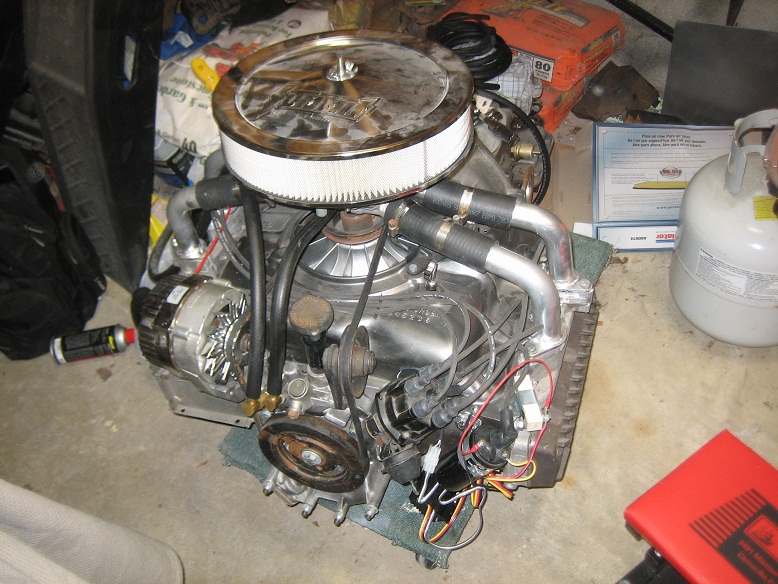
Posted by: zymurgist Dec 31 2009, 05:44 AM

Posted by: Vacca Rabite Dec 31 2009, 07:28 AM
I am about to go and remove this morning's snow in anticipation of getting this bitch started.
Zach
Posted by: stepuptotheMike Dec 31 2009, 08:38 AM
video will be required
Congrats!!!
Mike
Posted by: Vacca Rabite Dec 31 2009, 09:59 AM
Drive is cleared. Trucks have been down the roads, so they are cleared too. Just need mike and Scott to get here. Vroom vroom!
Zach
Posted by: rick 918-S Dec 31 2009, 11:28 AM
Be sure to add some transmission fluid. Don't run it dry. You could burn up the pump.
Posted by: Vacca Rabite Dec 31 2009, 04:16 PM
We were defeated by a crapped out (but freshly rebuilt) starter.
It turned, but only just when the starter was removed. Mike was able to stop it from spinning with his fingers... I shot video, but won't post it as it is not the victorious ending that we require.
Zach
Posted by: rick 918-S Dec 31 2009, 05:02 PM
That is a very common GM starter. If you can't fix it, check the local flats. I bet you can either get one or get one close enough to swap the starter nose and get it going.
Q.) Did you connect a battery with proper cables or are you trying to use a jump box or booster charger?
We want a new year victory!
Posted by: Vacca Rabite Dec 31 2009, 10:13 PM
There is a big corvair yard near us that we are going to check out Saturday for the starter. Revised go-time will be Saturday.
Zach
Posted by: type47 Jan 1 2010, 08:34 AM
There is a big corvair yard near us ...
Really? Maybe there's a Vanagon yard near-by too...
Posted by: Vacca Rabite Jan 2 2010, 05:03 PM
It coughed. It sputtered. It ate a starter and a fuel pump. It shot a foot of flames out the top of the carb.
BUT IT RAN!
Video inbound, sometime tonight. I am getting it off the camera now.
Zach
Posted by: Dr Evil Jan 2 2010, 06:39 PM
Brief list of the days events.
- Wake up
- Drive with Scotty B 1hr to Zach's house
- Pick up Zach and drive 1hr to Corvair Ranch to pick up new (rebuilt) starter
- Given tour of the ranch by Jeff, the owner
- Drive back 1hr to Zach's
Engine specific:
- tested starter on the ground and it worked MUCH better
- Removed spark plugs
- Cranked engine for a few cycles to get oil through it
- Re-installed plugs and attempt to fire up
- Get frustrated
- Scratch heads
- Starter slows down
- Ugh, no fuel in bowl. Damnit, new FP is dead now.
- Get new FP
- Start up, run, flood
Now I have the primary bowl with me so I can double check the float and adjustment. The adjustment still looks spot on, but the bowl was flooding out of the vent which eventually caught on fire (YAY! ).
Alternator, also a new part, but one that I modified, was making an eerie Weeeeeeee noise at any appreciable RPM. The shaft is not binding in any way so I took it off to investigate. Maybe the brushes are wearing in?
Posted by: Vacca Rabite Jan 2 2010, 06:44 PM
You can REALLY hear the alt. whine on the video.
Speaking of which...
https://www.youtube.com/watch?v=9_uG6JLvVZg
Windows Movie Maker is WAY easier to use then Adobe Premiere! Too bad WMM does not handle importing from my "real" video camera. But it worked just fine for the video shot from Erin's point and shoot.
Zach
Posted by: zymurgist Jan 2 2010, 07:00 PM
Posted by: plas76targa Jan 2 2010, 07:40 PM
Way to go guys! Congrats on getting the engine started!
You looked f'ing cold! I wonder if the bearings on the alternator are toast. I had a '63 Pontiac whose alternator died making a similar noise - ended up replacing the bearings and it worked fine. We all curiously await your diagnosis!
Posted by: jsayre914 Jan 2 2010, 07:50 PM

Great job guys. Didn't have time to stop by today. Plus it was waaaay too f*** cold out we did go ice skating for a few hours. (first time for all 4 of us)
That video looks great!
Posted by: rick 918-S Jan 2 2010, 09:24 PM
Minus 40 here over night. Great job guys! Way to stay at it. Shove that beast into the van and go for it!
Posted by: Dr Evil Jan 2 2010, 10:24 PM
IIRC, I put the old bearing from the original alt into the new one due to better fitment as I had to make a alt from the new and the old. I will look into that.
Posted by: Dr Evil Jan 2 2010, 10:26 PM
A consideration about the starter is that the corvair starter turns opposite of all other starters (other than 4cyl Hondas)
Posted by: rick 918-S Jan 3 2010, 08:19 AM
Is your alty spinning the correct direction or is the reverse rotation spinning it acks backwards?
Posted by: Dr Evil Jan 3 2010, 11:45 AM
Alts dont care what direction they spin. I bought a 100A alt that was supposed to be for a corvair. The front housing was wrong (mounting ears on opposite sides) so I was told I could swap the stock housing onto it. It did not fit exactly correctly so I mixed and matched parts as they fit (bearing assemblies, etc). It was still not perfect, but I thought that it was workable. The stock alt was 37A and way to weak. I found last night that I can buy an alt from a 74 Nova 350 w/ AC at any local FLAPS for $25 and swap the front housing onto it without issue. That alt is 65A and to buy an already converted one is stupid expensive for no reason. 65A is perfectly fine for my application. I bought the 100A because is was cheaper than the 65A converted and had higher amps, but it is more strain on the belt so the 65A seems like a good idea and is what I am going to do today.
The Hi-torque starter is anywhere from $180-250 and may not be necessary once I solve the float bowl adjustment. I am not sure the HT starter would fit in the small space the current one does.
We should be able to start it and keep it running today. Then I will install it (in the next few days). I have an interview Mon-Tues, a transmission to finish up, one to start, one incoming, visit to Grandmas on the 9-10, and, and, and.....
Posted by: Vacca Rabite Jan 3 2010, 11:58 AM
And I have to go back to work Monday.
You are welcome to work, but I won't be around to help. I'll also be gone the weekend of the 8th and Presidents Day weekend. As alawys, you are welcome to come over, but you will be on your own.
Zach
Posted by: scotty b Jan 3 2010, 12:13 PM
So what did you find on the float issue ? Out of adjustment, trash ?
Posted by: Vacca Rabite Jan 3 2010, 12:30 PM
I saw this on youtube.
Its not helping me. This car is HOT! and 193HP to the rear wheels (so says the video)
https://www.youtube.com/watch?v=ddbbGbUPlyc
Zach
Posted by: scotty b Jan 3 2010, 02:44 PM
Gee whizzzz Just go get that maroon one and get on with it
Posted by: scotty b Jan 3 2010, 02:47 PM
Weber setup
http://www.youtube.com/watch?v=uzicgyjY12E&feature=related
https://www.youtube.com/watch?v=uzicgyjY12E&feature
Posted by: jmill Jan 3 2010, 02:49 PM
A buddy of mine had one with a stock turbo. It wasn't as old as the one in the video. He was saving it for his kid (who must be 30 by now). It had some pep.
Posted by: Dr Evil Jan 3 2010, 05:49 PM
Today was a good day. I adjusted the float bowl and solved the flooding issue. I bought the new alt and switched the end cap for the corvair to it. I swapped the new bearing from the new alt end cap into the corvair end cap and assembled the new unit. All spun good, no noise, no binding. Interesting thing about the old one, when I disassembled it, it looked fine inside. No wearing, rubbing, binding or anything else that would be expected of an alt producing the whining noise. More oddity happened when I installed the new one and ran it was that it whined a little, but not as much. I am not going to worry about it for now. The new unit is better assembled and cheap so I intend to run it until it gets worse or stops working.
After reassembling all of the parts onto the engine I started it right up and ran it a few times for a few minutes. The carb is not adjusted so I had to keep giving it gas, then I adjusted the dizzy, needed less gas, tweak, run better, etc. Bottom line, the engine is ready for installation and can be tuned in the car.
Thing learned today, the starter is not sufficient for this engine. It only turns it when the engine actually wants to start, but it lags badly even after the engine has been running for a few minutes. It is not a ground issue or a battery issue. I had the car idling at 3k while the battery was attached to the starter directly. It was pathetic, and disappointing.
The engine sounded bad ass running though It made nice heat in the garage as I had the pipes outside of the garage, the door only just open and the engine in the garage. This is getting close to moving
Posted by: type11969 Jan 3 2010, 06:01 PM
Nice, congrats!
Posted by: scotty b Jan 3 2010, 07:20 PM
Wish I could have stayed another day
Posted by: Dr Evil Jan 3 2010, 07:21 PM
Your help allowed today to happen
Posted by: Vacca Rabite Jan 3 2010, 08:26 PM
I am still concerned about your alternator.
I could not hear your engine when it was running and I was inside. But I could hear the whine of the alternator. maybe its just the frequency, but it seemed to me to be pronounced.
Sorry I could not come out. Had to take care of little guy and give Erin the night off after she watched him all day yesterday.
But, my hiking trip next weekend is likely canceled due to the organizer being ill. However, that means I will be around to help get the engine in the van and help with other tuning stuff.
Zach
Posted by: Dr Evil Jan 3 2010, 08:39 PM
I am busy next weekend. The engine was LOUD so I am not sure how you didnt hear it. The alt was barely audible standing right next to it. Dont know what to say.
Posted by: Dr Evil Jan 5 2010, 07:46 PM
So here is the latest:
I ordered a Hi-torque starter that is made specifically for the corvair motor. Its new and should last forever. I didnt feel like messing with it any more. It should be here Fri.
As for the current starter issue, I do wonder if the alternator being wired up is having anything to do with it. It is a one wire, internally regulated jobby so I doubt it. But, I like to worry about stupid things.
Next, I need to prep the engine bay for drive-train insertion. This will be when I finish my engine tin fabrication.
Then simple engine wiring, cabling, install axles, install seat mount, drive?
Posted by: Dr Evil Jan 6 2010, 11:43 PM
I decided to draw out the schematic of my engine wiring and did some research on the "one wire" alternator. I found that the one wire alt needs a second wire from the ig switch to activate it. This turns out to be a good thing, though, as I will use this to power my idiot light and buzzer.
The warning system:
The alt needs B+ to the +1 pin in order to switch it on. If the alt should fail or stop turning then this wire will lose its ground and the light would go out, according to one web site I found; http://www.alternatorparts.com/FAQ.htm#how_to_wire
"The ignition wire to the #1 terminal can be supplied in two ways, either a direct ignition wire from the key switch or through a light bulb. Running the ignition wire through a light bulb before connection to the alternator will give you a warning if your alternator fails to start charging or if it quits working while the engine is running, this is commonly known as the idiot light. Another thing that should be mentioned is the #1 terminal must be ignition switched. I have heard of situations where a wire was run to the #1 terminal that had power on at all times. What happens is when the engine is turned off the #1 terminal switches to ground which over time can burn up the voltage regulator or the wire if power is not cut to the #1 terminal."
This is kinda unclear as it states that term 1 switches TO ground when the engine is off. This would cause the light to THEN come on.
Luckily, our cars are supplied with many little round relays that can either be SPST-NO or NC. If I go with the NC configuration, I just need to hook the power in to pins 85 (coil in) and 30 (power to warning equipment), hook the alt term 1 up to pin 86 (coil out), and hook either pin 87a (NC configuration) or pin 87 (NO) to the power into the light and buzzer which are wired in parallel. I would ground the warning circuit separately under the dash.
In the NC (normally closed) configuration, power is allowed to flow through the relay to the warning circuit when the power to the relay coil is lost but the key is on supplying power to the warning circuit.
In the NO (normally open) configuration, power is not allowed to run through the relay to the warning circuit until it is energized. Thus, the warning circuit does not get power unless the term 1 at the alt grounds and switches the relay on.
This should be very cheap and easy (my favorite) to do.
Posted by: Vacca Rabite Jan 7 2010, 08:41 AM
If you can get your starter to me, I'll try and get your engine in over the weekend.
is there anything more that needs doing before we stuff it in the Bus?
Zach
Posted by: rick 918-S Jan 7 2010, 10:30 AM
Mike, I would suggest just locating the idiot light wire for the bus dash and use it to excite the alternator. Check the bus wiring diagram.
When the exciter wire turns on the alternator it will loose ground and the light on the dash will turn off as normal. I have a GM one wire on the Alien and I used the 914 dash light wire for the exciter. Works fine. Oh, BTW: the alternator will turn itself on if you rev the engine a couple times. but it will not work well this way.
Posted by: Dr Evil Jan 7 2010, 10:38 AM
Zach, thats kind, but I will do it on Mon.
Rick, I need the buzzer as insurance against not noticing that my belt has slipped. The alt wire will be using the dash light as it was intended, but it will also have a buzzer inserted into the circuit to warn when bad stuff has happened. Are you saying that the exciter wire initially has ground through the alt and then loses it until the alt stops functioning?
Posted by: Dr Evil Jan 7 2010, 02:15 PM
Zach, if you want to do something, here is what I still need:
- Remove most of the metal around the VIN tab (leave only what is necessary)
- Remove rest of the engine shelf on the pass side (maybe)
- Smooth and prime/paint the new bare metal from cutting the engine shelf
- Prime/paint the support tubes I placed through the frame in the rear
- Prime/paint the engine bar (I have POR-15 for this one, upstairs)
I should have all the paints necessary to do this stuff. Once the engine bay is ready, the engine goes in and the tin gets fitted. I will need to mock up the forward tin before the engine goes in. I need to put the correct holes in it for wiring, throttle linkage, and the ATF tube. This will likely need to be installed prior to stabbing the engine into the bus. After this, it will be the fabrication of the aft tin under the pully that will be the challenge.
Posted by: rick 918-S Jan 7 2010, 03:34 PM
Zach, thats kind, but I will do it on Mon.
Rick, I need the buzzer as insurance against not noticing that my belt has slipped. The alt wire will be using the dash light as it was intended, but it will also have a buzzer inserted into the circuit to warn when bad stuff has happened. Are you saying that the exciter wire initially has ground through the alt and then loses it until the alt stops functioning?
I may be wrong but that is my undrestanding. I need to read up on that again, I may not have the accurately discribed or over simplified. BTW: there is something about using the bulb that creates a resistance. If you replace the bulb with an LED it will cause the system to fail. Eric Shea had something happen like that once but I'm not clear on the facts. Just saying don't replace the filiment bulb with an LED.
Posted by: Dr Evil Jan 7 2010, 10:24 PM
Zach, thats kind, but I will do it on Mon.
Rick, I need the buzzer as insurance against not noticing that my belt has slipped. The alt wire will be using the dash light as it was intended, but it will also have a buzzer inserted into the circuit to warn when bad stuff has happened. Are you saying that the exciter wire initially has ground through the alt and then loses it until the alt stops functioning?
I may be wrong but that is my undrestanding. I need to read up on that again, I may not have the accurately discribed or over simplified. BTW: there is something about using the bulb that creates a resistance. If you replace the bulb with an LED it will cause the system to fail. Eric Shea had something happen like that once but I'm not clear on the facts. Just saying don't replace the filiment bulb with an LED.
The way I will be wiring it it will be going straight through the coil in the relay so it will be fine. Luckily, no matter how the alt lead works, all I need to do is swap the lead from one terminal to another
Regarding the crappy starter plague, I just realized that the tranny was not in neutral so that had to be turned as well. I dont have the cable installed so I could not have put it in neutral. Still pathetic RE the starter. I have no reservations about buying the stronger starter.
Posted by: scotty b Jan 8 2010, 06:34 PM
Mike I watched the output flanges a couple different times when we were having problems, and never saw them move. Are you certain it is in gear ?
Posted by: Dr Evil Jan 10 2010, 02:12 PM
Watch the video and you can see them moving.
Posted by: Dr Evil Jan 14 2010, 11:52 PM
Got some more work done today. I heard that the weather would be about 50* so I planned my week around today being bus day. No pics, all in prose so consider yourself forewarned
I finished cutting the engine bay shelf, prepped and painted it. Then I did some wiring to get things about where they need to be on the engine. I will finish up the wiring when the engine is in.
I had received the nice HT starter but had yet to test it as I didnt want to go through the paces of bringing my car up, opening the hood, getting the damn cables. However, Zach's battery was just sitting there and his cables were near by so I figured what the heck. This starter cranked the engine over like it was nothing. I think that the stock corvair starters are no match for the abomination that I have created
I did some more work on the front tin with putting holes in it for the vacuum lines to pass. Its not complete, but I wanted to get the engine in the bus before I did anything more.
I had to raise the ass end of the bus up 32" to get the engine to slide right under the rear. It was so high up that I almost had to jump to pull the hatch down. I lowered the bus to its wheels afterward and the engine was not smooshed. I am starting to get a little concerned with clearance, though. It will be tight.
If I could have one more thing done to the bus, I would have the rear floor above the engine bay cut out and a late model large opening hatch welded in so I could get to the engine easily. Oh Scotty! I am gonna need to find some more matchbox cars.
Lastly, I took some naval jelly and applied it to the engine bar to cure the rust that developed on it. Worked like a champ. I primered it and left the final undercoat coating for another day.
Not wanting to be idle at home, I did some fancy wiring stuff for my bus. I got a bread board and used it to make several connections. The alt light now goes through the bread board and when the alt stops or dies a buzzer and light will go off. This board is also a junction for power to the electronic fuel control.
Next wiring stuff to do:
- Wire shifter cut off so that bus only starts in N.
- Wire reverse lights to trigger from auto shifter.
- Wire back up camera to turn on when shifter is in R.
Next time, I intend to mount the engine in the bus so that I can finish mocking up the engine tin. Once the tin is done, then is the wiring which is pretty much done. Then I will be goofing in the cabin with the wiring, then I try to make the boom in a useful way. I also need to weld in the bung for the O2 sensor which will require a small section of pipe to be added to one of the headers.
Thats about it. Pretty exciting. Hopefully I will have picture worthy stuff next time.
Posted by: zymurgist Jan 15 2010, 06:09 AM
What is the O2 sensor for?
Posted by: Dr Evil Jan 15 2010, 07:48 AM
to tune the electronically adjustable jets. This way I can adjust them for altitude and fuel economy.
Posted by: Vacca Rabite Jan 15 2010, 08:04 AM
Wait wait wait...
BACKUP CAMERA? Oh Mike. Not you too!
Zach
Posted by: zymurgist Jan 15 2010, 08:05 AM
Cool.
Posted by: Dr Evil Jan 16 2010, 09:48 PM
Camera is for Noel
Posted by: Phoenix 914-6GT Jan 19 2010, 04:47 PM
updates...pics...anything?
Posted by: Vacca Rabite Jan 19 2010, 04:51 PM
I'm back in class and Mike is interviewing and rebuilding many transmissions. Given the great weather today, I half expected him to pop in, but updates may slow for a bit until Mike knows where he is going.
Zach
Posted by: Dr Evil Jan 19 2010, 04:55 PM
I am out of it for this week. I returned from OH on Mon and have til Wed night to get all of my homework done for my two Masters classes before I leave to MN on Thurs morn. Then I will be gone until late Mon. Then I will see about starting in on this again. We are sooooo close now. Next step is to mount the engine, hopefully dodging disappointment with clearance issues, cut the engine tin, and cable/wire it up.
Soon to make the vroom vroom.
Posted by: Phoenix 914-6GT Jan 19 2010, 05:12 PM
Well I can't wait to see it Mike. You're doing an awesome job
Posted by: Dr Evil Jan 28 2010, 08:10 PM
Before I talk about what I did in the few hours I worked on the bus today, I must say that the camera battery was again dead when I got down there So, no pics.
Last night I took my instrument cluster and soldered all of the wires into a 15 pin plug to help with removal and diagnosis. I went to work on the bus and realized I brought EVERYTHING except the damn soldering iron Luckily, Zach had the equivalent of a solder machete vs my scalpel, but I made it work. I got most of the wires in the dash hooked up with a few exceptions that I need to research, but it was getting too damn cold in the bus so I quit when the sun went down.
Exhaust; I could not find a correct adapter to fit between the header and the pipe for the exhaust so that I could weld a bung in it for my O2 sensor. So I bought two sizes, welded them together and welded the bung into it tonight. Not bad for only working about 2-3hrs.
To do list:
- Run a few wires for things like tach, R, reverse lock out, gauges, etc.
- Reinstall the engine and finalize the engine tin
- Engineer a fitting for the oil temp sensor....figure out what temp sensor to use.
- Install fuel pump and ignition module.
- Buy and install battery
I am pretty close, but the weather is crap and I need to fill some bolt orders when the stock arrives. Add in school work and I will be done by summer
Posted by: Dr Evil Jan 28 2010, 11:42 PM
After inspecting my exhaust adapter (plug end and bung, blow in other end) I have found that I have a pin hole that needs attention. I love welding Its nice not to be bummed by having to reweld something
Posted by: zymurgist Jan 29 2010, 07:18 AM
You inspected your own bung?!?
Posted by: Vacca Rabite Jan 29 2010, 08:10 AM
Luckily, Zach had the equivalent of a solder machete vs my scalpel, but I made it work.
That soldering iron is probably older then you and I put together.
After inspecting my exhaust adapter (plug end and bung, blow in other end) I have found that I have a pin hole that needs attention. I love welding. Its nice not to be bummed by having to reweld something.
When I am really mad or frustrated, there are a few things that I do that always work to calm me down and help me focus and think straight. Welding is one of them (shooting is the other, but I don't ever have time to shoot anymore.)
Zach
Posted by: Dr Evil Jan 29 2010, 12:51 PM
Oh ya, Zach, your out of kerosene I hope to come over this weekend and will refill your tank.
Posted by: Vacca Rabite Jan 29 2010, 02:30 PM
Oh ya, Zach, your out of kerosene
I hope to come over this weekend and will refill your tank.I noticed that the other day. A chilling discovery, to be sure.
 I was planning on getting some more tonight after work, as I hope to get some work done out there myself. The new heater is thirsty, but it does a good job of warming.
Zach
Posted by: Dr Evil Jan 29 2010, 04:35 PM
As soon as the sun went down last night the inside of the bus became unbearably cold. My feet started to freeze so it was real nice to go in and have that 70,000btu of love waiting in the garage for me
Posted by: zymurgist Jan 29 2010, 04:43 PM
Holy crap, it's cold out there. The wind was cutting through my jeans like nothing. Gonna either find my long johns or stay inside.
Posted by: Vacca Rabite Jan 29 2010, 10:41 PM
I got caught in kid duty tonight as Erin needed to work late, so I did not have time to get any K1.
Posted by: pete-stevers Jan 30 2010, 10:56 AM
Holy crap, it's cold out there. The wind was cutting through my jeans like nothing. Gonna either find my long johns or stay inside.
for once it is warm and almost balmy up here....strange indeed
nize and warm....just in time for the "Winter" Olympics
Posted by: Dr Evil Jan 30 2010, 04:10 PM
Dudes, check out this converted bus. 110hp corvair motor with power glide
http://www.thesamba.com/vw/forum/viewtopic.php?t=397132
Attached image(s)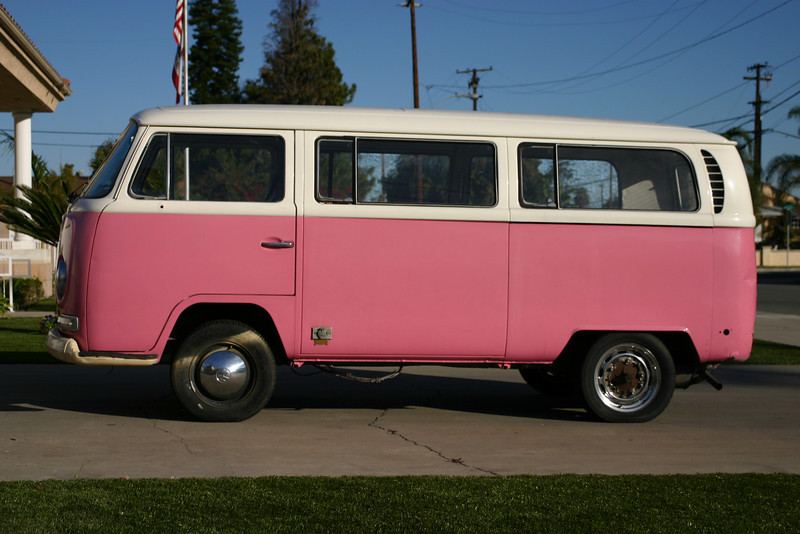
Posted by: scotty b Jan 30 2010, 04:14 PM
How adorable, one for you, and one for Noel
....or Blain
......or Antwon
.....or Marcel
.....or Daniel
.....or Stephan
See ya twinkle toes
Posted by: zymurgist Jan 30 2010, 06:43 PM
Dudes, check out this converted bus. 110hp corvair motor with power glide
http://www.thesamba.com/vw/forum/viewtopic.php?t=397132
Behold the awesome power of a two-speed transmission.
Nice color though.
Posted by: Dr Evil Jan 30 2010, 07:53 PM
How adorable, one for you, and one for Noel
....or Blain
......or Antwon
.....or Marcel
.....or Daniel
.....or Stephan
See ya twinkle toes
Jealousy looks ugly on you, bitch.

Posted by: scotty b Jan 31 2010, 11:29 AM
http://cgi.ebay.com/ebaymotors/Volkswagen-Bus-Vanagon-Van-1964-21-Window-Deluxe-Microbus-Classic-VW-Window-Bus_W0QQitemZ130360912779QQcmdZViewItemQQptZUS_Cars_Trucks?hash=item1e5a1dab8b
Posted by: Dr Evil Feb 2 2010, 12:21 AM
Today was a good day for the bus I forgot the damn camera again I will be there tomorrow to do some more work and will take some pics then.
The first thing I did was raise the engine into place. I did this by mounting the front of it first and then lifting the engine while checking clearance on the auto tranny filler tube, throttle linkage, and the air cleaner/carb. Well, the linkage and tube cleared, but the carb was too tall to use the kick ass mounts Zach and I built. Sooooo, I had to chop and drop the mounts 2". This went pretty well, actually. I cut and welded everything all by my self and the welds looked good, had good penetration, and the engine ended up sitting where it needed to be.
Oh ya, i was able to lower the carb assembly by removing the nifty spacers I made, moving the shorter one over, and tossing the larger ones. Unfortunately, this made my kick ass carb bracket too tall. I will be dropping all of this out one more time once EVERYTHING is mocked up correctly so that I can do final adjustments and finish.
Engine tin fabrication was pretty straight forward. I got the drivers side done and had to restart the front one as once the engine was in, the tin I started with the engine out was useless. I need to account for the bell housing now. I am making the front tin in two pieces so that it will be easy to install and remove. I hope to have the tin done tomorrow. Then it will be cabling, wiring, and thats it.
Posted by: Dr Evil Feb 2 2010, 12:54 AM
Oh ya, to give Zach some credit (because he thrives on that stuff), the 70,000 btu heater allowed me to work comfortably outside in 25* I got about another 1-2 hours of work today because of the heater that he found for us.
Posted by: zymurgist Feb 2 2010, 05:38 AM
http://cgi.ebay.com/ebaymotors/Volkswagen-Bus-Vanagon-Van-1964-21-Window-Deluxe-Microbus-Classic-VW-Window-Bus_W0QQitemZ130360912779QQcmdZViewItemQQptZUS_Cars_Trucks?hash=item1e5a1dab8b
$26.2K and reserve not met. Holy crap.
Posted by: Vacca Rabite Feb 2 2010, 08:34 AM
That heater may be the best thing that went into the garage this winter.
Zach
Posted by: scotty b Feb 2 2010, 06:11 PM
Camera up doc..........
Posted by: Vacca Rabite Feb 2 2010, 06:17 PM
He can't. He's too busy welding right now.
Poor bastard was trying to seam weld 22ga steel with my cheap .035 flux core wire. The fact that he did not burn much through was impressive.
I had to come in. I felt the call to work on my car (or just sit and BS for a while), but I have a shitload of homework to do.
Zach
Posted by: Dr Evil Feb 2 2010, 10:53 PM
Okey dokey. Here are the pics.
The modified/lowered engine/bumper mounts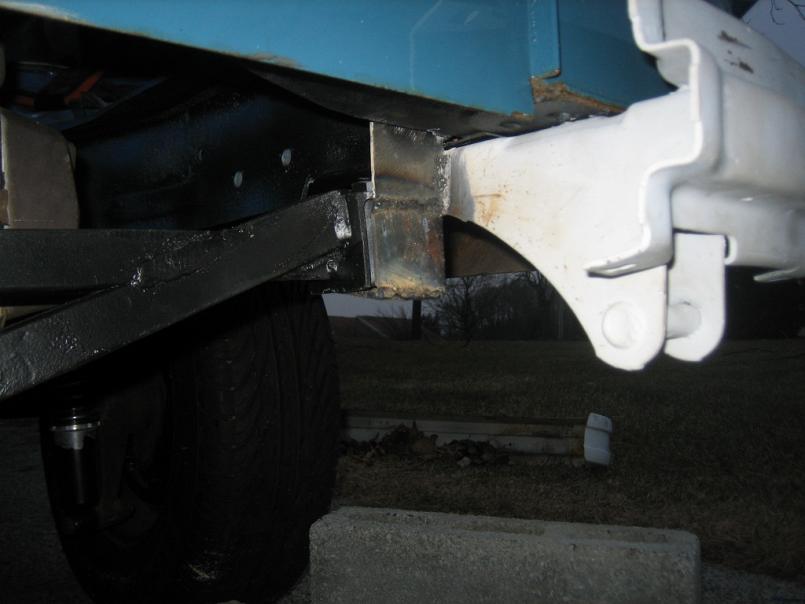
New engine height. Still acceptable, but it gives me something to shoot for with a different injection someday.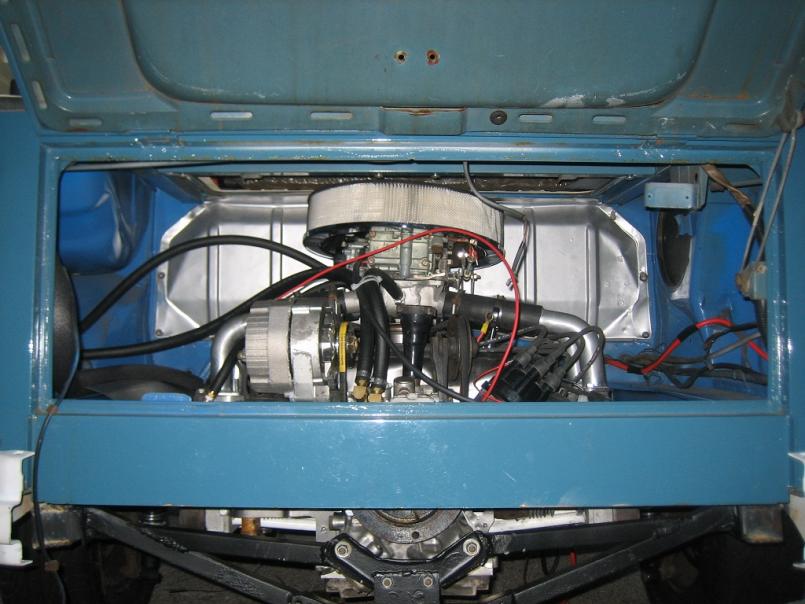
Posted by: Dr Evil Feb 2 2010, 10:54 PM
These pics are small so there will be several posts.
Here is another of the adjusted engine height. it looks lower than it is due to the angle I took the pic at.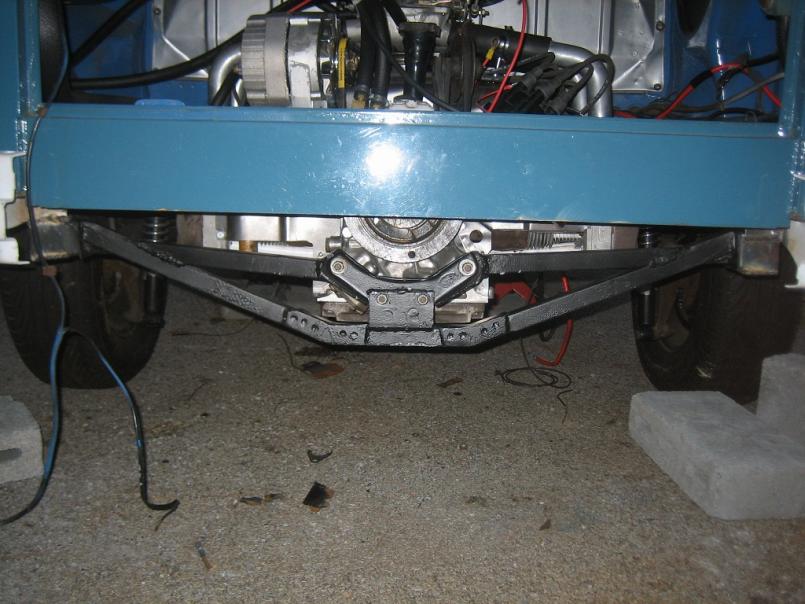
Posted by: Dr Evil Feb 2 2010, 10:56 PM
Driver side engine tin with foam seal.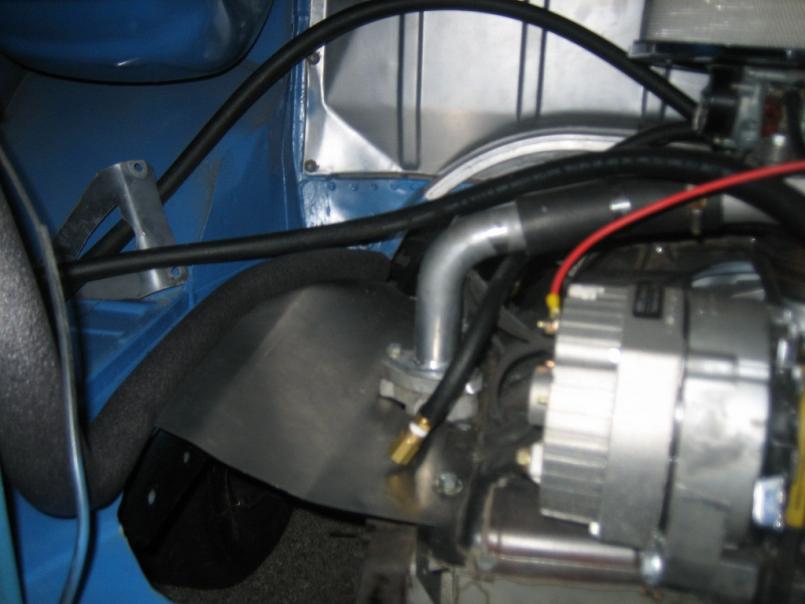
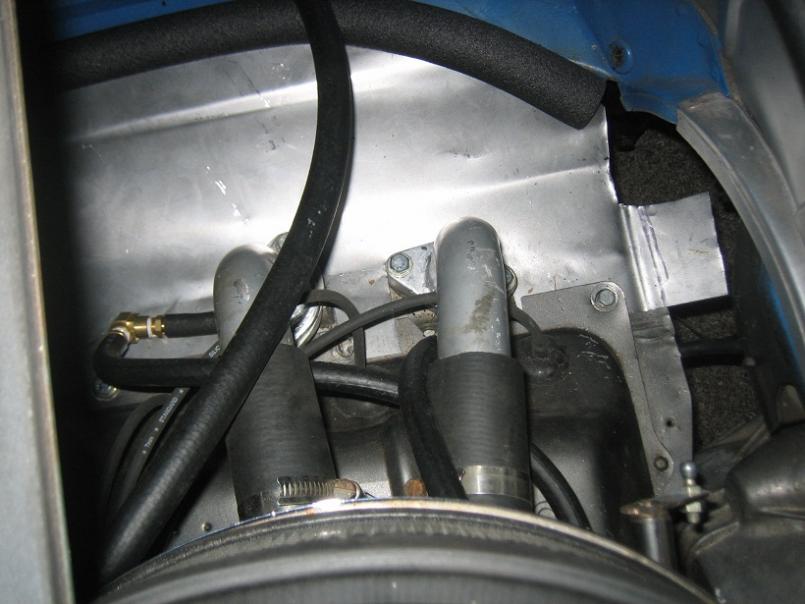
Posted by: Dr Evil Feb 2 2010, 11:00 PM
Carb clearance. It fits just barely, and I have to lower the engine to change the current filter. I mat get a filter top cover and shorter filter element to fix this.....or I will just switch to FI someday...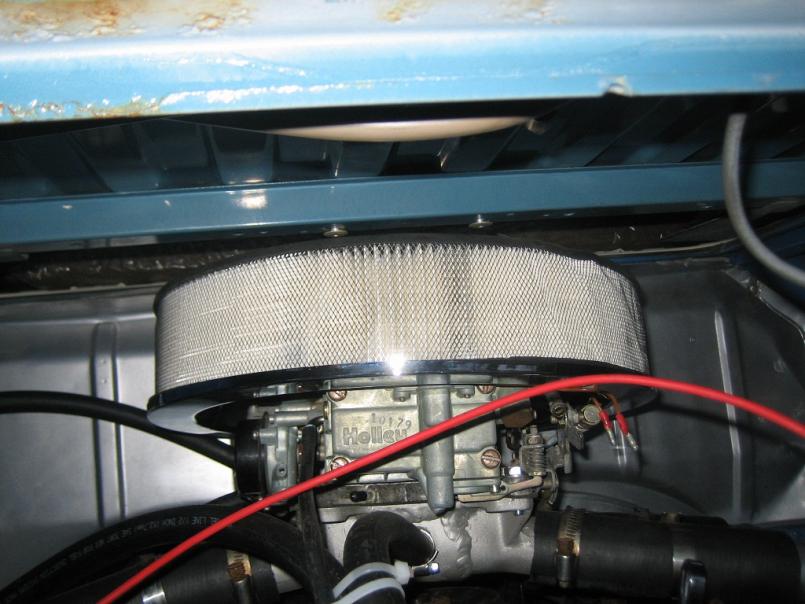
The gap to fill between the bay and the engine. I needed to accommodate the bell housing so welding had to occur 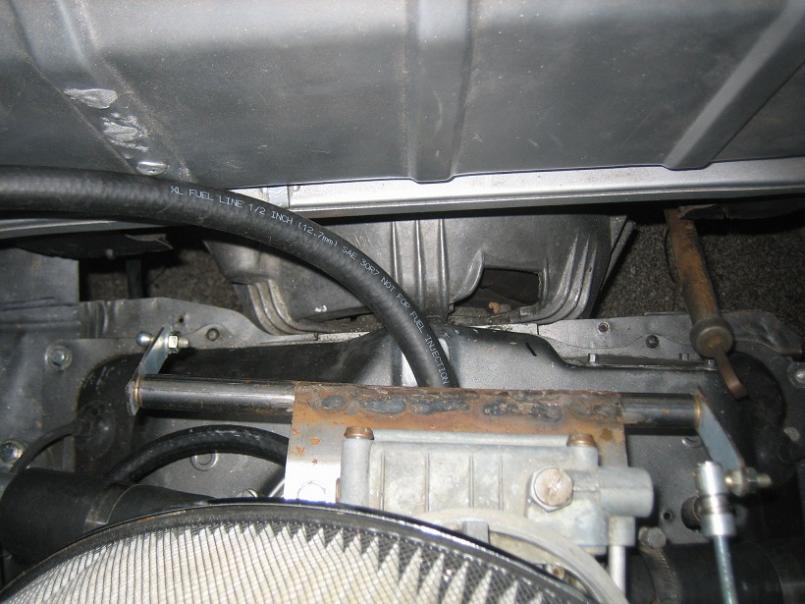
Posted by: Dr Evil Feb 2 2010, 11:03 PM
Drivers side front tin. I made it in 2 parts so I could remove and install with the engine in the car. 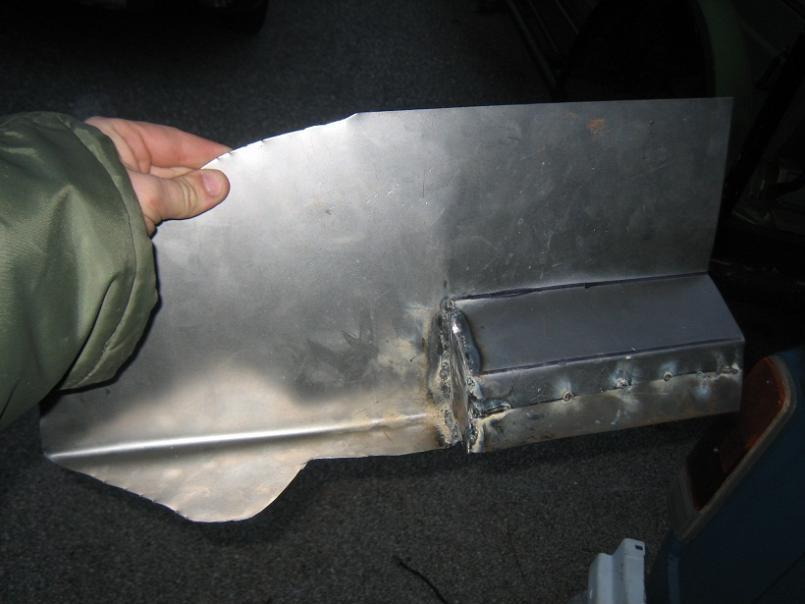
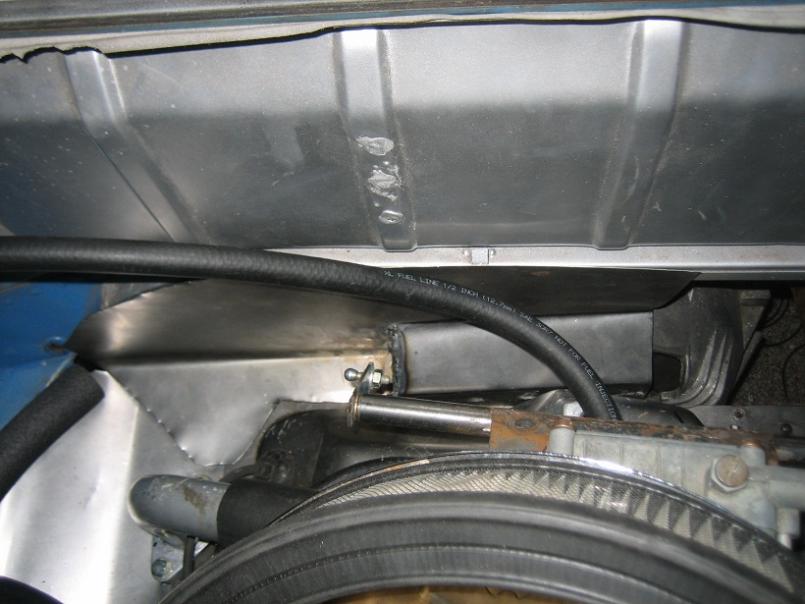
The cardboard template I made to mock things up.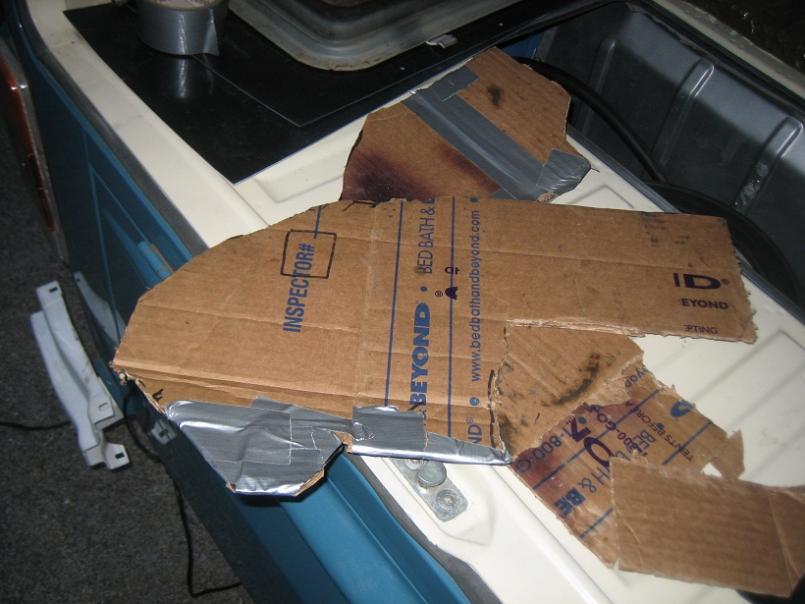
Posted by: Dr Evil Feb 2 2010, 11:09 PM
Here is the mock up of the right side front tin.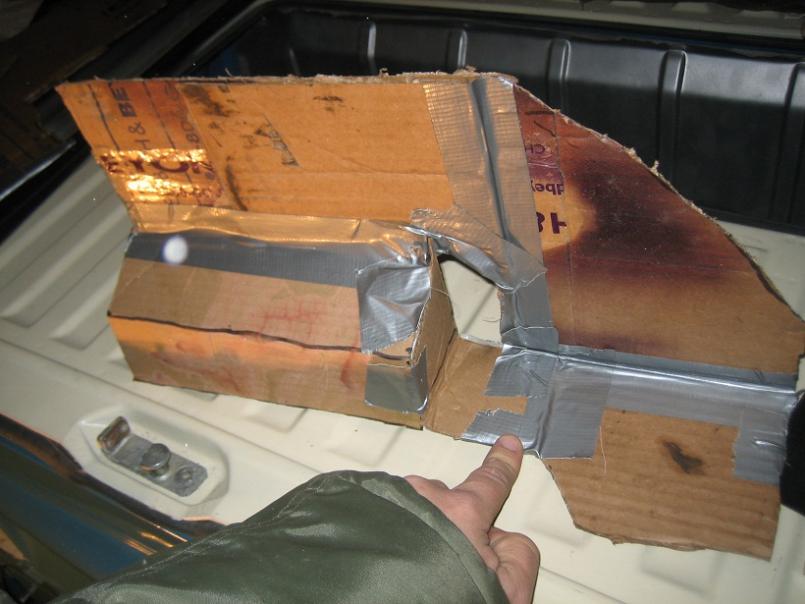
In place.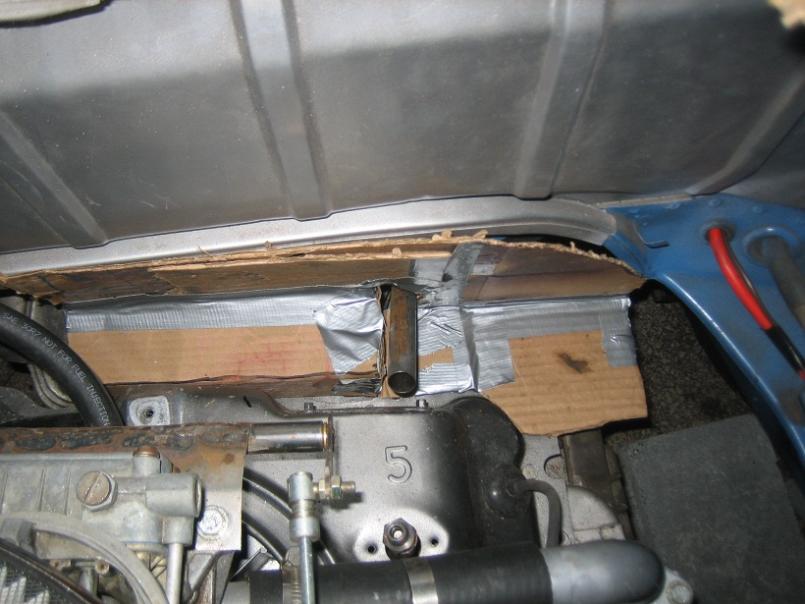
Metal unit made up.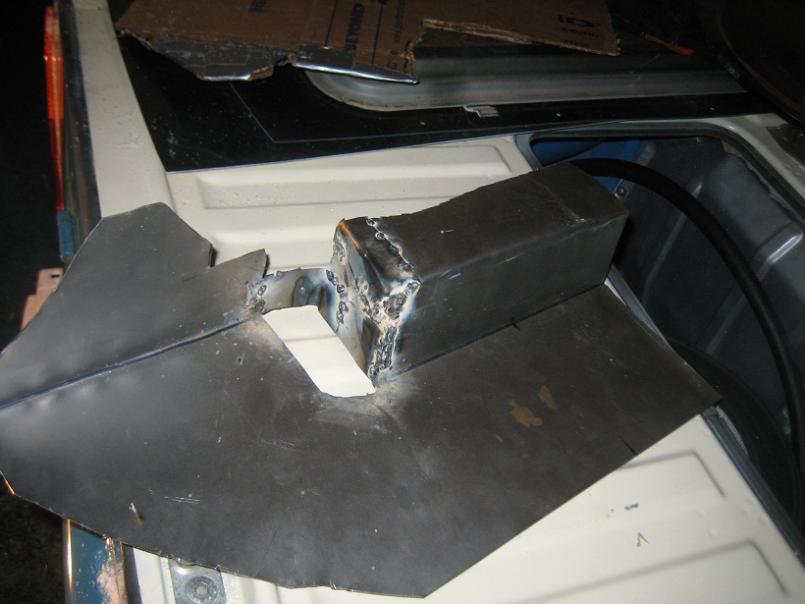
Posted by: Dr Evil Feb 2 2010, 11:13 PM
Both front tins installed.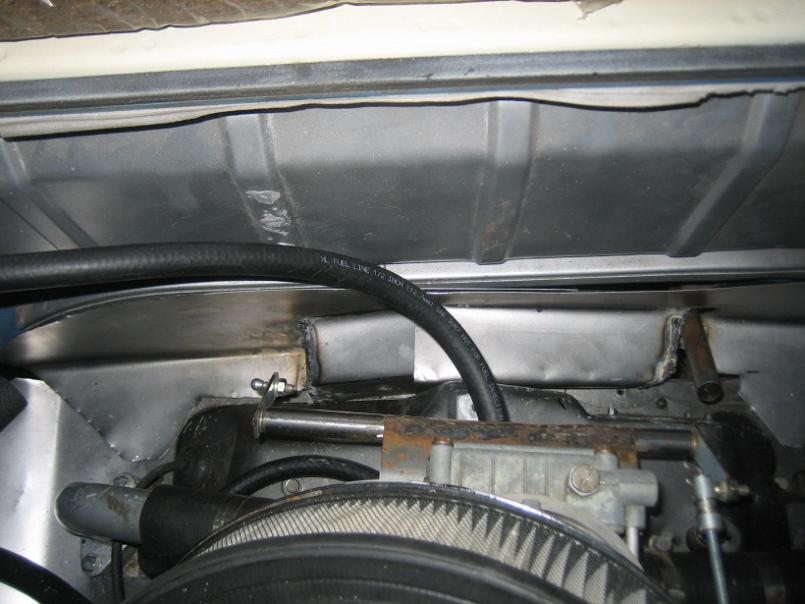
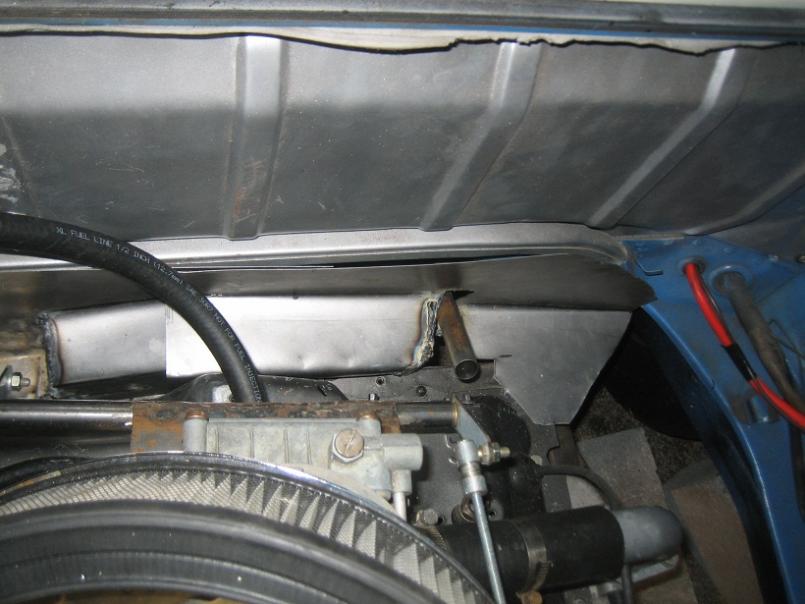
Posted by: Dr Evil Feb 2 2010, 11:15 PM
The tins are just mocked up and will be finalized once the engine is fremoved again for finalization.
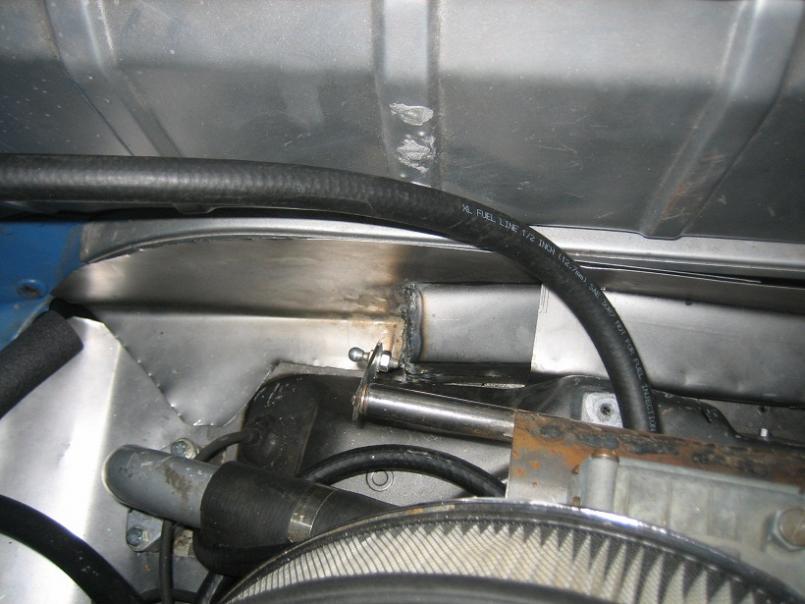
Posted by: Dr Evil Feb 2 2010, 11:16 PM
And with foam seal. I am using a $3 pack of insulation from wally world.
Attached thumbnail(s)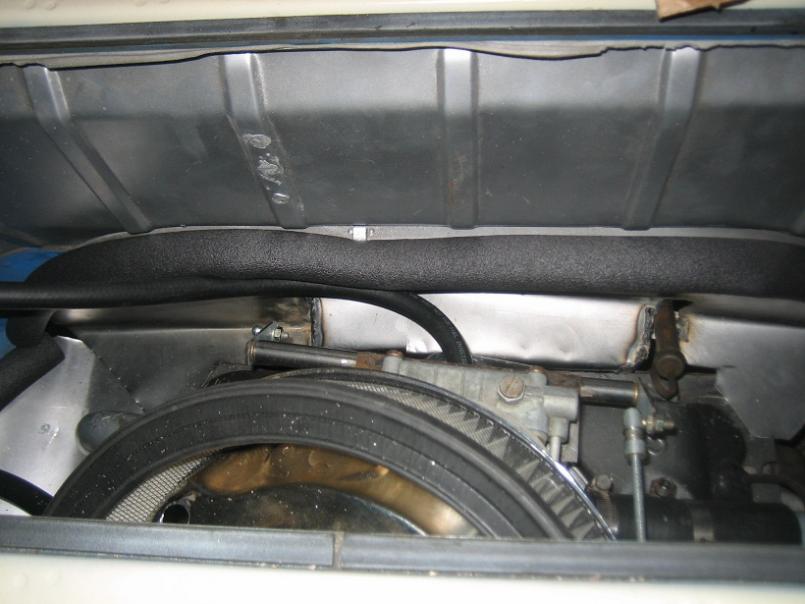

Posted by: Dr Evil Feb 3 2010, 02:26 AM
I think the filter I am using is a 14x3. If I can get a 14x2, which is the smallest I can find in the 14" dia size, then I will be pretty well off with the current setup. I do not wish to lower the engine one inch simply to change the damn filter
Next trip should find the pass side tin done (the sides are very easy), and the rear one started (maybe finished, but it is gonna need some engineering).
Posted by: zymurgist Feb 3 2010, 06:08 AM
Ever see this air cleaner? It's not cheap, but it may give you the clearance you need.
http://www.summitracing.com/parts/HLY-64280/
Posted by: Dr Evil Feb 3 2010, 11:26 AM
Ya, I saw that last night on my search for a filter element. It is nice, looks cool, and costs way too much. Since I eventually plan to go FI, CIS, or some other injection, I dont want to drop that kind of coin on the air filter housing. Maybe I can fab some bastardized version of that up? Probably easier to find the 2in tall element.
Posted by: zymurgist Feb 3 2010, 11:31 AM
I hear ya. I rejected the same filter for my Corvette because of the expense, and also because I think it's butt fugly. I found a little bitty air cleaner that just barely fits under the stock hood. I'm pretty sure it uses a 2 inch element as well.
Posted by: Dr Evil Feb 3 2010, 11:47 AM
I will try NAPA when I check next. They are smarter than the other parts stores and can search without needing a vehicle type. I know that there are 14x2 filters out there, google says so, but I dont want to buy one over the net if I can just get one down the street.
Posted by: Dr Evil Feb 3 2010, 12:47 PM
I see that Mr Gasket has a 1480a that is 14x2. Lets see if I can get it from NAPA or other FLAPS locally. I would love to find one shorter than 2", but so far no luck.
Posted by: Vacca Rabite Feb 3 2010, 01:58 PM
If you were planning on coming over tonight, last nights snow is pretty much gone. You should be clear to work. My shoveling this morning was not needed, as everything melted as soon as the sun came out.
Zach
Posted by: Andyrew Feb 3 2010, 02:06 PM
Your air cleaner element can also be modified to fit...
I had the same issue with mine on my V8, I took the lower piece and turned it upside down, got a shot bag on the bottom and hit around it with a hammer to make it more "lowered" I had to lopside it due to the throttle linkage but I moved it down about an inch.
Basically stretching the metal and lowering the air cleaner onto the carb more
Something to consider.
Posted by: Dr Evil Feb 3 2010, 02:48 PM
Your air cleaner element can also be modified to fit...
I had the same issue with mine on my V8, I took the lower piece and turned it upside down, got a shot bag on the bottom and hit around it with a hammer to make it more "lowered" I had to lopside it due to the throttle linkage but I moved it down about an inch.
Basically stretching the metal and lowering the air cleaner onto the carb more
Something to consider.
I already bought a filter housing that was dropped an inch. They make them stock and cheap. The 14" was needed to clear all the stuff under it. Here is the link to the one I have.
http://www.summitracing.com/parts/SUM-G3001K/
NAPA has a filter that is 14x1.5. Now I need to see if 1.5 is not too short. Also, I need to see if the ID of the filter housing I have is 12". If it is I have a filter
Posted by: Dr Evil Feb 3 2010, 02:49 PM
If you were planning on coming over tonight, last nights snow is pretty much gone. You should be clear to work. My shoveling this morning was not needed, as everything melted as soon as the sun came out.
Zach
Not tonight. I need to do homework on Wed nights. Maybe tomorrow.
Posted by: Dr Evil Feb 3 2010, 03:07 PM
Here is the one from NAPA, I just ordered it. They dont make me prepay so what do I have to lose. This may solve a lot of issues.
http://www.napaonline.com/Search/Detail.aspx?R=FIL2100_0071361101
Posted by: Dr Evil Feb 4 2010, 11:19 PM
So today was pretty productive. I knew that the next few days would be boogered by snow so I worked to get to a point where the engine could come out. That just meant that I needed to get the rest of the tin done, which I did. I resolved the air filter issue, but I will elaborate on that separately, it deserves its own explanation. The tin will not be completely air tight in the rear due to the way the engine and all the shit back there is. It will be tight enough, though. I do not foresee any issues.
This was the situation/weather today: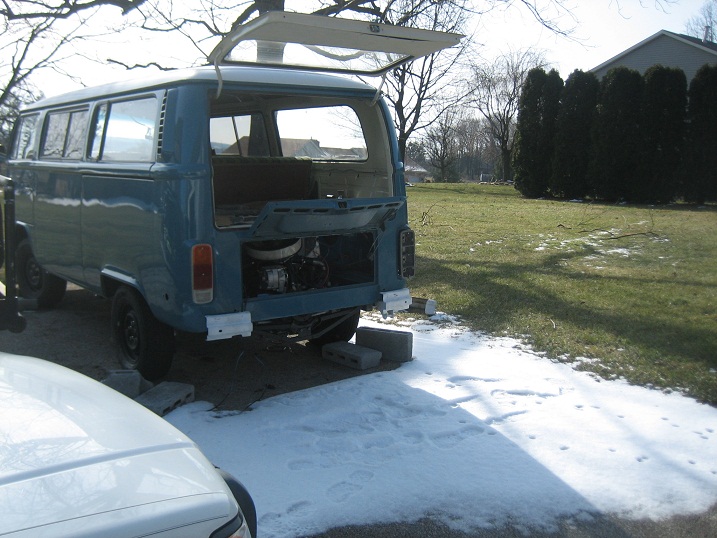
A better shot of the adjusted engine height: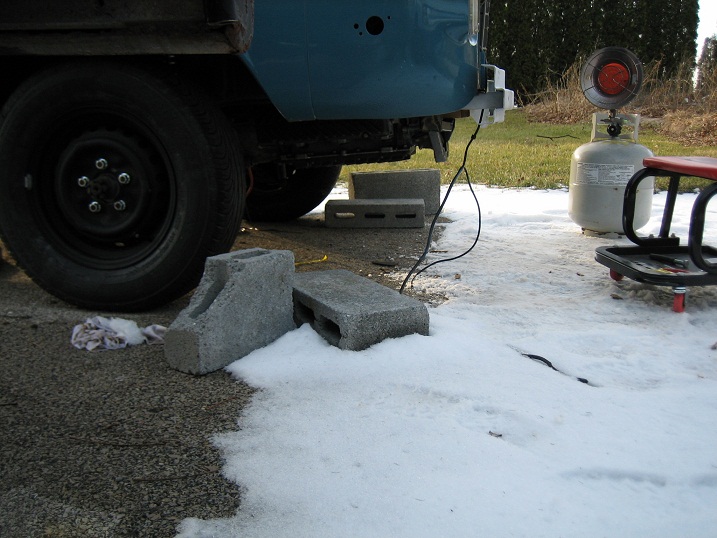
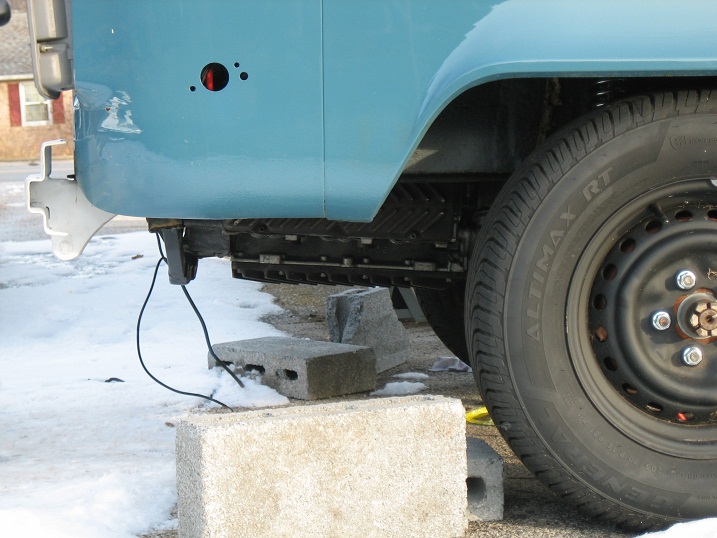
Posted by: Dr Evil Feb 4 2010, 11:21 PM
Tin sections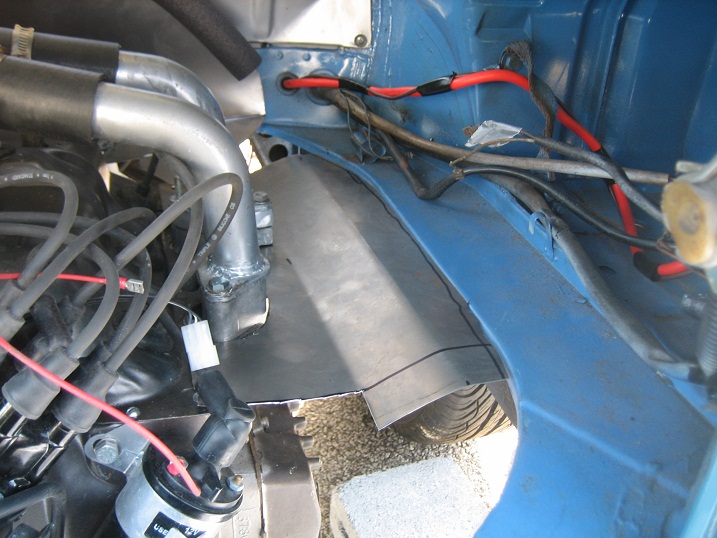
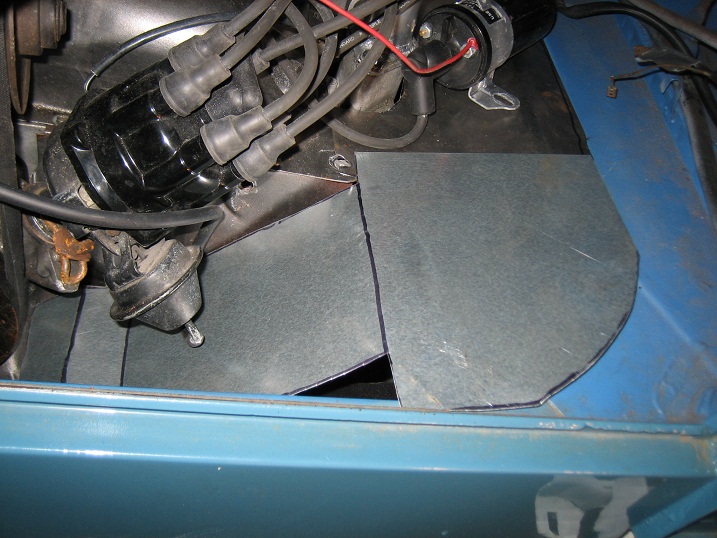
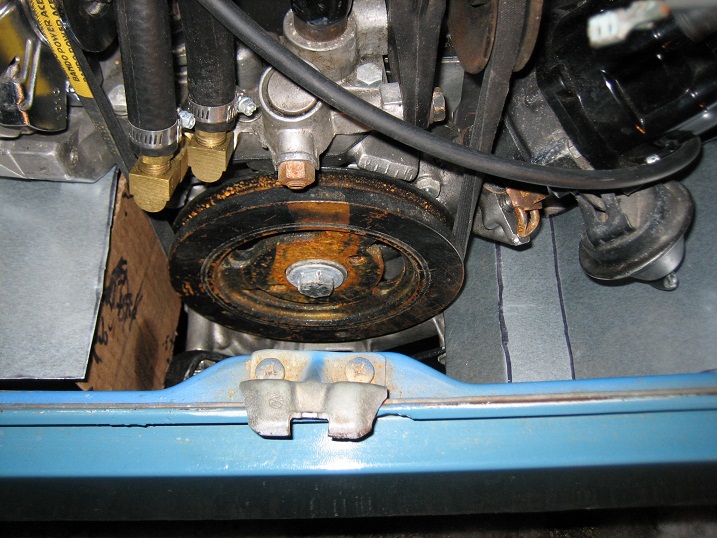
Posted by: Dr Evil Feb 4 2010, 11:26 PM
More tin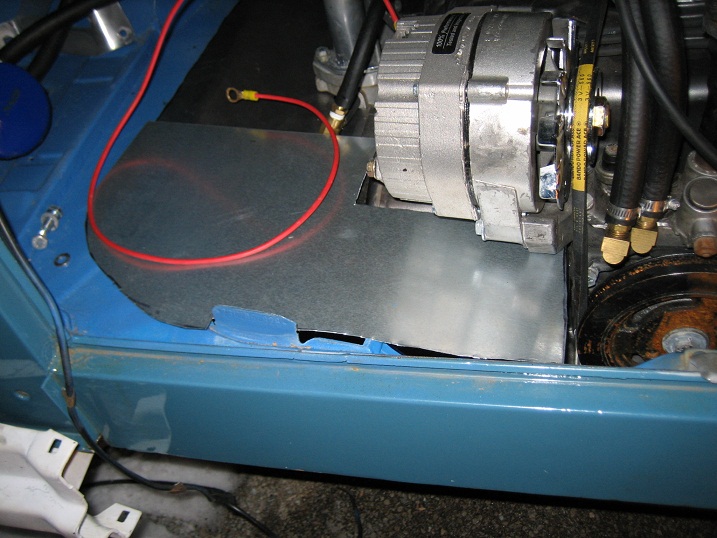
I have a piece that goes in front of the pulley and connects to the two sides. The cardboard section will be replaced with metal, of course. The tin needs to be finished with the engine out so I can do the fine tuning.
Posted by: Dr Evil Feb 4 2010, 11:31 PM
Now, the air filter was too damn big so I found one that was only 1.5" tall. 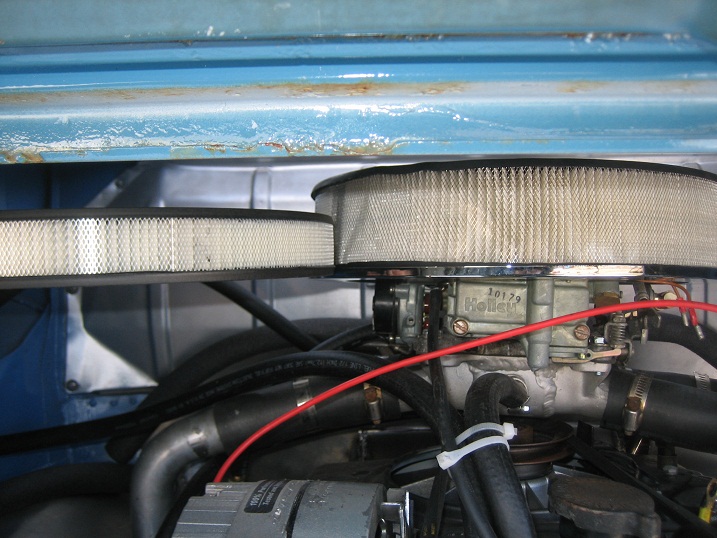
BUT, it was too short. The top cover was hitting the carb top. 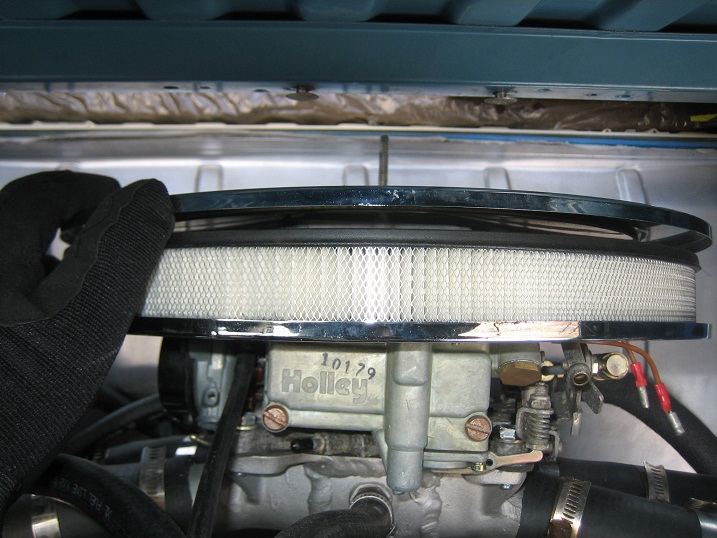
Sooooo, I went to the flaps and sourced a different assembly. Notice how much of the all thread is now sticking out 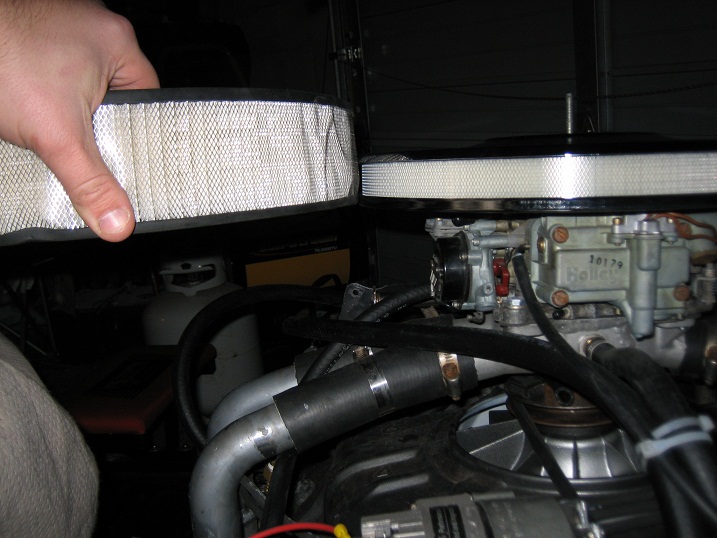
Posted by: Dr Evil Feb 4 2010, 11:34 PM
Final air cleaner. I have another filter that came with the new housing that is only .25 taller if I need it. For a /6, I dont think so, though.
Attached image(s)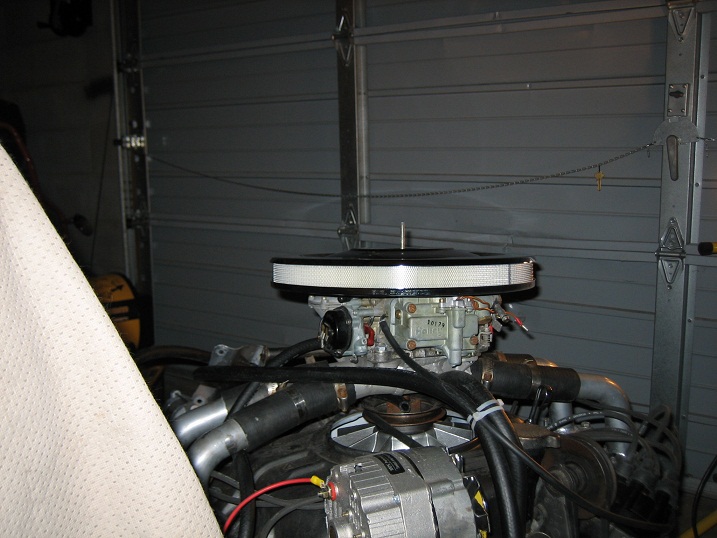
Posted by: Vacca Rabite Feb 5 2010, 07:10 AM
Awesome! With the new housing I don't think that you will be lacking for airflow.
The other option, which I am glad we won't have to do, was cutting the intake runners about 1cm and re welding them. You had the space above the pulley, but it would have made changing belts a real PITA.
Zach
Posted by: scotty b Feb 6 2010, 07:17 PM
For all you bay window breadbox freaks
http://cgi.ebay.com/ebaymotors/Volkswagen-Bus-Vanagon-RESTORED-70-VW-Camper-CampMobile-Westfalia-Westy-Bus-Van- Kombi_W0QQcmdZViewItemQQhashZitem2a0480ee1cQQitemZ180464184860QQptZUSQ5fCarsQ5fT
rucks
KILLER
http://cgi.ebay.com/ebaymotors/Volkswagen-Bus-Vanagon-Volkswagen-1962-VW-Van-Type-II-Split-Window-Panel- CUSTOM_W0QQcmdZViewItemQQhashZitem2305351735QQitemZ150411220789QQptZUSQ5fCarsQ5f
Trucks
Posted by: Dr Evil Feb 7 2010, 11:04 PM
Today was a great day! I finished the last rough fitting of the tins and things went very well. I am glad I dropped the engine and had it in the garage before the storm hit. 
I did a little trimming, welding, and designing of the tin.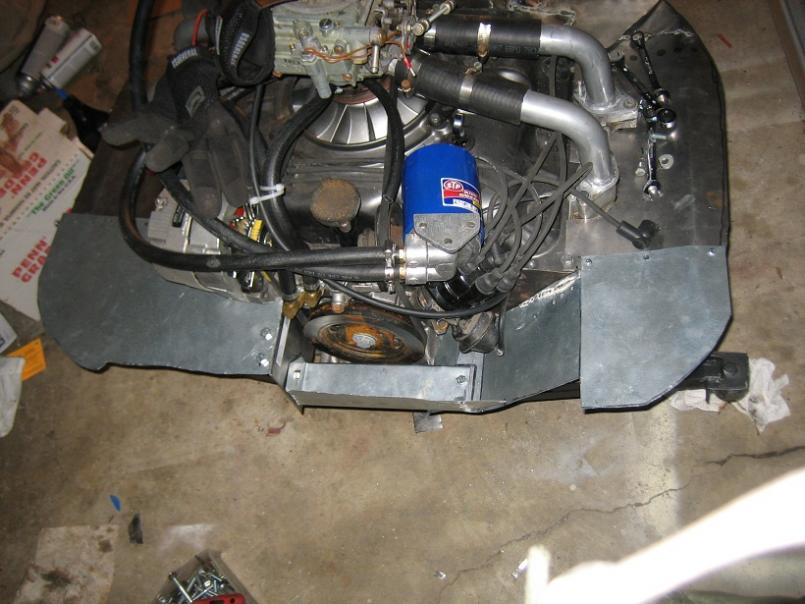
Posted by: Dr Evil Feb 7 2010, 11:05 PM
More.
Attached thumbnail(s)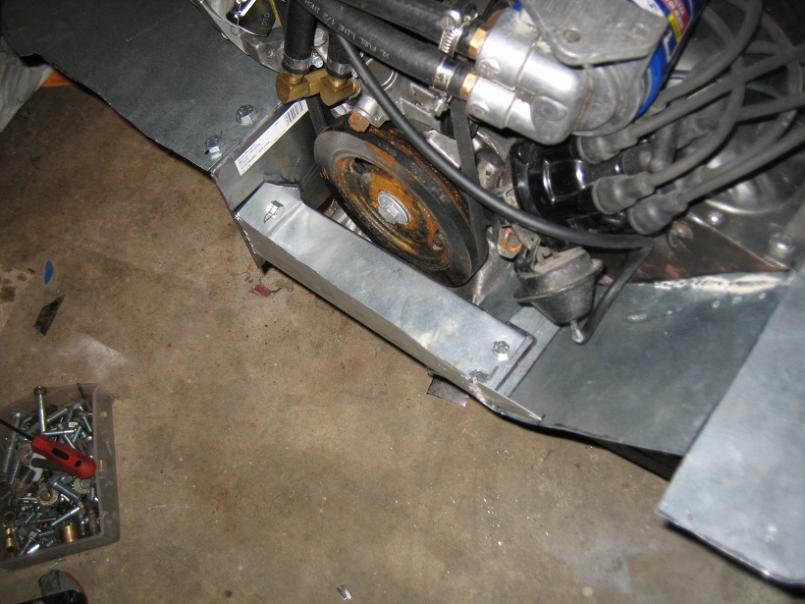
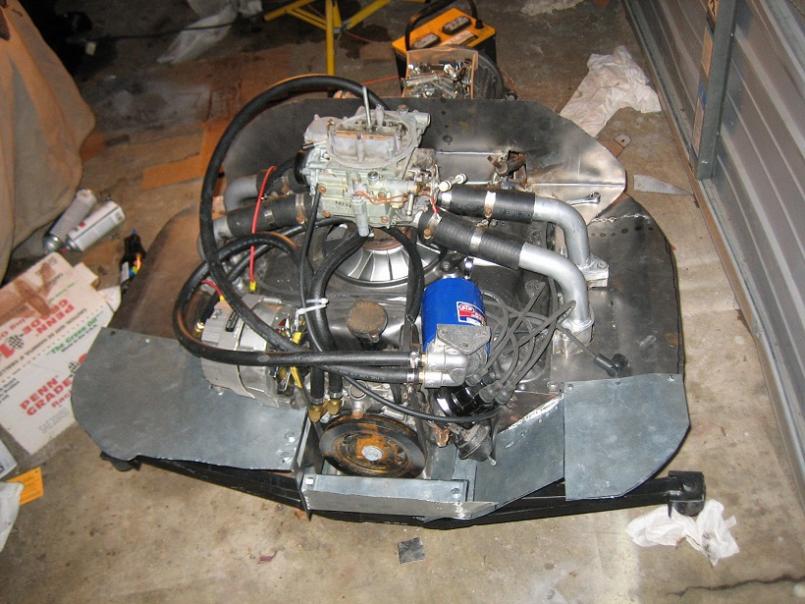
Posted by: Dr Evil Feb 7 2010, 11:06 PM
s'more.
Attached thumbnail(s)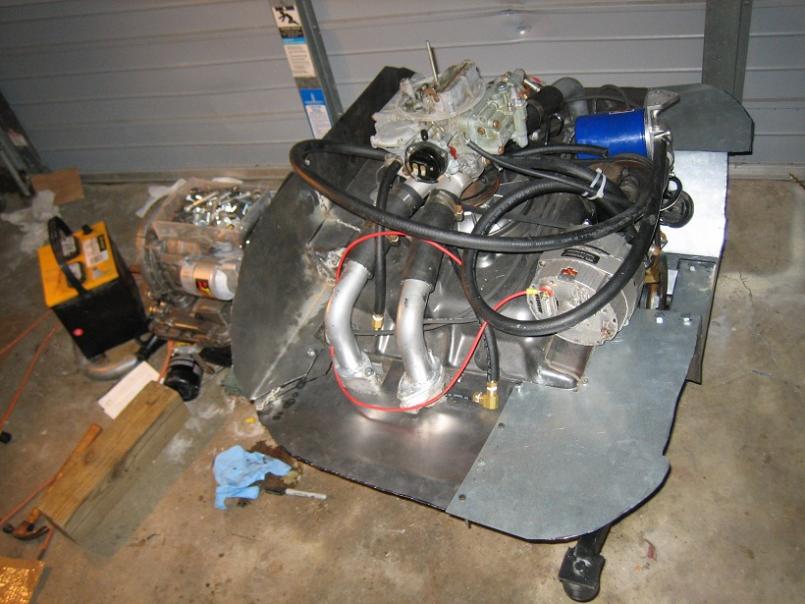
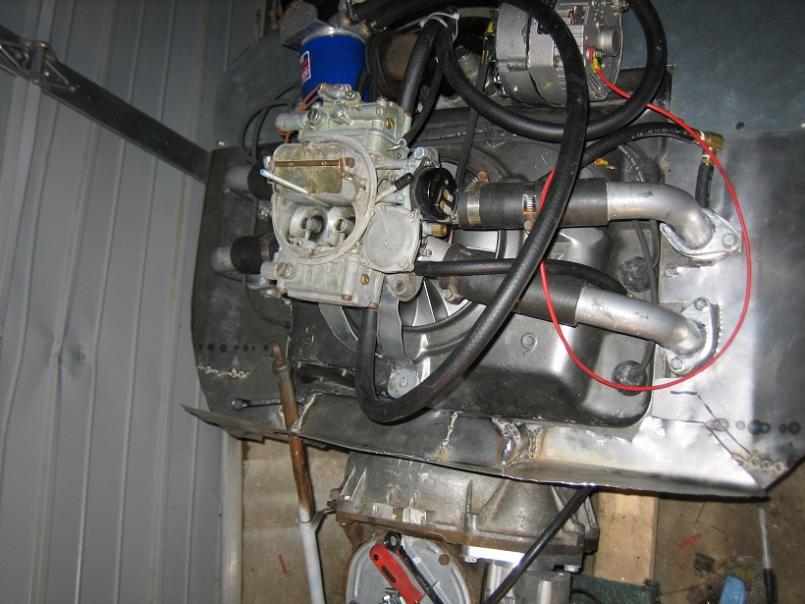
Posted by: Dr Evil Feb 7 2010, 11:10 PM
I made the rear pieces into one piece. No need for 2 and it fits better. I also installed a hose for the FP sensor.
Attached thumbnail(s)
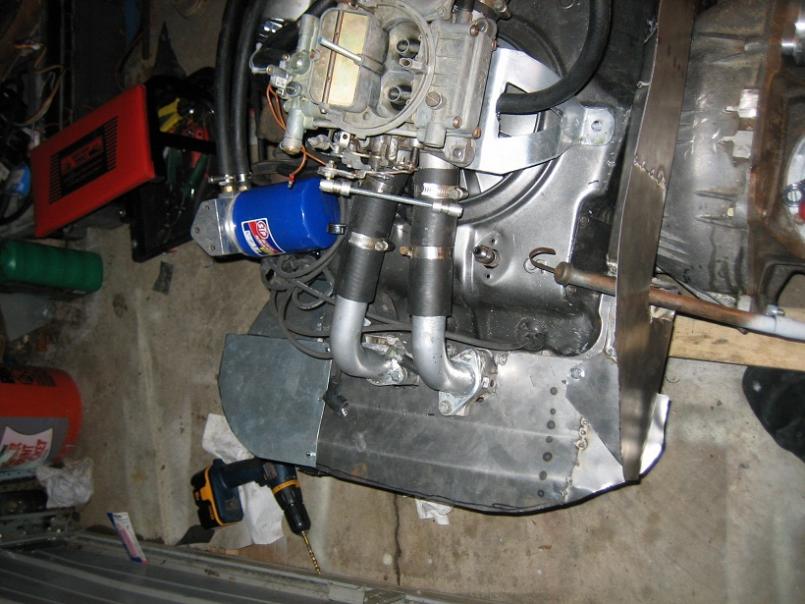
Posted by: Dr Evil Feb 7 2010, 11:12 PM
Oil P hose and sensor.
Attached thumbnail(s)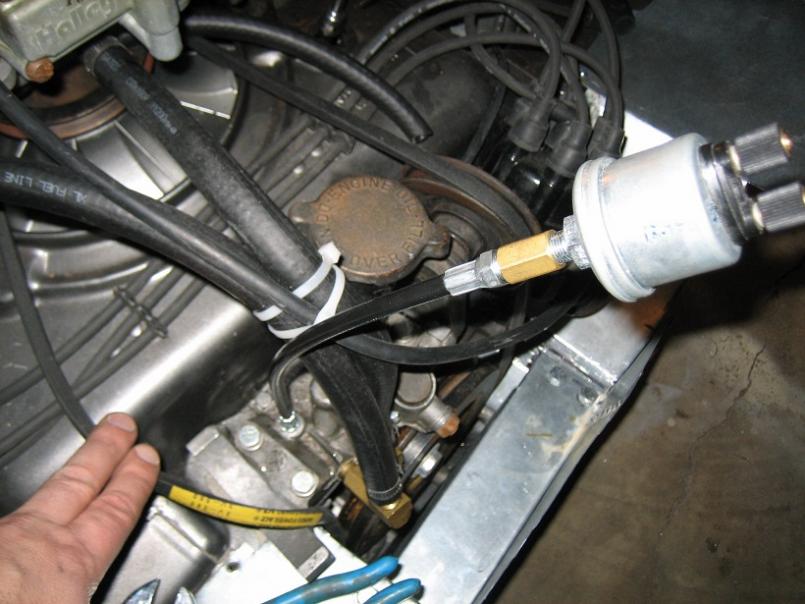
Posted by: Vacca Rabite Feb 8 2010, 08:39 AM
The pic of the snow drift is actually several inches smaller then it was Saturday. It is thawing a little during the day, then freezing solid and compacting at night when the temps drop back under 5 degrees. We have had about 4 inches of sublimation since the storm 2 days ago.
I also picked up 80 pounds of salt the AM to help fight the ice war on the lower driveway. Can't let the salt near the old iron though. Gotta keep'em separated!
I say the same thing about every T4 when it goes from untinned to tinned... It is amazing how much bigger they look with the tin on. That corvair motor is pretty compact, but it looks ginormous right now. Very cool watching this transform.
I have off work today, so I'll be able to help whenever Mike comes over. Even if my "help" is just BSing and working on my car while he is working on the bus.
Zach
Zach
Posted by: Dr Evil Feb 8 2010, 12:26 PM
That's more help than you know
Posted by: Vacca Rabite Feb 8 2010, 08:26 PM
Mike continued working on tin this evening, welding on capture nuts.
I puttered about on my car, then welded some of Mikes exhaust stuff together. I think that a lot got done tonight, but nothing really picture worthy.
Mike has a lot of stuff to take to get coated now. Then we wait out some silly white stuff, put the engine in the bus and drive it to Hershey to see if it makes it or not. (it will).
Posted by: Dr Evil Feb 8 2010, 11:20 PM
Zach is right, there was not much to take pics of. Welding the nuts to the sheet metal was fun, easy and will allow for it to be assembled and disassembled easily. Zach hooked up welding the adapter with the O2 sensor bung. Now I think I will get the headers coated. They are rusting pretty bad just sitting there. I had to adjust the throttle linkage since I lowered the carb. Also put a hole in the front tin to accommodate the linkage. I will be putting some rubber seals around the hole to reduce hot air flow into the engine bay. Then clean up and paint. After that, probably installing the engine.......when I can dig out the rear of the bus.
I also need to make an oil T adapter....and I need the sensor. Zach says he has one. I have part of an adapter, I just need to thread it for the temp sensor.
Posted by: Vacca Rabite Feb 9 2010, 08:42 AM
The sender (I think) is in one of the yellow bins on the wood walled workbench. Look through them and you will probably find it. It MAY still be in its box, hiding in plain sight. Another place to look is in the red tool box, probably in the top bin. Erin and I are going to try and have a date this afternoon (her work closed too) so we may not be there if you come over. We won't be long, though. Still have to get Theo by 5:30.
Zach
Posted by: buck toenges Feb 9 2010, 11:21 AM
Today was a great day! I finished the last rough fitting of the tins and things went very well. I am glad I dropped the engine and had it in the garage before the storm hit.
I did a little trimming, welding, and designing of the tin.
Is that a jeep 725 or a 914? The jackstands look familar.
Posted by: Dr Evil Feb 9 2010, 12:57 PM
The sender (I think) is in one of the yellow bins on the wood walled workbench. Look through them and you will probably find it. It MAY still be in its box, hiding in plain sight. Another place to look is in the red tool box, probably in the top bin. Erin and I are going to try and have a date this afternoon (her work closed too) so we may not be there if you come over. We won't be long, though. Still have to get Theo by 5:30.
Zach
I think I am staying home today. There is nothing pressing on the engine and the weather is gonna turn eventually. Maybe the next time I come down, the engine will be able to be put in. There is not much left to do before that and I am not motivated to come down just to do that little bit of work today.
Posted by: Vacca Rabite Feb 9 2010, 02:36 PM
Is that a jeep 725 or a 914? The jackstands look familar.
Neither! Its a Jeep 715. The 725 was the ambulance version. Needless to say, it has spent too much time near my 914 and picked up the jackstand disease. Between the bus, the jeep, and my 914, I have no more ramps or stands to change the oil in my DD. The jeep is waiting for an engine, which will be showing up soon after the bus leaves.
Zach
Posted by: buck toenges Feb 11 2010, 03:55 PM
Is that a jeep 725 or a 914? The jackstands look familar.
Neither! Its a Jeep 715. The 725 was the ambulance version. Needless to say, it has spent too much time near my 914 and picked up the jackstand disease. Between the bus, the jeep, and my 914, I have no more ramps or stands to change the oil in my DD. The jeep is waiting for an engine, which will be showing up soon after the bus leaves.
Zach
What type of engine. Didn't those trucks have some sort of flat head 6 cylinder that kaiser made into an overhead cam? Something like 230 tornado or something like that?
Posted by: Vacca Rabite Feb 11 2010, 05:07 PM
Yeah, 230 Tornado. It was the first Hemi engine, actually. Years before Dodge came out with one. Also, it was a very early overhead cam engine. It was ahead of its time.
Which is bad for a motor, since no one knows how to properly service it, and then they get a rep for poor reliability. 40 years later, many of them are still chugging along. But they are underpowered (130Hp, 210Tq) and parts are becoming difficult to find for the 24 volt motors.
I am dumping it for a Chevy 350. The donor truck will be moving in within days of the Evil Bus moving out. I wanted to do a Cummins 4BT diesel, or an AMC 360, but the 350 is a 4 bolt main, good condition and free. hard to turn down.
Zach
Posted by: Shade Tree Feb 11 2010, 05:22 PM
Are parts for your Corvair engine easy to find? I ask because there is an early 60's Corvair 6 with a powerglide for sale locally for $100.
Posted by: Dr Evil Feb 11 2010, 05:32 PM
Stupid easy and affordable.
Search:
Larry's corvair parts
Corvair Ranch (my local supplier)
Clarks Corvair (best catalog, but sometimes stuff is not in stock)
There are a few others, but these are all I have ever needed.
Posted by: Vacca Rabite Feb 14 2010, 07:15 PM
Yesterday I started de-burring the engine tin after I picked up a sheet and proptly but a metal jaggie into my thumb.
Then I primed, and got a coat of paint on one side before I decided I had enough.
I missed one edge de-burring that I noticed on the painted stuff that I might try and get Tuesday, and I have not touched the rear tin nearly at all - at least with paint.
Not picture worthy, but it is progress.
zach
Posted by: Dr Evil Feb 14 2010, 08:33 PM
Thanks man. That will help a lot. The only things left then:
- Figure out the Oil T sensor mounting
- Run some hoses and lines (drill some holes in the rear tin)
- Wire up the bus so it will be ready for hooking the engine up
- Paint the bay (again!, and again, and again)
- Paint mounts
- Install engine
If you want, the mounts are in the back of the bus and need paint as well. And maybe an inspection of my welds. I am not sure if they need more material or not. I think I but welded them.
Posted by: Vacca Rabite Feb 14 2010, 08:38 PM
I''ll try and get out Tuesday night and inspect the mounts. It is likely that I will just continue de-burring and painting though. That has to be done before the engine can go back in.
I also need to remember to fill up the K1 jug again. The heater burned it all up keeping the garage warm while I puttered with my car and painted your tins saturday.
Posted by: Dr Evil Feb 14 2010, 08:44 PM
I have to stay home all week to do home work and projects before I leave to KS.
Posted by: Vacca Rabite Feb 15 2010, 07:11 AM
No problem. I'll do what i can to speed things along in your absence. Welding and painting is stuff that is not weather dependent.
Zach
Posted by: Dr Evil Feb 15 2010, 04:17 PM
I dropped the headers off at a local ceramic coaters. They quoted me $150. They are pretty rusty so I expected such. I will be taking my R90 pipes to them as well. The guy was not sure about doing chrome, though. It may need to be blasted for a long time. If so, I will need to find someone with a blast cabinet and time. Maybe I will pay a visit to Scotty if he still has the cabinet.
Posted by: Dr Evil Mar 1 2010, 03:04 PM
Well, it has been a shitty two days this week already.
Sun, my seats will not be getting done. My Mom has issues (long personal story) and has become "unable" to do them. This screwed Zach over as well since I had him send his stuff to her
Today, I go to pickup and pay for my headers at the ceramic coaters. The door is locked and all signs of the business are missing. I was told that the headers would be done last Fri and I told them I would come get them this week. Their phone still works, but rings to the inside of the now abandoned looking building. There was an answering machine. Here is to hoping.....
Posted by: type47 Mar 1 2010, 04:49 PM
...I will need to find someone with a blast cabinet and time.
Some guys at Matsys are getting together to buy one of the Harbor Freight cabinets...want in?
Posted by: Dr Evil Mar 1 2010, 04:57 PM
I would, but I found a much cheaper shop that I can actually return to after the work is done The closed shop quoted me $300, the other shop $120.
Posted by: Vacca Rabite Mar 1 2010, 08:00 PM
Today, I go to pickup and pay for my headers at the ceramic coaters. The door is locked and all signs of the business are missing.
I was told that the headers would be done last Fri and I told them I would come get them this week. Their phone still works, but rings to the inside of the now abandoned looking building. There was an answering machine. Here is to hoping.....SHIT! Was this PA Powderworks? Or some other shop?
Zach
Posted by: Dr Evil Mar 1 2010, 08:09 PM
Today, I go to pickup and pay for my headers at the ceramic coaters. The door is locked and all signs of the business are missing.
I was told that the headers would be done last Fri and I told them I would come get them this week. Their phone still works, but rings to the inside of the now abandoned looking building. There was an answering machine. Here is to hoping.....SHIT! Was this PA Powderworks? Or some other shop?
Zach
No, it was TNK coatings. PA powderworks is the better one. TNK's web site says that they moved to Reading. That is only about 2hrs away
Posted by: Dr Evil Mar 2 2010, 02:31 PM
Well, luckily, the shop called me this afternoon and the guy said he found out Fri that they were moving to Reading. He said the headers were not done yet and that I could pic them up Thurs at noon.
It also looks as if Zach and I have another chance to get our seats done. Here is to hoping. I'll know for sure next week most likely.
Posted by: RJMII Mar 2 2010, 03:30 PM
Well, luckily, the shop called me this afternoon and the guy said he found out Fri that they were moving to Reading. He said the headers were not done yet and that I could pic them up Thurs at noon.
It also looks as if Zach and I have another chance to get our seats done. Here is to hoping. I'll know for sure next week most likely.
How close is Reading to the airport?
Posted by: Dr Evil Mar 2 2010, 04:07 PM
Completely the wrong way. In other good news I just took my subie in to have the oil changed, found that it was pretty empty (nothing in the stick) and that my radiator fluid has a nice sludge in it :trohpy:
Bad luck travels in 3s! I am so happy
Time to look for a shop to fix my head gasket
I need to sell a lot of videos for this.
Posted by: type11969 Mar 2 2010, 04:55 PM
Just throw a t4 in it?
Sorry man, that sucks.
Posted by: scotty b Mar 2 2010, 07:56 PM
I just took my subie in to have the oil changed, found that it was pretty empty (nothing in the stick) and that my radiator fluid has a nice sludge in it :trohpy:Time to look for a shop to fix my head gasket
I need to sell a lot of videos for this.
Heidi still working ? One word.....GARNISH !!!!!
Posted by: wilchek Mar 2 2010, 08:01 PM
Mike,
I am a 5 minutes from Reading if you need me to stop by and pick up your headers let me know. Do you know where the shop is?
Is this the place http://tnkcoatings.com/index.html
Posted by: Dr Evil Mar 2 2010, 08:18 PM
Scott, I dont think it is her fault. This is a common failure point with the original head gaskets and it is failing just like the others of this year and type tend to do.
Dan, thanks for the offer. I should be able to get it Thurs here in town, but if I cant I will let you know.
Regarding the suby, I am trying to decide if I want to fix it myself and save a lot of money. I might even be able to get the bus up and running before the suby could have been fixed. As it stands, the quickest a shop can look at it is Mon. It still drives, I will let Noel drive it to and from work as those are short trips. It is not overheating yet. I might be able to get the bus running by Mon. I would need a place to yank the engine and to the fix, though. It would take 2 full days. This week is suck because I have final projects to do, but if I finish my last one tonight, I can work on the bus tomorrow. I am rattling around ideas in prose if you cant tell
Posted by: Vacca Rabite Mar 2 2010, 08:29 PM
When was the last time that it had belts and water pump replaced?
If you are pulling the engine to do head gaskets, nearly everyone that deals with scoobs say to replace the water pump and belts.
Zach
Posted by: Dr Evil Mar 2 2010, 09:55 PM
Ya, I know. And belt tensioner, possibly. If I do it I will be doing both head gaskets and all the other stuff. Its about $200-300 if I do it and $1500+ if a shop does it from what I am reading.
I just need a space and a cherry picker.
Posted by: RJMII Mar 2 2010, 11:42 PM
Mike, I'd be happy to help you with whatever project(s) you want me to help with. Head gasket changes, bus assembly, sewing some upholstery... (I hope you have a LOT of thimbles)
Posted by: Dr Evil Mar 2 2010, 11:49 PM
Jim, while you are out here it is imperative that we have 2 working vehicles. So, we can work on the bus, but not the suby until the bus is up and running. If I can do the heads in the car then I can do the suby in my driveway. I need to look into that.
What we do have while you are out here:
- Transmission rebuild for Babydoll
- Stack RnR
- Stack gear swap
- Rebuild a side and tail shift on video. You may be more involved with the video than you or I previously imagined I should have you bring a monkey suit
Posted by: Dr Evil Mar 3 2010, 02:17 AM
Yikes, I am looking at the price of parts alone, gonna be about $500 for that stuff.
Posted by: zymurgist Mar 3 2010, 05:42 AM
I have a cherry picker but no way to get it to you.
Posted by: Vacca Rabite Mar 3 2010, 07:48 AM
Mike, there is a engine hoist in my garage, right next to your trailer.
Infact, I borrowed your trailer in the first place to pick it up.
By the way, I still have your docs for the trailer in my Scoob. I should get that stuff back to you one day, if either one of us manages to remember....
Zach
Posted by: camaroz1985 Mar 3 2010, 09:13 AM
Do it yourself, save the money. Easy to work on Subaru engines, will probably take a few hours to pull the engine, but is pretty easy to do. What year and model do you have?
Posted by: Dr Evil Mar 3 2010, 12:11 PM
1998 forester.
Zach, I can use my trailer to bring the picker up here if I can make room in my garage to work on the engine. The HOA will shit themselves if they see my pulling an engine in my driveway, though. Still planning.
I know I could do it myself, that is not a problem, I just lack the space. I have a wholesaler looking into getting the parts cheaper.
Posted by: Dr Evil Mar 3 2010, 01:48 PM
Man, I am looking into every option and a long block from one site is $3395 shipped, +$350 core. At least I know what the upper limit is.
http://www.ccrengines.com/id17.html
Posted by: Vacca Rabite Mar 3 2010, 06:58 PM
Hey, where are the bumper mounts that you are hinting need to be painted? and why did you not mention them last week when I was KOing paint stuff like it was my job. And what color do you want them painted.
I also shoveled a path from my garage to the back of the bus for engine installation. There is still about 6 inches of snow/ice back there, where it is not shoveled, but you now have a path and a work area behind the bus.
Zach
Posted by: Dr Evil Mar 3 2010, 07:25 PM
I did tell you that the mounts were in the back of the bus.
Thanks for hooking up the path. The Subt started to over heat, spit fluid, and die for Noel today Looks like I am needing to get the bus done this weekend/Mon. I am going to redo the rear passenger wheel bearing since I dont like how the other one went in I will have help, though.
Posted by: camaroz1985 Mar 4 2010, 11:43 AM
Man, I am looking into every option and a long block from one site is $3395 shipped, +$350 core. At least I know what the upper limit is.
http://www.ccrengines.com/id17.html
If you want to look into another engine might I suggest calling Mike Shaffer Auto Sales, they are a used car dealership, but also have a sort of junkyard of Subarus. Not to far away in Marietta. Phone number is 717-426-4202
Posted by: Dr Evil Mar 4 2010, 12:42 PM
Thanks for the tip Good insider info.
Today was an up and down already.
The headers: I dropped them off over 2 week ago with a quote they would be done the following Mon. Not an issue as I was going to KS. Come back from KS and was told they would be dont on Fri. OK, I still wasnt in a hurry. Try to pick them up and the shop has moved with out giving me any notice. I finally get in touch with a guy that tells me to meet him today at noon and they would be done. I get there, the dude is at lunch, the other dude (mover) calls him and tells him I am waiting, 30min later (he finished his lunch) the guy arrives. The headers.......only sand blasted, not coated. He says I can get them tomorrow AM if I want them coated. He is going to do them in his daddy's garage. I take them and say good buy. Deplorable customer service.
The up, I probably have a place for my suby work. Paul is the owner of European Import Motors in Harrisburg and he said that I can work on my car there. If any one went to the MEI in Hershey last you they likely met Paul. He really is a nice guy
So, I will be pulling the engine myself and will see what is up with it from there. If it is worse than expected, I will be seeing about Mike Shaffer.
Posted by: GS Guy Mar 4 2010, 04:24 PM
Not that close to you Doc - but Maryland Performance Coatings did my Suby header and did a very nice job. They are in Eldersburg/Sikesville and right next to a high quality powder coating shop. Those two shops get all my work now that I've found them.
FWIW - the MPC # 410-549-6122
No real web site and definitely no "posh" waiting room LOL. Usually have to drag Jeff away from the sand blaster to discuss your work! Nice guy though, and does a great ceramic coating. The kind of shop that doesn't need lots of advertising because word of mouth and return customers bring them plenty of work!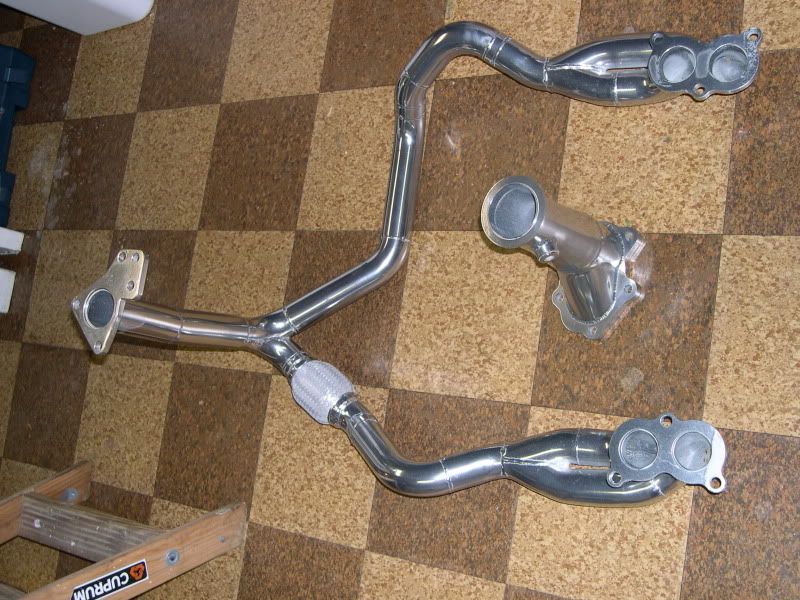
Jeff
Posted by: Dr Evil Mar 4 2010, 09:55 PM
Thanks, Jeff. There is a good place near by that Zach has used. They are less expensive and not like this other place I tried in any way.
Posted by: camaroz1985 Mar 5 2010, 07:57 AM
I too know Paul. He sponsors the local autocross series. Good luck on the repairs, and with the header.
Posted by: Dr Evil Mar 5 2010, 02:31 PM
So today Jim and I went to the Corvair Ranch to pick up some parts. I have been trying to fight feature-creep, but I am only human and I just HAD to pick up the posi-traction diff for my bus....at $250 I will be cleaning it up and resealing it tonight while Jim gets his refresher course in 901 gear box rebuilding. Tomorrow we go to cupomeat productions and shoot the rebuild video. Sun we work on the bus, Mon the bus and hopefully out on the road It is early spring weather here now, thankfully.
Posted by: Vacca Rabite Mar 5 2010, 03:40 PM
If I don't just crash tonight after putting theo to bed, is there any more prep work that needs doing on the bus that I could do later this evening?
Posted by: Dr Evil Mar 5 2010, 04:37 PM
Paint is the only thing needed. Check and paint the engine bay where I messed the paint up. Other than that, nope. We were over at your place yesterday to pick up the starter I returned today. You didnt answer your door and I noticed the blinds to the computer room were drawn....I figured that you were, ahem, busy on the computer
Posted by: Vacca Rabite Mar 5 2010, 05:35 PM
heh. I had Theo duty yesterday. When were you over, i did not even hear you at the door.
Posted by: Dr Evil Mar 5 2010, 06:11 PM
About 7pm.
Posted by: Vacca Rabite Mar 5 2010, 07:35 PM
About 7pm.
Ah. Theo's bath time. No way I would have heard you over the fan and his splashing and playing.
Shoulda just come in.
Zach
Posted by: Dr Evil Mar 5 2010, 09:10 PM
I got the limited slip diff cleaned up tonight. I need my seal puller which I think is at your house so I can change the seals. I cant wait to drive my bus with an LSD
Posted by: Vacca Rabite Mar 5 2010, 10:32 PM
I got the limited slip diff cleaned up tonight. I need my seal puller which I think is at your house so I can change the seals. I cant wait to drive my bus with an LSD
I am 90% sure that the puller is in the bus. I know I saw it there before the big snowstorm last month, and I don't think that you have been around much to move it. But, stranger things have happened.
Am I going to see you guys tomorrow? or just Sunday? Seems like you are ahead of your schedule. Weather is supposed to be real nice, I was thinking about firing up the grill. First burgers and brats of the season. Maybe get Joe to come over and have a little mini-meet.
Zach
Posted by: RJMII Mar 5 2010, 10:43 PM
Just Sunday; we've got the long drive to the video shoot tomorrow and the video shoot.
Then he's going to let me work on his computer.
Posted by: Dr Evil Mar 6 2010, 07:42 AM
Jim has tried to work on the desk top.....now it is manifesting newer, weirder symptoms. We believe I transferred my curse over to him.
See you Sun, most likely.
Posted by: Dr Evil Mar 8 2010, 11:52 PM
Nothing really photo worthy happened last time. Jim and I removed the old diff, resealed the posi, and reinstalled it. The only issue was that I was sold the wrong torque converter seal. It was an input shaft seal for a standard so the replacement is in the mail and should be here by tomorrow. If so, the engine is going back in and the wiring and cabling is due to commence. The weather is great, thankfully.
Posted by: Vacca Rabite Mar 9 2010, 05:33 AM
When I got home from class last night I noticed that the back of the bus was left open. Did you do that on purpose, or would you like me to close it?
Zach
Posted by: Dr Evil Mar 9 2010, 10:59 AM
Please close it (doh).
Posted by: Dr Evil Mar 10 2010, 10:56 PM
Yesterday and today I went down to see if I could get the engine in before the rain came. I finished up the sealing and installation of the posi differential, and finalized some engine odds and ends. The engine is in today, but I need to bend the new tranz fill tube down as it is crushing the front tin. I cut out the remainder of the old heating system to get some more free space and to rid the area of another nidus for rust. I also broke the throttle cable mount loose so I could place it lower by the clutch tube. I am gonna need to cut some of the tube off, re route it, and braze a section back on. I will see. I also removed the brake assist hose and replaced it with new hose.....but I am not sure if the new hose will work. Napa gave me heater hose when I asked for vacuum hose I will be checking other locations to see if they have some.
Now what is left is wiring and cabling. Then hoping.
Posted by: zymurgist Mar 10 2010, 11:17 PM
Gee, the guys at my NAPA knows what the hell they are doing. Unfortunately they cut back on their Saturday hours due to the economy.
Posted by: Dr Evil Mar 11 2010, 12:10 AM
Sunday hours? All the Napas here are open 9-5:30, 10-noon on sat and closed Sun. Real easy place to get parts.....if you work at night
Posted by: zymurgist Mar 11 2010, 06:20 AM
Yeah, if it weren't for working at home, I'd never get to go there.
Still, it's nice to go to a store and say that I need parts for a small block Chevy engine without hearing the counter guy saying that '77 Corvettes didn't come with iron Vortec heads.
Posted by: Vacca Rabite Mar 11 2010, 07:44 AM
I did not get a chance to poke around after class last night (VERY beat), but I did note the the bus was sitting lower and suspected that you got the engine back in. Nice! Today is suppsoed to be another really nice day, and again I won't be able to play due to having Theo duty.
Zach
Posted by: Dr Evil Mar 11 2010, 11:12 AM
I thought today was supposed to have bad weather. I was going to stay home, but I will likely be down there then.
Posted by: Dr Evil Mar 11 2010, 10:24 PM
Today was GOOOOOD!
I called around and found a parts store with a clue and the 15/32" vacuum line for the brake booster. Score
I cut the tube for the throttle cable, got an 8" section of 3/8" brake line and a section of 5/16" to make a new tube section. 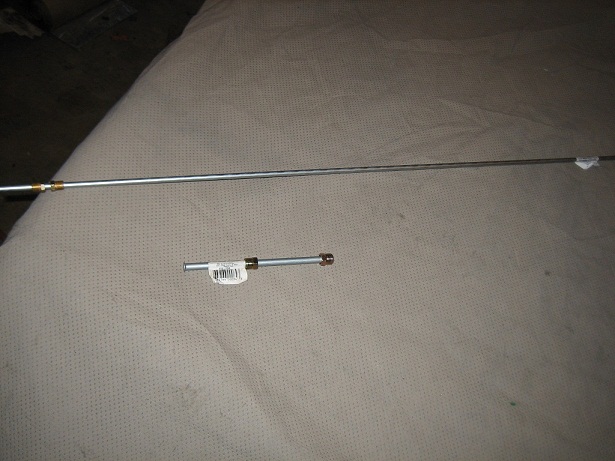
Here is a section of the old tube next to the 3/8" tube.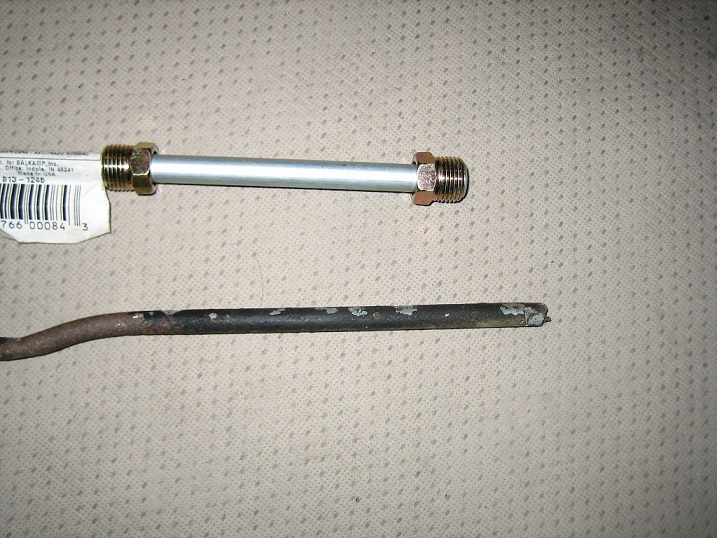
The 3/8" had an ID that was a bit too small for the OD of the 5/16" so I had to grind down the 5/16' a bit. Since I didnt want to do a long section of the 5/16 on the grinder I decided to tack it into place.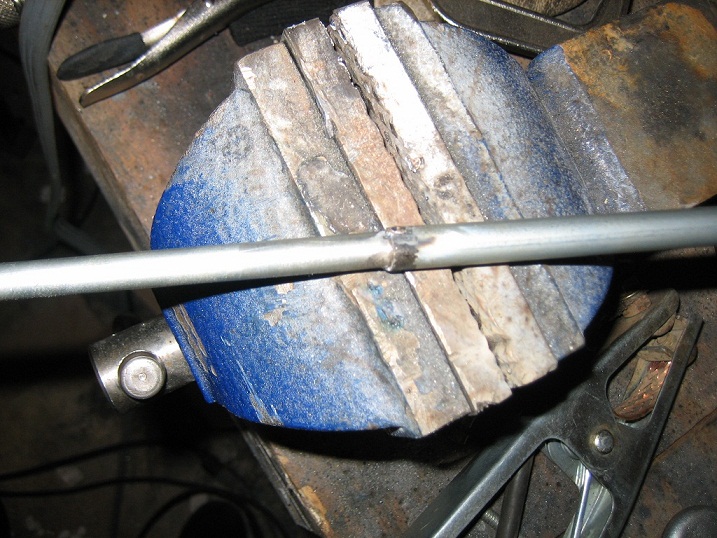
Posted by: Dr Evil Mar 11 2010, 10:25 PM
The tube was moved under the cross beam so that it had a more direct shot to the throttle linkage on the tranz. It needs to be finalized before I tack it into place.
Attached image(s)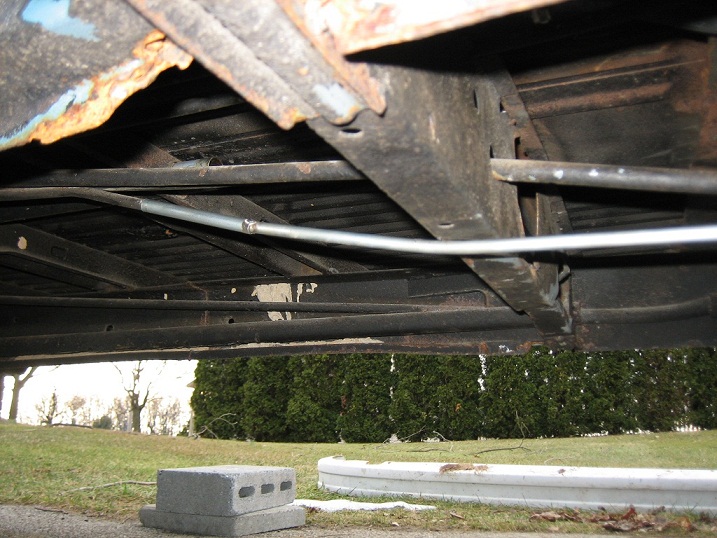
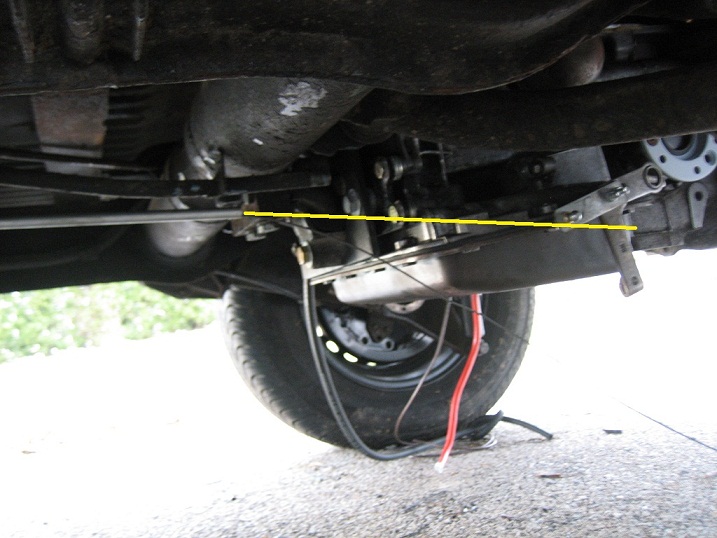
Posted by: Dr Evil Mar 11 2010, 10:27 PM
And now for the money shots! I put the tin in and none of it fit right. I had to trim everything. Weird. But, it still ended up working
Attached image(s)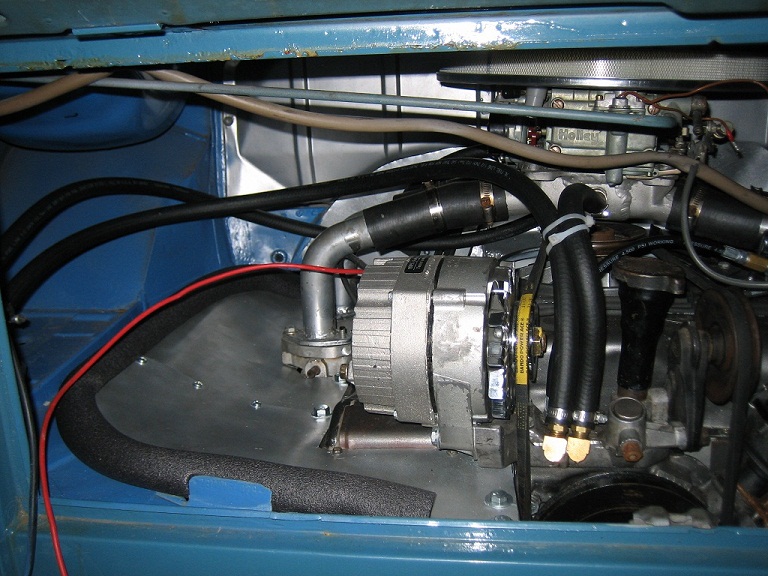
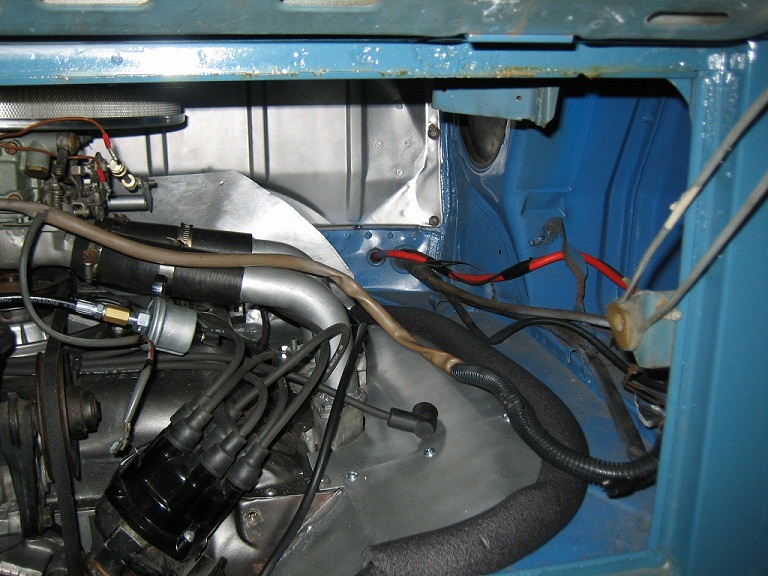
Posted by: Dr Evil Mar 11 2010, 10:28 PM
S'more
Attached image(s)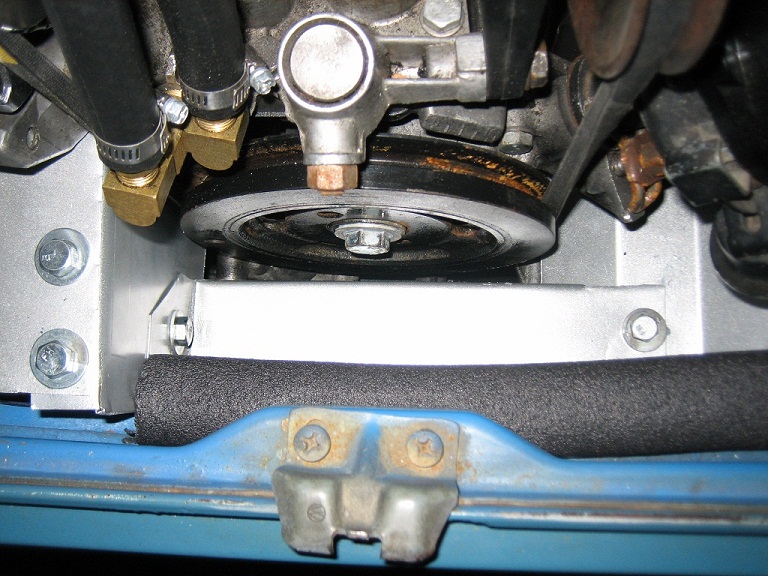
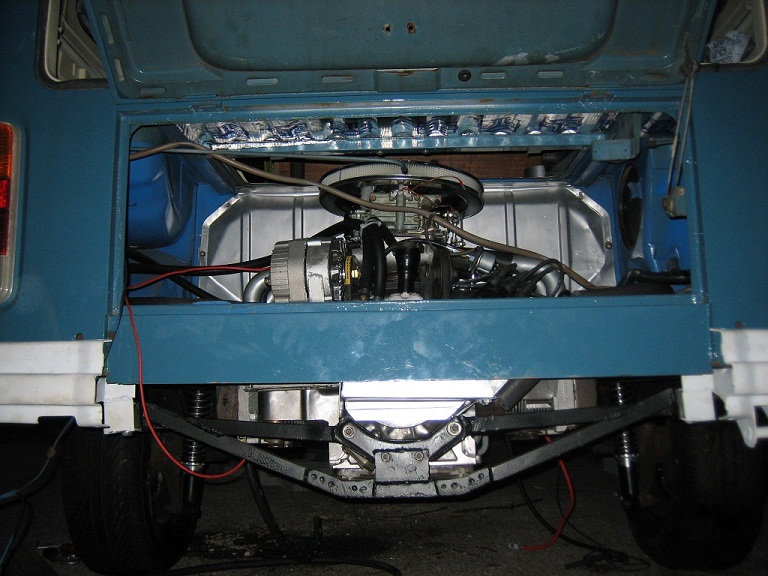
Posted by: Dr Evil Mar 11 2010, 10:29 PM
Last one showing the new clearance with the new filter and holder.
Attached image(s)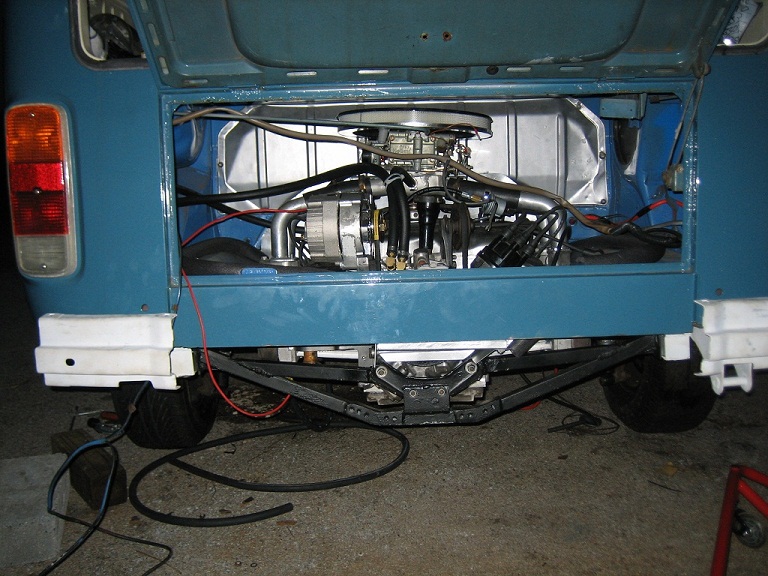
Posted by: Dr Evil Mar 11 2010, 10:38 PM
The engine looks much lower in the pics than in real life. For those that slam these buses, this thing is a monster truck.
Posted by: zymurgist Mar 12 2010, 06:53 AM

Posted by: Vacca Rabite Mar 12 2010, 07:31 AM
What time did you head out last night? I got home around 8 with little guy and figured that you had not been over when I did not see you there.
If you were reshaping and welding, you must have gotten over early. Sorry I missed you.
Zach
Posted by: Dr Evil Mar 12 2010, 10:09 AM
I was out of there at 7. I was in need of parts and had been working a solid 5 hours.
I need to figure out the routing of the brake booster line, and I need to get a reducer to put the larger hose to the smaller nipple on the manifold. I may also need to get an enlarger to put the tranz kick-down's smaller hose to the other nipple that is bigger. I have to look at the taps off of the carb to see if I have a small enough one.
I also need to figure out how I am going to couple my throttle cable to the bell crank on the tranz. That will dictate where my tube for the cable ends up.
I will be drilling holes in the tin for the booster hose, and the fuel hose, placing the starter solenoid, coil, and ignition control box, running wires, figuring out where I am going to be mounting the pressure sensor, and where I will place the oil temp sensor. I also need to figure out if I want to drill a separate hole for the CHT wire. I may just cut the plug boot grommet and place the wire in the cut.
Posted by: Vacca Rabite Mar 13 2010, 12:06 AM
Missing your iPod?
Zach
Posted by: scotty b Mar 13 2010, 10:44 AM
Check it for any Jonas Brothers before giving it back
Posted by: Dr Evil Mar 13 2010, 11:43 AM
Nope, I know where it is. Feel free to search it for Jonas, you will find nothing!
Posted by: kwales Mar 13 2010, 11:47 AM
Is it pink?
Posted by: Dr Evil Mar 13 2010, 12:11 PM
Here are some mock ups of how I am having the seats done.
Attached image(s)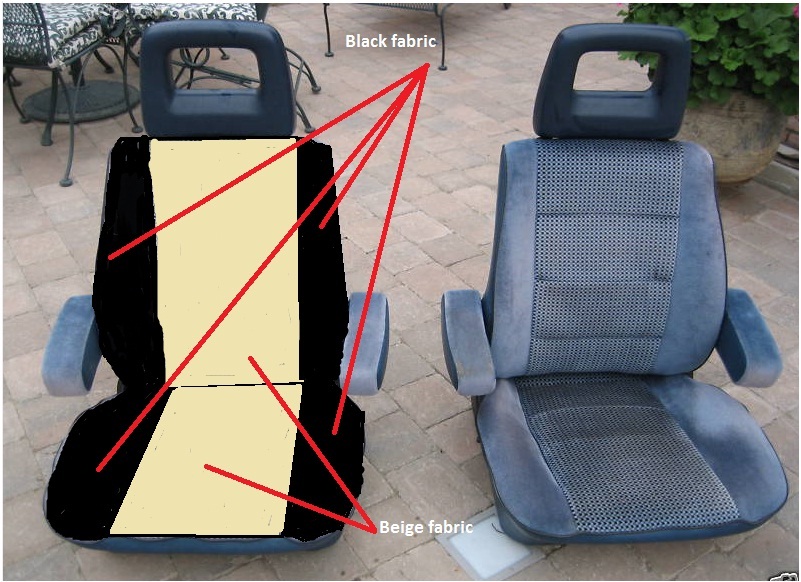
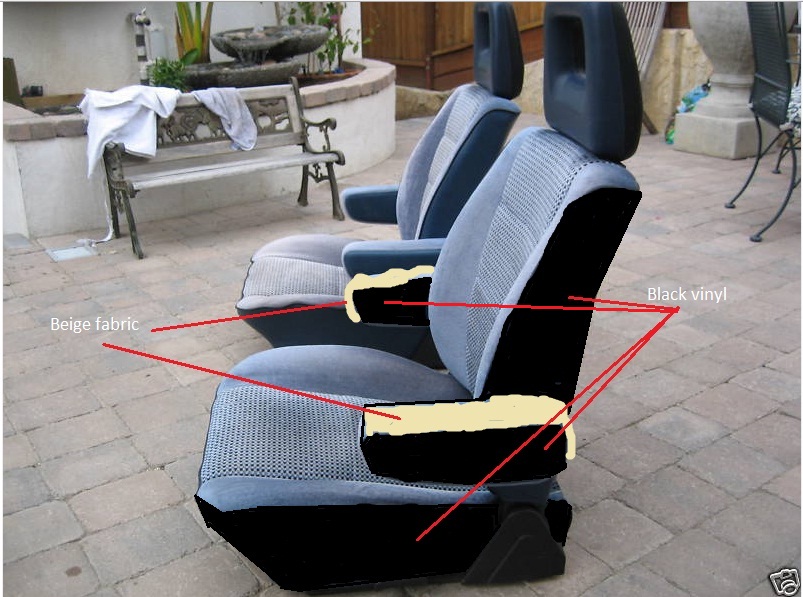
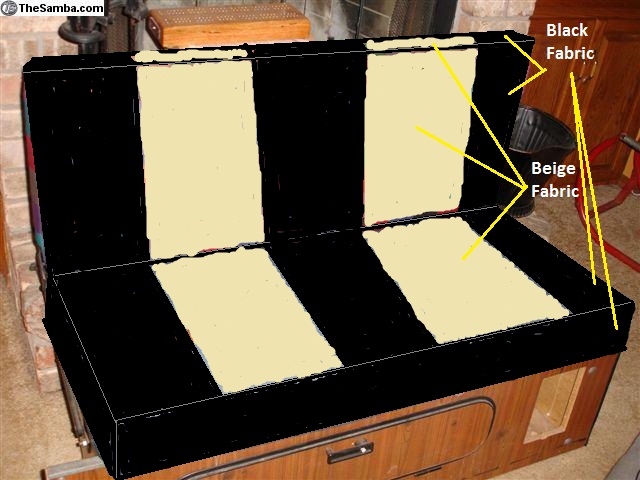
Posted by: Dr Evil Mar 15 2010, 11:23 PM
Today was another day of shitty weather. So, I decided to work inside the bus. I was itchin to get back to working on the bus this weekend so I was not gonna let the weather deter me. I trimmed the front engine tin so that it would fit better, installed a seal and then spent the remaining 7 hours working on the wiring inside the cabin. I finished the DIN 15 connector for the instrument cluster, and added a molex connector for the other instruments and fuel control.
I am pretty close now. To do list for tomorrow:
- Finish wiring
- Axles
- Exhaust
- Hook up the suck for the brake booster
- Hole for the fuel line
The arrow in the pic shows where I may need to trim the seal.
Attached thumbnail(s)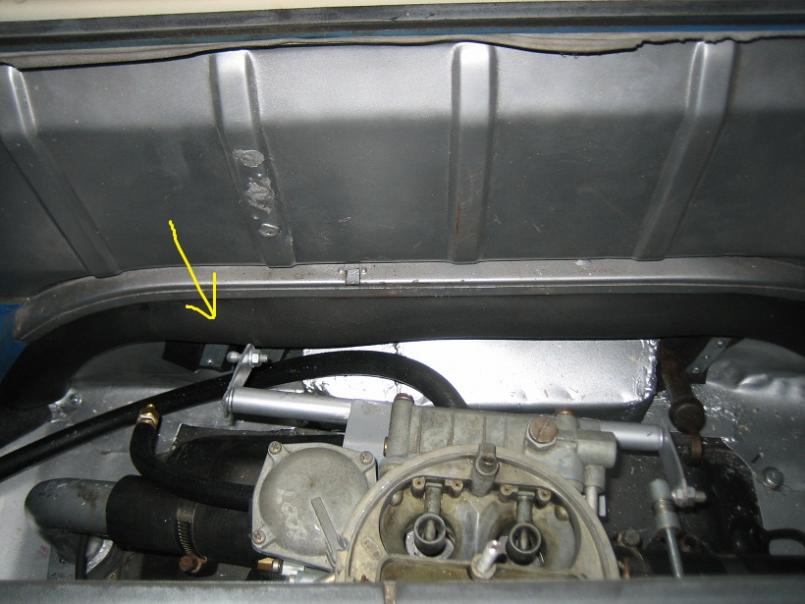
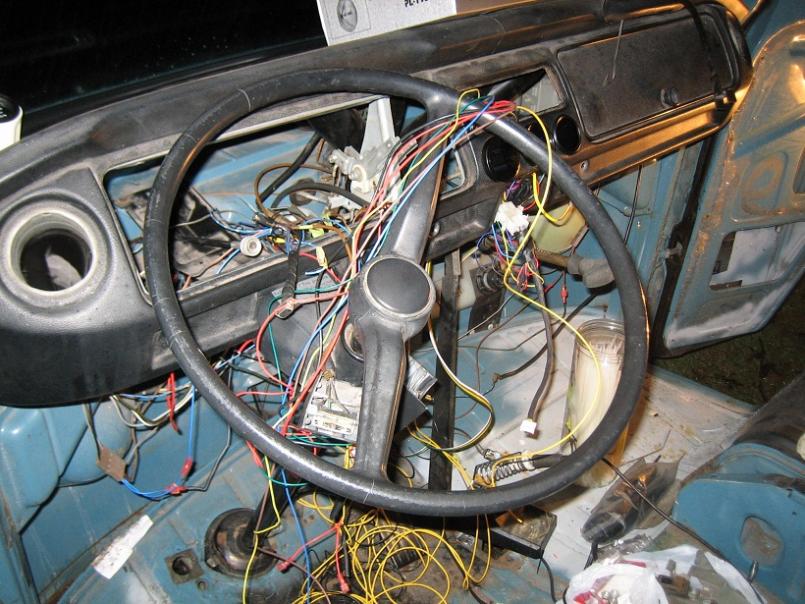
Posted by: Dr Evil Mar 15 2010, 11:24 PM
Two more.
Attached thumbnail(s)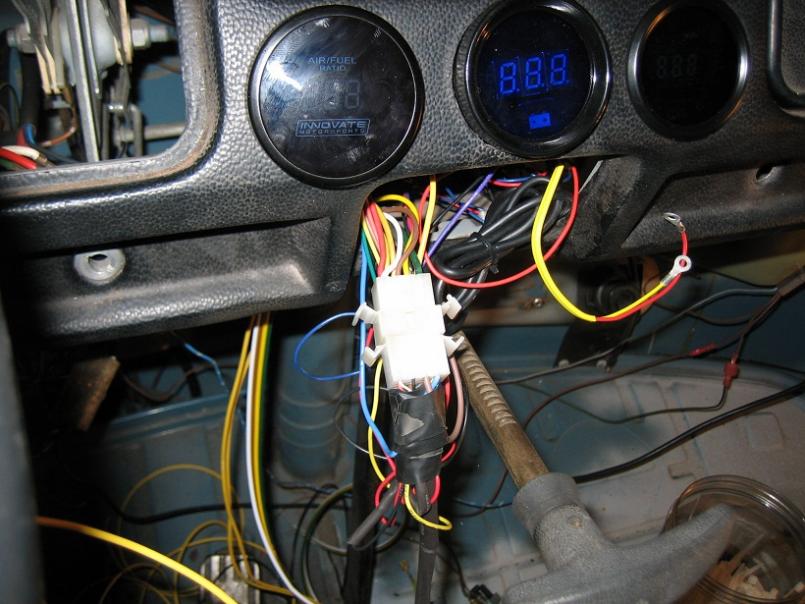
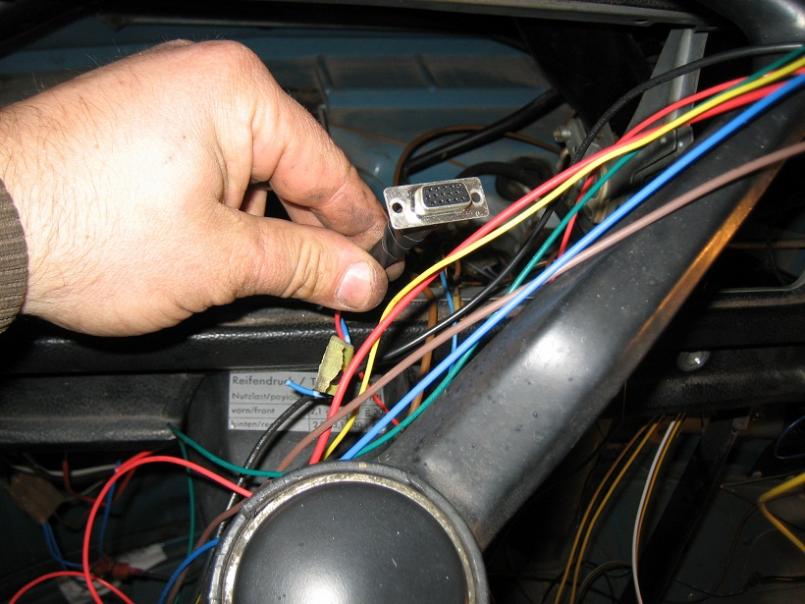
Posted by: Dr Evil Mar 17 2010, 10:52 PM
I had been thinking about going in this direction eventually. What do ya'll think?
2.5" spindle lift and one notch of adjustment in the rear.
Attached thumbnail(s)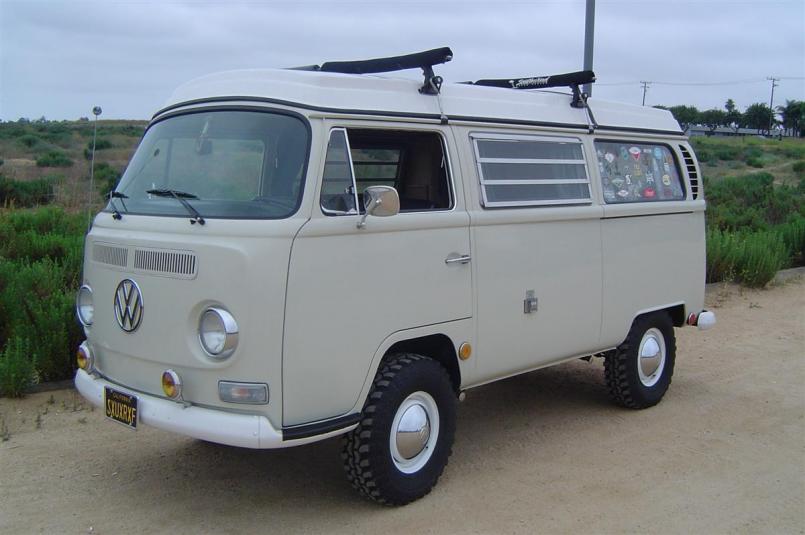
Posted by: KELTY360 Mar 17 2010, 11:23 PM
Oh yeah, that's badass.
Posted by: scotty b Mar 18 2010, 06:17 AM
Posted by: zymurgist Mar 18 2010, 06:26 AM
It's been done before. 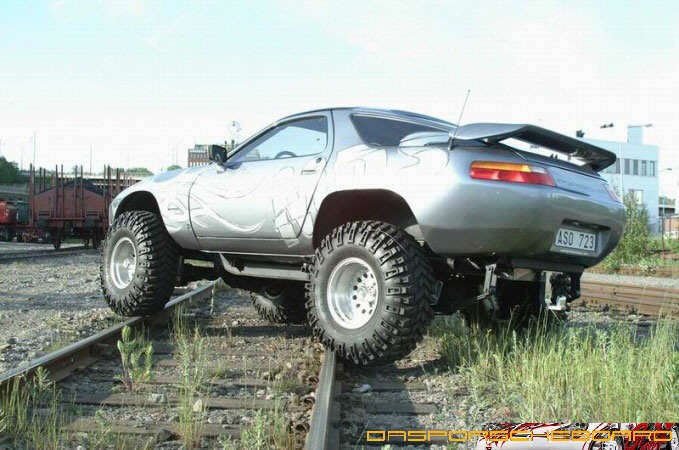
Posted by: camaroz1985 Mar 18 2010, 07:12 AM
Looks good with a little lift, and some beefy tires.
Posted by: Vacca Rabite Mar 18 2010, 10:23 AM
Thats what I thought you should have done from the beginning. And make it 4wd.
https://www.youtube.com/watch?v=iV2CHuxE228
You KNOW you want to do this. It is within your ability!
Zach
Posted by: Vacca Rabite Mar 18 2010, 10:31 AM
If you did, we could go wheeling together. me in the Jeep and you in the Bus. it would be awesome.
Posted by: Dr Evil Mar 18 2010, 01:06 PM
I will do a synchro conversion some day, but not now. This conversion would not take much so it is first. Here is a link to this and a bigger red bus on the Samba
http://www.thesamba.com/vw/forum/viewtopic.php?t=270489&postdays=0&postorder=asc&start=0
Posted by: type11969 Mar 18 2010, 01:59 PM
Syncro Vanagon Westy with a subaru diesel . . . definitely someday.
It is crazy how much syncro westys are listed for on the samba . . . so much cheaper to buy a syncro passenger van, a busted westy, and swap parts over.
Posted by: kwales Mar 18 2010, 02:19 PM
Hey!!!
Did you take those seats from my Vanagon during the Ohio tranny clinic?
I better check!
Seriously, I love the handling on my VW Bus (Vanagon), especially after changing from 14 inch steelie rims, to 15 inch Mercedes alloys. That change alone made a miracle change to the handling. Well, that and the natural 50/50 weight balance.
In fact, I might start stalking 16 inch wheels.
If it was mine, I'd improve the handling by changing the wheel rim size, and not increase the ground clearance. Extra height adds to the sidewind succeptablility, and decreases the cornering "slingability".
But, mebbe you want to offroad. Have fun.
Ken
Posted by: Dr Evil Mar 19 2010, 06:16 PM
This Sat will be a great day, I hope. Noel and I are both going down early (9:30am) and I hope to have it moving under its own power before I leave at about 7pm.
- Wiring
- Axles
- Exhaust
That is about it for the big stuff. I was going to go down today, but I am finishing up some gear stacks for people so I can get them out tomorrow AM, hopefully Its Spring, I need to get them cars on the road.
Posted by: Vacca Rabite Mar 19 2010, 06:51 PM
I am going to go out and give the prius an oil change so that I don't have to do it tomorrow. See you when Theo gets out of swim class.
Zach
Posted by: Dr Evil Mar 20 2010, 11:41 PM
Lots of work done today. Some stuff fought me so I did not get to finish, but the day produced some good results. Pics later. I am drunk, and going to be. Zach and his wife Erin are in the next room passed out Good day all around
Posted by: Vacca Rabite Mar 21 2010, 10:47 AM
Last night was fun. We are back home now, I am somehow not hung over at all. Mike elected to stay in bed instead of joining Noel and Erin and I for breakfast.
Zach
Posted by: Dr Evil Mar 21 2010, 10:53 AM
I decided to remain near a toilet. Robburritos and hot wings were nto kind to me today. I am doing better. I also finished my home work so I may come down and finish the bus
Maybe 
Posted by: Dr Evil Mar 21 2010, 10:23 PM
Alright, I know you all dont care if there aren't any pics. So, I took some
Over the last 2 days I managed to do the following:
- Starter and hot start relay wiring
- Fuel pump and hoses
- CHT wiring installed
- Oil pressure sensor mounted
- Oil temp T made and installed
- Coil, resistor and optical controller installed
- Completed installation of brake booster suck line
- Gear selector cable installed (what a PITA)
- Majority of the cockpit gauges wired, or wiring waiting for final placement of gauge
All that is left:
- Finish hooking up sensors
- Install gear selector under dash
- Buy a battery
- Axles
- Exhaust
The throttle linkage needs to be re adjusted as it is not working as it did before. I do not know why, but I need to set a day aside to have time to deal with it. It may take 15min, it may take a whole day.
And now, the pics.
Attached thumbnail(s)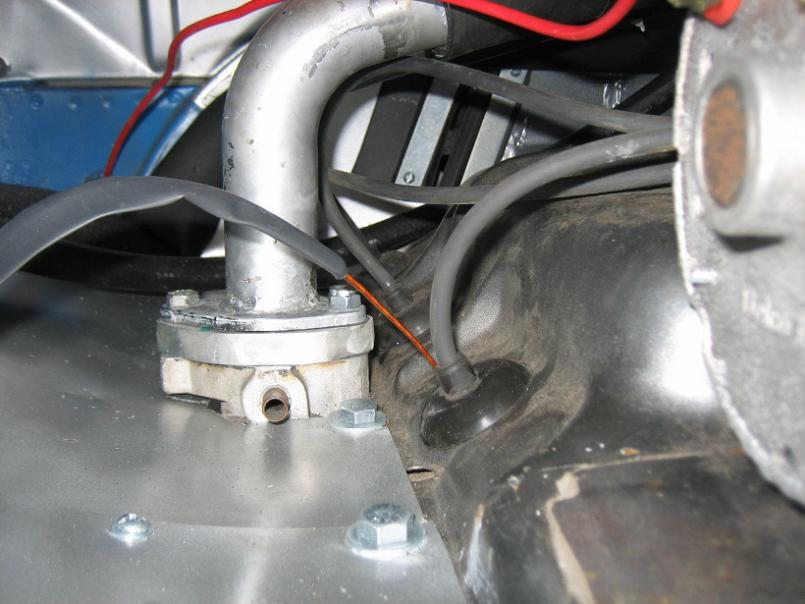
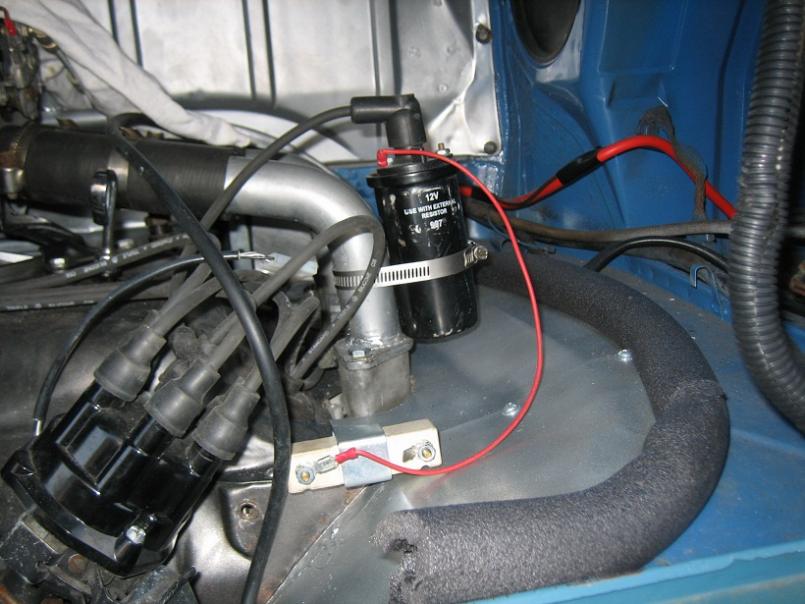
Posted by: Dr Evil Mar 21 2010, 10:25 PM
More
Attached thumbnail(s)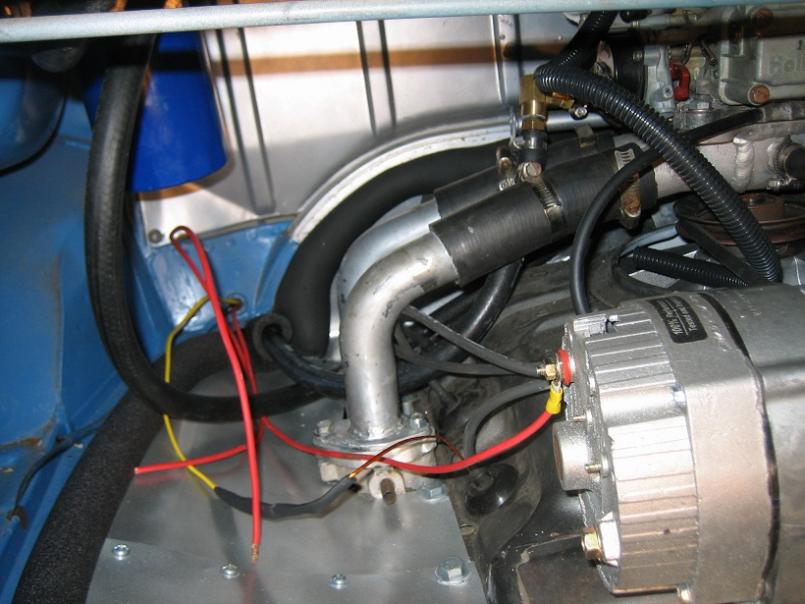
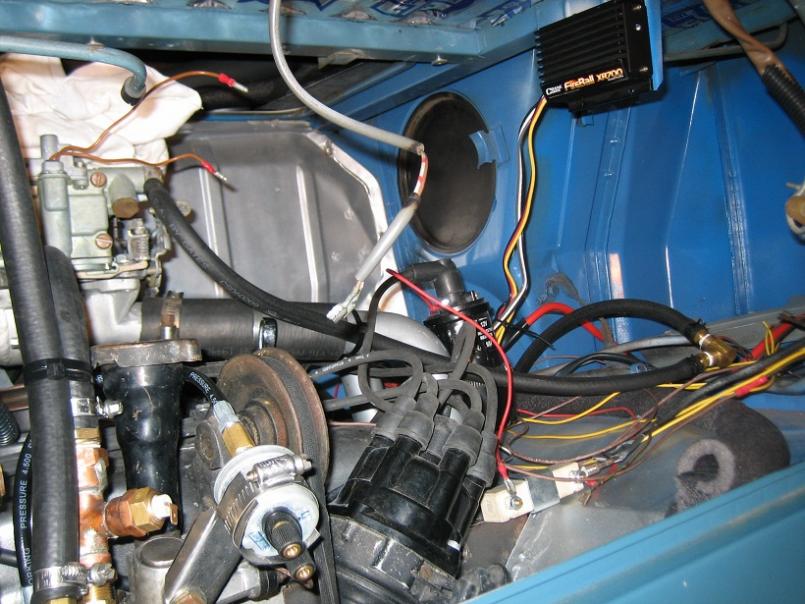
Posted by: Dr Evil Mar 21 2010, 10:26 PM
Still more.
Attached thumbnail(s)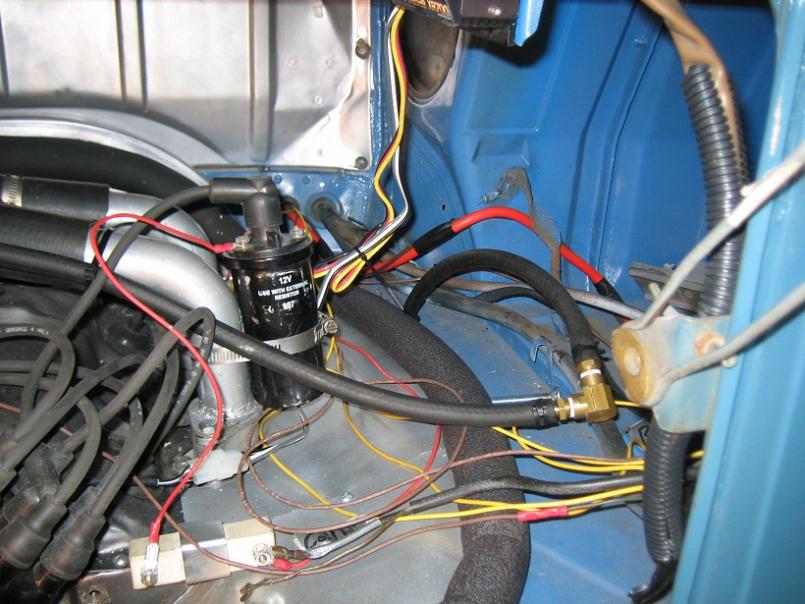
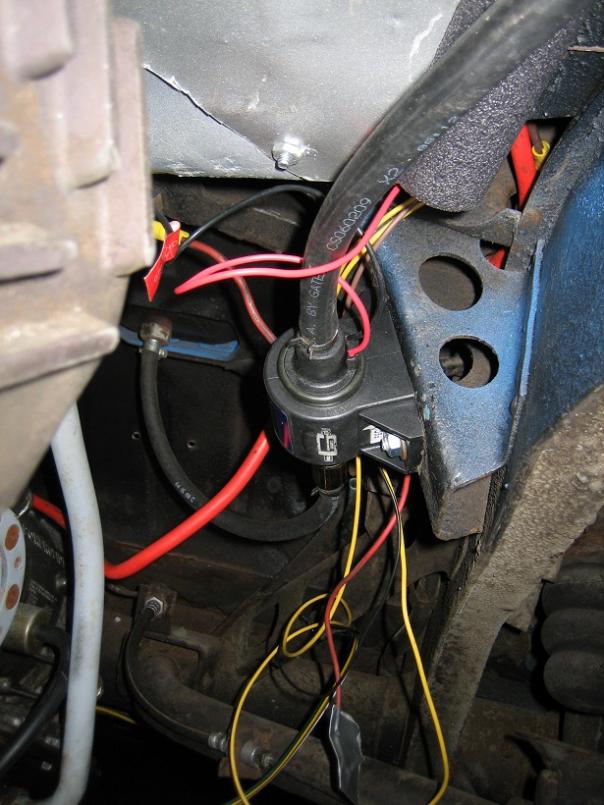
Posted by: Dr Evil Mar 21 2010, 10:27 PM
More more more
Attached thumbnail(s)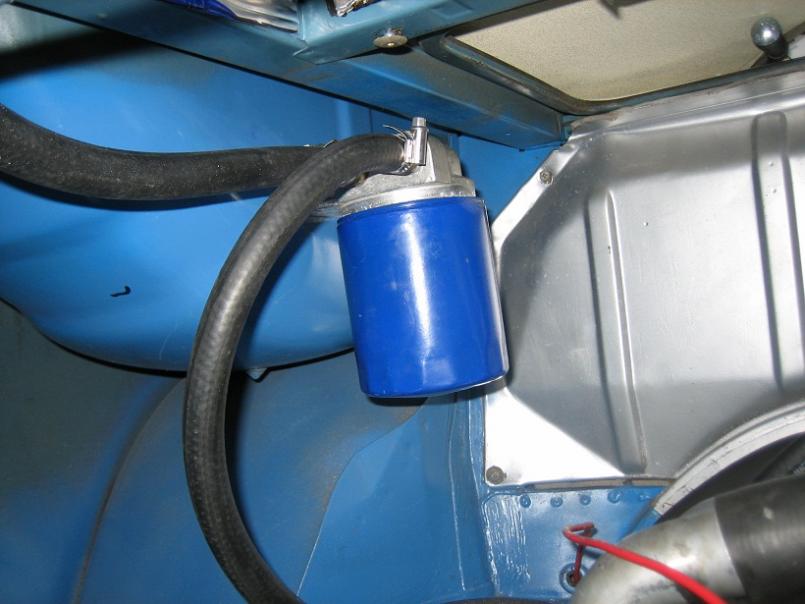
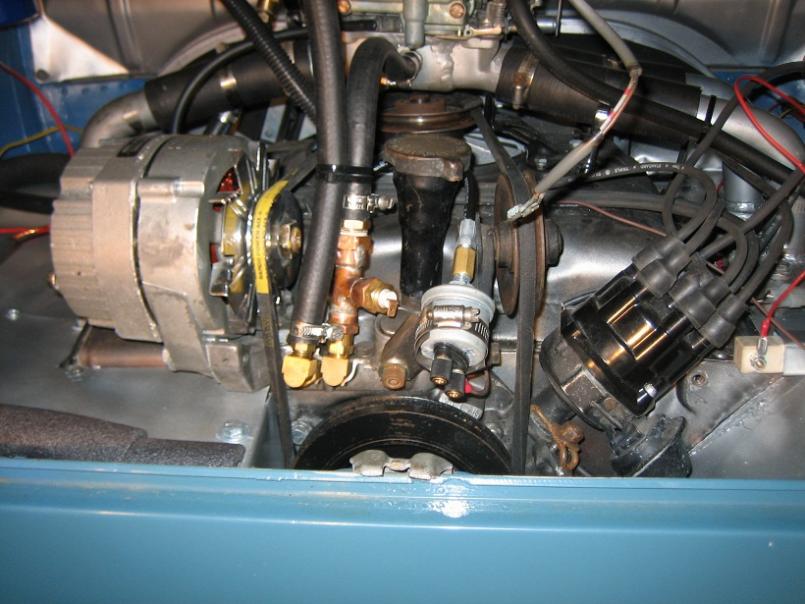
Posted by: Dr Evil Mar 21 2010, 10:29 PM
And then...
Attached thumbnail(s)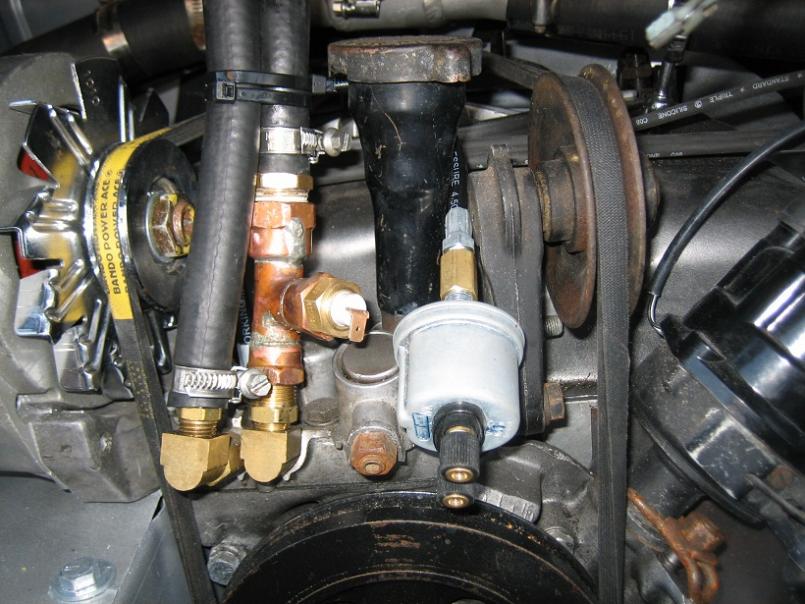
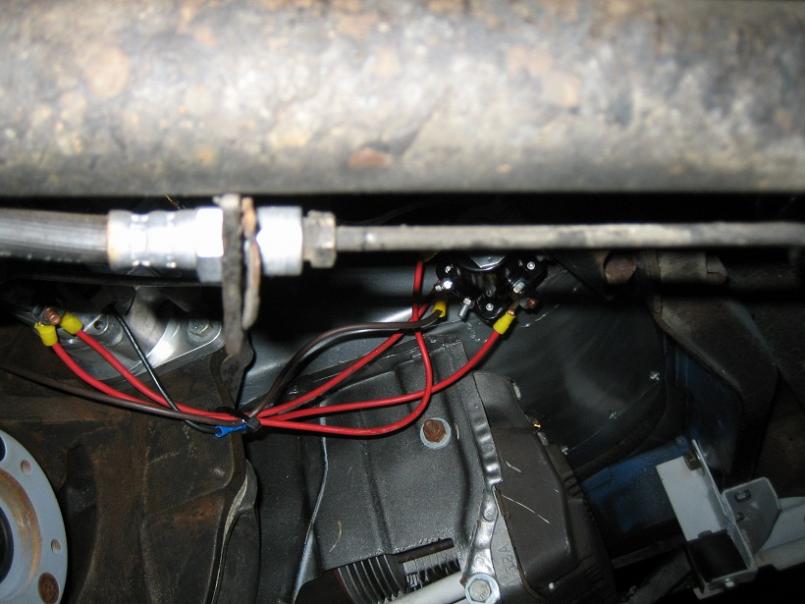
Posted by: Root_Werks Mar 22 2010, 03:59 PM
Wow! Looks very close to lighting up.
There is a running, driving syncro up here for $4k. Cheapest one I have seen......ever.
http://seattle.craigslist.org/see/cto/1645331682.html
Posted by: Dr Evil Mar 22 2010, 05:49 PM
There was one in town for $2,500.....it was hard to pass up, but I have to have my limits.
Posted by: RJMII Mar 22 2010, 06:41 PM
Looking good! The pics are cooler now that I've seen the bus in person.
Posted by: Dr Evil Mar 23 2010, 08:05 PM
What a friggen day. The last part of this post will need to be read while you are not drinking anything as to prevent from spitting.
The day started off pretty good. There was rain forecasted, but none happened so I decided to head down to try and finish the bus. We still need a second vehicle up and the bus is closer than the Suby at this point.
I went to Lebanon, PA to pick up my under dash A/C unit that I got for the bus (future plans). I then went directly to york to work on the beast.
I managed to get all of the rear wiring done and a battery installed. I was pretty happy about this and figured that the end was near (in a good way).
So, I figured it was time to install the passenger side axle and exhaust since I was finished with that side.
The axles.....
I bought my axles off of Eric Shea at a good deal. They were shipped and marked fragile. Whatever. The axles were contained in bags and there was a baggy of grease accompanying each one. One axle was dropped so hard that it burst the bag of grease all over the inside of the box. Excellent. The axle was clean, though. The other axle had one CV that someone had previously greased and as such the zip ties were missing and the whole damn thing was in pieces I HATE reconstructing greasy CVs. Well, that only too too long and made a huge mess. So, off to the beast I go to install the one I just reconstructed. Or so I though. I get under the bus and put the axle into place only to notice that.....it is too short How the hell? So, I try to fit it on the other side and wouldnt you know it,.....its too long! So, it would appear that my drive train, some how as we trial fit the throttle stuff in the bus, IIRC, is too far over to the drivers side by about an inch (2" too close on drivers, 2" to far on passenger).
Now, I need to drop the engine a little and see if I need to modify the front mount over, the rear bar (I hope not), or both. Oh ya, and the tin
I took pics, but what is the point Looks like I have a project waiting for me when I go down again. Tomorrow is home work day. Depending on how long it takes, I will likely not be going down.
Posted by: Dr Evil Mar 23 2010, 08:25 PM
Oh ya, the CV bolts are longer than our 914 type so that was a stopping point. AND, the adapters for the CV to corvair tranz are threaded for 5/15-24 bolts. FINE THREAD!? Why, I do not know. The stock are coarse, 7/16 coarse in grade 8 is readily available, but not the fine ones in grade 8. Oh, the kit only came with 6 and I need 12
These last few things are vexing.
Posted by: rick 918-S Mar 23 2010, 11:23 PM
Doc I feel your pain...  ouch!
ouch!
Posted by: zymurgist Mar 24 2010, 05:55 AM
Oh ya, the CV bolts are longer than our 914 type so that was a stopping point. AND, the adapters for the CV to corvair tranz are threaded for 5/15-24 bolts. FINE THREAD!? Why, I do not know.
If I recall correctly, the half shaft yokes on a Corvette bolt to the wheel hubs with fine thread bolts. I wonder if it's a weird GM thing.
Posted by: Root_Werks Mar 24 2010, 09:13 AM
Dude!
That sucks.
Posted by: Vacca Rabite Mar 25 2010, 12:13 PM
I am just seeing this... D'oh!
It might be faster to just get axle shafts made in a size that fits as things are now. There are a lot of 4X4 shops that make and sell axle shafts for the truck guys.
I am on Theo duty tonight (want to get as much time with him as I can before I fly to CT tomorrow) but I might be able to help after he goes to bed.
Zach
Posted by: Dr Evil Mar 25 2010, 07:15 PM
I removed the front mount and repositioned it 1.5" to the passenger side. The Axles now fit, but the tin is gonna need some trimming. More work, but not a complete re-do. I HATE working with axles. Fucking things are all greasy and then dirt sticks to every thing, the bolts are all greasy, they dont want to go in.
I hope to be done with this on Sat if I work on it. The weather is supposed to be nice. However, I still need to change the bearing hub on the VUE and the head gaskets on the Suby. At least this crap is happening when I am "unemployed"
Posted by: Dr Evil Mar 26 2010, 11:27 PM
OK, I will be going to be in about 30min so I can get an early jump on this damn thing. I intend to have it running this weekend!
Here are the pics I took just before I found out that my engine was out of alignment
Attached thumbnail(s)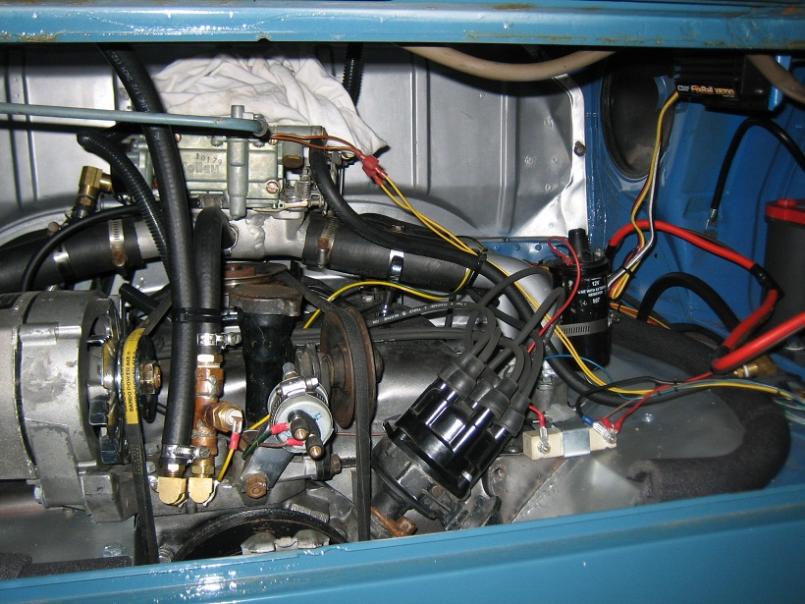
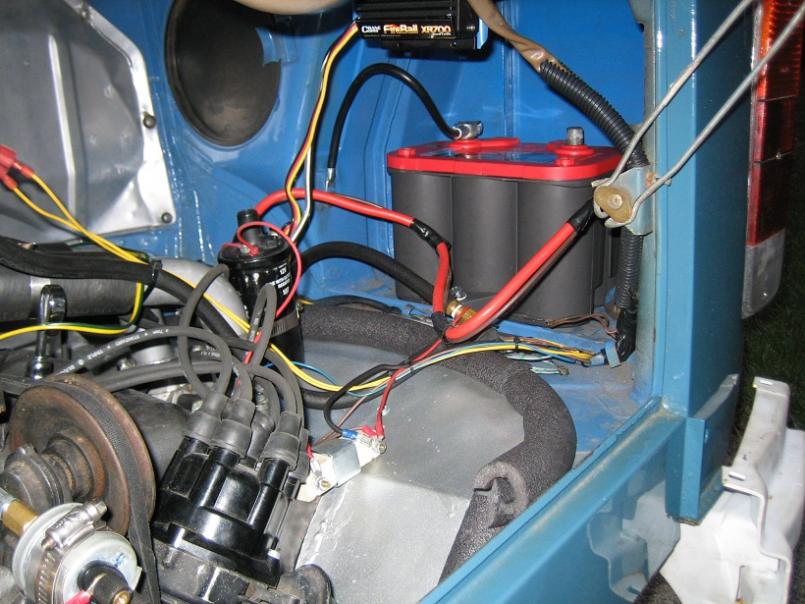
Posted by: Dr Evil Mar 26 2010, 11:29 PM
Last two.
Attached thumbnail(s)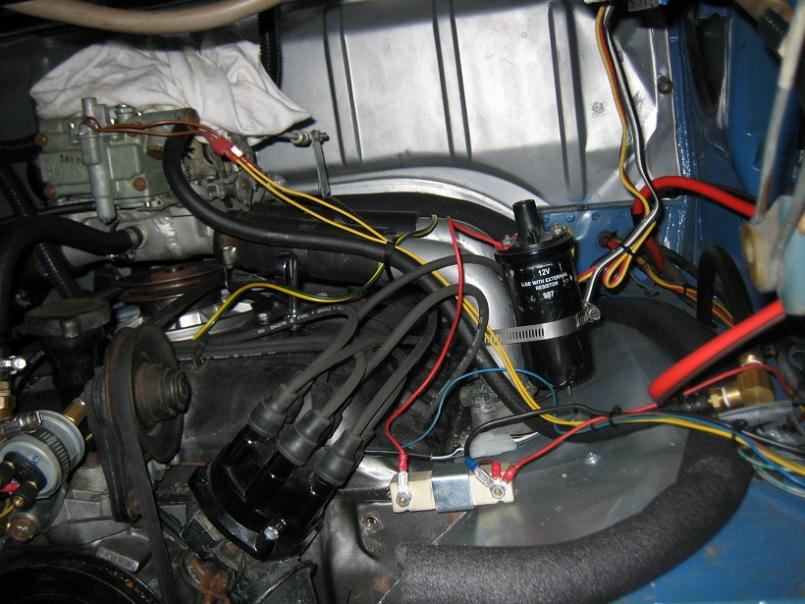
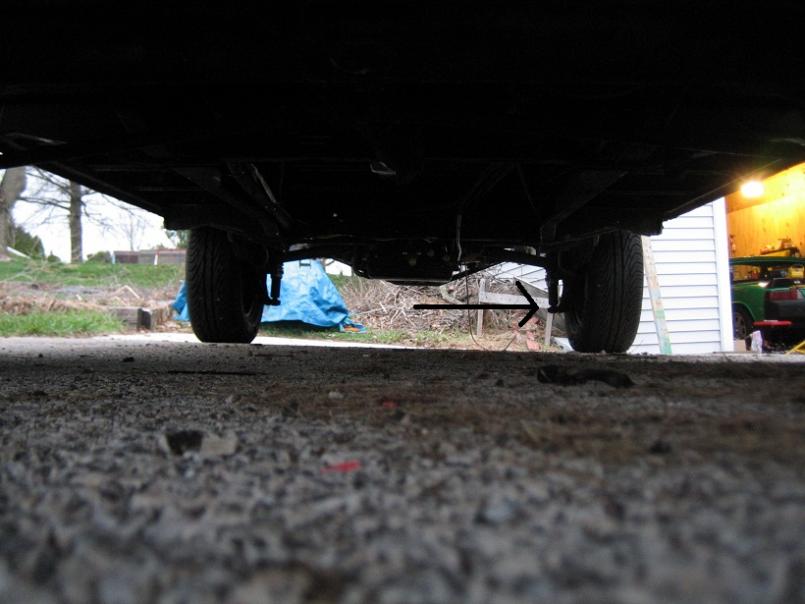
Posted by: Dr Evil Mar 28 2010, 12:15 AM
FINALLY! Today was a good 11hr work day I started at 1pm and left for home at midnight (and 33*, burr).
I adjusted the tin and installed the seals which went well
Start, drivers tin removed.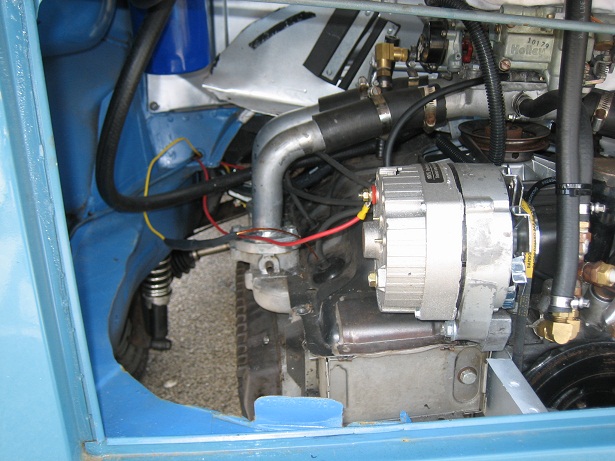
An example of the gap formed on the pass side when I shifted the engine. No biggie.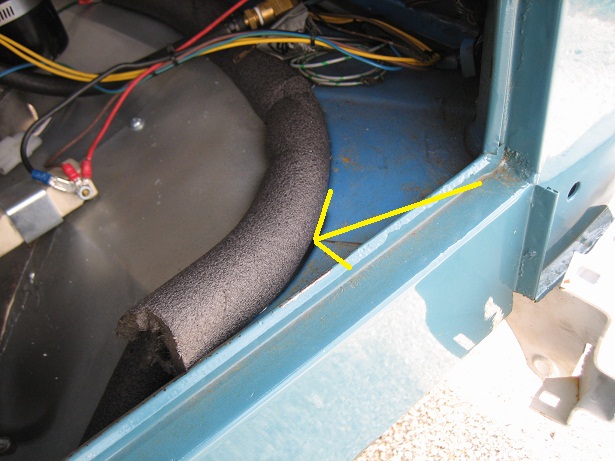
And the finished product 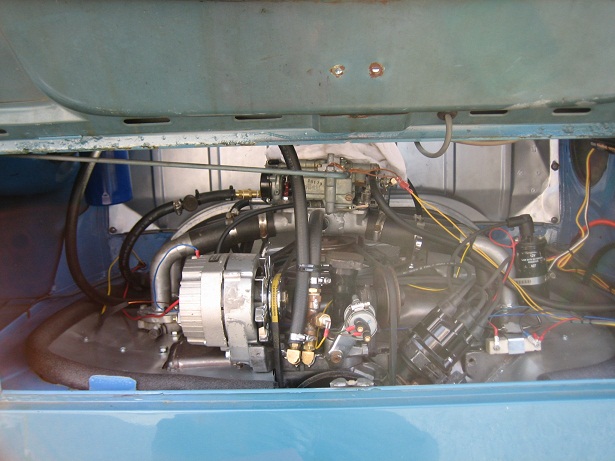
Posted by: Dr Evil Mar 28 2010, 12:24 AM
The thing I though would take the longest time, the throttle linkage, did. But, I came out victorious!
I bought a longer, thicker rod since I knew the new set up would require some bends that needed to be rigid. Not a big deal, just a Z bend, but it did have to be precise. It took a few attempts with lighter gauge rods.
Here is the return spring and plate I made for it. It works very well 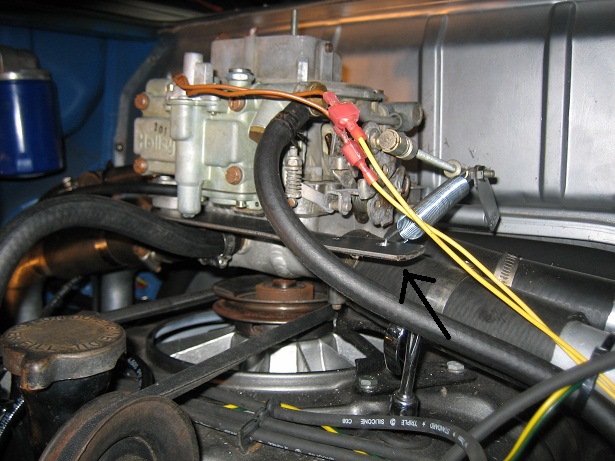
Here is a view of the Z bend. 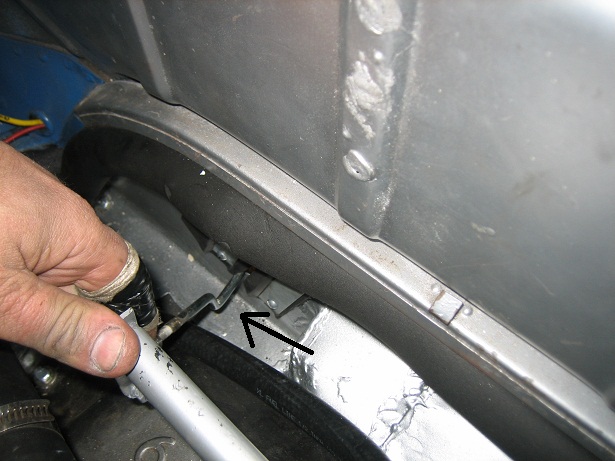
Throttle linkage going through tin.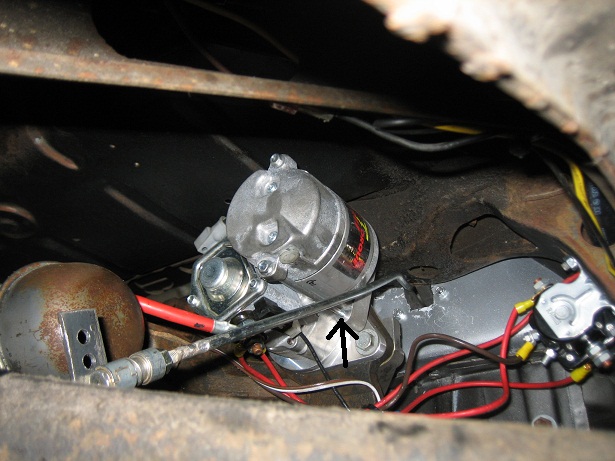
Posted by: Dr Evil Mar 28 2010, 12:38 AM
And now for the little part I am most pleased with. The throttle connection on the tranz was a 5/8 hole. So, I bought a 5/8 bolt with a good size unthreaded portion. I cut the threads off, flattened one side to make it easy to drill, drilled a hole for a cotter pin and one for the cable, put a washer on it, and installed it. It friggen worked as I imagined! I like fabricating things.....when they work 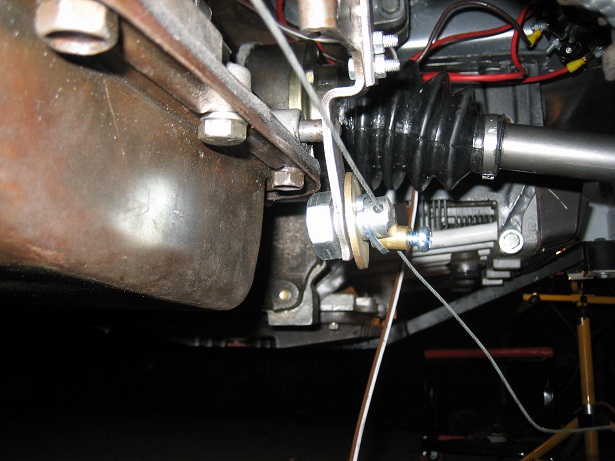
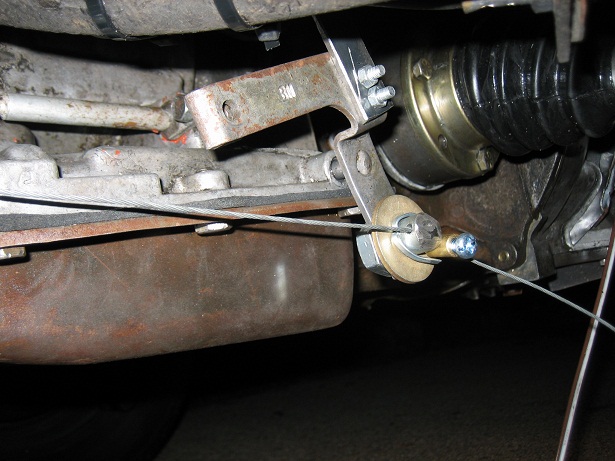
I had to make a new arm for the pivot on the tranz. This time I made it longer and with extra holes for adjustment. I did the drawing, caveman-trigonometry, and measurements and found the previous iteration to be 1cm too short. I could not get full throttle until I made the new arm. I will be cutting off the extra limb, and tacking the small fasteners on Sun, most likely. 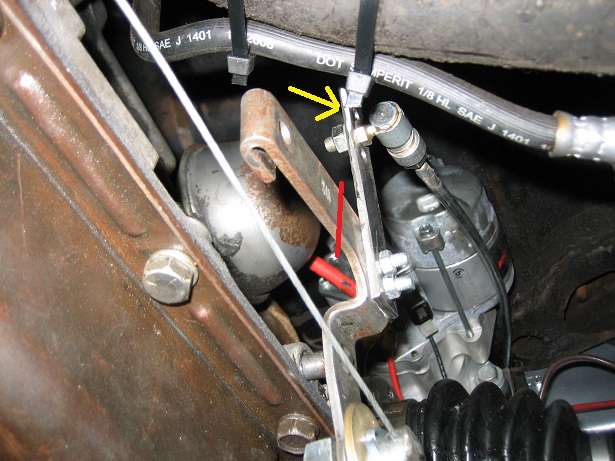
I should be able to start it and maybe drive it tomorrow I need to jack up the rear so I can spin the wheels to finish installing the bolts in the axles. The to do list includes:
- Finish axle install
- Tack the throttle tube down
- Tack the linkage arm down
- Cut off extra limb of pivot arm
- Check hose at brake booster
- Clean up the cabin and finish any left over wiring
- Attach MAP line to tranny
- Design, build and install mount for the tranz shifter
- Fill fluids
- Sacrifice goat
- Power up and fix what ever goes wrong
Posted by: scotty b Mar 28 2010, 06:49 AM
Nice job, but where are the bucket pics ??? 
Posted by: zymurgist Mar 28 2010, 08:07 AM
Don't let that goat go to waste.
Posted by: Jakeodoule Mar 28 2010, 08:58 AM
Nice Linkage!
Is Electrical tape and paper towel what they recommend for cuts in med school these days?
Posted by: Dr Evil Mar 28 2010, 11:27 AM
Nice Linkage!
Is Electrical tape and paper towel what they recommend for cuts in med school these days?
Good catch
My DIP knuckle on my left pointer finger keeps getting re-opened due to work, and I busted my PIP joint on the opposite hand. The shop towel/electrical tape worked very well. It was cold as hell, and my fingers were warm
Posted by: KELTY360 Mar 28 2010, 01:20 PM
Ya might want to consider this for a bus accessory. All the cool buses have one. 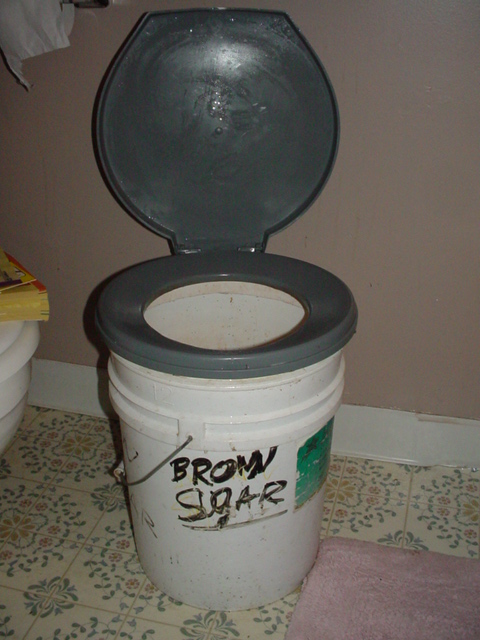
Posted by: Dr Evil Mar 28 2010, 01:22 PM
"Brown Sugar" that is so wrong.
Posted by: Dr Evil Mar 28 2010, 02:15 PM
dang it. It is raining and is supposed to at least through Tues Spring.
Posted by: jsayre914 Mar 28 2010, 02:39 PM
dang it. It is raining and is supposed to at least through Tues
Spring.You can borrow my umbrella
Posted by: Vacca Rabite Mar 28 2010, 05:15 PM
I just got home, and the pics look good. I was wondering if the bus would be there when Erin and theo and I pulled into the drive tonight. I am glad to see the axles back in it. Its cold again here, had to turn back on the pellet stove. It was starting to snow up around Breezewood today, up in the mountains.
Zach
Posted by: Dr Evil Mar 28 2010, 06:21 PM
I could have kept going, but I didnt want to disturb your neighbors with dragging the jack out at midnight I have 1 days worth of work left, unless problems arise. We all know how that is.
Posted by: Dr Evil Mar 29 2010, 09:58 PM
CRAP! So, last time I was at Zach's and I got all of this work done on my bus, I first replaced the front bearing and hub assembly on my left wheel of my VUE. The noise that was there did not go away. That was $166 that did not solve the problem. AND, it sucked to do. Well, I am sure it the right one is bad so I bought another one, $166, and tried to change the stupid thing today. Very corroded on. Can not get the axle shaft out or the bearing out. Maybe tomorrow I can get it out at Paul's shop.
So, for those at home keeping score, the suby is hard down, the VUE is soft down, the bus is on its way up..... if it were not raining, I would have driven the bus home today
Posted by: zymurgist Mar 30 2010, 04:42 AM
Good thing you have all those bikes, then.
Posted by: plas76targa Mar 30 2010, 06:11 AM
Good thing you have all those bikes, then.
Mike, when was the last time you were on the 6 foot long skate board?
Great thread! Amazing what one can do when they just keep trying!
Posted by: Vacca Rabite Mar 30 2010, 07:00 AM
I know this is a foreign concept to you, but you might want to just pay to have one of the vehicles fixed and back online.
Zach
Posted by: Root_Werks Mar 30 2010, 08:46 AM
Every time I read this thread, I want a Squareback.
Posted by: Dr Evil Mar 30 2010, 12:36 PM
Zach, I need to save some $$. I spoke to Paul at European Import Motors and he is gonna help me. I am on my way to his shop now. Its good to have a master mechanic that is cool and owns his own shop as a friend
Posted by: Dr Evil Mar 30 2010, 05:19 PM
Damn was I over my head. Paul had one of his techs, Jimmy, change out the bearing assembly. It was a real bitch with air tools and he needed to get pretty violent with it. 20min job took much longer and required. I will be bringing them pizza tomorrow for lunch.
Now one of the rear bearings is making noise
Posted by: Dr Evil Apr 2 2010, 12:07 AM
Closer.
Today I finished up installing the axles, cleaned up the outside of them and applied RTV to keep the grease where it is supposed to be, then spent a hell of a lot of time going to parts stores looking for exhaust parts. I installed the headers, sealed them with high temp sealant, and woudlnt you know it? The headers point directly at the axles and leave little room for design. I bought several 90* bends and made two S shaped pieces to go under the axles. This put the exhaust more central (which works for my overall plan), but also under the pan for the trans. I put them 1" away and will be constructing a heat shield for this area.
No pics this time. Hopefully I will be done with the exhaust next trip and will be motivated to snap some shots.
In other news, the engine turns over with the turn of the key Its a start.
Posted by: Solo914 Apr 2 2010, 10:06 AM
Closer.
Today I finished up installing the axles, cleaned up the outside of them and applied RTV to keep the grease where it is supposed to be, then spent a hell of a lot of time going to parts stores looking for exhaust parts. I installed the headers, sealed them with high temp sealant, and woudlnt you know it? The headers point directly at the axles and leave little room for design. I bought several 90* bends and made two S shaped pieces to go under the axles. This put the exhaust more central (which works for my overall plan), but also under the pan for the trans. I put them 1" away and will be constructing a heat shield for this area.
No pics this time. Hopefully I will be done with the exhaust next trip and will be motivated to snap some shots.
In other news, the engine turns over with the turn of the key
Its a start.Header wrap over the exhaust would help alot as well. Big debate on whether or not header wrap will hold moisture to your exhaust and rust it, I am of the school of thought that if you drive it a bunch there shouldn't be a problem. The heat from the exhaust gases should steam off the moisture.
Kyle
Posted by: Dr Evil Apr 2 2010, 10:13 AM
Good idea, Kyle. Cheap and easy to install. I can always upgrade. If the exhaust rusts through, I can handle that as well. I need it to drive to my house NOW so Zach can get his new (used) parts truck into the space. Once the exhaust is finished, I just need to finalize the wiring (the dash lights did not come on/gauges) and put gas in it
Oh ya, and put seat brackets in, but that should not be a biggie.
Posted by: Dr Evil Apr 6 2010, 01:27 AM
Well, today/night was all about getting the exhaust done. I would have gotten farther if my bike didnt strand me at the gas station for 1.5hrs at 10pm Loose wire, easy fix once found
So, here are the exhaust pics.
Here are the tubes coming from the headers, and under the axles. Tight fit.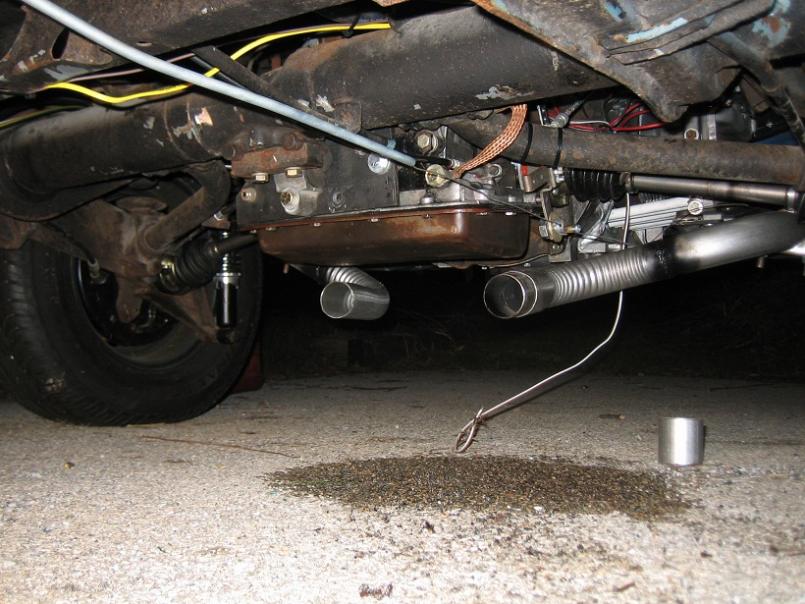
Here are the mufflers welded together so that they make one unit. 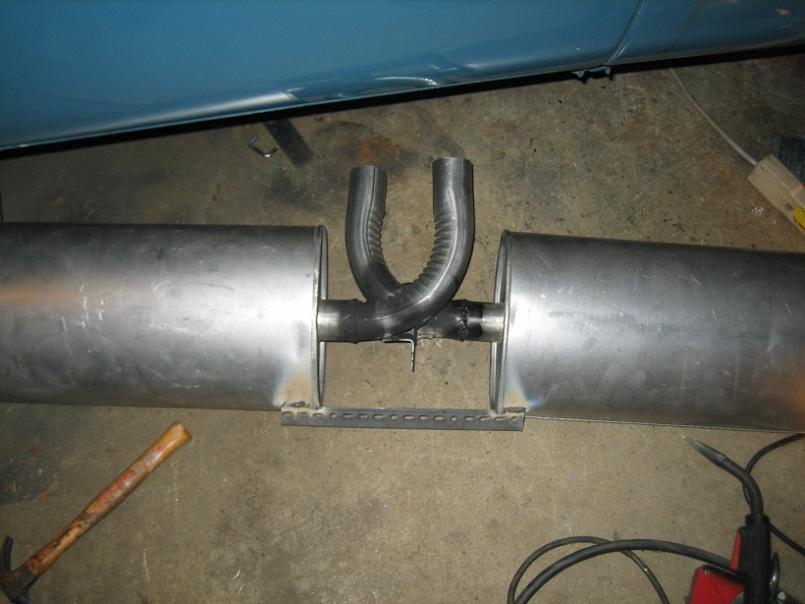
Posted by: Dr Evil Apr 6 2010, 01:31 AM
Mounting ears installed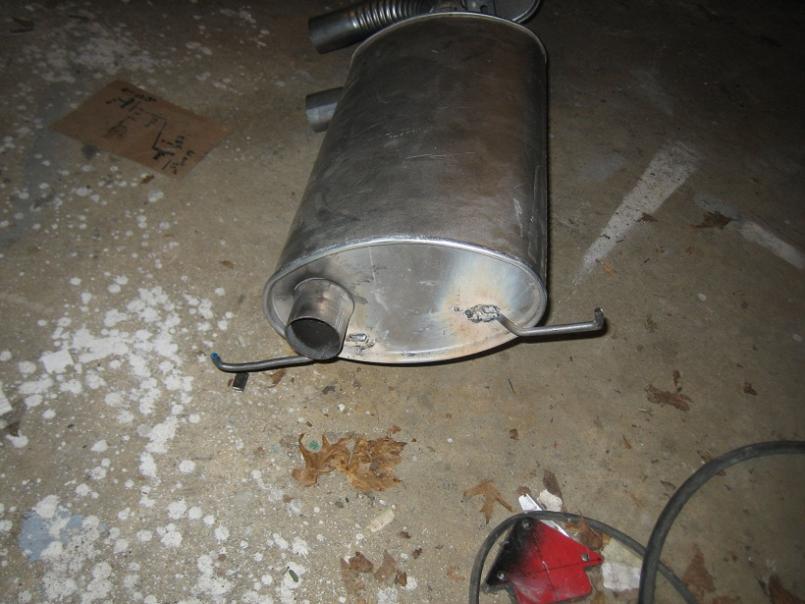
Muffler assembly mounted. I had to cut and reweld the upper pipe so I could aim it down more. The hose for that one needs a little shortening as well. 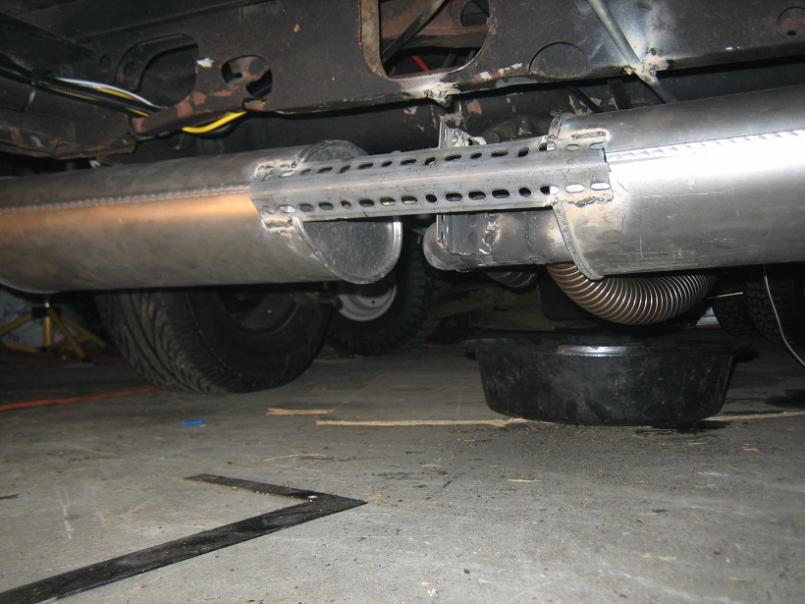
Where the mufflers end up. I will be putting 45* tips on them last. You can again see the one pipe that is a bit too long.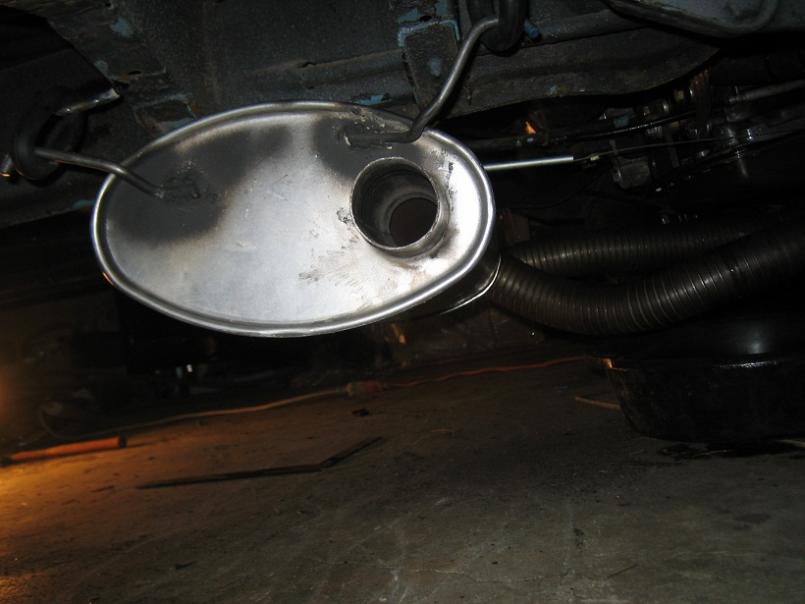
Posted by: Vacca Rabite Apr 6 2010, 07:03 AM
Ha!
You should have called me when you got stuck at the gas station.
Erin woke me up last night at 1:30. "Mike is still working outside!" I don't think that I said anything, but I was thinking"why are you waking me up to tell me this?"
I gave Evil 5 gallons of gas. he was all "I can start it!" And I was like "dude you have no exhaust" And he was "It'll be awesome!" And I was all "I want my neighbors to like me." So he did not start it up.
Anyway, since the 914 is out of the garage, we put the bus back into it so it could be finished off w/o care of the weather. Which is supposed to be stupid awesome this week.
I looked at the bus this morning before heading to work, and the exhaust looks great.
Posted by: Dr Evil Apr 6 2010, 10:34 AM
I field stripped my bike at the Sheetz station last night. I removed the seat and smugglers compartment to check the battery and wires, removed the headlight and messed with the wires, removed the gas tank (found the loose wire). I had to go across the street to the grocery store to get some tools and some tape to hold the headlight on I need to fix a few things on the bike before I come over today.
On the way home, there was a deer on the freeway walking around (natures retard). Scared the shit out of me, but I missed it.
I left at 0130 and heard someone in the bathroom Is Erin OK with my late hours?
Posted by: Vacca Rabite Apr 6 2010, 10:40 AM
She is fine with it, just surprised that you were still there. She tends to be a night owl. I was out cold by ~10:45. Whatever you were doing did not wake me up, so I was happy.
Posted by: Dr Evil Apr 6 2010, 11:10 AM
Cool. I am sore today. I anticipate another late night, depending. All I need to do is finish sorting out the wiring, mount the shifter, and mount the front seats. Then I can leave
Posted by: Dr Evil Apr 6 2010, 03:41 PM
My problems have moved from computers to vehicles with the VUE going through wheel bearings, the suby blowing a head gasket and not my R90 randomly deciding not to start. It just stranded me at a parts store down the street. I just spent a little time fixing the wiring and will be off to work on the bus at 6pm.
Posted by: scotty b Apr 6 2010, 04:22 PM
DANGER EVIL ONE, DANGER !!
Attached image(s)
Posted by: zymurgist Apr 6 2010, 04:28 PM
I field stripped my bike at the Sheetz station last night. I removed the seat and smugglers compartment to check the battery and wires, removed the headlight and messed with the wires, removed the gas tank (found the loose wire). I had to go across the street to the grocery store to get some tools and some tape to hold the headlight on
I need to fix a few things on the bike before I come over today. So is this the bike you're trying to sell me?
Posted by: Vacca Rabite Apr 6 2010, 04:51 PM
I field stripped my bike at the Sheetz station last night. I removed the seat and smugglers compartment to check the battery and wires, removed the headlight and messed with the wires, removed the gas tank (found the loose wire). I had to go across the street to the grocery store to get some tools and some tape to hold the headlight on
I need to fix a few things on the bike before I come over today. So is this the bike you're trying to sell me?
No, but from the looks of it he is going to be riding that one soon.
Or Noel's Dream (talk about an Ape on a minibike...)Zach
Posted by: zymurgist Apr 6 2010, 04:55 PM
What the heck, I trained on a Suzuki GZ250. And I was not the biggest guy in my class either.
Posted by: Dr Evil Apr 7 2010, 12:28 PM
Ken, I dont think my bike would be a good bike for you. It would be a great investment for someone, but not a good bike for a beginner wanting to ride it now.
Last night was my longest night yet. I quit at 0245 and got home at 0400 (stopped for a snack). All I did was wiring completion and a rough mock up for the shifter. It is actually very stout and will be where it stays until I decide to move it. I am focusing on getting it moving to my house at this point so form will follow function, as it should be.
The gauges look awesome! I need to adjust the light in the fuel gauge side as you can see.
No work today on the bus, I need to do school and transmission work
Attached thumbnail(s)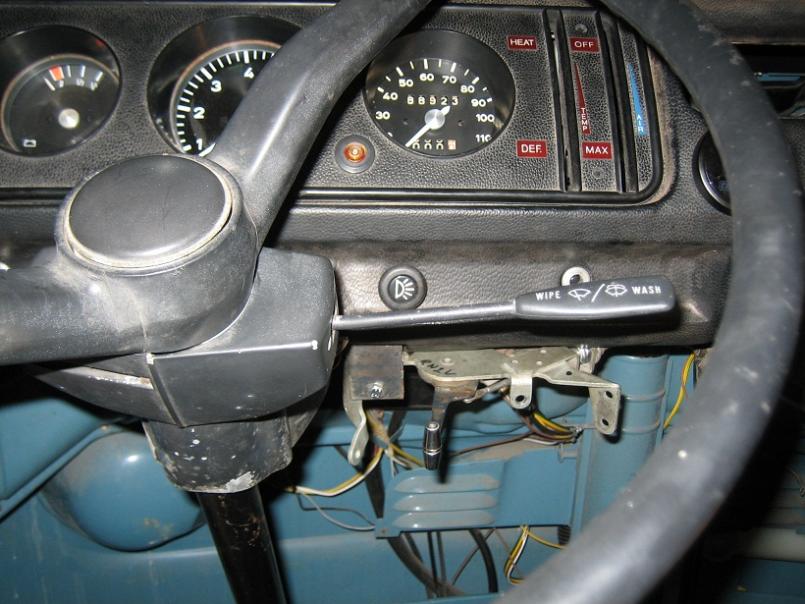
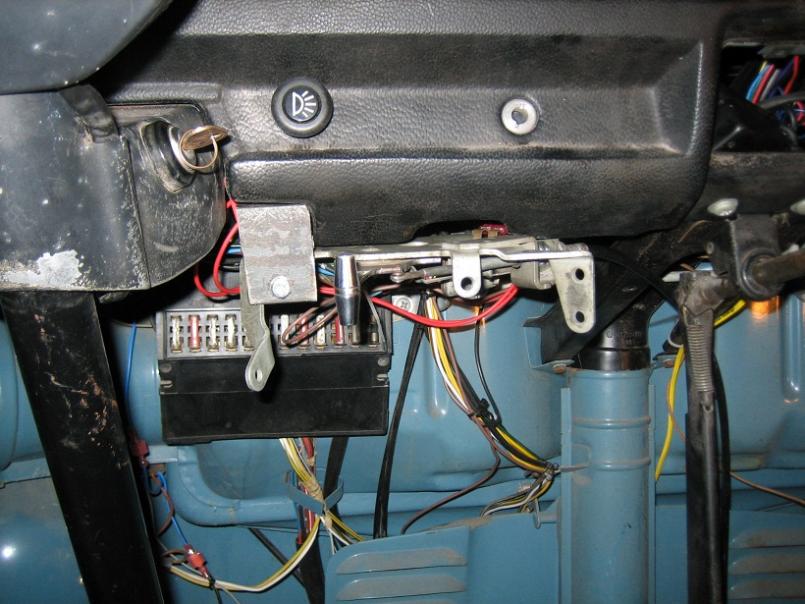
Posted by: Dr Evil Apr 7 2010, 12:29 PM
Gauges
Attached thumbnail(s)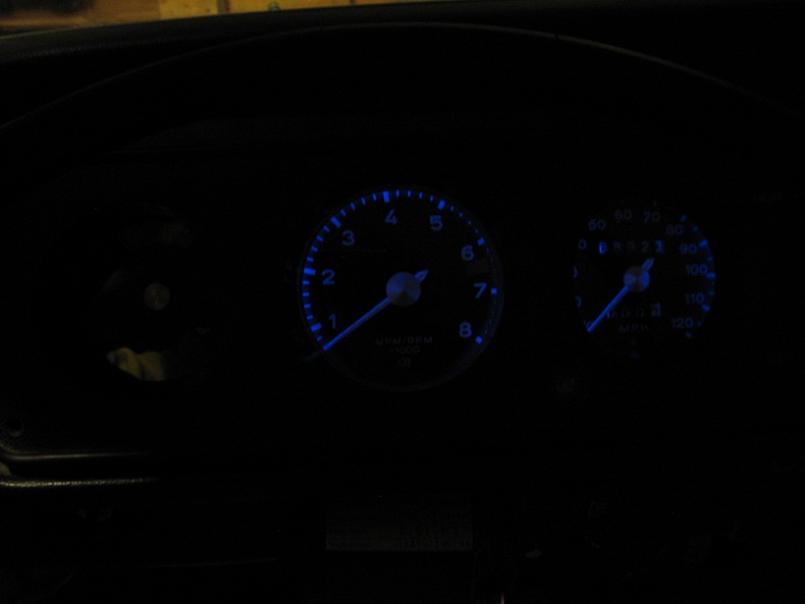
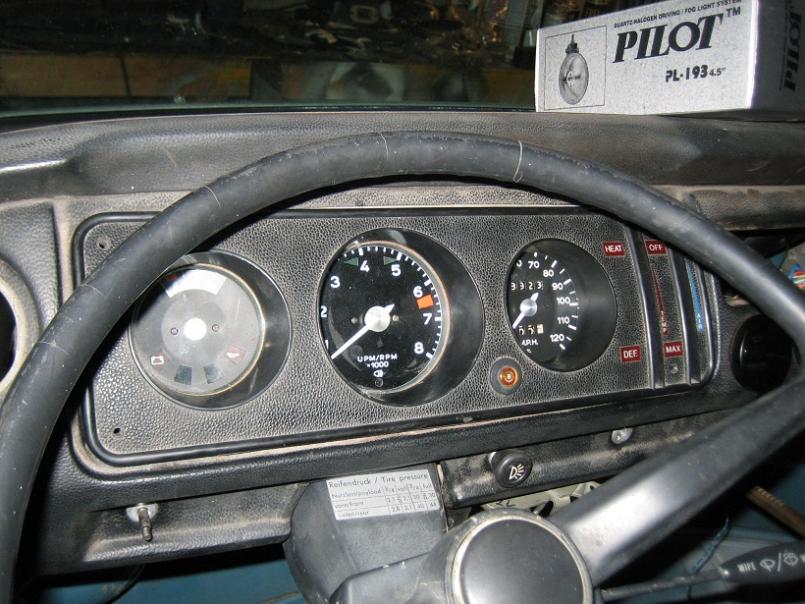
Posted by: Dr Evil Apr 9 2010, 11:55 AM
Last night was productive. I got stranded until 0130 by some rain and wind. I got all the wiring sorted out for the signals and instruments. Some dumbass (me) put the turn signal wire to the high beam indicator. Man, that was hooked into EVERYTHING and caused some fun mental exercise. Now all signals work, gauge lights, high beam indicator, oil P, and battery. The only gauge that is not firing up yet, and I am not sure why, is the O2 sensor, but I am not worried about it right now.
After cramping my mind with wiring diagrams, I decided it was time to figure out the front seat situation. I have captains chairs out of a later model bus and some feel that these are a bit high. After mocking up the bottom of the seat on the drivers side and sitting on it I quickly realized that it is too tall for me. My head was rubbing the headliner when I sat up straight. So, I opted to mount the seat pan directly to the body. One side of the body mount area was lower than the other so I made up some mount tabs and welded them in. 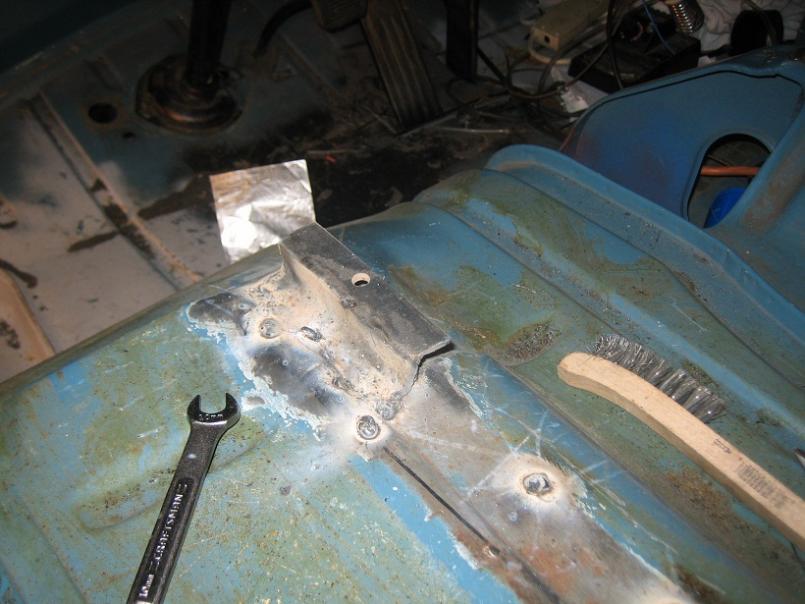
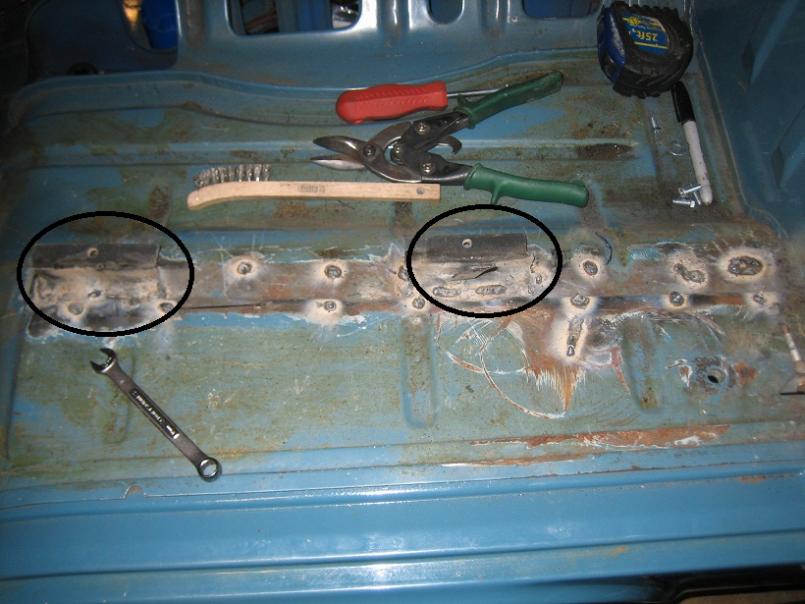
I also welded up all the holes from the old seat mount being drilled out. It was a stinky, smokey night.
Posted by: Dr Evil Apr 9 2010, 11:57 AM
The seat in position and the mount for the passenger seat being mocked up. I quit at this point as I need some more scrap metal to fab up a bracket for the passenger seat.
What is left to do:
- Finish seat mounts
- Wrap exhaust
- Weld last part of exhaust
- Start engine and drive
I also spent some time yesterday cleaning the rust out of the pulleys so that the belt would not be eaten up.
Attached thumbnail(s)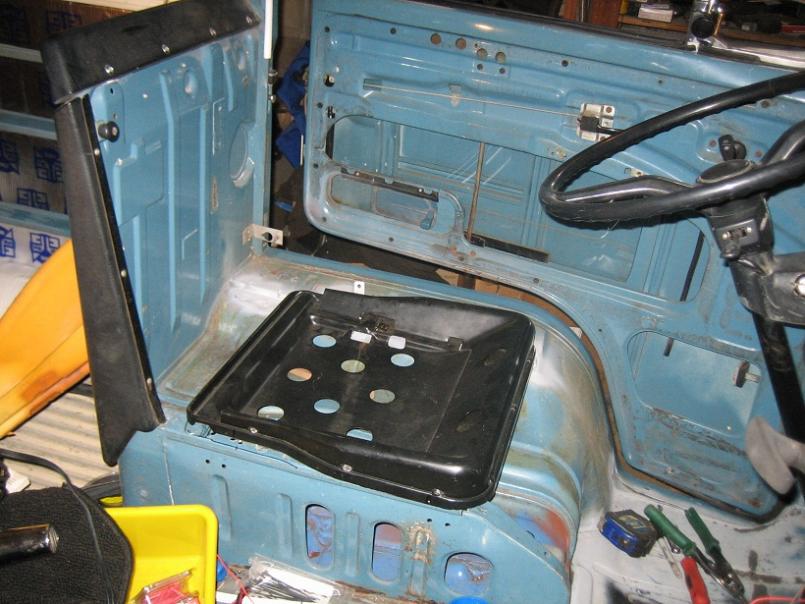
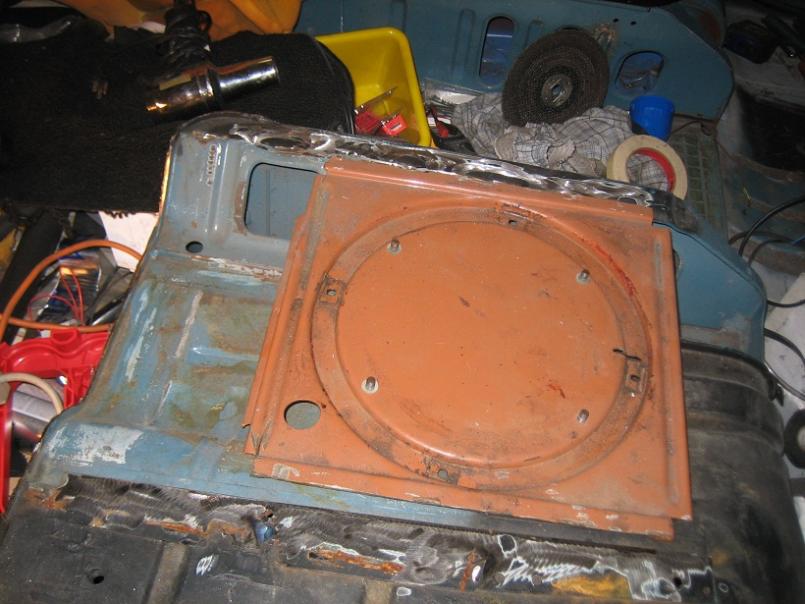
Posted by: Dr Evil Apr 9 2010, 12:53 PM
I suppose some may wonder about the lack of adjustment in my drivers seat. It will be adjustable, sort of. It will be bolted in place and all I have to do is drill holes where I want to move the seat. Luckily, I have the inseam of a person who is 5'7" so where it is now should be great for most people. All my height, 6'2" is above the waist, like an ape
Posted by: Vacca Rabite Apr 9 2010, 01:05 PM
Evil also spent some time trying to convince my son to ride motorcycles (while Theo tried to convince Mike of the benefits of wearing poopy diapers!)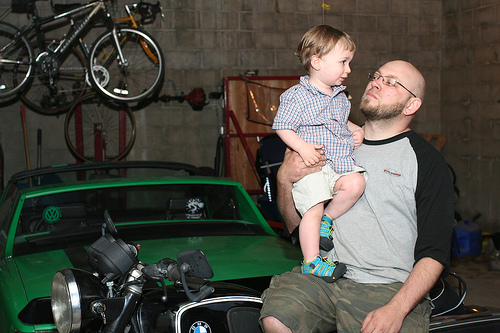
Zach
Posted by: Dr Evil Apr 9 2010, 01:36 PM
Prey animals in the wild often soil themselves with feces to make themselves unappetizing to predators
Posted by: Millerwelds Apr 9 2010, 03:08 PM
Prey animals in the wild often soil themselves with feces to make themselves unappetizing to predators
Was that Theo's reasoning? I just like the feel and the fact that I don't have to stop for anything.
Posted by: Vacca Rabite Apr 9 2010, 04:11 PM
Upon changing last night, that diaper was fairly epic. Low marks for overall smell, but excellent marks for volume, viscosity, and tenacity! It was a good thing we were going right to bath time.
Zach
Posted by: KELTY360 Apr 9 2010, 08:23 PM
All threads lead to poop.....eventually.
Posted by: Vacca Rabite Apr 10 2010, 09:34 AM
We got her started last night. Alternator needs to be replaced - again. We figured out why it was whining, and we can't fix it - I think. But the bus starts on the first turn of the key and sounds mean as hell.
Still some wiring to do. Rear lights look like a disco when you hit the various pedals.
trans won't go into reverse, but Mike says that it s a simple adjustment. it does want to go into drive.
It is very close.
Zach
Posted by: zymurgist Apr 10 2010, 09:45 AM
All threads lead to poop.....eventually.
Posted by: zymurgist Apr 10 2010, 03:04 PM
Ken, I dont think my bike would be a good bike for you. It would be a great investment for someone, but not a good bike for a beginner wanting to ride it now.
It's all good. I want to ride, not kill myself.
Posted by: Dr Evil Apr 13 2010, 12:56 PM
More productivity last night:
The shifter was not adjusted correctly which necessitated that I once again drain the pan, remove the pan and then monkey with the manual adjustment. It was WAY off. I hope I have reverse now.
I removed the exhaust pipes, wrapped them, and painted them with high temp silicon spray paint. And reinstalled. I also painted the mufflers and will install them today.
I found that the the reason the o2 sensor was not working was a wiring issue. The instructions I had were incomplete. I just downloaded the 24 page manual that has more info that I needed. Good times.
I found the tach wire that I had going to the wrong place and now I should have a working tach.
I modified and installed the side marker lights.
Now to the alternator I took it in to trade it for another one and when they tested it, it worked perfectly and did not whine I got another one anyway and will see what happens. I think it can only be the corvair nose cone if it still has an issue. The alt I picked up is the step up one and after trading in the old one I only paid $11 I am waiting for the correct alt fan to show up and then I will install.
What to do:
- Fill tranny
- Install exhaust
- Install alternator
- Fix O2 sensor wiring
- Paint and install wipers
- Finish seat install
Drive home????
Posted by: jsayre914 Apr 13 2010, 01:00 PM
i was gonna stop by in about an hour. are you over there??
Posted by: Vacca Rabite Apr 13 2010, 07:09 PM
Mike, just a thought.
At this point I think that I am going to take next Friday off (the one before Hershey). By then, you should have the bus ready to drive. I can drive up and get you in the Subaru, drive back to my house - finish whatever needs finishing on the bus. Then you drive the bus home while I chase you in the 914. Worst comes to worst and the bus is not yet ready, you can ride with me in the 914 back to Palmyra.
Zach
Posted by: Dr Evil Apr 14 2010, 12:38 AM
I will install the tow hitch so I can tow your 914 to my house
The quick and dirty from tonight, exhaust is in and perrrrfect. The alternator is in, I am going to get another nose cone just in case, though. It was too late to start it up and see if the whine was still there. Gotta be the cone if it is. I couldnt find the corded drill (other than the impact hammer) so I could not finish installing the seat, but there is <1hr left on that. I have one side of hte exhaust pipe done (for looks) and will do the other (<20min). Fill with tranny fluid, install wiper blades and try to move the beast.
Wed is school work so I will be home. Thurs I have someone coming over for a rebuild so that is booked. Fri I may have a date with the missus, if not then Fri will be the day I drive the bus home (I hope!).
I will post pics later after I sleep.
Posted by: Vacca Rabite Apr 14 2010, 06:02 AM
Oops. I needed the corded drill inside the other day, and it is down in my workshop in the basement. I'll bring it out the next time I think about it - which will probably be when you remind me that you need it the next time you are over. ;-)
Zach
Posted by: Dr Evil Apr 14 2010, 05:01 PM
All of the action last night seemed to be on the drivers side. I made up an exhaust tip for that side and began install of the rest of the drivers seat.
Attached thumbnail(s)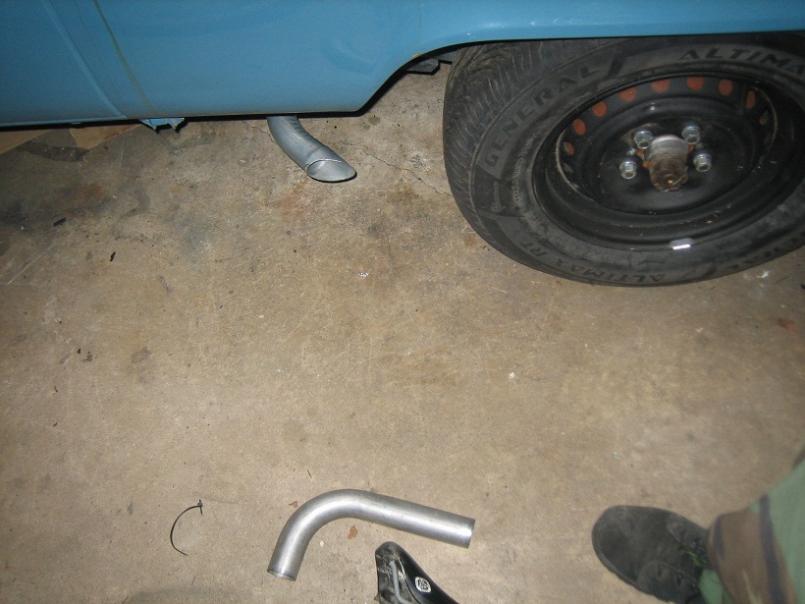
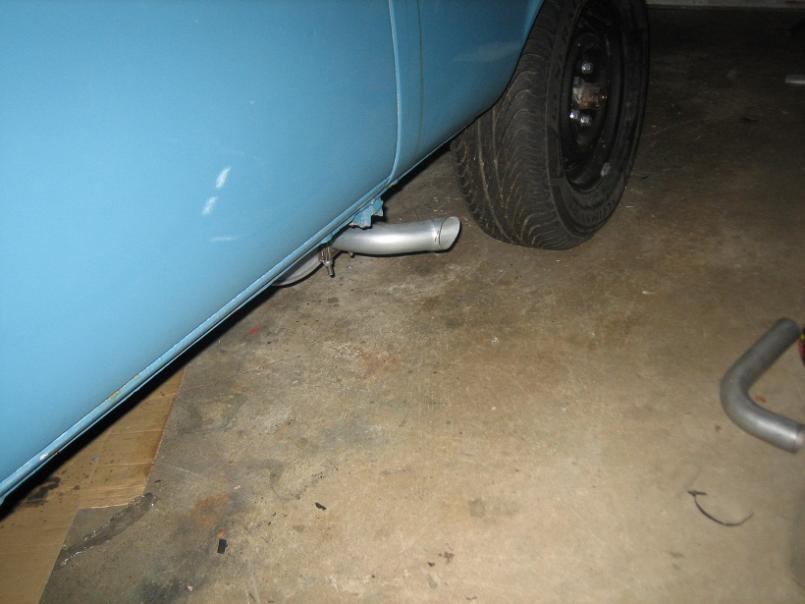
Attached image(s)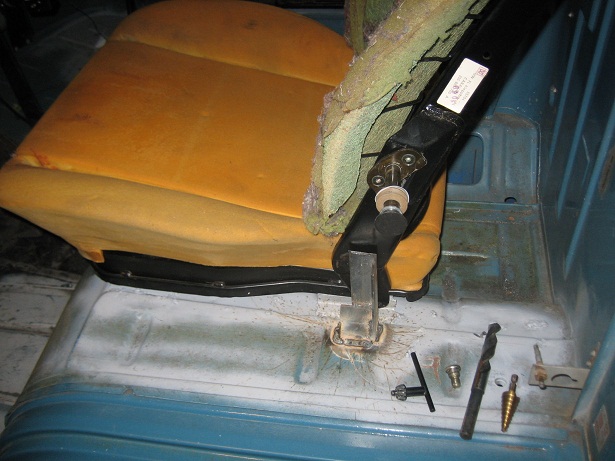
Posted by: Dr Evil Apr 14 2010, 05:02 PM
Last one showing how well the captains chair fits in my install. Very comfy!
Also, I wish I could find a stainless exhaust tip that had a 45* bend in it. Anyone know of a place? I havent really searched yet
Attached image(s)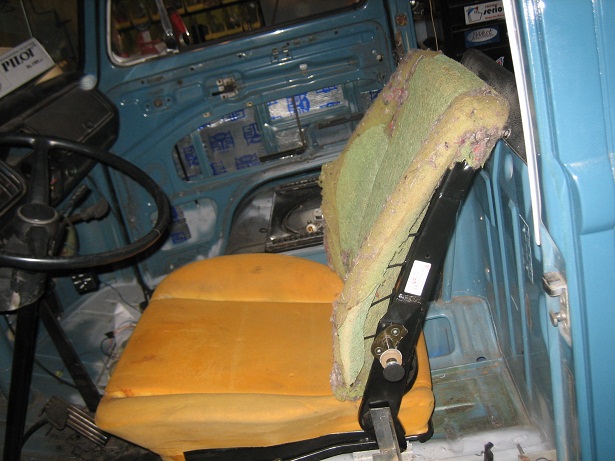
Posted by: scotty b Apr 14 2010, 06:45 PM
Need to make some reverse lake pipes
Posted by: Dr Evil Apr 14 2010, 08:39 PM
I thought about it, but no.
Posted by: GS Guy Apr 15 2010, 05:59 AM
Doc,
This place has lots of tips to choose from. Not sure if this is what you're looking for, but quality is excellent on the tips I got from them:
http://www.verociousmotorsports.com/Shop-by-Category/Exhaust-Tips_4
Jeff
Posted by: scotty b Apr 15 2010, 06:49 AM
Attached image(s)
Posted by: scotty b Apr 15 2010, 06:57 AM
Placed here. ( my bad ass photoshop skills at work. Don't be jealous)
Attached image(s)
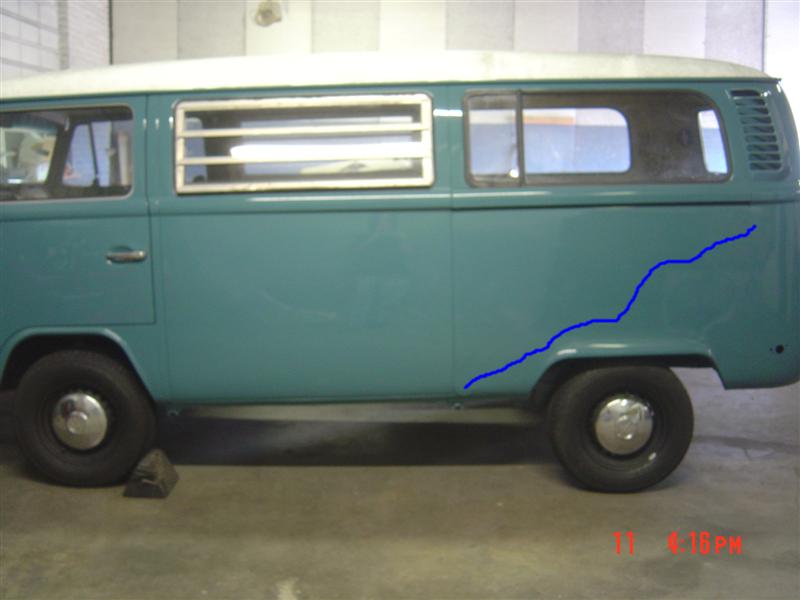
Posted by: MDG Apr 15 2010, 07:29 AM
Bitchin'!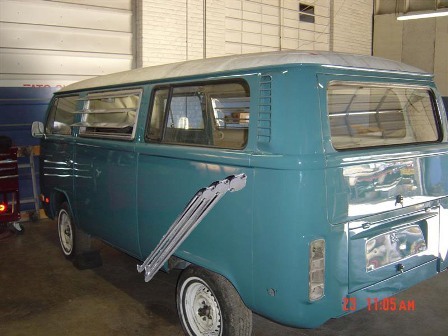
oh dear - looks like we have a winner!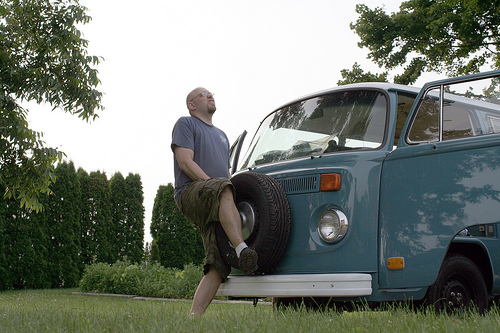
Posted by: GS Guy Apr 15 2010, 09:47 AM
Thinking more along the line of a set of Zoomies on either side!
Disturb the peace baby!!
(Looking for a picture/source but can't find these any more.)
Posted by: Dr Evil Apr 15 2010, 10:51 PM
Well, Wilchek came over so I could rebuild his transmission today and we finished early (from 1-6pm) due to him helping out a lot. So, Dan wanted to go help me work on the bus. "Theoretically" I could have driven the bus home tonight if I filled the tranz with fluid and finished the seat mount. Theoretically. What actually happened is that all of the rear lights worked perfectly.....until the smoke started pouring out from under the instrument cluster
1- The headlight switch grounded to the instrument case = 1st poof. I figured it out and rectified it by covering the wire with shrink wrap where the insulation melted away.
2- When I pulled the hazard switch to check it, sparks shot out. Then smoke. Then nothing. Rule #1, never trust previous wiring. I transferred wires from the old switch to the new one number by number. They were all wrong. Big time wrong. Well, new switch tomorrow.
3- After all of this, the 15 pin plug I used to attach the gauge cluster became a 13.5 pin connector. The original wire from the headlight switch that grounded was the power wire to the gauge lights, which was why they went out, and why the pin in the connector vaporized.
One overwhelming question is, why did none of the fuses blow??? Looks like I need to un-fuck some DAPO wire work +1 day of work (at least)
In other news, the bus went into reverse! so that issue is handled for now. The alt still squeals but Dan and I both firmly believe it is the belt and I will address that later. Dan wants me to put a bar of soap to it, why not?
Posted by: messix Apr 15 2010, 11:15 PM
i like to use candles.... wax doesn't wash away like soap does.
Posted by: wilchek Apr 18 2010, 06:18 PM
I have to say that after seeing the bus I really want one. The engine sounded sweet. It was a shame that we fried some of the wiring. I guess it is not just a 914 thing. There was enough smoke to make a Cheech and Chong movie. Overall, a small stumble in a long race. I hope you got the parts you needed.
Posted by: Dr Evil Apr 19 2010, 11:04 AM
It still smells of magic electrical smoke.
I checked the wiring and itis all how it should be so I do not know how the fuse for the hazards did not blow. I think the switch was bad to begin with and me sparking it, then opening it removed any hope of getting a new one for free
I finished the seat mount last night and wired in the two gauge pod. I forgot the molex connectors, though. I took the inst cluster home to do it here. I also took the seat home to cover it in my flannel sheet for the mean time while I wait for my actual seat covers to be done (some day, by my Mom ).
I think I figured out why the belt is screaming! The batt gauge showed 12v while engine running and indicated low. I think the alt was fully loaded trying to charge the battery. I do not know why. The batt has been fully charged in the mean time so I will see if this affects the alt load. If not, I need to check the wiring. It is a one wire set up, and I have an indicator light hooked up that worked, there may be a third wire I may need. I need to look into what terminal 2 is. I may need to wire terminal 2 to the battery as well (I recall something about this).
Rich running may be because I do not have the choke wired up yet. The choke is on until the engine heats it (hasnt run long enough).
Posted by: Dr Evil Apr 20 2010, 08:04 PM
Last night was all about last minute things and wire stuff. I got the hazards to work, the license plate light installed, side markers, gauges with new better molex connectors, the two gauge pod (still needs screws), the drivers seat, and most of the seat belt. I still need to affix the retract part. I checked the wiring to see why no fuses blew and found that the wiring was correct and that was just the way it was. The heal light switch fried the little spring coil inside so that I had no gauge lights, but since I am running LED I did not need the dimmer and hard wired the input lug to the output lug on the switch. It all works perfectly with not smoking. I need to run the wires for the brake warning light some time to see if one of them is black or brown It blew a fuse when I tried it so I just unplugged it. I need to shave the corners off of the seat mount to keep the seat belt from being cut.
Lastly, I need to try to see if the alt will charge and if the squeal will go away. If that turns out good then I will be doing a test run. Hopefully tomorrow.
I also stripped and primed the rear bumper and will be installing it with my tow hitch before the test run. Looking good for Hershey.
Attached thumbnail(s)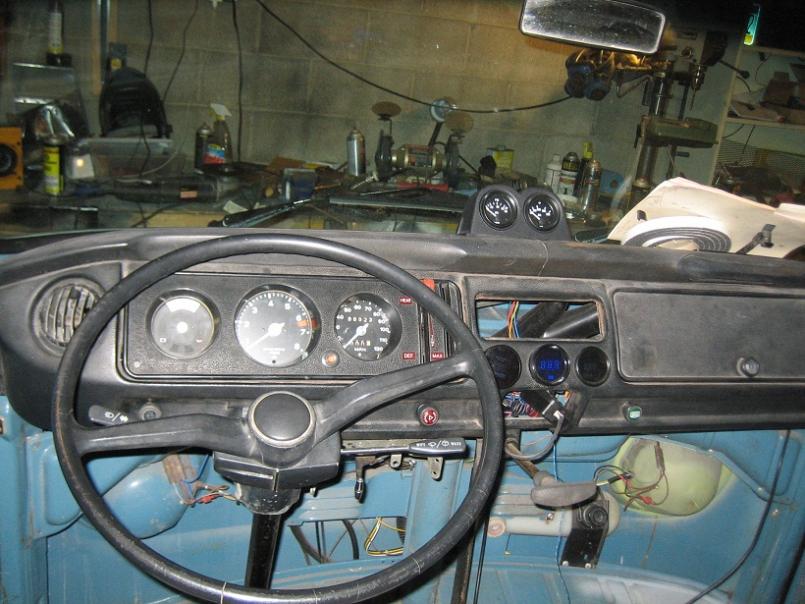
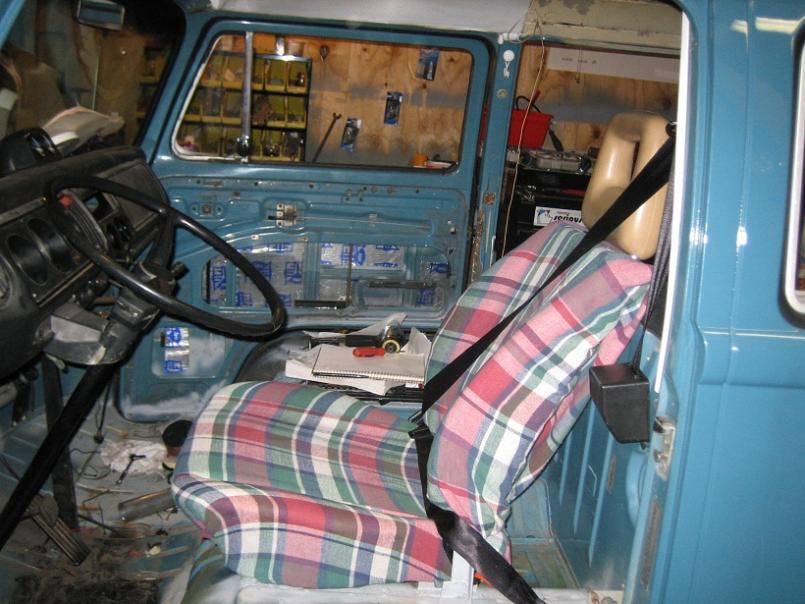
Posted by: Vacca Rabite Apr 21 2010, 06:46 AM
You were over last night?? I was working in the garage until 9:15 or so. What time did you show up?
Zach
Posted by: Root_Werks Apr 21 2010, 08:44 AM
I have to say that after seeing the bus I really want one. The engine sounded sweet. It was a shame that we fried some of the wiring. I guess it is not just a 914 thing. There was enough smoke to make a Cheech and Chong movie. Overall, a small stumble in a long race. I hope you got the parts you needed.
Me to, well, it is making me want a type3 squareback.
Posted by: Vacca Rabite Apr 21 2010, 09:25 AM
I was following a bus while commuting in this morning. Beat up, white, rusty, still awesome.
I found myself daydreaming of doing a full Subaru drivetrain swap - H6 NA engine, transmission, center diff, front and rear axles. Would give me power disks at all 4 corners, and a fairly robust AWD system that I am already familiar with. A stockish set up would net me AWD, with bias on the rear wheels.
Like I need another project...
Zach
Posted by: Dr Evil Apr 21 2010, 11:54 AM
Check the date Zach, I was over Mon night when you got back from the bar. I was a good student yesterday (Tues) and stayed home to do as much home work as possible. I also finished up a transmission so now I only have one to do......until this weekend when one shows in the mail and one shows up with mepstein
I am heading out now to your place to trouble shoot the charging system and maybe test drive. Maybe.
Posted by: Vacca Rabite Apr 21 2010, 12:17 PM
Ohhh! No test drives till I get there. I wanna play too! Won't be there till late though. Class.
I DO want to be part of the first drive, but if you can't wait, no worries. I will somehow survive.
This morning I was posting 1/2 asleep.
Zach
Posted by: Dr Evil Apr 21 2010, 11:04 PM
Un freakin believable. I spent tonight mostly chasing electrical gremlins. I found that the new hazard switch is defective. The smoke and blown fuse let me know. The old one that was original in the bus actually works perfectly. Tomorrow, more wiring. Once that is done, let drive!
Posted by: Vacca Rabite Apr 22 2010, 08:28 AM
I am home today, but will have theo duty tonight. Come over early and I can help though.
Posted by: Dr Evil Apr 22 2010, 09:59 AM
I should be heading out by 1pm, there by 2. You would not believe the stuff that is connected to the hazard switch and all the fun a bad one can cause I think most of my problems are now solved as for the intermittent weirdness. Now I need to finish wiring the oil P warning light, Batt warning light, horn, and I think that is it. Maybe I will do the brake warning light (many things pass through that, too )
Posted by: jsayre914 Apr 22 2010, 04:29 PM
are you driving it yet????
Posted by: Root_Werks Apr 22 2010, 04:31 PM
I should be heading out by 1pm, there by 2. You would not believe the stuff that is connected to the hazard switch and all the fun a bad one can cause
I think most of my problems are now solved as for the intermittent weirdness. Now I need to finish wiring the oil P warning light, Batt warning light, horn, and I think that is it. Maybe I will do the brake warning light (many things pass through that, too )VW did a lot of wierd wiring through the hazard switches for a number of years. Way over complicated the system!
I can't remember exactly what years, but you go new enough and they revert back to simple.
Posted by: Dr Evil Apr 23 2010, 12:22 AM
I exercised the demons. The tach is still dead, but it is the tach as I tried another and it worked. I forget who I bought the 911 tack off of, but it is poo
The alt is now charging, the oil P light is working, Batt light working, Horn working, passenger seat installed, passenger seat belt installed. It is ready to rock! I need to adjust the idle and timing and drive it. It was too late by the time I handled everything.
The electrical demons I exercised from the bus jumped to the bike I went to leave at 11 or so and my headlight was dim. It took me about 1 hour to mess with it. Loose/crossing connections. The light conked out on the road for a millisecond fun fun
Posted by: Vacca Rabite Apr 23 2010, 06:14 AM
Also, Evil is very excited about his tranny wagons' horn. When you hear it, try not to laugh.
Without the relay in, it sounded kinda like a sick cow. "moooooOOOOO"
With the relay in it was  shall we say underwhelming.
Not that there is anything wrong with that.
Its cool though. Mike embraced his new horn. He was tooting it to Dancing Queen at one point.
Zach
Posted by: Dr Evil Apr 26 2010, 08:31 PM
I have been so busy that I have not been updating here. The bus made its way from Zach's house to my house (about 50 mi and 1hr) on the freeway at about 1am the morning of the Hershey swap. It was not perfect as it would knock under load (I found that I forgot to hook up the vac advance), and the carb needed serious adjustment. Even still, it drove like a dream and I easily passed traffic doing 80mph This was with the throttle not nearly depressed. I think I may have over done it
The bus made its way to the swap lugging lots of stuff, but it just so happened that the ignition switch crapped out that morning so that I had to get under it and cross the relay to start it.
Since the ig switch was crapped out, I started to remove it today. What a PITA. I need to get a steering puller tomorrow so I can take the whole console off to get the stripped grub screw out that retains the ig switch (cluster f*ck). I also removed the carb today to make sure all of the primary settings were correct to see if I could find why it would die when it is given gas. As Root and Scotty B noticed, the accelerator pump was not engaging when it should due to too much clearance. I adjusted this tonight and was relieved to see that it was WAY out. The secondary idle was off as well. All was easily corrected and I hope to have the ig switch fixed so I can try out the re-adjusted carb.
Posted by: Dr Evil Apr 26 2010, 09:10 PM
Also, on the way home from Zach's I was so tempted to drive flat out just to get a ticket that read 100mph or more in a VW bus I would think that I could contest that in court due to it violating the laws of physics
Posted by: zymurgist Apr 27 2010, 05:43 AM
hahaha
Glad to hear the motor is exceeding your expectations.
Posted by: type11969 Apr 27 2010, 06:55 AM
Congrats man! Hope to someday see that beast in person . . . ride, well I'll sit in the back row middle.
I do think we need some videos of smoldering burn outs.
Posted by: plas76targa Apr 27 2010, 07:39 AM
Mike, I'll loan you my GPS so you can record maximum speed value .
Posted by: hot_shoe914 Apr 27 2010, 08:32 AM
Mike, I'll loan you my GPS so you can record maximum speed value .
Yeah, should have said something, I had mine with me. It was already on 110 though so you would have had to really nail it!
Posted by: Root_Werks Apr 27 2010, 08:35 AM
Very cool!
Any current fully body shots of the wagon?
Posted by: Dr Evil Apr 27 2010, 12:35 PM
Maybe today after I reinstall the carb and fix the ig switch. I need to tighten up the ATF fill tube as well. It is leaking on the header.
Posted by: Dr Evil Apr 27 2010, 06:37 PM
Well, SNAFU. I got the old ig switch out and wouldnt you know it, my replacement is the wrong one. My 74 was made in late 73 so the switch is different. It should be here by Thurs.....but I want it now
The old one was definitely toast. It had a cracked housing and the guts were wanting to come out.
Posted by: Vacca Rabite Apr 27 2010, 06:41 PM
Its weird here knowing the bus isn't. I kinda miss it.
Zach
Posted by: Dr Evil Apr 27 2010, 07:01 PM
Ya, now you have to get to work on the truck
Posted by: scotty b Apr 28 2010, 05:45 PM
Its weird here knowing the bus isn't. I kinda miss it.
Zach
Sorry about the breakup Zach. Mike hid a pair of old underwear in the garage just so he had a reason ( excuse ) to stop by and see you one more time.

Posted by: Vacca Rabite Apr 28 2010, 08:06 PM
Heh. I still have a ton of his stuff over here. we can keep this romance going on for mont.....
Did I just say that out loud?
Zach
Posted by: Dr Evil Apr 28 2010, 09:37 PM
Oh my dark lord
Stop staring at my blurry spot! Freak
Posted by: Vacca Rabite Apr 29 2010, 08:38 AM
hahahahahahahahahahaha
Posted by: Root_Werks Apr 29 2010, 09:27 AM
You guys need a room?
Hey, were are those full monte shots of the tranny wagon?
Posted by: Dr Evil Apr 29 2010, 10:42 AM
Soon enough. I have to fix the ig switch, install the carb, and change a wheel bearing on my VUE today I will see about taking pics today.
Posted by: Dr Evil Apr 30 2010, 12:02 AM
Carb is installed. I needed to remove it again to helicoil some threads in the adapter. The ig switch showed up while I was doing the threads and I installed that as well. I am getting ready to button it up to get it inspected tomorrow. I am going to install the fog switch before I put the gauge pod back in and needed a drill with a 1/2 " chuck, hello wal-mart at midnight
If I get it going today, I will shoot some pics. I was not motivated to stop and shoot today
Posted by: Dr Evil Apr 30 2010, 05:57 PM
Not sure what anyone wants to see.
Here is the broken ig switch: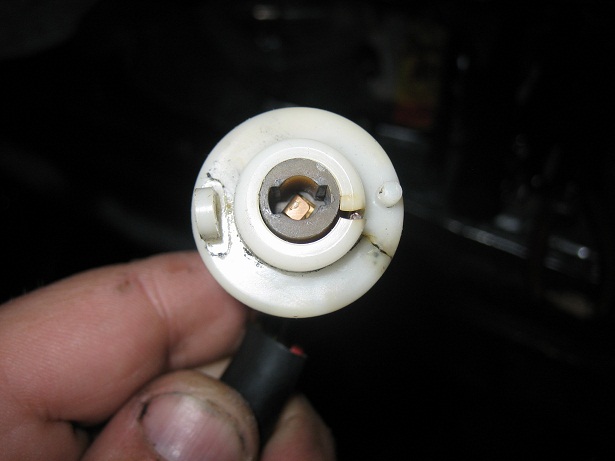
Here is proof that the bus is in my driveway: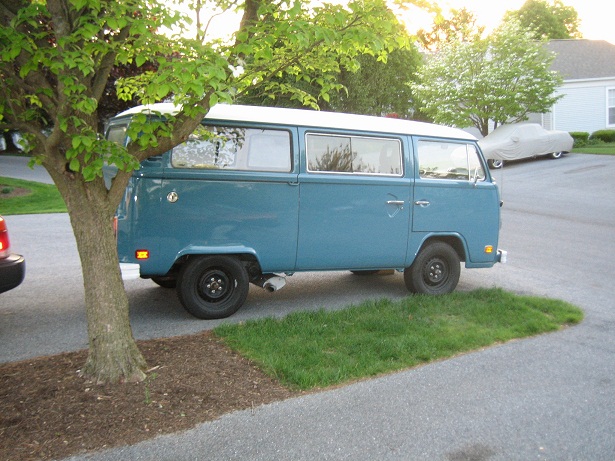
Here are the fogs I installed today. I figured why not since I was doing a bunch of electrical anyway: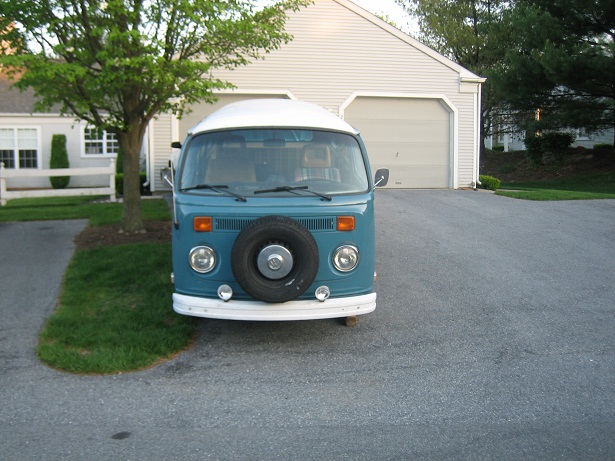
Posted by: Dr Evil Apr 30 2010, 06:00 PM
Here is evidence that the captains chairs sit way too high in the early bus. Mine is modified and it fits me perfectly. The passenger side was lowered as much as I could without cutting into the body. I may still modify it further, but with the back straight up my head is brushing the head liner and I can not see out the windshield well. 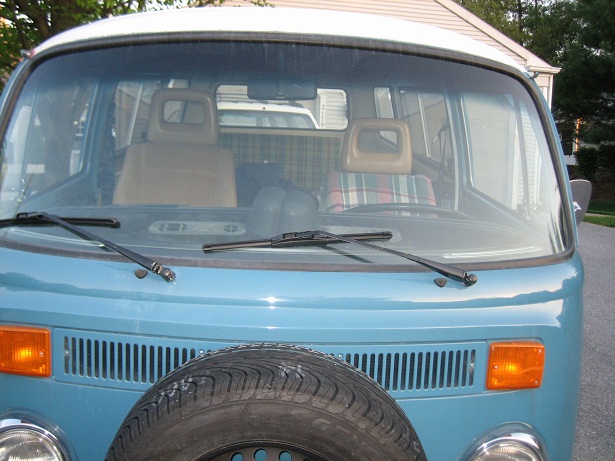
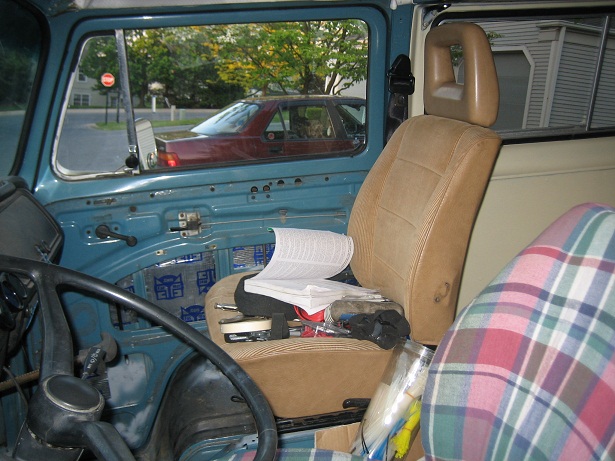
Here is the 914 fog light switch I used for my fogs 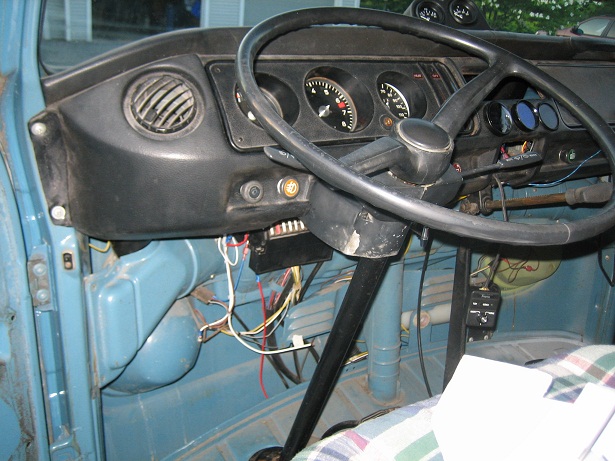
Posted by: Dr Evil Apr 30 2010, 06:26 PM
Holy crap! I finally manned up and turned the damn key. It is running 90% better now. It does not stall when put into gear, idles like a dream, has great power, but it still pops a little in transition. I am pretty sure it is because the accelerator pump is flooding it. It looks like a squirt gun when I give it any throttle. Horrible mileage that way. I will see if I can tweak it to give gas a little later in the throw. It has two positions. If not, I will get another cam and try that. This thing is AWESOME! I hope I can get it inspected on Mon so I can drive it anytime. I wait for night fall currently 
Posted by: Dr Evil May 2 2010, 06:54 PM
Well, I did a lot of carb learning over the last few days. I bought an accelerator pump cam kit and put a higher flow cam in. This cleared up the stumble from idle to open throttle. Works like a charm now My main jets are 54 and I am thinking smaller jets may be in order. That will be the last thing I goof with as it is doing fine on the freeway. I am pretty sure my power valve is not correct. When I put it in gear is barely runs from neutral. I wanted to get a dual zone power valve anyway. Better economy and tunability. I did not goof with the idle adjustment, though.
I may need to come down one on the accelerator pump cam as it is blowing up out of the carb a little every now and then. I need to recheck the timing as well. All pretty simple stuff, though I hope to drive it to inspection tomorrow.
Posted by: hot_shoe914 May 2 2010, 11:02 PM
Posted by: Root_Werks May 3 2010, 11:37 AM
Looks great!
We had a chance to see a few Type2's yesterday at a local VW show. Makes me want one!
Posted by: Dr Evil May 3 2010, 11:45 AM
Youtube is a great resource. I found some videos that went over tuning my style of carb and now know I need larger squirters for the accel pump. Back firing through the carb (should be front firing) means it is too lean, go figure. Now squirter, change the cam a little in the accel pump, and adjust the idle mixture and I am in business, I think. The power valve is actually working, but I will be getting a 2 stage anyway for better economy. I am not building a drag racer. Paul and European Import Maintenance Center said that he could have it inspected this week when his guy gets back (bad back). I found that it is a $250 fine for driving without inspection stickers so I am limited on driving it around
Posted by: Vacca Rabite May 3 2010, 11:54 AM
I found that it is a $250 fine for driving without inspection stickers so I am limited on driving it around
Eep! I hope you did not find that out the hard way.
Zach
Posted by: KELTY360 May 3 2010, 11:56 AM
Awesome work O Evil One. A bus is almost as cool as a 914, and that's saying a lot.
Posted by: Dr Evil May 3 2010, 01:31 PM
I found out about the fine by asking Paul, before I attempted to drive my bus regularly. I will wait until I have an appointment with Paul before I drive it any distance.
I just got a vacuum gauge so that I can set the idle, figure out what power valve I need, and all kinds of data. I was talked out of a two stage power valve as they are mostly useful for light weight vehicles and would only rob power. The vac gauge will make tuning so easy, I will have time to work on other things to make it pretty/useful.
Posted by: zymurgist May 3 2010, 01:42 PM
Good call. I could have had my bike on Saturday had I been willing to ride it with an expired tag... the PO rode it all the way from Annapolis (100 miles) with an expired tag... knowing my luck, I'd get pulled over in the 6 mile trip to my house.
Posted by: Dr Evil May 3 2010, 05:06 PM
I FOUND THE SHRIEK! It was a leak on the rear drivers down tube. I need to sand it down flatter. This changes everything with adjustments
Posted by: Vacca Rabite May 3 2010, 05:49 PM
I FOUND THE SHRIEK! It was a leak on the rear drivers down tube. I need to sand it down flatter.
This changes everything with adjustments Really? REALLY?
Thats crazy. I am playing the sound in my head, and I guess it could be a whistle. Must be a hell of a leak though.
Zach
Posted by: scotty b May 3 2010, 08:07 PM
I FOUND THE SHREK!:) This changes everything with adjustments
Attached image(s)

Posted by: Dr Evil May 3 2010, 08:47 PM
The gasket was acting like the paper part of a kazoo, only at higher pitch. Man, I do look like Shrek
Posted by: Dr Evil May 3 2010, 11:42 PM
Well, I sanded the flange down the best I could. The hole in the down tube is bigger than the hole in the head making the seating a bit of a bitch. I reinstalled it, I hope it works. I added some hi temp silly-cone to aid in sealing. While working on the tube I found a nice hole in the welds at the flange/tube interface I filled it with liquid steel. I also changed the accel pump cam back to stock in order to start at base line with the tuning. I am betting that I set everything richer to compensate for the lean condition caused by the leaks. Fun fun.
Posted by: Vacca Rabite May 4 2010, 07:24 AM
The gasket was acting like the paper part of a kazoo, only at higher pitch. Man, I do look like Shrek
No no. Don't fix it. Learn to drive the car so that it can play the Benny Hill theme song!
https://www.youtube.com/watch?v=MK6TXMsvgQg
Zach
Posted by: zymurgist May 4 2010, 08:48 AM
It's called "Yakety Sax."
Bunch of savages in this town...
Posted by: Vacca Rabite May 4 2010, 08:57 AM
I know what it is called. But most everyone knows it as "the Benny Hill song" so I was playing to the masses.
Zach
Posted by: zymurgist May 4 2010, 09:04 AM
It would be amusing to hear it emanate from the engine compartment while driving down the road.
Posted by: Dr Evil May 4 2010, 04:09 PM
I had that song in my head most of the day
Posted by: KELTY360 May 4 2010, 04:26 PM
I tried to play it on my sphincter flute, but I couldn't hit the high notes. 
Posted by: Dr Evil May 5 2010, 03:43 PM
It is LEGAL! Paul and Jimmy at EIMC inspected the bus while I finished rebuilding a race gear box. The bus drove awesomely on the way there. I can pull up hill all day long and it wont flinch. Head temps stay between 280-305*, oil steady at 225*, and pressure between 20-30psi I love having the gauges to make me feel confident. The carb still needs tweeking, and the exhaust has some leaks that need to be tightened, but it drives awesome
Posted by: Vacca Rabite May 5 2010, 03:55 PM
This is great news!
Do they even do vehicle inspections in Washington County? They may not, each county is different, and seem to be more lax the farther left you go.
Posted by: Root_Werks May 5 2010, 04:05 PM
Can I borrow it now?
Posted by: markb May 5 2010, 04:12 PM
Posted by: zymurgist May 5 2010, 04:34 PM

Posted by: Spoke May 5 2010, 04:57 PM
Looking Good!
The number of pages on this thread is catching up with the Hot Chicks thread.
Posted by: jsayre914 May 5 2010, 04:58 PM
nice job mike!!!!!
now when i cut you off you wont have to cuss at me then climb under the bus, start it back up, then cuss some more and drive away
now come over to my house before you leave town, the girls really miss you guys 
Posted by: Dr Evil May 5 2010, 07:32 PM
Joe, the girls will get a ride in the bus, I promise. I can now put the interior in and it should be ready for joy rides in the near future. I know how much they like it
Posted by: faux916 May 5 2010, 08:10 PM
This is great news!
Do they even do vehicle inspections in Washington County? They may not, each county is different, and seem to be more lax the farther left you go.
yes there is state inspection, but they may not have emissions. Nice work on the bus Mike!
Posted by: Dr Evil May 5 2010, 08:55 PM
The bus is a 74 so no emissions anyway
Posted by: Vacca Rabite May 5 2010, 09:38 PM
The number of pages on this thread is catching up with the Hot Chicks thread.
Of course it is. The Evil Bus is legendary. How many other people get their dinner interupted by fuching ELVIS, because he wants to talk you into selling your vehicle. How many vehicles were constructed with the possible ability to play Yakety Sax through the fuel induction system?
Its legendary!
Zach
Posted by: Dr Evil May 5 2010, 09:56 PM
How many vehicles are powered by a Frankenstein German-American hybrid power plant that is at least 40 years old?
I will try to shoot some video of it running and driving soon.
Posted by: balljoint May 5 2010, 10:05 PM
How many other vehicles are getting a mural of a lewd and lascivious lady with a sword and armour and a purple dragon airbrushed on both sides?
BTW Doc you still haven't got back to me on the total number of snakes you wanted writhing at her feet. I can't finish the proofs until you confirm the details.
Very nice work.
Posted by: Dr Evil May 5 2010, 10:07 PM
Posted by: zymurgist May 5 2010, 10:08 PM
How many vehicles are powered by a Frankenstein German-American hybrid power plant that is at least 40 years old?
You're too close to done. I think that engine needs a turbo.
Posted by: Vacca Rabite May 5 2010, 10:16 PM
How many vehicles are powered by a Frankenstein German-American hybrid power plant that is at least 40 years old?
You're too close to done. I think that engine needs a turbo.
Its not done. Its passable for now is all. The carb and induction that Mike has on it is very similar to bolting a single progressive on a 914 just to gt it driving. The exhaust is just painted flex pipe. There is so much power yet to be found out of that engine with better induction and exhaust.
Well, that, and most of the interior is still sitting in my garage.
AND there is the whole "its gotta go back to Scotty to get the top cut off and the pop top welded in" thing.
Its driving, but far from done.
Zach
Posted by: zymurgist May 5 2010, 10:49 PM
Are you saying that it doesn't need a turbo?
Posted by: Dr Evil May 5 2010, 11:16 PM
Everything needs a turbo
The 4bbl is actually far superior to a progy. It is as done as it will be in the engine department for a while. It works very well as is Better than stock!
Posted by: shoguneagle May 17 2010, 09:48 PM
Read everything again on this thread! It is one of the best threads I have ever read and includes a lot of "stick-to-it" attitude, working in cold, meeting adverse problems, adapting and changing as necessary, traveling long distances, working normal jobs, going to school, studying, - - - - -I could keep going on.
The dream is in a working configuration and Dr. Evil and Vacca Rabite along with Scotty should be complimented on the excellent job and getting the job completed. I really liked the way the thread was written and the humor which goes along ways in helping in getting a project through its problem areas. It was really nice to see collateral support from others to help in fixing cars as well as supportive.
This thread shows me that anything and everything is possible if you are willing to try and meet problems. The problems are really challenges and require adjusting as necessary with the final being in nature.
I am not very good in expressing the things that I see and feel in this thread but with people such as the ones involved here, I think the future is very bright for Americans.
I really enjoyed the thread and it was very informative; keep it up!!
Thanks for letting me read it.
Steve Hurt
Posted by: scotty b May 18 2010, 06:08 AM
You didn't tear up there did ya Steve?
Zach & I only did this for Mike because he has " sensitive " information on us ............ not together .............individually
Posted by: Vacca Rabite May 18 2010, 07:27 AM
We rock pretty damn hard.
Posted by: Dr Evil May 21 2010, 09:03 AM
Nice sentiment, Steve
So, when I got home from the WCR I saw a large puddle of ATF under the bus It turns out that the gasket sold to me by a vendor long ago (not Corvair Ranch) was for a cast aluminum pan It did not seal much at all. So, I spent the wee hours of last night removing and replacing with the correct seal. I hope the bus will be up by about 24hrs of me returning. Then I can take the VUE down for maintenance, and the suby, and....
To ease my mind I started getting stereo parts for it I had the head unit for it, Jakeodoule donated some nice 180w polk audio speakers he had, I got some similar 4 voice speakers for the rear, a 5 channel 700w amp and am awaiting to hear back on a subwoofer box/speaker combo.
Scotty, I am so swamped that if I make it out to Nags Head it will be a miracle. I may be able to make it out the last day and then drive to yoru shop to put the camper top on I would really like to get the top on before I move.
My to do list includes:
- 6 transmission rebuilds (people always wait until the last minute)
- Fix bus issues (looking very promising)
- Fix suby (let the pain begin)
- Fix VUE (checkbook please)
Oh ya, pack and move on the 20th
Posted by: Dr Evil May 26 2010, 06:05 PM
Perma-grin
I finally got the damn carb sorted! An unusual engine takes an unusual carb setup. I ended up with 58 jets (will evaluate this later), a 4.5 power valve (vac was 6), and a 37 squirter. Some big numbers for a 6, and the stock 2.7 would have used the smaller, more conventional sizes, but with the extra 400cc I added I needed more food for my monster. This thing is unbelievable! It sounds like a V8 van.
Noel just drove it for the first time and she could not stop making noises and smiling. She cant stop saying how proud she is of me on my project and how much she loves it. She is really cool 
I will try to shoot some video so y'all can see the thing run. It will not do it justice though as the bass of the engine will not adequately capture
Posted by: Vacca Rabite May 26 2010, 08:46 PM
I best be getting to drive it this weekend.
Zach
Posted by: Dr Evil May 26 2010, 10:31 PM
Hells ya! I just finished doing the sound deadening on the drivers door and now am mocking up my speakers I may have a stereo in it this weekend
Chris has to drive this when he stops by. I think it will blow his mind
Posted by: type11969 May 27 2010, 08:14 AM
Yeah, I already know I am going to be kicking myself for not blatantly copying you. I really dig my camper special/stock fuel injection and it would have taken me a long time to get a vair project together. But I'm sure the power is pretty badass and I know you have much less $$$ in to your engine. Oh well. Looking forward to checking the beast out.
-Chris
Posted by: Dr Evil May 27 2010, 09:48 AM
One little O-ring can really mess up a morning
The story:
Since Noel enjoyed driving the bus so much, she was looking forward to driving it to work today (with me as a passenger). Well, if anything will break, she will cause it to. She is cursed and is the best test pilot. Problem #1, I had just hit reserve on the fuel gauge. Plenty of gas to get to work and the gas station. She mentioned that the fuel was low....Problem #2, I did not look at the gauge as I thought I knew what she meant. Problem #3, it was running like shit this morning We get to the hospital (where she works) and when I get out I smell gas, VERY STRONG. I look in the engine bay and find it sprayed with fuel The O-ring that seals the tube connecting the primary and secondary bowls of the carb, on the secondary side, has split and was allowing fuel to spew forth. Obviously not good. Soooooo, I commenced to repairing it in the fire lane, out side the hospital. Except, I did not have any sealer, or a new O-ring.
So, as spots behind me opened up (semi OK parking for drop off and pick up) I pushed the bus back into them. Then, luckily, I saw my friend on his way to work and he lent me his car so I could go home and get another O-ring. When I returned, security was writing tickets for those vehicles left in the spots, unattended, for too long. I told the guy that I was just going to park my friends car (required me parking it behind the bus, leaving it, going into the basement to get Noel's ID for the lot, returning, driving to the lot, and walking back) and that I would be fixing and driving the bus away shortly. He was very cool and said no problem. When I returned I had the bus fixed and running in less than 5min
So, the valuable lessons learned:
1) I need to keep a fire extinguisher in the bus at all times. This could have been bad.
2) I need to assemble a tool kit to carry at all times. All I had was a small pair of vice grips to use as a wrench
I went to sleep at 0330, awoke at 0800 to take Noel to work, and got home at about 1130 after this ordeal
Next<_<
Posted by: Dr Evil Jun 2 2010, 12:31 AM
And the plot thickens
I was unable to get the trans pan to seal so I removed it to try again. That is when the shit hit the fan. I found burnt fluid, a nice metal sheen, 1/16 metal shards, and pieces of what was like a dremel cutoff wheel (the non reinforced ones). The weird dremel stuff does not match any of the materials from the trans or the torque converter (TC). The TC was the only thing not replaced and now I am thinking that it had contaminants in it I went and bought a used tranz to throw in, but when I removed the pan the valve train fell out as all the bolts were missing At that point, I figured I will just disassemble, clean and inspect the original one since it is easy and doesnt take too long. However, I am having to drop all of this crap in my drive way, at night so the old people on the rules committee dont see me. I am not sure how I am going to do it, but it will likely happen tomorrow PM.
I bought a rebuilt TC already. It should be here tomorrow. I will be adding a tranz cooler, and an oil cooler which should be showing up tomorrow as well. By the end of this I am going to be ready for residency and a break from wrenching
Posted by: zymurgist Jun 2 2010, 04:55 AM
It's always something... that bus is evil, I tell ya! EVIL!
Posted by: Vacca Rabite Jun 2 2010, 05:35 AM
Well, that explains the metal on metal noise we were hearing at times. I wonder what gave out?
Zach
Posted by: Jakeodoule Jun 2 2010, 08:45 AM
Bummer,
Wish I could help you out like you helped me on my trans.
Remember the conversation about how you LOVE fixing stuff?
Posted by: jsayre914 Jun 14 2010, 12:08 PM
Is everything fixed?? Everything on every vehicle ???
Moving day is comming, how can we help
Joe
Posted by: Dr Evil Jun 14 2010, 10:41 PM
Um, no I have been working every day at Paul's shop on the damn suby. It should be done this morning. The bus has been fighting me all the way as well. I just repositioned the torque converter again as it ended up misaligned. What fun. The bus is finally being put together and looks as if it will be in one direction this time.
Since my last post I have conceded to install AN fittings in the oil system and to mount the cooler under the bus up front. The 250 max oil temps may be "normal" for the corvair engine, but if I can make it cooler and protect the engine then I think it is a good idea. No rubber push on line could handle the 250* oil so the braided line with AN was a natural conclusion. I still need to install this and look forward to doing this tonight. I have installed a transmission cooler (I am planing on towing stuff with the bus to my new home). I wont be able to post pics for a while, too busy.
The bus can not run until I get a modified part from Root that will allow me to put the AN fittings into the block for send and return.
I hope to have everything pretty much buttoned up on Wed so that I can start to clean out the garage.
More later.....
Posted by: Root_Werks Jun 15 2010, 04:21 PM
Keep us posted!
Posted by: Dr Evil Jun 15 2010, 05:46 PM
OK, today the Suby came back to life. I had to cut it short as I needed to get the Saturn back for Noel and had some friends swinging by town that wanted to say hi. Tomorrow I will button up the last bits and Paul will inspect it. I said that if it ends up putting oil into the water again, I am selling it for what ever I can get and buying Paul's 944S
I am about to head out to conquer the bus! Last night I worked until midnight and got the tranz all sorted and installed. I need to button up the little odds and ends, and put the plumbing in place for the oil cooler tonight.
Posted by: Vacca Rabite Jun 15 2010, 05:50 PM
I am stressed as hell and am considering a mental health day tomorrow. If it s not pouring I might be able to take my 914 up to Pauls and help with whatever.
Were you able to get the AN lines ordered?
Zach
Posted by: scotty b Jun 15 2010, 06:47 PM
DO NOT BUY A 944 S !!! Seriously. They have a one of a kind ( dohc ) valve train and if/when you have an issue within there, you will pay out the arse for a new center shaft or cam if needed. They have a habit of breaking teeth on the center shaft, and the tooth gets tossed around in the valve train.Porsche stuck with a single overhead cam for a reason. 924 or 944n/a or turbo only NO S
Posted by: scotty b Jun 15 2010, 06:48 PM
Oh and glad to hear all is going back together. Sucks it happend when it did though
Posted by: Dr Evil Jun 18 2010, 12:04 AM
The Suby is alive! I also put new tires on it Paul was a great help and he inspected it for me and everything. It is nice having a second working vehicle again
Here are some pics of what I managed to get done on the bus since last time.
I am intending to tow things with the bus so I installed a transmission oil cooler. Not too hard to do.
90* NPT elbows to some nipples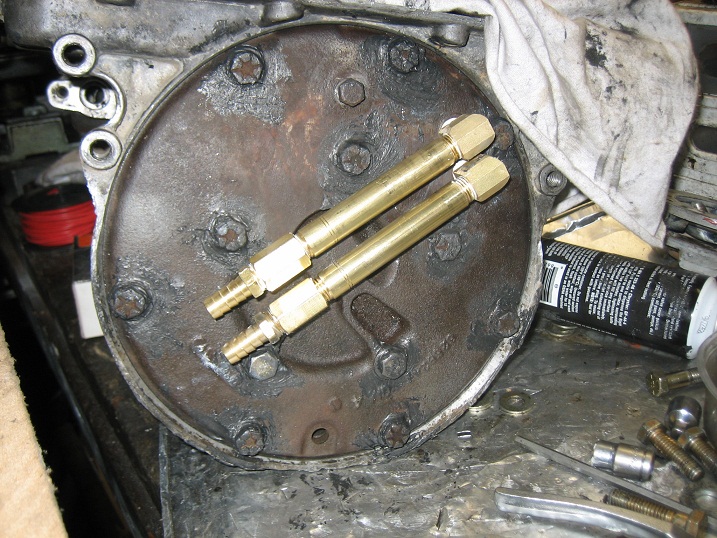
Clearanced the mount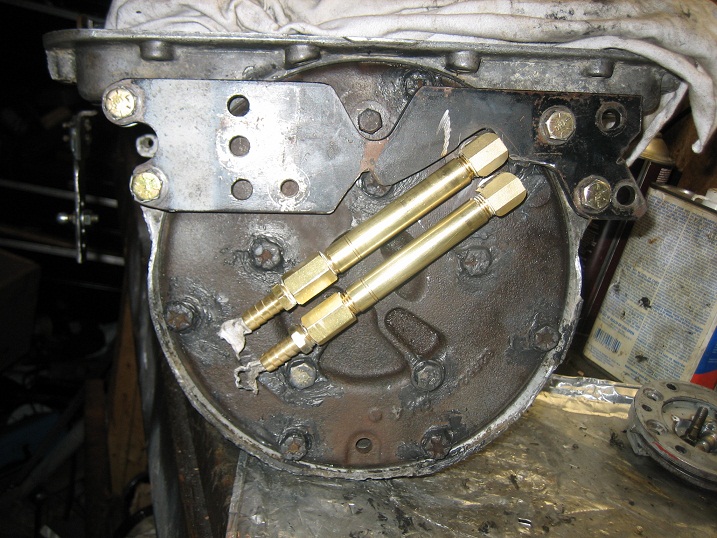
Posted by: Dr Evil Jun 18 2010, 12:06 AM
Of course the second part of the mount had to mess up what I had going on. The nut from the mount is right where the nipples were.
Attached image(s)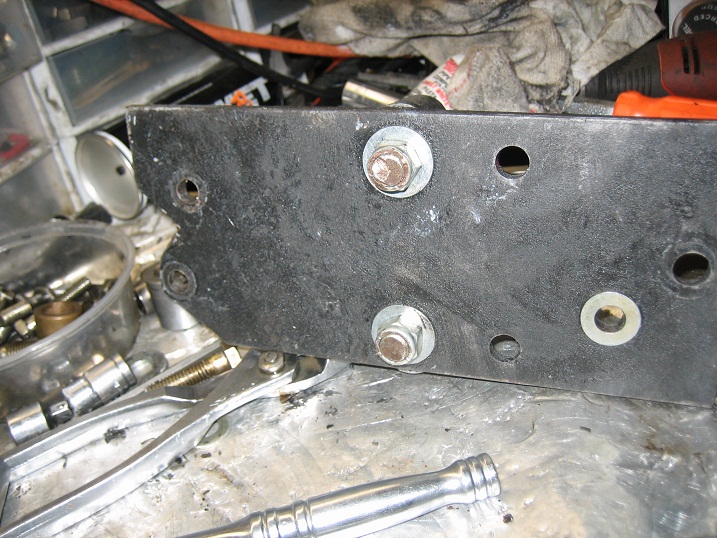

Posted by: Dr Evil Jun 18 2010, 12:08 AM
Spread them to fit
Tonight I did the oil cooler install which I can not finish due to awaiting the last major part from the USPS that Root modified for me Here is the AN madness I did.
Attached image(s)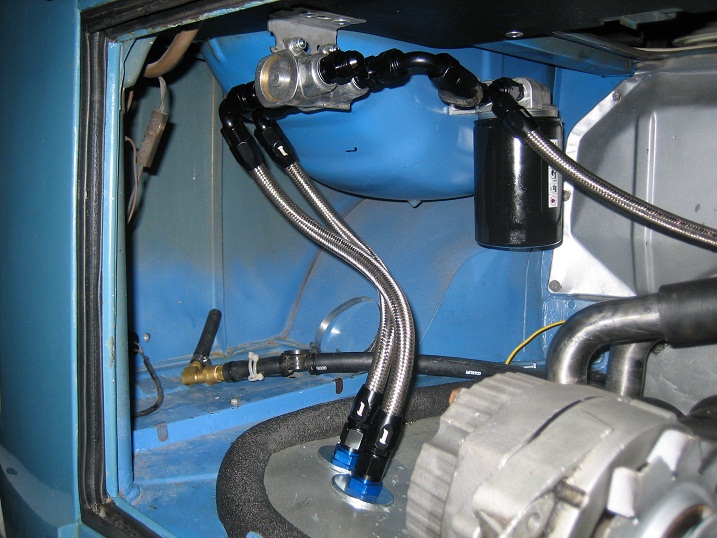
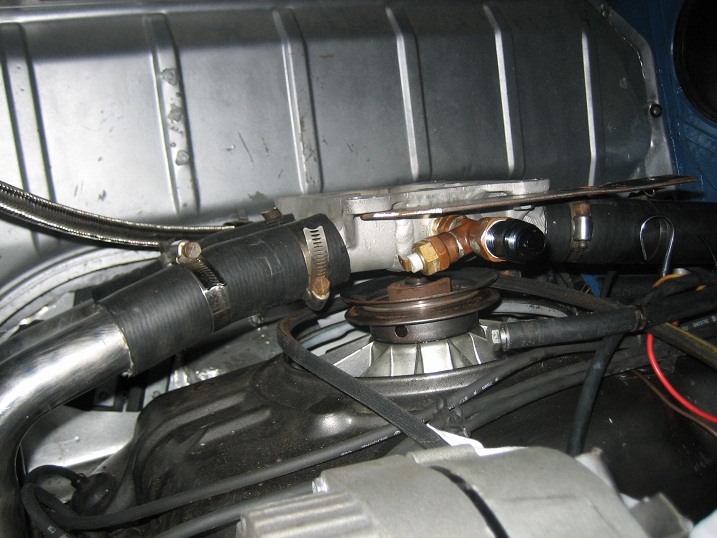
Posted by: Dr Evil Jun 18 2010, 12:09 AM
More
Attached image(s)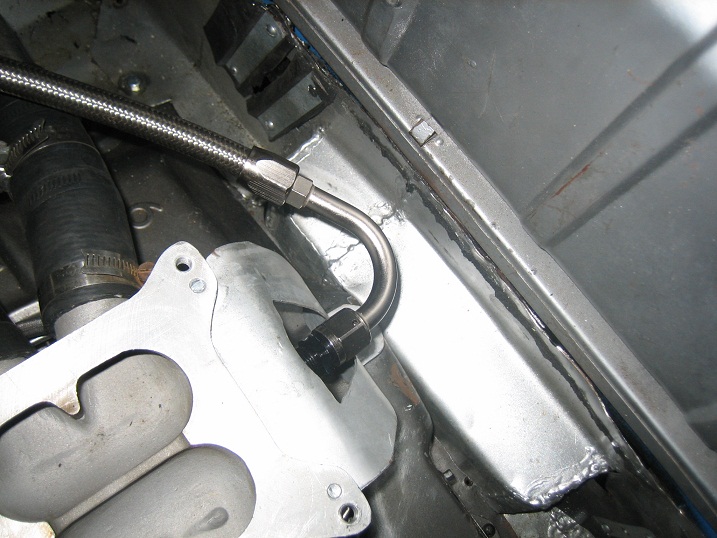
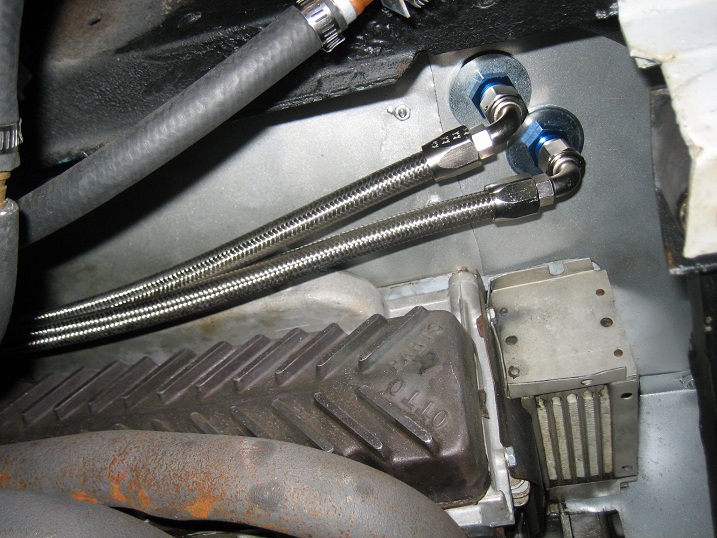
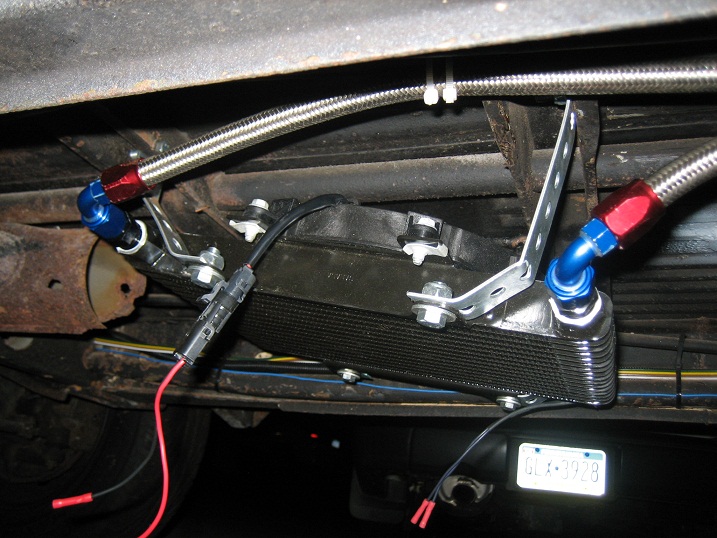
Posted by: Dr Evil Jun 18 2010, 12:11 AM
Quick shot of the tranny cooler in the left rear pocket.
Attached image(s)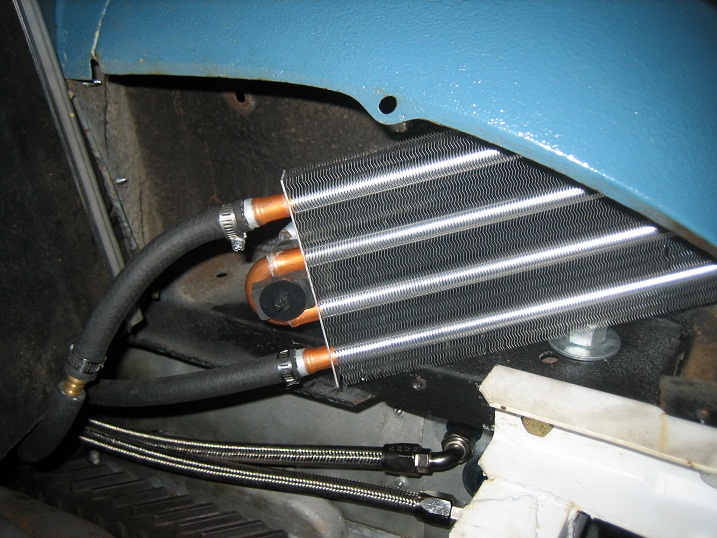
Posted by: Vacca Rabite Jun 18 2010, 07:00 AM
Thats hot. How easy did the hoses go together? I bought a set of AN wrenches and watched some videos on youtube. Does not look too hard, but curious to know.
Looks good, hope to see it before you move.
Zach
Posted by: zymurgist Jun 18 2010, 07:17 AM
Posted by: Dr Evil Jun 18 2010, 07:42 AM
I borrowed the Kool tool hose thing from Paul as well as a hardened pair of tree branch clippers that make cutting the hose way easy. I can make a hose in about 1 min. I didnt use no special wrenches
Posted by: arkitect Jun 18 2010, 08:39 AM
Mike,
You sure are keeping yourself busy...keeping multiple cars on the road and installing tran cooler.
Dave
Posted by: Dr Evil Jun 19 2010, 12:34 AM
I had to call it a night before I finished tonight. Some simple things fought me and cost me time The fan and oil cooler are all in now. All hoses are made and installed only needing to be tightened. To get on the road I need to install the CV axles and the Exhaust (plus a few incidentals). Tomorrow is going to be HELL.
The plan:
Wake up by 9am (going to bed at 3am) so I can have my work bench out of my garage and ready for pickup by 10am. Finish bus. Drive to Zachs and recover my trailer and what ever else I left there that I actually want. Come home, put two bikes on the trailer, load the bus, load other cars, drive to Washington for round one, return home later that night. Wake up on Sun and pack everything else into moving truck. I cant wait to start working 80 hours a week, only, and getting paid......
Posted by: Vacca Rabite Jun 19 2010, 06:57 PM
I miss you guys already.
Zach
Posted by: Vacca Rabite Jun 19 2010, 06:59 PM
By the way, do you need help monday?
I'll be getting home late Sunday, and can drive up to Hershey Monday if you guys need help or want company before you head out. But I don't want to impede momentum if you guys need to get out the door. Just let me know.
Zach
Posted by: Dr Evil Jun 19 2010, 10:30 PM
Dude, we will probably need help. Today has been an epic fail with regards to the bus. Every thing that could go wrong did. First, I had to move the engine over again as the axles were not centered, that started shit with the mount interfering with the trans cooler hoses (much time). Then the dam tranz didnt want to match up with the mount in the front. Working on a down hill SUX. The engine and drive train were all hanging down hill and that took up the 1/4" I needed to mount the damn front mount. I ended up putting the suby behind the bus, putting a strap on the engine bar of the bus and tying it to the suby's tow pointin order to pull the engine back the little bit I needed. I am a redneck. THEN the damn engine tin got bent and all of it was now off center. Then the exhaust would not go together and I found that two clips were lost on the road and the stores were closed and I could not get replacements. I stole the two I needed off of the pipe tips as they are only for looks. Finally, I was finishing the hardware hook ups, getting the throttle linkage on the tranz hooked to the throttle cable, I noticed that the lever was bent a bit from the jack going from lift to drop too soon, I pushed on the leaver and it came off in my hand. GAME OVER....
I need to remove the oil pan (with new gasket that I can not replace until Mon so I need to be careful), remover the rod the lever went on, and go to Paul's shop tomorrow and weld it back together
We have resigned to tow the bus on a trailer behind the moving truck. Tomorrow, Noel and Heidi will take the Suby to the new place. I will load it with all kinds of goodies for the trip (garage crap). I still need to come to York and get the trailer and stuff. Probably will do tomorrow of early Mon. We will trailer the bikes with the Vue and I will tow the bus with the moving truck. What a PITA today.
Posted by: Vacca Rabite Jun 19 2010, 10:47 PM
Just let me know what you need. If you need to keep stuff in my garage for a little bit of time, thats fine.
Zach
Posted by: Dr Evil Jun 19 2010, 11:24 PM
If you can bring up the trailer and any left over parts in your garage, that would be a huge help as it would save me 2 hours of driving. Let me know if you can.
Posted by: Vacca Rabite Jun 19 2010, 11:33 PM
I can. I'll bring it up Mon Morning. I'll probably be earlyish, as I can't stay too late (maybe getting to your place ~ 10 assuming everything goes smooth and I get the trailer set up tomorrow night when I get home. I want to take Theo to the pool monday afternoon. I've not seen him all weekend, and I miss him!
You should probably get the trailer inspected and properly tagged before you head off across the state. May not be an issue, but with your luck lately, you'd get tagged for it.
Waht do you want me load on it? All the stuff in the attic? Is there stuff that you want left here for staging to go to Scotty later?
Zach
Posted by: plas76targa Jun 20 2010, 07:16 AM
Mike, Zach,
I can help after 6/26 if there's anything you want to leave behind and maybe Zach and I could bring out later? Lemme know.
Posted by: Dr Evil Jun 20 2010, 07:35 AM
I will be awake early on Mon. All my stuff from your shop can go. The trailer is inspected, I just need to all the tag and sticker. I will register it on line today so it is legal when you tow it. Thanks for the help. Matt, I shouldnt have anything left over, but thanks for the kind offer.
Today's agenda:
- Remove exhaust pipes, refabricate drivers S pipe
- Get exhaust pipe clamps
- Remove tranz oil pan to get to shifter rod so I can weld the end back on
- Pick up truck at 11:30am
- Pack and clean garage
- Load stuff into bus
Not in any particular order. Noel and Heidi will be taking the VUE and Suby to the new house with a load of stuff. They will return in the VUE tonight about 8pm and start loading the truck with boxes from inside the house.
Posted by: Dr Evil Jul 28 2010, 07:16 PM
Believe it or not, I have found a few hours over the last month to work on the bus. I consider it a meditative activity. I put coil over front on, which raised the front up to the correct height and made the ride more firm, like I prefer. Then I added the 7/8" front sway bar which is a big difference Then, I could not help myself, I got some 15x7" wheels and put some 225/70-15 tires on them. These are the biggest that you can put on (I am finding out) with out having to modify the bus. I will get pics, but I am done today, on call tomorrow and out cold for most of the day fri. I got all the wheels on but one as the nuts on the one are freaky tight and I will have to find my 1" drive set That, and it is humid and I need to hit the sack.
I also had time to change and reseal the oil pan, and valve cover gaskets as well as try to seal the cable from the trans that was leaking badly. I over filled the trans some how, so I need to build a tank to suck some out with the vacuum. Probably Sat.
It is running rich now that I seem to have gotten all of the air leaks fixed. Gonna have to change the jets out again Worth it! It drives awesome Being able to do little things here and there when I have the time is great therapy.
Posted by: Vacca Rabite Jul 28 2010, 09:14 PM
I bet.
Looking forward to see how it looks w/o the racked front end. Good to see you on line again.
Zach
Posted by: type11969 Jul 29 2010, 09:24 AM
He lives! Good to hear that you are getting in some mental health breaks. I am real interested to hear more about the coil overs, the wheels, and the tires you got. I bet it looks mean.
Posted by: stepuptotheMike Jul 29 2010, 11:05 AM
Did we ever get video of this beast? We demand video ya know...
Mike
Posted by: Dr Evil Jul 31 2010, 08:17 PM
No video yet, but here are the wheels and tires I will need to take a few more to show the difference.
Attached thumbnail(s)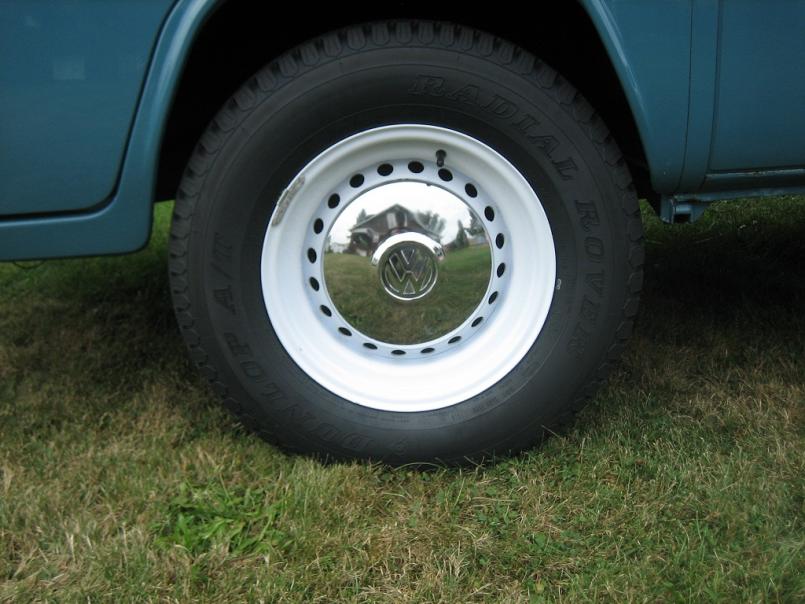
Posted by: Dr Evil Jul 31 2010, 08:18 PM
More
Attached thumbnail(s)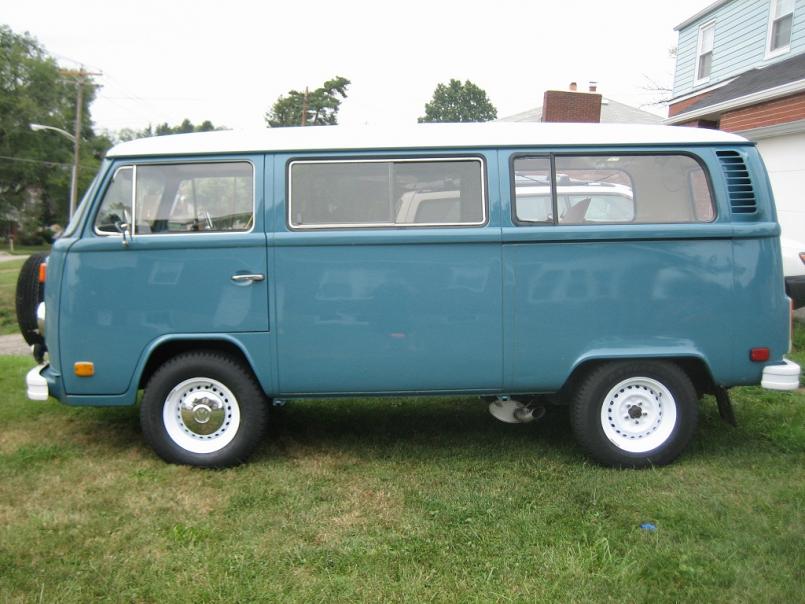
Posted by: Dr Evil Jul 31 2010, 08:19 PM
The rear.
Attached thumbnail(s)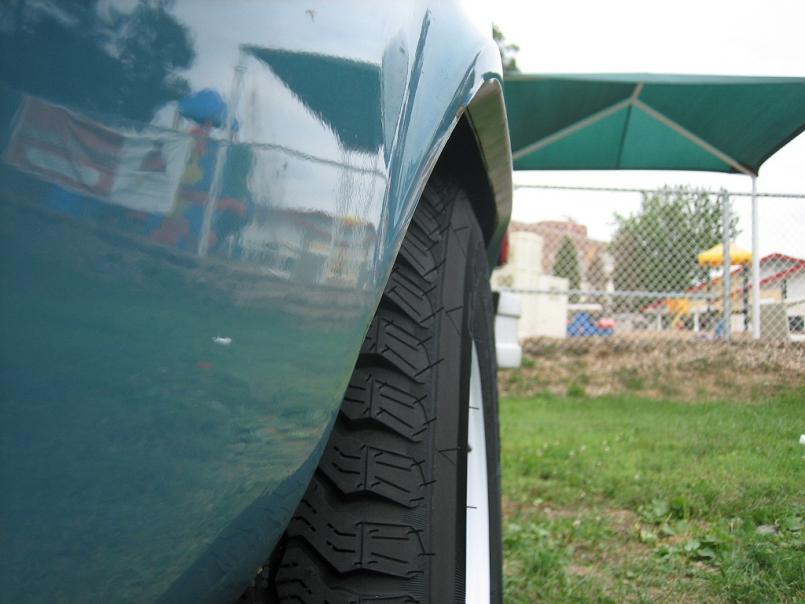
Posted by: scotty b Jul 31 2010, 08:26 PM
You gonna make it to Matts? Remind me to bring that hubcap if you are. You know my memory
Posted by: KELTY360 Jul 31 2010, 08:26 PM
More
I like the clever installation of your rear tire warmer for traction on those icy winter mornings. Inspired engineering.
Posted by: stepuptotheMike Aug 1 2010, 06:26 AM
Wheelie bars.... it needs wheelie bars
Posted by: type11969 Aug 1 2010, 02:03 PM
That looks sick, where did you get those wheels?
Posted by: Dr Evil Aug 1 2010, 03:13 PM
Wheels are 15x7 from Go Westy and are close out at $120 ea shipped. Gotta hurry if you want some because they are not scheduled to make any more.
Scott, I am intending to make it to Matt's provided nothing mucks it up.
Posted by: Vacca Rabite Aug 1 2010, 03:29 PM
Gah. Those look awesome with the hubcaps off, but silly with them on. The cap seems too small for the wheel.
Zach
Posted by: sixnotfour Aug 1 2010, 03:49 PM
914 hubcaps no VW logo
Posted by: Dr Evil Aug 1 2010, 08:07 PM
Well, I ended up using a torch to get the pass rear lug nuts off so I could put the new wheel/tire on. It did not want to go on easy as it was interfering with the outer wheel well I started rolling the body out a bit with a breaker bar. It looks like I will be able to remedy this so no biggie. Minor tweaking is ok. I need to get longer bolts to hold the spare mounted. Its HUGE
Posted by: Dr Evil Aug 1 2010, 08:08 PM
Gah. Those look awesome with the hubcaps off, but silly with them on. The cap seems too small for the wheel.
Zach
Its my bus
I like the hub caps a lot
Posted by: Root_Werks Aug 1 2010, 08:29 PM
Been a while since I've checked this thread.
I'm drooling all over my keyboard!
Looks really good doc, love how it's all finally coming together.
Posted by: scotty b Aug 2 2010, 05:31 AM
Gah. Those look awesome with the hubcaps off, but silly with them on. The cap seems too small for the wheel.
Zach
Yeah ? Well you look silly with a cap on too, as it is to small for your head
Posted by: zymurgist Aug 2 2010, 06:09 AM
Are you talking about Zach's Facebook picture? I'll give Zach credit all day long for having the good sense not to point the bill of his cap sideways.
Posted by: Vacca Rabite Aug 2 2010, 06:41 AM
Scott: I feel sorry for small headed people.
Mike: well, no accounting for taste I suppose.
Ken: Never. Ever.
Posted by: Dr Evil Aug 28 2010, 01:09 PM
A little update on the progress of the beast. Last weekend Noel and I took it on its maiden voyage 4 hours, over the mountains, on the freeway to Plasket's house in MD. I was passing people easily, even up hill. The head temps never saw 350* and the oil cooler fan worked flawlessly. Average was 15mpg and 3100 RPM at 65 mph
The only complaints:
1) when I filled it with gas I put too much in and it started pissing out the drivers side vent tube The flex hose there had cracked and I did not have another. I had to drive a few blocks home, pissing gas, to get another. It stopped before I got to my house. Easy fix, though.
2) When the fuel tank is full the front tires do not rub, when the tank is empty they do because the ass end is then lighter than the front. I need to adjust the front springs and maybe clearance some areas.
3) This is the biggest pain, the seal for the rear housing that holds the oil pump and dizzy is not sealing. I have another, but it requires the engine to be dropped, the pulley to be removed, the dizzy to be removed, and the housing to be removed. Very annoying. It misted the back of the bus in oil, but it leaks little enough that it did not effect the oil level appreciably over the whole 8 hours of driving.
4) The carb needs a better tune, but I am thinking of tossing it and putting on better heads that are mated to the 3.0 CIS I have. I did get 15mpg average and that was on very hilly terrain at faster highway speeds. I didnt feel the need to slow down if the engine wasnt limiting me. I could easily get going fast enough to cause Noel to beg me to slow down for fear of tipping over
Posted by: kwales Aug 28 2010, 03:11 PM
Gearing in that tranny isn't helping you.
With the Vanagon, ( a similarly boxy shape) 3000 RPM is 70 MPH and mileage at that engine speed/ ground speed is about 22 or so.
I know a guy that knows trannys inside and out...
Wait, I hope that didn't come out wrong......
Posted by: Dr Evil Aug 28 2010, 07:11 PM
The tranz is fine. I have 28" tires on it and stock was 24.5. Imagine how high the RPMs were on the OE size. It cruises very well with the current wheel/engine/tranz set up. It is a 2 speed auto tranz and there are no gearing options that I know of that would be straight forward.
Noel and I just went for a drive out to a hiking trail today. A little over an hour there and great country roads
Posted by: wilchek Aug 28 2010, 07:17 PM
Good to see you are still alive and kicking. The bus is looking good. New heads?? Sounds like you are looking for some more down time in the garage.
Posted by: Dr Evil Nov 11 2010, 08:54 PM
OK, it is getting colder and the bus has developed some, er, operational flaws.
Problem list:
- Fix electrical issues (actually not a hard thing to do)
- Find and fix damn transmission leak
- Rebuild the posi so it works
- Fix fuel induction issues (I have ideas, see below)
The above list is what needs to be done, but while I am in there.....
I was thinking of just biting the bullet and switching to the 3.0 CIS system that I have so I can get rid of the carb and get better power with better milage. I need to change the heads for this adaptation. It just so happens that there is a set of rebuilt, large valve heads, with most of the major work done to them on ebay for $1500 nothing is free.
http://cgi.ebay.com/ebaymotors/ws/eBayISAPI.dll?ViewItem&item=120643123913&viewitem=&sspagename=STRK%3AMEWAX%3AIT
Next, the posi needs to be rebuilt. This is about $100 with seals and stuff. But, while I am at it, I was considering changing the R/P to a 3.08 from a 3.55. At least a 3.27 which is not custom so would be cheaper. I currently have no overheating issues with big tires, petal to the metal, up hills in 90+ heat. Not even close.
The other thing I may wish to start on is my heating system design. I wont be driving the bus unless I can get it heated. I dont feel like heating it with gas when I am spewing heat out of the exhaust. I want to see if I can capture that heat and transfer it around the cabin. Why not?
That is all for now, and it is enough. Looks like I will be dropping the drive train in my free time
Posted by: Dr Evil Nov 12 2010, 11:43 AM
So I called my buddy Jeff at Corvair ranch and looked into some costs for things.
3.27 R/P ~$50
Posi new cover - $40
Posi may just need a new cover, this is common and kinda matches the way things went with the location of the tranz initially putting side load on the diff.
Set of 140hp heads rebuilt without core return = $1200. At that price, I might as well get the 140s done with the intake mods.
Posted by: Root_Werks Nov 12 2010, 12:12 PM
914's are always my first love, but love to see builds on other related VW-based platforms.
I'm almost done with my T3: ( I know I gotta finish adjusting the hood)
Attached thumbnail(s)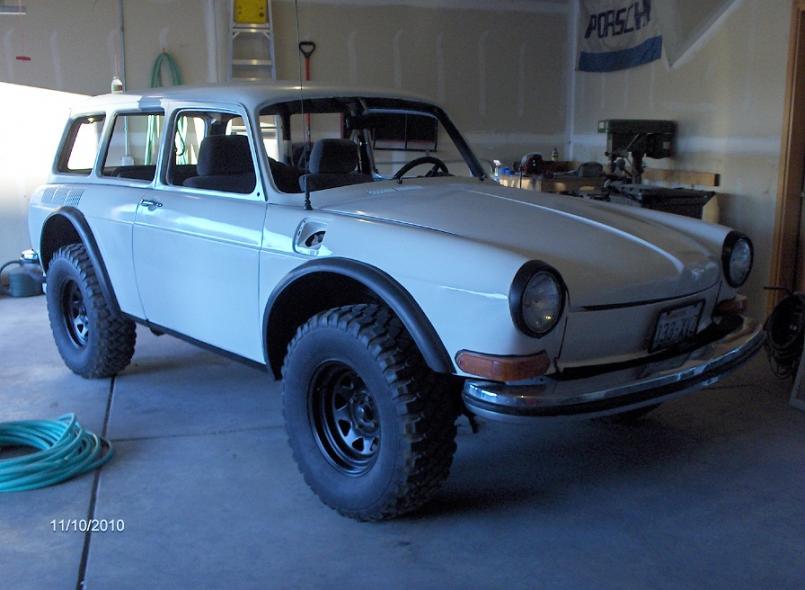
Posted by: Dr Evil Nov 12 2010, 03:29 PM
Ya, your T3 is one of my all time favorites. If I had time, $$ and space I would do that too.
Posted by: Dr Evil Nov 14 2010, 02:22 PM
Well, there is no turning back now. I just bought the tri-ported heads. I hate buying big things, but it is really what is needed to make the engine correct for what it is. Gonna need to rebuild me a few more gear boxes to pay for this
Posted by: Root_Werks Nov 14 2010, 08:13 PM
Well, there is no turning back now. I just bought the tri-ported heads. I hate buying big things, but it is really what is needed to make the engine correct for what it is. Gonna need to rebuild me a few more gear boxes to pay for this
Quit your belly-aching.
I might have a tranny to send to you this winter out of my 914. Doesn't NEED it, but I want it gone through and an "H" 5th installed.
Posted by: Dr Evil Nov 15 2010, 12:46 PM
Gimme gimme
Posted by: Root_Werks Nov 15 2010, 12:59 PM
Gimme gimme
Alright EvilOne, as soon as I get my Monster back on the road I'm sending you a tranny!
Probably 3-4 weeks?
Posted by: Cupomeat Nov 15 2010, 01:58 PM
I might have someone to send you another to rebuild next spring. Far off, I know...
Posted by: Dr Evil Nov 29 2010, 08:29 PM
Oh oh, the heads, adapters, and stuff showed up today I started dropping the engine yesterday. I have the CIS apart and am starting to evaluate the feasibility of CIS vs MegaSquirt. the bus will crave some more $$ before it will be right, but the biggest part is now here Pics later.
Posted by: Dr Evil Dec 31 2010, 04:35 PM
Today it was sunny, 52*, and I was OFF of work So, I got to do some work on the bus. The engine is almost ready to come out. It only needs the starter wires and tranz cooler hoses removed, and then I can drop it. I spent some of today welding/modifying jack stands, too. Scotty B is on his way over for New Years....maybe I will turn him out I hope to have the engine out this weekend, but it is supposed to rain some time. Nothing pic worthy yet.
Posted by: Dr Evil Jan 8 2011, 12:06 AM
So, while jacking the ass end of the bus, the thing shifted and fell to the side opposite of me. There is still a bit of a hill and it is now soft grassy ground. I seem to have this under control now with the ass end up about 18", but I need a way to get my engine out from under the bus once I drop it. I designed a dolly with 10" pneumatic tires that will allow me to lower the engine and drive train down on top of it and roll the whole package out from under the bus. I got about 1/3 of it done tonight in my basement (not cold! ) and will hopefully have it done and used tomorrow.
Posted by: Dr Evil Jan 9 2011, 01:37 AM
Ok, I know you guys could care less without pics, so here is the all terrain engine dolly.
First the bare frame.
Attached thumbnail(s)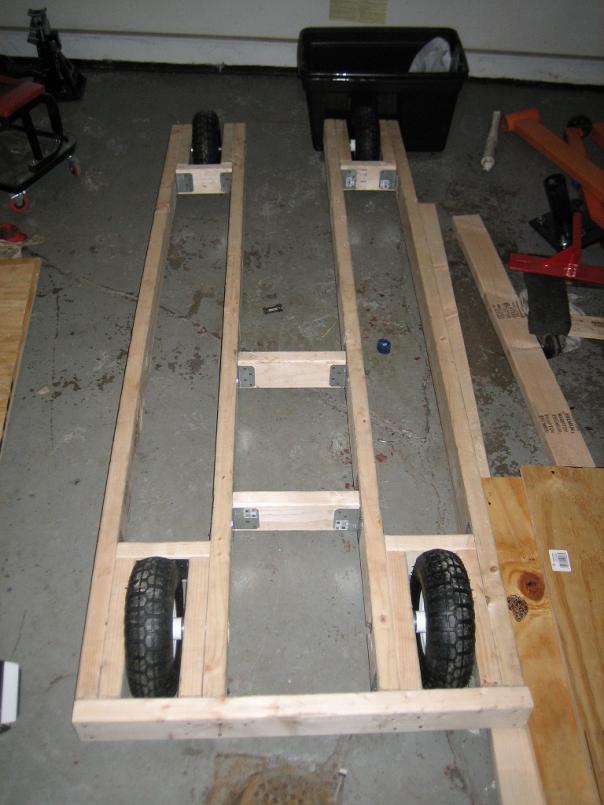
Posted by: Dr Evil Jan 9 2011, 01:38 AM
With minimal skin. I am gonna try it like this first. It is sturdy and stands less than 7" from the ground to the deck. It is hard to type with my left hand after all of the trauma....
Attached thumbnail(s)
Posted by: Dr Evil Jan 13 2011, 04:51 PM
FINALLY! I got to use my contraption and got the engine out pretty easily. Kind of hairy once the cradle was pointed down hill in order to get it into the garage. No much traction on a painted floor wet with snow
Now the fun begins
Attached thumbnail(s)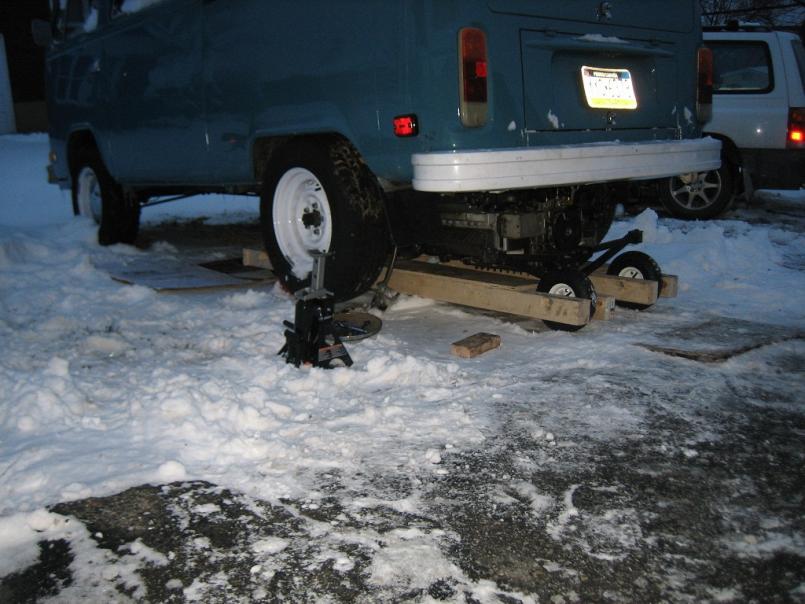
Posted by: Dr Evil Jan 13 2011, 04:51 PM
Next
Attached thumbnail(s)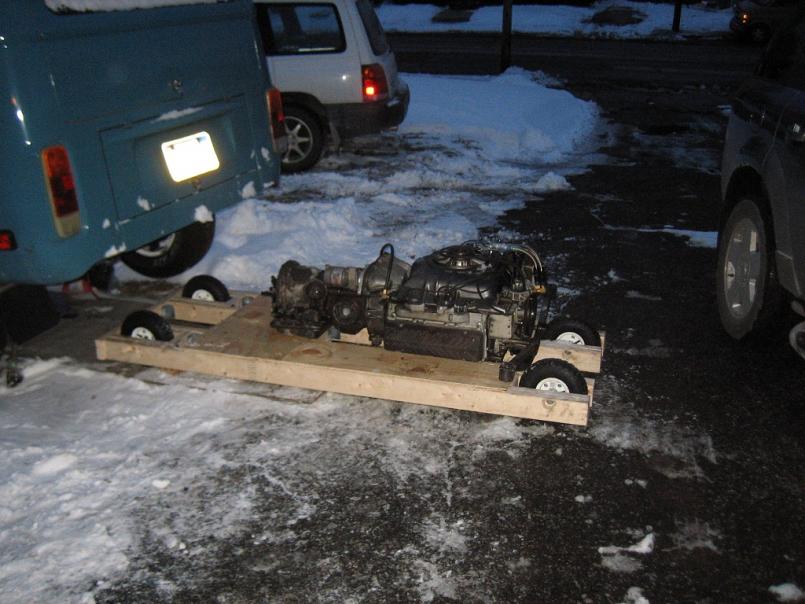
Posted by: Dr Evil Jan 13 2011, 04:52 PM
And into the OR
Attached thumbnail(s)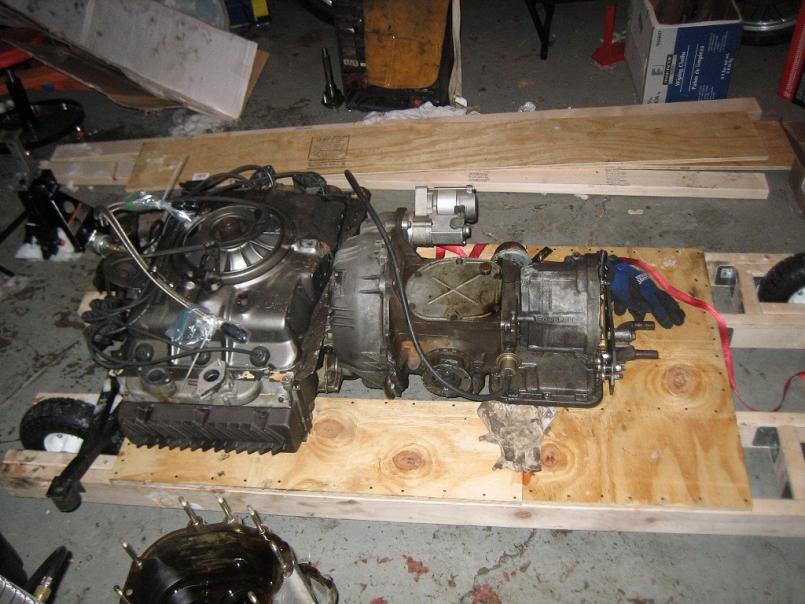
Posted by: MDG Jan 13 2011, 04:54 PM
And into the OR
Cool!
That looks like the start of one honkin' home-made go kart!
Posted by: Root_Werks Jan 13 2011, 05:21 PM
Very cool!
I kinda forget, what's the plan? 3 port heads?
Posted by: Dr Evil Jan 13 2011, 05:27 PM
3 port heads (already on the shelf) and Porsche 3.0 CIS (already apart and being cleaned
Posted by: Vacca Rabite Jan 13 2011, 06:52 PM
That frame you made looks strangely familiar!
You used bigger wheels though.
Also the bus in the air like that in the snow also looks strangely familiar! lololol
Zach
Posted by: markb Jan 13 2011, 06:55 PM
That almost looks like cheating
Posted by: scotty b Jan 13 2011, 07:02 PM
ALOMST looks like fun til you realize that driveway is as steep as Zachs and is most likely half a sheet of ice
Posted by: Dr Evil Jan 13 2011, 07:20 PM
That frame you made looks strangely familiar!
You used bigger wheels though.
Also the bus in the air like that in the snow also looks strangely familiar! lololol
Zach
Yup, I got the idea from that rig we used as Matt's place.
Posted by: Vacca Rabite Jan 13 2011, 07:25 PM
ALOMST looks like fun til you realize that driveway is as steep as Zachs and is most likely half a sheet of ice
Most of PA is a sheet of ice right now. Silly Virginian!
Zach
Posted by: Krieger Jan 13 2011, 07:33 PM
Cool tool....the sled I mean. Dr. Cock. Sir
Posted by: Dr Evil Jan 16 2011, 09:49 PM
So, the diff is off and completely apart. That squeaking noise and lack of Posi was due to......drum roll please......the posi plates and disks being completely bare and scraping So, only $71 shipped to replace them. No biggie....but, while I am in there I thought I would source out a 3.27 R/P set to replace the 3.55 set I already have. Lower RPM by a smidge. I could easily get a 3.08 set, but that has the explicit warning of not using with lower HP engines (not an issue) and not in hilly areas (have that). 3.08 seems too low. 3.55 is actually fine so any small improvement would be cool. Price will tell.
The damn trans pan gasket keeps leaking as does the control cable. I will have to replace the cable ($200) and will likely change to an Al pan for rigidity since I can not keep the fluid in
I need to rebuild another gear box, any takers?
Posted by: RJMII Jan 16 2011, 10:43 PM
The choice in tires must have helped; two tough elements to overcome for sure.
The cart looks like it worked out nicely and held its own. (and that drivetrain lol)
Posted by: Dr Evil Jan 18 2011, 08:49 PM
More pics of the carnage. This is what the posi looks like disassembled. Well, the posi and the whole damn diff.
Attached thumbnail(s)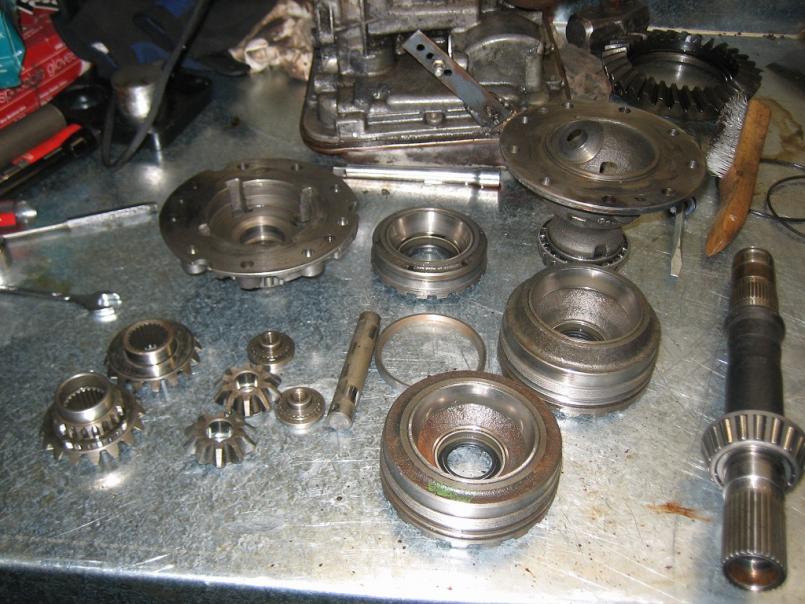
Posted by: Dr Evil Jan 18 2011, 08:50 PM
And the completely worn clutch disks and plates.
Attached thumbnail(s)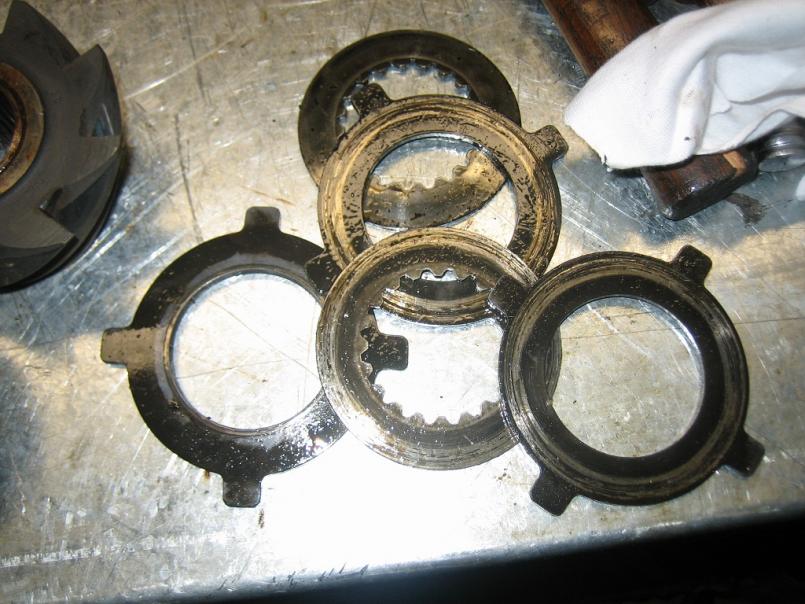
Posted by: Dr Evil Feb 11 2011, 10:16 AM
So, the diff is assembled with different R/P set (was 3.55 now 3.27), back lash is w/i tolerance, all bearings preloaded per MFR instructions. I just need to score some gear marking dye to check the interface and I can call that part good.
I still have the engine on the sled and will need help lifting it onto the stand. As such, I figured I could shed 30# by removing at least one head. Plus, I wanted to see what was going on with the passenger side. very rich running, possible oil burning. The carbon build up is insane. No pics right now...at work until tomorrow AM sometime.
I am debating on whether or not to CC the chambers on the new heads like I did on the old ones. I probably will I hope I still have all the gear that I made.
Can I reuse the copper head gaskets? They look fine. Do I need to re-anneal them? I may need new ones after doing the CR calc anyway. Maybe I will bump it a few tenths
The major transmission leak seems to have all come from the selector cable. The sheath on it parted from the metal sleeve at the end and allows fluid to piss all over the place. Everywhere I go the back of the bus is covered in ATF. As such, I had to shell out some dough for a repro cable (ouch). It is about the only "expensive" part that I have bought for this drive train (stock).
Next, I will pull the other head, check the diff, get engine on stand.
Posted by: Dr Evil Feb 13 2011, 07:51 PM
I know we all like pics, so here are some of the chambers and such.
Attached thumbnail(s)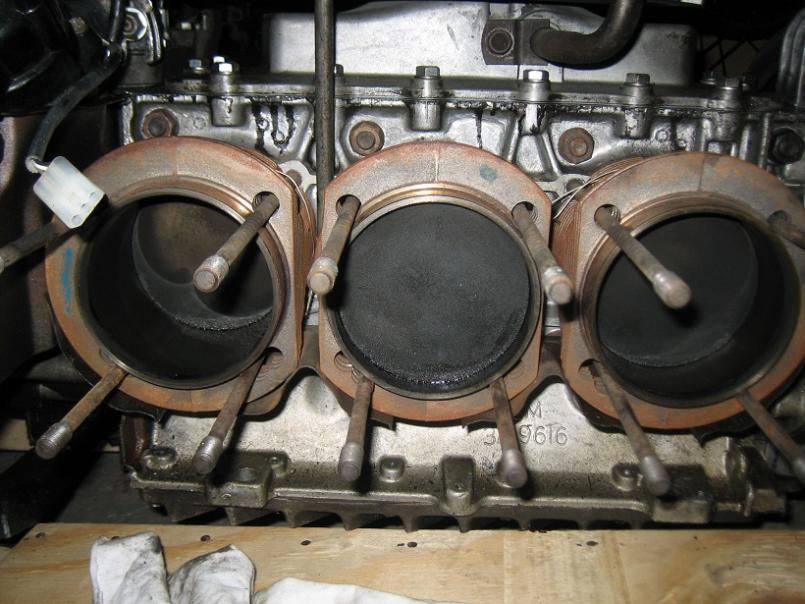

Posted by: Dr Evil Feb 13 2011, 07:53 PM
Samoa
Attached thumbnail(s)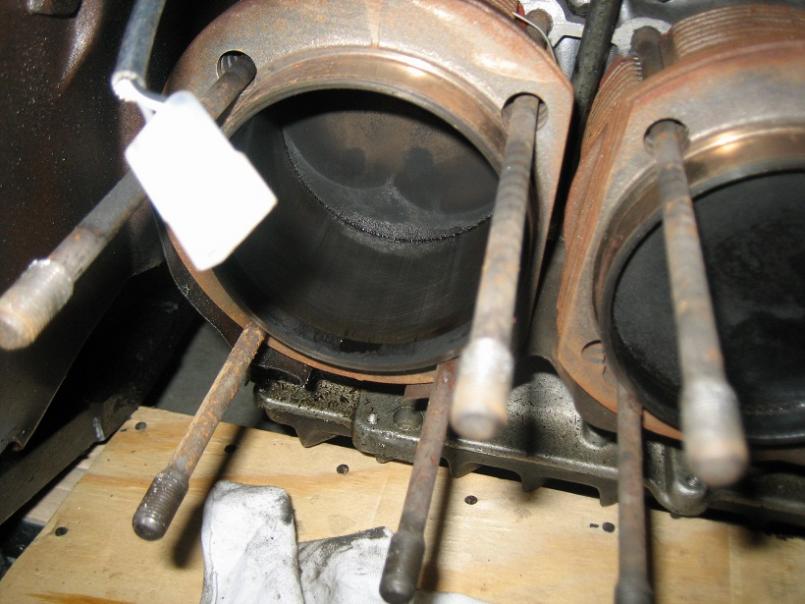
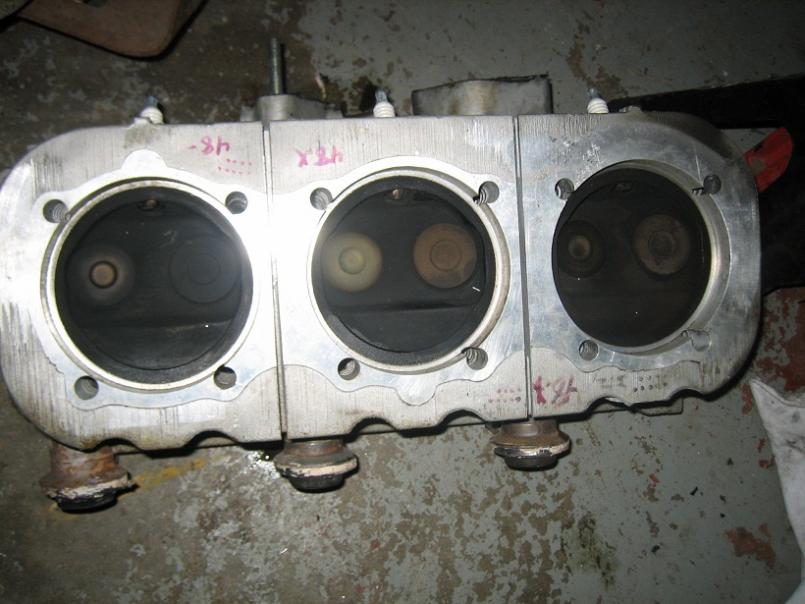
Posted by: Dr Evil Feb 13 2011, 07:53 PM
Lastly
Attached thumbnail(s)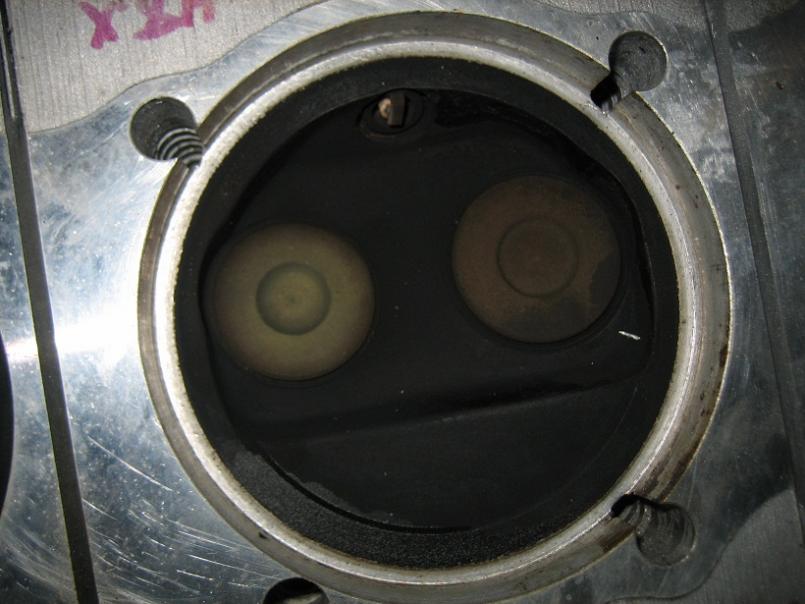
Posted by: rick 918-S Feb 13 2011, 08:20 PM
Your fuel mileage must have sucked. The CIS is not the most conservative but once you get it dialed in it will work better than the toilet flusher.
Posted by: Dr Evil Feb 13 2011, 08:43 PM
Ya, I thought I was actually getting 10mpg If I can get modern mileage levels with a bread box, that would rock!
Posted by: rick 918-S Feb 13 2011, 11:26 PM
I'm looking forward to seeing your intake setup. I always thought the CIS from a rabbit could be adapted onto the typeIV as an option over carbs.
Posted by: Dr Evil Feb 14 2011, 07:39 AM
To note, and to no surprise, the engine ran really cool head temps
Posted by: Dr Evil Feb 14 2011, 10:31 PM
Engine on the stand, other head off, no surprises there.
A nice tip for those of you with no friends or like me, have no time when your friends do and need to move your engine from the floor to the stand. I spent $8 on cinder blocks, slowly rock the engine side to side while building blocks under it, then slip the stand onto the adapter. Took < 5min.
Posted by: HarveyH Feb 15 2011, 07:45 AM
Don't know if gear marking dye is anything special, but I do know tool and die makers and die setters used to use Prussian Blue oil pigment (from the art supply store) to check high/low spots and alignment. Cleans up with a rag and solvent and is so fine it won't score mirror surfaces. Doesn't set up like Dykem Blue so they would just apply to the true surface and mate the parts to mark the high spots of the mating surface. After stoning and polishing the high spots they would clean the mating surface, make sure the coating was even on the true surface and repeat and repeat and repeat.......
My father was a Tool & Die Maker at the Budd Co. in Philadelphia. Most proud of the first die he ever made completely by himself, the end plate for a (I think) 56 Chevy dashboard. (about 2-1/2' x8" with a compound curve, the edges drawn over and two countersunk piercings). First die the company ever produced that was true the first strike in the tryout press.
Harvey
Posted by: Dr Evil Feb 15 2011, 04:51 PM
Prussian blus is used, but is dark and hard to see. I have some white lithium that I am going to try. Same concept as the blue. The paste that I can get from the auto dealer is basically a yellow paste that does not set up. I feel confident that I can get-r-done with the lithium.
Posted by: Randal Feb 15 2011, 06:06 PM
FINALLY! I got to use my contraption and got the engine out pretty easily. Kind of hairy once the cradle was pointed down hill in order to get it into the garage. No much traction on a painted floor wet with snow
Now the fun begins
How did you lower the engine and transmission down to the cradle?
Nice design on the receiver.
PS
Feel like a wimp complaining about a little rain stopping me from putting my engine back in....
Posted by: Dr Evil Feb 15 2011, 06:14 PM
The receiver is a unit I bought from a guy off of the Samba
The roller has an empty section that I built in specifically for the jack. I just roll the jack in and lower the engine. Raising it is just the opposite.
Posted by: Dr Evil Feb 15 2011, 10:52 PM
OK, time for some re-education. If the cylinders have this scoring mark on the low side, does this mean I have to do anything? I know it is likely because of one of the times that damn carb flooded the engine (no lube) and it gouged the sides a bit. I cleaned all the piston heads and barrels up on the one side tonight. Scotch brite and spun stainless pads.
Attached thumbnail(s)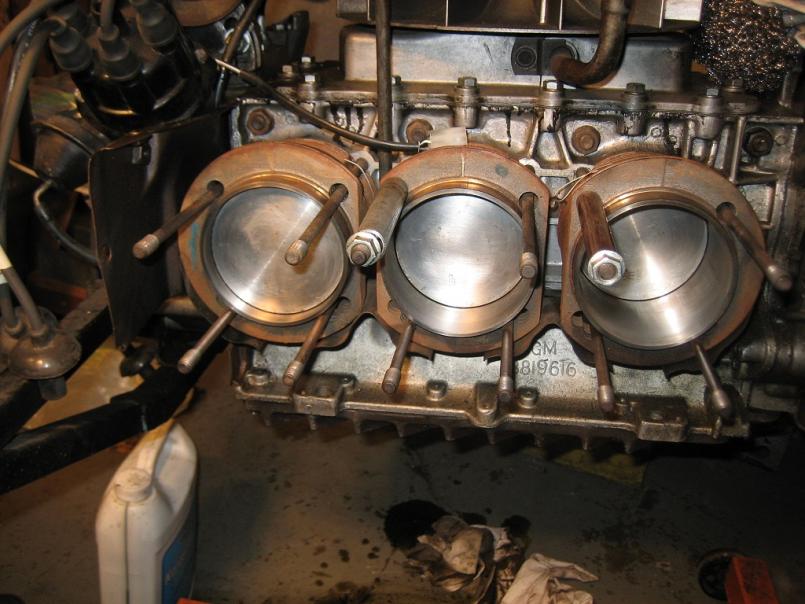
Posted by: Dr Evil Feb 15 2011, 10:53 PM
Here are some close-ups of the marks. These were brand new.
Attached thumbnail(s)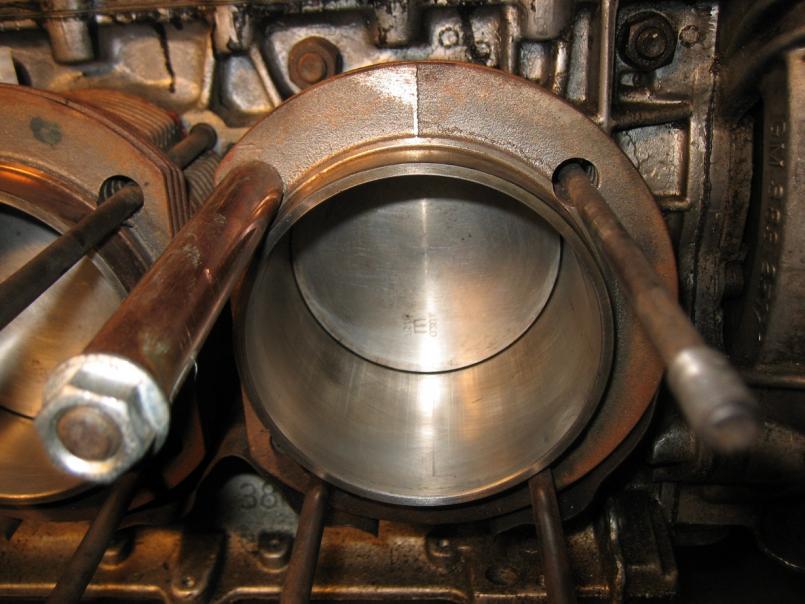
Posted by: Dr Evil Feb 15 2011, 10:54 PM
Uno mas. Mis pedos olfean como muerte.
Attached thumbnail(s)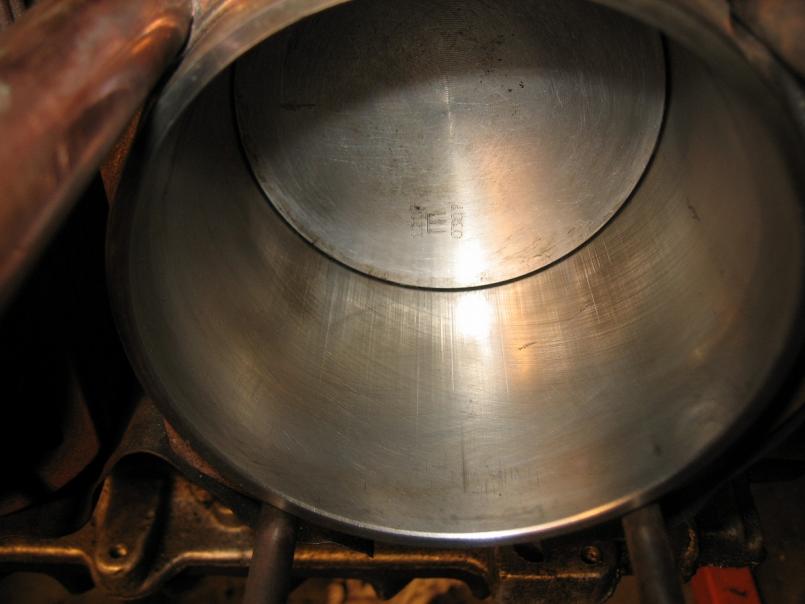
Posted by: Dr Evil Feb 16 2011, 10:26 AM
The lithium grease idea worked just fine. It gave me a faint pattern to read on the diff gear that was perfect.
Here is a good article about setting up differentials and such:
http://www.differentials.com/install.html
Lithium, good for more than just mood stabilization
Posted by: Dr Evil Feb 16 2011, 09:57 PM
Well, the pistons and cylinders ALL have rub marks....this is a kiss of death for the parts, and my account The worst part is that I need 6 p/c and that is typically a PITA to get since they come is sets of 4. The other PITA is that they all need to be modified to be used, which is more time and $$.
Posted by: Vacca Rabite Feb 17 2011, 07:38 AM
What are you seeing that I am not?
Unless the scoring is deeper then it looks, I don't see why that could not just be polished out. Are the pistons really so shot that they can't be used? they are really so shot that you can't just re-ring?
Zach
Posted by: Dr Evil Feb 17 2011, 09:04 AM
I got the same feeling, that they could be reused....but so far have had only you reflecting that sentiment. I ordered a dingle berry hone to recondition these. The skirts on the pistons are showing light scoring, but the factory marks are still there. The original hone marks on the cylinders are still present under the score marks. I can take better pics and get a consensus today. I think I will start a new thread to get more input.
Posted by: leebenedi Feb 17 2011, 01:51 PM
Uno mas. Mis pedos olfean como muerte.
Pues no te los tires cerca de mi.
Posted by: crash914 Feb 17 2011, 02:07 PM
just use them....cross hatch with a hone if you want to feel better..My guess is that you will have the same scrapes within a couple of hours after re-install....
Posted by: zymurgist Feb 17 2011, 03:23 PM
The cylinder in the 14 HP Kohler in my John Deere is scored a lot worse than that and it runs fine.
Posted by: Dr Evil Feb 17 2011, 04:12 PM
Well shit, if it will work in a John Deere
Posted by: rick 918-S Feb 17 2011, 07:09 PM
just use them....cross hatch with a hone if you want to feel better..My guess is that you will have the same scrapes within a couple of hours after re-install....
It's a bus. Hone it, clean the pistons and rings and run it. Remember you still have to dial in the CIS. If you end up with a rich condition again an smoke a second set of cylinders you will really be pissed. If you think your going to have a leak down problem you could always assemble the heads and check it.
Posted by: Dr Evil Feb 17 2011, 07:25 PM
I dont think I will have a prob. I can easily change them later, and you are right about doing the CIS. It made good power with the rich condition. No leak issue. Lets run em until they blow! I love how cheap and plentiful these engines are.
Posted by: Dr Evil Mar 6 2011, 05:46 AM
Starting to reassemble the engine. I used my blasting cabinet to clean the barrels and coated them with silver BBQ paint They look like fake nickies.
I also removed the rings and cleaned up the pistons. Then I roughed up the barrels with my flex-hone.
One side done.
I am seriously thinking of going with roller rockers on this engine...while I am in there
Posted by: rick 918-S Mar 6 2011, 07:46 AM
Roller rockers should be standard GM stuff. A Stock engine with pedestrian cam lifts doesn't over lift the rocker to the point of scrubbing the valve stem excessively. But it could add some benifit with less stress. It's proven that a roller tip affords less drag.
BTW: what lift and duation cam are you running? Some cams are not CIS friendly. Too much lift and duration will cause a reverse pulse on the air door. You may want to cross check specs with maybe a CIS 2.0 Rabbit or small displacement Porsche 6 running CIS. Or maybe you already thought about this.
Posted by: Dr Evil Mar 6 2011, 07:58 PM
I chose a mild cam as this is a bus and not a race car. I need to look up the specs as I can not remember.
Posted by: rick 918-S Mar 6 2011, 08:40 PM
I think you want a fast ramp to give the air door a nice bump without too much pulse back into the intake. Ya, mild cam with long duration and little overlap. That's my take on the function of F.I. But what do I know. Now ask me about welding... 
Nice project Doc. I have always been fond of the Vair and CIS.
Posted by: Dr Evil Mar 10 2011, 03:36 AM
Things are coming to gether....and my account is draining. I broke down and got the roller rockers. I figure, anything to take care of these heads.
I also got a new, aftermarket fuel pump for $44 Now I just need to find a good pressure accumulator and some fittings and the fuel system is ready to be tried out. I will of course assemble everything on the trolley and run it there first to get bugs sorted out. I hope this is done in time for Hershey. It should be fun taking the mountain passes with the even more monstrous engine.
For the roller rockers, I need to set geometry. I have a set ordered to do this and then it will be a matter of getting the new rods.
The CIS should be pretty straight forward once the long block is assembled.
No supercharge for now.....but maybe next year!
Posted by: Dr Evil Mar 10 2011, 07:30 AM
Found where a guy already tried to use CIS in a bus on a corvair engine. He did it wrong, though
http://corvaircenter.com/phorum/read.php?1,139315,176553
Posted by: rick 918-S Mar 10 2011, 07:35 AM
Things are coming to gether....and my account is draining. I broke down and got the roller rockers. I figure, anything to take care of these heads.
I also got a new, aftermarket fuel pump for $44
Now I just need to find a good pressure accumulator and some fittings and the fuel system is ready to be tried out. I will of course assemble everything on the trolley and run it there first to get bugs sorted out. I hope this is done in time for Hershey. It should be fun taking the mountain passes with the even more monstrous engine. For the roller rockers, I need to set geometry. I have a set ordered to do this and then it will be a matter of getting the new rods.
The CIS should be pretty straight forward once the long block is assembled.
No supercharge for now.....but maybe next year!
Doc, Find a shop that specializes in Volvo's. I'm not sure which model year but I used a pump and accumulator off the Volvo Turbo. If you find a Volvo guy they will know which one you need. Mine was used and works fine. They were both mounted to the same metal plate on rubber isolator mounts.
Posted by: Dr Evil Mar 13 2011, 05:18 PM
The roller rockers arrived on Fri. They are pretty
I have been researching spark plugs and found that the ones to use are not generally available Not only that, but the Autolite 425 ones that I did use are generally regarded as crap. I have e feeling that the plugs contributed to the carbon buildup as much as the fuel.
If you consider it ran pretty well when it was not tuned, it should be amazing when it is sorted out.
I plan on CCing the heads next so I can see what my CR will be/what shims I need. I also have the pushrod geometry kit to play with once the heads are on.
Posted by: Dr Evil Mar 19 2011, 08:44 PM
Some more engine talk:
I think I may have set up the previous configuration for failure. I was interested in keeping temps down and allowing the engine to run on low octane. So, after looking into VW setups I set the CR to 7.3:1. I have now found that the CR for the stock 140 is 9.25:1.
My current CC profile of the 140 head is looking like 56-60. I need to do some verifying.
Current deck height is listed as .138 and I was using a .04 gasket. If I have the barrels dropped so that the pistons are flush with the barrel tops, and use a .027 gasket I can get 9:1. That will be a nice bump with the rest of the mods.
Now I need to wait to have the barrels done....patience....
Posted by: rick 918-S Mar 19 2011, 09:35 PM
Chevrolets like compression. My 928 engine stock is 10:1 with CIS. You will be happier soon.
Posted by: Dr Evil Apr 12 2011, 12:23 PM
Geez, I am hitting snags left and right with this engine.
In Harrisburg, there is a shop that did the original specialty work for me called Feazers. Out here in the West of PA, I am not finding anyone who is willing to work on corvair/VW stuff. Many say, "uh, I really dont want to get into something like that."
I just started looking for my own damn vertical mill
What I am trying to do:
Previous iteration of the engine had the deck at .138 with .04 head gasket and 48cc (IIRC on this number). The CR was about 7.3:1 and was pathetic. So, I am looking to cut the top of the cylinders by .135, and fly cut the step in the chamber flush with the quench area. Then, I will have a deck height of .003, gasket of .04 and will be shooting for 60cc chambers (currently 54) by unshrouding the valves. This should give me 9:1 CR. I will polish and smooth the chambers as well.
All I need a shop to do is the fly-cutting and barrel shortening I do have a lead on a place about 15mi from me, in the boonies, but they are not answering their phone and I have limited time off to play with this stuff. I wanted to drop it off at a machinest today and be rid of the parts for a while, but that just aint in the cards.
The first shop I went to didnt even have a vertical mill
Posted by: kg6dxn Apr 12 2011, 12:43 PM
I know it's not that close but what about KRE? http://kawellracing.com/
Posted by: rick 918-S Apr 12 2011, 12:48 PM
Hey Doc, Try to fine out who does motorcycle work around you. They will be your local source for custom cylinder heights and fly cutting heads.
Posted by: Dr Evil Apr 12 2011, 03:57 PM
So here is how the progression of things went today:
Went to PMO, a machine shop that did a flywheel for a friend of mine. They could not do the work because they had no vertical mill. Randall, the guy there, referred me to Warren. Warren is a corvair guy with connections.
Warren referred me to Bob Bongiorni. Bob is probably one of the coolest humans, EVER! He owns a machine shop in the middle of now where, has CNC, mills, you name it, all in a large building. He has two fuselages on one side of the shop. They are KR-2s and are to be powered by.......corvair engines! He and I talked for 2 hours. He is into everything from engines, to experimental aircraft, to fringe scientific doo-dads like hydrodynamic heaters, hydrogen fuel cells, some sort of fuel thermal reaction unit. A real tinkerer. I like him
So, he looks at my stuff and says, no prob.
Posted by: Dr Evil Jul 14 2011, 02:47 PM
Well, I am getting that about to be screwed feeling again
I surrendered my $1500 heads and my $1000 cylinders over to this guy out in the boonies that had a loyal following. This was in April It is not 3 months later and he still has not gotten them done. If this was the only issue, I would not be whining, but it is not.
Shortly after I gave him the parts, he turned his phone off. He is planning on moving to SC eventually and is trying to finish things up before a huge move of his huge shop.
I could drop buy and visit with him randomly so I was not worried and figured I would give him more time (I was not in a hurry). Well, now I have been to his place 3 times in the last 2 weeks and he has not been around. This is how he does business as I had another old-timer stop buy to see if he was in while I was writing a not for him.
This is where I get more concerned. I wrote a nice letter asking him to call me so I can schedule a time for pickup of my stuff. Scotty B has a friend that can do it, and faster. I plan to go to Scotty's shop this weekend so I am trying to get my stuff to bring it instead of shipping it. I said so on the note, taped it to his door on Tues.
Today, the not is gone and I have received no call. I left another note pleading that he call me as I need my parts by tomorrow. I have little faith that such will happen.
I am starting to think about my recourse. When should I involve low enforcement? I actually like this guy, but he needs to get his shit together.
Why do I trust people?
Posted by: jsayre914 Jul 14 2011, 02:58 PM
so, whats his name and address of the shop?
that does suck
Posted by: PeeGreen 914 Jul 14 2011, 03:25 PM
Well, I am getting that about to be screwed feeling again
I surrendered my $1500 heads and my $1000 cylinders over to this guy out in the boonies that had a loyal following. This was in April
It is not 3 months later and he still has not gotten them done. If this was the only issue, I would not be whining, but it is not. Shortly after I gave him the parts, he turned his phone off. He is planning on moving to SC eventually and is trying to finish things up before a huge move of his huge shop.
I could drop buy and visit with him randomly so I was not worried and figured I would give him more time (I was not in a hurry). Well, now I have been to his place 3 times in the last 2 weeks and he has not been around. This is how he does business as I had another old-timer stop buy to see if he was in while I was writing a not for him.
This is where I get more concerned. I wrote a nice letter asking him to call me so I can schedule a time for pickup of my stuff. Scotty B has a friend that can do it, and faster. I plan to go to Scotty's shop this weekend so I am trying to get my stuff to bring it instead of shipping it. I said so on the note, taped it to his door on Tues.
Today, the not is gone and I have received no call. I left another note pleading that he call me as I need my parts by tomorrow. I have little faith that such will happen.
I am starting to think about my recourse. When should I involve low enforcement? I actually like this guy, but he needs to get his shit together.
Why do I trust people?
THat sucks. I will keep my fingers crossed for you.
Posted by: Dr Evil Jul 14 2011, 04:31 PM
I just got home with the parts! His partner called and said he was out of town. I told him I would be there in 30min. He actually got to my heads
Phew, that was too uncomfortable.
Posted by: zymurgist Jul 14 2011, 04:45 PM
<golf clap>
Posted by: 76-914 Jul 14 2011, 04:48 PM
"Ah yes, the old Rimco ploy." Inspector Clouseau
Posted by: Cap'n Krusty Jul 14 2011, 05:15 PM
Had I been following this thread, I would have repeated my recommendation for Engine Machine Service in Los Angeles. I know they're across the country from you, but they're also as close as the big brown truck. It happens that they're kinda the go-to guys for Corvair machine work and they used to do a lot of it. Now they're the world headquarters for Fiat 8V motors, but they'll get all of those done one of these days and move on to other interesting stuff.
Glad you got the problem solved! The Cap'n
Posted by: Dr Evil Jul 20 2011, 08:22 PM
I started unshrouding the valves in my heads and will CC them once I polish them up a bit.
I found a shop to finish up my barrels so I can start assembling this dang thing
Posted by: Dr Evil Jul 23 2011, 09:44 PM
Had a good day working on stuff. I got one head basically done. I managed to get them flycut so that there is no step for the sealing surface. This helped bump up the CR closer to what I was looking for. I then removed material from around the valves (unshrouding). This will allow the heads to breath better: bigger valves, bigger ports, and unshrouding
I also changed over to stainless valves since I could get the easier than the stockers and they are not expensive.
I polished the chambers up a bit, but I can see that shining them is not gonna happen as it is way too much work and not really necessary for my application.
I CCed the head and all chambers are at 50cc which is perfect. I have calculated what needs to be removed from the cylinders and can now tell the shop next week to get things moving further along
Before: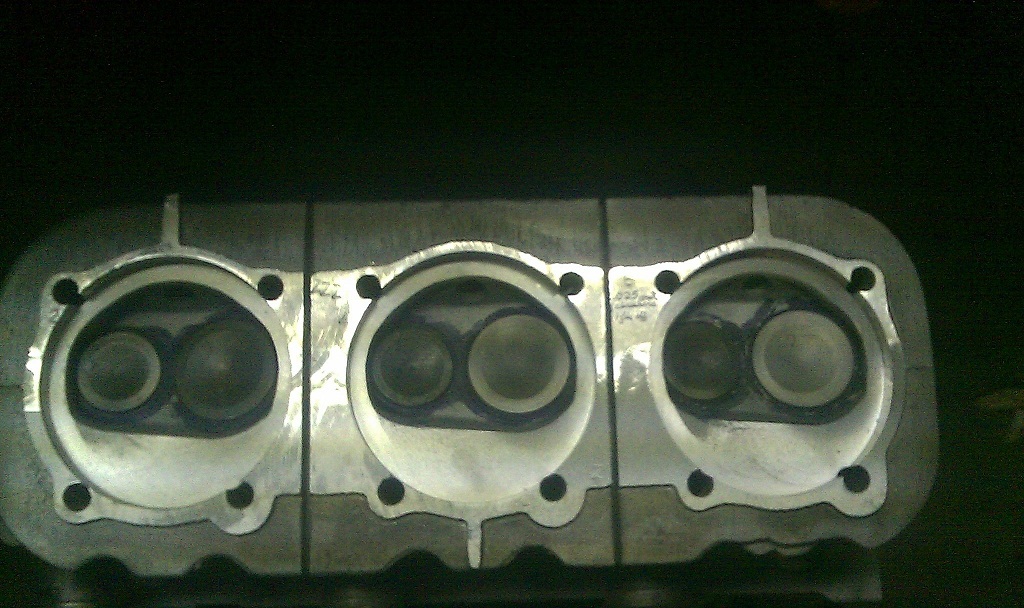
Posted by: Dr Evil Jul 23 2011, 09:45 PM
All I have is a cell phone, the wife took the camera to England with her.
After:
Attached image(s)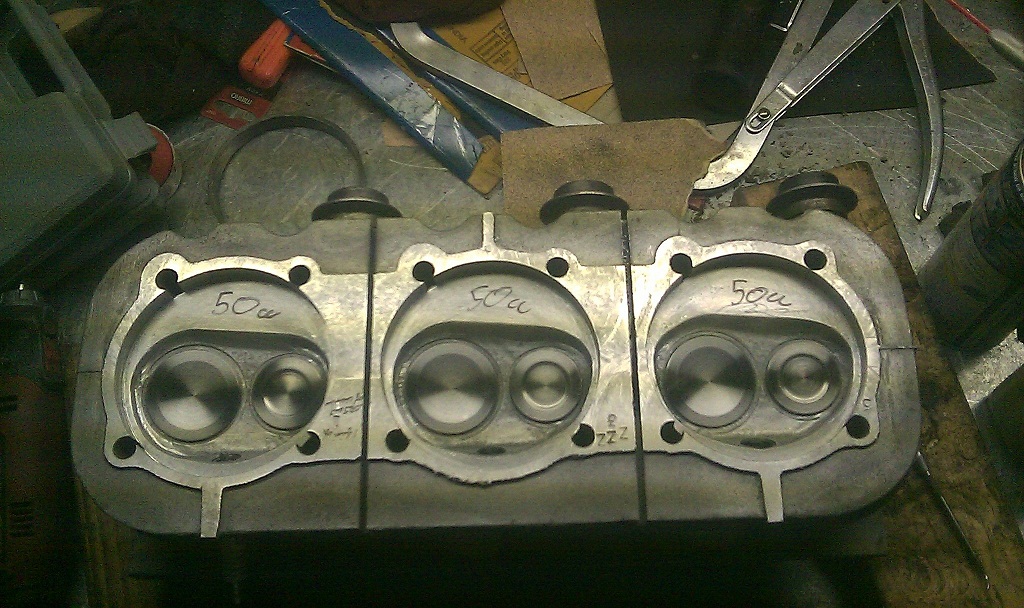
Posted by: type47 Jul 24 2011, 06:17 AM
Are there going to be any problems with the holes for the head studs open into the ... not combustion chamber 'cause the cylinders will seal against the head ... where the circumference of the opening for the cylinder intersects the hole for the head stud (best I can describe it w/decaf). But then again, the hole for the stud will also be sealed at the case and by the washer and nut at the head end.
Posted by: hot_shoe914 Jul 24 2011, 08:19 AM
http://littlerock.craigslist.org/cto/2501895129.html
Posted by: Dr Evil Jul 24 2011, 10:58 AM
Are there going to be any problems with the holes for the head studs open into the ... not combustion chamber 'cause the cylinders will seal against the head ... where the circumference of the opening for the cylinder intersects the hole for the head stud (best I can describe it w/decaf). But then again, the hole for the stud will also be sealed at the case and by the washer and nut at the head end.
No. I already ran heads like this, with the holes you mention, and it is a proven design. The cylinders seal against the surface, not the sides.
Posted by: Dr Evil Jul 24 2011, 11:00 AM
http://littlerock.craigslist.org/cto/2501895129.html
Has "the porsche engine" means 2.0 I am guessing.
If it was some other time in my life, maybe. Looks like a bunch of body work.
Posted by: hot_shoe914 Jul 24 2011, 03:49 PM
http://littlerock.craigslist.org/cto/2501895129.html
Has "the porsche engine" means 2.0 I am guessing.
If it was some other time in my life, maybe. Looks like a bunch of body work.
Thought you might want that automatic transmission.
Posted by: Dr Evil Jul 24 2011, 05:37 PM
Nope, I use the corvair one. Cheap, easy, stout.
Posted by: hot_shoe914 Jul 24 2011, 06:13 PM
It has air too.
Posted by: Dr Evil Sep 10 2011, 02:36 PM
FINALLY! I just got back from the machine shop and have my freshly cut barrels. This step took so long due to the first machinist disappearing. I got a call this AM and the second machinist, a good guy named Gregg, told be that the last barrel cracked when they were cutting it.....he said not to worry. This was this AM. This afternoon he had sourced one from a local ACVW place, and modified it perfectly to match. Good dude. Now the others look bad
Posted by: BajaXJ92 Sep 10 2011, 03:20 PM
Gonna need some pics! I need motivation to work on my '74 Bus project. Haven't touched it since before the accident....
Posted by: Dr Evil Sep 10 2011, 07:28 PM
Too many projects, too little time. I worked on the Guzzi today.
Probably tomorrow the jugs will be refitted. Then, I need to open up the second head. Then....Then.....Then....
Posted by: Dr Evil Sep 11 2011, 08:51 PM
AW, yeah.
Attached thumbnail(s)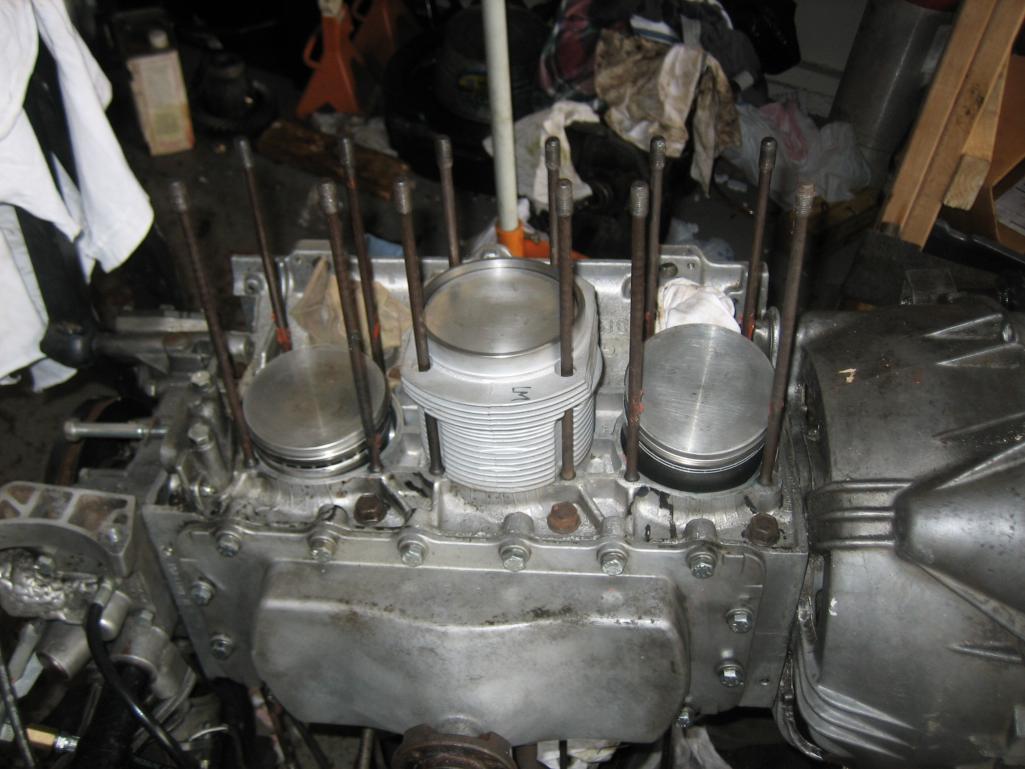
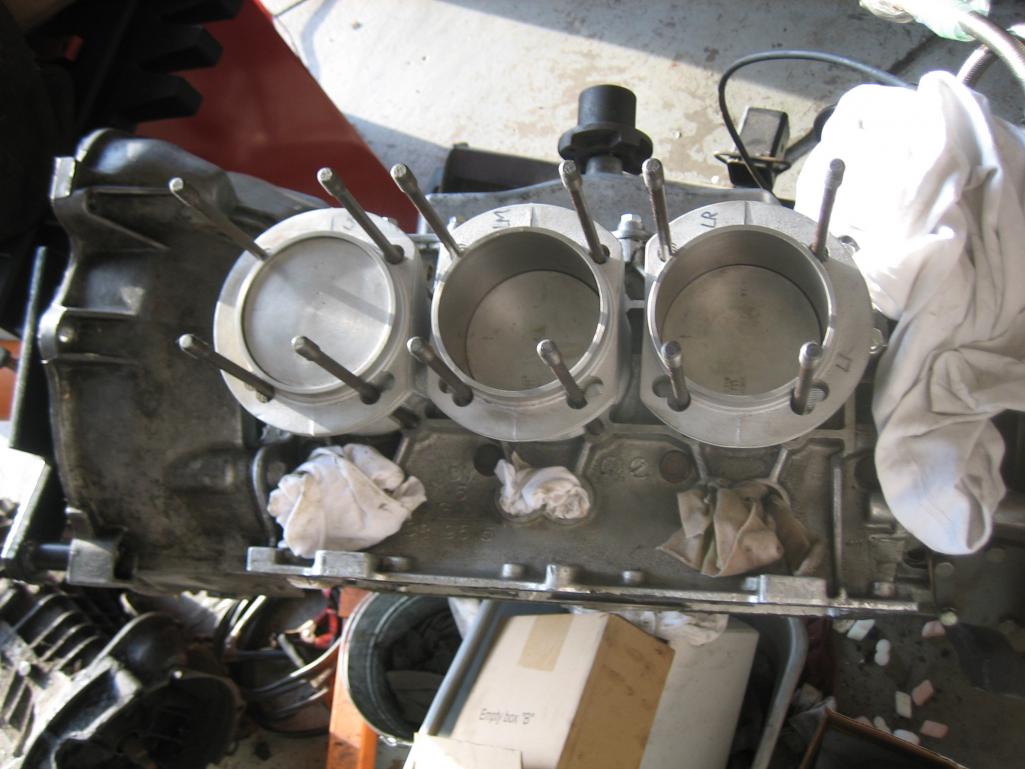
Posted by: Root_Werks Sep 12 2011, 02:29 PM
Looks good!
Back on the road soon I wager.
Posted by: Dr Evil Nov 13 2011, 09:41 PM
I had some time to think about the bus today. I am seriously annoyed with the wiring, and the last time I had it out it completely died. I am interested in just putting in a new harness and universal fuse panel. One option that I have found is at this place:
http://www.keepitcleanwiring.com/products/wire-harness-kits/
They dont have a specific set for the bus and the only problem I can see is that the engine stuff will have to be lengthened to match the placement of it in the back. PRO15 is supposed to be the kit I need. Who knows.
I also will be installing a plug to the engine so that the whole engine wiring can be run through one plug to the frame. This will clean the compartment and allow for quick install and removal.
If I could only afford a Raychem IR gun I would be set
Anyone else know of universal fuse panel vendors? I could just do the fuse panel and not all of the wires.
Posted by: kg6dxn Nov 13 2011, 10:51 PM
The only problem with a universal kit is most German cars use isolated left and right side lighting. Most universal kits do not. They are wired like an American car. If you can buy just the fuse panel and fix you harness, you will be better off.
Posted by: Dr Evil Nov 15 2011, 08:40 PM
The tube under the bus that the wiring runs in is rusted through on the bottom and a chaffing hazard for my wires. I am thinking of replacing with galvanized conduit, but this would require cutting the harness. I did find fuse panel only solutions, and may just rewire it myself. The wiring for the universal kit would not be too hard to adapt, but at $300 I think I can do as well with a more perfectly fit kit.
I need to get the wiring done before the big freeze. Then I can put the engine in.
Posted by: BajaXJ92 Nov 15 2011, 09:17 PM
You still got that set of wheels and tires we talked about at Scott's shop?
Posted by: Dr Evil Nov 16 2011, 06:32 PM
Ya. Please come and get them
Posted by: BajaXJ92 Dec 28 2011, 12:59 PM
Update?
I need motivation!
Posted by: lonewolfe Dec 28 2011, 01:23 PM
Hey, it is nice to see another bus owner on here. I have a 1970 tintop Westy that I've been restoring. The problem with that project is that I bought my first 914 back in September and the bus has not been touched since. I have a 2110cc stroker to build and want to pick up a late model 6 rib transaxle to take advantage of the additional power for hwy driving. These old busses make great parts haulers and weekend escape vehicles.
Posted by: Dr Evil Dec 28 2011, 02:22 PM
The latest that I did was to start hogging out the other head. When that is done, smoothed, CCed, then I will assemble the engine and begin the fab on the CIS system. Also, my compressor is putting out water so I need to drain it and install a water trap before I proceed.
The Moto Guzzi engine needed some love as I was running out of places to put parts and decided that "together" was a better place than most.
Soon, very soon
Posted by: bulitt Dec 28 2011, 02:29 PM
Painless wiring offers universal kits, 8, 12, 18 circuits. Available through summit racing.
Posted by: Dr Evil Jan 21 2012, 08:56 PM
Got busy working on the second bus head tonight. I hate doing this head work, but it is worth it in the end. I just keep going into the garage and sanding/polishing the chambers....as soon as they are done I can get it together. I hope I didnt goof up the seats by hitting them with the grinder
Attached thumbnail(s)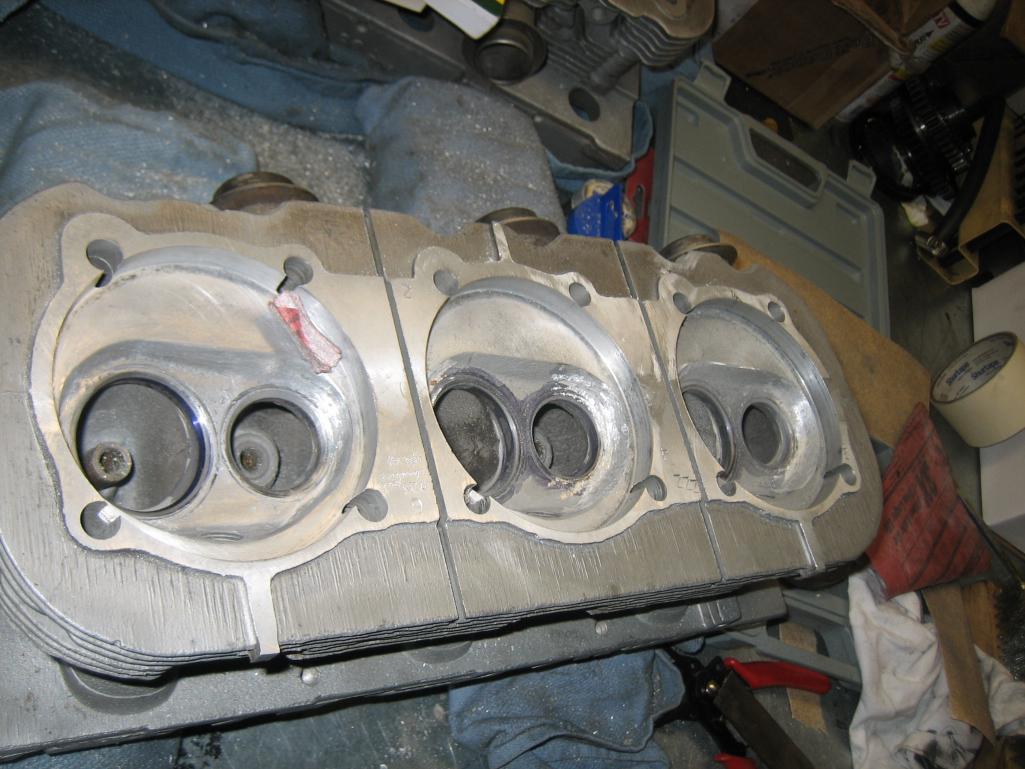
Posted by: Dr Evil Jan 23 2012, 06:28 PM
DAMNIT! In my haste to finish this last head to get the engine to the assembly stag, I slipped with the grinder and boogered at least 2 seats. This is gonna such. I know they need reground, then the springs will have to be adjusted. Or, they will have to be replaced (ouch). Maybe I should get my own cutters for this? Maybe I should get my head examined?
Posted by: Dr Evil Jan 27 2012, 10:18 PM
So, the head was mailed today to the Corvair Ranch for valve seat exam/repair and final assembly. I was tired of messing with it. I will finish the CC of it when it gets home and assemble
Posted by: scotty b Jan 27 2012, 10:21 PM
butcher
Posted by: rick 918-S Jan 27 2012, 11:55 PM
Hey doc, Two words. Family Practice. Your skills as a surgeon worry me.
Posted by: Dr Evil Jan 28 2012, 09:34 AM
Blah blah.
When I did the other head I left the old valves in to protect the seats....I thought I was more skilled and didnt need to do that with this head ah well, its only $$
Posted by: Dr Evil Jan 28 2012, 10:05 AM
Let us pontificate on the future of a CIS system on this mill. In my research I have found at least one other individual that had attempted, futilely, to put both a Corvair engine and CIS into his bus. This resulted in no improvement, crappy running and decreased, abysmal fuel mileage.
Attached image(s)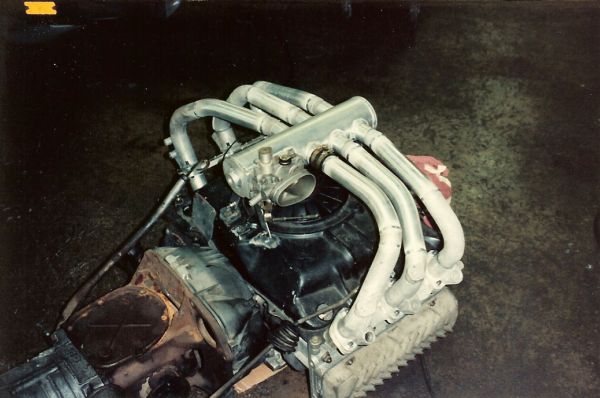
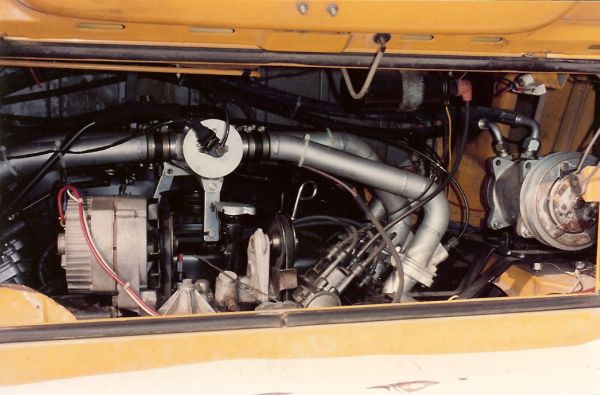
Posted by: Dr Evil Jan 28 2012, 10:05 AM
Why do you think this set up didnt work?
Posted by: rick 918-S Jan 28 2012, 10:27 AM
Hard to say from those photos but where is the fuel distributor? Biggest issue with CIS as I see it is fuel pressure and learning how to set it at the WUR. It took me years (really) to figure out why mine was all over the map. Vaccum is also an issue.
REfresh me on what parts you are using for your CIS. 911 stuff?
I never worked on CIS before my Alien build. There are three guys in town that have CIS experience. Two of them are the exclusive Volvo guys. The other guy is a Volvo, Ferrari and VW guy. I couldn't even pay these guys with an open check book to help me or take the car in to tune it. If I can help you I will. CIS is easy once you get the fuel pressure set.
PS: don't bother messing with the adjustment at the fuel distributor. It is for fine tuning only not for fuel pressure. Every CIS guy here in town came out to the car with a long allen wrench and dicked with the dizzy adjustment only to foul it up more than it was when I brought it to them.
Posted by: Dr Evil Jan 28 2012, 10:30 AM
All of the parts except the housing as I will make my own. Making my own down tubes, too. I will be using the Volvo distributor housing.
Posted by: rick 918-S Jan 28 2012, 10:36 AM
All of the parts except the housing as I will make my own. Making my own down tubes, too. I will be using the Volvo distributor housing.
Are you using 4 intake runners or 6? How are you using a Volvo Dizzy if it's 6 runners? Bertone V6 engine stuff?
Posted by: Dr Evil Jan 28 2012, 11:04 AM
My system consists of:
Stock 3.0 CIS from 911
Distributor mount/air box from Volvo - remote mount
Heads are as in the pic, individual ports
Aftermarket fuel pump with appropriate pressure and flow rating
Thanks for the call, Rick. I have considered that the guy whose engine is pictured above did not know exactly what he was doing.
My intentions are to make a plenum that is closer to the fan, and shorter down tubes. I am not sure where the injectors are going, yet, but this guy may have them too far away from the valve which would cause a rich running condition.
Things that I considered with this guys report, if all pressures and plumbing were correct:
- Injector location
- Plenum and down tube volume (his look large). Too large and response is slow, too small and response is erratic.
- System used. I am not sure what he got his CIS out of.
Posted by: Dr Evil Jan 28 2012, 11:18 AM
Some more ramblings about the engine:
Stock CR for a corvair 140 is 9.25:1
I was running 7.25:1 and it was kicking ass, but running rough. Now I am manning up and raising the CR to stock or there about.
Bore 94mm
Stroke 74.6125mm
Head gasket .04in
Deck height .038in (I need to verify. I cant find my notes, and my calc has .08 in the collumn )
Chamber 50cc
Pistons are flat top
In my research I have found that the magic # for higher CR and no detonation is a clearance of about .04" between quench and the piston top.
Posted by: scotty b Jan 28 2012, 08:47 PM
Problem #1 :
he used a 924/audi t.b. that was designed for a 2.0 liter 4 cylinder
Problem # 2 :
The runners a REALLY long for a 3.0+ engine thus creating more top end h.p. than low end that a bus really needs
Problem # 3 :
The T.B. is effectivey at a 180* bend to the runners thus creating an extremely awkward flow into an already lenghty runner
Problem # 4:
In my experiecne most people DO NOT know hw CIS works and DO NOT know how to set it up and " tune it "
Posted by: rick 918-S Jan 28 2012, 10:22 PM
Sheeze! That's what me and Doc were talking about today. That plemium is too small and the throttle body is in a very weird place. The 928 is directly under a very large plenium aith a direct connection to the fuel dizzy.
Posted by: strawman Jan 28 2012, 11:56 PM
Hey Doc --
One other thing to consider with CIS is the fuel lines. I shoehorned a Golf Mk2 1.8 engine into a factory diesel Vanagon Westfalia many years ago. I was warned that the fuel lines MUST be made using very high quality SS-jacketed material to stabilize the CIS "pulses." Apparently, cheapo lines that bulge can wreak havoc on the system. I can't remember what company I paid (dearly!) to make those longer-than-stock lines, but I never had any problems with the setup. YMMV.
Geoff
Posted by: Dr Evil Jan 29 2012, 12:18 AM
Problem #1 :
he used a 924/audi t.b. that was designed for a 2.0 liter 4 cylinder
Problem # 2 :
The runners a REALLY long for a 3.0+ engine thus creating more top end h.p. than low end that a bus really needs
Problem # 3 :
The T.B. is effectivey at a 180* bend to the runners thus creating an extremely awkward flow into an already lenghty runner
Problem # 4:
In my experiecne most people DO NOT know hw CIS works and DO NOT know how to set it up and " tune it "
Good eye, Scott. I would not have know that about the TB. Mine will likely be better. With you and Rick, we all agree that most dont know how to tune the CIS. That book you lent me helped me understand a lot so that this should be a no brainer.
Posted by: Dr Evil Jan 29 2012, 08:54 PM
Every time you let a project linger, you loose things I did some work today on the engine, sort of. I made a fixture to hold the barrels in place today so I can work on the other side while I await the return of my other head.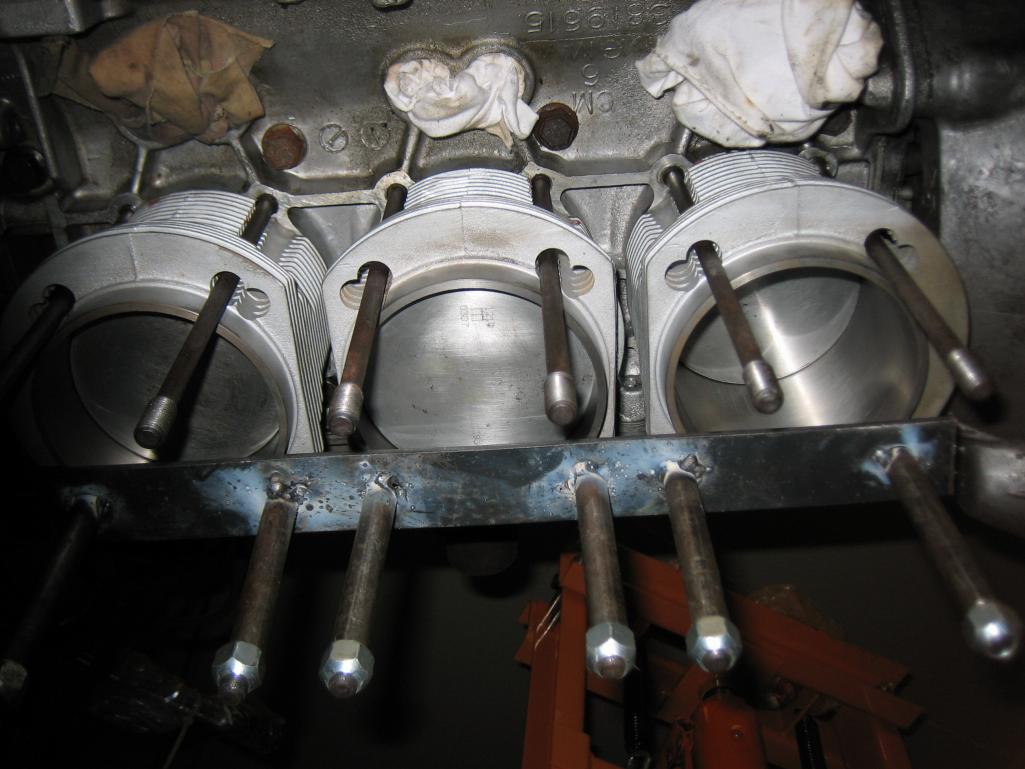
I got the other 3 pistons cleaned up and then I could not find the damn clips for the rod pins Looks like I will have to source some more
Posted by: Dr Evil Jan 31 2012, 05:58 PM
Happy day!
I found my clips for the pistons so I installed the P/C. I checked the new deck height and it is 0.063". I rechecked a chamber on the head and it was 50cc. I installed the head and began working the rocker geometry out
Attached thumbnail(s)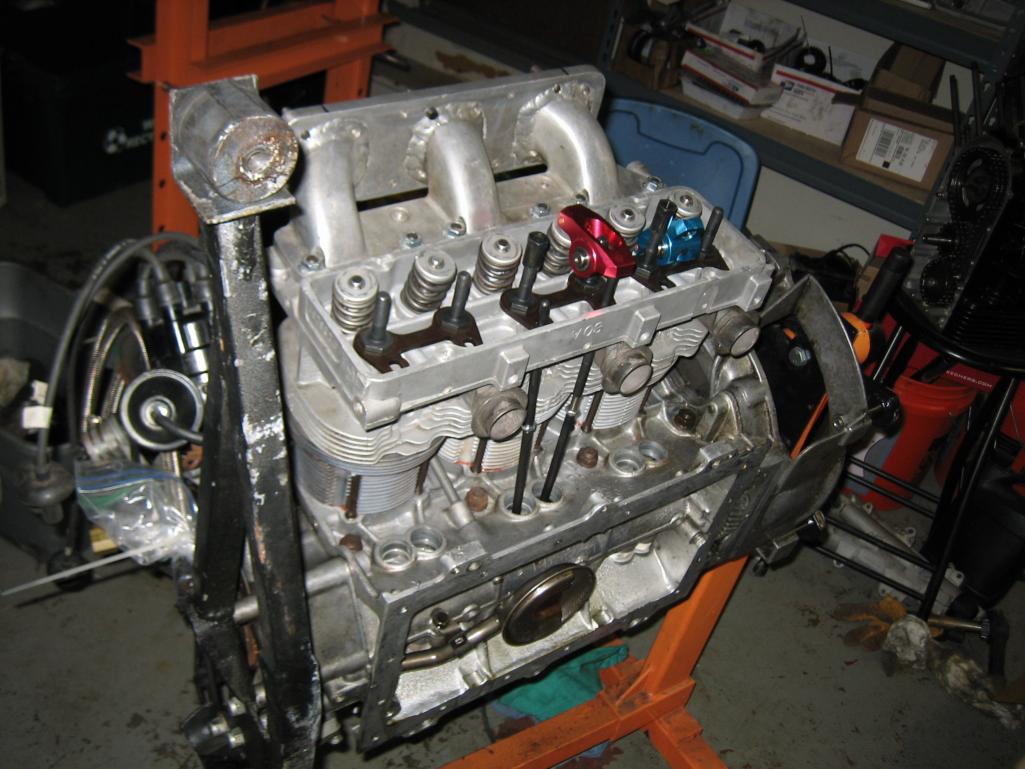

Posted by: Dr Evil Jan 31 2012, 06:00 PM
After very little trial and error, the pattern was perfect and the rod length locked in Now I need to wait for the other head to come back, and to send these rods off to be measured and matched. They are longer than stock by a bit.
Attached thumbnail(s)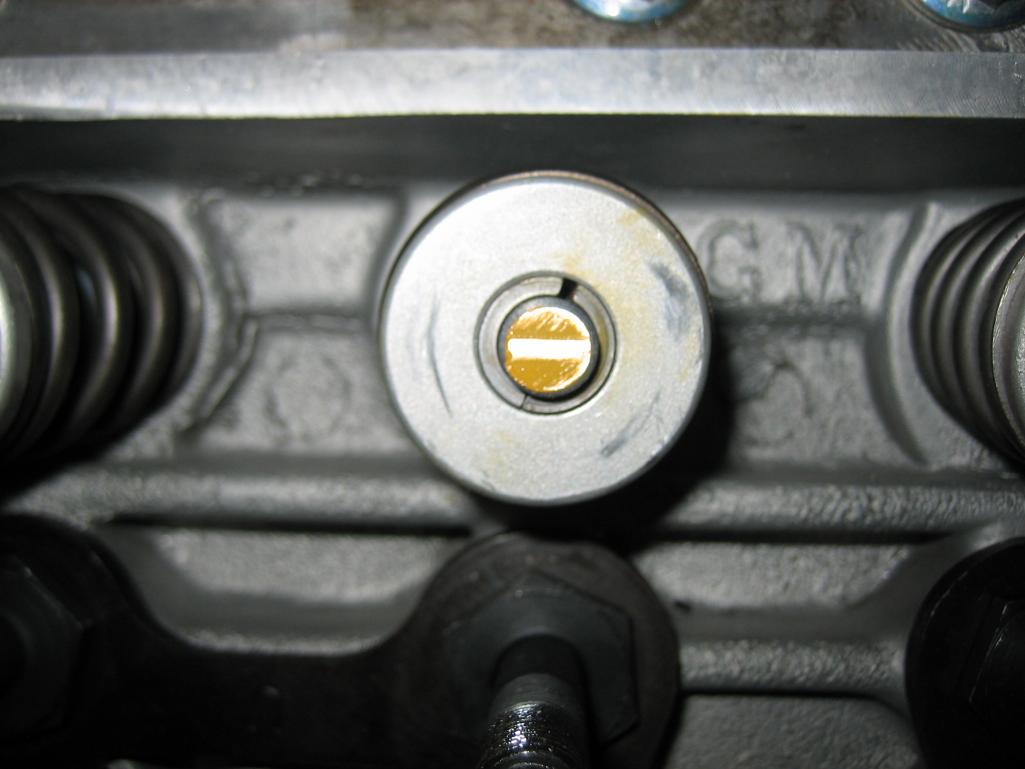
Posted by: Dr Evil Jan 31 2012, 06:02 PM
So, for those of you keeping score at home, here are the stats:
Bore = 94mm
Stroke = 74.6125mm
Deck = 0.063"
Chamber volume = 50cc
I am leaving the head gaskets off as they drop the CR lower than I want (<9). With no head gasket the Cr = 9.47:1
Posted by: rick 918-S Jan 31 2012, 06:21 PM
The CIS will like the compression. BTW: do you have an accumulator? You need to use an accumulator. That's what reduces the pulse in the fuel system. I used one from a Volvo turbo CIS car.
Posted by: Dr Evil Jan 31 2012, 09:39 PM
Yup, I am using a NOS Volvo one. Way cheaper than the Porsche part, same characteristics.
Posted by: messix Jan 31 2012, 09:52 PM
that engine in the bus was a wild assed guess on the intake runners and plenum!
the runners too big in dia. and long would make it fall on it's face across the board, the small plenum will make the runners "fight" each other in pulses in harmonic phases thru the rpm range.
it would be best to use a similar sized engine to model the runners and plenum on.
Posted by: Dr Evil Jan 31 2012, 09:58 PM
The 3.0 CIS system that I am using will pretty much be mimicked. Right size, right parameters. I will be making a bigger, rectangular plenum with shorter down tubes. I am wondering if it is worth it to put trumpets inside the airbox leading into each down tube. This is supposed to help air flow immensely.
Posted by: messix Feb 1 2012, 12:14 AM
if the point of entry for the runner tubes are not radiused you should do something to smooth the air entry to the runner.
Posted by: Dr Evil Feb 1 2012, 07:50 AM
The adapters to the head are pretty ugly in their transition. I will post a pic when I get home to show you.
Posted by: Eric_Shea Feb 1 2012, 06:30 PM
Eric Shea and Jeff Hailpern will be done with their cars before this thing is finished.
Posted by: messix Feb 1 2012, 07:04 PM
this? how does it mate to the plenum?
Attached image(s)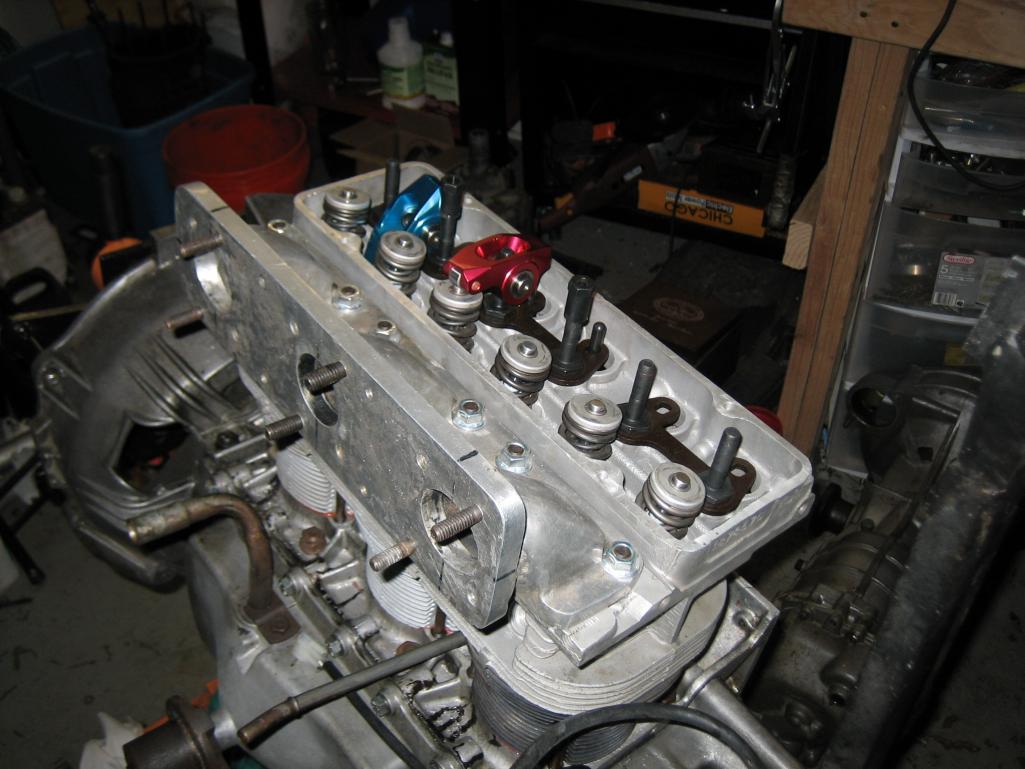
Posted by: Dr Evil Feb 1 2012, 07:55 PM
Here are some close ups of the intake adapter. Basically, there is a plate welded onto the top with round holes that transition immediately into square.
I also took a close up of the mating surface to the head. It shows that you can used square O-rings, but I dont know where to get such things. I will likely just cut out gaskets from gasket paper.
Note, this adapter is not the one used in the other guys failed attempt. His were welded in pipes so had a smoother transition.
Attached thumbnail(s)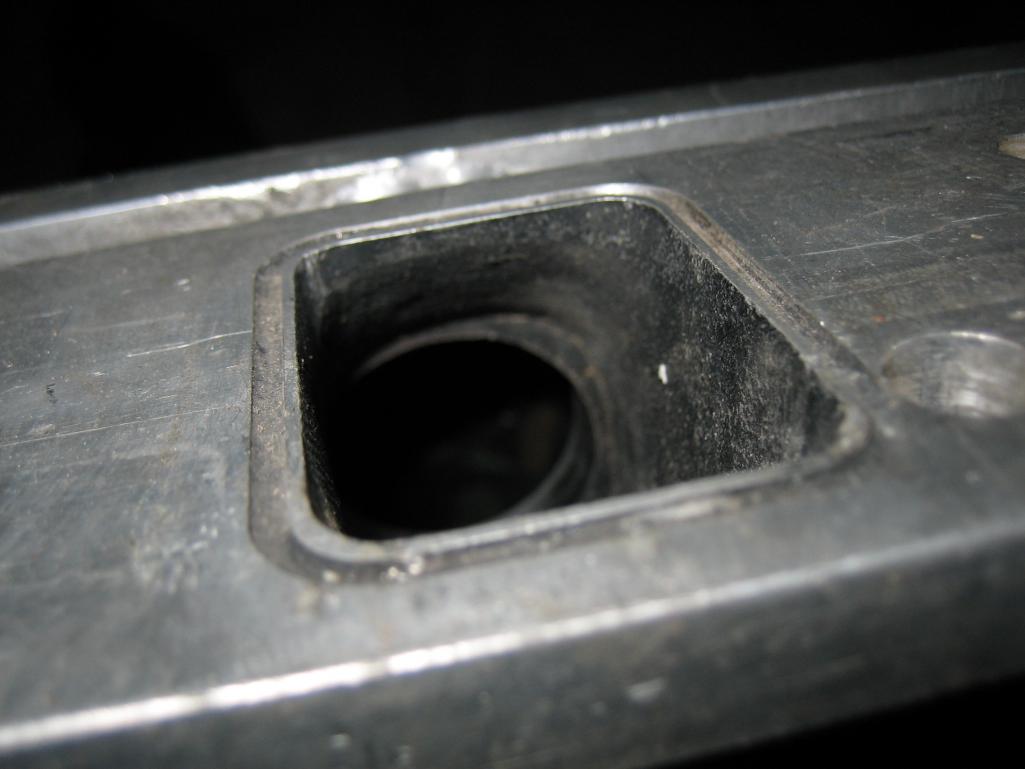
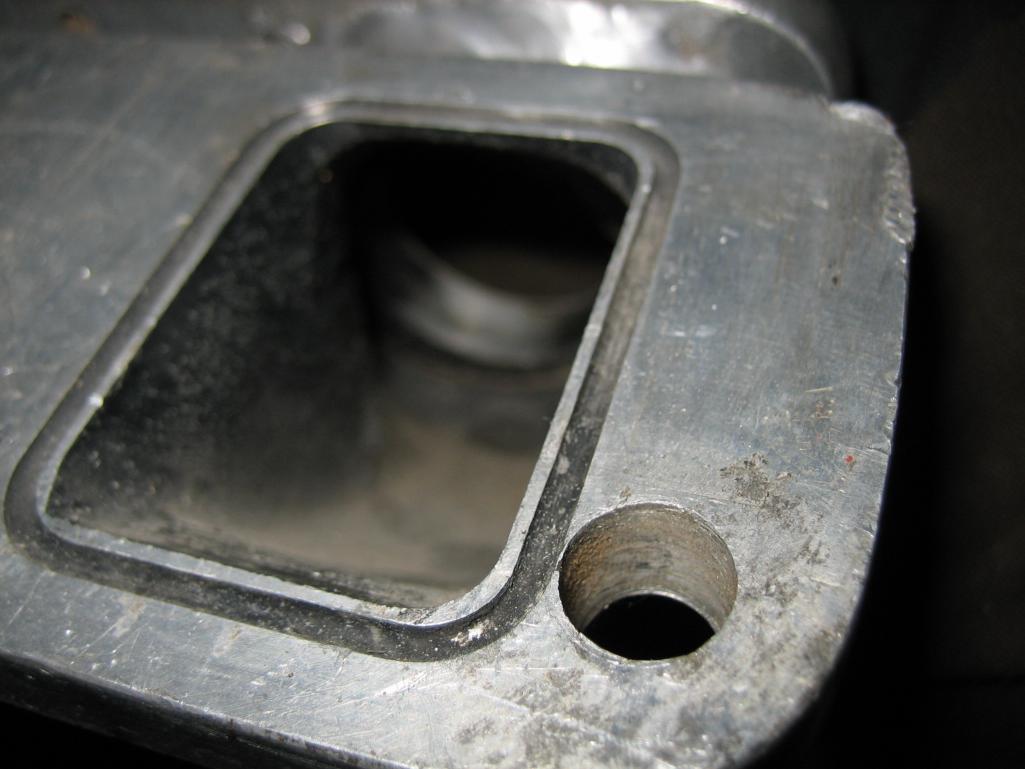

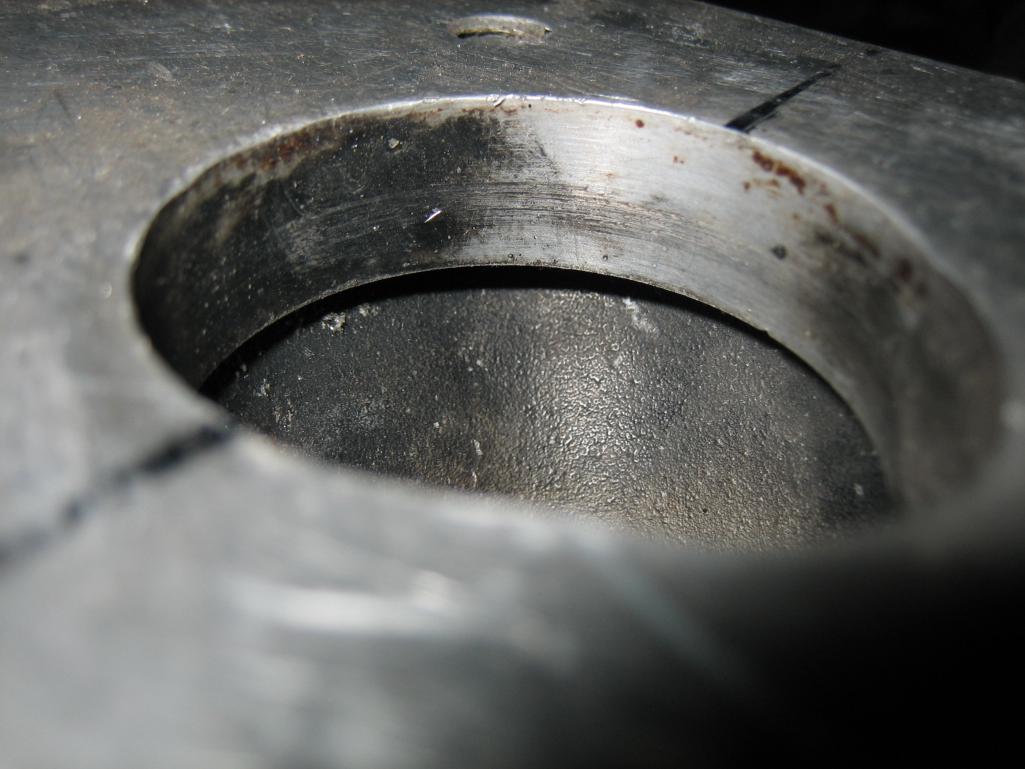
Posted by: Dr Evil Feb 1 2012, 07:58 PM
Eric Shea and Jeff Hailpern will be done with their cars before this thing is finished.
No need to be mean. I dont know how close you guys are, but I am really close
What do you mean finished? I just want it on the road.
Posted by: Dr Evil Feb 1 2012, 08:02 PM
How about some awesome news?!
After doing the calculations on the adjusted rods, and converting over to the hydraulic stock lifters, the correction is that the rods I need to use needed was .1115" shorter.....the stockers fit! Now I just need my head back so I can finish assembly
Posted by: Dr Evil Feb 2 2012, 09:33 PM
Today finds me with half of an engine done I am mixed about this
I love these roller rockers I got them because they are cool, and they should cut down on heat and valve-train wear. . 
I also made my own gaskets for the intake manifolds out of a roll of gasket paper I had. Came out pretty nice
Attached thumbnail(s)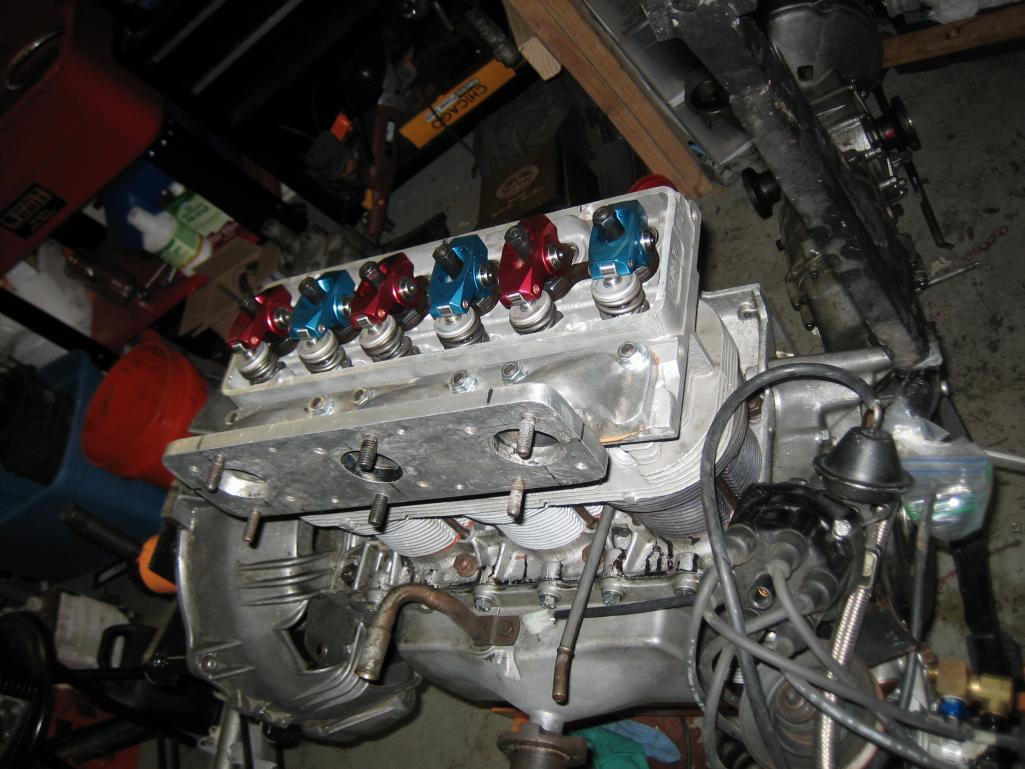

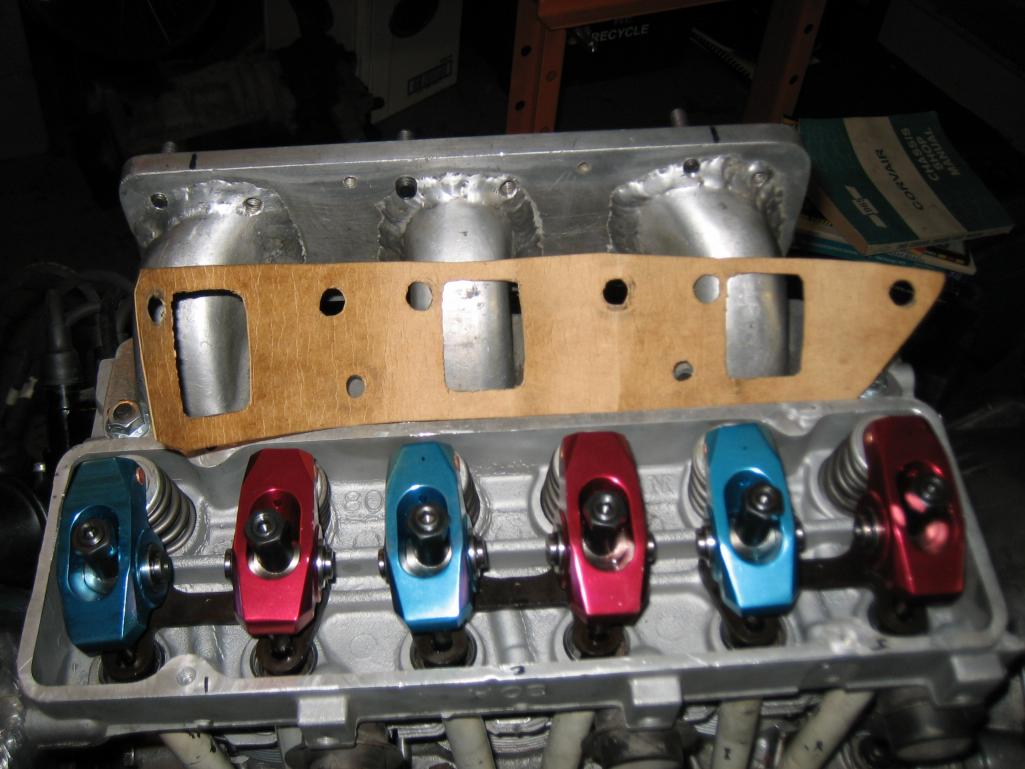
Posted by: Dr Evil Feb 2 2012, 10:00 PM
Eric Shea and Jeff Hailpern will be done with their cars before this thing is finished.
Suck it, E-Hole!
Posted by: Dr Evil Feb 3 2012, 06:24 AM
I am fighting the urge to use my mega-jolt on this engine. If I had it programmed with advance curves already I would do it, but I dont so I would have to do a lot of extra research. Maybe I can install it later when it is running
Damn feature creep.
Posted by: KELTY360 Feb 3 2012, 09:10 AM
Damn feature creep.
Not surprising after 57 pages and 1133 posts that you'd make that comment.
If you think feature creep is a problem now, just wait til when you start outfitting it for actual travel.Nice progress Doc, heads and intake look great!
Posted by: rick 918-S Feb 3 2012, 10:47 AM
Dirk Wrights Disease
Posted by: Vacca Rabite Feb 3 2012, 05:32 PM
Damn feature creep.
Dude, your whole automotive life could be described as "feature creep." It is not surprising that it has bled over to this facet of your project too...
Zach
Posted by: MDG Feb 3 2012, 05:48 PM
You know what would be cool . . . if you had Scotty paint it red and black like your logo.
You could program your mega-jolt while he's doing that.
Posted by: balljoint Feb 3 2012, 07:33 PM
What? And paint over the airbrushed mural of the buxom broad in the steel bustier and teh flaming sword? Scotty spend an entire weekend on those areoles! No way they just get painted over!
Posted by: MDG Feb 3 2012, 08:06 PM
. . . and teh flaming sword?
so . . you're channeling RealRed now?
Posted by: scotty b Feb 3 2012, 08:18 PM
..
Attached image(s)
Posted by: partwerks Feb 3 2012, 10:54 PM
A friend of mine has something that I thought he said they only made like 11 of them. I think he called it a DK10?? DK10.rtf ( 431.4k )
Number of downloads: 181
DK10.rtf ( 431.4k )
Number of downloads: 181
Posted by: Dr Evil Mar 11 2012, 08:31 PM
One side of the engine is done today. The aluminum is ugly, but I had to do a lot of building up to do, and subsequent grinding. Eventually, I had to leave some globs on as the material was too thin. New injectors and hardware are installed
Attached thumbnail(s)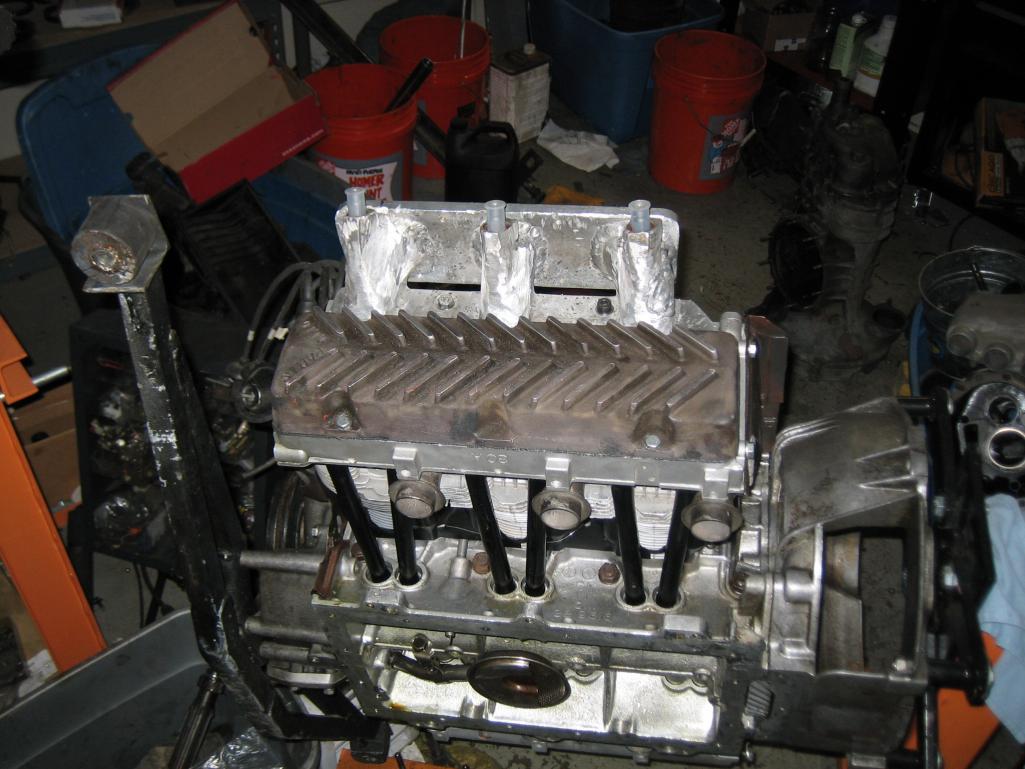
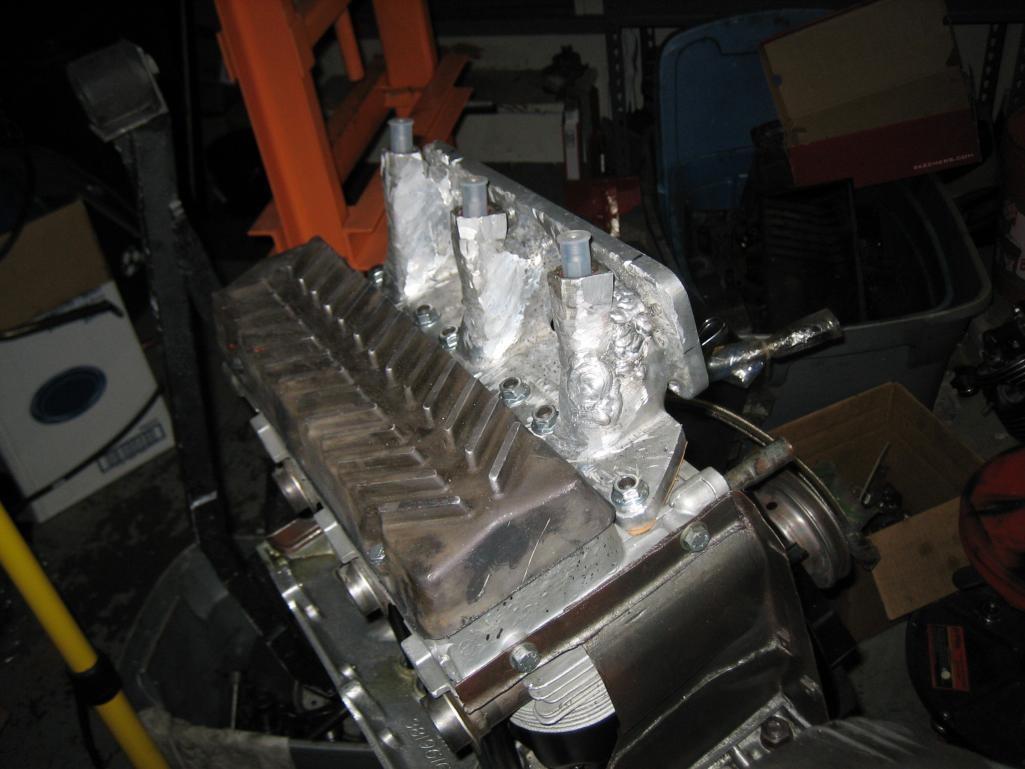
Posted by: Dr Evil Mar 11 2012, 08:37 PM
Here is a link to the agonizing design of the CIS system
http://www.914world.com/bbs2/index.php?showtopic=167036
Posted by: Dr Evil Mar 11 2012, 09:57 PM
So, one of the design things needing to be addressed to meet the and of the month deadline for completion is how to hook the CIS box to the intake. I have been looking at Volvo air boots, but the best think I am seeing is the 924 boot here:
http://www.ebay.com/itm/Brand-New-Porsche-924-CIS-Air-Intake-Boot-Elbow-OEM-/160508669415?pt=Motors_Car_Truck_Parts_Accessories&hash=item255f0fede7&vxp=mtr
Any other suggestions? I am wishing to go from vertical to horizontal and with the 924 boot I can do this with a simple elbow
Posted by: jsayre914 Mar 13 2012, 09:47 PM
I hope you bring this to Hershey Mike, cant wait to check it out
p.s. I will try not to cut you off this year
Posted by: Jeffs9146 Mar 13 2012, 10:08 PM
So, one of the design things needing to be addressed to meet the and of the month deadline for completion is how to hook the CIS box to the intake. I have been looking at Volvo air boots, but the best think I am seeing is the 924 boot here:
http://www.ebay.com/itm/Brand-New-Porsche-924-CIS-Air-Intake-Boot-Elbow-OEM-/160508669415?pt=Motors_Car_Truck_Parts_Accessories&hash=item255f0fede7&vxp=mtr
Any other suggestions? I am wishing to go from vertical to horizontal and with the 924 boot I can do this with a simple elbow
That looks very similar to the 3.0L intake!
You can do something like I did for the Volvo intake and the welded up elbow. I cut the original intake boot and made the elbow to fit my needs! Then I clamped the cut intake to the elbow to match everything together!
Attached thumbnail(s)
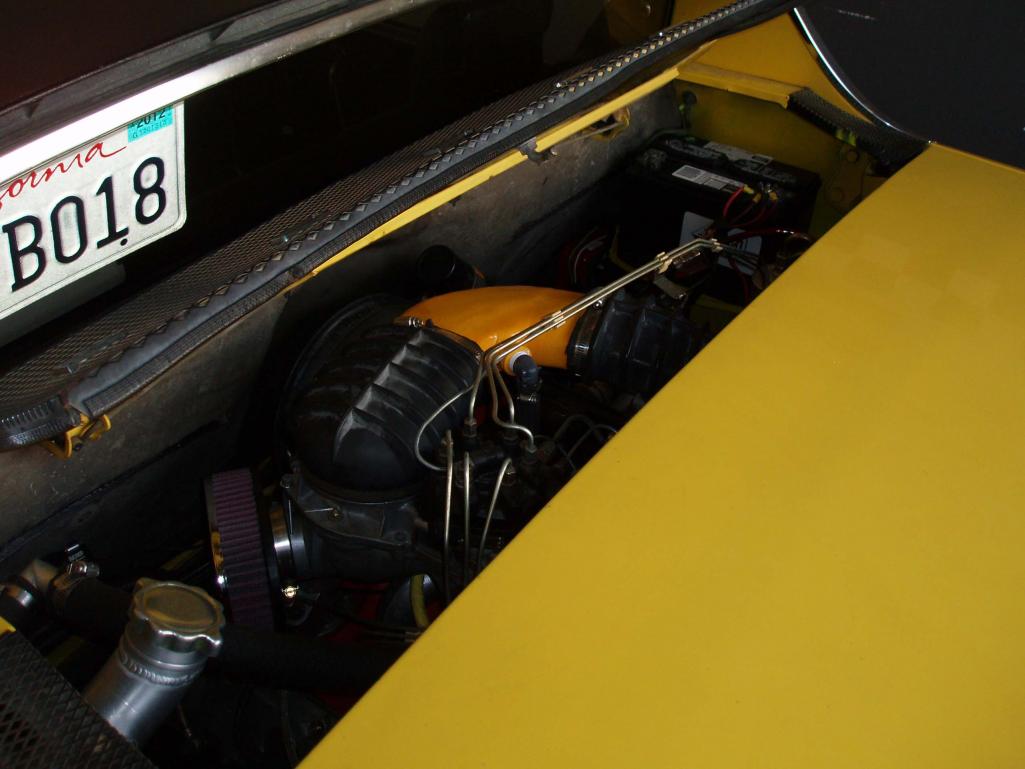
Posted by: Dr Evil Mar 14 2012, 11:06 AM
The problem I see in cutting the OE boot is that it is oval. The 924 boot is circular so plumbing the rest would be easier with standard plumbing supplies
At present, I am waiting to get the pipes for the down tubes, they ship on the 19th and this has held everything up. Once the plenum is built, i can install the engine, decide location of the airbox, measure FI hose lengths and order them, and make new engine tin while I wait. I can still make the end of the month deadline, but having to order out all of these damn parts is killing my timeline.
Posted by: Dr Evil Mar 17 2012, 12:16 AM
Back to posting in this thread. I have the heads done up and installed, the adapters welded up and installed withe new injectors and hardware, welded on the mounts for the AAR and the WUR. I diagrammed out the vacuum, fuel and electrical schematics that I will use to guide assembly and found that I am in need of 3 electrical plugs for the AAR, WUR, and CSI. I also found that I need a thermotime switch for the CSI....I think a 914 one should work so any used ones out there? You can also appreciate the billet pulleys I got to keep the belt form getting scruffed on rusty steel pulleys. Still need to keep the man crank pulley rust free and the alternator one, too.
Attached thumbnail(s)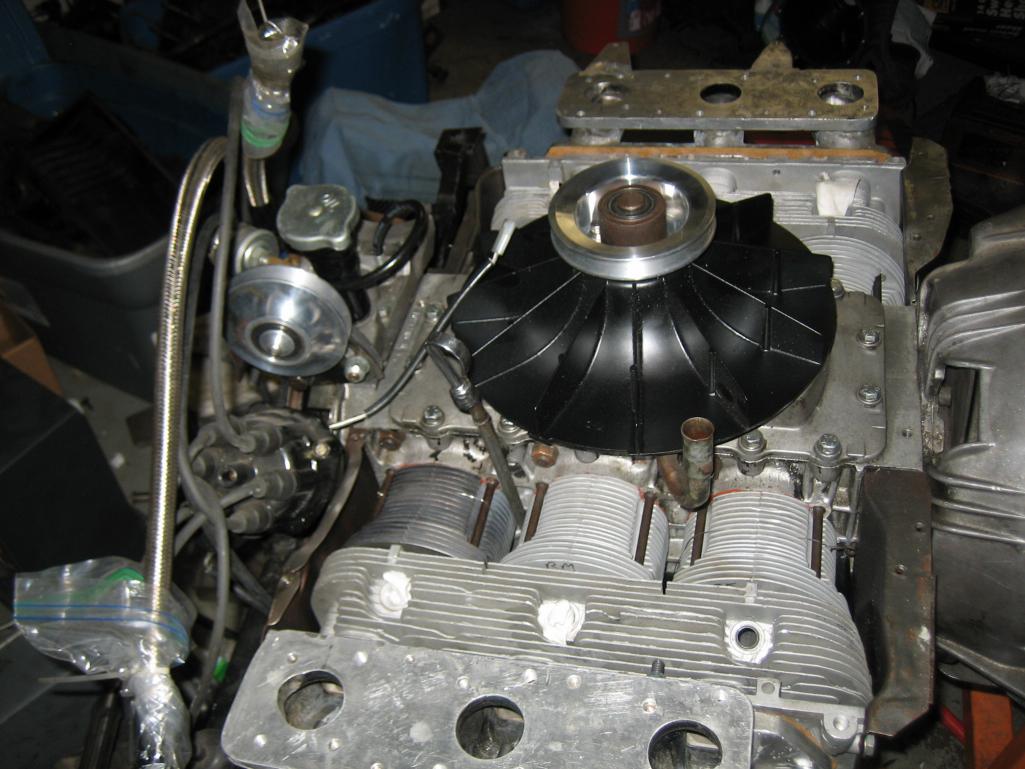
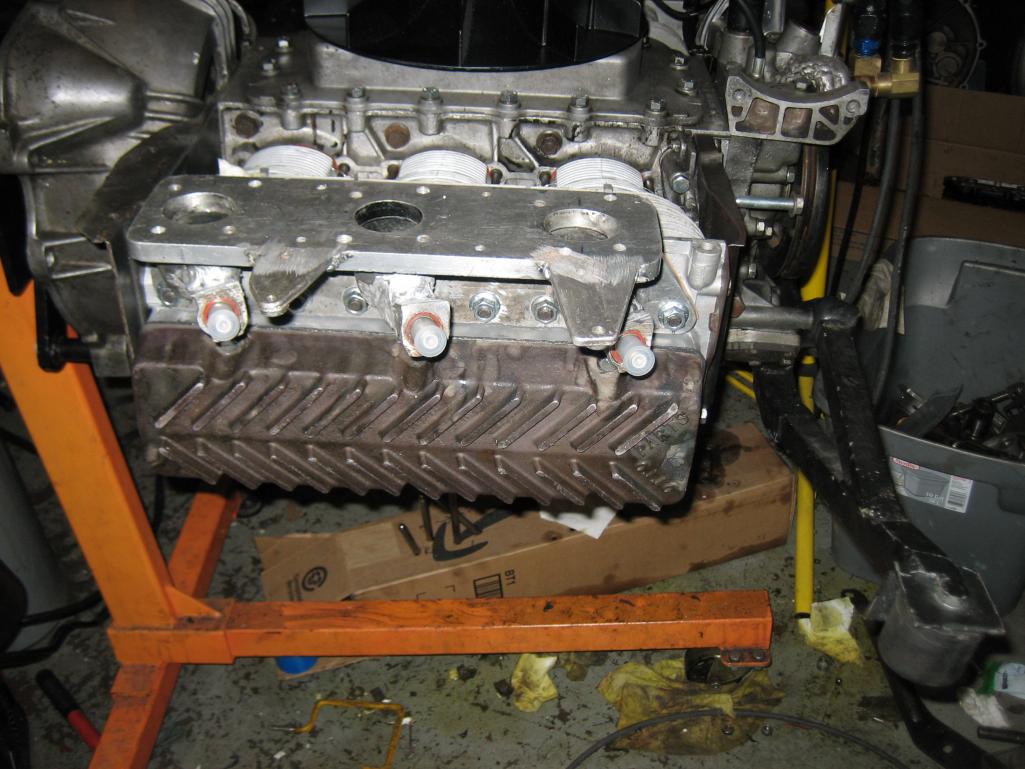
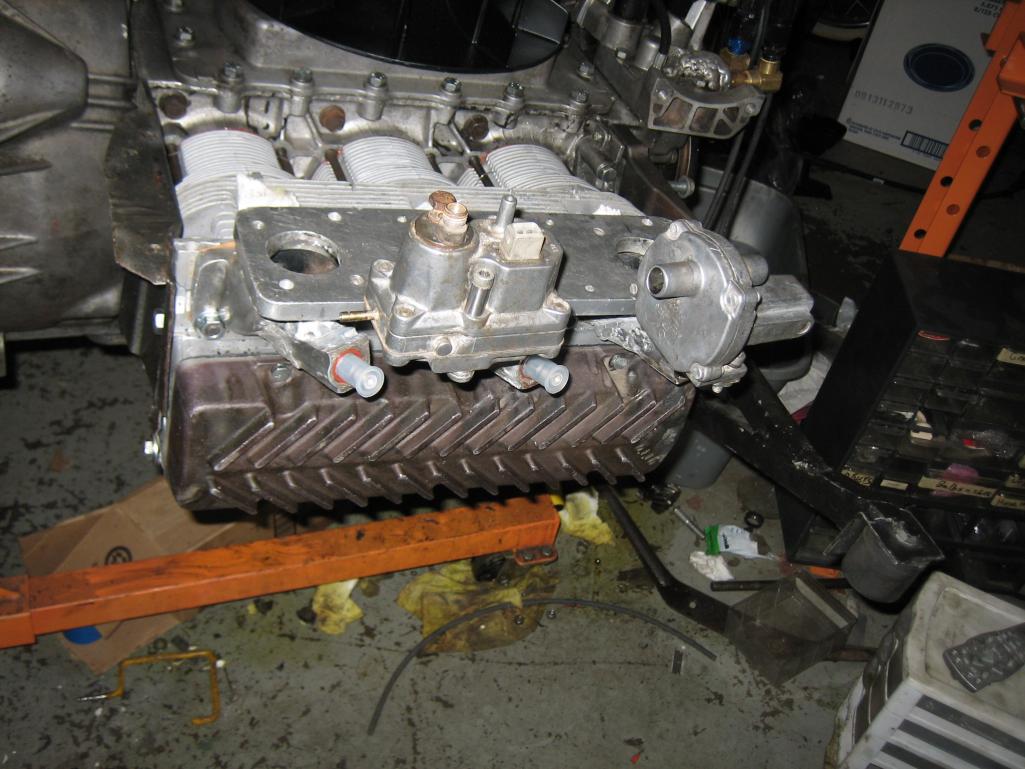
Posted by: Dr Evil Mar 18 2012, 02:06 PM
Some more victory last night with the making of the base plates for the intake system I first made my own gaskets, then I transferred the pattern onto the 1/4" 6061 Al plate and drilled out the holes. It all lines up! The down tubes are reported to ship tomorrow and I cant wait for them to get here so I can get this all buttoned up and installed for testing. 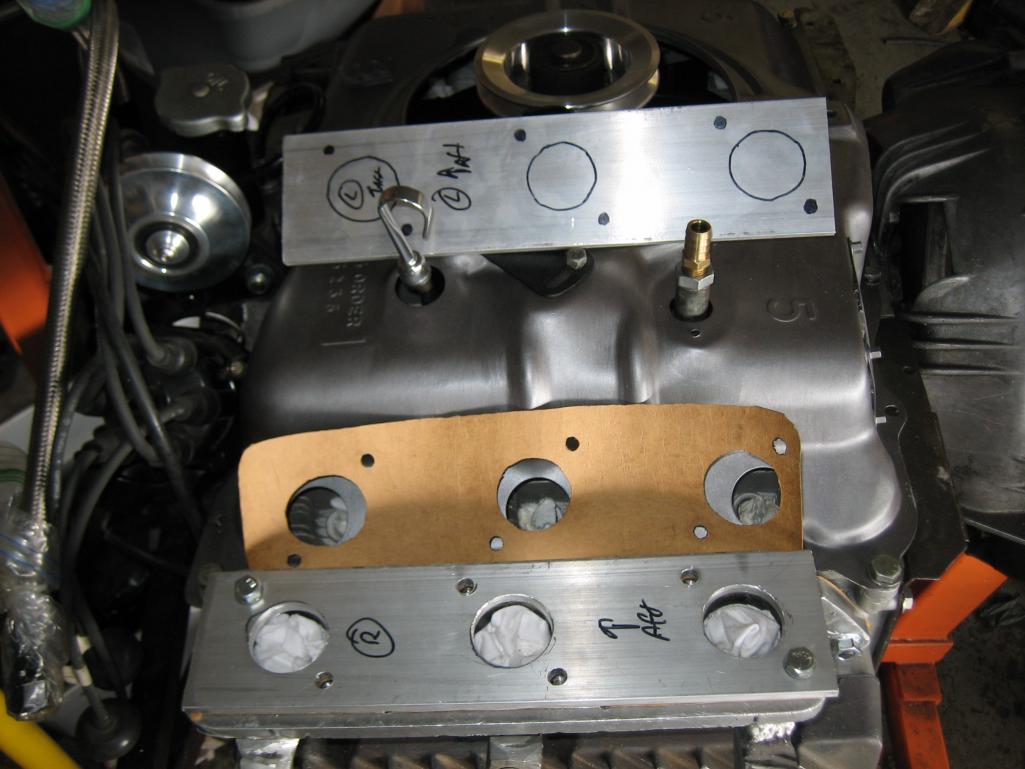
I also took a different route with the air box for the flapper and dist. I had been generously given a nice aluminum setup out of a Volvo, but the filter that would have to be used would be of the cone-style KN that would be pretty small. So, I came across a setup for a VW rabbit (I think) that uses readily available disposable filters. I also found a refresh kit with new copper washers and a gasket for the flapper assembly. Good price and looks appropriate for what I need.
Attached thumbnail(s)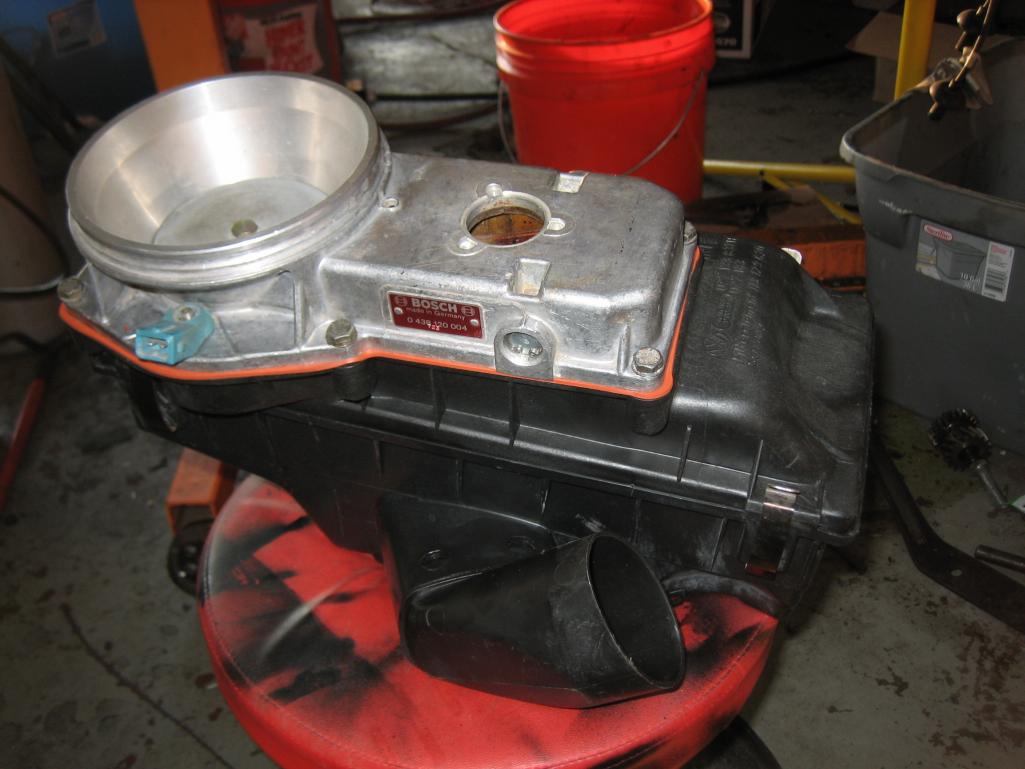
Posted by: jmill Mar 18 2012, 06:26 PM
Wonder what the wagon would look like with a 914 painted on the side.
Attached image(s)
Posted by: Dr Evil Mar 23 2012, 10:17 PM
The down tube stock showed up today and I got to work quickly after I got home....from work
Welding aluminum is difficult. I have yet to need to weld a straight line I think I finally got it dialed in. I also think that gun was not feeding uniformly so I fixed it
Attached thumbnail(s)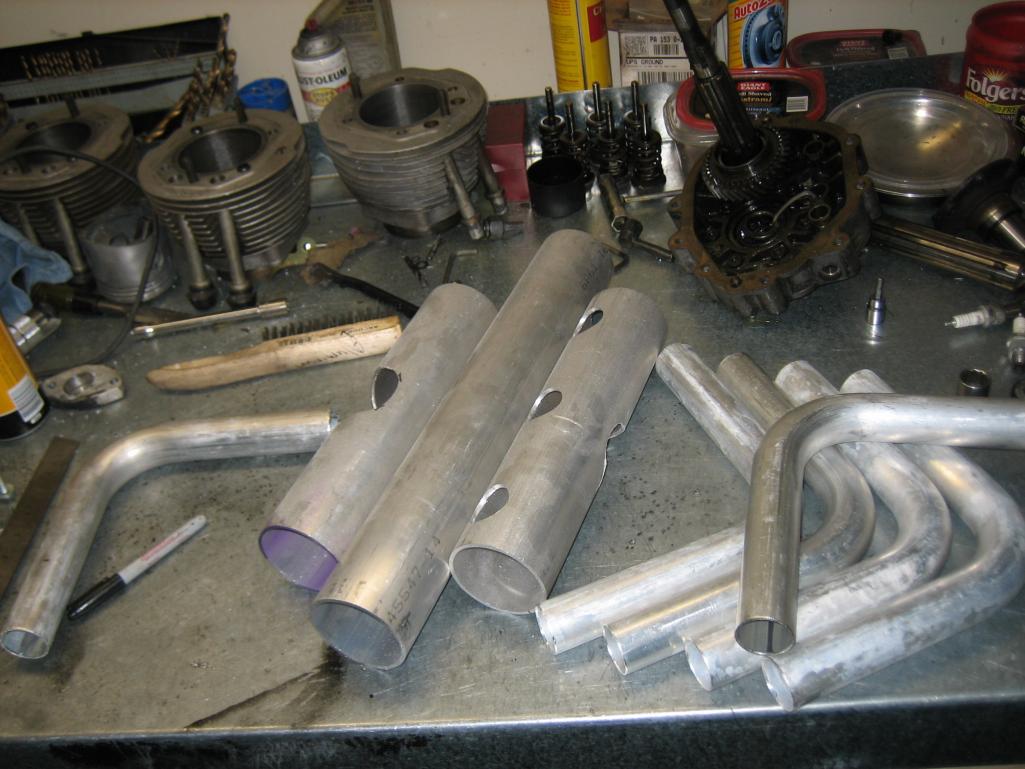
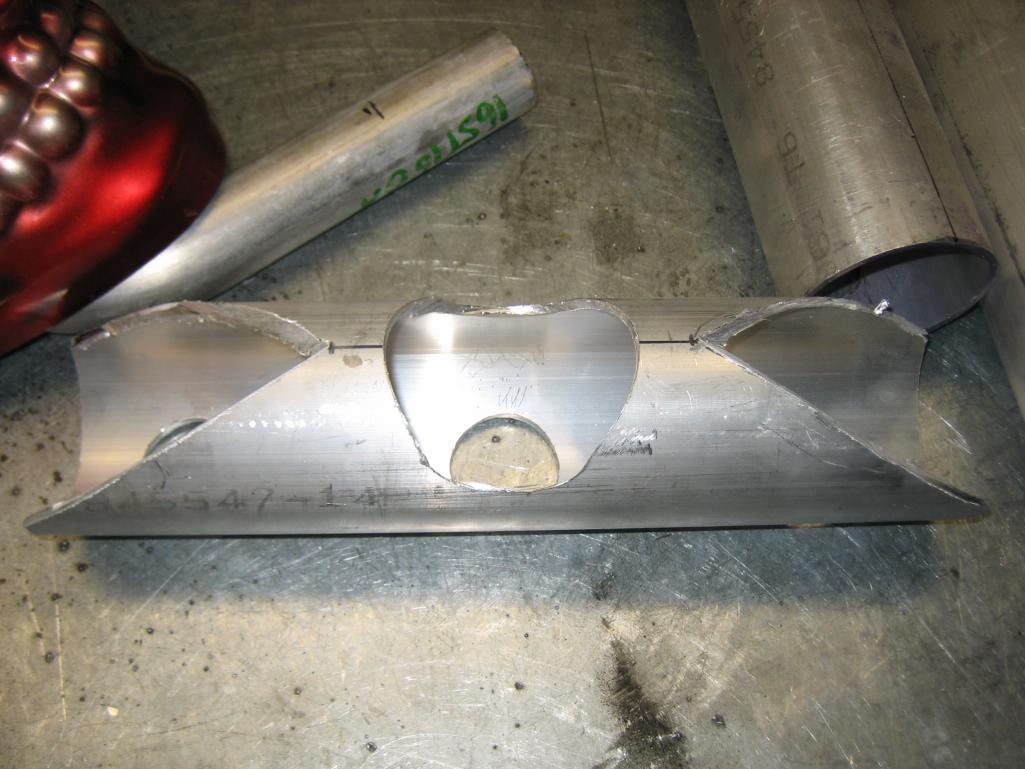

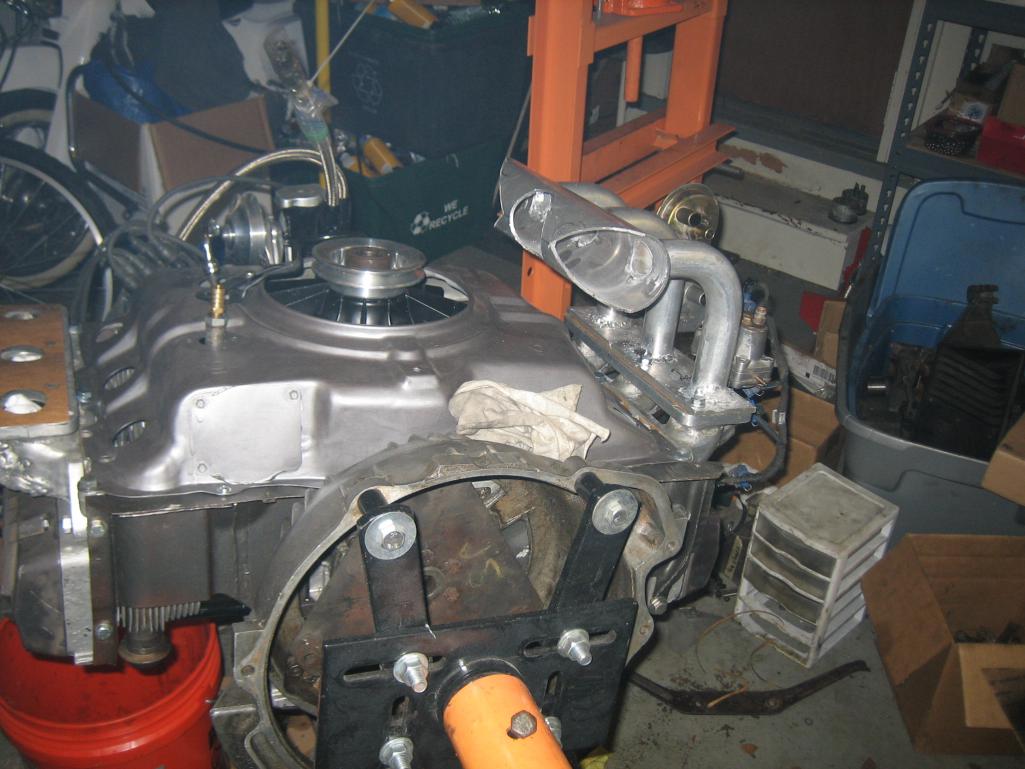
Posted by: Dr Evil Mar 23 2012, 10:19 PM
These are the last welds when I got the feed and the power correct. You have to weld fast!
Attached thumbnail(s)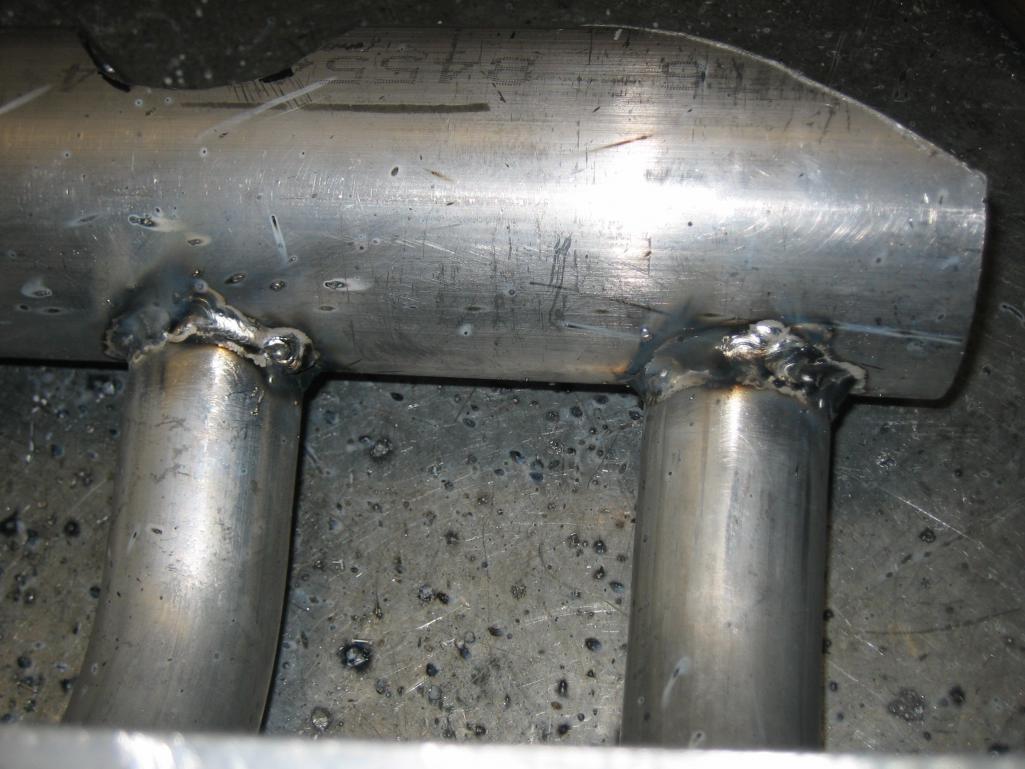
Posted by: rick 918-S Mar 23 2012, 10:34 PM
Hey Mike, Get a stainless wire brush and clean all the pipe surfaces where your welding. Use a new clean brush that you only use for aluminum.
Edit: On second look I think I can see where you cleaned the 90's
Posted by: Dr Evil Mar 23 2012, 11:11 PM
Yup, I have a brush just for this that is stainless. I cant imagine how crappy the welds would be if it didnt
The first set was a PITA as it would randomly burn through. I think I was welding too much at a time. The metal would flow through the burn through and make nice, HUGE boogers that I had to dremel out If I could weld better, I would be done
Posted by: brer Mar 24 2012, 01:28 PM
good work mike! took me awhile to get the hang of it.
when you can weld a beer can back together you're getting good.
Posted by: Dr Evil Mar 24 2012, 08:54 PM
I started on the hard stuff with the smaller tubes. I just finished up the large tubes and my welds were going awesome! Then I ran out of wire I put my other role of 4043 in and it kept misfeeding.....it was .030 and the feed wheel was .035. Off to the store to get a new spool and all they had was 54XX or something. Welded very different. Nothing a sanding disk couldnt fix
I am taking a break for the moment to post pics
Attached thumbnail(s)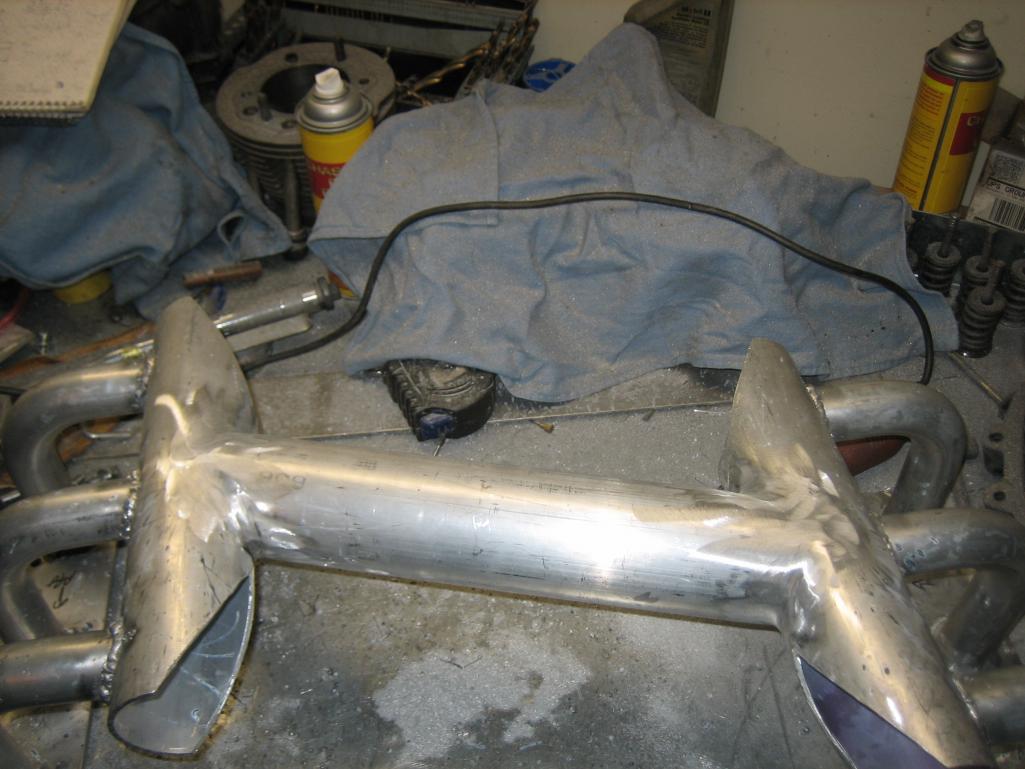
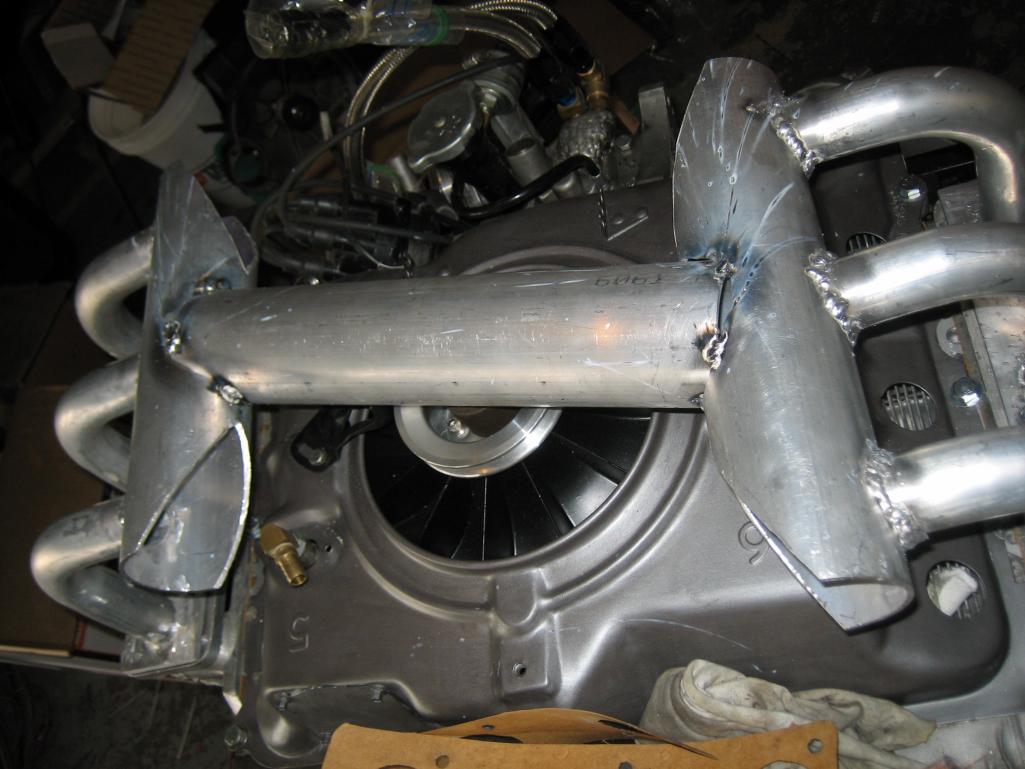
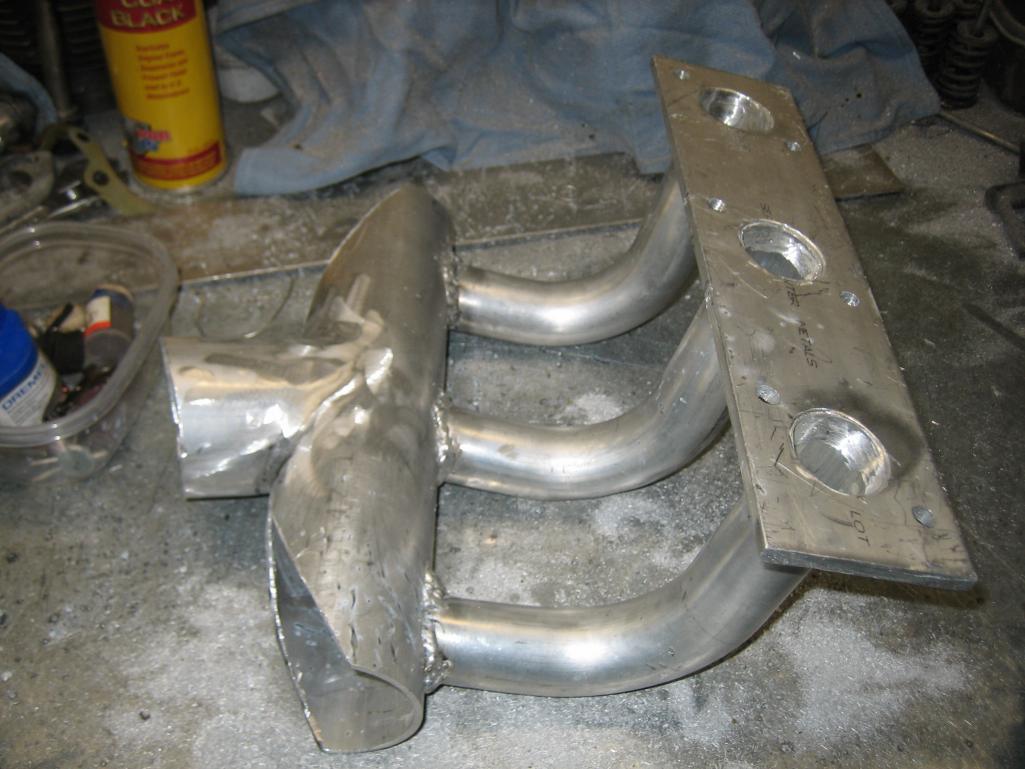
Posted by: Dr Evil Mar 24 2012, 11:21 PM
Alright, I am calling it a night. I am out of sanding disks anyway. I got one side almost completely done. I had to re-weld the one side as I noticed cracks when I hit it with the hammer (good test). Added material and ground it down again. All that is left on this piece is to throw a bunch of nuts in it and shake it around to break loose any metal boogers that might have formed with welding.
Attached thumbnail(s)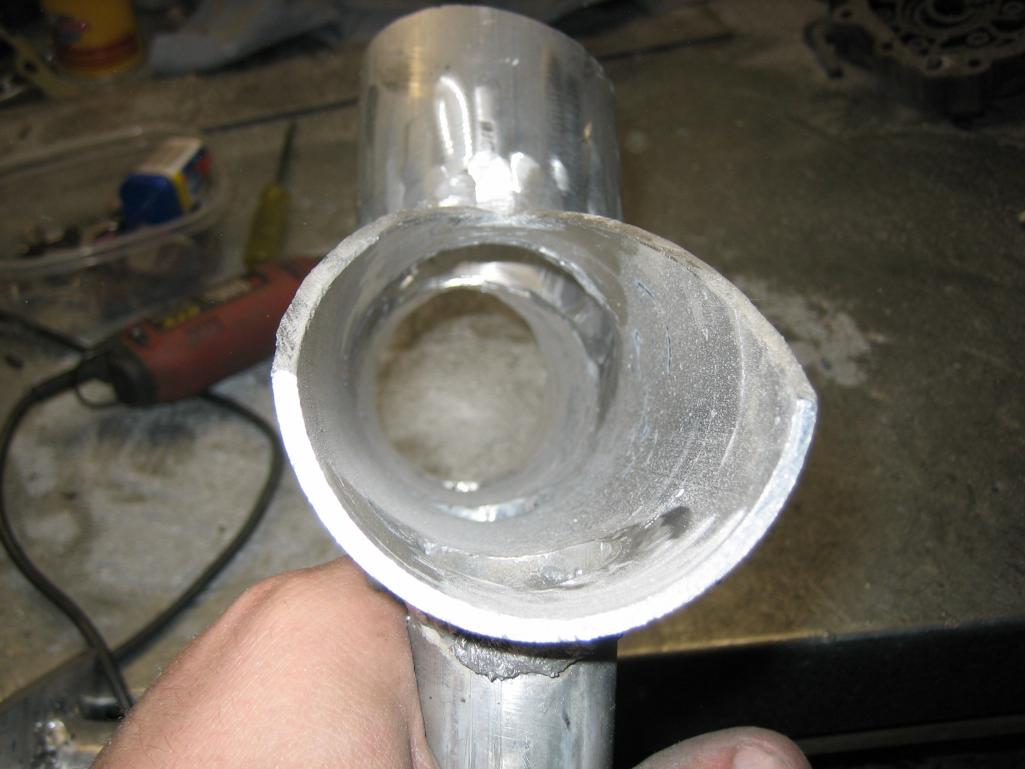
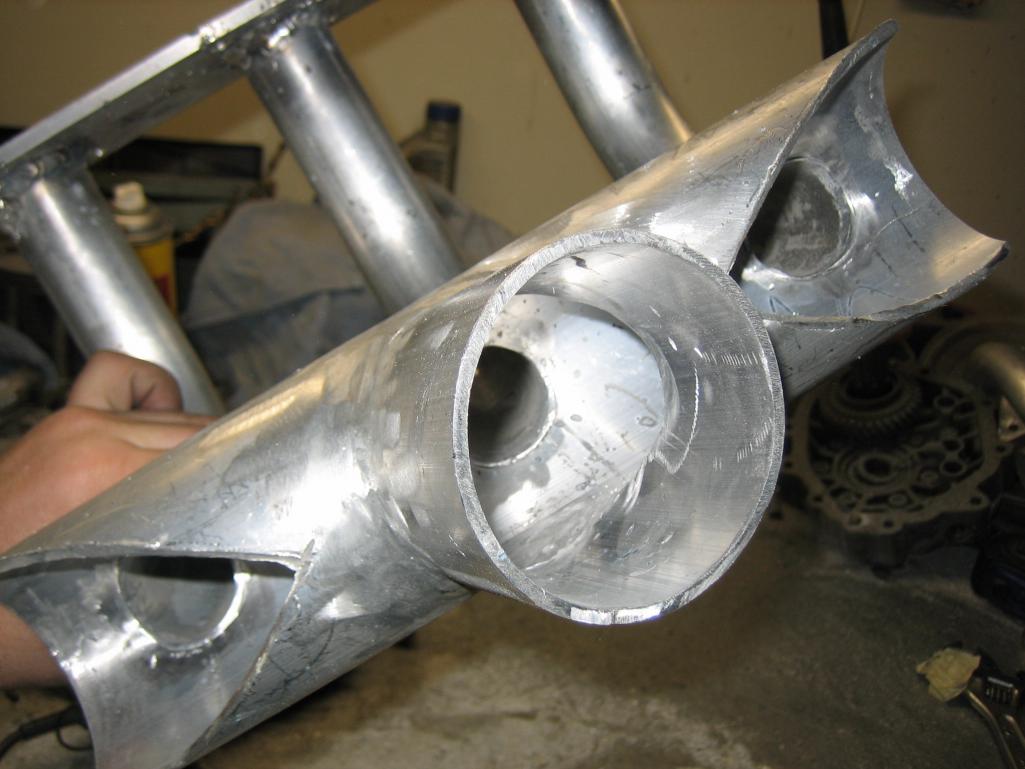
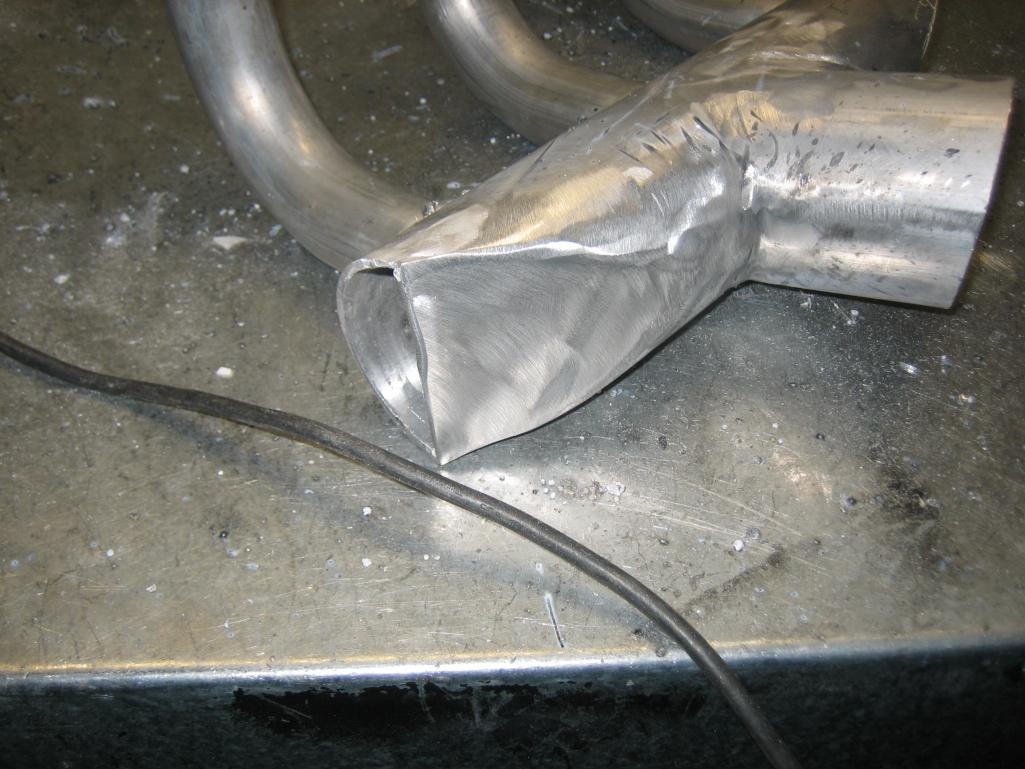

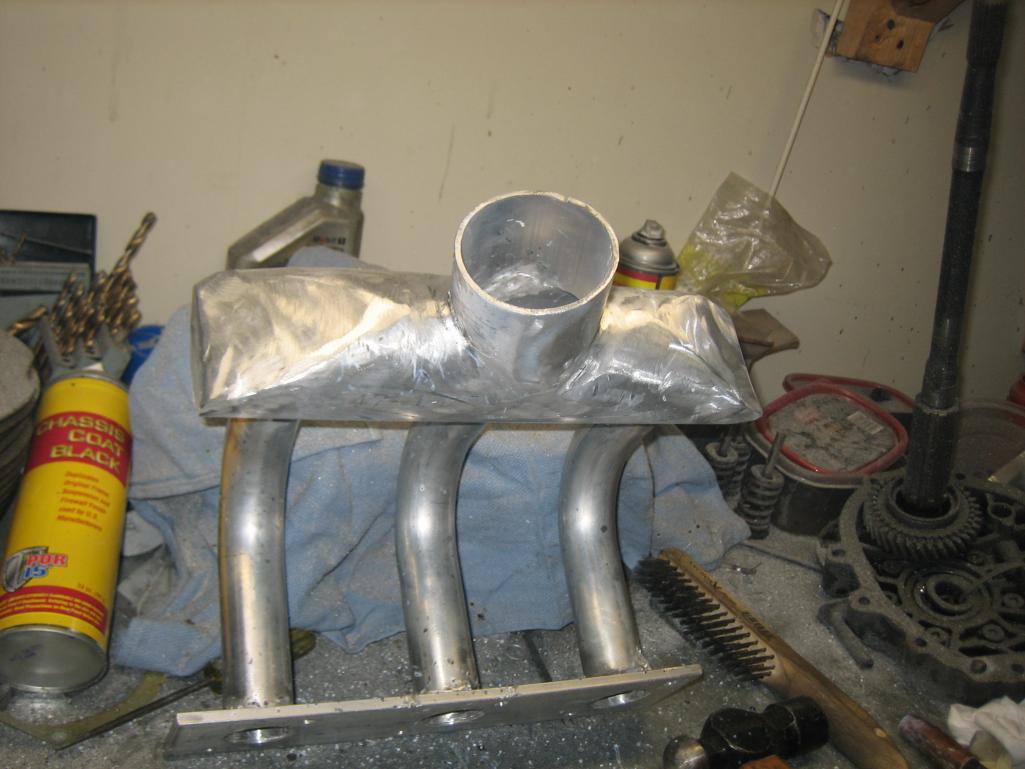
Posted by: zymurgist Mar 25 2012, 08:04 AM
Posted by: Dr Evil Mar 25 2012, 11:42 AM
PROOF that I can weld in a straight line 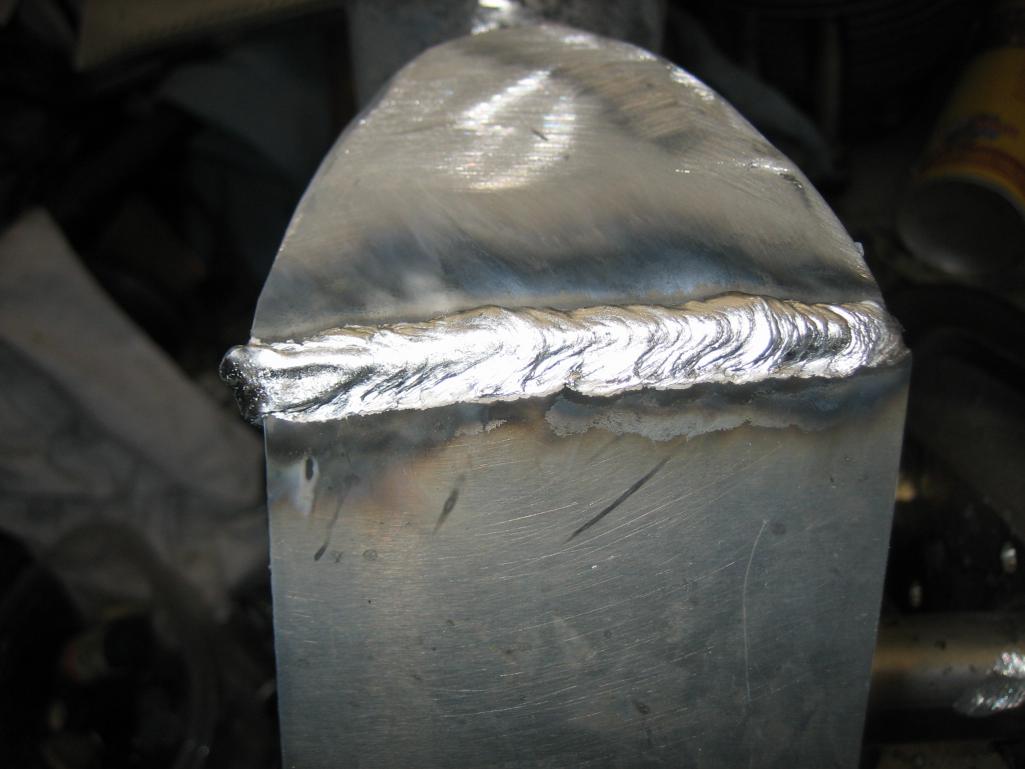
Second side
Both done 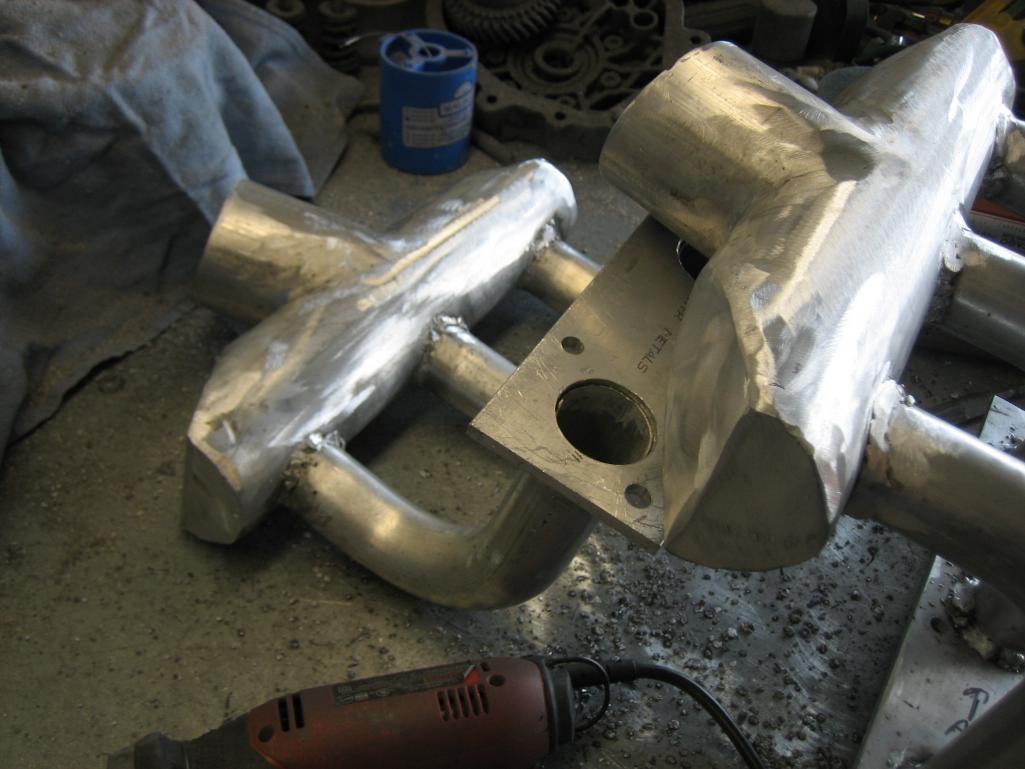
Posted by: Dr Evil Mar 25 2012, 12:51 PM
So, rattled some nuts around in them and got only a few little nuggets of slag. Then I leak tested them.......and went to repair some welds
Now to leak test the other one (yay).
Posted by: Dr Evil Mar 25 2012, 02:55 PM
Well, I was forced to take a break when a bolt broke flush in the adapter and the drill bit broke in the remnant Looks like I will be converting the welder over to ferrous metal to weld on it and hopefully get it out It almost came out all the way with the easy out, but then the top broke off the remnant so I tried to drill it further. 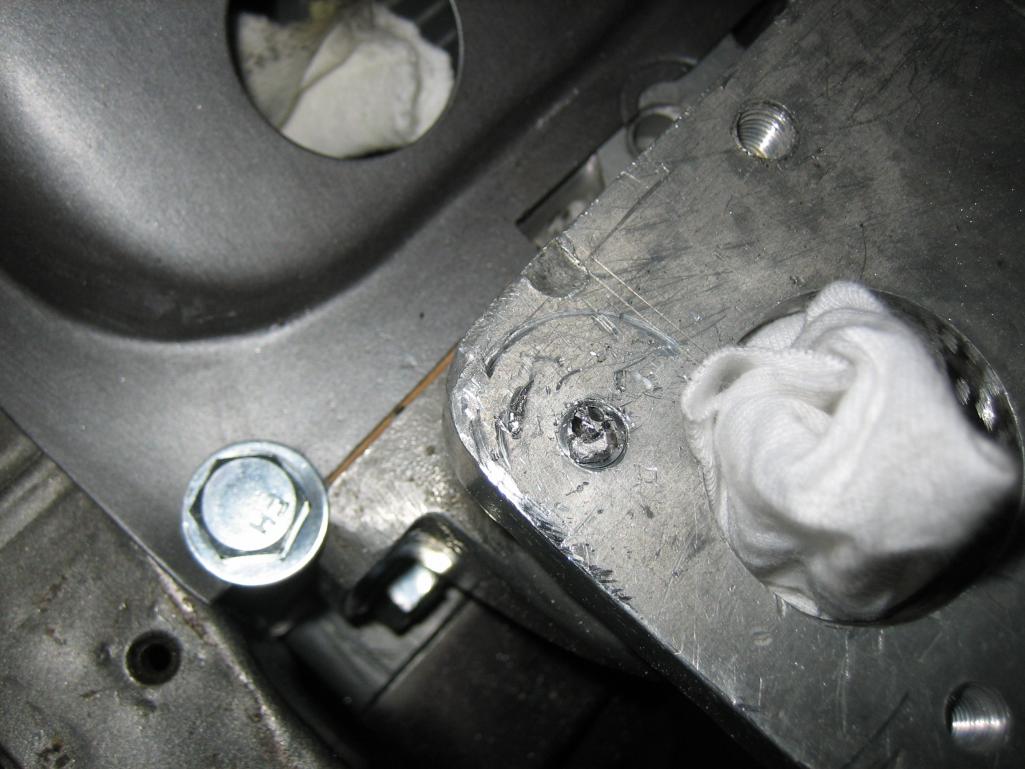
The other side air box only had one small leak in it so now the boxes are all finished up and ready to be mounted.....then I found that they are a bit too short So, I will need to make 1/4-1/2" spacers for the air boxes
Here is the TB stand pipe Maybe I can finish the center connector pipe today.
Attached thumbnail(s)
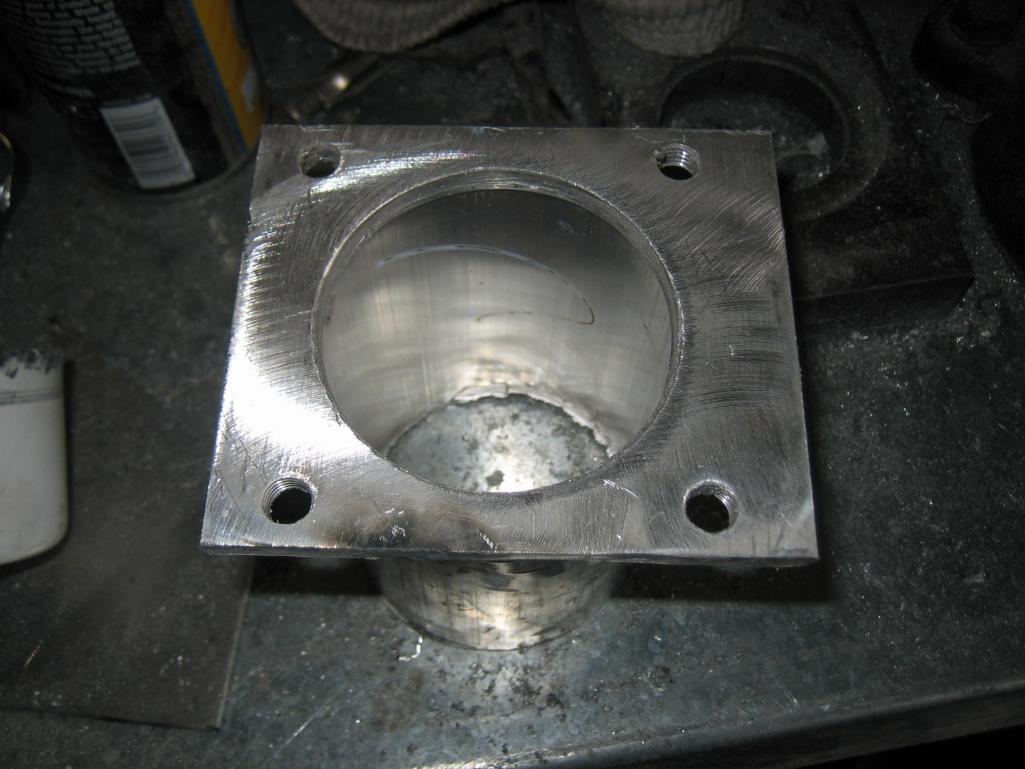
Posted by: Dr Evil Mar 25 2012, 06:10 PM
Done for the day. Gonna have to raise the boxes 3/8-7/16. That damn broken bolt took way to long to fix. I had to drill and drill and drill. Then I welded up the big hole, drilled and tapped. Good to go.
Attached thumbnail(s)

Posted by: Randal Mar 25 2012, 06:58 PM
The induction manifolds are turning out great. Nice welding job. Looking real clean.
Having helped with my FI system on the race motor, it's easy to understand the challenge you took on...and you had a lot of new ground to plow.
I'm hoping your arithmetic on the volume / air flow works out perfect.
Posted by: scotty b Mar 25 2012, 08:17 PM
Absolutely stunning work there Mikey  your skillz amaze me. You seem to have the world at your fingertips. This will no doubt be the most successful
 bastardization modification of a VW bus ever. Your name will go down in the anals of VW greatness
Posted by: Dr Evil Mar 25 2012, 08:23 PM
Laying it a bit thick there, eh Scooter?
Posted by: scotty b Mar 25 2012, 08:30 PM
Laying it a bit thick there, eh Scooter?

Posted by: Dr Evil Mar 25 2012, 08:41 PM
You know you are doing something good when you keep checking your own thread to look at the pics Looks so cool. I hope it works.
Posted by: Dr Evil Mar 26 2012, 08:38 PM
Scored a piece of 3"x0.5"x24" aluminum today. Too bad I was looking for 0.5" x 3" x 2'. I will make it into risers. I had to take a day off to get some DVDs made up. Huge demand lately
I have a part for the CIS that I won on Ebay 10 days ago....I still have yet to see.....it comes from a very notorious vender Called and got the usual today, "Uh, Bubba, they guy that handles that part of the biz, aint here right now."
Posted by: Dr Evil Mar 26 2012, 08:46 PM
Oh ya, we are past 43,000 views! And that was without boobies!
Posted by: scotty b Mar 27 2012, 07:46 AM
Everyone loves to look at a good train wreck
Attached image(s)
Posted by: Dr Evil Mar 27 2012, 09:18 PM
Why thank you. I do look hot today
Tonight I could not seem to drill a hole where I wanted to. I made due. Putting 2.5" holes in 1/2" Aluminum with a hole saw SUX. Its what I have and it cost me $0 so dont judge me.
I got the 1/2" sections drilled and almost completely welded to the feet of the boxes. Gonna pretty them up tomorrow. Then, install on engine, make TB center pipe combo, and make measurements for the fuel lines that I will be ordering. SS braided, goon look good. I hope it runs
Posted by: Dr Evil Mar 28 2012, 08:21 PM
I finished fabricating the center tube for mock up. It looks perfect I am not sure if I will have it horizontal or vertical, but I think vertical may be the best bet as long as it fits in the engine compartment, which I think it will. The aux air supply bung/CSV bung needs to be fabbed and welded on the center pipe still, as well as a mount to keep the center pipe in place. As you can see in the pics, there is the perfect amount of clearance now
Attached thumbnail(s)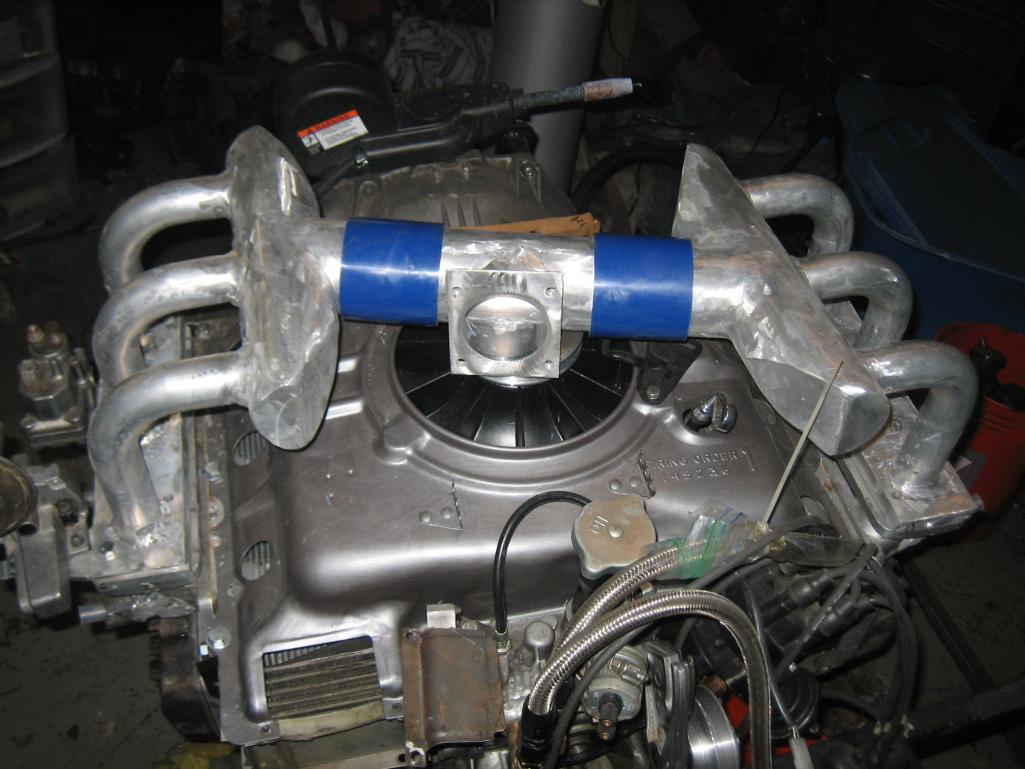
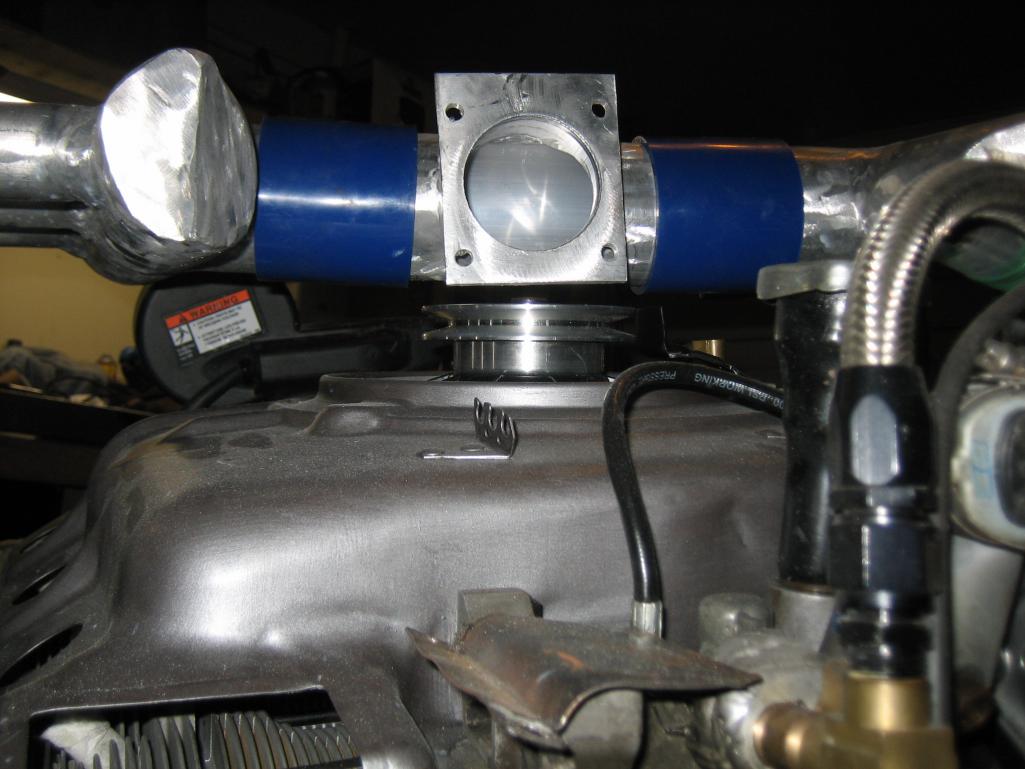
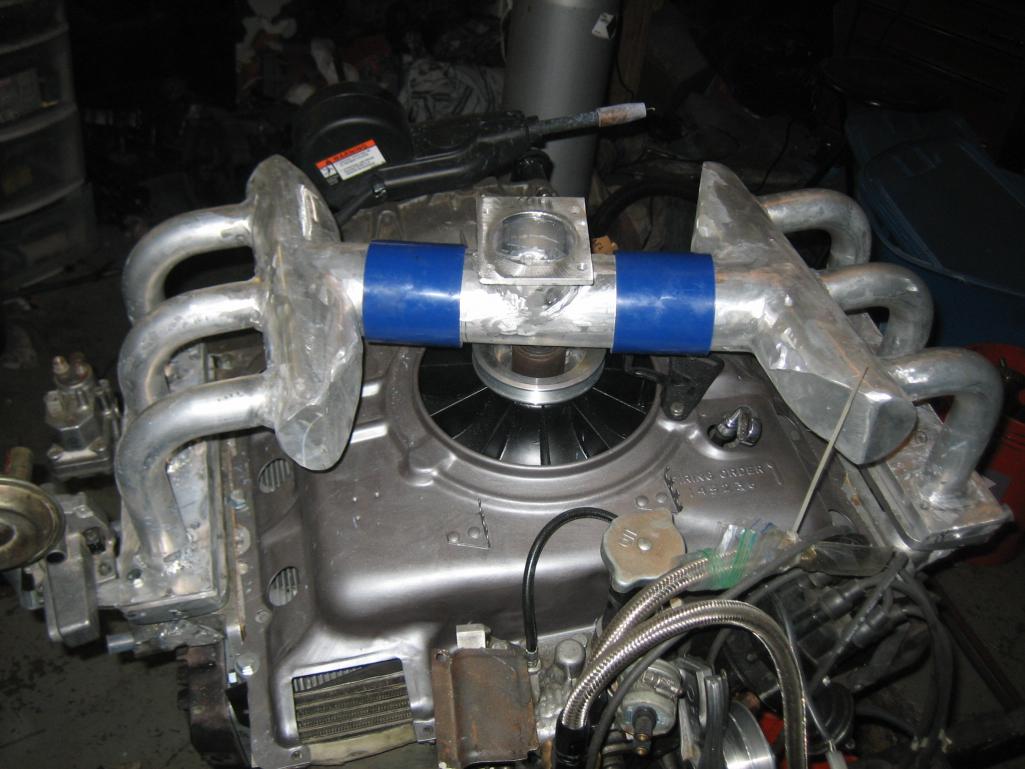
Posted by: Dr Evil Mar 28 2012, 08:24 PM
I am questioning the need for a pop-off valve like on the plastic boxes in order to keep the back fires from damaging things if they should happen. Anyone have input on that? How to mount a plastic valve to the aluminum will be interesting as well.
Or, I can carry extra rubber sleeves
Posted by: Dr Evil Mar 28 2012, 08:30 PM
At this point, I am going to try to install the drive train this weekend and finish up any odds and ends over next week.
Posted by: rick 918-S Mar 28 2012, 10:57 PM
Wasn't the pop off to prevent blowing up the plastic 911 air box? I don't have a pop off on my CIS 928 engine.
Posted by: Dr Evil Mar 29 2012, 05:54 AM
Ya, for protection of the box. I guess since the V8 doesn't have one, I don't need one. It will just test my welds.
Posted by: Katmanken Mar 29 2012, 10:02 AM
Dang!
That looks real nice. Hope it works as good as it looks.
Make sure none of that ground aluminum dust got into anything vital.
Clean up the ground aluminum. Produces oxygen in a fire and has been used for that purpose in some solid rocket fuels.
Posted by: Dr Evil Mar 29 2012, 10:14 AM
Ya, no kidding. With all the rust and Al shavings in my garage I have a huge thermite reaction waiting.
Posted by: Katmanken Mar 29 2012, 01:07 PM
I am questioning the need for a pop-off valve like on the plastic boxes in order to keep the back fires from damaging things if they should happen. Anyone have input on that? How to mount a plastic valve to the aluminum will be interesting as well.
Or, I can carry extra rubber sleeves
Don't worry about it. The flapper valves I've seen are used to protect plastic air boxes. I'd hazard a guess the aluminum is a bit stronger, and less sensitive to getting brittle when cold. If not, it may be a weld test.
FYI- If the aluminum used is heat treated (T4, T6) the welding will kill the heat treat near the weld and knock it back to dead soft (T0).
Posted by: Dr Evil Mar 29 2012, 01:26 PM
TO is better, then. More elastic and less brittle.
Posted by: Dr Evil Mar 29 2012, 02:43 PM
So, one of the design things needing to be addressed to meet the and of the month deadline for completion is how to hook the CIS box to the intake. I have been looking at Volvo air boots, but the best think I am seeing is the 924 boot here:
http://www.ebay.com/itm/Brand-New-Porsche-924-CIS-Air-Intake-Boot-Elbow-OEM-/160508669415?pt=Motors_Car_Truck_Parts_Accessories&hash=item255f0fede7&vxp=mtr
Any other suggestions? I am wishing to go from vertical to horizontal and with the 924 boot I can do this with a simple elbow
That looks very similar to the 3.0L intake!
You can do something like I did for the Volvo intake and the welded up elbow. I cut the original intake boot and made the elbow to fit my needs! Then I clamped the cut intake to the elbow to match everything together!
Jeff,
This is looking like the best setup for the intake. How did you make the connecting tube? I will need to know so I can copy it
Posted by: Jeffs9146 Mar 29 2012, 03:06 PM
I welded it up just like you did your intake!
I made a wooden block in the shape of the cut end of the intake boot and formed the metal to match the block by bending it and hammering it. It was a bottom piece, two end pieces to match the wood block, side pieces and a top piece all bent and welded to create the shape. I had to do the two end pieces seperate to match the boot pieces and then attached to bottom and filled in the remaining metal. The fill pieces didn't need to be perfect just air tight! Then I ground all the welds sanded it smooth and powder coated it to match the car!
I felt the powder coat was the best way to get a smooth surface for the boot to clamp snug without leaking!
I hope that helps!
Posted by: Dr Evil Mar 29 2012, 03:10 PM
Right on. I think mine will be easier as I may be able to make a straight pipe with the oval shape being the only fun part. I was looking at sheet metal that I may be able to make into a tube and then hammer into shape.
Stay tuned.
Posted by: Jeffs9146 Mar 29 2012, 03:21 PM
PS: I used two different boots so I could cut extra material on each end to allow me to grind off the humps on the boot surface and give me plenty of clamping area!
Here it is in raw form and powder coated!
Attached thumbnail(s)
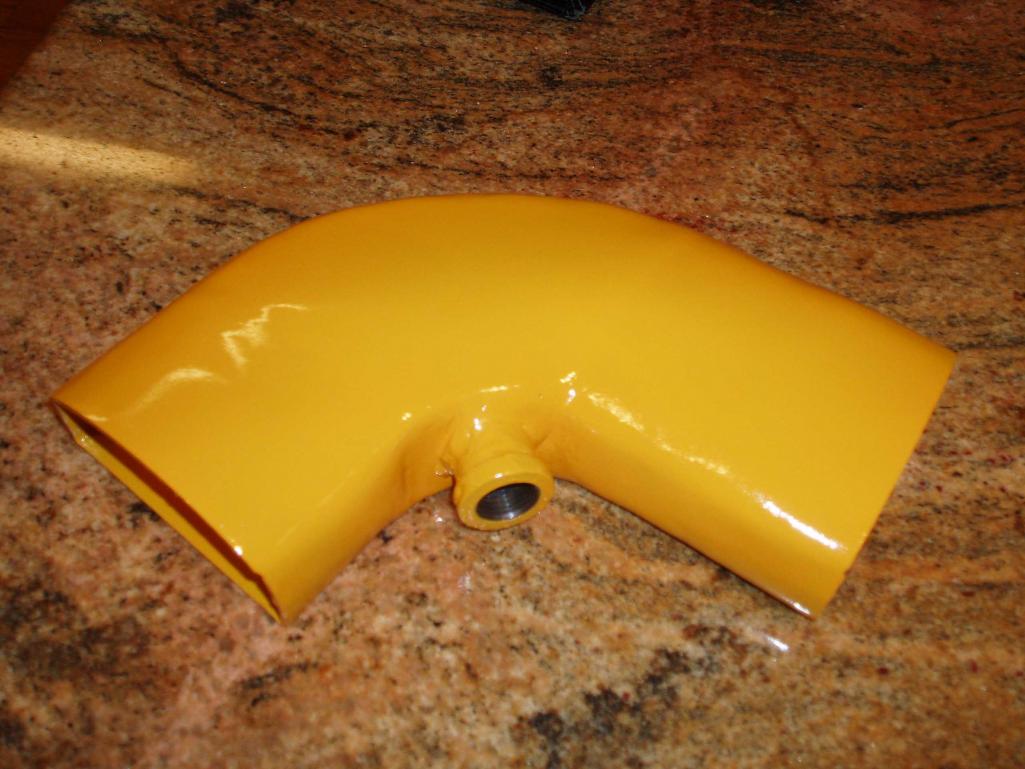
Posted by: Dr Evil Mar 29 2012, 03:37 PM
What gauge and material did you use??
Posted by: Jeffs9146 Mar 29 2012, 03:47 PM
Thicker than I planned for the two end pieces and thinner for the filled in section! I was planning on doing it again in aluminum or thinner gauge steal, this was my test one but it worked so well I just used it!
The end pieces were 2" straps bent and shaped then welded to get the clamping area correct!
Posted by: Dr Evil Mar 29 2012, 05:43 PM
I just bought a 24x24" 16ga sheet to attempt to make a tube with. I will bend it around a piece of pipe and see if that works. I have two boots to use.
Posted by: Jeffs9146 Mar 29 2012, 06:40 PM
I just bought a 24x24" 16ga sheet to attempt to make a tube with. I will bend it around a piece of pipe and see if that works. I have two boots to use.
Thats a good start. I found it easier to bend a 16g 2" or 3" strap into the shape you need and it will only take two welds to connect the two pieces. Then build your tube to connect the two by mounting them with hose clamps the two boots and put the boots on to the intake and the throttle body. Then make a template using a piece of cardboard to get the basic shape and length. That way you wont be guessing.
Mine was tough because it was not a straight shot and the 90' angle was not exactly 90'!
Posted by: Dr Evil Mar 29 2012, 07:19 PM
Luckily, I can go in a straight line. It is the height that I was worried about and with the CIS boot that is cut down significantly.
Posted by: Dr Evil Mar 30 2012, 09:00 PM
Good progress today. Made up the tube by hand bending and beating the hell out of some 16g steel. That was fun. I will finish it when I know how long I need it to be. 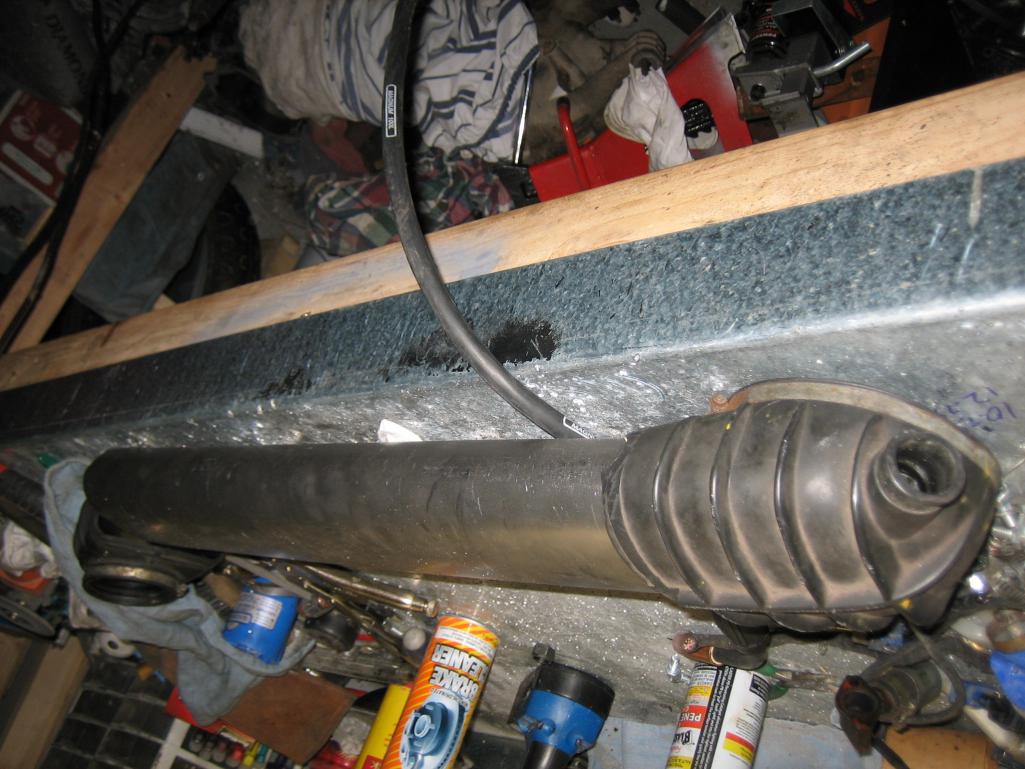
Here is an idea of the total height of the TB and stuff. I think this will fit just fine 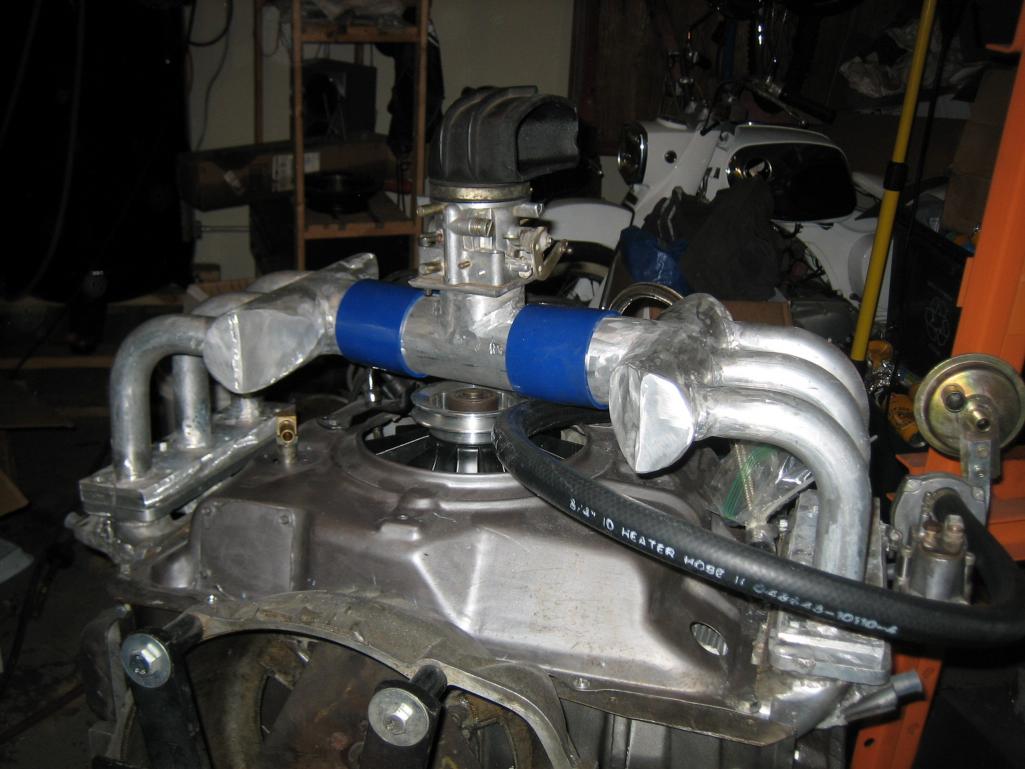
Here is the center section with the bung I made and welded in for the cold start valve and aux air tap.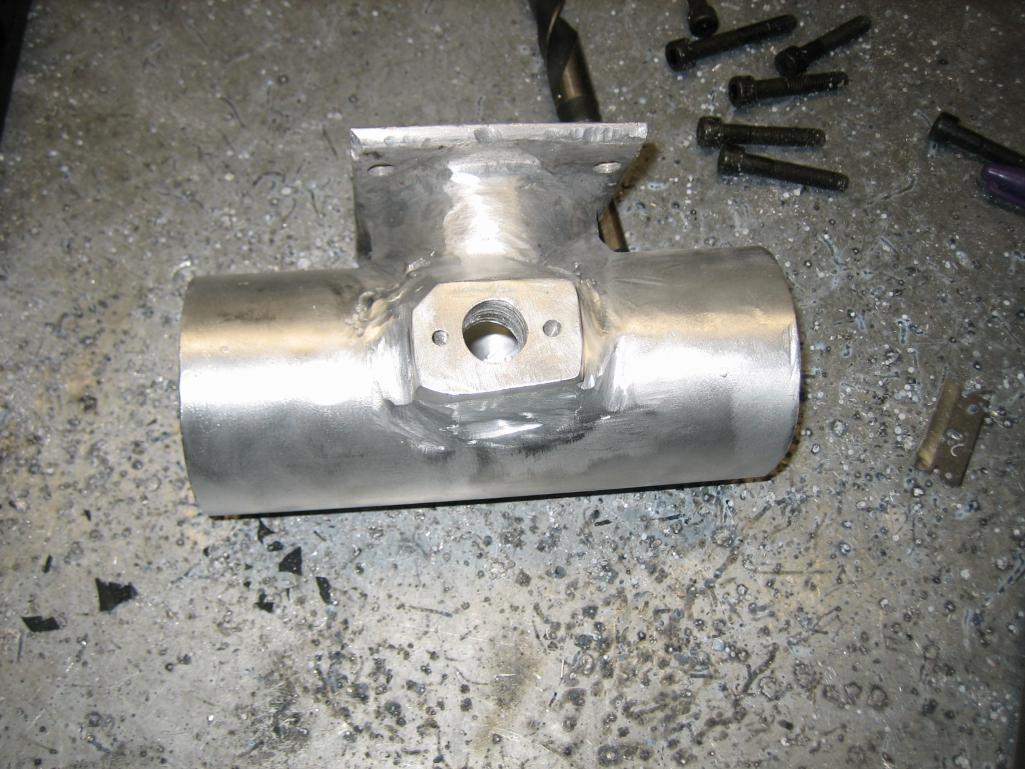
Next, I need to fab up some sheet metal for the tins. I finally used some power shears that I bought for this a long time ago. They cut the 16g pretty easy Last tie I made the tins I did it with hand shears and it was painful.
Tomorrow I will try to button up all the small stuff and by Sun night this stuff will hopefully be in the bus and my order for the fuel lines will be submitted
Posted by: Dr Evil Mar 31 2012, 07:52 PM
So, I finished up some welding on the setup, then leak checked to find out some of my welds suck Its my first time. What really sucks is that I am OUT of wire. So, I have to wait until tomorrow.
Meanwhile, I have the transmission and diff all reassembled and ready to mate up to the engine, I have the remove-install cart out and need to air up the tires, and I am making up the very simple wire harness.
I had to get inventive today, too. The air lines are 3/4", 5/8" and 1/2". The 3/4 and 5/8 are connected directly to the plenum where they will experience maximum vac. I could not find any large vac hose locally and quickly, and the OE stuff is actually welded aluminum tubing with special ends that would not fit my setup. So, I bought some throttle pedal return springs in a package for $2.49, took the one about the right dia and stretched it out. I cut it to length and slid it into the hose. No way that they will collapse now
More tomorrow.
Posted by: brer Apr 1 2012, 10:37 AM
grind it back before you try to weld it again or it may reappear over time. oh, and tig is ideal for this fix, just give it enough buzz to get it flowing and push the ally around with the gas flow. I can't imagine trying to mig it closed.
Posted by: Jeffs9146 Apr 1 2012, 10:44 AM
I pushed a piece of copper pipe into my lines to keep them from collapsing!
Posted by: Dr Evil Apr 1 2012, 11:30 AM
Brer, I will not be Tiging, but thanks for the tip to grind it out again. I will to that.
Jeff, I needed to be able to bend the hose without it collapsing Copper is good for a straight line, or a subtle bend, though
Posted by: Dr Evil Apr 1 2012, 05:11 PM
Its under the bus......then it started to rain
Posted by: jsayre914 Apr 1 2012, 05:14 PM
Its under the bus......then it started to rain
Do I get to drive it at Hershey?
Posted by: Dr Evil Apr 1 2012, 05:23 PM
Yes, you can drive it at Hershey....if it makes it
Drive train assembled on the purpose built trolley:
Under the bus.....damn rain. It looks like it may stop
Attached thumbnail(s)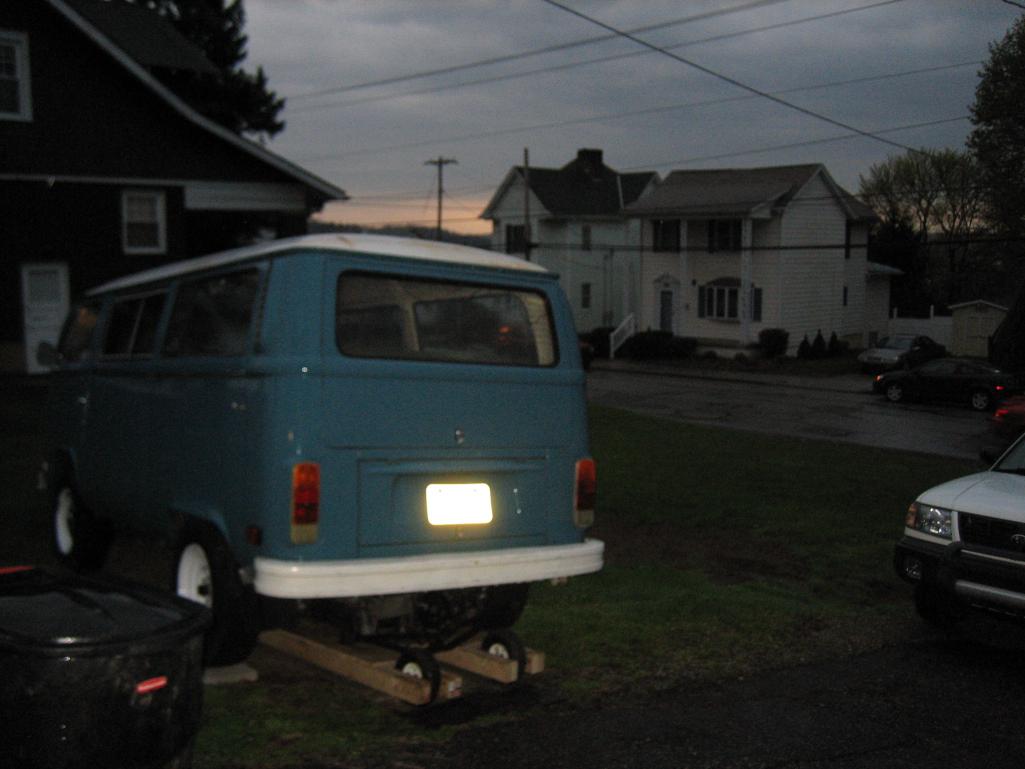
Posted by: BajaXJ92 Apr 1 2012, 06:11 PM
I wanna drive it!!
Posted by: scotty b Apr 1 2012, 06:34 PM
That dolly is going to make one hell of a downhill skateboard someday
Posted by: BajaXJ92 Apr 1 2012, 07:25 PM
That dolly is going to make one hell of a downhill skateboard someday
Perhaps you can recycle it and build some trailer ramps?
Posted by: Dr Evil Apr 1 2012, 08:19 PM
Well, I am back from the hospital Hard to type with my almost missing finger...I was welding and grinding and slipped with the 9" cut off wheel that I was using inappropriately....without a guard Right through the tendon on the thumb side of my pointer. Likely not gonna be salvageable.....I would care more but the pain meds are kicking in. typing one handed sux. Probably gonna have to sell mt guitars
One plenum is leak proof, now, though
Posted by: scotty b Apr 1 2012, 08:22 PM
April fools unless pics are posted, with the bus, BMW, GUZZI and Leon in the background....holding todays newspaper
Posted by: scotty b Apr 1 2012, 08:22 PM
The engine was already under the bus a couple hours ago
Posted by: Dr Evil Apr 1 2012, 08:32 PM
The plenums not on the engine. I was still fixing them. no pics....sleepy.
Posted by: scotty b Apr 1 2012, 08:35 PM
The plenums not on the engine. I was still fixing them. no pics....sleepy.
funny how you keep posting in other threads so injured and doped up. Try harder next year
Posted by: Dr Evil Apr 1 2012, 08:43 PM
Funny how you must ruin things so you can "feel" smart
I am tying one handed. I burnt the hell out of my left thumb.
Posted by: scotty b Apr 1 2012, 08:46 PM
Oh, sorr........y I guess I'll call off the tranny clinic. No way you can perform well all doped up. It kind of presents a real liability for me anyways. Sux for all
Posted by: scotty b Apr 1 2012, 08:47 PM
Funny how you must ruin things so you can "feel" smart
I am tying one handed. I burnt the hell out of my left thumb.
LEAVE THE CRACK PIPE ALONE MICHAEL !!!
Posted by: hot_shoe914 Apr 1 2012, 08:49 PM
Well, after Mike cut his unit off and almost his finger too, I felt sorry for him and went in to work on his bus after he passed out from the tequila and pain meds. I hope he isn't pissed when he comes too but here is what I left him with.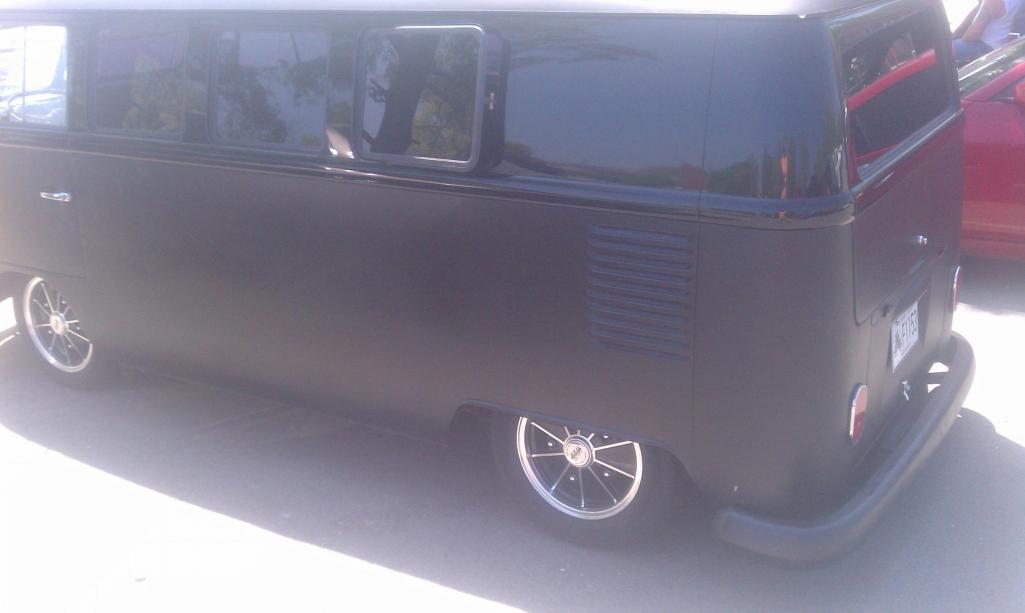
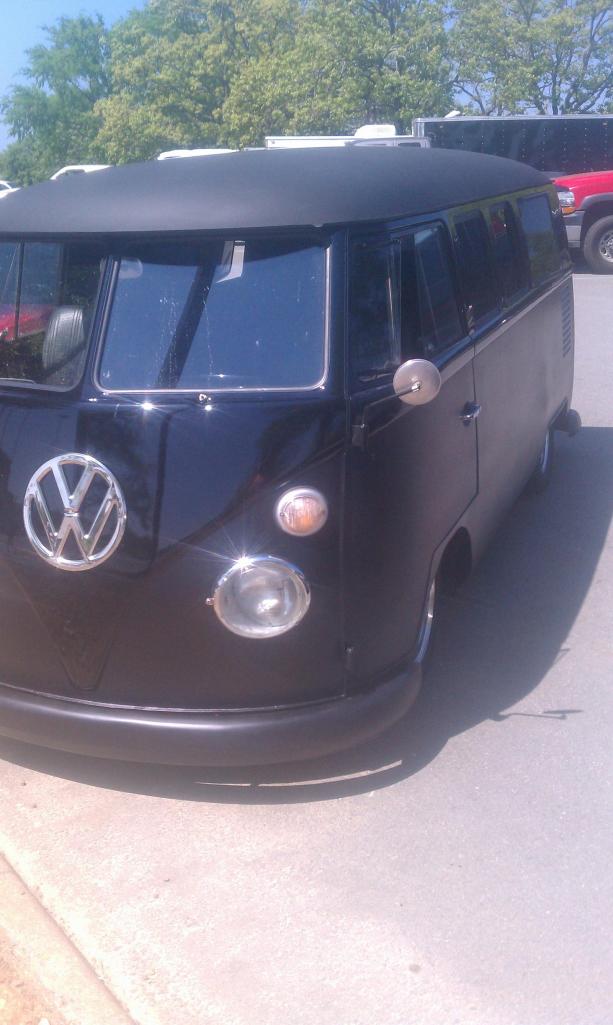
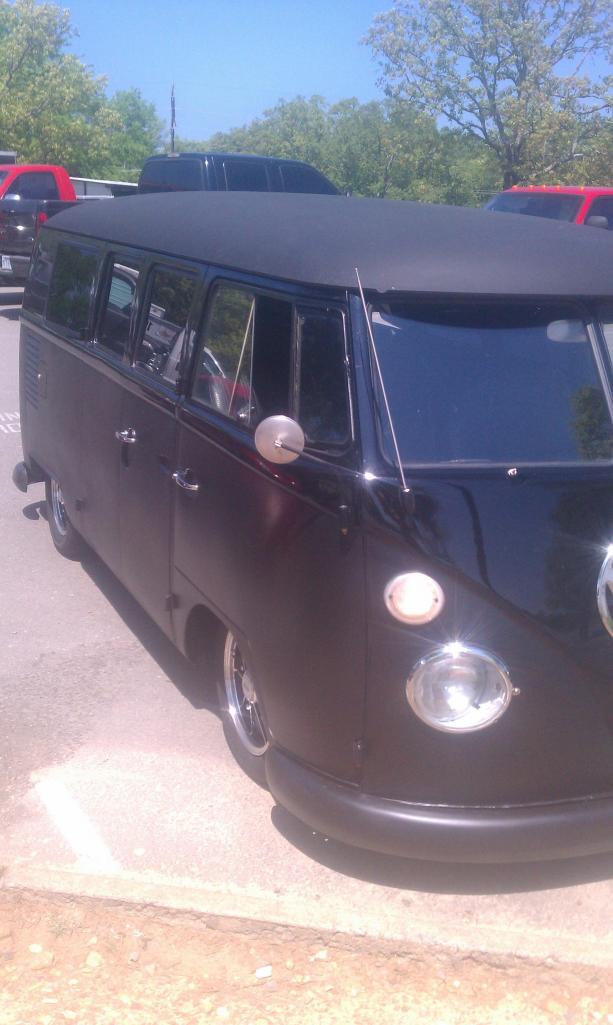
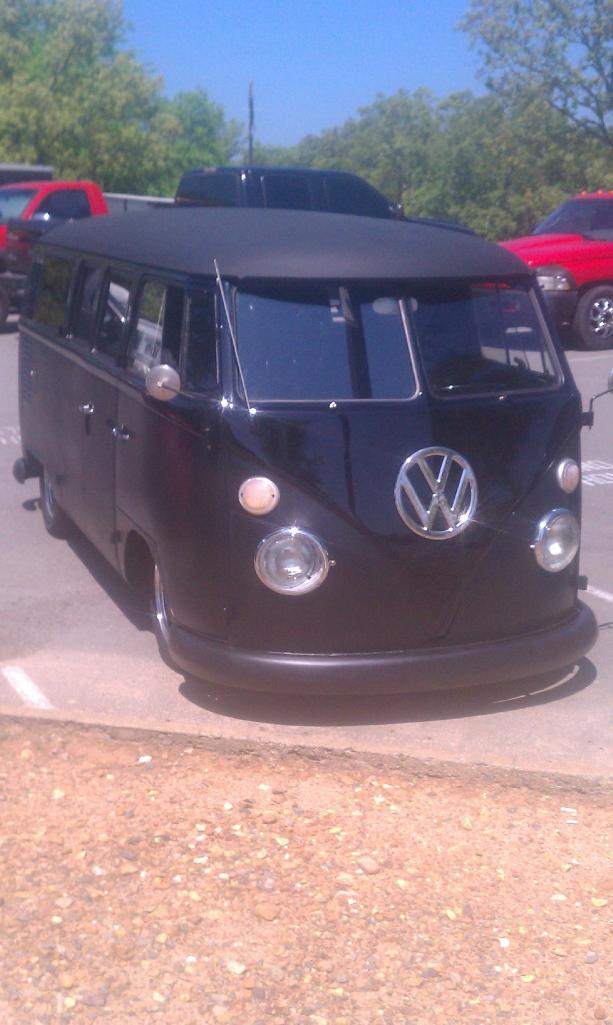
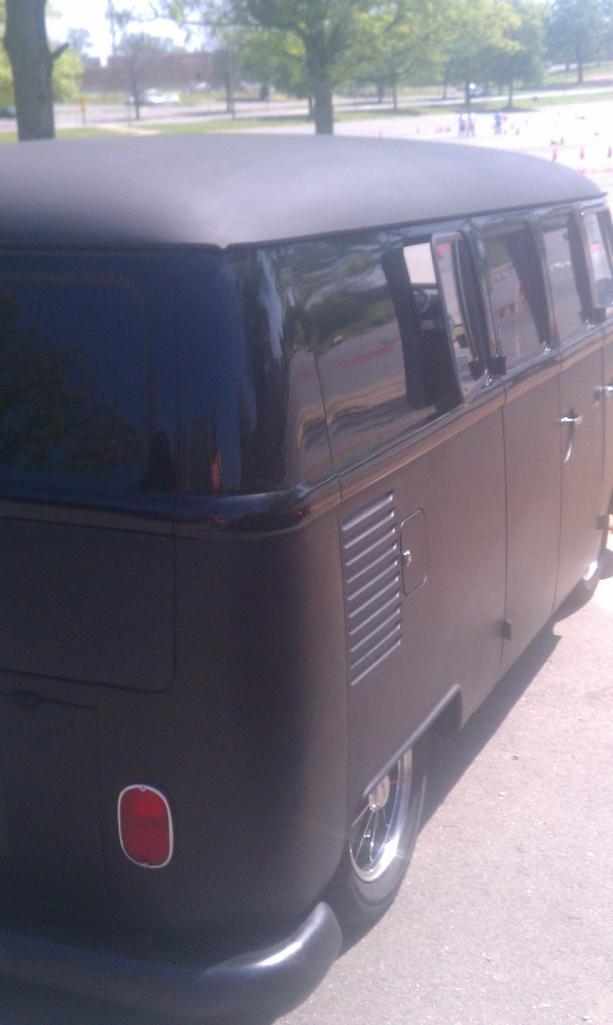
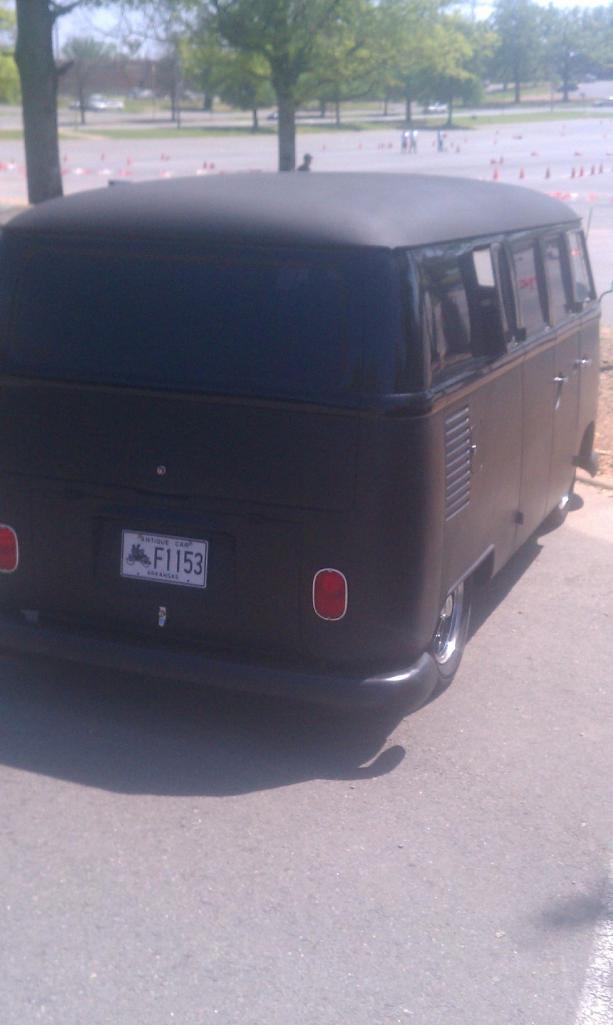
Sure hope he likes it.
Posted by: scotty b Apr 1 2012, 08:54 PM
OWWWWW I just severd my hand while working on my Agave green with brick red interior 356 Carrera roadster. What to do what to do. Oh me oh my. Hard to type wif face. I'll probably have to sell my.....my.....my paint guns.......... CRAP it hurtz. Oh cral payn neds kikin im. Go beddee by...............
Posted by: Dr Evil Apr 1 2012, 09:06 PM
I love gas-burners on a bus
Posted by: hot_shoe914 Apr 1 2012, 09:26 PM
Well, seeing as Scotty is my buddy too, and seeing as how he lost his masturbation hand and Alex doesn't want him anymor, I felt sorry for him too. On my way home from the Evil one's house I dropped by Scotty's to see if I could lend a "hand". I did the best I could to finish his car for him but apparently I used too much thinner in the paint. By the time I got the mix right I was out of green paint so he will just have to live with this.


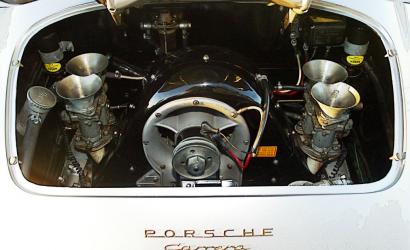
Oh yeah, I accidentally had a small accident when I was sitting in it taking a break. There was a small fire so you got stuck with silver interior too. Sorry bro, I am a rookie after all and from Arkansas. did you expect, perfection?
Posted by: scotty b Apr 1 2012, 09:50 PM
Well, seeing as Scotty is my buddy too, and seeing as how he lost his masturbation hand and Alex doesn't want him anymor, I felt sorry for him too. On my way home from the Evil one's house I dropped by Scotty's to see if I could lend a "hand".
I did the best I could to finish his car for him but apparently I used too much thinner in the paint. By the time I got the mix right I was out of green paint so he will just have to live with this.Oh yeah, I accidentally had a small accident when I was sitting in it taking a
break. There was a small fire so you got stuck with silver interior too. Sorry bro, I am a rookie after all and from Arkansas. did you expect, perfection? You're the best Shoe. I'll deal with the silver. I just wish you could have gotten the whole dor painted, but I guess I can still use a paint roller to finish it out
Posted by: Dr Evil Apr 2 2012, 07:09 PM
Alls I needed was some non-rainy weather and "poof" the engine is now suspended from the bus. Of course, I came down with a pretty damn good cold this weekend which has me a little less motivated 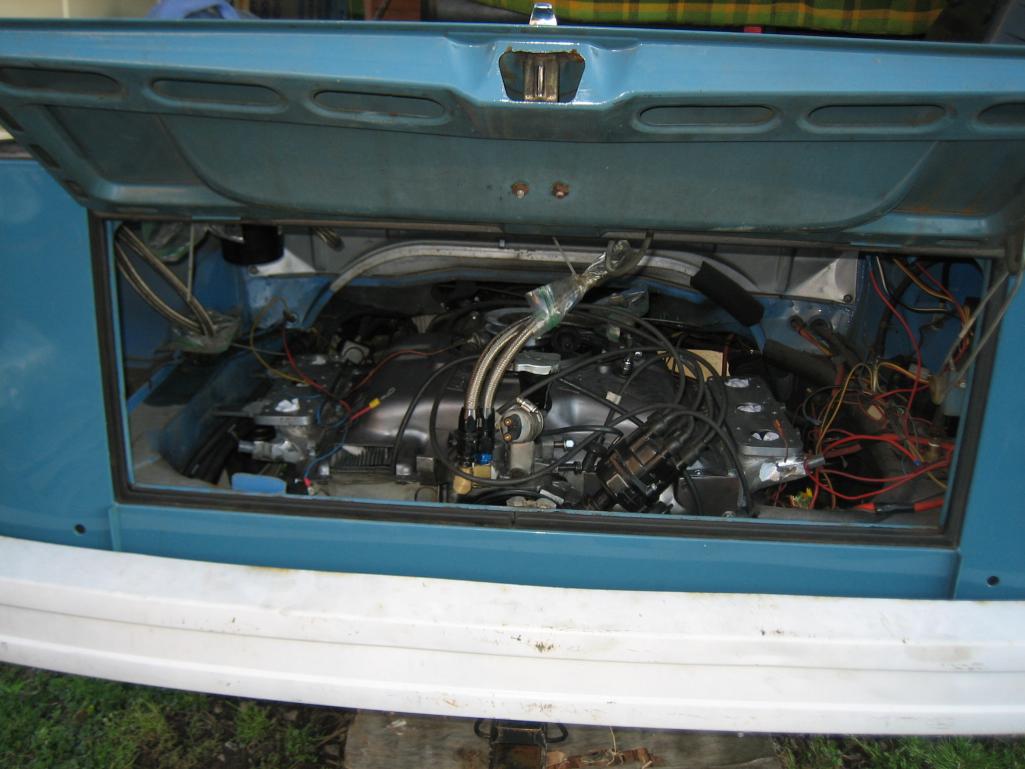
Things on the "to do" list:
Fuel pump plumbing
Engine tin design, fabricate, install
Figure out the throttle
Location of the CIS box
Find the registration
Get it inspected
Install the new gear selector cable
Figure out fuel hoses
That is the short list. The fuel hoses are actually the big hang up. I have the translucent OE style stuff, but I am not sure I have enough and I want to go to stainless braided. Hell, even hard lines would be nice as a 90* bend on the injectors would help out a lot.
Tonight I finished up the final phase of the plenums. I need to sand the intake welds smooth, re leak test one, and then install.
One other snag might be the location of the CIS box in the left engine bay as the spare tire cup is over there. I think I will have to cut it out, which I wanted to do any way as the spare is now on the front. The PITA will be getting the hole welded closed as the welder will not reach and the bus will have to drive to back into the garage to fix this Motivation.
Stay tuned.
Posted by: Dr Evil Apr 3 2012, 02:54 PM
Well, now that it is in I am seeing potential problems with the injectors. If I could get them to come off at 90* then they would be perfect. The ones for 924 have a banjo bolt that goes on the end and would fit the bill, but I am not sure the flow rate would be correct. Plus, I already have 6 new 911 injectors....maybe I can sell them
More research.
Posted by: Dr Evil Apr 3 2012, 03:29 PM
So, the 2.0 injectors from a pre-1980 924 seem to be the right part. I am looking into this further. If I can get this sorted, a major obstacle will be removed as I can get the hoses made and fit much easier.
Posted by: Dr Evil Apr 3 2012, 07:08 PM
I got some work done on the tin tonight. The good news is that the front and rear parts can be used as is with little to no modification. I did have to make new side ones as the new heads changed the layout completely. Here are the pics of the "easy" side (no AAR or WUR mounts to work around). The base is 16Ga for rigidity since there is no place to bolt that part on, the sides are 22ga and burn through very easy I keep telling myself, "its just s prototype".
Attached thumbnail(s)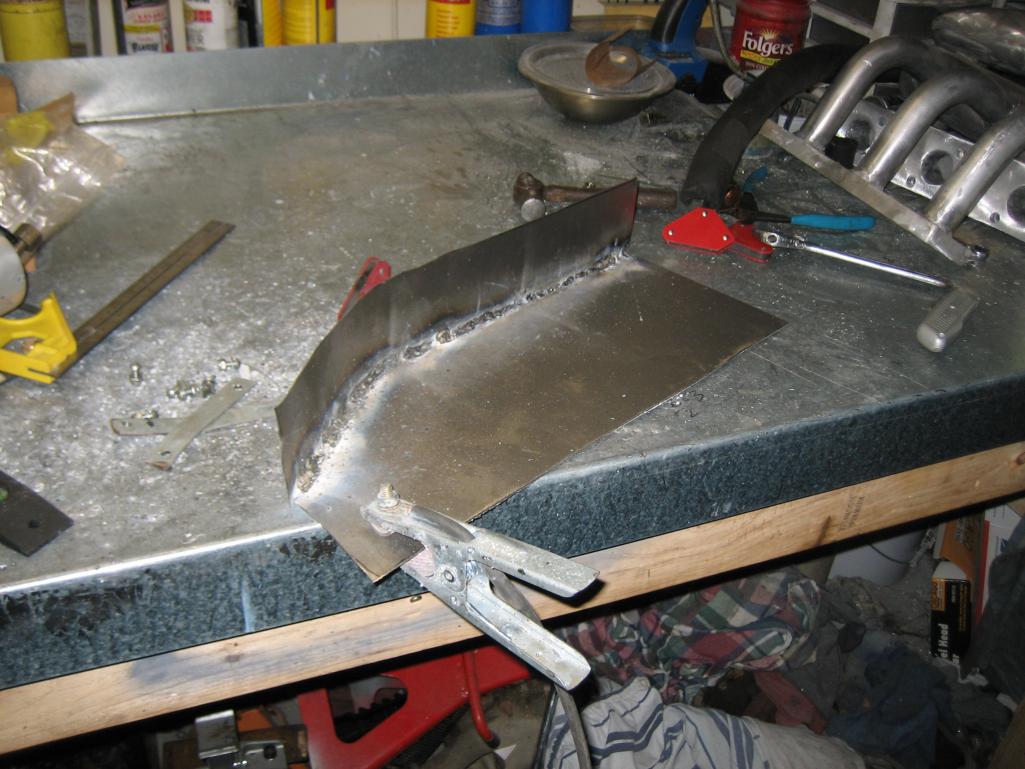
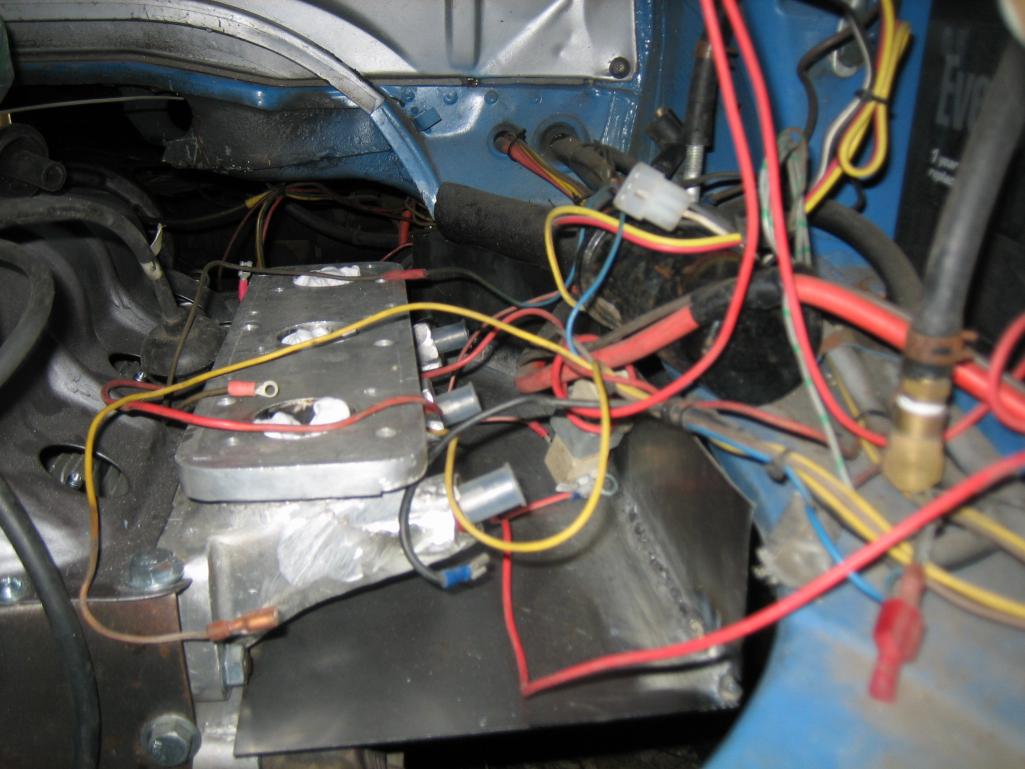
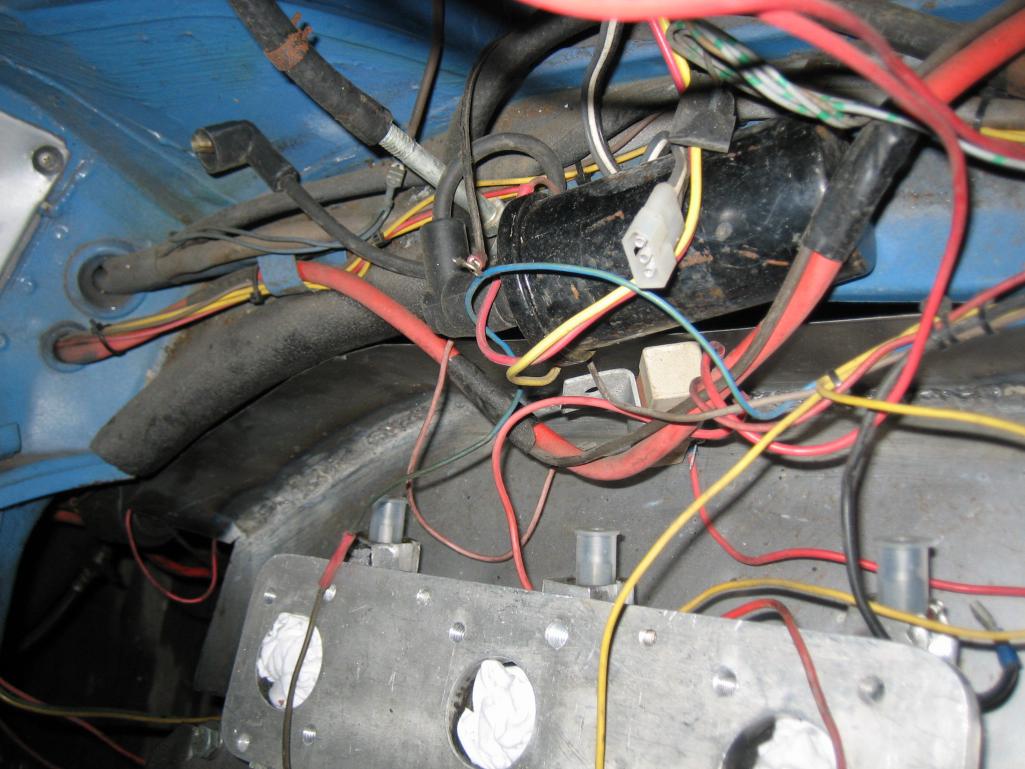
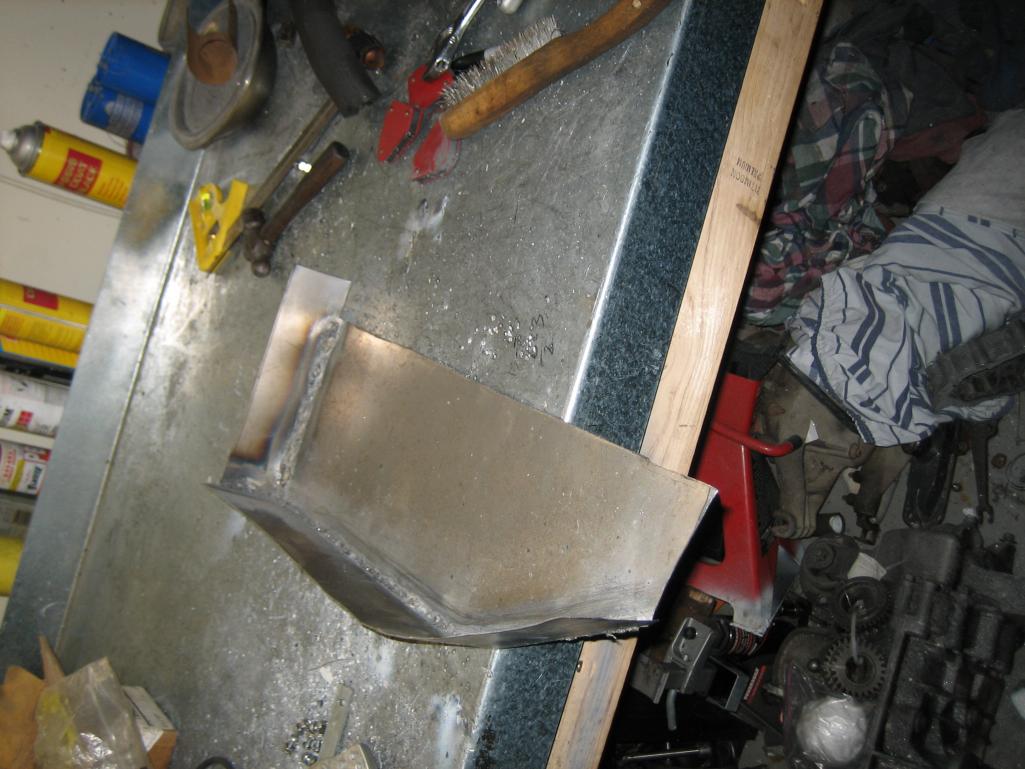
Posted by: Dr Evil Apr 3 2012, 07:24 PM
Found a good deal on a set of 924 injectors, cheap even with overnight delivery
I will likely not have this bus done by weeks end, but I think I can still make it to Scotty B's and Hershey. I hope to have the last bits needed by the end of the week, or ordered. This weekend I am working both days so will not be able to work on it before I leave town to OH to work. Lets see what I CAN get done.
Tomorrow:
Tins, Fuel system, throttle system
Posted by: Katmanken Apr 4 2012, 02:00 PM
Well, I am back from the hospital
Hard to type with my almost missing finger...I was welding and grinding and slipped with the 9" cut off wheel that I was using inappropriately....without a guard Right through the tendon on the thumb side of my pointer. Likely not gonna be salvageable.....I would care more but the pain meds are kicking in. typing one handed sux. Probably gonna have to sell mt guitars One plenum is leak proof, now, though
Evil,
Hospital called. You forgot yer finger.
Nice nail polish, not that there is anything wrong with that. The nursies said your blue exam gloves usually cover that up.
Attached image(s)
Posted by: Dr Evil Apr 4 2012, 03:27 PM
So, mocking up the CIS system and found a few obstacles that need removing/engineering around.
1) That damn tire well is in the way. Well, it was...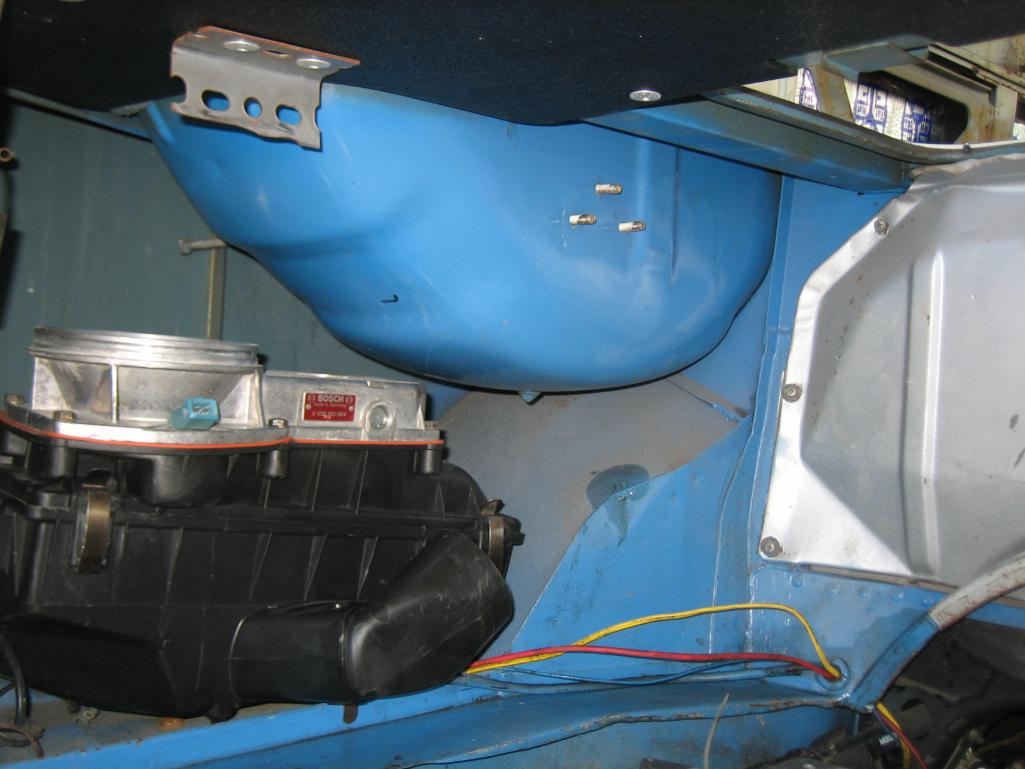
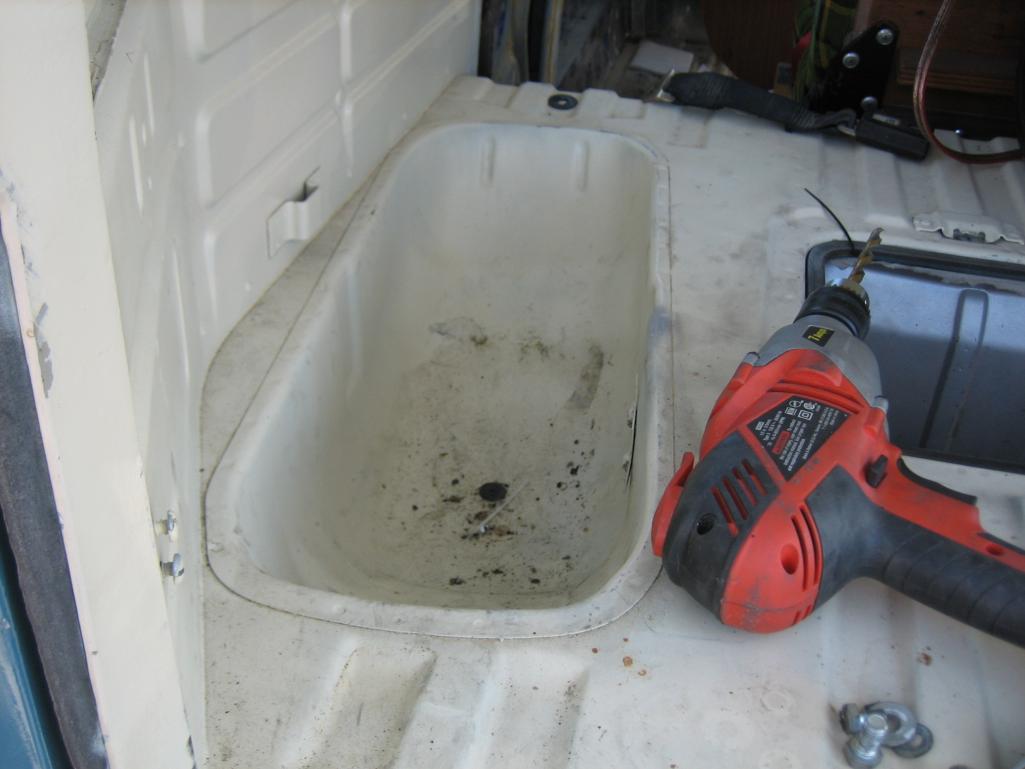
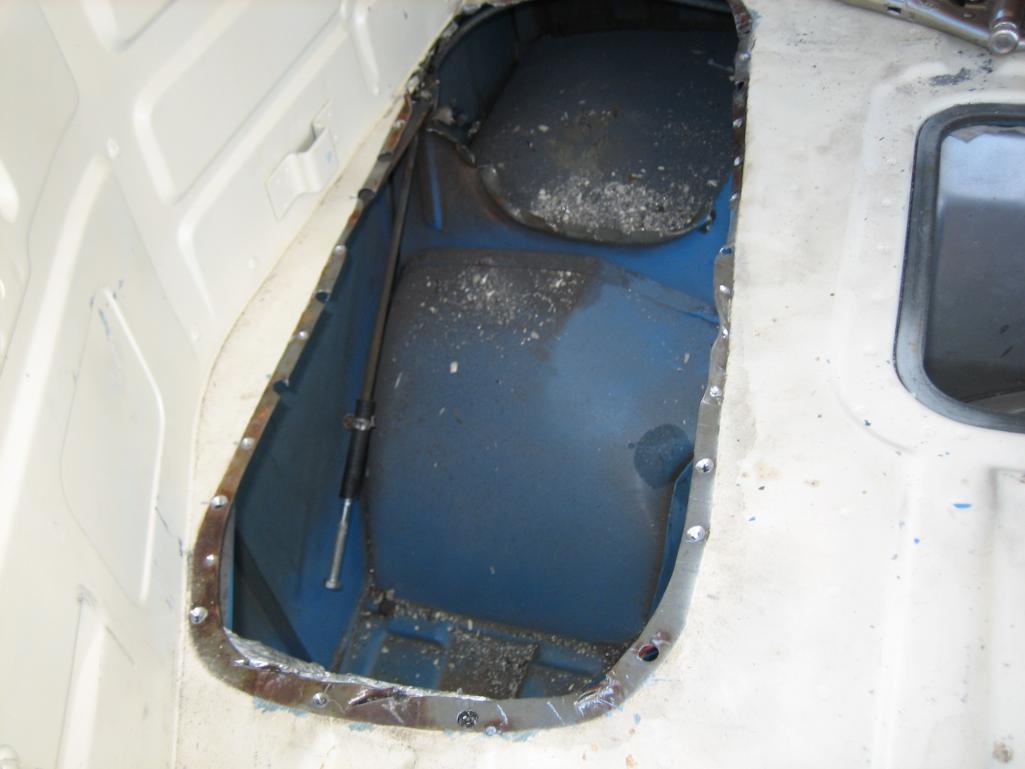
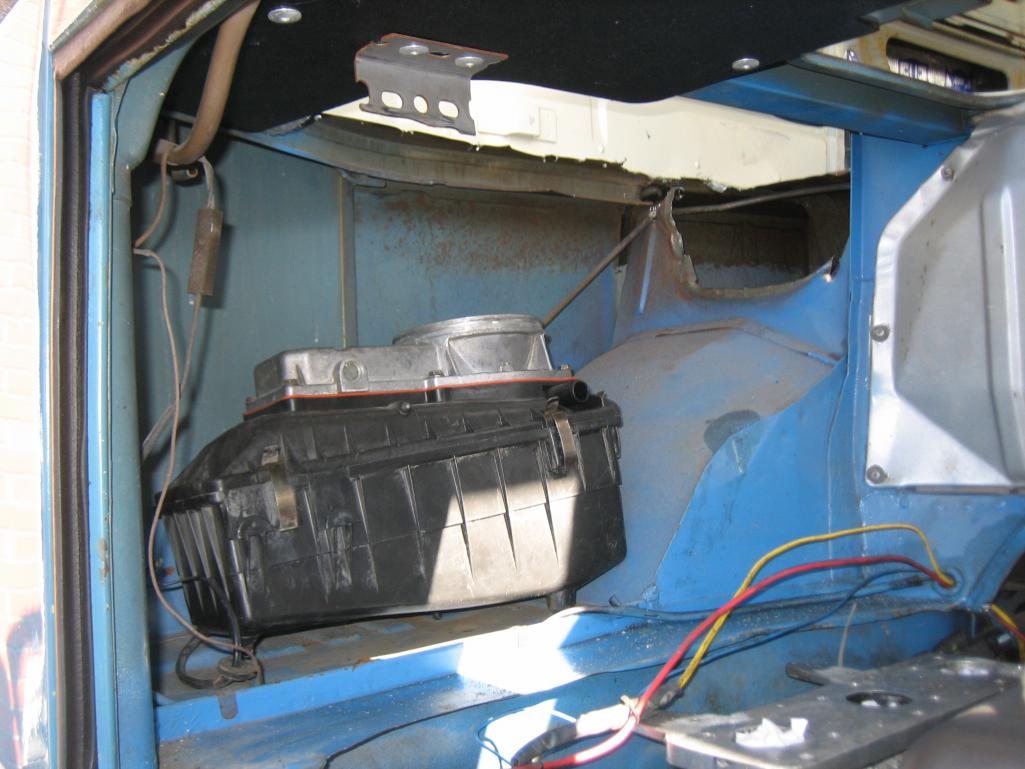
2) The TB with the shallow hose on top is too tall for the engine bay, so I will need to tilt the TB assembly and thus make the pipe from the air box with the distributor to the TB have a twist in it....this should be easy
I just got confirmation that my injectors shipped
I am sending measurements for the fuel lines to the guy that will make them
Posted by: Dr Evil Apr 4 2012, 04:03 PM
Shit! I just realized I need to put a return line on the tank This means draining, pulling it, getting some dry ice to evacuate the fumes, welding in a bung, and re-installing the tank. I think I just hit my limit.....
Posted by: zymurgist Apr 4 2012, 04:27 PM
Dry ice? If only you had a friend with a kegerator. He could bring over a bottle of CO2.
Posted by: Dr Evil Apr 4 2012, 05:07 PM
I have CO2/Argon, but would rather just get some cheap ice
Posted by: Dr Evil Apr 4 2012, 07:09 PM
I just submitted the list of parts for the fuel system. It is gonna look PIMP when I am done
I hope to still get it finished. I think I will start to pull the tank tomorrow.
Posted by: balljoint Apr 4 2012, 07:15 PM
Thanks for not using capital T's on "the tank".
Get at it!
Posted by: MDG Apr 4 2012, 07:24 PM
I didn't bother to read any of this. But I like those blue things. They're cool.
Scotty's paint is holdin' up pretty good too . . looks like.
Posted by: Dr Evil Apr 4 2012, 07:39 PM
Man, who invited the canucks?
Posted by: tod914 Apr 4 2012, 08:01 PM
Nice skittles Dr Mike. See if you can attend the Aircooled Fest, in Sept this year. Located in Flanders NJ. It's a great time. Alot of the folks camp over nite.
Posted by: scotty b Apr 4 2012, 08:11 PM
Nice skittles Dr Mike. See if you can attend the Aircooled Fest, in Sept this year. Located in Flanders NJ. It's a great time. Alot of the folks camp over nite.
NO MIKE. Stay away form the skittles, and for God's sake do NOT wear a hoodie.
As for the canucks, they're never invited, they just invade.........ish
Posted by: Dr Evil Apr 4 2012, 08:58 PM
I am not sure where to source a nipple for the return fitting on the tank, any ideas?
Posted by: scotty b Apr 4 2012, 08:59 PM
I am not sure where to source a nipple for the return fitting on the tank, any ideas?
a junkyard tank ?
Posted by: rick 918-S Apr 4 2012, 09:01 PM
Hey, your running a power glide right? You should see about installing a lockup converter. Your mileage would be enhanced on the highway.
Posted by: crash914 Apr 5 2012, 02:53 AM
ha ha, nipple, ha ha funny
Posted by: Dr Evil Apr 5 2012, 06:48 AM
Junk yard tank is not in the cards. I wont have time. Any other ideas?
What is a "lock up converter"? Yes I am running a PG with a posi and rebuilt TC.
Herb, I figured someone would say something about the nipple, but I expected better from you
Posted by: 9146986 Apr 5 2012, 07:46 AM
One of the local body shops used to use carbon monoxide to weld gas tanks. They'd hook up one of those flexible rubber exhaust hoses to the filler neck and to a running car, let it run until the fuel tank got good and hot, then weld 'er up.
Posted by: rick 918-S Apr 5 2012, 08:21 AM
Locks up at cruising speed for a direct drive like a clutch. No slippy and loss in mileage due to the engine not delivering all the rotation to the rear wheels. My understanding is it turns the hydrulic coupling into a mechanical coupling. Drag cars use them and many of the GM line had them from the factory starting the the 80's I think. I think some of them were called switch pitch or something like that. I would think it could really benifit a big van.
Posted by: d914 Apr 5 2012, 10:22 AM
I have one on my 1990 454... its good for an additional 200 rpm loss at highway speeds.. For my 454 that a big thing!! acts like an overdrive to a point..
Posted by: Dr Evil Apr 5 2012, 01:00 PM
No locking TC for my box. Not that I could find, but thanks for giving me a desire to upgrade even more
Injectors arrived today.
Posted by: Dr Evil Apr 5 2012, 04:11 PM
Well, the tank is out. I had to lower the engine to do it
Actually, not all the way. I did have a stroke.....of genius while looking around at the auto parts store. I am going to take a small section of plate, tap it for 1/4" NPT, cut a hole in the tank, weld in the plate, and install some npt-nipples This will be done tonight, I hope. I didnt feel like searching out dry ice so I will just flood it with argon/CO2 from my weld tank. I have a huge Argon tank right now.
Posted by: MDG Apr 5 2012, 04:19 PM
Herb, I figured someone would say something about the nipple, but I expected better from you
heh . . heh . . the Doc said nipple.
Again.
Posted by: Dr Evil Apr 5 2012, 06:33 PM
Easier than I thought. I will leak test it tomorrow and install if it doesnt leak.
Attached thumbnail(s)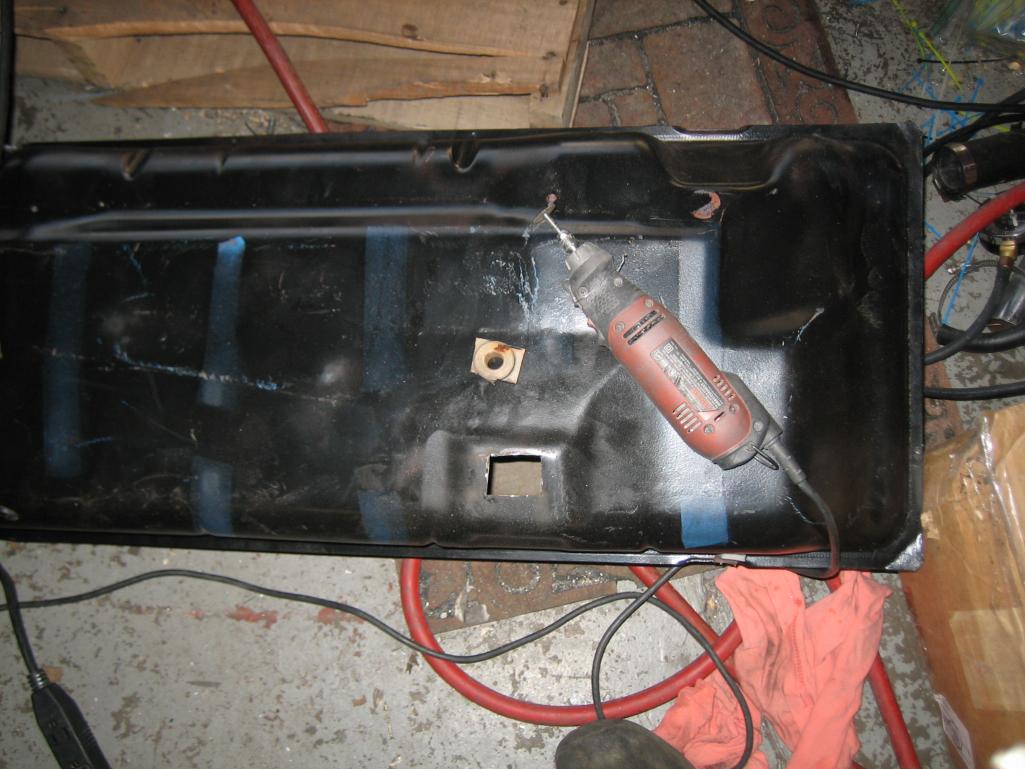
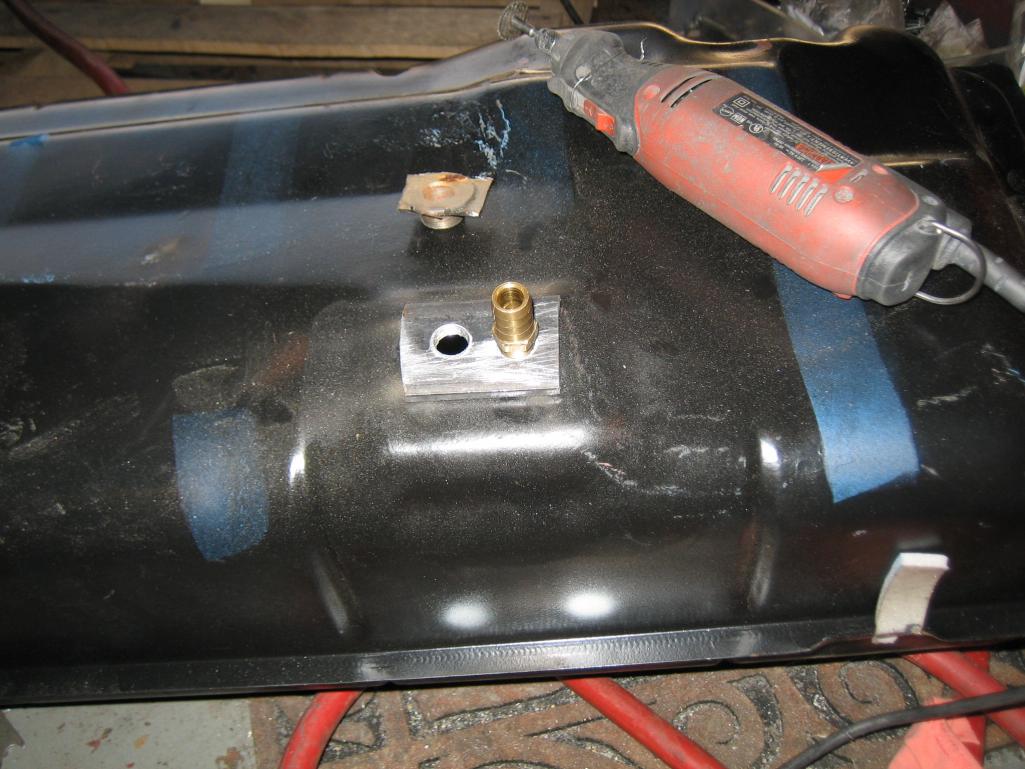
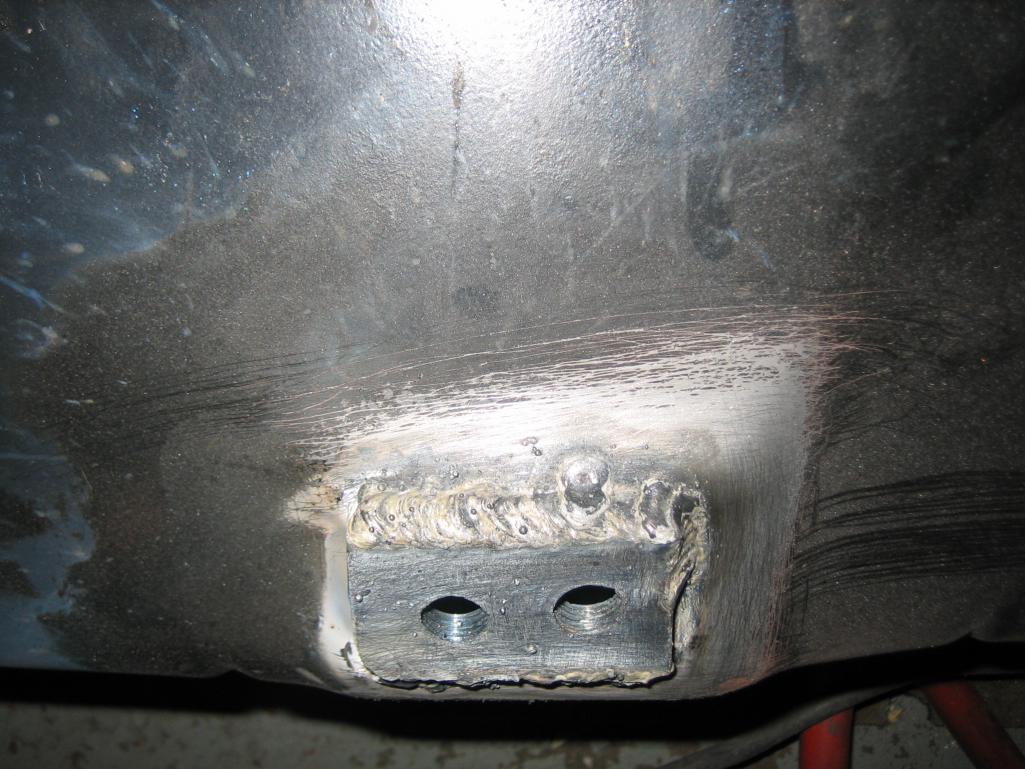
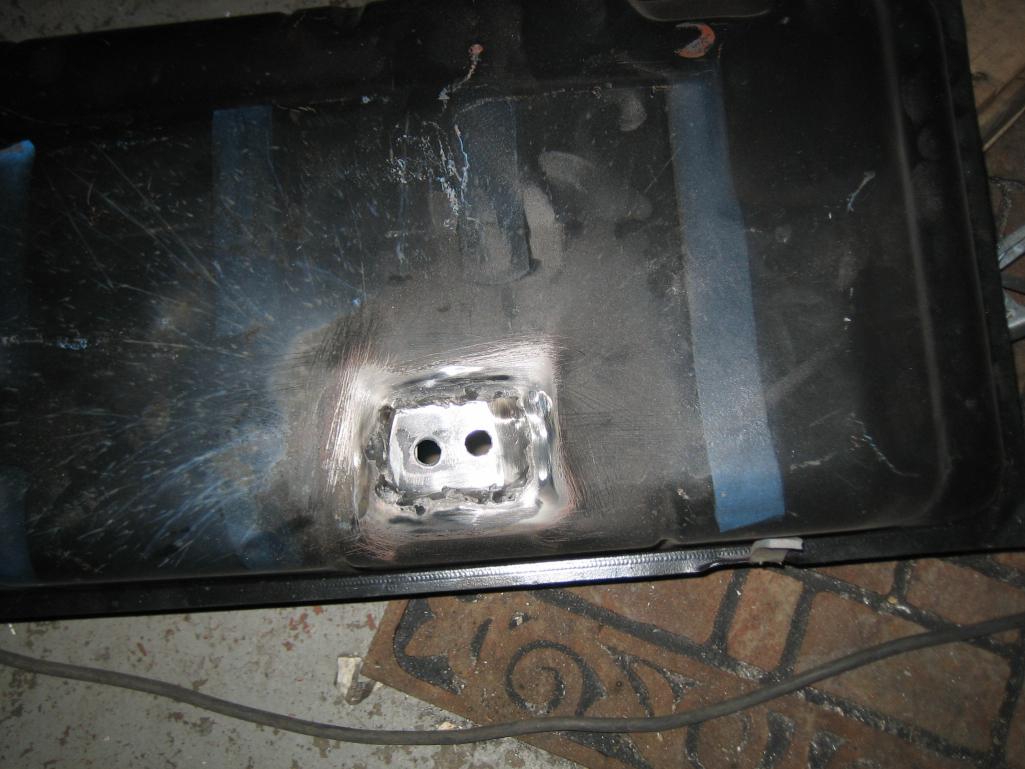
Posted by: Dr Evil Apr 5 2012, 07:15 PM
Yet another snag. The guy that makes the FI hoses I ordered with all the fancy fittings lives in TX and when I called him today he said he was real busy after the tornado that just went through
I of course told him to not worry about my stuff for the moment I hope all you Texans are well.
Posted by: Dr Evil Apr 7 2012, 03:29 PM
Well, the leak test of the tank turned into a can of worms The tank metal was so thin in the area I welded that it would vanish with any exposure to the weld metal. I cut some out, welded in thicker, leak tested it again, had a stroke of genius and finish welded upside down with water in the tank to keep the metal from vaporizing. It has now passed and is in pain with a fresh coat drying before install. I start work at the hospital at 7pm until 7pm tomorrow so no more progress this week.
Perhaps you all can help me, I am trying to find a way to make my own steel braided fuel line set with banjo fittings. This is becoming a PITA. The guy that I was to have do it, for a chunk of change, is otherwise occupied and I see no reason I can not do it myself.....if I can find the parts suppliers.
HELP!
Posted by: Dr Evil Apr 7 2012, 04:03 PM
Here, for the sake of reference, are the hoses I need to make:
qty 3 of 5' injector lines with 8mm banjo fittings on the ends
qty 3 of 2' injector lines with 8mm banjo fittings on the ends
qty 1 of 3' cold start valve line with 8mm banjo on one end and 12mm banjo on the other
qty 1 of 2' warm up regulator (WUR) send line with 8mm swivel on one end 10mm swivel on the other
qty 1 of 2' WUR return line with 10mm swivel on one end and 12mm banjo on the other
qty 2 of 12mm dual banjo bolt
Posted by: Dr Evil Apr 7 2012, 06:26 PM
So far I have found nice banjo fittings for $11ea. Problem, they go to AN 3 (3/16) ID hose and I cant find the damn hose now....yet.
Posted by: BajaXJ92 Apr 7 2012, 06:28 PM
Mike, what can Scotty and I do to make this happen next weekend?
I already know I don't have time, but I'm going to move some things in my week around and make myself available Saturday afternoon, Sunday and some of Monday.
Posted by: Dr Evil Apr 7 2012, 06:35 PM
I am looking into the option to come back from OH mid week to button things up. If that fails, then I will do the clinic in VA and maybe come back and work on it again to try and get it done by Hershey....other than actually coming over and helping me, or finding me the parts, I cant think of anything that can help.
Posted by: Dr Evil Apr 7 2012, 06:50 PM
So I do see this stuff in stock at Mcmaster for about $3.5-4/ft, but is specifically says not for fuel oil or gasoline It has the same handling characteristics and PTFE material so I wonder why they say no gas. I amy consider using them anyway: PTFE, 3000psi with -65 to 400 deg.
Posted by: wilchek Apr 8 2012, 06:15 AM
These guys are near me maybe they can help
http://www.clarkindustrialsupply.com/
Posted by: Dr Evil Apr 8 2012, 07:40 AM
I'll give them a call tomorrow. Thanks
Posted by: balljoint Apr 8 2012, 08:03 AM
Don't use anything that doesn't specifically say that it is for fuel.
Posted by: Dr Evil Apr 8 2012, 08:05 AM
It says that it is for toluene, mineral oil, etc. The PTFE is fuel proof so I do not know why they would not say use for fuel unless they dont want the liability of the tuners using it.
Posted by: Dr Evil Apr 8 2012, 08:27 AM
For reference 52515K21 is the part number at McMaster:
http://www.mcmaster.com/#catalog/118/261/=h0lzuc
Looking into other hoses they offer, there is one that has ends already made to it and is basically the same hose, but it has carbon black in the coat to dissipate the static that can be generated with fuel. This is likely the reason they dont fuel rate the above hose.
Posted by: kg6dxn Apr 8 2012, 08:28 AM
Could you use a -3 turbo oil feed line? Here's an example from ebay http://www.ebay.com/itm/T3-T4-T70-TO4E-T60-T61-Universal-Turbo-charger-Oil-Feed-Line-3-3an-braided-/270950741911?pt=Motors_Car_Truck_Parts_Accessories&vxp=mtr&hash=item3f15ec3797
They come in various lengths. search "turbo oil feed line".
Posted by: Dr Evil Apr 8 2012, 10:11 AM
That is the same stuff that McMaster is offering, just with the ends on. I need a few 5' lengths. I did the math and I basically spend the same if I order the hose and fittings and assemble myself for those hoses. Actually, I probably spend more as the banjo fittings dont come with the 8mm bolts.
I wish I had my lathe here so I could make the 12mm double banjo bolt. The ones that the guy I am trying to order from has look home made.
Looking bad for completion by end of next week. I will be calling the local hydraulic supply store tomorrow as well.
Posted by: Dr Evil Apr 8 2012, 04:01 PM
Here is a pic of the bolts.
Attached image(s)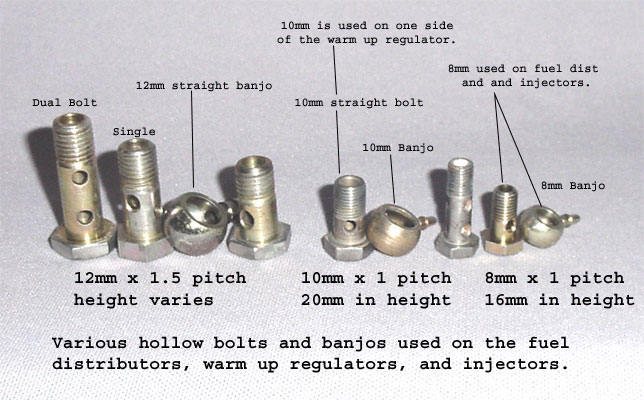
Posted by: scotty b Apr 8 2012, 04:50 PM
Rent a uhaul truck and trailer. Tow the bus down and use my place to work on it. I can help inbetween other jobs and at night. Adam could be here all day on Monday to help
Posted by: Dr Evil Apr 8 2012, 04:58 PM
Man, that is tempting, but would probably be metric $$$. I will look into it.
Posted by: Dr Evil Apr 8 2012, 04:59 PM
Man, that is tempting, but would probably be metric $$$. I will look into it.
Posted by: Dr Evil Apr 8 2012, 06:09 PM
Also, you do realize where the bus is parked and that it is not running, right? How would I get it off of the plateau, down the driveway, and onto a trailer???
Posted by: scotty b Apr 8 2012, 06:12 PM
park trailer at the bottom of the drive, get in the bus, get Leon and Heidi and the offspring to shove. Ride bus onto trailer Easy peasy lemon squeezy
Posted by: hot_shoe914 Apr 8 2012, 07:05 PM
park trailer at the bottom of the drive, get in the bus, get Leon and Heidi and the offspring to shove. Ride bus onto trailer Easy peasy lemon squeezy
Doc, get it to Hershey and I can get it down to Scotty from there. I will either have a trailer with me or my tow dolly.
Posted by: Dr Evil Apr 8 2012, 07:22 PM
Shoe, taking to Hershey would be the same as taking it to Scotty. If I can get the fuel fittings then the bus can drive. The only reason to get it to Scotty is so I can work on it while I am down there before Hershey.
Posted by: hot_shoe914 Apr 8 2012, 07:36 PM
Shoe, taking to Hershey would be the same as taking it to Scotty. If I can get the fuel fittings then the bus can drive. The only reason to get it to Scotty is so I can work on it while I am down there before Hershey.
I pretty much knew that but as your friend it was still my duty to offer to help anyway I could.
Posted by: Dr Evil Apr 8 2012, 09:48 PM
Going for A hail Mary. I have some of the stock type nylon fuel tubing. It looks like I can still get some at various places. I did my 911 engine in the 914 with this stuff and it worked fine with my assembly. So, I can make the current setup work while awaiting to see if there is better. Stay tuned as all I have on hand is 2mm ID and I need some other sizes, but I am off tomorrow so I can go forage for the other sizes.
Lets see.
Posted by: Dr Evil Apr 9 2012, 11:27 AM
Well that was a waste. Napa site lists the hard nylon hoses I need but when I call they are "obsolete" so they do not have them.
Next.
Posted by: Dr Evil Apr 9 2012, 11:31 AM
McMaster has the nylon hoses listed. Lets see.
Posted by: Dr Evil Apr 9 2012, 12:26 PM
After fiddling around with this for a while, it is still no use as I need the special fittings from the fuel pump to the accumulator to the dist. Only one guy that I know has this.
Posted by: Katmanken Apr 9 2012, 02:47 PM
Cheer up!
You can always drive your spare van.
On second thought, that would be an incentive to finish the VW.
Attached image(s)
Posted by: Dr Evil Apr 9 2012, 03:17 PM
So, for $50 I can get all the hose from McMaster to rebuild the system to stock. I have just bought the 12mm banjo I needed for the fuel pump output, now all I need to figure out is what fittings are on the pressure accumulator and where to buy them.
Anyone know what they are called and where I can score a set?
Posted by: Dr Evil Apr 9 2012, 03:32 PM
Ordered the hose, ordered the 12mm banjo, here are the fittings I need. I can use ones cut from a CIS line if any one has some These are for use with regular fuel line.
Attached image(s)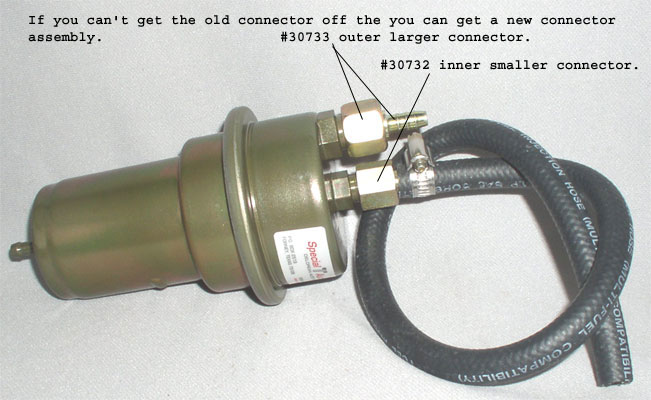
Posted by: scotty b Apr 9 2012, 03:49 PM
take the accumulator to Lowes and go to the plumbing section. Tons of brass pipe thread fittings. I can almost guarantee that is what you need.....almost...........
Posted by: Dr Evil Apr 9 2012, 03:54 PM
WTF, I got nothing to lose at this point.
Posted by: Dr Evil Apr 9 2012, 05:16 PM
Big surprise, Lowes had nothing. Tractor Supply had hydraulic fittings that were close, but I need metric
Posted by: Dr Evil Apr 9 2012, 06:05 PM
Scotty, to tow the bus to your shop will cost about $500 less gas. No way.
On my way to OH tomorrow I will be passing a parts yard and will see if I can be victorious in finding the fittings on the stuff I need. Still not giving up. Hershey is my new goal as I do not see Scotty's as a possibility.
Posted by: Katmanken Apr 9 2012, 06:25 PM
Got a truck hydraulic repair place nearby? They stock tubing, fittings, accumulators, and such for big truck brake, air, oil, and water lines. Also bend lines, make custom stuff, lift gate hydraulics, etc. Volvo-White makes trucks so maybe metric parts available too. Got to keep those big rigs running.
Also try hydraulic repair parts stores. They made hoses and stuff for backhoes, etc. I found steering rack seals there that fit a Honduh.
Mebbe you get lucky sailor.
Posted by: Vacca Rabite Apr 9 2012, 06:41 PM
Its expensive, but could you convert over to AN fittings and hook to standard (ethanol rated) FI fuel line? AN4 or AN6 would get you what you need, and is easily found.
Zach
Posted by: Dr Evil Apr 9 2012, 07:25 PM
I went to a hydraulic shop today and they did have the fittings, but only in crimp. One hose from the fuel pump to the accumulator would cost me $69. Then, I would have to figure out how I would get form the accumulator to my distributor as nothing they have would work.
I know I can get fittings from the UK....its just a time thing.
Posted by: Dr Evil Apr 9 2012, 07:26 PM
For instance:
http://www.ebay.com/itm/Metric-Conical-Hose-Tail-Fitting-Diesel-Petrol-Oil-Cooler-Tube-Pipe-Fuel-Filter-/280792554118?pt=LH_DefaultDomain_3&var=&hash=item41608a5a86
Posted by: rick 918-S Apr 9 2012, 11:14 PM
Is this what your looking for? After seeing the link I looked through my stash and found these. The only thing is I'm not sure the fitting is metric. I tried to screw it on about 6 other male fittings I have in my brass stuff and it wouldn't thread on stuff that I know is not metric.... It's a crap shoot.
Attached image(s)
Posted by: tdgray Apr 10 2012, 06:25 AM
Doc.... did you try summit racing?
I remember buying metric fittings from them long ago for the british cars.... of course it is local to me.... I can run up there for you if need be.
Posted by: Dr Evil Apr 10 2012, 07:00 PM
I made it to the junk yard today on my way to Plain City, OH. I found the only VW there with CIS and raided every fitting I could find. I also raided a few MBZ for parts, but their systems are all hard line so few fittings. The verdict? I have not been able to find the large swivel fitting for the pressure accumulator, probably because there is only one on the cars with it.
Dont fear! I have a solution! I am going to cut the threaded neck off of the large fitting on the accumulator, and weld on an appropriate fitting. If you cant understand what I am saying, just stand by. Its gonna be awesome
With this, I stand a chance of making it to Scooter's with the bus.
Let us pray........ 
Posted by: scotty b Apr 10 2012, 07:08 PM
I'll have the van gassed up and the trailer attatched
Posted by: rick 918-S Apr 10 2012, 10:30 PM
Just throw that accumulator in the trash now and save the van from the horrible fire that will ensue when the weld fails and hi pressure fuel sprays all over everything.
Seriously, Just find a wrecked Volvo and get the correct fitting.
Posted by: Dr Evil Apr 11 2012, 06:35 AM
Well, arent you a ray of sunshine
Wait and see.
Posted by: dlee6204 Apr 11 2012, 07:48 AM
I'm kinda confused because I think you are making this more difficult than it needs to be. You only need a barb fitting for the outer large connector on the accumulator right?
#30733 in this photo right? Five minutes on google and it looks like you can get it here...
http://www.specialtauto.com/delorean-parts/fuel-injection.html
$14.60 for the bigger one,
$11.96 for the smaller one (#30732)
Not exactly a bargain but better than trying to weld on an accumulator.
When I did the CIS system for my car, I had no problem finding any of the fittings or even adapting any of the parts to fit.
Posted by: Jeffs9146 Apr 11 2012, 08:50 AM
If you use the stock 3.0L lines and the stock fuel filter you can just adapt the line coming into the filter!
Attached thumbnail(s)
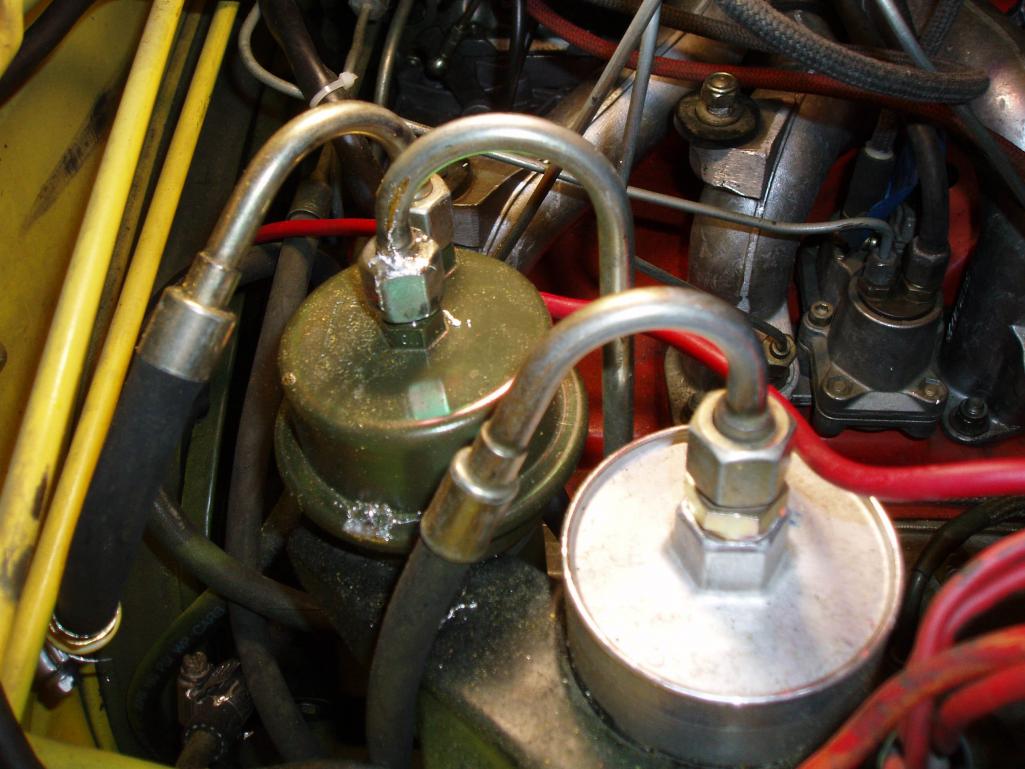
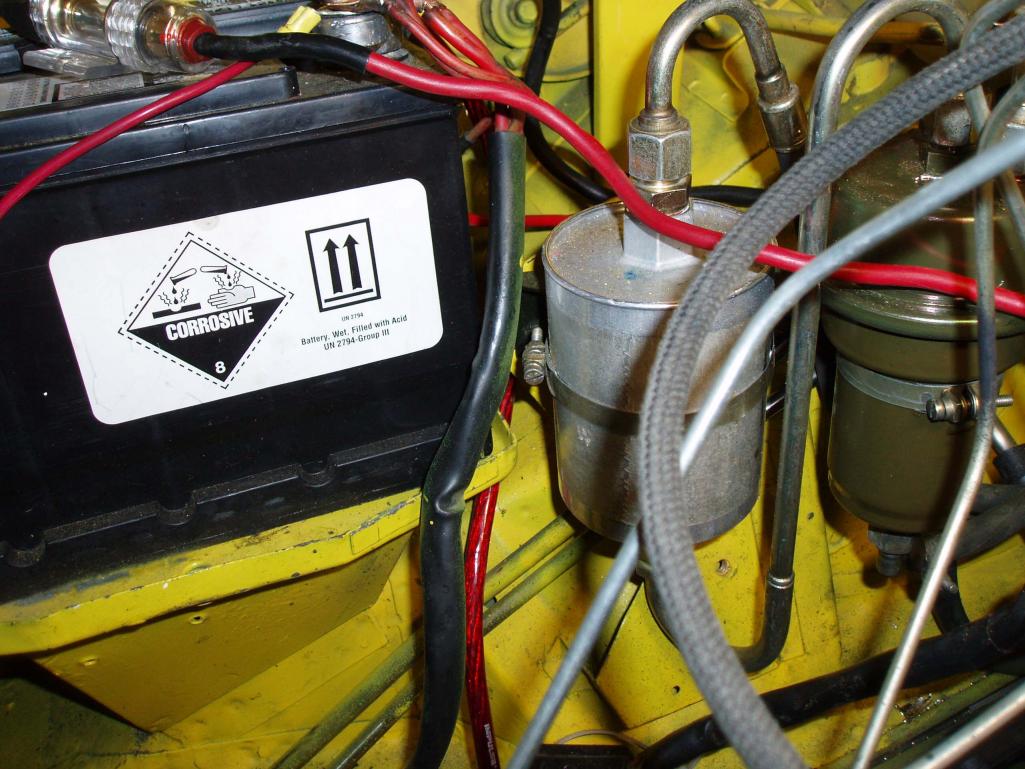
Posted by: rick 918-S Apr 11 2012, 04:04 PM
Well, arent you a ray of sunshine
Wait and see.
Don't mean to be a complete jerk but I have seen your welding. There is no way "I" would weld on an accumulator. First the guts will not survive the heat and second unless you have a tig you will stand about a 10% chance that the fitting will not leak at the weld someplace or crack under high pressure and vibration. Some problems shouldn't be solved with a welder. Have you thought of maybe rethreading the accumulator with a fitting you can actually get?
Posted by: Dr Evil Apr 11 2012, 05:33 PM
Alright, mother. I found the connector at a parts yard in Columbus, OH. Game on!
Dlee, that is the site I tried to order from, and where I got the picture from, and that is the guy who has not been returning messages after the tornado hit his area.
Jeff, if I had the whole CIS setup then I wouldnt need the fitting I didnt have that fitting, that is why I needed it.
Oh and Rick, the welding would have been nut to nut and I bet it would have worked, but no need to mess with that now.
Posted by: dlee6204 Apr 11 2012, 05:44 PM
Glad you got it. I forgot you mentioned that place in Texas.
Posted by: Dr Evil Apr 11 2012, 06:58 PM
If you use the stock 3.0L lines and the stock fuel filter you can just adapt the line coming into the filter!
You know what is neat about this pic? The fittings on your accumulator are all the same, and are of the available size
I have the parts all cobbled up, now the hard part is that the large barbed fitting is way bigger than the one it goes to. So, I either need to make a hose with a reducer (likely) or I dont know.
Posted by: Dr Evil Apr 11 2012, 07:03 PM
Update! Jeff, your pic helped out a lot. I didnt know that the smaller center input was the input. I thought the big one in was the input. This will make it possible for me to plumb it as it.
Posted by: rick 918-S Apr 11 2012, 10:00 PM
I'm so relieved Mike. You may have been successful but the risk is not worth the reward here. Carry on,,, carry on.
Posted by: Dr Evil Apr 11 2012, 10:02 PM
Posted by: Jeffs9146 Apr 11 2012, 11:03 PM
Update! Jeff, your pic helped out a lot. I didnt know that the smaller center input was the input. I thought the big one in was the input. This will make it possible for me to plumb it as it.
Yep it took me a while to figure out which fitting fit where! I got everything in a box from the pump to the engine but nothing labled. I did have to cut a few lines to attach to the ss lines and from the pump to the tank but it does work!
I even paid for some banjo stuff I didn't end up using because I already had it.
I pulled my engine today so I can fix the vacume and oil leaks!!
Attached thumbnail(s)
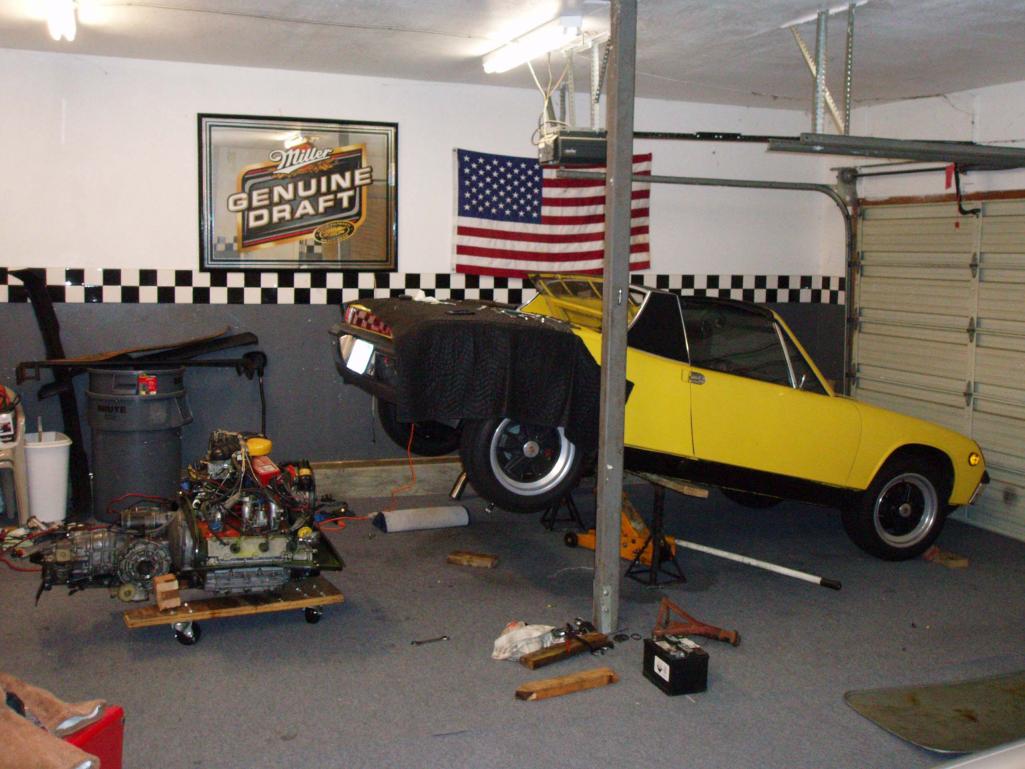
Posted by: Dr Evil Apr 12 2012, 07:24 AM
You took the upper and lower dash off to get the engine out???
Posted by: Jeffs9146 Apr 12 2012, 08:56 AM
You too the upper and lower dash off to get the engine out???
No those are extras with cracks!!
Posted by: Dr Evil Apr 12 2012, 10:25 AM
Some update:
I attempted to insert fittings into the 1.8mm (2mm) ID line that I bought and there is no way that is going to happen. I dont know what voodoo the Germans used to do it, but the tip of the fittings are about as big as the hose. So, I tried it with the 2.8mm line and it barely fits to start, but I made it work. I took two blocks of wood, clamped them together, drilled a hole down their interfaces just a bit smaller than the 3/16" OD of the nylon line, and then clamped the line in the blocks. Once clamped, I used my hydraulic press to apply the direct force necessary to push the fitting into the tube.
I have some more tubing that is due to be here either today or tomorrow so I will leave the line making as the last step.
I have the right 3/4 of the tin done with the front, back and right side.
I have riveted/bolted some metal to the airfilter box to keep it straight and allow for solid mounting.
Back to work.
Posted by: Dr Evil Apr 12 2012, 10:01 PM
OK, I am nearing the end of my time. I got the tins done for now. They aint pretty but they only need to last 6hrs to Scooter's. Transmission hoses hooked up. Transmission shifter cable routed, I will hook it to the tranz tomorrow when I change the pan on it. Axles on and sealed. Center section of the intake all assembled with TB, CSV, AAR port. Mean looking piece of work I got the fittings to change the big out to a little out.
Still on the to-do list:
- Change tranz pan and connect shifter cable
- Design and build throttle linkage
- Make all fuel lines (I hope UPS shows up early)
- Route vac and air hoses.
- Go through the wiring in the cabin, and engine bay and hook up or remove stuff.
- Wire up the CSV, AAR, and WUR to power. Oh ya, install TTS for the CSV.
- Exhaust
- Figure out if I have to goof with the oil lines or if I have all the parts (since I removed the manifold from the circuit).
- Mount the CIS air box and dist
- Finish making the air tube so that it accommodates a tilted TB.
- Battery....I should probably charge it
- Add oil and ATF
I cant think of anything else.
A cool note, for the throttle I am going to try and make a cable extension off of the tranz bell crank using a bicycle brake cable. I bought a set of 4; front and rear brake, and two shifter cables for $5 at Wally World. They are Bell, not a knock off either This ought to be fun.
Posted by: Dr Evil Apr 13 2012, 09:41 AM
Still on the to-do list:
- Design and build throttle linkage
- Make all fuel lines (I hope UPS shows up early)
- Route vac and air hoses.
- Go through the wiring in the cabin, and engine bay and hook up or remove stuff.
- Wire up the CSV, AAR, and WUR to power. Oh ya, install TTS for the CSV.
- Exhaust
- Figure out if I have to goof with the oil lines or if I have all the parts (since I removed the manifold from the circuit).
- Mount the CIS air box and dist
- Finish making the air tube so that it accommodates a tilted TB.
- Add oil and ATF
No idea how I am going to pull this off in 6 hrs. I have to leave around 6pm as I have to be fresh (enough) for the clinic tomorrow. Ugh.
Posted by: Dr Evil Apr 13 2012, 02:13 PM
After much internal debate, I yield. I could get this done tonight, drive 6hrs to Scooter's, and run a clinic for two days, maybe. I think it better to rest a bit and leave soon with a clear head.
I'll post pics in a sec.
Posted by: Dr Evil Apr 13 2012, 02:27 PM
Here she is in her all her glory.
Still to do:
- exhaust
- Finish fuel plumbing
- Electrical stuff
- Throttle
- Air tube
Attached thumbnail(s)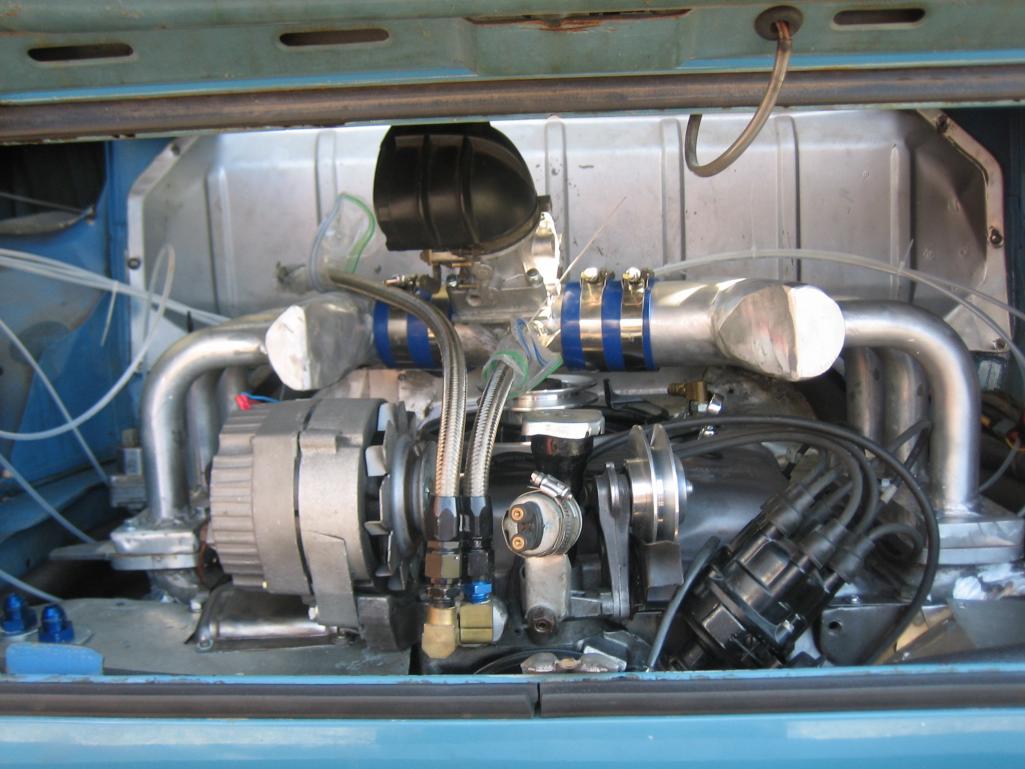
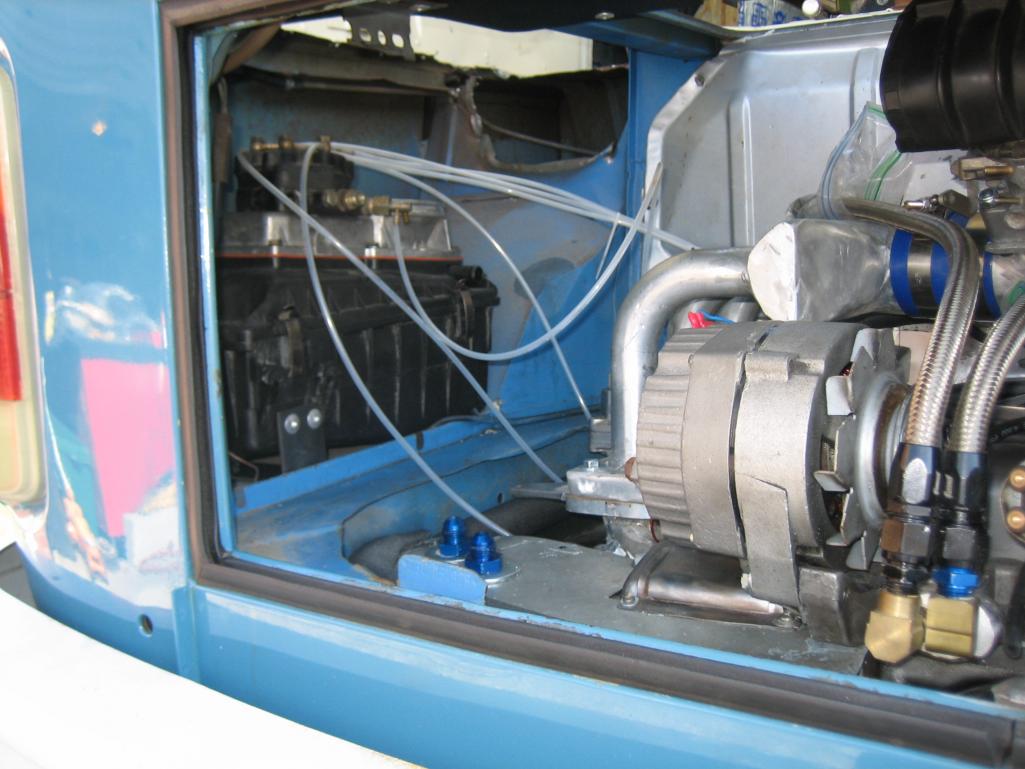
Posted by: jsayre914 Apr 13 2012, 02:44 PM
Looks great Mike !
Posted by: scotty b Apr 13 2012, 03:16 PM
Sick looking !!
Posted by: Dr Evil Apr 13 2012, 04:15 PM
Best damn lawn ornament ever!
Posted by: rick 918-S Apr 13 2012, 04:15 PM
Nice.
Posted by: type11969 Apr 13 2012, 04:57 PM
Looks sweet!
Posted by: scotty b Apr 13 2012, 11:04 PM
Zach's pens are here
BillH is here
Evil is here........
where are you ???
Posted by: Dr Evil Apr 13 2012, 11:11 PM
Here
Posted by: bulitt Apr 14 2012, 01:11 AM
getting up to let the fricking dog out...then driving there.
Posted by: BajaXJ92 Apr 14 2012, 05:08 AM
ETA 5pm Eastern Standard Time.
Posted by: Dr Evil May 27 2012, 02:24 PM
Alright, time to get back on this and hope to get it done in time for Matt's party (if I can get off of work at that time).
What is the big hold up? I am trying to figure out how to pipe the air from the fuel dist to the TB. My initial idea looks heavy and wont match the angles very well. I need to have pipe bend and twist a little, and I can not have the volume of the pipe be to large or the throttle response and running will be crappy.
One idea I have is to make a cage out of metal bar that I would weld to rings on either end that match the intake mouths. Then once I make a cage doing that, which matches the bends, I can skin it. The end product should be reinforced by the cage and match the curves......but what a lot of work. Any other ideas? I want it to be light since it has to stretch a bit of distance. If there was a hose I could use, that would be perfect.
Posted by: Jeffs9146 May 27 2012, 02:32 PM
You could try 3" electrical conduit and cut notches to bend then weld up the holes. Attach the TB rubber boots like I did on my 3.0L!
The conduit is light weight and can be welded.
Posted by: Dr Evil May 27 2012, 02:44 PM
That sounds plausible. I will have to look into that. I took your advise on making the rings for the ends so this may all just mate up. I can likely beat the conduit into the oval shape for the mouths....I think that the opening is larger than 3", though, so I will have to weld in some flairs. 3" volume should be appropriate, though.
Thanks, Jeff
Posted by: Dr Evil May 27 2012, 04:12 PM
Just hit 3 hardware places and the biggest conduit is 2" I had the idea to look at fence posts and they are no bigger than 2 3/8 OD .
Why can I not use ABS? Cheap, heat tolerant, premade bends. I just have to mate it to the TB and dist.
Posted by: Dr Evil May 27 2012, 04:30 PM
Acutally, 3" exhaust pipe should be pretty easy to come by and has angles in it
Posted by: Jeffs9146 May 27 2012, 04:56 PM
It would probably be a bit heavier but it would be the same!
Posted by: Katmanken May 27 2012, 05:29 PM
I know you have your fuel dist. set in a nice out of the way place, but maybe something like this would work for you.
The Vanagon puts the air sensor box on a pedestal right next to and partially over the intake manifolds, and uses a short rubber section to the TB to allow for motor vibration and rapid response. A tuned snorkel runs from the air sensor box to the right hand louvered engine air intake in the side of the van.
FYI, some people have reported a power loss when the snorkel is detached, so a tuned length does something.
Attached image(s)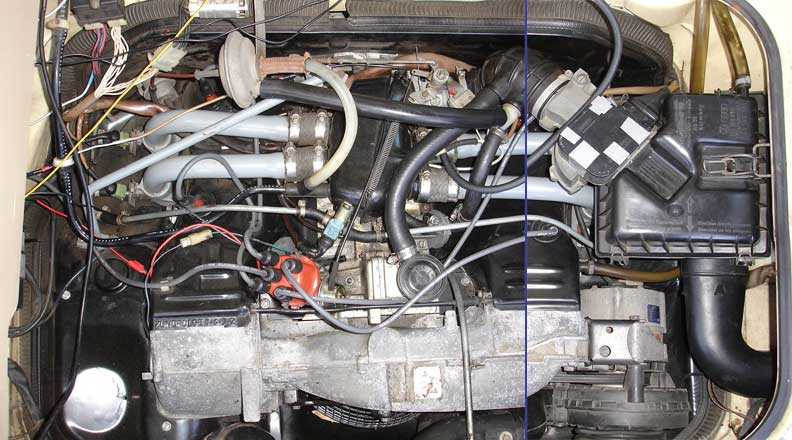
Posted by: Dr Evil May 27 2012, 06:00 PM
Not the same setup or FI system. Essentially, I am doing that, but with what I have to in the confines I am given.
Posted by: Katmanken May 28 2012, 01:39 PM
Evil,
I know they are different FI systems, but the all have a manifold, a throttle body on top of that, a piece of connecting tubing on that, and an air flow sensor of some kind that sets the fuel flow, and an air filter on top of that.
My point was that moving the box closer to the throttle body seems to be the norm, and that a small pedestal has been used to hold the airflow sensor/filter box closer to the throttle.
Since you are dealing with compressible flow, the reason a short piece of tubing makes sense is that when you open the throttle, you start a column of air moving towards the throttle body, and that triggers the demand for extra fuel by moving the CIS plate. When you close the throttle, the inertia of the column of air keeps moving through the CIS box and into the conecting tubing until the air column backs up against the throttle plate and creates enough pressure within the connecting tubing to move the CIS plate closed to match the throttle position.
The bigger the volume of the connecting tubing, the longer it takes to pressurize the connecting tubing when the throttle closes. When you accelerate, it takes longer to get a column of air moving enough to move the CIS plate. Shorter tubing means a better match on the fuel and air being fed into your engine, less lag when you push on the throttle and less lag when you release the throttle.
Used to call my Vanagon accelerator pedal a "fly-by-wire" system. Mash the pedal, and nothing happens until the EFI says it will. Once it got moving, it was great and the pedal seemed to better match the engine speed.
Posted by: Dr Evil May 28 2012, 01:48 PM
I can not move the DIS closer as there is no room and the dist has to be upright or it wont work, not like the L-jet pictured which has to be horizontal.
Posted by: Jeffs9146 May 28 2012, 02:10 PM
I can not move the DIS closer as there is no room and the dist has to be upright or it wont work, not like the L-jet pictured which has to be horizontal.
If you switch to the early Volvo 242 intake housing you will be cutting the height by 50%!
Attached thumbnail(s)
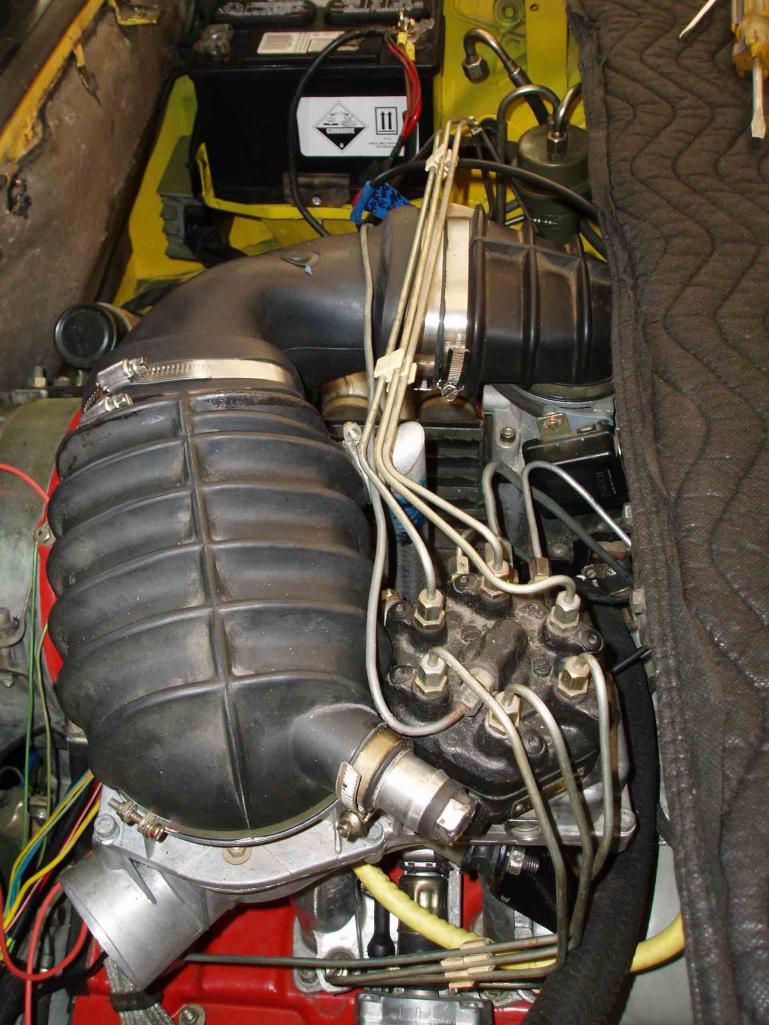
Posted by: Dr Evil May 28 2012, 02:13 PM
I have the housing, but it will still have to be as far away as the current model that I am using. I will take some pics to show what I am working with.
Posted by: Dr Evil May 28 2012, 06:16 PM
The distance from the dist to the TB is 21" in current location. I can move it slightly closer, but there are things in the way between: AAR, WUR, oil thermostat, oil filter. I have to move the oil supply parts to bring the air box closer, this will be interesting.
Attached thumbnail(s)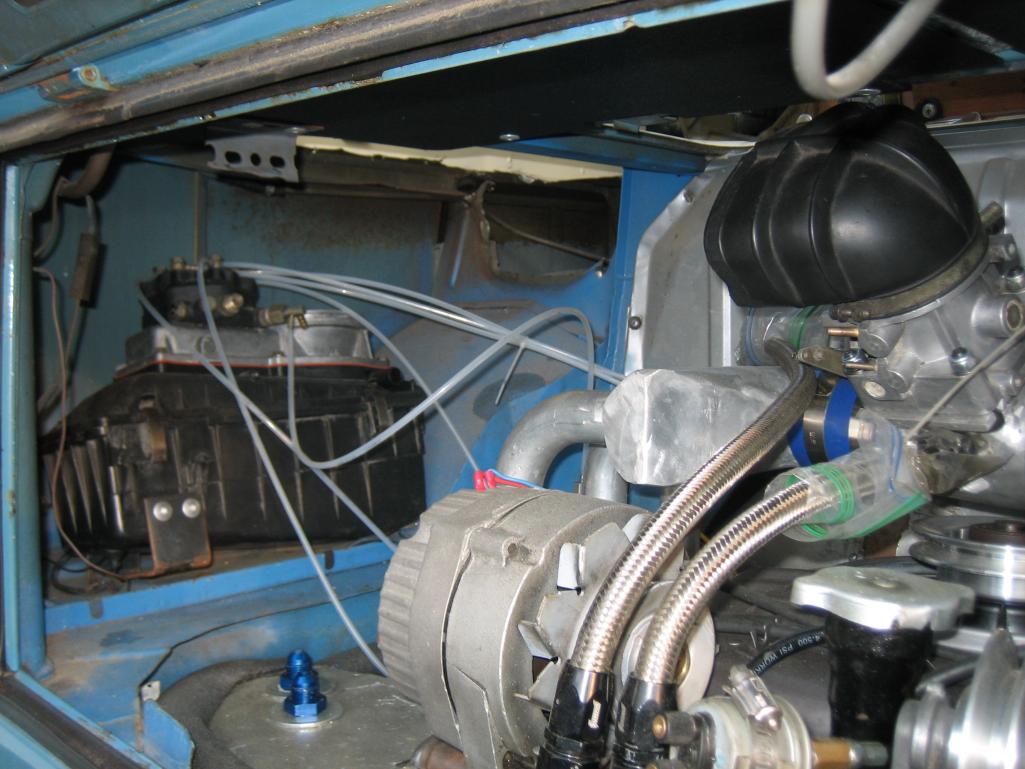
Posted by: Dr Evil May 29 2012, 02:00 PM
I picked up an 3" ID x 18" pipe this afternoon. I am due to go to a Pirates game tonight so no work now. But, I am committed to getting this part figured out. After this, I will order fuel lines and attempt to start it
Posted by: OU8AVW May 29 2012, 02:41 PM
Pirate's game?
Posted by: Dr Evil May 29 2012, 02:55 PM
Why do you have a picture like that?
Posted by: Katmanken May 29 2012, 05:35 PM
Maybe he went to Gasparilla Day down in Tampa. They celebrate the Pirate's visit and generally misbehave.
Posted by: OU8AVW May 29 2012, 08:06 PM
Just use Google. Amazing what you get with no result filter
Posted by: Dr Evil May 30 2012, 08:48 PM
Tonight was very productive. I changed gears after looking at the whole setup. I could find no close area to move the dist to, particularly with the bulky airbox. So, back to the pretty Al Volvo box. Still, it could not be mounted near the center of the engine.....from the bottom. So, I came up with an idea to build aluminum brackets to suspend the airbox from the ceiling of the engine bay More later.
Posted by: Jeffs9146 May 30 2012, 10:46 PM
That would work great if you mount the Volvo intake to the motor and just the air box above! You will run into problems if the dist is mounted to the chassis because of the movement of the motor!
Posted by: Jeffs9146 May 30 2012, 10:57 PM
If you make a bracket that bolts onto the intake bolts you could mount the volvo intake just to the left and the pipe would be considerably shorter. You could also hang it out to the left, not mounted to the chassis, but the motor!
Posted by: BajaXJ92 May 31 2012, 06:00 AM
So, I came up with an idea to build aluminum brackets to suspend the airbox from the ceiling of the engine bay
More later.What about the top access panel to the motor? Are you mounting to that?
Posted by: Dr Evil May 31 2012, 08:52 AM
You will see. I originally was trying to mount the Volvo setup to the intake manifold, but I need 5.5" of clearance and that was not available directly on top. However, there was room just to the side on the left. I have the AAR and WUR mounted on the left and those have to be considered in the equation. What I intend to mount to is one of the braces that runs fore and aft on the left ceiling. It will place the dist aft and better line it up with the TB. Another reason I decided to abandon mounting the dist to the intake gear is that it is rather heavy and I didnt want to stress the intake stuff. I dont think that engine movement will be a huge issue as the rubber ends of the coupler will act as shock absorbers, and the engine mount doesnt let the engine shake more than minimal. But, time will tell and if I need to adjust the design then so be it.
Posted by: Jeffs9146 May 31 2012, 09:00 AM
Just an FYI Doc!!
After dealing with vacume leaks on my 3.0L intake that would work for a while then fail it became clear that it needs to be solid attached to the motor or the vibrations alone will cause problems! I welded up a bracket that attached to the front and rear intake studs.
Posted by: Dr Evil May 31 2012, 09:11 AM
That just cant happen. There is no way to mount to the motor. There is too much stuff mounted to it already. I may just be able to place another flex joint in the tube between the TB and the dist. This is worrisome news.
Posted by: Jeffs9146 May 31 2012, 09:21 AM
That just cant happen. There is no way to mount to the motor. There is too much stuff mounted to it already. I may just be able to place another flex joint in the tube between the TB and the dist.
This is worrisome news.The flex line will need to be Very stout! When I had a 90' rubber elbow, before I welded up my steal one, I would hit the throttle and the rubber would flex and be pulled in from the vacume. This would cause a delay in the throttle response and would get worse the higher the RPM's!
If you do use a flex joint I would make it very short just to add the buffer from the vibrations.
Posted by: Dr Evil May 31 2012, 09:41 AM
That is my plan. I will try without first and then source some flexible hose for a 1" gap or so in the pipe. This will enable it to be stout, and allow for absorption of some of the vibration. Actually, this may be a great idea overall as it will make fabrication of the pipe easier as the flex joint enables slight adjustments in angle and rotation so mating to the TB should be a snap.
Posted by: Dr Evil May 31 2012, 08:28 PM
Here is the rough mockup in aluminum Turned out pretty well.
Attached thumbnail(s)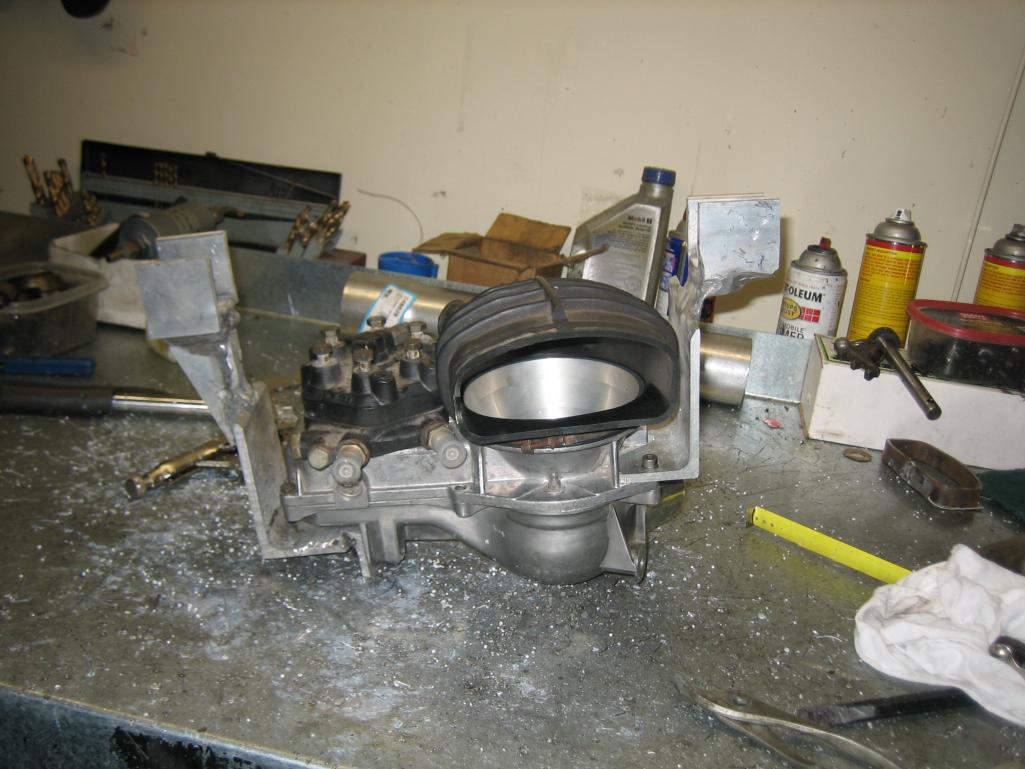
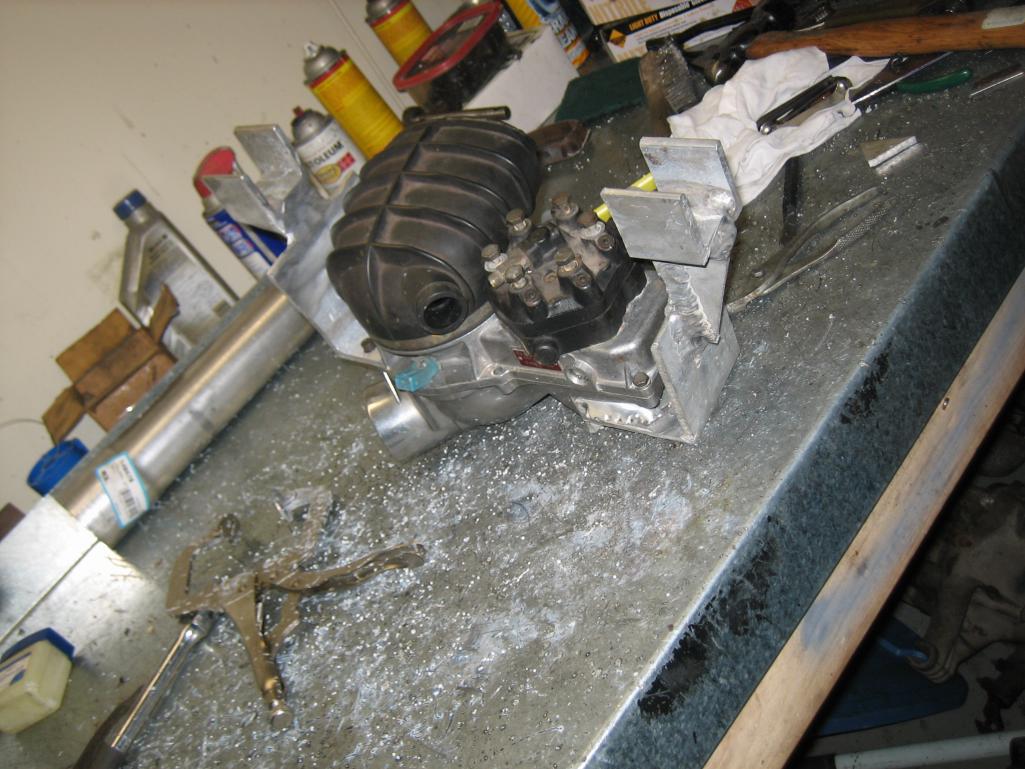
Posted by: Dr Evil Jun 3 2012, 09:09 PM
Here is the bracket assembly.
Attached thumbnail(s)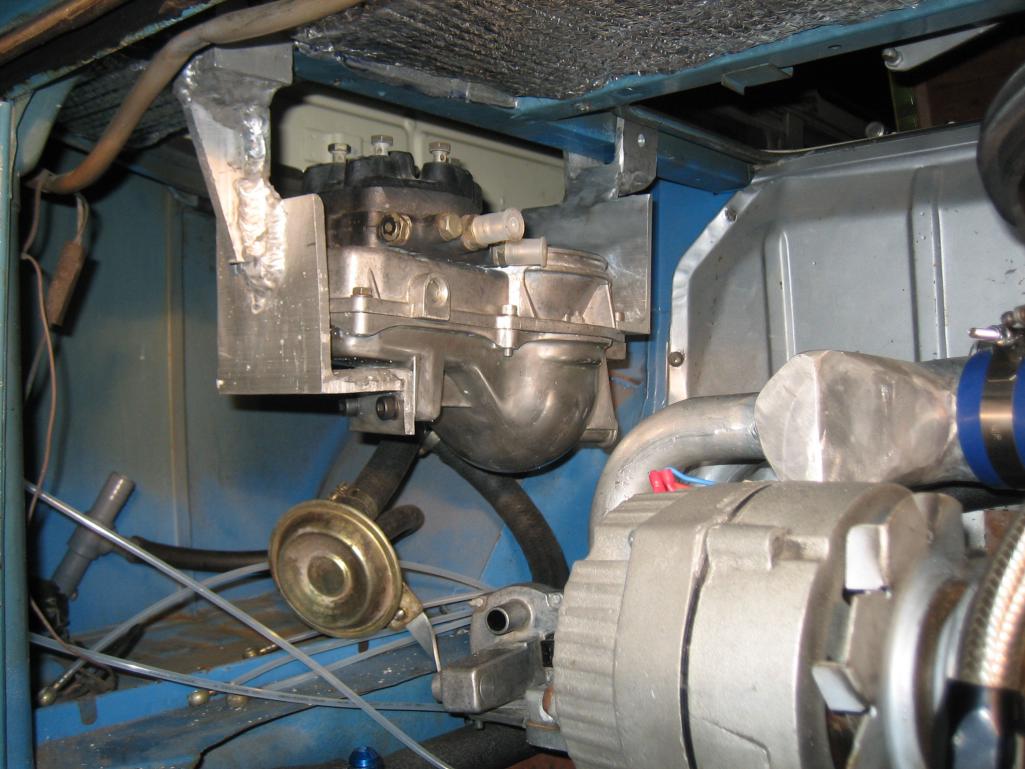
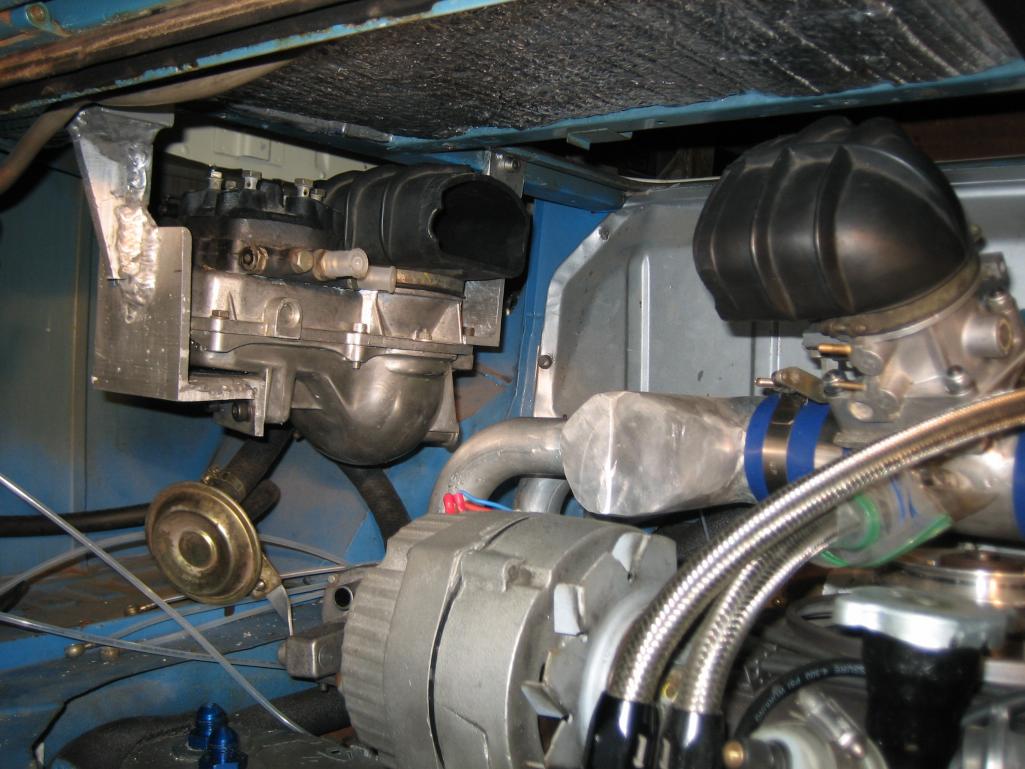
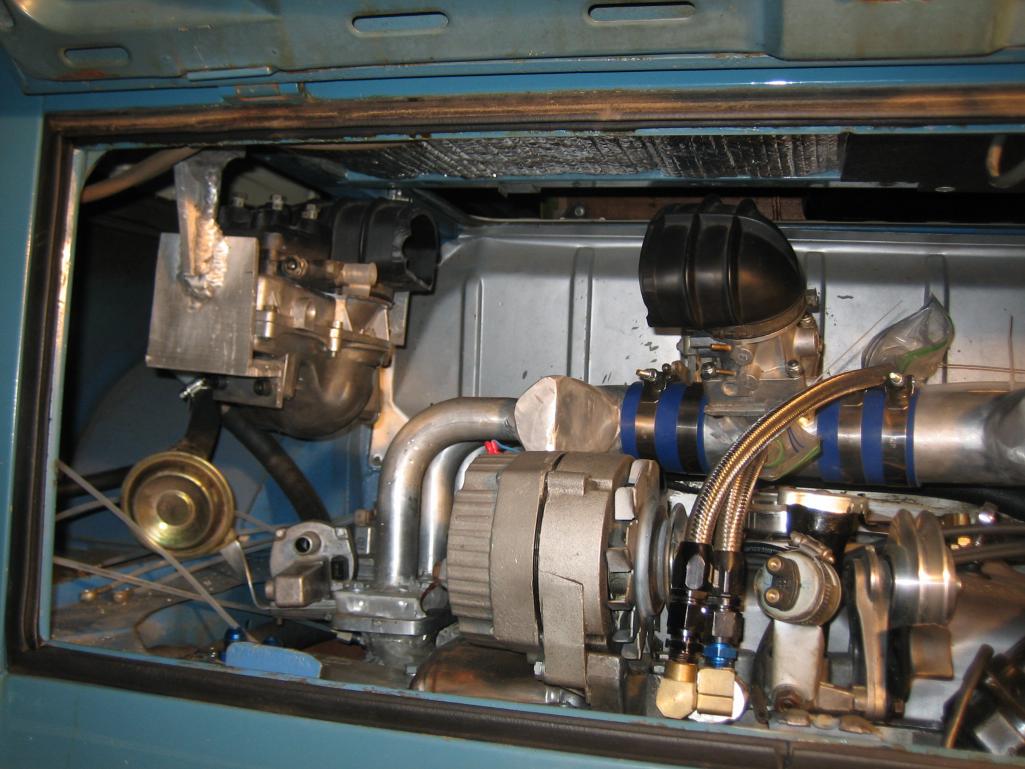
Posted by: Jeffs9146 Jun 3 2012, 10:20 PM
Looks good doc!
FYI you probably can eliminate the decel valve like I did!
Posted by: Dr Evil Jun 4 2012, 04:45 AM
I considered decel elimination, but my reading showed it to be better to have. But, since it is not necessary it may just go away. Too bulky.
Posted by: Dr Evil Jun 6 2012, 08:01 PM
I sure am having some luck with this step of the build. I emailed my detailed order for FI parts and hoses to the guy at DeLorean Auto Parts only to not have an answer back.....similar to last time. So I call to find out, via the answering machine, that they are packing and getting ready for a big DeLorean meet. This meet is to happen, I find on line, weekend after next How much longer must I wait?!
Posted by: Dr Evil Jun 8 2012, 04:28 PM
I sent another email to the hose guy to ask about an ETA. In the mean time, I made a diagram of the fuel system with a legend, I figured I would share. 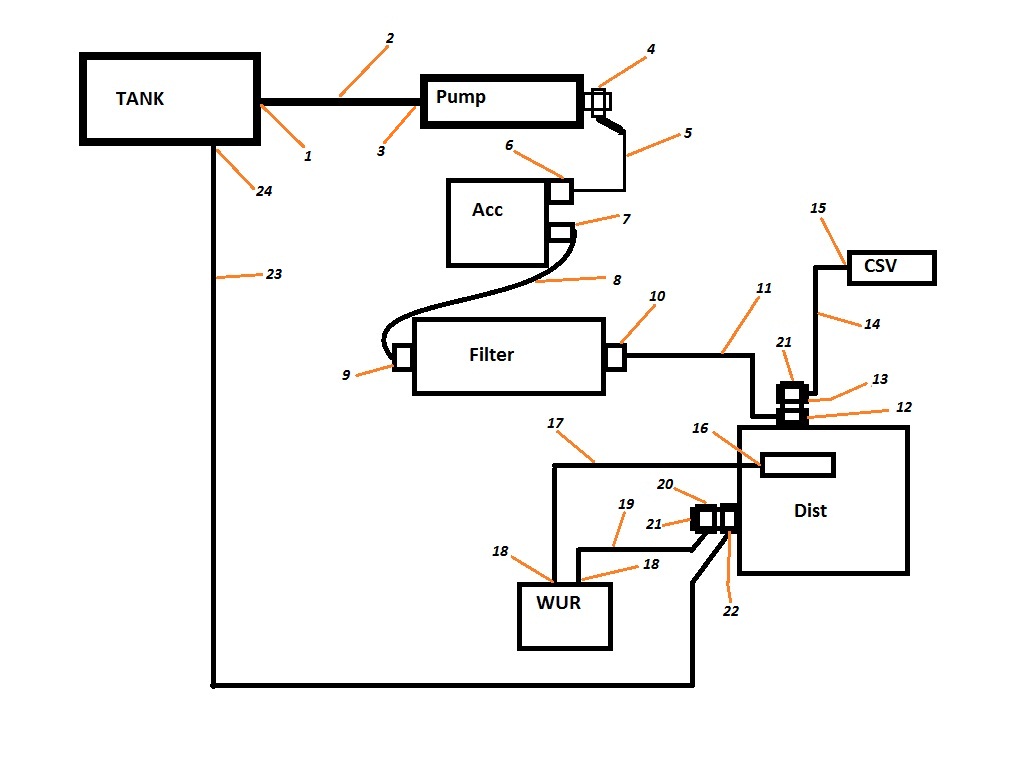
Bus CIS Legend
1. NPT to tank – Barbed to hose
2. Low pressure ~12mm ID fuel hose
3. 12mm nipple
4. 12mm banjo to 6mm angled barb
5. 6mm ID high pressure fuel hose
6. 14mm Swivel fitting with 6mm barb
7. Swivel fitting on hard line
8. Hard line
9. Swivel fitting on hard line
10. 14mm swivel to 6mm barb
11. 6mm ID high pressure fuel hose
12. 6mm barb to 12mm banjo
CSV line
13. 12mm banjo to SSB
14. SSB line
15. 8mm banjo
WUR supply
16. 8mm swivel
17. SSB line
18. 10mm swivel
19. SSB line
20. 6mm barb to 12mm banjo
21. 12mm double banjo bolt
22. 6mm barb to 12mm banjo
23. Low pressure fuel line, ¼” ID
24. ¼” barb to NPT
Posted by: Travis Neff Jun 9 2012, 11:07 AM
Why is the filter after the pump and accumulator?
Posted by: Dr Evil Jun 9 2012, 11:10 AM
I wonder that as well, but that is the correct way according to all diagrams I have seen. Screwy. I am looking into a high flow one before the pump. The filter is a beast built to handle pressure.
Posted by: Katmanken Jun 9 2012, 11:53 AM
Vanagon has a huge filter after the pump, and it may be there to act as a "pseudo-accumulator" and to catch crap coming out of a disintegrating pump to protect the rest of the EFI.
I like that you are putting a second filter in front of the pump. Had to go to that configuration when a load of bad gas dumped about 8 cups of crap into my fuel tank. The crap looked like clay, water, and ground up fuel pump from the gas company storage tank pump. Chewed up the expen$ive fuel injection pump, so consider the pre-filter as cheap insurance.
Posted by: Jeffs9146 Jun 9 2012, 12:03 PM
I put a prefilter before the pump also!
Posted by: Dr Evil Jun 9 2012, 12:22 PM
What pre-filter did you use? It would save me some time looking for a suitable one.
Posted by: Jeffs9146 Jun 9 2012, 12:40 PM
What pre-filter did you use? It would save me some time looking for a suitable one.
It took me a while looking through the parts book in Napa to find one with the proper sized in and out lines! You need to get your lines sorted out at the tank and then find the proper filter to attach to those lines. The 914 tank is probably different sized than the Bus so knowing what I have probably wont help your situation!
I don't have time today to open up the botom of the car to look at the filter part number, sorry!
Posted by: Katmanken Jun 9 2012, 03:28 PM
Measure the fuel line ID or the pump inlet barb, go down to your FLAPS, go to the huge fuel filter selection board, and pick one that matches the fuel line ID and the amount of money in your pocket. I used the translucent rectangular plastic ones that were non-metric as they were cheap and worked great.
25.4 mm per inch means a 6mm id is about a quarter of an inch, 8mm is about 5/16.
Posted by: Dr Evil Jun 9 2012, 03:58 PM
The inlet is 12mm and the FP is putting out 70-90 psi so I am reticent to use just any old filter. However, I would expect any big honking one would work. It needs to flow
Posted by: Lennies914 Jun 9 2012, 04:05 PM
Mike, fuel pressure shouldn't matter. If I'm reading this correctly and you're doing a "pre filter" you're on the suction side of the pump.
Posted by: Dr Evil Jun 9 2012, 04:07 PM
Clarified my post. It needs to be able to flow, yes.
Posted by: Lennies914 Jun 9 2012, 04:14 PM
Clarified my post. It needs to be able to flow, yes.
gotcha!
Posted by: Katmanken Jun 9 2012, 08:48 PM
Evil,
Don't worry about the flow too much. All fuel injection systems use a honkin big high pressure high volume pump, and then bleed off the excess pressure and flow.
Remember the plastic fuel filter found in the 4 cyl 914's? That's plenty big enough. All you need to do is find a filter with the correct inlet and outlet size that is at least close to that in size. They tend to come in metal or plastic. After the load of crappy fuel episode, I like the translucent ones because you can see the crud. When your filter gets full, the pump sound volume also increases.
Attached image(s)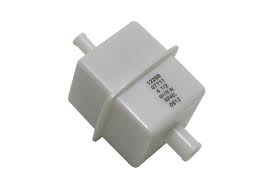
Posted by: rick 918-S Jun 9 2012, 09:54 PM
I didn't run a pre-filter. Just a huge one after the pump and accumulator.
Posted by: Dr Evil Jun 9 2012, 11:02 PM
My tank doesnt have a filter sock anymore as it is modified. I want to keep particles out of the pump. Seems like an easy way to add cheap protection.
Posted by: Dr Evil Jun 10 2012, 10:42 PM
I have been able to communicate with the hose maker. He changed his tune in one email and wanted the ends sent to him. I sent him the email where he said that those were included, and that I didnt have the ends anyway and he agreed. I calculated the cost for everything and will be sending a MO for the kit. He will not be able to make it until sometime after next week. At least the process is still in motion. So far the cost is looking good
Posted by: Dr Evil Jun 18 2012, 08:12 PM
Money in the mail today with list of hoses and fittings. I hate waiting
Posted by: Dr Evil Jul 7 2012, 11:09 PM
Finally got some time to work on the bus. The only pic I have right now is of the adapter hose that I fabbed up. The zip ties are only for the mock up
Attached thumbnail(s)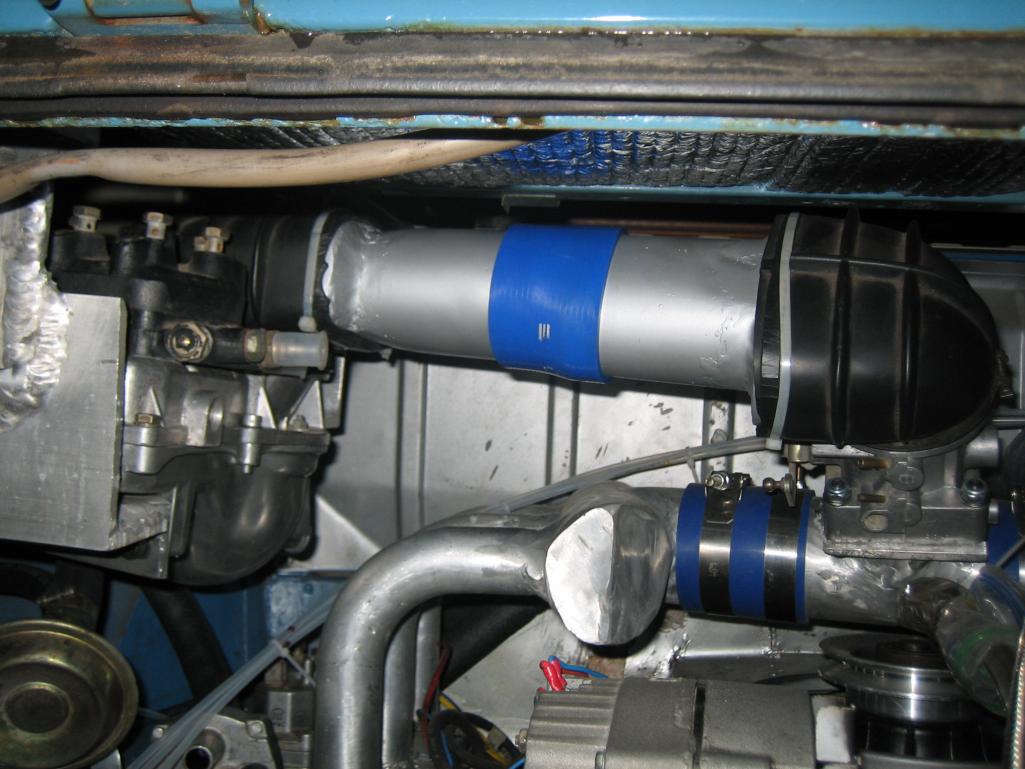
Posted by: scotty b Jul 8 2012, 10:15 AM
please change to black zip ties, the clear ones break down much quicker, plus the black looks stealth and more professional, thus gainng you the respect of fellow hack mechanics
Posted by: Katmanken Jul 8 2012, 12:46 PM
please change to black zip ties, the clear ones break down much quicker, plus the black looks stealth and more professional, thus gainng you the respect of fellow
Hunh? Clear ones are virgin nylon resin, black ones require adding something (carbon black) to color them.
Usually, adding something to virgin resin weakens it- unless it is the cheap crap mystery resin from companies like "Whang Poo" and "Dong Yu"
Posted by: Dr Evil Jul 8 2012, 01:34 PM
Go back to stroking your pussy, Ken
Posted by: Valy Jul 8 2012, 01:45 PM
Make sure that throttle body above the fan pulley doesn't touch the pulley from vibrations or torque twisting the engine in the bay.
I would replace the blue silicone connectors from the manifolds to the throttle body with something rigid to maintain the geometry of that construction under all circumstances.
Nice build.
Posted by: Katmanken Jul 8 2012, 02:11 PM
Go back to stroking your pussy, Ken
Too hot. All cats are in molt mode and if stroked, a cloud of fur erupts into the air.
Need any free cat fur? Makes an interesting texture for future painting projects.
Posted by: Dr Evil Jul 8 2012, 04:20 PM
Make sure that throttle body above the fan pulley doesn't touch the pulley from vibrations or torque twisting the engine in the bay.
I would replace the blue silicone connectors from the manifolds to the throttle body with something rigid to maintain the geometry of that construction under all circumstances.
Nice build.
The blue connectors on the main body are very thick and rigid.
Posted by: Dr Evil Jul 8 2012, 06:48 PM
Here is the vascular system mocked up
Attached thumbnail(s)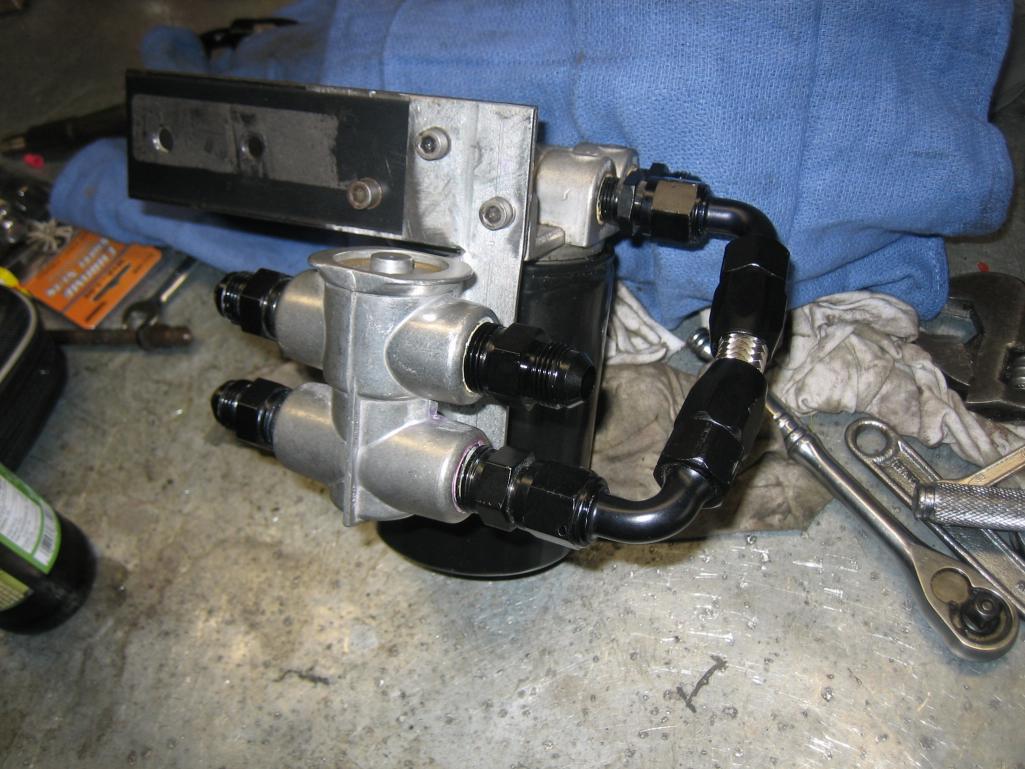
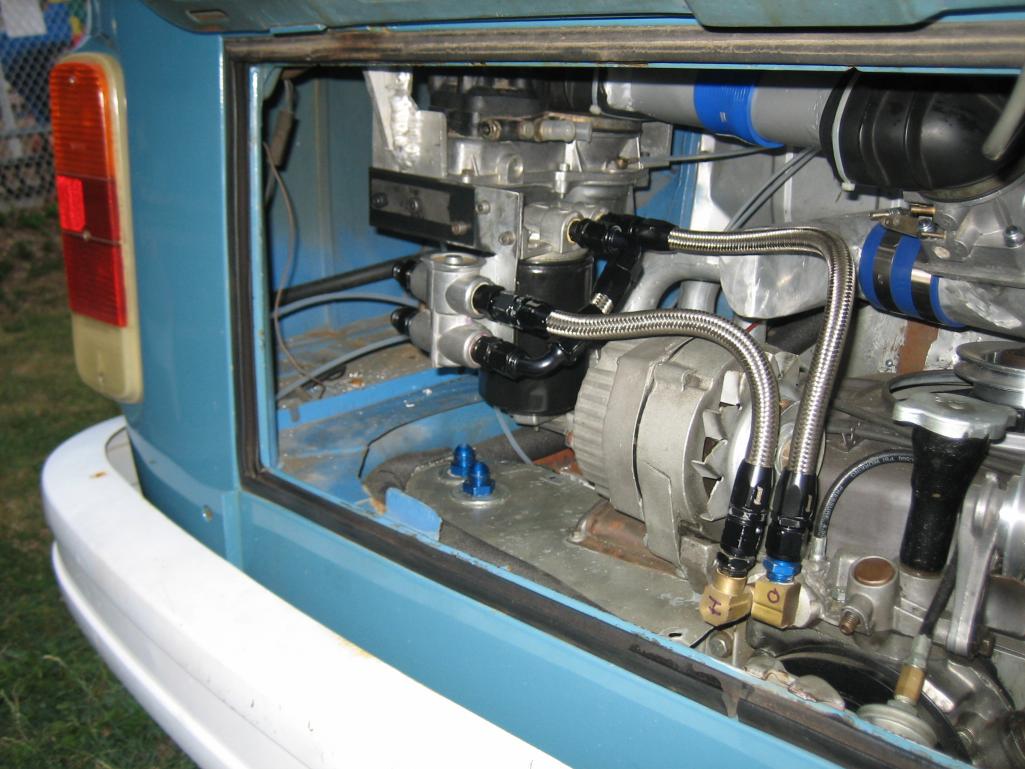
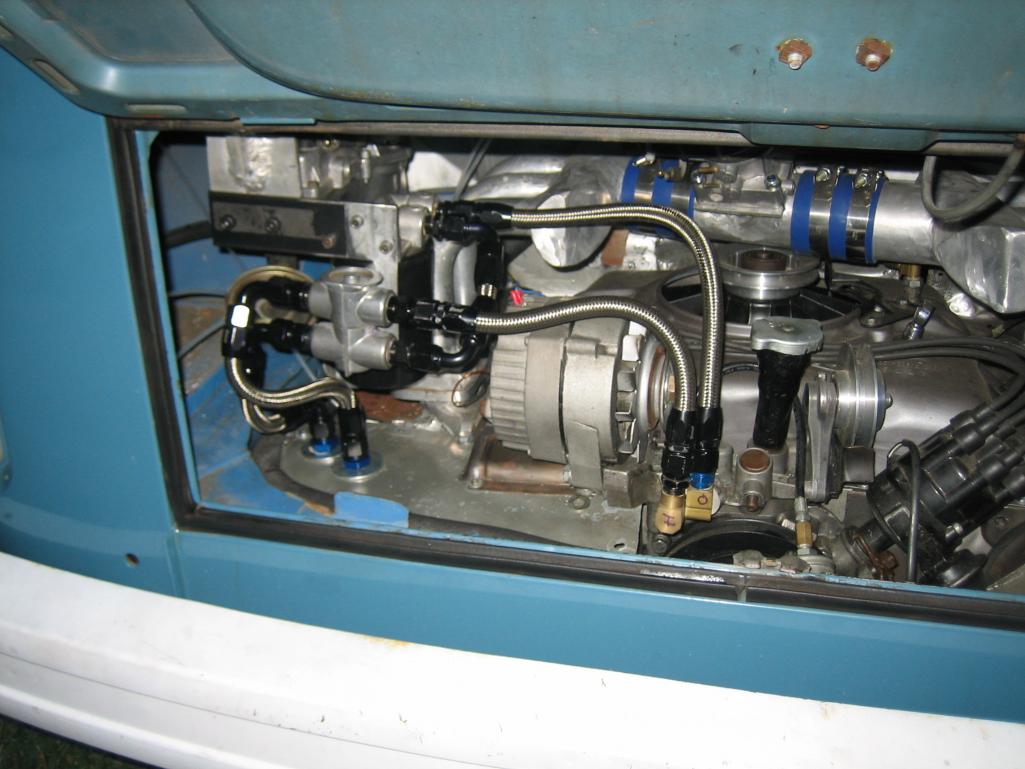
Posted by: scotty b Jul 8 2012, 07:03 PM
Looking good
Posted by: Dr Evil Jul 8 2012, 08:23 PM
The custom CIS hoses are almost done......long story I will tell when they are in hand
Posted by: BajaXJ92 Jul 8 2012, 08:37 PM
Ughh, maybe i should keep the bus, I just have nowhere to keep it this fall during school.
Its going up for sale this week.
Posted by: Dr Evil Jul 8 2012, 09:15 PM
Wrong thread. No one cares about your bus here
Posted by: Dr Evil Jul 12 2012, 07:56 PM
Stainless braided fuel hoses arrived today and are mocked up. All looks well. Only one fitting left out of the order to allow for gas to and from the tank
Pics tomorrow, and I will hopefully have this thing buttoned up this weekend
Posted by: Mr.242 Jul 12 2012, 10:57 PM
When do we see the car seat install?
Posted by: Dr Evil Jul 13 2012, 07:04 AM
Patience, it first needs to drive, then the baby has to be born.
Posted by: bozo914 Jul 13 2012, 10:34 AM
Leon's having a baby?
Posted by: Dr Evil Jul 14 2012, 08:44 PM
No, Noel is having my baby. Leon is off until Noel stops breast feeding (no booze ).
Posted by: Dr Evil Jul 15 2012, 08:55 PM
OK, no pics as I dont stop to take them usually. I am much closer now. Today, I made brackets for the pressure accumulator and the filter and mounted them under the bus. Then I made a bracket to hold the fuel pump, and under the bus it went. I have all of that plumbed up including a see through filter before the pump. I had to weld the brackets up and everything is held in place with hose clamps. Then, I marked the engine tin for modification, removed them, cut and welded what I needed changed, and smeared some quick steel on the seams. I will be sand blasting them and painting them next.
All that is left:
- Design throttle control
- Vac hoses
- button it up
Looking on schedule I'll try to take some pics of the fuel system tomorrow. I intend to remove all of it to pain the brackets once I have it mocked up and everything fits. That is a bit of the pain of engineering this stuff; you design, build and assemble only to disassemble, finish work everything, and then reassemble again
Posted by: Dr Evil Jul 25 2012, 08:30 PM
OK, it has been too long and I have been making progress here and there. All the hoses, fittings, fuel lines except for send and return (easy enough) are in place. The Tins are to be installed after being tweaked. All that is left to do is design the throttle linkage.
Attached thumbnail(s)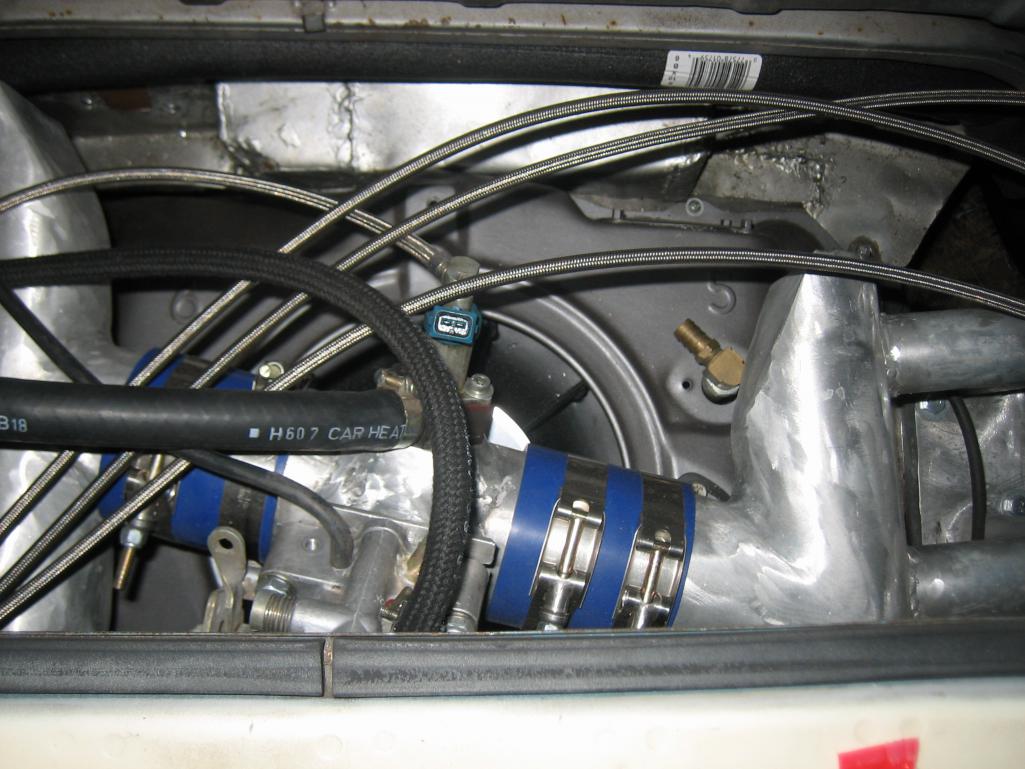
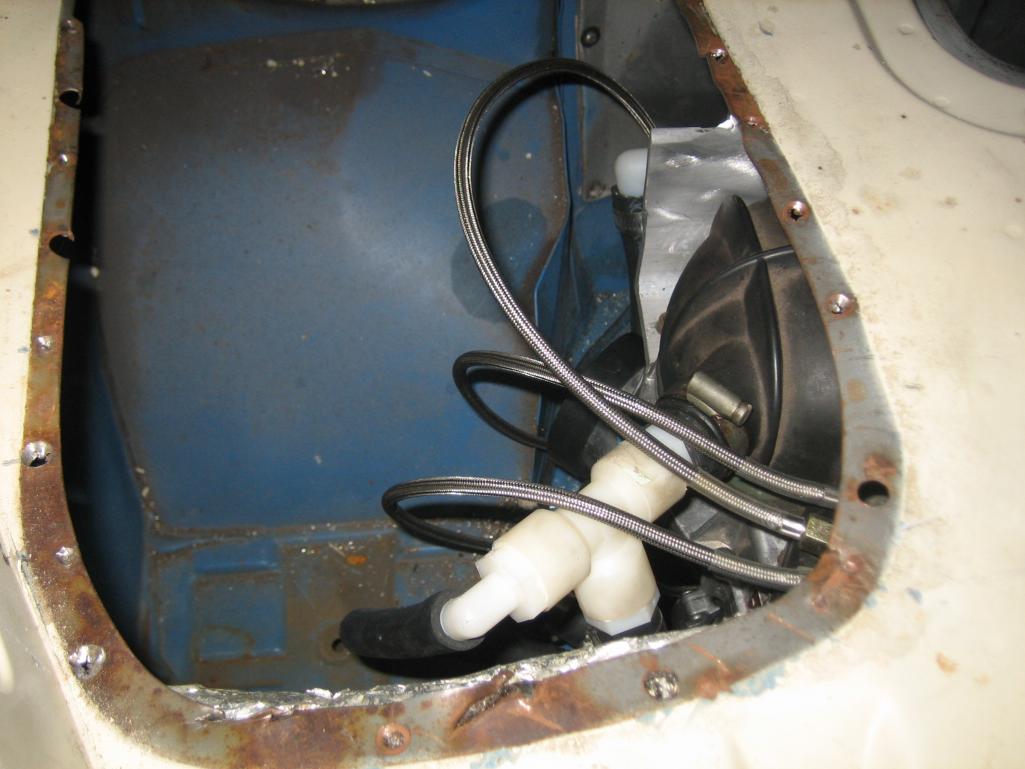
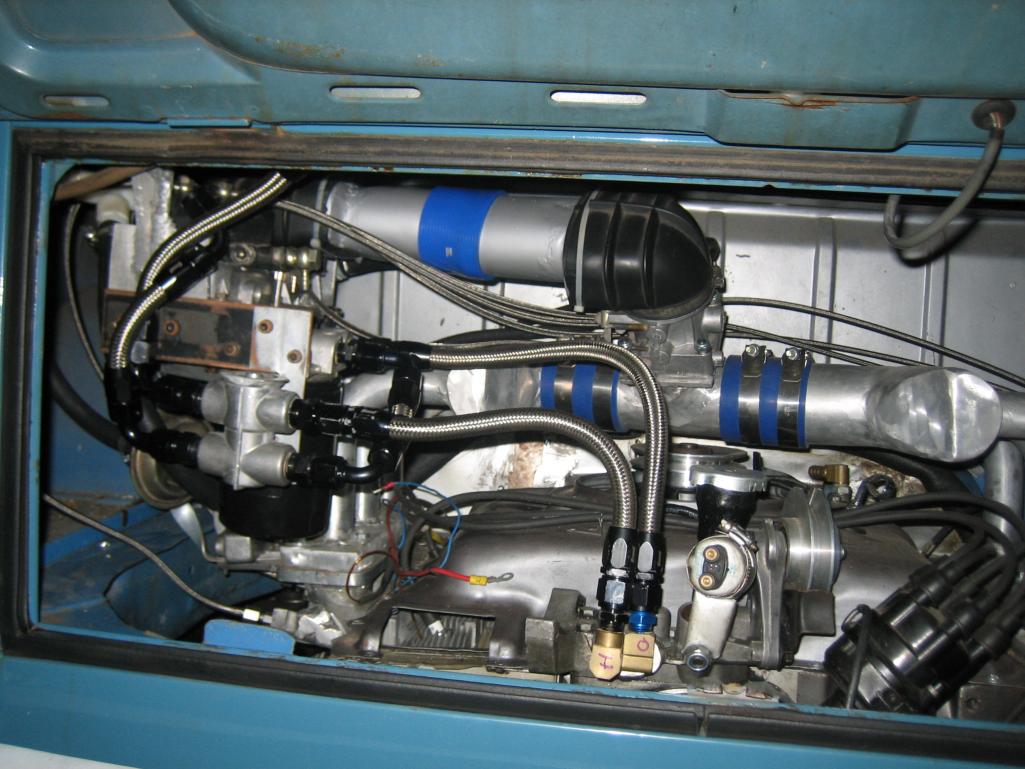

Posted by: Katmanken Jul 26 2012, 09:44 AM
Looking good.
Do you realize the EFI is almost as big as the engine?
Really glad to see the braided high pressure EFI fuel lines rather than the nylon ones.
Now who were you going to throttle with the linkage?
Posted by: ape914 Jul 26 2012, 10:00 AM
please change to black zip ties, the clear ones break down much quicker, plus the black looks stealth and more professional, thus gainng you the respect of fellow
Hunh? Clear ones are virgin nylon resin, black ones require adding something (carbon black) to color them.
Usually, adding something to virgin resin weakens it- unless it is the cheap crap mystery resin from companies like "Whang Poo" and "Dong Yu"
additives such as carbon black do a good job of protecting plastic form the effects of UV radiaton. the carbon absorbs the harmful light rather than the polymers that can be damaged by the light. Pigmented plastics in general perform better in UV resistance than "virgin" plastics
Posted by: Jeffs9146 Jul 26 2012, 10:26 AM
Boy Evil, I wouldn't want to have to change those spark plugs!!
Posted by: Katmanken Jul 26 2012, 02:16 PM
please change to black zip ties, the clear ones break down much quicker, plus the black looks stealth and more professional, thus gainng you the respect of fellow
Hunh? Clear ones are virgin nylon resin, black ones require adding something (carbon black) to color them.
Usually, adding something to virgin resin weakens it- unless it is the cheap crap mystery resin from companies like "Whang Poo" and "Dong Yu"
additives such as carbon black do a good job of protecting plastic form the effects of UV radiaton. the carbon absorbs the harmful light rather than the polymers that can be damaged by the light. Pigmented plastics in general perform better in UV resistance than "virgin" plastics
Ape, think a lot of UV gets in there? If it was a dash, I'd recommend black. This is not an area that gets a lot of sun, the clear has less additives and more strength, and it's an approprate place to use clear virgin resin.
And can you name a source of UV in an engine bay?
Posted by: Dr Evil Jul 26 2012, 02:46 PM
Boy Evil, I wouldn't want to have to change those spark plugs!!
Its much easier than it looks and way easier than my suby
I cant wait to see if this over-engineered-whoosiewhatsit fires up this weekend.
Plan; Turn key --> then fix problems that are discovered
Posted by: Jeffs9146 Jul 26 2012, 04:59 PM
Boy Evil, I wouldn't want to have to change those spark plugs!!
Its much easier than it looks and way easier than my suby
I cant wait to see if this over-engineered-whoosiewhatsit fires up this weekend.
Plan; Turn key --> then fix problems that are discovered
Posted by: Dr Evil Jul 27 2012, 10:37 PM
The universe is a little against me. Just a little. My Forester went for inspection today and they found a bad ball joint and rear brakes that were passable, but recommended replacement. $400 for all of it, I told them no thanks and I would fix it myself. The ball joint is $20, the brake shoes $15. Then the fun came.....the bolt holding the ball joint in place broke. I had to remove the whole hub assembly to drill it out. It would not come out. The non-threaded part needed to be drilled to paper thin and then barely was able to get out with an easy out. The other part of the bolt did not budge so I drilled it ant and began to re-tap new threads.....until the tap broke Oh well. That was 10pm.
Did I mention that bad T-storms are rolling through at the same time?
So, into the garage to work on stuff. I decided to get the headers rigged with phase one of my next experiment I ran out of tubing so it is not done.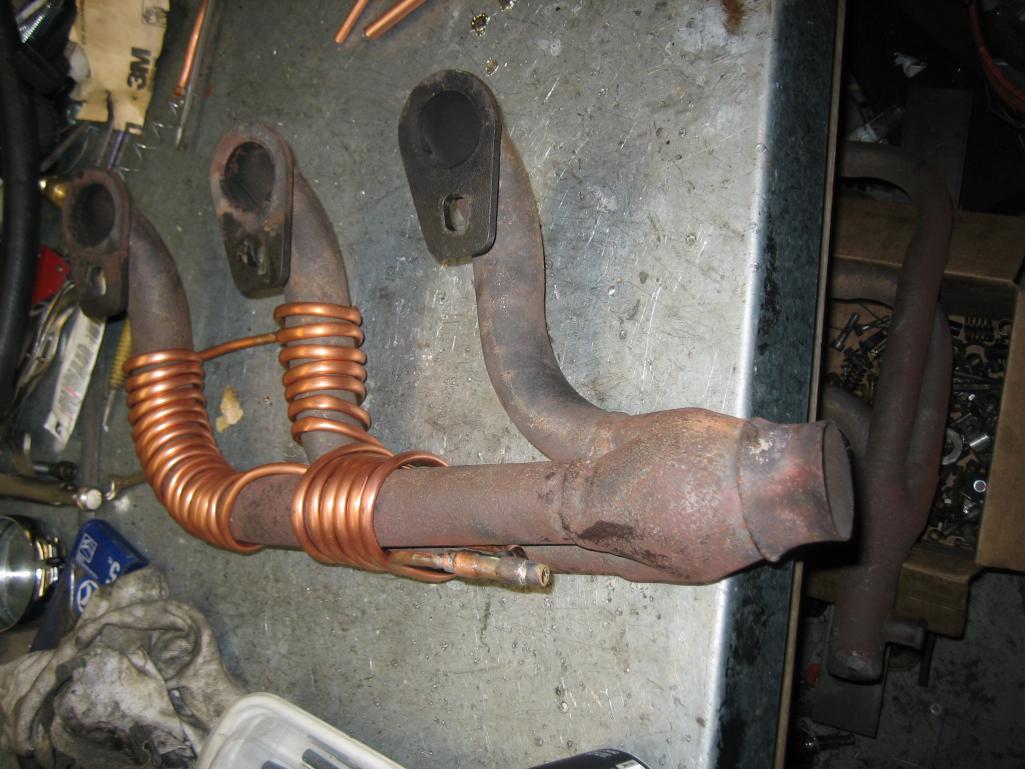
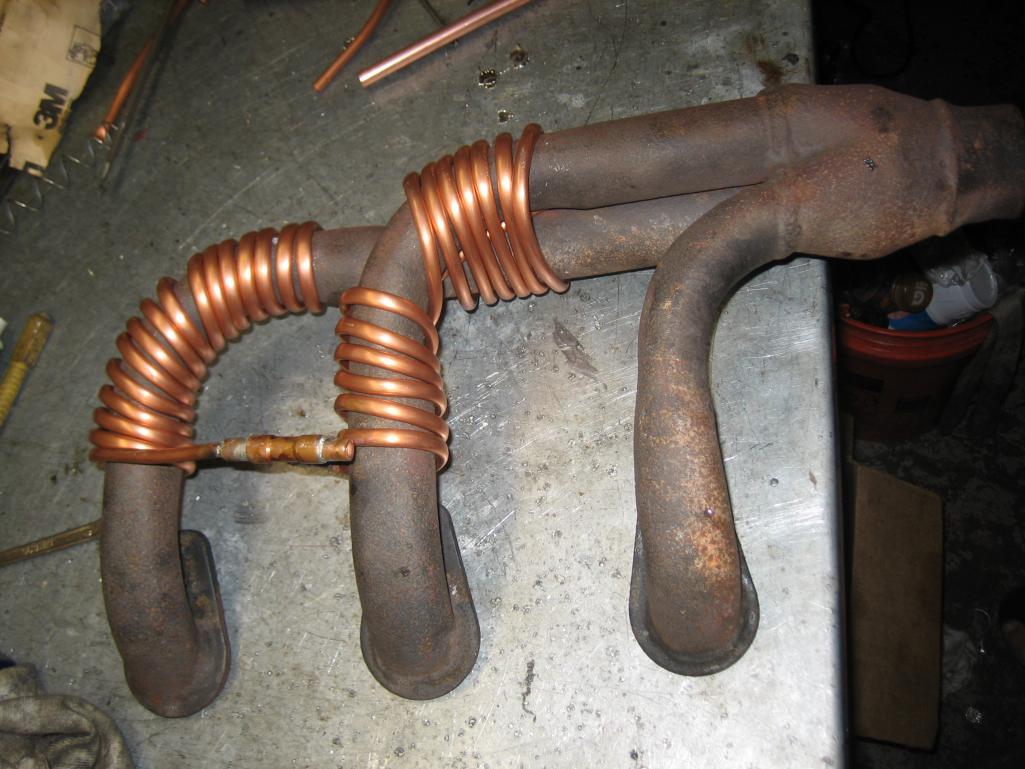
I also managed to get a pod filter to fit perfectly into the space on the engine bay. Hard to take pics of. I think I will turn the hole where the spare used to go into another access hatch for filter and FI maintenance. 
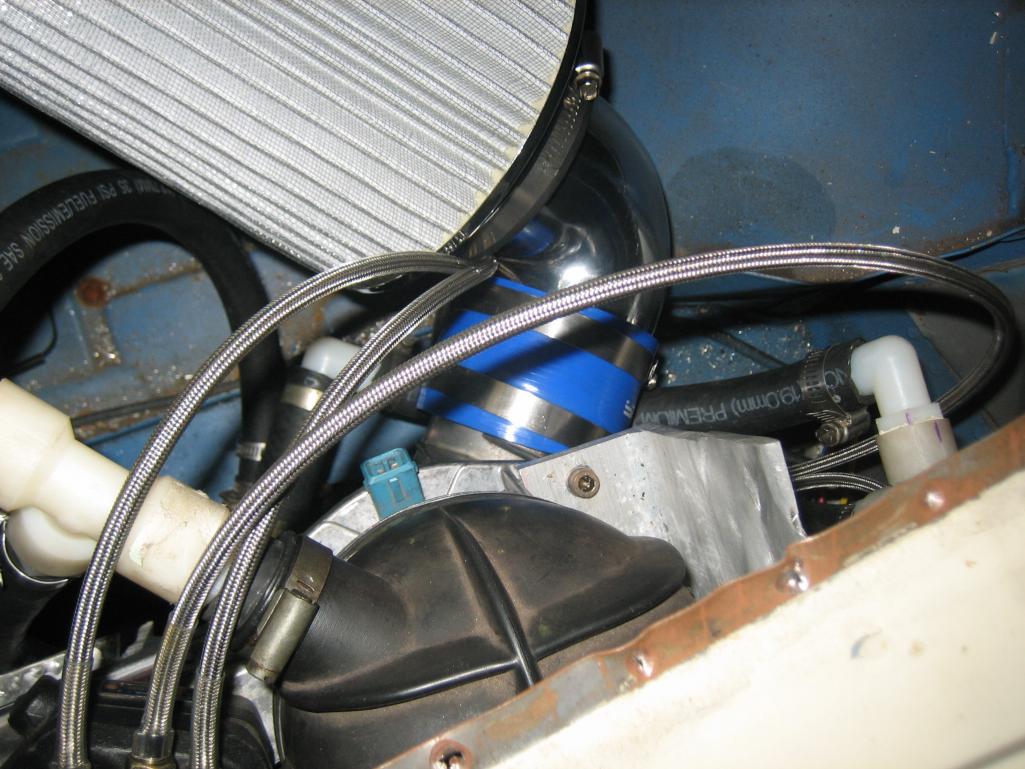
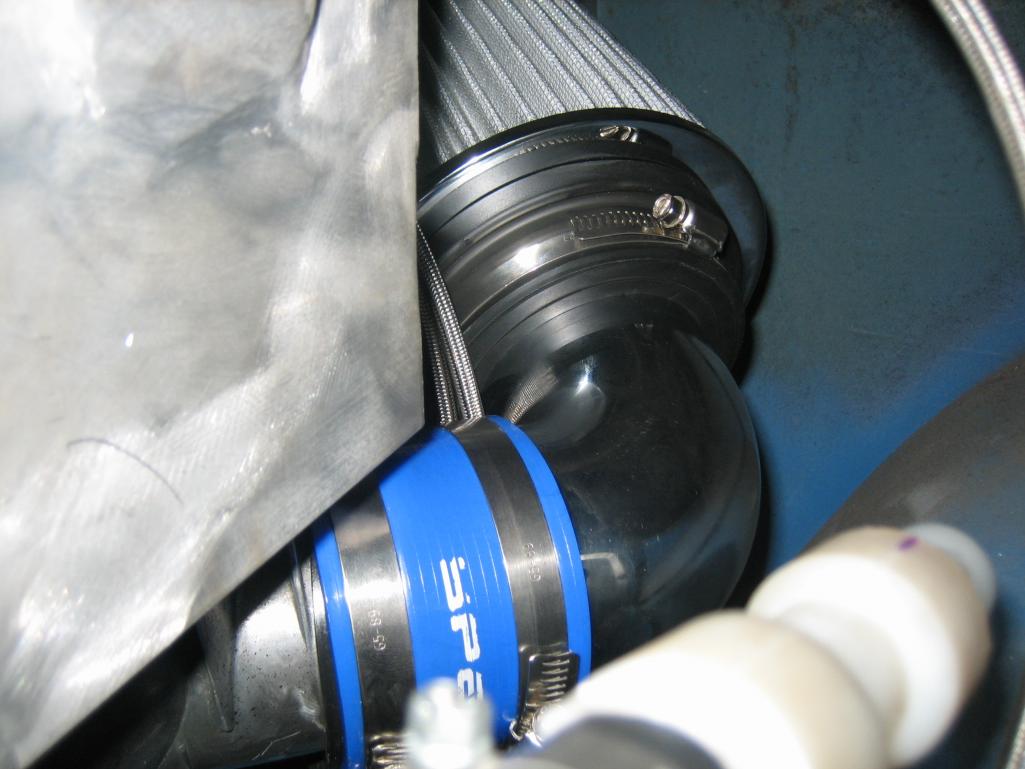
Posted by: hot_shoe914 Jul 27 2012, 10:41 PM
So it is a baby carrying corn mash still?
Posted by: Dr Evil Jul 27 2012, 10:49 PM
Only if it fails its intended purpose
Posted by: mrholland2 Jul 27 2012, 11:12 PM
Okay, am I the ONLY person that reads the title of this thread and just picture Doc driving around Ru Paul, Devine, and Mrs. Doutfire?
Posted by: tscrihfield Jul 27 2012, 11:56 PM
Doc,
What are the tubes for? I was thinking cooling, but that would be difficult with exhaust temps since you couldn't stop the coolant from boiling.
That said whats they fer?
Thomas
Posted by: bfrymire Jul 28 2012, 12:52 AM
Doc,
What are the tubes for? I was thinking cooling, but that would be difficult with exhaust temps since you couldn't stop the coolant from boiling.
That said whats they fer?
Thomas
Heater?
Posted by: Dr Evil Jul 28 2012, 08:10 AM
Doc,
What are the tubes for? I was thinking cooling, but that would be difficult with exhaust temps since you couldn't stop the coolant from boiling.
That said whats they fer?
Thomas
Heater?
Yup
I will be wrapping the headers in 1/4"OD copper tubing that will eventually terminate to 1/2" ID heater hose for transport forward to a heater core. I have a stand alone water pump already. I dont plan on finishing this design before I am driving the bus, but I wanted to see if I could get the header part done before I put them on so I didnt have to take them off again later for this.
Posted by: 9146986 Jul 28 2012, 09:36 AM
You might get enough hot water to make tea!
Posted by: ape914 Jul 28 2012, 09:39 AM
please change to black zip ties, the clear ones break down much quicker, plus the black looks stealth and more professional, thus gainng you the respect of fellow
Hunh? Clear ones are virgin nylon resin, black ones require adding something (carbon black) to color them.
Usually, adding something to virgin resin weakens it- unless it is the cheap crap mystery resin from companies like "Whang Poo" and "Dong Yu"
additives such as carbon black do a good job of protecting plastic form the effects of UV radiaton. the carbon absorbs the harmful light rather than the polymers that can be damaged by the light. Pigmented plastics in general perform better in UV resistance than "virgin" plastics
Ape, think a lot of UV gets in there? If it was a dash, I'd recommend black. This is not an area that gets a lot of sun, the clear has less additives and more strength, and it's an approprate place to use clear virgin resin.
And can you name a source of UV in an engine bay?
Can you name the city in which the Whang Poo and Dong Yu factories are located?
Remember additives can be added to give strength not just UV protection. The additive can be glass fibers, other polymers (a copolymer) carbon fibers, all sorts of fibers can give more strength. Additives can reduce swelling with heat, and of course additives can give UV protection.
Can UV degrade stuff in the 914 engine bay? Well parked in the sun, the light can pass thru the engine grills and damage things. If the rain tray is removed as is sometimes the case, UV can flood even more of the engine bay.
To answer you on UV in the engine bay I cite this example:
I have a 8+ year old Optima battery in my 914, the car gets occasional sun exposure but mainly it is covered, and has the rain tray. The top of the battery that is closest to the grill has a very visable fade pattern on its top, the red plastic is faded to pink. the fading is only on the portion that the sun can get at thru the grill, the shaded part of the battery is not degraded. This is UV degregation at work in the engine bay. I hope this unconfuses you.
????
Posted by: Katmanken Jul 28 2012, 01:38 PM
Evil,
That's not a heating solution that I've seen before. Are you going to rely on contact and radiated heat to heat the copper pipe, or are you going to add something that conducts heat between the copper tubing and the exhaust pipe??
Posted by: Dr Evil Jul 28 2012, 01:59 PM
This is not done yet, it works just like capillaries in the body. It is to work off of contact with inevitable radiant heat as well. I plan to wrap the whole works in header tape to both keep the heat in and to keep the meth addicts from stealing the copper
I just spent a couple of hours looking for an M14x1.5 tap for the thermotime switch for the FI system. I found a perfect place to put it, but I need to drill and thread the hole One little thing gummin up the works. At the very least I hope to have it ready to go when the tap arrives. It is raining a bunch right now so taking a break.
Posted by: Katmanken Jul 28 2012, 02:45 PM
This is not done yet.... I plan to wrap the whole works in header tape to both keep the heat in and to keep the meth addicts from stealing the copper
I just spent a couple of hours looking for an M14x1.5 tap for the thermotime switch for the FI system. I
OK, header tape makes sense as a way to help hold the copper in place as well as holding the heat in. The copper pipe will expand at a greater rate than the steel pipe and the copper pipe is "long" so it may expand and lift off a bit as things warm up. Try a quick and dirty "warm-up" test on a section of the coiled copper with a hot air gun or propane tourch to see what happens.
Like the idea of the header tape to act as a "sleeve" to keep the heat in.
Hey, I thought the internet searching was supposed to speed things up?
Posted by: Dr Evil Jul 28 2012, 03:29 PM
Taking a break due to another rain storm to post some success. I noticed earlier that the 5/16 NPT tap was very close to the 14x1.75 at its base. So, I gave it a shot I only need about 5mm of thread so this works out perfectly. The plug that goes into the hole where the mechanical fuel pump used to go was removed, placed in my lathe, drilled and tapped with the NPT tap. The thermotime switch fit perfectly and the location is very close to where it would be on the stock 911 motor.
Attached thumbnail(s)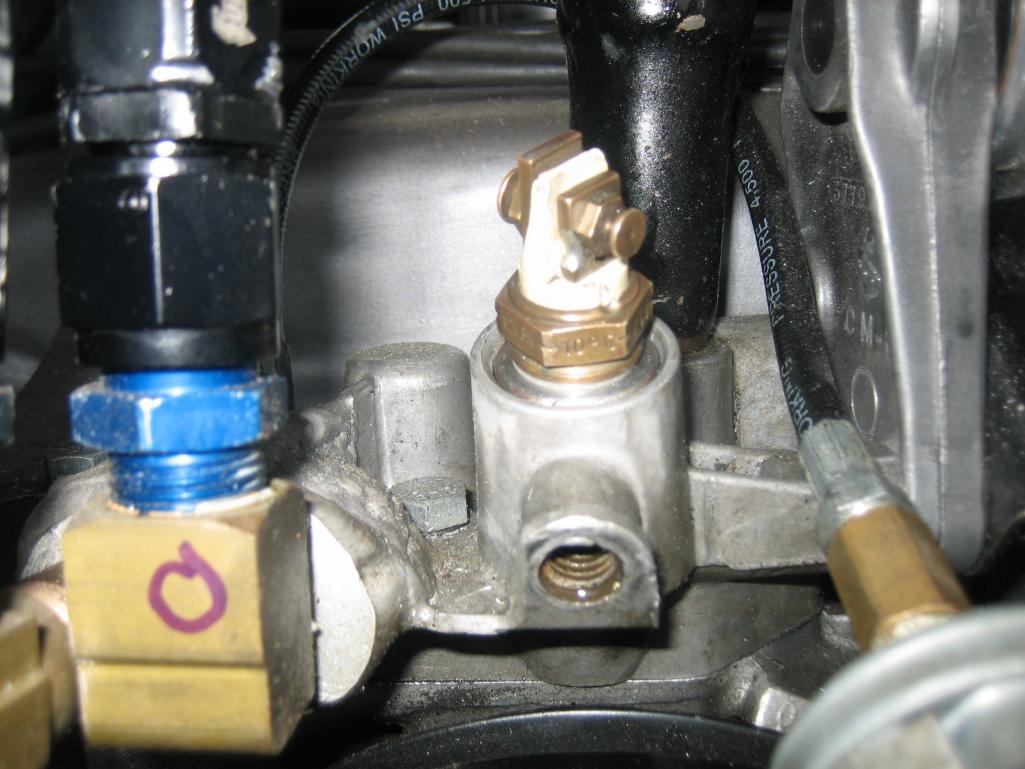
Posted by: Dr Evil Jul 28 2012, 03:45 PM
On the heater front, consider that what you see installed currently is only about 20' of 1/4" OD tube. At the end, I expect to have 60' total on both headers and can always add more. Intention is to have 1/2" hose to and from the heater up front to keep flow up and the volume down to allow for retention of heat.
Posted by: kg6dxn Jul 28 2012, 04:22 PM
On the heater front, consider that what you see installed currently is only about 20' of 1/4" OD tube. At the end, I expect to have 60' total on both headers and can always add more. Intention is to have 1/2" hose to and from the heater up front to keep flow up and the volume down to allow for retention of heat.
I would only be worried about getting enough flow through the 1/4" tubing. I don't think you will get enough volume/velocity, thus causing the water to cool down before it gets to the heater core.
Posted by: Dr Evil Jul 28 2012, 05:26 PM
Consider this, there will be 1/4" x 6 being fed by 1/2" and then feeding 1/2". There should be plenty of flow with lots of exposure between medium and heat source.
Posted by: tscrihfield Jul 28 2012, 07:49 PM
Very cool! Let us know how well that works. It seems like a good idea...
Thomas
Doc,
What are the tubes for? I was thinking cooling, but that would be difficult with exhaust temps since you couldn't stop the coolant from boiling.
That said whats they fer?
Thomas
Heater?
Yup
I will be wrapping the headers in 1/4"OD copper tubing that will eventually terminate to 1/2" ID heater hose for transport forward to a heater core. I have a stand alone water pump already. I dont plan on finishing this design before I am driving the bus, but I wanted to see if I could get the header part done before I put them on so I didnt have to take them off again later for this.Posted by: Dr Evil Jul 28 2012, 09:28 PM
Design on the throttle assembly is progressing well. Lots of stuff needing to be designed around. Probably finish this up tomorrow.
Posted by: Dr Evil Jul 28 2012, 11:31 PM
Some more theory on the heater setup.
Approx V of the capillary system = 2.3L
Approx V of send and return lines = 3.7L
38% of known volume exposed to heat at any moment.
Volume of the core is yet unknown.
Posted by: Dr Evil Jul 29 2012, 11:02 AM
Sometimes I get a feeling of Zen when working on the bus. Since I am creating things the did not exists in the form I needed them it, it often feels like I am actually discovering a design that existed, but I just had to see where it was and make it.
I particularly got this feeling with the mounting of the thermotimeswitch and last night with the throttle assembly. One bolt goes to a hole already in the throttle body, the base plate keeps it from rotating. The needs of the design were satisfied by a simple piece of 1/4" steel that was drilled, tapped, and notched. Not fancy, but perfect.
Attached thumbnail(s)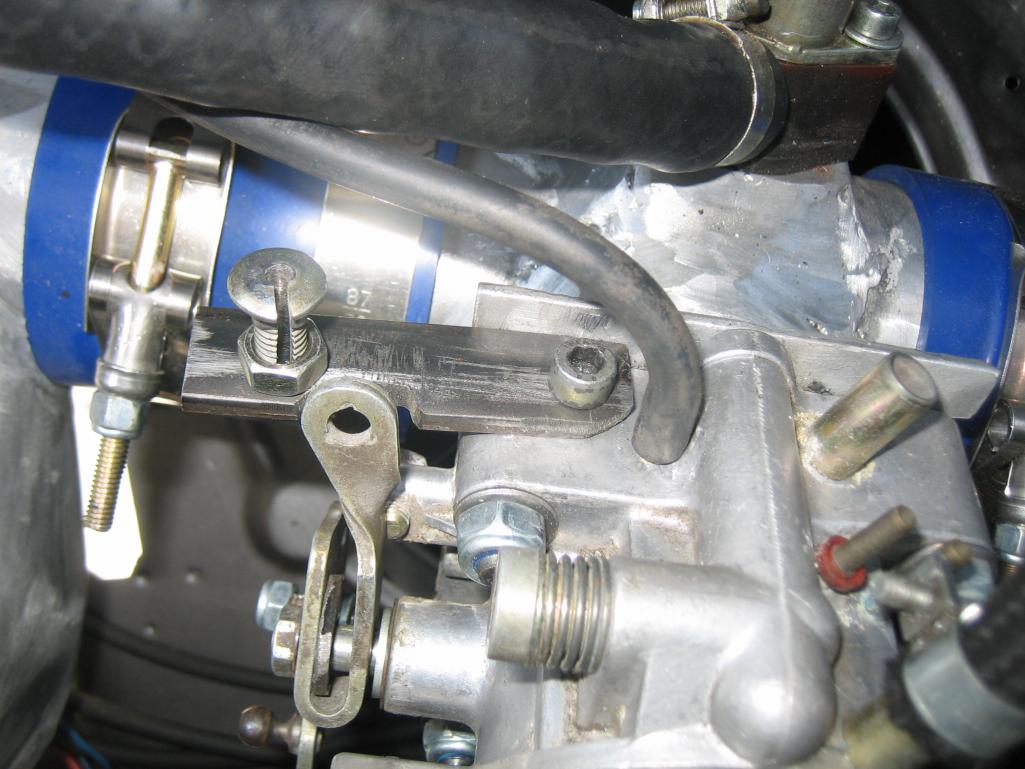
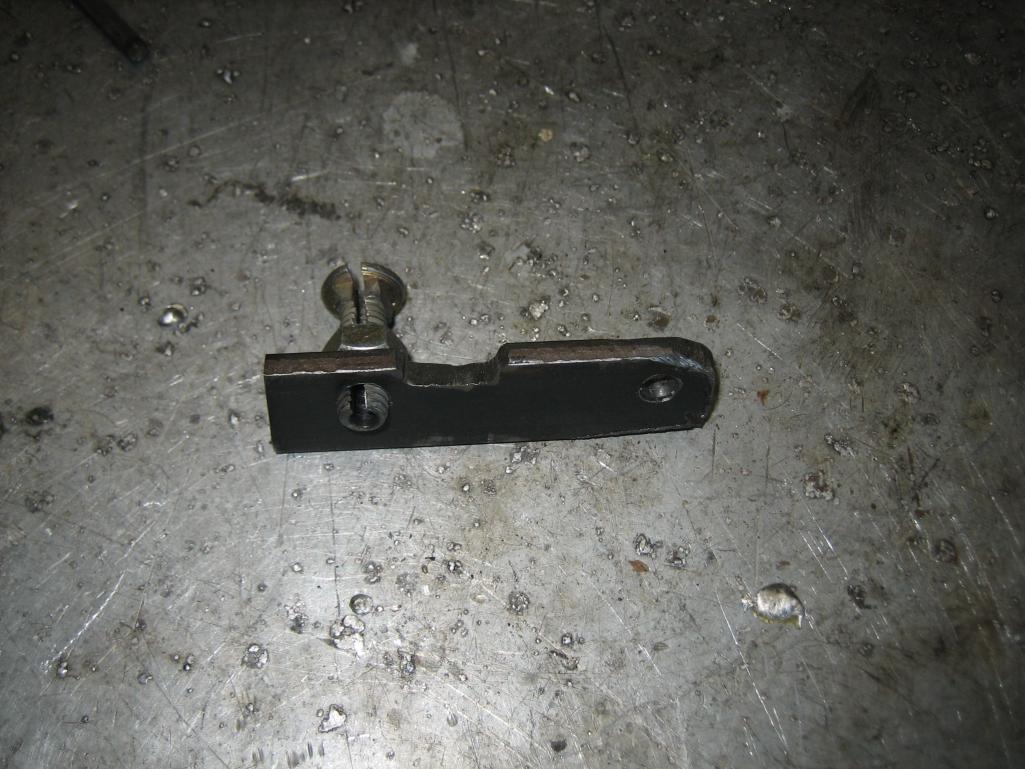
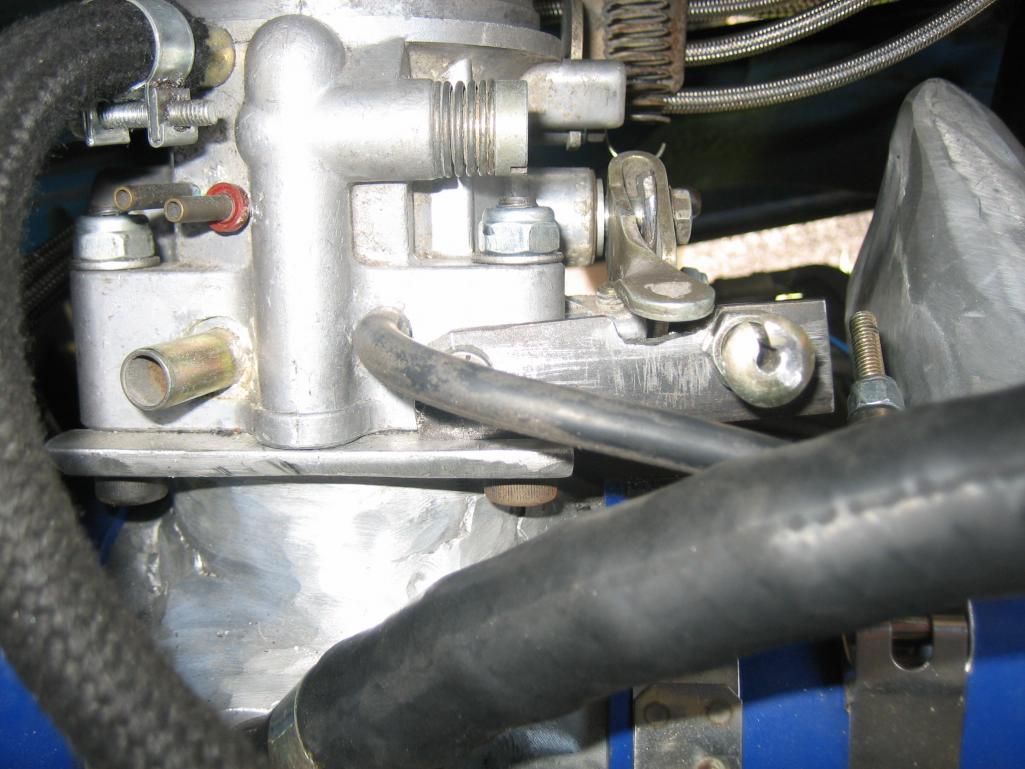
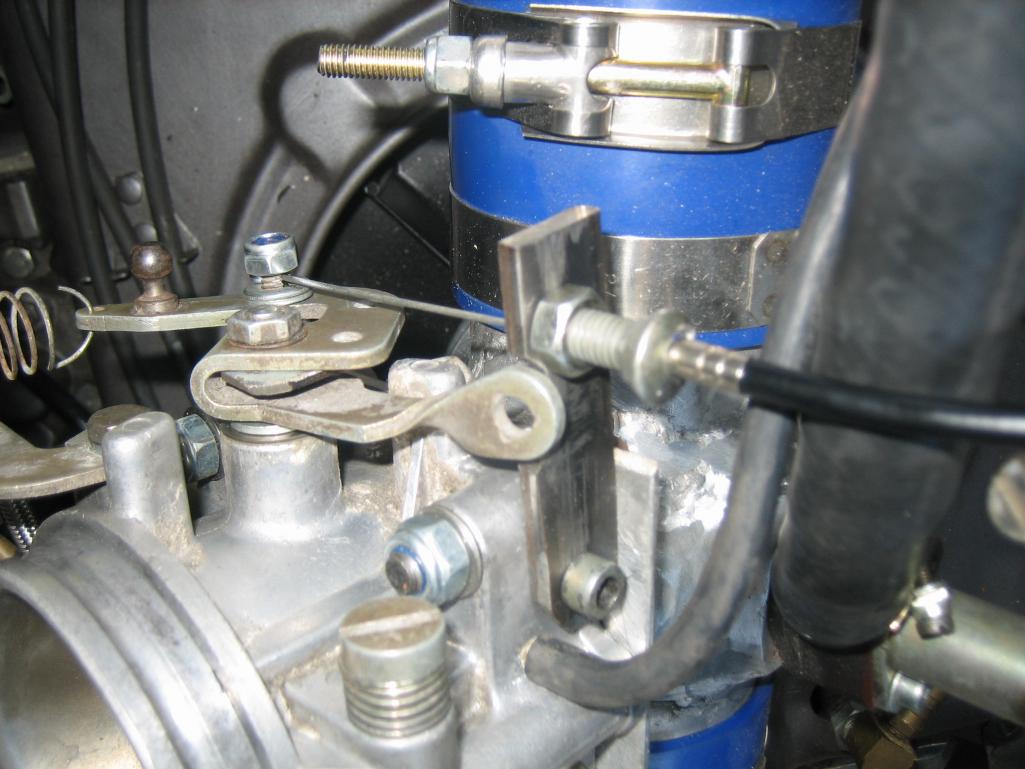
Posted by: Dr Evil Jul 29 2012, 12:55 PM
Yet more of pulling designs from the ether. Lower throttle assembly.
Attached thumbnail(s)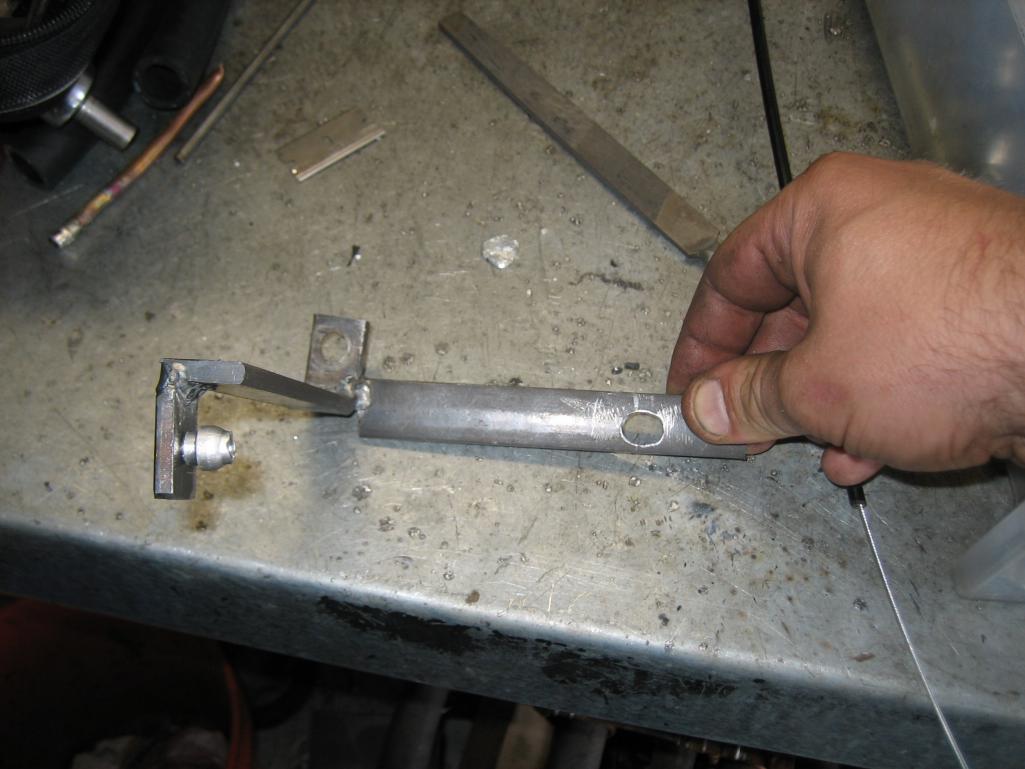

Posted by: scotty b Jul 29 2012, 01:54 PM
Izit running yet ?
Posted by: Dr Evil Jul 29 2012, 07:36 PM
Well, here come the excuses, my Suby stole 1.5 days from me this weekend Then, while working on it today some guys approached and asked if I could do some work on their 75 CB360.
The throttle is almost perfect. The ratio is off and the TB is not opening all of the way so I need to recalculate that. If that goes well, I will address this tomorrow, install the tins, wiring, turn the key and :bomb:
Nice little bike
Attached thumbnail(s)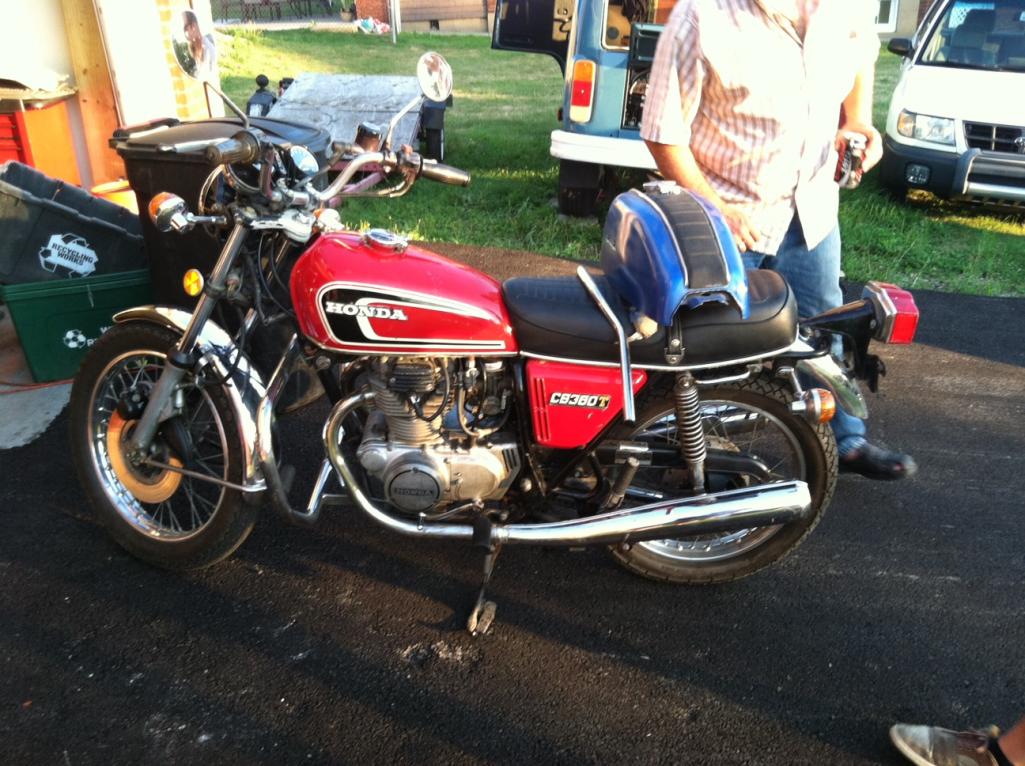
Posted by: BajaXJ92 Jul 29 2012, 08:37 PM
I was also curious as to how you were going to work out the copper wire/header expansion and the gap, and also the flow. Looks like you've got it worked out.
Can't wait to see/hear it running.
Posted by: Dr Evil Jul 30 2012, 08:33 PM
Damn it Damn it Damn it
Spent another few hours on the damn throttle cable design. I changed some parameters, welded up the throttle linkage off of the throttle body to allow for more adjustment in position of where the cable hooks in, and after all of that........the damn thing still does not function correctly. It will not open all the way until pushed by hand, the pedal feels real bad, then it wont close all the way. The weak link, after all the adjustments have been done? The cable from the tranz to the TB. I tried to use a bicycle brake cable, it is not going to work as there is no teflon lining and it is not built for this application. So, I need to either locate a cable that will work, or start to fabricate another rod control system like the one that worked so well on the last setup
Not working on it tomorrow or wed, but Thurs through the weekend should be productive now that I know what is going on.
Posted by: scotty b Jul 30 2012, 09:01 PM
Li'l Monty is counting on ya Doc
Posted by: Dr Evil Jul 30 2012, 09:12 PM
Posted by: bulitt Jul 31 2012, 06:12 AM
Wait, what...bicycle brake cable for your throttle linkage?
Your gonna be a Dad! You have to start taking the safe course through life now.
You don't want a sticking throttle cable. Spend some of those Doctor Dollars!
Posted by: Dr Evil Aug 1 2012, 06:33 AM
Working on sourcing some motorcycle throttle and clutch cables. These should be more up to the task. I cant believe the others failed so badly.
Posted by: scotty b Aug 1 2012, 06:49 AM
RTV much ?
Attached image(s)
Posted by: rick 918-S Aug 1 2012, 07:40 AM
RTV much ?No safety wire on those bolts?
Gitterdone
Posted by: Dr Evil Aug 3 2012, 09:50 PM
OK, I met a local guy, my age, that has a sweet collection of parts and vintage bikes to include BSA, Ducati, Honda. He gave me some cables to try and one was perfect. I spent some hours futzing with trying to get the measurements correct....this did not work. What I ended up doing was putting another return spring on the transmission arm, and bending the stop on the gas pedal so that I could get more movement. This worked to solve all problems Tomorrow looks to be a day for completion and hopefuly some triumph.
Posted by: hot_shoe914 Aug 3 2012, 09:56 PM
Posted by: speed metal army Aug 3 2012, 10:06 PM
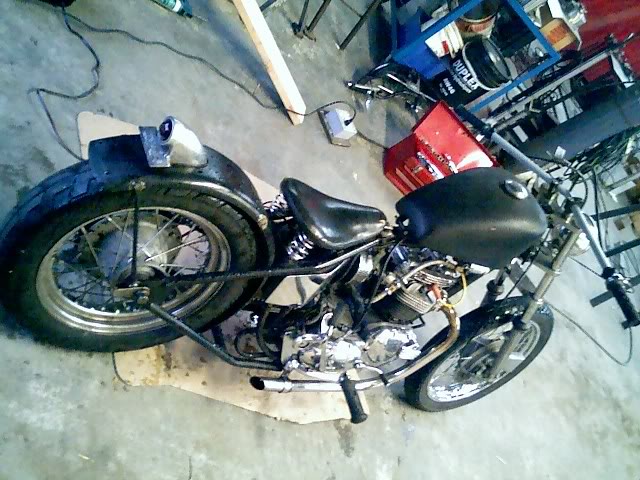
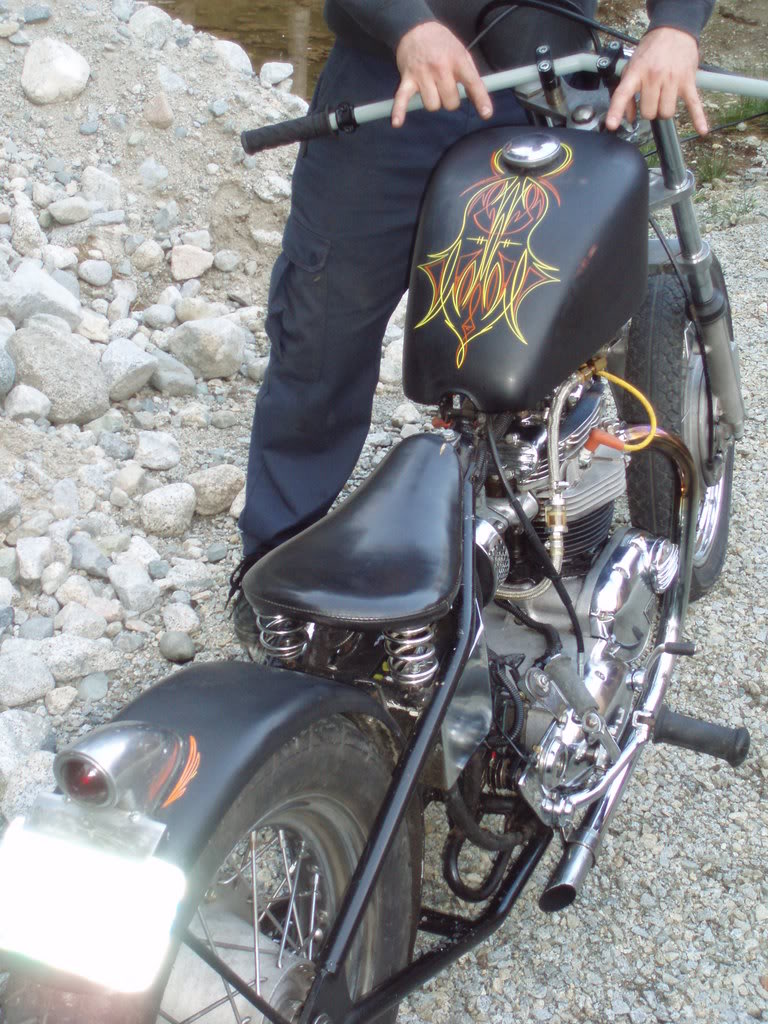
Another(smaller) Triumph
Posted by: Dr Evil Aug 3 2012, 10:08 PM
Wrong thread bozos.
Posted by: Dr Evil Aug 4 2012, 11:16 PM
Good progress today. I had to take a break from the heat and took Noel on a ride, but then I returned and sorted out some of the wiring. I have the WUR, and AAR wired up. Tomorrow I will get the CSV and TTS hooked up.
To do list for tomorrow:
- CSV-TTS wiring
- Fuel pump wiring
- Send and return fuel hose
- Install inlet for crank vent into air housing
- Find my oil temp sensor and install it (no idea where it went)
- Install the rest of tin
- Vac hose for transmission
- Install trans filler neck
- Exhaust
About then I should be able to turn the key (oil, gas and trans fluid of course).
Posted by: hot_shoe914 Aug 4 2012, 11:19 PM
You go doc. Don't forget the lubricant.
Posted by: Dr Evil Aug 5 2012, 10:24 AM
So far today is a bust. I would do better putting a hull on the damn thing with the rain and thunderstorms rolling through constantly
I think I may have to abandon this being done by Matt's party/my vacation. I leave town Wed night...
Posted by: Dr Evil Aug 30 2012, 07:23 PM
Anyone have an oil temp sender? I cant find the one I had and I need it to finish up the bus.
Looking into this one:
http://www2.cip1.com/ProductDetails.asp?ProductCode=VDO-323-055
Posted by: Dr Evil Oct 8 2012, 06:25 PM
Been distracting myself with motorcycle stuff lately. I needed a break from the bus as it was starting to not be fun. Now, winter is closing in and even if I do get it running, which I will, it will not be able to be driven without heat and defrost. So, I am now planning on buying a Propex heater for it. In the long run, this will make things better as I can drive whenever and do not have to divert time into my wacky heater design. This will not be cheap, though.
Here is the plan:
- 30lb horizontal propane tank in enclosed storage on floor against drivers wall in passenger area. I have checked into this and it only needs to be secured from moving, enclosed, and have a 4x4" vent to the outside in the floor in case of leak.
- Propex HS2800 for approx 9700 BTU
- Bilge fan for forcing air into/out of the heater so the air will travel through the bus' plumbing.
I plan to mount the heater in the bench seat like here:
Attached image(s)
Posted by: Dr Evil Oct 8 2012, 06:26 PM
The propane canister is steel and measures 12.2"x 23.4" and stands 13" high.
Posted by: edwin Oct 8 2012, 06:32 PM
What's the cost difference between those and the espar petrol heaters?
Would be nice not to need another fuel source in the bus
Posted by: Dr Evil Oct 8 2012, 06:51 PM
Looking into the Espar heaters, I see more price and not much benefit. Propane is efficient and largely cheaper and will not effect my travel range. At $4/gal for gas, and living in natural gas territory, I am leaning towards propane. Also, I can use the tank to run grills at camp outs so another bonus.
Cost I am finding:
- Tank = $153
- Heater = $830
- Bilge blower = $25
Posted by: Dr Evil Oct 8 2012, 07:10 PM
Here is a Espar D4 install. The D4 is $1820.
Posted by: sixnotfour Oct 8 2012, 07:18 PM
I have the smaller one in my 914,.....everyone will tell you that you are going to blow up....
Gasoline heater way scary...
Posted by: Dr Evil Oct 8 2012, 08:24 PM
Link to a full kit for the bus from UK
http://www.ebay.co.uk/itm/VW-Type2-Propex-Heater-HS2800-V1-Gas-Bottle-Kit-Duct-Kit-Timer-T2Customs-/271075551982?pt=UK_CarsParts_Vehicles_CarParts_SM&hash=item3f1d5caaee#vi-desc
Posted by: Dr Evil Oct 8 2012, 09:14 PM
I am also debating whether or not to use an Atwood Hydro Flame furnace as they are cheaper. Not a lot of data on their CFM and such, and I know they are 75% efficient vs the 91% of the Propex.
Posted by: rick 918-S Oct 8 2012, 11:08 PM
Did you start this thing yet?
Posted by: bulitt Oct 9 2012, 04:00 AM
Looking into the Espar heaters, I see more price and not much benefit. Propane is efficient and largely cheaper and will not effect my travel range. At $4/gal for gas, and living in natural gas territory, I am leaning towards propane. Also, I can use the tank to run grills at camp outs so another bonus.
Cost I am finding:
- Tank = $153
- Heater = $830
- Bilge blower = $25
I would add a marine CO detector also = 65$
Posted by: Dr Evil Oct 9 2012, 11:19 AM
Why "marine"? CO is CO. Oh, it is not CO2, that would go off often
Posted by: Dr Evil Oct 9 2012, 11:21 AM
Regular home CO detector = $5-15
Posted by: bulitt Oct 9 2012, 12:56 PM
Oh yeah, CO. You know what I meant.
Marine and RV detectors are calibrated differently (I'm guessing for smaller ppm for smaller confined spaces) . They are 12 volt. They are designed to handle extreme temperatures - your car could go from 110 to 0 degrees seasonally. And they are designed to stand up to excess vibration as you navigate the roads in Pittsburgh. Finally they won't go off when you fart.
Not the place to save a few $$$
Posted by: Dr Evil Oct 9 2012, 03:20 PM
Well, considering that gas heaters are used in vehicles of all types without these meters, I am not too concerned. The stock set up of air being blown over your exhaust pipes is more deadly
Posted by: bfrymire Oct 9 2012, 04:25 PM
Well, considering that gas heaters are used in vehicles of all types without these meters, I am not too concerned. The stock set up of air being blown over your exhaust pipes is more deadly
hum, I still like the idea of the oil, heater idea...
:-)
--brett
Posted by: rick 918-S Oct 10 2012, 05:17 PM
Don't worry about heat.  Iffin it don't run you don't need heat. Lesson yer movin into that thing en parkin it down by the river!
Posted by: sixnotfour Oct 11 2012, 02:44 AM
The nice thing about the Propex is you can get a timer and a thermostat and it can run continuos= warm bus in the morning.
my 914 stays warm all day and night.
BTW the importer USA is in Maryland. mine worked and quit, Karl sent me the capacitor and told what to do ,worked great ever since.
http://westyventures.com/index.html
Here is another option I have in a 914-6 (big alternator)
works good but motor must be running (High amp draw)
Also when its on its making heat. (no purge cycle etc, )
http://dcthermal.com/catalog/12-volt-ducted-heaters
Posted by: Dr Evil Oct 11 2012, 11:23 AM
Ooo, that electric one is interesting I have a BN4 already as well. I hope to tackle the last "running" things this weekend. I am just looking ahead to the fact that it is too cold to ride my motorcycle, so I need heat in my car.
Posted by: Dr Evil Mar 30 2013, 09:23 PM
It is now time to start working on getting the beast back on the street. One major stumbling block for me so far is the damn oil temp sensor placement.
I have male AN-10 coming out of the engine into the hose going to the cooler up front. In the previous iteration of using an oil heated manifold I had an easy place to put the sensor. Currently I do not. I was using a VDO 323-055 as it went with my gauge.
If I am to use this same sensor, which is M14x1.5, I need to find a way to insert this into the out flow circuit.
The only thing that I could find was an adapter that has male AN10 on one end, female on the other, and a 1/8NPT port in the middle. I can use a male 1/8NPT to M14 adapter (maybe, not sure it would exactly fit). However, if I can find another sender maybe this will work better?
Ideas?
Posted by: Dr Evil Mar 30 2013, 10:07 PM
I found this as a possible option. It does not protrude into the oil stream:
1H0919563, it is a VW/Audi/etc part. It is VDO and has the same 300F and 322-18 ohm range as the VDO 323-055. It is an M10x1.0.
This would be very good if I could find an adapter that was AN 10F - AN10M and had the ability to be drilled and tapped. I dont think that the 1/8NPT can be tapped out to M10x1.0.
Posted by: Dr Evil Mar 30 2013, 10:28 PM
Next thought, maybe an adapter to convert the male AN10 output to metric, and then back again so I can fabricate a block to go between the adapters that would take my temp sender?
Posted by: bulitt Mar 31 2013, 06:41 AM
Earls makes a tee with three female AN10 openings. You could fit a AN10 male to one opening and try and find a An10 to M14 x 1.5 for the third.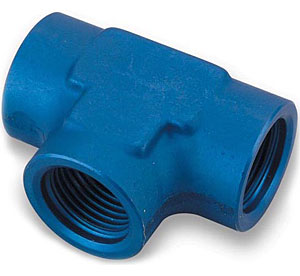
http://www.jegs.com/i/Earl%26%23039%3Bs/361/993810/10002/-1
Posted by: Dr Evil Mar 31 2013, 03:47 PM
I think that I am going to go with the build my own adapter approach.
I already have the metric male to AN male so all I need is the metric female to metric male and a piece of aluminum to drill out.
gonna be fun.
Posted by: Dr Evil Mar 31 2013, 03:53 PM
Its always good to measure. I am actually using AN12 (doh).
Posted by: Dr Evil Mar 31 2013, 06:31 PM
Alright, plans are in place:
AN12 male --> 3/4 NPT male --> Aluminum block with hole drilled in it for temp sensor --> 3/4 NPT male --> AN12 Female
Posted by: Dr Evil Apr 1 2013, 07:34 AM
The only change to the original idea is that I will be using the M14x1.5 sensor now that I can make the adapter any size I want. I am going to drill out a 1.25x1.5x2" block, off side so that the center bore is offset to leave room for the 1/2" long sensor The tip is better on the 055 as well because it is smaller dia than the sensor itself and will allow oil to flow around the whole sensor tip for an expected more accurate reading. Either way, I already had one
Taps, drill bits, and Al on the way. The trannywagon needs to move to the new house under its own power and we start to move May15 and finish June14. I will actively start working on the trannywagon April 22. Tight schedule, stay tuned.
Posted by: Dr Evil Apr 2 2013, 11:26 AM
Next update, I am using AN 8 and 1/2 NPT. It helps to keep measurements correct. AN12 is HUGE.
Posted by: Eric_Shea Apr 2 2013, 11:39 AM

Posted by: MDG Apr 2 2013, 11:42 AM
Doc? Is this the one you are turning into a cafe style racer?
Will you be doing any more welding? Cuz that was cool.
I was particularly taken with this example where you combined welding with whittling to create a kind of Dr. Seuss landscape effect.
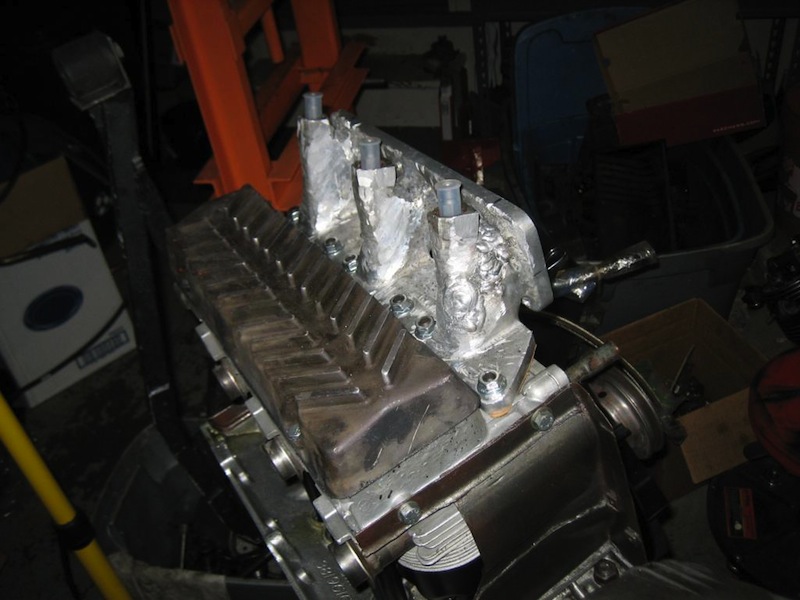
Posted by: scotty b Apr 2 2013, 11:44 AM
Next thing you know he'll be slapping a super rare fog light on the roof, use it to start promoting his Doc oral practice, and showing us pics of his business ad featuring Rob Zombie.
Posted by: Dr Evil Apr 12 2013, 09:24 PM
If they dont have it for sale, then you gotta make it.
Attached thumbnail(s)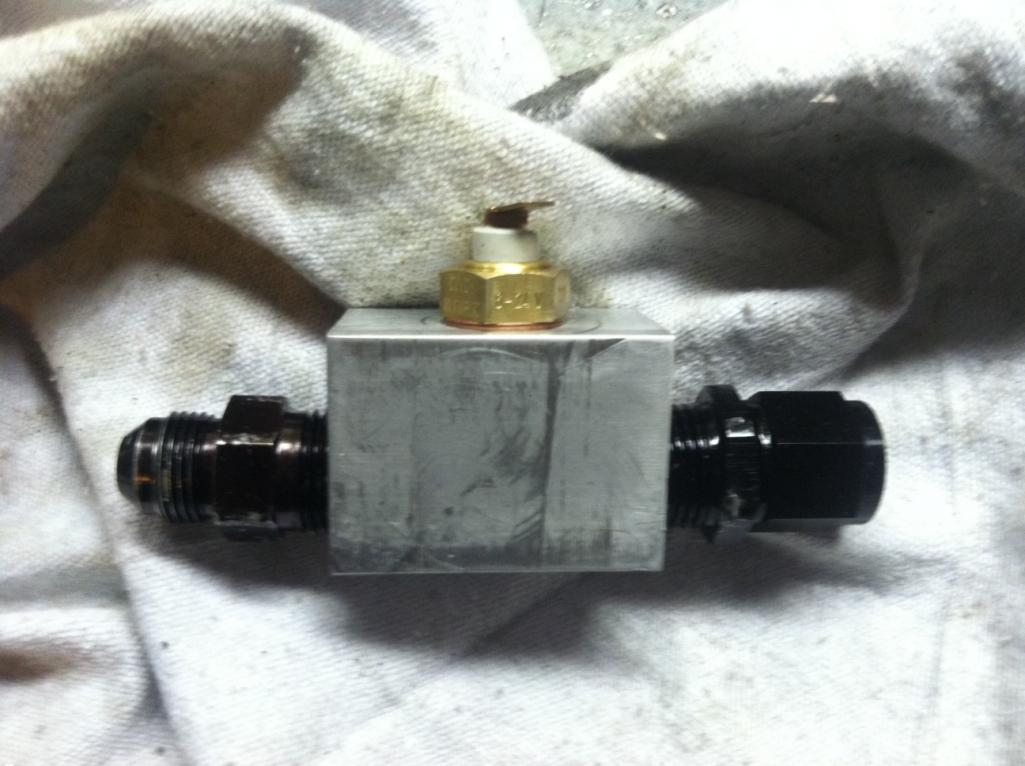
Posted by: BajaXJ92 Apr 15 2013, 04:53 PM
If they dont have it for sale, then you gotta make it.
Thats, um, what she said?
Posted by: wingnut86 May 4 2013, 07:58 PM
Powdah coat that Fuchah PINK
Posted by: Dr Evil May 5 2013, 06:11 PM
OK, today I started back on the bus project. I decided to get all the hoses done so now the fuel system is all hooked up and ready to rock. The oil system is ready as well and my adapter for the oil temp is in place and looks out of place. I just keep telling myself that it is a prototype and that some day, once the concepts are proven, I will drop the engine and pretty it all up (ya right).
Next on the list, figure out how I am going to wire the limited CIS electrical. The main issue is that I need power to the cold start valve and thermotime switch ONLY when the engine is actually turning. Having it run when the key is on, but engine not turning means that it will dump a lot of fuel into the intake and likely flood the engine. Engine flooding was a huge issue with my 914/6 CIS conversion and caused a lot of headache.
So, anyone have ideas on how I can control voltage to the cold start circuit as described above?
My back up plan is to throw on some 3A carbs just to get it going. I hope a friend of mine can lend me a set with manifolds and linkage
Posted by: scotty b May 5 2013, 06:22 PM
So, anyone have ideas on how I can control voltage to the cold start circuit as described above?
headlight switch. Use the leads for the guage dimmer
Posted by: Dr Evil May 5 2013, 06:42 PM
How would that work? I was wondering if I could just tap off of the alternator output to the alt fail light. I could at least use its output as a switch for a circuit.
Posted by: wingnut86 May 5 2013, 06:50 PM
Scotty may be on to something here...
Posted by: scotty b May 5 2013, 07:03 PM
How would that work? I was wondering if I could just tap off of the alternator output to the alt fail light. I could at least use its output as a switch for a circuit.
Push pull for the lights on would work as your power on off, the dimmer is just a rheostat ( ?) that would work to adjust the voltage.
Keep in mind, you know my
Posted by: Dr Evil May 5 2013, 08:13 PM
Uh, ya. So, the power to the cold start circuit needs to come on ONLY when the engine is turning. So, I like the idear of a switch in the cabin as this would be the easiest, and the thermotime switch would turn it off, but the rheostat is not needed as it needs either full on or full off.
Posted by: scotty b May 5 2013, 08:16 PM
then just put a f-ing switch on the dash ! Power in...power out
Posted by: Dr Evil May 5 2013, 08:18 PM
That is a pain to wire and not completely correct. I want it to be: turn key, engine start, no drama, no extra switches, etc.
Posted by: scotty b May 5 2013, 08:18 PM
doesn't the start circuit on the ignition switch cut out once you release the key ?
Posted by: scotty b May 5 2013, 08:20 PM
That is a pain to wire and not completely correct.
So you want everything to be primo, original condition ? Got it
Posted by: Dr Evil May 5 2013, 08:38 PM
doesn't the start circuit on the ignition switch cut out once you release the key ?
Yes, but I need the power to remain on while the engine is running until the thermo time switch turns it off.
Posted by: Valy May 5 2013, 09:59 PM
OK, today I started back on the bus project. I decided to get all the hoses done so now the fuel system is all hooked up and ready to rock. The oil system is ready as well and my adapter for the oil temp is in place and looks out of place. I just keep telling myself that it is a prototype and that some day, once the concepts are proven, I will drop the engine and pretty it all up (ya right).
Next on the list, figure out how I am going to wire the limited CIS electrical. The main issue is that I need power to the cold start valve and thermotime switch ONLY when the engine is actually turning. Having it run when the key is on, but engine not turning means that it will dump a lot of fuel into the intake and likely flood the engine. Engine flooding was a huge issue with my 914/6 CIS conversion and caused a lot of headache.
So, anyone have ideas on how I can control voltage to the cold start circuit as described above?
My back up plan is to throw on some 3A carbs just to get it going. I hope a friend of mine can lend me a set with manifolds and linkage
I posted a carbs fuel pump circuit a while ago.
I can't look it up now since I'm on my phone but it uses the starter control and oil pressure indication so it does what you need.
Posted by: sixnotfour May 5 2013, 11:04 PM
Posted by: crash914 May 6 2013, 02:52 AM
tie in a relay to the starter solenoid...
Posted by: Dr Evil May 6 2013, 08:48 AM
Valy, that is what I am planning. The Alt does not provide power, but the oil pressure switch can be used with less worry about goofing with the charging circuit.
A relay would be good, and I will be using one either way, but hooking it to the start circuit would only activate it when the starter is engaged. I could place a relay that closes with the first turn of the key and stays closed, but then if the engine did not start on the first turn it would flood with every subsequent attempt.
I may need to tie the pump into such a circuit as well. With the /6, the pump runs with the key on and that caused it to flood the engine. I had to do a quick key on --> start sequence and if this did not happen then I had to turn the key off quickly and try again. A real PITA. This should not be a problem.
I know I could probably design a simple circuit with a capacitor and/or transistor to act as a switch...lets see what the day brings.
Posted by: Dr Evil May 6 2013, 11:20 AM
Ah, research can some times lead to enlightenment My understanding that the cold start injector ran until the engine was hot was wrong. It actually only runs when the starter is engaged which makes wiring so much easier.
"Another fuel line comes off of the fuel distributor and goes to the cold start injector. It is bolted into the intake manifold with two Allen-key bolts and is sealed with a large rubber O-ring. It is an electronically operated injector (like those in a car with Electronic Fuel Injection). It only sprays fuel during the first few seconds when the car is starting, and it only does this when the engine is cold. It only injects fuel when the starter motor is turbing."
http://www.k-jet.org/articles/information/k-jet-in-detail/#3
Posted by: Valy May 6 2013, 11:42 AM
The circuit is powered by the starter until the oil pressure light goes off so if the engine doesn't start you don't flood it. Same, when the engine stops the current supply stops as well with the run-in of the oil pressure bulb.
I suggest you take a better look at the circuit.
Posted by: Dr Evil May 6 2013, 12:10 PM
I do not need to involve the OP light at all. The TTS I have will act as a switch for the CSI when the temp is <95F. This is not difficult now that I know it only is open when the engine is actually cranking and not while it is running.
Posted by: Dr Evil May 6 2013, 07:21 PM
Almost done with the wiring. Got the fuel pump, cold start injector, thermo time switch all set.
I had a thought as I was working on the bus...."Holy shit, this thing might actually run!"
What is left; clean up wiring, ignition wiring, final vac hose, install exhaust. Then I find what else I need to do
Posted by: scotty b May 6 2013, 07:27 PM
Almost done with the wiring. Got the fuel pump, cold start injector, thermo time switch all set.
I had a thought as I was working on the bus...."Holy shit, this thing might actually run!"
Posted by: Dr Evil May 6 2013, 07:39 PM
You all know that feeling. Right before the next disappointment
Posted by: wingnut86 May 6 2013, 08:40 PM
Shit Scott, that's funny
I'm screwed...
Posted by: kg6dxn May 6 2013, 09:39 PM
You all know that feeling. Right before the next disappointment
Yep, I'm almost afraid to connect the battery on my car...
Posted by: Jeffs9146 May 6 2013, 11:10 PM
Thats how I felt just before I started my 6!
Then when the first touch of the battery hit and there was no smoke
Gota love it when it works!
Posted by: Dr Evil May 15 2013, 08:01 PM
Almost done. Who knew having a baby would soak up so much time. My wife officially hates the bus again Whatever.....
For the last few days I have been chasing many wires. Since much of the stuff is not OE, and I can not find my notes (or didnt make them) I had to do this. Tonight, I think I have it all worked out except for two wires in the back. I will button up the front around the fuse panel and then chase the back wires tomorrow, maybe. Then, exhaust, filler neck for tranz, and gas for tank. :bomb:
Posted by: worn May 16 2013, 10:53 AM
Who knew having a baby would soak up so much time.
My wife officially hates the bus again
Whatever.....Well, uh...Duhhh. Hint: there is no gain in efficiency when the second one comes - it works the opposite.
Posted by: Dr Evil May 18 2013, 09:25 PM
Got a lot done today.
Built a mount to place the trans fill. Mad it out of plate.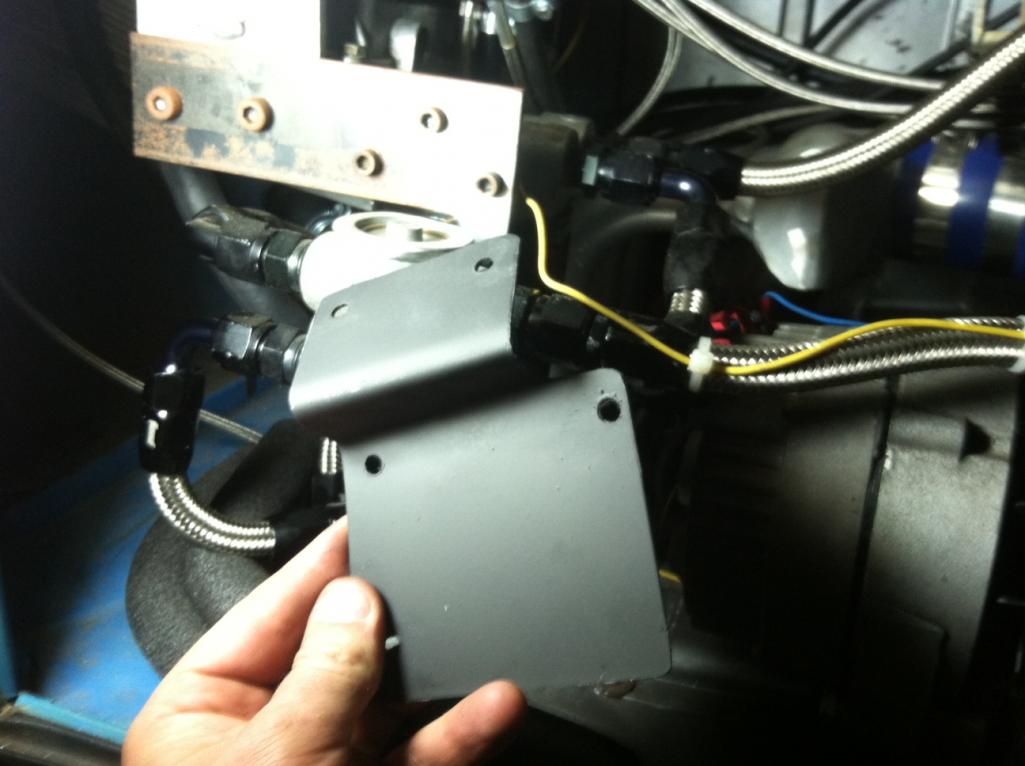
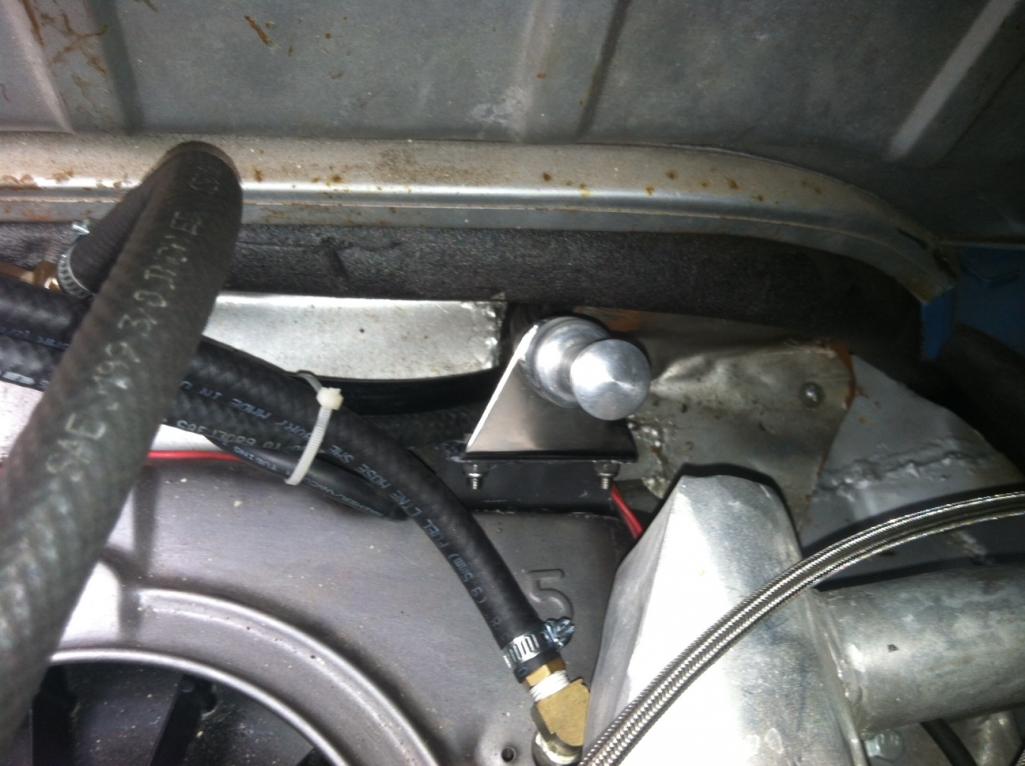
Made a hose and taps for the case vent. Checked all the hoses, and a good thing I did as I found two hose clips on an air bypass hose that were very loose and fixed that.
At this point, I need to install the exhaust, hook up a battery, and start doing checks on the systems
Posted by: scotty b May 19 2013, 09:22 AM
Nothing left to weld ?
Posted by: MDG May 19 2013, 10:16 AM
Nothing left to weld ?
Wut??
Posted by: Dr Evil May 19 2013, 12:20 PM
Nothing left to weld ?
Not true, I need more welding gas
Posted by: Dr Evil May 19 2013, 12:24 PM
Some stuff I did
Attached image(s)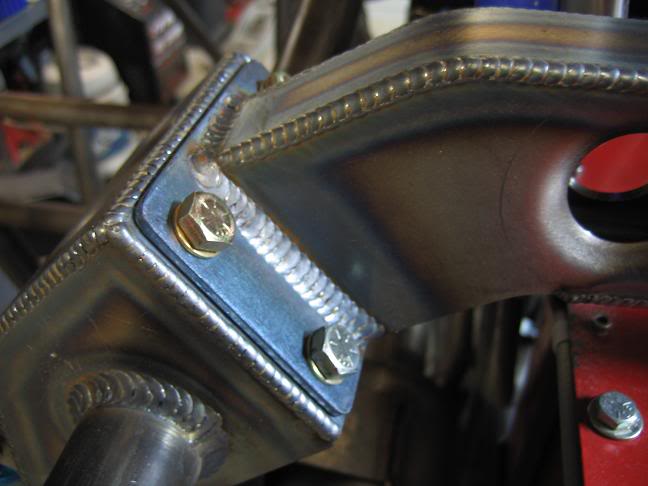
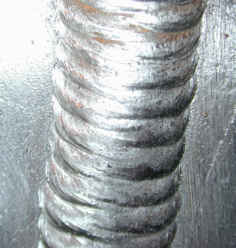
Posted by: MDG May 19 2013, 01:13 PM
Nothing left to weld ?
Not true, I need more welding gas
Woot!
Posted by: Dr Evil May 19 2013, 01:16 PM
I rode the R1100RT to get the gas, on the way back I made a Hardley riders year
I hear, "Hey, hey buddy! Hey Buddy!" I look back and he says, "Your tail light is hanging off!"
The nuts to retain said unit, well only one was in the back compartment and this is why the whole thing was hanging by its wires.
Posted by: scotty b May 19 2013, 01:32 PM
Some stuff I did
WOW !! you're building a tube chassis for the bus body to sit on now ? that rawksss !!:drooley: Can't wait to see it this weekend
Posted by: Dr Evil May 19 2013, 06:11 PM
No, I downloaded pics of such a thing.
Posted by: Dr Evil May 19 2013, 06:17 PM
Almost ready to turn key. Welded up the exhaust to be better then previous and installed. Cleaned up wires and remounted fuse panel.
I need help with the throttle cable assembly and my friend is going to do that. Probably tomorrow, though.
Attached thumbnail(s)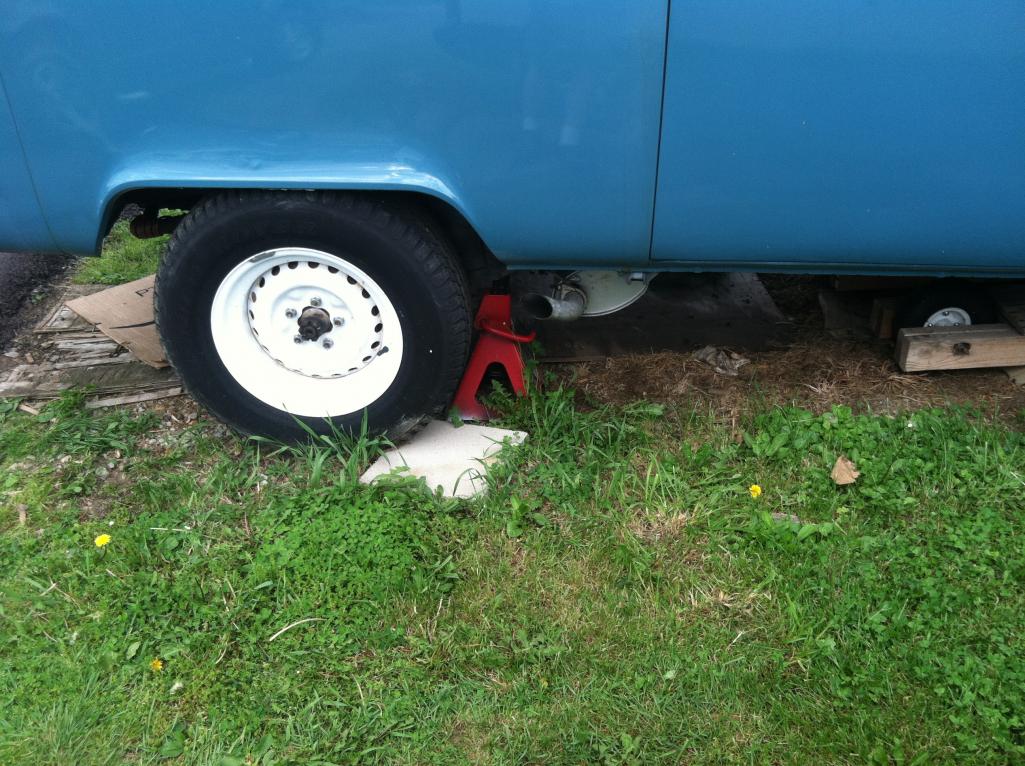
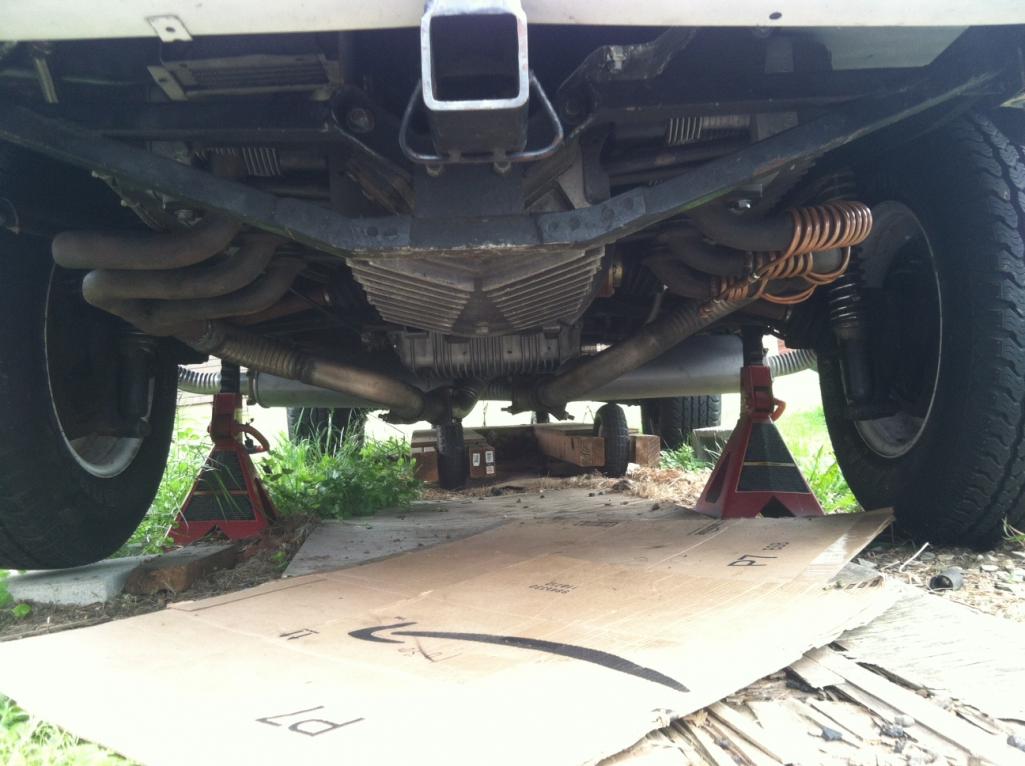
Posted by: Dr Evil May 21 2013, 09:22 PM
No pics, but god news. I put the fluids in that it needed, except gas (didnt have time before a big storm hit), and made a modification to the throttle cable that increased its accuracy and repeatable use (not electric, yet).
The throttle opens almost all the way, about 1/8" too short. However, I think it works well enough to get it going. It is a question of cable/crank geometry that I will need to solve later. I think the cable is tight enough that if I adjusted it for full open it would not close all the way.
Tomorrow, I hope to put fuses in, battery in, gas in, air tube in, key in and start......stay tuned
Posted by: Dr Evil May 22 2013, 07:51 PM
Wazzup bitches!? It LIVES! I did it!
First start at idle
https://www.youtube.com/watch?v=sQCA9-4fzC0
A little throttle
https://www.youtube.com/watch?v=qv6kLOqIVfA
Posted by: Dr Evil May 22 2013, 07:52 PM
I dont know what the squeaking is, but it is too late tonight to go fiddling around in the dark for it. I will do that tomorrow.
Posted by: balljoint May 22 2013, 07:56 PM
Posted by: Dr Evil May 22 2013, 08:08 PM
Ok, I have calmed down and taken a shower to get all of the gas off of me
I had the send and return hoses to the distributor wrong, 4 hose clams that were not able to tighten enough so I replaced them with ones that would, and I forgot to tighten the hoses on the WUR. Once the fuel stayed in the system, I cranked it and it coughed alive! It is running very smooth.
The squeak sounds like the belt or an associated part. It does not sound like the air leak we had last time, but I will be ruling all of that out tomorrow, I hope. With any luck, it will be inspected by this weekend and I can use it to move stuff. I think that Canada will be seeing this beast in June
I still cant believe my concepts worked. Cant wait to see what the HP and TQ are like.
Posted by: hot_shoe914 May 22 2013, 08:32 PM
Good job Annabelle.
Posted by: zymurgist May 22 2013, 08:34 PM
Good job Mike!
Posted by: wingnut86 May 22 2013, 08:40 PM
BooYAH! Mike
Posted by: Chris H. May 22 2013, 10:00 PM
Awesome Dr Mike! Sounds very 911ish. Just noticed how fat (and phat) your wheels are. Those look wider than stock... I'm too lazy to comb through the 76 pages and find out for sure.
Posted by: Dr Evil May 22 2013, 10:46 PM
Special 15" ( or 16, I forget) wheels with truck tires on them.
Posted by: Dr Evil May 23 2013, 04:03 PM
Better, longer video with no squeal.
https://www.youtube.com/watch?v=3RjV6nA76ss
Posted by: kg6dxn May 23 2013, 06:18 PM
Posted by: flippa May 23 2013, 08:50 PM
That's killer Mike!
Posted by: Dr Evil May 23 2013, 10:05 PM
Just took it for a drive! It hauls ASS! It has good stable power up to 3.5K, then it really throws you back into the seat
However, it will not shift out of first. I may have the vac hose hooked up to the wrong spot. I need to check on this tomorrow. I hope to have it inspected tomorrow, then I will be legal.
Posted by: Vacca Rabite May 24 2013, 09:17 AM
Just in time for me to get there! PERFECT!
Posted by: Dr Evil May 24 2013, 10:20 AM
Just passed inspection! Woot! Still not shifting into 2nd, but I can figure that out.
Posted by: worn May 24 2013, 10:45 AM
Just passed inspection! Woot! Still not shifting into 2nd, but I can figure that out.
I love it! Dr. Evil with a tranny stuck in first
Posted by: Dr Evil May 24 2013, 11:05 AM
I was just going through the manual and I think I have a misadjuted low band. I did rebuild the tranz, and I thought I adjusted it correctly, but it is a place to look. It is a weird method:
- First you tq the adjuster to 40 in/lb
- Then you back off EXACTLY 4 full turns
Simple enough.
Posted by: Dr Evil May 24 2013, 05:08 PM
Well, now it is acting up and pissing fluid on the driveway. Break time.
Posted by: Dr Evil May 28 2013, 08:09 PM
I talked with a corvair guru today to help focus my thoughts and he made some valid points that talked me out of just buying a rebuilt and slapping it in.
Here is the evolution of events:
- Had forward in low only, and reverse worked. Possible cause is low pressure due to pump not working correctly.
- Lost all forward, maintained reverse. Same possible cause as above.
- Lost all gears. Further shows that pressure to the whole system was lost.
There is a pump shaft coupling in the nose that is fairly easy to get to. This will show me the pump and if there is something cheap to fix it. Man, I hope so. I have to drain it and remove the pan anyway. This will just be a little delay in time. I hope to figure it out more tomorrow. I need time, no rain, and a place to work. It broke down on my inclined driveway. Good times
Posted by: rick 918-S May 28 2013, 11:26 PM
I guess it's safe to assume it's not the loss of vacuum modulator or an out of adjustment Modulator? That effects shifting into high gear in a powerglide. Also there is a band adjustment you can make too. The other probability is the pump is dead. If you have an out of alignment converter it will take out the pump. I've also seen the converter spacing incorrect and the converter wipe out the pump dogs. (converter not fully engaged)
Posted by: crash914 May 29 2013, 02:54 AM
I will check with Jim at work...his family owned corvair ranch.....
he really knows them....
Posted by: Dr Evil May 29 2013, 07:52 AM
Funny you should mention Corvair Ranch. The guru I spoke to was Jeff Stonesifer, the owner Nice guy and we have had lots of talks in the past.
Posted by: crash914 May 29 2013, 10:39 AM
new owner. old owner is Goulden...jim's father..he grew up there...
Posted by: Dr Evil May 29 2013, 05:38 PM
Jeff still works there and answers the phone, then.
Well, I dropped the front of the tranz today and pulled the front cover to expose the main pump. It is easy to see the wear on the pump drive dogs. The pump shaft was OK and the C clip was in place. The primer piston was stuck in its slot and the drain plug had nice fine metal on it.
I am wondering if I missed a measurement and the pump drive dogs were too big. I did have two trannies to choose from when I was rebuilding.
At this point, I am shorter on time than $$ so I am going to spend for a rebuilt and hope it can get here fast so I can throw it in and GO.
Attached thumbnail(s)
Posted by: crash914 May 29 2013, 06:40 PM
which trans? torqueflight or th350?
Could be sealing rings on main shaft....
Posted by: Dr Evil May 29 2013, 08:02 PM
It is a corvair, so powerglide. They only came with the powerglide as an automatic.
I put all new seals in. I am pretty sure I did not screw that up as it is straight forward.
Posted by: crash914 May 30 2013, 02:49 AM
oops, that is what i was thinking of.....been a long time since I have rebuilt one...last one was done in my living room...
Posted by: Dr Evil May 30 2013, 11:55 AM
Well, looks like the universe is conspiring to make me rebuild my transmission. Clark's is our of rebuilds and cores so would need mine. Corvair ranch has no good used that they would trust to sell me. Gonna be an enlightening weekend.
Posted by: FourBlades May 30 2013, 12:55 PM
Nice work getting it running!
You'll get the tranny licked soon.
Wait that sounds wrong.
John
Posted by: zymurgist May 30 2013, 02:48 PM
Nice work getting it running!
You'll get the tranny licked soon.
Wait that sounds wrong.
John
Posted by: Dr Evil May 30 2013, 03:09 PM
I hope to drop the tranz tomorrow and to figure out what is wrong with it and fix it this weekend.
Wish me luck
Posted by: budk May 30 2013, 03:28 PM
I hope to drop the tranz tomorrow and to figure out what is wrong with it and fix it this weekend.
Wish me luck
Are you sure you don't want to drag it over to the new place first?
Posted by: Dr Evil May 30 2013, 05:56 PM
Bud, I dont see how. I would love to work on it here, but the parking in back is tight and getting it on the parking area would be a feat in and of itself.
The folks at the corvair forum pointed me to California Corvair and I just scored a rebuilt transmission for less than the competition and it will ship tomorrow FedEx. Next week I hope to have this all resolved.
Posted by: Dr Evil May 31 2013, 09:24 PM
Went over to the old house tonight and with four bolts removed the transmission came right off. It is pretty easy to do, actually. And now, I wait for the rebuilt one. It should only take about ~1hr to get the new one in and running. Fingers crossed.
Posted by: Dr Evil Jun 8 2013, 06:36 PM
Aaaaaaand, its back on the road. What happened to the other tranz? I forgot to put the governor drive gear on the diff so it would never up shift and likely burnt the damn thing out
It now has all gears and can cruise at 65 and 2700RPM all day (so far).
The first trip today was to the gas station. The second, I loaded it up and hauled stuff to the new house. All of this fit, and even some not pictured.
Attached thumbnail(s)
Posted by: FourBlades Jun 8 2013, 06:57 PM
Great work!
Oh, and some Norsemen want to stop by later to compose an epic saga about your restoration.
John
Posted by: scotty b Jun 8 2013, 07:12 PM
WOOHOO !!
Posted by: rick 918-S Jun 8 2013, 08:05 PM
You need to do a video of the driving so we can see how it drives and shifts.
Posted by: balljoint Jun 8 2013, 08:09 PM
I look forward to seeing it in person next weekend.
And then helping to fix what broke on it.
And then possibly towing it to PA.
Posted by: MDG Jun 8 2013, 08:54 PM
Nice!
Posted by: Dr Evil Jun 8 2013, 11:43 PM
I look forward to seeing it in person next weekend.
And then helping to fix what broke on it.
And then possibly towing it to PA.
You all saw it here! Dave offered to tow me back to PA. I am driving without fear on the Canada trip.
Video to come. I need to repair the speedo.....the lens fell in
Posted by: MDG Jun 9 2013, 06:59 AM
You all saw it here! Dave offered to tow me back to PA.
Right.
Which means you'll have to ride with him.
Trapped in the cab of a pick-up truck.
Dave.
With his A.D.D.
And O.C.D.
Posted by: Dr Evil Jun 9 2013, 09:00 AM
You all saw it here! Dave offered to tow me back to PA.
Right.
Which means you'll have to ride with him.
Trapped in the cab of a pick-up truck.
Dave.
With his A.D.D.
And O.C.D.
And my bad gas
Posted by: MDG Jun 9 2013, 10:38 AM
You all saw it here! Dave offered to tow me back to PA.
Right.
Which means you'll have to ride with him.
Trapped in the cab of a pick-up truck.
Dave.
With his A.D.D.
And O.C.D.
And my bad gas
By the time you roll into PA the two of you will have mutated into an entirely new strain of humanoid . . .
Posted by: rick 918-S Jun 9 2013, 11:45 AM
You all saw it here! Dave offered to tow me back to PA.
Right.
Which means you'll have to ride with him.
Trapped in the cab of a pick-up truck.
Dave.
With his A.D.D.
And O.C.D.
And my bad gas
By the time you roll into PA the two of you will have mutated into an entirely new stain of humanoid . . .
Fixed it for ya.
Posted by: wingnut86 Jun 9 2013, 02:26 PM
Dawn Rick, that's cold.
WAAHHHHH!
Posted by: Dr Evil Jun 10 2013, 05:13 PM
Interesting developments. This AM I attempted to adjust the timing as I realized I had not dont this and under load it pings pretty bad. I did this on my way to work....I forgot to pull and plug the vac advance hose so that explained why it got worse. I fixed it over lunch. The timing was right to begin with.
But, it was still detonating under load. So, I tried some octane boost and the noise went away. Crap. I guess I will need high octane after all.
Another interesting thing that has been developing, before I was monkeying around with the timing, is that the bus was stalling when I shifted it into gear. No idea. I adjusted the air bypass for a higher idle and it seems to be doing well now.
With the pinging figured out and treated (for this tank of gas) I can now clearing hear the exhaust leaks I am not surprised. I did not paste the header to the gaskets like last time.
The windshield wipers stopped working today, after it rained so yay me. The fairly new Dakota Digital voltmeter has some of the LEDs burned out so it is not readable.
Looking good for Canada
Posted by: timothy_nd28 Jun 10 2013, 05:20 PM
Due to the bus requiring higher octane, will this change the admittance fee for the workshop?
Posted by: Dr Evil Jun 10 2013, 09:27 PM
Nah, I am about to be a well paid doctor.
Posted by: worn Jun 11 2013, 10:29 AM
The windshield wipers stopped working today, after it rained so yay me. The fairly new Dakota Digital voltmeter has some of the LEDs burned out so it is not readable.
Looking good for Canada
So it is like driving my Ford Falcon up hill over Snoqualmie Pass in the snow. Vacuum all used up getting you up the hill, thank you very much. When you close the throttle there will be some for the wipers. But not in a bus I suppose...
Is this a testimony for Dakota Digital?
Residency about over?
Posted by: Vacca Rabite Jun 11 2013, 10:35 AM
Dakota Digital will probably fix that for you under warranty if you call them.
Glad to hear its running!
Posted by: Dr Evil Jun 12 2013, 08:50 PM
I have been driving it all week. No real issues. It was pinging, I tried mid grade in this helped. I did some reading and found that the vac advance on the dizzy actually tends to cause this. I pulled and plugged the vac line and the bus ran better. It still pings under load above 3.5K so I need to retard the timing a little, I think. I do not like the 3.27 R/P as it places the power band out of reach in 2nd until about 75mph. Sounds weird, but the engine can produce pretty well until I change back in the winter.
As for other parameters, the engine maxed out at 315* head temp in up hill, stop and go traffic with 85* ambient temps. Pretty good. It is just in need of some fine tuning.
Posted by: Dr Evil Jul 24 2013, 10:11 PM
Well, I have a few days off and nice weather so I figured it is a good enough time to drop the tranz/diff and change the R/P to a shorter gearing. It is nice to work on a paved, flat surface for once
I found a ripped and pissing CV boot so that needs to be addressed while I am in there.
Probably see about getting a custom throttle cable.
Figure out why my oil temp is not registering......
Posted by: Dr Evil Jul 25 2013, 10:03 AM
I really hate working on auto trannys. There is fluid everywhere, no matter what you do.
I am letting the TC drain.......trickling down.......soooo fucking slowly. Then, I will pull the diff and I can get to business.
A new throttle cable was $4 form BusDepot. The one I have is frayed as it needed to be cut short and has been molested numerous times. It has kinks in it as well so out it comes. I hope to be able to engineer a better throttle pull system in the next few days while working on the rest of this stuff.
Posted by: Dr Evil Sep 19 2013, 08:55 AM
I am thinking of growing my tool inventory and being that I have two CIS vehicles and like to tweak with them, and neither is running right, is it a wide band O2 sensor that is needed to adjust these? I am interested in a handheld unit, if so.
Posted by: rick 918-S Sep 19 2013, 09:30 AM
No, you need to check the fuel pressure. That is the key to CIS. Search Adjusting CIS. If the fuel pressure is off you will never make any adjustment that will be meaningful using an 02 sensor. I ended up using a Volvo turbo warm up regulator with the guts from my 928 regulator. You need to take a cold reading and a warm reading and adjust the fuel pressure accordingly. The Volvo regulator had an adjustment bolt that my 928 one didn't. You can make them adjustable but it requires drilling, tapping and such. It was easier to just source a Volvo part and change the guts over.
Posted by: Dr Evil Sep 19 2013, 09:33 AM
Assuming that my fuel pressure is correct (no idea why you wouldnt), then can I adjust with the aforementioned gauge?
Posted by: bulitt Sep 19 2013, 10:22 AM
Not sure if there is a handheld O2 scanner on the market, but don't know? I have owned this meter called a gunson gastester. It worked great. It has a probe you stick in the tailpipe.
You calibrate it in the open out of the breeze, then up the pipe and it will give you AFR digital reading. They sold for @149$ but I see them for 199$ now.
You can use them on any engine, cycle etc.. Up stream of any cats. Wish I never sold it Sure there are some Youtubes showing it.
http://compare.ebay.com/like/221274457509?var=lv<yp=AllFixedPriceItemTypes&var=sbar
Innovate sells a clamp to mount the sensor on the tailpipe. So you need the clamp, the wideband kit. Clamp lists for 65$
http://www.amazon.com/Innovate-Motorsports-3728-Exhaust-Cast-Stainless/dp/B000CO9MF8/ref=pd_bxgy_auto_text_y
Posted by: Dr Evil Sep 19 2013, 10:28 AM
That is what I am talking about! Thanks
Posted by: bulitt Sep 19 2013, 10:42 AM
You find it cheaper let me know I may buy another.
Posted by: rick 918-S Sep 19 2013, 10:44 AM
Assuming that my fuel pressure is correct (no idea why you wouldnt), then can I adjust with the aforementioned gauge?
No need. Completely different from modern cars. I could be wrong but my mileage went from 10 mpg to 21 with correct fuel pressure.
Posted by: rick 918-S Sep 19 2013, 10:48 AM
What would you adjust? You have an idle screw, a sensor plate adjustment and the fuel pressure. Most guys try to adjust the sensor plate without checking the cold and warm fuel pressure. Bad idea.
Posted by: Dr Evil Sep 19 2013, 11:06 AM
I have a 3.0 system on a bastard 3.1 corvair engine. I "know" very little, exactly. I would like to be able to data track. I will check the fuel pressure, but A/F is still important and I may need to adjust the plate. I know the 914 needs the plate adjusted.
Posted by: rick 918-S Sep 19 2013, 11:08 AM
http://www.volvoclub.org.uk/tech/fuel_injection/BoschMechanicalFuelInjection.pdf
http://www.porsche928forums.com/download/manuals/CISRebuild.pdf
http://forums.pelicanparts.com/porsche-911-technical-forum/218814-made-adjustable-wur-step-step-got-pics.html
Totally old school. By the gauges. You will be surprised when you take your first reading.
Posted by: scotty b Sep 19 2013, 11:09 AM
I have a 3.0 system on a bastard 3.1 corvair engine. I "know" very little, exactly. I would like to be able to data track. I will check the fuel pressure, but A/F is still important and I may need to adjust the plate. I know the 914 needs the plate adjusted.
That's the least of it's issues.....
Posted by: rick 918-S Sep 19 2013, 11:12 AM
I have a 3.0 system on a bastard 3.1 corvair engine. I "know" very little, exactly. I would like to be able to data track. I will check the fuel pressure, but A/F is still important and I may need to adjust the plate. I know the 914 needs the plate adjusted.
Without proper fuel pressure any adjustment will only push the engine further out of whack. It doesn't matter what engine the CIS is on. You still need to start with fuel pressure. The fuel pressure acts on the sensor plate. Wrong pressure can't be compensated by messing with the senor plate and a tail pipe sniffer. I tried that and made it worse. The 911 system was designed to run on the same basic C.I. as your Vair engine and therefore needs to be tuned the same.
Posted by: Dr Evil Sep 19 2013, 11:37 AM
I have a 3.0 system on a bastard 3.1 corvair engine. I "know" very little, exactly. I would like to be able to data track. I will check the fuel pressure, but A/F is still important and I may need to adjust the plate. I know the 914 needs the plate adjusted.
That's the least of it's issues.....
Mmmm, ya.
Posted by: Dr Evil Sep 19 2013, 11:49 AM
So, where do you recommend checking and adjusting fuel pressure? At the spring in the distributor?
Posted by: Dave_Darling Sep 19 2013, 11:50 AM
There are several key "fuel pressures" in the CIS system. The delivery pressure (like you'd check on a 914) is the least of it. There is a "control pressure" and at least one other that you check. Those vary depending on load, O2 sensor feedback, warmup status, and so on. The system varies pressure in those circuits to deliver more fuel or less fuel.
Read up on CIS, it's a really weird hydraulic-based system. It's even a little weird when compared to screwy analog-electronic controlled systems like D-jet!!
--DD
Posted by: Dr Evil Sep 19 2013, 12:06 PM
I have read up on the CIS, and I have the basic so no 02 or lambda stuff. What I want to know is why I would go all over and check every pressure when all I did was put the system from one engine onto another. It is appearing like I will have to make several special fittings to check every fucking pressure. It ran, it just would not start warm sometimes (flooded), and is hard to cold start so the injector may be crap.
Posted by: Dr Evil Sep 19 2013, 12:28 PM
Nice links, Rick. Good refresher. I dont know if my AAR is working, my CSV is working, my WUR is working. I turned the key and drove it around lake Ontario....getting shitty mileage from the too tall gearing in the diff.
Posted by: rick 918-S Sep 19 2013, 12:44 PM
Set the pressure with the WUR. Add the special gauge set that is designed for this to your tool box if you want to add cool tools.
Seriously, I had the same issue. I never messed with the WUR or any of the settings. I bolted a complete 928 engine to my adaptor plate in my car. Never touched the WUR. My mileage at start up was 18. Shortly after I drove the car it started to drop. On one trip to the WCR I stopped at Carl's place in Vegas with John Peterson. We managed to stabilize the mileage at 10 mpg by messing with the sensor plate and a sniffer.
I tried all the hocus pocus with the 02 sniffer and the sensor plate tweek. I tried to pay shops to check things out. All they wanted to do was tweek the sensor plate. A couple old Volvo guys even told me they no longer had special tools. I located a gauge and a shop that knows the system. They refused to work on the engine but borrowed me the gauges. WHAM! fixed.
Get everything working and wired correctly. Adjust the WUR first, lean out the sensor plate after as you adjust the idle. You won't believe the difference.
Posted by: Dr Evil Sep 19 2013, 12:47 PM
This is funny. I didnt even know I had a problem and now I am on the way to, hopefully, fixing it. I figured; Bus = low mpg.
Any idea what the special tools are called? Pics? I will do some googling. I am typing between seeing patients so that is why I am not quick on the search function.
Posted by: rick 918-S Sep 19 2013, 12:51 PM
This is funny. I didnt even know I had a problem and now I am on the way to, hopefully, fixing it. I figured; Bus = low mpg.
Any idea what the special tools are called? Pics? I will do some googling. I am typing between seeing patients so that is why I am not quick on the search function.
https://www.google.com/#q=cis%20fuel%20pressure%20gauge&safe=off
Get the one that say's it's for K-Jet. Not all gauges are created equal.
Posted by: Dr Evil Sep 19 2013, 01:12 PM
Just ordered, thanks. Gonna be interesting.
Posted by: Dave_Darling Sep 19 2013, 05:19 PM
Because the pressures are the control signals for the injection. So if the cam, compression, exhaust, intake flow, yadda yadda, are different on the second motor than the first, the signals will be wrong for the second motor. Kind of like when you take a VW 1600 MPS and bolt it up to your 2230cc hot-rod motor and it runs for crap--you have to adjust it. Or if you tear a set of Webers off an early 911S motor and put them on a 3.6--you have to re-jet, right?
--DD
Posted by: Dr Evil Sep 19 2013, 11:20 PM
Came home after working 12.5hr shift, put some work in on the bus and hope to have it running tomorrow so I dont have to ride to Scooters in the rain.
Posted by: Dr Evil Sep 21 2013, 07:50 AM
The plan last night was to sleep in the bus, in a parking lot....but it was supposed to be Scott Burnett's shop lot not Sheetz. I am fortunate to have been able to make it to Sheetz on what felt like 5 cylinders as I have food, bathroom, and internet. Waiting for my tow from Scotty to Scotty's. Time to source some cheap wheels while the bus is hard down. My 6hr trip was going to take 9 last night before the breakdown. I tried to go through the middle of WV, got lost, asked for directions, and came out about 80-100mi off target. No phone service for much of the drive, no directions on the phone. I ended up on 92 for most of the trip and popped out at 64......way away from where I intended. Ah well, adventures. Tonka is doing fine.
Posted by: wingnut86 Sep 21 2013, 01:43 PM
Doc,
See if the American Racing wheels & new tires fit your bus that I left at Scotty's...
Dave
Posted by: rick 918-S Oct 1 2013, 07:11 AM
Not sure I posted this link.
http://www.porsche928forums.com/download/manuals/CISRebuild.pdf
Posted by: Dr Evil Oct 1 2013, 09:26 AM
Thanks! I got my K-jet tester. Now, I just have to wait for engine part and I can start tuning the beast.
Posted by: Dr Evil Oct 15 2013, 01:11 PM
Well, I am way overdue for an update.
The bus is down. On a trip to Scotty B's shop I lost some power and later found that I had snapped a rocker stud. I would guess that one of the circlips came off, the needle bearing let go, then the head cocked, then the stud broke.
I called the guy who makes and sells these. He lives in Canada during the summer and in AZ in the winter. He was surprised, very nice to deal with, and is sending out repair parts today. This is actually an easy fix and the failure mode protected the drive train Silver lining.
The carnage.
Attached thumbnail(s)
Attached image(s)


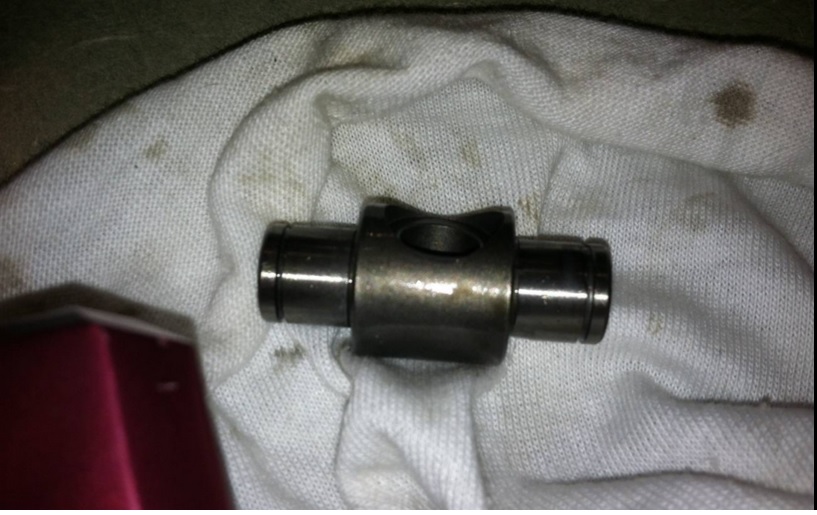
Posted by: Dr Evil Oct 23 2013, 12:21 PM
Well, I got home yesterday from being out of town. My new roller rocker arrived.....it was for the intake valve :facepalm: I called the guy, he apologized and will get me the exhaust one out in the next 32 hours.
Posted by: Dr Evil Dec 17 2013, 11:09 PM
Well, shit. I was all set to get the replacement rocker installed and get back on the road today. However, I decided to take a better look at the remaining rockers. Most of them look like they were about to have the same failure. WTF?
The bushing that the needle bearing is held into is coming out of many of them, the rockers are migrating to the side for reasons I do not know, and rubbing on the stud. This is obviously what happened to the one that failed.
So, I removed all of them and am not sure what the hell I am going to do. I need to call the guy that sells this kit and find out why most of them are not staying centered.
Attached thumbnail(s)

Posted by: balljoint Dec 18 2013, 06:13 AM
Weird. Did you leave it parked on a hill?
Posted by: bulitt Dec 18 2013, 08:09 AM
You have stubby fingers.
Posted by: Dr Evil Dec 18 2013, 09:00 AM
I am planing to switch back to the stock rockers. This is too much of a PITA.
Posted by: bozo914 Dec 19 2013, 10:47 AM
Article in this months Hot Rod details a failure very similar to this. The geometry of the push rod/rocker arm is causing side loading, causing the wear and eventual snapping of the studs. It was blamed on the push rod guide plates being incorrect for the head, having the notch hogged out and inferior (read Chinese) manufactured studs. Don't know if this helps, but it might be good for a couple of clues.
Posted by: r3dplanet Dec 19 2013, 11:55 AM
Crap. This is lousy but you might have saved me from making the same purchase. Are these the ones from Corvair Specialties? If so, I wonder if the ones from Clark's would suffer the same problem.
-m.
Posted by: Dr Evil Dec 19 2013, 12:36 PM
The brains on the Corvair page feel that CorvairSpecialties parts are cheep Chinese crap. The guy copies designs and has them manufactured in China, with questionable quality - per their opinion.
The more expensive, quality, USA made parts have not seen failures like this.
Bozo - that is interesting. How bad would the geometry have to be off to cause this? I checked and unless my measurements were way off I would be surprised that this would occur. I honestly do not know, though.
Posted by: bulitt Dec 19 2013, 02:39 PM
Roller rockers are cool if you are looking to free up several HP or looking to increase the rev limit by reducing valvetrain weight (aluminum) but seems to me for your application the stamped steel OEM's will be more than fine.
Posted by: Dr Evil Dec 19 2013, 03:08 PM
I installed them to help with heat, as a precaution. Now that I have driven it, I dont feel I need them, either. I hope I still have the stock gear.....or I will be ordering it.
Posted by: MDG Dec 19 2013, 06:13 PM
Hey did you ever finish reupholstering the seats in that zebra fun-fur yet?
I think once you finish that all these other problems will go away.
Posted by: Vacca Rabite Dec 19 2013, 08:13 PM
Double check your Geo just to be sure, but I agree that stock rockers are a smart idea here.
Zach
Posted by: scotty b Dec 19 2013, 08:36 PM
Double check your Geo just to be sure, but I agree that stock rockers are a smart idea here.
Zach
When did he buy a Geo ? Metro or Trakhur ? Or a metro-trakhur
Posted by: Dr Evil Dec 19 2013, 10:00 PM
How far would the geometry have to be off? I installed these with engine on stand and rotated and checked each rocker for contact and rang of motion. I did check the geometry and the rods were perfect as stock. This was surprising, but I bought the kit to check it and that is what I found.
I am going back to stock, it is just easier.
Posted by: wingnut86 Dec 20 2013, 11:39 AM
Well,
Again, not a rocket scientist, just one who has fixed their theoretical musings to make them work;-{
I have had to relearn what I knew previously about metallurgy, etc.
Nothing is wrong with Chinese methods, as long as you know that the aluminum they use differs greatly, and all depends on the mix/blend of aluminum oxide (more pure) as well as recycled content when they cast their Chinese boules or cast blanks.
It all looks high grade, only the metallurgist or end user at his wits end knows the truth.
So YES, they may be a perfect geometrical knockoff, and take anodizing perfectly.
Sadly, you get what you pay for or worse. If you take a brand new set of these rockers to a local CNC machinery, request them to make high-end aluminum blanks, maybe add pressed stainless or high grade bronze inserts, you will probably be extremely happy with the result.
And, it will bankrupt your hobby fund for 3 years going forward.
Hope that warms everyone's Xmas Spirits:-)
Dave
Posted by: rick 918-S Dec 20 2013, 04:13 PM
I'm not sure I follow you. Based on the type of failure there it doesn't seem to me that it would make a difference what the rockers are made of. It appears they drifted off to one side and started to grind themselves into the stand bolt. US or Chinese the drift would have been the same. Eventually even high end parts would have failed if they were running misaligned. The common failure of a low quality alloy rocker is breakage at the pivot shaft. I think you still have something running out of line.
Posted by: rhodyguy Dec 20 2013, 05:26 PM
these are cast aluminum parts?
Posted by: bulitt Dec 20 2013, 05:51 PM
I'm not sure I follow you. Based on the type of failure there it doesn't seem to me that it would make a difference what the rockers are made of. It appears they drifted off to one side and started to grind themselves into the stand bolt. US or Chinese the drift would have been the same. Eventually even high end parts would have failed if they were running misaligned. The common failure of a low quality alloy rocker is breakage at the pivot shaft. I think you still have something running out of line.
If the roller assembly in the rocker is loose, or installed in the rocker at an incorrect geometry, or the stud hole is drilled off, it could cause wear.
Look at the picture Mike posted. The stud hole is either offset improperly, drilled at a wrong angle. or the circlips have failed allowing the roller to shift to one side in the rocker.
Posted by: scotty b Dec 20 2013, 07:01 PM
...
Attached image(s)
Posted by: tomeric914 Dec 20 2013, 07:07 PM
The 140 and 110 have slightly different geometry with respect to the angle that the valves sit in the heads. If you have the wrong rockers OR the manufacturer didn't know the difference, then that could explain why the rockers got side loaded.
Posted by: rick 918-S Dec 20 2013, 10:20 PM
The 140 and 110 have slightly different geometry with respect to the angle that the valves sit in the heads. If you have the wrong rockers OR the manufacturer didn't know the difference, then that could explain why the rockers got side loaded.
Or Dr. ordered the wrong stuff.
Posted by: Dr Evil Dec 21 2013, 12:25 AM
No, the 110 and 140 use the same roller rockers. If my geometry was off, it was only by a fraction. I would check this, but I have decided to abandon the whole roller rocker thing. The gain just isnt there for me. As for why these all failed and the rocker was shifting on the roller cam, I do not know.
Posted by: Dr Evil Dec 21 2013, 12:28 AM
Hmmm, what tomeric said was not false, but what I found on certain sites was misleading. The one that I bought from had one option. American Pi has one options.....Clarks has 2, one for 140 and one for all others. Interesting.
http://www.corvair.com/user-cgi/catalog.cgi?function=goto&catalog=SPECIALTY§ion=OTTO&page=OTTO-11
Posted by: tomeric914 Dec 21 2013, 12:35 PM
There's only a couple of degrees difference between the 140 and 110, but at 2000 rpm, the rocker is actuating 1000 times per minute. The rocker gets pulled off center and has nothing but time and cycles to get chipped away at.
The concept of roller rockers is precision and accuracy. That all goes out the window if the engineer who designed them lacks the precise details! The stamped steel rockers allow for lots of play. You're safer with them.
Posted by: Dr Evil Dec 21 2013, 03:18 PM
Completely agree I would have to redo my whole geometry if I went with another or different set. No thanks. I did it when I built the engine and it was on the stand. I do not want to do it with the engine in place and am not dropping it again if I can help it.
Posted by: Dr Evil Dec 21 2013, 10:40 PM
Damn, the stock rockers/studs/balls/nuts cost some money. I wish I held onto the ones I had
Posted by: bulitt Dec 22 2013, 08:28 AM
Ebay. Just buy new balls.
Posted by: Dr Evil Dec 22 2013, 09:27 AM
Nope. Already bought and paid for. New balls, nuts, studs, and rockers. You kinda need all of them. Also, I do not trust any of the parts gotten from the vendor of the roller rockers.
Posted by: Dr Evil Jan 10 2014, 10:40 AM
Scotty, did I bring and leave my CIS test kit at your place. I can not find it anywhere and I need it, like now If I am to use the bus to help move my shop I need to get the CIS tuned up.
Posted by: scotty b Jan 10 2014, 12:23 PM
Scotty, did I bring and leave my CIS test kit at your place. I can not find it anywhere and I need it, like now
If I am to use the bus to help move my shop I need to get the CIS tuned up.nope
Posted by: Dr Evil Jan 10 2014, 12:35 PM
How the hell do I lose a big red box with a CIS tester in it between Oct 1 and now? I looked everywhere I am pretty sure my pressure if grossly low.
Posted by: type47 Jan 10 2014, 03:17 PM
... I looked everywhere ...
Did you look in Baby Evil's toy chest?
Maybe he was checkin' his CIS pressures and forgot to put it back ...If you are in a bind for a tester, there is a guy selling a homemade one on vwvortex for $20 and there are plans out there for building them...
Posted by: Vacca Rabite Jan 10 2014, 03:25 PM
How the hell do I lose a big red box with a CIS tester in it between Oct 1 and now? I looked everywhere
I am pretty sure my pressure if grossly low.Between Oct 1 and now you have had 4 different garages.
I'd say its a wonder more stuff has not turned up missing.
You know the quickest way to find it of course. Just buy a new one. You will find the old one within a day or so of the new one arriving.
Zach
Posted by: bozo914 Jan 10 2014, 04:16 PM
How the hell do I lose a big red box with a CIS tester in it between Oct 1 and now? I looked everywhere
I am pretty sure my pressure if grossly low.Between Oct 1 and now you have had 4 different garages.
I'd say its a wonder more stuff has not turned up missing.
You know the quickest way to find it of course. Just buy a new one. You will find the old one within a day or so of the new one arriving.
Zach
My jumper cables are missing, am going to buy new ones, I'll trip over the old ones tomorrow or Sunday
Posted by: scotty b Jan 10 2014, 04:38 PM
How the hell do I lose a big red box with a CIS tester in it between Oct 1 and now? I looked everywhere
I am pretty sure my pressure if grossly low.Between Oct 1 and now you have had 4 different garages.
I'd say its a wonder more stuff has not turned up missing.
You know the quickest way to find it of course. Just buy a new one. You will find the old one within a day or so of the new one arriving.
Zach
You've seen Mike's organizational skillz. It's highly unlikely he misplaced it. Someone must have stolen it
Posted by: type47 Jan 10 2014, 04:44 PM
http://www.harborfreight.com/automotive-motorcycle/diagnostics/master-fuel-injection-pressure-test-kit-97706.html
Posted by: bulitt Jan 10 2014, 05:25 PM
Scotty, did I bring and leave my CIS test kit at your place. I can not find it anywhere and I need it, like now
If I am to use the bus to help move my shop I need to get the CIS tuned up.nope
I usually blame my wife for everything
Posted by: worn Jan 10 2014, 10:16 PM
How the hell do I lose a big red box with a CIS tester in it between Oct 1 and now? I looked everywhere
I am pretty sure my pressure if grossly low.Well they came down a long way at hf if you only needcis. Just saying since now you arent stuck at thelow end. Duplication is the key to clutter. Good luck. My mom always told me to clean up when i wanted to vfind things. Bless her spirit, it always worked.
Posted by: Dr Evil Jan 10 2014, 10:36 PM
HF has a CIS kit? Hmmmm.
Posted by: wingnut86 Jan 11 2014, 12:32 PM
Mike,
My apologies for the rest of the negative comments that the balance of the Motley Crew left here.
I for one, think your organizational skills are top notch
By the way, if you ever have to "work" on me personally in one of your medical MTV like "Cribs", please don't take the "NOT THIS ONE" tattoos personal...
Posted by: Dr Evil Apr 4 2014, 09:13 AM
Okey dokey, I finally took some time to go work on the bus yesterday. I have a download of the factory CIS manual and another one of a troubleshooting guide. From this I made a trouble shooting chart and reacquainted myself with the CIS.
Gripe list:
- Hard to start cold or warm
- Sometimes will not start warm
- Shitty mileage (could be because it is a bus and I drive it kind of fast)
- Poor idle. I had to adjust the idle high to keep the engine running when I switch from idle to D, otherwise it dies right off and it sucks to start (as above mentioned).
Based on this list, I had a suspicion that my fuel pressure was likely too low, and that this was either a restriction problem due to pump, or flow issue due to faulty WUR.
Pre-test exam of parts:
- Found that I had my Cold Start Injector wired backwards. This should not have been an issue, but I corrected it. I had Ground directly to one wire and power going first to the thermoswitch and then to CSI. This may have heated the TS and caused the CSI to prematurely close, but I doubt this was the issue. Fixed it anyway. The location I chose to put the TS in is unfortunately under more pressure than the TS could handle and it is pissing oil all over the place I will need to remedy this soon.
- Cleaned up oil, checked a bunch of other stuff, proceeded.
The test:
- The manual says to hook the gauge between the control pressure outlet on the fuel distributor and the WUR. Did this. Almost all tests are done here.
Findings:
- All cold, key on, system pressure is around 2.2 bar ( I think this is high).
- Warm running control pressure was 4.7 bar (seems kind of high, actually).
- System leak down pressure was good as it dropped fairly fast to 2.2bar and then maintained for over 10 min. (pass)
I have to admit making a mistake. I did not unplug the WUR power in when doing the cold system pressure check so I just noted the pressure dropping and the WUR making a whining noise due to it shunting the pressure in back to the return line. So, I did not record exact cold system pressure. I could not replicate the cold system pressure as the WUR did not cool down over the hour or two I was messing with it while doing other projects around the garage. I will go back tonight (maybe) and see if I can get cold pressure.
Thoughts:
-If cold pressure is too high, starting will be hard. The WUR did warm up pretty damn fast. The manual mentions 10min, mine was like <2min. The manual is not exact on each WUR and they changed about every friggen year.
-If I can deduce that the whole system pressure is actually too high, I can then change the check valve pressure limit with removal of a shim on the intake of the fuel distributor.
- One issue I am having with this thing is that the WUR I have has a vacuum component to it. So, to accurately measure it I have to have a vacuum source. So, I need to buy one I can measure. OR, I have a WUR without this feature and I can just omit this and try that out. I would rather do it with the one that came with the system (I think it is correct). An improperly functioning vacuum mechanism in the WUR would make cold starts suck as it would not drop the pressure and the pressure would then flood the cylinders on start up. A high pressure state makes sense as the engine floods often; smell of gas, wont start, have to wait 30min for fuel to dissipate from cylinders.
Any thoughts from those that know CIS stuff? Maybe the WUR originally had a special time delay circuit that I am not compensating for. Maybe changing to a simpler WUR would solve/remove some issues. I want simple. The current system does not have the TB pressure regulator that I have on my 74 2.7 in my 914.
Posted by: malcolm2 Apr 4 2014, 09:33 AM
Okey dokey, I finally took some time to go work on the bus yesterday. I have a download of the factory CIS manual and another one of a troubleshooting guide. From this I made a trouble shooting chart and reacquainted myself with the CIS.
Grip list:
- Hard to start cold or warm
- Sometimes will not start warm
- Shitty mileage (could be because it is a bus and I drive it kind of fast)
- Poor idle. I had to adjust the idle high to keep the engine running when I switch from idle to D, otherwise it dies right off and it sucks to start (as above mentioned).
Based on this list, I had a suspicion that my fuel pressure was likely too low, and that this was either a restriction problem due to pump, or flow issue due to faulty WUR.
Pre-test exam of parts:
- Found that I had my Cold Start Injector wired backwards. This should not have been an issue, but I corrected it. I had Ground directly to one wire and power going first to the thermoswitch and then to CSI. This may have heated the TS and caused the CSI to prematurely close, but I doubt this was the issue. Fixed it anyway. The location I chose to put the TS in is unfortunately under more pressure than the TS could handle and it is pissing oil all over the place
I will need to remedy this soon. - Cleaned up oil, checked a bunch of other stuff, proceeded.
The test:
- The manual says to hook the gauge between the control pressure outlet on the fuel distributor and the WUR. Did this. Almost all tests are done here.
Findings:
- All cold, key on, system pressure is around 2.2 bar ( I think this is high).
- Warm running control pressure was 4.2 bar (seems kind of high, actually).
- System leak down pressure was good as it dropped fairly fast to 2.2bar and then maintained for over 10 min. (pass)
I have to admit making a mistake. I did not unplug the WUR power in when doing the cold system pressure check so I just noted the pressure dropping and the WUR making a whining noise due to it shunting the pressure in back to the return line. So, I did not record exact cold system pressure. I could not replicate the cold system pressure as the WUR did not cool down over the hour or two I was messing with it while doing other projects around the garage. I will go back tonight (maybe) and see if I can get cold pressure.
Thoughts:
-If cold pressure is too high, starting will be hard. The WUR did warm up pretty damn fast. The manual mentions 10min, mine was like <2min. The manual is not exact on each WUR and they changed about every friggen year.
-If I can deduce that the whole system pressure is actually too high, I can then change the check valve pressure limit with removal of a shim on the intake of the fuel distributor.
- One issue I am having with this thing is that the WUR I have has a vacuum component to it. So, to accurately measure it I have to have a vacuum source. So, I need to buy one I can measure. OR, I have a WUR without this feature and I can just omit this and try that out. I would rather do it with the one that came with the system (I think it is correct). An improperly functioning vacuum mechanism in the WUR would make cold starts suck as it would not drop the pressure and the pressure would then flood the cylinders on start up. A high pressure state makes sense as the engine floods often; smell of gas, wont start, have to wait 30min for fuel to dissipate from cylinders.
Any thoughts from those that know CIS stuff? Maybe the WUR originally had a special time delay circuit that I am not compensating for. Maybe changing to a simpler WUR would solve/remove some issues. I want simple. The current system does not have the TB pressure regulator that I have on my 74 2.7 in my 914.
I have an 85 VW Cabriolet with CIS. I feel your pain. In the past, my problems were the under car fuel pump, but you are getting high pressure. My car has an in-tank one too. Folks say that the screen falls off of it sometimes. Could there be something in the return line? When is the last time you replaced the fuel filter?
I have also been thru a few fuel distributors. Those things are so finicky. A mechanic told me once that he used to polish the plunger with ashes from his cigarette.
One more thing: the injectors. Mine are easy to pull and do a squirt test in empty water bottles. Could be plugged.
Good luck.
Clark
Posted by: Dr Evil Apr 4 2014, 09:35 AM
More digging, more revelation.
This is from a 3.0, so it is either 76-77. Non-turbo.
Atmospheric warm system pressure is 2.7-3.1 so I am significantly over this. Finally, a definitive problem. More to come as I dig around the notes and manuals.
Posted by: Dr Evil Apr 4 2014, 10:01 AM
Okey dokey, I finally took some time to go work on the bus yesterday. I have a download of the factory CIS manual and another one of a troubleshooting guide. From this I made a trouble shooting chart and reacquainted myself with the CIS.
Grip list:
- Hard to start cold or warm
- Sometimes will not start warm
- Shitty mileage (could be because it is a bus and I drive it kind of fast)
- Poor idle. I had to adjust the idle high to keep the engine running when I switch from idle to D, otherwise it dies right off and it sucks to start (as above mentioned).
Based on this list, I had a suspicion that my fuel pressure was likely too low, and that this was either a restriction problem due to pump, or flow issue due to faulty WUR.
Pre-test exam of parts:
- Found that I had my Cold Start Injector wired backwards. This should not have been an issue, but I corrected it. I had Ground directly to one wire and power going first to the thermoswitch and then to CSI. This may have heated the TS and caused the CSI to prematurely close, but I doubt this was the issue. Fixed it anyway. The location I chose to put the TS in is unfortunately under more pressure than the TS could handle and it is pissing oil all over the place
I will need to remedy this soon. - Cleaned up oil, checked a bunch of other stuff, proceeded.
The test:
- The manual says to hook the gauge between the control pressure outlet on the fuel distributor and the WUR. Did this. Almost all tests are done here.
Findings:
- All cold, key on, system pressure is around 2.2 bar ( I think this is high).
- Warm running control pressure was 4.2 bar (seems kind of high, actually).
- System leak down pressure was good as it dropped fairly fast to 2.2bar and then maintained for over 10 min. (pass)
I have to admit making a mistake. I did not unplug the WUR power in when doing the cold system pressure check so I just noted the pressure dropping and the WUR making a whining noise due to it shunting the pressure in back to the return line. So, I did not record exact cold system pressure. I could not replicate the cold system pressure as the WUR did not cool down over the hour or two I was messing with it while doing other projects around the garage. I will go back tonight (maybe) and see if I can get cold pressure.
Thoughts:
-If cold pressure is too high, starting will be hard. The WUR did warm up pretty damn fast. The manual mentions 10min, mine was like <2min. The manual is not exact on each WUR and they changed about every friggen year.
-If I can deduce that the whole system pressure is actually too high, I can then change the check valve pressure limit with removal of a shim on the intake of the fuel distributor.
- One issue I am having with this thing is that the WUR I have has a vacuum component to it. So, to accurately measure it I have to have a vacuum source. So, I need to buy one I can measure. OR, I have a WUR without this feature and I can just omit this and try that out. I would rather do it with the one that came with the system (I think it is correct). An improperly functioning vacuum mechanism in the WUR would make cold starts suck as it would not drop the pressure and the pressure would then flood the cylinders on start up. A high pressure state makes sense as the engine floods often; smell of gas, wont start, have to wait 30min for fuel to dissipate from cylinders.
Any thoughts from those that know CIS stuff? Maybe the WUR originally had a special time delay circuit that I am not compensating for. Maybe changing to a simpler WUR would solve/remove some issues. I want simple. The current system does not have the TB pressure regulator that I have on my 74 2.7 in my 914.
I have an 85 VW Cabriolet with CIS. I feel your pain. In the past, my problems were the under car fuel pump, but you are getting high pressure. My car has an in-tank one too. Folks say that the screen falls off of it sometimes. Could there be something in the return line? When is the last time you replaced the fuel filter?
I have also been thru a few fuel distributors. Those things are so finicky. A mechanic told me once that he used to polish the plunger with ashes from his cigarette.
One more thing: the injectors. Mine are easy to pull and do a squirt test in empty water bottles. Could be plugged.
Good luck.
Clark
Pressure being up could be an obstruction in the line, but the pressure was not up until the WUR warmed up. I just changed the filter, but that is on the supply side so if it was clogged it would be low pressure, not high at dist.
I dont smoke cigarettes, so that wont work
Posted by: Dr Evil Apr 4 2014, 10:53 AM
According to the scriptures, for a 76-77 WUR:
- PN 911 606 105 03 and 04
- Bosch PN 0438140017 and 033
- Test vac; 520-546 mBar (390-410mmHg)
- Atmospheric pressure should have max Bar of 2.7-3.1 bar
- At vac of 390-410mmHg pressure should be same as atmospheric – 2.7-3.1bar
- At high idle of 1800rpm pressure should be 3.4-3.8bar
And here is the chart for temp/pressure.
Attached image(s)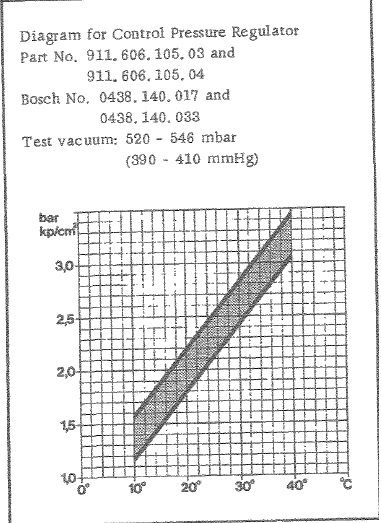
Posted by: Dr Evil Apr 4 2014, 10:59 AM
Based on all the above, there are two likely culprits:
- Check valve set too high, so I need to shim it correctly to bring the pressure down a bit. I think this is a good first step in that the cold and warm running pressure were both high. I need to get more data tonight.
- WUR is shot due to it obstructing and causing pressures to be too high. However, it is garbage in garbage out if the pressure in is too high, maybe. More to read up on.....
Posted by: Dr Evil Apr 4 2014, 11:19 AM
But wait, there is more! If this is a 77, the parameters change a lot
Two different PN:
- 911 606 105 05
- 911 606 105 06
At atmospheric pressure, cold - 2.7-3.1 bar
At 390-410mmHg, cold - 3.2-3.6bar (this is a change, but is still lower than what I saw)
Then the manual lists "system pressure", which the above were a measurement of, as 4.5-5.2 bar...... It does not stipulate warm or not for the 77, but 74-75 have same value and it does stipulate warm. The 76 lists warm running system pressure as 2.7-3.1 bar, way lower than the 74, 75, and 77.
I rechecked my notes, I actually got 4.7 bar and this puts me in the correct zone for the 77 WUR. I will amend the previous posts with the wrong value lest a CIS guru find this later, revive the thread, correct me and thus publicly spank me for my mistake
Posted by: Dr Evil Apr 4 2014, 11:34 AM
Oh goody, this may be a system from an 83 SC......and back to the manual.
Posted by: Dr Evil Apr 4 2014, 12:22 PM
Manual stops at 81 and 80 and later had O2 sensors on them. I think this is, latest, as 78-79.
Guess I will wait until tonight to check the part numbers.
Posted by: scotty b Apr 4 2014, 12:33 PM
Pretty sure the engine the CIS came off of was an 83 SC
Posted by: Dr Evil Apr 4 2014, 12:55 PM
Looking at other late model CIS systems and it appears that this is not likely one of them as it is missing a few of the things that they had on them. Really, a parts check will give the best answer, though. I hope to get the Dist and WUR numbers tonight and then can go from there. However, it does appear that pressure is good to go for most every year. So, I will try unplugging the WUR heater power and see if it starts better. Also, I have a list of tests to do with the engine running.....if I can start it. The majority of tests, other than idle set, happen with engine off and only the fuel pump running.
Posted by: Dr Evil Apr 4 2014, 05:02 PM
So, I read through all the iterations from 73.5 to 83 and, unless Scooter missed giving me some electrical stuff with this setup, like a brain box and a bunch of switches and a sensor for the tail pipe, I do not have an 80 or newer CIS with Lambda. That is good.
Another thing I find is that the 76-77 have a typo in its parameters for warm pressure. All systems have the same parameters. So, keeping it simple, I will rule out the fuel as an issue if these are followed.
Starting to think air leaks may be a bigger problem, but not sure why it was smelling and acting like it was flooding. Stay tuned, I hope to find out tonight.....by like midnight. 
Posted by: Dr Evil Apr 4 2014, 05:30 PM
And, because I have enough bus issues to go around, there is a nice problem that has me a bit perplexed. Someone at the Canadian clinic had suggestions and a lot of experience....but I got drunk and forgot it all. I think it was Canada. Ya.
Anyway....
The teeth of the torque converter rub on the bell housing during start up on one section (ring, ring, ring, ring), but after a few minutes it goes away. I have pulled it and reassembled it 2x and all looked fine. Why/how is this happening.
Posted by: balljoint Apr 4 2014, 08:13 PM
I remember you having that conversation.
At some point in the evening you were shouting.
And losing the argument quite badly.
You were talking to a lobster.
Posted by: Dr Evil Apr 4 2014, 11:36 PM
Well, tonight was fun. Got a bunch or erroneous readings and could not figure it out.... the whole test kit is shit Cant win.
Posted by: rick 918-S Apr 5 2014, 05:36 AM
First read the plugs.
If rich check the fuel pump pressure.
Check the AAR to be sure it's functioning. Remove it from the bus put 12V to it and time it as per the manual.
If it checks out test the wiring to the AAR. This is a very important step as a faulty AAR will not allow you to even set the idle and throws off the dizzy when the engine warms up. Some guys start dicking with the dizzy and really mess things up.
Next if your fuel pump pressure is set properly check the WUR. Unplug the heater and set the cold pressure. If yours is not the easily adjustable kind go the pick and pull and search through the Volvo turbo cars and some vintage Mercedes. and find one that has the adjustable plunger. If you find one swap the top case with your WUR guts and start adjusting. If you can't find one pull yours apart and remove the plunger and drill and tap it for an adjustment bolt. This will allow you to easily raise and lower the plunger without dismantling the WUR every time.
Check for vacuum leaks. Oh, and check for vacuum leaks. Did I say to check for vacuum leaks?
Once you have these things checked and set the turn in the idle screw about 3/4 turn out or so start the engine and see if it will idle. If not start adjusting the idle screw (air screw) until it will.
THEN start adjusting the dizzy. You will be surprised how far out of whack that thing is once you get it set.
Posted by: Vacca Rabite Apr 5 2014, 10:35 AM
At least you can find the time to work on your projects.
Zach
Posted by: Dr Evil Apr 6 2014, 04:56 PM
Hey Rick,
Those are my basic thoughts. The plugs will not be much help due to the running that it got with messed up valve train, etc. The pump seemed to be flowing fine with static pressure. I was hoping to check running pressure, but not sure I can trust it.
At this point, the AAR, or other air leak seems most likely as pressure was good and it runs like a car with lots of air leaking. It will not stay running lower than 1800 or so, which is high idle.
Next, I will try to mess with air intake and such. I wander if my plenum sprung a leak.
Posted by: scotty b Apr 6 2014, 04:58 PM
At least you can find the time to work on your projects.
Zach
Attached image(s)

Posted by: Dr Evil Apr 6 2014, 05:59 PM
Posted by: Dr Evil Apr 12 2014, 09:54 PM
I am debating what to do. I am being worked like a dog, 24 hours in the last 2 days and 12 more tomorrow. One day off on Mon, 12hrs on Tues, then off for Hershey. I am thinking I may take another stab at the bus tomorrow night and part of Mon. BUT, I now have a 914 and want to make sure it is in better shape when it is driven there. My local 912 friend will be driving it if the bus is up. If not, I will drive the 914. The 914 has a bad bearing that I can hear. Awful whine. I can fix it in a day....but that is one less day. I need the bus to haul cores (that I sorely need, and hope to find and buy) back to my house. Dilemma. I need to con, er, ask Scotty to transport cores for me to his place, or mine, or Sacks.
Posted by: Vacca Rabite Apr 13 2014, 06:38 PM
Drive the 914.
I'll store the cores, and will probably bring the Highlander.
Scott needs to drive the 944.
Zach
Posted by: Dr Evil Apr 13 2014, 06:56 PM
OK, I am sourcing all the bushings for my shifting, and will rebuild the trans tomorrow and Wed. I wish I could have gotten a short shift kit, but no one has a used one and a new one will not ship from the parts people until too late. Sigh. I may have to pick one up at the swap and install it there in the lot.
Posted by: Dr Evil Aug 2 2014, 07:36 AM
I am in need of a functioning bus. So, I am considering putting carbs on it for the time being and I can go through the CIS later and check welds, etc. A working bus will be a huge benefit as I wont have to tow it, and it will haul a lot of shit.
Does this sound reasonable? Anybody have a set of carbs and manifolds to lend me? Should I just buy? Should I start a post in the main forum begging for a set of carbs/manifolds?
I hate this I also need to definitively fix the drain pan on the stupid tranny. Time to throw money at it as time runs out!
Posted by: Eric_Shea Aug 2 2014, 04:52 PM
Pretend you're a doctor and go buy a 3.2 motronic six. Put it in there and be done with it.
Posted by: Dr Evil Aug 2 2014, 04:57 PM
You dont get it. I am trying for truck motor, not race motor. I think a Porsche 6 is wasted in a parts hauler. Why not try to make an F1 engine fit and use my bus to haul parts? Same concept. Parts cost is a lot lower for domestic, corvair stuff. It is looking like I may do a Holley 2bbl 350 carb to manifold. I have the manifold, an adapter is $20, and the carb is like $180. I personally hated the last Holley I had on this damn thing....but desperate times = desperate measures. Maybe the 350 will be less temperamental. The corvair guys swear it will work well and be easy. I was leaning toward Eddelbrock 500 due to ease of operation....I am seriously deferring to those that have come before me.
Posted by: Eric_Shea Aug 2 2014, 05:10 PM
Then stick a sequential turbo 6.4 diesel in there. While you're at it, put a crew cab and a bed on it and add some AC.
Parts hauler extraordinaire. 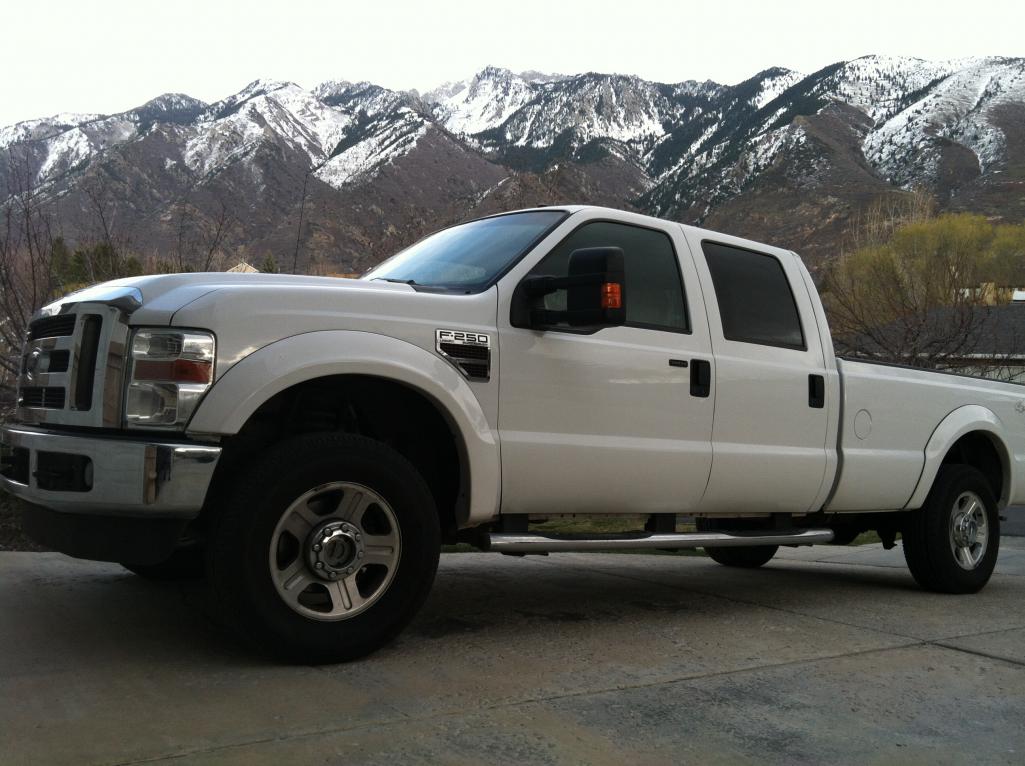
Posted by: scotty b Aug 2 2014, 05:20 PM
You dont get it. I am trying for truck motor, not race motor. I think a Porsche 6 is wasted in a parts hauler. Why not try to make an F1 engine fit and use my bus to haul parts? Same concept. Parts cost is a lot lower for domestic, corvair stuff. It is looking like I may do a Holley 2bbl 350 carb to manifold. I have the manifold, an adapter is $20, and the carb is like $180. I personally hated the last Holley I had on this damn thing....but desperate times = desperate measures. Maybe the 350 will be less temperamental. The corvair guys swear it will work well and be easy. I was leaning toward Eddelbrock 500 due to ease of operation....I am seriously deferring to those that have come before me.
HMmmm, yes parts are cheaper, and your time is worthless, so keep at it. Buy a fuggin 3.2 and move on
On second thought, I'm sure Byron would trade you a set of carbs for something
Posted by: Dr Evil Aug 2 2014, 05:26 PM
Interesting one on ebay
http://www.ebay.com/itm/Volkswagen-Bus-Vanagon-pop-up-Camper-top-1972-vw-bus-camper-decent-shape-lots-of-new-parts-including-/161380835745?forcerrptr=true&hash=item25930c21a1&item=161380835745&pt=US_Cars_Trucks
All you assholes really want to give me advice about making a choice of more modern stuff (3.2, diesel truck, etc) on a vintage car forum dedicated to a car that is plagued with all kinds of short comings that we are constantly trying to improve, and that is totally impractical to own other than it is really cool? Really?
Posted by: Eric_Shea Aug 2 2014, 05:43 PM
Yeah.
Posted by: scotty b Aug 2 2014, 06:00 PM
Yeah.
Posted by: scotty b Aug 2 2014, 06:02 PM
Interesting one on ebay
http://www.ebay.com/itm/Volkswagen-Bus-Vanagon-pop-up-Camper-top-1972-vw-bus-camper-decent-shape-lots-of-new-parts-including-/161380835745?forcerrptr=true&hash=item25930c21a1&item=161380835745&pt=US_Cars_Trucks
Ummmm didn't you start out with that exact carb setup and tossed it in favor of the frankenweldCIS ?
Posted by: Dr Evil Aug 2 2014, 06:10 PM
The "frankenweldCIS " (I like this designation) was an experiment that I had planned before the carb. Remember, I got the CIS from YOU before the engine was even running. However, I do not have time to refine my monster. I need it moving under its own power. If I can do that for <$500, that is a win Besides, once it is running again, I can drive it to you for the roof swap!
Posted by: Dr Evil Aug 2 2014, 06:11 PM
Yeah.
Indeed
Posted by: scotty b Aug 2 2014, 06:12 PM
Webers with intakes for under 500.00 ?
Posted by: Fe2O3 Aug 2 2014, 06:13 PM
I had a buss with a corvair
Posted by: Dr Evil Aug 2 2014, 06:18 PM
Webers with intakes for under 500.00 ?
Uh, no. 2bbl Holley. No luck with borrowing webers, and you sold the set I traded you.
Posted by: Dr Evil Aug 2 2014, 06:19 PM
You dont get it. I am trying for truck motor, not race motor. I think a Porsche 6 is wasted in a parts hauler. Why not try to make an F1 engine fit and use my bus to haul parts? Same concept. Parts cost is a lot lower for domestic, corvair stuff. It is looking like I may do a Holley 2bbl 350 carb to manifold. I have the manifold, an adapter is $20, and the carb is like $180. I personally hated the last Holley I had on this damn thing....but desperate times = desperate measures. Maybe the 350 will be less temperamental. The corvair guys swear it will work well and be easy. I was leaning toward Eddelbrock 500 due to ease of operation....I am seriously deferring to those that have come before me.
Quoted here for Scotty B ADHD.....cant keep up. Always having to slow the rest of the class down to let him catch up...
Posted by: Dr Evil Aug 2 2014, 06:20 PM
I had a buss with a corvair
 Did you like it? Parameters?
Posted by: scotty b Aug 2 2014, 06:22 PM
You dont get it. I am trying for truck motor, not race motor. I think a Porsche 6 is wasted in a parts hauler. Why not try to make an F1 engine fit and use my bus to haul parts? Same concept. Parts cost is a lot lower for domestic, corvair stuff. It is looking like I may do a Holley 2bbl 350 carb to manifold. I have the manifold, an adapter is $20, and the carb is like $180. I personally hated the last Holley I had on this damn thing....but desperate times = desperate measures. Maybe the 350 will be less temperamental. The corvair guys swear it will work well and be easy. I was leaning toward Eddelbrock 500 due to ease of operation....I am seriously deferring to those that have come before me.
Quoted here for Scotty B ADHD.....cant keep up. Always having to slow the rest of the class down to let him catch up...
Attached image(s)

Posted by: scotty b Aug 2 2014, 06:22 PM
I had a buss with a corvair
Did you like it? Parameters?Nah, just one
Posted by: Dr Evil Aug 2 2014, 06:26 PM
You dont get it. I am trying for truck motor, not race motor. I think a Porsche 6 is wasted in a parts hauler. Why not try to make an F1 engine fit and use my bus to haul parts? Same concept. Parts cost is a lot lower for domestic, corvair stuff. It is looking like I may do a Holley 2bbl 350 carb to manifold. I have the manifold, an adapter is $20, and the carb is like $180. I personally hated the last Holley I had on this damn thing....but desperate times = desperate measures. Maybe the 350 will be less temperamental. The corvair guys swear it will work well and be easy. I was leaning toward Eddelbrock 500 due to ease of operation....I am seriously deferring to those that have come before me.
Quoted here for Scotty B ADHD.....cant keep up. Always having to slow the rest of the class down to let him catch up...
now I am slow.....why the pic I am laughing at no show in quote???
Posted by: Fe2O3 Aug 3 2014, 12:52 AM
It was reverse rotation... could pull the Queen Mary to 50 mph, belt probs was the ultimate demise. Wish it had the corvair trans. Was my first driver in high school all kind a second gear if you could find it
Posted by: Dr Evil Aug 3 2014, 07:19 AM
I got this one up to 100mph.....once. I had a 3.27 r/p in it. It would drag in 2nd up to about 70 and then, all of the sudden, throw you back in your seat and accelerate at a frightening rate. Not comfy above 70. Acts like a sail.
Now, I put in the stock 3.55, the PG is rebuilt, and I have posi. It drives OK, but the CIS system I designed stopped working so well. It went from needing a fine tune to only running at 3krpm. Stopping sucks as if it dies, you are not guaranteed it will restart.
I am definitely switching to a carb for the mean time.
Posted by: rick 918-S Aug 3 2014, 07:37 AM
If you have an intake why not use this? http://www.summitracing.com/search/product-line/holley-terminator-efi-engine-management-systems
Self tunes as you drive. No drama.
Posted by: Dr Evil Aug 3 2014, 08:12 AM
Freaky cool, but the 4bbl or 2bbl is intended to be a temporary measure to get the bus to the next location. $xxxx is too much for a temp measure. I will get my frankenCIS to work. I WILL.....just not anytime soon. I dont mean like Scotty B project anytime soon. I will get it done way sooner than any of his stuff
Posted by: budk Aug 3 2014, 08:33 AM
Deleted
Posted by: Dr Evil Aug 3 2014, 02:24 PM
Well, if you cant say anything nice....
Posted by: Dr Evil Aug 3 2014, 04:07 PM
Now, not that I intend to keep the cab on for a prolonged amount of time, but the event of down tube icing and the issues it plays with fuel suspension sounds like a problem for my shadetree mechanic skills. As such, I was wondering about maybe wrapping the runners with NiChrome wire to heat the top parts, at least. This would be more complete than just heating the mount for the carb. I figure the heads would heat up the bottom half of the runners and the wire could do the rest. Keeping the air charge at a better temp to keep the junk from freezing up and dropping fuel out of solution.
Here is one site with some parameters:
http://www.wiretron.com/nicrdat.html
Need to see, but I anticipate a pretty low current draw of <3A
Posted by: scotty b Aug 3 2014, 04:13 PM
really ? Are you fuggin serious ? Put the damned carb on it and drive the P.O.S. You're living in Ohiohwa, not Minnahsohtah. Yern't gun be havin no icerin problems
Posted by: Dr Evil Aug 3 2014, 04:24 PM
Oh thank you Scottchcandyman. I like to think about solutions to problems. Probably about to spring on an Edelbrock 500 (1403) as was recommended by the corvair guys and is the cheapest solution.
Posted by: scotty b Aug 3 2014, 04:28 PM
You're thinking about a solution to a problem you think you may have that you more than likely won't. Why would you have " icing " issues ? You've built a flat 6 and stuffed it into a shoebox. You'll have more than enough heat generated in there to keep the runners warm.
And no that doesn't mean you now need to worry about heat soak or boiling the gas. It's the absolute perfect environment for a carb. Especially an Edelbrock 500 Most brilliant idea you've had yet. Congrats
Posted by: Dr Evil Aug 3 2014, 05:35 PM
Really? Thanks
Posted by: Dr Evil Sep 16 2014, 07:35 AM
So, I have yanked the FI except for the fuel pump assembly which I will get to when I have the other pump in place. I mocked up the manifold and the bolt holes line up exactly opposite to the ones that I used for the FI manifold. However, there are holes at the new locations as well since the manifold came with the heads. No biggie. I took the manifold home and made gaskets and studs to place in the head. Bolts are not gonna work as access is not good under the down tubes. Luckily, I have hesitated to pack certain tools in my shop so I could accomplish this task.
For the fill tube on the tranz I decided to just use a hose to couple the old to the new. No need to weld or source the proper sized tubing, which I dont have time for. The good news is that the new braided stainless tube is terminated in an standard coupling that allows me to shorten the hose and screw the coupling back in. So, that is looking good for fixing my leaky hose on the tranz fill. I need to fill the tranz pan to get a volume of fluid to use. I have been guessing....wrong I think.
I may just get this fucking thing running by move time.
The last thing will be the throttle cable/linkage setup. Not sure how this will go.
Posted by: Dr Evil Jun 18 2017, 06:59 PM
Finally, some good news! It is alive! The advice to get an Eddlebrock due to cost and ease of operation turned out to be great advice. I literally installed it, fabbed up a throttle cable set up, and turned the key. The attached video is the first drive without any adjustment, first time out of the barn in 3 yrs, first time driving under its own power since 2013. Changed the crappy, incorrect roller rockers for stock rockers and it runs smooth and steady. Altogether, a much better running engine. I still have the chirp in the tranz when in gear. I have a few thoughts, not sure, I will continue to dig into it.
https://www.youtube.com/watch?v=ltzLR8AVp6E
Posted by: KELTY360 Jun 18 2017, 08:40 PM
Sounds awesome! Glad to see it on the road.
Posted by: porschetub Jun 18 2017, 10:18 PM
Don't you love having you knees as the front line of defense in a head on collision?
You have showed your lack of knowledge...safest van ever built try researching ok ...
Posted by: Chris H. Jun 19 2017, 11:06 AM
Sweet. Nice to see it moving! It looks like those power glide's need adjustment of the band or bands occasionally. Maybe that will stop the chirping.
Hey are those rims oversized? I just picked up some 15x7's for my Vanagon. Just pulled the TINY engine out of it. No idea what will go in its place yet.
Posted by: Dr Evil Jun 19 2017, 09:54 PM
Chris, care to elaborate on the chirping? Band adjust? There is only one. Yes, custom over sized wheels from Bus Depot when they had them.
Posted by: Mark Henry Jun 19 2017, 11:57 PM
Hope you replaced those fuel lines.
Last time you were here you drove the bus, just before you were going to leave I noticed a slight leak and made you put the bus on the hoist. Had to do a emergency fuel line repair, you would have had a nice bonfire on the way home.
I told you then to replace the fuel lines when you got home...you did right?
Posted by: Chris H. Jun 20 2017, 08:31 AM
Chris, care to elaborate on the chirping? Band adjust? There is only one. Yes, custom over sized wheels from Bus Depot when they had them.
I know very little about powerglides but I remember hearing this before.. found the doc linked below that specifically describes chatter in reverse and low gear. Take a look and maybe it will help. (Don't worry that the doc downloads immediately...it's a PDF of an OLD manual.
http://567chevyclub.com/images/56_Chevy/powerglide.pdf
See the first page which describes some common issues then skip to page 305.
Posted by: Dr Evil Jun 20 2017, 06:47 PM
Rock on, Chris! Thanks.
Mark, I don't recall a leak, but I did put the beast on your lift to inspect before departing and we found that fuel injection line that couldn't handle the high pressure and was sausaged, that your wife drove long distance to get a replacement for. The current system is carbed so 2.5psi, not 70+. All new lines and everything.
Posted by: Dr Evil Aug 17 2018, 11:47 AM
Ok, Im back on messing with this Damn Bus. Admins, I would not bitch (like it would matter ) if this thread got moved to the sandbox. Tolerance for no-914 stuff has changed since this thread started in 2008 (a friggen decade!).
Anyway, I had the bus running, did pretty well last year, towed a trailer full of mini bikes and was fully loaded with stuff, freeway, 75mph and passing cars. The "rebuilt" powerglide that I bought back in 2013 in a rush to get the bus moving under its own power when I was moving has started messing up with me needing to actively switch the gears. I could re build it, I have another one in a container almost done, but I am asking myself, "WHY?" I do love the corvair engine and the PG trans in the bus. It is kick ass, but I dont live in CA anymore and I only really want to drive it during a few weeks of spring and fall due to no heat and no A/C. Cant see out the window when it is foggy and cant really do anything about it. Sooooo, time for a change.
I have started making payments on a conversion kit to raise a Subaru SVX engine into the beast. I am keeping it automatic, which meant finding an 090 VW auto box for it. That was actually harder than I anticipated and if not for contacts I would not have much of a chance for under $3K+. As I type this, my good friend is driving to SC to pick one up from an elderly gentleman that had rebuilt it a year and a half ago and then his vision went. I got this guys contact from another bus guy I know online. Networking rocks! Price is right, too. So far for engine and trans+ torque converter, I am due to be out $2250. It will be nice to have reliable power, ac and heat.
Yes, I get that this basically turns the bus into a glorified mini van, and me into a pseudo soccer mom, but I dont care. It will still rock.
Now, I am not sure what to do with the corvair powerplant. Sell or store??? Hmm.
Posted by: KELTY360 Aug 17 2018, 02:04 PM
SVX engine in a bus rocks! Will the VW AT hold up to the hp and torque? What about the gearing? When I converted the syncro mt in my Westy, I went taller in both 3rd and 4th to take advantage of the power. Very glad i did that.
Posted by: Dr Evil Aug 17 2018, 02:09 PM
SVX engine in a bus rocks! Will the VW AT hold up to the hp and torque? What about the gearing? When I converted the syncro mt in my Westy, I went taller in both 3rd and 4th to take advantage of the power. Very glad i did that.
The trany should be fine. The VW does have a 3 geared planetary and I wanted to source a auto section from an Audi 5000T as it has a 4 geared planetary that just swaps in, and some other good stuff. The price of the rebuilt box was too good to pass up and I havent found an Audi box yet. As for the gearing, I had wondered about that as well, but I do have a lifted bus with wider wheels so I am hoping that will help. Maybe I will get board and go standard some day. Probably not.
Posted by: Dr Evil Dec 2 2018, 05:31 PM
Closer. Heart of the beast is now in my shop on a stand. I can’t touch it until I finish my current back log of transmission work. The conversion kit arrived this Sat. Pics to come. Just finished the wall and some electrical so I can have a shop to work in at new house. Still need to install the mini split.
Attached thumbnail(s)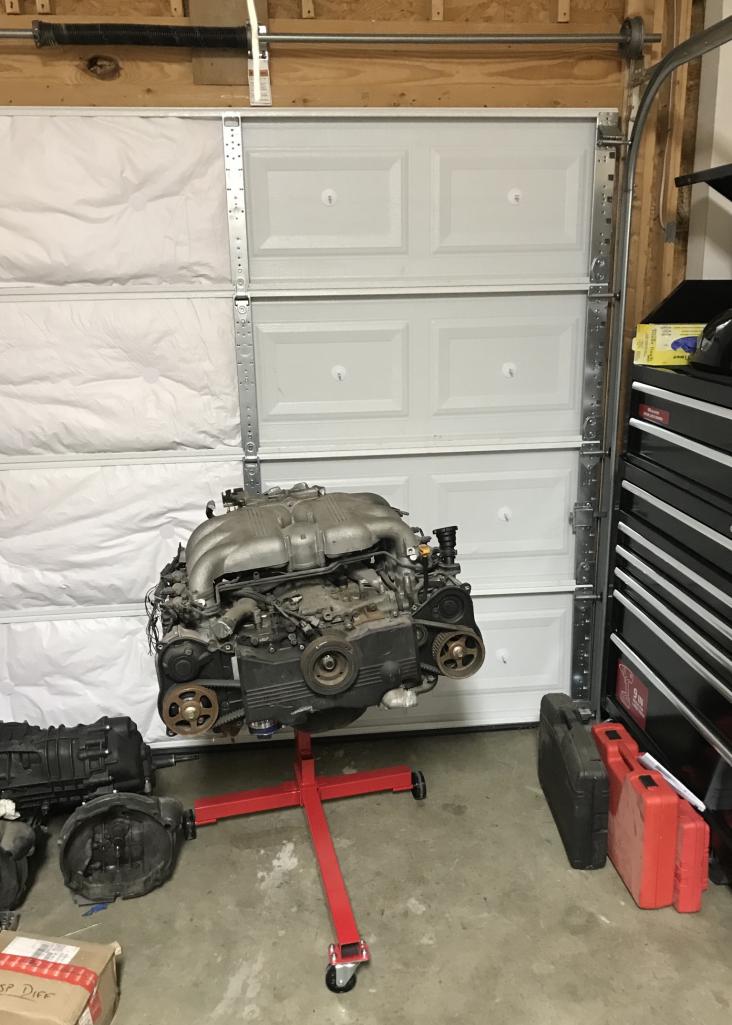
Posted by: FourBlades Dec 2 2018, 08:00 PM
Very cool engine choice!
John
Posted by: 76-914 Dec 2 2018, 08:17 PM
You won't regret going with a Suby 6 although my preference is the newer series. Regardless, it will be a quantum leap in power and reliability. I passed one on the Ortega hi way once we hit a straight bit of road. I eased around thinking it was a stock van when he punched it which caught me by surprise. I put my foot into it then shot around him and from the look on his face he had believed a stock 914 was attempting to pass him. I think we were both surprised.
Posted by: Olympic 914 Dec 4 2018, 09:05 AM
We had an SVX and it was a blast to drive. I can't imagine that in a 914...
I seem to remember that 3200 was 100mph.
The timing belt was recommended to be changed somewhere around 60>75k
easier to do it with the engine out and on the stand.
Spark plugs were also a bitch to change in that car.
Posted by: mepstein Dec 4 2018, 10:25 AM
$500 for a car with a running engine. $200 for an MT5 out of a totaled bug eye. Normal part prices for all the other stuff. Can’t beat it.
Attached image(s)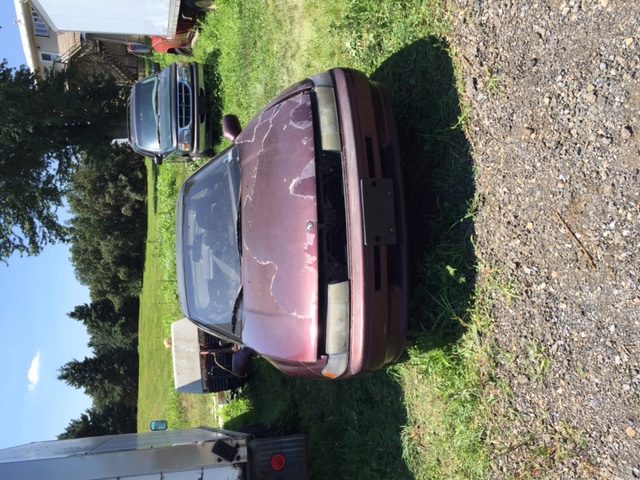
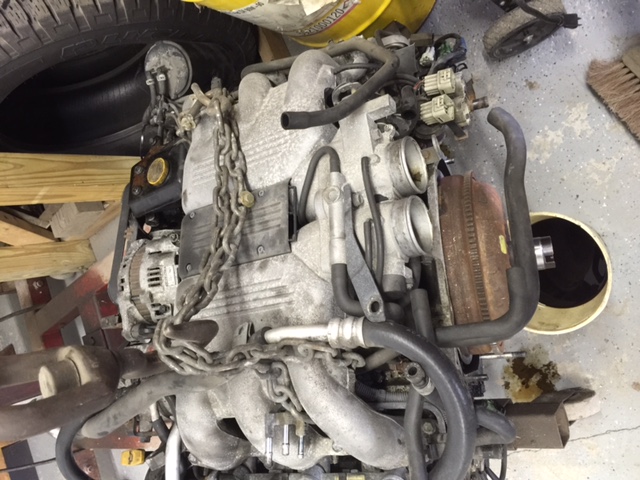
Posted by: Dr Evil Dec 4 2018, 12:43 PM
Engine cost me $400. A good deal for what I got. Plan is to do at least a top end, but may go deeper depending on availability, need, cost of parts. The kit to mount it into the bus showed up this weekend. Worth the money. Now I need to finish building my garage shop and the transmissions lined up. Hope is to drive this to Mid OH in July with a completed BMW project. Aspirations
Posted by: Dr Evil Dec 4 2018, 12:45 PM
Consequently, anyone with a line on an audi 5000T transmission, I want some of the guts. I have a rebuilt VW auto that will be used with this, not sure ifninternals were beefed up or not.
Posted by: Chris H. Dec 4 2018, 04:17 PM
Engine cost me $400. A good deal for what I got. Plan is to do at least a top end, but may go deeper depending on availability, need, cost of parts. The kit to mount it into the bus showed up this weekend. Worth the money. Now I need to finish building my garage shop and the transmissions lined up. Hope is to drive this to Mid OH in July with a completed BMW project. Aspirations
That's a good deal. Did you get the wiring harness/ECU by chance or are you going aftermarket? There are a number of EG33 conversions on The Samba for Vanagons
which might give you some ideas...this one is REALLY detailed:
https://www.thesamba.com/vw/forum/viewtopic.php?t=450863&highlight=eg33+svx+conversion
Also check out the Busaru Youtube channel. He's done a ton of conversions including a belly pan style radiator that looks like it works pretty well (laying flat underneath the bus)
https://www.youtube.com/results?search_query=busaru
PM me if you need any help. I think I have the wiring pinouts memorized
. Posted by: crash914 Dec 4 2018, 07:16 PM
forget the car, post pictures of the mini split....
Posted by: Dr Evil Dec 5 2018, 01:13 PM
Engine cost me $400. A good deal for what I got. Plan is to do at least a top end, but may go deeper depending on availability, need, cost of parts. The kit to mount it into the bus showed up this weekend. Worth the money. Now I need to finish building my garage shop and the transmissions lined up. Hope is to drive this to Mid OH in July with a completed BMW project. Aspirations
That's a good deal. Did you get the wiring harness/ECU by chance or are you going aftermarket? There are a number of EG33 conversions on The Samba for Vanagons
which might give you some ideas...this one is REALLY detailed:
https://www.thesamba.com/vw/forum/viewtopic.php?t=450863&highlight=eg33+svx+conversion
Also check out the Busaru Youtube channel. He's done a ton of conversions including a belly pan style radiator that looks like it works pretty well (laying flat underneath the bus)
https://www.youtube.com/results?search_query=busaru
PM me if you need any help. I think I have the wiring pinouts memorized
.I decided to enjoy a time in my life when I have more money than time, so I bought a full conversion kit from David White at SubiSwaps in El Cajon, CA. Super nice guy and the kit is complete including heater. All arrived, I have t had time to get it completely evaluated. It comes with the wiring harness. It comes with ECU, too.
https://www.subiswaps.com/product-page/subaru-engine-conversion-do-it-yourself-kit
Posted by: Chris H. Dec 6 2018, 12:32 PM
Interesting...that's one offer I was not aware of. Definitely worth the $ to have everything you need.
Anyone who has done a conversion knows this quote from the website is 100% true:
"This kit will save you at least 200 hours of trying to figure out what works and what doesn't."
Posted by: Dr Evil Oct 24 2019, 01:49 PM
So, I recon an update is to be made. I paid the money to SubiSwaps for the kit to drop in the SVX motor. I paid last Dec, got some boxes of stuff, nothing to spectacular, the big ticket special items were pending like the brain, harness, and exhaust. Next thing I know, no answers. Trying weekly. Then I get an email about a month ago that they are going out of business by Dec. A little panicked. Dave White, the owner, seemed like a stand up guy and the email said that all customers that paid will have their orders satisfied. It was a group message, tho. Here is to hoping he stays a stand up guy and I get the parts I really need and not the stuff I could have easily sourced myself, only.
Posted by: crash914 Oct 25 2019, 05:24 AM
That was almost a year ago! You should have received your complete order by now. get on the horn!
Posted by: Chris H. Oct 25 2019, 07:56 AM
Bummer.....FYI just in case, I have a couple of extra ECUs, and I MIGHT know where to find a complete SVX wiring harness. It's been about a year but the guy might still have it. The exhaust is pretty easy to figure out. Do you happen to know what parts you DID get? Adapter plates, engine mounts, etc?
Powered by Invision Power Board (http://www.invisionboard.com)
© Invision Power Services (http://www.invisionpower.com)