Printable Version of Topic
Click here to view this topic in its original format
914World.com _ 914World Garage _ Rain Tray Help
Posted by: WizPorsche914 May 8 2008, 10:09 AM
I picked up a rain tray for my 914 but its the late style and I have a 72. I appears to mount different. Is there any chance of getting it to work ?
Posted by: anderssj May 8 2008, 10:12 AM
I was able to make the newer style tray work on my 72, but I installed it years ago and can't remember the specifics. I'll have to look at it . . . and will try to post pictures later (this weekend?)
Posted by: rhodyguy May 8 2008, 10:15 AM
is the old one riveted on? later versions used philips head screws. it should work.
k
Posted by: Doug Leggins May 8 2008, 11:04 AM
You can do it!
I did this a couple of years ago and it worked well. I took alot of pics of the process. If I can get the time tonight, I will post the pics.
Posted by: WizPorsche914 May 8 2008, 01:46 PM
Yeah this new one is mint so I couldnt pass it up. I remember pulling the old one off by not having to remove more single screw. It was so badly cracked and full of duct tape.
Posted by: SirAndy May 8 2008, 02:11 PM

Yeah this new one is mint so I couldnt pass it up.
don't let Pat hear that ...

 Andy <------ ducking for cover
Posted by: krazykonrad May 8 2008, 05:09 PM
I remember my 72 having screws...before it fell off.
Posted by: Doug Leggins May 8 2008, 09:23 PM
When I gathered parts to send to the painter I did not know that the 72 and earlier lids were different than the 73 and later lids. I ended up sending a 72 lid to the painter and had to get creative to attach the later rain tray to the earlier engine lid. I chose my method of attack because my paintwork was already complete on the engine lid and I do not weld. If the lid is going to be painted, it may be a good idea to source a later style lid to paint. This would allow for a standard attachment of the engine lid rain tray. If you are in a position to fit a late style rain tray to an early style engine lid, then here are some key steps.
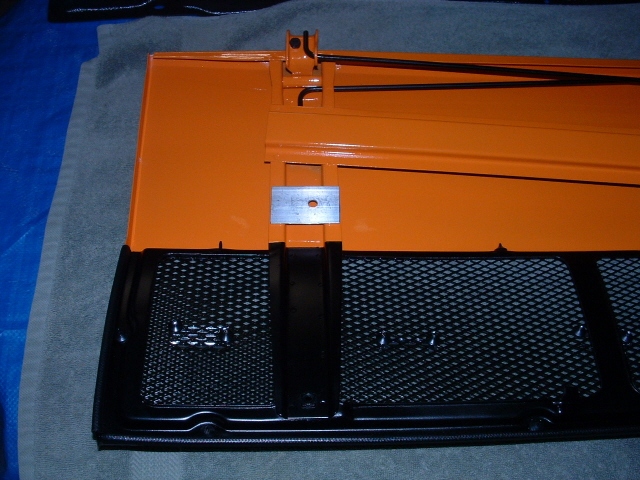
1) Drill a hole where indicated in the picture. Use the rain tray to determine the location of the hole.
2) Make a support plate similar to the one in the pic. I used aluminum, easy to machine and it will not rust. The black stuff in the pic is windshield butyl tape. I applied it so that the part would not rattle against the engine lid frame. This support plate is necessary to support one of the cone shaped mounting points on the rain tray.
Attached image(s)
Posted by: Doug Leggins May 8 2008, 09:24 PM
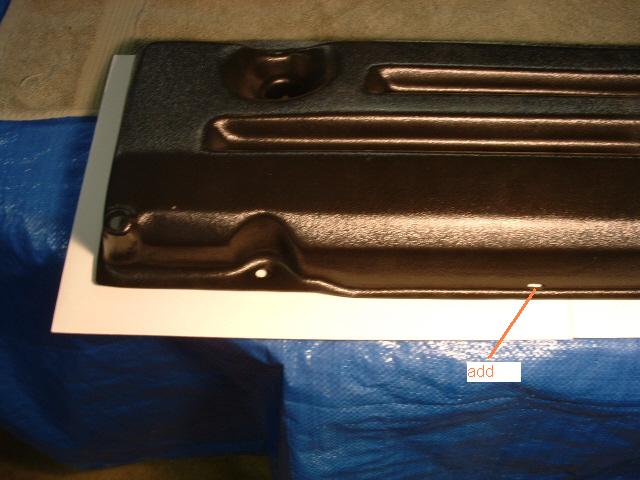
3) Elongate the holes in the rain tray as needed so that fasteners will pass through and align with the threaded holes. Add the slots in the rain tray where the flat metal tabs from the engine lid will pass through. I used a dremel tool to make the needed slots.
Attached image(s)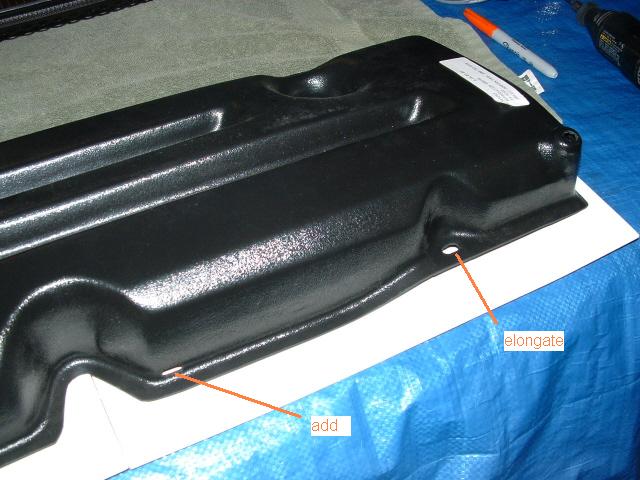
Posted by: Doug Leggins May 8 2008, 09:25 PM
4) I used JB Weld to attach a nut to the bottom side of the engine lid for the center fastener. It worked well for a while, then the JB weld let go. It looks good but there is no holding force anymore. I would recommend skipping this step. The 2 engine lid tabs passing through the slots that were made using the dremel tool are sufficient to hold the rain tray edge.
Attached image(s)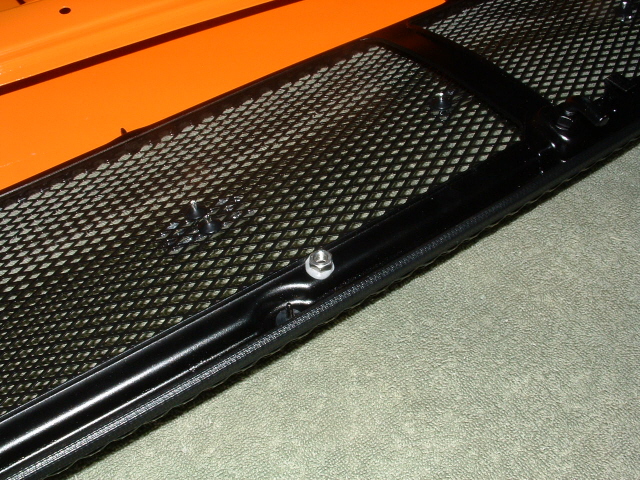
Posted by: Doug Leggins May 8 2008, 09:27 PM
5) The holes in the engine lid diagonal positioned cross brace are in the correct location for 2 of the 3 holes. However, there are no nuts welded to the back side of the early lids. So you will need to use nuts on the backside. It is difficult to hold the nuts in place to start and tighten the bolts. I used a wrench with tape holding the nut to the wrench so that I could get the nut in the correct location. For one location I was able to use the box end of the wrench, for another location I had to use the open end of the wrench.
Attached image(s)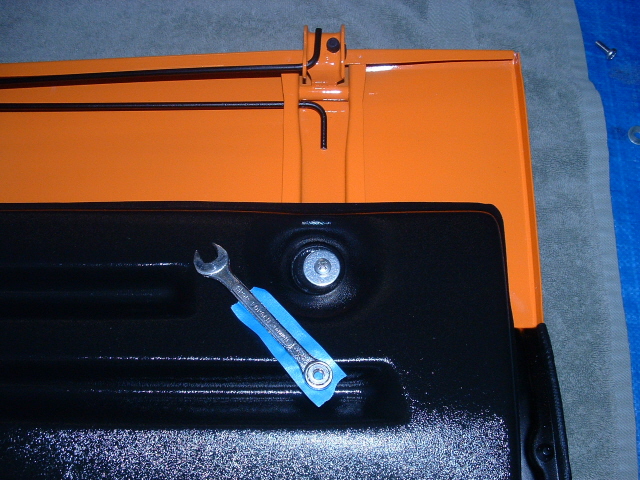
Posted by: Doug Leggins May 8 2008, 09:28 PM
6) I used washers behind each of my fastening points to help prevent cracking of the rain tray.
Attached image(s)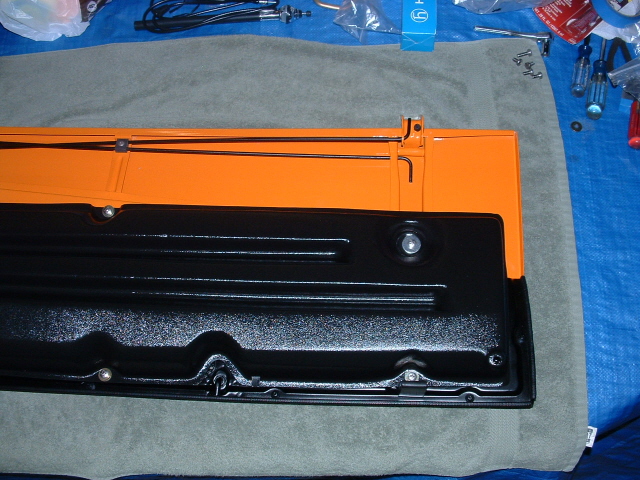
Posted by: Doug Leggins May 8 2008, 09:29 PM
7) Here is a pic of the support plate assembly with the rain tray in place.
Attached image(s)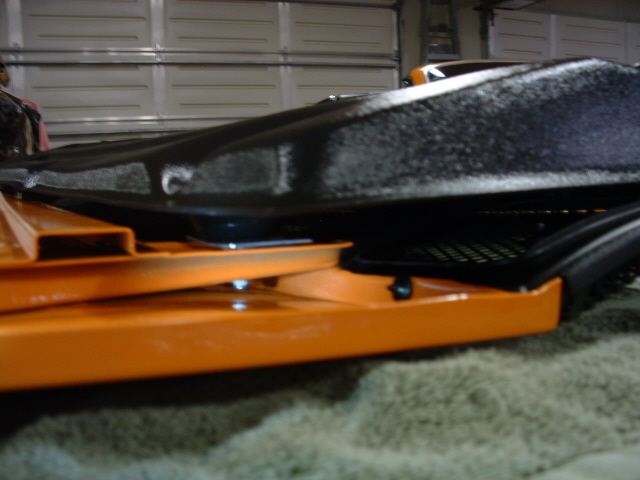
Posted by: Doug Leggins May 8 2008, 09:30 PM
8) I used the proper grommets/spacers from a later style lid to keep the rain tray mounting surface flat (in the same plane).
Attached image(s)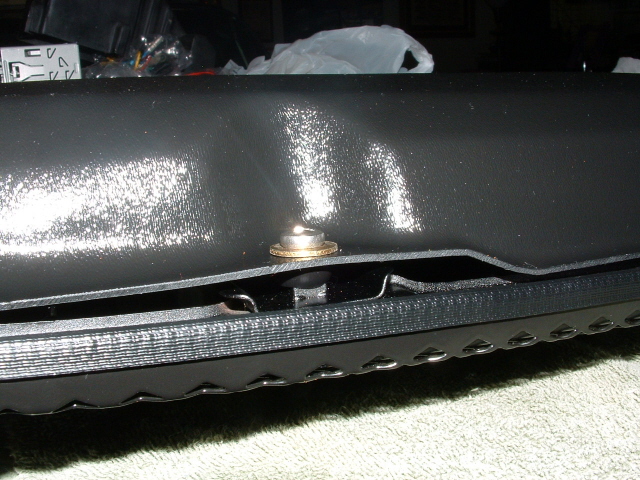
Posted by: Doug Leggins May 8 2008, 09:32 PM
It took me some time to determine how I wanted to mount the rain tray. But, it was actually pretty easy to do. 
Posted by: RJMII May 8 2008, 11:45 PM
wow, those are some nice instructions! Great pictures. They look good! thanks for sharing.
Posted by: WizPorsche914 May 9 2008, 08:58 PM
Yeah Thanks Alot for the pics !
Powered by Invision Power Board (http://www.invisionboard.com)
© Invision Power Services (http://www.invisionpower.com)