Printable Version of Topic
Click here to view this topic in its original format
914World.com _ 914World Garage _ Tony's progress pages, resumed...
Posted by: geniusanthony May 13 2008, 08:15 AM
So gang, I will be returning to the PNW in the upcoming week and change and would like to organize a party for those intersested to finish a few :laugh: items on my 71.
Things on the list include-
*Final smoothing /matching of rear soft flares
*Replacing 71 seats with 72+ cores for the meanwhile, I am sourcing the components presently and have one lead.
*Welding in replacement section for the hellhole area. This is also being sourced.
*filling front marker holes.
*Lastly the bodywork and engine bay cleaned, smoothed and sprayed.
*Hang FB bumpers front and rear. Still need these however.
Prior to my deployment I had the exterior stripped to bare metal and worked the rear fenders. As time ran short I covered the body via rattle can enamel which seemed a good idea at the time. It should sand off fairly easily. and the car has been under a cover in my garage since then (A year as of yesterday)Regrettably I do not have a current pic to aid us.
The end state I am shooting for is to bring the car back to presentable condition as I will be moving to VA in July for my next service school.
Facilities available to me are the hobby-shop on Ft Lewis(tacoma area). If anyone has a better venue available it would be most appreciated. Laying the material is the most problematic to working here as regulations, scheduling, etc.. would affect the timetable. We are also not able to actually use the equipment, the foreman does all spraying. I see this as a problem but i may be wrong.
If interested please post below and perhaps amongst us local guys this may actually work. I am not striving for a marathon build as that would be unrealistic with family duties, it does seem reasonable that in maybe 2-3 weekends a group of several could make some awesome progress.
Thanks gang!!
Edit
found one old pic from somewhere in the middle of last years stretching session
Posted by: PanelBilly May 13 2008, 10:04 AM
See your PM
Posted by: Phoenix 914-6GT May 13 2008, 11:27 AM
Love to help if I can. I really don't know much about body work, but I will do anything to help. Let me know.
Posted by: anderssj May 13 2008, 03:02 PM
Nice work on the soft fenders!
Where is the school in VA--Ft. Eustis? Will you bring the car with you?
What will you be doing to the car when you move east?
Ft. Eustis has a pretty good auto craft shop (great manager!), but no paint facility. The shop at Langley AFB has a paint booth, but I think their painter has to do the work (I can check on this later).
There are few teeners in the area--if you're coming this way, is there anything you need "advance party"-wise?
Posted by: geniusanthony May 15 2008, 12:49 PM
PanelBilly-reply sent
Jon-I appreciate your eagerness. We will have to meet up one day
Steve-Your compliment makes the 40ish hours worthwhile. The move will be taking me 30 min outside of DC, in Ft Belvoir. Sometime by late July I should be there.
Posted by: Gint May 15 2008, 04:25 PM
Welcome home ![]()
Posted by: geniusanthony May 24 2008, 06:35 PM
And I'm back.
Anyone from tacoma area want to link up this weekend?
What I have in mind is some minor welding on front corner light holes and inner door metal repair..
Posted by: Headrage May 24 2008, 07:29 PM

Welcome home

Glad your back...
Posted by: rhodyguy May 25 2008, 10:14 AM
sending a pm.
Posted by: geniusanthony May 26 2008, 12:34 AM
Some progress today, no pics but I met Kevin and Jack in the afternoon and bought a little mig welder. Proceeded to weld a little tear in my front trunk pan. tomorrow I get to play with the inner door support rattles.
Posted by: championgt1 May 26 2008, 12:38 AM
Good luck with the welding.  It was nice to meet you.
Posted by: Phoenix 914-6GT May 26 2008, 12:46 AM
I'd love to help next weeked if I can. I have an open house on a listing I have in Renton on Saturday and could come down after that if you would like.
Posted by: roadster fan May 26 2008, 03:03 PM
Glad you are home, welcome back!!!!! 
Jim
Posted by: geniusanthony May 29 2008, 04:48 AM
Been a few days but have been pluggin away. I have filled my side marker holes and actually looked at my hellhole and longs. Pics and photos to follow.
Question I have is, how many layers are the sides of my longs? Under the jack post I pealed away, the jack post suround, and one layer of metal beneath that. doesnt seem right to me, but I am sure the pics will clarify my wording. gauge of these pieces would be good to know also if you know.
Tony
Posted by: geniusanthony Jun 6 2008, 07:32 AM
In the last week I have cleaned and replaced my hellhole metal, 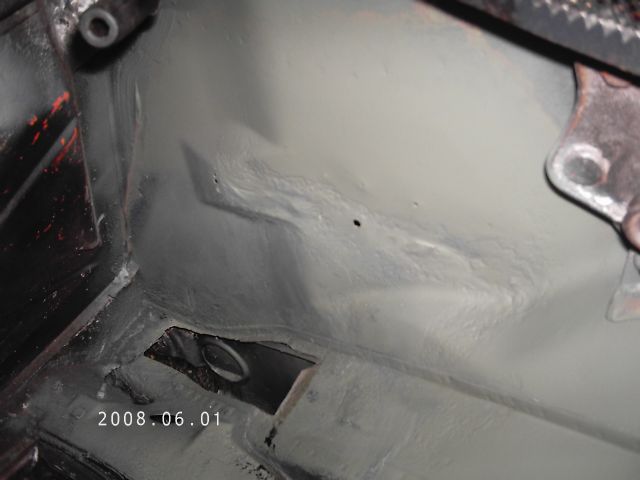

cleaned and patched a 2 x 3 " area of the long, 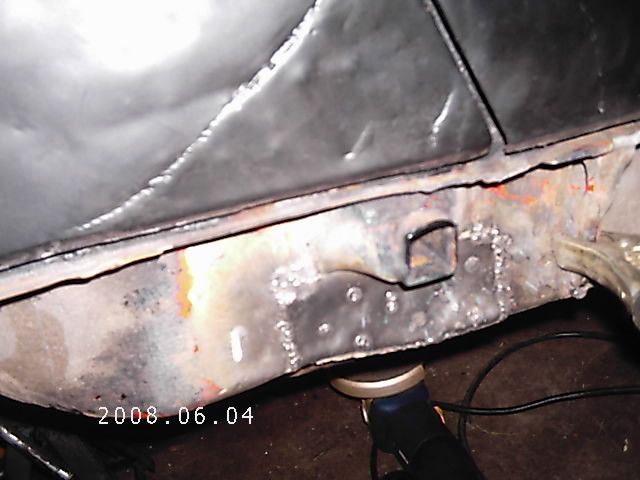
and broken one of the Vitalonis i got from Jim H. 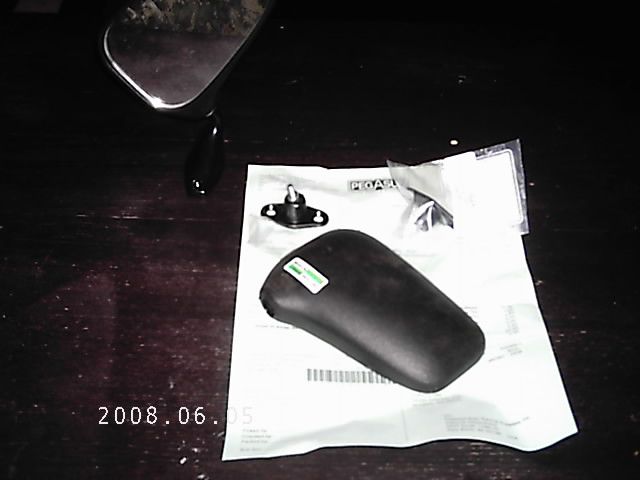
The SPA brackets(?) that pegasus sells are about perfect, just gotto find a way to thread the ball stud into the mirror body..maybe fiberglass and a nut or something.. It was a 5/8 balllstud before I had snapped the base/
Also started filling my side markers and fixing the inner supports for the driver vent window. I could not take the rattle anymore when shutting the door.
Pics below
Posted by: geniusanthony Jun 6 2008, 07:37 AM
I am still waiting for an engine shelf but it feels good to know that my frame is solid now. Fender stuff is on other cam. will post later.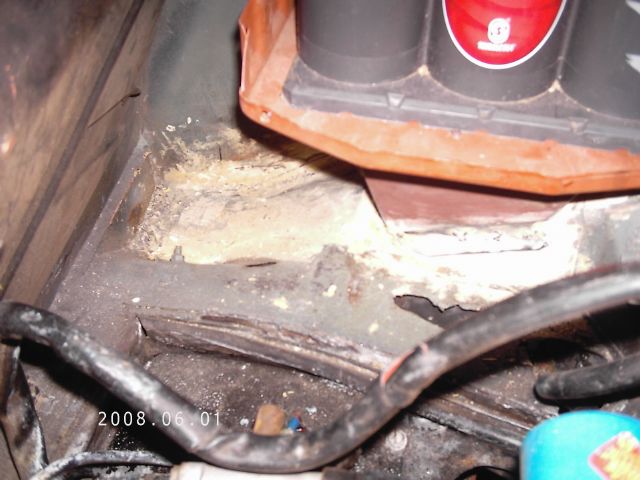
Posted by: rhodyguy Jun 6 2008, 10:21 AM
anthony, i see you sourced a bat tray. you really need to secure the bat. if you need a stock bat clamp (you'll have to modify to fit the optima) i have one for you. let me know.
k
Posted by: geniusanthony Jun 9 2008, 03:46 AM
Today I finished up my side marker holes and mounted the Vitaloni flags I got from Jim H. onto the Spa bases.
side marker patch made.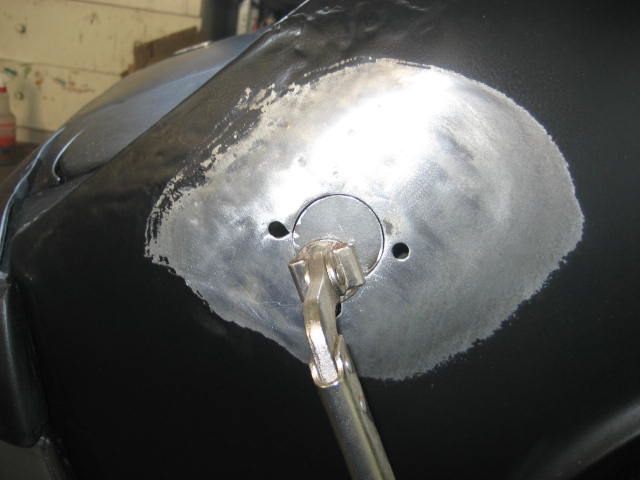
this is the old base, new base and the surgery patient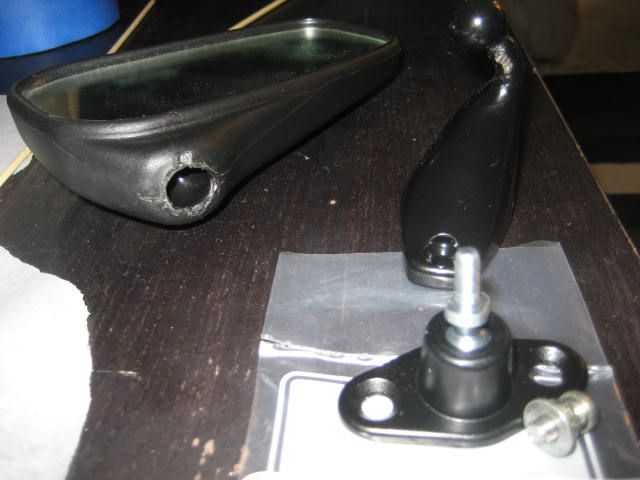
This is the roughened up ball socket that I will fill with epoxy and the nut/bolt assembly pictured..the screw will be removed once set.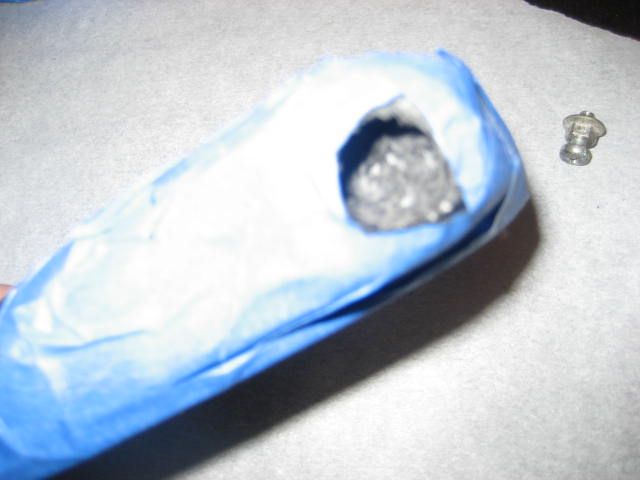
Posted by: geniusanthony Jun 9 2008, 04:07 AM
The filled/ threaded sockets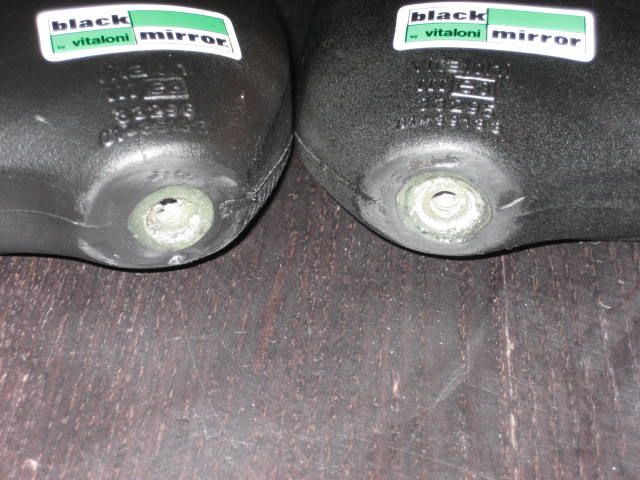
The completed assemblies, I blue locktited the ball stud into the mirror, and lithium greased the ball in the mount. There is a large setscrew in the base to lock it down completely the grease gives it that little bit of adjustment so the stud won't loosen in the mirror.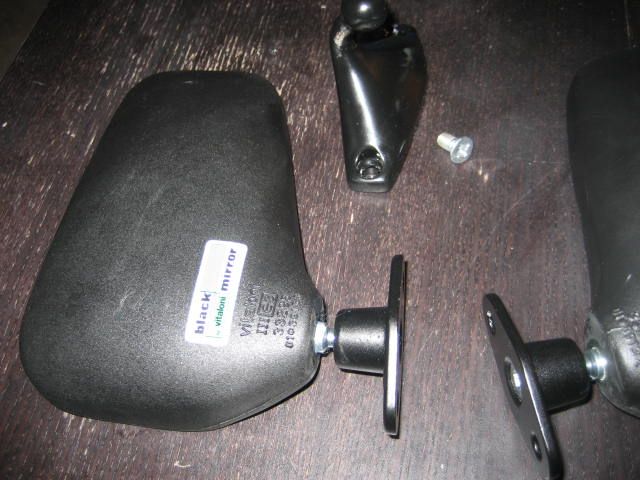
mounted , side marker filling done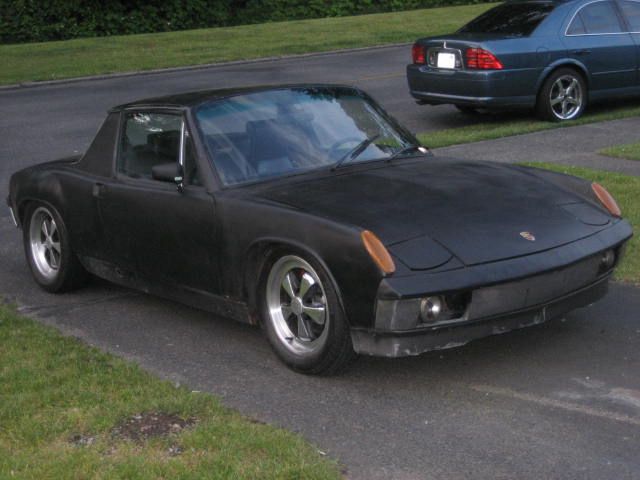
Posted by: rhodyguy Jun 9 2008, 08:48 AM
the new welder seems to be working out for you tony.
Posted by: geniusanthony Jun 9 2008, 10:01 AM
staying busy I guess...I'll give you a call this week sometime , maybe tomorrow if theres a gathering..:shrug:
Posted by: jim_hoyland Jun 9 2008, 10:39 AM
Looking Good ! 
Posted by: geniusanthony Jul 2 2009, 09:34 PM
Since my last post about a year ago.. wow, I have done alot of side projects and can post some pics later.
I have as of this evening rebuilt the front end from the crash damage of January this year and stripped all of the filler off the body.
The cool things I have done that I wish I had pics of are-
New seats, corduray door panels and dash face, built a console from the plans on the french site, added a stereo and koni suspension.
So, spelled out like that it looks like I have done way more than I feel like I have accomplished in those six months.
Before I get the TTIWLWOP streamers flowing in I will take pics tomorrow when I get to the shop.
As I get the body finished this weekend I found that I am missing my driver side headlight cover. If anyone in the DC area has one that I could buy off ya this weekend that would be awesome. 2068504602 is my telly #.
The scheme that I am spraying is the Silver/Phoenix Red creamsicle that I have been tossing around forever and have posted as a photoshop in the past.
Posted by: geniusanthony Jul 2 2009, 09:37 PM

This is the scheme I am doing though the silver is of course off a bit, as is the red. I have also bought the Getty bumper set w/ GT valence so those will be going on as well.
Posted by: geniusanthony Jul 3 2009, 12:08 AM
Right now my wheels have polished lips and paddles but on a black background.. I really dont want to go to the effort of stripping and repainting if that would be too much red. What do you all think about the trim color matched wheel backgrounds? Is it too much or does it flow well with the scheme?
Posted by: poorsche914 Jul 3 2009, 09:09 AM
Right now my wheels have polished lips and paddles but on a black background.. I really dont want to go to the effort of stripping and repainting if that would be too much red. What do you all think about the trim color matched wheel backgrounds? Is it too much or does it flow well with the scheme?
Go with the color match. I have a silver 914 and have been thinking of painting the centers of my Mahles to add some color to the car.
Posted by: geniusanthony Jul 22 2009, 08:28 PM
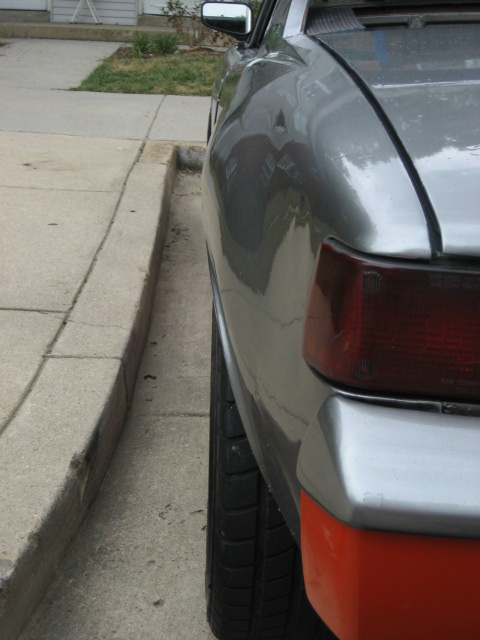
Fresh outta paint, by myself. The colors are Silverstone Metallic (by Honda) and Phoenix red. I think that the phoenix red didn't come quite right as the mixer did not have the one of the correct lead substitute colors, just something that was stated to be a replacement just not THE replacement.. I still need to clean all the dust out of the inside and engine but I am pretty happy with my work being my first time and all. Recall the accident from December when I was parked and you can see what took a little bit of time.
_Still left is to fit the rear fiberglass bumper and the wheel centers in trim color.. and some side stripes.
I am anxious to hear your thoughts as the orange is a bit louder than I had intended.
Attached image(s)

Posted by: iamchappy Jul 22 2009, 08:58 PM
I think it looks great!
Posted by: Sleepin Jul 22 2009, 09:15 PM
Very nice!!
Posted by: r_towle Jul 22 2009, 10:16 PM
very nice job.
The colors work great....paint the wheels like your photoshop...
Rich
Posted by: championgt1 Jul 22 2009, 10:47 PM
That looks really good.  Are you back in the PNW?
Posted by: PH1 Jul 22 2009, 11:21 PM
Cool paint scheme!
Posted by: carr914 Jul 23 2009, 07:43 AM
It looks very Nice 
T.C.
Posted by: Zaney Jul 23 2009, 11:20 AM
Glad to see this paint scheme in a photo! I plan on doing something fairly similar to this. I am going to use the original metallic silver paint color and the phoenix red for the bumpers/rockers/and 5-lug fuchs.
I think for my fuchs I will combine the color background with RSR-look pedals. We will see...
Looks awesome! 
Nate
Posted by: geniusanthony Jul 25 2009, 11:30 AM
Does anyone have advice on painting the centers? I would think that there would be a mask available for the petals.
Posted by: charliew Jul 25 2009, 04:39 PM
You can probably make a pattern of one petal and go to a vinyl graphics shop and they can make 20 exactly alike for masking. Or just do it the hard way like most everyone else with masking tape. To keep them all the same you can make a paper pattern to tape around.
Posted by: geniusanthony Jul 26 2009, 04:03 PM
OK, I will try doin the wheels this week.
Today I am cleaning up all the trim and the interior before I show shots of it.
Do you suppose polished trim or blacked out trim would look best with this car?
Posted by: Zaney Jul 27 2009, 11:05 AM
I vote Satin black for all the trim!
Nate
Posted by: Travis Neff Jul 27 2009, 06:22 PM
Looks great, I like the monster driving lights too.
Posted by: geniusanthony Jul 27 2009, 09:18 PM
I have been fitting cleaning time into my evenings since I brought her home. When I get all the paint dust boogies out I will post some shot of the corduroy interior and radio stuff that I squeezed in. I have played hell today fitting new window squeegees(sp) in. There is still 6 inches of seal sticking out on the pass door while I let my fingers heal/regain strength. I have had some requests to post some shots of my work on the rear quarters which I will put up as well. The phoenix is quite bright in the daylight, the two above were at like 6 am before work that day.
Posted by: nsr-jamie Jul 28 2009, 06:33 AM
Thats a beautiful car, I like it better without the logos on the side...the wheels are nice just how they are but would be sweet painted...very cool car!!
Posted by: kfish914 Jul 28 2009, 07:59 AM
What driving lights are you using? they look cool, i would like to do that to mine.
That color combo is very nice, looks great.
Here is a pic from the internet I had.
attachmentid=185282]
Posted by: kfish914 Jul 28 2009, 08:04 AM
let's try that picture again.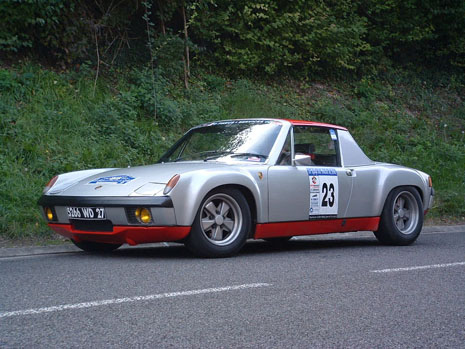
Posted by: Zaney Jul 28 2009, 10:39 AM
Now that is HOT!
The only change I would make is painting the background in the Fuchs Phoenix Red too. Leave the pedals the body color.
 Gives me more options when it comes time to paint mine.
Posted by: geniusanthony Jul 28 2009, 03:30 PM
The lights are Hella 500's with the mounts welded about 2ish inches inboard. I really like that GT that you posted above.
Shortly I will go take a few pics after that seal goes in.
Posted by: geniusanthony Jul 29 2009, 02:29 PM
I thought I had all my cleanup done but here is what I did with the interior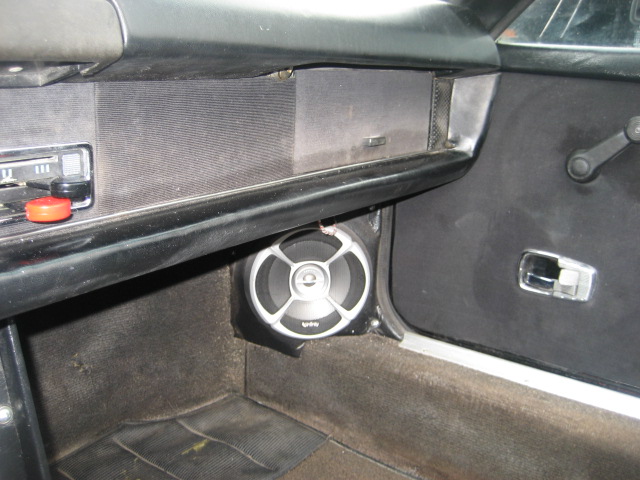

All black corduroy on the dash face and door panels. the speaker pods from Morph were padded and vinyled by myself and was a PITA to get even half right. The few flaws I built in were oriented to the backside of the pods. I had to make the door cores using 1/4 inch outdoor ply and it worked out quite well. The threads on this site were helpful in building those and covering them.
I have yet to decide on door pulls and still have the original armrests in good shape so I may dig em out someday to look.
My question about door pulls, Do the GT/Fiat parts have a good feel to them or do they feel "cheap"?
Posted by: geniusanthony Jul 29 2009, 03:18 PM
The audio components that I chose were to keep the dash face uncluttered and mostly hidden from prying eyes. I may need to get some black nylon or something over the subwoofer cone, the speaker store stuff looks like garbage usually. I had to cut away the console to clear the amp just a little, It wasn't original, I built it from the plans on the french site. So the only input is by headphone jack to ipod or whatever. That headphone jack has RCA ouputs on the other side with Y's on each plug to feed all 4 amp inputs.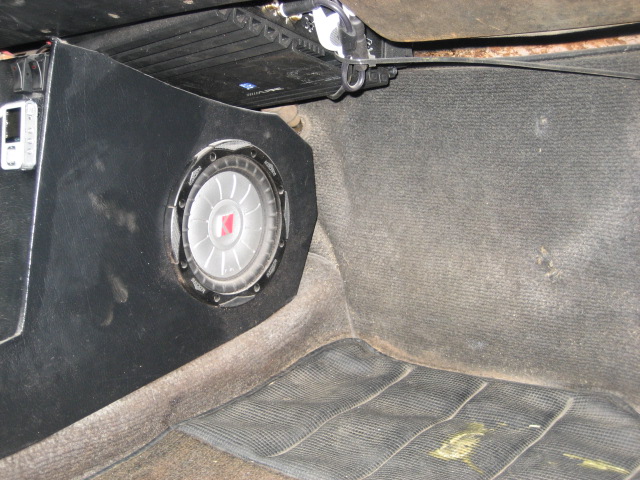
All told the amp is a 75x4 Alpine with 3&4 bridged to feed 200w to a 4ohm Kicker 8. At more than half volume on the mp3 player it is more than loud enough.
Posted by: geniusanthony Jul 29 2009, 03:34 PM
Some different views of the rear flares, as finished as I wanted to get them. 
Also shown is the muffler that I made with a chambered muffler from FLAPS and some resonated tips. Behind that is a Patrick MS 4->1 header. Sounds nice with a healthy burble at idle. 
Posted by: ghuff Jul 29 2009, 03:50 PM
I like it......
It looks good with that color combo.
Posted by: jsayre914 Jul 29 2009, 03:53 PM
your car looks sweeeet! 
Powered by Invision Power Board (http://www.invisionboard.com)
© Invision Power Services (http://www.invisionpower.com)