Printable Version of Topic
Click here to view this topic in its original format
914World.com _ 914World Garage _ The Project Anklebiter Build Thread.
Posted by: plymouth37 Jun 9 2008, 01:08 PM

Here's the plan:
Tub up restoration/customization (no cutting corners here).
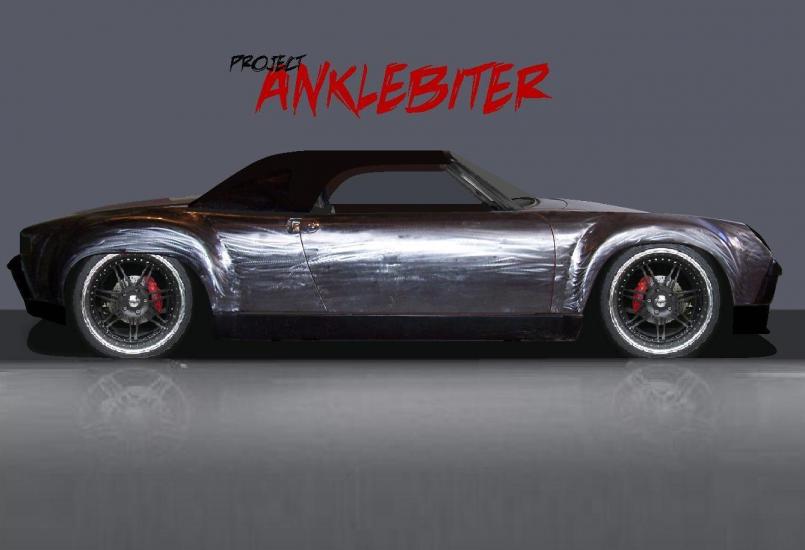
Speedster styling.
40" tall
Under 1800 pounds.
350 horsepower WRX engine.
Let the games begin!
Posted by: KELTY360 Jun 9 2008, 01:17 PM
You are a naughty, naughty boy.

Posted by: Ferg Jun 9 2008, 01:17 PM
This is one Concours Weenie that say F*&^ yeah!!! 
Posted by: plymouth37 Jun 9 2008, 01:20 PM
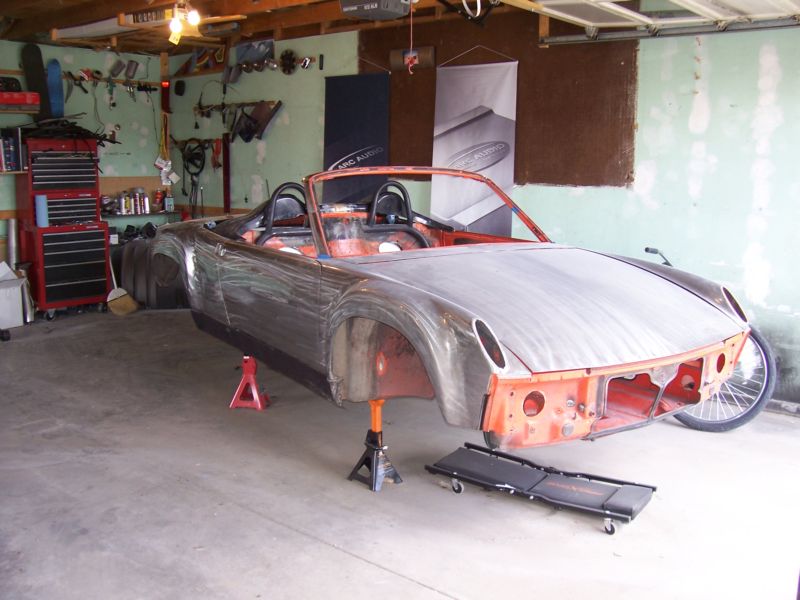
First off here is a little history on the car.
In 2002 I found this 1973 1.7 in a field outside Laramie WY where it had been sitting since 1982 with some other VWs.
After bolting on some webers and swapping out the battery, fluids, and tires I drove it out of there.
As you can see she was pretty rough but other than some surface rust she was darn near rust free.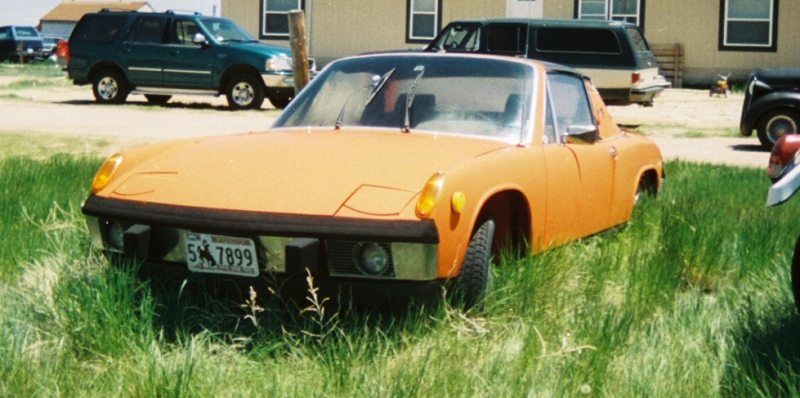
Posted by: geniusanthony Jun 9 2008, 01:23 PM
Gee thanks, now I have to get a better job to buy a new house, bigger garage, new tub, and....
Seriously though, are those speedster humps I spy, what are you thinking for a windshield? Would it be rude to suggest flyscreens? I have been waiting to see what you were gonna do since you hinted at this way back when. GL Dana
Posted by: plymouth37 Jun 9 2008, 01:25 PM
While in school I added a custom cage and interior both of which will be modified during the course of this project.
Here is a picture of the 914 about a month after I found it, next to it is my '37 Plymouth street rod.
As you can see I had already installed the rollcage when this picture was taken. 
After school I moved to Las Vegas to work for Renegade Hybrids. This is when I really started upgrading the car.
Here is a picture of the car with stock body and drivetrain after I had installed the carrera front suspension and polished fuchs.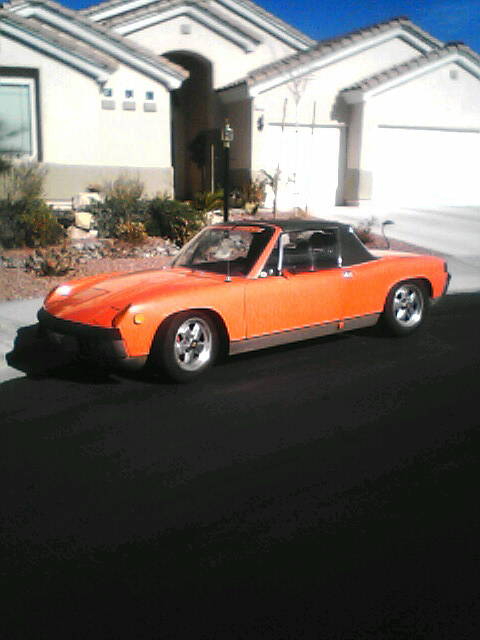
Here is a random pic I found, the car was my daily driver and I could only weld on half a set of flairs per weekend.
As you can see this shot was taken after the first weekend...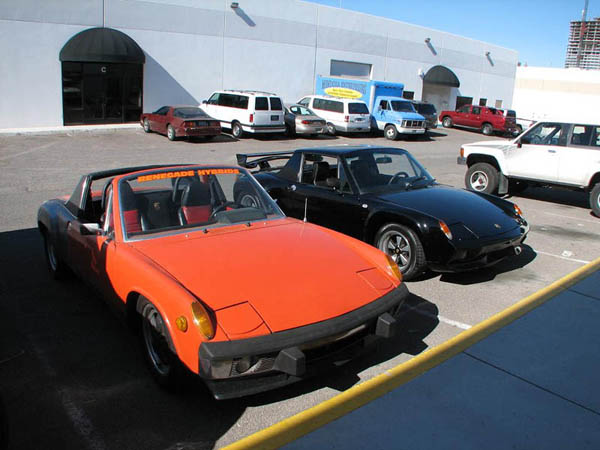
At Renegade we designed the 914 WRX conversion kit using my car as the test bed.
My car is running a 2004 WRX engine with exhaust and computer mods bumping the power up to around 320HP.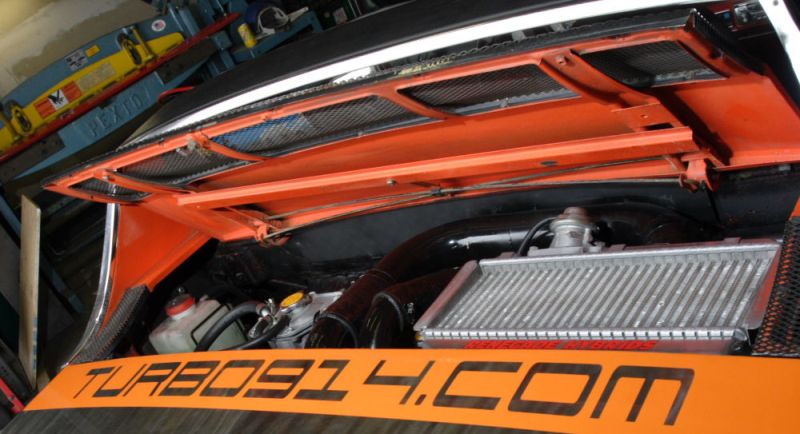
Posted by: plymouth37 Jun 9 2008, 01:28 PM
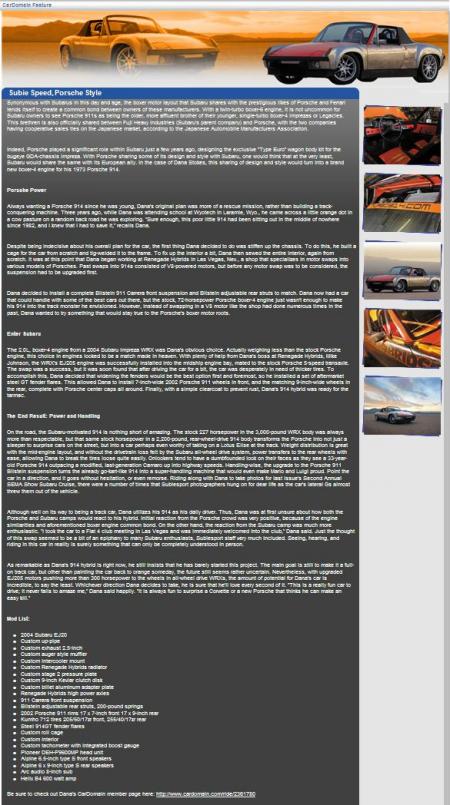
The car has been featured by SubieSport magazine and by several online publications including Cardomain.
I drove the car in its subie powered form as a daily driver for about 2 years then decided to move to Wyoming to pursue a Mechanical engineering degree.
I have now transfered into the Architectural Design program at CU Boulder.
I bought a real car for a daily driver and figured now would be a great time to build the street monster I had been dreaming of.
I am going to take my time and build this thing right.
Posted by: ericread Jun 9 2008, 01:30 PM
That's a sweet looking mod you're planning. I, for one, don't go in for most of the mods shown in this board. I believe that most of these do nothing to add to the 914 experience. Your design appears to me as the exception!
I can't wait to see more!
![popcorn[1].gif](style_emoticons/default/popcorn[1].gif)
Posted by: Kirmizi Jun 9 2008, 01:36 PM
You're one sick puppy Dana... LOL
Can't wait to see this one when it's finished!!
Mike
Posted by: plymouth37 Jun 9 2008, 01:38 PM
The technical details:
2004 Subaru EJ20
Custom up-pipe
SS Wrx Header
3.5-inch straight pipe exhaust
Renegade Hybrids radiator
KEP stage 2 pressure plate
KEP 9-inch Kevlar clutch disk
KEP billet aluminum adapter plate
Renegade Hybrids high power axles
911 Carrera front suspension
Cantilever rear suspension
Qa1 adjustable Struts, 400-pound springs
2002 Porsche 996 rims 17 x 7-inch front 17 x 9-inch rear
Kumho 712 tires 205/50/17zr front, 255/40/17zr rear
Steel AA 914GT fender flares
Custom roll cage
Custom interior
No radio
No top
No windows
Getty C/F Rear lid
GT-Racing F/G non-headlight Front lid
Getty F/G Bumpers
Getty F/G Rockers
Chopped and raked windshield
Pontiac Solstice door mirrors
Customized Porsche Boxster Humps
Ferrari F430 rear diffuser
F/G Belly Pan
Posted by: plymouth37 Jun 9 2008, 01:48 PM
To keep track of my progress have been documenting my weight savings with excel.
Here is my spreadsheet showing the part removed or replaced, the resulting weight and power to weight ratio, along with the info from a few other cars for refrence. So far I have dropped just over 500 pounds.
I have a feeling this car will kill me if I ever get it on the road.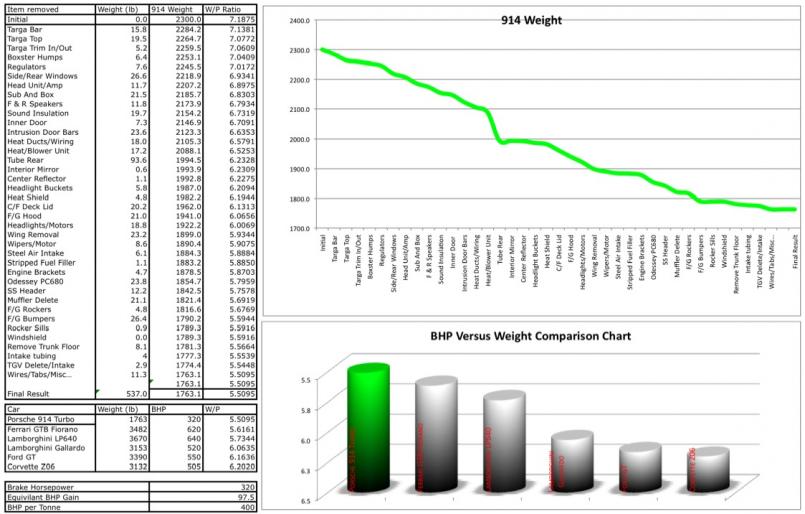
Posted by: KaptKaos Jun 9 2008, 01:53 PM
I like your pic above. I always thought that a speedster style windshield would look cool on a 914.
Posted by: plymouth37 Jun 9 2008, 02:13 PM
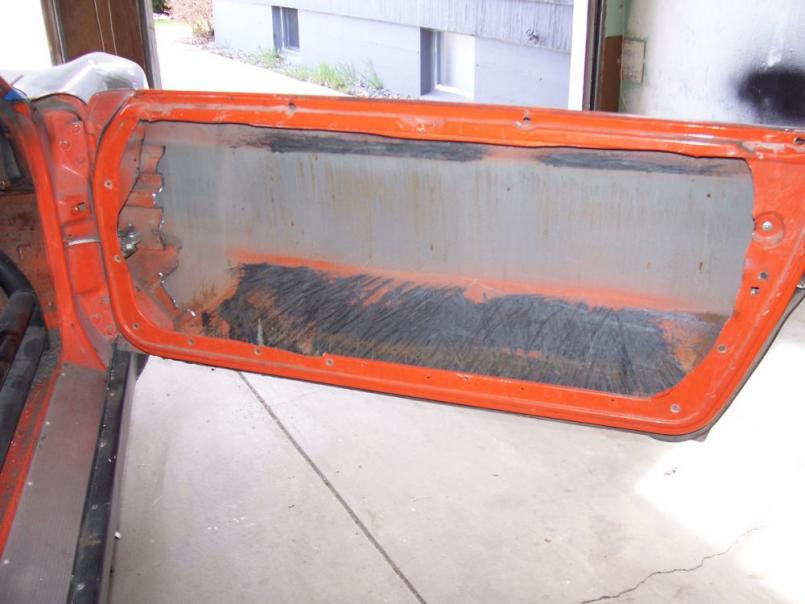
I finished scraping the tar out of the interior and gutted the pass side door.
I was glad to find very clean floors under the tar.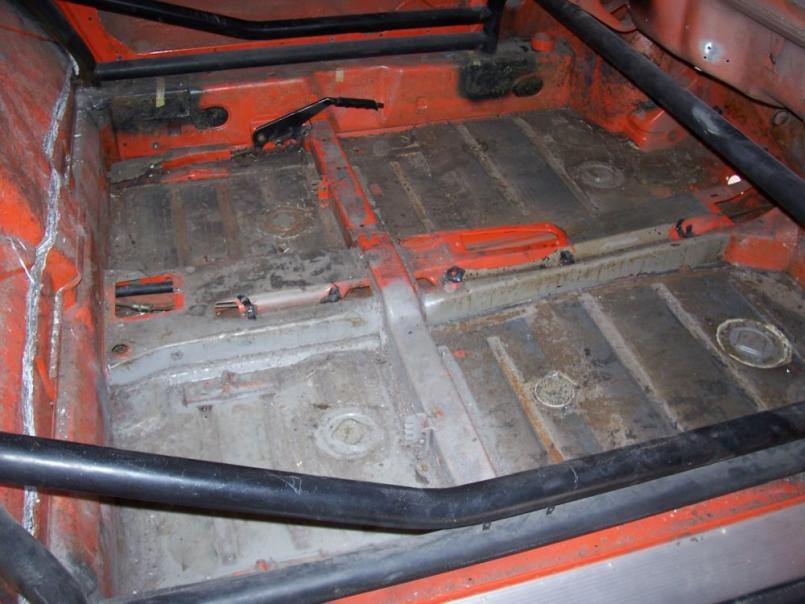
Posted by: Phoenix 914-6GT Jun 9 2008, 02:18 PM

I have a feeling this car will kill me if I ever get it on the road.
Is that such a bad way to go?

Posted by: Phoenix 914-6GT Jun 9 2008, 02:19 PM
Wow those floors look great. I had just done that a few months ago and mine were not like that.
Posted by: roadster fan Jun 9 2008, 02:29 PM
yesssssssssssssssss! 
Eagerly awaiting the updates on the build. You say you bought a "real" car so you felt it was time to build the beast, but I think this will be the REAL car 
Jim
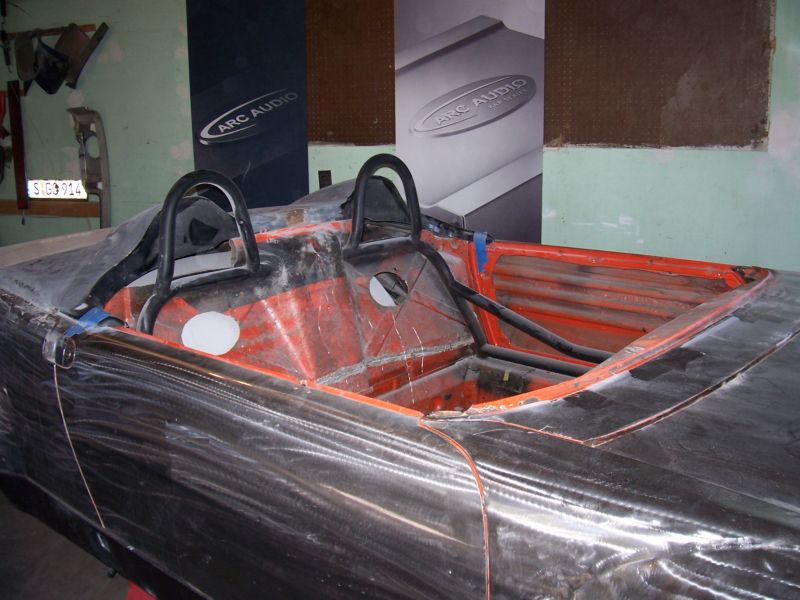
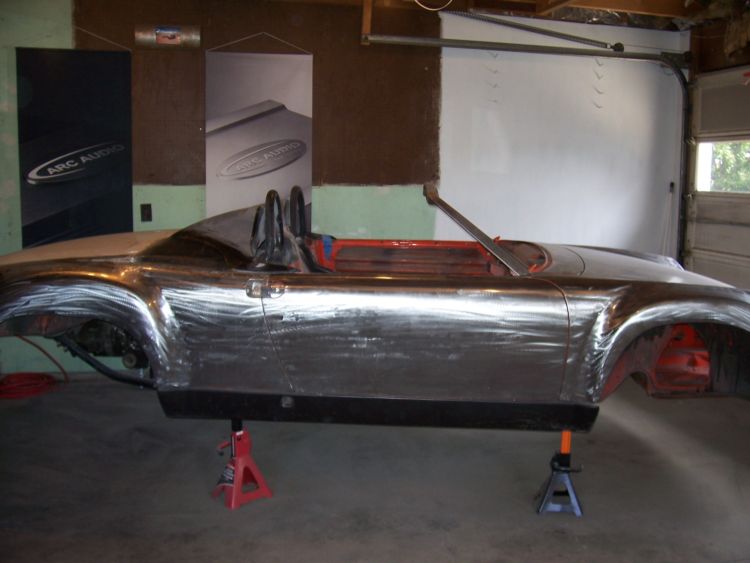
Posted by: plymouth37 Jun 9 2008, 03:45 PM
No turning back now!
I cut off the targa bar and made this horrendous hole...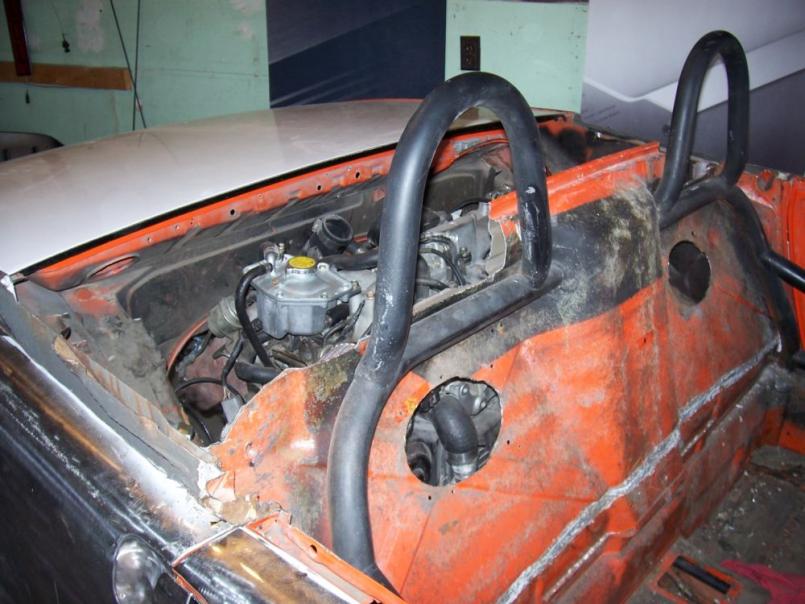
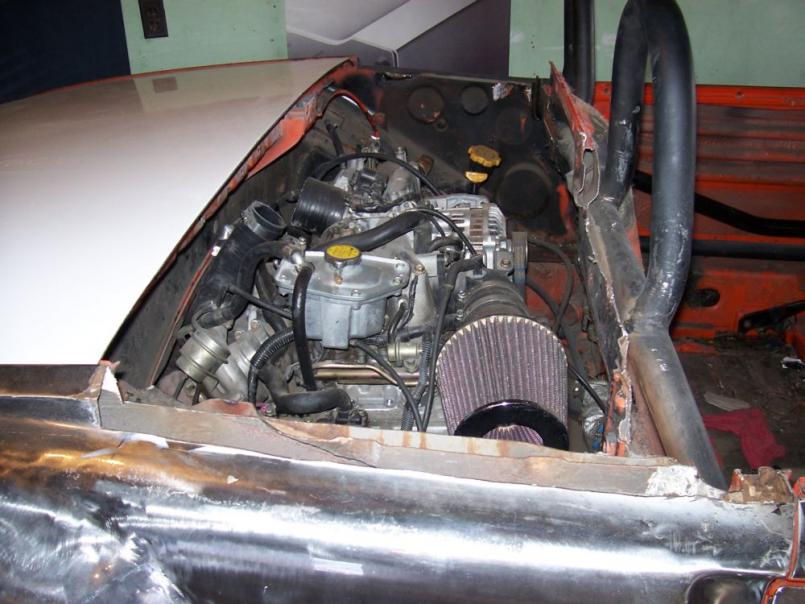
The car is pretty much stripped but I am leaving the engine and tranny in for now so I can build the belly pan and design the intercooler system.
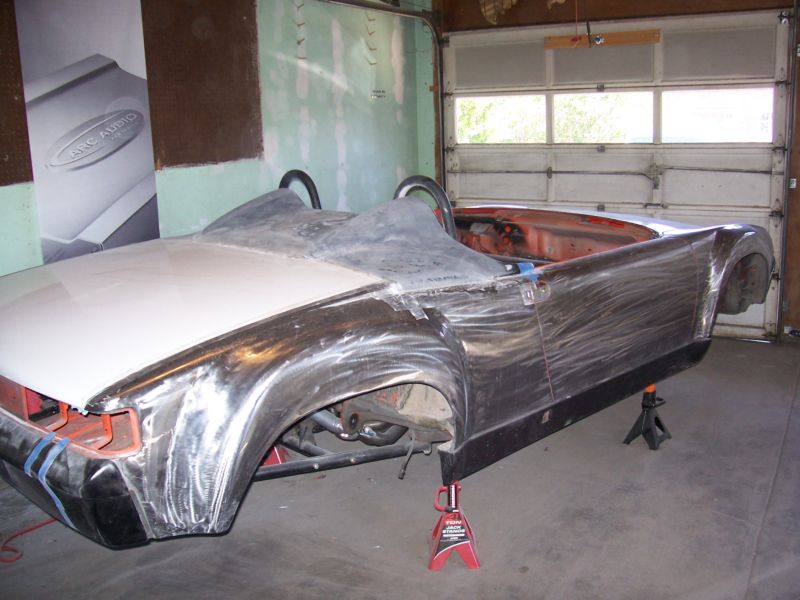
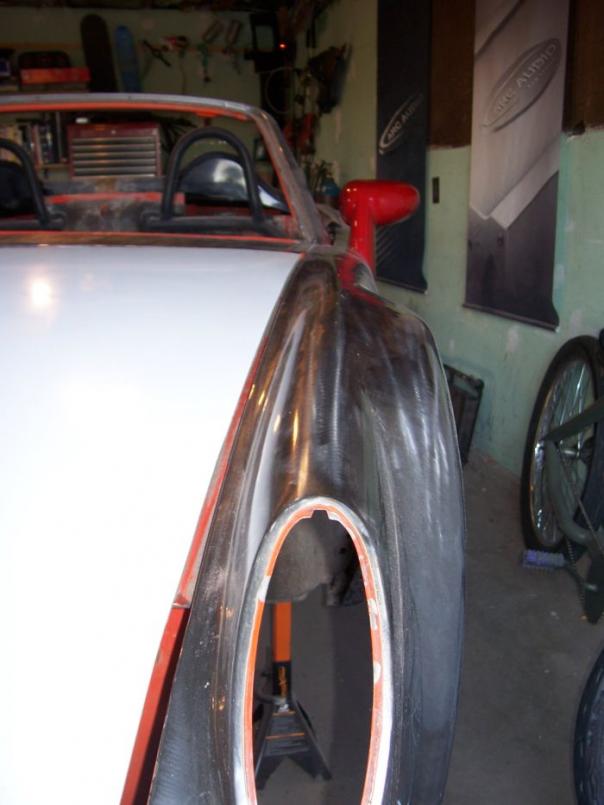
Posted by: plymouth37 Jun 9 2008, 03:49 PM
I got a heck of a deal on these Boxster Humps. The plan is to 'glass these into one piece and build up the lid to match the rest of the car. Then I will rebuild the metal around the area. I absolutely hate working with F/G so I will make the metal match the F/G lid rather than vice versa.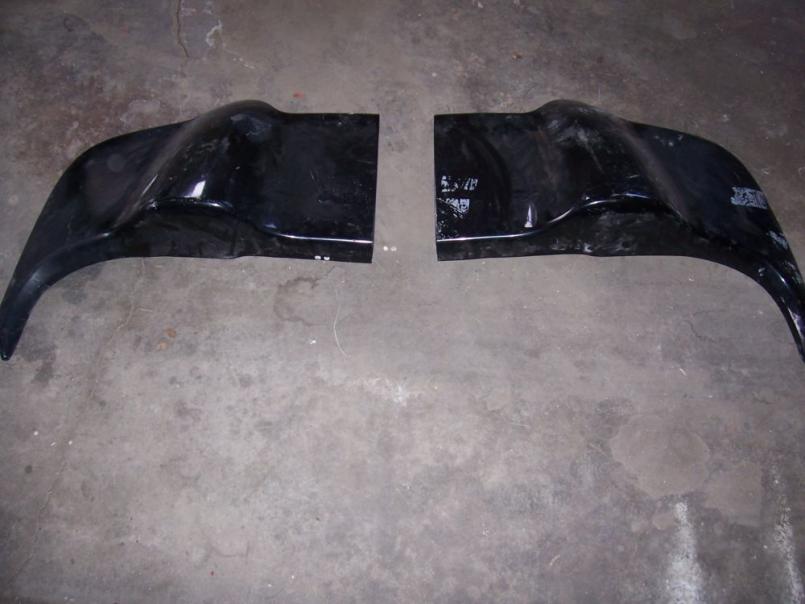
My dog Bailey checking the fit.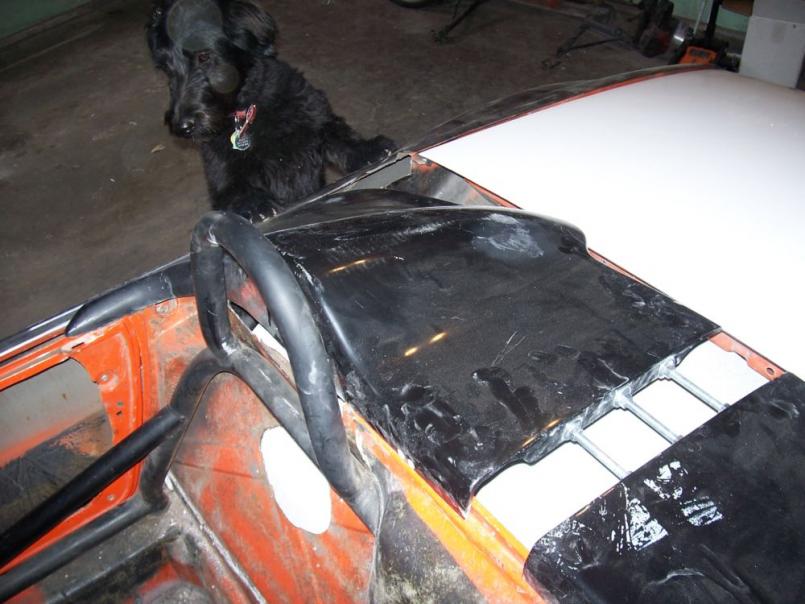
This just might work!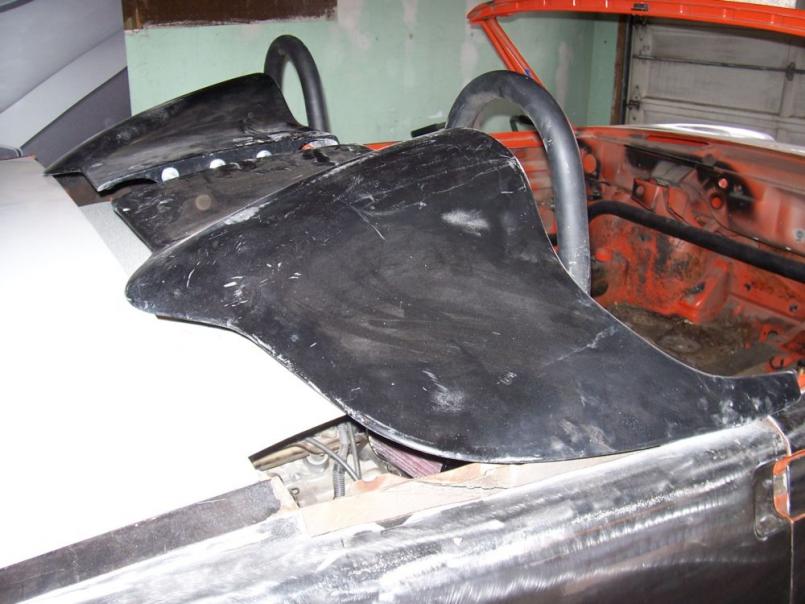
Posted by: Ferg Jun 9 2008, 04:06 PM
Baily's a cool looking pup 
Ferg
Posted by: brant Jun 9 2008, 04:37 PM
nice pics Dana!
and cool car
there aren't many 1900lb street legal teeners out there
good for you!
brant
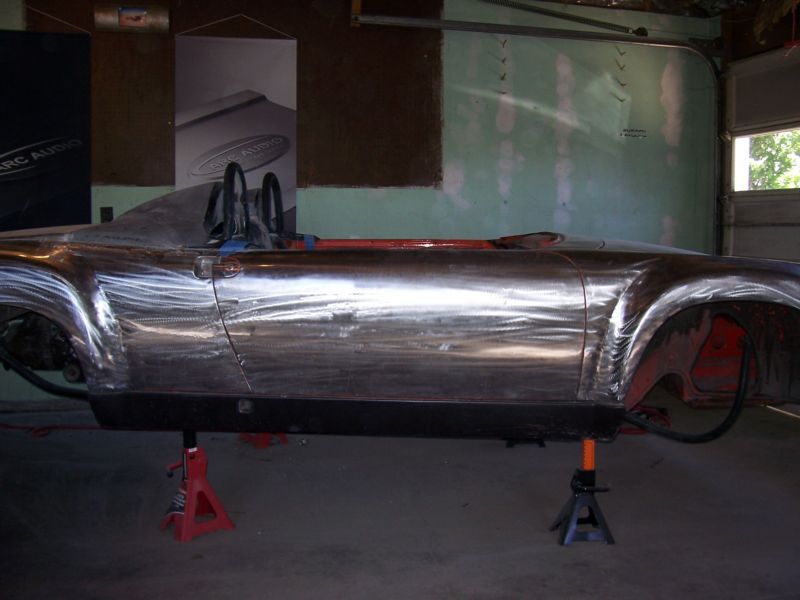
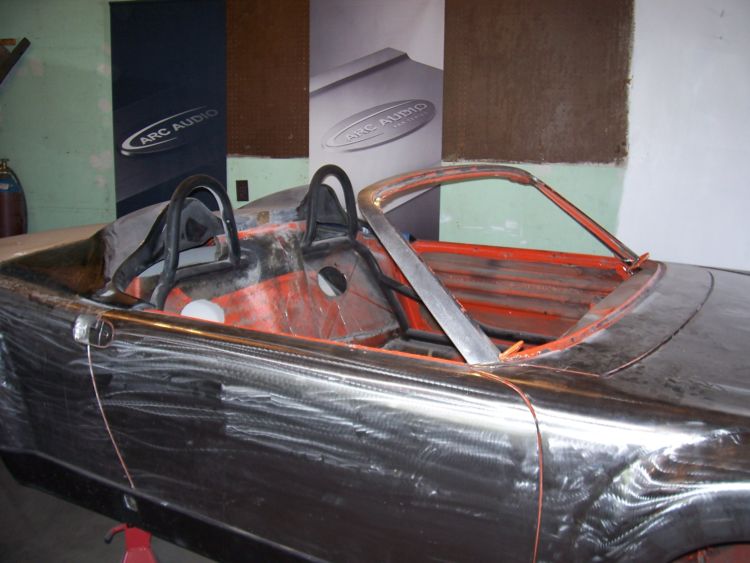
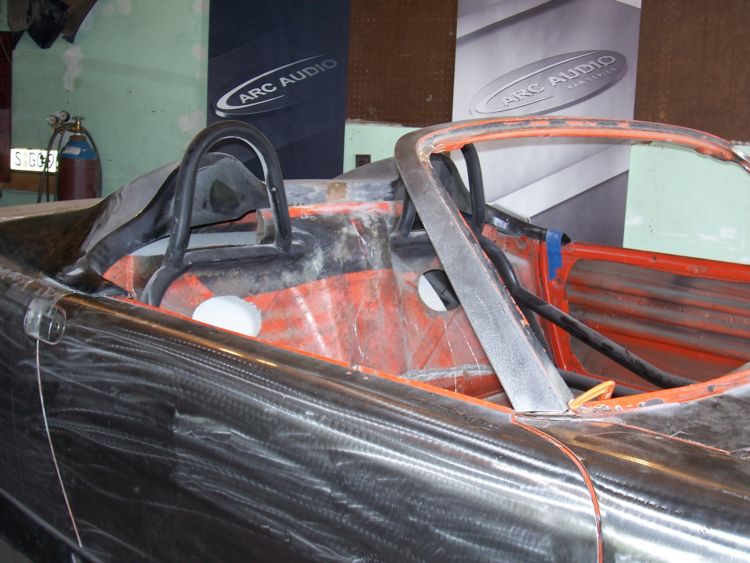
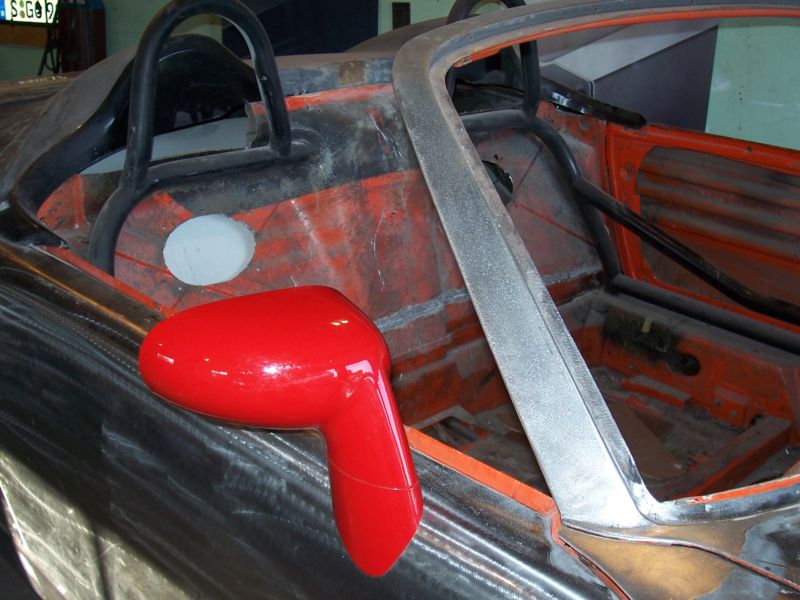
Posted by: plymouth37 Jun 9 2008, 05:00 PM
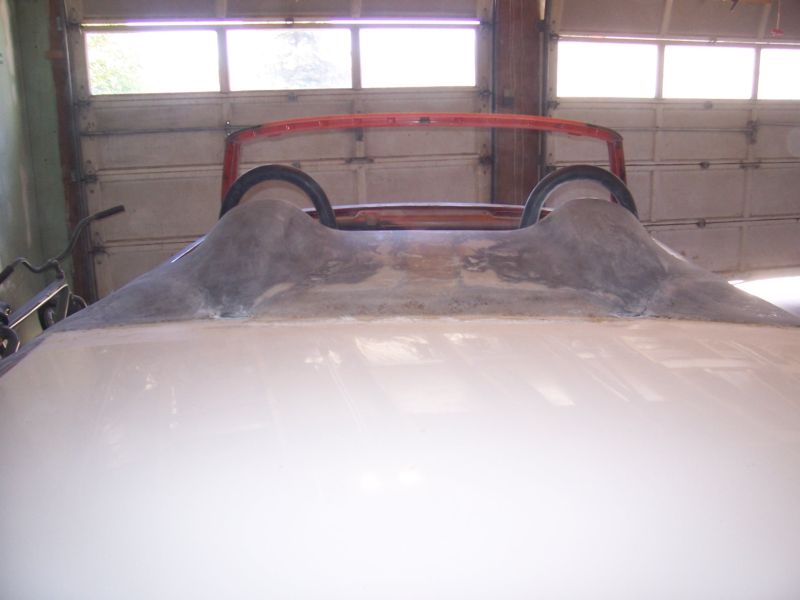
I raked the windshield posts back as far as the stock windshield allowed.
Next I will chop the windshield posts so the top of the frame is even with the top of the rollbar hoops.
I found a guy that will cut the stock glass to fit. Or cutting a lexan one is always an option if all else fails.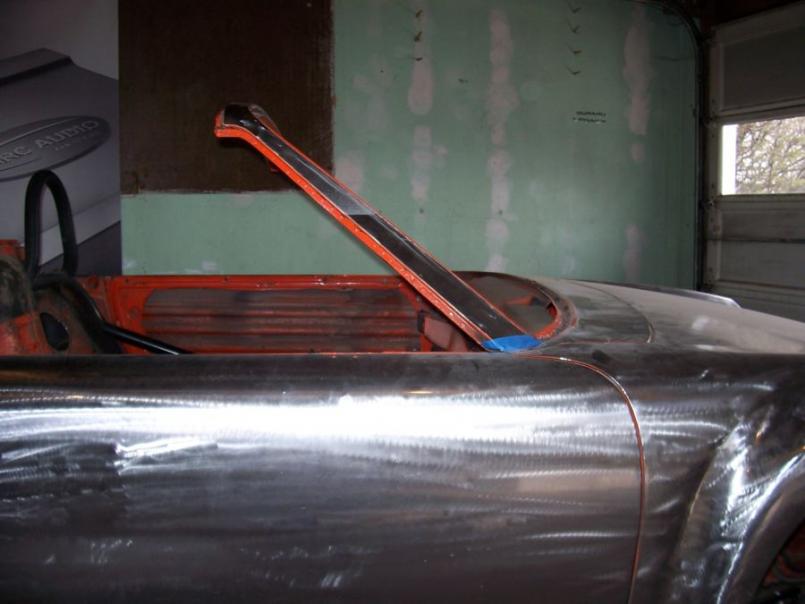
Here's how things are looking now.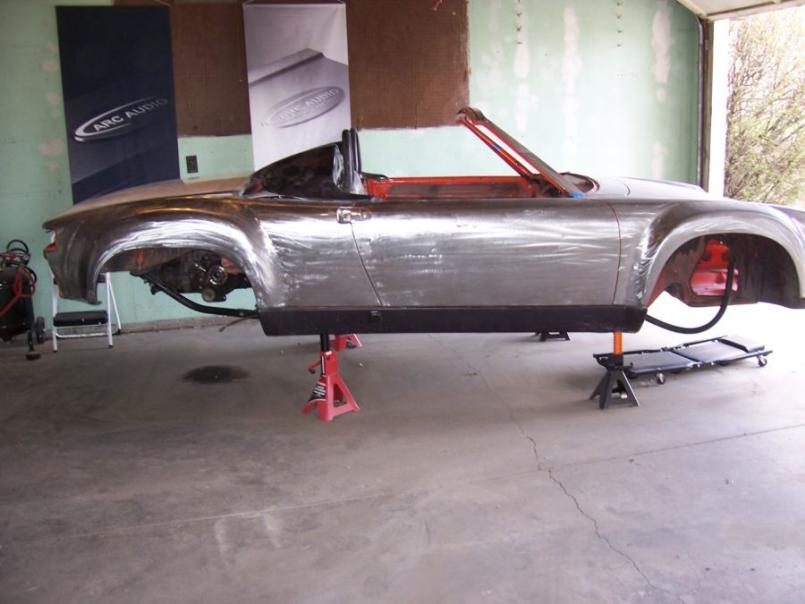
Posted by: Travis Neff Jun 9 2008, 05:12 PM
Posted by: Phoenix 914-6GT Jun 9 2008, 05:20 PM
That's just cool Dana. Can't wait to see where this goes.
Posted by: (*)(*) Jun 9 2008, 05:28 PM
For some reason, I'm down wit dis....
Posted by: plymouth37 Jun 9 2008, 05:30 PM
Can't wait to see where this goes.
Me too!

I think I will start doing some glassing this afternoon, gross...
Posted by: Rand Jun 9 2008, 05:36 PM
I've been waiting for this thread! 
Love the concept pic.
Keep it coming Dana!
Posted by: scotty b Jun 9 2008, 07:06 PM
Wyotech would frown on the use of fibreglass 
Killer idea. Can't wait to see it done
Posted by: plymouth37 Jun 9 2008, 07:12 PM
Yeah, I should be rolling these out of aluminium on my english wheel
I want this car to be nice, but screw that!
Posted by: scotty b Jun 9 2008, 07:15 PM
Get a stump boy  Stump, ball peen hammer, oxy acetylene torch and a cigar is all any good body man needs
Posted by: plymouth37 Jun 9 2008, 07:32 PM
Stump, ball peen hammer, oxy acetylene torch and a cigar is all any good body man needs 
A stump sounds pretty good right now. Where's the "sticky fiberglass hands" smiley?
I was thinking of lighting up a cuban but with the amount of fumes filling up the garage an explosion would probably follow promptly!
Posted by: Dr Evil Jun 9 2008, 09:59 PM
ooooo Me likey
Posted by: 3d914 Jun 9 2008, 10:00 PM
This is very cool!
Make them cry BIG TIME . . .
Posted by: jgara962 Jun 9 2008, 10:09 PM
I personally like any modifications to at least look period correct, but man, I can't wait to see this thing finished! It's going to look cool.
Posted by: championgt1 Jun 9 2008, 10:13 PM
Unreal! Nice!
Posted by: LarryR Jun 9 2008, 10:14 PM
I raked the windshield posts back as far as the stock windshield allowed.
Next I will chop the windshield posts so the top of the frame is even with the top of the rollbar hoops.
I found a guy that will cut the stock glass to fit. Or cutting a lexan one is always an option if all else fails.
Here's how things are looking now.
man this thing is sweet! I wish I could do body work like that.
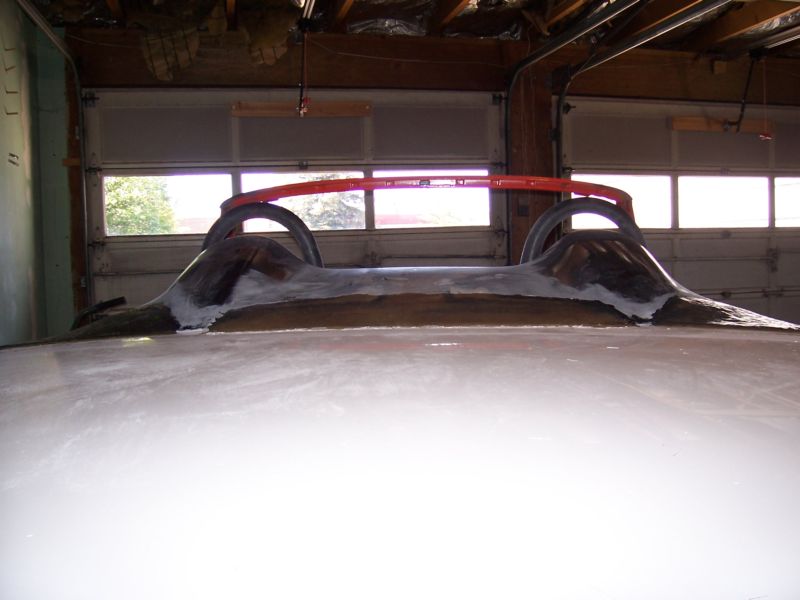
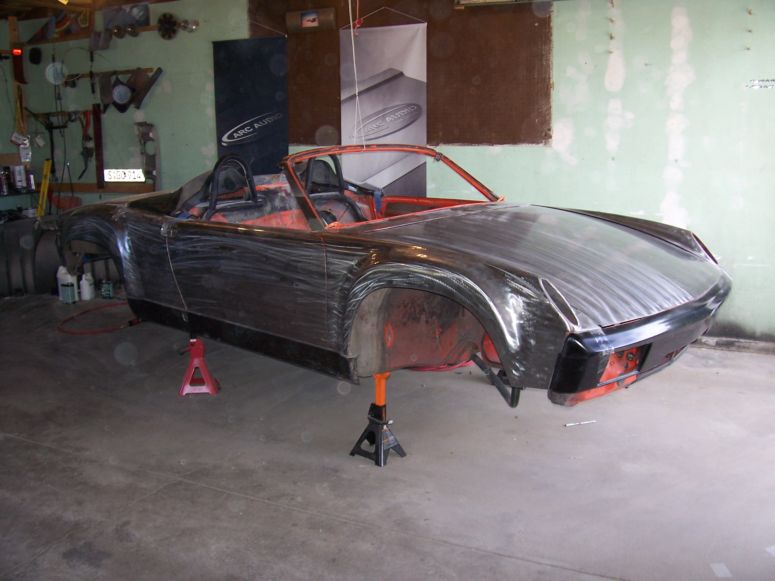
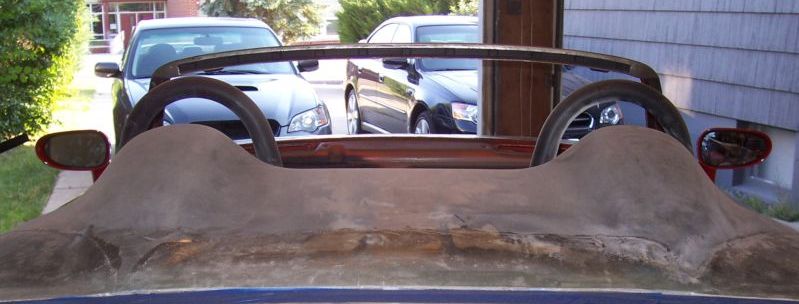
Posted by: plymouth37 Jun 9 2008, 10:24 PM
I started 'glassing the humps today and remembered how terrible fiberglass is to work with.
I 'glassed the two halves together and filled in the area at the back of the lid between the humps. Despite my total lack of skill I think it's coming along pretty well. It's a good thing I got these humps for cheap because the quality was terrible (good thing I am just cutting them up huh?)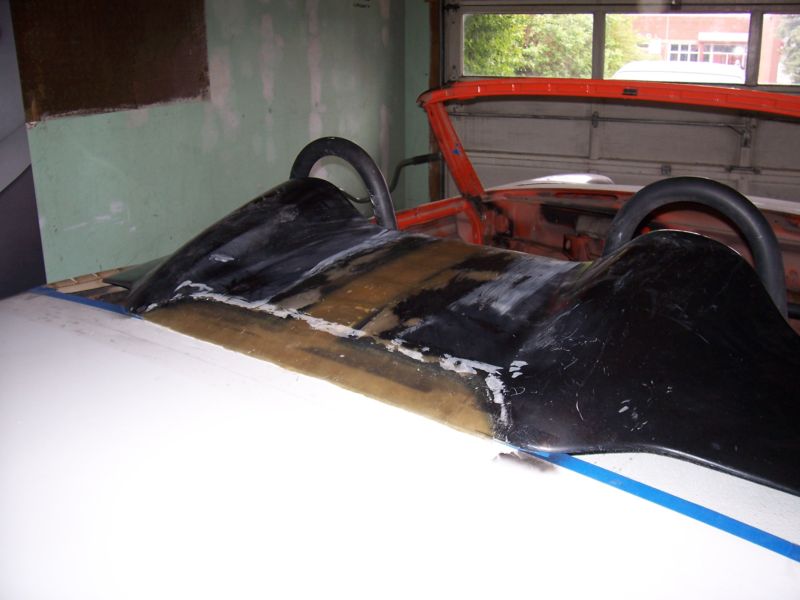
To blend in the sides I am stretching polarfleece and glassing it (a trick used by audio guys to build complicated sub boxes). The fleece creates really nice transitions and when covered by F/G cloth is really strong.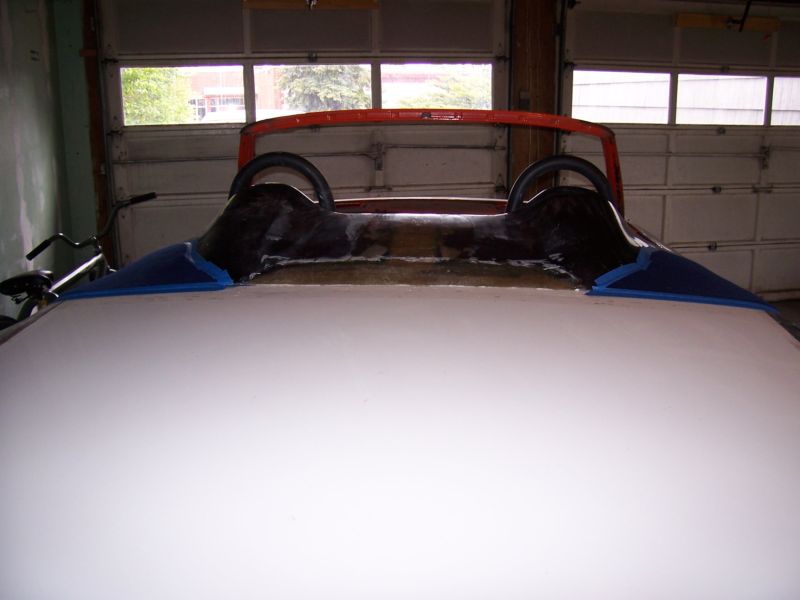
Here are some more shots of the car and the garage.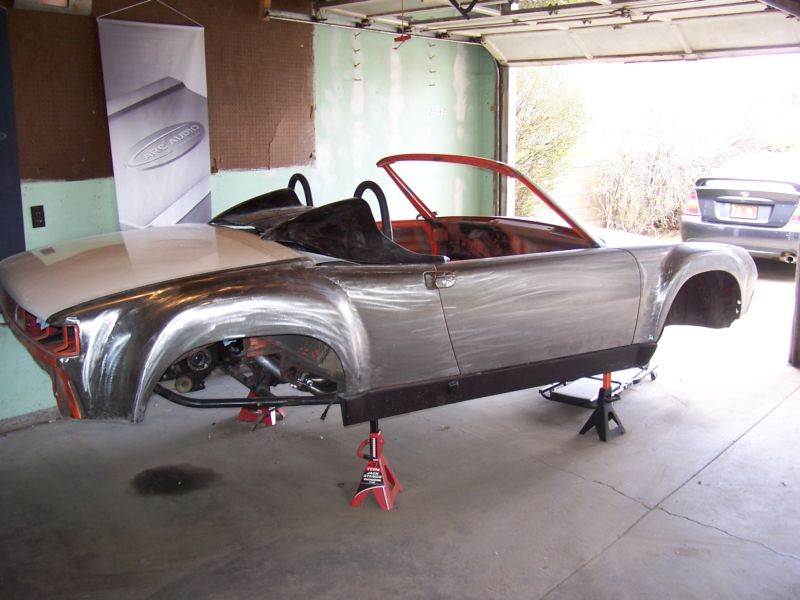
Thanks for the support guys, this is gonna be fun!
Posted by: craig downs Jun 9 2008, 10:29 PM
I'm usually not a fan of projects like these but this one is different. I like the look and the design. I'd say your committed now and no turning back. Looking good
Posted by: somesonofabeach Jun 9 2008, 10:30 PM
This thing already looks completely badass and its still on jack stands. What are your ideas for the interior? It could be completely bare and this car would still be amazing by the look of things so far.
Posted by: plymouth37 Jun 9 2008, 10:34 PM
What are your ideas for the interior?
I will be replacing the interior, some seats with good bolsters would be nice.
Wow, now that I look at the pics I really need to chop that windshield ASAP!
Posted by: Jeff Hail Jun 9 2008, 10:39 PM
This is an awesome project. I like it because it has style, it's clean and it flows. You have a good eye for line and proportion. Follow your instincts and not the crowd.
Many people frown on cutting up a car and modifying it. In my book anything that is not concourse to start is a candidate for customization. A free canvas is what makes the end result a masterpiece.
Reminds me of that TV show from the late 80's "Max Headroom" Stay low!
Posted by: rick 918-S Jun 9 2008, 11:14 PM
Very cool!
Posted by: ericread Jun 10 2008, 09:24 AM
Truely an awesome look! Great job !!!
Are you going to build a rag top for it, or is it a fair weather ride only?
Posted by: 914rrr Jun 10 2008, 09:44 AM
I found a guy that will cut the stock glass to fit. Or cutting a lexan one is always an option if all else fails.
A word of caution. A friend of mine in FL built a car similar to yours with a chopped and raked windshield. His was a low buck build with a plexi windshield on a rusty POS chassis that I sold him for $200. The next owner wanted a glass windshield, and a 'pro' broke 3 or 4 windshields attempting to cut it down to size.
Killler project, best of luck with it!
Posted by: plymouth37 Jun 10 2008, 10:34 AM
Are you going to build a rag top for it, or is it a fair weather ride only?
I was playing around with the concept of a lift off hard top with drop in windows.
It would be hard to build but it would really make the car alot more useable. We shall see...
Posted by: ericread Jun 10 2008, 10:42 AM
The lift off hard top looks sick. Sweet!!! Now to get the price for these down to under $20,000.
You are putting this model into production aren't you???
Posted by: seanery Jun 10 2008, 12:43 PM
what a bitchin' project!
I like where this is going
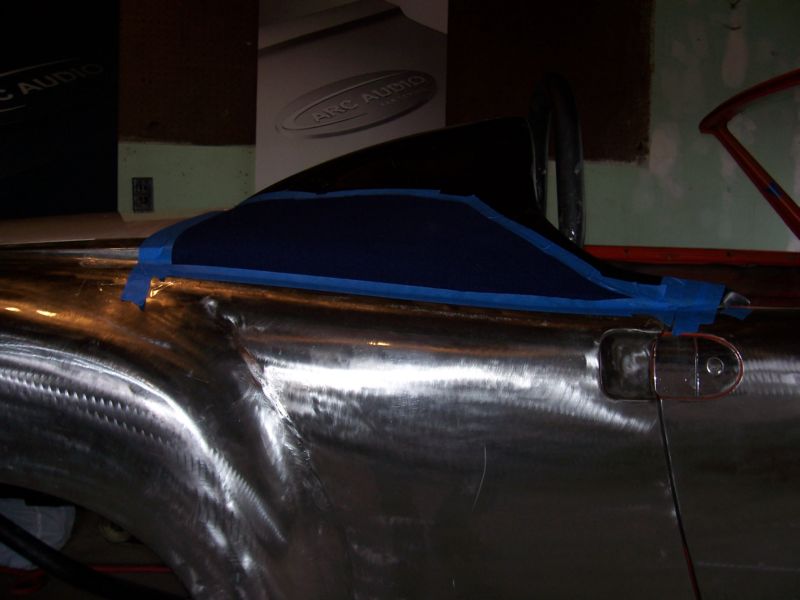
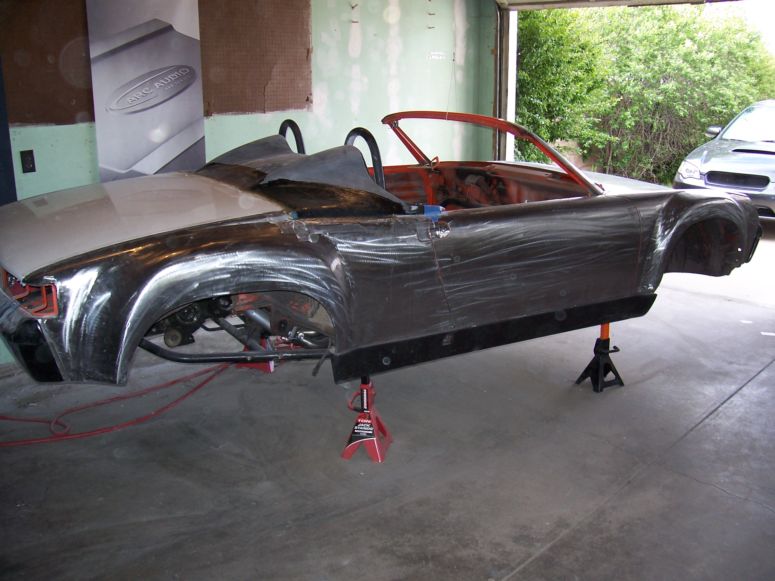
Posted by: plymouth37 Jun 10 2008, 12:44 PM
I added a layer of F/g last night: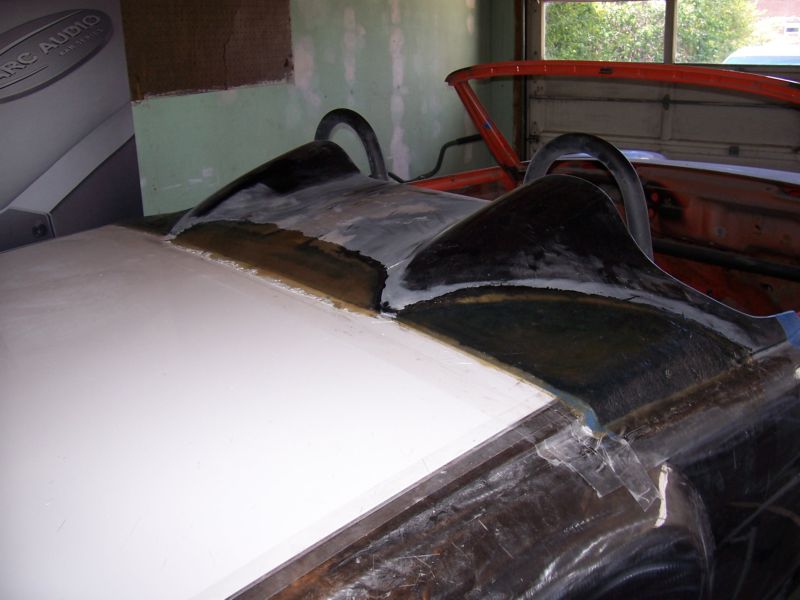
I sanded the humps down this morning. There are a couple low spots but the shape is getting pretty close. I should be able to get it straight with one more glassing session, after that I will finish the bottom and edges.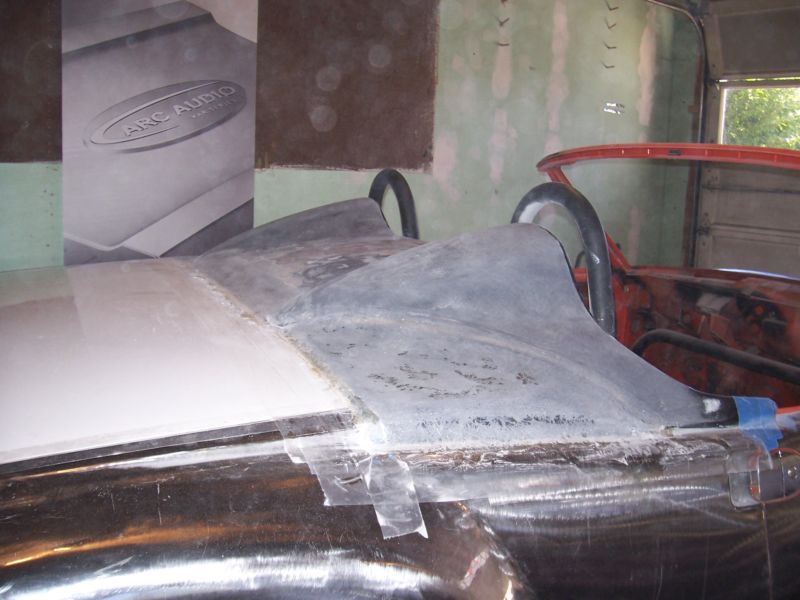
Posted by: Phoenix 914-6GT Jun 10 2008, 12:50 PM
Looking good
Posted by: Rand Jun 10 2008, 01:03 PM

Is that piece going to lift off or be hinged (for engine access)?
Are you keeping the retractable wing/brake widget, or is that gone now?
Nice work Dana. Loving this!
Posted by: mudfoot76 Jun 10 2008, 01:05 PM
Damn that is sweet!
Posted by: Travis Neff Jun 10 2008, 01:18 PM
How are you going to vent the engine compartment, all from below? Howza bout grill material between the humps, a la C-GT
Attached image(s)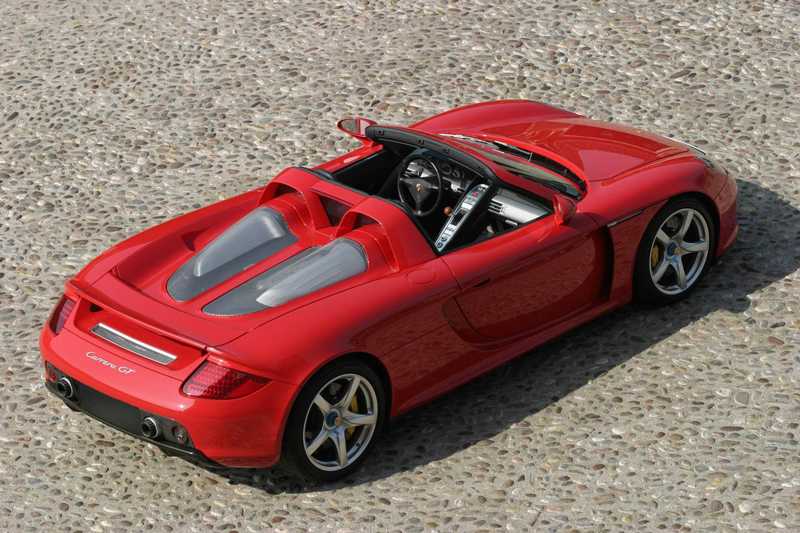
Posted by: plymouth37 Jun 10 2008, 02:20 PM
Yes it is going to hinge. I am going to figure out how that will work after I rebuild the metal around the engine bay.
The spoiler is gone, it was fun while it lasted but it was heavy and created alot of drag. Now I am using a Ferrari F430 diffuser for downforce.
I have looked hard at the C-GT engine lid. I will probably be bringing in air from between the humps for the intercooler and venting the engine bay out the back of the car. I have to see the lid complete before I can tell what will look good.
Posted by: carr914 Jun 10 2008, 02:24 PM
I found a guy that will cut the stock glass to fit. Or cutting a lexan one is always an option if all else fails.
A word of caution. A friend of mine in FL built a car similar to yours with a chopped and raked windshield. His was a low buck build with a plexi windshield on a rusty POS chassis that I sold him for $200. The next owner wanted a glass windshield, and a 'pro' broke 3 or 4 windshields attempting to cut it down to size.
Killler project, best of luck with it!
Must have been Glenn
I really like this project and the lift off roof will be very cool.
T.C.
Posted by: plymouth37 Jun 10 2008, 04:55 PM
Today I made a wood template to ensure that I install the windshield at the right angle after I chop it.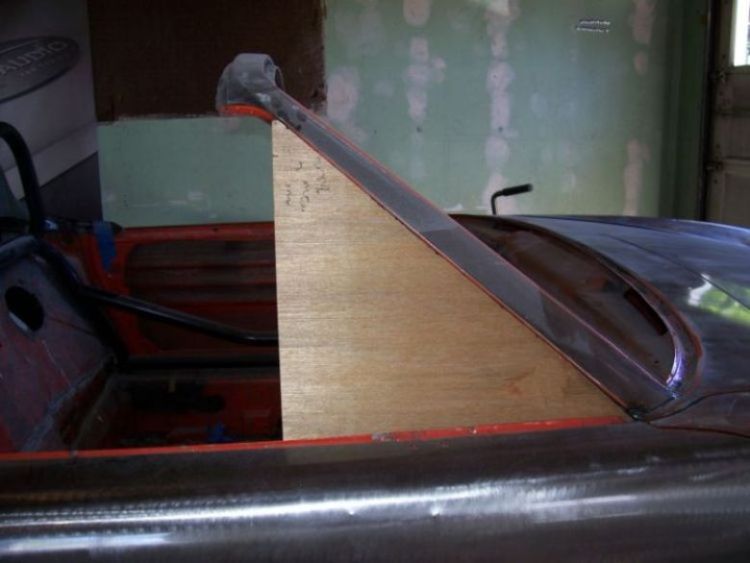
Then I cut the thing off so I can modify it. Looks pretty cool huh?
I also test fitted my Getty F/G bumpers, they will need a little work but are pretty close.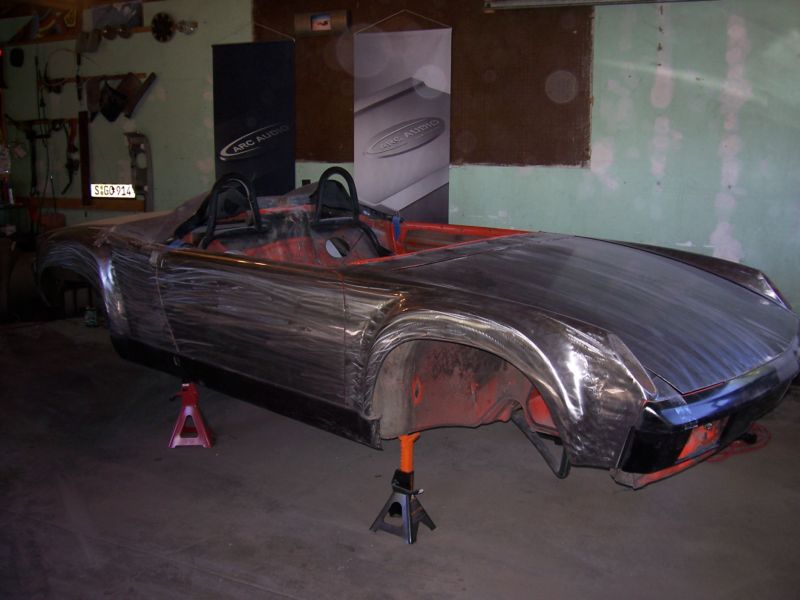
It is so tempting to just toss the windshield all together.
Nothing like having to wear a helmet to go for a drive! (for some reason I don't think the wife would approve. )
Posted by: nein14 Jun 10 2008, 05:07 PM
that is smokin'
Posted by: dw914er Jun 10 2008, 05:08 PM
I thought your car looked sweet before (saw it on car domain and renegade a while ago)
but damn, its gonna look good. I like the concept photo too.
keep up the work, and keep us posted.
Posted by: ninefourteener Jun 10 2008, 05:12 PM
I really like what you are doing.... this is definately one of the cooler "mod" builds I've seen. Plus... I'm partial to Subies
With that.... I have to suggest you go a different direction with the wheels.
You've created (or will create) a low, fat stance for the car, and filled the wheelwells with these ricey, skinny-spoked wheels. I'd like to see you go with a more solid looking, less ricey wheel. I personally like mesh style wheels, but there are thousands of other options. Yea, you may gain a little weight, but I think that will be a small sacrifice for such a radical design.
What are you going to do with the "interior" portions of the car that are still painted?? Getting them all sanded down?? Just curious.
Are you sticking with the stock WRX TMIC setup? I was going to suggest a nice STI TMIC setup.... by the looks of the engine bay, I think it would fit nicely. I really don't think a FMIC would work with the radiator.... although that would be pretty cool.
Posted by: plymouth37 Jun 10 2008, 05:19 PM
With that.... I have to suggest you go a different direction with the wheels.
You've created (or will create) a low, fat stance for the car, and filled the wheelwells with these ricey, skinny-spoked wheels. I'd like to see you go with a more solid looking, less ricey wheel. I personally like mesh style wheels, but there are thousands of other options. Yea, you may gain a little weight, but I think that will be a small sacrifice for such a radical design.
What are you going to do with the "interior" portions of the car that are still painted?? Getting them all sanded down?? Just curious.
Are you sticking with the stock WRX TMIC setup? I was going to suggest a nice STI TMIC setup.... by the looks of the engine bay, I think it would fit nicely. I really don't think a FMIC would work with the radiator.... although that would be pretty cool.
The wheels in the concept are just for fun, these are the actual wheels I will be using, they are off of a 996.

As for the interior I will remove all orange paint and paint it to match the rest of the car.
I will be running a custom top mount intercooler, the new lid creates a ton of space for plumbing. Intercooler plumbing should be kept as short as possible so a front mount intercooler is really out of the question..
Posted by: Rand Jun 10 2008, 05:25 PM
It is so tempting to just toss the windshield all together.
I hear ya, but have to say I like the looks a lot better WITH the windshield like your concept photo.
That chopped/raked windshield, and the dual humps behind the cabin are exactly what really makes this thing WAY cooler than the other 914s without the targa bar and windshield that I've seen. Your design is working!
Posted by: turboman808 Jun 10 2008, 05:31 PM
Dam that is pretty sick. Makes me want to cut the top off of mine. HAHA
Posted by: plymouth37 Jun 10 2008, 05:33 PM
It is so tempting to just toss the windshield all together.
I hear ya, but have to say I like the looks a lot better WITH the windshield like your concept photo.
That chopped/raked windshield, and the dual humps behind the cabin are exactly what really makes this thing WAY cooler than the other 914s without the targa bar and windshield that I've seen. Your design is working!
 It will be a heck of a lot more tolerable to drive with a windshield as well.
Posted by: scotty b Jun 10 2008, 06:38 PM
The roof....Carson Top
Make a buck from wood, PVC pipe whatever you think would be better suited to get the line you want, Then do the panty hose fiberglass trick. Viola you have a removeable top. Glass in some attachment hardware. Tkae a look at the quick top kits made for Jeeps for the front latches and maybe some sort of vertical pin setup in the rear. Obviously the pins would have to have some sort of tension put on them to seal and protect  theraded rod would work but who wants to bolt and unbolt the F-in top everytime it rains. Peanut gallery ???
Posted by: MoveQik Jun 10 2008, 06:55 PM
Dana,
You are too damn young to have that level of skills! Get it together for RRC in September! I LOVE modded cars.
Posted by: Sleepin Jun 10 2008, 07:40 PM
Dana,
Get it together for RRC in September!

Posted by: plymouth37 Jun 10 2008, 07:42 PM
How 'bout RRC 2012?
Posted by: boxstr Jun 10 2008, 10:07 PM
If you do the carson top, cover it is Hartz cloth give it a convertible top look.
SO far it looks great excellent job.
CCLIN914SPEEDSTER
Posted by: championgt1 Jun 10 2008, 10:48 PM
Slate gray body, black wheels. You got my vote!
Posted by: lotus_65 Jun 11 2008, 05:10 AM
The roof....Carson Top
Make a buck from wood, PVC pipe whatever you think would be better suited to get the line you want, Then do the panty hose fiberglass trick. Viola you have a removeable top. Glass in some attachment hardware. Tkae a look at the quick top kits made for Jeeps for the front latches and maybe some sort of vertical pin setup in the rear. Obviously the pins would have to have some sort of tension put on them to seal and protect
theraded rod would work but who wants to bolt and unbolt the F-in top everytime it rains. Peanut gallery ???sure. i would do a Campi style http://en.wikipedia.org/wiki/Image:Quick_release_ad.png setup.
schweet ride
Posted by: ninefourteener Jun 11 2008, 08:49 AM
An upgraded TMIC is always a good idea, particularly over the 300hp range.
What brand are you going with??
My biggest concern is heat soak.... from a poorly ventilated I/C. How exactly are you going to draw air across the I/C with the new engine cover? I assume you're going to vent it somehow.... but how will you draw air across it?
Another question..... what turbo are you using.... and what EM are you using?
I'm REALLY interested in this build.... just curious about the route you're going.
Posted by: plymouth37 Jun 11 2008, 11:32 AM
What brand are you going with??
Bell intercoolers, they make some really nice stuff.
I am using a stock turbo. I ran with a group of subie guys in vegas and with out fail every time someone would upgrade their turbo they would regret it, oiling issues, lag, overheating etc... Subaru put a good turbo on this engine and I intend to keep it.
I had the stock computer tuned by Vishnu Performance who did a custom job to suit my car. These guys are really talented and can pull huge numbers out of the subie engine.
Posted by: plymouth37 Jun 11 2008, 11:44 AM
Make a buck from wood, PVC pipe whatever you think would be better suited to get the line you want, Then do the panty hose fiberglass trick. Viola you have a removeable top. Glass in some attachment hardware. Tkae a look at the quick top kits made for Jeeps for the front latches and maybe some sort of vertical pin setup in the rear. Obviously the pins would have to have some sort of tension put on them to seal and protect
theraded rod would work but who wants to bolt and unbolt the F-in top everytime it rains. Peanut gallery ???schweet ride
The more I research a carson style top the more I like it. I would obviously use less padding than the hot rod guys but if I could make it look like a 'vert top it would be pretty sweet. If I am going to make it to RRC (some day) a top would be good.
It would be really cool to be able to swap from a dedicated speedster to a coupe, it would be like having two cars!
Posted by: Spoke Jun 11 2008, 11:46 AM
This is what a 914 built in 2009 might look. Awesome hood/cowl treatment. You've taken a lot of the ugly out of the 914 with this. Can't wait to see the finished product. Keep the pics coming.
Posted by: plymouth37 Jun 12 2008, 10:46 AM
My dogs decided to wake me up at 4:45 and I couldn't get back to sleep so I got an early start on the car today 
I added a layer of 'glass to the humps.
I chopped the windshield frame and mocked it up on the car.
I need to do a little welding and cleanup to the frame such as rounding the top edge and corners before I install it for good.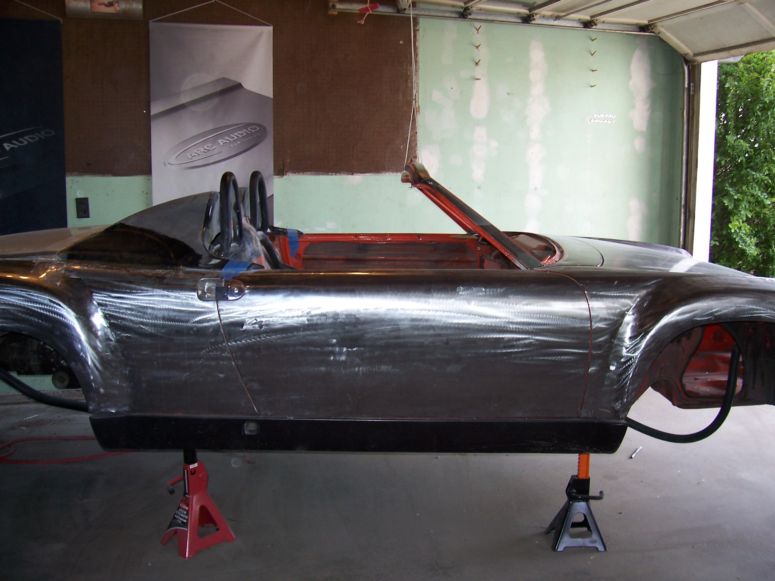
How funny is this, the car is on 18" jackstands and it's still lower than my Subie! 
Well I think that is all for the day, I am running low on homebrew and found a good recipe for some cherry chocolate stout so I think I will do some brewing...
Posted by: jasons Jun 12 2008, 11:10 AM
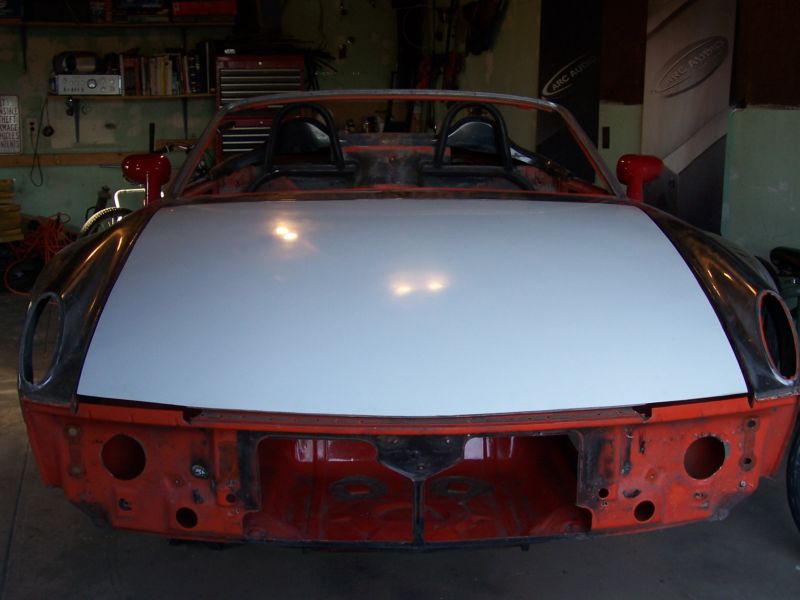
Bitchin. Did you make the front hood too?
Posted by: plymouth37 Jun 12 2008, 11:13 AM
Bitchin. Did you make the front hood too?
I filled in the headlight holes on a stock hood but I am swapping this one out for a lightweight F/G one.
Low enough?
As you can see I needed to make relief cuts in the top corners to be able to spread the pillers to fit the cowl.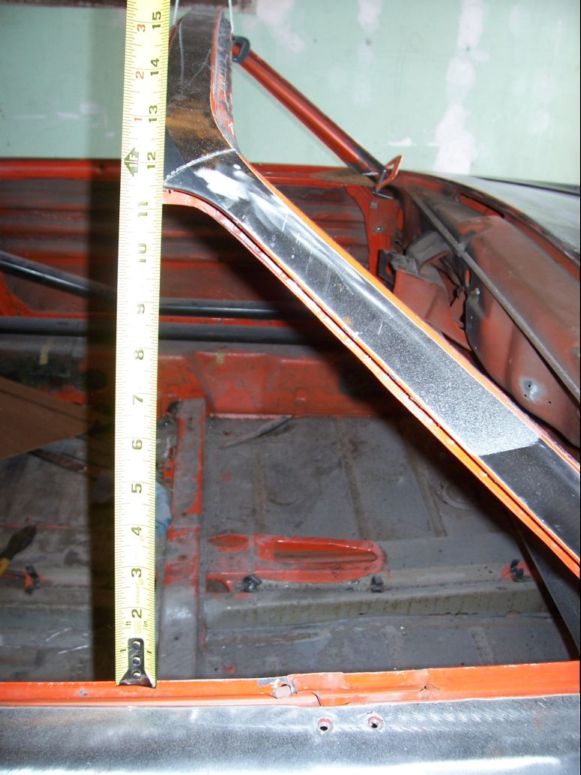
Posted by: Phoenix 914-6GT Jun 12 2008, 12:06 PM
Looking very good. You do some nice work Dana.
Posted by: i love porsche Jun 12 2008, 01:25 PM
wow...as if your car was not already gorgeous enough..this is going to be ridiculously awesome
Posted by: Ferg Jun 12 2008, 01:36 PM
I think you should paint it brown
Very Cool Dana, I think the early 356 grey would look sweet, I think it's Dove grey??
Ferg
Posted by: plymouth37 Jun 12 2008, 02:19 PM
I think you should paint it brown
Very Cool Dana, I think the early 356 grey would look sweet, I think it's Dove grey??
Ferg
I do really like the dove grey, its a nice warm color. Right now I am leaning towards the slate grey but knowing me I will probably change my mind about 100 times before it gets painted.
Posted by: seanery Jun 12 2008, 02:24 PM
just pick a color that will show off the great work you've done/are doing.
Color can make a huge difference. For example, my red 951's lines seem a bit softer than my previous black 951.
Posted by: Ferg Jun 12 2008, 02:29 PM
IMO a NON metalic would work best on a car such as this...
Sahara Beige would be sweet
Posted by: Zundfolge Jun 12 2008, 02:53 PM
For color, I'd love to see you just polish up the metal a bit and remove some of the tooling marks, then just clear coat it ... kind of like the Renegade Hybrids Subie (would be very 550 spyder-esque).
Then paint all the fiberglass parts a nice metallic silver ... or black.
Posted by: plymouth37 Jun 12 2008, 02:56 PM
A non-metallic would be a lot easier to spray and repair should I hit a moose. ( a real possibility up here!) Oh well, good thing I have some time to figure it out!
Posted by: plymouth37 Jun 12 2008, 03:04 PM
For color, I'd love to see you just polish up the metal a bit and remove some of the tooling marks, then just clear coat it ... kind of like the Renegade Hybrids Subie.
This is the Renegade Hybrids Subie!
Posted by: Zundfolge Jun 12 2008, 03:05 PM
Ok, I'm a dork 
Posted by: ericread Jun 12 2008, 03:09 PM
For color, I'd love to see you just polish up the metal a bit and remove some of the tooling marks, then just clear coat it ... kind of like the Renegade Hybrids Subie.
This is the Renegade Hybrids Subie!
No, I don't think that's the same one...
Posted by: James Adams Jun 12 2008, 03:12 PM
A non-metallic would be a lot easier to spray and repair should I hit a moose. ( a real possibility up here!)
Nahh, it's so low you can just drive between the moose's legs!

Posted by: plymouth37 Jun 12 2008, 03:14 PM
For color, I'd love to see you just polish up the metal a bit and remove some of the tooling marks, then just clear coat it ... kind of like the Renegade Hybrids Subie.
This is the Renegade Hybrids Subie!
No, I don't think that's the same one...
My bad, sorry.
Posted by: Krieger914 Jun 12 2008, 03:15 PM
This may turn out to be the best looking 914 EVER!
Posted by: ericread Jun 12 2008, 03:24 PM
For color, I'd love to see you just polish up the metal a bit and remove some of the tooling marks, then just clear coat it ... kind of like the Renegade Hybrids Subie.
This is the Renegade Hybrids Subie!
No, I don't think that's the same one...
My bad, sorry.
Posted by: ninefourteener Jun 12 2008, 05:00 PM
I am using a stock turbo. I ran with a group of subie guys in vegas and with out fail every time someone would upgrade their turbo they would regret it, oiling issues, lag, overheating etc... Subaru put a good turbo on this engine and I intend to keep it.
You know...... you could go with a slightly used VF39 (Stock STI turbo), and a set of Subaru "blue" 06-07 555cc injectors (Stock 06-07 WRX injectors).... and still be 100% OEM Subaru parts....... and probably put down another 100-125 horsepower..... safely and reliably
You're always gonna have guys with oiling problems, tuning problems, backfiring, and all sorts of other crap. Without fail, every time I hear about guys having problems like that...... they've done something wrong, or cut corners that they shouldn't have.
It's just a suggestion..... I went that route... and just crossed over 30K miles... with zero problems whatsoever.
Don't get me wrong, I'm not beating you up at all... I think what you're doing is awesome..... in fact, I'm planning a similar project for the future.
In fact..... your car is the reason I bought my first issue of Subiesport.
Now, I own 2 Subies, one of which has one of the highest viewed build threads on two different national Subie sites.,.. and I even own my own Subie Site.
I just get the impression you're leaning away from a Turbo swap because of others' bad experiences. Do it right, the FIRST time, and you'll be absolutely tickled with the results.
Please keep posting.... I'm subscribed

Posted by: Rand Jun 12 2008, 05:16 PM
For color, I'd love to see you just polish up the metal a bit and remove some of the tooling marks, then just clear coat it ... kind of like the Renegade Hybrids Subie.
This is the Renegade Hybrids Subie!
No, I don't think that's the same one...
My bad, sorry.
Now THAT was funny. Oy.
Posted by: plymouth37 Jun 12 2008, 06:05 PM
You know...... you could go with a slightly used VF39 (Stock STI turbo), and a set of Subaru "blue" 06-07 555cc injectors (Stock 06-07 WRX injectors).... and still be 100% OEM Subaru parts....... and probably put down another 100-125 horsepower..... safely and reliably
You're always gonna have guys with oiling problems, tuning problems, backfiring, and all sorts of other crap. Without fail, every time I hear about guys having problems like that...... they've done something wrong, or cut corners that they shouldn't have.
It's just a suggestion..... I went that route... and just crossed over 30K miles... with zero problems whatsoever.
100-125 MORE horsepower in a 1900 pound car? That sounds terrifying!

You are such a bad influence, I suppose I need a 930 transaxle too while I am at it?
Posted by: Zaney Jun 12 2008, 06:41 PM
Just to throw a grenade into your planning...
I found this part on a Rocketrally site. 6 speed AWD to RWD conversion sleeve.
If it would work with a STi six speed with your current engine and the other proposed Mods, it would be the Best Damn Teener hands down! 
http://www.rocketrally.com/website/index.php?option=com_oscommerce&osMod=product_info&cPath=40_182_221&products_id=40
Awesome project! Gives me inspiration for my Suby conversion!
Posted by: plymouth37 Jun 12 2008, 07:11 PM
Just to throw a grenade into your planning...
I found this part on a Rocketrally site. 6 speed AWD to RWD conversion sleeve.
If it would work with a STi six speed with your current engine and the other proposed Mods, it would be the Best Damn Teener hands down!
Throw as many grenades as you want! There are a ton of really smart people on this board and I really enjoy hearing everyones input.
As far as your personal grenade: I really do think an STI tranny would be great for this car. I know I could make it work, the only question is if my wallet and my patience could handle it.
Thanks for the link!
Posted by: plymouth37 Jun 12 2008, 07:57 PM
So I finished my other project for the day, say hello to 5 gallons of sweet cherry chocolate stout! Give it about a month and it will be perfect. 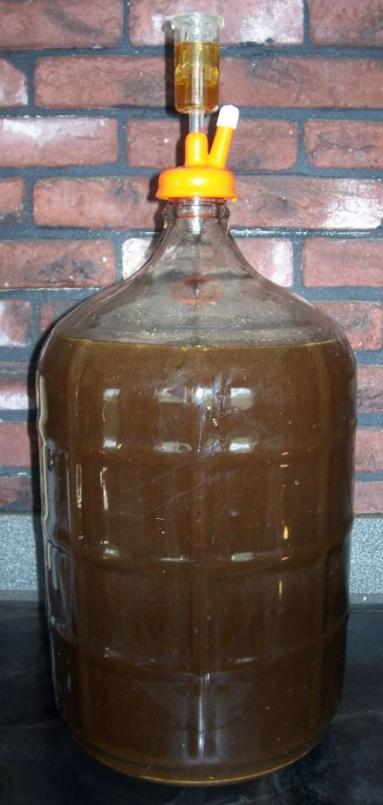
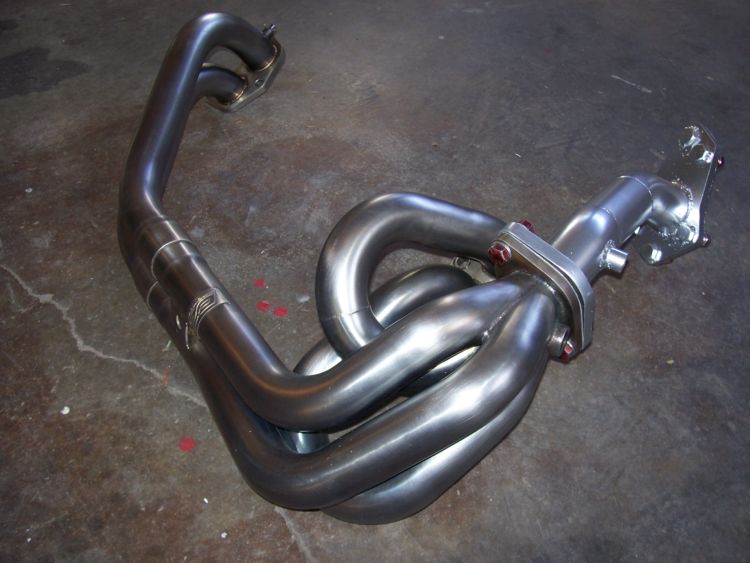
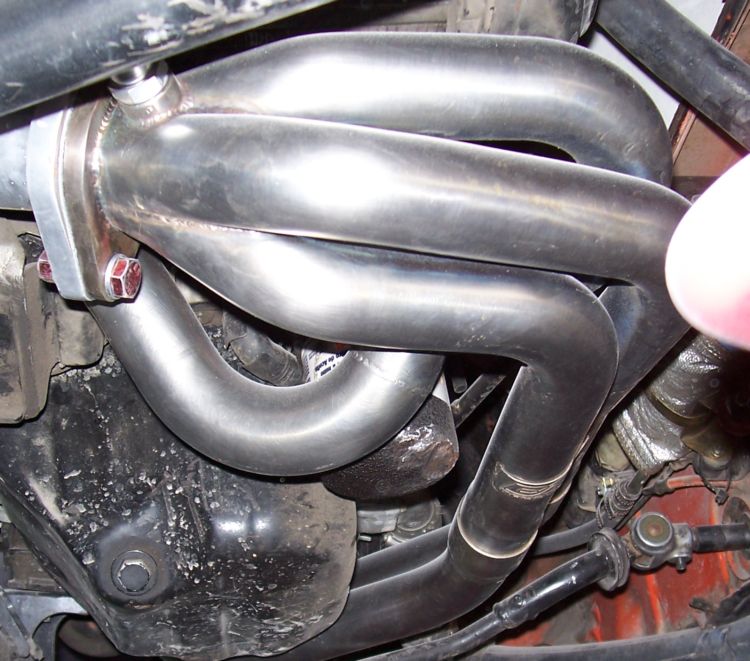
Check out the stainless steel DC sports header I installed along with a custom up-pipe I built. Purty aint it?
It frees up some horses and is 12.2 pounds lighter than the stock manifold 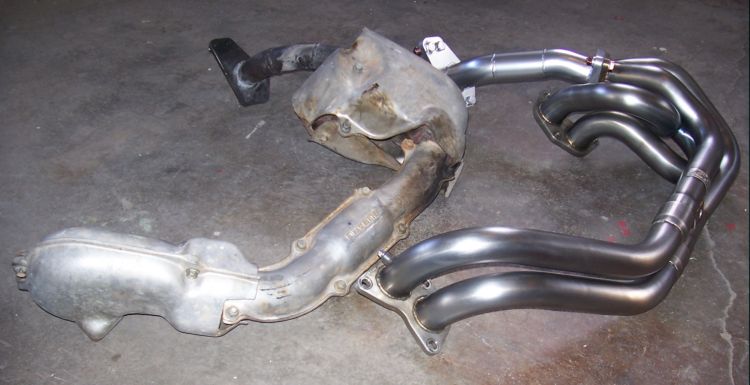
Posted by: ericread Jun 12 2008, 09:16 PM
So I finished my other project for the day, say hello to 5 gallons of sweet cherry chocolate stout! Give it about a month and it will be perfect.
Check out the stainless steel DC sports header I installed along with a custom up-pipe I built. Purty aint it?
It frees up some horses and is 12.2 pounds lighter than the stock manifold
First: The pipes are awesome - belongs in the Gugenheim (that's a museum for you gearheads out there).
Second: About the chocolate stout - What octane is it and how hot does it burn? You really don't drink that sh*t do you???
Posted by: plymouth37 Jun 12 2008, 09:29 PM

And yes, the header is a work of art, DC makes some nice stuff.
Posted by: Phoenix 914-6GT Jun 12 2008, 09:31 PM
I want some
Posted by: ericread Jun 12 2008, 09:33 PM
I'll be in Vegas the weekend of June 28th. Will it be ready by then?????
(hint, hint)
Posted by: plymouth37 Jun 12 2008, 09:39 PM
I'll be in Vegas the weekend of June 28th. Will it be ready by then?????
(hint, hint)
Got out of that crazy town but if you ever come through Laramie a cold one will be waiting for ya
Wow up to 100 posts already! Thanks for the support guys!
Posted by: plymouth37 Jun 12 2008, 10:09 PM
Tonight I pulled my tank and gutted everything in the front trunk, I bagged and tagged everything, next stop for the parts I am keeping is the powder coater.
I will be welding up all of the un-needed holes then stripping the remaining paint in preparation for primer.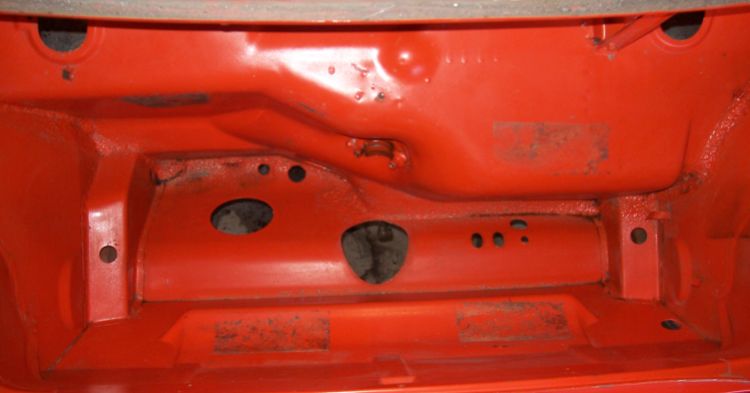
Posted by: lotus_65 Jun 12 2008, 10:18 PM
...has something to do with a sick whip i think...
Posted by: somesonofabeach Jun 12 2008, 11:45 PM
I didn't think it was possible to have a gas tank area that clean. Yours looks better than factory compared to mine. KEEP UP THE AMAZING WORK!!!!
Posted by: ninefourteener Jun 13 2008, 09:08 AM
100-125 MORE horsepower in a 1900 pound car? Damn that sounds terrifying!
You are such a bad influence, I suppuse I need a 930 transaxle too while I am at it?
Well crap, now I am going to have to sink even more money in to this fricken car!
I thought a Murcie was out of reach but now, well, can you imagine a 914 beating a Murcielago in a race? I think I would die laughing!
What have I done...
Yup.... My 2006 WRX (stock) is 230hp, after 25% in drivetrain loss, you're only looking at about 175 hp to the wheels.
Bellmouth downpipe, 3-inch exhaust, and a cobb accessport... I was at 285 hp (stage 2)... I think that ends up to be around 230 at the wheels.
Bolted on a VF39 turbo (it was a straightforward install), downloaded a free map online from Cobb..... boom, 362 hp.... just like that.... free, no dynotuning required.
I got ancy... and forked over $400 for some fine-dynotuning at Cobb in SLC.... they got me up to 304 at the wheels by maxing out my injectors.... 380-ish at the crank. All I've done since then was add an intake... so I'm guestimating right at 385 crank hp.
Keep in mind.... I'm turning 5 driveshafts and heavier wheels.... you're not.
My local club/website (SLCSUBARU.COM) has several guys running WELL over 350 WHP (close to 450 crank hp) on the stock internals. I've seen STI guys run close to 600hp on the stock internals..... It's all about the size turbo, the fuel system to support it, and the tuning.
I would say your biggest issue is going to be tranny strength..... and traction
Posted by: plymouth37 Jun 13 2008, 09:14 AM
100-125 MORE horsepower in a 1900 pound car? That sounds terrifying!
You are such a bad influence, I suppose I need a 930 transaxle too while I am at it?
Yup.... My 2006 WRX (stock) is 230hp, after 25% in drivetrain loss, you're only looking at about 175 hp to the wheels.
Bellmouth downpipe, 3-inch exhaust, and a cobb accessport... I was at 285 hp (stage 2)... I think that ends up to be around 230 at the wheels.
Bolted on a VF39 turbo (it was a straightforward install), downloaded a free map online from Cobb..... boom, 362 hp.... just like that.... free, no dynotuning required.
I got ancy... and forked over $400 for some fine-dynotuning at Cobb in SLC.... they got me up to 304 at the wheels by maxing out my injectors.... 380-ish at the crank. All I've done since then was add an intake... so I'm guestimating right at 385 crank hp.
Keep in mind.... I'm turning 5 driveshafts and heavier wheels.... you're not.
My local club/website (SLCSUBARU.COM) has several guys running WELL over 350 WHP (close to 450 crank hp) on the stock internals. I've seen STI guys run close to 600hp on the stock internals..... It's all about the size turbo, the fuel system to support it, and the tuning.
I would say your biggest issue is going to be tranny strength..... and traction
Wow! That is wicked! Thanks for the info!
Posted by: tdgray Jun 13 2008, 09:57 AM
Absolutley WICKED Dana... this is going to be one of my favorite project threads ever.
Keep it up
Posted by: Slider Jun 13 2008, 07:31 PM
Nice job Dana,
the car looks awesome
im looking forward to seeing this beast...
Posted by: carreraguy Jun 15 2008, 08:06 PM
For color, I'd love to see you just polish up the metal a bit and remove some of the tooling marks, then just clear coat it ... kind of like the Renegade Hybrids Subie.
This is the Renegade Hybrids Subie!
No, I don't think that's the same one...
My bad, sorry.
WTF? IMHO your car (in its previous incarnation anyway) is the iconic RH conversion!
Subscribed for sure!
Posted by: ericread Jun 15 2008, 08:23 PM
For color, I'd love to see you just polish up the metal a bit and remove some of the tooling marks, then just clear coat it ... kind of like the Renegade Hybrids Subie.
This is the Renegade Hybrids Subie!
No, I don't think that's the same one...
My bad, sorry.
WTF? IMHO your car (in its previous incarnation anyway) is the iconic RH conversion!
Subscribed for sure!
Damn, I hate having to explain jokes. See, the expert identified the vehicle, then the person without any knowledge whatsoever, challenged the identification. Lastly, the expert, rather than fall into the trap of justifying his expert knowledge, agreed and apologized.
Another variation of this is when you meet someone, tell him "I know your, name... don't tell me... it's John" The person you're meeting corrects you and says "No, my name is Brent". Then you tell him "No, it's not Brent, I really think it's John". The fun begins when Brent tries to use logic to prove his name is Brent. At that point, you have drawn Brent into an argument over what his name is!!!
Damn... Now that's funny!!!
Posted by: carreraguy Jun 15 2008, 08:41 PM
For color, I'd love to see you just polish up the metal a bit and remove some of the tooling marks, then just clear coat it ... kind of like the Renegade Hybrids Subie.
This is the Renegade Hybrids Subie!
No, I don't think that's the same one...
My bad, sorry.
WTF? IMHO your car (in its previous incarnation anyway) is the iconic RH conversion!
Subscribed for sure!
Damn, I hate having to explain jokes. See, the expert identified the vehicle, then the person without any knowledge whatsoever, challenged the identification. Lastly, the expert, rather than fall into the trap of justifying his expert knowledge, agreed and apologized.
Another variation of this is when you meet someone, tell him "I know your, name... don't tell me... it's John" The person you're meeting corrects you and says "No, my name is Brent". Then you tell him "No, it's not Brent, I really think it's John". The fun begins when Brent tries to use logic to prove his name is Brent. At that point, you have drawn Brent into an argument over what his name is!!!
Damn... Now that's funny!!!
I get it - kind of like - "My bad, sorry (not)"
Posted by: ericread Jun 15 2008, 09:09 PM
For color, I'd love to see you just polish up the metal a bit and remove some of the tooling marks, then just clear coat it ... kind of like the Renegade Hybrids Subie.
This is the Renegade Hybrids Subie!
No, I don't think that's the same one...
My bad, sorry.
WTF? IMHO your car (in its previous incarnation anyway) is the iconic RH conversion!
Subscribed for sure!
Damn, I hate having to explain jokes. See, the expert identified the vehicle, then the person without any knowledge whatsoever, challenged the identification. Lastly, the expert, rather than fall into the trap of justifying his expert knowledge, agreed and apologized.
Another variation of this is when you meet someone, tell him "I know your, name... don't tell me... it's John" The person you're meeting corrects you and says "No, my name is Brent". Then you tell him "No, it's not Brent, I really think it's John". The fun begins when Brent tries to use logic to prove his name is Brent. At that point, you have drawn Brent into an argument over what his name is!!!
Damn... Now that's funny!!!
I get it - kind of like - "My bad, sorry (not)"
OK, it's not the funniest joke in the world... I try to being a little light humor to your dry, boring, nothing lives, and that's the thanks I get???
Posted by: plymouth37 Jun 23 2008, 09:53 AM
Well, it's been a while. Between painting my house and haven't had much time to work on the car!
I snuck away last night and got the windshield cleaned up and reshaped.
I started out by using the templates I made earlier to position the frame where I wanted it. I was going to mount the frame so the top of it was even with the top of the head hoops but it just didn't look right. Now that the lift off hard-top is looking like its going to happen having the frame a little higher will be better anyway. I ended up mounting the windshield an inch higher than the hoops so now the car will be 41" tall not 40".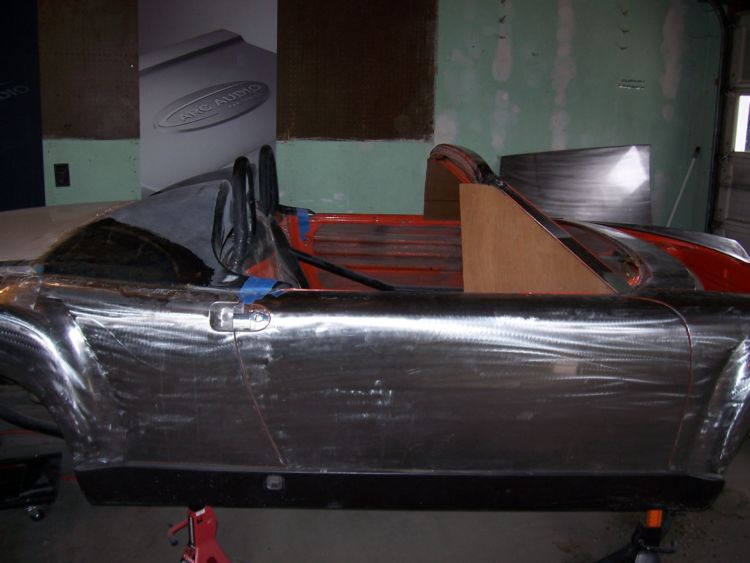
I welded up the relief cuts I made in the corners, then I rounded off the corners of the frame and boxed them.
I then ground down the pinch welds and rewelded the frame with butt welds.
As you can see I left a small bit of the pinch weld at the bottom of the frame so I would have something to clamp to for final adjustments, this will be ground down once I have welded the frame in place.
(Did you notice the wall? I did a little painting while I was waiting for the welds to cool, I figure if I paint it four feet at a time that wall will be all white by fall 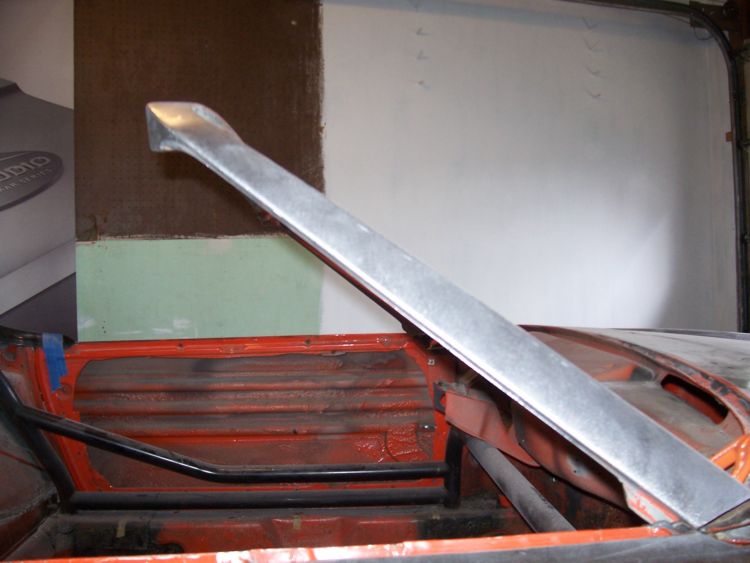
Here is a good shot of the new rounded frame.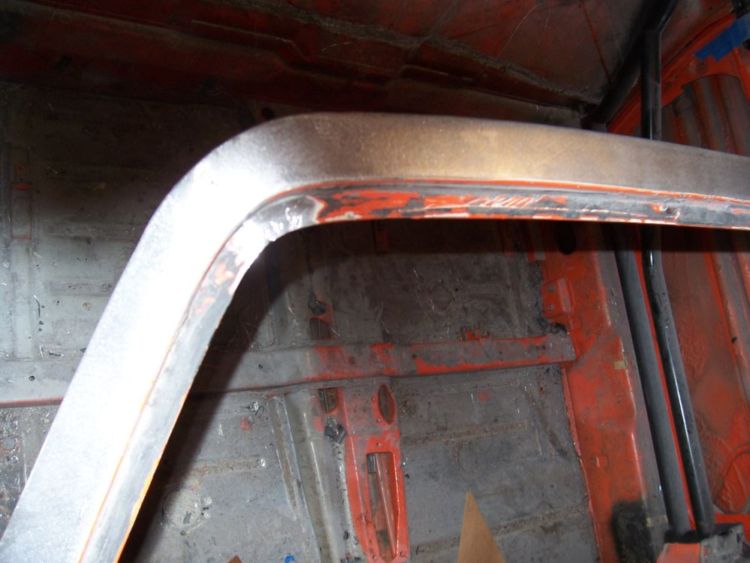
I boxed in the corners but left the center un-boxed. The interior side and back of the frame will be wrapped in vinyl and I will make a matching removable filler piece for the center of the frame. When I make the top I will design it so its front lip fits into the center slot (with the filler piece removed) for a secure and fairly water tight fit.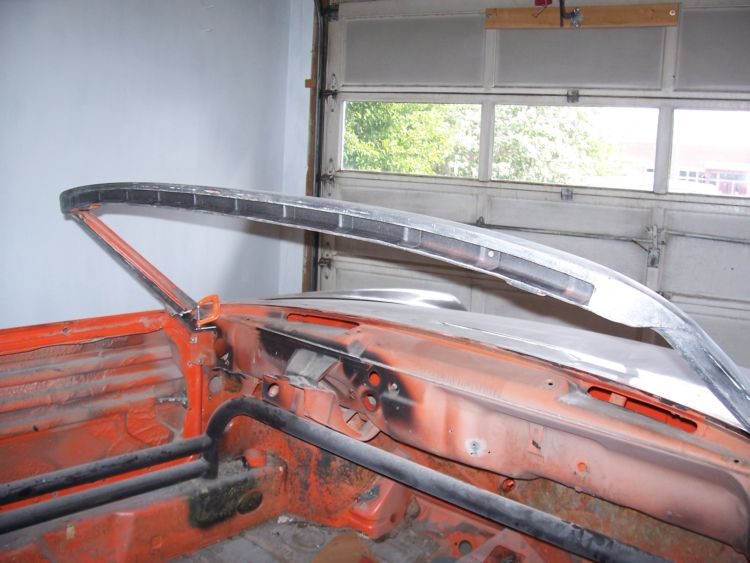
Posted by: plymouth37 Jun 23 2008, 10:02 AM
Here is how things are looking now.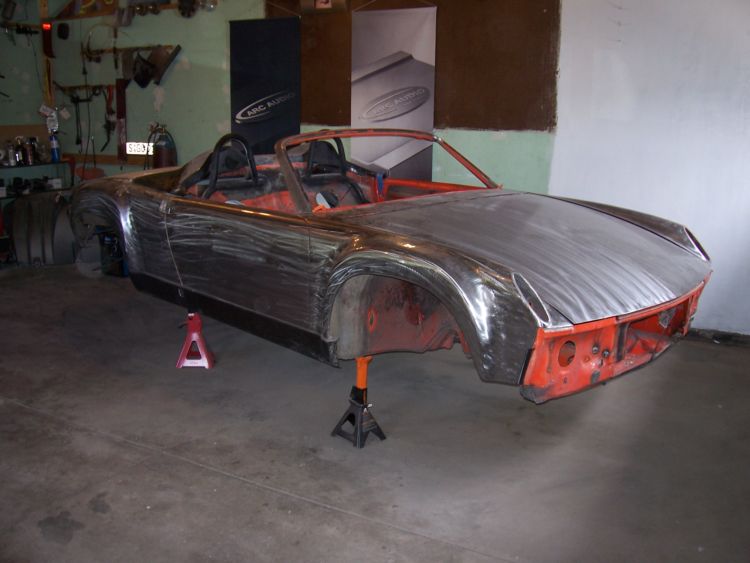
Next I will fabricate the backing plates for mounting the windshield. I am going to plug weld in a second layer of metal inside the frame at the connection point so I will have a backed butt-weld, and double the stock metal thickness where the frame meets the cowl. I will then drill an access hole in the back of the frame so I can weld up the interior support plate, then weld up the access hole. If I do this right the frame will be much stronger than stock.
Posted by: Phoenix 914-6GT Jun 23 2008, 11:12 AM
Looks sweet Dana.
Any chance you want to come out here and make me a cage 
Posted by: byndbad914 Jun 23 2008, 11:48 AM
yeah, wow dude, you are doing some very nice work!
Posted by: ericread Jun 23 2008, 11:54 AM
I'm still not sure why you'd want to paint that??? It would look awesome with a clearcoat!!!
Great work. Are you sure this is your first 914 project???
Posted by: Phoenix 914-6GT Jun 23 2008, 11:57 AM
I expect to see the whole garage painted now
Posted by: BKLA Jun 23 2008, 01:18 PM
OMFG!!!!
We're not worthy! We're not worthy! 
This is the coolest thread and build!
I feel completely inadequate! (Shrinkage here!)
Posted by: plymouth37 Jun 23 2008, 05:45 PM
I'm still not sure why you'd want to paint that??? It would look awesome with a clearcoat!!!
I could do a 914 "Pur Sang" in honor of the Bugatti Pur Sang
Polished steel and carbon fiber trunks and humps would be pretty sweet
Although it would be a lot easier to sand bondo than metal finish the whole car...

Posted by: kerensky Jun 24 2008, 12:04 PM
PWN pg 7...
EDIT: D'oh, Mitchell, read the ENTIRE post. I shouda guessed that, as completely as you seem to have worked all this out, that you'd have considered and discarded that idea already. Oh well, looks hot, man.
Posted by: plymouth37 Jun 24 2008, 12:20 PM
Thanks for the support guys! I plan on doing some more welding tonight!
Posted by: Gint Jun 24 2008, 06:04 PM
Too cool Dana! Love the plan. You're doing with a 914 what I want to do 29 roadster. 
Posted by: seanery Jul 1 2008, 11:10 AM
Damn, I love this thread...Dana - we need more! It's been a week!
I wish I had 1/2 the metal skills you have!
Posted by: SirAndy Jul 1 2008, 12:00 PM
Tonight I pulled my tank and gutted everything in the front trunk
no sway bar?
Andy
Posted by: plymouth37 Jul 1 2008, 12:02 PM
Damn, I love this thread...Dana - we need more! It's been a week!
I have been building a huge deck and re-seeding my yard so the car has fallen on the back burner for a little while.
I should be ready to resume work in about a week.
Andy
I am running a 911 carrera front suspension with an underbody swaybar.
And the car did not have a through body sway originally (two less holes to fill
).
Posted by: ericread Jul 1 2008, 01:29 PM
Damn, I love this thread...Dana - we need more! It's been a week!
I have been building a huge deck and re-seeding my yard so the car has fallen on the back burner for a little while.
I should be ready to resume work in about a week.
Andy
I am running a 911 carrera front suspension with an underbody swaybar.
And the car did not have a through body sway originally (two less holes to fill
).Damn it Dana, you need to get your priorities straight. Your yard can wait. Let's get back to this car right now!!!

Wait a minute.... Isn't this about the time your beer was going to be ready? Are you sure your working on your "yard", or are you just over-embibing a bit???
OK, I got a bit carried away... sorry....
Eric
Posted by: plymouth37 Jul 1 2008, 01:36 PM
Eric
I bottle tomorrow!
"over embibing" sounds alot better than yard work but at least I am getting a nice tan
.
Posted by: BKLA Jul 14 2008, 11:43 PM
Need Update, Badly!!!!
Posted by: plymouth37 Jul 15 2008, 05:04 AM
Sorry guys, I am in the middle of building a 1000 sq foot deck and after a full days work on that I have no strength or patience left to work on the car.
I will finish the deck in a couple weeks and will then have the time and energy to get back to the car. Don't worry you will get your fix in a little bit
Posted by: rebelmdot Jul 15 2008, 02:32 PM
Here is your Porsche Mural for your wall. If I come knock out that deck for you, will you please get back to the car?
Posted by: turboman808 Jul 15 2008, 03:43 PM
This is what sucks about living in the city. I don't even have tools I wish I could go out back and build a deck and do some welding in my garage. Oh well I will just sit at my computer.
I am jealous
I do get to detail cars for money but it's not the same.
Posted by: byndbad914 Jul 15 2008, 07:01 PM
Sorry guys, I am in the middle of building a 1000 sq foot deck and after a full days work on that I have no strength or patience left to work on the car.
I will finish the deck in a couple weeks and will then have the time and energy to get back to the car. Don't worry you will get your fix in a little bit
I agree with some others... priorities man! I have had plans laid out for about 500sqft of deck that I have since reduced to about 320 sqft and I have still refused to start it
 too busy with the paint and projects on the car.
That and they both cost too much money, so I pick the lesser of the evils... last time I checked I can't drive a deck
and I don't think the HOA will let me paint a black cross on it either
Posted by: plymouth37 Jul 15 2008, 08:58 PM
Yeah my priorities are totally backwards, believe me I am hauling on this thing to get it done so I can get back to the car.
Posted by: plymouth37 Jul 26 2008, 03:21 PM
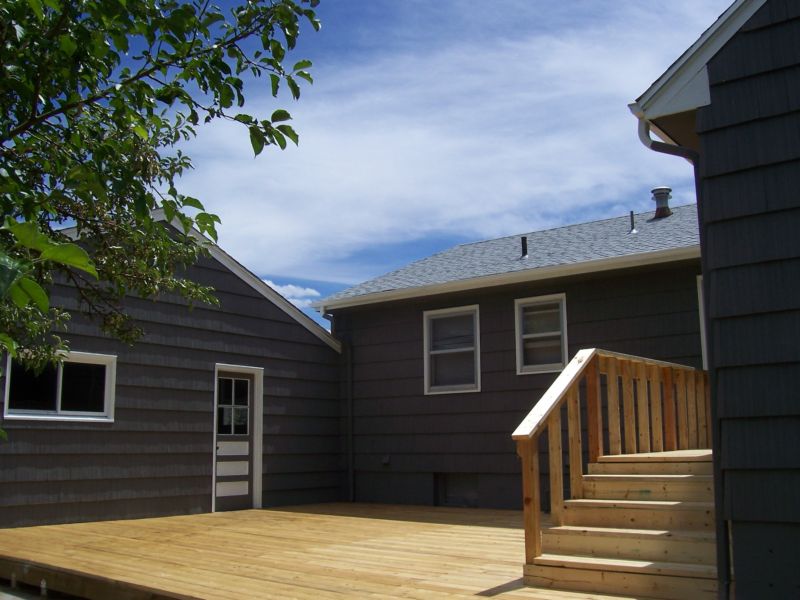
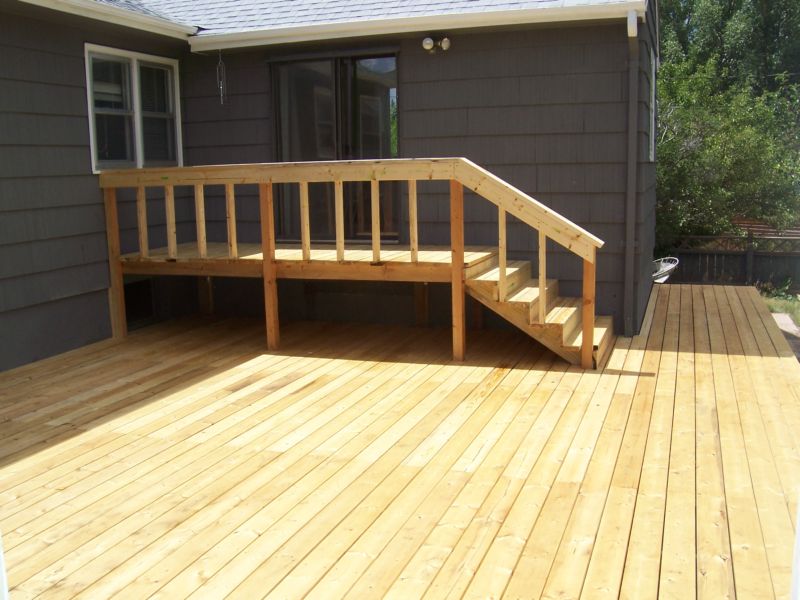
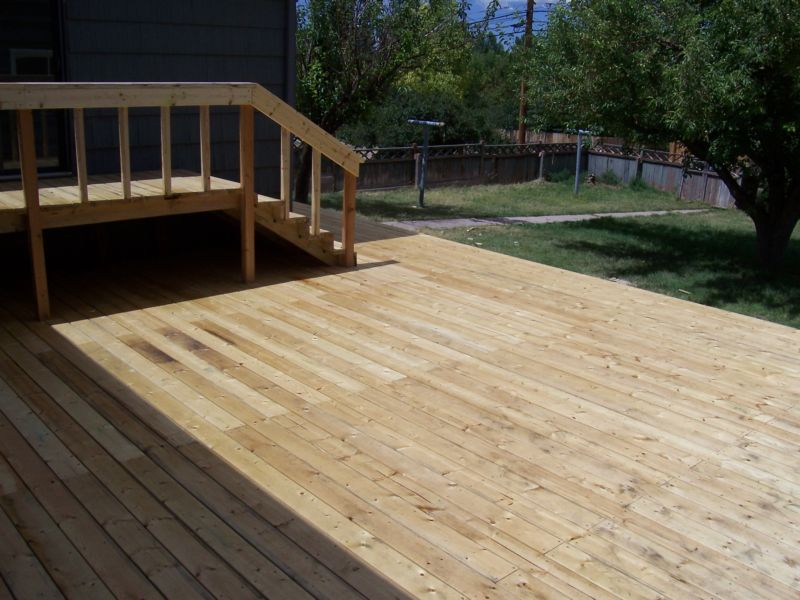
O.K. guys, the deck is DONE!
Here are a couple pictures of my huge deck, I think it turned out pretty well for being my first attempt at working with wood.
And yes now that this monster is done work will resume on the anklebiter on monday!
It will be so refreshing to get back to working on metal...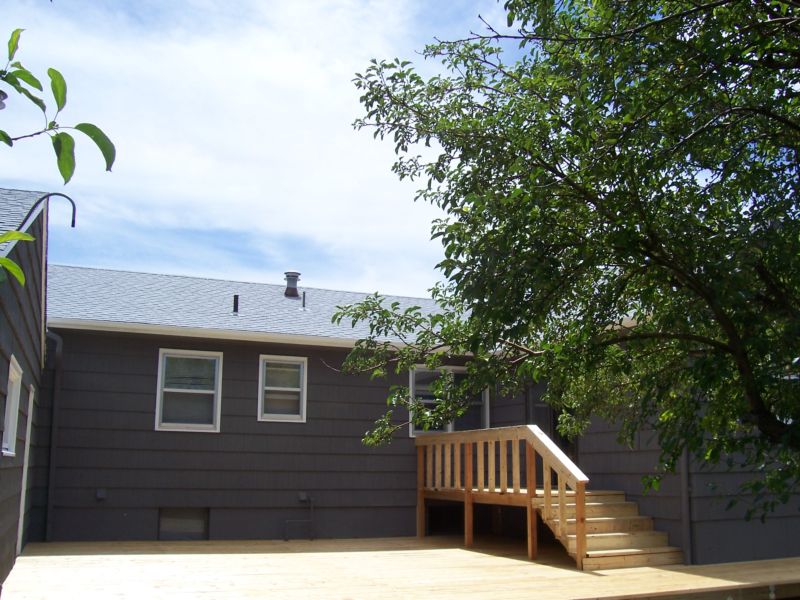
Posted by: ericread Jul 26 2008, 04:34 PM
Yeah, yeah, yeah, it's a deck. Here's an idea... Put a roof over it, some walls around it, install a lift, set up a ramp and you've got a second garage.
Maybe this will provide you with the extra garage space you need to complete your Anklebiter project... 
Eric
Posted by: Wes V Jul 26 2008, 05:59 PM
I was thinking much the same thing!
Where is the round hole for the lift??
Wes
Posted by: Phoenix 914-6GT Jul 26 2008, 07:01 PM
Wow... You have a really big deck 

Get to working on that car I have been wondering when this thread was going to be updated
Posted by: plymouth37 Jul 28 2008, 07:19 PM
Due to public outrage regarding my lack of progress I have decided to start working on the car again...
Today I started out by tack welding in backing panels for the windshield frame, I figure the more metal I can weld into this area the better.
I then clamped the windshield frame in place and took what felt like an hour to make sure it was where I wanted it. I intentionally left a gap between the frame and the cowl so I could get good penetration into the backing plates.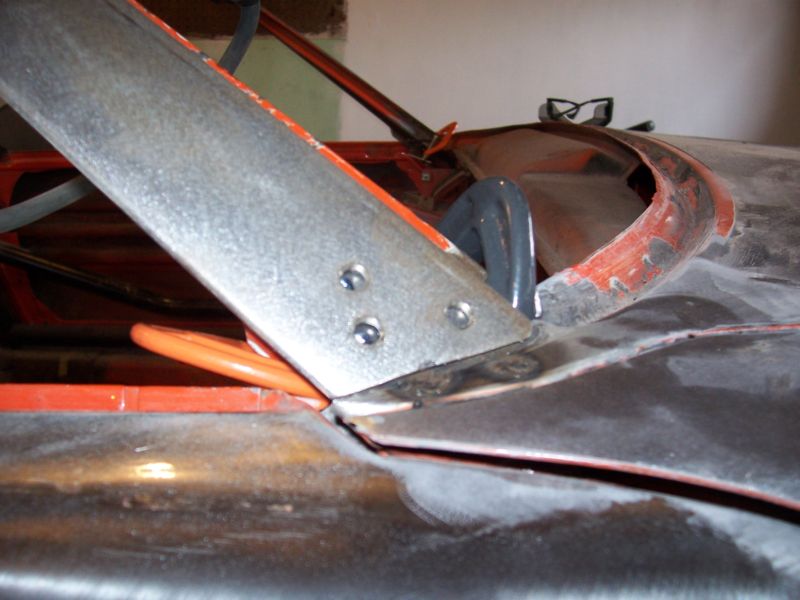
Then I welded and finished the area. After I buy the right sized hole saw I will drill into the back of the frame and weld its inner structure. 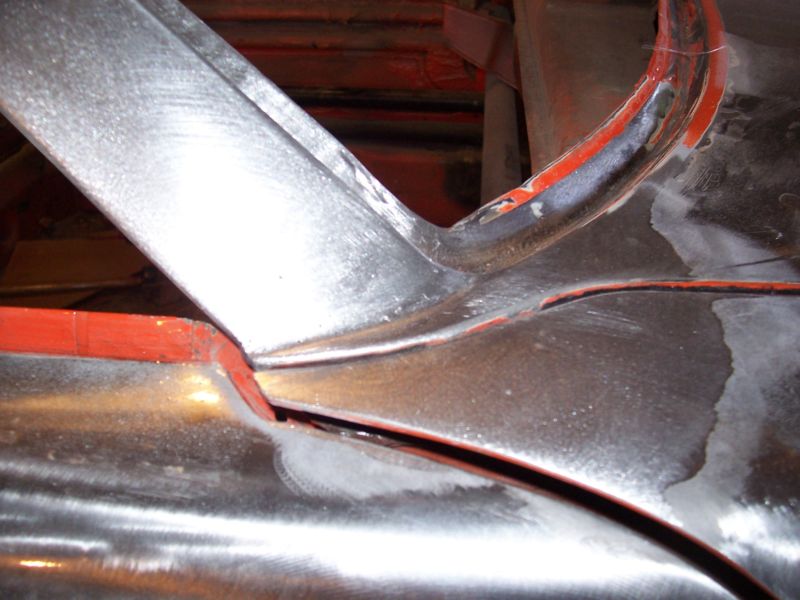
Here's how things are looking now.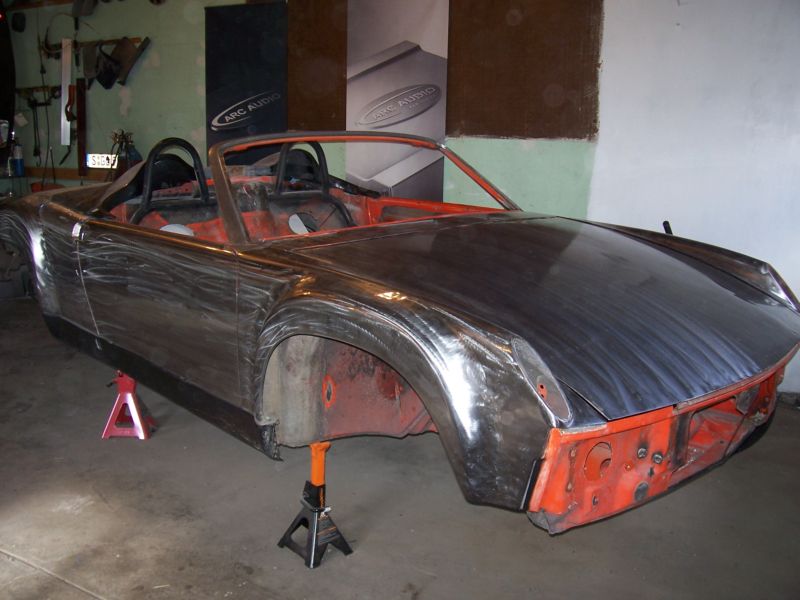
You can put away your pitch forks and torches now.
Posted by: Wes V Jul 28 2008, 07:33 PM
Wes V
Posted by: plymouth37 Jul 28 2008, 07:38 PM
After finishing the windshield frame I went into the front trunk and removed all of the seam sealer. Since the car has no top I figure it won't be spending much time in the rain so seam sealer is unnecessary weight that can be done away with. I heated it with a torch and it came off pretty easily.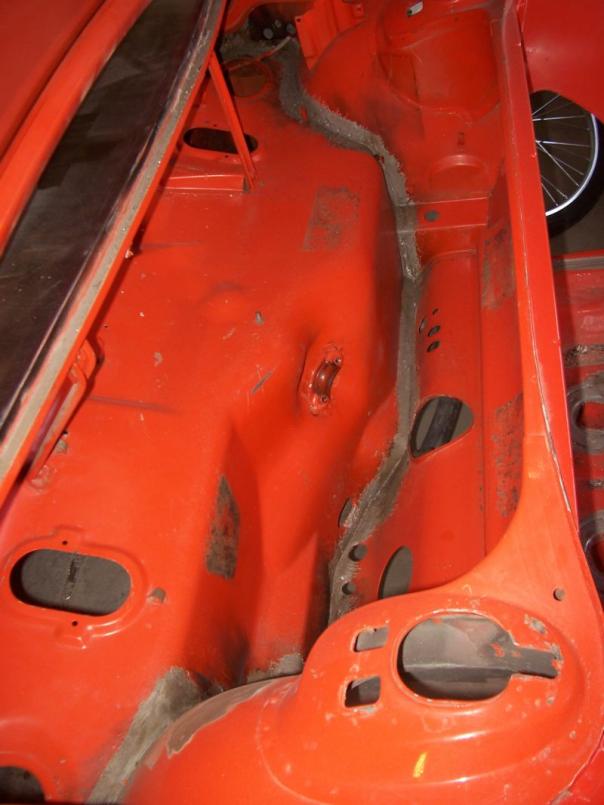
I have been keeping track of the weights of everything I have removed from the car so far and this junk is no exception.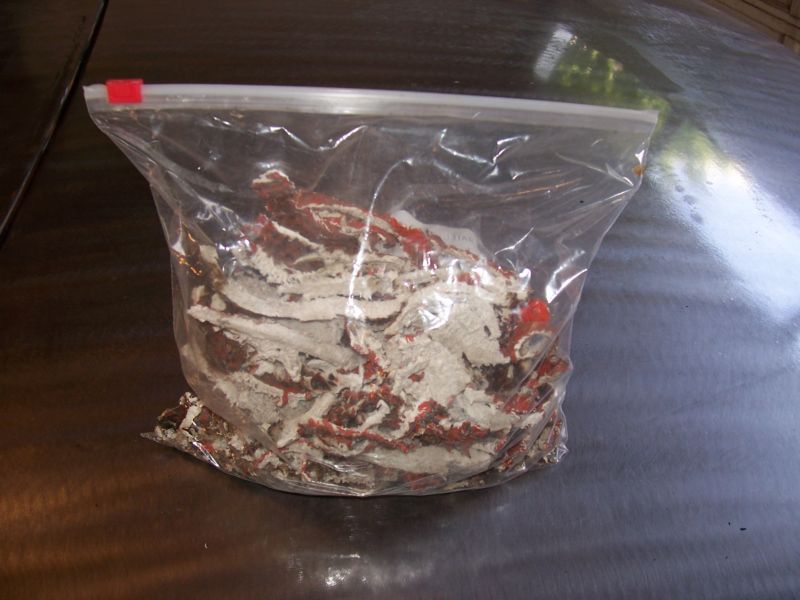
By stripping the seam sealer I dropped 1.43 lbs which is equivalent to gaining 0.242 brake horsepower WOOHOO! 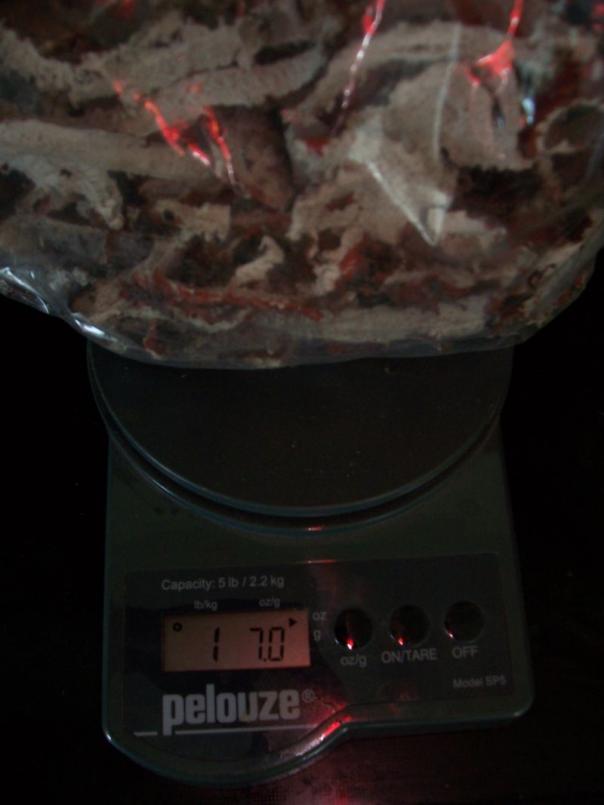
Posted by: scotty b Jul 28 2008, 07:43 PM
So um how about some pics of the Plymouth 
Posted by: plymouth37 Jul 28 2008, 07:45 PM
What are you bored with this project already?
I'll try to dig some up, they are around here somewhere...
Posted by: tdgray Aug 8 2008, 09:21 AM
Ummm... come on 10 days... WTH
Posted by: Wes V Aug 8 2008, 10:47 AM
Ummm... come on 10 days... WTH
Don't you dare say that you are working on another deck!!
Wes
Posted by: Phoenix 914-6GT Aug 8 2008, 03:45 PM
Ummm... come on 10 days... WTH
Or are you thinking that now that you have a big deck you don't need a sports car anymore
Posted by: plymouth37 Aug 8 2008, 04:49 PM
Ummm... come on 10 days... WTH
Just got in from a 10 day 2900 mile drive through the northwest corner of the country and yellowstone park, give me a couple days to recover and I will get back to work
.
Posted by: nsr-jamie Aug 9 2008, 11:13 AM
Wow, just finding out about this project, looking forward for sure to see it done. Nice deck by the way
Posted by: scotty b Aug 9 2008, 07:30 PM
What are you bored with this project already?
I'll try to dig some up, they are around here somewhere...
Ahem...... hop to it chuckles

Posted by: plymouth37 Aug 9 2008, 08:16 PM
Here ya go Scotty.
This is an old picture I had laying around of the Plymouth next to the 914. This picture was taken about a month after I drug the 914 out of the field where it had been sitting since 1982.
I can't seem to find my box of old pics so this one is all I have to post now.
I love that car and will get to work on it once the anklebiter is done (someday ).
Sorry for the poor quality picture, its all I got.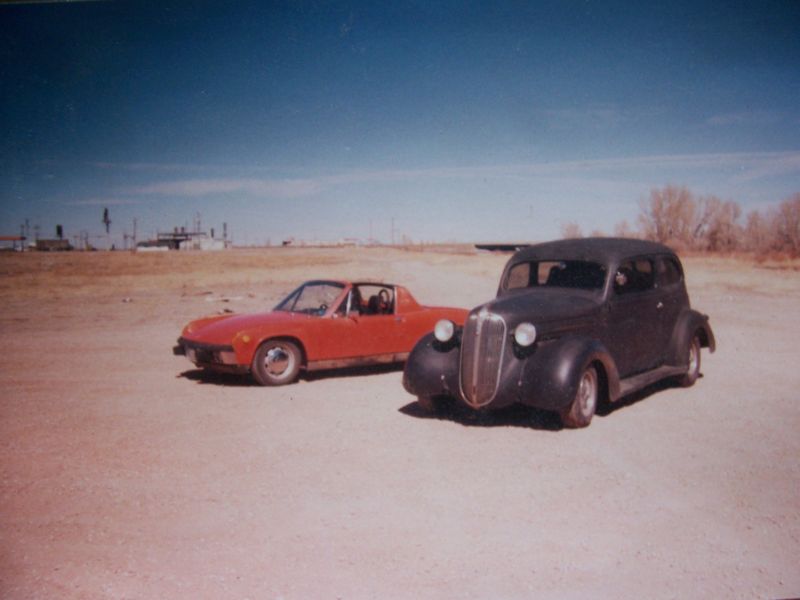
Posted by: scotty b Aug 9 2008, 08:18 PM
Kewl, Makes the 914 look a little tiny huh ?
Posted by: plymouth37 Aug 11 2008, 08:51 PM
So today I removed the headlight buckets and I've got to tell you it was a lot harder than i thought it would be... 
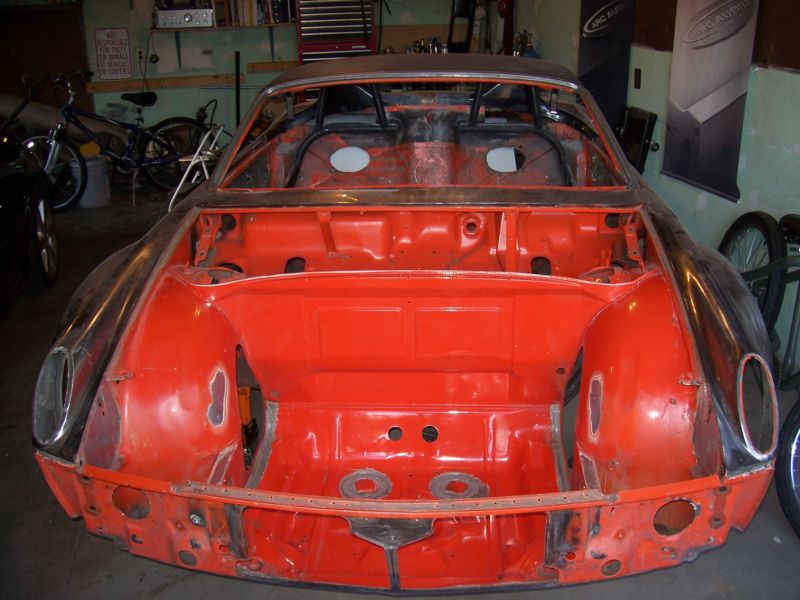
Despite putting up a good fight I got them out with out damaging anything
I also scraped out the black tar from the bottom of the bucket.
Next I need to make a new hood seal channel for the bucket-less trunk.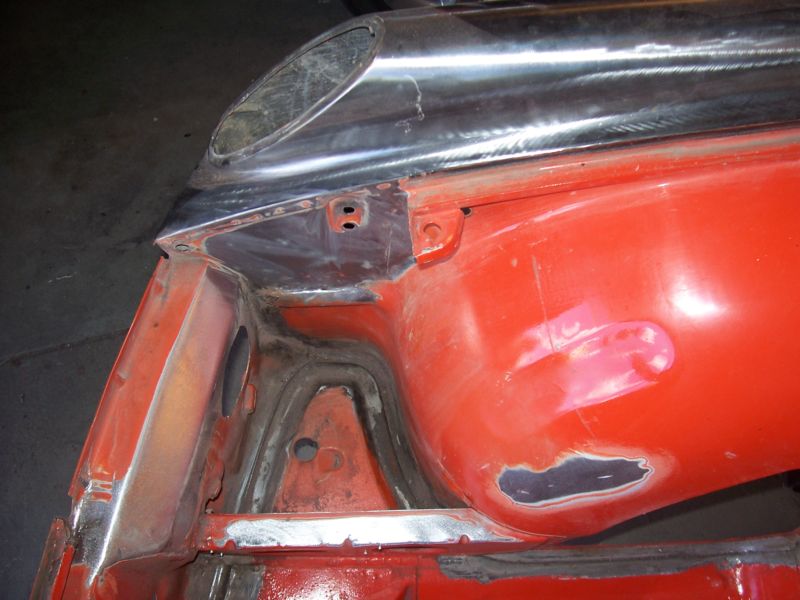
Here you can see I had already removed the sheet metal that used to surround the spare tire when I installed the radiator the first time.
Also you can see the venting holes cut for the radiator air flow.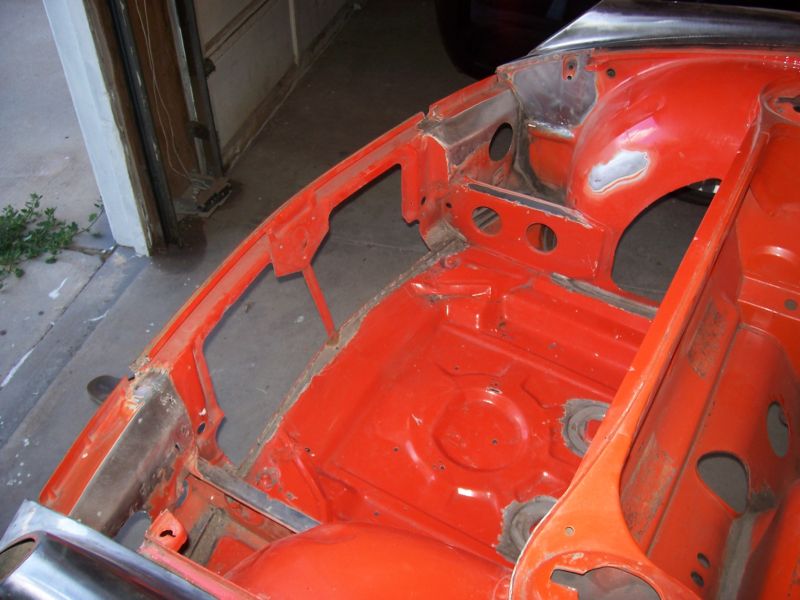
To replace the heavy pop-ups I am running KC hilites in the foglight holes.
They are not street legal by any stretch of the imagination but neither is the rest of the car so I might as well stay consistent.
All I know is they work a lot better than the stockers (and look better too!).
Over all I cut a total of 21.6 pounds which translates to 3.66 BHP
Posted by: scotty b Aug 11 2008, 08:55 PM
Nice werk,Nice car, nice bicycle too
Posted by: Lou W Aug 11 2008, 08:58 PM
Wow, you sure do very nice work.
Posted by: plymouth37 Aug 11 2008, 10:35 PM
When I talk about the cars weight loss I have mentioned the equivalent BHP a couple of times. Since there have been a couple topics and questions on the subject I thought I would explain how I am coming up with these crazy numbers just to prove that I am not making this crap up .
The original weight was 2300 pounds and it had 320 BHP.
Since the car now weighs 1875 pounds and still has 320 BHP.
1875/320 = 5.86
So if the car still weighed 2300 pounds it would need 392 BHP to be as fast as it is now.
2300/392 = 5.86
If we divide the weight lost by the theoretical BHP gained:
425/72 = 5.9
This means that for every 5.9 pounds the car drops it gains an equivalent of 1 horsepower.
The beauty of this is that the lighter your car gets the less poundage it takes to gain a HP! Yay!
So there you go, bored yet?
Posted by: Phoenix 914-6GT Aug 11 2008, 11:22 PM
That's just cool. I want to get my car that lite.
Posted by: effutuo101 Aug 11 2008, 11:41 PM
Umm, last time I checked, Wyoming only had a law that you had to have lights, turn signals, brake lights and running lights. I don't remember the law saying that they had to be in the stock place. I remember the Cheyenne Police asking nicely if I wouldn't mind reving my motor, but ( year 2k) but no noise either. I don't think anybody is going to give you grief unless you get caught out at night in the rain, near Gurnsey.
Posted by: plymouth37 Aug 11 2008, 11:50 PM
My brother in law is a Wyoming state trooper and I have spent alot of time with his "laws of the road" book, by my count the car is in violation of 12 major laws, so far...
There are a lot of laws like minimum headlight height and required front plates on the books in Wyoming but fortunately you have to be doing something really stupid to get anyone to care about it. So as long as I don't drive like a total jackass I should be ok
The only really obvious legal problem I have is that after I mount the diffuser there will not be any room for a rear plate, and that is one thing I think they may notice, better get on that problem huh?
Posted by: Phoenix 914-6GT Aug 12 2008, 12:18 AM
Rear diffuser? How are you going to do that? I want one
Posted by: plymouth37 Aug 12 2008, 12:29 AM
Rear diffuser? How are you going to do that? I want one
I got mine off of a Ferrari F430, the thing is going to fit really well, more on that later...
Posted by: effutuo101 Aug 12 2008, 12:30 AM
Stater? Cool. Brother in law was a Sherrif in Cheyenne. Can you do a ricer thing and put it up on one side between the tail lights? a little work and you should be good. I loved making the run from Cheyeene to Laramie then down to Ft. Fun then back up to Cheyenne. Loads of fun. Mountains, curvy roads, sand dunes, then back on the freeway.
Posted by: Phoenix 914-6GT Aug 12 2008, 01:10 AM
Rear diffuser? How are you going to do that? I want one
I got mine off of a Ferrari F430, the thing is going to fit really well, more on that later...
Don't suppose they have many of those laying around
Posted by: Aaron Cox Aug 13 2008, 12:27 AM
dude.. that is TASTY!
Posted by: dinomium Aug 13 2008, 03:10 PM
just fantastic...
Posted by: turboman808 Aug 13 2008, 03:23 PM
just fantastic...
Got to agree this has me wanting to chop the roof on my 914.
Posted by: plymouth37 Aug 14 2008, 03:43 PM
Rear diffuser? How are you going to do that? I want one
I got mine off of a Ferrari F430, the thing is going to fit really well, more on that later...
Don't suppose they have many of those laying around
Here's what you do:
1) Join a Ferrari forum.
2)Wait for some guy to brag about the new carbon fiber F430 diffuser he got because he backed into a curb with the old one. (It happens more than you would think)
3)Ask how much he wants for the old broken stock one.
4)Obtain Ferrari diffuser for cost of shipping...
Try it, it worked for me!
I am in the middle of patching up the damage now. Should be an easy fix. Wait 'till you see it on the car it is HUGE!
Posted by: Phoenix 914-6GT Aug 14 2008, 03:50 PM
I'll try that. Then I just have to wait and see how you do this.
Posted by: plymouth37 Aug 24 2008, 05:59 PM
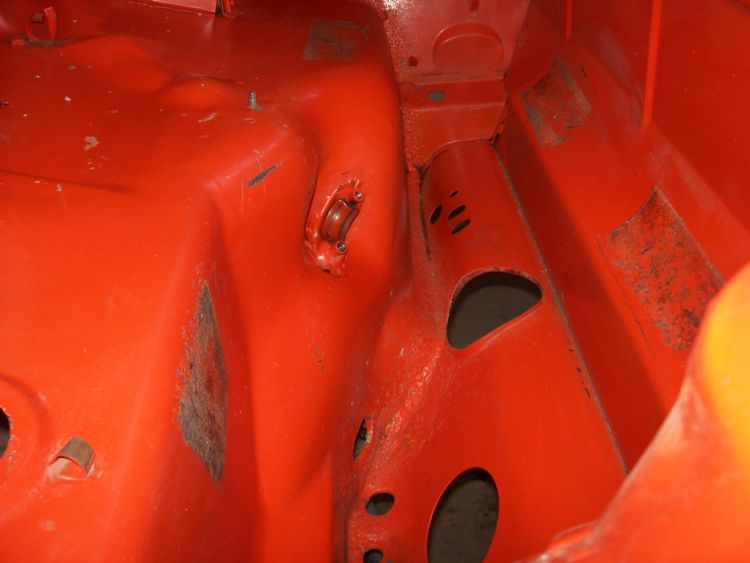
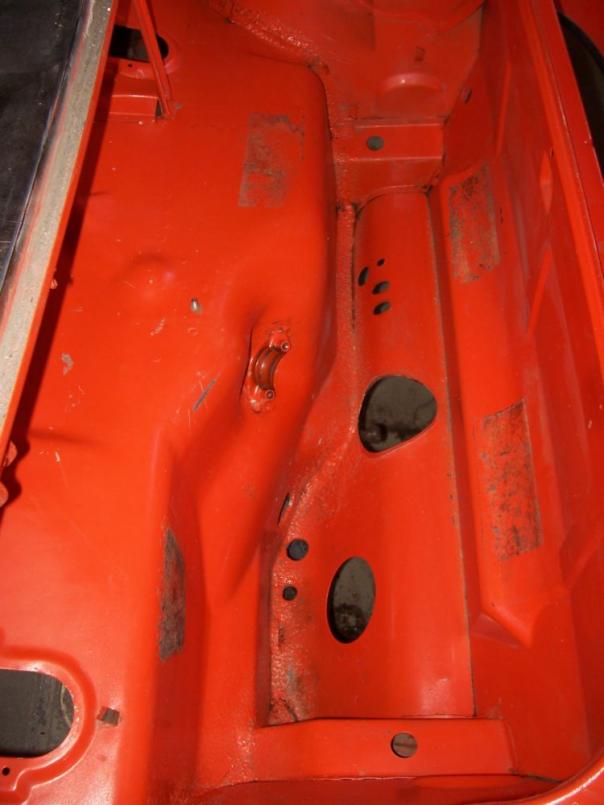
I stripped down the paint inside the cowl area.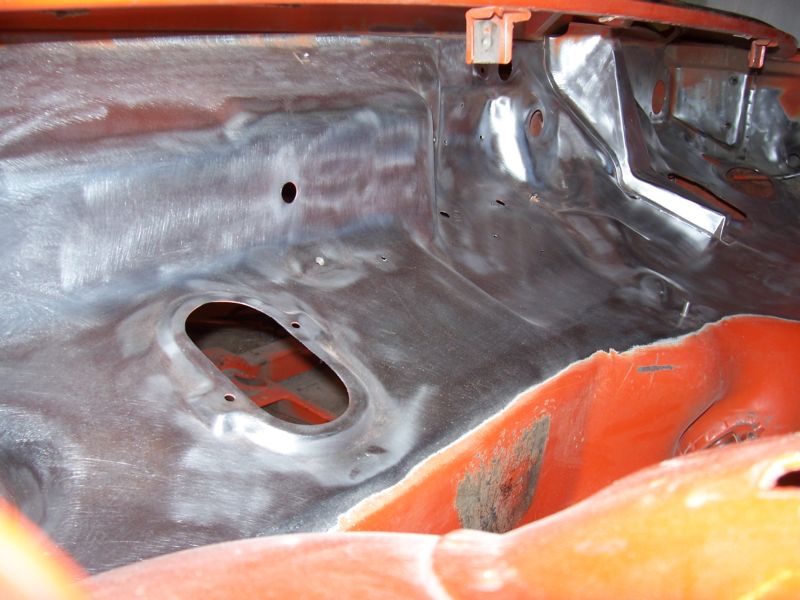
Between the original owner and myself we managed to add quite a few extra holes in the cowl that needed to be filled.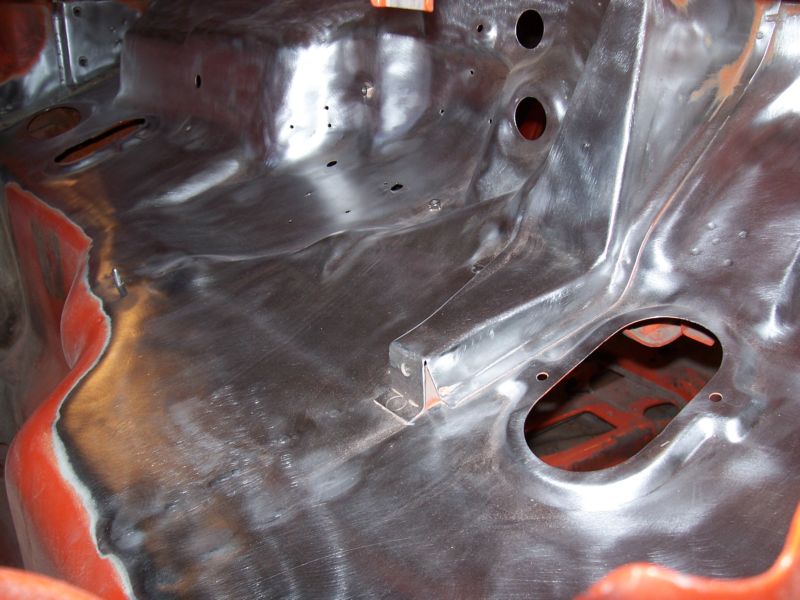
Since the car will not have any climate control I filled the vent holes along with any extra holes that will not be needed.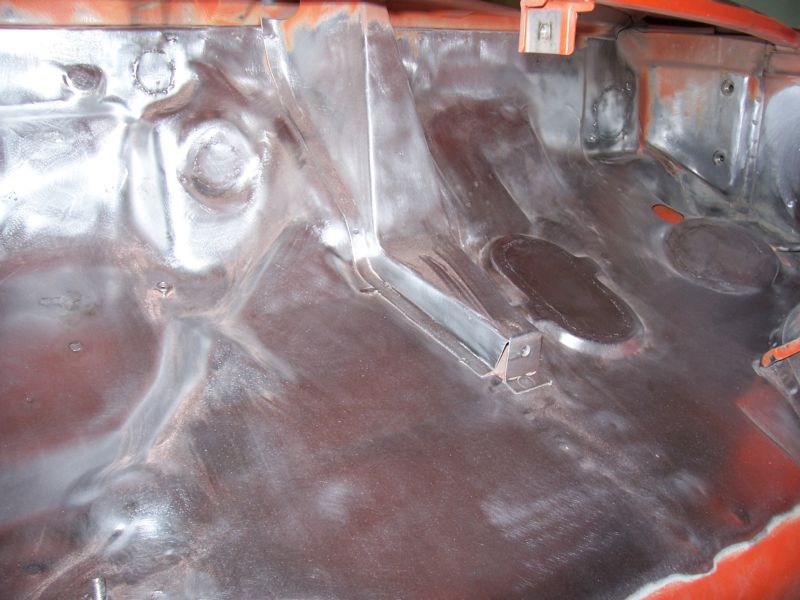
It was tough working with the complicated thin metal but with a little high build primer it should turn out nice and straight.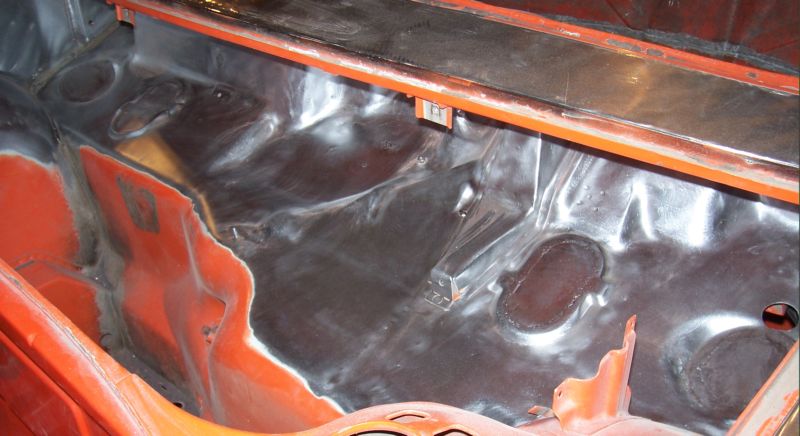
Posted by: Rand Aug 24 2008, 06:08 PM
Yah, such putrid rustage. OY!!!
Glad your tub is worthy. Keep it coming, ya freakin' weiner.
Dammit, I'm an envious SOB. Grr. Sweet project. Go go go.
Posted by: plymouth37 Aug 24 2008, 06:18 PM
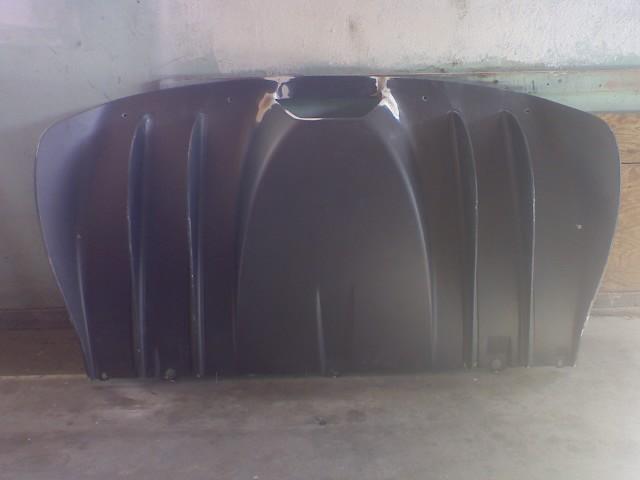
I also received a F/G GT-Racing hood, it weighs 12 pounds for a weight savings of 21 pounds.
This brings my weight savings total up to 427.9 pounds.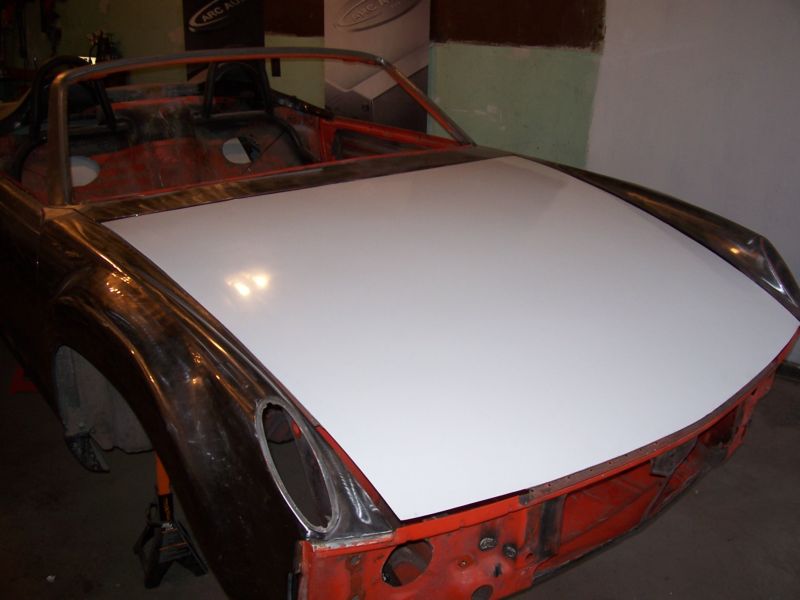
I am a big fan of Getty's work but for some reason they don't make a 914 hood with filled headlight holes so I had to buy a GT-Racing hood.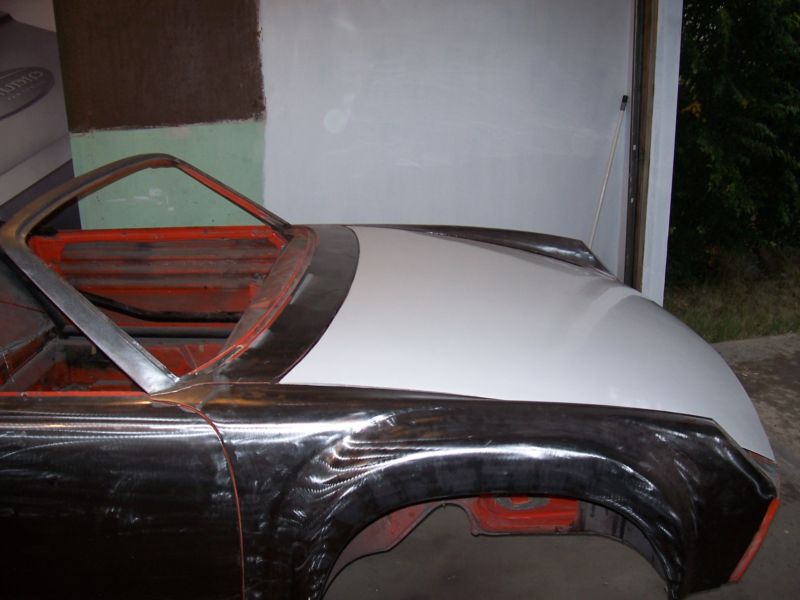
Over all the hood looks pretty good but it was cut way to small so I have to do a ton of work to make the hood gaps anywhere close to reasonable. Also the filled areas are not supported in any way so they are really flimsy, they really need some kind of inner bracing to keep them from ripping off at speed.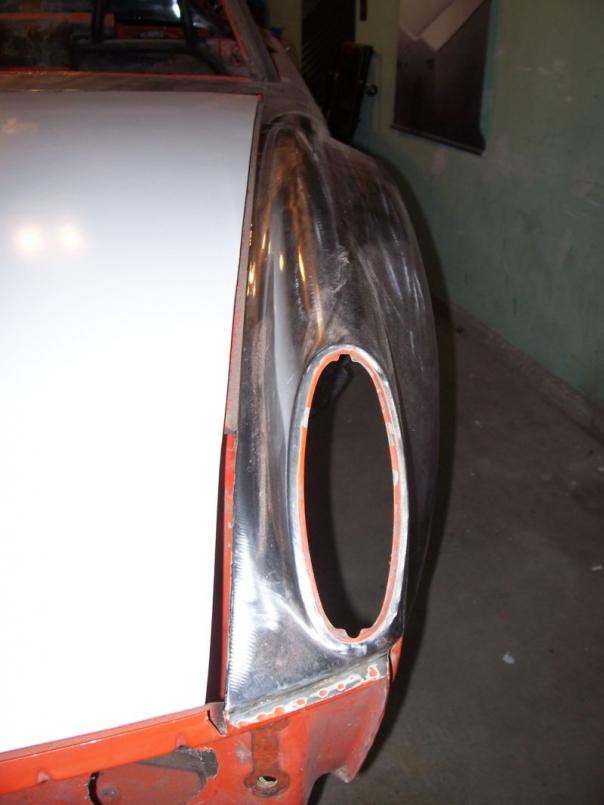
Seriously Getty step up, I know you are busy selling parts to the 997 guys but it is time to start making some filled hoods, this hood is going to take years to fix.
Posted by: lotus_65 Aug 24 2008, 06:52 PM
now that chappy's car is done, this is the coolest thread on the net.
Posted by: plymouth37 Aug 24 2008, 06:58 PM
now that chappy's car is done, this is the coolest thread on the net.
If this car ends up half as nice as Chappy's I will be thrilled.
Thanks for the support guys!
Posted by: Sleepin Aug 24 2008, 07:48 PM
...now I need to find a reason for my company to send me to Laramie for a visit!
Posted by: iamchappy Aug 24 2008, 08:11 PM
I agree with all of the above quotes. This is going to be fun to watch..
On my way to Jackson(my home away from home) i will have to make a stop while passing through.
My good friend Charlie who has a nice orange 914 -6 lives in Jackson, i gave him and his boy Sam a ride in my car the other night when they were in town.
Charlie wants me to transform his car now.....
Posted by: Gint Aug 24 2008, 09:42 PM
1) Join a Ferrari forum.
2)Wait for some guy to brag about the new carbon fiber F430 diffuser he got because he backed into a curb with the old one. (It happens more than you would think)
3)Ask how much he wants for the old broken stock one.
4)Obtain Ferrari diffuser for cost of shipping...
Try it, it worked for me!
I am in the middle of patching up the damage now. Should be an easy fix. Wait 'till you see it on the car it is HUGE!
Too funny. What are you using to strip paint with Dana?Posted by: Brett W Aug 24 2008, 10:03 PM
Since you are patching up all the holes under the cowl, you should add a piece of sheetmetal to box that area in and create and nice strong beam in that area. It will stiffen the car up and you won't lose any space.
Posted by: plymouth37 Aug 24 2008, 10:41 PM
What are you using to strip paint with Dana?
I am using a DA and a wire wheel to strip paint. I have been taking my time so I don't build up too much heat and since it is the original paint it comes off pretty easy. I really should get the whole tub mediablasted but after spending $900 on text books money is a little tight!
Posted by: r_towle Aug 24 2008, 10:43 PM
Did you actually chop the windshield??
I know you were scared of getting it cut.
If you are getting it cut, please share the contact details of the company that is doing it.
I would like to send them a template to have cut from a 914 windshield.
Rich
Posted by: plymouth37 Aug 24 2008, 10:56 PM
Did you actually chop the windshield??
I know you were scared of getting it cut.
If you are getting it cut, please share the contact details of the company that is doing it.
I would like to send them a template to have cut from a 914 windshield.
Rich
I found http://www.psautoglass.com/page.aspx?page_id=10 who said he would cut one for $450 (not including buying the windshield) but it seemed pretty steep so I am going to go with lexan, it's lighter and a heck of a lot cheaper.
Posted by: neo914-6 Aug 25 2008, 03:56 AM
I also received a F/G GT-Racing hood, it weighs 12 pounds for a weight savings of 21 pounds.
I am a big fan of Getty's work but for some reason they don't make a 914 hood with filled headlight holes so I had to buy from GT-Racing.
Over all the hood looks pretty good but it was cut way to small so I have to do a ton of work to make the hood gaps anywhere close to reasonable. Also the filled areas are not supported in any way so they are really flimsy, they really need some kind of inner bracing to keep them from ripping off at speed.
Seriously Getty step up, I know you are busy selling parts to the 997 guys but it is time to start making some filled hoods, this hood is going to take years to fix.
My GT-R hood gaps needed ALOT of work and the lid to cowl edge rubbed too. I'm concerned about the flimsy corners lifting and am considering dual latches but I don't have much room with the Boxster rads. IIRC we both requested Getty CF full lids during the group buy but they just wouldn't make them. I went ahead and bought the CF front but abandoned the idea of trying to mold in fillers and match the weave...
Posted by: turboman808 Aug 25 2008, 01:35 PM
I'd be willing to bet that is the hood I sent back to them a month ago. I ordered form them for the same reason. No one else makes a race hood that I could find.
Chris made a hood using my stock hood and the headlight covers.
I would have loved to drop some weight but what can ya do?
Posted by: db9146 Aug 25 2008, 07:27 PM
Not trying to highjack this cool thread but what about Fiber-Lite Racing?
http://www.fiber-literacing.com/store.html
Anyone ever tried their front hoods or deck lids? They have a front hood w/o the headlight cut outs.
Posted by: plymouth37 Aug 25 2008, 10:43 PM
I bought the hood used so I am pretty much stuck with it, on the bright side it was cheap enough to make fixing it worth while.
And no, the guy I bought it from had nothing to do with the poor quality and fit, it was this screwed up when it was brand new!
Time to pull out the 'glassing gear!
Posted by: plymouth37 Aug 27 2008, 04:14 PM
By filling the holes in the cowl area I added about 7.2 ounces.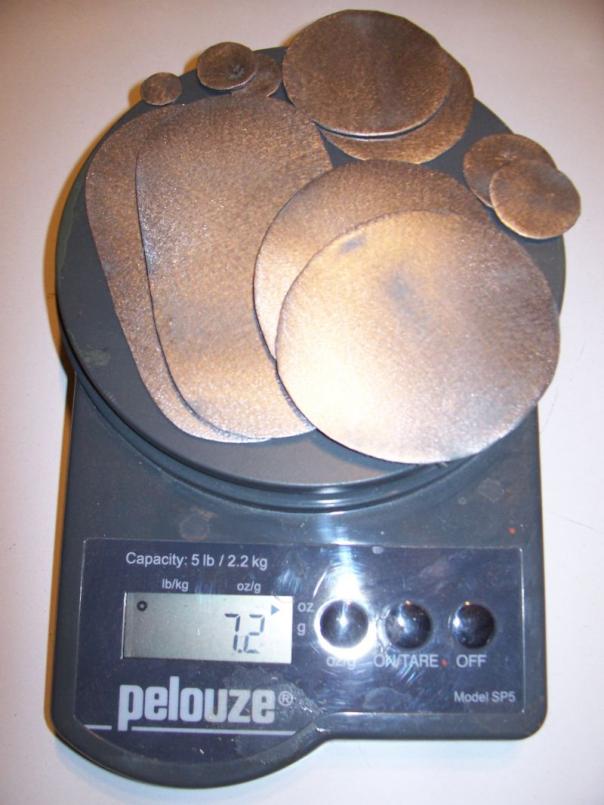
Since this is a light-weight car I couldn't add this weight without cutting some weight too!
I cut off the remaining unused brackets and tabs, whipped out the hole saw and managed to trim off 7.2 ounces to counter-act filling the other cowl holes.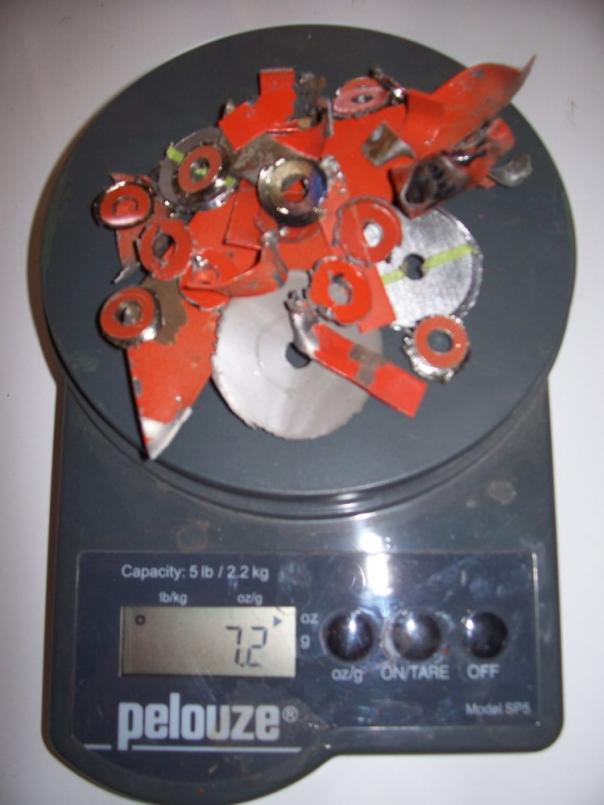
Here is the final product: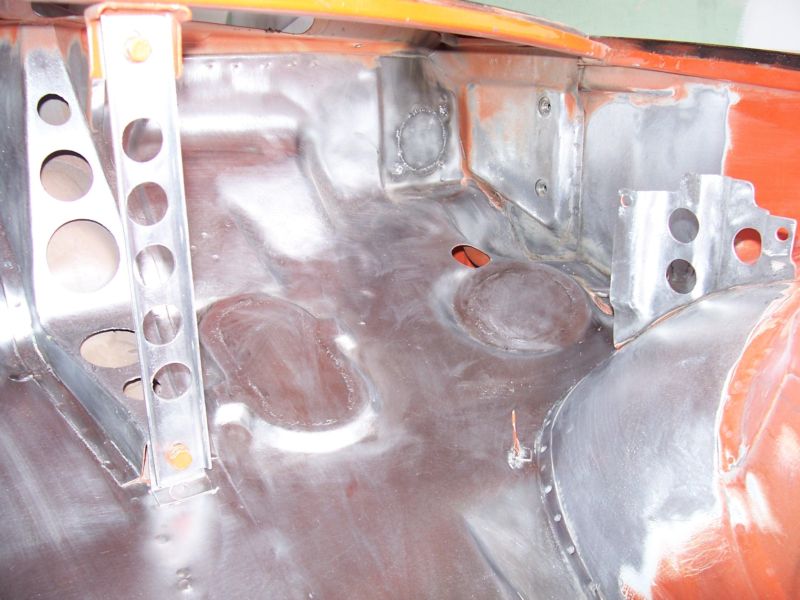
Yummy swiss cheese!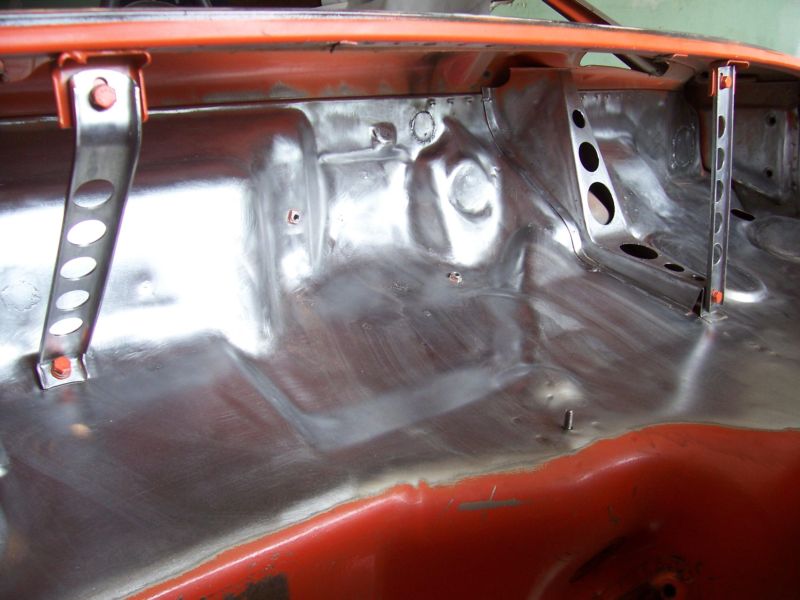
Expect to see a lot more swiss cheese in the future! 
Posted by: schreiber Aug 28 2008, 10:55 AM
This build is incredible!
Posted by: plymouth37 Aug 29 2008, 07:50 PM
Since I am doing so much to update the the cars looks I couldn't just use the stock mirrors. There are a lot of choices out there but i finally settled on 2006 Pontiac Solstice mirrors, they are quite a bit smaller (and cheaper!) than the Porsche Aero mirrors and I think they fit the cars style pretty well.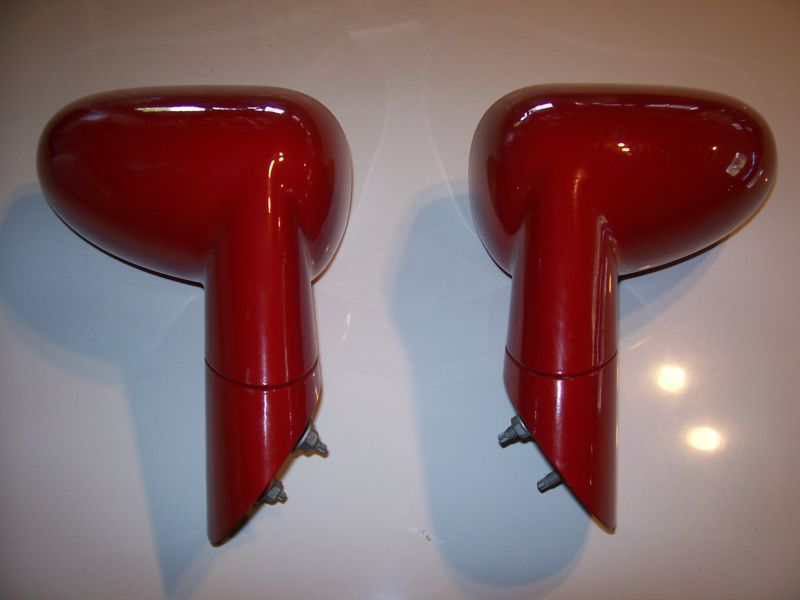

Here is what I had to do to make them fit. I had to grind down the base to fit the contour of the door, then drill and tap deeper mounting holes. It was actually pretty easy to mount these mirrors, overall it took about an hour.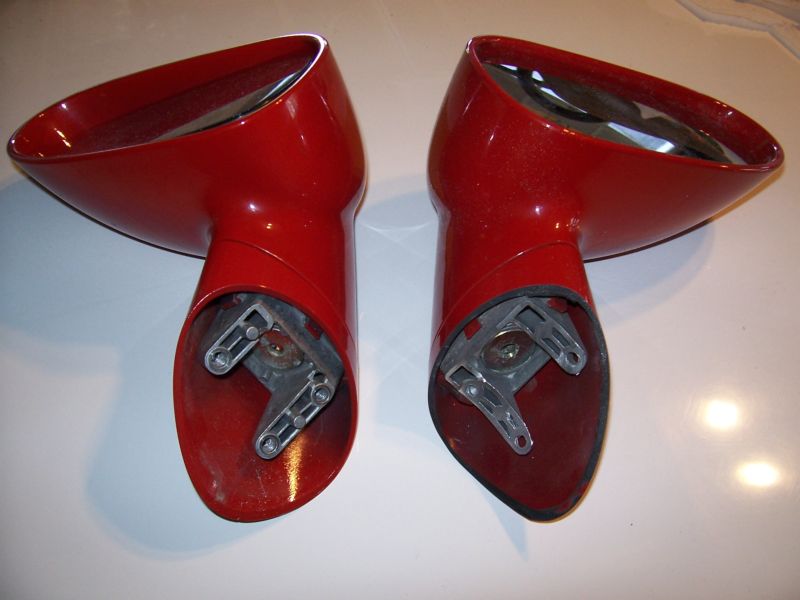

Posted by: Phoenix 914-6GT Aug 30 2008, 02:06 AM
Those look surprisingly amazing.
Posted by: roadster fan Aug 30 2008, 05:51 AM
Yup, I think they look good with the style of your build.
Jim
Posted by: byndbad914 Aug 30 2008, 03:24 PM
jesus dude, those look like a factory fit. nice work!
Posted by: charliew Aug 30 2008, 07:47 PM
While your changing things you could go to a 5spd subie tranny. A OBX LSD is pretty easy to put in and stronger gears are available. The OBX goes for around 400.00. Porscharu had some nice adapters made to use the type 2 larger cvs so the axle deal is ok you probably only need two inner cvs and the adapters if you are already using bus axles.
I'm going to try the suby with just the LSD mod and see how it holds up.
The one thing that will save this subie application is the two wheel drive and low weight.
As the other poster stated a vf39 sti turbo will make more volume without the heat you are now making by over running the 2.0 turbo.
I am still stuck on the awic to avoid the air flow problem over the motor.
Also while your in there I thought about cutting out the bottom of the longs and putting in a 2x3 rectanglar tube with one of the 2 inch sides removed to provide a channel on both sides for the plumbing. Once it's welded in it should really make the rails stiff. I know you have a nice roll cage setup but I am trying to avoid a cage.
I'm going to use all the normal tub additions to try to stiffen things up so I guess I'm really going a little different direction than you.
I really like the style you have come up with. I have always thought the 914 was ugly and you have made it look fast and lean. The soltice mirrors are very nice. Some else used a gm mirror that also looked pretty good.
On the 6spd. sti tranny the mod that was mentioned was for a REAR wheel drive not a front wheel drive as I am using from Bremar. The Bremar I have will only work on the 5spd.
Several people are installing subie trannys in 914's.
I also have thought about maybe putting scoops in front of the rear wheels for a air intake and the ataic. A fiberglass duct could be made pretty easy on each side.
I am so glad you are so far ahead of my project so that I can study your approach.
You are doing great work. Are you tigging or miging?
I did my first rust repair 30 yrs ago with a stick welder boy what a job.
I have been miging for a long time but I am now using tig and it's really the lowest heat and the welds are more malible. Also there is lots less grinding and sanding of welds.
My 914 will be a street car and I also don't like the stock lights so I am trying to work that out also.
This may prove to be the best thread I am aware of.
Posted by: plymouth37 Aug 31 2008, 01:23 AM
WOW, sounds like you have a lot planned for your project!
To answer some of your questions:
I ran this drivetrain for two years and am really happy with it, at 320 HP it is very reliable and I think it makes plenty of power for the car.
If it aint broke don't fix it!
I ran an air to air intercooler on this car as a daily driver in Las Vegas heat for 2 years and didn't grenade anything but i agree awic for mid-engines isn't a bad idea!
I have a mig and a tig, I use either of them depending on what the job at hand requires.
It sounds like you have a lot of great ideas, I look forward to seeing how they turn out on your project!
Posted by: hwgunner Aug 31 2008, 02:14 PM
Can I have this when you are done??????????
Posted by: Phoenix 914-6GT Aug 31 2008, 02:15 PM
Sorry Jonthan. He said he was going to give it to me already
Posted by: plymouth37 Aug 31 2008, 03:00 PM
If by "give" you mean pay me $75K then yes Jon consider it yours!
Posted by: Phoenix 914-6GT Aug 31 2008, 03:15 PM
Oh... That's what you meant. I get confussed easily
Posted by: hwgunner Aug 31 2008, 04:50 PM
If by "give" you mean pay me $75K then yes Jon consider it yours!
Toss in the movable rear wing and you have a deal!!!!!!!!!
Posted by: charliew Sep 1 2008, 11:11 AM
I'm sure the stock tmic is ok for the wrx at 12 psi but the stock turbo really makes a lot more heat when it is pushed beyond it's capacity. To make 320 hp reliabily you will need a bigger turbo that makes it's volume at lower rpm and makes less heat. BUT it will need a bigger intercooler to handle the larger amount of cfm. On my son's sti at 20 lbs of boost with a 30r turbo at the top of 3rd the turbo was making 340 degrees f. With a fmic it was 106f on a 95 f evening at the tb.
It sounds like you have a perfect tune on the setup you have. The only thing I hope is you don't get some bad gas and get to build a better motor. 320 is A LOT for the stock 2.0 turbo setup.
I have lots of ideas but you have done a lot more than talk that's whats important. You have really raised the bar for the 914. Who cares that you started with a really clean tub. This will be sooo much more performance and style that a lot of guys with bought cars will not want to be seen next to you.
Posted by: plymouth37 Sep 1 2008, 11:49 AM
Like I stated before I will be running an upgraded Bell intercooler, even though the stock intercooler did a great job of cooling over the last 2 years I drove it. I agree that an sti turbo is a great upgrade but I don't feel the need to replace the stock one. I had this engine tuned to 320 HP by Vishnu performance and I trust their judgement and experience, they told me the stock turbo is fine and after 2 years of beating the crap out of it they have been 100% right. The main key to making this kind of power reliably in this car versus an STI is that the exhaust has a very short trip to the rear bumper. I am literally running a 3 foot long, 3.5 inch perfectly straight tube from the turbo to the rear bumper, the exhaust has no restriction and trust me that unties a couple ponies and makes the turbo's life a lot easier. Not to mention the fact that the engine is under almost no stress pushing around my 1850 pound car compared to the tank like STI
Posted by: Twise Sep 2 2008, 02:48 PM
This thread is making me want to build another car. I cant wait to see how it turns out. Great job so far...
Posted by: plymouth37 Sep 2 2008, 04:04 PM
Thanks for the great support guys! 200 replies and over 10,000 views, wow, how crazy is that? It is so great having you guys follow along, it keeps me motivated and excited about the project. It's funny, when you post a picture of everything you do to your build it's really hard to cut corners, you all are keeping me honest and my car will turn out better for it!
Thanks again!
Dana.
Posted by: jd74914 Sep 2 2008, 04:26 PM
The views really speak towards the craftsmanship. The work is awesome and your attention to detail is amazing. :trophy"
I think threads like this just increase the quality of everyone's work. Looking at your thread and others like Jeff Hail's are really good motivational tools for me. Now I feel compelled to finish every little bit to the best of my abilities. Thanks.
Posted by: g911 Sep 2 2008, 04:52 PM
Very nice work
Posted by: 749142 Sep 4 2008, 08:44 PM
this is will be the sweetest modified 914 ive ever seen. keep up the awsome work. keeps me motivated
Posted by: LarryR Sep 4 2008, 10:43 PM
I think the thing that I like the most about this project is the hint of old school hot rodding, coupled with excellent handling and extreme power.
What is not to like about this car. I cant wait to see it finished.
Posted by: tdgray Sep 18 2008, 10:52 AM
![]()
Anything... this is my favorite build by far... second only to Chappy's
Posted by: plymouth37 Sep 18 2008, 11:08 AM
Sorry for the lack of progress guys, the whole engineering degree thing is really eating up a ton of my time, I am averaging about 6 hours of homework a night, sheesh. I have 4 huge tests next week, after that I should be able to finally get some work done!
Posted by: byndbad914 Sep 18 2008, 11:51 AM
Sorry for the lack of progress guys, the whole engineering degree thing is really eating up a ton of my time, I am averaging about 6 hours of homework a night, sheesh. I have 4 huge tests next week, after that I should be able to finally get some work done!
don't miss those days! Best o' luck with the exams.
while getting my BSME a few year back I carried 17 units, worked 40 hrs/week and had an agreement with my GF (now fiancee) that Wed night and Sat night were the only nights I could go out. Averaged 6hrs of sleep per night so I hear you. I didn't even touch my project during that period.
Got the BSME, got a better job, and went from idea and bodywork to running in less than a year. I did my engine conversion stuff as my senior design project with a full analysis of the engine mounts, etc - figure out how to make the car fit in and kill 2 birds with one stone
Posted by: charliew Sep 18 2008, 12:21 PM
The me is so important in your life. My son hotrods a STI but he is chomping at the bits for my start on the 914 suby. He has a great job as a me and a great place to work. He has dropped in on a Seibon vender in Oregon on a business trip to see why his damaged hood had taken months to resolve. He travels about once a month. He is single and has a great income and he also has a great mechanical apptitude. The science and math overwhelm me on my hotrodding challenges. On that subject he is outstanding. He only lacks the hands on that will come very fast as he helps with our fabbing projects. To him programming is a fun but very time consuming challenge. I took programming in college (to me very boring) but when it makes the car go faster it is way more interesting and of course very different.
GPA is pretty important in looking for a big job but the mechanical apptitude that you have is something that can't be taught.
I was too lazy to finish college in the 60's, I thought my mechanical apptitude was enough so I switched to Industrial Engineering, welding, machine shop, drafting and design and etc. Not as much boring math and science, a lot more hands on. Needless to say I never got to where I could just buy the car of my dreams.
really though I enjoy making things other people want to buy.
Posted by: byndbad914 Sep 18 2008, 06:32 PM
Charlie brings up a good point - the mechanical aptitude will serve you WELL. I didn't get my ME until I was 30 (started out of HS, dropped out of ME when the Aerospace (AS) economy collapsed in SoCal, got an AS in Auto Mechanics and an AA small biz mgmt degree and went off to hot rodding.
After getting my BSME I got a job with a large AS company.. with just a few weeks of experience messing with the simulation software I was asked to consider a structural issue. I applied all I had learned working on tube chassis cars and where tubes work and don't work, real world load paths, etc... I beat the senior analyst and the computers optimizing software and I could hardly use the software at the time. I was the lead on that in 3 months... out of college 3 mo. and a lead analyst.
I am not BSing or tooting my own horn, just making a point that instead of going straight thru college - doing the auto thing was a better education and put me further in my career than 5yrs of engineering experience would have. You will hands down kick the ass of every one of your classmates when the time comes to start interviewing assuming you keep a good GPA of course.
I had a guy one night in DiffEQ ask me why I was so greasy (would literally go straight from working on building race engines and managing that biz to class), told him about my work and he said "You're fuching up the curve. Engineers are supposed to be stupid from the elbows down!" I will NEVER forget that comment.
Posted by: tronporsche Sep 19 2008, 03:45 AM
Dana, I know you are moving toward your design, but I have to ask you something. Since you have the skill, and are transfoming your car, but still have the 914 bloodline "look" (does that make sense ?) have you considered doing the front end like the "concept" car we have seen? I know what you are doing is a lot of work, but I just can't believe no one has done it yet.........Also- I know this sounds crazy, but for some reason, I keep seeing a chrystler 300 front end on a 914 !! I'm going to see if the computer artists can do one up to see what it would look like over in their post going on rite now (fake band challenge). Your car is looking great.
Posted by: charliew Sep 20 2008, 10:21 AM
I have crossed paths with several engineers that can talk very effectvely but can't hold a wrench or turn it without going the wrong way first. On my son and my adventures I have repeatedly told him to try to take something apart that he has designed. He is amazed at the effort of some disassemblies we do and how awkard they seem. I told him the first time is always the hardest and if you do it every day on "high maintenance units" IBM's term for junk, you get real fast, it's called specialized. In his job he travels and supports a product he helped design and of course tries to teach proper maintenance, but sometimes the operators really frustrate him. Overall most of the good engineers I know have loved every job they have had though. My job fixing business machines was not nearly as rewarding, and usually depressing. Only when the asian competition came along did we see a improvement in or own designs. I know they sort of copied us but their engineering was better. Electro mechanical control versus relay logic/mechanical control mostly. Most jap bikes are many times over better engineered than a harley. Even the vrod is a take off of the 83 honda magna, 130 hp., and still not as powerful it is a better harley though.
To me the front of the 914 is screaming for improvement especially on the radiator cars.
Posted by: carreraguy Sep 20 2008, 05:46 PM
To me the front of the 914 is screaming for improvement especially on the radiator cars.
As I recall, it was Dana himself who did this nice look on my car! Improvement enuf? ;o)
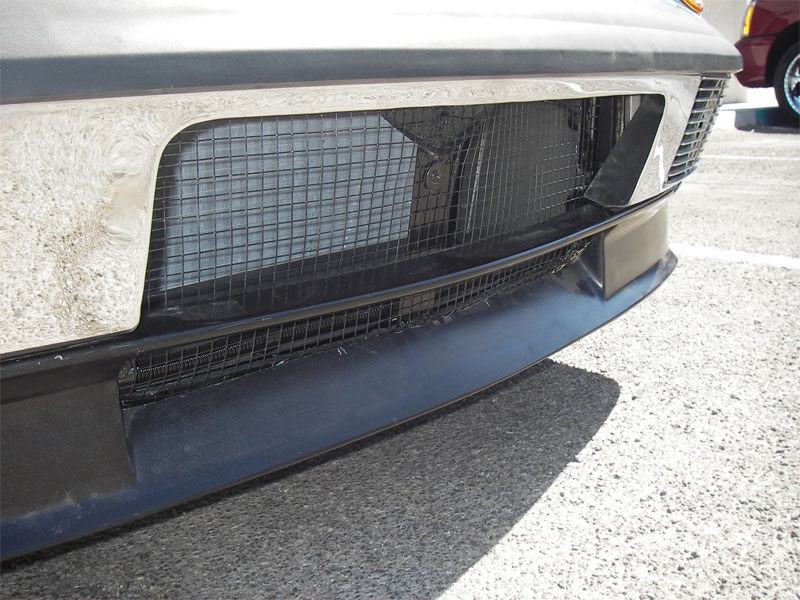
Posted by: plymouth37 Sep 20 2008, 06:04 PM
As I recall, it was Dana himself who did this nice look on my car! Improvement enuf? ;o)
I plan on keeping the front end pretty simple, I am planning on a F/G version of what I did on Tom's car except with the headlights in the foglight holes. Light and simple are definitely the two main driving forces on this build, oh yeah it has to look awesome too
. I got 2 tests out of the way this week and have 2 more on Wednesday
 , after that I plan on doing some more glassing before the weather turns. Progress will resume in a couple more days.
Posted by: plymouth37 Sep 30 2008, 05:11 PM
No big progress but given my crazy schedule I am amazed I got anything done!
The stock Boxster humps were made out of two thin fiberglass layers with a gap between them. Since I am doing extensive work on the humps I needed a thicker fiberglass base than the top layer was made out of.
I cut out the lower layer to expose bottom of the top layer.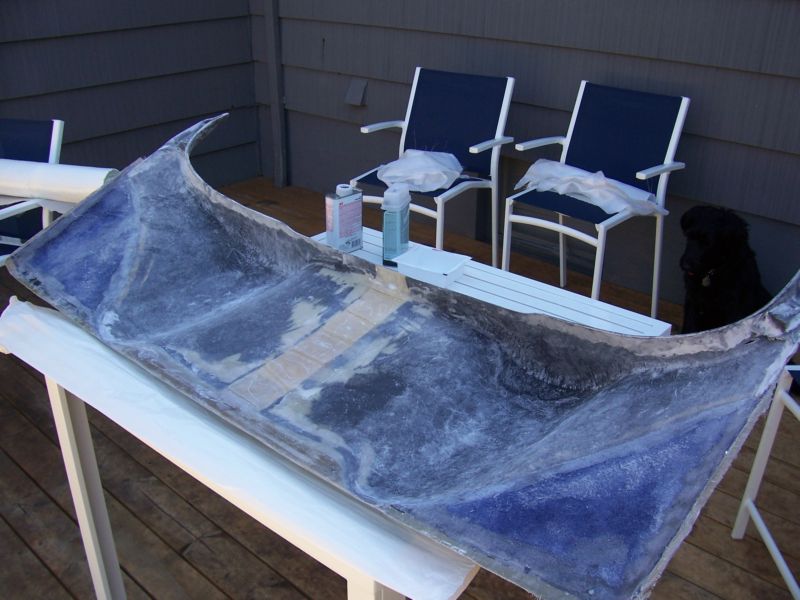
I then added four layers of 'glass to the underside.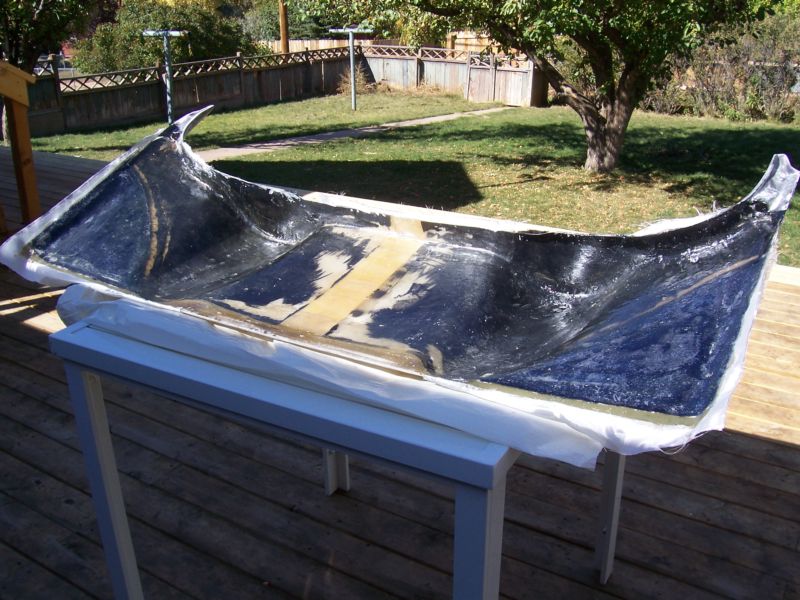
Now that the fiberglass is strong enough I can sand and smooth the final layer of 'glass on the top of the lid. This thing is almost done!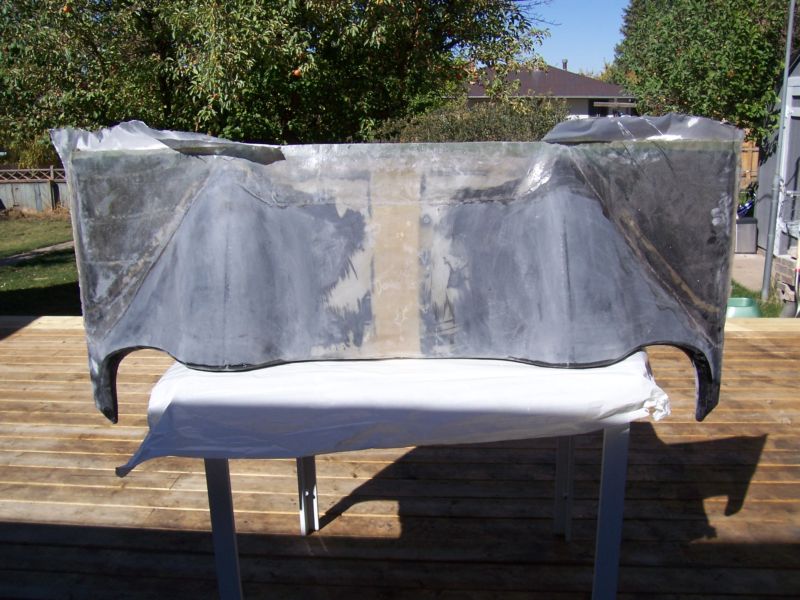
Hopefully I can get the rest of the 'glassing done before the snow falls
Posted by: r_towle Sep 30 2008, 05:45 PM
I still vote that you do the carbon fiber look (could be vinyl or just top coat) to the rear bumper, rear trunk, humps/decklid, roof, front trunk and front bumper...
Then leave the sides all metal exposed and clear coat that...
It would look awesome.
Rich
Posted by: plymouth37 Sep 30 2008, 05:54 PM
Then leave the sides all metal exposed and clear coat that.
Or I could just replace the fenders and doors with 'glass and wrap the whole damn car in C/F
Right now I am thinking about a simple non-metallic paint job, probably black or dark grey.
If I do a single stage I can spray it myself in my shop so I may go that route.
Posted by: r_towle Oct 1 2008, 06:49 AM
might be interesting with flat black satin finish...
Or
Chrome paint...that would be cool.
Rich
Posted by: Twise Oct 8 2008, 03:49 PM
Glasurit used to have this anthracite grey in a single stage. You could darken that up a bit and it would look dope. I like the idea of a black or dark grey - it will really show off the lines. Bling will just draw attention away from the shape of the body...
This is the first thread I have ever bookmarked. You got me checking this shit like every day. Keep up the good work...
Posted by: sean_v8_914 Oct 16 2008, 10:37 PM
Trev just turned me on to this insane build. sweet concept.
Posted by: biggy72 Oct 17 2008, 12:55 AM
I just finished up my ME degree in May. I really didn't have that great of a GPA and I will blame most of that on being in Formula SAE.... but I had a job before most of my friends so it worked out. Compared to the other younger guys I work with I am far and away more experienced at actually doing pretty much everything besides writing reports which I am catching up on pretty quickly. I don't know how much my boss is noticing of what I am capable of yet, but I know the guys in the shop notice it. Out of everyone at work I know the most about composite work and I learned it all because of FSAE.
How far into your degree are you? I know my junior year was the worst... and my senior year left me in the lab about 6 hours a day, then I would go home and do more hw.
What type of resin are you using for your fiberglass? If you want to make your glass parts lighter I would suggest pulling a mold off of the part you currently have, then make a new part with just the shape that you want. Also vacuum bag everything. We don't do it at work yet, but it only makes your work lighter and stronger, and it can be done pretty cheaply if you do it right.
After graduation, but before the FSAE competition I built the body for our formula car by myself in my garage. I wish I had a little more time and I wish the mold was nicer, but I think it turned out pretty well for only having about a month after work to build it.
Attached image(s)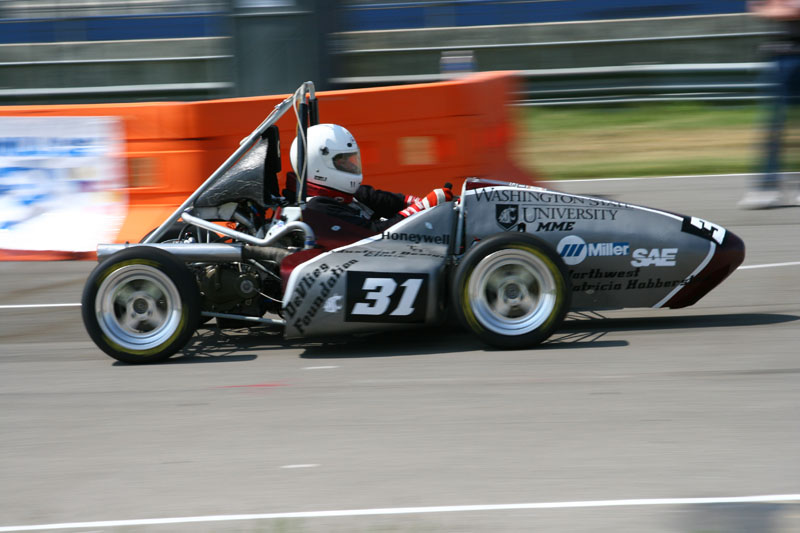
Posted by: plymouth37 Oct 17 2008, 01:09 AM
Formula SAE looks like blast!
I have thought about pulling a mold off of the humps, I want to see how they end up, i they don't end up right a mold may be the way to go. Now that the 'glass is thicker I need to sand them down and lay on some primer, after mid-terms are over that is...
Posted by: r_towle Oct 17 2008, 03:03 PM
Formula SAE looks like blast!
I have thought about pulling a mold off of the humps, I want to see how they end up, i they don't end up right a mold may be the way to go. Now that the 'glass is thicker I need to sand them down and lay on some primer, after mid-terms are over that is...
Its Damn hard to find the time to work on these major projects...the little ones add up to suck up all available bandwidth some days...weeks..
I finally chopped, cut, sectioned and welded the fender on one side...
I will post up a few pics in my thread to inspire you to go out and tinker,,
Its really fun doing the custom stuff....its alot more freelance.
Rich
Posted by: Loser_Cruiser Oct 17 2008, 04:35 PM
I just finished up my ME degree in May. I really didn't have that great of a GPA and I will blame most of that on being in Formula SAE.... but I had a job before most of my friends so it worked out. Compared to the other younger guys I work with I am far and away more experienced at actually doing pretty much everything besides writing reports which I am catching up on pretty quickly. I don't know how much my boss is noticing of what I am capable of yet, but I know the guys in the shop notice it. Out of everyone at work I know the most about composite work and I learned it all because of FSAE.
How far into your degree are you? I know my junior year was the worst... and my senior year left me in the lab about 6 hours a day, then I would go home and do more hw.
What type of resin are you using for your fiberglass? If you want to make your glass parts lighter I would suggest pulling a mold off of the part you currently have, then make a new part with just the shape that you want. Also vacuum bag everything. We don't do it at work yet, but it only makes your work lighter and stronger, and it can be done pretty cheaply if you do it right.
After graduation, but before the FSAE competition I built the body for our formula car by myself in my garage. I wish I had a little more time and I wish the mold was nicer, but I think it turned out pretty well for only having about a month after work to build it.
I ams like its gonna be pretty fun and I can get my car fix while Im away from the 914.
Posted by: plymouth37 Oct 25 2008, 05:03 PM
I finally had a weekend off and decided to do some welding today.
I plan on cutting out the rear trunk floor but decided to weld in some rear bracing first to ensure that nothing moves.
I am not really sure if this will drop any weight from the car but it should make it stiffer and easier to work on.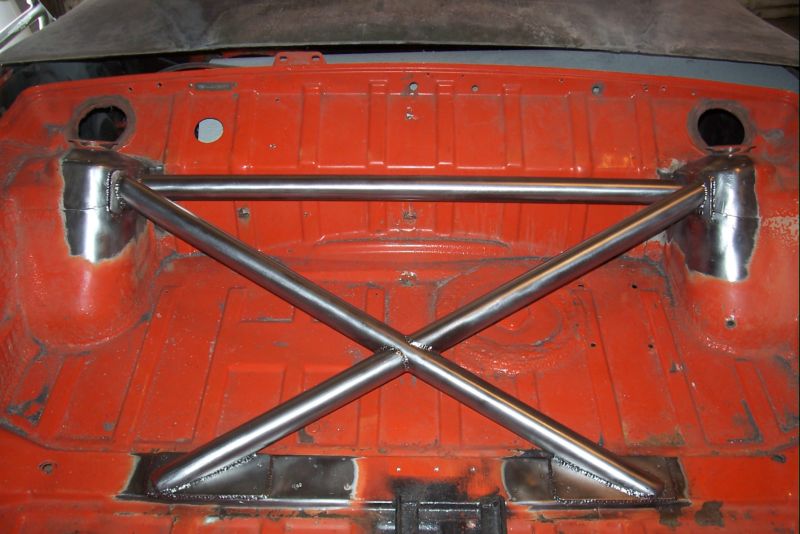
I welded in 1/8" steel plate as a base to weld the 1.5" diameter 1/8" wall tubes to.
I weighed the tubes, plates, and the difference in weight of my welding wire spool and found that the whole structure weighs 14.7 pounds, next I will cut out the floor and hope it weighs more than 14.7 pounds .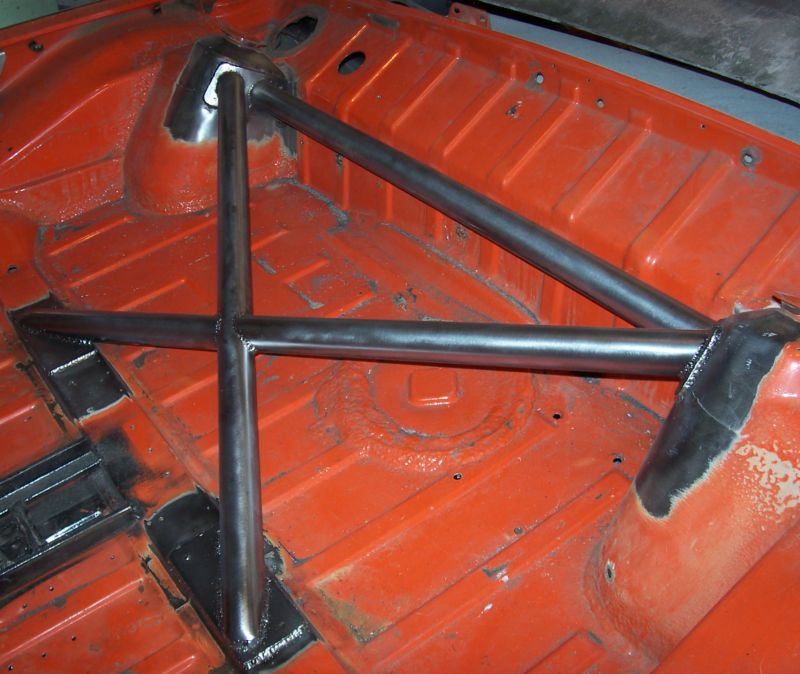
I will probably also tie this rear structure into the roll cage.
The black structure you can see in the photos is the old mounting bracket for the retractable wings actuators, it will be removed along with the floor.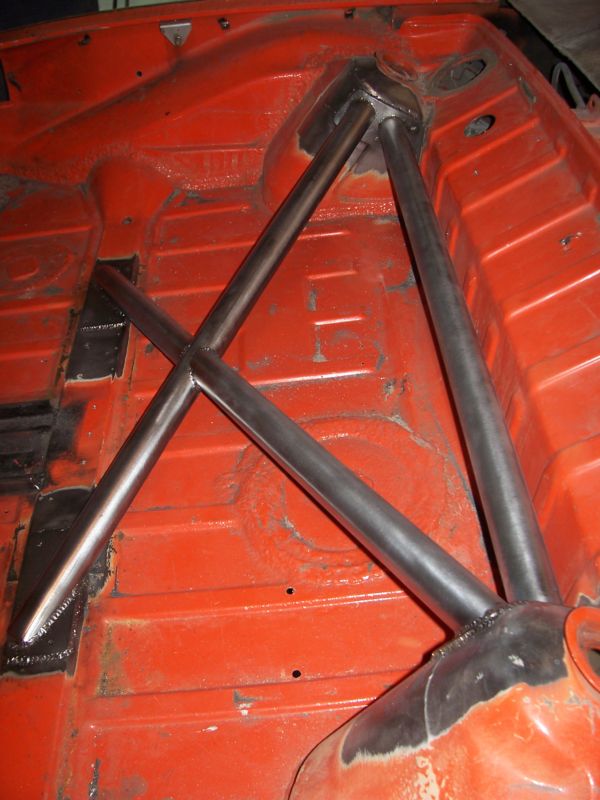
Posted by: plymouth37 Oct 26 2008, 12:41 AM
I cut out the rear portion of the floor and cleaned things up.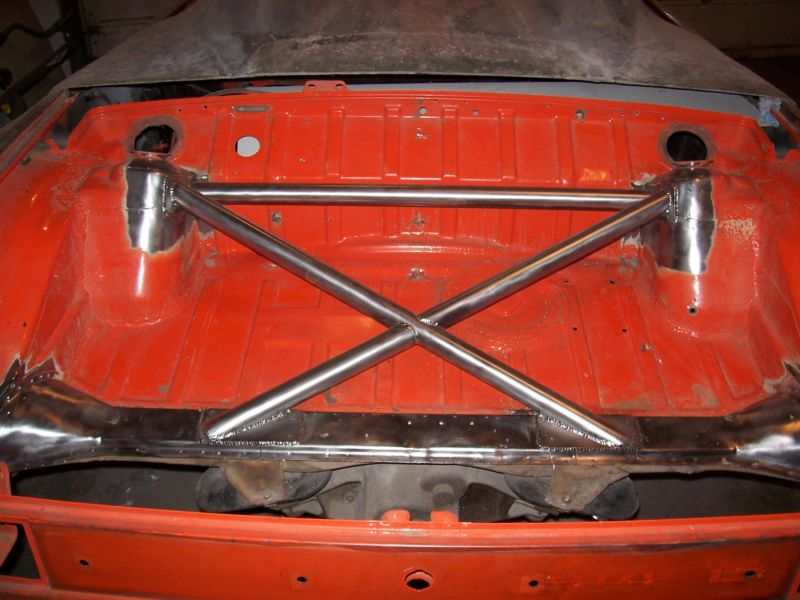
The removed floor section weighed in at 6 pounds so it looks like I will be able to drop 5 or 10 pounds by replacing the floor with tubing.
I should be able to remove the rest of the floor tomorrow.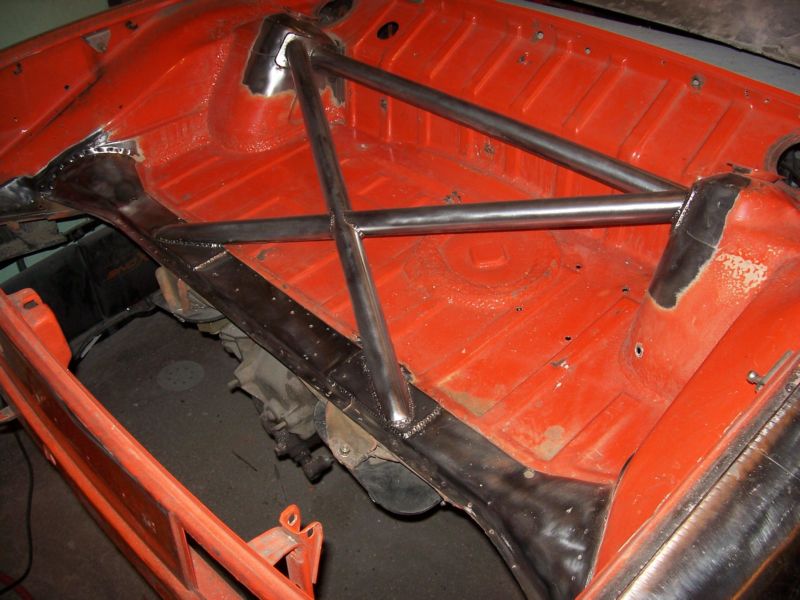
Posted by: Loser_Cruiser Oct 26 2008, 01:41 AM
Looking back at this it must have been margarita friday or something.
 Not meaning to hijack but I was try to say that Im joining the FSAE here at WSU pulman this week. I really admire all the work done on this car. I can not wait to get done with school so i have some real money to put into my car.
Posted by: Zaney Oct 27 2008, 03:49 PM
GO COUGS! (Served my four years in Pullman 92'-96')
Awesome werk DANA!!!!
Skillz baby skillz!
Posted by: byndbad914 Oct 27 2008, 04:07 PM
lookin' good - I sure wish I had something to weld Mendeola is still waiting on shift forks to assemble my transaxle
Typical "only takes two weeks to assemble and ship out" but they fail to mention the 4 weeks they will mess around waiting on parts. I will be lucky to have it before the really cold weather sets in.
Posted by: Phoenix 914-6GT Oct 27 2008, 05:27 PM
lookin' good - I sure wish I had something to weld
Mendeola is still waiting on shift forks to assemble my transaxle Typical "only takes two weeks to assemble and ship out" but they fail to mention the 4 weeks they will mess around waiting on parts. I will be lucky to have it before the really cold weather sets in.
I could drive my car down there and have you weld on it for me
Posted by: r_towle Oct 27 2008, 05:49 PM
WOW
You are a neat freak prior to your pictures...
How are you making it so shiny??? Wire brushed grinder???
Rich
Posted by: byndbad914 Oct 27 2008, 07:45 PM
lookin' good - I sure wish I had something to weld
Mendeola is still waiting on shift forks to assemble my transaxle Typical "only takes two weeks to assemble and ship out" but they fail to mention the 4 weeks they will mess around waiting on parts. I will be lucky to have it before the really cold weather sets in.
I could drive my car down there and have you weld on it for me
hahaha, Dana and I have talked about me trailering my car up to his place so he can finish weld whatever bracketry I need to make to mount the Mendy
Prolly don't want me welding - I was over at my friend's house a couple weeks ago and trying to practice with his TIG - I haven't really welded in probably 15yrs now (did in college and a little bit here and there after that) and I am WWWAAAAAYYYYY rusty hahaha. OMFG I about
 and gave up after an hour and had him weld some suspension stuff I reconfigured.
Posted by: sendjonathanmail Oct 27 2008, 08:39 PM
Dana, I sent you a PM.
Posted by: plymouth37 Oct 27 2008, 08:58 PM
hahaha, Dana and I have talked about me trailering my car up to his place so he can finish weld whatever bracketry I need to make to mount the Mendy
Let me know whenever you get that beast, given the good weather we have been having we could probably still get it in this year
.Yep, DA and a wire wheel, I love finding that nice shiny metal under the paint!
Sorry Jonathan the rear floor was screwed up from the rear wing mount so I junked it.
As for the car I just finished cutting out the rest of the floor and weighed it. It looks like I dropped 7.2 pounds by replacing the floor with tubes
My camera ran out of juice so I will post pics after it wakes up.
Posted by: Brett W Oct 28 2008, 09:57 AM
Wow, you used .125 wall tubing? You could have easily done that with .065 or even .058 wall. Plus there is no flex back there to speak of. The chassis doesn't bend in the direction you put the bracing. You could have saved 50% of the weight and still had the necessary level of stiffness.
Posted by: fat73 Oct 28 2008, 11:07 AM
Check out the stainless steel DC sports header I installed along with a custom up-pipe I built. Purty aint it?
It frees up some horses and is 12.2 pounds lighter than the stock manifold
Dana,
Man.....I've been off the forum for wayyyyyy toooo long. I didn't know you were doing this to your car. Awesome work...just what I'd expect from you.
Is that the same custom uppipe as I have from Renegade? If so, I'd really like to get some of those headers for my car. Any idea what the hp + is?
I'm still running the stock ECU on my car. I have another one that I intend to get flashed one of these days. But with 0-60 4.5 seconds, 24,000+ miles with absolutely NO problems (short of one broken transaxle), 30+ mpg on the interstate, I'm hesitant to change a thing.
Ed Hunziker aka W9R1
Posted by: plymouth37 Oct 28 2008, 12:56 PM
Wow, you used .125 wall tubing? You could have easily done that with .065 or even .058 wall. Plus there is no flex back there to speak of. The chassis doesn't bend in the direction you put the bracing. You could have saved 50% of the weight and still had the necessary level of stiffness.
When you live in a small town you use what you can find
I had to look really hard to find anything under 1/4" wall! I am happy though, even with the thicker wall tubing I still lost a good amount of weight.
As for the design of the structure, almost every 914 race car I have seen is braced like this so I figure it must work just fine.
My uppipe is a larger diameter than the renegade uppipe but the DC header will bolt right up to your car. If I remember correctly the gains were around 12-15 HP.
Posted by: Brett W Oct 28 2008, 02:27 PM
The suspension does not twist that way. Just because everyone does it doesn't mean it is right. Look at how your suspension moves. The rear shock towers see no lateral load at all. There is no reason to build that structure in the rear of the car. All the metal after the shock towers is pretty much hanging on for the ride.
When you need small quantities of metal check out these guys:
http://www.speedymetals.com
Posted by: fat73 Oct 28 2008, 02:28 PM
Wow, you used .125 wall tubing? You could have easily done that with .065 or even .058 wall. Plus there is no flex back there to speak of. The chassis doesn't bend in the direction you put the bracing. You could have saved 50% of the weight and still had the necessary level of stiffness.
When you live in a small town you use what you can find
I had to look really hard to find anything under 1/4" wall! I am happy though, even with the thicker wall tubing I still lost a good amount of weight.
As for the design of the structure, almost every 914 race car I have seen is braced like this so I figure it must work just fine.
My uppipe is a larger diameter than the renegade uppipe but the DC header will bolt right up to your car. If I remember correctly the gains were around 12-15 HP.
Is it one of these headers?
http://www.racepages.com/products/?N=1719+917+4294965131
Thx...Ed
Posted by: plymouth37 Oct 28 2008, 05:11 PM
That looks like it Ed, any WRX header that does not incorporate an uppipe will fit.
I really like the DC header though, they make great stuff.
Good to hear from you buddy!
Posted by: plymouth37 Oct 28 2008, 05:48 PM
I finished cutting out the rest of the trunk. As you can see it will be so easy to work on the drivetrain and managing the cooling around the engine should be easier now as well.
I still need to do a little welding around the frame rails to get everything solid but it is getting close.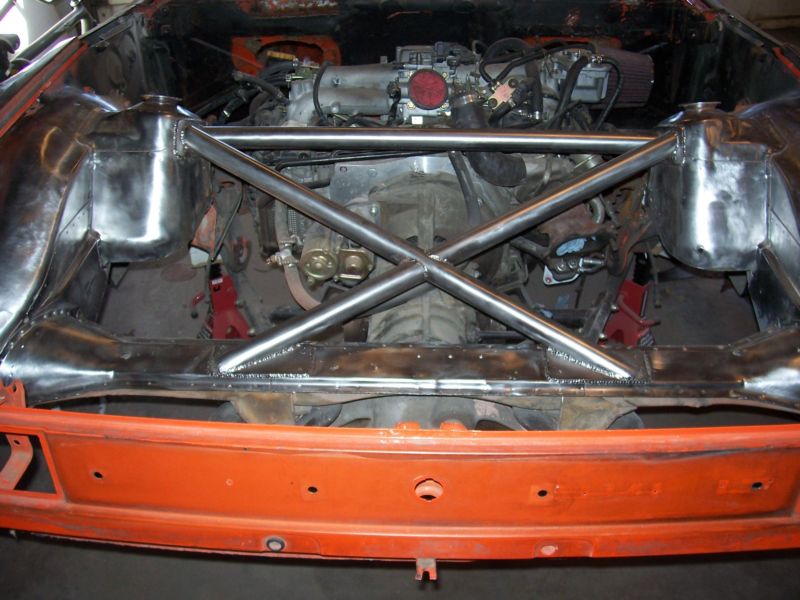
By cutting out the floor and welding in tubes I dropped 7.2 pounds which brings the total weight cut up to 434 pounds so far.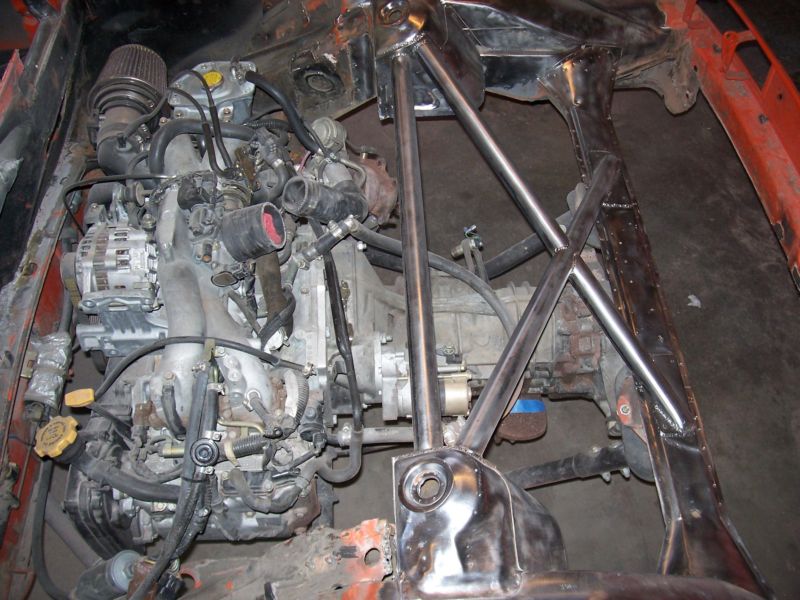
Now I have to clean up the drivetrain because it looks like crap behind the shiny tubing!
Posted by: fat73 Oct 28 2008, 07:45 PM
That looks like it Ed, they make great stuff.
Good to hear from you buddy!
Dana,
I'm honored to be one of the few that have actually had an opportunity to take a ride in your car. That was the inspiration for building mine right from the moment you scared the hell out of me in Las Vegas rush hour traffic nearly 3 years ago. Thank you for all the work and engineering you put in at Renegade that made the Subaru WRX conversion feasible and practical, inspiring those of us who want to modernize and improve on the performance of our 914s without having to think too hard, do a bunch of trial and error, or have the engineering skills of you and some of the other superstars on this forum (you know who you are...tony, scott, et al).
By the way...I have my car garaged in Tennessee at the moment in my shop. I have a few things to do, like Carrera front suspension/brakes, new windshield, and yes....paint. I've got to decide what paint scheme to use to replace the old Martini style scheme ( ideas are welcome), but it's getting tired (30 years old) and has gotta be done. I just sold a really solid 72 roller (from Arizone) that I was gonna build, but have decided just to work on what I have. Maybe some day...
I continue to be amazed how many incredibly talented people there are on this forum. I can't wait to see how this unique hot rod turns out.
By the way all you die hard Porsche purists....Don't ever take a ride in one of these....You may find you will have some crow to eat. You'll want one too.
Ed aka W9R1
Posted by: smdubovsky Oct 28 2008, 09:19 PM
...
There is no reason to build that structure in the rear of the car. All the metal after the shock towers is pretty much hanging on for the ride.
Its not about the shock towers. Its about having to support the tranny ear loads (calculate the downward vertical force when you drop the clutch on a ???lbft motor in 1st gear). It sees more force than the motor mounts and people have torn those loose. Most people run the rear tubes to the shock towers because thay ALSO run the cage tubes to the rear shock towers, thus tying the tranny into the cage. Its simply a convenient place to bring the tubes.
Posted by: plymouth37 Oct 28 2008, 09:50 PM
Well put, I used to have bars running from the cage to the towers when I was running a type IV but I had to remove them to get the WRX engine to fit. I just started prepping the rest of my cage this afternoon to weld in some new tubes that will clear the taller engine.
Posted by: Brett W Oct 29 2008, 10:45 AM
I was under the impression he was just doing the tubes and not connecting it to a cage structure.
Posted by: plymouth37 Oct 29 2008, 11:04 AM
I was under the impression he was just doing the tubes and not connecting it to a cage structure.
Yeah I kind of mentioned that earlier but it was hidden between the pictures (I had a hard time finding it and I wrote the damn thing).
Anyway I am wondering how I should do this, I have seen some people go straight forward to the cage from the towers which would work well for fore and aft stress but not very good for twisting forces. On the other hand I could put another X across the engine bay which would help to counteract twisting forces but only do ok with the fore and aft forces (and look cooler
). Any opinions?
Posted by: r_towle Oct 29 2008, 12:12 PM
there is little twisting force there that you need to deal with.
the passenger compartment firewall and the rear tubes you put in provide the shear strength for that area...the firewall doing most of the work...
The twist is forward of that firewall...put the car on jack stands under each donut only...then rock the rear of the fenders and watch the door gaps and door alignment as you do this...
the rear of the car...firewall back moves as a unit...the twist occurs forward of that...basically right where the longitudinal cracks....
drop a line down from the top of the windshield to the long...that is the stress point..
You will see what I mean if you wiggle the chassis while its on jack stands under the donuts.
Rich
Posted by: J P Stein Oct 29 2008, 12:38 PM
A couple things.
First, I am surprised at the weight savings. My eyeball job on the area told me that it would be minimal or a push. I've been wrong before. Taking weight out of the rear of a 914 is a bitch....7 lbs is significant.
Second. IMO you're doing it right....after you tie it into the roll hoop/cage. The hoop alone won't cut it for overall stiffness.
A lot of opinions ventured on the necessity of bracing various parts of the 914 chassis. Those are about as good as mine....except my chassis is stiff....for a 914. Could it be better, sure, I've seen better...or what appears to be better. Nobody has supplied numbers, just speculation. I don't have numbers either but my butt dyno revealed a huge improvement when I tied the front & rear towers into the cage.....shoulda done it sooner.
Posted by: byndbad914 Oct 29 2008, 03:26 PM
If I were me Dana I would hack that rinky-dink stock shock mount tower completely out and run a tube from the cage back near that area*, make a bend and head down to the trans mount and create a rear structure exactly like Paul (URY) did. Then I would weld a couple tabs on to mount a new, better shock with rod ends at each end. Get rid of that rubber crap in the stock shock (which puts a shock on your shock and I would rather have a hard interface so the shock can do its job).
* I say near the area because you would need to have the bar in that region to create the upper mount.
Here is a shot of my shock assy and upper mount and what I am essentially describing.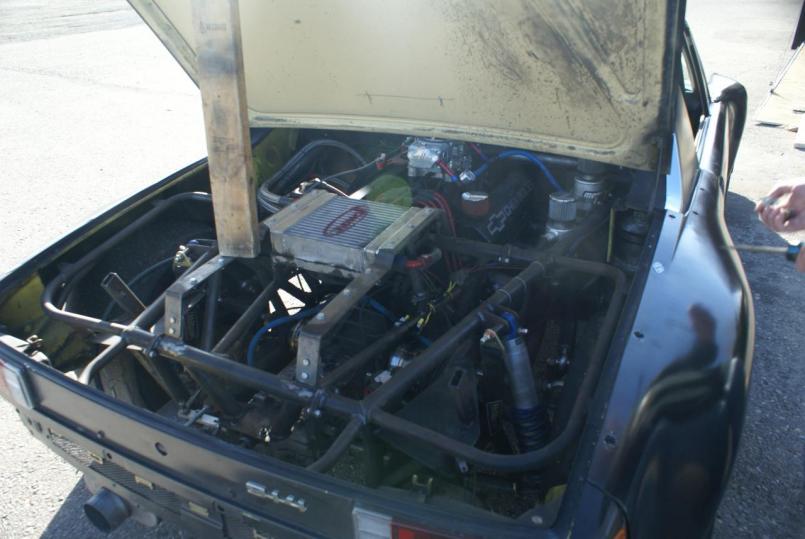
Posted by: jd74914 Oct 29 2008, 03:36 PM
Dana, I agree with Tim. A friend and I were looking at pictures of the rear cutout this morning, and we were both thinking a mount like above would be the way to go. Its not too much more work, and really opens up a whole new world in relation to shock selection and mounting precision.
Posted by: J P Stein Oct 29 2008, 03:51 PM
Due to some computer problems, I can't load the pic of a car which I think was done better and got rid of the "rinky dink" shock tower mounting of the shocks.
I think "Bads" frame is stiffer than most all racing 914......by God, it should be.
And, by God, he shoulda gotten rid of the rinky dink McPherson strut suspenders up front tho.
Posted by: byndbad914 Oct 29 2008, 04:15 PM
I think "Bads" frame is stiffer than most all racing 914......by God, it should be.
And, by God, he shoulda gotten rid of the rinky dink McPherson strut suspenders up front tho.
hahaha - working on coming up with a dual A setup up front (and rear for that matter) but not this winter.
Time and money... I had more time (future) than money when I did the front section, as well as already had the RSR struts and stuff in the "tub" car before. Converting a tube chassis car from strut mount to SLA is pretty easy once the money comes around again - just reroute a couple tubes. But after the latest transaxle purchase won't be for at least a year
I sorta wanted to do a power steering rack up front which I would want to build the SLA around (to remove bumpsteer i.e. set the front geom to specifically work with an aftermarket rack width). All that was adding up a bit quick at the time. There is limited room in the front to mount the rack, so since that is the limiter I want to have that piece first.
Posted by: Brett W Oct 30 2008, 10:42 AM
Yeah, since you are removing the rear trunk may as well go ahead and cut out everything including the fenderwells and just hang the back of the body off the tube chassis stuff. It would be lighter and you could make custom wheel wells in the trunk.
Plus you can use regular double eye shocks. I would come straight back from the fire wall to the shock towers with tubes, Cross the firewall underneath the the engine lid, right up against the fire wall. Weld it to the chassis in several places. Then build an Xbrace out of 1in or 1.25 in tubing for the engine compartment. Make it removable so you can get into the engine bay.
Posted by: BKLA Nov 18 2008, 11:19 AM
Update(s)????? Half a month is too long to wait!
Posted by: plymouth37 Nov 18 2008, 06:29 PM
Update(s)????? Half a month is too long to wait!
Just flew in from out o' town, I have some friends coming into town tomorrow but should be able to make some progress on Monday.
Posted by: plymouth37 Nov 20 2008, 01:13 AM
Since I have removed my trunk floor I no longer need the turbo relocation kit, I figured it would be better to bring the turbo back up to its original position. Here is the turbo in its relocated position, notice the mangled oil lines, custom bracket, and intake extension.
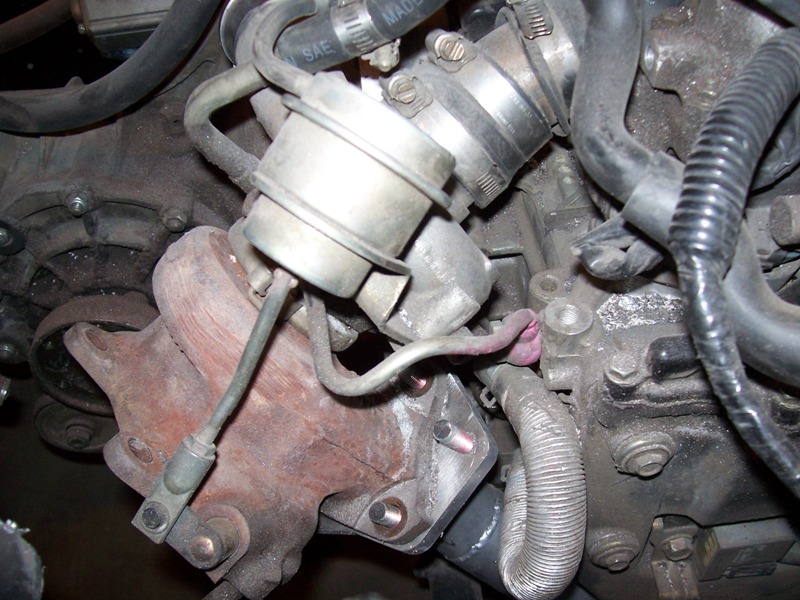
Posted by: plymouth37 Nov 20 2008, 01:13 AM
I removed the turbo and found that my intake was cracked and that the oil and coolant lines running to the turbo were also damaged. I ordered new lines, mounts, and a high performance silicone intake. According to it's maker this intake will increase performance by 10HP but I have my doubts, it looks good though! Here it is compared to the restrictive stock unit.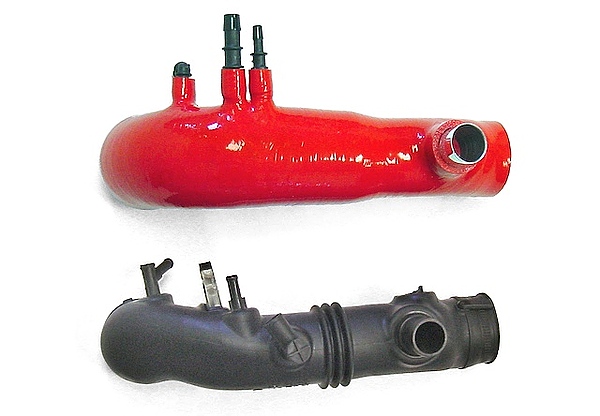
I installed everything and now my turbo is back where it belongs. And don't worry that missing nut is on order!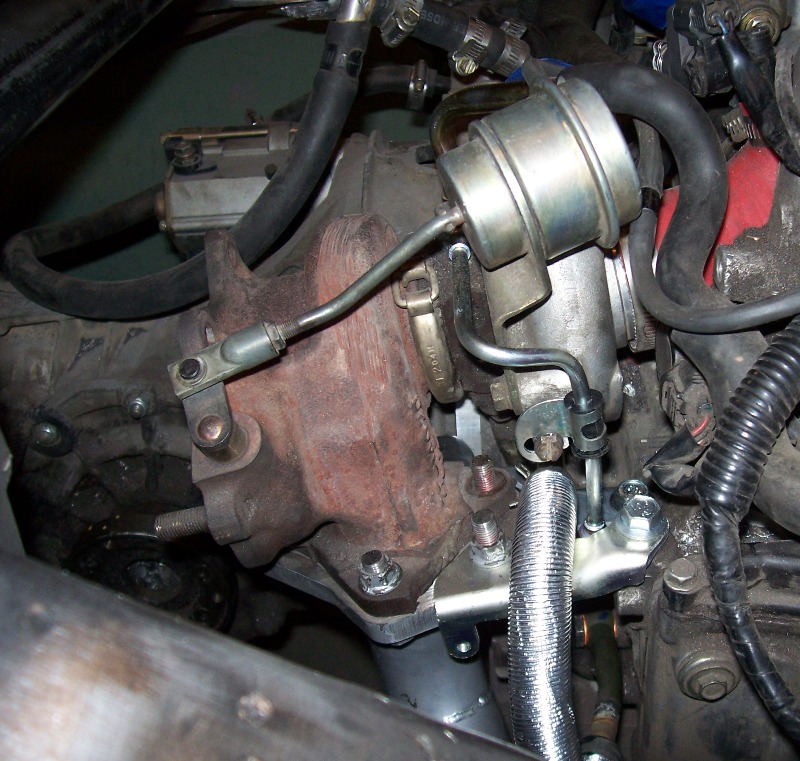
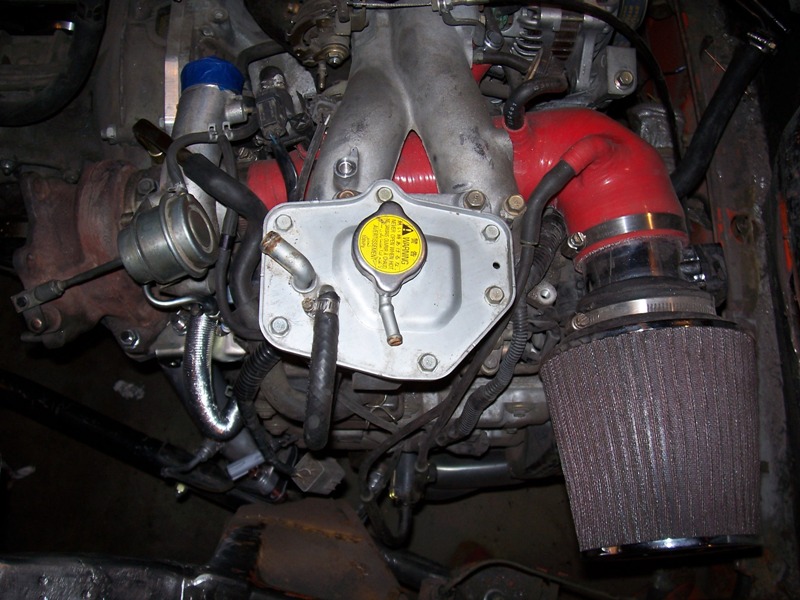
Posted by: Phoenix 914-6GT Nov 20 2008, 01:24 AM
I love this thread
Posted by: plymouth37 Nov 20 2008, 01:26 AM
I also removed the remaining excess sheetmetal and cleaned up the frame rails. Next I am going to rebuild the area where the rails meet the towers and weld in the tubes that will tie the rear structure into the main cage.
Posted by: wobbletop Nov 20 2008, 11:48 AM
FYI... The newer Subies have a plastic coolant tank instead of the metal one. The top of the metal tank tends to corrode. I just replaced mine.
I also did the silicon inlet hose. My race shop says they are beneficial.
While I was there I also added the Hondata intake manifold gaskets. They reduce the temperature from the block going into the intake. Also, there is a coolant line going into the throttle body. You could remove that as well. I think it's only to prevent the throttle from sticking in (really) cold weather. People also remove the tumble generator valves (TGVs) between the intake manifold and the block to free up some airflow.
These are some simple things to improve on the stock design. Just trying to be useful .
-Walter
Posted by: plymouth37 Nov 20 2008, 12:30 PM
FYI... The newer Subies have a plastic coolant tank instead of the metal one. The top of the metal tank tends to corrode. I just replaced mine.
I also did the silicon inlet hose. My race shop says they are beneficial.
While I was there I also added the Hondata intake manifold gaskets. They reduce the temperature from the block going into the intake. Also, there is a coolant line going into the throttle body. You could remove that as well. I think it's only to prevent the throttle from sticking in (really) cold weather. People also remove the tumble generator valves (TGVs) between the intake manifold and the block to free up some airflow.
These are some simple things to improve on the stock design. Just trying to be useful
.-Walter
Thanks for the advice
I will have to take a look at the coolant tank in my '07 Legacy, it sounds like the plastic one may be a good replacement, I hadn't heard about the corrosion problem but after looking inside mine it does look pretty rough. I will also check out those gaskets, they sound like a good upgrade.
Since this is a fair weather car I have already removed the throttle body heater and plan on removing the TGVs once I pull the engine from the car. After I pull the engine I am going to re-route alot of things like the coolant lines to make the engine look cleaner.
Posted by: Root_Werks Nov 20 2008, 12:44 PM
Cool! Nice to see some updating going on today. 
Posted by: effutuo101 Nov 20 2008, 10:41 PM
Very nice, I can't wait to see how the defuser fits in with all of this. Are you going to move the radiator to the back now? Looks like you have a bunch more room now.
Posted by: plymouth37 Nov 20 2008, 11:15 PM
I had thought about moving the radiator to the rear but I think it will bring alot of extra heat to the engine bay. I have a feeling it will be hard enough to get the intercooler cool as it is, running a belly pan and diffuser will seriously limit airflow to the engine bay. Who needs trunk space anyway?
Posted by: plymouth37 Dec 4 2008, 04:30 PM
I did a little welding today.
I reinforced the rest of the tower and tied the rear tubes into the main cage.
While I had the welder out I patched all of the un-needed holes in the "trunk" and engine bay.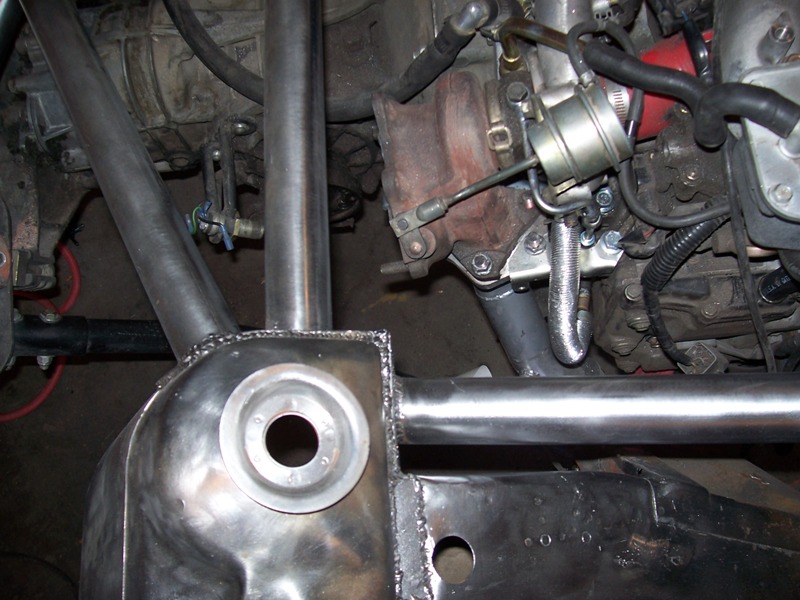
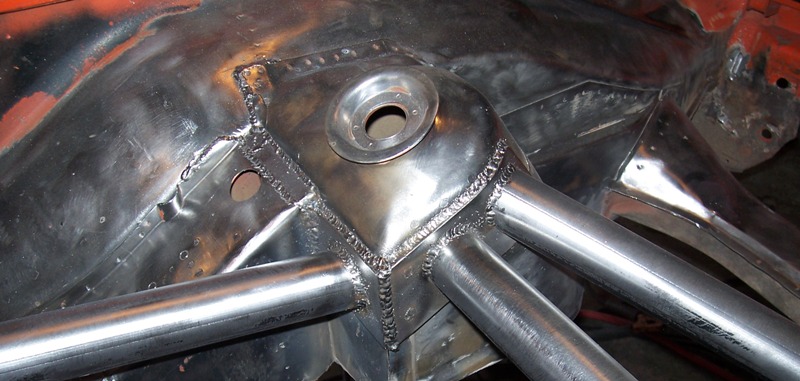

Posted by: plymouth37 Dec 4 2008, 04:30 PM
I had planned on welding tubes into both sides today but it is 9 degrees here so I gave in to the cold after only finishing the passenger side.
I should be able to weld in the other side tomorrow.
I also properly attached the framerail to the tower, it looks like the only thing attaching the two in the stock car were 3 tiny spot welds.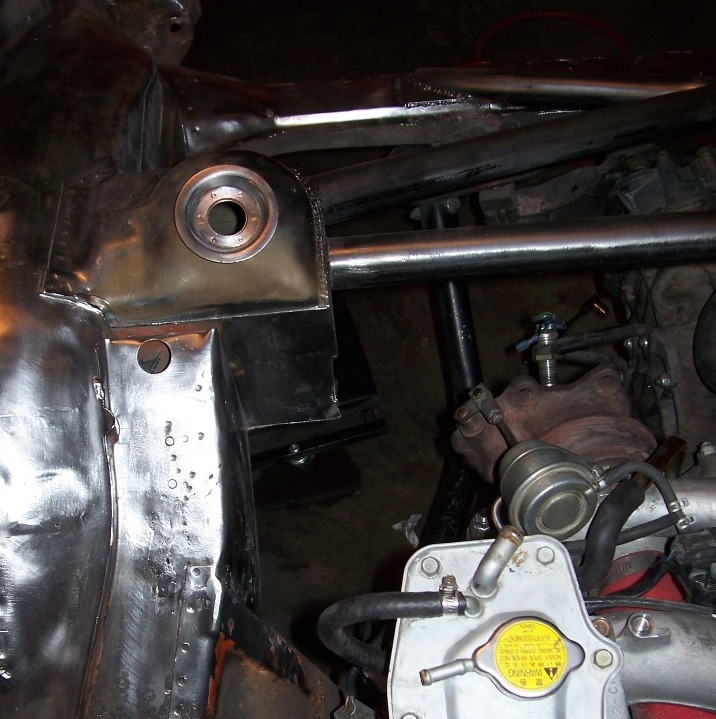
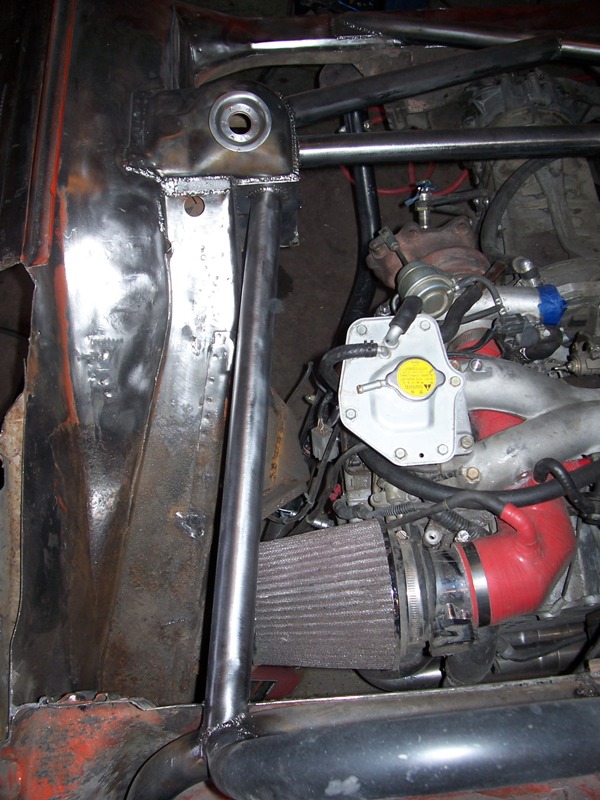
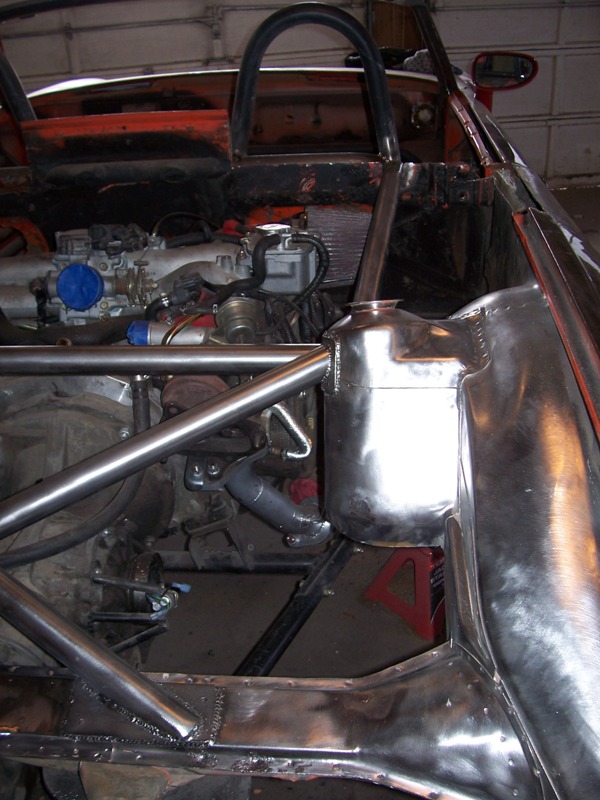
Posted by: Phoenix 914-6GT Dec 4 2008, 05:08 PM
Posted by: Brett W Dec 5 2008, 02:38 PM
Are you using that bzt-bzt-bzt-bzt welding technique that I see so many kids using now days when welding with a MIG machine? Your welds look funny.
Posted by: plymouth37 Dec 5 2008, 03:20 PM
Yeah I use the bzt-bzt technique, the welds run a little on the cooler side but I find that I have better control of the weld quality this way.
The welds do look a little crazy in the pictures, because I polished them with the wire wheel the cameras flash goes nuts and makes them look all wonkey, trust me they look a lot better in person!
Posted by: plymouth37 Dec 7 2008, 01:44 PM
I finished the cage today.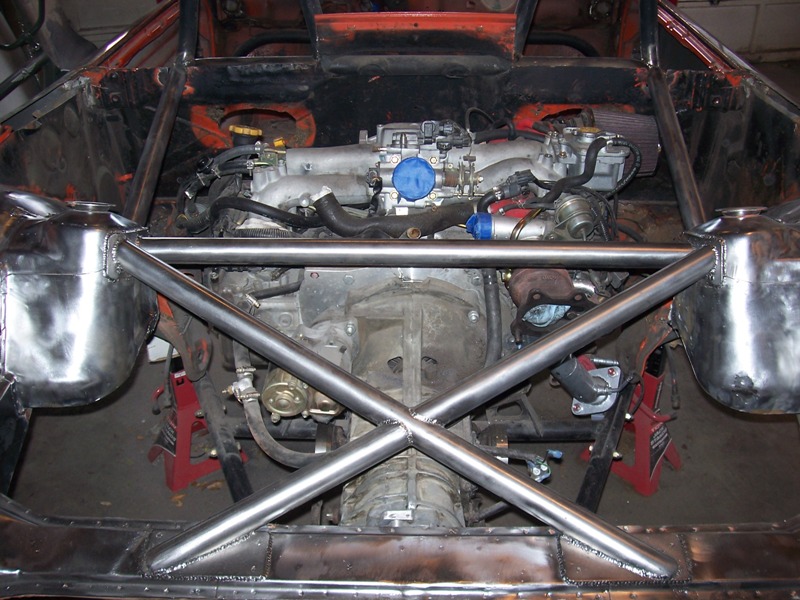
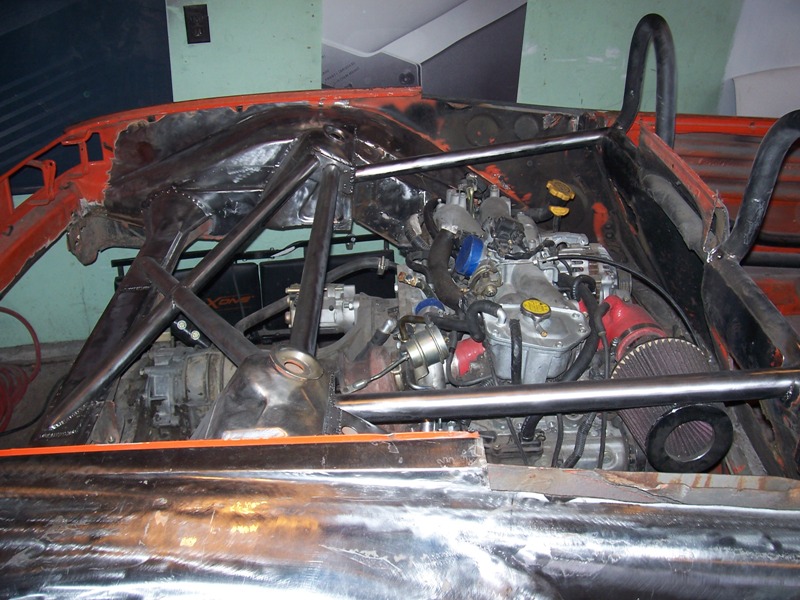
Posted by: plymouth37 Dec 7 2008, 01:44 PM
After cutting out the trunk floor and welding in all of the rear tubes I dropped a total of 3.2 pounds, not bad considering what was done.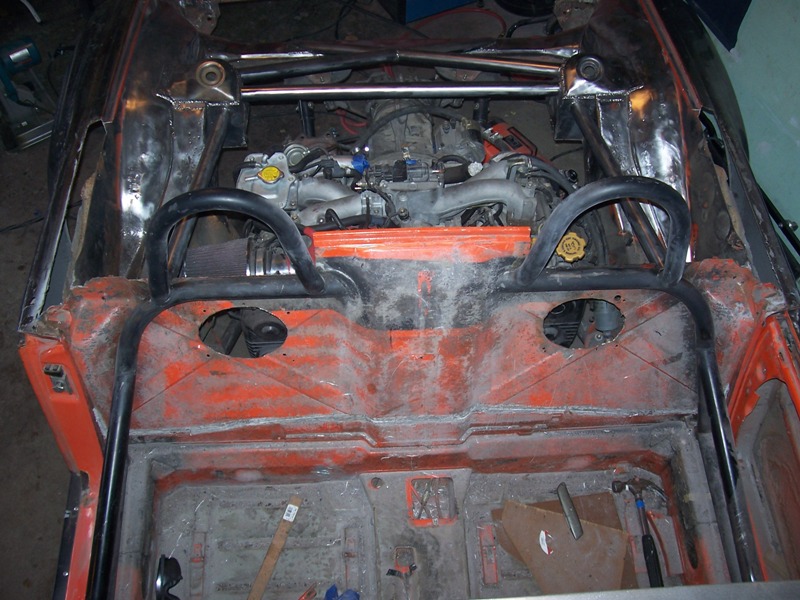
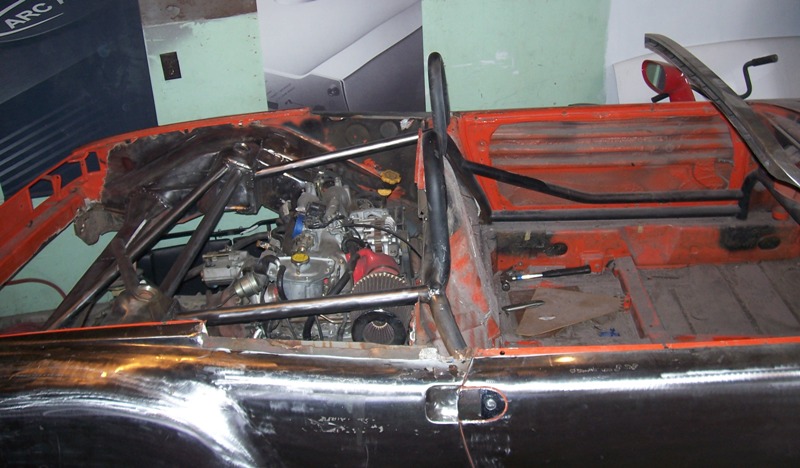
Posted by: Zaney Dec 7 2008, 03:27 PM
Now there should be no problem in finding room to upgrade your 901 to a WRX 5 speed someday.
Looks awesome!
Posted by: Wilhelm Dec 8 2008, 01:50 AM
I'm concerned that the hoops of your roll bars are not continuous to the frame rails and are entirely dependent for their strength on the welds at their bases. They are also not triangulated and worry they will fold over onto your noggin in a crash. Don't get me wrong, I like what your doing overall, just want you to be safe.
Posted by: plymouth37 Dec 8 2008, 10:34 AM
I totally agree, at this point the hoops are not nearly as strong as they could be.
I have decided to run 5-point harnesses so it would probably be a good idea to triangulate the hoops with another bar.
It will be tough to squeeze another bar under the humps, I will have a better idea of what is possible after I finish the firewall.
Posted by: BKLA Dec 8 2008, 10:36 AM
great job!
Posted by: plymouth37 Dec 8 2008, 07:10 PM
Today I started rebuilding the firewall. Since I cut off the targa bar that held the upper seat belt bracket I have decided to go with 5-point harnesses. Luckly my main hoop is in a great position to anchor the shoulder belts but the firewall needed to be recessed to clear the belts.
I made these blisters then welded them into the firewall.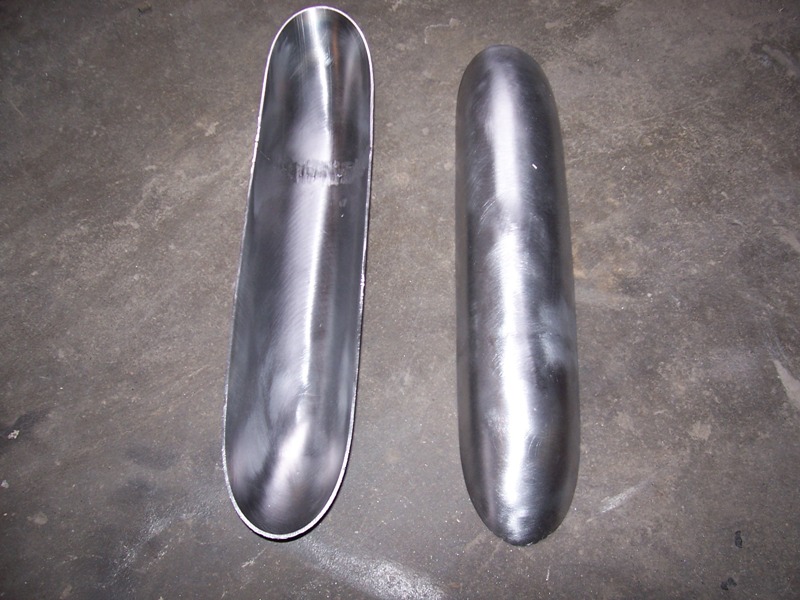
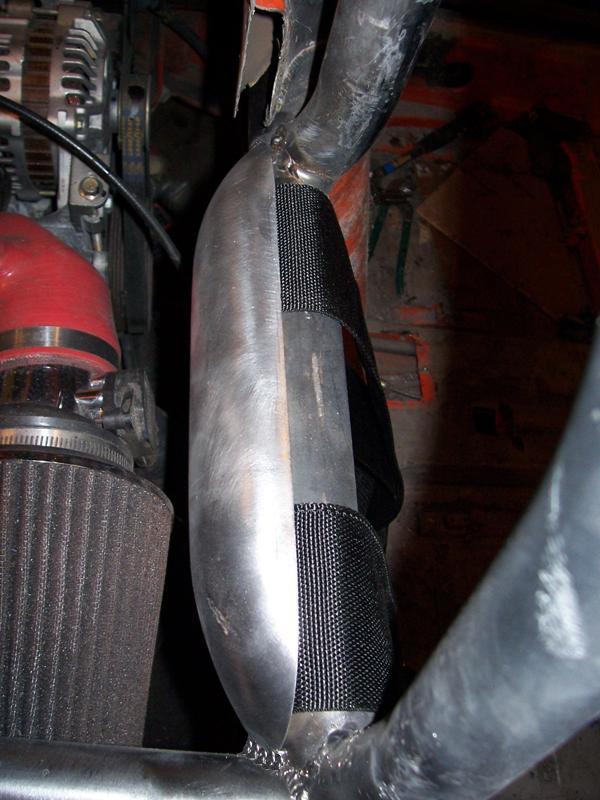

Posted by: plymouth37 Dec 8 2008, 07:22 PM
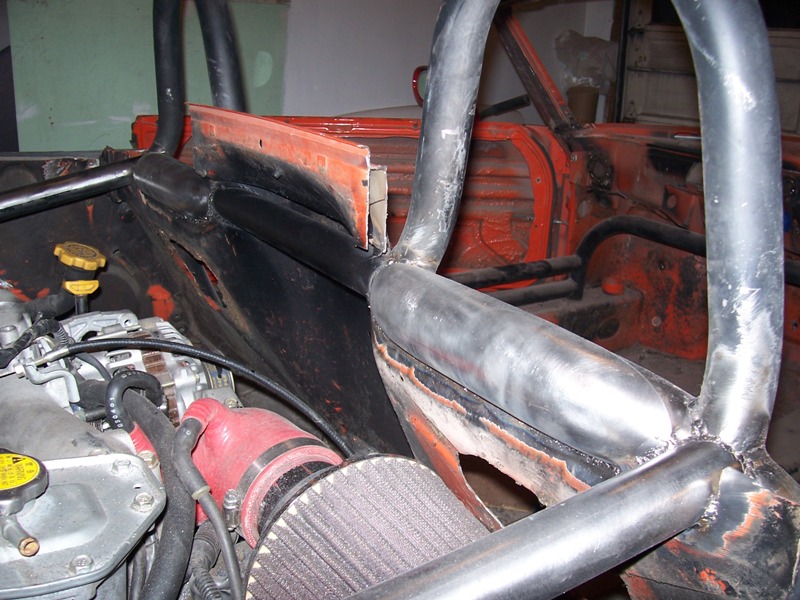
.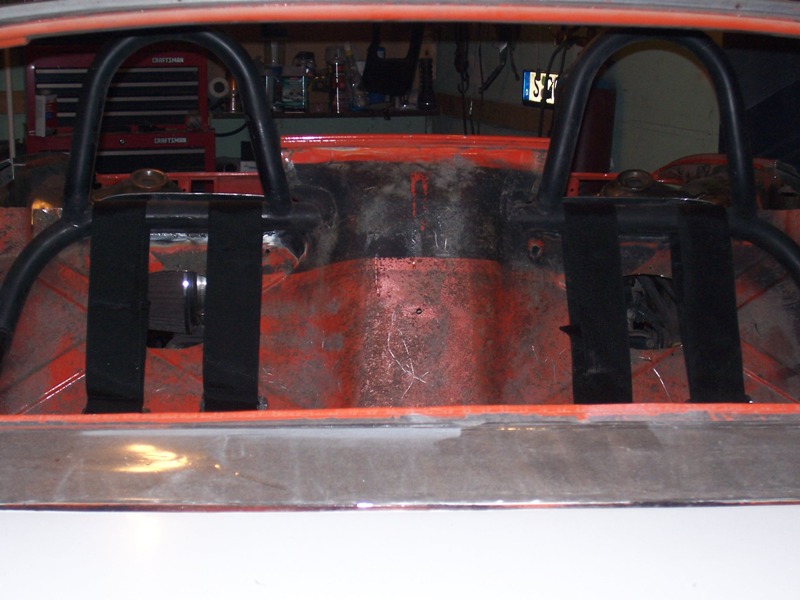
Posted by: plymouth37 Dec 16 2008, 06:06 PM
Big news, My wife and I are moving to Boulder Colorado in a couple weeks. I am transferring to CU Boulder in time for the spring semester. We got a nice place with a garage so work can continue on the Anklebiter. I dropped it back onto it's wheels to move it and decided to take some pics. 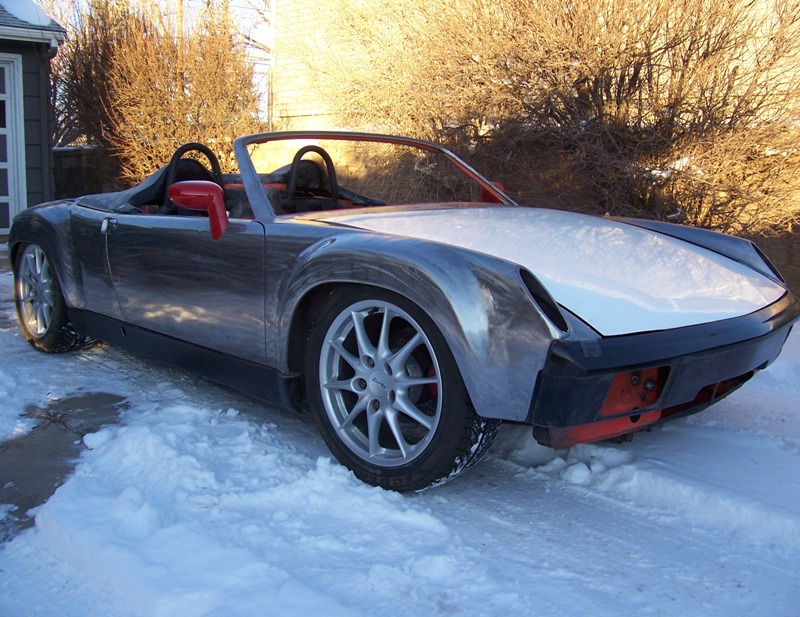
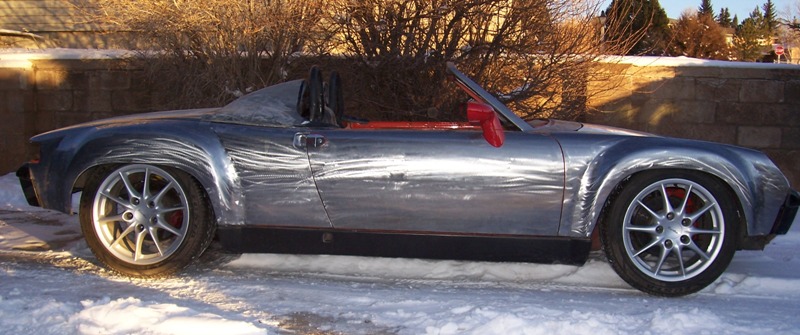
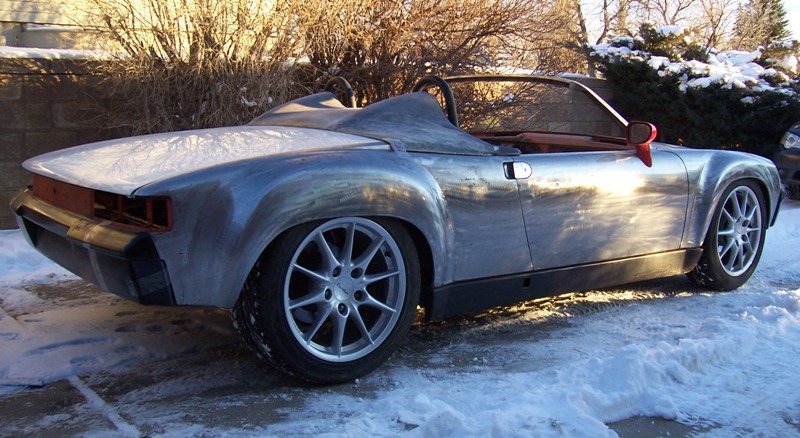
Posted by: plymouth37 Dec 16 2008, 06:07 PM
After having the car on 18" jackstands for a year I could not believe how low it was after I dropped it down on its wheels.
I took a couple pictures of the car next to our Subies to show just how low a 41" tall car really is.
The car is sitting at 5" from the ground to the donuts, I could go a little lower but I think things are looking pretty good as they are.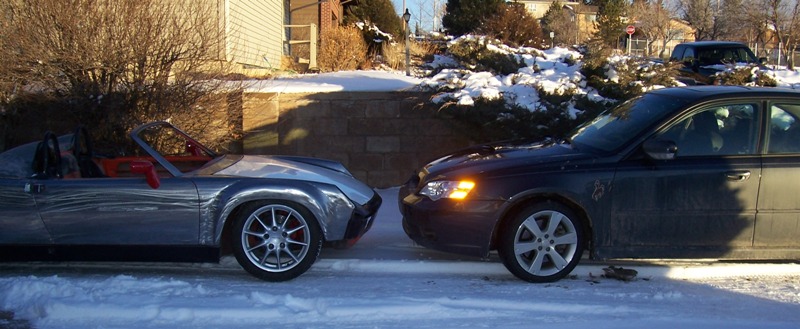
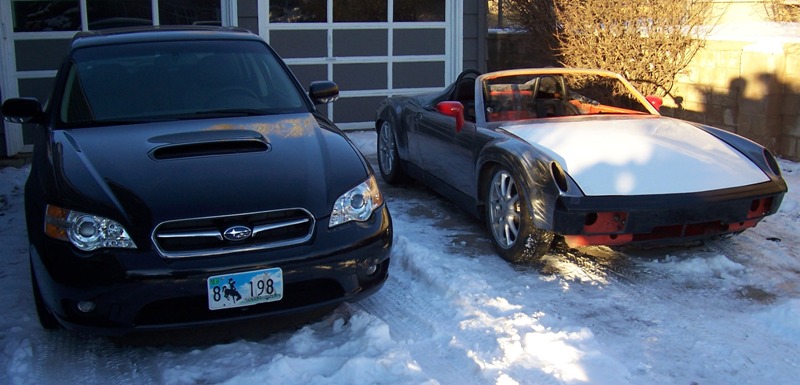
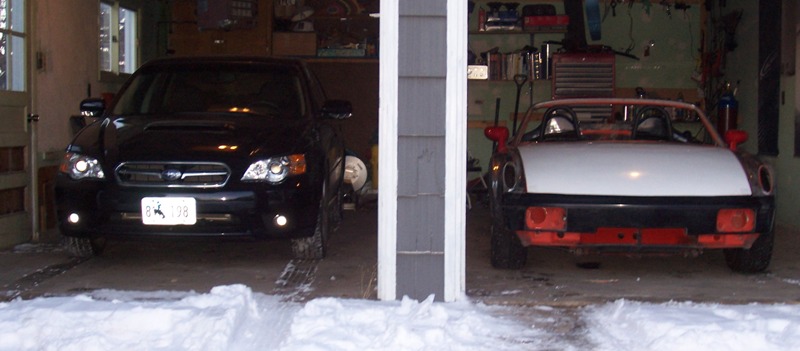
Posted by: scotty b Dec 16 2008, 06:10 PM
DAMN that thing is wicked !!
Posted by: spaceshuttle Dec 16 2008, 07:16 PM
WOW. I am thinking Porsche should reintroduce the 914 ala the Camaro/Challenger/Mustang and just copy your design. Sign me up.
SS
Posted by: iamchappy Dec 16 2008, 07:58 PM
F'ng Cool....
Posted by: Ferg Dec 16 2008, 08:02 PM
Moving to Boulder!! Great News.
Let me know how If I can help in any way. Where in Boulder?
Ferg
Posted by: plymouth37 Dec 16 2008, 08:07 PM
We got a place in Tantra Lake, about 5 mins south of campus.
Looks like it will be a lot easier to make it to the Colorado get togethers this summer!
Posted by: Ferg Dec 16 2008, 08:30 PM
We got a place in Tantra Lake, about 5 mins south of campus.
Looks like it will be a lot easier to make it to the Colorado get togethers this summer!
Very Cool! I work right off the walking mall, Porsche lunches on the Hill next summer
Ferg
Posted by: fat73 Dec 16 2008, 08:32 PM
Hey Dana,
That thing is bad to the bone. By the way, how wide are the spacers on the front wheels?
Ed aka W9R1
Posted by: plymouth37 Dec 16 2008, 08:38 PM
Porsche lunches on the Hill next summer
That sounds awesome!How wide are the spacers on the front wheels?
2" front and rear.
Posted by: jsayre914 Dec 16 2008, 08:58 PM
That is by far the coolest 914 I have ever seen. Hands Down. Can we vote now for January car of the month.?? 
incredible
Posted by: ChrisNPDrider Dec 16 2008, 10:29 PM
Ha!
Isn't it WEIRD to see your 914 so low on the ground after seeing it every day for months up on jack stands? I felt like an NBA player or something.
Lookin good!
Posted by: byndbad914 Dec 16 2008, 11:07 PM
nice! I am thinking Illegal Pete's on the Hill at least once when it warms up and the scenery is nicer (hahaha hey, I'm getting old)...
Posted by: Phoenix 914-6GT Dec 16 2008, 11:15 PM
That is by far the coolest 914 I have ever seen. Hands Down. Can we vote now for January car of the month.?? incredible
Let's at least wait until it's finished
Looking very good Dana. I just remembered I need to go out and take some pictures for you
I really do think the seats we are talking about will look sweet in there. When done you have to send pictures to Porsche and see if you can get anythnig from them
Posted by: ericread Dec 16 2008, 11:40 PM
It's awesome.
But we would expect nothing less from you...
Eric
Posted by: rick 918-S Dec 16 2008, 11:56 PM

 That pegs the cool factor meter
Posted by: Todd Enlund Dec 17 2008, 12:00 AM
Holy sh!t!
Posted by: stephenaki Dec 17 2008, 04:13 AM
Love the look of the rear area; what type of side mirrors are those?
Never mind, I just found the page that talks about using Pontiac Solstice mirrors. I should really look harder before asking obvious questions!
Posted by: degreeoff Dec 17 2008, 06:54 AM
and of course the work, your wife must be a great gal......
Posted by: Mr.C Dec 17 2008, 07:59 AM
Oh man that thing is BAAAAD!!
In touch with a guy locallly who is doing a subie conversion. He's got some plans..big plans.
Here's his subie powered Ghia that he built. http://f-bautomotive.com/ghia.html I'm trying to get him on here, but he's too busy in his shop for the net.
Posted by: Gint Dec 17 2008, 08:05 AM
Looks like it will be a lot easier to make it to the Colorado get togethers this summer!
Ferg
Great news Dana!
Lunch... I'm in.
Posted by: d914 Dec 17 2008, 08:43 AM
that is awesome,, You might have said but what are you doing for headlights.. I was playing with the idea of some motocycle lights mounted next to the fogs kinda rally style but Im not that far to worry to much about it??????
Posted by: roadster fan Dec 17 2008, 03:23 PM
Just set as my desktop background. Cant stop staring at it........need help.........
Jim
Posted by: jhadler Dec 17 2008, 04:02 PM
Fantastic looking car! I agree, Porsche should scrap their "new" 914 attempt, and just clone your body style. For a fee of course... A nice big one...
And welcome to Boulder!!!!
I work just up a short way from you! We'll certainly need to get some lunches going!
-Josh2
Posted by: stownsen914 Dec 17 2008, 04:05 PM
I totally agree, at this point the hoops are not nearly as strong as they could be.
I have decided to run 5-point harnesses so it would probably be a good idea to triangulate the hoops with another bar.
It will be tough to squeeze another bar under the humps, I will have a better idea of what is possible after I finish the firewall.
Very cool project! To triangulate the main hoop a little more, why not just put a diagonal tube laterally behind where the seats will go?
Scott
Posted by: plymouth37 Dec 17 2008, 04:11 PM
Thanks for the kind words guys!
The main hoop is not the issue, I am going to run a bar diagonally from the rear up to each head hoop to keep them from folding if the car flips.
Posted by: shelby/914 Dec 17 2008, 04:19 PM
Welcome back to Colorado, I've shown this thread to friends who aren't into 914s and they can't wait to see the car in person. I think you could charge admission.
Posted by: KELTY360 Dec 17 2008, 07:09 PM
Wow.......nice Fiat!
My girfriend's uncle used to have one just like it, sep it were a four door.
Posted by: Sleepin Dec 29 2008, 10:48 AM
Big news, My wife and I are moving to Boulder Colorado in a couple weeks.
Posted by: turboman808 Dec 29 2008, 03:20 PM
The car is looking fantastic. The only thing not working for me is the bumps behind the headrest. I say get rid of them and keep the line clean.
Really thought this thread makes me want to chop the top on my car.
Posted by: Phoenix 914-6GT Dec 29 2008, 03:21 PM
Any updates Dana?
Posted by: plymouth37 Dec 29 2008, 07:17 PM
WOW, over 20,000 views and over 300 replies! You guys rock, thank you so much for the support!
Any updates Dana?
I am working on rebuilding the firewall, it is turning out to be a ton of work but I should have some pics to post by the end of the week.
I would like to get the firewall done before I move on the 2nd so as to not piss off my new neighbors with the excessive noise.
Dana.
Posted by: effutuo101 Dec 30 2008, 11:45 AM
Good luck in Boulder! I lived right out side of there for a couple of years. Lots of runs out of there during the summer.
Posted by: Phoenix 914-6GT Dec 30 2008, 11:54 AM
WOW, over 20,000 views and over 300 replies! You guys rock, thank you so much for the support!
Any updates Dana?
I am working on rebuilding the firewall, it is turning out to be a ton of work but I should have some pics to post by the end of the week.
I would like to get the firewall done before I move on the 2nd so as to not piss off my new neighbors with the excessive noise.
Dana.
There's nothing wrong with breaking in your new neighbors . They need to get use to it soon anyway. When I move into my house I pulled up the tax records of my neighbors and learned what I could about them. I bought them all "I'm your new neighbor gifts" and now I can borrow any tool or do anything. Then I got married and had kids and all the older neighbors bought us a ton of baby stuff. Can't wait to see more work.
Posted by: Scott Schroeder Dec 30 2008, 12:06 PM
Very stoked to have this car local!! I am just two exits away from you on 36 - really look forward to watching the progress and seeing the car in person.
Welcome to the nieghborhood!
-Scott S
Posted by: jcambo7 Dec 30 2008, 12:06 PM
WOW, over 20,000 views and over 300 replies! You guys rock, thank you so much for the support!
Any updates Dana?
I am working on rebuilding the firewall, it is turning out to be a ton of work but I should have some pics to post by the end of the week.
I would like to get the firewall done before I move on the 2nd so as to not piss off my new neighbors with the excessive noise.
Dana.
There's nothing wrong with breaking in your new neighbors . They need to get use to it soon anyway. When I move into my house I pulled up the tax records of my neighbors and learned what I could about them. I bought them all "I'm your new neighbor gifts" and now I can borrow any tool or do anything. Then I got married and had kids and all the older neighbors bought us a ton of baby stuff. Can't wait to see more work.
Wow Jon! Looks like you know how to get your neighbors on your side!!!!! LOL
Whatever works though!
Posted by: jcambo7 Dec 30 2008, 12:09 PM
This car is looking awesome. I can't wait to see the car finished and what you are going to do. It's going to look awesome.
Posted by: 914junkie Jan 5 2009, 03:57 AM
Looking great Dana! Love the direction you took with your car. Hard to believe thats the same car I was looking at in Renegades parking lot. I drove down to Las Vegas 3 years ago to pick up my V8 conversion kit. You were showing me your car and around the shop and I kept thinking I should have done the Subaru conversion instead of the SBC. Now I want both! Was nice to meet you guys and the conversion was painless. Good luck with the project, can't wait to see the end result. How bout some HID projectors behind some clear replica turn signal lenses? Just a thought. Have fun! Paul S.
Posted by: AgPete139 Jan 7 2009, 05:33 AM
I've been stalking this page for a while now (a while = since May 2008). I've never really had anything to say, and still don't since I'm a newb to 914...
But damn. Dana, that is a good-looking car. The chopped windshield, front KC's, motor choice (sans bracing dilemma), and mirrors are well done. The look is mean, and the brushed metal is so unique and fitting for the car. But, with the fiberglass, what about a tan (bottom) / high gloss black (top) 2 tone paint scheme with a red stripe going along the length of the car?
I just Googled the first 2 images I saw.
http://www.allfordmustangs.com/forums/attachments/5-0l-talk/36079d1195266596-help-w-two-tone-paint-2.jpg
http://www.digimods.co.uk/images/Virtualcarimages/cars/fordequatorconcept2.jpg
Congrats on the successful move, btw.
By the end of the build, YOU will be weighing more than the unloaded CHASSIS!
I'd say good luck, but it looks like you don't need it.
Pete
Posted by: Phoenix 914-6GT Jan 11 2009, 10:58 PM
 Dana, ae you really 5 years younger than me? Even more impressive work now. Someone with this skill in their mid 20s
Posted by: plymouth37 Jan 11 2009, 11:04 PM
Dana, are you really 5 years younger than me? Even more impressive work now. Someone with this skill in their mid 20s Thanks! As far as the car goes I am in the middle of getting our house in Laramie ready to sell (aka finishing all of my half finished renovation projects) and starting a new semester tomorrow so it may be a little while before I can get back to her. Never fear though, you guys will be the first to know if anything gets done...
Posted by: oldschool Jan 11 2009, 11:21 PM
Are you going to build a rag top for it, or is it a fair weather ride only?
I was playing around with the concept of a lift off hard top with drop in windows.
It would suck to build but it would really make the car alot more useable. we shall see...
Dude that's looking so cool I dreamed of a chop
914, But how are you going about the seats? am short Mexican and I some times hit my head on a reg.top?
Posted by: oldschool Jan 11 2009, 11:28 PM
that is awesome,, You might have said but what are you doing for headlights.. I was playing with the idea of some motocycle lights mounted next to the fogs kinda rally style but Im not that far to worry to much about it??????
I think a cool look would be light's ala 928 you know facing up when not in use and when on bam! just like the 928.
Posted by: plymouth37 Jan 11 2009, 11:30 PM
Dude that's looking so cool I dreamed of a chop
914, But how are you going about the seats?
I am going to move the crossbrace that the stock seats mount to about 3" or 4" forward and hard mount Sparco Evos to the floor. This should give me a pretty decent driving position even if the car is only 41" tall.
Posted by: mbrown3039 Jan 26 2009, 10:31 PM
Thanks! As far as the car goes I am in the middle of getting our house in Laramie ready to sell (aka finishing all of my half finished renovation projects) and starting a new semester tomorrow so it may be a little while before I can get back to her. Never fear though, you guys will be the first to know if anything gets done...
Blah, blah, blah...life stuff...yadda, yadda, yadda...real responsibilities...who cares? Call the house in Laramie a "fixer-upper" and get back on the car!
Seriously, though, I commend you. Not just for the car itself -- which I think is a work of art in progress and has some pretty feasible business venture possibilities -- but for your committment to this thread. A lot of us have cars -- mostly 914's but I'm sure there are a few "foreigners" following along, too -- and we've all dreamed of some sort of modification if only we had enough time/money/skills/other to get it done. But you're actually doing it AND writing about it humbly and graciously, even when some of the readers offer their "advice" in a less-than-gracious (IMO) manner.
I doubt I'll ever create something as striking as the Anklebiter, but I'm glad I get to share along with all the other readers as you do. We met a few years ago when you were at Renegade and -- now that I finally own a 914 -- I keep going back and forth: stock or Subie? Stock or Subie? And that's all because of you.
Now, of course, that question is morphing into "everyday Subie or super-morphed Dana special Subie?"
<sigh>......if only I had $75K.................
Posted by: retro914 Jan 27 2009, 11:34 AM
I have sat here at an can truly say that I love this build. I came across a Porsche 914 Carrera GT rendering and didn't seem to like it as much, but your work has prove me otherwise. Keep up the good work!
Nick
Posted by: Ferg Feb 5 2009, 04:24 PM
![]()
Posted by: majkos Feb 6 2009, 01:56 PM
Isn't he like moving from Windy Wyoming,to Colorado!
Posted by: mrhurtalot Feb 6 2009, 03:52 PM
wow, been gone from the site for months, and i come back to see this masterpiece has arose.
good job so far man.
Posted by: GTeener Feb 6 2009, 04:01 PM
I really like the brushed metal treatment.
Posted by: plymouth37 Feb 8 2009, 06:44 PM
Isn't he like moving from Windy Wyoming,to Colorado!
I have indeed moved to Boulder, the problem is that the 914 is still in Wyoming.
As soon as I get it down here work will begin once again, probably in about a month.
While moving I stumbled upon some old negatives from the day I found the 'biter and have added them to the first page of the thread, she has come a long ways huh?
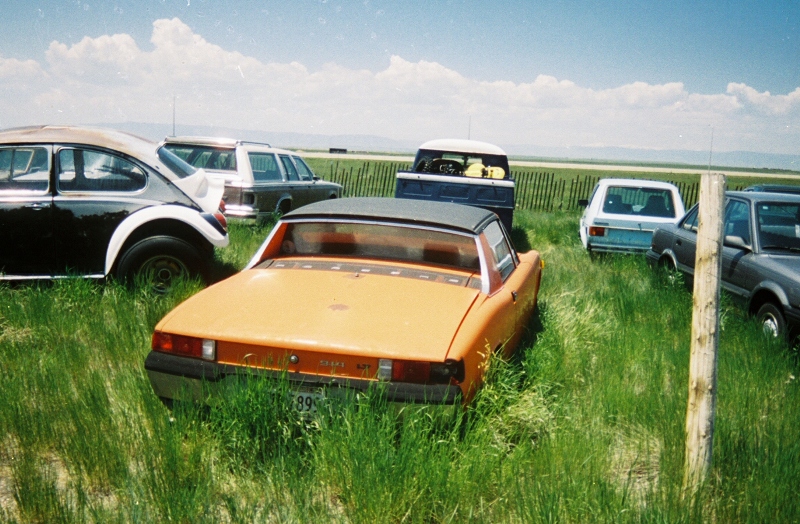
Posted by: Gint Feb 8 2009, 07:28 PM
I can't wait to see it in person. Need any help?
Posted by: plymouth37 Mar 26 2009, 03:23 PM
It's sping break and I finally had some time to spend on the car. As some of you may know I moved down to Boulder, CO in January but my car is still in Laramie, WY. I drove up on Sunday and was finally able to make some progress on the car.
I started out by welding in the center beam for the new cross member. 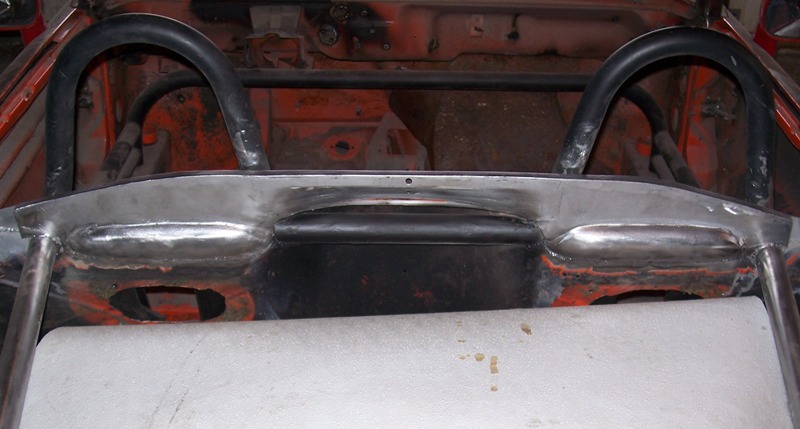
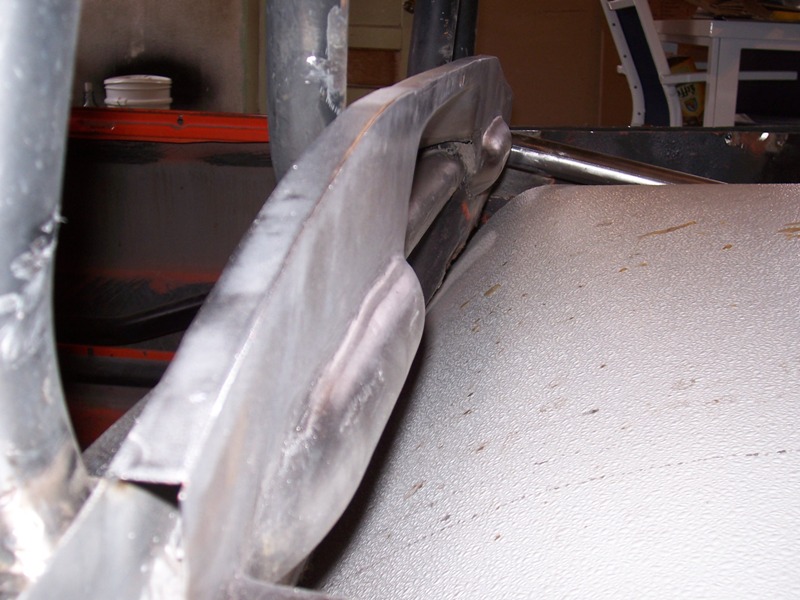
Posted by: plymouth37 Mar 26 2009, 03:23 PM
Then I welded in filler panels for the corners, as you can see they are crazy pieces that needed a lot of shrinking and stretching to fit.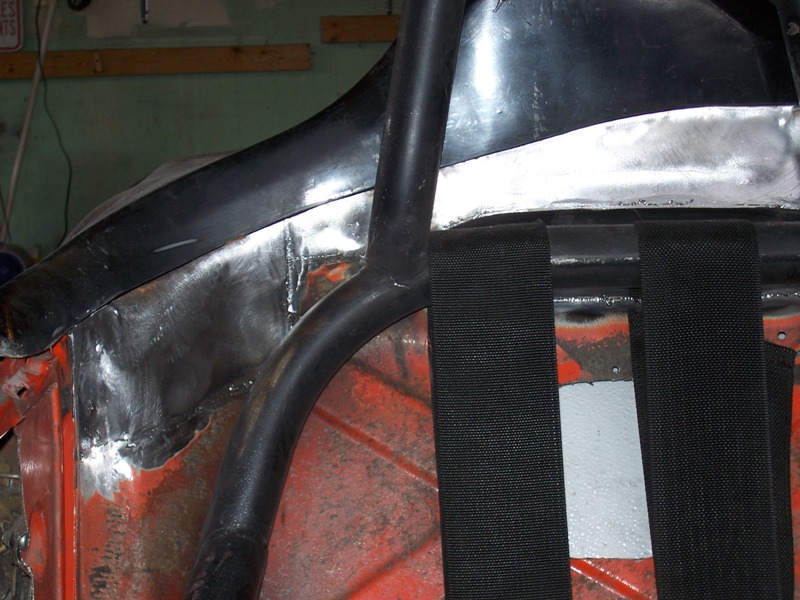
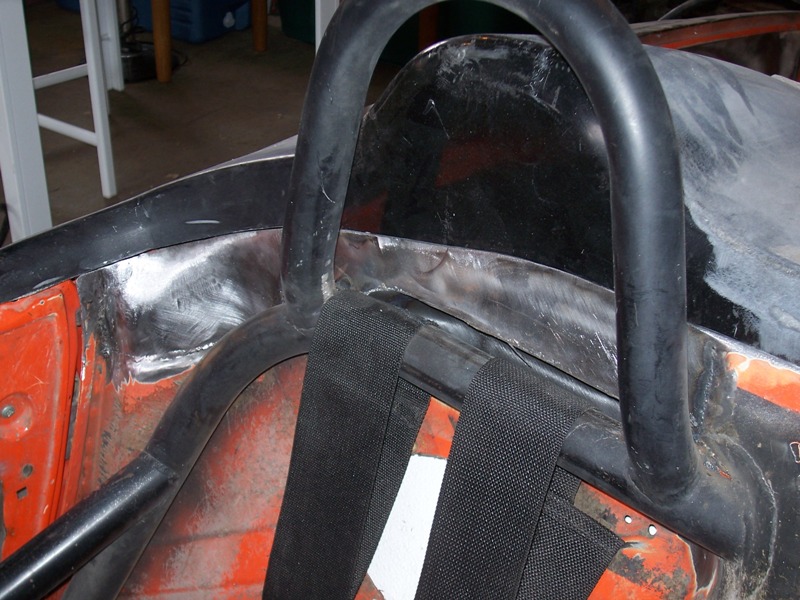
Posted by: plymouth37 Mar 26 2009, 03:23 PM
Then I moved on to the most complicated piece of the cross member. I was remembering a 550 spyder I had worked on years ago and designed the cross member to echo those lines.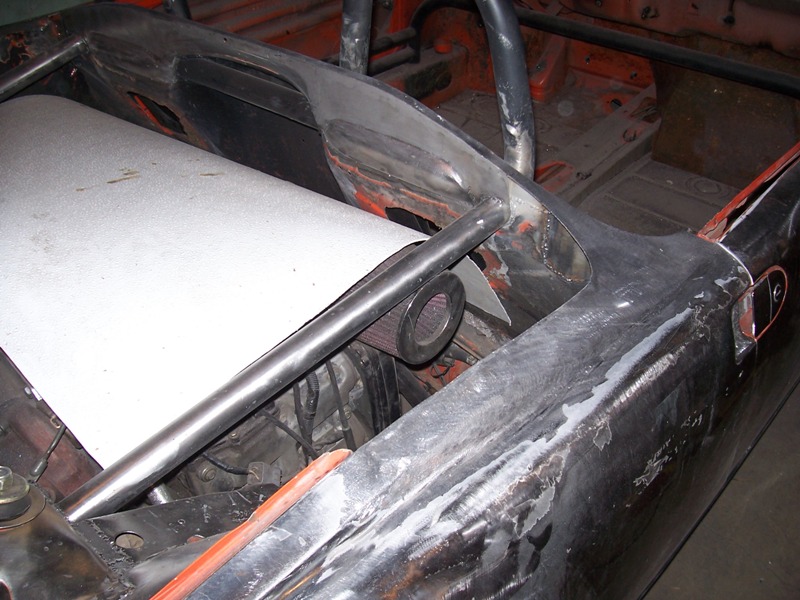
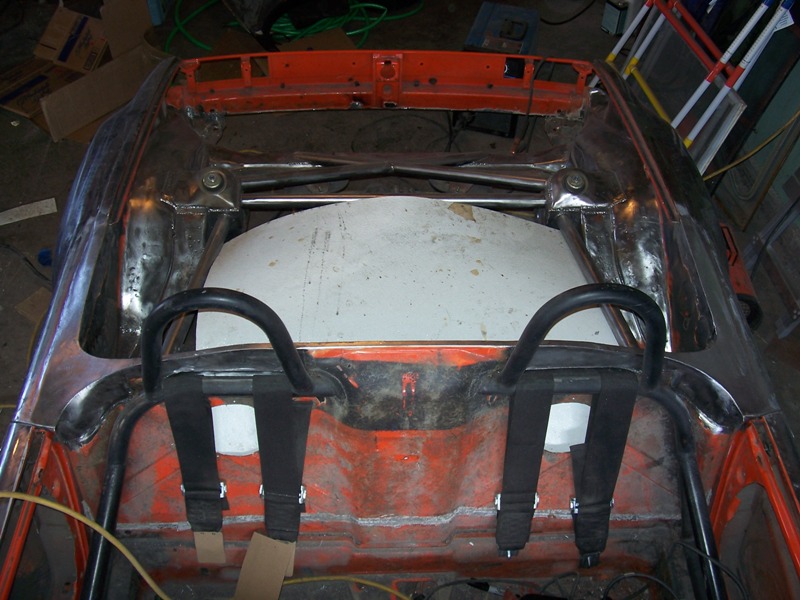
Posted by: plymouth37 Mar 26 2009, 03:23 PM
I finished up the cross member by capping it's back and bottom.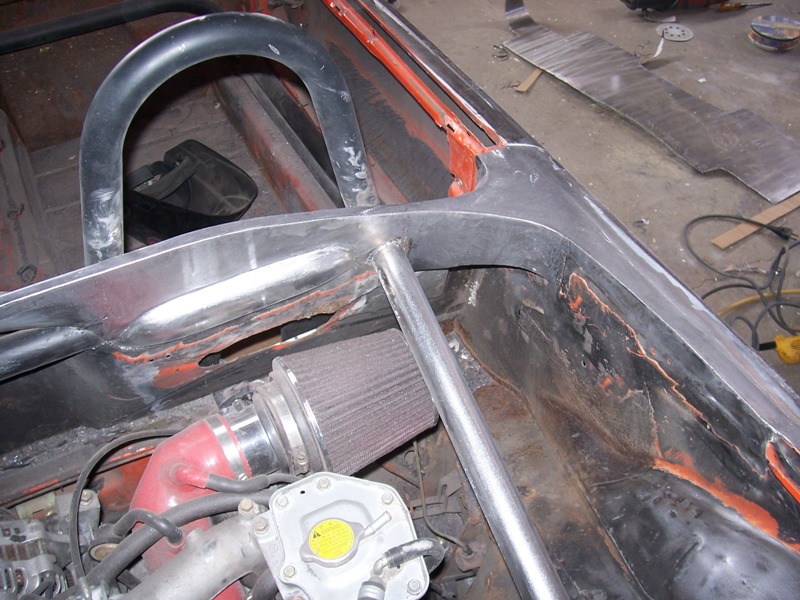
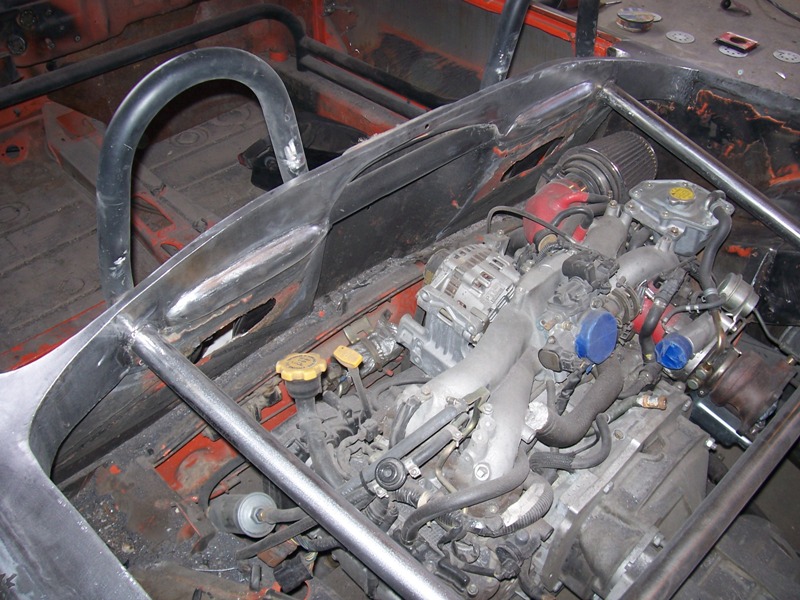
Here is the firewall with the humps on. I think the gap between them turned out pretty nice.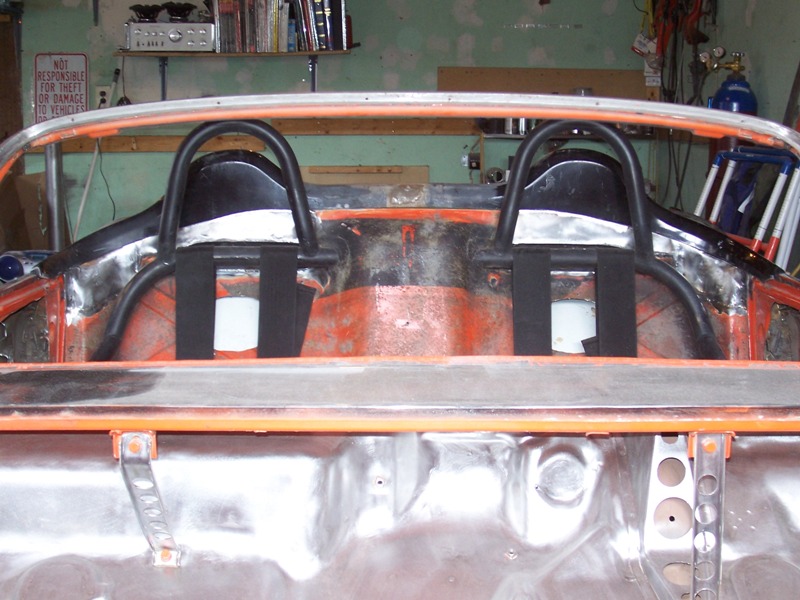
Posted by: plymouth37 Mar 26 2009, 03:23 PM
Here is a cool pic from the trunk looking into the engine compartment.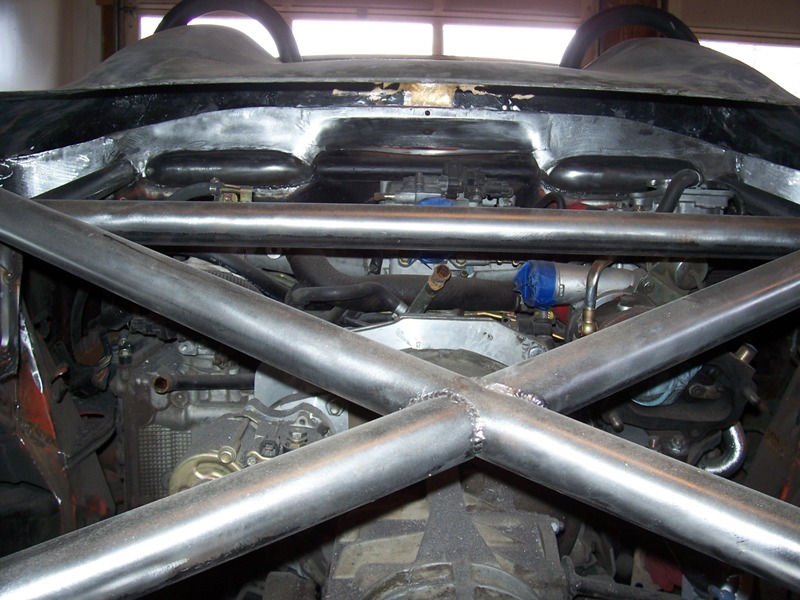
Not much left of her...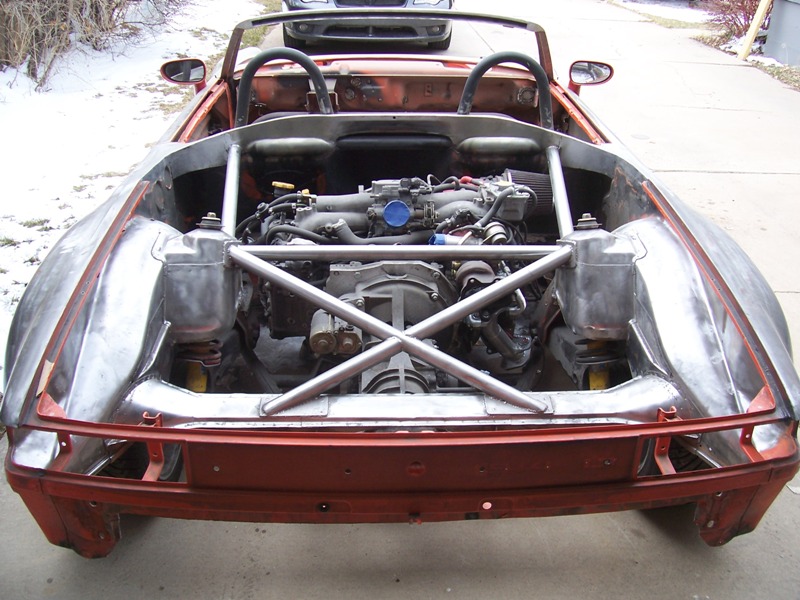
Posted by: plymouth37 Mar 26 2009, 03:24 PM
To finish off the fire wall I welded in some patch panels to fill the holes left by the speakers.
Thanks to Leo Imperial for getting out his sawzall and cutting me the perfect patches!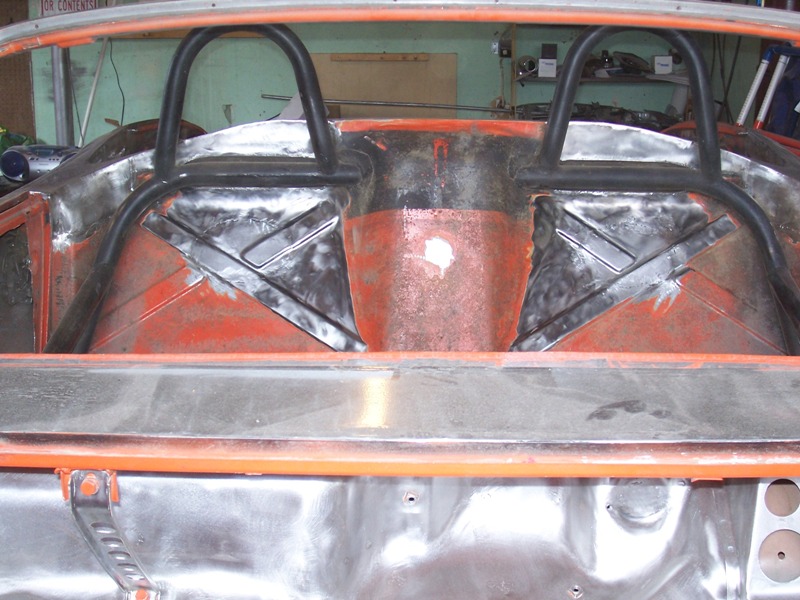
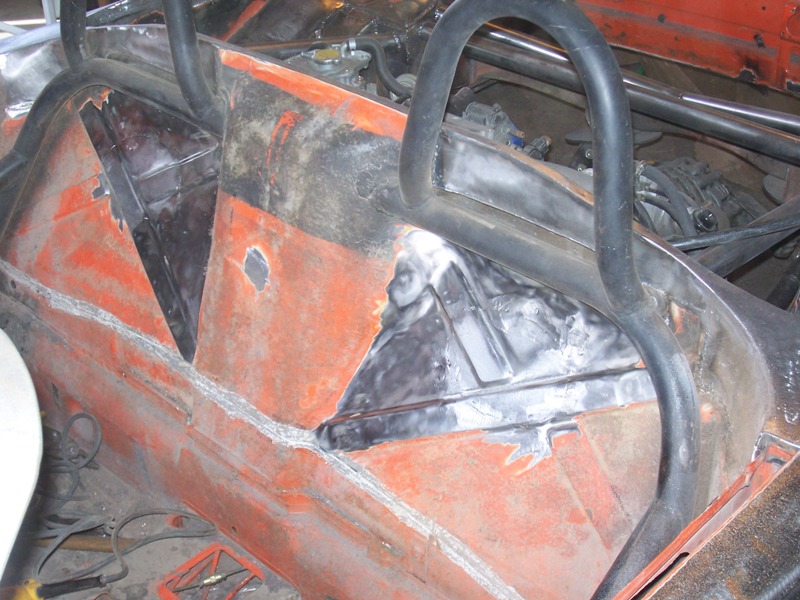
Posted by: carr914 Mar 26 2009, 03:34 PM
He's Back
Posted by: g911 Mar 26 2009, 04:06 PM
Most excellent
Posted by: dlee6204 Mar 26 2009, 05:18 PM
Very nice work!
Posted by: r_towle Mar 26 2009, 05:36 PM
That is cool...similar thought and deeds going on here.
I am making that piece removable...and I am making three of them.
So, I am struggling with this.
One will be for a single hoop.
One for a double hoop.
One for no hoop.
I may just have a removable piece to add the second hoop and call it a day.
I love how you tied in the inner fender...do you have any progress pics of that funky area...I had a tough time due to the jog in the inner fender.
Rich
Posted by: BKLA Mar 26 2009, 07:33 PM
Yay!!!!! I've had my "fix"! Thanks!
Posted by: roadster fan Mar 27 2009, 02:52 AM
love the metal work, I really have to start practicing some of those skills
Jim
Posted by: Phoenix 914-6GT Mar 27 2009, 10:46 AM
As always, excelent work Dana
Posted by: 3d914 Mar 27 2009, 07:35 PM
I'm inspired. Now to just get out and work on mine.
Posted by: So.Cal.914 Mar 27 2009, 09:53 PM
This project is really bitchen. Sooooo what color?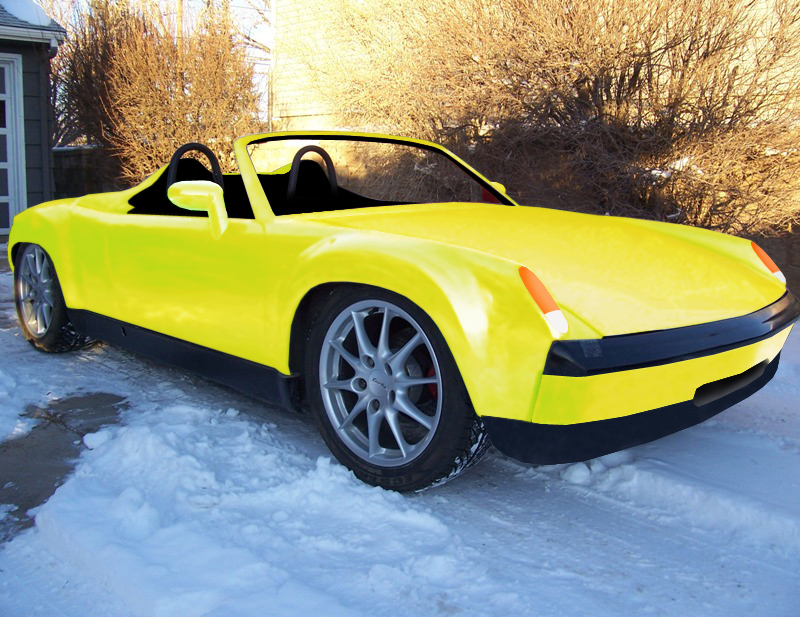
Posted by: plymouth37 Mar 28 2009, 12:57 PM
This project is really bitchen. Sooooo what color?
That is fricken awesome!
I hate to break it to you but I was thinking lime green!
I know yellow cars are faster but I think this car will be fast enough without the power of yellow paint!
Posted by: ssstikircr Mar 28 2009, 01:01 PM
Looks awsom!!!
Posted by: So.Cal.914 Mar 28 2009, 01:25 PM
Oooooop's, Green it is. I also added a wheel and the front windscreen.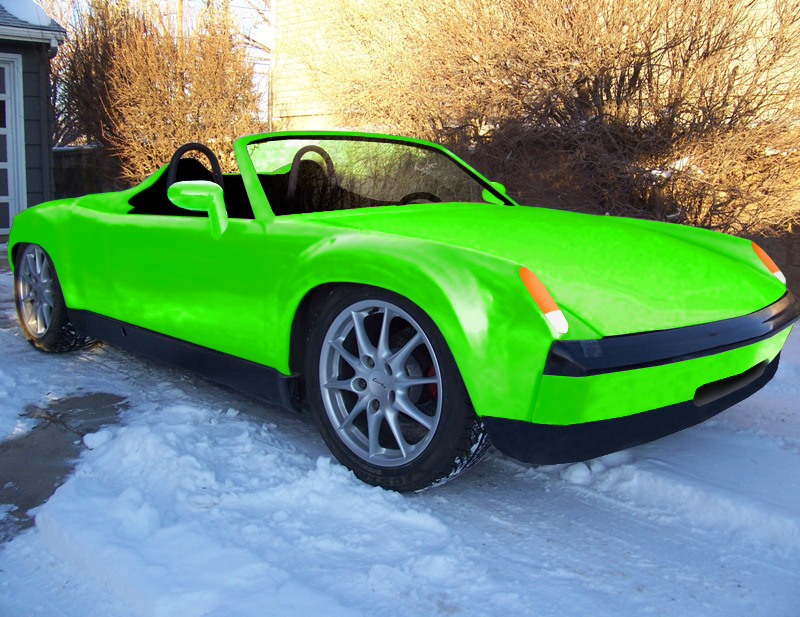
Posted by: plymouth37 Mar 28 2009, 04:38 PM
That looks perfect! You rock, thanks Paul!
Posted by: So.Cal.914 Mar 28 2009, 04:41 PM
My Pleasure.
Posted by: type47fan Mar 28 2009, 11:56 PM
Pure artistry, Dana . . . .
Posted by: r_towle Apr 3 2009, 05:00 PM
This next picture may slow down your progress and add more work.
It uses two motorcycle windscreens. I really thought you should see this.
Attached thumbnail(s)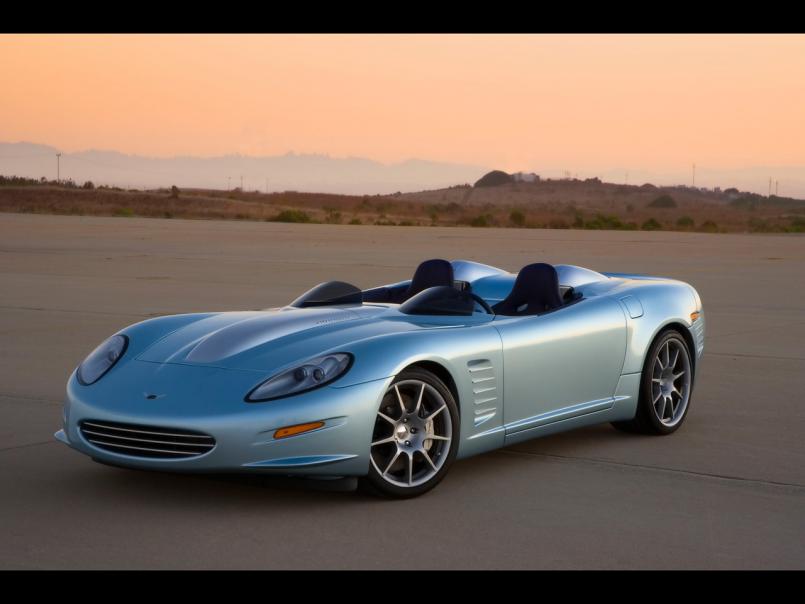
Posted by: plymouth37 Apr 3 2009, 05:08 PM
You have no idea how many times I have thought about that...
I would love to have to put a helmet on to run to the grocery store!
Damn it, I had just gotten over that concept and now you have to go and bring it up again, it is so tempting.
Posted by: r_towle Apr 3 2009, 05:40 PM
Use the bmw electric windscreen that raises up and down...its on the big cruiser bikes from bmw...no helmet needed.
rich
Posted by: plymouth37 Apr 3 2009, 07:43 PM
Use the bmw electric windscreen that raises up and down...its on the big cruiser bikes from bmw...no helmet needed.
rich
You just have a solution for everything don't you?
Feel like whipping something up on photoshop Paul?
Posted by: r_towle Apr 3 2009, 08:33 PM
Use the bmw electric windscreen that raises up and down...its on the big cruiser bikes from bmw...no helmet needed.
rich
You just have a solution for everything don't you?
Feel like whipping something up on photoshop Paul?
If I could, I would.
My state wont allow this...though I am going to go back a look into it again.
the rules were safety glass and both wipers....so I could do it...
Rich
Posted by: charliew Apr 4 2009, 12:22 PM
The rules may say the windshield must be safetyglass. And if there's a windshield there must be two wipers.
Posted by: jcambo7 Apr 4 2009, 01:03 PM
Looking great man. Still can't wait to see the car finished.
Posted by: plymouth37 Apr 4 2009, 05:01 PM
The rules may say the windshield must be safetyglass. And if there's a windshield there must be two wipers.
I stopped caring about the "rules" along time ago. This car has not been even close to legal for years. I have not run wipers on this car for years and lexan is in this cars future. I am perfectly willing to be hassled to the cops if that means I get to build my dream car.
Posted by: r_towle Apr 4 2009, 05:18 PM
Custom laminated glass for the windshield is easy to do and most decent glass shops can get it done.
Custom tempered glass for the side windows will cost you dearly.
The hot rod guys I spoke with all use laminated glass for the side windows just due to the price...
Go find a decent glass shop and talk to them...there are glass factories all over the country,,,you just need to make a metal template that is supported from behind with struts to keep its shape. (they will explain it to you)
Rich
Posted by: plymouth37 Apr 4 2009, 07:31 PM
I think I will just use lexan.
Its lighter and cheaper.
If I am going for the chopped look that I have now I will buy a lexan 914 'shield and cut it down, if I go with the Callaway 'vett look things might get a little more interesting...
Posted by: r_towle Apr 4 2009, 07:37 PM
still gotta go for a decent bend to make it look good.
Metal form...pizza oven (easy guys to convince...)
Rich
Posted by: rick 918-S Apr 4 2009, 10:40 PM
I did some work on this car. It has an upside down Saab 99 windsheild that was re-cut.
Attached image(s)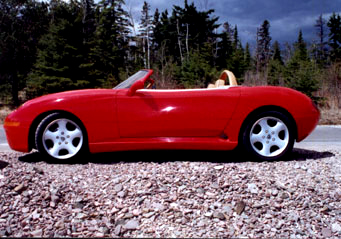
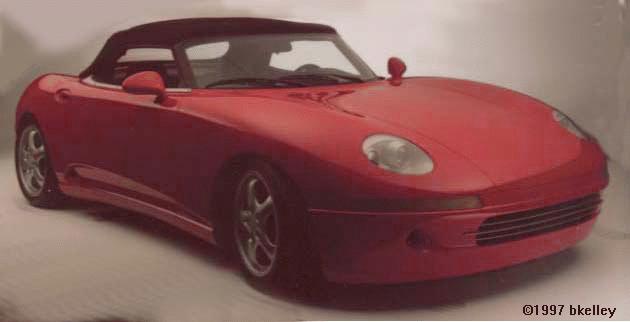
Posted by: geniusanthony Apr 4 2009, 11:40 PM
The rules may say the windshield must be safetyglass. And if there's a windshield there must be two wipers.
does that mean a helmet is legal on the street.. or goggles?
Posted by: db9146 Jun 5 2009, 10:27 PM
Hey Dana,
What's goin' on? Been two months and no update.
Posted by: plymouth37 Jun 5 2009, 11:06 PM
Hey Dana,
What's goin' on? Been two months and no update.
I finally got the car moved down here from Laramie a couple of weeks ago, so now I can actually work on it.
While I was waiting for the car to make it down I decided to stay busy and started building a vintage cafe racer. I am almost done with the bike and will start back on the Anklebiter in about a month.
Here is my excuse for not working on the Porsche, 1970 Honda CL350 with many custom bits.
If you want to check out the Build Thread for the bike you can find it http://mycafebike.blogspot.com/
Before:
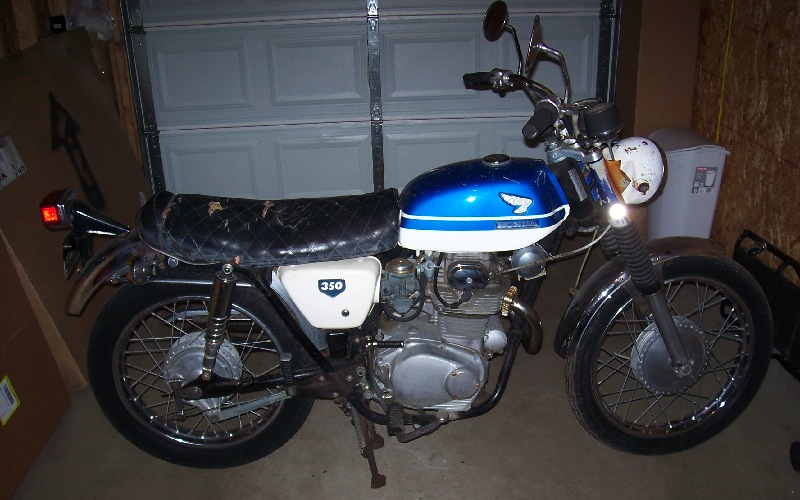
Now:
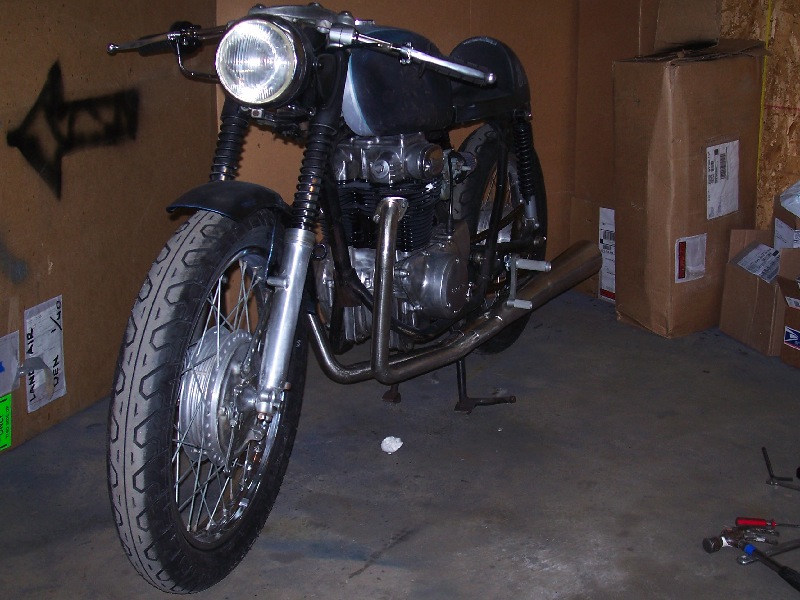
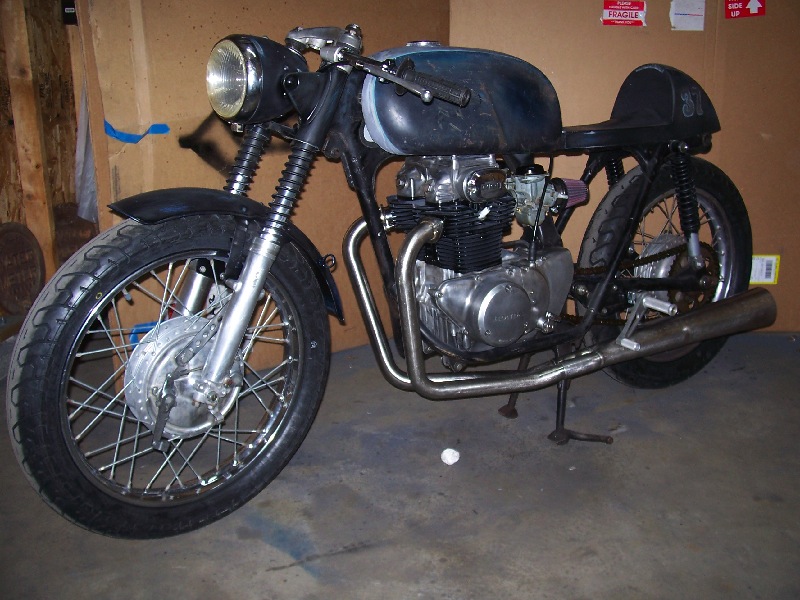
Posted by: Phoenix 914-6GT Jun 5 2009, 11:14 PM
Dana, I just have to say... I hate you... in the nicest way possible . Nice work. You have some seriously mad skills. Sweet bike. I have an old Yamaha I need to fix up some day.
Posted by: Wes V Jun 6 2009, 08:24 AM
The motorcycle is major cool!!
I particularly like what you did with the paint.
Wes
Posted by: RobW Jun 6 2009, 08:54 AM
This is the first time seeing this thread and I have to say... dude you are friggen AWESOME!!!! Keep it up!
Posted by: poorsche914 Jun 6 2009, 11:32 AM
Putting the photoshop skills to use...
Old school look with chrome steelies and a 916 bumper.
Posted by: plymouth37 Jun 6 2009, 04:16 PM
Putting the photoshop skills to use...
Old school look with chrome steelies and a 916 bumper.
Very cool rendering, I really dig it. Thank you so much!
Sorry again for the delay in progress guys, you all will be the first to know when the build resumes.
Dana.
Posted by: majkos Jun 6 2009, 04:23 PM
No hurries,
you can't rush "Perfection"
Posted by: r_towle Jun 6 2009, 09:35 PM
Hey Dana,
What's goin' on? Been two months and no update.
I finally got the car moved down here from Laramie a couple of weeks ago, so now I can actually work on it.
While I was waiting for the car to make it down I decided to stay busy and started building a vintage cafe racer. I am almost done with the bike and will start back on the Anklebiter in about a month.
Here is my excuse for not working on the Porsche, 1970 Honda CL350 with many custom bits.
If you want to check out the Build Thread for the bike you can find it http://mycafebike.blogspot.com/
Before:
Now:
You have a great eye for design.
Rich
Posted by: effutuo101 Jul 7 2009, 12:33 PM
Nice work Dana,
I picked up a 71 BMW R75/5 for my wife, doing a lot of similar work. I have the solo saddle, but she likes the shape of the full seat, so we are going to keep that.
She wants clubman or straight bars for that vintage racer look, and is spinning wrenches to get all of the little stuff done. The frame should be all stripped and ready for powder coat at the end of the week. Then let the build begin. It should be fun as the front end is off of a R75/6 and has a single disk up front.
Looking forward to seeing your project in final paint.
Posted by: plymouth37 Jul 7 2009, 12:46 PM
I just finished up the bike. I just need to re-configure the garage to work on a car instead of a bike and then pull the car out of storage. Work on the Anklebiter will resume soon!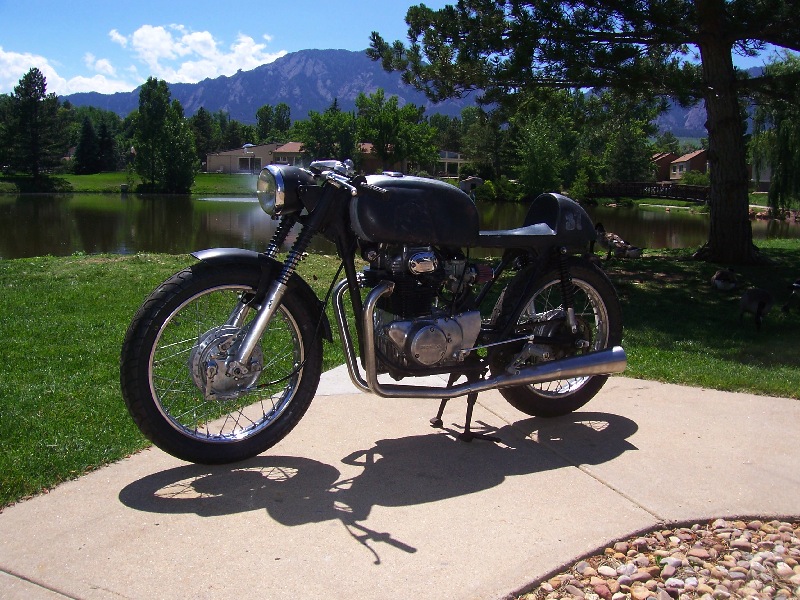
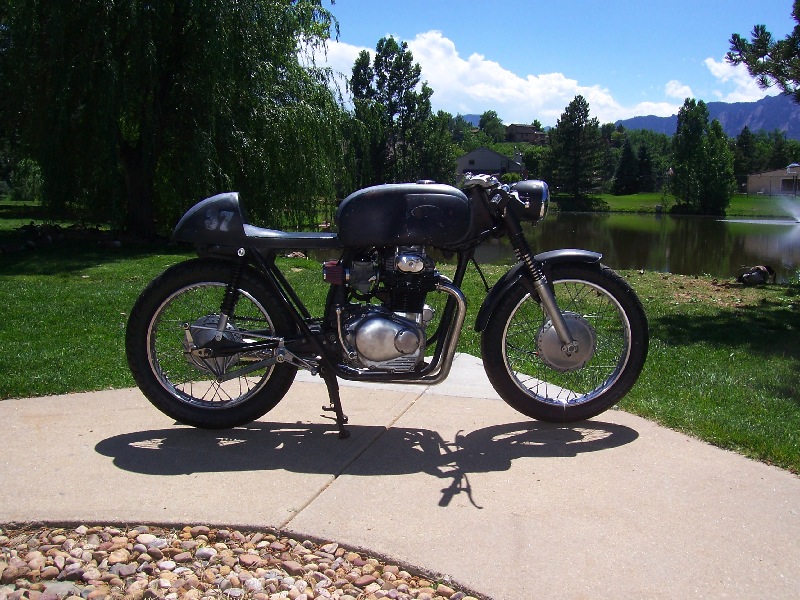
Posted by: Greco Aug 26 2009, 10:02 AM
So what kind of top will this have? Convertible or Carson removable hard top? Very cool build, your blog is what brought me to the forums.
Posted by: plymouth37 Aug 26 2009, 10:08 AM
I am thinking a F/G lift off hardtop, there is a rendering of a possible top on page 3 of this thread.
My buddy has set up shop in my garage without asking so as soon as I can get rid of him and his bike work will resume.
Welcome to 914world Greco!
Posted by: Greco Aug 26 2009, 03:32 PM
I am thinking a F/G lift off hardtop, there is a rendering of a possible top on page 3 of this thread.
My buddy has set up shop in my garage without asking so as soon as I can get rid of him and his bike work will resume.
Welcome to 914world Greco!
Thanks for the welcome. I saw the rendering, any idea on headroom? I found your blog when I was googling modded/chopped/convertibe 914's and found these boards about a year ago. If my roller does'nt sell then I have two choices. Either start hacking it up myself for a project or scrap it. The latter I have avoided as long as I can. I'd rather start with something cheap and running as my first project. Keep up the great work.
Posted by: lotus_65 Aug 26 2009, 06:25 PM
THAT'S BOMB.
Posted by: lotus_65 Aug 26 2009, 06:27 PM
THAT'S BOMB.
i guess bomb enough to double post...
Posted by: BKLA Oct 29 2009, 02:09 PM
Its time for an update!!!!
Posted by: Ferg Oct 29 2009, 03:42 PM
Hi Dana
Posted by: plymouth37 Oct 29 2009, 08:12 PM
Its time for an update!!!!
I know, this is totally ridiculous, it has almost been a year since I tore into this car. I could give you all a ton of excuses but I will just say that hopefully if no one minds I will get back to it soon. Hang in there, I am trying to get back to work soon!
-Dane
Posted by: Gint Oct 29 2009, 08:21 PM
Give the guy a break already. He's so busy he can't even spell his own name correctly!
Hi Dana.
Posted by: Kirmizi Oct 29 2009, 08:45 PM
Yeah Dana, better get to it before the snow flies....
Oh wait. Glad I'm in Feenix! 
Mike
Posted by: plymouth37 Nov 12 2009, 11:10 PM
So after almost a year of down time I have finally started back into the car.
I was originally planning on running a custom intercooler. After playing with the stock one and calculating flow rates of other aftermarket intercoolers it became pretty clear that the stock intercooler was a pretty good fit for what I needed, and it's free! I will just have to get its fins straightened and give it a good cleaning and it will be ready to go.
I am going to cut subtle but effective venting slots in between the head humps and use a couple small electric fans to draw air into the intercooler.
To mount the intercooler I threaded a couple 1/2" aluminum bars at each end. One end screws into the engine block and the intercooler bolts into the other end. I think they look pretty clean and they are surprisingly sturdy, most importantly they weigh almost nothing.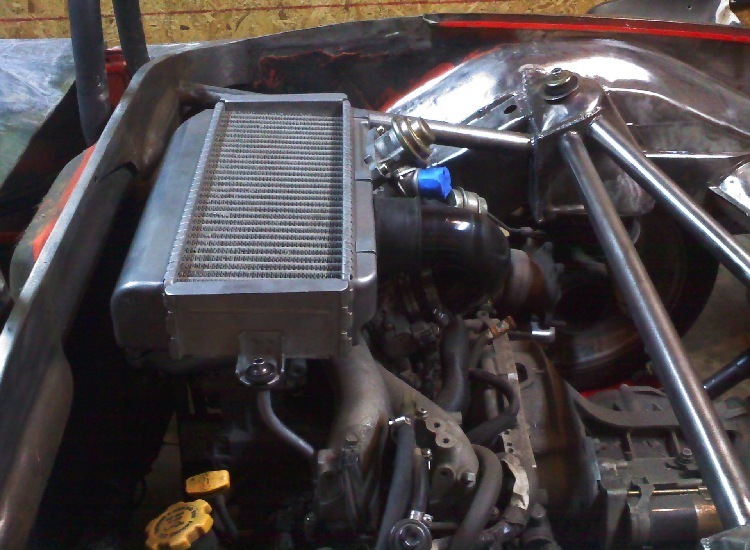
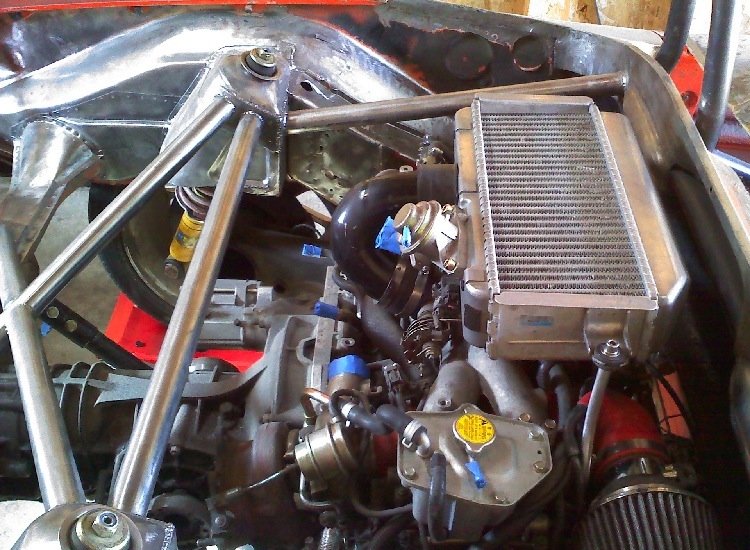
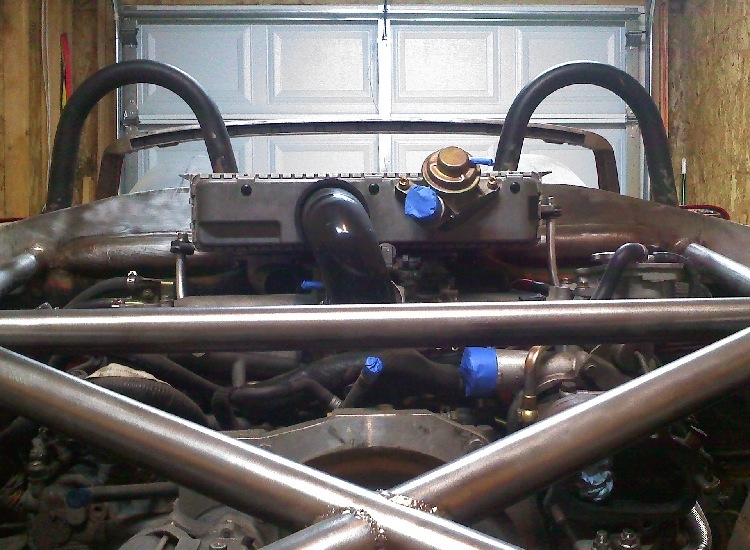
I wanted to get a start on running the inlet tubes for the intercooler but out of the thousands of feet of tubing I have none of it is 2", looks like I will have to hit up the exhaust shop tomorrow...
Posted by: Phoenix 914-6GT Nov 13 2009, 09:55 AM
Sweet. Glad to se you back at it Dana
Posted by: effutuo101 Nov 13 2009, 10:14 AM
No matter how many times I look at this thread, I am always impressed. Keep it up Dana.
Posted by: BKLA Nov 13 2009, 03:38 PM
OK..... I'm good now.... For a while!
Posted by: plymouth37 Nov 15 2009, 12:09 AM
I drove down to Littleton, CO this morning and picked up some 2" mandrel u-bends. I then pieced together the intercooler intake tubes. They are only held together with tape now because I still haven't figured out my welder situation. I only have 110 at my place and my 220 welders are up at my in-laws place in Cheyenne. I may have to make some time for welding when I go up there for thanksgiving. Some day I would love to swap these out for aluminum but that is more trouble then it is worth right now, I still managed to drop 4 pounds because this plumbing system is much shorter than the previous version. That brings the total up to around 414 pounds shed. Sorry for the fuzzy pics, my camera couldn't figure out all of the shiny tubing.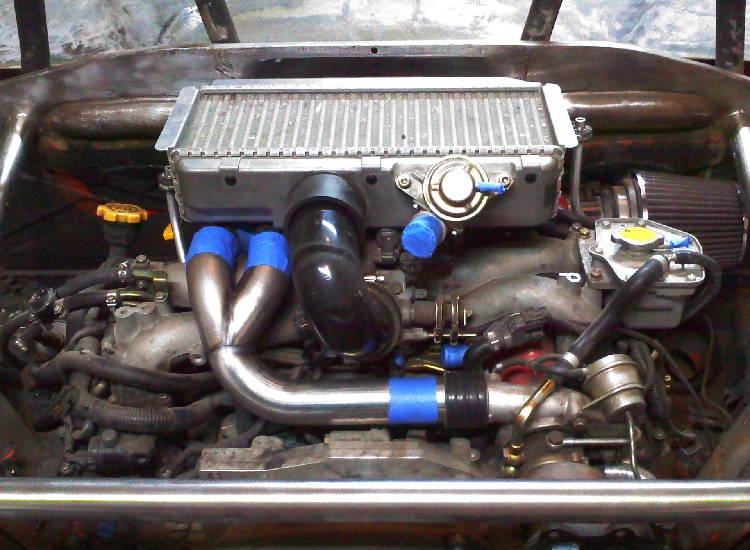
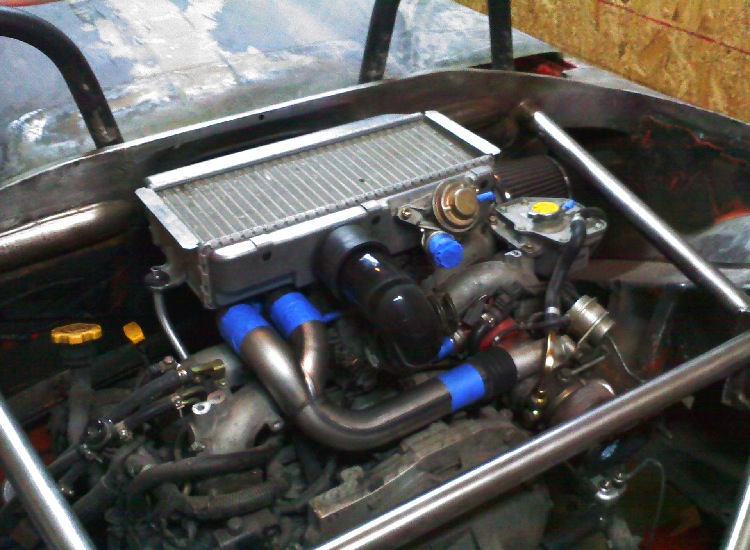
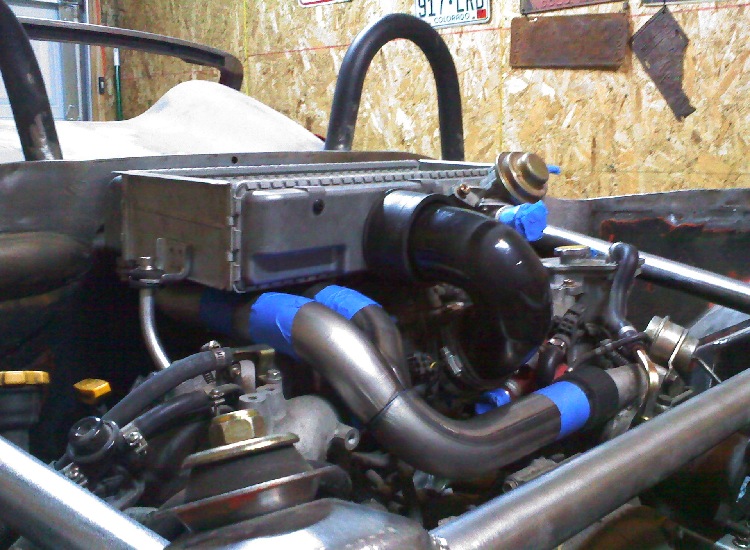
Posted by: scrz914 Nov 15 2009, 01:46 AM
I just saw this on the Porsche website. Didn't know they made a roadster.
I like yours better.
Attached thumbnail(s)
Posted by: plymouth37 Nov 15 2009, 01:50 AM
I think they copied me, I started production way before they did!
Posted by: SECHSER Nov 15 2009, 01:40 PM
hey, just gotta say "wow!!!.." what an amazing effort and it sure is turning out looking really good. keep up the good work man, looking forward to see the updates.
oh btw, i noticed that you're rather a subie fan. i really dig my saabaru except on the 05 ej205 had a crappy oil pump and straved my crank bearings.. i'm looking into ways to get that puppy back on the road..
Posted by: plymouth37 Nov 16 2009, 11:21 AM
Last night I mocked up the blowoff valve tubing. Other than welding these pieces up the intake system is fairly complete. I think I will have these three tubes painted body color.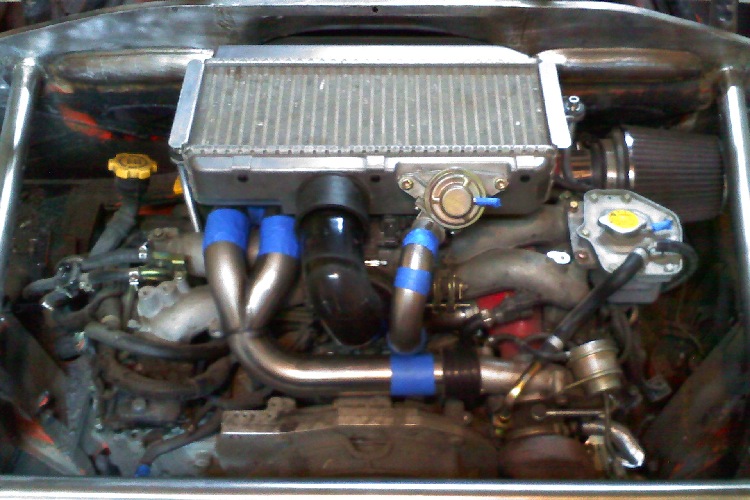
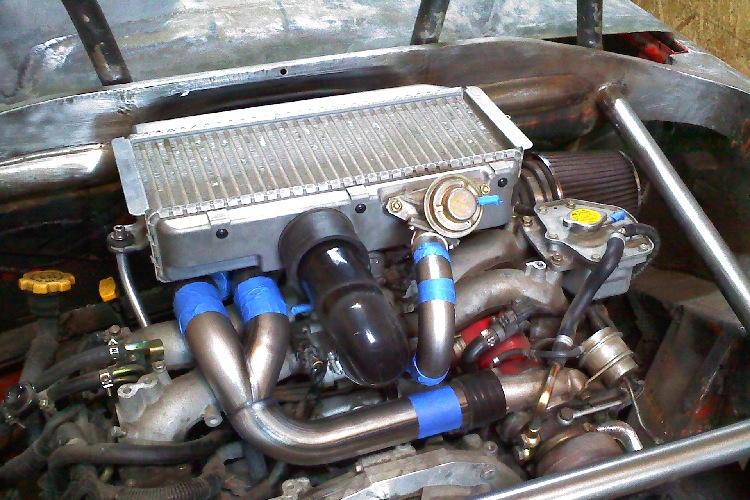
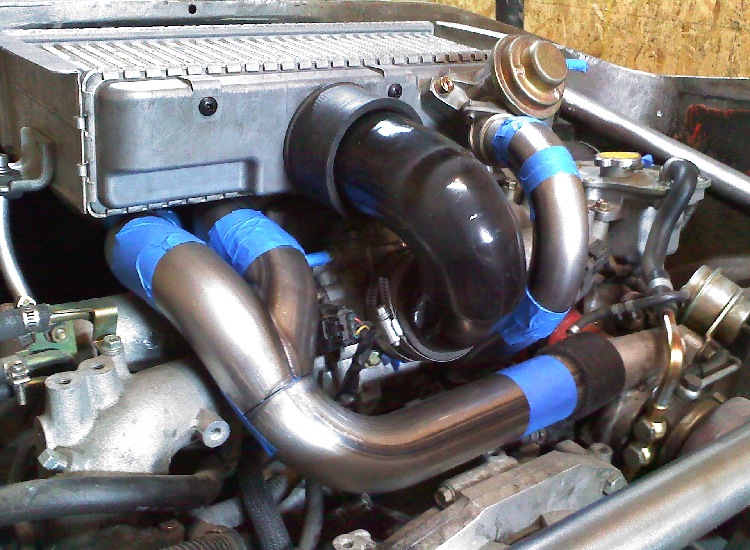
Posted by: Rand Nov 16 2009, 11:30 AM
I think I will have these three tubes painted body color.
They already are!
Glad to see you back on this Dana. We all look forward to the next episode. I hope I get to see this thing in person some day.
Posted by: plymouth37 Nov 16 2009, 11:33 AM
I think I will have these three tubes painted body color.
They already are!
Smartass!Posted by: BKLA Nov 16 2009, 11:41 AM
We all give you a hard time, but this IS the coolest thread on the "world". We just love to see what you come up with and how you build it.
We are... so not worthly!
A little poo flinging is all in fun.
Now, get back to work so that we can feel inadequate and small!
Posted by: plymouth37 Nov 16 2009, 11:48 AM
Believe me, one of the main reasons I hang out here is to give you all a hard time, I appreciate it when someone throws it back
Posted by: SirAndy Nov 16 2009, 12:02 PM
I appreciate it when someone throws it back
So, when are you going to clean that thing and make it purdy?
Posted by: plymouth37 Nov 16 2009, 12:05 PM
I appreciate it when someone throws it back
So, when are you going to clean that thing and make it purdy?
Hopefully sometime before I die...
Posted by: Crazyhippy Nov 16 2009, 01:42 PM
Looking good Dana...
Just a heads up, the MAF might need to be clocked slightly to get a pure reading. Ran into an issue on an 05 stang w/ a vortech. Some places it would read very erratically based on RPM, and just twisting it around really cleaned up the signal.
BJ
Posted by: Slider Nov 16 2009, 01:44 PM
good to see your back at it Dana!
keep us posted and someday i will see it in real life
Posted by: plymouth37 Nov 17 2009, 12:09 AM
Looking good Dana...
Just a heads up, the MAF might need to be clocked slightly to get a pure reading. Ran into an issue on an 05 stang w/ a vortech. Some places it would read very erratically based on RPM, and just twisting it around really cleaned up the signal.
BJ
Good to hear from you BJ, thanks for the heads up on that MAF, I swear those sensors have minds of their own.
When I was trying to get the car to run the first time I had the MAF in backwards because it had no directional arrow on it, awesome right?
The car would run fine for 34 seconds then just shut down, that was a fun problem to diagnose...
Posted by: shoguneagle Nov 17 2009, 12:26 AM
Ah!!! Winter is setting in and there was "something" keeping from my "long winter nap".
Something was missing, something was wrong!!!! WHAT NEEDS TO BE DONE???
"ANKLEBITER, ANKLEBITER, ANKLEBITER" UPDATE!!!! WHERE IS IT?
There it is---------------
EVERYTHING IS GOING ALONG AND I NOW HAVE CURRENT KNOWLEDGE OF THE PROJECT.
Looking forward to a long extended Winter nap; see you in the Spring.
Steve Hurt
Posted by: Mr.242 Dec 15 2009, 01:42 PM
OMG..I have been living under a ROCK! I just found this build and it's great.
The law and my .02$: Don't apply the law on currently manufactured vehicles(Chevy/Ford/etc). Read the laws for a "specilty" vehicles or "KIT" vehicles. I PERSONALLY know WA has them and there are laws that allow builds such as these. Have it licensed as something other than a Porsche, maybe a "KIT" vehicle. It will apply. Then carry a print out of the laws tucked somewhere in a nice little binder near your registration/insurance.
Fight smarter....
WAHOO....I love this car!
Posted by: charliew Dec 15 2009, 04:39 PM
After going all night a few years ago on the motor we put in my son's sti it wouldm't run smooth. About 10am I had to crash and he woke me up about noon and said someone on nasioc said to check the maf and that was it. No arrow or anything. It was mounted on a aluminum housing and we turned the housing around on re-assembly.
Posted by: BKLA Jan 7 2010, 04:35 PM
Holidays are done. We're in need of an update!
Posted by: Ferg Jan 7 2010, 04:49 PM
Hi Dana You gonna be at 3R tonight???
Ferg
Posted by: markb Jan 7 2010, 05:15 PM
Holidays are done. We're in need of an update!
Posted by: plymouth37 Jan 7 2010, 10:14 PM
I will post an update on Sunday
Posted by: sendjonathanmail Jan 7 2010, 10:16 PM
Posted by: plymouth37 Jan 10 2010, 02:50 AM
No big news on the car but my wife and I moved from our apartment into a little house with a huge shop. So now I will actually be able to get some work done!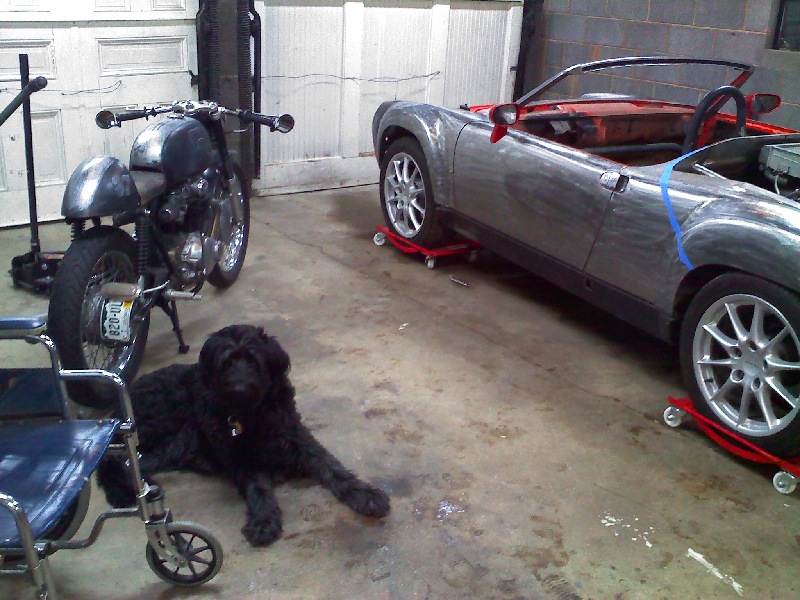
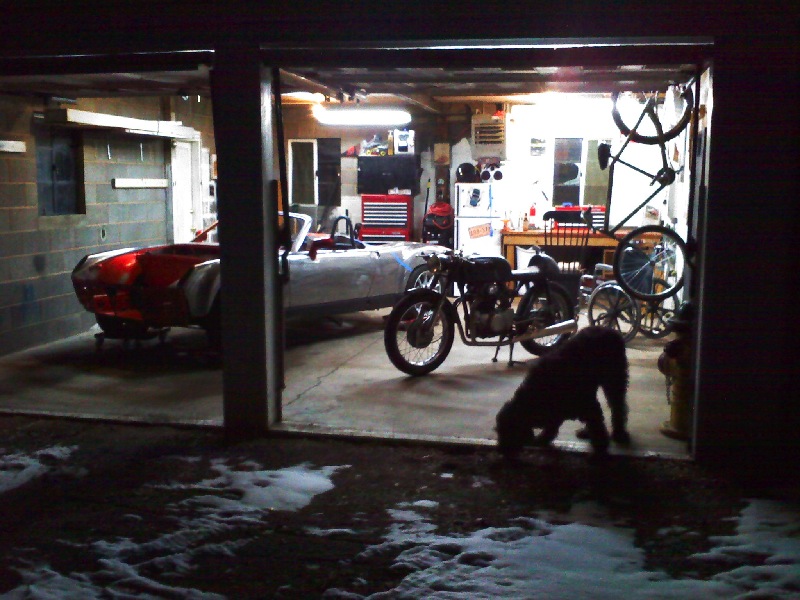
Posted by: plymouth37 Jan 10 2010, 02:54 AM
My other vehicles.
And of course the awesome REZNOR gas heater to combat the Colorado winter.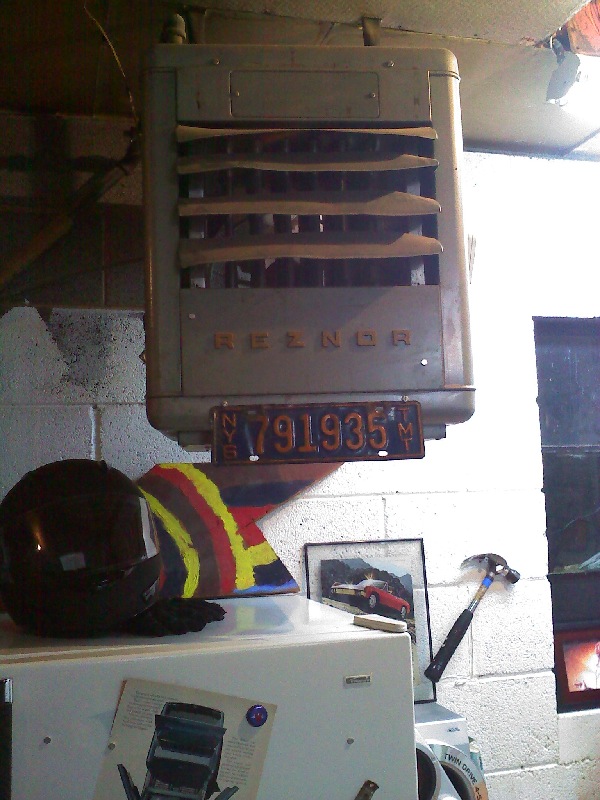
Posted by: plymouth37 Jan 10 2010, 03:07 AM
How she sits now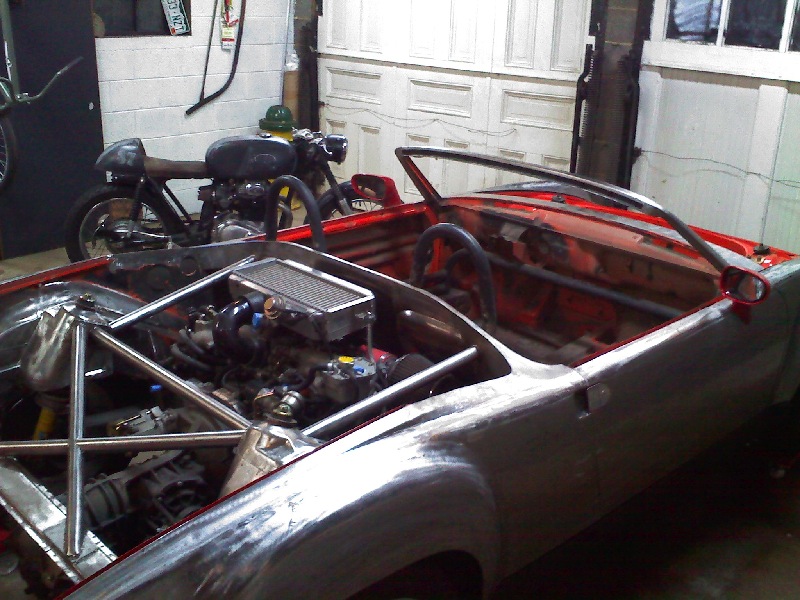
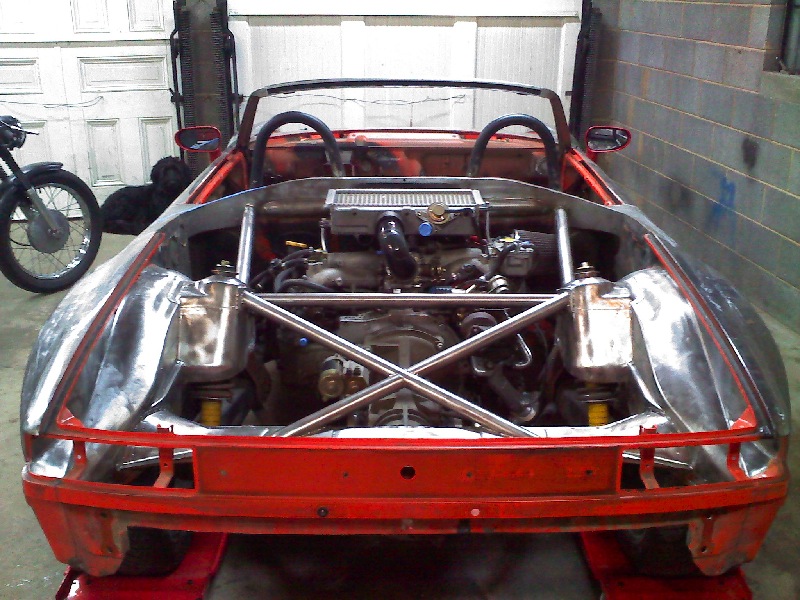
Posted by: Ferg Jan 10 2010, 09:11 AM
I need to meet your dog, is it a doodle?
Posted by: Phoenix 914-6GT Jan 10 2010, 10:49 AM
Swet....looking good Dana
Posted by: bill pierce Jan 10 2010, 01:44 PM
No big news on the car but my wife and I moved from our apartment into a little house with a huge shop. So now I will actually be able to get some work done!
Too bad your dog is in a wheel chair. He looks so young.
Loving this thread. Keep up the good work!
Posted by: plymouth37 Jan 10 2010, 02:16 PM
I need to meet your dog, is it a doodle?
We think Bailey is a labradoodle but she was born in the pound and then was abandoned by the person who adopted her so we are not totally sure as to her make and model. She is a real sweetheart and an awesome garage dog.

Posted by: plymouth37 Jan 20 2010, 07:46 AM
Last night I started to cut out some extra sheet metal around the engine bay. I finally got sick of working around the engine and decided to pull the drivetrain. 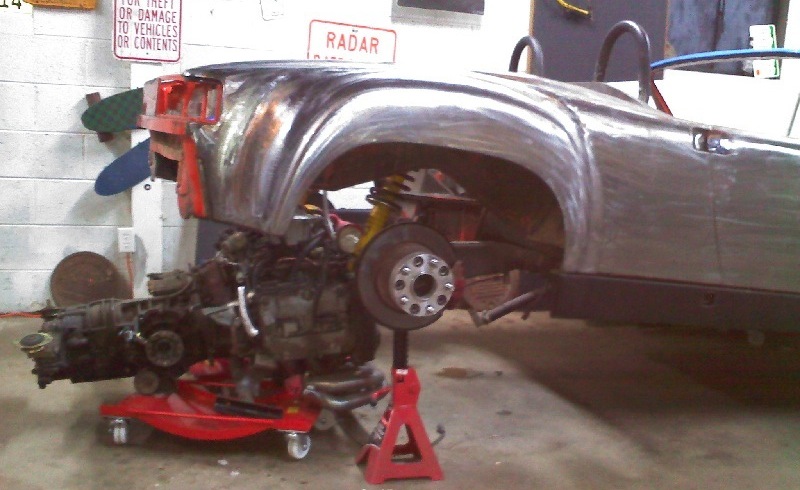
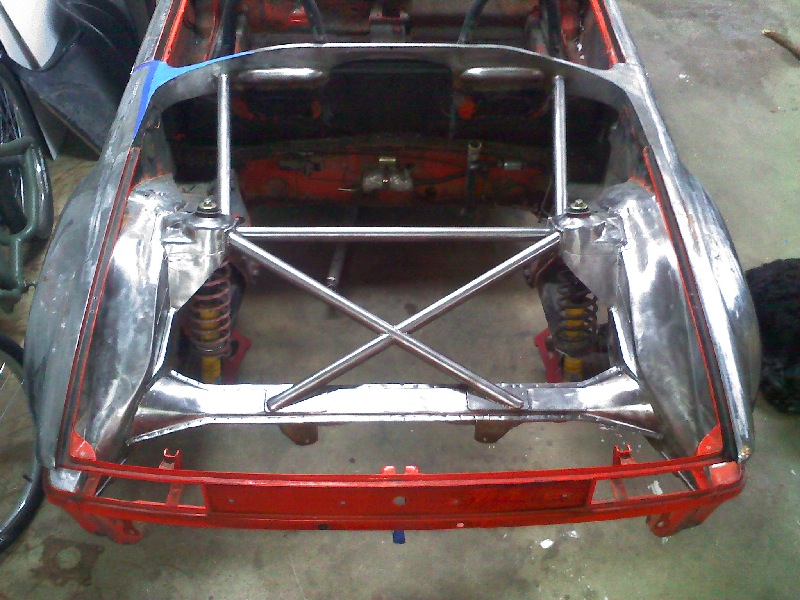
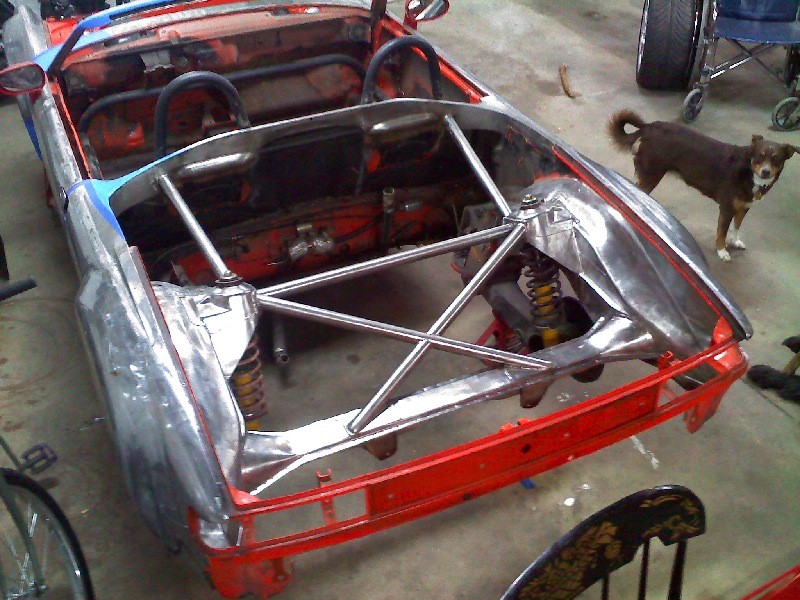
Posted by: plymouth37 Jan 20 2010, 07:50 AM
Now that the drivetrain is out I am going to detail it and work on shaving some weight off of the engine. The stock alternator bracket weighs a ton and the intake manifold needs to have a ton of extra metal shaved off of it.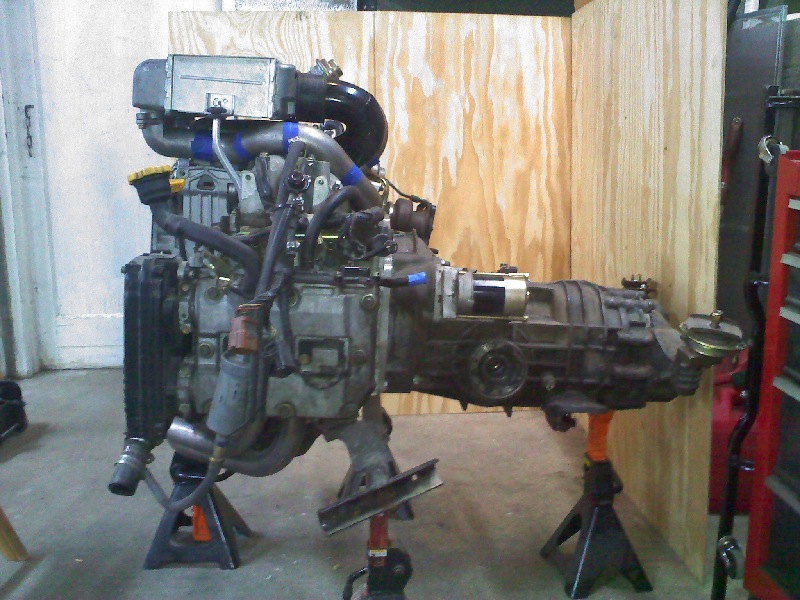
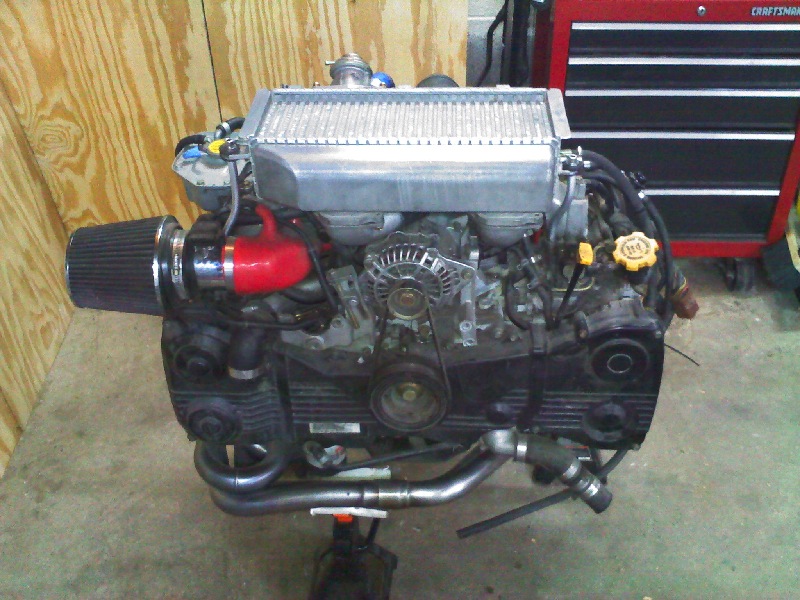
Posted by: Phoenix 914-6GT Jan 20 2010, 01:51 PM
Sweet.... I'm so happy you're back to work on this.
Posted by: FourBlades Jan 20 2010, 02:43 PM
This car is so unique and so cool it really needs to be finished.
Any book, chapter, or article on custom 914s needs to cover this car.
What kind of color scheme do yo have in mind for the engine?
John
Posted by: BKLA Jan 20 2010, 04:00 PM
I'm soo happy now!!!! I look forward to seeing your posts and pictures of your work.
I hope its not too presumptuous of me to ask, (but I am going to anyway) what are your plans here? (See pic) I'm very interested to see how you resolve how the trunk meets the fender and the cover...
Thanks!!!!!!!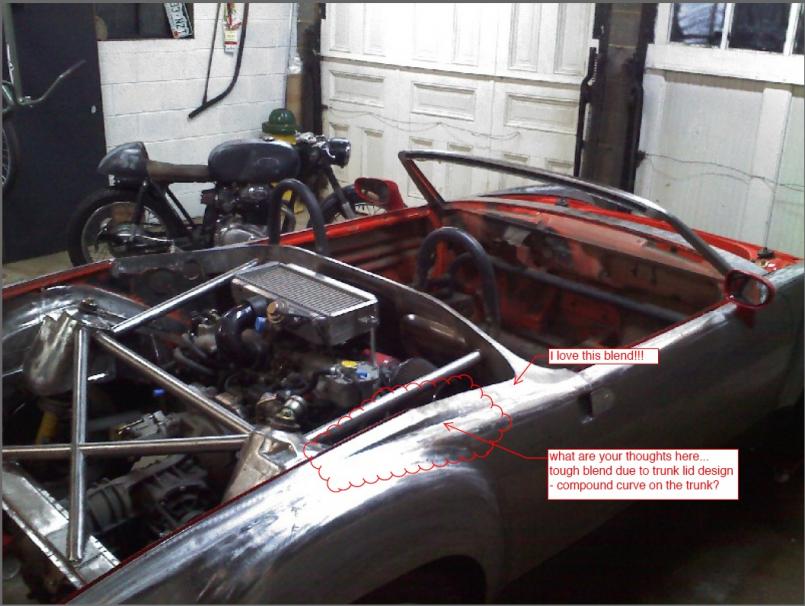
Posted by: Gint Jan 20 2010, 05:07 PM
Hey Dana... when do I get to see this car in person? I could bring over a real camera.
Posted by: Rand Jan 20 2010, 05:19 PM
This may shed some light on that:
Posted by: plymouth37 Jan 20 2010, 06:23 PM
What kind of color scheme do yo have in mind for the engine?
I am going to keep it looking pretty factory, only real dress up will brushed aluminum, black powder coat and stainless fasteners.
I hope its not too presumptuous of me to ask, (but I am going to anyway) what are your plans here? (See pic) I'm very interested to see how you resolve how the trunk meets the fender and the cover...
That area still needs a little work, you can see a point where the old meets the new that I need to smooth out into a much softer curve.
Hey Dana... when do I get to see this car in person? I could bring over a real camera.
You are welcome to come over any time, I am over in old town Longmont now and have a pretty open schedule.
And yes the pics suck, my camera died on me and I am making due with my phone for now, I keep spending my money on the car instead of a new camera.
I also need to find a better mac program to shrink the photos to 800X600 the program I am using makes them even blurrier and the files are way too big for their size.
Posted by: rick 918-S Jan 20 2010, 07:02 PM
I'm soo happy now!!!!
I look forward to seeing your posts and pictures of your work. I hope its not too presumptuous of me to ask, (but I am going to anyway) what are your plans here? (See pic) I'm very interested to see how you resolve how the trunk meets the fender and the cover...
Thanks!!!!!!!
I'd cut the sharp edge off (outer edge of the remaining sail panel) and taper it out to the roll of the quarter panel. Take out the step
Posted by: g911 Jan 20 2010, 07:05 PM
glad to see you're back at it. very sweet indeed.
Posted by: plymouth37 Jan 20 2010, 07:18 PM
I'd cut the sharp edge off (outer edge of the remaining sail panel) and taper it out to the roll of the quarter panel. Take out the step
That is pretty much what I was thinking, that spot has bugged me ever since I welded it up, it looks unnatural when compared to the metal around it. My welder is coming down in a week or two and I am going to make up for lost time with it.
Posted by: BKLA Jan 20 2010, 07:28 PM
I'd cut the sharp edge off (outer edge of the remaining sail panel) and taper it out to the roll of the quarter panel. Take out the step
That is pretty much what I was thinking, that spot has bugged me ever since I welded it up, it looks unnatural when compared to the metal around it. My welder is coming down in a week or two and I am going to make up for lost time with it.
That's what I wanted to hear!!!
Posted by: Zundfolge Jan 20 2010, 08:35 PM
I also need to find a better mac program to shrink the photos to 800X600 the program I am using makes them even blurrier and the files are way too big for their size.
I use Photoshop, but I'm also a professional so I can justify the expense.
If you have X11 installed there's http://www.gimp.org/macintosh/
If you don't want to go to the trouble of installing X11 for The Gimp, there's http://seashore.sourceforge.net/index.php (based on Gimp but built on the Cocoa Framework).
I run Seashore on my Hackintosh Netbook (since Adobe software won't install on a machine running less than 1024x768 resolution, and I really didn't need something that powerful for the very little image editing I do on the netbook)
Posted by: JJ914GT Jan 21 2010, 11:50 AM
Love this build, it's actually the car that inspired me to go for the subaru conversion.
Here's a nice online "photoshop-like" program:
http://www.pixlr.com/editor
Posted by: plymouth37 Feb 5 2010, 10:43 AM
After pulling the drivetrain I stripped the engine down to almost a long block. There is a ton of weight that can be removed from the engine and a couple small power adders that are easier to do with the engine out of the car.
Now I need to take this opportunity to clean things up a bit.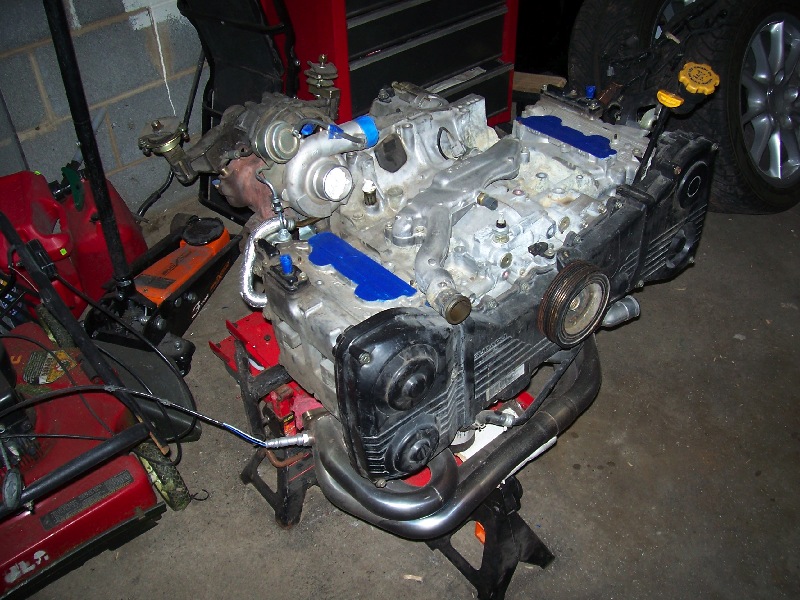
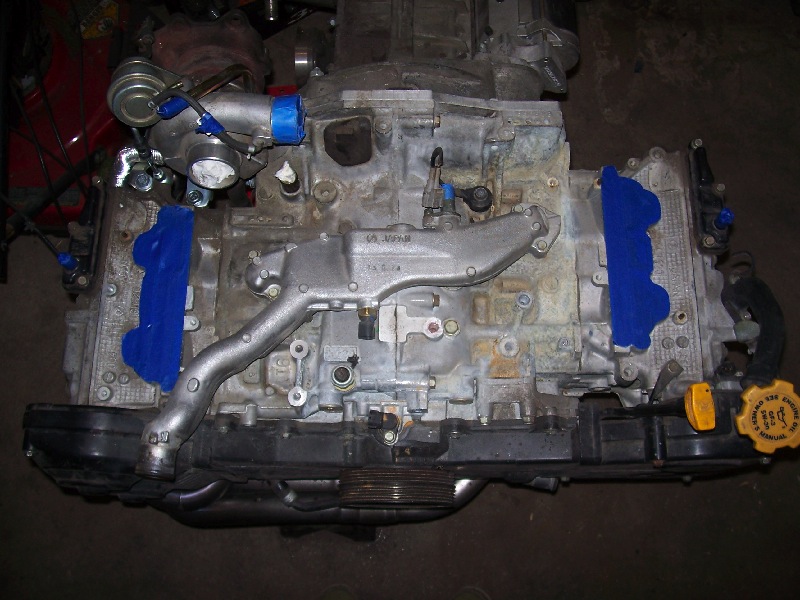
Posted by: plymouth37 Feb 5 2010, 11:19 AM
Next I pulled the Tumble Generator Valves off of the intake. For those of you who are not familiar with these little bastards, they are located between the intake and the heads, during cold start ups they close to improve emissions. The problem is that when the valves open during normal driving they still block a ton of air flow and rob mid range power.
Here are the stock TGVs: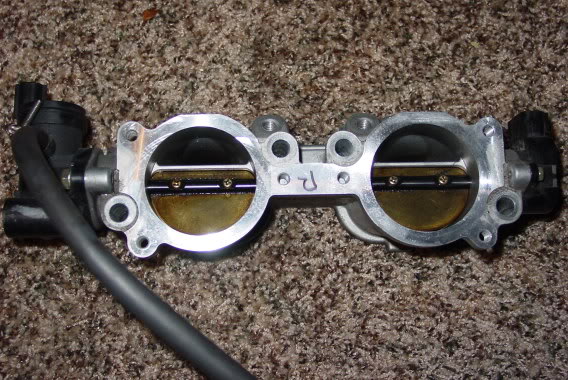
I removed the butterflies and the motors and sensors related to them, this procedure does trigger a check engine light but I am going to have the car tuned anyway and this code can be eliminated from the ecu.
Here you can see the casting that directs air around the closed butterflies so the engine doesn't stall.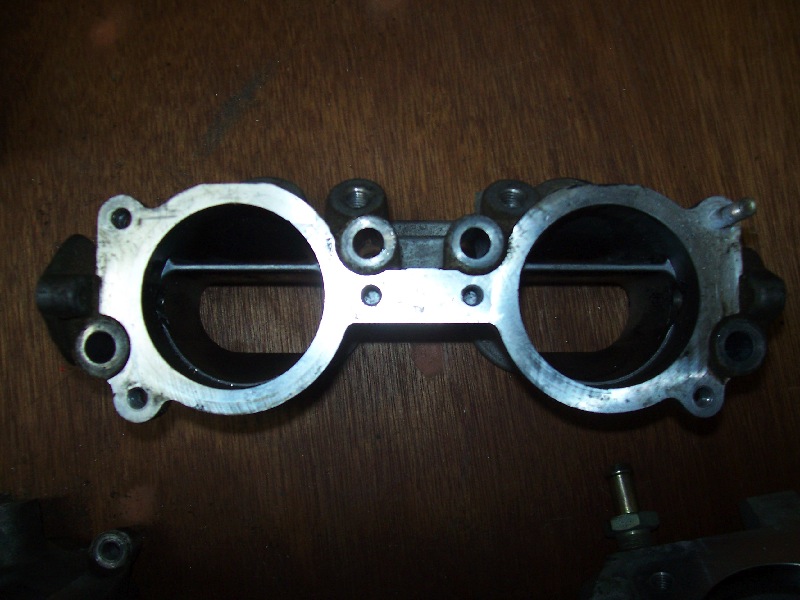
I bored out the cast partitions and ported out the TGV bodies
Here is a shot half way through porting: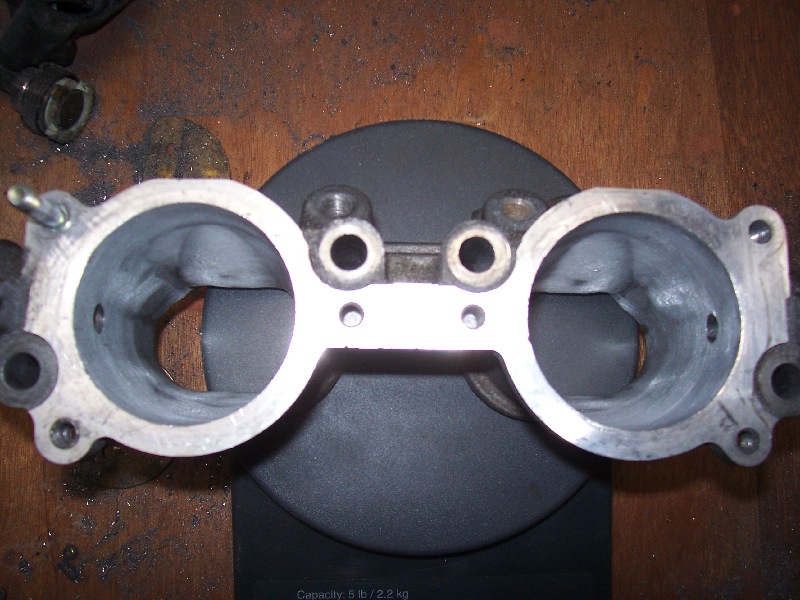
Posted by: plymouth37 Feb 5 2010, 11:20 AM
Lastly I finished porting the bodies then ground off any unnecessary mounts or brackets on the exterior of the TGVs then hit them with a wire wheel. The holes you see where the rods used to go will be filled as soon as I get my tig down here.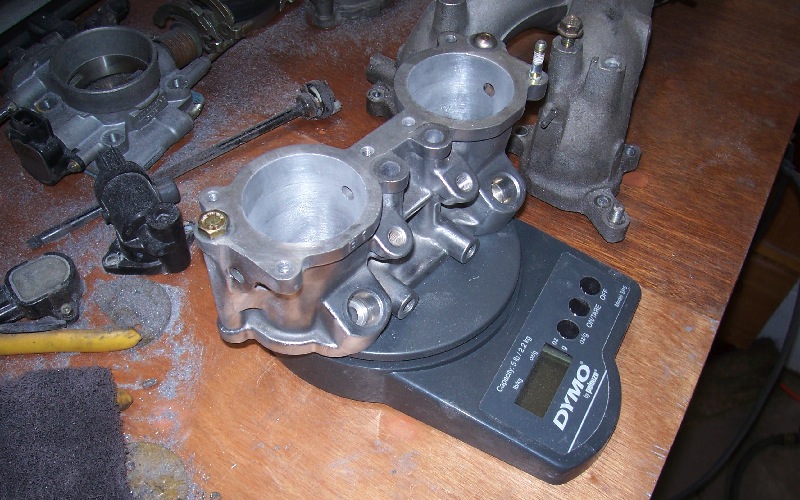
And now for the Bonuses: I lost a total of 2.2 pounds by removing the motors, sensors, butterflies, driveshafts, and extra aluminum.
Here is a TGV mod before and after chassis dyno sheet from a guy who has almost exactly the same mods on his engine as mine:
Check out the gains at 3000 rpm, and this is at the wheels!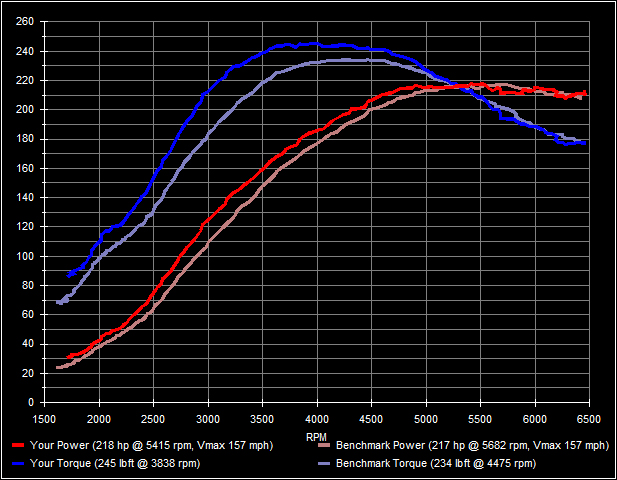
Not a bad gain for a days work!
Posted by: Kirmizi Feb 5 2010, 11:28 AM
Hey Dana,
You gonna have it back together and running for Cars and Coffee tomorrow?
Mike
Posted by: plymouth37 Feb 5 2010, 11:30 AM
Hey Dana,
You gonna have it back together and running for Cars and Coffee tomorrow?
Mike
Sure, no problem...Posted by: fat73 Feb 5 2010, 11:40 AM
Hey Dana,
You gonna have it back together and running for Cars and Coffee tomorrow?
Mike
Sure, no problem...Dana...Does this mod have any effect on the ECU? I'm asuming the sensors that previouly controlled the throttle body butterflies stay attached to the harness, or can they be removed?
Ed
Posted by: plymouth37 Feb 5 2010, 11:47 AM
Dana...Does this mod have any effect on the ECU? I'm asuming the sensors previously attached to the throttle body butterflies stay attached to the harness, or can they be removed?
Ed
The sensors measure the butterflies movement which varies depending on the engines running conditions so it is impossible to just plug in a resistor to trick the ECU like I have done with other sensor deletes. It is an all or nothing kind of deal, messing with the TGVs will give you a check engine light and a possible limp mode situation unless you get the code programmed out. Since it will trigger a problem weather you remove the sensors or not I am removing the sensors and the wires for them from my wiring harness. To fully optimize the TGV delete procedure you need to have the ECU programmed for a freer flowing intake but since I am getting my car tuned anyway it wasn't really an issue.
Posted by: Crazyhippy Feb 5 2010, 01:40 PM
There are alos companies that make an emulator for the TGV sensors... just the TGV motor on one side, a short shaft and the sensor on the other...
Re-programming is a better choice.
There are decent gains to be had gasket matching everything, and cleaning up the heads (requires removal though) The Exhaust ports have lots of room for improvement.
Look at the throttle body inlet, and where it meets the intake... lots of areas to clean up, and decent gains for some time and lil money.
Posted by: plymouth37 Feb 10 2010, 08:57 PM
I was looking at the stock intake manifold and realized that I have eliminated the need for any mounting brackets on the manifold. 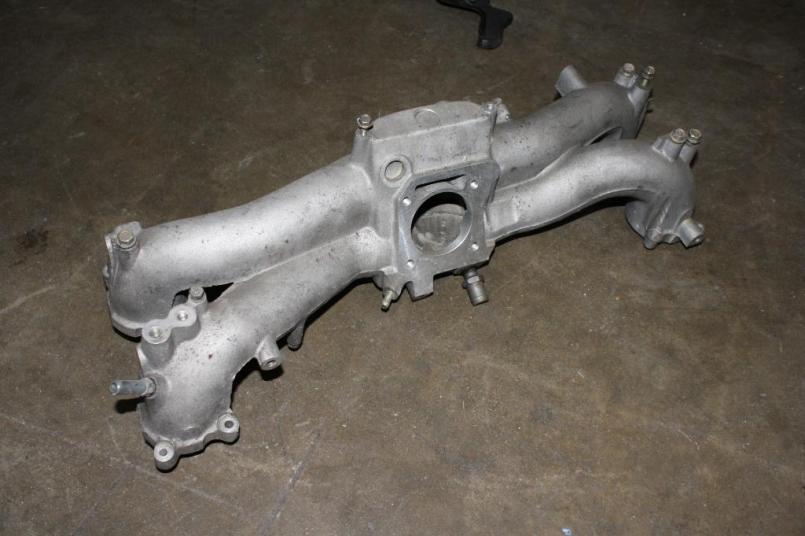
I gasket matched the TGVs to the manifold.
I have wanted to go with a little more of a stock look so I decided to put a brushed finish on the manifold rather than full out polishing it.
I took a grinder to the mounts and casting marks on the manifold then hand sanded it down with 60 grit, 100 grit, and then a scotch brite pad. It is so nice to have a wife that doesn't bat an eye when you pull an intake manifold out of the dish washer...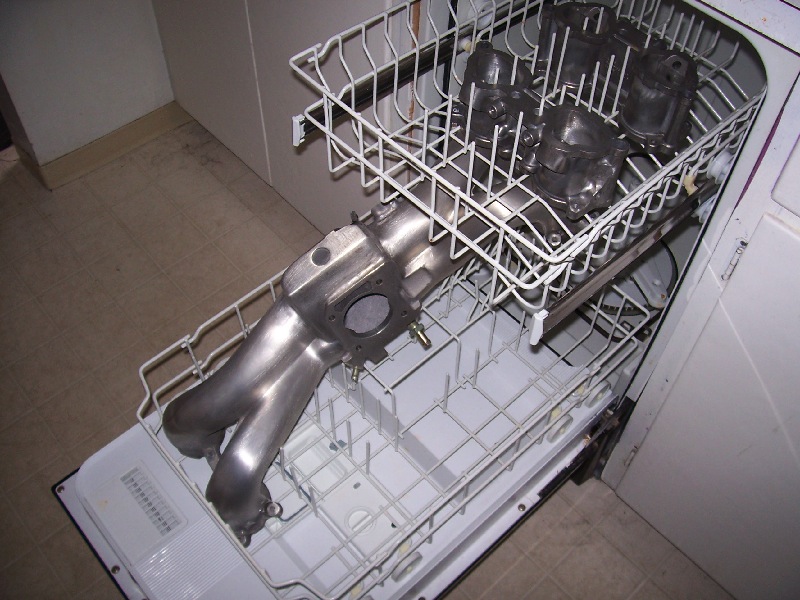
Then I bolted the gutted TGV bodies and manifold up the the engine with new gaskets all around. The process of shaving and polishing the manifold dropped an additional 1/2 pound.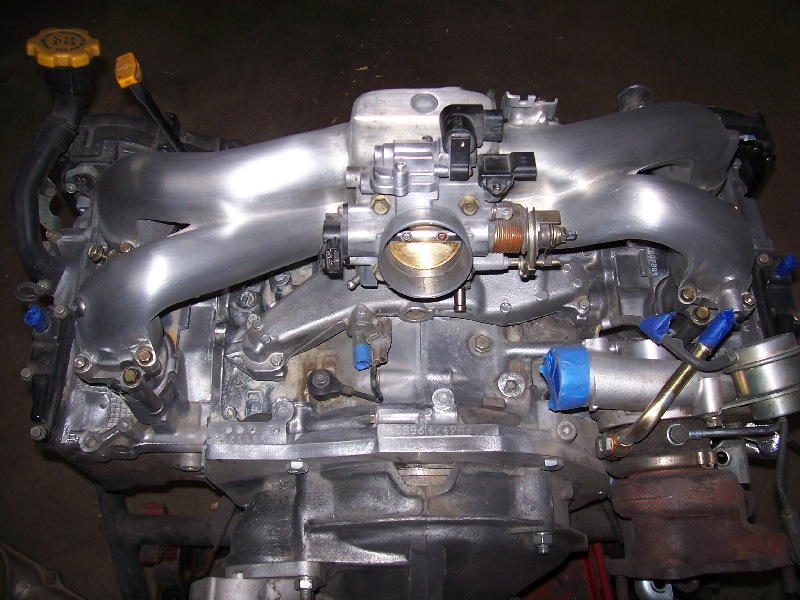
Posted by: plymouth37 Feb 10 2010, 09:01 PM
Here are another couple shots.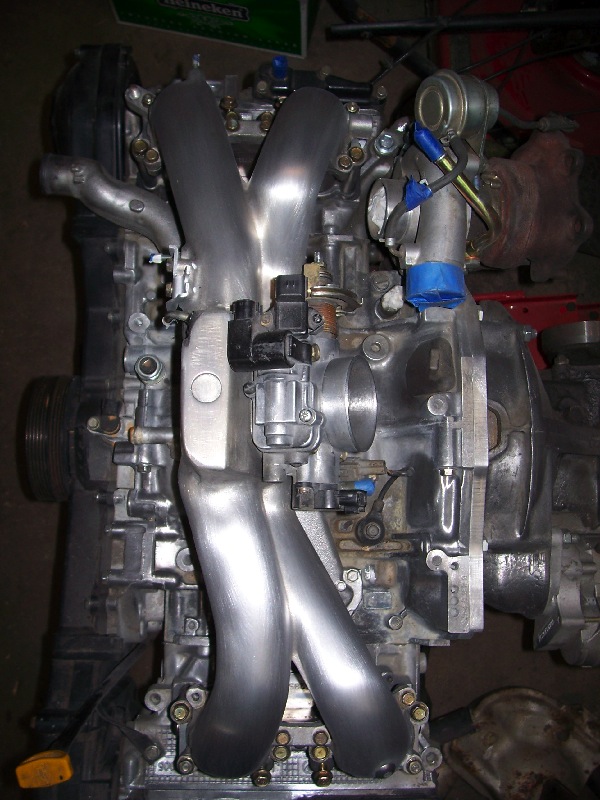
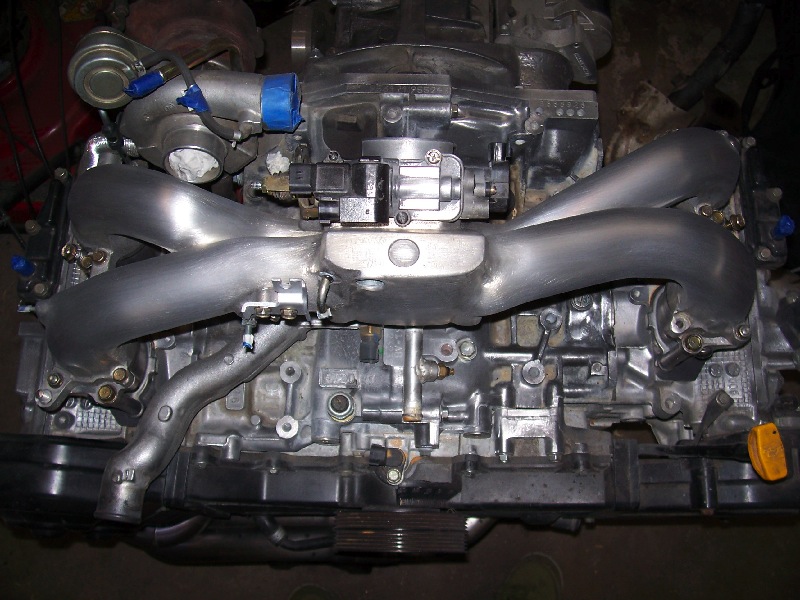
Posted by: rnellums Feb 10 2010, 09:11 PM
The manifold looks gorgeous!
Posted by: plymouth37 Feb 13 2010, 02:40 PM
The WRX engine is not the best looking engine, I am trying to make it look as good as possible by re-routing and tucking everything I can.
I want to make the engine as easy to remove as possible so I am moving the connection points for all of the fuel and wiring to one location in the front of the engine.
Here is the original routing of the fuel lines.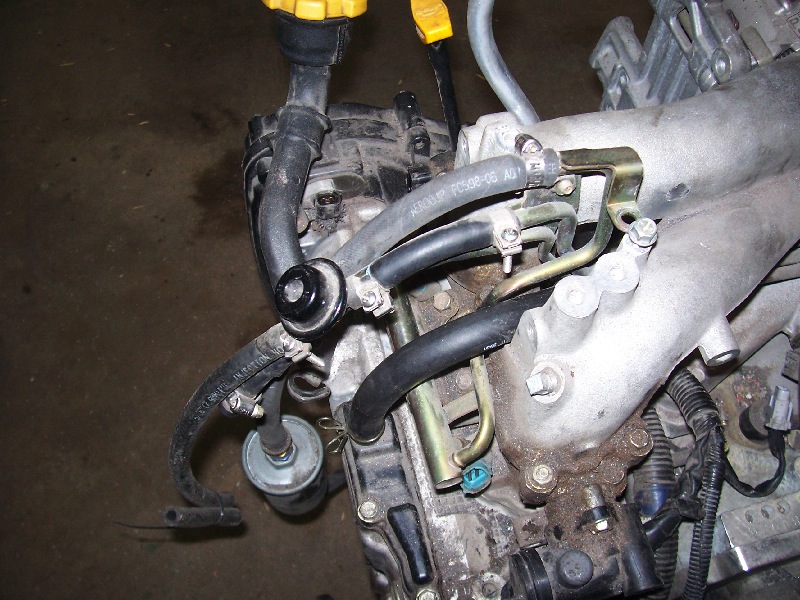
I cut off part of the original lines and ran my own feed and return. Once I run the wiring to the "connection area" I will make a nice aluminum bracket that mounts both lines and the wiring to the alternator bracket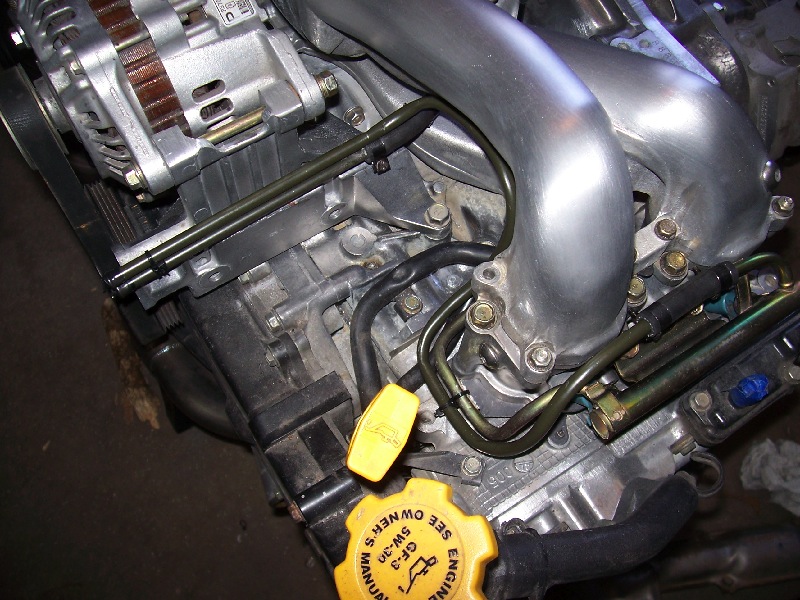
Posted by: plymouth37 Feb 13 2010, 02:41 PM
I also deleted the heater loop, I cut off most of the steel tubing for the system then replaced them with a couple rubber elbows and my temp sensor housing. I still need to find some sexy hose clamps since this area will be pretty visible.
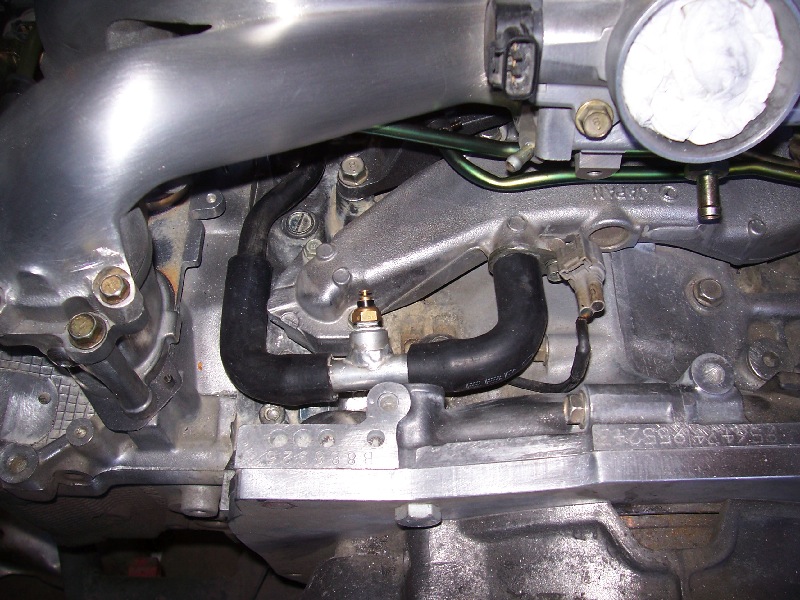
Since I am not running A/C or P/S I cut down the accessory brackets so they are only set up to hold the Alternator, I lost 1/3 pound in the process.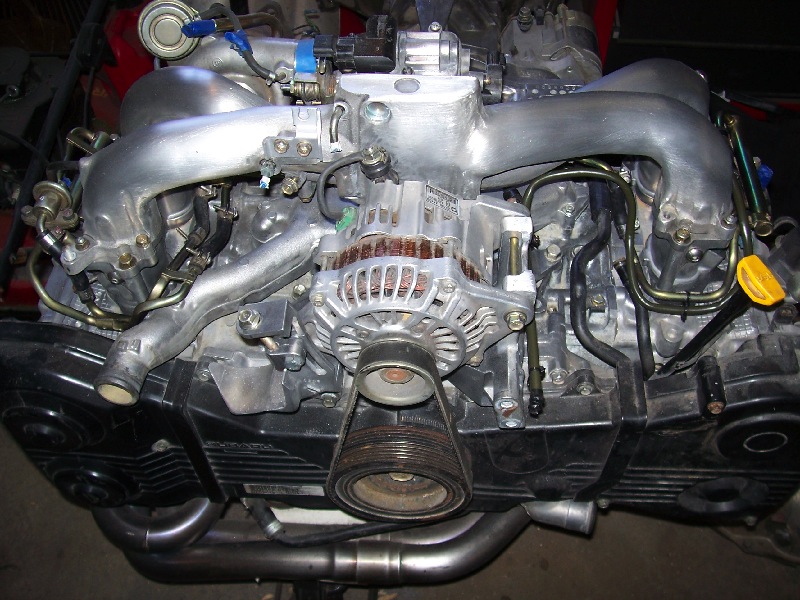
Posted by: budman5201 Feb 14 2010, 12:35 AM
Hey dont forget another 7-8 lbs in a lightened front pulley. You can find a good 2 lb one out there. Awesome manifold polish!
Posted by: plymouth37 Feb 14 2010, 03:20 AM
Hey dont forget another 7-8 lbs in a lightened front pulley. You can find a good 2 lb one out there. Awesome manifold polish!
That could be a good mod, off to NASIOC to do some research!
Posted by: fat73 Feb 14 2010, 07:37 AM
Hey dont forget another 7-8 lbs in a lightened front pulley. You can find a good 2 lb one out there. Awesome manifold polish!
That could be a good mod, off to NASIOC to do some research!
Yep you definitely want to do the pulley. Did that on mine. I used the Cobb pulley with stock dimensions. Also makes it rev like a mutha.
Ed

Posted by: d914 Feb 14 2010, 08:25 AM
small point.. the svx oil fill tube is shorter and points to the outside which might actually work better in our cars..plus cleans up the look some..
Posted by: daveyboybadion Feb 14 2010, 10:25 AM
Hi Dana, I've been following your build with great interest, fantastic job so far. I just received this months MCN and their innovation of the month is the Oetiker clamp. These clamps are meant to be used for fuel injection fuel lines. Check them out at www.oetiker.com. They are very attractively priced as well...daveyboy
Posted by: plymouth37 Feb 14 2010, 10:42 AM
Thanks for all the tips guys! Lots of good info in the last three posts!
Posted by: Dr Evil Feb 14 2010, 12:21 PM
Does the original pulley not act as a harmonic balancer? If so, removing the weight could be detrimental.
Posted by: plymouth37 Feb 14 2010, 12:41 PM
Does the original pulley not act as a harmonic balancer? If so, removing the weight could be detrimental.
There seem to be two trains of thought on the subject, half of the people on the subaru boards say that it is not a dampener, and that the boxer engine is pretty well balanced on its own. The other camp says it is a dampener and that it is a potentially disastrous mod to do.
On one hand I can see that the stock pulley was drilled to balance it which makes me think it should probably be there, also the STI has a heavier pulley to do something. On the other hand I have seen very little evidence of anything bad happening after a pulley swap and most people seem to like the quick revs. I can't really find anything definitive either way.
Posted by: d914 Feb 14 2010, 12:42 PM
from my research, on another suby thread:
I finally got an answer directly from Subaru of America...I asked them if the crank pulley for the WRX and the STi is used as a harmonic damper/balancer. Here's the reply...
Hello F. Flores:
Thank you for your patience as I checked with our Technical Services
Department regarding your message below. They advised that the crank pulley
is a pulley and nothing else. It is not used as a harmonic damper/balancer.
Thanks for the opportunity to be of assistance. If you need any future
assistance, please feel free to contact us again.
Best wishes,
John J. Mergen
Subaru of America, Inc.
I think this topic can now end!:D
Posted by: plymouth37 Feb 14 2010, 12:46 PM
Awesome looking engine Ed, I remember welding up that intercooler kit for you like it was yesterday!
Posted by: plymouth37 Feb 14 2010, 12:51 PM
from my research, on another suby thread:
I finally got an answer directly from Subaru of America...I asked them if the crank pulley for the WRX and the STi is used as a harmonic damper/balancer. Here's the reply...
Hello F. Flores:
Thank you for your patience as I checked with our Technical Services
Department regarding your message below. They advised that the crank pulley
is a pulley and nothing else. It is not used as a harmonic damper/balancer.
Thanks for the opportunity to be of assistance. If you need any future
assistance, please feel free to contact us again.
Best wishes,
John J. Mergen
Subaru of America, Inc.
I think this topic can now end!:D
I have seen that letter before, the only problem is the opinionated "subie masters" on nasioc totally tore it apart, not saying that it is wrong in any way, I googled "John J. Mergen" and he seems to know his stuff. It's just that those nasioc guys are really good at convincing you that your engine will blow up if you so much as breath on it. I have some time before the engine goes back in to decide if I am going to go for one or not. They sure are pretty though!
Posted by: plymouth37 Feb 14 2010, 12:52 PM
Good tip on the SVX filler Greg, I have been trying to figure out what to do to the odd WRX one!
Posted by: d914 Feb 14 2010, 01:27 PM
here is a quick pick to see if this works for you..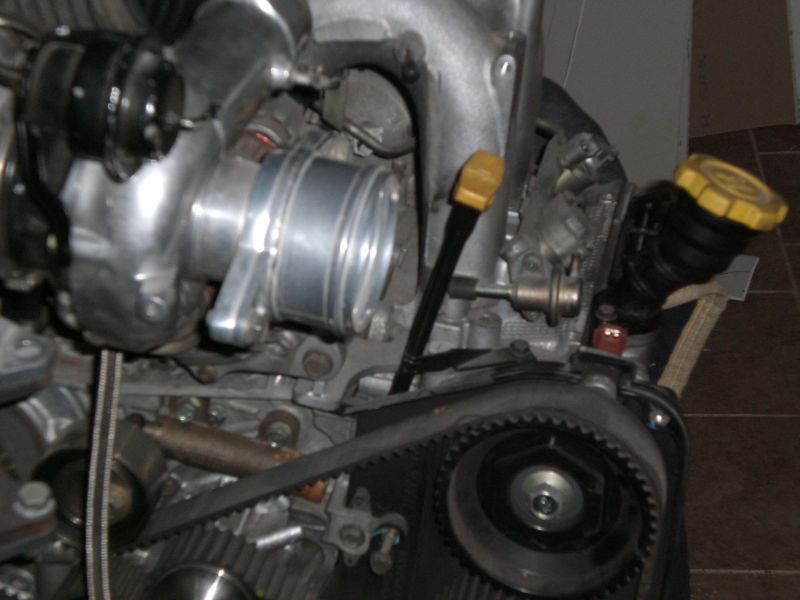
Yeah I have a long way to go before I see a running car..
Posted by: plymouth37 Feb 14 2010, 02:56 PM
here is a quick pick to see if this works for you..
Nice! I need to pick one up, that is exactly what I was looking for!
Posted by: fat73 Feb 14 2010, 03:32 PM
Awesome looking engine Ed, I remember welding up that intercooler kit for you like it was yesterday!
Yep seems like yesterday but it was in 2006! 2005 was my first ride in one of these conversions in your car in Vegas. I'll never forget that.
We did a ton of work cleanint/poslishing on this motor, and powdercoating everything we could. Unfortunately, after we got it in there you couldn't see much of it. But I know it's there...
One of the reasons for doing this was so the engine bay and underneath of the car would stay clean...NO OIL LEAKS.
So far I've put over 24k miles on my conversion with zero problems, except for one busted transaxle (my fault entirely....smoking those 11" tires is just too much fun).
Ed
Posted by: flipb Feb 14 2010, 04:26 PM
Might be a dumb question from someone who isn't all that mechanically inclined, but with the fuel line connections rerouted to the front, do you risk catastrophe if the alternator belt breaks?
Posted by: charliew Feb 14 2010, 04:55 PM
It doesn't take much inspection of a suby 2.0 or 2-5 damper to figgure out it is truly a damper. It has different pieces mounted in rubber. Being a oem damper means it is designed to work in the lower rpm ranges. ATI builds a nice aftermarket damper that works in a much broader range. Don't forget the oil pump is directly behind the damper any hormonics created will be directly sent through the internal part of the pump. Check out ATI's site. I originally tried to find a fluid damper like the one's on my sbcs but then read ati's info and decided to go that way. Who knows what all goes wrong on high strung subys but why screw with whats a known thing, all motors hotrodded need all the high tech mods you can afford to make them live longer. Also on the fi clamps you could use the one time use ones like what is on a harley. They are cleaner looking than a screw type clamp. You can get them at a harley shop or once you have some I bet they can be found online. You will also need the installation tool to squeeze them.
Oh yeah I have two light weight pulleys one is a perrin, I think the other also has a additional pretty pulley for I guess the alt. I will sell them if anyone is interested, they have never been on a running motor.
Also Grimspeed has thin or thick phoenolic sp? spacers to keep the engine heat out of the intake. I think I remember they are 3mm and 7 or 11mm the longer ones come with bolts. With those guys on you can put your hand on the intake on a hot day while the motor's running. Justin Grimm is the vender on nasioc.
Posted by: fat73 Feb 14 2010, 05:48 PM
It doesn't take much inspection of a suby 2.0 or 2-5 damper to figgure out it is truly a damper. ...
All I know is I've been running mine with the light pulley for about 24k miles with no problems. Has not hurt performance, bottom end or top end.
Ed
Posted by: plymouth37 Feb 14 2010, 06:10 PM
It doesn't take much inspection of a suby 2.0 or 2-5 damper to figgure out it is truly a damper. ...
All I know is I've been running mine with the light pulley for about 24k miles with no problems. Has not hurt performance, bottom end or top end.
Ed
Like I said, there are two camps with the pulley probably both of which are right, luckily I have some time to figure this one out
Might be a dumb question from someone who isn't all that mechanically inclined, but with the fuel line connections rerouted to the front, do you risk catastrophe if the alternator belt breaks?
I think it is a valid concern, once I get everything together I will see if the wiring and fuel lines need some protection.
Posted by: budman5201 Feb 14 2010, 07:09 PM
Hey dont forget this pretty filler from outfrontmotorsports.com, but i bet it adds a few ounces to stock plastic one.
Attached image(s)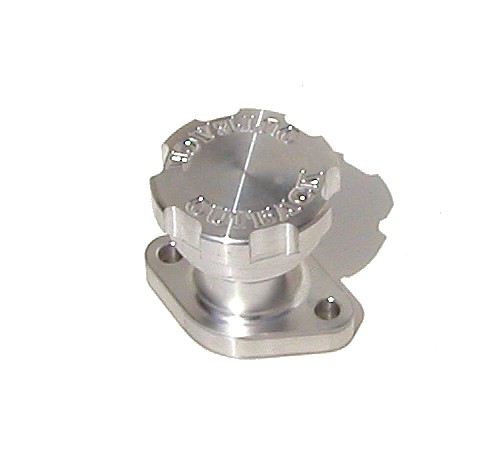
Posted by: plymouth37 Feb 14 2010, 07:22 PM
So here is a good demonstration of how huge modern cars have gotten, or how tiny the 914 really is.
Here is a Ferrari F430 diffuser at home on an F430, looks pretty reasonably sized right?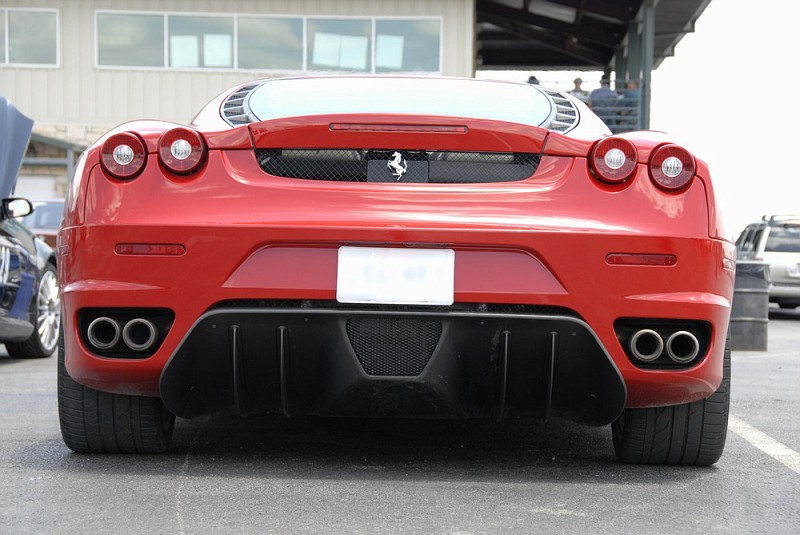
And here is the same diffuser on my 914, got a little bigger huh? 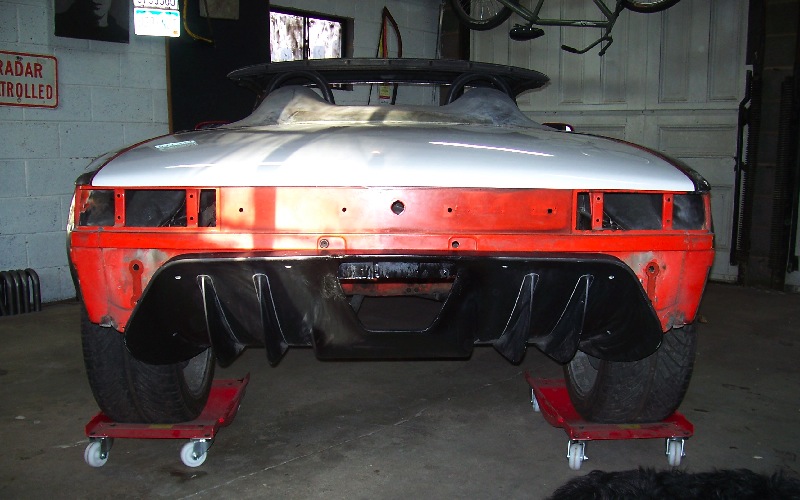
Another couple shots, I am just mocking it up, fitting all of these new components into such a small car is getting to be tricky! I have ground out all of the cracks in the fiberglass and filled them, a little more sanding and it should be ready for paint. Keep in mind my car is sitting about a foot higher than it will when I lower the suspension and get it off of the wheel dollies, that thing is going to look even bigger dragging a couple inches off of the ground!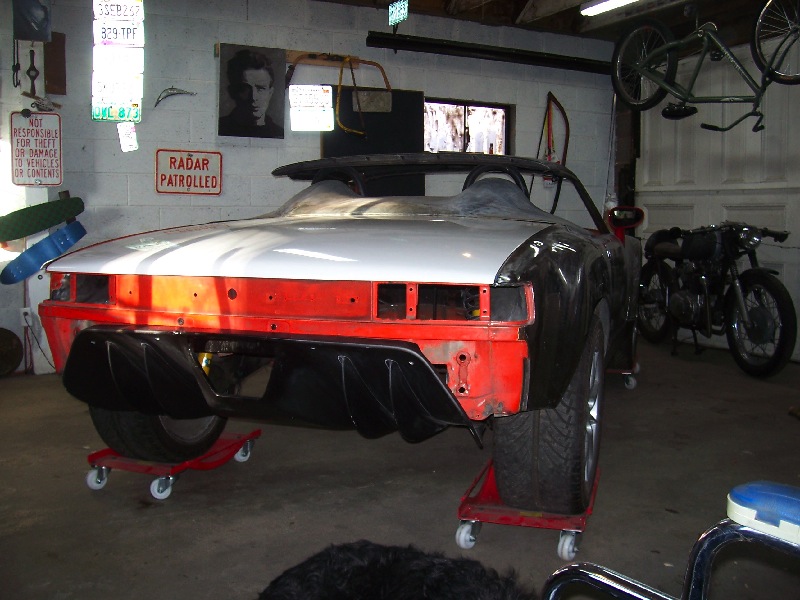
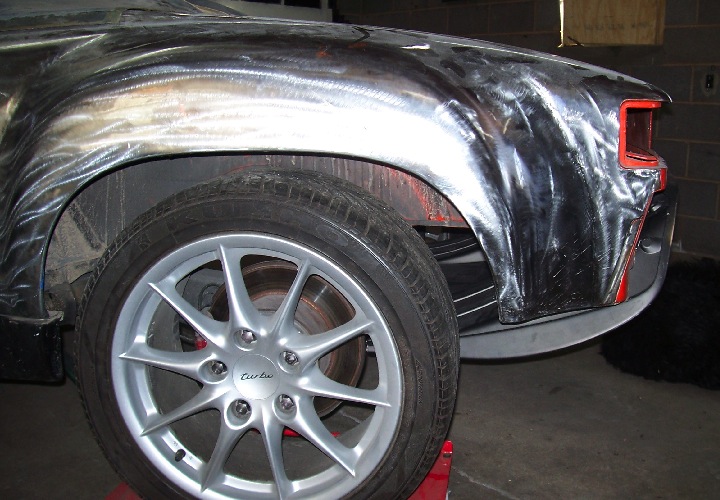
Posted by: plymouth37 Feb 14 2010, 07:27 PM
Hey dont forget this pretty filler from outfrontmotorsports.com, but i bet it adds a few ounces to stock plastic one.
Posted by: KELTY360 Feb 14 2010, 07:27 PM
here is a quick pick to see if this works for you..
Nice! I need to pick one up, that is exactly what I was looking for!
Hey Dana, I've got a filler tube on my SVX parts engine I'd donate to this great build....as long as I can visit it the next time I'm in Boulder. The cap is fubar but your current one probably fits.
Posted by: plymouth37 Feb 14 2010, 07:32 PM
here is a quick pick to see if this works for you..
Nice! I need to pick one up, that is exactly what I was looking for!
Hey Dana, I've got a filler tube on my SVX parts engine I'd donate to this great build....as long as I can visit it the next time I'm in Boulder. The cap is fubar but your current one probably fits.
That would be awesome! Thank you so much!
Posted by: Ferg Feb 14 2010, 09:19 PM
I was wondering when we would see the diffuser mock up
Posted by: fat73 Feb 14 2010, 09:48 PM
...
And here is the same diffuser on my 914, got a little bigger huh?
Where'd you get that? I've been toying with doing the same / similar thing to my 914. Already have a fiberglass rear bumper I can butcher before the repaint.
Ed
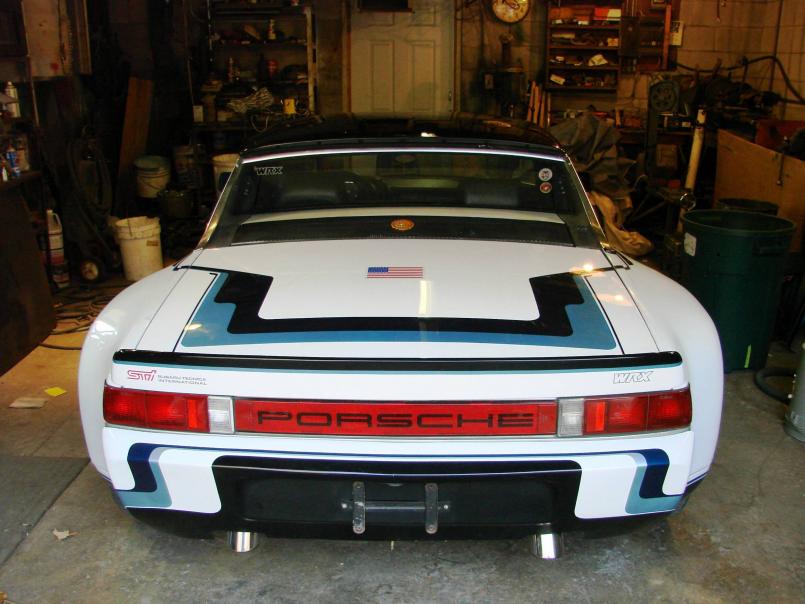
Posted by: plymouth37 Feb 14 2010, 10:22 PM
Where'd you get that? I've been toying with doing the same / similar thing to my 914. Already have a fiberglass rear bumper I can butcher before the repaint.
Ed
Cruise the Ferrari forums, it seems like a guy backs into something every other week with his diffuser. I saw a post a couple years ago about a guy who backed into a curb and rewarded himself with a new carbon diffuser, I asked him what happened to the old one and he had the body shop who had done the work send it to me for free, nice guy!
They really fit the 914 chassis pretty well, I was going to build my own but I think Ferrari has a little more experience with aerodynamics than I do!
Posted by: oldschool Feb 14 2010, 10:31 PM
here is a quick pick to see if this works for you..
Nice! I need to pick one up, that is exactly what I was looking for!
Hey Dana, I've got a filler tube on my SVX parts engine I'd donate to this great build....as long as I can visit it the next time I'm in Boulder. The cap is fubar but your current one probably fits.
That would be awesome! Thank you so much!
Dana I want your bike

Posted by: championgt1 Feb 14 2010, 11:18 PM
Is your exhaust going to exit through the hole in the center of the diffuser?
Posted by: turboman808 Feb 14 2010, 11:29 PM
few random thoughts
I've wondered how a diffuser would work on a 914. Seems it would need to have a smooth underbelly across the whole car for them to work right. Since the back is open from the firewall back how could it work?
Since your car has a subaru motor I guess it's possible to make a pan across the whole thing. With the air cooled cars that doesn't seem possible.
This is assuming things work like I imagine they do.
I removed the rear valance and made an exhaust that tucks up out of the airflow. I kind of figured there is a hell of alot of air coming out the back end and the more open the better.
I have also wondered how it would work mounting a wing down where the diffuser is mounted. If done right it would almost go unnoticed. Of course it could be the air is in such turbulence it would never work.
Posted by: plymouth37 Feb 15 2010, 12:00 AM
I was planning on making an aluminum belly pan all the way from the front valence to the diffuser, With a little creative cutting I should be able to get the belly perfectly flat.
Other than the diffuser the rear of the car is going to be hexagonal expanded aluminum mesh. Probably some hidden led taillights to keep weight down and not block airflow out the back.
Posted by: plymouth37 Feb 15 2010, 12:07 AM
Dana I want your bike
Don't have a build thread for the cruiser, built the frame from scratch, hilariously terrifying to ride!
Here is the Cafe bike's http://mycafebike.blogspot.com/
I had no idea 36 horsepower could be so fun!
Posted by: plymouth37 Feb 15 2010, 12:25 AM
Is your exhaust going to exit through the hole in the center of the diffuser?
I had thought about it, I think I will figure out the exhaust after everything is in place, center exhausts are pretty cool.
Posted by: fat73 Feb 15 2010, 07:24 AM
Is your exhaust going to exit through the hole in the center of the diffuser?
I had thought about it, I think I will figure out the exhaust after everything is in place, center exhausts are pretty cool.
Yeah, center exhausts with a vent for the blow-off valve too!
Ed
Posted by: charliew Feb 15 2010, 10:18 AM
I guess I need to look at that more thoroughly to see what the ferrari guys did in front of the diffuser. When you add a street bumper there is more room to get it all worked in. I will probably use a aluminum tube under the fg gt bumper I have but a added on diffuser valence was always a thought but it also seems like a great air catcher without a under pan at least from the oil pan back. Also to cover the rear of the tranny and cable shifter, that will be visible. I also will need some air movement over the ic in the engine compartment so side vents might be a needed thing and the air's gotta go somewhere. No blow off valve to atmosphere for me the short fat suby exhaust will be loud enough as it is, my sons sti blow off valve in the intake is still noticeable in a enclosed coldair box and his waste gate is still in the exhaust and on full throttle it's not quiet and very obvious for at least a mile and his 3 inch exhaust is at least 7 or 8 ft long.
Posted by: camaroz1985 Feb 15 2010, 10:31 AM
I would like to shed some light on the pulley/damper. It does indeed have a damper in it however it is not a harmonic damper. It is meant to lessen the shock when the a/c kicks on. I have had a lightened pulley on both of my Subaru engines and have had no problems other than when I turn the a/c on (this is in a Subaru not a 914). When the clutch engages the belt slips a second and you can feel it through the steering wheel. I don't use the a/c for this reason.
Posted by: Dr Evil Feb 15 2010, 04:08 PM
Thinking about your diffuser on my drive today and saw a Honda Fit with one 05-07 I think. Cheaper than a Ferrari part, new
Attached image(s)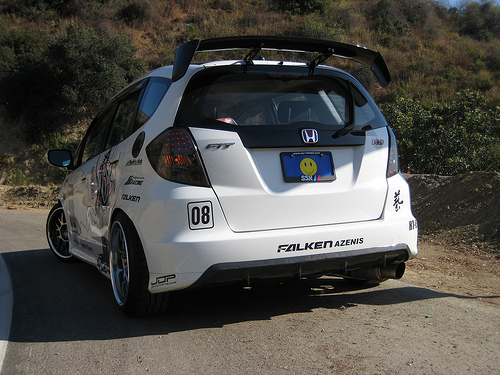
Posted by: plymouth37 Feb 15 2010, 04:15 PM
I would like to shed some light on the pulley/damper. It does indeed have a damper in it however it is not a harmonic damper. It is meant to lessen the shock when the a/c kicks on. I have had a lightened pulley on both of my Subaru engines and have had no problems other than when I turn the a/c on (this is in a Subaru not a 914). When the clutch engages the belt slips a second and you can feel it through the steering wheel. I don't use the a/c for this reason.
Good info, makes sense. Good thing I deleted the a/c!
Posted by: Crazyhippy Feb 15 2010, 04:33 PM
Is your exhaust going to exit through the hole in the center of the diffuser?
I had thought about it, I think I will figure out the exhaust after everything is in place, center exhausts are pretty cool.
F1 style... out the top, molded into the speedster hump
Or go a bit taller like a pulling truck

think of it as adding downforce
Posted by: Crazyhippy Feb 15 2010, 04:36 PM
Only issue i've heard of is using a light flywheel, and a light pulley, the Crank pos. sensor can give some screwy numbers.
we've got a bit of extra mass on the flywheel side, and shouldn't have any issue w/ the light pulley.
Posted by: plymouth37 Feb 15 2010, 04:43 PM
F1 style... out the top, molded into the speedster hump
Or go a bit taller like a pulling truck
think of it as adding downforce
You mean like this?
Might need to weld some flappers on the stacks while I am at it...
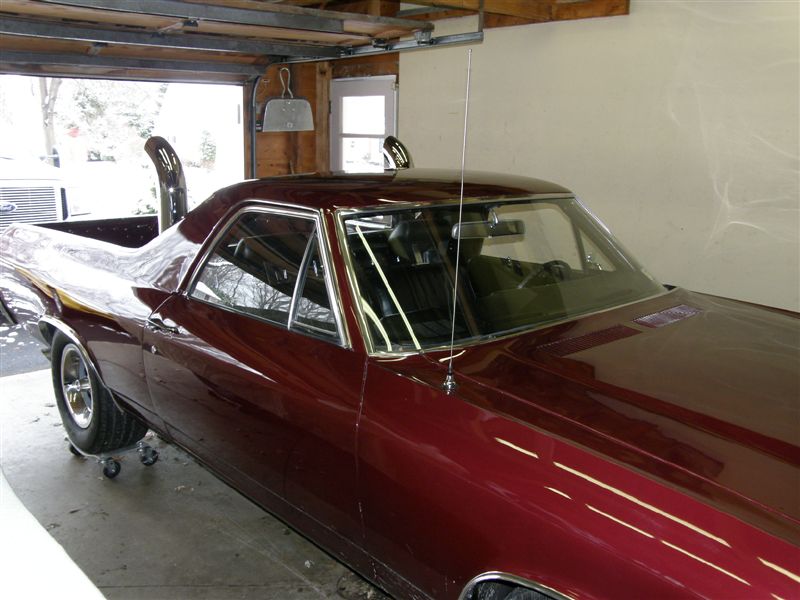
Only issue i've heard of is using a light flywheel, and a light pulley, the Crank pos. sensor can give some screwy numbers.
we've got a bit of extra mass on the flywheel side, and shouldn't have any issue w/ the light pulley.
True that, the adapter setup weighs a fricken ton.
Posted by: Crazyhippy Feb 15 2010, 04:57 PM
True that, the adapter setup weighs a fricken ton.
It can be lightened
I was thinking more along these lines for Exhaust...
 Call it ticket monster
Posted by: plymouth37 Feb 15 2010, 05:04 PM
True that, the adapter setup weighs a fricken ton.
It can be lightened
I was thinking more along these lines for Exhaust...
Call it ticket monsterI could point the exhaust out the side of the head hump so it points into the window of those who dare to come near it
Posted by: dw914er Feb 15 2010, 05:12 PM
this just keeps getting cooler and cooler
Posted by: Rod Feb 15 2010, 05:16 PM
Love it! A nice Ferrari driver too! very kind of him.
The hole in the diffuser is gagging for an exhaust imo.
Loving your project, it seems to me that you are doing everything to a car that I wanted to do in my daydreams at fourteen years of age. very envious and admiring your skills!
Posted by: fat73 Feb 15 2010, 05:42 PM
I would like to shed some light on the pulley/damper. It does indeed have a damper in it however it is not a harmonic damper. It is meant to lessen the shock when the a/c kicks on. I have had a lightened pulley on both of my Subaru engines and have had no problems other than when I turn the a/c on (this is in a Subaru not a 914). When the clutch engages the belt slips a second and you can feel it through the steering wheel. I don't use the a/c for this reason.
Good info, makes sense. Good thing I deleted the a/c!
I have A/C, light pulley, no problems.
Ed
Posted by: camaroz1985 Feb 16 2010, 12:50 PM
I have A/C, light pulley, no problems.
Ed
Guess everyone's results are different. I have another compressor I want to swap in to see if it makes a difference.
I also have a 9.5 lb. Fidanza flywheel with a 1 lb. pulley and have never had a misfire code (or any other code for that matter).
Posted by: plymouth37 Feb 17 2010, 03:29 PM
I installed the intake and the snake's nest of vacuum hoses that is associated with it.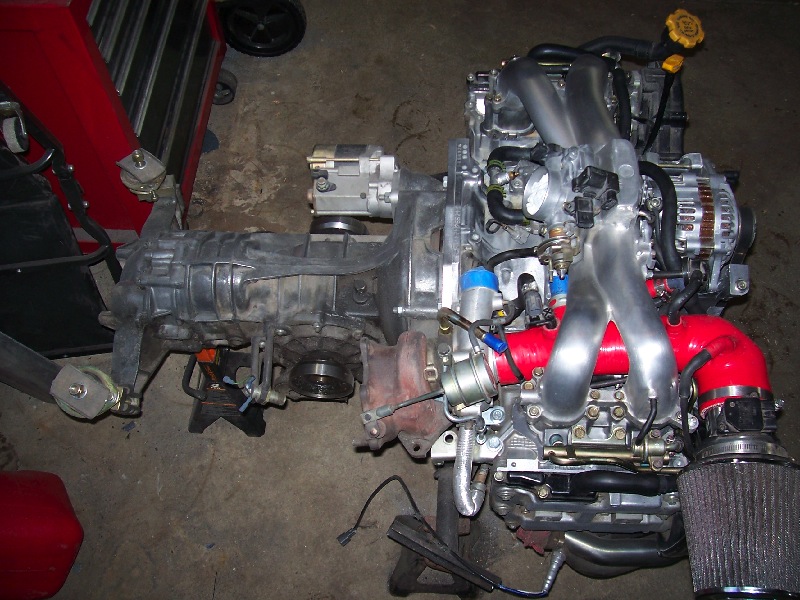
Then I started working on the engine's wiring harness: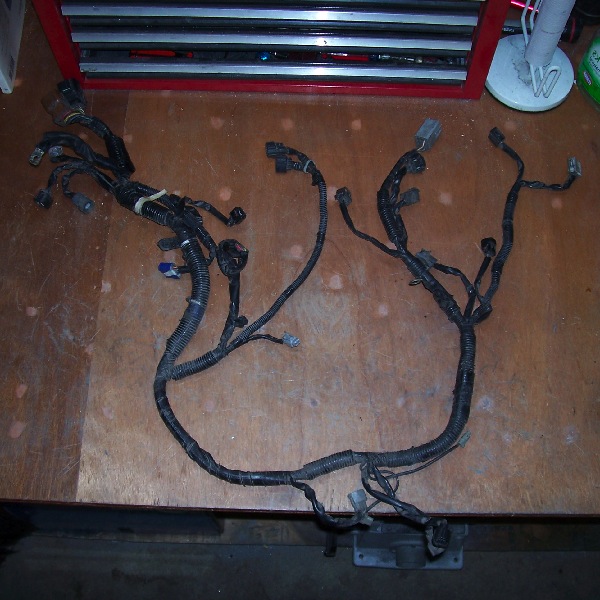
First I zip tied the harness into its basic stock shape and stripped off most of its insulation.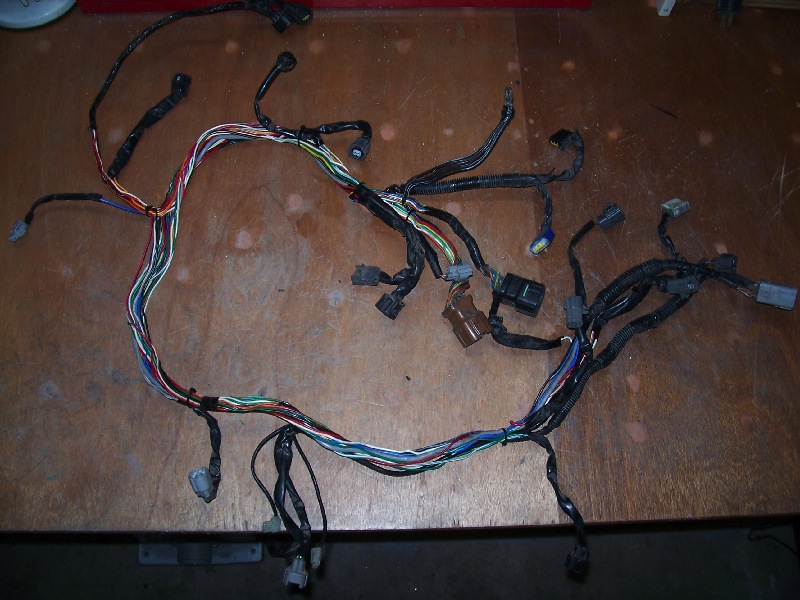
Posted by: plymouth37 Feb 17 2010, 03:29 PM
Then I loosely installed the harness on the engine.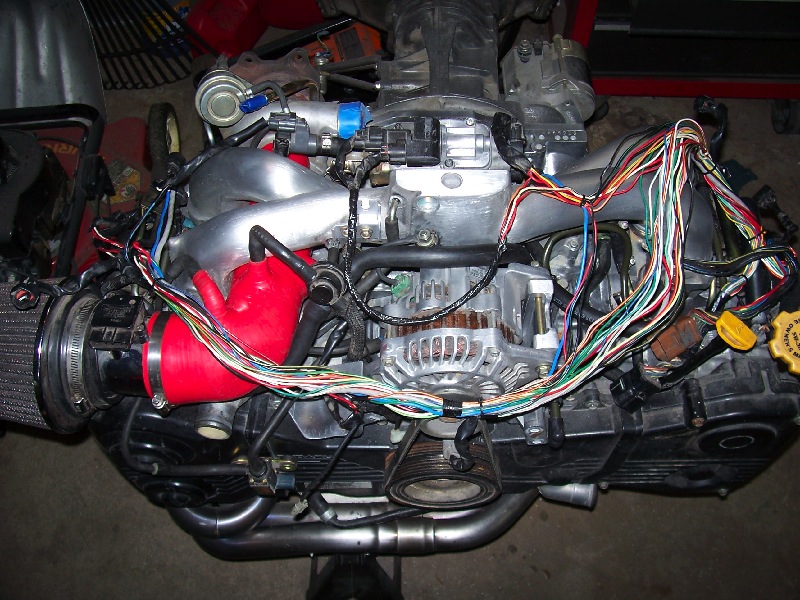
Here is the harness half way through me re-routing the wires, I also added a couple wires to the harness for my boost and temp gauges.
This is the point at which you wonder if your car will ever run again.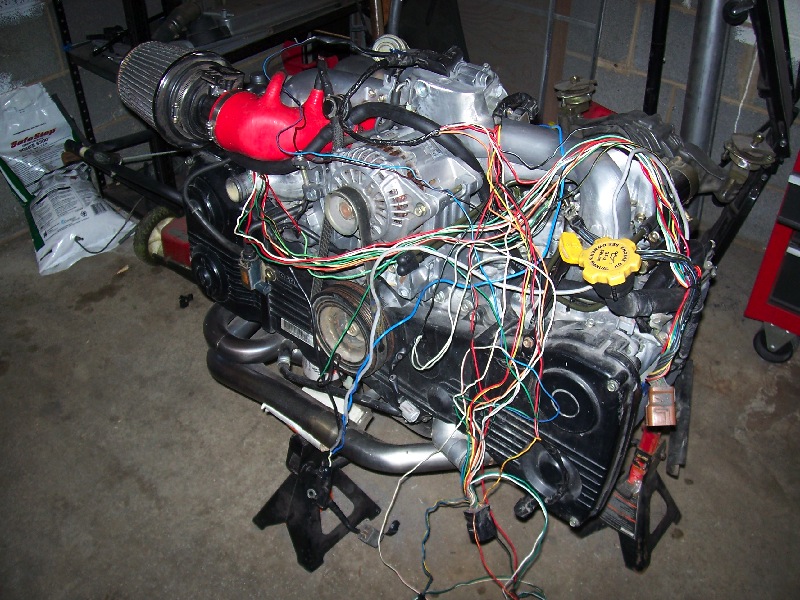
Posted by: plymouth37 Feb 17 2010, 03:29 PM
After tucking, re-routing, and eliminating the plugs for the TVG assembly and a/c pump, this is how things looked, after I get it running and work out the bugs I will pull the harness and wrap it.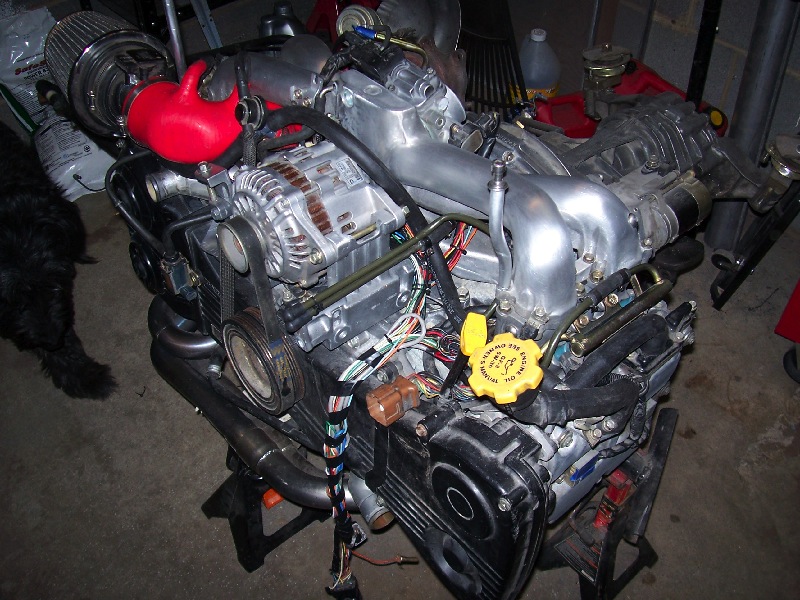

Posted by: Rod Feb 17 2010, 03:34 PM
Jeff Bowlsby would have enjoyed looking at those
Looking great! Now remember what you do to the loom and recreate them for sale - the VW crowd would bite your hand off!
Posted by: lotus_65 Feb 18 2010, 05:13 AM
this just keeps getting cooler and cooler
Posted by: plymouth37 Feb 18 2010, 08:38 AM
Last night I brushed the intercooler and installed it, I still need to get a bottle of gas for the welder so the intercooler tubes are taped together for now.
I still have a couple little things here and there to do to the engine but overall it is pretty much complete.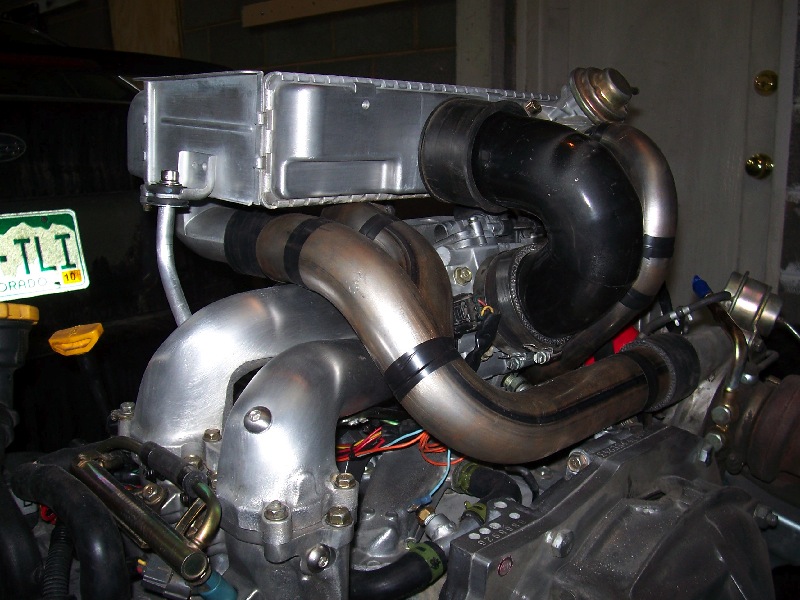
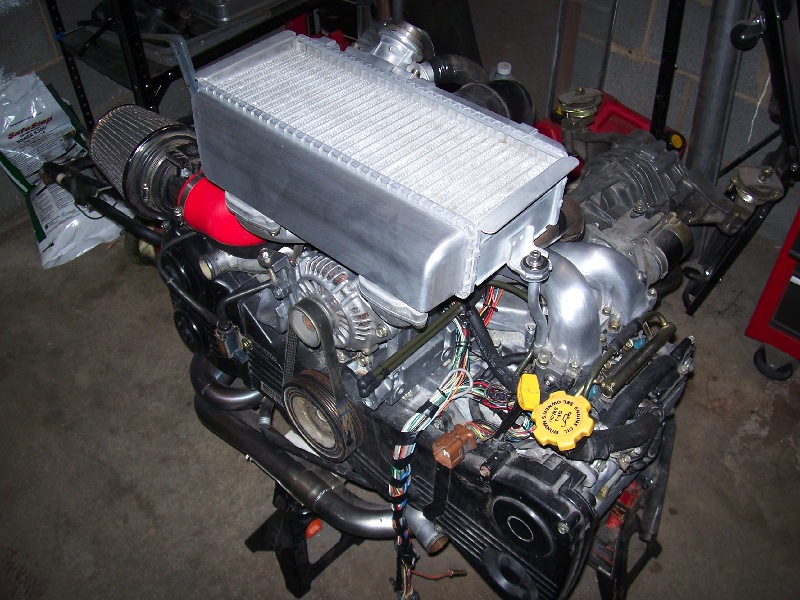
Posted by: plymouth37 Feb 18 2010, 08:38 AM
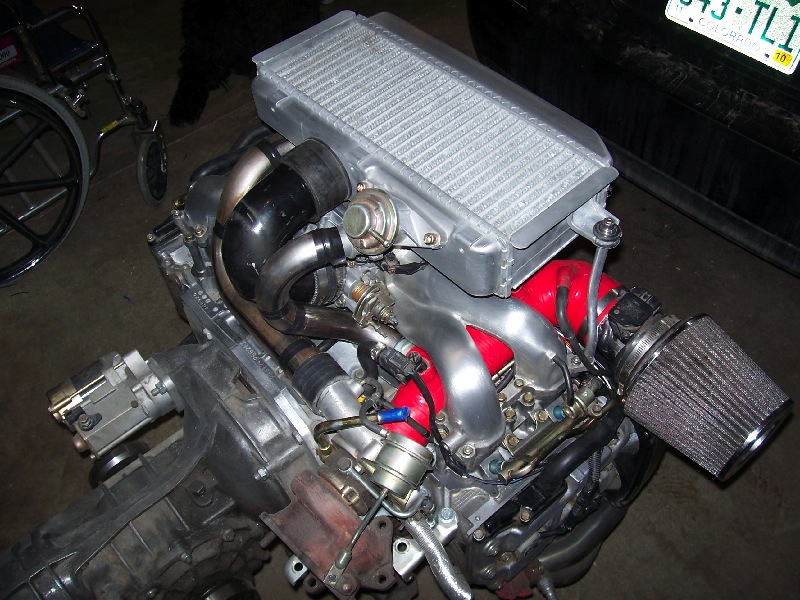
.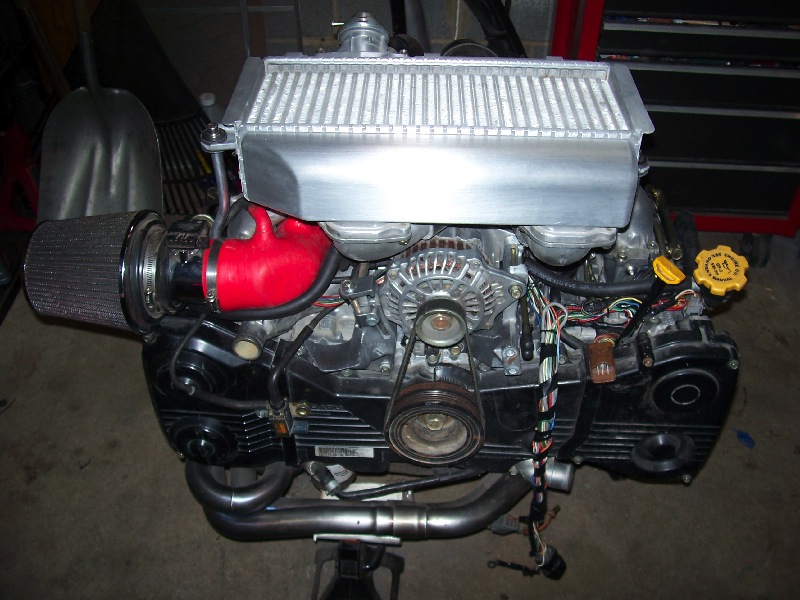
Posted by: fat73 Feb 18 2010, 09:01 AM
Now if you wanted to get rid of all that annoying FI plumbing underneath the intake manifold change over to Perrin fuel rails....Prettier and supposedly more efficient too.
Ed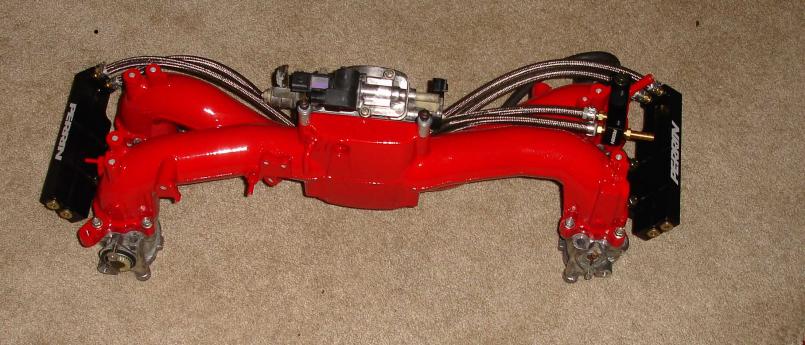
Posted by: plymouth37 Feb 18 2010, 09:09 PM
Just wanted to thank Marc (KELTY360) for making a kickass donation to the project.
Here is the original oil filler: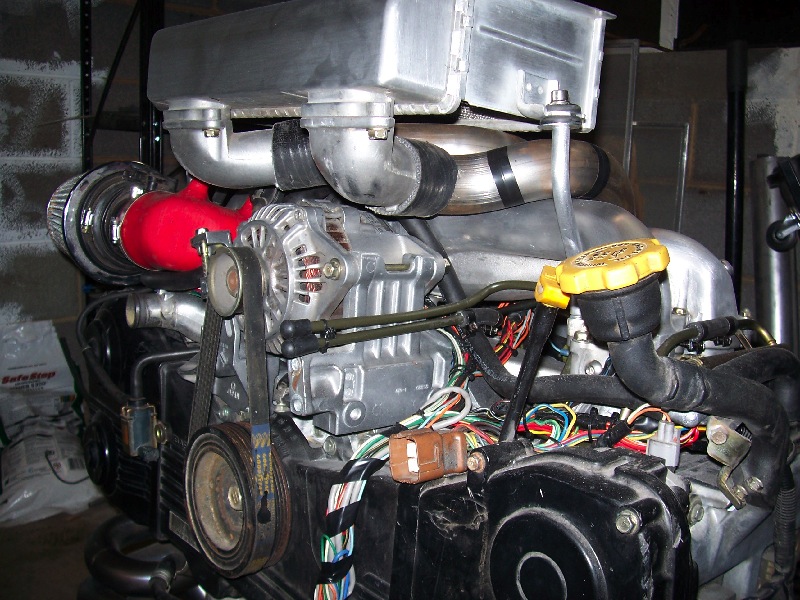
And the SVX filler he sent me: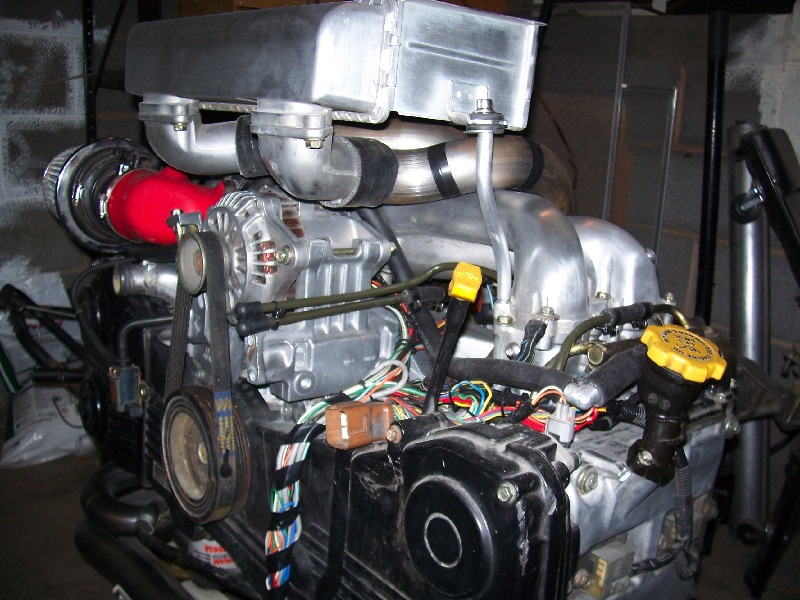
This a pretty nice upgrade to WRX powered teeners, it looks a lot better and makes for a much more rational location for filling the oil. It was not a direct bolt on, the tube that fits into the head is a couple millimeters to big and needed some light filing to fit, the mounting holes were also a little too wide and needed to be slightly ovaled. It was an easy mod, 10 minutes or so.
Thanks again Marc!
Posted by: KELTY360 Feb 19 2010, 11:05 AM
Wow! That really opens up the view of that section of the engine. Your engine is looking great. I've really come to appreciate the underlying simplicity of the Subie engines, once all the modern complexities are stripped away. Glad I could help.
Just for a little more Subie bling, here's a shot of the SVX that's going in my Syncro Westy. Couldn't resist getting the intake polished. As you can see, I went to the Sir Andy School of Photograpy. 
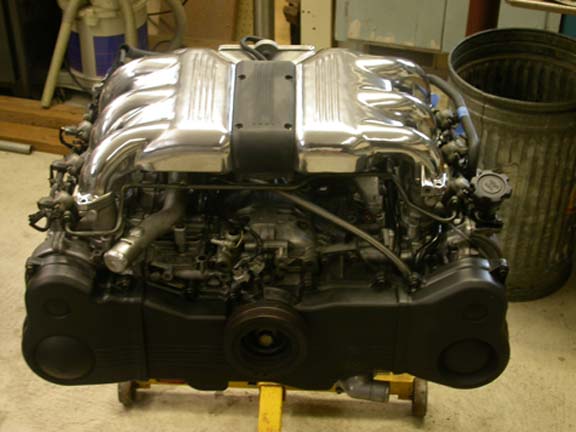
Hijack over....now get back to work on the Biter. The 914 Nation awaits your progress.
Posted by: turboman808 Feb 19 2010, 11:39 AM
Wow! That really opens up the view of that section of the engine. Your engine is looking great. I've really come to appreciate the underlying simplicity of the Subie engines, once all the modern complexities are stripped away. Glad I could help.
Just for a little more Subie bling, here's a shot of the SVX that's going in my Syncro Westy. Couldn't resist getting the intake polished. As you can see, I went to the Sir Andy School of Photograpy.
Hijack over....now get back to work on the Biter. The 914 Nation awaits your progress.
That is a really pretty motor.
Posted by: plymouth37 Feb 19 2010, 11:48 AM
That is a really pretty motor.
That is gorgeous! Posted by: KELTY360 Feb 19 2010, 12:06 PM
That is a really pretty motor.
That is gorgeous!Thanks. The intake does a great job of covering all the wiring and plumbing.
Posted by: carr914 Mar 9 2010, 09:50 AM
I'm guessing it was Dana who broke into my garage and started tearing into my Matchbox 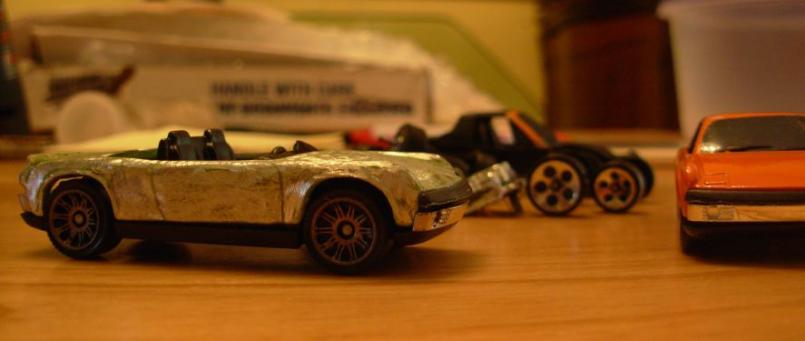
Posted by: plymouth37 Mar 9 2010, 10:51 AM
HAHAHA, The resemblance is uncanny!
Posted by: plymouth37 May 13 2010, 03:33 PM
I finally finished a tough semester and I leave for a month long stay in Rome in 13 days so I decided to really push to make some progress on the car before I leave.
I took a big leap and decided to take the car to the next level and go with a full tube chassis in the rear. I will be able to drop a ton of weight and can custom build everything to mount the Subie engine rather than relying on a conversion kit.
I would love to go with a double a-arm set-up in the rear but with out a chassis bench I don't feel like it's something I can do right. Since I will be retaining the stock swing arms I had to build a couple jigs to locate the swing arm mounts on the new frame. In addition to the jigs I took hundreds of measurements to make sure everything ends up where it needs to be.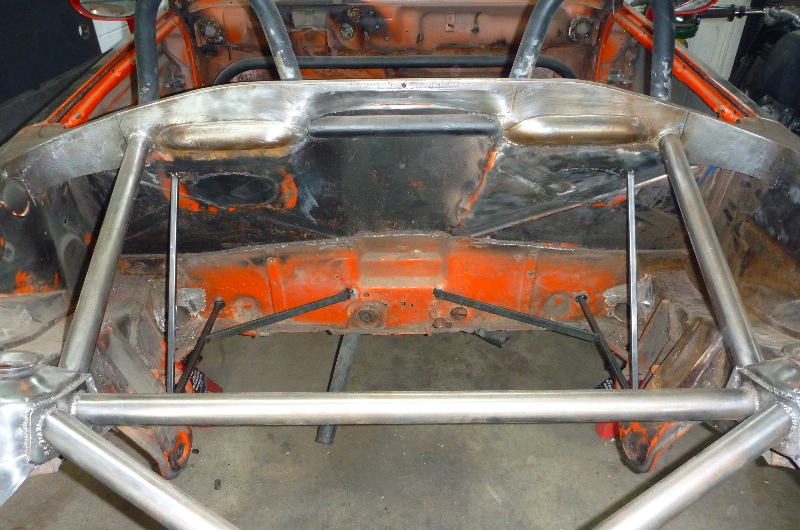
I will be raising the swing arm mounts 2" so the swing arm sits level at the cars lowered ride height.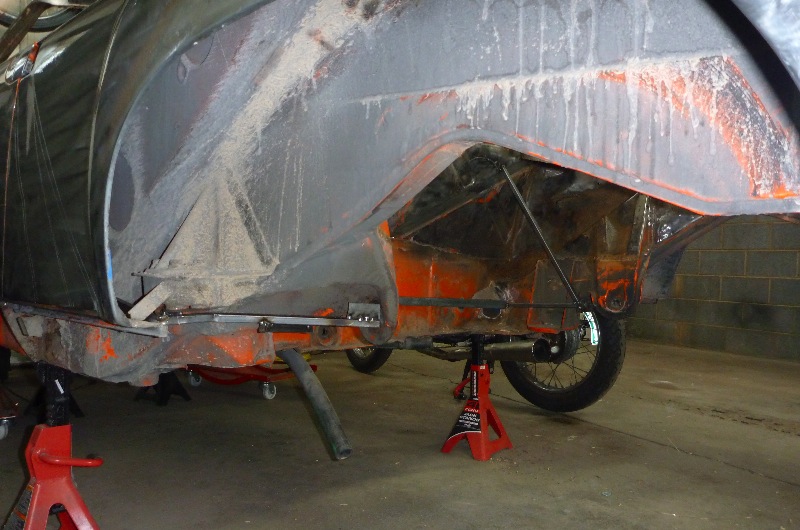
After a couple hours of careful cutting the two halves were separated.
No turning back now! 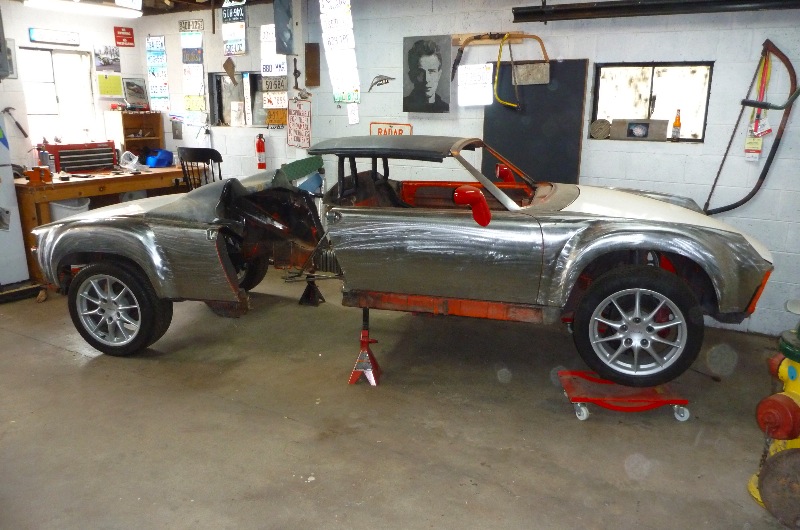
Posted by: plymouth37 May 13 2010, 03:33 PM
Here is what I am working with, I managed to remove the rear half of the car without hitting the jigs and according to my measurements the swing arm mounts are right where they should be.
The tubes of the rear frame will tie into my existing cage and into the longs.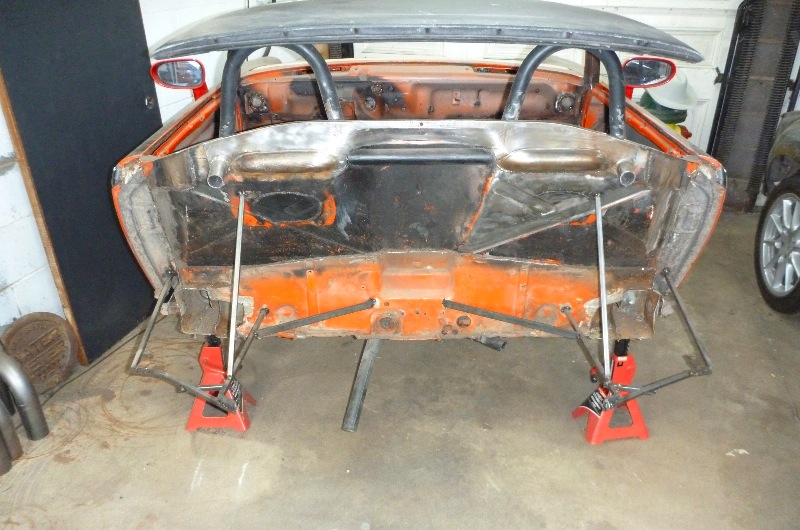
The Renegade conversion cradle weighs 28 pounds and the bare rear section I removed without suspension, lid, or diffuser weighed 144.4 pounds, I would be amazed if the new tube frame and f/g fenders weigh half that.
I couldn't resist mocking up the 2 Anklebiters in the garage shot
Stay tuned, lots of work on its way!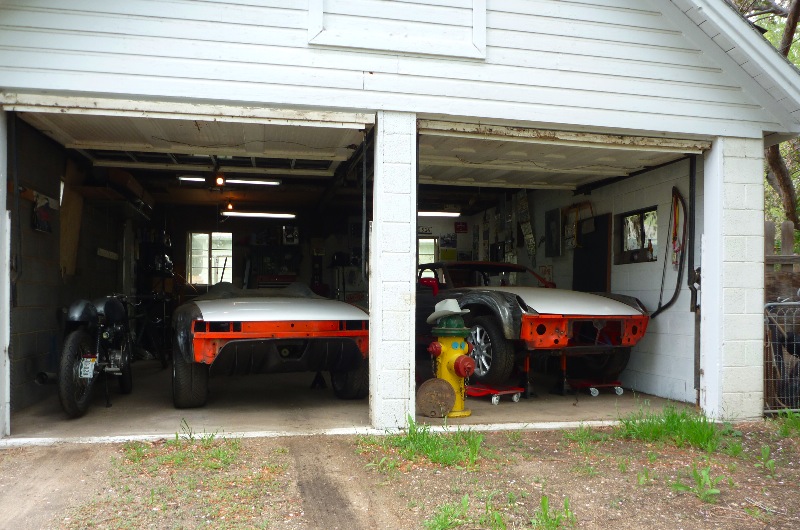
Posted by: BKLA May 13 2010, 03:47 PM
Holy  !
!
That's something I didn't expect. Looking forward to the (re)build!
Posted by: KELTY360 May 13 2010, 03:48 PM
Holy crap! You've got stones the size of boulders. This pic reminds me of the old vaudeville magicians that sawed their assistants in half. Rock on!
Did you cut it with the saw hanging on the wall?
Posted by: siverson May 13 2010, 04:01 PM
I agree, you're very brave!
Posted by: Root_Werks May 13 2010, 04:05 PM

Posted by: plymouth37 May 13 2010, 04:14 PM
HAHAHA, I suppose I should put a not safe for purists warning on this!
Don't worry, it will be done perfectly, no corners will be cut.
On the bright side I got a kick ass 914 trailer out of the deal!
Posted by: Ferg May 13 2010, 04:34 PM
Tis but a scratch!
A scratch? Your car is cut in two!
No, it isn't!
Well, what's that then?
Sorry, that's what through my head when I saw that pic, Monty Python aside you sir are crazy (in a good way)
Ferg
Posted by: RobW May 13 2010, 04:42 PM
Uh.. you cut it in half to do... what?
Posted by: Phoenix 914-6GT May 13 2010, 05:01 PM
Posted by: plymouth37 May 13 2010, 05:13 PM
Uh.. you cut it in half to do... what?
Lighter, faster, better, give me a week or so, I have things planned
Posted by: carr914 May 13 2010, 05:25 PM
Holy Snikeys
Posted by: Krieger914 May 13 2010, 05:37 PM
Bullshit, he's doin a limo. And while the guys are away in Tahoe his going to get it done and claim the first right to a 914 Limo. He scheemed and waited till they were gone. This is going to divide 914 world into 914 universe and 914 world. Oh the drama.
Posted by: Millerwelds May 13 2010, 05:58 PM
Bullshit, he's doin a limo. And while the guys are away in Tahoe his going to get it done and claim the first right to a 914 Limo. He scheemed and waited till they were gone. This is going to divide 914 world into 914 universe and 914 world. Oh the drama.

Posted by: plymouth37 May 13 2010, 06:05 PM
Bullshit, he's doin a limo. And while the guys are away in Tahoe his going to get it done and claim the first right to a 914 Limo. He scheemed and waited till they were gone. This is going to divide 914 world into 914 universe and 914 world. Oh the drama.
Gee thanks a lot, way to ruin the surprise!
Posted by: KELTY360 May 13 2010, 06:41 PM
Are you going to use the existing rear bodywork for a mold to do the whole ass end in FG?
You do realize it's not stock anymore.....right?
Posted by: plymouth37 May 13 2010, 06:45 PM
Yeah that whole stock thing kinda went out the window huh
I am thinking about a one piece tilt rear like a 904, probably f/g, same shape as before.
Posted by: RobW May 13 2010, 08:07 PM
Bullshit, he's doin a limo. And while the guys are away in Tahoe his going to get it done and claim the first right to a 914 Limo. He scheemed and waited till they were gone. This is going to divide 914 world into 914 universe and 914 world. Oh the drama.

Posted by: RJMII May 13 2010, 09:18 PM
I thought you didn't like fiberglass... ?
Posted by: plymouth37 May 13 2010, 09:39 PM
I thought you didn't like fiberglass... ?
I really do hate the stuff but I think it is the best way to get a single piece light weight body. I have done the finishing bodywork on a couple 550 replicas and I think I can get the glass quality pretty good. I would love to roll one out of aluminum on an english wheel but I want to finish this thing before I'm 90!
Posted by: BigDBass May 14 2010, 12:25 AM
Wow. Just discovered this thread and read all 27 pages. I couldn't believe my eyes when I got to that last little cut... Amazing stuff. Thanks for doing it and sharing it.
Posted by: Rand May 14 2010, 01:25 PM
I am thinking about a one piece tilt rear like a 904, probably f/g, same shape as before.
That would rock. I would love to be able to tip the whole back end up and have complete access to everything around the drivetrain. (ala 904, 550, Ford GT, etc.)
Posted by: lotus_65 May 14 2010, 07:42 PM
Wow! That really opens up the view of that section of the engine. Your engine is looking great. I've really come to appreciate the underlying simplicity of the Subie engines, once all the modern complexities are stripped away. Glad I could help.
Just for a little more Subie bling, here's a shot of the SVX that's going in my Syncro Westy. Couldn't resist getting the intake polished. As you can see, I went to the Sir Andy School of Photograpy.
Hijack over....now get back to work on the Biter. The 914 Nation awaits your progress.
i see nothing wrong with your pic, sir.
unless you mind that i found some parts even you didn't know you had!
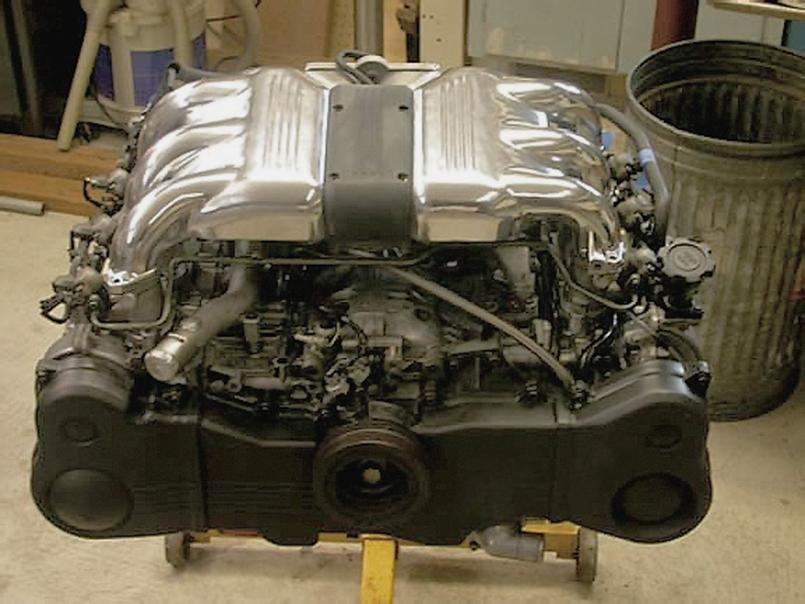
btw, see if you can adjust the cam to keep from blowing out the highlights-
thefleur
Posted by: plymouth37 May 15 2010, 10:18 PM
I built the trailing arm mounts today.
I welded threaded 10mm X 1.50 couplers in between two 1/8" steel plates.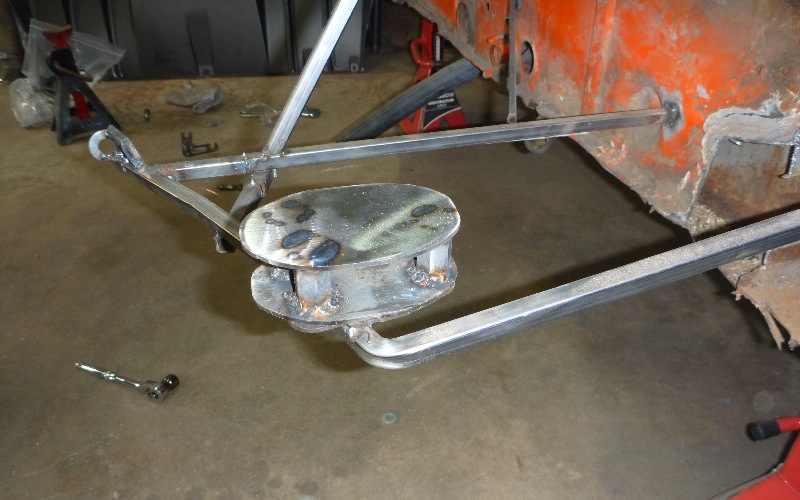
Then wrapped the coupler sandwich in 1/8" steel and tacked it all in place. I tacked it together with a nice gap so I can finish the pieces without taking off much of the weld.
I tacked inside as much as I could as well then shot some weldable primer inside before everything was sealed in.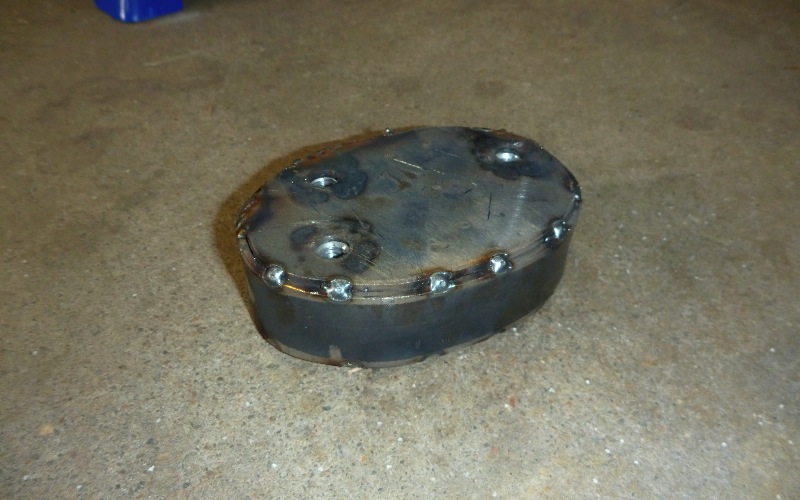
And here is the finished product, The tranny mounts are the same shape and almost done, I will post pics of them when they are done.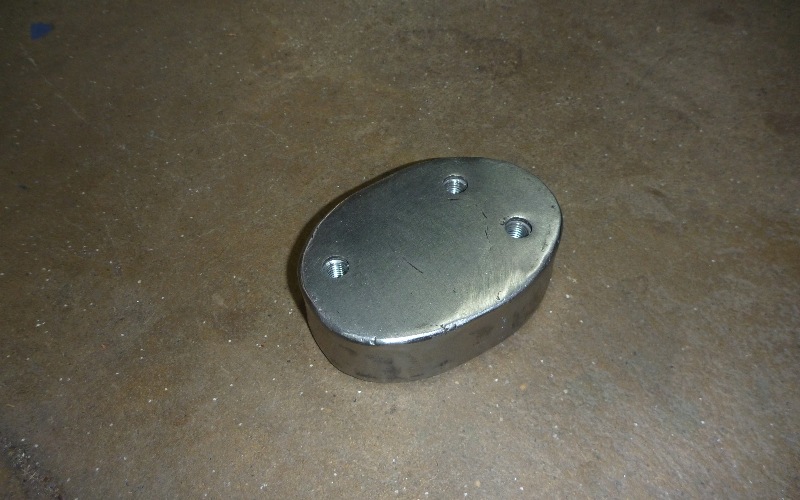
Here is how they will mount only 2" higher.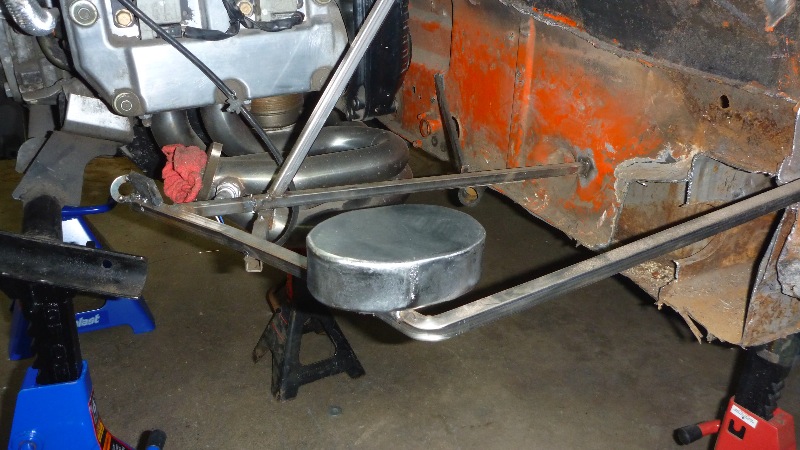
Posted by: plymouth37 May 15 2010, 10:18 PM
I also mocked up the drivetrain today.
The renegade kit moves the whole drivetrain forward 1.5" and I am keeping that position, however I moved the drivetrain up 3/4" so everything clears the belly pan.
After I finish the tranny mounts I will start mocking up some bars.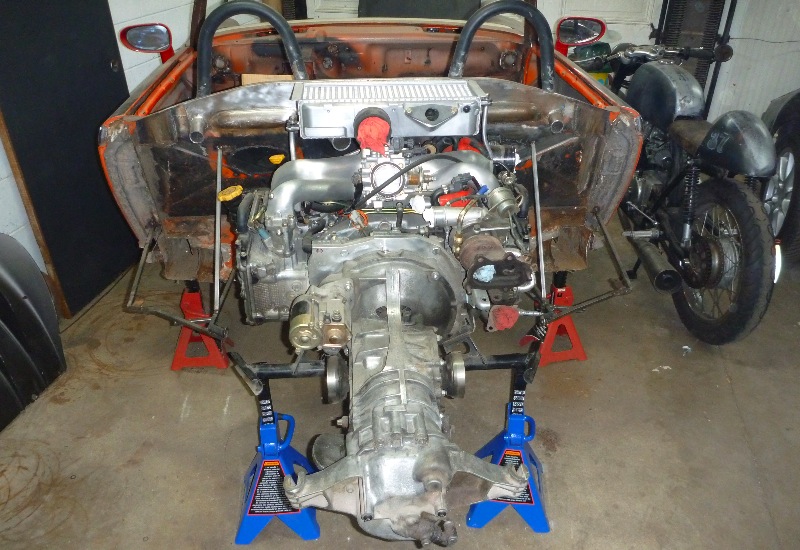

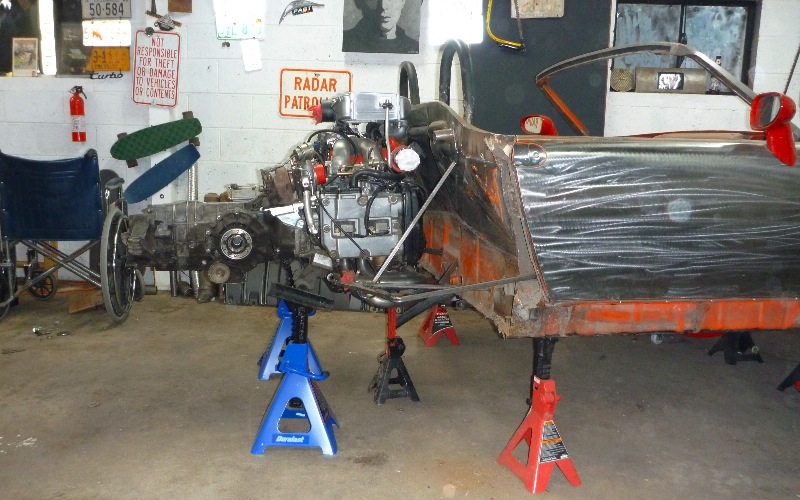
Posted by: effutuo101 May 15 2010, 10:33 PM
wow. huge stones. that is right on! thank you for keeping this thread.
Posted by: r_towle May 15 2010, 10:59 PM
double a-arms..
Rich
Posted by: plymouth37 May 15 2010, 11:01 PM
double a-arms..
Rich
sounds good, send me a check
Posted by: Zaney May 15 2010, 11:15 PM
Perfect time to go Suby 5 speed!!!
Awesome work, Dana!
Posted by: effutuo101 May 16 2010, 08:47 AM
he would have to move the motor backwards about 2 inches if he did that.
Posted by: charliew May 16 2010, 09:43 AM
Great ideas.
How does the rh kit move the drive train forward 1.5 and still use the stock axles? I intend to use the suby 05 legacy tranny with the obx lsd and still angle the axles forward some. I haven't decided on the axle length yet because I also want new trailing arms to do away with the spacers on the axle hubs. Now would also be a good time to make some new trailing arms if you don't want to go to a arms. Think about all the benefits of the suby tranny while you are a this stage. I don't know how strong they are but suby now has a 6 spd that is the same size as the 5 spd, they also have the cvt, paddle shift?. The only thing about the six spd is in the light car it might be usless unless the tires are a bigger diameter. I think the leg tranny also has a 4:11 so you might want the wrx 3:90.
My opinion on the squeal is it's the aluminum slickness. nascar uses ati and there is no motor made that can't benefit from a front balancer especially one that has the oil pump right behind it.
Posted by: plymouth37 May 16 2010, 11:12 AM
The renegade v8 kits move everything back 1.5", the subie kit moves it all forward 1.5" I have never seen that degree of angle cause problems with the renegade high power axles.
I have been thinking a lot about the subie tranny, I am not ready to pull the trigger on one now, it is tempting but the beauty of a tube frame is it will be easy to adapt to new drivetrains in the future. If the 914 tranny can't do the job once I get this thing running I will lop off some tubes and start thinking about other options.
Posted by: charliew May 16 2010, 11:18 AM
Does the rh use higher angle cvs? I was hoping to use 100mm bus cvs and at least go 2-3 inches forward of the axle centerline. Someone here is using 944 stubs that have the cv built in and are welding adapters on the inside to move the cv toward the tranny some. That will get it out of the bearing carrier some and give a little more room for the angle of the axle. I know a angled cv wastes a little power but the binding is my concern, I didn't really want to go to high angle 930 cv's unless it's the only way.
Nice job on the arm pivot mount. Just think, if you had a rear subframe made out of aluminum and those were billet with helicoils.
Posted by: plymouth37 May 16 2010, 11:24 AM
I am pretty sure they are just bus CVs and axles, I have not gone farther than 1.5" in either direction but I would have to think that is pretty close to their limit
Posted by: charliew May 16 2010, 11:43 AM
I think blind chicken racing has the angles of most or all of the porsche cv's listed mainly for offroad stuff. Actually the t4 has more angle than the t2. http://blindchickenracing.com/How_to/CVJoints_Axles/cv_joints_101.htm
Posted by: plymouth37 May 20 2010, 08:21 PM
I welded in the rear frame mounts, The entire back half of the frame and the body attached to it will be removable for easy access and/or replacement.
The couplers are really machined well and are guaranteed to some ridiculously high shear strength.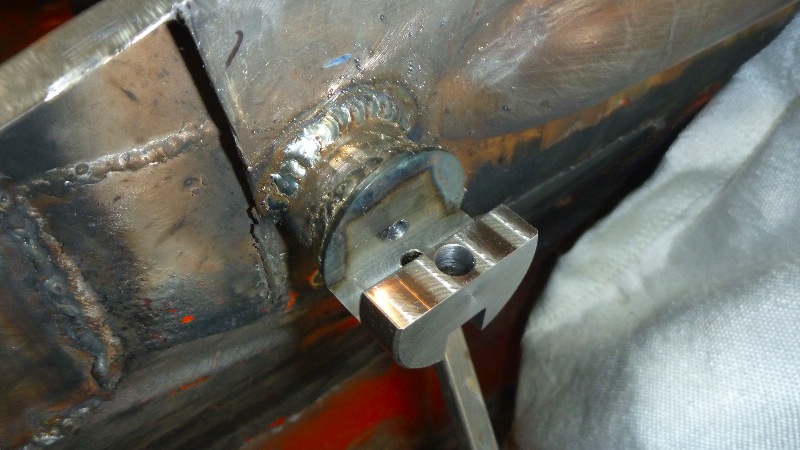
I also fabbed up the tranny mounts, the tranny mounts are oriented in the stock direction but I put them under the tranny rather than hanging it from them.
This location will work much better for the cage design I have in mind.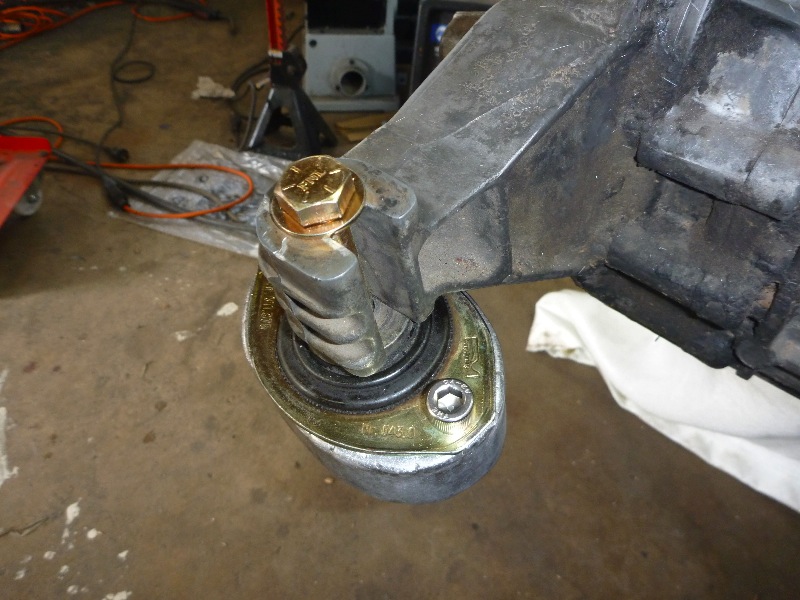
Posted by: plymouth37 May 20 2010, 08:44 PM
I moved the swing arm mounts up 2" so the swing arm sits level at ride height and ran the main tube back to the tranny mounts.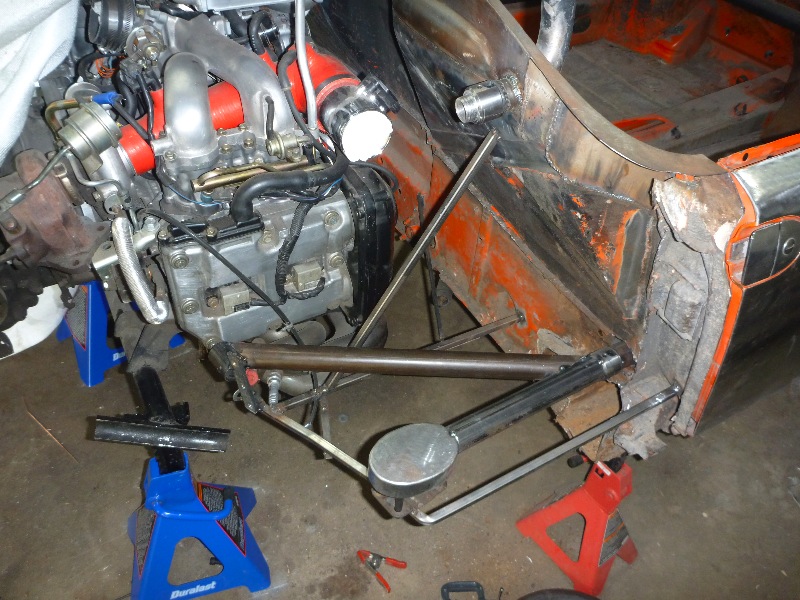
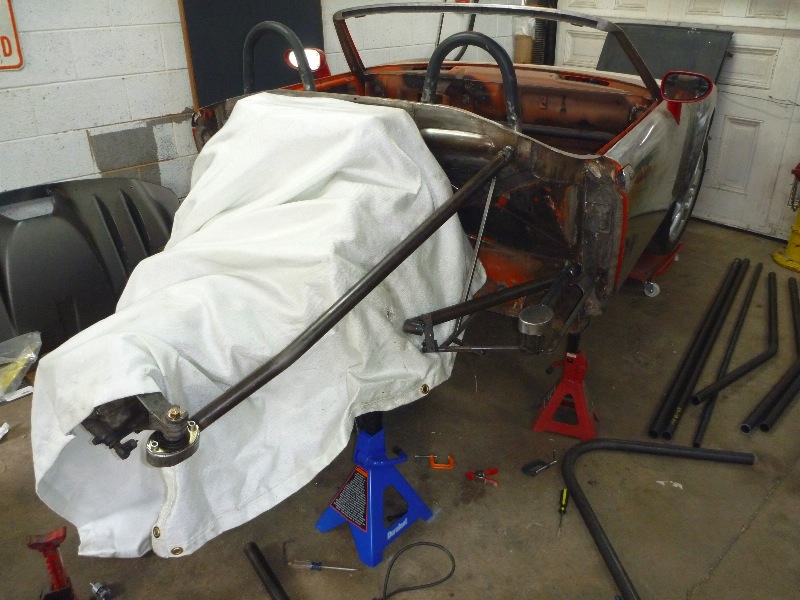
Posted by: Krieger914 May 20 2010, 08:58 PM
Very cool! Nice ideas and execution.
Posted by: plymouth37 May 20 2010, 09:30 PM
I finished up the passenger side "frame rail" and moved on to the drivers side.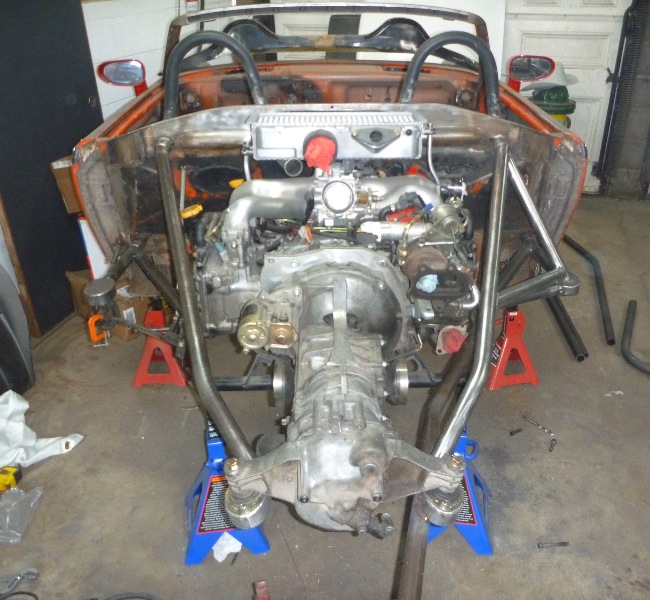
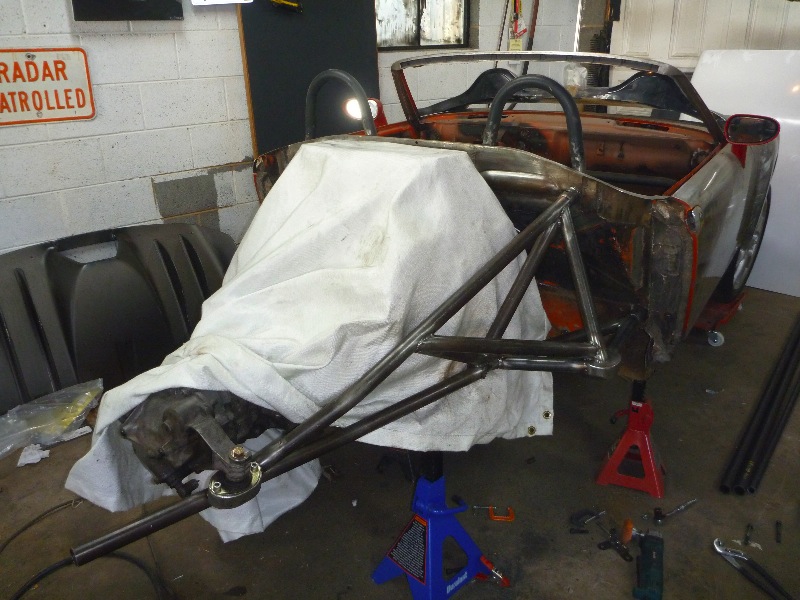
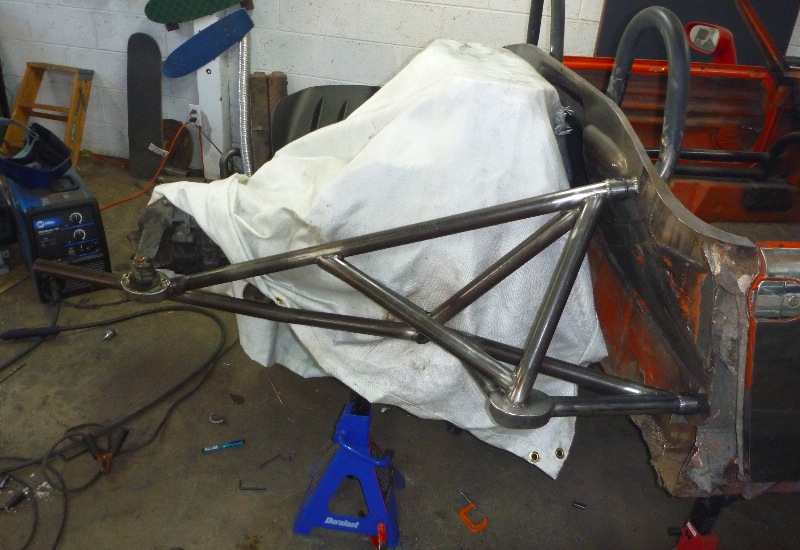
Posted by: plymouth37 May 20 2010, 09:39 PM
I then wrapped up the drivers side.
When I get back from Rome in a month I will build the X-Brace and the lower tube that will connect to the tranny.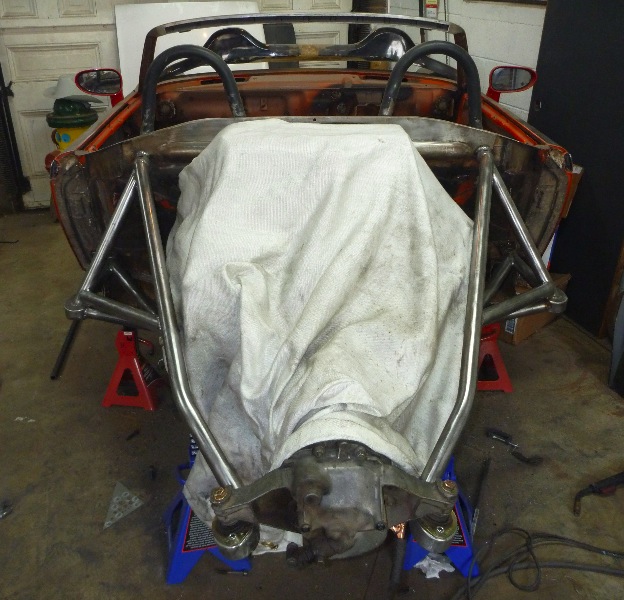
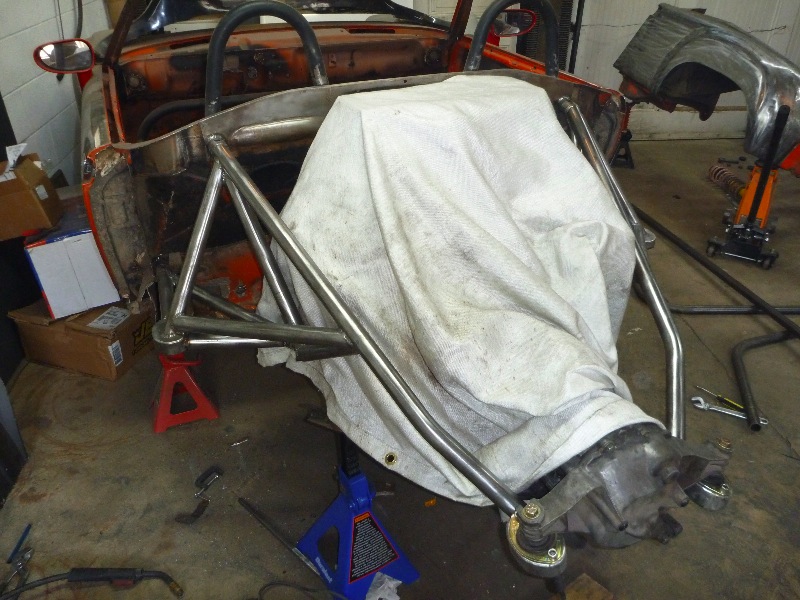
Posted by: Zaney May 20 2010, 09:51 PM
Porsche needs to hire you and have you in charge of the 918 or 'modern 914' project!
This is insane!!! 
Say 'Hi' to Roma for me.
Nate
Posted by: KELTY360 May 20 2010, 11:30 PM
Breathtaking
Posted by: Phoenix 914-6GT May 20 2010, 11:34 PM
Wow Dana
Posted by: shoguneagle May 21 2010, 04:51 AM
WHAT A SURPRISE!!! I LOVE IT!!! Very, very nice adaption and goes beyond the normal car conversions, either body and/or engine configurations. I love projects that are being developed/are developed such as this one. Warms my heart to see engineering and project execution done with such talent, thought, and . . . . . . . . .! Keep going!!
You probably are doing what a lot of us would like to do - I am pulling for you, Tiger.
Steve Hurt
Posted by: J P Stein May 21 2010, 06:14 AM
Like building a house, everything starts with the foundation. You've shown us part of the framing, but not the foundation. What is happening forward of the firewall?
Posted by: plymouth37 May 21 2010, 07:15 AM
I couldn't resist mocking up the trailing arms and wheels to see how it looks.
JP, you can kind of see the main cage in these pics, I will post better views later, I am going to add some tubing to the passenger compartment to strengthen the tie in points for the new rear chassis section in a month or so.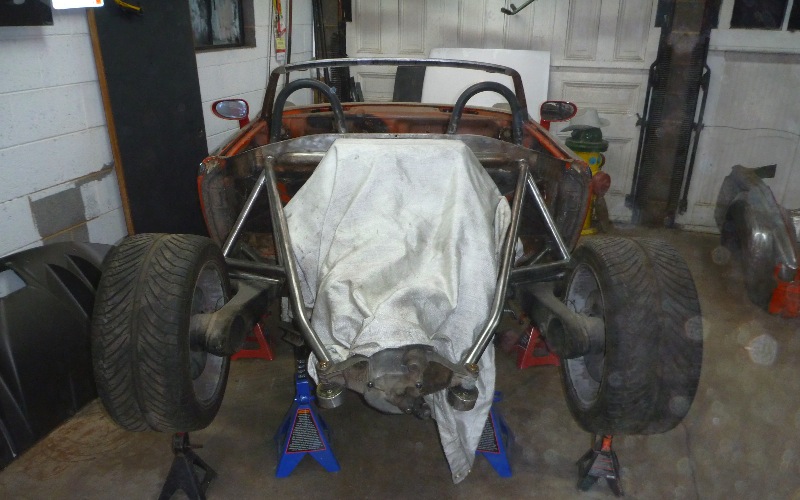
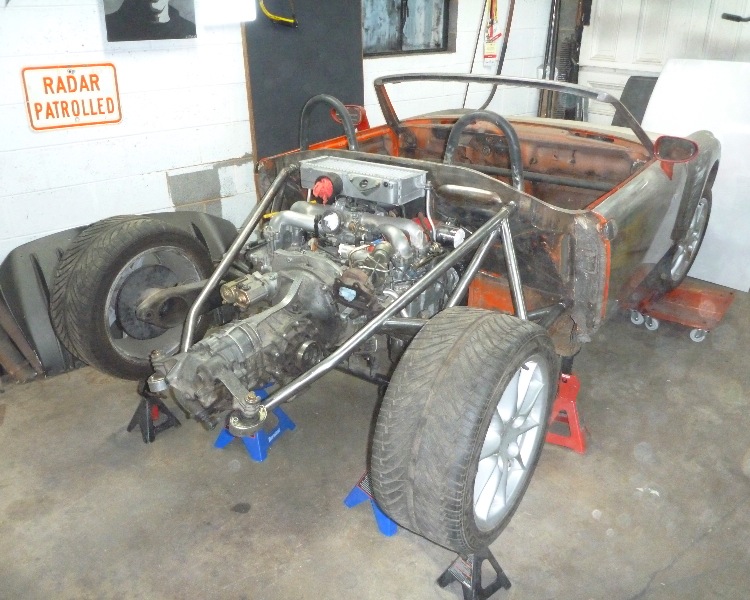
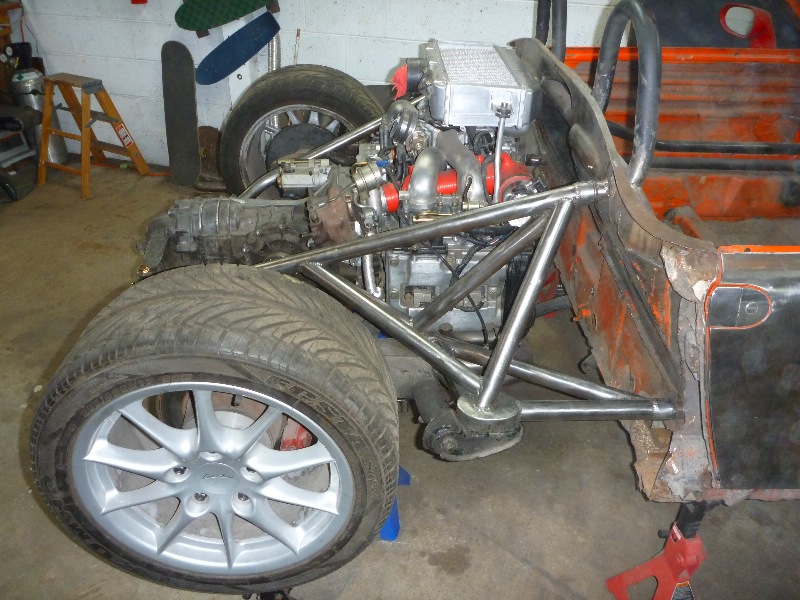
Posted by: plymouth37 May 21 2010, 07:18 AM
The rear section that I have fabbed up so far weighs in at 52 pounds, the rest of what I am adding will not weigh more than 30 or so pounds including the f/g fenders so it looks like I am looking at losing around 100 pounds bringing the grand total to 550.4 pounds lost or the equivalent of gaining 100.7 horsepower.
Do I win the "most jackstands used to hold up a 914" award?
Attached image(s)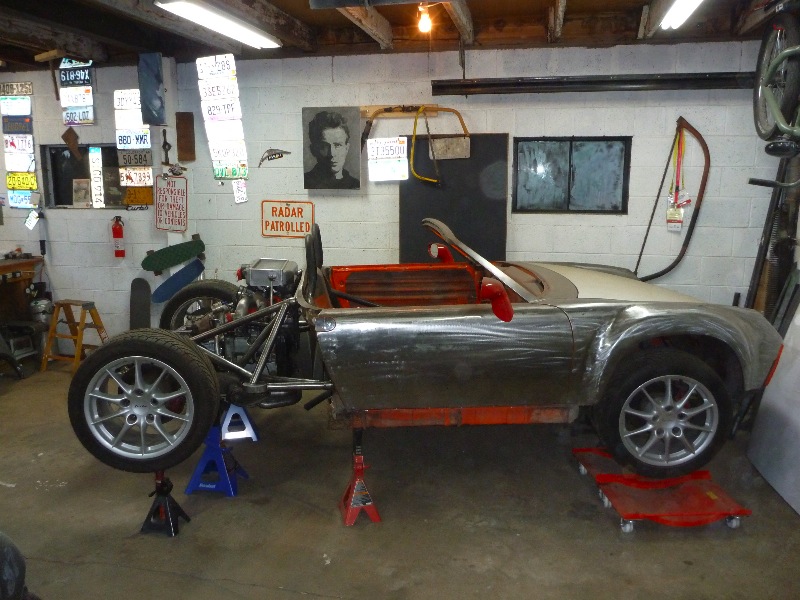
Posted by: MDG May 21 2010, 07:26 AM
Unreal stuff, Dana. You're turning into a mad scientist before our eyes.
Posted by: Dr Evil May 21 2010, 08:41 AM
Dude, you have a real problem. When you get tired if this foolishness (after it is completed) you should sell it to me. I will start donating plasma now to save up
Posted by: Scott Schroeder May 21 2010, 09:17 AM
you get more done in a week than I do in a year!! Cant wait to see the car. Simply fantastic work!!
Posted by: KELTY360 May 21 2010, 09:50 AM
Still not sure how you'll make it rust.
Posted by: J P Stein May 21 2010, 11:10 AM
I couldn't resist mocking up the trailing arms and wheels to see how it looks.
JP, you can kind of see the main cage in these pics, I will post better views later, I am going to add some tubing to the passenger compartment to strengthen the tie in points for the new rear chassis section in a month or so.
I was thinkin' that was the case....you haven't done anything half assed yet.
I've been watching your thread with interest....more so now as there may be a Subi in the shitboxes' future. It needs another 150hp and the 2 valve motor won't go there
at a reasonable price. I hear there a JDM TT Subi motor.....true?
Posted by: plymouth37 May 21 2010, 02:23 PM
Okay so here is where it gets interesting, as you can see the frame is not set up for the conventional vertical coilover placement. Having to build the frame a foot higher than it needed to be seemed like a waste of tubing and an unnecessary weight addition up high so I am going cantilever. And I rendered a little diagram:
Here is an exploded view: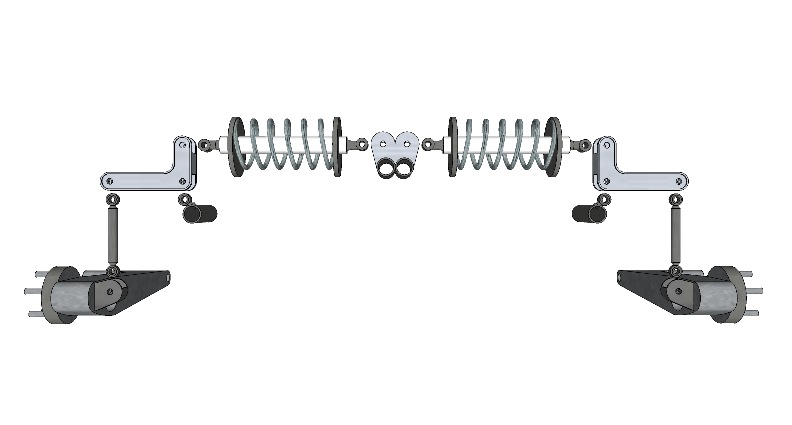
And here it is with one inch past maximum travel in either direction.
I am using QA1 aluminum shocks with 400# springs and 4" travel, with the 2-1 lever the suspension will see 8" of travel and a 200# spring force.
The top of the shocks will mount on the X-member right above the diff, kind of like this very loose mock up. The coilovers also weigh a total of 6 pounds less than the stockers and that is pretty significant for a partially unsprung part.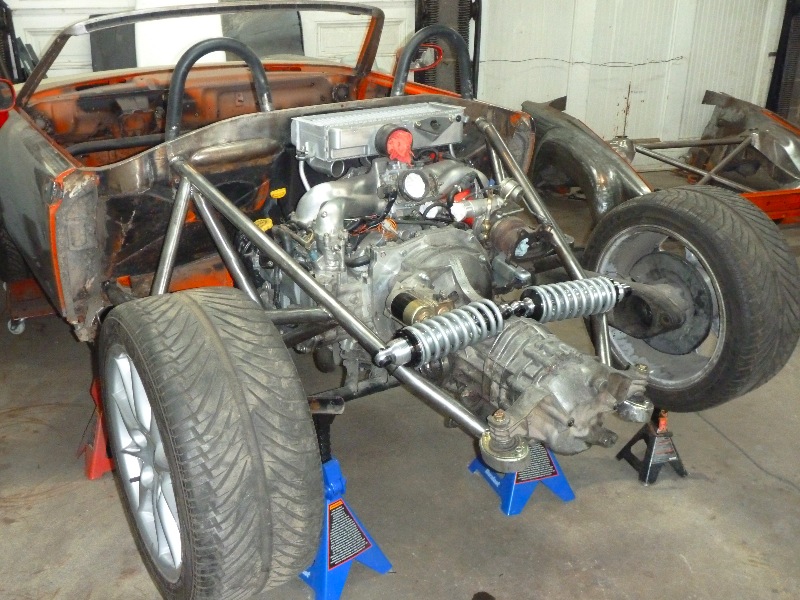
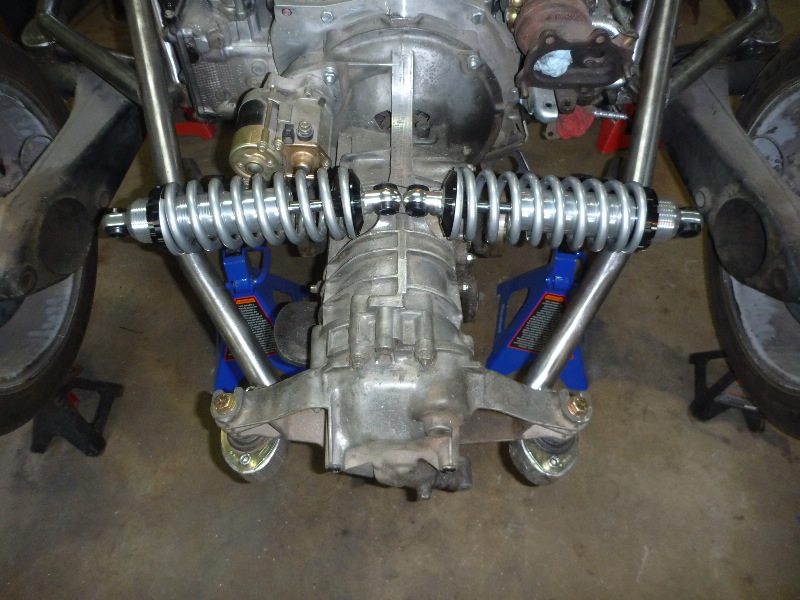
Posted by: Dr Evil May 21 2010, 03:11 PM
SICK!
Posted by: MDG May 21 2010, 03:18 PM
Like I said, Mad Scientist. This is actually the apparatus that channels the lightning strike into creating life . . ..
Posted by: plymouth37 May 21 2010, 05:13 PM
Like I said, Mad Scientist. This is actually the apparatus that chanels the lightning strike into creating life . . .. Just grab some jumper cables and you are ready to go!Posted by: Jeff Bowlsby May 21 2010, 05:58 PM
I dunno...don't want to question your care in aligning things, but there are a couple photos that make it look like the rear structure is not aligned with the center axis of the front of the car. See how the rear looks to be too far to the passenger side in this photo? Maybe its the camera angle? Otherwise
Attached image(s)
Posted by: Phoenix 914-6GT May 21 2010, 07:57 PM
Jeff, I think it is just your eye as he has the triangle on the right side but not yet on the drivers side tricking your eye.
Posted by: lotus_65 May 21 2010, 07:59 PM
does this look any better jeff? 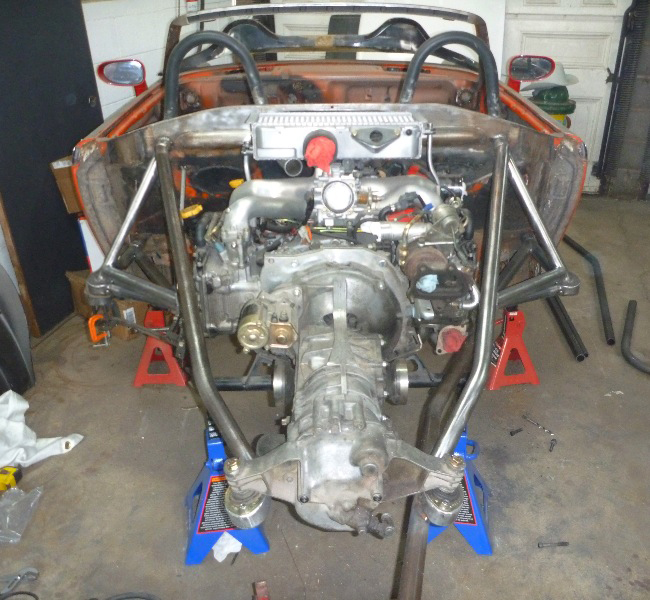
the camera angle is off a little to my eye, but i see what your talking about-
Posted by: plymouth37 May 21 2010, 09:04 PM
Trust me, it is dead on, that second main tube literally took 2 hours to place. It's funny I looked back through the pictures and they are all a little to the left, my inner compass must be a couple degrees off!
Posted by: Rand May 21 2010, 09:10 PM
We know Dana wouldn't build something crooked. You can see the shot is at an angle... Look at the bump hoops compared to the windshield frame and mirrors.
Dana, you never cease to amaze me. The only thing I'm worried about is you'll keep doing crazier things and it's not going to make it back on the road soon enough. 
Posted by: J P Stein May 23 2010, 10:41 AM
What I don't see in the pic is the car center line scribed/marked on the floor.
I've been doing dimensioning all my professional life and that is where I would start.
Take a couple hours and establish the center line of the car ( that will take some doing), drop it down to the floor, then extend it out past the end of your work using a straight edge, string, wire, fishing line, yada. Be prepared to go back and check/realign the car if it *might* have moved.
Taking the possible camera angulation into account, it still looks off to the right per my eyeball.
My attempt to help.
Posted by: plymouth37 May 23 2010, 10:49 AM
With the help of the good doctor I rebuilt my tranny yesterday.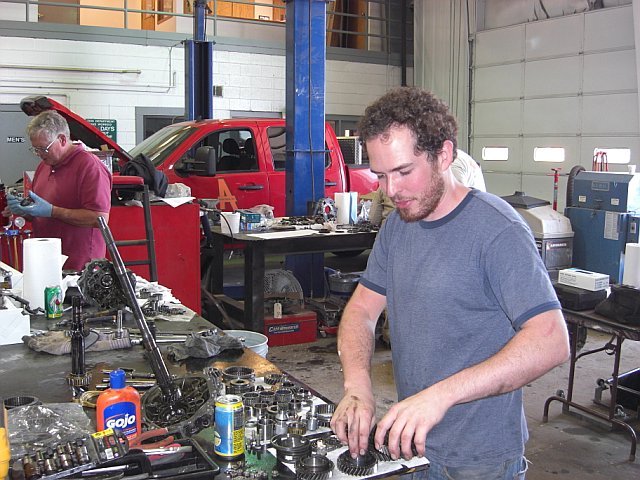
This is the point where you hope the Doc knows what he is doing because I was sure lost!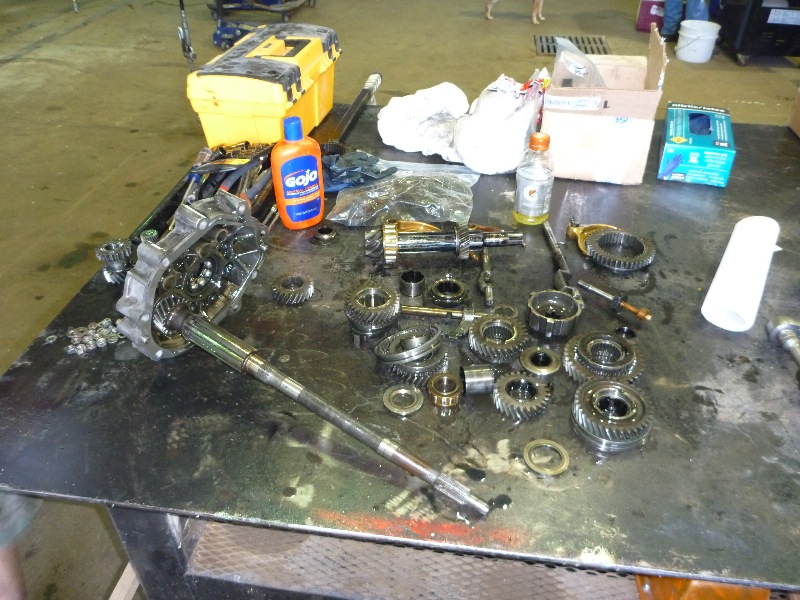
And back in the car the same day it was pulled, not a bad turnaround!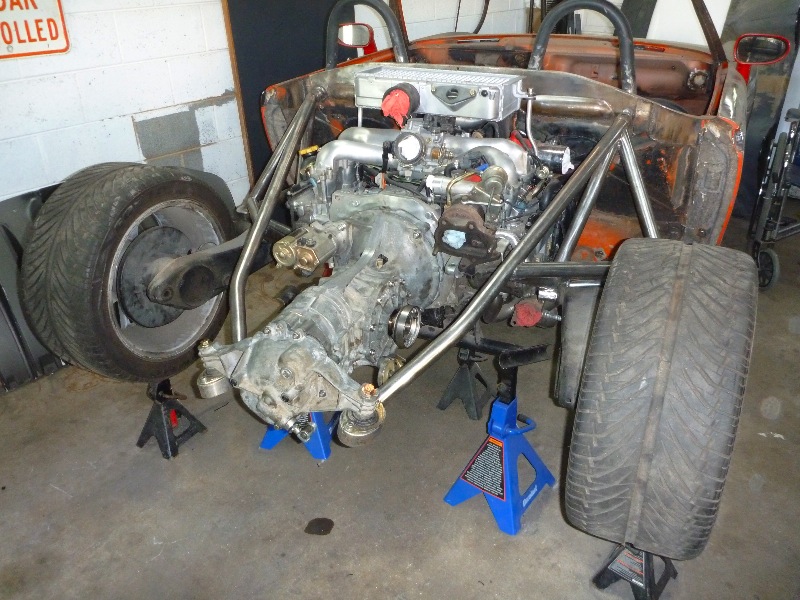
Thanks again to Dr. Evil, it was an awesome workshop and I learned a ton.
Posted by: plymouth37 May 23 2010, 10:57 AM
JP, I built a jig to locate the rear suspension and worked off of that for the location rather than a C/L because I was designing around the engine rather than off of blueprints. Rather than taking measurements off of the car to make a c/l I took measurements off of the car to make the cage, both techniques work to make a straight cage. Believe me, I am a student of architecture, I know how to measure things and I have quintuple checked with an actual measuring device and it is right on, the wheels on the other hand are not aligned so they do make things look a little wonky.
Posted by: J P Stein May 23 2010, 12:38 PM
JP, I built a jig to locate the rear suspension and worked off of that for the location rather than a C/L because I was designing around the engine rather than off of blueprints. Rather than taking measurements off of the car to make a c/l I took measurements off of the car to make the cage, both techniques work to make a straight cage. Believe me, I am a student of architecture, I know how to measure things and I have quintuple checked with an actual measuring device and it is right on, the wheels on the other hand are not aligned so they do make things look a little wonky.
Yeah, & I'm one of the dritbags that transform your pretty pictures into reality and I know my biddness. Jigging off an unknown surface location can cause you all kinds of grief. You can't even think in 3 dimensions until you build an axis system.
Posted by: MDG May 23 2010, 12:48 PM
I bet you looked at this stuff and went, "Hmmm, if I omit all this junk I could save another 32lbs!!"
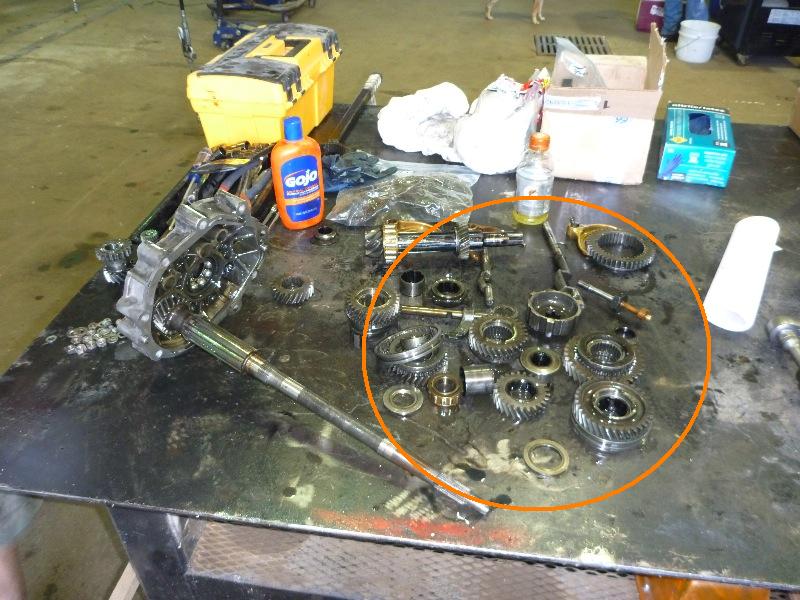
Posted by: rsrguy3 May 23 2010, 12:59 PM
This is toooo funny. BTW, I've been following this thread for some time, and I gotta say I'm lovin it, I really like the cleanliness of your shop, and your attention to detail. The tower of Pisa had an architect too, it might have worked had the masons/dirtbags been listened to, they knew it didn't belong there. JP is just sayin' its almost impossible to pick points out of space w/out a proper foundation. You need to have solid a datum line to start from (not the car) in order to build correct fixtures (PC) from.
Posted by: plymouth37 May 23 2010, 02:58 PM
Jigging off an unknown surface location can cause you all kinds of grief. You can't even think in 3 dimensions until you build an axis system.
JP is just sayin' its almost impossible to pick points out of space w/out a proper foundation. You need to have solid a datum line to start from (not the car) in order to build correct fixtures (PC) from.
That is why I built a jig while the car was in one piece then removed the back half of the car around the jig, no datum, axis, points out of space, whatever, the suspension points were never lost in the process, I really don't see how there is a problem here.
Posted by: r_towle May 23 2010, 03:14 PM
So, at this point in the build, line it all up, create a centerline on the floor and double check...seems like a reasonable double check to make. You know what is kinda cool to use for this is a laser level.
The little ones that look like a telescope can project a line wherever you point it...so you can set up a few (they are cheap at Home Depot) and have a few straight lines to measure from...and they look cool at night.
One thing I wonder is how much things change as you weld...a mm here a mm there...
Rich
Posted by: plymouth37 May 23 2010, 03:28 PM
I bet you looked at this stuff and went, "Hmmm, if I omit all this junk I could save another 32lbs!!"
Well if I quadruple my redline and go direct drive...
I wonder if it will start in 5th, would a 1-speed be lighter?
Posted by: plymouth37 May 23 2010, 03:53 PM
I didn't remove the jigs until everything was totally welded and cooled and it was spot on, welding tweaks are a bitch and I was keeping an eye out for them.
There is a lot of good advise on this page so taking that in I drew a c/l with a projecting laser level and a plumb bob, the left suspension points are dead on, the right are in by 1/32 and the transaxle mounts are to the left by 1/16. I think I am okay with that.
I will pick out a few more points over the next hour of so just to be sure everything is beyond reproach.
Thanks for the help double checking that everything is okay!
Posted by: charliew May 23 2010, 04:01 PM
When it turns better one way than the other it will make you wonder. Or why it needs more air in the right rear that the left rear to set straight. Or when it's wet you get used to it always going to the left when you get on the brakes hard. A guy can get used to all these things. It will probably be just as straight as any other car with a tube frame.
Posted by: plymouth37 May 23 2010, 04:03 PM
When it turns better one way than the other it will make you wonder. Or why it needs more air in the right rear that the left rear to set straight. Or when it's wet you get used to it always going to the left when you get on the brakes hard. A guy can get used to all these things. It will probably be just as straight as any other car with a tube frame.
Worst case I can circle track it, all left turns baby!
Posted by: Dr Evil May 23 2010, 08:29 PM
Dana, you clearly do not know what you are doing on your car
Posted by: charliew May 23 2010, 08:39 PM
He can always fall back on 914 tranny rebuilding in the denver area.
Posted by: plymouth37 May 23 2010, 09:19 PM
Dana, you clearly do not know what you are doing on your car
He can always fall back on 914 tranny rebuilding in the denver area.
I don't know, I know even less about trannies than I do car construction!
Good thing I went back to school to get a non-car related degree or I would be screwed!
Posted by: budman5201 May 23 2010, 10:12 PM
wow! great work!! Makes my conversion look like its nothing. Amazing!
Posted by: Britain Smith Jun 30 2010, 12:34 AM
Does anyone know that this thread has been moved over here...it is quite.
-Britain
Posted by: charliew Jun 30 2010, 02:57 PM
I agree, it is kinda moving.
Posted by: Phoenix 914-6GT Jun 30 2010, 05:26 PM
Does anyone know that this thread has been moved over here...it is quite.
-Britain
Moved?
It has always been here. Dana mentioned something about going on vacation or something so he wasn't going to do anything for a while. Something about going to Rome and getting robbed at gun point. Oh wait, the last part is from someone else
Posted by: BKLA Jun 30 2010, 05:32 PM
I think someone hyjacked britain's login and posted for him.
Posted by: plymouth37 Jul 1 2010, 07:02 AM
Just flew in from Rome yesterday, the build thread is still where it has always been as far as I can tell and work will resume soon.
Posted by: majkos Jul 1 2010, 07:40 AM

Just kidding
Welcome home Dana!
Posted by: Crazyhippy Jul 1 2010, 02:28 PM
Just flew in from Rome yesterday,
and boy my arms are tired...
Posted by: KELTY360 Jul 1 2010, 04:05 PM
Just flew in from Rome yesterday, the build thread is still where it has always been as far as I can tell and work will resume soon.
About time
You've got a lot of nerve leaving us hanging like this Welcome back Dana
Posted by: Britain Smith Jul 1 2010, 07:35 PM
Well, there is a new Build Sub-Forum and a bunch of thread got moved there. Then all of them were stale...just wondered what was going on.
Let life resume...
-Britain
Posted by: Zundfolge Jul 1 2010, 10:04 PM
Looking at all the work going into this one I'd almost think it would be easier to design a fiberglass 914 body and install it on an Ariel Atom
Posted by: BKLA Jul 30 2010, 04:00 PM
Nothin' new goin' on??????
Posted by: plymouth37 Jul 30 2010, 05:40 PM
I actually spent all day welding on her today, I will post pics in a few days when I have made more progress.
Posted by: plymouth37 Aug 11 2010, 01:17 PM
I have been doing some welding over the last couple of weeks.
I wanted to raise the door bars in the cabin to meet the rear tube chassis' upper bars but there was no way to do that except by having to wear a chunk of tube like a seat belt. Instead I decided to strengthen the existing cage and rockers in addition to making another tie-in point for the rear sub-frame.
I totally forgot to take pictures until I was almost done but here you can see the inner structure of the long, I welded in tubing to connect the two horizontal door bars and then continued the cage down through the rocker. 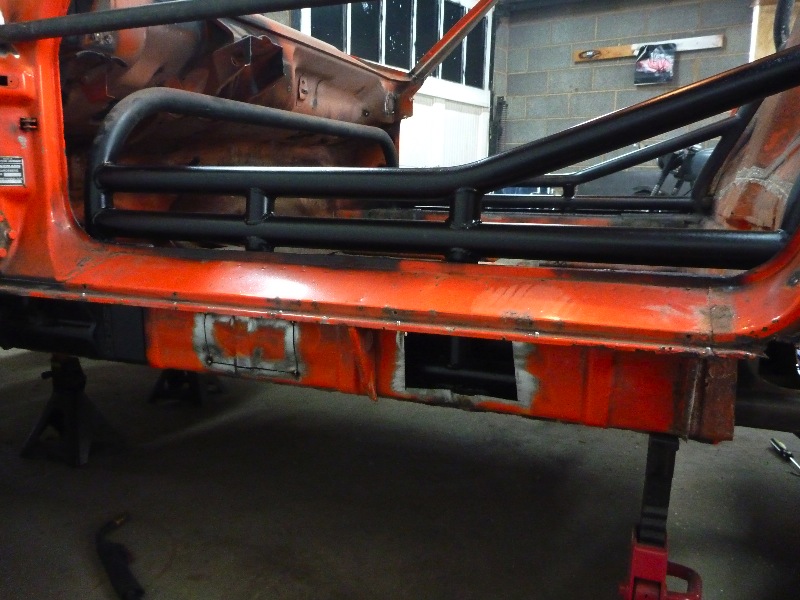
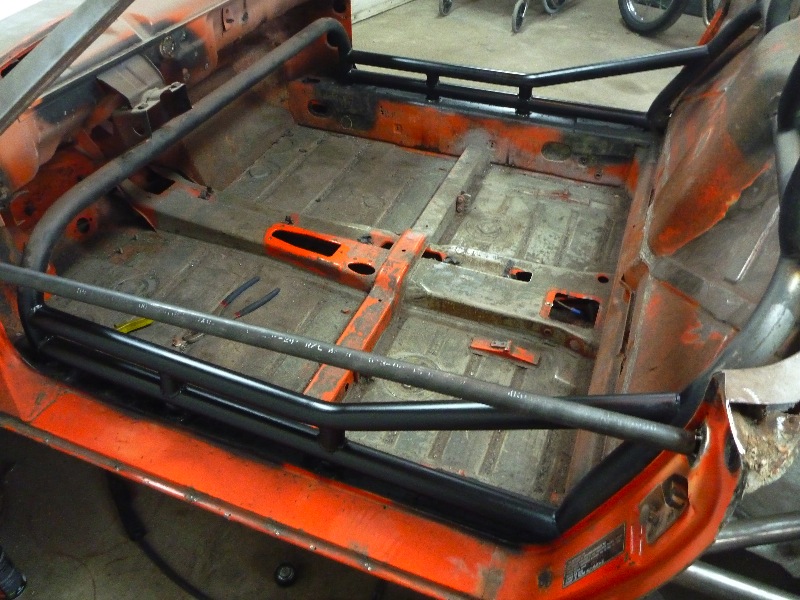
At the end of the lower bar I made another tie-in point for the lower portion of the rear tube frame.
The next step is to finish the lower section of the rear and weld up the rear suspension mounts.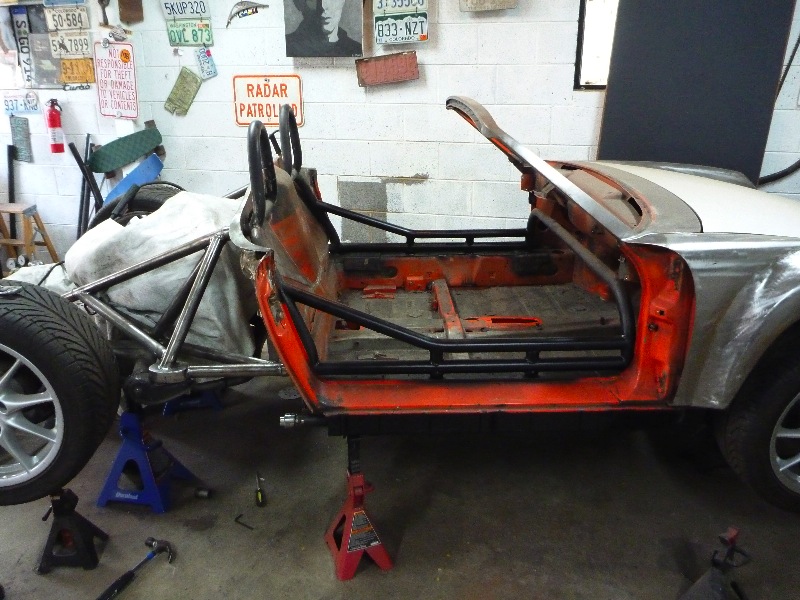
Posted by: Phoenix 914-6GT Aug 11 2010, 01:31 PM
You make me sick
Nice work as always Dana.
Posted by: plymouth37 Aug 11 2010, 03:11 PM
I have the cage pretty much wrapped up. I ran out of mig wire so there are still a couple bits I need to finish.
Marc (Kelty360) stopped by today so I figured I would tidy things up and take the car off of it's semi-permanent bed of jackstands.
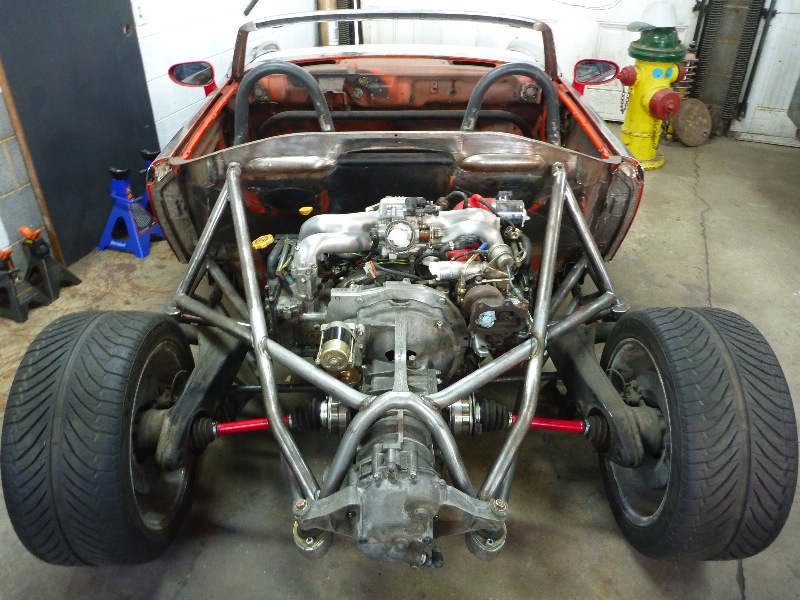
Posted by: plymouth37 Aug 11 2010, 03:11 PM
Next step is to design and fab up the rear suspension.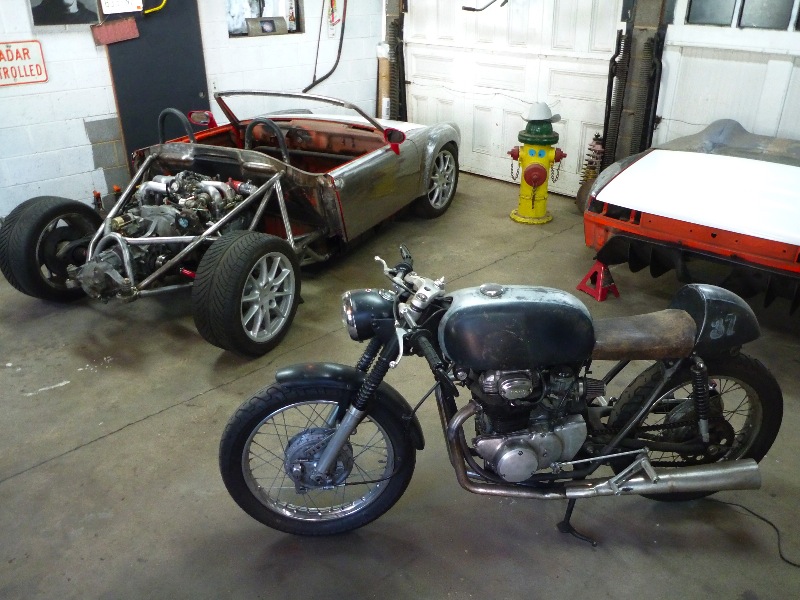
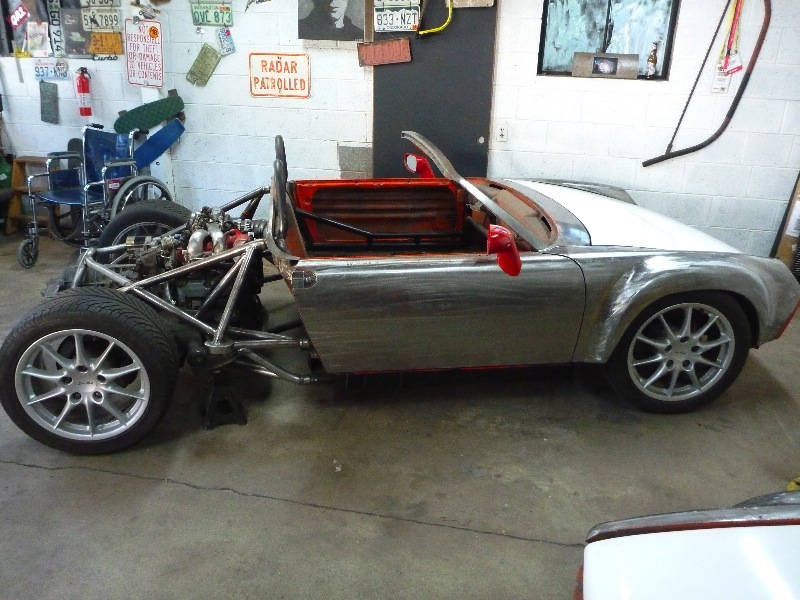
Posted by: Zaney Aug 11 2010, 06:17 PM
Awesome job as usual, Dana!
Simple question: how did you get the machined look in the bare metal? Wire wheel or another tool?
Thanks!
Nate
Posted by: plymouth37 Aug 11 2010, 06:32 PM
Awesome job as usual, Dana!
Simple question: how did you get the machined look in the bare metal? Wire wheel or another tool?
Thanks!
Nate
I knock the scale off of the tubing with a fine grid pad on a DA, as for the body it is "brushed" with tiny abrasive pads on an air powered angle grinder.
Posted by: Phoenix 914-6GT Aug 13 2010, 12:09 AM
I think this thread should be nailed
Posted by: MDG Aug 13 2010, 07:50 AM
I think this thread should be nailed
I believe it's already in the 'Restoration' forum Andy created a few months back. In fact, I think it was the first one put in.
m.
Posted by: DBCooper Aug 13 2010, 10:56 AM
I think this thread should be nailed
What? You want to have sex with this thread? Well that's sure different. No marriage though, right?
Posted by: plymouth37 Sep 11 2010, 04:25 PM
I made some progress today. I pulled the drivetrain, finished welding the frame, and made the new suspension mounting points. I should be able to mock up most of the suspension within a week or so but here is how things look now. It is hilarious being able to pick the car up with one hand while placing a jackstand with the other, this thing is going to be so light!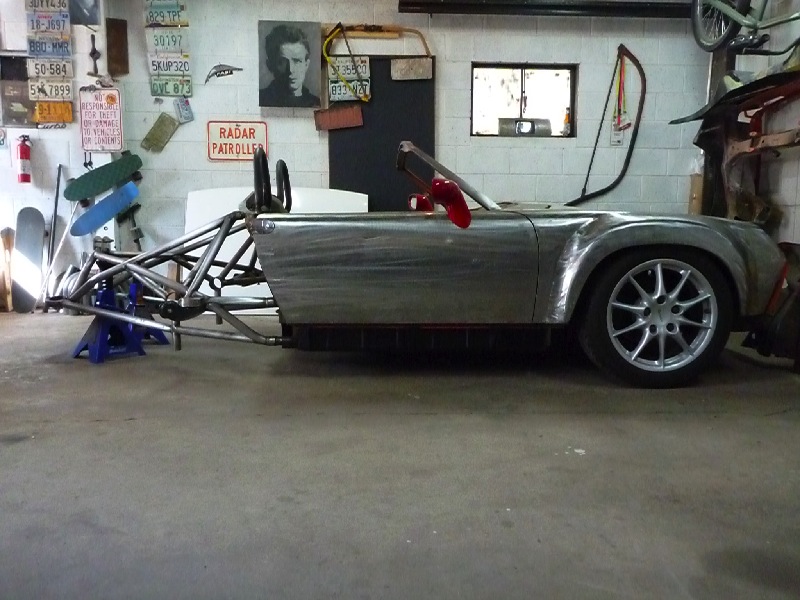
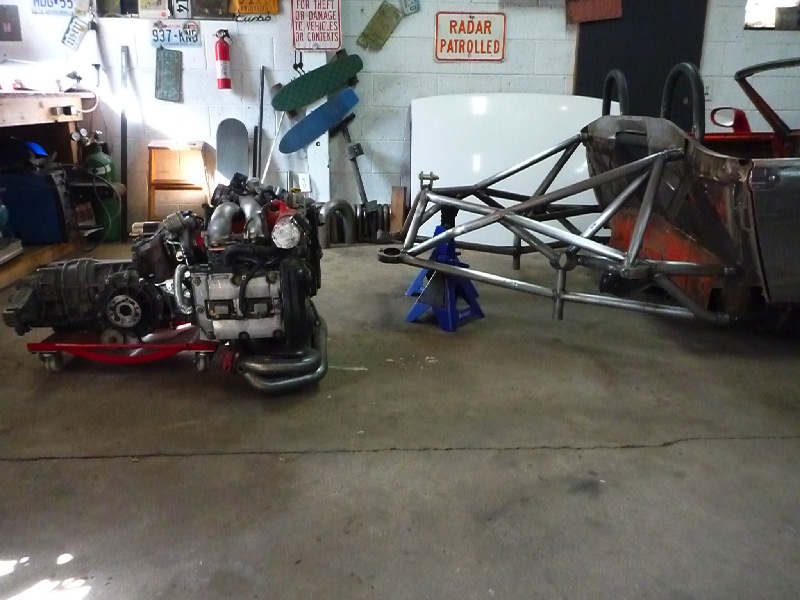
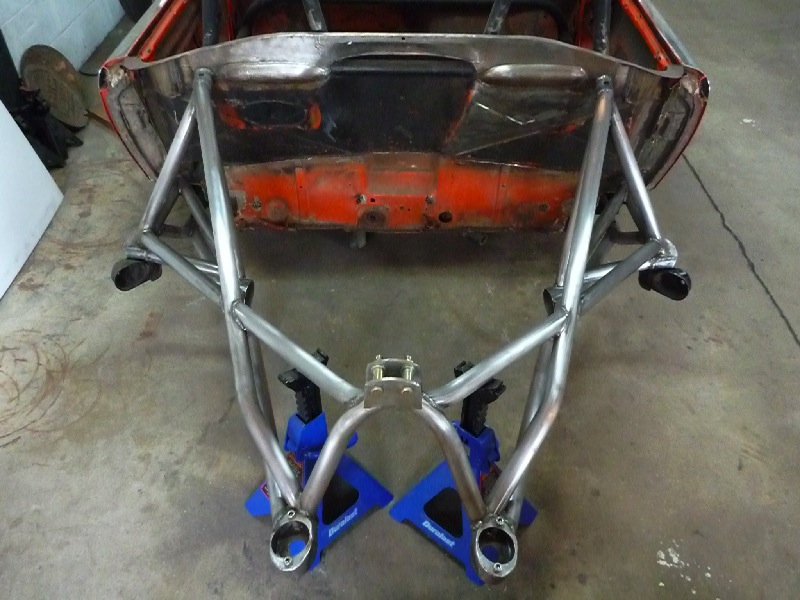
Posted by: Britain Smith Sep 11 2010, 09:37 PM
You know, the more I look at this the more I like it.
-Britain
Posted by: RobW Sep 12 2010, 08:21 AM
Wow!
Posted by: bigvag Sep 14 2010, 05:17 PM
Next step is to design and fab up the rear suspension.
congrats the last pic just became my background on my putter. If I had the skills to do this I would it looks sick. Can you post some more pic on how you connected everything into the longs. well the pics didn't show up with my post.
Posted by: plymouth37 Sep 14 2010, 08:20 PM
Can you post some more pics on how you connected everything into the longs?
I didn't manage to get any good pics of the entire inner structure so here is a crappy illustration. The red lines are the tubes that run within the frame rail while the green lines are the plates that tie them into the long.
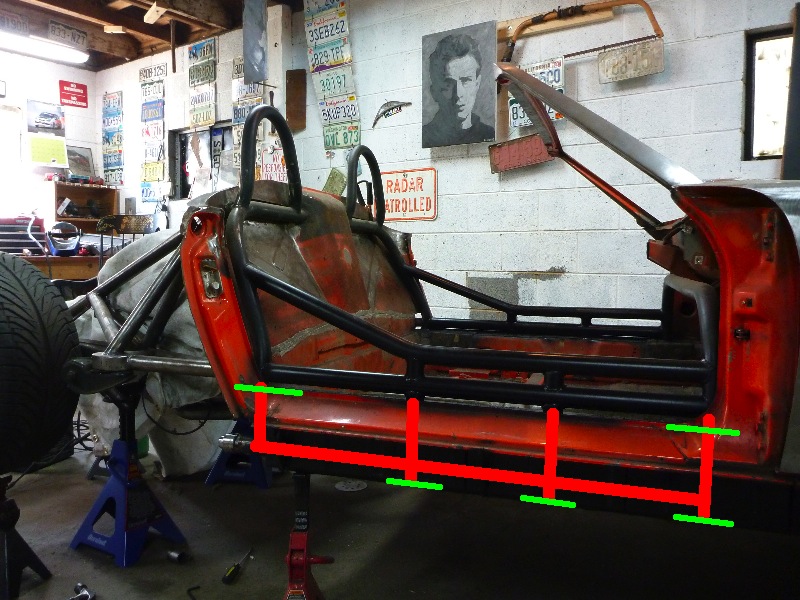
Posted by: bigvag Sep 14 2010, 09:18 PM
Do you have a pipe bender in house or do you take it somewhere? Aslo when you made the trailing arm mounts how did you bend the 1/8" metal around, english wheel?
Posted by: plymouth37 Sep 14 2010, 09:54 PM
Do you have a pipe bender in house or do you take it somewhere? Aslo when you made the trailing arm mounts how did you bend the 1/8" metal around, english wheel?
There is a guy a couple blocks from me that has a good stock of tubing and a nice digital hydraulic bender that he lets me use. Although I did the passenger compartment cage myself with a hand bender while I was at Wyotech years ago.
The 1/8" steel bends pretty easy, I just tacked, then bent it a little around the contour and tacked it again about 1/2" from the previous tack weld, the heat from a couple tacks loosens it up and you can shape it pretty easily.
Posted by: plymouth37 Sep 19 2010, 08:27 PM
I made some progress over the weekend. I did a string and level alignment on the rear of the car and dialed in the the caster and camber. With the wheels aligned the bolts that hold the outer trailing arm mounts are exactly in the middle of the alignment slots so when the time comes to get it professionally aligned it should be an easy
(or at least possible) job.
I also tacked on the central strut mount and mocked up the struts.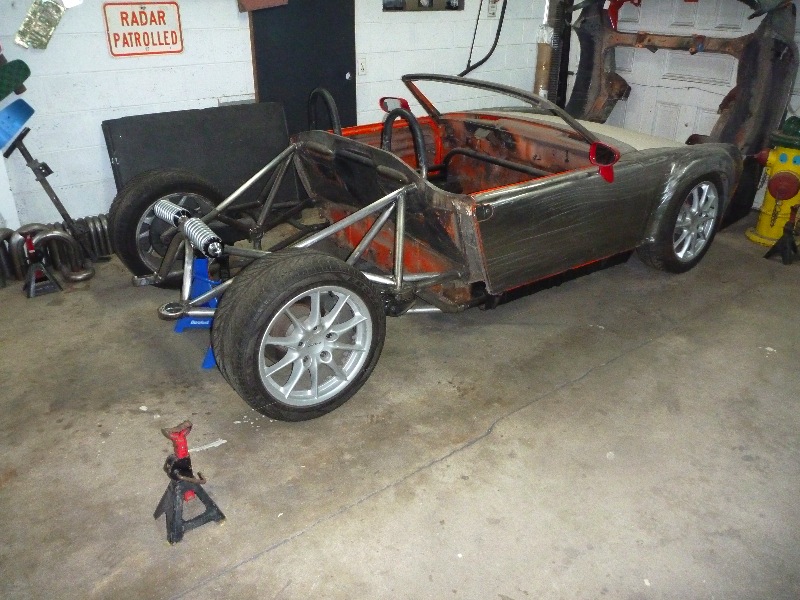
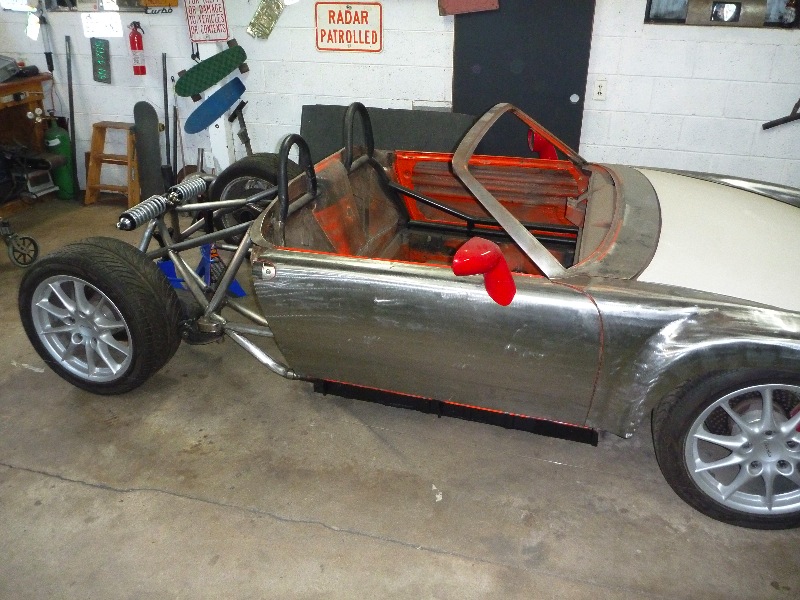
Posted by: plymouth37 Sep 19 2010, 08:27 PM
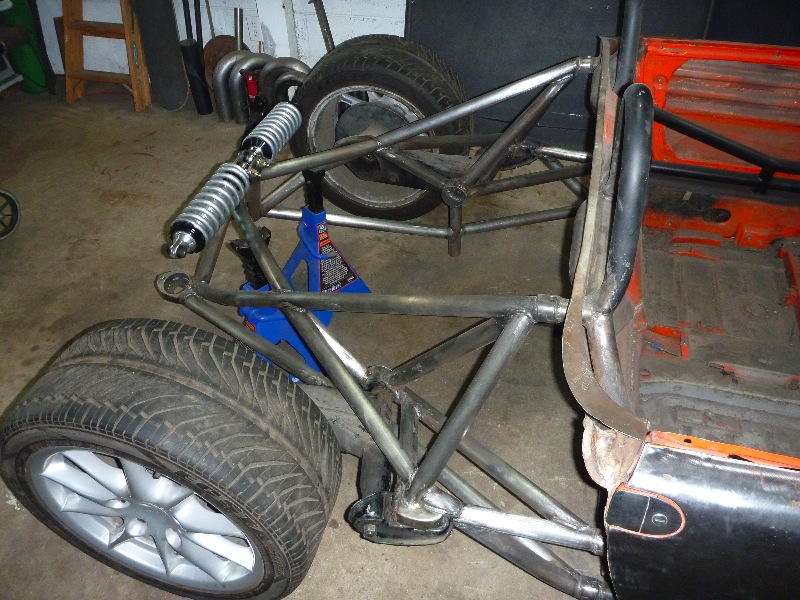
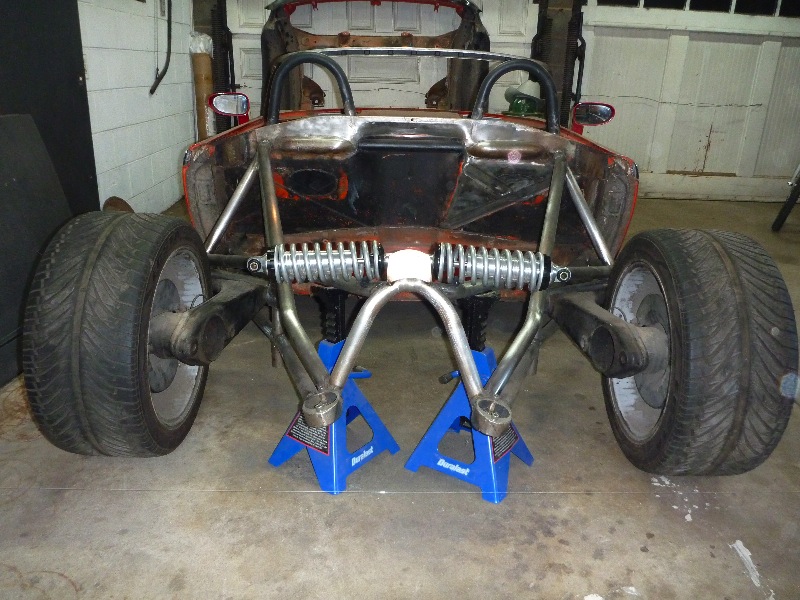
Posted by: scotty b Sep 19 2010, 08:32 PM
I M N awe. Definitely one of the best threads EVER on this site
Posted by: BKLA Sep 19 2010, 11:09 PM
looking forward to see what you are thinking with the pushrods and rocker assembly in the rear suspension.
Very C O O L!
Posted by: Hontec Sep 29 2010, 01:20 AM
I just read all 31 pages! WOW, simply amazing! Your car was the inspiration for my project, the way it looks is stunning!
Randall
Posted by: plymouth37 Sep 29 2010, 01:51 AM
I just read all 31 pages! WOW, simply amazing! Your car was the inspiration for my project, the way it looks is stunning!
Randall
Thanks man, that means a lot coming from someone with your talent. Can't wait to see the next update to your build thread!
Just put some pieces back together on the car, hopefully I can find the time to make some progress over the weekend.
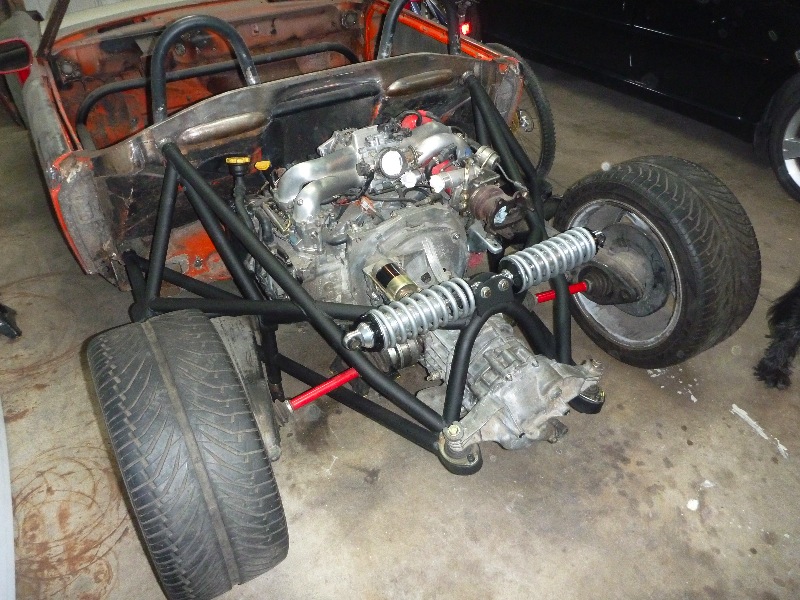
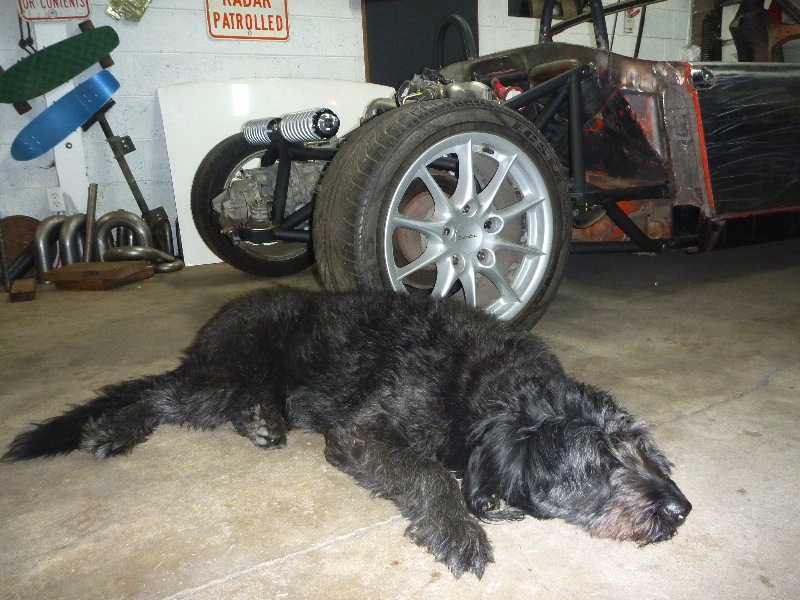
Posted by: Hontec Sep 29 2010, 02:06 AM
What are you going to do with the rear body? After seeing some cars on this forum, I'm in serious doubt about which rear fenders to use with the tube frame.
Posted by: plymouth37 Sep 29 2010, 02:15 AM
I am either going to buy stock looking fiberglass GT fenders or make them if I am feeling brave, then bond them to a lid to form a 1 piece tilt rear (kind of like a Muira). Then if I feel really really brave I will take a mold of my bonded rear and create a non-bonded 1 piece F/G rear.
My focus right now is on the chassis, I would like to get it drivable by next summer, then focus on fitting a body to the independent chassis.
Posted by: Hontec Sep 29 2010, 03:19 AM
Brave undertaking!
I'm thinking about buying GT complete fenders from a German company here, They are not just the bulges but complete fenders including sail panel and door frame. According to the 914 parts guy here, they are of good quality. This company also sells just the rear bulges but then a tad wider then the GT. I'm thinking of re-crafting these on the GT complete fenders and also buying the rear bumper/lip that fit's the new width and after making these to an exact fit, have them reproduced in Carbonfibre. Then also the rear trunk in CF.
I love the Sheridan rear, especially the wider one, but i would like to be able to open the trunk, on the other hand, I guess it would also be possible to adapt the sheridan to single fenders...
Here's what I mean
The GT fenders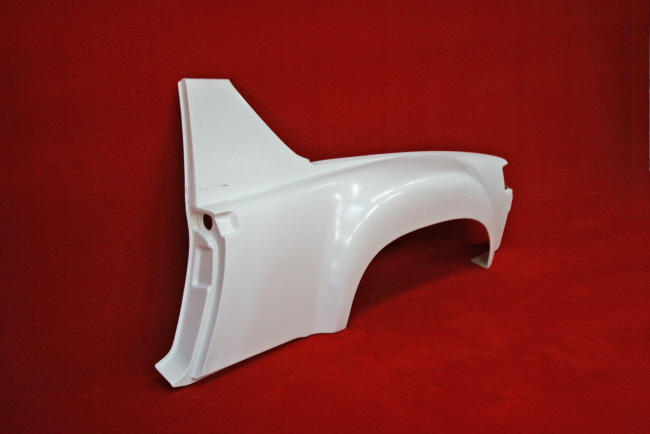
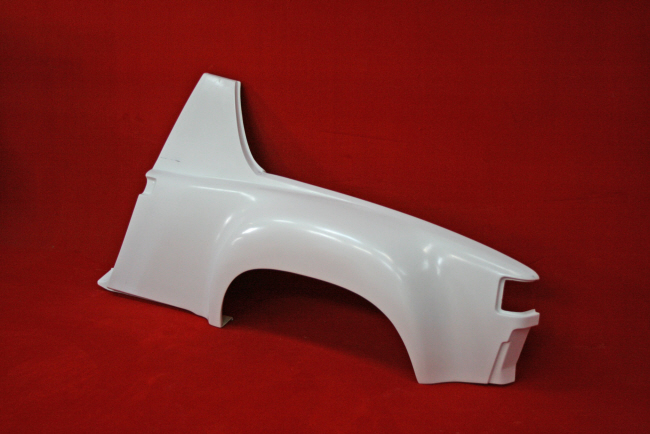
The tad wider fenders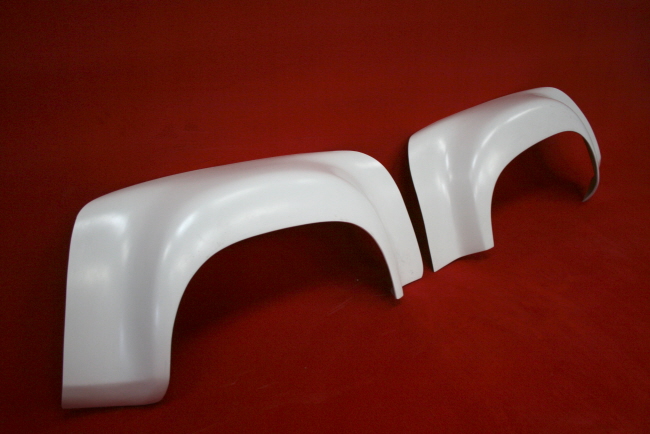
And the bumper to match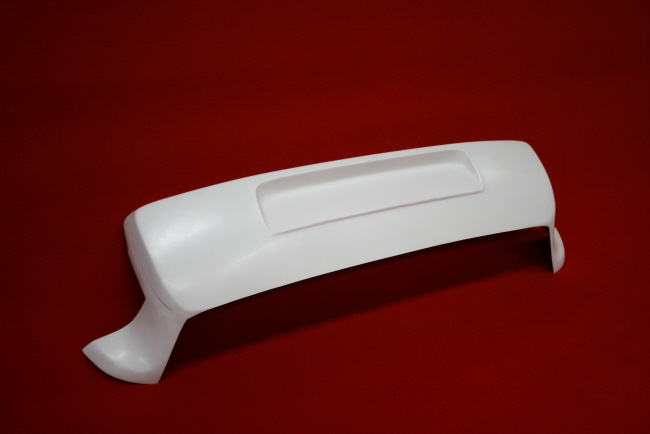
Posted by: jt914-6 Sep 29 2010, 04:24 AM
Great looking build.....your rear shock set up looks like what a friend of mine did to his race car....BTW this car is/was up for sale....unique center drive, hand built from the ground up 914 race car.....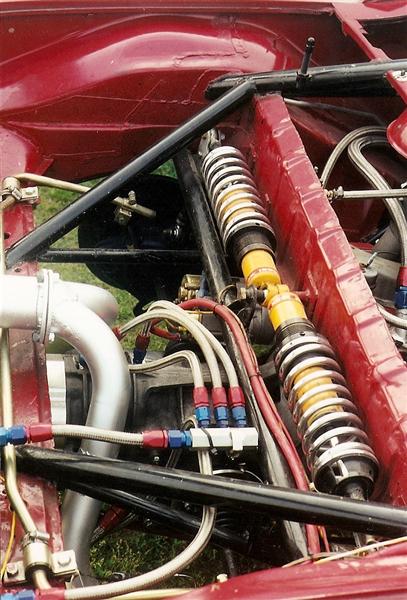
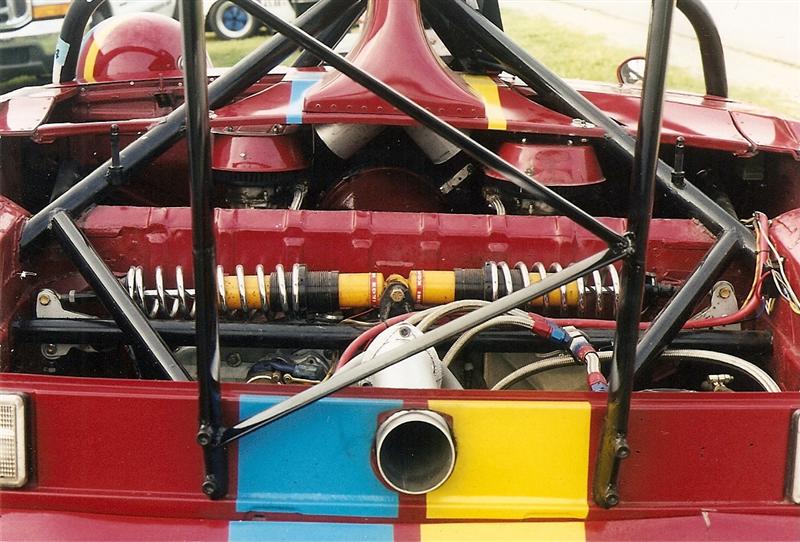
Posted by: Ferg Sep 29 2010, 07:57 AM
Glad your Dog made it in the pic Can't wait to meet her Sunday.
Ferg
Posted by: Britain Smith Sep 29 2010, 10:24 AM
Great looking build.....your rear shock set up looks like what a friend of mine did to his race car....BTW this car is/was up for sale....unique center drive, hand built from the ground up 914 race car.....
Do you have any more pictures of this car, looks very interesting. Does it have custom control arms in the rear?
-Britain
Posted by: Cupomeat Sep 29 2010, 03:15 PM
Yes, Very interesting.
Do you have a picture of the shock actuator pivot arm and mount? Do you know what the ratio used was?
LOVE THIS STUFF!
Posted by: jt914-6 Sep 29 2010, 04:54 PM
Don't know about the actuator ratio or don't have a better pic....he was a little secretive about it but I'm sure he'd share info. He was a student of mine when I was instructing DE's. He's missed his calling in life. He built it from the ground up including body work & paint. PM me and I'll see if he'll share info. He's not a member of the world. Last time I talked to him it was for sale......
A older pic....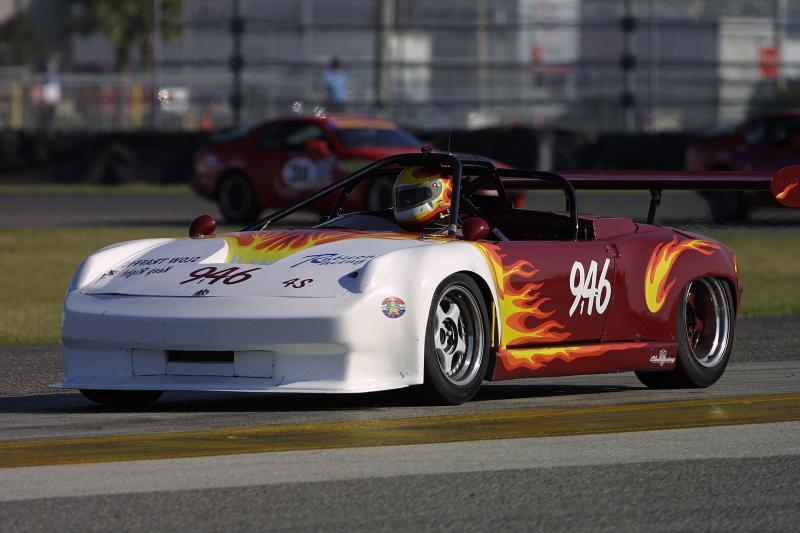
What it looks like now.....
Posted by: Britain Smith Sep 29 2010, 05:00 PM
Nice...if it is for sale, try to get some more pictures.
-Britain
Posted by: Steve Sep 29 2010, 05:03 PM
Very nice car and amazing craftmanship, but I am always curious why someone puts so much money and time into a car and then sells it. Was the car not competitive? Hardship? Got bored of it and wanted to try something else?
Posted by: jt914-6 Sep 29 2010, 05:45 PM
Very nice car and amazing craftmanship, but I am always curious why someone puts so much money and time into a car and then sells it. Was the car not competitive? Hardship? Got bored of it and wanted to try something else?
He runs it in GT5 in PCA club racing and it has many wins and beats many others in higher classes. He's raced it and at least one other 914 for years. He is a family practice MD and I'm sure it has taken lots of his time. No hardship. As I said, he's missed his calling in life.
Rear control arms are modified stock. I think he just may be tired of racing and his "pit crew" daughter is older now and is not going to races. A couple of more pics
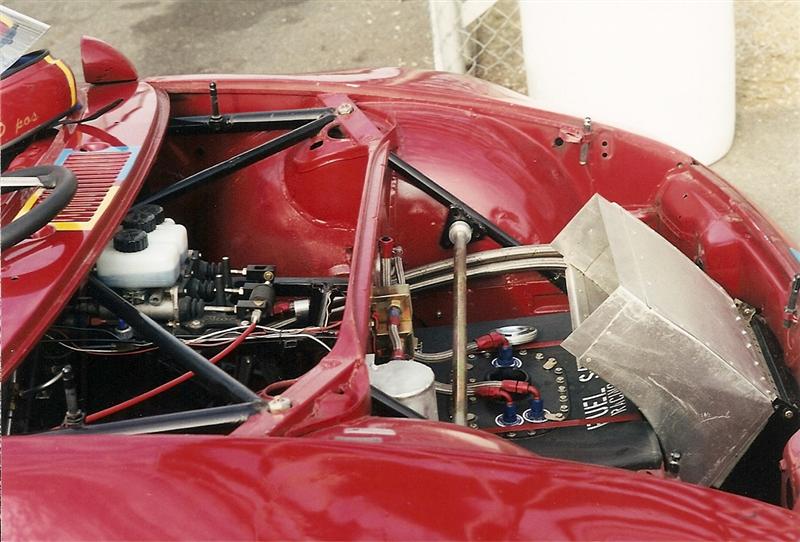
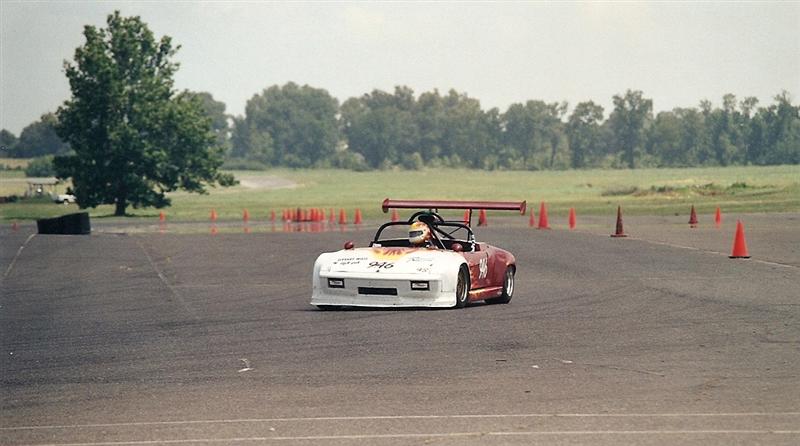
Posted by: Britain Smith Sep 29 2010, 08:54 PM
Looks awesome. Where is it listed for sale?
Posted by: plymouth37 Sep 29 2010, 10:30 PM
Cool project, it's nice to see that a cantilever suspension like this has been done before on a 914, thanks for the pics!
Posted by: jt914-6 Sep 30 2010, 04:57 AM
Cool project, it's nice to see that a cantilever suspension like this has been done before on a 914, thanks for the pics!
Thanks......your car is going to be great.....hijack over.....anyone wanting to know more about the center drive 914.....pm me.....
Posted by: brant Sep 30 2010, 07:56 AM
I ran wheel to wheel against your friends car. Nice car
that was about 1996 ish...
heartland park, topeka kansas...
spoke with him at length. The car was a lot less modified then. He that same front hood (metal) and gave me the idea of doing it to my hood. That is actually how I learned to weld too. After talking to your friend and building up the courage, I bought a welder and cut my hood. First thing I ever MIG welded... Twas not pretty... but with enough bondo it worked fine.
brant
Posted by: RJMII Nov 20 2010, 02:50 PM
Dana... here's your thread. It's lonely. It wants more pictures of recent progress that you've done.
Posted by: plymouth37 Nov 20 2010, 03:38 PM
Dana... here's your thread. It's lonely.
It wants more pictures of recent progress that you've done. Funny you should say that, I found a hole in my overwhelming school schedule to work on the beast, I am working out the geometry of the cantilever suspension now, should be able to post progress soon!
Posted by: majkos Nov 20 2010, 09:17 PM
Dana... here's your thread. It's lonely.
It wants more pictures of recent progress that you've done. Funny you should say that, I found a hole in my overwhelming school schedule to work on the beast, I am working out the geometry of the cantilever suspension now, should be able to post progress soon!
Posted by: Hontec Nov 20 2010, 11:19 PM
Yep
Posted by: plymouth37 Nov 21 2010, 12:10 AM
Here is what I have been playing with, it is a nice compact setup with a low cg. The springs are 400 lb/in and with the cantilever this is equivalent to about 250 lb/in at ride height and around 280 lb/in at full compression.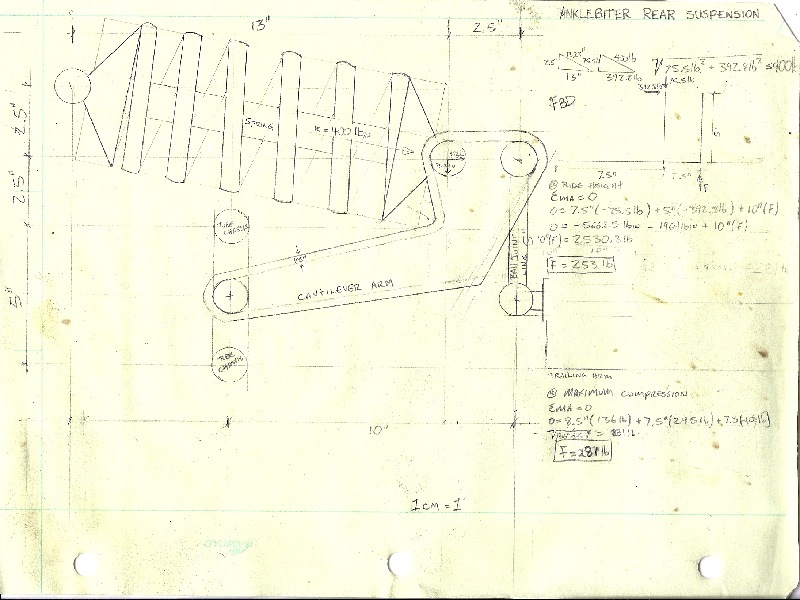
Posted by: Hontec Nov 21 2010, 12:29 AM
Just my 2C: but by putting the pivotpoint of the cantilever that far inward, in your setup, most of the force is used to raise the complete coilover instead of using that force to compress it. I could be wrong but by glancing over your drawing, that's the first thing that springs to my mind.
Randall
Posted by: plymouth37 Nov 21 2010, 12:37 AM
From what I can figure out, there is a good amount of force used to rotate the assembly but ultimately the spring should properly counteract the rotation of the cantilever arm. I could be wrong though, anybody else have a couple cents they want to pitch in?
Posted by: Hontec Nov 21 2010, 01:04 AM
Your upward movement of the trailing arm now results in a lateral force on the pivot arm. By moving the pivot point out and slightly tilting the triangle you get only vertical force as a result from trailing arm movement, this is what you want. The cantilever only translates this into lateral force onto the coilover. Avoiding slight up/down movement of the coilover is almost impossible, but in trying you wil get the best linear suspension travel.
Trying to find a pic, but doing this from my i-phone in a hotelroom...... Doesn't work
Randall
Posted by: plymouth37 Nov 21 2010, 01:22 AM
I see what you are saying, I have played around with a couple designs that were closer to what you are talking about. My main issue with those designs i was that it forced me to mount the springs very high in the car in order to make the geometry work, which in turn was blocking the path for my exhaust to make it to the back of the car. Should have sucked it up and gone with double a-arms in the rear, would have made mounting shocks a lot easier.
Posted by: Dr Evil Nov 21 2010, 05:31 AM
some inspiration from our motorcycle friends
Attached image(s)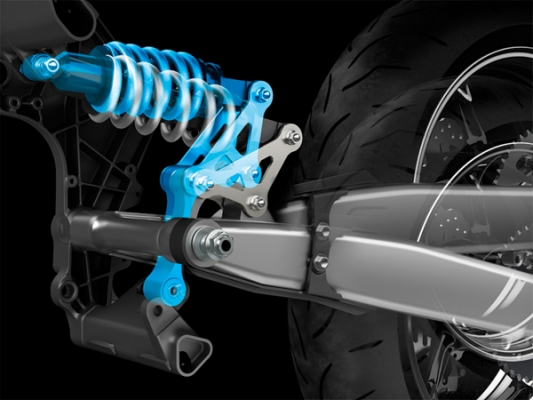
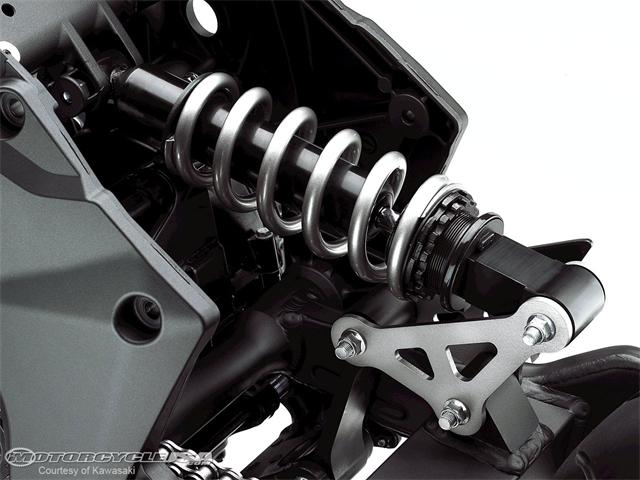
Posted by: geniusanthony Nov 21 2010, 07:10 AM
What would be the effect of a simple 90 deg bellcrank to transfer vertical motion into horizontal motion? The off center triangle designs exist for the tightest confines and non-linear travel like say bikes and such, like a mechanical means toward progressive action. Please correct me if I am wrong however.
Posted by: plymouth37 Nov 21 2010, 10:57 AM
This is what I was looking at before, a simple bell crank converting vertical motion to horizontal.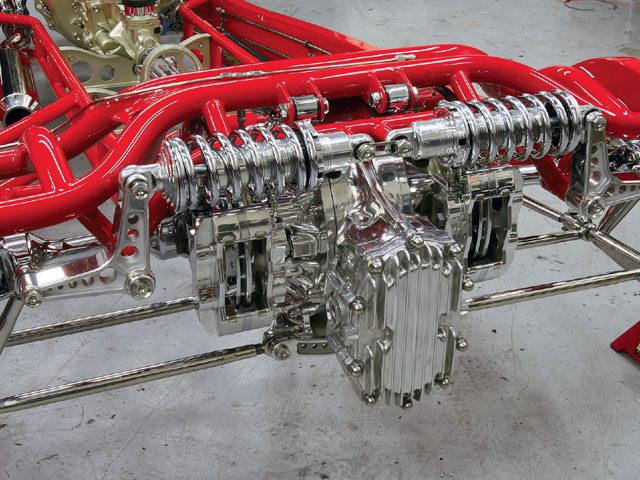
And here was my rendering using this concept.
I think this is the most straight forward solution but I was thinking about the offset cantilever because of space restrictions and the fact that the design above has a high center of gravity while the off set one is relatively low.
Posted by: plymouth37 Nov 21 2010, 11:07 AM
How do you guys think the handling would suffer if I went with the offset cantilever option? I think I am fine with the equivalent spring rate acting like a progressive spring adding around 7 pounds of extra spring force per inch of suspension compression, any opinions?
Here it is again for easy reference:
Here is a shot of an aftermarket wrangler suspension that looks similar, granted the Anklebiter will have a slightly different driving experience than this guy...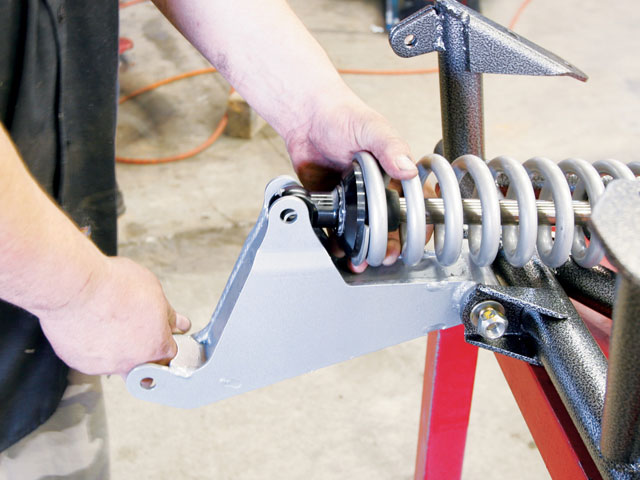
And another similar setup for a Nissan Titan: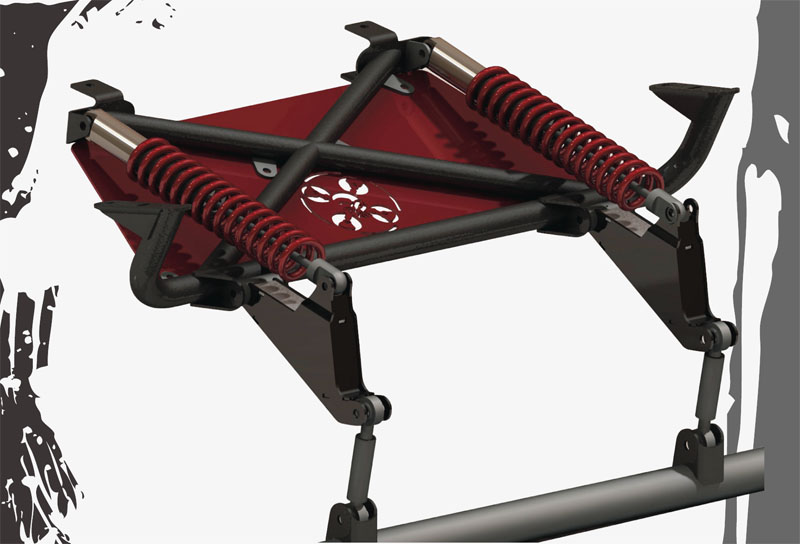
My springs will be pointing towards each other rather than parallel but the lever action will work in the same way.
Posted by: PeeGreen 914 Nov 21 2010, 01:41 PM
Dana, you make me sick. I love your work. Keep it going. I keep looking at the pictures I took when I was at your house and druel regularly.
Posted by: jd74914 Nov 21 2010, 03:32 PM
How do you guys think the handling would suffer if I went with the offset cantilever option? I think I am fine with the equivalent spring rate acting like a progressive spring adding around 7 pounds of extra spring force per inch of suspension compression, any opinions?
My gut reaction is that the progressive change is a non-issue. I'm assuming the springs are maybe 1.5 orders of magnitude stiffer than the progressive increase so it probably will not be very noticeable at all.
One suggestion though. You might want to look into adding a bearing at the bellcrank's pivot point. While the car weights and hence suspension forces are radically different, we found the stiction to be pretty [unacceptably] high on our FSAE car with only a bushing.
Posted by: plymouth37 Nov 21 2010, 05:56 PM
One suggestion though. You might want to look into adding a bearing at the bellcrank's pivot point. While the car weights and hence suspension forces are radically different, we found the stiction to be pretty [unacceptably] high on our FSAE car with only a bushing.
Good point, I had planned on using a bushing there but was wondering if it was going to be an issue.
Posted by: Bee Jay Nov 23 2010, 01:21 AM
I just spent two evenings reading all 33 pages. Absolutely amazing work. I'm inspired and motivated.
Bee Jay
Posted by: smontanaro Nov 23 2010, 05:07 AM
I just spent two evenings reading all 33 pages.
Don't be fooled. It is actually a clever ploy to soak up our time and keep us from working on or driving our cars. With the cumulative evenings people have spent reading this thread two or three complete cars could have been restored!
Posted by: plymouth37 Nov 23 2010, 10:27 PM
So I decided to go ahead with the design I posted earlier, I blew up my drawing to full size and made a template for the arms.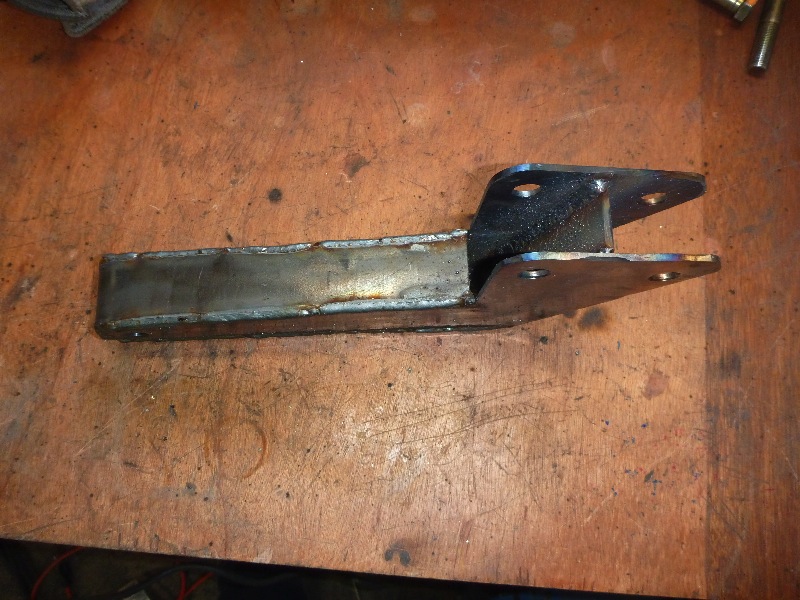
Today I built the suspension arms, I welded all of the seams from the inside, then welded and finished all of the seams on the outside. Now I have one bead of weld for structure and one for looks. I have a feeling I overbuilt the crap out of these but I would rather not risk it with suspension components. Even with the beefy arms this new suspension system weighs about a pound less per side than stock with a super low and inboard center of gravity.
I shot the arms with a coat of primer and will mock things up in the morning.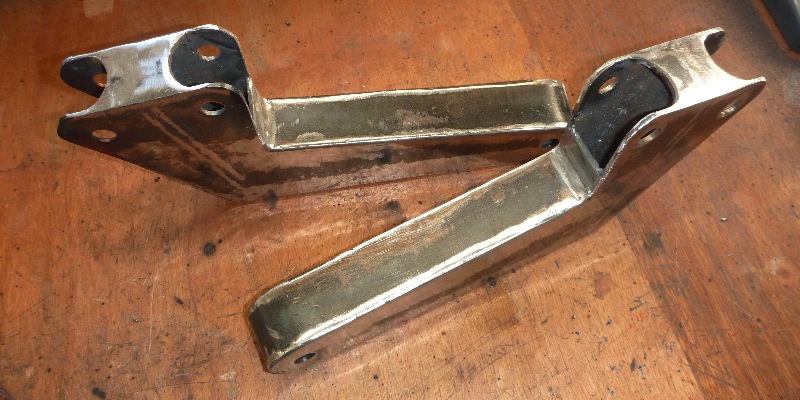
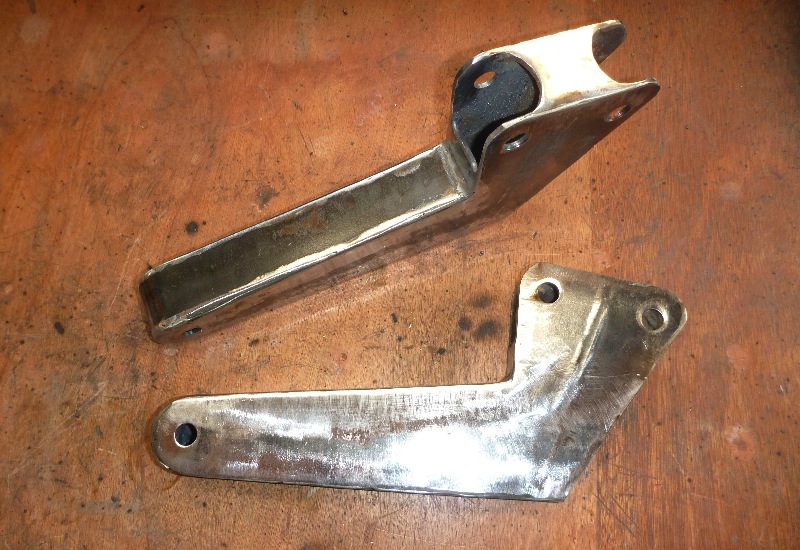
Posted by: Hontec Nov 24 2010, 01:47 AM
Lookin' good Can't wait for the mockup....
Posted by: plymouth37 Nov 24 2010, 09:56 AM
I did a loose mockup this morning, everything is just held on with zipties but you can get a pretty good idea of how this is supposed to work. I ran it through its entire range of movement and it looks like I am free of interference and binding so the next step is building mounts for everything then connecting this assembly to the trailing arm.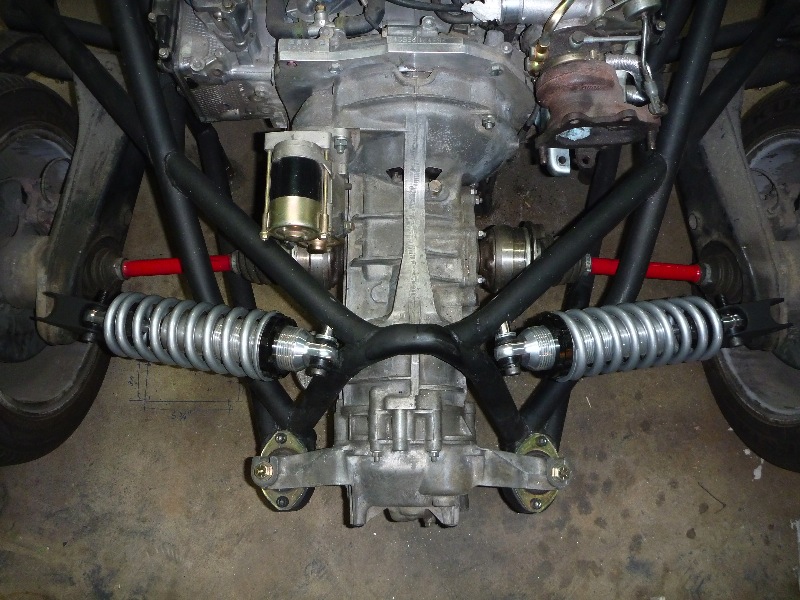
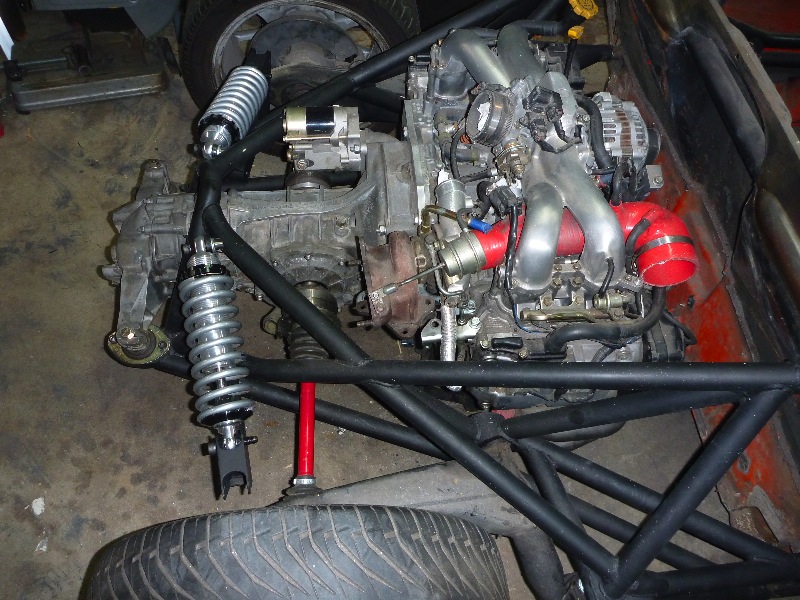
Posted by: plymouth37 Nov 24 2010, 09:56 AM

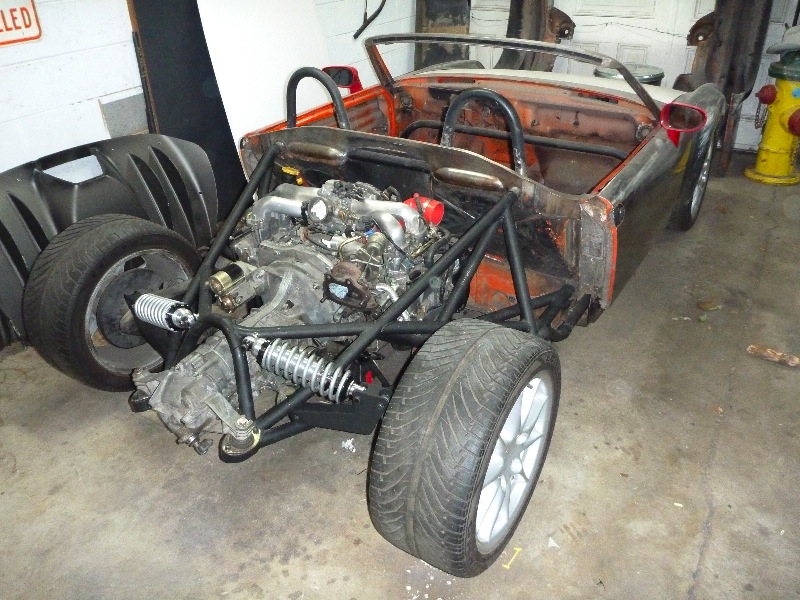
Posted by: Ferg Nov 24 2010, 10:14 AM
Looking Good!
Hey you going to the Rod show in Denver Friday?
Ferg
Posted by: plymouth37 Nov 24 2010, 10:36 AM
I am going to be in Wyoming until Sunday night so it looks like I will miss it, too bad, looks like it will be a good show!
Posted by: Hontec Nov 24 2010, 11:01 AM
Nice work, can't wait to see the rest of the construction!
Posted by: plymouth37 Nov 24 2010, 06:10 PM
One suggestion though. You might want to look into adding a bearing at the bellcrank's pivot point. While the car weights and hence suspension forces are radically different, we found the stiction to be pretty [unacceptably] high on our FSAE car with only a bushing.
I think I will go with a bearing rather than the bushing I was planning on using. I just drilled a 1/2 hole at the pivot point for now to get the arm mounts placed, what type of bearings did you guys use on the FSAE car and where did you source them?
Posted by: trojanhorsepower Nov 24 2010, 06:16 PM
OK I have a stupid question that I have wanted to ask you for a long time. Why does your car stay so shiny?? Did you clear coat it? I love this build and am just wondering since every thing I touch turns immediately to rust. Would you consider leaving it shiny with grinder marks.... I think it looks cool.
Eagerly awaiting more pictures
-Pete
Posted by: plymouth37 Nov 24 2010, 10:14 PM
OK I have a stupid question that I have wanted to ask you for a long time. Why does your car stay so shiny?? Did you clear coat it? I love this build and am just wondering since every thing I touch turns immediately to rust. Would you consider leaving it shiny with grinder marks.... I think it looks cool.
Eagerly awaiting more pictures
-Pete
The main factor is the fact that I live in Colorado and we have almost no humidity, any bare steel takes a good long time to gather even a dusting of surface rust. As far as the body goes I shot it with a layer of clear coat about 4 years ago and it has kept the rust at bay pretty well over the years. I did run the car for a couple years with just the clear coat, works pretty well when you can't afford a fancy paint job!
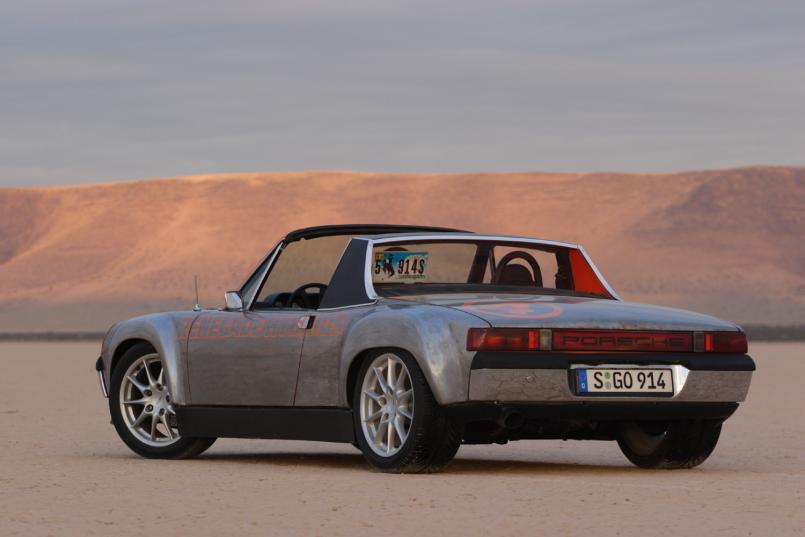
Posted by: McMark Nov 24 2010, 11:30 PM
I'm not sure I understand. Seems like that orientation will achieve very little shock compression, because the pivot point is not between the trailing arm attachment and the shock attachment.
What am I missing?
Attached image(s)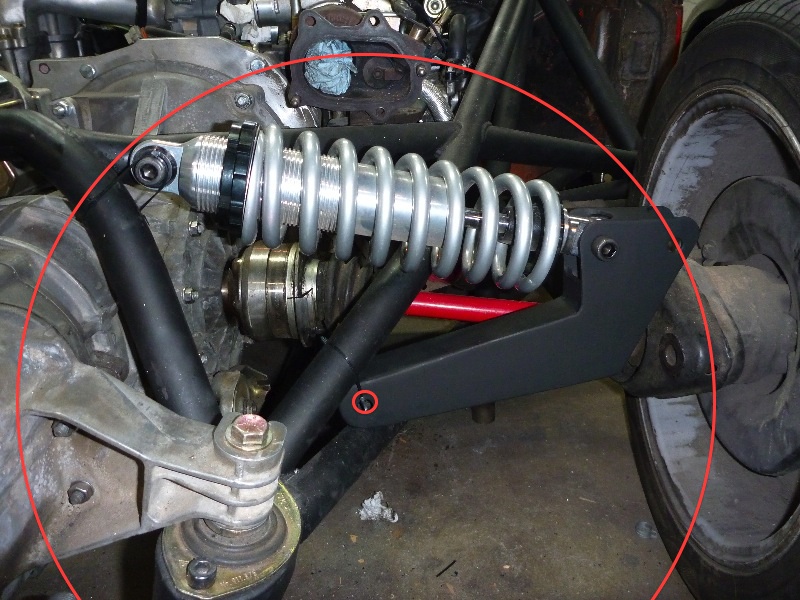
Posted by: plymouth37 Nov 25 2010, 01:07 AM
The trailing arm will push up on what is now the open bolt hole in the pivot arm. That upward motion will cause the trailing arm to rotate in a counter-clockwise direction (on the passenger side). The upward force of the trailing arm is counteracted by the vertical and horizontal forces of the shock, given the angle of the shock about 392 pounds of its force will be acting horizontally on a point that is 5" above the pivot point while around 75 pounds of the shock resistance acts vertically on a point 7.5" off of the pivot point. These leverage points are counteracted by the trailing arm that attaches at a point 10" off of the pivot point. Since the trailing arm has a mechanical advantage on the shock the 400lb/in in the shock gets reduced down to about 250lb/in at the trailing arm which is just about what I want. Not sure if that clears anything up, I won't know for sure exactly how this thing will react until I get everything done and jump around on it
Posted by: MDG Nov 25 2010, 06:24 AM
The trailing arm will push up on what is now the open bolt hole in the pivot arm. That upward motion will cause the trailing arm to rotate in a counter-clockwise direction (on the passenger side). The upward force of the trailing arm is counteracted by the vertical and horizontal forces of the shock, given the angle of the shock about 392 pounds of its force will be acting horizontally on a point that is 5" above the pivot point while around 75 pounds of the shock resistance acts vertically on a point 7.5" off of the pivot point. These leverage points are counteracted by the trailing arm that attaches at a point 10" off of the pivot point. Since the trailing arm has a mechanical advantage on the shock the 400lb/in in the shock gets reduced down to about 250lb/in at the trailing arm which is just about what I want. Not sure if that clears anything up, I won't know for sure exactly how this thing will react until I get everything done and jump around on it
Halfway through reading that I had to take a nap. I said it before, pages back - mad scientist at work here.
God I love this thread.
Posted by: plymouth37 Nov 25 2010, 09:26 AM
The trailing arm will push up on what is now the open bolt hole in the pivot arm. That upward motion will cause the trailing arm to rotate in a counter-clockwise direction (on the passenger side). The upward force of the trailing arm is counteracted by the vertical and horizontal forces of the shock, given the angle of the shock about 392 pounds of its force will be acting horizontally on a point that is 5" above the pivot point while around 75 pounds of the shock resistance acts vertically on a point 7.5" off of the pivot point. These leverage points are counteracted by the trailing arm that attaches at a point 10" off of the pivot point. Since the trailing arm has a mechanical advantage on the shock the 400lb/in in the shock gets reduced down to about 250lb/in at the trailing arm which is just about what I want. Not sure if that clears anything up, I won't know for sure exactly how this thing will react until I get everything done and jump around on it
Halfway through reading that I had to take a nap. I said it before, pages back - mad scientist at work here.
God I love this thread.
That was quite possibly one of the most boring things I have ever written.
The shape of the pivot arm is deceiving, the shock is given a lot more leverage than it looks like it should have.
And since the trailing arm has a mechanical advantage on the shock the spring needs to move less to counteract it. The spring will only have a 2-3 inch range of compression.
While I am on here: Have a Happy Thanksgiving Everybody!
Posted by: MDG Nov 25 2010, 10:03 AM
Halfway through reading that I had to take a nap. I said it before, pages back - mad scientist at work here.
God I love this thread.
That was quite possibly one of the most boring things I have ever written.
The shape of the pivot arm is deceiving, the shock is given a lot more leverage than it looks like it should have.
And since the trailing arm has a mechanical advantage on the shock the spring needs to move less to counteract it. The spring will only have a 2-3 inch range of compression.
While I am on here: Have a Happy Thanksgiving Everybody!
To be clear, Dana, my sudden case of narcolepsy had nothing to do with boredom. In fact, I found your explanation to be enlightening. The nap was to give my brain a rest before continuing.
Posted by: scotty b Nov 25 2010, 01:39 PM
The trailing arm will push up on what is now the open bolt hole in the pivot arm. That upward motion will cause the trailing arm to rotate in a counter-clockwise direction (on the passenger side). The upward force of the trailing arm is counteracted by the vertical and horizontal forces of the shock, given the angle of the shock about 392 pounds of its force will be acting horizontally on a point that is 5" above the pivot point while around 75 pounds of the shock resistance acts vertically on a point 7.5" off of the pivot point. These leverage points are counteracted by the trailing arm that attaches at a point 10" off of the pivot point. Since the trailing arm has a mechanical advantage on the shock the 400lb/in in the shock gets reduced down to about 250lb/in at the trailing arm which is just about what I want. Not sure if that clears anything up, I won't know for sure exactly how this thing will react until I get everything done and jump around on it
Halfway through reading that I had to take a nap. I said it before, pages back - mad scientist at work here.
God I love this thread.
A NAP ?? REALLY ? Half way through it I had to

Posted by: PeeGreen 914 Nov 25 2010, 01:41 PM
The trailing arm will push up on what is now the open bolt hole in the pivot arm. That upward motion will cause the trailing arm to rotate in a counter-clockwise direction (on the passenger side). The upward force of the trailing arm is counteracted by the vertical and horizontal forces of the shock, given the angle of the shock about 392 pounds of its force will be acting horizontally on a point that is 5" above the pivot point while around 75 pounds of the shock resistance acts vertically on a point 7.5" off of the pivot point. These leverage points are counteracted by the trailing arm that attaches at a point 10" off of the pivot point. Since the trailing arm has a mechanical advantage on the shock the 400lb/in in the shock gets reduced down to about 250lb/in at the trailing arm which is just about what I want. Not sure if that clears anything up, I won't know for sure exactly how this thing will react until I get everything done and jump around on it
Halfway through reading that I had to take a nap. I said it before, pages back - mad scientist at work here.
God I love this thread.
A NAP ?? REALLY ? Half way through it I had to
Posted by: McMark Nov 25 2010, 03:36 PM
Will the trailing arm connect to the lever arm via a rod? Or will it be a direct connection. Your explanation makes sense. It seems like a small range of motion, but you sound like you've done your math and I'm just armchair speculating. It's cool looking, regardless.
Posted by: rick 918-S Nov 25 2010, 04:01 PM
Be careful you don't build in a metronome effect with the vertical connecting rod from the trailing arm to the rocker. Could cause a weird vibration at speed. Just an arm chair observation.
Posted by: jd74914 Nov 25 2010, 05:50 PM
Cool. I like that shock placement.
One more observation: your new rocker is the perfect place to add attachment for a sway bar arm for fine tuning. Just think if it; you could have a blade arm with cabin stiffness adjusters...
Posted by: roadster fan Nov 25 2010, 05:57 PM
Hey Dana thanks for posting all the progress on your project. I love learning along the way and am fascinated by suspension design. I drew up your arm and shock into a simple CAD program as I was skeptical that you could compress that that shock 2.5"-3" with the geometry you designed in.
I discovered (and i will attempt to upload a pic of my drawing but have to convert it i think) that you can compress your shock and spring 2.5" with a vertical trailing arm motion of 4.25" which I believe is possible in a 914. But I noticed that the actuator rod between the trailing arm and the cantilever arm has to be 6.25" long. This is due to the cantiliver arm moving on an arc away from the trailing arm so the mounting hole on the cantilever arm gets further away as it moves vertically.
It is probably hard to visualize without my drawing but I think your design would work fine as long as the actuator rod is at least 6.25" long which means it probably would have to mount an 1" to 1.5" below the shock bolt hole on the trailing arm. Your drawing shows the actuator rod to be 5" long I think but that would try to pull the trailing arm inboard causing a binding issue. This is all a novices observations, I could be completely off my @$$ and confused, that has happened before
I love your project and cant wait for more pics of the progress,
Jim
Posted by: geniusanthony Nov 25 2010, 06:59 PM
39k views. keep it up Dana, great work.
Posted by: plymouth37 Nov 25 2010, 11:07 PM
Hey Dana thanks for posting all the progress on your project. I love learning along the way and am fascinated by suspension design. I drew up your arm and shock into a simple CAD program as I was skeptical that you could compress that that shock 2.5"-3" with the geometry you designed in.
I discovered (and i will attempt to upload a pic of my drawing but have to convert it i think) that you can compress your shock and spring 2.5" with a vertical trailing arm motion of 4.25" which I believe is possible in a 914. But I noticed that the actuator rod between the trailing arm and the cantilever arm has to be 6.25" long. This is due to the cantiliver arm moving on an arc away from the trailing arm so the mounting hole on the cantilever arm gets further away as it moves vertically.
It is probably hard to visualize without my drawing but I think your design would work fine as long as the actuator rod is at least 6.25" long which means it probably would have to mount an 1" to 1.5" below the shock bolt hole on the trailing arm. Your drawing shows the actuator rod to be 5" long I think but that would try to pull the trailing arm inboard causing a binding issue. This is all a novices observations, I could be completely off my @$$ and confused, that has happened before
I love your project and cant wait for more pics of the progress,
Jim
Thanks for drawing that up, I look forward to seeing it! Totally agree about a potential binding issue with the connecting rod, I went old skool and replicated each component from my diagram on trace paper last week and simulated its movement, the 5" rod does tweek out a good amount as the suspension reaches its outer limits of rotation. I was going to tack in the suspension mounts and then really dial in the position and length of the rod, thanks for the tip about the length, longer is definitely better, luckily the shocks and the connecting rod will be adjustable so I should be able to fine tune within reason once everything is in position and making a mount that adds a couple inches to the connecting rod should be pretty doable. Luckily since the motion of the connecting rod is fairly vertical I can make the connecting rod any length I need to without effecting the suspension geometry too much.
Posted by: plymouth37 Nov 25 2010, 11:09 PM
Will the trailing arm connect to the lever arm via a rod? Or will it be a direct connection. Your explanation makes sense. It seems like a small range of motion, but you sound like you've done your math and I'm just armchair speculating. It's cool looking, regardless.
It will be a heim joint connection to compensate for the various crazy directions the different parts of the suspension will be going.
Posted by: roadster fan Nov 26 2010, 01:50 PM
Well I slept on this, and like I suspected I was wrong
Attached below is a bitmap of the drawing as corrected this morning. Looks like a 5" actuator arm will work fine, and you would get the 2.5" compression with a vertical trailing arm movement of 4.22". Like I said I like learning along the way, and as I should have suspected YOU had it worked out right from the beginning
Here is the drawing:
Posted by: plymouth37 Nov 26 2010, 02:00 PM
Nice rendering! It is so much easier to understand this drawing than anything I have created, thanks for the help!
I may still need to make the connecting rod a little longer, as the suspension unloads the pivot arm kicks out over the trailing arm and there is a potential binding/contact issue between the trailing arm and the connecting rod there, still won't know for sure until I can tack in the mounts and run the suspension through its entire range of motion though.
Posted by: piedmont6 Dec 6 2010, 01:58 AM
......Got Milk?
Posted by: db9146 Dec 6 2010, 09:25 AM
Okay, I'm going to go ahead and stick my neck out.....
The trailing arms pivot from the front of the arms so any compression will tend to ultimately move the rear wheel forward given enough travel, correct? However, it looks like the planned mounting point for the horizontal shocks is going to be behind the wheel centerline. This makes it seems to me that there will be a twisting motion on the linkage and shocks.
Takes a lot more time to "conduct class" while doing the work rather than just forgetting about "schooling" all of us and completing the project, huh?
Posted by: stownsen914 Dec 6 2010, 10:44 AM
Really cool stuff. I actually am in the middle of redoing the suspension on my 914 track car, and am currently modeling my ideas using susprog, a suspension analyzer. It's extremely helpful to test out stuff that i otherwise would probably discover only after building the parts I haven't read your whole thread, but it might be worth trying something like that if you haven't already done so. Susprog also has an option to visualize your design while moving the suspension through it's full range of motion.
Edit -- modified post after I realized that your design already has a push rod. That part should be OK. Only other thing a lot of bending forces on the rocker. I would think the push rod would try to push the rocker forward and rearward (relative to front/rear of the car). Would a wider base help where it mounts to the chassis?
Scott
Posted by: plymouth37 Dec 6 2010, 03:54 PM
There is a potential for bending in the arms but I would think that since the entire cantilever component moves on a single plane and is connected to the trailing arm with a heim joint the chances of significant off axis movement occurring would be minimal. To counteract any twisty forces that do appear I had planned on making wide reinforced attachment points on the chassis and the arms have already been built with additional reinforcement points at that point.
Posted by: plymouth37 Dec 12 2010, 07:23 PM
I decided to take a break from the suspension to wrap up a couple little projects on the car.
A year or so ago I pieced up this intercooler system but since I was in an apartment couldn't weld it up. 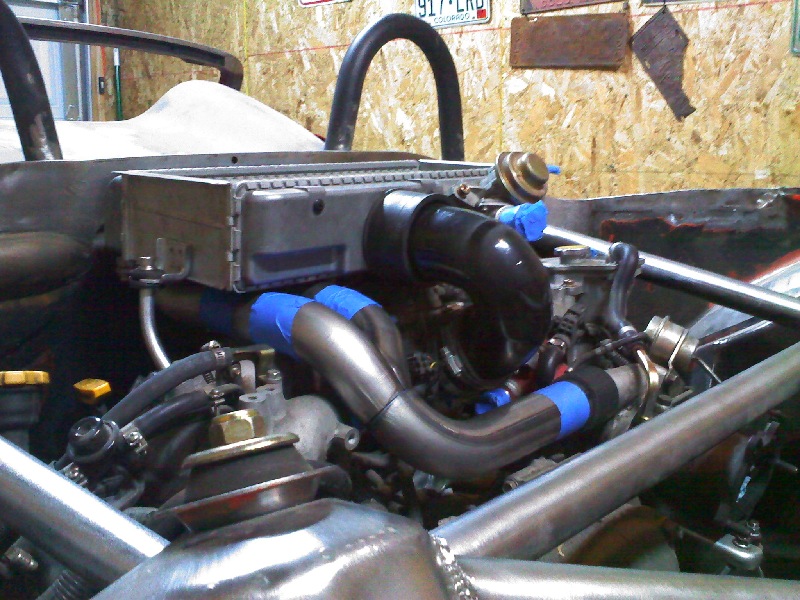
Now that I have my house I can play with welders all I want so I decided to weld up the intake system, I also welded in a bung for the boost gauge sender and a ground stud for the sender.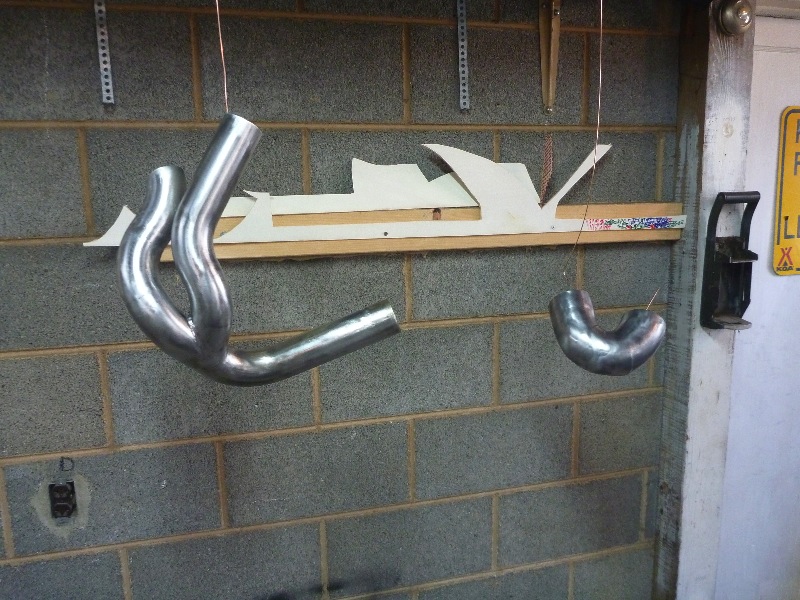
Posted by: plymouth37 Dec 12 2010, 07:24 PM
Then I sprayed the parts with high heat paint and hung them in front of my trusty Reznor heater to bake. 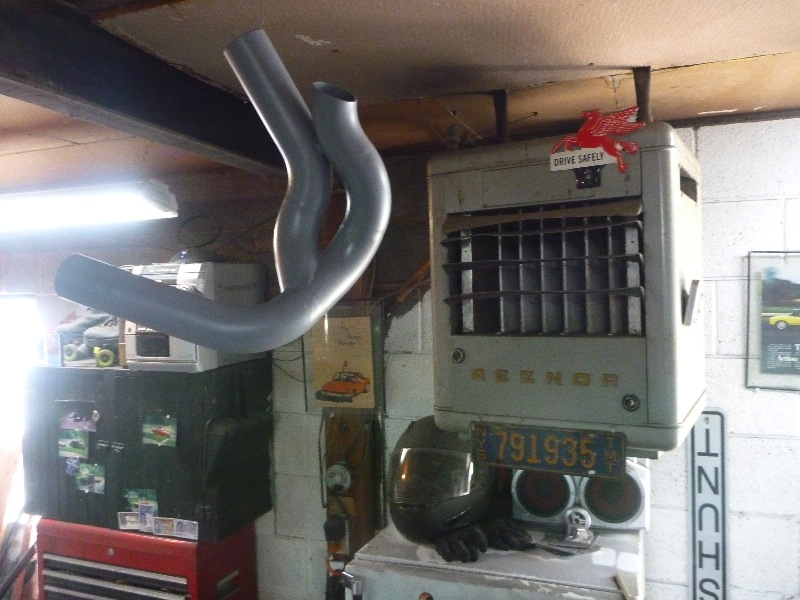
This is starting to look like progress!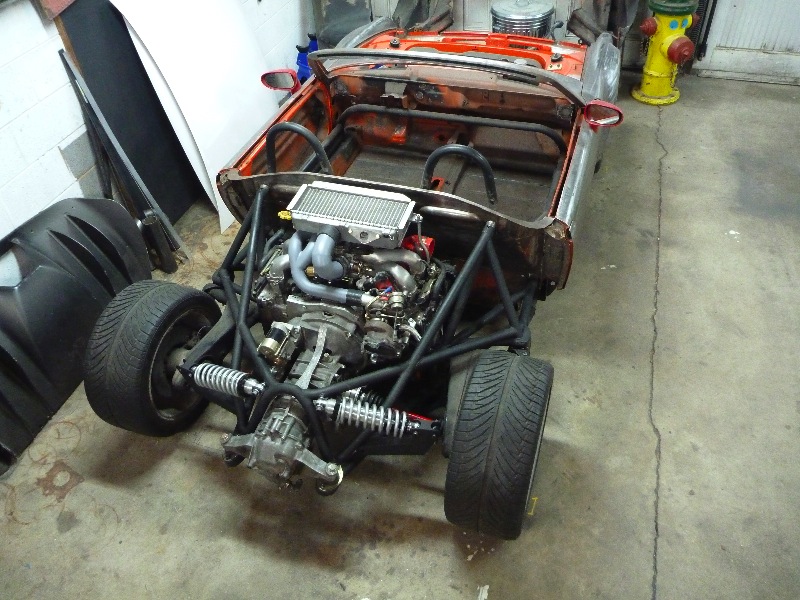
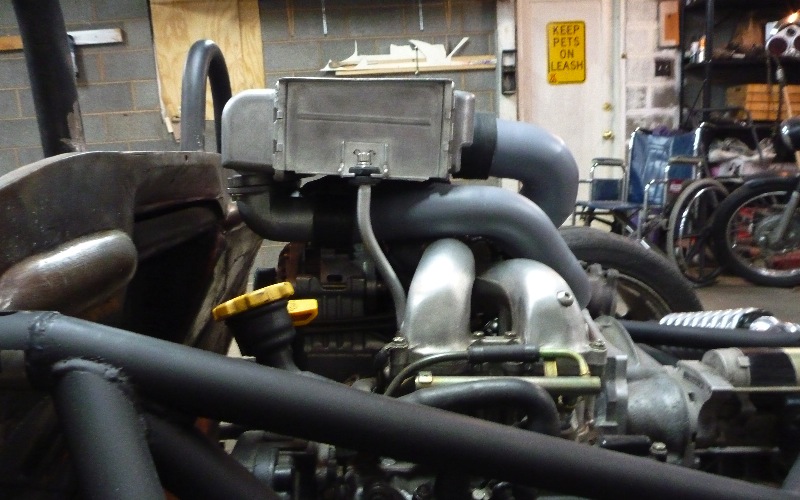
Posted by: plymouth37 Dec 12 2010, 07:24 PM
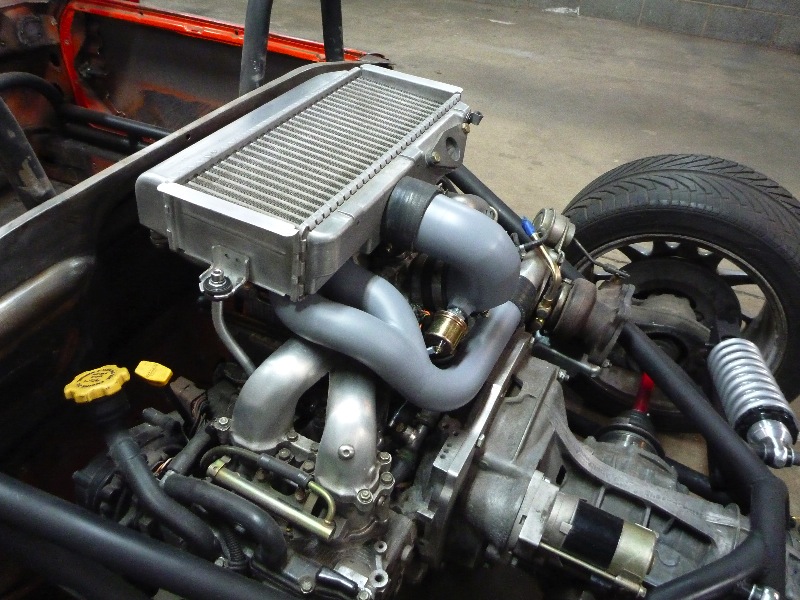
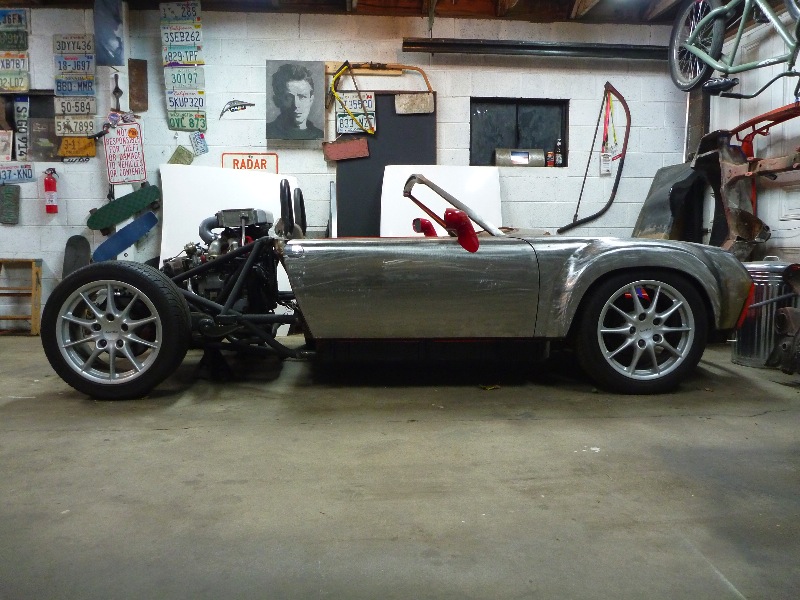
Posted by: Gint Dec 12 2010, 10:01 PM
Very nice!
Hey Dana... got a tig machine? Can you weld aluminum? My Audi has a crack in the oil pan.
Posted by: plymouth37 Dec 12 2010, 10:05 PM
I do have a tig but it is in storage up in Wyo, never been great at welding aluminum either, wish I was though.
Posted by: plymouth37 Dec 17 2010, 12:04 AM
I finally finished this semester yesterday so I decided to spend some of my new found freedom working on the car. I wanted to start nailing down details like exhaust but I had to get the engine in a fixed position before I made any more progress on the drivetrain. I fabbed up an engine mount cross member, this one is almost identical to the Renegade one I used to run on my car, just the ends are at a slightly different angle.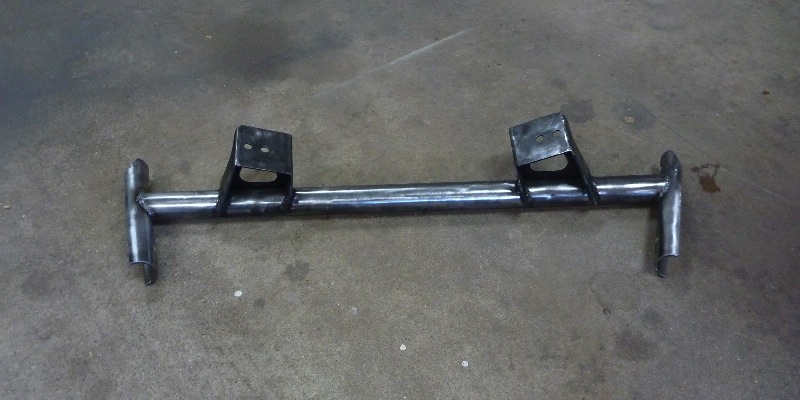
Here is an under side view of the engine mount setup.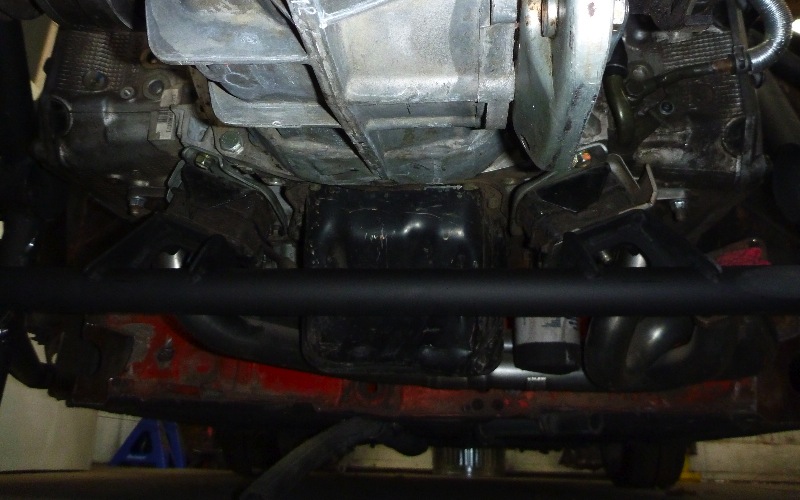
And a shot from the top, I am going to weld in threaded mounting holes into the chassis but everything is just hose clamped together until I can pick some up.
Posted by: Hontec Dec 17 2010, 03:20 AM
Lookin' good, as usual!!!
Posted by: piedmont6 Dec 17 2010, 12:06 PM
Dana,
I'm most impressed young Jedi...
Maybe I should just rack, stack and tow my 2 out to Colorado for skiing.
Hmmm, maybe drop by for a cup of cocoa, 3-weeks of body and chassis work and take in the big skies
2nd thought - I'll just freeze in the deep south and dream a little dream...
-- Dave
Aka Wingnut
Posted by: PeeGreen 914 Dec 17 2010, 05:44 PM
Nice Dana. Can't wait to see what you are able to do over the break
Posted by: 914Sixer Dec 18 2010, 07:31 AM
Really bad to the bone !!!!! Keep up the excellent work.
Posted by: nsr-jamie Dec 18 2010, 09:49 AM
Excellent!! Always glad to see updates in this thread, its one of my favorites. Thanks!!
Posted by: plymouth37 Dec 18 2010, 01:06 PM
I had an hour or so to work this morning and pieced together an f-ing huge exhaust. I wanted to use oval tubing but since the exhaust had to follow a kind of complex path I decided to fabricate it out of 3" round tubing with a 1" spacer in the middle, the equivalent area is about that of 3.5" round tubing. Once I have a little more time I will weld it up, add an O2 sensor bung, and finish it smooth.
I think this should flow pretty well . I will run this portion of the exhaust when I test the bare chassis, then eventually add on a full (but still muffler-less) exhaust once the body is on.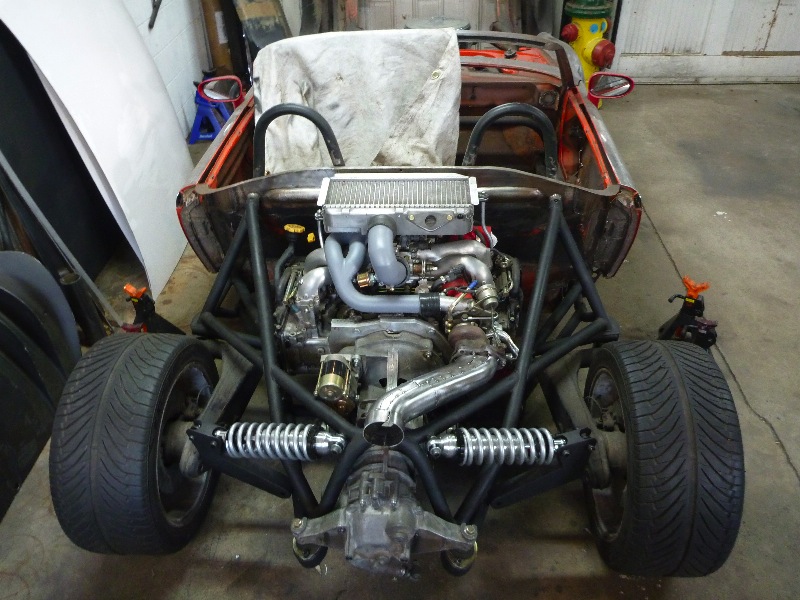
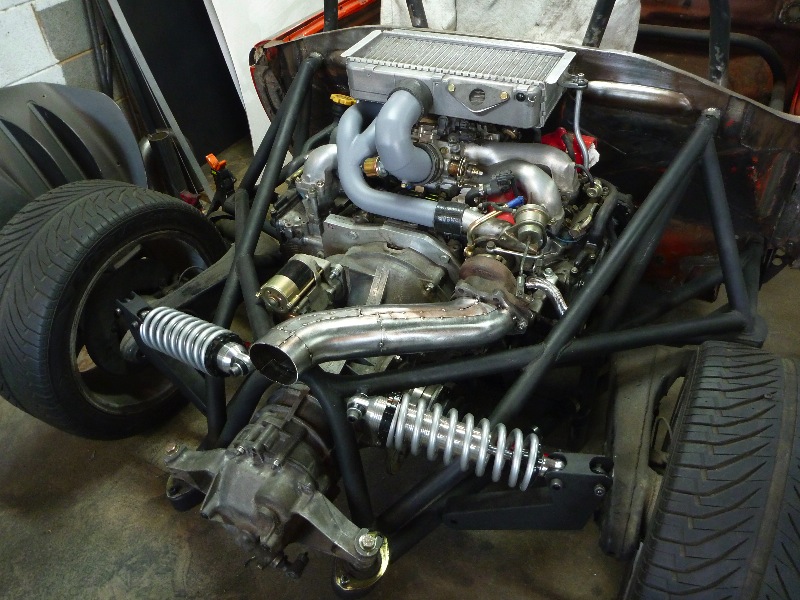
Posted by: KELTY360 Dec 18 2010, 01:40 PM
I think this should flow pretty well
. I will run this portion of the exhaust when I test the bare chassis, then eventually add on a full (but still muffler-less) exhaust once the body is on.An hour or so? You make me sick Dana, I haven't accomplished that much all year.
The Anklebiter just gets better....and better....and better...and better...and.......................
Posted by: plymouth37 Dec 18 2010, 01:43 PM
Thanks! I used to build headers for Renegade so fitting tubing goes pretty quick for me, I can't wait to hear how this sounds, the turbo is going to scream!
Posted by: KELTY360 Dec 18 2010, 01:48 PM
Thanks! I used to build headers for Renegade so fitting tubing goes pretty quick for me, I can't wait to hear how this sounds, the turbo is going to scream!
Looking forward to seeing how you'll set up the cooling system. Is that next?
Posted by: plymouth37 Dec 18 2010, 08:08 PM
Looking forward to seeing how you'll set up the cooling system. Is that next?
I am going to wrap up the rear end first, amputate the back of the tub, then tackle the front end with the cooling system. I am going with my Renegade radiator mounted in the front of the car with a custom shroud.
Posted by: KELTY360 Dec 18 2010, 10:58 PM
Looking forward to seeing how you'll set up the cooling system. Is that next?
I am going to wrap up the rear end first, amputate the back of the tub, then tackle the front end with the cooling system. I am going with my Renegade radiator mounted in the front of the car with a custom shroud.
Does that mean we get to see the diffuser in place soon?
Posted by: iamchappy Dec 19 2010, 12:47 AM
Sick, talk about zero restriction.......
Posted by: TC 914-8 Dec 19 2010, 09:18 PM
Hi Dana, I've been following your thread for quite a while (lurking) to say the least. Whats the chance of you making it to the WCR in June ?
At the rate you are going I think its possible..
Everyone needs to chime in
Posted by: plymouth37 Dec 19 2010, 11:57 PM
Hi Dana, I've been following your thread for quite a while (lurking) to say the least. Whats the chance of you making it to the WCR in June ?
At the rate you are going I think its possible..
Everyone needs to chime in
There is no way the body will be done but I am not opposed to driving a bare chassis!
I may show up looking like this:
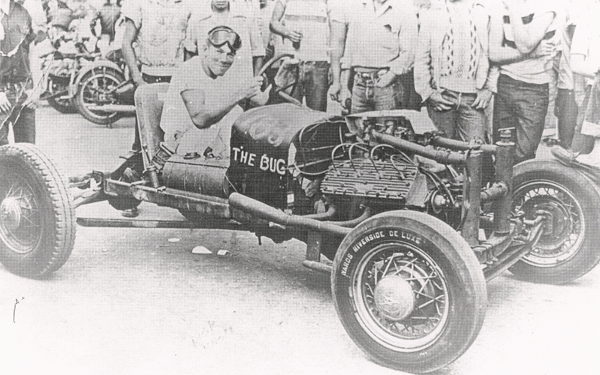
Posted by: MDG Dec 20 2010, 07:11 AM
I may show up looking like this:
That would actually be pretty cool. Not sure about about a flathead for your car though.
Posted by: plymouth37 Dec 20 2010, 07:22 PM
I finished the exhaust today. And here is a little diffuser action for you Kelty .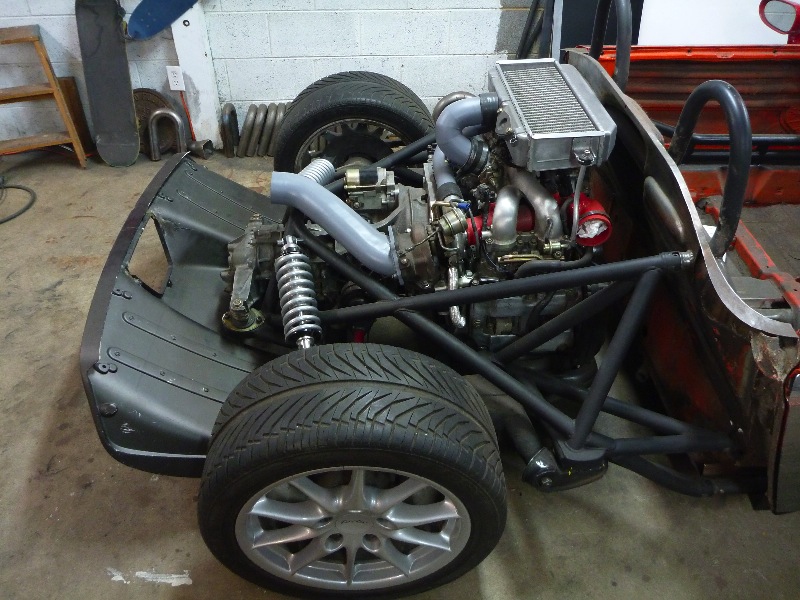
Posted by: plymouth37 Dec 20 2010, 07:23 PM
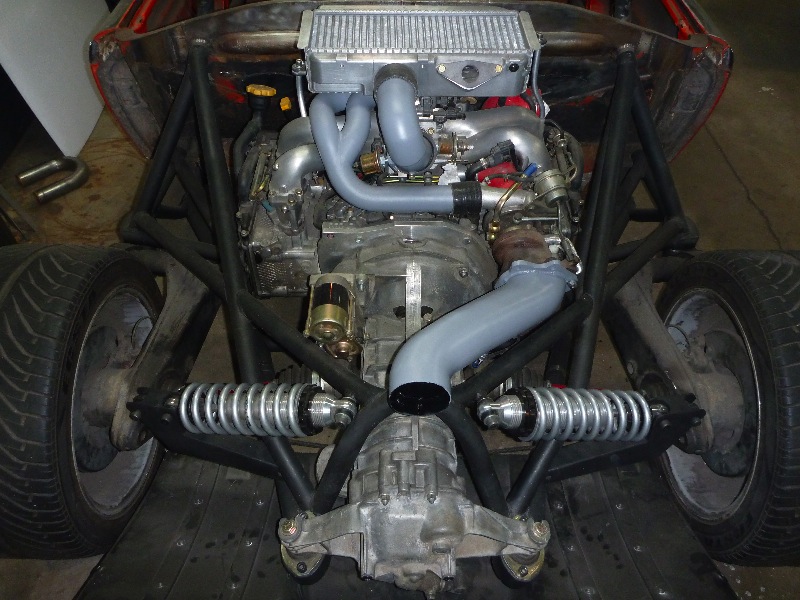
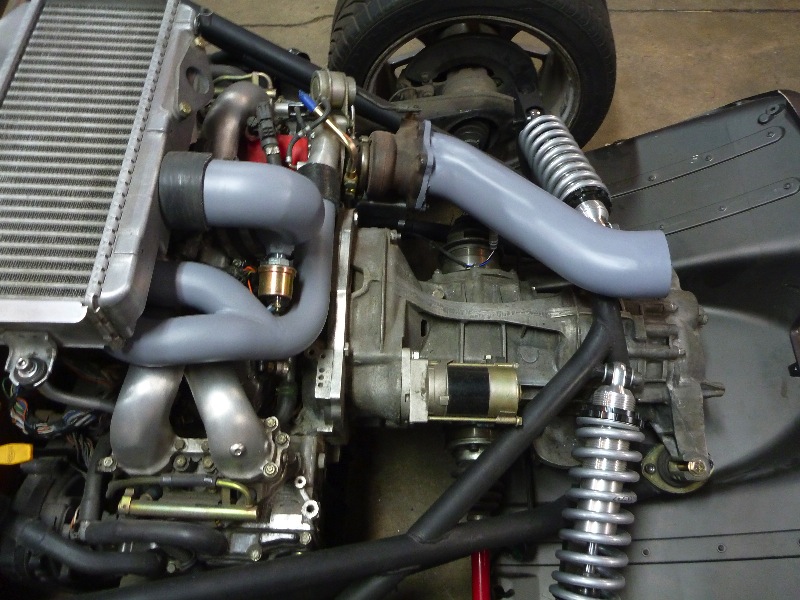
Posted by: KELTY360 Dec 20 2010, 11:41 PM
I finished the exhaust today. And here is a little diffuser action for you Kelty
.Ohhh, you're such a tease.
Happy Holidays Dana......now get back to work!
Posted by: turboman808 Dec 21 2010, 01:53 PM
I'm just waiting for the day you get it all finished then get bored or have a kid. Then I will buy it off of you. Just make sure it works good first.

Posted by: plymouth37 Dec 21 2010, 10:38 PM
I'm just waiting for the day you get it all finished then get bored or have a kid. Then I will buy it off of you. Just make sure it works good first.
If I ever get bored with this I am dropping in a Turbocharged Subie H6 engine backed up by a subie tranny, Perrin squeezed 600 hp out of one they dropped in an STI! And I have plenty of room for an extra pair of cylinders

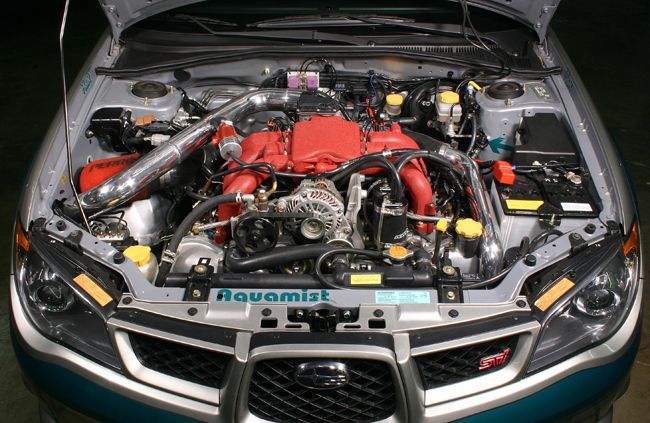
Posted by: plymouth37 Dec 27 2010, 01:51 PM
I got the last piece I needed for my exhaust system for Christmas, a stainless DC Sports up pipe to match the stainless header I have from them.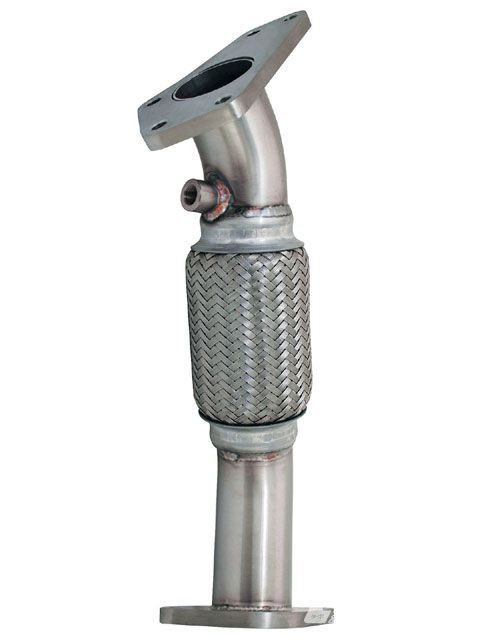
I managed to pull 4 out of the 5 studs from my renegade up pipe with out damaging them. Unfortunately one got a little galled while I was pulling it and cost $8 to replace!
I am glad I only had to buy one!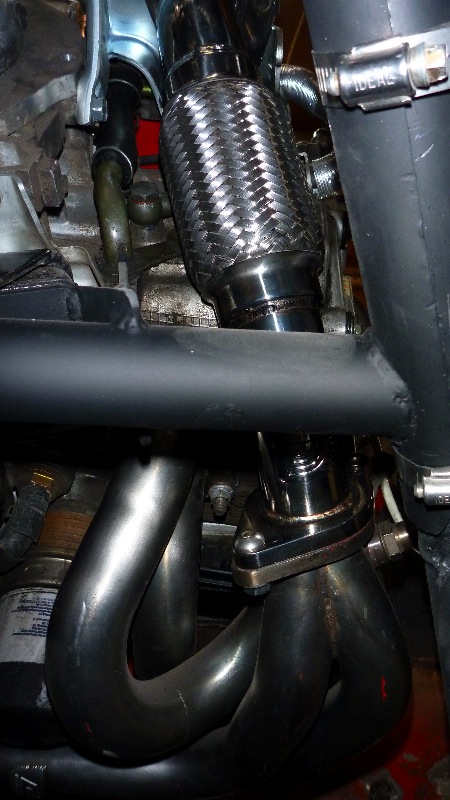
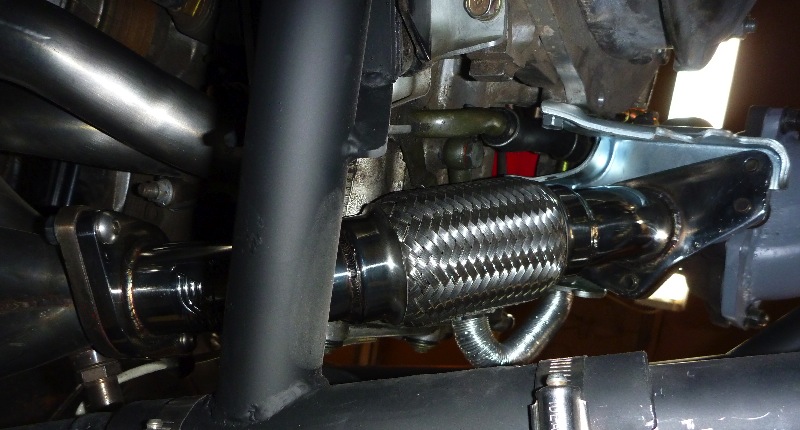
I am planning a couple big work days this week so stay tuned!
Posted by: charliew Dec 27 2010, 02:27 PM
nickle high temp neversieze helps with stainless and aluminum and steel exhaust bolts and studs when you need to take them apart.
Posted by: plymouth37 Dec 27 2010, 02:41 PM
nickle high temp neversieze helps with stainless and aluminum and steel exhaust bolts and studs when you need to take them apart.
Good tip! The factory studs sure were in there good, had to drench them in PB blaster, double nut them, and use many big tools and swearing to get them free, it is a miracle I only damaged one of them!
Posted by: PeeGreen 914 Dec 27 2010, 03:12 PM
I will be watching I love seeing new posts to this thread.
Posted by: markb Dec 27 2010, 03:27 PM
I will be watching
I love seeing new posts to this thread.
Posted by: plymouth37 Dec 28 2010, 05:47 PM
I only got in 3 or 4 hours of work today.
I welded up the blow off return tube and welded in the cantilever arm mounts.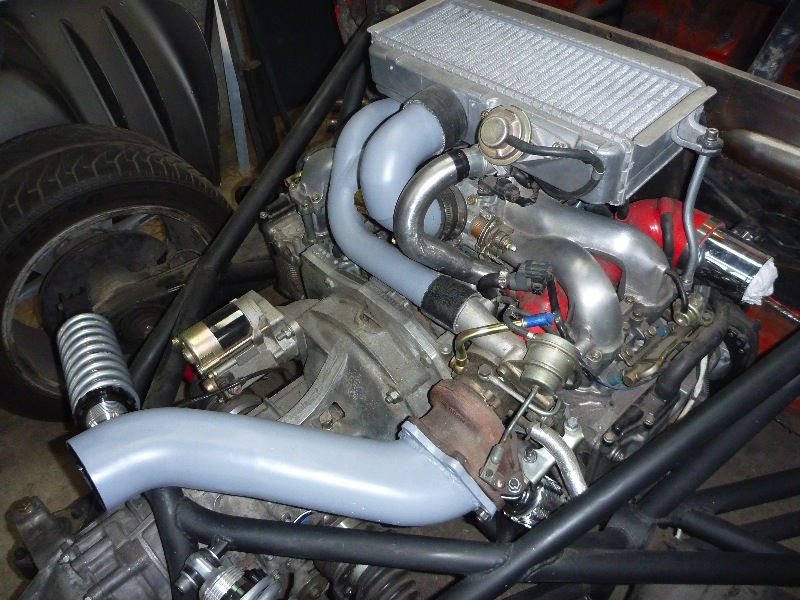
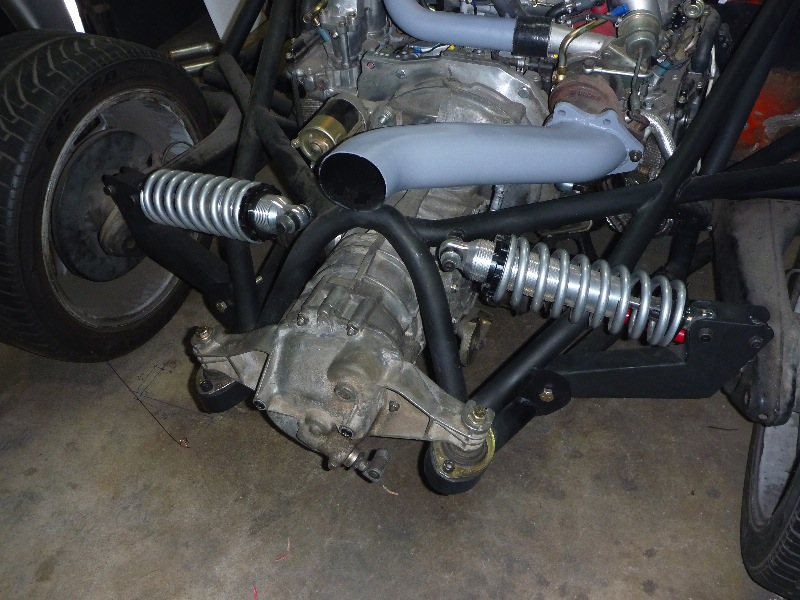
Posted by: plymouth37 Dec 28 2010, 05:50 PM
I also built the grounding harness for the boost and coolant temp sensors.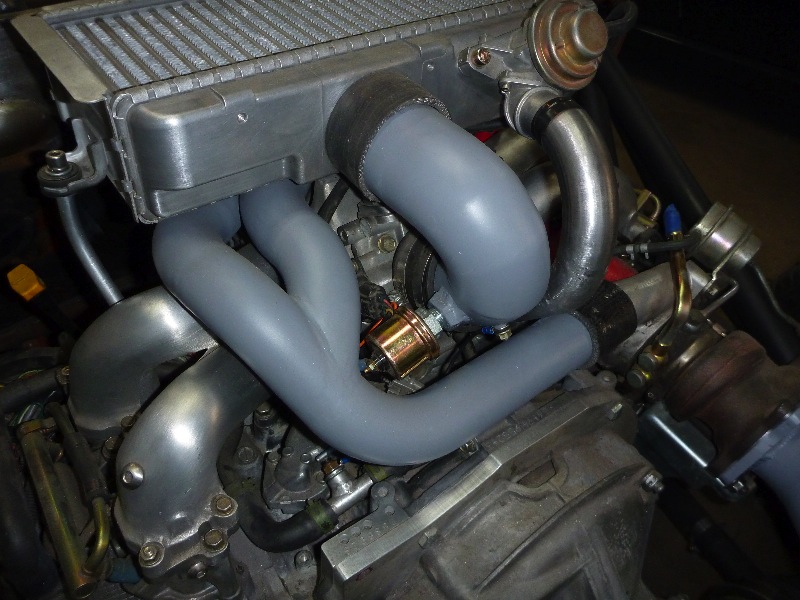
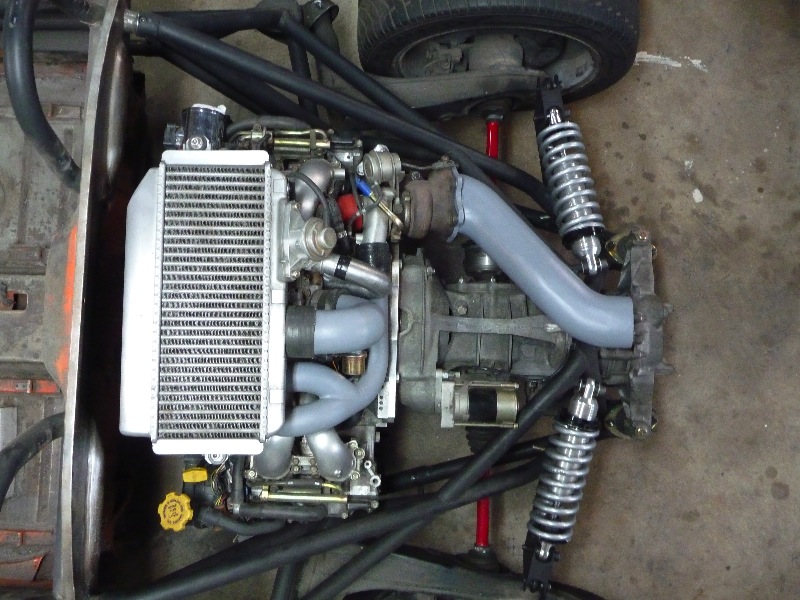
Posted by: pktzygt Dec 28 2010, 05:58 PM
I'm just waiting for the day you get it all finished then get bored or have a kid. Then I will buy it off of you. Just make sure it works good first.
If I ever get bored with this I am dropping in a Turbocharged Subie H6 engine backed up by a subie tranny, Perrin squeezed 600 hp out of one they dropped in an STI! And I have plenty of room for an extra pair of cylinders
If you haven't already, you should go peek at what outfrontmotorsports does with those things. They are pretty neat looking sans emissions equipment and all polished up.
Posted by: RJMII Dec 29 2010, 01:22 AM
The 3.0 is only 1.5 inches longer than the 2.5. Just sayin..
Nice work for only 4 hours, BTW.
Posted by: SGB Dec 30 2010, 10:28 AM
This is the ultimate go kart.
Driving it will be a blast.
Posted by: AMG Dec 30 2010, 03:53 PM
Plymouth, where did you get the adapter to bolt that engine to that trans? What trans did you use?
Posted by: plymouth37 Dec 30 2010, 09:21 PM
Plymouth, where did you get the adapter to bolt that engine to that trans? What trans did you use?
The adapter is from http://www.kennedyeng.com/, the box is the stock 914 with stock ratios. You have to be careful with first but with as light as the car is, and the torque curve of the subie engine, I feel pretty confident running it.
Posted by: kg6dxn Dec 30 2010, 11:05 PM
What clutch package are you running? Awesome build!
Posted by: plymouth37 Dec 31 2010, 08:52 PM
What clutch package are you running? Awesome build!
Kennedy stage 2 pressure plate and a kennedy 9-inch Kevlar clutch disk. I am switching to a different clutch though, I was never really happy with its performance during the couple years I drove the car with subie power.
Posted by: carreraguy Dec 31 2010, 11:37 PM
Lookin' good Dana - can't wait to see the final product!
I can vouch for your great car building skills - I get a lot of props on the work you did on my 914AROO when you were at Renegade!
Later,
Posted by: Joe Sharp Jan 1 2011, 08:26 AM
Lookin' good Dana - can't wait to see the final product!
I can vouch for your great car building skills - I get a lot of props on the work you did on my 914AROO when you were at Renegade!
Later,
Love your avatar Doc....
Posted by: plymouth37 Jan 5 2011, 06:44 PM
I finally wrapped up the rear suspension. I built all of the linkage so it was a bolt in, leaving the trailing arm unmolested. I still need to buy a couple bolts and bushings but this is pretty much it. I aligned everything and ran it through it's range of movement, everything looks and feels good as far as I can tell, the real test will come when I get it on the road.
Sure is nice to get it back on its wheels!
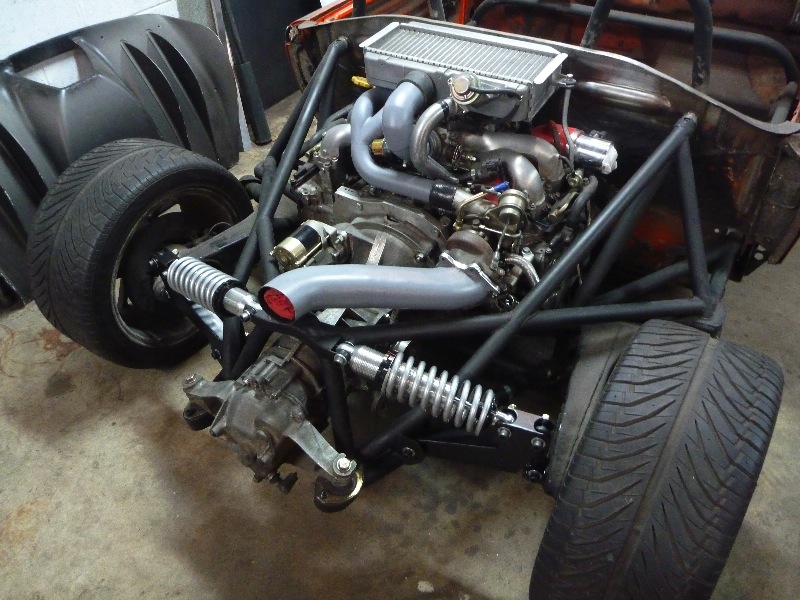
Posted by: plymouth37 Jan 5 2011, 06:45 PM
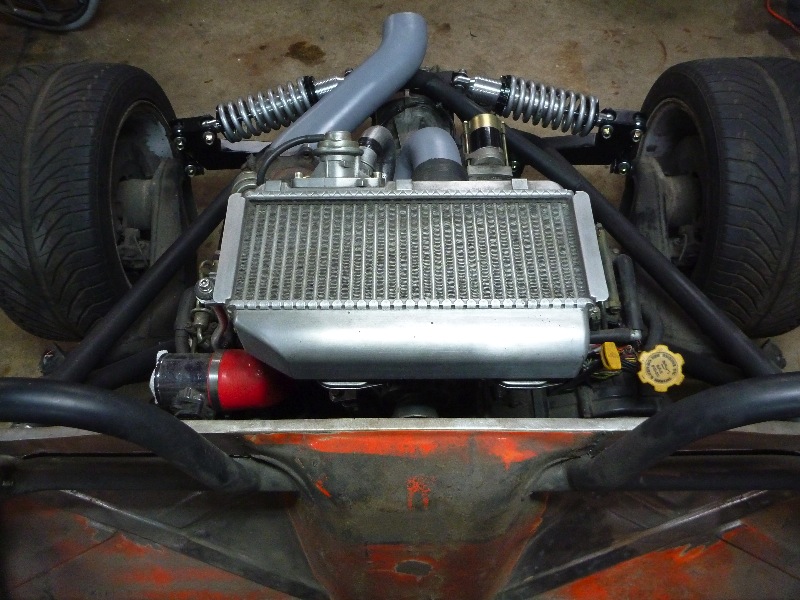
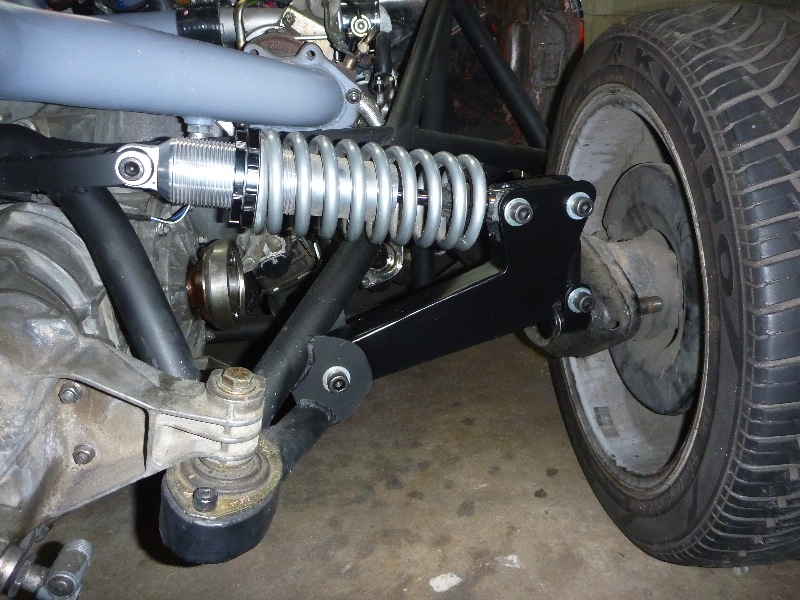
Posted by: aircooledtechguy Jan 5 2011, 07:07 PM
Stunningly inspiring work!!! Beyond words
Posted by: Krieger Jan 5 2011, 07:24 PM
So how much suspension travel do you have in the rear? I know some bomb thrower in a previous post said that the up down motion of the arm would bind or something like that with the angle of the shock motion.
Posted by: plymouth37 Jan 5 2011, 07:38 PM
By removing the springs and jacking the car from the bump stops to full strut extension I get 7.5" of bind free travel, the suspension runs out of travel well before the linkage gets a chance to bind.
Posted by: BKLA Jan 5 2011, 08:38 PM
Looking at this rear assembly, just for poops and giggles, seems like you could do a "kit" rear assembly that "attaches" to rollcage points in the tub.
looks like a V8 or other engine option might fit....Hmmm
You may have found another "side" business from this build, Dana! Ill bet Britain and others might be interested in a rear half kit that is assembled and ready to install!
Great job!!!
Posted by: Krieger Jan 5 2011, 08:51 PM
Nice! I will be availlable to drive and sort out the bugs when your ready.
Posted by: plymouth37 Jan 5 2011, 09:30 PM
Nice! I will be available to drive and sort out the bugs when your ready.
Thank you for your generosity!
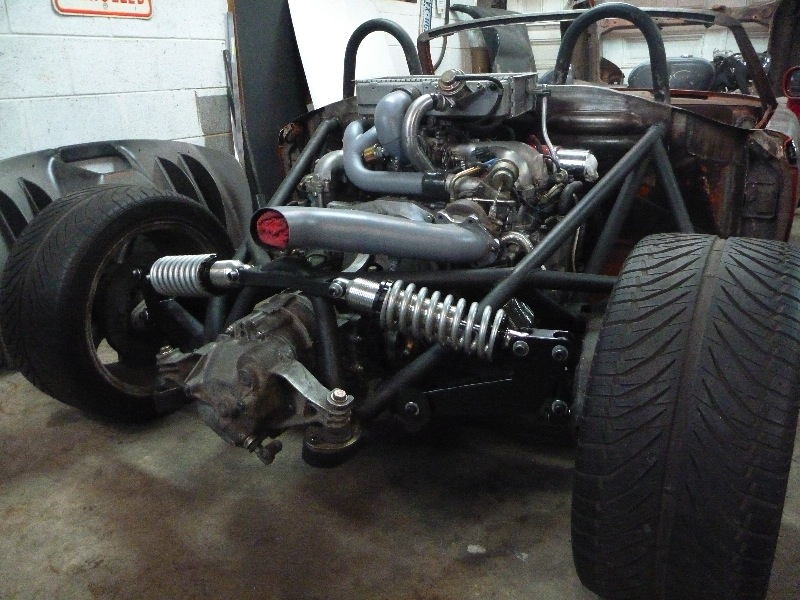
Posted by: scotty b Jan 5 2011, 10:19 PM
What a Rube Goldberg setup
Stunning as usual
Posted by: KELTY360 Jan 5 2011, 10:34 PM
What a Rube Goldberg setup
It's like he's making it up as he goes.
"
maybe I should cut it in half and make a tube frame..... i could save a lot of space by dampening the suspension laterally..... I've got a couple of minutes, maybe I should bend up an oval exhaust..... this needs Ferrari parts"Like a trapeze artist working without a net. Wonder if he dreams in technicolor?
![yellowsleep[1].gif](style_emoticons/default/yellowsleep[1].gif)

Posted by: scotty b Jan 5 2011, 10:37 PM
[quote name='KELTY360' date='Jan 5 2011, 08:34 PM' post='1414152'] --><div class='quotetop'>QUOTE(scotty b @ Jan 5 2011, 08:19 PM) </div><div class='quotemain'><!--quotec-->
What a Rube Goldberg setup
[/quote]
It's like he's making it up as he goes.
" maybe I should cut it in half and make a tube frame..... i could save a lot of space by dampening the suspension laterally..... I've got a couple of minutes, maybe I should bend up an oval exhaust..... this needs Ferrari parts"
Like a trapeze artist working without a net. Wonder if he dreams in technicolor?
[/quote]
Then there is the fibreglass. Don't get me going on that crap. Is he building a car or a boat ??? Oh I know it's a Corvette..... At least we know he isn't buying anything from AA for this car
Posted by: KELTY360 Jan 5 2011, 10:43 PM
[quote name='scotty b' date='Jan 5 2011, 08:37 PM' post='1414154']
[quote name='KELTY360' date='Jan 5 2011, 08:34 PM' post='1414152']--><div class='quotetop'>QUOTE(scotty b @ Jan 5 2011, 08:19 PM) </div><div class='quotemain'><!--quotec-->
What a Rube Goldberg setup
[/quote]
It's like he's making it up as he goes.
" maybe I should cut it in half and make a tube frame..... i could save a lot of space by dampening the suspension laterally..... I've got a couple of minutes, maybe I should bend up an oval exhaust..... this needs Ferrari parts"
Like a trapeze artist working without a net. Wonder if he dreams in technicolor?
[/quote]
Then there is the fibreglass. Don't get me going on that crap. Is he building a car or a boat ??? Oh I know it's a Corvette..... At least we know he isn't buying anything from AA for this car
[/quote]
Well, he might need bumper tops.
Posted by: plymouth37 Jan 5 2011, 10:58 PM
It's funny 'cause it's true...
Rube Goldberg indeed, it might not be functional but at least it's entertaining!
Posted by: RJMII Jan 5 2011, 11:23 PM
Dana, why does your exhaust terminate forward of the diffuser?
Posted by: buhs914 Jan 6 2011, 09:41 AM
I apologize if this has been asked before, but I noticed your tranny mounts are upside-down in relation to how they are normally on a 914. Would that cause any issues for the mounts themselves since they are being "pushed on" instead of being pulled? Just curious...
Posted by: RJMII Jan 6 2011, 09:52 AM
The forces are still going in the same direction, and the stopping points are in the same places on the transmission. The tube frame is now doing the job that the bolts/nuts would have been doing in the stock configuration. My guess would be 'no'.
Posted by: plymouth37 Jan 6 2011, 09:59 AM
Dana, why does your exhaust terminate forward of the diffuser?
I am building the car in 3 stages:
The first stage is just a drivable bare chassis, I will dyno the chassis and dial in the suspension.
The second stage will see the under body aero work done, this is when the diffuser will be mounted and the exhaust completed.
Third stage is bodywork.
I apologize if this has been asked before, but I noticed your tranny mounts are upside-down in relation to how they are normally on a 914. Would that cause any issues for the mounts themselves since they are being "pushed on" instead of being pulled? Just curious...
Since they are in the proper orientation with a reasonable load I am guessing that they will be fine. Like Kelty said building this thing is like a trapeze artist working without a net, I am going to have to thoroughly test the chassis to really see what works and what doesn't.
Posted by: bfrymire Jan 6 2011, 01:59 PM
Great work. Love it.
Do have a minor question, with the exhaust as it is, anything that falls into the exhaust pipe will it not end up inside the turbo? (Water, nuts bolts, hamsters...) Am I missing something?
Posted by: plymouth37 Jan 6 2011, 02:38 PM
Great work. Love it.
Do have a minor question, with the exhaust as it is, anything that falls into the exhaust pipe will it not end up inside the turbo? (Water, nuts bolts, hamsters...) Am I missing something?
It is possible but the car will see very limited use with the exhaust like this, if feral hamsters become a problem I can throw a screen in there once the chassis gets closer to being drivable. I am just piecing components together for now, still a long way to go before it sees the road. The reason for the stubby exhaust is that I honestly don't know where the rest of it will go until the diffuser and maybe even the body is in place, I am just making this up as I go.
Posted by: ChrisNPDrider Jan 6 2011, 03:28 PM
Awesome build. And since you got all of us in the peanut gallery at 914world watching, you are never really without a net
Interested in seeing the rear suspension with axles in there. Looks like the axles go either behind or inside the black squared-off piece?
Also super interested in a rear diffuser for the 914...
That exhaust would be just fine popping up out the top like a stinger on a Baja Bug! I love that look!
Thanks for sharing all the great photos and posts
Posted by: jsayre914 Jan 6 2011, 04:26 PM
I M N awe. Definitely one of the best threads EVER on this site
AGREE!!
Posted by: plymouth37 Jan 8 2011, 12:12 AM
I built the speed sensor bracket today, installed the axles, and painted the intercooler tubing and exhaust.
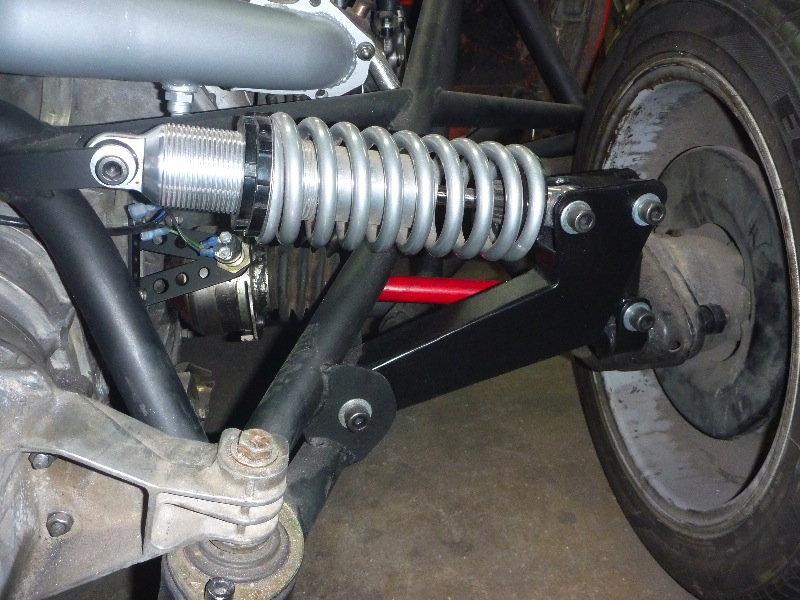
Posted by: plymouth37 Jan 8 2011, 12:12 AM
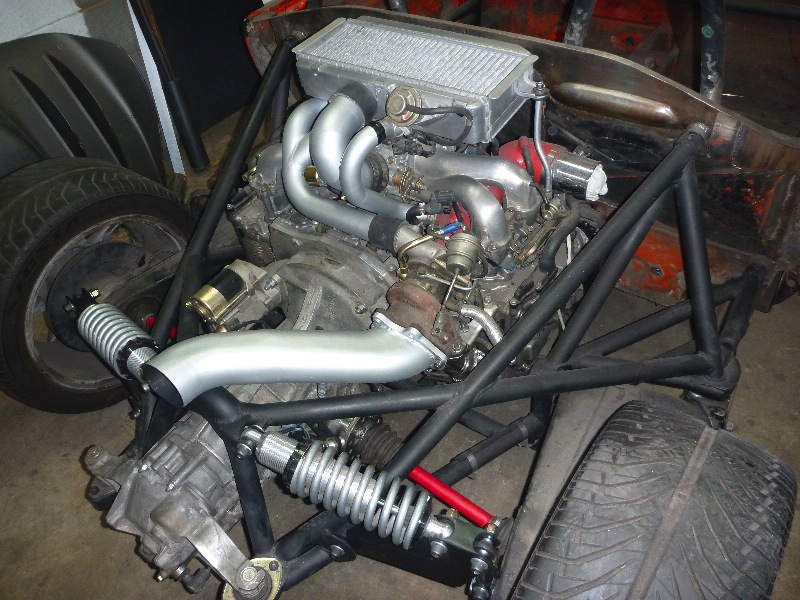
Check out inside the exhaust in this pic, you can see the O2 sensor and all the way back to the wastegate, this should flow pretty well!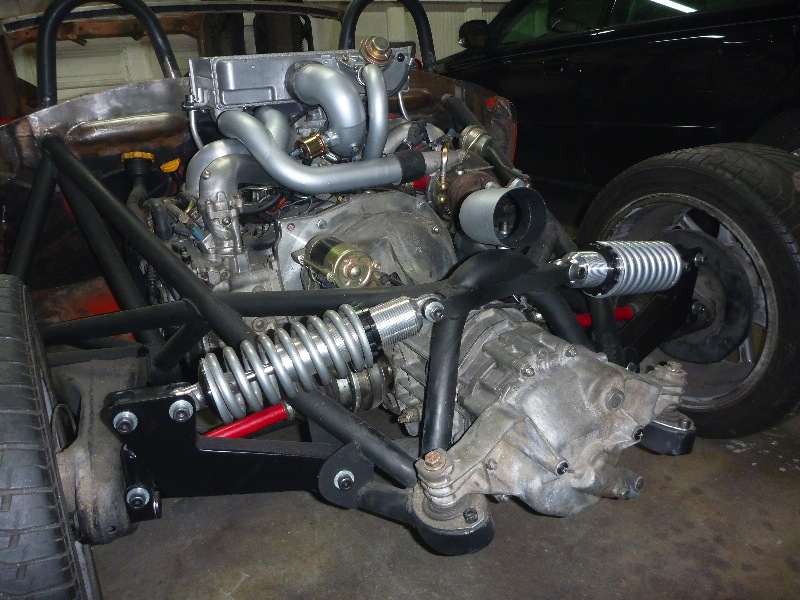
Posted by: KELTY360 Jan 8 2011, 12:18 AM
Looking at that bracket makes me wonder how your weight saving tally is going. Do you have a target weight?
Posted by: plymouth37 Jan 8 2011, 12:26 AM
Right now the weight savings are somewhere around 525 pounds give or take. If it ends up around 1800 pounds when it is completely done I would be happy, could end up much lighter though.
Posted by: Britain Smith Jan 8 2011, 03:33 AM
What are you using for a speed sensor?
I got a Hall Effect Sensor from Small Car Performance for mine, but I haven't installed it yet.
-Britain
Posted by: Hontec Jan 8 2011, 03:57 AM
Superb Dana!!!! Excellent work.... can't wait to see how you are going to build the body..
Posted by: MDG Jan 8 2011, 08:35 AM
I'm pretty sure when Dana gets an idea, right before he executes it, he goes "BWAHAHAHAaaaaaa . . ."
Too cool for words.
Posted by: plymouth37 Jan 8 2011, 10:35 AM
What are you using for a speed sensor?
I got a Hall Effect Sensor from Small Car Performance for mine, but I haven't installed it yet.
-Britain
I honestly don't remember all it says on it is "0140", I think I got it from North Hollywood Speedometer, pretty sure it is the one Renegade sells for their Subie kits.
Posted by: plymouth37 Jan 15 2011, 10:39 AM
I made a little progress yesterday.
I built the mounts for the coolant tank and the fuel pump/filter assembly. 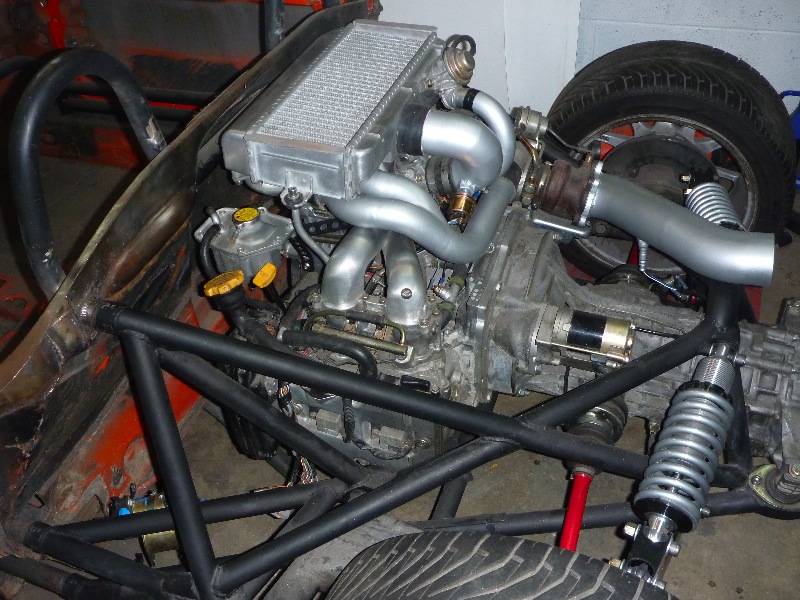
Posted by: plymouth37 Jan 15 2011, 10:40 AM
I am running a 928S pump on its stock bracket, the filter is on its way. Sorry for the bad shot, it is hard to get a good view of it.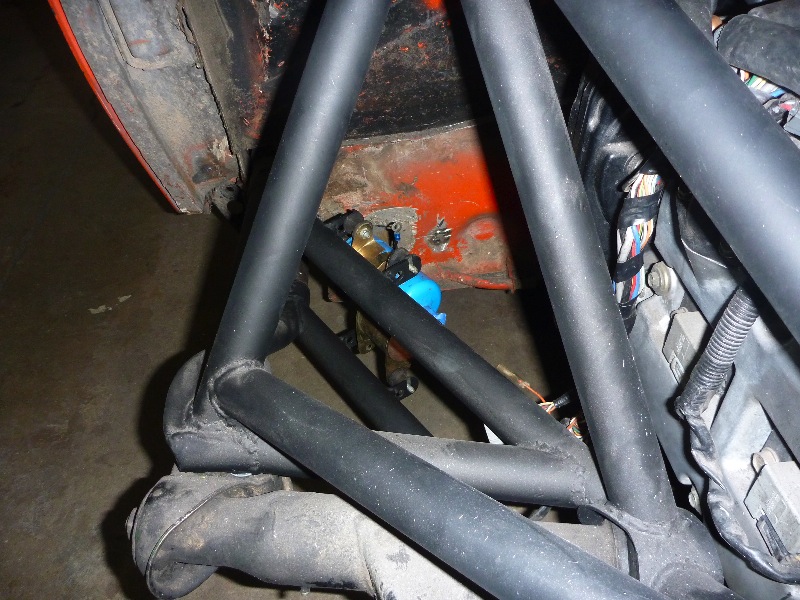
The coolant tank is stock WRX, just relocated to the other side of the engine.
By deleting the throttle body heater I was able to lower the coolant tank by about 3" while still keeping it at the highest point in the system by 4 or so inches.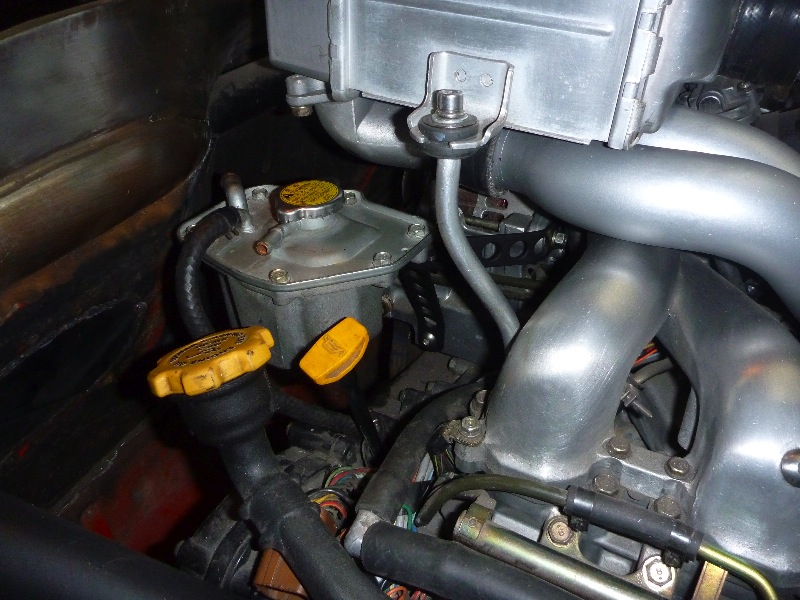
Posted by: plymouth37 Jan 15 2011, 10:49 AM
Then I plumbed the rest of the engine's coolant lines.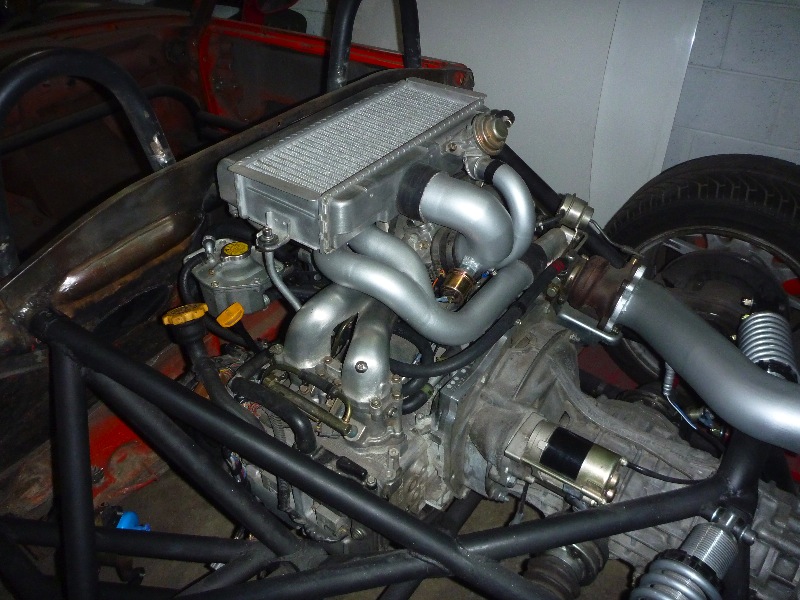
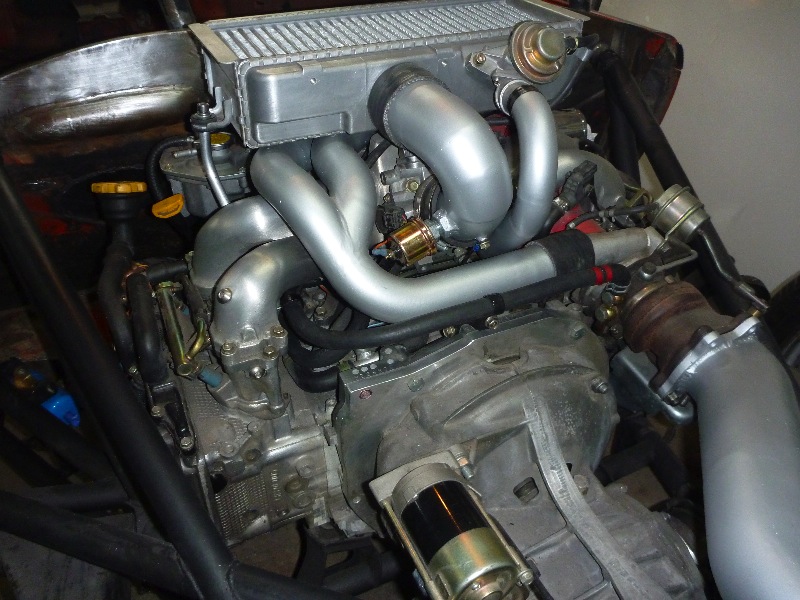
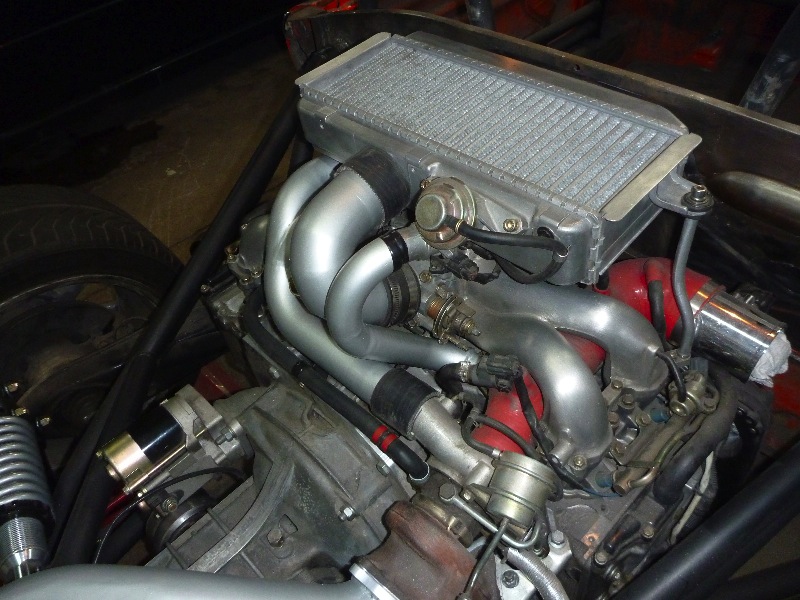
Posted by: KELTY360 Jan 15 2011, 12:13 PM
Looks like you had to modify the oil filler tube. Is that still the SVX piece or did you use something else?
Posted by: plymouth37 Jan 15 2011, 12:20 PM
Looks like you had to modify the oil filler tube. Is that still the SVX piece or did you use something else?
I have the stock wrx filler in there for now, the clearances were close enough with the engine raised that I was keeping the SVX piece off of the car while I put in the engine cross bar for fear of breaking it, I will be swapping it back in after I am done working on the tube chassis.
Posted by: Britain Smith Jan 15 2011, 10:27 PM
What did you use for a throttle cable?
-Britain
Posted by: plymouth37 Jan 15 2011, 11:57 PM
I got it custom made by http://www.terrycable.com/index.aspx when I did my conversion at http://renegadehybrids.com/, I think they sell them now.
Posted by: Britain Smith Jan 16 2011, 12:05 AM
Really...I will give them a call. How do did you route it? What does the end at the throttle pedal look like? Does it just go into the stock ball socket?
-Britain
Posted by: Britain Smith Jan 16 2011, 12:06 AM
Looking at their catalog, didn't see the Subaru conversion cable....but it is a good thing they list a cable for a Porsche 935. Bet they sell a lot of those.
-Britain
Posted by: plymouth37 Jan 16 2011, 12:35 AM
It is a custom cable, you specify length and what threads you need on the ends, then they supply the necessary hardware to adapt to whatever you need. It is routed like the stock one through the tunnel and attaches to the pedal like the original.
Posted by: Hontec Jan 16 2011, 03:23 AM
Dana,
how much room is there physically between your suspension pickup and the subaru cam covers? I'm also using your method of hollow tube over the pivot point on the trailing arm, but I'm thinking of moving them out to create a wider track at the rear and at the same time give me more room for whatever engine in the future..
Thanks
Randall
Posted by: plymouth37 Jan 16 2011, 11:51 AM
Dana,
how much room is there physically between your suspension pickup and the subaru cam covers? I'm also using your method of hollow tube over the pivot point on the trailing arm, but I'm thinking of moving them out to create a wider track at the rear and at the same time give me more room for whatever engine in the future..
Thanks
Randall
There is about an 3/4" of clearance between them, it is pretty tight. You are a lot better equipped to create totally custom suspension points than I am, I think it would be a good idea to explore. I did move my trailing arm mounts up by 2" so the suspension arms would sit level at the car's new lowered height, which would also be something to think about as far as positioning goes. With your skill level though you should just go with double A-arms on all 4 corners and really make us all look bad
Posted by: Hontec Jan 16 2011, 04:13 PM
Dana,
how much room is there physically between your suspension pickup and the subaru cam covers? I'm also using your method of hollow tube over the pivot point on the trailing arm, but I'm thinking of moving them out to create a wider track at the rear and at the same time give me more room for whatever engine in the future..
Thanks
Randall
There is about an 3/4" of clearance between them, it is pretty tight. You are a lot better equipped to create totally custom suspension points than I am, I think it would be a good idea to explore. I did move my trailing arm mounts up by 2" so the suspension arms would sit level at the car's new lowered height, which would also be something to think about as far as positioning goes. With your skill level though you should just go with double A-arms on all 4 corners and really make us all look bad
I'm also in discussion about that, I can change certain chassis groups but there is a limit, suspension, engine and chassis. If I change 2/3 . I will have to get a new title, something I'm trying to avoid to all extent.
Raising the pickup points is something I will surely do, even maybe move them out some..
Posted by: plymouth37 Jan 16 2011, 08:58 PM
No real work done today, I am pretty much done with the rear half barring a few bits I need to buy. For now I am going to set it aside to start cleaning up the rear of the tub in preparation for its amputation. I am going to rebuild the area where the back half was cut off so it looks a little more "finished".
Here are a couple pics of the car separated. I timed myself and it only takes 20 minutes working leisurely to split the car in half.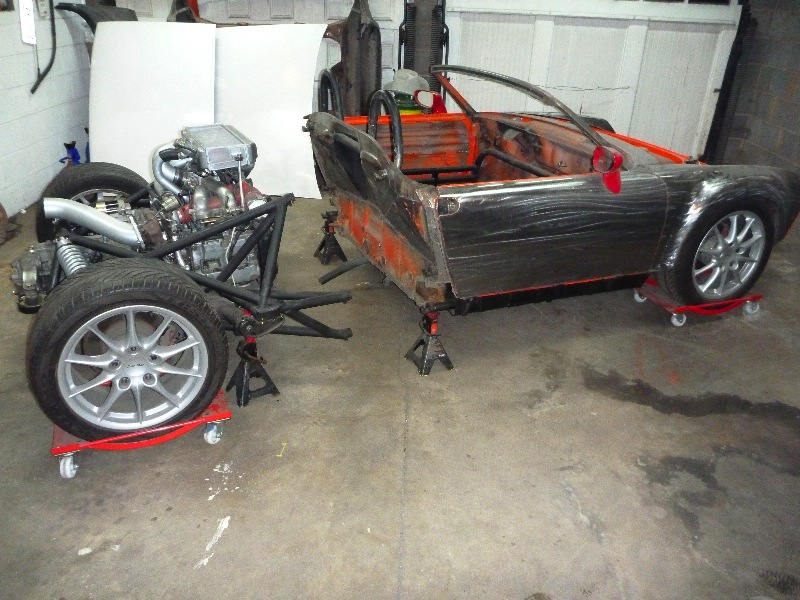
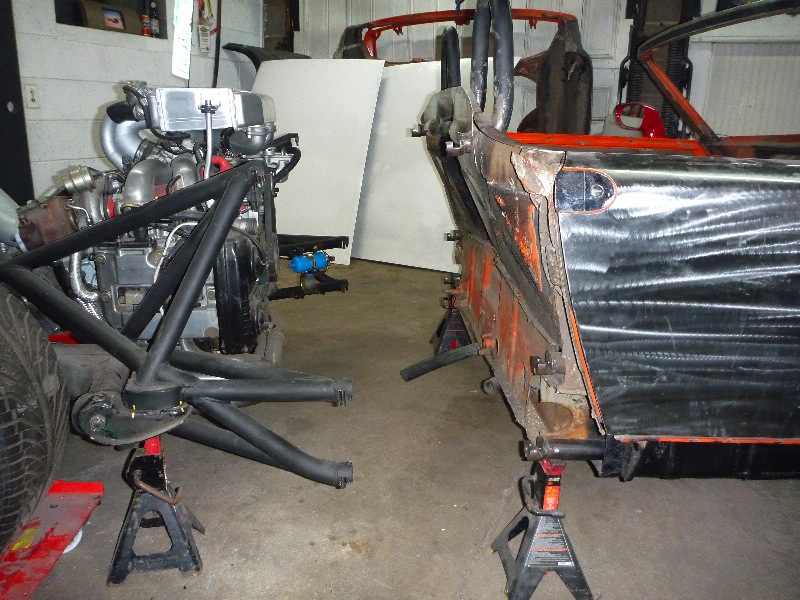
Posted by: smontanaro Jan 17 2011, 06:15 AM
After you take it apart and put it back together will it need to be realigned? I can't tell from the pictures how the back end connects to the tub.
Posted by: URY914 Jan 17 2011, 07:26 AM
Can we see a close up of the connection details. How the rear tubes connect to the mid section. Thanks
Posted by: plymouth37 Jan 17 2011, 10:26 AM
This is what the connectors look like, they fit together like puzzle pieces and have 2 bolts coming in from opposite sides to hold them together. The other end slips into the tubing, I welded the seam as well as a few plug welds to attach them.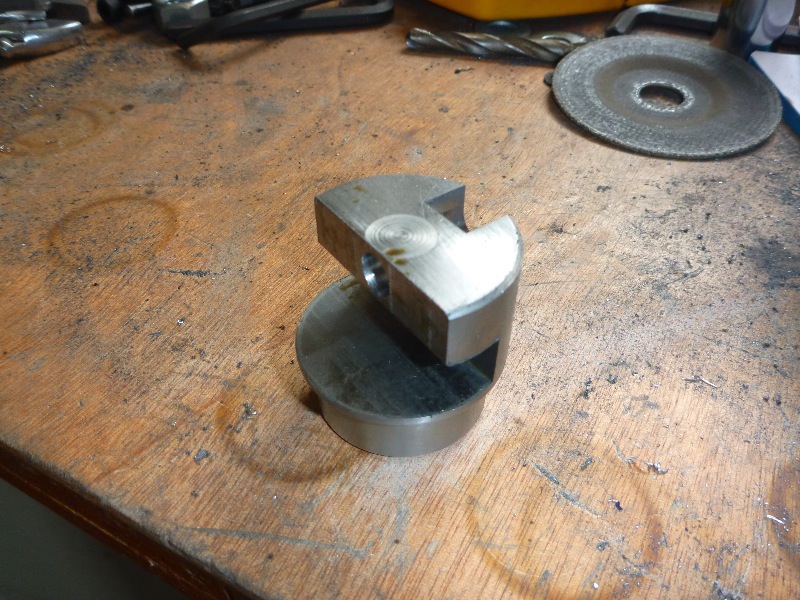
Here they are installed on the car, you can see the smaller diameter end that the tubing slips over as well as the seam that divides the 2 pieces. In the top of the lower connector you can see the ends of the bolts that hold the pieces together.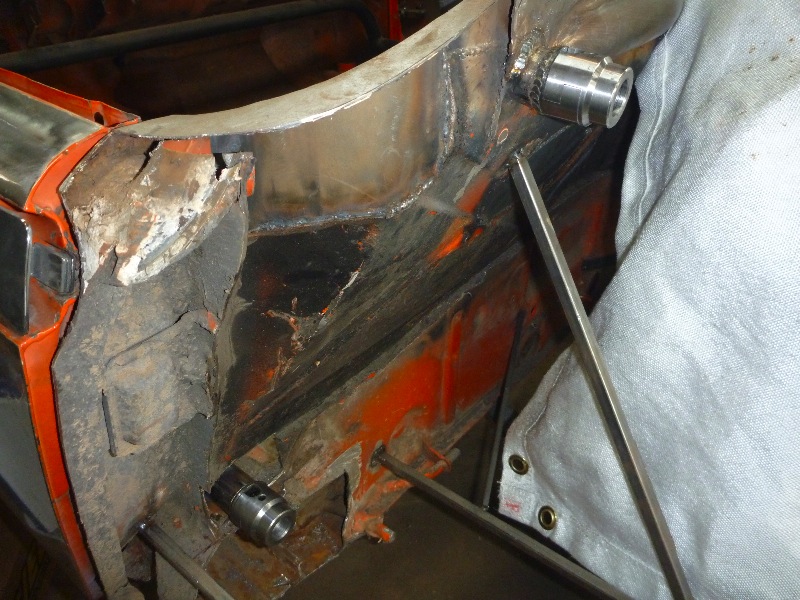
Posted by: plymouth37 Jan 17 2011, 10:29 AM
There are 6 connection points like this that attach the 2 halves, making a total of 12 bolts holding everything together. The connectors are circled in red and linked to their partner in yellow.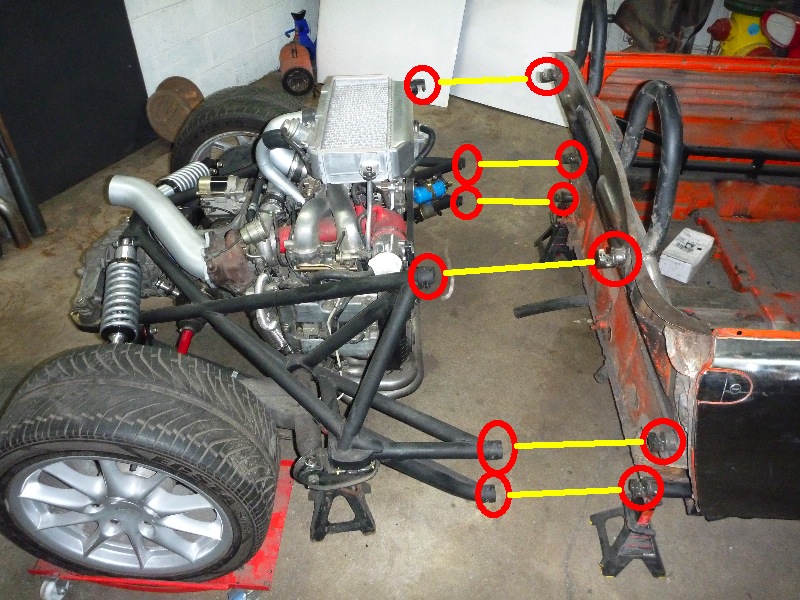
I don't think everything will need to be aligned every time the car is split, the suspension is bolted firmly to the rear half. I would think that even if the cage were to move a little when it is unbolted it will regain it's proper alignment once it is bolted back to the car.
Posted by: r_towle Jan 17 2011, 10:41 AM
As always, very slick.
I really like the removable rear just from a servicing standpoint.
It will take up less space in the shop also....lol
Rich
Posted by: RJMII Jan 17 2011, 10:51 AM
Where do you get those connectors?
Posted by: BKLA Jan 17 2011, 10:58 AM
I'm still of the opinion that you should market this set up with a roll cage and front clip. Three parts easily shipped, put together with either a donor teener, a 550 or 904 kit. Even a sheridan body kit. Just a rear half and roll cage kit would be cool!
Seems like you've designed it so that it fits a number of engines.
I'd be first in line for one!
Posted by: plymouth37 Jan 17 2011, 11:12 AM
Where do you get those connectors?
You can find them at a lot of off road supply places, I got mine from http://www.ballisticfabrication.com/, search "clamp" on their site to find them.
Posted by: plymouth37 Jan 17 2011, 11:19 AM
I'm still of the opinion that you should market this set up with a roll cage and front clip. Three parts easily shipped, put together with either a donor teener, a 550 or 904 kit. Even a sheridan body kit. Just a rear half and roll cage kit would be cool!
Seems like you've designed it so that it fits a number of engines.
I'd be first in line for one!
That has definitely crossed my mind, if I had a celette bench and twice as much free time I could totally do it. I am making the back half fairly independent, you could just bolt it to the front half of anything that had matching connection points, hook up a fuel line and have a self sufficient rear suspension and drive train. 350hp 3 wheelers could be fun, how about a home built Atom?
Posted by: McMark Jan 17 2011, 01:32 PM
You need a bracket to bolt on to each half so they become self supporting. That way you can easily move each part around when separated.
I just trying to slow down your progress.
Oh, and I can see your fuel pump now. Take a nice picture of that and go back and edit your earlier post to bring it up to date.
Posted by: plymouth37 Jan 17 2011, 01:36 PM
I have 4 casters that would be perfect to make each piece rollable, now if I can just get my homework done I could drag out the welder and get back to work!
Posted by: BKLA Jan 17 2011, 01:40 PM
....
Seems like you've designed it so that it fits a number of engines.
.... how about a home built Atom?
And there you go! When's the first one available?
Posted by: plymouth37 Jan 21 2011, 05:53 PM
I pulled the front suspension today, I am running a full Carrera suspension including the aluminum cross member and underbody sway bar.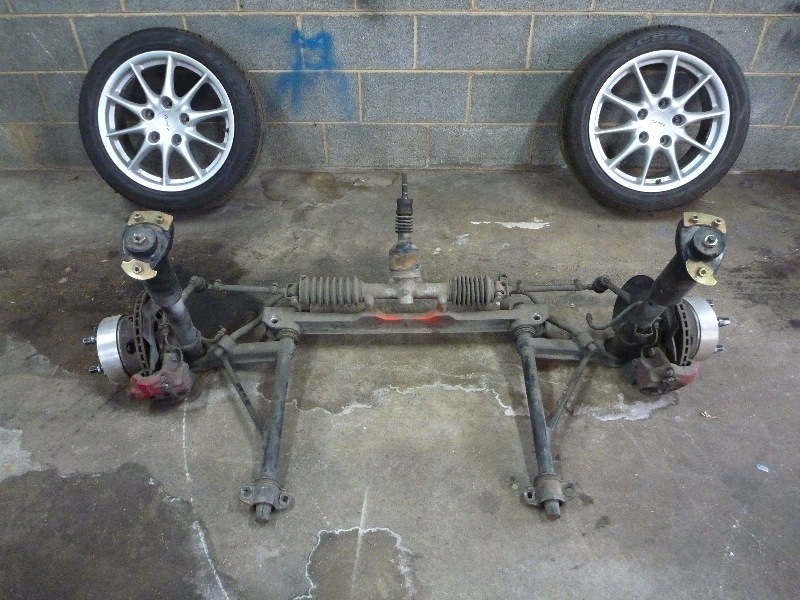
I also finished plumbing the turbo hoses.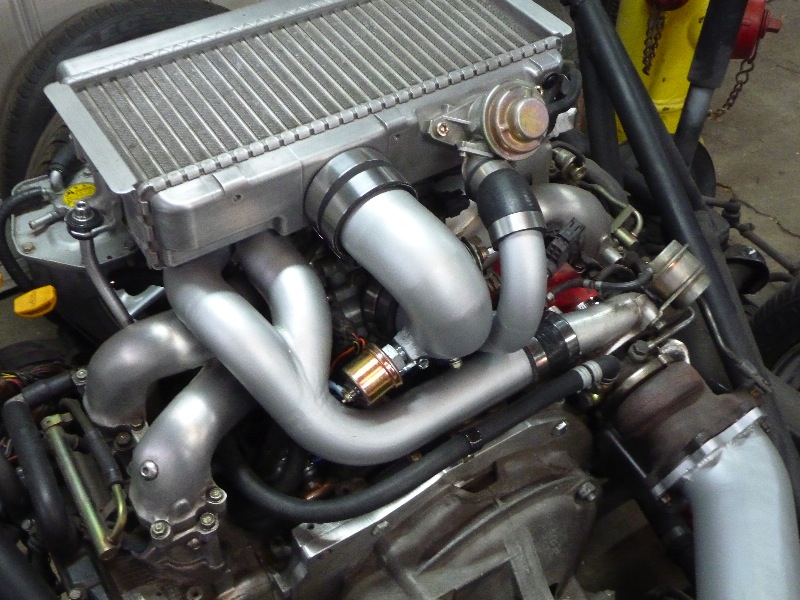
Posted by: plymouth37 Jan 21 2011, 06:00 PM
Now that the suspension has been removed I am pretty much left with a bare tub.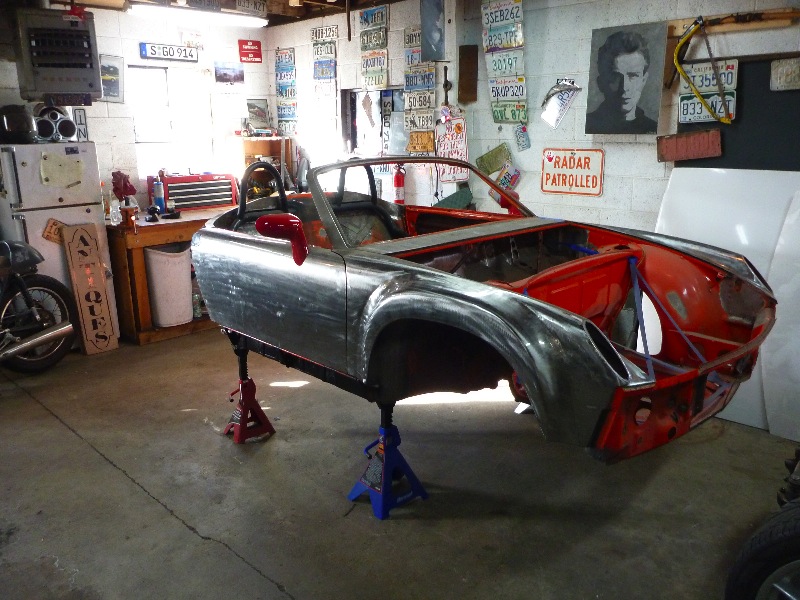
I also started cleaning up the fire wall, I have a lot of metal work to do back here over the coming months.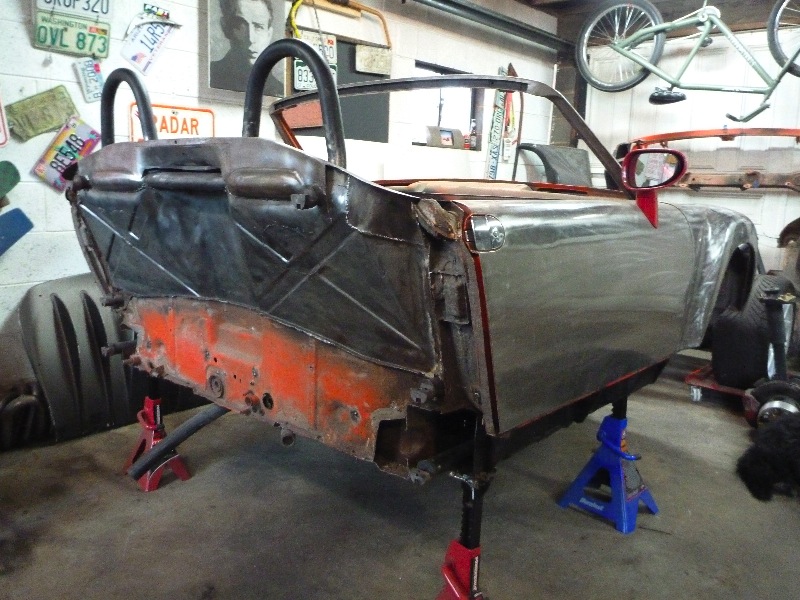
Posted by: fat73 Jan 25 2011, 09:29 AM
Now that the suspension has been removed I am pretty much left with a bare tub.
I also started cleaning up the fire wall, I have a lot of metal work to do back here over the coming months.
Dana...some additional inspiration (like you need it).
http://www.gizmag.com/lamborghini-introduces-pushrod-suspension-to-series-production/17666/?utm_source=Gizmag+Subscribers&utm_campaign=637a3a3f57-UA-2235360-4&utm_medium=email
Ed
Posted by: plymouth37 Jan 25 2011, 11:10 AM
HAHA, Just saw that too, glad to see Lamborghini is thinking along the same lines as I am for the new LP-700
I am pretty envious of those double A-arms though!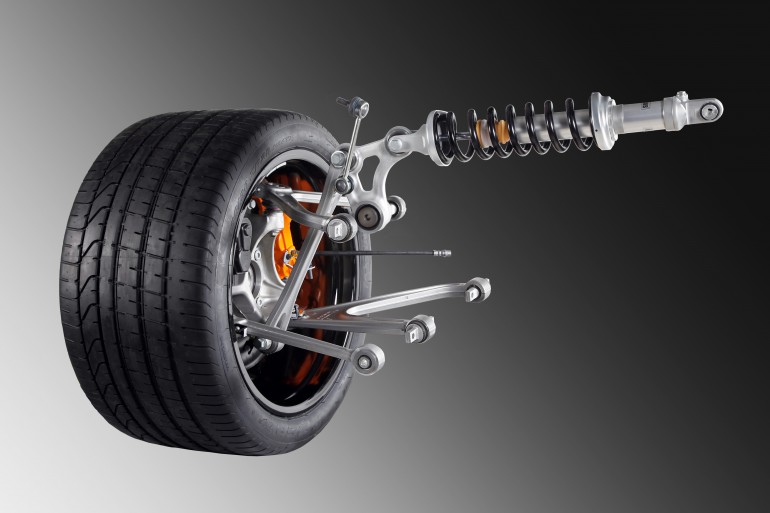
Posted by: RJMII Jan 25 2011, 03:22 PM
What size of wheels are those? We could use the wheel diameter and a little bit of math and get some dimmensions for the a-arms. I'm liking the way those a-arms look like they mount, too.
Posted by: db9146 Jan 25 2011, 03:30 PM
So let's see....you've got the sports car covered. If you found a VW bus and did the same to it, you'd have a family hauler or a camper. You could add a VW squareback or notchback for an estate wagon or family sedan, all using the same power plant. Kinda like swapping a battery pack into one of those multi-tool Dewalt kits. There you go!!!
Posted by: Hontec Jan 25 2011, 03:30 PM
Dana, you used to work for Renegade right?
I have a question regarding the tacho; is the stock 914 unit compatible with the Subie output? (probably not) How are you going to run this? I bet you have experience with this.
Thanks
Randall
Posted by: plymouth37 Jan 25 2011, 06:19 PM
Dana, you used to work for Renegade right?
I have a question regarding the tacho; is the stock 914 unit compatible with the Subie output? (probably not) How are you going to run this? I bet you have experience with this.
Thanks
Randall
I had mine refinished and re-calibrated by http://www.nhspeedometer.com/, they also added the boost gauge, LED lighting, and changed the redline to match the subie's.
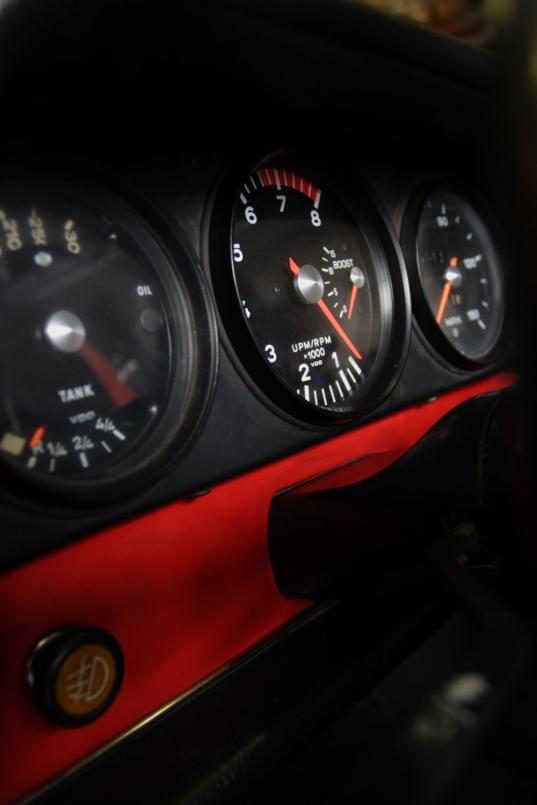
Posted by: Hontec Jan 26 2011, 02:25 AM
Thanks!
Posted by: plymouth37 Jan 30 2011, 12:22 PM
I did a little wiring yesterday. I started out by building a harness for the car's rear lights and rear mounted sensors. The harness will plug into the main harness at the firewall and at the other end the rear clamshell will plug into it for the taillights, this way it is still possible to break the car into components easily. 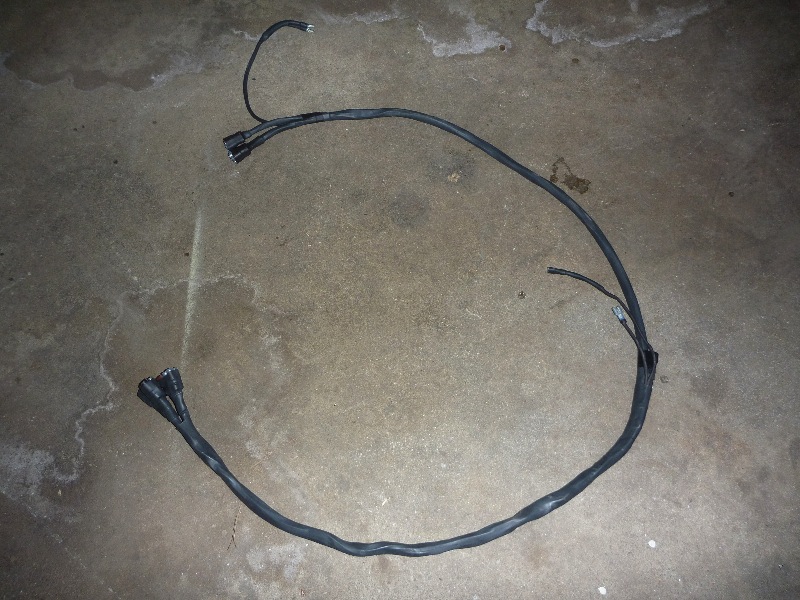
Then I pulled the subaru engine harness, ran any extra wires I needed to, and combined it with the car harness I had just built. Within the harness I ran a few extra wires to various parts of the car, this way any extra sensors or electronics I want to run in the future are already wired and ready to go.
Remember when it only took about 4 wires to hook up an engine? Well those days are gone!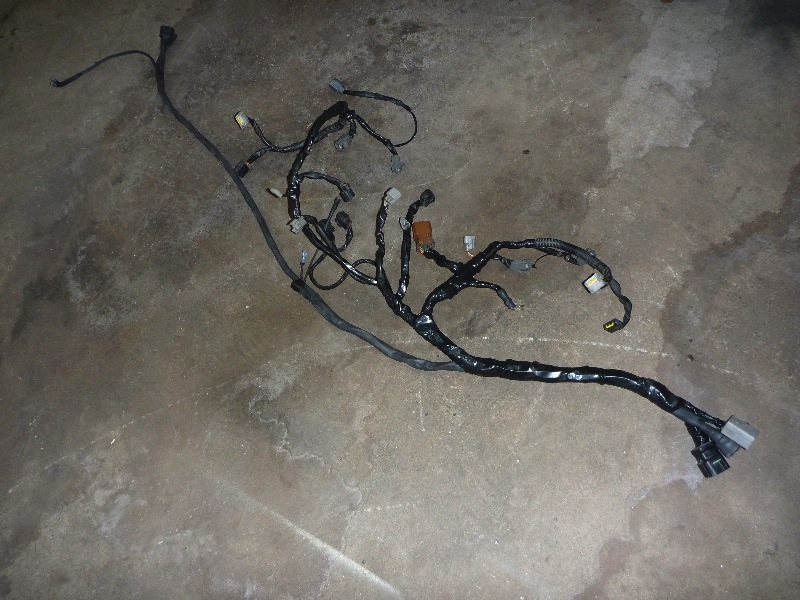
Posted by: plymouth37 Jan 30 2011, 12:23 PM
And here is the harness installed, I still need to run the battery cables but other than that the entire rear of the chassis is wired.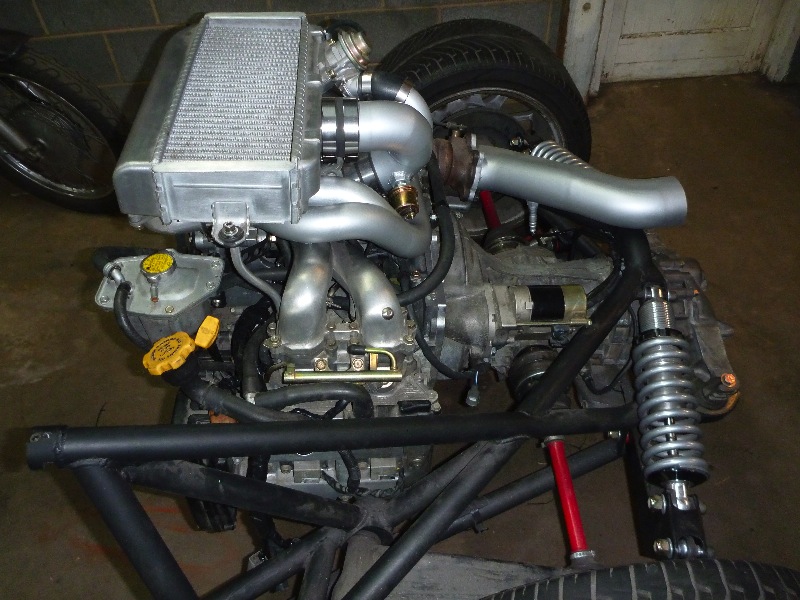
Since it was readily accessible, here is a shot of the front of the engine. Also notice that the engine is lacking a Perrin lightweight pulley, gonna have to fix that problem soon!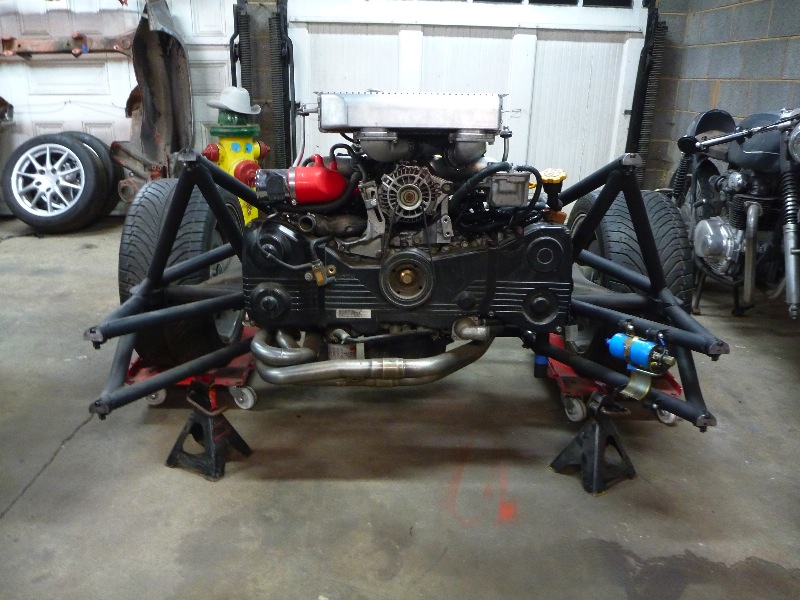
Posted by: plymouth37 Feb 11 2011, 02:01 PM
I did a lot of trimming and wire wheeling on the firewall today. I have stripped the entire rear of the tub and trimmed it down to a point where I can start rebuilding the fire wall and longs.
I also decided that if I am going to build a high quality fiberglass or carbon body I need a perfect steel body to take a mold off of. Because of this I have decided to trade my lightweight lids for stock steel lids, If you want to trade click http://www.914world.com/bbs2/index.php?showtopic=115528&st=. I think by starting with steel, I material that I am much more competent working with, I can end up with a much better final product. And then once I make a carbon body, one of you can have the steel one 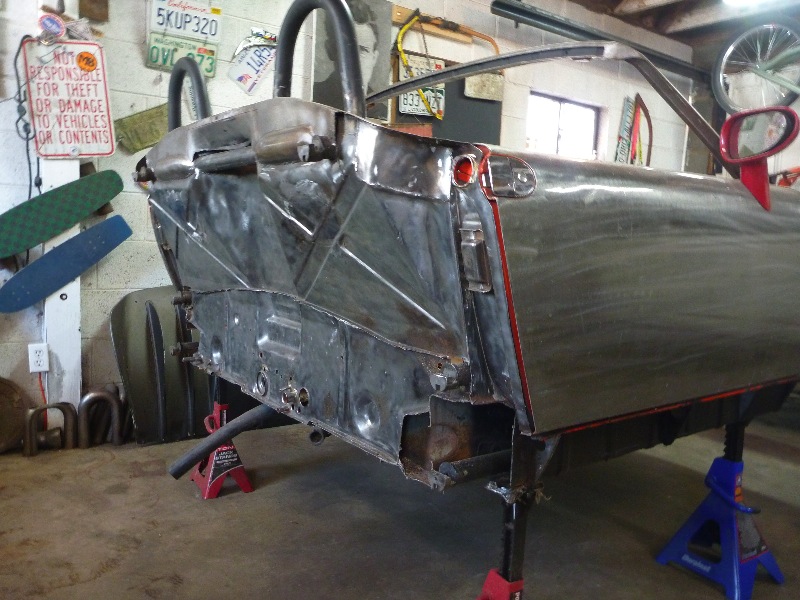
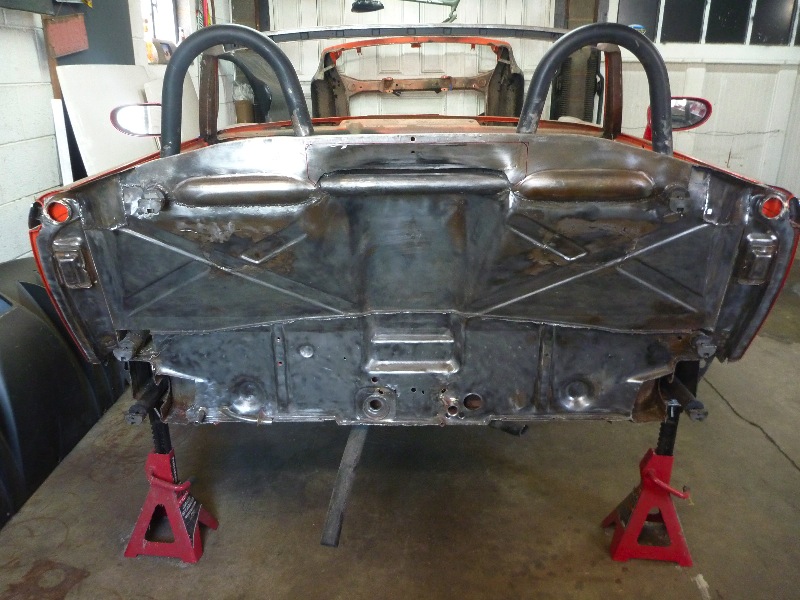

Posted by: Hontec Feb 11 2011, 02:11 PM
Nice work! Are you excited to start building up again? Can't wait to reach that stage..
Posted by: fat73 Feb 11 2011, 02:30 PM
Dana, you used to work for Renegade right?
I have a question regarding the tacho; is the stock 914 unit compatible with the Subie output? (probably not) How are you going to run this? I bet you have experience with this.
Thanks
Randall
I had mine refinished and re-calibrated by http://www.nhspeedometer.com/, they also added the boost gauge, LED lighting, and changed the redline to match the subie's.
Hey Dana,
What boost sensor are you using? My boost guage stays pegged all the time. I thought I put a 930 sensor on there. Is that right?
Ed
Posted by: BKLA Feb 11 2011, 08:04 PM
I can see a bidding war on the steel shell already!
Looks great!
Posted by: plymouth37 Feb 16 2011, 09:36 PM
I got some welding done today, I reconfigured the upper portion to eliminate the stock dip and added about a foot of weld between the cage and the tub in the process. I also seam welded the firewall and ground down the pinch weld that splits the firewall in half.
Before: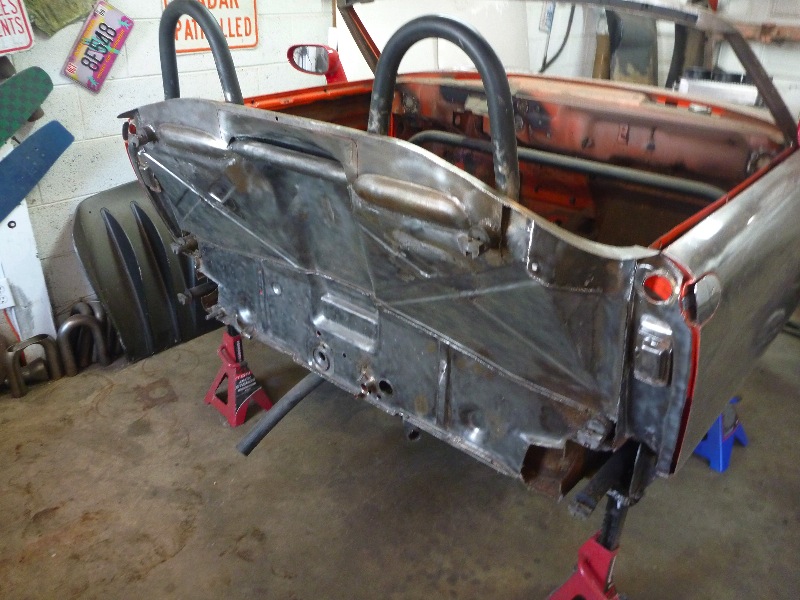
Posted by: plymouth37 Feb 16 2011, 09:36 PM
After: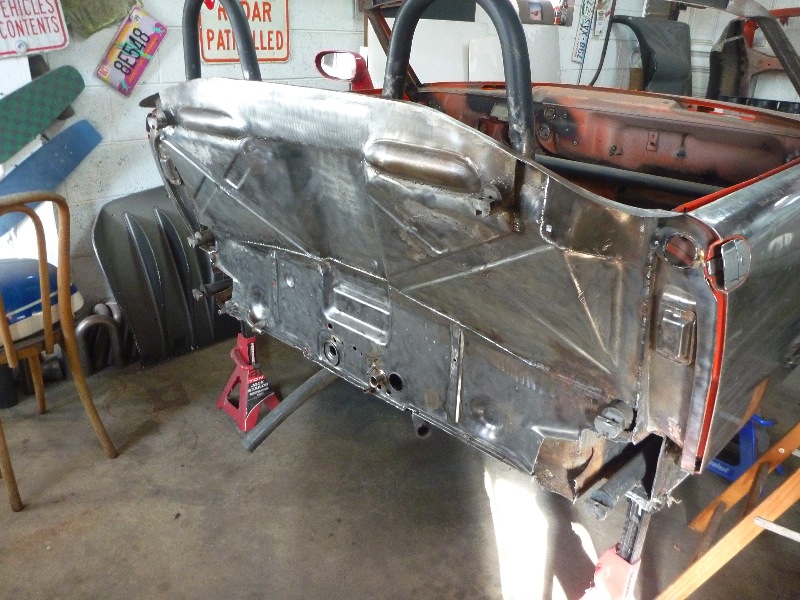
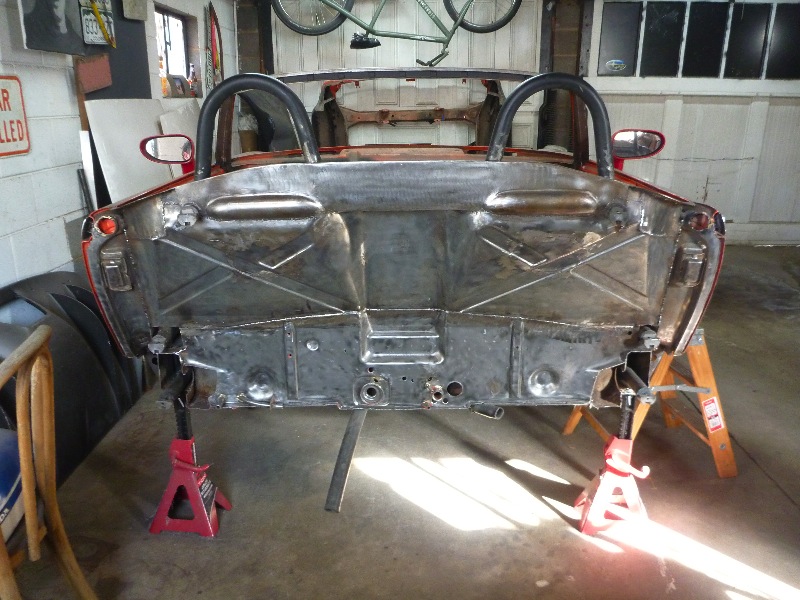
Posted by: majkos Feb 17 2011, 08:56 AM
Very nice Dana!
I like how you made it so smooth.....
Care to help me with the Kar-B-Q ?
Posted by: KELTY360 Feb 17 2011, 09:25 AM
Looks heavy. You must have added at least 8 oz.
Posted by: plymouth37 Feb 21 2011, 08:53 AM
I started rebuilding the frame rail area of the firewall. Since the tub will end at the firewall I had to amputate the frame rails.
Here is how much I needed to remove to get to flat, rust free metal.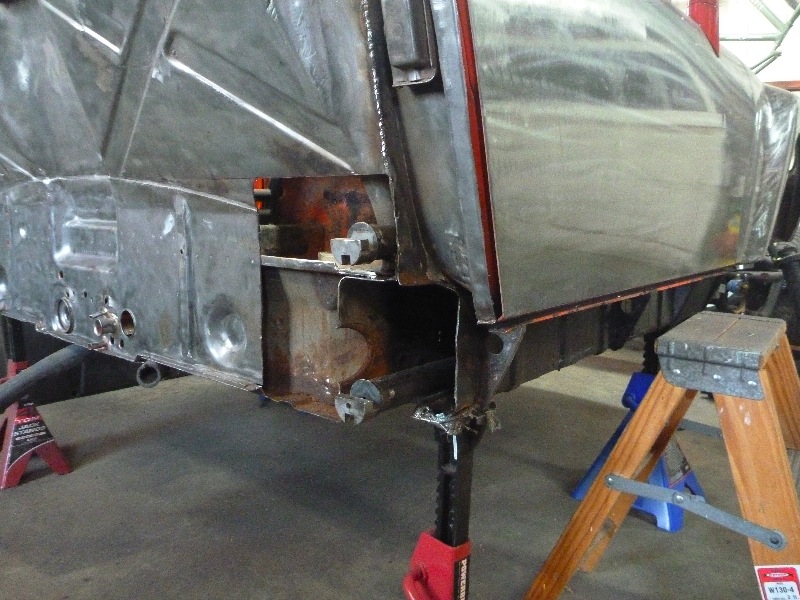
I welded in a filler plate, the frame rails, cage, and inner structure are all welded to the filler piece, hopefully this should tie all of the inner structure together. 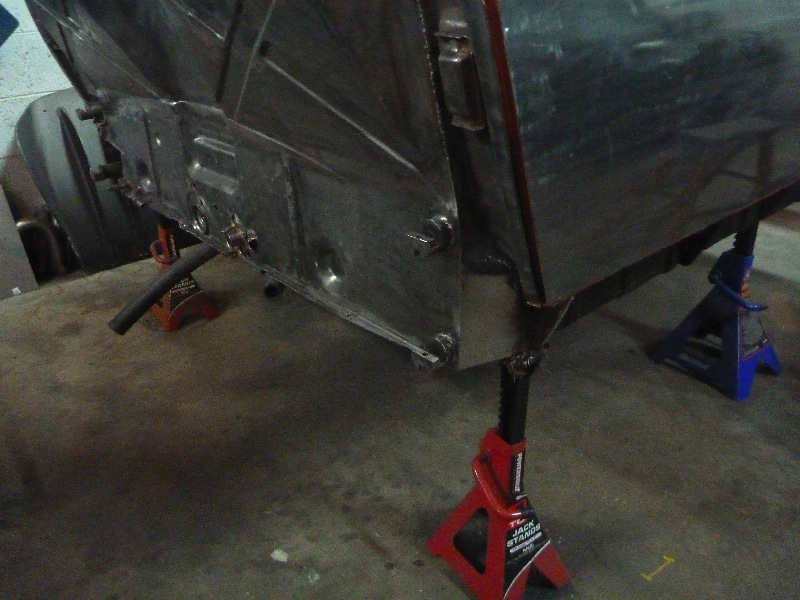
Posted by: plymouth37 Feb 21 2011, 08:57 AM
Here is a before and after shot, after I finish welding up the drivers side I will start fabbing up the outer structure that will tie the door jambs into the rest of the firewall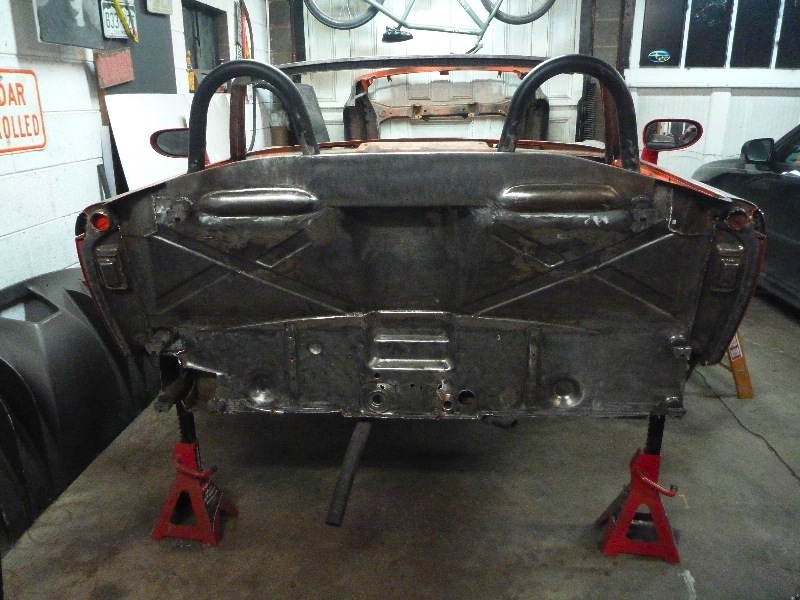
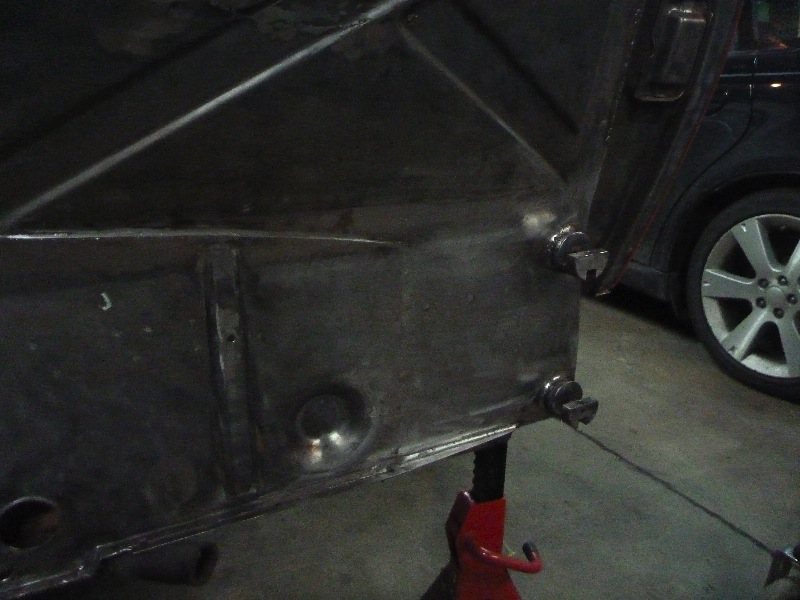
Posted by: KaptKaos Feb 21 2011, 10:40 AM
Have you seen this???
http://www.autoblog.com/2011/02/18/you-can-design-factory-fives-new-mid-engine-wrx-powered-kit-ca/
http://www.factoryfive.com/whatsnew/update/5ffrsurprises/announcement.html
Posted by: plymouth37 Feb 21 2011, 07:44 PM
Have you seen this???
http://www.autoblog.com/2011/02/18/you-can-design-factory-fives-new-mid-engine-wrx-powered-kit-ca/
http://www.factoryfive.com/whatsnew/update/5ffrsurprises/announcement.html
Very cool! The WRX engine really is a perfect power plant for a sub 2000 pound sports car. I am surprised it took them this long to come out with a good kit with Subie power. Nice find!
Posted by: plymouth37 Feb 21 2011, 09:14 PM
Hey Dana,
What boost sensor are you using? My boost guage stays pegged all the time. I thought I put a 930 sensor on there. Is that right?
Ed
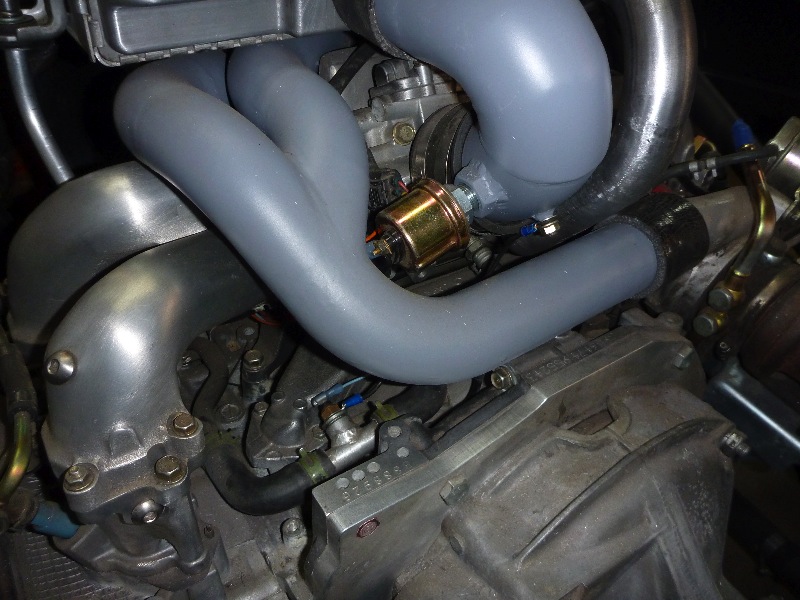
Hey Ed,
Mine is a VDO piece.
The part number reads: 993-606-103-00
The other side reads: 0-1.5 Bar
Posted by: plymouth37 Mar 9 2011, 05:14 PM
I finished rebuilding the drivers side frame rail area today.
Next I need to fill a couple small holes in the firewall and start building the door jamb to firewall connection. 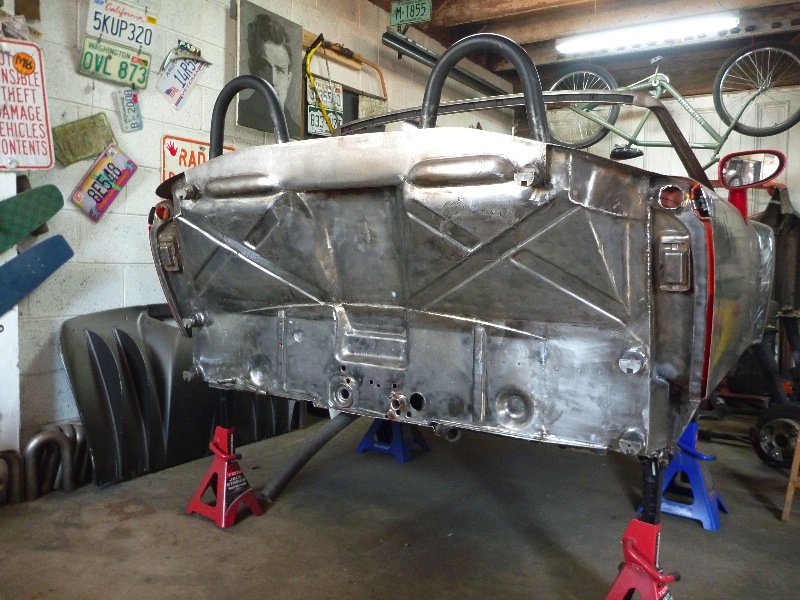
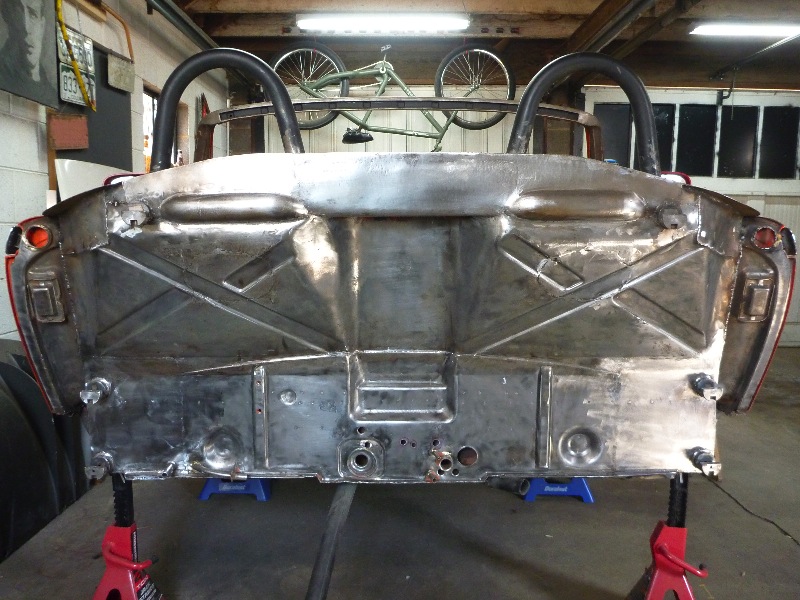
Posted by: Hontec Mar 10 2011, 01:34 AM
Lookin' real good!!!
Posted by: fat73 Mar 10 2011, 06:19 AM
Hey Dana,
What boost sensor are you using? My boost guage stays pegged all the time. I thought I put a 930 sensor on there. Is that right?
Ed
Hey Ed,
Mine is a VDO piece.
The part number reads: 993-606-103-00
The other side reads: 0-1.5 Bar
Thanks Dana
Posted by: plymouth37 Mar 21 2011, 08:50 PM
Spring break is upon us and by some miracle I have absolutely no obligations for the next 5 days, time to get some work done!
I pretty much wrapped up the firewall today, I boxed in the outer portions of the firewall and made a solid sealing surface around the bulkhead for the tilt up rear to rest on.
After welding all of this up the tub was noticeably stiffer and the door jambs fit much better.
Stay tuned for 4 more days of huge progress! 
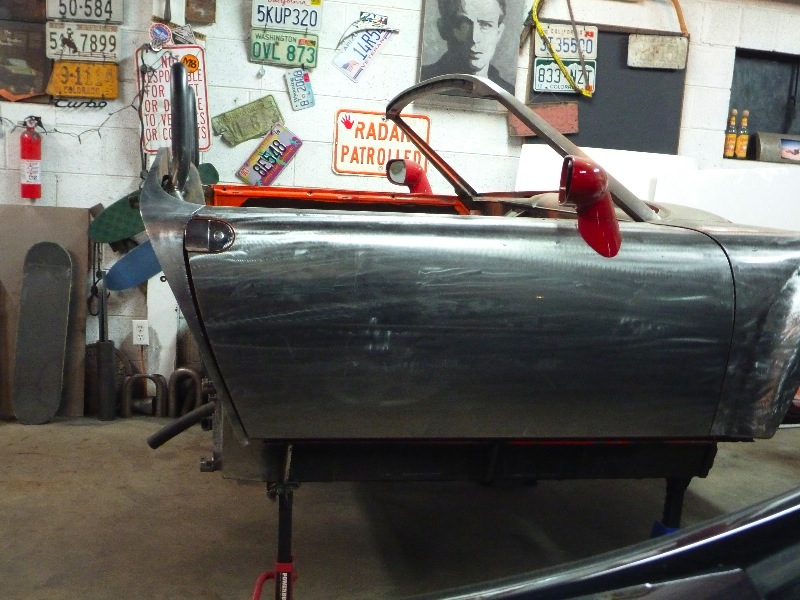
Posted by: plymouth37 Mar 21 2011, 08:50 PM
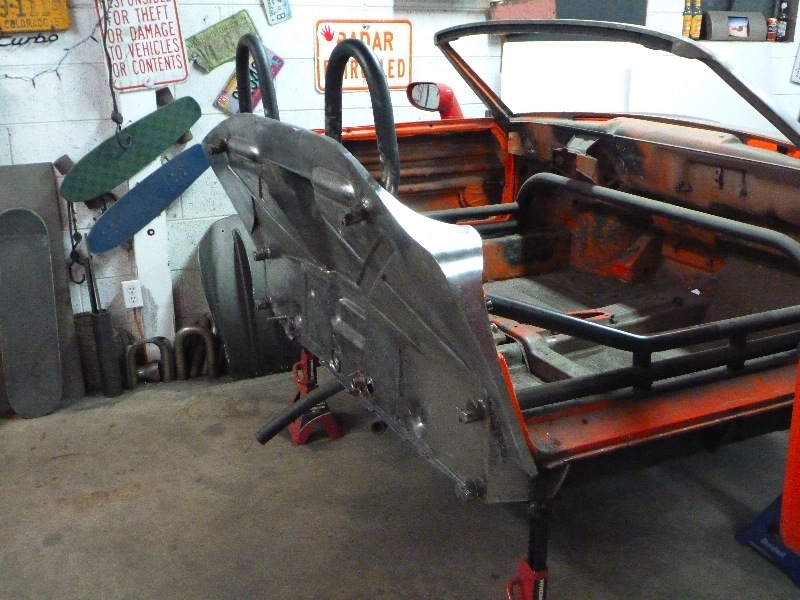 .
.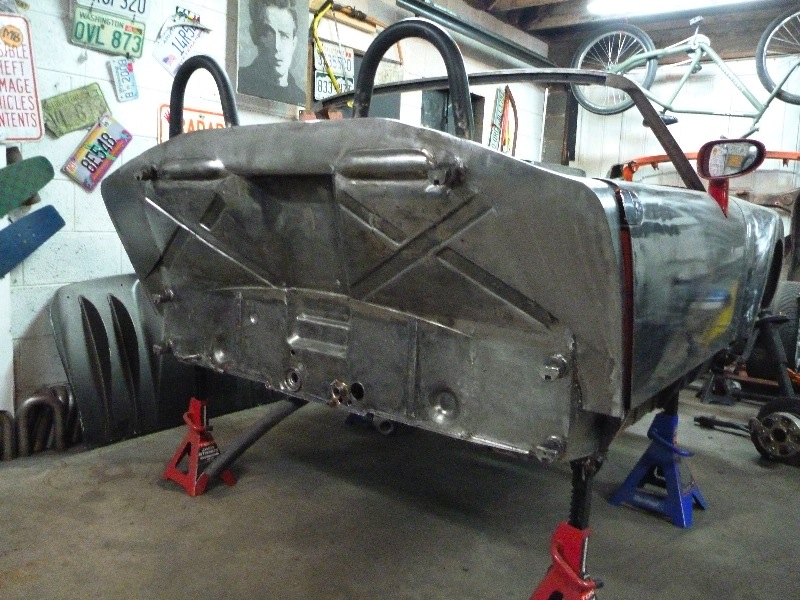
Posted by: PeeGreen 914 Mar 21 2011, 08:53 PM
Posted by: KELTY360 Mar 22 2011, 12:20 AM
I just noticed...are you really going with stock door latches? I thought you were going to modify this thing.
Posted by: plymouth37 Mar 22 2011, 08:40 AM
I just noticed...are you really going with stock door latches? I thought you were going to modify this thing.
Haven't decided yet, I will run them while I test the chassis then figure out what to do for door handles when I do the body, I will probably steal a pair off a Del Sol or a miata type car, not totally sure yet.
Posted by: my928s4 Mar 22 2011, 08:52 AM
Beautiful work.
Posted by: BKLA Mar 22 2011, 09:07 AM
I just noticed...are you really going with stock door latches? I thought you were going to modify this thing.
I've always liked the 914 handles from a design point of view. Minimal, light and simplistic. They are, along with the hourglass profile in the bodyline, the most unique and clearly defining elements of the design. Maybe not perfect from an engineering standpoint, but clearly a uniquely 914 element.
I look forward to see your possible interpretations!
Posted by: plymouth37 Mar 22 2011, 01:28 PM
I just noticed...are you really going with stock door latches? I thought you were going to modify this thing.
I've always liked the 914 handles from a design point of view. Minimal, light and simplistic. They are, along with the hourglass profile in the bodyline, the most unique and clearly defining elements of the design. Maybe not perfect from an engineering standpoint, but clearly a uniquely 914 element.
I look forward to see your possible interpretations!
I totally agree, I have always liked them too, I may end up making some custom handles that preserve the lines of the originals but actually function properly.
Posted by: plymouth37 Mar 22 2011, 08:03 PM
I finished welding up a couple details on the firewall, then got the tub down off of the jack stands to turn it around.
It is always startling to take a car off of tall jack stands, it is so tiny!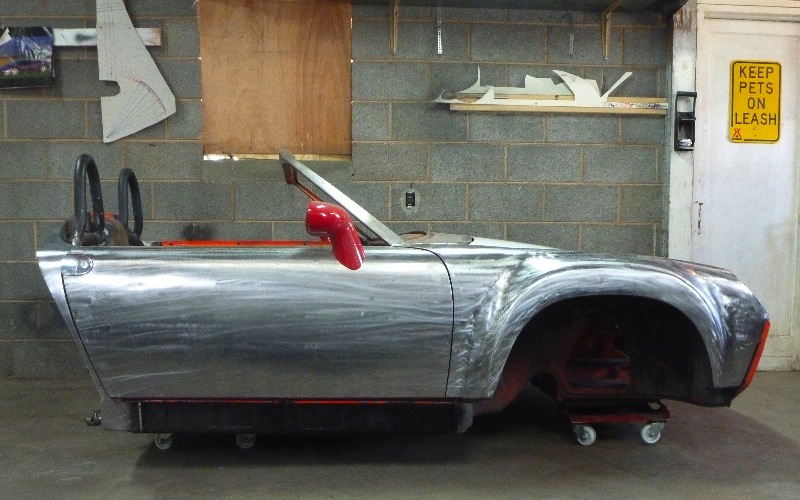
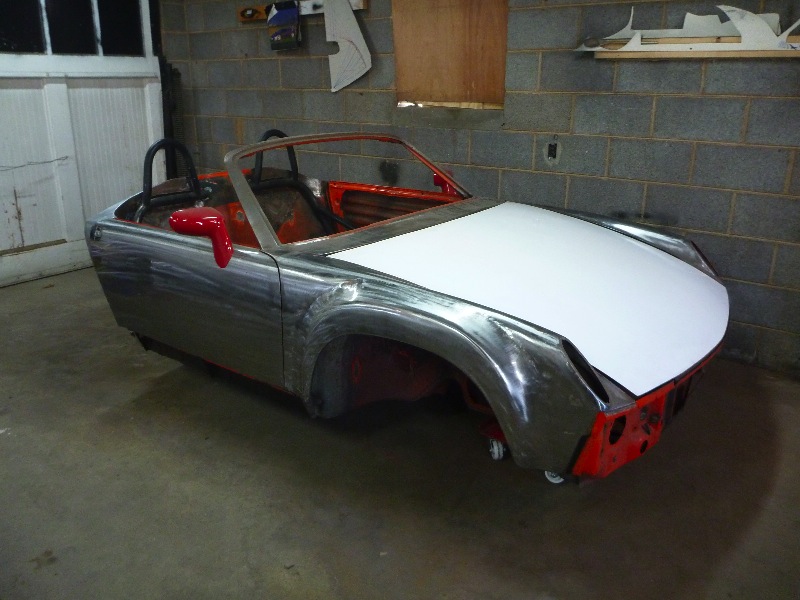
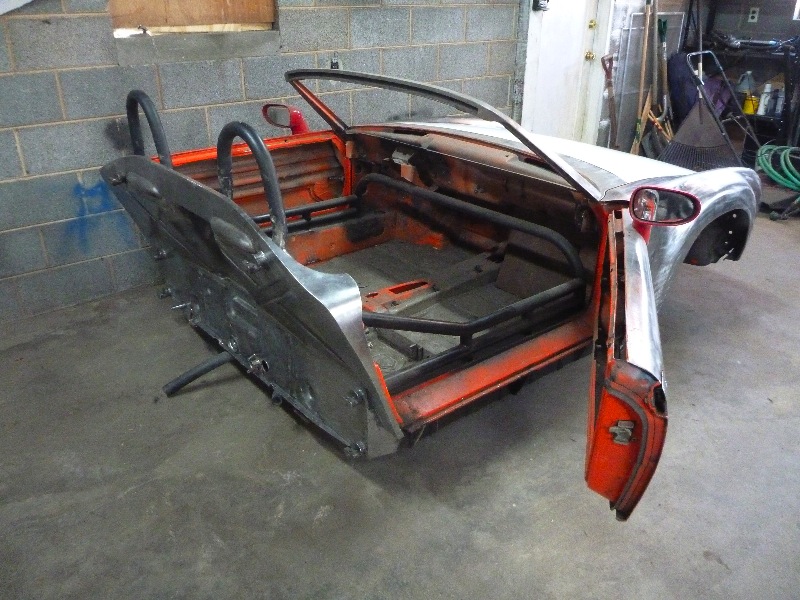
Posted by: plymouth37 Mar 22 2011, 08:15 PM
I turned the car around, put it back up on the jack stands, then pulled the doors.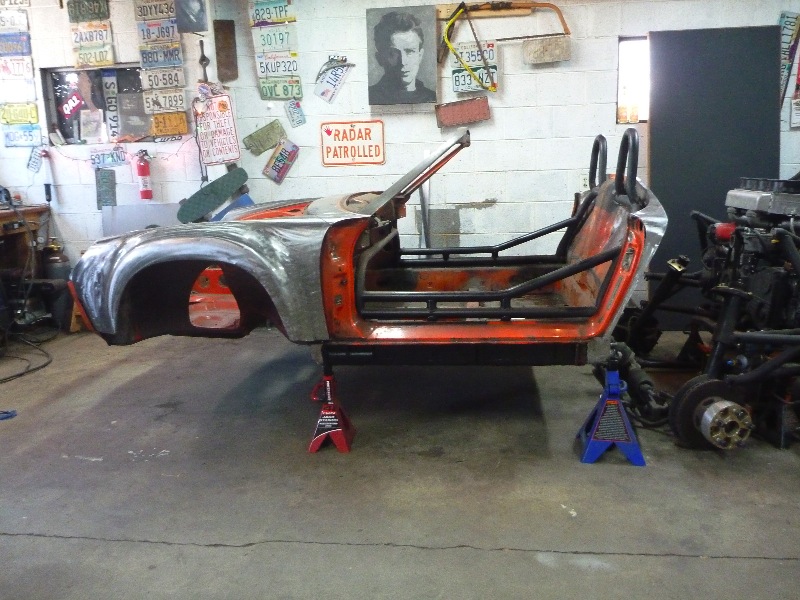
I built a front suspension jig then taped out the cut line to remove the nose from the tub. Lots of cutting to do tomorrow!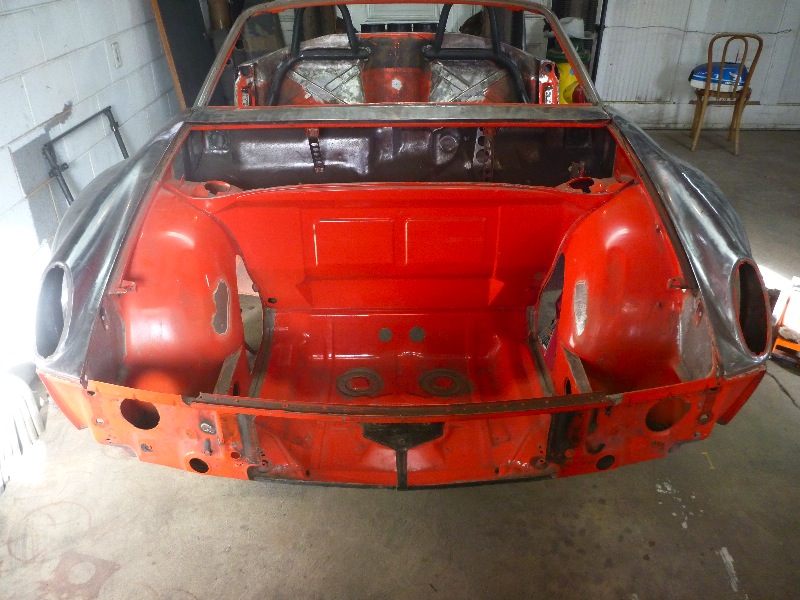
Posted by: Rand Mar 22 2011, 08:54 PM
I don't care how you slice it, that thing is sexy from every angle.
Ok, back to work. You have a couple more days to overwhelm us with stellar progress.
Posted by: plymouth37 Mar 23 2011, 11:16 AM

If anyone was wondering, the nose as you see it weighs in at 52 pounds.
Posted by: jcambo7 Mar 23 2011, 12:41 PM
If anyone was wondering, the nose as you see it weighs in at 52 pounds.
Pretty crazy what you are doing! It's freaking awesome though.
Posted by: URY914 Mar 23 2011, 02:23 PM
Puzzle Car!
Posted by: plymouth37 Mar 23 2011, 03:09 PM
Another advantage to cutting your car into thirds, you can park it sideways in the garage and still have plenty of room for the wife's car!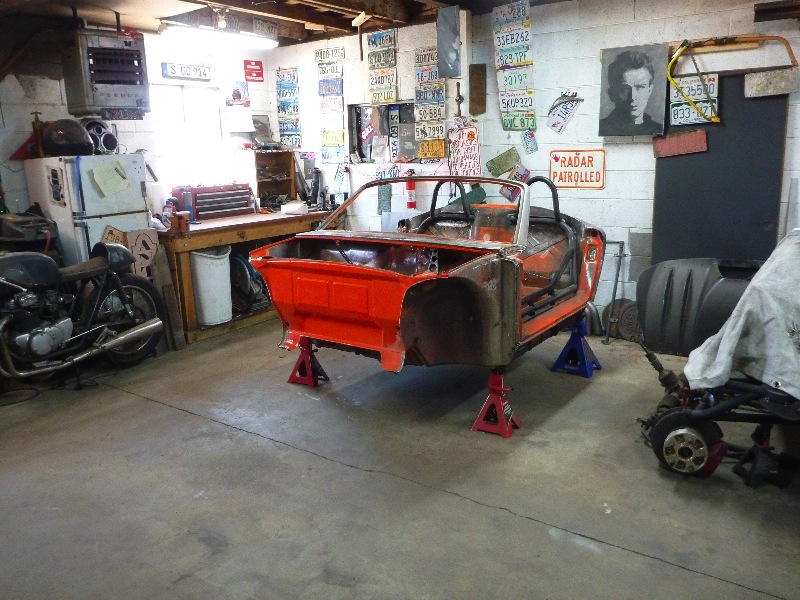
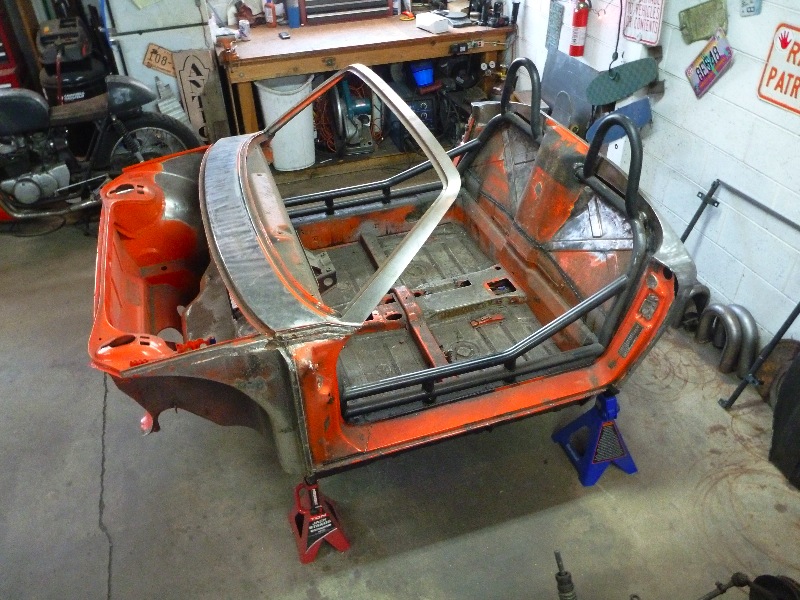
Posted by: plymouth37 Mar 23 2011, 03:10 PM
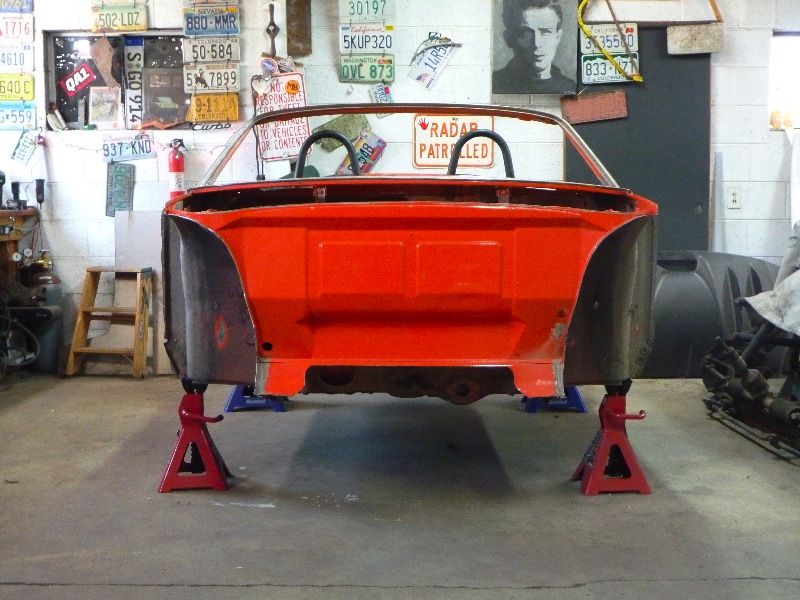
Posted by: fat73 Mar 23 2011, 03:26 PM
So does this mean it's going to have a flip open front with wish-bone suspension?
Ed
Posted by: plymouth37 Mar 23 2011, 03:42 PM
So does this mean it's going to have a flip open front with wish-bone suspension?
Ed
I will be running a flip up front while retaining the Carrera front suspension. I will post some mockups sometime this afternoon.
Posted by: plymouth37 Mar 23 2011, 06:20 PM
I bolted the suspension jig back on and mocked up the front subframe. 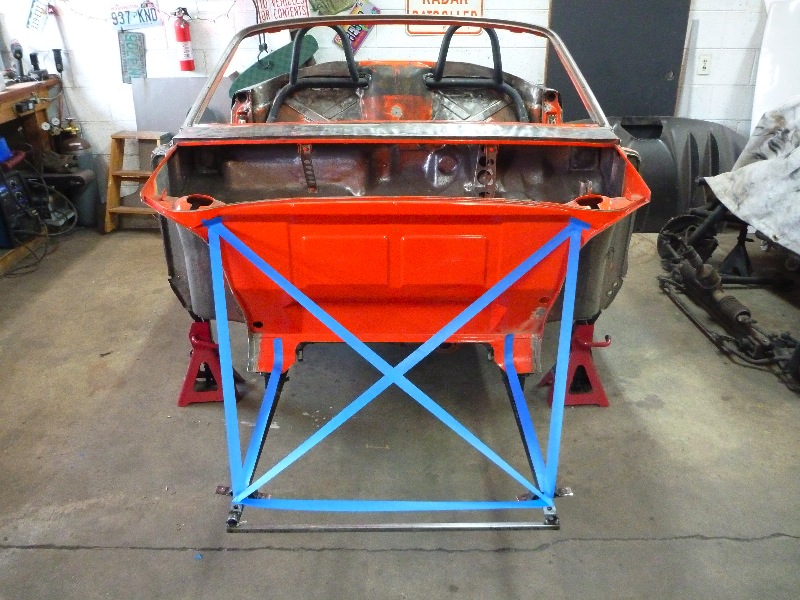
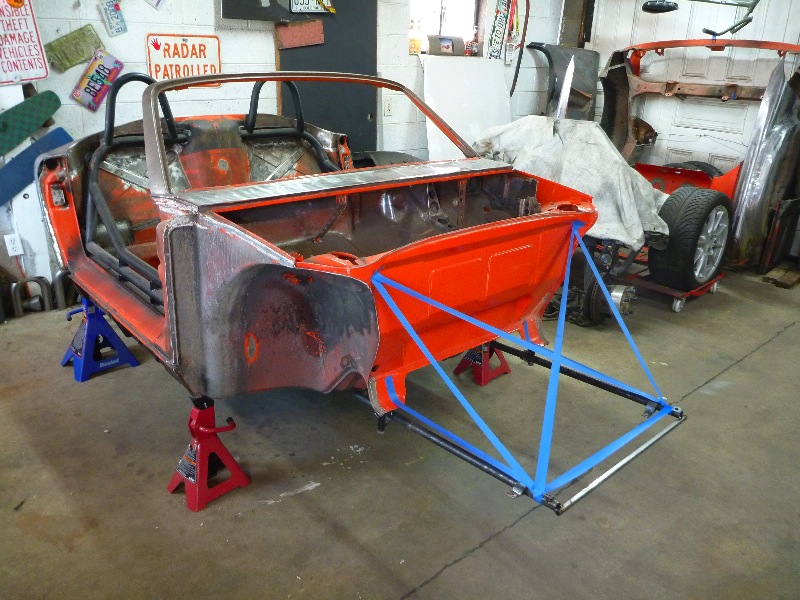
Posted by: jd74914 Mar 23 2011, 10:14 PM
cough...cough...unequal length a-arms with custom uprights...cough cough.  Its looking great!
Posted by: plymouth37 Mar 24 2011, 08:08 AM
cough...cough...unequal length a-arms with custom uprights...cough cough.
Its looking great!You have no idea how tempting that is, don't think I can swing a new suspension on a college kid's budget though.
If anybody feels like donating one I wouldn't turn them down
Check out this one
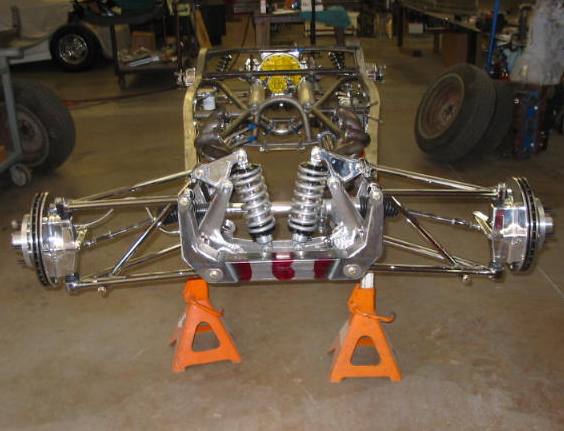
Posted by: Kirmizi Mar 24 2011, 08:32 AM
Dana, you really need to pick up the pace a bit spring break's almost over
Posted by: jhadler Mar 24 2011, 08:54 AM
You have no idea how tempting that is, don't think I can swing a new suspension on a college kid's budget though.
If anybody feels like donating one I wouldn't turn them down
Not to contaminate this amazing and brilliant design, but what about harvesting an SLA front suspension from something else? Say... something you could find cheaply at a local pick-n-pull? Say... something that is a proven, effective design? Say... <gasp-choke> from a <cough - choke> Miata?
Since the front end is basically a blank slate right now, you could build around the suspension once the space requirements are set.
By the way Dana, any chance I could drop by to gaze in wide-eyed wonder at this creation in person?
-Josh2
Posted by: Ferg Mar 24 2011, 09:05 AM
Blue Tape!! 
Posted by: Scott Schroeder Mar 24 2011, 09:31 AM
HA! Ferg -you just made me shoot water out of my nose!!! (we need a water-coming-out-of-the-nose smiley...)
Again Dana, project is simply amazing. It has taken me two nights to mount the
-6 breather tank in my trunk... about the same amount of time it would take you re-engineer and rebuild the Empire State Building....
Posted by: plymouth37 Mar 24 2011, 09:47 AM
Not to contaminate this amazing and brilliant design, but what about harvesting an SLA front suspension from something else? Say... something you could find cheaply at a local pick-n-pull? Say... something that is a proven, effective design? Say... <gasp-choke> from a <cough - choke> Miata?
Since the front end is basically a blank slate right now, you could build around the suspension once the space requirements are set.
By the way Dana, any chance I could drop by to gaze in wide-eyed wonder at this creation in person?
-Josh2
If anybody wants to stop by just send me a PM, my doors are always open!
I will be sticking to the Porsche suspension just because it is free and easy but here is a Miata front for comparison.
Miata's really do have great suspensions, compact and almost infinitely adjustable.
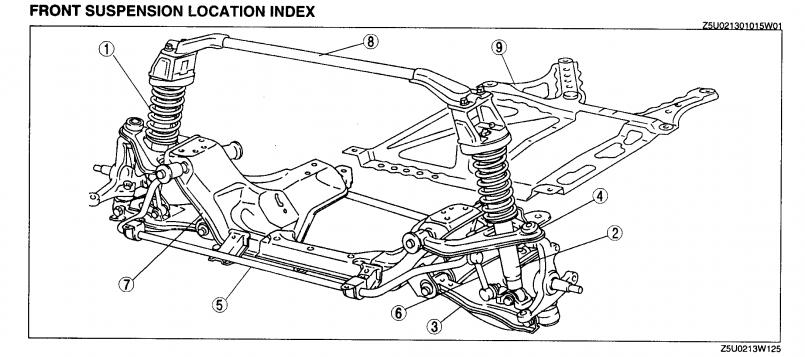
Posted by: plymouth37 Mar 24 2011, 09:59 AM
Wow! Just noticed the view counter, up over 75,000!
Thanks for the support everybody!
Posted by: PeeGreen 914 Mar 24 2011, 10:51 AM
If anybody wants to stop by just send me a PM, my doors are always open!
Currently the doors are off
Posted by: Britain Smith Mar 24 2011, 11:04 AM
I have been look at alternative front suspension options as well. One question I have when running a set-up from a Miata or something else, what do you do with the bolt pattern? Are you have to have a different bolt pattern on the front vs. the rear of the car?
-Britain
Posted by: plymouth37 Mar 24 2011, 11:32 AM
I have been look at alternative front suspension options as well. One question I have when running a set-up from a Miata or something else, what do you do with the bolt pattern? Are you have to have a different bolt pattern on the front vs. the rear of the car?
-Britain
Wheel adapter plates would probably be the easiest option, you would probably be running spacers anyway, so you could just have them adapt the bolt pattern too.
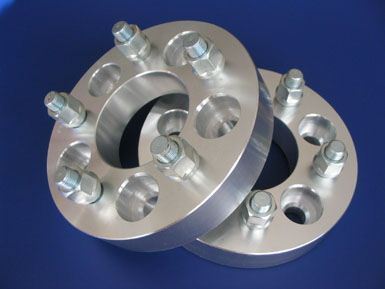
Posted by: plymouth37 Mar 24 2011, 09:48 PM
I fabbed up some plates for the front subframe to attach to. (My cordless drill died on me so those rosette weld holes will be a little bigger)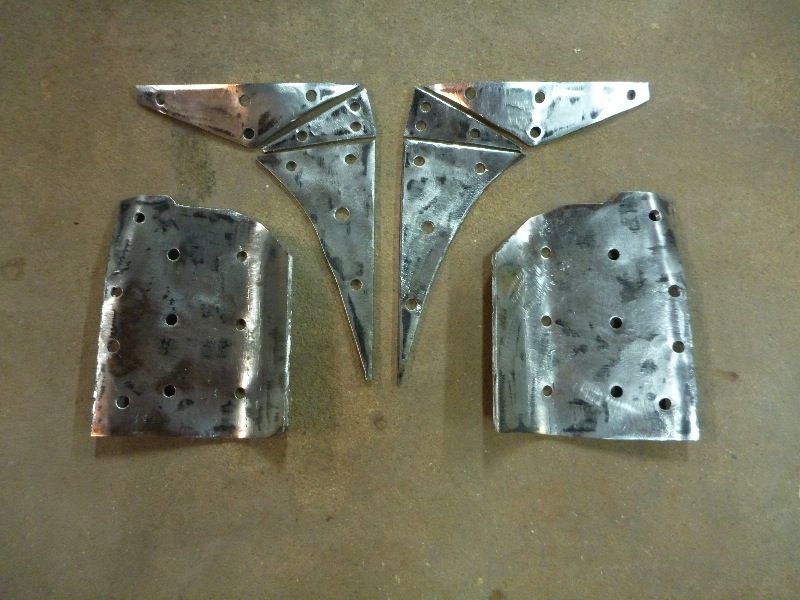
Here is how they will mount. Hopefully I can get most of the front end welded up tomorrow.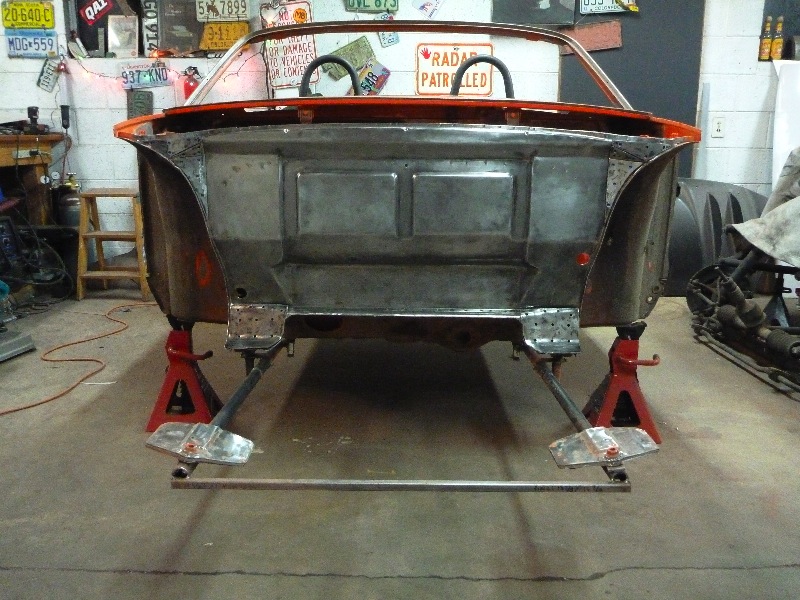
Posted by: rohar Mar 25 2011, 01:22 PM
I have been look at alternative front suspension options as well. One question I have when running a set-up from a Miata or something else, what do you do with the bolt pattern? Are you have to have a different bolt pattern on the front vs. the rear of the car?
-Britain
I'm running aluminum front hubs at 4/114.whatever. I ended up having the rears redrilled/bossed. Redrilling from 4x bolt pattern to 4x leaves a LOT of metal so I'm not so worried about failure.
Besides, there's a TON of rims available in early Miata 4x100.
Posted by: plymouth37 Mar 25 2011, 11:05 PM
I got most of the front welded up today, just the front torsion bar mounts and the other cross bar to go. 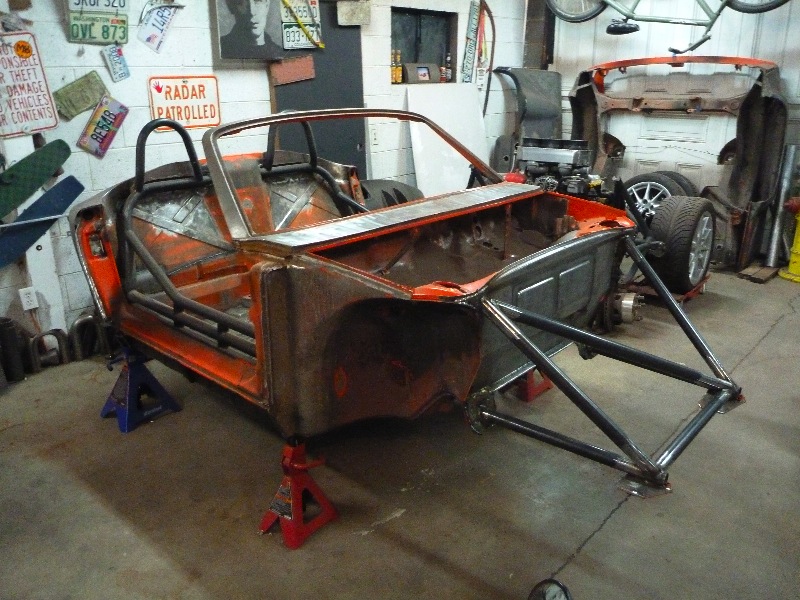
Everything stayed square so I should be able to test fit the entire chassis tomorrow.
Just about time to get this thing back on its wheels to see how it looks in one piece!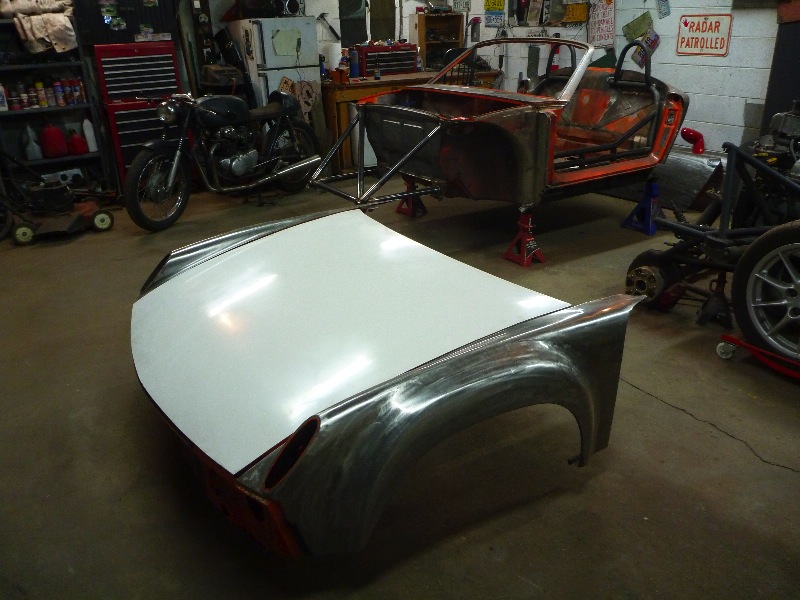
Posted by: plymouth37 Mar 26 2011, 04:16 PM
I finished up the front end today, I will try to mock up the suspension tonight to see how everything fits.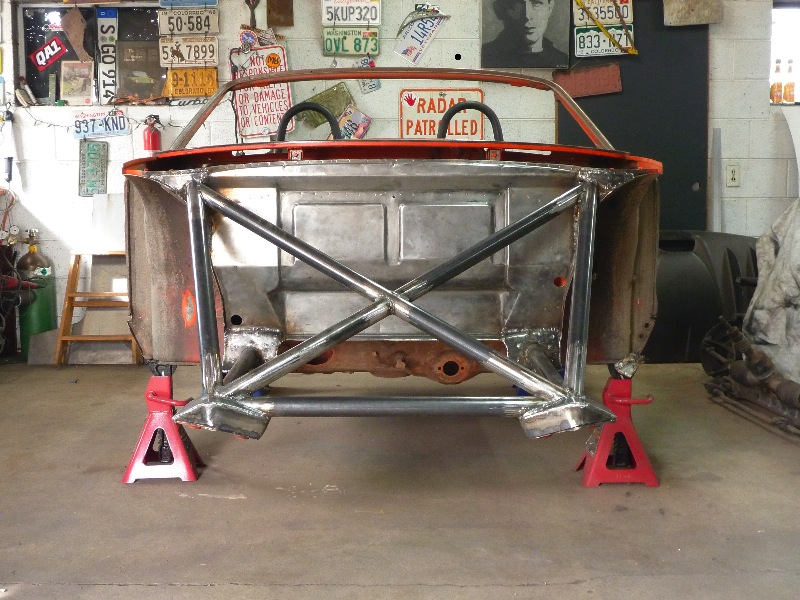
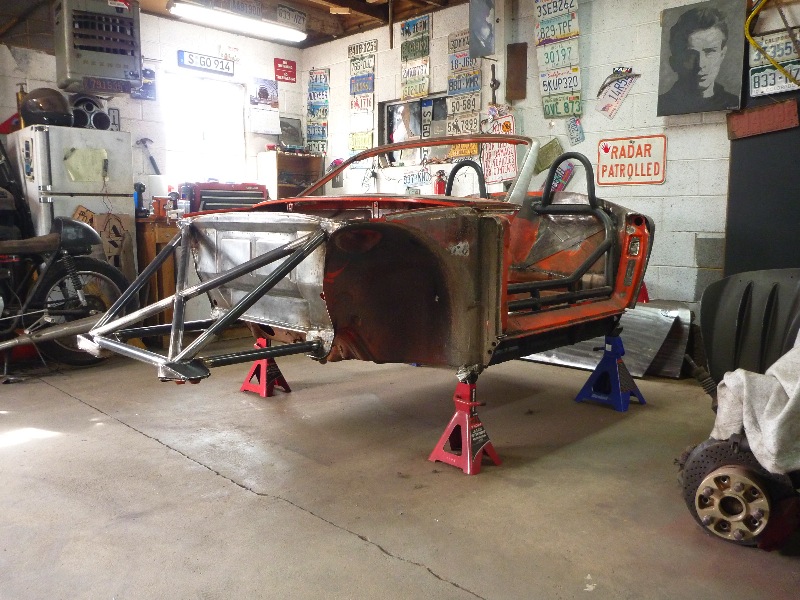
Posted by: plymouth37 Mar 26 2011, 09:25 PM
I test fit the front suspension tonight, the chassis stayed straight and everything bolted up the way it should, lost a bit of trunk space though!
I will bolt on the back half tomorrow and put it back down on its wheels.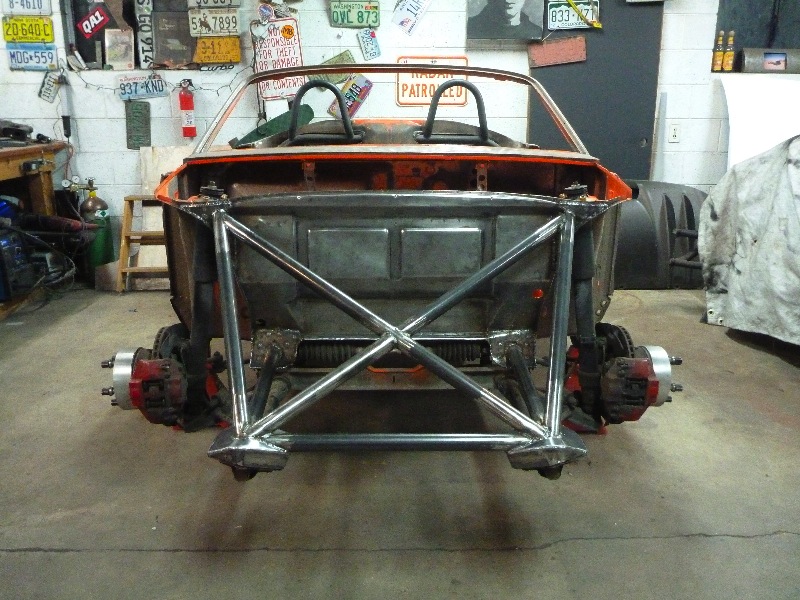
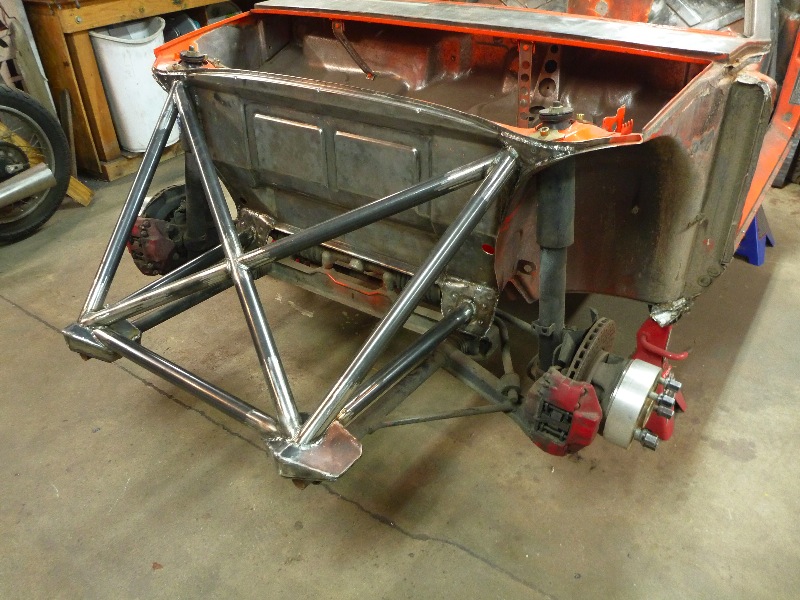
Posted by: plymouth37 Mar 26 2011, 09:26 PM
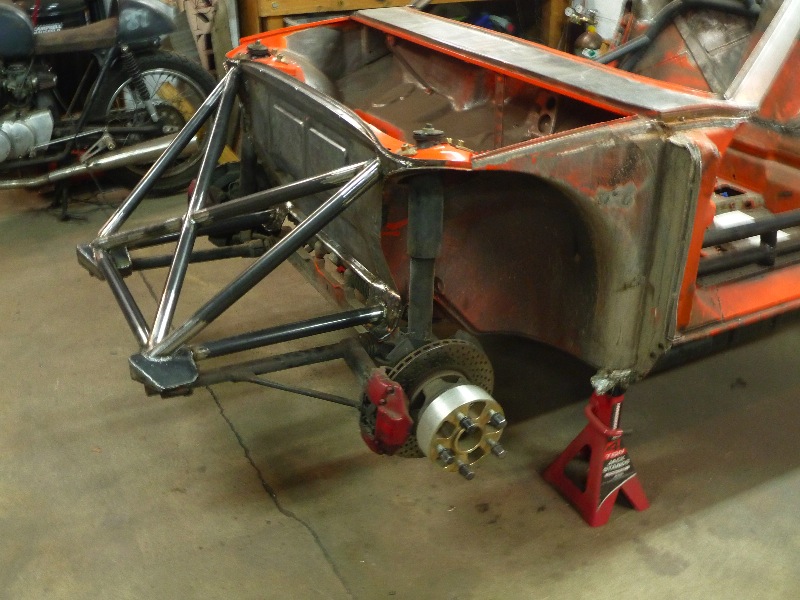
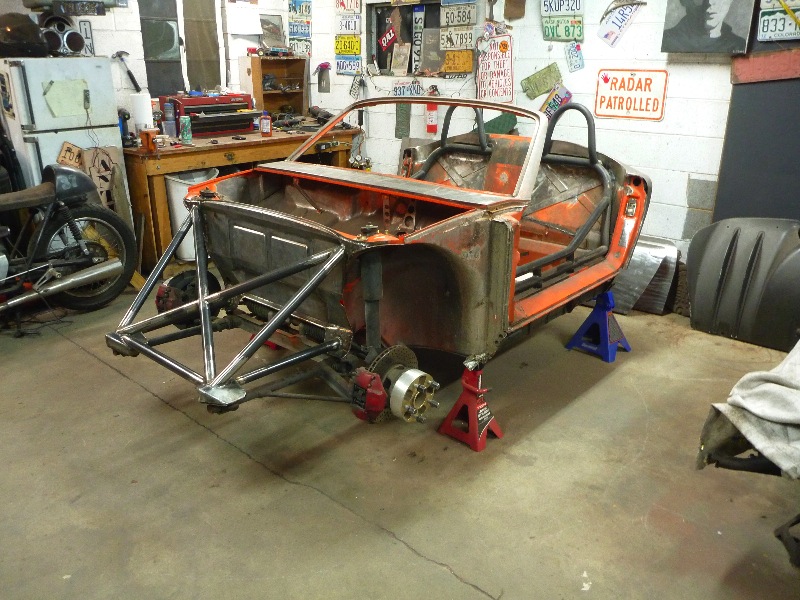
Posted by: Rand Mar 26 2011, 09:44 PM
So I assume front shocktower to hoop in the cab is eminent?
Anyway, so nice to see the front suspension getting tied in terminator style.
Keep it coming Dana!
Posted by: plymouth37 Mar 26 2011, 10:10 PM
So I assume front shocktower to hoop in the cab is eminent?
Yep, I need to start figuring out the best way to beef up that area next, it is going to be a little tricky to route the tubing around the gas tank but I should be able to get a good amount of tube in there to connect the nose to the rest of the cage.
Posted by: wes Mar 27 2011, 12:09 PM
I must say simply amazing work, it has inspired me to work on my own wich is nothing in comparison, thanks and keep up the great work!
Posted by: plymouth37 Mar 27 2011, 12:54 PM
Spring break is drawing to a close, back to school tomorrow.
I bolted the chassis back together and mocked up the body next to it, I have 2 914s now!

Posted by: plymouth37 Mar 27 2011, 12:54 PM
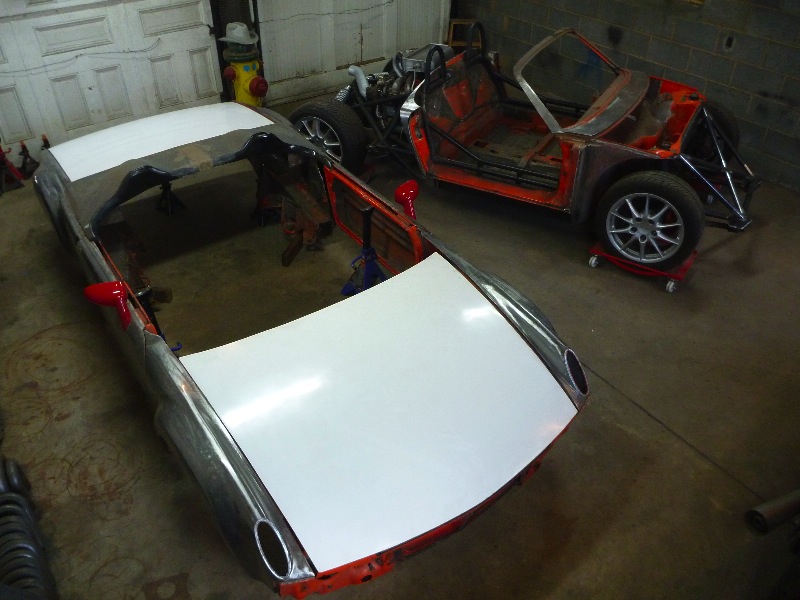
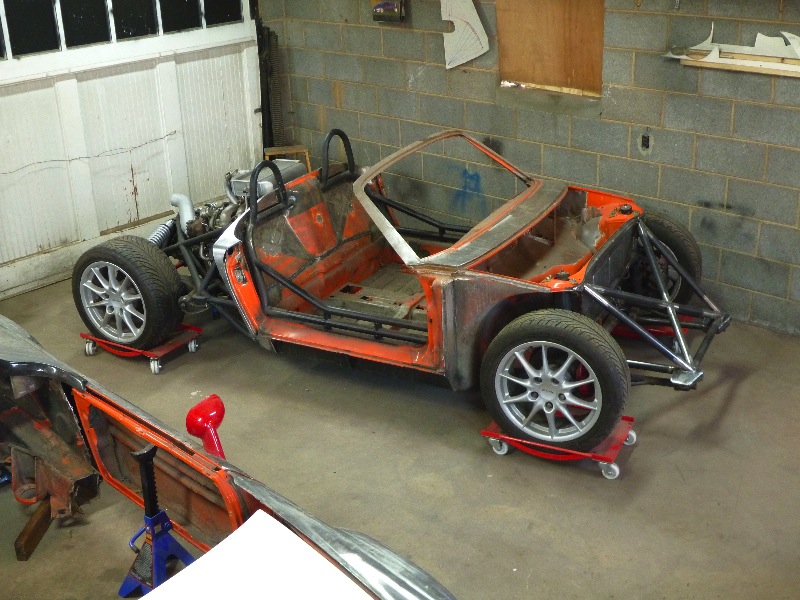
Posted by: kg6dxn Mar 27 2011, 01:41 PM
I think you should look into this fuel cell. It will fit in the stock location with minor mods and give you clearance for the tubing. http://www.summitracing.com/parts/RCI-2161A/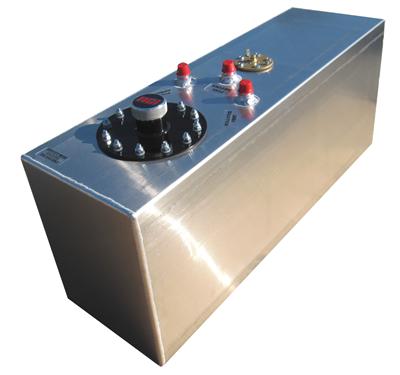
Posted by: plymouth37 Mar 27 2011, 02:02 PM
I think you should look into this fuel cell. It will fit in the stock location with minor mods and give you clearance for the tubing. http://www.summitracing.com/parts/RCI-2161A/
Nice find, that could be perfect, anybody have a pic of one like this installed?
Posted by: plymouth37 Apr 16 2011, 03:14 PM
I did some sidework for my neighbor who is restoring a victorian house next to us and earned enough dough to buy some shiny bits for the car.
If I am going to insist on keeping the antiquated 914 box I figured I had better make it shift as well as possible.
After a call to JWest a Rennshifter and their stage 1 shift linkage showed up.
They are discontinuing the 914 shift linkage and only have the stage one left so if you want one now is the time to order.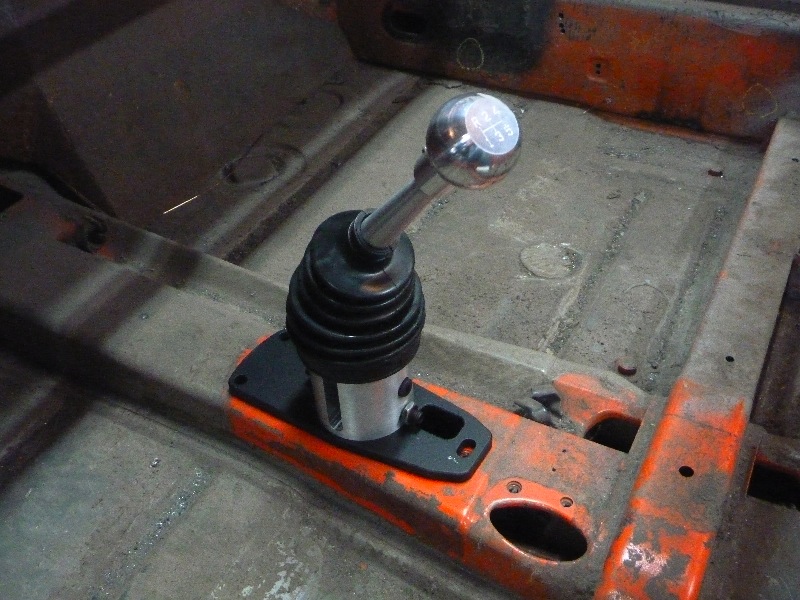
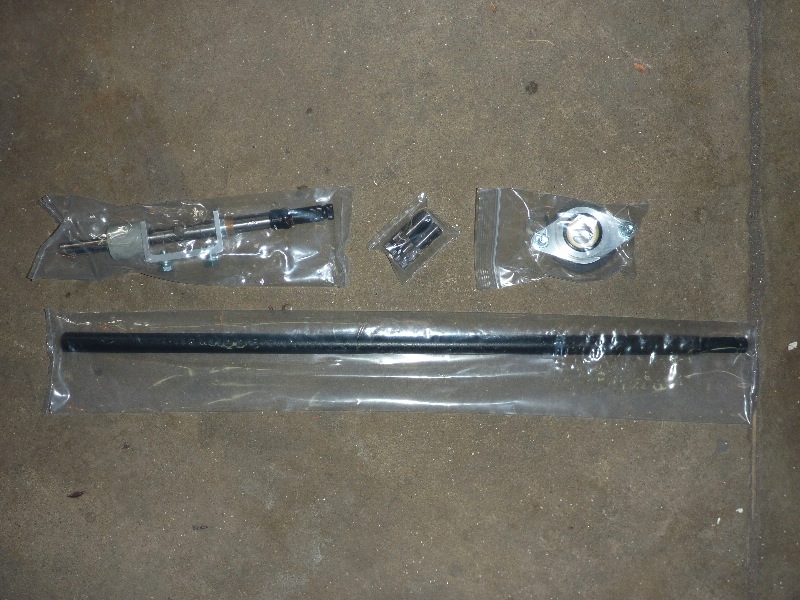
Posted by: 396 Apr 16 2011, 03:52 PM
[attachmentid=173418]
Here's the plan:
Tub up restoration/customization (no cutting corners here).
Speedster styling.
40" tall
Under 1800 pounds.
320 horsepower WRX engine.
Let the games begin!
Very very SWEET build! Congrats and enjoy in good health !
Posted by: smontanaro Apr 16 2011, 05:00 PM
You should talk with Mark in Bartlett, IL (screen name "Bartlett 914") about his new shifter setup.
Skip
Posted by: fat73 Apr 16 2011, 07:48 PM
I did some sidework for my neighbor who is restoring a victorian house next to us and earned enough dough to buy some shiny bits for the car.
If I am going to insist on keeping the antiquated 914 box I figured I had better make it shift as well as possible.
After a call to JWest a Rennshifter and their stage 1 shift linkage showed up.
They are discontinuing the 914 shift linkage and only have the stage one left so if want one now is the time to order.
You won't regret that shifter. Let me know how the other parts work out with the Renegade setup. (clearance wise)
Posted by: banksyinoz May 14 2011, 05:12 PM
OMFG
i am inspired, i love this, cant wait to see the final result
Posted by: tscrihfield May 14 2011, 05:31 PM
OMFG
i am inspired, i love this, cant wait to see the final result
This is one of those threads you hope that has been finished already from years ago.... So you can read it from start to finish without waiting! Impaitience takes over when watching a Thread like this one! Great work! You are quite a fabricator!
Thomas
Posted by: 513mugsy Jun 3 2011, 08:27 AM
This has to be the most mind blowing buildup that I have ever come across. Dana you have to be the most productive fab'er that I have seen. I have a couple of questions... how much of this just comes out of your head and how much have you designed out on paper that we don't see? And how much weight could be saved if you redesigned the rear trailing arms to a chromoly tubing setup...maybe 20-25 lbs a pc? It took me 12 hours to read it all from the start. Very impressed and looking forward to seeing the finished product.
Posted by: plymouth37 Jun 3 2011, 08:48 PM
I ran the coolant lines today. There are a few ways to run them through a 914, I used to have rubber lines running below the floor but wanted to integrate them into the car a little better so I decided to try a different route. I poked around the site and really liked the way Britain Smith ran them in his subie conversion and decided to follow a similar path.
First I welded in tubing that led through the front firewall into the passages that pass beneath the gas tank,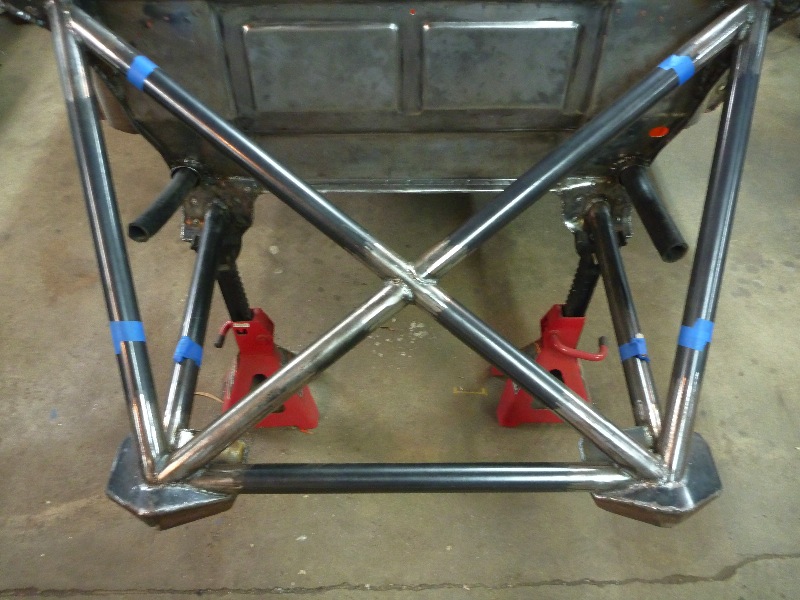
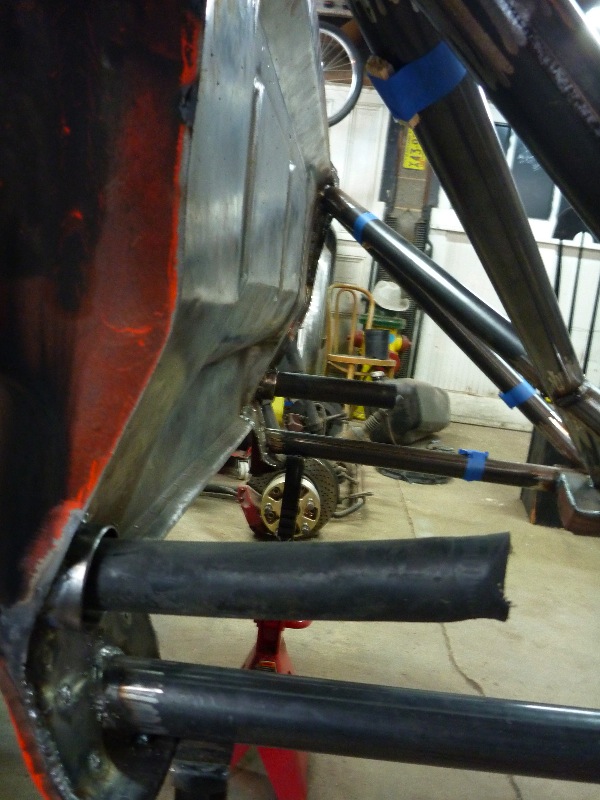
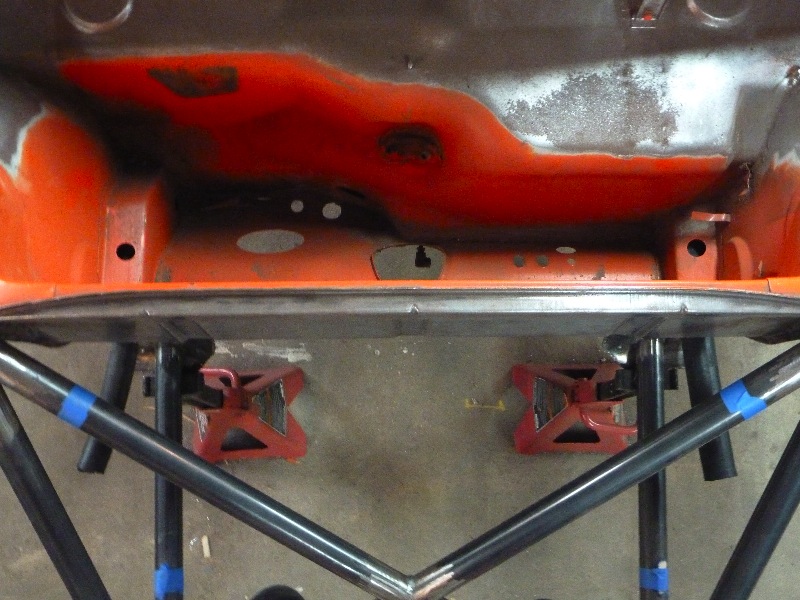
Posted by: plymouth37 Jun 3 2011, 08:51 PM
Then I opened up the other end of the passage and the end of the long and welded in tubing to protect the hose from sharp edges.
Next step is to make some nice covers to seal off the area where the hose passes through the cabin.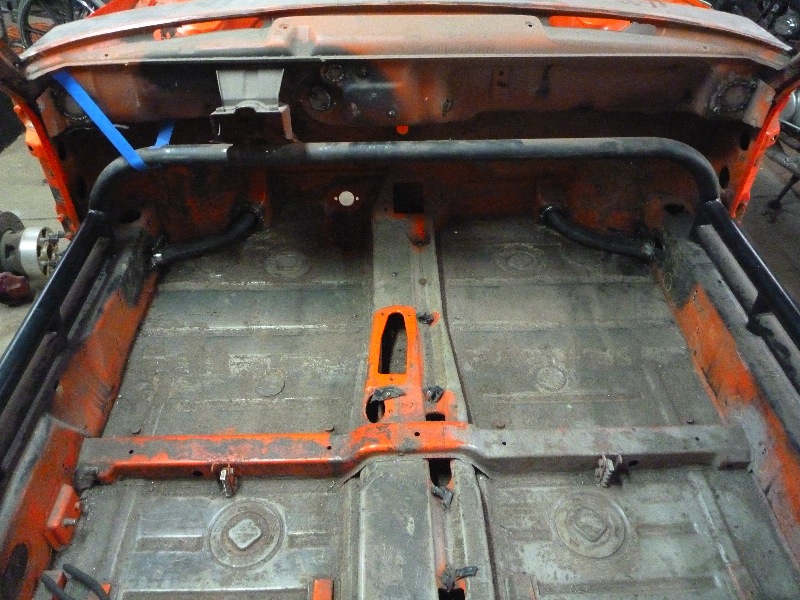

Posted by: plymouth37 Jun 3 2011, 08:53 PM
Finally I opened up the back of the long and welded in a tube that passes through the firewall.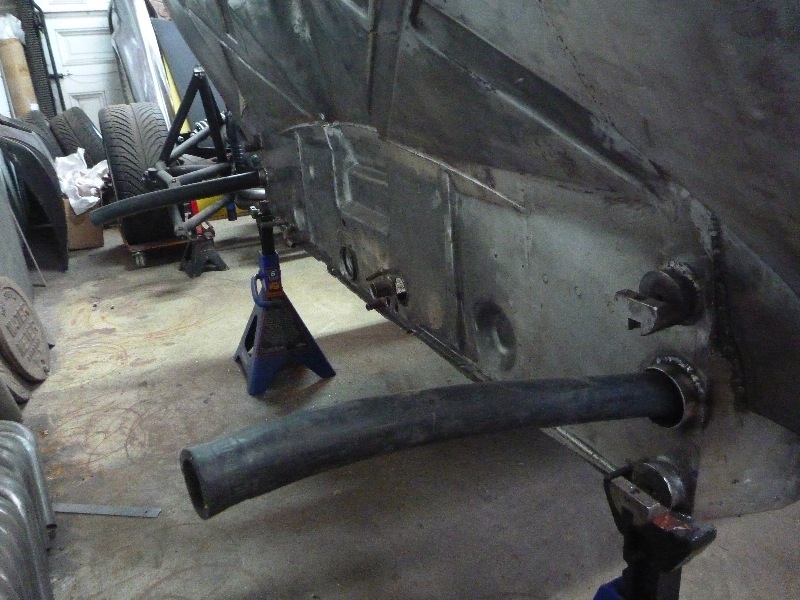
Posted by: majkos Jun 3 2011, 09:18 PM
Hmmm........
I like it.
Glad you done your homework,Dana!
Posted by: Britain Smith Jun 3 2011, 10:48 PM
Looking good. I want to see what you come up with to cover the lines inside the cabin...I might want you to make an extra set Needs to be lightweight!
-Britain
Posted by: plymouth37 Jun 13 2011, 05:59 PM
I mounted the radiator today, I am running the standard Renegade unit, due to the new position I had to change the outlet tube's angle and the location of the bleeder. Luckily there is a helicopter repair place close to my house that can weld anything to anything so they could handle welding the aluminum radiator easily.
Keeping with my tradition of mounting everything as low and inboard as possible, the radiator is mounted far inside the trunk, it is at a pretty steep angle but with proper shrouding I believe it will cool the engine just fine.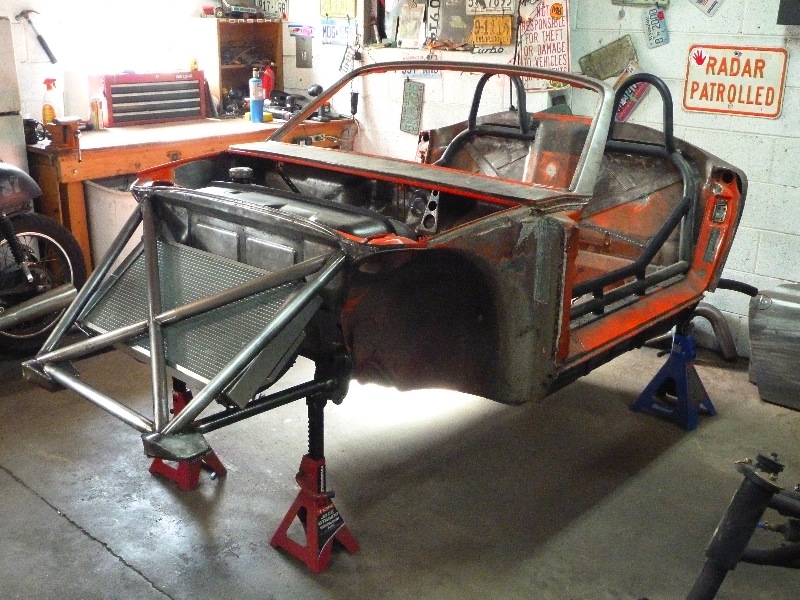
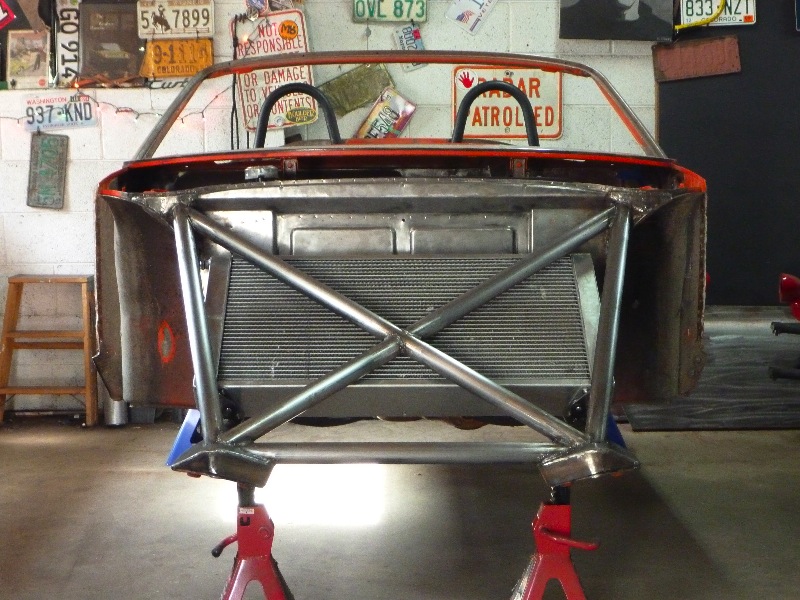
Posted by: plymouth37 Jun 13 2011, 06:00 PM
Here is a close up of the mounts, the radiator is rubber insulated at all 4 corners.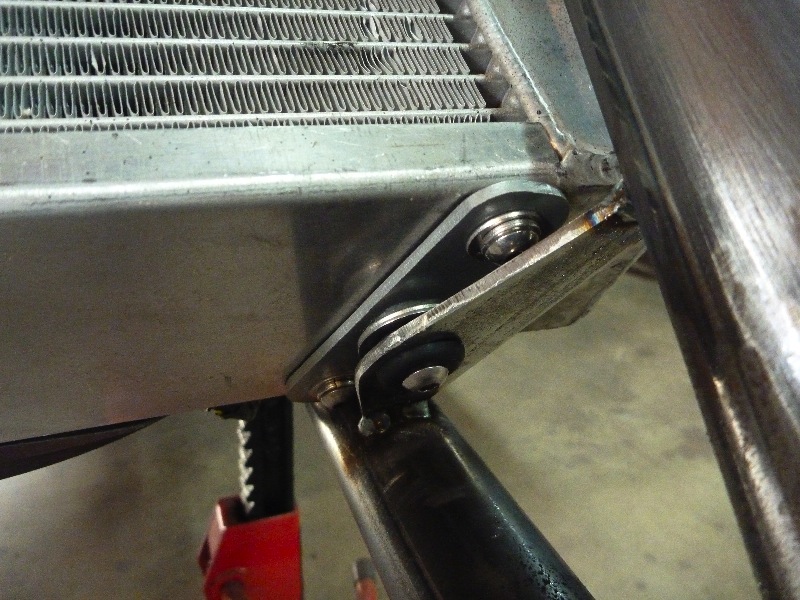
Posted by: Ferg Jul 27 2011, 03:56 PM
![]()
Posted by: plymouth37 Jul 27 2011, 04:14 PM
Yeah yeah I know
I actually picked up the last bits of tubing I need for the chassis this morning.
Posted by: Ferg Jul 27 2011, 04:20 PM
Coolio
Posted by: wingnut86 Jul 27 2011, 06:23 PM
DAMN.
You get us all together for a meeting here, and there's no recent emergency/build??
OK
We'll wait
Posted by: AgPete139 Sep 12 2011, 02:04 PM
Checking back in after quite some time. I like the progress.
Still excited to see this puppy on the pavement again...
Pete
Posted by: MDG Sep 24 2011, 04:46 PM
Where's Dana? Why has he foresaken us? 
Posted by: KELTY360 Sep 24 2011, 07:10 PM
Where's Dana?
Why has he foresaken us? I saw him post on another thread yesterday so he's around. Maybe he's taken up pottery.
Posted by: plymouth37 Sep 24 2011, 08:39 PM
Where's Dana?
Why has he foresaken us? I saw him post on another thread yesterday so he's around. Maybe he's taken up pottery.
Sorry everybody, I am around, I am applying to grad school this December and am rushing to get applications and portfolios submitted. Have no fear, I have not forsaken you, just super busy with school!
Posted by: mark21742 Sep 25 2011, 10:53 AM
Where's Dana?
Why has he foresaken us? I saw him post on another thread yesterday so he's around. Maybe he's taken up pottery.
Sorry everybody, I am around, I am applying to grad school this December and am rushing to get applications and portfolios submitted. Have no fear, I have not forsaken you, just super busy with school!
It's a shame you don't live close to me.....I have a feeling if we parked our cars in the same big garage side by side we could motivate eachother through several productive sleepless nights in the garage
Posted by: Kraftwerk Oct 19 2011, 12:28 PM
I would like to take this opportunity to say WOW~!
Posted by: Bob L. Oct 24 2011, 09:13 PM
Hi, I just found your thread, What did I miss?
Seriously though, I just spent the last two days reading from the top, and have concluded 3 things:
1) I suck!
2) I have a new hero.
3) You can hate your hero.
All the other necessary praise has already been heaped upon you in sufficient quantities.
Rock on!
Posted by: KELTY360 Dec 10 2011, 11:08 PM
Is it soup yet?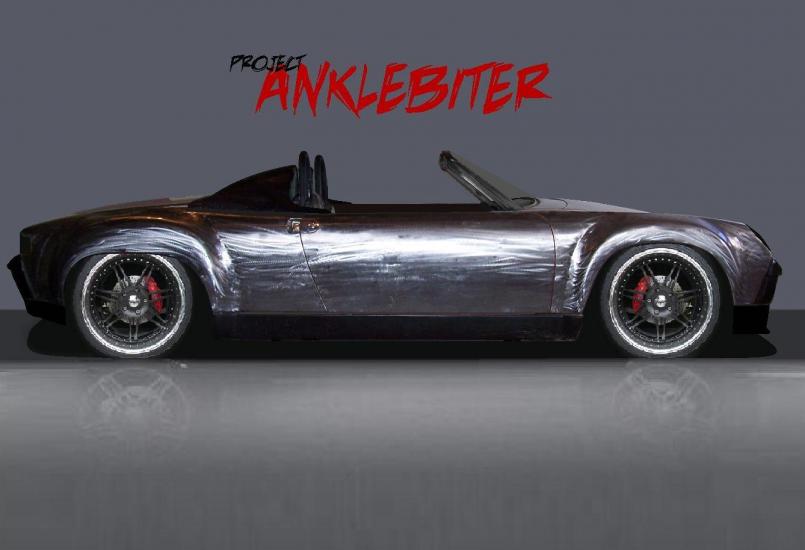

Posted by: plymouth37 Dec 10 2011, 11:24 PM
Haha, no, I graduate in a week, between the chaos of school and applying to grad school I haven't had any time to even look at the car.
Hopefully once I graduate on Friday I will have plenty of time to work on the car.
I am really looking forward to getting in some 914 time soon!
Posted by: KELTY360 Dec 10 2011, 11:37 PM
I am really looking forward to getting in some 914 time soon!
So are we.
Congrats on your graduation Dana and good luck on getting into grad school. Now, enough with the excuses.....
Posted by: jcambo7 Dec 11 2011, 02:10 AM
Seriously get to work.
Posted by: rudy543us Dec 19 2011, 08:34 PM
Dude
What do you do for a living, you have to be a engineer.
I'm not trying to kiss up, I am just giving credit were it is due.
Rudy
Posted by: plymouth37 Dec 19 2011, 11:45 PM
Dude
What do you do for a living, you have to be a engineer.
I'm not trying to kiss up, I am just giving credit were it is due.
Rudy
I started out trying for a degree in Mechanical Engineering, then switched to Architecture, I just graduated first in my class with an undergrad in Architecture on Friday.
Posted by: PeeGreen 914 Dec 20 2011, 12:08 AM
Dude
What do you do for a living, you have to be a engineer.
I'm not trying to kiss up, I am just giving credit were it is due.
Rudy
I started out trying for a degree in Mechanical Engineering, then switched to Architecture, I just graduated first in my class with an undergrad in Architecture on Friday.
Congrats Dana
That's awesome news. Now get to work
Posted by: flipb Dec 20 2011, 09:37 AM
Dude
What do you do for a living, you have to be a engineer.
I'm not trying to kiss up, I am just giving credit were it is due.
Rudy
I started out trying for a degree in Mechanical Engineering, then switched to Architecture, I just graduated first in my class with an undergrad in Architecture on Friday.

Congratulations! Can't wait to see the garage you design for Anklebiter.
Posted by: JmuRiz Dec 20 2011, 12:19 PM
Dude
What do you do for a living, you have to be a engineer.
I'm not trying to kiss up, I am just giving credit were it is due.
Rudy
I started out trying for a degree in Mechanical Engineering, then switched to Architecture, I just graduated first in my class with an undergrad in Architecture on Friday.
Congrats, you should move out to the DC area and work at my wife's architecture firm. Then you could help me on my car
Posted by: Gint Dec 20 2011, 06:44 PM
Grats Dana. I'll buy you a beer the next time I see you.
Posted by: MDG Dec 20 2011, 07:22 PM
That's fantastic news, Dana - congratulations!
But before you start building really cool looking buildings will you PUH-LEEEZE get back to work on the car.
I dunno. I just feel like I have no direction without this project moving forward. It's like waking up every morning to an overcast sky. I just don't know.
Posted by: wingnut86 Dec 20 2011, 07:31 PM
Absolutely!
great work.
My son changed from Biomedical to Electrical and then to Mechanical and Math recently. I like that combo
Posted by: DblDog Dec 20 2011, 08:27 PM
It's obvious you have a great number us waiting for your every next move.
In reply # 872, we get to see your project in it's 'fabrication aesthetic'...it is purely visceral. Naked. Far from purist. The culmination of vision and the epitome of execution.
As we await the next chapter, would it be possible to see other views of the car?
...the 914world is watching.
(btw, one architect to another)
Posted by: plymouth37 Jan 10 2012, 07:18 PM
I have finally managed to make some time to work on the car!
I had an entire day so I decided to finish the last section of the cage; the connection between the front shock mount and the existing cage.
This is a pretty tricky spot to run tubing through on the 914, especially with my low knee bar but I did the best I could with it.
I started out by welding in base plates for the cage.
Not my best welding work by far but welding 1/8" plate to sheet metal is super tricky.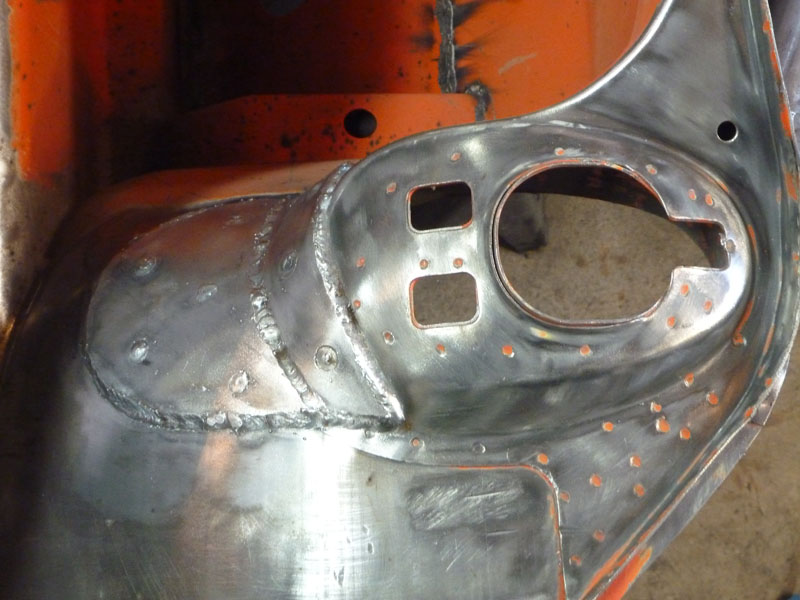
Next I welded in a tube from the knee bar to the shock tower.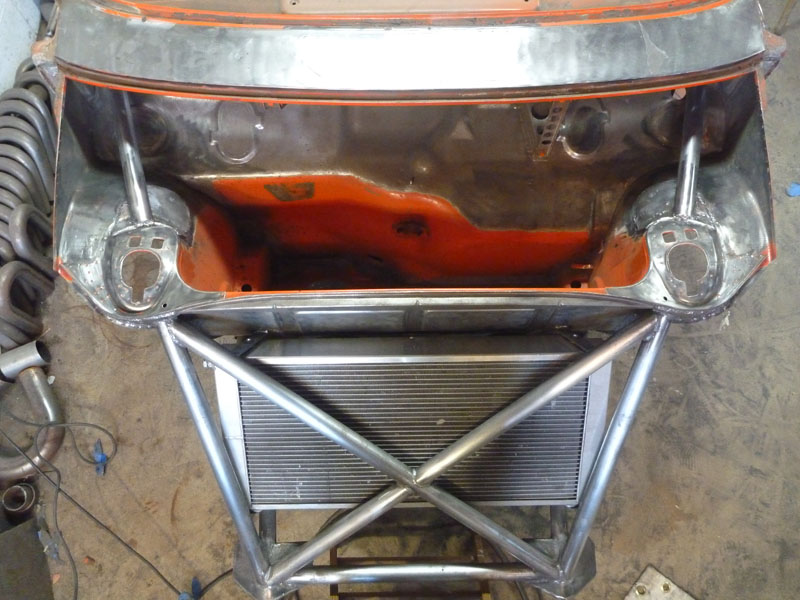
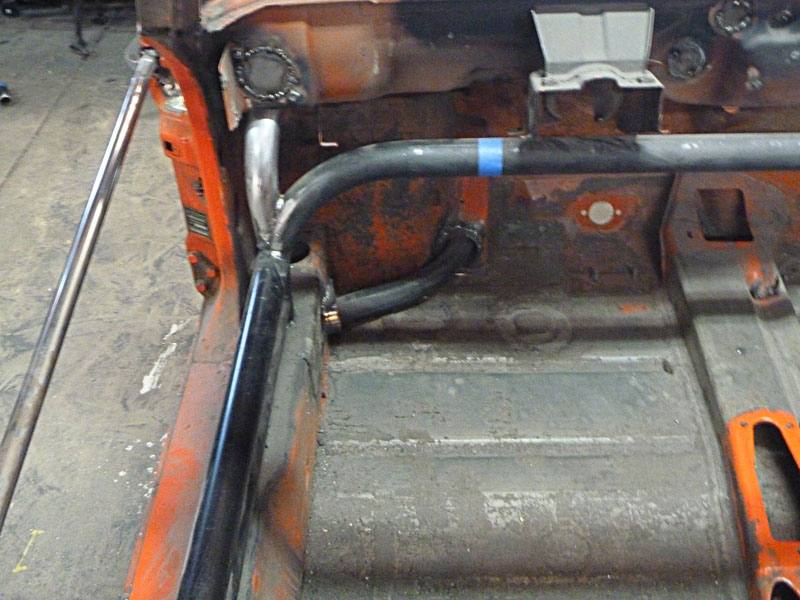
Finally I welded in a second bar to triangulate the connection.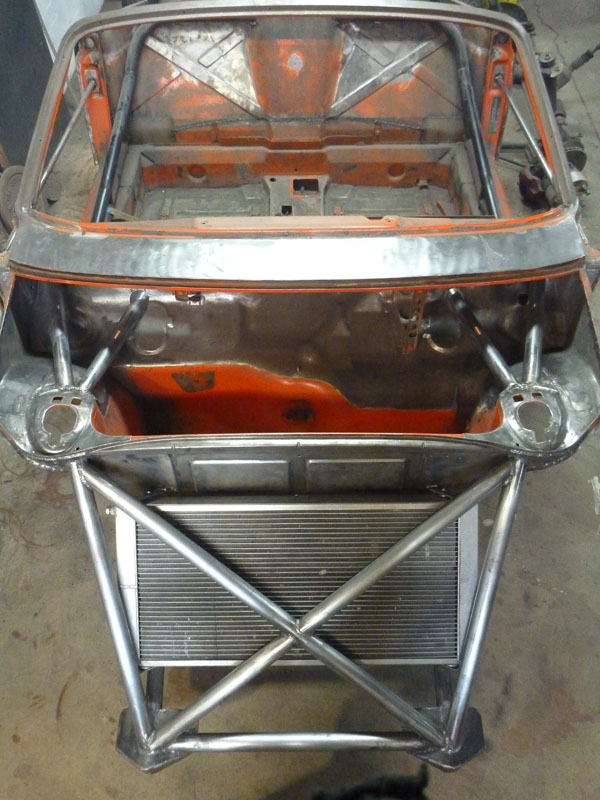

Here is a quick mockup with the tank.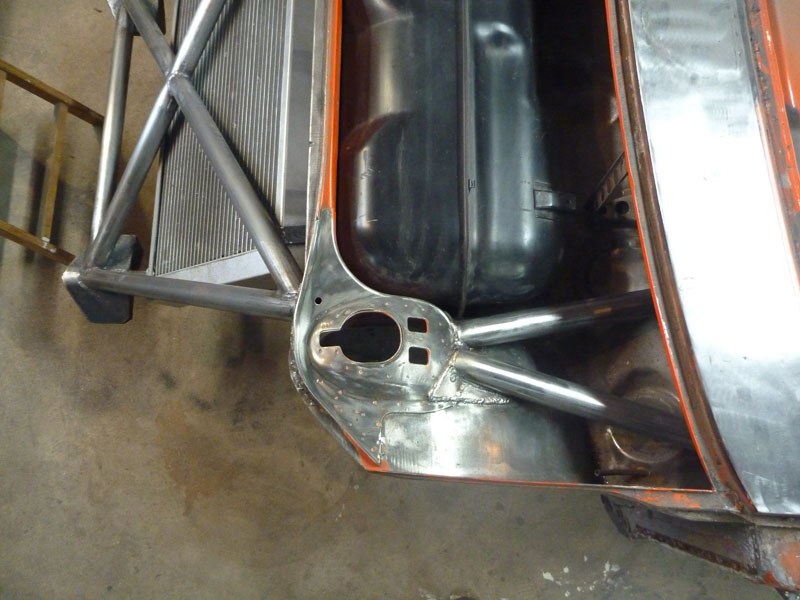
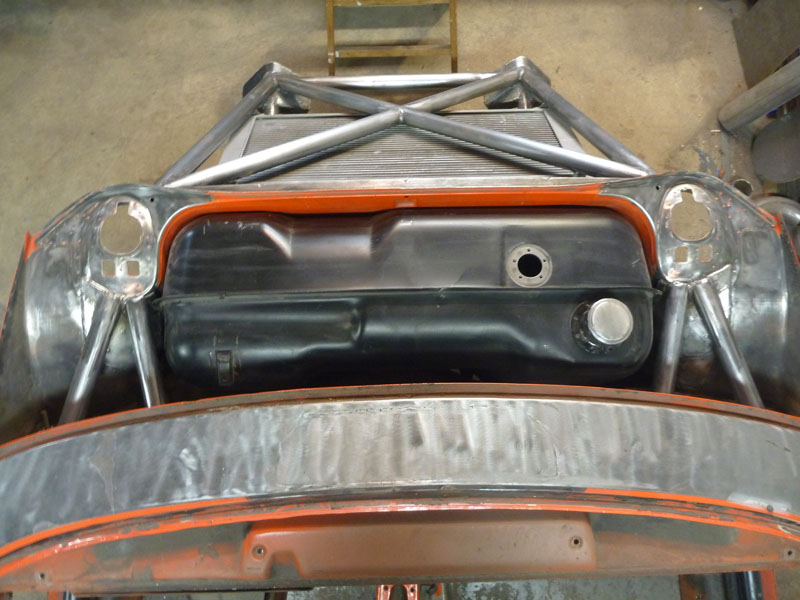
Posted by: PeeGreen 914 Jan 10 2012, 07:42 PM
I've been waiting for this day to come
Looking forward ot seeing more Dana
Posted by: MDG Jan 10 2012, 08:13 PM
Welcome back, Dana!! Immaculate work as always. I kinda did something similar on Dave's car.
Posted by: wingnut86 Jan 10 2012, 09:07 PM
Ahhh, The "DANA-NATOR" is BACK!
Posted by: plymouth37 Jan 11 2012, 07:01 PM
Not a ton of progress made today, I had a job interview this morning so I only had a couple of hours to work on the car this afternoon.
I didn't get a chance to seal off the holes where the tubing runs under the dash yesterday so I tackled that today.
I am glad I am pretty much done welding in this area of the car, access is a nightmare, welding upside down in a footwell sucks!
Before: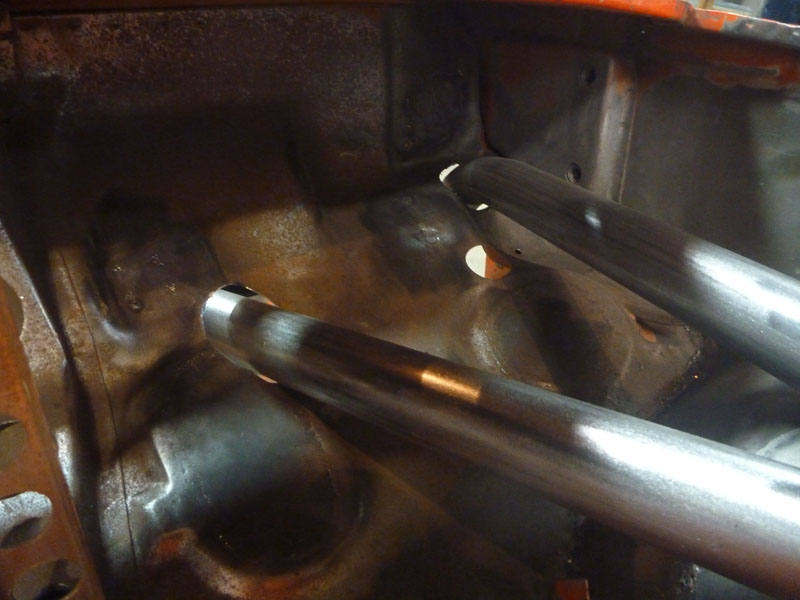
After:
Posted by: plymouth37 Jan 12 2012, 05:18 PM
Today I started tackling the rusty spots on the tub, luckily most of my car's rust was on parts that I removed but there is still a little eating the door sill.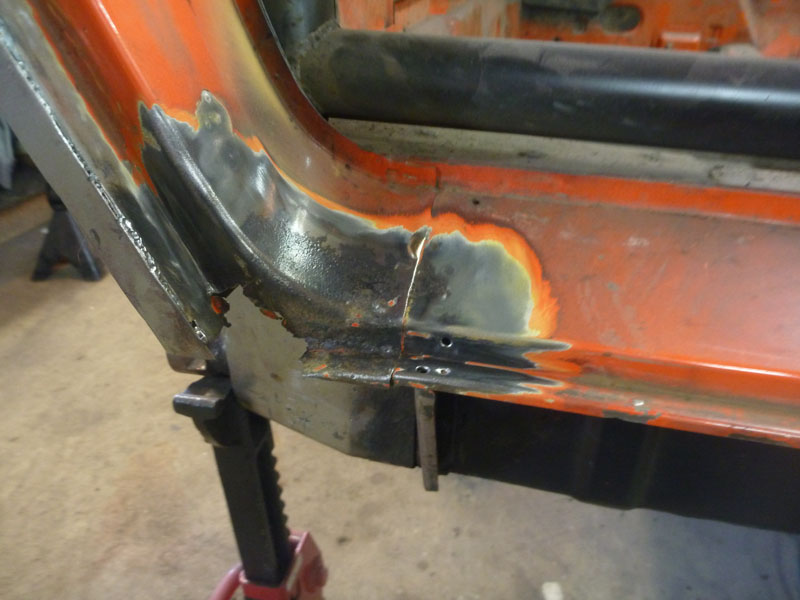
First I made a template of the opening to ensure everything lined up once I was finished.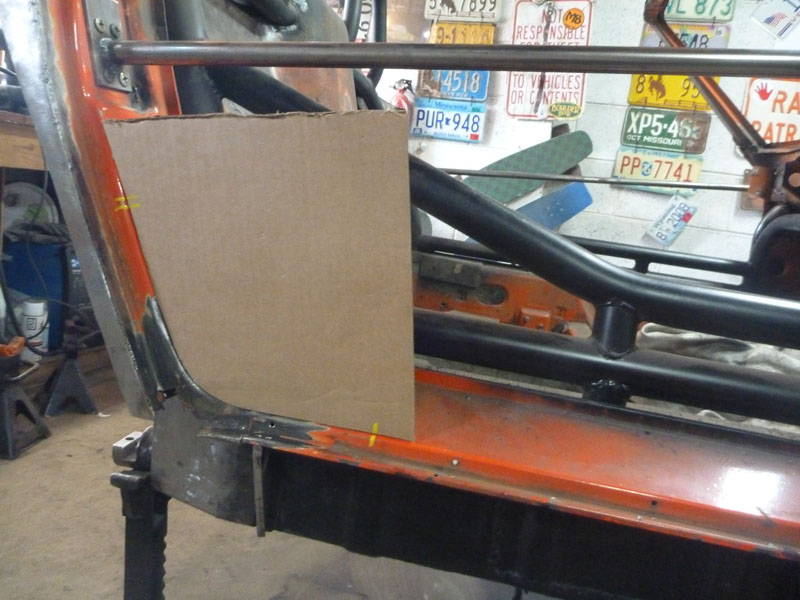
Then I rebuilt the rotten area.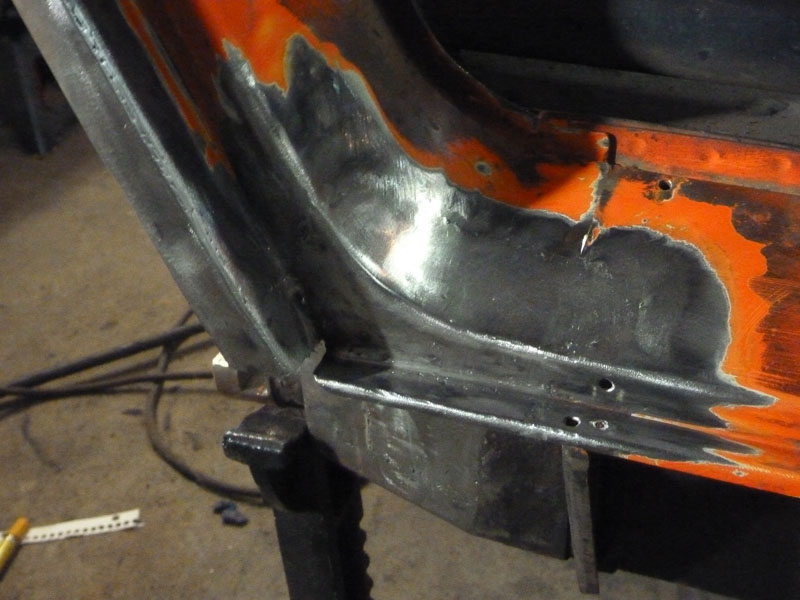
Finally I test fit the rocker.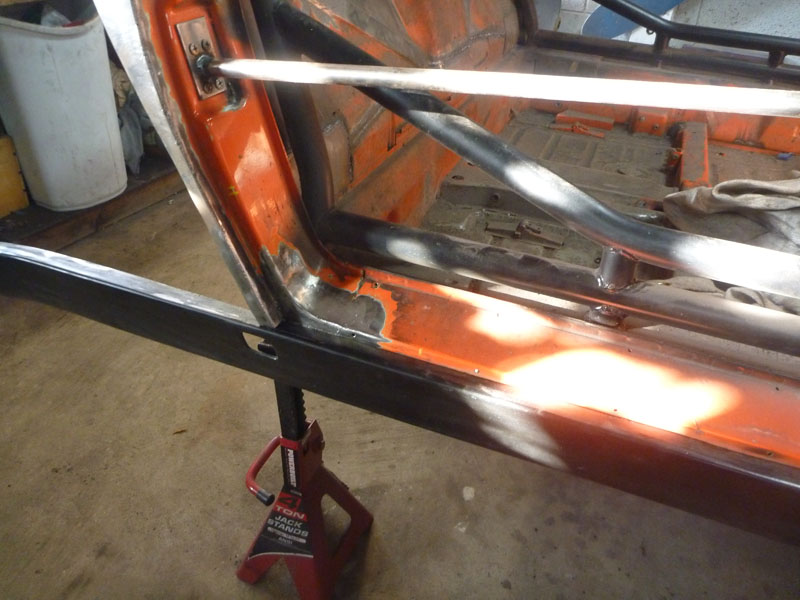
Posted by: jcambo7 Jan 12 2012, 08:15 PM
Man finally! I was starting to have withdrawals.
Posted by: wingnut86 Jan 12 2012, 08:17 PM
you and me both brother...
Posted by: JRust Jan 12 2012, 08:37 PM
Awesome Dana! Glad to see you back at it! Excellent work as usual
Posted by: MDG Jan 12 2012, 09:24 PM
Oh, Dana? Happy Birthday!
Posted by: plymouth37 Jan 12 2012, 09:27 PM
Oh, Dana? Happy Birthday!
Thanks!
Posted by: bigkensteele Jan 12 2012, 09:33 PM
Dude, you need to send in a tape to Spike or Speed! I would much rather watch you work than most of the JOs that have shows on those channels now. Throw in a little architecture work as an added bonus - the ultimate man show!
Posted by: plymouth37 Jan 30 2012, 05:22 PM
Today I repaired the other door jamb's corner that was rotted out.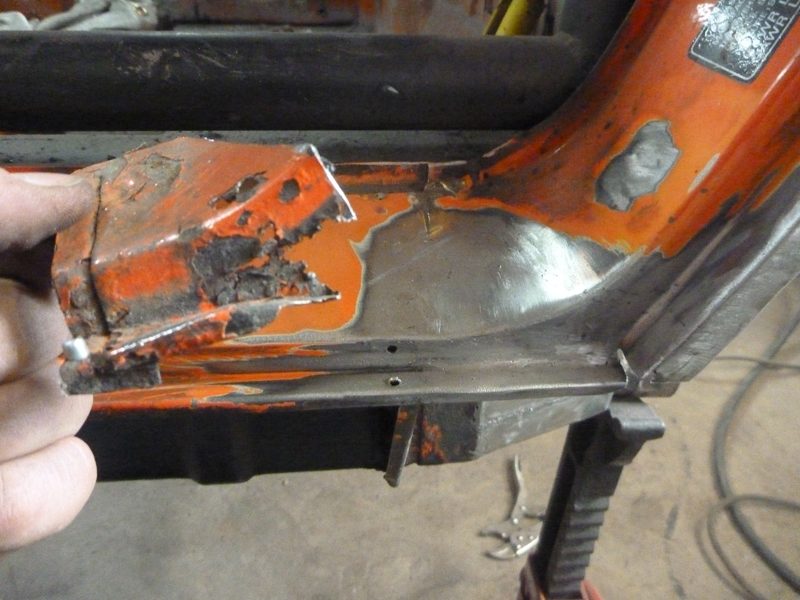
I also welded in nuts to mount the Jwest shift rod bushing. 
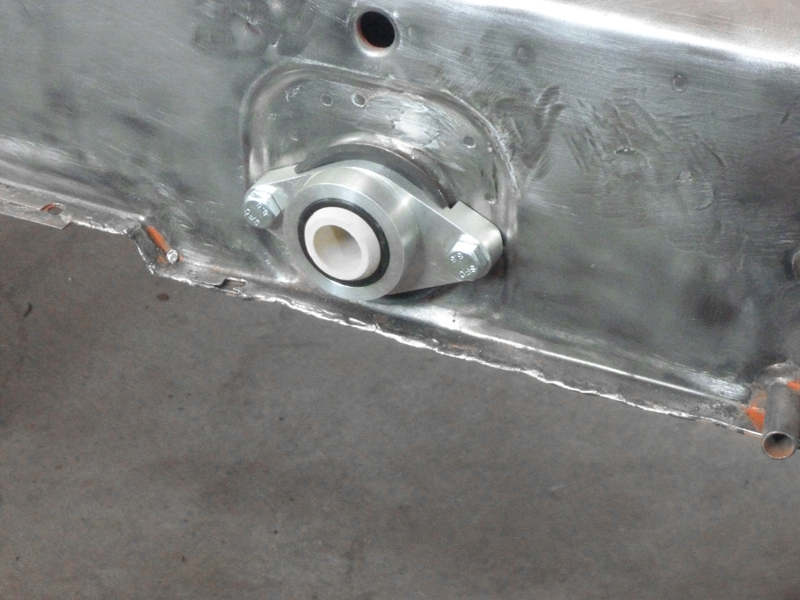
I never really finished the area around the door handle recess when I built the firewall so I decided to clean that up on both sides.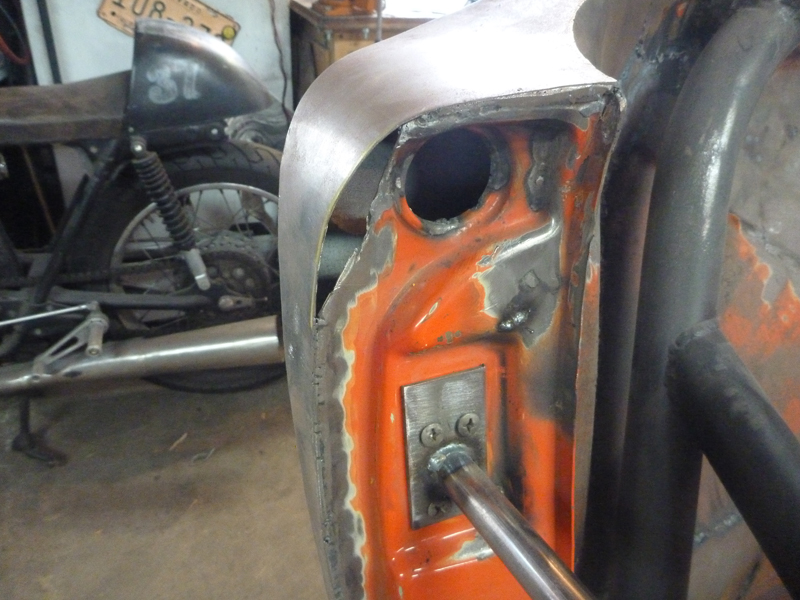
I am shaving the door handles so I filled the area where the recesses used to be and generally cleaned everything up.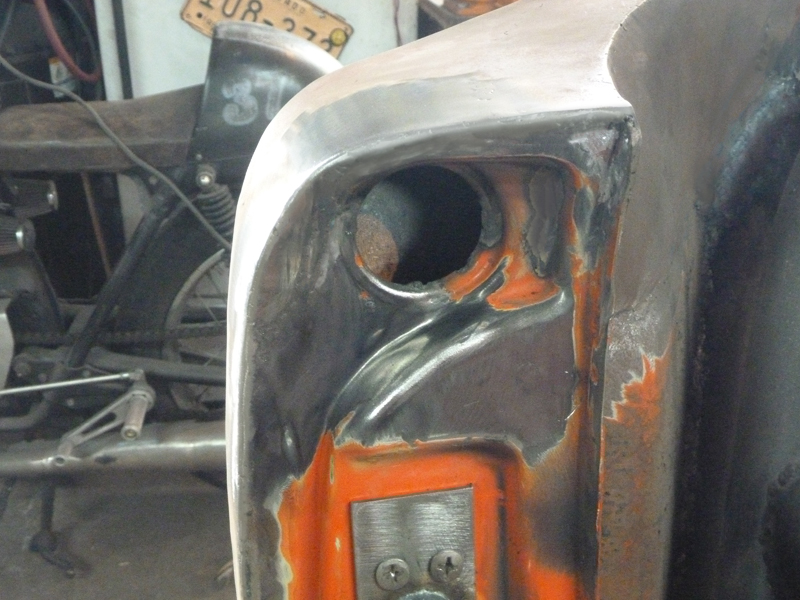
Posted by: 513mugsy Jan 30 2012, 05:29 PM
Awesome work. Where and how are the door popper's being mounted then?
Posted by: Ferg Jan 30 2012, 05:39 PM
Posted by: plymouth37 Jan 30 2012, 05:44 PM
Awesome work. Where and how are the door popper's being mounted then?
Since the car will be a true roadster I am imitating the MGA door setup.
The doors will be hollow with a cutout for storage, inside the cutout will be a cord that runs horizontally through the door.
It will be anchored at one end and attached to the latch mechanism at the other. To get in you will just reach in the car and pull the cord. Super simple, super light.
MGA door cutout:
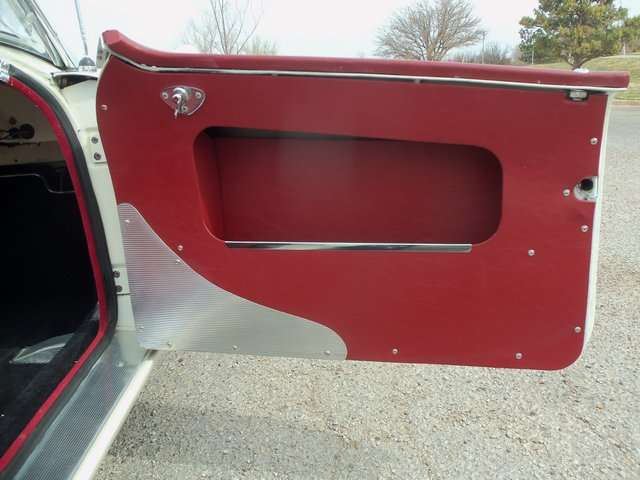
Cord behind door panel:
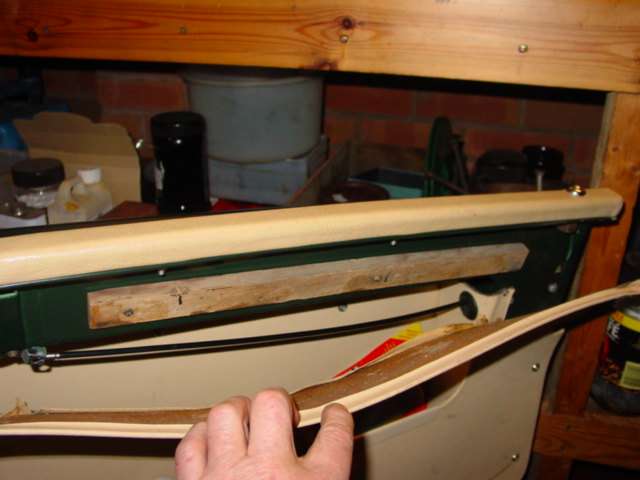
Posted by: 513mugsy Jan 30 2012, 06:03 PM
Even more awesome! That idea is great. I was thinking of running locks and poppers through an alarm system myself...but I also need windows and locks cause I plan on traveling when I finally saw off the rotisserie and reattach the suspension!!
Posted by: 3d914 Feb 18 2012, 09:47 AM
That's a very cool design feature with the doors. It's evident you have a clear vision of what you want to achieve. Most achitectural/engineering type do. Keep it up.
Almost forgot - congrats on the graduation!
Posted by: plymouth37 Feb 20 2012, 04:16 PM
No fun work today, just cleaning up the tub in preparation for paint, I want to fill every unused hole in the tub before it gets sprayed.
Since I had to tunnel through this part of the long for the coolant hoses I figured it would be good to add some metal back into this area.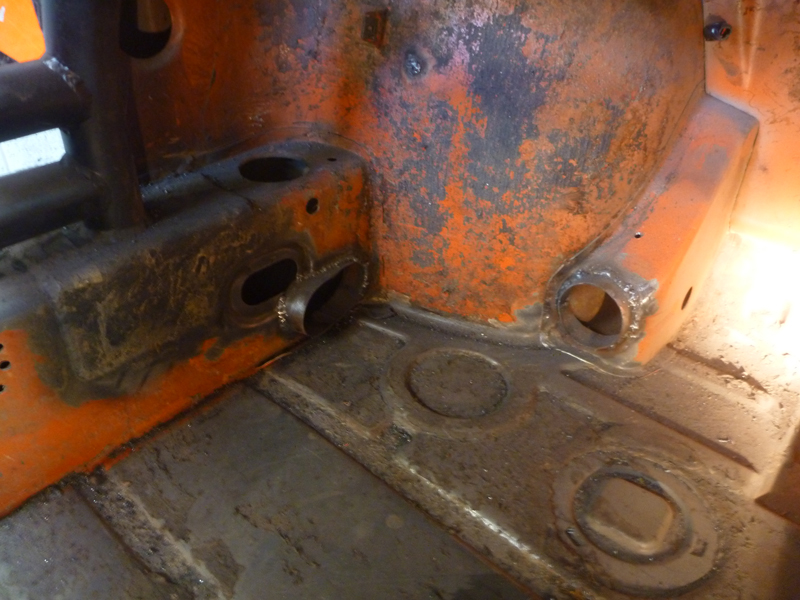
Since I was working in the area I decided to cleanup and patch any holes in the longs I had created when I removed the heater ducting.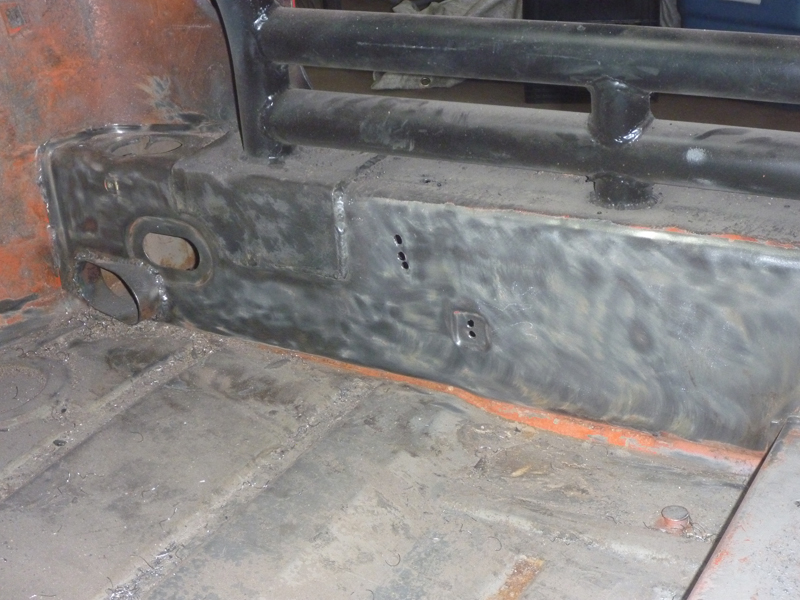
Everything is welded, it is reassuring to find it harder and harder to find projects to do before the chassis is ready to paint!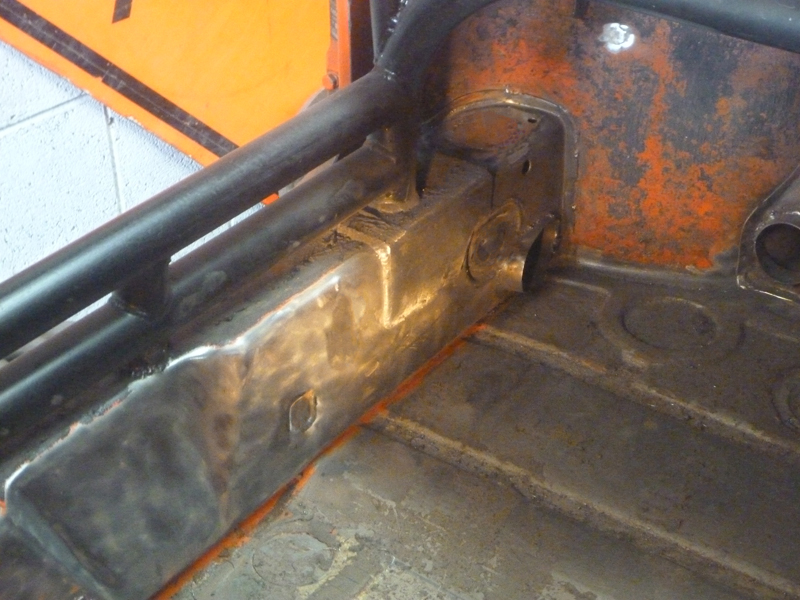
Posted by: plymouth37 Mar 16 2012, 05:48 PM
Hey everybody! I just wanted to check in, I haven't been able to work on the car for a while. I am working full time at an architecture firm in downtown Boulder, so "Garage Time" has been at a minimum. And on a professional note I also want to add that I got accepted to Penn's Architecture Graduate Program! I am not sure how that will effect the Anklebiter, I do know this will be an excuse to get it as complete as I can if I have to store it until I get settled somewhere. Anyway here is a current pic to tide you over, I will try to get in some time this weekend, the drivetrain half of the car only needs about a days worth of work before it will be complete.
Posted by: DBCooper Mar 17 2012, 03:21 PM
Contrats on the Penn part, good school. Sorry about the Philadelphia part.
Posted by: Ferg Mar 17 2012, 04:20 PM
Contrats on the Penn part, good school. Sorry about the Philadelphia part.
No joke, hope you make it back here!!
When do you start, time for a party
before you leave.
Posted by: trojanhorsepower Mar 17 2012, 05:38 PM
Congrats!
Posted by: Dr Evil Mar 17 2012, 06:16 PM
Hmmm, 6 hrs from me Maybe 3 hrs in the future.....depending on how long you are there.
Posted by: firstknight13 Mar 18 2012, 09:07 AM
it would be great to see you on the east coast.....!!!!!!
Posted by: wingnut86 Mar 18 2012, 09:23 AM
Hmmm, maybe you could even lend your expertise to Scotty, Zach and Doc on their racer build - show'em how's it's done from a tube frame point of view.
Don't forget to post pictures if you guys become "The 4 Horsemen of the Apocolypse"
Posted by: plymouth37 Mar 18 2012, 08:07 PM
I got a little time today to pretty much wrap up the rear portion of the car.
I started off by bending and mounting the fuel return line.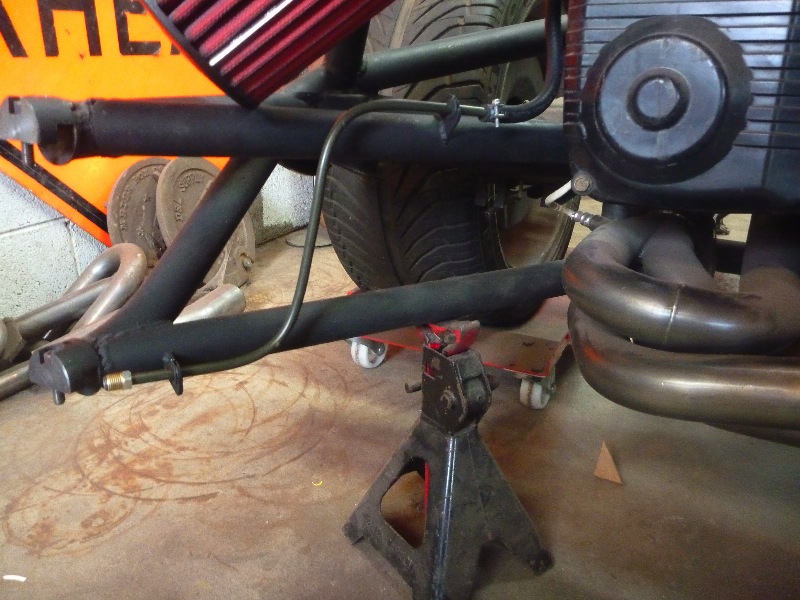
Then I made the bracket for the coolant overflow tank.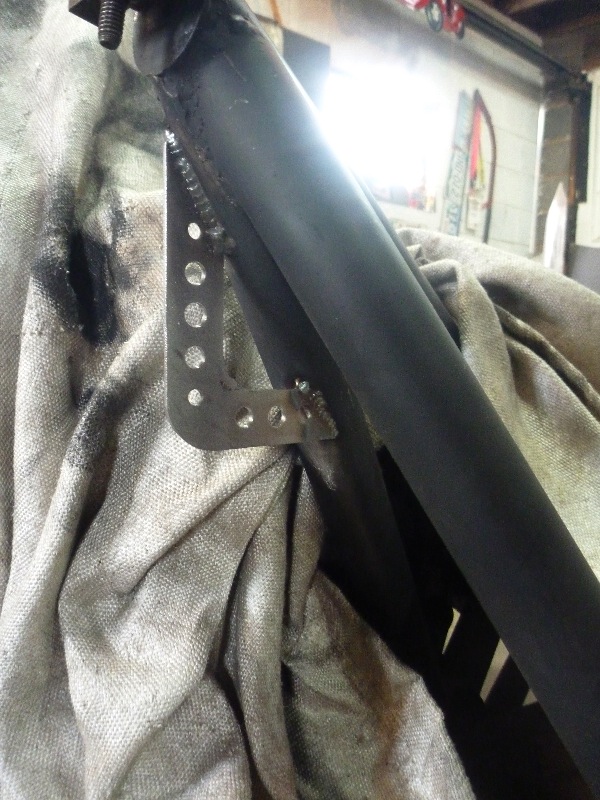
I bought a "WeaponR" aluminum import tank, cheap and reasonable build quality.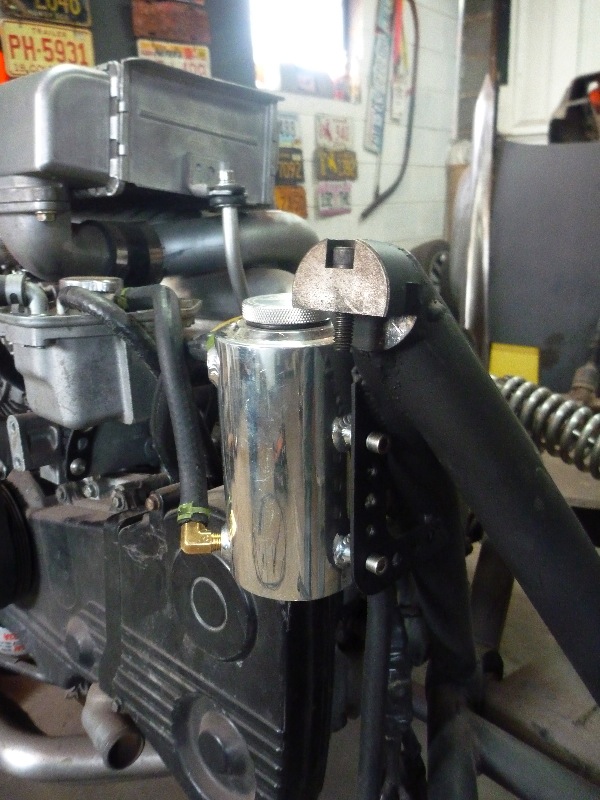
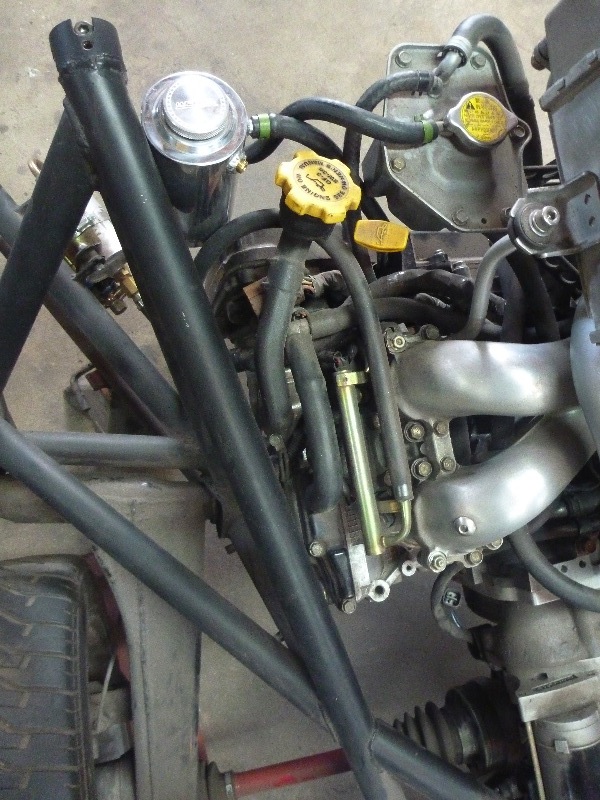
Finally I made a mount for the intake system, I welded a bung into the tubeframe and tied the airfilter adapter into that.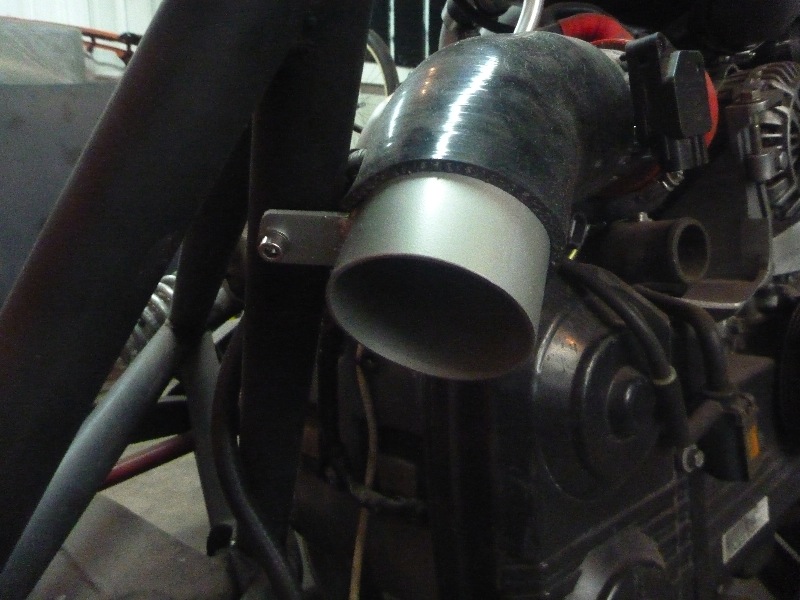
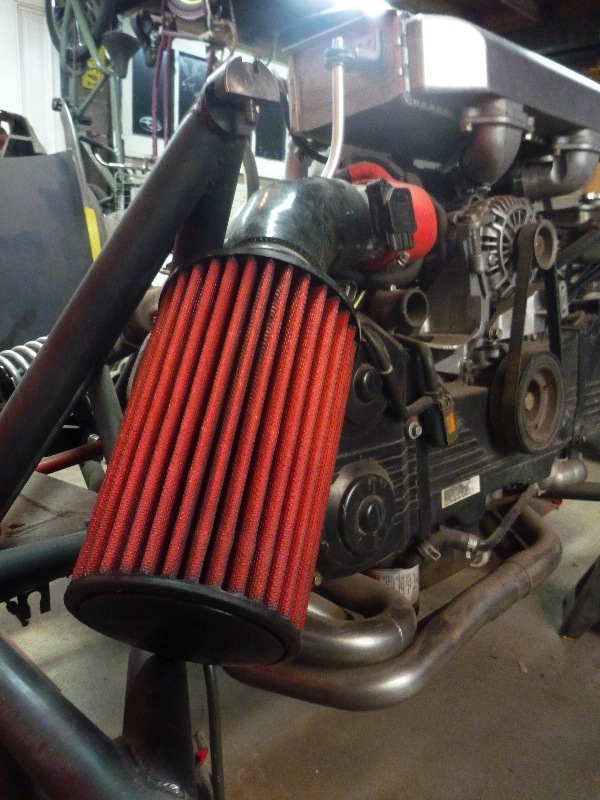
Posted by: Phil Plummer Mar 18 2012, 09:23 PM
That is without question the most atractive & tastefulll departure from the 914 style I have ever seen!!
Well now that I have started a 916 look alike I want this look .
Many an afternoon has been spent looking at the rear of the 914 and 914/6 and wondering as I would doodle a fast back or slope or just think "what is this car missing?" was the question in my mind -You have the answer & wowthat is agood answer!! what would it cost to duplicate thismost attractice creation you Fu*@#$% Brilliant .This is way @#$%*&!! COOL!
Posted by: plymouth37 Mar 19 2012, 06:19 PM
That is without question the most atractive & tastefulll departure from the 914 style I have ever seen!!
Well now that I have started a 916 look alike I want this look .
Many an afternoon has been spent looking at the rear of the 914 and 914/6 and wondering as I would doodle a fast back or slope or just think "what is this car missing?" was the question in my mind -You have the answer & wowthat is agood answer!! what would it cost to duplicate thismost attractice creation you Fu*@#$% Brilliant .This is way @#$%*&!! COOL!
Thanks! My long term plan has been to weld up a perfect steel body, get it through paint then take a mold of it. Then I could make lightweight 'glass or carbon kits, give me 10 years and I'll sell you a carbon Anklebiter!
No joke, hope you make it back here!!
When do you start, time for a party
before you leave.I won't be leaving until the fall so we have plenty of time to plan a get together, definitely going to be hitting up C&C this spring and summer so I will be around.
Also totally off topic: Anybody know of decent neighborhoods near Philly to rent a small house with a garage? The wife and I will be heading out for the Penn open house at the end of the month and I want to scout possible rentals.
Posted by: plymouth37 Mar 20 2012, 07:20 PM
And let me use post #914 in this thread to celebrate hitting 100,000 views!
Thank you so much for the support and encouragement you have all contributed to this thread over the years, we have come a long way!
Posted by: wingnut86 Mar 20 2012, 07:49 PM
I have close friends in Carlisle who are moving soon back to DC area. They have a small house and garage - upscale, but I'll ask for details. Give me a week.
Dave
Posted by: plymouth37 Apr 17 2012, 04:39 PM
Well it looks like I am going to Penn! We will be moving to Philly in August, I am looking forward to meeting the East Coast contingent of the club!
Since we are moving I had a decision to make with the 914, I could store it in boxes at my in-laws house in Wyoming, or I could just go for it and try to hammer it out by the end of July.
If it is a fully functioning car I have a much better chance of my wife letting me bring it along. I am taking 6 weeks off this summer to get us boxed up and get the car done. Look for lots of progress in the coming months!
Last weekend I finished the rear portion of the brake lines.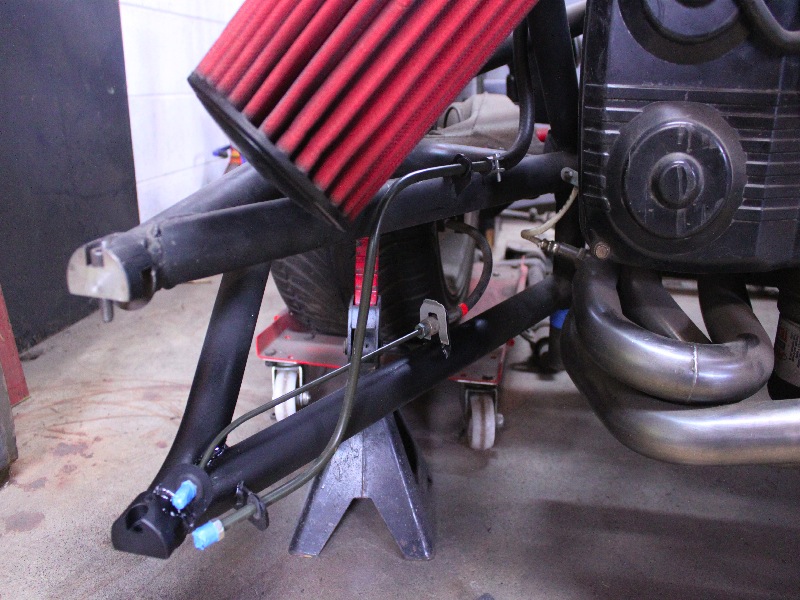
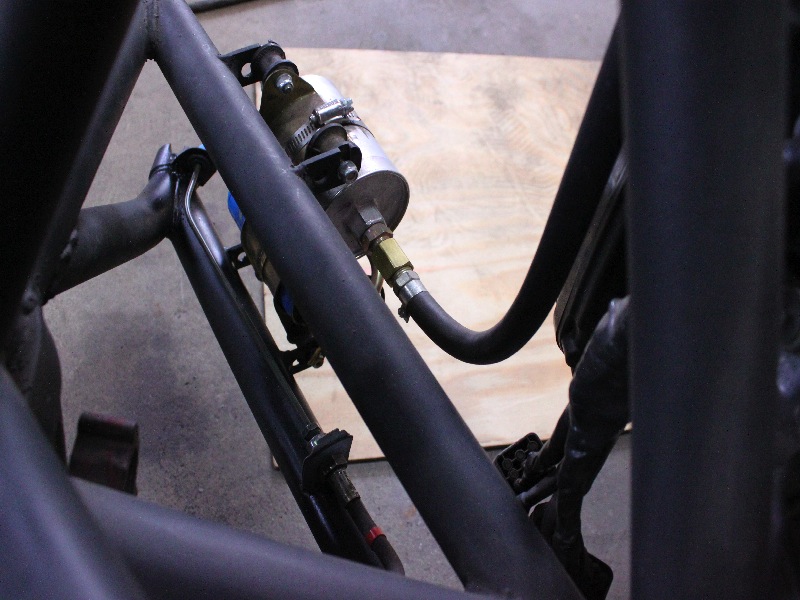
Here is a look at the front of the engine.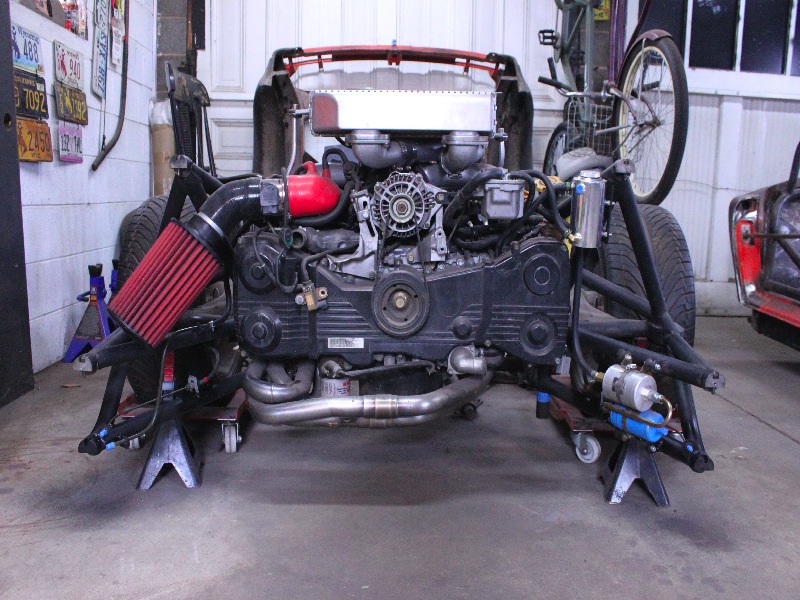
I also started fitting the nose to the chassis.
It is an almost perfect fit, I will be welding up the tilt nose soon!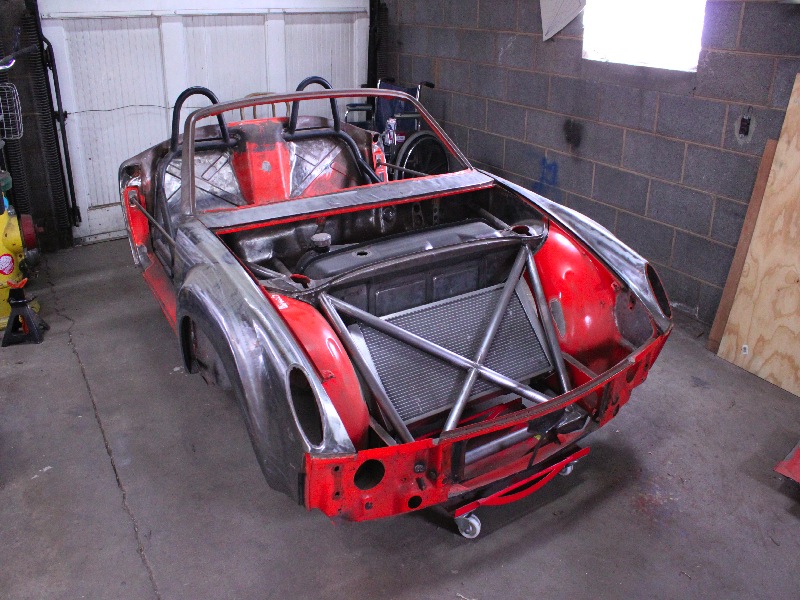
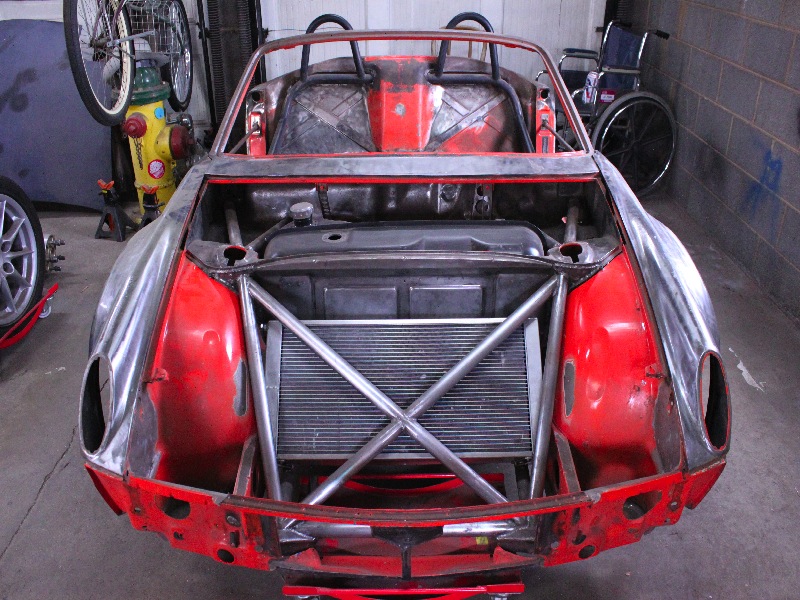
If anyone needs to repair an A/C hole this is yours for the cost of shipping! (Sold!)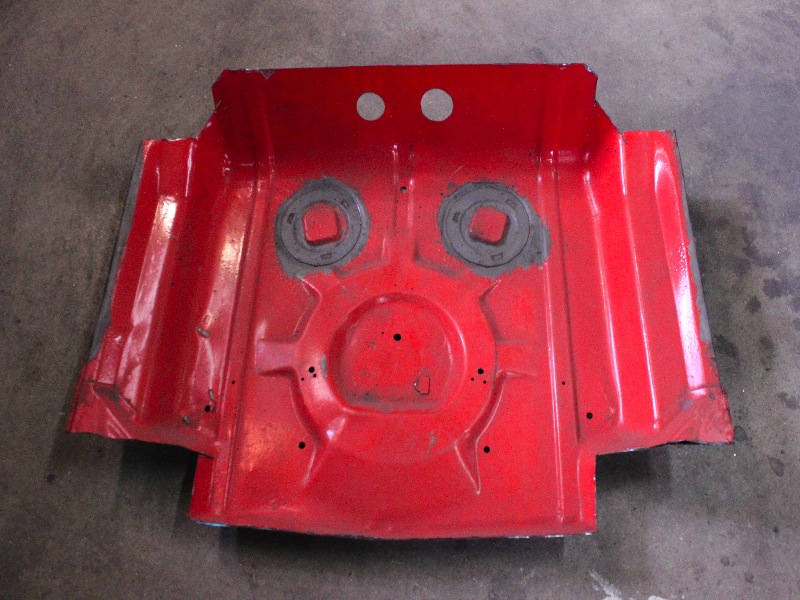
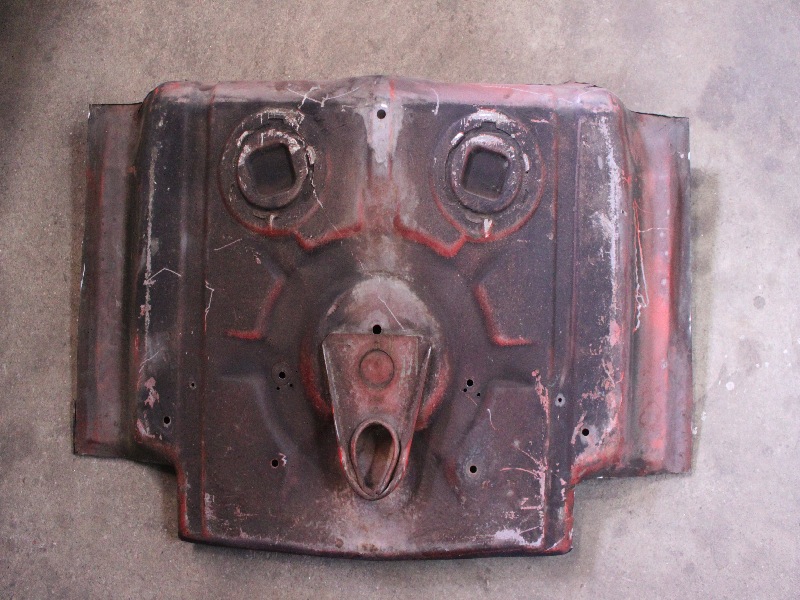
Posted by: effutuo101 Apr 17 2012, 05:01 PM
keep it up Dana!
Posted by: TJB/914 Apr 17 2012, 07:36 PM
plymouth37,
Congratulations on your Architect career Your Anklebiter project is outstanding and beautiful. I love the look.
BTW: Wondering where the headlights will go?? I hope you keep them in the stock location, my opinion, but it's your choice.
Tom
Posted by: Ferg Apr 17 2012, 07:38 PM
Just let me know when to come over and
Posted by: malcolm2 Apr 17 2012, 08:56 PM
If anyone needs to repair an A/C hole this is yours for the cost of shipping!
Hey... PM sent. I can certainly use that trunk floor.
Thnks,
Clark
Posted by: plymouth37 Apr 17 2012, 09:02 PM
Hey... PM sent. I can certainly use that trunk floor.
Thnks,
Clark
It is all yours, give me a day or two to box it up!
Posted by: KELTY360 Apr 17 2012, 10:22 PM
Hey... PM sent. I can certainly use that trunk floor.
Thnks,
Clark
It is all yours, give me a day or two to box it up!
@malcolm2 - have Dana autograph that piece from the world famous Anklebiter - it will be worth big bucks some day!
Posted by: PeeGreen 914 Apr 18 2012, 09:04 AM
Hey... PM sent. I can certainly use that trunk floor.
Thnks,
Clark
It is all yours, give me a day or two to box it up!
@malcolm2 - have Dana autograph that piece from the world famous Anklebiter - it will be worth big bucks some day!
Yeah,
Once my CF rear lid is painted you will have to sign it for me Dana
Posted by: malcolm2 Apr 18 2012, 07:56 PM
Hey... PM sent. I can certainly use that trunk floor.
Thnks,
Clark
It is all yours, give me a day or two to box it up!
Awesome, Autograph is welcome. I'll do my best to keep it whole. I PM'd my number, just call and let's work out the details.
Clark
Posted by: Mr. 5150 Apr 18 2012, 08:45 PM
Flip'n sweet I can see your not afriad to start from scratch! I love builders who believe limits are for the limited.
Posted by: plymouth37 Apr 22 2012, 04:59 PM
I finished hooking up the coolant hoses, it took a 1991 Nissan Sentra hose, half a 2001 Suburban hose and an un-identified hose I found at AutoZone to get everything connected. I am almost done hooking up all of the connections needed for the car to run. Both coolant hoses will be heat wrapped to keep heat from effecting the fuel system once I get to final assembly. Once I am done with the mechanicals I will pull the chassis apart and go into paint.
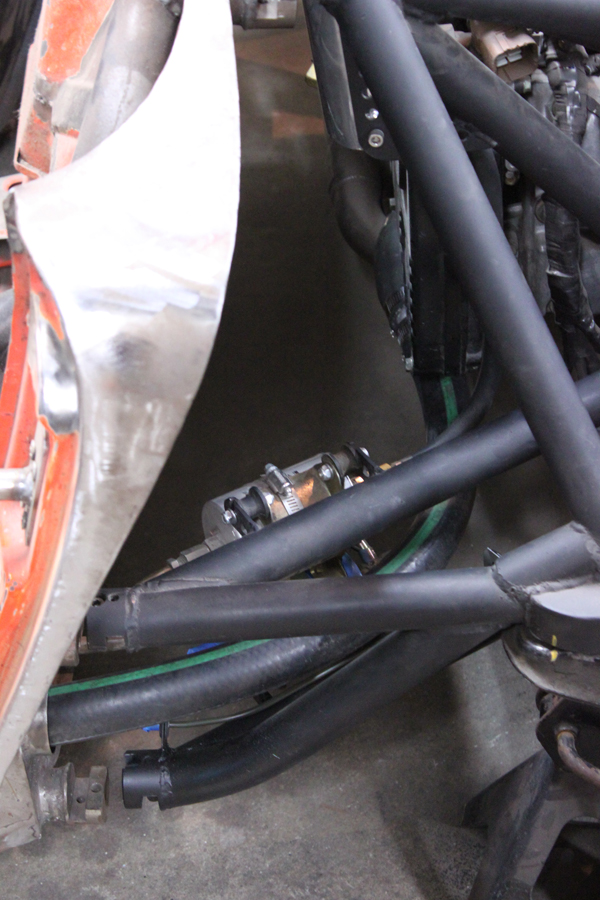
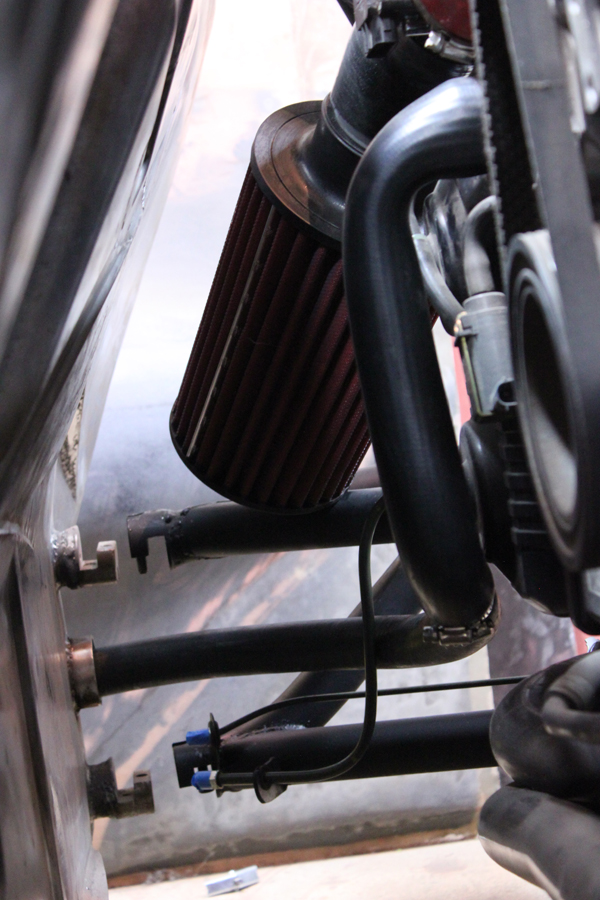
I also worked on fitting the pieces of the front nose.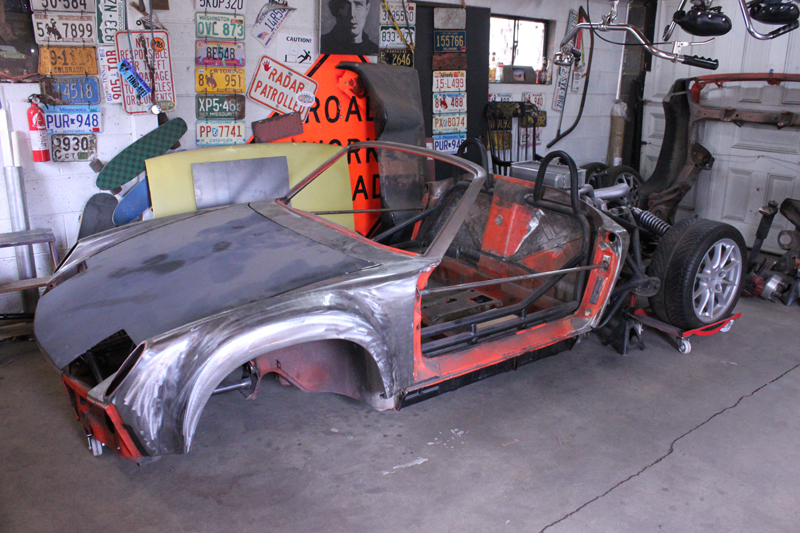
Posted by: majkos Apr 22 2012, 06:22 PM
Go,Dana,Go!
Posted by: nein14 May 15 2012, 01:18 PM
Fantastic work when will you be in Pa?
Posted by: plymouth37 May 15 2012, 06:00 PM
Fantastic work when will you be in Pa?
We are moving out at the end of July, classes start in the middle of August.
Glad to have the site back, thanks Andy!
Posted by: plymouth37 May 16 2012, 07:32 PM
I got a little bit of work done last weekend, I am trying to finish up the handful of welding jobs left on the tub.
I focused my efforts on the tunnel, I started by bracing the clutch tube.
There wasn't anything wrong with it but it is the kind of job you have to do if you have the shifter out and the welder handy. 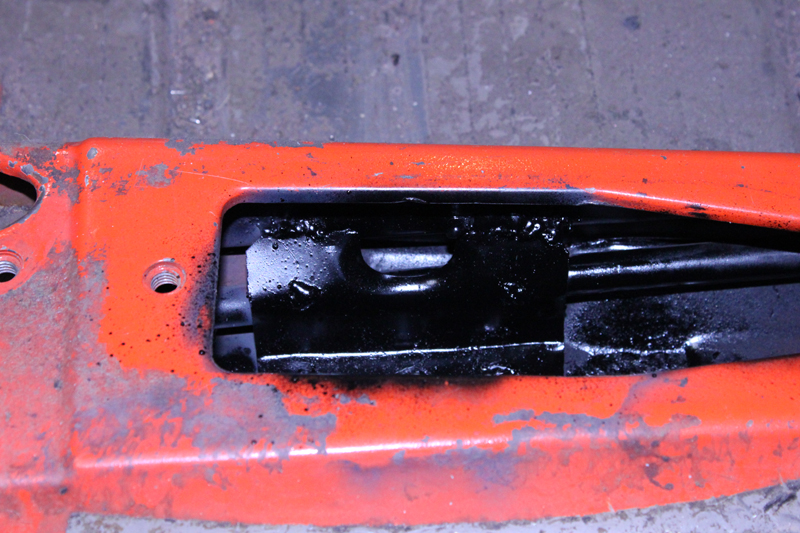
Next I welded in a bracket to hold the Wilwood brake proportioning valve I bought from JWest.
I figure a little adjustability in the brake bias will probably be nice once the test driving portion of the build comes around.
It will also make dialing in future brake upgrades a snap.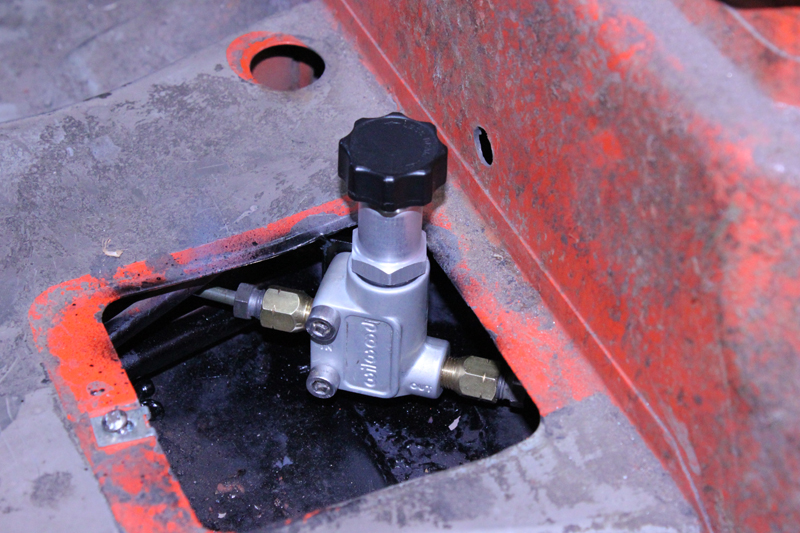
Finally I mounted the JWest brake tee to the firewall with a little bracket, making it possible to eliminate the stock brake regulating unit.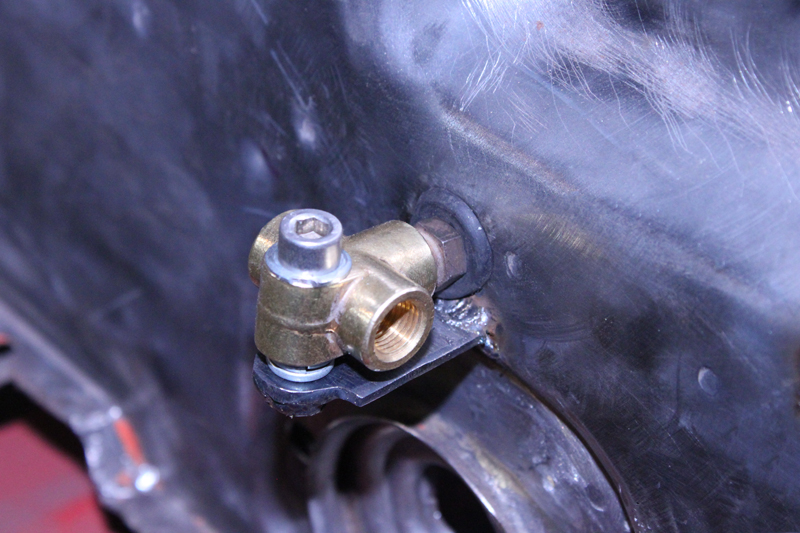
Posted by: plymouth37 May 18 2012, 10:28 PM
I cut the stock shifter end off of the original shift linkage then welded it to the JWest shift rod. 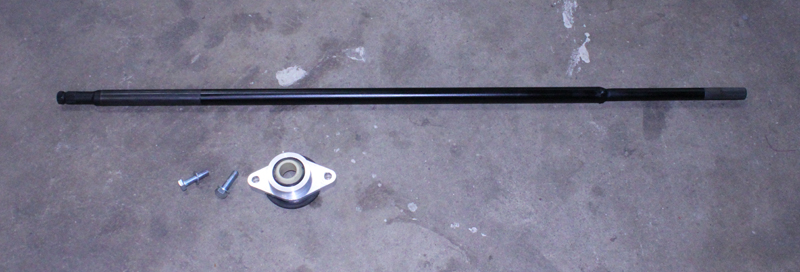
Then I mocked up the shift rod bushing on the firewall.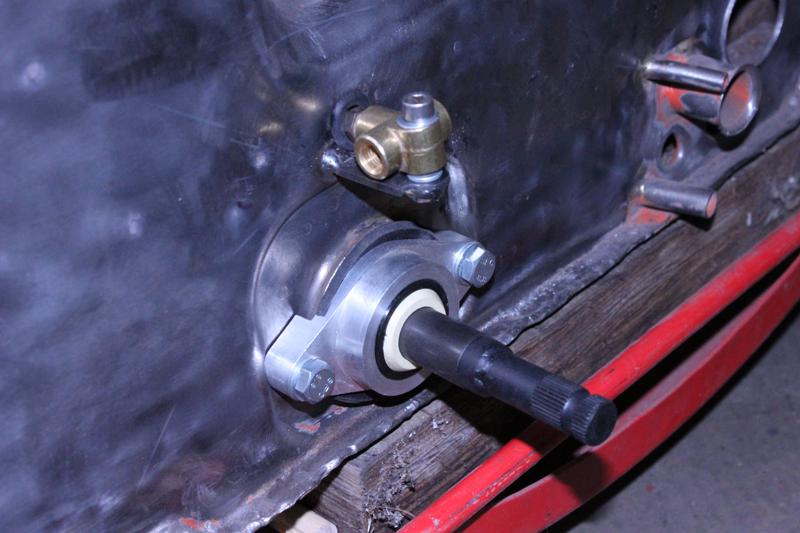
Next I mounted the Rennshift shifter with a custom shift knob I rigged up.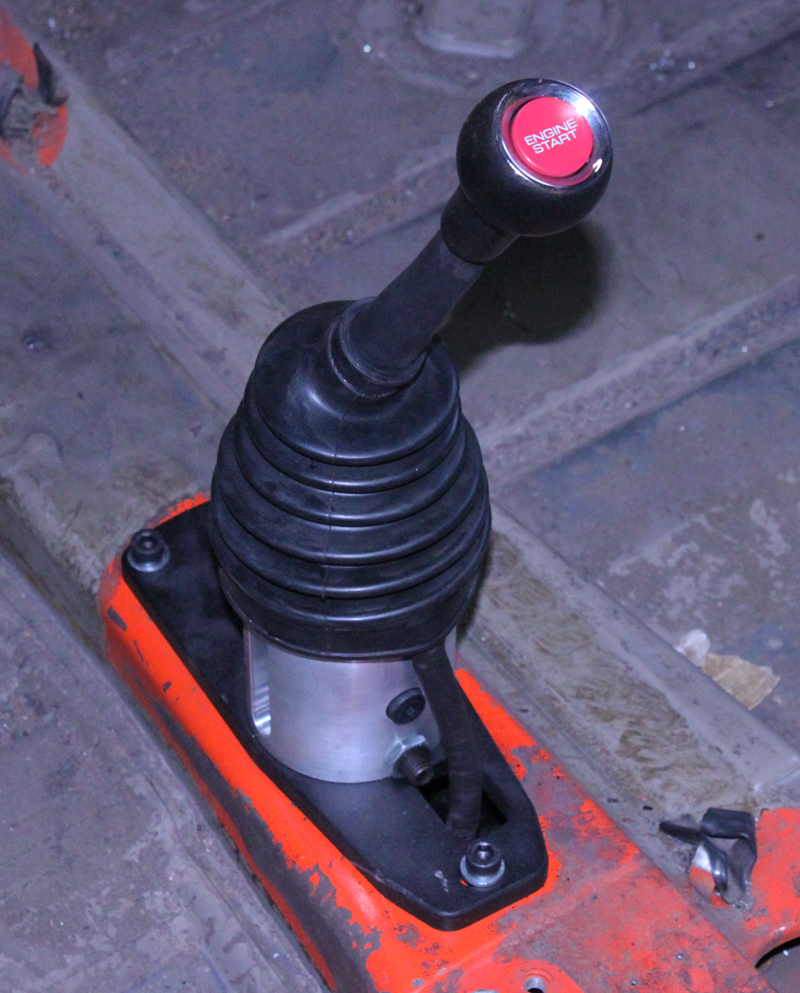
My stock shift knob was in really rough shape so I mounted the starter button from a Honda S2000 into it.
The button will be functional and the lettering lights up when it is armed.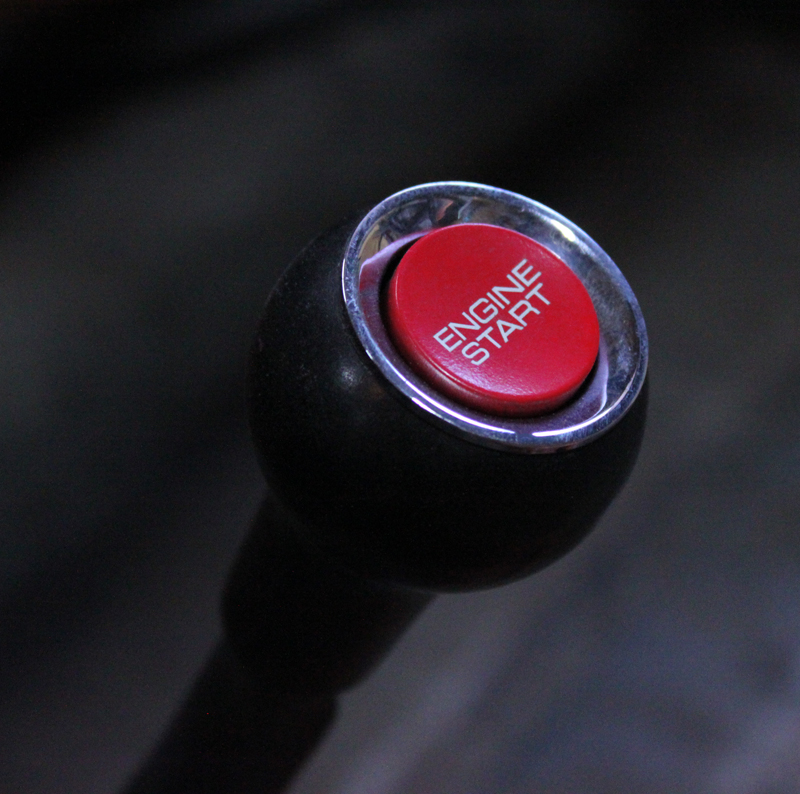
Posted by: poorsche914 May 19 2012, 07:12 AM
That is cool
Posted by: Ferg May 19 2012, 07:56 AM
I thought the button was going to flip up and you were going to have an ejector seat
Posted by: plymouth37 May 29 2012, 10:28 PM
I was up at our cabin over the holiday weekend so no hands on work got done.
I did manage to design a hinge system that allows the nose to clear the doors as it opens though.
Here is an illustration of how it will operate. Hopefully I can get it built this weekend.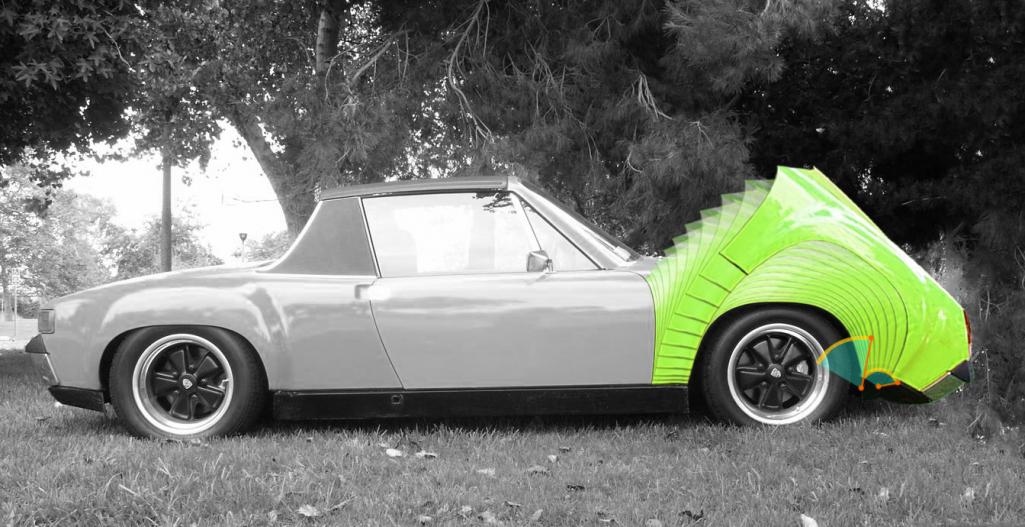
Posted by: nomore9one4 May 30 2012, 08:00 AM
I was up at our cabin over the holiday weekend so no hands on work got done.
I did manage to design a hinge system that allows the nose to clear the doors as it opens though.
Here is an illustration of how it will operate. Hopefully I can get it built this weekend.
Built this weekend? lol..I could have a team of engineers and not build that in six months! You've got some mad skills
Posted by: Scott S May 30 2012, 10:30 AM
Built this weekend? lol..I could have a team of engineers and not build that in six months! You've got some mad skills
I am pretty sure Dana could have finished my -6 conversion (that I am into right at 2 years) in an afternoon.....
Fantastic project sir!
Posted by: plymouth37 Jun 3 2012, 08:24 PM
I got the major elements of the nose hinge done today.
I started out by fabricating the components needed to build the hinges I designed last weekend. I used nylon spacers to serve as a bearing, I also drilled out the centers of them to adapt the standard tubing to the metric hardware. The cotter pins allow the entire nose to be removed in a couple minutes at most.
Here is a shot of the nose closed, notice the perfect door gap, my biggest concern with this project was properly aligning the nose and I think I pulled it off.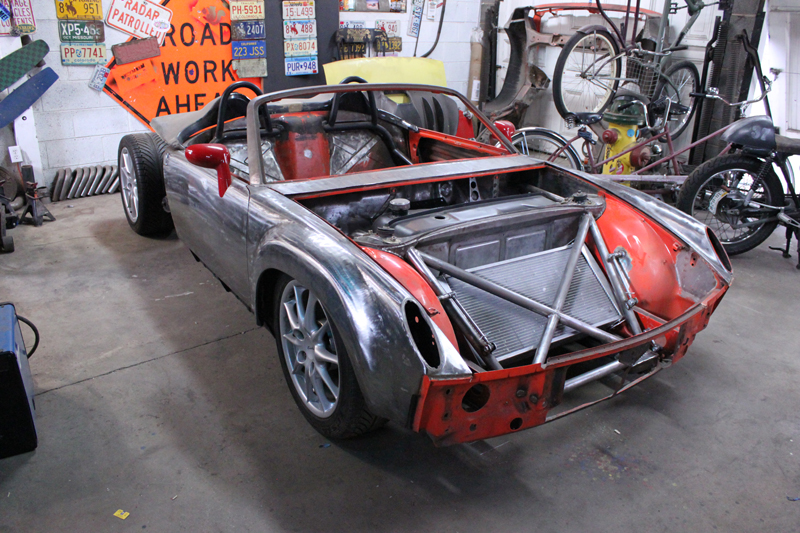
Here is the hinge system with the nose closed, I will be adding hydraulic struts to the system next. Ultimately you will never see this view because the hood will be welded to the fenders. 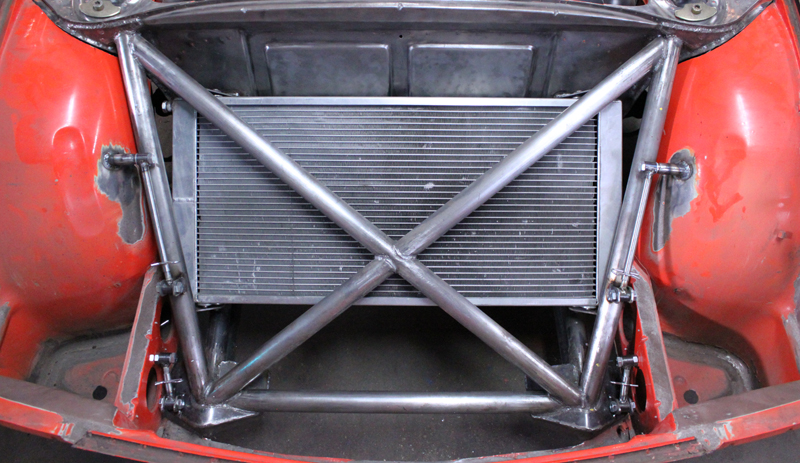
The nose partially open.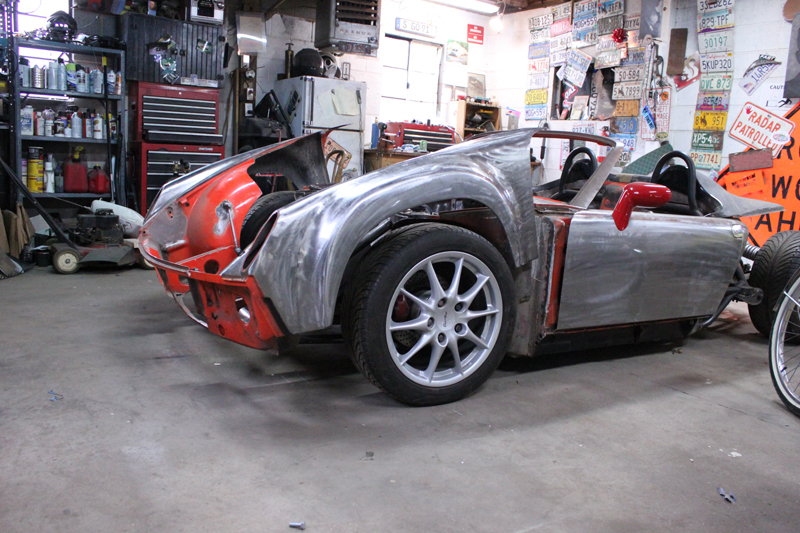
The nose fully open. 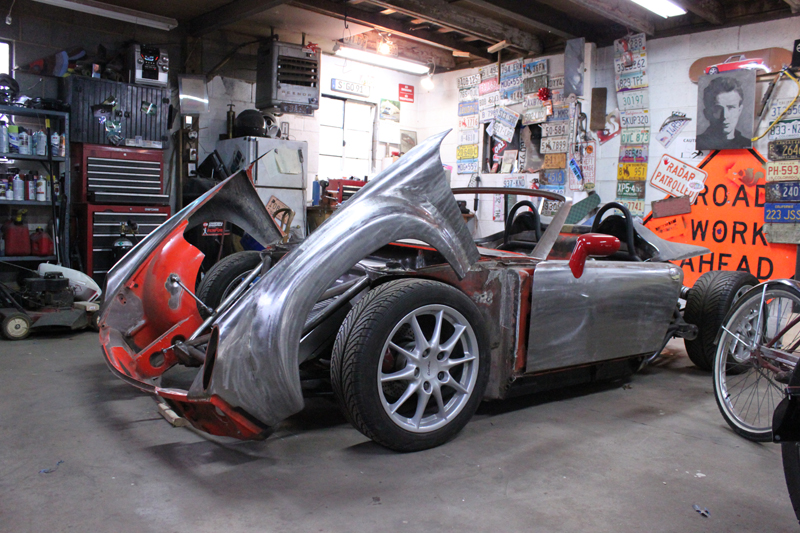

Posted by: wingnut86 Jun 3 2012, 09:00 PM
Wow.
OK, I'm officially jealous...

What a Hot Ride
Posted by: Dasnowman Jun 3 2012, 11:24 PM
For color, I'd love to see you just polish up the metal a bit and remove some of the tooling marks, then just clear coat it ... kind of like the Renegade Hybrids Subie (would be very 550 spyder-esque).
Then paint all the fiberglass parts a nice metallic silver ... or black.
For color, I'd love to see you just polish up the metal a bit and remove some of the tooling marks, then just clear coat it ... kind of like the Renegade Hybrids Subie.
This is the Renegade Hybrids Subie!
Ok, I'm a dork
For color, I'd love to see you just polish up the metal a bit and remove some of the tooling marks, then just clear coat it ... kind of like the Renegade Hybrids Subie.
This is the Renegade Hybrids Subie!
No, I don't think that's the same one...
For color, I'd love to see you just polish up the metal a bit and remove some of the tooling marks, then just clear coat it ... kind of like the Renegade Hybrids Subie.
This is the Renegade Hybrids Subie!
No, I don't think that's the same one...
My bad, sorry.
OMG I know this was old but I just spit out my vodka and coke out my nose!
Posted by: sixnotfour Jun 4 2012, 12:27 AM
Looks great how about these remote operated ?
http://www.firgelliauto.com/default.php?cPath=110
Posted by: DEC Jun 4 2012, 03:10 AM
This one of the best build threads I ever read.
All times a new idea with an excellent implementation
All your work is impressive.
I'm excited.
Posted by: KELTY360 Jun 4 2012, 08:01 AM
I got the major elements of the nose hinge done today.
I started out by fabricating the components needed to build the hinges I designed last weekend. I used nylon spacers to serve as a bearing, I also drilled out the centers of them to adapt the standard tubing to the metric hardware. The cotter pins allow the entire nose to be removed in a couple minutes at most.
Here is a shot of the nose closed, notice the perfect door gap, my biggest concern with this project was properly aligning the nose and I think I pulled it off.
Here is the hinge system with the nose closed, I will be adding hydraulic struts to the system next. Ultimately you will never see this view because the hood will be welded to the fenders.
The nose partially open.
The nose fully open.
Gotta say I'm pretty disappointed Dana. Your garage is looking a little cluttered these days. There's even some nuts, bolts and other assorted debris on the floor. what's up with that?
Posted by: Scott S Jun 4 2012, 08:58 AM
Absolutely killer Dana.
Great to see you on Saturday!!
Posted by: wingnut86 Jun 4 2012, 09:33 AM
Dana - stay focused.
Excuse the pun, "don't get off" track, by focusing on accuators or STROKE!
Posted by: lotus_65 Jun 4 2012, 10:10 AM
wow
Posted by: 7TPorsh Jun 4 2012, 02:52 PM
OMG!!!!! This car just keeps getting cooler!
Posted by: Jeff Bowlsby Jun 4 2012, 03:35 PM
How about on board hydraulic jacks?
Impressive...
Posted by: bigkensteele Jun 4 2012, 08:35 PM
I think that I suggested it a while back in this thread, but you should be on TV with this stuff. There are a handful of shows that I DVR not because I like what they are building, but just to watch the process, and your stuff is WAY cooler!
Posted by: kg6dxn Jun 4 2012, 08:45 PM
Awesome work!
Posted by: plymouth37 Jun 8 2012, 05:42 PM
I did a ton of cutting and freed the rear fenders from the old frame rails. If anybody wants a fairly rust free chassis half let me know, you can have it as long as you pick it up.
It is shocking how much this weighs.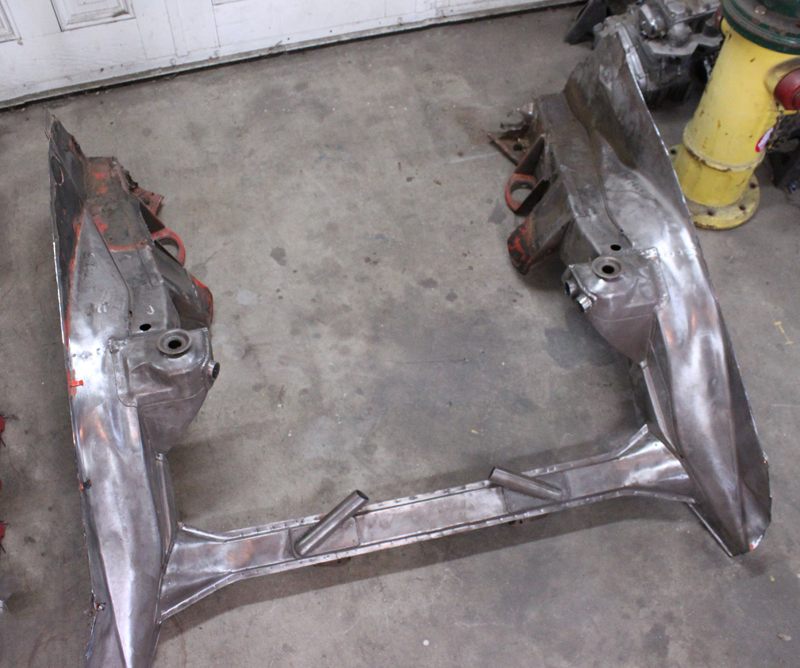
I started fitting the rear portion of the body to the car. it is really surprising to see how much open space I have back here!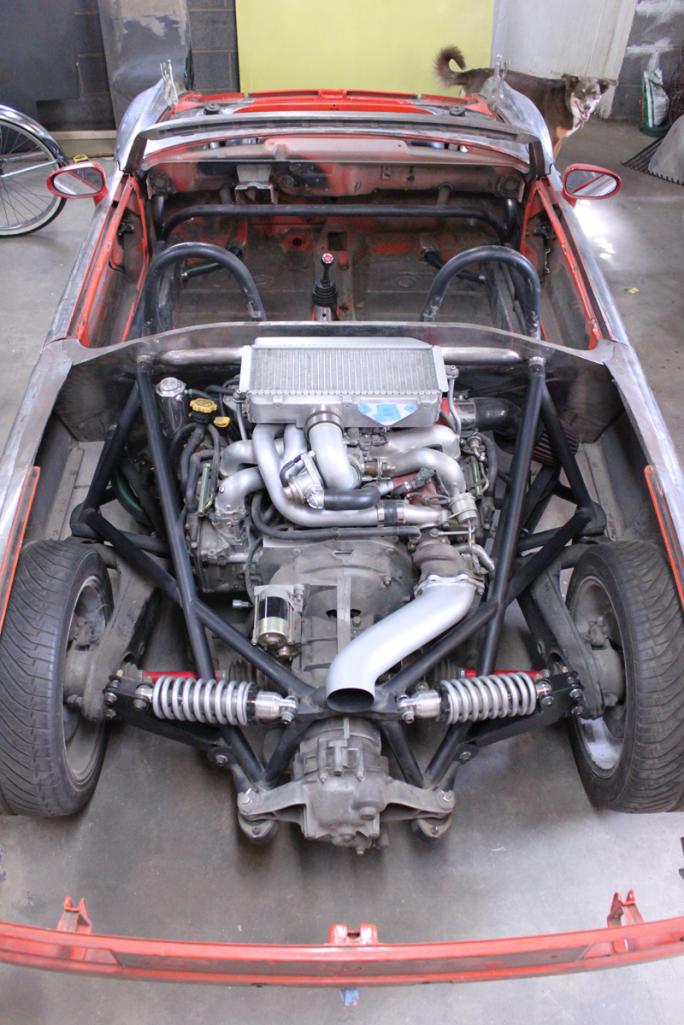
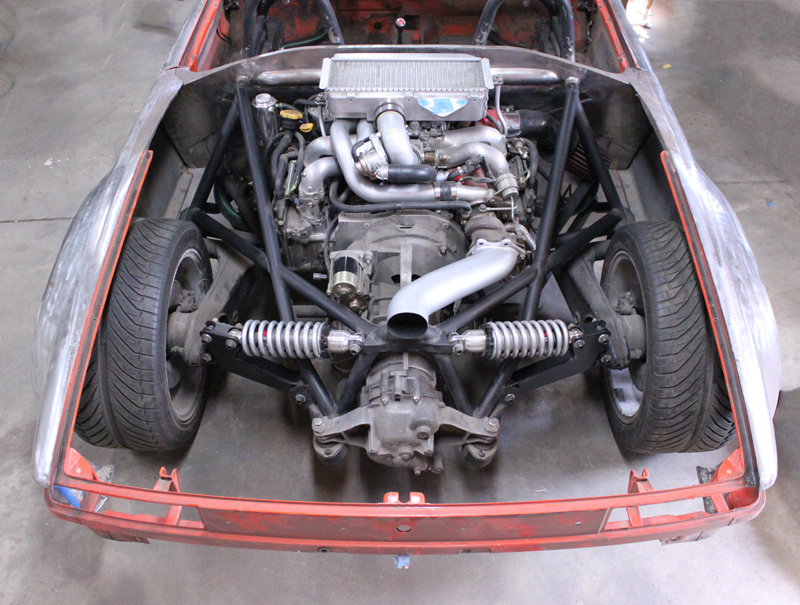
Now that the rear portion of the body is mocked up the next task is to make the hinges to tilt it open.
It will be hinged from the back offering excellent access to the drivetrain, the lid will be welded to the fenders just like the front.
Posted by: effutuo101 Jun 8 2012, 06:04 PM
sweet!
Posted by: 513mugsy Jun 8 2012, 06:08 PM
PM SENT!
Posted by: KELTY360 Jun 8 2012, 06:23 PM
it is really surprising to see how much open space I have back here!
Any idea how much all that open space weighs?
Posted by: brant Jun 8 2012, 06:34 PM
Dana,
lars in boulder just bought his first teener
the longs are rusted, the hell hole is bad, and I think some of his pick up points are questionable...
if no one claims the rear xtra, I would like to claim it for him to use
brant
Posted by: plymouth37 Jun 8 2012, 07:06 PM
Just missed it, Mugsy has dibs. Stay tuned for more goodies!
Dana,
lars in boulder just bought his first teener
the longs are rusted, the hell hole is bad, and I think some of his pick up points are questionable...
if no one claims the rear xtra, I would like to claim it for him to use
brant
Posted by: Travis Neff Jun 8 2012, 10:00 PM
Every time I hit this thread, I am amazed over and over and over...
Posted by: brant Jun 8 2012, 10:35 PM
Just missed it, Mugsy has dibs. Stay tuned for more goodies!
Dana,
lars in boulder just bought his first teener
the longs are rusted, the hell hole is bad, and I think some of his pick up points are questionable...
if no one claims the rear xtra, I would like to claim it for him to use
brant
No problem
if he changes his mind, let me know
I am 4 miles from you and can bring a pick up truck at any time
brant
Posted by: markb Jun 8 2012, 11:04 PM
Every time I hit this thread, I am amazed over and over and over...
Posted by: rnellums Jun 9 2012, 07:25 AM
Pretty soon people are going to stop building 914-6 clones and start building Anklebiter clones!
Posted by: 3d914 Jun 9 2012, 06:10 PM
Dana,
Be sure to get the weight on that beast for comparison. You've gotta be close to 2000lbs or less.
Posted by: PeeGreen 914 Jun 10 2012, 12:21 PM
Dana,
Be sure to get the weight on that beast for comparison. You've gotta be close to 2000lbs or less.
You know a 914 is close to 2000lbs stock right?
I'd bet Dana is around 1,400lbs
Posted by: malcolm2 Jun 23 2012, 03:16 PM
Hey... PM sent. I can certainly use that trunk floor.
Thnks,
Clark
It is all yours, give me a day or two to box it up!
Awesome, Autograph is welcome. I'll do my best to keep it whole. I PM'd my number, just call and let's work out the details.
Clark
Thanks again....here is the autograph.
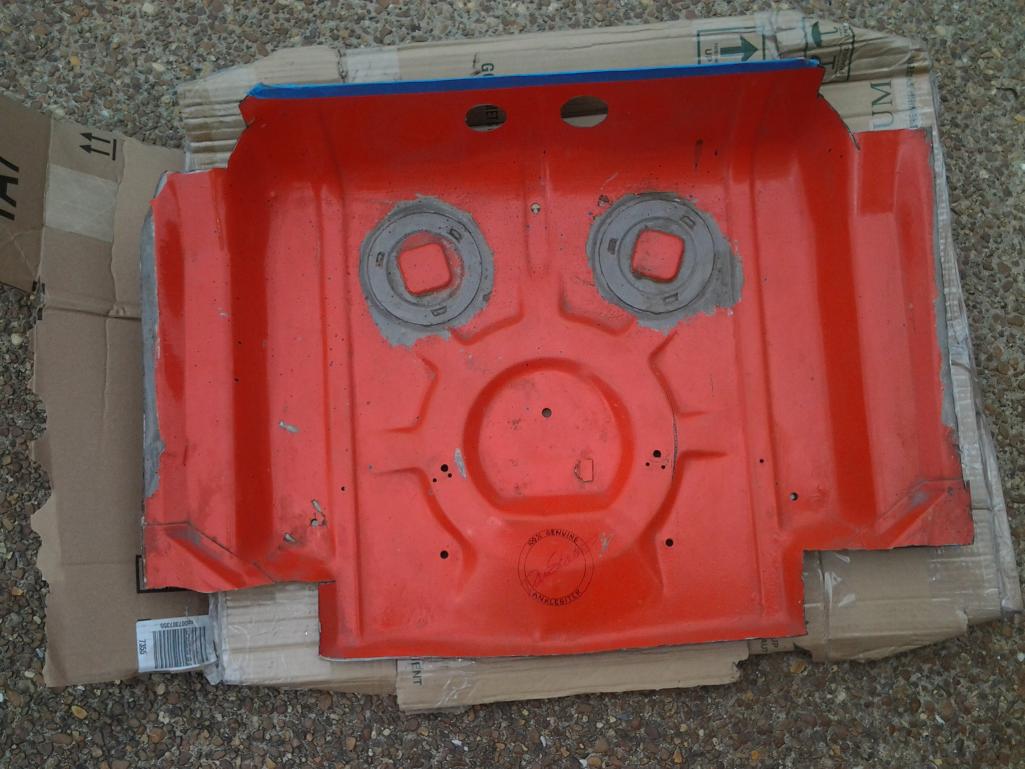
Posted by: KELTY360 Jun 23 2012, 06:17 PM
Thanks again....here is the autograph.
Way cool!
Posted by: plymouth37 Jul 5 2012, 07:32 PM
Today I broke down the car into its bare tub and rear chassis. I was surprised it only took a couple hours to pull the suspension, brake the car in half, and pull the engine.
With the extra time I gained I started stripping the remaining stock paint off of the tub in preparation for a couple coats of chassis primer and paint.
I like having a project you can lift onto jackstands with one hand...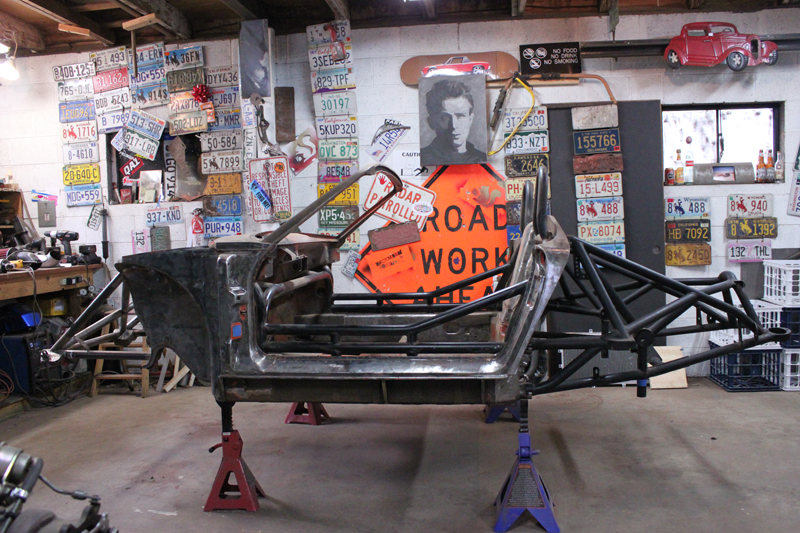
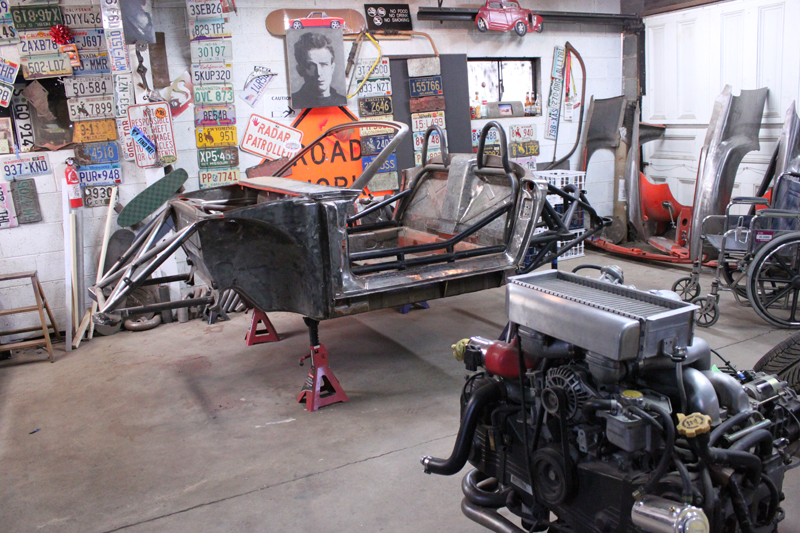
Posted by: BIGKAT_83 Jul 5 2012, 08:27 PM
Damn that looks good!
Nice work
Bob
Posted by: KELTY360 Jul 5 2012, 09:48 PM
I like having a project you can lift onto jackstands with one hand...
He he he
Amazing as always Dana. You could always just pack up the Anklebiter and take it to PA as carry-on luggage.
Posted by: PeeGreen 914 Jul 6 2012, 11:52 AM
Can't wait to see this in paint
Posted by: Rand Jul 7 2012, 08:10 PM
Can't wait to see this in paint Mee too, but part of me almost hates to see the metal get covered with color instead of clear. Always loved the clean metal look.
Great stuff Dana.
Posted by: plymouth37 Jul 9 2012, 11:18 AM
I woke up this morning and found out my thread had gained almost 5000 hits overnight!
It turns out http://build-threads.com/build-threads/wrx-powered-tube-framed-porsche-914/ ran a feature on this build. Follow the link to check it out, along with a ton of other really cool projects!
http://build-threads.com/
Posted by: scotty b Jul 9 2012, 11:20 AM
I woke up this morning and found out my thread had gotten almost 5000 hits overnight!
It turns out http://build-threads.com ran a feature on this build. Follow the link to check it out, along with a ton of other really cool projects!
http://build-threads.com
VERY cool. you deserve it
Posted by: jsayre914 Jul 9 2012, 11:41 AM
Thats Awesome Dana
Congratts !!
Posted by: wingnut86 Jul 9 2012, 01:11 PM
Crap Dana.
Please say "No" to Chip Foose when he calls, at least till you finish your Masters
Awesome coverage...
Dave
Posted by: plymouth37 Jul 9 2012, 06:11 PM
This morning I tackled the under side of the tub. Using every jack, jackstand, and a system of levers and pulleys I got the tub resting on its side with minimal "sketchiness".
To lower the murphie's law factor I anchored the tub to the I-Beams holding up the rafters. It is actually pretty solid and makes working on the belly of the car really nice.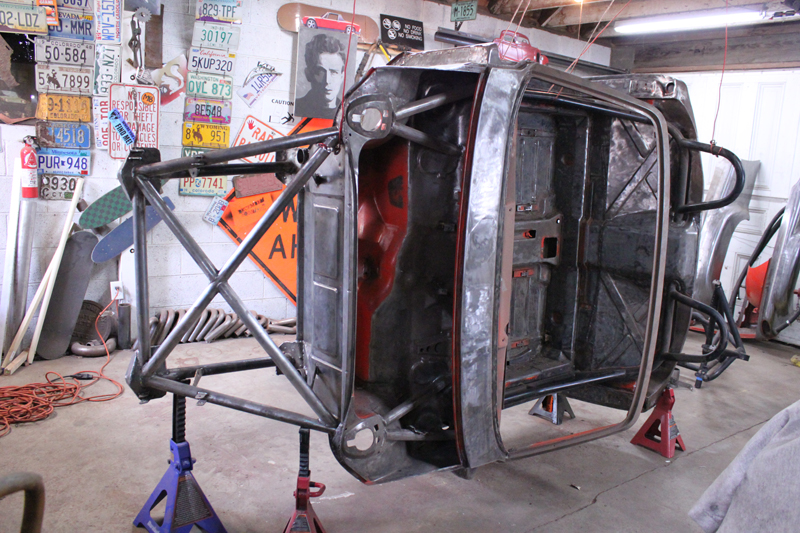
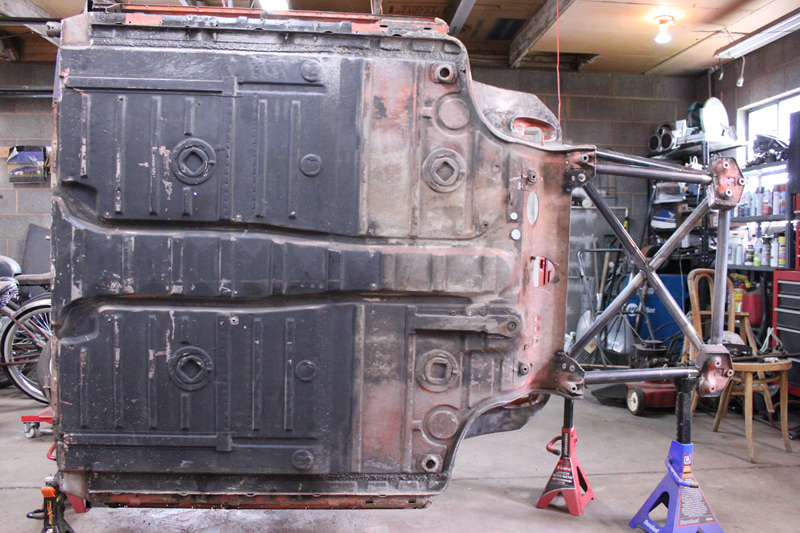
I started out by stripping off all of the old paint, then welded up the forty or so holes I had drilled in the floor to mount the old water lines and after market rockers.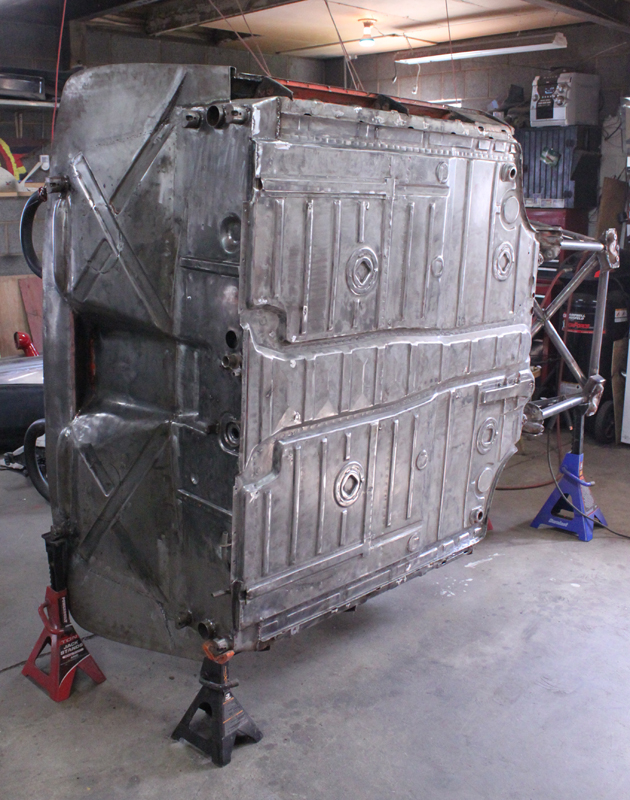
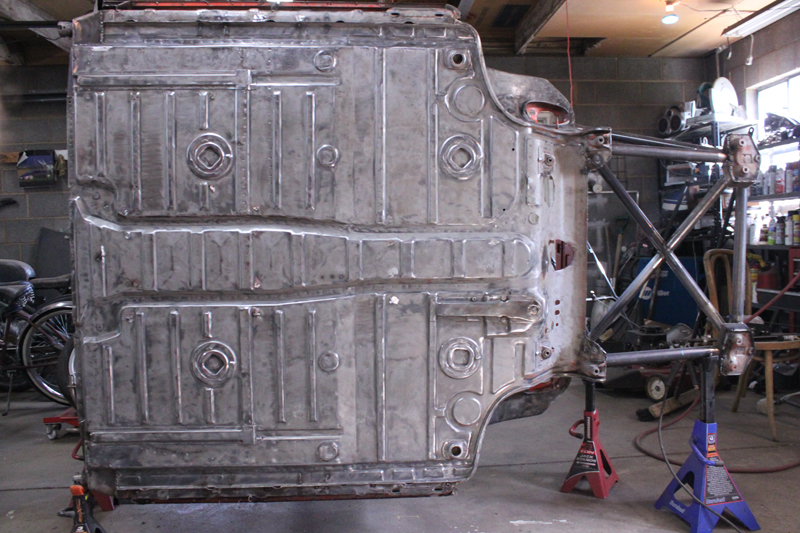
Finally I sprayed on the first coat of primer. I am using the Eastwood chassis black paint system, I used it on a couple cars when I worked at Renegade, it is tough as nails and looks pretty good too. After this first coat I will apply a second coat of primer, then 2 finish coats of satin black.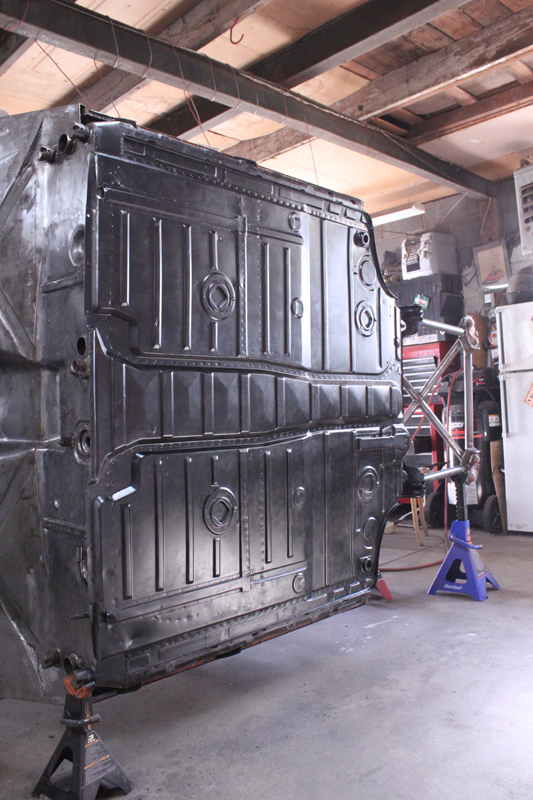
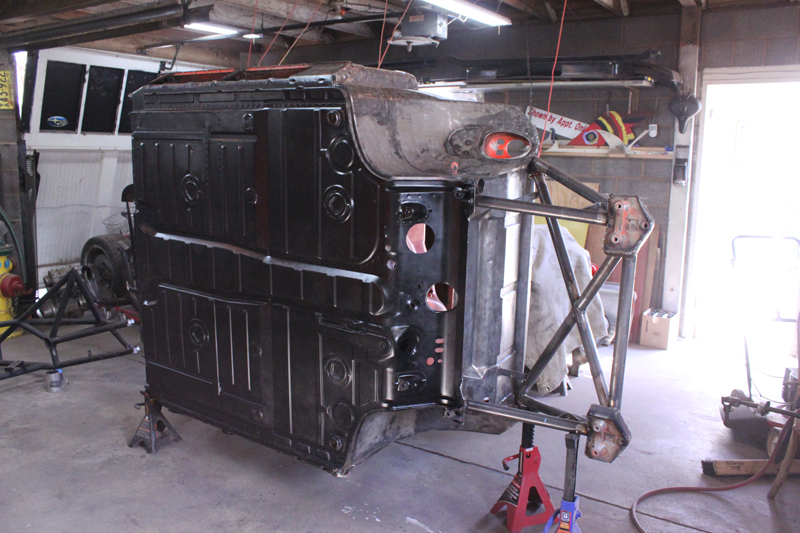
Posted by: fat73 Jul 9 2012, 06:20 PM
I think you should make a mold of that tub as is in preparation for making copies out of carbon fiber...hmmmmmm.....just saying.
Nice work Dana...Sure isn't the same car I rode in nearly 7 years ago.
Ed
Posted by: bigkensteele Jul 9 2012, 06:23 PM
I started out by stripping off all of the old paint...
That alone is a weekend for most people! How do you do it?
Did you clone yourself? I am fairly certain that if anyone on this board could, it would be you
Posted by: flipb Jul 10 2012, 01:24 PM
Please make http://www.914world.com/bbs2/index.php?showtopic=185293 the East Coast debut of the Anklebiter!
Just realized you'll be out here in time for it.
Posted by: plymouth37 Jul 10 2012, 02:08 PM
Please make http://www.914world.com/bbs2/index.php?showtopic=185293 the East Coast debut of the Anklebiter!
Just realized you'll be out here in time for it.
You're right! I doubt the car will make it but I should be able to!
Posted by: plymouth37 Jul 10 2012, 07:01 PM
I prepped and primed the tub and the rear tube frame today. Paint goes on tomorrow!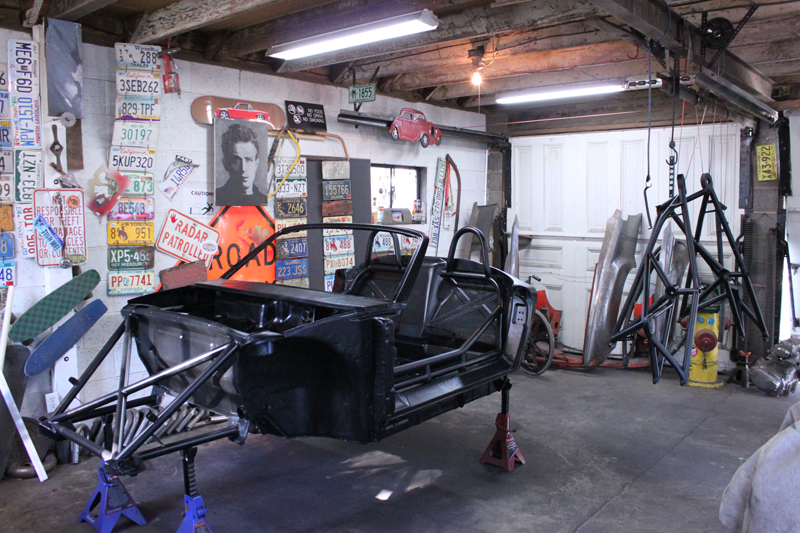

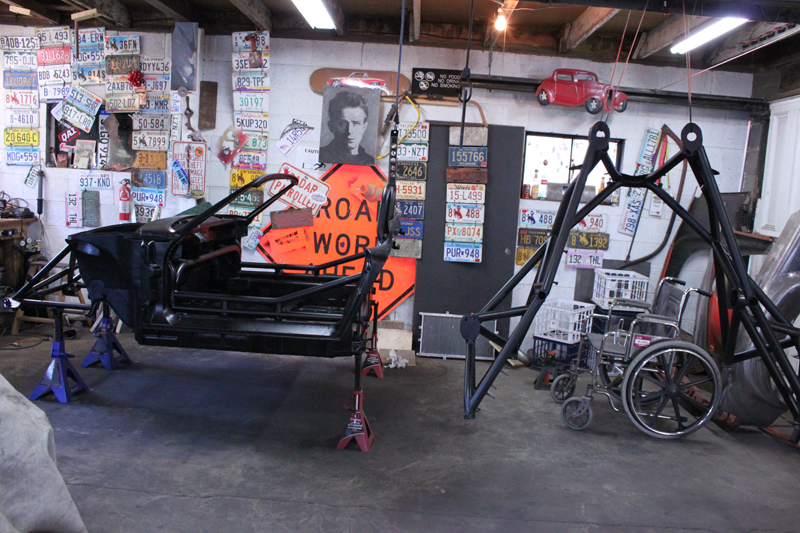
Posted by: PeeGreen 914 Jul 10 2012, 07:28 PM
Posted by: rnellums Jul 11 2012, 07:24 AM
I'm super pumped for you Dana!
Posted by: flipb Jul 11 2012, 09:17 AM
Posted by: effutuo101 Jul 11 2012, 10:10 AM
rockin! spectacular work Dana.
Posted by: trojanhorsepower Jul 11 2012, 06:33 PM
It's tomorrow.
Posted by: plymouth37 Jul 11 2012, 08:07 PM
Satin black chassis paint is on! I found it sprays the best reduced by about 20%, I put on 2 light coats and got the coverage I was looking for.
I turned the heater in the garage up as far as it goes and will leave it to bake overnight.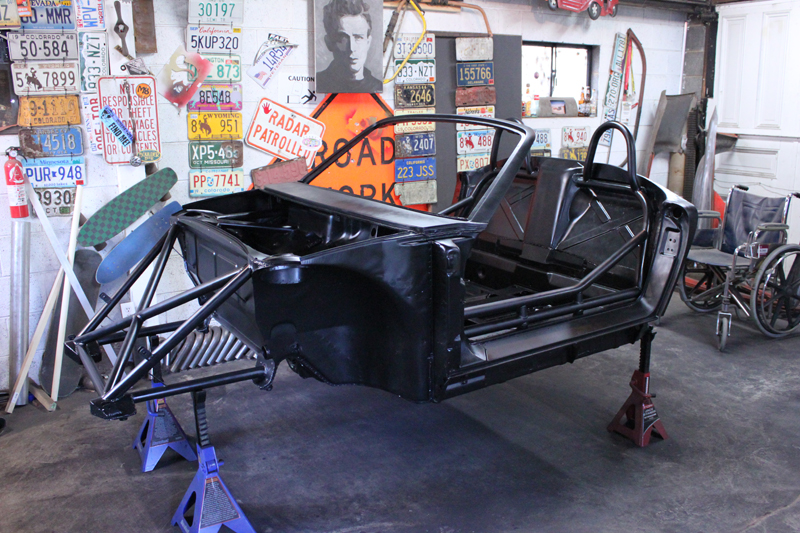
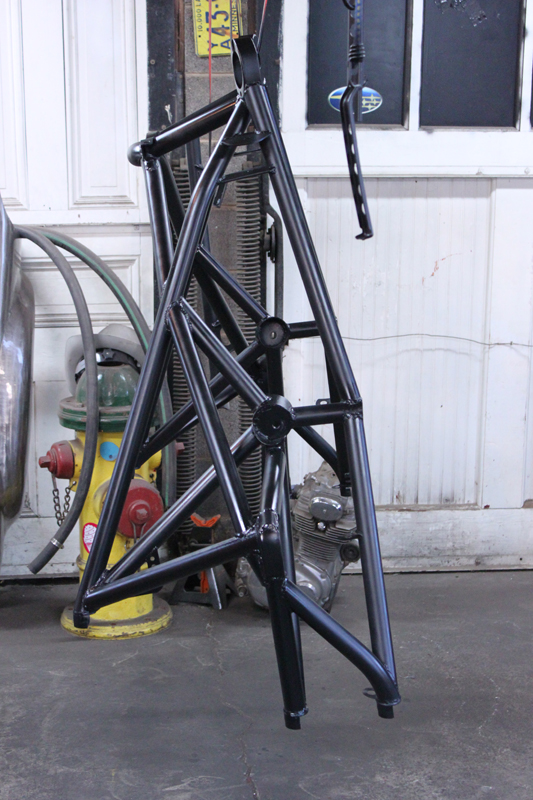
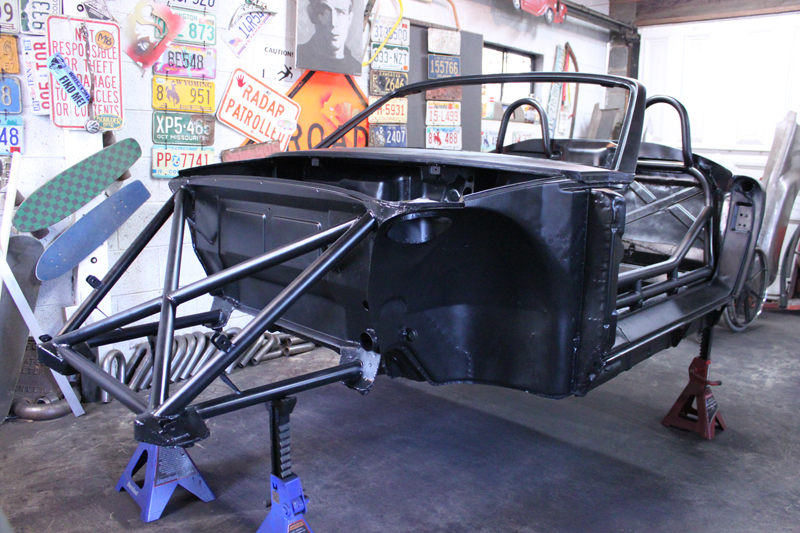
Posted by: dlee6204 Jul 11 2012, 08:11 PM
Awesome!
Posted by: KELTY360 Jul 11 2012, 10:07 PM
Sorry Dana, I can't resist...
That'll buff out!
Posted by: plymouth37 Jul 18 2012, 06:37 PM
I did a bunch of little tasks to get the engine ready to install.
First I replaced my thoroughly melted clutch and reinstalled my freshly turned flywheel.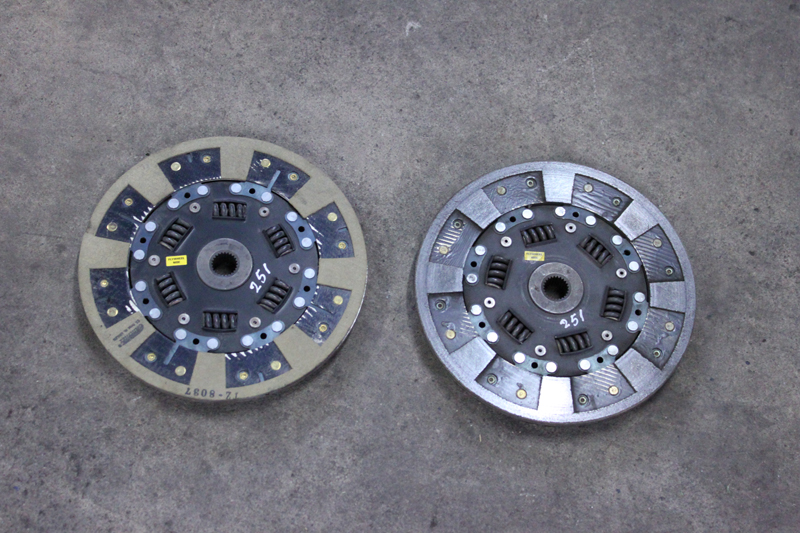
Then I installed a new Perrin light weight pulley, this took 3lbs 8.8oz off of the rotating mass of my engine, that aught to change it's revving characteristics!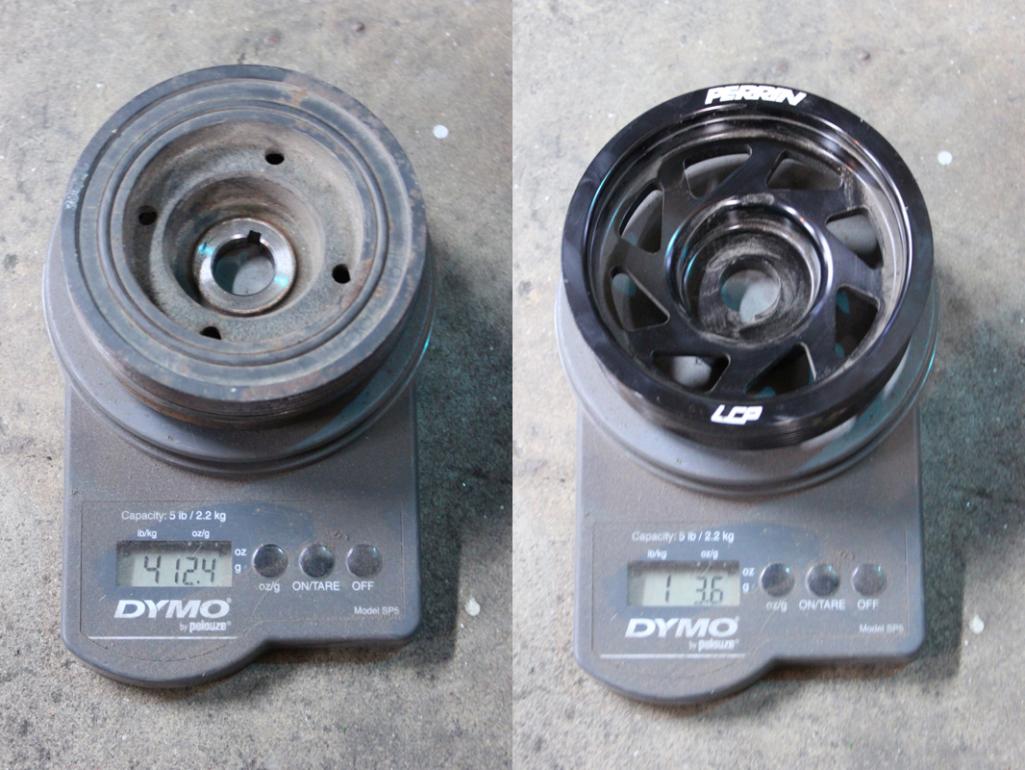
Next I installed the rear piece to the JWest shift linkage.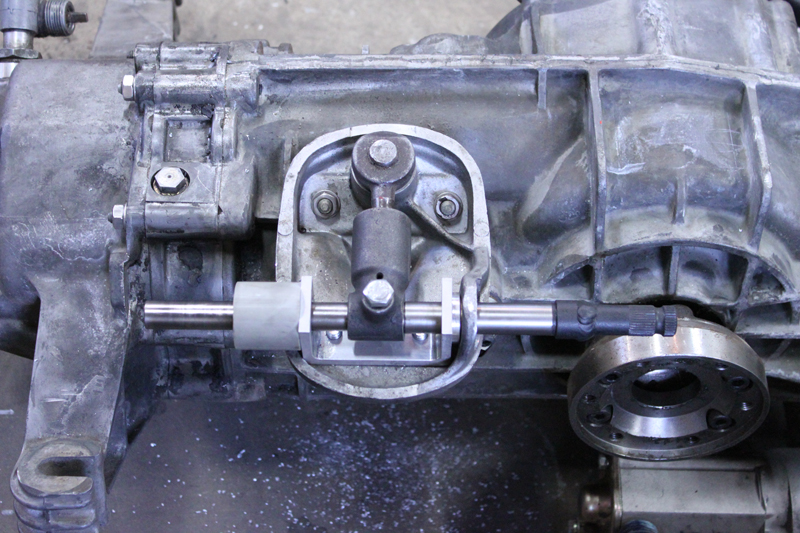
Finally I mounted the rear tube chassis to the drivetrain. I even miraculously avoided scratching the new paint!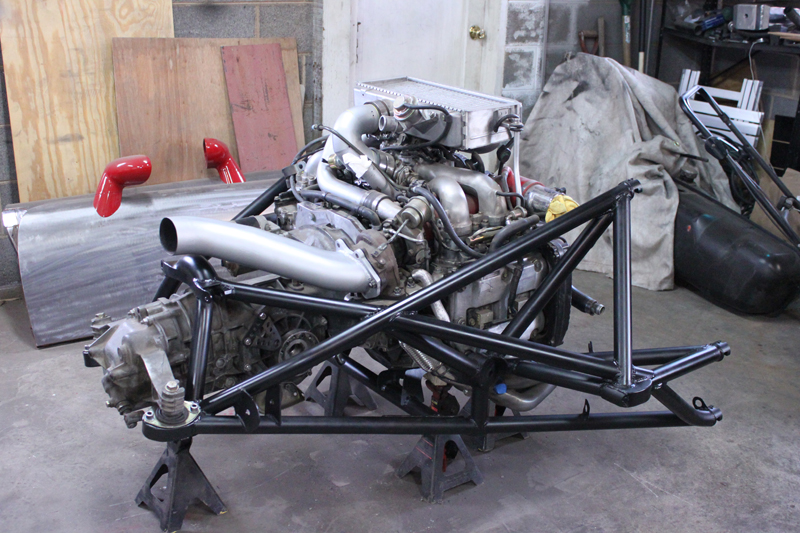
Posted by: Dasnowman Jul 18 2012, 09:27 PM
Then I installed a new Perrin light weight pulley, this took 3lbs 8.8oz off of the rotating mass of my engine, that aught to change it's revving characteristics!
Being a Suby guy I would keep the factory one on it works as a great harmonic balancer, for the little differance you feel from the Perrin it's not worth the relaibility issue's you "WILL" have. Even with a B & B engine I still think the factory one is the best option. I know it's really easy way to drop some weight especially on a rotating mass but sometimes weight can be a benefit.
I have read though your whole thread and love everything you have done and wish I had the dedication and know how to do the things you are doing.
Cheers,
Marlon
Might putting something like this in my Teener was in my 07 Ltd STi. Built short block, TVG deleats, meth injection, AP2 engine managment, 380 WHP
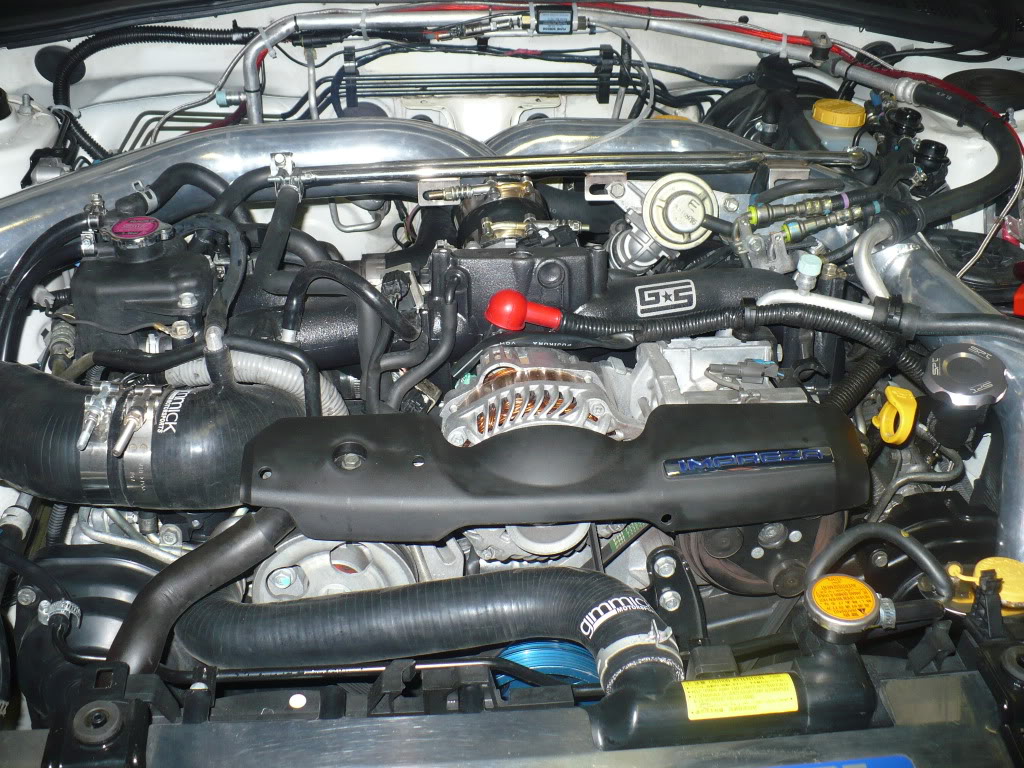
Posted by: plymouth37 Jul 18 2012, 10:47 PM
Being a Suby guy I would keep the factory one on it works as a great harmonic balancer, for the little differance you feel from the Perrin it's not worth the relaibility issue's you "WILL" have. Even with a B & B engine I still think the factory one is the best option. I know it's really easy way to drop some weight especially on a rotating mass but sometimes weight can be a benefit.
Yeah, I have read the thousands of arguments on nasioc.com http://forums.nasioc.com/forums/showthread.php?t=444518 regarding the aftermarket pulleys, some guys (myself included) are of the opinion that they are safe to use, some guys think the engine will grenade if you remove the stock one. I have a couple friends with over 50k miles on their pulleys without experiencing problems, hopefully I will be as lucky as they have been. I figure I will try this one out and if I am not happy with it I can always swap back, thanks for the advice!
Posted by: kg6dxn Jul 18 2012, 10:54 PM
Less rotating mass is cool to a point. My rotary setup has a lightened flywheel. It gets a little "jumpy" at low speed low throttle driving. A heavier flywheel would help prevent this but would make the wind up slower.
There are pros and cons to rotating mass, especially when our cars are so light...
Posted by: plymouth37 Jul 18 2012, 11:01 PM
I think this is one of the components that I will just have to wait until the R&D portion of the build to see if I like it.
Right now I am sticking to the theory that lighter is better, if my driving experience starts to tell me otherwise I will reevaluate.
Posted by: bulitt Jul 19 2012, 02:49 AM
You will know real quick if its causing a balance issue and it will only grenade if you then choose to ignore it. IMHO
Posted by: lotus_65 Jul 19 2012, 03:43 AM
I think you should make a mold of that tub as is in preparation for making copies out of carbon fiber...hmmmmmm.....just saying...
i saw all the pieces disassembled and thought the exact same thing!
Posted by: fat73 Jul 19 2012, 06:18 AM
Then I installed a new Perrin light weight pulley, this took 3lbs 8.8oz off of the rotating mass of my engine, that aught to change it's revving characteristics!
Being a Suby guy I would keep the factory one on it works as a great harmonic balancer, for the little differance you feel from the Perrin it's not worth the relaibility issue's you "WILL" have. Even with a B & B engine I still think the factory one is the best option. I know it's really easy way to drop some weight especially on a rotating mass but sometimes weight can be a benefit.
I have read though your whole thread and love everything you have done and wish I had the dedication and know how to do the things you are doing.
Cheers,
Marlon
Might putting something like this in my Teener was in my 07 Ltd STi. Built short block, TVG deleats, meth injection, AP2 engine managment, 380 WHP
I beg to differ about the pulley. I have a lighweight COBB Performance pulley on my '73 914/2003 WRX conversion with 25k on it (the engine has 58k now). No problems and it hasn't been pampered in terms of how I run it.
Ed
Posted by: stickerdick Aug 17 2012, 01:25 AM
I just got through going over your build, very impressive. I am in the process of building a tube chassis based on a914 drivetrain for a landspeed buggy and I find your ideas for the rear setup of your car to be very helpful for what I am doing. Thank you for being so talented and detailed with your build. Can't wait to see what you do next.
Posted by: charliew Sep 29 2012, 11:32 AM
It's not the longetivity of the pulley that is the question. The oil pump is right behind the pulley. The balancer is there to smooth out the revolutions. ATI, check out their faqs. Most suby beginners crater a motor from many different things, mostly thinking the oil level is good between changes because it aways was in the na honda they dogged before the wrx they moved on to. Subys are a different motor entirely and were originally meant for under 7k operation in the snow but the engineers didn't cut the cost of the motor by using a solid light weight pulley, wonder why? Most hard hotrodded subys don't make it far enough to find out if the lightweight pully helped cause the destruction. Some people even have cel issues from lightweight flywheels at idle.
Unabomber only writes what he reads, he is not a engine builder or a mechanic. All you need to do is look at a suby stock balancer and you will see the rubber and metal parts of a balancer built to try and smooth hormonics out, but like most oem stuff it's really only designed to smooth it out where the normal guy uses the motor, not at the rpms a high reving hotrodder uses. Thats why nascar uses ATI balancers. You think they aren't looking for every hp they can find?
I guess light pulleys do look better than a stock hormonic balancer though.
Posted by: plymouth37 Sep 30 2012, 06:06 PM
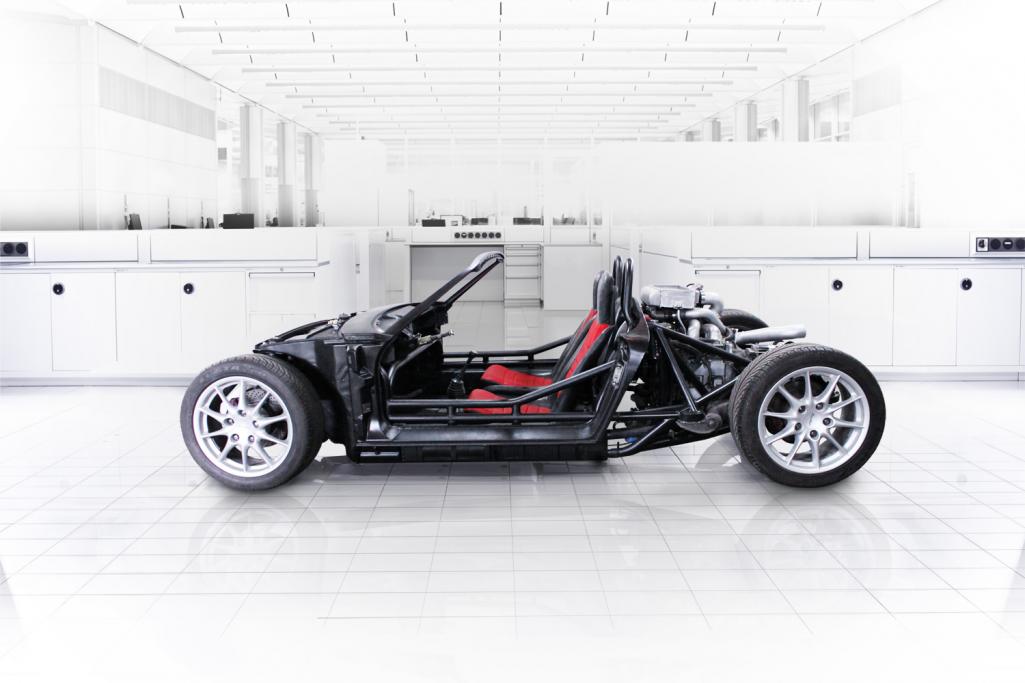
Posted by: David J Sep 30 2012, 06:26 PM
Like I stated earlier, I have made my decision and am sticking with it, I have done my research and based on what I know I feel comfortable running a light weight pulley.
Thank you for your input but I am sticking with what I have learned from my experiences within the Subaru community.
If I blow my engine because of this I will let you say I told you so
. Here is a pretty picture to get everyone back on topic...
That is one awesome 914! Congratulations for your vision and your skills.
Posted by: rnellums Sep 30 2012, 07:14 PM
New Background... Check.
Posted by: Jeff Hail Sep 30 2012, 09:51 PM
Dana
Always like your style, form and fabrication skills.
Without going back on your entire thread what did you do in the highlighed area to beef up the area where the lower tube ties into the remaining uni-body? I see that plate that drops down .. just wondering whats behind it. Is it tied into another tube or boxed in? The angle of the pic's gets my brain wandering.
Attached image(s)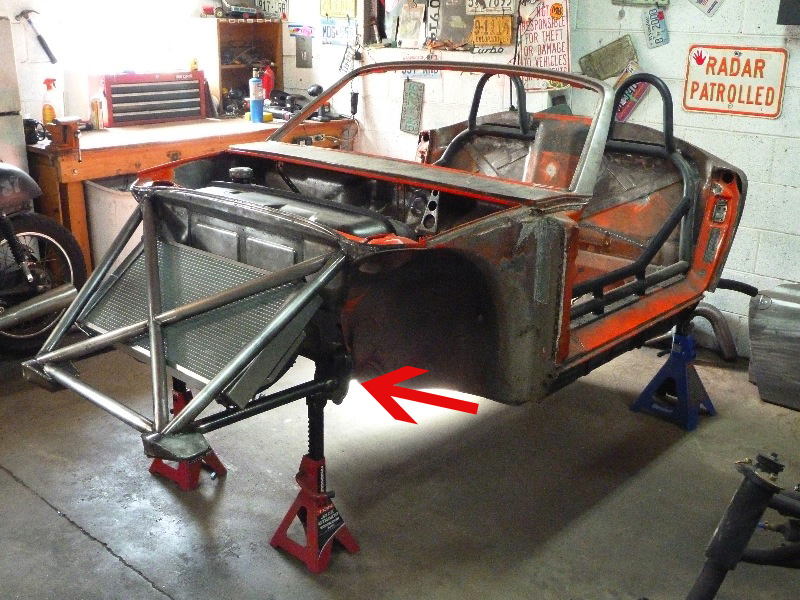
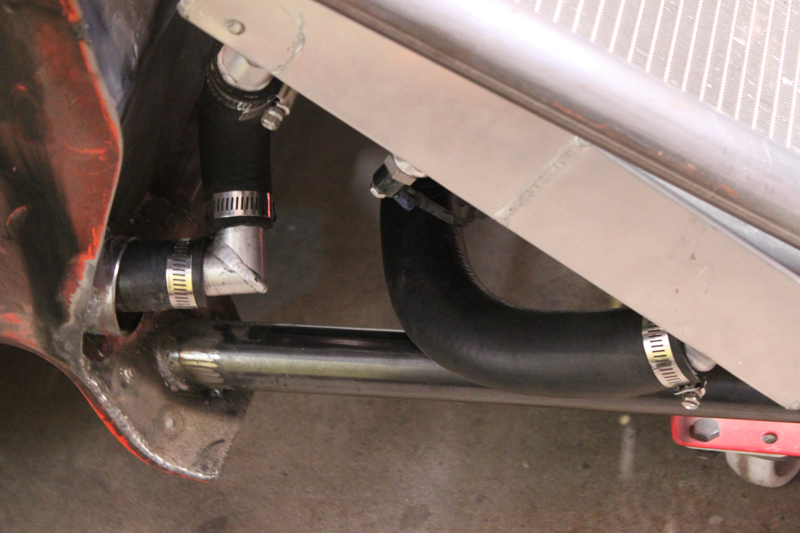
Posted by: plymouth37 Oct 1 2012, 04:58 PM
Yeah, that looks a little sketchy when the chassis is stripped. The suspension cross member bolts into that tab and a cross brace ties the whole assembly rearward to the tub, I tried to find a good picture in my photo archive but couldn't find one. Here is a shot of the bottom of the car, you can see the mounting points that the bolt in brace mounts to. With the suspension components directly behind this tab I feel like that is the most I can do to stabilize it, hopefully the brace along with the 1/8" plate I welded in there are sufficient.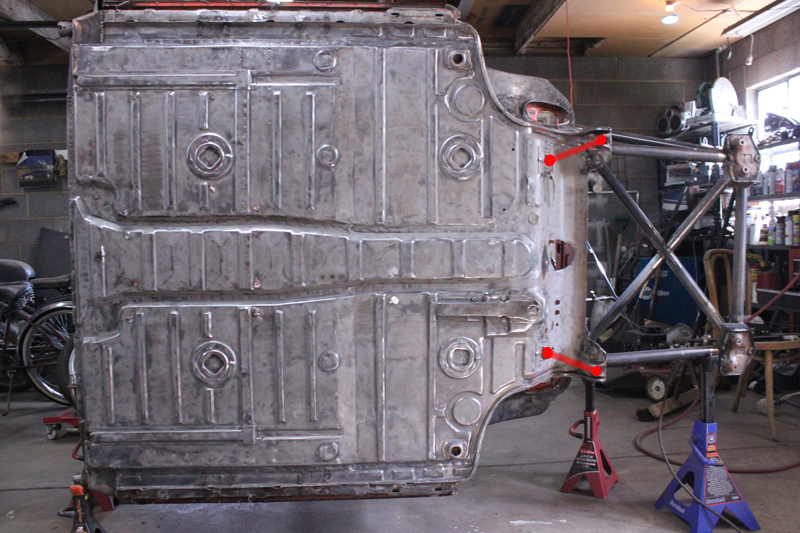
Posted by: McMark Oct 2 2012, 08:07 AM
By my thinking, that's pretty much how the cars are from the factory. You didn't really change anything structurally, just made it see-through.
Posted by: plymouth37 Oct 2 2012, 08:15 AM
By my thinking, that's pretty much how the cars are from the factory. You didn't really change anything structurally, just made it see-through.
I totally agree, it is scary when you "make the car see-through" and expose how little is actually holding the front end together!
Posted by: wingnut86 Oct 2 2012, 08:25 AM
Great idea!
Plexiglass portals in the body work to expose the cutaway "awesome-ness";-}
Posted by: plymouth37 Oct 2 2012, 08:33 AM
Great idea!
Plexiglass portals in the body work to expose the cutaway "awesome-ness";-}
Or just make a plastic body like Pontiac did in '40
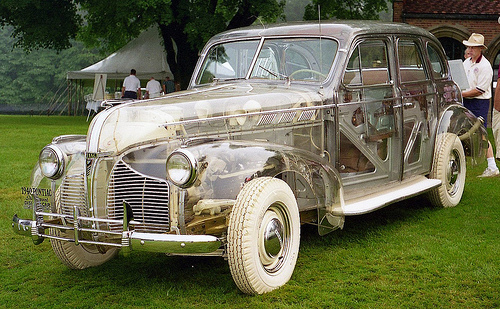
Posted by: rick 918-S Oct 2 2012, 07:55 PM
If you tie that 1/8" plated tab back into the chassis like the red line denotes that should help detune the constant vibration that will crack the chassis over time. I see it as a long term issue more than a point of weakness that would cause sag or cowl shake.
Posted by: scotty b Jan 14 2013, 12:20 PM
Posted by: trojanhorsepower Jan 14 2013, 06:14 PM
I agree!
Posted by: wingnut86 Jan 14 2013, 06:43 PM
I think he's still trying to finish his 1st year in his Masters program at The Nittany Lion.
Frikkin Dweebs
Posted by: plymouth37 Jan 18 2013, 12:39 PM
Yup, I accidentally got accepted to my dream school for my Masters degree in Architecture and had to move to Philly to attend UPenn (not Penn State). Not only did I have to leave the Anklebiter back home in Colorado, this program is so challenging I wouldn't have the time to work on it even if I had it here.
I still have every intention of finishing the project after grad school but I need to focus on kicking ass at school right now. Don't worry though, I haven't let this Ivy-league school take the mechanic out of me, I am taking a series of experimental robotics classes along with my Architecture classes so when I return to the car expect some pretty legit technology to make an appearance in the design.
To tide you over here is a fun little video of a design project I got to make last semester .
https://www.youtube.com/watch?v=4auTp2tyFLM
Thanks for sticking with the build, I am really looking forward to getting back to it once my education goals get accomplished.
Posted by: Kirmizi Jan 18 2013, 12:51 PM
Stick with your goals Dana!
Just think of all the new ideas you'll come up with when you get back to your project.
Good luck!
Mike
Posted by: Cairo94507 Jan 18 2013, 12:54 PM
Best wishes in school. You are absolutely doing the right thing.
Posted by: Woody Jan 18 2013, 01:13 PM
http://www.build-threads.com/general-car-stuff/top-10-builds-of-2012/
Posted by: plymouth37 Jan 18 2013, 01:15 PM
http://www.build-threads.com/general-car-stuff/top-10-builds-of-2012/
That is awesome! Thanks for posting that, I didn't even know!
Posted by: Woody Jan 18 2013, 02:24 PM
http://www.build-threads.com/general-car-stuff/top-10-builds-of-2012/
That is awesome! Thanks for posting that, I didn't even know!
No problem. Keep up the good work.
Posted by: stugray Jan 18 2013, 06:18 PM
Very cool! Tell us more! I have helped with a few robotics projects while at Ball. The last two were called Spirt & Opportunity.
Maybe we could turn the anklebiter into a transformer:
http://www.youtube.com/watch?v=fUxzNZimhRo
Stu
Posted by: scotty b Jan 18 2013, 07:25 PM
Yup, I accidentally got accepted to my dream school for my Masters degree in Architecture and had to move to Philly to attend UPenn (not Penn State). Not only did I have to leave the Anklebiter back home in Colorado, this program is so challenging I wouldn't have the time to work on it even if I had it here.
I still have every intention of finishing the project after grad school but I need to focus on kicking ass at school right now. Don't worry though, I haven't let this Ivy-league school take the mechanic out of me, I am taking a series of experimental robotics classes along with my Architecture classes so when I return to the car expect some pretty legit technology to make an appearance in the design.
To tide you over here is a fun little video of a design project I got to make last semester .
https://www.youtube.com/watch?v=4auTp2tyFLM
Thanks for sticking with the build, I am really looking forward to getting back to it once my education goals get accomplished.
I'm sorry to inform you, but we at the 914 world, have decided you are too smart for this BBS. You are being asked to leave. Thanks for the input, but you have made too many here insecure.
BTW what's the song in the video ?
Posted by: Gint Jan 18 2013, 07:54 PM
Dana, does that mean you're coming back to Colorado after school?
Posted by: plymouth37 Jan 18 2013, 10:52 PM
Very cool! Tell us more! I have helped with a few robotics projects while at Ball. The last two were called Spirt & Opportunity.
LOL! Oh thats all? Just the rovers that redefined our understanding of Mars? That is awesome!
I am getting into really primitive stuff in comparison, mostly reactive architectural systems that are fed data by motion sensing cameras and accelerometers that then interface with an arduino to power servos. I have found a great niche that lets me be an Architect and a gear-head at the same time.
Scotty, here is the link to the song:http://www.youtube.com/watch?v=Bzd3BjXHjZ0
And yes Gint, I am doing everything in my power to return to the Front Range area, it has really become home base for me and I plan to settle down there if I can find a good enough job after graduation.
Posted by: MDG Jan 19 2013, 07:14 AM
I'm sorry to inform you, but we at the 914 world, have decided you are too smart for this BBS. You are being asked to leave.
Yes
 we're all sorry about this.
Please leave your 914 at the door on your way out.
Posted by: KELTY360 Jan 19 2013, 01:50 PM
I'm sorry to inform you, but we at the 914 world, have decided you are too smart for this BBS. You are being asked to leave.
Yes
we're all sorry about this.Please leave your 914 at the door on your way out.
I'll take the back half!
Posted by: rnellums Jan 22 2013, 09:22 AM
If you end up manufacturing that "Crawler" sign me up Might be good for scooting under cars to work on them too!
BTW, if you like Enter the machine you might want to give Phutureprimitive a try too.
Posted by: CptTripps Aug 25 2013, 10:43 PM
Since I am doing so much to update the the cars looks I couldn't just use the stock mirrors. There are a lot of choices out there but i finally settled on 2006 Pontiac Solstice mirrors, they are quite a bit smaller (and cheaper!) than the Porsche Aero mirrors and I think they fit the cars style pretty well.
I couldn't remember where I saw a cool set of rear-view mirrors...and remembered this thread!
Just ordered a set for my new build. Holy crap are they cheap! $85 a set on eBay. Made sure I got the "Manual" set so I didn't have a bunch of motor-stuff to tear out.
Just thought it was worth mentioning that this thread helped me.
Posted by: Chris H. Aug 26 2013, 08:32 AM
I'm looking at those or 99-05 Miata...Wonder if the Solstice mirrors fit in the stock location?
Posted by: CptTripps Aug 26 2013, 08:51 AM
I'll find out and let you know in about a week. ;-)
I WILL be buying another set of Miata sun-visors though. That was a good upgrade on my last 914.
Posted by: plymouth37 Sep 22 2013, 08:30 AM
Wonder if the Solstice mirrors fit in the stock location?
Here is a shot of how they fit, not an easy bolt on but not hard either, you need to re-contour the base of them to match the curvature of the door and drill 3 pretty huge holes. You can see the stock bolt holes in the door for reference.
Glad I could help Tripps!
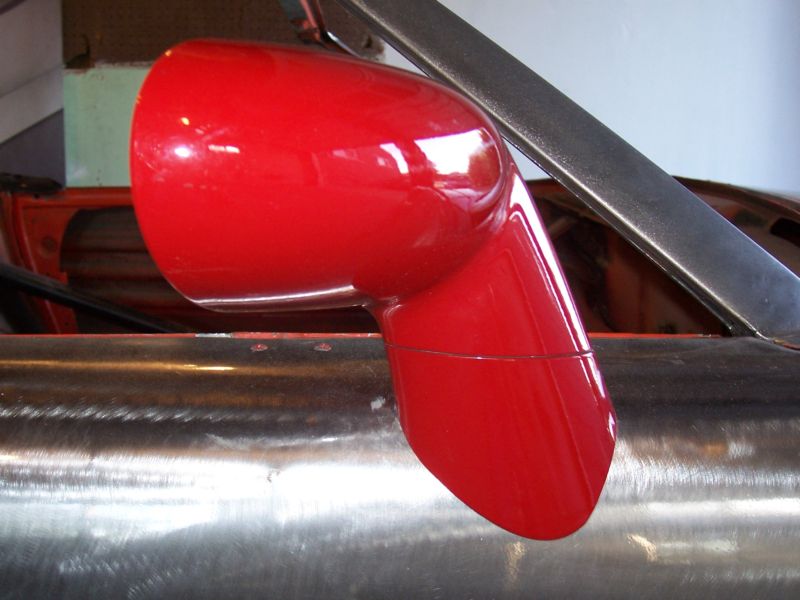
Posted by: CptTripps Sep 23 2013, 11:22 AM
I dug into this a few days ago and fear that I REALLY messed up the angle on the passenger window. I was clearly using the wrong tools. I think this would be easier with a belt-sander where I could use the rounded end to keep it more consistent.
I put the brakes on it for a few days until I can get the right tools. I love the look of them, and think they'd be a great replacement. I've got time before I need to have them mocked up.
I'm also going to add arrow LEDs behind the glass, so (luckily) I got the glass off in one piece.
Attached thumbnail(s)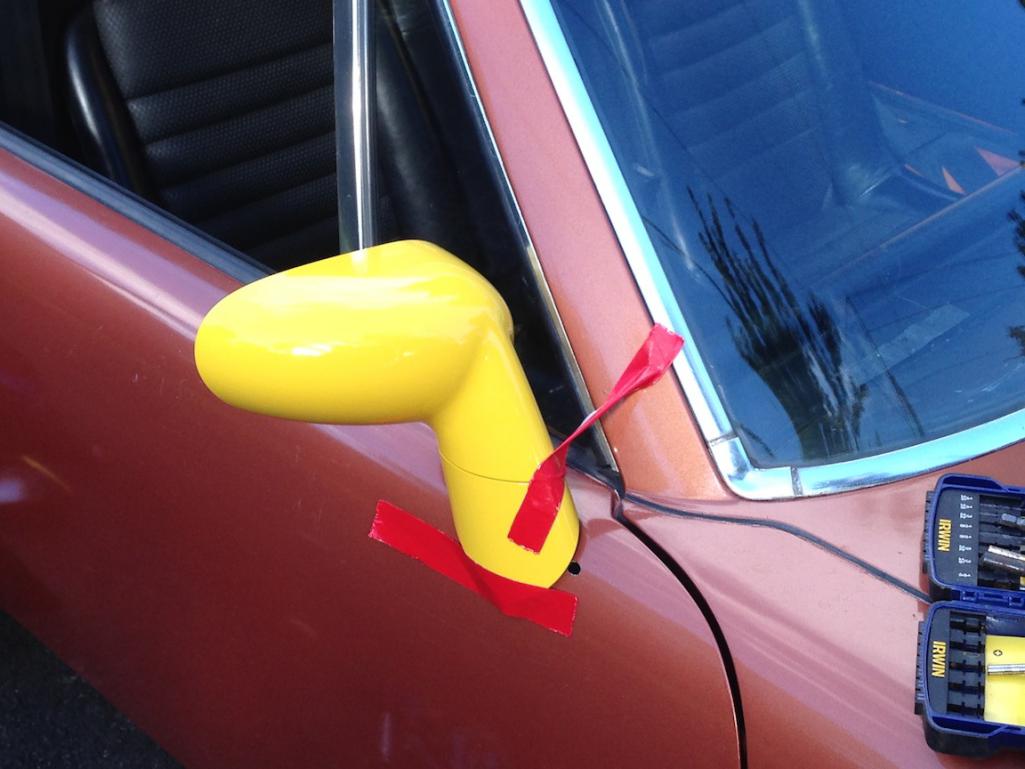
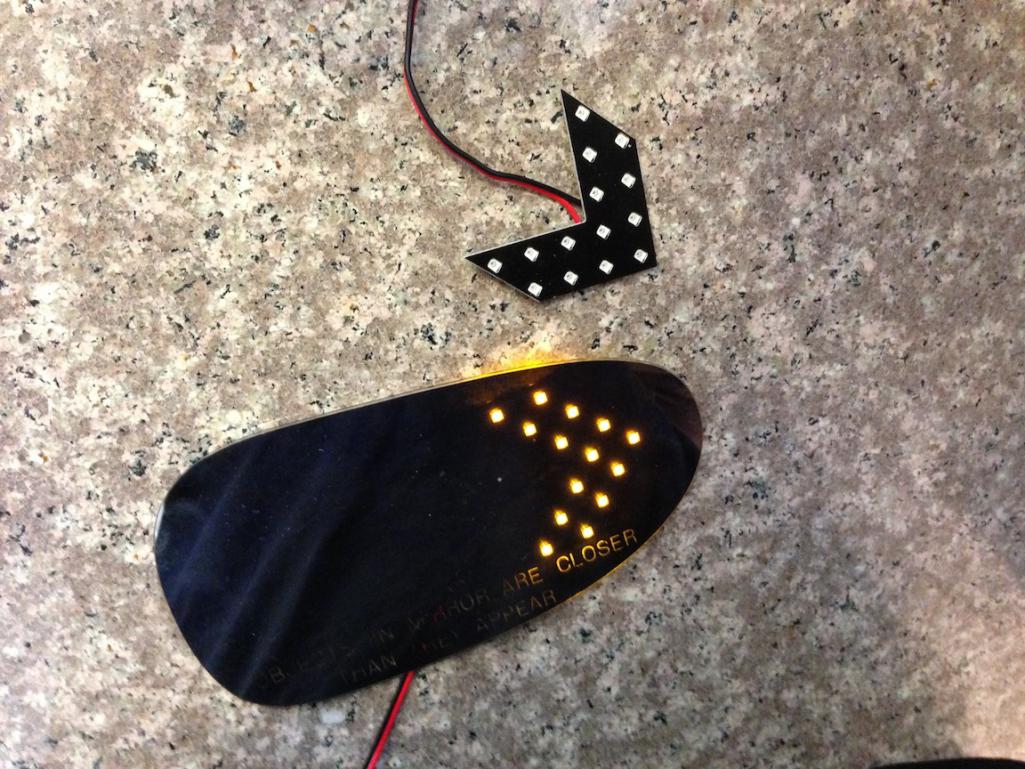
Posted by: 2mAn Nov 18 2013, 04:39 PM
love this build. I was really hoping it would be completed by the time I got to the end, damn school!
Posted by: stugray Nov 18 2013, 05:19 PM
BRZ/FR-S/ft86 mirrors also look like they would be a nice fit: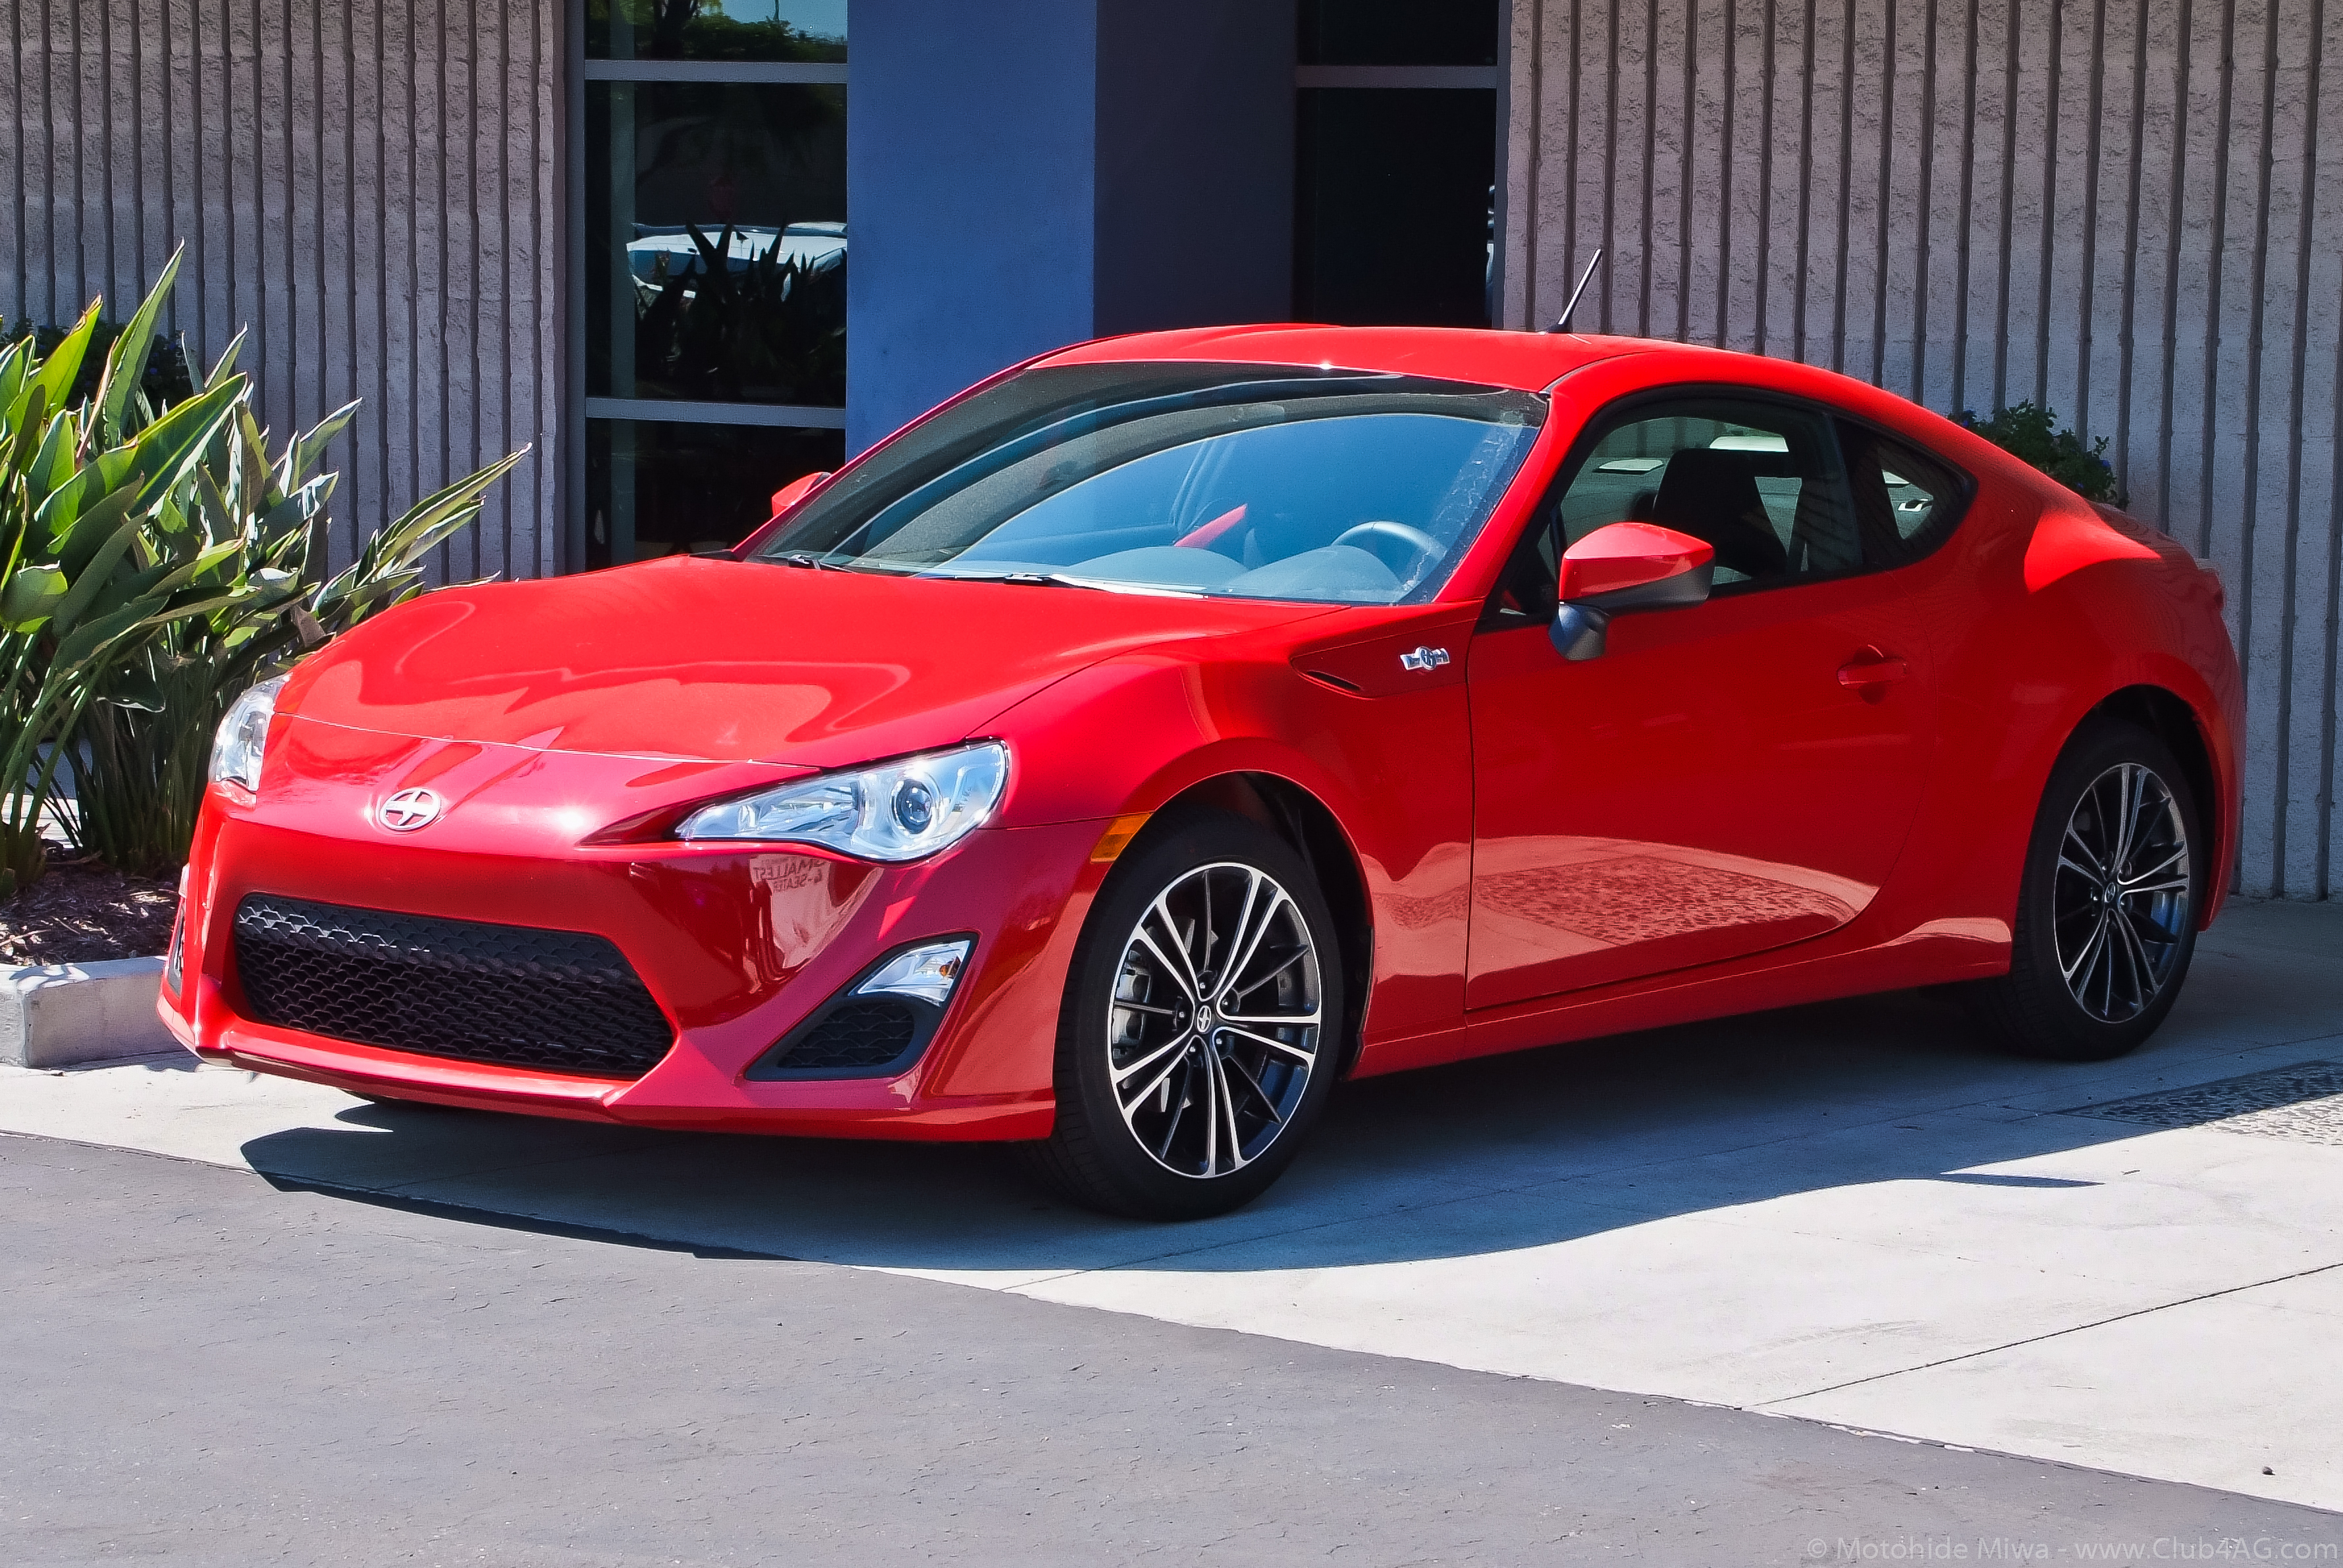
Posted by: KELTY360 Jan 8 2014, 12:25 AM
[attachmentid=173418]
Here's the plan:
Tub up restoration/customization (no cutting corners here).
Speedster styling.
40" tall
Under 1800 pounds.
320 horsepower WRX engine.
Let the games begin!
Man, I really miss this thread.
Hey Dana, if you're still subscribed, check in and say hi.
Note: for a quick refresher, see post #506.
Posted by: El Vikingo Tropical Nov 2 2014, 06:47 AM
Just amazing.
Don't paint it! Just leave it with clear coat don't hyde your handcraft. It's a master piece
Posted by: RJMII Jan 14 2015, 11:06 PM
Dana?
You still around?
Posted by: Rand Jan 14 2015, 11:07 PM
seriously, this one can't die.
Dana, what's going on in your life these days?
Posted by: rick 918-S Jan 14 2015, 11:19 PM
Posted by: trojanhorsepower Jan 15 2015, 08:08 PM
Me to!
Posted by: nsyr Jan 15 2015, 08:55 PM
Didn't he say he was taking a couple years off for school?
Posted by: scotty b Jan 15 2015, 09:09 PM
Didn't he say he was taking a couple years off for school?
yes and IIRC he moved to Pa
Yep, thar tis post 1010
http://www.914world.com/bbs2/index.php?showtopic=84842&st=1000#
Posted by: SirAndy Jan 15 2015, 09:30 PM
Somebody poke him ...
Posted by: Rand Jan 18 2015, 07:07 PM
Where is he active online? Anybody Facebook friends with Dana?
Time's fun when you're having flies. Seems like it's been longer now.
Posted by: 76-914 Jan 19 2015, 01:59 PM
IIRC, I read on one of the Suby forums that it was in another garage or hands presently. I'll see if I can locate that thread to confirm.
Posted by: 76-914 Jan 19 2015, 07:50 PM
here's the link. read down a few posts on page 2
http://forums.nasioc.com/forums/showthread.php?t=2285822&page=2
Posted by: Mike Bellis Jan 19 2015, 09:35 PM
One of us is going to get a great deal on a highly modified 914 project someday...
Posted by: Chris H. Jan 20 2015, 06:31 AM
I think they just reference the anklebiter in that thread Kent. The yellow car is not it. Cool car though!
Mike you need another project ! I saw a W8 engine for sale on Craigslist and thought of you.
Posted by: plymouth37 Jan 26 2015, 09:38 AM
Hey Everybody,
I just wanted to check in and see how everybody is doing. Finally the end of the Anklebiter's long hiatus is drawing to a close. I just started my last semester at UPenn, which means this summer will see my joyful return to the garage!
In other news I have just accepted a job with ZGF Architects in Seattle so look out Northwest Contingent, you are about to gain a member!
I look forward to becoming more active on the forum soon, I have been so busy over the last 3 years the internet has become a luxury, to see the work that has been keeping me from you check out http://www.danestokes.com
Posted by: rdauenhauer Jan 26 2015, 09:45 AM
Very Cool! Congratulations!
So that'll mean we'll get to see this project up close & personal!
Posted by: CptTripps Jan 26 2015, 10:02 AM
Can't wait to have you back! This project is bar-none my favorite on the site, so I can hardly wait to see it on the road.
Posted by: KELTY360 Jan 26 2015, 10:12 AM
WooHoo!!
Great to see you check in, Dana. Congrats on you success at Penn. Excited to hear you'll be coming to Seattle and we get to see the Anklebiter's progress. Let me know if you need any assistance in the relocation.
Posted by: KELTY360 Jan 26 2015, 10:13 AM
Very Cool! Congratulations!
So that'll mean we'll get to see this project up close & personal!
I've seen it in person, Rich.....the front was on one side of the garage and the rear was at the other. Very impressive, and disorienting.
Posted by: Cairo94507 Jan 26 2015, 10:28 AM
Glad to see you almost back. Looking forward to seeing your project move forward. Keep up the excellent work.
Posted by: Randal Jan 26 2015, 10:30 AM
Hey Everybody,
I just wanted to check in and see how everybody is doing. Finally the end of the Anklebiter's long hiatus is drawing to a close. I just started my last semester at UPenn, which means this summer will see my joyful return to the garage!
In other news I have just accepted a job with ZGF Architects in Seattle so look out Northwest Contingent, you are about to gain a member!
I look forward to becoming more active on the forum soon, I have been so busy over the last 3 years the internet has become a luxury, to see the work that has been keeping me from you check out http://www.danestokes.com
Get the puppy done and come run some NW hill climbs with "222"!
Posted by: tdgray Jan 26 2015, 11:16 AM
Congrats on the job... you are really working hard... nice to see.
Can't wait for the progress to continue.
Posted by: 914forme Jan 26 2015, 11:51 AM
I love the 914, but I am sorry, it pales in comparison to your architectural design. Keep that part up, the car has a limited focus, but some of these spaces are just incredible!!!!!
Posted by: JmuRiz Jan 26 2015, 12:07 PM
Site blocked at my work, I'll check at home.
My wife is in the interior architecture/design field, so your work hours are something I understand. Sometimes I have to give her quick updates on what's going on in the world/news.
Good to have an update from you!
Posted by: Mr.242 Jan 26 2015, 07:42 PM
In other news I have just accepted a job with ZGF Architects in Seattle so look out Northwest Contingent, you are about to gain a member!
http://www.danestokes.com
Wahooo! Another PNW Teener! If Anklebiter counts....
Posted by: trojanhorsepower Jan 26 2015, 07:56 PM
Another reason to look forward to summer.
Posted by: db9146 Jul 6 2015, 03:35 PM
Okay Dane,
Its July, 2015!!!!!
Let's get back to it.....we have all been waiting patiently.
Posted by: Mueller Jul 6 2015, 03:44 PM
Congrats on school and the job...so glad you are going to start working on the 914 again!
Wasn't there talk of the next WCR being up North in the Seattle area?
Posted by: Annapolis914 Jul 6 2015, 03:51 PM
Go Quakers.........great education. Spent a lot of years and money there, and daughter just graduated from Wharton. Best of luck in career.
Posted by: 3d914 Jul 6 2015, 07:52 PM
Awesome work Dana! You definitely have the goods for the field. Best wishes for a long and productive career.
Posted by: worn Jul 6 2015, 08:05 PM
Hey Everybody,
I just wanted to check in and see how everybody is doing. Finally the end of the Anklebiter's long hiatus is drawing to a close. I just started my last semester at UPenn, which means this summer will see my joyful return to the garage!
In other news I have just accepted a job with ZGF Architects in Seattle so look out Northwest Contingent, you are about to gain a member!
I look forward to becoming more active on the forum soon, I have been so busy over the last 3 years the internet has become a luxury, to see the work that has been keeping me from you check out http://www.danestokes.com
My father was a Seattle architect. Good luck and may you finish many projects. Especially in the Porsche variety. You have to have something besides fame and fortune.
Posted by: plymouth37 Jul 29 2015, 11:08 AM
Well, 3 years has come and gone, I graduated with a Masters degree in Architecture from Penn in May:
11 days later we welcomed our first child into the world:
and now we are relocating to Seattle!
But don't worry, I stopped by Cheyenne to pick up an old friend I have been missing for a long time now: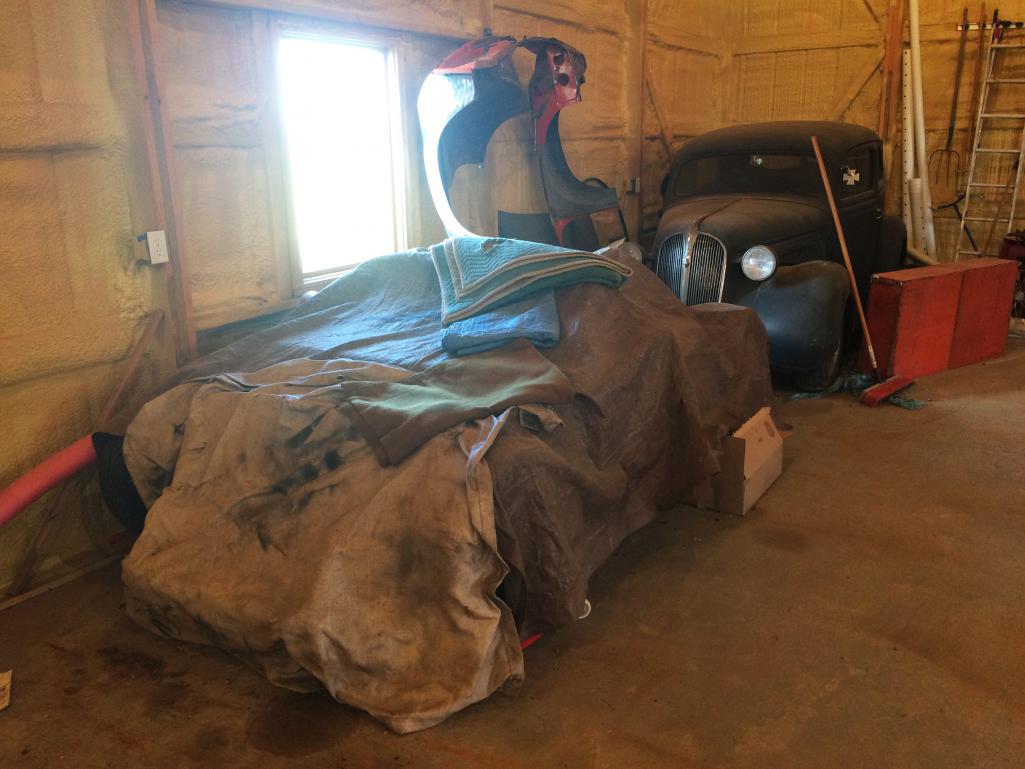
Posted by: Philip W. Jul 29 2015, 11:13 AM
time to get and back at it using all that new found knowledge and expertice!looking forward to seeing this back on track
Posted by: Philip W. Jul 29 2015, 11:14 AM
Oh, and congradulations on both of those recent developments!
Posted by: Ferg Jul 29 2015, 11:15 AM
Congrats on everything. You are doing it right as usual
Posted by: plymouth37 Jul 29 2015, 11:21 AM
It looks like she weathered the storage pretty well, it is going to be tough to remember everything I was half done with, should have left myself a note on what to do next!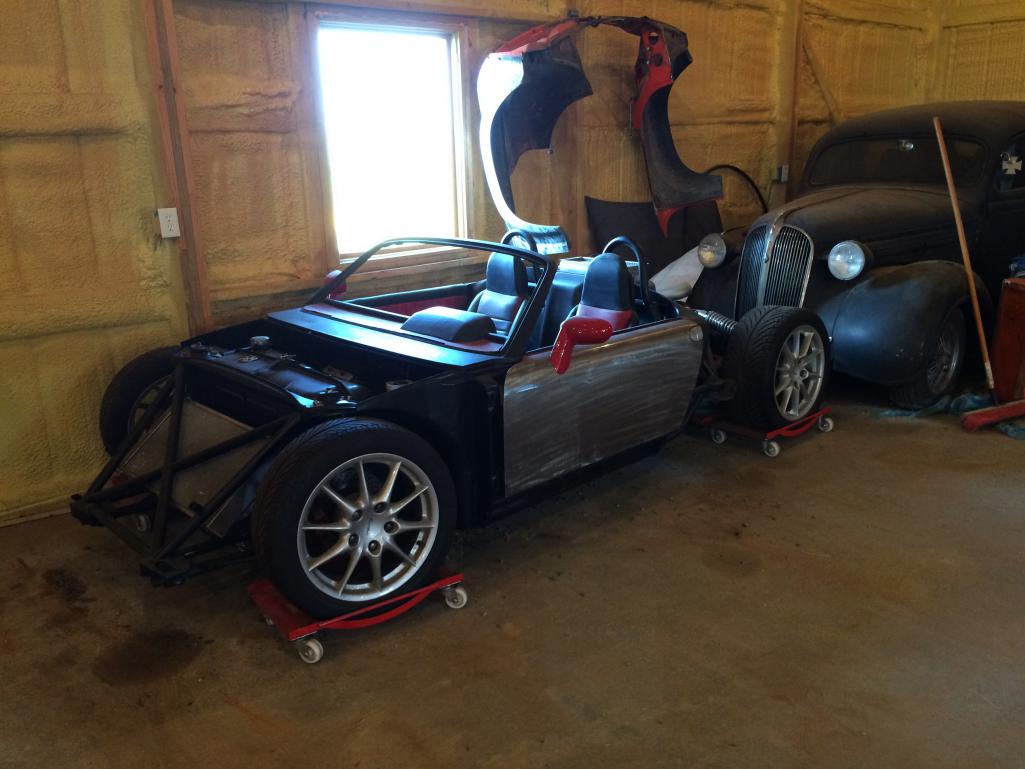
Posted by: plymouth37 Jul 29 2015, 11:23 AM
Time to throw her on a trailer and head West!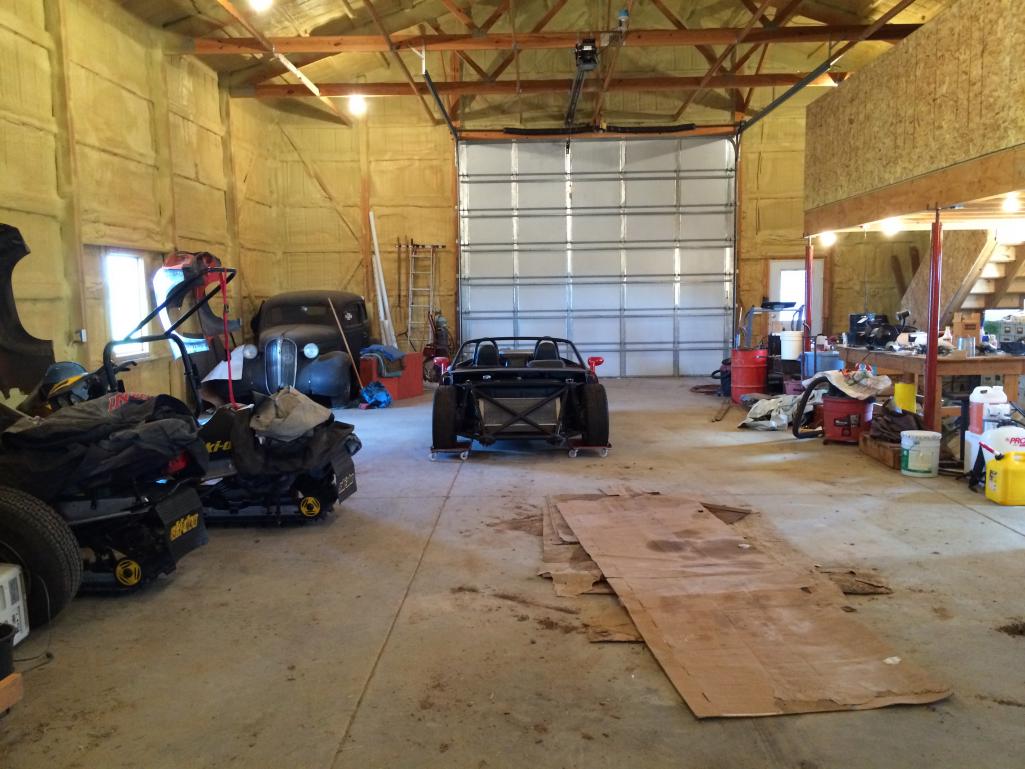
Posted by: KELTY360 Jul 29 2015, 12:35 PM
it is going to be tough to remember everything I was half done with, should have left myself a note on what to do next!
Just a reminder dude, you cut your car in half!
Congratulations Dana! New baby! New sheepskin! New job! That's the trifecta. Looking forward to seeing you in the NW. Do you know where you'll be living yet?
BTW, if you need some storage space I can always move Greenie's 911 outside to make room for the Anklebiter.
Posted by: wingnut86 Jul 29 2015, 01:09 PM
Dane,
I can't remember if I congratulated you, so, here ya go!
Dave B...
Posted by: wingnut86 Jul 29 2015, 01:14 PM
...note to self.
WELDING RODS!!!
...and JB Weld
It looks like she weathered the storage pretty well, it is going to be tough to remember everything I was half done with, should have left myself a note on what to do next!
Posted by: iwanta914-6 Jul 29 2015, 01:23 PM
I'm still new around here (though I've technically been a member for a while), but can we even call this a 914 anymore? It looks about 15% 914 and the rest is completely custom and Subie powered. Just a thought and maybe it came up in one of the other 53 pages that I haven't gone through completely, lol. Very interesting build, that's for sure!
Posted by: KELTY360 Jul 29 2015, 01:26 PM
I'm still new around here (though I've technically been a member for a while), but can we even call this a 914 anymore? It looks about 15% 914 and the rest is completely custom and Subie powered. Just a thought and maybe it came up in one of the other 53 pages that I haven't gone through completely, lol. Very interesting build, that's for sure!
Read the other 53 pages.
Posted by: Millerwelds Jul 29 2015, 01:36 PM
oh my Gawd I am sooo f'in excited to see some progress on this. By far my favorite build. So outside the box and crazy and awesome and so on.
And now there is an actual Anklebiter to work on it too! Congrats!
Posted by: Cairo94507 Jul 29 2015, 02:09 PM
Congratulations X3! I so look forward to seeing this car move forward. Oh, remember to add windshield wipers to your build sheet.....
Posted by: RobW Jul 29 2015, 03:06 PM
Congratulations on everything!
We're all looking forward to you picking up on your project!
Posted by: JRust Jul 29 2015, 03:18 PM
WOOHOO! So glad to see this come back to life. Plus your moving closer to me so I might actually get to see it. Awesome
Posted by: ice cold Jul 29 2015, 06:09 PM
Congratulations Dane,
I spent an evening reading the entire thread waiting to see what was next. I am glad to see you are back because there is nothing worse than a novel without an ending. You have an awesome imagination and some mad skillz. I am sure with your drive and ambition your project's completion and a very successful life are inevitable. Congratulations again and get back to work!!
Chris
Posted by: dudzy's914 Jul 29 2015, 07:02 PM
This is a coincidence! I was just reading this thread this morning! I look up to you and your amazing skills
Posted by: 76-914 Jul 29 2015, 07:44 PM
I'm still new around here (though I've technically been a member for a while), but can we even call this a 914 anymore? It looks about 15% 914 and the rest is completely custom and Subie powered. Just a thought and maybe it came up in one of the other 53 pages that I haven't gone through completely, lol. Very interesting build, that's for sure!
If it walks like a Duck and quacks like a Duck then yes, we can call it a 914.
Posted by: plymouth37 Jul 30 2015, 11:06 AM
I'm still new around here (though I've technically been a member for a while), but can we even call this a 914 anymore? It looks about 15% 914 and the rest is completely custom and Subie powered. Just a thought and maybe it came up in one of the other 53 pages that I haven't gone through completely, lol. Very interesting build, that's for sure!
If it walks like a Duck and quacks like a Duck then yes, we can call it a 914.
If it has more than a quarter million views on a 914 site it might be a 914
Posted by: plymouth37 Jul 30 2015, 11:22 AM
All loaded up and wrapped, ready to hit the road!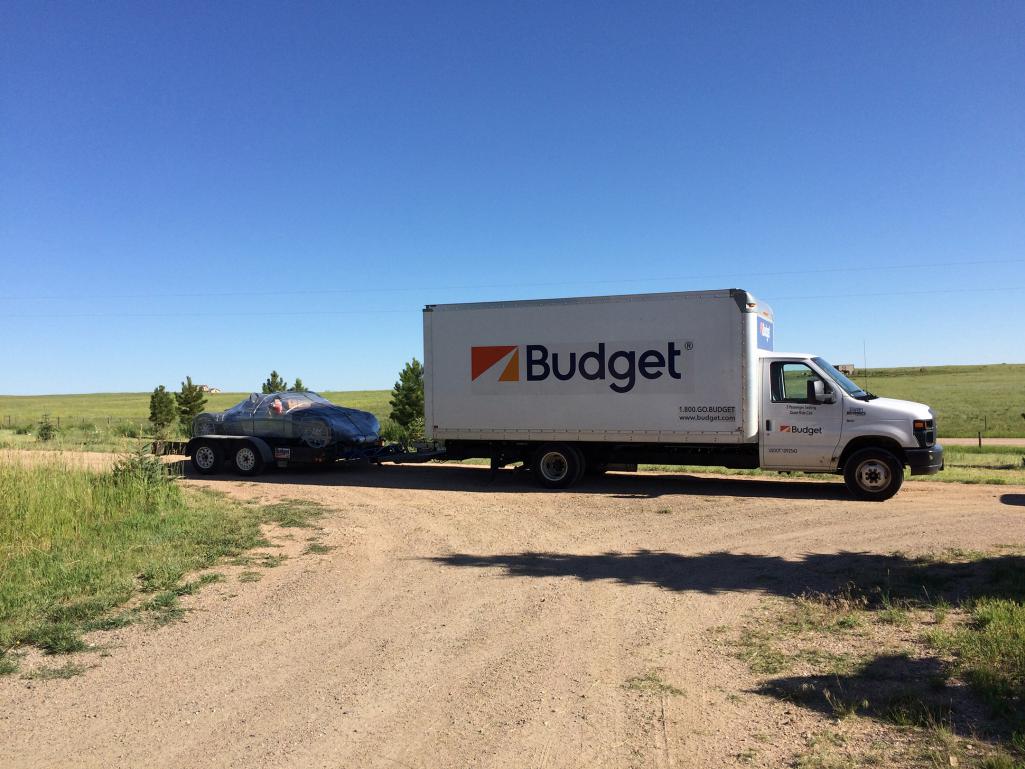
Posted by: plymouth37 Jul 30 2015, 11:23 AM
Sealed for freshness...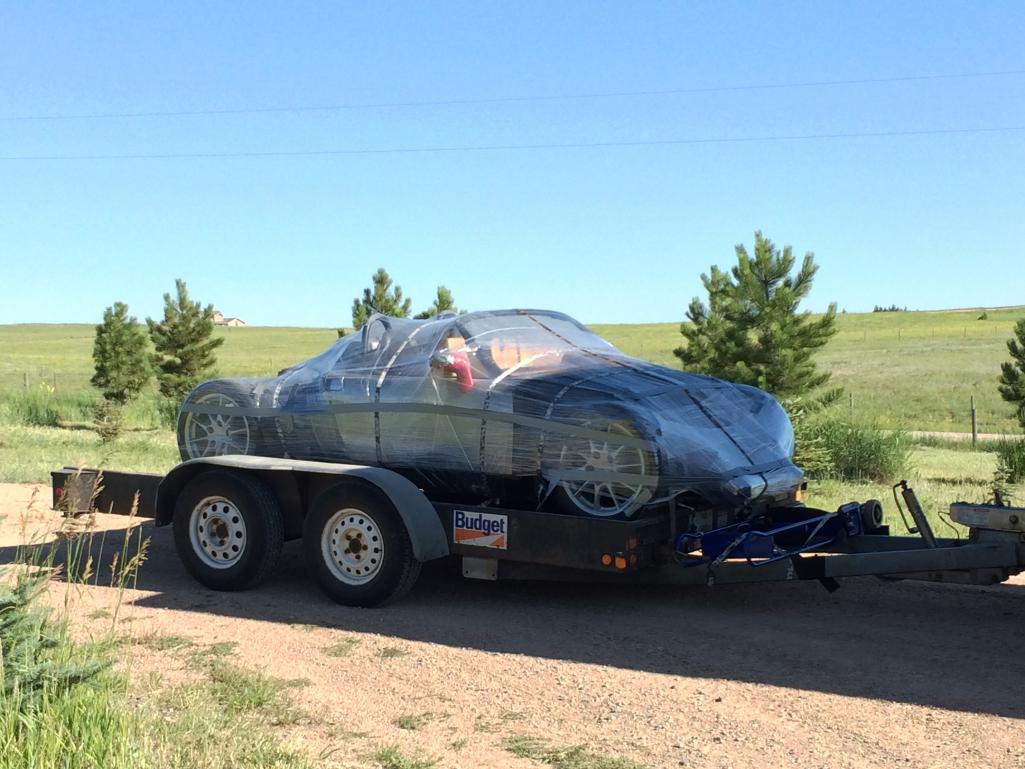
Posted by: Ferg Jul 30 2015, 11:28 AM
It's not blue tape, but it will do
Posted by: flipb Jul 30 2015, 11:32 AM
Sealed for freshness...
I can't wait to see spy photos of this on automotive blogs, speculating what it might be... "New Baby Boxster?!!"
Posted by: rick 918-S Jul 30 2015, 12:01 PM
Posted by: Chris H. Jul 30 2015, 01:18 PM
I'm still new around here (though I've technically been a member for a while), but can we even call this a 914 anymore? It looks about 15% 914 and the rest is completely custom and Subie powered. Just a thought and maybe it came up in one of the other 53 pages that I haven't gone through completely, lol. Very interesting build, that's for sure!
If it walks like a Duck and quacks like a Duck then yes, we can call it a 914.
I'f I'm remembering right this is the ORIGINAL Renegade Subaru car. The one in many of the videos. Orange with polished Fuchs. He then made a few "tasteful mods". It's gonna be awesome when done.
Posted by: Jeff Bowlsby Jul 30 2015, 01:35 PM
Reminds me of an embryonic sac...just visible enough to make something out, but not enough detail to know what it might become...
Attached thumbnail(s)
Posted by: thieuster Jul 30 2015, 01:43 PM
I just found this thread. I spent some time reading 'diagonally' through a few - in fact a lot- pages, looking at the pics. And every pic amazes me more! What a fantastic job you're tackling. I think I can safely say that I'm quite handy with most tools, but this... You are lightyears ahead of me!
I will start to follow this with a lot of interest!
Menno
Posted by: Millerwelds Jul 30 2015, 01:45 PM
I can't wait to see spy photos of this on automotive blogs, speculating what it might be... "New Baby Boxster?!!"
The next Bugatti Veyron...
Posted by: plymouth37 Jul 30 2015, 03:37 PM
They don't call it "Big Sky Country" for nothing! My cocktail of plastic wrap, duct tape, and tie down straps seems to be holding so far!
Getting a lot of attention on the road and lots of questions at gas stations, makes me excited to get this thing on the road under its own power!
Posted by: Spoke Jul 30 2015, 03:45 PM
Congrats on your graduation. Good luck with future endeavors.
Can't wait to see this project move forward. That's one bad-ass vehicle.
Posted by: shoguneagle Jul 30 2015, 04:45 PM
IT IS BACK!!!!! Now, I have to re-read the entire file to get caught up again on this build. Us older people take longer and longer to get through reading these threads and understanding what is going on. DO NOT LEAVE US HANGING AGAIN WITHOUT FINISHING THIS PROJECT!!!! LOL!!
Congratulations of finishing school and getting back to the project. I have missed this thread and the building of your dream car. The project is one of the more interesting items on the board and will be back following it with extreme interest.
Welcome back!
Now that all the greetings are out of the way; GET BACK TO WORK AND KEEP US ENTERTAINED AND INFORMED! Again, LOL/LOL/LOL/ETC.
Steve Hurt
Posted by: ruby914 Jul 30 2015, 04:54 PM
Congratulations on your graduation.
"11 days later we welcomed our first child into the world" That would be Anklebiter II!
Congratulations again! Good to see your back at it.
Posted by: KELTY360 Jul 30 2015, 05:08 PM
I see you're heading for Snoqualmie; beautiful place at the foot of Mt. Si. Are you heading for Old Snoqualmie or New Snoqualmie?
Posted by: FourBlades Jul 30 2015, 05:29 PM
This is big news!
Good luck with everything.
John
Posted by: plymouth37 Jul 30 2015, 05:35 PM
I see you're heading for Snoqualmie; beautiful place at the foot of Mt. Si. Are you heading for Old Snoqualmie or New Snoqualmie?
We got a little house in old town, near the old depot.
Posted by: KELTY360 Jul 30 2015, 06:09 PM
I see you're heading for Snoqualmie; beautiful place at the foot of Mt. Si. Are you heading for Old Snoqualmie or New Snoqualmie?
We got a little house in old town, near the old depot.
Excellent, I couldn't picture you in those sterile suburbs on the hill. How's your shop?
Posted by: wingnut86 Jul 30 2015, 06:18 PM
Geez Dane, you could have used "wreck wrap" in blue
you know, you should really print out some cheap Gucci-flage and hide certain aspects of the car as you drive - all of us here could sign a non-dosclosure and giggle like crazy when the car mags start their coverage
Posted by: Mike Bellis Jul 30 2015, 07:33 PM
Welcome back Dane. Your car is the cover pic on the Facebook 914 Outlaw group. Looking forward to progress!
Posted by: Krieger Jul 30 2015, 08:10 PM
Sealed for freshness...
I'm really loving the shape of this "wrap" job of yours. I think you need to build a second set of aluminum or glass front and rear body clips similar to this that you could change out depending on how bad ass you feel!
Posted by: plymouth37 Jul 31 2015, 01:57 AM
I see you're heading for Snoqualmie; beautiful place at the foot of Mt. Si. Are you heading for Old Snoqualmie or New Snoqualmie?
We got a little house in old town, near the old depot.
Excellent, I couldn't picture you in those sterile suburbs on the hill. How's your shop?
Exactly, give me a 100 year old house over a new one any day! The shop isn't huge, like a one and a half car. Luckily the huge chassis fabrication projects are behind me, mostly going to focus on getting the chassis running and driving next so space shouldn't be an issue. The shop is super old, with good character, just need to hang a bunch of crap on the walls and it should be perfect!
Posted by: arkitect Jul 31 2015, 08:26 AM
Cool project and crazy fab skills. Can't wait to see picts of your continued progress and completion.
Dave
Posted by: bulitt Jul 31 2015, 09:01 AM
Welcome back Dana!
You accomplished allot in three years!
Posted by: Java2570 Jul 31 2015, 09:41 AM
Awesome! Snoqualmie is a beautiful place, I visit a friend of mine there every year.
Posted by: KELTY360 Jul 31 2015, 11:10 AM
There's a cool car show on Aug 16 that runs down the main street as part of their Railroad Days. A very short walk from your new digs.
Posted by: plymouth37 Jul 31 2015, 11:34 AM
There's a cool car show on Aug 16 that runs down the main street as part of their Railroad Days. A very short walk from your new digs.
I was thinking about entering the Anklebiter in the show and rolling it over there, its only about a block from my house!
Posted by: KELTY360 Jul 31 2015, 12:02 PM
There's a cool car show on Aug 16 that runs down the main street as part of their Railroad Days. A very short walk from your new digs.
I was thinking about entering the Anklebiter in the show and rolling it over there, its only about a block from my house!
Do it! You could display it in two pieces...that would be so radical.
I'll have my Merc at a show in Pt. Townsend on the 15th but if you're going to roll out the Anklebiter I'd have to make it back for that. I'm guessing we could get a nice 914 turnout too. Probably get some guys to help you roll it over to the show.
Posted by: plymouth37 Jul 31 2015, 12:36 PM
There's a cool car show on Aug 16 that runs down the main street as part of their Railroad Days. A very short walk from your new digs.
I was thinking about entering the Anklebiter in the show and rolling it over there, its only about a block from my house!
Do it! You could display it in two pieces...that would be so radical.
I'll have my Merc at a show in Pt. Townsend on the 15th but if you're going to roll out the Anklebiter I'd have to make it back for that. I'm guessing we could get a nice 914 turnout too. Probably get some guys to help you roll it over to the show.
That would be great lets do it!
Posted by: KELTY360 Jul 31 2015, 12:55 PM
There's a cool car show on Aug 16 that runs down the main street as part of their Railroad Days. A very short walk from your new digs.
I was thinking about entering the Anklebiter in the show and rolling it over there, its only about a block from my house!
Do it! You could display it in two pieces...that would be so radical.
I'll have my Merc at a show in Pt. Townsend on the 15th but if you're going to roll out the Anklebiter I'd have to make it back for that. I'm guessing we could get a nice 914 turnout too. Probably get some guys to help you roll it over to the show.
That would be great lets do it!
I'll get the ball rolling. We'll talk about it at breakfast tomorrow along with the Nord Run. PM me your address; I want to contact the show organizers and see if they'll reserve us a spot close to your house.
Posted by: KELTY360 Jul 31 2015, 02:12 PM
Are you going to build a rag top for it, or is it a fair weather ride only?
I was playing around with the concept of a lift off hard top with drop in windows.
It would be hard to build but it would really make the car alot more useable. We shall see...
Now that you're on the wet side of the Cascades you may want to revive this idea.
Posted by: plymouth37 Jul 31 2015, 04:24 PM
Got a flat tire on the trailer in Bozeman, it took Budget 7 Hours to send someone to fix it Oh well, on the road again!
Posted by: Millerwelds Jul 31 2015, 04:27 PM
Got a flat tire on the trailer in Bozeman, it took Budget 7 Hours to send someone to fix it
Oh well, on the road again!Damitt Budget! You are slowing down progress. Can't you see how many people are on here waiting for updates!
Posted by: tdgray Aug 1 2015, 08:51 AM
Awesome... good things for a god guy... congrats on everything... good luck with the relocation.
Look forward to more progress.
Posted by: KELTY360 Aug 4 2015, 04:12 PM
Got a flat tire on the trailer in Bozeman, it took Budget 7 Hours to send someone to fix it
Oh well, on the road again!So have you made it to Snoqualmie yet?

Posted by: rhodyguy Aug 4 2015, 04:18 PM
bozeman to the west side is a LOOOOng haul if you do it in 1 day. in a big box truck and pulling a trailer? way not so much fun. then you clear the columbia and the attitude improves. i'm looking forward to this event. bfast first? kinda early?
Posted by: Asheikh Aug 7 2015, 10:09 AM
omg this is perhaps the most interesting thing I've seen on the Internet in years
I remember following ur previous build, which was years ago( this very same car) , and now ur just on the pinnacle point of another amazing building what's even more amazing it's the same car
I've got loads of respect for ur dedication and ur skill full work
Can't wait for u to post more pics
Posted by: plymouth37 Aug 8 2015, 01:42 AM
Made it to Seattle! Waited to unpack the best stuff last!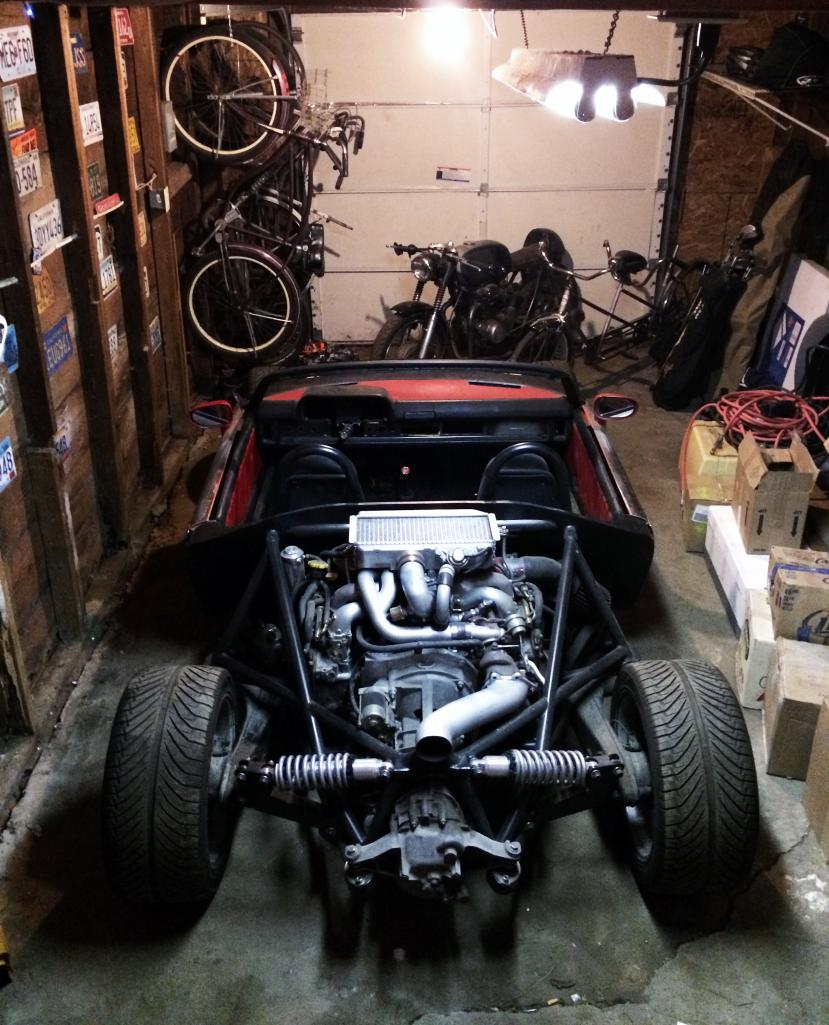
Still in the whirlwind of the unpacking and new job and newborn thing, managed to grab a couple hours tonight to start to get the shop unpacked, after not seeing this stuff for 3 years every box is a total mystery. This is almost as bad as restarting someone else's restoration project. I have been re-reading the thread to try to remember my train of thought.
In the meantime Marc was nice enough to arrange a nice 914 get together for the Railroad Days Car Show in Snoqualmie, WA on Sunday August 16th. My place is close enough to the show to push the car over so I am entering it! More details http://www.914world.com/bbs2/index.php?showtopic=260984&hl=anklebiter
Posted by: sixnotfour Aug 8 2015, 09:48 AM
Dana you moved to Wash...I am moving to Utah....I also got a flat ,,but nowhere to pull over because of construction....made it to a gas station burgerking and it took Uhaul 3 hours on juy 4th.....Remember us coming by youre house in Co. ??
Congrats on the new life ..
Attached image(s)
Posted by: plymouth37 Aug 8 2015, 01:31 PM
Dana you moved to Wash...I am moving to Utah....I also got a flat ,,but nowhere to pull over because of construction....made it to a gas station burgerking and it took Uhaul 3 hours on juy 4th.....Remember us coming by youre house in Co. ??
Congrats on the new life ..
Ouch! "Moving Adventure" for sure!
Posted by: whitetwinturbo Aug 9 2015, 11:55 PM
your sled.
Where's the dog?
Posted by: plymouth37 Aug 13 2015, 11:35 PM
Garage is pretty much unpacked, I still need to give the car a good cleaning, 3 years of Wyoming dust has collected everywhere.
I wanted to thank Mark (mepstein) for donating a couple steering wheels to the cause, steering it to the show should be easy now!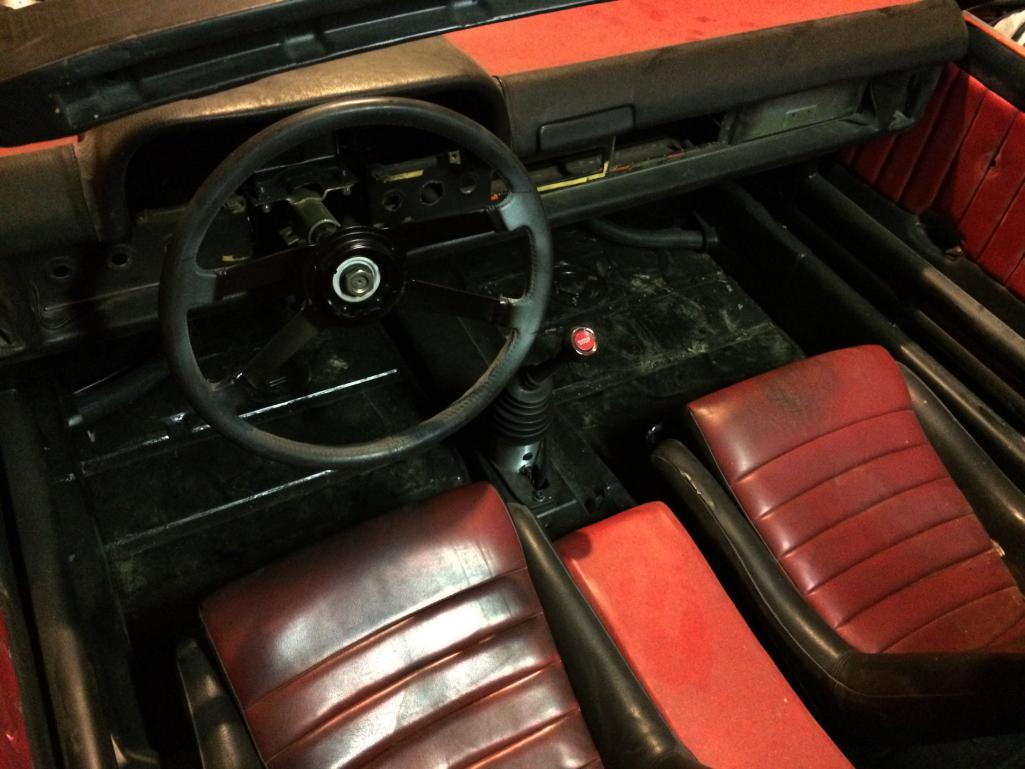
Posted by: plymouth37 Aug 17 2015, 10:55 PM
I had a great weekend with the PNW contingent, it was great to meet everybody. Special thanks to Marc (KELTY360) for setting everything up!
Thanks for the push guys!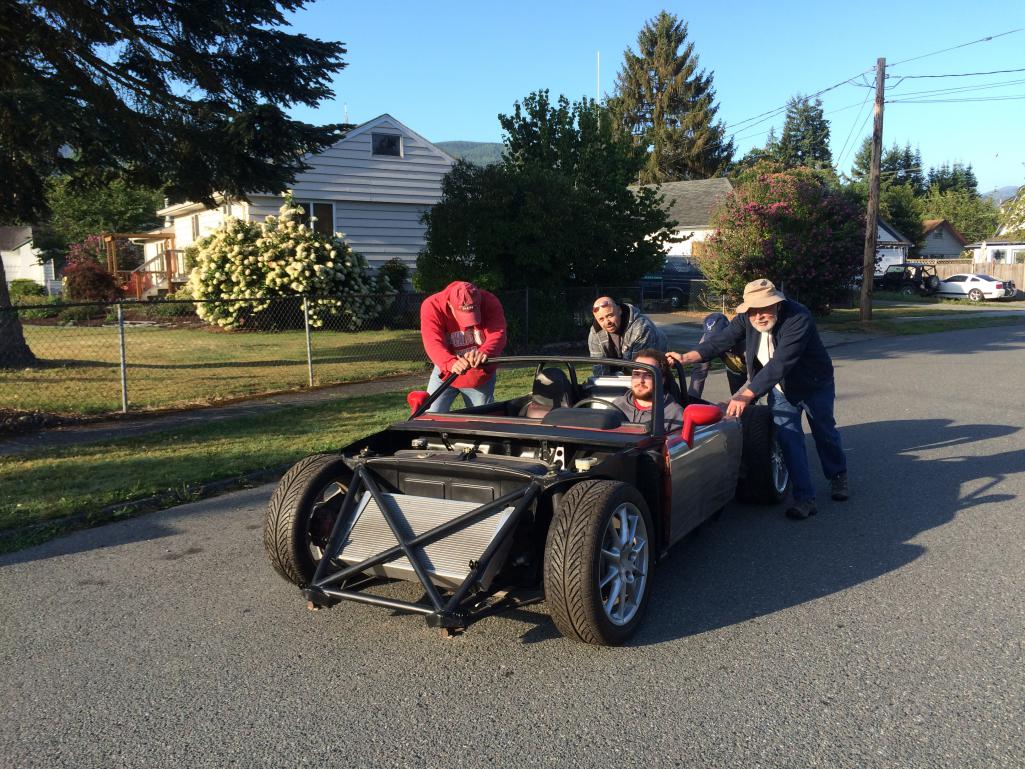
Posted by: plymouth37 Aug 17 2015, 10:57 PM
The show was great, definitely motivated me to get back to work on the car!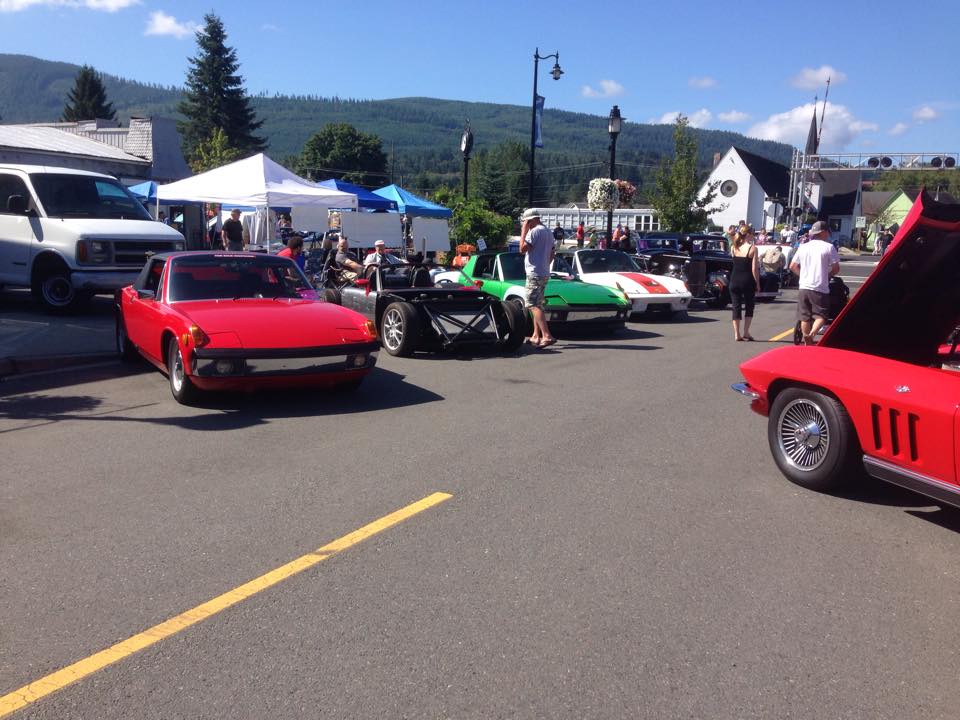
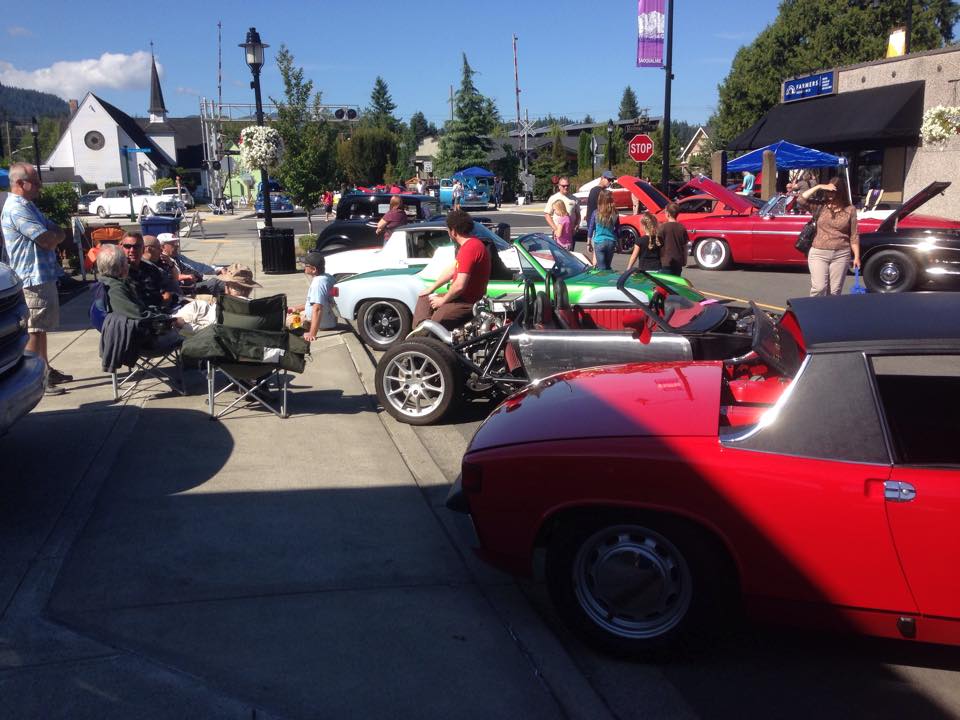
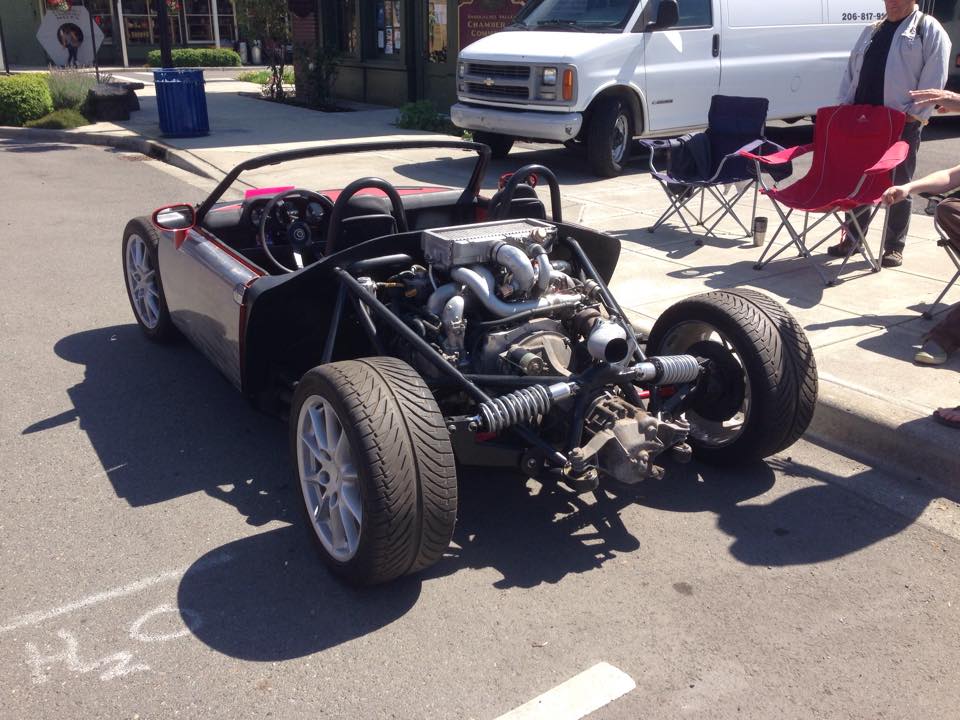
Posted by: Mike Bellis Aug 17 2015, 11:00 PM
I love this car but I have to say... Loose the 901 transmission. That is the weak link.
Posted by: plymouth37 Aug 17 2015, 11:07 PM
Marc perfectly captured the average onlookers "what is this?" reaction to the car...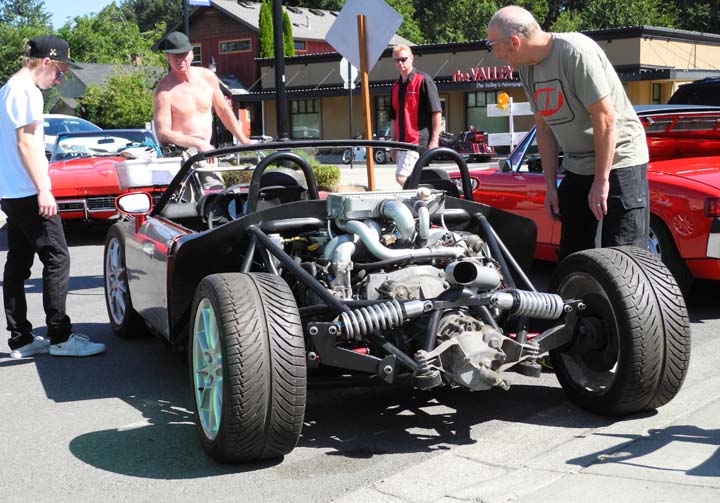
Posted by: plymouth37 Aug 17 2015, 11:10 PM
I love this car but I have to say... Loose the 901 transmission. That is the weak link.
I agree, although I really have nothing against a nice 901, it pairs really well with the WRX engine. If money were no option I would totally go for a subie tranny, maybe in the future I will bolt on a new rear subframe with IRS too!
Posted by: 221kw914 Aug 18 2015, 02:27 AM
WOW!!! Very nice!! But the 901 Transmission ist not good........... Take a 986 Boxster Transmission or a 987 this is very nice!! Good Luck with the Projekt !!!!
Attached image(s)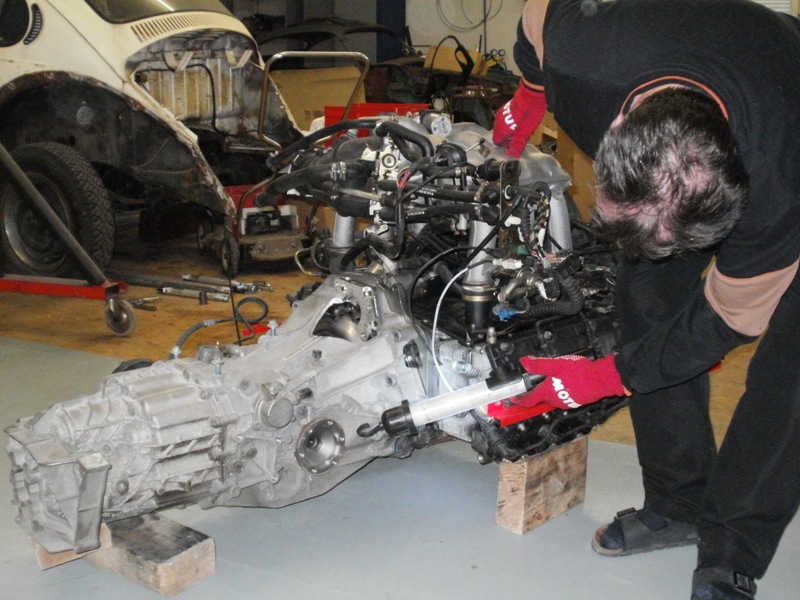
Posted by: rhodyguy Aug 18 2015, 07:56 AM
I look forward to hearing the straight out of the turbo when this car is up and running. the neighbors? Not so much.
Posted by: plymouth37 Aug 23 2015, 01:59 PM
I put the car back up on jack stands. My old chassis instructor used to say a good frame only needs 3!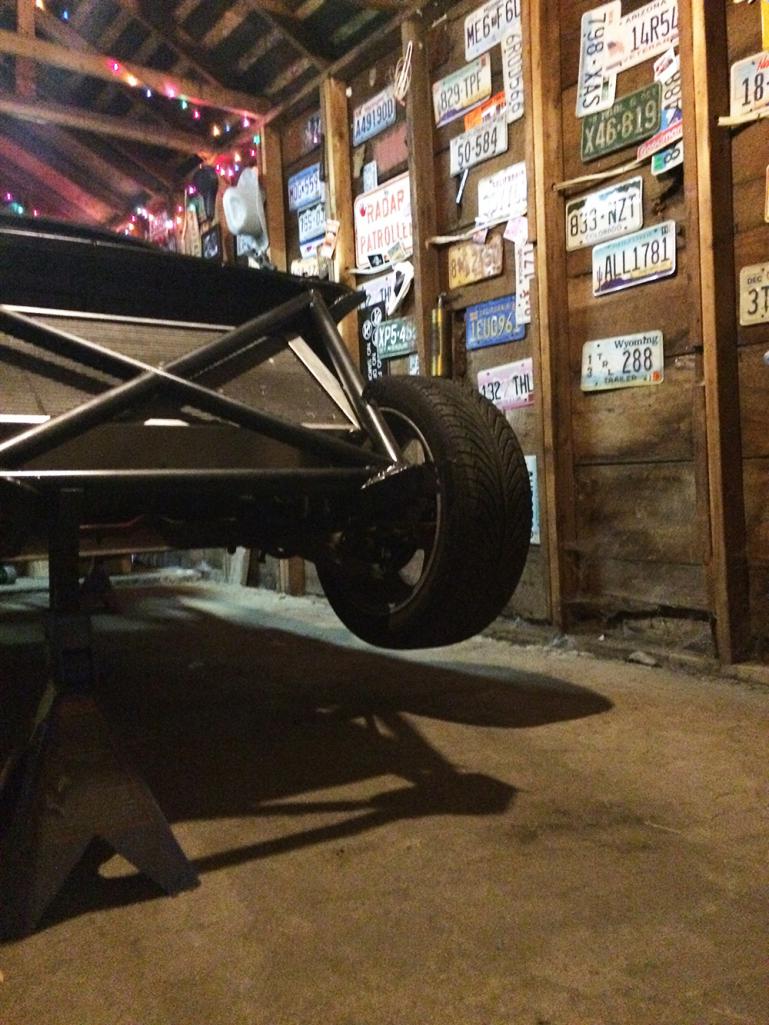
I then pulled the seats and doors.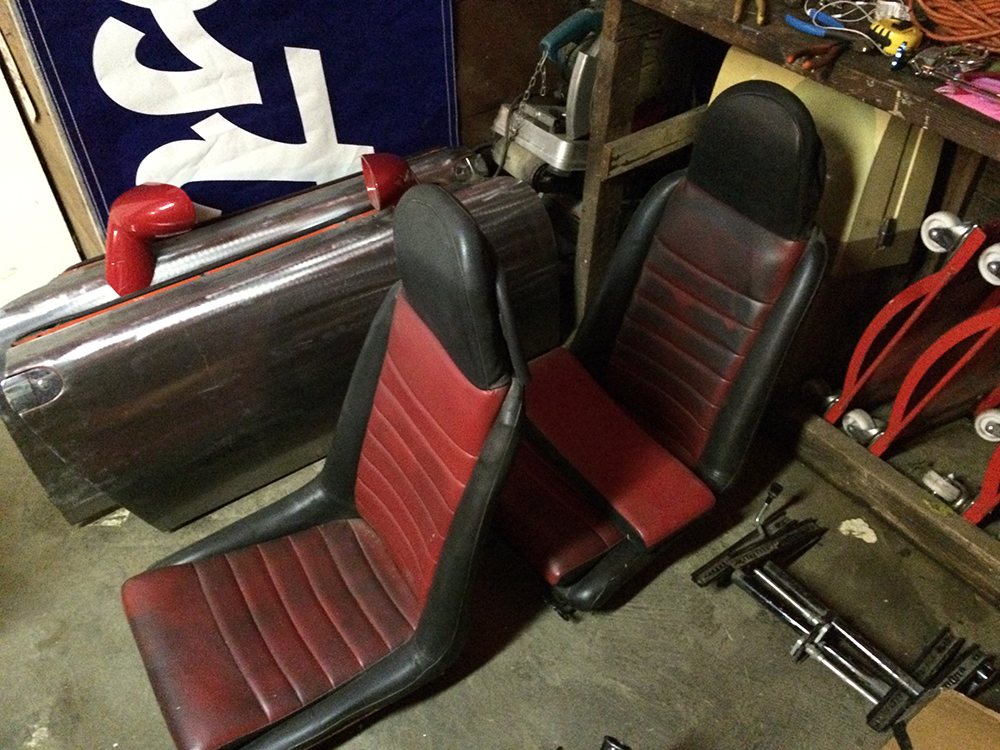
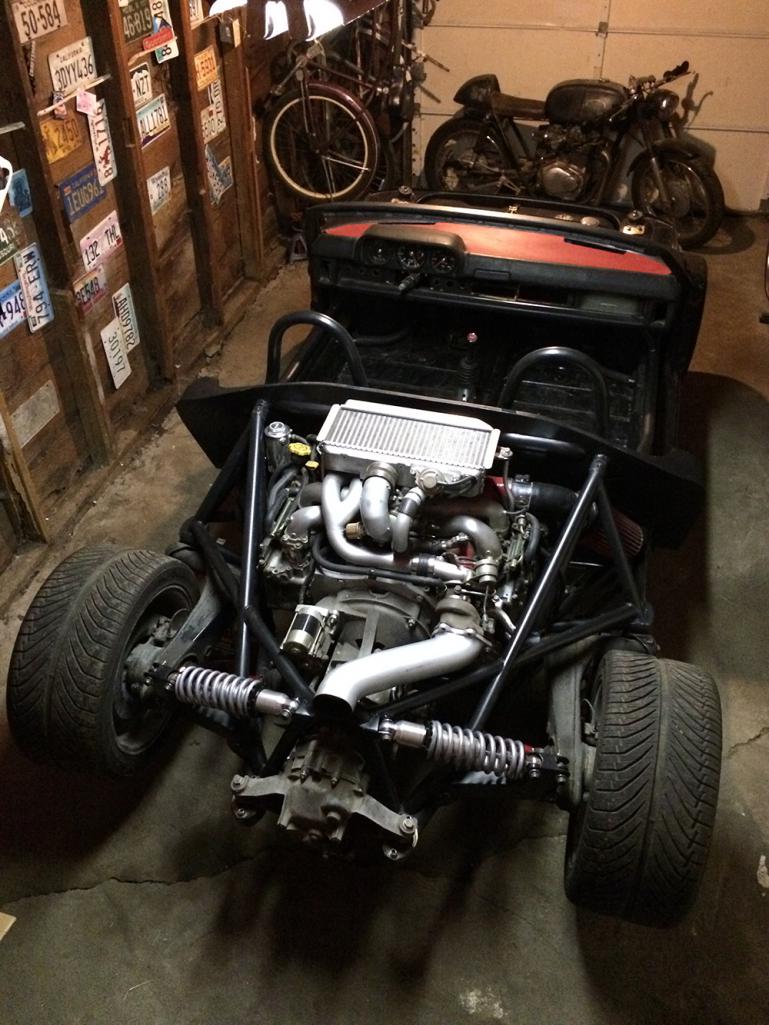
Then I opened this box and went looking for my Haynes Manual...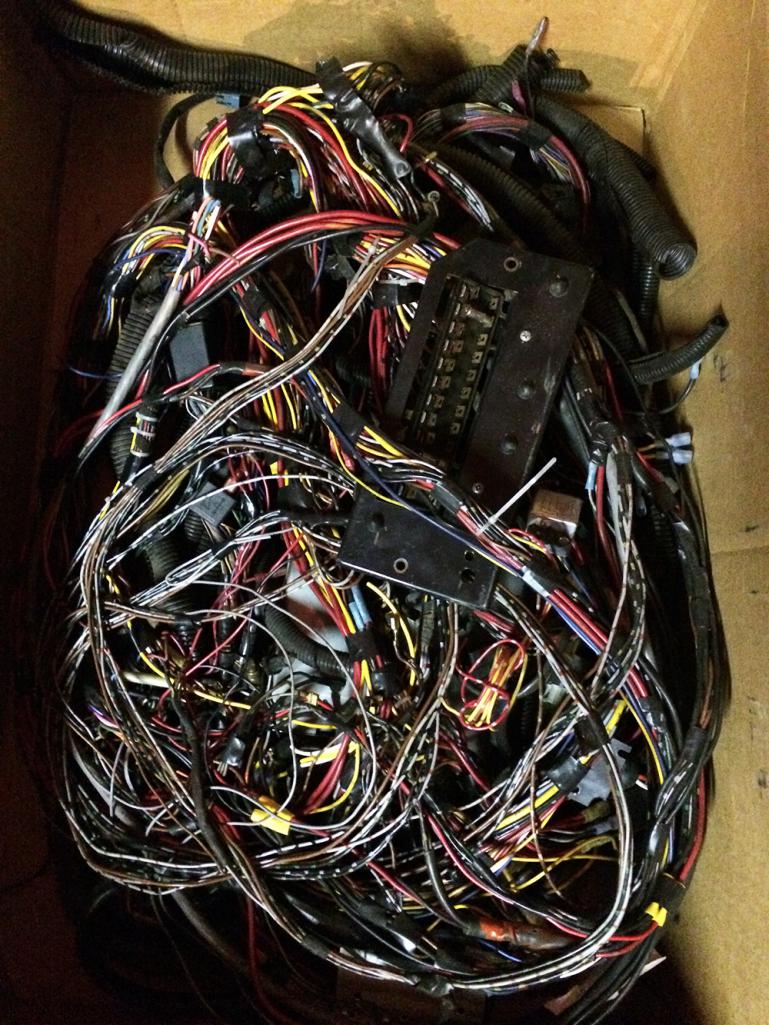
Posted by: KELTY360 Aug 23 2015, 02:27 PM
There's a Haynes manual for the Anklebiter? Who knew?
I was looking at a thread from 2010 where you inquired about tube frame 914s and there were lots of pics of complex mazes of tubular structures. Seems like you really simplified the design to bare elements. Obviously, eliminating the shock towers had a huge impact on streamlining the package.
Posted by: wingnut86 Aug 23 2015, 03:31 PM
Yep, I once had a supervisor in the Air Force who said to me, when I asked a question, "Look it up, it's in the GD BOOK!!!"
I'm still looking for that book called "GD" going on 30+ years, maybe that's why I have been afraid of manuals ever since;-P
Posted by: plymouth37 Sep 4 2015, 02:39 PM
I have been working on prepping the wiring harness for installation, there are some cut wires around the fuse box that I need to replace and repair before swapping in the JWest fuse box.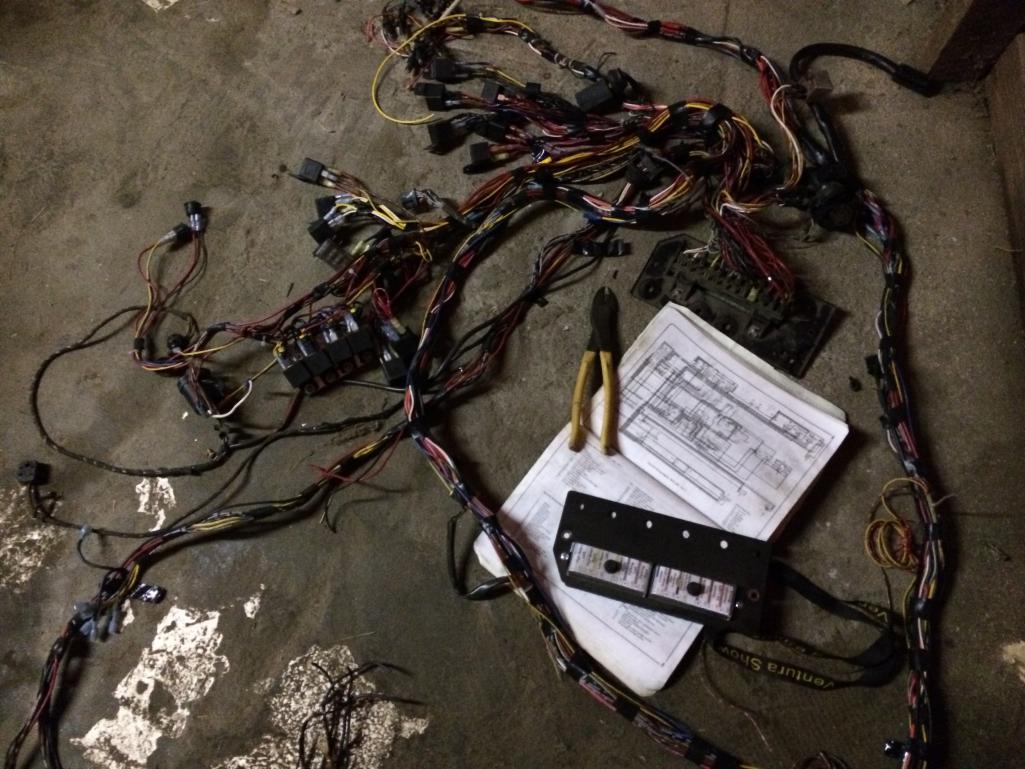
There are also some disturbing abnormalities whose purpose is still a mystery to me...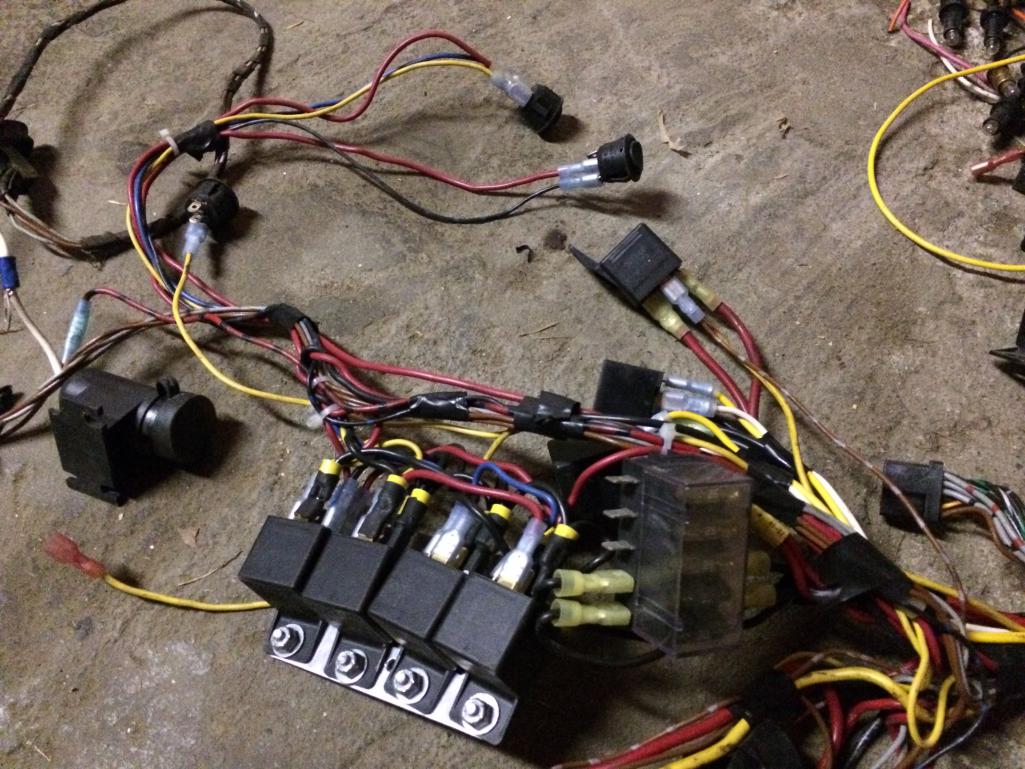
Posted by: plymouth37 Sep 4 2015, 02:43 PM
I am keeping my modifications to a minimum until I get everything up and running, then I will prune unnecessary wires and wrap the harness after I know everything is working. Here I go!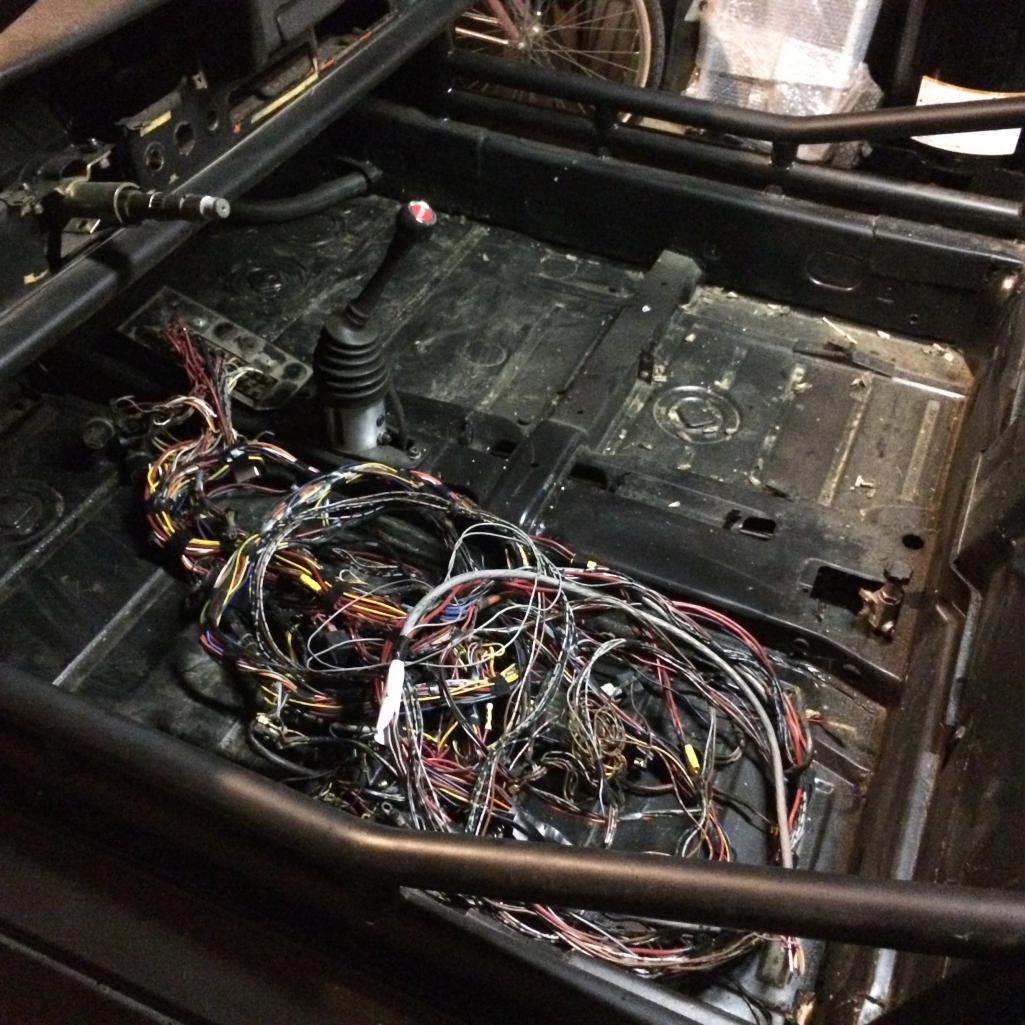
Posted by: Cairo94507 Sep 4 2015, 04:23 PM
I am thrilled to see this project getting back on track. As for your skills.....crazy skills dude.
Posted by: plymouth37 Sep 28 2015, 10:20 PM
Time to tackle the wiring, this is going to take forever but I want to do it right while the car is apart.
I am relocating the fuse panel and relay board to the area that used to house the blower motor and wipers, first I installed a grommet and fed the harness forward through the firewall.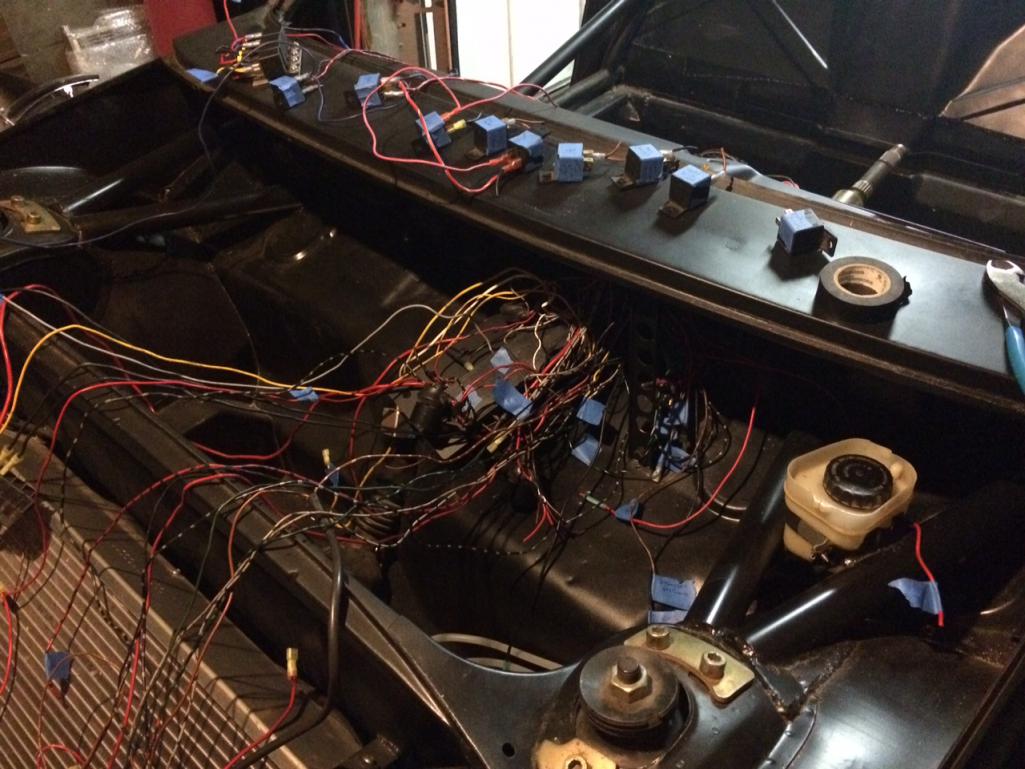
I cut away all of the relays that were all over the place and labeled all of the connections, hopefully I can figure out what everything is by the time I resemble the harness. I will make a centralized fuse block to house all of the relays in one place.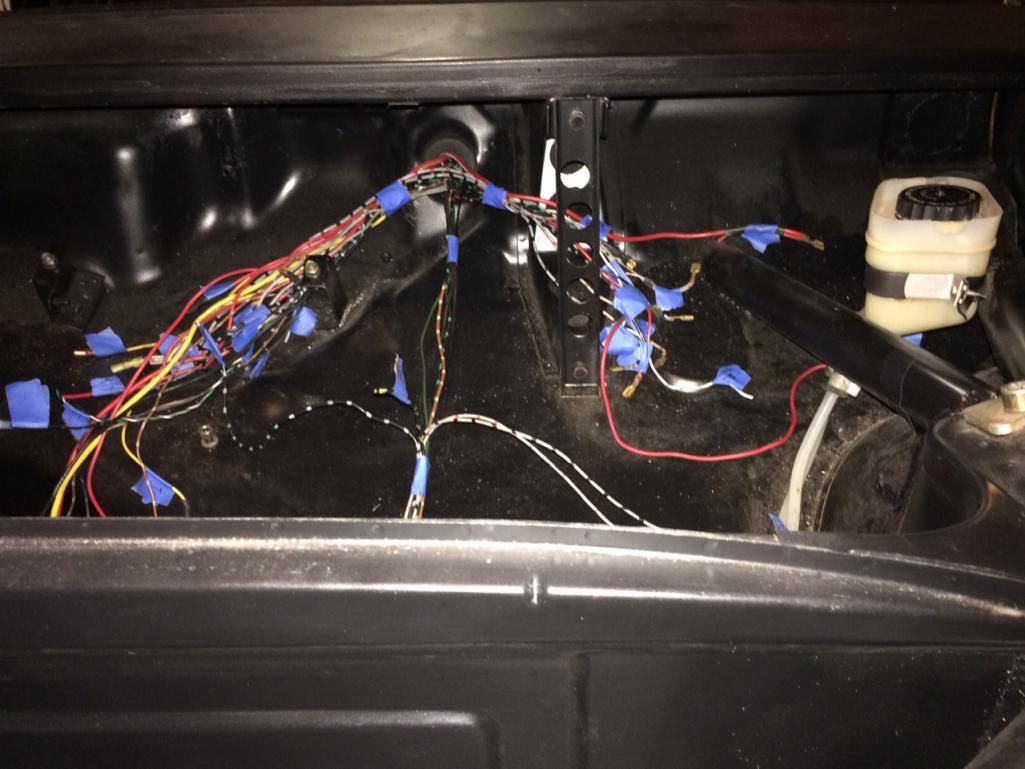
Here is the wad of wiring I cut out.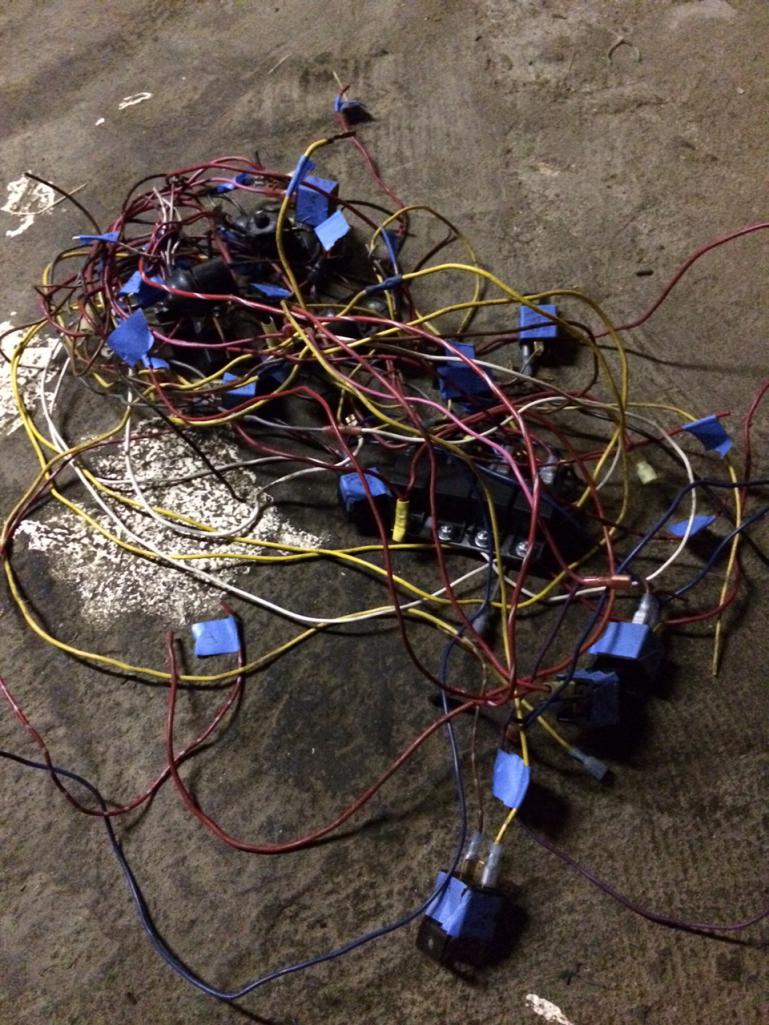
And again after organizing everything.
Posted by: effutuo101 Sep 28 2015, 10:25 PM
That is going to be pretty.
Why not the small car harness and be done? Cost?
Posted by: Zaney Sep 28 2015, 10:51 PM
Welcome to the PNW!!!
Even though I ended up selling my Suby 914 last winter I still remember the painstaking process of wiring my own harness with the Smallcar print out.
I am 30 min away in Redmond and can lend a hand or pop a beer and stare at wires if you need to hear what not to do
My harness came out great in the end with an Engman fuse box and stock Suby ECU.
I am back at it with another Suby powered project, http://www.thesamba.com/vw/forum/viewtopic.php?t=612650
Anywho, welcome to the neighborhood! And congrats on the new baby!!
Cheers!
Nate
Posted by: plymouth37 Sep 28 2015, 11:30 PM
I could buy a basic wiring harness, I did that for my Plymouth and it was great, I just want to build this one myself, and the wires are already there, I will cull what I don't need once I figure out what everything is.
We will definitely have to get together Nate! Love the Beetle!
Posted by: plymouth37 Oct 17 2015, 02:01 PM
I am drawing up a wiring diagram so I can build a relay and fuse board, so in the meantime I decided to pull the rear end apart one last time to sort the clutch, paint and clean the tranny and suspension and then put it together again for real with properly torqued hardware. I started by pulling the suspension:
The clutch was getting funky when I drove it last, I have a new disk, but the pressure plate and flywheel have definitely seen some heat and need some love:
83 bolts later... it is amazing how quickly and easily I can break down this car when the body isn't getting in the way, the clam shell body is going to be awesome for maintenance.
If anybody wants to donate an STI transaxle to the cause now would be the time 
Posted by: 914GTSTI Oct 17 2015, 02:46 PM
Glad to see you back at the car !
Posted by: NS914 Oct 26 2015, 12:25 PM
Dane, as all the others have said Congratulations on your Degree, Anklebiter II of course and it goes without saying....the Beast!!!
I had been following your build for some time so it will be great to see you at it again. I am stripping out my wiring harness as well although not even close to what you have gone through.
Hope you guys are enjoying the new house...we live in 100 year old Victorian as well....old houses are great!
Grant
Posted by: plymouth37 Nov 28 2015, 11:31 AM
I have been doing a lot of wiring work on the car over the past couple of weeks but there isn't much to see, I have sorted and identified all of the wires that I need to wire my new relay and fuse panel into, and culled any unneeded wires. Now that the wires are under control I will start building the relay/fuse panel soon.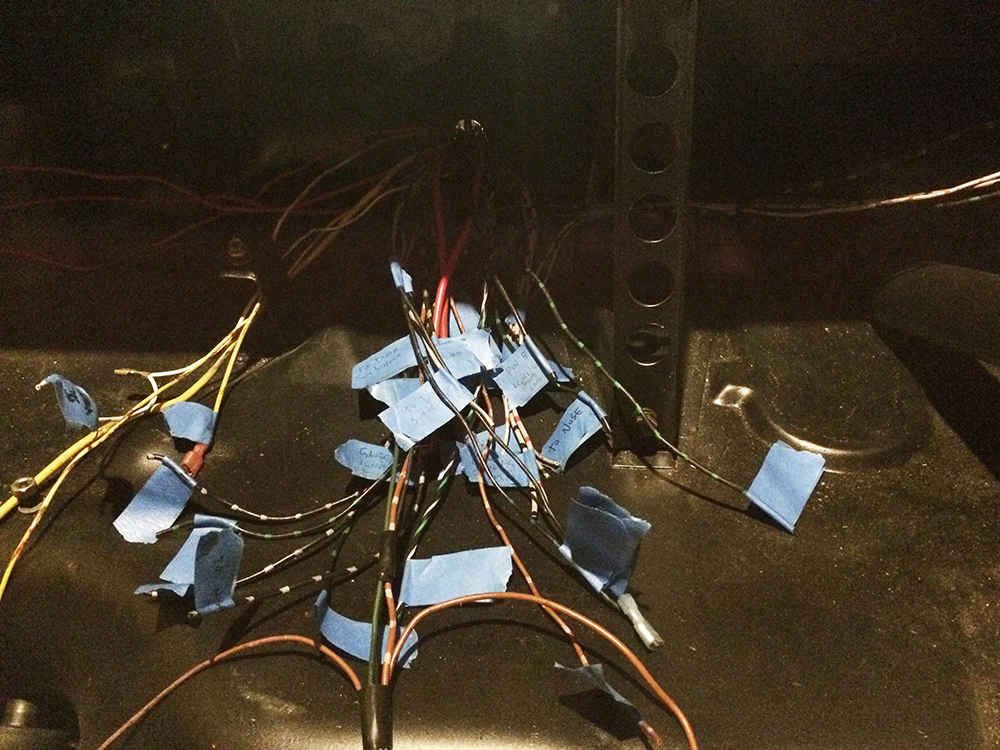
While I am waiting on clutch components I took the opportunity to clean the transaxle, it will get a fresh coat of Eastwood Alumablast as soon at it is warm enough to spray.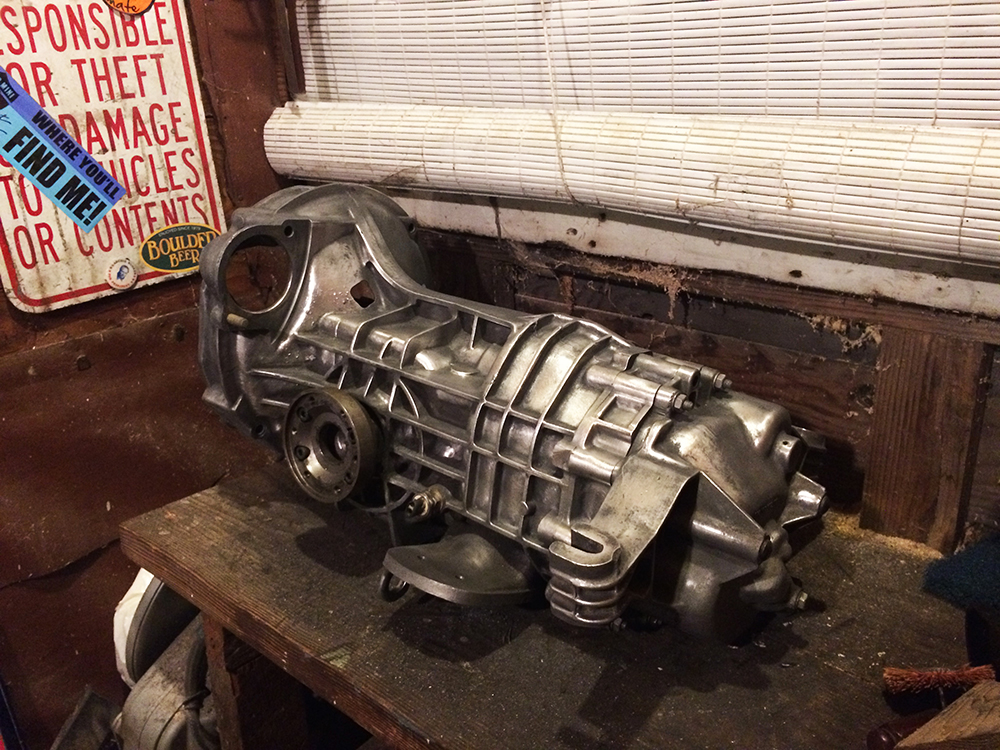
Posted by: bigkensteele Nov 28 2015, 09:57 PM
Interesting - you are sticking with the 901. With your fab skills and the insane nature of this build, I am just wondering why you wouldn't go to a Subi or Boxster trans?
Posted by: mgp4591 Nov 29 2015, 12:31 AM
Interesting - you are sticking with the 901. With your fab skills and the insane nature of this build, I am just wondering why you wouldn't go to a Subi or Boxster trans?
STI six speed? Maybe take advantage of all the boosted power?! Oh, and the more robust case would make for a better stressed member platform?
Posted by: plymouth37 Nov 29 2015, 12:51 AM
While entertaining, switching which tranny I use this late in the build would ensure this car never runs again, maybe I upgrade later but I am keeping forward momentum on this project and not looking back. 901 is fine for now, the car only weighs 1500 lbs, it doesn't need a huge tranny.
Posted by: mgp4591 Nov 29 2015, 12:56 AM
While entertaining, switching which tranny I use this late in the build would ensure this car never runs again, maybe I upgrade later but I am keeping forward momentum on this project and not looking back. 901 is fine for now, the car only weighs 1500 lbs, it doesn't need a huge tranny.
Sounds good to me if it's good for you- I think most of us want to see your end result as much as you do! Well second thought, you probably want it more...
Posted by: plymouth37 Dec 31 2015, 03:50 PM
So I just finished up the new relay and fuse board wiring diagram. I am using most of the stock wiring harness with a few new additions, and running it with modern fuses, relays and micro switches. All lighting will be LED so amp draw is pretty minimal, next step is to fab up the board and wire it for real! Happy New Year Everybody! 
Posted by: wingnut86 Dec 31 2015, 04:11 PM
Same to you Dane!
Here's hoping the storms didn't dampen your spirit too much. Let me know if you need something from my sale cache.
Happy New Year!
Dave
Posted by: plymouth37 Jan 30 2016, 12:41 PM
Now that the wiring has been diagrammed I have started work on the relay and fuse board. I wasn't really happy with the relay blocks that are out there so I decided to make them myself. I 3D printed a couple mockups and after a couple iterations got something that worked pretty well.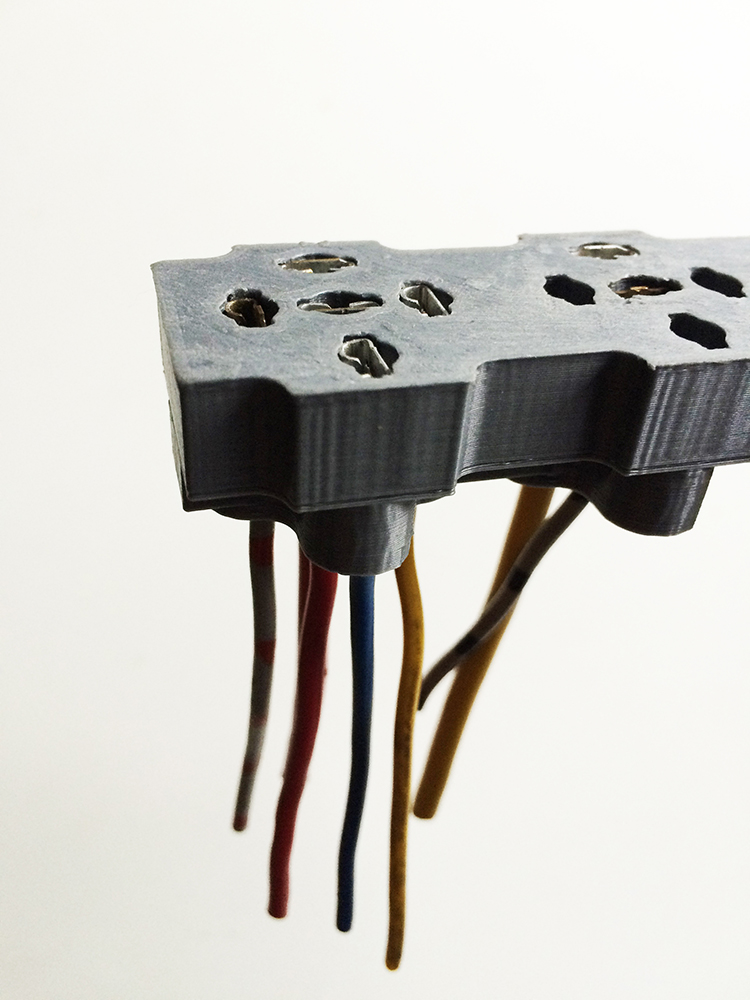
Here are the final pieces fresh off the printer.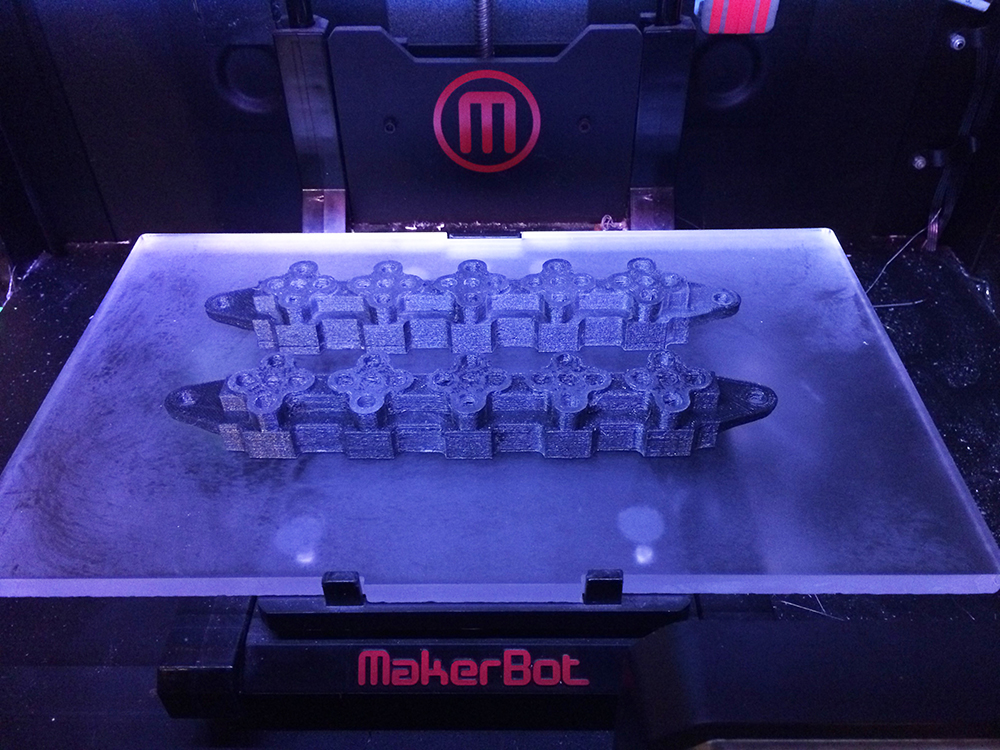
I bought a fuse block, and laser cut a piece of acrylic as a temporary jig to mount everything for wiring.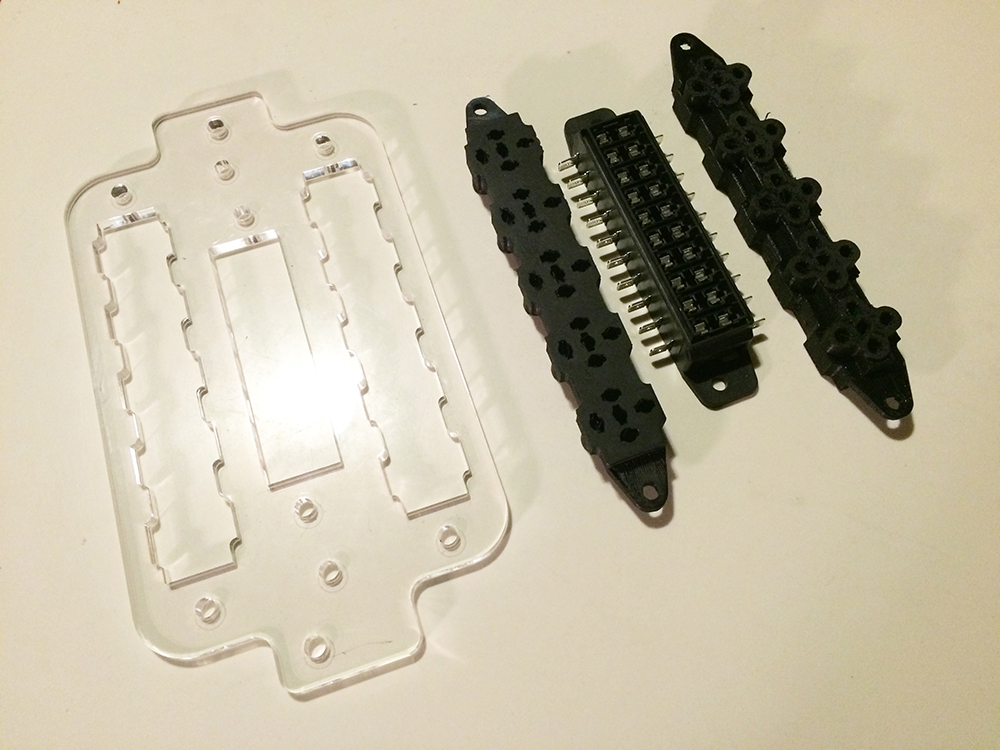
I assembled the board and started running primary power, ignition, and ground wires.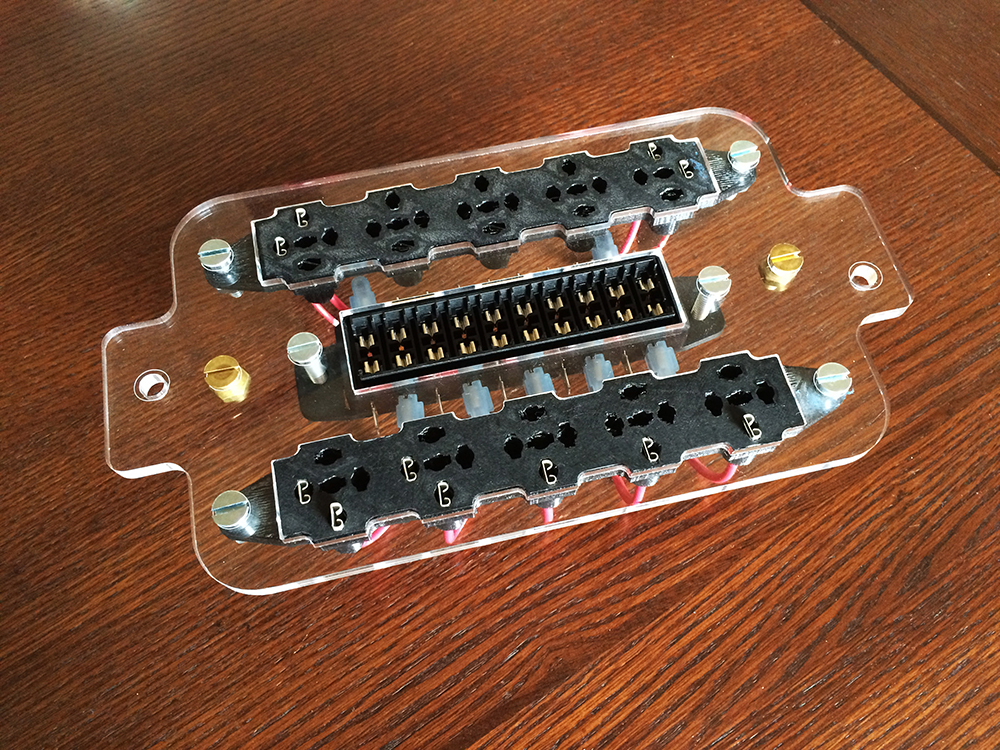
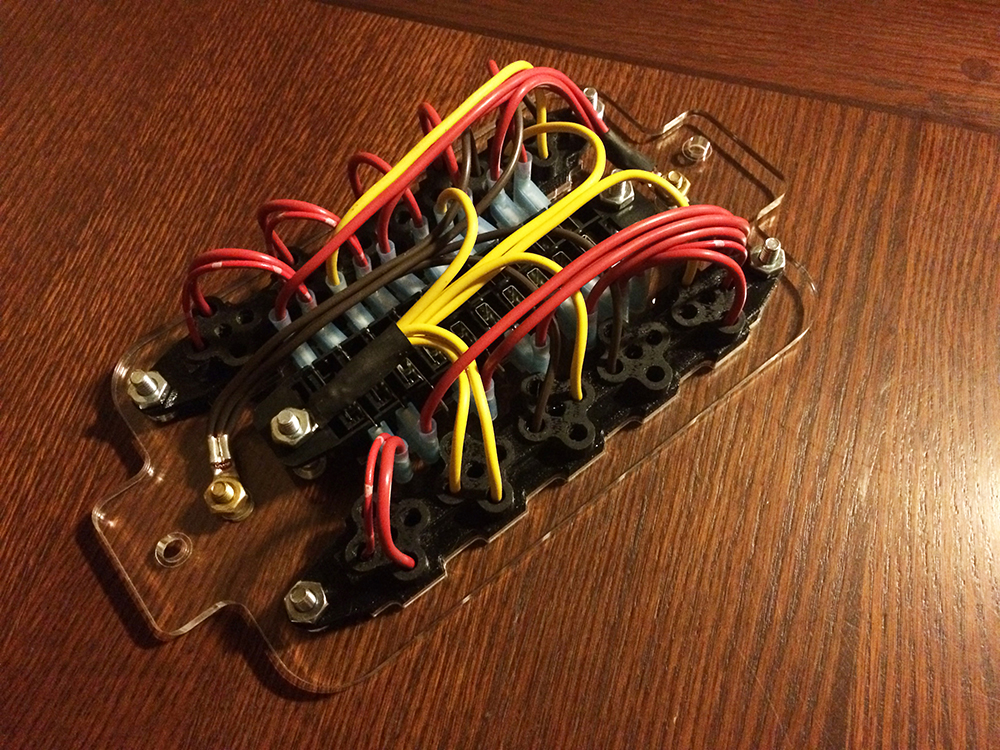
Posted by: KELTY360 Jan 30 2016, 04:37 PM
Why doesn't this standard of innovation surprise me? Superb!
Glad to see you posting Dane. Will The Anklebiter move on it's own power this year?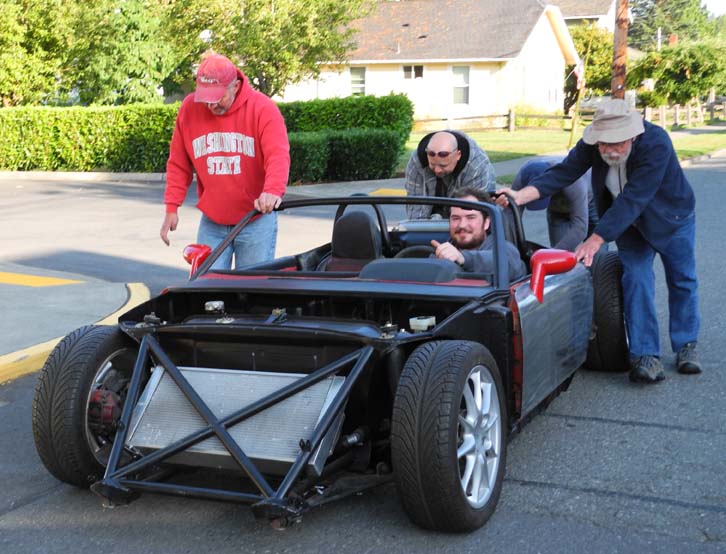
Posted by: Cairo94507 Jan 30 2016, 05:51 PM
What planet are you from? Seriously, every aspect of this car is just incredible.
Posted by: jd74914 Jan 30 2016, 06:08 PM
Looks great!
Just out or curiosity, why did you go the custom route rather than with a Bussman RFRM/RTMR or Littelfuse HWB combination fuse/relay block?
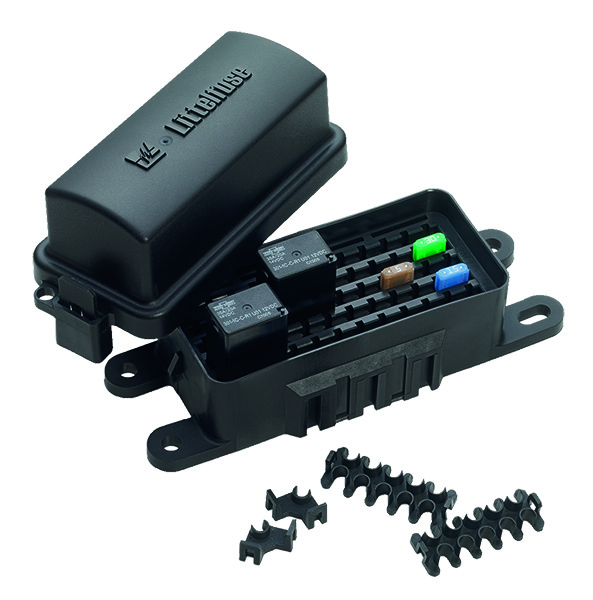
Posted by: plymouth37 Jan 30 2016, 09:42 PM
Looks great!
Just out or curiosity, why did you go the custom route rather than with a Bussman RFRM/RTMR or Littelfuse HWB combination fuse/relay block?
I had a specific number of relays and fuses that I needed to house which none of the standard blocks had, and already had a mount installed so the custom route made more sense.
I like to geek out on wiring too and didn't want to miss out on the fun of wiring this!
Posted by: thieuster Jan 31 2016, 12:55 AM
What planet are you from? Seriously, every aspect of this car is just incredible.
Nicely said what I was thinking - well, I wasn't thinking this: I was still looking for my lower jaw on the floor. I dropped the jaw in a moment of total awesomeness...
Are you sure you want to remain an architect for the rest of your life? Architect, inventor, engineer... There was this man in Florence/Firenze, Italy when I visited the town last summer. I think his name was Leonardo...
Menno
Posted by: RobW Jan 31 2016, 06:39 AM
Yeah, just build your own fuse box and wire a 914 for the enjoyment!
Friggin awesome. This world is going to need you someday!
Posted by: plymouth37 Feb 3 2016, 09:21 PM
Well it took couple days but I finished wiring the board!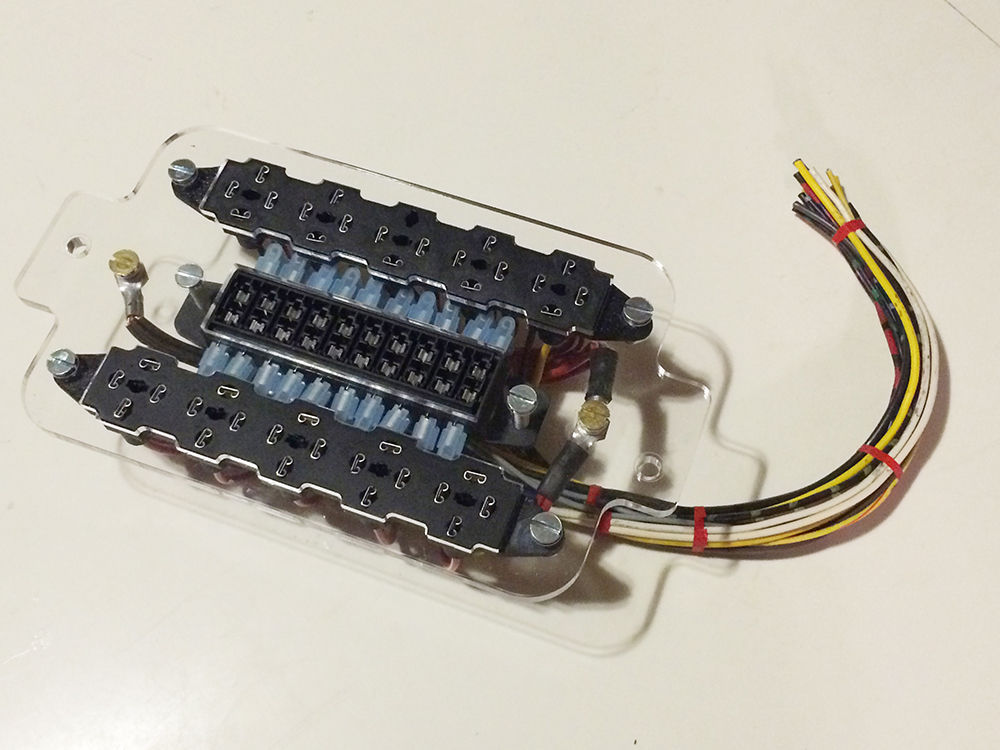
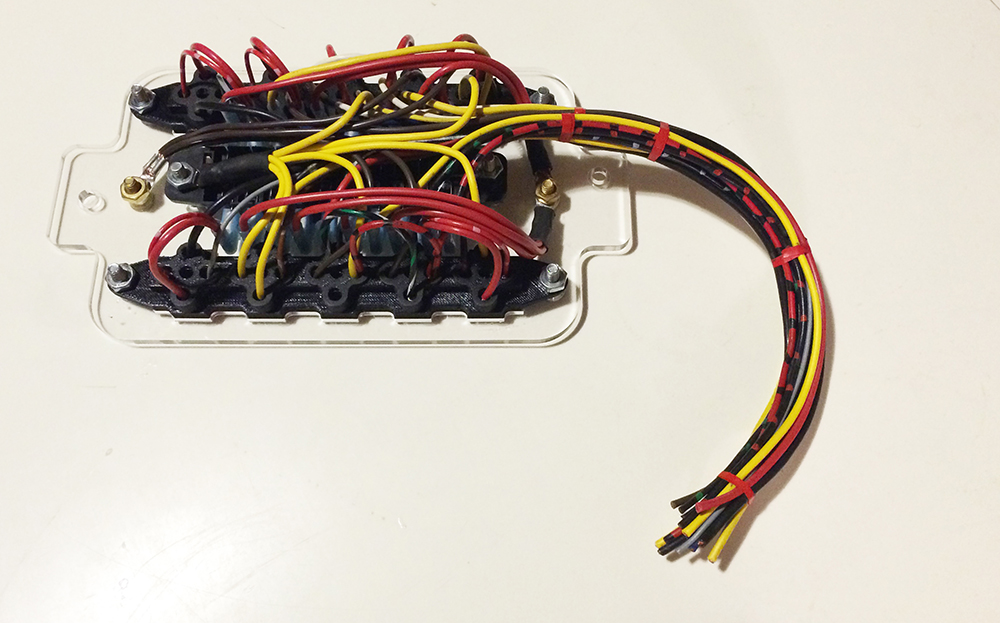
I removed the jig in preparation for the final plate.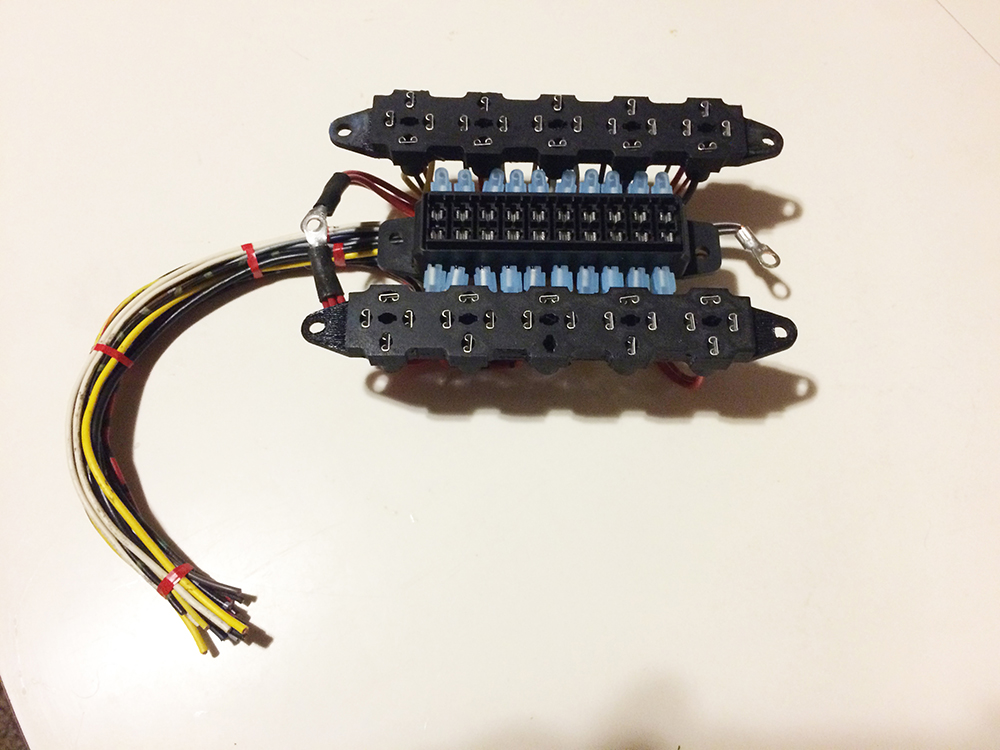
I laser cut the final iteration of the base plate out of black acrylic, I countersunk the hardware and mocked everything up, along with a template for the top cover.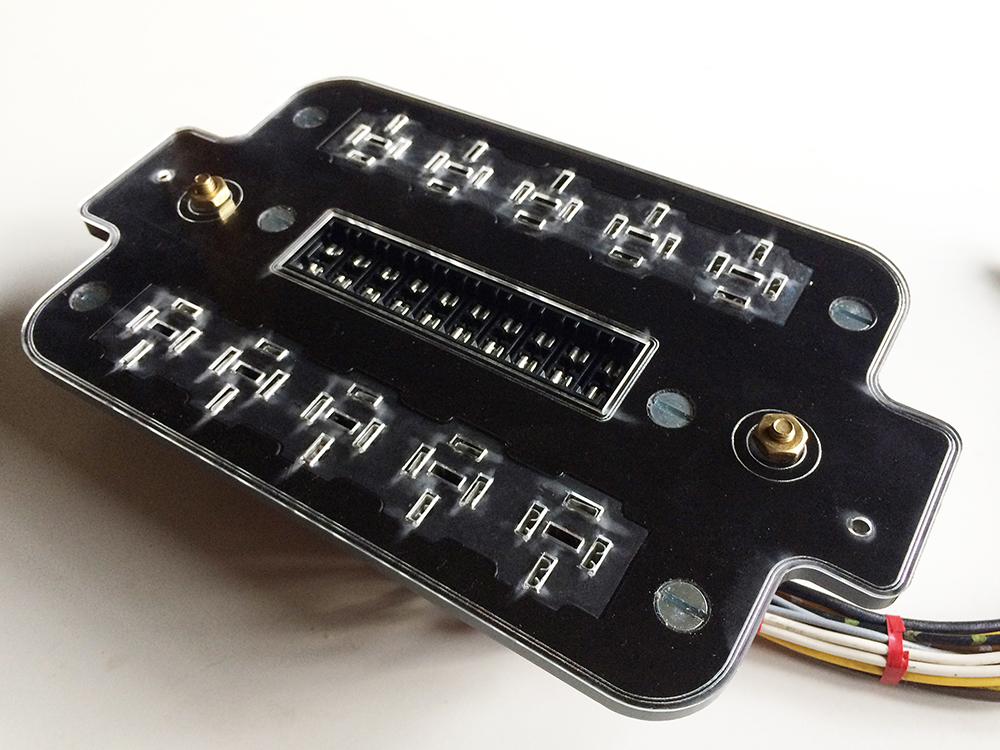
Posted by: plymouth37 Feb 4 2016, 03:54 PM
Why doesn't this standard of innovation surprise me? Superb!
Glad to see you posting Dane. Will The Anklebiter move on it's own power this year?
I sure hope so, I am focusing on finishing critical drivetrain systems now which consist roughly of:
finishing the wiring harness
welding in new fuel tank bungs
painting the tranny
replacing/resurfacing clutch components
throttle/clutch cables
restoring and assembling the suspension
checking and torqueing every nut and bolt on the car
and probably 10 other things I have forgotten
It would be great to at least have it running by end of year, moving might or might not be possible, I will do my best!
Posted by: plymouth37 Feb 6 2016, 10:17 AM
I drew up the file for the face plate. Since I have access to a Laser cutter I used this file to not only cut out the face plate but to cut out masking tape for back painting as well.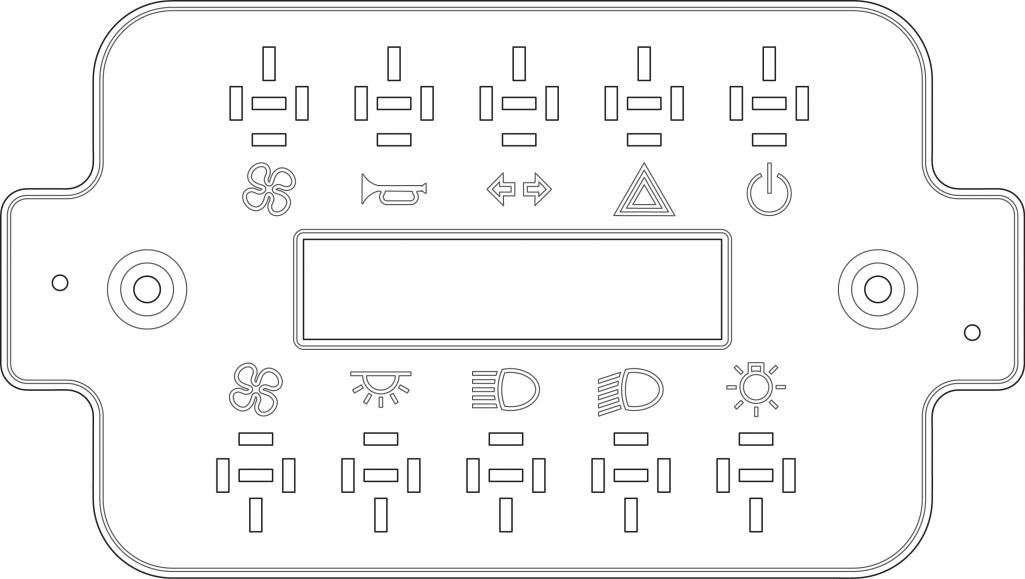
Here you can see the finished result, by strategically removing layers of the laser cut masking tape you can layer the paint on the back of the clear sheet creating the result below. The faceplate also locks the relay plugs in place. I decided to connect the common power and ground leads to studs rather than hidden hardware so I have a reliable power source to tap into if I need one.
I used the standard federal automotive icons for continuity but swapped out the normal fan icon for the radiator fans because it looked better.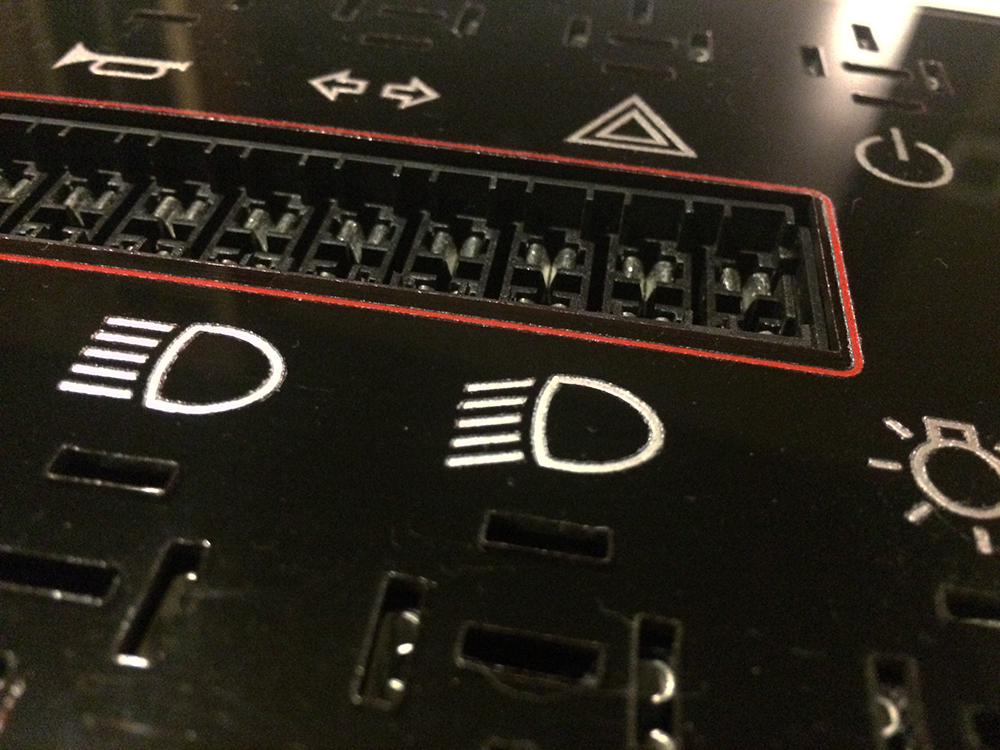
Now all I have left is to trim the hardware and mount the board, I will buy mounting hardware today and see how it looks in the car.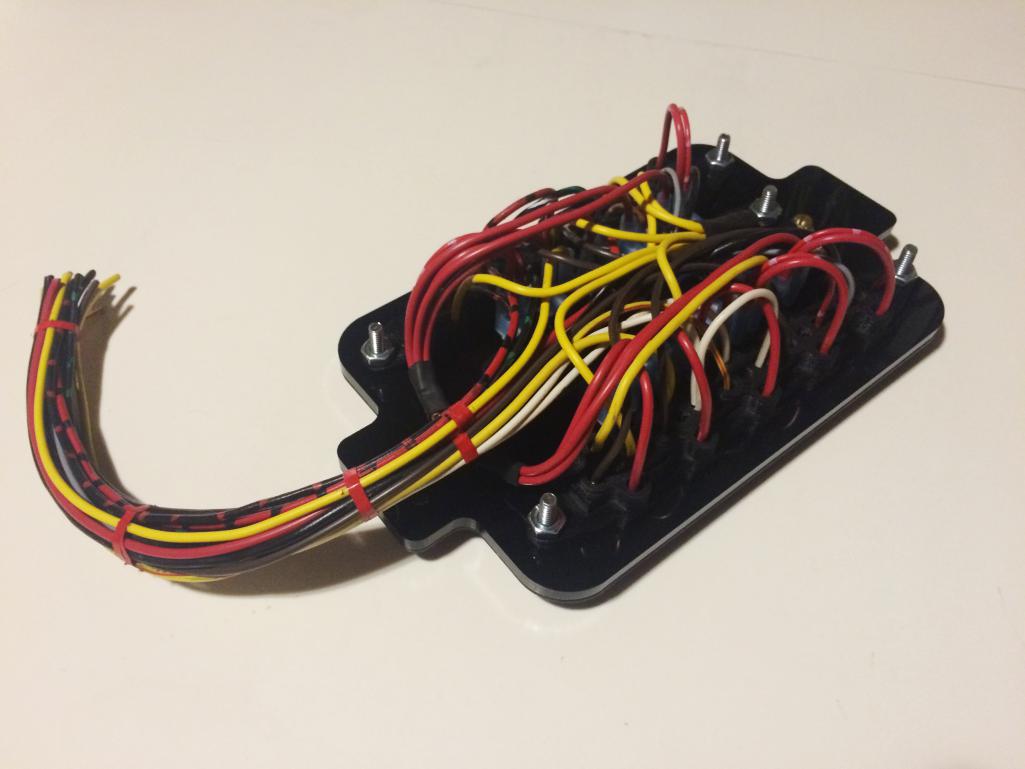
Posted by: effutuo101 Feb 6 2016, 10:28 AM
Just wow.
Posted by: wingnut86 Feb 6 2016, 12:38 PM
Dane,
Sending you a PM...
Posted by: NS914 Mar 14 2016, 09:51 AM
Dane, I had to laugh....geeking out on wiring....I love it....I have been lazy as heck with other volunteer stuff taking up all my free time...Spring has sprung here in Nova Scotia so I am back at it.
The stock location for the fuse panel is just a pain so I too am going to move mine...congratulations on new family and car too!
[/quote]
Posted by: Ferg Mar 14 2016, 10:02 AM
You are insane
Posted by: plymouth37 Apr 24 2016, 10:37 AM
Here is the panel mounted in the car: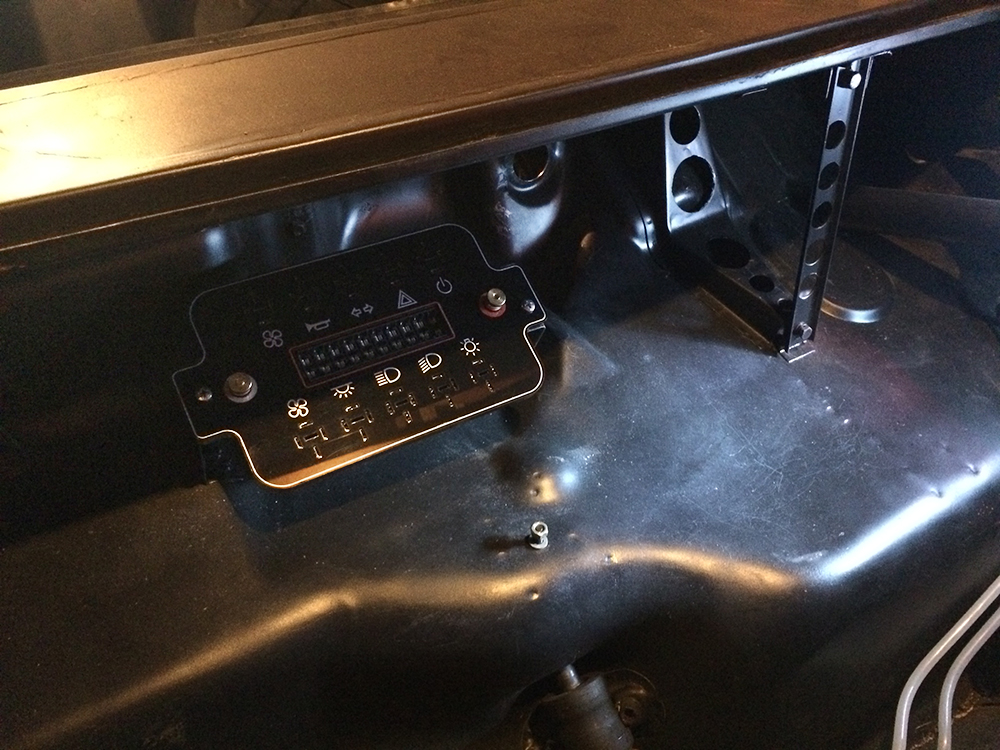
And with the gas tank in place: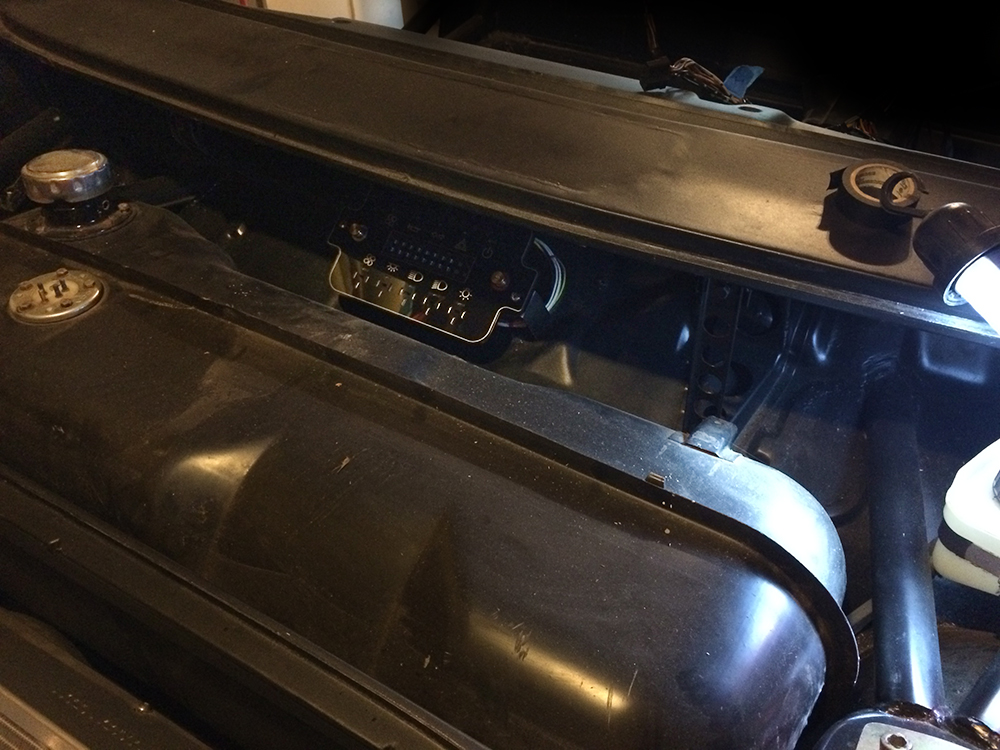
Now to plug it in! I bought a 22 pin Delphi Weatherpack bulkhead connector to run through to the interior. With only one plug swapping out brains will be easy if I decide to change or upgrade anything. 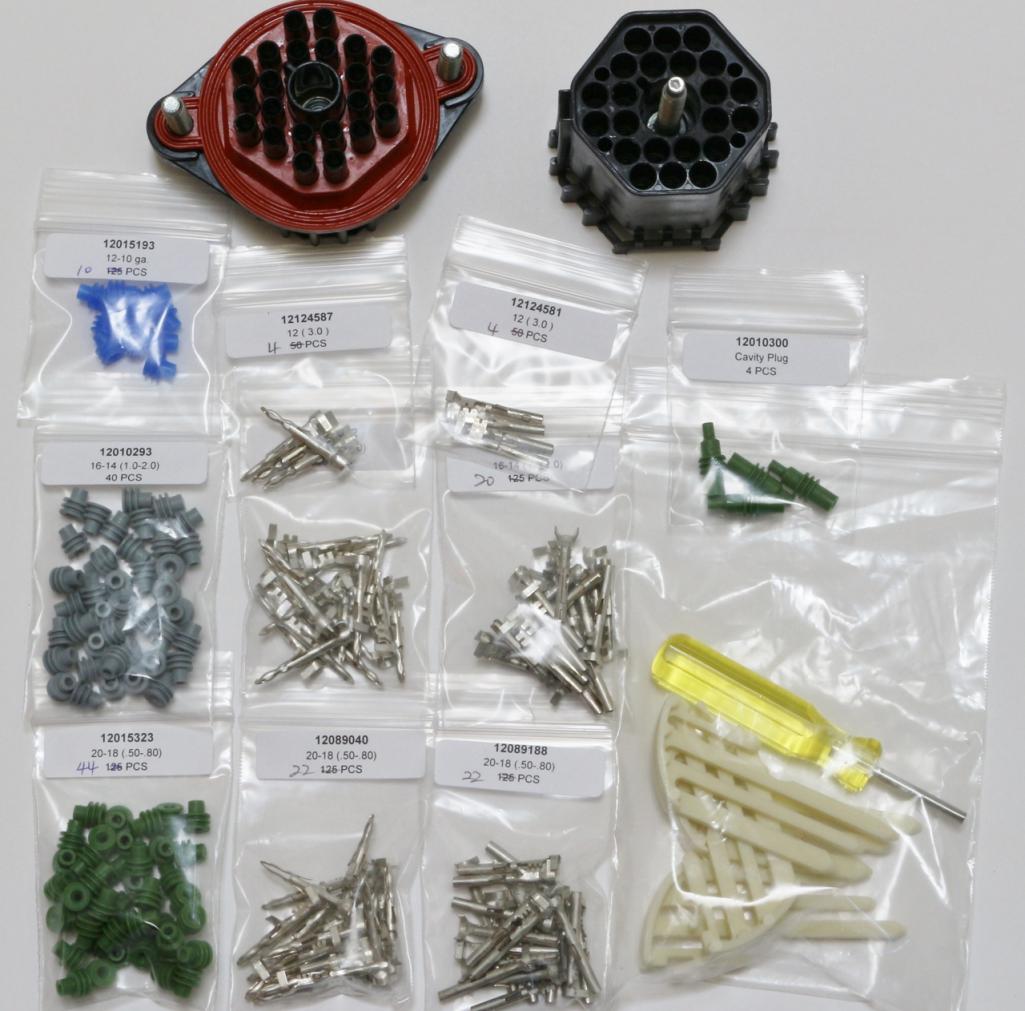
And all wired up, ready to go in the car!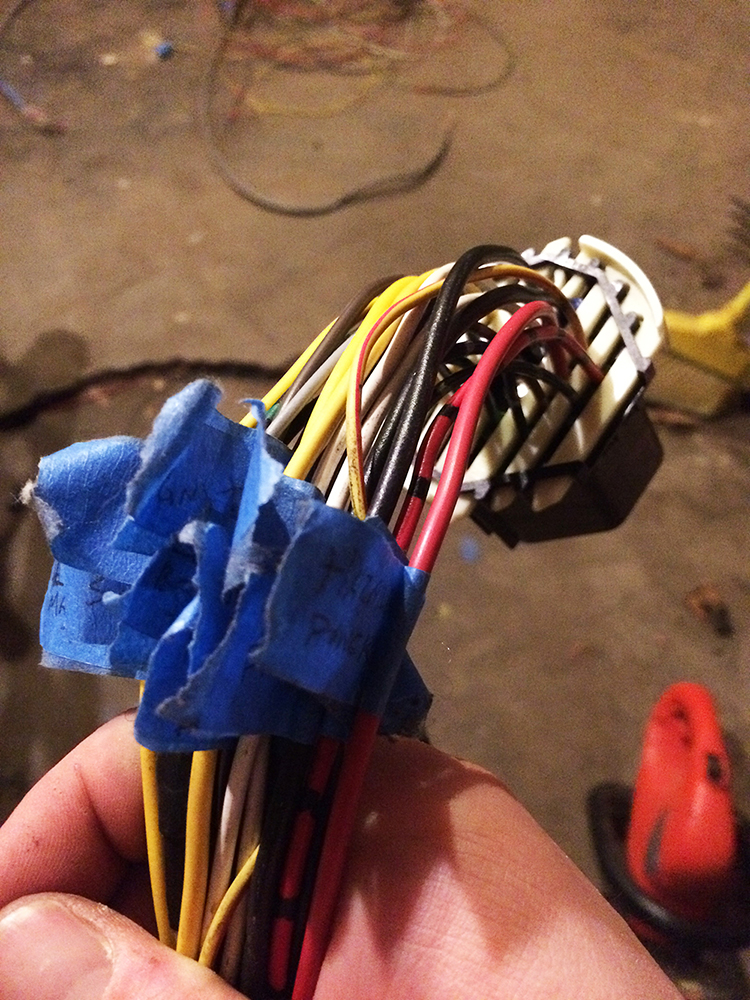
Well this portion of the harness is finished, time to move to the interior!
Posted by: plymouth37 Apr 24 2016, 10:51 AM
So here is the other side of the bulkhead connector:
And here is my updated diagram on how the relay board needs to be spliced unto the existing harness: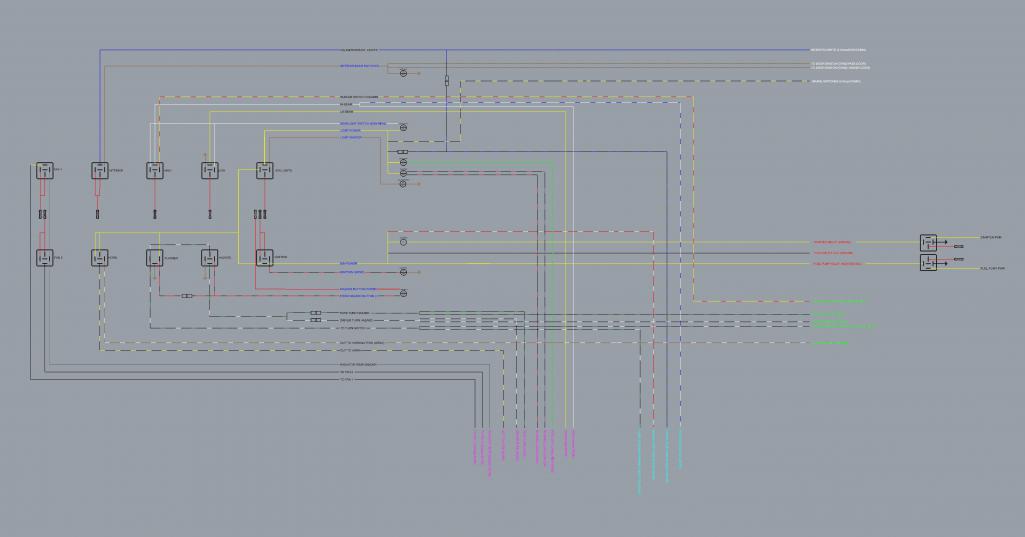
Posted by: wingnut86 Apr 24 2016, 10:52 AM
I had a fellow avionics technician I worked with back in 1985 in Shreveport, LA. He had his 72' bug wired with a single through-hole hubbel style plug, courtesy of a B52 parts scrap bin. I helped him pull his motor once, we had it out from ignition disconnect in under 12 minutes or similar - I was shocked with how well it worked. I had a 66' Ghia that I was rigging for similar when I got a cash offer I couldn't refuse.
You'll appreciate the ease with which you can do service, especially on a cold floor in mid-winter;-)
Posted by: plymouth37 May 5 2016, 06:58 PM
I just had to share the state of affairs, what a rats nest!
I think I have the 914 wiring harness (or at least my interpretation of it) just about memorized.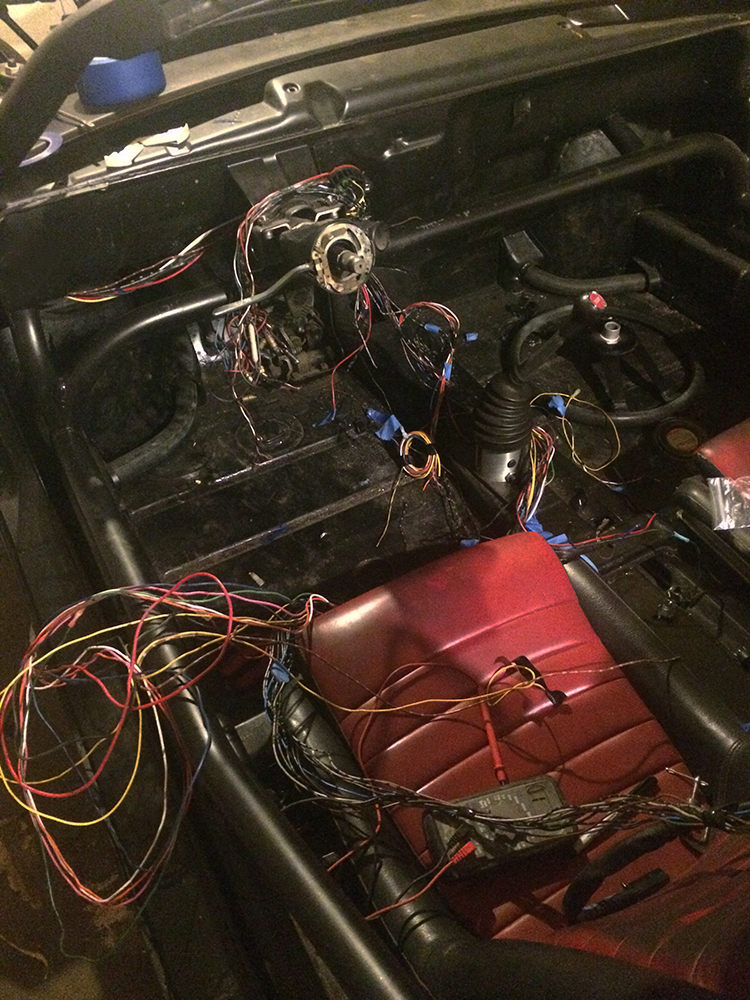
Posted by: 2mAn Jun 27 2016, 10:44 AM
I like to geek out on wiring too and didn't want to miss out on the fun of wiring this!
quoted for the insanity!
You are insane
exactly how I feel.
Dane, I've shared this thread with other forums and believe it or not theres a TON of people waiting to see this car finished. Wiring is always where I stall out, glad to see you geek out at this point. just dont take too long!
Posted by: not_hans_stuck Jul 5 2016, 01:44 PM
How have I never seen this thread?
This is a fantastic build. So, listen up, I set the standard over on Pelican for how you're supposed to start and finish your thread. (Go look them up - same username)
With a build this awesome and a thread this long, you simply have to finish it.
Thanks for sharing your life with us.
Hal
Posted by: Mike Bellis Jul 5 2016, 05:36 PM
How have I never seen this thread?
This is a fantastic build. So, listen up, I set the standard over on Pelican for how you're supposed to start and finish your thread. (Go look them up - same username)
With a build this awesome and a thread this long, you simply have to finish it.
Thanks for sharing your life with us.
Hal
Who are you? What standard and where is the link? We are too lazy to search pelican...
Posted by: restore2seater Jul 5 2016, 07:39 PM
How have I never seen this thread?
This is a fantastic build. So, listen up, I set the standard over on Pelican for how you're supposed to start and finish your thread. (Go look them up - same username)
With a build this awesome and a thread this long, you simply have to finish it.
Thanks for sharing your life with us.
Hal
Who are you? What standard and where is the link? We are too lazy to search pelican...
Possibly these 2 threads.
http://forums.pelicanparts.com/porsche-engine-conversion-tech-forum/649179-rsr-ls-conversion.html
http://forums.pelicanparts.com/paint-bodywork-discussion-forum/502929-diy-iroc-rsr-conversion.html
Posted by: plymouth37 Jul 8 2016, 11:53 PM
Thanks for the kind words guys, progress has been slow, wiring takes forever but I will keep plugging away at this thing!
Well the rat's nest has been cleared and sorted, I wired the existing car harness into the interior half of the bulkhead connector.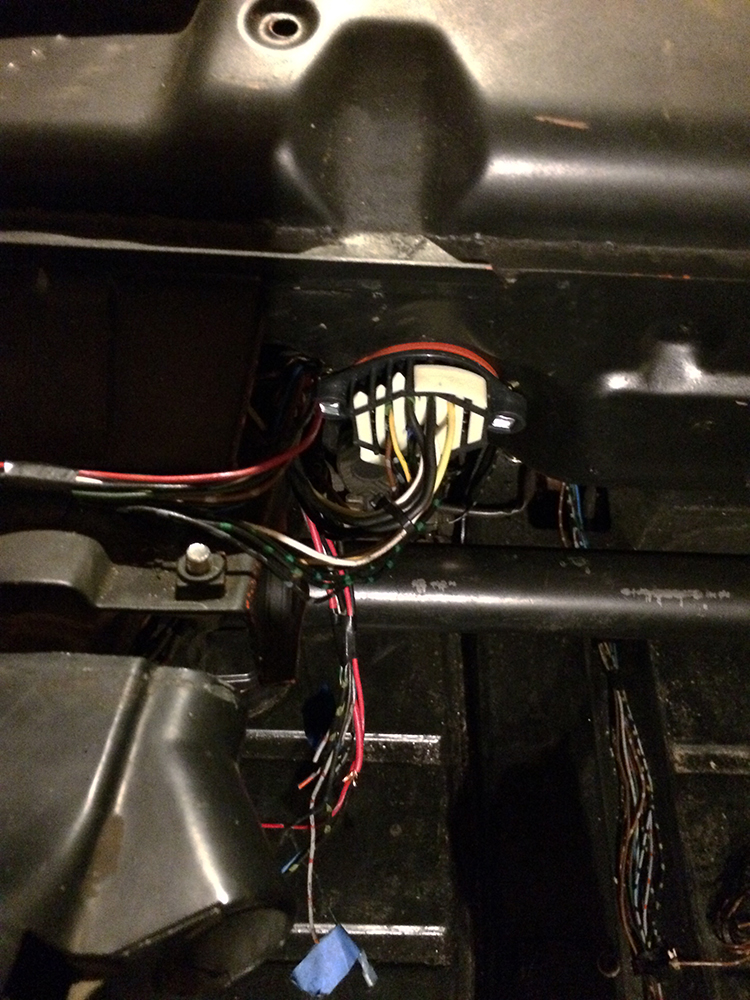
Then I routed what remains of the stock harness through the rest of the car.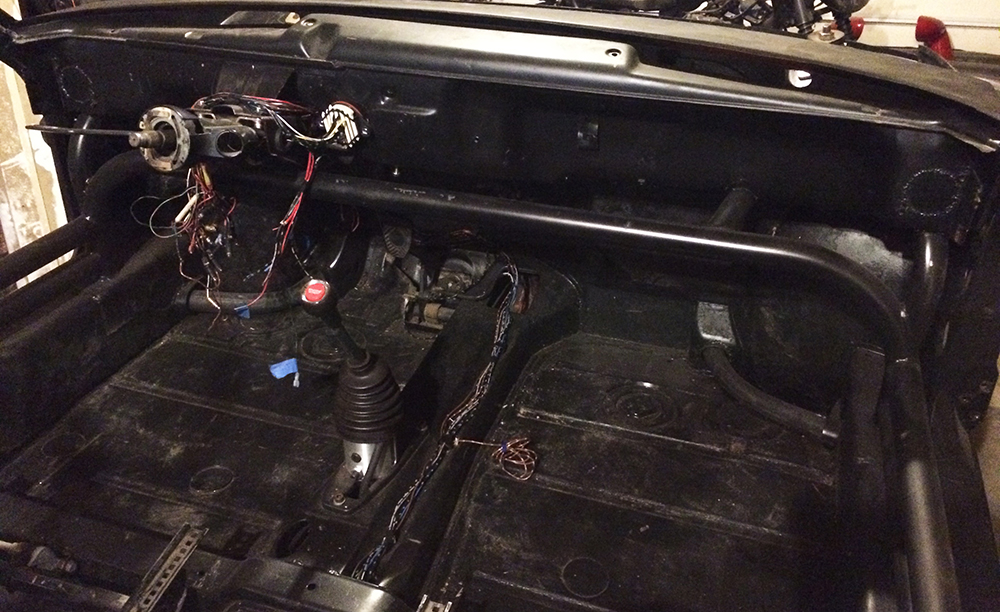
i am not wiring up the cabin yet, i want to focus on getting the engine running first.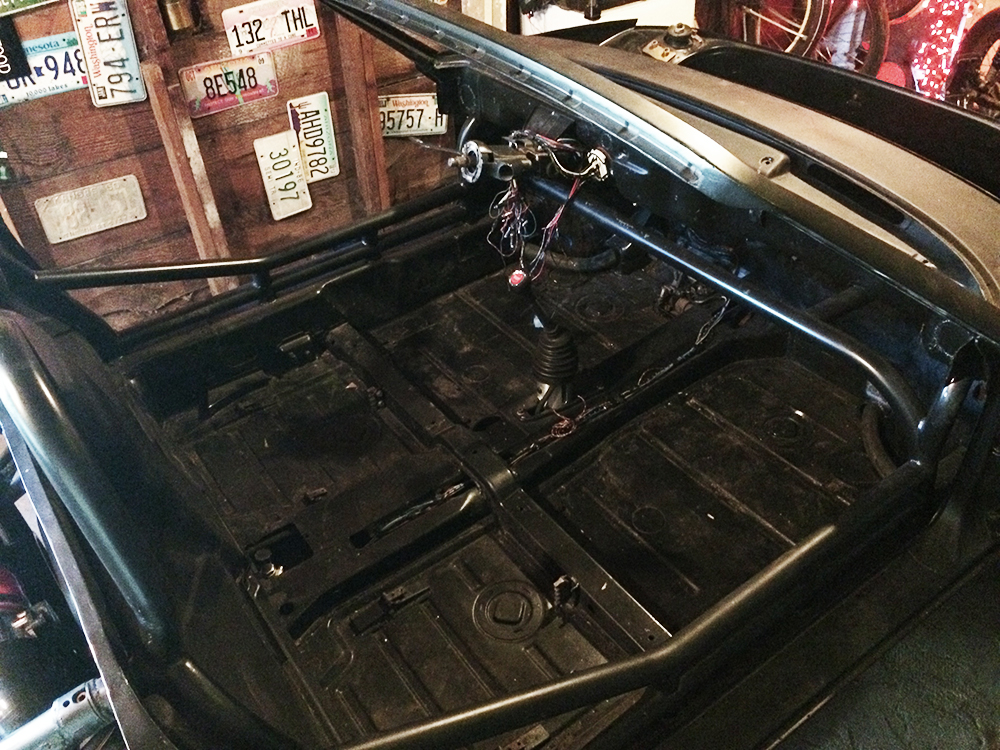
The harness has been run into the engine bay, ready to connect my next project, the WRX computer and engine harness. 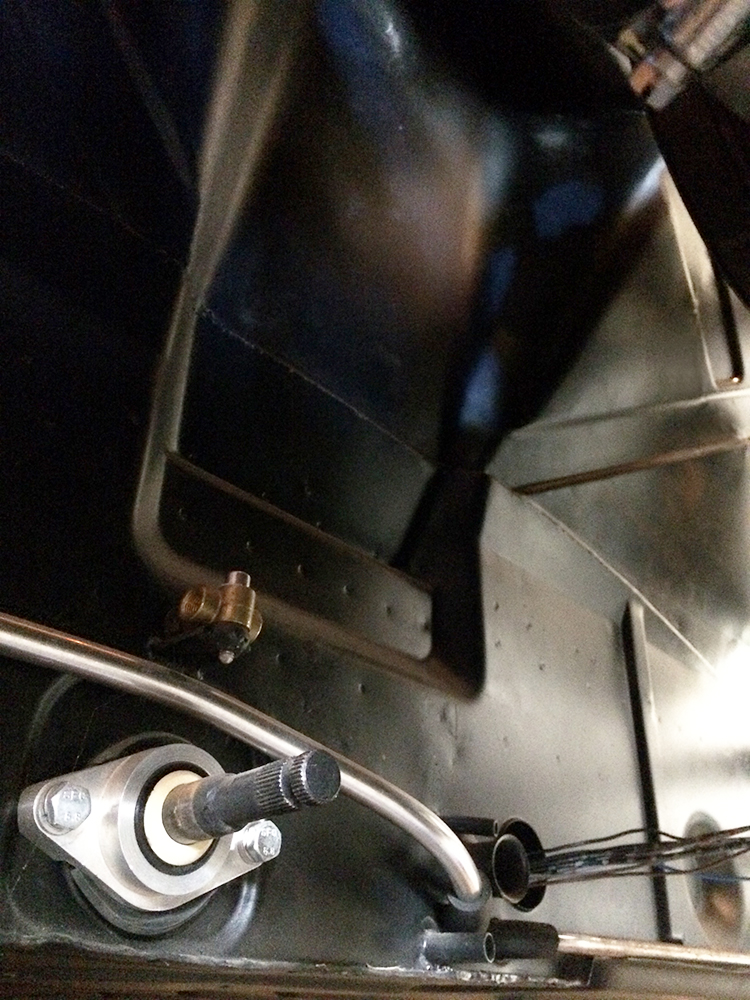
Posted by: plymouth37 Jul 9 2016, 12:32 AM
Here is the WRX wiring harness, as you can see it is about 10 feet longer than it needs to be. I will trim and shorten it in the future but I know it works as it is so I will leave it until I have a running engine to test it with.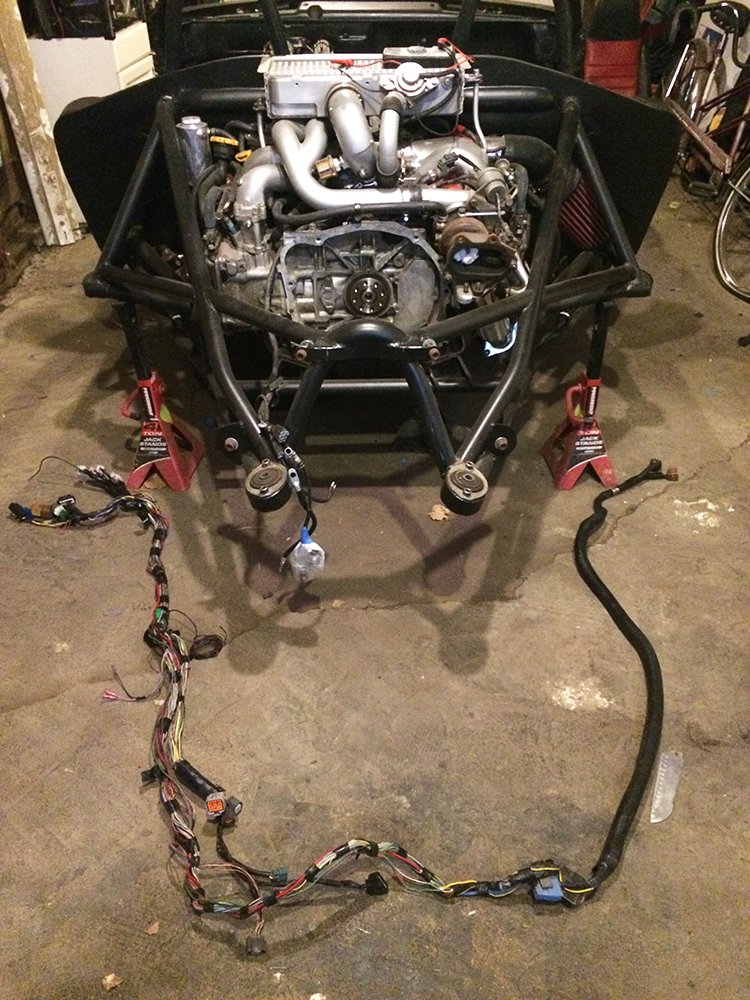
I am thinking I will mount the computer and the excess wiring harness in a compartment I build around the back of the firewall bulge. 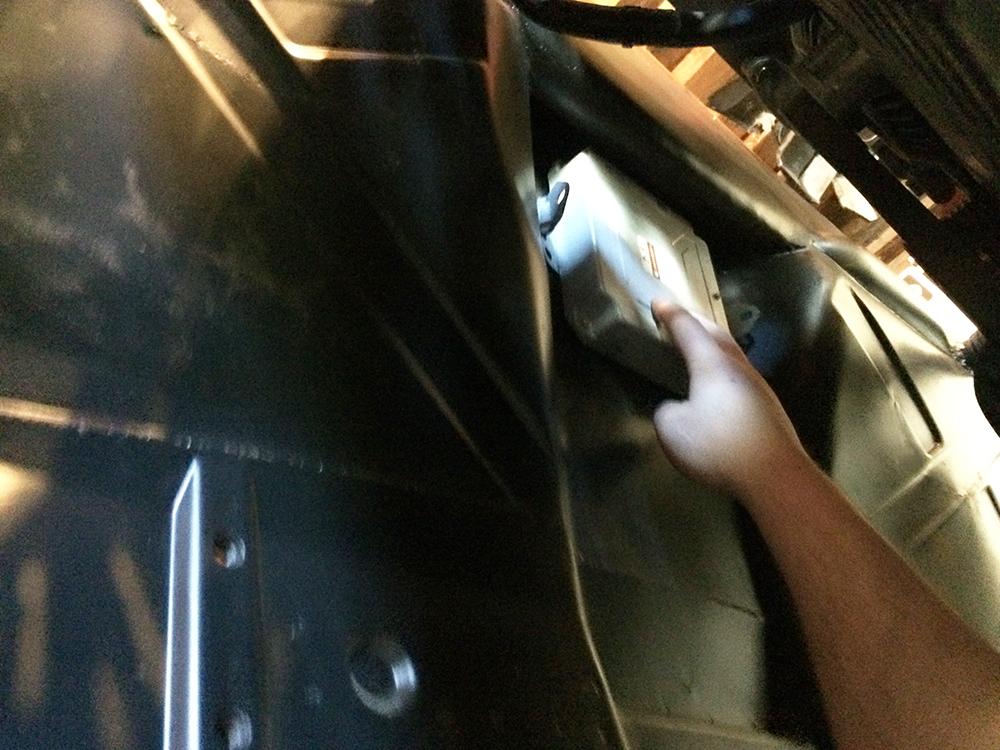
I organized the harness in a way that should fit in the space provided, 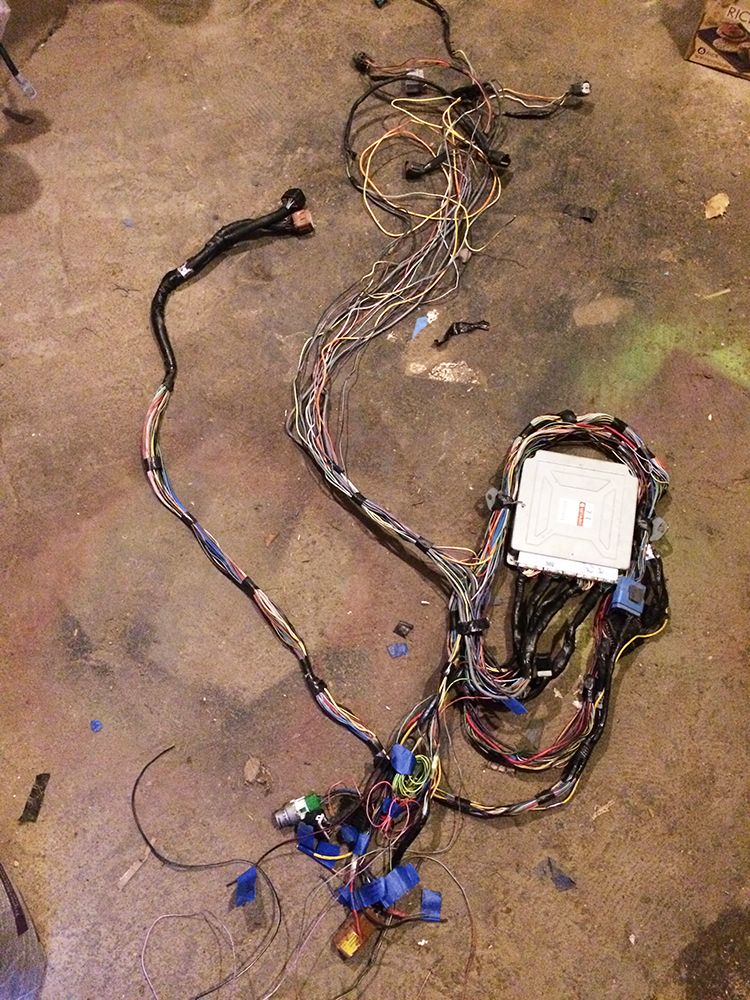
I had to make 3 big loops around the ECU to take up the slack.
Posted by: 914forme Jul 9 2016, 06:47 PM
Dana great work as usual, I was walking around Goodguys Columbus Nationals today and thought about how I would rather look at your build than most of the cars i saw today.
Now one question.
What the hell is this still doing in this build?
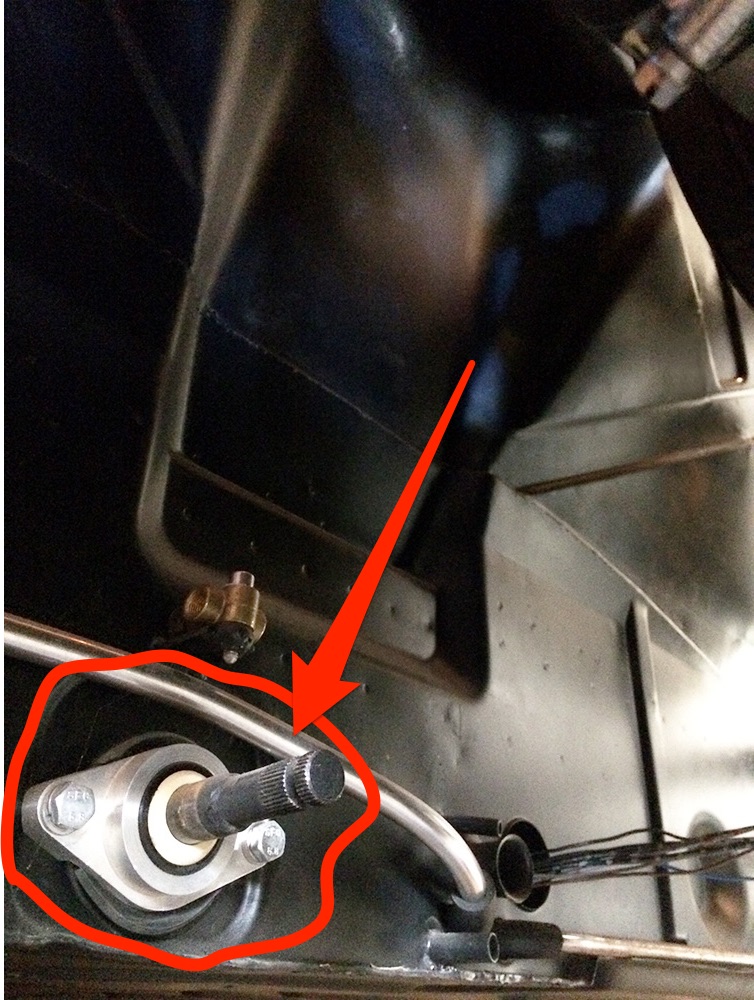
Don't get me wrong, I love Chris' products. And they have there place. This car needs a Subaru MT5 in its back end, and a cable shifter. We have a bunch of these in various conversion cars, and I would love to see your build skills being put to use on an MT5.
Posted by: mepstein Jul 9 2016, 07:48 PM
Dana great work as usual, I was walking around Goodguys Columbus Nationals today and thought about how I would rather look at your build than most of the cars i saw today.
Now one question.
What the hell is this still doing in this build?
Don't get me wrong, I love Chris' products. And they have there place. This car needs a Subaru MT5 in its back end, and a cable shifter. We have a bunch of these in various conversion cars, and I would love to see your build skills being put to use on an MT5.
maybe not to get it on a he road if you already have the 901 parts but in time, I think the suby trans is the logical upgrade.
Posted by: plymouth37 Jul 9 2016, 10:01 PM
Unfortunately now is not the time to change huge things like a tranny, in the future definitely. It will be drivable in the relatively near future and the detour of changing drivetrains at this point would kill this project. Lucky the rear half of the car is replaceable, so nothing is permanent. Once I have play money upgrades will be implemented on the entire car, I just need it to move under its own power first.
Posted by: Cairo94507 Jul 10 2016, 06:37 AM
Hi Dana - So glad to see you making progress on your car. One of my absolute favorite builds. Good luck.
Posted by: 914forme Jul 10 2016, 12:14 PM
Unfortunately now is not the time to change huge things like a tranny, in the future definitely. It will be drivable in the relatively near future and the detour of changing drivetrains at this point would kill this project. Lucky the rear half of the car is replaceable, so nothing is permanent. Once I have play money upgrades will be implemented on the entire car, I just need it to move under its own power first.
Sounds like a great answer to me, carry on love the build
Posted by: rgalla9146 Jul 10 2016, 04:47 PM
Get a stump boy
Stump, ball peen hammer, oxy acetylene torch and a cigar is all any good body man needs The cigar comes first.
Posted by: plymouth37 Nov 19 2016, 07:26 PM
Sorry for not posting in a while, rest assured, progress continues!
I got the ECU and engine harness wired into the car and engine.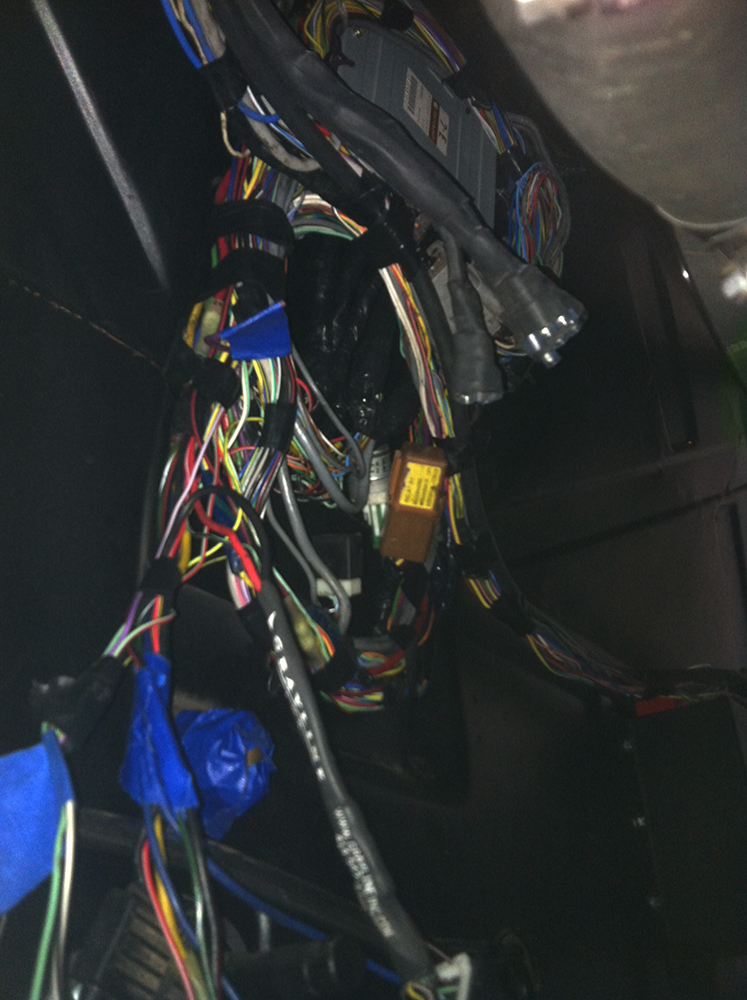
In addition to attaching the engine to the ECU I also attached the car harness to the ECU as well as a custom rear wiring harness.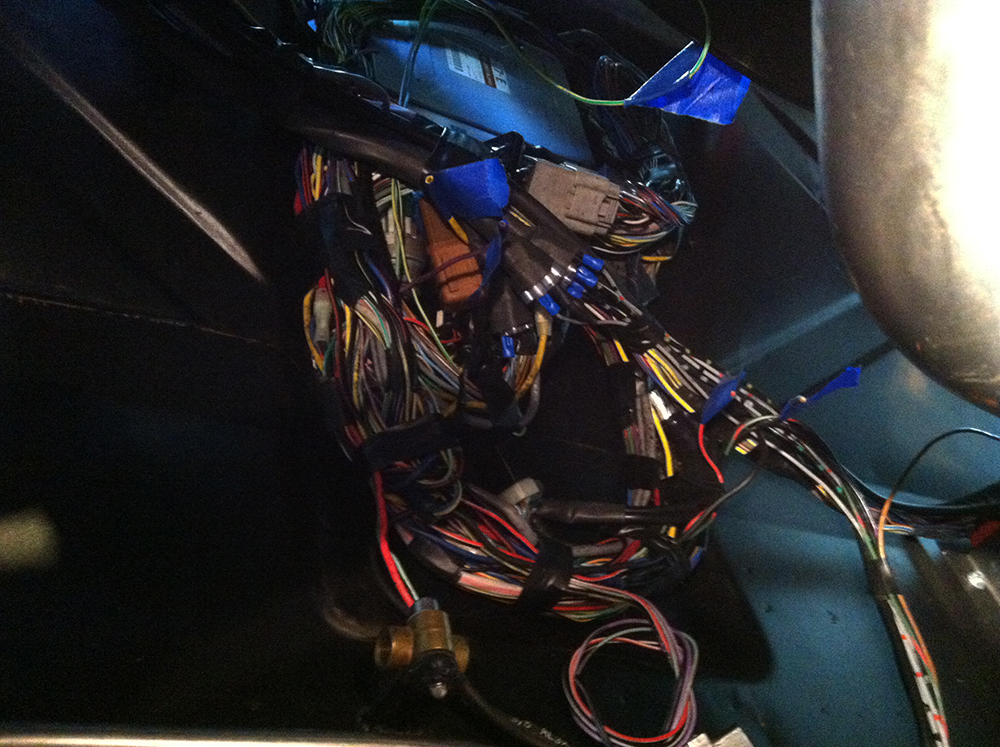
Here is the rear wiring harness I built, it attaches to the intake sensors, starter, reverse switch, speed sensor, and rear lights.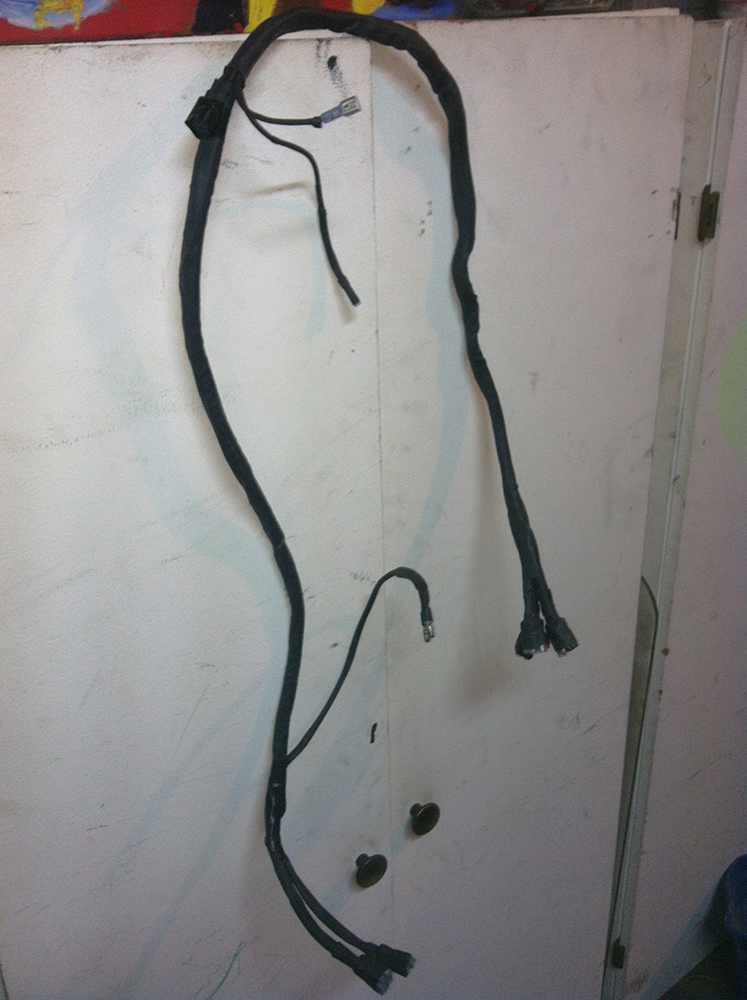
This is hard to represent properly but here is the state of affairs, I now know the wrx wiring harness by memory, but engine wiring is just about done!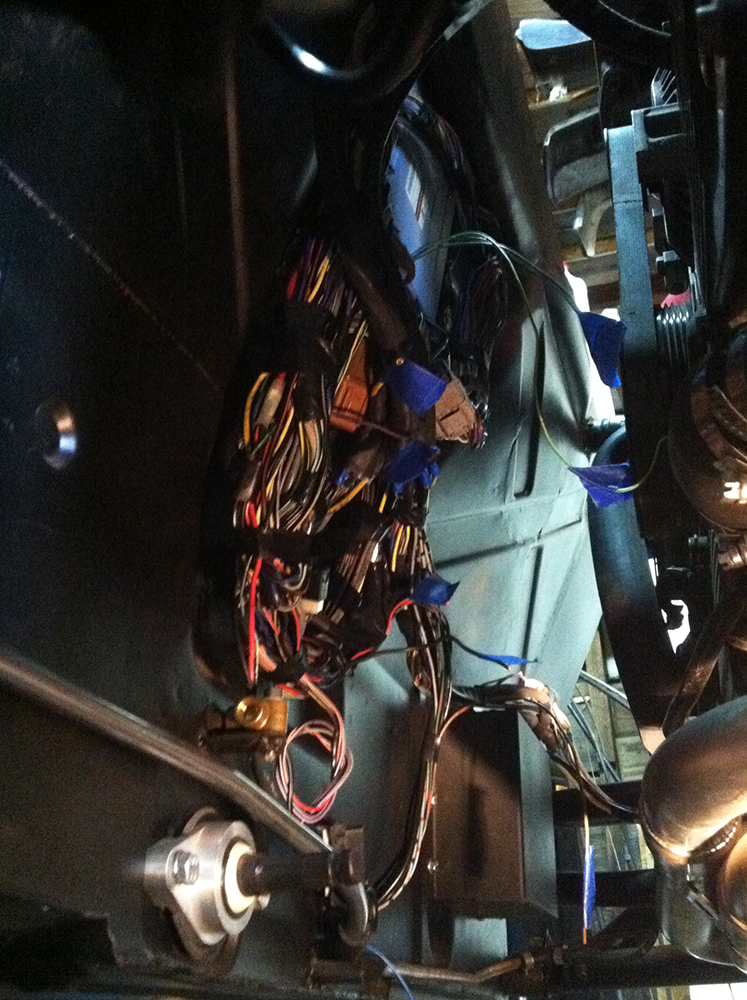
Here you can see the rear harness, plugged into the intake sensors and waiting for a tranny to wire up. Also refurbished the adapter plate and installed it, clutch is on its way!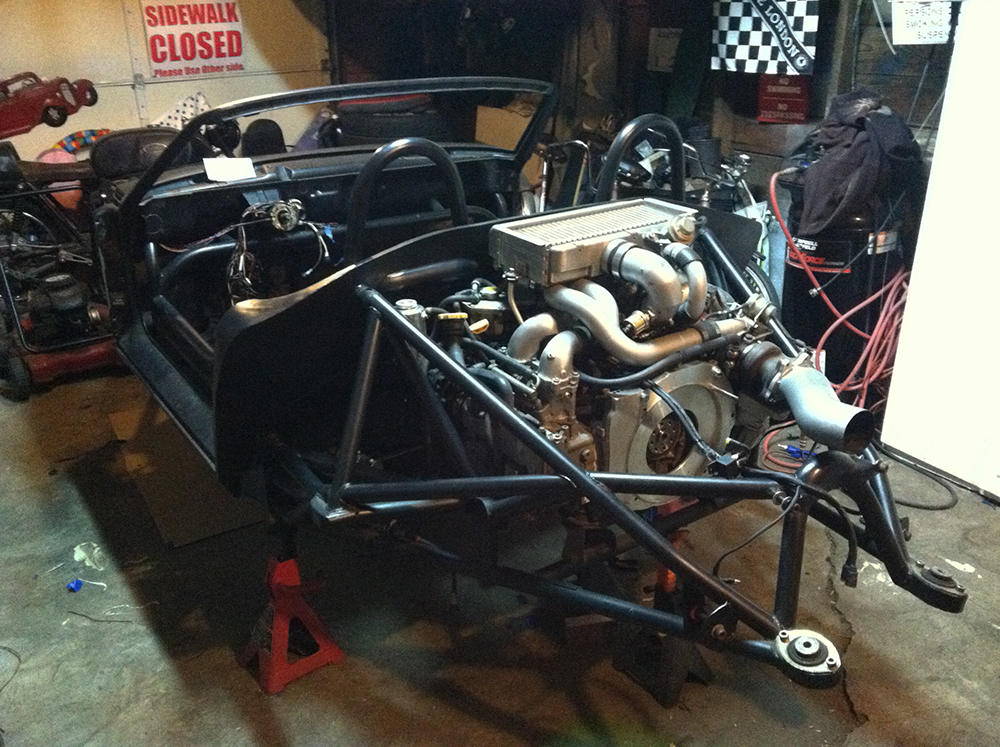
Posted by: plymouth37 Nov 20 2016, 01:39 AM
I needed to start wiring up the battery cables, but wasn't close enough to starting the engine to buy a battery so I decided to make a battery mockup. I started by modeling an Odyssey 680 based on images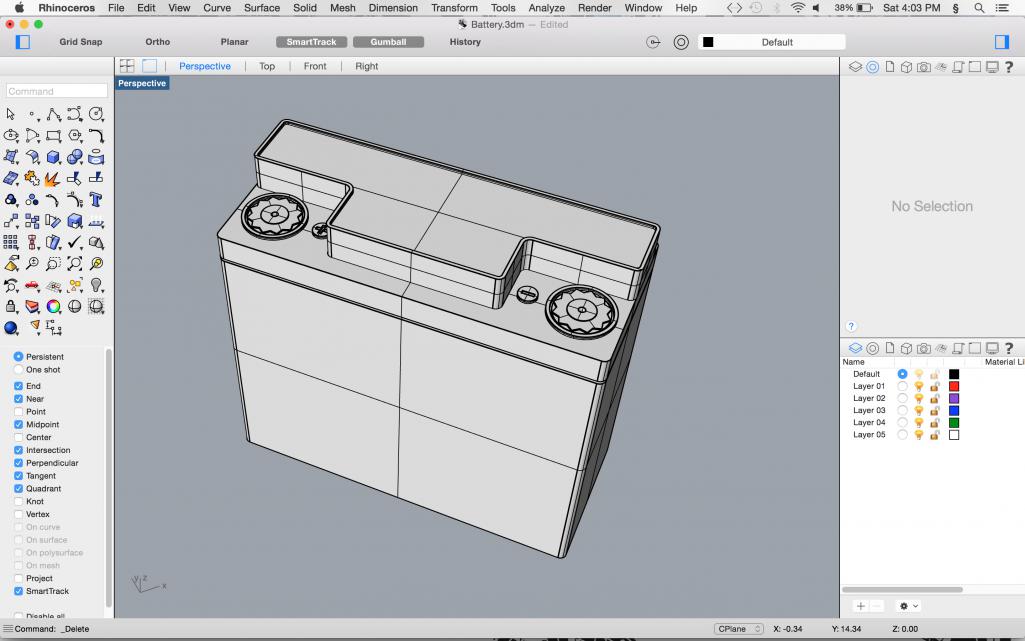
Then I 3D printed it.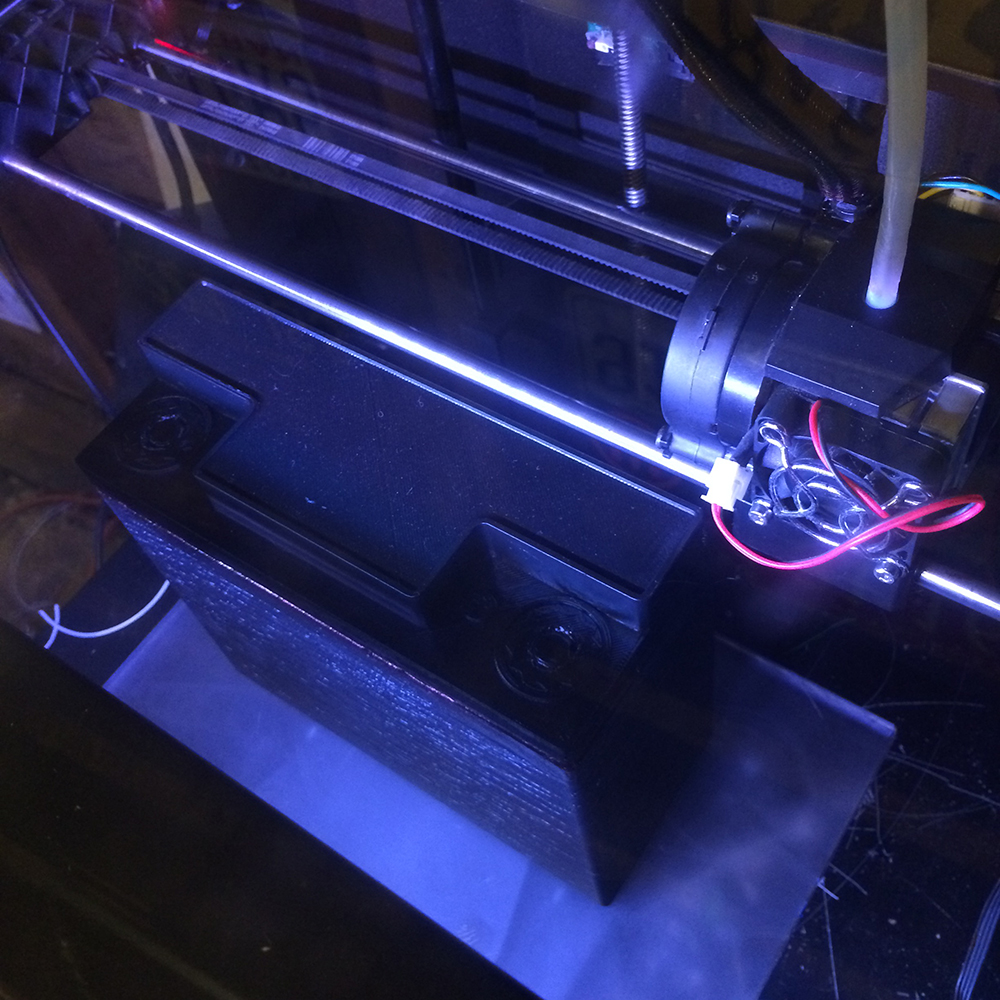
I painted the print and installed the proper threads into it.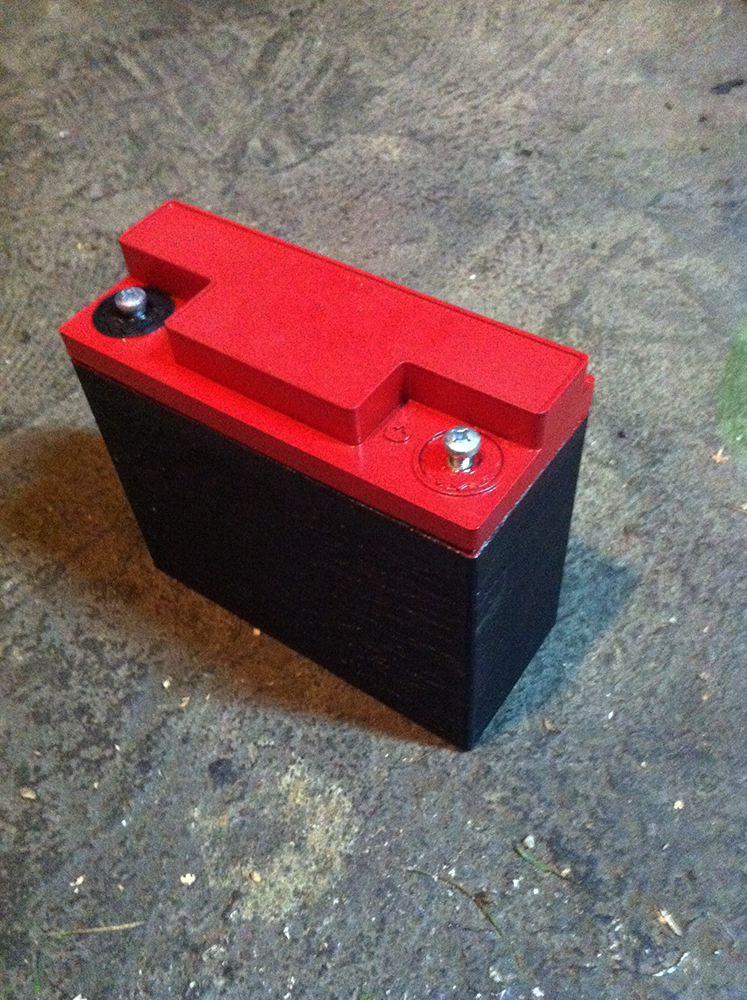
Here is the Battery Mount.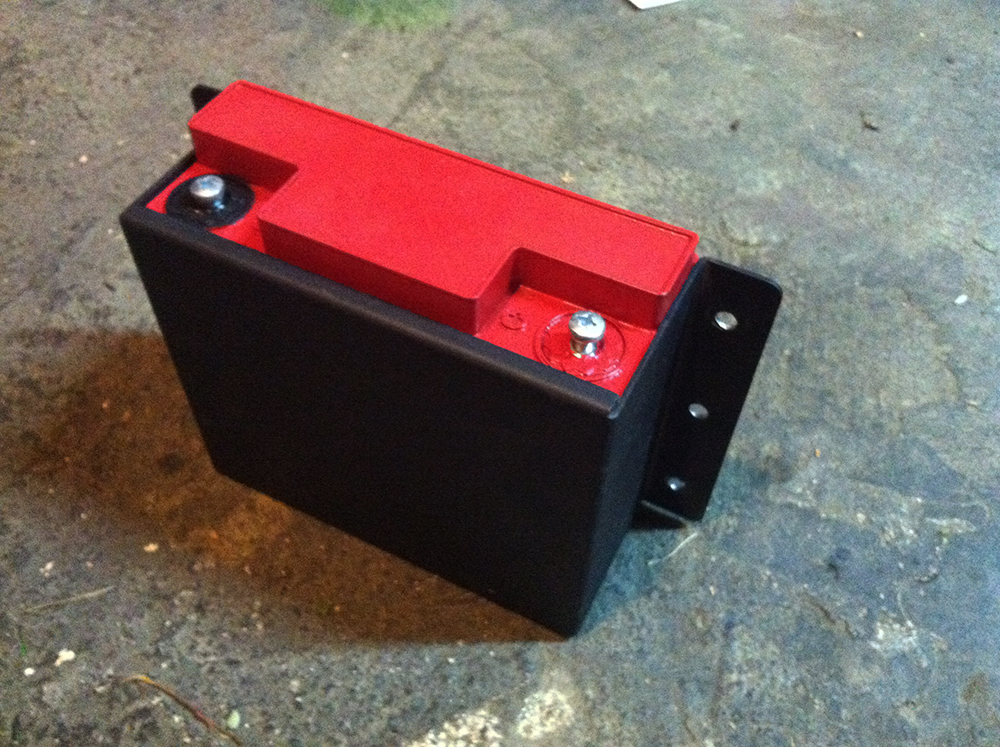
Finally I installed it in a clear spot on the firewall, low, opposite the driver, hidden by the air cleaner. I then ran the harness for the passenger side of the engine and battery cables to the chassis, starter, and wiring harness.
[attachmentid=582677]
Attached image(s)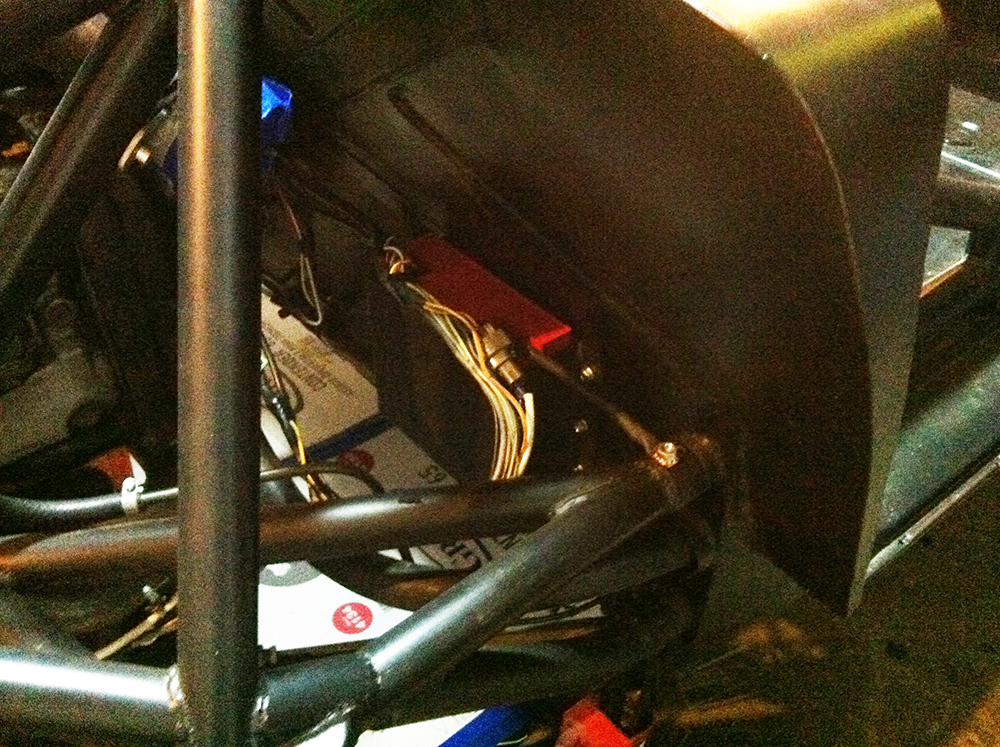
Posted by: plymouth37 Nov 24 2016, 01:13 PM
Happy Thanksgiving everybody!
I finally got all of the parts of my new clutch setup. New kennedy kevlar disk, new stage 2 pressor plate, and a resurfaced flywheel. I will install them and hopefully the tranny this weekend!
I found a great local machinist, look at this beautiful work!
Posted by: Curbandgutter Nov 24 2016, 01:22 PM
Dane your work is incredible. You keep raising the bar!
Posted by: Ferg Nov 25 2016, 09:09 AM
Nice work Dana
Posted by: plymouth37 Nov 25 2016, 08:37 PM
Flywheel is in!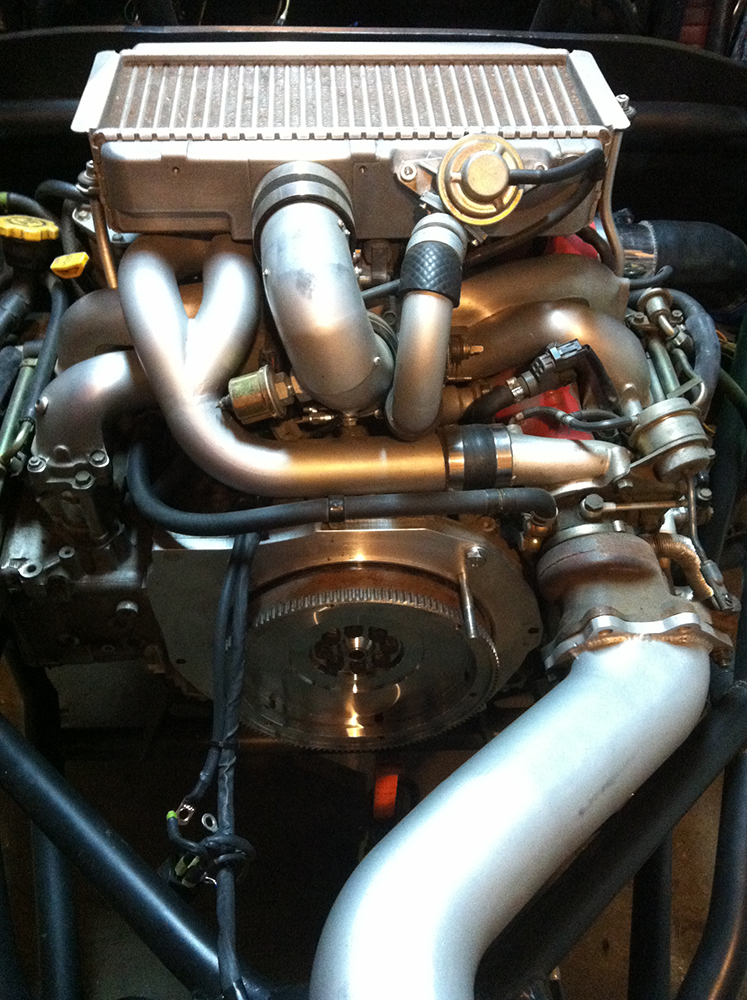
Pressure plate and disk are in too.
Tranny goes in tomorrow!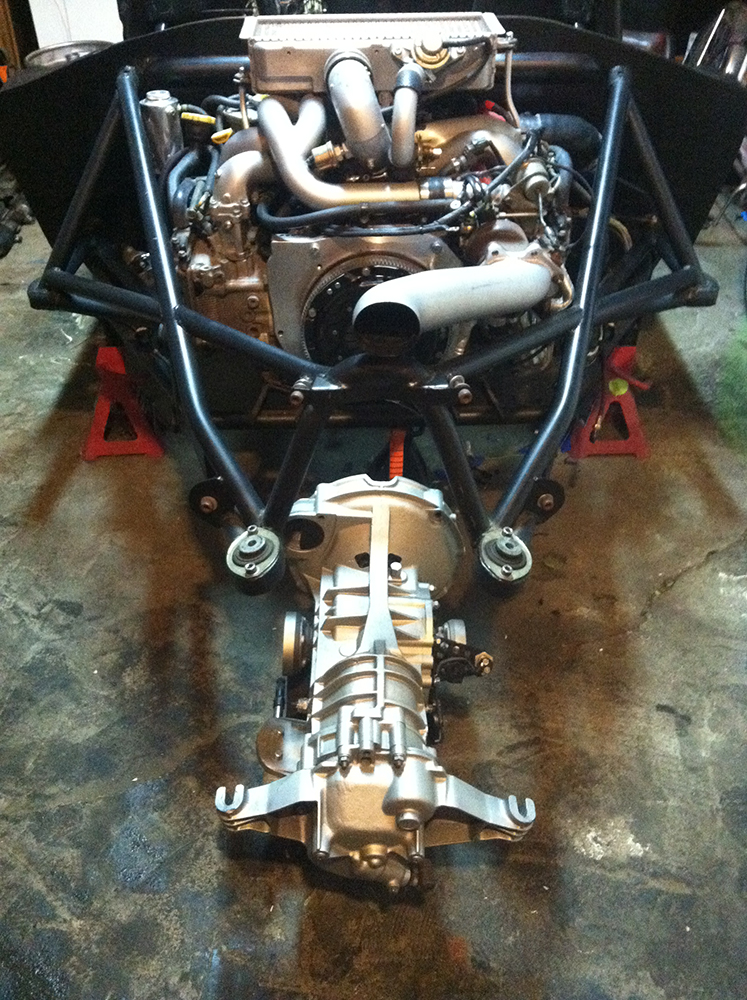
Posted by: wingnut86 Nov 26 2016, 06:37 PM
Dana,
You should earn "914 Emerald Points" or similar. How many times have you moved that dream across the US? 3 or 4?
It looks great as usual.
Dave
Posted by: matthepcat Nov 27 2016, 01:32 PM
Since 2008 when this project started, WRX transmissions have become common on conversion cars. Did you ever think of ditching the Kennedy adapter and 901 for a Subaru trans with a cable shifter?
Posted by: plymouth37 Nov 27 2016, 02:46 PM
Since 2008 when this project started, WRX transmissions have become common on conversion cars. Did you ever think of ditching the Kennedy adapter and 901 for a Subaru trans with a cable shifter?
Yes, I feel like that is all people want to talk about on this thread. Check out the previous page for my most recent answer to this question, or the page before that to see the previous time I answered this. A new tranny really isn't a priority right now.
Posted by: matthepcat Nov 27 2016, 03:25 PM
Sorry.
Since 2008 when this project started, WRX transmissions have become common on conversion cars. Did you ever think of ditching the Kennedy adapter and 901 for a Subaru trans with a cable shifter?
Yes, I feel like that is all people want to talk about on this thread. Check out the previous page for my most recent answer to this question, or the page before that to see the previous time I answered this. A new tranny really isn't a priority right now.
Posted by: plymouth37 Nov 27 2016, 03:39 PM
No problem, just trying to get this thing on the road!
I installed the tranny to prove that I am embracing this inferior technology, at least for now.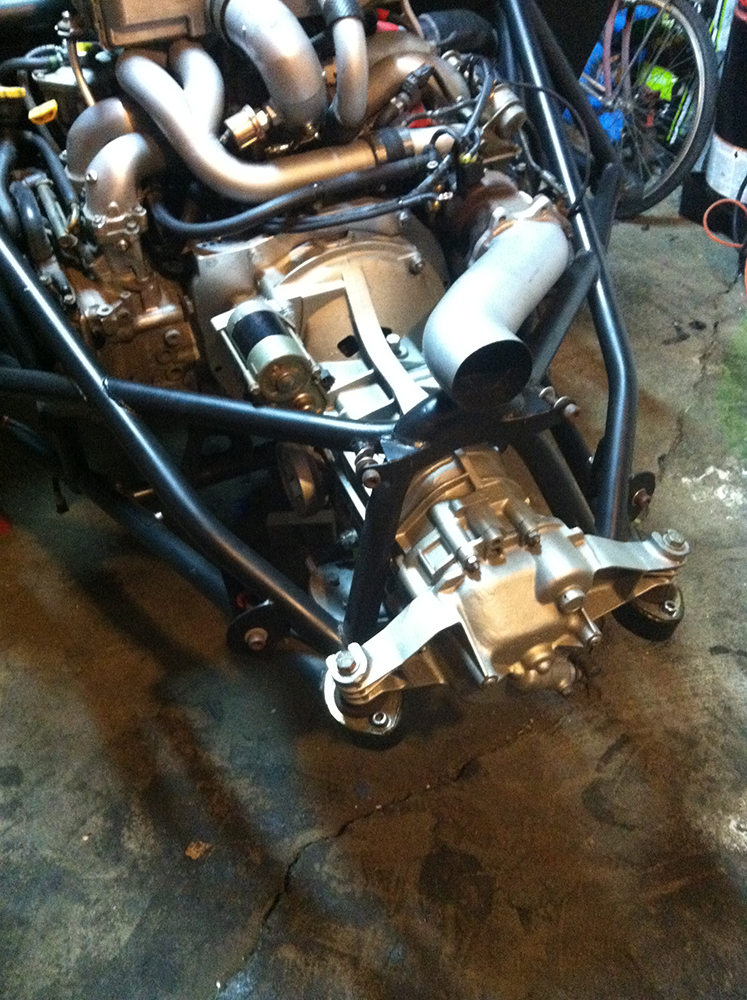
Time to start wiring it up!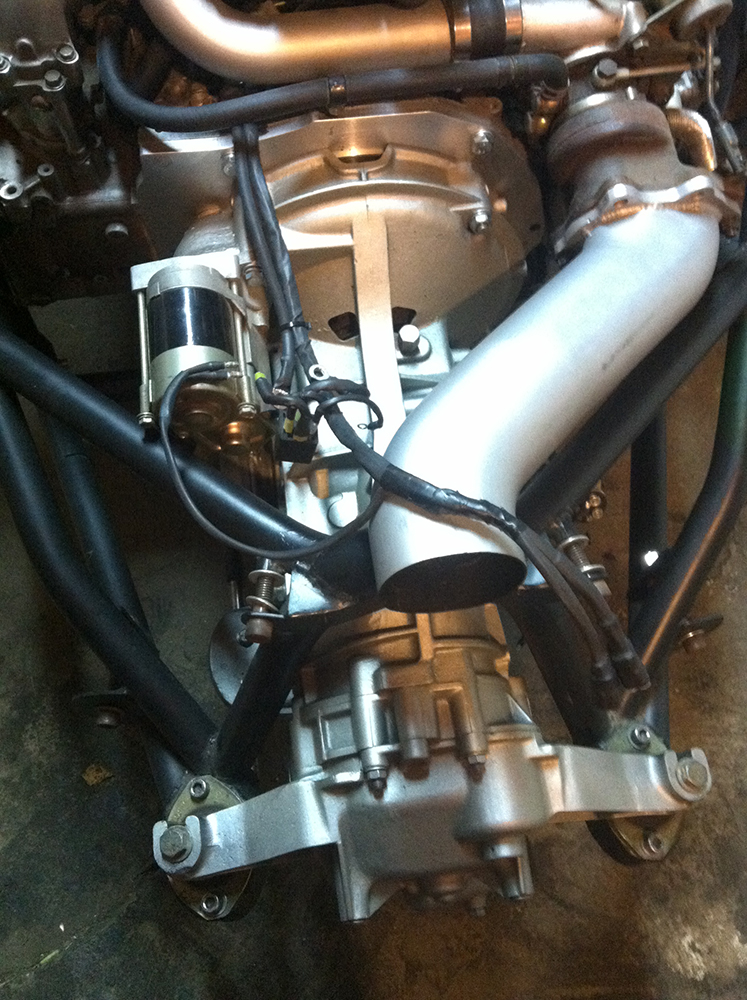
Posted by: sixnotfour Nov 27 2016, 04:05 PM
not many cars had a 5spd in the 70s..time marches on
Posted by: plymouth37 Dec 3 2016, 03:46 PM
Tranny is wired up!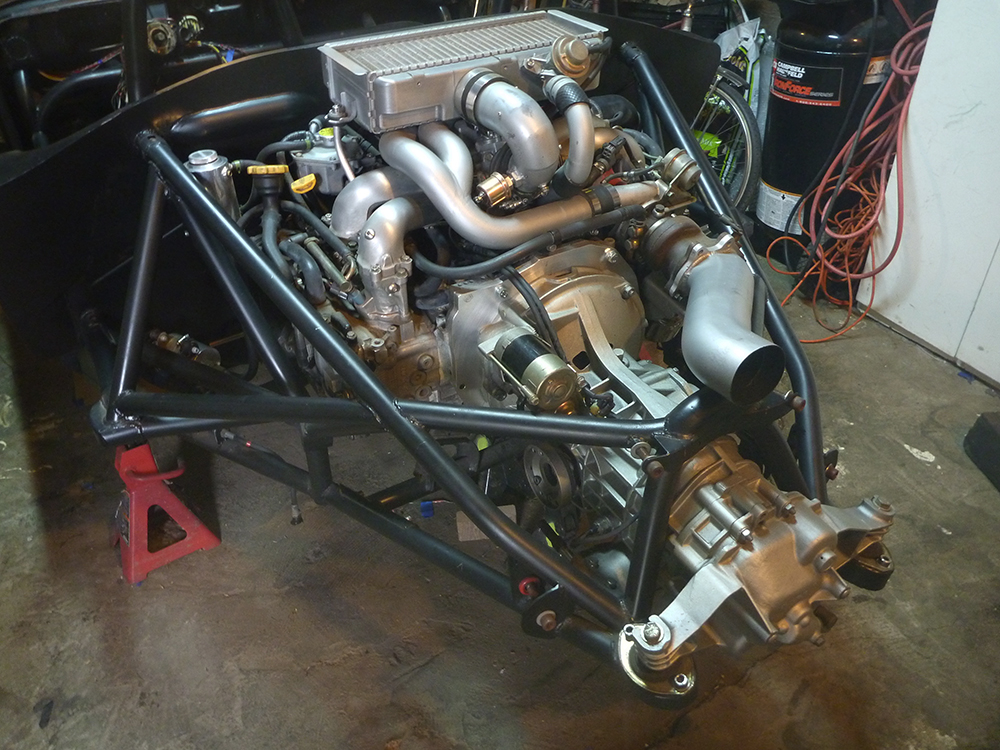
Starter and relay: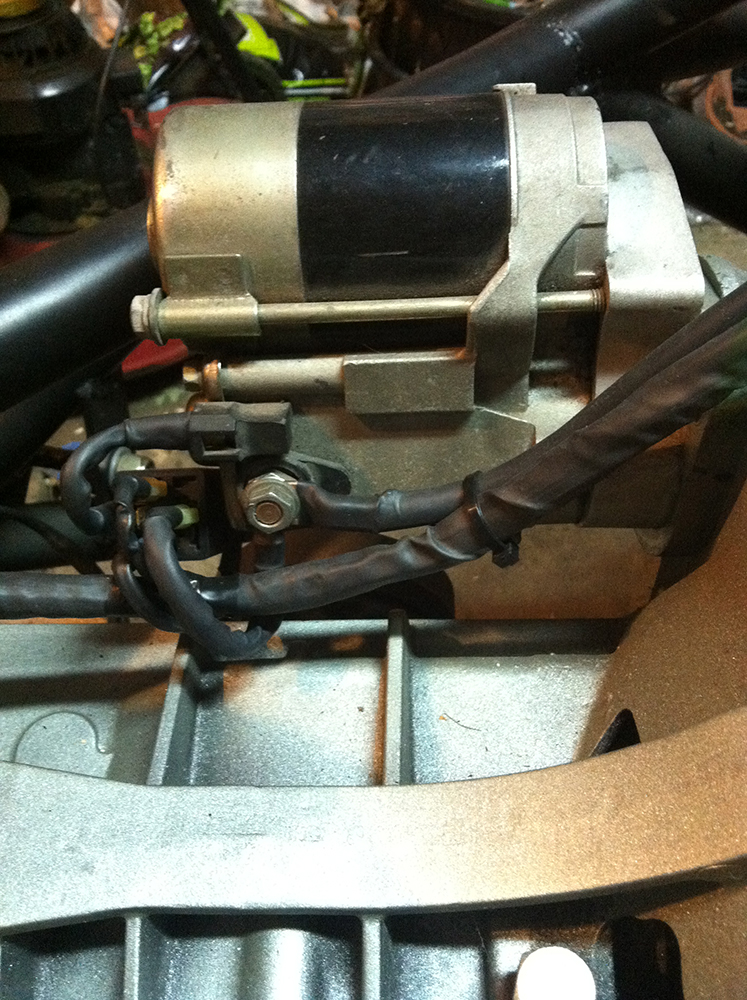
Speed sensor: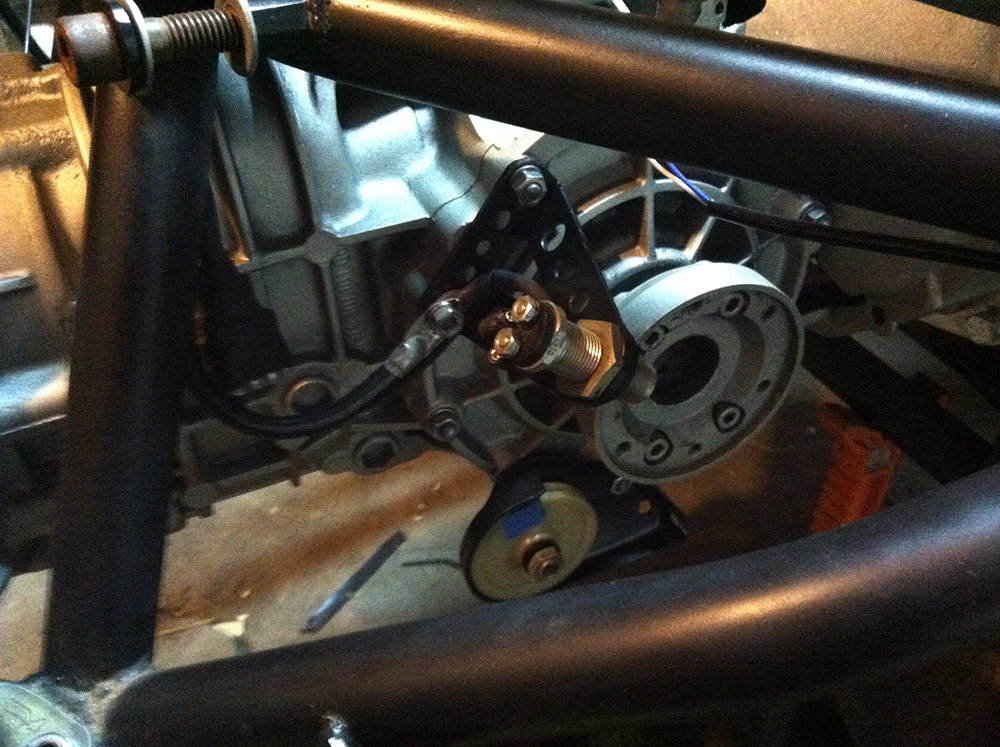
Ground strap, and plugs for rear lights: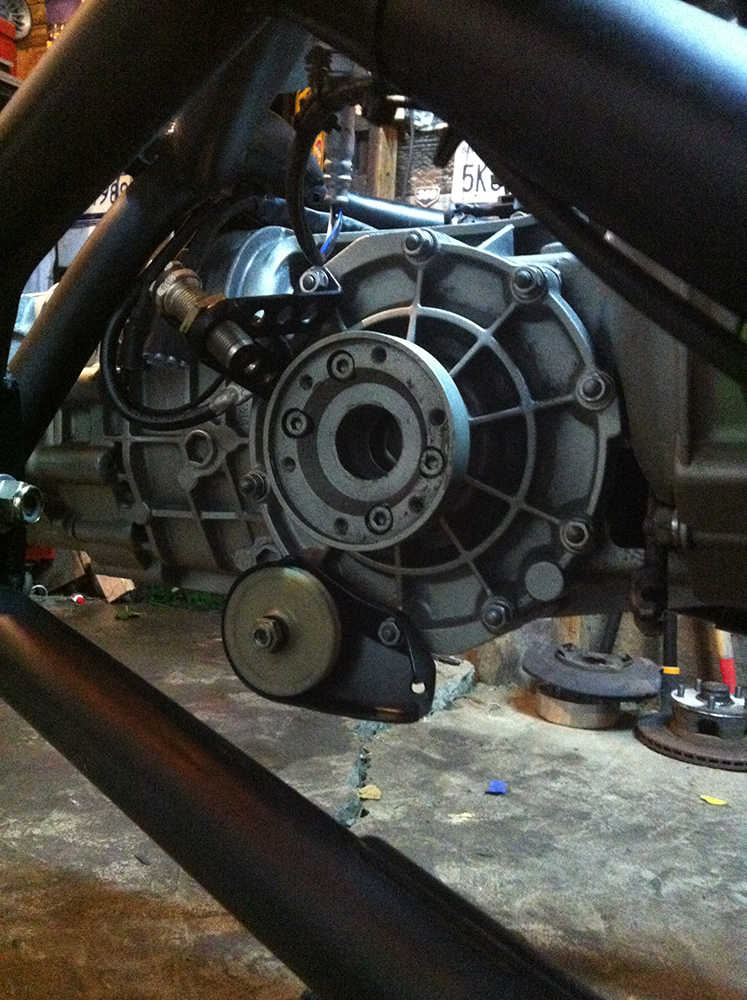
Posted by: KELTY360 Dec 3 2016, 04:24 PM
Kind of a shame to cover up all this fine art with body work.
Posted by: 76-914 Dec 3 2016, 08:02 PM
Yea, It's a work of Art; it needs to go to a Museum. It's too clean to drive on a dirty road.
Posted by: speed metal army Dec 3 2016, 10:12 PM
Man! I haven't been around here lately..But I am stoked to see this project activity! Love this thing.
Posted by: plymouth37 Dec 5 2016, 11:49 PM
I had a couple people pm me asking about about tranny paint, this is the paint I am using throughout the car, I have found it to be very durable, and looks great.
It is available for aerosol and paint guns, I have used both on the car with good success.
Usually cheapest (but not cheap) directly from Eastwood.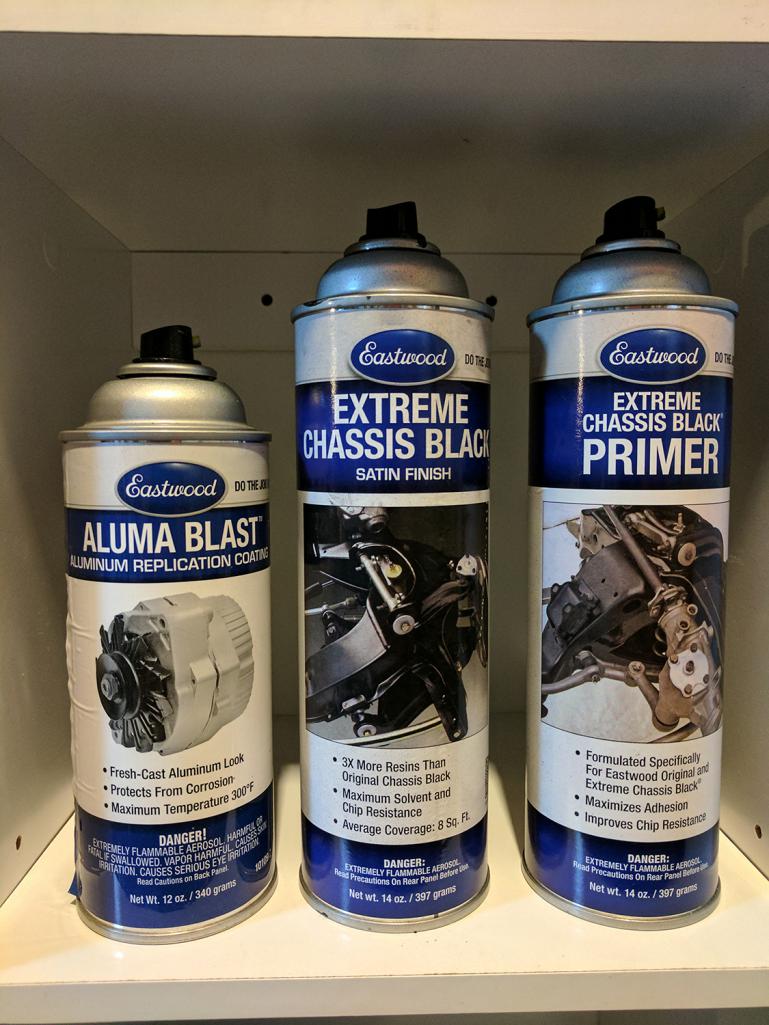
To repaint the tranny I started by cleaning it with soft wire and fiber wheels.
Then premiered with Eastwood black primer.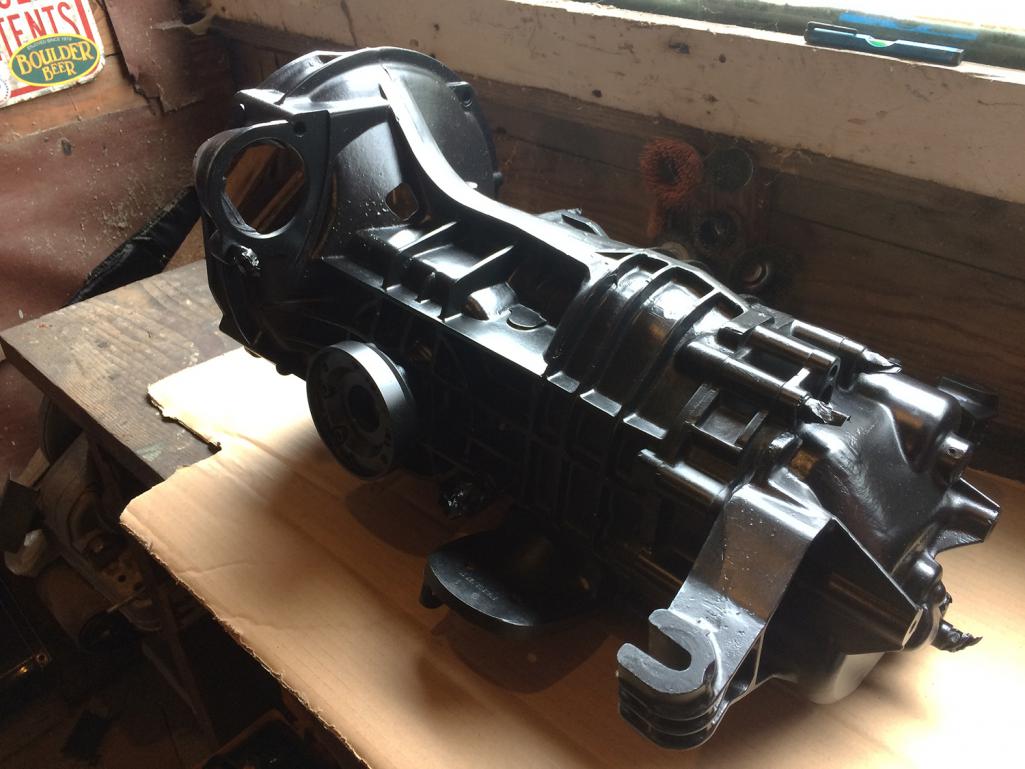
Posted by: plymouth37 Dec 5 2016, 11:50 PM
Here are some higher quality images of the Alumablast finish, clear coating is optional, I chose not to.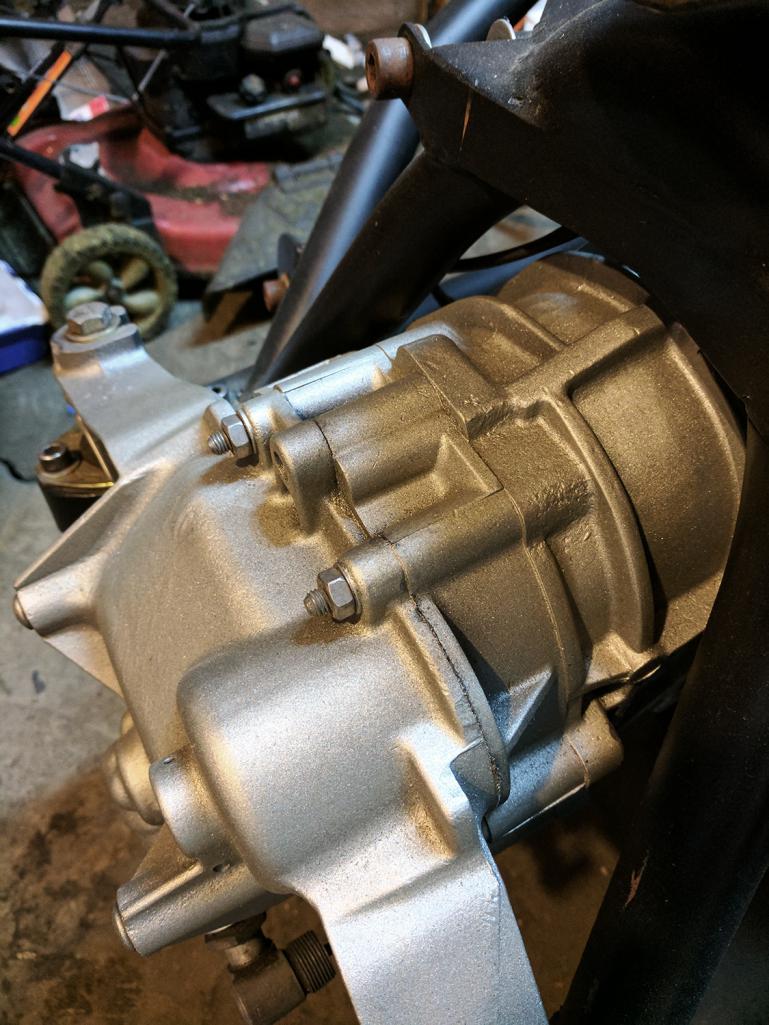
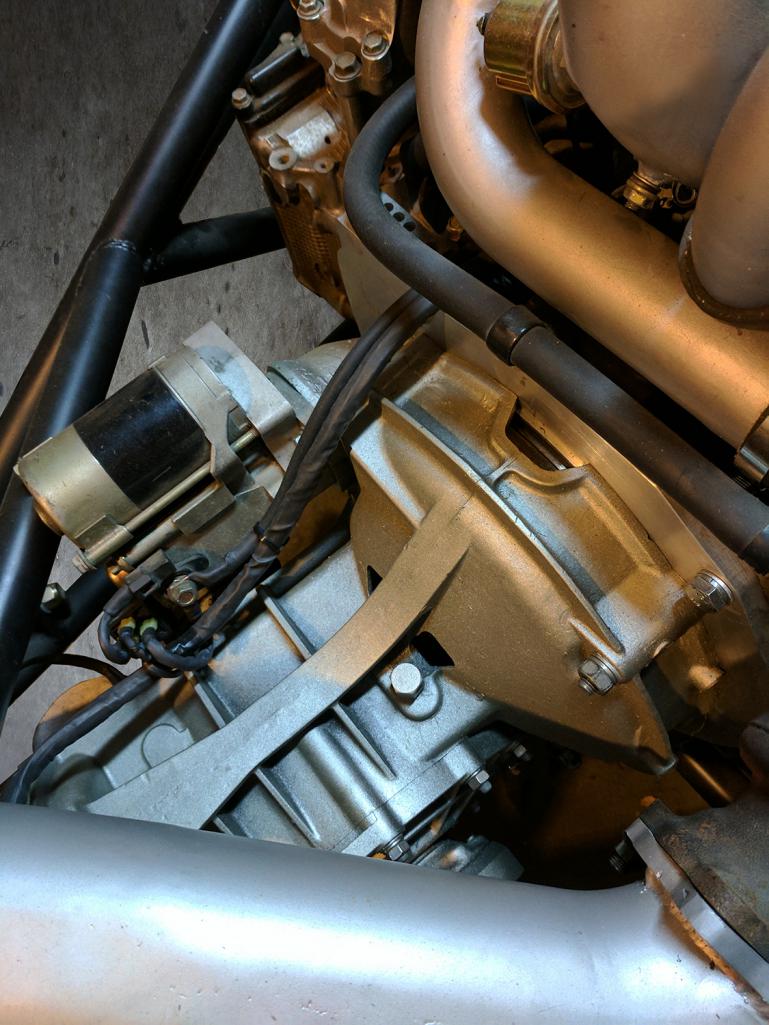
Posted by: Michel Dec 6 2016, 03:52 AM
Reading this thread... Second honeymoon
Posted by: quadracerx Dec 6 2016, 08:26 AM
How many cans of primer and aluma blast paint did it take to do your transaxle?
Thanks,
Steve
Posted by: rick72_914 Dec 6 2016, 12:46 PM
Just found this thread today, man I wish I had seen this years ago. Mine has been sitting in my dads barn for 10yrs and this is defiantly an inspiration!
Posted by: plymouth37 Dec 8 2016, 11:07 PM
How many cans of primer and aluma blast paint did it take to do your transaxle?
Thanks,
Steve
2 cans of each should be plenty, I did 2 coats of both primer and paint.
Posted by: plymouth37 Dec 26 2016, 06:41 PM
I am going to give the WRX fuel pump controller a shot, I didn't use it when I had the car running before, it delivers variable voltage to the pump based on engine need, and shuts the pump off after a couple seconds when the ignition is on and you haven't started the car.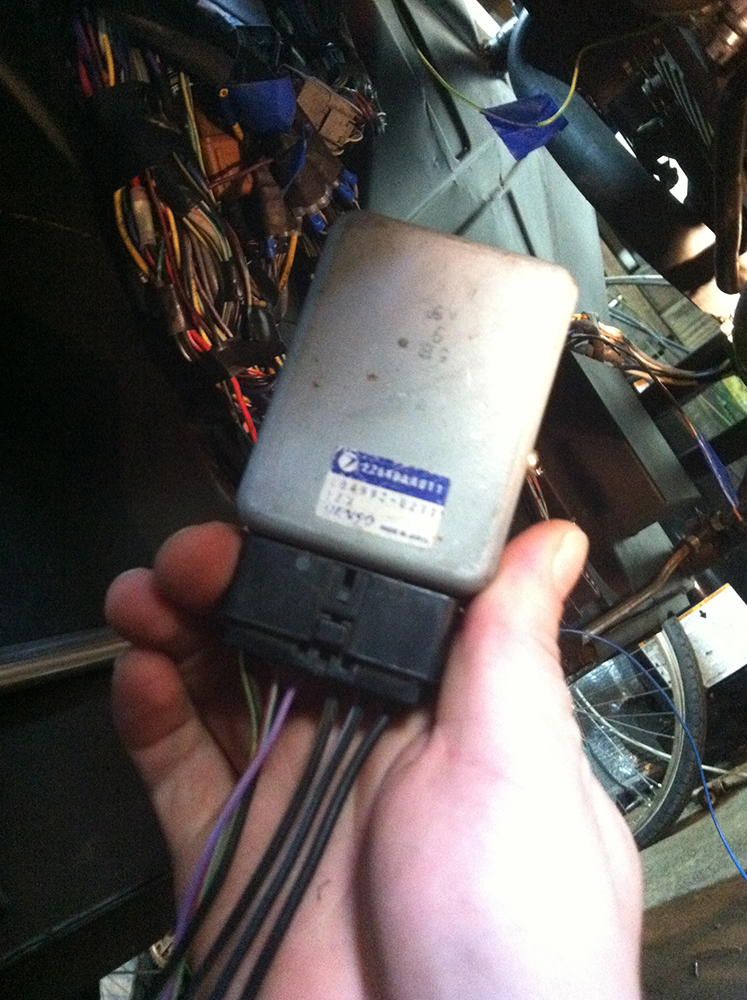
Here it is installed, I also wired up the pump, As far as I can tell I think all of the wiring needed to start the car is done. Radiator and everything up front is wired as well. I will get some test runs under its belt then shorten the excess length out of harness and wrap everything. Eventually I will build a cover for all of this.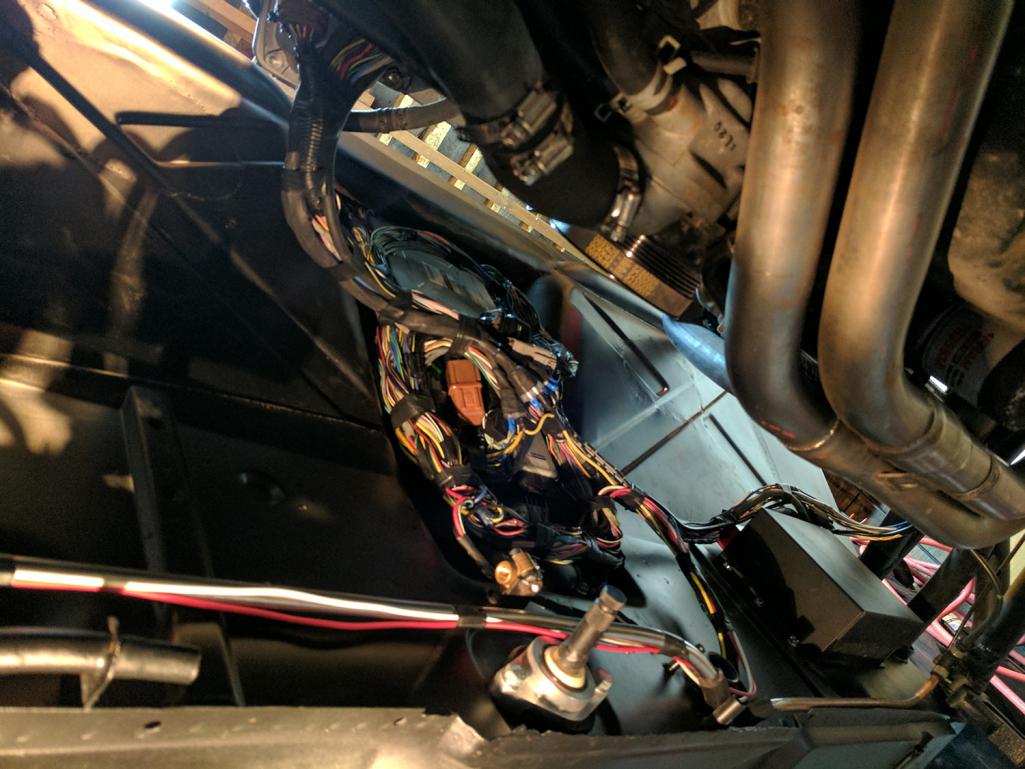
All of the dash wiring is good to go, and ignition and starter buttons are wired up for testing.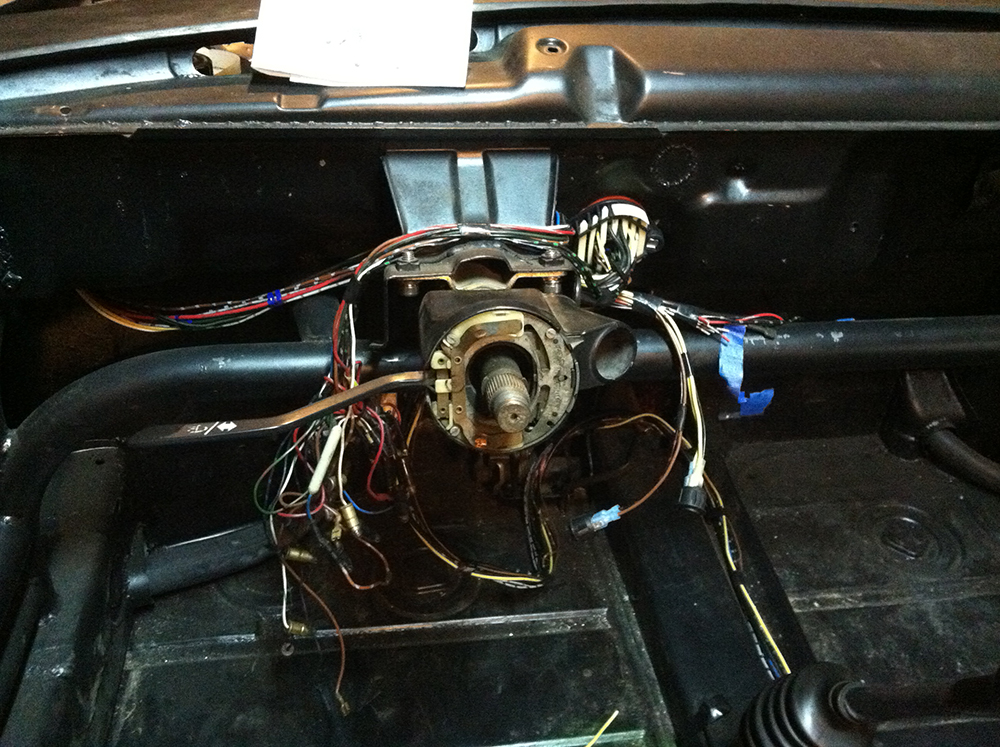
Looks like the chassis wiring is fairly done, here are the leftovers, nice to cull this amount of chaos and weight out of the car!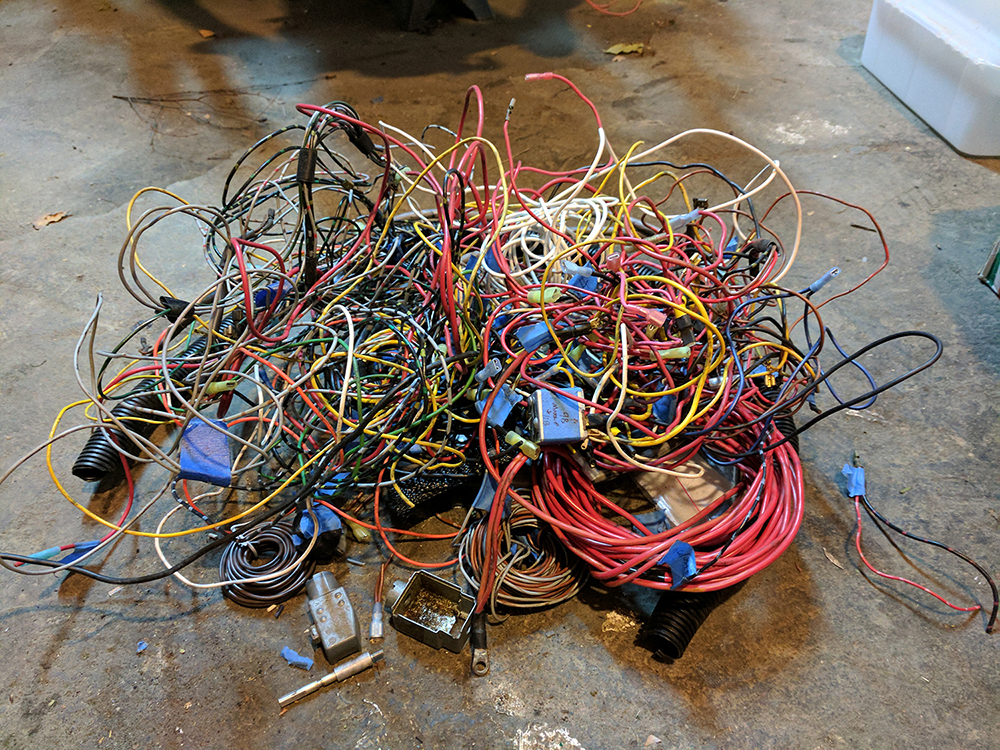
Posted by: plymouth37 Jan 1 2017, 02:23 PM
Now that the fuel system and wiring are done in the rear I got going on the tank in the front. I installed the flexible hose that connects between the stainless tunnel lines and the tank. 1/2" feed and 3/8" return all the way to the engine, should be able to handle any engine I drop into this car in the future.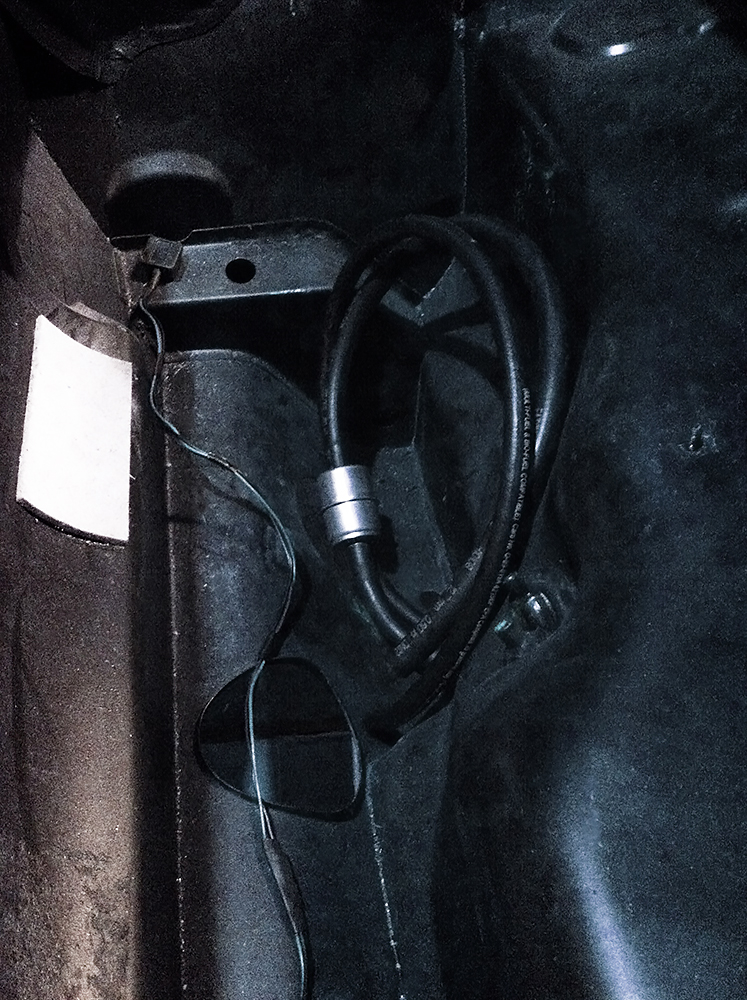
I needed to modify the rubber tank mounts to clear the cage.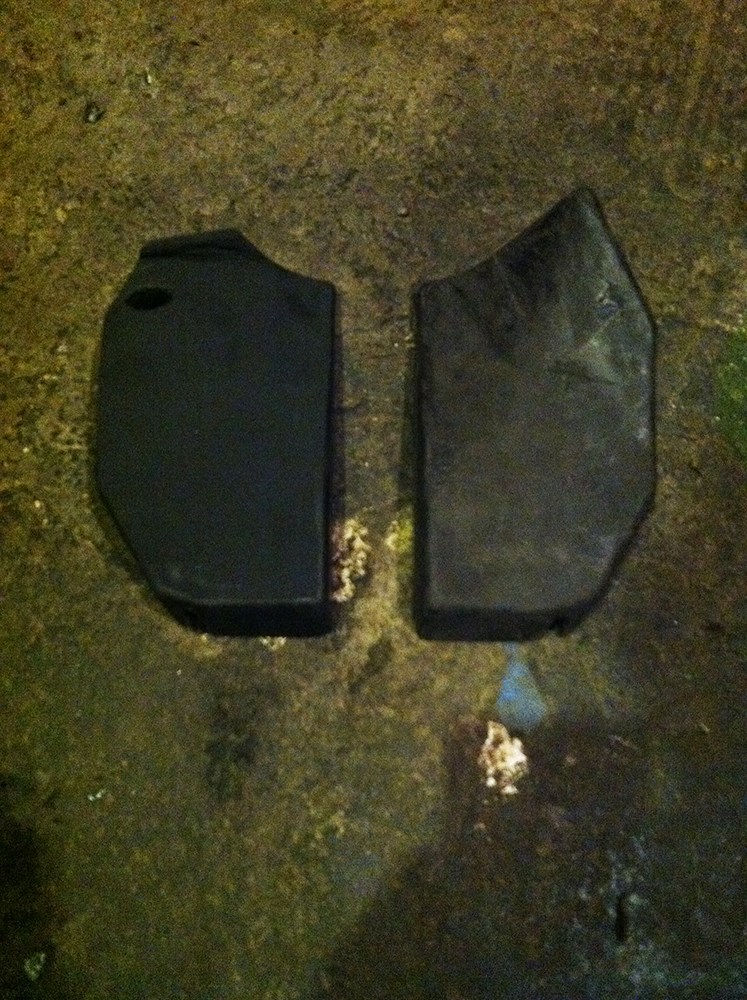
Here is the before and after.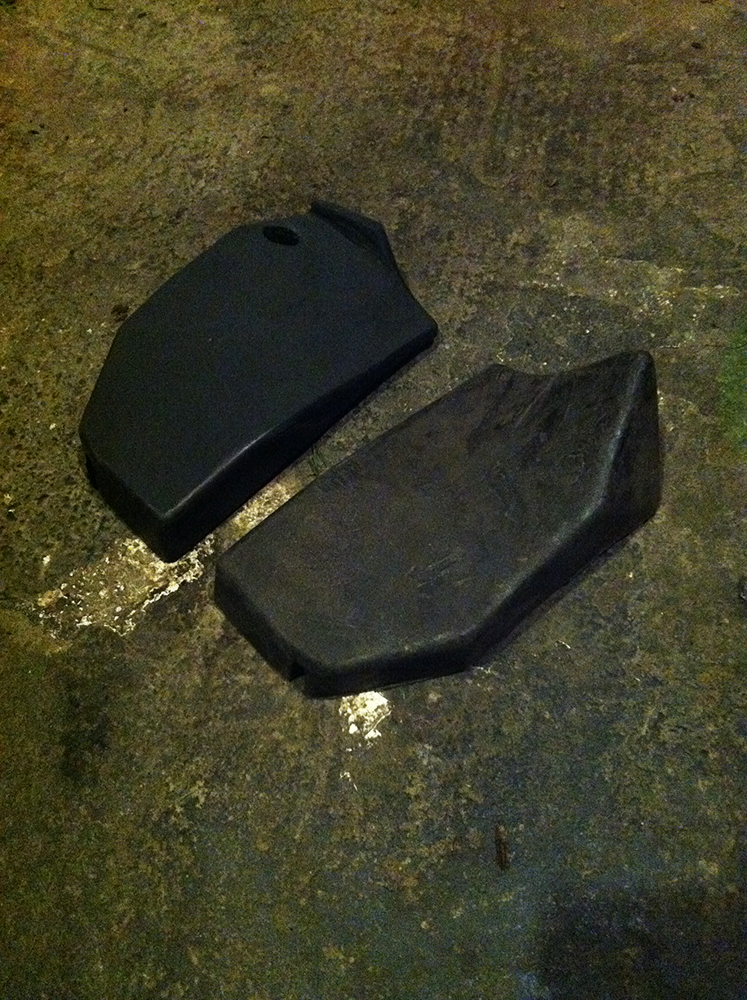
Then I cut off all of the brackets and finished the metalwork on the tank, primer is next!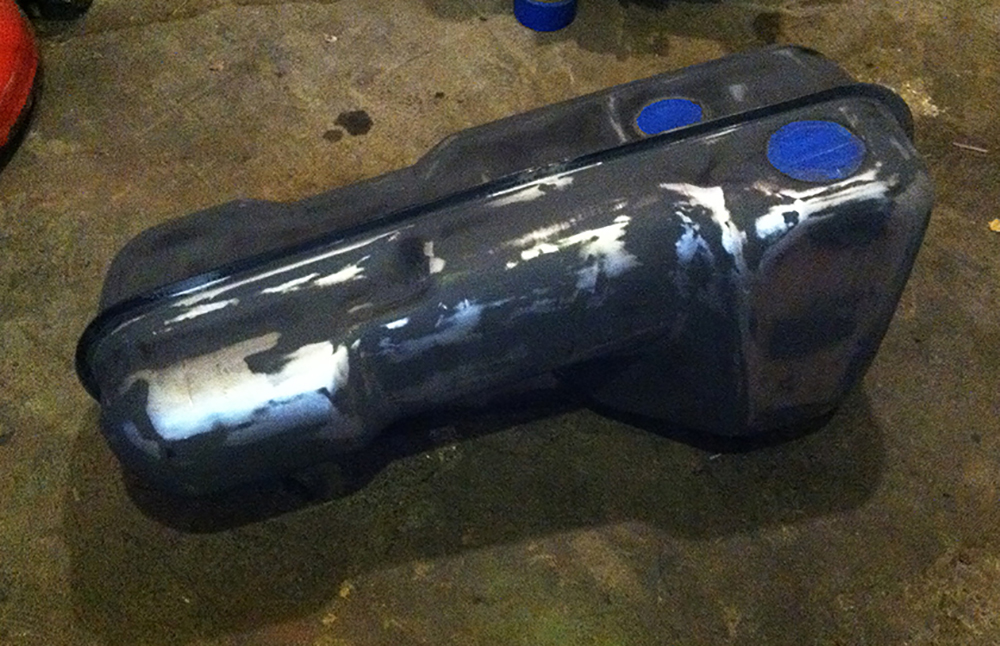
Posted by: KELTY360 Jan 1 2017, 06:42 PM
When do we get to hear that exhaust?
Happy New Year Dane!
Posted by: rdauenhauer Jan 1 2017, 10:38 PM
No front Sway bar?
Posted by: 76-914 Jan 2 2017, 09:01 AM
I am going to give the WRX fuel pump controller a shot, I didn't use it when I had the car running before, it delivers variable voltage to the pump based on engine need, and shuts the pump off after a couple seconds when the ignition is on and you haven't started the car.
I have one on my six. Apparently 2003 was the only year they were employed by the six. FP varies from 32psi @ idle to 45psi when I goose it.
Posted by: plymouth37 Jan 2 2017, 10:23 AM
No front Sway bar?
I am running a Carrera front suspension with an under body sway bar. More on that soon!
Posted by: plymouth37 Jan 2 2017, 10:26 AM
When do we get to hear that exhaust?
Happy New Year Dane!
Hopefully within a month or two!!! Going to try to drive it this year!

Posted by: plymouth37 Jan 8 2017, 05:04 PM
I primered and painted the tank.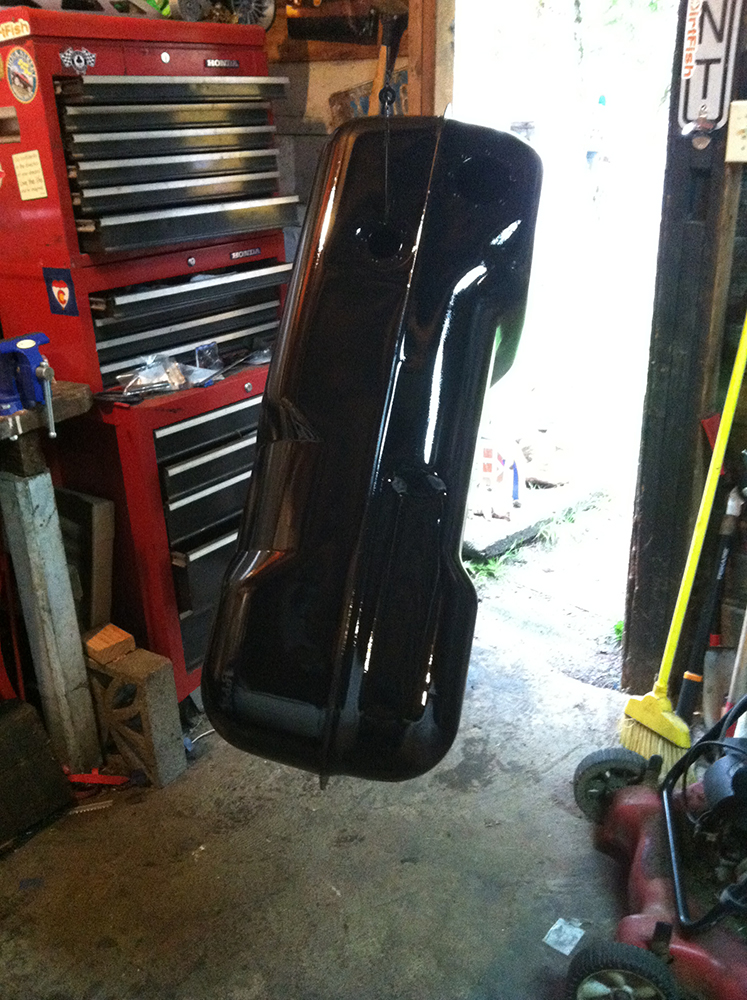
Then I installed the filler neck and repainted cap, along with the level sender. 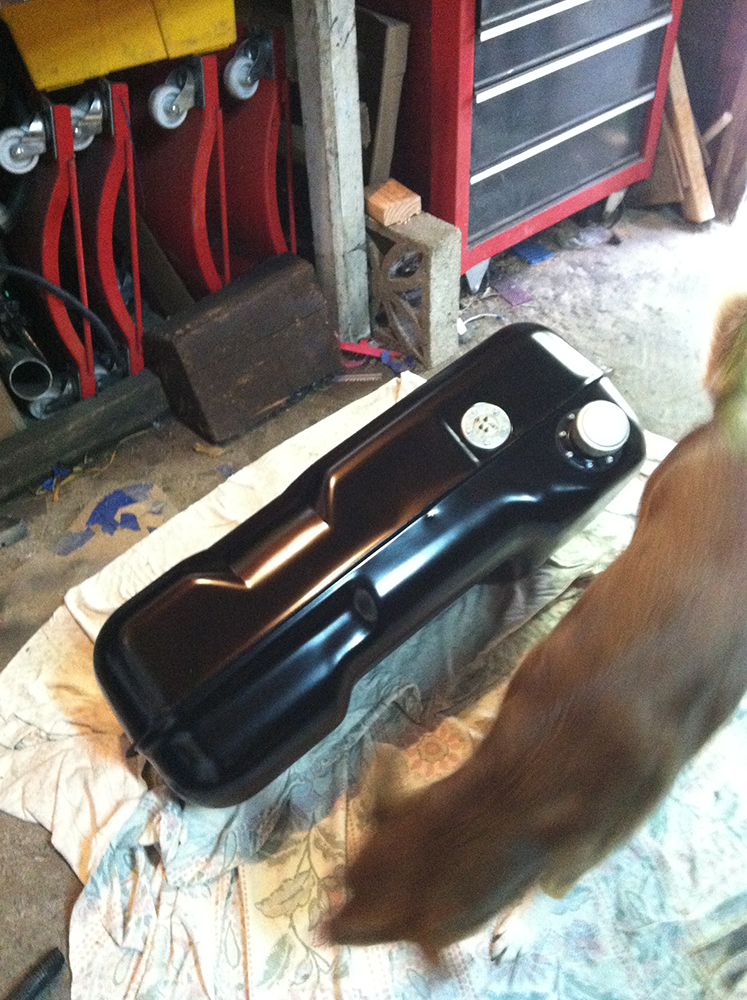
All with fresh gaskets.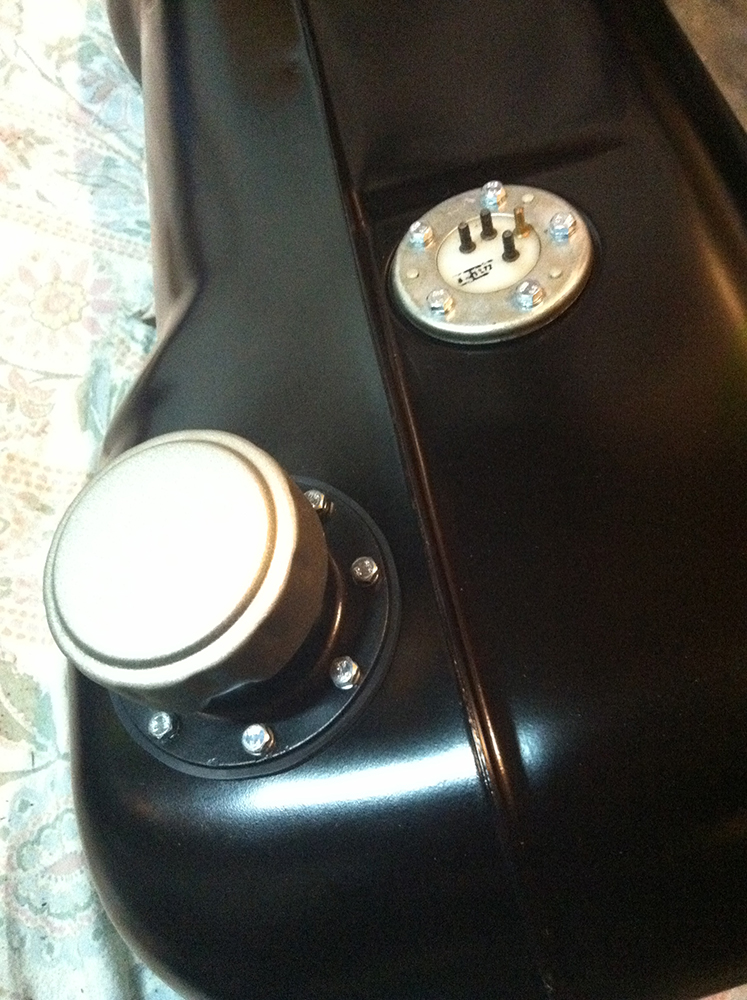
Since I am running such large fuel line I upgraded the tank fittings. 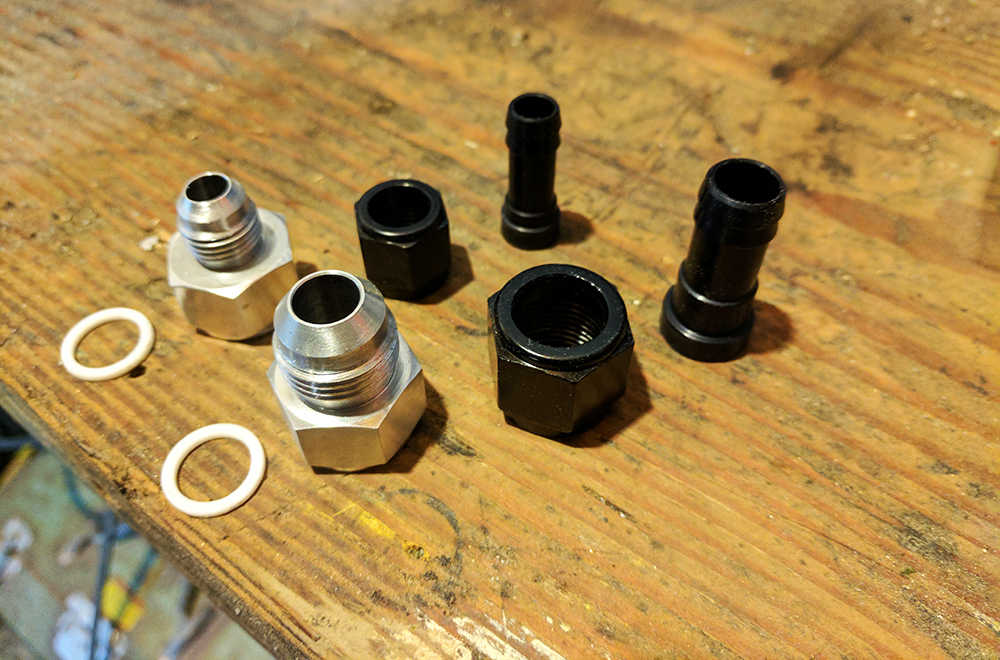
It is a vw tank thread to AN adapter to hose barb compilation. 
Posted by: plymouth37 Jan 23 2017, 12:46 AM
Now that I have shifted my focus to the front I decided to pull the front suspension.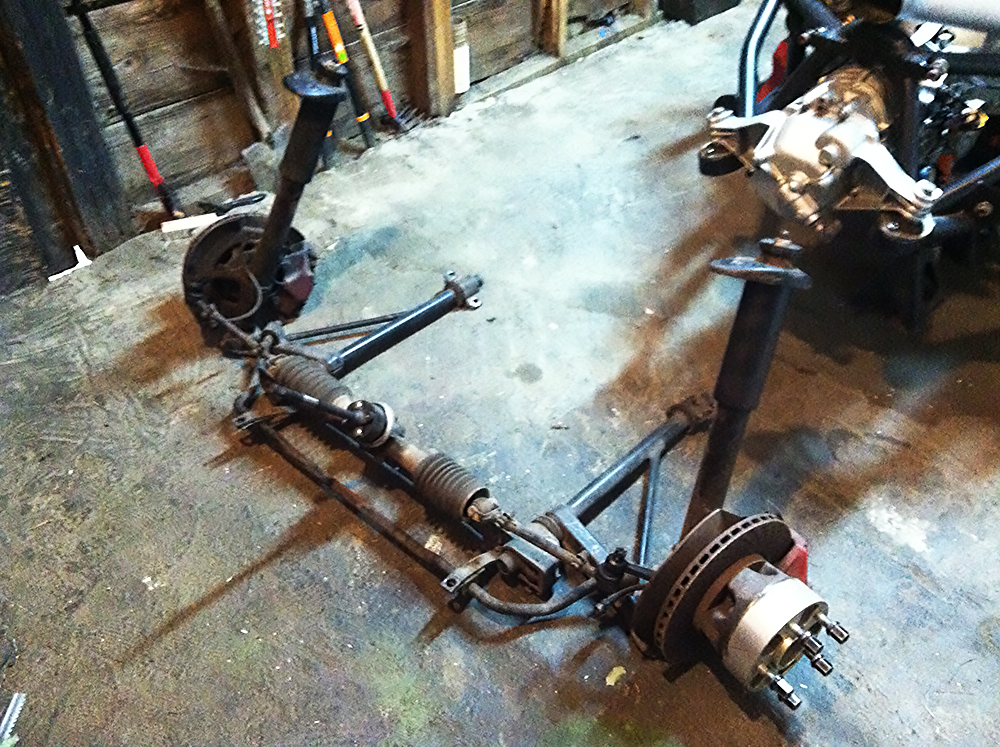
I am running an '89 Carrera suspension, I plan on disassembling, rebuilding and repainting everything, then reinstalling.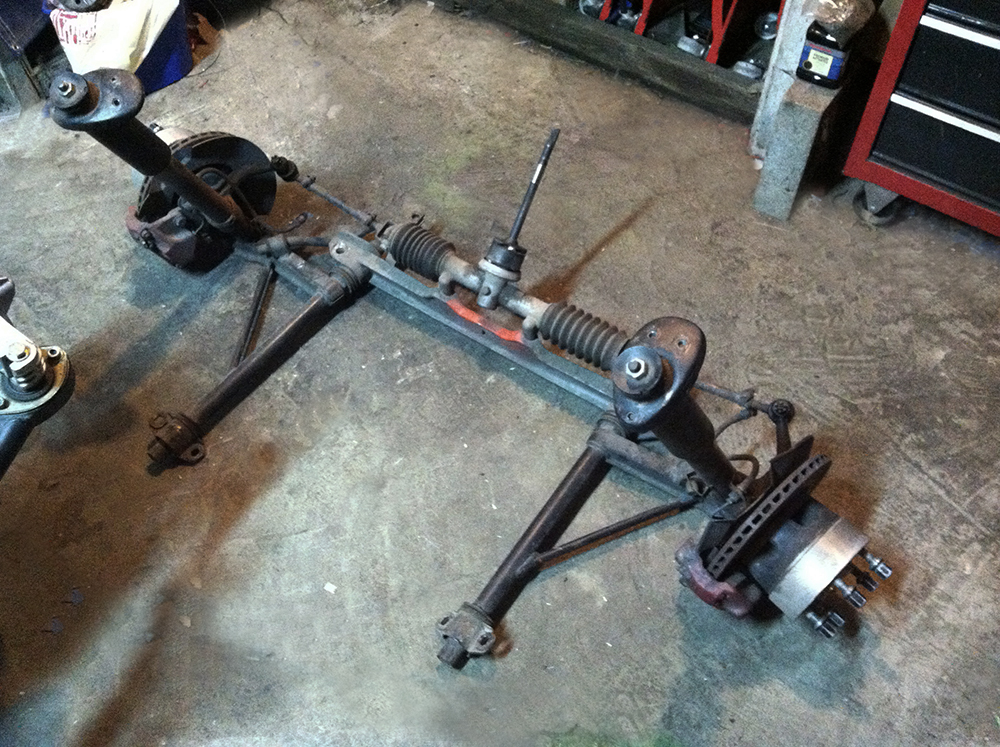
First I pulled the struts off, going to rebuild the calipers and get new disks and pads.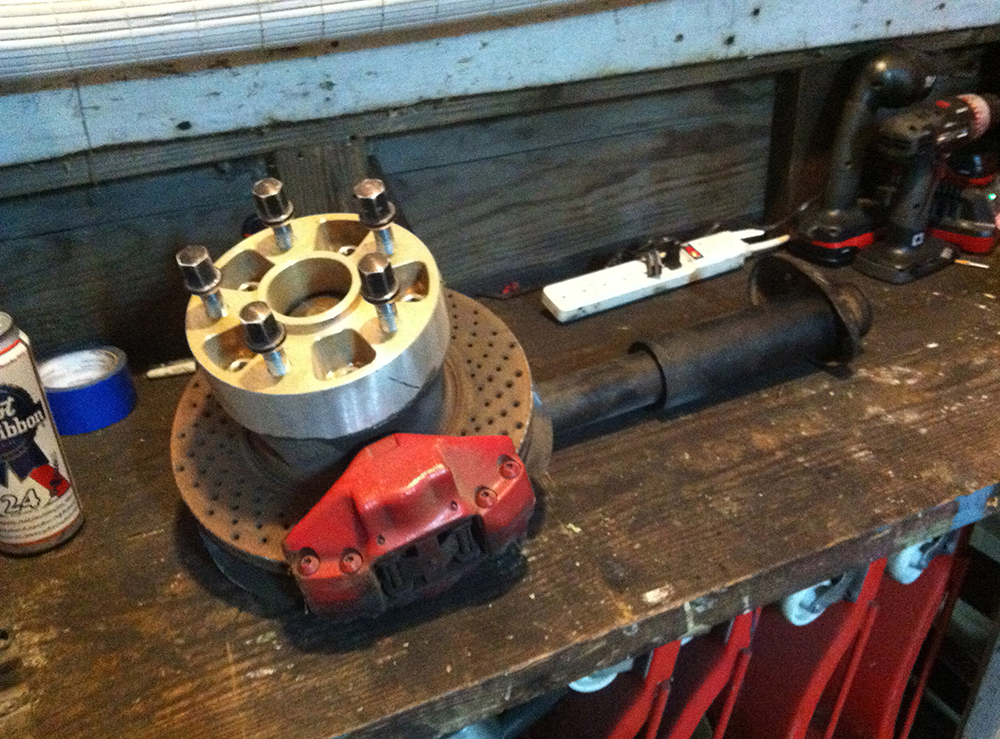
Posted by: plymouth37 Feb 5 2017, 11:33 PM
I continued breaking down the suspension.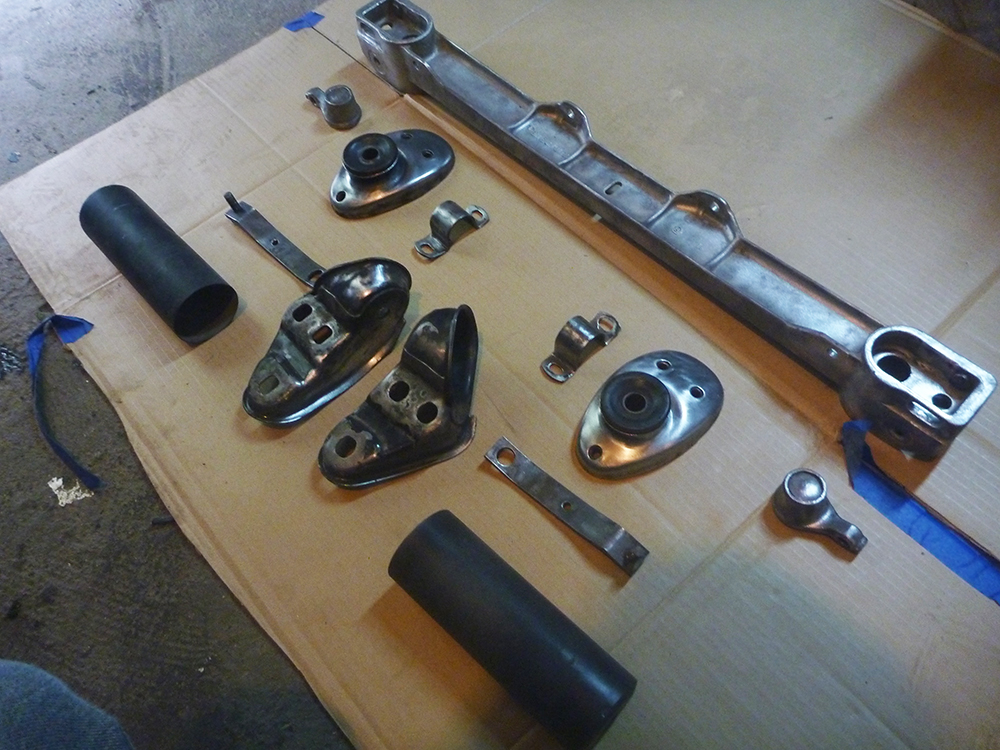
I got this batch painted, sticking with the silver and black like the rest of the car.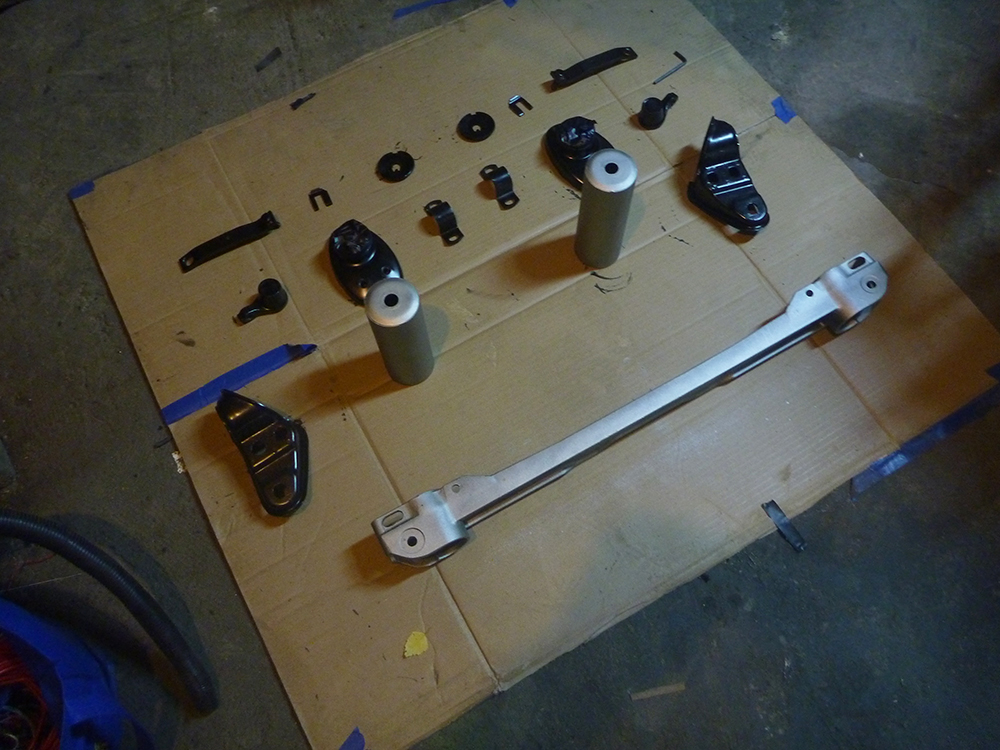
I added shrink wrap tubing to the metal tabs that hold the wiring harness under the tank, the wrapped the harness and installed it.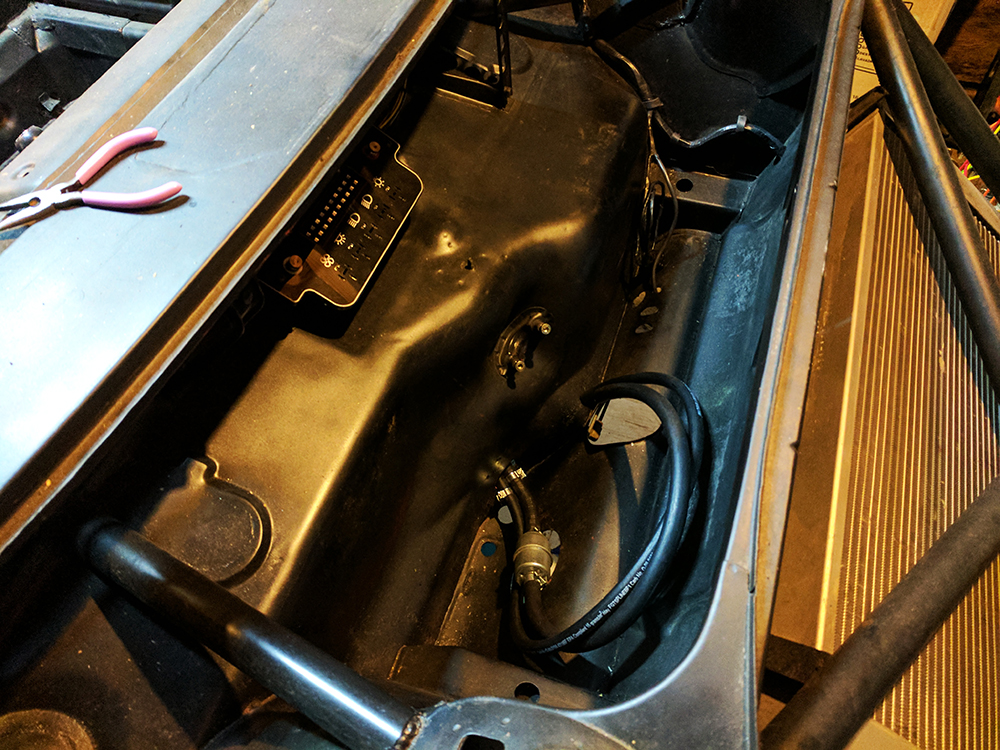
I also installed the master cylinder and the front brake lines.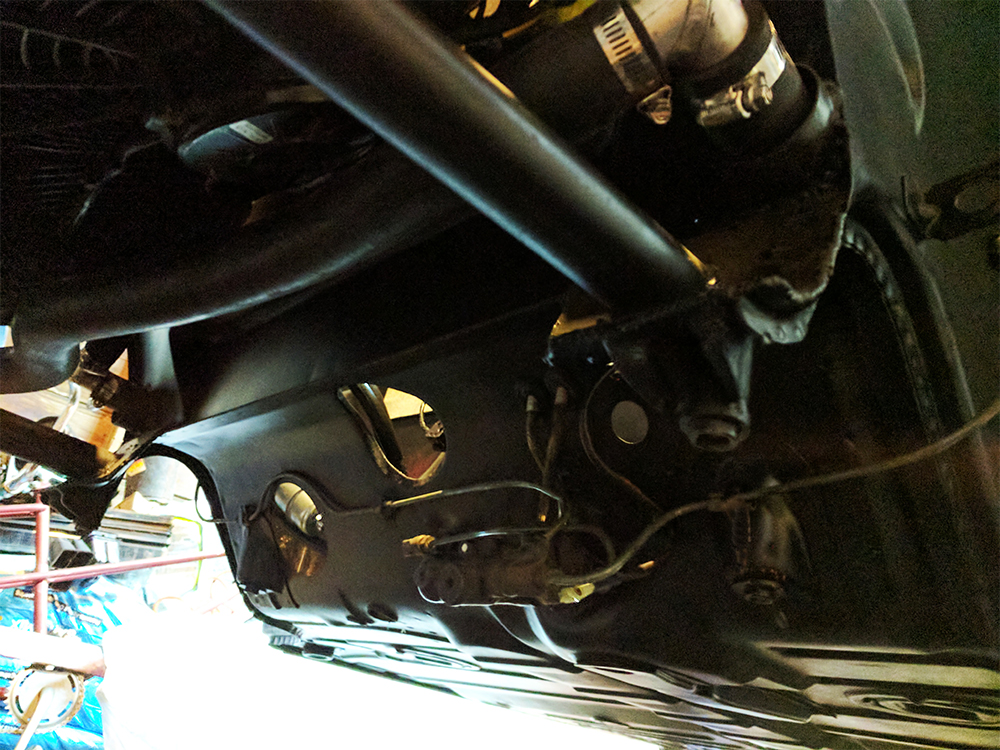
Then I freshened up the steering rack and bolted it to the re-painted cross member.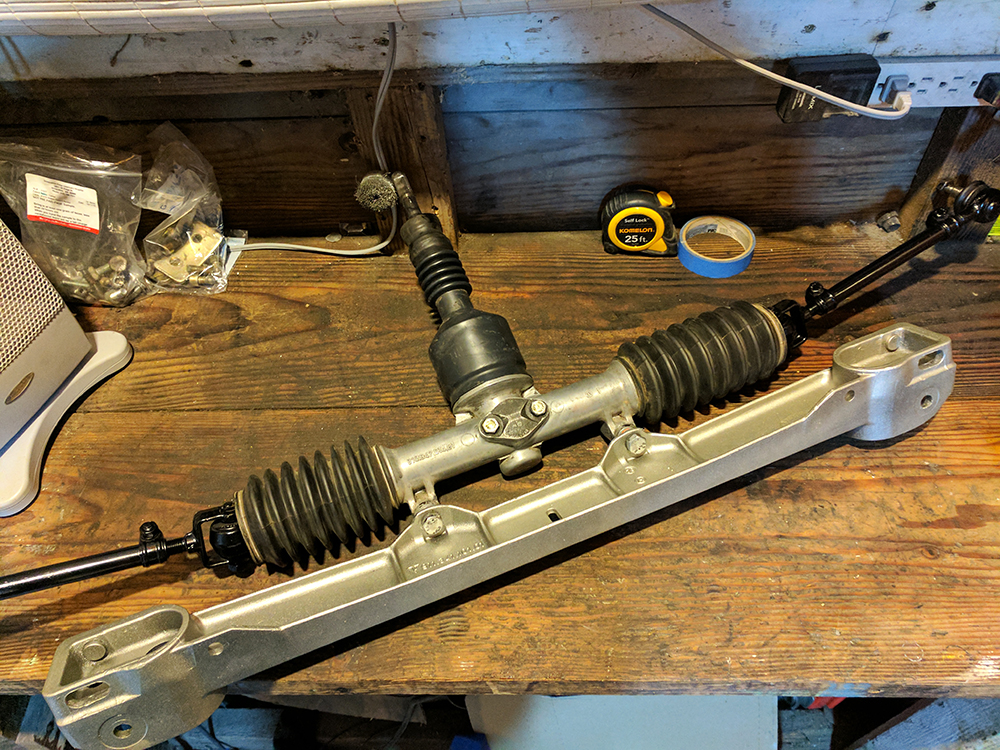
Finally I installed the steering rack and cross member, the brake fluid reservoir, and the tank brackets. Just about ready to drop in the tank!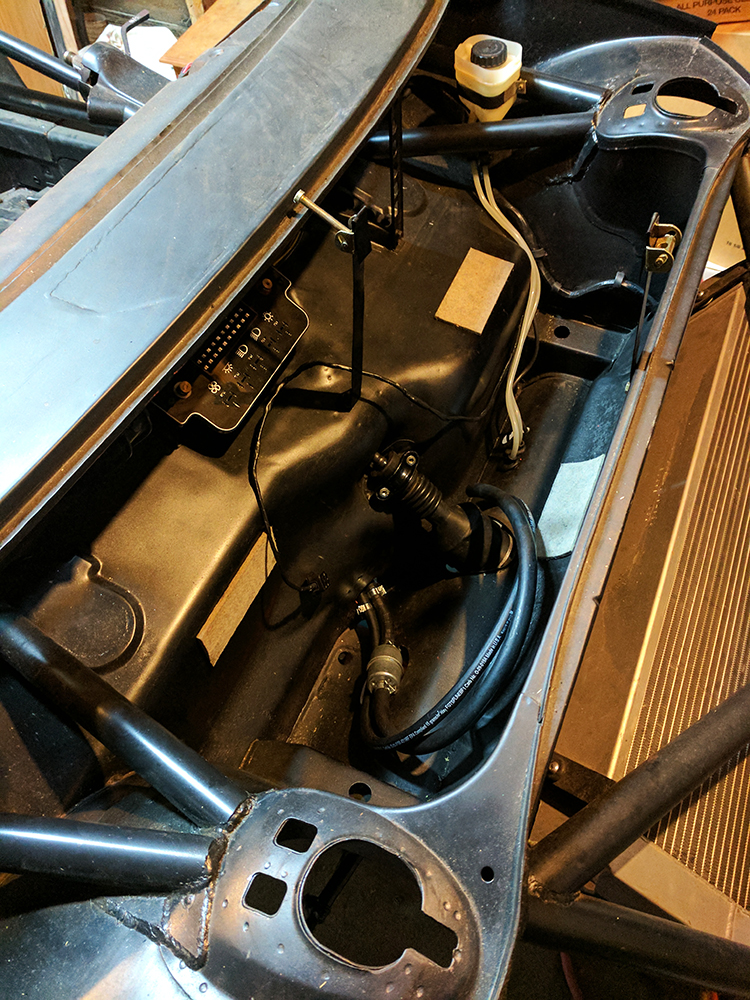
Posted by: plymouth37 Feb 18 2017, 10:54 PM
Fuel System is complete! I hooked up the feed and return lines: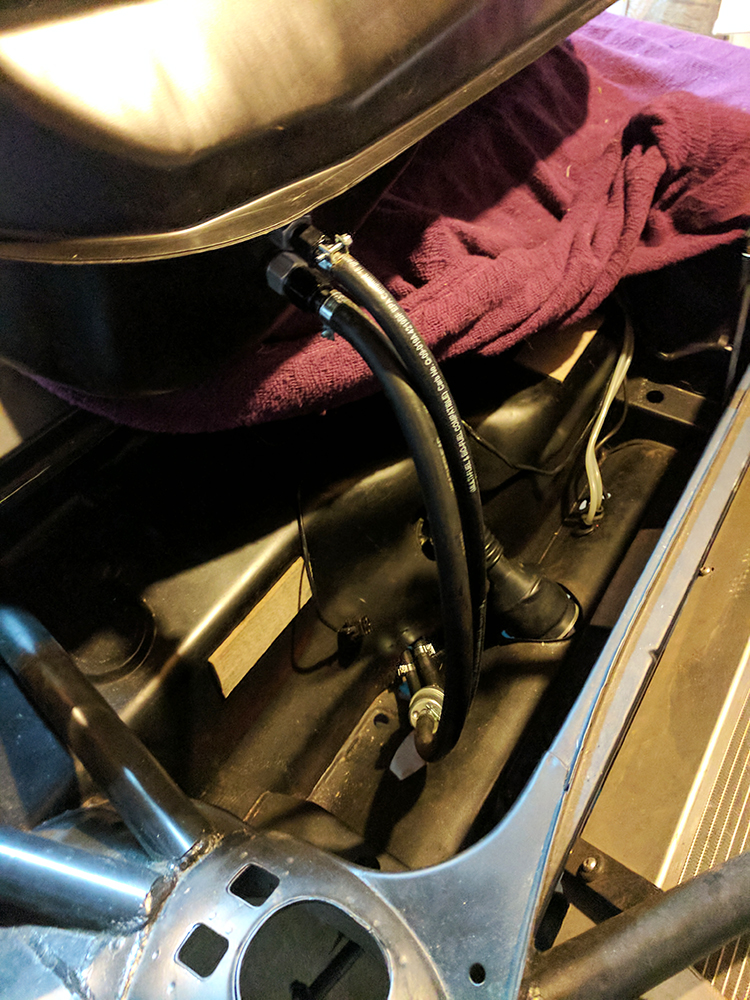
And strapped the tank down. The stripped down stock tank looks pretty good!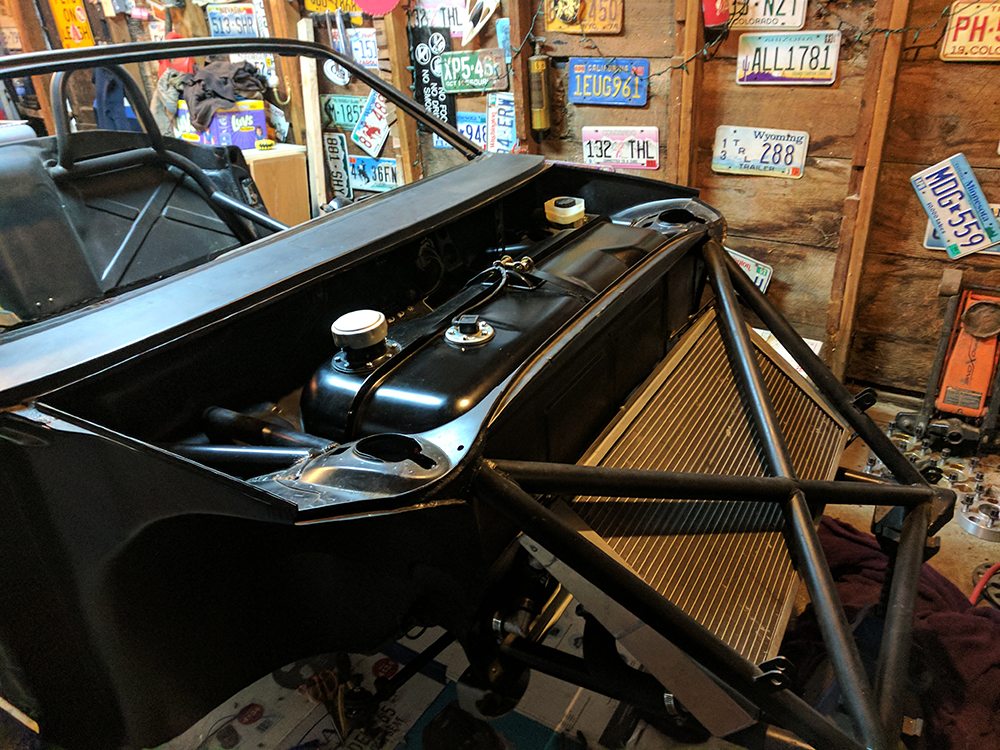
Dangerously close to starting this thing!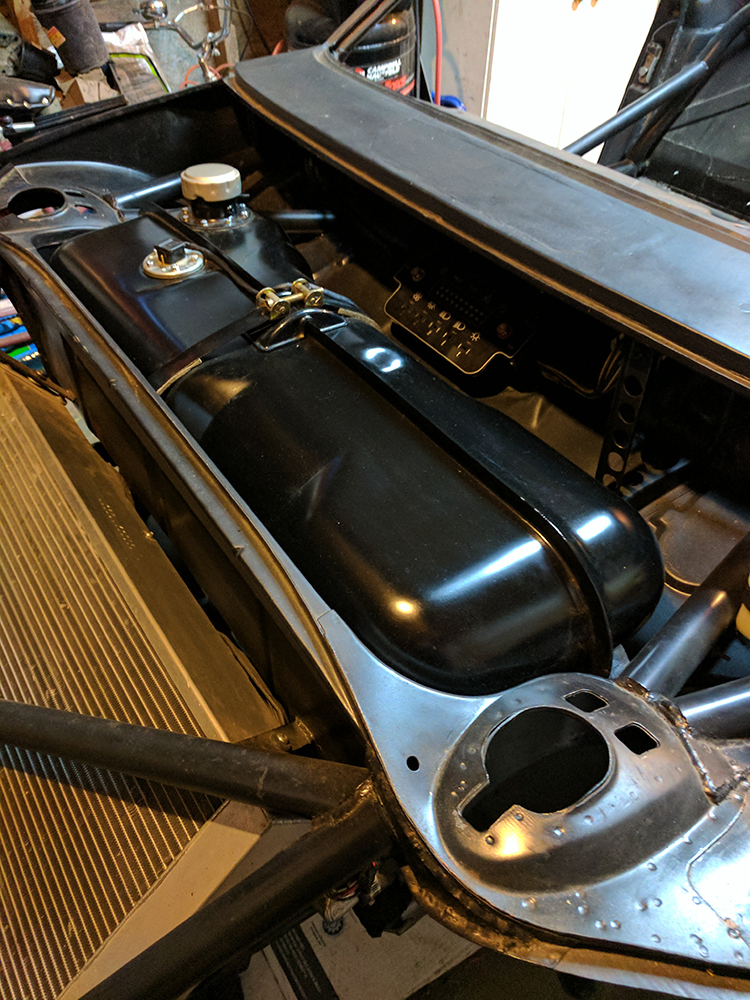
Posted by: Cairo94507 Feb 19 2017, 08:03 AM
Love this build.....
Posted by: PanelBilly Feb 19 2017, 09:23 AM
Start up party!!
Posted by: plymouth37 May 2 2017, 10:57 PM
I have been making progress over the last couple months I promise!
I have been picking away at the suspension, installing the repainted crossmember, brake master, steering rack etc...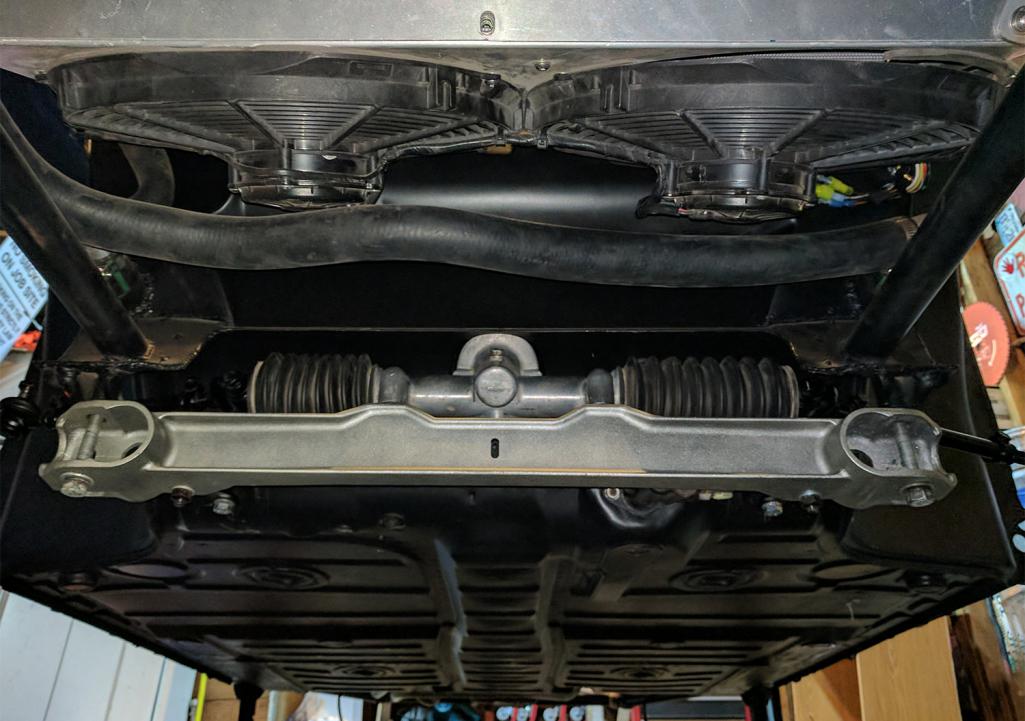
Painting and Polishing varius bits.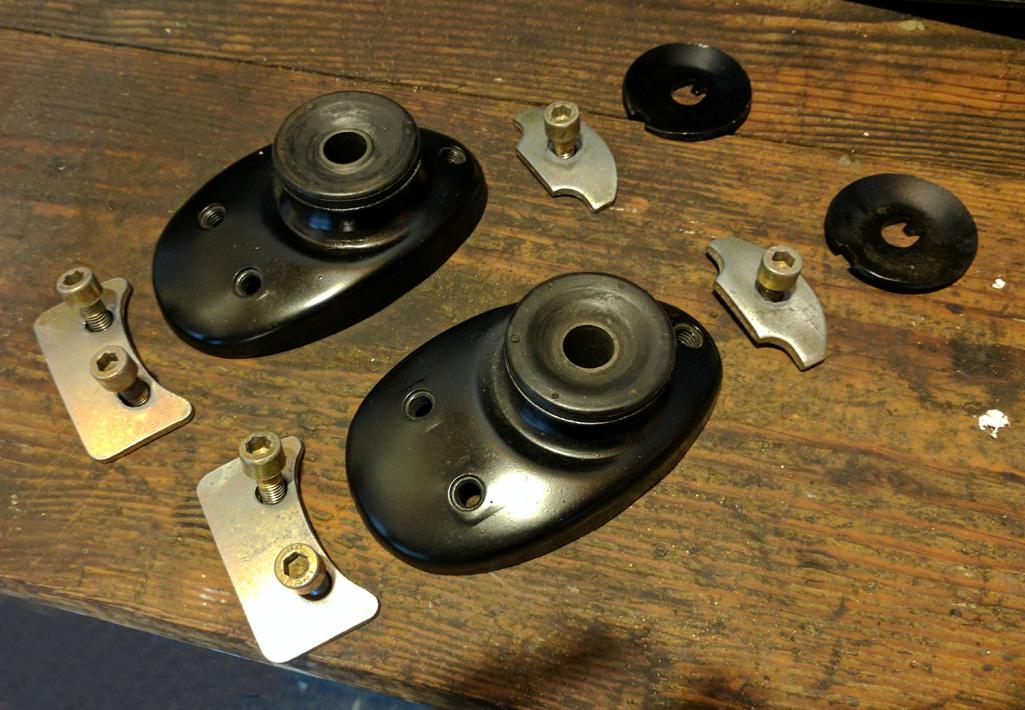
22mm carrera sway bar, stripped and ready for paint.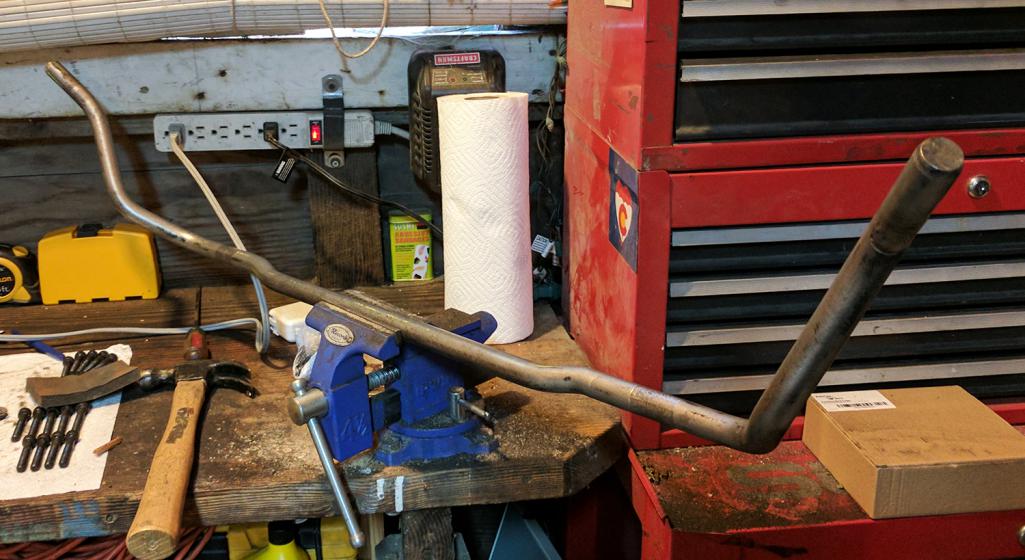
Posted by: plymouth37 May 2 2017, 11:07 PM
We have set the all time record for rainfall this year, 45" since October first, painting has become a well choreographed dance timed to the weather channel, my yard is a muddy mess!
Despite mother nature's best efforts I got the struts painted.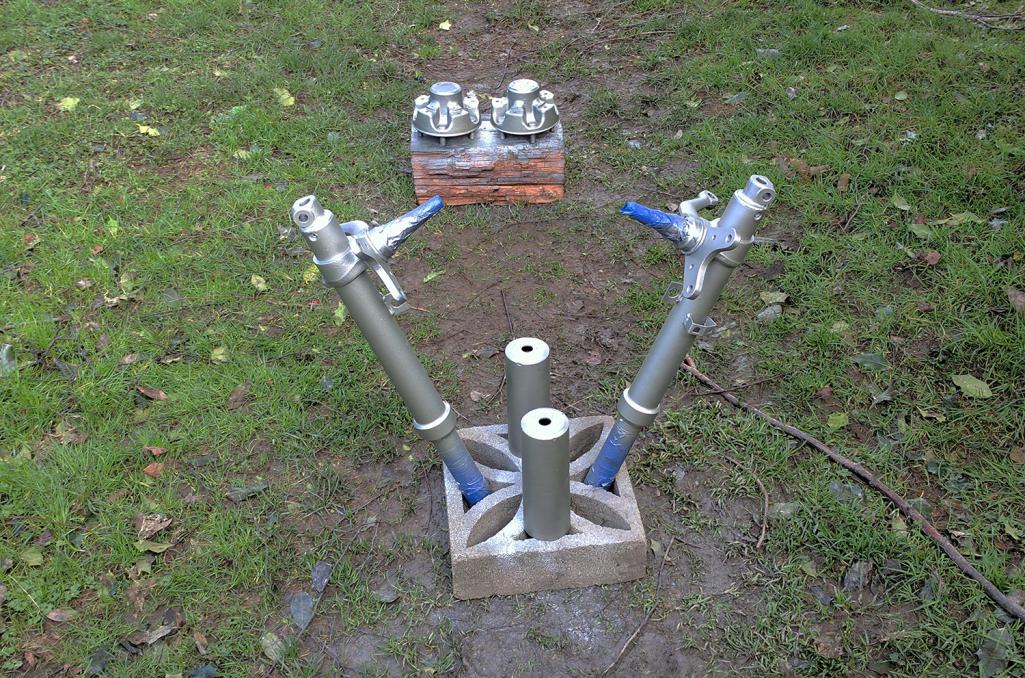
I know this will get dirty instantly but this paint is so nice!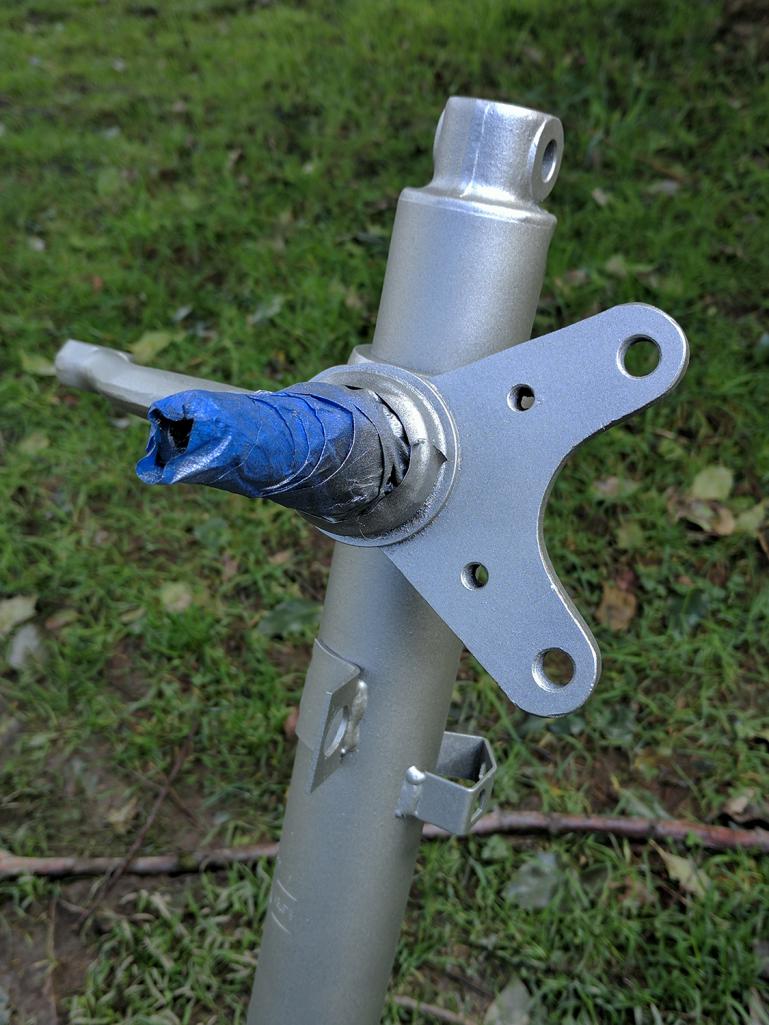
I am tackling the calipers next.
Posted by: plymouth37 May 2 2017, 11:13 PM
Other than the brakes everything is ready for install!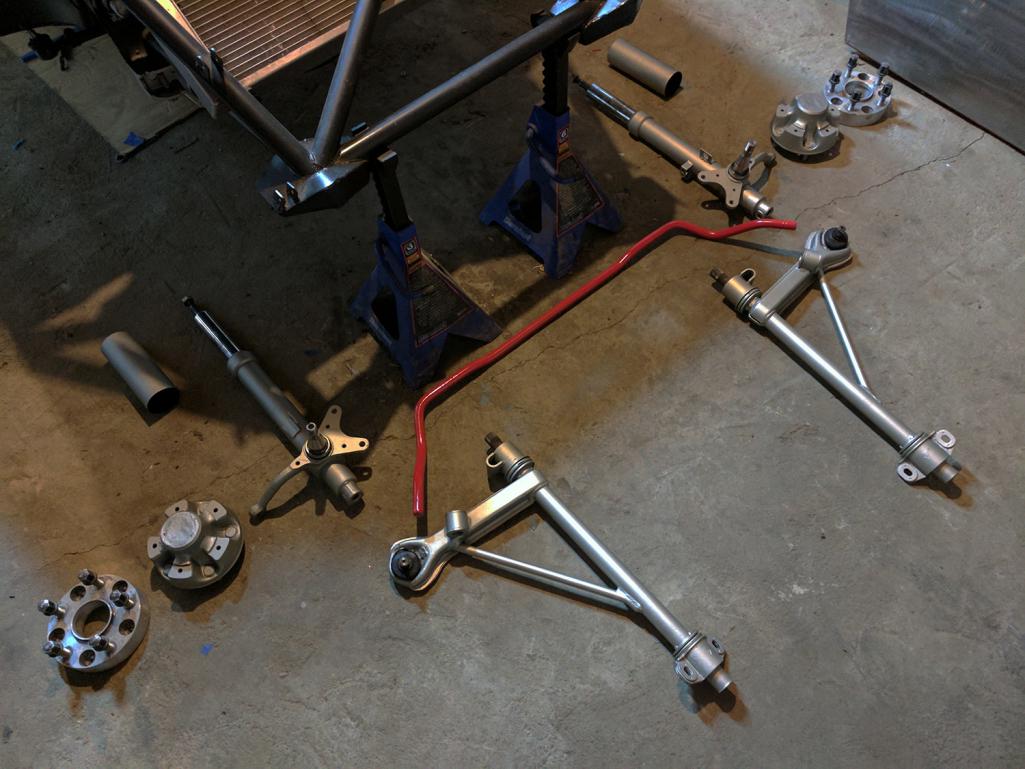
Posted by: Ferg May 3 2017, 07:53 AM
Nice as always.
Posted by: plymouth37 May 7 2017, 12:36 PM
I got the front suspension installed, still need to sort out the brakes but the rest of the suspension is ready to go.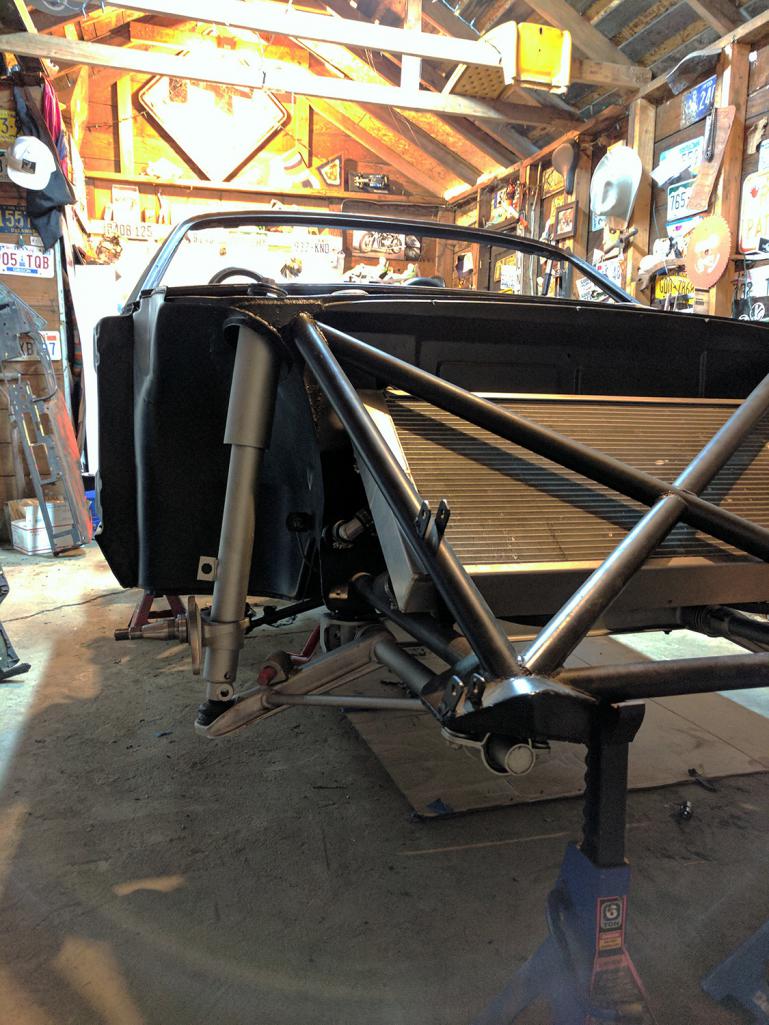
This probably looks the same to you as the last one I posted but I have reverse engineered a lot of the wiring and spliced in the fuel pump relay, tested the wiring and am pretty confident the engine wiring is ready to go.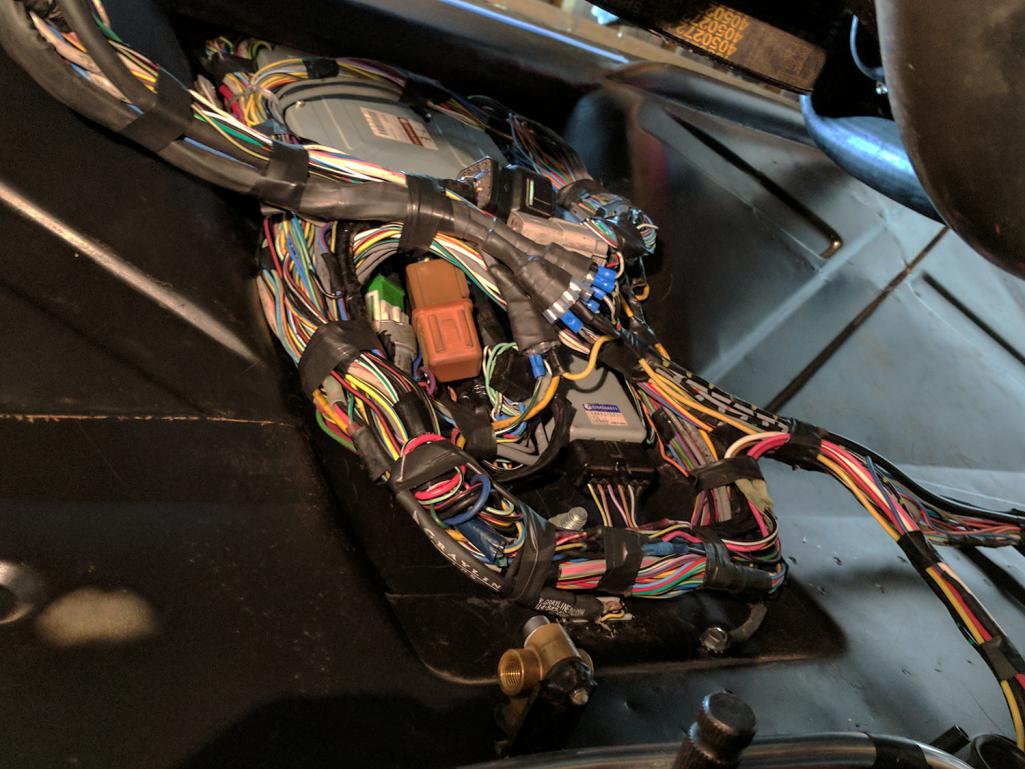
I don't think I have shown the fuel pump setup, I am running some kind 911 or 928 pump and filter mount I dug out of the junk pile at Renegade a decade ago, A 911 filter, and a 928 fuel pump, the date on it says 1988 so I might be swapping this out, we'll see how it works first. You can see the loose wires to the pump, I am not wrapping or tying down any of the wiring until i have a running engine.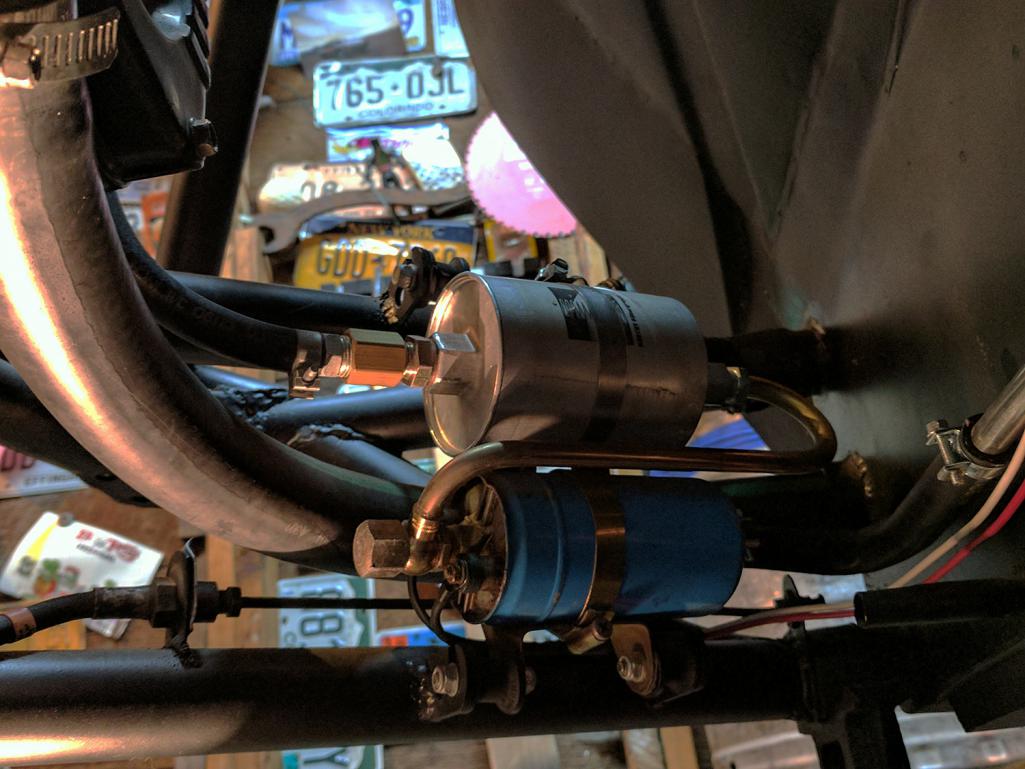
Posted by: plymouth37 May 7 2017, 12:41 PM
I also made a pretty exciting parts store run!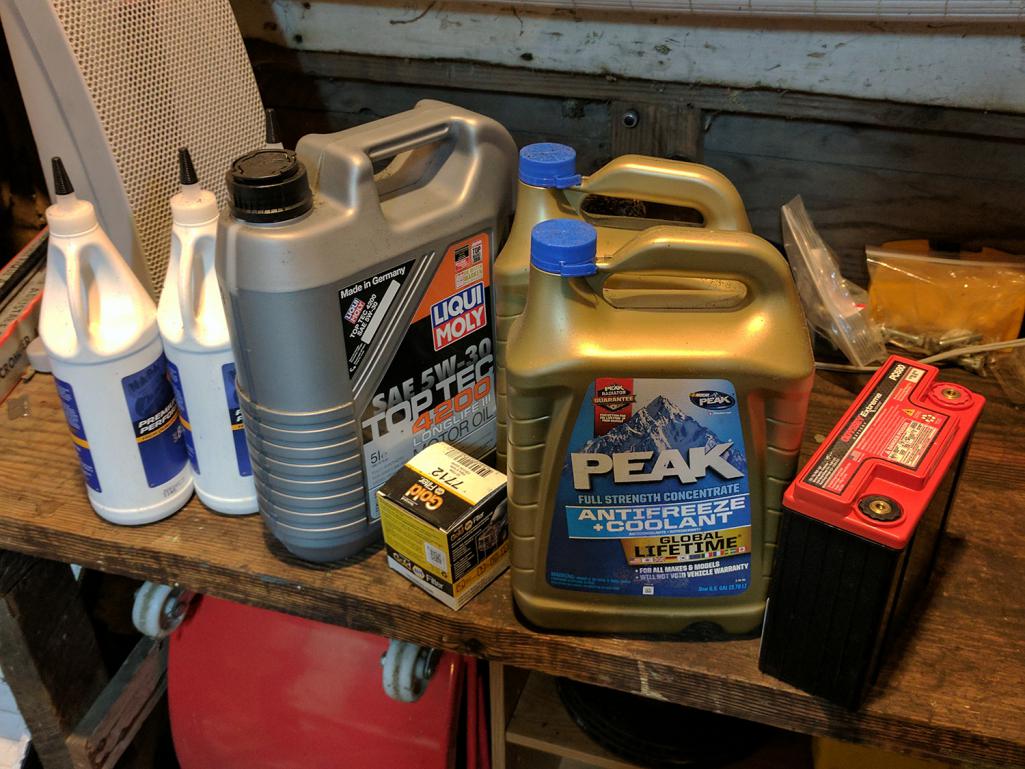
Posted by: MoveQik May 11 2017, 10:35 PM
I don't think I will ever live to see another build like this. Amazing.
Posted by: plymouth37 May 15 2017, 10:07 PM
I had mocked up the 3D printed battery mount with sheet metal screws so I riveted in some steel threaded inserts as a more permanent solution. 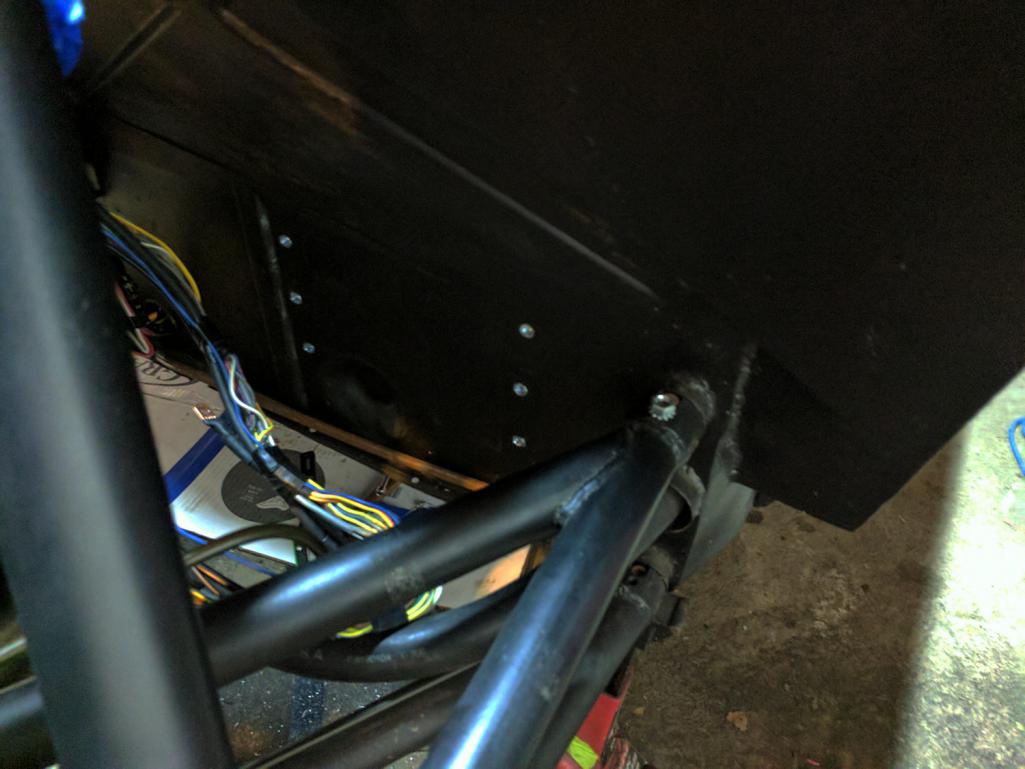
Real Battery is in.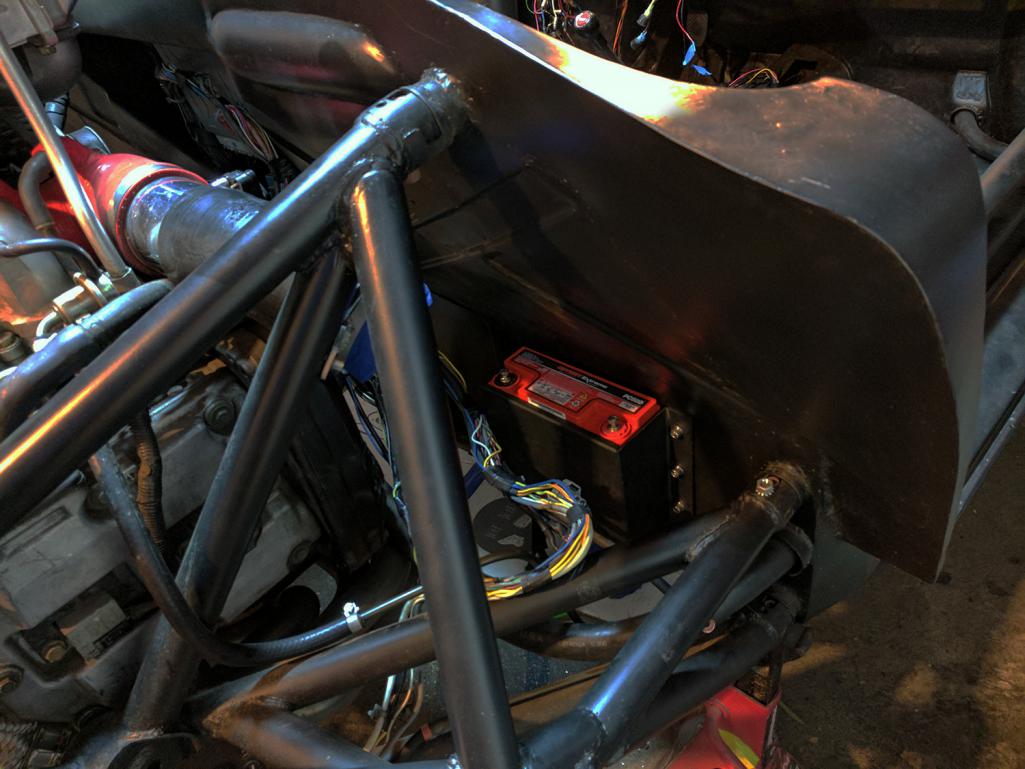
Engine oil and tranny has been changed.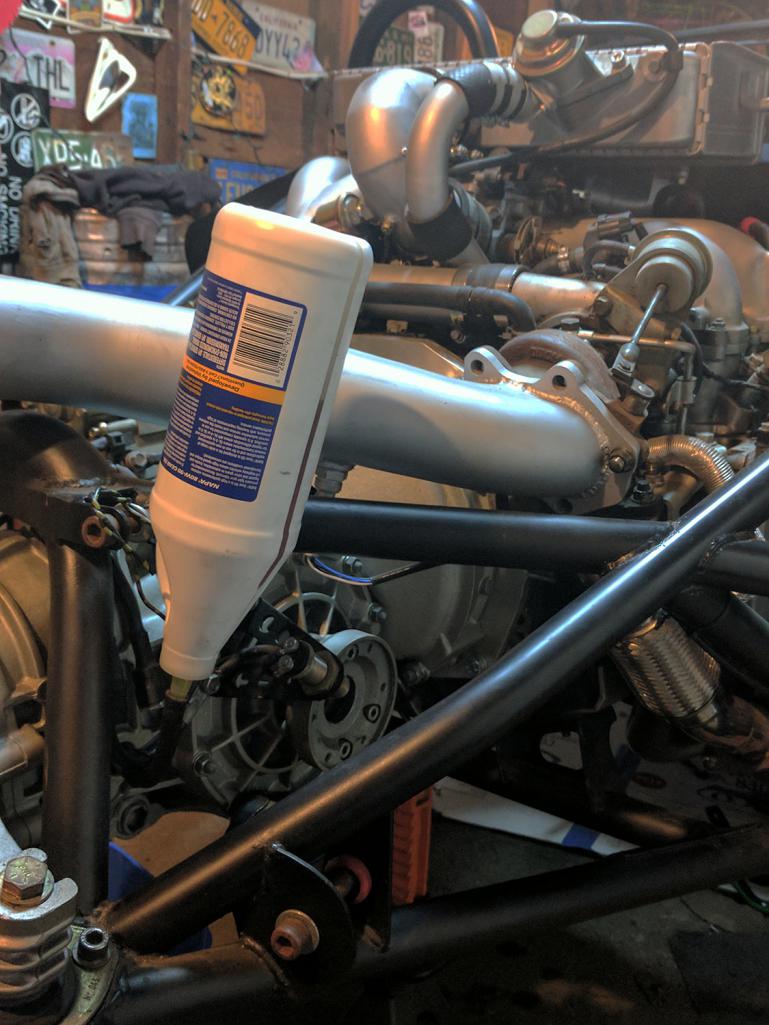
Posted by: plymouth37 May 15 2017, 10:29 PM
I repainted the trailing arms and installed them, Renegade axles in as well.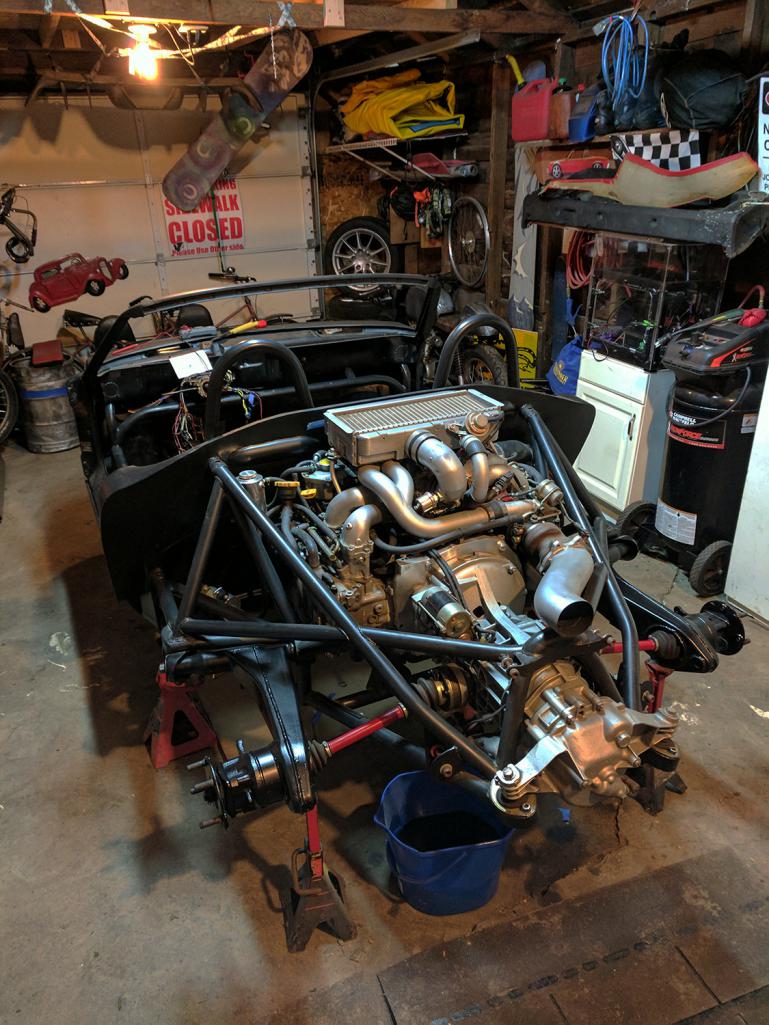
Suspension is mocked up, still some work to do here, bushings, hardware etc...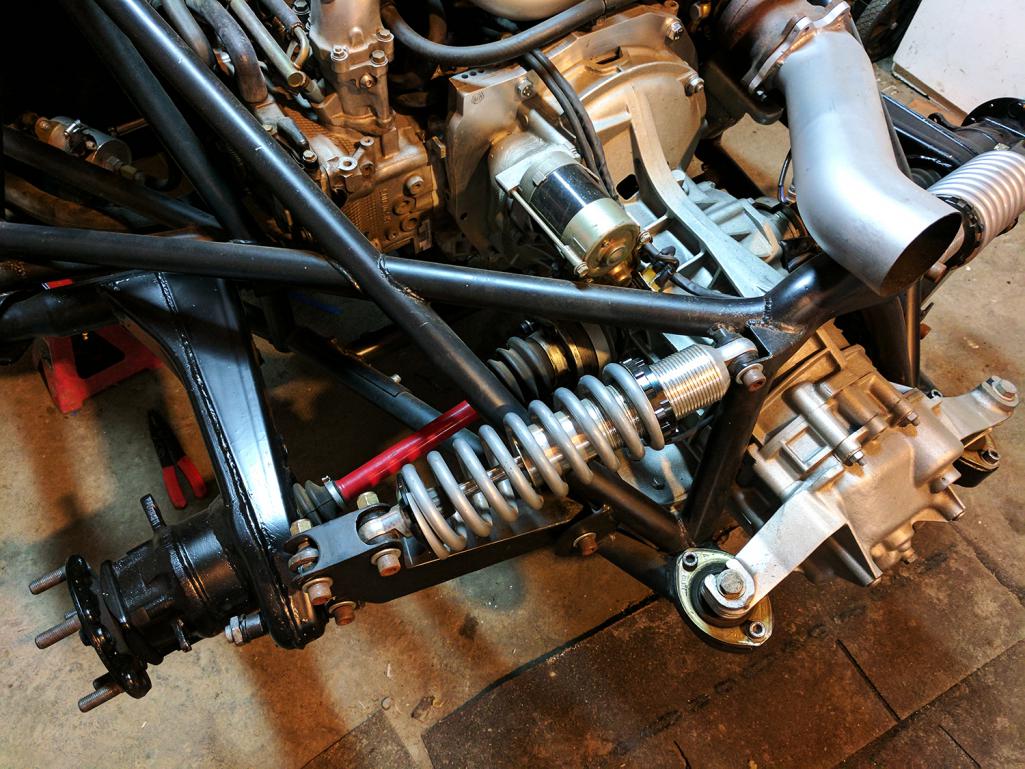
Okay, now we are getting somewhere!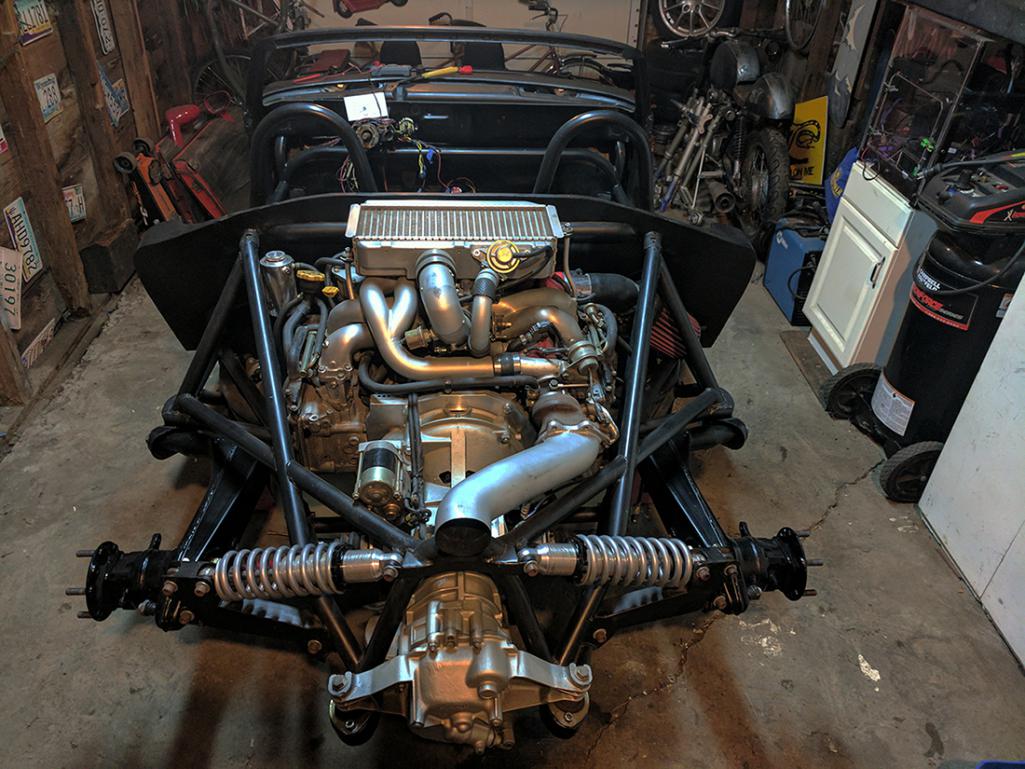
Posted by: r_towle May 15 2017, 10:33 PM
I am glad you kept on this one! Great project and some innovative ideas! Keep it up, you are getting close.
Posted by: rhodyguy May 16 2017, 08:47 PM
That's really cool. I don't think it will be loud enough.
Posted by: plymouth37 May 20 2017, 12:03 AM
I got the battery wired up.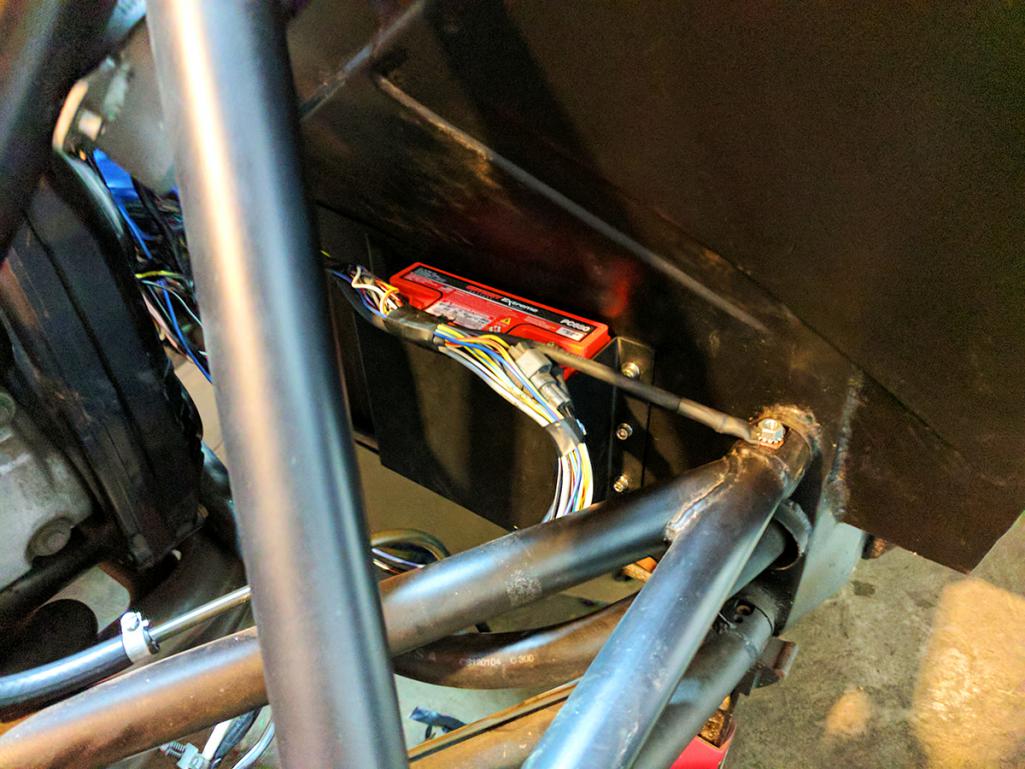
Then re-installed the air filter, hiding everything.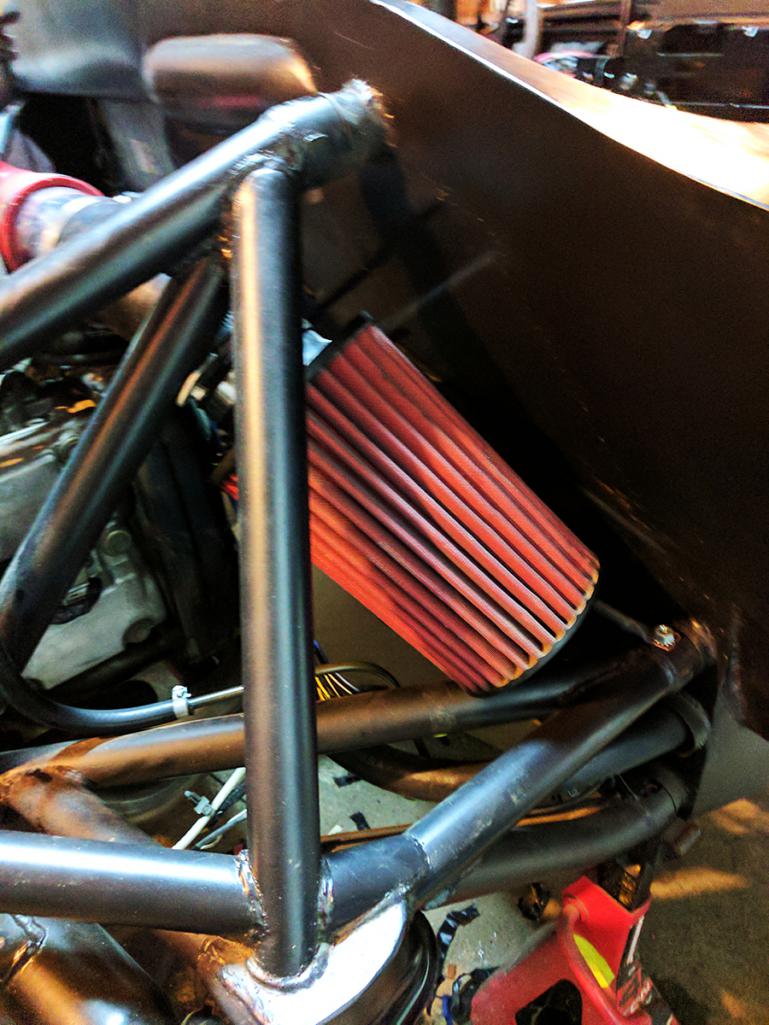
Posted by: flmont May 20 2017, 12:53 PM
Hi Plymouth37,...Your Build is pretty incredible,..I would like your opinion on the Renegade cradle,..is it a good fit ,or did U need to re-work it..a little,..Thanks, !! Frank
Posted by: plymouth37 May 24 2017, 10:33 PM
Hi Plymouth37,...Your Build is pretty incredible,..I would like your opinion on the Renegade cradle,..is it a good fit ,or did U need to re-work it..a little,..Thanks, !! Frank
Hi Frank,
We designed the renegade cradle to be a direct bolt in, no cutting required if I remember correctly. Haven't been in touch with them for years but I was pretty happy with the fitment on the half dozen or so cars I installed them on. The jig was based off of this car, before I cut it in half...
Posted by: plymouth37 May 24 2017, 10:49 PM
Can anybody spot the problem with this picture? Somehow the Carrera suspension I bought and ran years ago had one "A" caliper and one "Wide A" caliper I must have known about this and forgotten... The difference is a 7mm vs an 11mm spacer between the two halves. I decided to keep the one Wide A and order another one for the other side.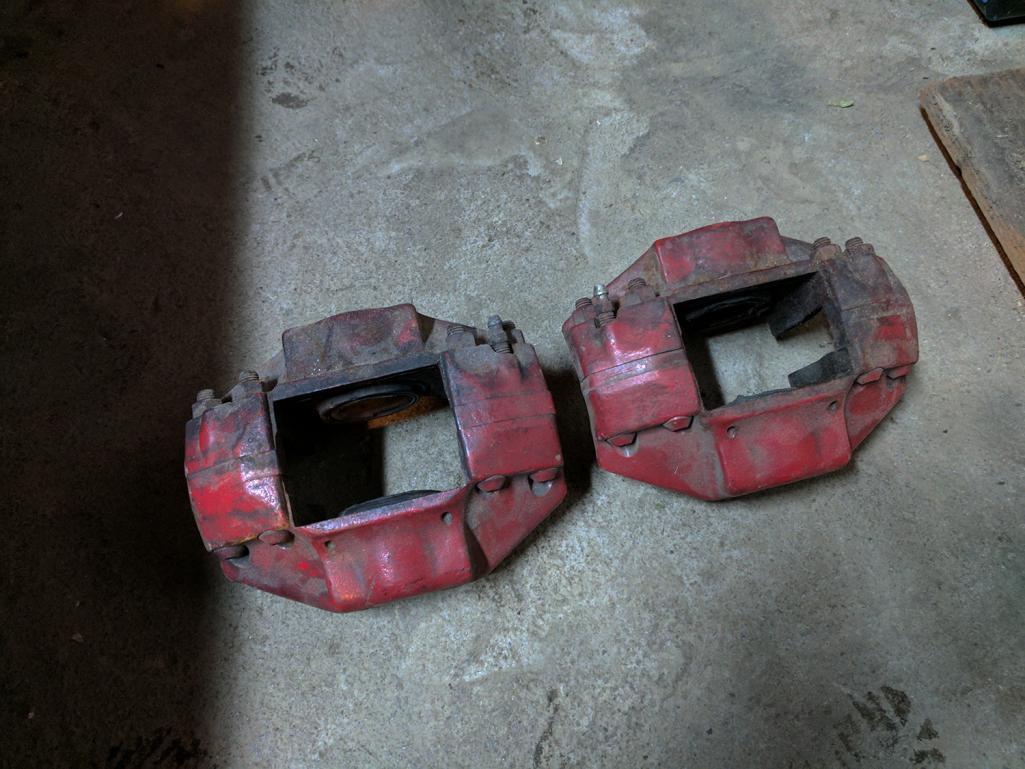
It turns out the right side Wide A calipers are near impossible to source while the left side is cheap and plentiful, of course.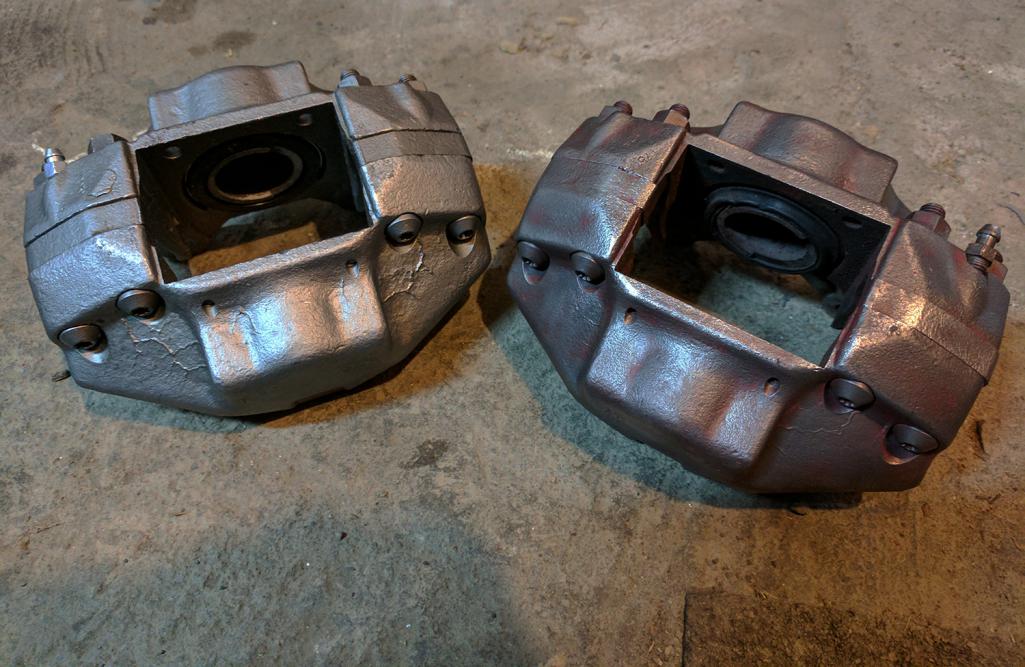
This caliper, from a very tired mold with incorrect hardware arrived after a 5 month backorder, but not being in a hurry was a plus, it was only $65! I stripped the other Wide A I already had to match the new one.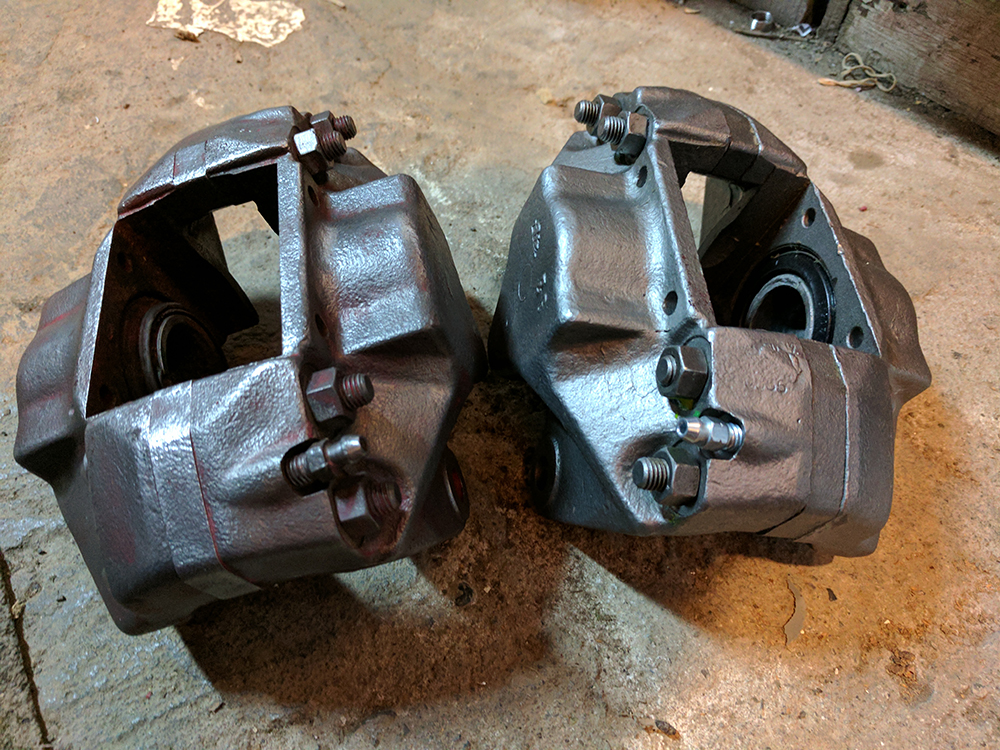
Posted by: plymouth37 May 24 2017, 11:00 PM
I stripped the rear calipers as well, still running the 914 brakes back here, mostly because of the parking brake.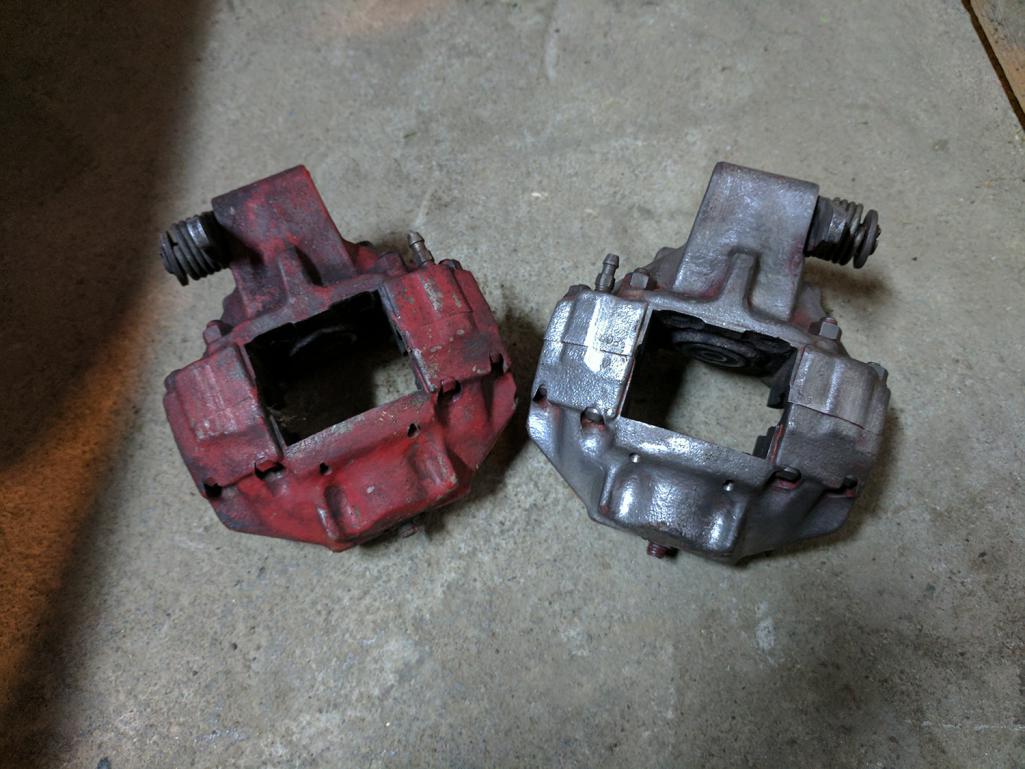
Then I finished them off with 1000 degree enamel.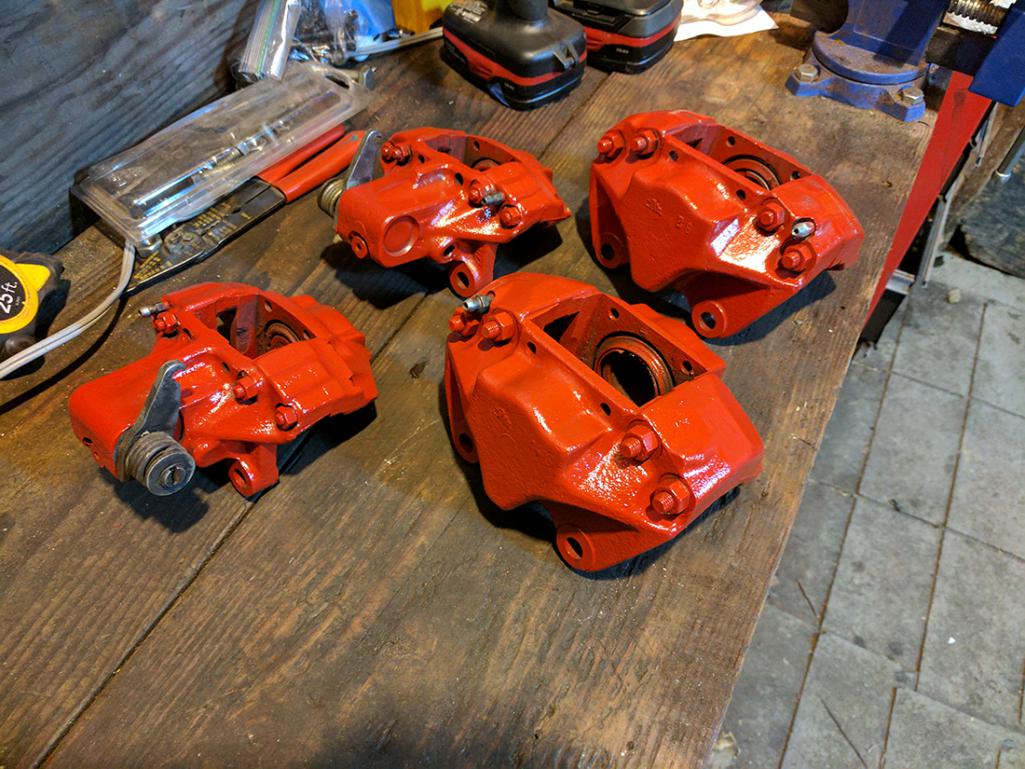
Posted by: Curbandgutter May 25 2017, 08:06 AM
Dane I love your build. You stepped out of the box then turned around and lit the box on fire!!! Love your work man. It has been an inspiration for my build. You're almost there. But do we really get there? It's a limit problem.
Posted by: barefoot May 25 2017, 11:42 AM
Those rear springs look like a very highly loaded set-up with such low angle attachment, do you have a straight on rear view or a kinematic analysis of the loads ??
Posted by: plymouth37 May 25 2017, 01:10 PM
There is more discussion on this starting around page 32 of this thread, but this gives the gist of it, there is more of a mechanical advantage on the spring than the original, I doubled the springs to 400 lbs, this is totally unproven, just like the rest of the car, just need to thrash it around and see what happens!
Posted by: plymouth37 May 25 2017, 11:23 PM
I wanted to do a test crank on the engine, still no gas in the tank, but a step towards running! I plugged in the master fuse and the ignition fuse.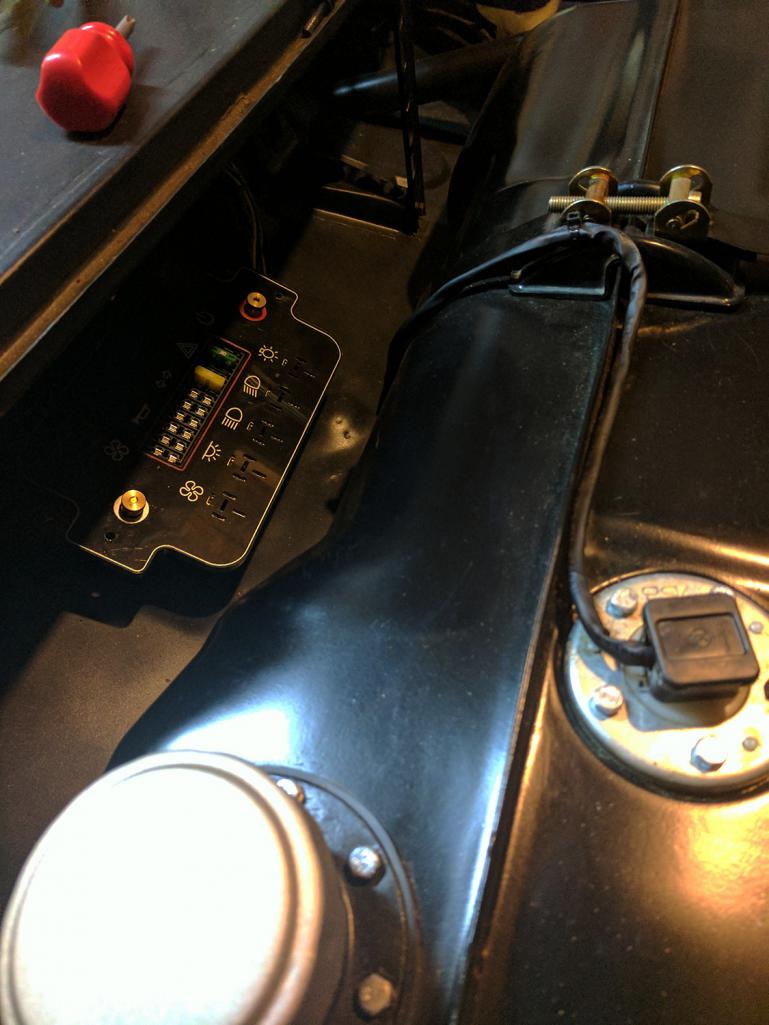
And as you can see things did not go as hoped... on the bright side, I now know it takes less than 15 minutes to pull the turbo! Check out the stream of oil running out from under the car!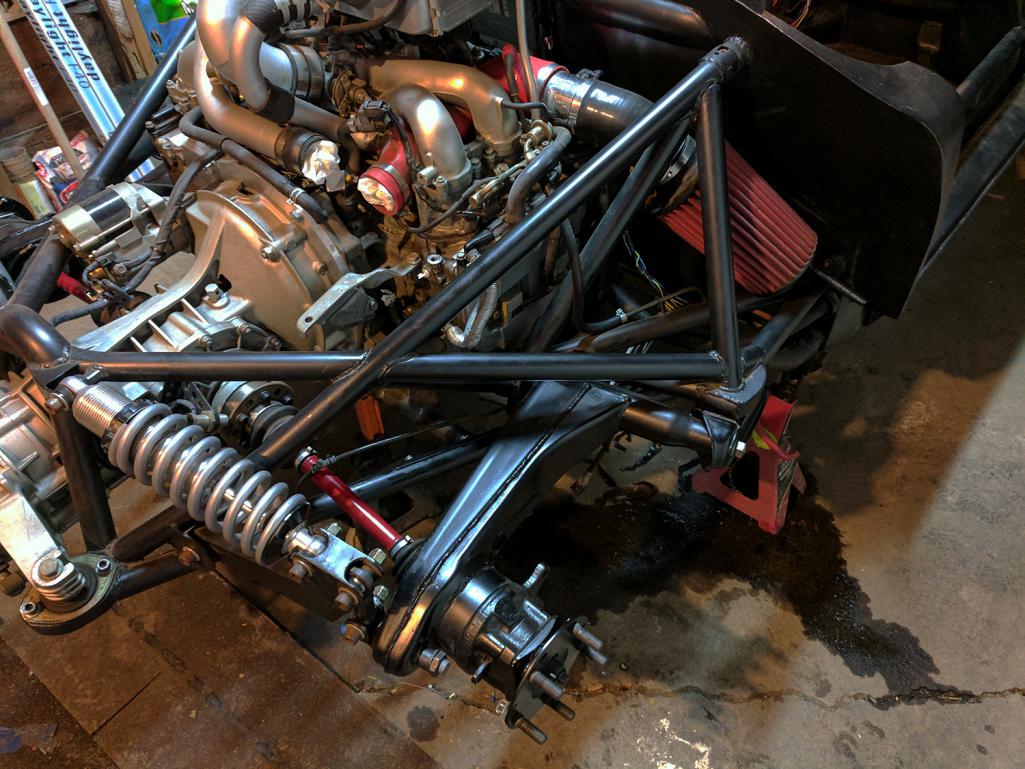
Here is the culprit, stripped turbo oil feed line threads in the head, from what I found this is a pretty common issue, I am pretty sure I can get a helicoil in there, bummer!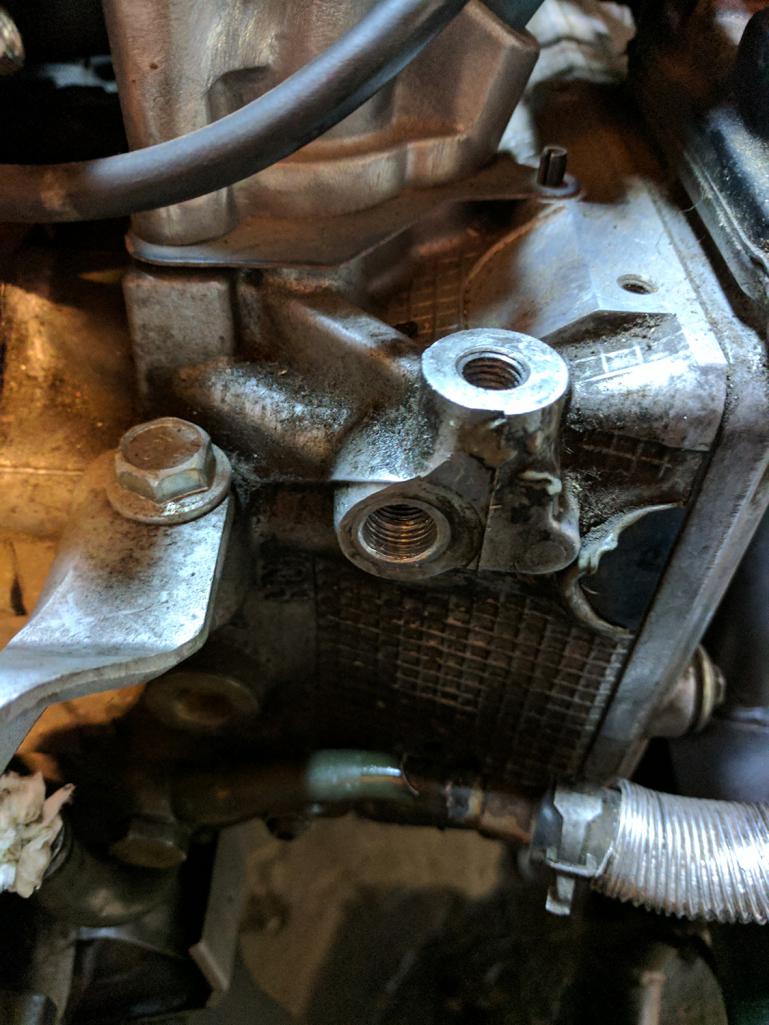
Posted by: PanelBilly May 26 2017, 07:47 AM
Tell me that you will plan a party around the first start!
Posted by: KELTY360 May 26 2017, 03:59 PM
On the bright side, at least you didn't leak any smoke out.
Posted by: flmont May 26 2017, 09:46 PM
Plymouth37 Thanks for the cradle info, Being that I can't weld,..I will have to order one,..I just happen to see it installed on your car,..how close to finishing are you ..??
Posted by: plymouth37 May 28 2017, 04:31 PM
I bought a Helicoil kit, the Banjo bolt is a 10mm X 1.25, so I am putting in a 12mm Helicoil, the inner thread diameter is 10mm.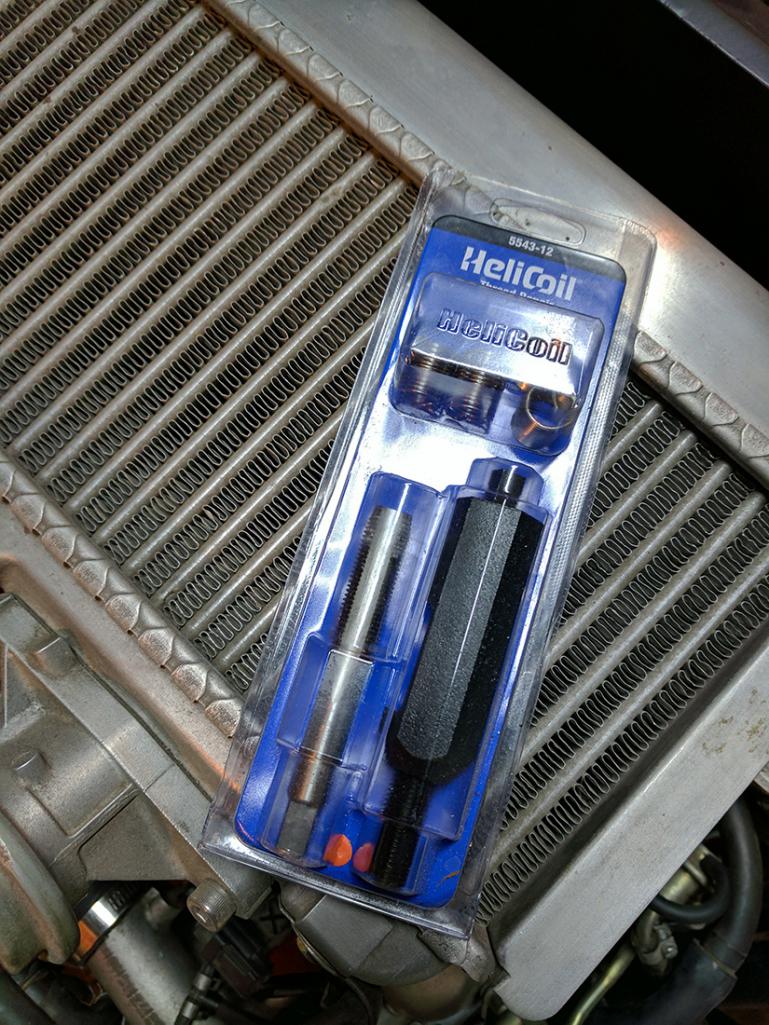
I think I got it installed correctly, no shavings in the head, good clean threads.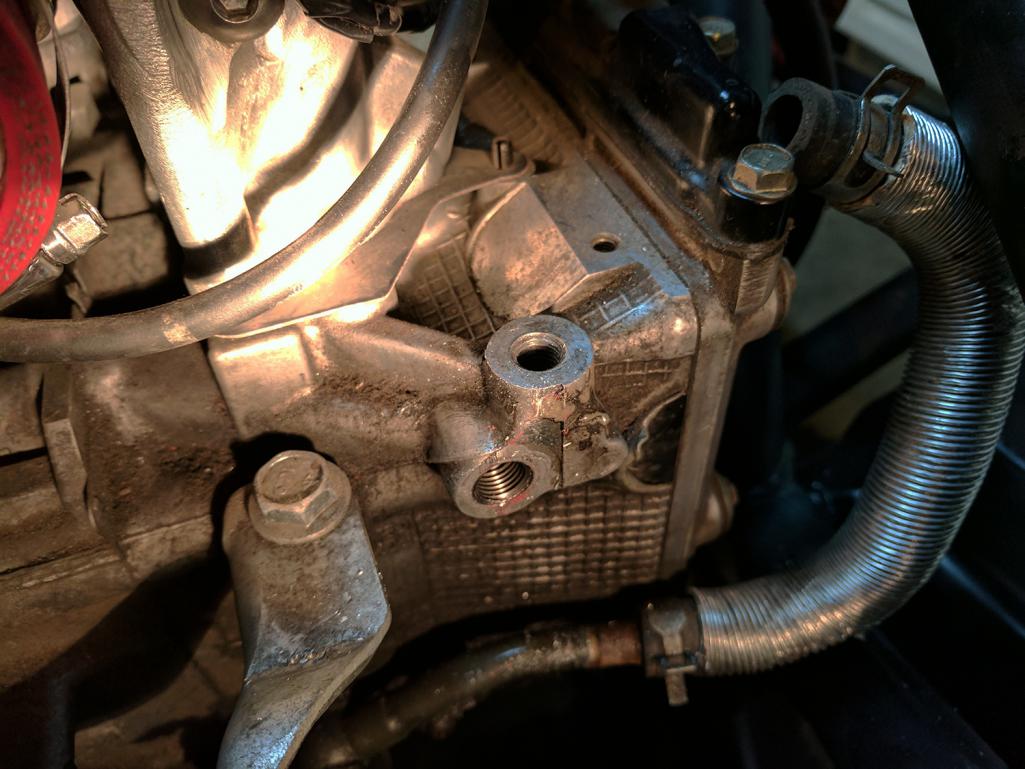
I reinstalled the turbo, cranked it over without leaks, and celebrated by installing rear brakes. The calipers are 914, the rotors are early 911 5 lug, hubs were re-drilled to 5 lug. I stripped the rust off of the rotors and repainted the drum with high temp paint.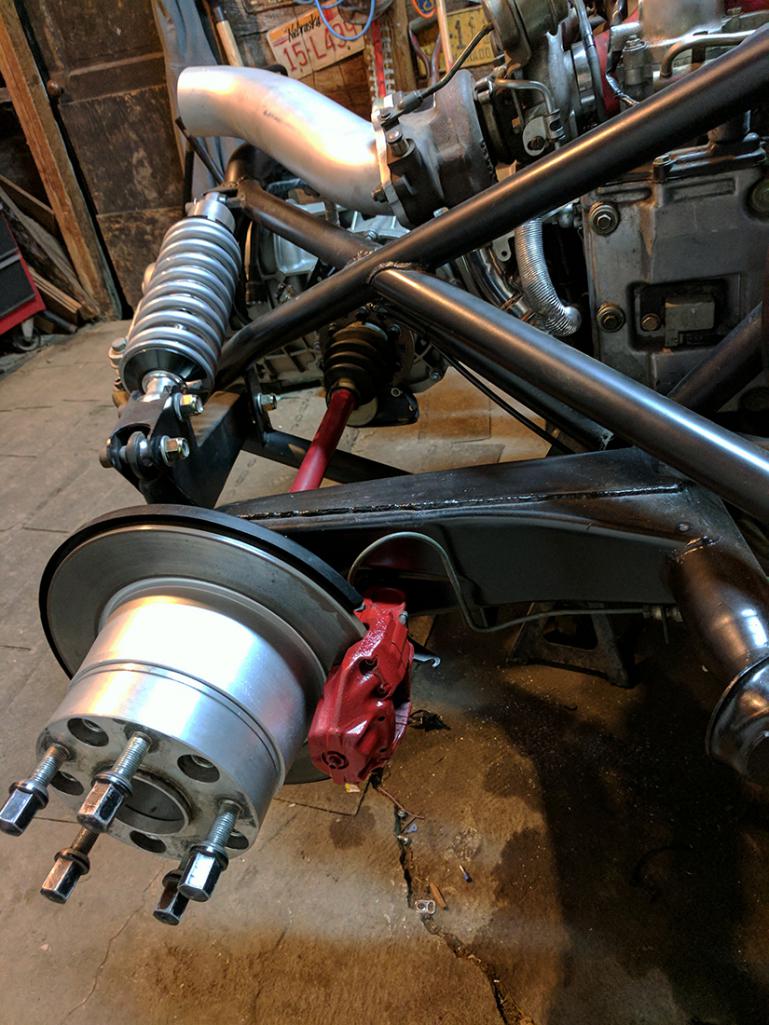
Posted by: plymouth37 Jun 4 2017, 11:35 AM
The rear rotors were salvageable but the fronts were trashed, I bought some new rotors and installed them on the freshly painted hubs.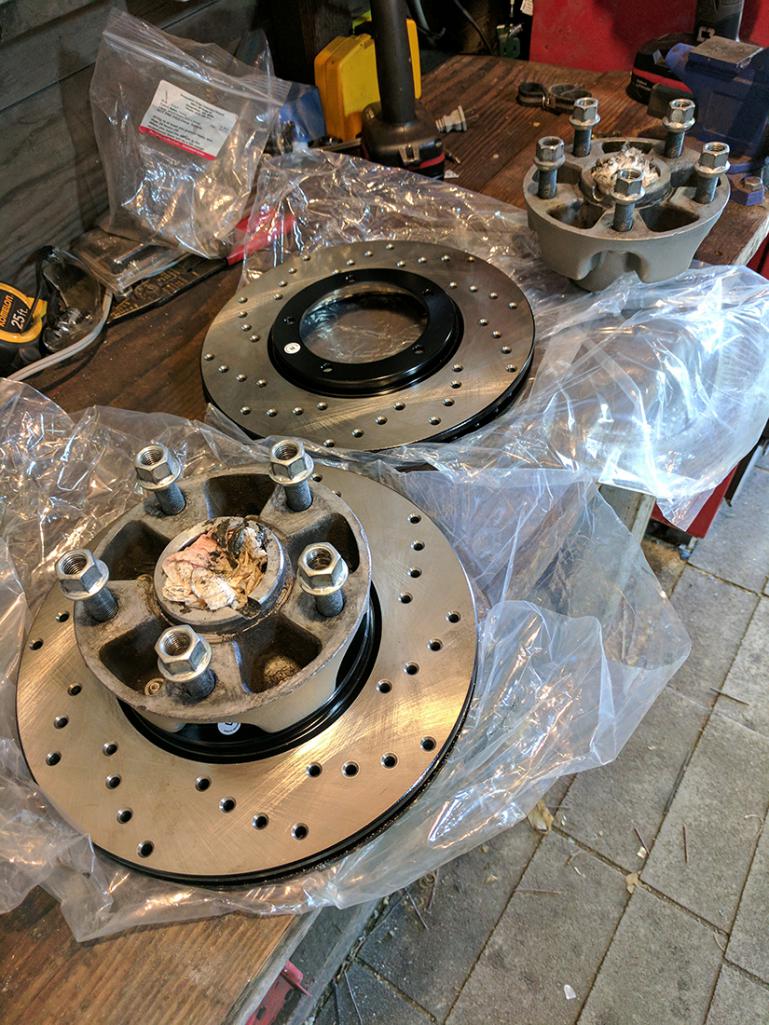
Then I installed the front brakes.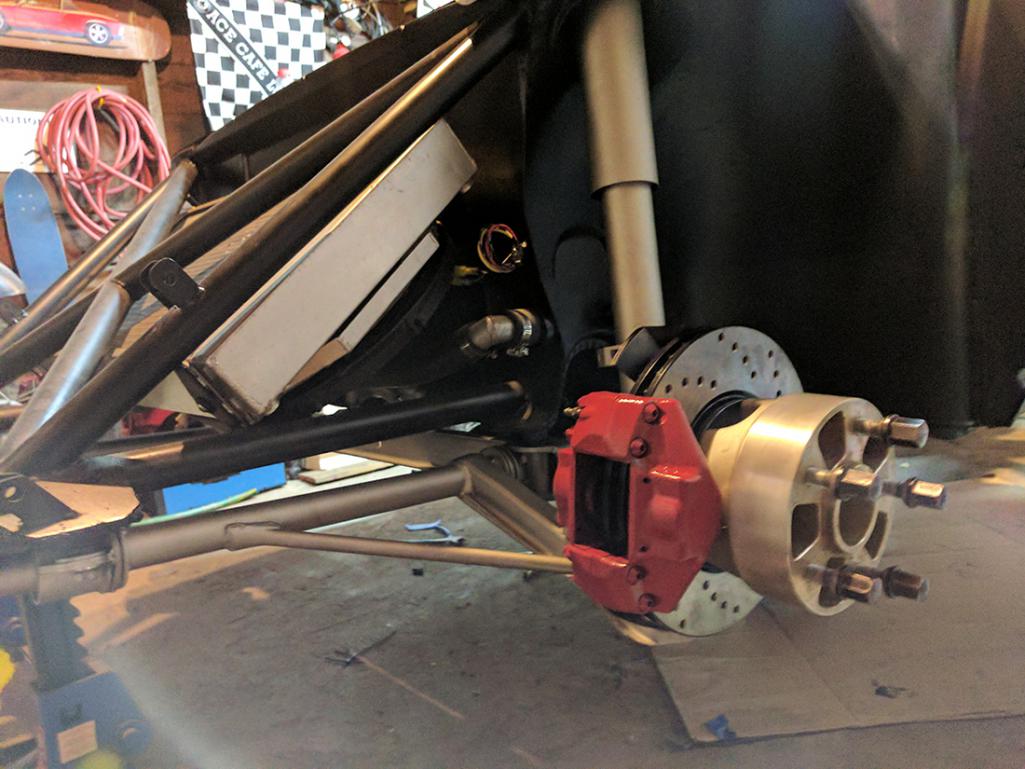
Just need to finish some missing chunks of the brake lines and then the brake system will be complete!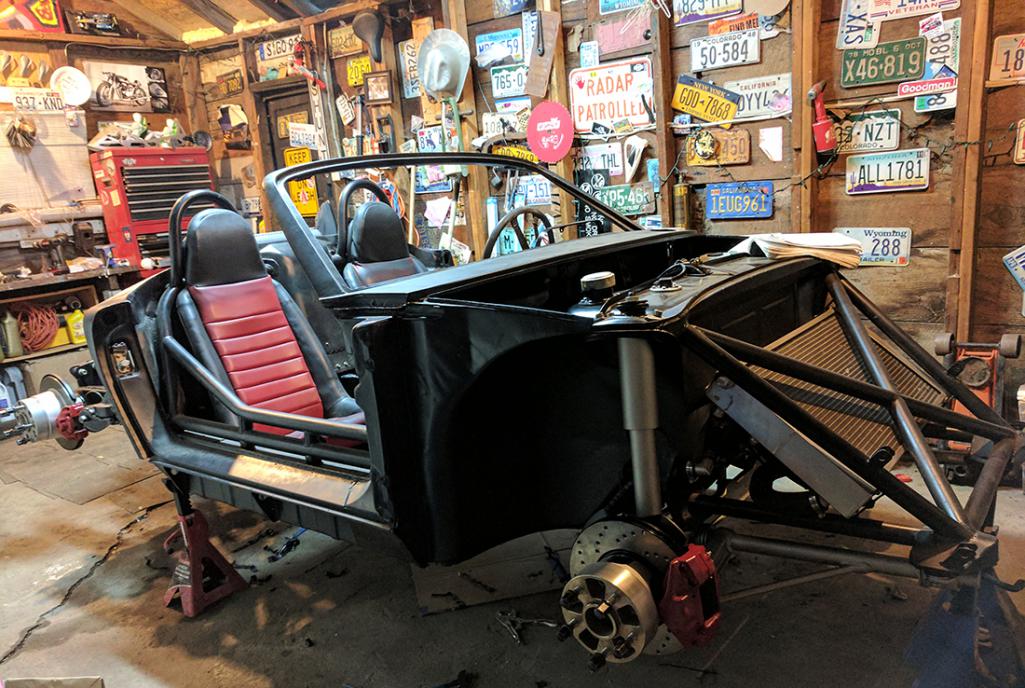
Posted by: Cairo94507 Jun 4 2017, 12:15 PM
I am so looking forward to seeing a video of this car moving on its own power. Can't wait. Terrific build and incredible talent.
Posted by: KELTY360 Jun 4 2017, 12:18 PM
Hmmm....are those seat inserts a hint of the color decision?
Posted by: plymouth37 Jun 4 2017, 12:34 PM
Hmmm....are those seat inserts a hint of the color decision?Those are from the interior I had in it before this whole adventure started. Still not a clue on color, the accent bits of the chassis are red but that doesn't dictate much. I'll mull it over as I finish the body work, a nice dark blue or silver with a red interior might be nice but I really don't have a clue yet! The interior will need to be redone anyway so I have options.
First step to paint is retreiving the body from Wyoming, didn't have room on the truck to bring it with the rest of the car! I was actually just in Wyoming, here is the body, waiting its turn, just like my '37 Plymouth in the background... Nice having relatives with pole barns...
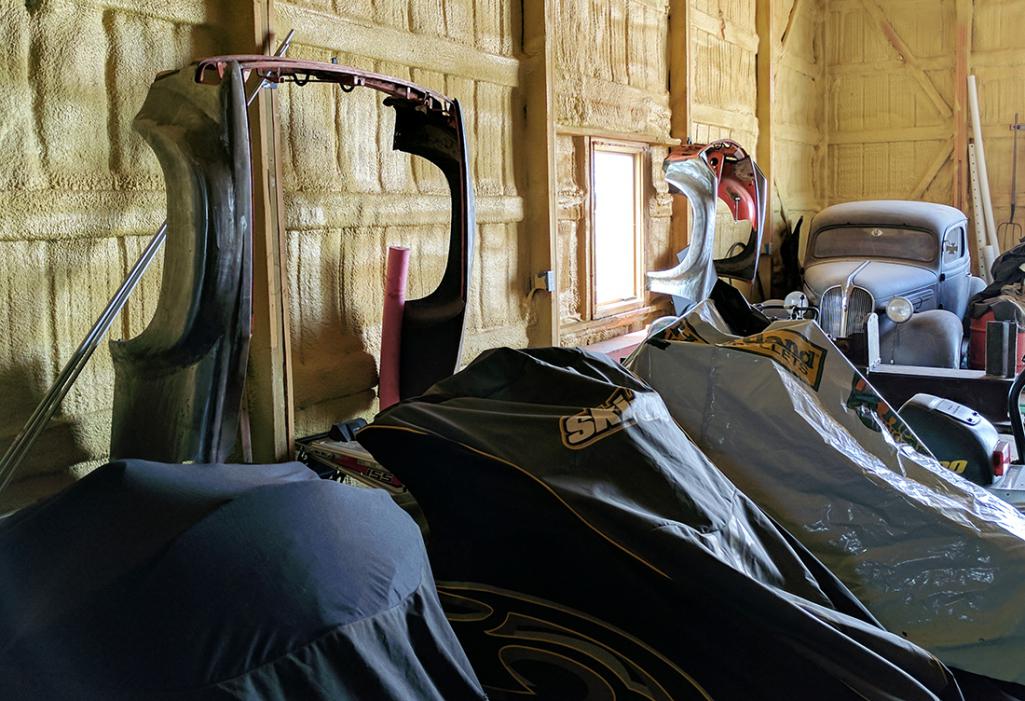
Posted by: plymouth37 Aug 5 2017, 02:29 PM
As I suspected my vintage 928 fuel pump wasn't up to the task, I swapped in a TRE performance pump, I hear good things, quieter, cheaper etc... Had to add in a hard elbow as well, the soft line was kinking into the pump.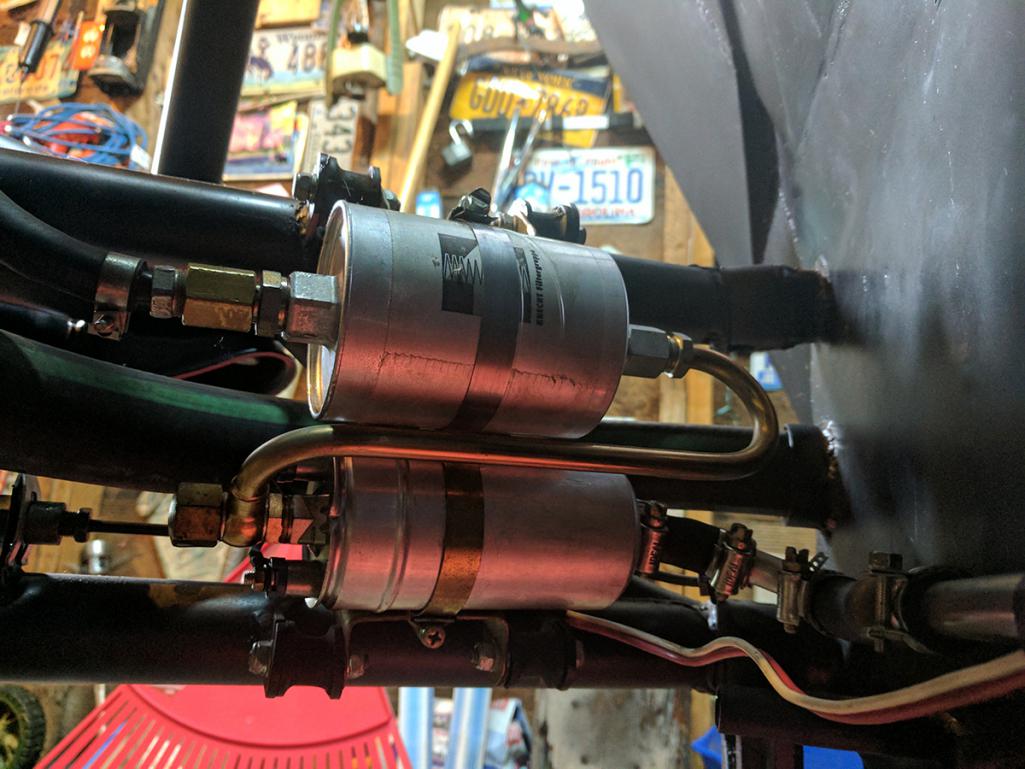
I am getting good fuel pressure but didn't get the startup I was hoping for. Looks like i am diving into diagnostic land. On that note I figured out a handy way to mount the OBDII port. The computer is right on the other side of the firewall, so I punched a hole into the cabin and tucked it in here.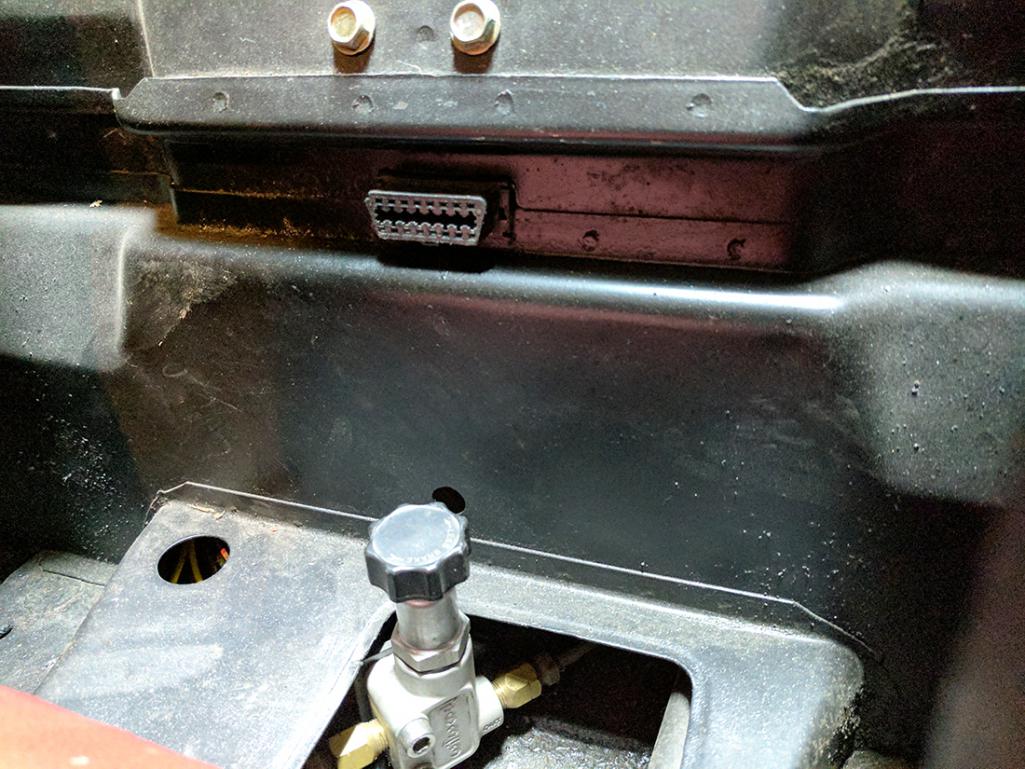
Posted by: plymouth37 Aug 5 2017, 02:29 PM
Now I can run codes from the comfort of the drivers seat.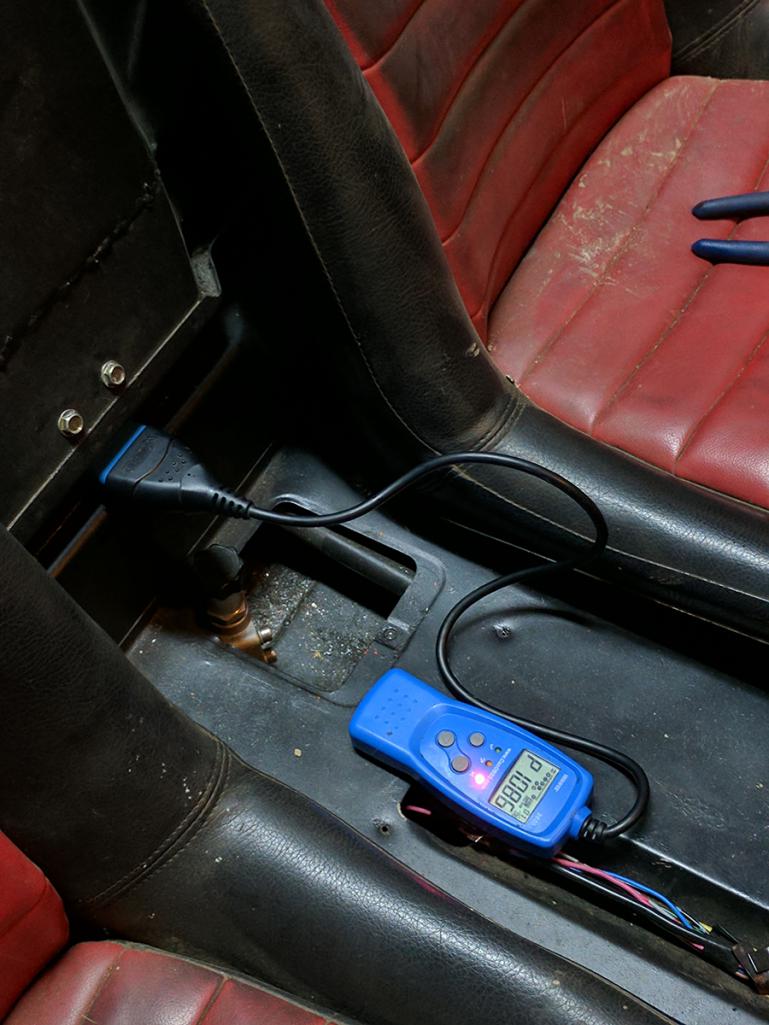
I am just sorting out the computers state of mind, nothing really unexpected. There are 3 codes that relate to the missing wrx gas tank sensors, A handful about missing emissions equipment, and 4 on the TGV I pulled. None of these should keep it from running, at least poorly, I will start probing things like coils and injectors and see who isn't doing their job...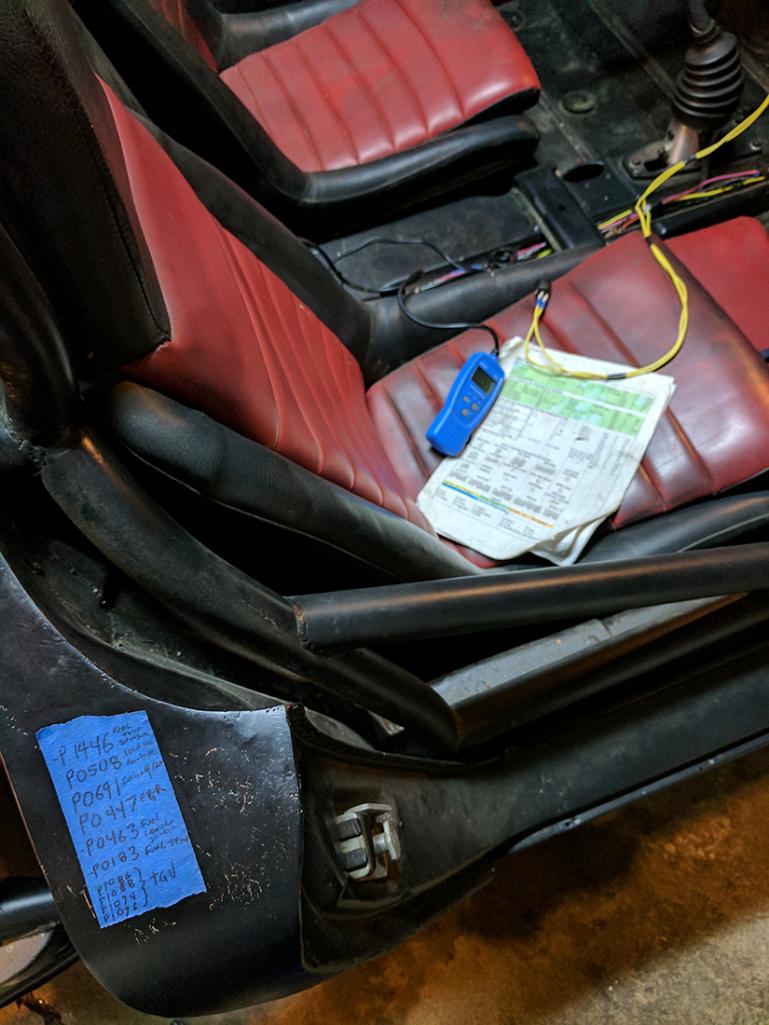
Posted by: 914werke Aug 5 2017, 02:36 PM
Dane wher did you get the hardline from pump to filter? Or did you make it?
Posted by: plymouth37 Aug 5 2017, 02:55 PM
Dane wher did you get the hardline from pump to filter? Or did you make it?
Most of my setup is stock 928, here is how it looks in its native environment, I believe 911s and 944s of the same era had something similar.
Attached image(s)
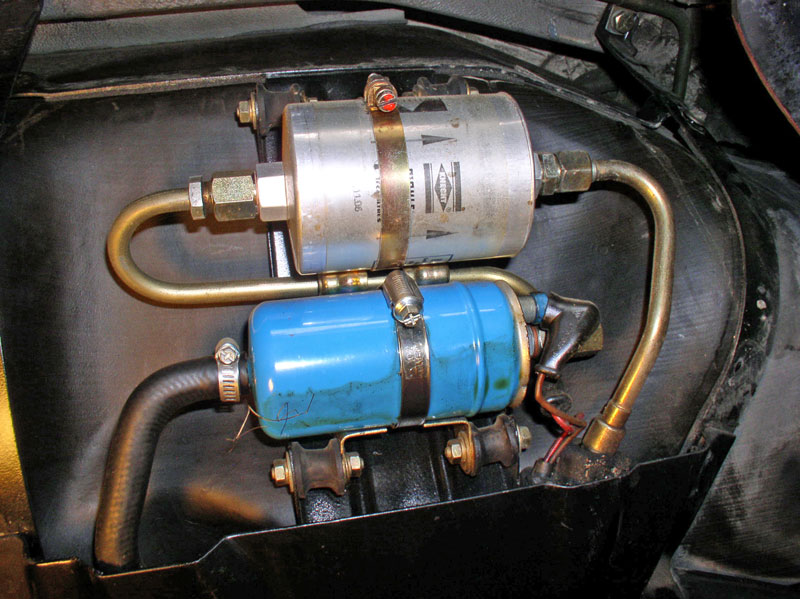
Posted by: plymouth37 Aug 9 2017, 10:05 PM
I installed the front brake pads, and splurged on new pins and retaining clips.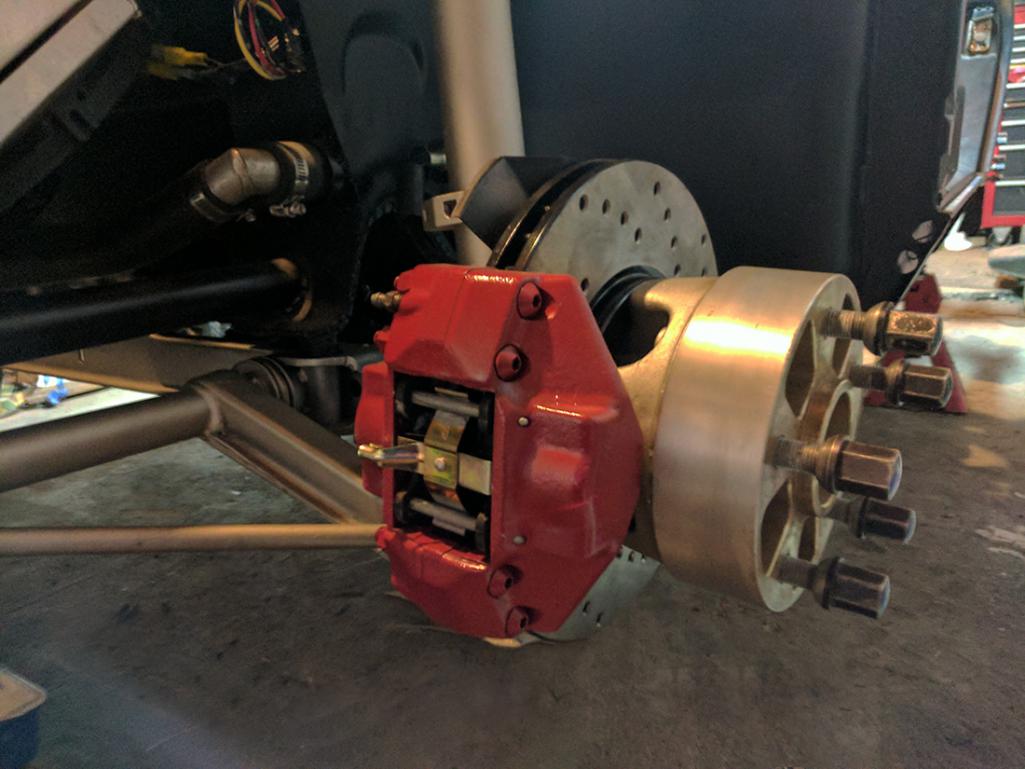
Same thing on the rear, and adjusted the calipers, parking brake and cables are installed as well. Just need to make 2 lines on the firewall and the brake system will be complete!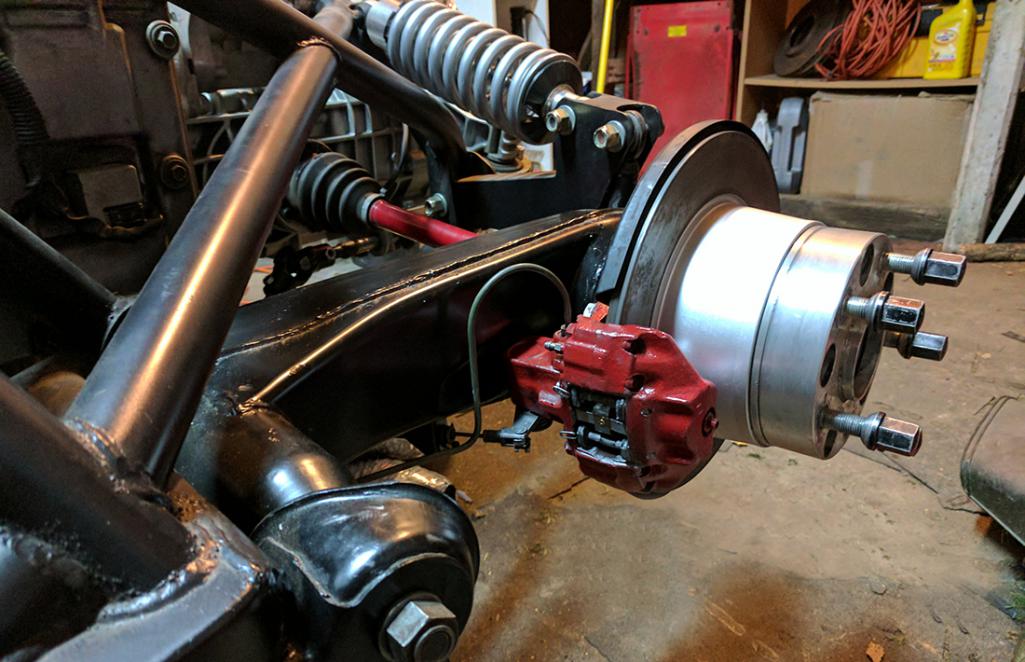
Posted by: effutuo101 Aug 11 2017, 06:17 PM
Posted by: Amenson Aug 22 2017, 08:46 PM
Great project, so happy that you are back at it, the details are excellent.
I would like to steal your idea to use the AN adapters on the bottom of the tank for Grey Matter.
Are these the fitting that you use?
https://socalautoparts.com/shop/an-fittings-hose/adapters/6-an-fuel-tank-bung-plain-aluminum/
Cheers,
Scott
Since I am running such large fuel line I upgraded the tank fittings.
It is a vw tank thread to AN adapter to hose barb compilation.
Posted by: infraredcalvin Aug 22 2017, 10:23 PM
This is a neat build, but with all that engine and wheel/tire, it looks to be under braked... sorry if this has been covered previously. Looks to be begging for a boxster setup.
I'm sure these will stop the car, but I'd be concerned with fade after a bit of spirited driving.
Posted by: plymouth37 Aug 26 2017, 04:17 PM
Yup, I got mine from http://www.dansperformanceparts.com/latest-rage-201209-6-vw-fuel-tank-fitting-to-6an.html, they also have an 8an size that I am running to my 1/2" feed line.
Great project, so happy that you are back at it, the details are excellent.
I would like to steal your idea to use the AN adapters on the bottom of the tank for Grey Matter.
Are these the fitting that you use?
https://socalautoparts.com/shop/an-fittings-hose/adapters/6-an-fuel-tank-bung-plain-aluminum/
Cheers,
Scott
Since I am running such large fuel line I upgraded the tank fittings.
It is a vw tank thread to AN adapter to hose barb compilation.
Posted by: plymouth37 Aug 26 2017, 04:20 PM
I tracked this with these brakes when it was 600 pounds heavier and they did pretty well. Always room for upgrades in the future though, Boxster conversion is really tempting!
This is a neat build, but with all that engine and wheel/tire, it looks to be under braked... sorry if this has been covered previously. Looks to be begging for a boxster setup.
I'm sure these will stop the car, but I'd be concerned with fade after a bit of spirited driving.
Posted by: plymouth37 Aug 26 2017, 04:54 PM
IT'S ALIVE!!!!!!!
https://www.youtube.com/watch?v=4GiV_jFGDxI
It was a bad coil wire connection!
Posted by: 914forme Aug 26 2017, 05:09 PM
Also thank you for the tip on the AN fittings
The -8 is located http://www.dansperformanceparts.com/latest-rage-201209-8-vw-fuel-tank-fitting-to-6an.html, LATEST RAGE 201209-8 You just change the -6 or -8 depending on what you want or wish to use.
Posted by: Spoke Aug 26 2017, 05:13 PM
Awesome build! Can't wait to see it buzzing around.
Posted by: plymouth37 Aug 27 2017, 05:13 PM
I sanded and painted the dash.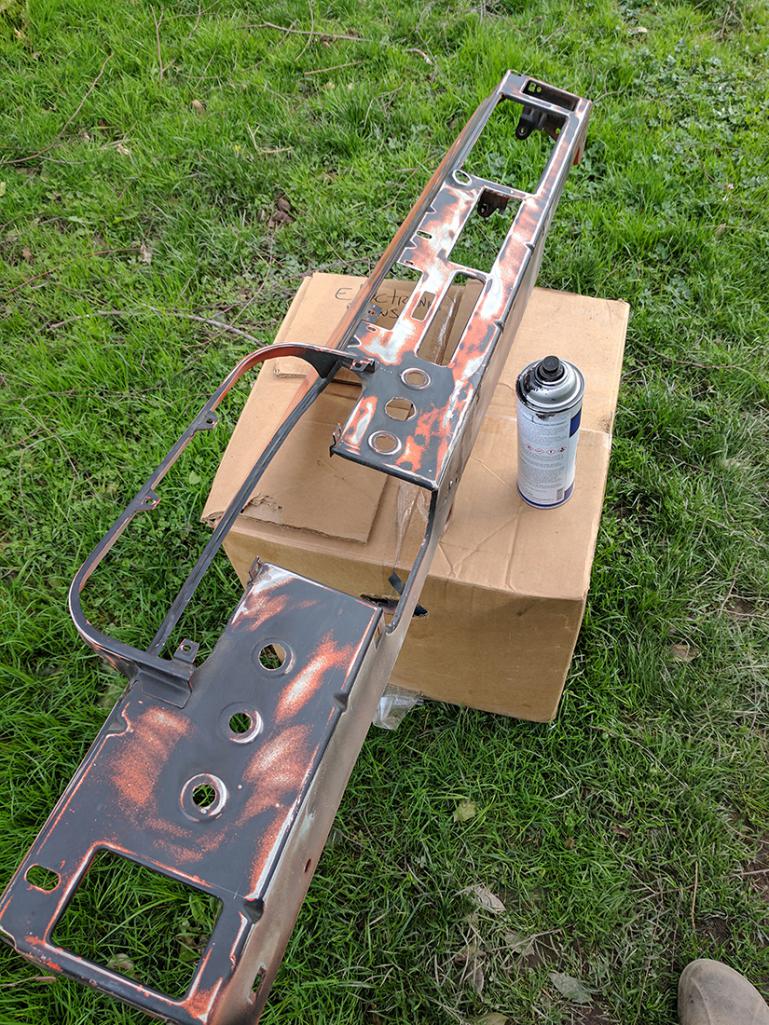
Now that I have a running engine I need gauges to keep an eye on it!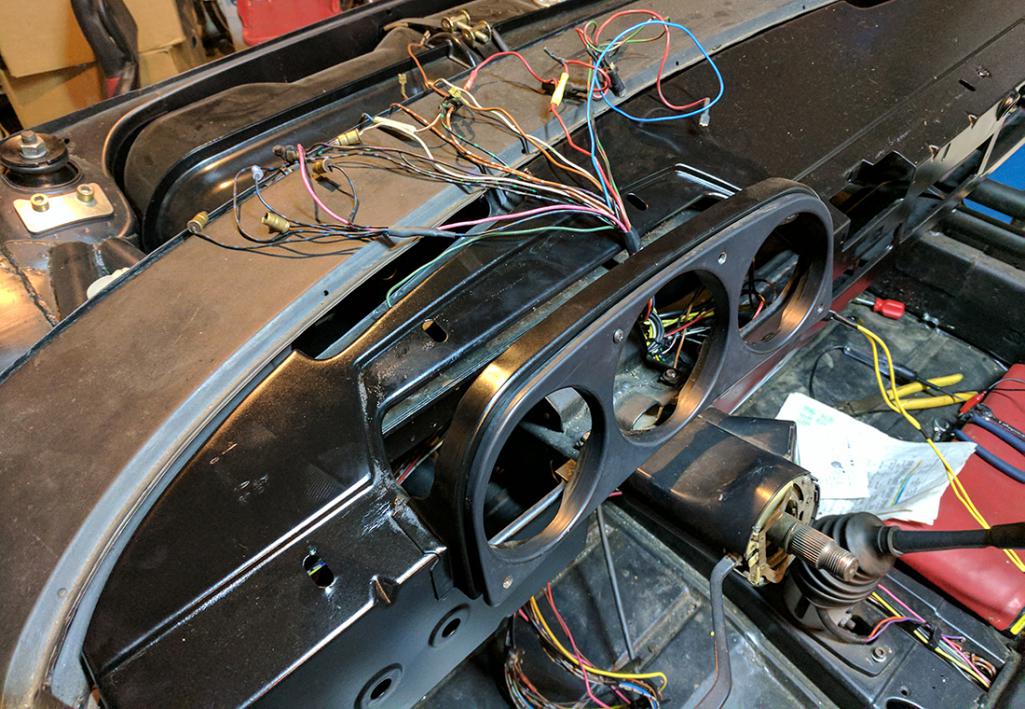
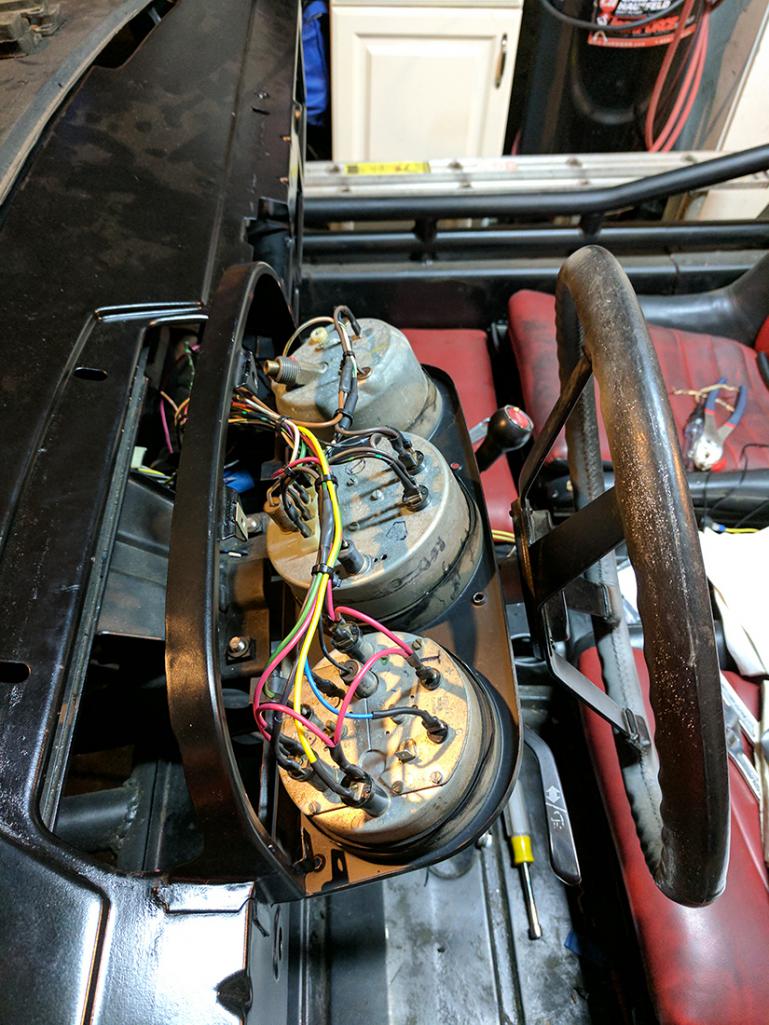
Posted by: plymouth37 Aug 27 2017, 05:15 PM
All nice and clean!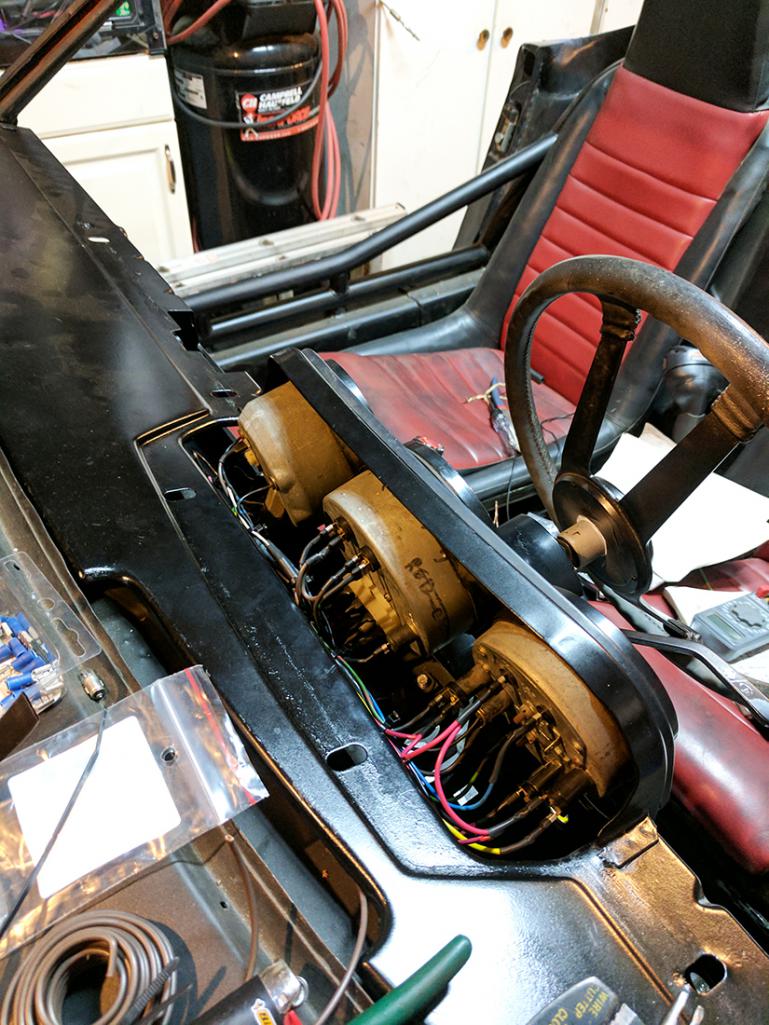
I will probably get a gauge upgrade once I start focusing more on the interior, these will work for now!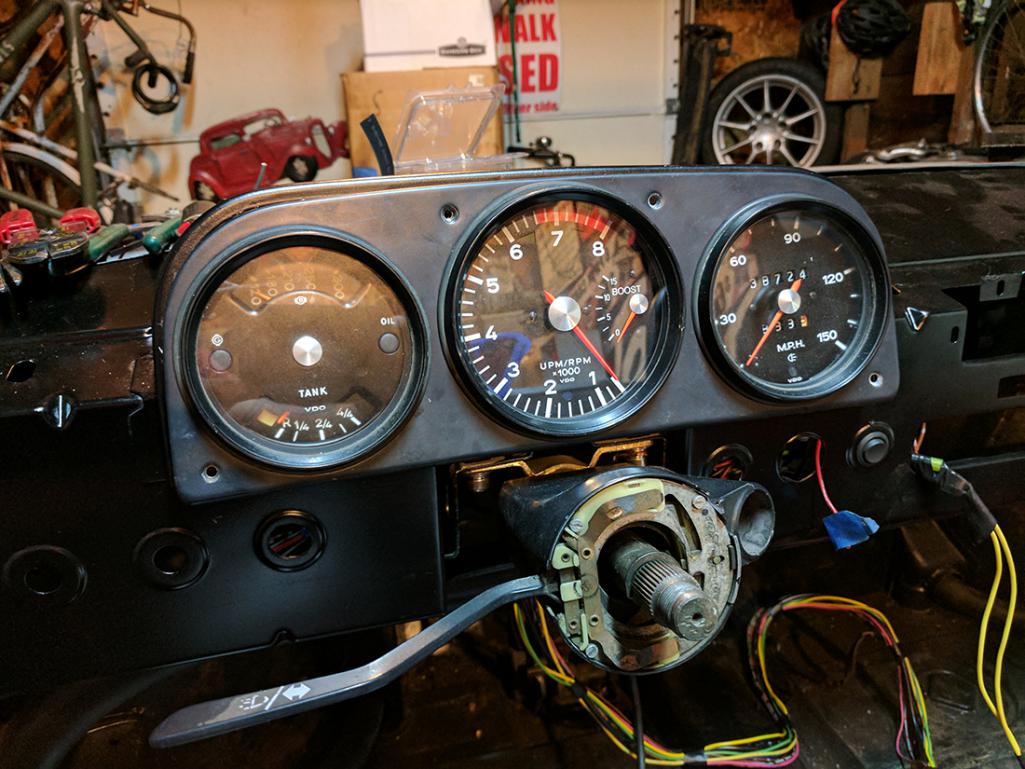
Posted by: Krieger Aug 27 2017, 05:21 PM
Congratulations on the first firing! That thing sounds good!
Posted by: plymouth37 Aug 30 2017, 03:59 PM
I broke out the flaring tool and bender, time to finish the brake system!
I made and fitted the missing firewall lines.
They connect to the rear lines at the separation point near the firewall, lot of systems bundled here, that radiator hose may need some insulation.
I filled up the system with brake fluid, bled the system, brakes are done!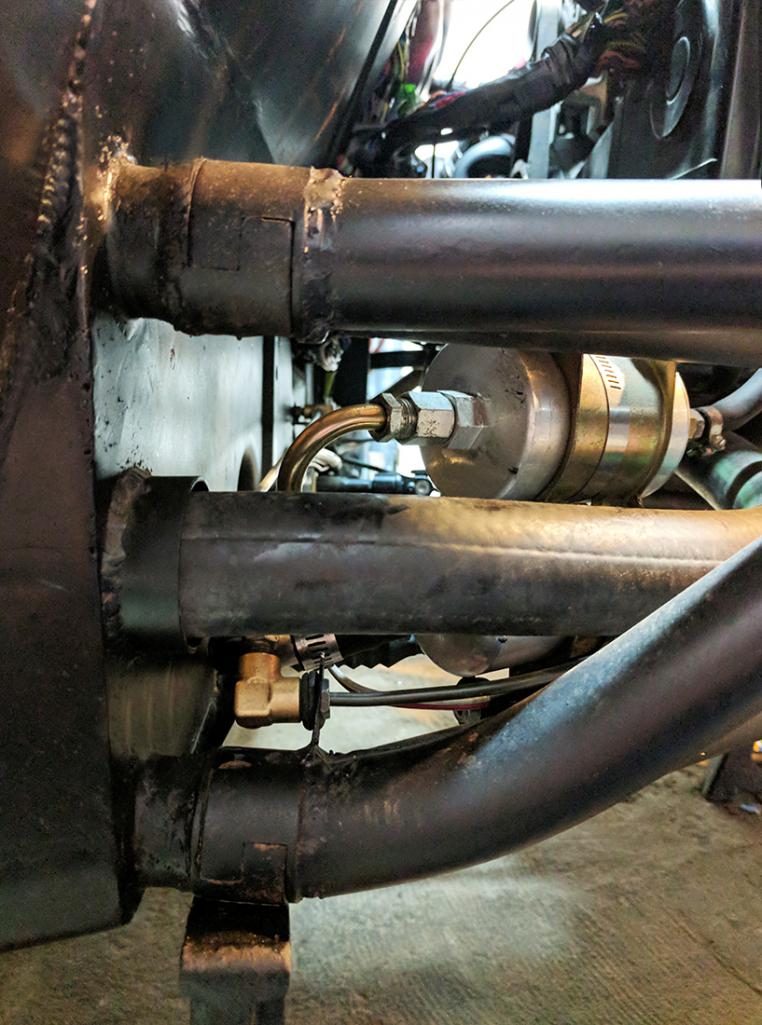
Posted by: KELTY360 Aug 30 2017, 06:49 PM
BADASS!!!!
Posted by: Cairo94507 Aug 30 2017, 09:28 PM
Congratulations on firing that engine - sounded good.
Posted by: plymouth37 Aug 31 2017, 11:15 AM
Time to tackle controls! I broke out the torch and bent up a shifter.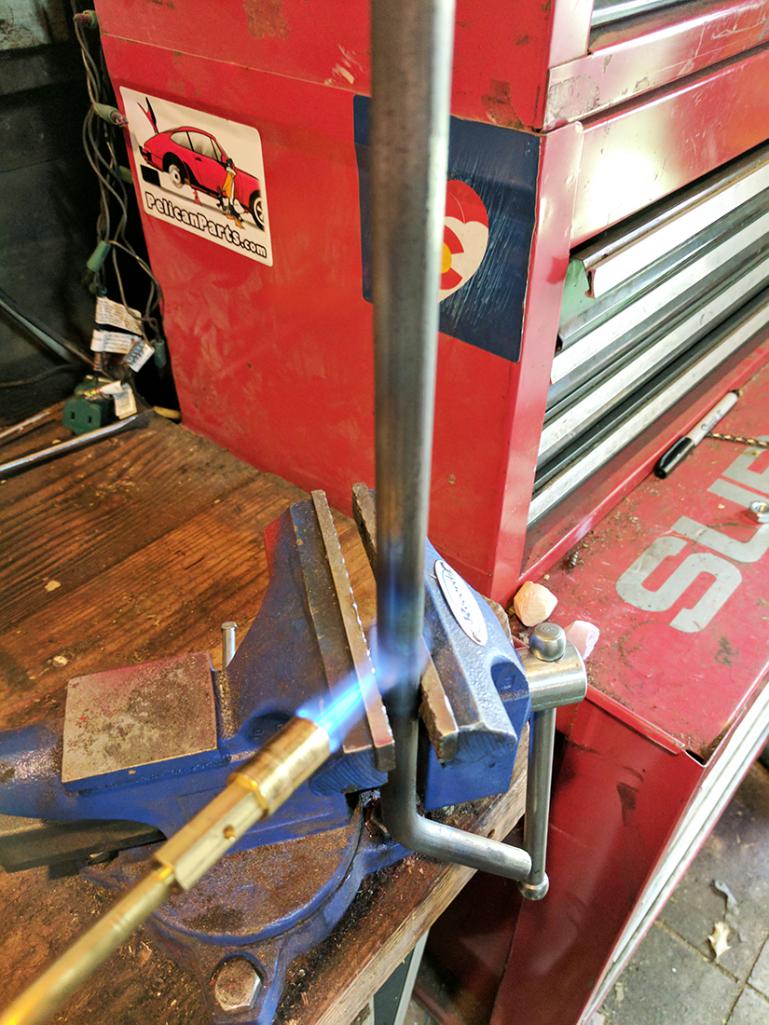
I used a 1/4" rod as a template, then bent the shifter rod to match.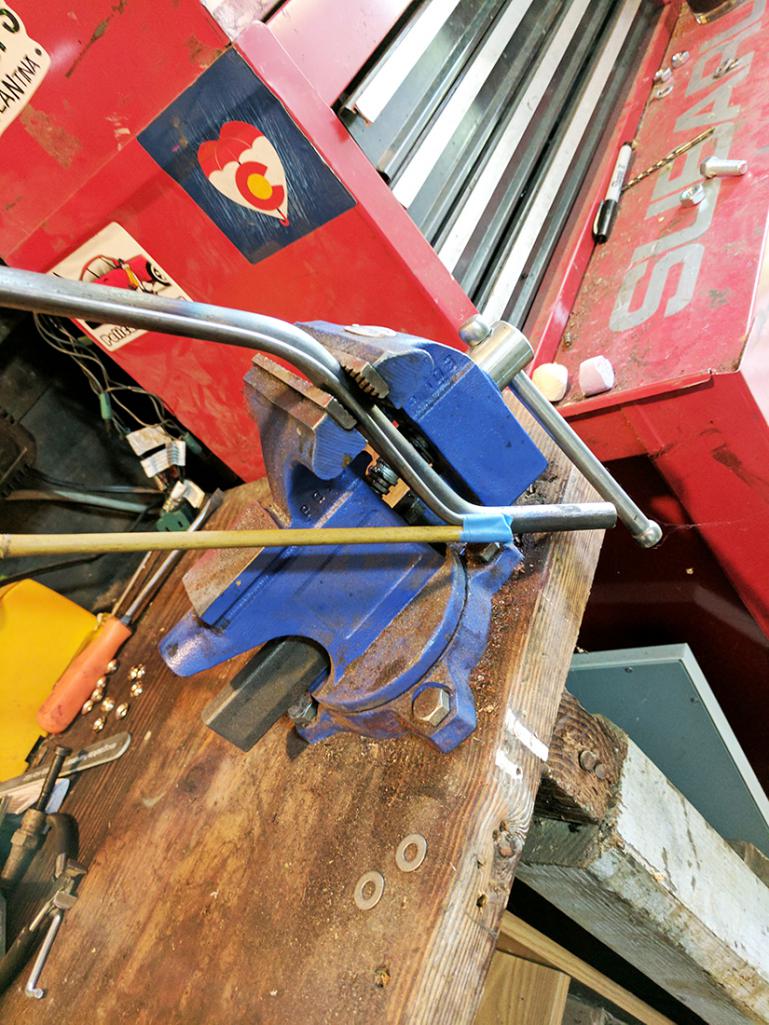
Mocked up the splined ends, the ends are in line with each other, with an engine shaped detour in the middle.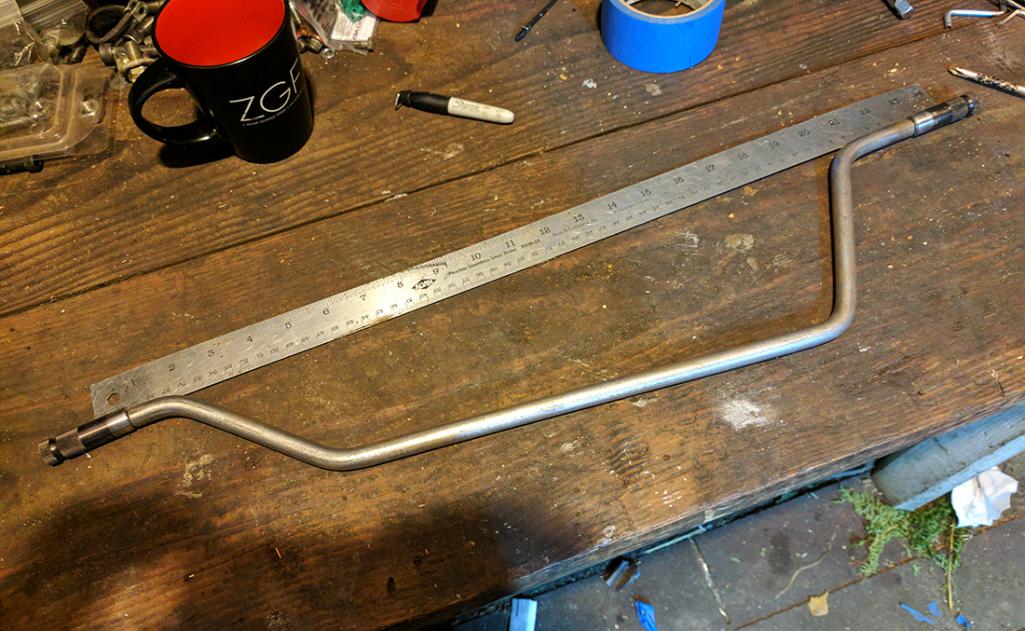
All welded, painted, and ready to install!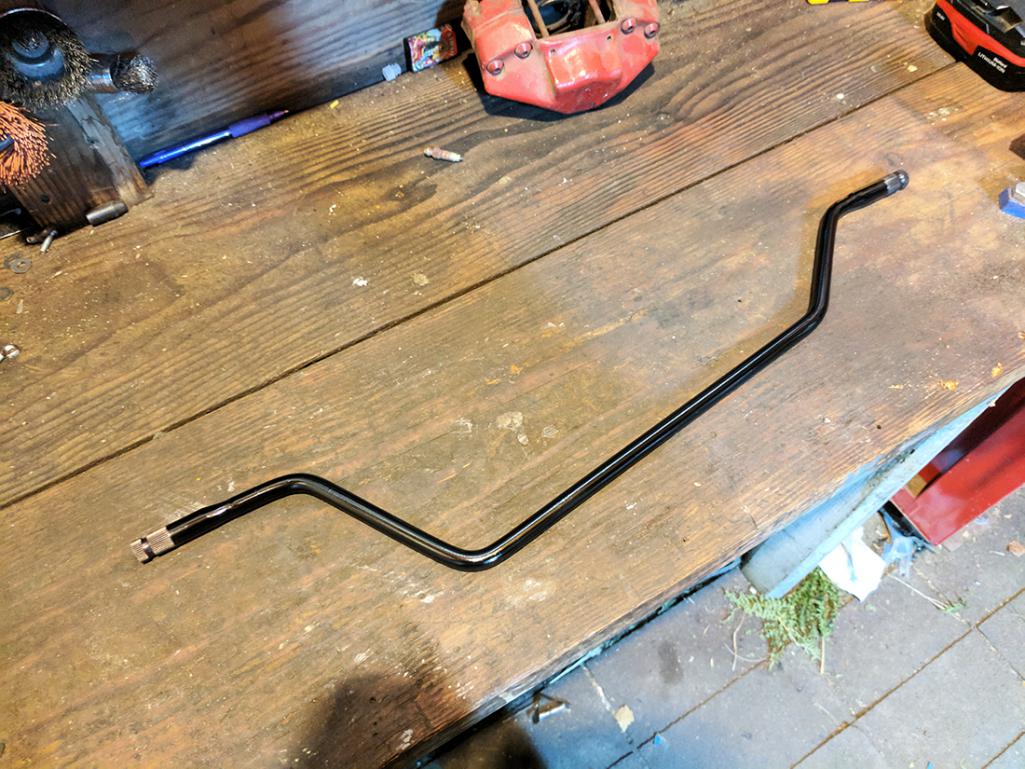
Posted by: Ferg Aug 31 2017, 03:24 PM
You are going to paint it brown right?
Posted by: plymouth37 Aug 31 2017, 11:13 PM
You are going to paint it brown right?
Maybe! Put in a nice plaid interior, why not?
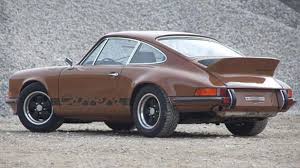
Posted by: plymouth37 Aug 31 2017, 11:24 PM
Shifter rod is in, I adjusted the shifter and have it dialed in pretty well.
Throttle, clutch, and speedometer cables are in as well.
Still some work to do here but this chassis is pretty darn complete!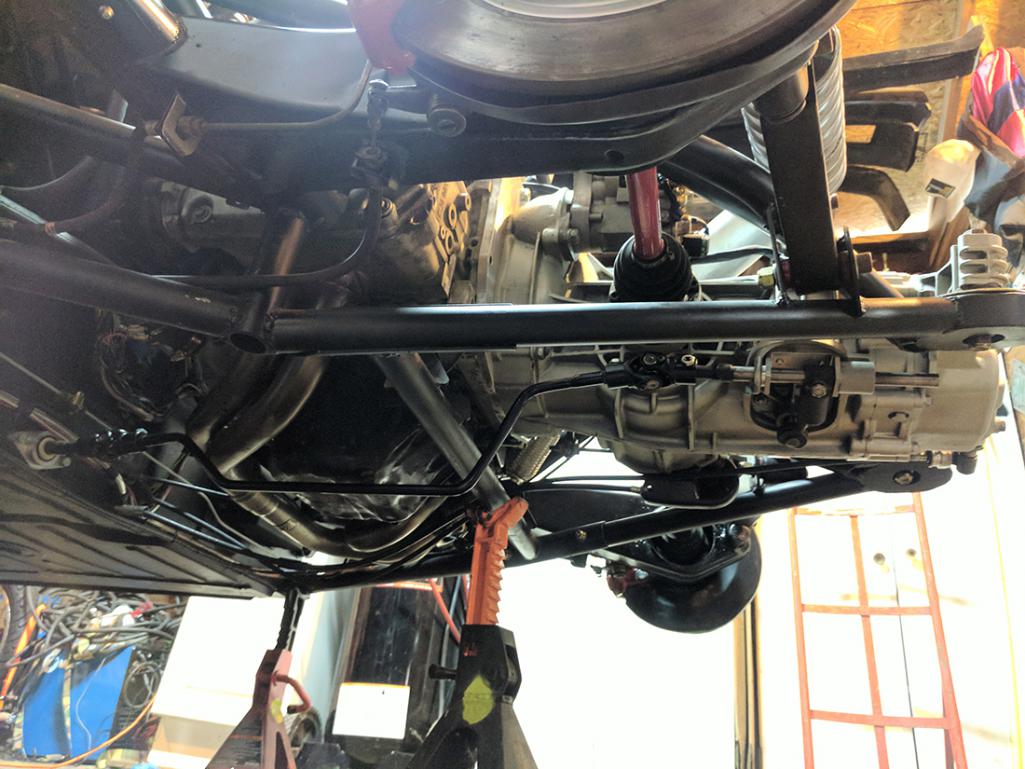
Posted by: Cairo94507 Sep 1 2017, 10:30 AM
Sweet. I can't wait to see that going down the street.
Posted by: tmckenna Dec 22 2017, 10:09 AM
I just read this entire thread, and WOW just WOW. Everything is so well done, the car seems incredible. Ive always dreamed of building a (semi) street legal, tube chassis, LS powered, mid engine car and was looking into the 914 for feasibility. I'm super impressed, hope you made some progress since september. Id love to see some videos of this thing at the track someday, I'm sure it'll be hard to beat considering the power, weight, and suspension setup. Awesome job man keep it up
Posted by: 2mAn Dec 22 2017, 10:39 AM
I dont frequent 914world much anymore, but I still get notifications on this thread and everytime I come back, Im just shocked at the build...
I also watched Leno driving Eric Sheas car last night and the urge is coming back... Luckily I dont have a garage to stuff a 914 into... yet
Posted by: plymouth37 Feb 10 2018, 12:15 AM
Hey everybody, fear not, I haven't forgot about you or this build. We bought our first house in August and that kind of derailed the car build, but here we go, time to get back to it!
Now that the car is reliably running it is time to tear into the WRX engine wiring harness, This may look pretty tidy but in reality there is about 10 extra feet of harness wrapped around in here, time to get out the wire cutters and shorten it to fit!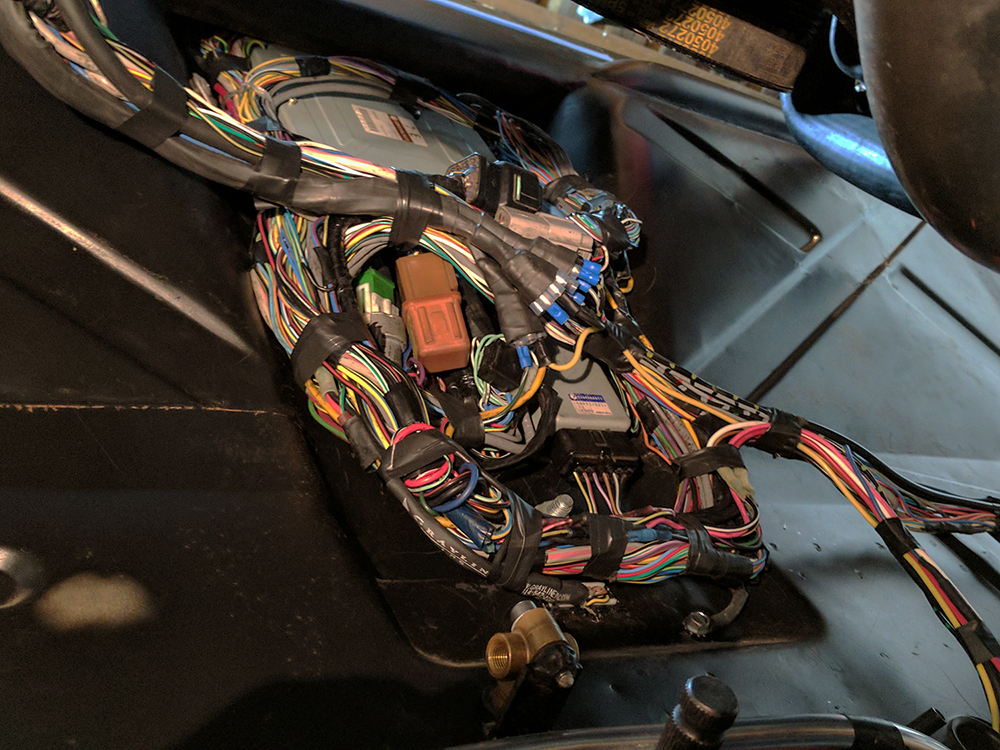
I started with the brown main plug in the engine harness, this holds the power and trigger wires for the injectors and coils, as well as a series of ground wires from the ecu. I shortened it by about 10' and soldered and shrink wrapped the connections.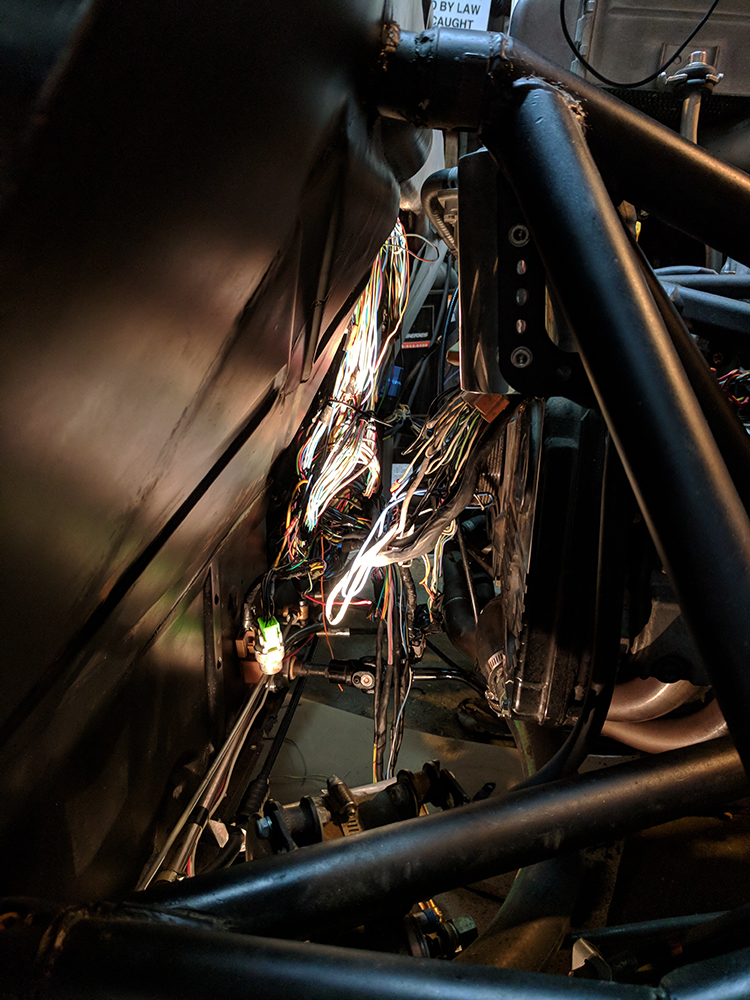
I wanted to wait to do this until the engine ran so i could start up the engine and check the codes as I modified the harness be able to catch a problem as i did it rather than after cutting literally every wire that controls the engine. I finished the Brown plug, it fired up well, no extra codes, here is how much extra wire I am dealing with here. Next I shortened the black plug's wires, these hold the sensor leads and grounds. There is an extra gray plug as well that has the cam and crank sensor wires that I merged into unused spots in the black plug so now I only have 2 main plugs leading to the engine.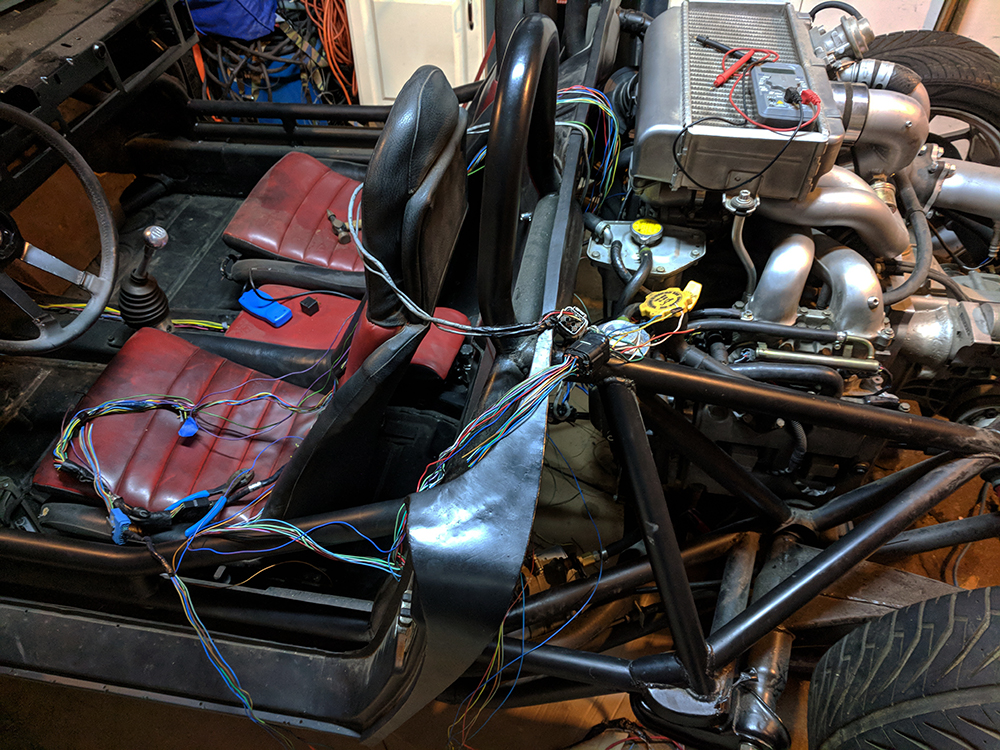
I also removed the stock WRX fuel and ignition relays and replaced them with a new relay panel I fabbed up. These power the two main ignition circuits for the engine as well as the fuel pump.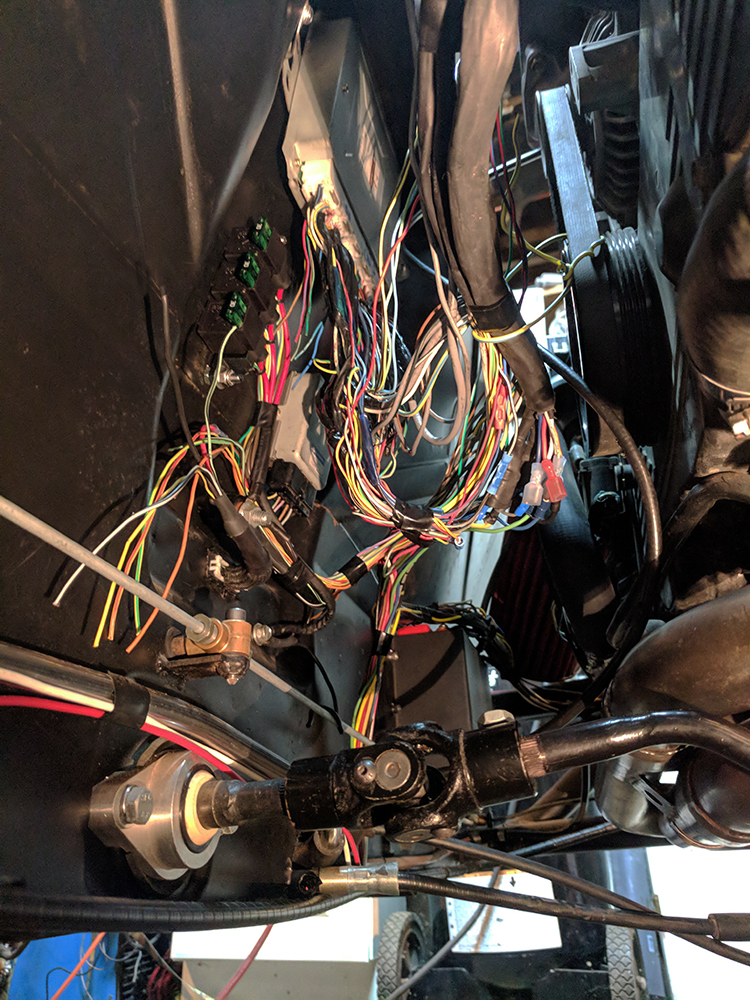
Here is a view of how it is shaping up from the top.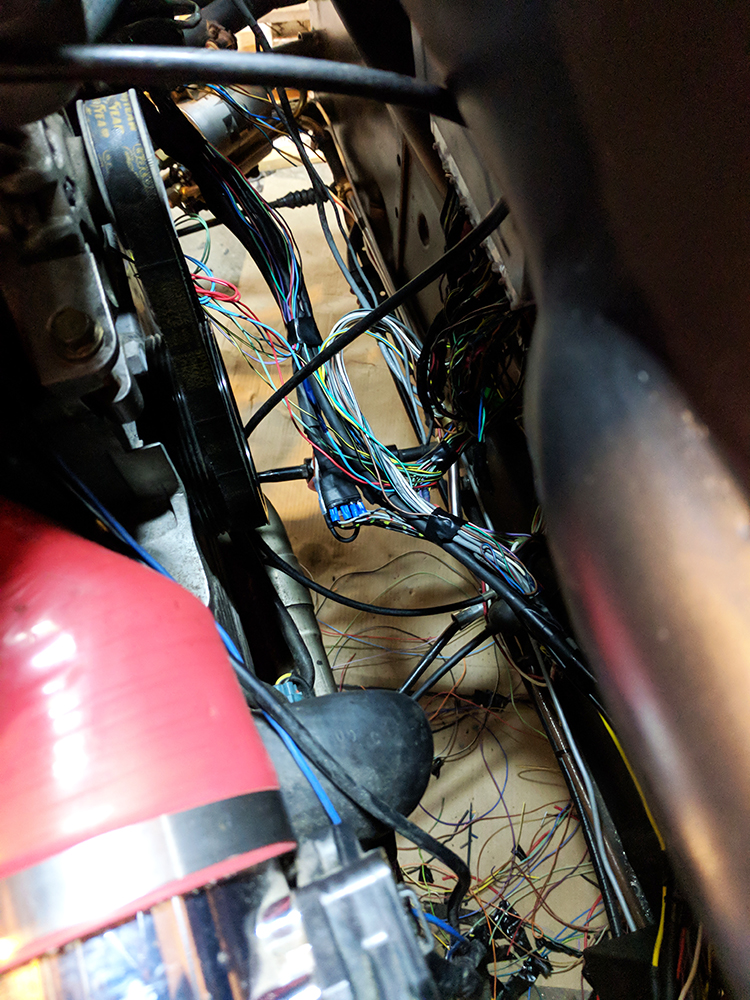
Posted by: plymouth37 Feb 10 2018, 12:15 AM
Here you can see the 2 main plugs and the wires waiting to be spliced.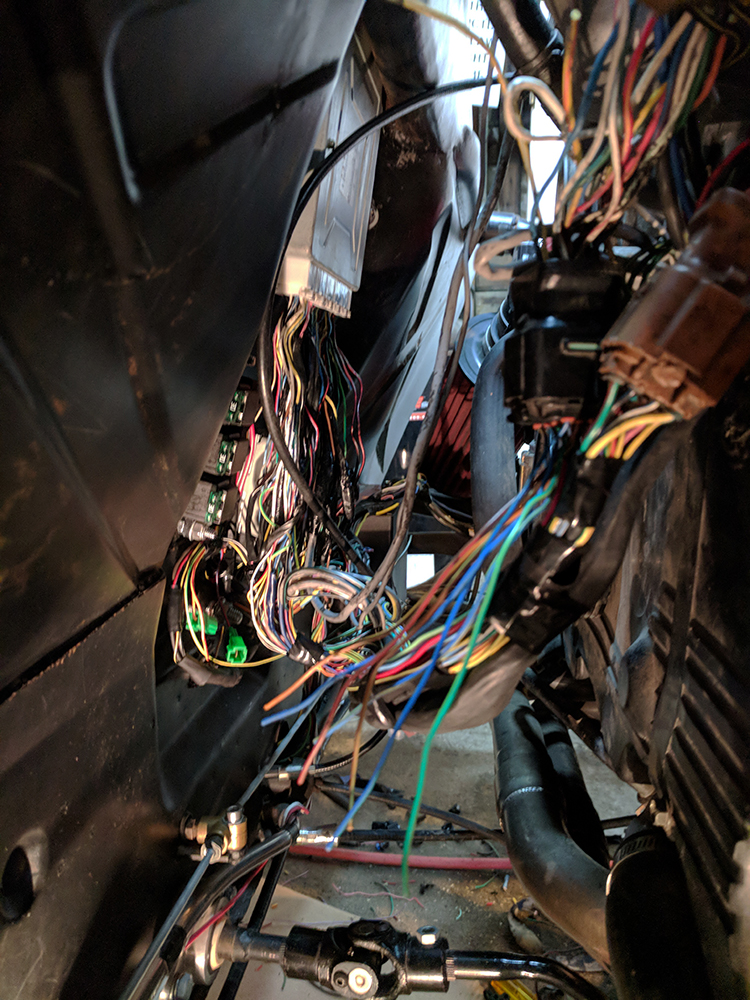
It is starting to look manageable!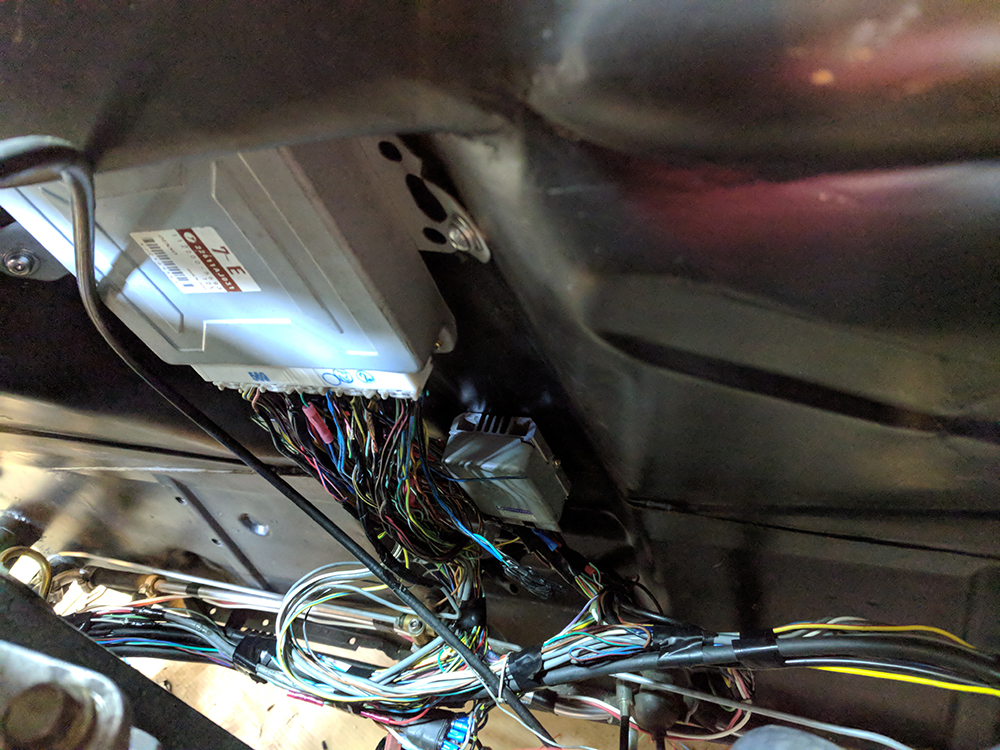
And here is the final product, looks a heck of a lot better, I think the car runs better too. Best part was actually taking the time to understand how this system works, i didn't blindly cut and splice, I got a wiring diagram and figured it out which was really rewarding, this was one of the last big chunks of the car i really didn't understand or want to mess with.
Next I will fab up a cover and wrap everything up for real. 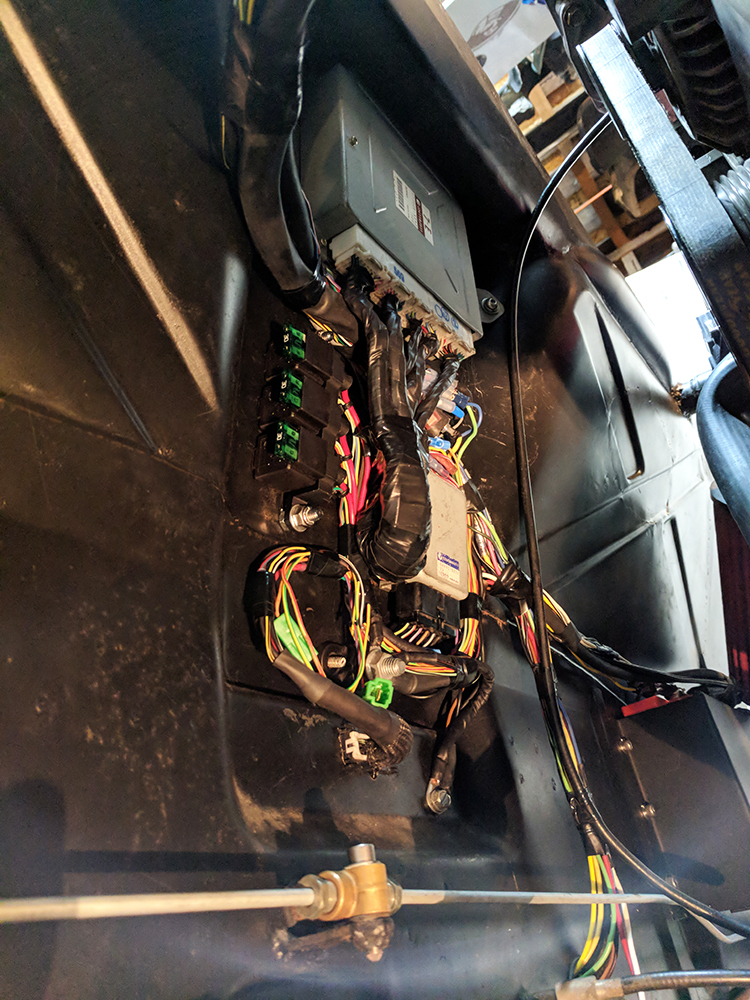
Here is a side view, boy do i have room for a few extra cylinders in there or what?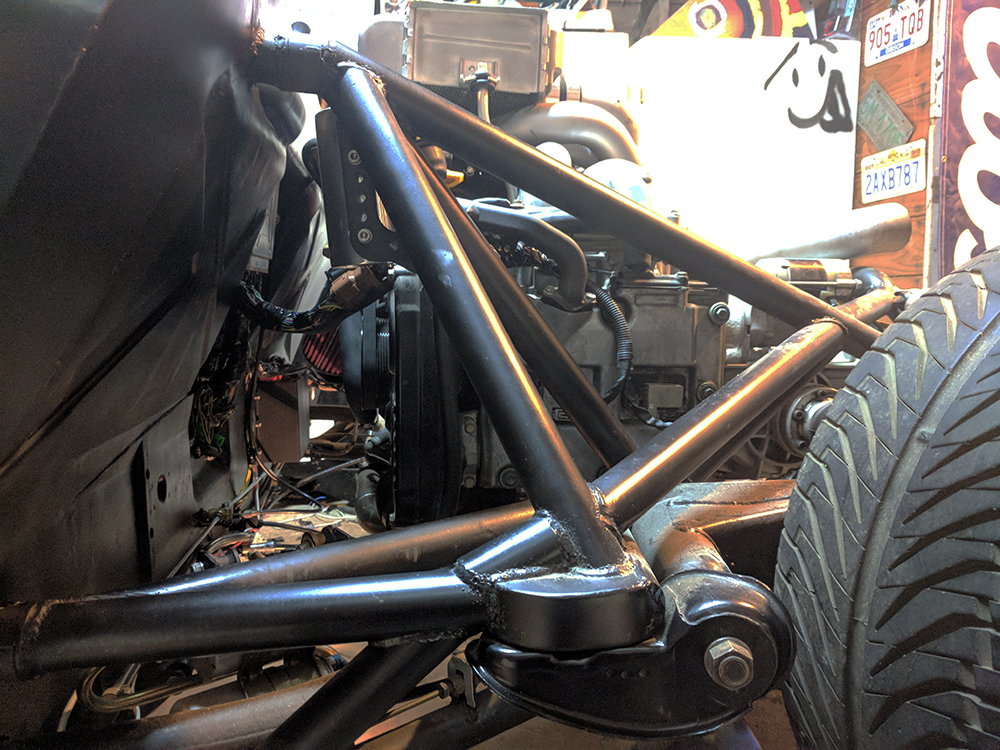
Well I think that brings an end to the cleaning and modifying of the entire cars harness, I added my newly culled wires to the pile, I have cut so much wire out of this thing!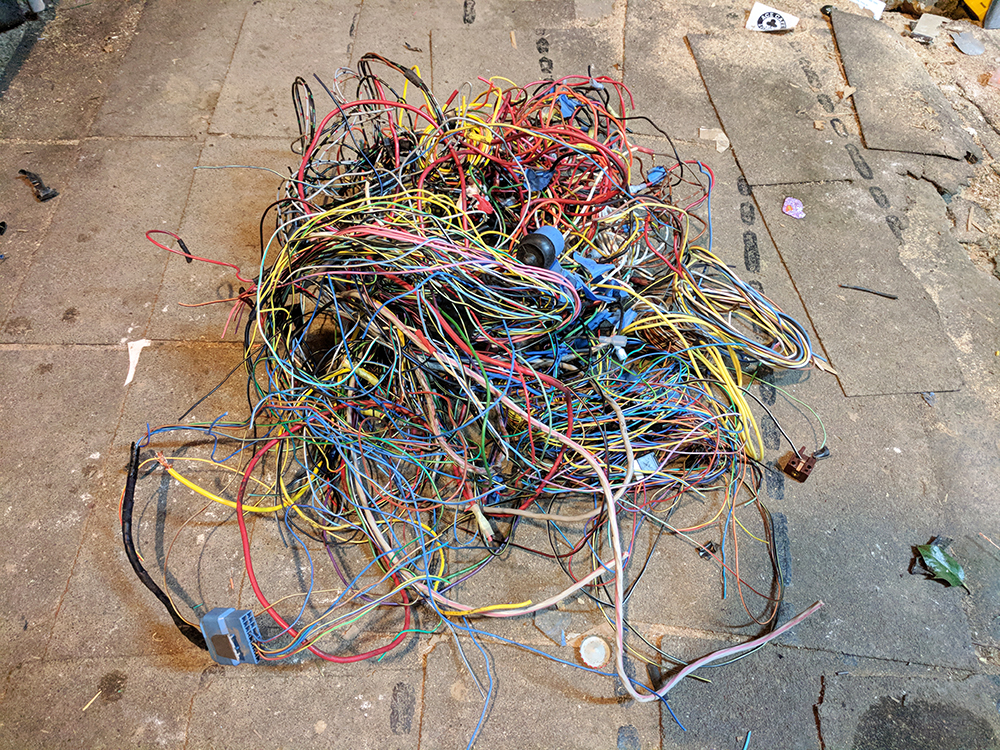
Posted by: effutuo101 Feb 10 2018, 12:29 AM
Nice!
Posted by: Cairo94507 Feb 10 2018, 07:38 AM
This is a great build thread.
Posted by: Edward Blume Feb 10 2018, 07:42 AM
and a well earned bottle cap in the wiring to celebrate....
Posted by: Charlesforfun Feb 25 2018, 10:53 PM
wow. just. wow. I just finished taking my engine out for the first time, have to replace some piston rings. It took me just about an entire weekend just to get the type 4 out of there.
Posted by: Mueller Feb 25 2018, 11:36 PM
Impressive work as always on this build.
Posted by: KELTY360 Feb 25 2018, 11:43 PM
So, have you calculated the weight savings yet?
Congrats on buying a house; no small feat in this market. Are you still in Snoqualmie?
Posted by: plymouth37 Jun 6 2018, 10:29 AM
One of the last big tasks I had for the suspension was putting bushings in the rocker arms, previously there was just a 1/2" hole with a bolt through it.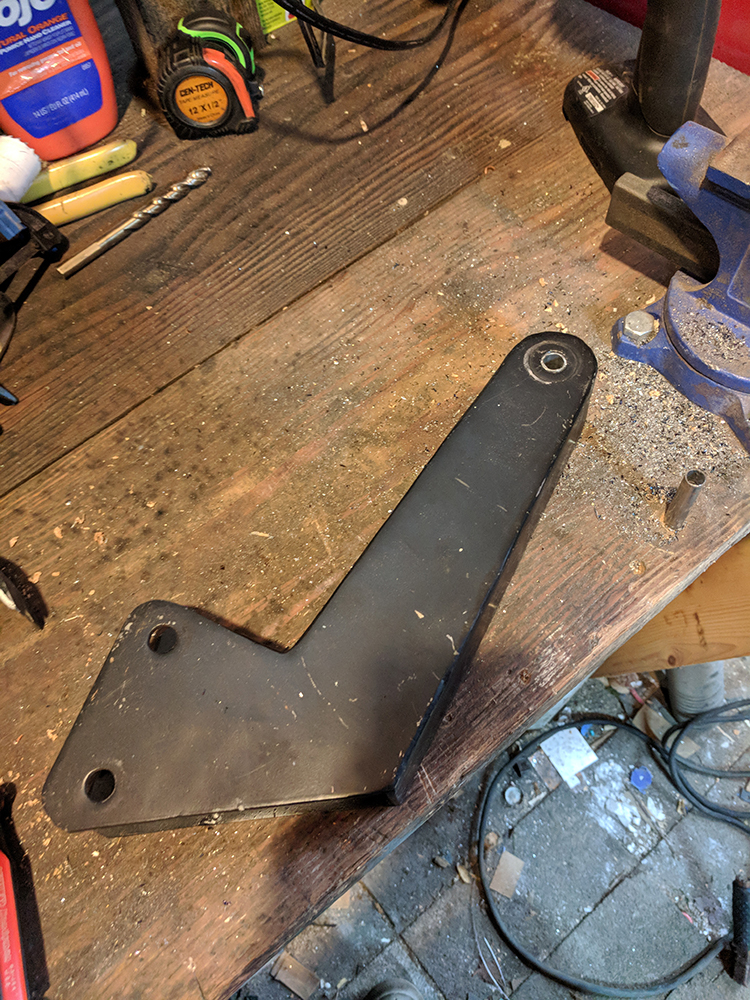
I drilled out a hole in the rocker and welded in a sleeve, then put in the bushings.
These rocker arms are definitely prototypes, I want to drive the car to see what they do, then reevaluate from there, I have a CNC at work, Maybe we mill version 2.0...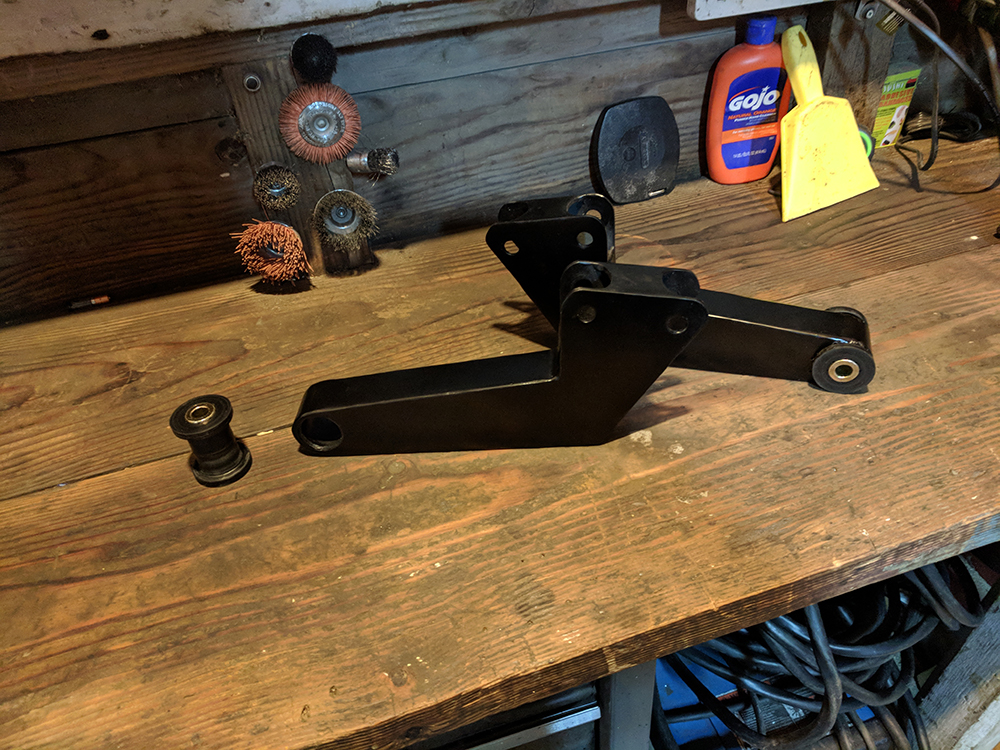
I reinstalled the rocker arms, put on the doors and dropped it back down on its wheels.
Now I am going to run it up to temperature and see if anything blows up...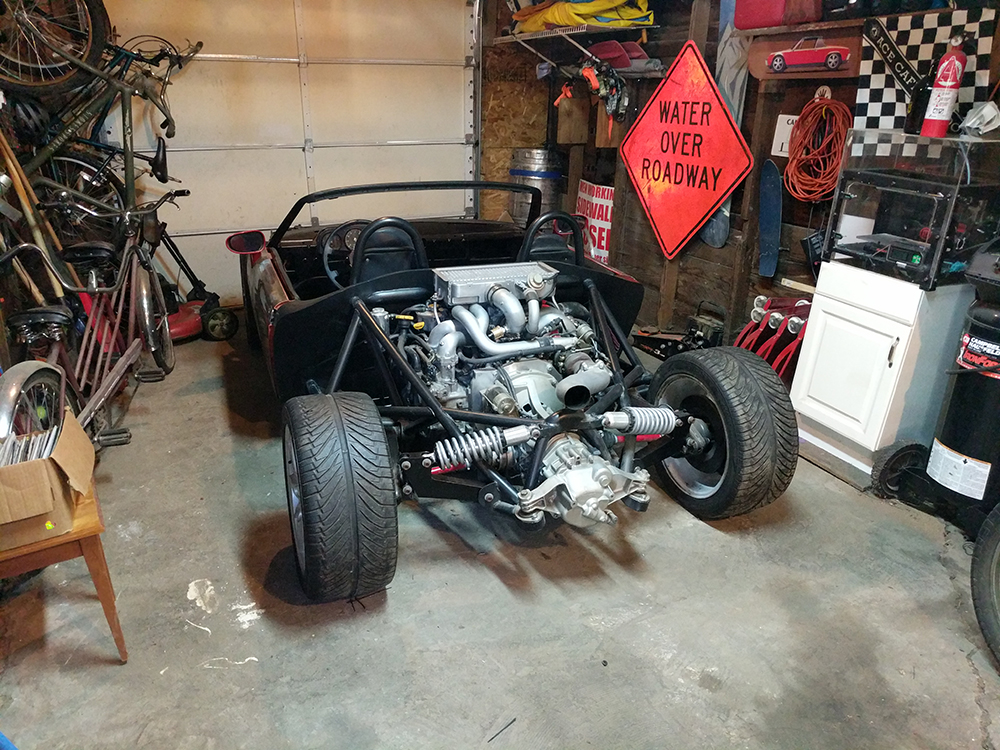
Posted by: plymouth37 Jun 6 2018, 10:31 AM
So, have you calculated the weight savings yet?
Congrats on buying a house; no small feat in this market. Are you still in Snoqualmie?
Thanks! We actually bought the house we were renting, no moving, no realtor! Same tiny garage
Posted by: JmuRiz Jun 6 2018, 10:36 AM

Posted by: plymouth37 Jun 6 2018, 11:02 AM
Posted by: 76-914 Jun 6 2018, 11:45 AM
Such a build! It will be good to see it hit the road.
Posted by: PeeGreen 914 Jun 6 2018, 01:02 PM
So, have you calculated the weight savings yet?
Congrats on buying a house; no small feat in this market. Are you still in Snoqualmie?
Thanks! We actually bought the house we were renting, no moving, no realtor! Same tiny garage
Where are you at Dana? Our shop is in Greenwood off of 79th.
Posted by: plymouth37 Jun 6 2018, 04:28 PM
So, have you calculated the weight savings yet?
Congrats on buying a house; no small feat in this market. Are you still in Snoqualmie?
Thanks! We actually bought the house we were renting, no moving, no realtor! Same tiny garage
Where are you at Dana? Our shop is in Greenwood off of 79th.
I am out in Snoqualmie but I work downtown at 4th and Madison, we should get together sometime, been a while!
Posted by: plymouth37 Jun 6 2018, 04:39 PM
Well I started running it up to temperature and then I get a little dribble of coolant coming from the Radiator... oh yeah, like 10 years ago when I last drove this thing it started developing a radiator leak, guess a decade of sitting didn't fix it so I guess i need to pull it.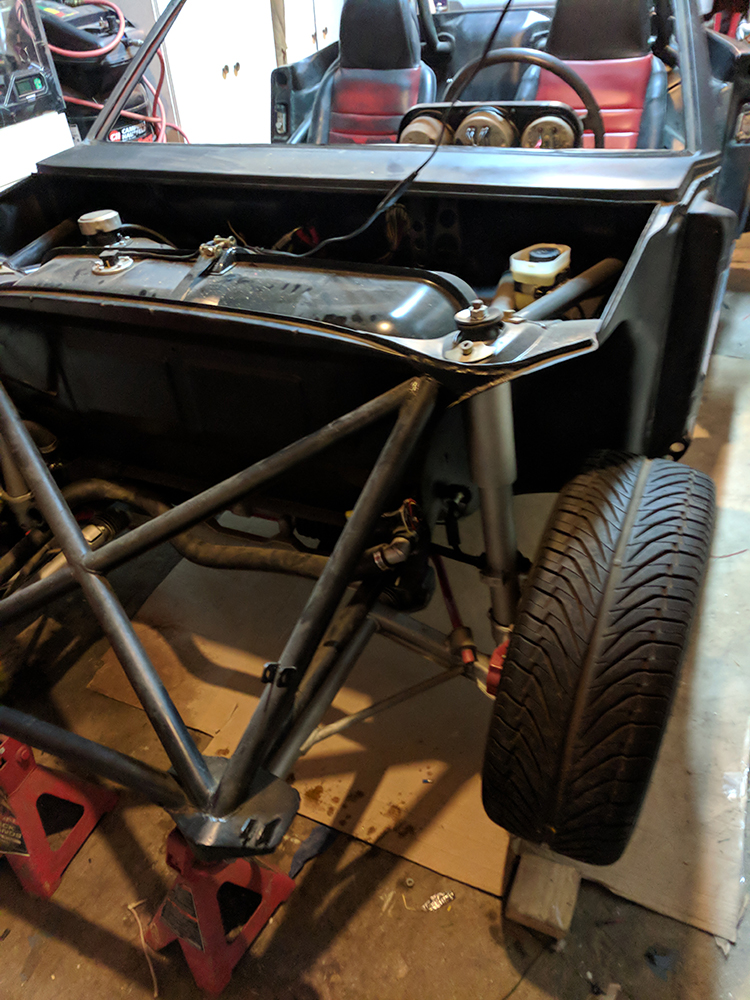
Now for an activity my 3 year old was all about, leak hunting! Ran a bath, capped the outlets, time for a dunk!
(Look at that tub ring, my wife was about as happy about this as the time I put the intake manifold in the dishwasher...)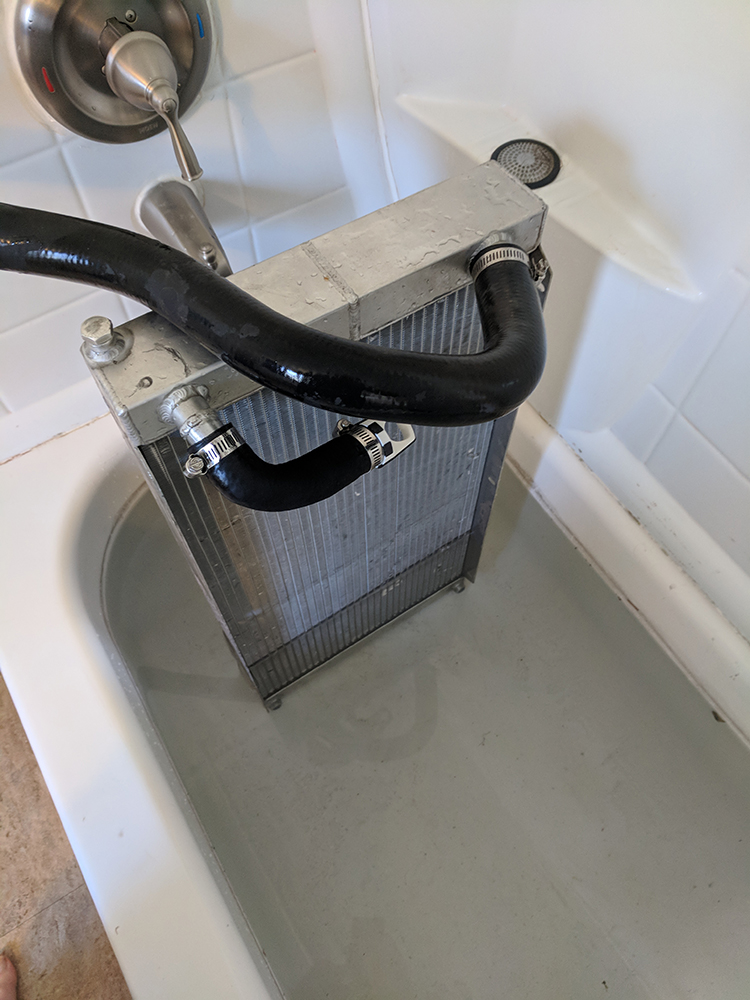
Bingo! it was small enough that I had to blow into a coolant hose to build up enough pressure to make it bubble but sure enough here it is!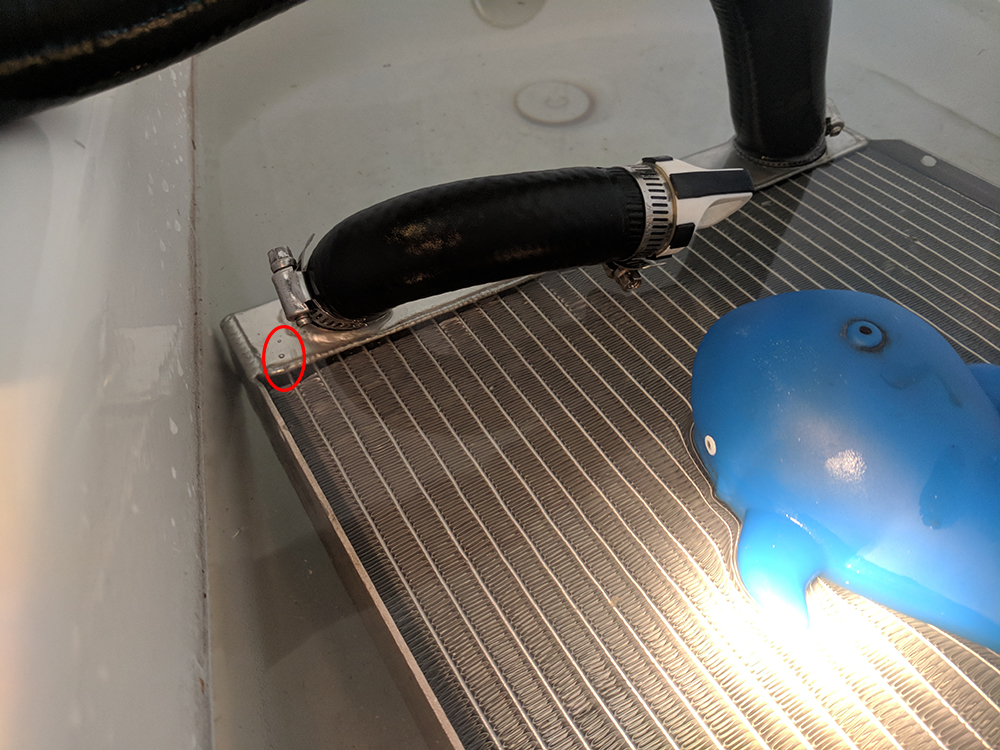
I got so lucky, literally the easiest spot to access. I mixed up some JB Weld and patched it up. 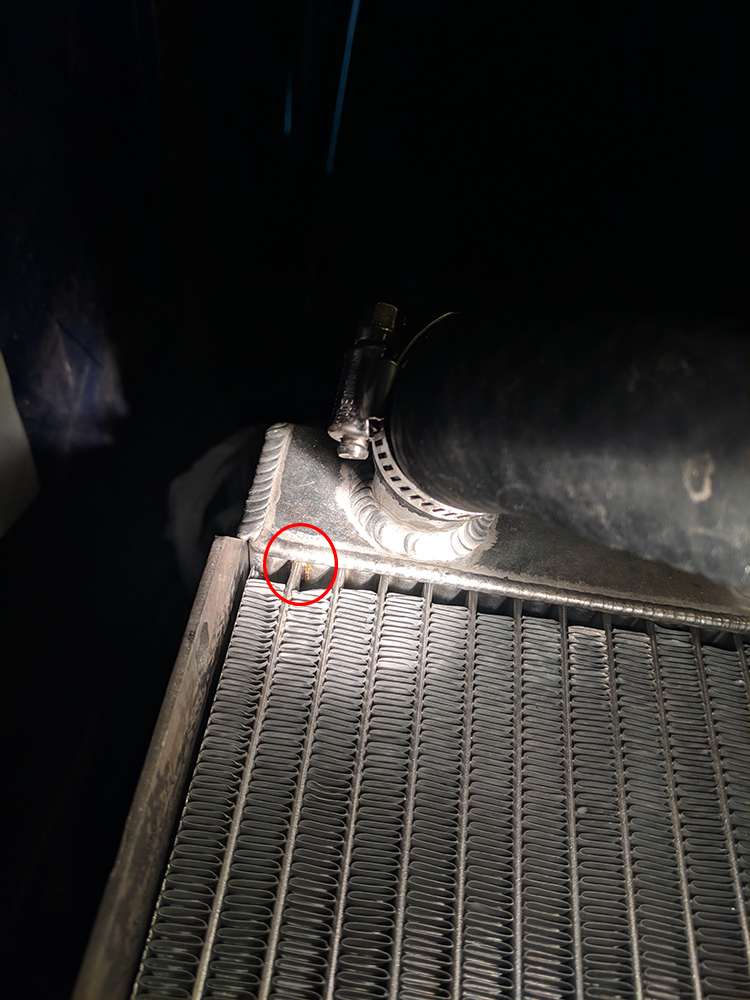
Reinstalled my freshly washed and patched radiator, I will give it a day or so to dry and see how it holds!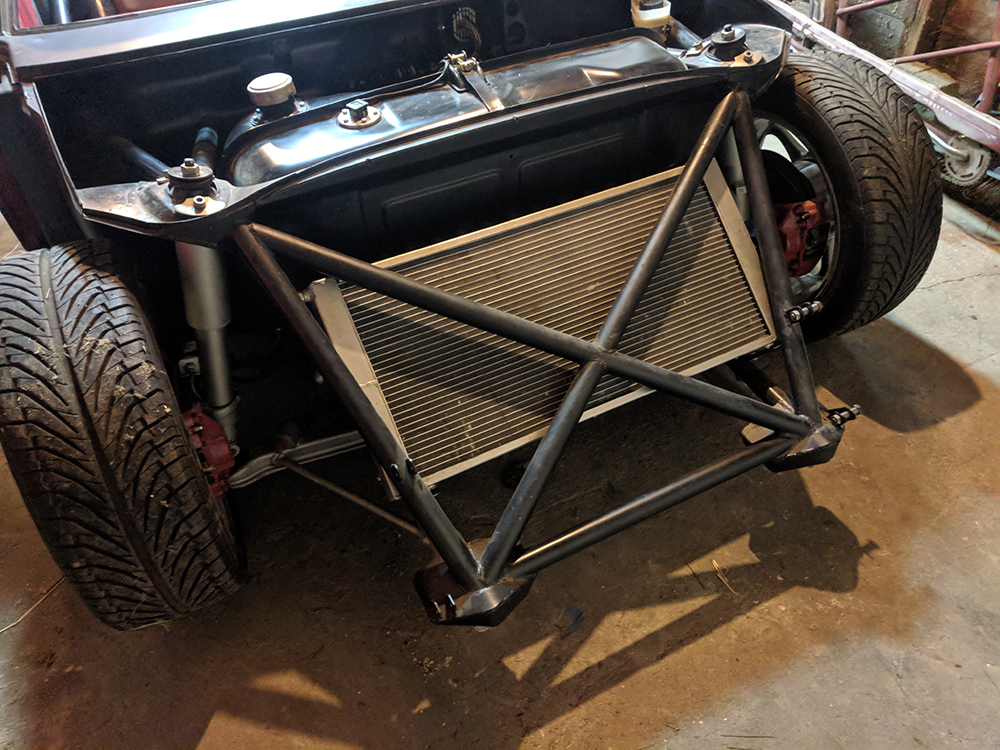
Posted by: Cairo94507 Jun 6 2018, 05:24 PM
The whale is a nice touch.
Posted by: plymouth37 Jun 7 2018, 11:37 PM
I am sorting out the rear taillight wiring, looks like another thing I forgot didn't work was the reverse lights. Circuit was good but the switch doesn't engage correctly.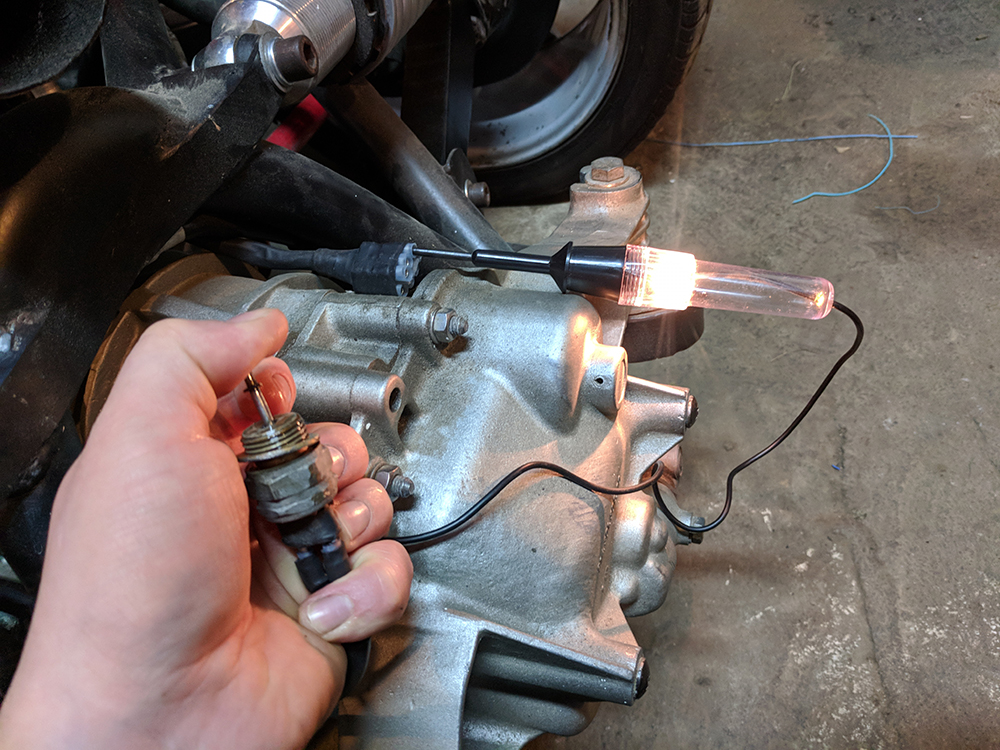
I pulled the switch and the pin was about the right length, I think there is something a bit funky with the switch but I cut a chunk of an allen wrench a little longer than the pin and after a couple filing sessions I got it dialed in.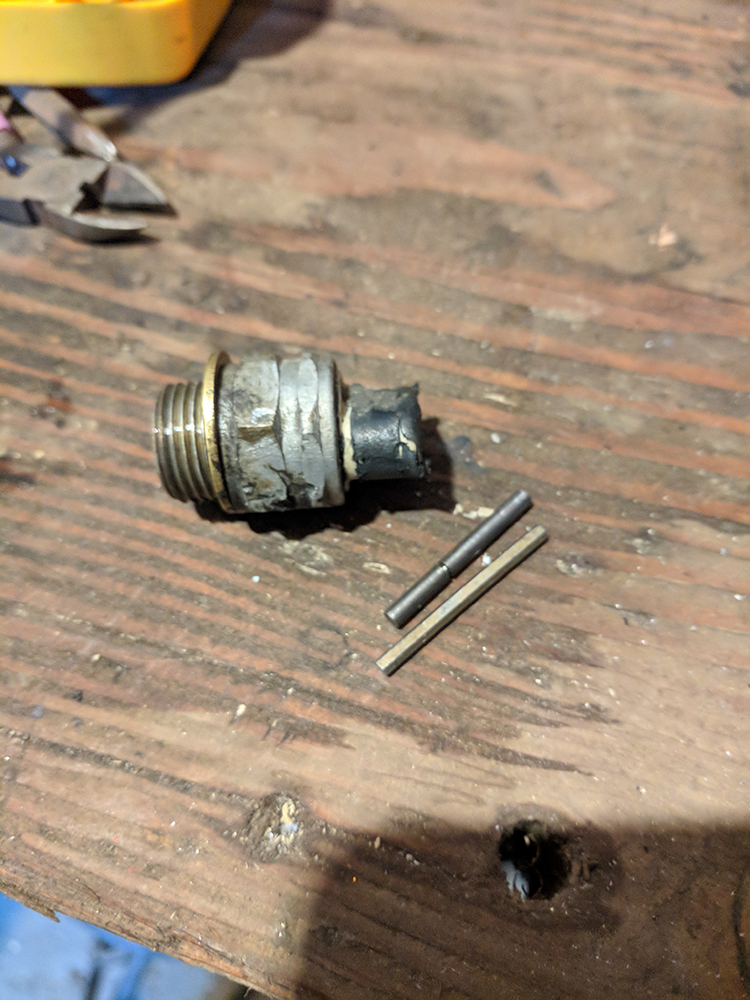
Reverse light wire gets power when I engage reverse now, one step closer to street legality!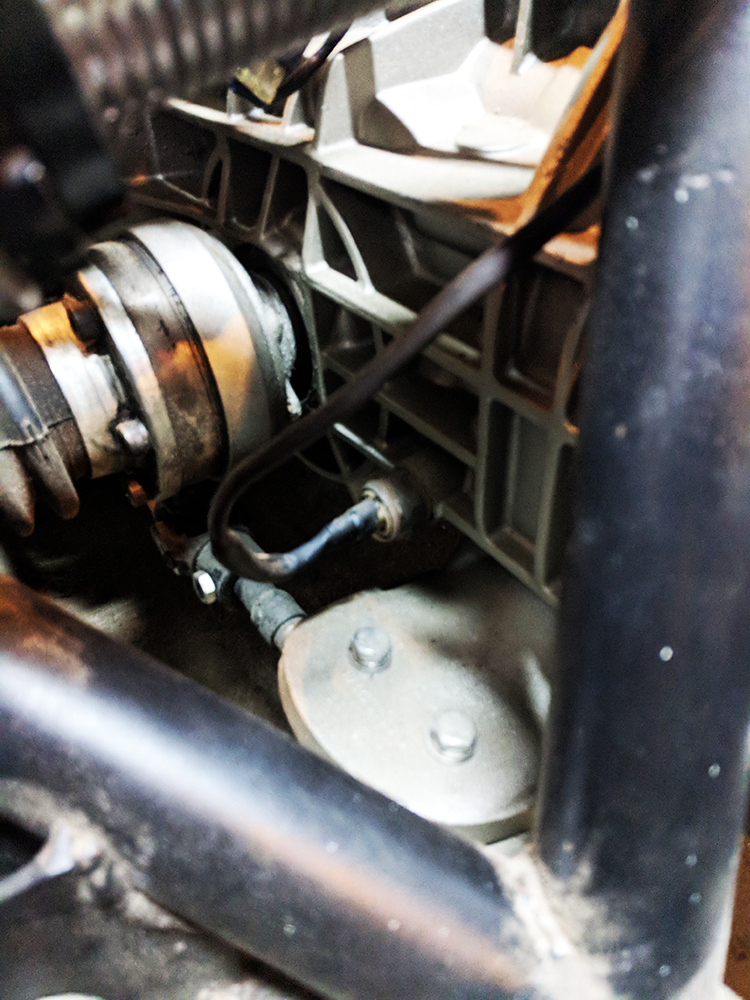
Posted by: PeeGreen 914 Jun 8 2018, 03:27 PM
So, have you calculated the weight savings yet?
Congrats on buying a house; no small feat in this market. Are you still in Snoqualmie?
Thanks! We actually bought the house we were renting, no moving, no realtor! Same tiny garage
Where are you at Dana? Our shop is in Greenwood off of 79th.
I am out in Snoqualmie but I work downtown at 4th and Madison, we should get together sometime, been a while!
That would be great. There is a number of cool places in the area. Just say when.
Posted by: plymouth37 Jun 9 2018, 12:38 AM
Okay, so a lot of you know the body to this car is still in storage in Wyoming, I am going to retrieve it later this summer, but I think this chassis is ready to start testing now, so I have a plan, a bolt on "bumper" that includes all of the bits to make it "street legal" I cut up some steel stock using an old license plate as a jig.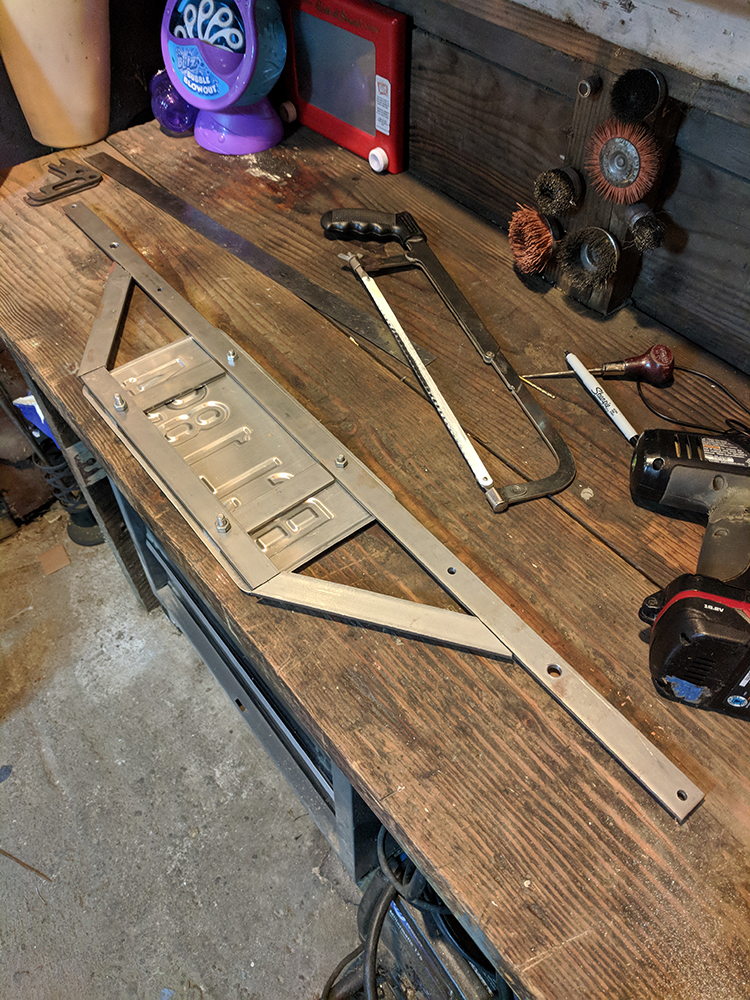
Welded it up and used the stock tranny exhaust mounting points to hang it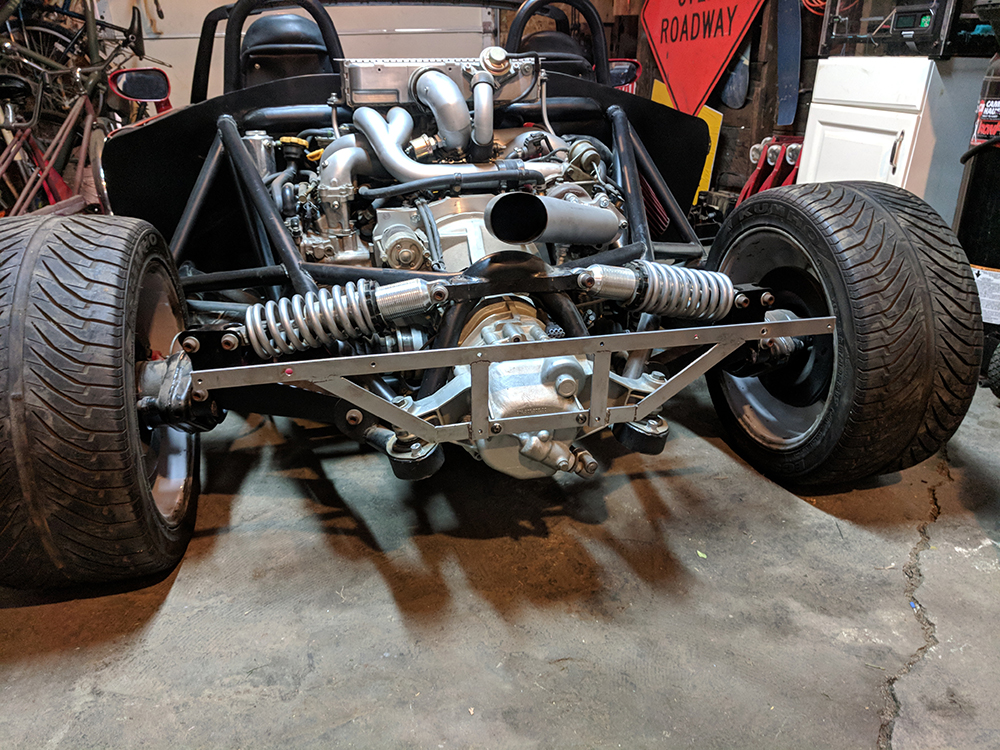
Then painted it and wired up some led trailer taillights. For fun I mounted the license plate that it ran the last time it drove, tags expired 13 years ago... how time flies!
Well it is about to make its triumphant return to the street! This is going to be fun!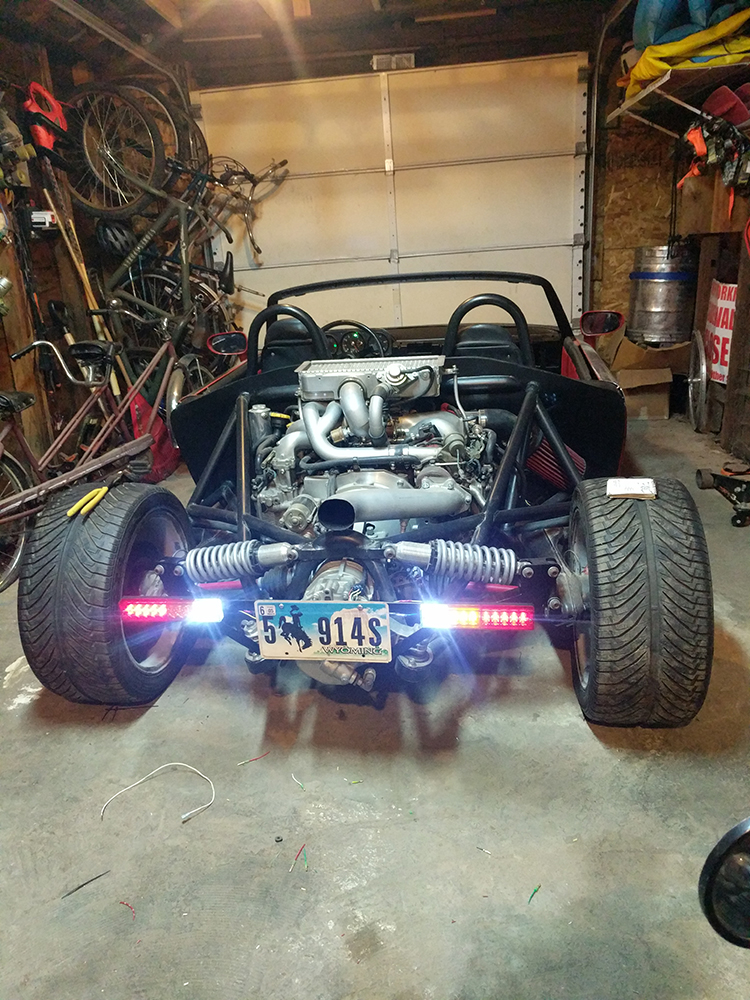
Posted by: Porschef Jun 9 2018, 05:32 AM
10 year Anniversary. Don't time fly indeed...
Helluva project, looking forward to your first drive.
Posted by: Cairo94507 Jun 9 2018, 06:38 AM
Looking forward to the video very much.
Posted by: plymouth37 Jun 9 2018, 08:36 AM
10 year Anniversary. Don't time fly indeed...
Helluva project, looking forward to your first drive.
Wow, you are right, 10 years to the day since my first post in this thread, didn't even realize that until you said something, how cool.
Looks like I better take it out for a spin today to celebrate, good thing I just got it insured, titled and licensed!
Anklebiter!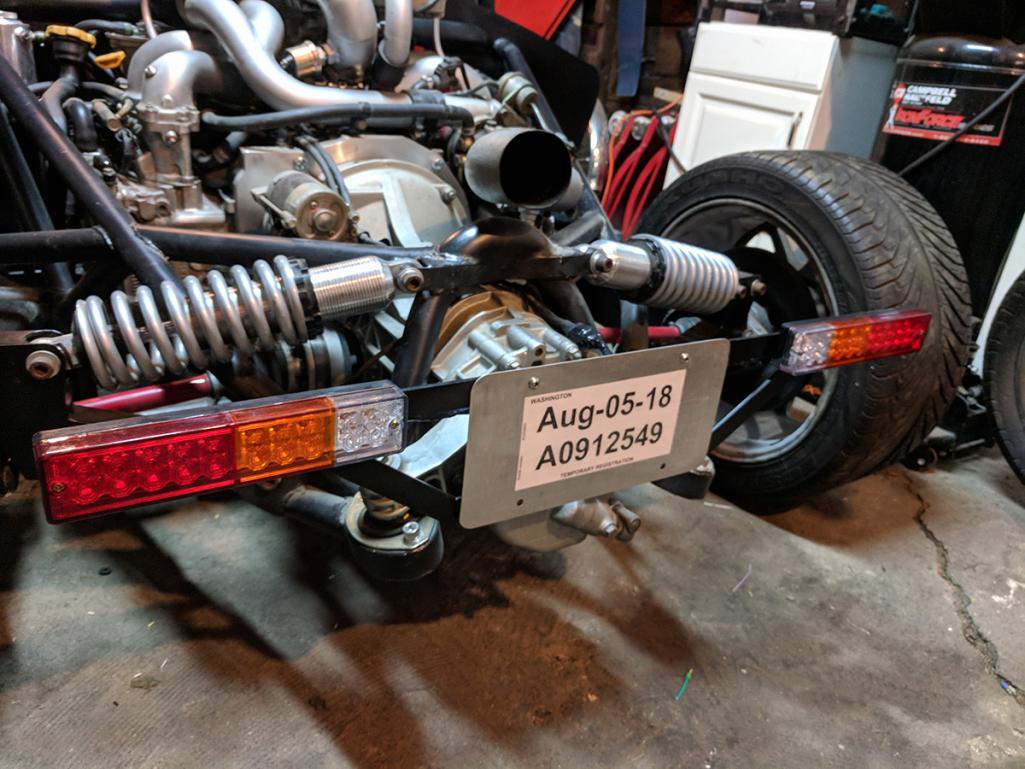
Posted by: Porschef Jun 9 2018, 08:46 AM
Yaay!! Please make/post a vid, I'm sure we'd all appreciate it
Posted by: plymouth37 Jun 9 2018, 11:27 AM
Okay, 10 years to the day, first drive is here, still a long way to go but a major milestone none the less! Thank you to all of you for joining me on the long meandering journey!
As promised here are the videos!
https://www.youtube.com/watch?v=sEqFDY0ZNrk
Got it into third here, tires broke loose at about 4500 rpm in third this thing is going to be a monster...
https://www.youtube.com/watch?v=NwWOz25GmaU
Posted by: horizontally-opposed Jun 9 2018, 11:34 AM
This is so far beyond cool that it just made me grin from ear to ear. Congrats!
I also love those taillights...they're subtly "914" with a modern twist. If you can swap the order to have the ambers to the outside, they really would tie in with the car's basis.
Can't wait to see this car as it moves back under bodywork—although seeing all of its systems so low and within wheels is equally fun to look at.
Posted by: jcambo7 Jun 9 2018, 11:36 AM
So, have you calculated the weight savings yet?
Congrats on buying a house; no small feat in this market. Are you still in Snoqualmie?
Thanks! We actually bought the house we were renting, no moving, no realtor! Same tiny garage
Where are you at Dana? Our shop is in Greenwood off of 79th.
I am out in Snoqualmie but I work downtown at 4th and Madison, we should get together sometime, been a while!
That would be great. There is a number of cool places in the area. Just say when.
Maybe we could do a PNW get together or something.
Posted by: type47fan Jun 9 2018, 11:37 AM
Finally seeing the car on the road . . . well worth the wait!
Posted by: Travis Neff Jun 9 2018, 11:55 AM
Great to see this on the road again, I love it!
Posted by: Porschef Jun 9 2018, 11:57 AM
Haha, that's great!
Very cool.
And looks street legal to boot!
Posted by: Cairo94507 Jun 9 2018, 02:49 PM
That is just way to cool for words. Congratulations on getting to drive your build.
Posted by: KELTY360 Jun 9 2018, 03:31 PM
Okay, 10 years to the day, first drive is here, still a long way to go but a major milestone none the less! Thank you to all of you for joining me on the long meandering journey!
As promised here are the videos!
https://www.youtube.com/watch?v=sEqFDY0ZNrk
Got it into third here, tires broke loose at about 4500 rpm in third
this thing is going to be a monster...https://www.youtube.com/watch?v=NwWOz25GmaU
Beats pushin' it!
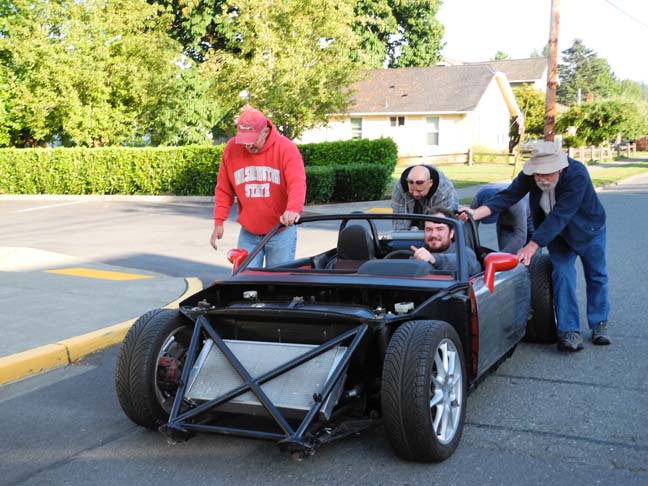
Posted by: plymouth37 Jun 9 2018, 03:43 PM
Beats pushin' it!
Sure does, We should do another Snoqualmie days car show get together this year, I won't even make you push me over there this time! August 19th! We might even let you bring the 911 Jon!
Posted by: KELTY360 Jun 9 2018, 03:50 PM
Beats pushin' it!
Sure does, We should do another Snoqualmie days car show get together this year, I won't even make you push me over there this time! August 19th! We might even let you bring the 911 Jon!
Good idea. I'll be in Portland for a wedding that day but it would be fun for some guys to get together.
Do you have plans yet for how to transport the body?
Posted by: tomh Jun 9 2018, 05:41 PM
My 10 year project is learning the piano, I hope I'm as successful!
Good job I admire the staying power!
Posted by: Edward Blume Jun 9 2018, 08:00 PM
Damn good job! You rock dude!
Posted by: speed metal army Jun 9 2018, 10:13 PM
Holy Macaroni! I log in for the first time in a while and get rewarded with this.
Nice work!!! Such a Rad project.
Posted by: 513mugsy Jun 22 2018, 08:01 PM
So I was just looking through old bookmarks, and came up on this one. Decided to see if it ever got finished. And 10 years to the date your driving it for the first time! Love it!!
Posted by: Mueller Jun 22 2018, 08:07 PM
Such a cool build.... must stop viewing this thread as i get too many ideas!
Posted by: plymouth37 Aug 18 2018, 02:30 PM
Sorry for the short notice but if you want to see the Anklebiter in person we will be at the car show at railroad days in Snoqualmie, WA tomorrow! Come on out and say hi!
http://www.railroaddays.com/events/legends-classic-car-show/
Posted by: effutuo101 Aug 18 2018, 04:35 PM
Wow! Love seeing this on the road again!
Posted by: worn Aug 19 2018, 04:56 PM
Sorry for the short notice but if you want to see the Anklebiter in person we will be at the car show at railroad days in Snoqualmie, WA tomorrow! Come on out and say hi!
http://www.railroaddays.com/events/legends-classic-car-show/
I just left north bend on Wednesday. My mother in law is in snoqualmie, and my sister shows art at railroad days. But I miss out. Congratulations.
Posted by: flmont Aug 19 2018, 05:19 PM
Any pics of this event..
Posted by: plymouth37 Aug 19 2018, 08:16 PM
Had a lot of fun today, our kiddo had a blast too. By the end of the show she could correctly identify half of the cars there. Good turnout, about 150 cars.
I let any kid that wanted to climb in the car, my daughter had a lot of fun showing people the car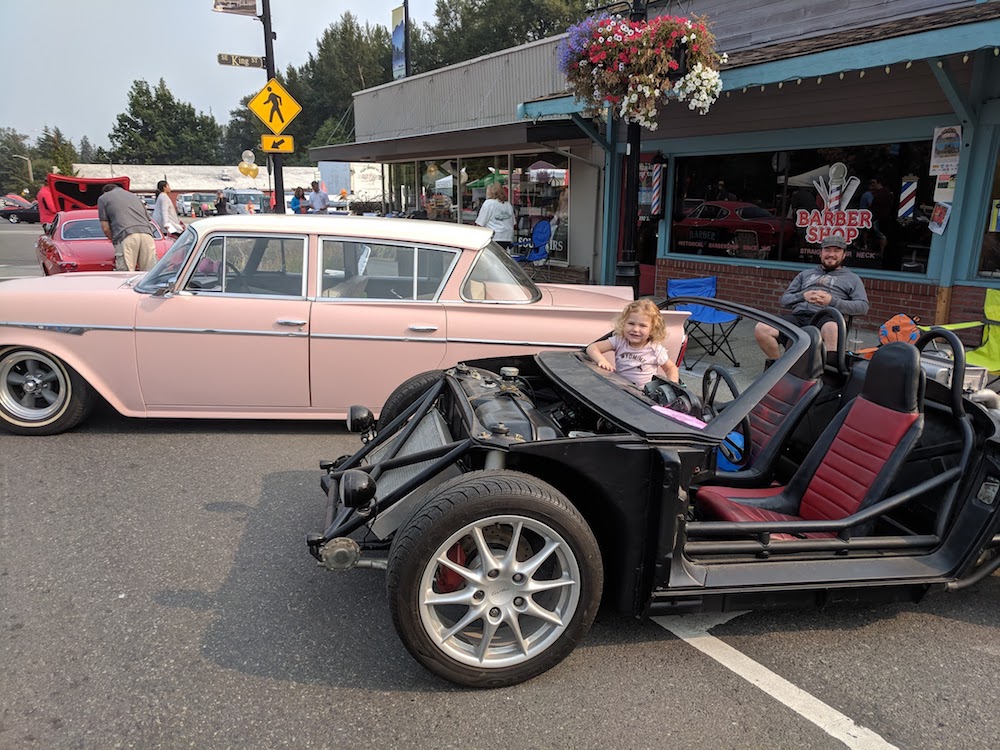
Lots of pretty confused people, "is this a miata?" "is that a boxster engine?" "did you mean to do this?" "did you lose a couple parts on the way over?" etc... Good conversation starter!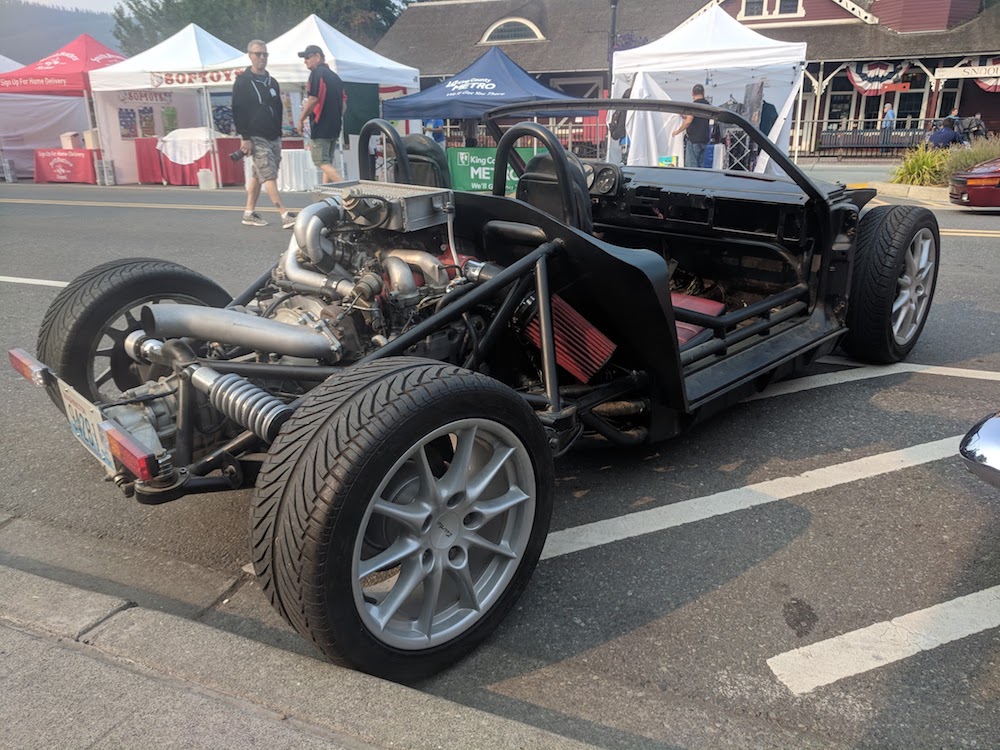
My Dad brought over his 1960 Rambler as well, good family outing! When I was driving out the local cops were just pointing and laughing, hopefully they are as kind the next time they see me take it out!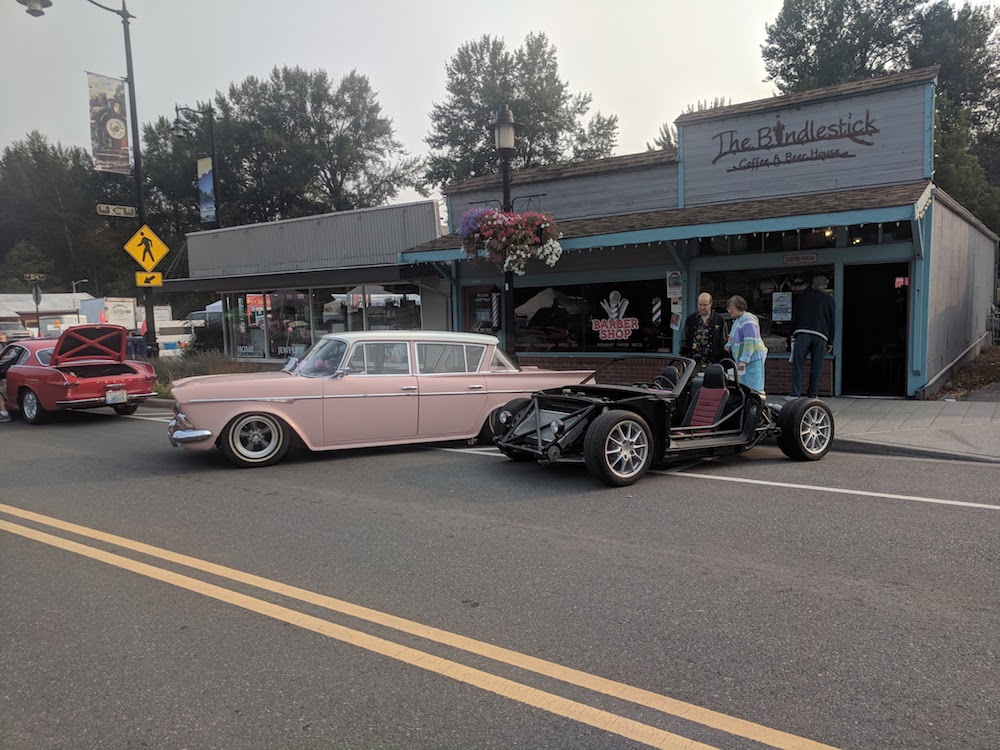
Posted by: flmont Aug 19 2018, 08:37 PM
Sweet...Thanks for the Pics..Gotta B fast..
Posted by: Ferg Aug 20 2018, 02:34 PM
Very Cool! Glad it didn't rain.
Posted by: KELTY360 Aug 20 2018, 03:10 PM
I thought I recognized that Rambler!
The Anklebiter personifies the minimalist ethic at this point. I was talking to a friend of mine from the Mercury Cougar world and he was telling me about this amazing 914 build he'd read about. He said it was called The Anklebiter.... Your fame is spreading Dane!
Have you got plans for picking up the bodywork yet?
Posted by: rhodyguy Aug 20 2018, 03:27 PM
Street legal. Very cool.
Posted by: badcatt Aug 29 2018, 12:50 PM
I thought I recognized that Rambler!
The Anklebiter personifies the minimalist ethic at this point. I was talking to a friend of mine from the Mercury Cougar world and he was telling me about this amazing 914 build he'd read about. He said it was called The Anklebiter....
Your fame is spreading Dane!Have you got plans for picking up the bodywork yet?
Marc, I like this build enough to have joined this group. I; like I'm sure many others here are waiting patently for the body to return and be installed.
Posted by: plymouth37 Oct 10 2018, 11:27 AM
So now that the car is running kind of reliably I am trying to go through the engine, replacing some of those things that might be negatively effected by sitting around for a decade... Seeing as this is an interference engine a timing belt was high on that list, while i was in there might as well do a water pump as well. 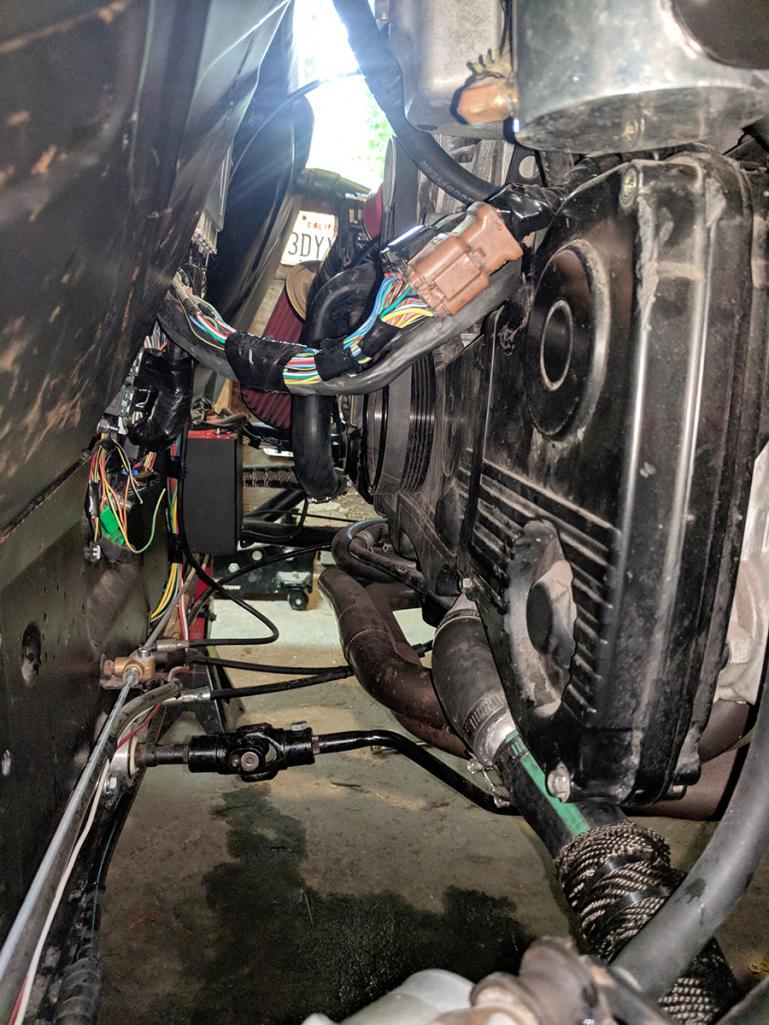
There is a really annoying design flaw in the Subie EJ Engines, the captured nut that the timing belt covers mount into are captured in plastic, right next to the cylinder head, so when you go to remove the bolts they just spin. did some googling and the best way to fix this is drilling a tiny hole into the captured nut, screwing in a wood screw or something similar then bracing that and backing out the bolt... had to do this 6 times... grrr.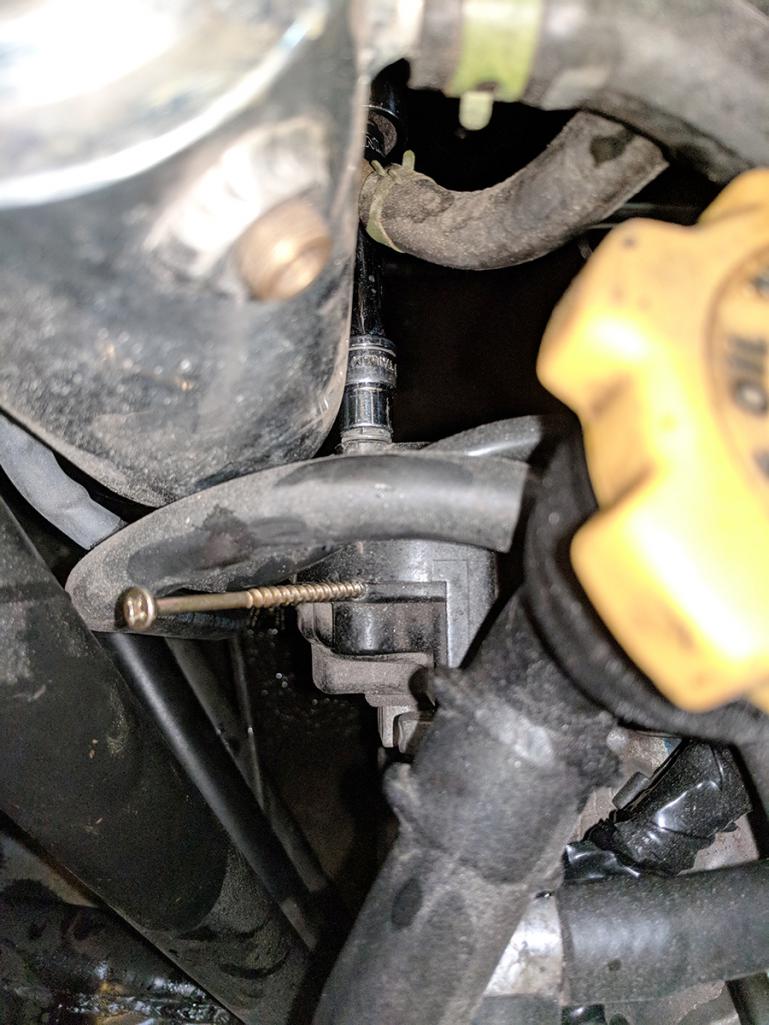
Pulled the belt and pump.
New stuff in, bled the system again and got the new belt on, aligning the 4 cam pulls is no annoying, especially because one of the cylinders is under compression, so you even breath on that pulley and is spins at a million mph out of your hand, finally got it perfect after what felt like forever, the engine runs great so i think I got the cams aligned correctly. One step closer to reliability!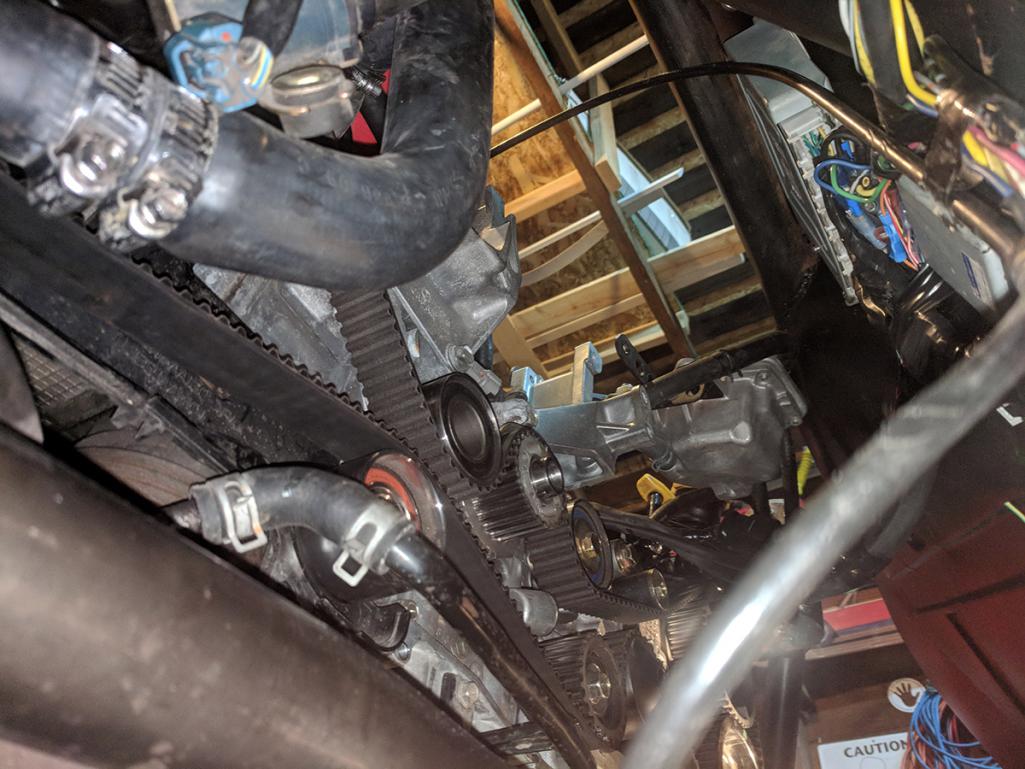
Posted by: Ferg Oct 10 2018, 12:23 PM
Whoo hoo. Nice Dana.
What cosmetic changes are in order if any?
Ferg
Posted by: plymouth37 Oct 10 2018, 12:34 PM
Whoo hoo. Nice Dana.
What cosmetic changes are in order if any?
Ferg
The body will be fairly stock other than the chopped roadster part, it has GT flares, the lids will be welded to the fenders to make clamshells, don't forget the Ferrari Diffuser, oh and I am shaving the headlights and mounting new tiny modern headlights in the turn signal buckets. I don't want it to be too over the top, just modernized.
I really wish I had tried harder to get the body on the trailer, I can't find a way to get it out here for less than a grand which is super lame...
Posted by: worn Oct 10 2018, 12:59 PM
Whoo hoo. Nice Dana.
What cosmetic changes are in order if any?
Ferg
The body will be fairly stock other than the chopped roadster part, it has GT flares, the lids will be welded to the fenders to make clamshells, don't forget the Ferrari Diffuser, oh and I am shaving the headlights and mounting new tiny modern headlights in the turn signal buckets. I don't want it to be too over the top, just modernized.
I really wish I had tried harder to get the body on the trailer, I can't find a way to get it out here for less than a grand which is super lame...
I was looking at the first page of your thread right after I got a Moss Motors catalog. I think your project might. Might. Look good with cutaway doors so you can put your elbows in danger. Of course then you have the option of leaky side curtains. Also, the thing is probably way too fast for rain to touch it.
Posted by: plymouth37 Oct 10 2018, 01:28 PM
Whoo hoo. Nice Dana.
What cosmetic changes are in order if any?
Ferg
The body will be fairly stock other than the chopped roadster part, it has GT flares, the lids will be welded to the fenders to make clamshells, don't forget the Ferrari Diffuser, oh and I am shaving the headlights and mounting new tiny modern headlights in the turn signal buckets. I don't want it to be too over the top, just modernized.
I really wish I had tried harder to get the body on the trailer, I can't find a way to get it out here for less than a grand which is super lame...
I was looking at the first page of your thread right after I got a Moss Motors catalog. I think your project might. Might. Look good with cutaway doors so you can put your elbows in danger. Of course then you have the option of leaky side curtains. Also, the thing is probably way too fast for rain to touch it.
You do have a point, I have found it is a lot more fun to drive without doors, I pulled the doors off for the car show and enjoyed it so much that I stole the mirrors off of my cafe racer and bolted them into the hinge mount so I was still "legal".
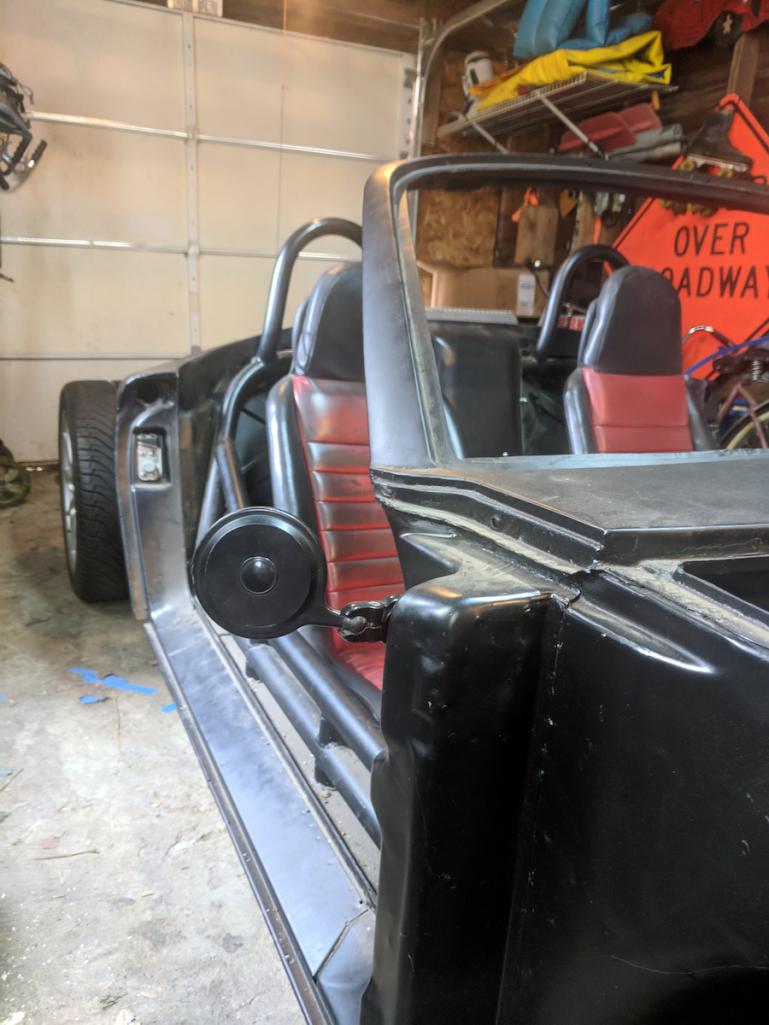
Posted by: Ferg Oct 10 2018, 03:59 PM
Where is the body now?
Posted by: plymouth37 Oct 10 2018, 04:11 PM
Where is the body now?
At my in-laws in Cheyenne WY
Both lids and intact front and rear, at least it is nice and dry there
I could probably split the nose and tail into 2 halves to help with shipping but don't really want to...

Posted by: plymouth37 Oct 11 2018, 04:47 PM
So the car is crazy loud, I thought the turbo would nock the noise down a bit but I really can't drive it with the level of exhaust note insanity that is coming out of this thing. I mocked up the diffuser, and yes, I am doing big double tips that center dump through the hole in the diffuser. 
It is impossible to find the type of muffler I need with anything larger than a 3" inlet so I am making a funnel that necks it down while simultaneously bending around the cage and lining up a straight shot to the diffuser hole.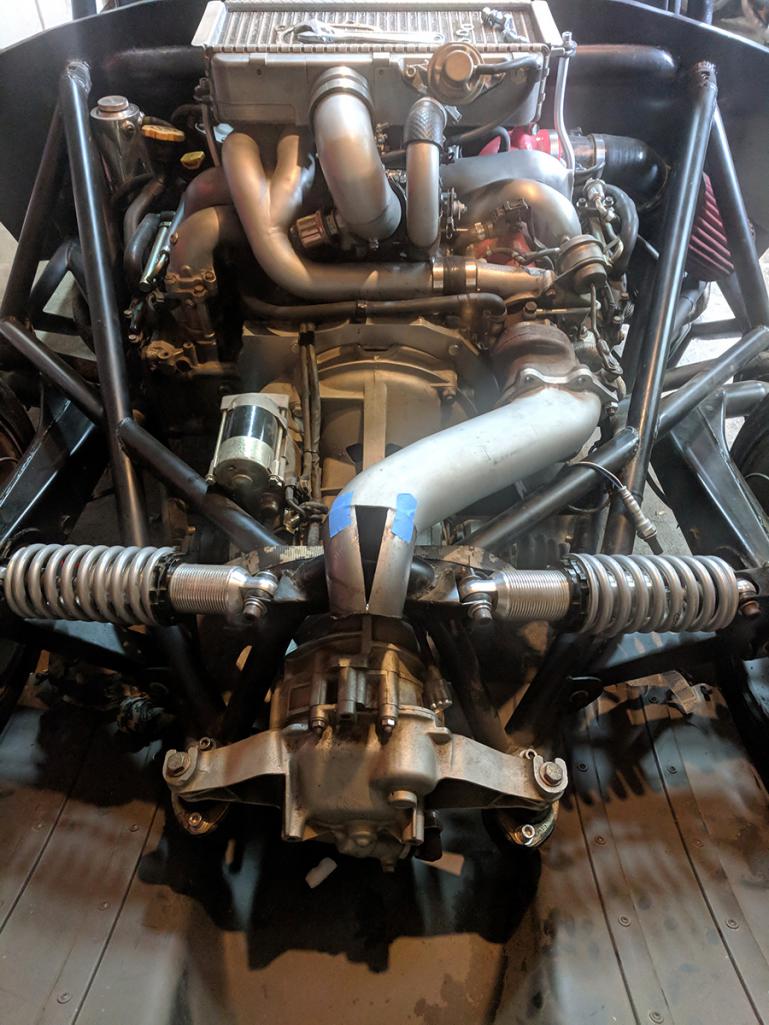
And here it is, my adapter bend from 4.5' oval to 3' circle, ohh shiny!
Posted by: plymouth37 Oct 11 2018, 11:24 PM
So space is pretty limited, and I felt like an integrated tip would help with packaging, I also figured out that my muffler would sit at about a 45 degree downward slope. 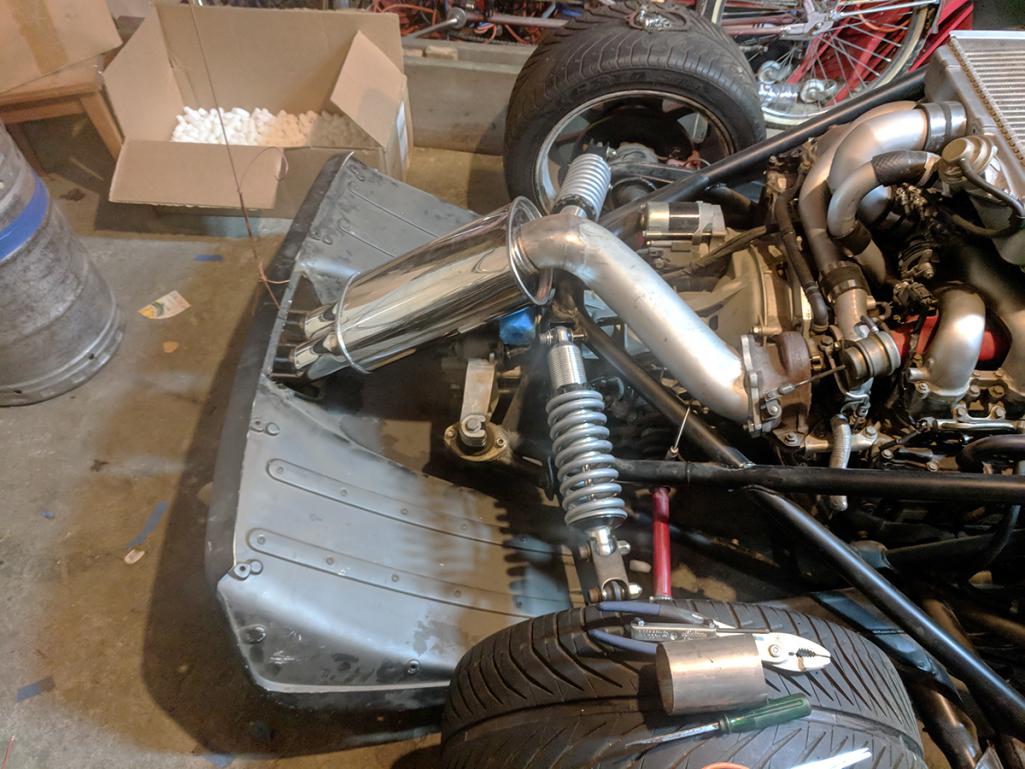
The DTM style mufflers have a 45 degree kick up of their tips when mounted "correctly" so when mounted at a 45 degree angle the tips are dead straight, perfect!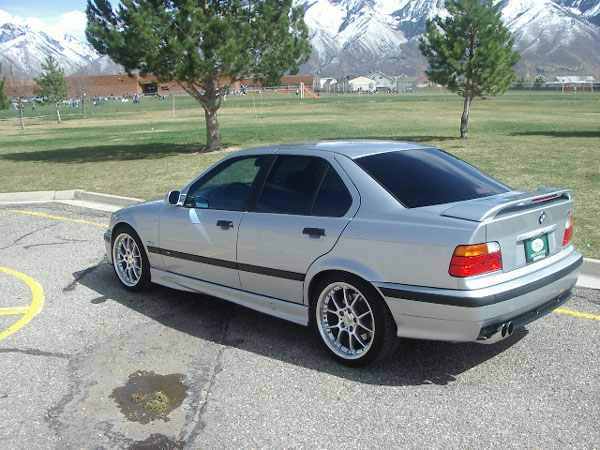
Got everything welded up and mounted, even used the stock muffler mounts on the tranny, muffler is stainless but way too much bling for my tastes, painted everything except the end cap and tips matt black. Fired it up to bake the paint and test out the sound, hard to tell without driving it but i think it sounds pretty good.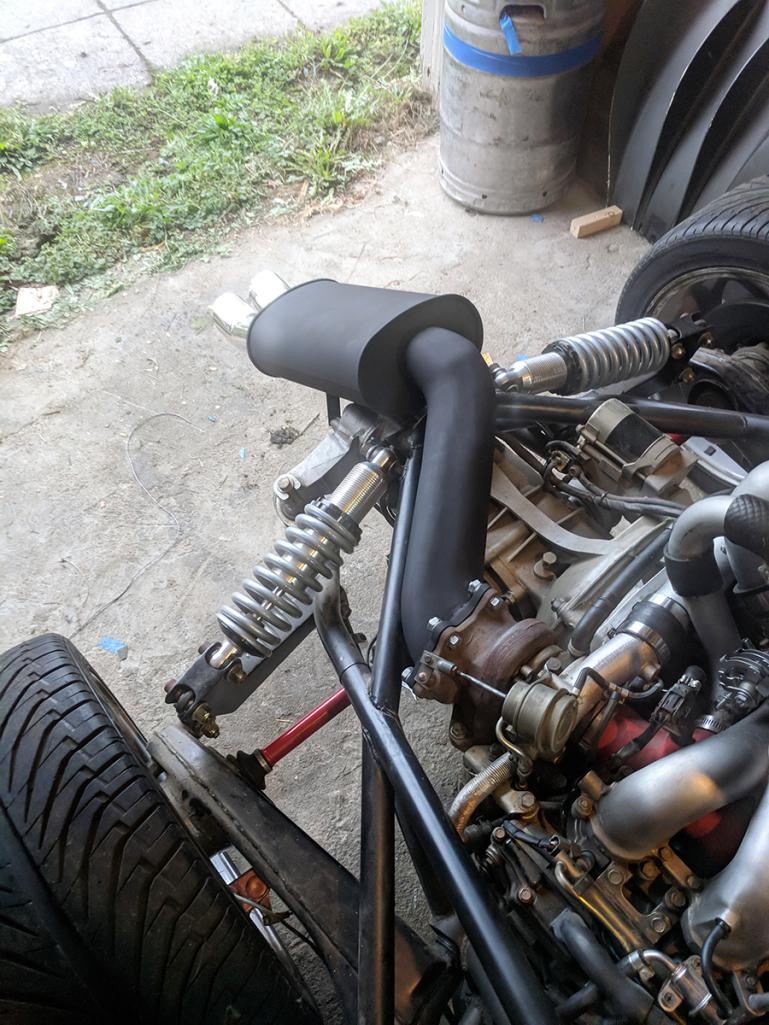
Nice stinger!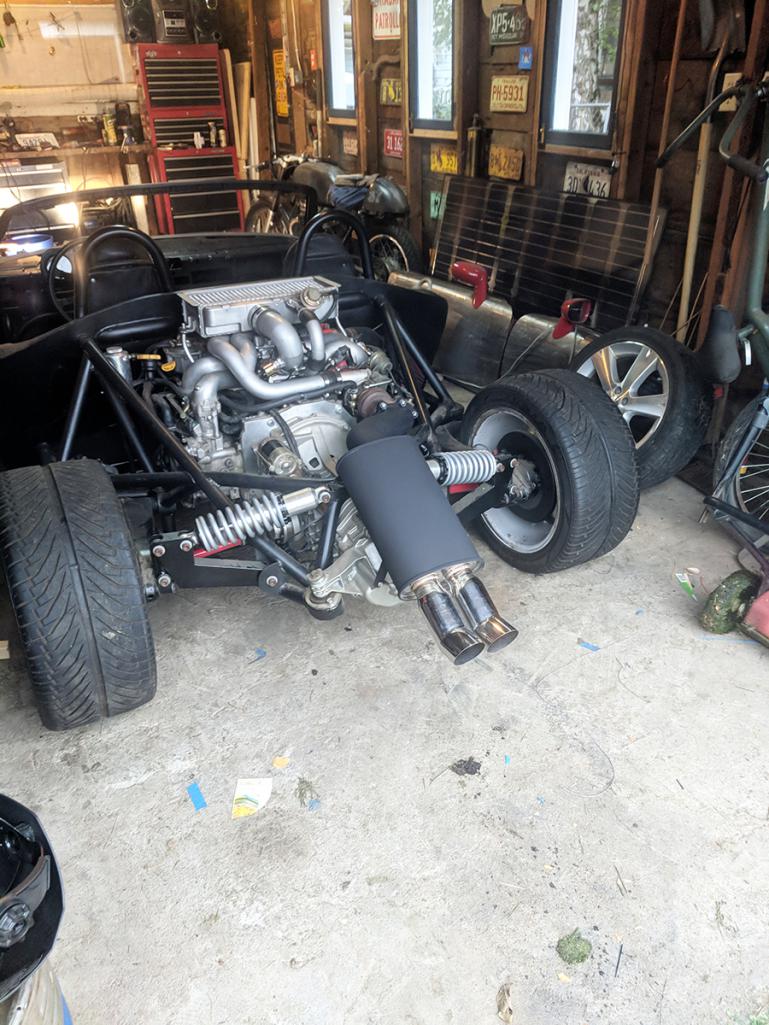
Here you can see the tip placement, pretty pleased with this. I also cut out the license plate holder from my temporary light bar and remounted it, plate is getting the zip tie treatment somewhere else for now.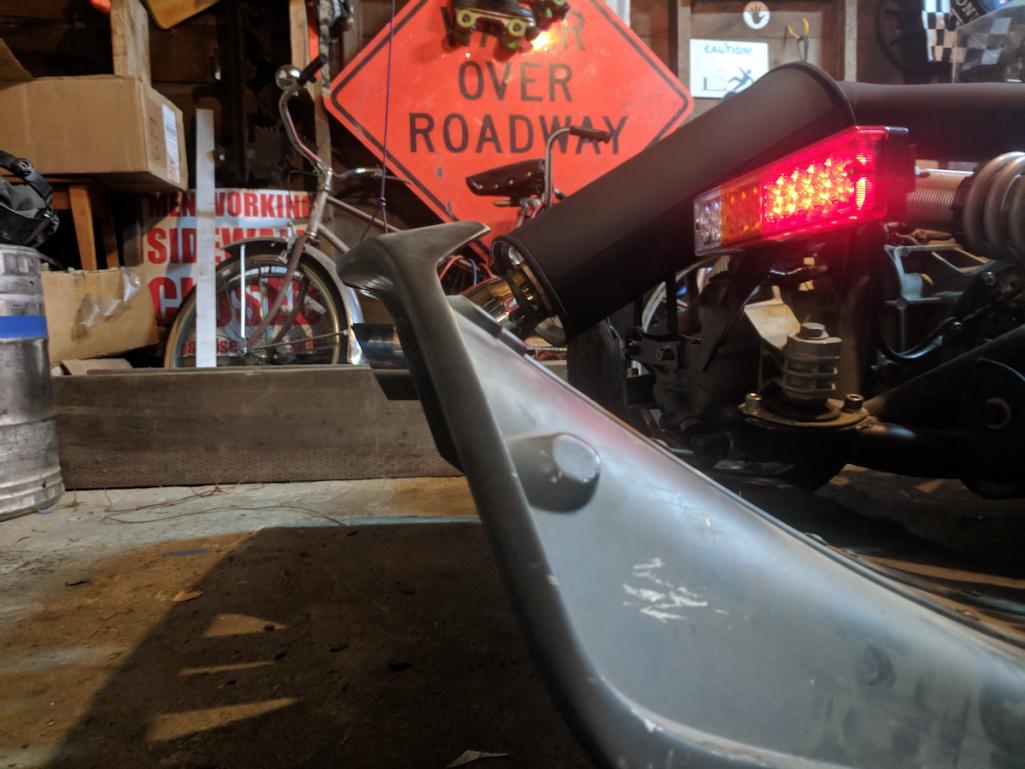
It is still going to be a while before i mount the diffuser for real, might rework the rear opening a bit with fiberglass or do a trim piece but I think this is in the ball park as far as how I want it to look
Nothing like mounting dirty Ferrari parts with 2x2s and old wire, keeping it classy!
Should be nice and dry this weekend, looking forward to taking it out for a spin to see how it sounds at speed!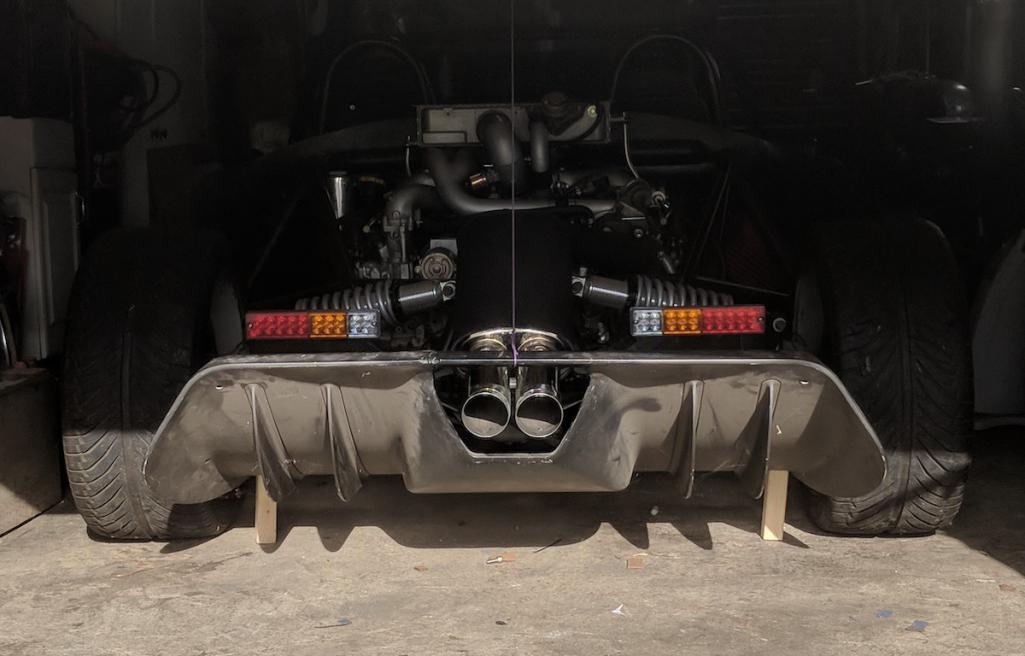
Posted by: 914 Ranch Oct 12 2018, 12:44 AM
Hey Dana, did I see a '37 Plymouth in the back ground in the barn?
Posted by: plymouth37 Oct 12 2018, 08:14 AM
Hey Dana, did I see a '37 Plymouth in the back ground in the barn?
Yup, that's my first car, next in line after the 914! I built that car when I was 15, needs a full going through but all of the original hard to find bits are there. Pretty rust free too. Was lucky enough to buy it before anything with 2 doors disappeared and found all the parts before eBay showed up and ate them all...
Posted by: horizontally-opposed Oct 12 2018, 09:13 AM
One of the things I really love—and appreciate—about this build is the lack of visual bling and colored/polished/etc stuff. Everything looks purposeful, and that has a cumulative effect that is very, very cool. I even liked the body in naked steel when you had it on the car, and the way you've respected so many elements of the 914 when you could very easily just throw them away. I am very curious to see which way you will go with exterior color...
Re: headlights and putting them where the turn signals usually reside, I am likewise curious to see what you will do there. The treatment has been done in the past, but I have set to see a result that looks right on the 914. As an addition or alternative (or focal point?), have you considered mounting one headlight in each bumper opening, cutting the top and bottom of the lights off with the upper and lower edges of the rectangle? Might be a nice look with the rest of your build, but it's a thought offered respectfully. This is one of the cooler builds going on a 914, and it's been fun to watch it go along.
Posted by: plymouth37 Oct 12 2018, 02:28 PM
One of the things I really love—and appreciate—about this build is the lack of visual bling and colored/polished/etc stuff. Everything looks purposeful, and that has a cumulative effect that is very, very cool. I even liked the body in naked steel when you had it on the car, and the way you've respected so many elements of the 914 when you could very easily just throw them away. I am very curious to see which way you will go with exterior color...
Re: headlights and putting them where the turn signals usually reside, I am likewise curious to see what you will do there. The treatment has been done in the past, but I have set to see a result that looks right on the 914. As an addition or alternative (or focal point?), have you considered mounting one headlight in each bumper opening, cutting the top and bottom of the lights off with the upper and lower edges of the rectangle? Might be a nice look with the rest of your build, but it's a thought offered respectfully. This is one of the cooler builds going on a 914, and it's been fun to watch it go along.
Yeah, I don't know about the color, won't even pretend to know, the original phoenix red is a great color, so is viper green, and slate grey metallic, and classic Porsche silver, dark blue too. Once I buy paint we will know what it will be
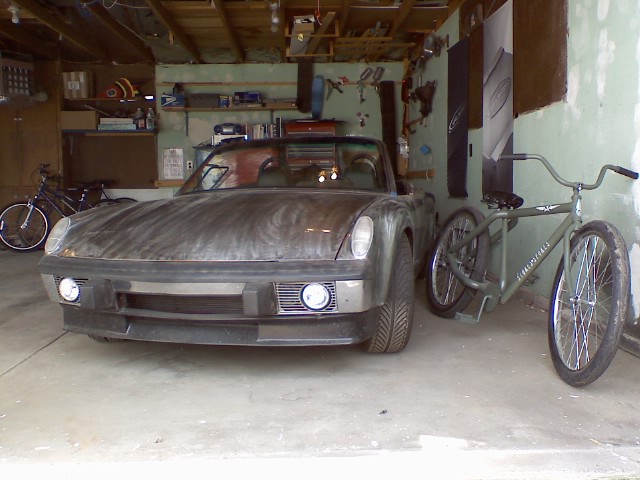
In the last iteration of this car it had shaved popups and the KC hi-lights I am running now mounted in the fog light holes. That is always an option, not legal though (not that I care). I saw Neo-914s attempt and others, hopefully I can tread that fine line between new and old. worth a shot, although now that you made me find this photo it does look pretty good!
Posted by: PanelBilly Oct 12 2018, 03:02 PM
When do we get to hear it in person?
Posted by: horizontally-opposed Oct 13 2018, 03:37 PM
Yeah, I don't know about the color, won't even pretend to know, the original phoenix red is a great color, so is viper green, and slate grey metallic, and classic Porsche silver, dark blue too. Once I buy paint we will know what it will be
In the last iteration of this car it had shaved popups and the KC hi-lights I am running now mounted in the fog light holes. That is always an option, not legal though (not that I care). I saw Neo-914s attempt and others, hopefully I can tread that fine line between new and old. worth a shot, although now that you made me find this photo it does look pretty good!
GOOD group of colors. Of those, Phoenix Red (which is orange to these eyes, and a shade you just about never see...) or a non-metallic dark blue (Meerblau from Zwart's 911R, which is an early Cayenne color?) stand out as particularly cool (and rarely chosen) colors. Hard to go wrong with Slate Gray Metallic or silver—though these will make the car blend in a sea of white/gray/black cars, which cuts two ways.
Excited to see what paint you buy, when that time comes. Whatever color you choose, this car is gonna be a stunner.
Glad you dug that photo out....thinking about this from another angle, those turn signals are a signature element of the 914, and one of the better ones as time goes on. Dark blue will make Euro or US lenses really pop, while Phoenix Red would make clears pop, or US units blend in. Hmm again. You've got a lot of great options ahead of you...
Posted by: rhodyguy Oct 13 2018, 04:26 PM
The problem with the HLs in the FL location in Washington is minimum light height. Sure fire pull over mounted low driving at night. I got stopped driving at night just for having euro rear lenses.
Posted by: PanelBilly Oct 13 2018, 10:22 PM
The problem with the HLs in the FL location in Washington is minimum light height. Sure fire pull over mounted low driving at night. I got stopped driving at night just for having euro rear lenses.
Or were you stoped for driving too slow?
Posted by: rhodyguy Oct 14 2018, 08:02 AM
No billy. The trooper felt the Amber portion of the lense would confuse driver's behind me. So he said. Bottom line is US spec vs illegal/nonDOT euro. I played the ignorance card and 'they were on the car when I bought it'. In all fairness, it was 11:30pm and I had been to see the Blasters play in Seattle. No alcohol involved. That was question 3 or 4. Told me to get the correct lenses and sent me on my way.
Posted by: Spoke Oct 14 2018, 10:42 AM
No billy. The trooper felt the Amber portion of the lense would confuse driver's behind me. So he said. Bottom line is US spec vs illegal/nonDOT euro. I played the ignorance card and 'they were on the car when I bought it'. In all fairness, it was 11:30pm and I had been to see the Blasters play in Seattle. No alcohol involved. That was question 3 or 4. Told me to get the correct lenses and sent me on my way.
Not sure I followed what the US spec vs illegal/nonDOT euro issue is. I see many cars with amber rear turnsignals. Do your amber turnsignals light up at night when not flashing?
Posted by: horizontally-opposed Oct 14 2018, 10:59 AM
No billy. The trooper felt the Amber portion of the lense would confuse driver's behind me. So he said. Bottom line is US spec vs illegal/nonDOT euro. I played the ignorance card and 'they were on the car when I bought it'. In all fairness, it was 11:30pm and I had been to see the Blasters play in Seattle. No alcohol involved. That was question 3 or 4. Told me to get the correct lenses and sent me on my way.
Not sure I followed what the US spec vs illegal/nonDOT euro issue is. I see many cars with amber rear turnsignals. Do your amber turnsignals light up at night when not flashing?
^ Guessing this is what the officer was focused on? If so, that's one sharp cop, and/or one with too much time on his hands or looking for a reason to pull you over.
Turn signals can light up amber on U.S. cars, but I don't think their rear marker lights can? Really surprised rhodyguy got pulled over, even by a sharp-eyed officer. U.S. 914 taillight housings illuminate their outer section as a result of corner marker bulbs, which of course end up glowing orange with Euro lenses. After running that way for years, I replaced the U.S. housings with Euro housings (would have been just as easy to simply delete the side marker bulbs in U.S. housings, but mine were no longer very bright and U.S. replacements were either NLA or a lot more $$, can't remember which). I suppose I could be cited for no side markers, but my 914 is rarely driven at night anymore. As for headlights in the front bumper, there's a minimum headlight height in CA and many lowered cars are probably in violation of the same law that would prevent one from mounting headlights in the front bumper. Would be curious to know if WA's laws are the same, and if a magnetic (or?) setup could be fabbed up to work at night and/or satisfy a fix-it ticket. They might have to be mounted on the cowl of Project Anklebiter...
Posted by: rhodyguy Oct 14 2018, 11:23 AM
He was a younger trooper with supervisor. It was prob part of a 'emphasis program' combating impaired drivers as they were setup on the shoulder and bars would have been starting to empty. I saw the cruiser long before I got to it and made sure I was doing 60. The 6 pack came on right after I passed them. A lawful excuse for a stop. "Have you been drinking tonight sir?", "I don't consume alcohol".
Sorry for the highjack.
Posted by: plymouth37 Oct 14 2018, 10:23 PM
Not a hijack at all, I have been studying the Washington laws a ton trying to actually make this thing legal in it's current form. Washington requires a minimum height of 24" measured to the center of the headlight, and 15" on the tail lights.
As for the euro tail light issue the wording of the law is actually pretty strange:
RCW 46.37.200
"Any vehicle may be equipped and when required under this chapter shall be equipped with a stop lamp or lamps on the rear of the vehicle which shall display a red or amber light, or any shade of color between red and amber, visible from a distance of not less than one hundred feet."
Sooo, like orange is okay? Whole law is here: https://app.leg.wa.gov/rcw/default.aspx?cite=46.37.200
Took the car out for a long drive yesterday, made it about 20 minutes before getting pulled over, the guy was pretty nice, mostly just curious. We were having a fairly pleasant conversation but the whole time he was looking over the car hard, best he could come up with was that I was missing the license plate light. Not bad, $12 on Amazon will have that sorted. He didn't give me a ticket but made sure to tell me his co-workers would definitely be looking for me. Which made me even more invested in making this thing perfectly legal, mostly out of spite. I am making a book of relevant laws to carry in the car, lots of obscure exemptions in the laws for collector cars, like a beautiful one that makes fenders, hoods, and bumpers optional, lol. My headlights are about 4" low, will move those, add a lighted plate frame and see what other "conversations" I have with our friends in blue.
Posted by: mepstein Oct 14 2018, 10:33 PM
Find a second hood. Add headlights to it. Reinstall the first hood for pictures and shows.
Posted by: horizontally-opposed Oct 14 2018, 10:42 PM
Not a hijack at all, I have been studying the Washington laws a ton trying to actually make this thing legal in it's current form. Washington requires a minimum height of 24" measured to the center of the headlight, and 15" on the tail lights.
As for the euro tail light issue the wording of the law is actually pretty strange:
RCW 46.37.200
"Any vehicle may be equipped and when required under this chapter shall be equipped with a stop lamp or lamps on the rear of the vehicle which shall display a red or amber light, or any shade of color between red and amber, visible from a distance of not less than one hundred feet."
Sooo, like orange is okay? Whole law is here: https://app.leg.wa.gov/rcw/default.aspx?cite=46.37.200
Took the car out for a long drive yesterday, made it about 20 minutes before getting pulled over, the guy was pretty nice, mostly just curious. We were having a fairly present conversation but the whole time he was looking over the car hard, best he could come up with was that I was missing the license plate light. Not bad, $12 on Amazon will have that sorted. He didn't give me a ticket but made sure to tell me his co-workers would definitely be looking for me. Which made me even more invested in making this thing perfectly legal, mostly out of spite. I am making a book of relevant laws to carry in the car, lots of obscure exemptions in the laws for collector cars, like a beautiful one that makes fenders, hoods, and bumpers optional, lol. My headlights are about 4" low, will move those, add a lighted plate frame and see what other "conversations" I have with our friends in blue.
LOL. Sounds like orange brake lights are okay, but orange rear taillights are not.
Forget a second hood. Liking magnetic headlights for when you need them. Was looking at another thread here today, and it looks like Garland's 914 nails the bumper lighting treatment on a GT-flared 914 I saw in a single photo in Excellence many years ago, a photo that burned itself into my mind. Interestingly, Garland's car has your hood setup, and also looks like it adds "headlights" up higher. I'd do the bumper lighting (while keeping the stock headlights) on my car if I thought a narrow 914 was aggressive enough to get away with it. I've never loved the foglight grills in the 914...but have never found anything I like better, either. Except this. Something very Miura/Mangusta—or is that Le Mans/Spa?—about it.
Attached thumbnail(s)
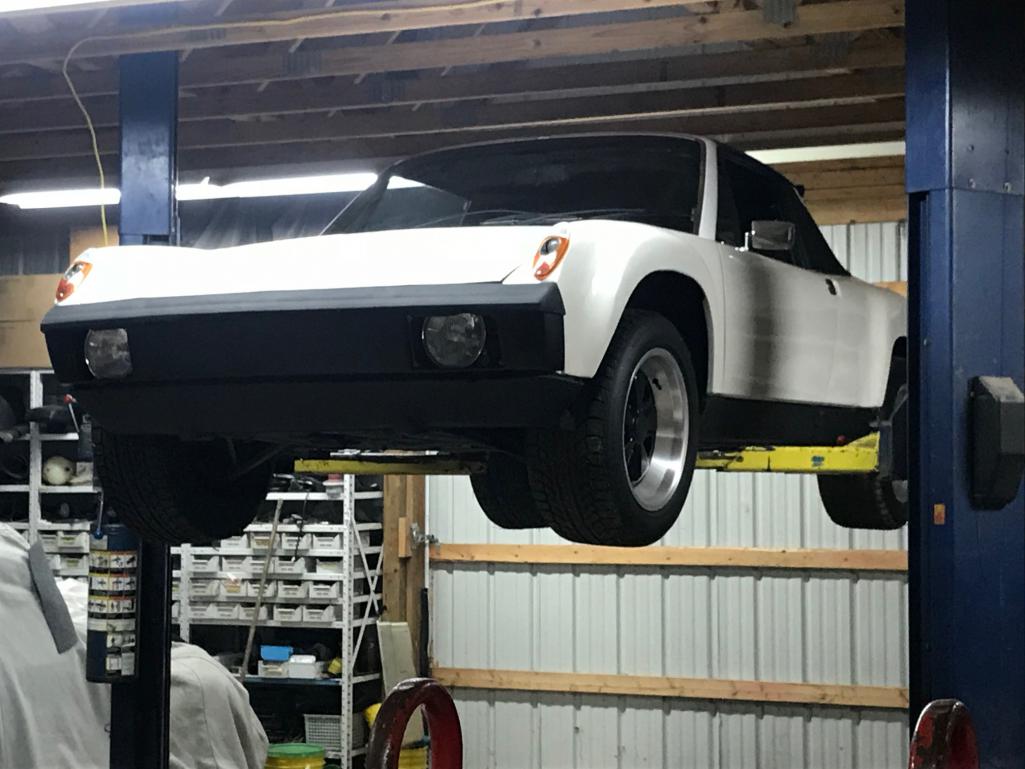
Posted by: sixnotfour Oct 15 2018, 04:51 AM
Where is the body now?
At my in-laws in Cheyenne WY
Both lids and intact front and rear, at least it is nice and dry there
I could probably split the nose and tail into 2 halves to help with shipping but don't really want to...
if some how they can get to slc Utah I can bring em to WA.
Posted by: KELTY360 Oct 15 2018, 08:08 AM
Where is the body now?
At my in-laws in Cheyenne WY
Both lids and intact front and rear, at least it is nice and dry there
I could probably split the nose and tail into 2 halves to help with shipping but don't really want to...
if some how they can get to slc Utah I can bring em to WA.
Geez Dane, just pay Jeff to run over to Cheyenne and pick up the body. It's only a little over 400 miles. But warn your folks, he likes to drive in his pajamas.
Posted by: plymouth37 Oct 15 2018, 09:18 AM
Where is the body now?
At my in-laws in Cheyenne WY
Both lids and intact front and rear, at least it is nice and dry there
I could probably split the nose and tail into 2 halves to help with shipping but don't really want to...
if some how they can get to slc Utah I can bring em to WA.
Geez Dane, just pay Jeff to run over to Cheyenne and pick up the body. It's only a little over 400 miles. But warn your folks, he likes to drive in his pajamas.
as long as the body makes it out here he could show up naked for all I care!I am targeting spring to get the body out here, need to expand my storage and garage space first before I can receive something that big. I am finishing the attic in our house so we will have storage up there this winter, which means I can empty out all of the crap in the garage, it will be tight but after moving our storage to the house I should be able to get the body in here. Thanks for the offer Jeff, I may take you up on that eventually. I am running out of stuff to do on the chassis so the body will need to get out here by spring or so.
Posted by: KELTY360 Oct 15 2018, 09:38 AM
Where is the body now?
At my in-laws in Cheyenne WY
Both lids and intact front and rear, at least it is nice and dry there
I could probably split the nose and tail into 2 halves to help with shipping but don't really want to...
if some how they can get to slc Utah I can bring em to WA.
Geez Dane, just pay Jeff to run over to Cheyenne and pick up the body. It's only a little over 400 miles. But warn your folks, he likes to drive in his pajamas.
as long as the body makes it out here he could show up naked for all I care!Better watch out what you wish for.
Posted by: sixnotfour Oct 15 2018, 10:43 AM
Slits taught me this one..
Posted by: plymouth37 Dec 2 2018, 10:28 PM
After driving the car a few weeks ago I couldn't help feeling that it wasn't as fast as I thought it should have been. My boost sender hasn't been working so on a hunch I pressure tested the intake. This is pretty easy to do, find the appropriately sized pvc cap to fit your intake and pop a couple holes in it. Screw in a couple schrader valves, then use random objects from around your garage to plug all of the ports in your intake. Once everything was sealed I tried to pressurize the system and found it failed to build any pressure at all, turns out the seals around the intake butterfly shaft in the throttle body were totally shot, I think this thing has been running on no boost!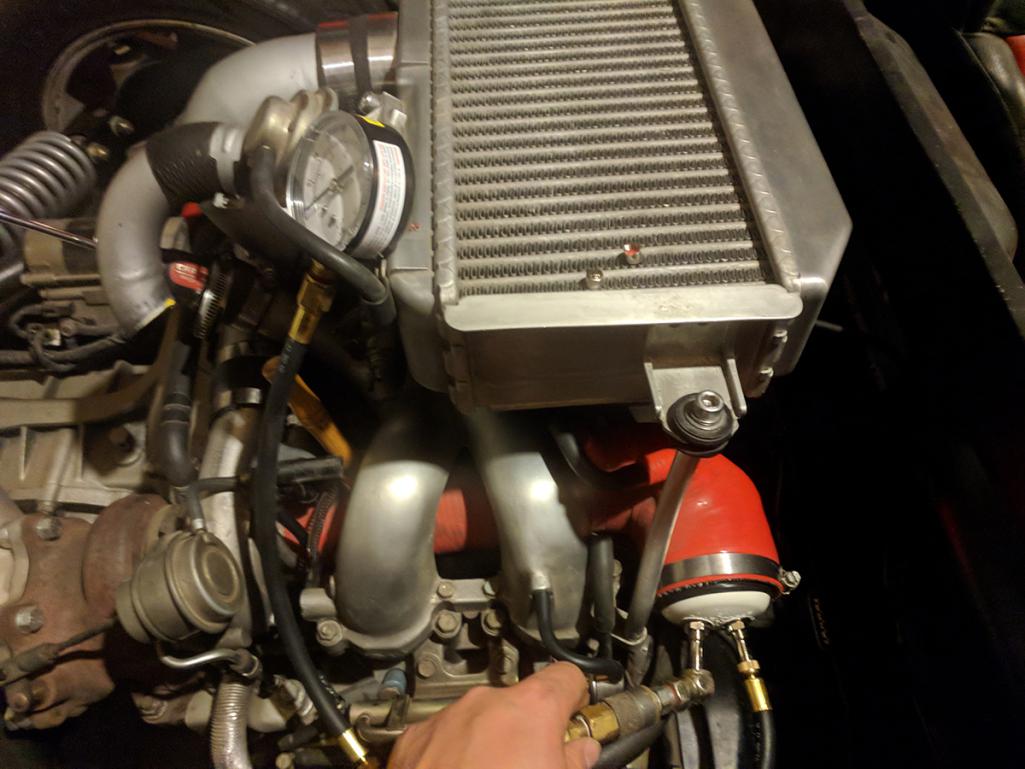
I found a billet intake on ebay, I liked it because it was simple, didn't have all the stuff for cruise control etc... Unfortunately although this thing was machined pretty well i am pretty sure someone described over the phone to the machinist what it needed to look like, but neither of them had actually ever seen a WRX. Everything looked right but was totally a part for a car that doesn't exist. Needless to say i returned it...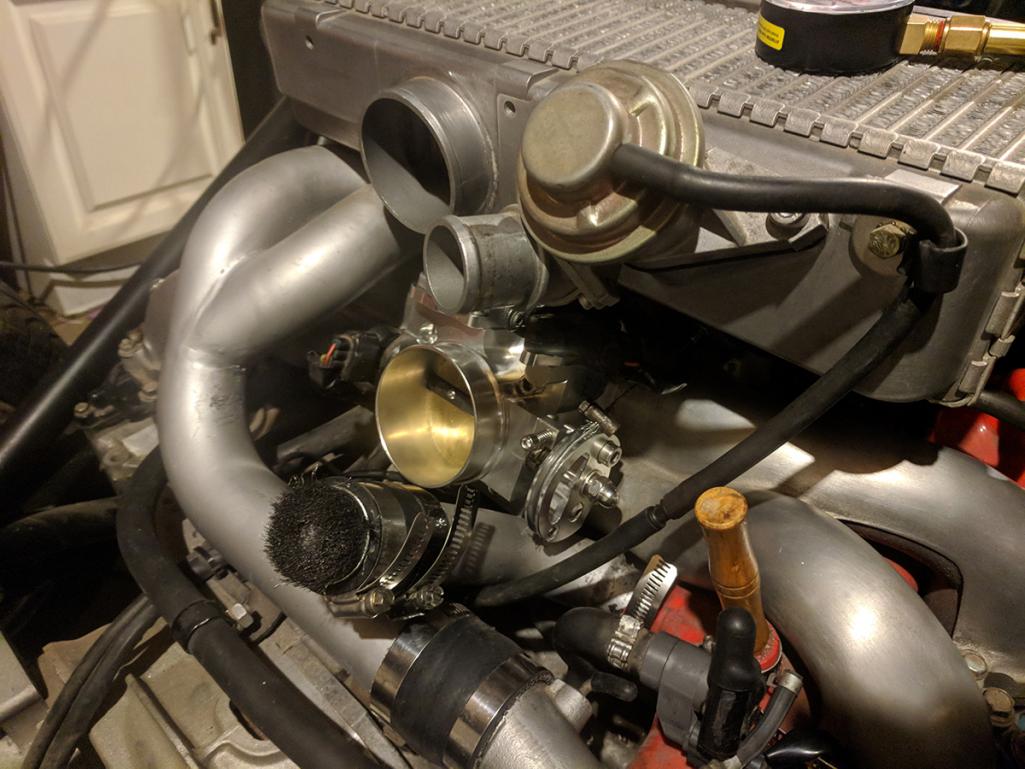
Got a super nice remanufactured throttle body, should have done that to begin with, installed it and reassembled the engine, pressure tested, had to tighten a couple clamps and now it is holding 10lbs of pressure, once it stops eternally raining here I will take it for a spin, i think i just gained 150HP! 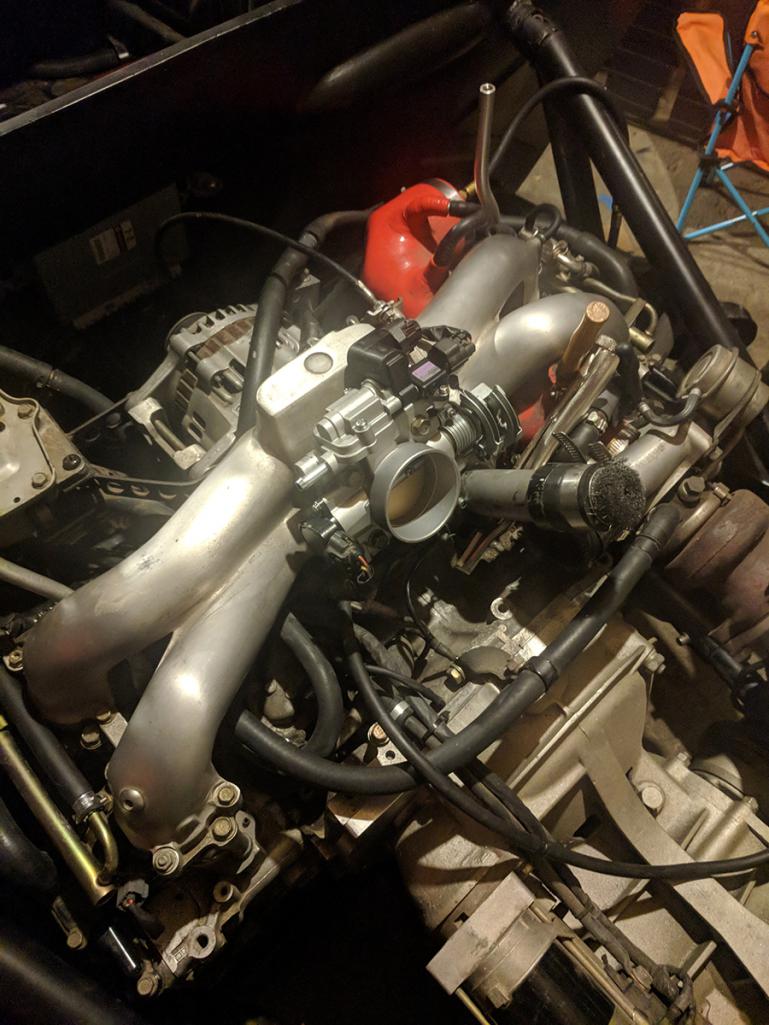
Posted by: plymouth37 Dec 2 2018, 10:43 PM
So I got a little spooked when I got pulled over the last time I drove the car, The officer was nice but he made it pretty clear he wasn't impressed. I decided to take another crack at increasing the legality of the car so it follows the law perfectly. One pretty obvious problem was the lighting on the front of the car.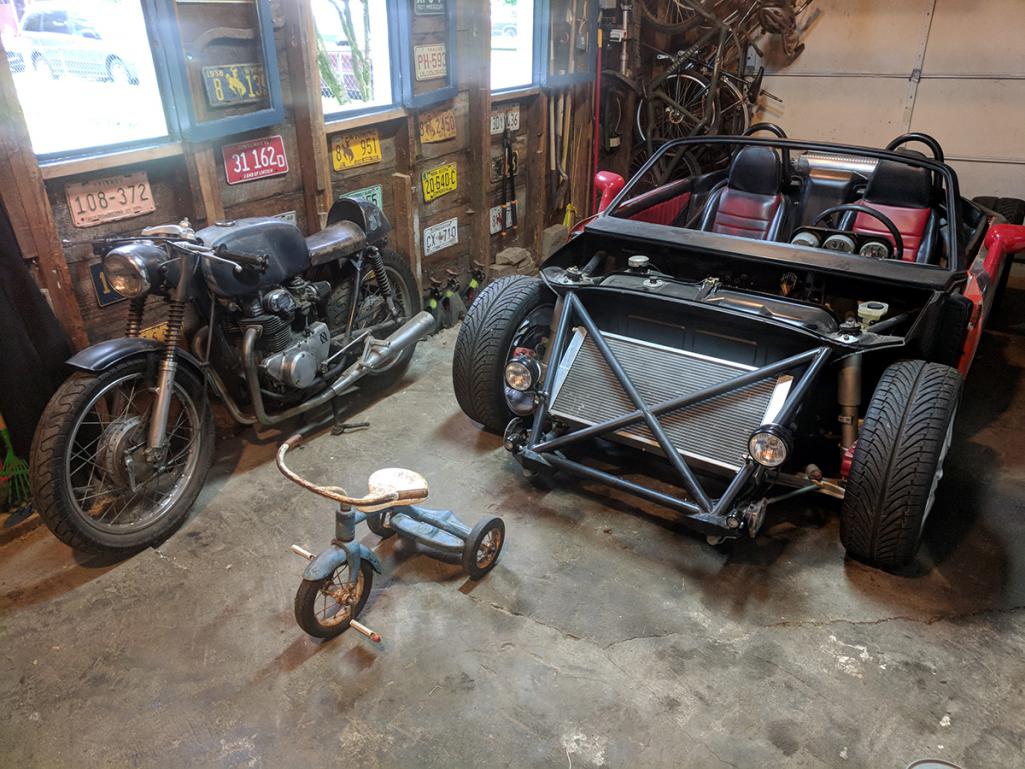
Washington State law states that headlights need to be mounted at a minimum of 24" high to the center of the lens, so I moved the light buckets up to that height. It also states that turn signals need to be at least 15" high, so I moved those up to the old headlight mounts.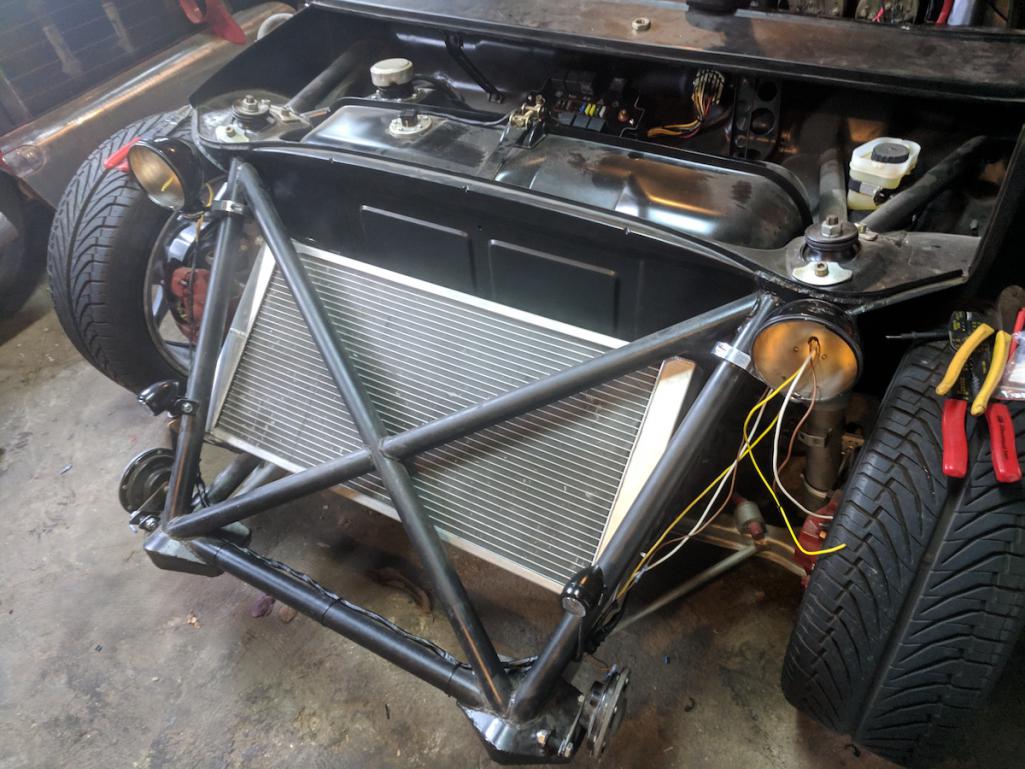
So these lights are just some old KC hi-lights that I used to run in the fog light holes in the bumper, and state law says that if you plan on traveling over 20 mph you need high beams. I will never run this car at night in this form so I just need to check the box, not actually create a functioning dual beam headlight. With this in mind I swapped in some H4 bulbs into the light buckets and wired them up, good enough for now! 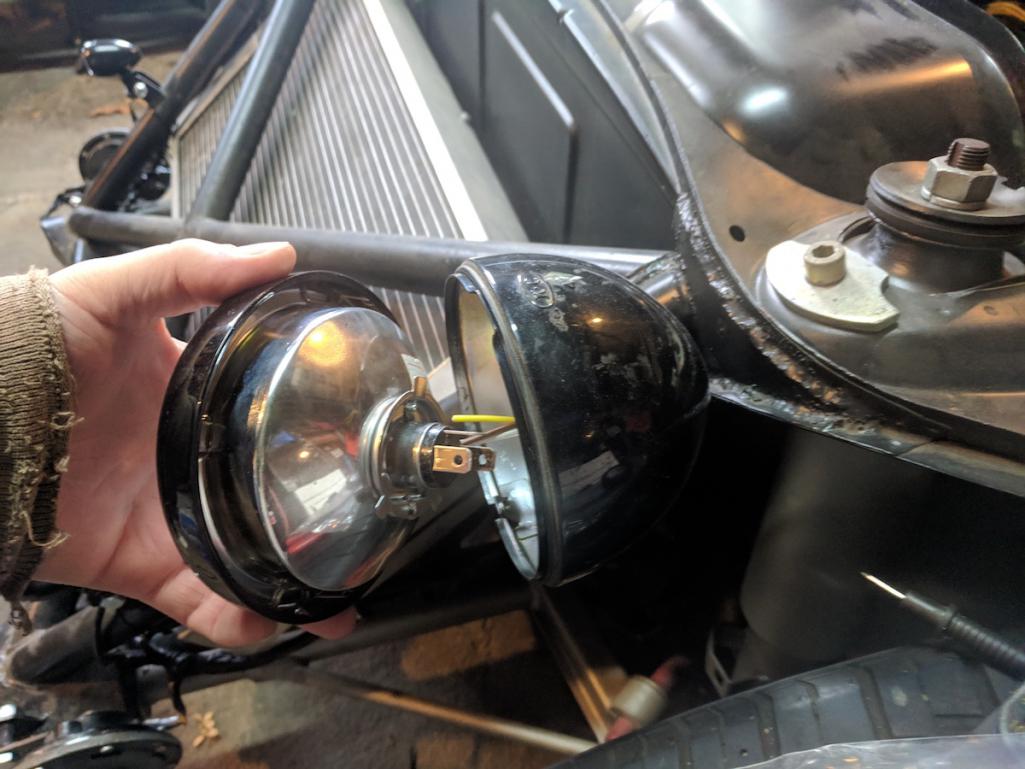
There, "legal" front lighting! One less thing to worry about as I drive around in a naked car 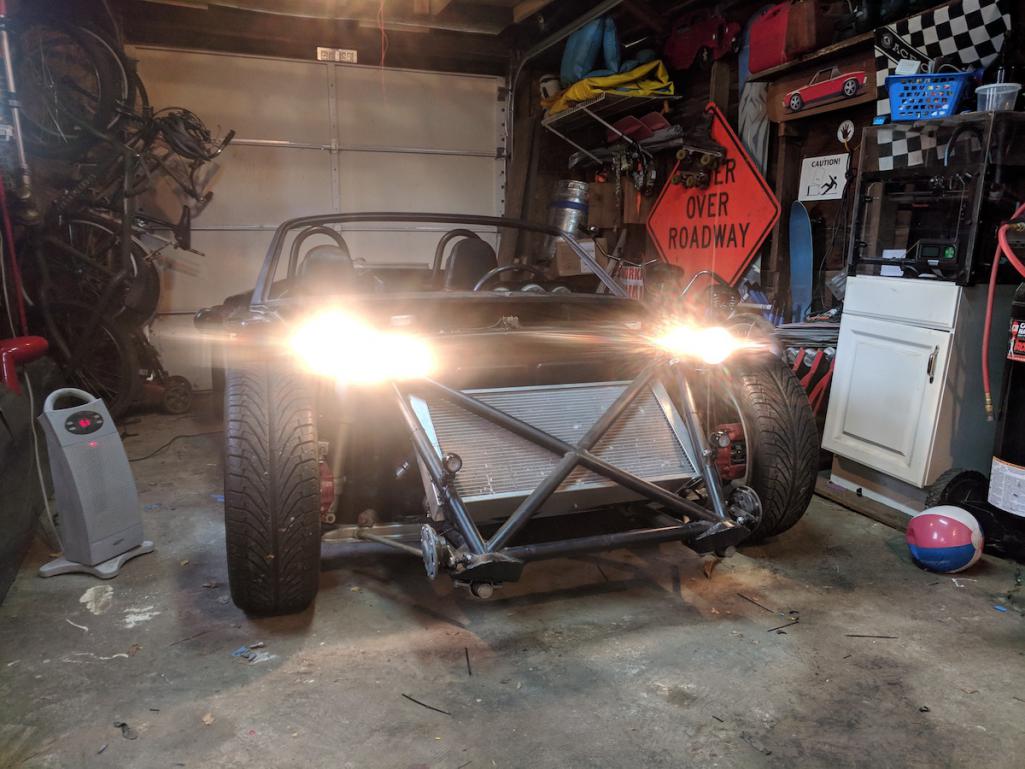
Posted by: DRPHIL914 Dec 4 2018, 09:57 AM
No billy. The trooper felt the Amber portion of the lense would confuse driver's behind me. So he said. Bottom line is US spec vs illegal/nonDOT euro. I played the ignorance card and 'they were on the car when I bought it'. In all fairness, it was 11:30pm and I had been to see the Blasters play in Seattle. No alcohol involved. That was question 3 or 4. Told me to get the correct lenses and sent me on my way.
Not sure I followed what the US spec vs illegal/nonDOT euro issue is. I see many cars with amber rear turnsignals. Do your amber turnsignals light up at night when not flashing?
^ Guessing this is what the officer was focused on? If so, that's one sharp cop, and/or one with too much time on his hands or looking for a reason to pull you over.
Turn signals can light up amber on U.S. cars, but I don't think their rear marker lights can? Really surprised rhodyguy got pulled over, even by a sharp-eyed officer. U.S. 914 taillight housings illuminate their outer section as a result of corner marker bulbs, which of course end up glowing orange with Euro lenses. After running that way for years, I replaced the U.S. housings with Euro housings (would have been just as easy to simply delete the side marker bulbs in U.S. housings, but mine were no longer very bright and U.S. replacements were either NLA or a lot more $$, can't remember which). I suppose I could be cited for no side markers, but my 914 is rarely driven at night anymore. As for headlights in the front bumper, there's a minimum headlight height in CA and many lowered cars are probably in violation of the same law that would prevent one from mounting headlights in the front bumper. Would be curious to know if WA's laws are the same, and if a magnetic (or?) setup could be fabbed up to work at night and/or satisfy a fix-it ticket. They might have to be mounted on the cowl of Project Anklebiter...
after seeing and reading thru this thread and seeing these comments of the previous page, it appears that most state have same or similar rules but many including you policeman may be mistaken about what is legal and what is not.
In South Carolina , I just looked this up here, it reads that the "rear clearance and maker lamps, rear or side-rear shall be RED, but "except for the stoplight and signal device, which may be Red, Amber or Yellow"
so , here in SC the license plate lights must be white and not blue green or orange, but the signal light maybe red or amber, . the brake light may even be red or amber or yellow, just the running or marker lamp in rear must be red. -
interesting, but good to know in case your local or state police are not aware,
you just may need to keep that information on file in the car to "educate" them in the future.
- my wife got a warning for her license plate light being out last week! they are big on that around here.
BTW awesome to see the car on the road and driving! hope to see soon what you do with the panels too!
Posted by: Chi-town Dec 4 2018, 10:58 AM
US DOT FMVSS says your rear turns can be amber or red. FVMSS trumps all state laws.
"The color of the light from turn signal lamps shall
be red or yellow (amber) to the rear and yellow (amber) to the front
of the vehicle. (See SAE J578.) "
I have some JW Speaker LED driving lights that are DOT / SAE legal if you need better lighting.
Posted by: rhodyguy Dec 4 2018, 12:24 PM
Well done. Registration, licence, Proof of ins and you're golden.
Argueing, with the guy holding your ID in his hand and wearing a sidearm, about who's rules count at 12:30am can be counterproductive. First thing you know you're out of the car, flashlight in your eyes and walking heal to toe for no reason. A simple "I'll fix those lenses straight away" is much easier and one is on their way.
Posted by: PanelBilly Dec 4 2018, 06:22 PM
When do we get to go for rides?
Posted by: plymouth37 Dec 4 2018, 07:23 PM
When do we get to go for rides?
Soon hopefully! I think by Spring this thing will be dialed in enough to start joining up for the PNW teener events! Main thing keeping me from traveling far now are the lack of windshield and a lack of racing seats with more than lap belts. When the rains fade in the spring let's go play!
Posted by: plymouth37 Dec 4 2018, 10:37 PM
As I was plugging up my intake to pressure test it I started to ask myself what all of these vacuum hoses and controllers were in there for. Turns out these are part of the emissions system that purge the charcoal canister on the gas tank, the little doohickey is the purge valve, needless to say I don't have any canister or emissions anything so I gutted everything and capped the intake nipples, I was rewarded with the code "P0458 EVAP Emission System Purge Control Valve Circuit Low" but it doesn't throw it into limp mode so I will just add it to my list of codes to have programmed out when I get the ECU tuned. Less crap on the engine is a win for me!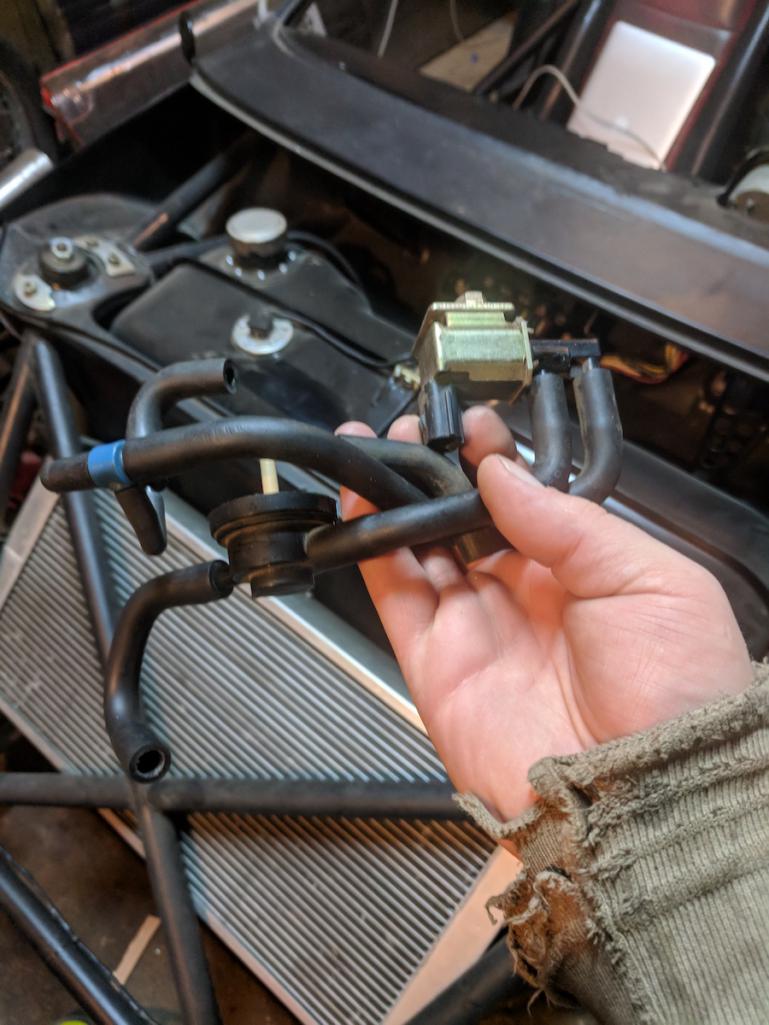
Speaking of taillights from the earlier conversation, when I put in the muffler it eclipsed the spot I had made for the license plate, zipties weren't cutting it for Mr. Officer so I welded up a little bracket and hacked in some led lights into a license plate frame. There, that's legal too.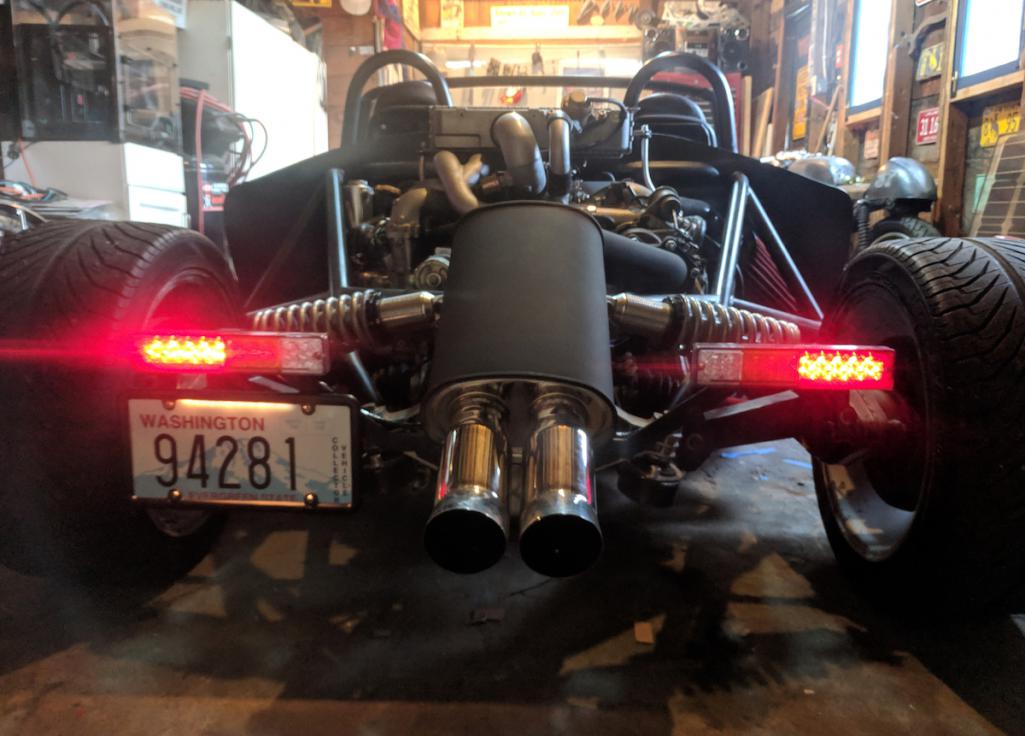
Finally the trailer lights i got didn't have reflectors which isn't legal, so I got some reflective tape on Amazon for $3 and stuck a strip on the lights, Check that one off too.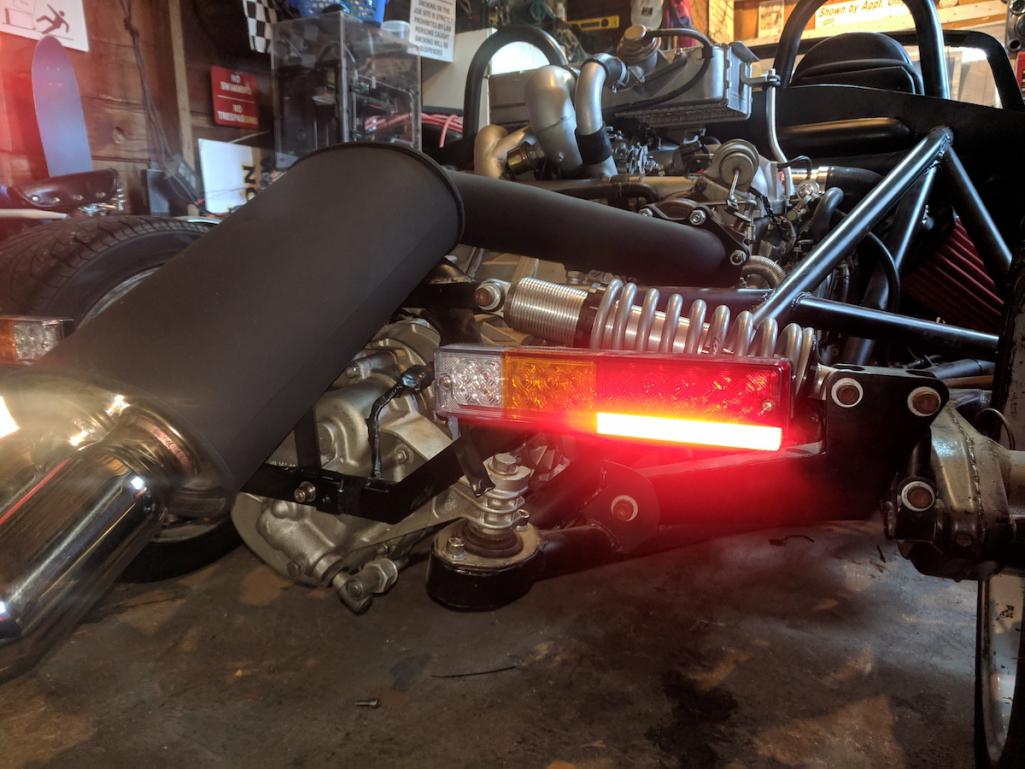
I think I do actually legally need doors, the law is pretty explicit about that, despite the plethora of doorless Jeeps that I see all over the place. Being the sitting duck that i am and that I guess the ultimate goal is to have a body on this thing eventually I am going to clean up and paint the doors next, stay tuned!
Posted by: KELTY360 Dec 5 2018, 12:08 AM
Have you calculated the weight loss of all those hoses? Don't forget to include all the air inside them too.
Happy Holidays, Dane.
Posted by: plymouth37 Dec 5 2018, 03:32 PM
Have you calculated the weight loss of all those hoses? Don't forget to include all the air inside them too.
Happy Holidays, Dane.
Hey, every ounce counts! This particular item is hard to weight though, depending on the throttle position these hoses either contain 1 bar of vacuum or 2 bars of total pressure! It has a variable weight!
Happy Holidays to you too Buddy!
Posted by: plymouth37 Mar 28 2019, 02:31 PM
Well spring is upon us and my garage isn't quite so freezing, Lets get some work done!
I had been running a stock ECU for testing just incase I shorted something out accidentally but now it is time to put in my Stage 2 ECU from Vishnu Tuning
The tune on this should be a pretty good starting point but there are a dozen or so codes I need to turn off in order to get a working check engine light.
So here we go into the world of editing a car's Rom, and to do that we need a cable to connect my ECU to a laptop. I was initially looking at getting a tatrix tuning cable but these go for like $200 and this is a budget build, we can do better!
I bought this cable on ebay for less than $7...
https://www.ebay.com/itm/VAG-COM-KKL-409-1-OBD2-USB-Cable-Scanner-Scan-Tool-Audi-VW-SEAT-Volkswagen-Auto/291808374163?hash=item43f1226d93:g:dk0AAOSwGIBZubyk&frcectupt=true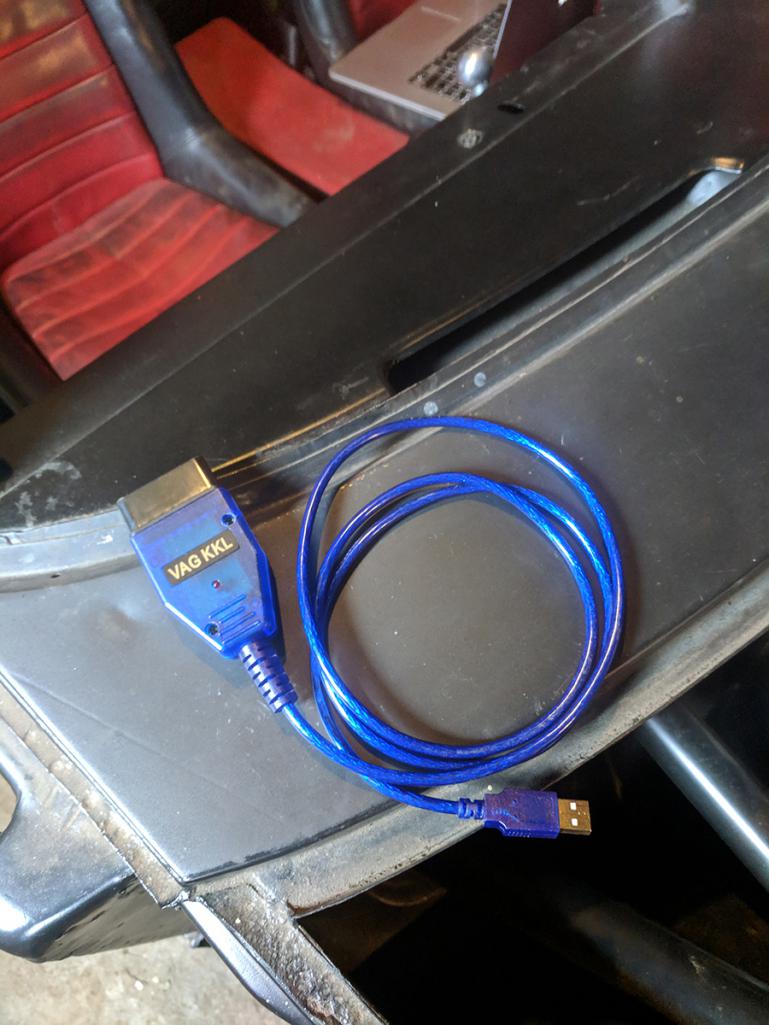
I put the computer into read mode by connecting the green test mode connectors, and then gave pin A10 on the ECU 12V to trigger write mode.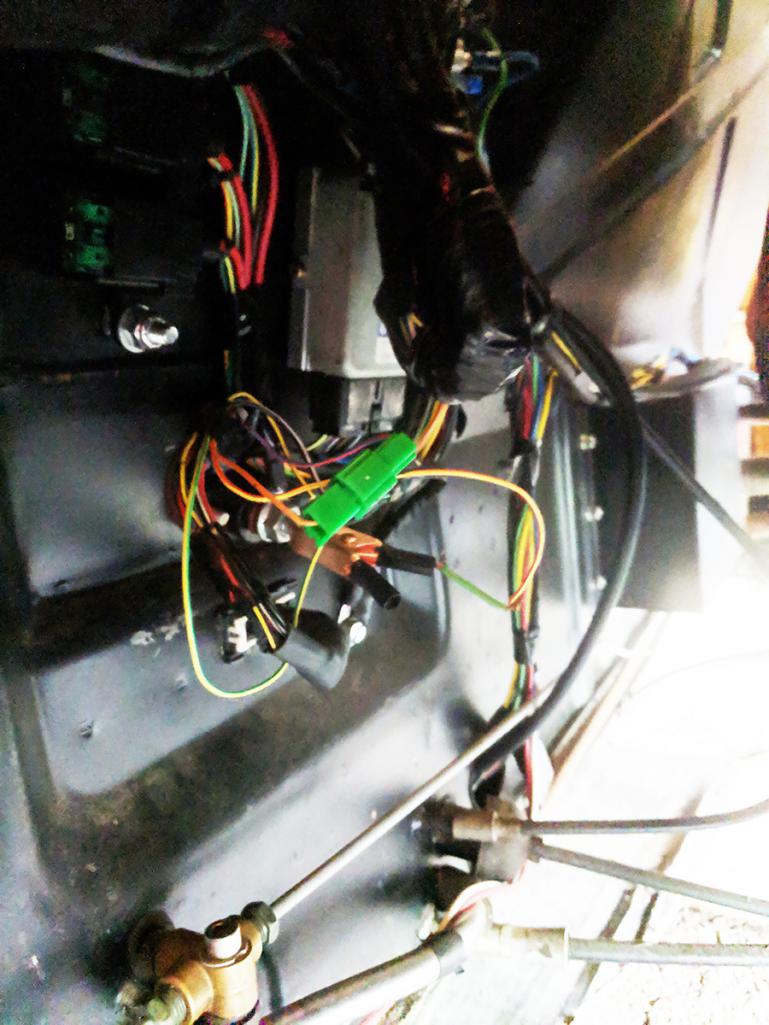
I then plugged the computers together.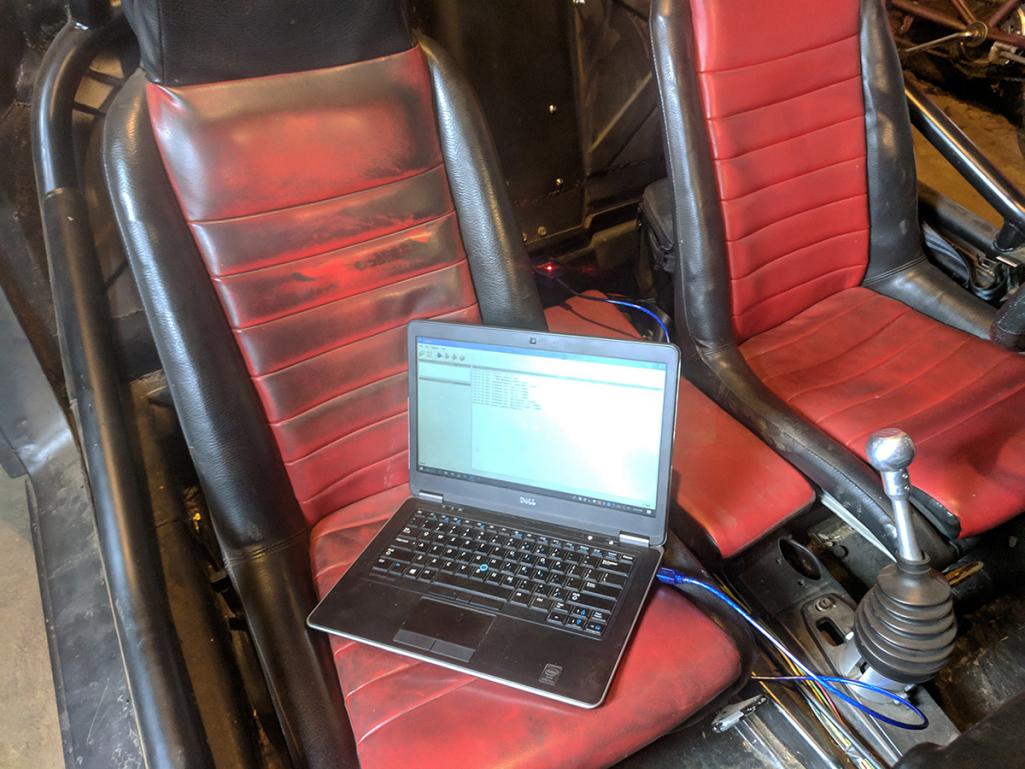
To read and write images to and from the ecu I downloaded EcuFLash for free (you need v1.29 or earlier to use the cheap cable).
I successfully downloaded the ROM from the ECU. Now off to Romraider to edit it!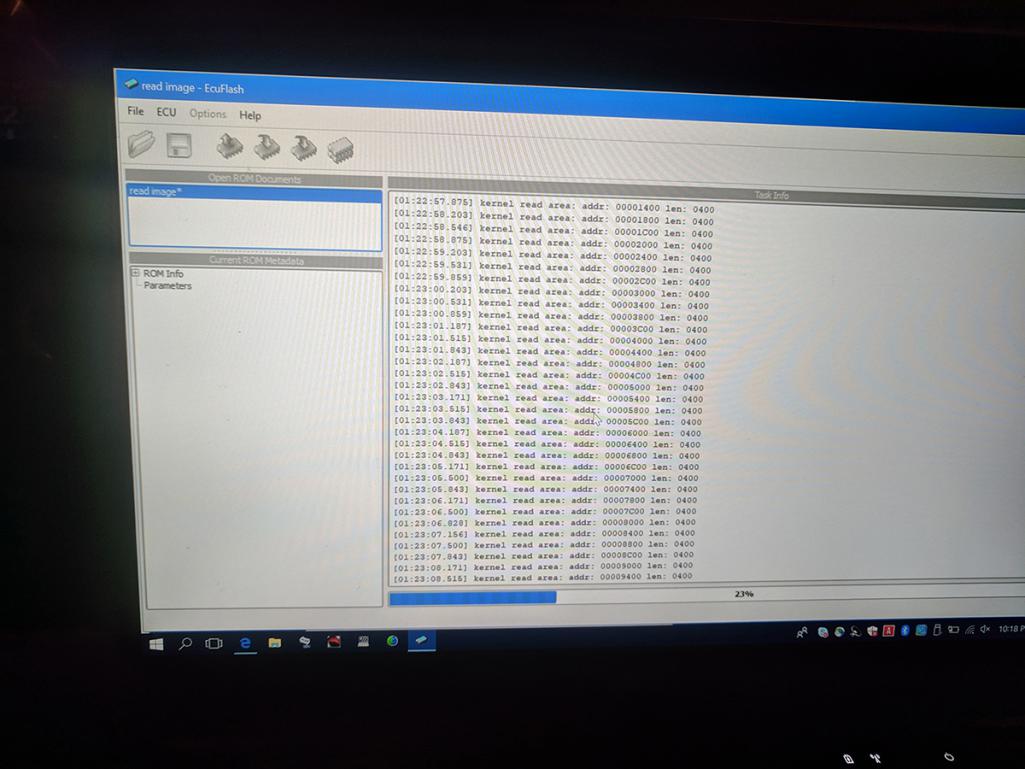
Posted by: plymouth37 Mar 28 2019, 02:31 PM
Like EcuFlash, RomRaider is also a free program, you use it to edit the Ecu's Image. I am not going to delve into tuning right now, the goal is just to turn off the error codes that are no longer relevant to this vehicle. To do this select the error code you wish to edit from the menu on the left, open it, turn it off, then close it. 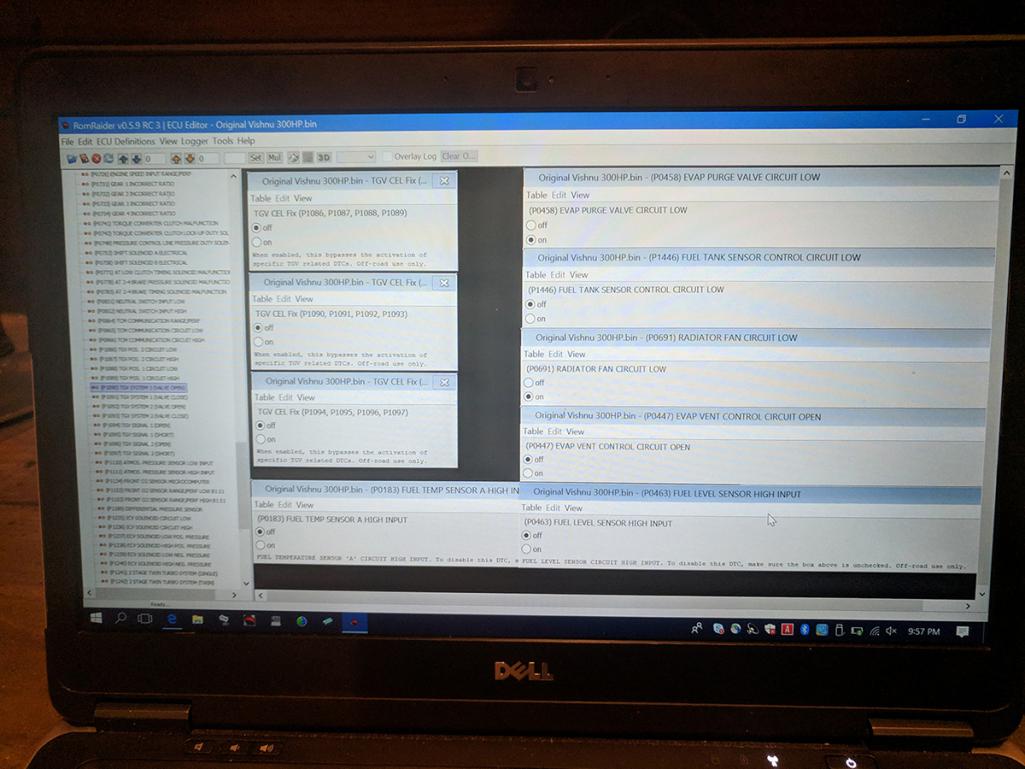
Then after I saved the new edited image, I wrote it back to the ECU. Done, $7 tuning package, heck yeah!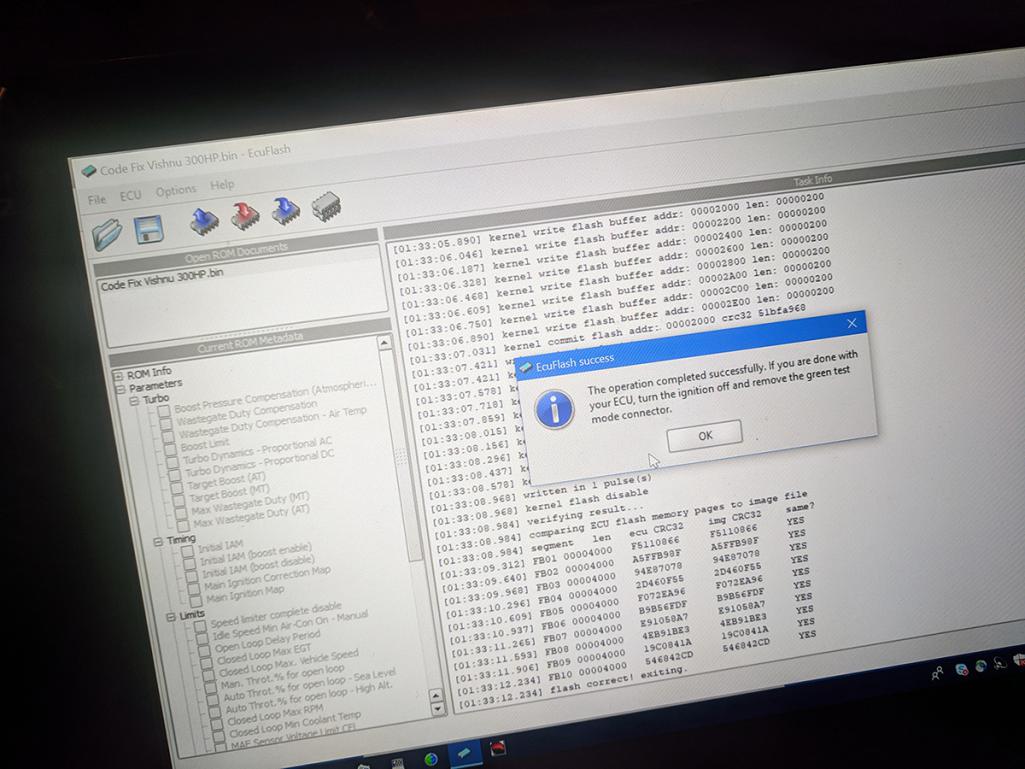
I noticed an interesting thing while I was turning off the codes, p0508 Intake Air Control Valve Error, I had initially thought that this was an inaccurate code because I had deleted the coolant hoses to this controller but after I thought about it that didn't make sense, more likely it was gummed up and causing some of my rough idle conditions. I decided to leave the code in place and pulled out the IACV and cleaned it thouroghly. I was totally right, car ran so much better on startup after a good cleaning.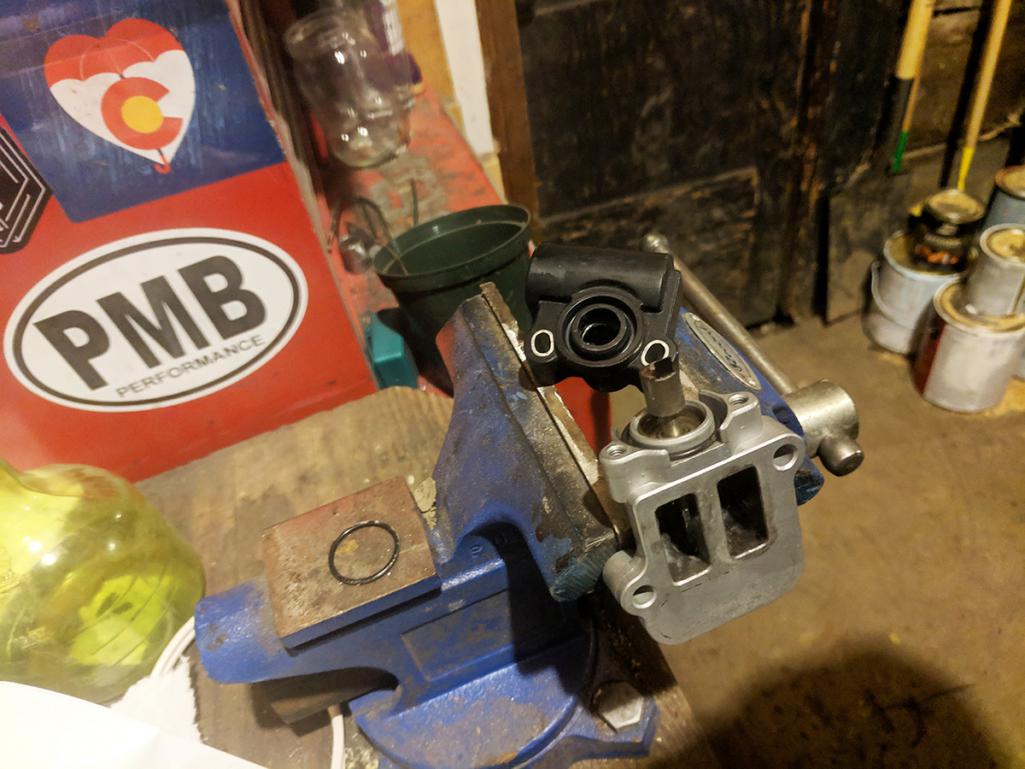
Ran a test and got a clean bill of health! Now I can hook up a check engine light and have it mean something!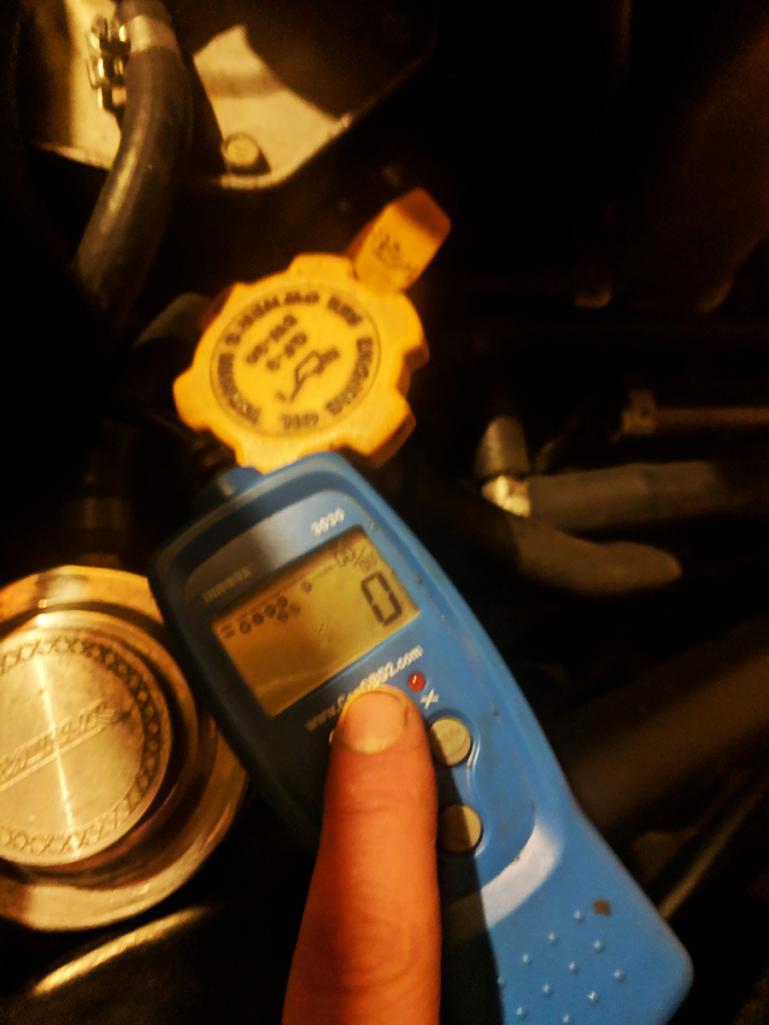
Time to go for a drive under full power for the first time!
Posted by: plymouth37 Mar 28 2019, 02:36 PM
Took her out and I can confirm that we have full boost, and a legitimately scary amount of power, this thing is a monster, what have I built???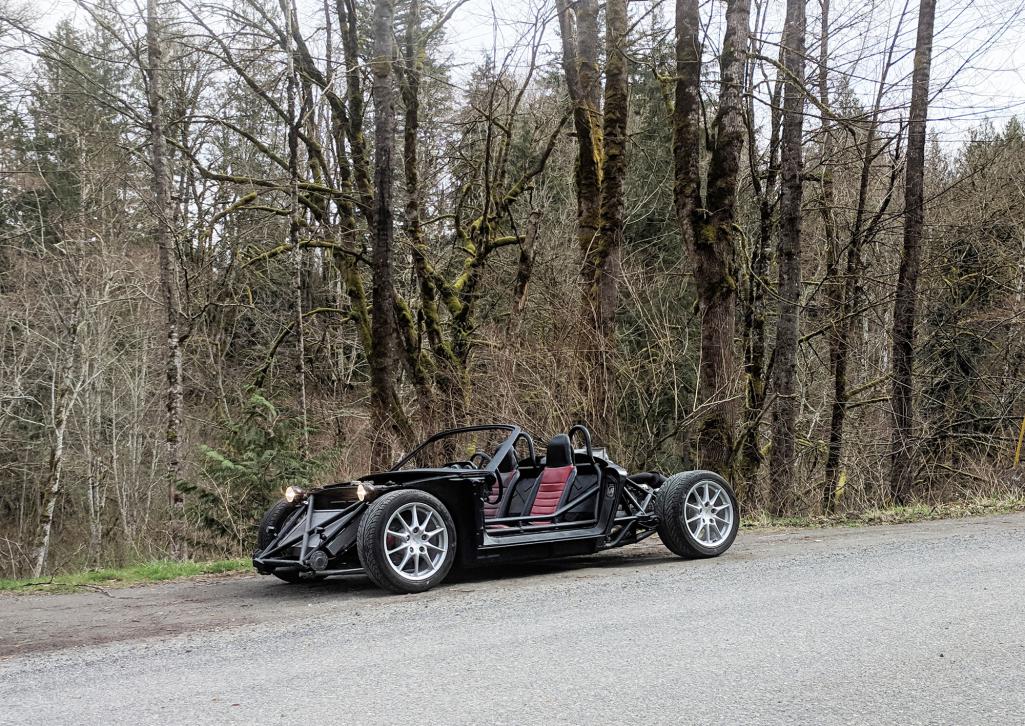
Posted by: plymouth37 Mar 28 2019, 02:38 PM
The car drives really well below 4500 rpm, aka no boost, it is like there is nothing holding this engine back, it will do 30mph at idle in third. 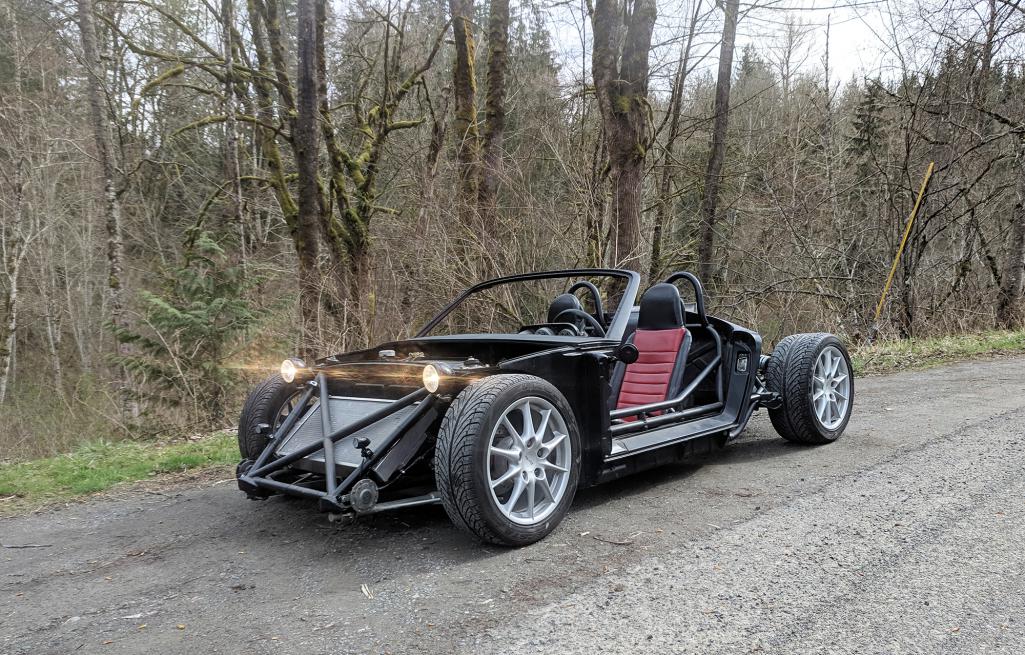
Posted by: plymouth37 Mar 28 2019, 02:40 PM
Once boost comes in though it is like full blown starwars warp speed, still not brave enough to get it into 4th, or above 5000rpm, I was still shaking an hour after driving it, this is going to take some getting used to. Spins those big tires effortlessly at any speed in any gear. 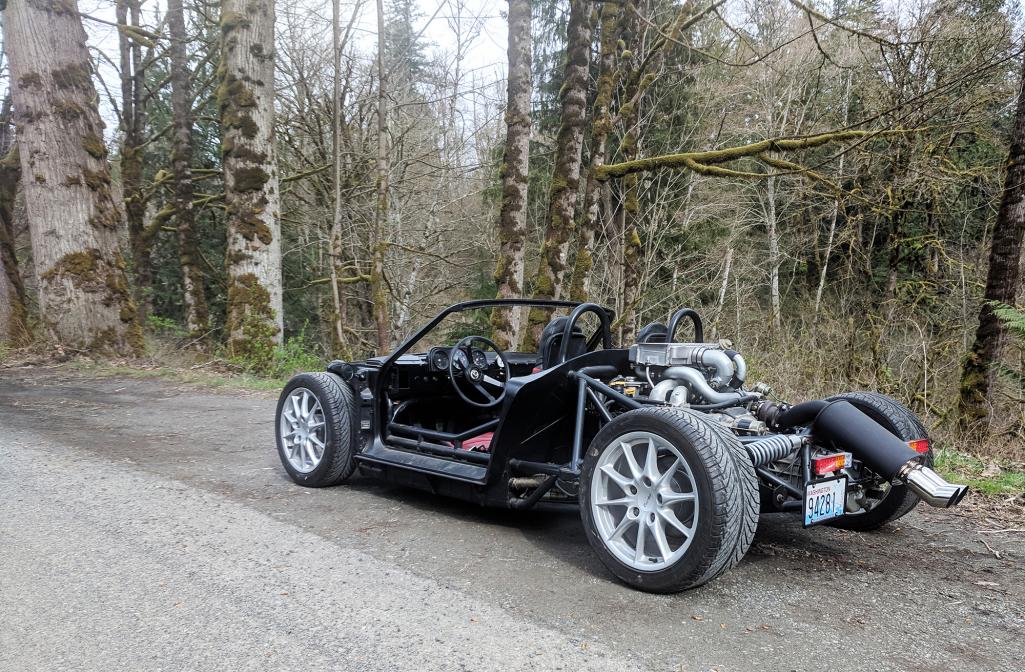
Posted by: plymouth37 Mar 28 2019, 02:42 PM
Next priorities are real seats, real belts and a windshield, oh and doors (maybe), woohoo!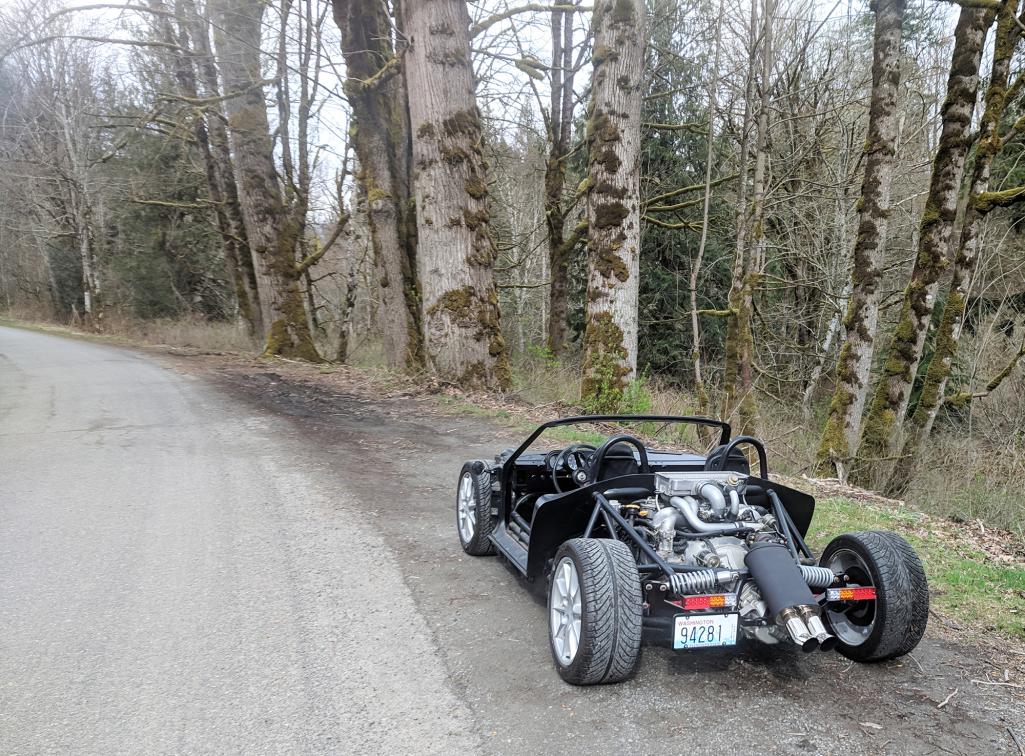
Posted by: SirAndy Mar 28 2019, 03:01 PM
Posted by: JeffBowlsby Mar 28 2019, 03:30 PM
"...and this is a budget build..." Glad you clarified that for us mere mortals....


Posted by: Cairo94507 Mar 28 2019, 03:57 PM
I am just amazed at the work you have done and the skills you have.
Posted by: Millerwelds Mar 28 2019, 04:17 PM
Need video!
Posted by: sixnotfour Mar 28 2019, 04:19 PM
I have some CF doors ..????
Posted by: plymouth37 Mar 28 2019, 04:31 PM
Need video!
I will grab a gopro and take you all along for the next ride!
Posted by: plymouth37 Mar 28 2019, 04:31 PM
I have some CF doors ..????
Posted by: PanelBilly Mar 28 2019, 05:48 PM
Drive it to breakfast Sunday
Posted by: Porschef Mar 28 2019, 08:55 PM
Next priorities are real seats, real belts and a windshield, oh and doors (maybe), woohoo!
Awesome stuff.
Those are some big trees. Drive mindfully...
Posted by: JRust Mar 29 2019, 12:55 AM
Awesome to see bro Congrats! I still like it better with the full body on it. But damned if that doesn't look bad ass as is
Posted by: Andyrew Mar 29 2019, 08:48 AM
Posted by: KELTY360 Mar 29 2019, 02:55 PM
Awesome to see bro
Congrats! I still like it better with the full body on it. But damned if that doesn't look bad ass as is It's almost a shame to cover up that gorgeous infrastructure, but I'm sure it's going to be equally badass with body panels.
Posted by: rhodyguy Mar 29 2019, 05:41 PM
Where are you going to put the 'it's a 914' sign?
Posted by: plymouth37 Apr 1 2019, 10:39 AM
The most glaring and complicated thing I have left to finish on the chassis is a windshield. Since this car's windshield frame is chopped and raked, I am going to be making all of this from scratch.
I am going to try to bend a polycarbonate piece into the shape I need, I don't want to use exposed fasteners like most non-glass windshields use, instead I am going to hold the windshield in with a bolted in windshield frame. I started out by making some cardboard templates.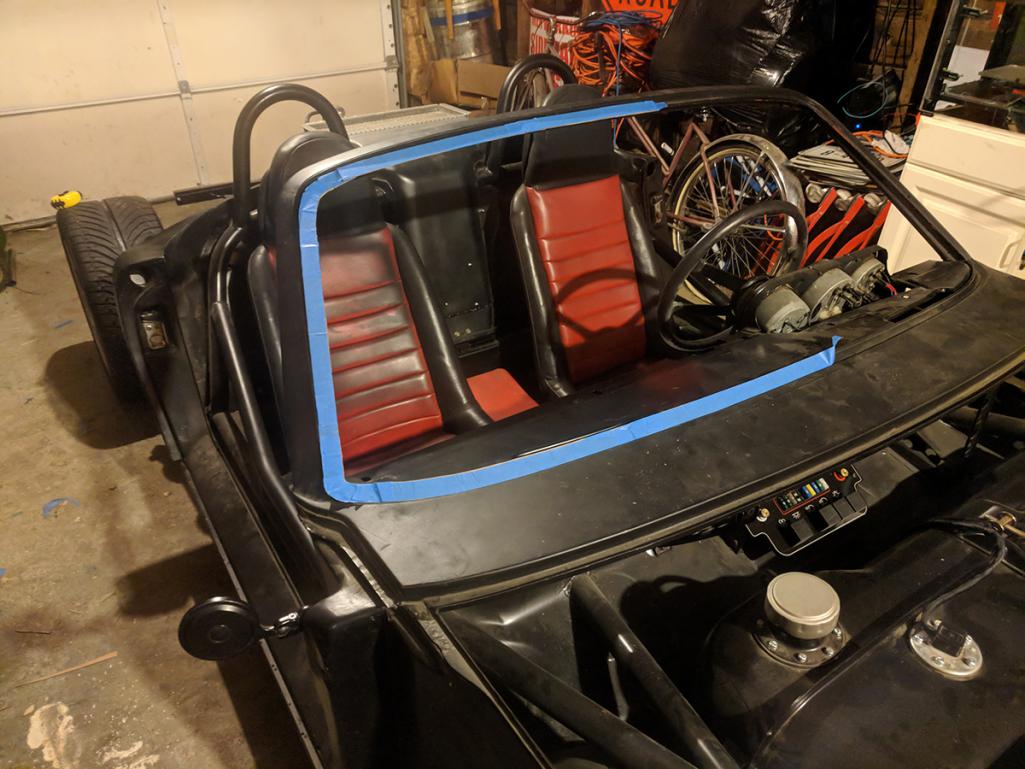
I then transferred these rough templates to some 3/16" steel, I want this frame to be beefy enough that I can use it to help inform the shape of the poly.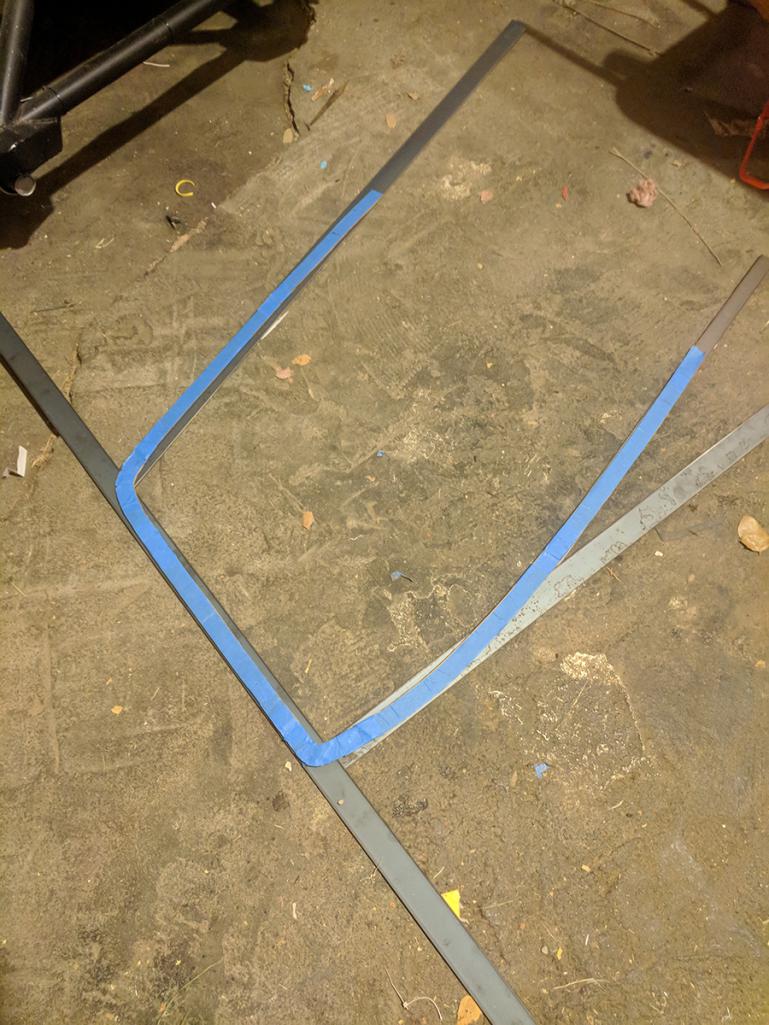
Here are the rough cut pieces in place, I am using magnets as spacers to leave enough of a gap for the windshield and gasket.
Posted by: plymouth37 Apr 1 2019, 10:40 AM
I made some more templates and made the pieces for the passenger side.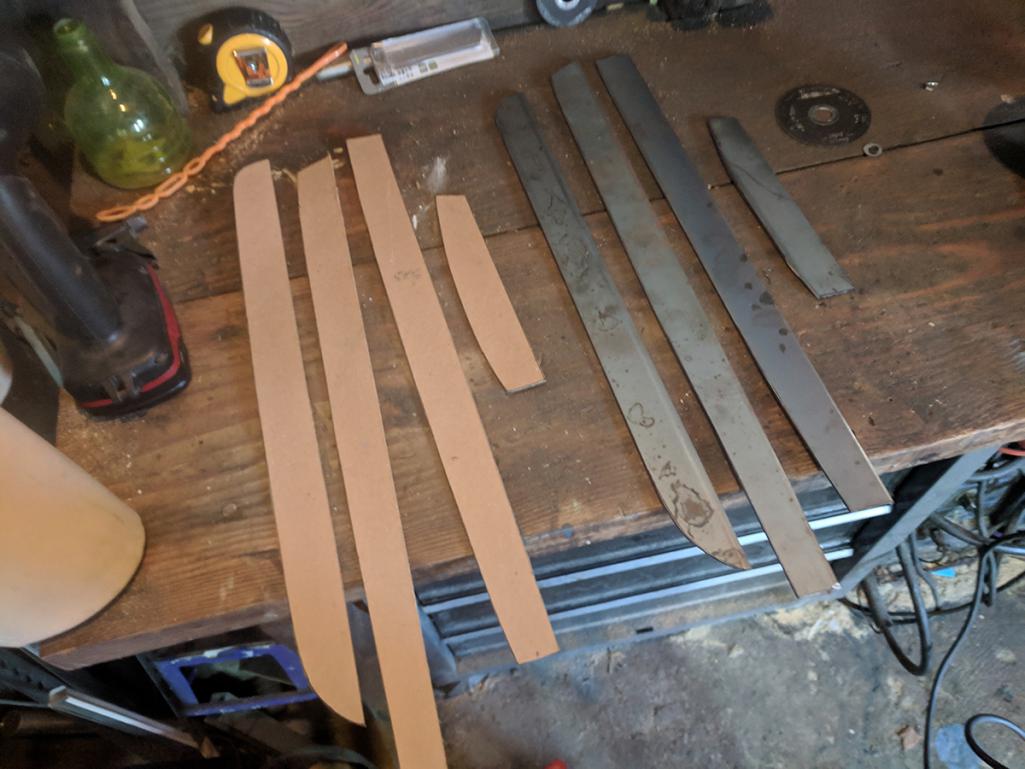
I am grinding these to fit as tight as I can against the frame, after I get everything dialed in I will go back and cut a gap into this part. good to leave it long for now!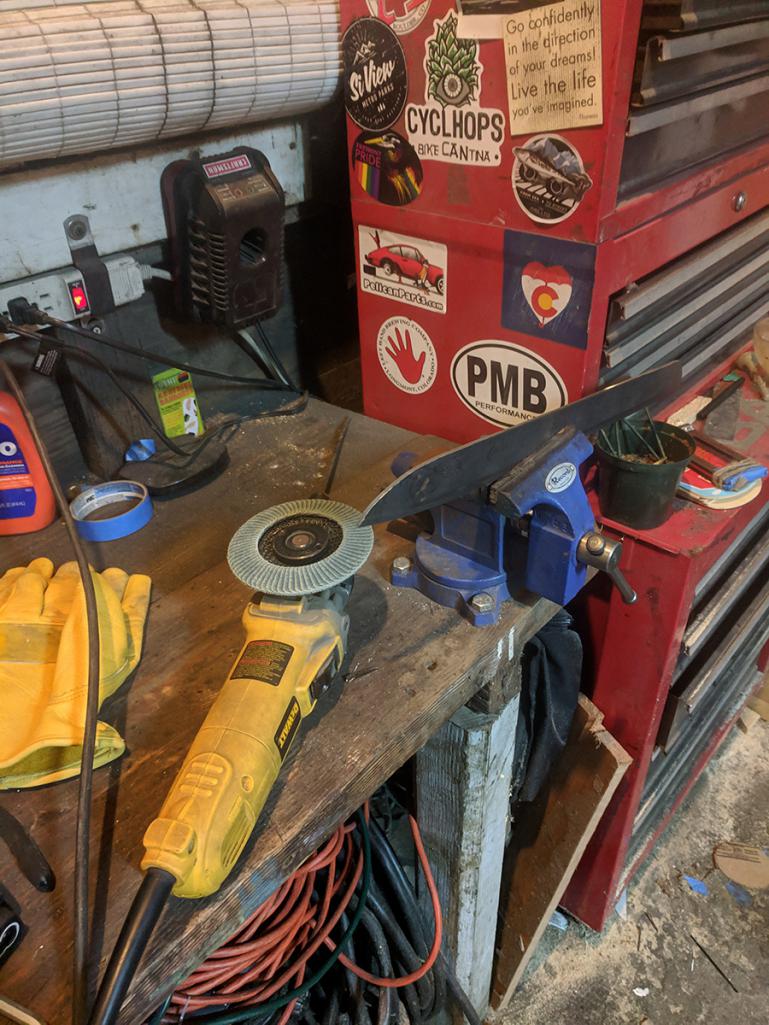
A lot of effort went into shaping these into the correct shape.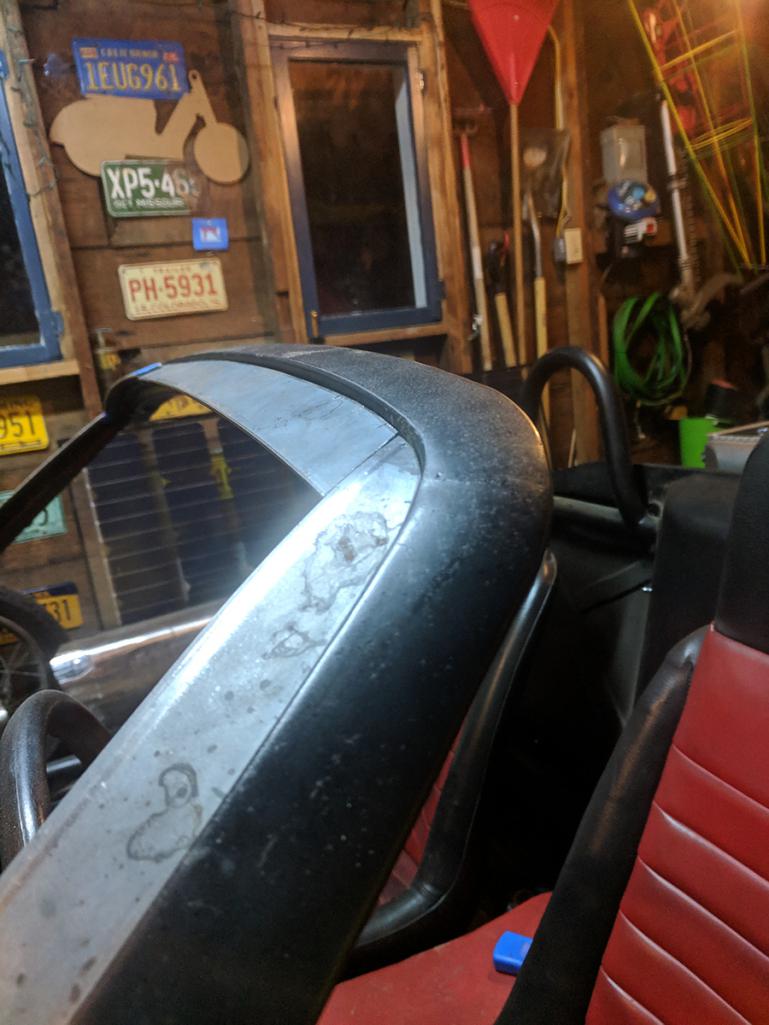
Outside is shaped! Time to do the inside cut!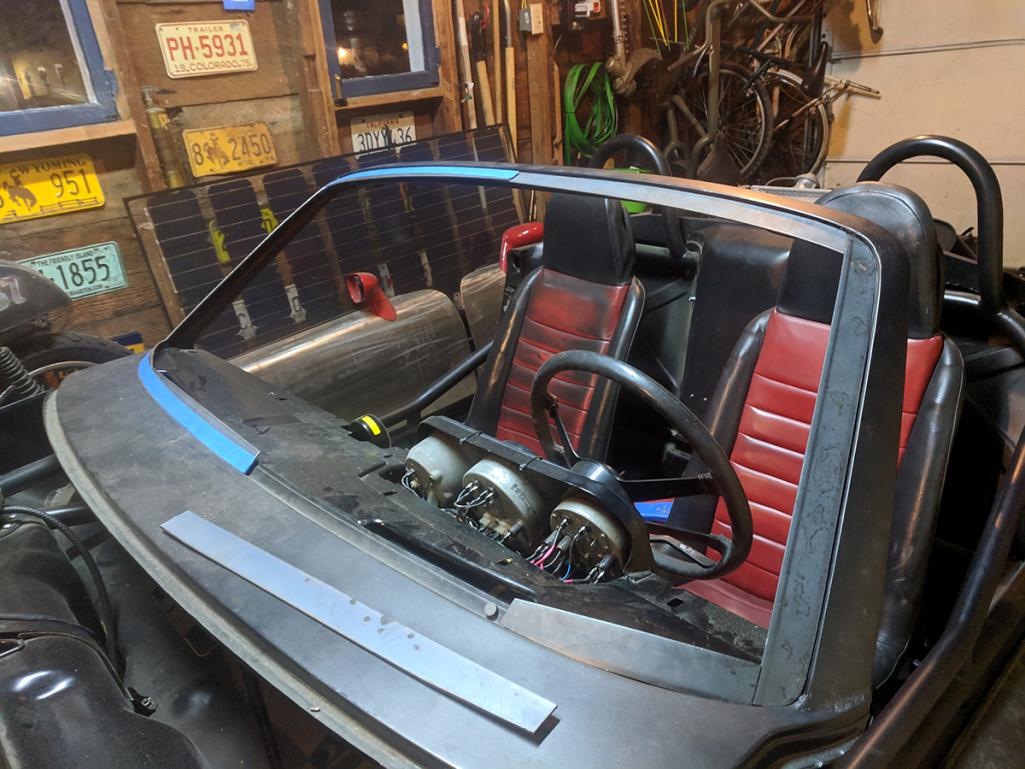
Posted by: plymouth37 Apr 1 2019, 10:40 AM
These are still oversized, I am going to need to do a lot of work on these and need to leave a buffer for grinding.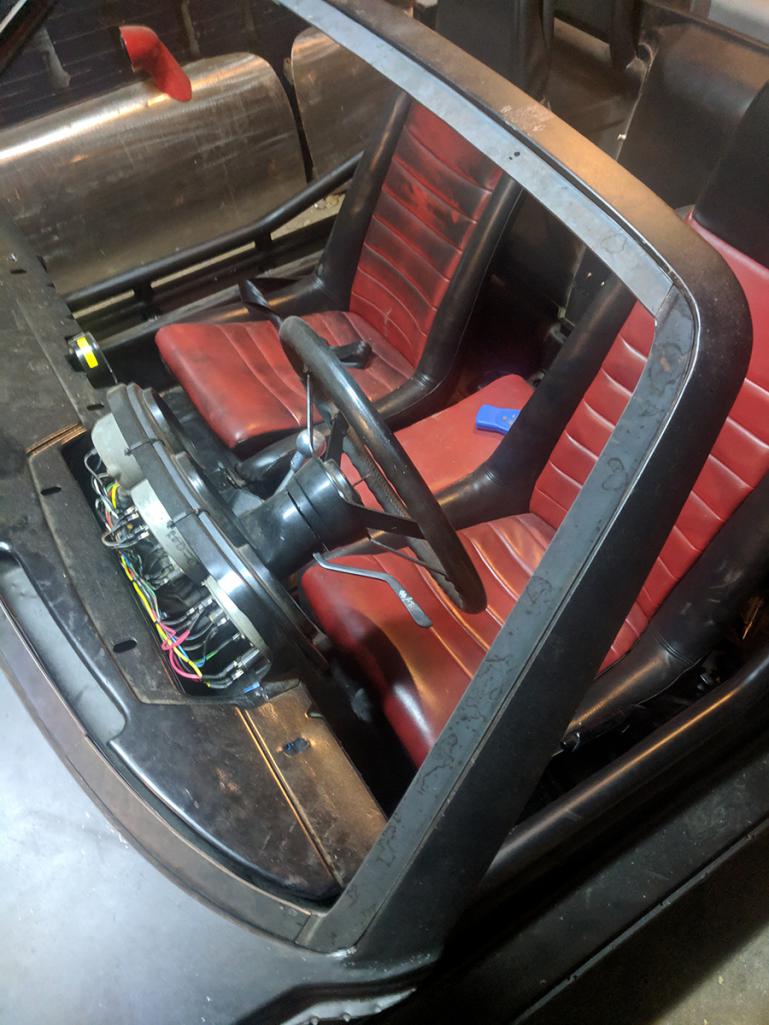
Looking at the shape the Polycarbonate will have to take is encouraging though, I think I may actually be able to pull this off!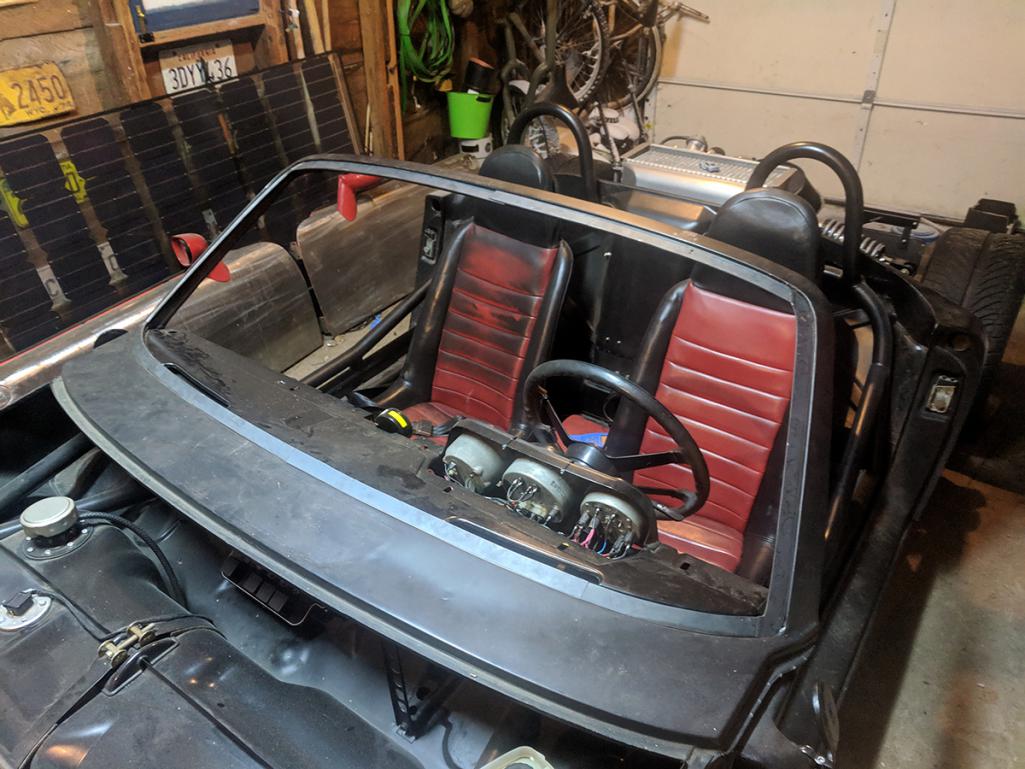
Posted by: Ferg Apr 1 2019, 01:07 PM
Doors and a windscreen. Big year year for sure
Posted by: plymouth37 Apr 1 2019, 03:55 PM
Doors and a windscreen. Big year year for sure
they grow up so fast
Posted by: Spoke Apr 1 2019, 05:24 PM
Amazing project. Your crafting skills are beyond belief. The Police that pulled you over didn't even know to ask you "Is this a Fiat?" since it didn't have it's 914 skin on it.
When you get the front and rear on and if it uses the standard 914 front and rear light fixtures, I'd gladly donate LED brake, turnsignals, and reverse lights to the project.
Posted by: plymouth37 Apr 1 2019, 09:56 PM
Amazing project. Your crafting skills are beyond belief. The Police that pulled you over didn't even know to ask you "Is this a Fiat?" since it didn't have it's 914 skin on it.
When you get the front and rear on and if it uses the standard 914 front and rear light fixtures, I'd gladly donate LED brake, turnsignals, and reverse lights to the project.
Heck yeah! That would be amazing! Even more motivation to get going on body work! Thank you!
Posted by: plymouth37 Apr 4 2019, 09:35 AM
Did you know the 16bit WRX computers only use the rear O2 sensor for emissions purposes? The JDM cars don't even have it. Time for more simplification and weight savings!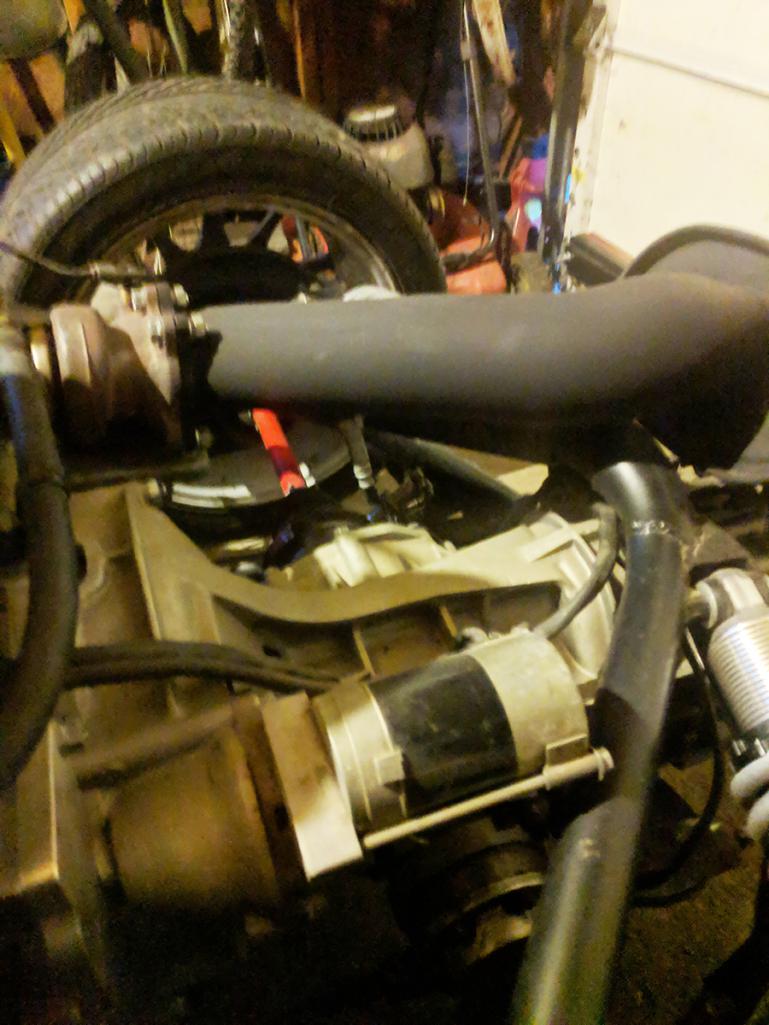
Got a shiny new plug for the bung, this will be a good spot for a wideband once I start tuning.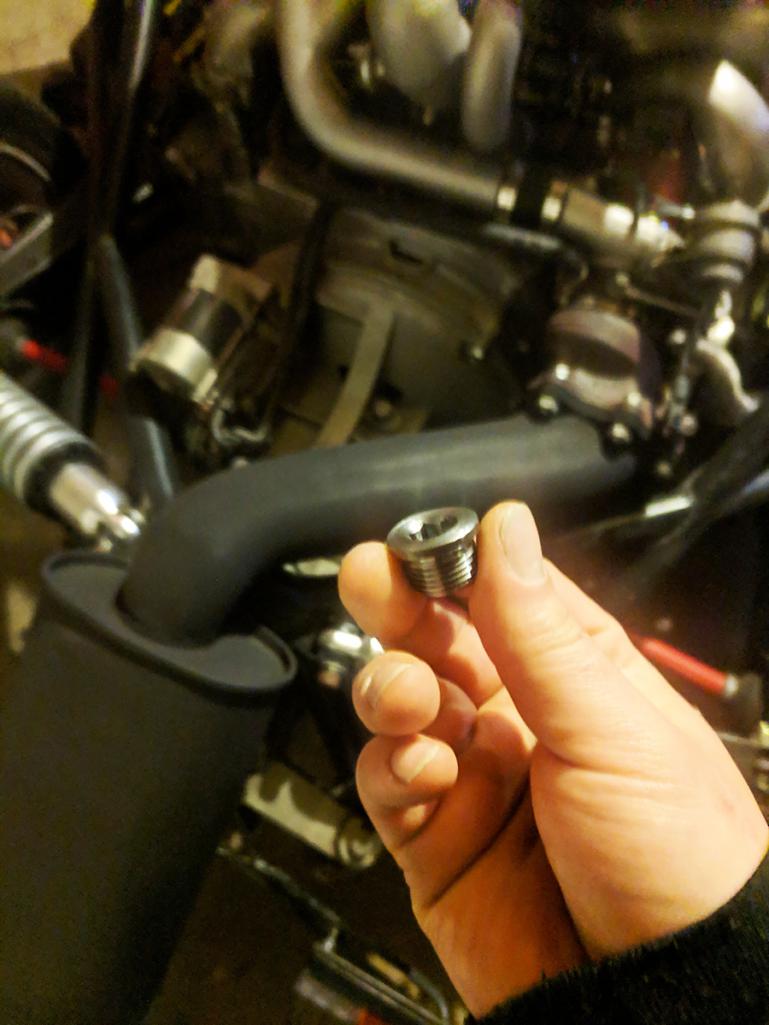
There! Saved a couple ounces and shed 4 more wires!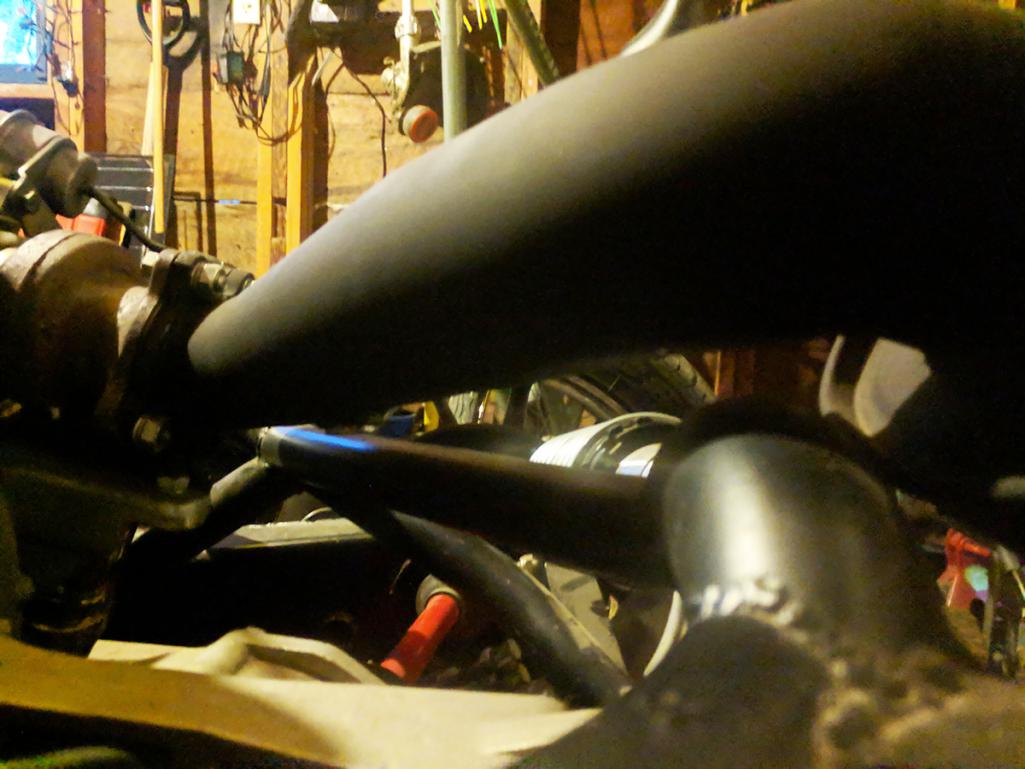
Posted by: KWPorsche914WRX Apr 4 2019, 10:22 AM
Mr. Stokes...
I hope this post finds you well. It sure has been awhile. It is your old friend Keith from Vegas. Hit me up on PM. I am thinking about selling my 914 and wanted to talk with you regarding value before I go any further. Since we last taked, we have left the house in Henderson where we all used to live and moved to Colorado Springs. Hope to hear from you soon Dana.
Buds of old,
Keith Wilson
Posted by: Ferg Apr 4 2019, 10:54 AM
Mr. Stokes...
I hope this post finds you well. It sure has been awhile. It is your old friend Keith from Vegas. Hit me up on PM. I am thinking about selling my 914 and wanted to talk with you regarding value before I go any further. Since we last taked, we have left the house in Henderson where we all used to live and moved to Colorado Springs. Hope to hear from you soon Dana.
Buds of old,
Keith Wilson
Keith! Good to hear you are still around and in CO Springs. We had lunch at Hooters with LVSteve when I bought his Gold 914 years ago.
Posted by: 76-914 Apr 4 2019, 11:09 AM
Did you know the 16bit WRX computers only use the rear O2 sensor for emissions purposes? The JDM cars don't even have it. Time for more simplification and weight savings!
Same goes for the EZ-30D 6cyl.
Posted by: KWPorsche914WRX Apr 4 2019, 11:19 AM
Mr. Stokes...
I hope this post finds you well. It sure has been awhile. It is your old friend Keith from Vegas. Hit me up on PM. I am thinking about selling my 914 and wanted to talk with you regarding value before I go any further. Since we last taked, we have left the house in Henderson where we all used to live and moved to Colorado Springs. Hope to hear from you soon Dana.
Buds of old,
Keith Wilson
Keith! Good to hear you are still around and in CO Springs. We had lunch at Hooters with LVSteve when I bought his Gold 914 years ago.
Hey! How ya been???
Posted by: Chris914n6 Apr 4 2019, 12:35 PM
Just to clarify, all OBD2 cars have an after cat o2 sensor. It's sole purpose is to verify the cat is installed and working. Appropriately coded P0420 
Looking forward to seeing the car in person this WCR.
Did you know the 16bit WRX computers only use the rear O2 sensor for emissions purposes? The JDM cars don't even have it.
Posted by: plymouth37 Apr 4 2019, 12:42 PM
Just to clarify, all OBD2 cars have an after cat o2 sensor. It's sole purpose is to verify the cat is installed and working. Appropriately coded P0420
Looking forward to seeing the car in person this WCR.
Did you know the 16bit WRX computers only use the rear O2 sensor for emissions purposes? The JDM cars don't even have it.
True, however the later drive by wire 32bit wrx/sti use the rear O2 sensor as a secondary input to correct the air/fuel ratio, while the earlier cars just use it check your cat health/existence.
Posted by: plymouth37 Apr 4 2019, 03:06 PM
Mr. Stokes...
I hope this post finds you well. It sure has been awhile. It is your old friend Keith from Vegas. Hit me up on PM. I am thinking about selling my 914 and wanted to talk with you regarding value before I go any further. Since we last taked, we have left the house in Henderson where we all used to live and moved to Colorado Springs. Hope to hear from you soon Dana.
Buds of old,
Keith Wilson
Hey buddy! Good to hear from you, you should start a thread here on the world, I bet we could dial in your car's worth together!
Tom's is a pretty relevant recent sale, went for around 30k, I bet yours is probably in that ballpark.
http://www.914world.com/bbs2/index.php?showtopic=335699
Posted by: KWPorsche914WRX Apr 5 2019, 10:09 AM
Mr. Stokes...
I hope this post finds you well. It sure has been awhile. It is your old friend Keith from Vegas. Hit me up on PM. I am thinking about selling my 914 and wanted to talk with you regarding value before I go any further. Since we last taked, we have left the house in Henderson where we all used to live and moved to Colorado Springs. Hope to hear from you soon Dana.
Buds of old,
Keith Wilson
Hey buddy! Good to hear from you, you should start a thread here on the world, I bet we could dial in your car's worth together!
Tom's is a pretty relevant recent sale, went for around 30k, I bet yours is probably in that ballpark.
Thanks Dana! Tom's car is nice, very nice. Do you think that due the the various magazine articles on my car raises the value at all? I have a standing offer right now for $25k but I think it is worth more. I put $60k into it and just can't let THAT much $$$ go down the drain.
http://www.914world.com/bbs2/index.php?showtopic=335699
Posted by: plymouth37 Apr 25 2019, 11:28 AM
My 930 boost sender wasn't working, and verifying correct boost is pretty critical as I dial in the car. This was a parts bin freebie from when I worked at Renegade, a new one is like $180 so the goal was to restore the one I had. I found the issue as soon as I pried the cover off, the little piece of aluminum that holds the end of the return spring had snapped off. (Circled in red)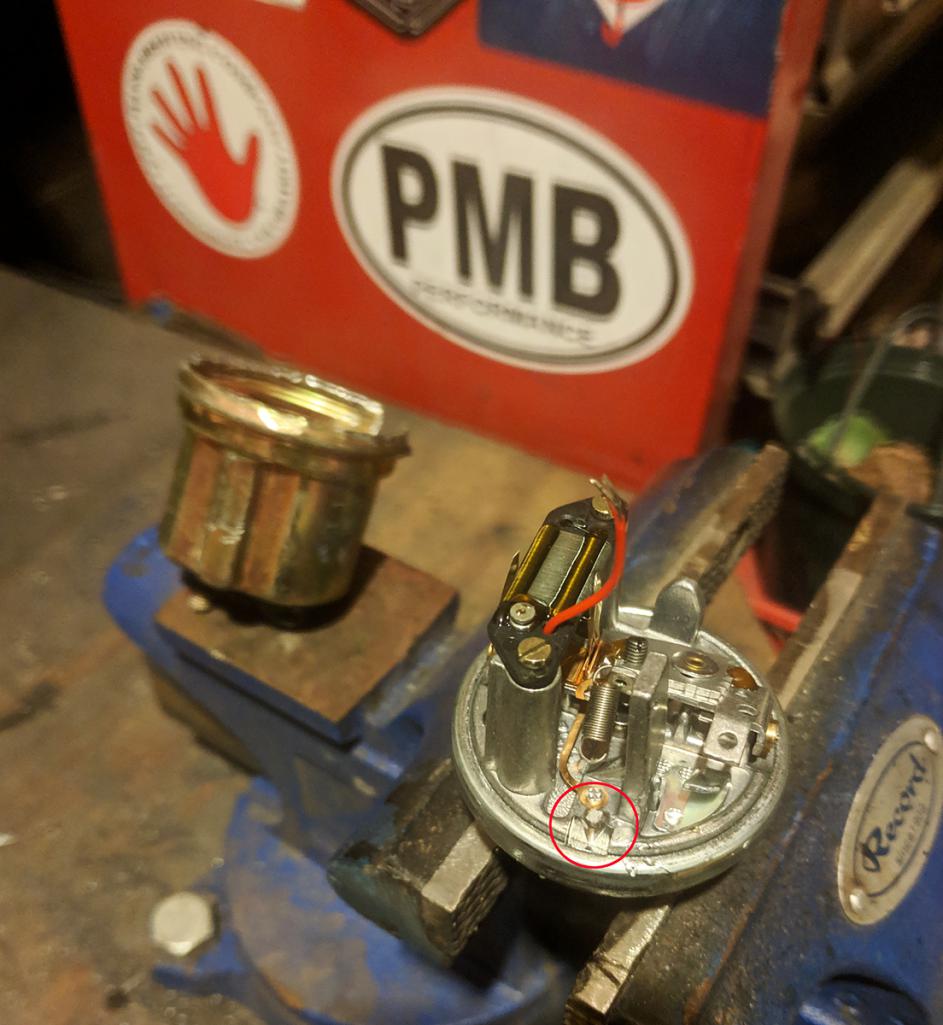
I drilled a tiny hole in another piece of the case in a spot that would tension the spring in a similar way to the original then temporarily installed it to tune it.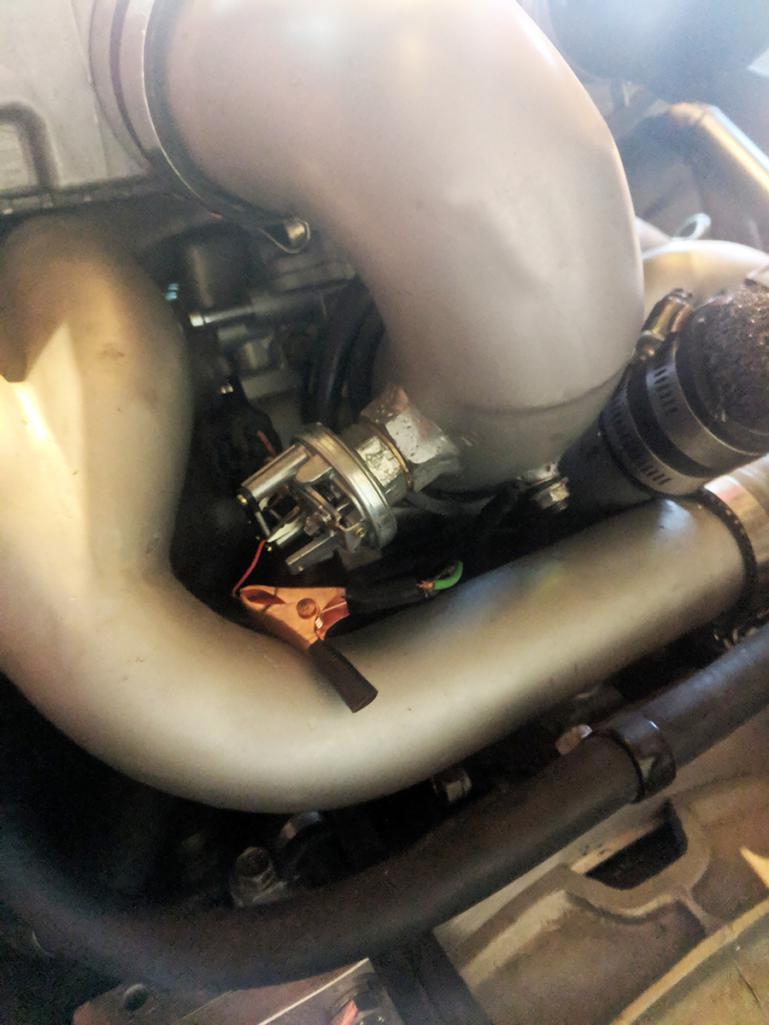
There are a few tiny metal tabs inside the sender that you can bend to adjust the min and max travel of the potentiometer. I pressurized my intake and verified the gauge against a second pressure sensor I rigged up. it took a little poking to adjust it but it reads correctly now.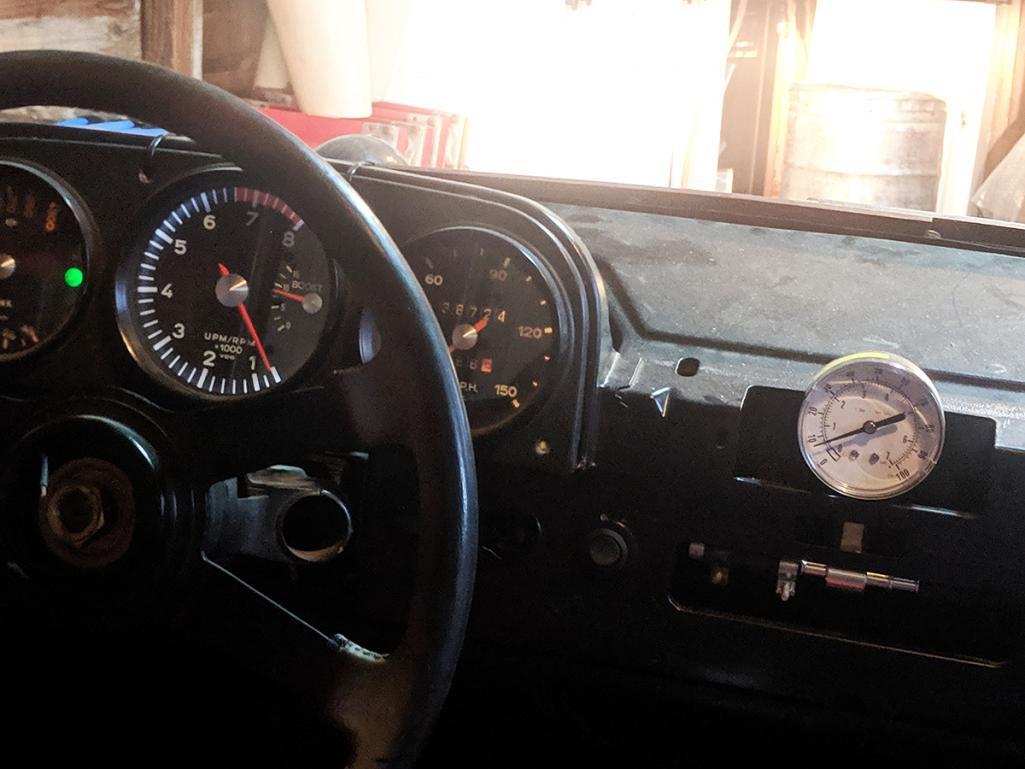
After a test drive to ensure it worked well I painted the cover I scratched up prying it off. and soldered a longer wire in. finally I put it all back together.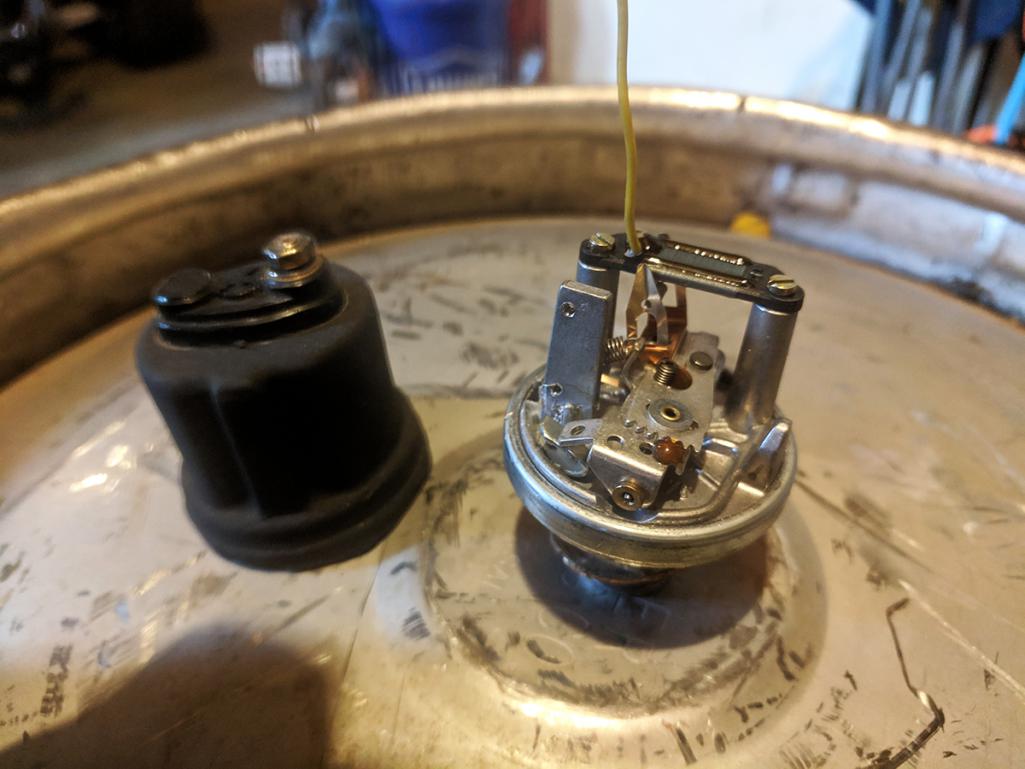
Then I installed it. Eventually I would like to drive my gauge off of the Subie MAP sensor and eliminate all of this but this will work for now!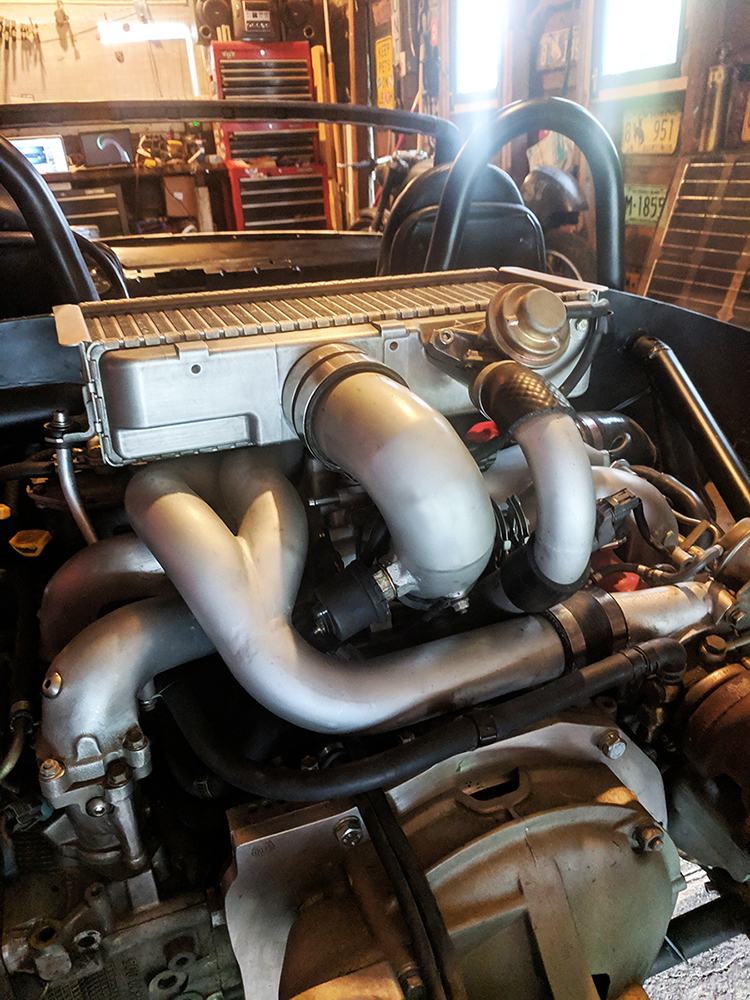
Posted by: plymouth37 Jun 25 2019, 10:29 AM
My car is too small, or at least these seats are too high, time to address that!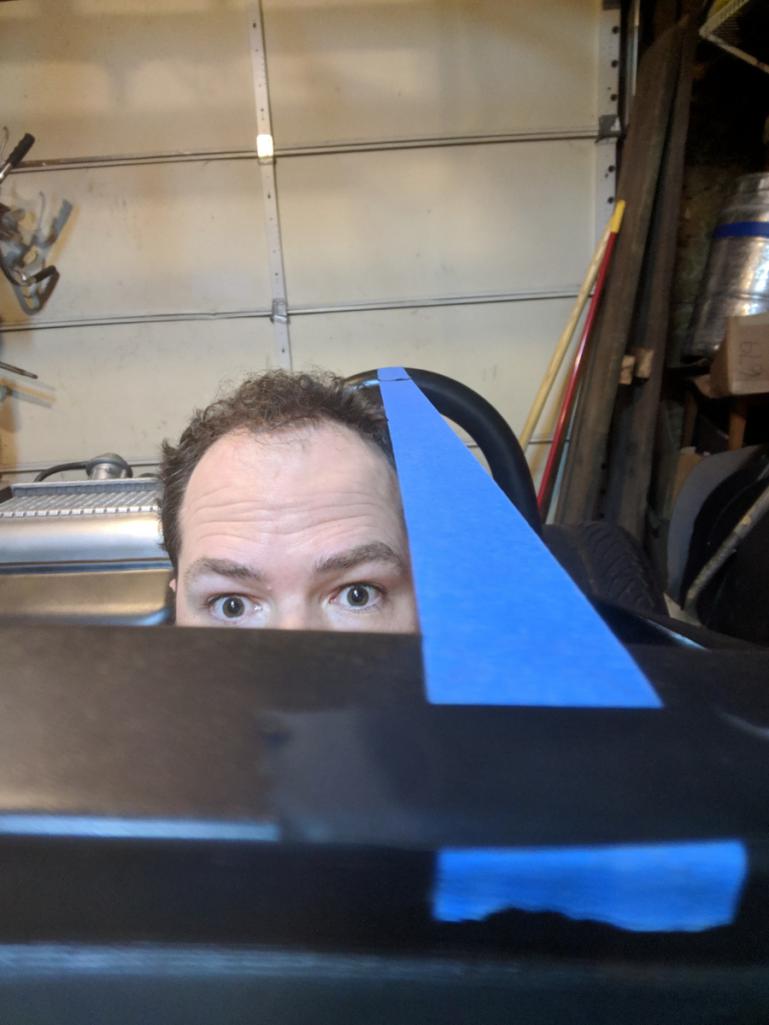
I picked up some cheap Bride knockoffs, i was being optimistic and tried just mounting them with the stock rails.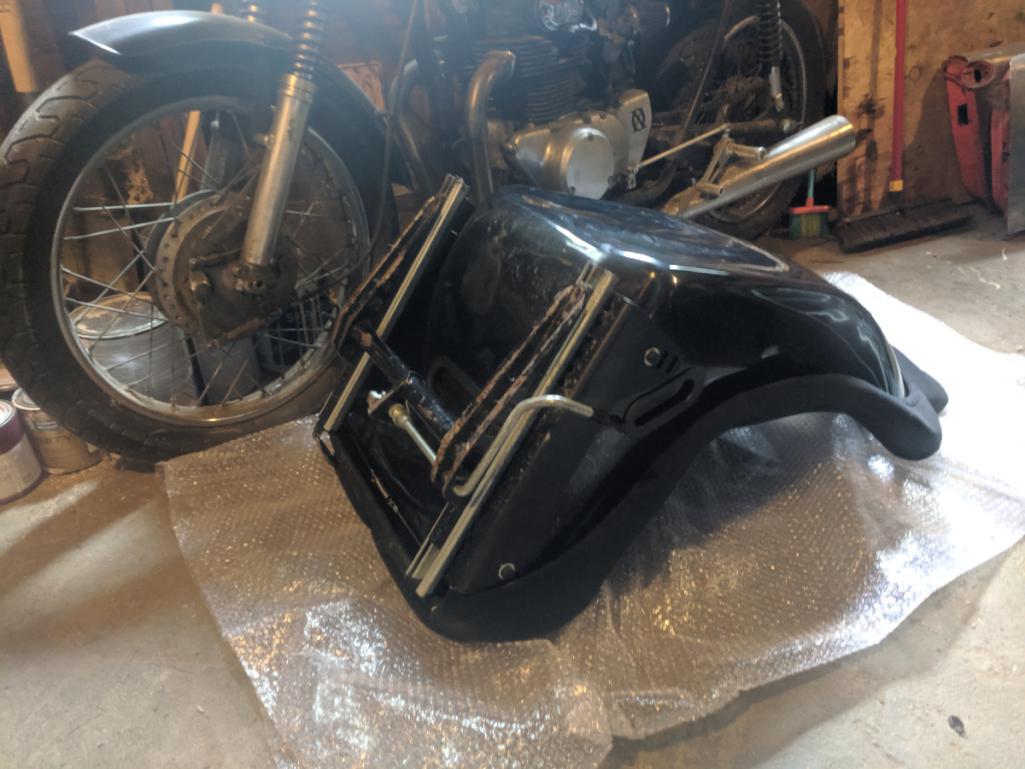
Predictably they sat way too tall... 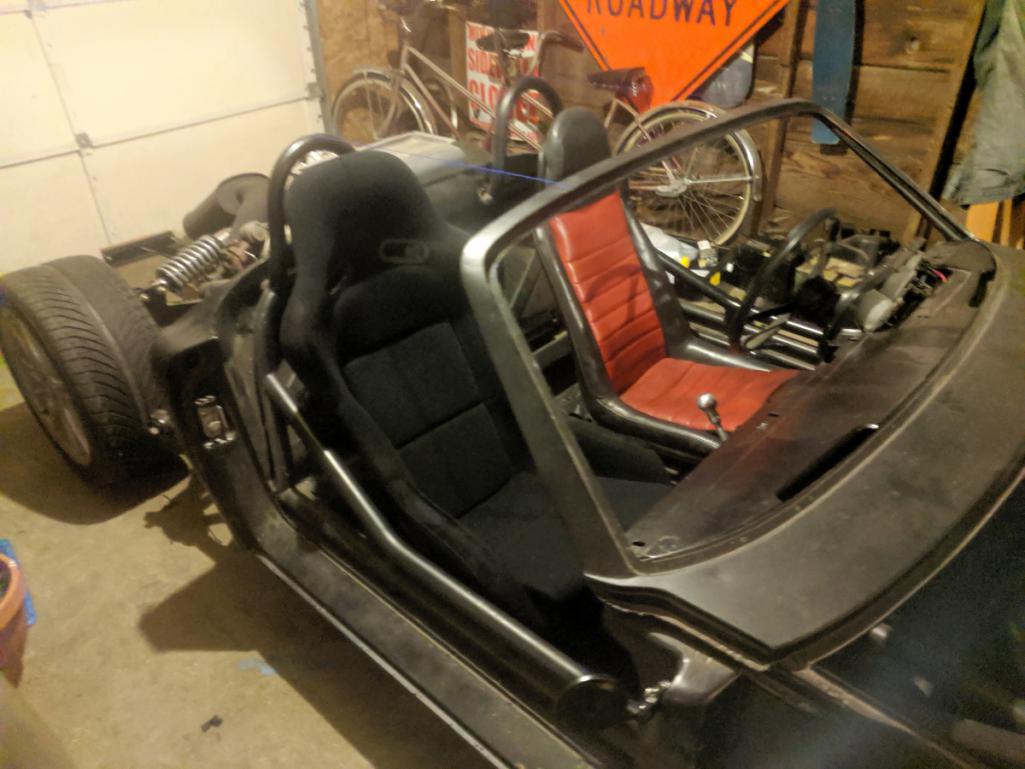
So I took out my angle grinder and removed the floor support.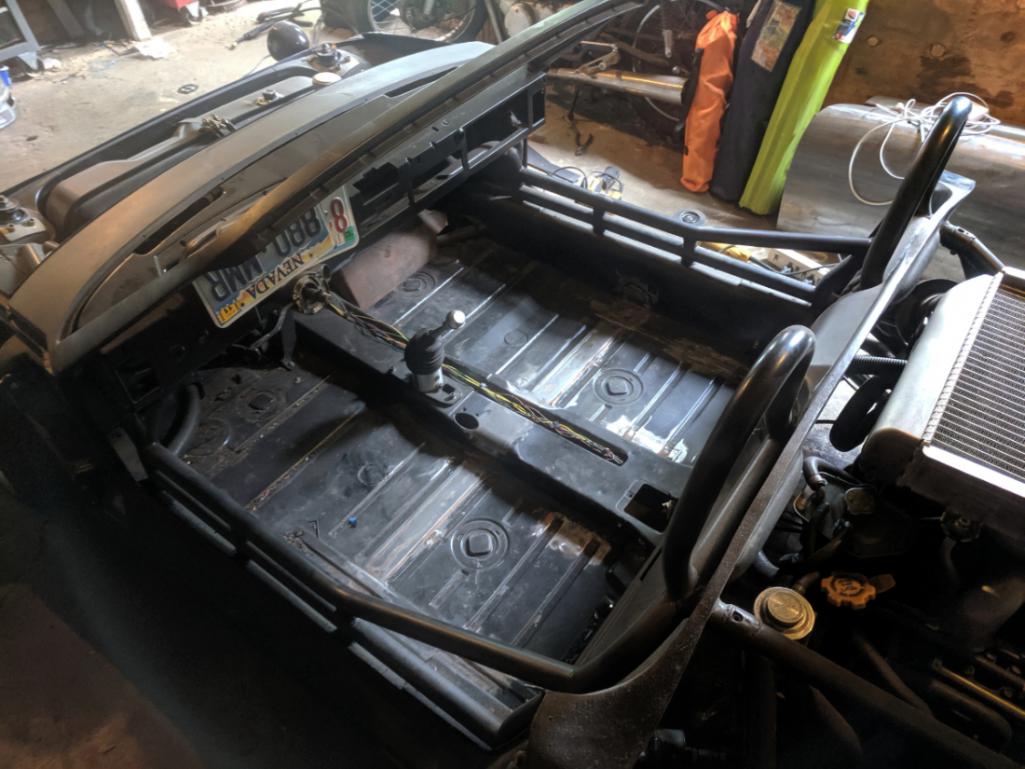
Posted by: plymouth37 Jun 25 2019, 10:33 AM
I threw some paint on the floor, I will probably add a floor support back in there, haven't figured out how crucial it is yet.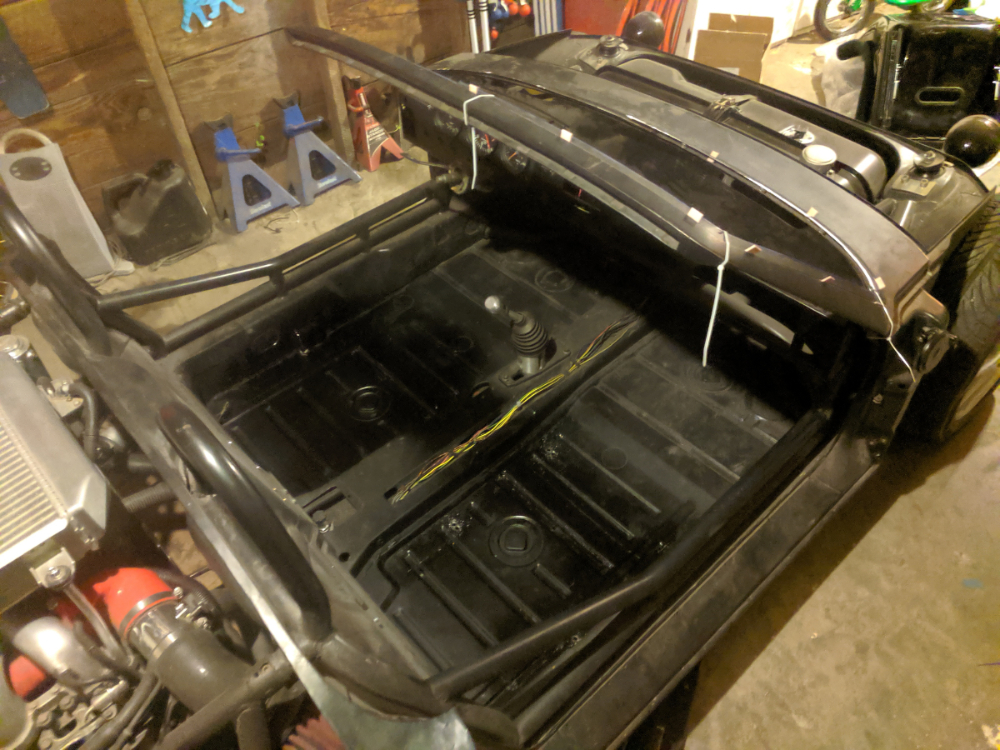
I mounted the seats on their runners, they are already pretty low but I lowered them an additional inch in the rear to replicate the 914 seating angle.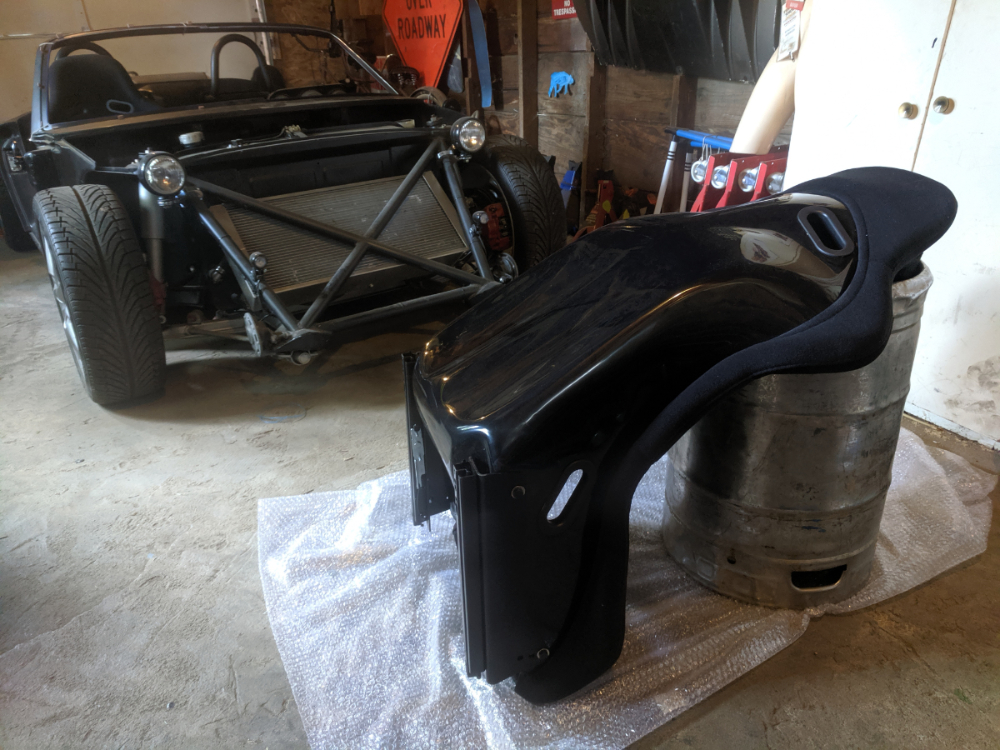
then I bolted them to the floor using monster fender washers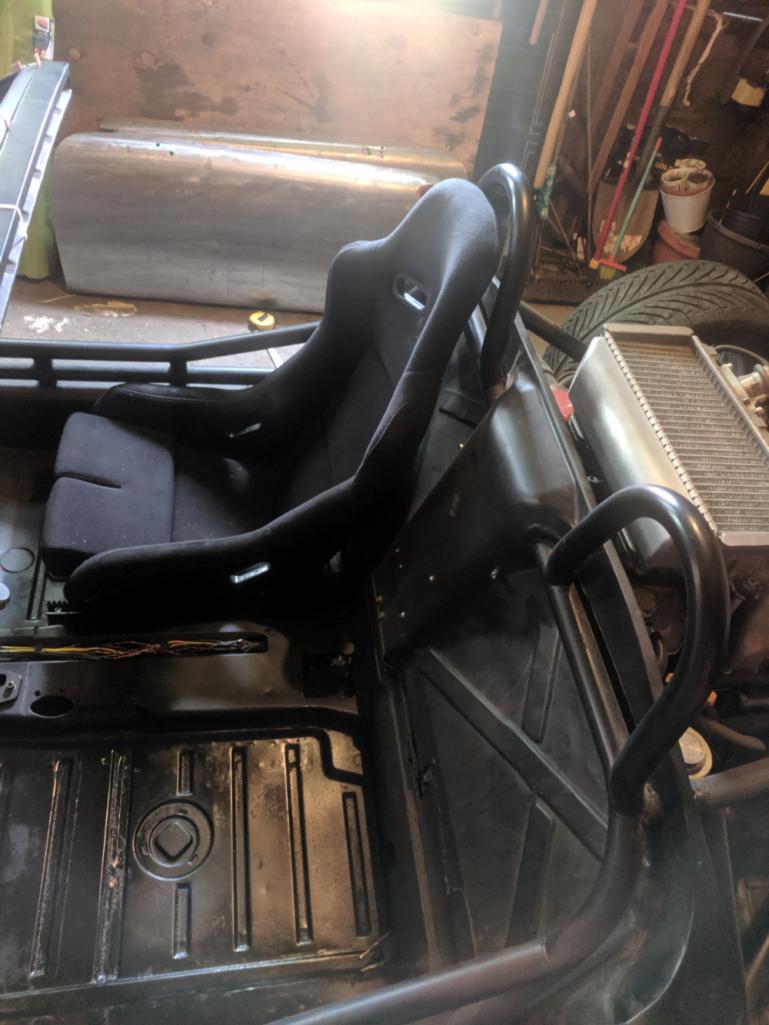
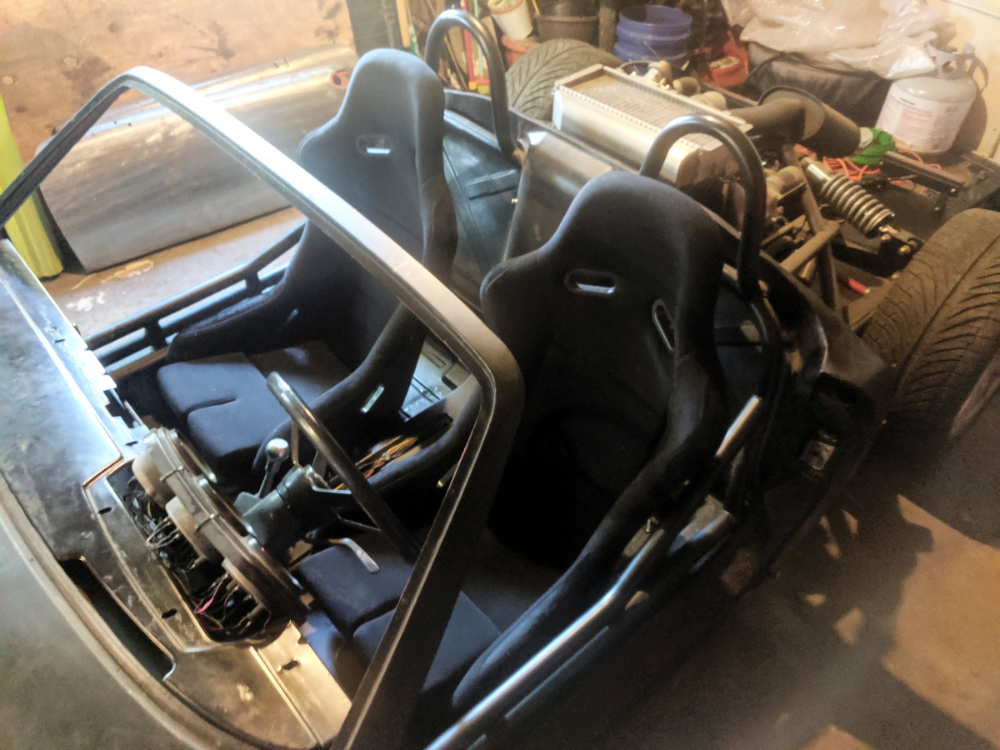
I am going to reupholster and modify these so these are perfect, I fit in them pretty well as well, next step belts!
Posted by: 76-914 Jun 26 2019, 08:35 AM
![]() I almost missed this update. Wish you were local. I'd love to get an up close look.
I almost missed this update. Wish you were local. I'd love to get an up close look.
Posted by: 2mAn Jun 26 2019, 10:09 AM
What are you going to do when its actually "done" ... so much work modifying every single item on the car
Posted by: horizontally-opposed Jun 26 2019, 11:05 AM
Nice work, and choice on seats!
Not sure how crucial those cross-beams are, but a race shop felt they were important enough to save when we lowered my driver's seat. Got about 0.8-inch while keeping sliders.
From post #75 on:
http://www.914world.com/bbs2/index.php?showtopic=80724&st=60
And some more recent pics here, in post #44:
http://www.914world.com/bbs2/index.php?showtopic=337884&st=40
Posted by: plymouth37 Jun 26 2019, 11:39 AM
What are you going to do when its actually "done" ... so much work modifying every single item on the car
Don't worry, it will never be done, just wait until I disassemble the whole thing again before paint
Posted by: plymouth37 Jun 26 2019, 01:05 PM
I bought some Schroth 4-point harnesses with anti-submarining technology, I eliminated the original upper seatbelt mount so a 4-point solution made sense, also this isn't really a full blown race car so I wanted to avoid a 5 or 6 point race harness.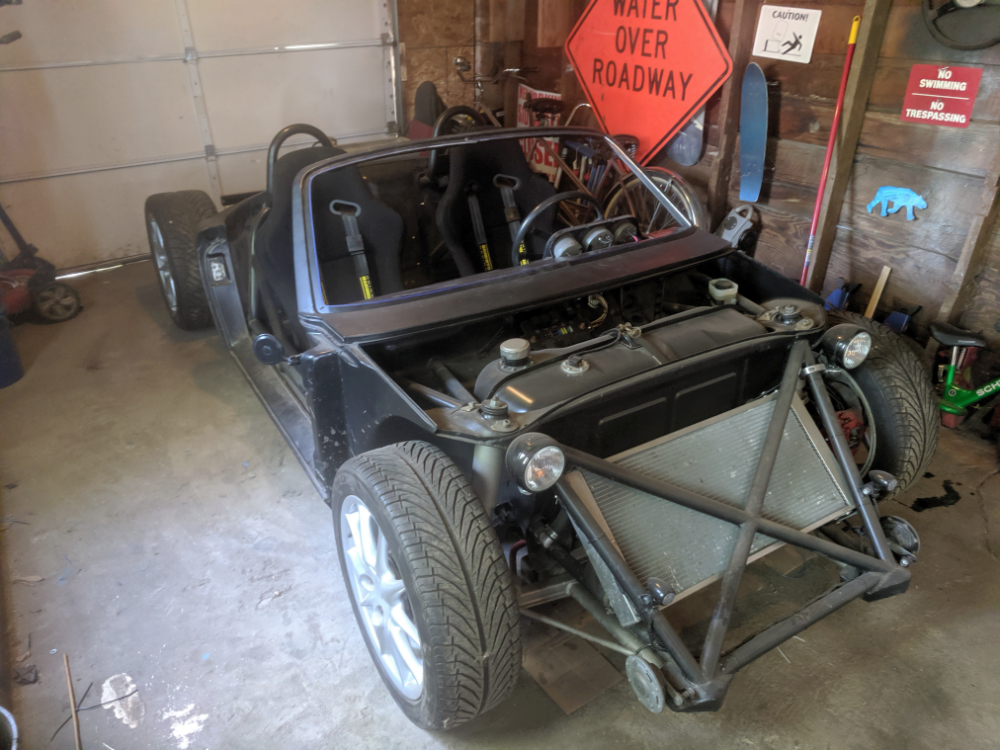
They mount to the main hoop that passes through the firewall, typically your belts should be between level or sloping up to the seat less than 20 degrees, mine are about dead straight.
Here they are, next problem to solve is replacing the handbrake I had to eliminate to get these seats to fit in the car...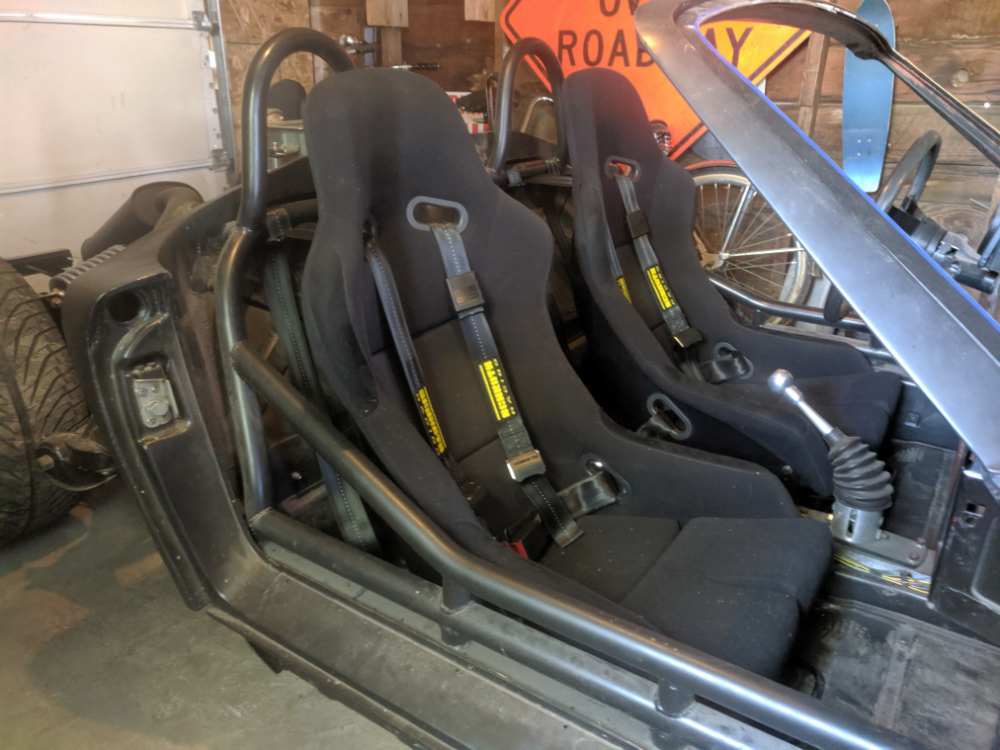
Posted by: plymouth37 Jun 27 2019, 12:25 PM
I need to move the handbrake in-between the seats now that I have wider seats. Browsing ebay I found one that was perfect for adapting to a 914, it has a built in mount for the cable ends, and the perfect recess that corresponds to the wiring trough in the console.
Here is the unfortunate victim that gave up its handbrake handle for the build, thanks Ferrari! Second Ferrari bit on the car, that has to be worth a couple hundred horsepower right?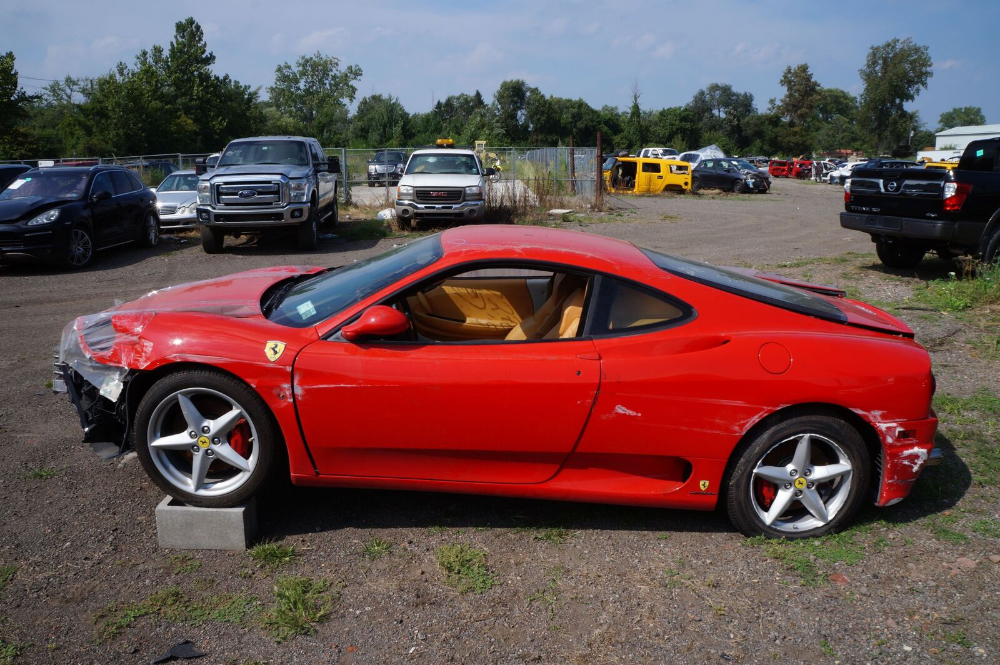
The Ferrari handbrake mechanism has a pully wheel that the cable loops around, I replaced this with a more normal equalizer, this requires a more conventional end on the cables. To make a more conventional end on the cables I cut a chunk of a bolt and drilled a hole in it, then threaded the cable through.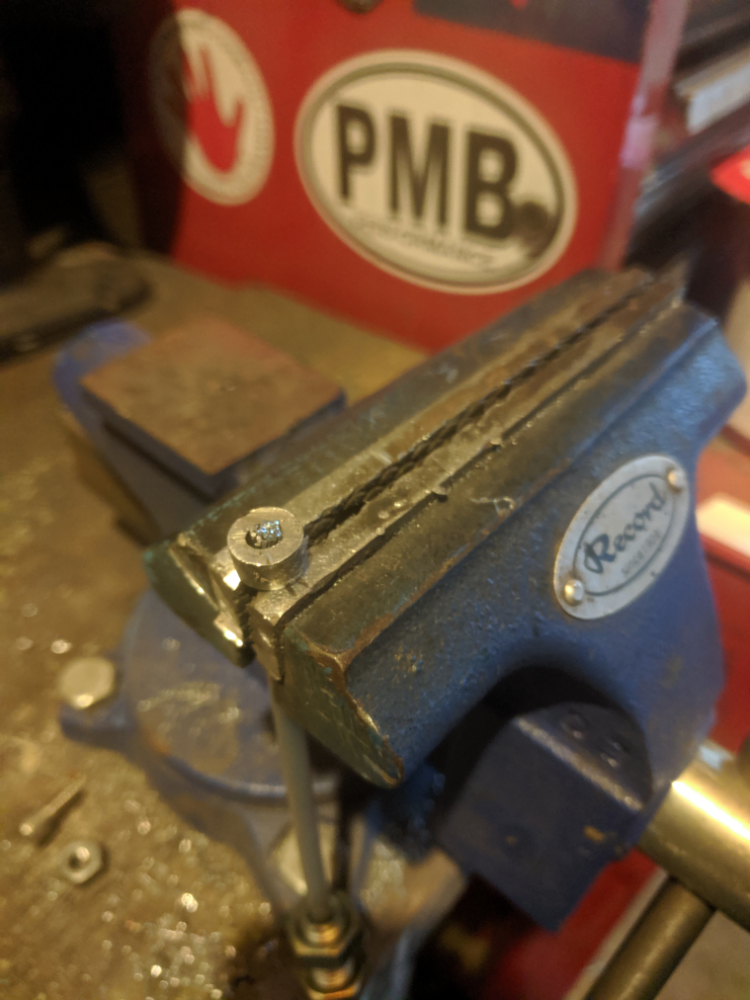
Then I blasted it with a nice hot blob of weld. 
To relocate the handbrake to the center you need to buy a second passenger cable to replace the driver side, here is the handle base with the cables and equalizer installed. 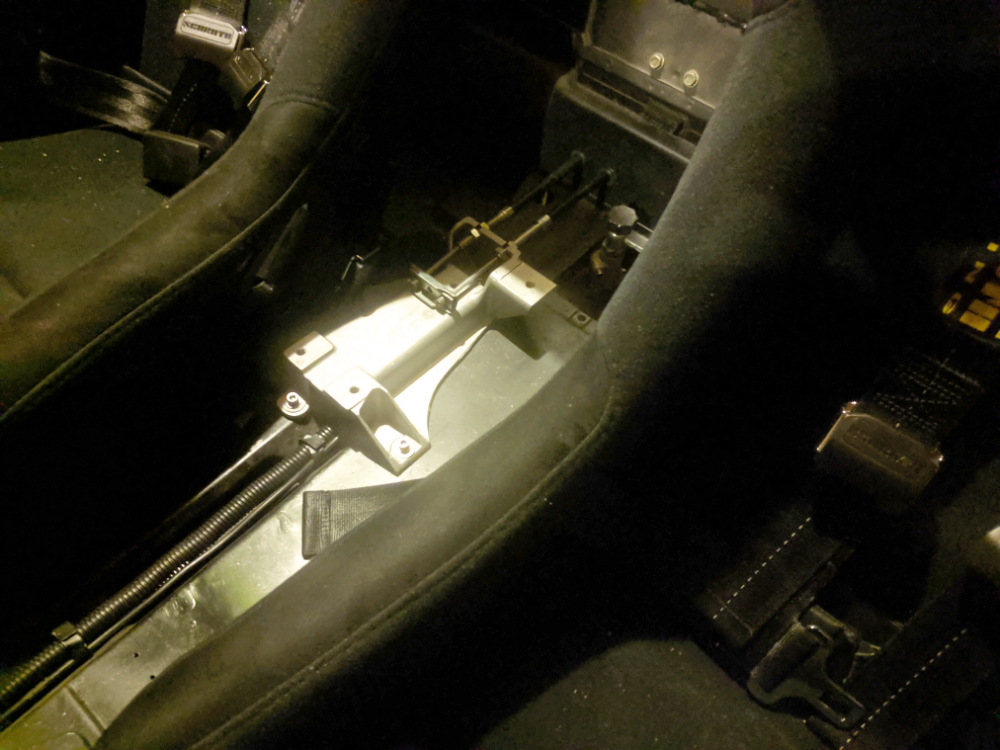
Posted by: plymouth37 Jun 27 2019, 12:26 PM
I have to say I am pretty darn happy with this. It is about as close to a bolt in solution as I could find.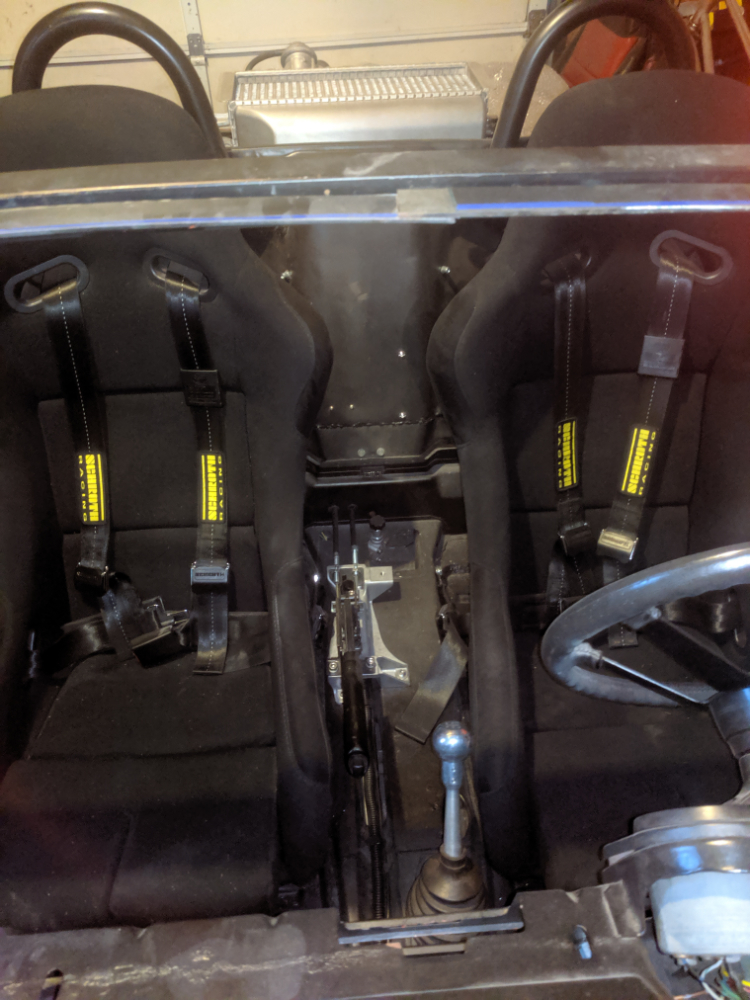
It is reasonably ergonomic and controls the brakes perfectly, there is another thing off the list! Woohoo!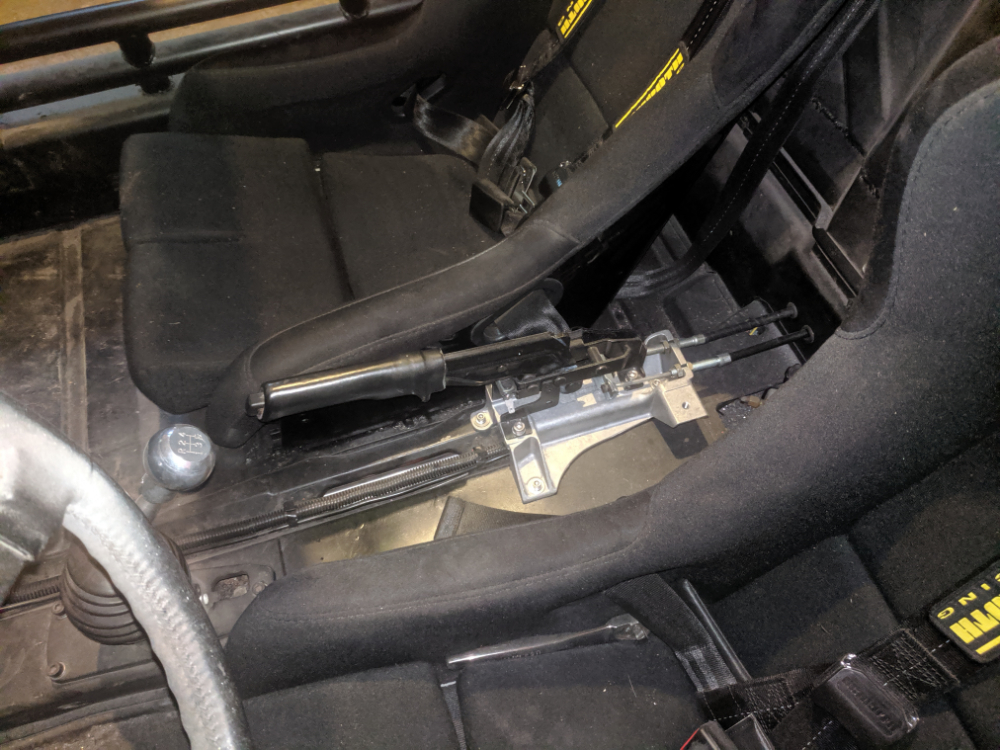
Posted by: sixnotfour Jun 27 2019, 02:23 PM
thats fuchin awesome...
Posted by: FourBlades Jun 28 2019, 03:00 PM
Great to see more progress.
Ya know, a car like this deserves its own one off, custom carbon body.
Did you ever want to take a stab at designing your own car body?
John
Posted by: plymouth37 Jul 1 2019, 11:06 AM
Great to see more progress.
Ya know, a car like this deserves its own one off, custom carbon body.
Did you ever want to take a stab at designing your own car body?
John
I have actually, my thesis in grad school reimagined Bucky Fuller's Dymaxion car as a modern sports car, retaining the 3 wheel configuration and rear steering, still have the first and last study models from that project on my desk at work.
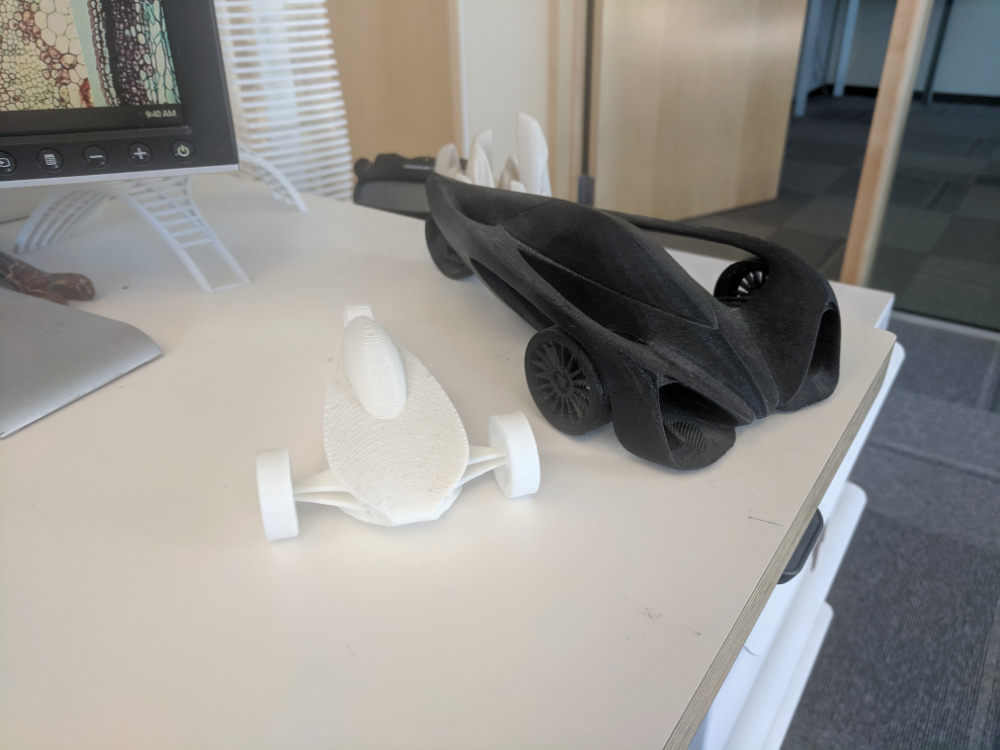
Fully designed and modeled the chassis and suspension too:

As for the 914 body, I would love to keep it fairly stock looking, too easy to fall into bad kit car territory with these cars, but reproducing the modified flared body in full carbon is definitely on the table if I get bored enough
Will definitely be watching this build with interest https://www.youtube.com/watch?v=dvCVw3k6PZY
Posted by: plymouth37 Jul 1 2019, 11:21 AM
Time to tackle doors, as far as all body components go I am just welding up any damage that requires it, ignoring the dents, and throwing some paint on them, once the dry fit is totally complete at least the exterior of these will get stripped and bodywork will commence for real, still got a few years before that though!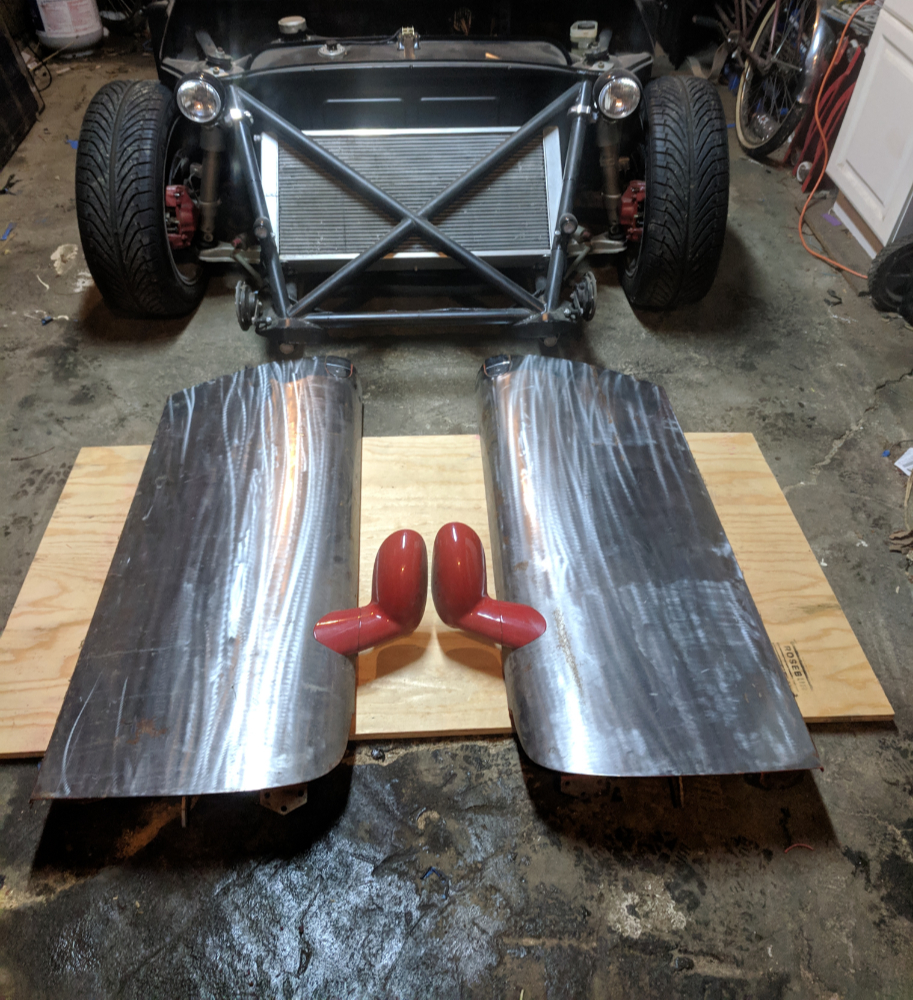
I stripped the doors down and then removed the other crash bar, I pulled the other one about 10 years ago and never got around to this one.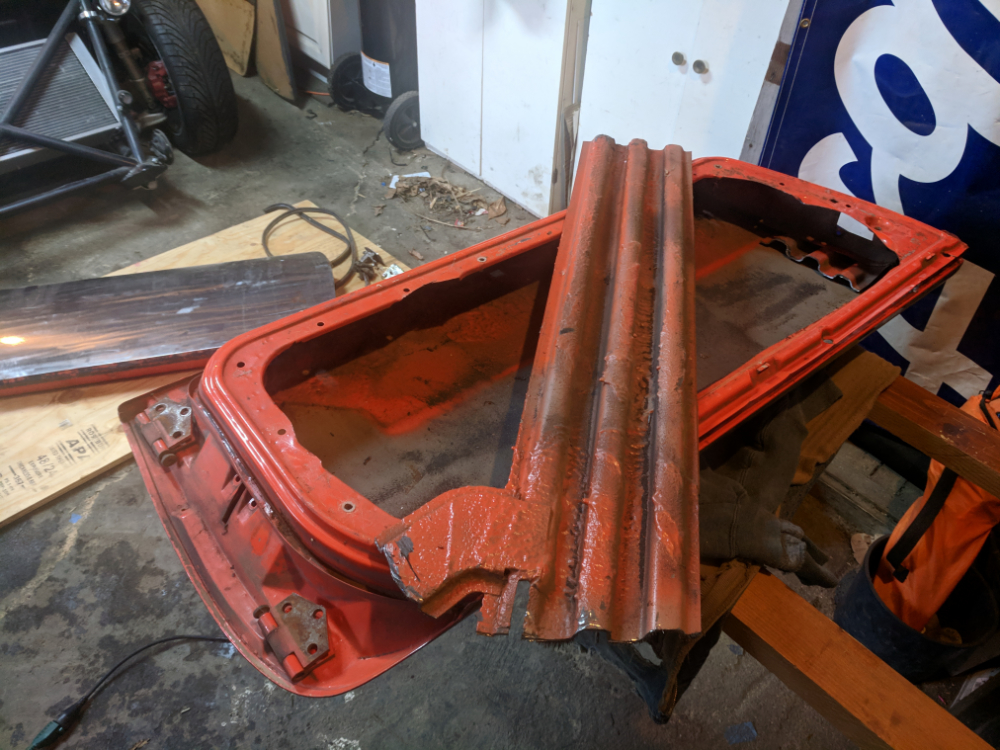
then I scraped the tar from the insides of the doors.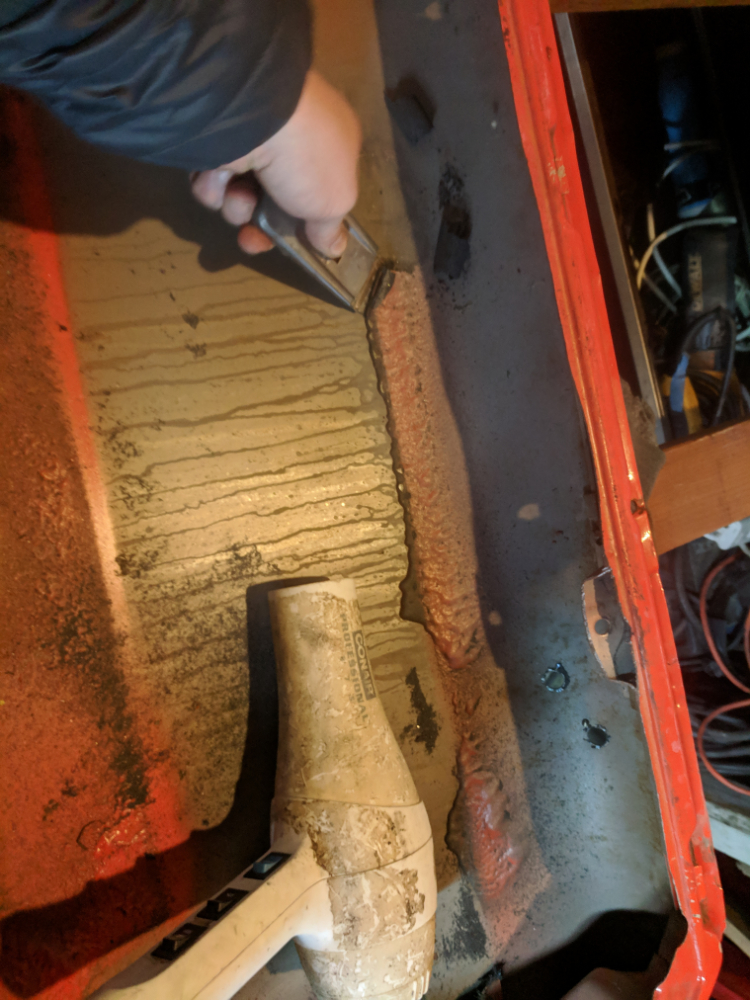
Repaired any damage that required a welder.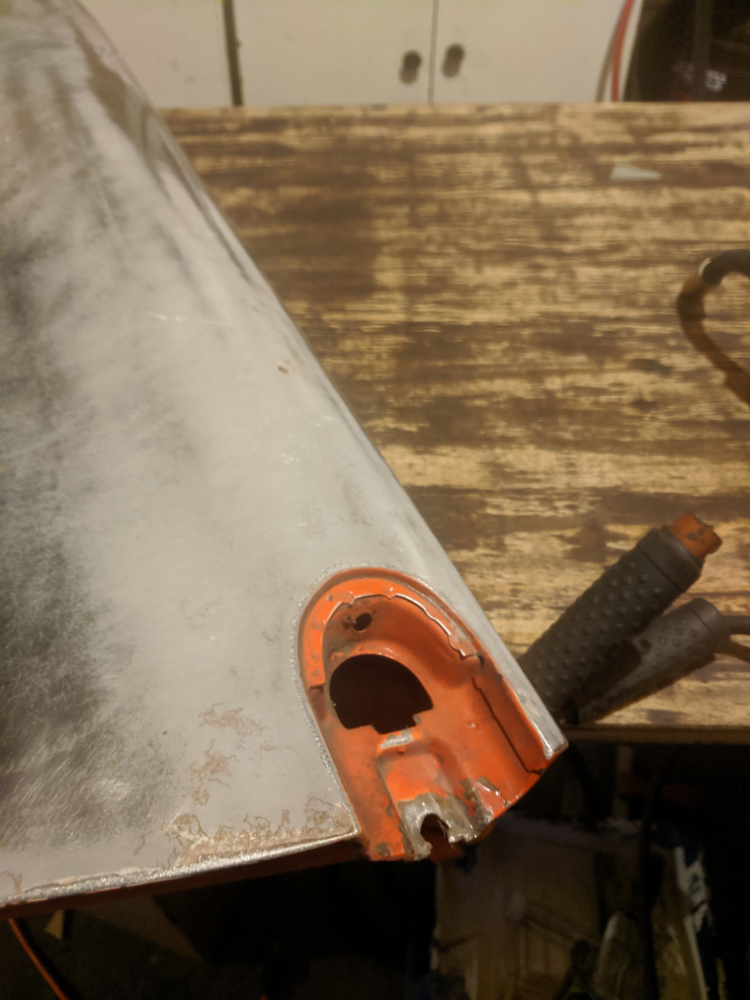
And stripped the clear that had been on there since my Vegas days.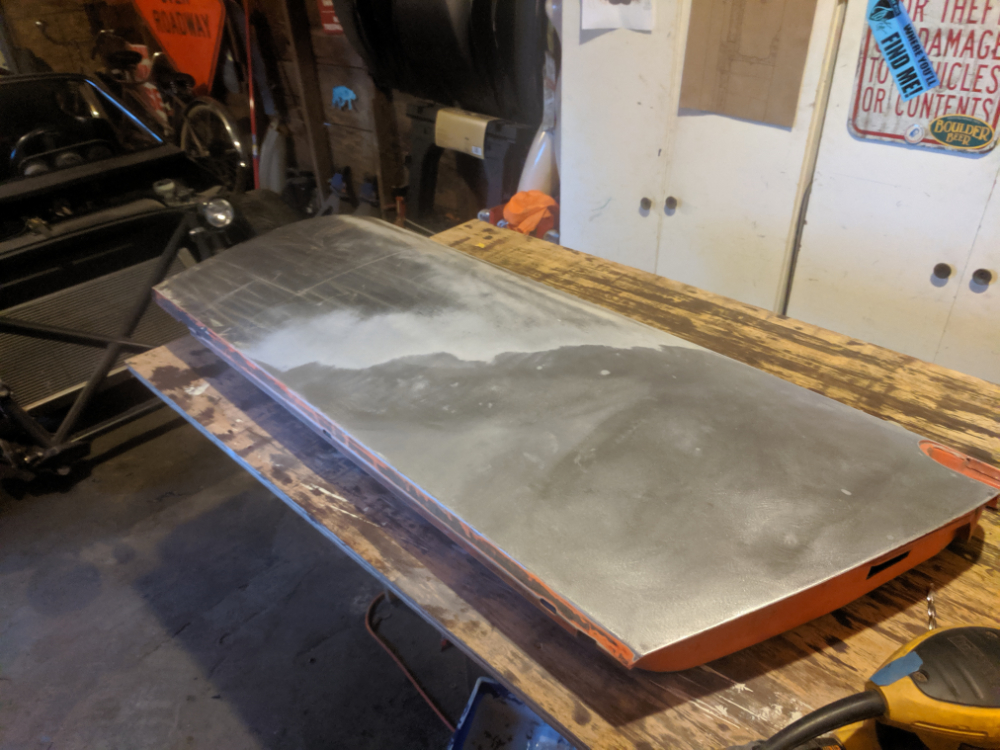
Posted by: plymouth37 Jul 1 2019, 11:22 AM
I got them all stripped and hung up.
Primed and painted.
Then threw them on the car, mirrors and latches next!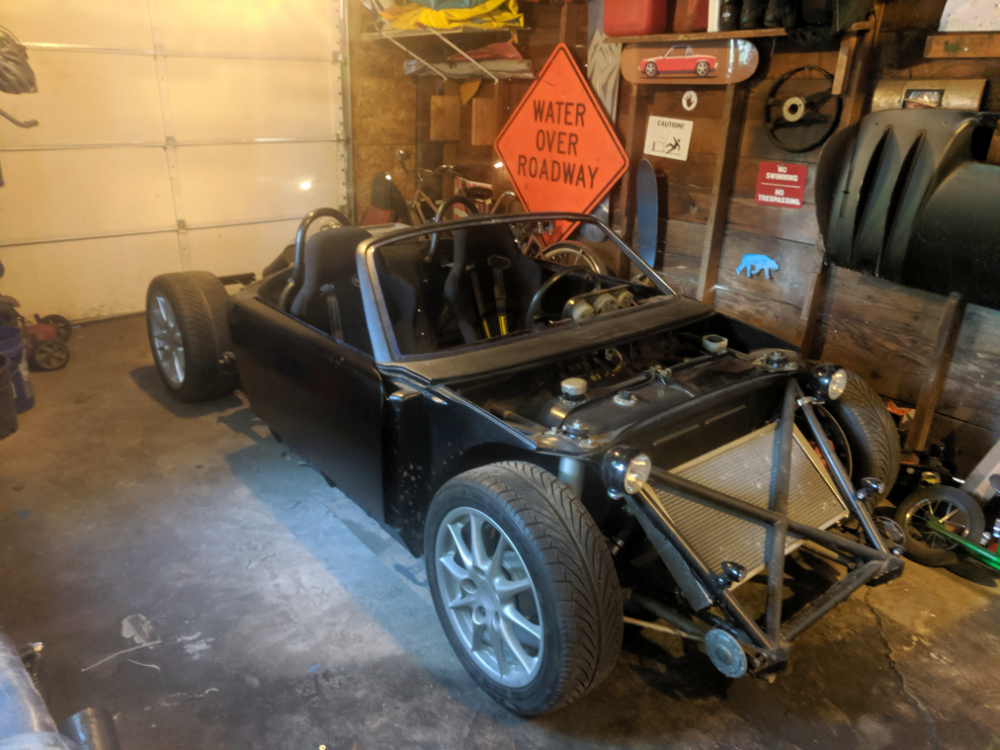
Posted by: 2mAn Jul 1 2019, 01:30 PM
so close, yet so far away!...
I wonder what will happen first, you finishing the car or me actually buying a 914 lol both seem to have no end in sight
Posted by: JeffBowlsby Jul 1 2019, 02:00 PM
You and Paul Elio out to get together.
Attached thumbnail(s)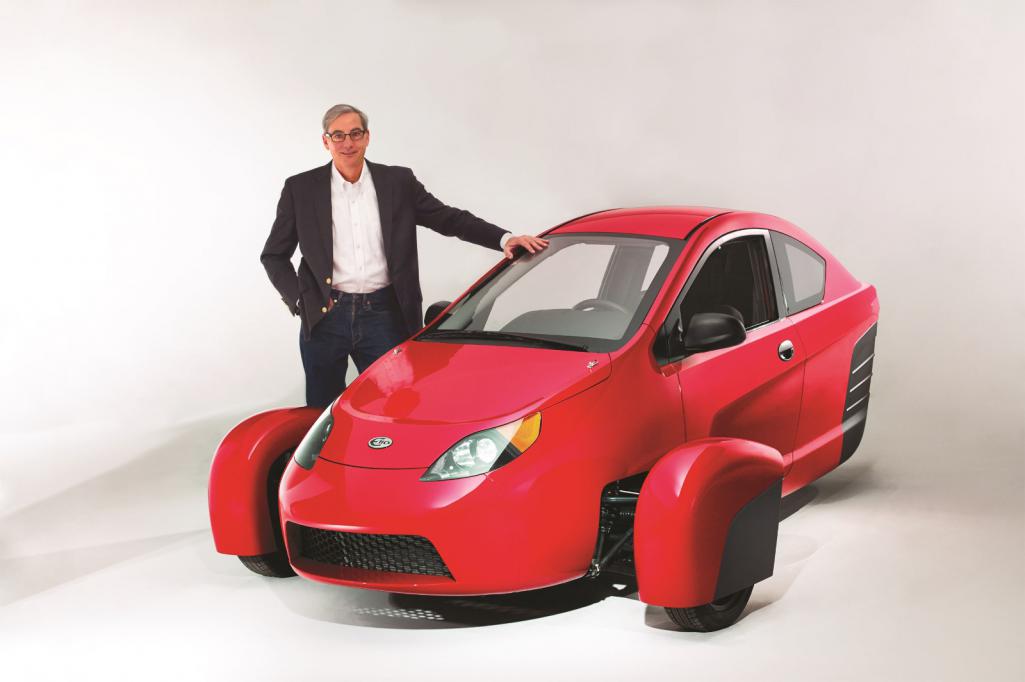
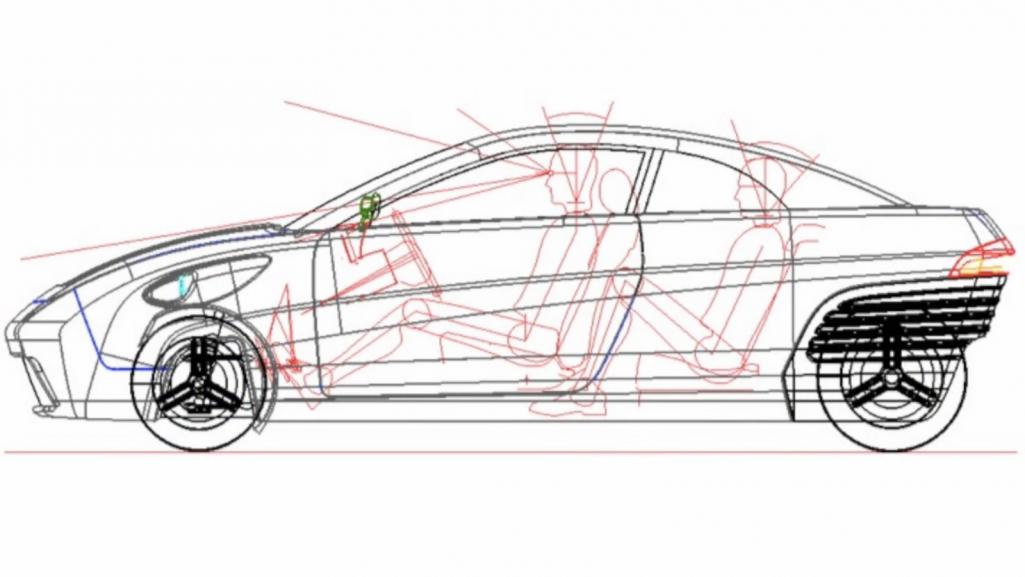
Posted by: Rand Jul 1 2019, 02:04 PM
Thank god this isn't a trike. Trikes suck donkey balls.Yes we know the only possible possibility is two front. Still sucks.
No wait... what worse balls can we find?
No matter. Murray Goldberg leaving pants right here at the door.
Posted by: MoveQik Jul 1 2019, 10:29 PM
I get all giggity when I see update to this thread! One of the coolest parts of this build IMHO is the garage its being built in...it looks like it should be a storage shed for lawn equipment. It really shows your talent as the builder.
Posted by: Andyrew Jul 2 2019, 09:20 AM
You and Paul Elio out to get together.
Unlike the Dale er I mean Elio.. The Anklebiter is Real.
Posted by: get off my lawn Jul 3 2019, 05:59 PM
What are you going to do when its actually "done" ... so much work modifying every single item on the car
Done. ROFLMAO!!!!!!!
they're never done.
Posted by: plymouth37 Aug 8 2019, 05:01 PM
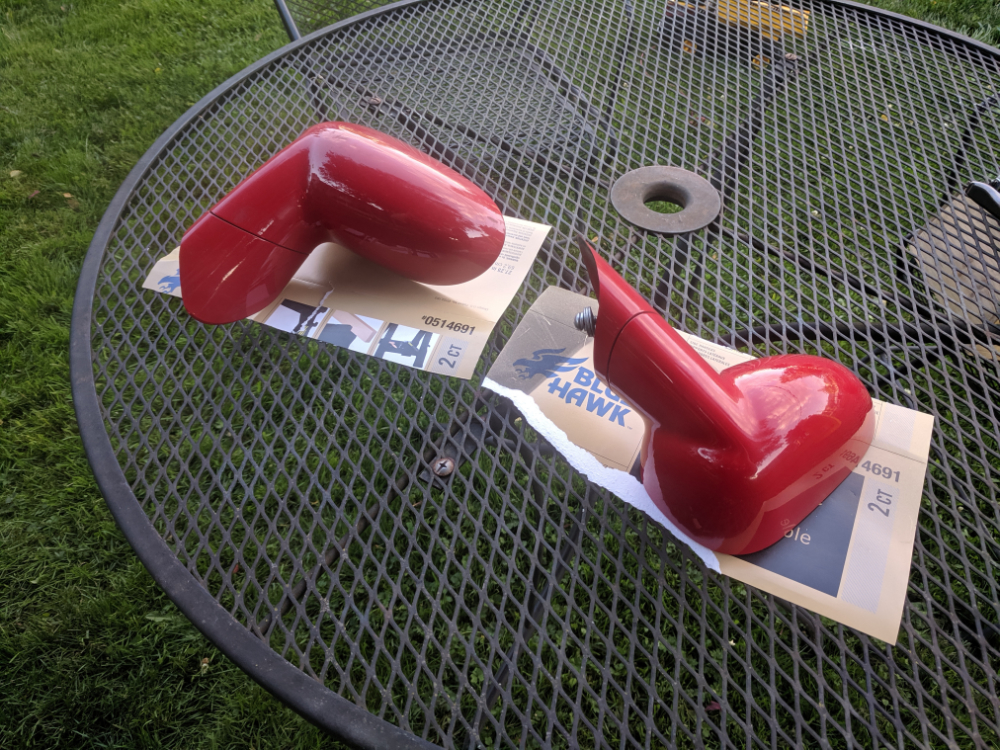
I polished up my Solstice mirrors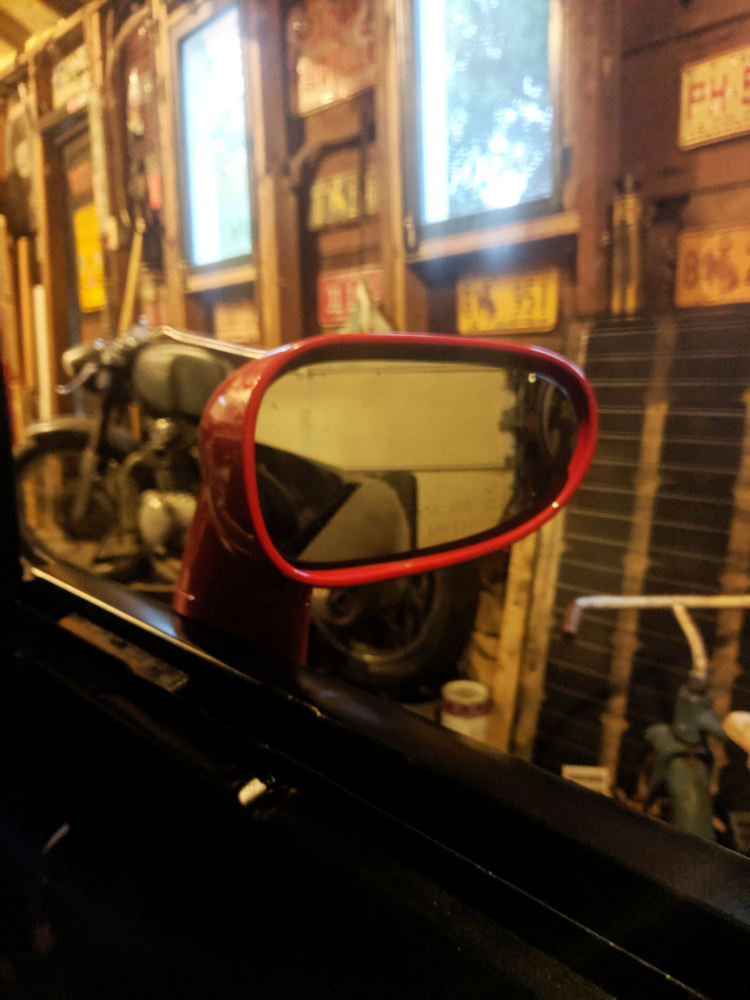
and put them on, just going to leave them red for now, they match the other red accents on the car as it is. More on how I got them to fit http://www.914world.com/bbs2/index.php?s=&showtopic=84842&view=findpost&p=1073199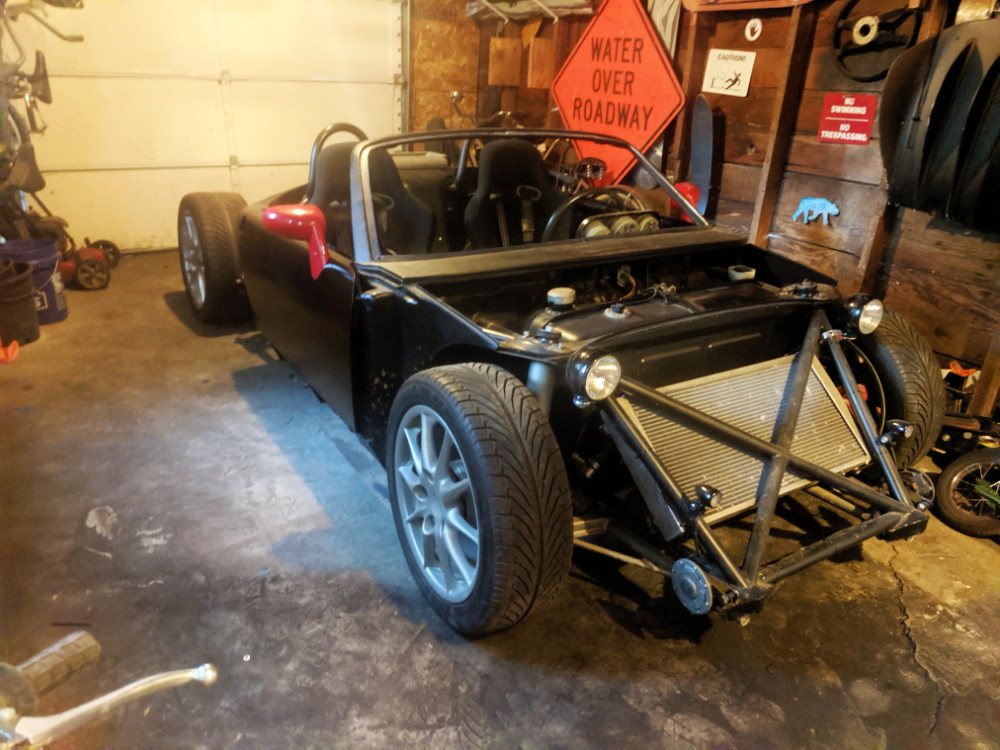
Behold, the Pontiac goodness...
Posted by: worn Aug 8 2019, 05:11 PM
I polished up my Solstice mirrors
and put them on, just going to leave them red for now, they match the other red accents on the car as it is. More on how I got them to fit http://www.914world.com/bbs2/index.php?s=&showtopic=84842&view=findpost&p=1073199
Behold, the Pontiac goodness...
Looks grand with doors! The horn placement reminds me of the old disc shock absorbers of the early twenties. No, the nineteen twenties. Visually that is.
Posted by: plymouth37 Aug 8 2019, 05:12 PM
This package has a funny story, if you look closely the date on it is from way back in 2006, when I moved from Vegas to Wyoming, somewhere along the way my door handle broke. I ordered the replacement part from pelican, and as soon as I got the car to my new house in Laramie I pulled apart the door to fix the handle. If you look back at the 13th post on this thread you will notice that the first thing I did on this build was cut out the crash bar in the door, then the second thing was cut off the targa top. This little twist of fate created this build, if I hadn't pulled that door apart I may not have even started this journey.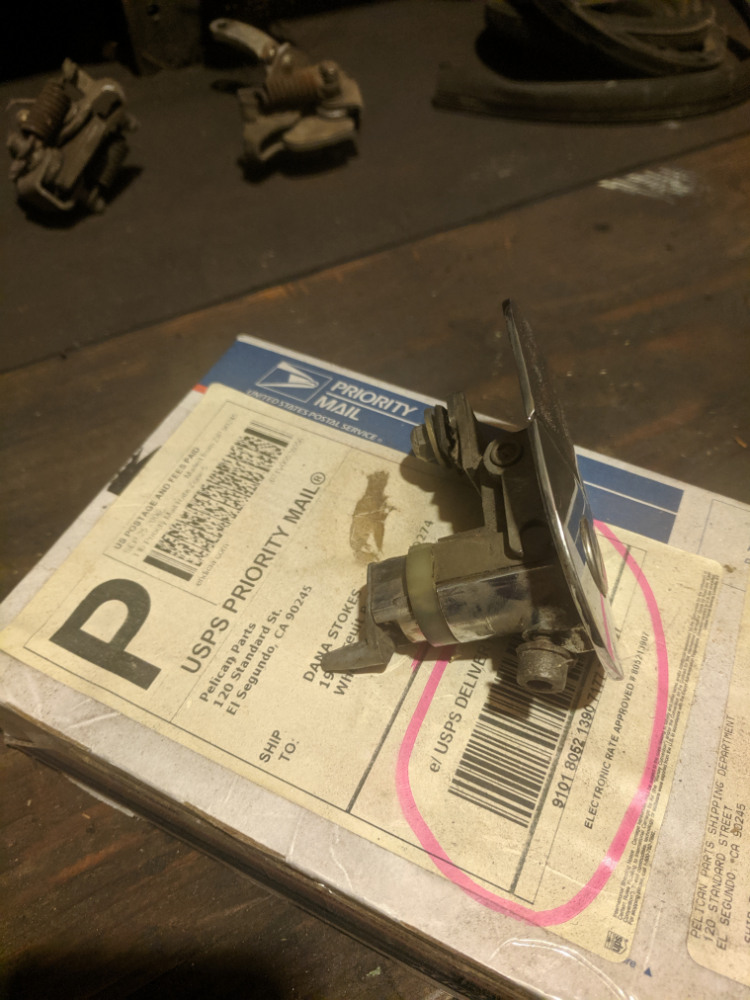
Well here we are 15 years later, time to finally fix that handle!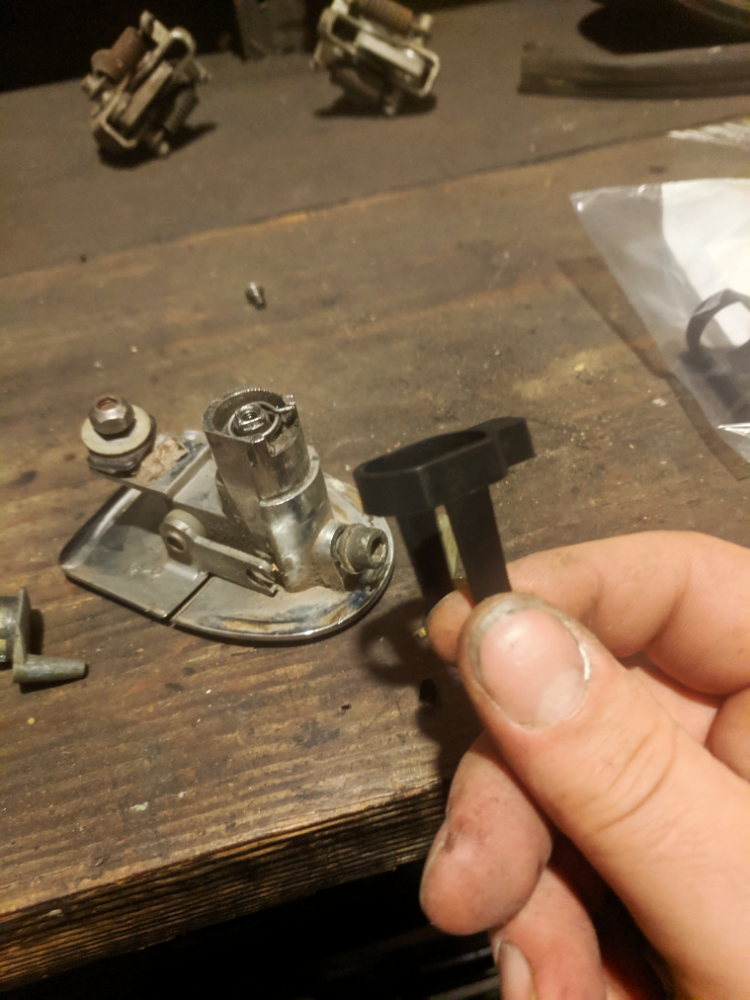
Posted by: plymouth37 Aug 8 2019, 05:13 PM
Totally! getting MG flashbacks!
Posted by: wingnut86 Aug 8 2019, 05:40 PM
Geez Dana. Talk about anticipation
Keep at it. You'll get her done before they phase out gasoline
Of course, I ain't got one at all.
Looking at used TESLA'S!!
HAH, that'll bring the comments and viewers back to your thread 
Dave
Posted by: plymouth37 Aug 8 2019, 08:32 PM
Geez Dana. Talk about anticipation
Keep at it. You'll get her done before they phase out gasoline
Of course, I ain't got one at all.
Looking at used TESLA'S!!
HAH, that'll bring the comments and viewers back to your thread
Dave
Believe me, this will be the last gas car I own. Maybe I can move the radiator to the back and jam a fwd KERS system in the front?
Posted by: flipb Aug 9 2019, 07:51 AM
Geez Dana. Talk about anticipation
Keep at it. You'll get her done before they phase out gasoline
Of course, I ain't got one at all.
Looking at used TESLA'S!!
HAH, that'll bring the comments and viewers back to your thread
Dave
Believe me, this will be the last gas car I own. Maybe I can move the radiator to the back and jam a fwd KERS system in the front?
Bought a used Model S and made it my daily driver. It's such a great car that it makes it hard to justify keeping the 914 for weekend drives, but the 914 scratches a different itch and still puts a huge grin on my face.
Posted by: plymouth37 Aug 9 2019, 08:53 AM
The windshield frame has been a challenging piece to fabricate but it is coming along! I took all of the rough cut pieces I made back in April http://www.914world.com/bbs2/index.php?showtopic=84842&st=1360# and welded them into two halves of a frame.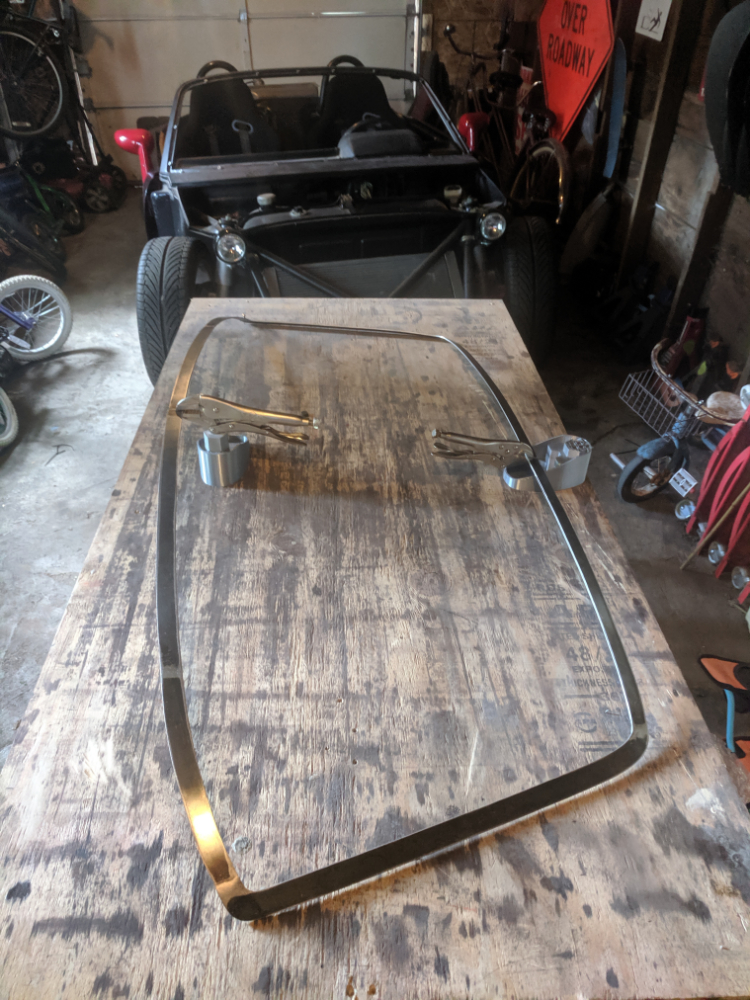
Then I used spacers to make sure it was positioned perfectly on the car and trimmed the halves to fit together perfectly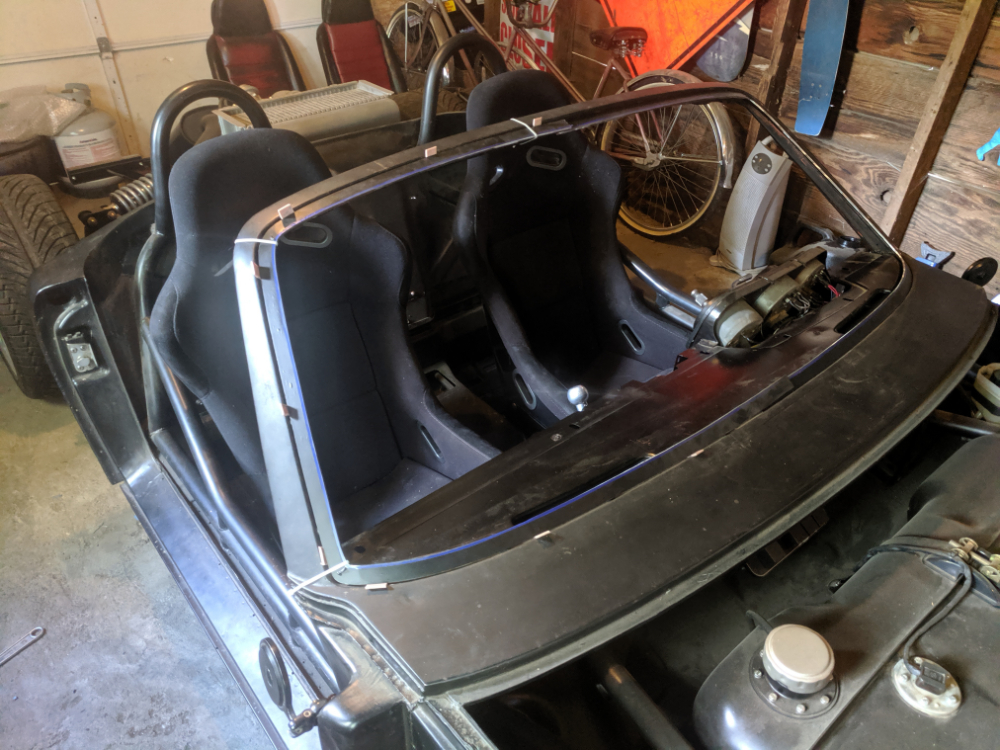
Then welded it into one piece, getting there, might buy some polycarbonate this weekend!
Sneak peak, I have been working on mocking up the interior components as well, more on that in a bit!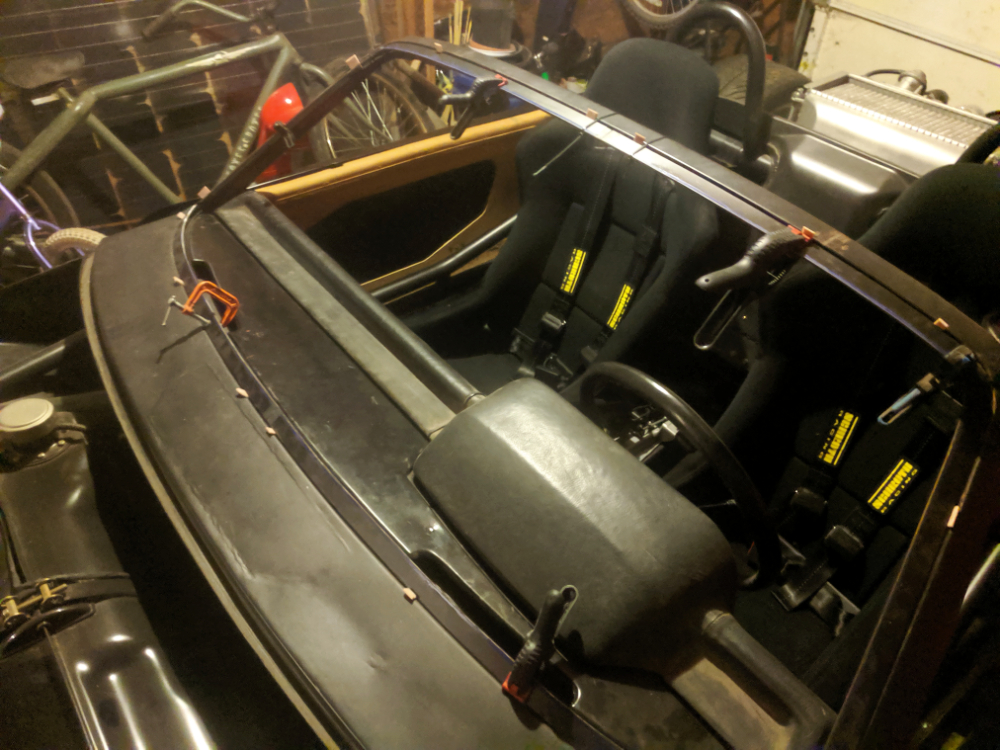
Posted by: Ferg Aug 9 2019, 03:16 PM
It's gonna be Ferg worthy in no time
Posted by: plymouth37 Aug 9 2019, 08:51 PM
It's gonna be Ferg worthy in no time
It isn't ready for you, I haven't painted it brown yet
Posted by: plymouth37 Aug 19 2019, 10:30 AM
We attended the annual Snoqualmie Railroad Days car show, it is only a block from my house so it is a pretty easy drive over there!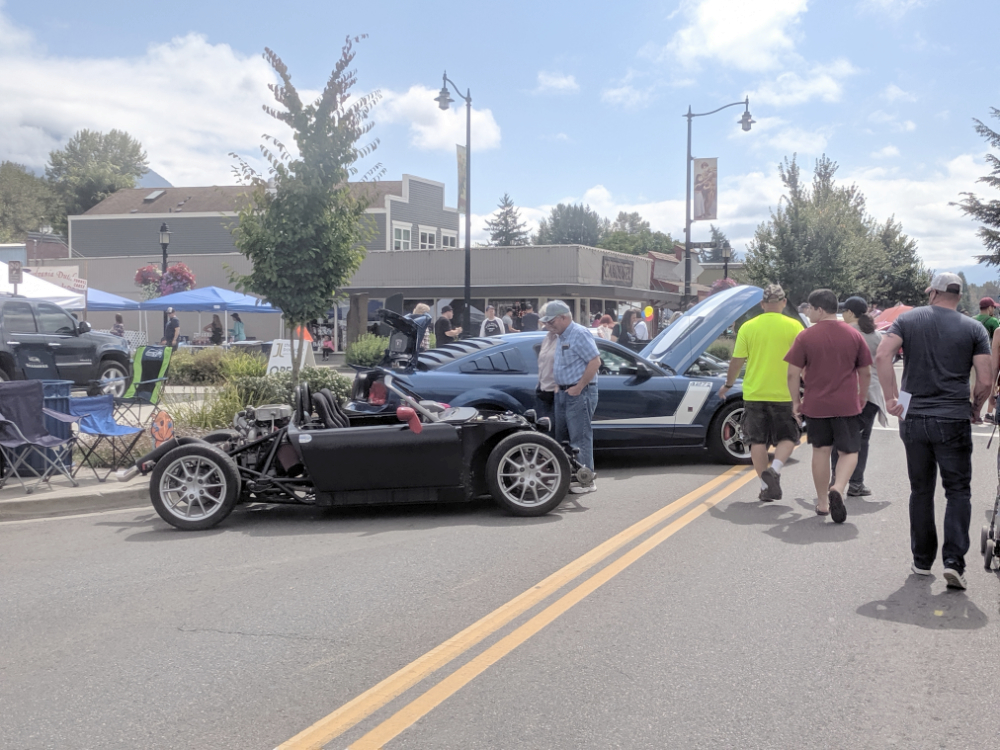
As usall there were a ton of questions, "where is the rest of it" "is that a miata' etc...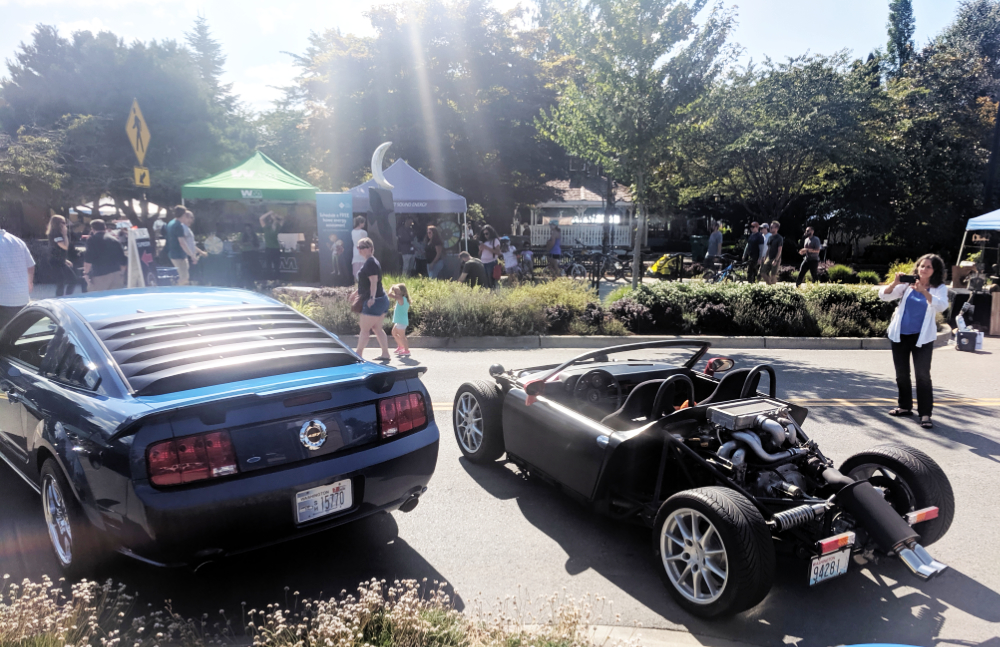
My kiddo always has a blast showing the car to people, she even corrected a few people that were saying Porsche wrong which was hilarious, good kid!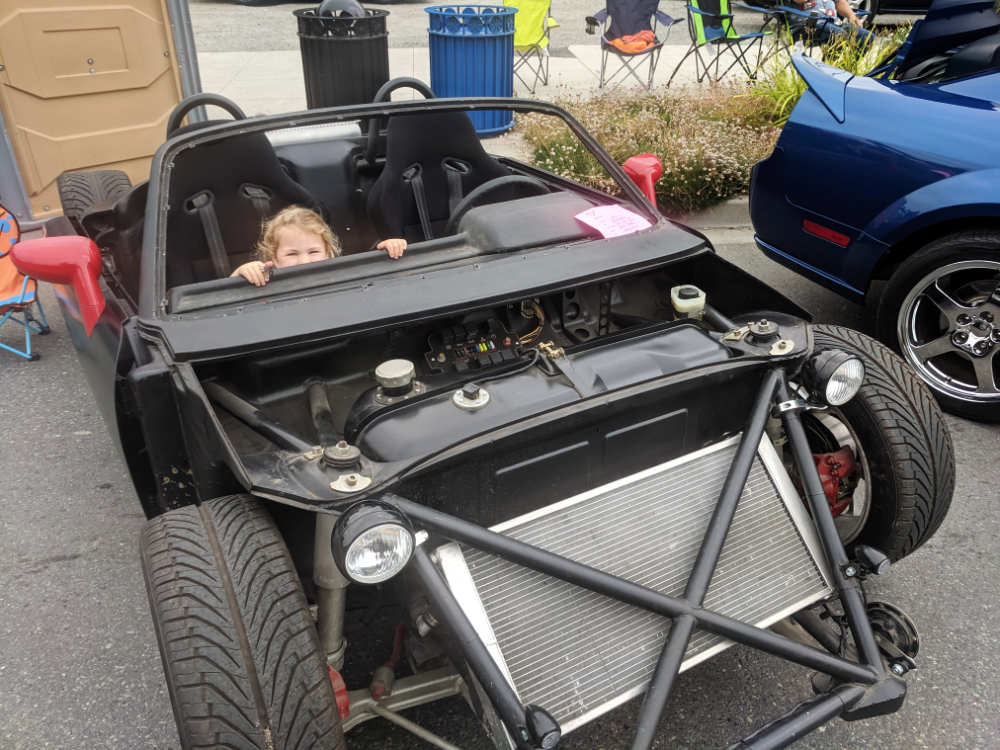
Posted by: AZBanks Aug 19 2019, 12:40 PM
Parenting done right!
Posted by: plymouth37 Aug 21 2019, 06:04 PM
I got the windshield frame temporarily installed, I used 1/8" spacers around the perimeter to ensure a uniform gap around the perimeter.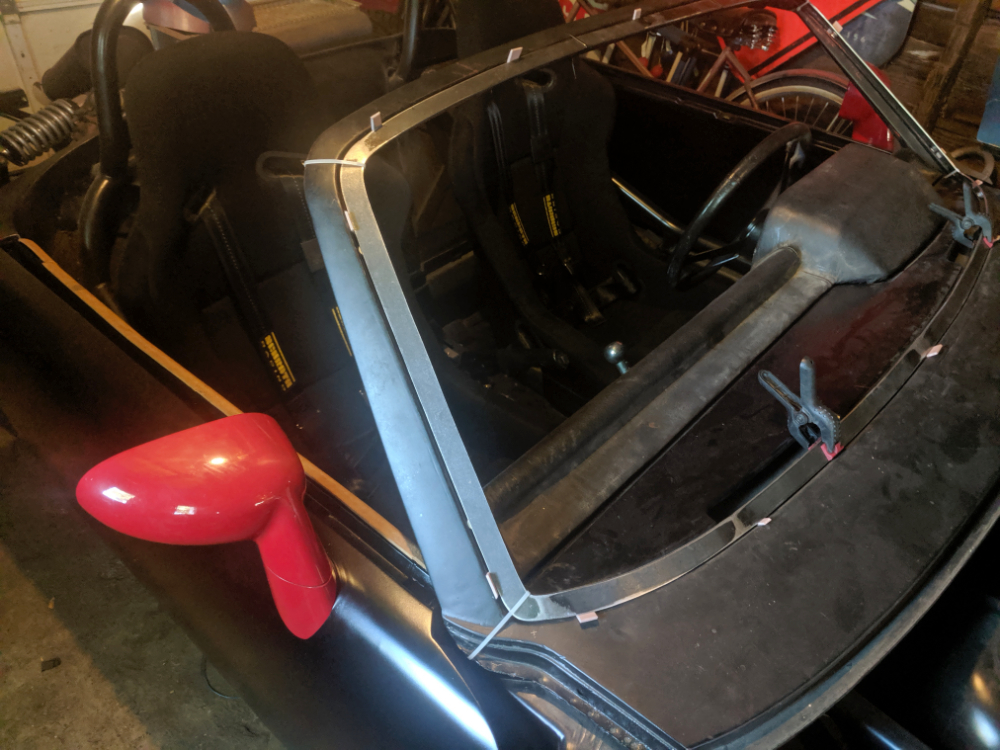
Initially I wanted to weld studs to the back of this frame to hide the fasteners but the complexity of having to install that system was inevitably going to lead to a lot of heartache and probably a broken polycarbonate windshield during installation. Instead I am countersinking flat head allen fasteners into the frame to sit flush, I started this process by marking out and drilling holes around the frame.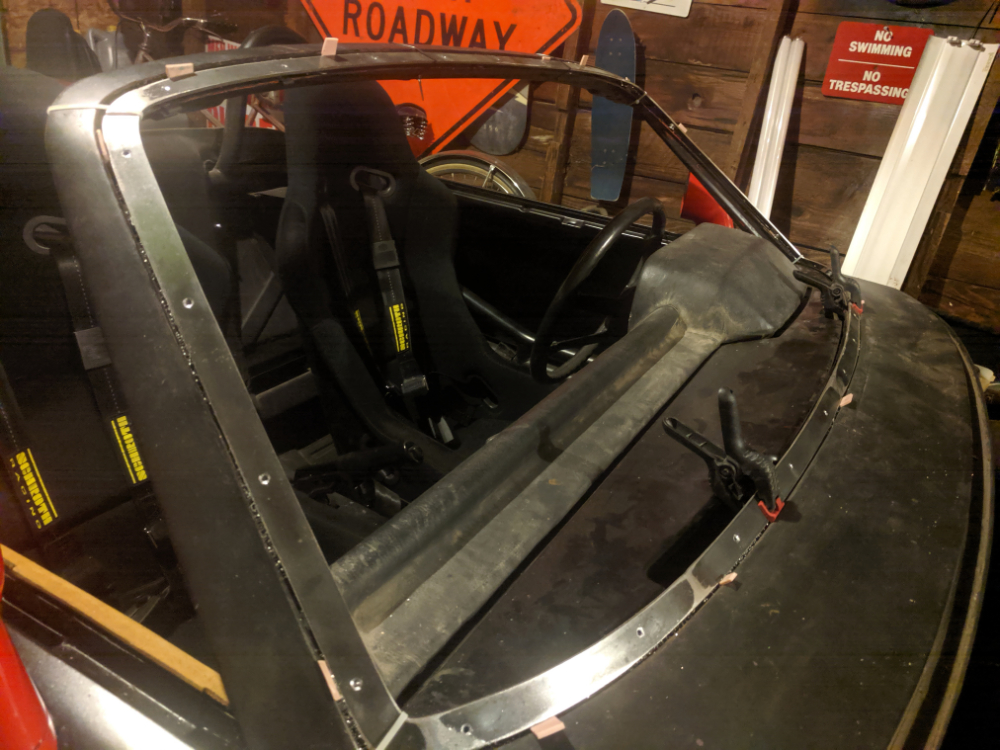
I pulled the frame and got a big chunk of MDF for a template.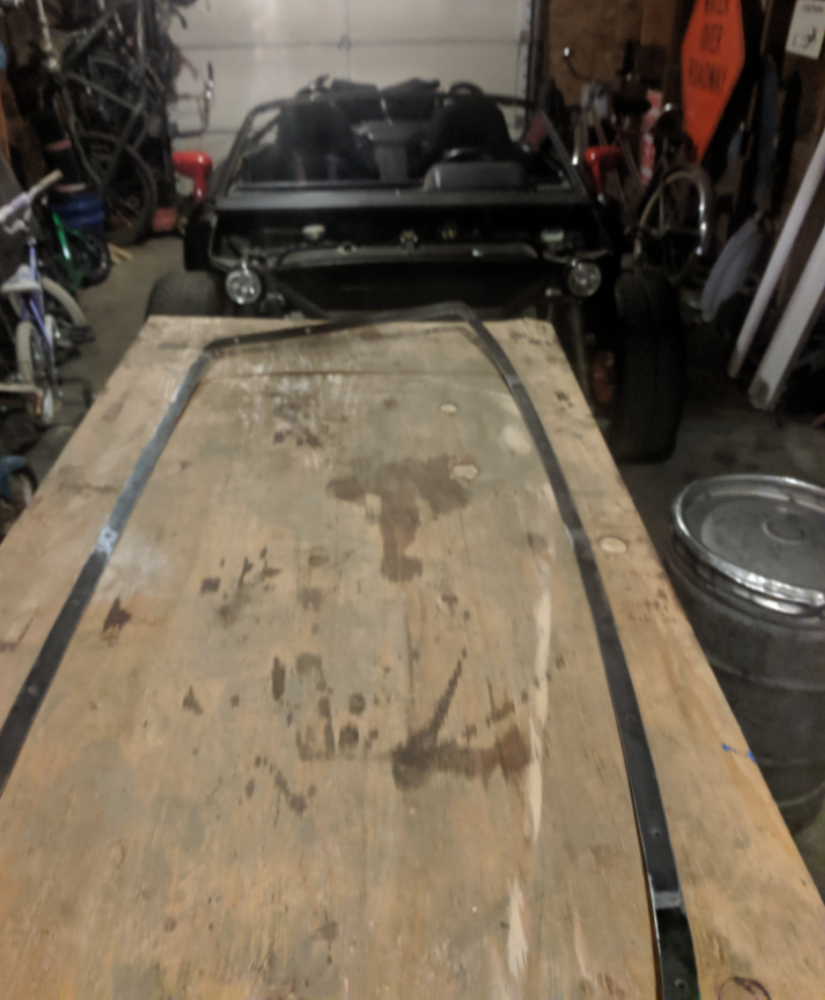
Then using my newly drilled holes, I bolted the frame to the MDF.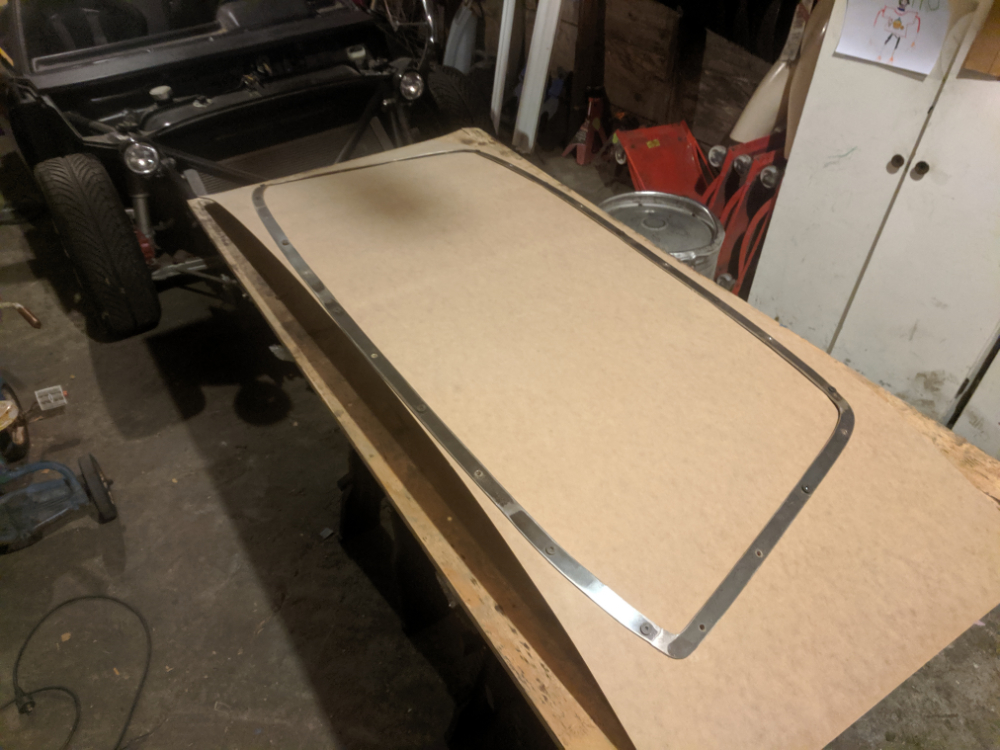
Then cut off the excess material, time to throw this in and see what happens!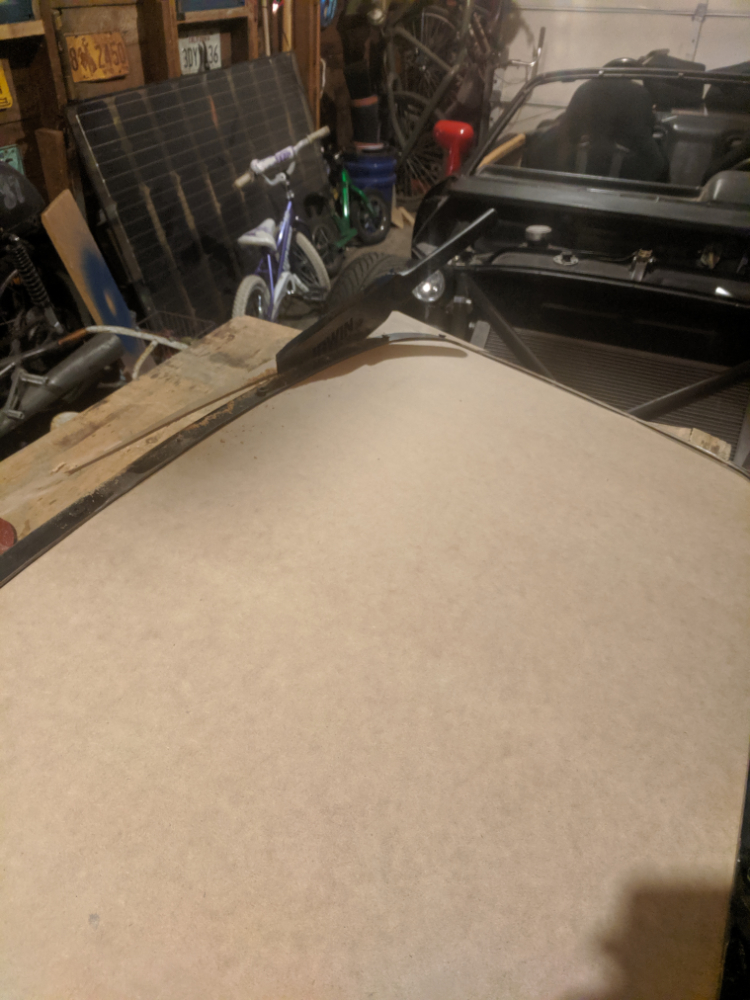
Posted by: plymouth37 Aug 21 2019, 06:35 PM
Well I only have half the bolts in and no gasket material but this sure looks promising.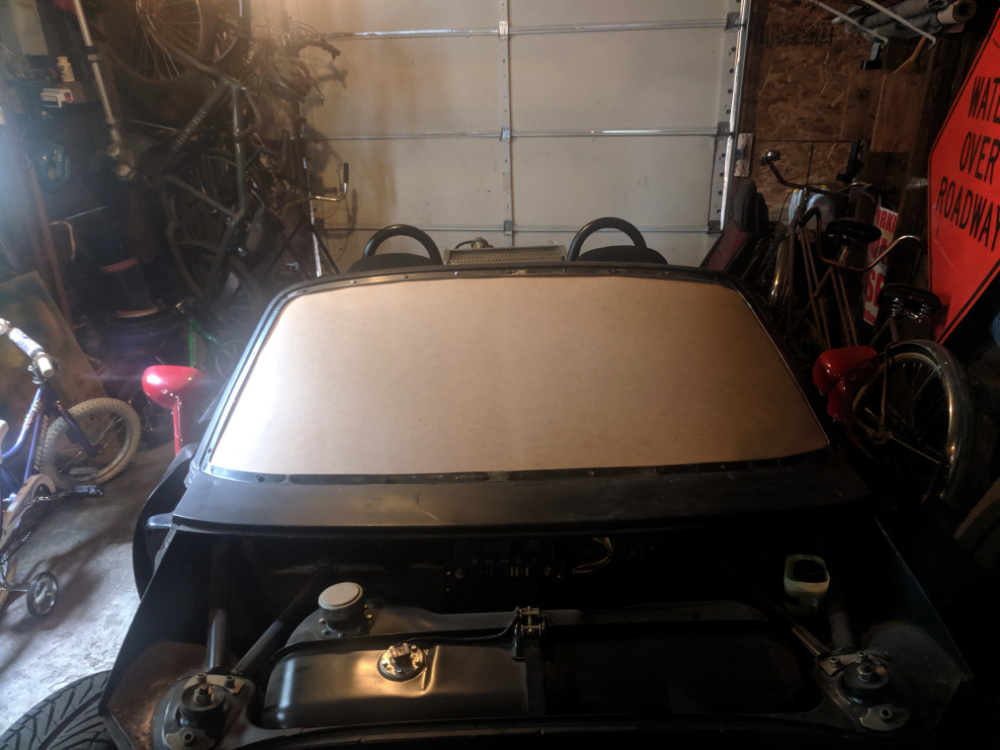
Having the frame to clamp the material in with is really helpful and should make it look a little cleaner than the usual polycarb windshield install process.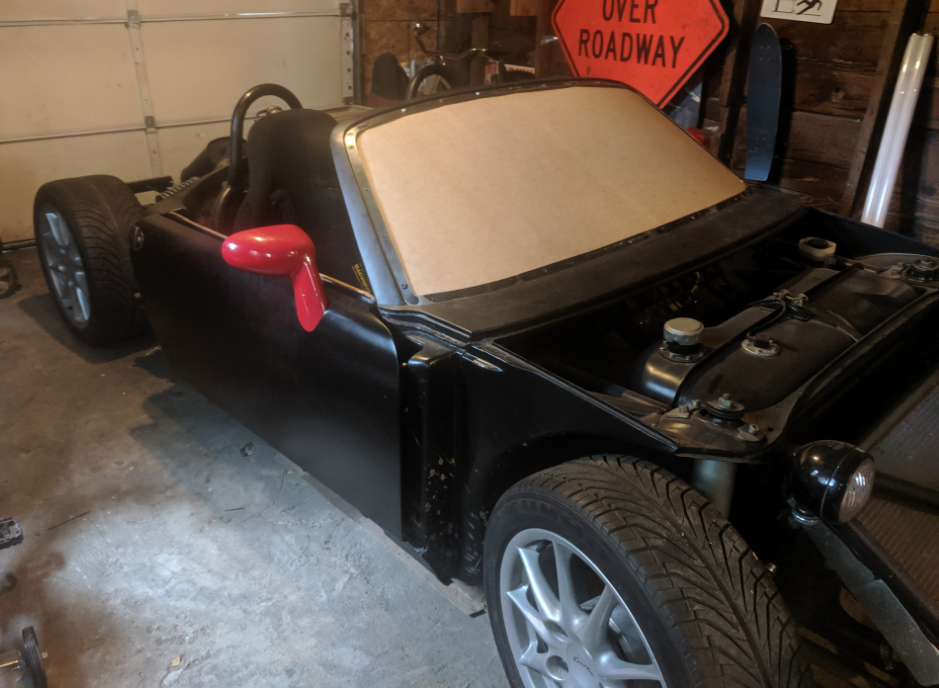
This is good enough to move forward and buy a big ol' hunk of Poly, Woohoo!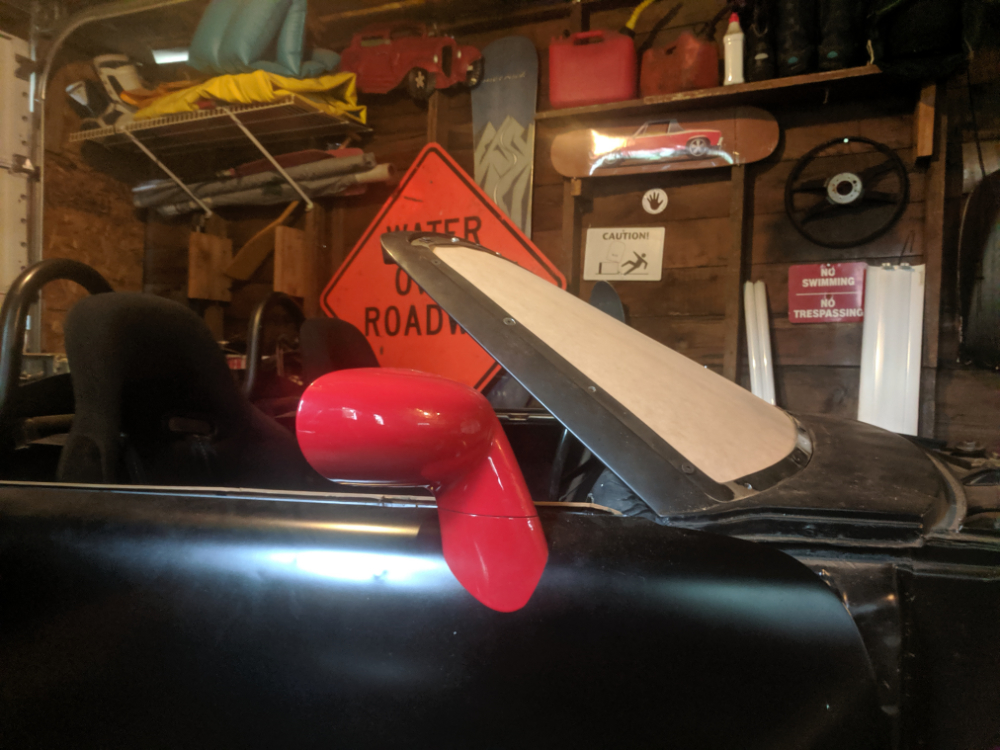
Posted by: sixnotfour Aug 21 2019, 06:50 PM
add the hump at the top like 70-71 ..= aero
Posted by: worn Aug 21 2019, 09:33 PM
Did my sister Ann find you? She had a booth of artwork. I asked her to look for you. Last year i missed you by a week. My wife grew up in the valley, and we visit often.
Warren
Posted by: plymouth37 Aug 22 2019, 08:19 AM
Did my sister Ann find you? She had a booth of artwork. I asked her to look for you. Last year i missed you by a week. My wife grew up in the valley, and we visit often.
Warren
Was it the car artwork that the teenager was doing or another one? Shoot didn't connect, I will totally find them next year!
Posted by: 76-914 Aug 22 2019, 08:45 AM
Do you pre-form the polycarbonate before trimming to size?
Posted by: plymouth37 Aug 22 2019, 09:23 AM
Do you pre-form the polycarbonate before trimming to size?
I think I can just bend it in there, the MDF formed in there pretty well and it is pretty brittle itself. I did stretch the frame opening vertically a bit when I bolted it to the mdf to make the template so it will naturally be somewhat convex. At the very least I will try to jam it in there on a hot day in the sun with a hairdryer. I actually have access to a large thermo-forming oven but then I would have to make a mold and that seems a lot harder than just trying to jam it in there.
After the first one explodes on installation I will probably explore pre-forming
Posted by: rhodyguy Aug 22 2019, 01:49 PM
If you were to place the poly on a piece of black plastic out in the sun (when it comes back) the plastic would heat uniformally.
Posted by: plymouth37 Aug 22 2019, 04:06 PM
If you were to place the poly on a piece of black plastic out in the sun (when it comes back) the plastic would heat uniformally.
Yeah that is a good idea, I think the sun is about as extreme as I want to get at first, even a heat gun can create bubbles if you aren't careful. The shape is pretty mild, not going all George Barris on it, should be a good experiment!
Posted by: wndsrfr Aug 22 2019, 07:09 PM
This is good enough to move forward and buy a big ol' hunk of Poly, Woohoo!
Take the MDF template to a glass place that has the polycarbonate for the local circle track guys....they'll use the template and cut it for you right there....
Local indy shop "Danny's Glass" here was easy to find as they sponsored a circle track car at Langley Speedway. $100 for a cut out lexan windshield...
Posted by: plymouth37 Aug 29 2019, 12:33 PM
Okay, time to conquer the task that has been hanging over my head for about a decade, the windshield. I am not really tackling body work yet but my cowl was looking pretty tired, and when I filled the cowl years ago I didn't get everything as smooth as I would have liked. So as part of the windshield install I am doing a light cowl freshening.
Skim coat of bondo to smooth out the lumps.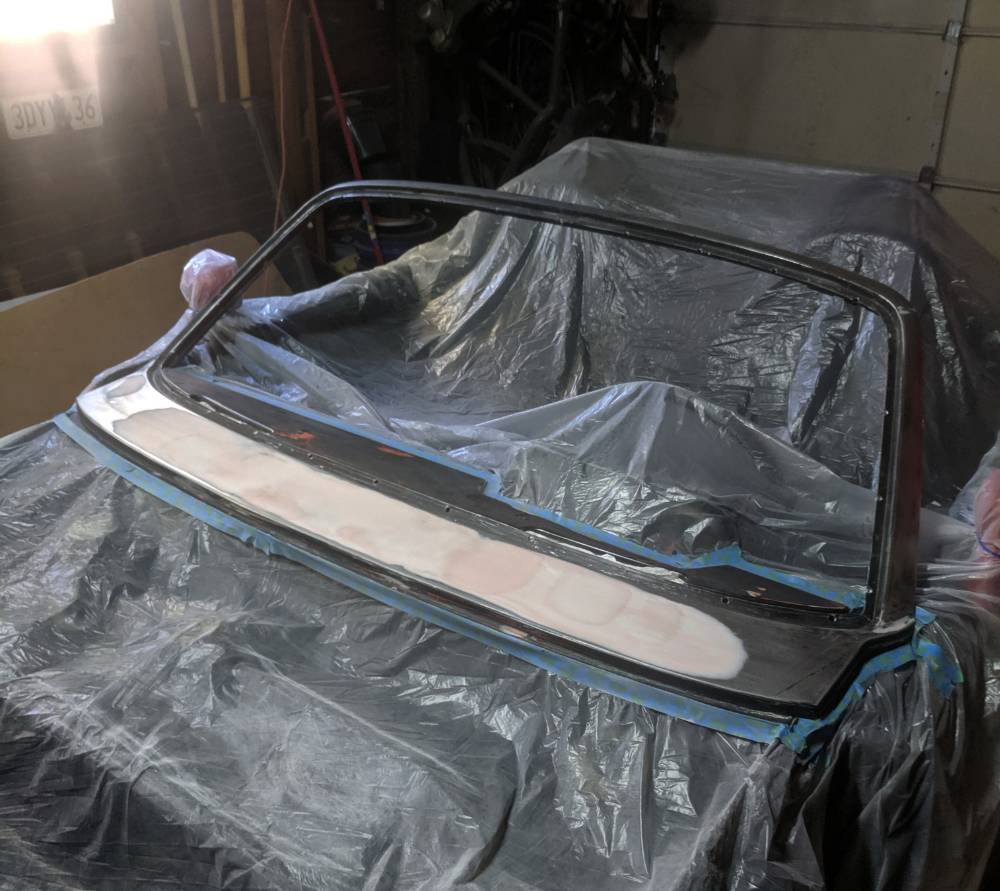
ohh, fresh paint: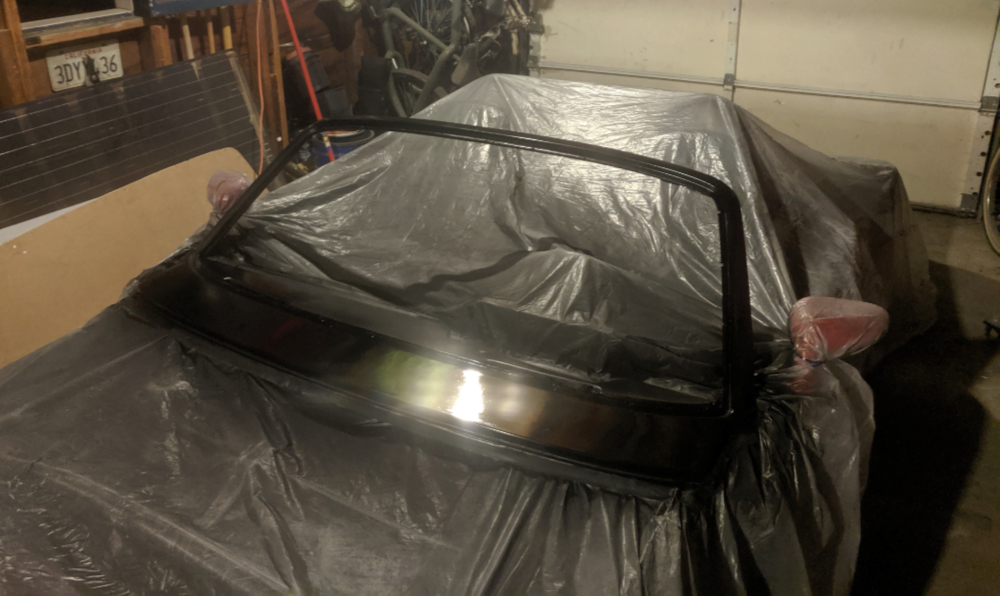
I also filled, primered and painted the windshield frame in a flat black.
Posted by: plymouth37 Aug 29 2019, 12:34 PM
After the paint dried I installed the attachment clips, I went with these because they introduce a nice amount of slop in the system which should help in installation.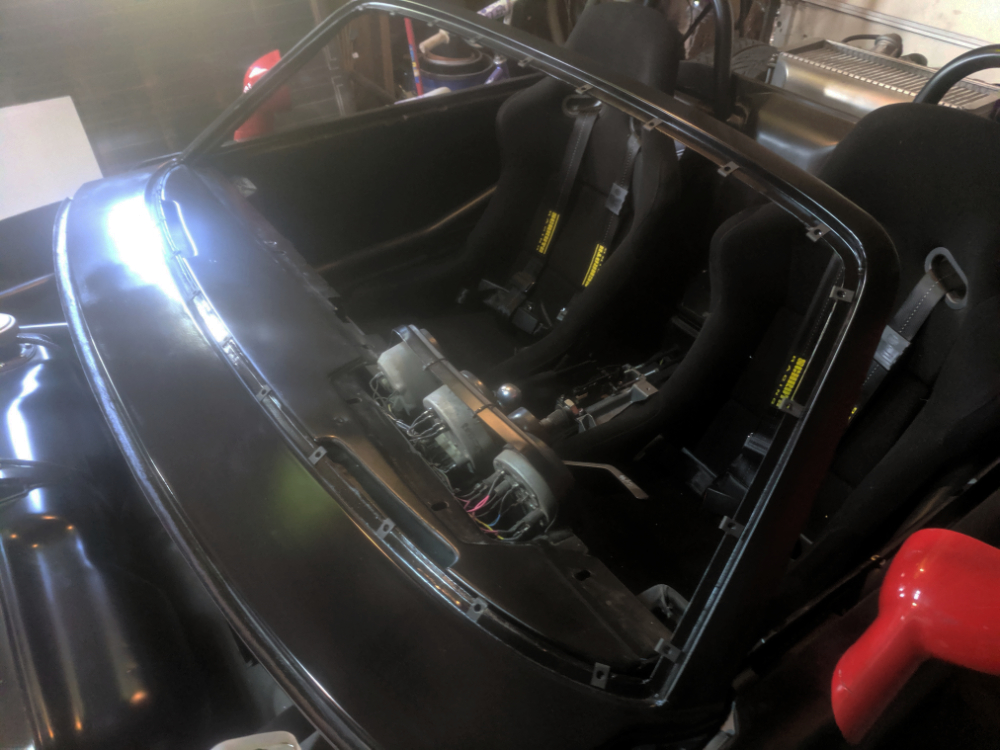
I ran some poly foam weather stripping around the frame opening. this is just generic hardware store weather stripping, not sure if this is the right stuff but I am rolling with it for now.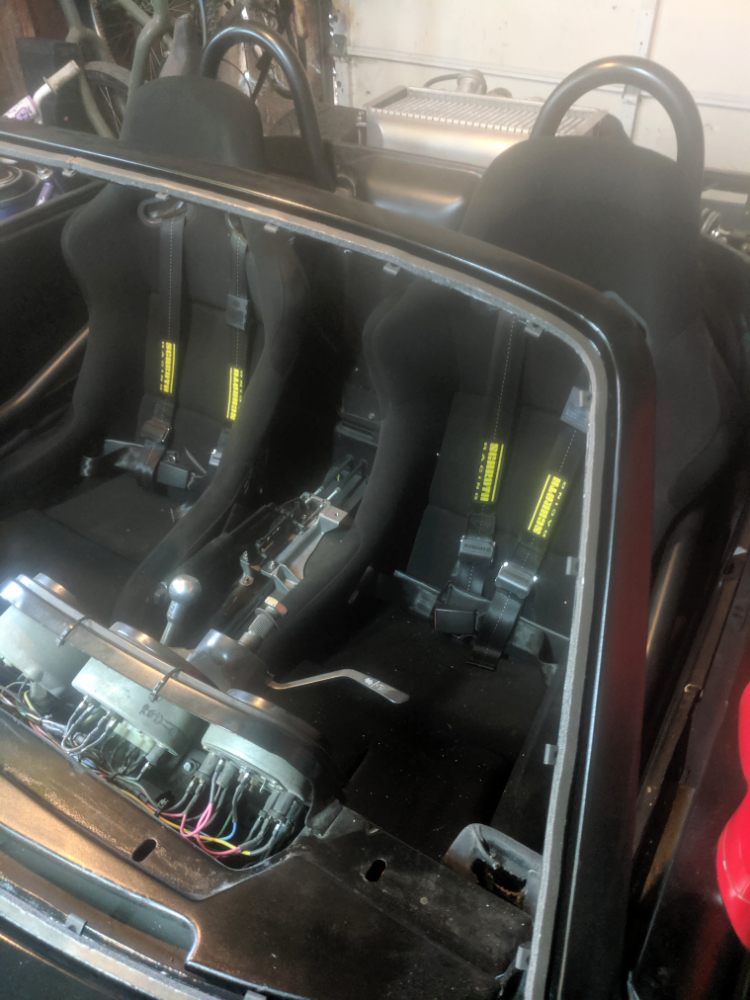
Also ran a few strips around the back of the outer frame, leaving a channel down the middle for hardware.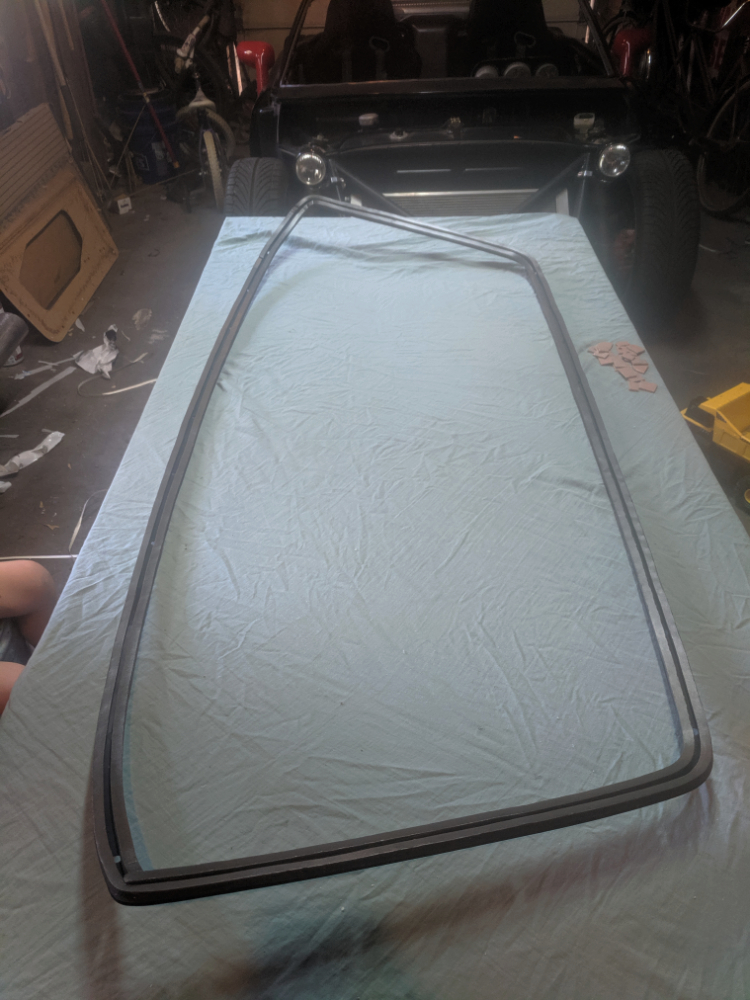
I also brought my windshield template to TAP plastics and they kindly cut some abrasion resistant 3/16" polycarb to shape.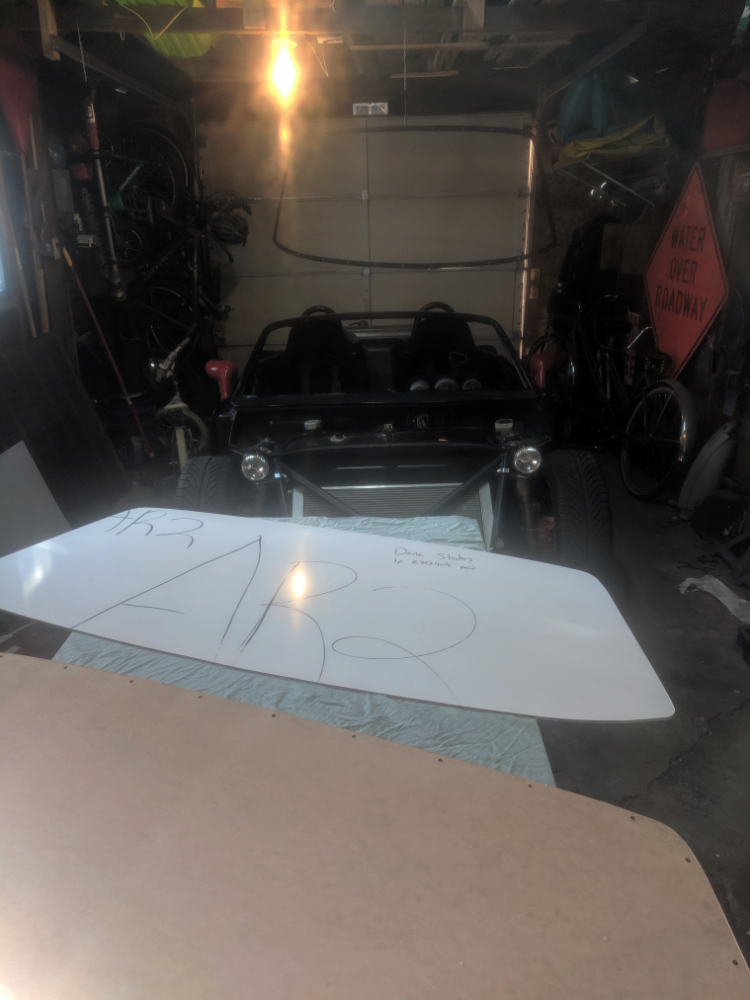
I taped the template to the poly and drilled the mounting holes around the perimeter.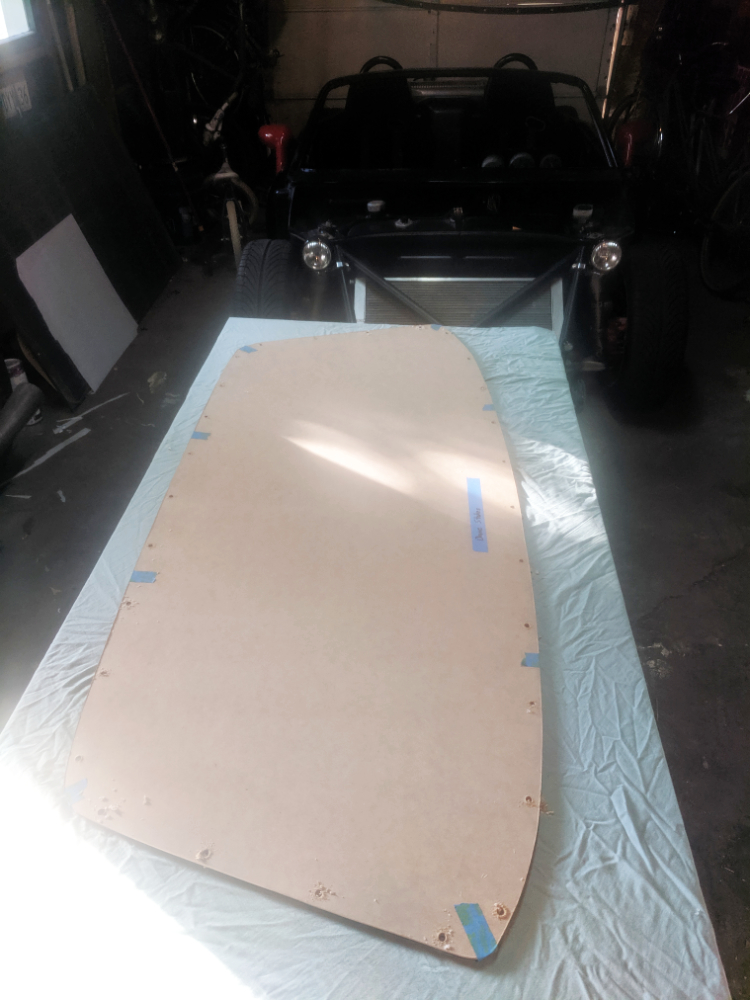
I don't know if this helped or not but it was in the 90's yesterday so I dragged an old solarpanel I haven't had the time to mount up out into the sun and baked the polycarbonate in the sun for an hour or so.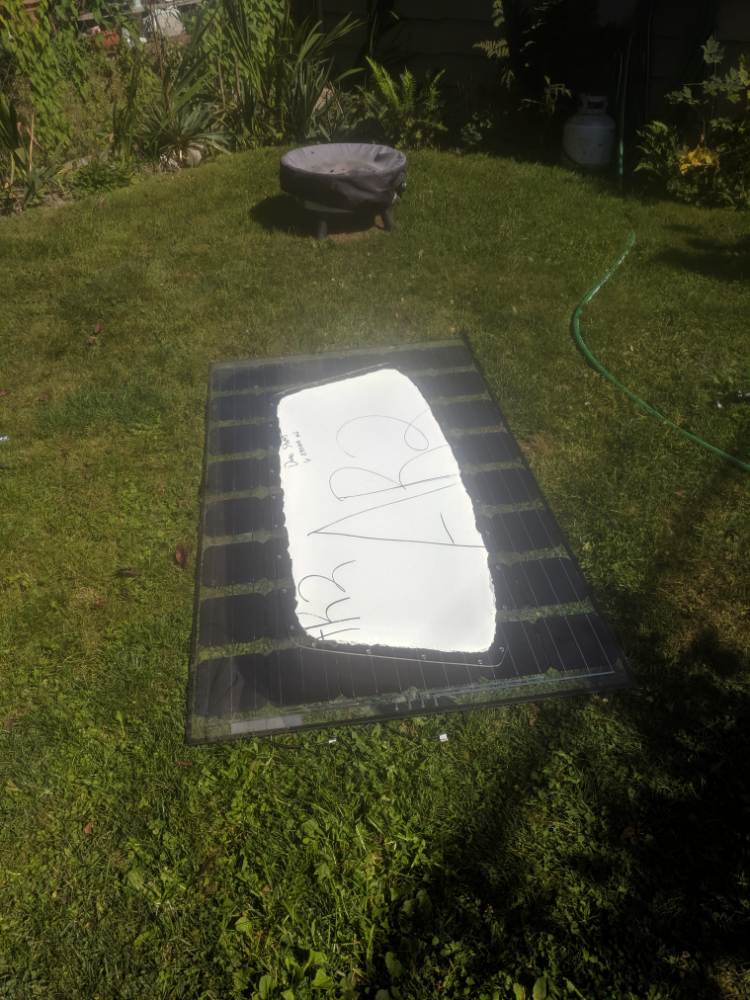
Posted by: plymouth37 Aug 29 2019, 12:34 PM
Oh hell yes! I can't believe this worked.
It took me 3 tries to get this bolted in correctly, the order the bolts are inserted definitely matters, I finally figured that starting at the sides and then bolting around the perimeter towards the center got it to take the shape well.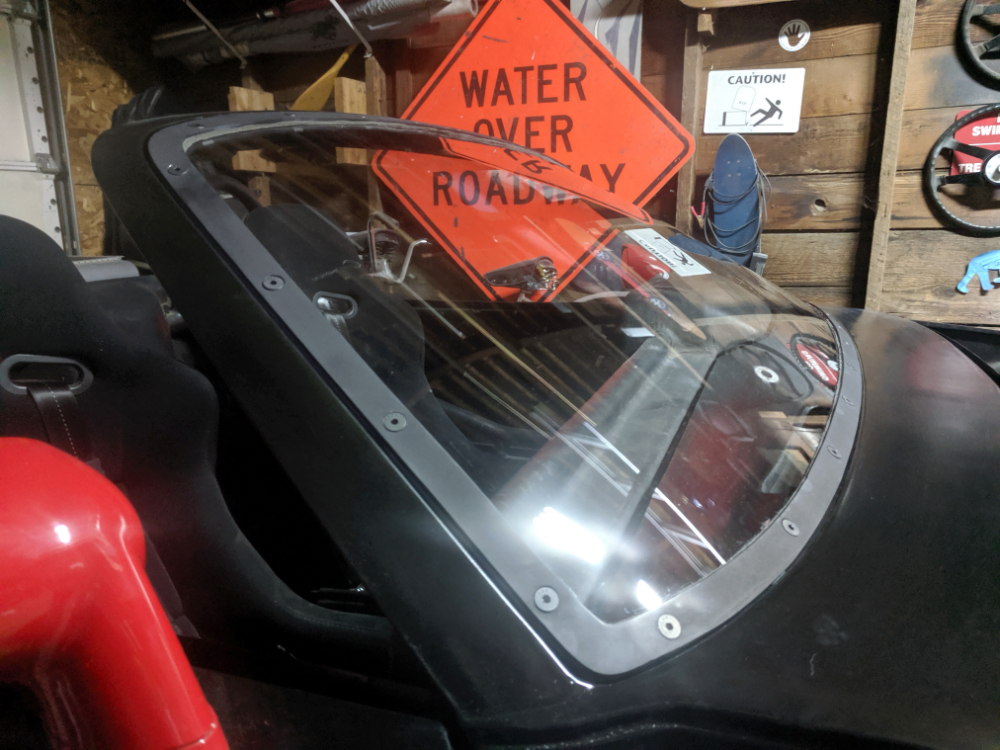
I just gradually put a turn into each screw and worked my way around until it slowly clamped down into the frame. This thing looks beautiful, can't wait to take it out for a spin.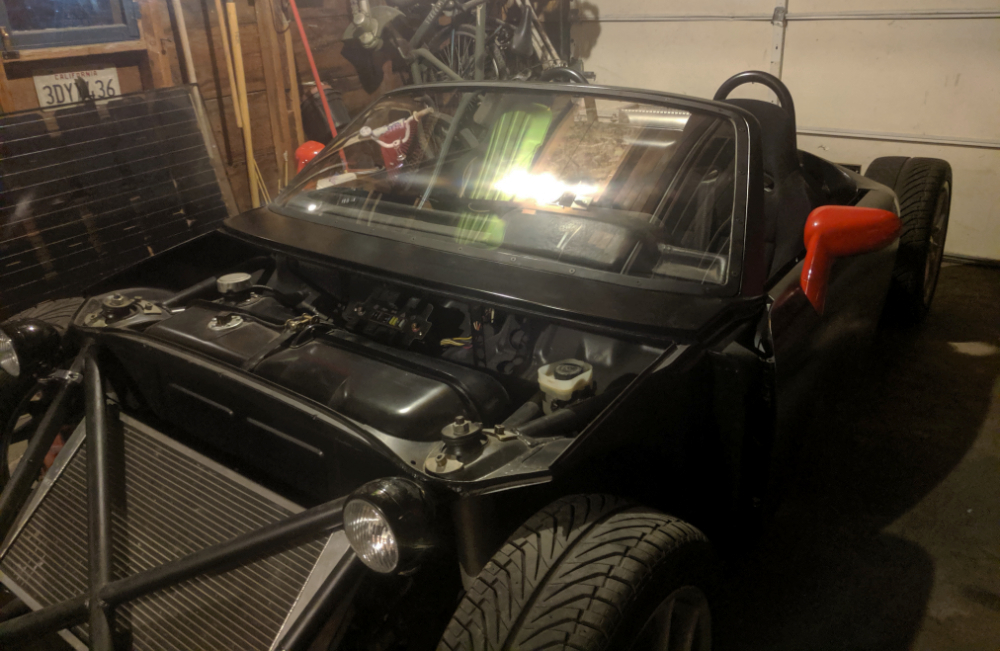
I am going to take it out this weekend to get some better shots for you all, this is a big milestone, one step closer to completion!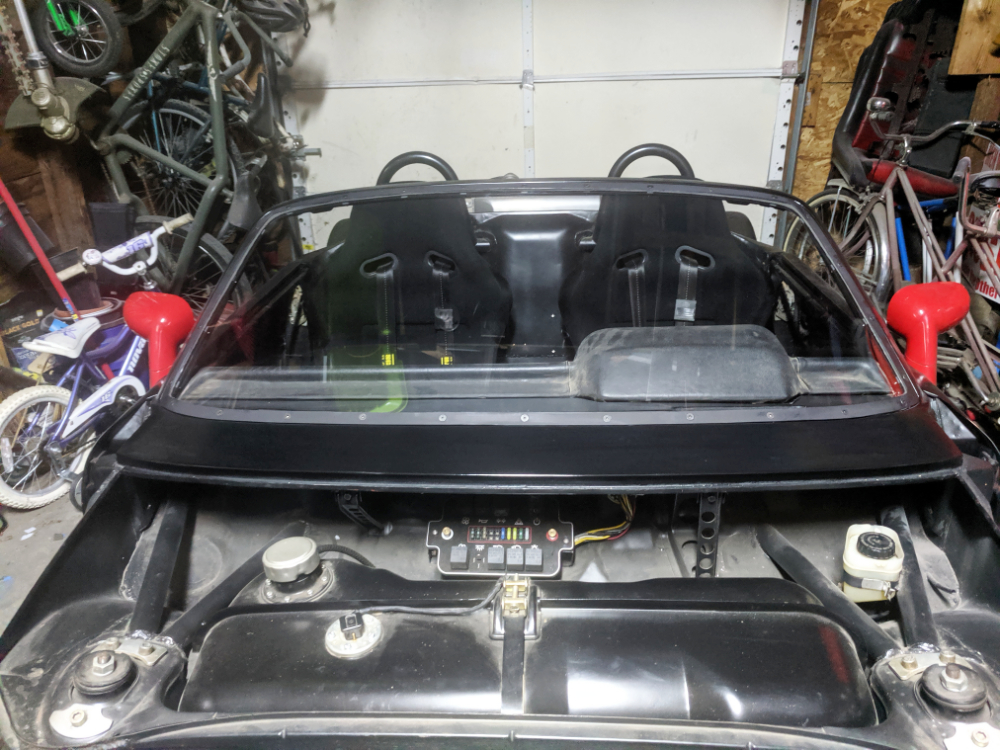
Posted by: rhodyguy Aug 29 2019, 12:42 PM
Everyone enjoys a success story. Nice work.
Posted by: falcor75 Aug 29 2019, 01:33 PM
Nicely done, congratulations
Posted by: tygaboy Aug 29 2019, 03:58 PM
Dude! Big congrats. I love when folks just jump in and give things a go.
And I know what you mean about those tasks that loom over you. But man, way to knock it out of the park!
It turned out great and looks FABRICATIONULOUS!
Posted by: Krieger Aug 29 2019, 05:47 PM
That looks really good!
Posted by: 914 Ranch Aug 30 2019, 01:29 AM
NICE…
Posted by: plymouth37 Sep 5 2019, 09:12 AM
I took the car out a few times this past weekend, as I drive the car more I suppose there should be at least some shassis identification numbers on this thing, not totally stock but I threw the windshield frame ID tag on and VolksWerks plate on the fender well. Sure, that looks official?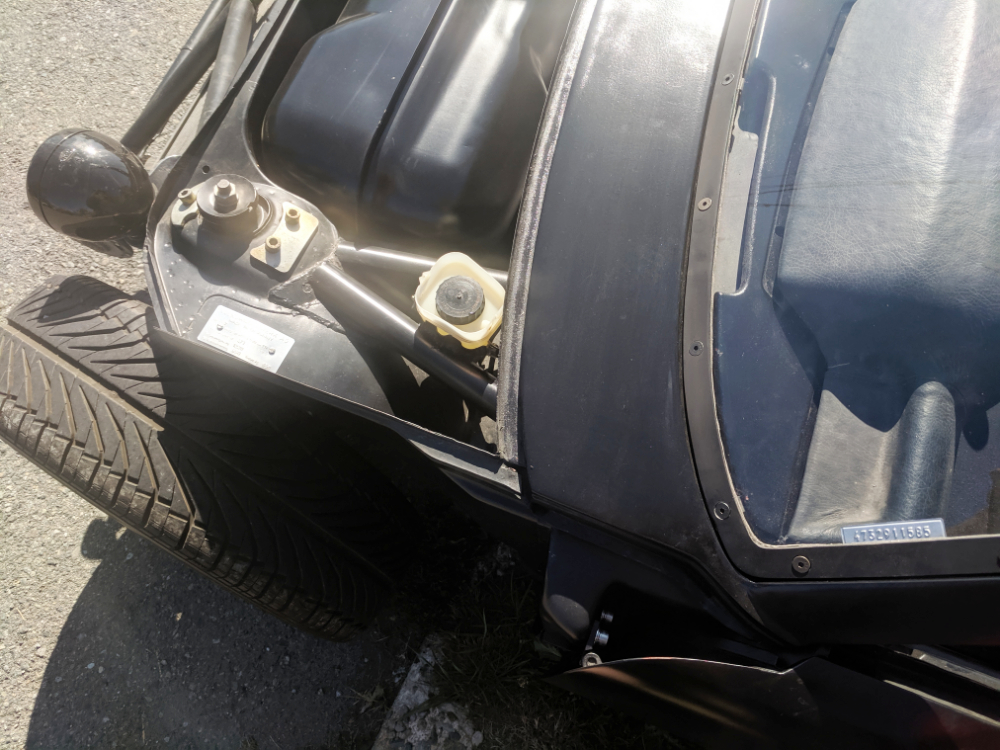
Got some better pictures out in the sun, I will try to grab some video soon, I can definitely verify that windshields are an awesome invention that make this car a heck of a lot more enjoyable to drive!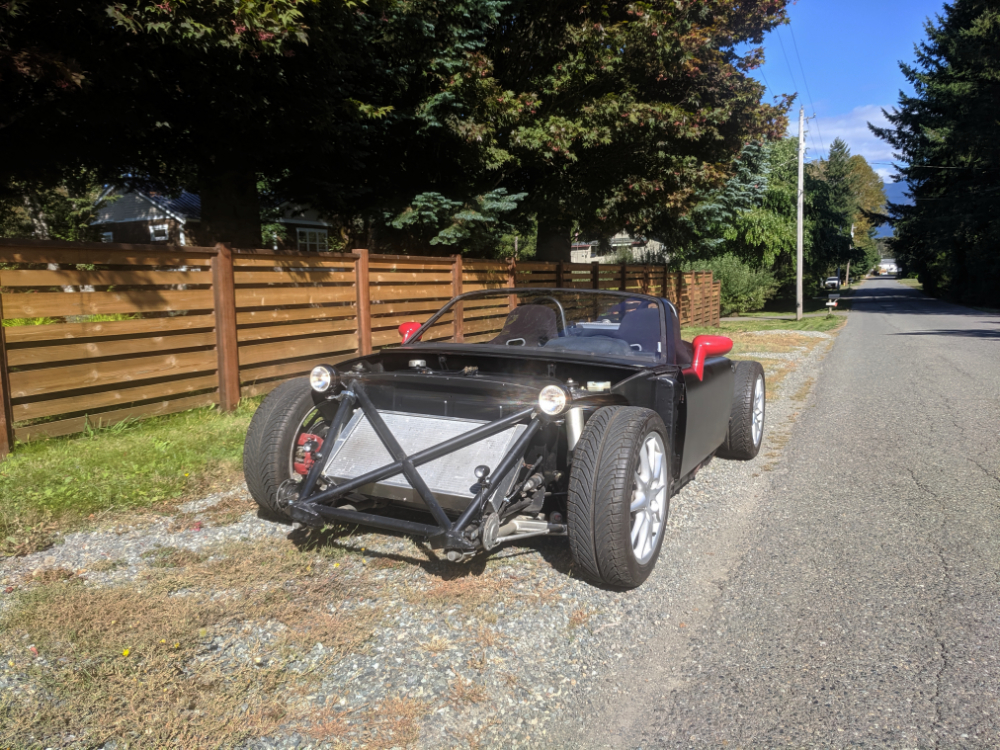
Man I really need to get that body, running out of things to do!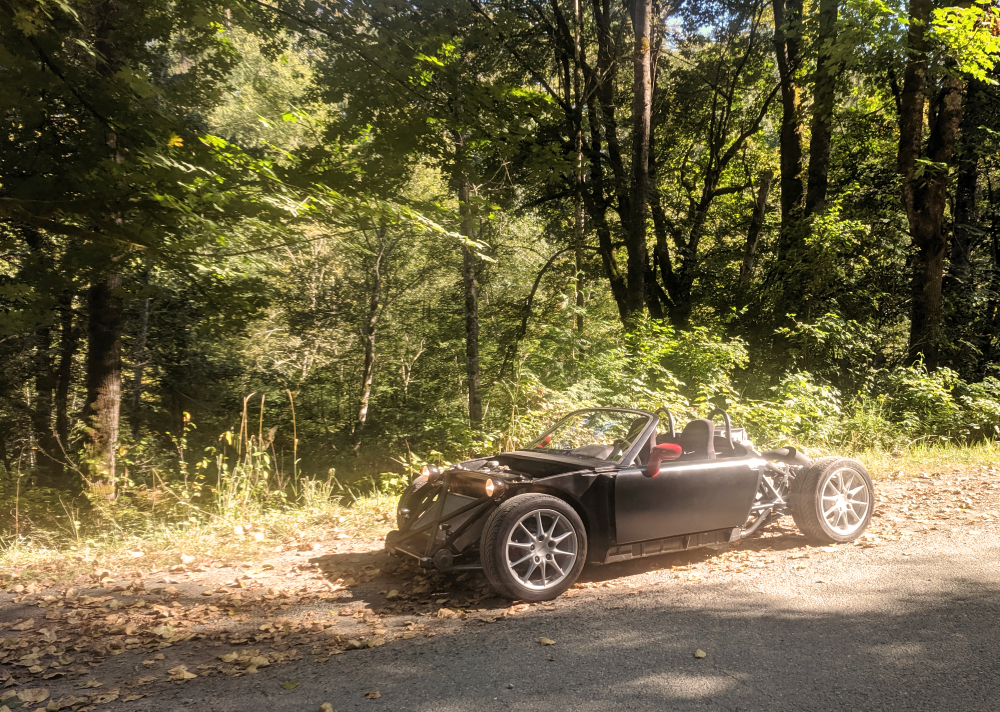
Posted by: JeffBowlsby Sep 5 2019, 09:27 AM
Today's "The Nature Porsche"...
Attached image(s)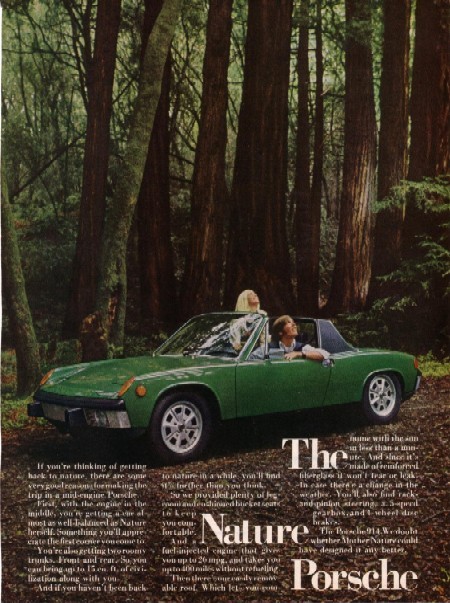
Posted by: plymouth37 Sep 5 2019, 09:39 AM
Today's "The Nature Porsche"...
Hahaha, that looks like the same spot!
Posted by: rhodyguy Sep 5 2019, 10:13 AM
No wipers. no doubt WSP or other LE agency will have an opinion about that if they should decide to squeeze your shoes. Looks cool just as it sits.
Posted by: sixnotfour Sep 5 2019, 10:39 AM
No wipers.
no doubt WSP or other LE agency will have an opinion about that if they should decide to squeeze your shoes. Looks cool just as it sits.Make a clip on electric wiper..
Posted by: plymouth37 Sep 5 2019, 11:26 AM
No wipers.
no doubt WSP or other LE agency will have an opinion about that if they should decide to squeeze your shoes. Looks cool just as it sits.Make a clip on electric wiper..
I am just going to use an ultrasonic forcefield
https://newatlas.com/mclaren-ultrasonic-windshield-wiper-washer/30205/
Or ignore it, unfortunately adding a windshield made my car more illegal, no wipers needed without one!
Posted by: pploco Sep 5 2019, 02:12 PM
Dummy wipers and a bottle of Rainx - FTW
Posted by: plymouth37 Sep 9 2019, 10:40 AM
I upgraded my steering wheel, reinstalling the Renegade wheel spacer as well, first step is to drill out the hub from the original wheel.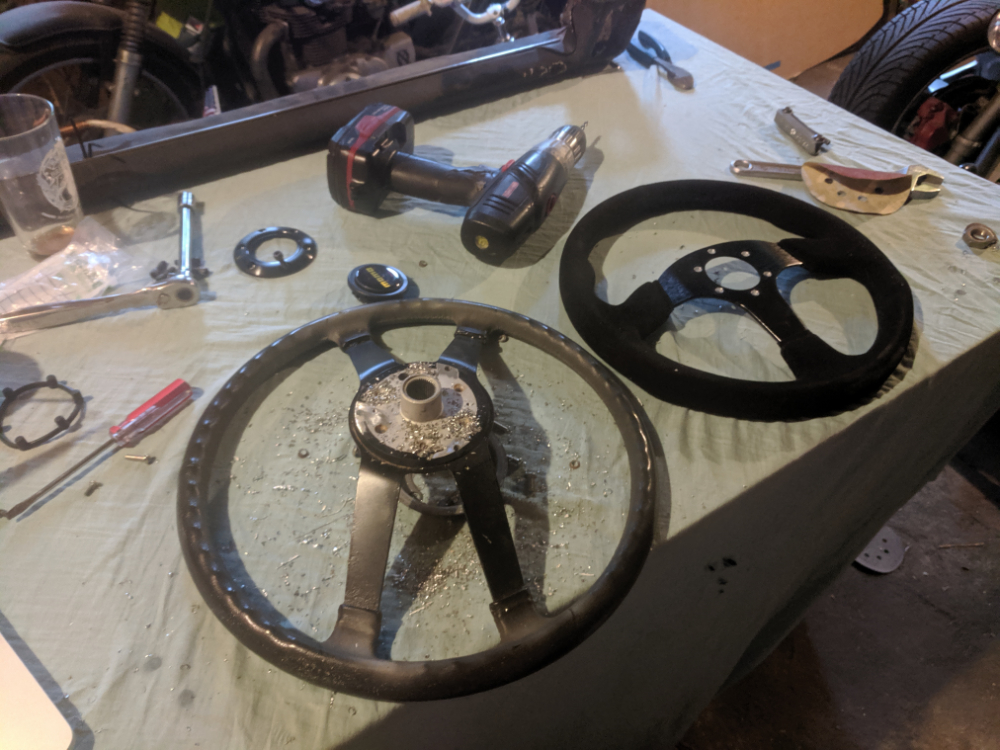
Extracted hub and spacer, sanded and awaiting flat black paint.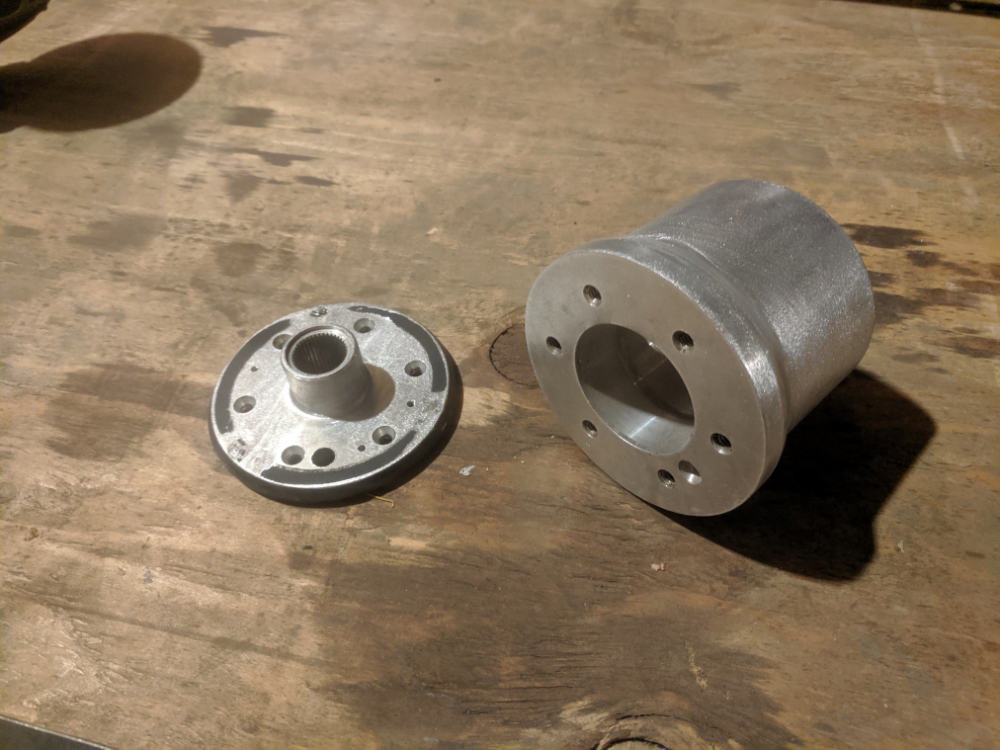
Hub all assembled, ready for install.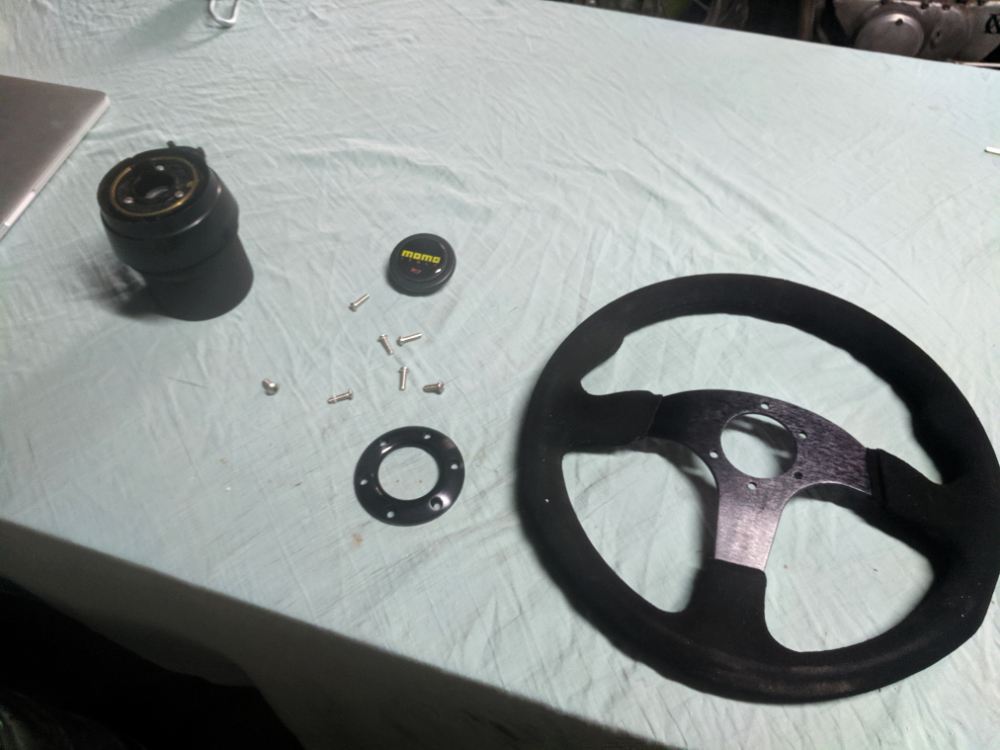
Looking good! Definitely easier to get into the car with the new setup as well.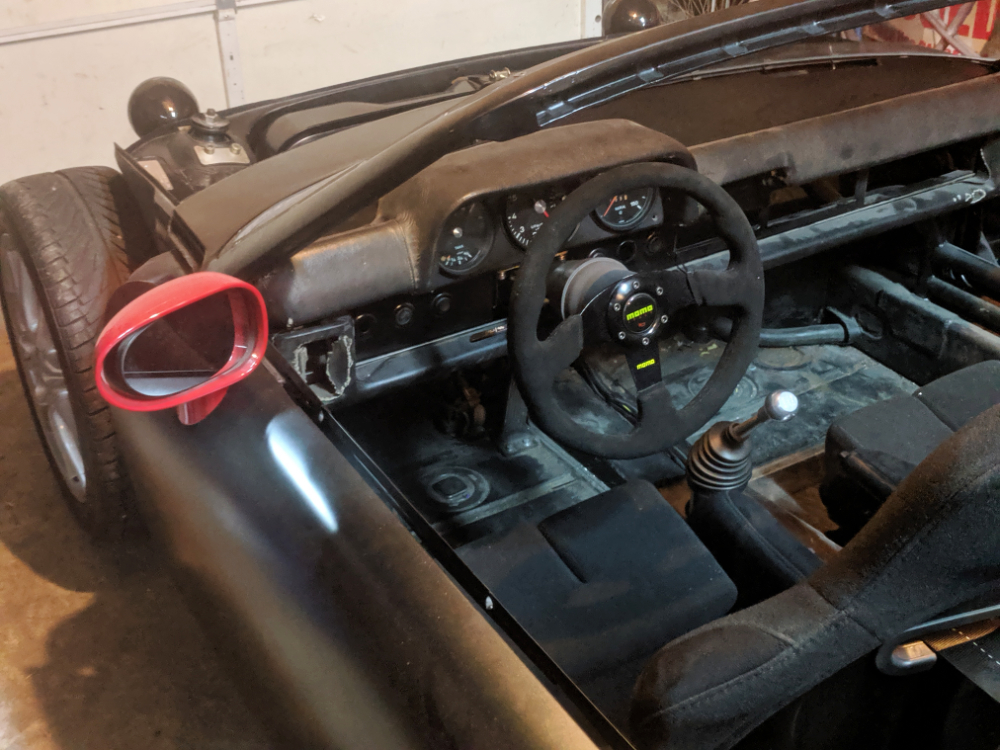
Posted by: DRPHIL914 Sep 9 2019, 11:27 AM
I upgraded my steering wheel, reinstalling the Renegade wheel spacer as well, first step is to drill out the hub from the original wheel.
Extracted hub and spacer, sanded and awaiting flat black paint.
Hub all assembled, ready for install.
Looking good! Definitely easier to get into the car with the new setup as well.
Curious about what you are thinking for the body- GT look obviously but something like a Sheridan kit or steel panels with steel flares custom made like your original concept pics?
Posted by: DRPHIL914 Sep 9 2019, 11:28 AM
Sorry duplicate post darn IPhone
Posted by: plymouth37 Sep 9 2019, 01:51 PM
Curious about what you are thinking for the body- GT look obviously but something like a Sheridan kit or steel panels with steel flares custom made like your original concept pics?
Full steel GT body, it is pretty much ready to go just need to weld the lids to the fenders to form clamshells. Main problem is it is in Wyoming and I am not, anybody want to haul them to the PNW for me?
Other than minor stuff like headlights, mirrors etc.. it will be fairly stock looking as far as the body goes other than the roadsterification of course.
(man I miss that big shop)
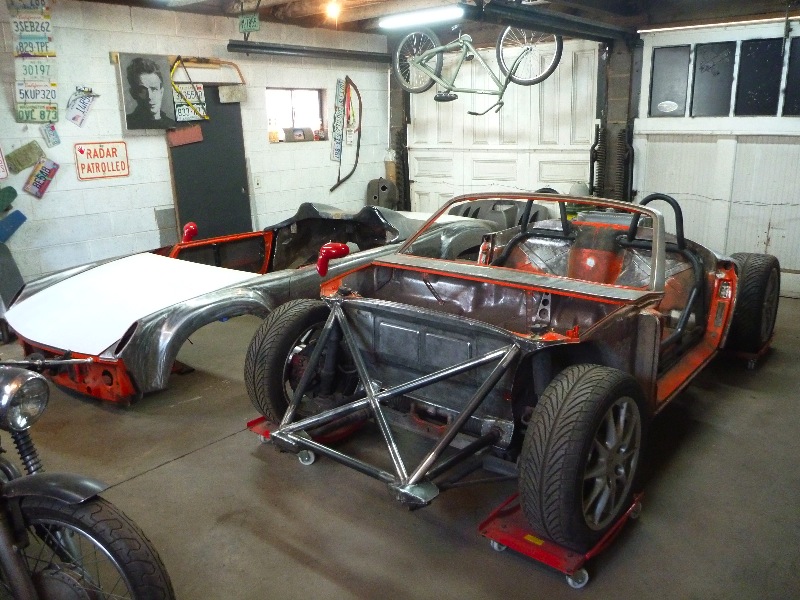
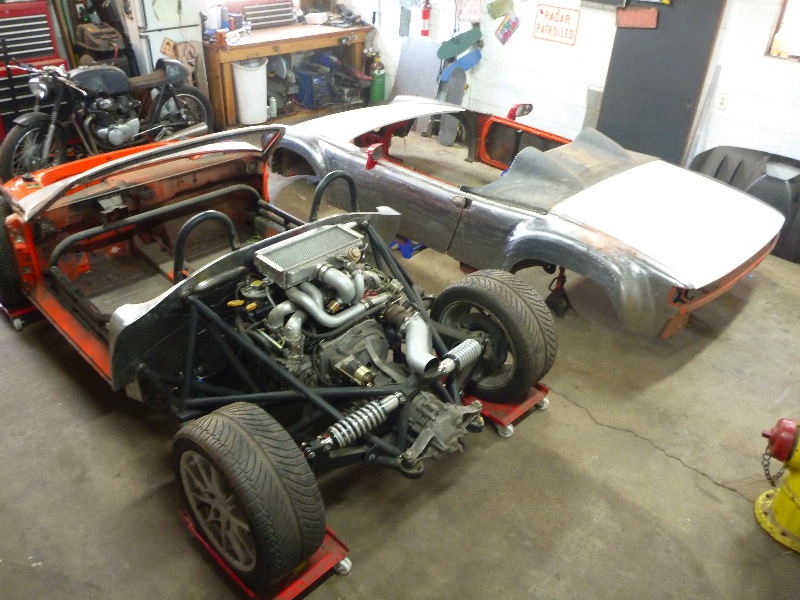
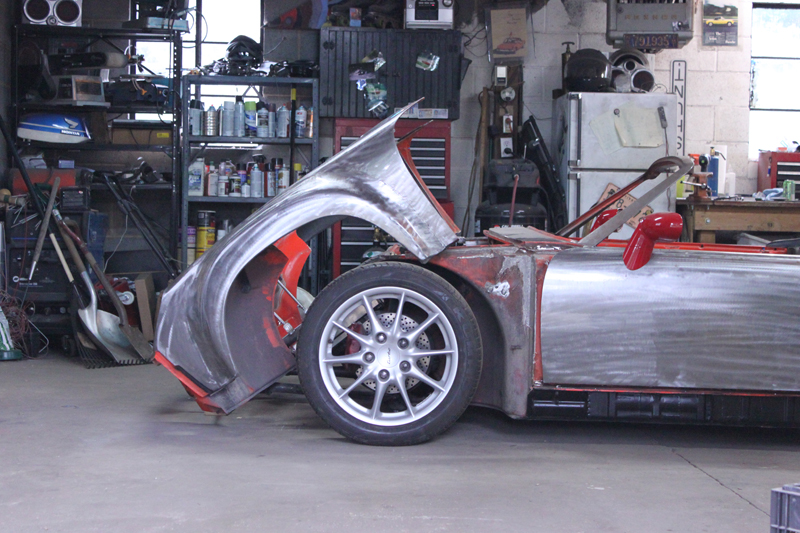
Posted by: Cairo94507 Sep 9 2019, 02:51 PM
I look forward to one day seeing this car in person.
Posted by: Andyrew Sep 9 2019, 03:59 PM
I look forward to one day seeing this car in person.
Posted by: plymouth37 Sep 10 2019, 02:56 PM
Come see the Anklebiter at the 914 Turnout this weekend!
http://www.914world.com/bbs2/index.php?showtopic=337341&st=0
I will be there at the tech session on Saturday morning. Look forward to seeing everybody!
Posted by: plymouth37 Sep 16 2019, 10:31 AM
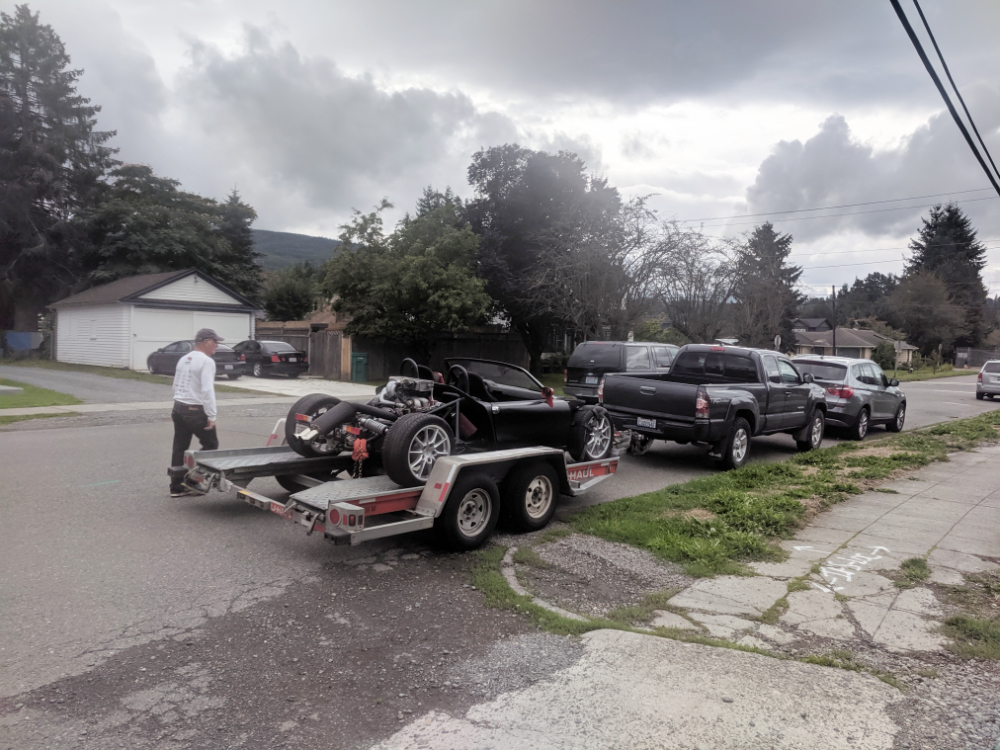
We took part in the PNW 914 turnout tech session, it took place at Porsche of Tacoma, about an hour from our place, loaded on a trailer, managed to dodge most of the rain!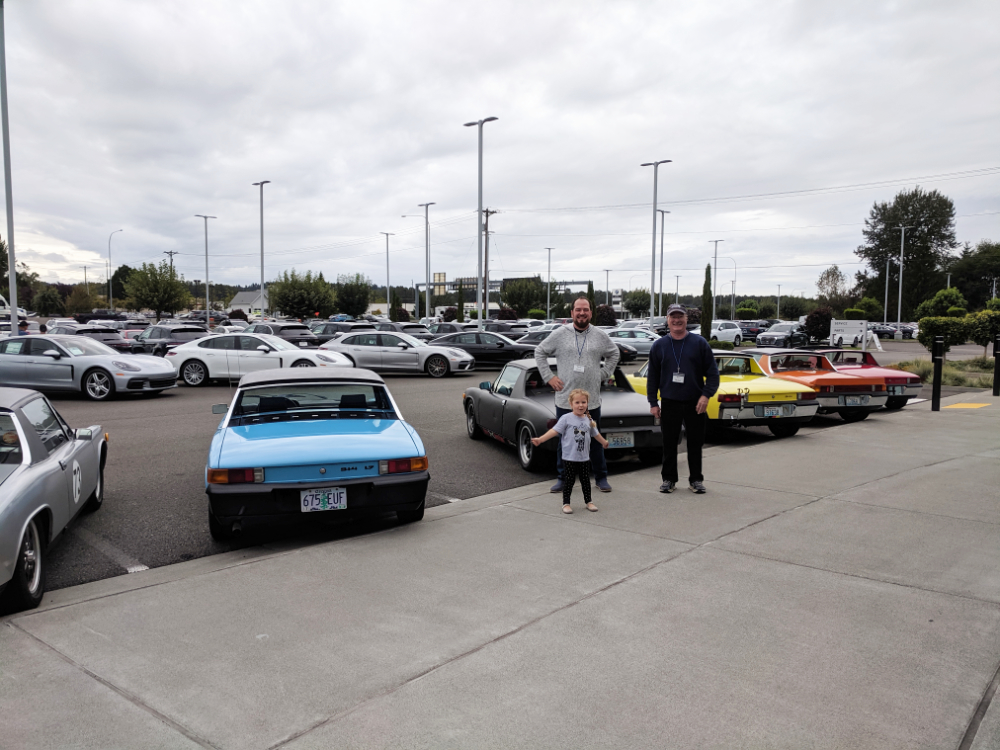
Good turnout of all flavors of 914s. My dad and kiddo had a blast!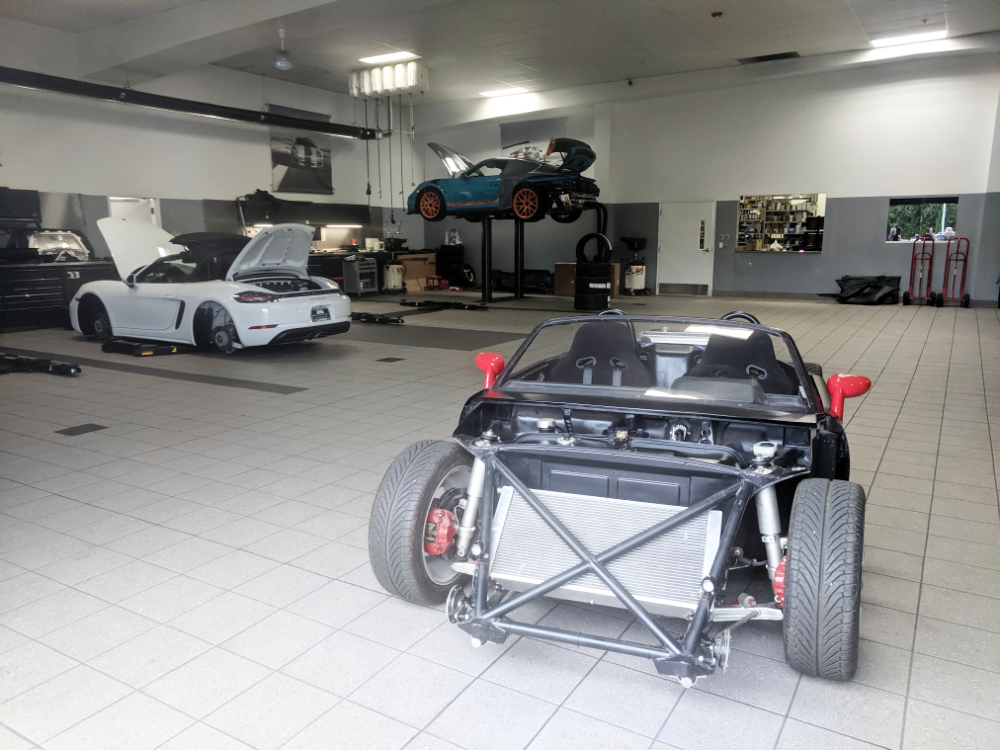
This is the first time my car has been in a dealership in about half a century!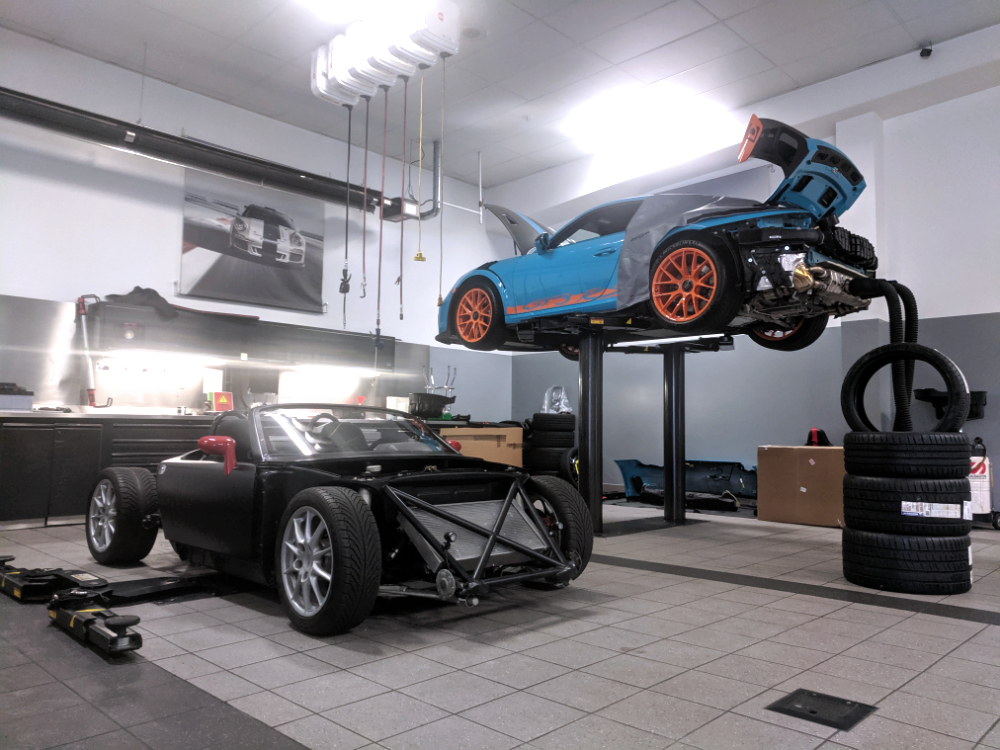
GT3s make good backgrounds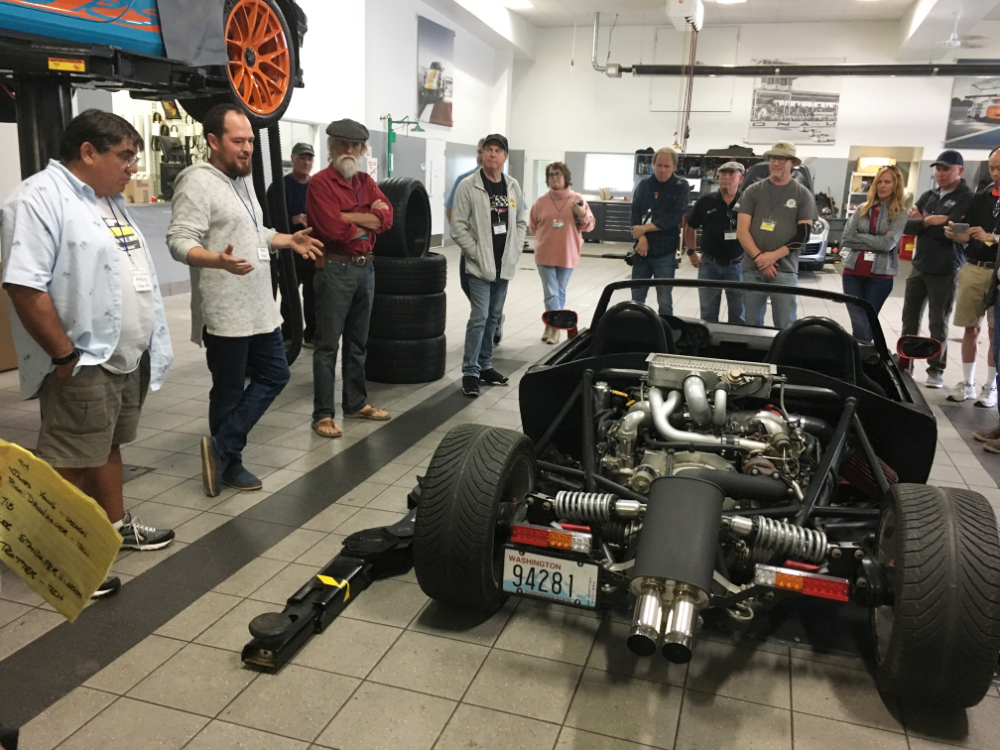
Got a good chance to talk about the car and what is has taken to get to this point, as well as future goals, over all a great event, thanks to Billy for making this possible, it was a lot of fun!
Posted by: plymouth37 Jan 20 2020, 01:01 PM
As those of you who have been watching this build for a while may know, the body for the car is still in Wyoming, I didn't have room on my trailer when I brought the chassis to Washington. Now that the chassis is fairly complete the next thing to work on is the nose of the car.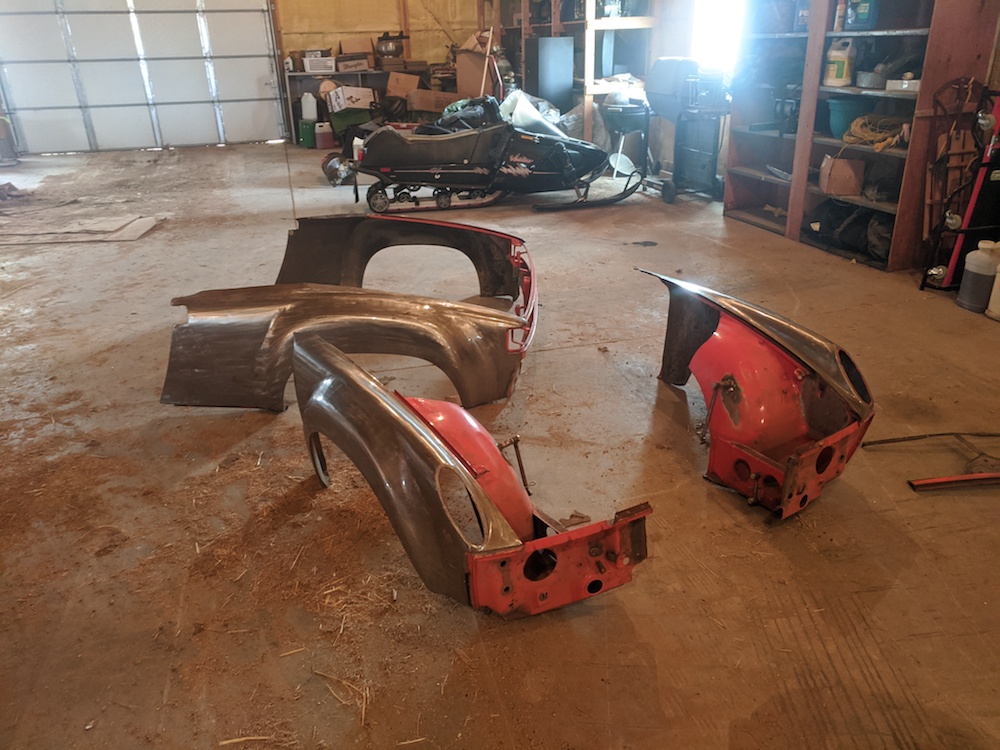
I have struggled to find a cheap way to get the body out west, but I think I found the answer, Greyhound Bus, or more specifically GPX freight, some discount shipping service that uses Greyhound. They only wanted $175 to ship the entire front end, what a deal! I am in Wyoming visiting family so I figured I should go for it and ship the nose home.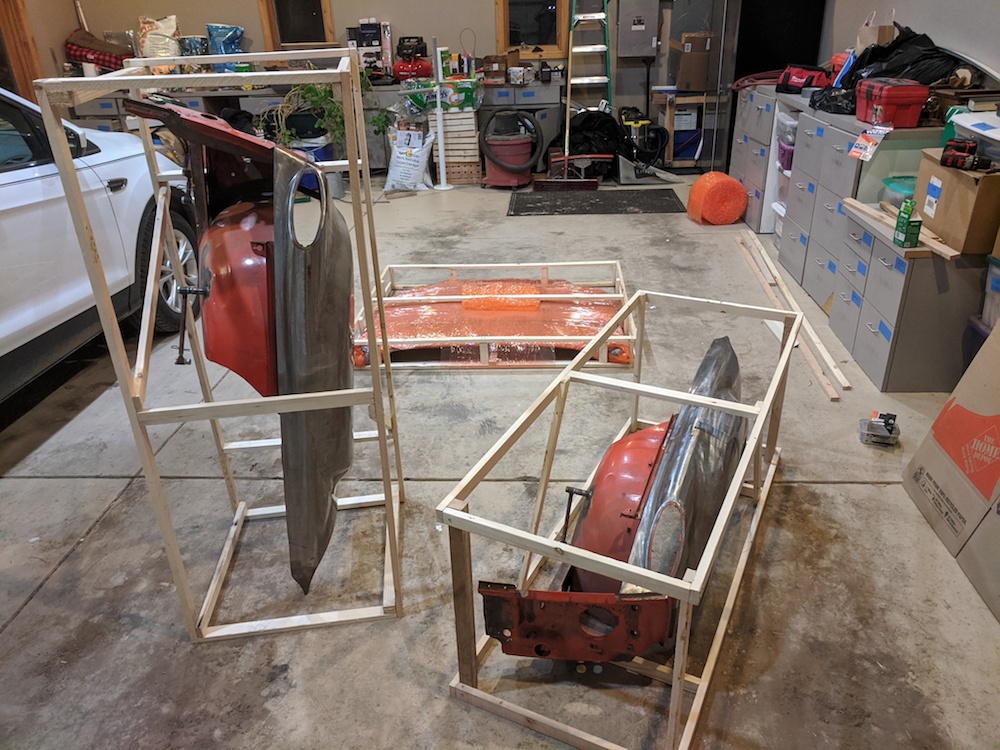
I had a feeling these things were not going to be handled with great care so I built crates that will hopefully keep everything safe, no bubble wrap spared here!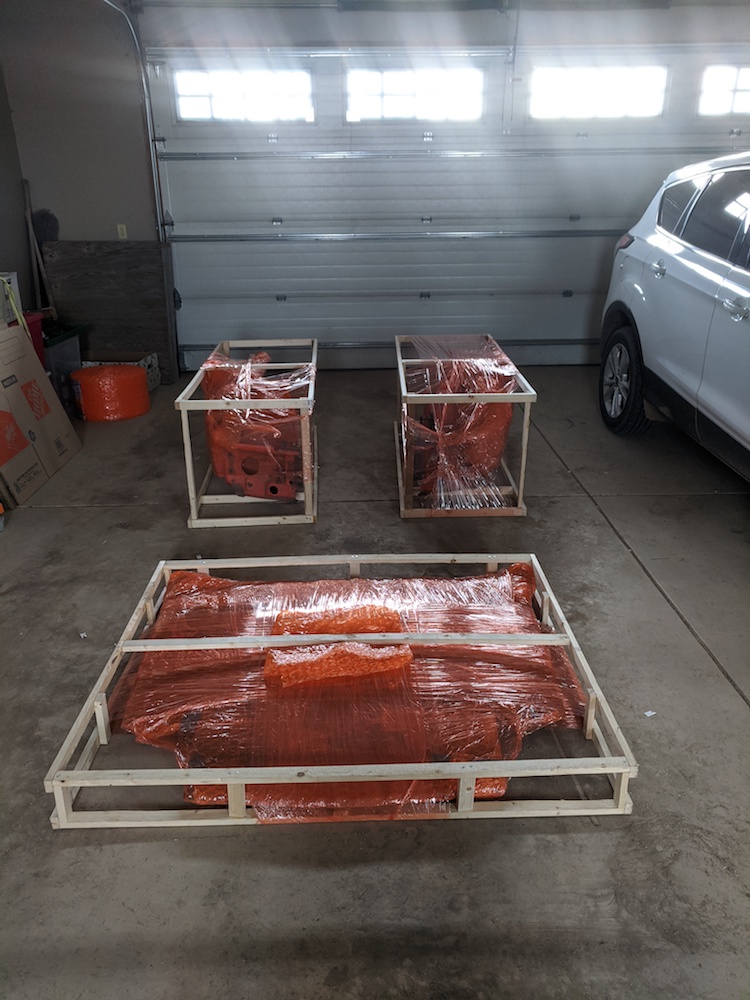
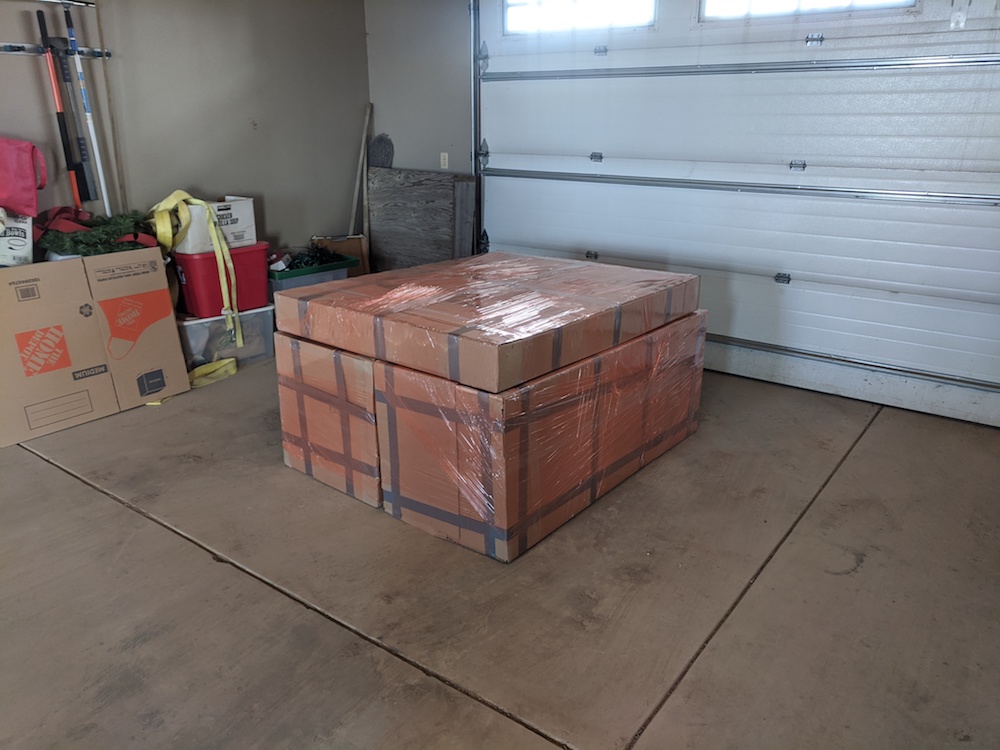
All ready to go!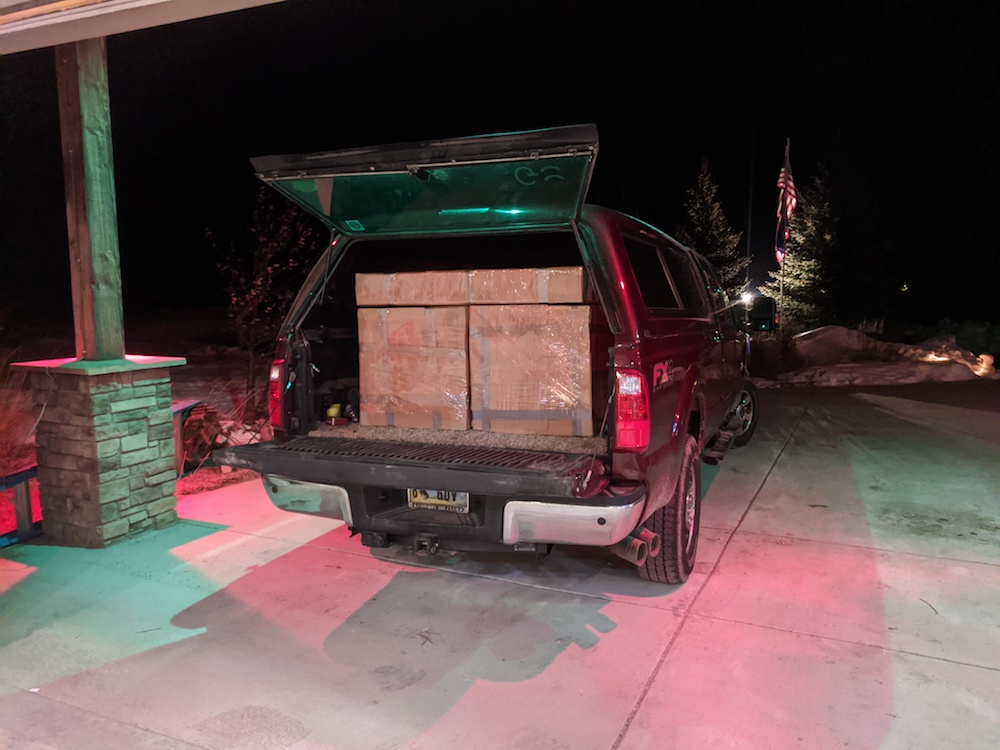
Loaded it in the truck and dropped it off at the Greyhound Station in Laramie, here goes nothing!
Posted by: 914forme Jan 20 2020, 01:07 PM
Best of luck, I like the packaging, about to do the same with some fenders.
Good hint on GPX
Posted by: Ferg Jan 20 2020, 10:24 PM
Great news!
Posted by: plymouth37 Jan 27 2020, 12:37 PM
Look what made it out west!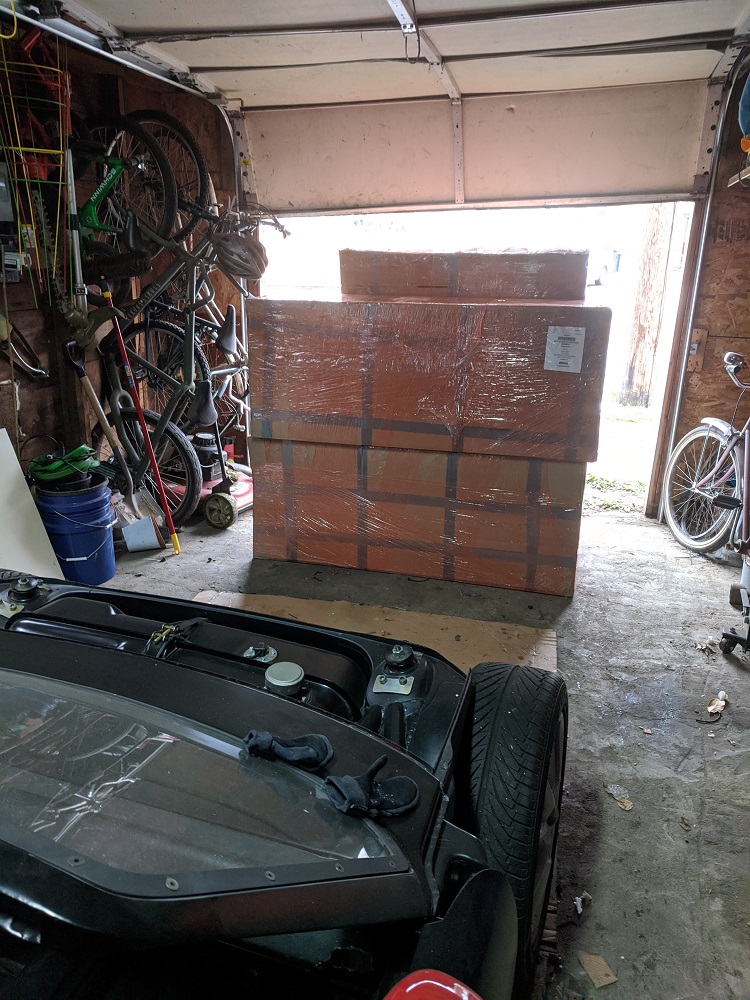
Let the unboxing begin! 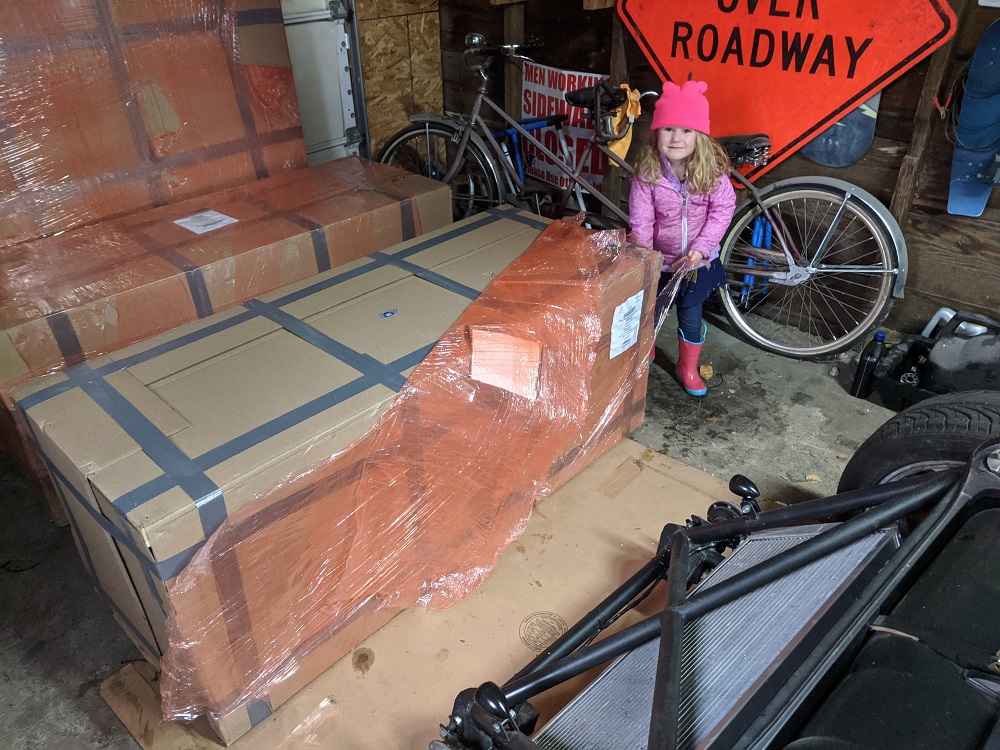
Reunited after about 7 years... time flies when you are busy doing other stuff!
Here is a quick mockup, more to come soon!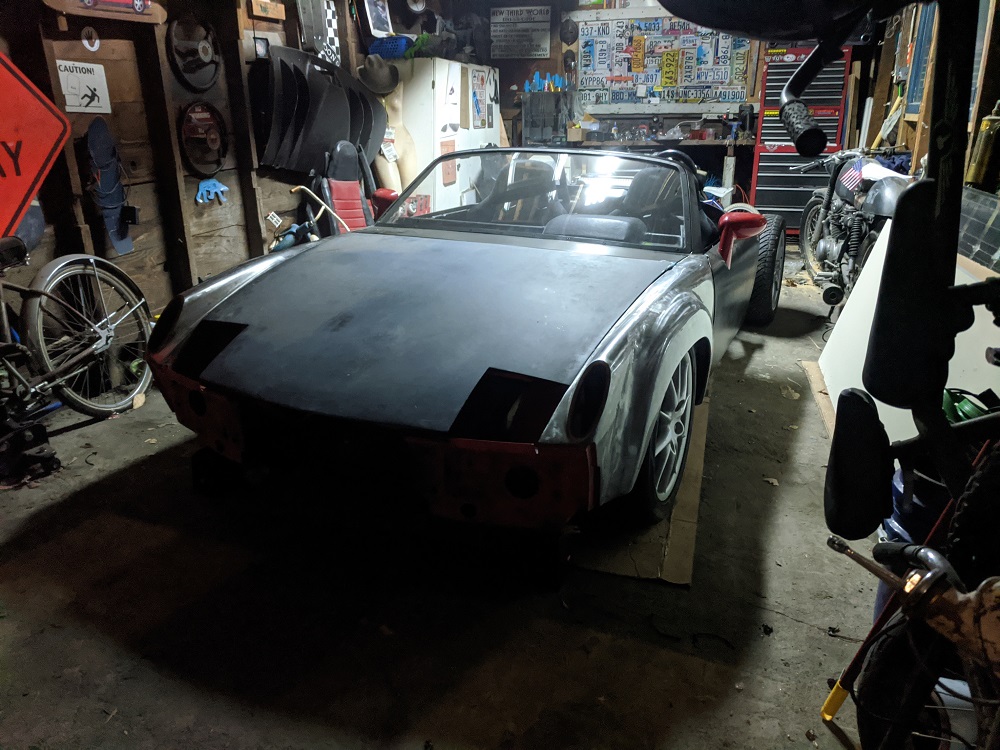
Posted by: Cairo94507 Jan 27 2020, 01:20 PM
That is a milestone for the build; reunited after 7 years. I love this build and always enjoy the progress photos.
Posted by: rhodyguy Jan 27 2020, 01:26 PM
That's some pretty exciting stuff. 
Posted by: 914werke Jan 27 2020, 03:01 PM
Whoo Hoo!!
Posted by: KELTY360 Jan 27 2020, 06:15 PM
Whoo Hoo!!
Can't believe how big your shop helper is getting!
Posted by: twistedstang Jan 28 2020, 05:52 AM
Saw the progress pics last night. Had to come back this morning and look again. Amazing car.
Posted by: plymouth37 Mar 4 2020, 04:15 PM
I mocked up and trimmed the rockers, aligned the doors and got everything relatively straight.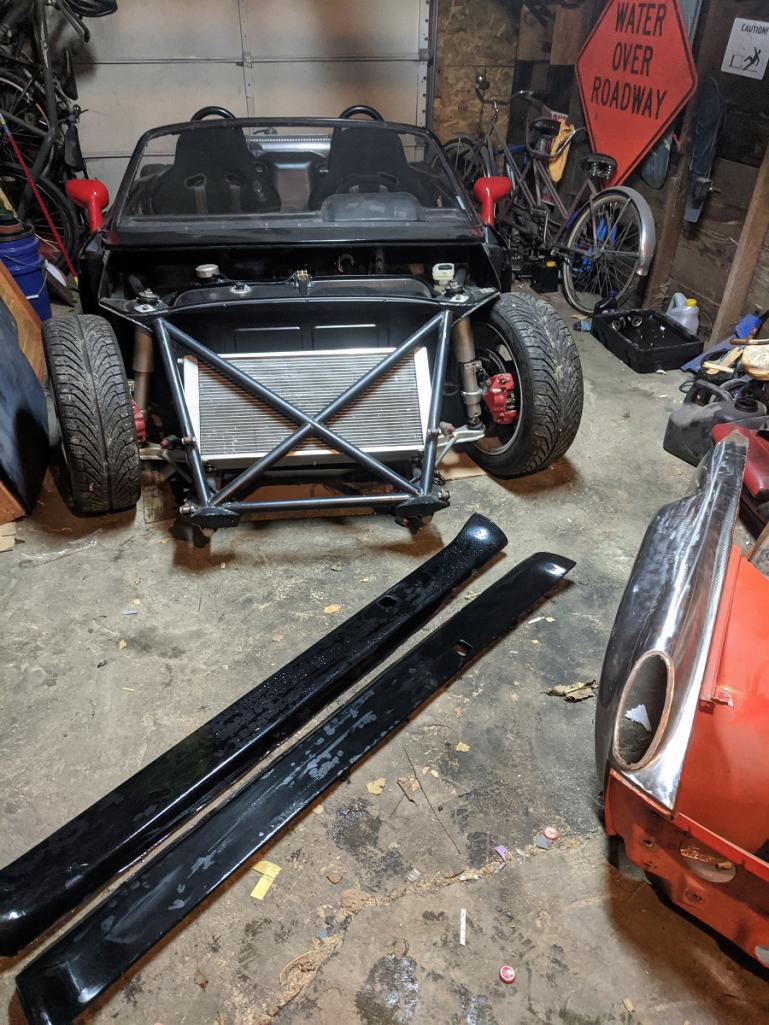
I got the fenders mocked up, got the gaps good, threw on the bumpers to generally test fitment.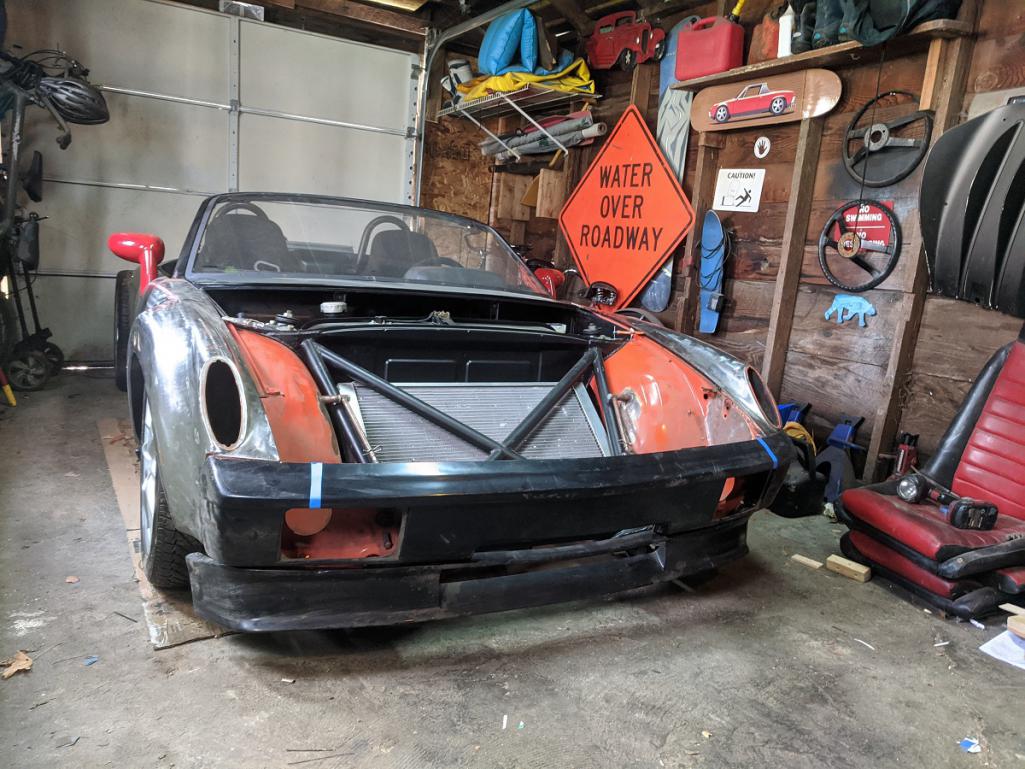
I am re-thinking the hinge system in the front, after mocking it up I can get away with a simple pivot point off of the front of the chassis.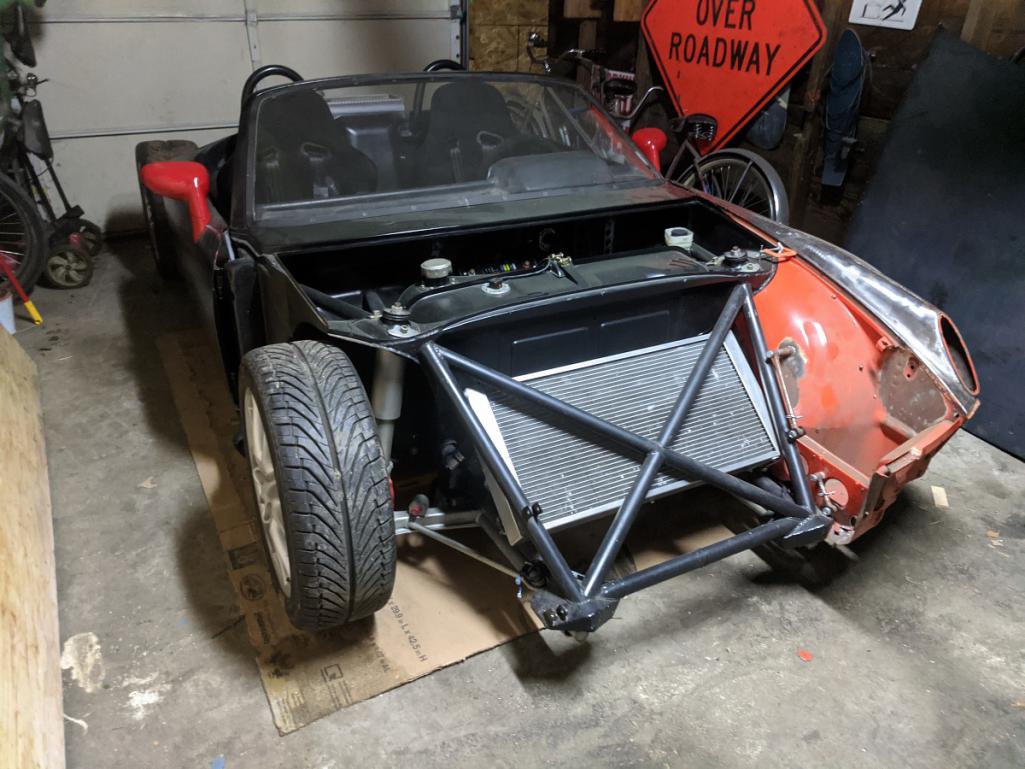
I pulled off the fender and ground off the old hinge points and started stripping it.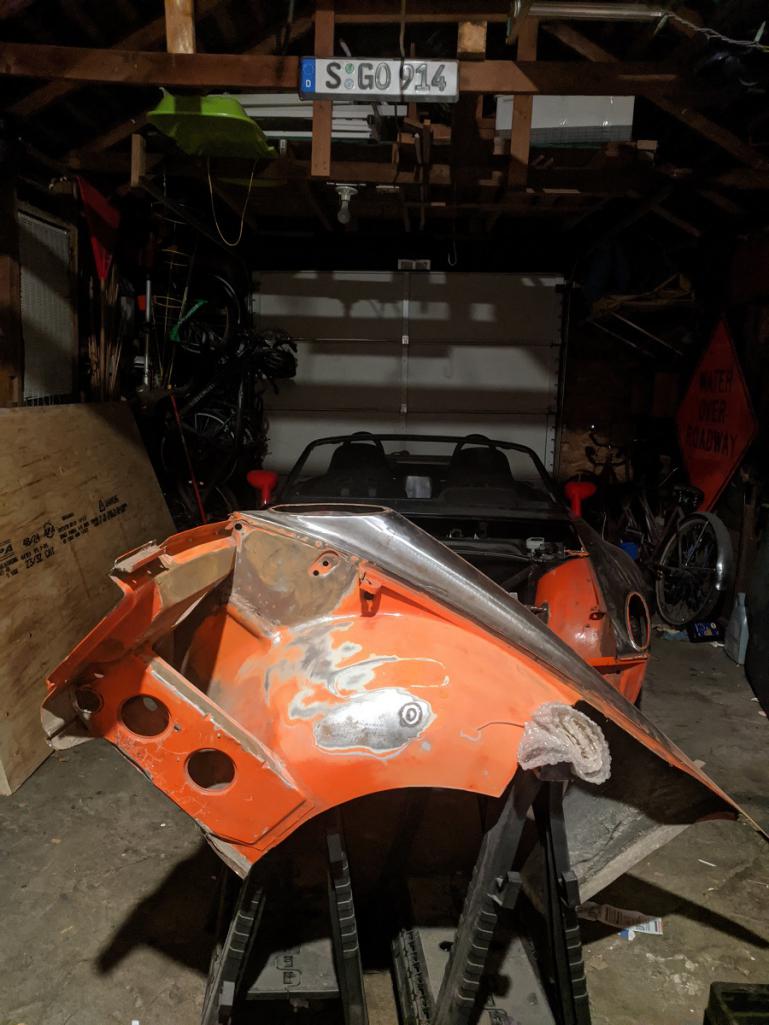
Posted by: porschetub Mar 5 2020, 01:23 PM
Impressive build ,have been following this,IMO the raked windscreen really gives the car a more modern look .
Posted by: plymouth37 Mar 12 2020, 09:33 AM
I threw some primer on the interior portions of the fenders after cleaning them up, whole new world doing metal work in the wet PNW, I used to be able to leave metal bare for years in Wyo/Co, not any more!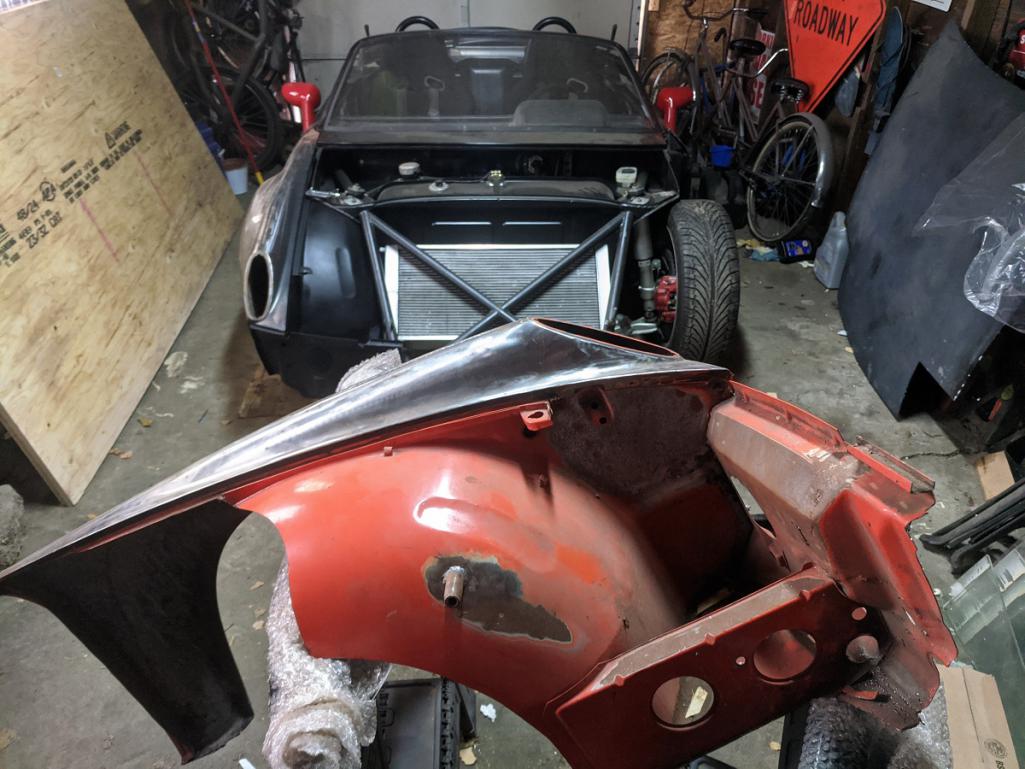
Took the front wheels off, then started getting the fenders aligned for real with good door gaps, forgot how fiddly body work is...
This is to set the exact location for the front pivot point, get the fenders in the right spot, mark it, add pivot points, then weld the hood on.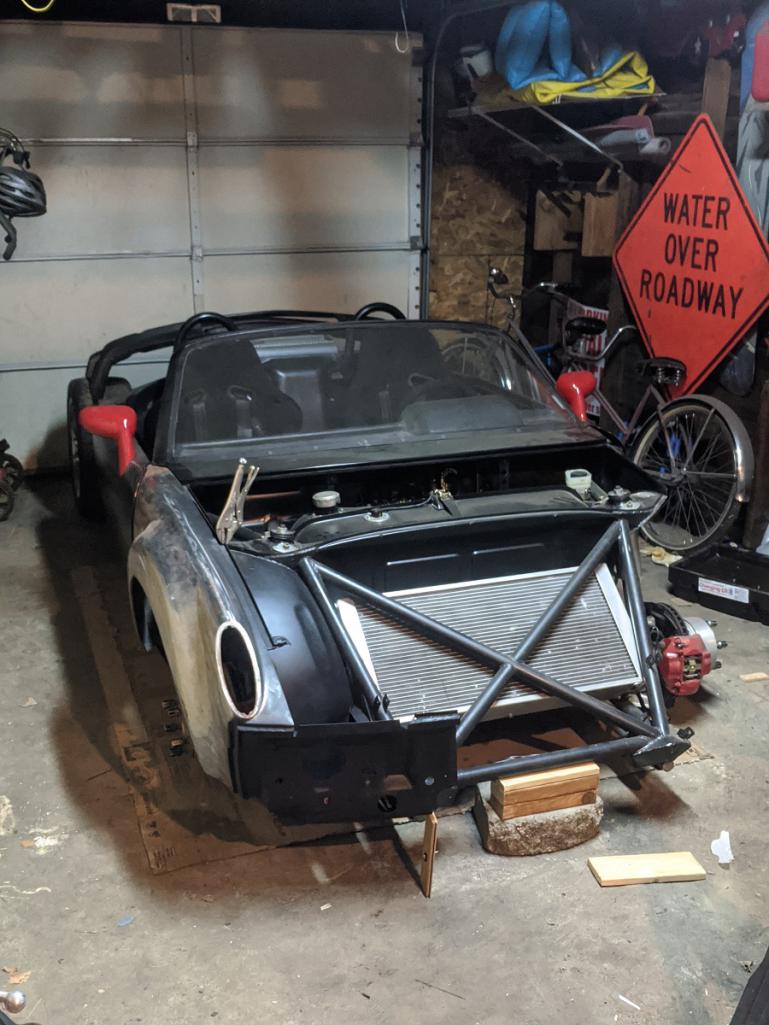
Had to do a bit of clearancing on the chassis but everything fits snug now.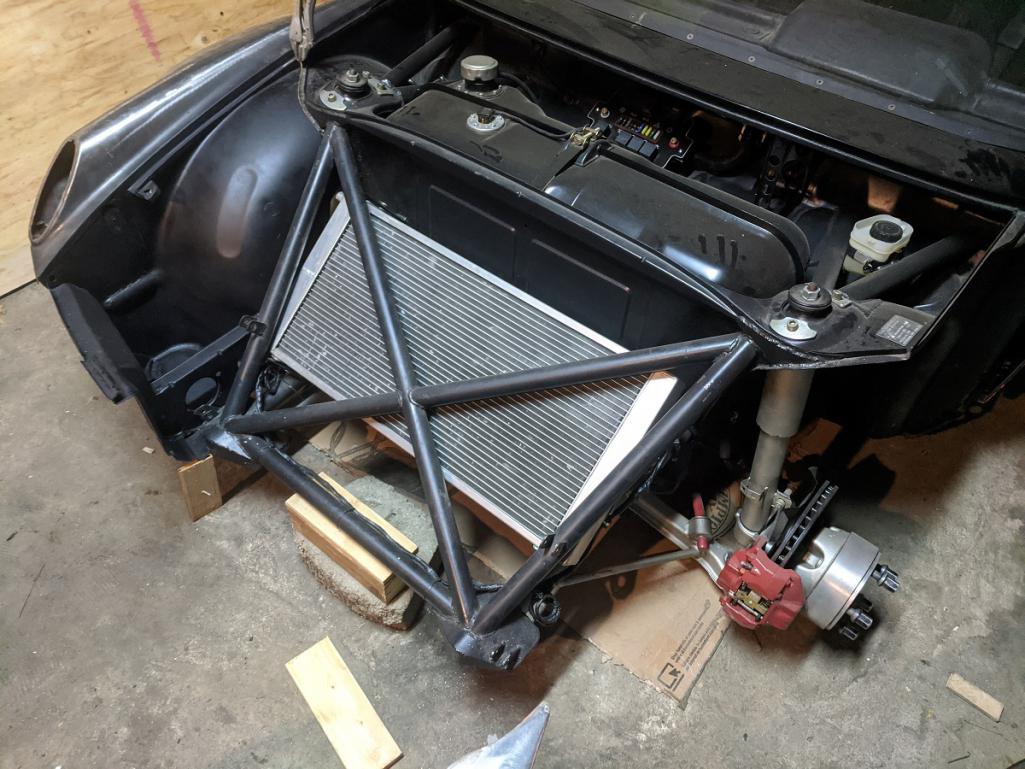
But now for the most important bit of news, I am upgrading my shop to 220, I used to have to drag a 50' extension cord to our dryer plug in the house to weld, which pretty much kept me from welding at all, not any more! Never had the luxury of just being able to turn on a welder and go, should be life changing for all of the panel welding I have on the horizon!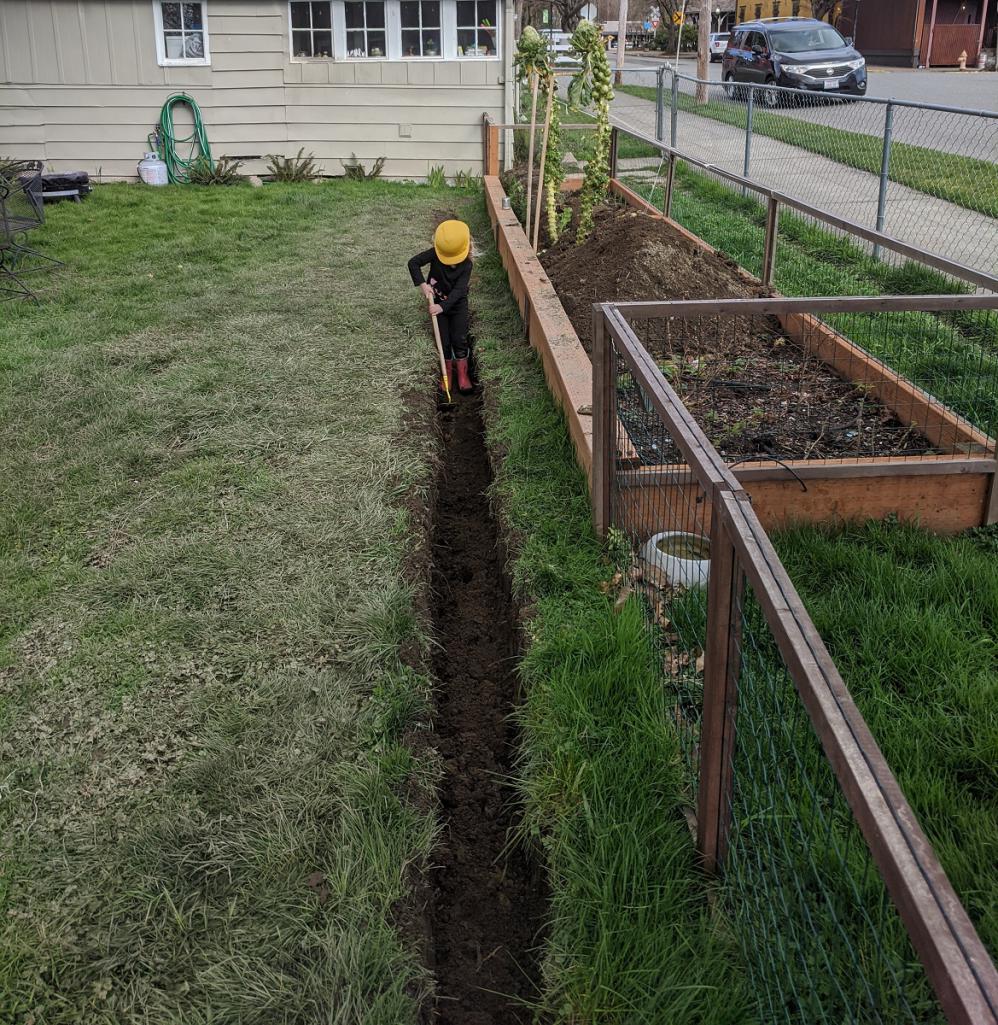
Posted by: Cairo94507 Mar 12 2020, 10:09 AM
Great picture. Teach them young that life requires work. Love your project.
Posted by: plymouth37 Apr 9 2020, 10:43 AM
Well good news and bad news, bad news is we are under shelter in place orders for the foreseeable future, good news is I am sheltering in my garage...
Quick little project to start off, I think the lack of wipers on the car is the only actual violation on the car, time to make that situation a little less obvious...
I bought some manual golf cart wipers, I like their blacked out minimal design.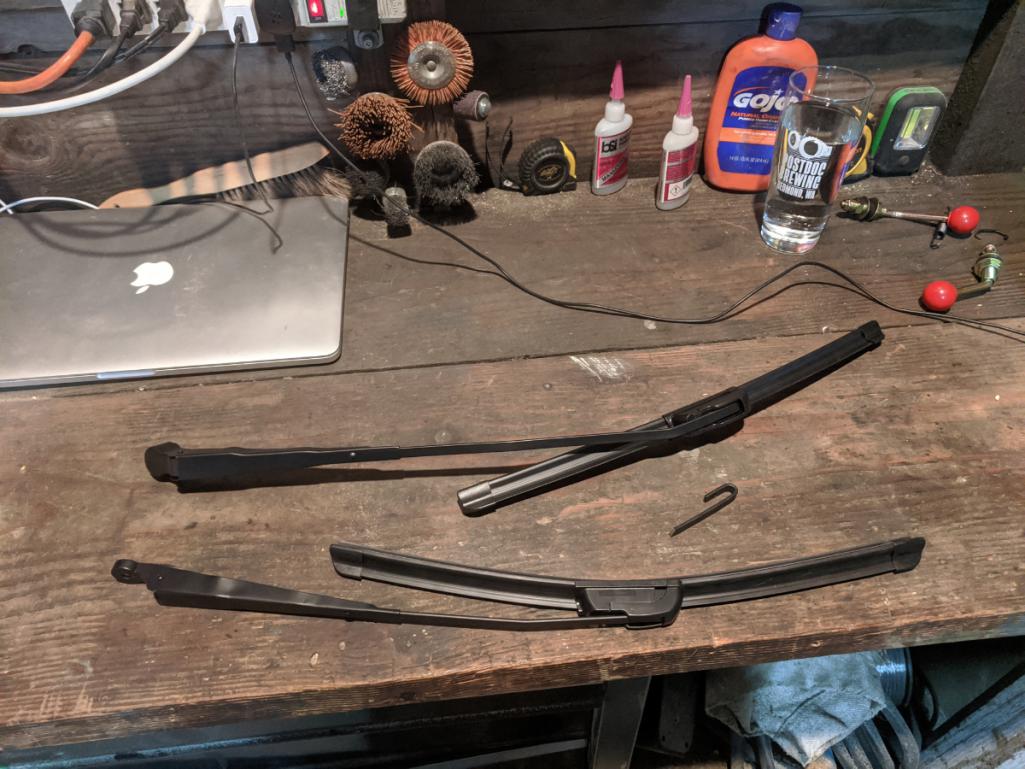
Then modified them to be straight and short enough for the chopped windshield.
Then bolted them on....
![whistle[1].gif](style_emoticons/default/whistle[1].gif)
Posted by: plymouth37 Apr 9 2020, 12:12 PM
Now onto some real work, I am rethinking the front tilt hinges and going to a simple pivot in the front, this causes issues in other spots but that is a problem for another day.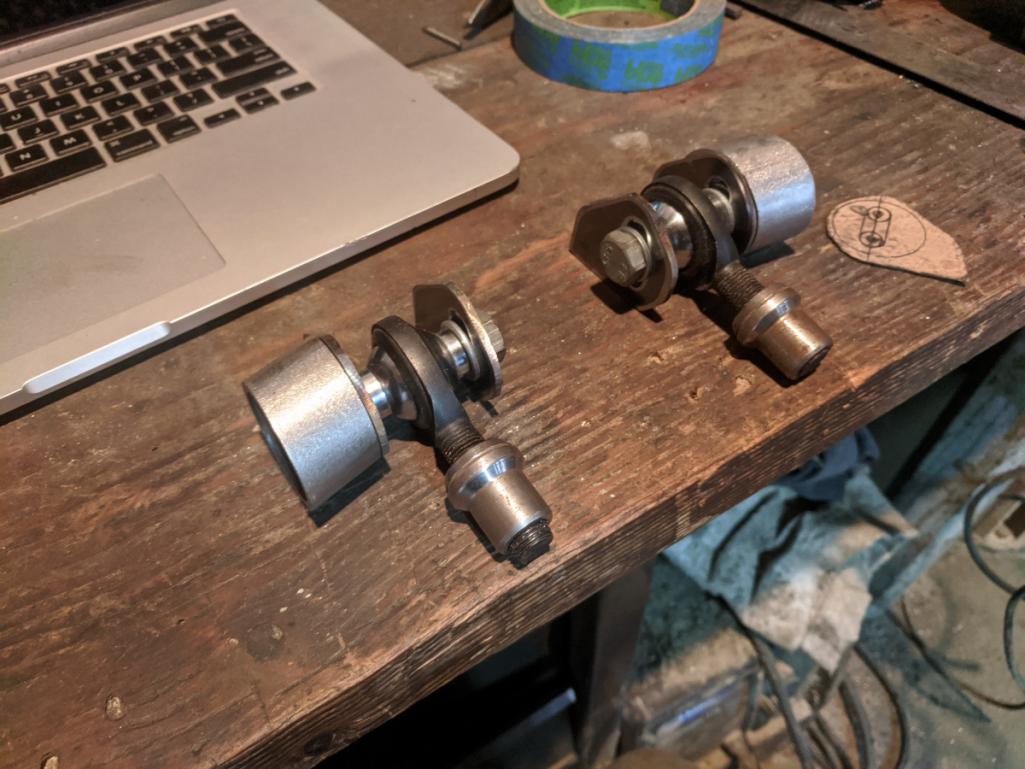
I prepped the fenders for their new attachment points: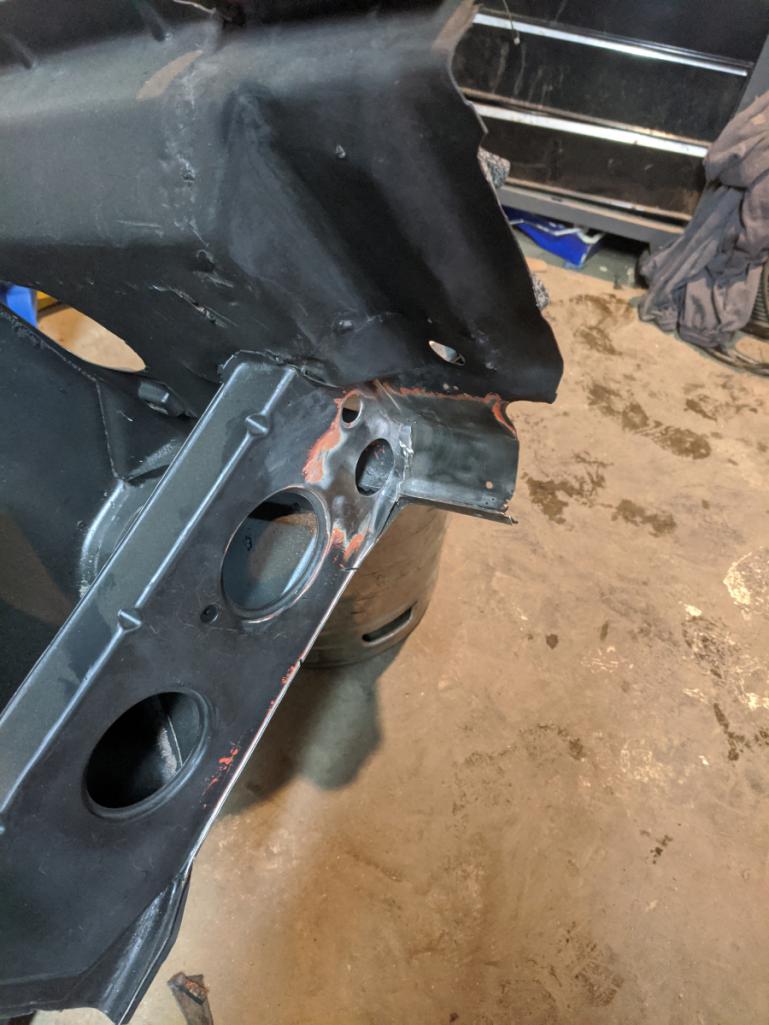
And welded them on: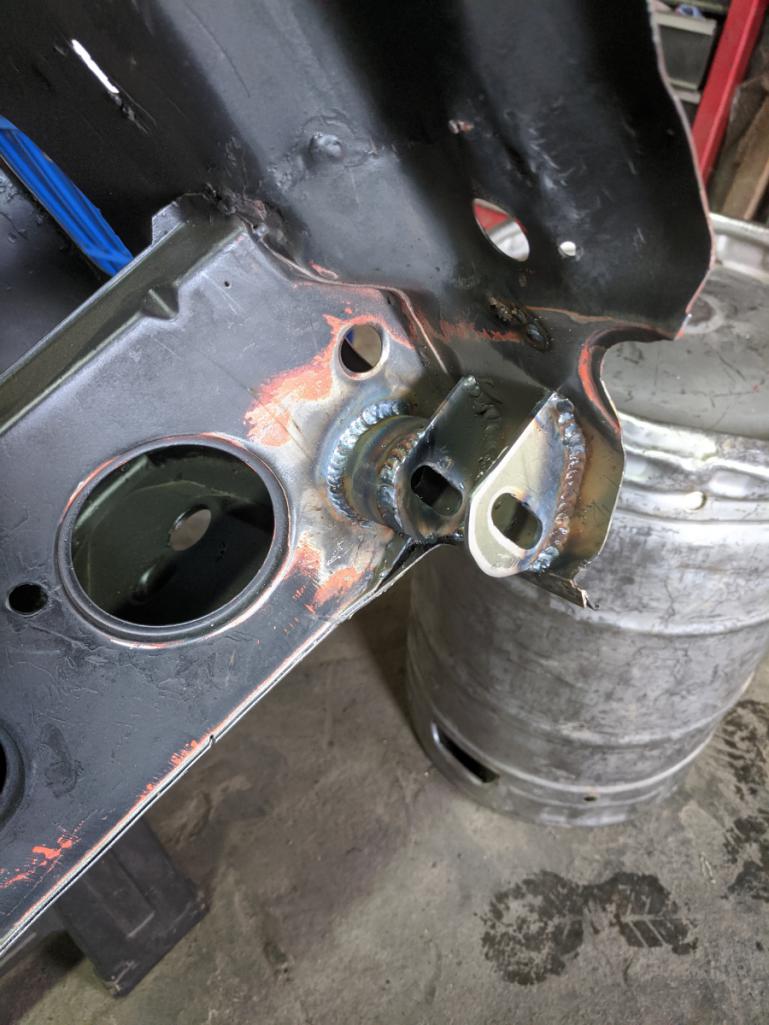
Posted by: plymouth37 Apr 9 2020, 01:00 PM
Looks like a butcher shop in here! 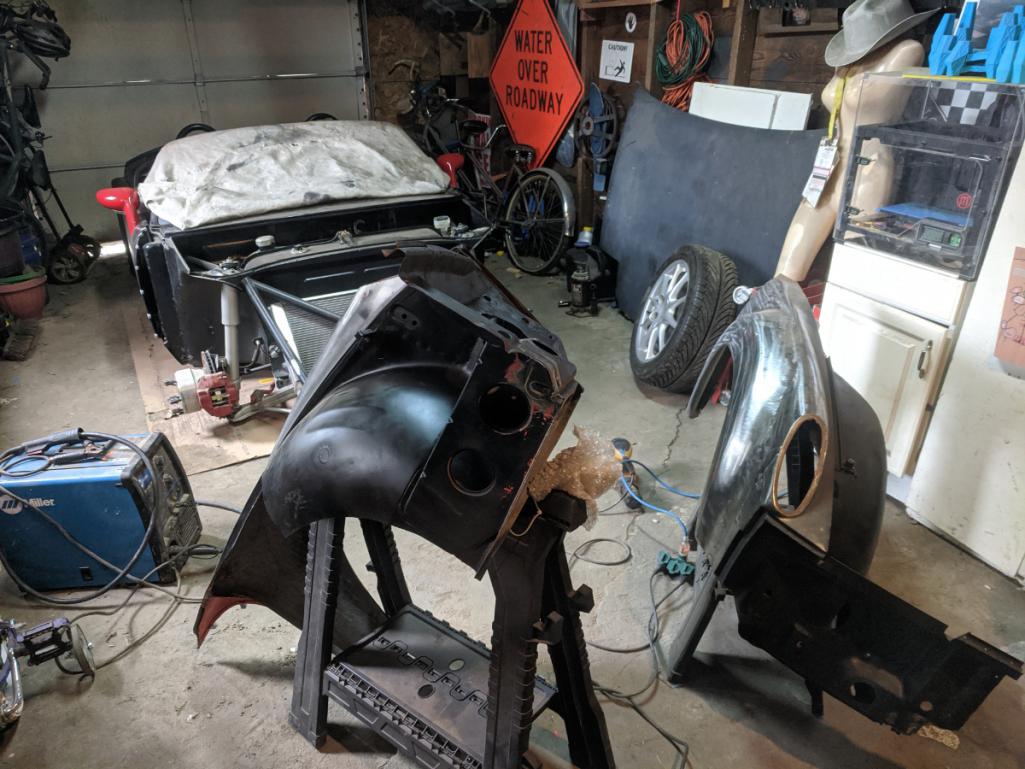
Posted by: plymouth37 Apr 13 2020, 09:16 AM
I cut off the old tilt front brackets, and cleaned up the front a little bit.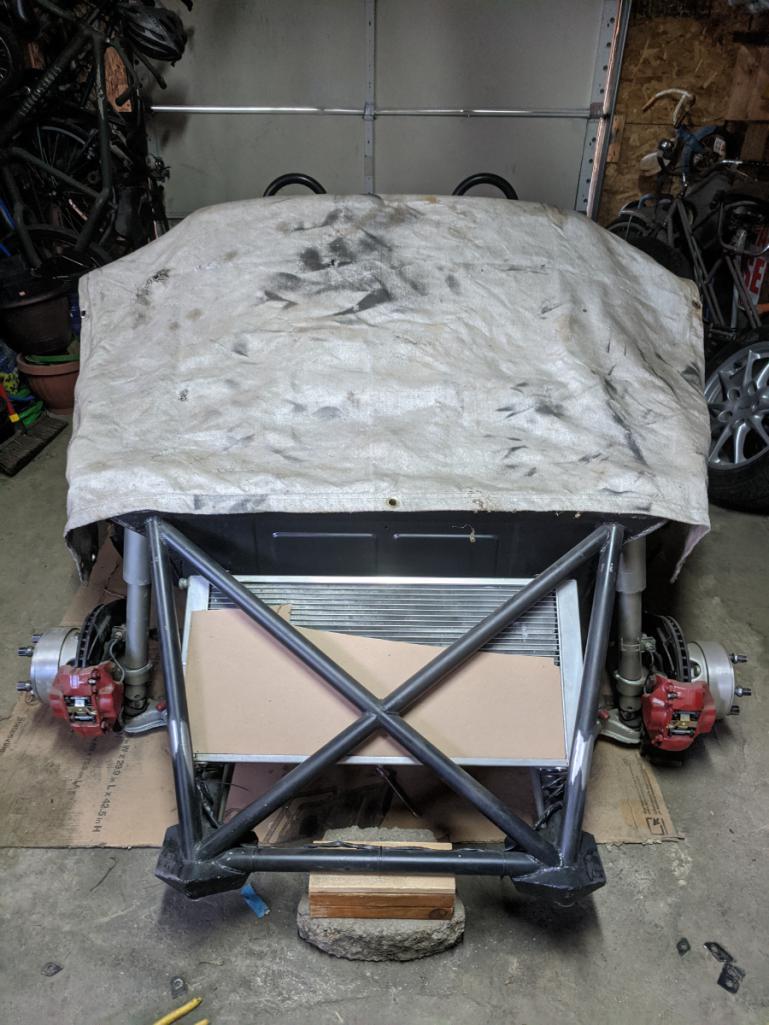
Welded in the mounts for the new front pivots.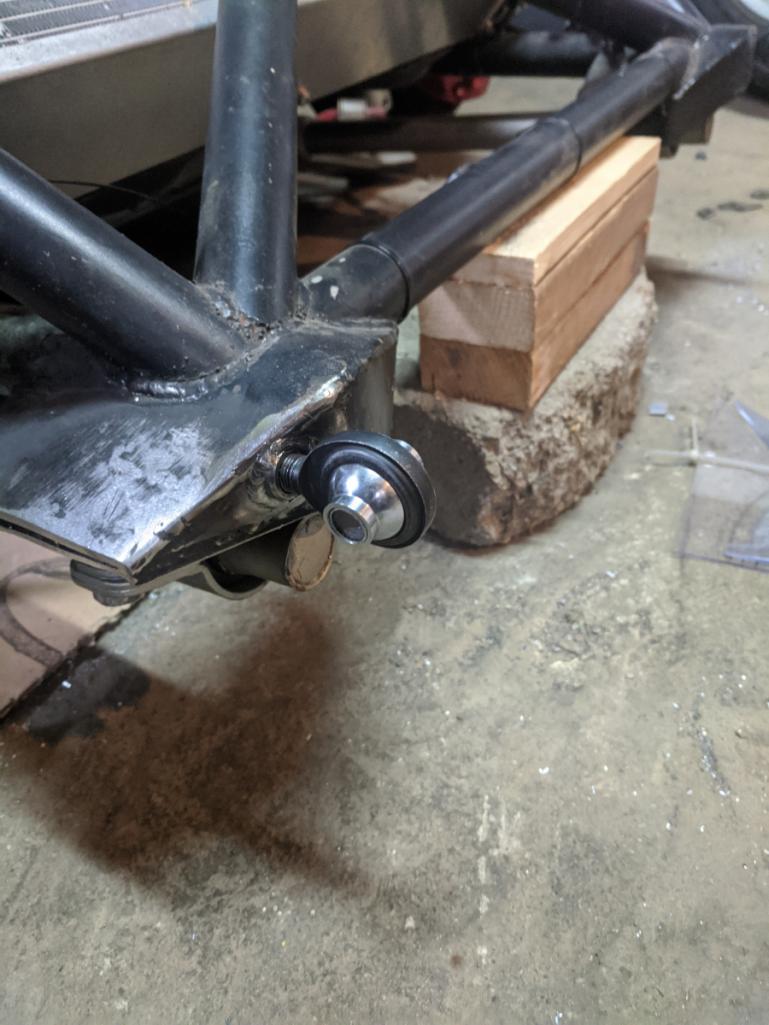
Then mounted the fenders to the new mounts. 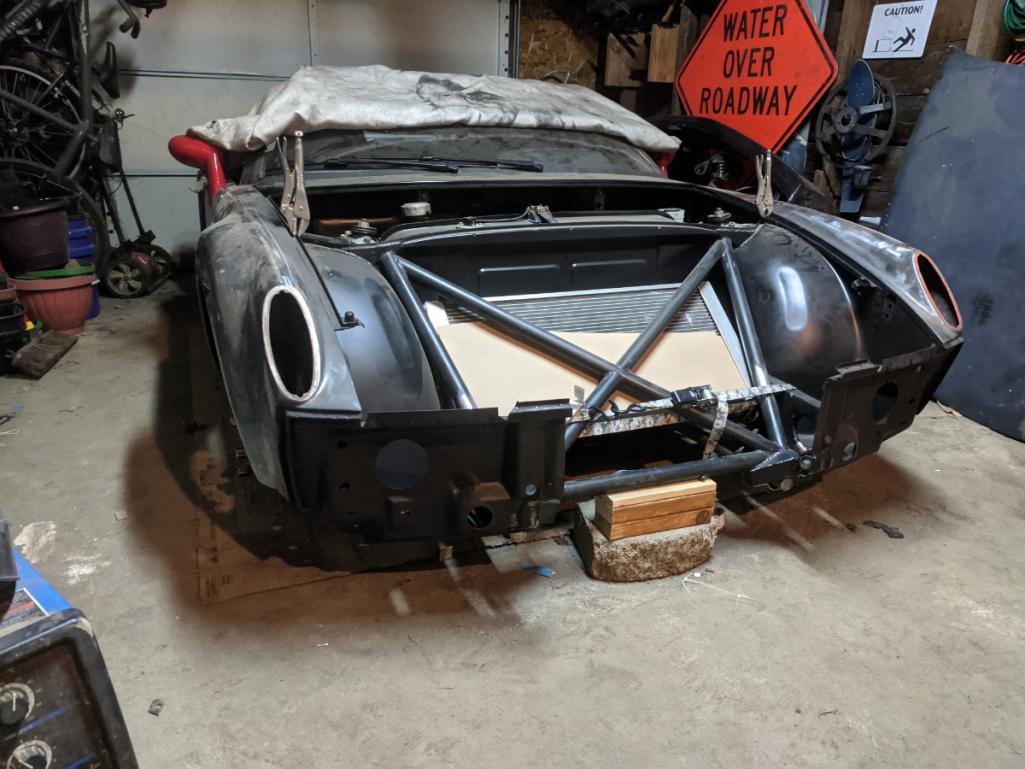
Posted by: dan10101 Apr 13 2020, 10:03 AM
I cut off the old tilt front brackets, and cleaned up the front a little bit.
Welded in the mounts for the new front pivots.
Then mounted the fenders to the new mounts.
Nice work!
I can't wait to see it tilt.
Posted by: Asheikh Apr 13 2020, 11:31 AM
I Absolutely love this build!
Posted by: MidshipMadness Apr 13 2020, 11:44 AM
Very cool project!
Posted by: plymouth37 Apr 14 2020, 04:22 PM
Now that I am setting panel gaps for real I need to make some tools to hold panels in the correct location. I cut out all the ingredients for some panel clamps.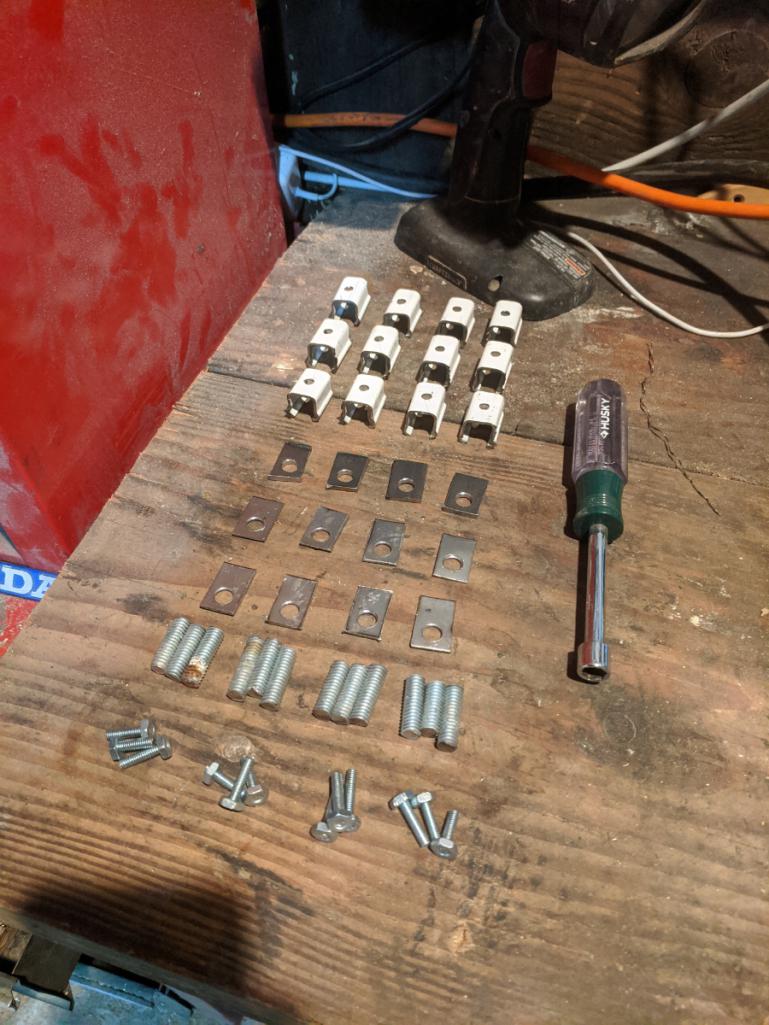
Welded them up.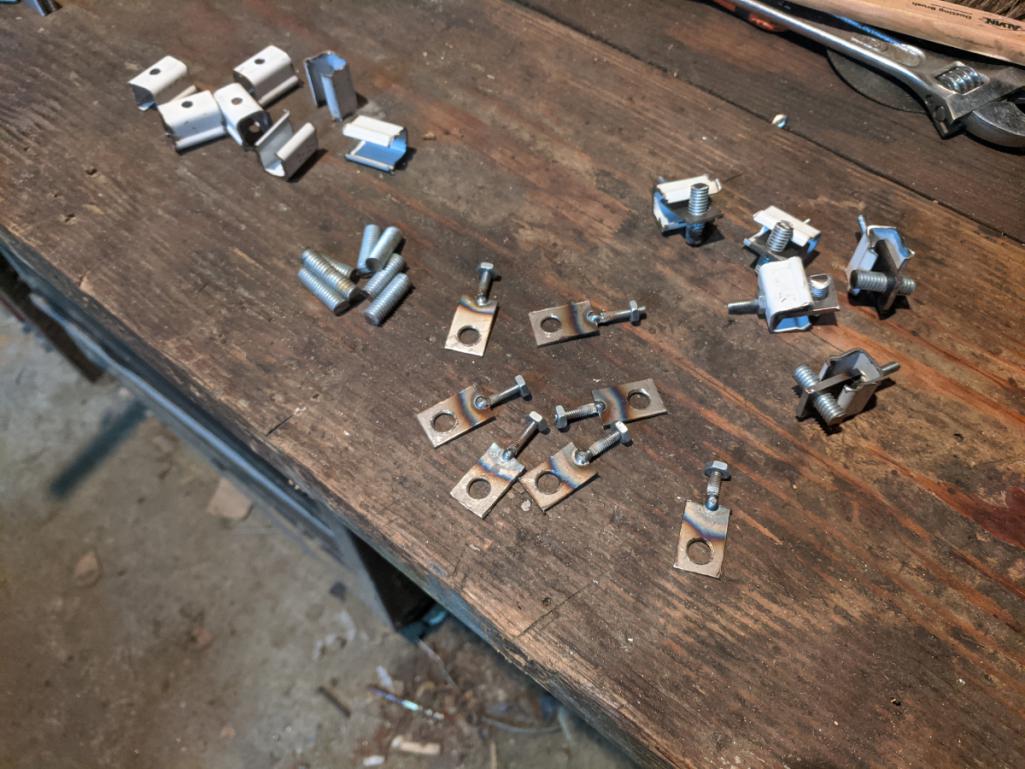
I also 3D printed some panel spacers. 
Posted by: plymouth37 Apr 14 2020, 04:27 PM
i am pretty pleased with the 3D printed door spacers, they hold the gap perfect.
Other clamps are working well too.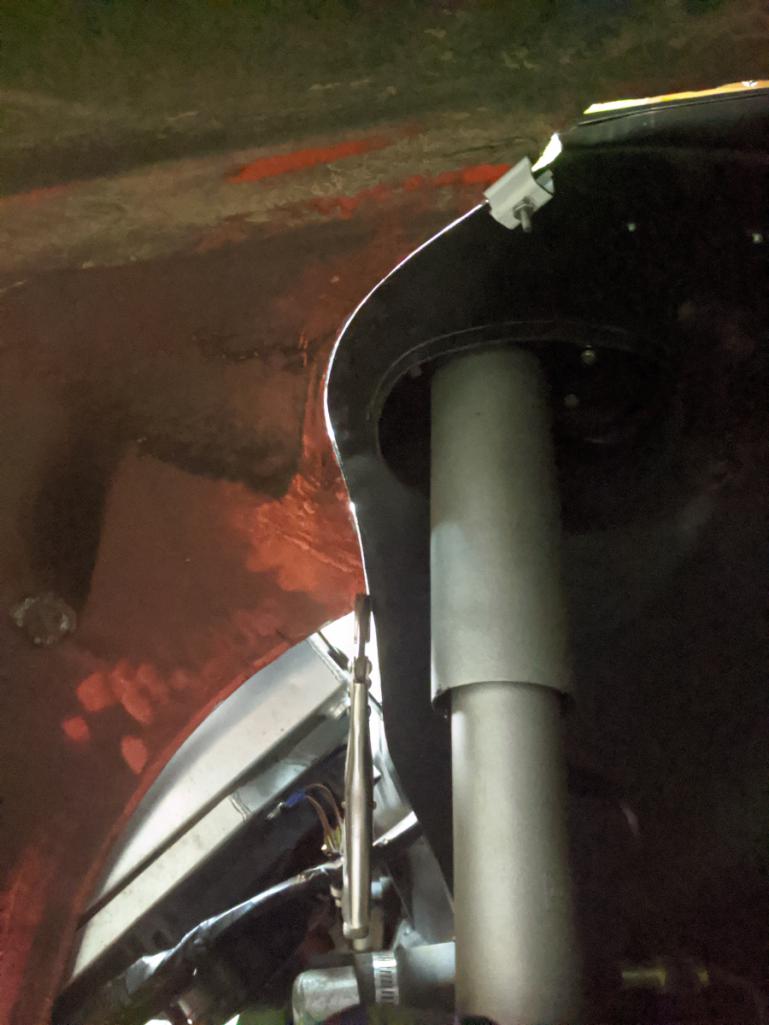
Now the fenders really seem to be in the right spot and ready to meet the hood.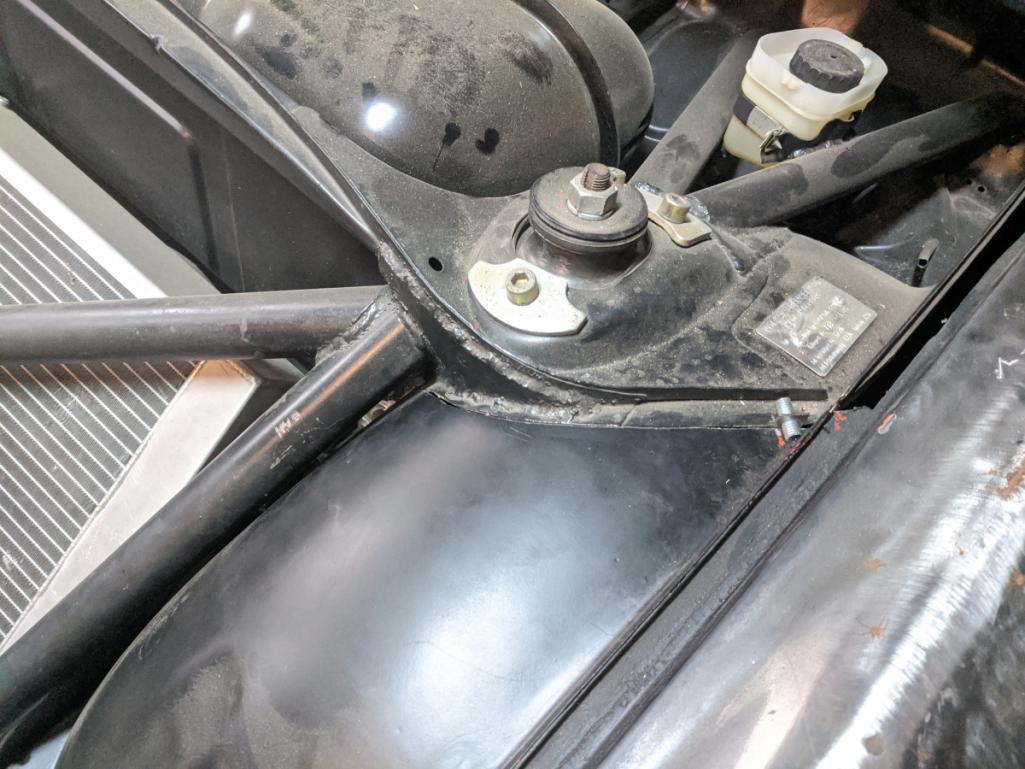
Posted by: Asheikh Apr 16 2020, 11:02 AM
do u still have your break active spoiler....? can you please share more information on it
Posted by: plymouth37 Apr 23 2020, 03:47 PM
do u still have your break active spoiler....? can you please share more information on it
I may make another one, that was a relay logic board (would use an arduino now) powering a couple linear actuators attached to a cut portion of the original trunk lid.
didn't have it for long, can't even find a pic!
Posted by: plymouth37 Apr 23 2020, 04:00 PM
I used a flat sheet held against the cage to mark the inner wheelwell that needed to be clearanced.
Then marked and cut out the excess material.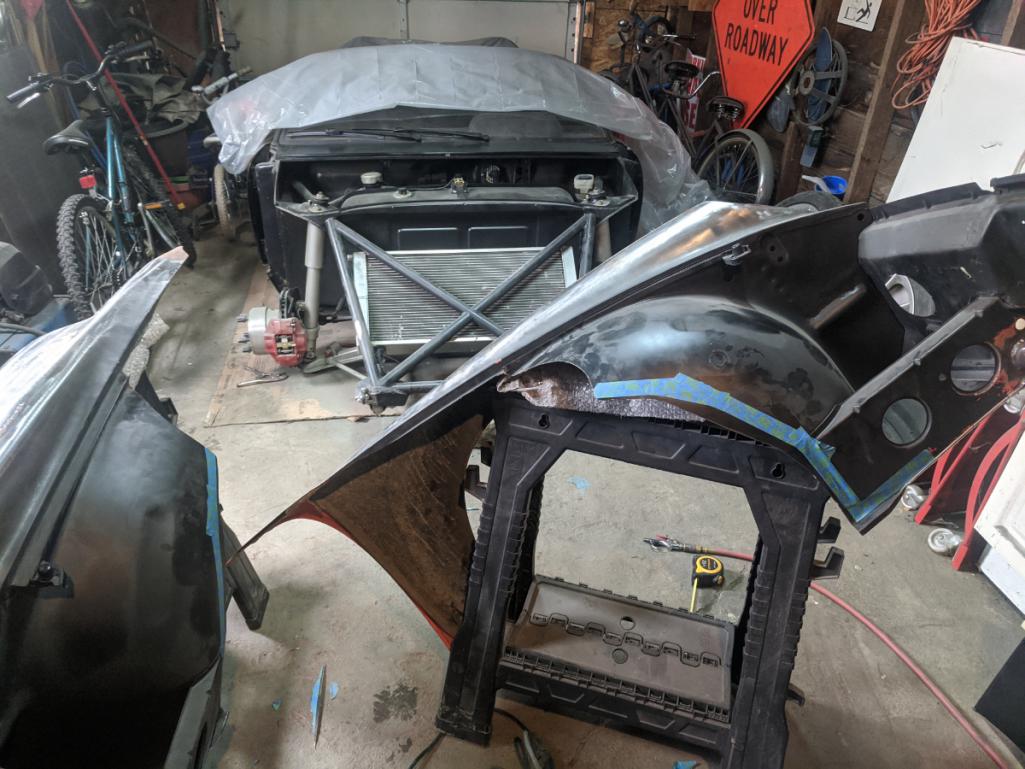
Finally I mocked up the front end for the 100th time, this time though I bolted them onto the pivots, then temporarily reinforced with an appropriate amount of plywood 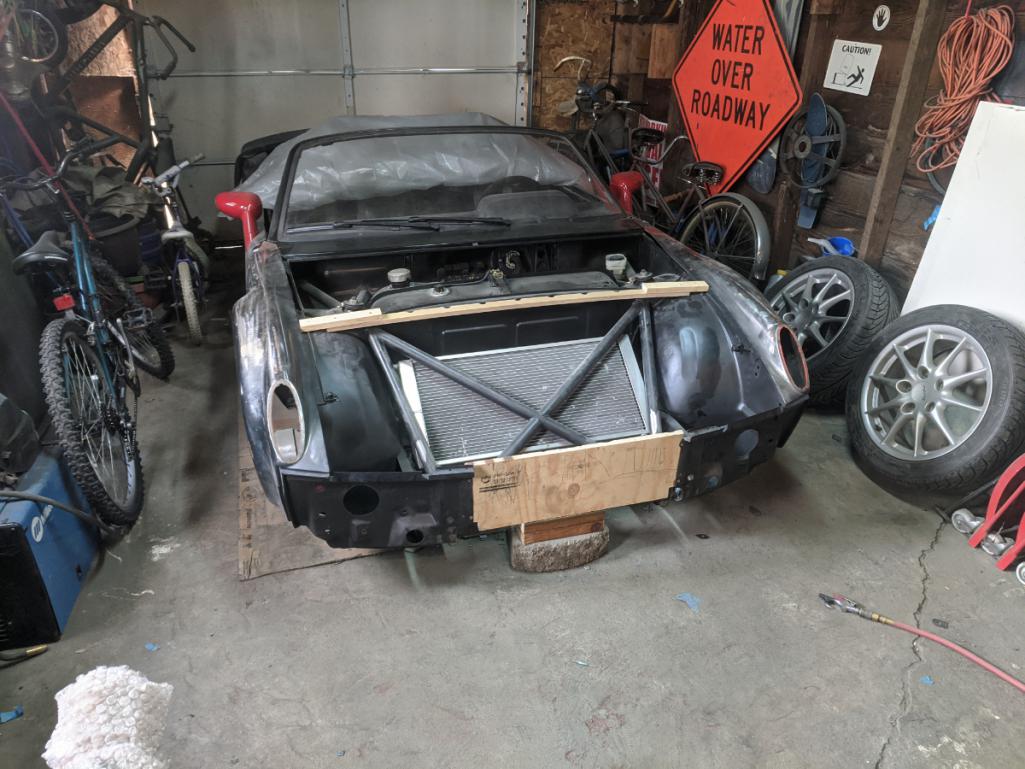
Posted by: plymouth37 Apr 23 2020, 04:03 PM
Test tilt time!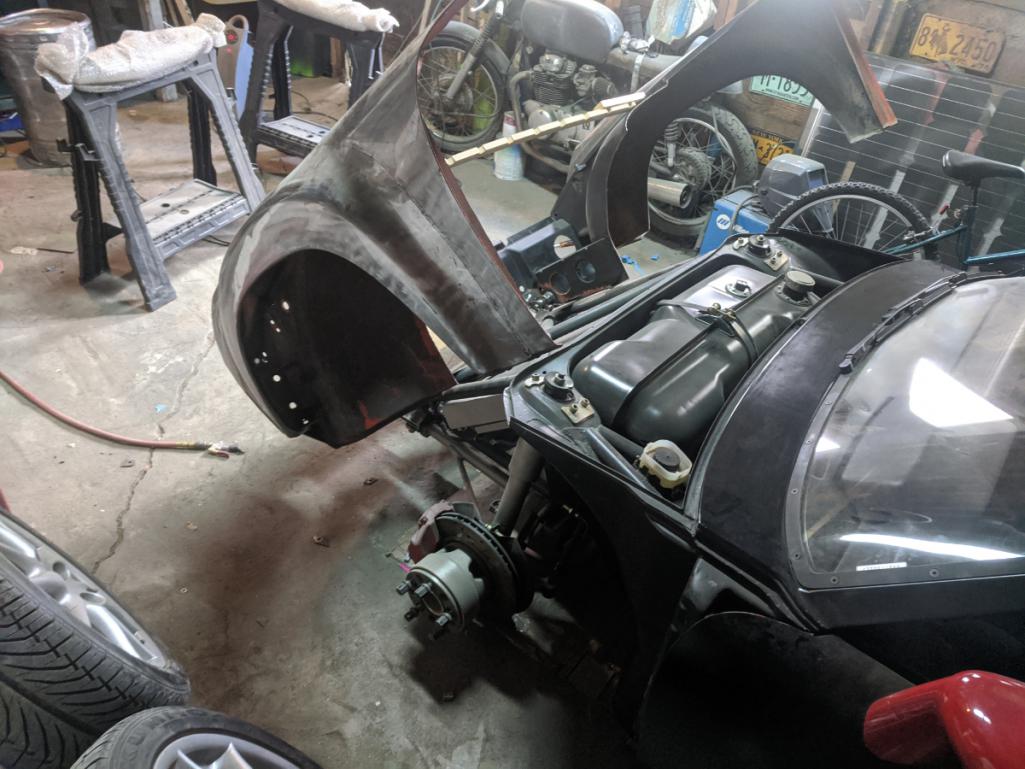
Heck yeah! Hood prep is next!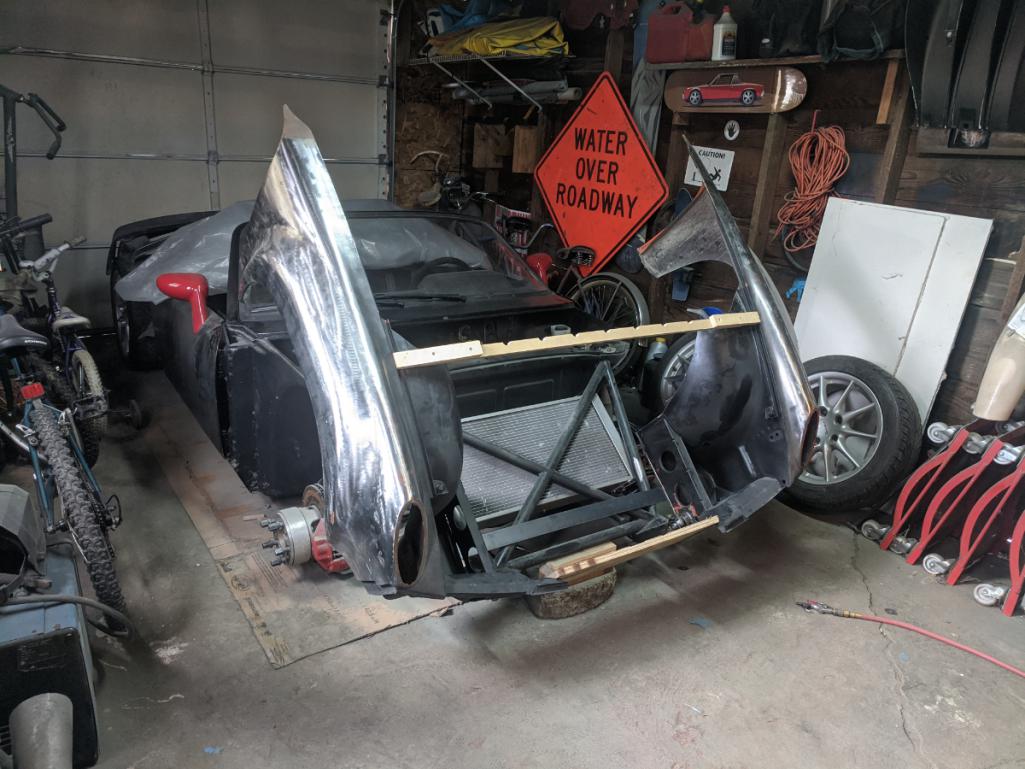
Posted by: 76-914 Apr 23 2020, 04:09 PM
Very nice indeed. Maybe this will be the year!
Posted by: Root_Werks Apr 23 2020, 04:21 PM
Gotta love it when something actually works as planned! Well done!
Posted by: plymouth37 Apr 23 2020, 04:32 PM
Maybe this will be the year!
I've been saying that for 10 years...
Posted by: KELTY360 Apr 23 2020, 05:43 PM
Maybe this will be the year!
I've been saying that for 10 years...
Yeah, we know.
I still get chills remembering logging into your thread and seeing you’d cut the car in half!
Posted by: plymouth37 Apr 27 2020, 10:17 AM
Now onto the hood, I got this lid in a trade and it has always felt a little heavy to me, lets see what is lurking under this paint!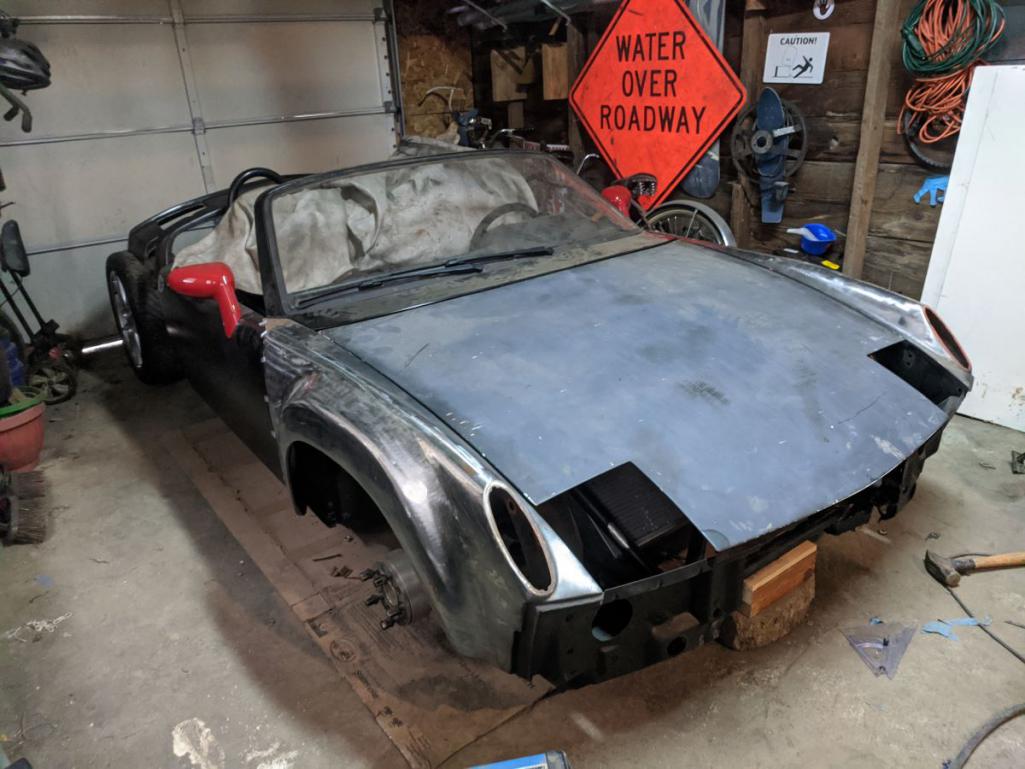
Merry Christmas, your present is Bondo!
A lot of it!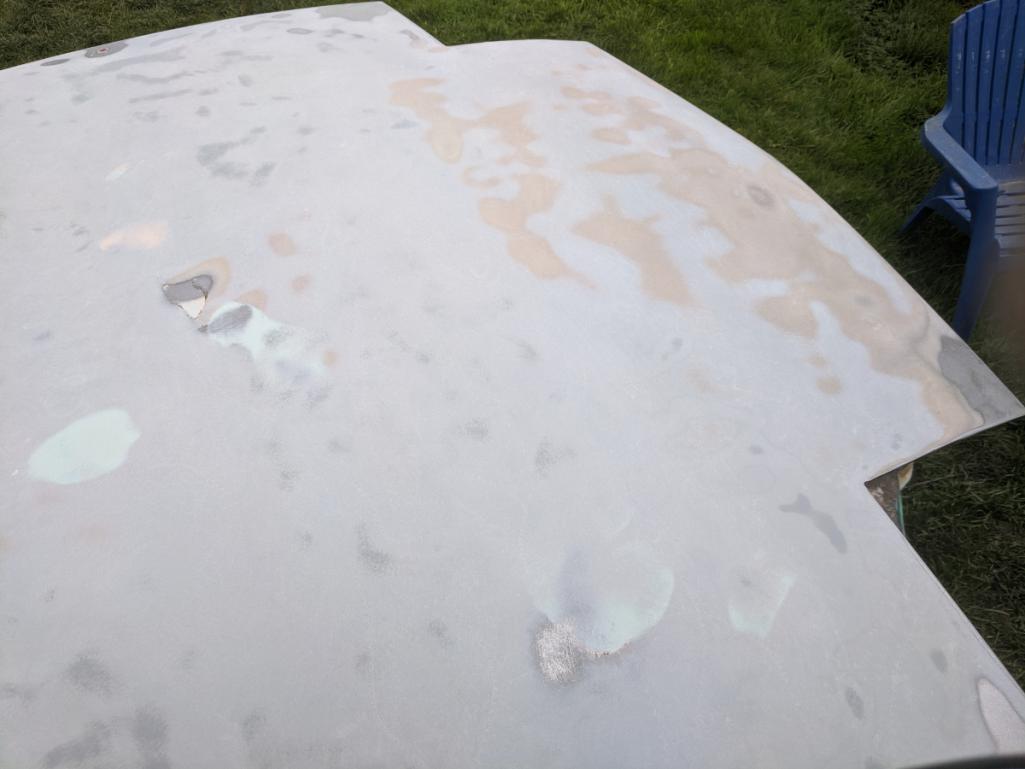
After stripping away pounds of Bondo it looks like this lid is actually pretty clean, it just suffered from the two most common injuries that happen to these lids. The dent where you put your hand to close it, someone closed the lid on a strangely shaped, too big object, oh and there are a few rock dings.
I can totally work with this, an afternoon with a hammer and dolly will get this straight, I think the last person just added Bondo until the high points were hidden, yikes!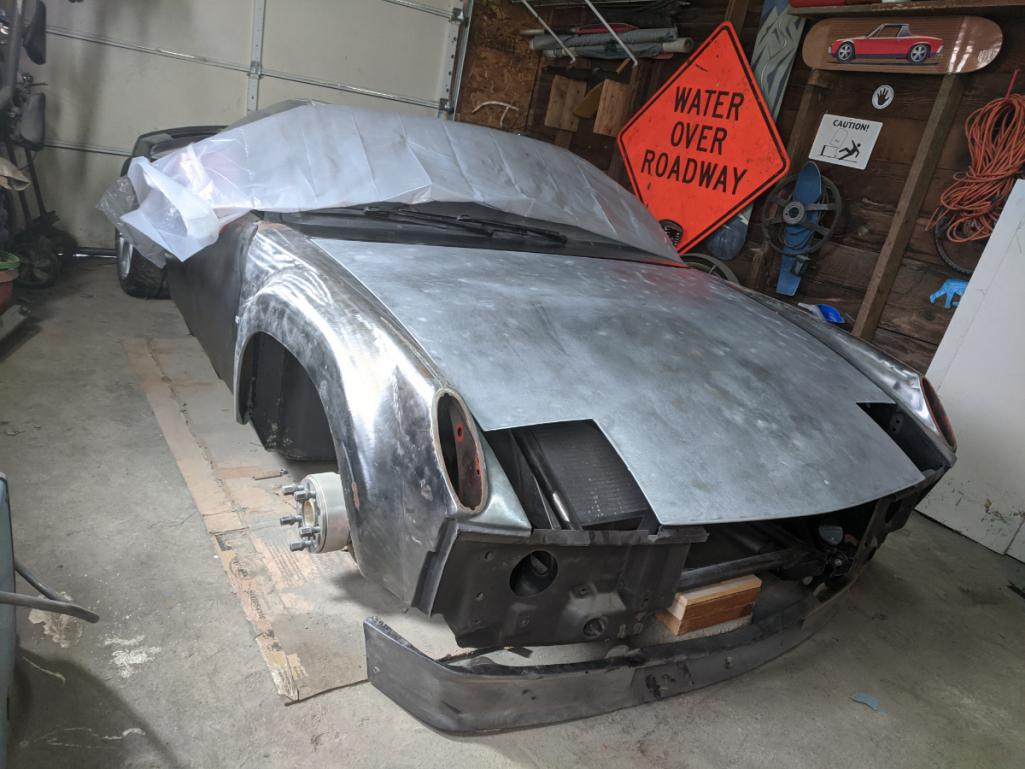
Posted by: Cairo94507 Apr 27 2020, 10:22 AM
Really taking shape now. Can wait to see it all buttoned up and running.
Posted by: plymouth37 Apr 27 2020, 10:22 AM
Cleaned up the back.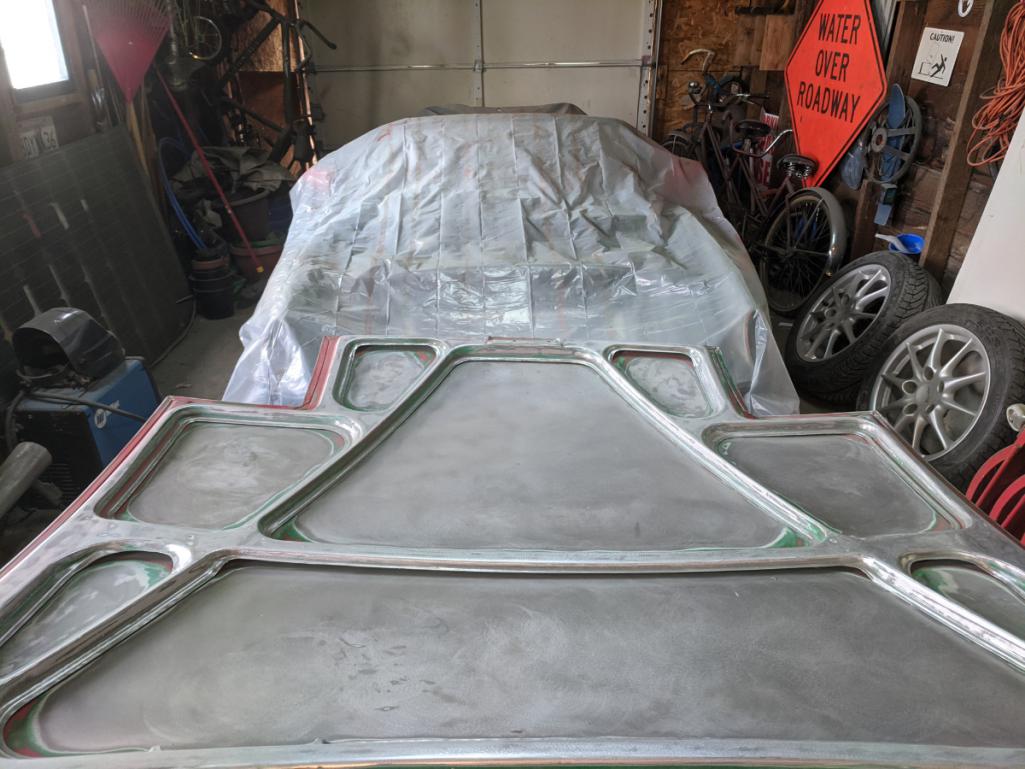
ohh shiny!
Oh the 220V to the garage is done too, trench is almost undetectable already!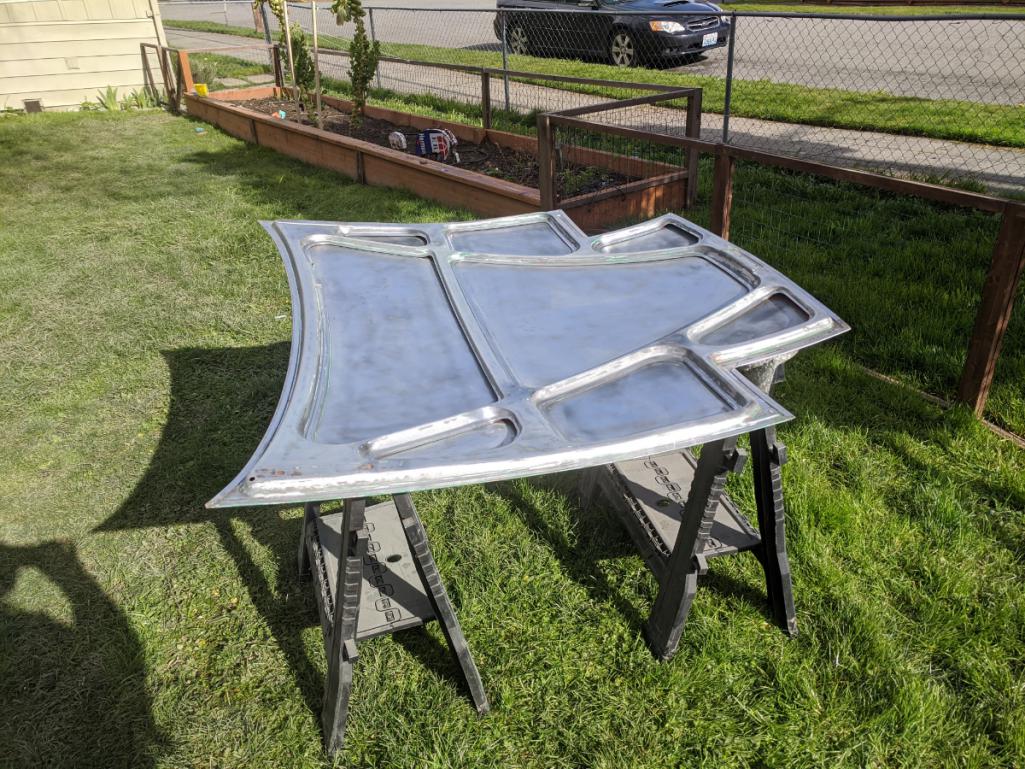
Then shot the whole thing in primer again, looks about the same as before but about 10 pounds lighter!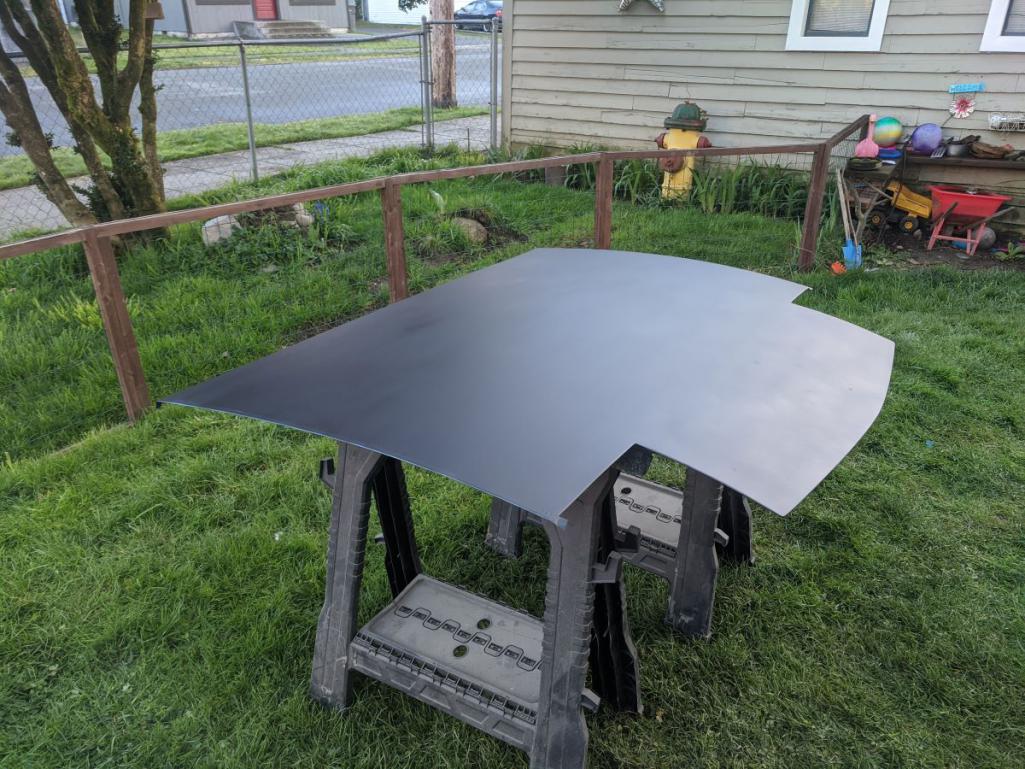
Posted by: dan10101 Apr 27 2020, 10:35 AM
Nicely done.
Posted by: Mueller Apr 27 2020, 11:38 AM
That tilting front end section is next level stuff, great job.
Posted by: 914werke Apr 27 2020, 11:39 AM
I thought you might strip the steel skin & replace it with Alum or FG.
Posted by: plymouth37 Apr 27 2020, 12:06 PM
I thought you might strip the steel skin & replace it with Alum or FG.
I am welding the lid to the fenders to make it a single piece, might take a mold off it when it's done.
Posted by: Root_Werks Apr 27 2020, 12:39 PM
I thought you might strip the steel skin & replace it with Alum or FG.
I am welding the lid to the fenders to make it a single piece, might take a mold off it when it's done.
You'd think you could lose some of the factory bracing since the hood won't have to support itself anymore. A little less weight. Very cool!
Posted by: plymouth37 Apr 28 2020, 08:34 AM
I am going to need to do 2 welds on each side of the hood to attach it to fill the panel gap. I cut a 1/4" wide strip of 1/8' steel and tacked it on.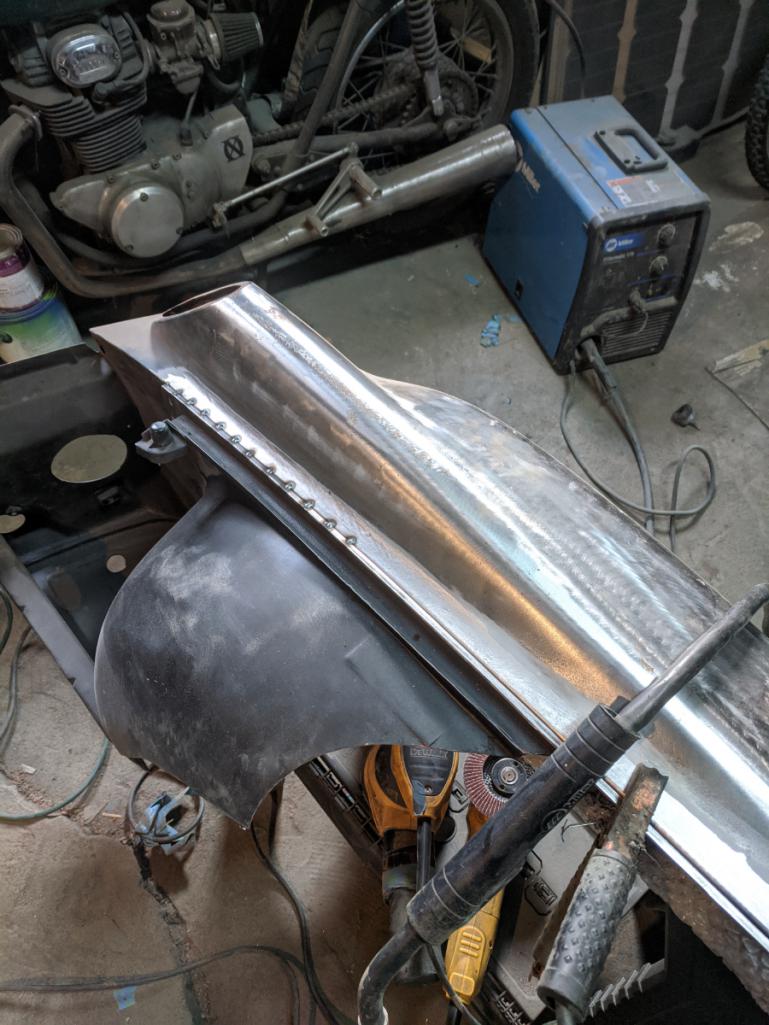
Between the fold in the fender and the 1/8" material I could sink some good heat into the tacks, but went slow and tacked every inch or so, then every 1/2" then slowly filled in the gaps.
3 feet of weld down, 9 more to go!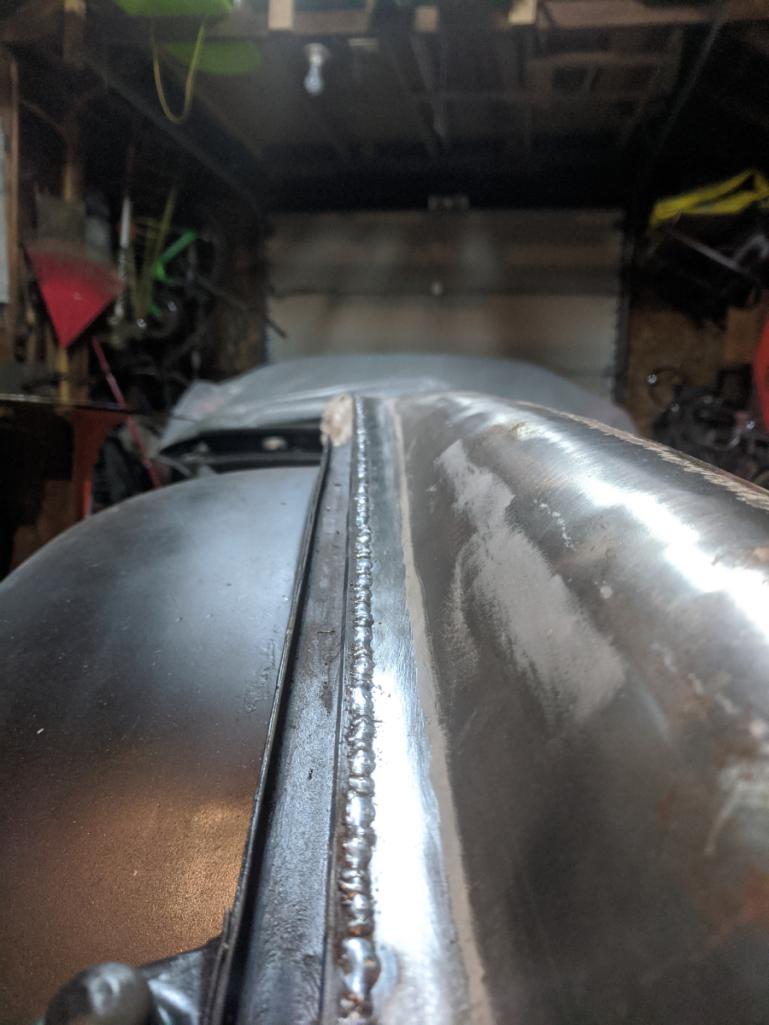
Posted by: sixnotfour Apr 28 2020, 12:04 PM
He had fiberglass F&R Hoods, My son and I drove over to WY. and traded, Bovy got the rear I have the head-lite delete front, Dana got steel F&R.. Late night Winter night trade...luckily the roads where open..
Wish I find the pic. of Chris standing next to the ANKLBTR.2011.
Posted by: Asheikh May 4 2020, 05:23 AM
do u still have your break active spoiler....? can you please share more information on it
I may make another one, that was a relay logic board (would use an arduino now) powering a couple linear actuators attached to a cut portion of the original trunk lid.
didn't have it for long, can't even find a pic!
I found the https://drive.google.com/open?id=13hqo7esC294rQsTpUWjMpv8lcHLn13iQ for it. I downloaded it 13 years ago
Posted by: plymouth37 May 4 2020, 11:07 AM
I got both filler strips welded on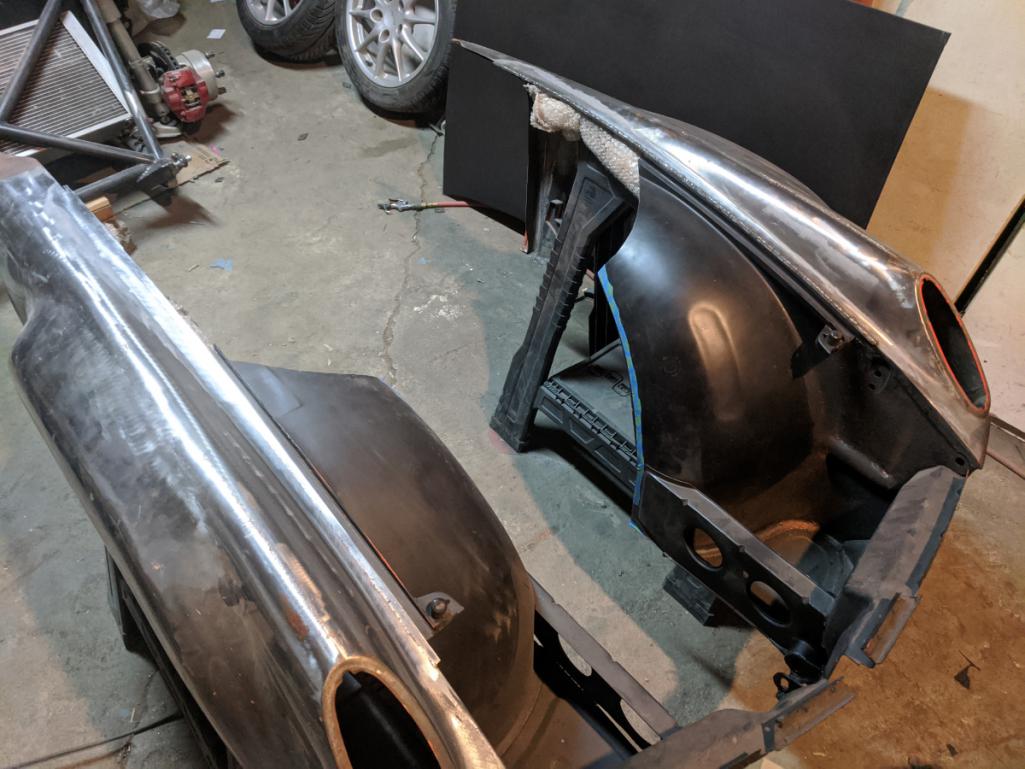
Ground the weld down 75% of the way or so, filler strips are also still wide.
You can see I also masked the edges of the hood when I primered it so I have a clean edge to weld to, forethought? What's that?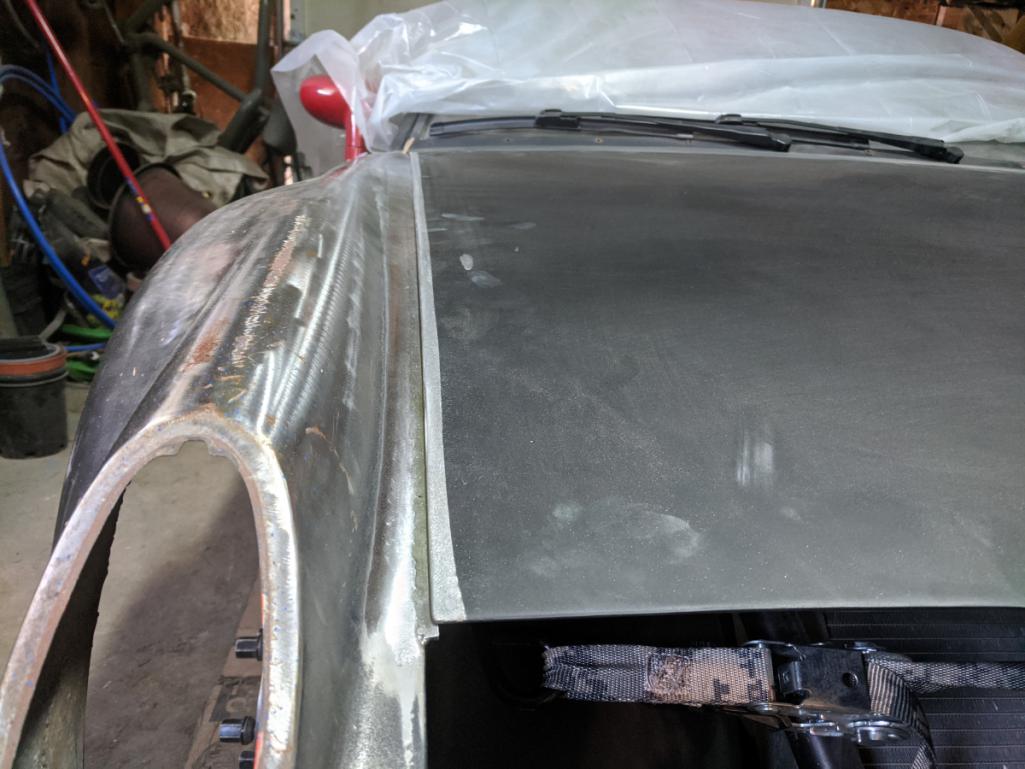
I mounted the fenders, laid the lid on them, now I will mark and cut the hood opening, then weld it in.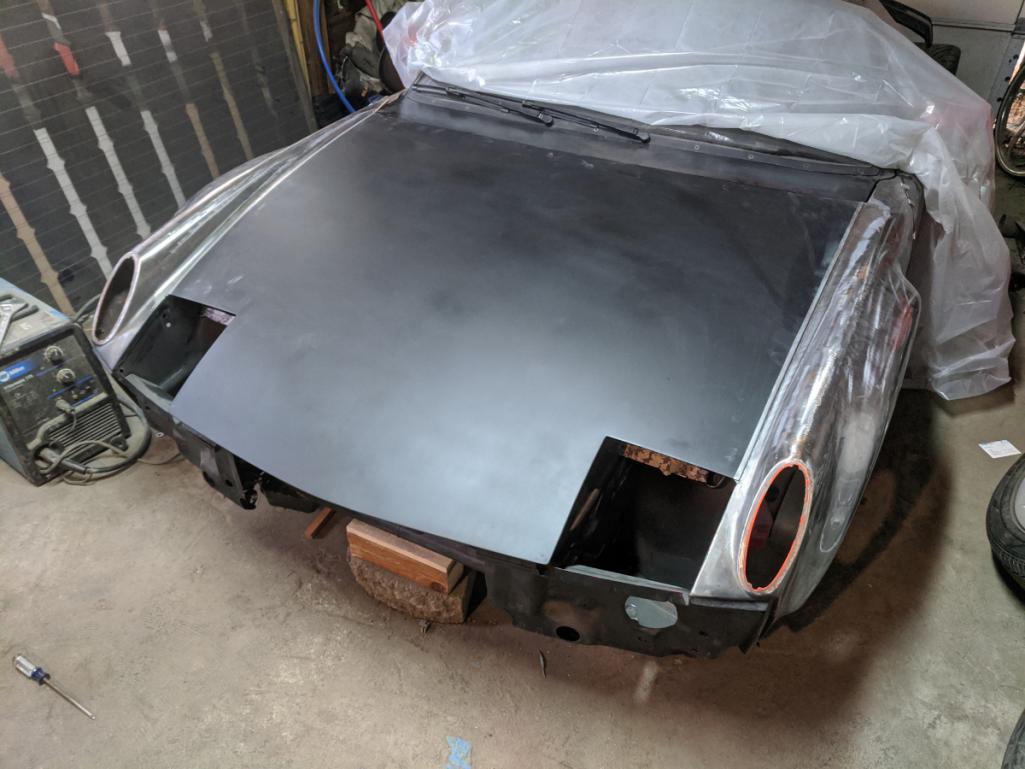
Posted by: plymouth37 May 4 2020, 11:20 AM
do u still have your break active spoiler....? can you please share more information on it
I may make another one, that was a relay logic board (would use an arduino now) powering a couple linear actuators attached to a cut portion of the original trunk lid.
didn't have it for long, can't even find a pic!
I found the https://drive.google.com/open?id=13hqo7esC294rQsTpUWjMpv8lcHLn13iQ for it. I downloaded it 13 years ago
haha, forgot how cool that was! Damn I look young!
Posted by: plymouth37 May 18 2020, 04:06 PM
I got the fenders aligned and mounted.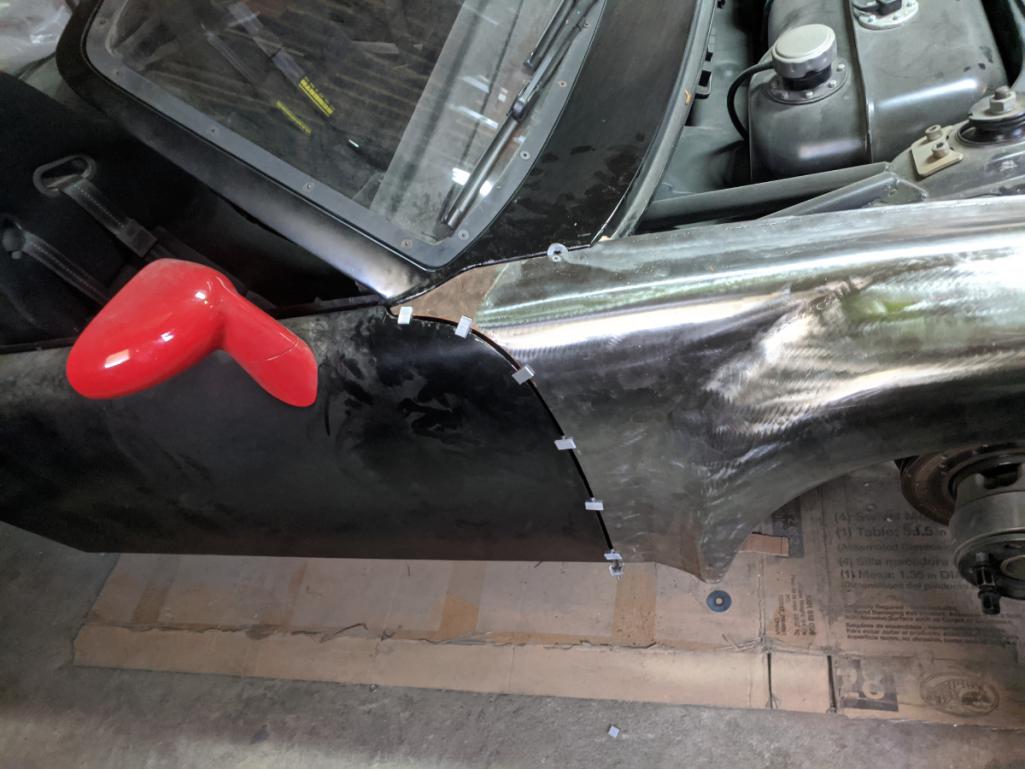
Cut down my oversized fenders to fit the lid, (sheetmetal screw included for added accuracy).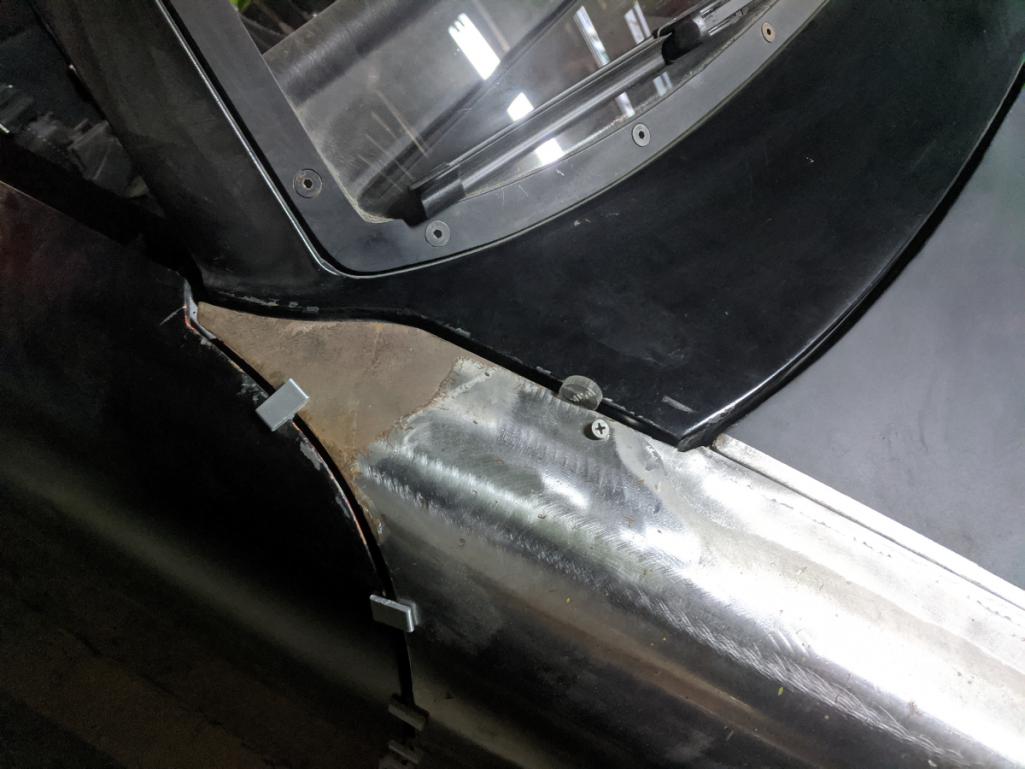
Here we go!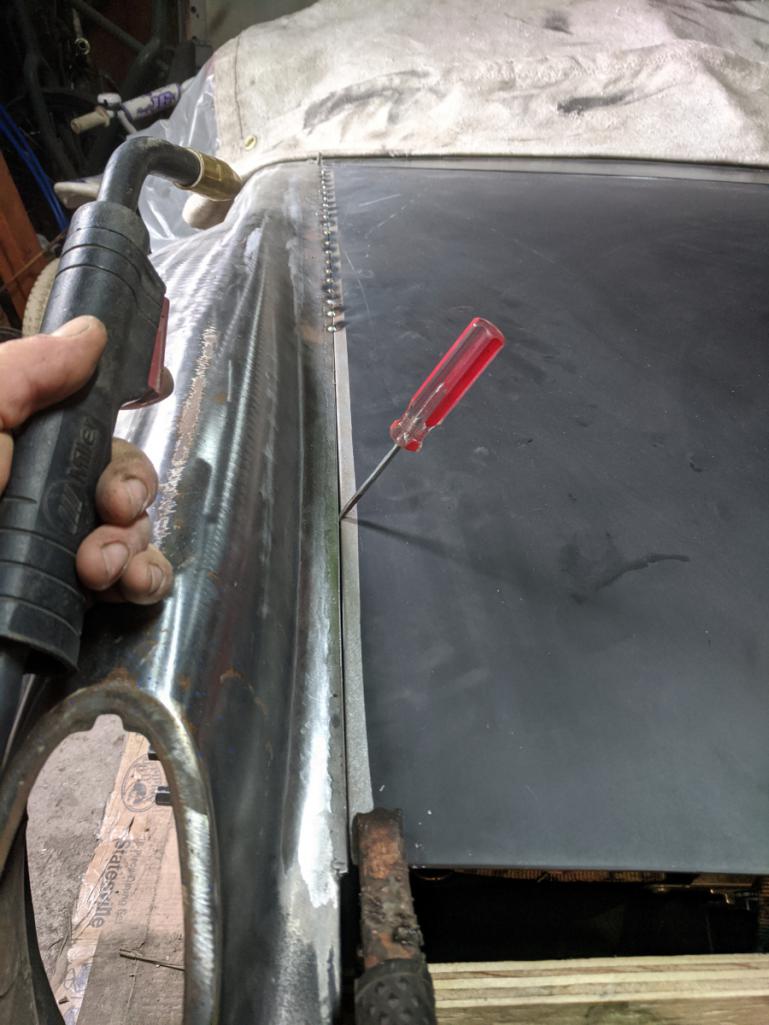
Hood is tacked on, gaps still look good, time to fully weld the lid on and move on to rebuilding the front inner sheet metal.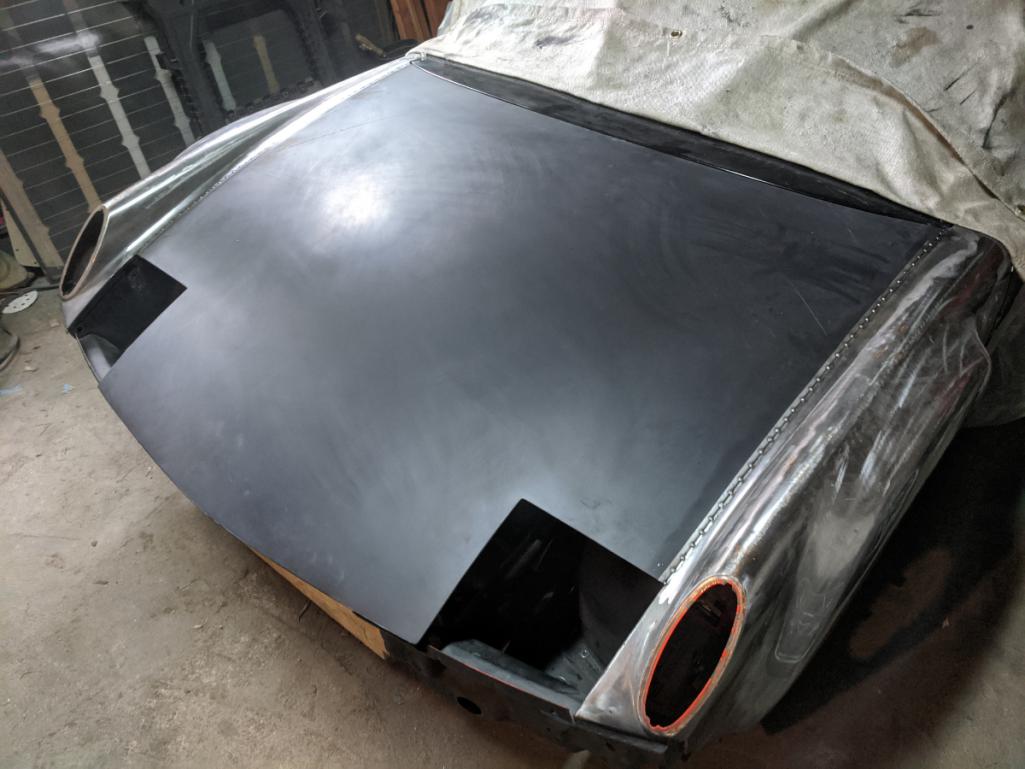
Posted by: plymouth37 Jun 3 2020, 03:08 PM
Finished welding the lid on, also welded in a filler panel for the old radiator opening.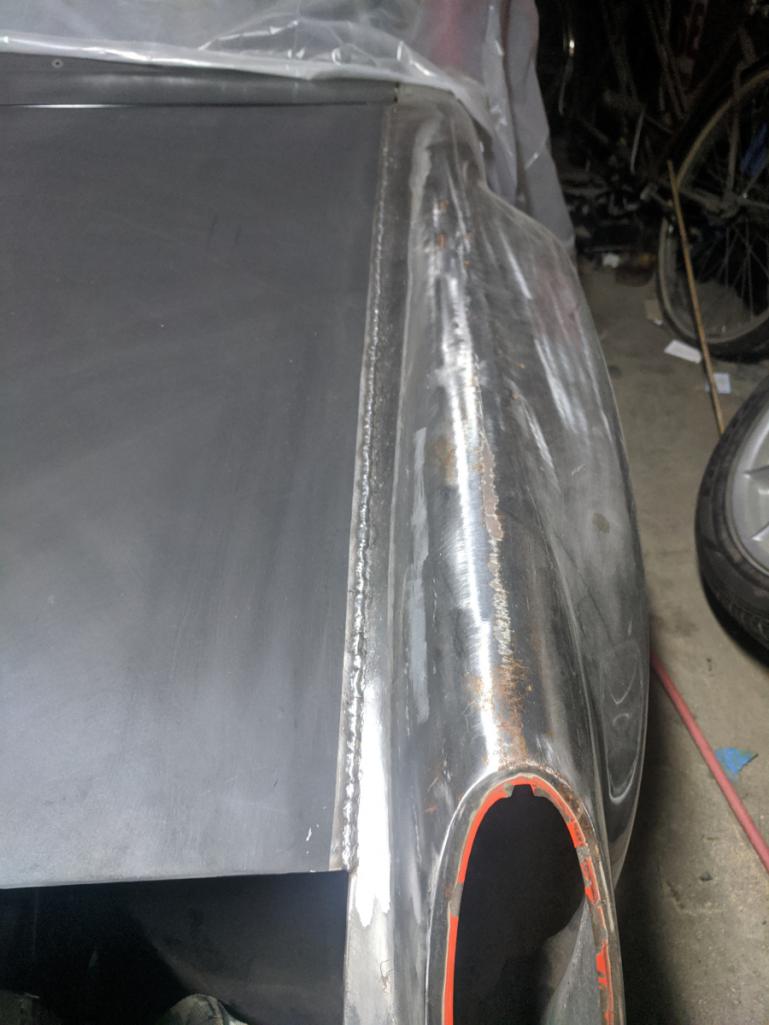
I am going to re-cut the front opening once I get the bumper figured out but I really think the hole can be much smaller than it was before. We were just copying the design for the V8 cars at the time but I think that is way oversized now that I have lived with the car for a while.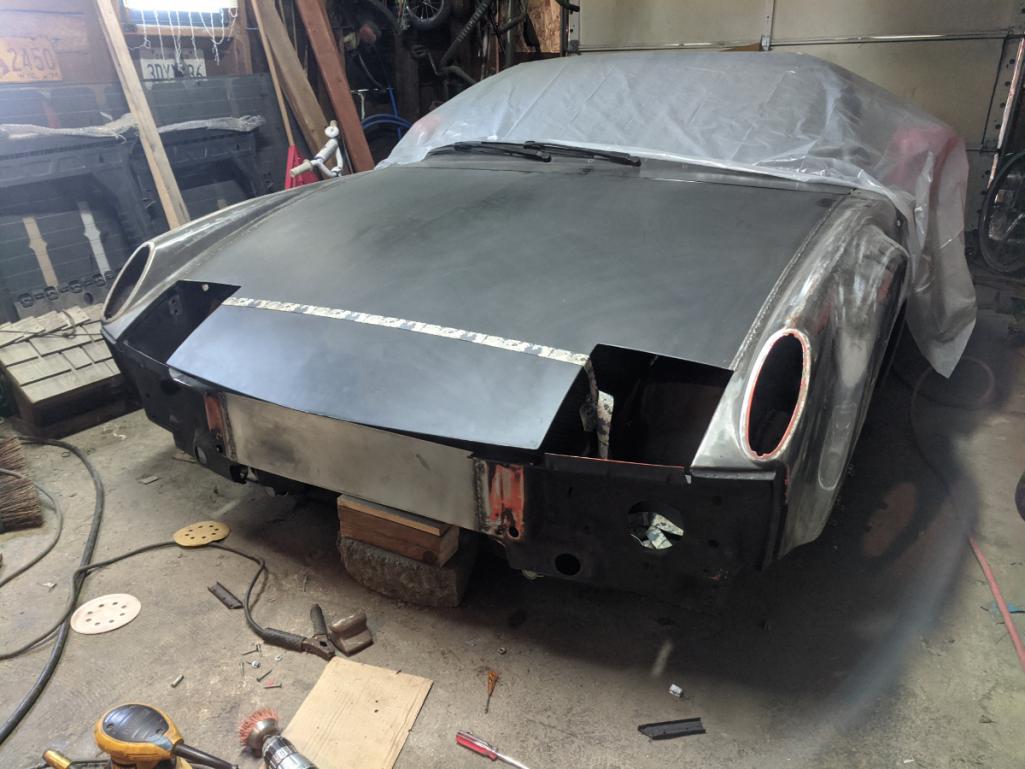
Then I finished the welds, should be able to finish this seam with a light skim coat of filler.
(found another dent in the hood too )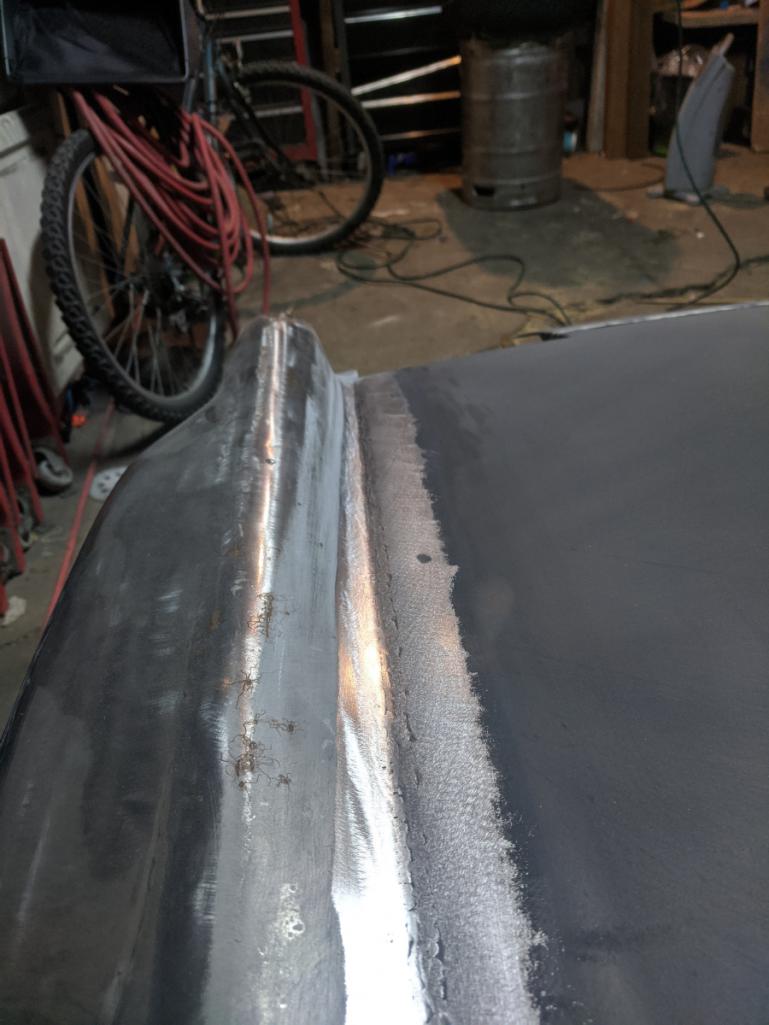
Next I am going to rebuild the structure that attaches the front hood structure to the nose of the car and make some headlight filler pieces.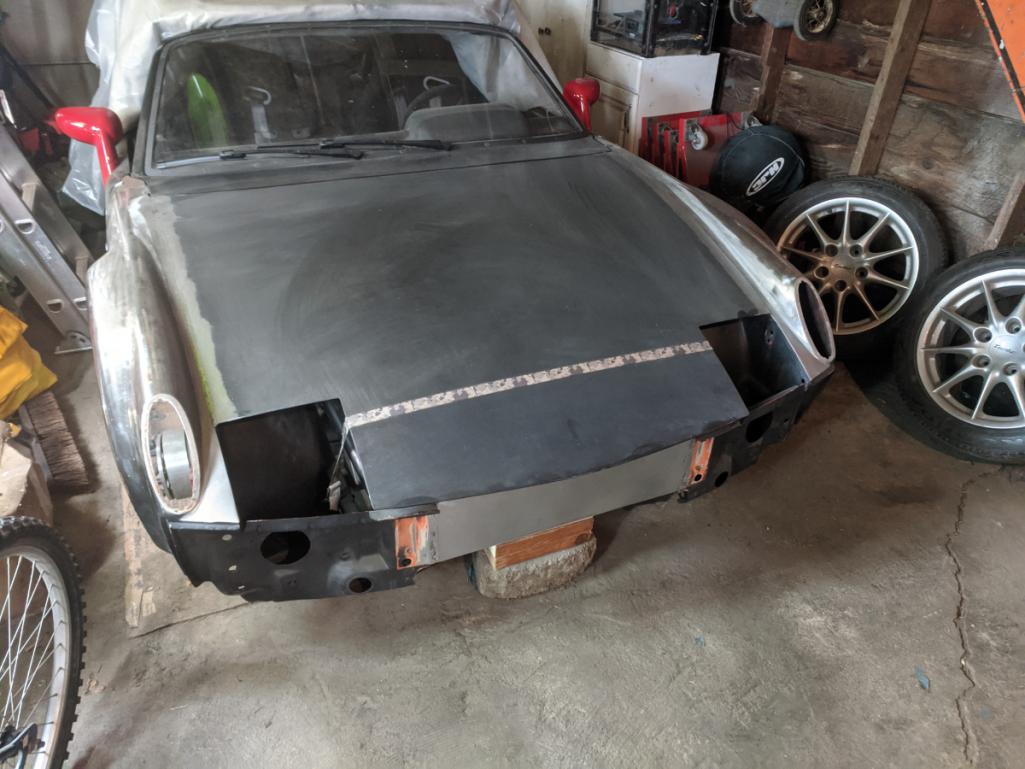
Posted by: Matty900 Jun 7 2020, 04:36 PM
Awesome work Dana!! Keep the momentum going
Posted by: 76-914 Jun 7 2020, 05:11 PM
The more I see of your work the more I realize how little I know!
Posted by: flyer86d Jun 7 2020, 05:48 PM
This is my favorite build!
Charlie
Posted by: Andyrew Jun 8 2020, 08:33 AM
Way to cool!
Posted by: JRust Jun 8 2020, 01:34 PM
Hell yeah Dana that is looking great
Posted by: horizontally-opposed Jun 8 2020, 01:44 PM
Next I am going to rebuild the structure that attaches the front hood structure to the nose of the car and make some headlight filler pieces.
Awesome work as usual. Such a cool build.
Pic above reminds me: Why does the 914's nose always look so good when the headlights and their trims are missing? There's just something right about those voids in relation to the other shapes of the front end.
Not that I know what to do with them...other than fill them or reinstall the headlights.
Posted by: plymouth37 Jun 19 2020, 01:16 PM
Next I am going to rebuild the structure that attaches the front hood structure to the nose of the car and make some headlight filler pieces.
Awesome work as usual. Such a cool build.
Pic above reminds me: Why does the 914's nose always look so good when the headlights and their trims are missing? There's just something right about those voids in relation to the other shapes of the front end.
Not that I know what to do with them...other than fill them or reinstall the headlights.
I totally agree, I was admiring the proportions of those openings as well, but yeah what do you do with that information is a harder question.
Vector W8 pop-down headlights?
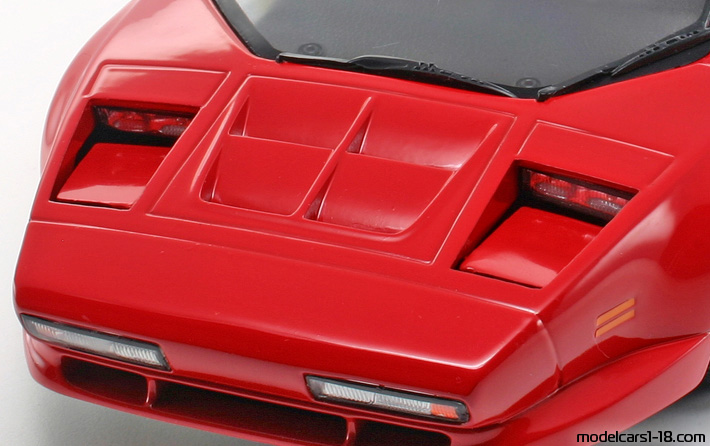
Posted by: plymouth37 Jun 19 2020, 01:34 PM
Whipped up some cad templates...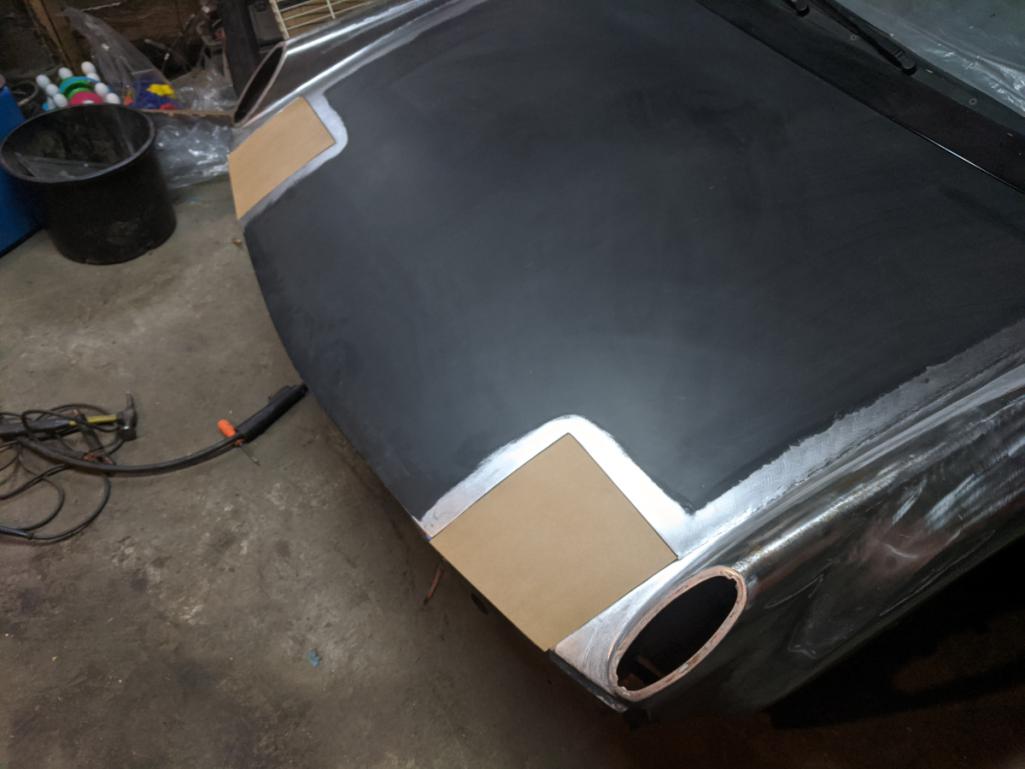
Transferred them to steel.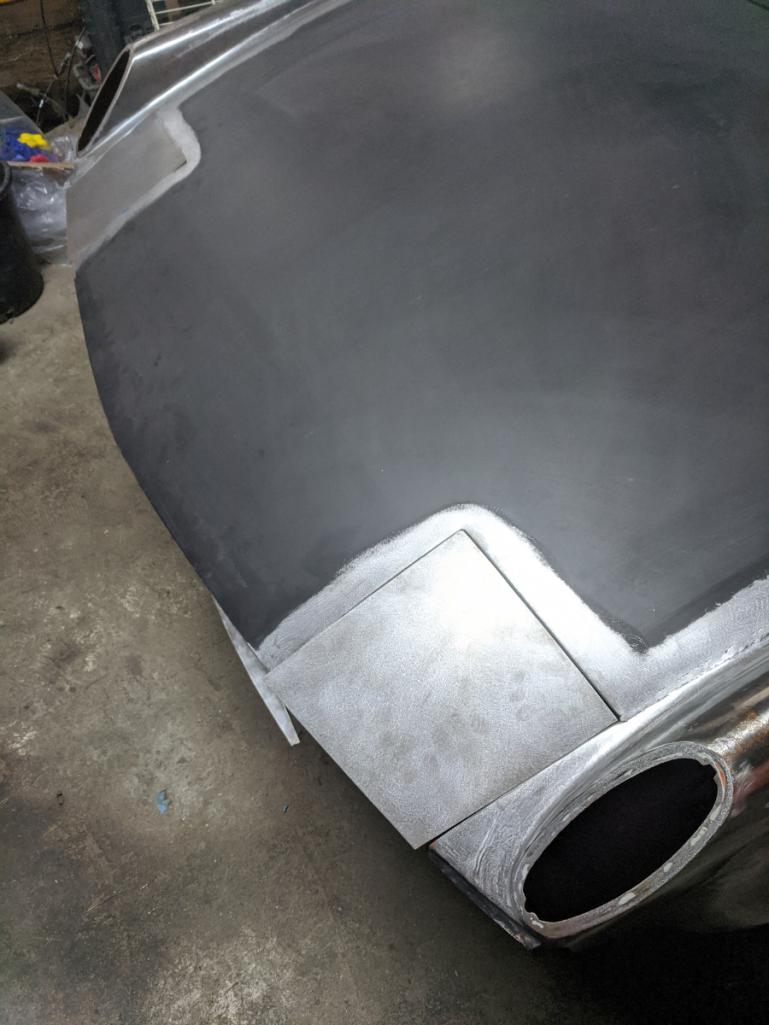
Tacked them in.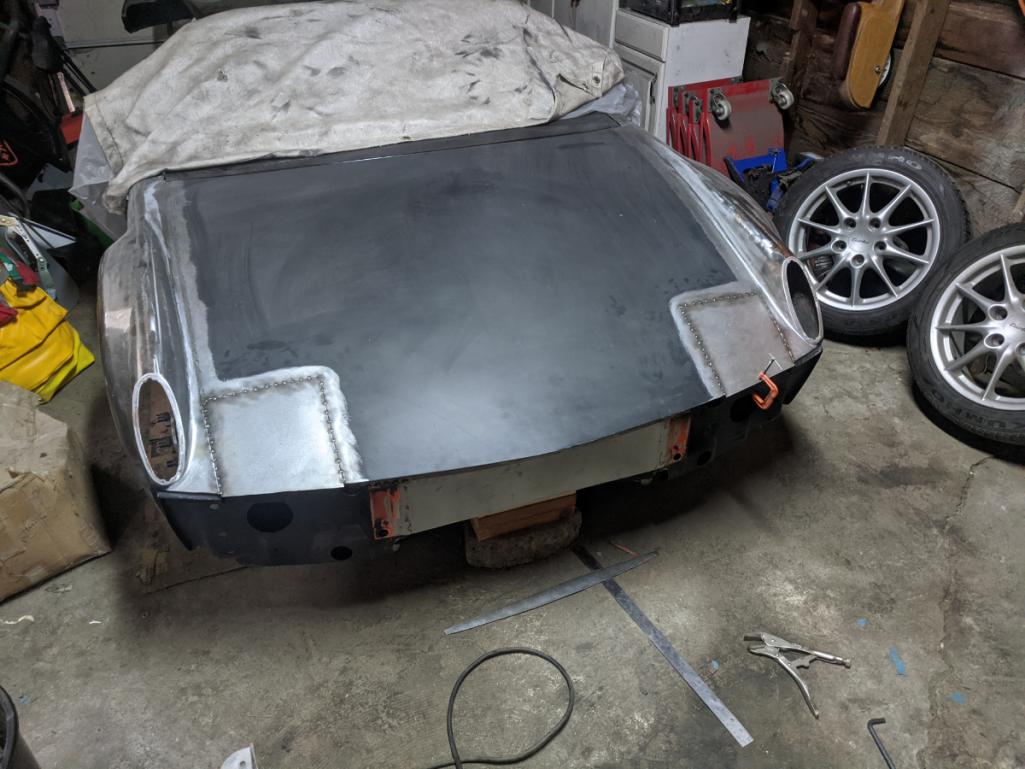
Finished the welds to about 90% and shaped the front edge, need to rethink the cowl separation line next then we can do a test tilt with the complete nose!
Posted by: eric9144 Jun 19 2020, 06:38 PM
Posted by: Rand Jun 20 2020, 11:23 AM
Really like the updates. This project is too epic to die. Gotta be tough keeping it alive with everything else in life, but dooood!! Cheering for you.
Posted by: Rand Jun 20 2020, 11:26 AM
I always wanted to shave the popup headlights. But they have grown on me and they are a part of the soul of the car. Don't look back I guess. Where will the new headlights go? Not that DOT matters.
Posted by: horizontally-opposed Jun 20 2020, 02:58 PM
I totally agree, I was admiring the proportions of those openings as well, but yeah what do you do with that information is a harder question.
Vector W8 pop-down headlights?
Totally missed this—apologies. Your Vector-style pop-down headlights are a genius idea...would provide a change to keep the shape of 914 headlights without the "busy" brow.
Tacked them in.
Finished the welds to about 90% and shaped the front edge, need to rethink the cowl separation line next then we can do a test tilt with the complete nose!
Buuuut, you are well on your way now. Suspect this will also look great.
Posted by: B.Curvin Feb 2 2021, 06:16 AM
Awesome awesome awesome. First post here. I read the your whole thread. Any updates?
Posted by: Dion Mar 30 2021, 08:12 AM
What an amazing build. Just read this whole thread. Wow.
Posted by: badcatt May 9 2021, 09:21 PM
I'm looking forward to the next instalment of The Anklebiter Build. I hope the winter was good to you.
Posted by: Rand May 9 2021, 09:37 PM
Snort. Slough. Snithch. Dang, you wake me up. Snnghgph.
Sometimes work and life gets in the way. Imagine that.
Posted by: Shivers May 10 2021, 12:19 PM
do u still have your break active spoiler....? can you please share more information on it
I may make another one, that was a relay logic board (would use an arduino now) powering a couple linear actuators attached to a cut portion of the original trunk lid.
didn't have it for long, can't even find a pic!
I thought that video was so cool. That brake looked functional.
Posted by: siverson Oct 9 2021, 01:59 PM
I love this build and hope to see it in person some day.
-Steve
Posted by: AZBanks Mar 10 2022, 07:56 PM
Any new developments?
Posted by: 914werke Nov 3 2022, 01:23 PM
Hey Dana here is a ![]()
hope you are still tweezing on the Anklebiter.
Posted by: KELTY360 Nov 3 2022, 03:46 PM
Hey Dana here is a
hope you are still tweezing on the Anklebiter.
@http://www.914world.com/bbs2/index.php?showuser=4138 hope you’re doing well these days, Dana.
Posted by: plymouth37 Nov 9 2022, 05:43 PM
I'm BAAACK! Actually, I never really left, just did a couple other projects, built a house, took about a year off the car, but never fear, progress has been made, and now it is time to share the last year of work with you.
Here is where I left off, the front clamshell was just about together, just waiting for a bumper and some bodywork: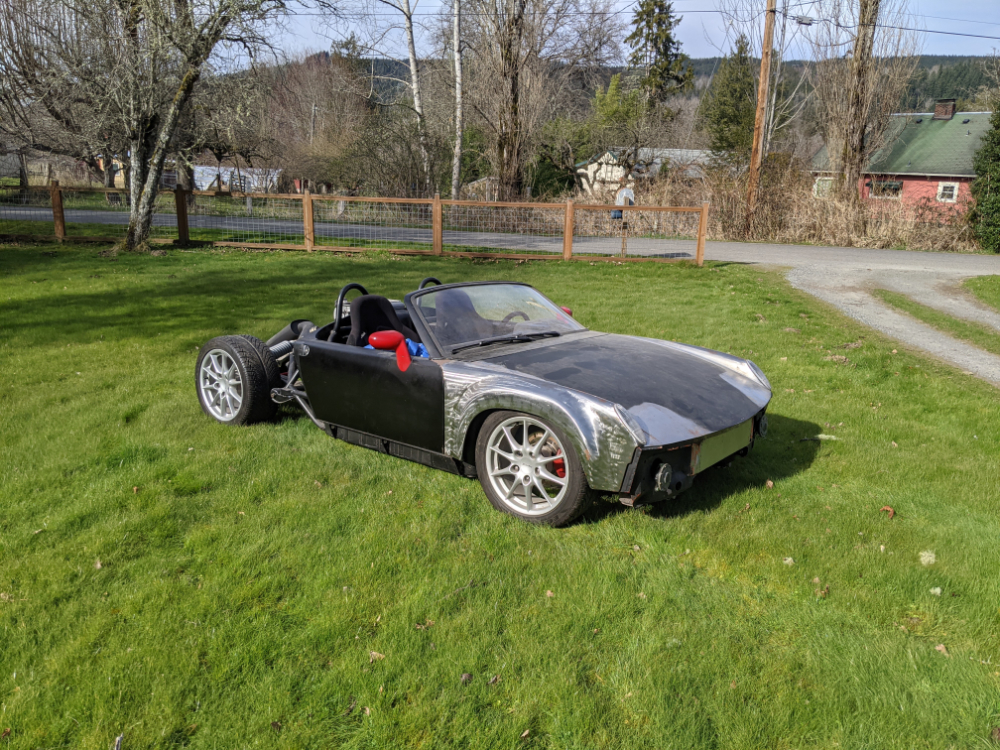
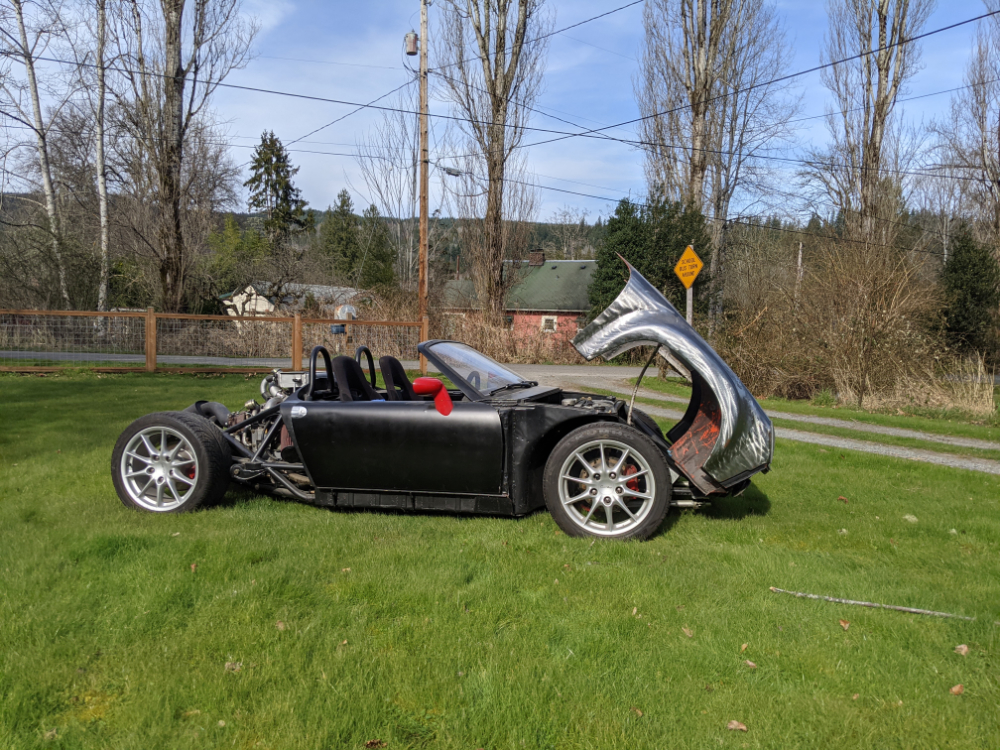
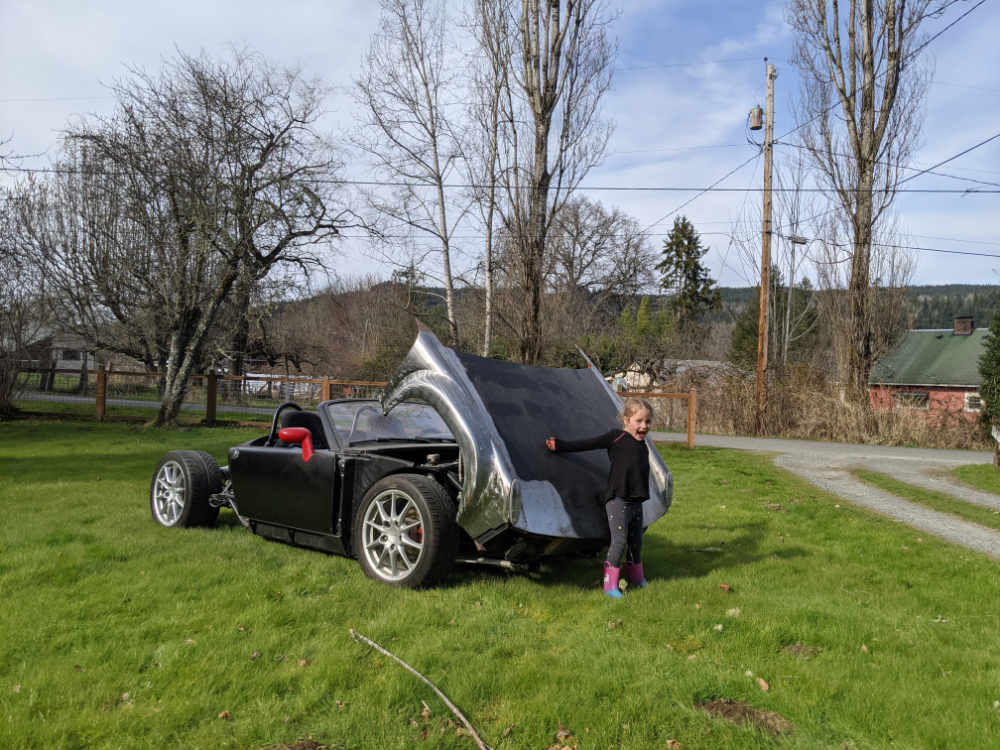
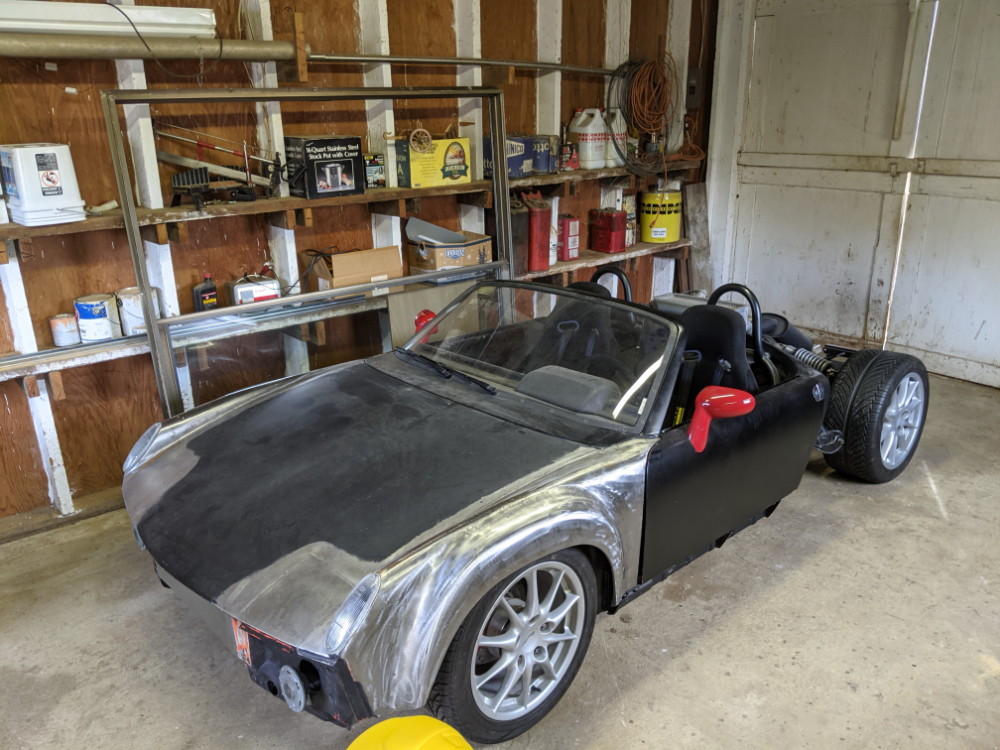
Posted by: plymouth37 Nov 9 2022, 05:44 PM
I went to bolt on my fiberglass stock-ish bumper and just could not talk myself into liking the look of it, I have just modified this car too much to bolt on something off the shelf. I started researching 916 bumpers and a post on 914 world resonated with me, someone complained that fiberglass 916 bumpers fit so bad that they might as well build one themselves, so that is what I planned to do. The new bumper will be made from steel and modeled after a new take on the 916/Porsche design aesthetic.
This is my design inspiration board, a hint of 916, some contemporary Porsche, and a hint of the similarly styled wrx.
Using the wrx grills as a loose starting place I did some sketching in Photoshop to get in the ballpark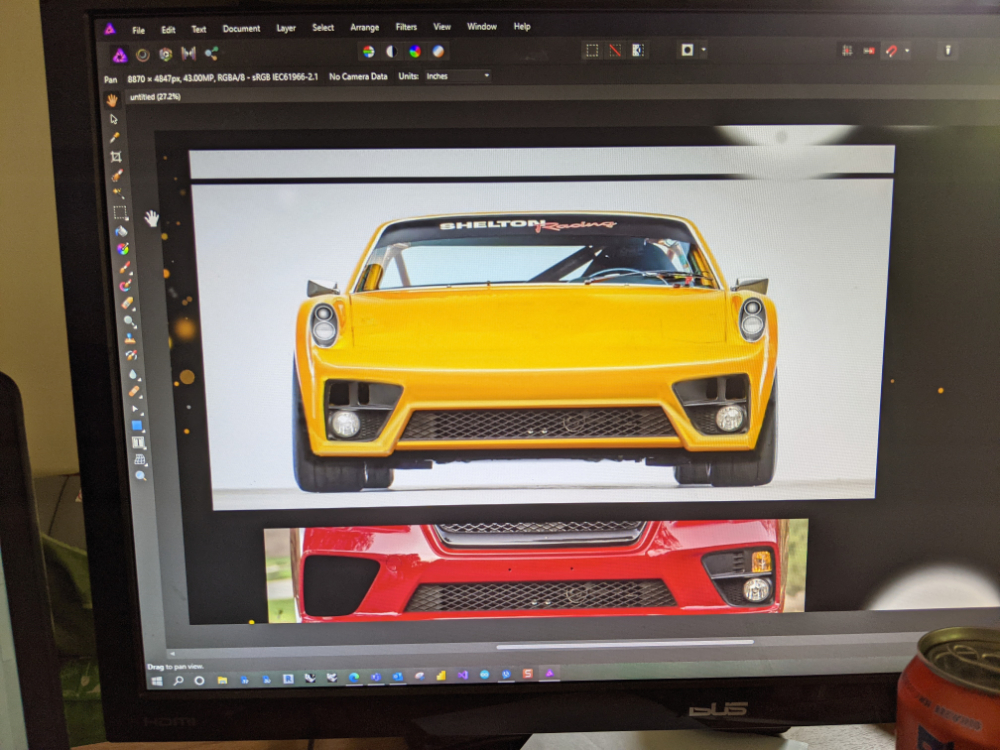
Posted by: plymouth37 Nov 9 2022, 05:44 PM
I started feeling out the shape by buying a 2014 wrx grill set and trying to integrate them into the 914 with chip board, still rough but I am starting to get a sense of the 3-dimensional shape that will be required to get everything to flow together.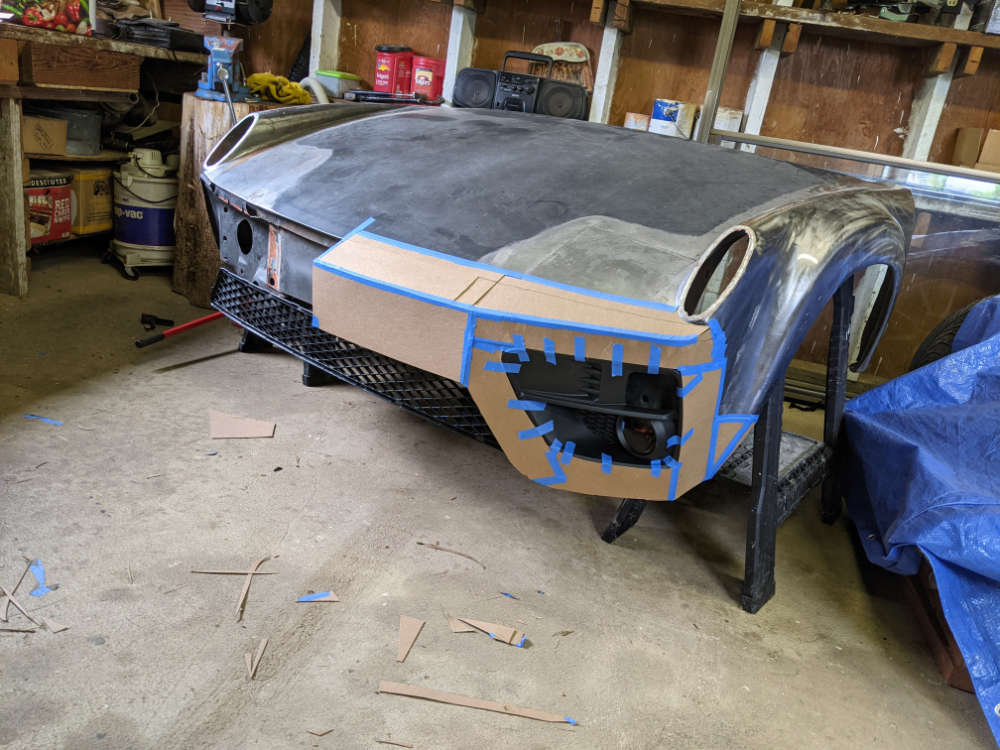
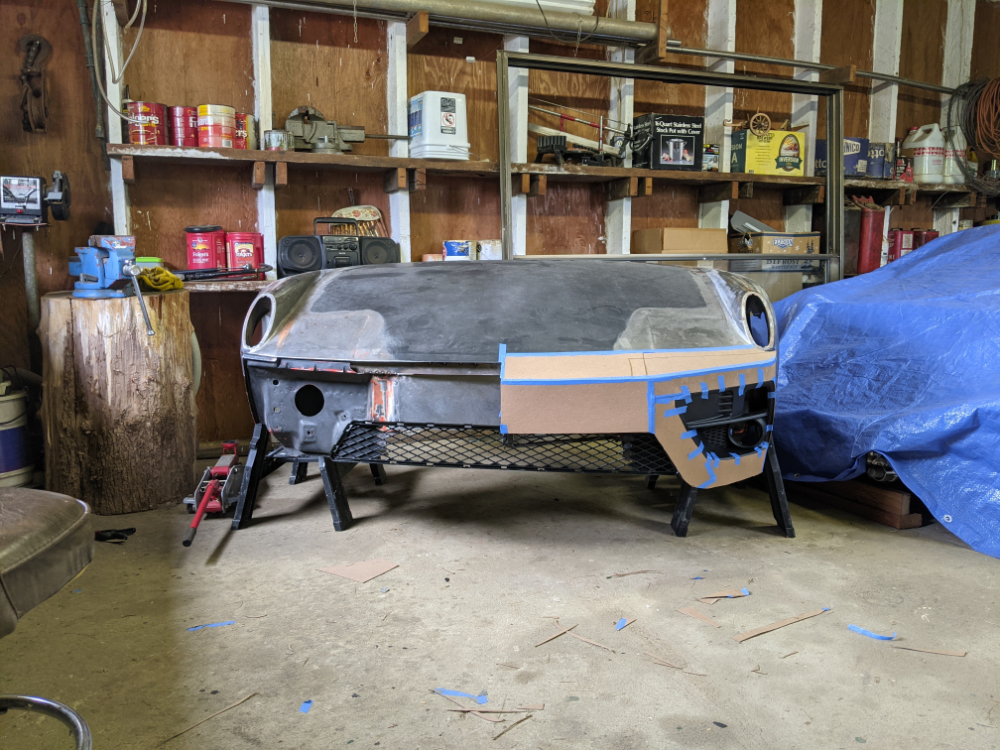
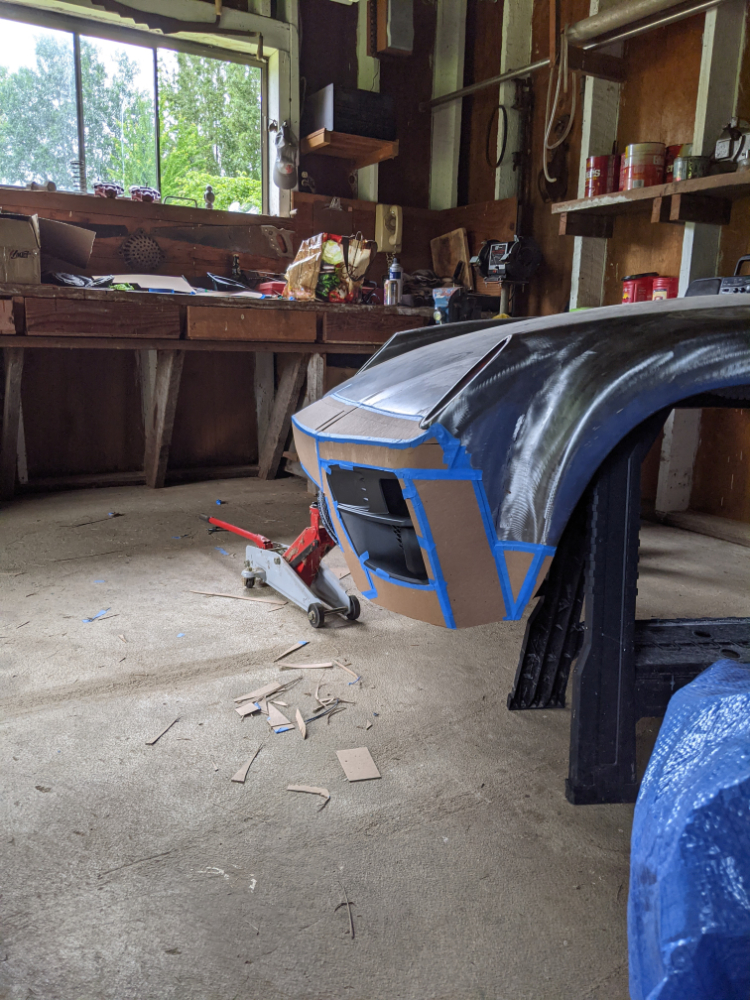
Posted by: plymouth37 Nov 9 2022, 05:44 PM
After I got that in the ballpark I remade my templates and mirrored them for the other side, there are still some waves in the template seams but I have a trick for that.
Stay tuned for next week where I get out the tubing roller and start welding in some structure!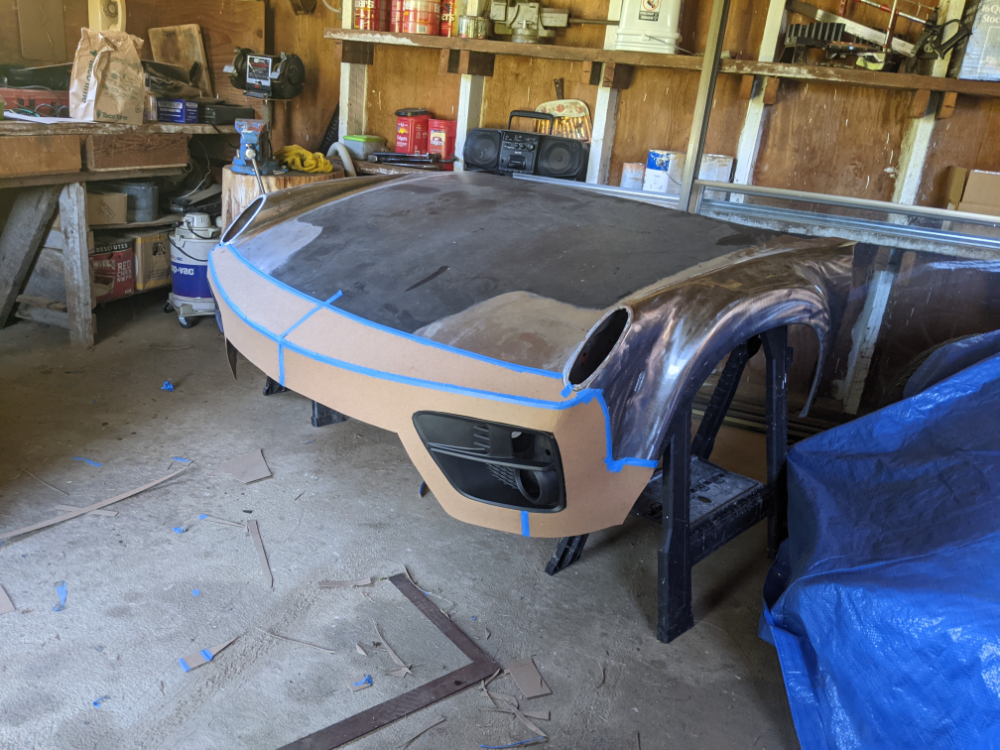
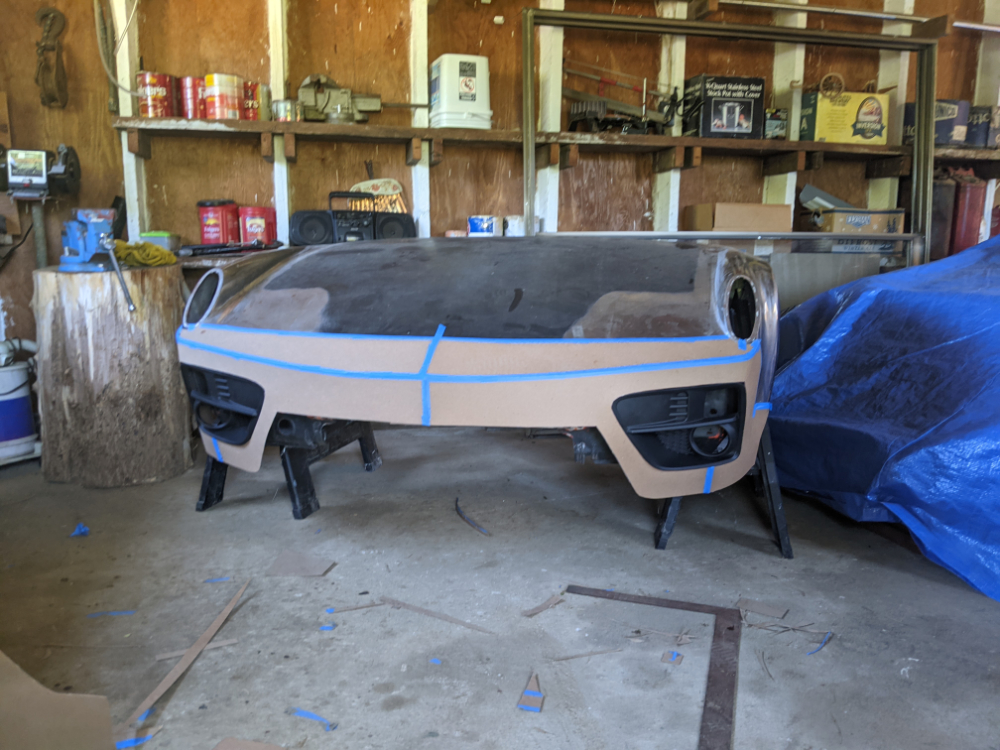

Posted by: plymouth37 Nov 9 2022, 05:46 PM
Hey Dana here is a
hope you are still tweezing on the Anklebiter.
@http://www.914world.com/bbs2/index.php?showuser=4138 hope you’re doing well these days, Dana. Hi Friends! Thanks for checking in!
Posted by: 914werke Nov 9 2022, 06:49 PM
Posted by: 914Sixer Nov 9 2022, 07:22 PM
Really like the look, late Cayman style
Posted by: burton73 Nov 9 2022, 08:01 PM
Great to see you back on this fantastic build. Very tasteful custom job
Best Bob B
Posted by: g911 Nov 9 2022, 08:05 PM
Posted by: infraredcalvin Nov 9 2022, 10:33 PM
I think you nailed it with your design, fits right in with overall car aesthetic. Only critique I have (and it’s an over the top item) is the big plastic inserts, including the grill don’t tie into the all metal look of the car….
Posted by: Krieger Nov 9 2022, 11:34 PM
WOW! This might be my all time favorite front end for the 914. I can't wait to see your work on this!
Posted by: JeffBowlsby Nov 10 2022, 07:58 AM
Followed this for a long time, what a great project.
You have good eye for design Dana, obviously. Does the non-parallel curvature of the outer bumper edge and front trunk lid edge give you any pause or concern?
Posted by: autopro Nov 10 2022, 10:22 AM
That front end is coming out great!
Posted by: rjames Nov 10 2022, 10:50 AM
Love what you're doing for the front end!
Posted by: siverson Nov 10 2022, 10:56 AM
Wow! Nice work!
Posted by: r_towle Nov 10 2022, 09:42 PM
I’m so happy you are still working on this!
Posted by: tazz9924 Nov 11 2022, 06:53 AM
This is one of the two (likely more) main cars that inspired me to build mine!
Posted by: Cairo94507 Nov 11 2022, 07:43 AM
So glad to see progress on your car Dana. I like the direction the front end is taking.
Posted by: plymouth37 Nov 12 2022, 08:17 PM
One of the most distinctive design characteristics of many Porsches new and old is the rounded transition from the hood surface to the vertical bumper surface, as you can see in this random assortment of Porsche bumpers:
This would be a really hard dual curvature piece to fabricate so I figured out a hack, I bought a relatively cheap tubing roller at Harbor Freight and some .0625 wall 1.5" tubing and rolled the shape I wanted into it. It isn't a continuous curve, it is a little more rounded in the middle, and a hair flatter around the side grill areas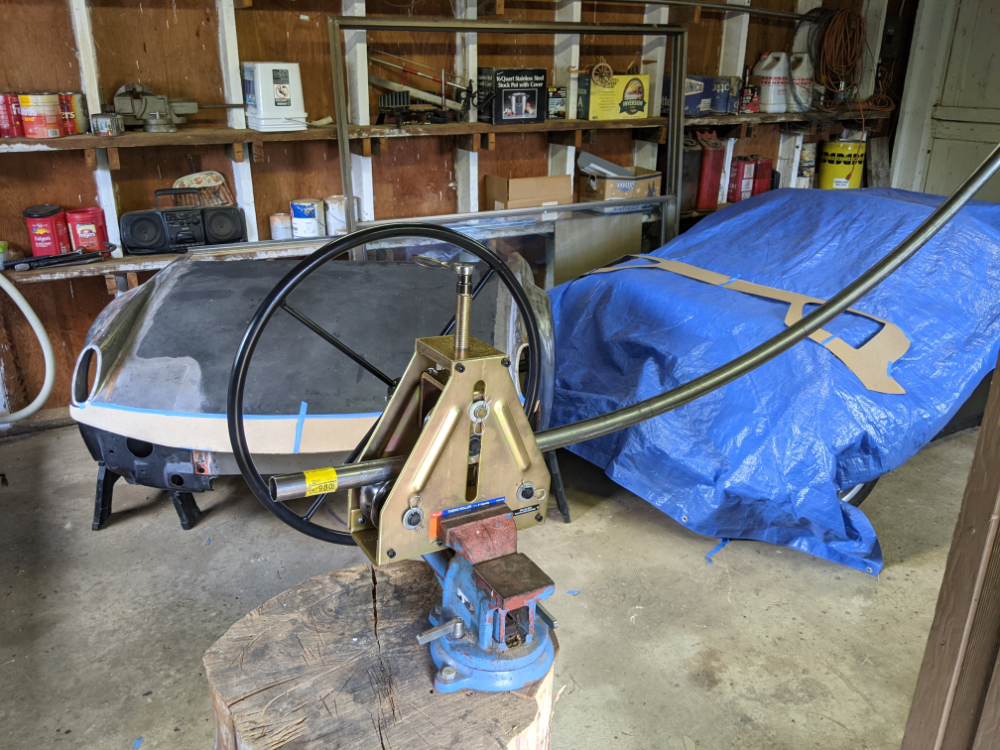
Then I duct taped it into place: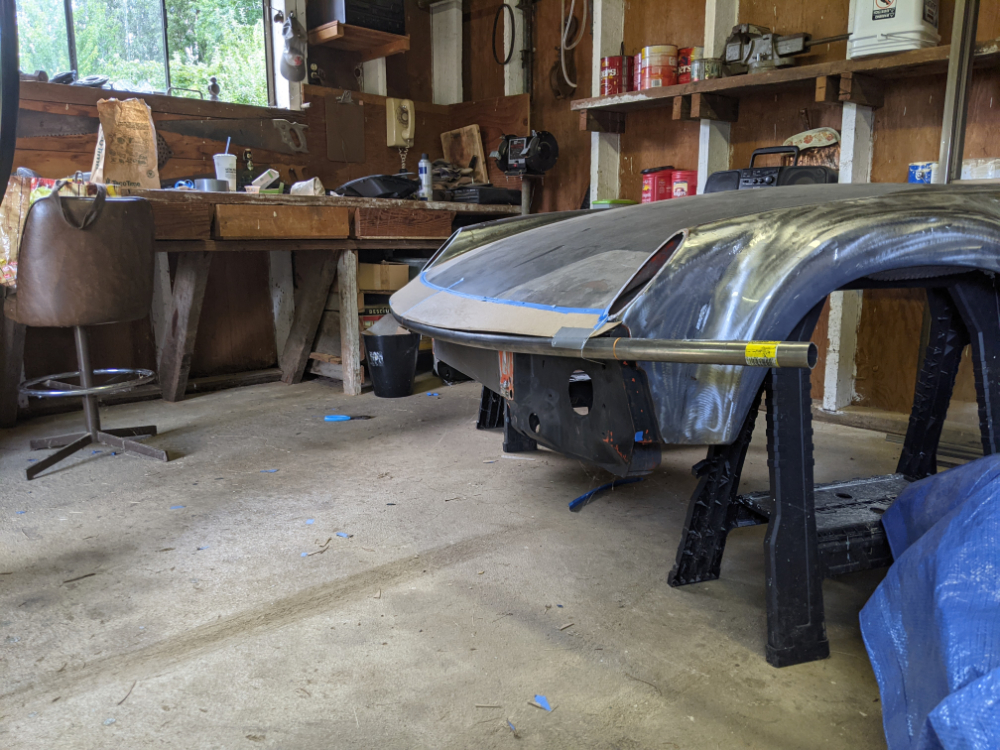
I had initially planned to cut out a quarter of this tube and butt weld it to the other sheet metal but it doesn't weigh much, and i kind of like the idea of an integrated bash bar in here so I think I will leave it whole and build the rest of the bumper around it.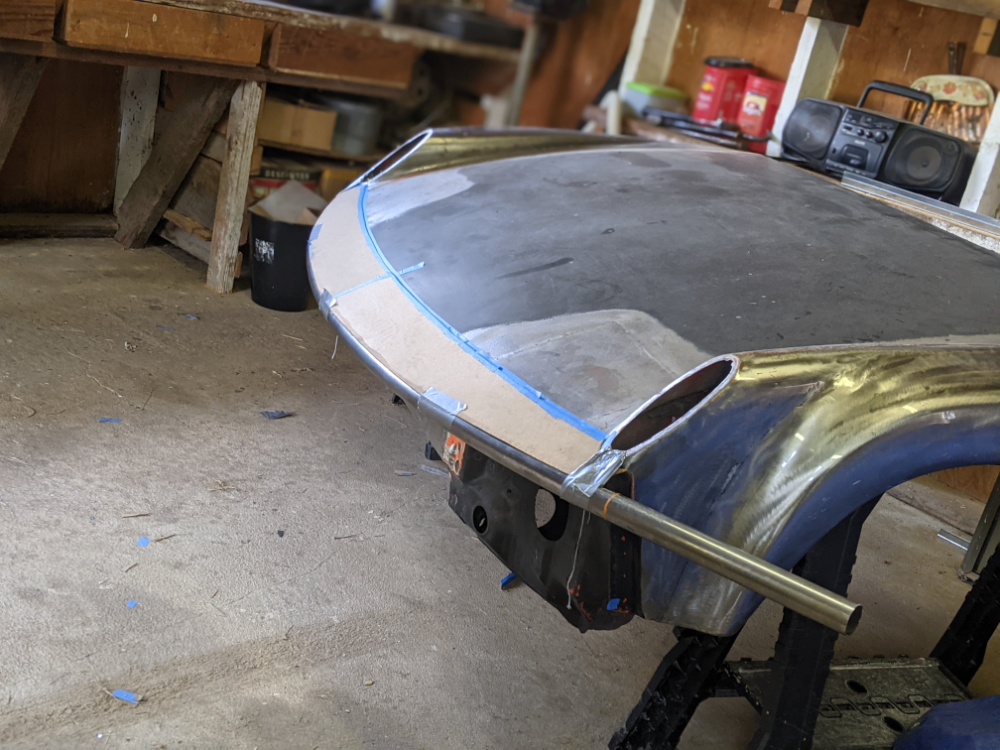
Posted by: plymouth37 Nov 12 2022, 08:17 PM
After rolling out the tube I cut out some sheet metal for the hood extension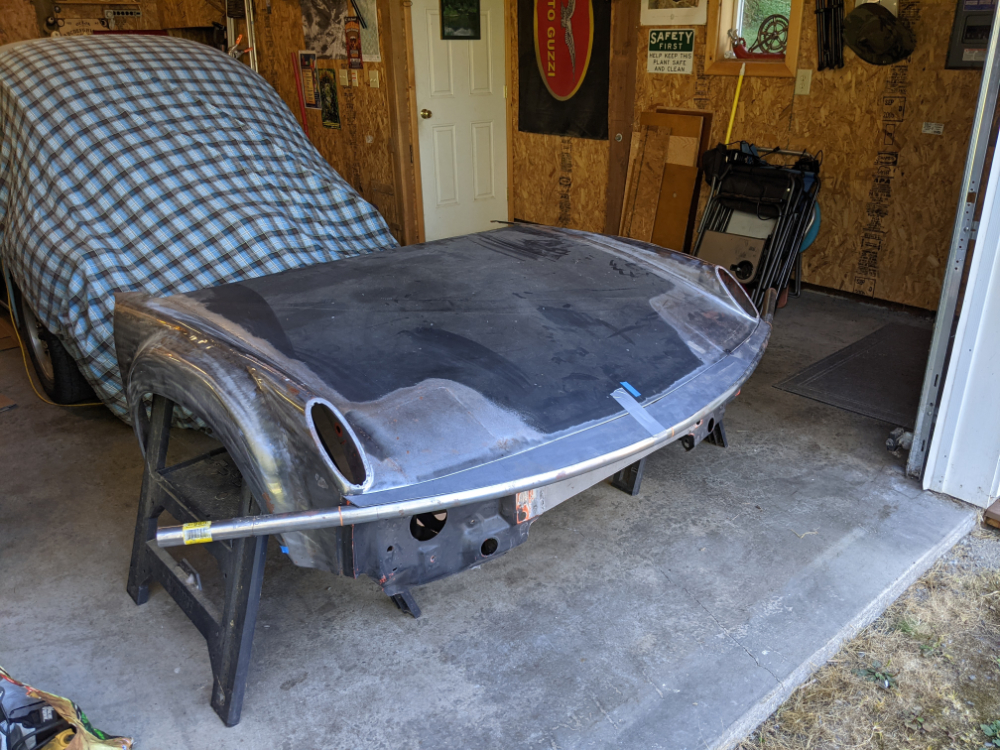
Then welded the tube to the inner structure of the nose, and tacked the hood metal into place: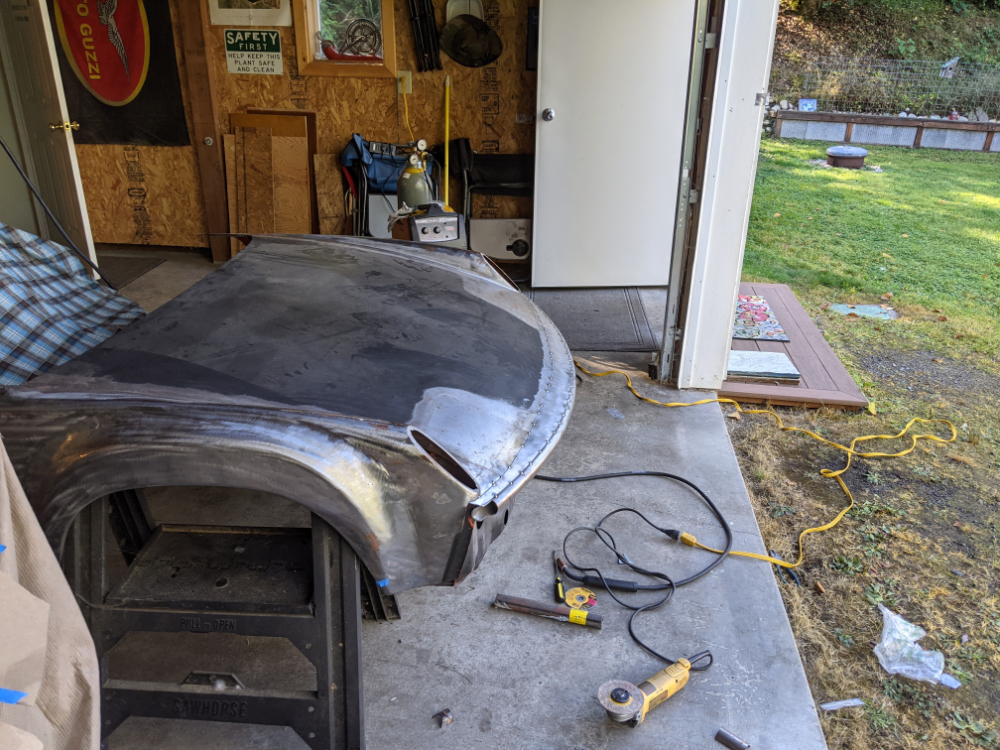
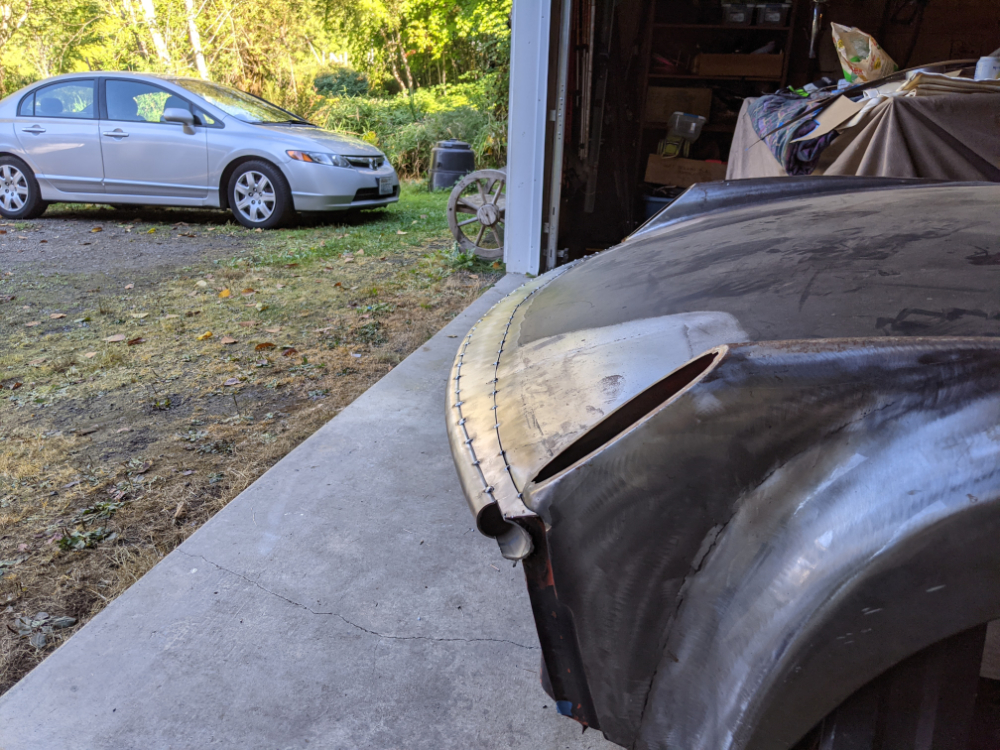
Next I put the template back on and gave it a look, definitely getting there, don't worry about the plastic grills, they are only for reference, I have a better final piece planned for those spots 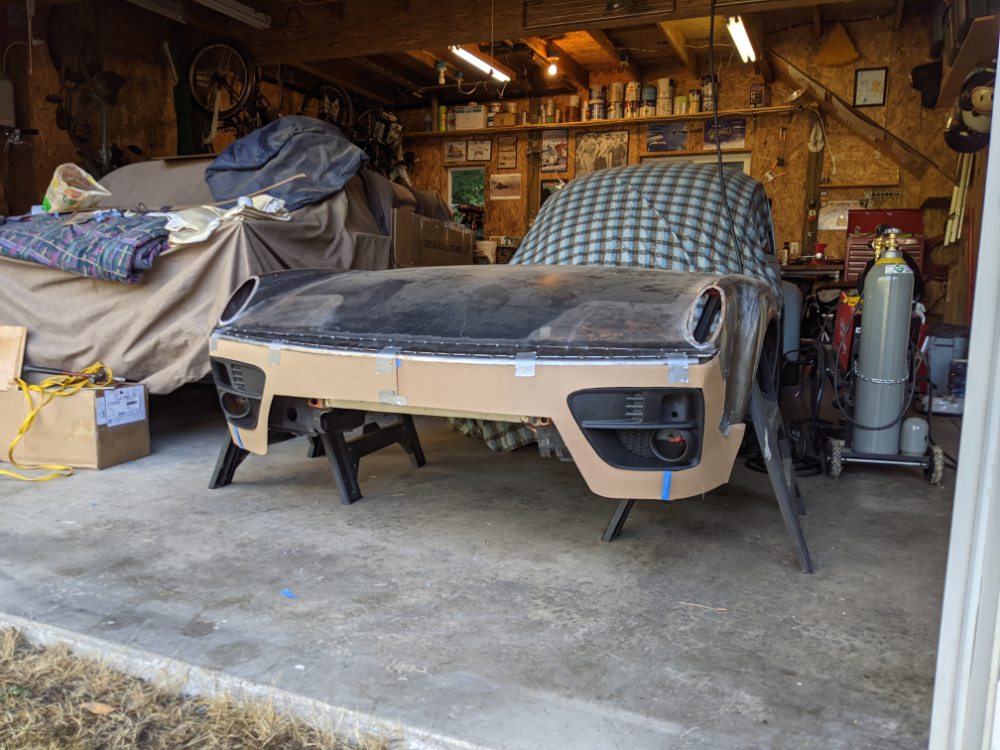
Posted by: plymouth37 Dec 2 2022, 03:48 PM
Time to fabricate the front of the bumper, I started by bending 1/8" steel round stock into frames for the fog light housing. 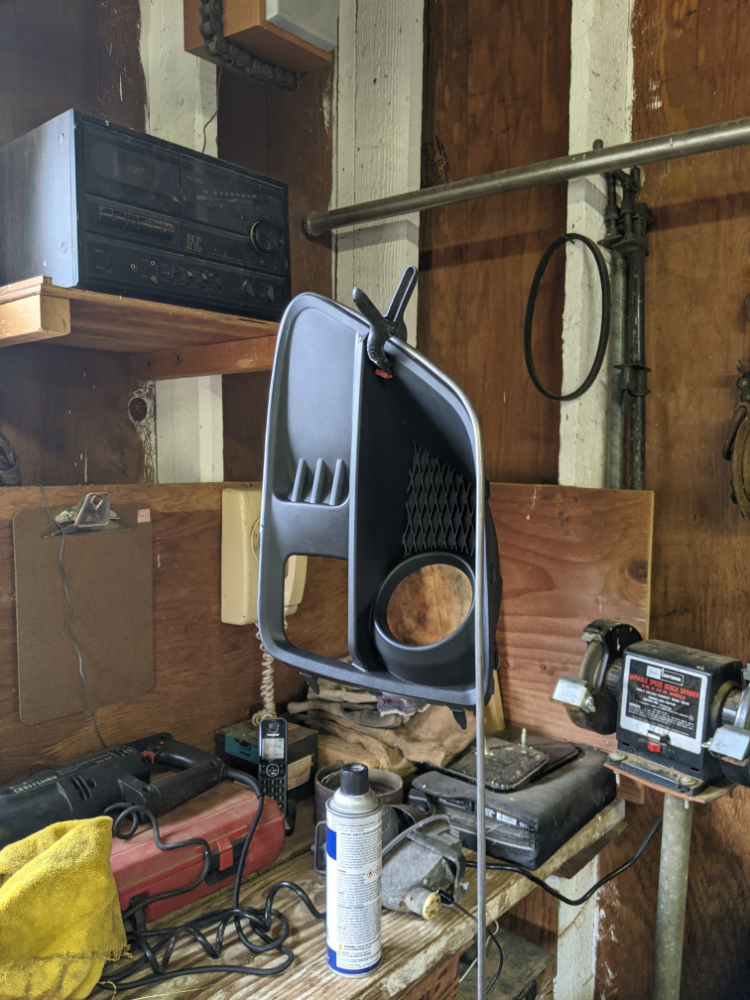
I am not going to use these plastic pieces but they make great mirrored templates for the opening shape that I need to integrate into the bumper.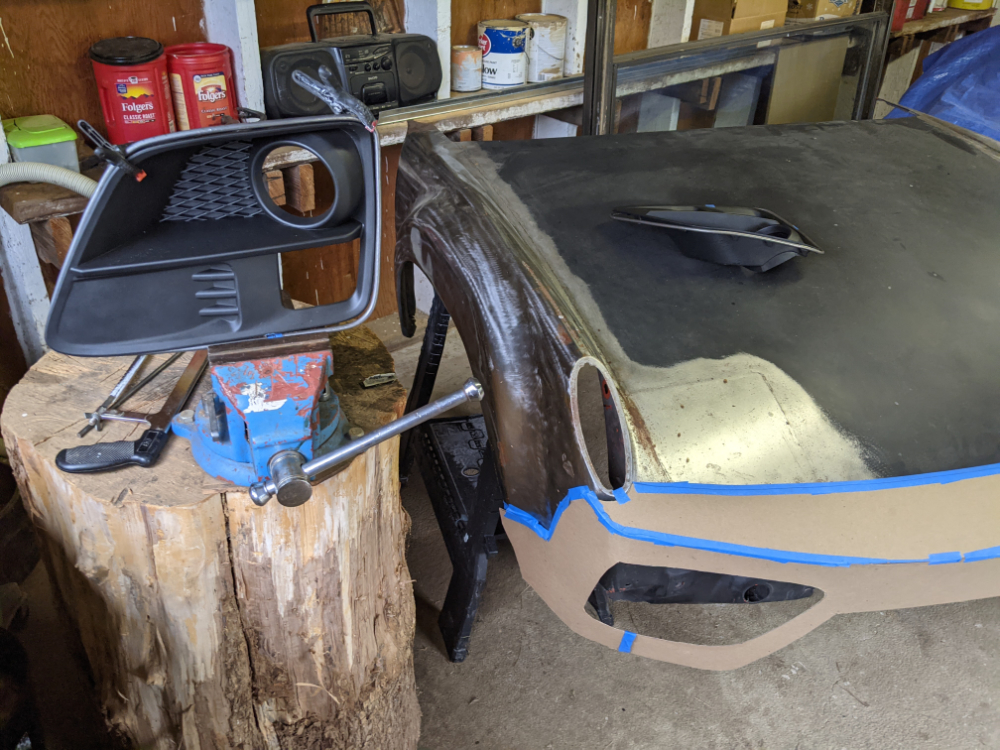
Then i transferred my chipboard template from the bumper to a sheet of steel, I decided to make the bumper out of 3 pieces, the 2 complex corner pieces and a simple middle rectangle between them.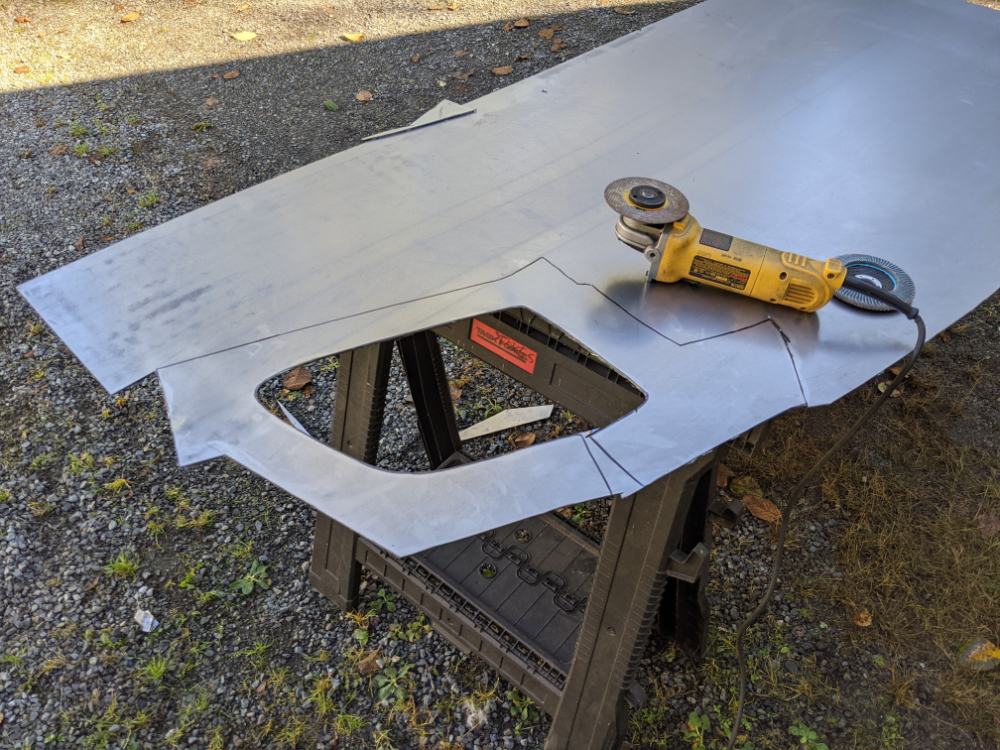
I tacked the corners along their top to the curved tubing and folded them into shape, then clamped the fog light housing frames to them to find where everything needed to land.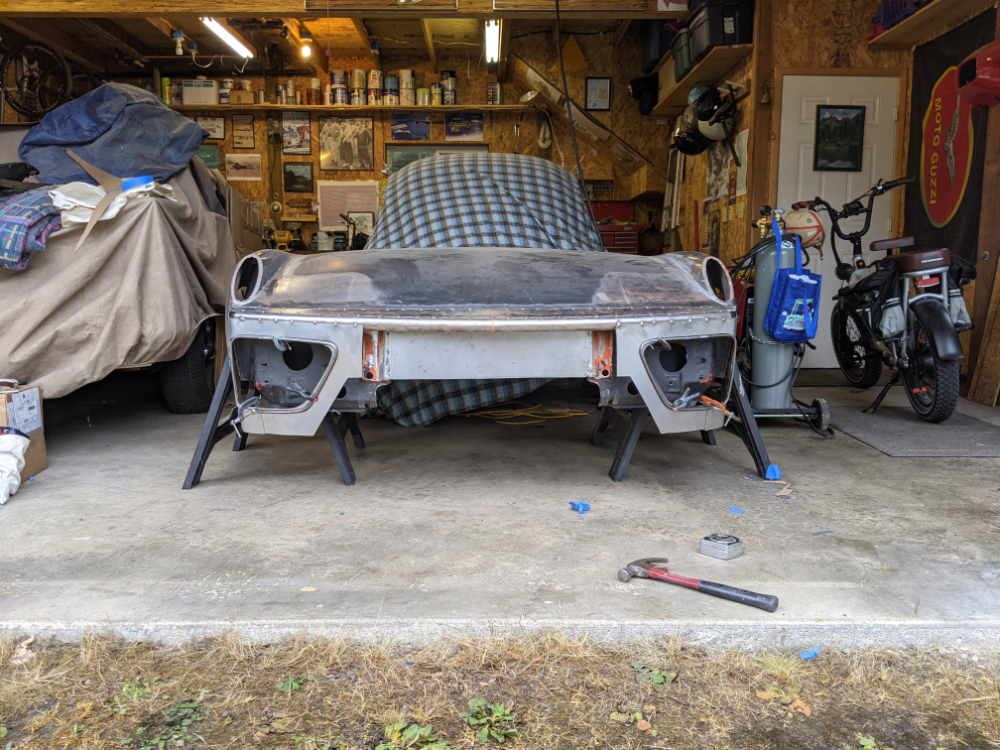
Posted by: plymouth37 Dec 2 2022, 03:48 PM
After much fiddling and hammering I got the corner pieces tacked into place.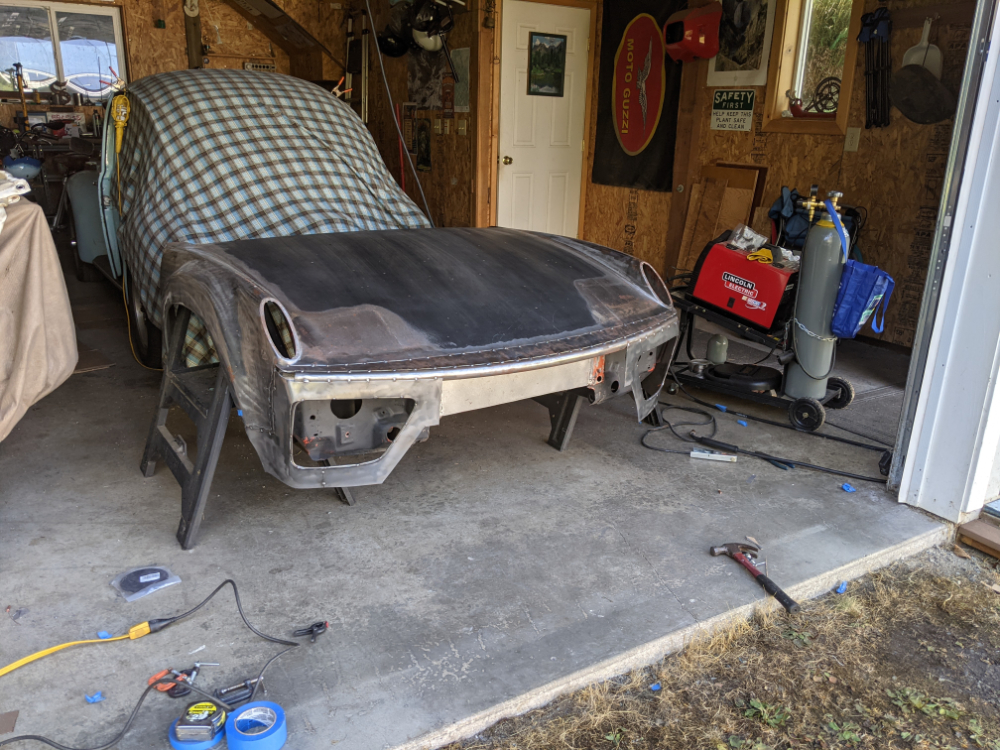
The round stock I formed for the foglight housings is tacked inside the bumper opening to form a radiused transition.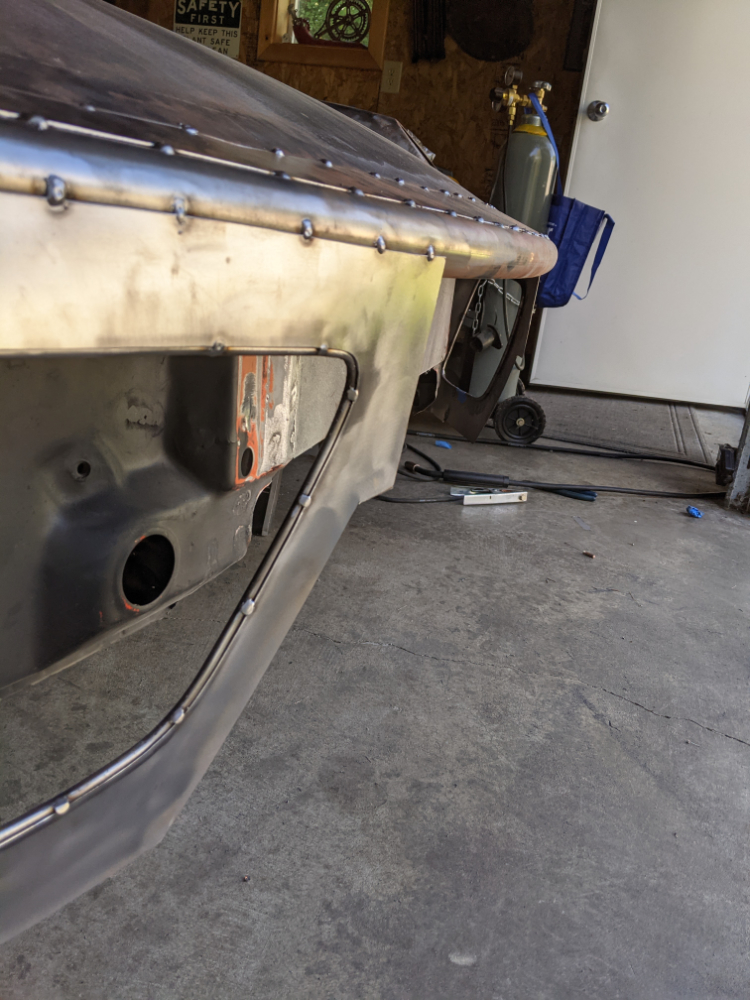
Here it is lightly tacked in and with the temporary Foglight housings but I am pretty happy with the results, I will fill in the middle and the weird hole in the corners next time!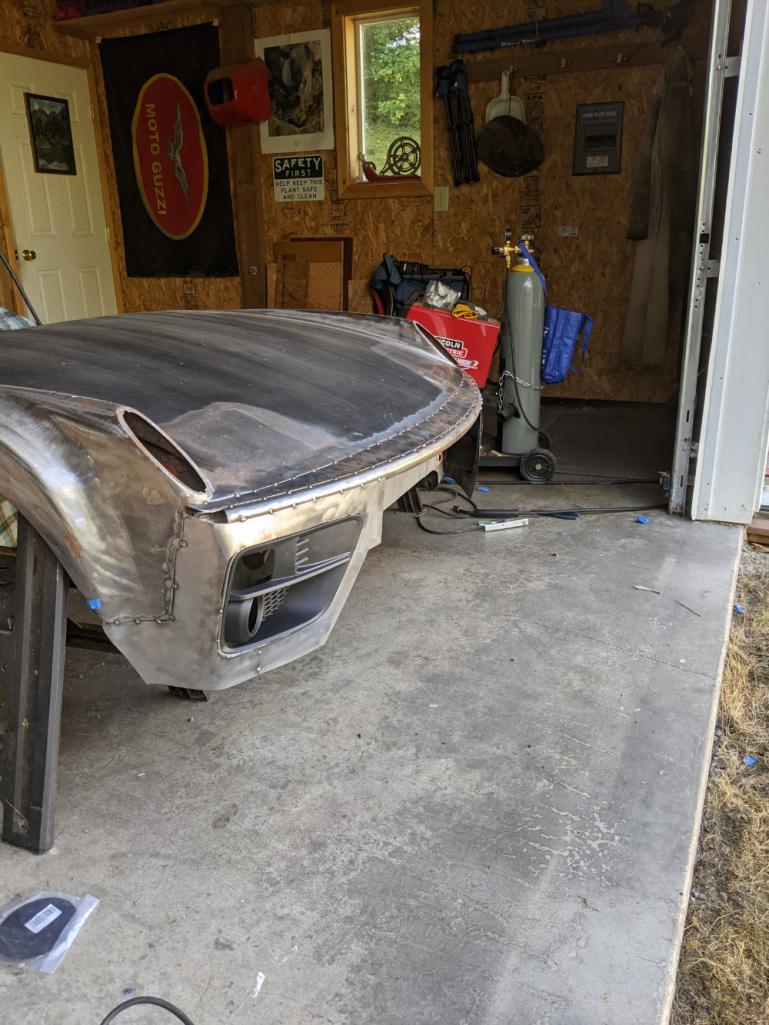
Posted by: Cairo94507 Dec 2 2022, 03:50 PM
Posted by: worn Dec 2 2022, 05:52 PM
Fantastic from start to…well, here. Really great. I have one concern. When I lived out there you could buy reasonably fresh coffee at a place with two outlets: Pike Place Market and University Village. Star something. Might want to ditch the Folgers habit if those little coffee bean vendors are still around. The down side is that bolts don’t fit as good in Mylar bags as they do in plastic or metal cans. Thou dothe rocke.
Posted by: tygaboy Dec 2 2022, 07:07 PM
You and your build are epically epic in your/its epicness.
You are setting the bar for 914 customization and I think your car is the ONLY one I've seen where the styling changes not only work, but are, IMHO, improvements.
You've accomplished something that, in other hands, would have certainly gone horribly wrong and has instead turned out SOOOOO incredibly well.
I can't compliment you more highly. Wow.
I'll just stop here and drool over your work for a bit longer...
Posted by: plymouth37 Dec 4 2022, 03:59 PM
Thanks for the kind words guys!
Tacked in the center piece:
Filled the little corner gaps around the tube ends and half welded everything together:
Finished welding: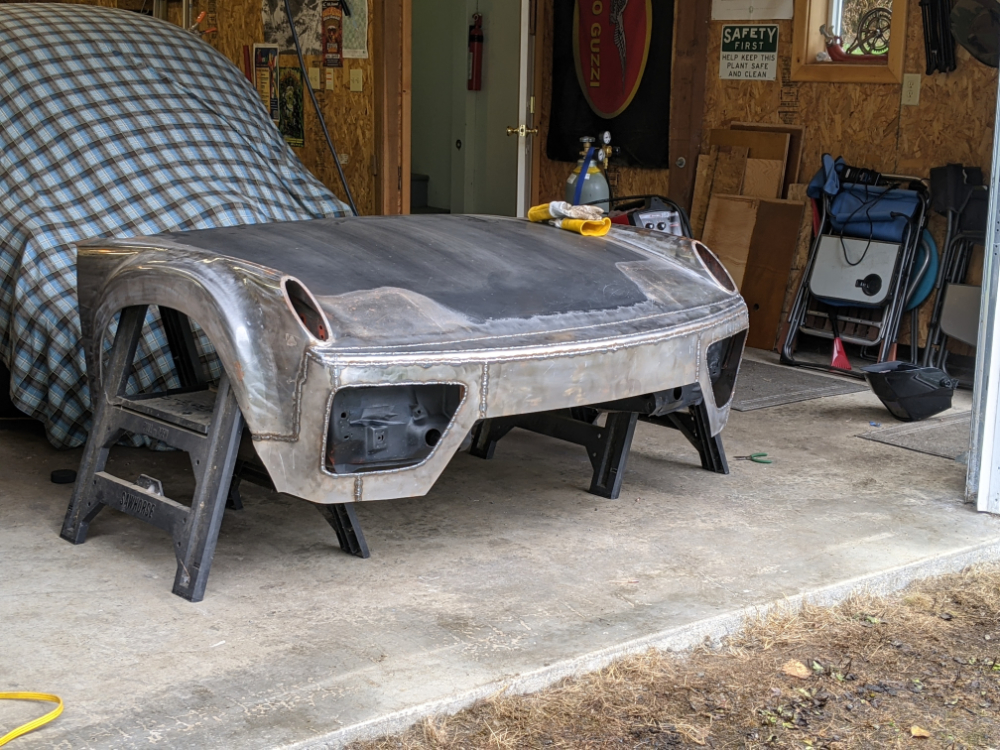
With a little light grinding it is starting to take shape!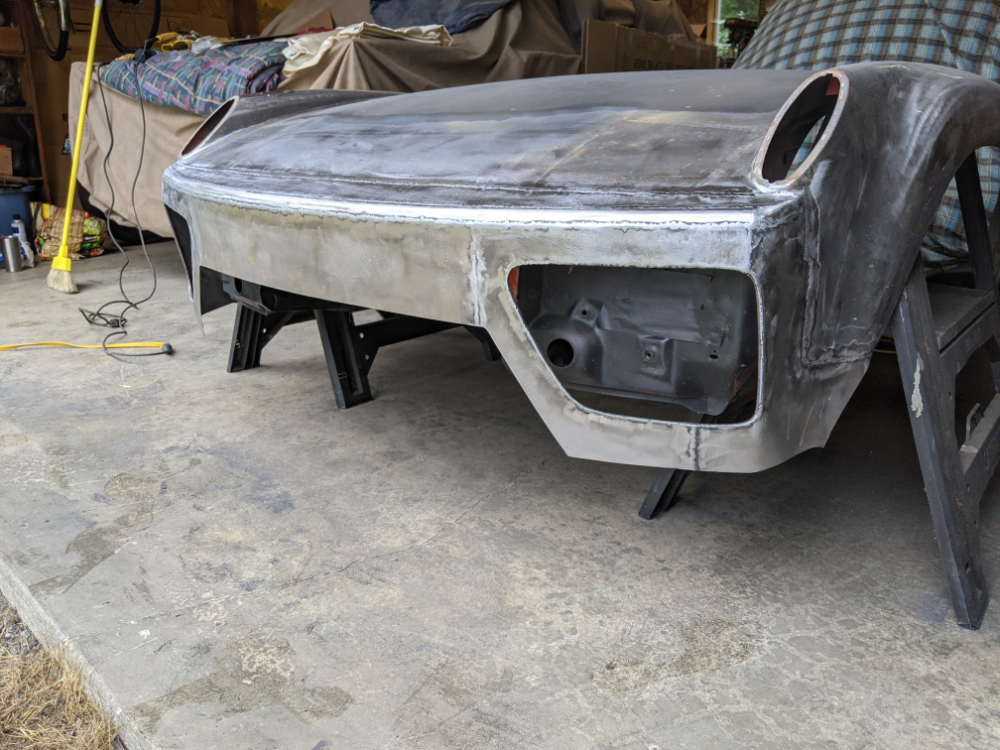
Posted by: sixnotfour Dec 4 2022, 05:44 PM
Fantastic from start to…well, here. Really great. I have one concern. When I lived out there you could buy reasonably fresh coffee at a place with two outlets: Pike Place Market and University Village. Star something. Might want to ditch the Folgers habit if those little coffee bean vendors are still around. The down side is that bolts don’t fit as good in Mylar bags as they do in plastic or metal cans. Thou dothe rocke.
Haha,, He is EAST of all that Downtown BS...Im Sure there is some Designer Coffee shops though...
Great Work..
Posted by: East coaster Dec 4 2022, 07:17 PM
Nice work! Awaiting to see how you finish off that center section, I’m sure it will be good based on all you’ve done so far.
Posted by: plymouth37 Dec 5 2022, 12:13 PM
Before I moved on to the grills and lips I filled and primed the hood extension to cut down on the Frankenstien weld aesthetic I had going on there.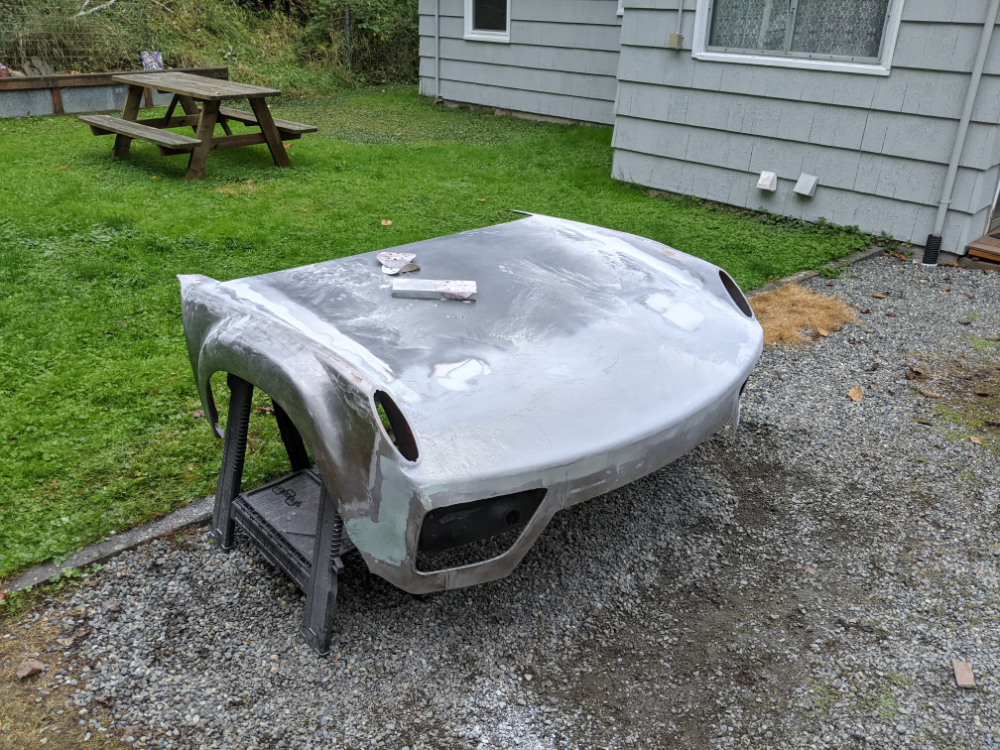
I got it close to straight, good enough for now, now on to the front bumper fab: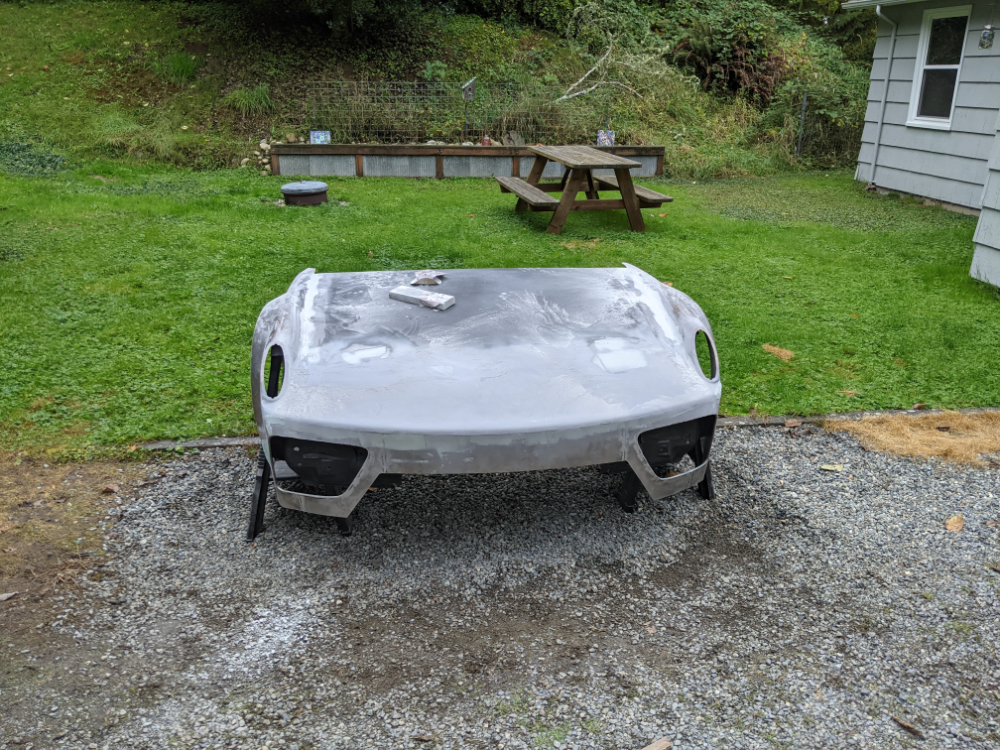
I made some templates for the fog light housing buckets, and started mocking up the lip for the center grill opening: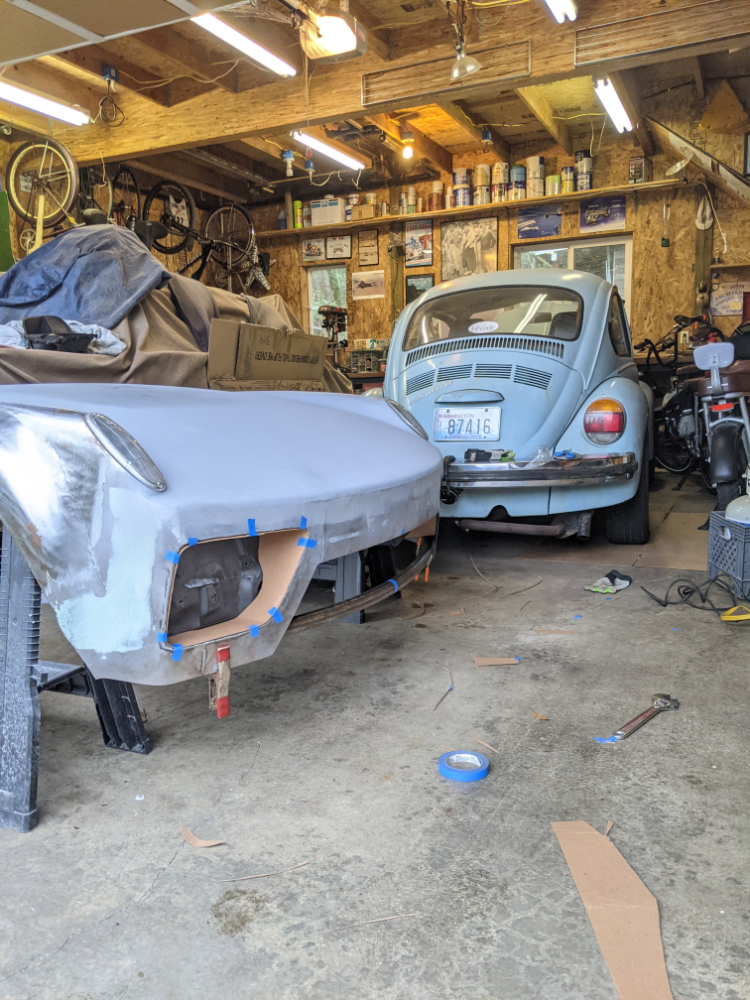
This lower bar will divide the air between the radiator and the active under tray that leads to the Ferrari diffuser at the back, as well as providing a sturdy mounting point for the new front tilt system. I like the look of the "pouty" 916 bumper and will try to have a bit of that going on here: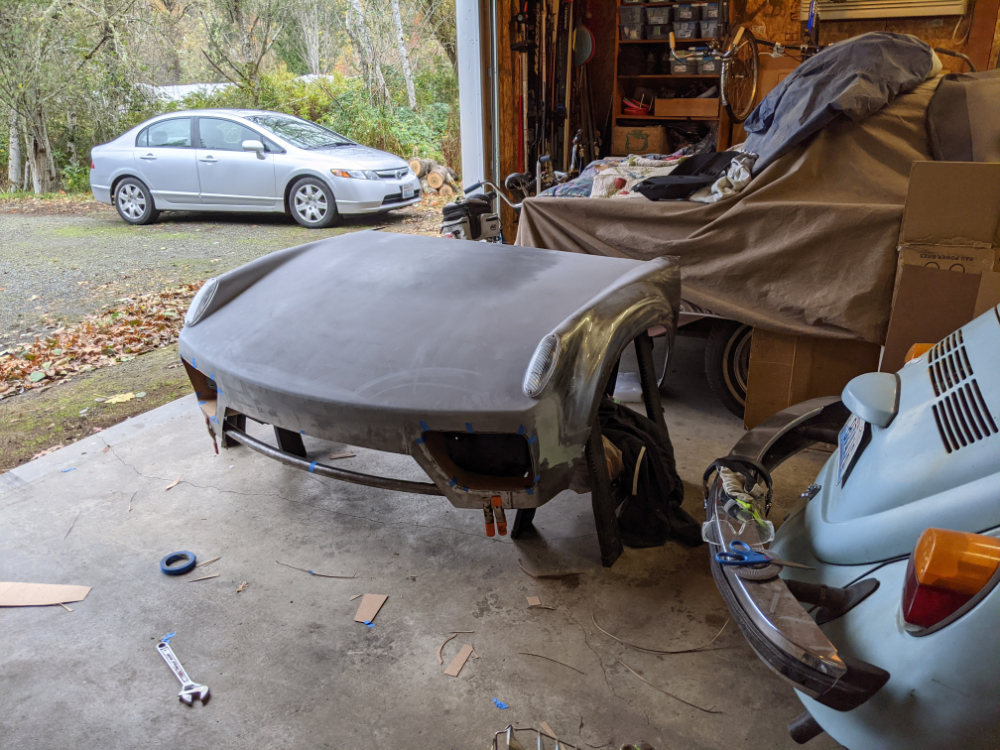
Posted by: tygaboy Dec 5 2022, 02:22 PM
Not only are your designs super attractive but unless you took the pics in the past, you're hauling ass on getting this done.
Can't hardly wait to see the final look!
And if it's OK with you, I'll let you know when I'm next in your area. I'd love to meet you and see your car in the metal.
Posted by: Root_Werks Dec 5 2022, 03:31 PM
Nice to see these mad fab skills, and in metal to boot!
Posted by: plymouth37 Dec 13 2022, 11:25 AM
Not only are your designs super attractive but unless you took the pics in the past, you're hauling ass on getting this done.
Can't hardly wait to see the final look!
And if it's OK with you, I'll let you know when I'm next in your area. I'd love to meet you and see your car in the metal.
Thanks! I am loving your build as well, yeah PM me when you are in the PNW, I would be happy to meet up!
Posted by: plymouth37 Dec 13 2022, 11:25 AM
Time to make templates for the openings.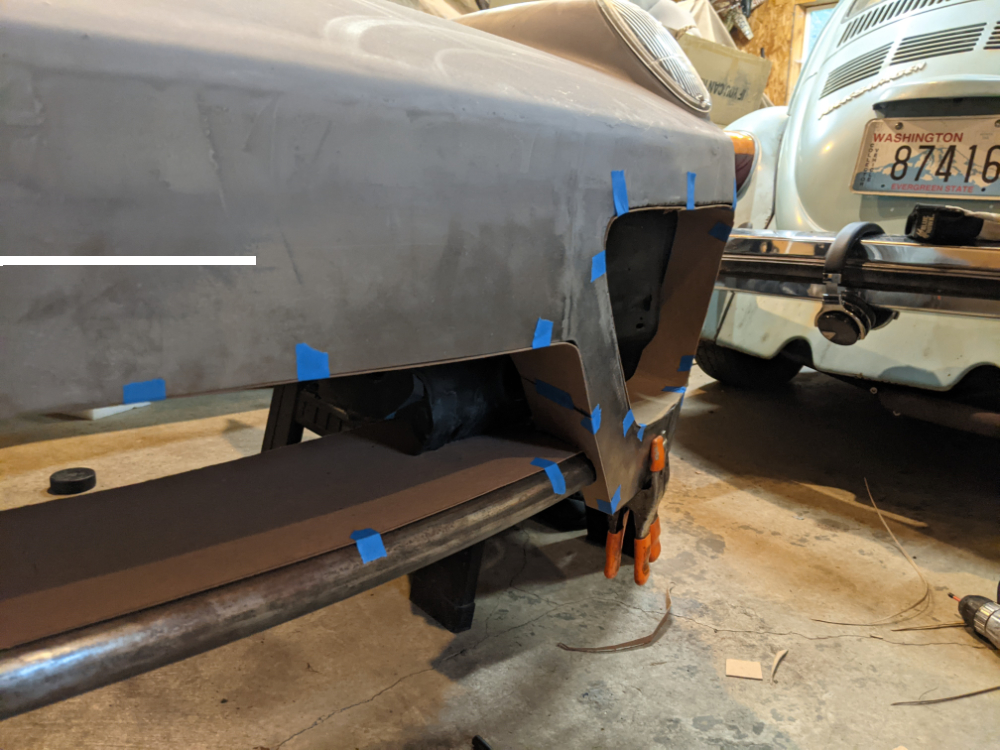
Here is a quick mockup.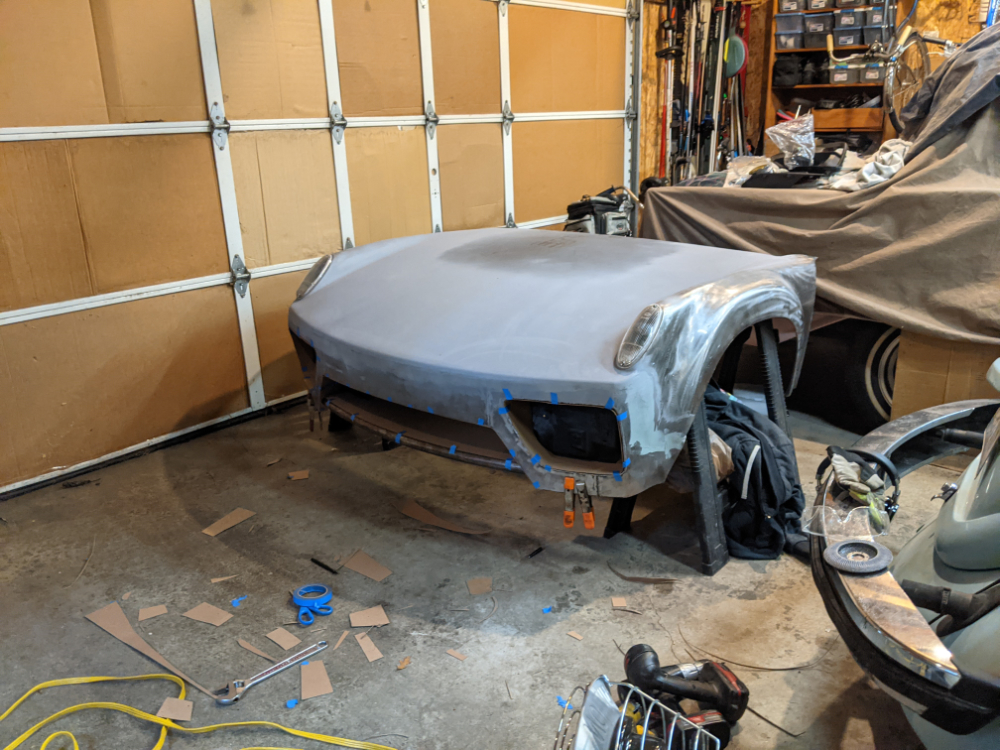
Transfered my templates to steel.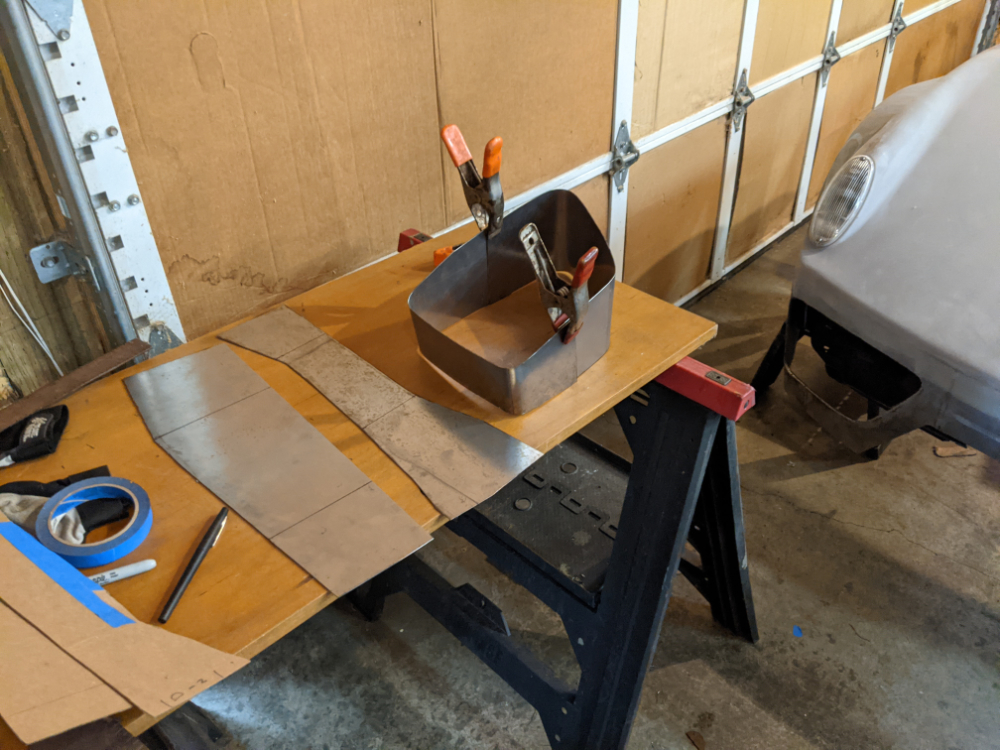
And formed the side grill buckets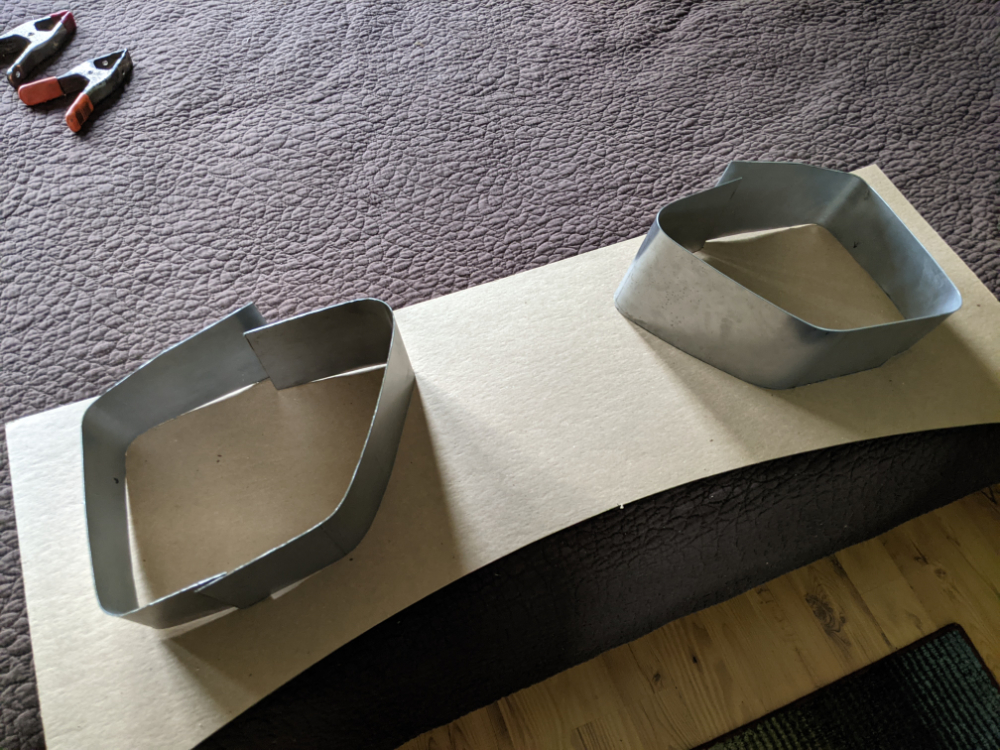
Test fit the side buckets and welded the center grill plate onto the lip bar as well.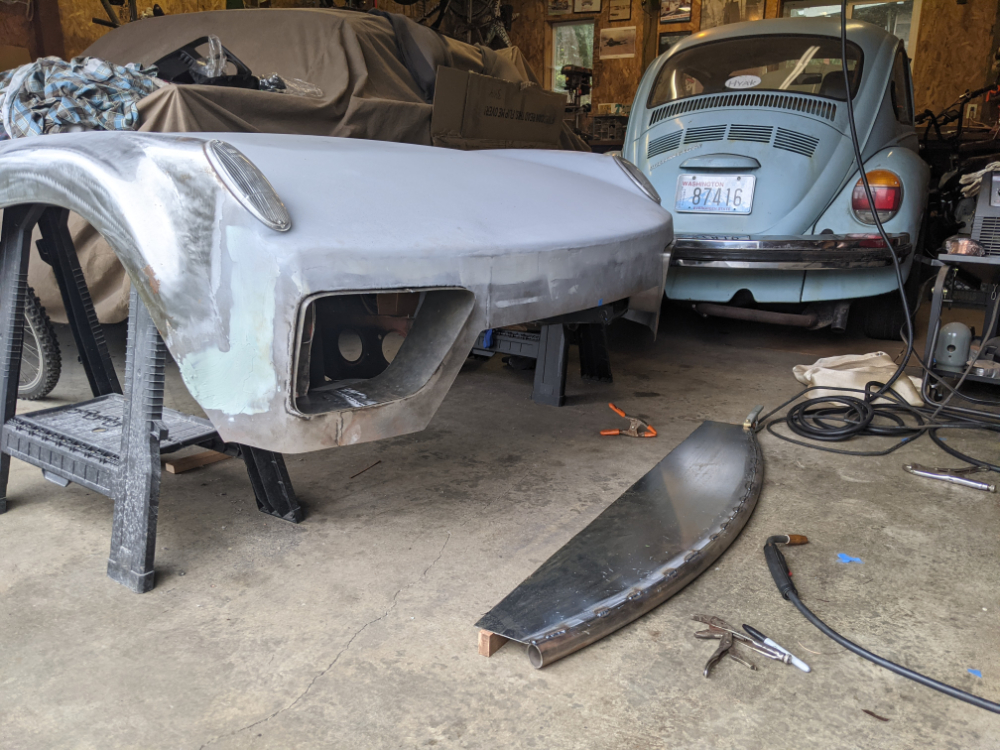
Posted by: plymouth37 Dec 13 2022, 11:26 AM
Here it is with everything just slipped loosely into place.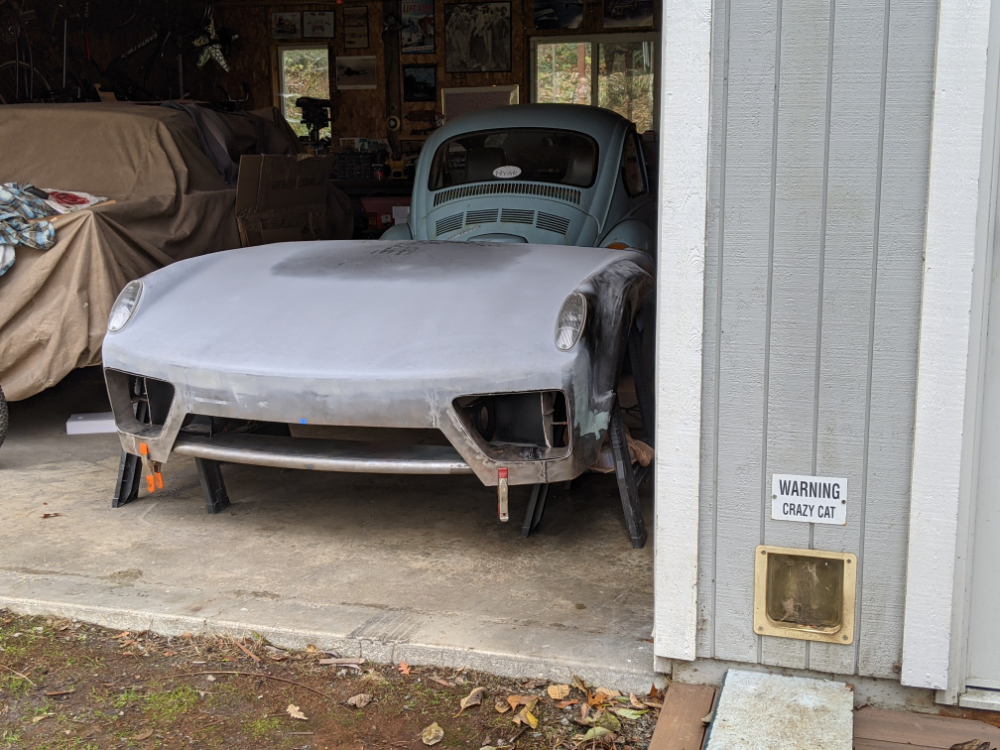
Here you can see I cut out the inner sheet metal from the original bumper that fell within the side opening.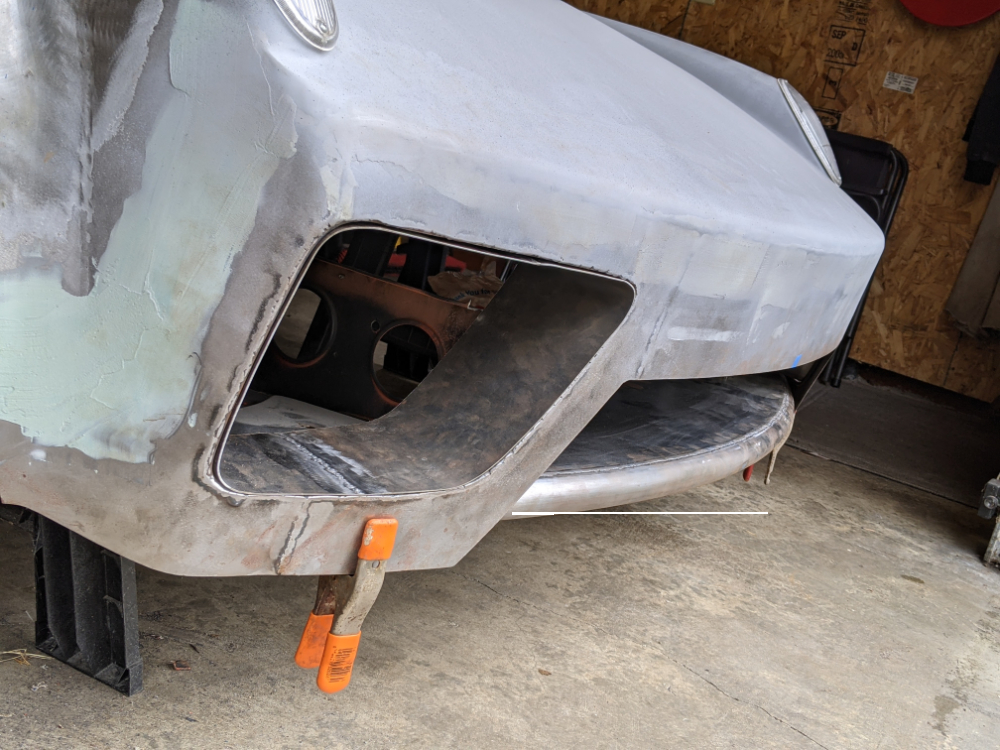
Removing that inner metal revealed the inner fenderwell, I will need to seal this back up as I rebuild.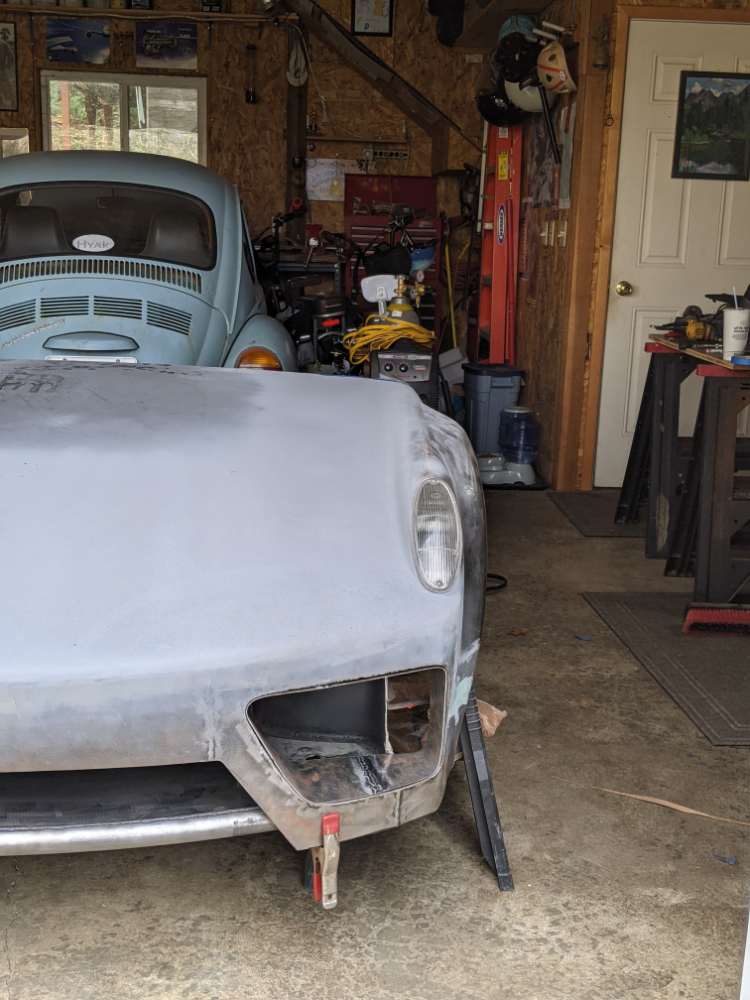
Here is a loose mockup, nothing welded yet but progressing!
Posted by: KELTY360 Dec 13 2022, 05:45 PM
I have to say I had my doubts when you introduced the concept because it seemed a little too modern to mix with 50 year old styling. Now the melding seems natural with the seamless line of the front 'bumper' and the angularity of the openings that fit with the many angles of the body. Can't wait to see how you fill the openings.
Once again, your vision blows me away. Kudos Dana.
Posted by: tygaboy Dec 13 2022, 06:45 PM
So cool. The Ferrari drive train should go in your chassis...
Posted by: 76-914 Dec 13 2022, 07:58 PM
You and your build are epically epic in your/its epicness.
You are setting the bar for 914 customization and I think your car is the ONLY one I've seen where the styling changes not only work, but are, IMHO, improvements.
You've accomplished something that, in other hands, would have certainly gone horribly wrong and has instead turned out SOOOOO incredibly well.
I can't compliment you more highly. Wow.
I'll just stop here and drool over your work for a bit longer...
Dana is like a cross between Chip Foose & Ron Covell; only better!
Posted by: xtophr Dec 18 2022, 09:56 PM
This is the best build that I’ve ever seen. The fact that it’s a 916 is just icing.
Anyhow, I was lurking and then I registered because I saw these great pics in an Amazon book preview. The book is, 50 Years Porsche 914 by Jurgen Lewendowski and costs $268.89!
As you can see, these are preliminary topless 914 designs that thankfully never quite made it. Project Anklebiter may share the dna, but is far more refined.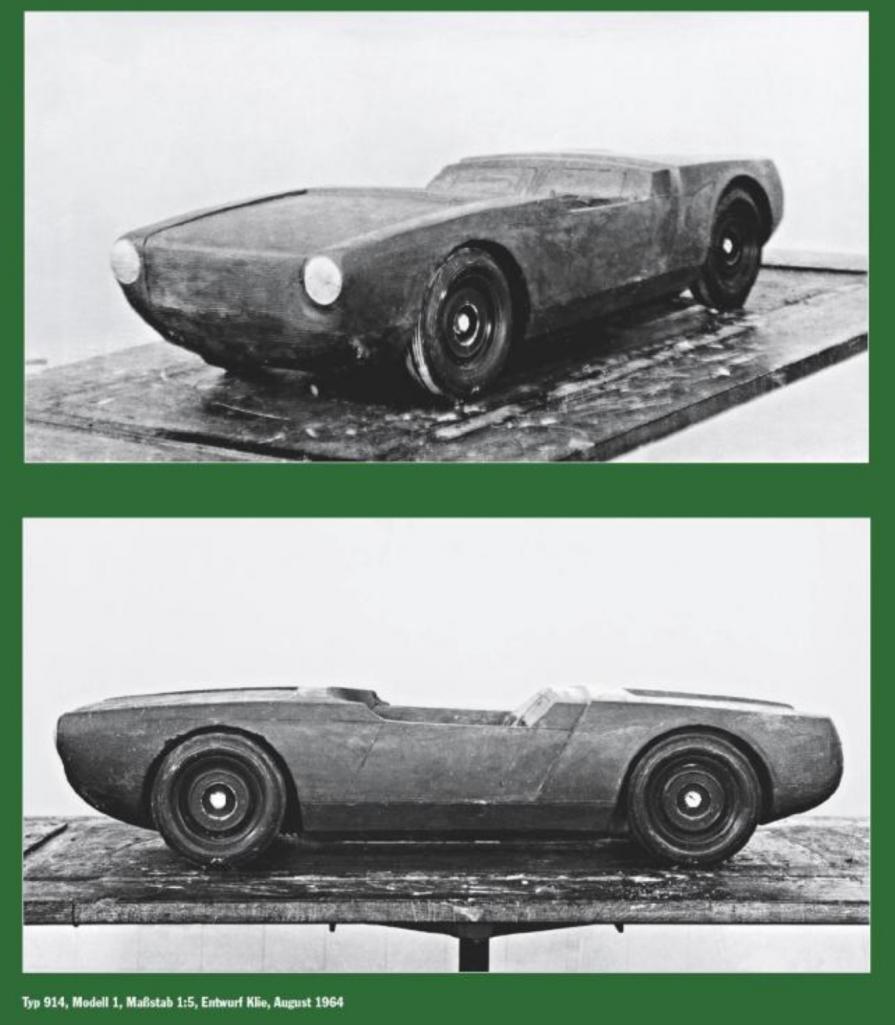
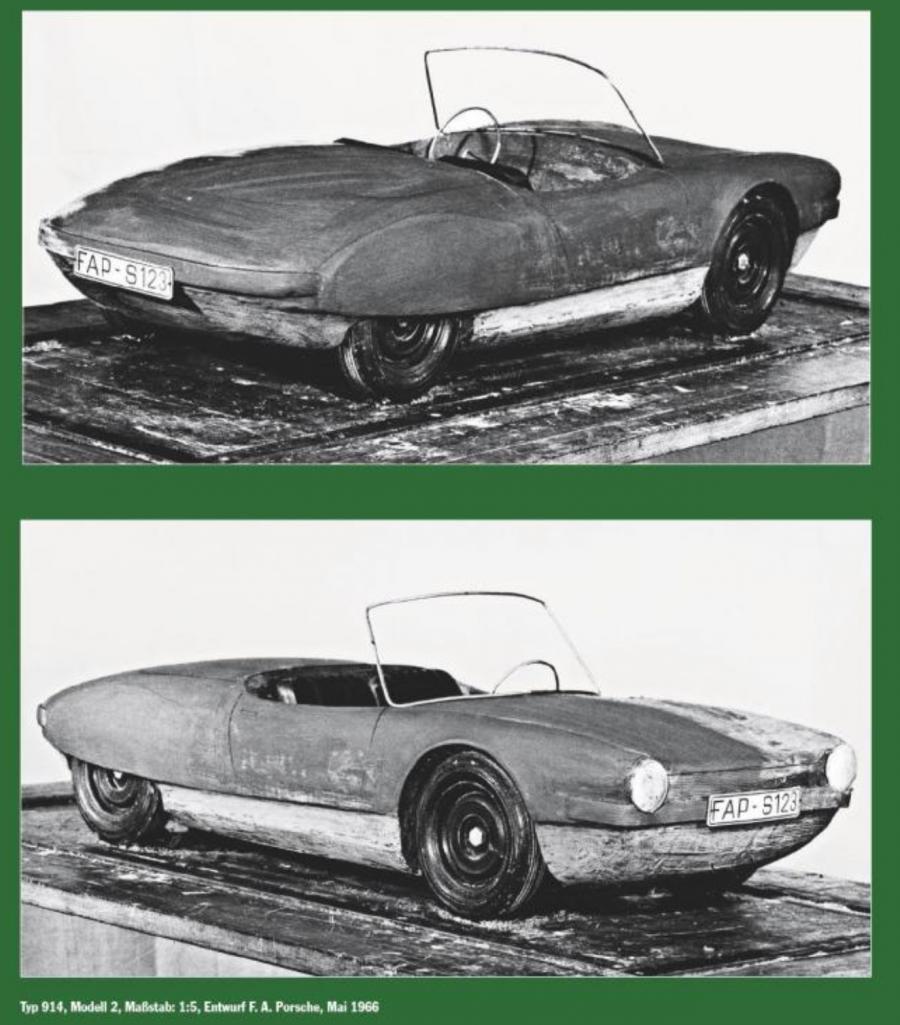
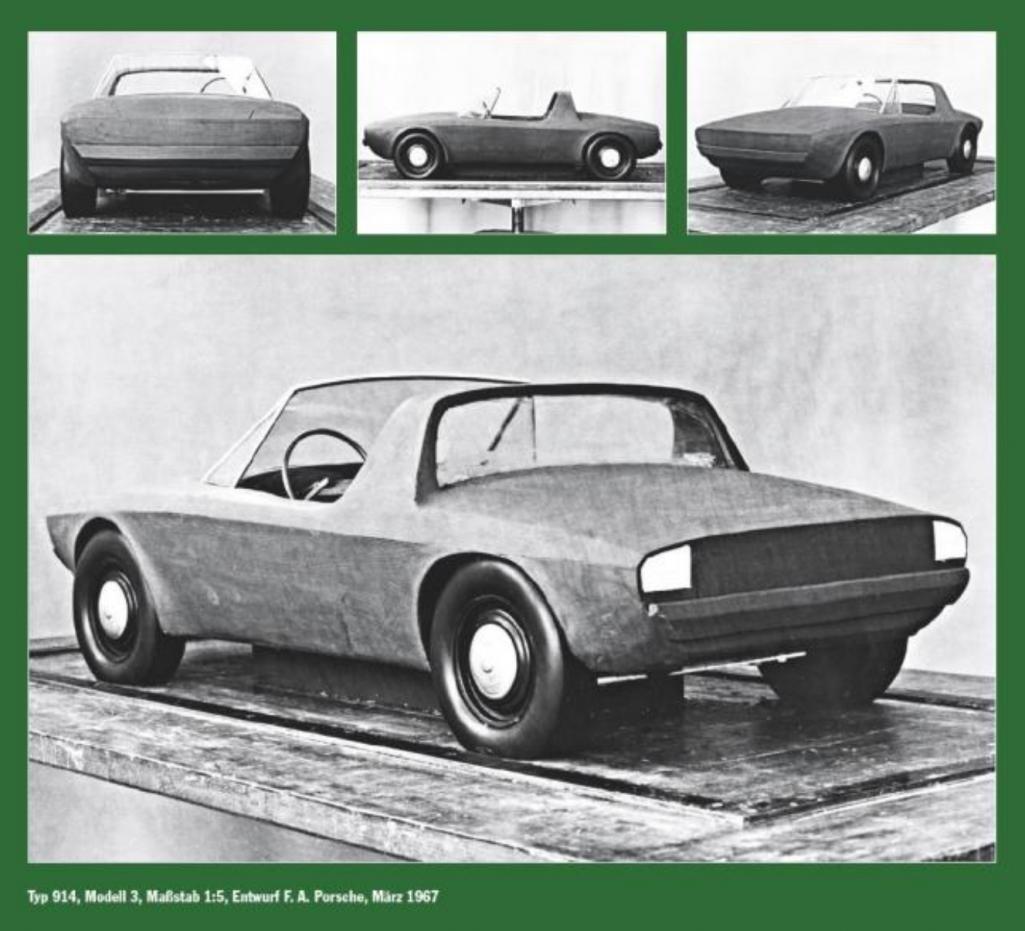
Posted by: 76-914 Dec 19 2022, 10:00 AM
Not only are your designs super attractive but unless you took the pics in the past, you're hauling ass on getting this done.
Can't hardly wait to see the final look!
And if it's OK with you, I'll let you know when I'm next in your area. I'd love to meet you and see your car in the metal.
You beat me to it Chris. Amazingly quick development on that hood. BTW, I like the Hell out of it. The look is very appealing yet allows the 914 design theme an avenue to reach even the purists. Well done Dana.
Posted by: plymouth37 Dec 19 2022, 11:59 AM
This is the best build that I’ve ever seen. The fact that it’s a 916 is just icing.
Anyhow, I was lurking and then I registered because I saw these great pics in an Amazon book preview. The book is, 50 Years Porsche 914 by Jurgen Lewendowski and costs $268.89!
As you can see, these are preliminary topless 914 designs that thankfully never quite made it. Project Anklebiter may share the dna, but is far more refined.
Thanks for the kind words, the early 914 design exercises are super interesting, thanks for sharing!
Posted by: plymouth37 Dec 19 2022, 12:18 PM
Time to start filling the side grill areas, I am loosely following the organization of the WRX grills, a horizontal division, with a radiator opening on the top, and a Foglight and brake duct on the bottom.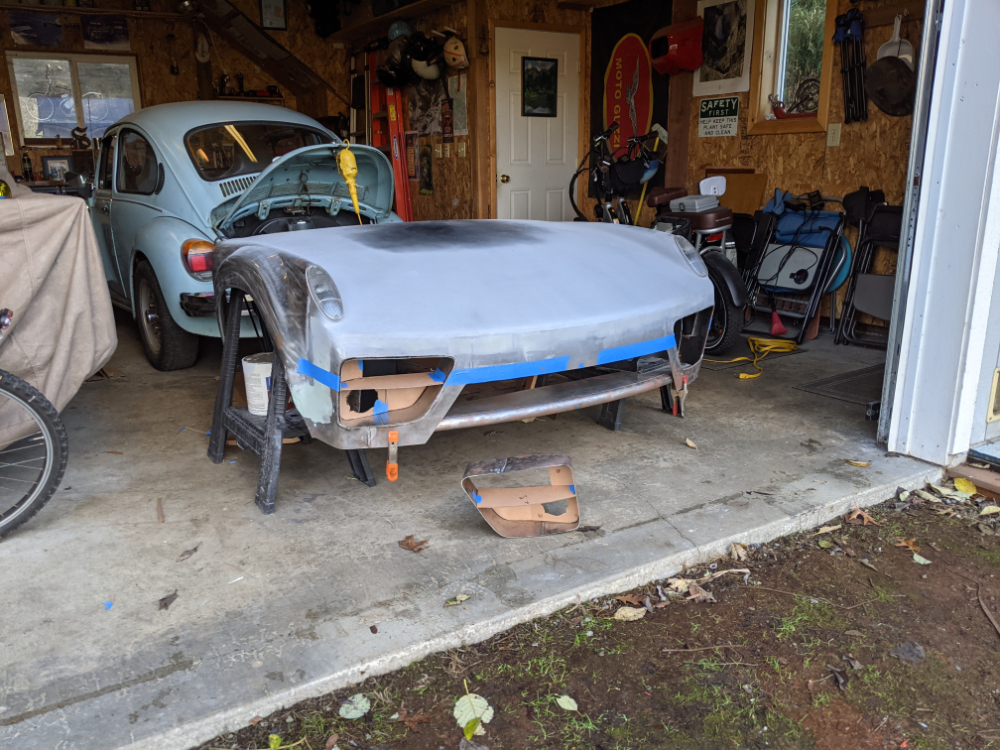
I lined up the horizontal division with the upper center opening edge to continue that line across the front of the bumper.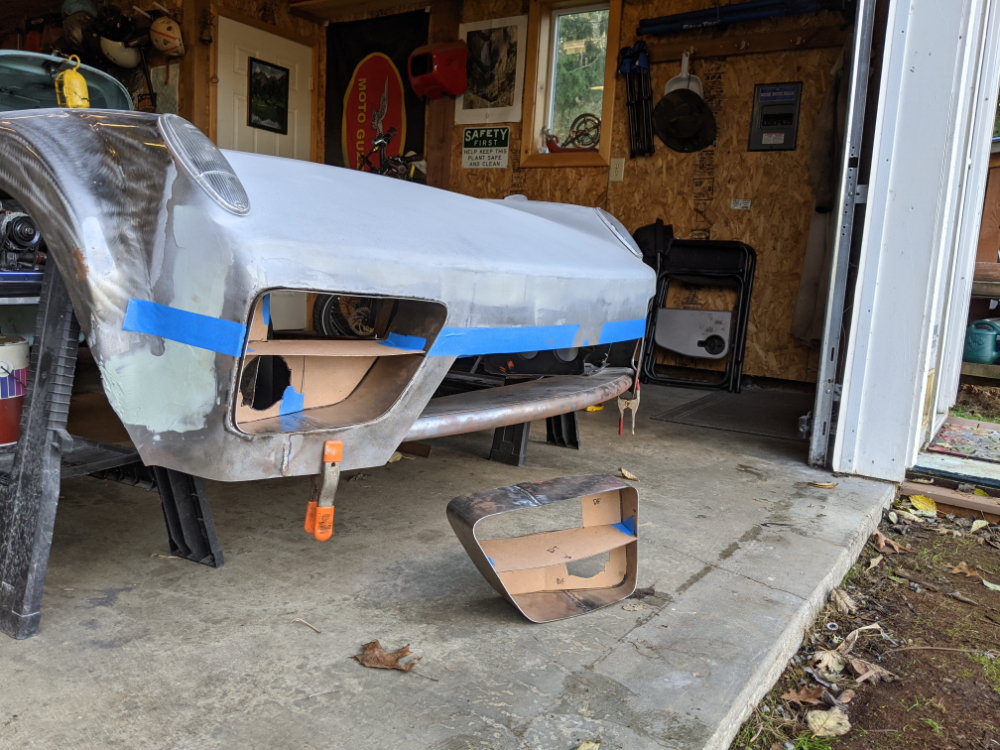
I made the dividers teardrop shaped in profile so they would be rounded and thick in the front by welding in a rod.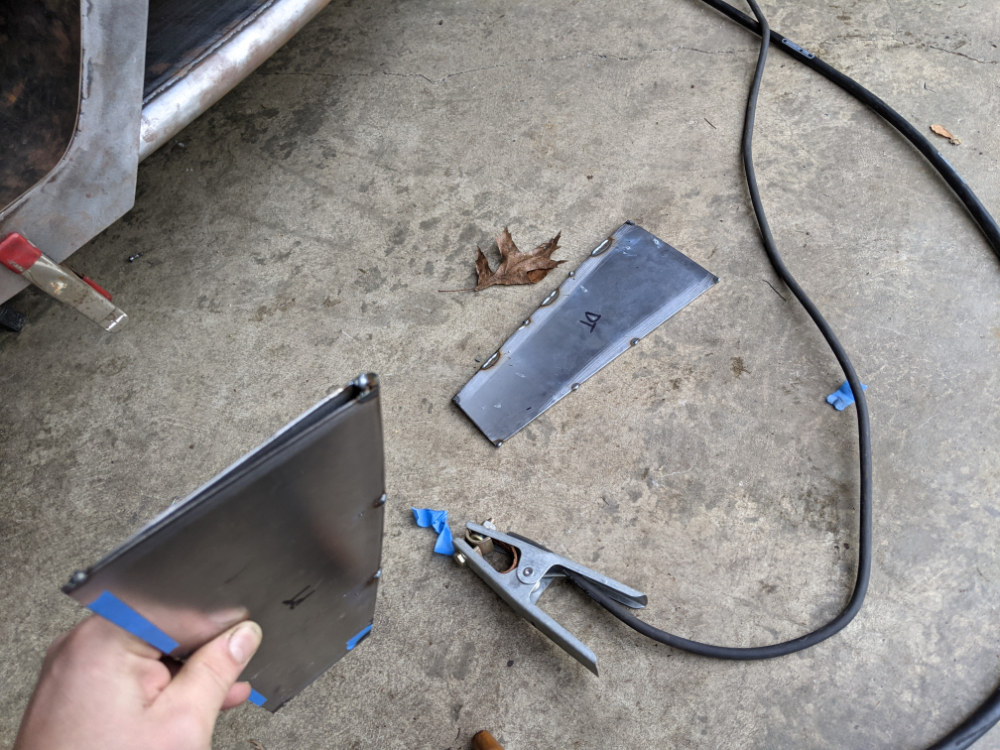
Then tacked them into the pods.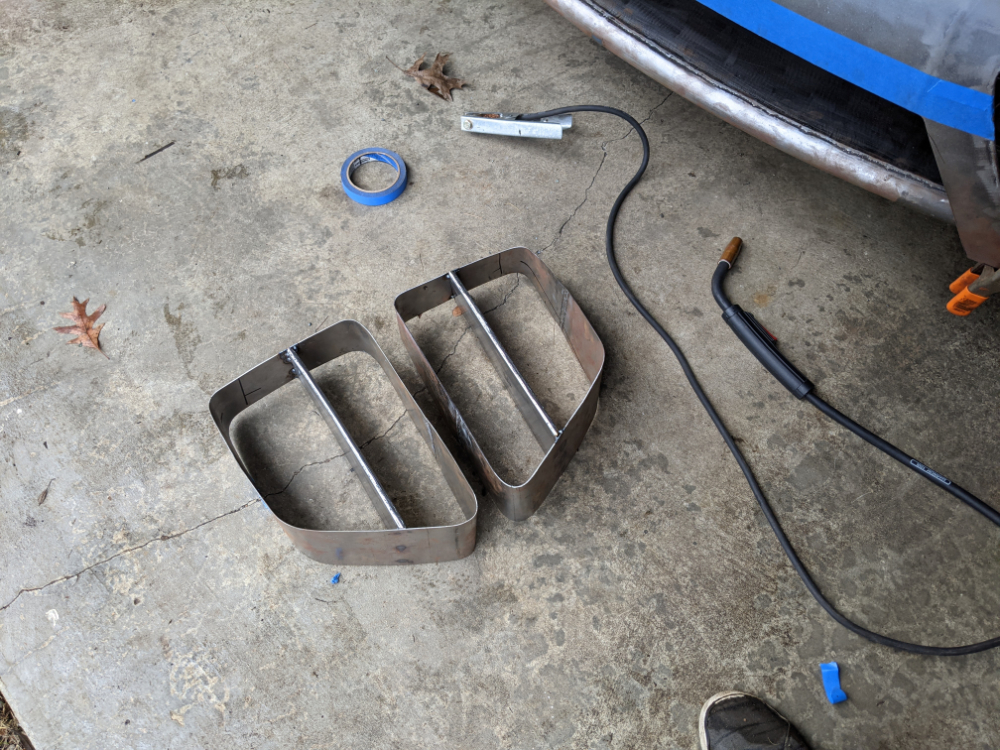
Posted by: plymouth37 Dec 19 2022, 12:18 PM
Here they are fitted in place.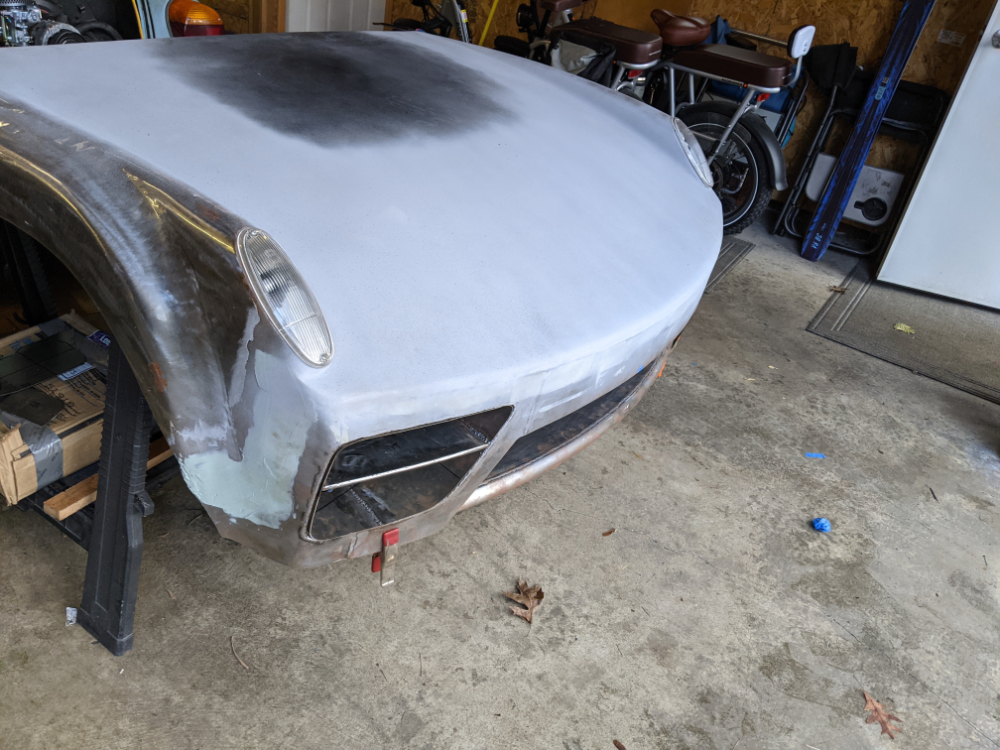
Next I will make and weld in the rest of the elements that hold the fog light and ducts.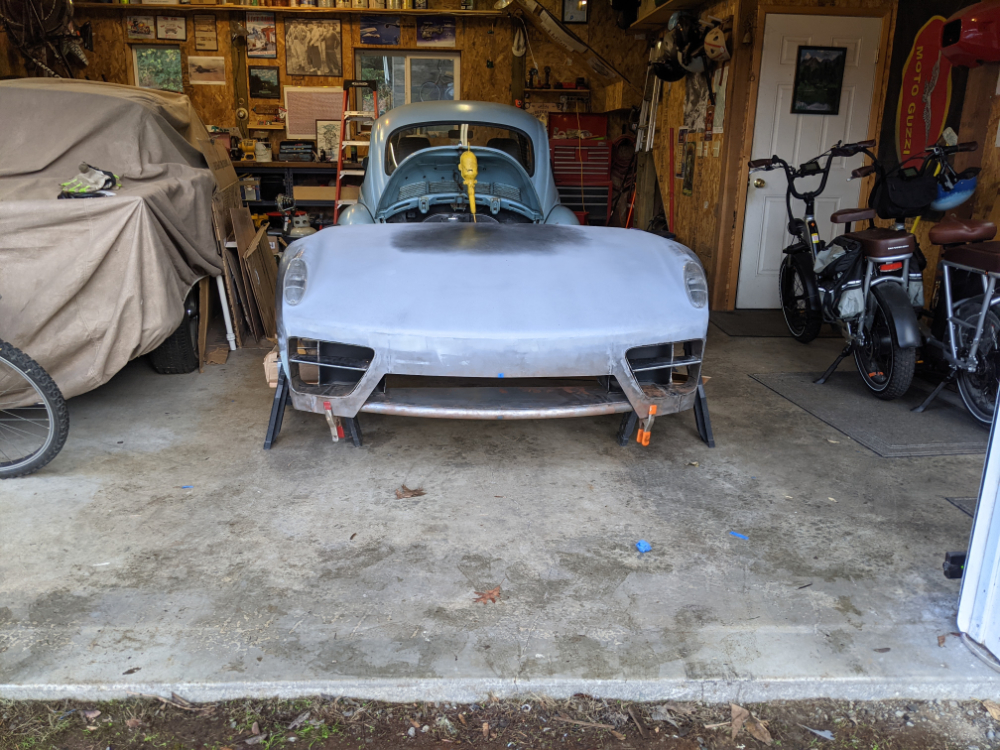
Posted by: tygaboy Dec 19 2022, 05:48 PM
Simply no words, only:
Posted by: bkrantz Dec 19 2022, 08:03 PM
Yup, über-cool.
Posted by: East coaster Dec 19 2022, 08:07 PM
Great work and good eye for design!
Posted by: mgp4591 Dec 19 2022, 09:37 PM
LOVE the new/old combo touches...I believe you've NAILED it!
Posted by: KELTY360 Dec 19 2022, 11:37 PM
I like the way you’ve angled the dividers up at the outside edges. Follows the curvature of the bumper.
Posted by: badcatt Jan 30 2023, 12:35 AM
It's nice to log in and see all the updates. Top tier work.
Posted by: tubegeek Feb 3 2023, 07:21 AM
The first time I saw this thread I started way towards the end somehow, and I only saw the recent nose fabrication. So I had no idea all that had gone into this build over a decade plus. Now that I have seen 79 pages of its amazing development I fully agree with all the compliments to your design and fabrication skills, Dana - you've got quite the car factory running there! But I also want to say how impressed I am with the sheer patience and determination it has taken to keep this project moving forward, bit bit bit, year by year, while clearly "having a life" all along. Quite a ride, so to speak.
My favorite part so far has been the test drive through the woods after you fixed the turbo boost, and you first realized what a rocket monster you've unleashed! "Adequate power" as Rolls-Royce would say.
Add me to the list of would-be designers rooting you on and getting inspiration from your fearsome Anklebiter.
Little Miss Anklebiter is clearly enjoying growing up with a tube framed sibling.
The other day I had just absorbed one of the long rustoration patch-welding threads and wondered, "at what point do you just start building sections from scratch?" Then I came across your thread which is an answer to that question - even though you started with a rust-free car!
Posted by: plymouth37 Feb 13 2023, 11:57 AM
I started building out the fog light buckets, The top half is radiator inlet, the bottom is divided between fog light and brake duct inlet, I am taking advantage of NAPA exhaust bits to make nice, flared inlets for the brake ducts.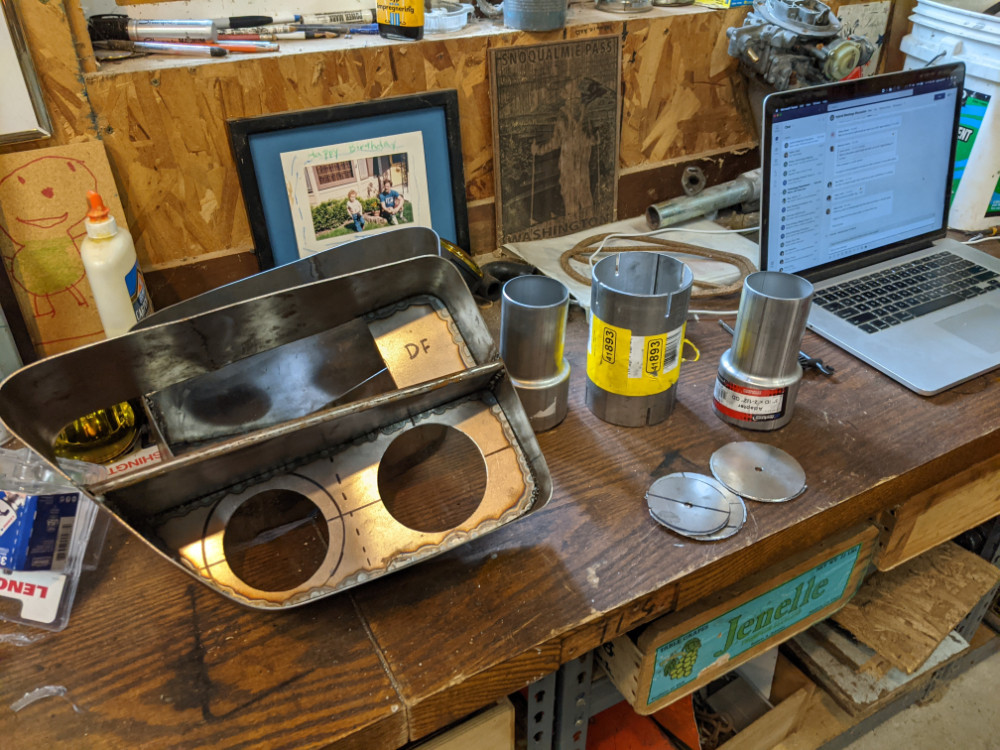
I quickly discovered that after welding the buckets together they were no longer flexible enough to fin in the bumper openings so I had to temporarily chop off the bumper bottoms.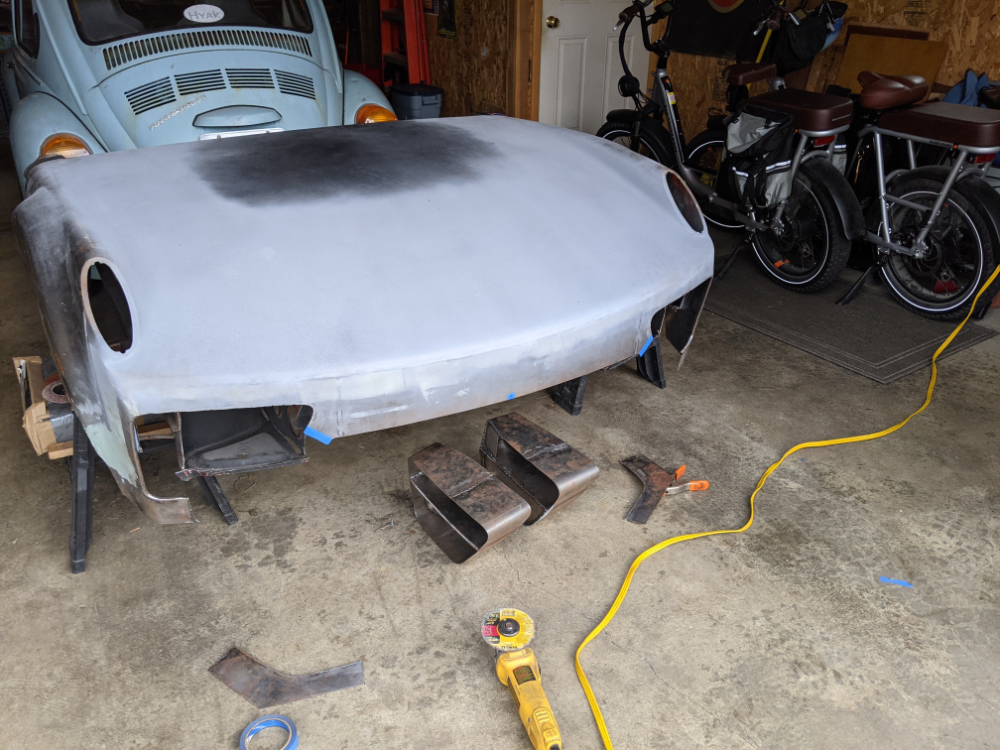
Here they are just sitting in place, the fog lights came along with the WRX grill set I used as a template, there will be a grill near the front of these bumper openings so the fog light lenses will be more flush than they appear now.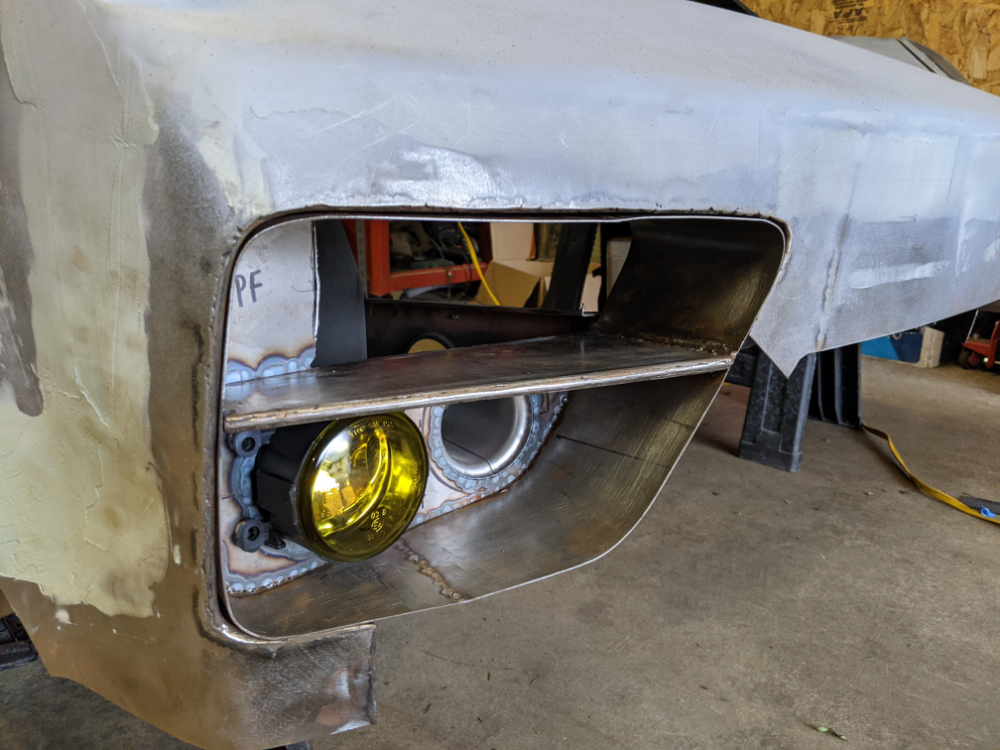
Rest of bumper duct taped into place.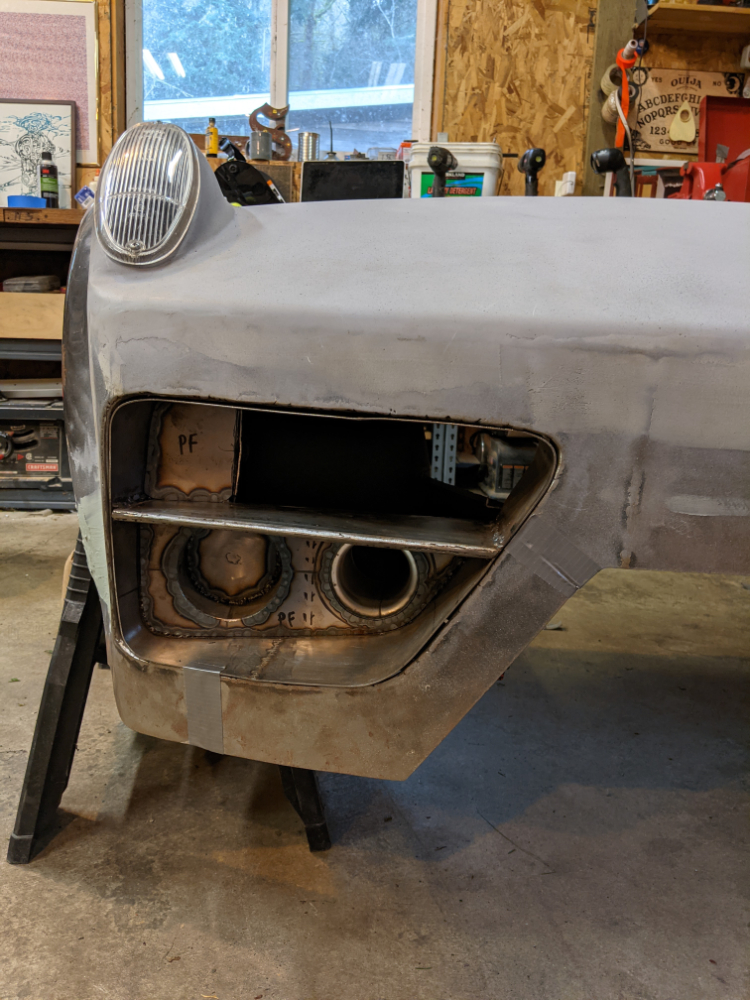
Posted by: plymouth37 Feb 13 2023, 11:58 AM
Tack welding has begun.
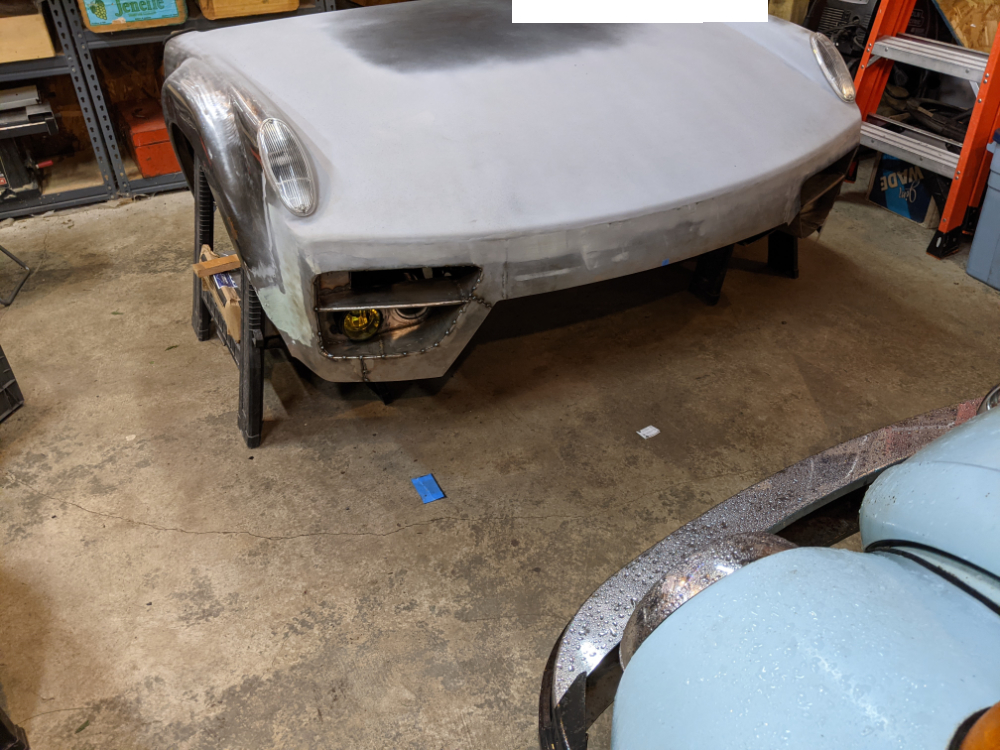
Fully welded in ready for finishing. I had to pie cut and reweld the seam that attached the center section of the bumper, the contour of the center opening was a hair too far out to match the contour of the top of the bumper, all good now!
Next I will flip the nose over and work on underside and interior.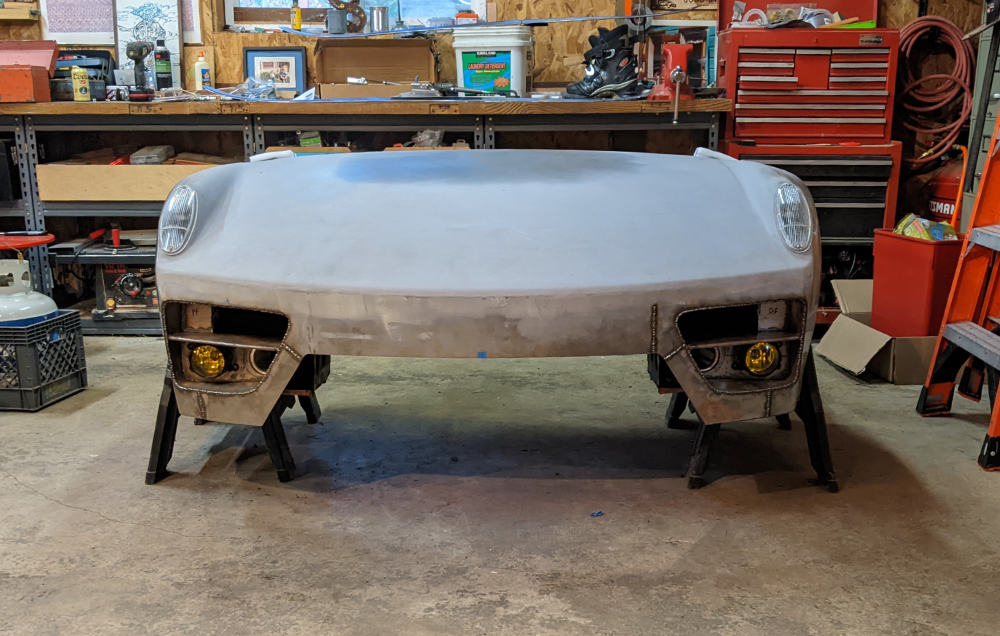
Posted by: plymouth37 Feb 13 2023, 11:59 AM
The first time I saw this thread I started way towards the end somehow, and I only saw the recent nose fabrication. So I had no idea all that had gone into this build over a decade plus. Now that I have seen 79 pages of its amazing development I fully agree with all the compliments to your design and fabrication skills, Dana - you've got quite the car factory running there! But I also want to say how impressed I am with the sheer patience and determination it has taken to keep this project moving forward, bit bit bit, year by year, while clearly "having a life" all along. Quite a ride, so to speak.
My favorite part so far has been the test drive through the woods after you fixed the turbo boost, and you first realized what a rocket monster you've unleashed! "Adequate power" as Rolls-Royce would say.
Add me to the list of would-be designers rooting you on and getting inspiration from your fearsome Anklebiter.
Little Miss Anklebiter is clearly enjoying growing up with a tube framed sibling.
The other day I had just absorbed one of the long rustoration patch-welding threads and wondered, "at what point do you just start building sections from scratch?" Then I came across your thread which is an answer to that question - even though you started with a rust-free car!
Thanks for the kind words, I am not great at finishing projects but I refuse to give up on this one!
Posted by: flipb Feb 13 2023, 12:29 PM
Every time @http://www.914world.com/bbs2/index.php?showuser=4138 posts an update to this thread, it's a little like Christmas morning. Can't wait to open it up and see the latest.
Posted by: tubegeek Feb 13 2023, 05:14 PM
The first time I saw this thread I started way towards the end somehow, <snip> But I also want to say how impressed I am with the sheer patience and determination it has taken to keep this project moving forward, bit bit bit, year by year, while clearly "having a life" all along. <snip>
Thanks for the kind words, I am not great at finishing projects but I refuse to give up on this one!
I've tried my best to live up to my motto from grad school: "Too stubborn to fail!"
"When your only head is a hammerhead, every problem looks like an endurance test..." or something like that.
Posted by: plymouth37 Mar 10 2023, 06:19 PM
I flipped the nose over and started patching the holes between the original structure and the new bumper.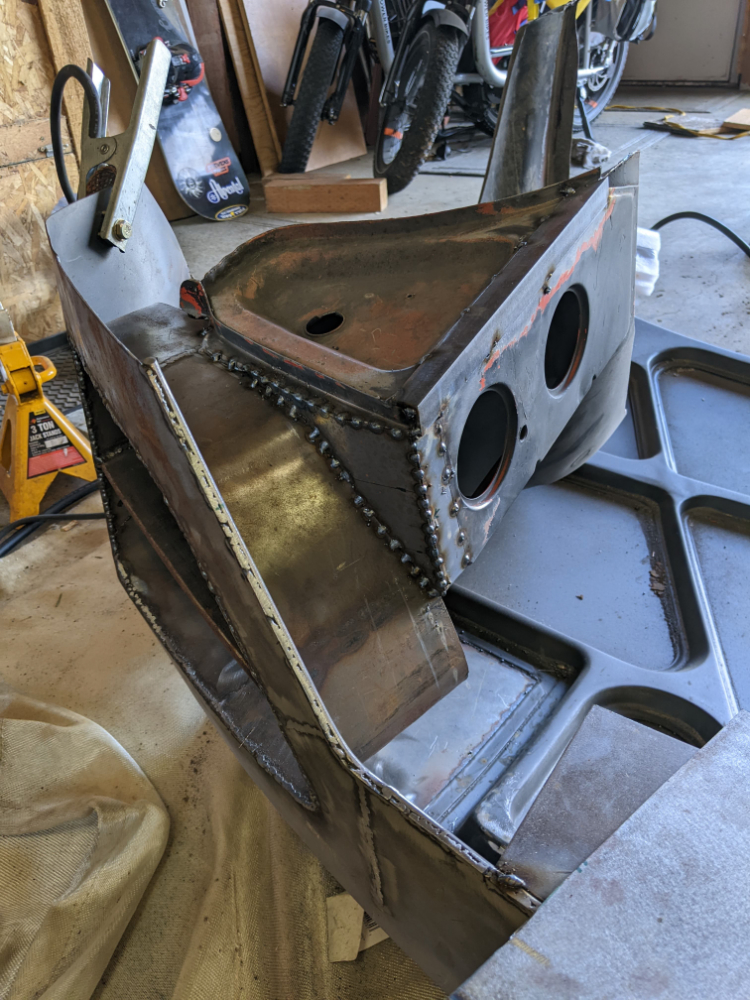
Made some templates for the inner surround of the main grill opening.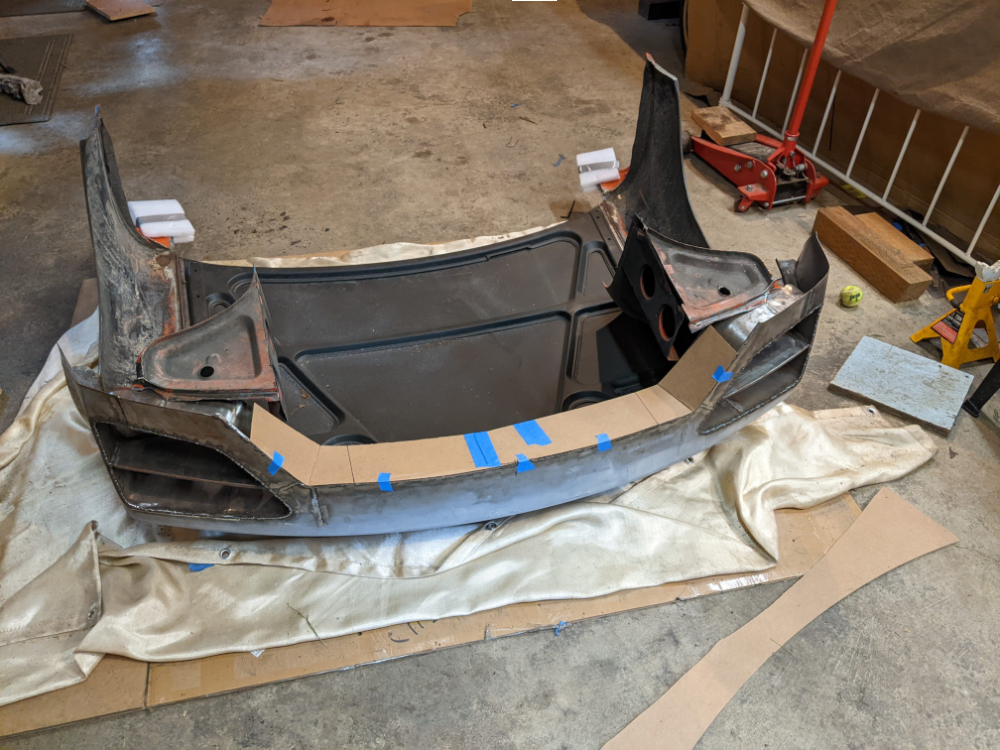
Welded in Steel for the intake surround.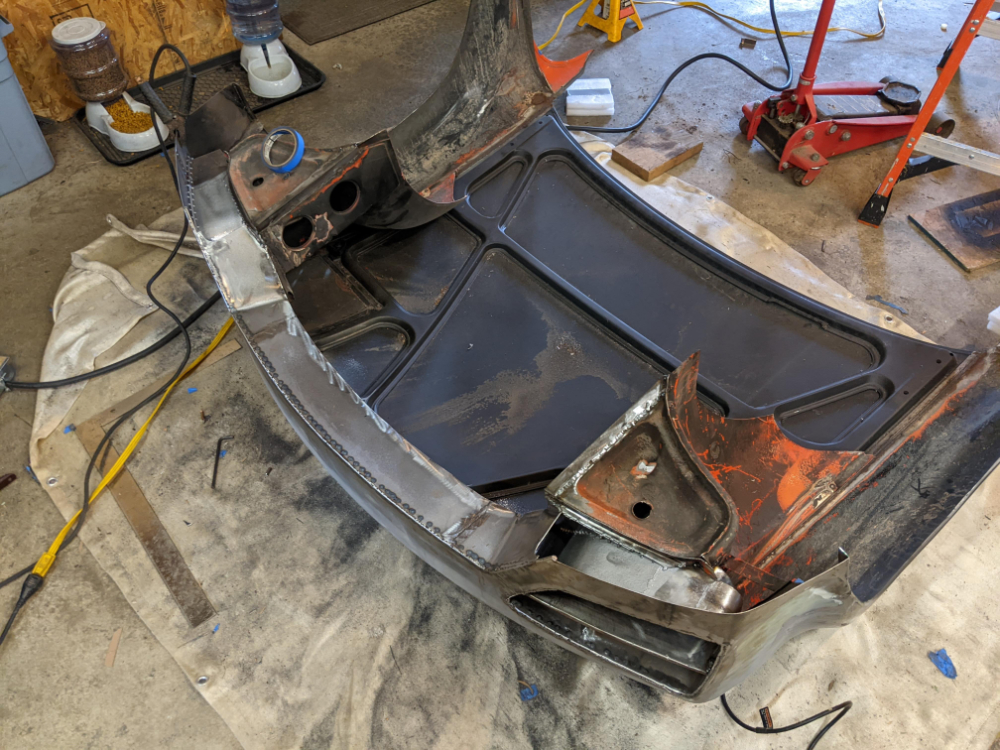
Then finished the welds.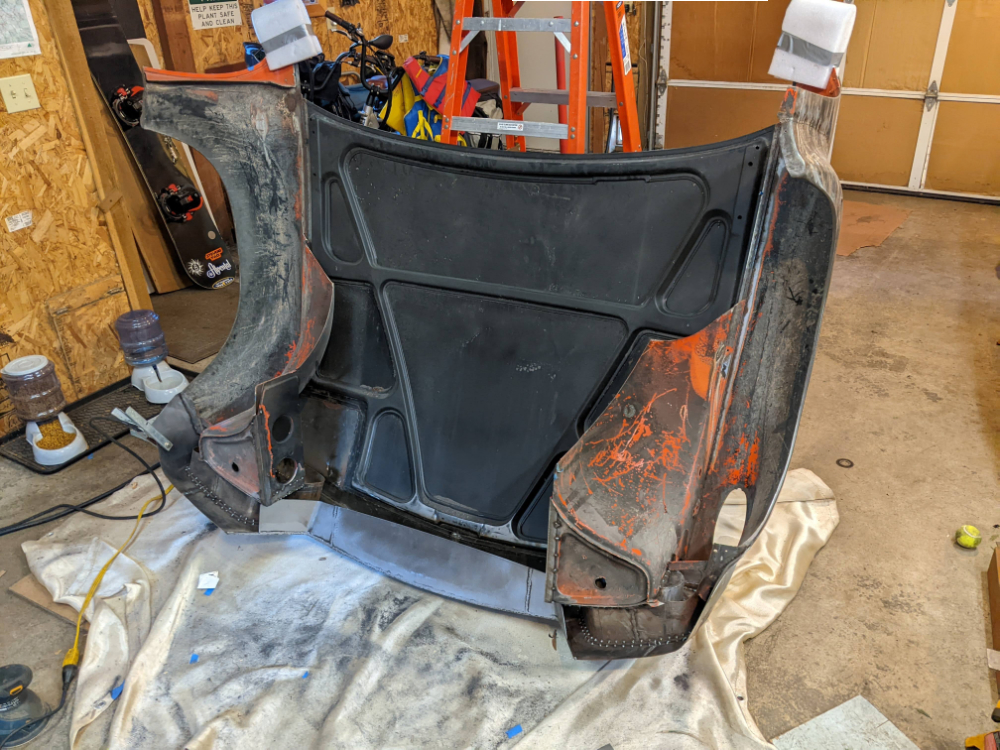
While the nose was upsidedown I also added some welds to the back side of the bumper seams and boxed in part of the back of the radiator opening.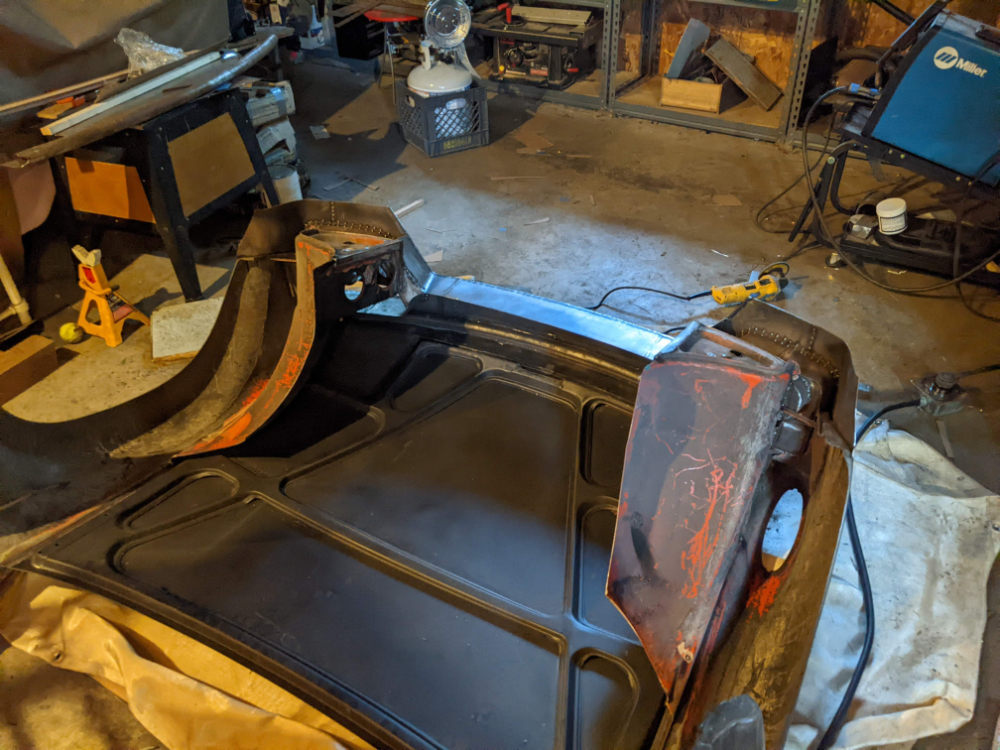
Posted by: plymouth37 Mar 10 2023, 06:19 PM
Did you know finger sanders are awesome? There were a ton of tight spaces I had to clean before I welded them up and it did a great job of getting into the tightest spots, definitely recommend.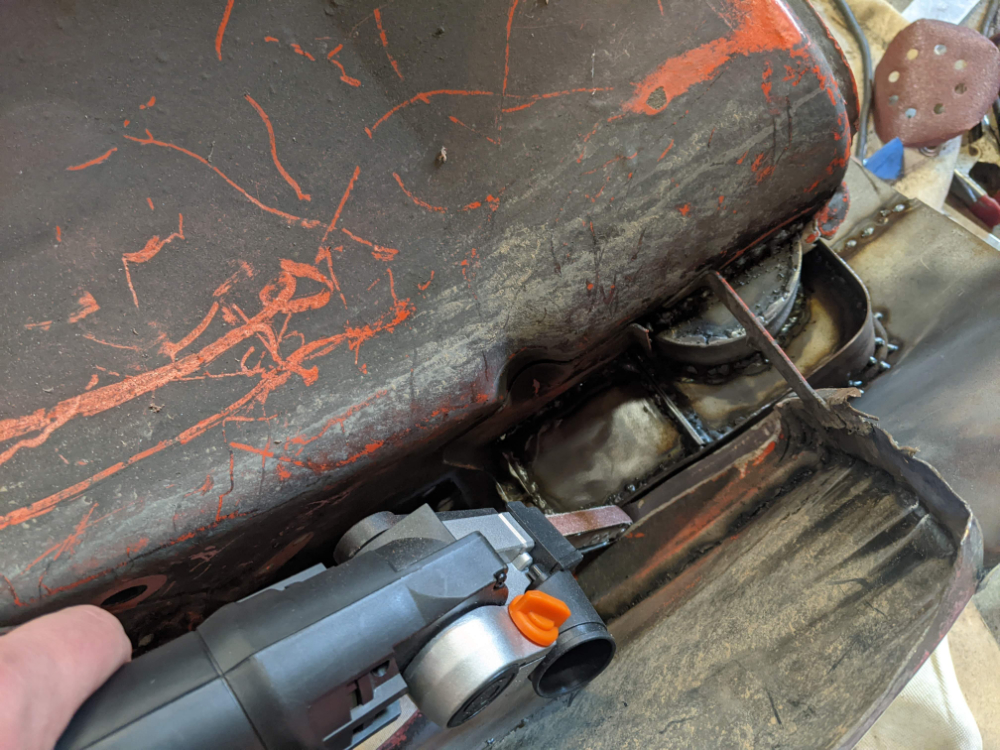
I trimmed and fit the lower lip bar into place.
I had to add some metal in the corner of the wheel opening to get that to look correct.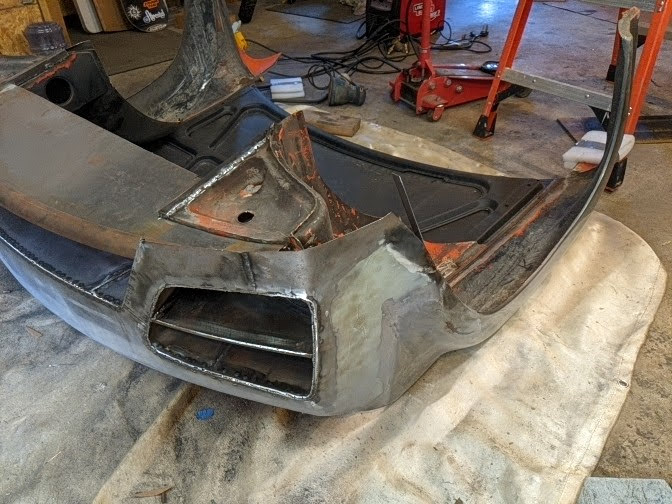
Then welded the lip in and boxed in the edges where it met the bumper.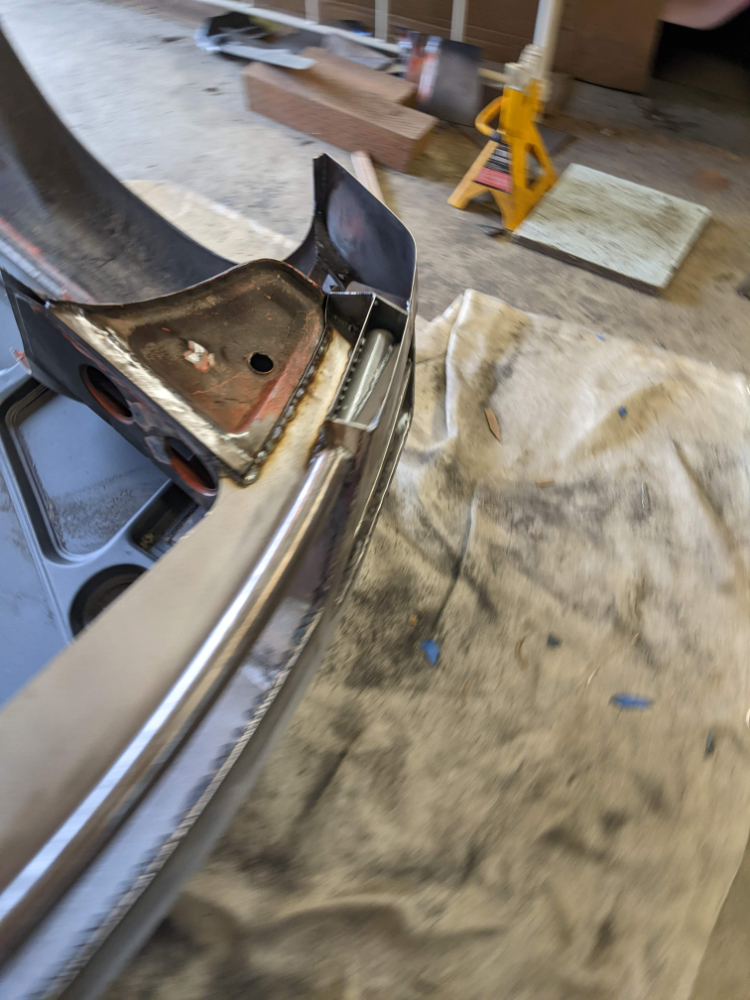
Then made some templates to box in the bottom of the bumper.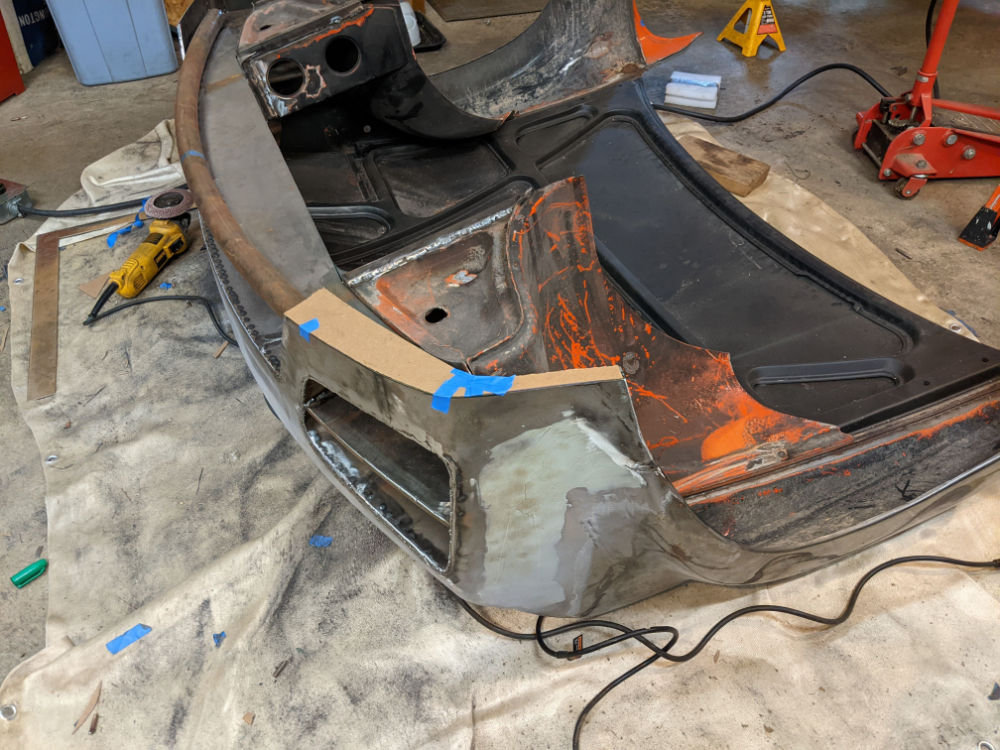
Posted by: plymouth37 Mar 10 2023, 06:19 PM
I capped the bottom of the bumper.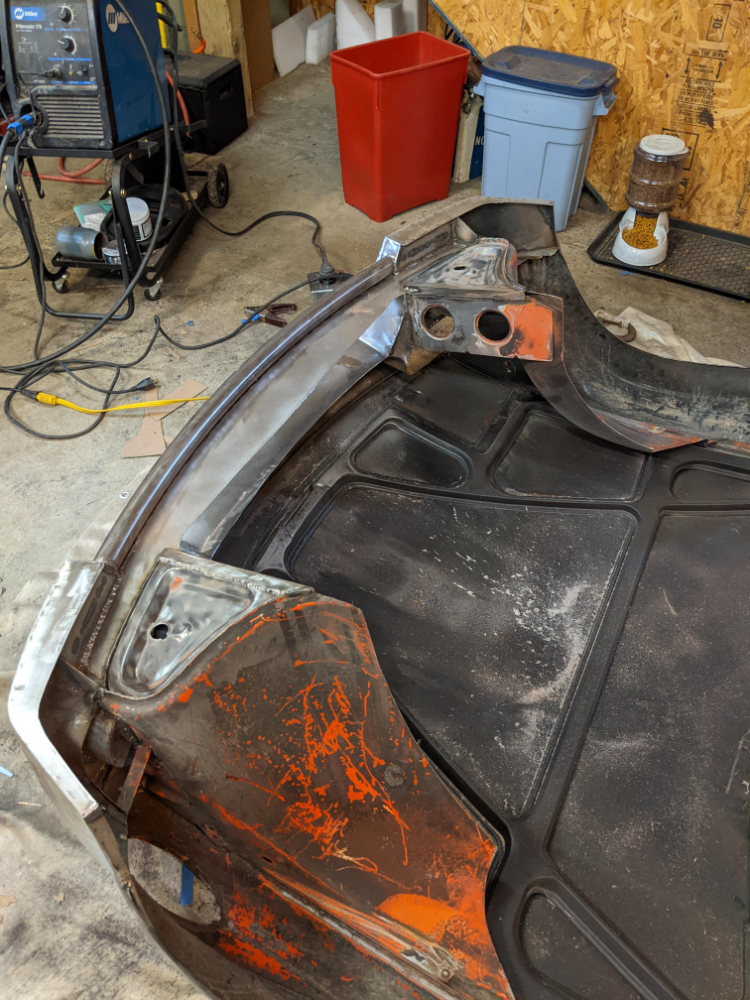
here is everything welded up.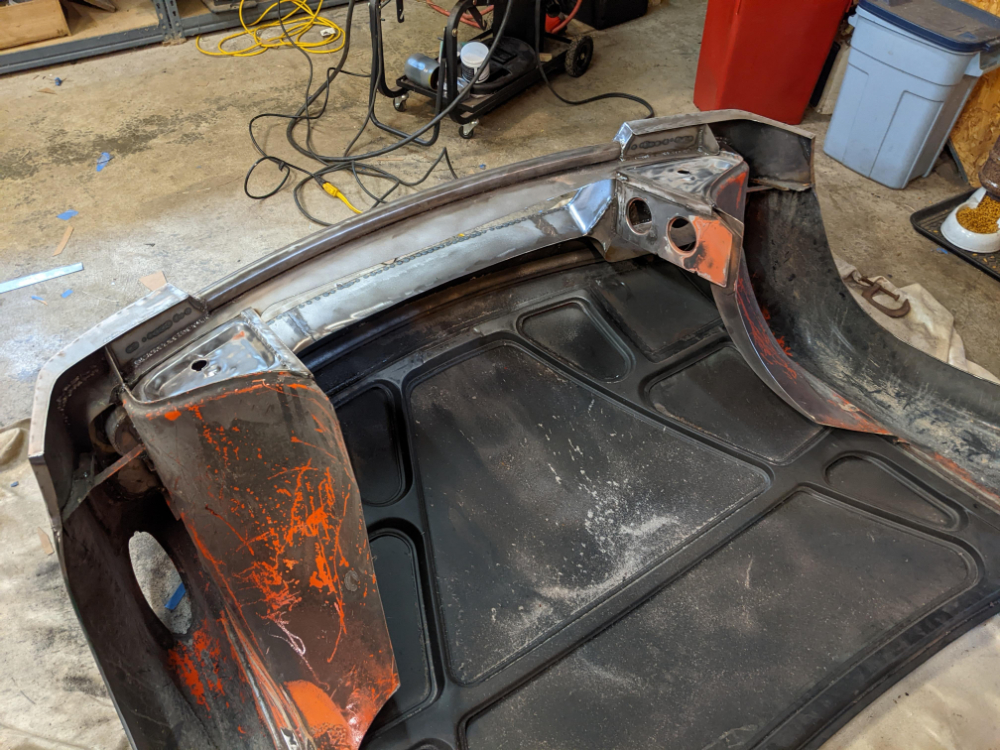
Last step is to weld in mounting tabs for the front opening hinges.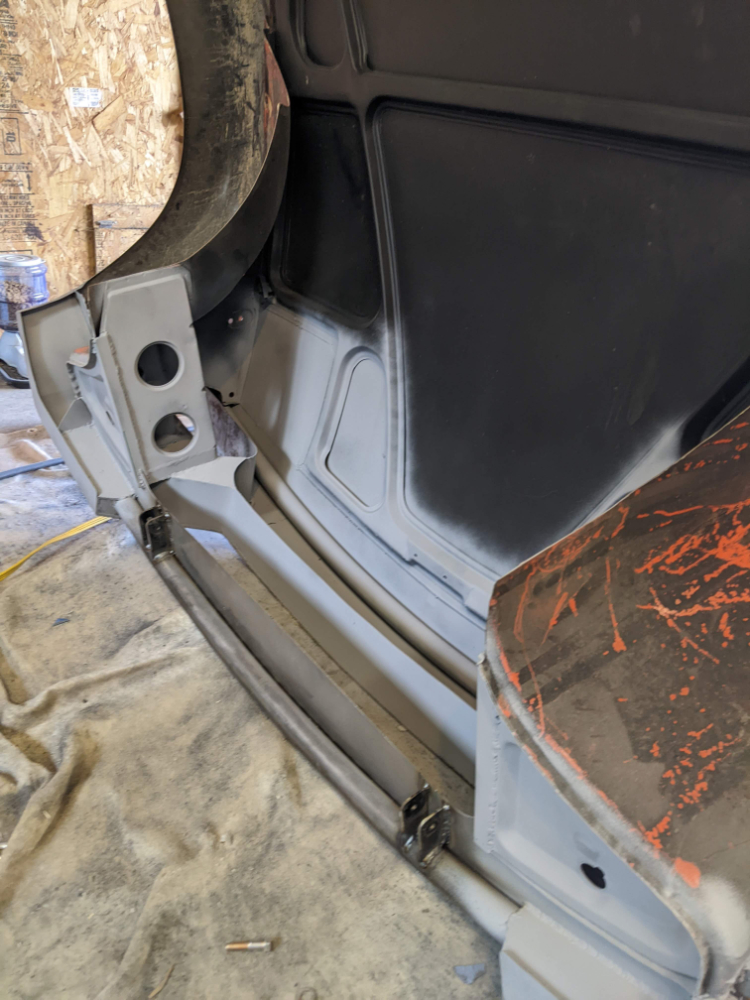
Tune in next time where I flip it over and we see how it looks!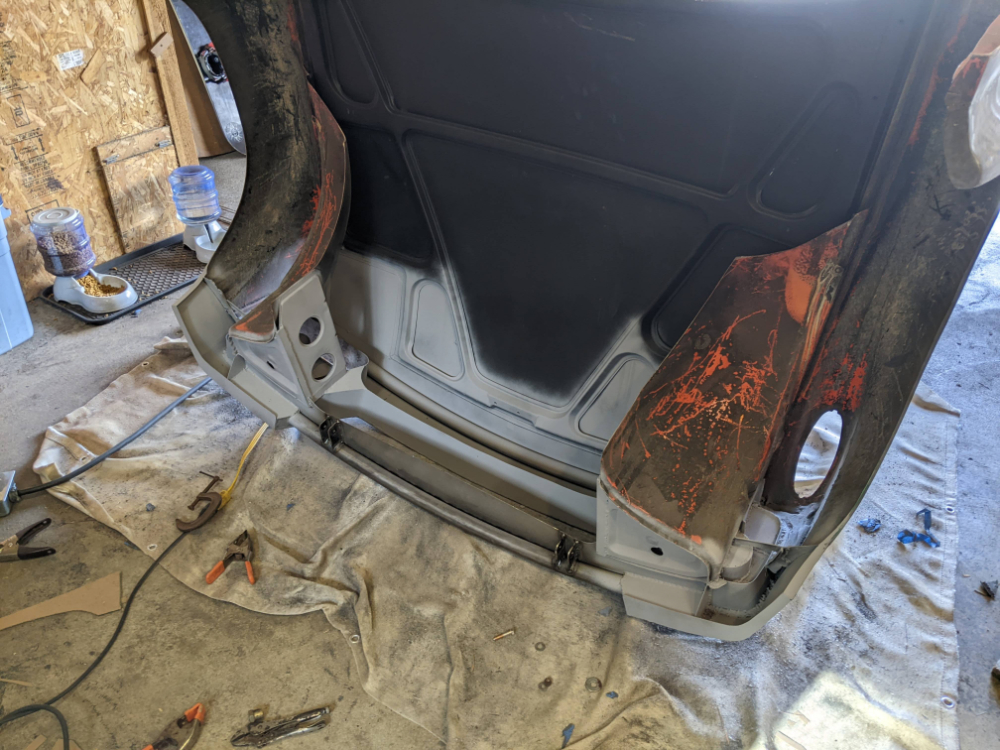
Posted by: 76-914 Mar 10 2023, 08:00 PM
I never heard them called finger sanders but you're right about their usefulness. Don't buy anything but 3M Cubitron belts. Pricey bastards but they last. Especially if you flip them over. Seems like one side always wears faster than the other. I look forward to your updates. You're a Metal Michelangelo.
Posted by: tygaboy Mar 11 2023, 09:22 AM
World's Best Modified 914
Posted by: plymouth37 Mar 13 2023, 11:30 AM
I flipped the nose over and hit it with some metal etch primer and some high build.
Still a lot of body work to do but here is the best look so far as to how it will look.
Next I will grind down offensive welds, hammer down some high spots and enter sanding land.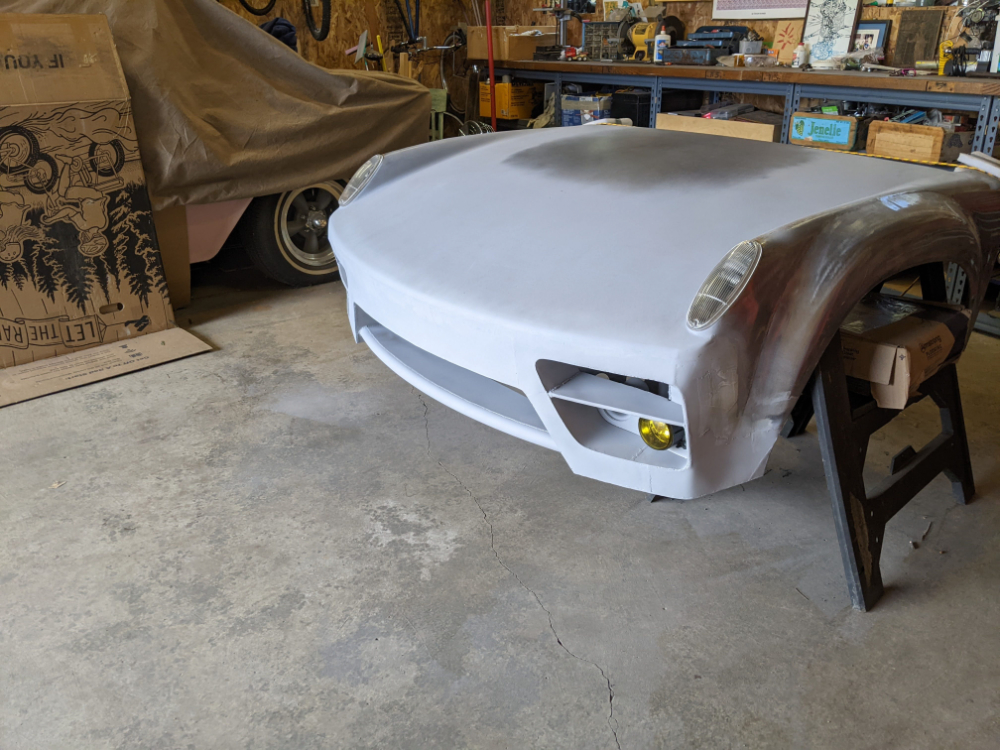
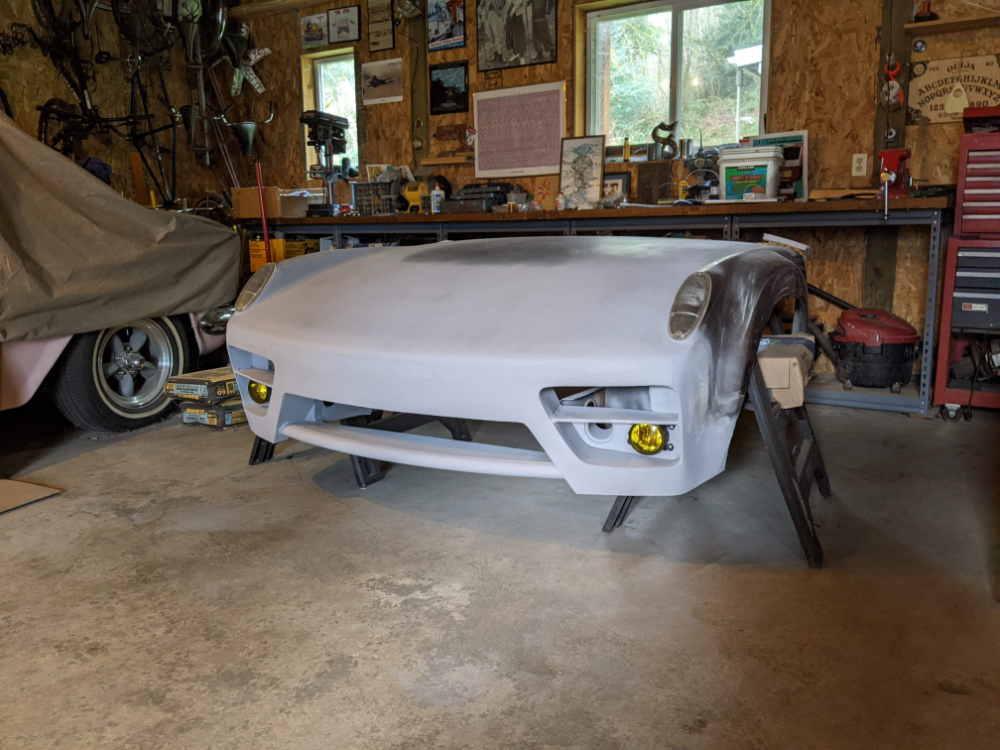
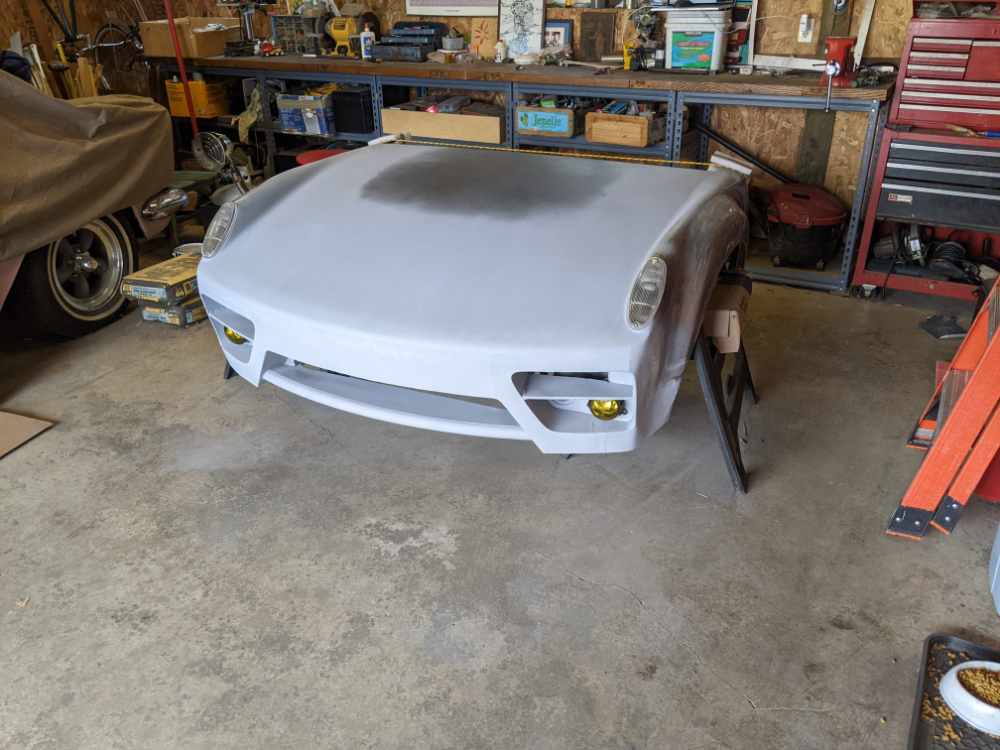
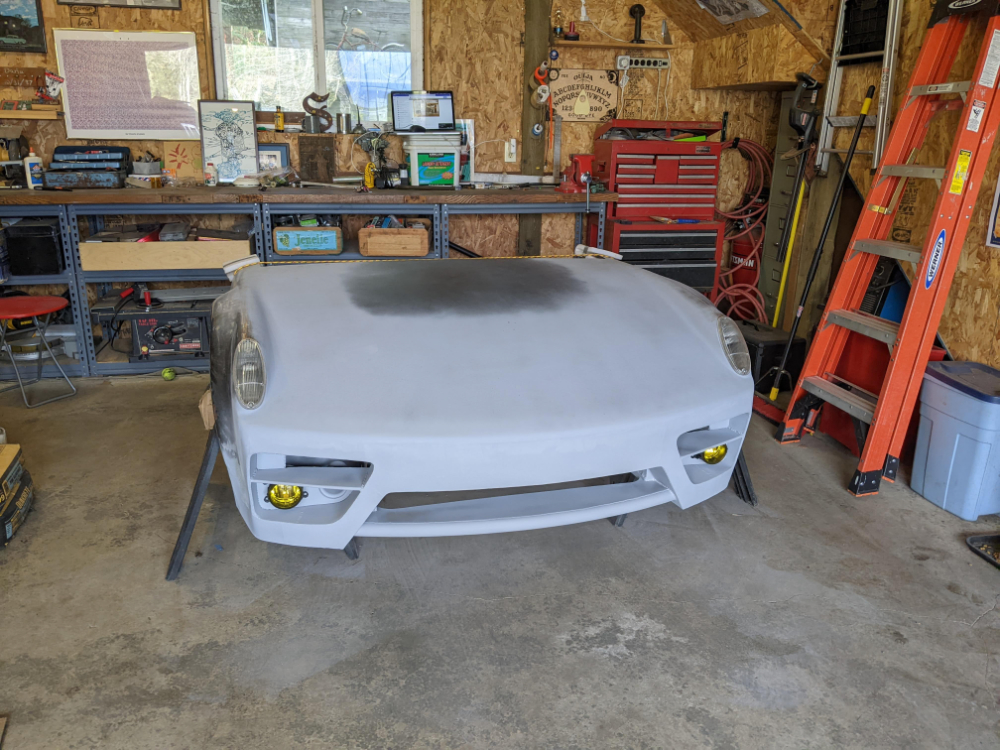
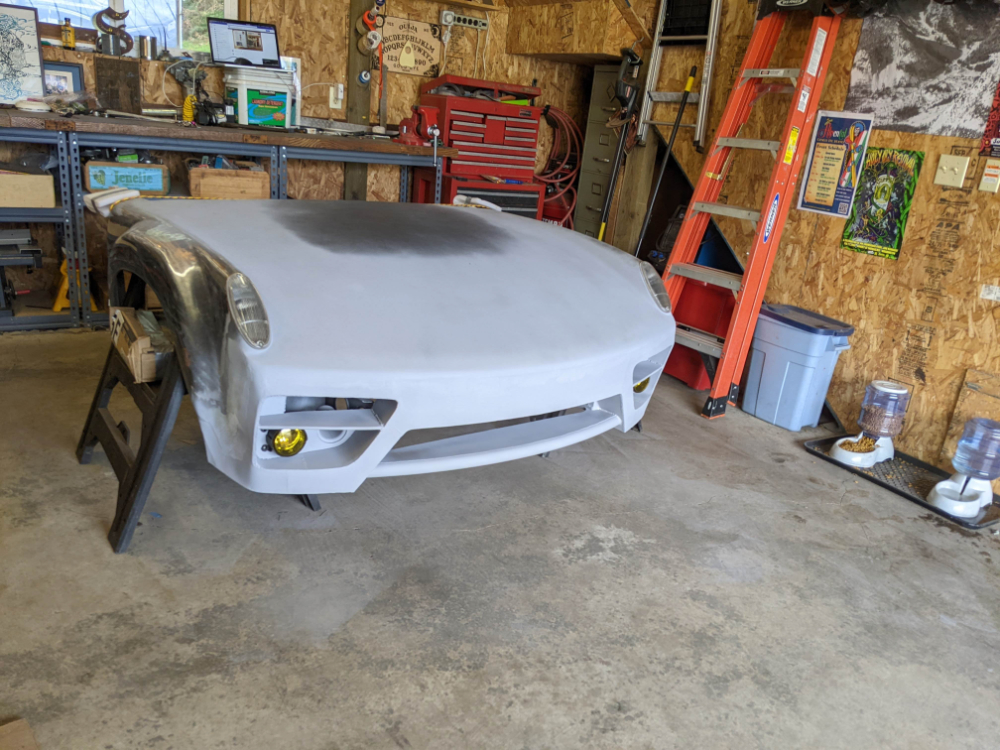
Posted by: Cairo94507 Mar 13 2023, 11:42 AM
Beautiful work.
Posted by: mgarrison Mar 13 2023, 01:35 PM
Simply amazing!
Posted by: East coaster Mar 13 2023, 08:04 PM
Looks awesome!
Posted by: Syscrush Mar 24 2023, 07:58 AM
Like many others, I've been watching this thread for a long time - since I found it on build-threads.com - probably around 2014 or so.
And I finally cracked and signed up here just so that I could tell you how much I love the work you've done on this project so far. It's really on another level.
The new front end looks sick as hell - another in a long list of really cool touches.
Posted by: flyer86d Mar 24 2023, 03:02 PM
Wow! Very nice.
Charlie
Posted by: horizontally-opposed Mar 24 2023, 09:17 PM
Seriously impressive work, and love the aesthetics too. Fabulous!
Posted by: KELTY360 Mar 26 2023, 03:18 PM
Epic.
I’ve just spent a couple of days re-reading this thread and near as I can figure The Anklebiter Project has spanned almost 15 years (more when the Rengade genesis is included), at least 7 moves with entire sections of the car transiting to different regions and relentless focus on the initial description. All this while raising a family and pursuing an elite education.
It’s gone beyond a project into the realm of a life’s work becoming a masterpiece. Dazzlingl.
Now that you’ve got the windshield in place and the front body in metal, I’ve got to guess you’re thinking about the rear body section. Have you got a plan for that yet? Is it still in Wyoming?
What is your shop situation? Your most recent pics show a larger garage with what looks to be your father’s vintage Rambler covered up in the corner.
Thanks Dane. You’ve provided hours of reasons to procrastinate at the same time inspiring motivation to get into the garage and get something done. Kudos.
Posted by: plymouth37 Jun 20 2023, 11:12 AM
Epic.
Now that you’ve got the windshield in place and the front body in metal, I’ve got to guess you’re thinking about the rear body section. Have you got a plan for that yet? Is it still in Wyoming?
What is your shop situation? Your most recent pics show a larger garage with what looks to be your father’s vintage Rambler covered up in the corner.
Thanks Dane. You’ve provided hours of reasons to procrastinate at the same time inspiring motivation to get into the garage and get something done. Kudos.
Hey, thanks for the kind words, yeah, it has been quite a journey! As for your questions:
I am definitely starting to think about the rear body work, it is still in Wyoming but I am going out there this Summer and will ship it back, marking the first time the whole car was in the same state in about 8 years...
I turned that detached garage on my property that the car used to be in into a little house for my Mom over the pandemic (thanks work from home!). The car had to move to my Dad's house about 15 minutes from me, that is the newer garage with the Rambler. Now my Dad is moving to the house across the street from his old house and I moved into the detached shop on that property, I think this one will be home base for a while!
Posted by: plymouth37 Jun 20 2023, 11:24 AM
I have worked on the car quite a bit but it is just endless sanding.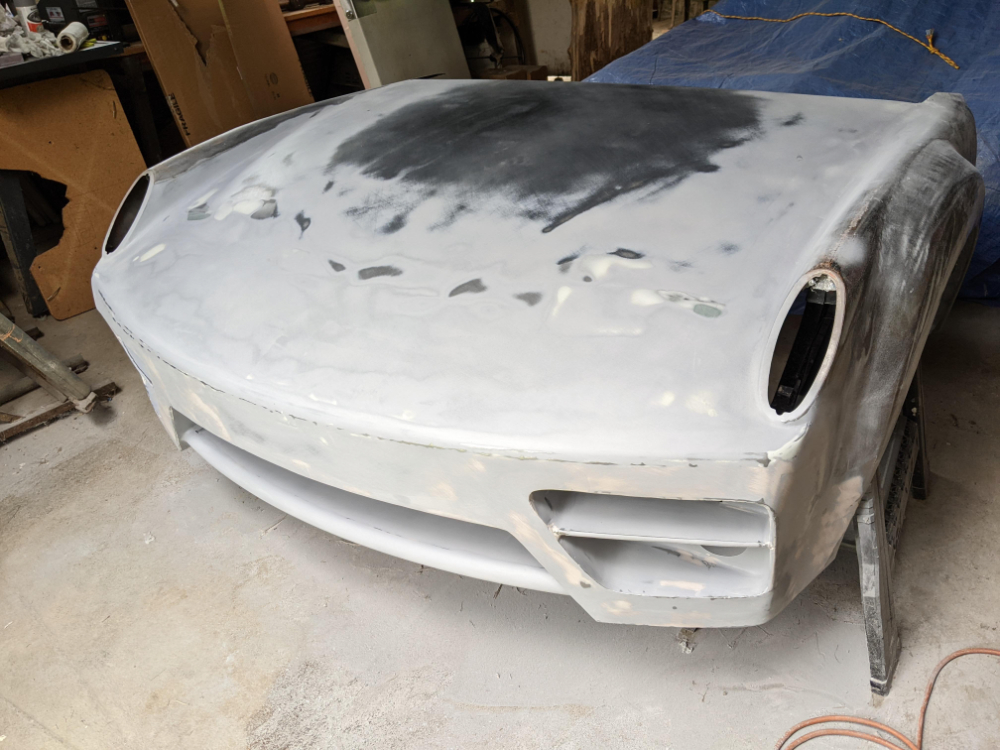
My goal is to get the entire nose into Primer, filler primer is your friend when you need to smooth out Frankenstein bodywork...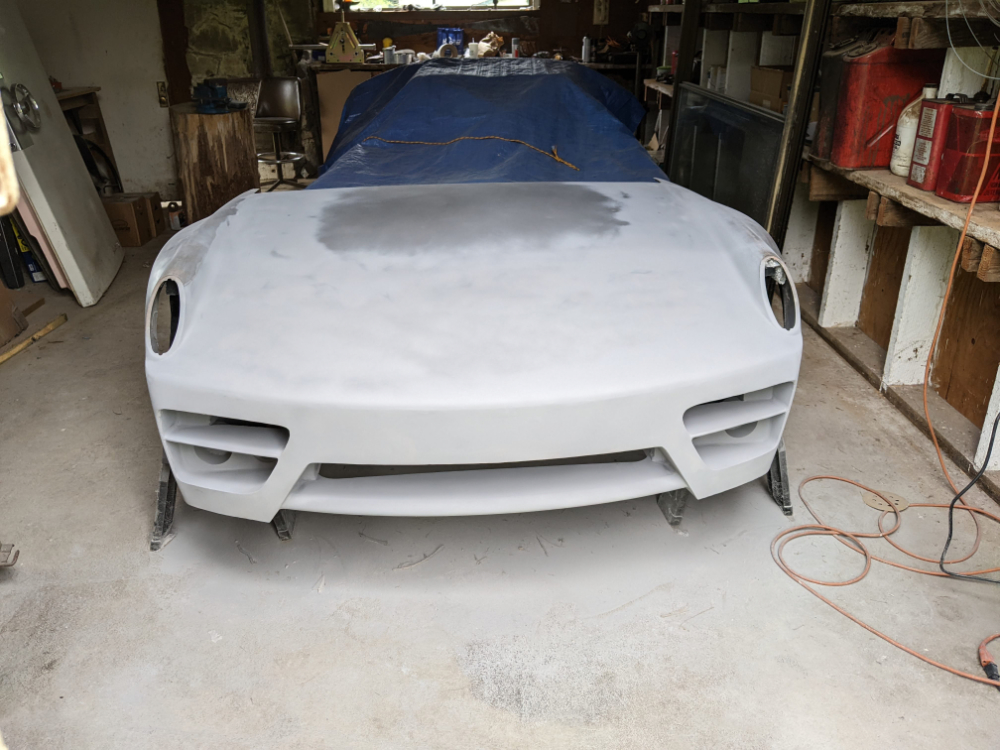
The fender flares have been clear coated steel since the Vegas days and it is still hanging on pretty well, time to remove all of that.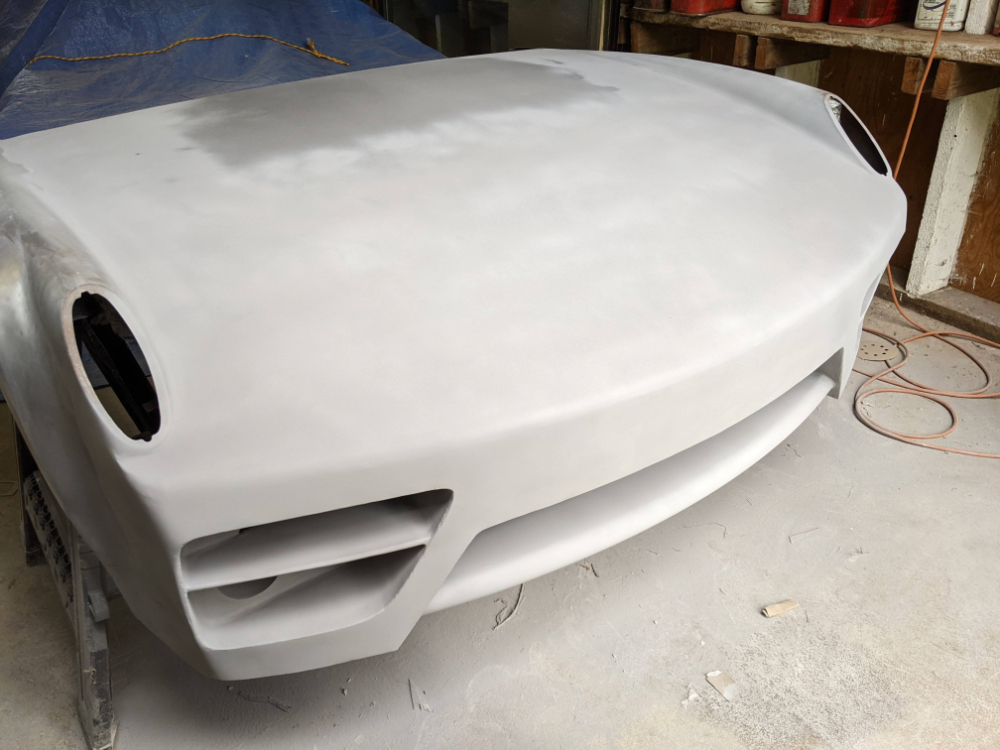
I removed all of that clearcoat and filled and primed the rest of the fenders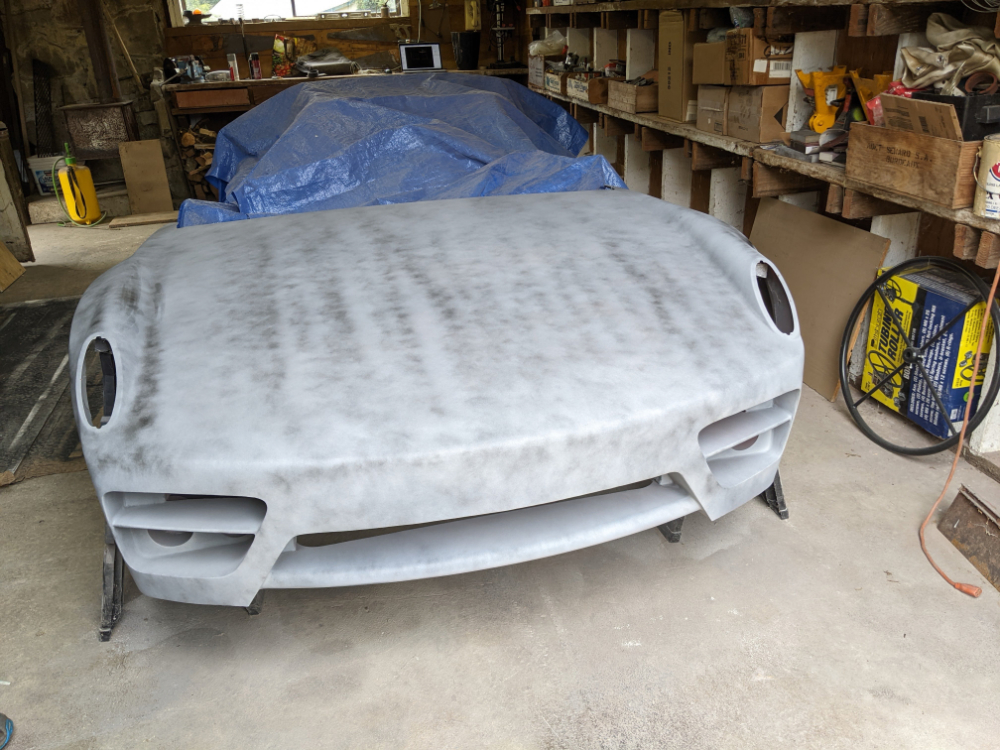
More sanding, more primer.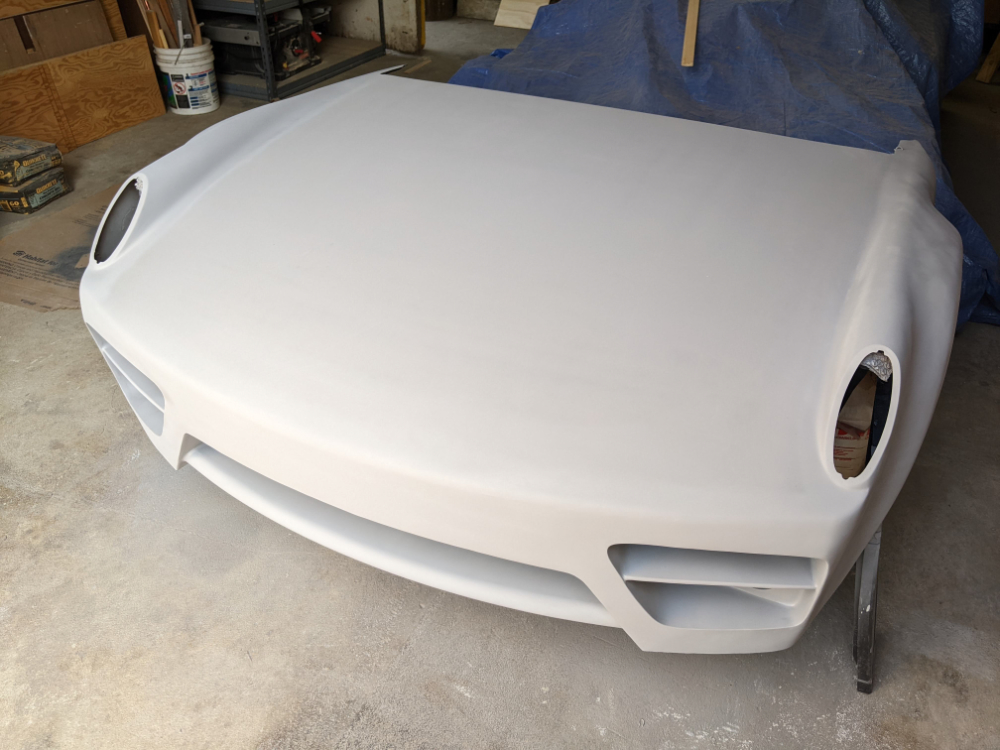
Getting somewhere now, bodywork is maybe 80% there, I need to focus on hinges and latches before I take it the rest of the way. Next time I'll put it on the car and see how it looks!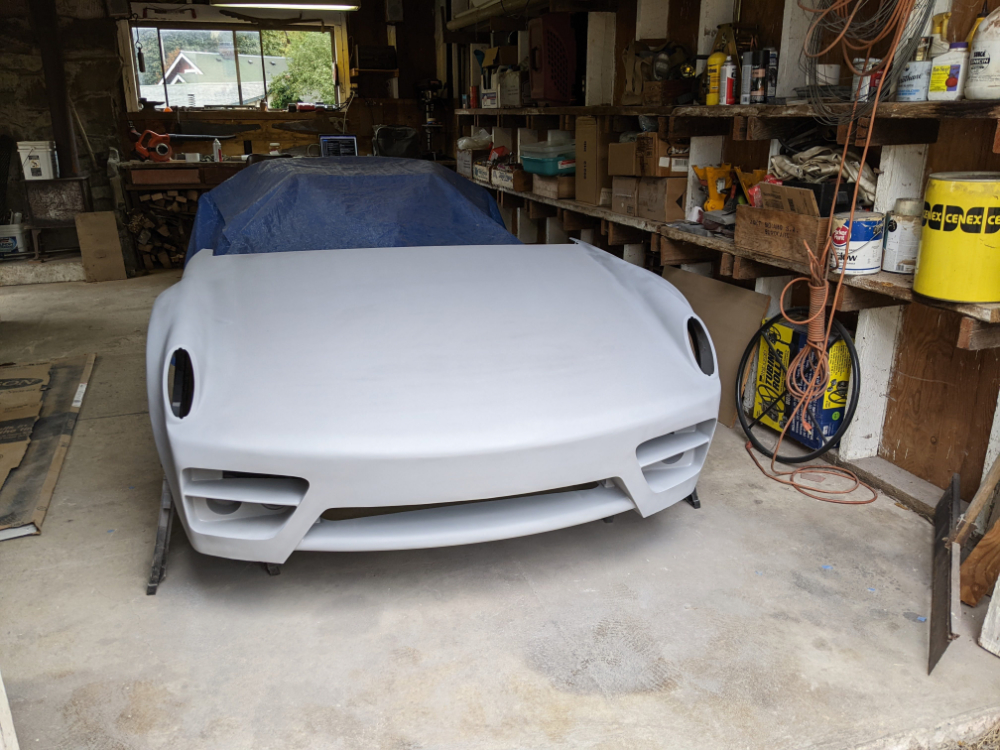
Posted by: Shivers Jun 20 2023, 11:41 AM
That’s just plain sexy. Steel is real
Posted by: rhodyguy Jun 20 2023, 11:43 AM
WOW!
Posted by: Nate W Jun 20 2023, 02:24 PM
So bad ass!!
Posted by: tscrihfield Jun 21 2023, 08:39 PM
Holy Crap! That looks amazing! Been watching this build for years and it never disappoints.
Posted by: rhodyguy Jun 22 2023, 07:52 AM
What make is the pink car under the cover?
Posted by: sb914 Jun 22 2023, 08:00 AM
What make is the pink car under the cover?
37 Plymouth
Posted by: Shivers Jun 22 2023, 08:09 AM
I thought it was a 50s Rambler
Posted by: plymouth37 Jun 23 2023, 12:48 PM
I am just about ready to get the nose on the car but first I couldn't resist mocking up the lights and seeing how it all looks.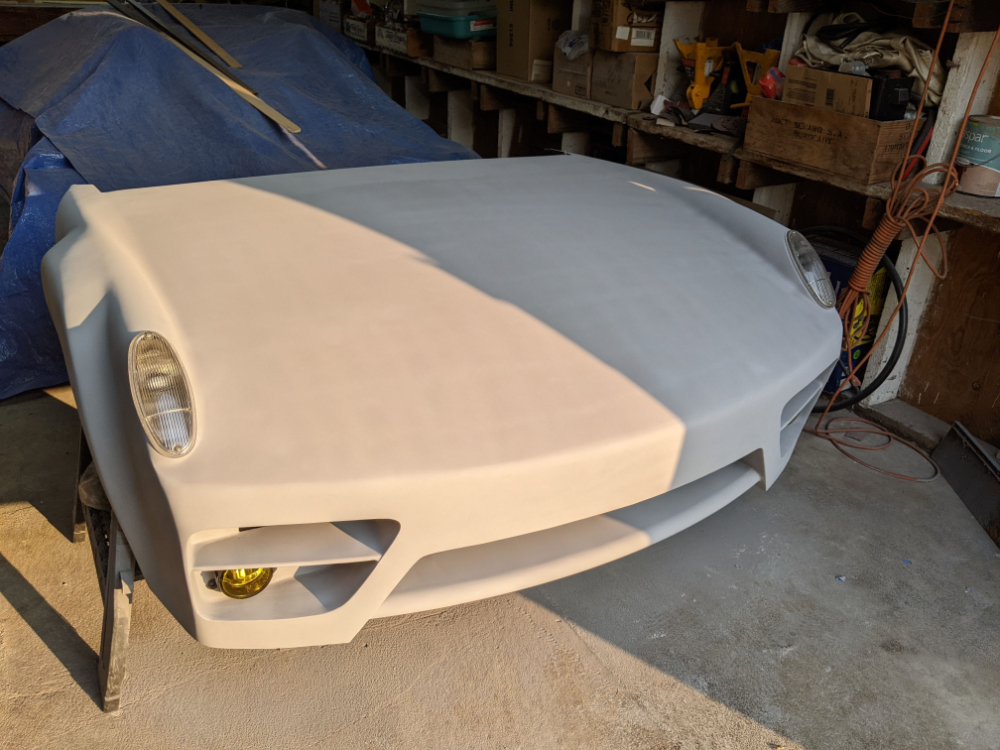
Projector headlights in the turn signal buckets are down the road but for now I swapped in Yellow and White Drl/turn led lights behind the clear lenses and called it good for now.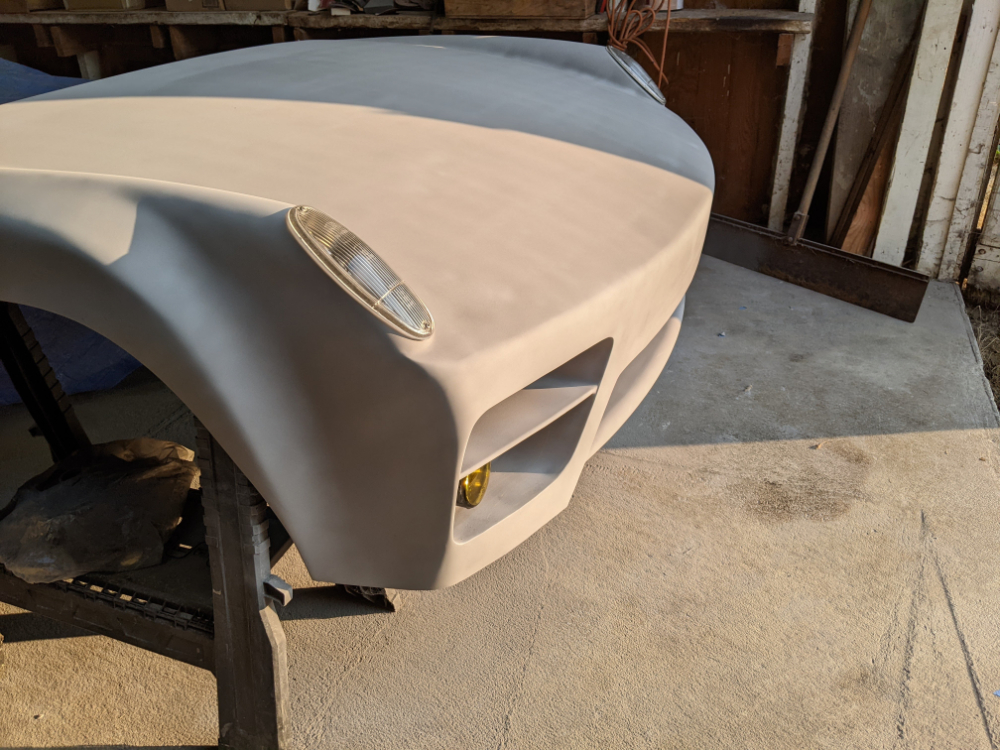
Looks like a Porsche to me!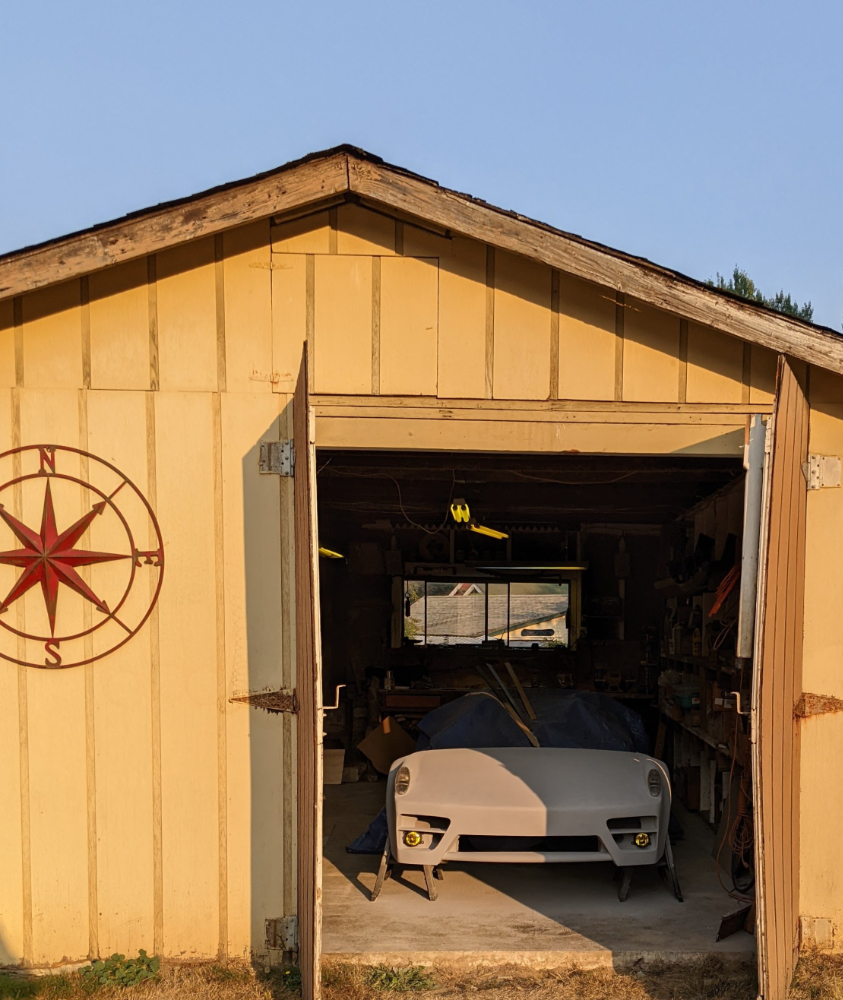
Posted by: Craigers17 Jun 23 2023, 03:10 PM
That thing is just badass. Awesome fabrication. You seem like the type of guy who is going to fabricate everything one off, but there is a guy here.... beng295.... who looks like he has come up with a great looking solution for projector headlights/blinkers in the turn signal housing. Here's a ink to his site if you are interested:
https://3dgauto.com/
I have no affiliation with this vendor, but am considering buying a set myself.
Posted by: KELTY360 Jun 23 2023, 03:20 PM
What make is the pink car under the cover?
37 Plymouth
I think it's his dad's '59(?) Rambler. Saw it at a car show a few years ago.
Posted by: flyer86d Jun 23 2023, 03:31 PM
I love it with the parking lights. That pinpoints the origin.
Charlie
Posted by: plymouth37 Jun 26 2023, 10:41 AM
That thing is just badass. Awesome fabrication. You seem like the type of guy who is going to fabricate everything one off, but there is a guy here.... beng295.... who looks like he has come up with a great looking solution for projector headlights/blinkers in the turn signal housing. Here's a ink to his site if you are interested:
https://3dgauto.com/
I have no affiliation with this vendor, but am considering buying a set myself.
That is pretty cool, I already bought the projectors and have designed the buckets already, I might reach out to see if I can buy some lenses though, I wasn't looking forward to figuring those out, good tip! Thanks!
Posted by: plymouth37 Jun 26 2023, 10:48 AM
Got the nose on, just kind of sitting there but hey, this looks like progress!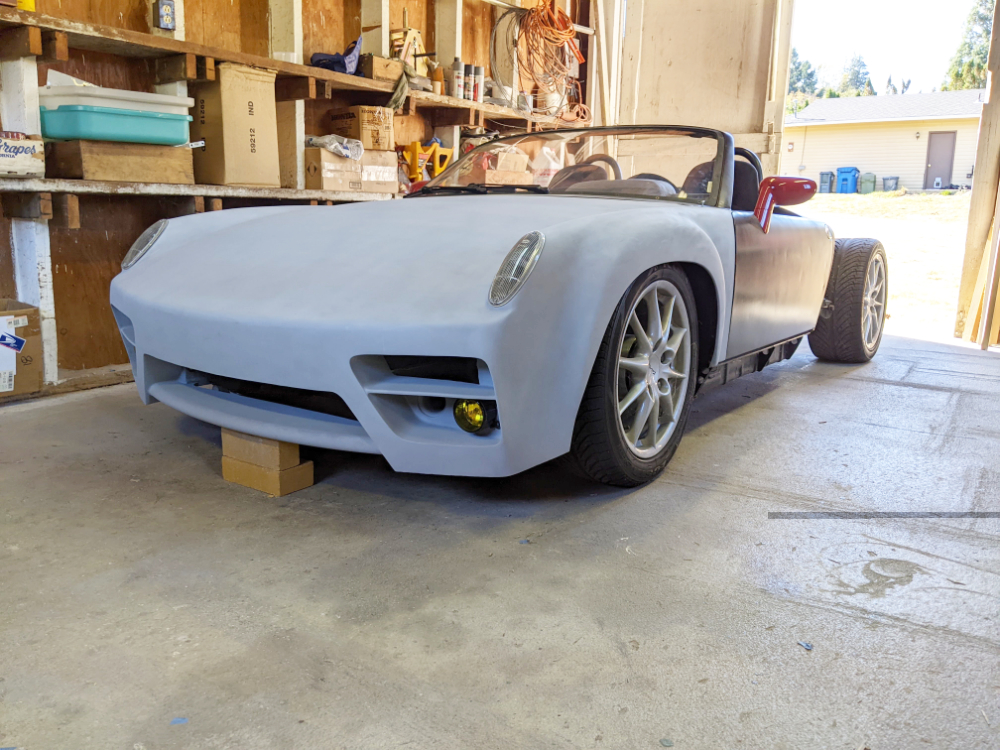
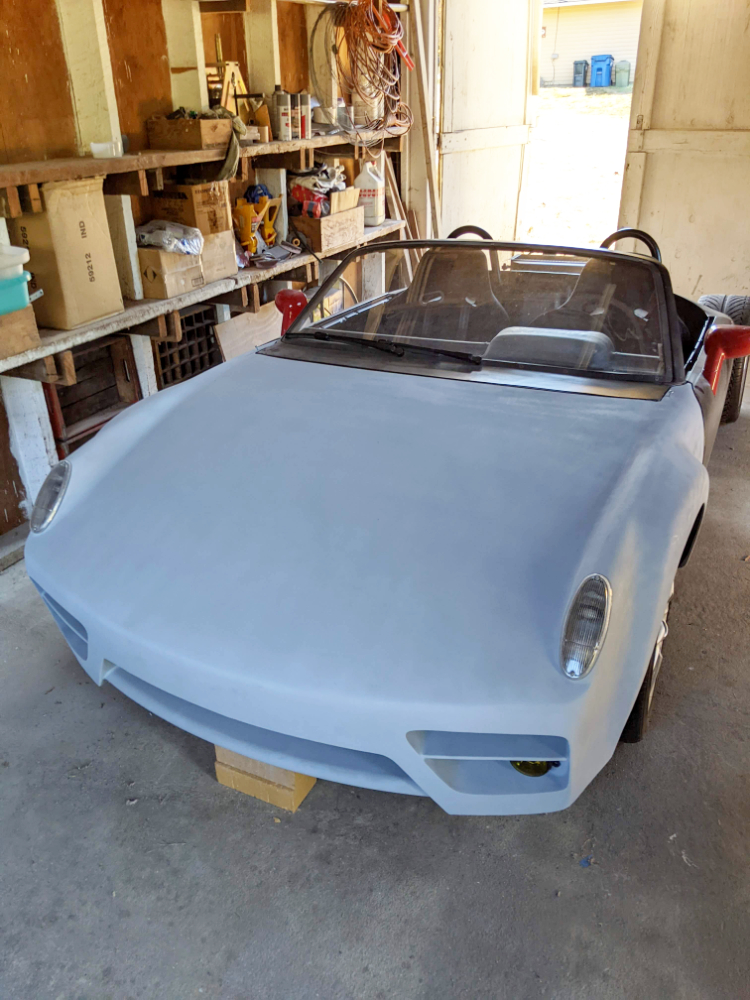
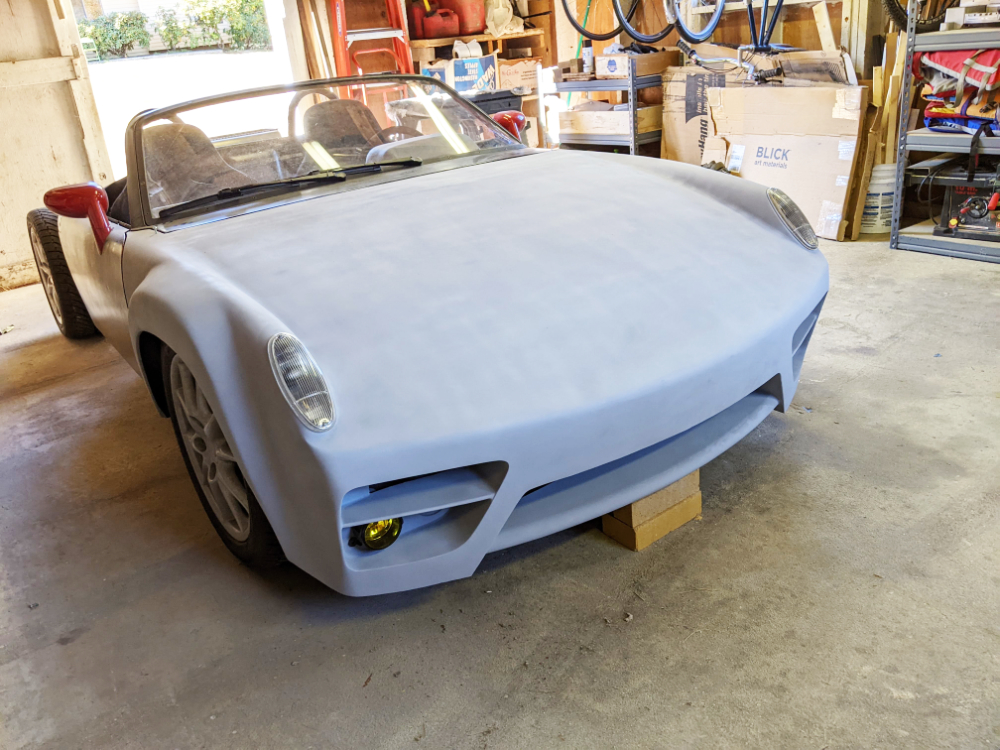
I am going to make front tilt hinges (for real this time) next!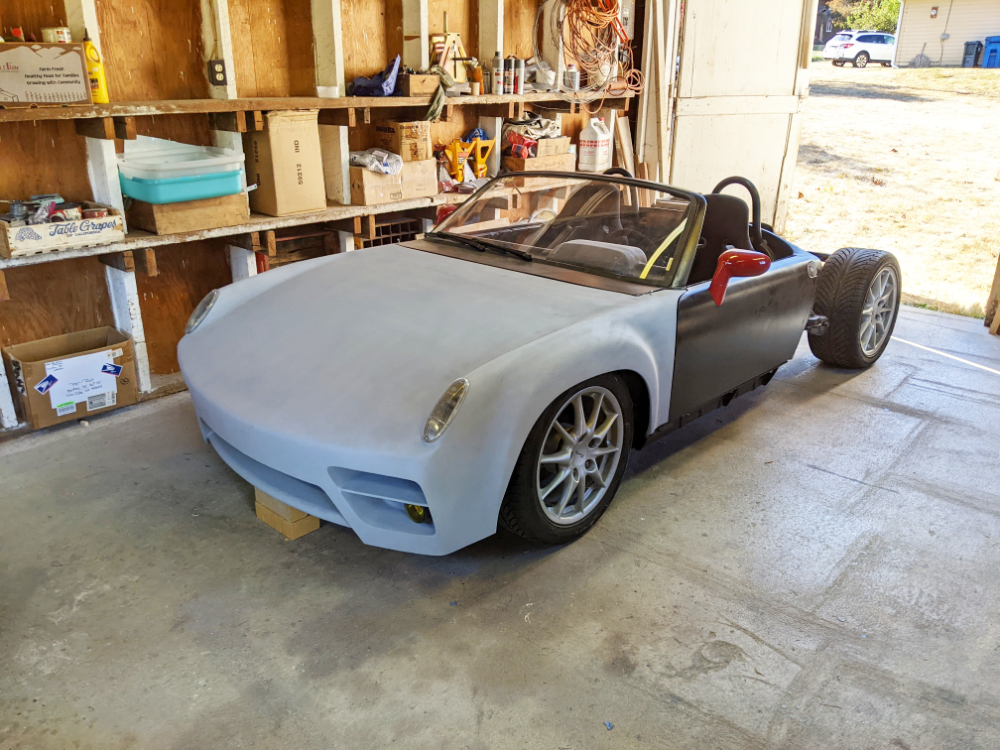
Posted by: rick 918-S Jun 26 2023, 11:20 AM
Looking Good Dana!
Posted by: tygaboy Jun 26 2023, 12:08 PM
OK, so I gotta say... Dana, this is so cool. You've accomplished the impossible:
You've messed with the basic 914 design in a major way and, IMO, improved it.
What an accomplishment! You should be very proud.
And, no pressure, but what the rear section going to look like?
Posted by: plymouth37 Jun 26 2023, 01:20 PM
OK, so I gotta say... Dana, this is so cool. You've accomplished the impossible:
You've messed with the basic 914 design in a major way and, IMO, improved it.
What an accomplishment! You should be very proud.
And, no pressure, but what the rear section going to look like?
Thanks for the kind words! Yeah the back will be a similar approach, weld the lid to the fenders, reimagined but not too weird rear lights, Ferrari F430 diffuser (image 50 pages back or so), hopefully I can figure out how to hinge it from the back of the car like a Muira. Also debating adding a targa bar, we will see?
But first I need to get it out of Wyoming...
Posted by: plymouth37 Jul 3 2023, 10:28 AM
Time to make the front hinges for real this time, for those of you following along I think this is the 3rd hinge design I have attempted for this, and i think it is the best solution.
I am making this out of bent angle steel and mounting into the front A-Arm mounts.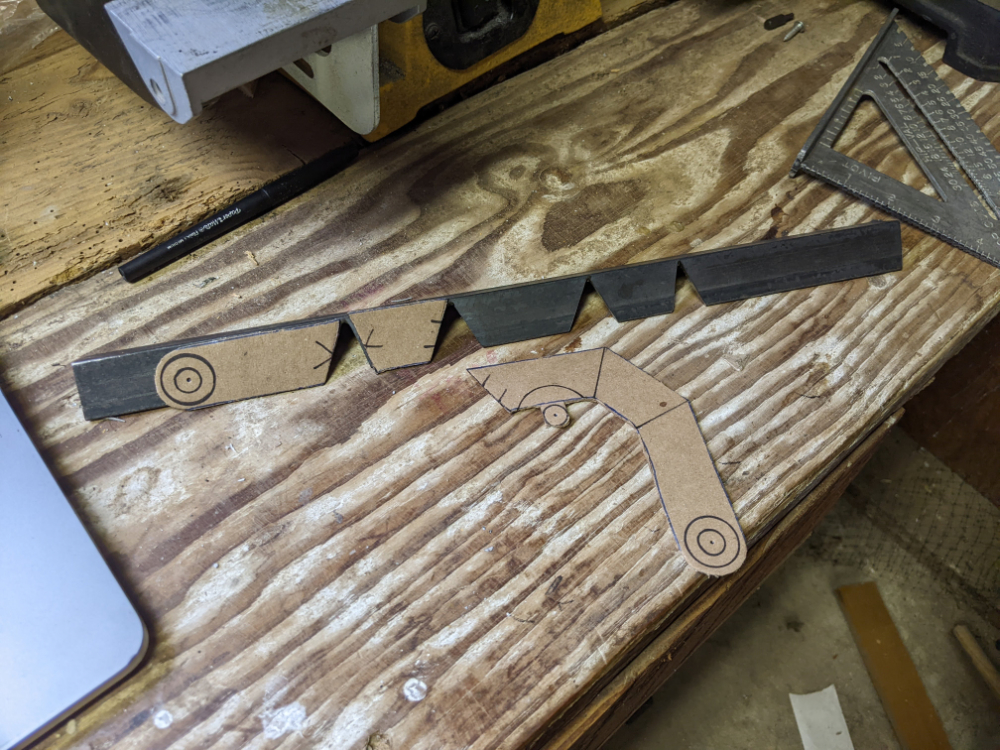
The lower you mount the pivot point the better these things open, staying below the bottom of the door ensures the back of the fender doesn't move back into the door as it opens.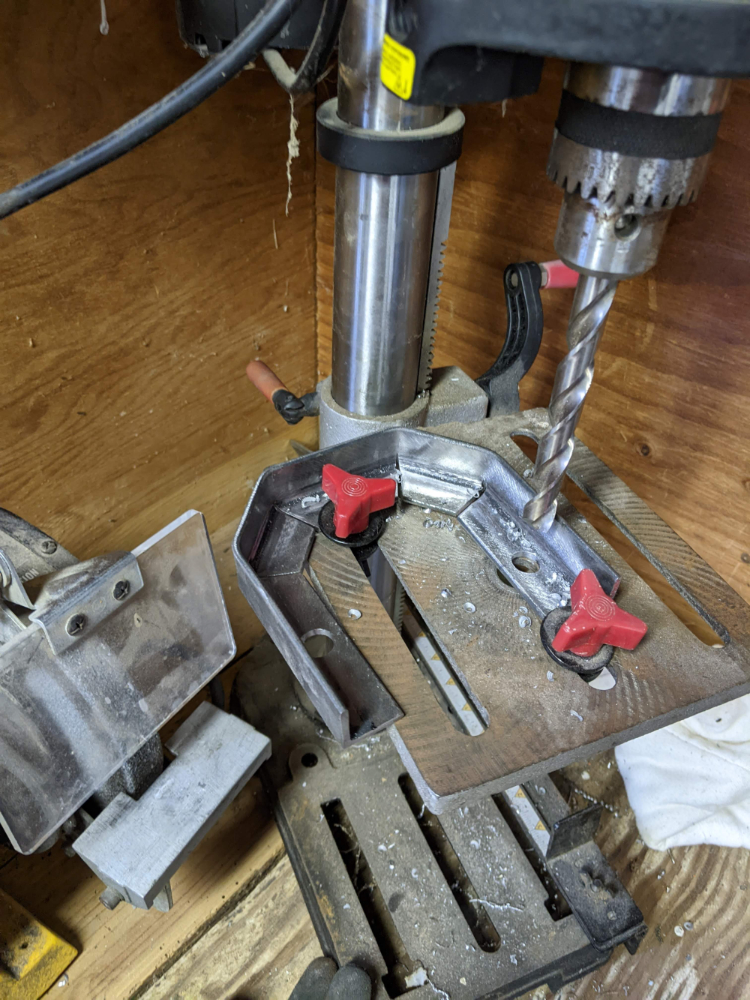
Mocked up now, I am running a big old heim joint into a coupling nut, looks like it all works, time to weld it all together.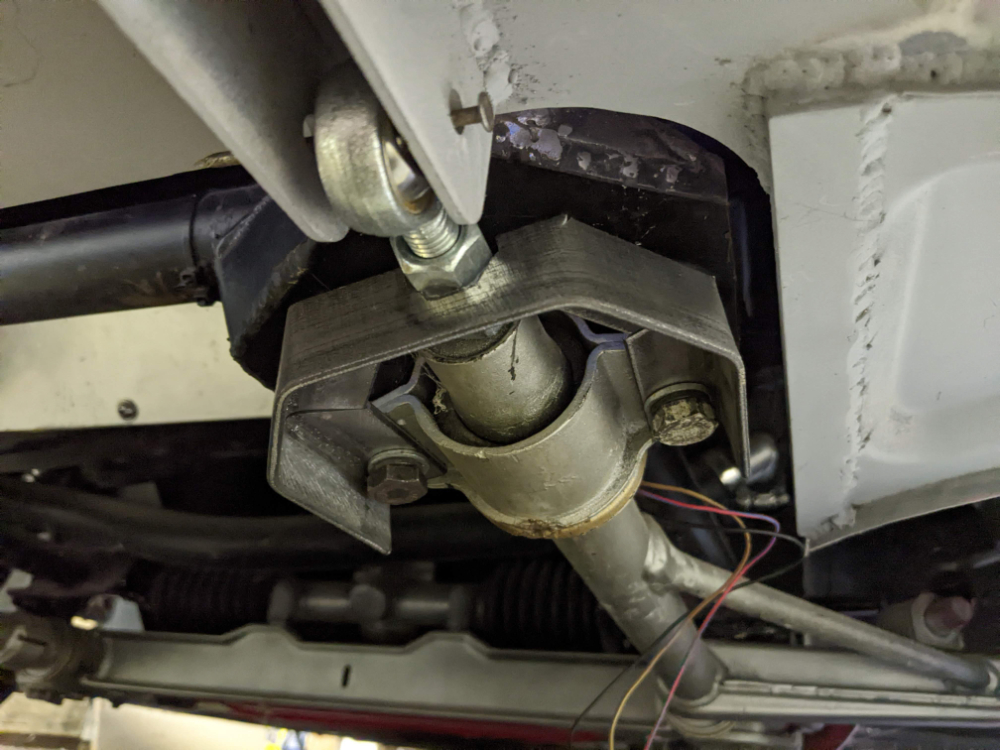
I picked up the 2 back mounting points, unfortunately the 3rd one in the front clashed with the heim joint threads, I will add that 3rd point eventually, and trim off excess material, this is good enough for mockups though.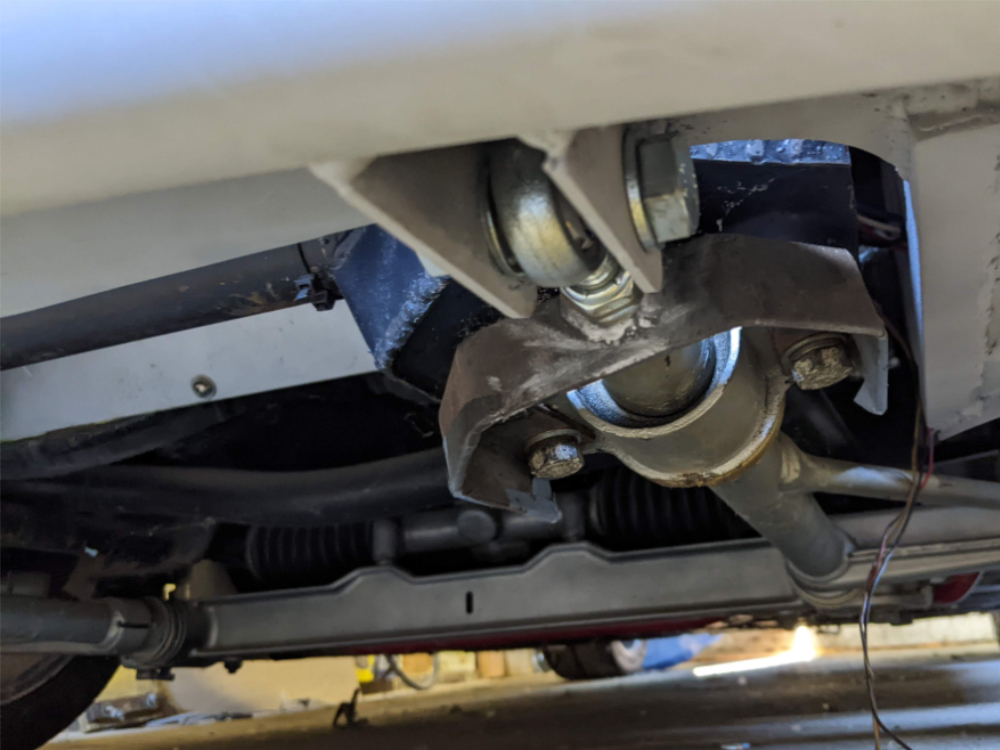
Posted by: plymouth37 Jul 3 2023, 10:36 AM
Here you can see the hinge from above: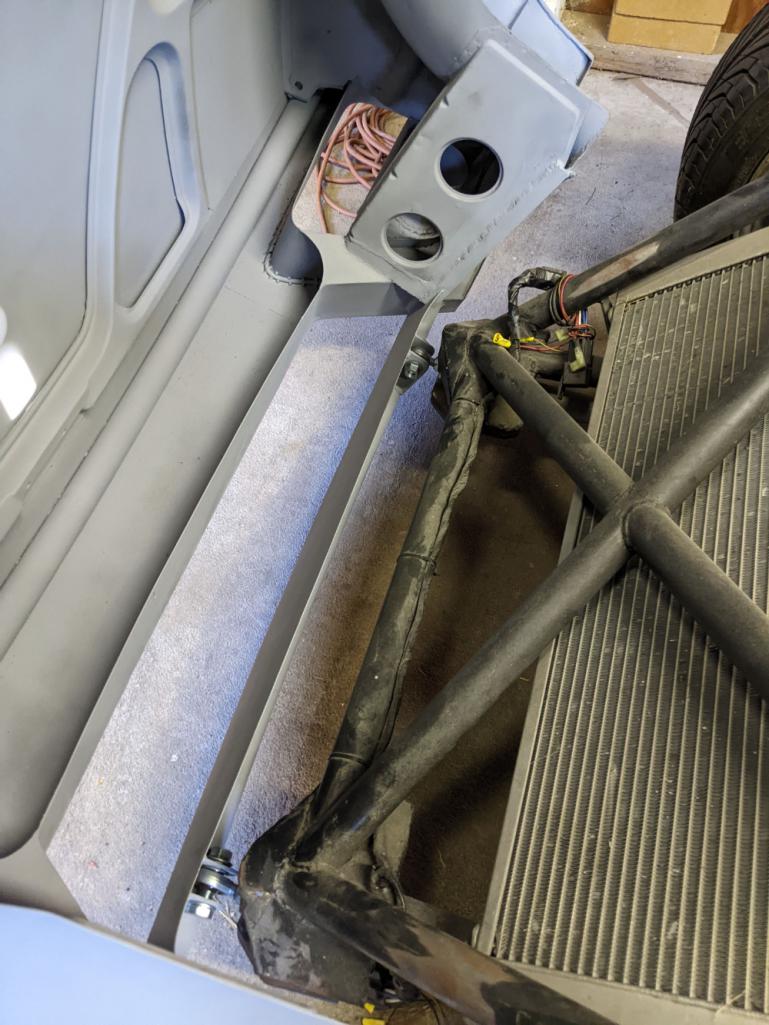
This simple pivot design works pretty well and is quite solid, I like it!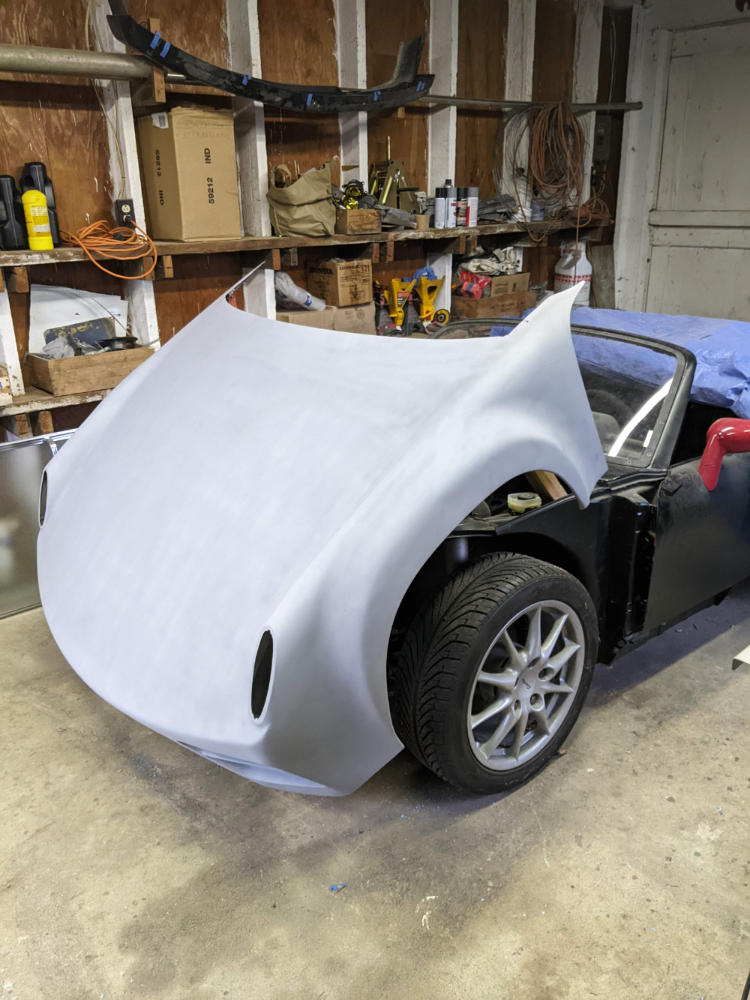
Next I need to mount some bump stops to the rear and I will dial in some nice door gaps, then latches!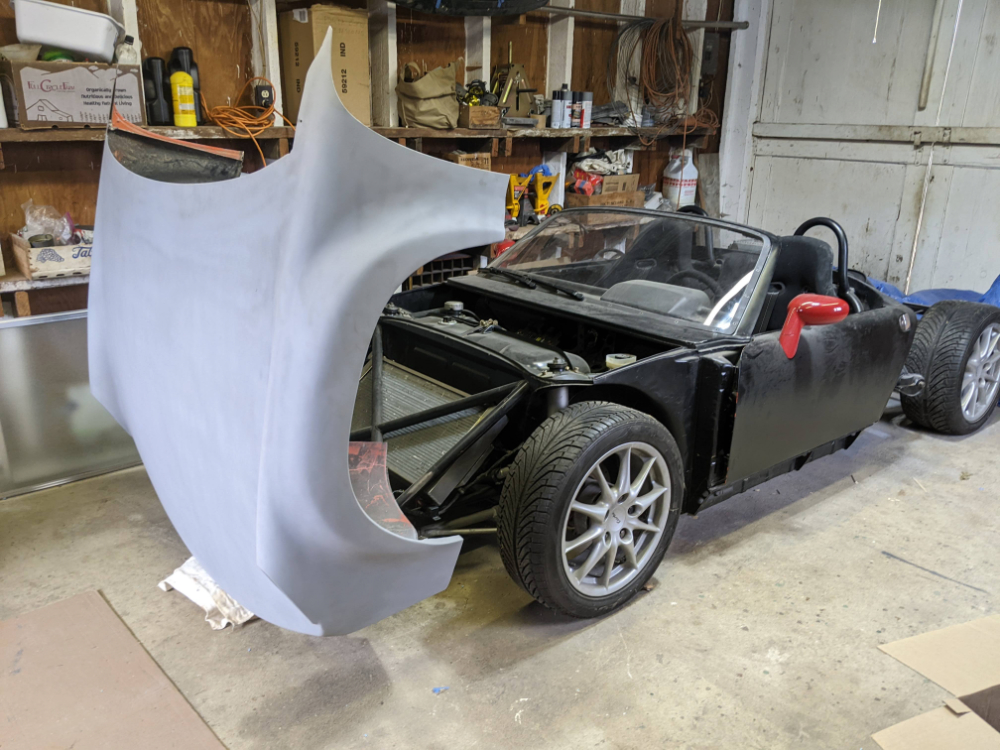
Posted by: Cairo94507 Jul 3 2023, 11:02 AM
Love this project.
Posted by: tygaboy Jul 3 2023, 12:25 PM
So f-ing epically COOL!!! I really hope I get to see this in person. And meet you, Dana. Would love to pick your brain about your build. Rock on, dude!
Posted by: slowrodent Jul 3 2023, 12:35 PM
Yeah... Certainly no shortage of rather genius/artistic solutions to problems on this site...but this build is most certainly up there...Not for the purists perhaps, but gets a solid A+ from me...
Posted by: siverson Jul 3 2023, 02:53 PM
Posted by: sixnotfour Jul 3 2023, 02:57 PM
So Glad My Son and I visited.. Way back when in Wyoming...
Posted by: plymouth37 Jul 19 2023, 11:39 AM
Now that the hinges are done it is time to focus on the lid latches, i am using a bunch of street rod stuff for this, first one are adjustable bump stops, I installed a nutzert on the chassis. Apologies for the filthy chassis, after design is done this whole car will be pulled apart for a "restoration".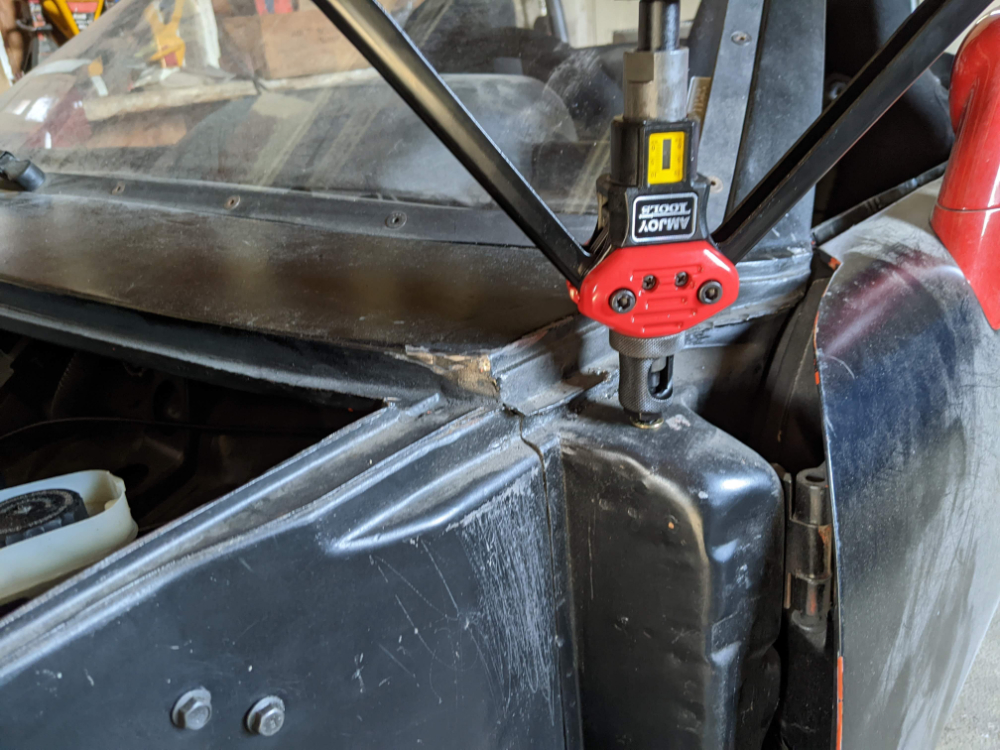
Then screwed in the bump stop, now i can set the height of the rear to a correct height.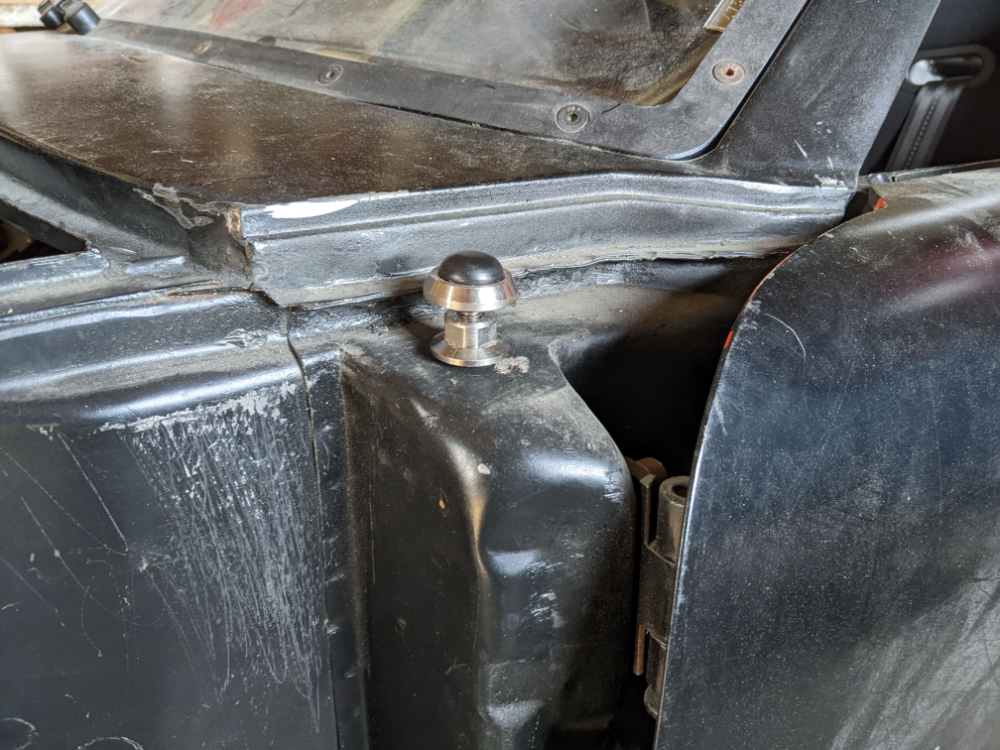
For the latches I am using universal streetrod door latches, there will be one on each side of the cowl.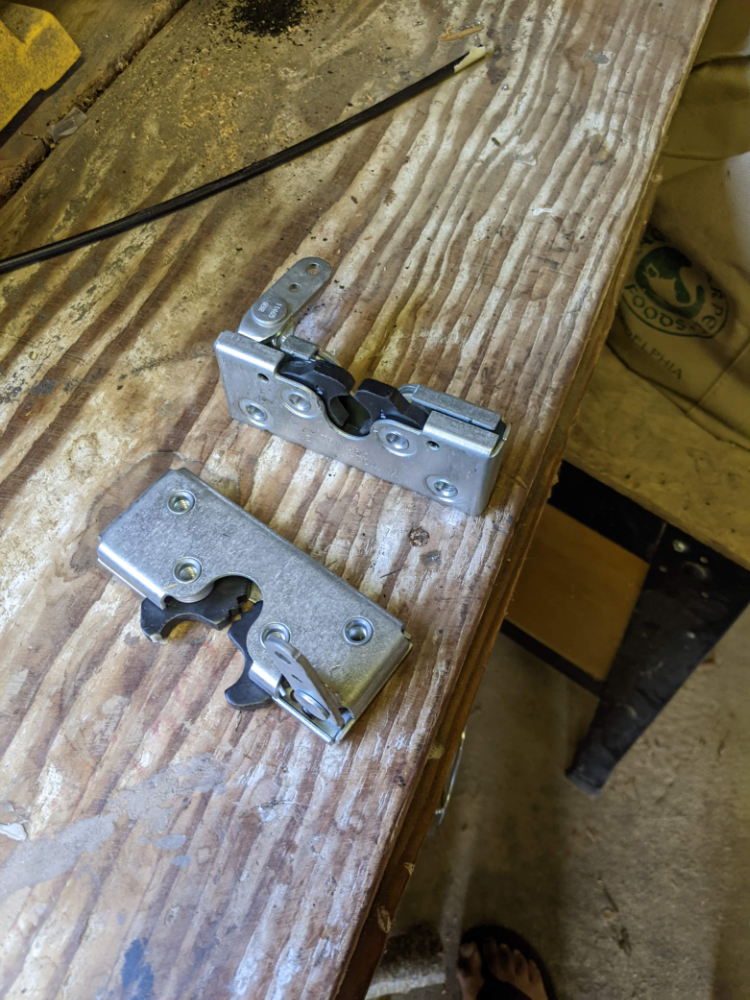
And for the release I found a cool double cable release that is meant for streetrods as well. it will simultaneously pop both latches. 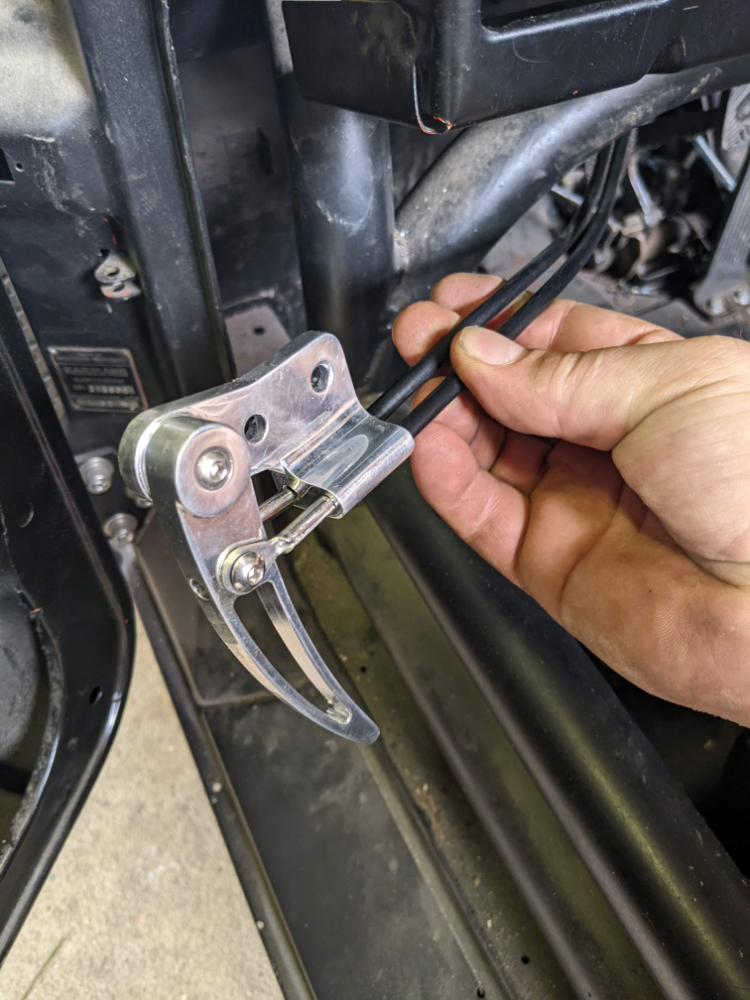
Posted by: plymouth37 Jul 19 2023, 11:39 AM
Here is how I installed everything, the hinges bolt through the outside of the wheel well, this way when the hinge release mechanism fails you can unbolt it from outside the lid.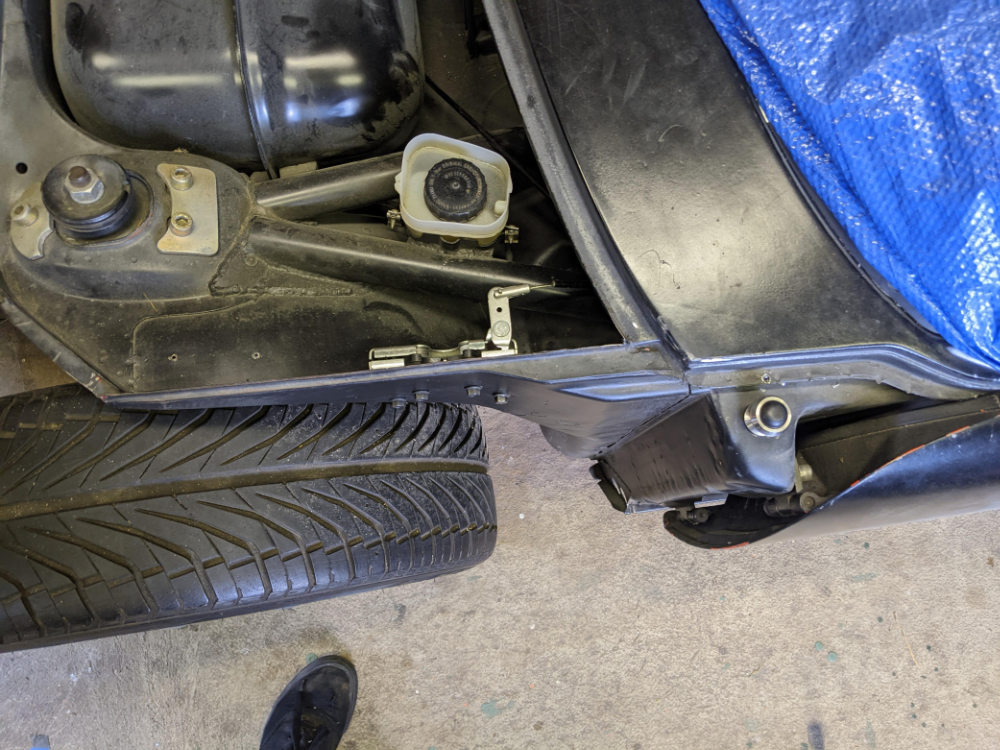
The release cable mounts to the tube frame with a billet motorcycle bracket.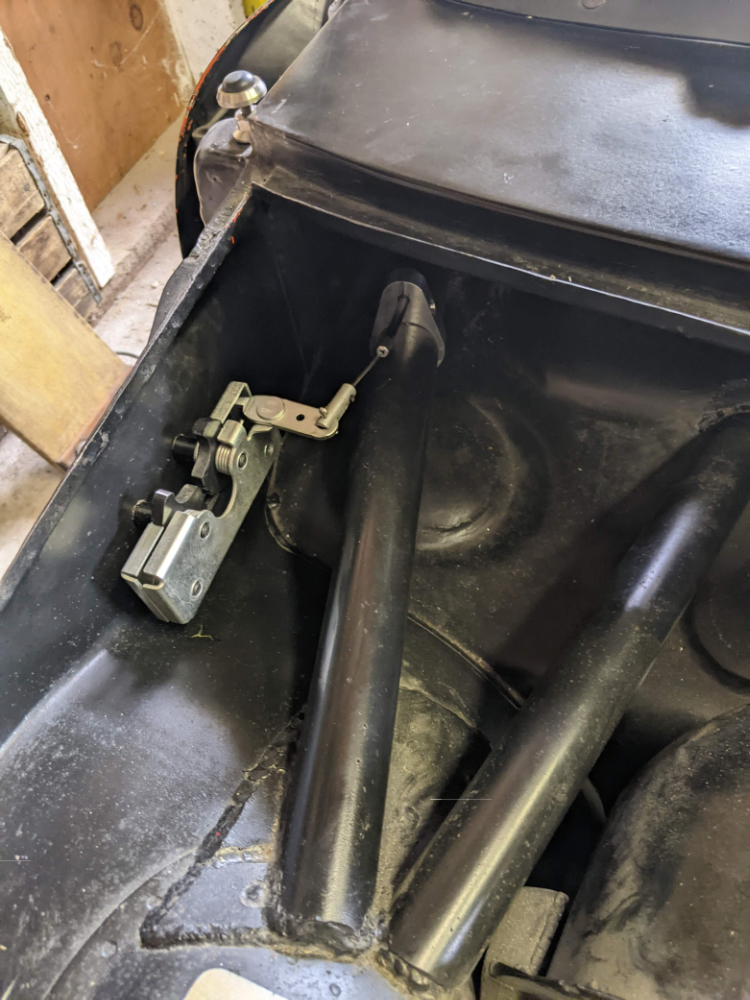
now I will focus on the lid half of the mechanism and see if I can latch it. 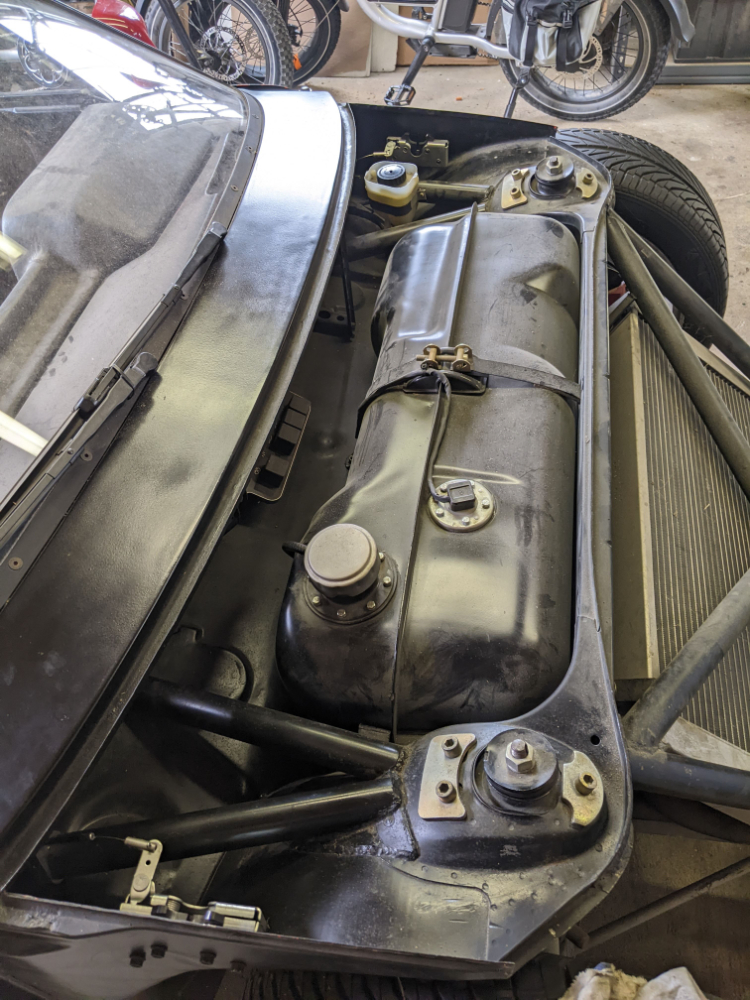
Posted by: 914Sixer Jul 19 2023, 12:18 PM
Really beyond comprehension
Posted by: mgarrison Jul 19 2023, 02:19 PM
Simply amazing!
Posted by: plymouth37 Aug 16 2023, 03:43 PM
I am trying to get the door gaps right, my fenders are sucked in a bit: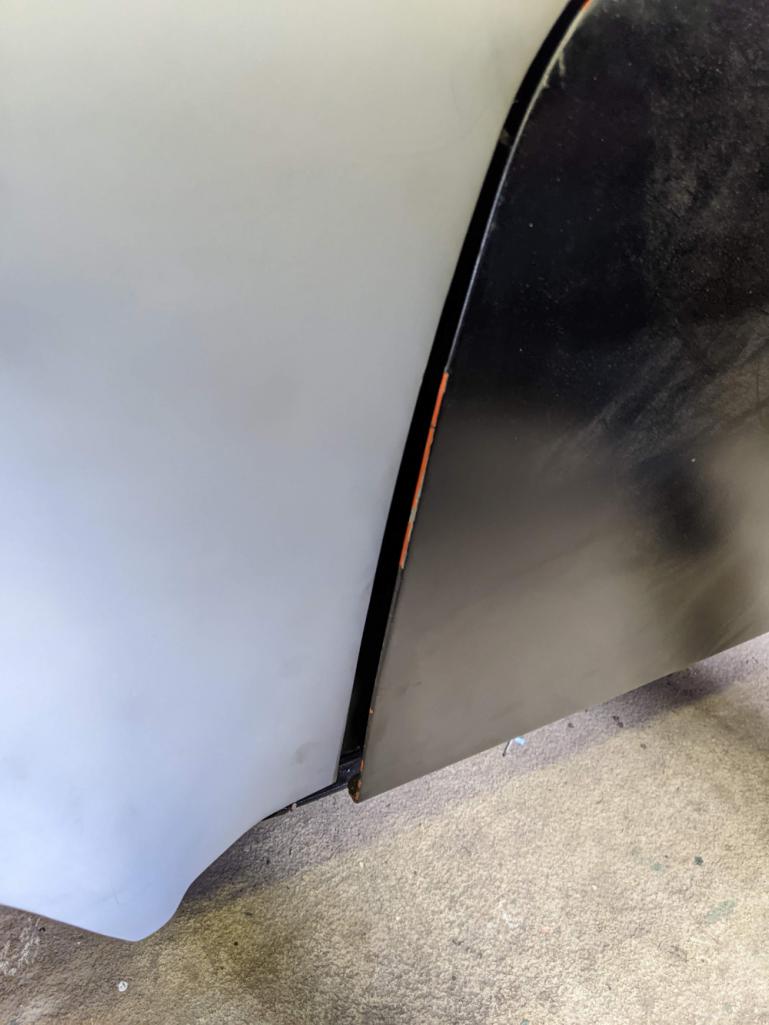
I pie cut the inner structure of the fender: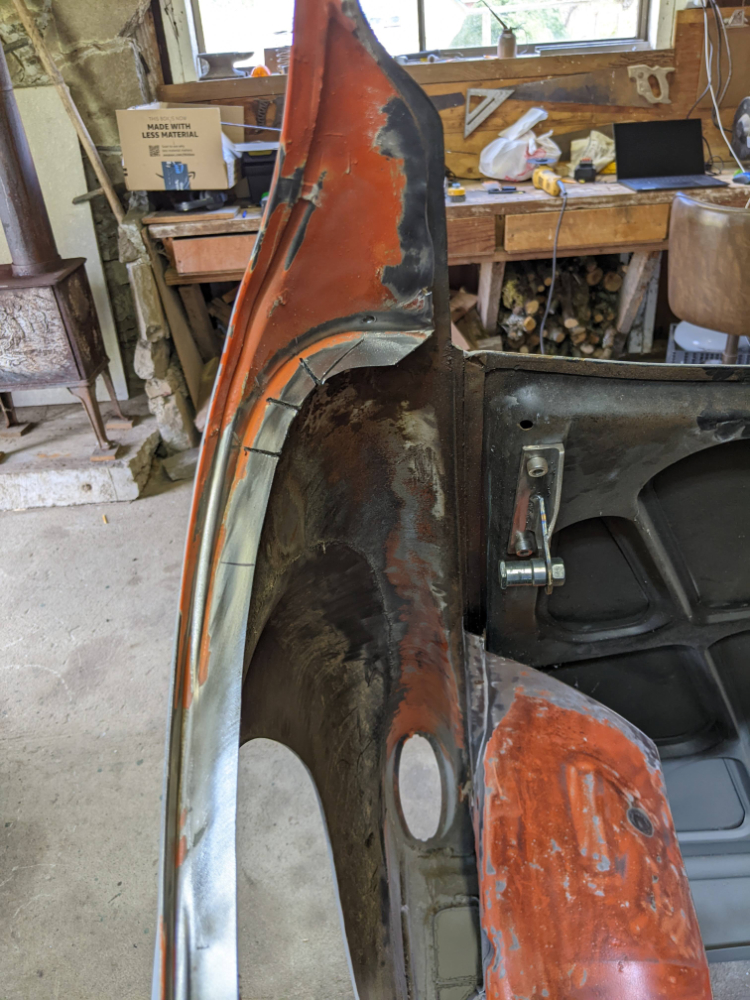
then pulled it out a bit,
now they fit just right, I will bolt the door gaps together and weld the cuts to the proper contour: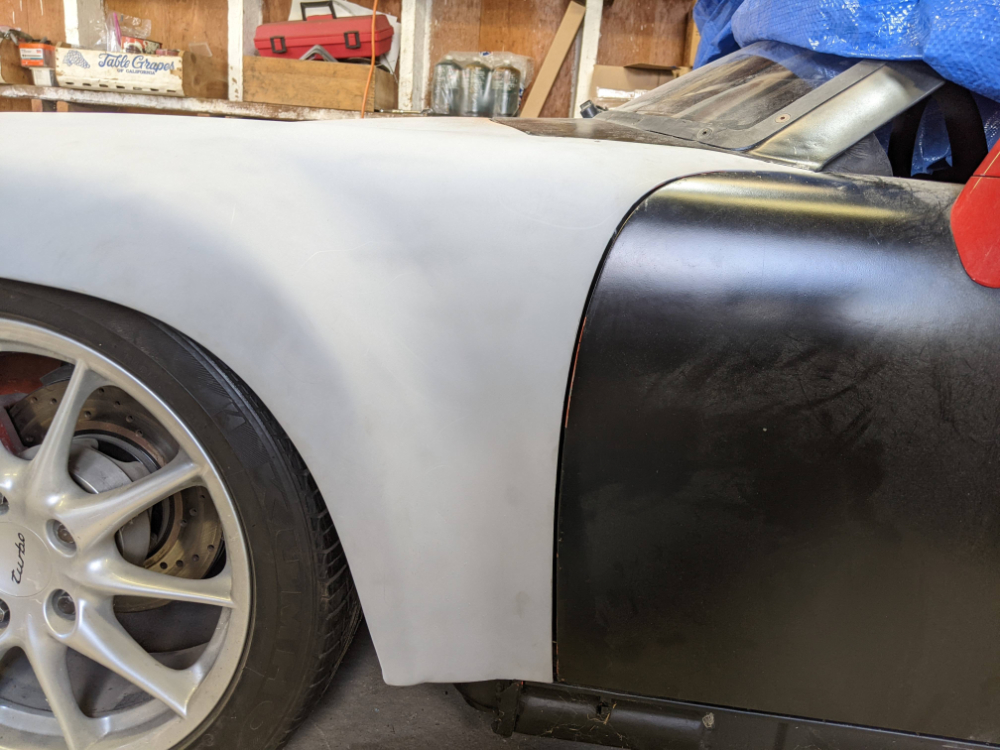
But first I need to clean off the rest of the lid before welding.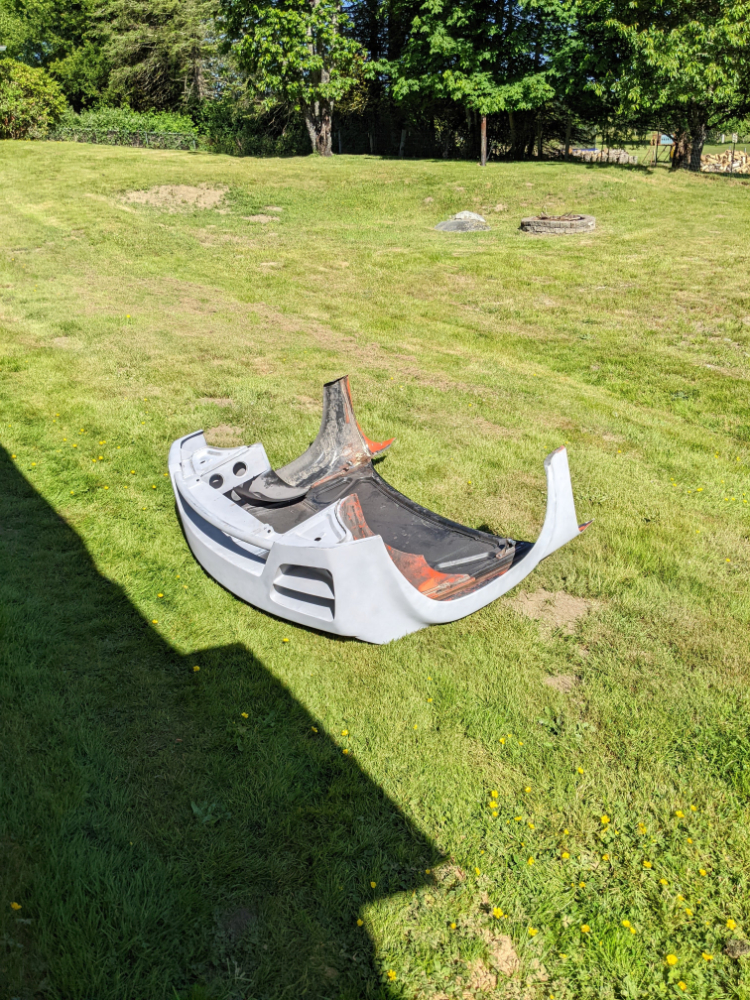
Posted by: plymouth37 Aug 16 2023, 03:43 PM
Time to get rid of the orange fender paint, also there is a sneak peak of the other half of the hinge mechanism.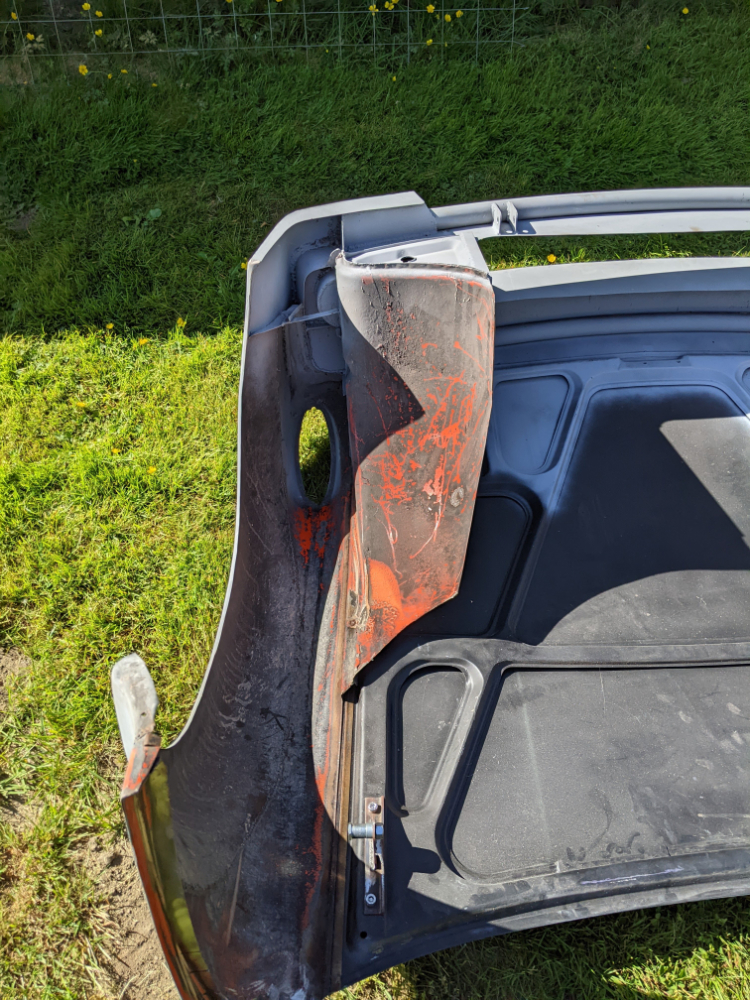
I picked out all of the old seam sealer.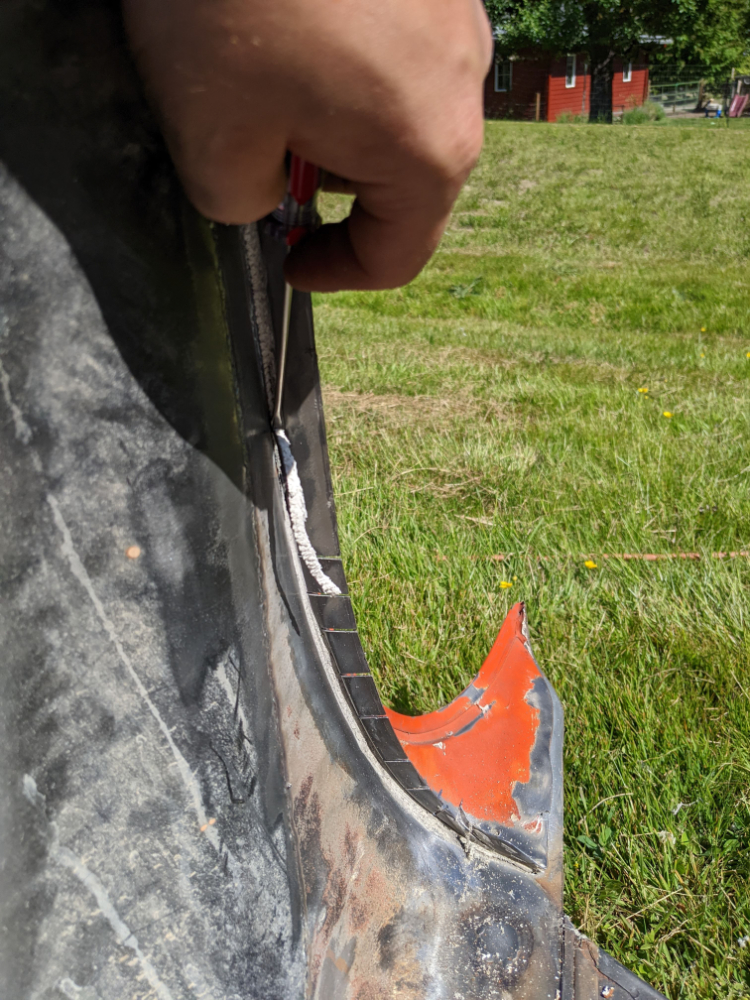
Grind grind brush brush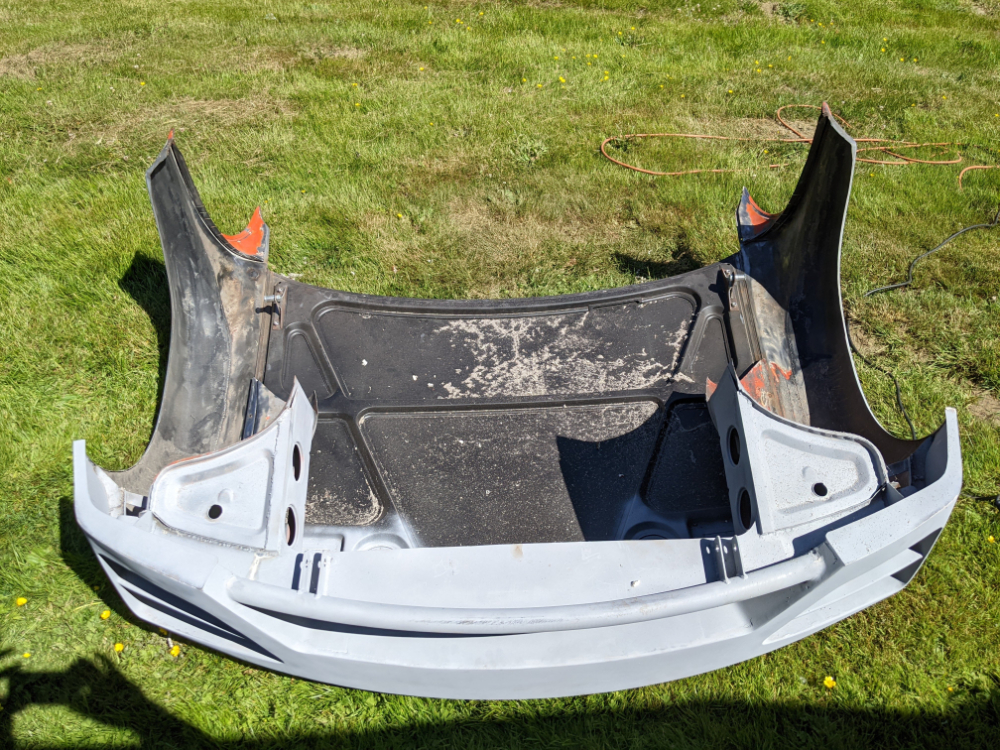
Primer time!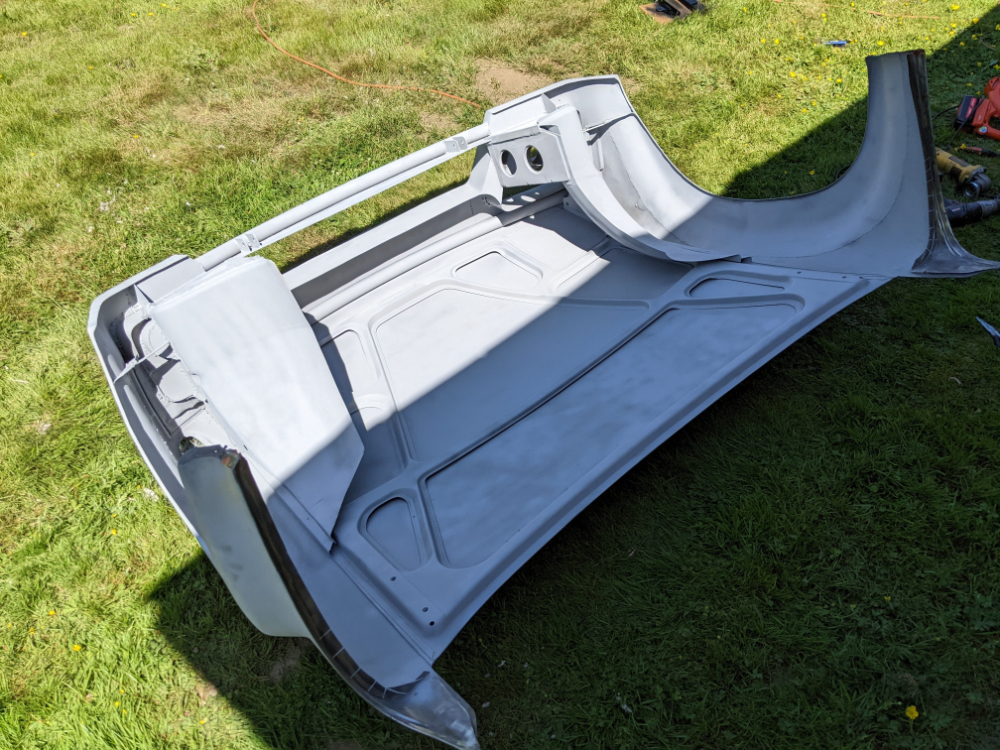
Posted by: plymouth37 Aug 16 2023, 03:43 PM
Lid back on, will finish latches and weld that inner lip.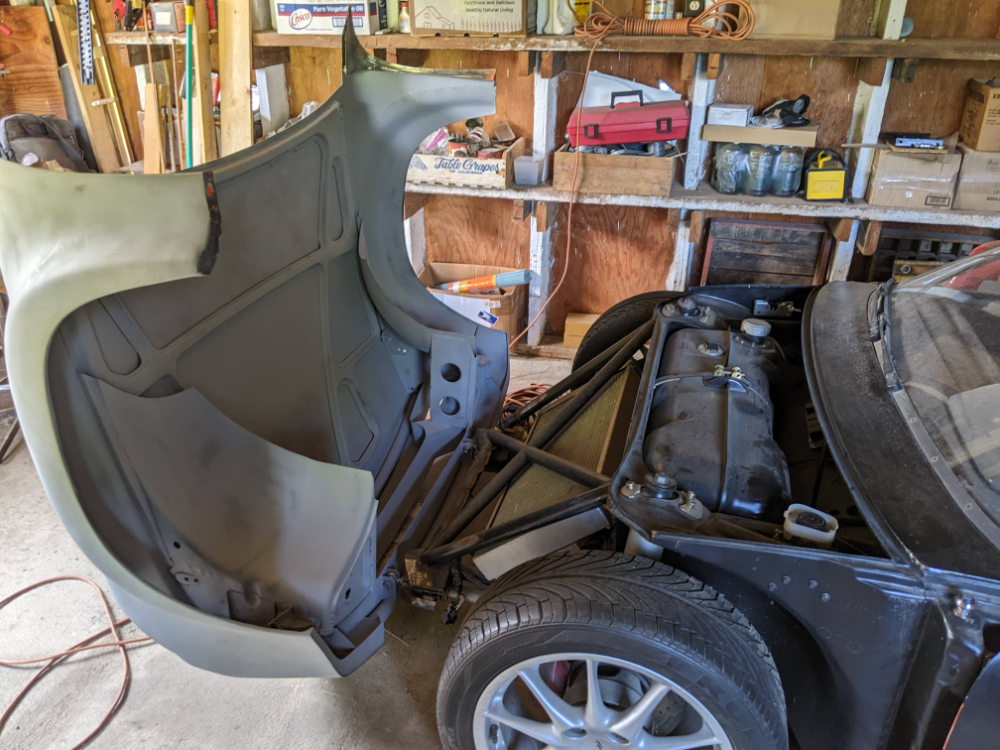
Posted by: East coaster Aug 16 2023, 05:57 PM
Very cool project, lots of time spent thinking I’m sure!
Posted by: tygaboy Aug 16 2023, 06:20 PM
The stunning spectacularness just keeps coming. Utter coolness to the power of 10.
Posted by: Shivers Aug 16 2023, 06:45 PM
Very cool solution to securing the hood.
Posted by: 76-914 Aug 17 2023, 08:40 AM
I'm always anxious to see your next process. As others have said, I'm amazed! @http://www.914world.com/bbs2/index.php?showuser=19241 Did you have to wrestle with Spell Check over your noun coinage? :shades2
Posted by: plymouth37 Aug 29 2023, 04:16 PM
I finished the upper latch pins, they bolt into the old hood hinge threaded holes. notice the cuts in the fender, I am dealing with those next.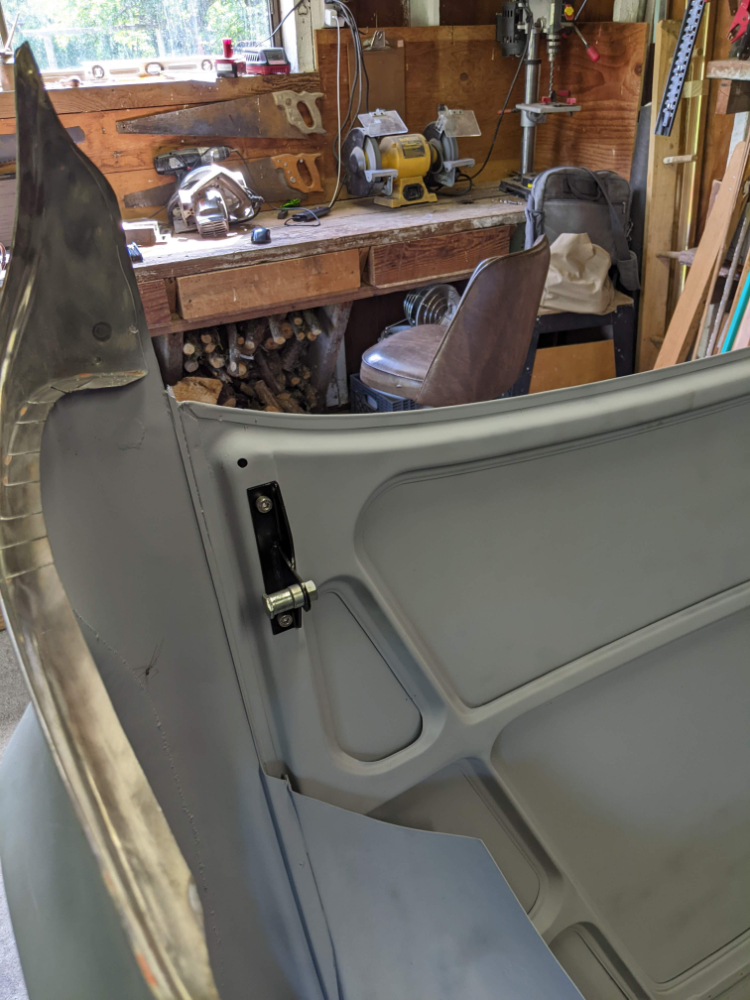
Here is the lid latched for the first time, feels very secure and works like a charm!
Now to fix the fender gaps.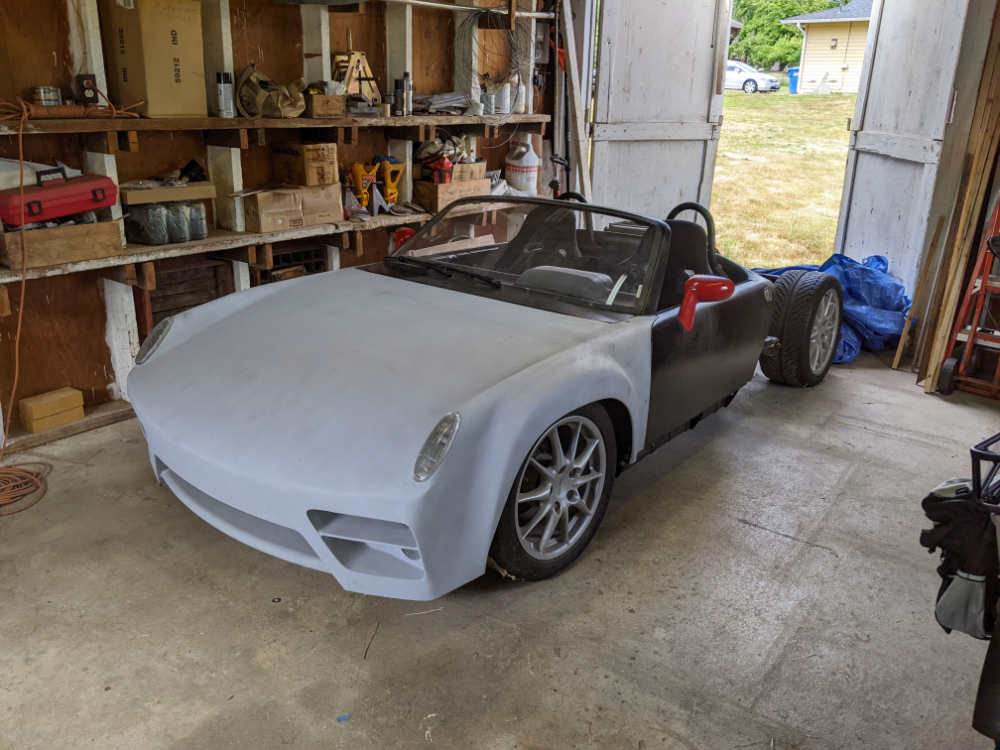
I bolted the fenders to the doors like this, it holds the fender to the right curvature while i weld the cuts in the back to set the shape.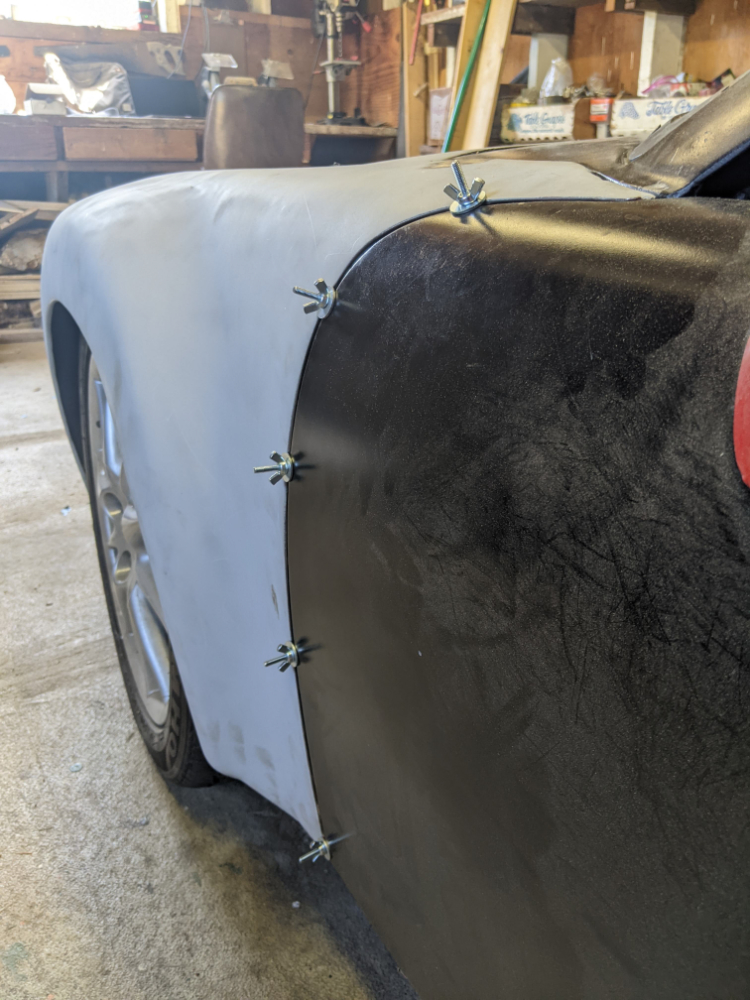
Welder is in the other garage, drove it over and took the front wheels off.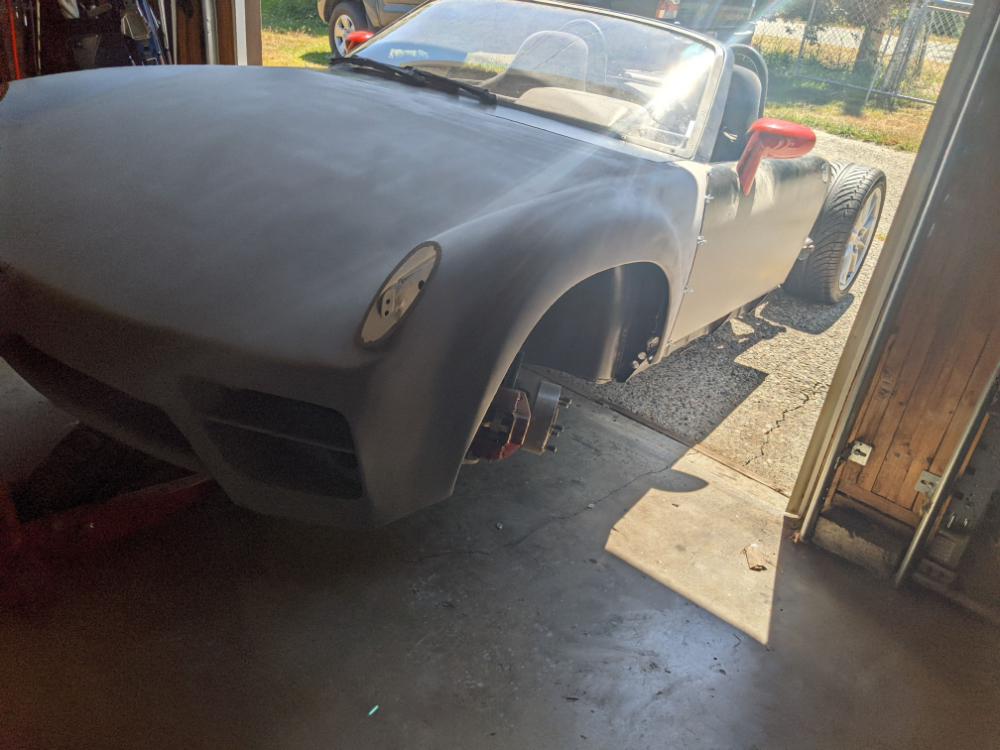
With the fenders bolted in place I welded in a filler piece into the fender well, this will hold the proper shape of the fender and keep crap from flying into the door jamb.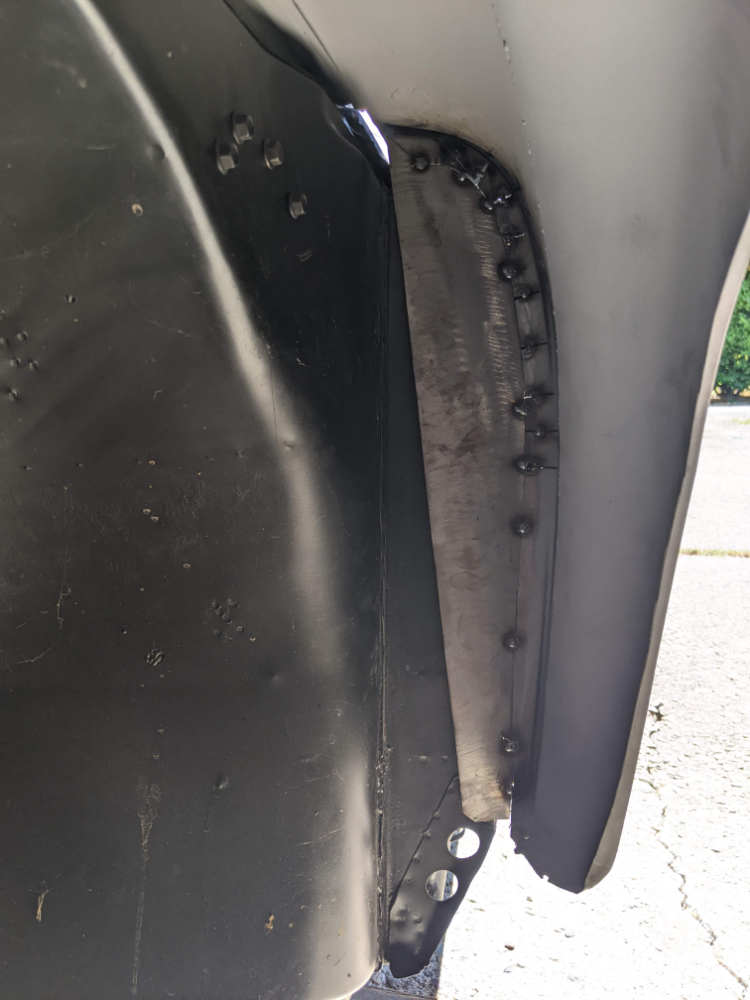
Once the inside was tacked I could unbolt the fender gaps, tilt open the lid and weld the outside of the fender filler.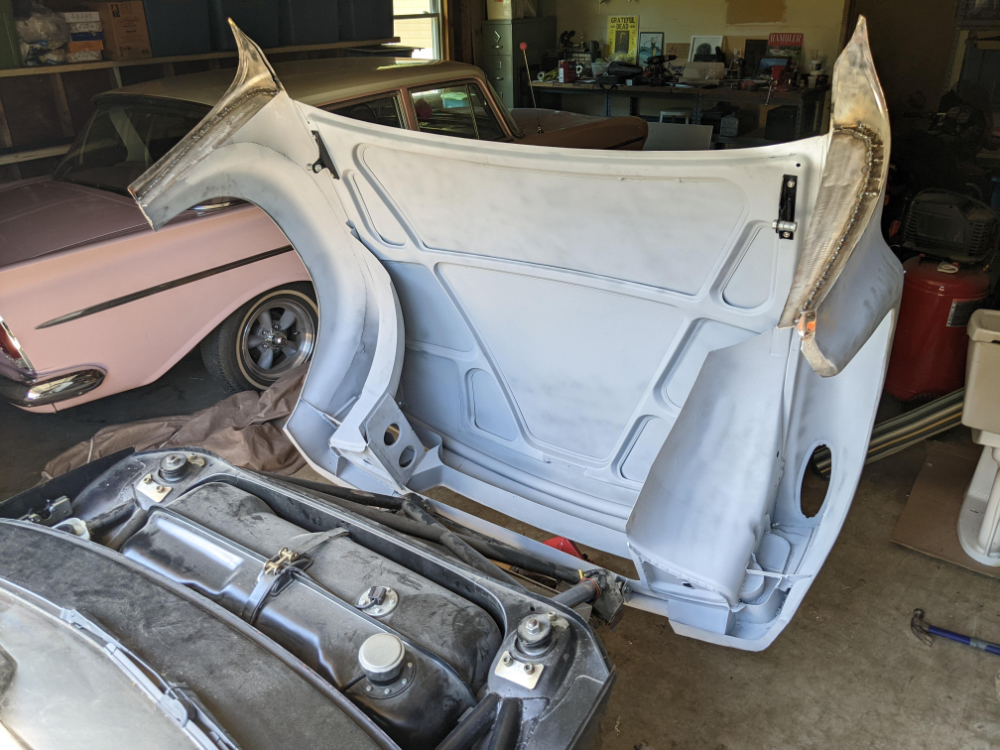
Posted by: plymouth37 Aug 29 2023, 04:16 PM
I like this shot, the state of affairs...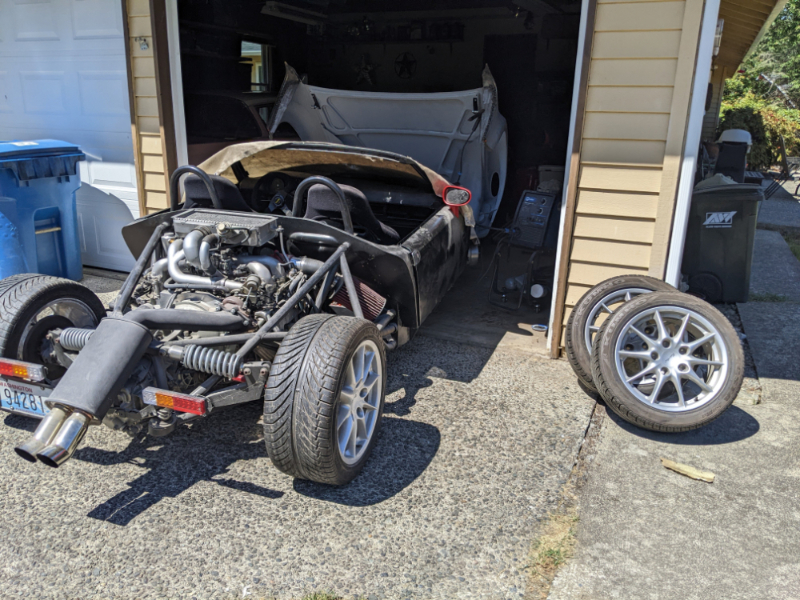
Since I had the car out of the garage I took it for a quick spin, I need to replace the timing belt before I gun it too hard, but it ran great, here are some images of it out of the shop: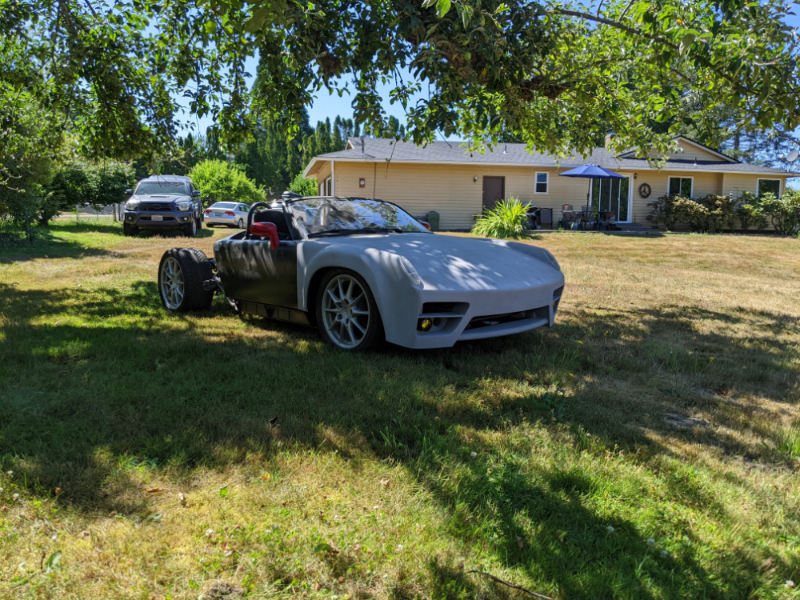
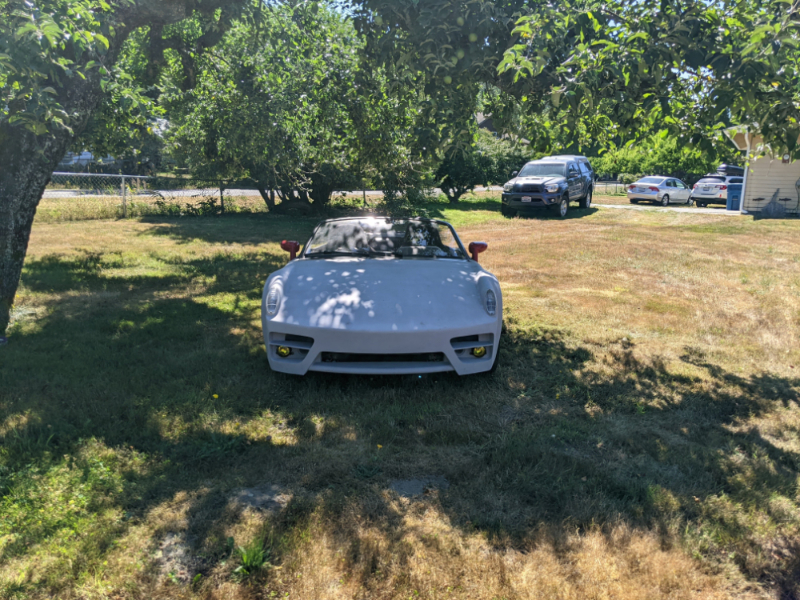
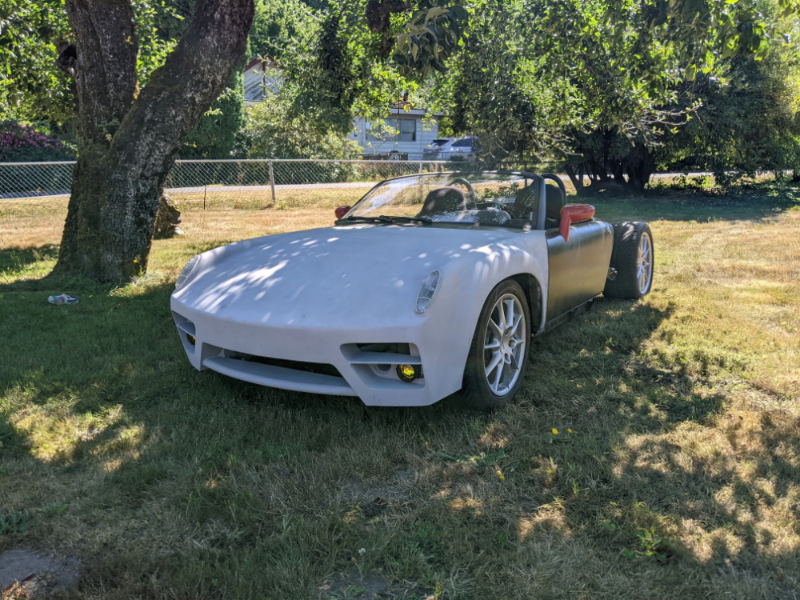
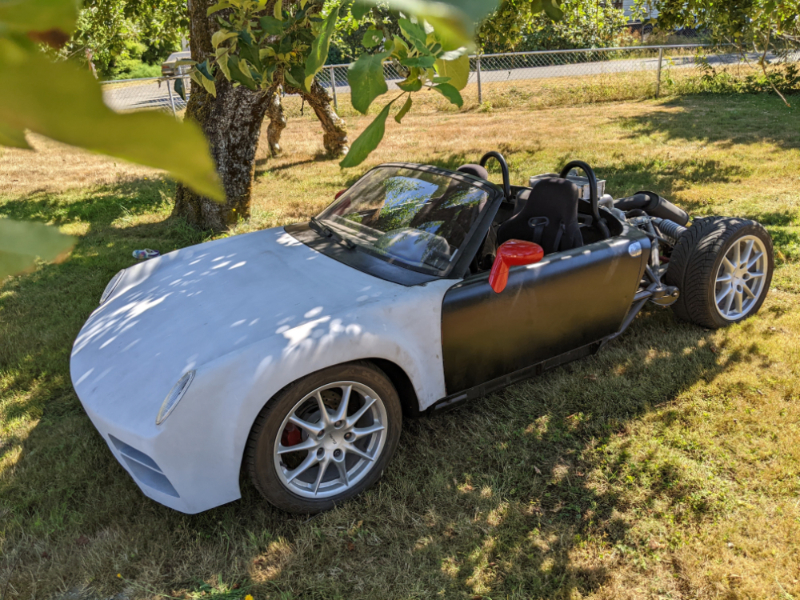
Posted by: East coaster Aug 29 2023, 05:17 PM
Looks great!
Powered by Invision Power Board (http://www.invisionboard.com)
© Invision Power Services (http://www.invisionpower.com)