Printable Version of Topic
Click here to view this topic in its original format
914World.com _ 914World Garage _ the sawtooth build thread
Posted by: sawtooth Aug 23 2008, 05:56 PM
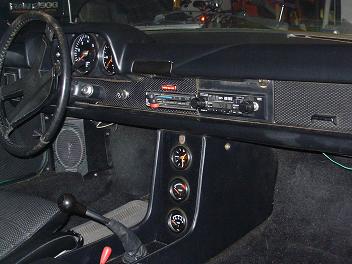
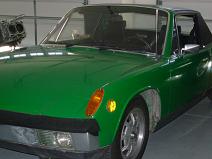
Wanted to start a build thread for my na suby conversion. The car is my newly acquired '73 2.0L fi. It is very clean, appearance group, 2nd owner, 88K. I currently use it as my daily driver.
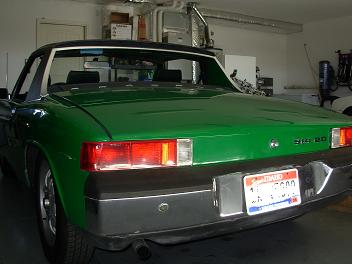
I want to do a suby conversion because I believe the overall package will have the performance, drivability, and dependability I'm looking for.
EDIT: I've changed motor selection slightly and am also taking a bigger plunge by going with a suby trans, see Post #49.
Posted by: KELTY360 Aug 23 2008, 07:19 PM

Nice looking car. If it's as nice as it looks, a fairly stock, '73 2.0L FI is worth more as a stepping stone than a conversion car. Strictly my opinion, but I'd sell that car as is and find something a little more flawed to do the conversion. You could make some nice cash out of it and then increase the value of a 'lesser' car.
I've got no problems with doing a suby conversion, but with what we've seen in prices lately, a '73 2.0 has good value.

Posted by: DBCooper Aug 23 2008, 08:12 PM
Could be, but how much less would a well converted car be worth, exactly? I doubt THAT much. He's getting a quieter engine, twice the horsepower, overhead cams, modern fuel injection, not needing to rebuild the T4, no oil leaks, never having to adjust valves again, or worry about dropped seats? For a thousand bucks? Sounds like a pretty sweet deal. In fact I think I'd be inclined to pay quite a lot more for a good conversion car, not less.
What was that? I think I just heard Jake groan.
Nice project, and smart to go NA. Good looking car, and it's going to be a lot of fun to drive.
Posted by: KELTY360 Aug 23 2008, 08:59 PM

Could be, but how much less would a well converted car be worth, exactly? I doubt THAT much. He's getting a quieter engine, twice the horsepower, overhead cams, modern fuel injection, not needing to rebuild the T4, no oil leaks, never having to adjust valves again, or worry about dropped seats? For a thousand bucks? Sounds like a pretty sweet deal.
What was that? I think I just heard Jake groan.
Nice project, and smart to go NA. Good looking car, and it's going to be a lot of fun to drive.
That's not the point. As it sits, a '73 2.0 with FI is probably worth $5-7K; unless it has serious rust issues. A '73 1.7 in comparable condition can probably had for $3K. That's $2-5K left on the table and the suby converted 1.7 will be be worth the same as a converted 2 litre. It's got nothing to do with whether the suby would be worth the same as the 2.0.
Posted by: zymurgist Aug 24 2008, 08:47 AM
I've got no problems with doing a suby conversion, but with what we've seen in prices lately, a '73 2.0 has good value.
Speaking as someone who will be in the market for a 2.0 (once the Mercedes sells), I agree. If the 2.0 is reasonably nice with the FI system intact, you'll find somebody who wants it. I think the best conversion candidates are the 1.8's, a/k/a the redheaded stepchildren of the 914 family.
Posted by: brant Aug 24 2008, 09:09 AM
pretty car
neat project
I kinda agree with the above
my uneducated guesses:
- stock rust free 1973 2.0 = 8-9K
- subaru conversion 1973 = 7k
-------------------
net loss of 2k plus the cost of the conversion
- 1975 (non running) 1.8 = 2k
- 1975 subaru conversion = 7k
------------------
you could pay for the new donor and the conversion costs by selling the 2liter, and then increase the value of the donor car by converting it.
of course I realize its not as simple as that. Your donor may need different interior work or may not have as nice of a paint job. It may even need suspension upgrades (although once you get bitten by the project bug, your probably going to do that to either chassis anyways)
brant
Posted by: DBCooper Aug 24 2008, 09:37 AM
Could be I guess, I don't pay attention to used values that much. On the other hand I did just go over to e-bay and checked the "completed" 914 listings, and I didn't see that big a difference between 2.0 and 1.7/1.8 cars. There's a real big difference between running cars and crappy non-running cars though, no question.
One observation comes from looking at those e-bay cars. People running down conversions say they've seen lot of poorly converted cars. That might be because people who are trying to minimize costs start out with cars that are in poor condition to begin with. That obviously makes getting a good end result a lot more difficult. If you start out with a better car it may cost more in the beginning, but you also end up with a better car when you're done. And it appears that really good cars aren't that common, regardless of engine size.
Bottom line he's starting out with a good car, and is going to end up with a very nice car when done, at an extremely reasonable price. Still sounds like a pretty good plan to me. Not a perfect plan of course, but he says he'll throw in a turbo if he ever needs more power. That should fix it.
Posted by: jasons Aug 24 2008, 10:40 AM
I'm not opposed to conversions, but your car looks too nice to cut.
Because you think you can do it cheap, isn't the right reason to do it. You should plan on doing it "right". And then determine how much "right" will cost. Especially on that car. Frankly, If that 73 2.0 is as nice as it looks, I think converting it is a mistake.
The 73 2.0 is probably the second most valuable (and rising) 914-4 after the LE. And your looks like a pristine candidate with the FI intact. That makes it a very desirable 73 2.0.
Posted by: DBCooper Aug 24 2008, 11:22 AM
Make him an offer...
Posted by: DBCooper Aug 24 2008, 11:23 AM
Brant says $8-9K...
Posted by: KELTY360 Aug 24 2008, 11:32 AM
OK, sure.
Hey sawtooth - I'll give you $6000 for the car, provided that the paint, trim and bumpers are as nice as pictured, the engine and trans operate properly and there is no substantial rust. PM me if you're interested.
Posted by: jasons Aug 24 2008, 11:41 AM
Make him an offer...
LOL I already have a 73 2.0 with FI. Maybe I'm biased? Honestly the advice that would serve me the most would be to beg him to cut it. Thats one less 73 2.0 on the road. Maybe mine appreciates?
Posted by: jasons Aug 24 2008, 11:52 AM
FWIW I don't know how the original posters car compares and I don't know how close these cars could sell to asking price, but if his car is 88k miles and 2 owner this is the company he might keep.
http://www.thesamba.com/vw/classifieds/detail.php?id=647128
http://www.thesamba.com/vw/classifieds/detail.php?id=651297
http://www.thesamba.com/vw/classifieds/detail.php?id=603738
Posted by: DBCooper Aug 24 2008, 12:45 PM
That's crazy, those are prices that I've seen sixes sell for. Truth is anybody can ask anything, but what it's worth is what it actually sells for instead of what someone HOPES it can sell for. That's the reason for looking at the e-bay "completed" listings, the only place I know to see real actual everyday selling prices. You'll see a lot of high "buy it now" and "reserve not met" prices there too, almost every one of them on cars that didn't sell.
So Sawtooth, what do you think? Have an auction, right here, see what that car is really worth? Could get interesting since you already have an opening bid of $6K and it's not even offered yet. And of course need to confirm the other side of the equation too, that you can really find a 1.7/1.8 as nice as the car you have and as cheap as these good folks say.
Posted by: jasons Aug 24 2008, 01:05 PM
Anybody can ask anything, but what it's worth is what it actually sells for.
I agree asking price means jack crap. I kind of made the same point in my post, we don't know what these cars for sale are really worth. And, we don't know the condition of the original posters car. What I know for sure, his car won't be stock when its got a radiator and a Japanese motor. And, any chance of reaping the rewards of scoring a low mileage 2 owner car are gone forever.
I'm not against conversions. But some cars are survivors and this looks like one.
Posted by: DBCooper Aug 24 2008, 02:13 PM
What I know for sure, his car won't be stock when its got a radiator and a Japanese motor. And, any chance of reaping the rewards of scoring a low mileage 2 owner car are gone forever.
I've heard that over and over, Jake chants it incessantly, for example, but it's not really true. The only "irreversible" changes made to the car are three pieces of metal removed for the radiator. Save those pieces and they're easily replaced if anyone ever wants to convert it back, which to my knowledge has never happened. Even if they aren't saved you're talking about the equivalent of relatively minor rust repair to put it back to stock. That's just not that big a deal, and as I said earlier I personally would pay MORE for a good converted car with a modern and more powerful boxer engine, because it would be a HECK of a lot more fun to drive. And if boxes of the original parts happen to come with it, bonus.
But that's just me, and I'm definitely not a concours kind of guy. Like I said, if somebody has real strong feelings about it they only need to make him an offer he can't refuse. Probably need to do it pretty quick, though...
[I can just see him grinning like a Cheshire cat as he reads this, wondering what the next unsolicited offer is gonna be...]
But to call an end to this discussion, he said in his very first post that he's read all these debates and is past that. It's his car, he knows what he's doing, which is interesting, so now why don't we just watch his build thread?
Posted by: jasons Aug 24 2008, 02:18 PM
But to call an end to this discussion, he said in his very first post that he's read all these debates and is past that. It's his car, he knows what he's doing, which is interesting, so now why don't we just watch his build thread?
 This thread has been hijacked enough.
Posted by: tronporsche Aug 24 2008, 03:37 PM
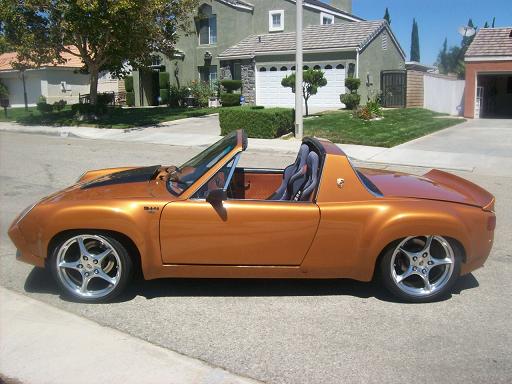 Good points made here. Not to keep things going , but just to throw in my point of view, I think Sawtooth should consider the point of selling the car and getting one that does not have as good mileage (cheaper), but the body is good, or frame 914 , and consider a couple of other things, as well. I have done a conversion on my car, and really enjoy it. It is definately worth NOT being a "contour" car, and all this value stuff.......well, maybe in another 30 years, because the only car collector enthusiasts that I have EVER heard about trying to find these 914s is ......us, 914 guys.( I wonder if Jay Leno has a 914 in his car collection....) But his (Sawtooth) car is immaculate stock from the start. Do you plan on modifying the body ? How about the interior ? Suspension, for sure, like said up above. If you are going to do these things, If it were me, after the experience I have had, (a good one) I would sell, the stock car, make a profit, (you already have a nice offer to put you ahead without having to wait for a buyer) and find a nice custom framed car, plan your COMPLETED project, and build off of the frame. You see, if you are going to change everything anyway, there simply is no need to keep this car, when you can make money off of it, buy one that is already stripped, and ready for modifications, for less money, or already done custom caged and all, and you will spend the same money anyways, but swapped a stock car for a custom chassis, without having to go throught the headache of having to sale all your individual pieces and parts !!! You might even want a tinted windshield. My point is , consider the overall project , not just the engine swap, to see if keeping this car is going to really benefit you in the long run, or are you really going to lose out on making some nice cash, finding another car you can take advantage of because you are doing a conversion, and be done with it. If you do a conversion, You are going to be adding torque to this car, that will twist the frame, you will need to add strength to the car,
  as well as time and money. Why not get a car that already is pretty much where you want to be, just needing your engine, and your custom touch, this will save lots of time and headaches ( with that being said, this is why I brought my conversion already done in another 914, and just swapped everything over to my 914, trust me , this made life so much easier !!!)....... This is just what I would do. Wish you the best.
Attached image(s)
Posted by: sawtooth Aug 24 2008, 07:44 PM
tron, that is an amazing looking car. And from one newby to another
I appreciate all the input. If I could get $8-9K as brant suggested I would have to consider it. But I don't think its a reality. The car is very clean but to get that kind of money it really needs minor rust work and paint. If I were paying that much for a 914 I'd expect it to have new paint.
The beauty of the NA suby conversion is that I'm not cutting up the car, if I ever wanted to take it back to stock it would be easy. Without the IC there's no need to cut the trunk. And I'm committed to making an engine bay radiator work, others have done it successfully. The only body change I would like to do is steel flares at some point, but that has nothing to do with the conversion and the six guys do it all the time.
The other factor is that it's important for me to start and end with a very clean car. That way I can be finished, and enjoying the car in months, not years. Clean stock interiors are also rare and fairly expensive to build. And this one has a great interior.
What should I be able to get if I sold the complete 2.0L plug-n-play setup, (engine, djet, wiring, exhaust, etc.)? From what I've been seeing $1K wouldn't be unreasonable. That reduces the difference in using a 2.0 car vs 1.8/1.7.
Posted by: jd74914 Aug 24 2008, 07:45 PM
Sawtooth,
Hopefully these guys didn't scare you off. :wink:
I'm really looking forward to seeing more of this build!
James
Posted by: sawtooth Aug 24 2008, 08:55 PM
Sawtooth,
Hopefully these guys didn't scare you off.
:wink:I'm really looking forward to seeing more of this build!
James
Posted by: carreraguy Aug 24 2008, 09:48 PM
Sawtooth - FWIW , for obvious reasons I'm totally in your corner; been there done that. Bottom line, its your car, do what you want. I imagine you've read all the comments I received when I did my conversion. 
Posted by: KELTY360 Aug 24 2008, 10:11 PM
So I guess this means I won't get a screamin' deal on a '73 2.0. 
Sounds like you've got it figured out and that's the important thing. There's a lot to be said for a great starting point and quick turnaround to get it off jackstands. BTW, I'm currently doing a 6 cyl subie conversion on my Westy.
Good luck on the project, you'll have a bargain to be proud of when you're done.
Posted by: brant Aug 24 2008, 11:01 PM
I'll buy your running F.I. drive line for 1K
(when you get it out please email me!)
nice car
neat project
go for it.
Posted by: Sleepin Aug 24 2008, 11:21 PM
I'll buy your running F.I. drive line for 1K
(when you get it out please email me!)
nice car
neat project
go for it.
I agree with your point! I would love to do a Subie engine on my '75 1.8L! But, I would definetly settle settle for a 2.0! I can't wait to watch your build thread!
If Brant doesn't want your engine for some reason, I will match his $1k offer for the setup! My '75 would thank me!
Posted by: tronporsche Aug 25 2008, 02:55 AM
Sawtooth, please don't get me wrong, basically, what I was saying is that if the majority of the car is the way you want to keep it (interior, bumpers, mirrors, etc.), than go ahead and keep it. I just , in my view, saw an advantages opportunity for you to make some instant money. There are things I would do differently from the begining if I had the advise and knew about this forum 7 years ago. I will even give you another example. I saw a car on a site a couple of days ago for $4500 that was clean. Now, lets say, you sold your car to the gentleman who offered you $6000, or you sold it for $8000. You just made a very quick $1500-$2000, and have a car that is just as clean as the one you sold, just more mileage, that doesn't make a difference to you, because you are about to rip out the stock engine and other parts, and add in your Subie. I am in no way trying to talk you into selling your car, just trying to get you to see the big picture-- from my viewpoint. And you are going to change the paint ???? Look at it like this than, the profit you can make off of that car can pay or help pay for a nice paint job, or your flares !!! That nice, stock interior is not as rare as you think ! I've got to tell you Saw, you are not going to go back to stock after you put in that Subie. I can tell you that, rite now !!! To answer your question about the 2.0, I sold my brand new rebuilt (under a 1000 miles) 2 liter to a guy for $2600. I had just spent $5000 re-building it , but the loss was worth it to me after I discovered that a family station wagon kicked my butt going up hill at Angeles forest crest highway ( a wavy uphill, fun and deadly drive here in So. Cali.). No dis-respect to the 2liter or 1.7or 8 guys, but that engine isn't for me. You will find that subie motor is changing your car into a rocket, why would you take it out , and make the car back to stock ?? Saw, I , and many others, just don't see this incredible "high value" in these 914s as others claim they do ! I wish they were that rare and demanding !! I wouldn't have cut mine !!! You have to ask yourself "hmm this car is from the 70s, and yet, I can still find them in good condition for $1500-$4000 in great shape ? " Like I said, I respect everyones opinion, I just don't see this amazing value some people talk about. If you are going to transform your car , go for it all the way. If your plan is to sell it , the conversion buyer is gonna want everything done, and the "stock" guy is going to want everything original,which means any cutting you have done, even if you patched it back up to stock, you have now" dropped the dollar" to them.....Which means Plan on keeping the car, or go full throttle with the conversion, if you do it.
Attached image(s)
Posted by: sawtooth Aug 25 2008, 07:41 PM
I'll buy your running F.I. drive line for 1K
(when you get it out please email me!)
nice car
neat project
go for it.
Sounds good, I will put you first in line.
Posted by: Sleepin Aug 25 2008, 07:46 PM
I'll buy your running F.I. drive line for 1K
(when you get it out please email me!)
nice car
neat project
go for it.
Sounds good, I will put you first in line.
Me 2nd!
Posted by: sawtooth Aug 25 2008, 08:55 PM
I'll buy your running F.I. drive line for 1K
(when you get it out please email me!)
nice car
neat project
go for it.
Sounds good, I will put you first in line.
Me 2nd!
Got it. You two guys will be the first to know.
Posted by: tronporsche Aug 26 2008, 03:20 PM
So out of curiosity, do you have a final plan and what is your decision ?
Posted by: sawtooth Aug 29 2008, 12:22 AM
So out of curiosity, do you have a final plan and what is your decision ?
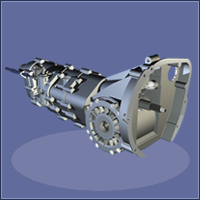
For now I'm moving forward with tasks that have to be done no matter what car I use, to take some more time to think about it and to research what's available. I'm 95% certain I'll use my current car. But if I run across just the right deal in the near future who knows. As far as my final plan for the conversion, I'm definitely using the NA ej22/ej25 combo, small car motor mount, stock ecu and converted harness, kep adapter and clutch. And I'll be attempting a radiator mounted similar to Scott Thatcher's design.
Posted by: sawtooth Aug 29 2008, 03:28 PM
Sawtooth - FWIW , for obvious reasons I'm totally in your corner; been there done that. Bottom line, its your car, do what you want. I imagine you've read all the comments I received when I did my conversion.
Thanks for the support. I love how your conversion turned out, still waiting to see some driving vids on utube.

Posted by: bfrymire Aug 29 2008, 03:51 PM
So out of curiosity, do you have a final plan and what is your decision ?
For now I'm moving forward with tasks that have to be done no matter what car I use, to take some more time to think about it and to research what's available. I'm 95% certain I'll use my current car. But if I run across just the right deal in the near future who knows. As far as my final plan for the conversion, I'm definitely using the NA ej22/ej25 combo, small car motor mount, stock ecu and converted harness, kep adapter and clutch. And I'll be attempting a radiator mounted similar to Scott Thatcher's design.
We should compare notes. I am doing the same conversion. (On my spare 914, that is...) And I am attempting to use the same idea as Scott. I have a aluminum radiator from Griffin, and with proper airflow should cool 400hp. Way overkill, but I would rather error on the side of cooler.)
I differ, in that I am using an aftermarket ECU, due mostly to the simplicity of hook-up.
I am going to be watching your thread intently.
-- brett
Posted by: charliew Aug 30 2008, 11:02 PM
Do the guys wanting to buy the motor realize you are using the tranny in the car? One of them said driveline.
Posted by: computers4kids Aug 30 2008, 11:23 PM
That appears to be a very nice 914 and for the price that you got it for, I can see how you feel about the coversion dollar wise. That FI 2ltr will almost pay for the cost of your car, which is pretty appealing. But to be honest, I think I would leave that one stock and look for another one. On the flip side, because the car is so nice inside and out, you'll end-up with a nice ride with the suby powerplant. Just don't think you wil ever get your money out of it...conversion cars, other that six conversions, should be done for your own pleasure...never from the perspective of getting your money back.
Good Luck &
http://www.914world.com/bbs2/index.php?showtopic=84435
Posted by: sawtooth Dec 28 2008, 06:56 PM
It's been a few months since my last update. The project got side tracked for a bit while I tackled some medium sized rust issues in the inner rocker on both sides. I cut out the rusted areas, killed rust and coated entire inner long. Welded in new sections. And then I decided to install the long kit from Brad Mayeur. This ties the trailing arm to the longs and adds a great amount of stiffening. I'm really happy with the results.
This weekend I pulled the 2.0L and transaxle after doing a compression test. Compression looks great (136,125,132,126). Spent the day cleaning and getting ready to sell. I was surprised at how much bigger the typeIV is then the suby motor, with all the air cooled components. Even with the added radiator, the suby setup will be smaller and lighter.
Received my KEP adapter and flywheel package, high quality stuff. Also talked the guys at Small Car Performance into selling me a set of motor mount arms. They no longer have the painted style, they have moved to a new powder coated set which is quite a bit more expensive. But after I begged for a while they sold me just the arms from the powder coated set for about the same as the old style.
Also received my cams back from Delta, got a new water pump, timing belt and cam shaft oil seals.
Next will be to clean up the engine bay, minor hell hole repair, and paint the engine bay.
Posted by: pktzygt Dec 31 2008, 01:09 PM
I'm following your progress. I'm still concerned about the wiring. I might just go the standalone route.
Looks good though!
Posted by: Zaney Sep 23 2010, 02:07 PM
![]()
From one Suby guy to another...
How goes the battle?
Posted by: sawtooth Sep 23 2010, 02:45 PM
From one Suby guy to another...
How goes the battle?
Sadly the battle has been stalled for a while now. I get distracted easily, man I need a local support group or something to keep me giong
 Very few 914s around here. But reading great threads like yours almost daily has me fired up to get going again. Just got a couple small projects to get out of the way and then I hope to be back at it.
 Engine and trans are in, radiator setup is mostly finished (changed to up front), in the process of running new ss fuel lines and reconditioning fuel tank. Then installing wiring harness and hopefully firing it up soon.
Question for you.. what axle solution will you be using with your suby trans? I did pick up a suby 5spd MT and am really excited to that conversion at some point. But I'm going to treat it as a completely separate conversion later since I already have a kennedy adapter setup. Just collecting parts now.
Man thanks for the :bump Keep up the great work on yours, I'm counting on it for inspiration.
Posted by: Britain Smith Sep 23 2010, 03:00 PM
When you say motor mount arms...are you talking about the engine cradle thing they sale?
Which Kennedy set-up did you go for?
-Britain
Posted by: sawtooth Sep 23 2010, 03:34 PM
When you say motor mount arms...are you talking about the engine cradle thing they sale?
Which Kennedy set-up did you go for?
-Britain
It's http://www.smallcar.com/index.php?dispatch=products.view&product_id=29789, but they sold me just the 2 arms that bolt up to the block, not the cross piece you see in the pic. I bolted these up to the block, and welded a piece of 2" angle at the front for the cross brace. This brace then sits on top and bolted to the stock 914 engine mount bar. I stole this idea http://www.914world.com/bbs2/index.php?s=&showtopic=58431&view=findpost&p=749985. But, I didn't cut lower notches like he did. I let the bar sit on top which gives enough clearance below that I don't have to modify the oil pan which is a big plus for me. Only down side to the engine sitting up that high is that there isn't enough room for the intake hose between the trunk. I'm planning on A/C at some point so I'm not flipping the intake manifold 180 like some do. I'll end up modifying the trunk slightly to make room for an intake hose.
I just have the standard kennedy adapter with the stock 200mm pressure plate size. I plan on using that for a while and then converting to a suby trans later.
Posted by: Hontec Sep 23 2010, 03:38 PM
Love the Subaru conversion, doing it myself, only I'm also using the subie transmission.
Keep up the good work
Posted by: sawtooth Sep 23 2010, 03:47 PM
Love the Subaru conversion, doing it myself, only I'm also using the subie transmission.
Keep up the good work
Cool, you going to start a build thread? What axle and shifter solution are you going with?
Posted by: Hontec Sep 23 2010, 03:52 PM
Love the Subaru conversion, doing it myself, only I'm also using the subie transmission.
Keep up the good work
Cool, you going to start a build thread? What axle and shifter solution are you going with?
I'm trying to but the site keeps giving me an error when I try to upload the pics....
Axles are going to be custom since I'm going to put in a Sequential transmission, hence the shifter will be too
Posted by: charliew Sep 24 2010, 01:11 PM
Sequential tranny as in the new suby sequential tranny? I read up on it and it's doesn't support much hp or torque. I really want to do a sequential tranny but haven't come up with a cost effective solution yet. I considered try to design a shifter that would work with the suby tranny but it is not to the must have stage yet. One missed downshift with a suby at high rpm will make the sequential tranny much more important though. My son hotrods a 425 hp sti and missed 5th in the 1/4 mile and putting it in third at 7500 in 4th is tough on ringlands, it probably went over 9k before he got the clutch back in. Luckily he has forged pistons in it.
Posted by: Hontec Sep 24 2010, 01:26 PM
Sequential tranny as in the new suby sequential tranny? I read up on it and it's doesn't support much hp or torque. I really want to do a sequential tranny but haven't come up with a cost effective solution yet. I considered try to design a shifter that would work with the suby tranny but it is not to the must have stage yet. One missed downshift with a suby at high rpm will make the sequential tranny much more important though. My son hotrods a 425 hp sti and missed 5th in the 1/4 mile and putting it in third at 7500 in 4th is tough on ringlands, it probably went over 9k before he got the clutch back in. Luckily he has forged pistons in it.
The Elite transmissions gearbox holds 425 LBS/ft which is 575NM, that will do I think..
Second plus is that it is exactly the same on the outside as the oem subaru box, it fits directly to the subaru engine, no adapterplates, uses stock subaru flywheel and clutch parts etc etc.....
The Mendeola holds even more power, works with an adapter plate which is developed by OUTfront motorsports for the baya's . the plate is very short and brings the axle closer to the engine, benefit is that if you want to upgrade in the future to let's say a V8 (LS6), you just change the adapterplate.....
Posted by: charliew Sep 24 2010, 01:56 PM
If you are talking about the new suby sequential tranny, the info I found was it's not available for a turbo suby motor, that alone should say what it's potential is. I asked a tranny shop about the old sequential suby trannys and the owner said they were not good trannys and very expensive to repair. They basically had metal to metal wear areas but that was the old suby trannys.
I assume you are talking about aftermarket since you mentioned the mendeola and that is not a cost effective solution for my needs.
If they ever get a long term vender on nasioc that can build the 5eat to take 450 ft lbs that would be the closest thing to a sequential I would want to spend my hard earned cash on but it will still probably be 3000.00
Posted by: Hontec Sep 24 2010, 02:55 PM
If you are talking about the new suby sequential tranny, the info I found was it's not available for a turbo suby motor, that alone should say what it's potential is. I asked a tranny shop about the old sequential suby trannys and the owner said they were not good trannys and very expensive to repair. They basically had metal to metal wear areas but that was the old suby trannys.
I assume you are talking about aftermarket since you mentioned the mendeola and that is not a cost effective solution for my needs.
Yes, I'm talking about aftermarket transmissions here..
Posted by: sawtooth Nov 12 2010, 12:42 AM
Back on the project. Since my last update I have decided to go with a different motor, 2000 ej25 n/a SOHC, usdm, 50K. Also using EMS stinger stand-alone ecu. Outfront is building the harness and setting up the base tune this week. This setup will give me much more potential for n/a power then my original 2.2/2.5 combo. Should give me solid 200chp+ for now and potentially 250chp later, with no turbo lag and no ic and ic heat to deal with. 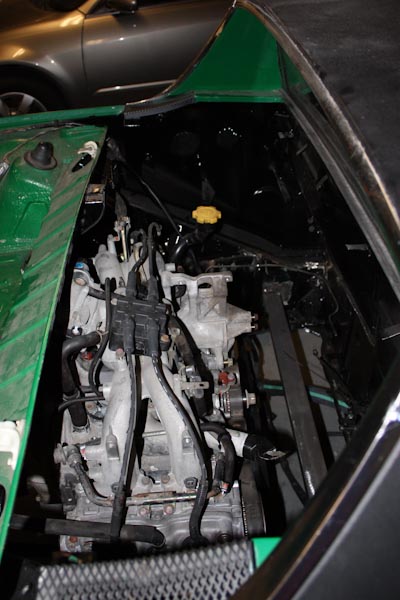
Gave up on the engine bay cooling route, there's room but just didn't want to mess with it. I'm hoping that just opening up the oil cooler holes and using a decent double pass cooler will be enough, we'll see. Homemade gt valance for now, I'll get a real one later.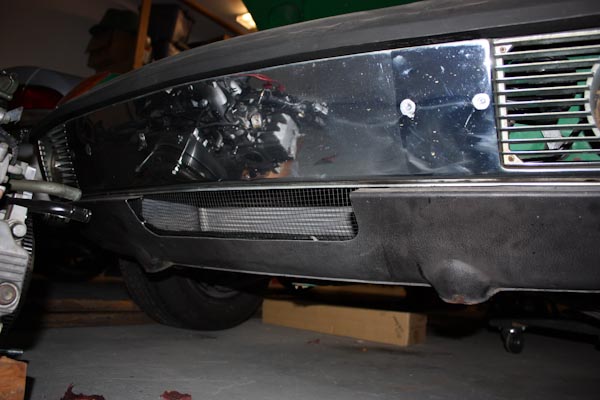
Didn't cut anything in the front except for opening up the existing oil cooler holes. Still room for a space-saver spare too.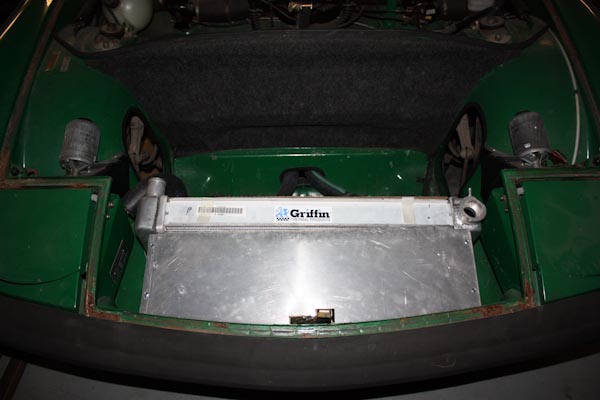
Also decided to do a subaru trans swap sooner rather than later (thanks for the encouragment bigkat_83 and dbcooper). Got a an early 5spd and will have the new engine cradle finished by this weekend. The SmallCar engine mount arms aren't going to work for this setup. Sent the axles off to Dutchman for re-spline to match up to the suby inner cv. Having them shortened by 2.25in for a total of 18 in. I came up with this amount after measuring and re-measuring where I wanted the final length to be. Depending on ride height, foward position, and personal preference yours may be different, so don't assume this measurement is universal.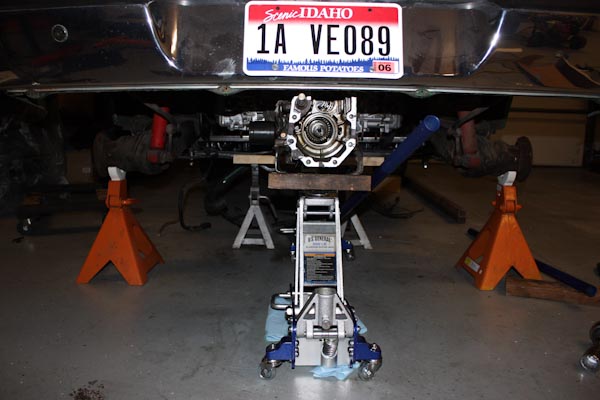
Found these for building the trans mount at Summit Machine...excellent service & very high quality stuff.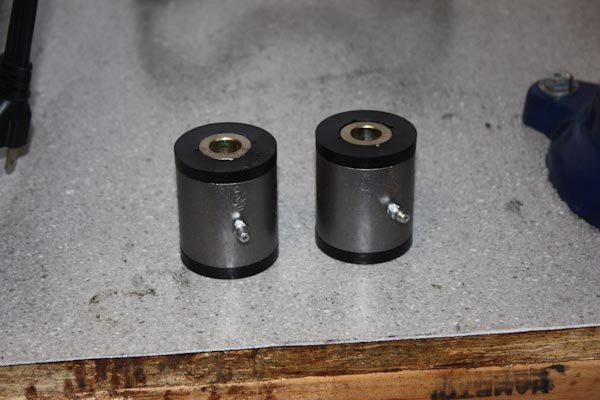
I'll be welding these to the stock suby trans support and will be using a slightly different approach to the engine cradle, more pics coming soon.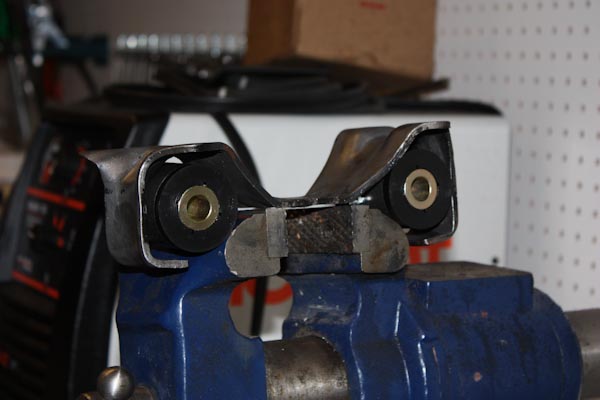
I also picked up an '85 mr2 cable shifter with stock cables from a local wrecking yard. I'll use the stock cables to get the bracket assembly built, then get everything in place and replace with correct length cables. Looks like it'll fit nicely into the stock console with slight modification to the tunnel.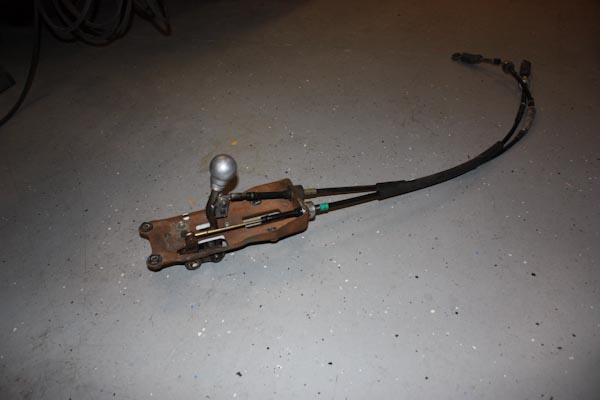
Posted by: BIGKAT_83 Nov 12 2010, 10:17 AM
Looking great...
You have about the same size inlets for the radiator as I have. I cut these small after blocking off the openings on one of my V8 cars and testing to see how small you can go. On my Subaru car with openings like yours I run right at the thermostat 190'
Bob
Posted by: sawtooth Nov 12 2010, 10:21 AM
Looking great...
You have about the same size inlets for the radiator as I have. I cut these small after blocking off the openings on one of my V8 cars and testing to see how small you can go. On my Subaru car with openings like yours I run right at the thermostat 190'
Bob
That's good to hear, I was really hoping not to have to modify the front bumper. This way it's pretty stealth, and a regular gt valance with oil cooler opening will work.
Posted by: strawman Nov 12 2010, 10:50 AM
Great project (from another Suby guy)! In the pic above, did you weld that bar connecting the longs to stiffen things up, or as part of the engine mounting system?
Also, are you able/planning to flip the intake manifold (so the throttle body faces forward)? That might preclude you from having to cut too much into the rear firewall for the intake air filter tract. On the earlier engines, the intake mounting bolt patterns on the heads permits that... although I had to develop a custom alternator mount and reroute some hoses/wires after flipping the manifold.
Keep up the great progress!
Geoff
Posted by: sawtooth Nov 12 2010, 11:33 AM
Great project (from another Suby guy)! In the pic above, did you weld that bar connecting the longs to stiffen things up, or as part of the engine mounting system?
Also, are you able/planning to flip the intake manifold (so the throttle body faces forward)? That might preclude you from having to cut too much into the rear firewall for the intake air filter tract. On the earlier engines, the intake mounting bolt patterns on the heads permits that... although I had to develop a custom alternator mount and reroute some hoses/wires after flipping the manifold.
Keep up the great progress!
Geoff
Hey Geoff,
That bar was put in place originally as a mounting point for an engine bay radiator. After scrapping that idea I decided to keep it in place for now. It seems like a great place to mount my battery down low and forward, and possibly other items, as well as adding some reinforcement.
Still haven't decided on the intake position. I want to keep the option for a/c open. With the 901 trans, the output shaft location allowed the engine to sit just far enough ahead of the trunk wall to fit an elbow in for the intake. But now with the suby trans, wanting to keep the output shafts lined up you can see it's pretty close to the trunk wall. I believe I'll try to flip it for now, and may move it back later if i decide to do a/c, then I'd have to cut the trunk wall.
- Dean
Posted by: sawtooth Dec 11 2010, 09:27 PM
Got some more work done on the car. Engine cradle is finished, just needs powder coat. Got most of the design from DBCooper, a great design that looks good, keeps the stock suby mounts, great support fwd/aft, and is easy to install/uninstall.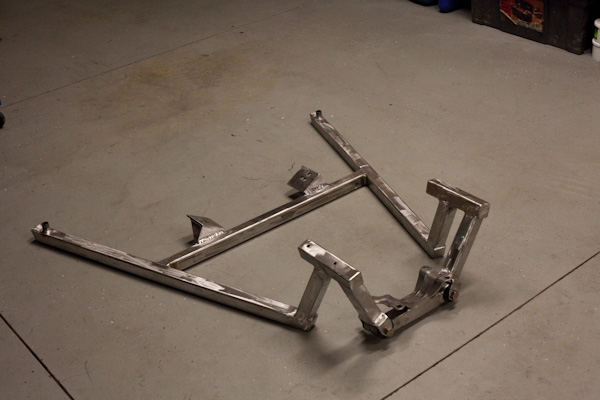
trans mount with bushings
I got my re-splined 914 axles back from dutchman. I decided to do a 5-lug conversion since I'm working on axles anyway. After some hunting for the right 911 pieces it finally came together.
Suby CV -> re-splined 914 axle -> 944 CV -> '78 911 stub axle -> '70 911 hub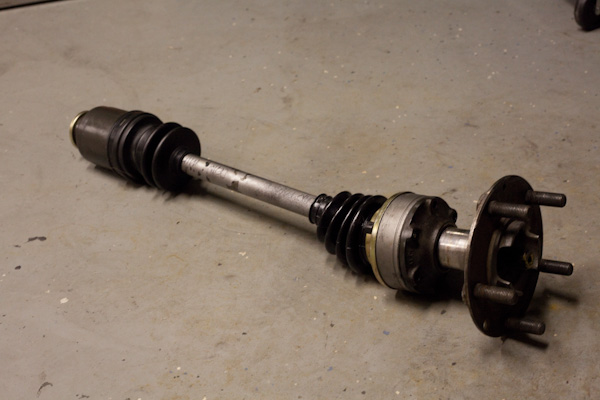
The '78 stub axles were the toughest part to find.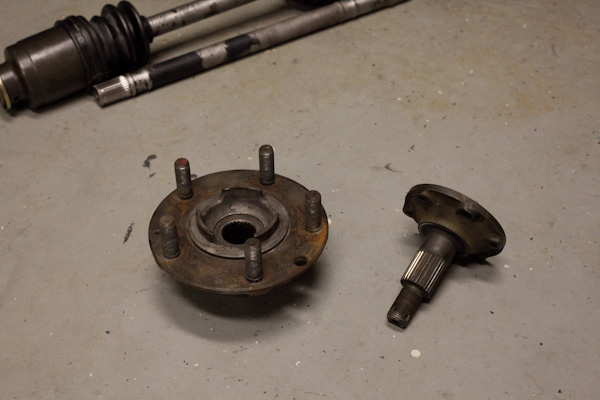
Posted by: Hontec Dec 12 2010, 03:42 AM
Nice setup, but I have a question: I have the same 911 5 lug hubs, but in my case the part/hub that slides into the wheel bearing is about 5mm longer then the original 914 hub shaft, so I need a 5mm spacer between the hub and stub axle to make the bearing fit snug..
simply said: the 914 bearing is less high then the part of the 911 hub that slides into the bearing...
Do you have that too?
In the meanwhile, I took a picture of what I meant:
They are the same height: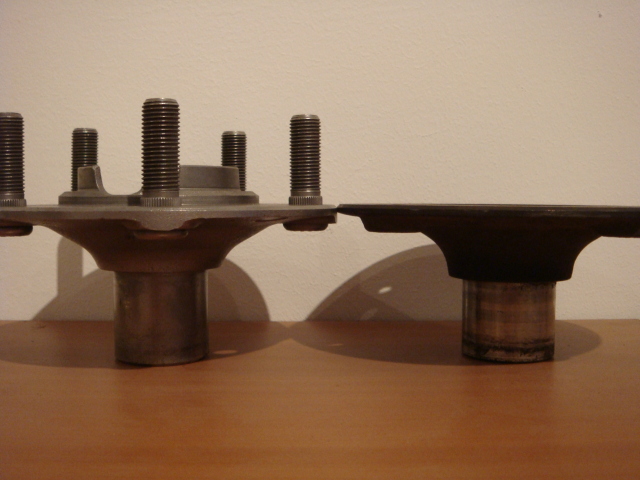
But this is the difference: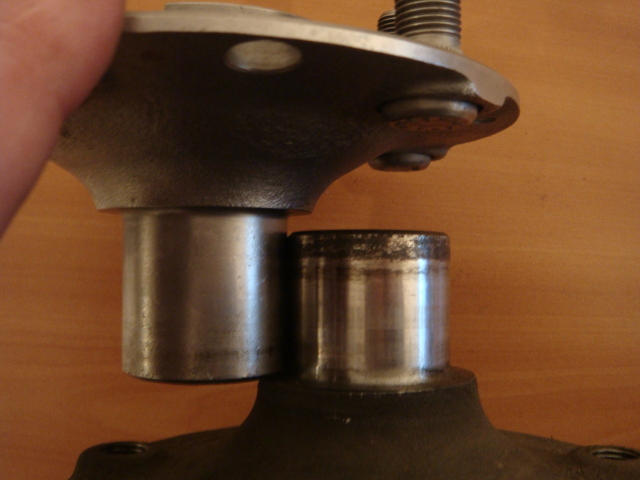
Nothing that can't be solved by machining a spacer ring.....but I was wondering if you had that same issue..
O, and my 944 stubs fit into the 911 hubs.....
Posted by: sawtooth Dec 12 2010, 07:04 PM
Yeah, mine look the same as yours. That'd be a good question to ask Sir Andy in http://www.914world.com/bbs2/index.php?showtopic=80641.
That's good to know about 944 stubs, would have been a lot easier to find.
Posted by: charliew Dec 13 2010, 11:44 AM
Nice work. A person here makes the spacers for the stub you have. PRS 916-6 He also sells the new press stickers for the seat belts.
Posted by: sawtooth Jan 7 2011, 09:29 PM
Made some more progress...
- Refinished fuel tank internals with eastwood kit.
- Stainless fuel lines and walbro fuel pump installed
- 2wd conversion spool and cover plate finished
- act 12lb flywheel
- exedy stage 1 clutch
- shortened trans dipstick for clearance
- spent a bunch of time cleaning up motor and trans. New soda blaster worked wonders on getting the corrosion off all the sand casted aluminum.
- Ready to go back in the car and finish connecting up the wiring harness. Hope to fire it up this weekend.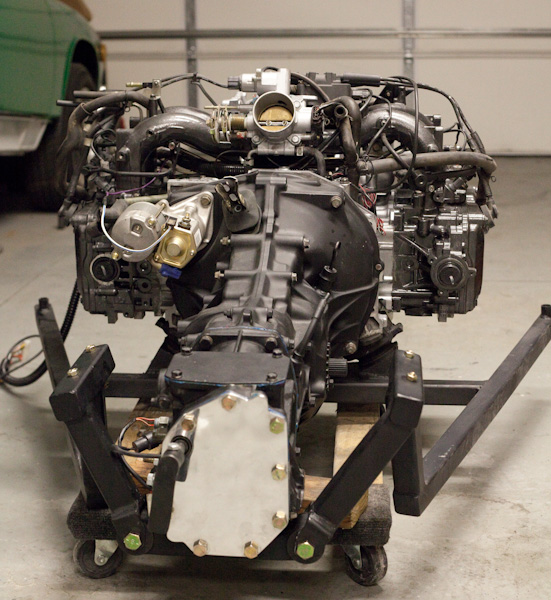
Posted by: sawtooth Jan 18 2011, 03:11 PM
Nice work. A person here makes the spacers for the stub you have. PRS 916-6 He also sells the new press stickers for the seat belts.
Thanks for the tip. He didn't have any on hand so I'd need to get a small group buy for 3 going. I ended up just having my local machinist whip some up for me.
Posted by: sawtooth Feb 1 2011, 12:04 PM
Got to drive my car for the first time in over 2 years last night, pretty surreal with everything finally coming together in one moment. Man I'm excited about this setup. All I can say is that it's everything I hoped it would be.  No, it's not a fire breathing turbo monster, but at around 220chp the power feels like a perfect balance for this car, hard pulling power all the way through. The torque of this motor is very good. I was really surprised to find that it'll idle up my fairly steep driveway in 1st with no extra throttle, didn't expect that. Only car I've seen do that is my jetta tdi. The suby trans is outstanding, short precise and smooth shifts. Thanks bigkat_83 and dbcooper for giving me the confidence to go for the suby trans! I ended up using my stock clutch pedal with a new heavy duty push/pull cable. Since my trans was a cable clutch to begin with I decided to give it a try. I'm really glad I did, the clutch feels fantastic. Still need to finish the exhaust, just running the equal length header right now. Will post some more pics and video once the exhaust is done.
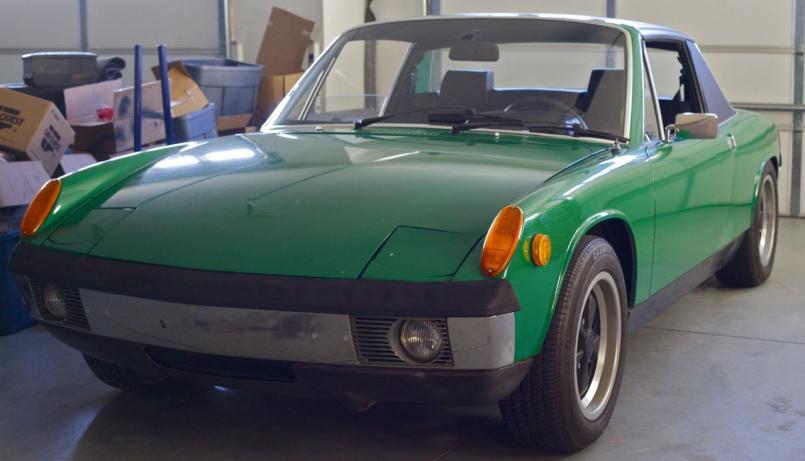
Posted by: Ferg Feb 1 2011, 12:06 PM
 Very Nice!
Posted by: BIGKAT_83 Feb 1 2011, 01:21 PM
Looks real nice. You used a cable clutch? I guess it would be pretty easy to make a mount for the cable where the slave cylinder went.
GOOD JOB.............................
Bob
Posted by: sawtooth Feb 1 2011, 01:32 PM
Looks real nice. You used a cable clutch? I guess it would be pretty easy to make a mount for the cable where the slave cylinder went.
GOOD JOB.............................
Bob
Thanks Bob, I've really appreciated your help. Yep my trans was cable clutch to begin with. It's from an outback so its a push-style clutch. Everything I could find to read says that all suby 5spd trannys are basically the same from early 90's on up, slight difference in gear ratios. So I used a '93 awd 5spd I bought locally for $40. My goal was to use it as a test platform to get the cradle and everything else built before laying down the cash to get a wrx trans. We'll see how it holds up but judging by the way it feels right now I won't be changing it out any time soon. I replaced the stock clutch cable with a heavy push/pull cable. Made a bulkhead mount in the tunnel near the pedal, and built a new bulkhead mount at the trans. It's action is like butter and I like the old school feel where you can tell where the clutch is.
Posted by: charliew Feb 1 2011, 01:39 PM
For good info on the strengths of the VARIOUS suby awd trannys go to the tranny section on nasioc. All the 5 spds are not the same. They are used in order of torque and awd and 2wd, but really mostly by the torque of the motor in the stock application. Your tranny may hold up just fine. As I'm sure you know some people can break a anvil. But as far as I know the turbo 05 legacy and possibly later wrx's have thicker gears and better syncros. My son's 6 spd sti tranny started scratching 5th at 7k early on so even the good ones may develop problems.
Posted by: sawtooth Feb 1 2011, 02:11 PM
For good info on the strengths of the VARIOUS suby awd trannys go to the tranny section on nasioc. All the 5 spds are not the same. They are used in order of torque and awd and 2wd, but really mostly by the torque of the motor in the stock application. Your tranny may hold up just fine. As I'm sure you know some people can break a anvil. But as far as I know the turbo 05 legacy and possibly later wrx's have thicker gears and better syncros. My son's 6 spd sti tranny started scratching 5th at 7k early on so even the good ones may develop problems.
Thanks, good info. What I should have said was that I learned that awd 5spds are interchangeable which is why I chose to start with the one I have. The great thing is that it's an easy swap to drop in a newer wrx trans at some point if needed. I'll just have to switch over to a hydraulic clutch pedal setup. But for now I'm just going to drive it til it gives up

Posted by: sawtooth Feb 1 2011, 02:28 PM
After a quick break for some honey-do's and enjoying driving the car for a bit, it's on to body and paint. Staying with green, but thinking of changing to a little different shade of green. We'll see, first got to get the body work done.
Posted by: charliew Feb 1 2011, 02:45 PM
Actually you can probably just get the legacy internal parts and put them in your tranny. The 05 legacy tranny I have uses a clutch fork with the pivot ball instead of the wrx style cross shaft throwout arm and it also has a damaged case so I will put the later parts in a earlier tranny.
Posted by: sawtooth Feb 1 2011, 02:52 PM
Actually you can probably just get the legacy internal parts and put them in your tranny. The 05 legacy tranny I have uses a clutch fork with the pivot ball instead of the wrx style cross shaft throwout arm and it also has a damaged case so I will put the later parts in a earlier tranny.
Nice, I could keep my cable clutch then. Sounds like a good plan to me, I'll check it out. Thanks!
Posted by: JRust Feb 1 2011, 09:03 PM
I'm so much more excited reading your thread after buying one. I will be picking your brain soon. Did you do anything to your motor? How are you getting the 220hp? I thought the 2.5 was like 160 stock. I still have plenty of research to do there. Your cradle is looking good man. I will need to hit you guys up for some info on that bad boy. If I can get 200+ out of this motor I will be thrilled. 
Posted by: sawtooth Feb 2 2011, 12:00 AM
I'm so much more excited reading your thread after buying one. I will be picking your brain soon. Did you do anything to your motor? How are you getting the 220hp? I thought the 2.5 was like 160 stock. I still have plenty of research to do there. Your cradle is looking good man. I will need to hit you guys up for some info on that bad boy. If I can get 200+ out of this motor I will be thrilled.
Hey Jamie, I just got back from taking another drive this evening. Too much fun, exploring the power band a little at a time until I gain more confidence in the whole setup.
So the 2.5 is 165hp with the stock ecu. Here's what I have over and above that:
- EMS Stinger instead of stock ecu. Outfront uses this computer in most of their suby dune cars and they say they can get well over 200hp with the stinger.
- Equal length header which is proven to add 10-15hp wheel HP by guys at nasioc.
- Cheap but effective high flow intake which really helps open it up.
- I'll also be doing cams which can add another 15-20hp
- I also have an ACT 12.9lb chromoly flywheel and exedy clutch setup. While this doesn't add any hp, it certainly brings the power on much faster.
Matt Monson describes this setup in the http://www.914world.com/bbs2/index.php?showtopic=40415&st=0&p=524961&#entry524961. See post #2 where he says 225 is very attainable with this motor, that is with the stock ecu just doing cams intake and exhaust. The stinger adds even more tunable potential. So when I do the cams I should be close to 250chp at that point may be too optimistic but we'll see.
More than happy to share anything I can with you, just let me know what you need.
- Dean
Posted by: charliew Feb 2 2011, 04:58 AM
Matt's been around a long time and is very knowledgeable. I just wish I knew what he knows and could always remenber all of it. I enjoy reviewing that thread. Google cfm flow to hp and torque, there are formulas for power. The suby has a pretty good ve but from my memory the good heads flow about 220-230-240 cfm on the intakes na. When you go to 14 psi on the turbo you double the cfm flow to the cylinder thats how a 2.5 can perform like a 5.0 but still get the fuel economy of the 2.5 off boost if you leave the ports stock. When you go to bigger cams on na you always loose some lowend power on any motor, the same with bigger ports. My google button found 1 hp = 1.45 cfm There are charts somewhere on this.
For me 250 is VERY optimistic. That will probably be on the lean scary side on av gas with 11:1-12:1 compression, which means a built motor. Probably a 8000.00 motor if you pay for it.
Posted by: sawtooth Feb 2 2011, 09:22 AM
Matt's been around a long time and is very knowledgeable. I just wish I knew what he knows and could always remenber all of it. I enjoy reviewing that thread. Google cfm flow to hp and torque, there are formulas for power. The suby has a pretty good ve but from my memory the good heads flow about 220-230-240 cfm on the intakes na. When you go to 14 psi on the turbo you double the cfm flow to the cylinder thats how a 2.5 can perform like a 5.0 but still get the fuel economy of the 2.5 off boost if you leave the ports stock. When you go to bigger cams on na you always loose some lowend power on any motor, the same with bigger ports. My google button found 1 hp = 1.45 cfm There are charts somewhere on this.
For me 250 is VERY optimistic. That will probably be on the lean scary side on av gas with 11:1-12:1 compression, which means a built motor. Probably a 8000.00 motor if you pay for it.
I guess for me it comes down to this... say Matt is wrong and I can only squeeze 200chp out of this motor. With the flat torque curve I've seen out of this motor, it has more than enough power to make the 914 feel pretty crazy. It's a good balance for this car. I'm obviously not an expert on any of this by any standard. But I do know from an upgraded STI that I get to drive once in a while that it has an enormous hit, but comes on pretty late, there is definitely a lag waiting for the power to come on. I like the way my car pulls better, it's very strong right from the start. No, it doesn't produce anywhere near the same power at the top side, but down low and in the medium range it is more than enough for me. That, combined with the simplicity of not having a turbo is a winning combination for me. If it's not enough, I could plug-n-play upgrade to an EZ30R to get 300hp without a turbo.
charliew, seriously love getting your feedback, gets me thinking through things. Really appreciate it.
- Dean
Posted by: draganc Feb 2 2011, 09:39 AM
Congratulations!! Great wotk and I’m glad it worked out the way you wanted!
Just a small reminder:
“…That way I can be finished, and enjoying the car in months, not years...“ 
And
“….my car for the first time in over 2 years last night…”
I wish I could drive my 914 and it’s been about 1.5 years. Heck I wish I even drove my car once – it never drove when I bought it! 
I remember the day my '76 2.0 FI - silver - was delivered on a flat bed and my wife asked why didn’t I drive the car home.
The answer was that it was sitting in a garage for 8 years. Her comment: then it should have stayed in that garage for another 8 years.
Posted by: sawtooth Feb 2 2011, 01:15 PM
Congratulations!! Great wotk and I’m glad it worked out the way you wanted!
Just a small reminder:
“…That way I can be finished, and enjoying the car in months, not years...“
And
“….my car for the first time in over 2 years last night…”
I wish I could drive my 914 and it’s been about 1.5 years. Heck I wish I even drove my car once – it never drove when I bought it!
I remember the day my '76 2.0 FI - silver - was delivered on a flat bed and my wife asked why didn’t I drive the car home.
The answer was that it was sitting in a garage for 8 years. Her comment: then it should have stayed in that garage for another 8 years.
Yeah, you had to bring that up.
 I should know better than to spout off, especially in writing. Can't help it most of the time but I'm working on it. I went back and looked, all in all it was about 3-4 months of work on nights, weekends, and my week of forced vacation at Christmas. I really didn't get rolling until November last year. But the good side of it is that during all that time I was not working on the car I did manage to keep doing research which helped make some key changes to my game plan that I'm really happy with now.
Just got back from getting final exhaust done, man I wish I could take you for a drive. It has put a permanent smiley on my face.
Posted by: draganc Feb 2 2011, 01:34 PM
... man I wish I could take you for a drive. It has put a permanent smiley on my face...
thanks for the offer man!
it's been freaking freezing in NJ the last 3-4 months and it bugs the hell out of me that I can't work on my car. the last accomplishment was new trailing arm bearings.
Attached thumbnail(s)
Posted by: bfrymire Feb 2 2011, 08:20 PM
Dean,
How did you handle the ignitors for the coils? I know MS has built in ignitors. But some of the other EMC's do not.
Not familiar with the stinger....
Also, isn't there some kind of unwritten rule, that it's not really running until there is a youtube video of it.... 
Still waiting for start on my conversion. Too many projects and my job keeps getting in the way...
-- brett
Posted by: jd74914 Feb 2 2011, 08:37 PM
How did you handle the ignitors for the coils? I know MS has built in ignitors. But some of the other EMC's do not.
Sorry for the hijack (I also have no idea how the Stinger works), but many aftermarket ECU's (Microsquirt, a few Motecs, Adaptronics, etc) use the Bosch 211 ignition module found on a bunch of VW 1.8T's. http://www.microsquirt.info/Bosch_211.htm
Awesome job Dean!! The conversion looks great!
Posted by: bfrymire Feb 2 2011, 09:51 PM
How did you handle the ignitors for the coils? I know MS has built in ignitors. But some of the other EMC's do not.
Sorry for the hijack (I also have no idea how the Stinger works), but many aftermarket ECU's (Microsquirt, a few Motecs, Adaptronics, etc) use the Bosch 211 ignition module found on a bunch of VW 1.8T's. http://www.microsquirt.info/Bosch_211.htm
Awesome job Dean!! The conversion looks great!
Thanks for the prompt reply and great info.
Are there any other ones that could be used? Not to be a CSOB,
but $150+ seems a little steep. I could make one cheaper with the Bosch BIP373 used with MS. Even a four channel is $30 in parts. -- brett
Posted by: sawtooth Feb 3 2011, 01:45 AM
Dean,
How did you handle the ignitors for the coils? I know MS has built in ignitors. But some of the other EMC's do not.
Not familiar with the stinger....
Also, isn't there some kind of unwritten rule, that it's not really running until there is a youtube video of it....
Still waiting for start on my conversion. Too many projects and my job keeps getting in the way...
-- brett
Hey Brett, it must be built in with stinger, I didn't have to do anything except plug in the engine harness they made for me and connect a few wires for the ecu power, fuel pump, etc. So easy even I could do it.

You'll just have to take my word for it, it's running... ok the video documentary will be revealed soon.
Posted by: bfrymire Feb 3 2011, 02:04 AM
Dean,
How did you handle the ignitors for the coils? I know MS has built in ignitors. But some of the other EMC's do not.
Not familiar with the stinger....
Also, isn't there some kind of unwritten rule, that it's not really running until there is a youtube video of it....
Still waiting for start on my conversion. Too many projects and my job keeps getting in the way...
-- brett
Hey Brett, it must be built in with stinger, I didn't have to do anything except plug in the engine harness they made for me and connect a few wires for the ecu power, fuel pump, etc. So easy even I could do it.
You'll just have to take my word for it, it's running... ok the video documentary will be revealed soon.
Thanks for the info. I have a Link ECU and it states in the docs that it can't drive the coils directly. I will have to continue to research. I do have a MS II i can use also... We'll see which direction I go.
Looking forward to seeing the video.
-- brett
Posted by: sawtooth Feb 3 2011, 02:10 AM
Dean,
How did you handle the ignitors for the coils? I know MS has built in ignitors. But some of the other EMC's do not.
Not familiar with the stinger....
Also, isn't there some kind of unwritten rule, that it's not really running until there is a youtube video of it....
Still waiting for start on my conversion. Too many projects and my job keeps getting in the way...
-- brett
Hey Brett, it must be built in with stinger, I didn't have to do anything except plug in the engine harness they made for me and connect a few wires for the ecu power, fuel pump, etc. So easy even I could do it.
You'll just have to take my word for it, it's running... ok the video documentary will be revealed soon.
Thanks for the info. I have a Link ECU and it states in the docs that it can't drive the coils directly. I will have to continue to research. I do have a MS II i can use also... We'll see which direction I go.
Looking forward to seeing the video.
-- brett
budman5201 has been using Link with his suby projects. He's been a great help to me in the past. You might want to send him a pm.
Posted by: sawtooth Feb 5 2011, 01:35 AM
Here's a short clip of my son and I heading down to meet the guys for our local 914 meet this evening. Not much but lets you hear some of the exhaust note. I'm really happy with the exhaust sound, very deep and zero rasp. You'll see me using the gps for a speedometer for now, never a shortage of projects.
https://www.youtube.com/watch?v=WNmizmQVBy0
Posted by: charliew Feb 5 2011, 09:29 AM
Boy that sure is good motivation. Nice job. Most of my projects really never end. When the dust settles you can study up on doing your own programming with a laptop. I wanted to have different maps one for e85 and a couple more for cheap gas and good gas. Someone is going to come up with a device thats checks fuel quality in the tank as you are using it and adjust the tune accordingly. The suby ecu sorta does that but the range is pretty narrow for peak performance. The old tt ej2oh I have would not let the turbos boost if the fuel quality was not good. The relearn part of the suby ecu is really tricky to tune with but it is very sophisticated. It watches even the fuel temp in the tank I think I remember reading.
Great video, I guess the camera was mounted on a hat? utube video and music is something that is out of my spectrum of shadetree. Thats both of my son's relm.
Posted by: computers4kids Feb 5 2011, 09:56 AM
Great video...love these kind of "in the driver seat" experiences! The motor was music enough...could left out the other stuff.
Just curious...since I've never been in a suby 914, what kind of ball park rear wheel hp and torque are you running at this point? Estimate?
Put up another video without music...I would love to hear the just the motor and how the tranny is responding.

Posted by: bfrymire Feb 5 2011, 12:59 PM
Great video! Loved it. And always liked that color. As well as that sound. I will have to go back in the thread and see the exhaust that you used.
-- brett
Posted by: sawtooth Feb 5 2011, 02:52 PM
Boy that sure is good motivation. Nice job. Most of my projects really never end. When the dust settles you can study up on doing your own programming with a laptop. I wanted to have different maps one for e85 and a couple more for cheap gas and good gas. Someone is going to come up with a device thats checks fuel quality in the tank as you are using it and adjust the tune accordingly. The suby ecu sorta does that but the range is pretty narrow for peak performance. The old tt ej2oh I have would not let the turbos boost if the fuel quality was not good. The relearn part of the suby ecu is really tricky to tune with but it is very sophisticated. It watches even the fuel temp in the tank I think I remember reading.
Great video, I guess the camera was mounted on a hat? utube video and music is something that is out of my spectrum of shadetree. Thats both of my son's relm.
Thanks Charlie, the camera is a ContourHD helmet cam. I made a head band setup I can wear. It's a fantastic little camera.
Posted by: sawtooth Feb 5 2011, 04:05 PM
Great video...love these kind of "in the driver seat" experiences! The motor was music enough...could left out the other stuff.
Just curious...since I've never been in a suby 914, what kind of ball park rear wheel hp and torque are you running at this point? Estimate?
Put up another video without music...I would love to hear the just the motor and how the tranny is responding.
Thanks, so fun to be on the road again. Haven't been on the dyno yet, so not certain what I'm getting at the wheels. Should be close to 220chp and 200ft/lb at the crank. Whatever it is, it feels like a fantastic balance in this car.
Here's a vid with no background music, hey it was old school Bad Company, goes good with anything
 I know what you mean though, can be distracting.
 You'll hear a whine in the gears when in low gears or backing off the throttle in any gear. I'm suspecting its coming from the differential. Anyway I'm not sure if it is just to be expected with this older trans or if its a sign of needing a rebuild. Made a post over on nasioc for some advice. If anyone here has some ideas about the noise I'd love to hear them.
https://www.youtube.com/watch?v=8-o7TaHb4Ss
Posted by: sawtooth Feb 5 2011, 04:57 PM
Great video! Loved it. And always liked that color.
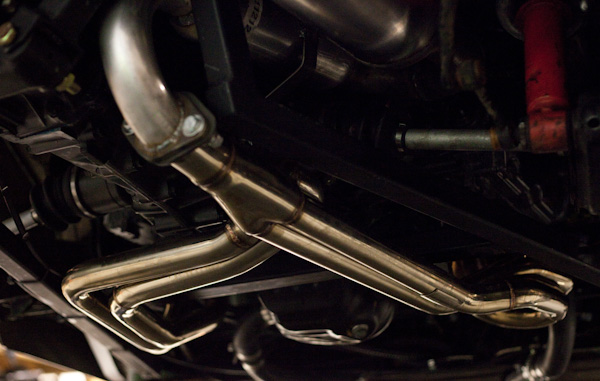
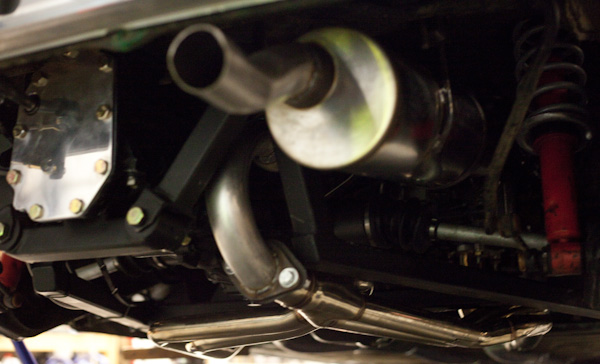
As well as that sound. I will have to go back in the thread and see the exhaust that you used.-- brett
Thanks Brett. I don't have much on my exhaust in the build thread yet. Here's a couple of pics. I'm using an OBX EL header which give the suby motor a smooth sound rather than the traditional suby rumble. It also gives me 10-15 more whp which is a big deal for an n/a build. I have a 14" resonator off the header to kill any deceleration rasp (which you can see a little of in the first pic) and then an 18" magnaflow muffler. It's a really nice sound, almost silent at idle and sings pretty when opened up.
Posted by: JRust Feb 5 2011, 05:40 PM
Looks great! This is close to just what I want. Although depending on getting the adapter plate for the 901 tranny. Along with the suby adapter motor mounts. I know this guy who is dying to give me a great deal on them  . Just waiting to hear back from him on it. LOL
Posted by: Hontec Feb 6 2011, 02:12 PM
Great video! the sound alone is food for motivation!!!
Posted by: Zaney Feb 6 2011, 03:42 PM
Thanks for the motivation posts!!!
I would be interested in your front modified valance when you go for a GT flared version
Awesome job!
Nate
Posted by: Eric_Shea Feb 6 2011, 04:34 PM
That's one cute passenger!
Posted by: sawtooth Feb 6 2011, 09:53 PM
That's one cute passenger!
Yep she's the best. She made sure to let me know that she would only go for a ride when it had a muffler, and when it was "glitch" free. I said "honey it will never be glitch free, it's a 914. But it does have a muffler now, so lets go for a ride".
Posted by: sawtooth Feb 6 2011, 10:07 PM
Thanks for the motivation posts!!!
I would be interested in your front modified valance when you go for a GT flared version
Awesome job!
Nate
Thanks Nate. Glad I could add some motivation, your build definitely motivated me when I needed it. It really is worth it all to get 'er done. Can't wait to see you get your car finished up. Got any updates for us?
Posted by: Britain Smith Feb 6 2011, 11:41 PM
Man...that is awesome!
I can't wait to get mine running. I got a date with the dyno in 2 weeks.
-Britain
Posted by: Eric_Shea Feb 6 2011, 11:51 PM
I say we try to get a group site at Pine Flats Campground this summer and have a long Porsche weekend. About 1/2 way for the NW crew.
Posted by: sawtooth Feb 7 2011, 12:01 AM
I say we try to get a group site at Pine Flats Campground this summer and have a long Porsche weekend. About 1/2 way for the NW crew.
Sounds good to me, which Pine Flats campground you talkin about. The one by Lowman?
Posted by: a914622 Feb 7 2011, 12:21 AM
Love the build. Im looking forward to starting mine.
Have you had any Knocking running the outfront computer ? I ran the same set up in my vanagon and had lots of knocking up over the pass. I had to go back to the stock ecu.
jcl
Posted by: Eric_Shea Feb 7 2011, 01:12 AM
Yup. Great site. We can be river rats and rent a bunch of rafts.
Posted by: sawtooth Feb 7 2011, 11:08 AM
Love the build. Im looking forward to starting mine.
Have you had any Knocking running the outfront computer ? I ran the same set up in my vanagon and had lots of knocking up over the pass. I had to go back to the stock ecu.
jcl
No knocking at all, sewing machine smooth so far. Did you talk with the guys at outfront about it? They have top notch support.
Posted by: sawtooth Feb 7 2011, 11:12 AM
Yup. Great site. We can be river rats and rent a bunch of rafts.
Hmmm that would be cool. That area also has some of the best scenic mountain twisty roads anywhere, between Idaho City and Stanley.
Posted by: BIGKAT_83 Feb 7 2011, 11:15 AM
Love the build. Im looking forward to starting mine.
Have you had any Knocking running the outfront computer ? I ran the same set up in my vanagon and had lots of knocking up over the pass. I had to go back to the stock ecu.
jcl
No knocking at all, sewing machine smooth so far. Did you talk with the guys at outfront about it? They have top notch support.
When the stinger ecu is wired up are you using the stock Subaru knock sensors. If so you sould never hear any spark knock.
The car is looking great. Keep up the good work.
Bob
Posted by: Eric_Shea Feb 7 2011, 12:52 PM
I knoooooooooow...
Posted by: sawtooth Feb 7 2011, 01:01 PM
I knoooooooooow...
What about this...
We could meet in McCall, drive to Banks for a float trip, from there go to Stanley via Lowman, and end up staying in Stanley. Then on the drive home could head out over Galena and down through Sun Valley. It would be epic at the right time of year. Or maybe the opposite, start in Sun Valley and end up in McCall.
Posted by: sawtooth Feb 7 2011, 02:31 PM
Love the build. Im looking forward to starting mine.
Have you had any Knocking running the outfront computer ? I ran the same set up in my vanagon and had lots of knocking up over the pass. I had to go back to the stock ecu.
jcl
No knocking at all, sewing machine smooth so far. Did you talk with the guys at outfront about it? They have top notch support.
When the stinger ecu is wired up are you using the stock Subaru knock sensors. If so you sould never hear any spark knock.
The car is looking great. Keep up the good work.
Bob
Thanks Bob.
Regarding knock sensors, the Stinger does not use them. Here's the info I have from John the owner of Outfront:
"Dean, no EMS product uses a knock sensor. There are only a few select ecus out there that can. The knock sensor is not usually used in High Performance as the engines make so much internal noise that it's hard to distinguish normal noise and knock. In a stock motor/cast pistons, standard valve train engine, a knock sensor makes more sense. Knock is due to poor timing maps and cheap fuel [that] a map was not intended for. My ignition map and using 91oct fuel should be real close and knock should never be an issue"
Posted by: Eric_Shea Feb 7 2011, 02:46 PM
I'm doing Stanley over the 4th with the other Porsche (if you wanna call it that)
We should start another thread to gauge interest though...
Posted by: sawtooth Feb 7 2011, 03:11 PM
Great video! the sound alone is food for motivation!!!
Thanks Hontec, it is a great sound. Gets my blood flowing every time I fire it up. I'm going to use my real video cam in the next few days to hopefully get a cleaner sound clip to share.
Posted by: sawtooth Feb 7 2011, 03:12 PM
Looks great! This is close to just what I want. Although depending on getting the adapter plate for the 901 tranny. Along with the suby adapter motor mounts. I know this guy who is dying to give me a great deal on them
. Just waiting to hear back from him on it. LOLSorry about the wait, thanks for the reminder, sent a PM.
Posted by: sawtooth Feb 7 2011, 03:16 PM
I'm doing Stanley over the 4th with the other Porsche (if you wanna call it that)
We should start another thread to gauge interest though...
Man I think you are spoiled. I'll probably be up in that area the same weekend, maybe we can meet up.

Posted by: Eric_Shea Feb 8 2011, 11:42 AM
Elk Creek group site.
Posted by: charliew Feb 9 2011, 08:51 AM
na might be ok on the street without knock sensors but a stock piston turbo suby will quickly be junk on bad gas without knock sensing in my opinion. Sure you can run a safe tune without them but you will be giving up a lot of timing to be safe in a 18- 25 psi turbo application. My son even uses aquamist, a 800.00 setup just to be safe at 26 psi. It is true built motors are noisey till it warms up but the knock threshold can be set a little to allow for it. Hotter climates are more critical I'm sure. The knock sensors must be torqued and have a clean installation to be optimum also. The best tunes are done with a listening device that can be made with a cheap hearing helper with the microphone put on a alligator clip and long lead so you can listen while you are tuning. Autospeed had a how to a few years ago on making one, but it's really just moving themicrophone to a lead with a alligator clip to fasten it to a bolt head or motor part close to the combuston chamber. You can usually hear a knock before the ecu registers it. My son is always reviewing his data for knock detection timing after a run. He looks first for any pulled timing incidences. He usually spots the knock light if it comes on during a run. He also has three things he watches, the road, the tach, and the knock light. Then the oil pressure and temp maybe. Thats still using the stock ecu but with speed density and open source tuning.
Posted by: JRust Feb 9 2011, 10:54 PM
I can't wait to go for a ride saturday Dean . Not to mention picking up my other bits & pieces . Don't forget to get me the link on the header
Posted by: a914622 Feb 9 2011, 10:59 PM
About the knock sensor
I did talk to them but it was back when they were outback. I did get the bad gas wrong timing store. I only got knocking under load at high alt.
here is a thread from the vanagon forum. Bad things with out a knock BUT heavier rig.
http://www.thesamba.com/vw/forum/viewtopic.php?t=272753&highlight=ems+stinger
The only reason im asking is because im thinking of using the stinger system on the 914 suby conversion . Its not doing me any good sitting on the shelf.
You couldnt send me a copy of what your running ??
thanks jcl
Posted by: sawtooth Feb 9 2011, 11:24 PM
About the knock sensor
I did talk to them but it was back when they were outback. I did get the bad gas wrong timing store. I only got knocking under load at high alt.
here is a thread from the vanagon forum. Bad things with out a knock BUT heavier rig.
http://www.thesamba.com/vw/forum/viewtopic.php?t=272753&highlight=ems+stinger
The only reason im asking is because im thinking of using the stinger system on the 914 suby conversion . Its not doing me any good sitting on the shelf.
You couldnt send me a copy of what your running ??
thanks jcl
You mean the base map outfront installed on my stinger? I'll see if I can figure out how to make a copy, don't know my way around the software too well yet. So what altitude where you at?
Posted by: sawtooth Feb 9 2011, 11:27 PM
I can't wait to go for a ride saturday Dean
. Not to mention picking up my other bits & pieces . Don't forget to get me the link on the headerThat's so cool, can't believe you are going to get to come over to my neck of the woods. Looking forward to it!
Posted by: sawtooth Feb 9 2011, 11:29 PM
Elk Creek group site.
I know the spot and will definitely track you down.
Posted by: JRust Feb 10 2011, 12:02 AM
I can't wait to go for a ride saturday Dean
. Not to mention picking up my other bits & pieces . Don't forget to get me the link on the headerThat's so cool, can't believe you are going to get to come over to my neck of the woods. Looking forward to it!
Yeah my 12 year old boy is going to ride along to keep me company. Should be a cool weekend

Posted by: sawtooth Feb 27 2011, 12:52 AM
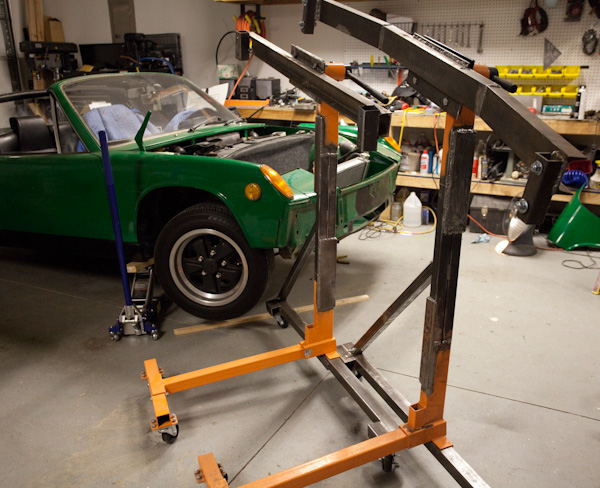
Spent some time building a rotisserie last weekend.
Posted by: sawtooth Feb 27 2011, 12:56 AM
Dove in today and tackled the cowl/fender area. Nasty in there but not as bad as I thought.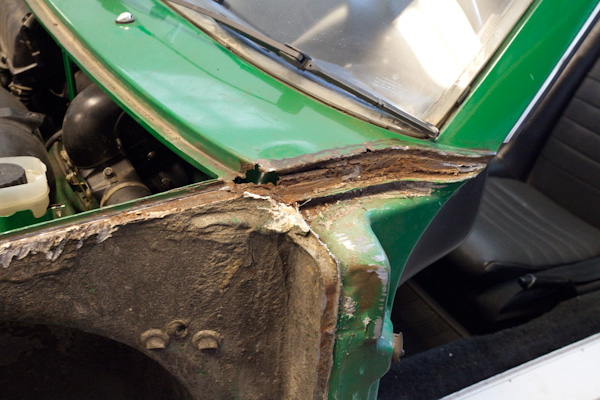
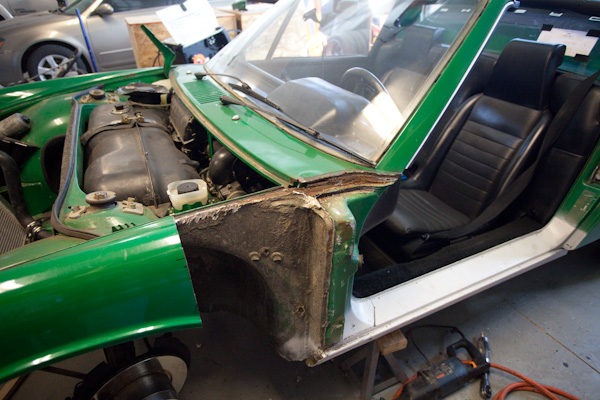
After a some cleaning.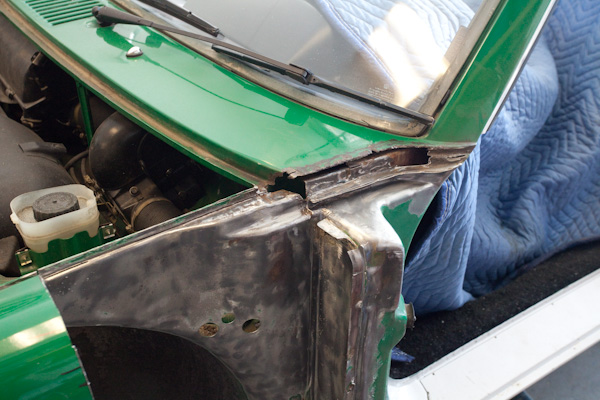
Posted by: sawtooth Feb 27 2011, 12:58 AM
Finishing up...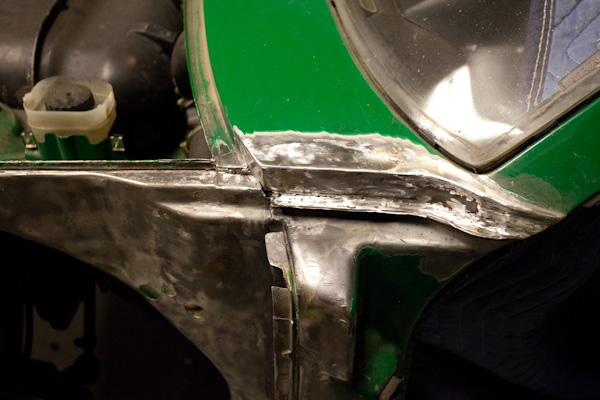
Posted by: charliew Feb 27 2011, 09:45 AM
I haven't tried this yet, not sure if I will need to but I do have a bubble on the edge of the seal strip on each fender. Wouldn't it be easier to just remove just the top of the fender and not distrub the lower part where the fender attaches. It really looks like the fender will be hard to put back on and seal up the way you have removed it. You probably have thought about it a lot and have it figgured out but it still looks like a hard spot to get to from under the fender and getting sealer in at the door jamb side looks even harder. I'm still thinking the only reason for the strip was to allow for a fender replacement without body work at the windshield post area. Maybe they learned from the karmen ghia. But it could be for flex also. I'm thinking I will just blast the seam out, clean it up, ospho it, seal it up with weld through primer then close it up with weld, especially the trunk channel and see if it cracks. The bottom of the welded area won't be sealed though. The only thing is if it does crack it will be way harder to fix it back stock.
You are doing so good so far I'm sure you have it under control. This thread is a really good reference thread.
Posted by: JRust Feb 27 2011, 12:44 PM
Looking good Dean! Now just get those flares on
Posted by: sawtooth Feb 28 2011, 10:06 AM
I haven't tried this yet, not sure if I will need to but I do have a bubble on the edge of the seal strip on each fender. Wouldn't it be easier to just remove just the top of the fender and not distrub the lower part where the fender attaches. It really looks like the fender will be hard to put back on and seal up the way you have removed it. You probably have thought about it a lot and have it figgured out but it still looks like a hard spot to get to from under the fender and getting sealer in at the door jamb side looks even harder. I'm still thinking the only reason for the strip was to allow for a fender replacement without body work at the windshield post area. Maybe they learned from the karmen ghia. But it could be for flex also. I'm thinking I will just blast the seam out, clean it up, ospho it, seal it up with weld through primer then close it up with weld, especially the trunk channel and see if it cracks. The bottom of the welded area won't be sealed though. The only thing is if it does crack it will be way harder to fix it back stock.
You are doing so good so far I'm sure you have it under control. This thread is a really good reference thread.
Hey Charlie, I decided to make one smaller visible cut and take the 1/2 section of fender for a few reasons:
- The problem with just removing the top of the fender is the double layer in the top corner of the fender. If you come down the fender about 10" you'll clear the double layer. It'd be near impossible to weld the back side of the double layer when re-installing.
- Steel flare will cover all but about 5" of the visible cut at the top
- Cutting the jamb attachment stretch will be pretty straight forward to re-attach. There is good access from both sides to weld it back in.
On the passenger side, it isn't nearly as bad, so I'm going to...
- use a heat gun and saw blade to scrape out as much of the factory seam sealer as possible from the under side of the cowl/fender seam. There's no welds, just seam sealer for 99% of that seam.
- ospho from the top of the seam letting it soak through the seam to the under side. - prime and 3m seam seal the bottom and top side
- and finally paint.
The cowl/fender seam will be left open with no rubber seal to match the trunk and door gap. This will allow it to dry out whenever it gets wet, with not much chance to trap any water.
Posted by: charliew Feb 28 2011, 10:56 AM
That sounds like a good plan to me. Except for the groove going into the trunk seal channel. I guess you will put a dam on the end of the groove up against the seal to stop water from getting under the seal. I read where someone actually takes the trunk seals out after washing the car to dry the channel out. He doesn't glue them in.
Posted by: sawtooth Feb 28 2011, 11:21 AM
That sounds like a good plan to me. Except for the groove going into the trunk seal channel. I guess you will put a dam on the end of the groove up against the seal to stop water from getting under the seal. I read where someone actually takes the trunk seals out after washing the car to dry the channel out. He doesn't glue them in.
Good point. I like the idea of not gluing in the trunk seal, may not even use one at all. It may keep water out of the trunk, but it's destroyed my channel in places.
Posted by: sawtooth Mar 3 2011, 12:55 AM
Got one flare on tonight. Since I'm a rookie at fab work, this was pretty fun to see a flare go on smoothly and fit nice.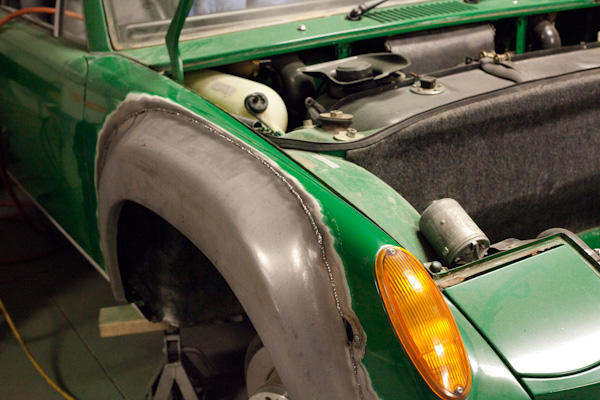
When lining up the bottom of the flare with the bottom of the fender, I was a little concerned about the top of the flare hitting the fender too high. But it turned out perfect, using Root_Werks method. Thanks Dan!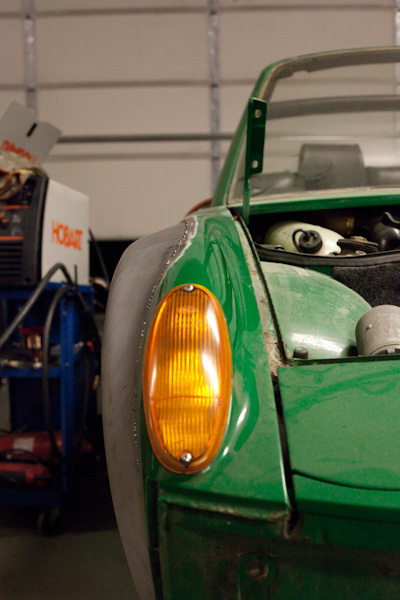
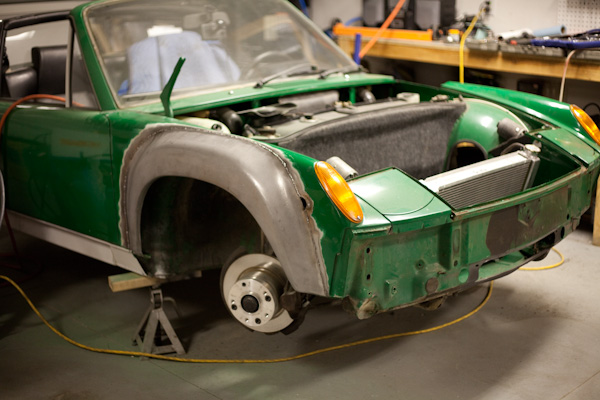
Posted by: pktzygt Mar 3 2011, 04:33 AM
Looks great, you're giving me the "if he can do it, I can do it" ideas yet again. My suby 914 isn't even running yet.
It really does look good though!
Posted by: charliew Mar 3 2011, 08:16 AM
I don't remember if you said whether you are using fg rockers. Did you check the front to rear positioning to the rocker or are you going to mod steel rockers to fit? And have you heard about easygrind filler wire? It's not cheap but really easy to grind and hammers a lot easier and doesn't seem to crack as easily when you hammer it.
Posted by: sawtooth Mar 3 2011, 10:50 AM
I don't remember if you said whether you are using fg rockers. Did you check the front to rear positioning to the rocker or are you going to mod steel rockers to fit? And have you heard about easygrind filler wire? It's not cheap but really easy to grind and hammers a lot easier and doesn't seem to crack as easily when you hammer it.
Yes, AA flared fg rockers. I did mount the rocker up first to get forward/rear position for the flare. Looks like it'll line up well. I've read some on the easygrind wire but haven't tried it. I'm using a high quality .023 and really like it so I'll probably stick with that. It grinds down pretty easy using a die grinder with cut-off wheel to knock down the high spots and then finish up with a flap disk. Easygrind does sound good, although I did see quite a few mixed reviews. I'll need to get some and compare for myself.
Posted by: sawtooth Mar 3 2011, 11:01 AM
Looks great, you're giving me the "if he can do it, I can do it" ideas yet again. My suby 914 isn't even running yet.
It really does look good though!
Thanks Sean.
Yep, if I can do it I'm betting you can too, get'er done.
Posted by: sawtooth Mar 30 2011, 12:07 AM
Since I now live in an area where I'd get lynched if I blasted my car outside, I decided to go stealth and turn one side of my garage into a 914 sized blasting cabinet. Not sure I'll do that again  but I sure love the results.
I did have a few neighbors giving me the look as I backed my brother-in-law's diesel powered compressor into my driveway. 
before...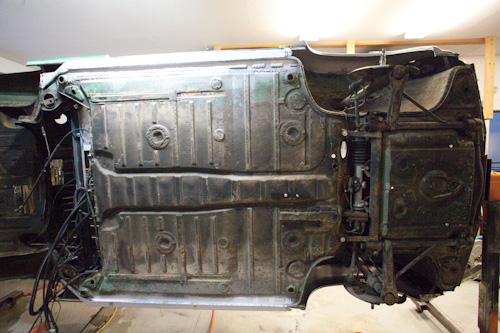
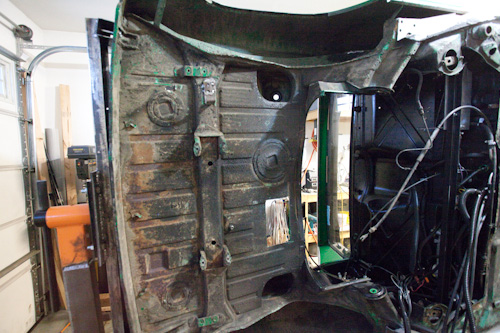
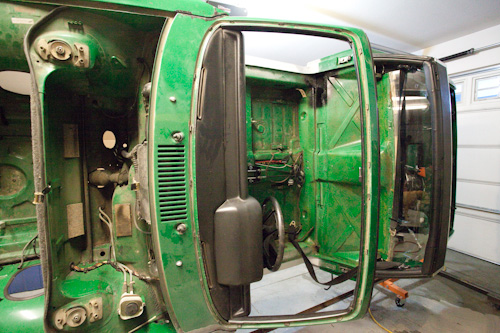
Posted by: sawtooth Mar 30 2011, 12:12 AM
After finishing up with disassembly, and 1000lbs+ of sand later...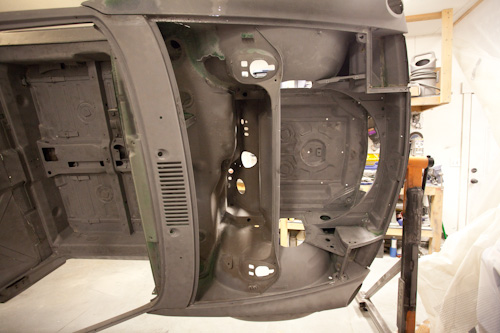
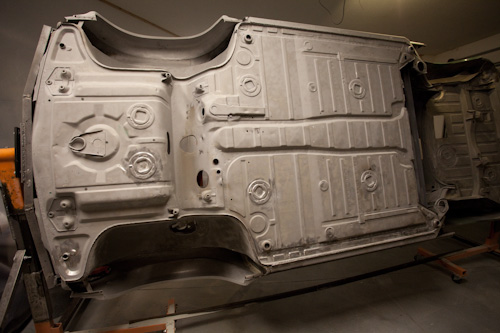
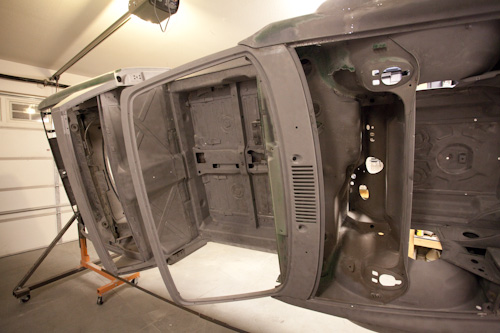
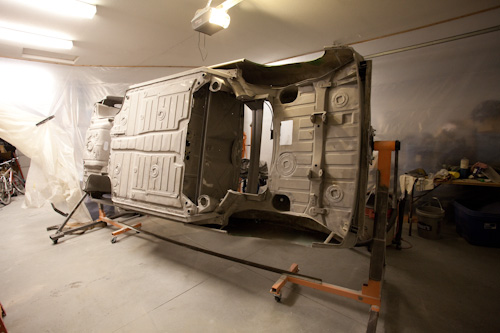
All of the seam sealer and foam in the wheel wells is gone, and most of the rest of the body too. There was enough surface rust under some of the seam sealer that I decided I wanted it all out of there. Heat gun and chisel worked best, then hit it again with sand. Glad that's over. Time to finish up the rust repair and rear flares.
Posted by: sawtooth Mar 30 2011, 12:27 AM
New gauges arrived today, can't wait until it's time to install these. My goal was to get updated gauges with as close to original look as possible. I'm really happy with the way they turned out. Electric programmable speedo which is driven by the stock suby vss.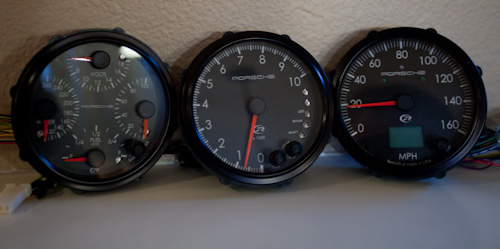
Posted by: JRust Mar 30 2011, 02:39 AM
Absolutely looking great! I'm amazed you took it down as far as you have. Going to be an absolute beauty once you get the new paint on there. I can't wait to see it
Posted by: Quebecer Mar 30 2011, 03:39 AM
I've been contemplating doing exactly the same thing (blasting booth in garage) for the longest time. I live in the suburbs, neither my neighbours, nor my wife would let me do it outside.
Did you leave the plastic loose on the bottom, did you cover the ceiling and the floor?
Can you tell us (or show us) more about your booth?
Keep up the good work!
Posted by: pktzygt Mar 30 2011, 06:52 AM
What gauges are those? I'm going to end up using vdo vision series electronic gauges to stay with the stock'ish look and still have better functionality and low cost. I just haven't pulled the trigger on ordering them yet.
I want to switch over to red lighting which is easy with the vdo, but the speedometer is really expensive for anything over 120mph.
Posted by: sawtooth Mar 30 2011, 10:17 AM
I've been contemplating doing exactly the same thing (blasting booth in garage) for the longest time. I live in the suburbs, neither my neighbours, nor my wife would let me do it outside.
Did you leave the plastic loose on the bottom, did you cover the ceiling and the floor?
Can you tell us (or show us) more about your booth?
Keep up the good work!
I used a good quality duct tape to seal the barrier wall to the floor. I didn't cover the ceiling or the floor. The biggest obvious problem with this whole setup is the silica dust. It's toxic to breath so you need a good mask. And if your garage is attached to your house like mine is, you'd want to be really careful to keep the dust isolated to the booth. Honestly if I do another car again I'll be looking for an outdoor location to do it. I could go on about what I learned as far as equipment goes etc. happy to share. Just let me know if you want any more info.
- Dean
Posted by: dlee6204 Mar 30 2011, 10:23 AM
Wow. Talk about progress... Keep up the good work! 
Posted by: sawtooth Mar 30 2011, 10:28 AM
What gauges are those? I'm going to end up using vdo vision series electronic gauges to stay with the stock'ish look and still have better functionality and low cost. I just haven't pulled the trigger on ordering them yet.
I want to switch over to red lighting which is easy with the vdo, but the speedometer is really expensive for anything over 120mph.
The gauges are from speedhut.com, revolution series. I was going to go the vdo route, but decided to go with speedhut instead. I really like their options. You can configure the gauge to have exactly the look and features you want on their site. I like the porch logo, and the turn signals and hi-beam in the speedo, not exactly like oem in the tach, but still has the same feel and functionality.
Posted by: charliew Mar 30 2011, 07:54 PM
I would never attempt to try to do that in a confined space. I'm really surprised you're still breathing. How could you see? The only good thing is you could reuse the sand but I guess you survived and got it done.
Posted by: pktzygt Mar 30 2011, 08:07 PM
Silica dust is why I don't use sand.
Posted by: sawtooth Mar 30 2011, 10:02 PM
I would never attempt to try to do that in a confined space. I'm really surprised you're still breathing. How could you see? The only good thing is you could reuse the sand but I guess you survived and got it done.
It actually wasn't a complete enclosed/confined space, I had a decent airflow moving through by opening the big overhead door and the back door. I used a 3m organic vapor mask the entire time which is more than adequate for silica dust so I don't feel like I was in any danger. Only time it got hard to see was working in up under the fender wells. Had a big spotlight for those areas. It certainly wasn't optimal but it got the job done.
Posted by: Eric_Shea Mar 30 2011, 10:21 PM
Talk to me about that garage door opener, the slider track and rails... 
Posted by: charliew Mar 30 2011, 10:37 PM
And the motor setting on the other side of the screen. It'll just breakin quicker.
Posted by: sawtooth Mar 31 2011, 01:18 AM
Absolutely looking great! I'm amazed you took it down as far as you have. Going to be an absolute beauty once you get the new paint on there. I can't wait to see it
Thanks Jamie, needed to take it this far to get the level of detail I'm looking for. It'll be worth it. Now to get the metal work finished up. Looking forward to seeing your suby conversion get wrapped up.
- Dean
Posted by: sawtooth Mar 31 2011, 01:31 AM
You guys are bored tonight I see. The motor is sealed up well, and being on the other side of the barrier didn't get to see any of the dust. Garage door opener, rollers, drive track survived just fine. Life will continue on.
Posted by: RobW Mar 31 2011, 06:31 AM
 WAY COOL!
Posted by: JRust Mar 31 2011, 01:02 PM
Thanks Jamie, needed to take it this far to get the level of detail I'm looking for. It'll be worth it. Now to get the metal work finished up. Looking forward to seeing your suby conversion get wrapped up.
- Dean
You & me both brother
. I get all day saturday to work in the shop. I am excited to get some work done. Not only on the suby but my v8 car as well 
Posted by: Andyrew Mar 31 2011, 05:13 PM
That is just awesome!! Congrats for it going well!!! PS your gauges are beautiful!!
Posted by: Eric_Shea Mar 31 2011, 05:21 PM
Sorry... not trying to distract from your awesomeness on this build. That was just one of the first things that crossed my mind as I saw your "tent" Godspeed Mr. Potato head. Godspeed!
Is it done yet?
Looking great... this is going to be a sweet ride. We're going to have th schedule some teener weekends at The City of Rocks.
Posted by: BIGKAT_83 Mar 31 2011, 05:42 PM
Great work... Are you going to do the paint yourself?
If you do the color I think this thing will be fabulous. I really want to do one of the newer colors on my old orange car.
Bob
Posted by: BRAVE_HELIOS Mar 31 2011, 06:26 PM
You guys are bored tonight I see.
The motor is sealed up well, and being on the other side of the barrier didn't get to see any of the dust. Garage door opener, rollers, drive track survived just fine. Life will continue on.Holy crap Dean, you are one determined SOB!

It's hard to believe it was just a few weeks ago, you we soo happy just to get in on the road and we were all happy to get a ride!
Now look at it... simply astounding!

So let's see... work, sleep, family and Porsche... Hmm, It just don't add up! You must operate on the 36 hour clock!

Great job man!

Posted by: sawtooth Mar 31 2011, 11:41 PM
Great work... Are you going to do the paint yourself?
If you do the color I think this thing will be fabulous. I really want to do one of the newer colors on my old orange car.
Bob
I'll be doing underside, trunks, jambs and interior myself. And I'll be having somebody who knows what they're doing shoot the important parts. Hoping to get some video of that. My goal is to be headed to the booth by the end of April, hopefully sooner. WCR or bust
Posted by: sawtooth Apr 1 2011, 09:58 PM
Sorry... not trying to distract from your awesomeness on this build. That was just one of the first things that crossed my mind as I saw your "tent" Godspeed Mr. Potato head. Godspeed!
Is it done yet?
Looking great... this is going to be a sweet ride. We're going to have th schedule some teener weekends at The City of Rocks.
Yeah, City of Rocks would be a great location. Gotta get this baby finished.
Posted by: sawtooth Apr 2 2011, 10:10 AM
My inner suspension ear looks good, no signs of trouble that I can see. Just to be safe for the future, should I install inner console overlay plate and the heim rod brace from tangerine, or would it be overkill for a street car with occasional ax? I already have the Brad Mayeur long kit installed which supports the outer suspension console point.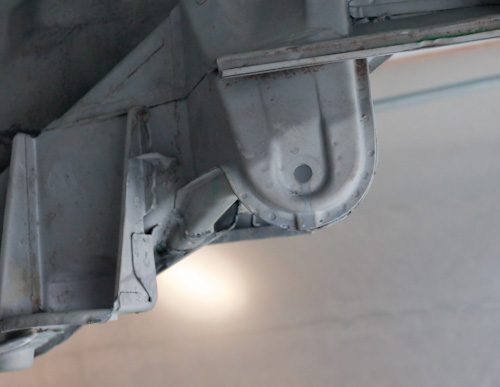
Posted by: strawman Apr 2 2011, 07:37 PM
I installed the Tangerine ear reinforcement kit whilst my car was on the rotisserie; kinda one of those "while yer in there" things. Since I'm also doing a Suby conversion, I welded in the ear to firewall connectors. See my build thread if you wanna see details.
Geoff
Posted by: JRust Apr 2 2011, 07:49 PM
It is a good time to do it. I don't think you'll have so much torque it is necesary. Still kind of nice to be sure
Posted by: sawtooth Apr 3 2011, 12:26 AM
thanks guys, makes sense. I'll at least do the Tangerine ear reinforcement kit while I'm in there.
Posted by: JRust Apr 3 2011, 09:42 AM
thanks guys, makes sense. I'll at least do the Tangerine ear reinforcement kit while I'm in there.
If your going to you may as well add the extra support piece. You can make your own piece to the firewall. Of course tangerine's rod brace is a great setup. Hell I don't care. Just paint that sucker
I can't wait to see it
Posted by: Eric_Shea Apr 3 2011, 10:46 AM
It's not so much torque as it is big tires. I did a similar mod to mine.
Posted by: J P Stein Apr 3 2011, 11:00 AM
A couple other things come into play.
One is how much rust there is inside the ear.
Another is: Is there any overlap of the spot welds to the outside edge of the pinch seam.
Most cracks I've seen appear to come from the outside edge.
Again I'll say. Seam welding up the pinch seam is good insurance.
Attached thumbnail(s)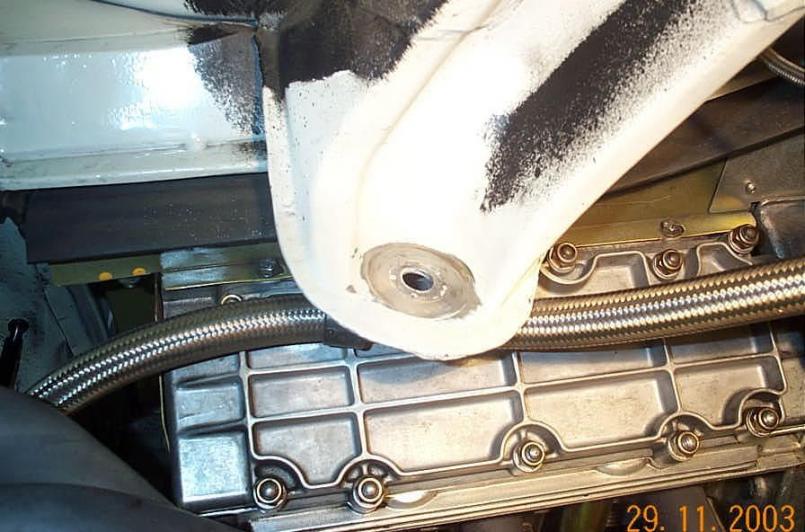
Posted by: sawtooth Apr 3 2011, 10:58 PM
A couple other things come into play.
One is how much rust there is inside the ear.
Another is: Is there any overlap of the spot welds to the outside edge of the pinch seam.
Most cracks I've seen appear to come from the outside edge.
Again I'll say. Seam welding up the pinch seam is good insurance.
Thanks JP, that makes sense. I welded up the seams around the ears today.
Posted by: sawtooth Apr 7 2011, 11:55 PM
Received my tangerine ear reinforcements today. Thanks Chris for the fast shipping! And I made my own ear to firewall brace.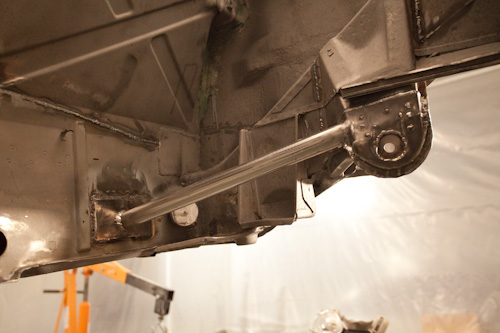
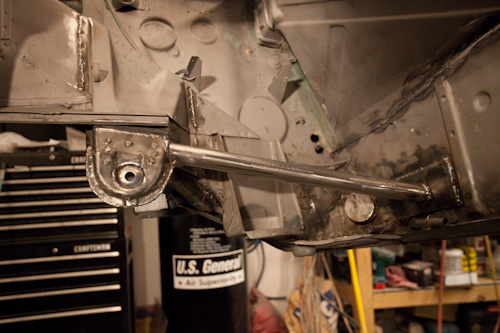
This shows the welded the seam around the ear, and the drain hole left open.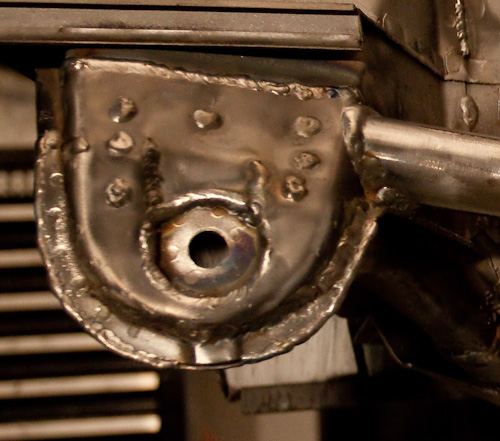
Posted by: pktzygt Apr 8 2011, 03:44 AM
That tube isn't round, is it? What did you use? I'm about to do something similar next week. I was thinking about .120 wall 1" square tubing just because I have an easier time cutting the correct angles in square tubing and I have some handy.
Posted by: sawtooth Apr 8 2011, 09:02 AM
That tube isn't round, is it? What did you use? I'm about to do something similar next week. I was thinking about .120 wall 1" square tubing just because I have an easier time cutting the correct angles in square tubing and I have some handy.
It is round, I believe it is .125" wall and 1" id. I think it's easier working with round tubing then square in this situation. With either you still have to get the angles right on the ends, but with the round you can rotate slightly to adjust for best fit. With square tubing you really can't rotate unless you don't care about the tube being at right angles with the rest of the car.
Posted by: charliew Apr 8 2011, 09:59 AM
I will probably make the ear reinforcements for my 75 out of some 16 ga I have on hand. What gauge is Chris's made from. 16 ga is a little thick to form easily.
Posted by: sawtooth Apr 8 2011, 10:03 AM
I will probably make the ear reinforcements for my 75 out of some 16 ga I have on hand. What gauge is Chris's made from. 16 ga is a little thick to form easily.
Chris's are 16 ga. I bought the flat version, and shaped them during the install. I thought about making them myself, but decided his laser cut pattern would save me a bunch of time. Glad I did, it was a 5 min. install per side.
Posted by: sawtooth Apr 8 2011, 10:51 AM
Holy crap Dean, you are one determined SOB!
It's hard to believe it was just a few weeks ago, you we soo happy just to get in on the road and we were all happy to get a ride!
Now look at it... simply astounding!
So let's see... work, sleep, family and Porsche... Hmm, It just don't add up! You must operate on the 36 hour clock!
Great job man!
Thanks Tony, I just try to get a small project done each evening, big projects get divided up. Some times it doesn't work out because of other stuff going on with life, but more often than not I get something accomplished each night. I end up with 1 solid day most weekends. It all adds up. If I didn't have an event I was shooting for, forget it. I'd get side tracked and never get finished. Even if I don't make it to this year's WCR, the motivation has been great, and I'll make it to the next event. Can't wait to see your car on the road!
Posted by: JRust Apr 8 2011, 12:18 PM
Very nice Dean. I will be doing this on my v8 car soon. Paint that sucker man. I want to see it at WCR
Posted by: sawtooth Apr 8 2011, 01:40 PM
Very nice Dean. I will be doing this on my v8 car soon. Paint that sucker man. I want to see it at WCR
Yeah, somebody keeps reminding of things I need to do before paint
I believe it was you and your broken suspension ear that got me fired up about reinforcement. And you just reminded me today that I need to weld in a brace for my master cylinder What else am I forgetting? I'd rather get 'em done now while it's all easy access. I hear ya though, it's time to get 'er done. Hope to get the body work done this weekend. By next weekend I hope to be priming and undercoating.
Posted by: JRust Apr 8 2011, 02:04 PM
Yeah your making good progress. Despite me riminding you of extra stuff to do . Your getting most of the hard stuff done though at the right time. Although reassembly can be very slow after paint. I'd offer to come out with that but I don't want to jinx you. My reassembly of my creamsicle was slow & it didn't work when I finished
Posted by: Quebecer Apr 11 2011, 03:53 AM
I've been contemplating doing exactly the same thing (blasting booth in garage) for the longest time. I live in the suburbs, neither my neighbours, nor my wife would let me do it outside.
Did you leave the plastic loose on the bottom, did you cover the ceiling and the floor?
Can you tell us (or show us) more about your booth?
Keep up the good work!
I used a good quality duct tape to seal the barrier wall to the floor. I didn't cover the ceiling or the floor. The biggest obvious problem with this whole setup is the silica dust. It's toxic to breath so you need a good mask. And if your garage is attached to your house like mine is, you'd want to be really careful to keep the dust isolated to the booth. Honestly if I do another car again I'll be looking for an outdoor location to do it. I could go on about what I learned as far as equipment goes etc. happy to share. Just let me know if you want any more info.
- Dean
Actually, yes I would love to learn more about the equipment (blasting gun, compressor, etc) used and the setup of your booth. I was thinking of installing a positive pressure ventilation system using supply air from outside with large fans at top rear of the booth and the air exit at bottom front with filters and smaller fans. Did you use a dust collector of some kind? My garage is attached to the house, similar to yours, but my floor has been epoxied therefore I'll want to protect it. I wanted to get it done outside, but they want like $1000, that's why I wanted to do it myself. Also, then I can keep quality control in my own hands, literally. Thanks for your help, your thread is very interesting.
Posted by: sawtooth Apr 11 2011, 11:32 PM
I've been contemplating doing exactly the same thing (blasting booth in garage) for the longest time. I live in the suburbs, neither my neighbours, nor my wife would let me do it outside.
Did you leave the plastic loose on the bottom, did you cover the ceiling and the floor?
Can you tell us (or show us) more about your booth?
Keep up the good work!
I used a good quality duct tape to seal the barrier wall to the floor. I didn't cover the ceiling or the floor. The biggest obvious problem with this whole setup is the silica dust. It's toxic to breath so you need a good mask. And if your garage is attached to your house like mine is, you'd want to be really careful to keep the dust isolated to the booth. Honestly if I do another car again I'll be looking for an outdoor location to do it. I could go on about what I learned as far as equipment goes etc. happy to share. Just let me know if you want any more info.
- Dean
Actually, yes I would love to learn more about the equipment (blasting gun, compressor, etc) used and the setup of your booth. I was thinking of installing a positive pressure ventilation system using supply air from outside with large fans at top rear of the booth and the air exit at bottom front with filters and smaller fans. Did you use a dust collector of some kind? My garage is attached to the house, similar to yours, but my floor has been epoxied therefore I'll want to protect it. I wanted to get it done outside, but they want like $1000, that's why I wanted to do it myself. Also, then I can keep quality control in my own hands, literally. Thanks for your help, your thread is very interesting.
For the media blaster I used a hf pressurized unit that holds 100lbs of media. It worked well but was pushing the limits for a complete car. For the compressor I have a 2-stage 170psi 60gal US General. I used a 3/8" line but it really needs a 1/2" line to keep up the volume at the gun. With this setup I had to stop every once in a while to let the pressure build, which got old fast. I ended up borrowing a diesel compressor on a trailer used for blowing out sprinkler lines. With this I was able to easily keep the gun pressure at 90-100psi constant. It made a huge difference in how fast the job went.
I tried using a blast hood but I quickly tossed it for a better solution. I ended up liking a pair of clear goggles with a screen face shield the best. I also wore a 3m organic vapor breathing filter. To keep the sand off I wore an old rain coat with the hood up. It worked great, I could see and was much more mobile than fighting with the blasting hood in tough to reach places. I also found with a 500 watt work light I could see through the dust pretty well in the dark places up under the wheel wells.
I used 16 bags (100lbs each) of #30 sand which cost me about $5/bag. I went through several ceramic tips for the blaster nozzle, and used 12 gal of diesel in the compressor. It took me about 10 hrs spread over the course of 3 days.
I didn't have a dust collector or fans. I just had an opening to the outside at each end of the booth that I opened up to let the air flow through.
All I can say is that I'm glad it's over, and I love the results. But I would find a way to get it done outdoors if I ever do another one.
- Dean
Posted by: Zaney Apr 18 2011, 09:31 PM
New gauges arrived today, can't wait until it's time to install these. My goal was to get updated gauges with as close to original look as possible. I'm really happy with the way they turned out. Electric programmable speedo which is driven by the stock suby vss.
Dean,
Will these gauges be a plug and play option or do you have to use a custom dash plate?
Awesome gauges! If they are easy enough to swap out that is what I will probably do
Cheers,
Nate
Posted by: sawtooth Apr 19 2011, 12:33 PM
New gauges arrived today, can't wait until it's time to install these. My goal was to get updated gauges with as close to original look as possible. I'm really happy with the way they turned out. Electric programmable speedo which is driven by the stock suby vss.
Dean,
Will these gauges be a plug and play option or do you have to use a custom dash plate?
Awesome gauges! If they are easy enough to swap out that is what I will probably do
Cheers,
Nate
Hey Nate, I'll be making a custom face plate. The tach is only 4", too small for the original tach hole. They are really nice, only about 1" thick too.
Posted by: sawtooth Apr 19 2011, 10:38 PM
Been working on body work and getting undercarriage ready to prime. A few update shots. Seam seal and wurth stone guard is next.
before: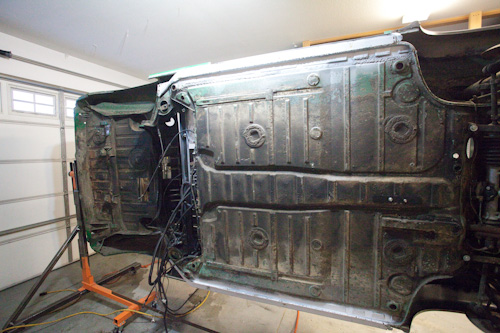
after: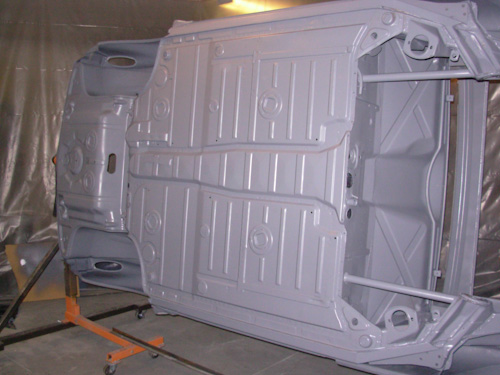
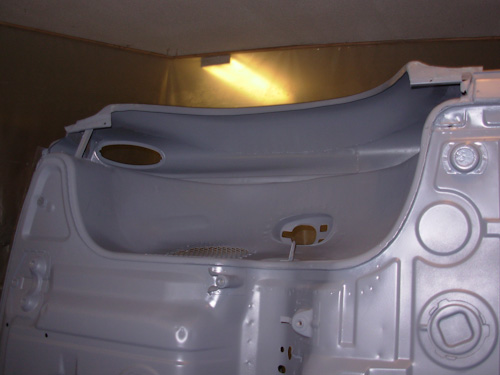
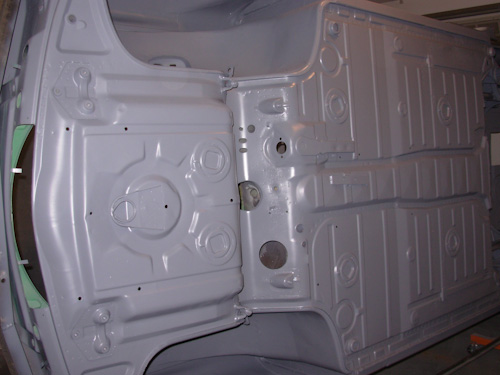
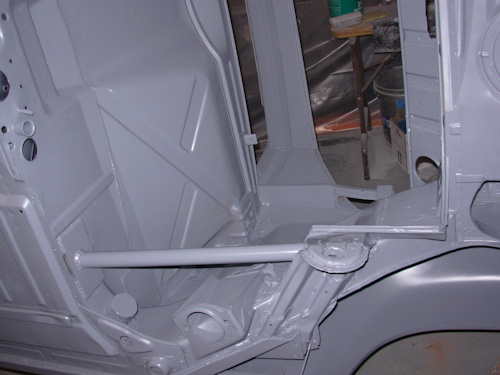
Posted by: draganc Apr 19 2011, 10:48 PM
holy scheisse! that looks sweet!!
Posted by: sawtooth Apr 19 2011, 10:55 PM
Got a truck load of parts back from the powder coater. 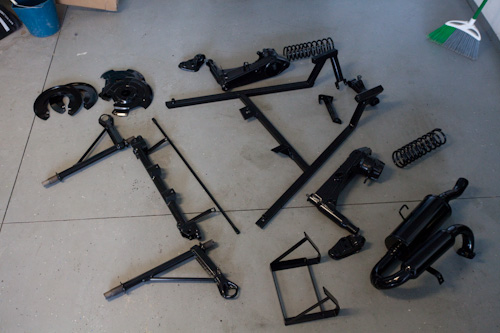
Posted by: sawtooth Apr 19 2011, 10:57 PM
holy scheisse! that looks sweet!!
Thanks, it's nice to finally get everything one color, even if it's primer gray.
Posted by: JRust Apr 19 2011, 11:07 PM
Got a truck load of parts back from the powder coater.
! Excellent but more of your car man 
Posted by: sawtooth Apr 19 2011, 11:15 PM
Got a truck load of parts back from the powder coater.
! Excellent but more of your car man Decided to weld the cowl seam shut...
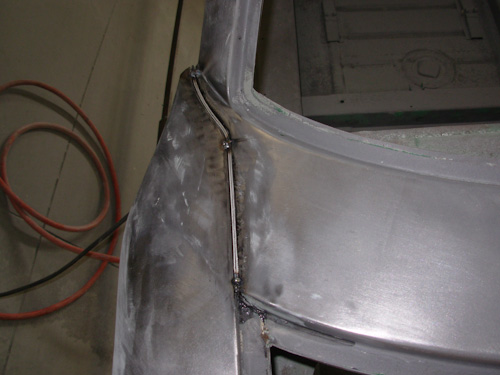
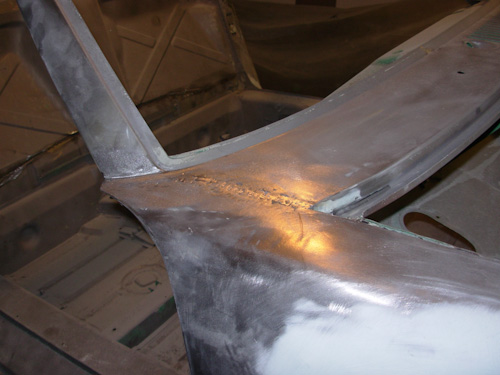
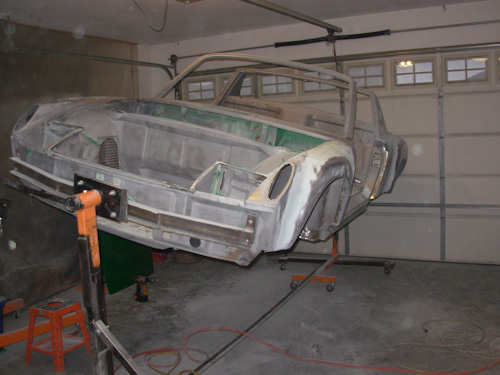
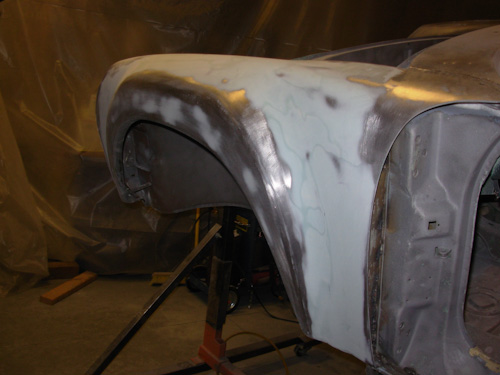
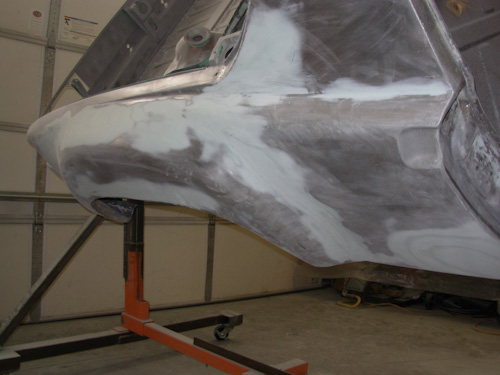
Posted by: sawtooth Apr 19 2011, 11:24 PM
And a couple more...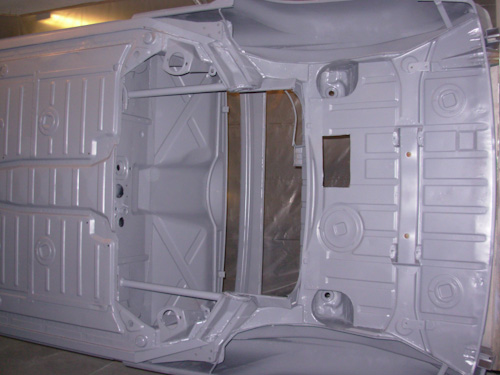
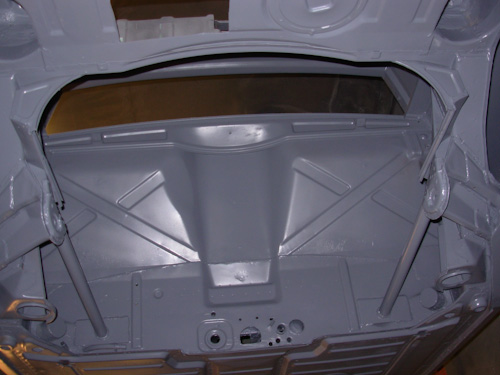
Posted by: JRust Apr 19 2011, 11:29 PM
Thanks
That is looking great. So nice to see them stripped down like that & so clean looking. Looks like paint is coming soon
Posted by: sawtooth Apr 19 2011, 11:37 PM
Thanks
That is looking great. So nice to see them stripped down like that & so clean looking. Looks like paint is coming soon
Thanks for the encouragement Jamie, it makes all the difference. Hope I can help to spread that to some others.
Yep paints not too far off.
Posted by: sawtooth Apr 20 2011, 11:19 AM
My new windshield is here already? I ordered oem glass from my local Porsche dealer last Thursday figuring it would take a couple of weeks at least. It made it over the pond, through customs, to the dealer, and finally to the glass shop by the following Tuesday, 4 business days. The dealer said it would ship pretty fast, but 4 days, I'm shocked. Anyway it'll get to sit at the glass shop for a couple of weeks until I'm ready for it. The same dealer also had the 19 trim clips overnight for $1 each, sweet.
Posted by: JRust Apr 20 2011, 03:37 PM
Thanks for the encouragement Jamie, it makes all the difference. Hope I can help to spread that to some others.
Yep paints not too far off.Is the top of the car primed too? Dang I wish you were closer. I'd be heading over to help put it back together after paint. How are you having the windshield installed? On my LE they used the calking/butyl stuff instead of the tape. It is really obvious & I don't like the look. I would be very specific there in how you want it done. Otherwise you will end up with something you may not like. The tape the factory used seemed to seal things up just fine. I'd stick with that.
Your car definately inspires me to keep going with mine. Keep up the pics man. We all love progress pics

Posted by: sawtooth Apr 20 2011, 04:11 PM
Thanks for the encouragement Jamie, it makes all the difference. Hope I can help to spread that to some others.
Yep paints not too far off.Is the top of the car primed too? Dang I wish you were closer. I'd be heading over to help put it back together after paint. How are you having the windshield installed? On my LE they used the calking/butyl stuff instead of the tape. It is really obvious & I don't like the look. I would be very specific there in how you want it done. Otherwise you will end up with something you may not like. The tape the factory used seemed to seal things up just fine. I'd stick with that.
Your car definately inspires me to keep going with mine. Keep up the pics man. We all love progress pics
Tops not primed yet, will be by the end of the weekend though.
Good point about the windshield. I was going to have them use the urethane caulking. But if it doesn't look good I should go the butyl rope/tape route instead. Don't let the distance stop you from coming over to help...
Posted by: r_towle Apr 20 2011, 04:18 PM
keep going...its looking great
Rich
Posted by: JRust Apr 20 2011, 10:25 PM
Tops not primed yet, will be by the end of the weekend though.
Good point about the windshield. I was going to have them use the urethane caulking. But if it doesn't look good I should go the butyl rope/tape route instead. Don't let the distance stop you from coming over to help...
I would consider the butyl rope/tape. The urethane can be inconsistent & depending on the guy doing it. It is very obvious where it is thin & thick. You have to be looking for it with the trim on. Still mine drives me nuts.
As far as coming over to help. I'd love to make the trip but doubt I will have a weekend to spare between now & then. There is always the chance I will get mine done in plenty of time

Posted by: sawtooth Apr 27 2011, 02:52 AM
Got my plating setup going tonight. First attempt at zinc chromate (copy cad) plating. I'm really happy with the way the pieces are turning out, especially something as big as a hub. I bought the chemicals from Caswell, and put together the rest of the kit on my own.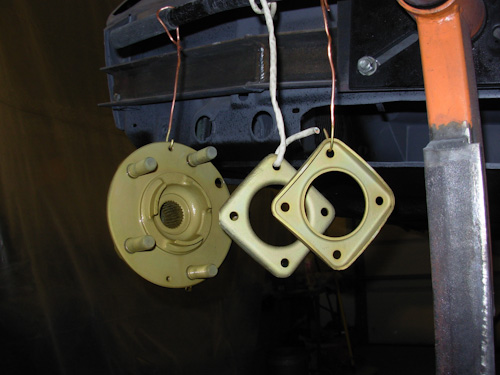
Posted by: Hontec Apr 27 2011, 03:18 AM
Wow, that looks very nice!
Btw, your chassis looks like new! very nice job!!
Posted by: Eric_Shea Apr 27 2011, 09:39 AM
Chassis looks amazing Dean!
Posted by: sawtooth Apr 28 2011, 02:21 AM
thanks guys, I'm having a lot of fun with it.
Got the stone guard finished. I love this stuff, so easy to apply, looks great, and tough as nails.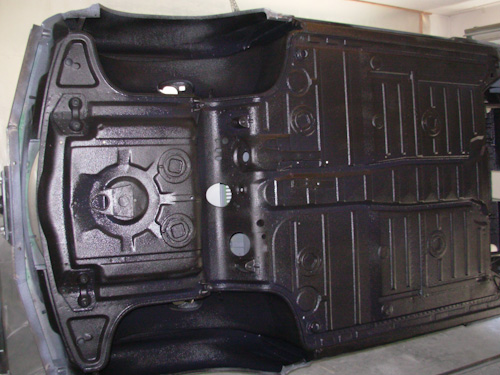
And finally got a chance to put some color down. I'm treating paint as two separate projects. I'm completing the undercarriage first then painting the top side which will happen next week. For color I wanted to do something a little different, it's a 3 stage candy green. I'm excited about this color, can't wait to see it finished.
The silver base layer. 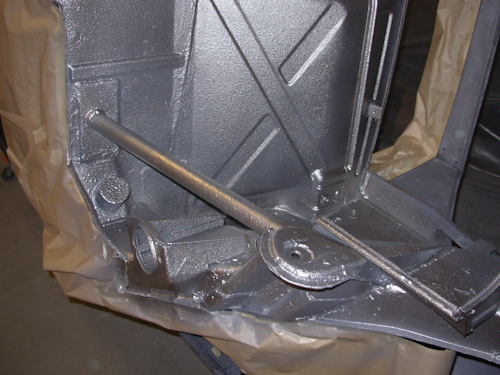
With the last two stages finished. 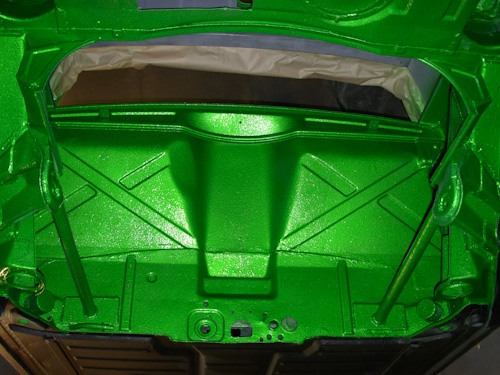
Scheduled to hit the paint booth a week from this friday. Lots to do before then.
Posted by: sawtooth May 4 2011, 07:26 PM
Made some progress. Body work is done, and just finished painting jams and trunks. Almost ready for full paint in the booth on Friday.
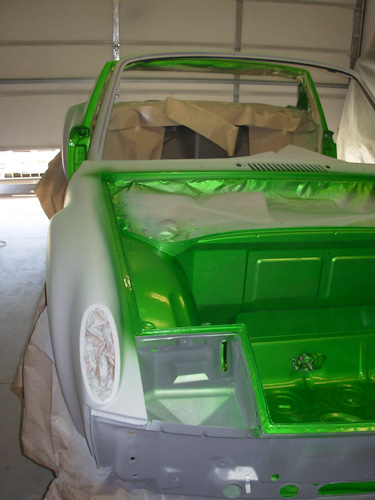
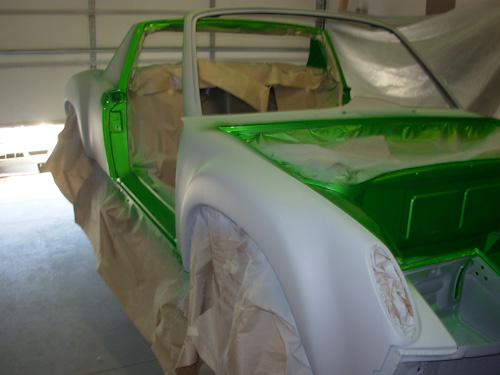
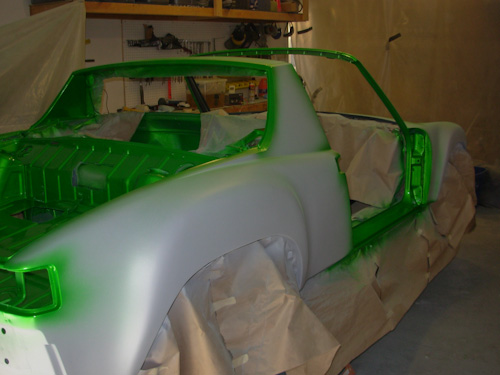
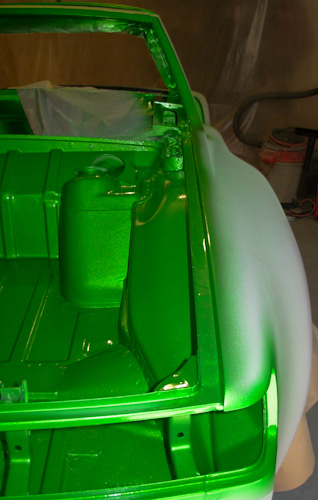
Posted by: JRust May 4 2011, 07:29 PM
Awesome Dean! Love the color
Posted by: porsche_dreamer May 4 2011, 07:40 PM
Dang thats awesome! Cant wait to see the paint finished. Where did you get your undercoating at?
Posted by: sawtooth May 4 2011, 07:55 PM
Dang thats awesome! Cant wait to see the paint finished. Where did you get your undercoating at?
Thanks man, this color is going to be too much fun. I like it more every time I see it. I bought the Wurth SKS Stone Guard from Wurth directly. You can call them up and they ship out super fast from the closest warehouse.
Posted by: sawtooth May 4 2011, 07:57 PM
Awesome Dean! Love the color
Cool Jamie, I was hoping you'd like it. Can't wait to show it to you at WCR!
Posted by: porsche_dreamer May 4 2011, 08:32 PM
How many bottles of the sks did you use?
Posted by: Andyrew May 4 2011, 10:49 PM
That color looks killer!!! Congrats!!
Posted by: sawtooth May 5 2011, 03:44 AM
How many bottles of the sks did you use?
I ended up using 5 bottles. Could have done just the floor pans and wheel wells with 4 bottles. I also did the engine bay mainly for sound dampening, which took another bottle.
Posted by: charliew May 5 2011, 03:11 PM
I really like that color. It looks like it might even glow in the dark. You will be able to pick that car out of any other from a very long way off. I hope it's not too hard to touch up though.
Posted by: sawtooth May 5 2011, 03:57 PM
I really like that color. It looks like it might even glow in the dark. You will be able to pick that car out of any other from a very long way off. I hope it's not too hard to touch up though.
Not sure about glow in the dark, but it sure glows in the sun
This color does some pretty cool stuff outdoors. The flash of the camera makes it look overly bright, in person the shadows are really pretty dark. I was concerned about touch-ups too at first, but now I think it's going to be okay. I tried doing a touch up with a small brush using just the green top coat. It appears to cover and blend well. I shouldn't need to mess with adding base layer on small chips. I'm also going to use a good quality clearbra type layer in the vulnerable areas, so hopefully it'll stay nice for a good long time.
Posted by: jd74914 May 5 2011, 06:19 PM
That looks awesome!
I might have missed it, but what kind of paint are you using? And how did it shoot? I'd love to paint my current project in a wild three stage.
Posted by: sawtooth May 5 2011, 07:24 PM
That looks awesome!
I might have missed it, but what kind of paint are you using? And how did it shoot? I'd love to paint my current project in a wild three stage.
Thanks Jim. I'm using RM brand paint. It's pretty straight forward to shoot if you've ever done b/c before. The only difference is you have two base coats. The second base coat is only slightly translucent. It's not a traditional candy where the top coat is mainly clear with a small amount of color, and you have to shoot 10+ coats to get the build up you want. The top coat with this system is pretty dense, and has metallic in it. The first coat is a silver bronze color with a lot of metallic in it, very dense and covers quickly. So it's simply 2 coats base #1, 2 coats base #2, and 2 coats clear. I'm not sure what other colors are available in this system, mine is a 2010 Camaro LE color called synergy green. I know there is a burgundy that uses the same technique, and possibly a blue.
Posted by: pktzygt May 6 2011, 05:08 AM
That looks awesome!
I might have missed it, but what kind of paint are you using? And how did it shoot? I'd love to paint my current project in a wild three stage.
Thanks Jim. I'm using RM brand paint. It's pretty straight forward to shoot if you've ever done b/c before. The only difference is you have two base coats. The second base coat is only slightly translucent. It's not a traditional candy where the top coat is mainly clear with a small amount of color, and you have to shoot 10+ coats to get the build up you want. The top coat with this system is pretty dense, and has metallic in it. The first coat is a silver bronze color with a lot of metallic in it, very dense and covers quickly. So it's simply 2 coats base #1, 2 coats base #2, and 2 coats clear. I'm not sure what other colors are available in this system, mine is a 2010 Camaro LE color called synergy green. I know there is a burgundy that uses the same technique, and possibly a blue.
I knew I'd seen that color before. Just couldn't figure out where.
Posted by: BIGKAT_83 May 6 2011, 06:34 AM
That looks great!
When I first saw that color on a new Camaro thats the first thing I thought of. What would it look like on a 914.
I saw that you sold your wheels what kind of wheels are you going to use on the car now that its flared???
Bob
Posted by: Root_Werks May 6 2011, 09:18 AM
Posted by: abnrdo May 6 2011, 11:20 AM
Love the color. Cant wait to see the entire car! Its a bit brighter than my Palma Green Metallic, but I still like it. Awesome job!
BTW, thanks for the parts. Cant wait to work on the car again.
-Jim
Posted by: sawtooth May 8 2011, 12:02 AM
Made it back from a trip to the paint booth. Everything went according to the plan, so I'm very happy
Took off Friday morning, headed to Twin Falls which is about 2 hrs away. 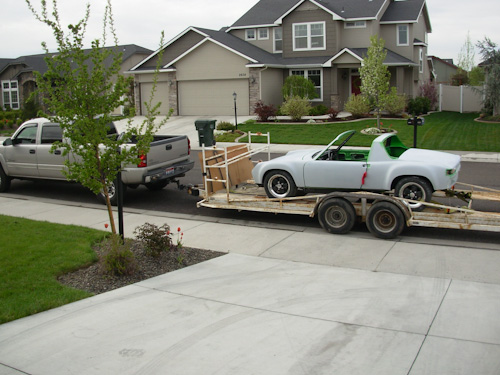
I had some help from some very talented guys. Huge thanks to my brother-in-law Chris and my friend Jake!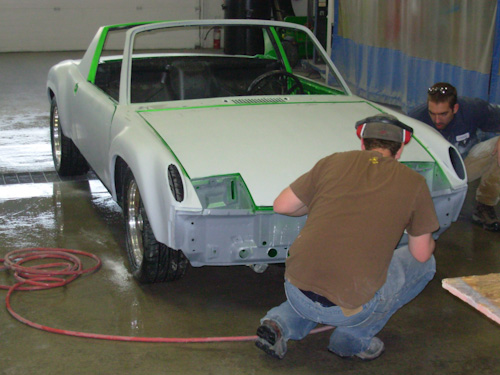
After making the final preparations we masked it up and moved to the booth.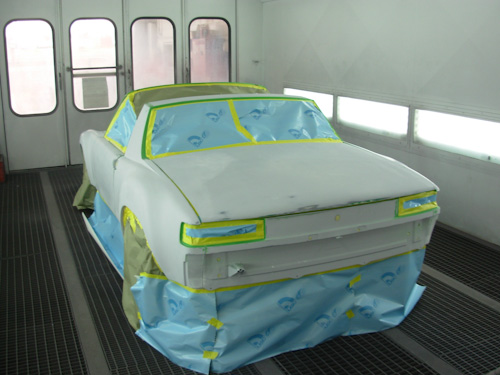
Posted by: sawtooth May 8 2011, 12:10 AM
First base layer going down...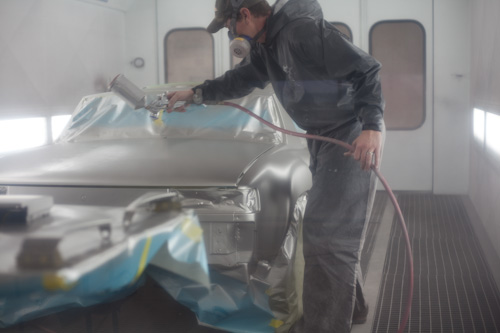
Using the first base layer as the color for the side stripe.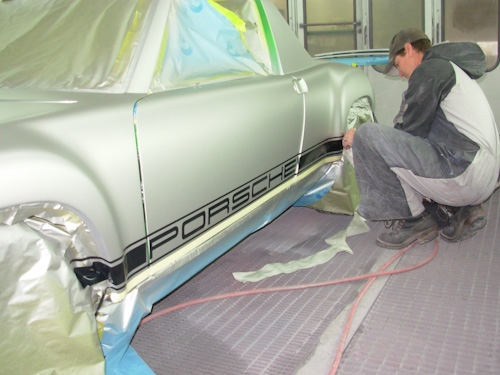
Second base layer...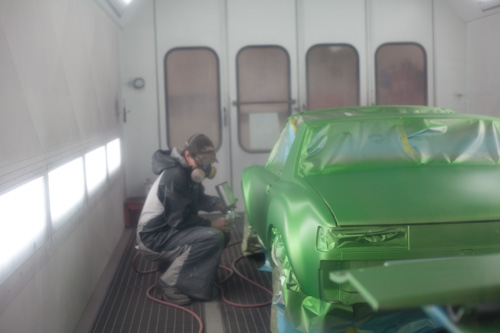
Decal/stencil being removed...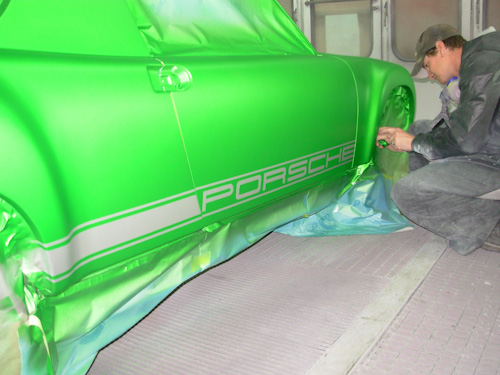
And after baking in the booth to cure out the base layers a bit, the final clear coat 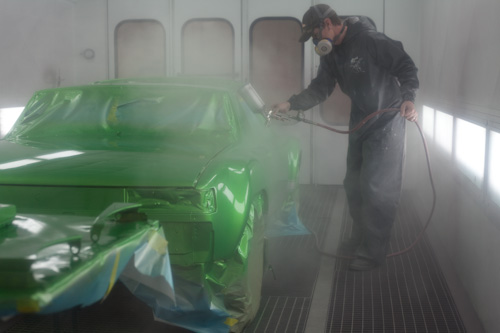
Posted by: sawtooth May 8 2011, 12:17 AM
Left it to bake in the oven over night...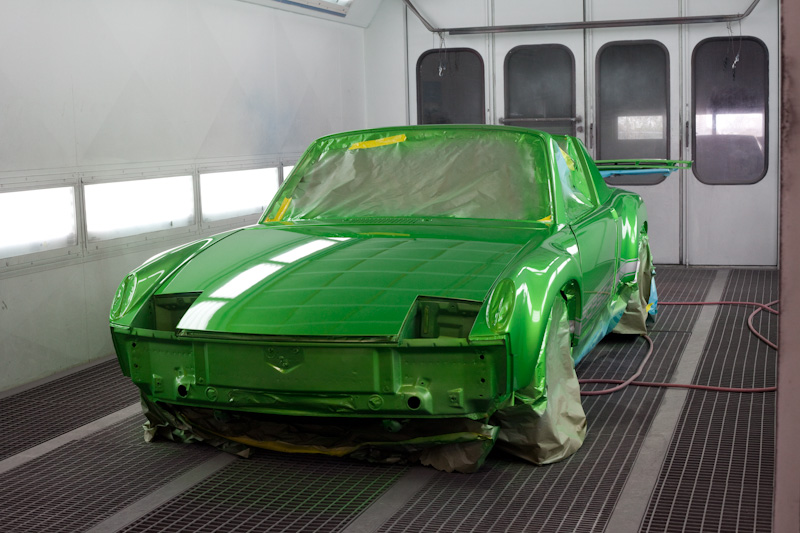
Unwrapped, and headed back home the next morning.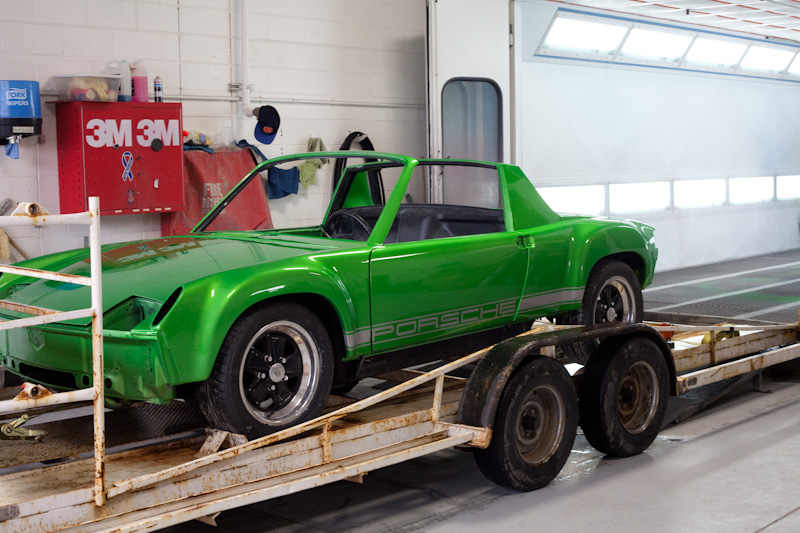
Posted by: kg6dxn May 8 2011, 12:20 AM
That's pretty 
Posted by: sawtooth May 8 2011, 12:23 AM
Back home again, me and my girls Everyone happened to be wearing green just for the occasion! It's ironic, I remember when I first started this project I wanted to paint the car anything but green. Now I can't imagine any other color (granted it is a bit different than Zambezi). Funny how things change.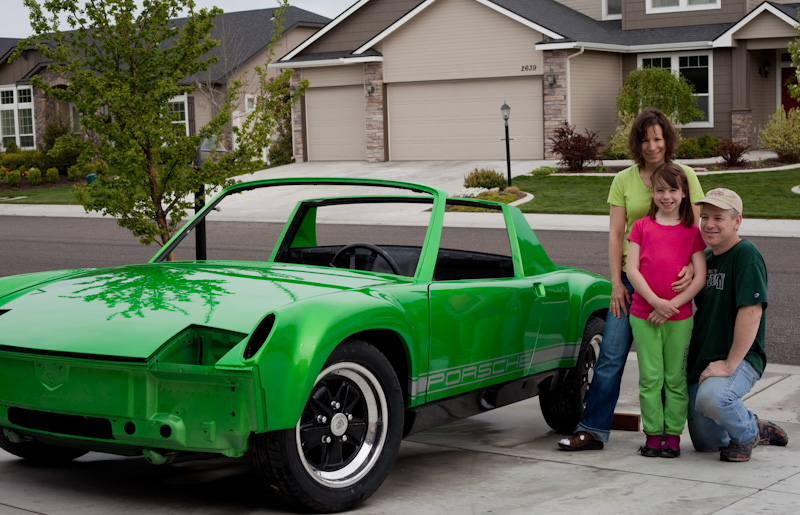
And she's back in the barn ready to be re-assembled.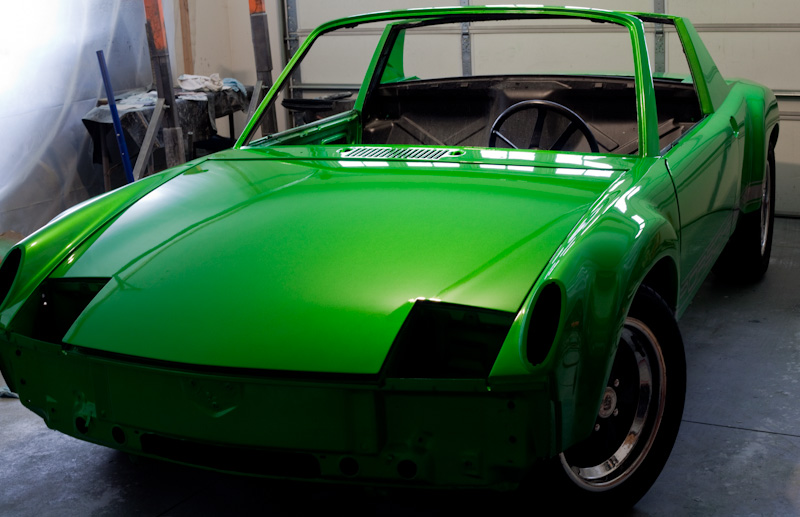
Posted by: sawtooth May 8 2011, 12:29 AM
That's pretty
Thanks Mike! It is very cool to see it come together.
Posted by: sawtooth May 8 2011, 01:04 AM
That looks great!
When I first saw that color on a new Camaro thats the first thing I thought of. What would it look like on a 914.
I saw that you sold your wheels what kind of wheels are you going to use on the car now that its flared???
Bob
Hey Bob, my thought's exactly. first time I saw the synergy green camaro in person I new what had to be done.
For wheels I'm using 16x7 fuchs all the way around (thanks for giving these up Jamie, I love 'em!). I've got 245/50 firestone wide oval's mounted up, which are supposed to be a great street tire. Thought about going wide on the rear, but decided not to for now. Using a 1" spacer in the rear to fill out the flare.
Posted by: abnrdo May 8 2011, 02:26 AM
That car is gorgeous!! Good looking family too Dean!
Posted by: Spoke May 8 2011, 05:01 AM
Very Nice! Good job on everything.
Posted by: MDG May 8 2011, 05:33 AM
I like it! The colour has a completely modern look and yet still evokes the same vibe as the bright '70s colours used by the factory. Fantastic.
Posted by: d914 May 8 2011, 06:02 AM
omg!!!very pretty!
Posted by: Eric_Shea May 8 2011, 06:46 AM
Posted by: Andyrew May 8 2011, 07:56 AM
Freaking Gorgeous! Did you spray it because it turned out glass!
VERY nice.
Posted by: porsche_dreamer May 8 2011, 08:12 AM
Looks fantastic! Congrats on a beautiful car. Can't wait to see it assembled.
Posted by: watsonrx13 May 8 2011, 09:21 AM
Fantastic color/stripe combination...
-- Rob
Posted by: charliew May 8 2011, 07:50 PM
Great color and it looks very straight. Is it so nib and orangepeel free you don't need to buff it out? That looked like a nice booth. So all total to paint everything in color, 1.5 of each color and 1.5 of clear?
Posted by: tdgray May 9 2011, 08:06 AM
Great Job... Great Color!
Posted by: BIGKAT_83 May 9 2011, 08:29 AM
Damn I wished I had a brother in law like that.
It looks great. Can't wait to see it with everything back on it. Thats when it will really look good.
Bob
Posted by: sawtooth May 9 2011, 09:09 AM
Freaking Gorgeous! Did you spray it because it turned out glass!
VERY nice.
I only sprayed the jambs, trunks, bottom side of deck lids, and engine bay. Jake (in the booth shots above) is the man with the talent. I learned so much from him on friday. He is a real pro and knows exactly what it takes to get a top notch finish without touching it with a buffing wheel afterwards. In my experience the only way to get something like this with a garage paint job is to go with many layers of clear, cutting just before the last layer of clear, then cutting and buffing the final. That's what I would have been doing if Jake and Chris hadn't offered to help me out.
Posted by: charliew May 9 2011, 09:15 AM
Probably some of the orangepeel will level out as the paint shrinks so it will look like a original finish or better. After a few years you could knock the worst nibs down and buff it out as you touch it up. The clear chip guard film on the fender bulges and edges will help a lot.
Posted by: sawtooth May 9 2011, 09:34 AM
Great color and it looks very straight. Is it so nib and orangepeel free you don't need to buff it out? That looked like a nice booth. So all total to paint everything in color, 1.5 of each color and 1.5 of clear?
This paint is so smooth as it is, it needs no buffing. It's really hard to detect any orange peel at all. I think it's much better than a factory finish already.
You are close on total paint quantities. Roughly used 1 gal each color, 1 gal clear. That includes jambs, trunks, engine bay, etc. One of the great benefits to having them spray it for me at the booth, the paint was mixed as needed just before spraying each layer, so almost no extra or wasted paint.
Posted by: JRust May 9 2011, 11:30 AM
Hey Dean that is frickin hot . I love it man & can't wait to see it in person. The wheels look great too . Get that puppy back together
Posted by: sawtooth May 9 2011, 02:23 PM
Hey Dean that is frickin hot
. I love it man & can't wait to see it in person. The wheels look great too . Get that puppy back togetherThanks Jamie. Yeah I couldn't be happier with the wheels, it's amazing what a difference the 16's make, and that polished lip is so nice.
Posted by: Zaney May 9 2011, 03:12 PM
Dean,
Awesome job!!!!
That is some real motivation for me to get my Suby done!!!
Just a few small pieces to go!
Can't wait to see the car back together!
Nate
Posted by: PeeGreen 914 May 9 2011, 03:19 PM
That may be one of the sexiest colors I've seen on a 914
Posted by: JmuRiz May 10 2011, 08:12 AM
Wow, that looks amazing...great stuff!
Posted by: nsr-jamie May 10 2011, 08:52 AM
Excellent work!!!!!!!!!!!!!!! I love the work you did!!! Awesome !
Posted by: sawtooth May 10 2011, 09:01 AM
Thanks guys for all the great comments. It has been a lot of fun taking a bit of a risk with this color and seeing it turn out well and fitting the character of the car. Now to get finished up. Got the dash back in last night with new vinyl and windshield seal. The windshield and back glass go in tomorrow.
Posted by: karmanbuilt May 11 2011, 09:51 PM
Dude........I'm GREEN with envy. Last time we talked, all you said was you were welding on the flairs. We need to paint mine too. BTW...when is the next meeting?
Gene
Posted by: sawtooth May 11 2011, 10:04 PM
Dude........I'm GREEN with envy. Last time we talked, all you said was you were welding on the flairs. We need to paint mine too. BTW...when is the next meeting?
Gene
Hey Gene, yeah it's been a few weeks since then
You need to come over and check it out. Got the windshield and back glass installed today. Give me a call.Posted by: computers4kids May 11 2011, 10:07 PM
What a great finish, well done! Are those the wheels off of Jamie's V8?
Posted by: sawtooth May 11 2011, 10:22 PM
What a great finish, well done! Are those the wheels off of Jamie's V8?
Thank you. Yes, Jamie and I traded some goods. He was generous enough to give em up.
Posted by: JRust May 11 2011, 10:42 PM
As much as it kills me not to have them on my car. They look kick ass on yours Dean .
Posted by: veltror May 12 2011, 05:25 AM
Looks liek the Viper Green on 1303 beetles and the new Scirocco, very nice...
Posted by: BRAVE_HELIOS May 12 2011, 06:24 PM
Congrats Dean! The car looks phenomenal! Can't wait to see it in person! You going to be around this weekend?
Posted by: 6freak May 12 2011, 06:38 PM
WOW ...I think you hit it out of the park ....nice job
Posted by: sawtooth May 12 2011, 09:51 PM
Congrats Dean! The car looks phenomenal! Can't wait to see it in person! You going to be around this weekend?
Yep I'll be here, hopefully putting the drive train back in this weekend. Got the wiring harness installed tonight. Bring that v8 over so I can go for a spin
Posted by: sixnotfour May 13 2011, 05:33 AM
Thats going GREEN , nice, here is 76 viper green metallic, yours has more green looks Great.
Attached image(s)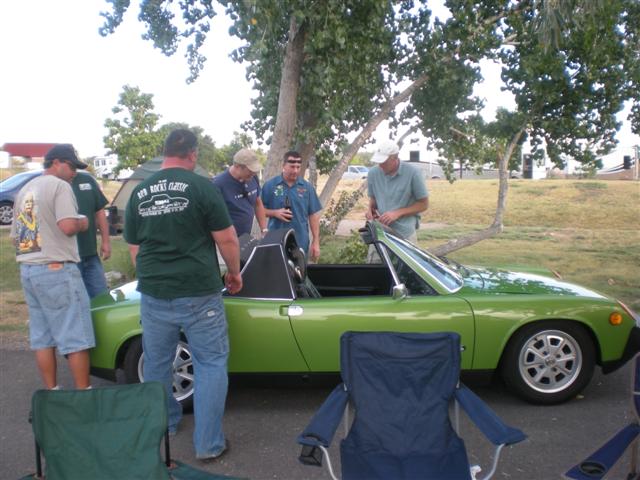
Posted by: sawtooth May 13 2011, 08:25 AM
Thats going GREEN , nice, here is 76 viper green metallic, yours has more green looks Great.
Thanks! I really like the viper green too, fantastic factory color. Your '76 looks like an extremely fine car. Yeah this synergy green is definitely an intense green. It has dark shadows and bright highlights, hard to represent well in a photo. I'll get some more shots with it out in the sunlight when I get it back together.
Posted by: AZ914 May 13 2011, 08:29 AM
Love it!
Posted by: Zaney May 13 2011, 08:35 AM
Dean,
Do you have a pic of the new dash/face plate for your new gauges? I am contemplating which route to go with mine. Either, bigmarkdesigns makeover or use your gauges.
Thanks!
Nate
Posted by: sawtooth May 13 2011, 08:39 AM
Dean,
Do you have a pic of the new dash/face plate for your new gauges? I am contemplating which route to go with mine. Either, bigmarkdesigns makeover or use your gauges.
Thanks!
Nate
Hey Nate, haven't finished mine yet. I'll be working on it soon though and will definitely post some pics.
Posted by: sawtooth May 17 2011, 01:44 AM
Ok Nate, here's a shot of my gauge cluster. I think it's going to work out really well.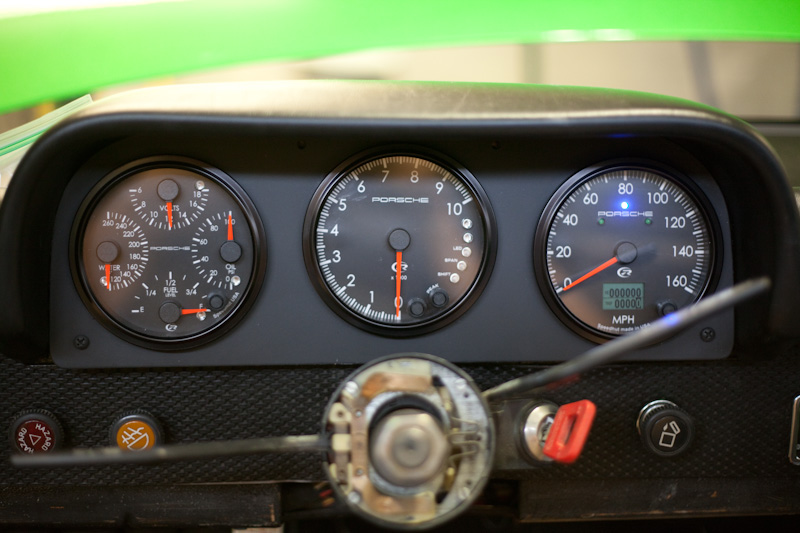
Posted by: sawtooth May 17 2011, 01:48 AM
I know WCR is coming up fast, but I just can't put this beauty back in...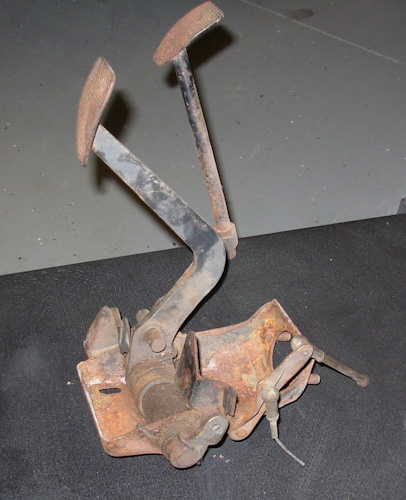
after some blasting, zinc plating, and new bushings...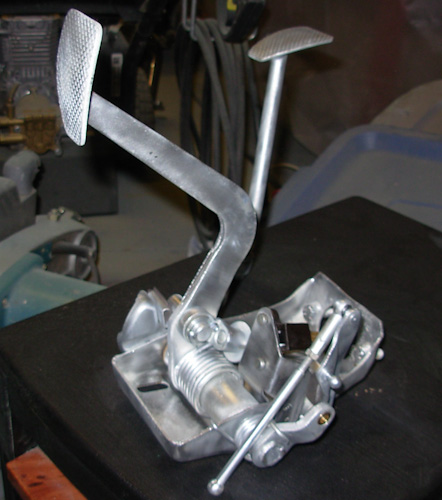
Posted by: JRust May 17 2011, 07:56 AM
Looking great Dean. Keep up the progress. You are just flying through everything. Really amazing as the quality of your work is excellent. I know you have a job too besides. LOL! I need the inspiration so keep updating with pics
Posted by: JmuRiz May 17 2011, 08:48 AM
Ok Nate, here's a shot of my gauge cluster. I think it's going to work out really well.
WOW, those are REALLY cool.
Posted by: Eric_Shea May 17 2011, 09:26 AM
Man Dean... do us a favor and do "something" half-assed so we can at ya!
Posted by: sawtooth May 17 2011, 10:22 AM
Man Dean... do us a favor and do "something" half-assed so we can
at ya! I'm sure I could be accused of doing more that a few things half-assed. I just do my best to not take pictures of 'em.

Posted by: eric9144 May 20 2011, 09:26 PM
![popcorn[1].gif](style_emoticons/default/popcorn[1].gif)
Freaking amazing, can't wait to see what's next!
Posted by: JRust Jun 3 2011, 01:49 PM
Need an update Dean! You got this baby on the road yet or what?
Posted by: charliew Jun 3 2011, 01:53 PM
It all looks great Dean. Are you putting any clear laquer or something else on the zink?
Posted by: sawtooth Jun 3 2011, 01:58 PM
It all looks great Dean. Are you putting any clear laquer or something else on the zink?
Thanks Charlie. No, I'm just adding brightener to the plating process, then going over lightly with a wire wheel after plating.
Posted by: sawtooth Jun 3 2011, 02:05 PM
Need an update Dean! You got this baby on the road yet or what?
not yet, but close. I've gotten a little bogged down in the details of getting it all put back together. Lots of little upgrades and restoring parts along the way. The motor and tranny are finally going in tomorrow. I'll hopefully be going for a test drive by the end of the weekend. I'll get some update pics posted tonight.
Posted by: sawtooth Jun 3 2011, 11:54 PM
Some update pics of things I've been working on.
The new suby trans prepped and ready to go. The trans I started with was on it's last legs, this is a new one with a fresh rebuild and better gear ratio. Thanks to Jamie for picking this up in Oregon on his way over to Boise a while back.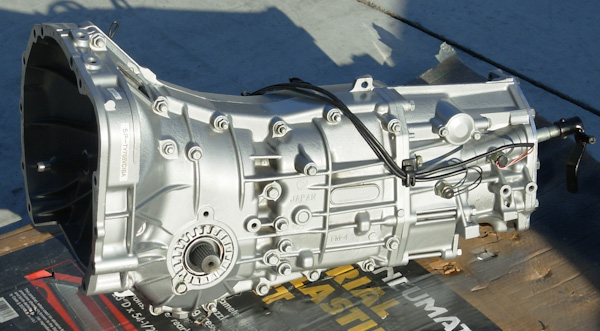
Previously I was using 5-lug adapters up front. I had picked up 911 components along the way and now was the time to get them cleaned up and installed. Using boge struts with bilstein inserts. Huge thanks to Eric Shea for helping me with all of it, especially getting the calipers set up! Wish I could take credit for plating those 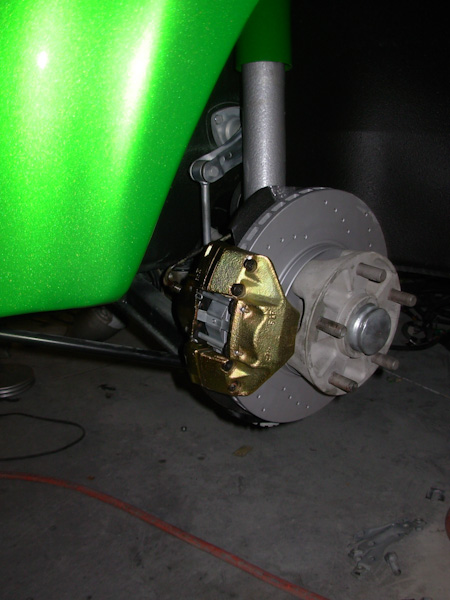
Upgraded to hella H4 housings. Also replaced the fog lights with pilot pl193 driving lights. And new italian turn signals from Mikey914.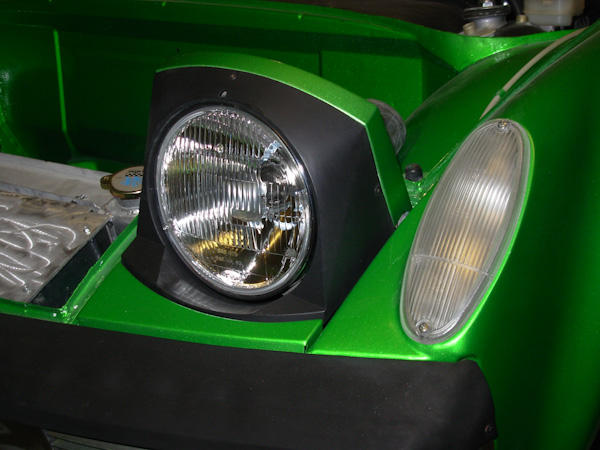
Posted by: sawtooth Jun 4 2011, 12:00 AM
Front trunk area almost finished.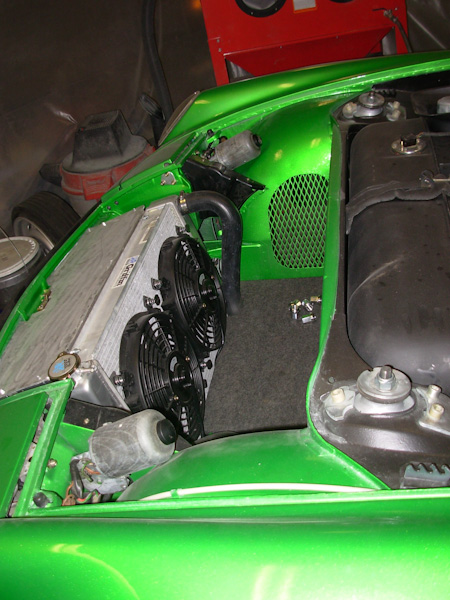
My low budget zinc plating setup. Works great for plating parts as needed. Takes about 20-30 min for a batch to finish. So I try to plan ahead and keep a batch going while I'm working on other things.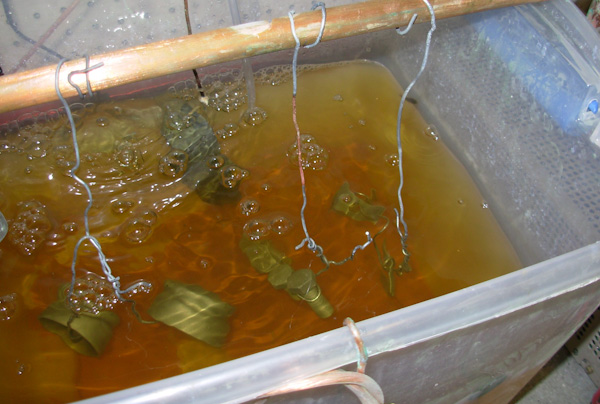
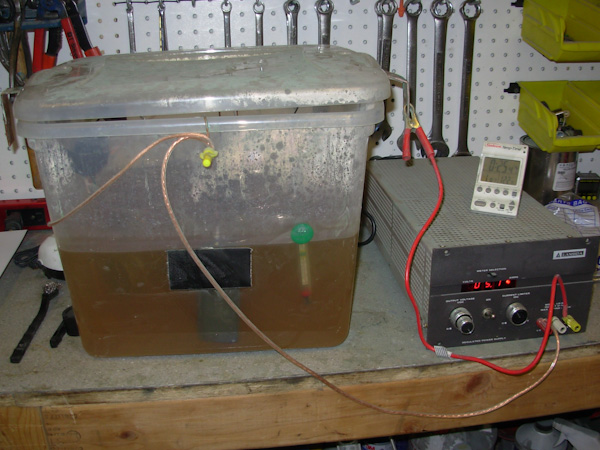
Posted by: Derek Seymour Jun 4 2011, 03:16 AM
Crazy awesome! That's one gorgeous looking car man!
Posted by: KELTY360 Jun 4 2011, 09:09 AM
Spectacular!
What are you doing with your bumpers? Chrome? Body color? Black? IMO, that color is tailor-made for body color bumpers.
Posted by: sawtooth Jun 4 2011, 09:21 AM
Spectacular!
What are you doing with your bumpers? Chrome? Body color? Black? IMO, that color is tailor-made for body color bumpers.
Right now I've got chrome bumpers on. The back is really nice but the front needs some help. I had thought about doing an RSR style finish to match what I want to do with the fuchs. But I hadn't thought about body color.
I'll have to photoshop it and see how it would look when it all gets finished here shortly. Thanks for the idea!
Posted by: KELTY360 Jun 4 2011, 12:52 PM
Spectacular!
What are you doing with your bumpers? Chrome? Body color? Black? IMO, that color is tailor-made for body color bumpers.
Right now I've got chrome bumpers on. The back is really nice but the front needs some help. I had thought about doing an RSR style finish to match what I want to do with the fuchs. But I hadn't thought about body color.
I'll have to photoshop it and see how it would look when it all gets finished here shortly. Thanks for the idea!Synergy Green bumpers would rock!
For reference, here's mine. You don't see them often but I think it ties the whole body together and actually gives it a more modern look. Up through '72 they came from the factory either chrome or body color. I had the clear 3M film put on the front bumper to prevent chips and you can't tell it's there.
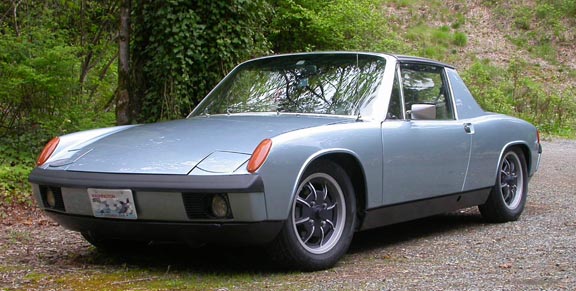
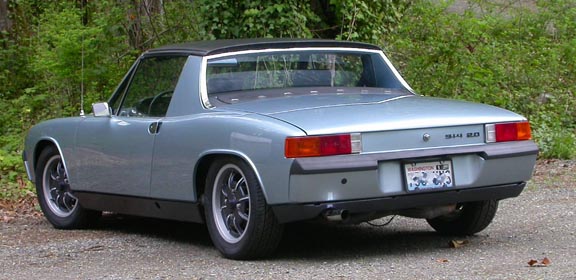
Posted by: charliew Jun 6 2011, 04:20 PM
I forgot and left the plating heater on when I took it out of the solution and burned it up when I first started plating. I don't see one on your setup either. I bought two new ones but haven't used them yet. For a different look you can add a yellow top coating that caswell has it looks pretty good also.
Posted by: enderw88 Jun 6 2011, 04:49 PM
Some update pics of things I've been working on.
The new suby trans prepped and ready to go. The trans I started with was on it's last legs, this is a new one with a fresh rebuild and better gear ratio. Thanks to Jamie for picking this up in Oregon on his way over to Boise a while back.
What does it take to covert an AWD subaru trans to FWD? Advanced DIY or specialized shop?
Posted by: DBCooper Jun 6 2011, 06:43 PM
What does it take to covert an AWD subaru trans to FWD? Advanced DIY or specialized shop?
Well, you can do it yourself like this: http://www.914world.com/bbs2/index.php?showtopic=104513
Or buy the adapters for the transmission and axles from Bremar, here: http://www.bremarauto.com/products/subaru-2wd-conversion-kit/
.
Posted by: enderw88 Jun 6 2011, 06:57 PM
What does it take to covert an AWD subaru trans to FWD? Advanced DIY or specialized shop?
Well, you can do it yourself like this: http://www.914world.com/bbs2/index.php?showtopic=104513
Or buy the adapters for the transmission and axles from Bremar, here: http://www.bremarauto.com/products/subaru-2wd-conversion-kit/
.
Thanks!
Posted by: abnrdo Jun 7 2011, 01:00 AM
Dean,
Awesome plating setup! I have thought about doing that myself.
I know the transmissions are pretty much plug and play, but what year is your new transmission from?
-Jim
Posted by: sawtooth Jun 7 2011, 01:47 AM
Dean,
Awesome plating setup! I have thought about doing that myself.
I know the transmissions are pretty much plug and play, but what year is your new transmission from?
-Jim
Hey Jim, this trans is from an '01 forester.
Posted by: sawtooth Jun 7 2011, 01:52 AM
What does it take to covert an AWD subaru trans to FWD? Advanced DIY or specialized shop?
Well, you can do it yourself like this: http://www.914world.com/bbs2/index.php?showtopic=104513
Or buy the adapters for the transmission and axles from Bremar, here: http://www.bremarauto.com/products/subaru-2wd-conversion-kit/
.
Thanks!
I went the DIY route and it worked out great. I cut the necessary pieces for the locking spool myself as shown in the link dbcooper posted. And I had a machinist weld it together.
Posted by: sawtooth Jun 7 2011, 01:54 AM
I forgot and left the plating heater on when I took it out of the solution and burned it up when I first started plating. I don't see one on your setup either. I bought two new ones but haven't used them yet. For a different look you can add a yellow top coating that caswell has it looks pretty good also.
I have a fish tank heater, in the tank off to the side, not really visible in the pics. It will keep the water at around 100 which is close enough for me. Has been working pretty good.
Posted by: sawtooth Jun 7 2011, 02:20 AM
I ended up getting a new motor too. A guy down the street from me had the same motor (phase II sohc 2.5) that was built by http://www.xcceleration.com/. He bought it a few years ago and never installed it. The heads have been worked over and it has the cams I wanted to upgrade to. Talked to Xcceleration about this motor, they say it is a solid 50hp over stock, but retains stock compression. If so it should be a nice little upgrade. Selling my motor will just about cover the cost so I'm happy.
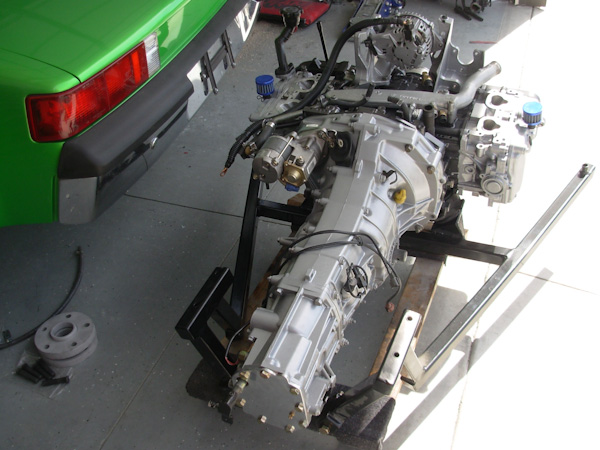
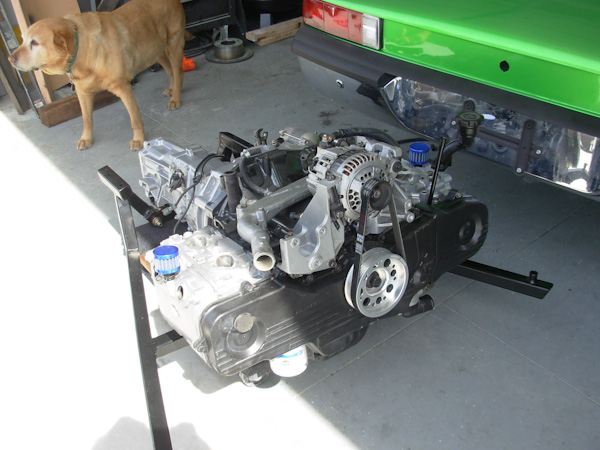
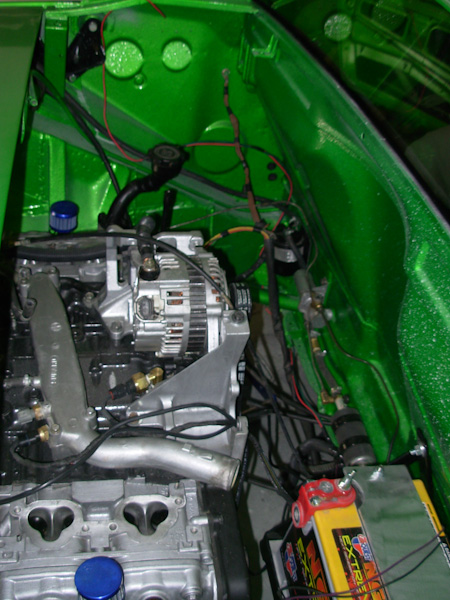
Posted by: DBCooper Jun 7 2011, 02:26 AM
Beautiful, really beautiful job. It looks great.
Posted by: sawtooth Jun 7 2011, 02:35 AM
Beautiful, really beautiful job. It looks great.
Thanks Paul, what's the update with your car? Just driving and having too much fun?
Posted by: JRust Jun 7 2011, 08:30 AM
I ended up getting a new motor too. A guy down the street from me had the same motor (phase II sohc 2.5) that was built by http://www.xcceleration.com/. He bought it a few years ago and never installed it. The heads have been worked over and it has the cams I wanted to upgrade to. Talked to Xcceleration about this motor, they say it is a solid 50hp over stock, but retains stock compression. If so it should be a nice little upgrade. Selling my motor will just about cover the cost so I'm happy.
Dang it just keeps getting better! A new motor too? I'm jealous
Posted by: jaxdream Jun 7 2011, 08:40 AM
I'd call it Kermit.........
That is one of the most fantastic looking teeners I've seen pictured for a while , wayyyyy faster than Yelo.
My $.02........
Jack
Posted by: mrgjones Jun 7 2011, 09:38 AM
I love the zinc plating. What are you using to pre dip or "pickle" the parts before they go in the tank? Also curious about your electrolyte solution and anode.
Posted by: sawtooth Jun 7 2011, 10:59 AM
I love the zinc plating. What are you using to pre dip or "pickle" the parts before they go in the tank? Also curious about your electrolyte solution and anode.
After media blasting, I dip the parts in a mild acid for about 5 seconds. It's a concrete floor cleaning product. Seems to do the trick.
For electrolyte I'm using Zincate Concentrate from caswellplating.com. I also use their Zinc brightener. I tried some of the yellow chromate to copy the cadmium look but am not to impressed with it now, so I just do the zinc plating by itself.
You'll laugh at what I'm using for anodes. I didn't want to pay for the sheet metal style anode that Caswell sells. Figured I'd use them up pretty quickly. I looked at the marine anodes but wasn't sure I'd be getting pure zinc. So I ended up buying zinc bars off ebay. They claim to be pure zinc and are 2lbs each. Way overkill for size, but they should last forever and are giving great results.
The power supply/rectifier can be the most expensive piece. I found an old Lambda CC/CV on ebay that outputs 14 amps for $75 shipped. I'm really happy with it.
Posted by: sawtooth Jun 15 2011, 04:07 PM
On the lift at the alignment shop this morning.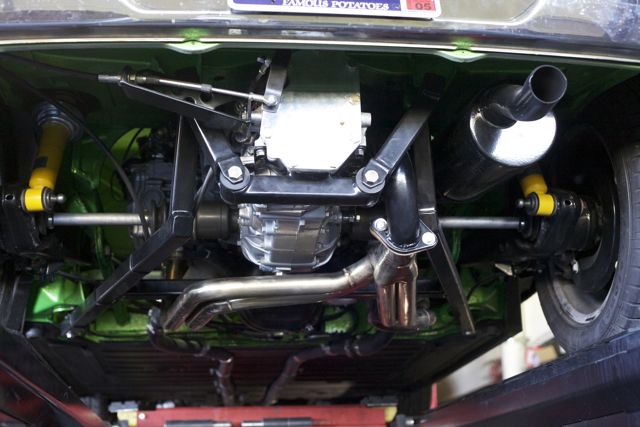
My wife's first drive in it since last fall, got the big smile approval.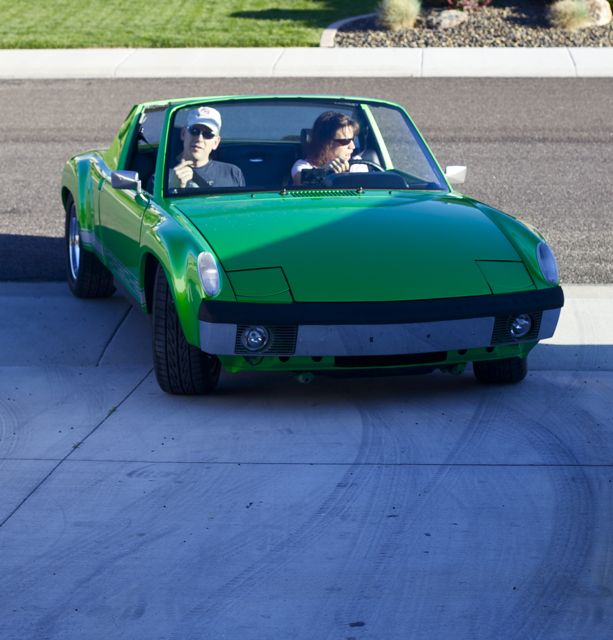
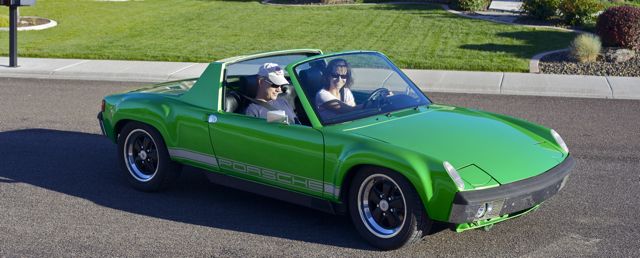
Posted by: JRust Jun 15 2011, 04:10 PM
Damn those wheels look good! Car is looking great Dean. I can't wait to see it in person. Not to mention get a ride with the new motor . Congrats on such a fine ride. I am sure your wife had a ball driving it 
Posted by: sawtooth Jun 18 2011, 10:59 AM
Made a trip up up to McCall last night with the family. Flushing out any bugs before WCR and testing out a new external stereo mic for the helmet cam, what a difference. Still need to isolate the rear trans mount better so I don't get the downshift whine up through the body.
https://www.youtube.com/watch?v=ALwR2Fj91Co
Posted by: charliew Jun 19 2011, 01:38 PM
Dean it looks great. The whine I think is ring gear to pinion and you should be able to adjust it out if the pinion is in the right spot. Maybe Matt Monson will chime in, he is the guru, even though it is a suby I'm sure he has a lot of suby tranny experience also. Did you post the rear axle ratio it would like the rpms in the upper gears at their top when you get time, your tires are probably about 25 inches tall so it would be good for the 914 subt tranny guys to have as a reference. I think I remember the ratios are 3:90. 4:11 and 4:44 and maybe a 3:70
Posted by: sawtooth Jun 19 2011, 02:10 PM
Dean it looks great. The whine I think is ring gear to pinion and you should be able to adjust it out if the pinion is in the right spot. Maybe Matt Monson will chime in, he is the guru, even though it is a suby I'm sure he has a lot of suby tranny experience also. Did you post the rear axle ratio it would like the rpms in the upper gears at their top when you get time, your tires are probably about 25 inches tall so it would be good for the 914 subt tranny guys to have as a reference. I think I remember the ratios are 3:90. 4:11 and 4:44 and maybe a 3:70
Thanks Charlie, I'll look into the adjustment, would be great to get it figured out. I noticed this in my last trans too. The final drive on this trans is 4.11, tire height is about 24.5, gears are 3.545, 2.111, 1.448, 1.088, 0.780. At 65mph I'm at about 2800 rpm. So far I'm really happy with it.
Posted by: charliew Jun 19 2011, 02:26 PM
It is the side to side of the ring gear but the pinion needs to be in the right front to rear relationship first. The side to side is the bearing adjusters on each side. I think you showed the pictures of all this? The only way I know to do the pinion without the factory tool would be to make one up on a known good tranny before it is taken apart. I'm hoping for a taller 1st gear so if I can I want to try a 3:70 or 3:90 but thats also with a turbo motor so more torque.
Posted by: strawman Jun 20 2011, 12:08 AM
Look at my "Suby Rustoration" build blog on how to set the ring preload (see post 85 of http://www.914world.com/bbs2/index.php?showtopic=83031&hl=suby+rustoration). Pretty simple really; but it means you'll have to yank the trans. However, unless you've opened it up in the past or changed the preload, you might need new bearings...
Posted by: jimkelly Jun 20 2011, 07:07 AM
that is some sweet video footage : )
jim
Posted by: charliew Jun 23 2011, 10:30 AM
From my memory the backlash can be set by going in through the drain with a extension on a dial ind. The preload is the tension between the two side bearings. Set with a torque measurement on the amount of drag. Or a predetermined amount of fractional turns of the covers. Both are set with the side to side covers over the bearings.
Posted by: sawtooth Jun 29 2011, 07:55 PM
Some pics from WCR. I got a chance to use the coveted WAS top prototype from Mark. Used it for the first half of the drive on Saturday, it was fantastic. We had the feeling of having the top off, light coming in overhead, but no sun or wind issues. It looked really great on the car, l didn't want to give it back. Mark had to pry it out of my hands, I'll be saving up for one of these babies. 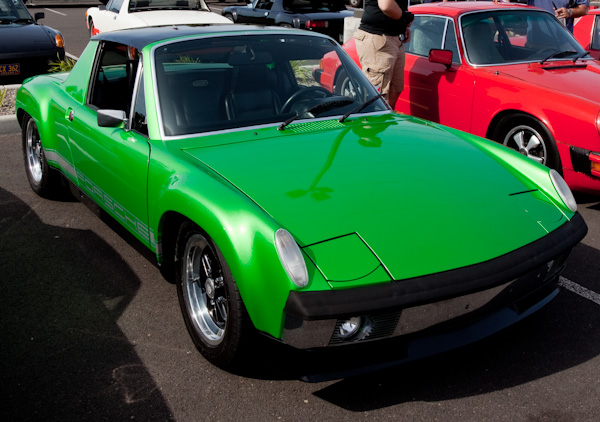
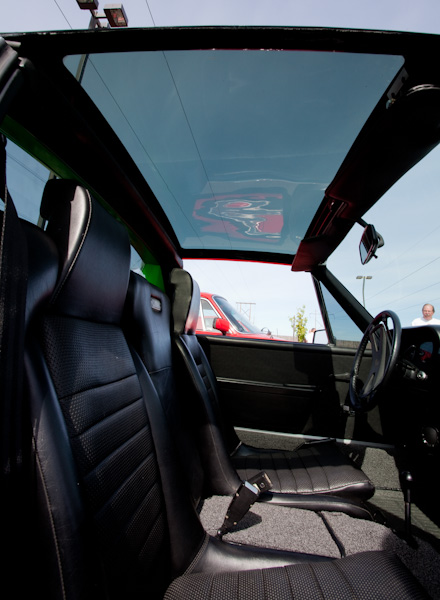
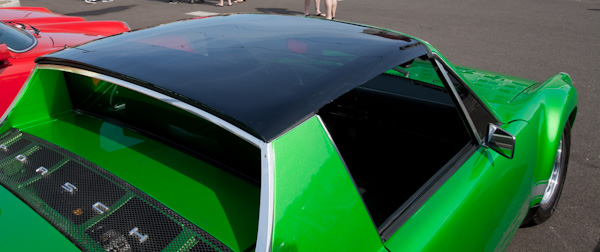
Posted by: sawtooth Jun 29 2011, 08:29 PM
And a few more... Hard to put into words what WCR 2011 meant to me and my wife Heidi. The event and a lot of great people in this club inspired me to get our car finished. Bottom line is it would have taken much longer without the goal of making it to WCR. There couldn't have been a greater way to celebrate getting the green machine on the road. Thanks everybody!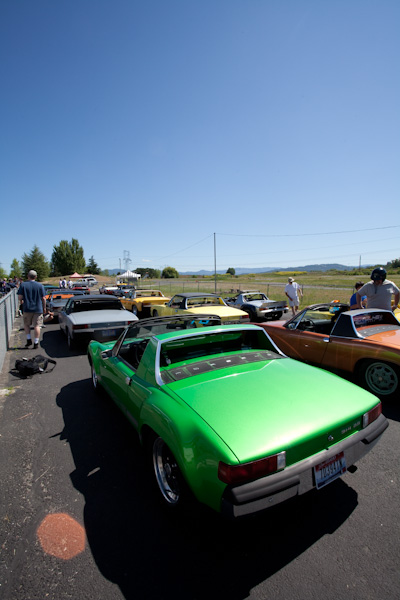
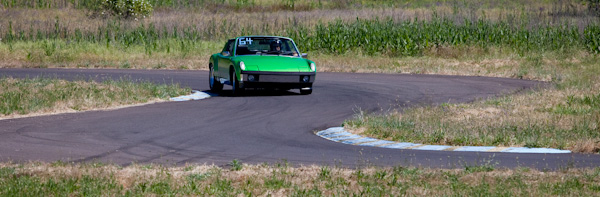
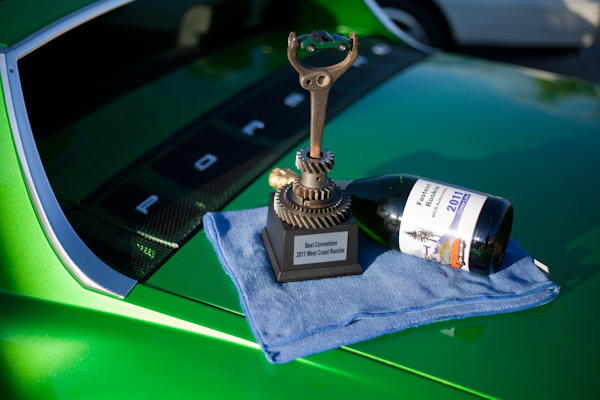
My last, and best run for me in the morning. Jamie's riding with me.
https://www.youtube.com/watch?v=fNQKI0wL1wc
Posted by: sawtooth Jun 29 2011, 08:43 PM
WCR drive to Crater Lake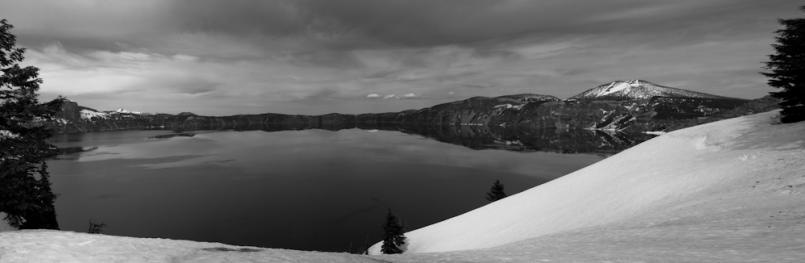
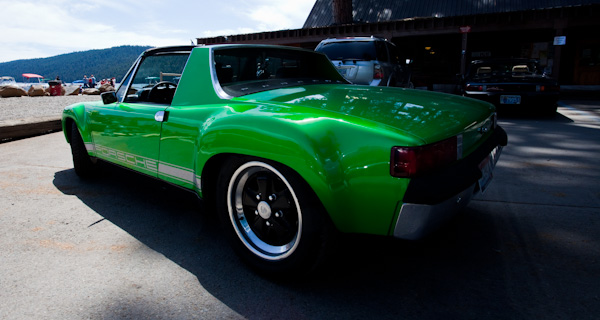
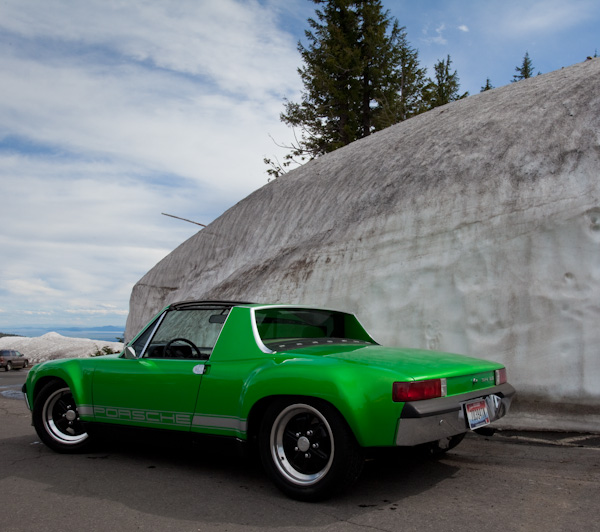
Posted by: jzdu Jun 29 2011, 09:09 PM
Beautiful car Dean. It was nice to meet you.
Posted by: sawtooth Jun 30 2011, 12:39 PM
Beautiful car Dean. It was nice to meet you.
Thanks Brian, same here. Really enjoyed seeing your car there!
Posted by: JRust Jun 30 2011, 04:27 PM
I just found my replacement Fuchs for your wheels Dean. Got a set of 16x7 front & 16x8 rears that should be at my house tommorow. So glad to get another set. I love 5-lug Fuchs on 914's . As good as they look on your car. I won't cringe every time I see them now
Posted by: sawtooth Jun 30 2011, 04:33 PM
I just found my replacement Fuchs for your wheels Dean. Got a set of 16x7 front & 16x8 rears that should be at my house tommorow. So glad to get another set. I love 5-lug Fuchs on 914's
. As good as they look on your car. I won't cringe every time I see them now Nice, but ooh 8's, those must a been spendy. Glad you'll have some new ones so I won't feel so bad for taking yours
Posted by: trojanhorsepower Jun 30 2011, 05:39 PM
Wow, you scared that guy so bad he jumped out and ran away.
The car is awesome!
Posted by: JRust Jun 30 2011, 07:57 PM
LOL. I was up next in my creamsicle. Had to get to my car to go. Probably not my smartest decision to ride then.
Posted by: DBCooper Jul 9 2011, 06:14 AM
Just re-read this whole thread. I'd seen most but not all the parts while it was in progress, but it's SO much more impressive reading it straight through. Great job. I especially enjoyed re-reading the debate in the beginning, use that car or some other. Cool.
Excellent, Dean, in every detail. Well done and you should be proud as hell. But most important, isn't that sucker fun to drive?
Posted by: Randal Jul 9 2011, 08:08 AM
WCR drive to Crater Lake
Your car is even nicer in person than in pictures Dean. Sure enjoyed seeing it up close at WCR.
I still can't believe how smooth your paint came out. It's just perfect.
Posted by: Eric_Shea Jul 9 2011, 01:50 PM
I drove all the way to Boise to see this car and Dean wouldn't come out and play! Next time!
Posted by: sawtooth Jul 11 2011, 09:16 AM
I drove all the way to Boise to see this car and Dean wouldn't come out and play!
Next time!You were just too fast in your cayenne, couldn't catch up to you. Sorry I couldn't make it work. Definitely next time.
Posted by: sawtooth Jul 11 2011, 09:46 AM
WCR drive to Crater Lake
Your car is even nicer in person than in pictures Dean. Sure enjoyed seeing it up close at WCR.
I still can't believe how smooth your paint came out. It's just perfect.
Thanks Randal, it was great meeting you seeing your car on the track
Hope to get to do it again next year!
Posted by: sawtooth Aug 2 2011, 03:03 PM
Spent some time with a local tuner on the dyno. Learned a bunch about fuel and ignition maps. He did a great job on the tune, it has much crisper acceleration now, and it's getting fantastic mpg (mpg results to follow). Nothing earth shattering for hp results, but it is in line with what I was expecting. Outfront sees a drive train reduction with this motor at approx 33% Correction, should be more like 25% loss. We ended up with 153whp and 162 ft/lbs torque. That comes out to about 230chp 204chp using whp/(1-loss) = chp. According to the shop that did the cams and head work on this motor it should output 50hp over stock which is 215chp so I expected a little more on the dyno. Regardless it is running great and now I have a baseline for future improvements.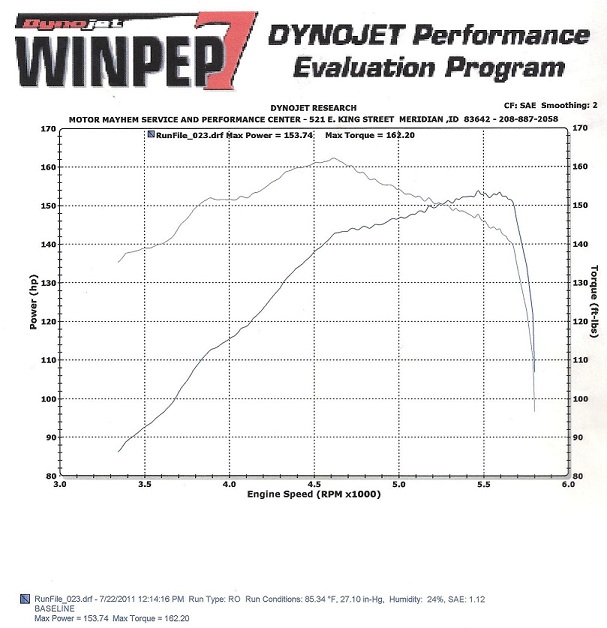
Posted by: Andyrew Aug 2 2011, 03:19 PM
Dean,
33% loss? Maybe for an AWD vehicle thats also automatic, I personally dont believe that... The 914 trani is closer to 20% drivetrain loss.
Also 153whp x 1.33 = 203.49chp
For reference 153 x 1.2 = 183.6chp
Not trying to be a downer, but I dont think the engine is making the power you think it is.
HOWEVER that is a great looking tq line!
Posted by: sawtooth Aug 2 2011, 03:54 PM
Dean,
33% loss? Maybe for an AWD vehicle thats also automatic, I personally dont believe that... The 914 trani is closer to 20% drivetrain loss.
Also 153whp x 1.33 = 203.49chp
For reference 153 x 1.2 = 183.6chp
Not trying to be a downer, but I dont think the engine is making the power you think it is.
HOWEVER that is a great looking tq line!
I'm not using a 901, it's a subaru trans. So front wheel drive usually is accepted to have a little more loss than rwd. But I agree after talking with outfront some more it should be in the neighborhood of 20-25% drive train loss. If you were actually calculating loss, it should be applied to chp, not whp. whp/(1-loss) = chp. So 153whp /(1.0-.25) = 204chp or 153/(1.0-.20)=191.25chp. I've seen some use the calculation you used, just doesn't make sense to me to apply the correction to the reduced amount, should be applied to the total amount. Anyway, however you calculate chp from whp, now I have a base line to work from.
Posted by: Andyrew Aug 2 2011, 04:33 PM
I realize its not a 901 trani, but Im telling you this for comparison. You might have some loss due to the bearings, but typically the loss comes in all the extra moving parts, AKA the driveshaft, the rear diff, the rear axles. They all play apart in the drivetrain loss.
Your number should be closer the the Subaru FWD drivetrain loss.
Regardless, You have a great baseline to go up from!
Posted by: JRust Aug 2 2011, 05:49 PM
I am a little surprised it is that low. I was expecting more also just by the feel of it around the track. Or course I was coming from the feel of my stock 2.0  . Now we'll have to see how it does against my wimpy v8
  . Of course I have to get it off the stands to do that . I am sending my rear calipers off to Eric to get rebuilt. Otherwise I could be driving it tonight
Posted by: sawtooth Aug 2 2011, 06:02 PM
I am a little surprised it is that low. I was expecting more also just by the feel of it around the track. Or course I was coming from the feel of my stock 2.0
. Now we'll have to see how it does against my wimpy v8 . Of course I have to get it off the stands to do that . I am sending my rear calipers off to Eric to get rebuilt. Otherwise I could be driving it tonight And it is noticeably more responsive now with the tune than it was on the track at WCR. IMHO I think the hp rating is deceptive, it's the way the torque (although not close v8, but much lighter) comes on quick and remains that makes it pull pretty decent.
Posted by: uncle smokey Aug 2 2011, 07:51 PM
Man, I just read the whole thread and all I can say is WOW! That thing is friggin awesome.
Posted by: Mikey914 Aug 3 2011, 09:07 AM
This car is truely impressive!
Posted by: J P Stein Aug 3 2011, 09:21 AM
I've always used 15% driveline loss. That may seem conservative but I never got into the big hp numbers game. Nice torque regardless. Torque is what counts (IMO) unless you're running at Daytona.
Posted by: charliew Aug 3 2011, 12:46 PM
I think going by the numbers others have achieved with midly hopped up na 2.5 subys that 200-210 is reasonable at the crank. Just keep using the same dyno and keep all the tuning printouts for reference and you are good to go. It will be a good reliable package that will leak far less oil and when it warms up it will keep the power unlike a air cooled motor. A good equal length header is about all I could think of that might help as it is. Also make sure the fuel is always the same. Also you might try removing the air filter on one of the pulls to see if the intake is restricted next time. The numbers do fall off a little early for better cams though. I would want the revs to go to at least 6500 on a na motor.
The shop that did the work surely doesn't think it should quit at 5700? Sorry actually 5800 I think.
Posted by: sawtooth Aug 3 2011, 01:38 PM
I think going by the numbers others have achieved with midly hopped up na 2.5 subys that 200-210 is reasonable at the crank. Just keep using the same dyno and keep all the tuning printouts for reference and you are good to go. It will be a good reliable package that will leak far less oil and when it warms up it will keep the power unlike a air cooled motor. A good equal length header is about all I could think of that might help as it is. Also make sure the fuel is always the same. Also you might try removing the air filter on one of the pulls to see if the intake is restricted next time. The numbers do fall off a little early for better cams though. I would want the revs to go to at least 6500 on a na motor.
The shop that did the work surely doesn't think it should quit at 5700?
Thanks Charlie, yeah I do already have an equal length header on it. I was thinking the same thing on the cams, not what I expected. I bought this motor mainly because it was supposed to have some expensive head porting done to it, and a mild set of cams. The work was done many years ago and the motor was never installed, stored for a long time. I bought it (for quite a bit less than a stock motor) taking a chance that it was as advertised. I could see the porting work in the heads, but couldn't think of an easy way to verify the cams. I did talk to the builder who had records of the engine and so I had some confidence in it. Anyway, I'll probably end up putting some more aggressive cams in it in the near future. I'm guessing they are stock now.
Posted by: charliew Aug 3 2011, 02:03 PM
I'm thinking you should be able to find the stock lift specs on the cams and just put a dial ind on the lobes to read the lift. Most all turbo motors go to 6500 and make power to 6k I'm pretty sure. Matt Monson, the guy with the porsche tranny shop in Co. knows a lot about na subys, he is here and on nasioc he may have the knowledge you want. Just search nasioc on the na forum. Probably if the builder was very good there will be stuff about his work and results. On the graph it looks like the motor was just not run to 6500 to see where the torque and hp really fell off. Make sure the air cleaner is not the restriction. I would guess the cleaner needs to flow at least 300cfm to be good. The well ported suby heads usually flow at least 240-260 cfm on the intake on the wrx heads and the 04 sti heads. .400 inch lift would be my estimation on the hotter na cams. I wonder if the springs are stiff enough? Used sti cams are pretty cheap but they are retarded for the acvs but they are used in wrx's a lot for more lift, I think I remember they are a little shy of .400. I have a set and plan on using them in a wrx head setup. I think I remember 5 degrees retarded at static position. I bet just jumping them 1 tooth would put them right for a non acvs motor. I just thought of something, did you check the cam timing on the motor? If a suby is backed up it can jump time real easy. Never park it on a trailer in gear as if it rolls back any it will jump time. The idler only works in the forward direction, it will let the belt get slack if it is backed up and the valve spring tension on the cam lobes helps the cams to jump time at the cog pulley on the crank. You can look at the belt with the covers off and see what I'm talking about. I don't remember but it may make all the cams get advanced cause the crank is the one that changes. There is a guide that is used on some motors that goes over the crank gog gear that hopefully keeps the belt from jumping. It's on the sti motors for sure. I made one out of 2.0 id tubing formed to fit close. The mounting holes are already there on the regular motors oil pumps casting.
I'm sorry I just reread this post and I was talking about dohc heads and your heads are sohc. Not sure about the belt tensioner on sohc.
Posted by: Porsche930dude Dec 16 2011, 10:06 PM
Amazing car ! Pretty much what iv been envisioning mine to be like in a year or so! great job
Posted by: Strudelwagon Dec 17 2011, 05:24 PM
Dean,
I freaking love your car! If I do another one, It's getting modelled after yours.
Keep the pictures coming!
Steve
Posted by: messix Dec 18 2011, 03:03 PM
some thing is going on at about 4700 rpm.
look at the graph and wee where the line gets wavy on both the torque and hp, it's losing some thing starting at the rpm and if you find whats causing it you will see the hp climb some more.
i would data log it on another dyno run and see whats happening to the timing and if it's a closed loop see whats happening with fuel.
Posted by: ww914 Dec 19 2011, 10:07 AM
As a newbie, I have realy enjoyed reading this thread. I am in the process of simi-restoring my 2.0 and have learned a lot here. Your car is awesome. Good Job!!!
By the way, I took the liberty of copying a couple of your pictures for my own use. I hope this is OK with you.
Posted by: Porcharu May 16 2012, 08:51 PM
Just got back from getting final exhaust done, man I wish I could take you for a drive. It has put a permanent smiley on my face.
I got a ride at the WCR 2112 and it put a
on my face. I can't wait to get my version on the road - screw the DD volvo project.
Posted by: jimkelly Oct 3 2015, 06:06 AM
sawtooth posted this in another thread, so I thought I would include it here, tie it all together.
wondering if anyone has used this exact dimensions (18" length)
OR 18.5" length as bigkat_83 used ???
using 914 axles to 914 cv on wheel end and suby cv on trans end.
I especially want to know from those using ian's coldwater cradle.
http://www.914world.com/bbs2/index.php?showtopic=218865&hl=axles
thanks
guys
Attached thumbnail(s)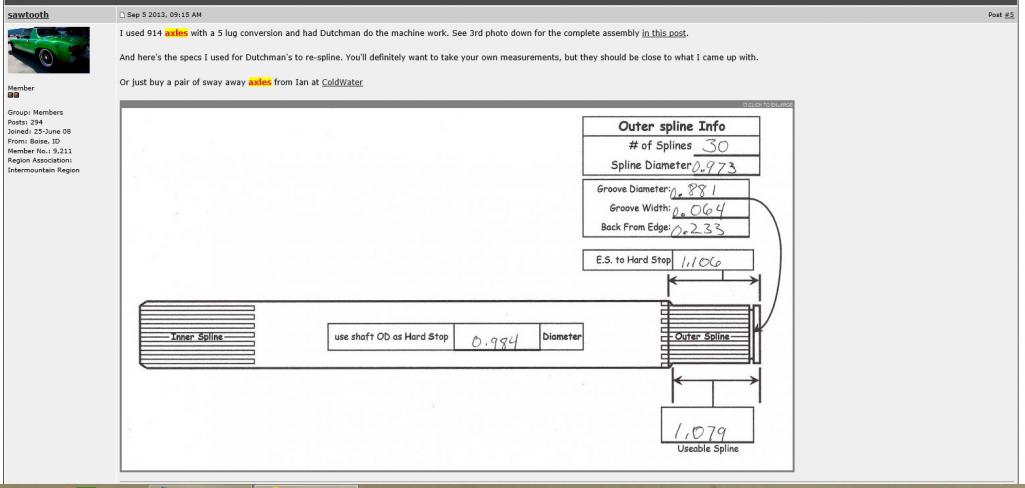
Posted by: mepstein Oct 3 2015, 08:40 AM
Funny, I was just looking at this thread yesterday. I thought it was sawtooth that relocated the transmission fluid fill on his suby trans to hold more volume.
Posted by: Chris H. Oct 3 2015, 09:02 AM
Funny, I was just looking at this thread yesterday. I thought it was sawtooth that relocated the transmission fluid fill on his suby trans to hold more volume.
He was the first one to report that the Subie trans is in a completely different position in the 914, and you are removing the center diff which also displaced fluid in the AWD setup, therefore you SHOULD NOT go by the dip stick to consider it full. I think he tapped a plug so that it could be filled until it dribbled out. Instead of the normal amount, he had almost 6 quarts in his IIRC. You can tell if it's not quite full because there is a slight whine on decel (not like the LOOOOUUDD whine I had when I had that washer missing).
Powered by Invision Power Board (http://www.invisionboard.com)
© Invision Power Services (http://www.invisionpower.com)