Printable Version of Topic
Click here to view this topic in its original format
914World.com _ 914World Garage _ New Six Conversion Build Thread
Posted by: proto31 Sep 8 2008, 12:21 AM
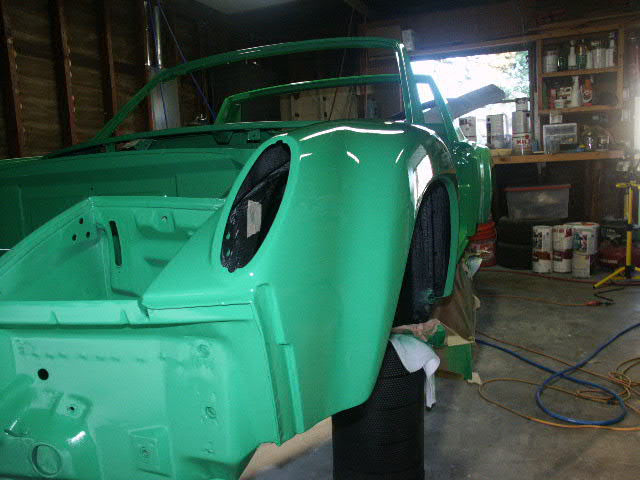
So, I started my new project (Thomas's old project). The shell was originally aubergine, then painted yellow. Thomas had stripped all the undercoating and removed all the exterior paint. I plan on having the entire shell walnut shell blasted to remove the last of the interior paint. Thomas had also installed the "6" engine mount and the chassis stiffening kit. I have removed the mounting hardware for the window washer tank. This weekend I have started installing the steel AA GT flares. Front and and rear left GT flares were installed. I dismantled the 3.0 engine that I will be using, the heads are off to be rebuilt, the rods balanced, the crank balanced and micro polished, the rockers rebushed and resurfaced, and the flywheel and pressure plate balanced. I'll be running carbs and a 911-01 transmission. More to follow.
Attached thumbnail(s)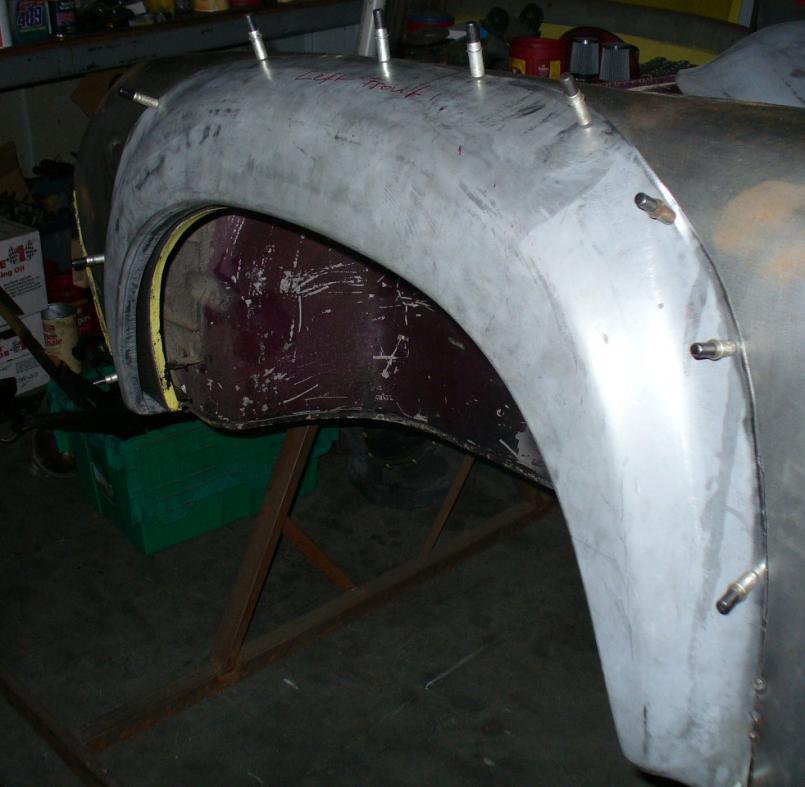
Posted by: tronporsche Sep 8 2008, 02:49 AM
HHHmmmmm, somethin is telling me this is gonna be a "mean machine" !!! Have fun, best wishes.
Posted by: sww914 Sep 8 2008, 12:00 PM
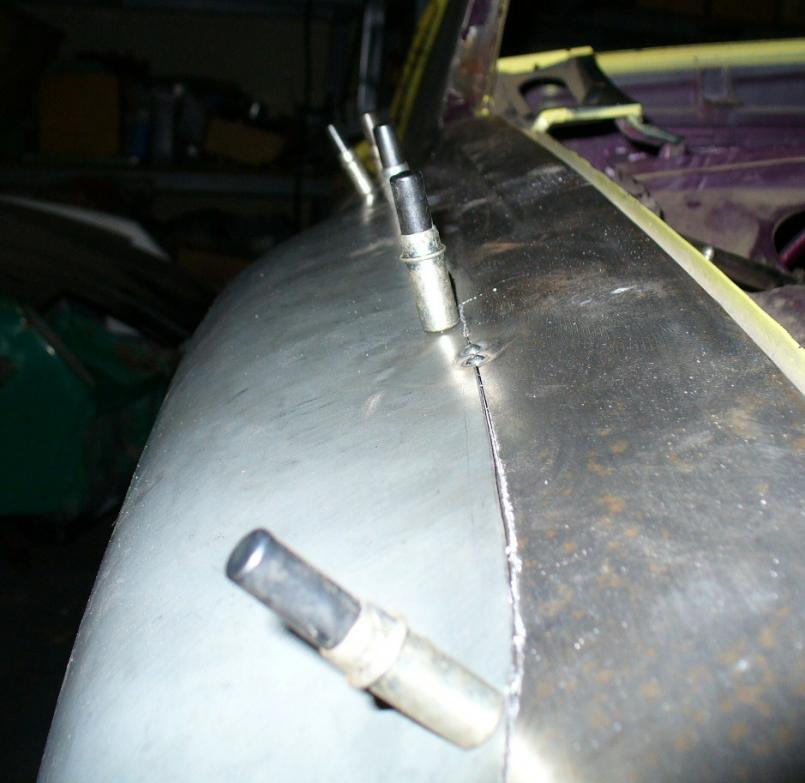
Cleco fasteners are good, but this seems like a perfect time to share a trick. Self tapping screws do the same job but much faster and cheaper. 1/2" or 5/8" drill point phillips heads go right in with a cordless drill and leave a small hole behind that's just as easy to weld up.
Attached image(s)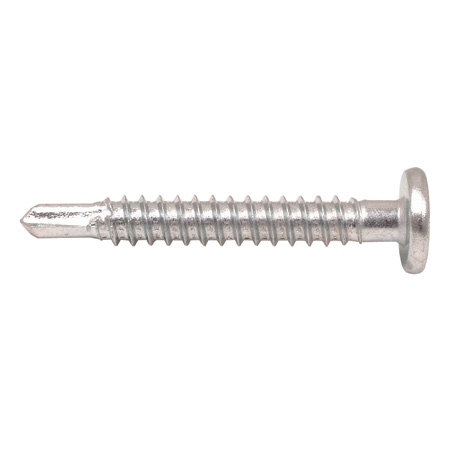
Posted by: proto31 Sep 8 2008, 01:12 PM
Thanks for the Tip! I had the Clacos lying around so I figured I'd use them, the sheet metal screws would would work well too. I like the Clacos because you can put them in with one hand while your holding the panel in position with the other.
Posted by: LarryR Sep 8 2008, 11:41 PM
Subscribing looks like it will be an interesting build ![popcorn[1].gif](style_emoticons/default/popcorn[1].gif)
Posted by: r_towle Sep 9 2008, 07:36 PM
post some more pics...
Rich
Posted by: Lou W Sep 9 2008, 07:52 PM
This is gonna be a great build, I really liked this car. 
Posted by: proto31 Oct 5 2008, 12:20 AM
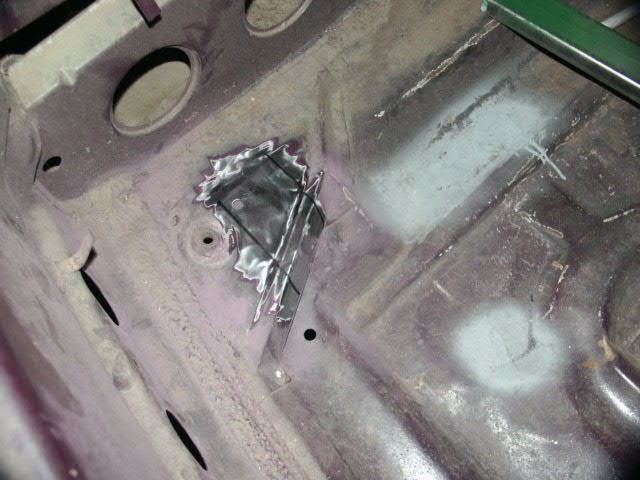
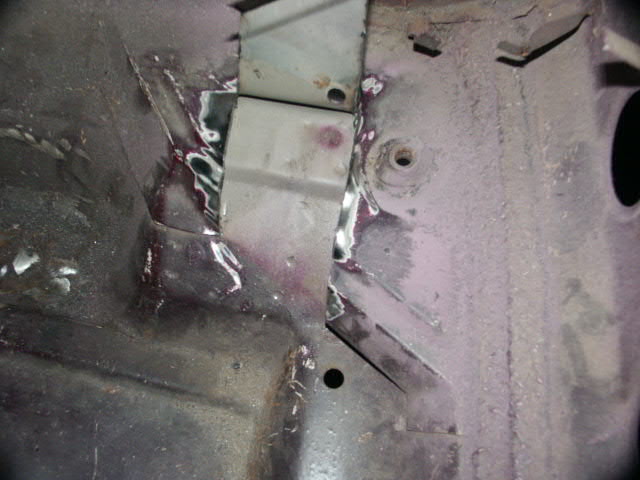
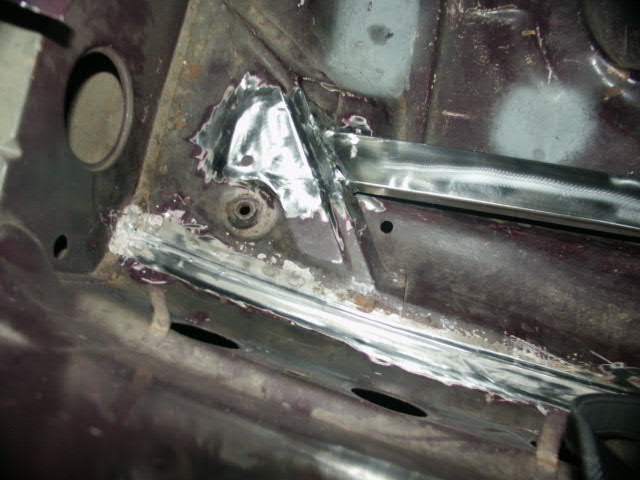
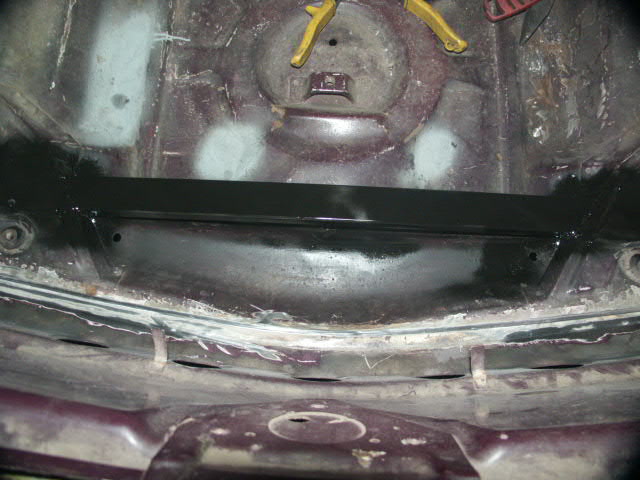
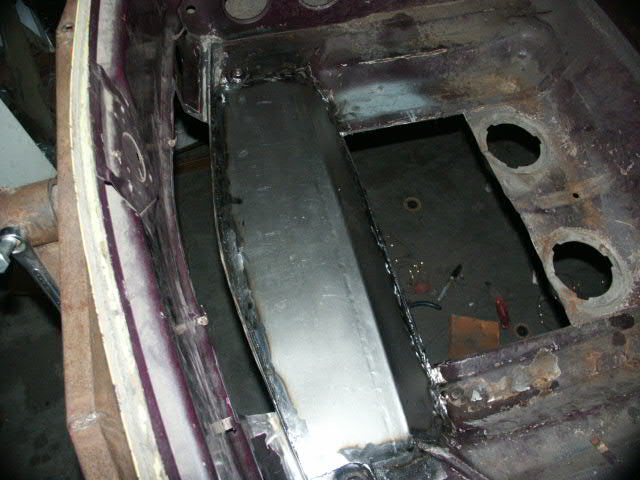
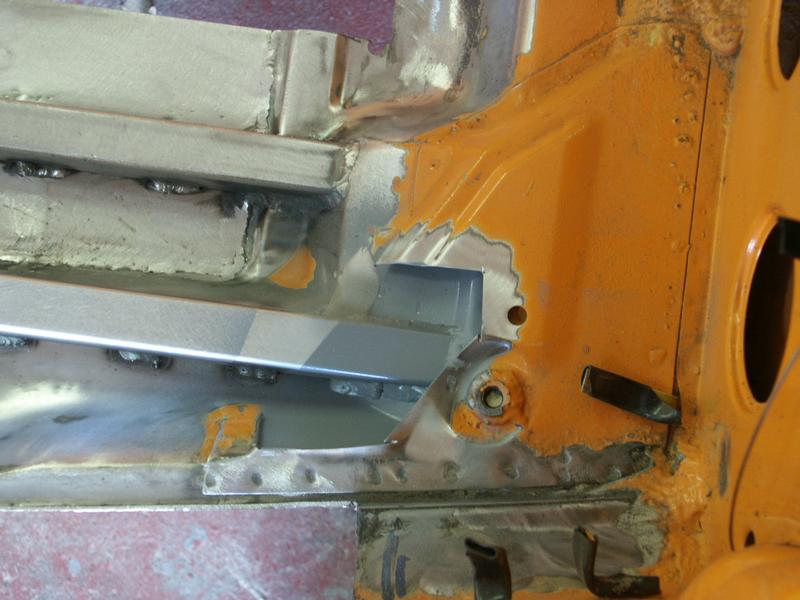
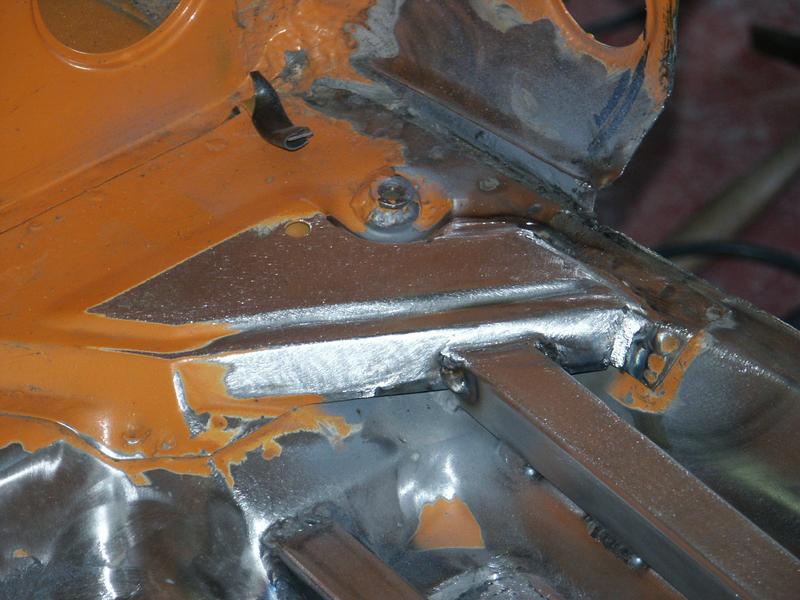
So, I finished all the steel flares last weekend. Those took a lot more work than I thought. This weekend I started on the front oil cooler. I decided to fabricate a brace that attached the two front A-arm pick-ups just like the factory did on all the GTs. I used a pretty beefy beem that was mated to match the contour of the A-arm mounts. Thomas helped me make a cap which will help air flow better through the oil cooler. I then cut out the front and bottom holes needed to feed air into the cooler. I plan on having the entire tub walnut shell blasted before paint. The next step will be to fabricate copper oil lines to feed the cooler. Here are some pics...
Posted by: proto31 Oct 5 2008, 12:25 AM
Some more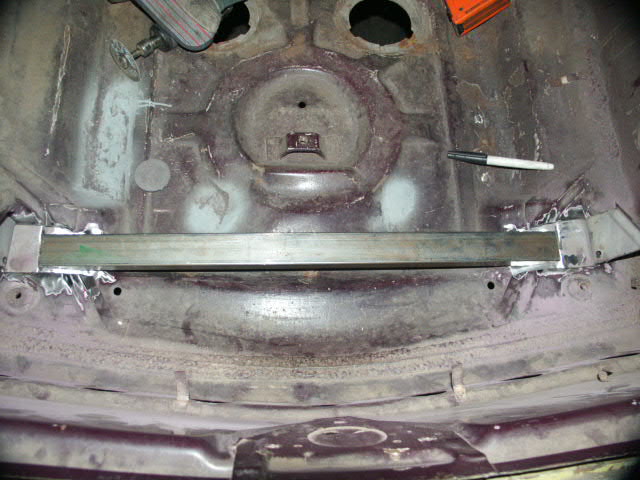

Posted by: proto31 Oct 5 2008, 12:32 AM
More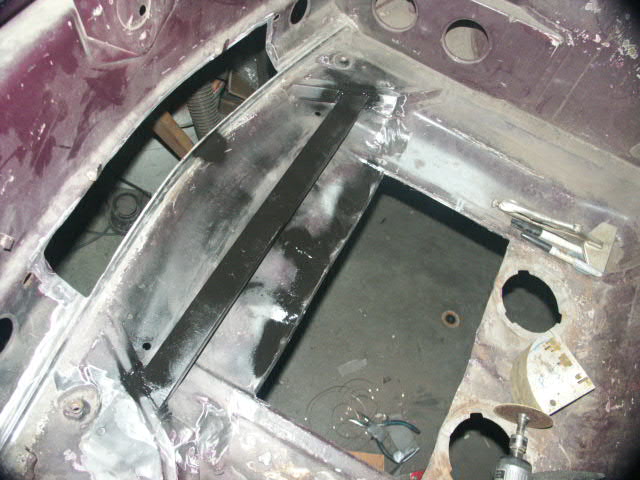
And here's one of Thomas working on his "Dark Night" project, notice the chopped windsheild. This car is going to be pretty wild!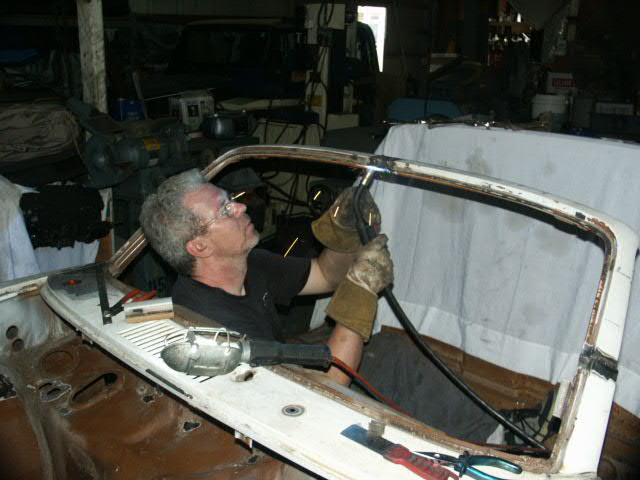
Posted by: Todd Enlund Oct 5 2008, 02:28 AM
Are you going to return the car to Aubergine?
Posted by: rick 918-S Oct 5 2008, 09:21 AM

Are you going to return the car to Aubergine?
Ya,
Posted by: SLITS Oct 5 2008, 10:10 AM
Tell that damn Kraut to wear welding goggles before he burns his eyes (Yeh, been there did that ONCE).
Nice build.
Posted by: Gint Oct 5 2008, 12:32 PM
Can't you see the man is trying to get a tan?
Posted by: dakotaewing Oct 5 2008, 05:11 PM
Is that beam solid, or rectanglar tubing/channel?
Looks great!!!
Posted by: proto31 Oct 5 2008, 07:32 PM
I told Thomas to stop staring into the light... His car is turning out really nice, I don't want to give too much away, so you'll all have to wait until he starts posting pictures.
The steel tube I used is a hollow rectangular tube. It's definetly over-kill, but it was a fun side project.
I don't think I'll be re-painting the car aubergine, right now I'm leaning toward slate grey (late sixties 911 and 912 color). We'll see, I've got a bunch of time to decide what color to paint it.
Posted by: jmill Oct 5 2008, 08:29 PM
Adding that beam is a great mod. I like it. I just straightened out my front end and that would be a slick addition. Do you have a pic of how the factory did it?
Posted by: proto31 Oct 5 2008, 10:29 PM
Here are some photos from Armando Serano's website, this is supposedly an exact replica of how the factory did it. I've seen pictures of GT front trunks with the same cover over the area where I've welded in the bar, but unfortunatly you cannot see what's underneath the cover. 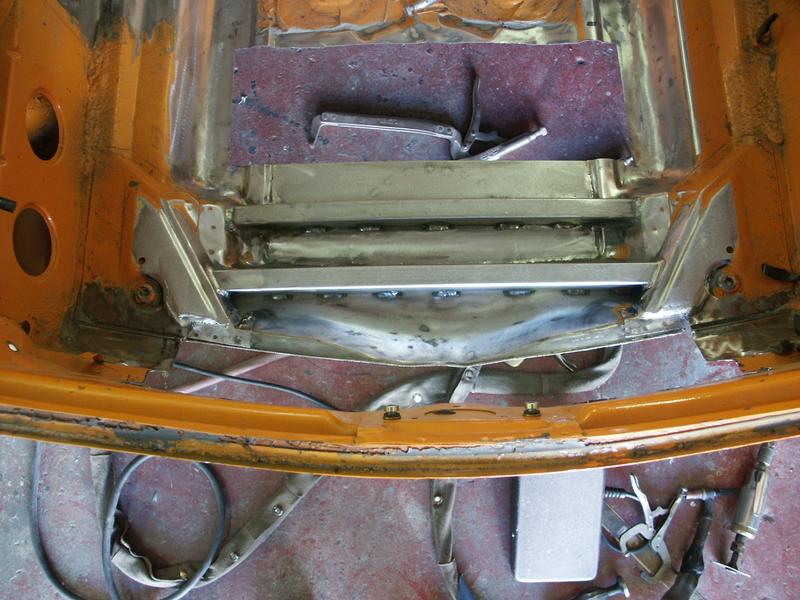
Posted by: jmill Oct 6 2008, 07:27 AM
Thanks for digging those up. Thats just what I was looking for.
Posted by: proto31 Jul 12 2009, 11:36 PM
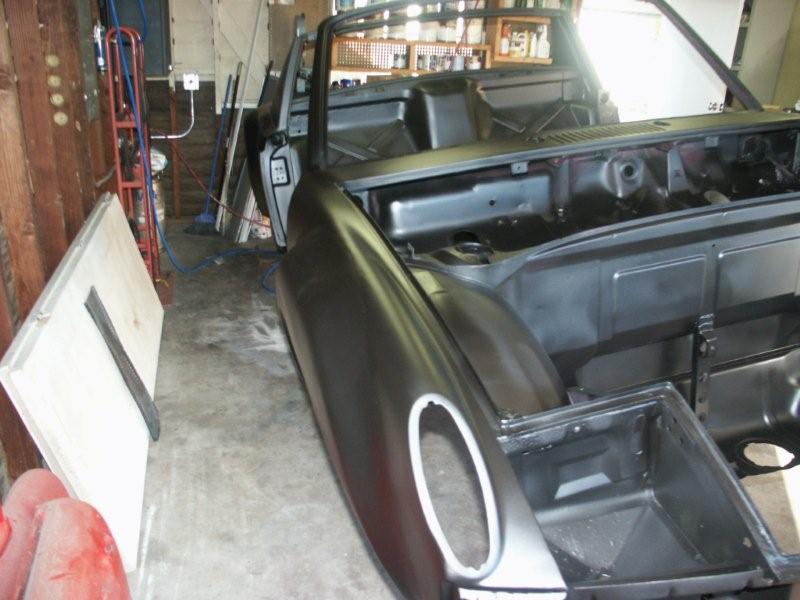
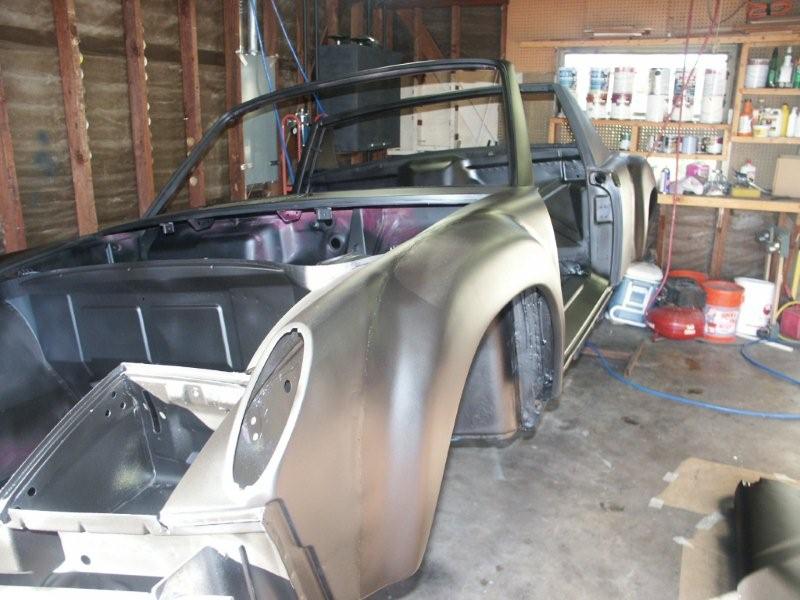
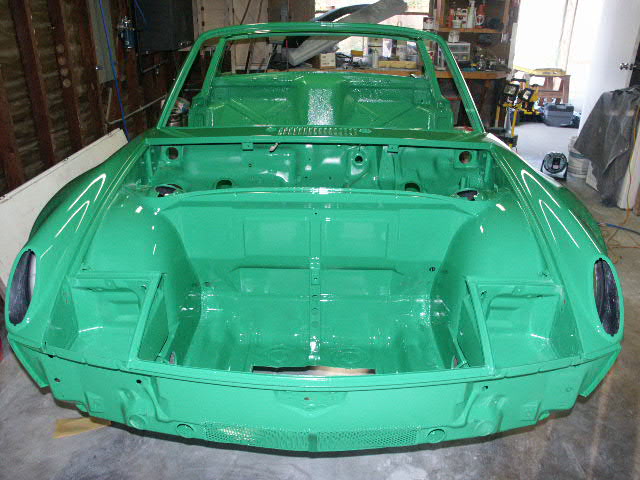
Well, I finally got around to working on my car again. The entire car is protected with a layer of sealer. I have a little bit of body work to do, but not much (mainly the areas around the flares). The color has been chosen, it will be viper green, a 1972 911 color, this car is a 1972 98 paint code color car, so viper green is a feasible color for this car. 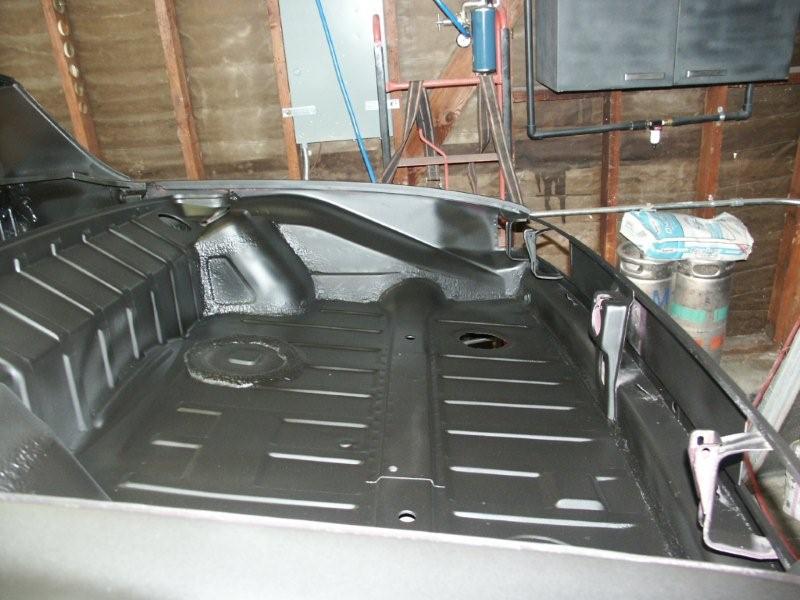

And this will be the power plant, a rebuilt 3.0 with carbs.
with some bowtailing....
Posted by: 396 Jul 13 2009, 01:39 AM
Congrats on your new project!
Posted by: RobW Jul 13 2009, 01:47 AM
Neat. Adopt me.
Posted by: nsr-jamie Jul 13 2009, 06:37 AM
Cool! Looks like its going to be an excellent project!! Nice work on the front brace too. Cheers
Posted by: proto31 Aug 6 2009, 05:25 PM
Well, I've made a lot of progress over the last 3 weeks (I'll post pictures a little later). I sprayed the underside with Wurth undercoating, Thomas' lent me the special Wurth gun for spraying this stuff on. It's water based, takes about 4 days to completely dry, but once it's dry that stuff is amazing, stronger than sh@t. I've also gone through and completed all the filler for the flares, I used Rage Extreme which worked out very well. Yesterday I sprayed on the first coat of primer, I used UPOL's high build primer, that stuff is amazing too. I could have blocked the car on the same piece of sand paper if I wanted to, UPOL does not clog up the sand paper at all. My plan is to start laying down some color next weekend.
Once all the messy work is complete I'll start assembling the 3.0. I still need to get the heads, crank, rods, rocker arms, pistons, and flywheel back from the machine shop. Does anyone happen to have a set of intake manifolds for a set of 40 webers that are bored out to mate with 78-79' 3.0 liter heads?
Posted by: 914Sixer Aug 6 2009, 05:28 PM
Sweet looking !!!!!!
Posted by: PanelBilly Aug 6 2009, 07:36 PM
Your working way too fast.
Posted by: greenie Aug 6 2009, 07:48 PM
Your working way too fast.

Looking great!
Posted by: Travis Neff Aug 7 2009, 11:25 AM
It's been a little later, where's the pics?
Posted by: proto31 Aug 7 2009, 11:31 AM
It's been a little later, where's the pics?
You guys are too greedy...
 I'll get some pics up tonight, I spent this morning spraying a second coat of primer, it turned out really good.
Posted by: jt914-6 Aug 7 2009, 02:31 PM
What cams are you going to use with the carbs????? What pistons too?????? I'm using Web cam early "S" grind #149, and Cosworth pistons on my 3.0.....
Posted by: proto31 Aug 8 2009, 12:15 AM
You my friend have taken your 3.0 liter to a whole different level. I have plans for a more radical 3.0 upgrade later but for now it will have stock CIS pistons and cams, the originals are in perfect shape, I figure it will be good for 210-220 with carbs and headers. That will be plenty for me for a a few years. The engine will be completely balanced...
Posted by: proto31 Aug 8 2009, 01:18 AM
Here's some pics:
Seam sealer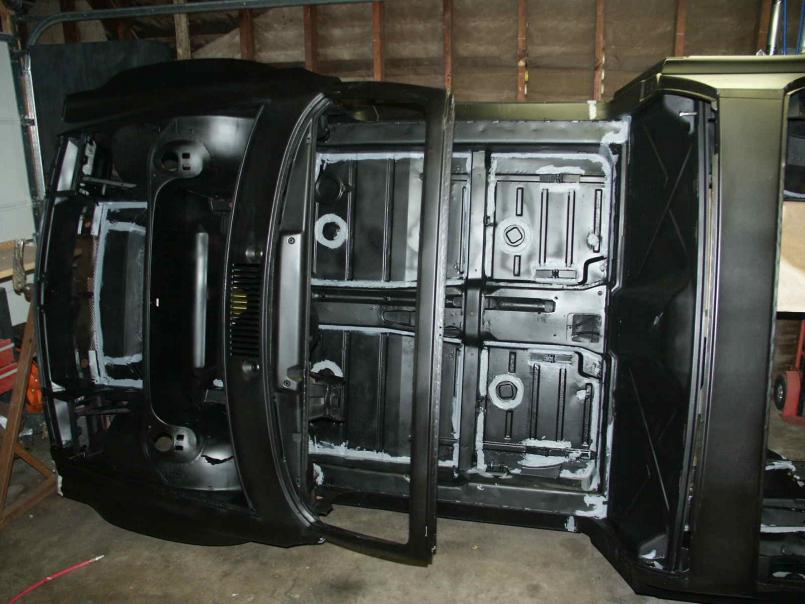
More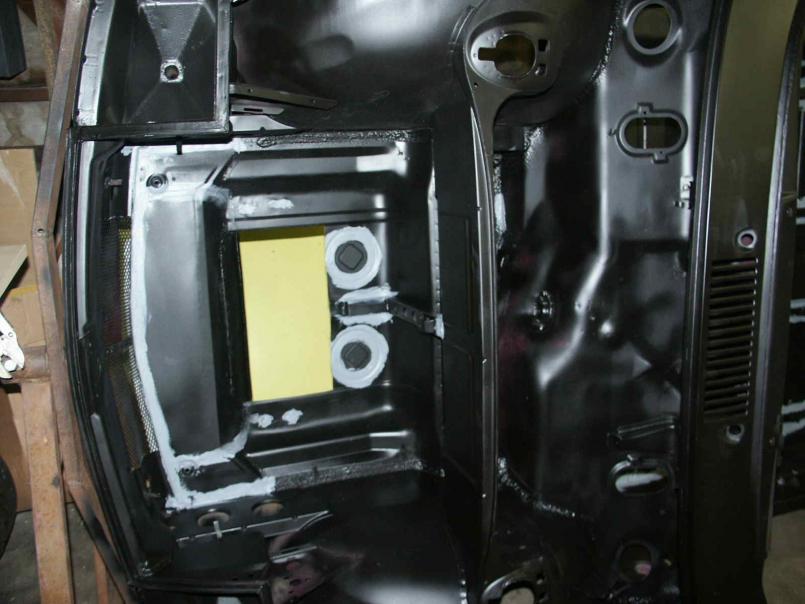
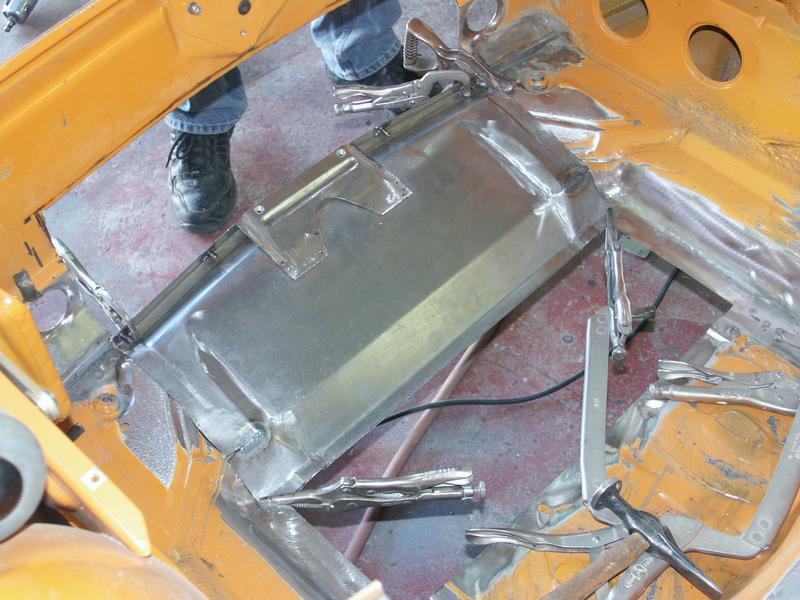
Underside of front trunk with oil cooler cut out, I added the additional flap you see to create a low pressure pocket where the hole is to suck out air for better cooling, a few GTs had this same style flap.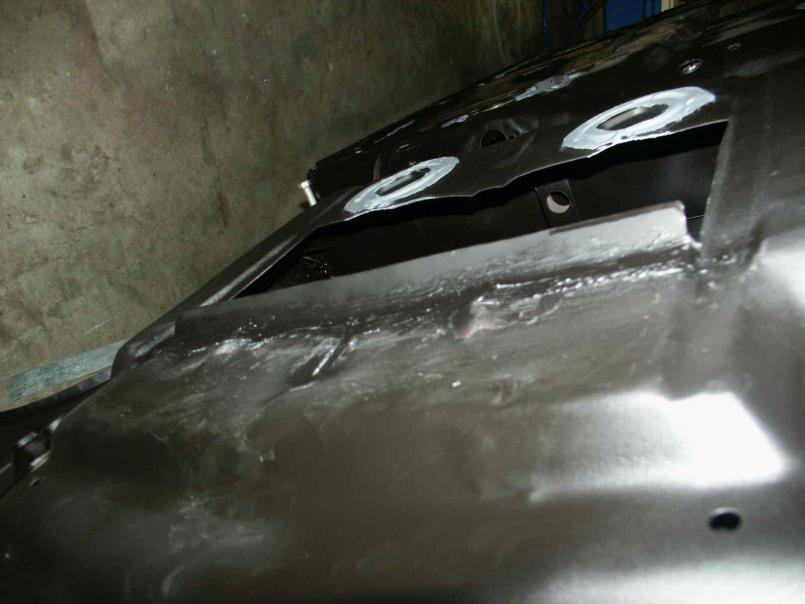
First coat of primer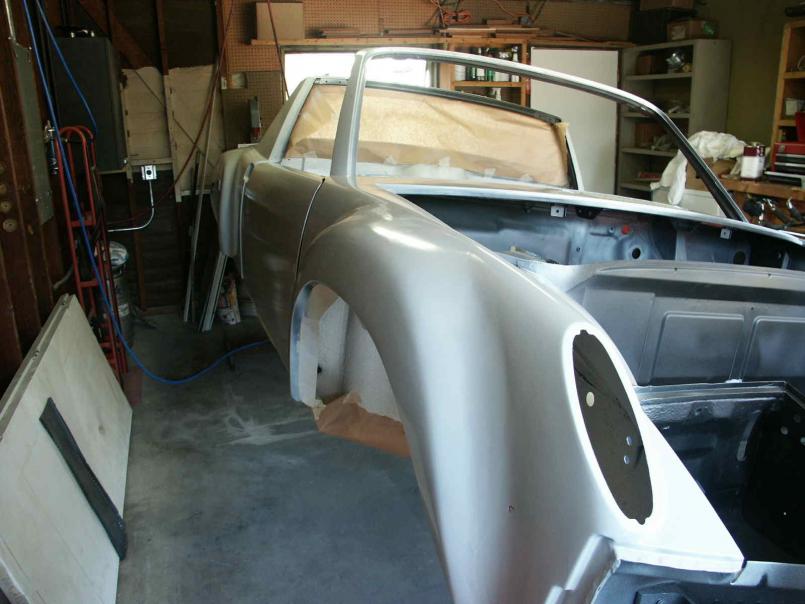
Posted by: jt914-6 Aug 8 2009, 05:29 AM
Since you are using a 3.0 SC engine with carbs, you should at least have someone like Jerry Woods to recurve the dizzy for carbs. Had mine done and it makes a difference. Also, consider using a MSD 6AL. I'm using that with the Blaster coil, and I've also got the adjustable timing control.
Posted by: proto31 Aug 23 2009, 11:14 PM
So, here are some updates. I'm extremely happy on they way everything has turned out so far.
A few pics of the Wurth undercoating:
Attached image(s)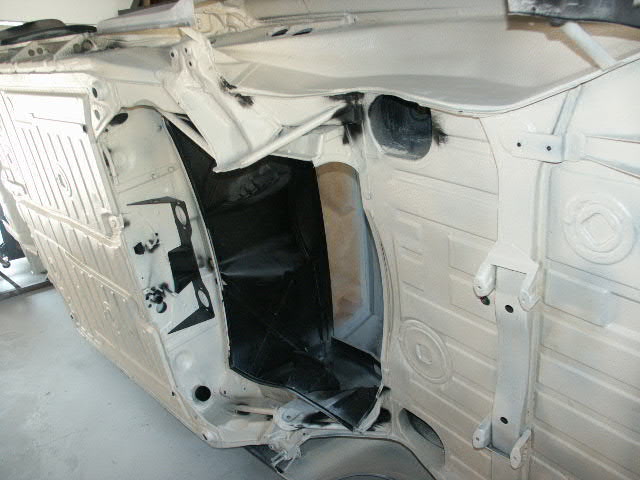
Posted by: proto31 Aug 23 2009, 11:27 PM
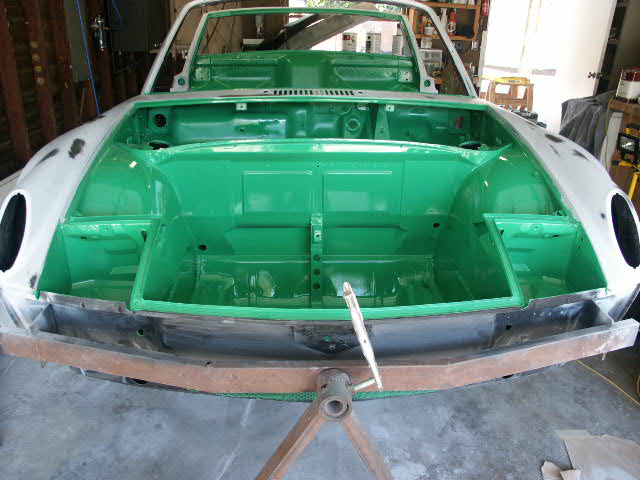
And now for the fun part. I painted the car in my garage, was able to use my 5 gal compressor with my HPLV gun. I did setup a few separators in line on the air supply to ensure no water ever made it to the gun. I used Dupont ChroMax for my base coat, it is a water based product and it seemed to work really well. The only advice I'd give anyone else doining this is to make sure you apply it on a relative warm day, it could take an hour or two for it to flash before you can apply your clear coat.
My house has a relative constant westerly wind, to take advantage of this I placed these screens under the garage door, opened rear door and installed a fan to help pull air through the garage.
A pic of the car after the trunks, passenger compartment, and engine bay were painted: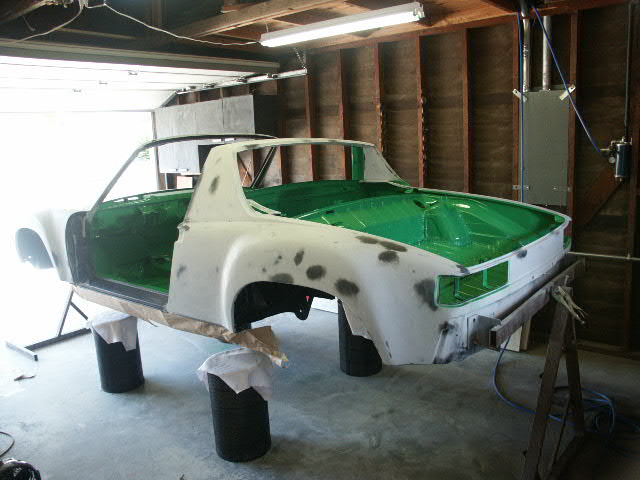
Posted by: proto31 Aug 23 2009, 11:37 PM
A few more: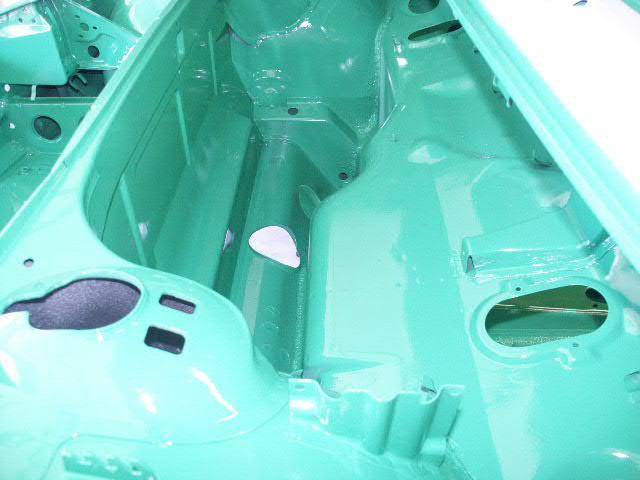
Here's Thomas helping out with the taping- Thomas spent about 16 hours this weekend helping me out, I figured I would be able to get it done on my own, absolutely no way. Not the best pic...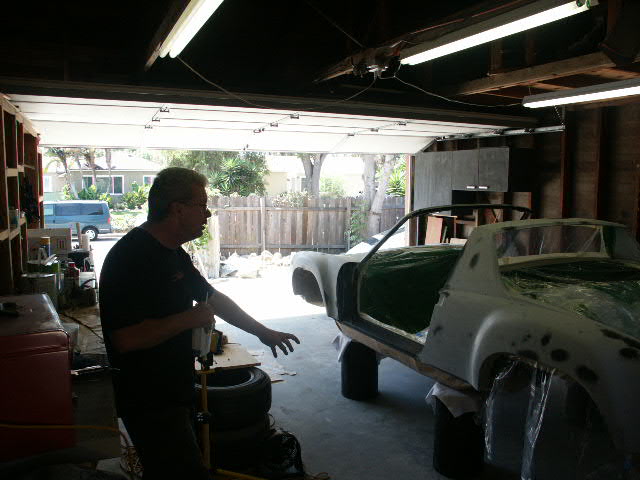
Posted by: Heeltoe914 Aug 23 2009, 11:40 PM
Very nice job Love the fact that your doing it all yourself. Go tiger.
Posted by: proto31 Aug 23 2009, 11:48 PM
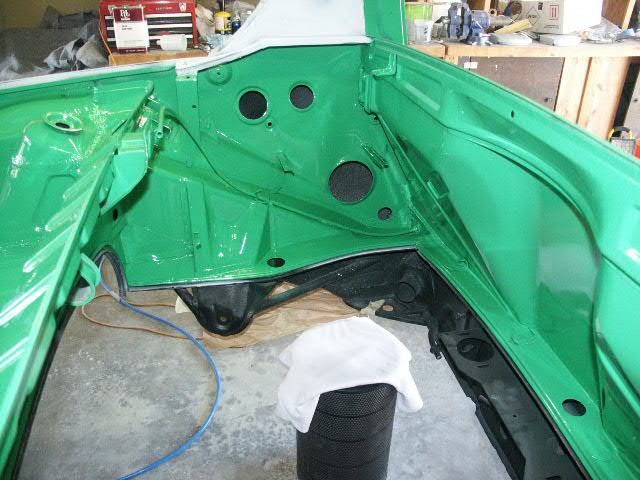
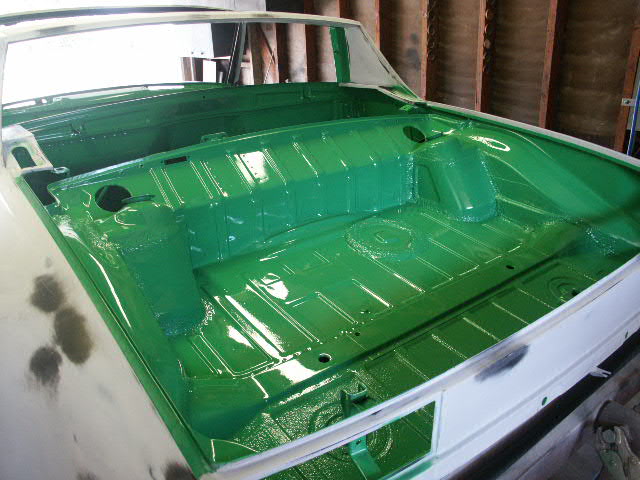
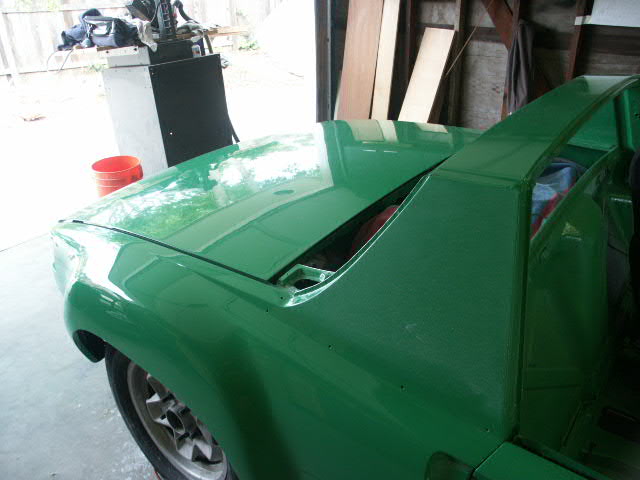
And finally the car (not the doors and hoods) are finished. The color is Viper Green, it's the same color used on the new 911 GT3 RS, the photos hardly do it justice (lighting really makes a difference as you can tell from the photos). I plan on color sanding the car once I've finished re-assembling the car, I figure that I will likely scratch it at some point during re-assembly. 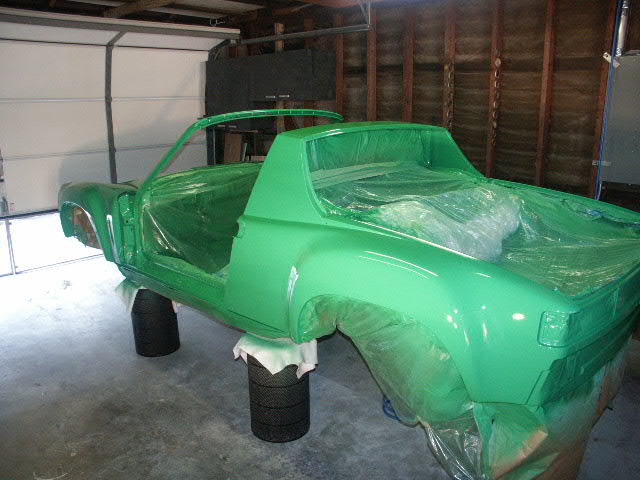

Posted by: Travis Neff Aug 24 2009, 01:23 AM

That looks great!
Posted by: greenie Aug 24 2009, 10:33 AM
You are doing fantastic work! Great color!
I'm thinking of painting myself also in the garage, are you satisfied with the paint finish?
Was dust a big problem for you? I'm concerned about wasting a lot of expensive product.
Keep at it!
Posted by: proto31 Aug 24 2009, 06:37 PM
You are doing fantastic work! Great color!
I'm thinking of painting myself also in the garage, are you satisfied with the paint finish?
Was dust a big problem for you? I'm concerned about wasting a lot of expensive product.
Keep at it!
I'm completely satisfied with the paint finish, it turned out better than I ever expected. Dust was a bit of a problem but not a big deal. I watered down the driveway in front of the garage where the circulation was coming from, blew the entire garage out with a blower several times (days before hand) and just tried to keep things clean. There are a few lint pieces that fell into the paint- no big deal and easily sanded out. The culprit I believe were the stupid rags I used to place over the stands I used...

I think as long as you spend the time prepping the car and cleaning everything really well, you should be ok. I spent about 40-50 hours installing the flares, about 80-90 hours on body work (3 coats of primer, sealer and filler where needed) and about 22 hours painting (still need to paint the doors and hoods). I could have gone a bit faster but I was in no real hurry.
Posted by: proto31 Sep 11 2009, 12:19 AM
It's been a few weeks, I've got some updates to post. Everything is going together quite smoothly.
Here's a pic of the NOS wiring harness that I've installed: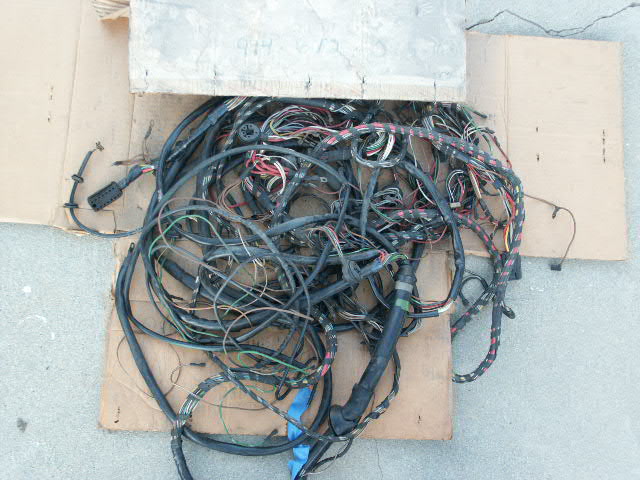
NOS rear tail light assembly: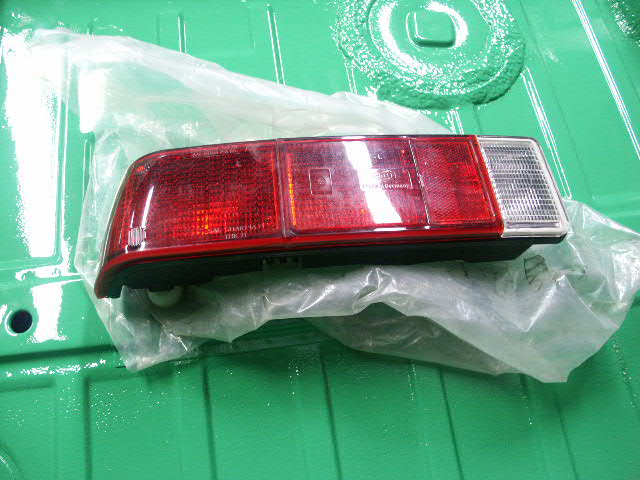
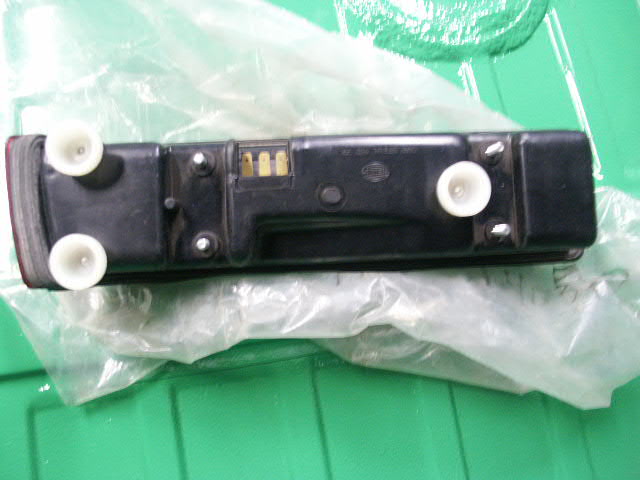
Posted by: proto31 Sep 11 2009, 12:27 AM
another: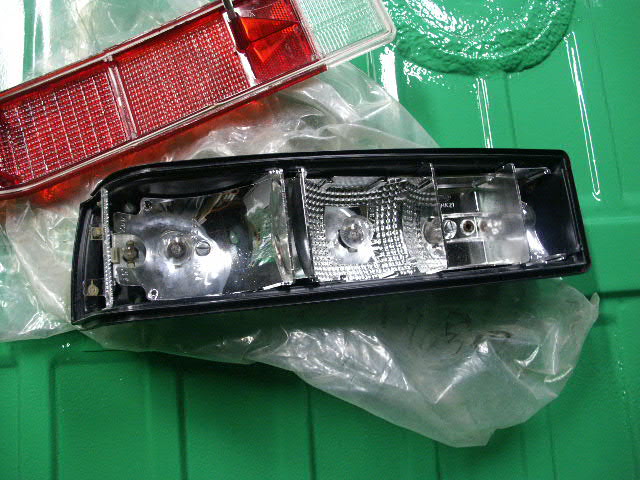
Wiring harness installed: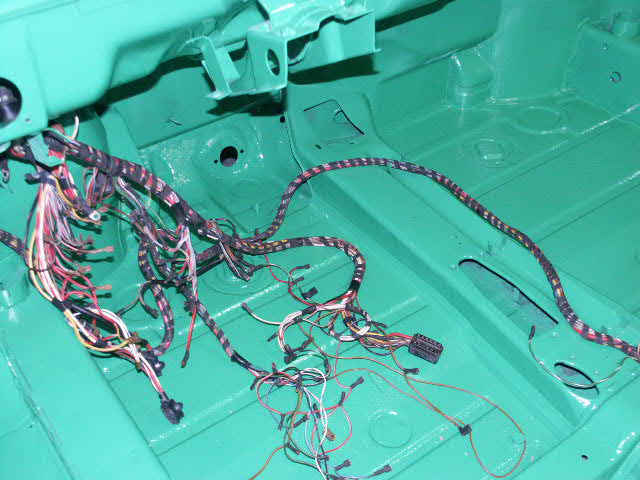
Rebuilt pedal cluster- powder coated, zinc plates, brass bushings... 914-6 hand throttle: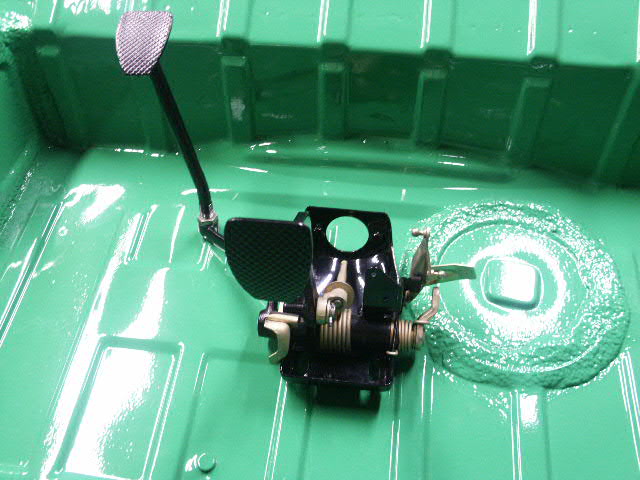
NOS seat track: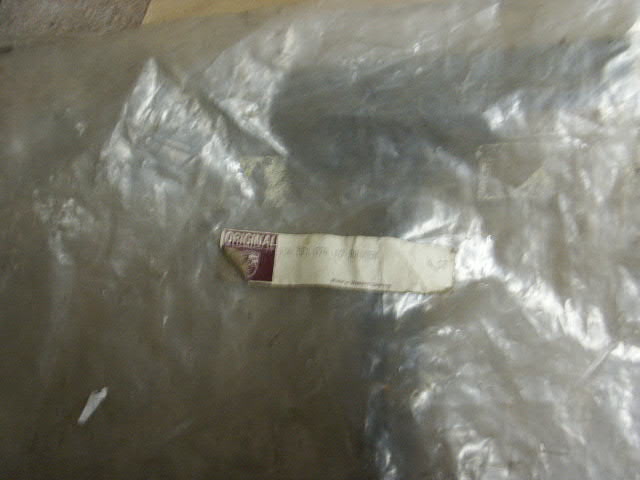
Posted by: proto31 Sep 11 2009, 12:35 AM
another: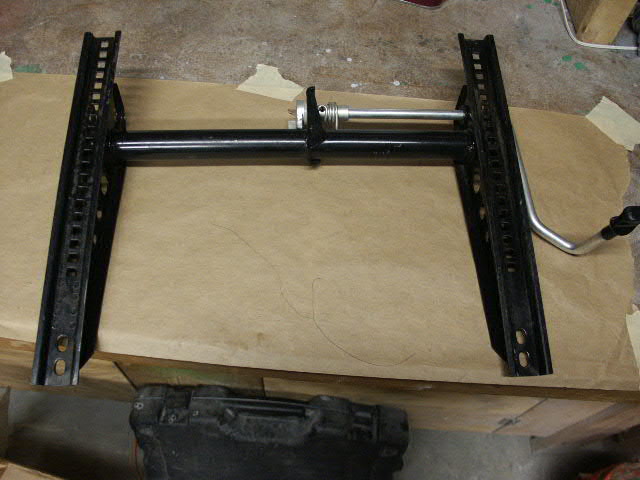
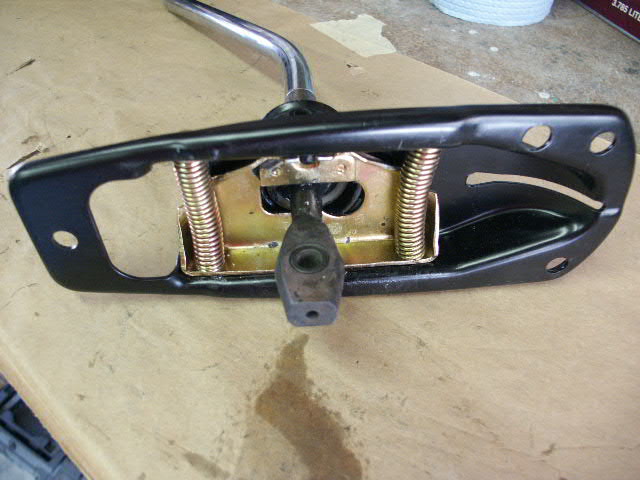
Rebuilding the shift lever: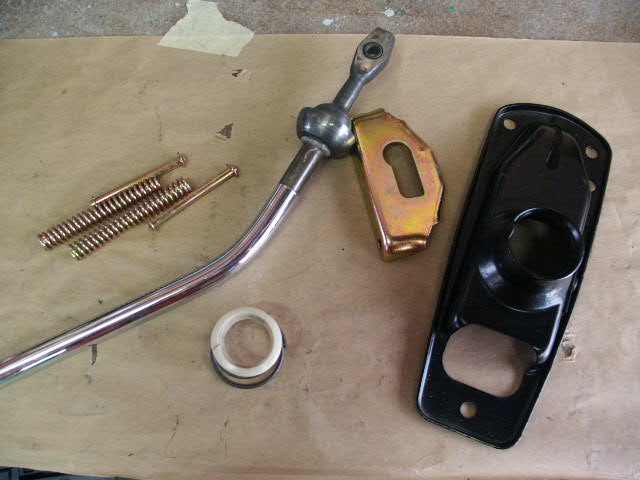
Installing the springs is a real PIA 
Posted by: proto31 Sep 11 2009, 12:41 AM
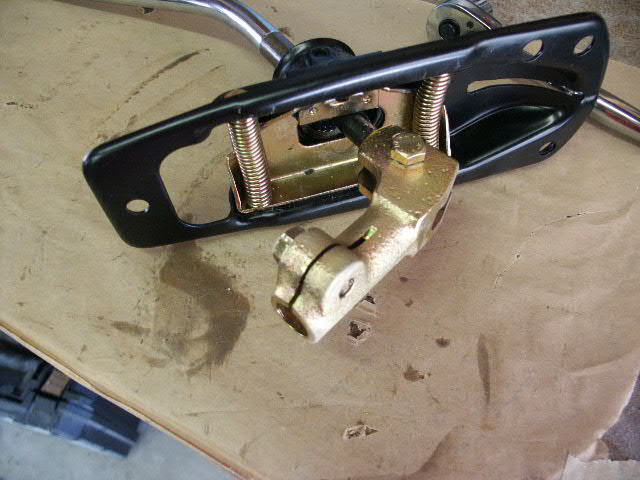
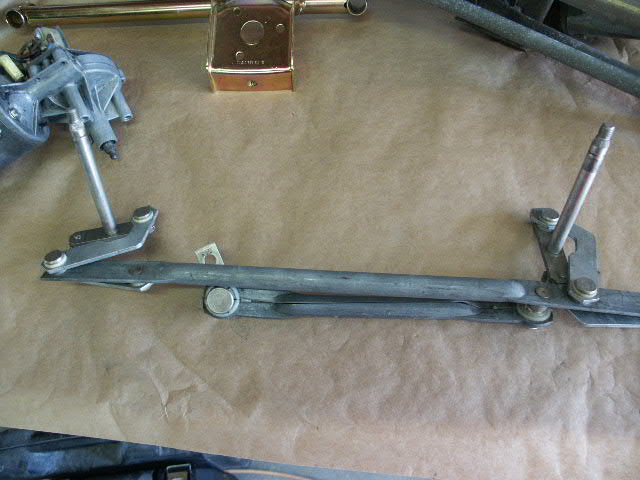
Rebuilding the windshield wiper assembly, zinc plated the mounting bracket, cleaned everything else up and re-greased everything: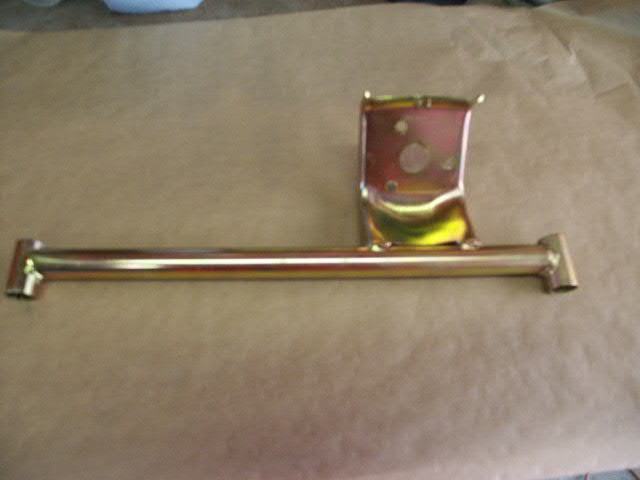
Finished: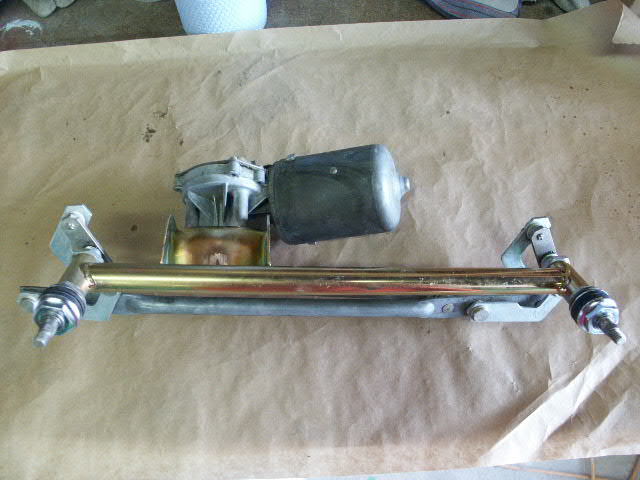
Posted by: rick 918-S Sep 11 2009, 07:41 AM
That is going to be one fine car. Nice work.
Posted by: Rod Sep 11 2009, 02:21 PM
Fabulous build. Looking forward to see how you progress, I saw a GT3 the other day in Viper Green and it stopped me in my tracks! Very cool colour, what wheels and interior colour are you going for?
Posted by: proto31 Sep 11 2009, 04:05 PM
I've got a set of 7 and 8 fuchs that I'll be using, I'm still debating on the finish. I just had an old cookie cutter powder coated in mat black as a test, it turned out really nice. I might have the fuchs pc'd in mat black and then do a viper green pin stripe along the lip, not sure. Any suggestions would be greatly appreciated!
The interior will be pretty stock, black of course. I do have a set of Scheel seats that I will be installing. Also, I have a WWII aircraft elapsed time clock that I'll be installing in the dash, sort of like the old rally clocks. I'll probably go with a 911 combo gauge and then fab a holder for an individual fuel gauge that will be placed where the radio would normally sit, similar to the GTs.
Posted by: AgPete139 Oct 17 2009, 11:10 AM
Looks good, Dan! Man, you are moving quickly! I like the choice of paint, too. Any pics of the 3.0 yet?
Peter
Posted by: PanelBilly Oct 17 2009, 11:40 AM
Now I told you this before and you're not paying attention. Your working way too fast. This project should be taking you at least 10 years and at this rate you'll be finishing the car in only three! I suggest you resand the body to the filler coat again and repaint it. Doing each step only once is not enough.
Posted by: McMark Oct 17 2009, 11:09 PM
Amazing job.
I would do charcoal/gray on the wheels before I did black, if it were my car.
Posted by: pete-stevers Oct 19 2009, 12:32 AM
you could do something different for the wheels, like an accent color or an complete opposite color ...if you are daring,
Posted by: Gint Oct 19 2009, 08:02 AM
Just swipe the wheels off Thomas's car. They should be a pretty close match!  Looks awesome.
Posted by: proto31 Oct 22 2009, 12:14 PM
Swiping Thomas' wheels would be the easiest route, not a bad idea...
I like the idea of the dark gray, do you guys have any pictures of any green cars with gray fuchs? I've never been the biggest fan of painting a set of fuchs all the same color without having the lip and spokes anodized clear, but I think it's growing on me. All the trim on this car will be powder coated in matte black, I really like the contrast between the black and green. Any pics would be helpful.
Also, I started assembly of the 3.0 last night, I'll post some pics a bit later. Other updates: completed new brake hard line install in the rear half of the car, received Cohline oil line from Rebel Racing (this stuff is REALLY nice, same as factory original lines, and reasonably priced), finished the hard oil lines that run to the front oil cooler, installed the dash frame with new vinyl and hooked up the fresh air box, also bought a bunch of new parts and found some really cool NOS parts at the Pomona swap meet last weekend.
Dan
Posted by: proto31 Oct 22 2009, 11:08 PM
Here's some pics of the beginning of the engine build:
Parts and assembled crank-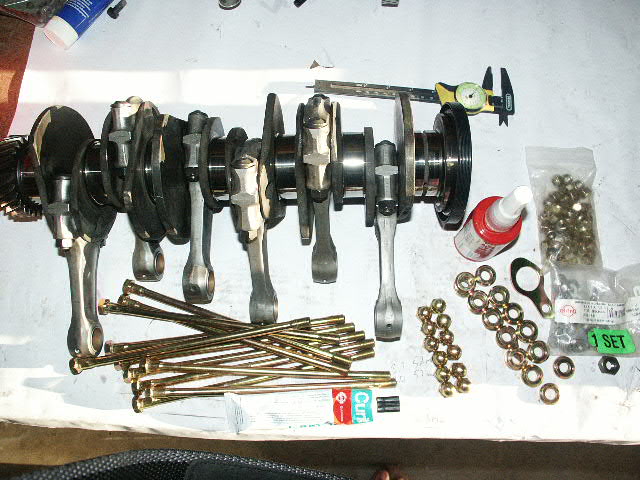
Case-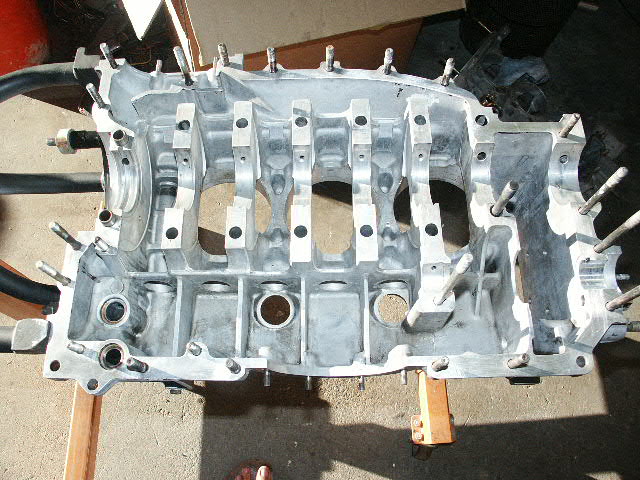

Posted by: proto31 Oct 22 2009, 11:10 PM
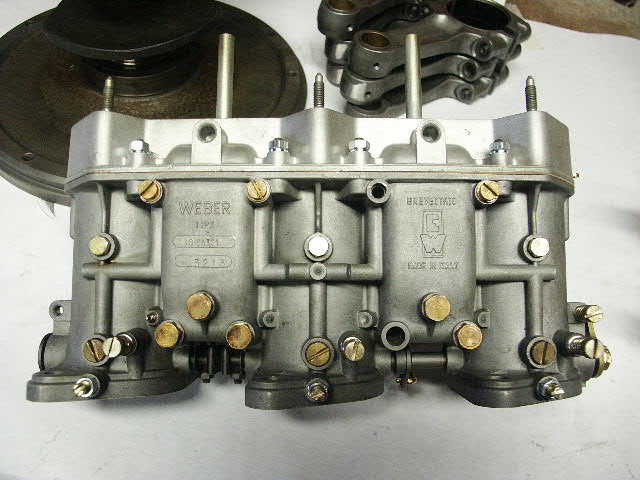
The carbs, completely rebuilt, ultrasonically cleaned-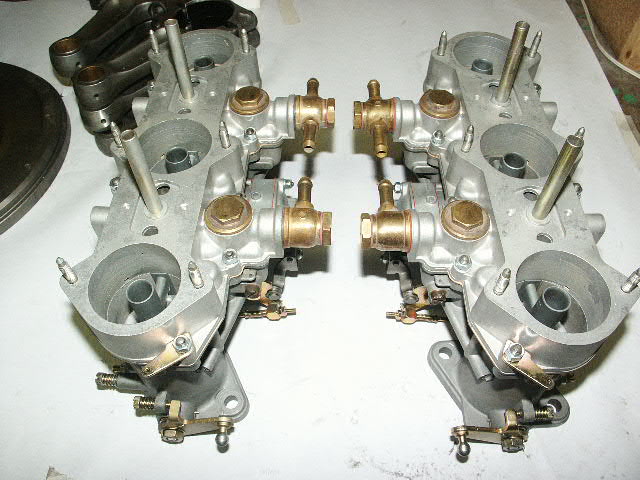
Posted by: proto31 Oct 22 2009, 11:15 PM
Rear brake hard lines, with T instead of proportioning valve-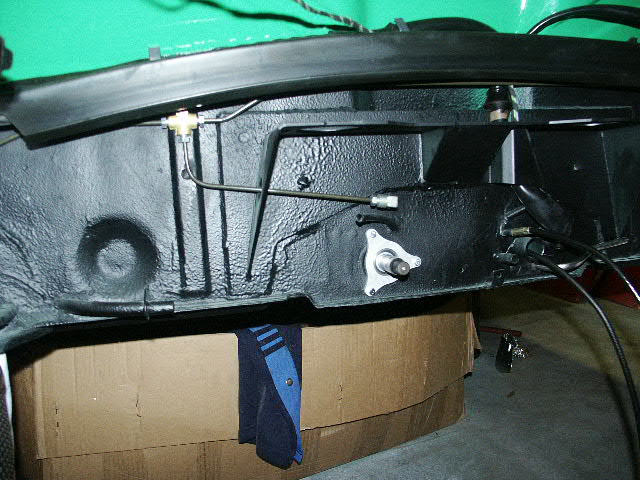
Upper dash frame- 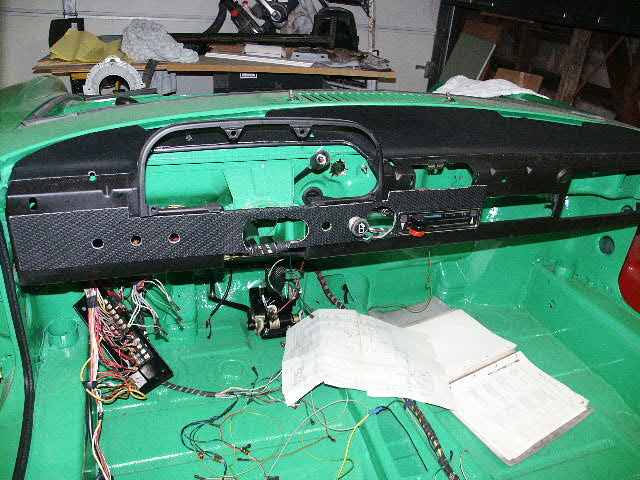
Front oil cooler test fitting-
Attached image(s)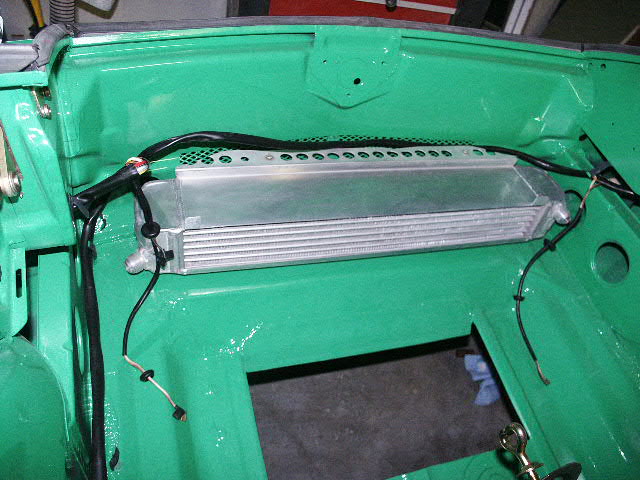
Posted by: proto31 Oct 22 2009, 11:18 PM
Headlight installation-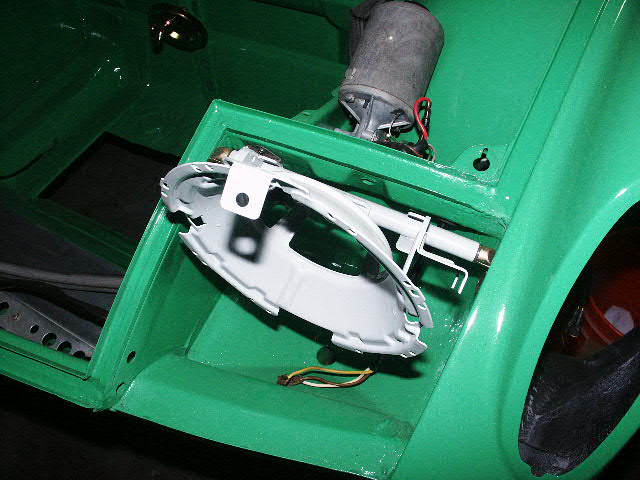
Rear sway bar (stock)-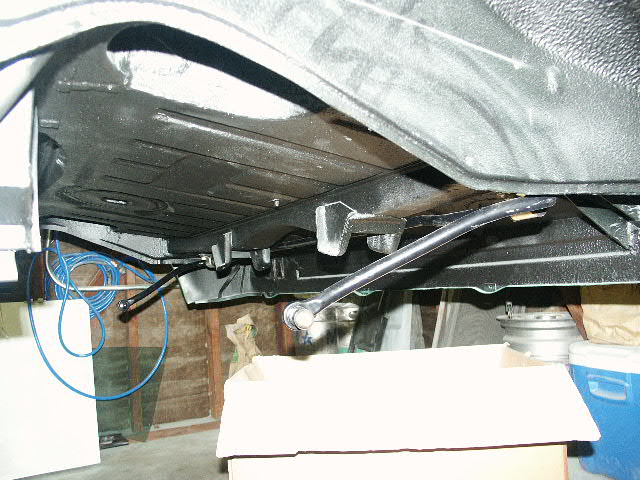
Posted by: proto31 Oct 22 2009, 11:28 PM
I got my oil line from Rebel Racing, they are original wrapped Cohline, you give them a rough estimate of the total footage and the type of fittings needed, they send you the complete line with fittings, you cut and fit everything how you like and send them back marked, they crimp all the fitting and send it back to you. Custom oil lines that will last forever and look factory, very reasonably priced.-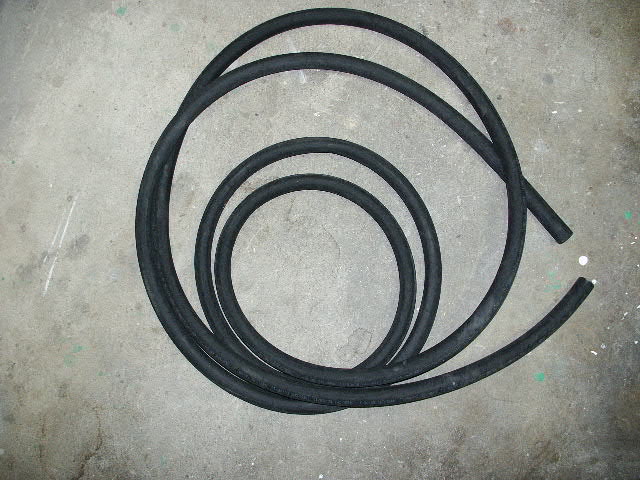
Close up-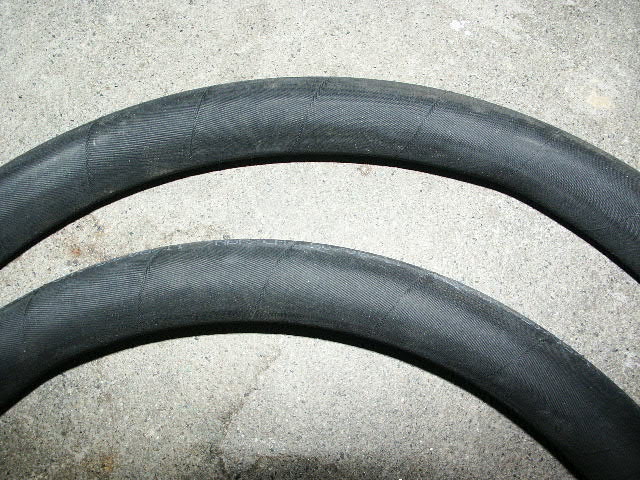
Fittings-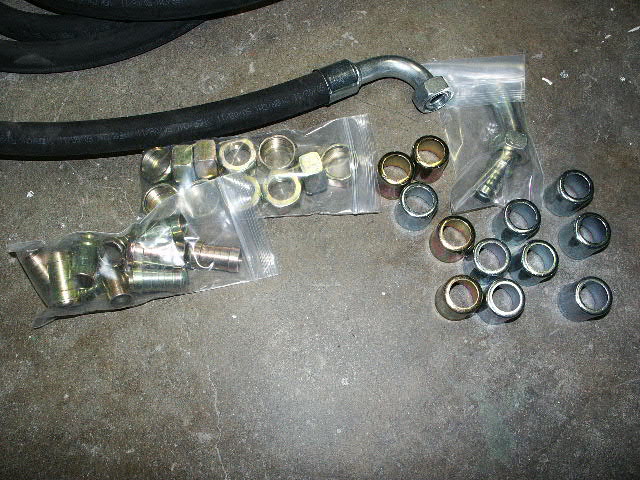
Posted by: proto31 Oct 22 2009, 11:35 PM
Here's some previews of the front and rear suspension, real 935 front struts, coil overs with needle bearings (Rebel Racing again)-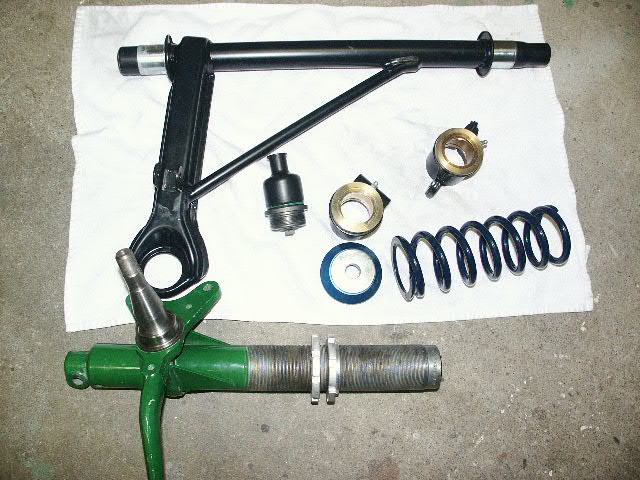
Close up of upper bearing-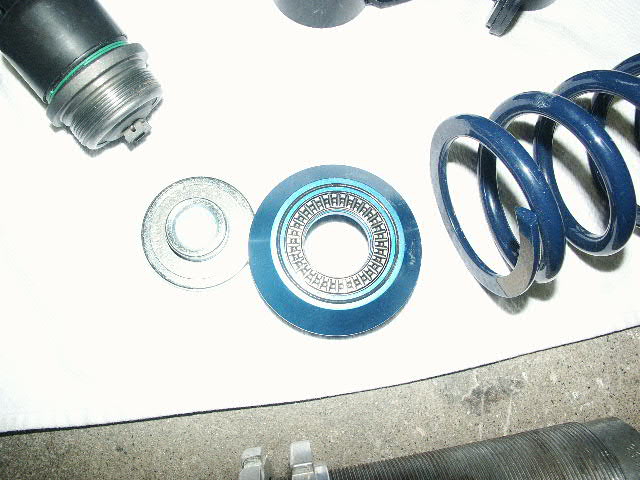
Rear coil overs-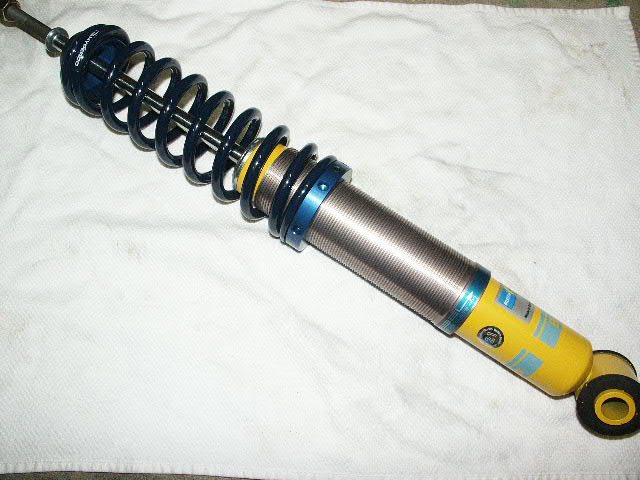
Posted by: proto31 Oct 22 2009, 11:39 PM
Front rotor (picture of just one)-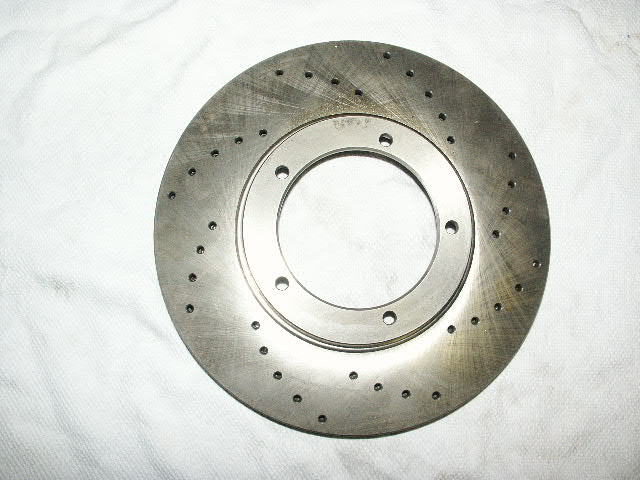
Misc. Cool find at the Pamona swap meet last weekend, NOS front trunk pull with key, I've never seen a new one of these before-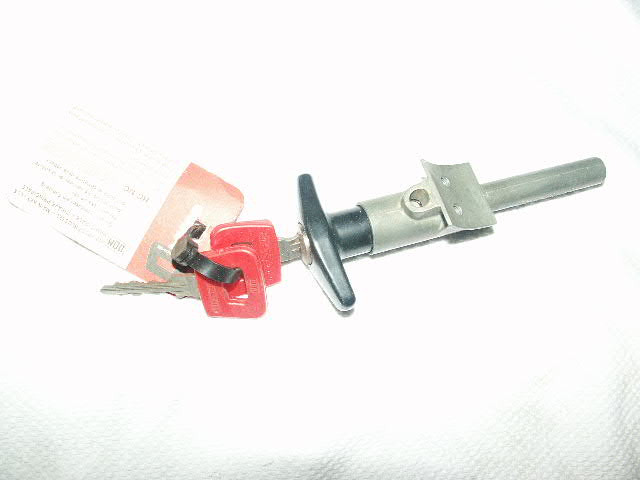
Posted by: cwpeden Oct 23 2009, 03:11 AM
It may have already been mentioned, but I think your rear sway bar is upside down. Had mine the same and it hit the cross member right where it takes the bend down.
Posted by: bcheney Oct 23 2009, 05:50 AM
You are doing a VERY nice job with all your work. I am converting my 75 to a six and fully appreciate the time and dedication that it takes to jump into a project like this. You will have one helluva a ride! Keep the pics coming!!
Posted by: Travis Neff Nov 26 2009, 10:40 PM
Bada-bump!
Posted by: Dr Evil Nov 26 2009, 10:47 PM
Thanks for the oil hose info. Great build 
Posted by: ajserrano Jan 16 2010, 12:10 PM
Here are some photos from Armando Serano's website, this is supposedly an exact replica of how the factory did it. I've seen pictures of GT front trunks with the same cover over the area where I've welded in the bar, but unfortunatly you cannot see what's underneath the cover.
...precisely the idea...
CLARIFICATION...
The Porsche factory never implemented this front-end modification on any 914-6 GT and I can't take credit for it either. This modification was initially fabricated and implemented in a very early IMSA 914-6 by the very talented Don Araki. I was told Araki built a winning GTU 914-6 race car for Wayne Baker many years ago. To see additional photos of the 914-6 to GT conversion that Mr. Don Araki created along with the owner, Dr. Bob Gagnon, please follow these links;
http://www.pbase.com/9146gt/other_porsche_9146gt_race_cars_sn9140430599_dr_bob_gagnon
http://www.pbase.com/9146gt/image/22288815
http://www.pbase.com/9146gt/image/22288814
We kicked-it up a notch...
Because this was NOT a Porsche factory GT modification, we simply decided to cover the modification work in a way that could not be seen and later scrutinized as a "non-factory 914-6 GT" mod.
Frankly, it was a brilliant modification and IMHO, certainly worth the effort when considering its benefits while cutting out those two large gaping holes at the front trunk of the 914-6 to accomodate the large BEHR front oil-cooler. To see our entire fabrication sequence, follow the link below;
http://www.pbase.com/9146gt/the9146gt_front_oil_cooler_install_reinforcements
Posted by: geniusanthony Jan 17 2010, 12:09 AM
I just went through your thread and I am impressed with the job you've done. Makes me want to take mine apart and redo everything.
That front end support looks great and def. beats just putting a fiberglass cover on the floor next to the giant hole for a cooler.
Posted by: proto31 Apr 5 2010, 04:05 PM
So, a lot of progress has been made since my last post. I got a bit lazy posting stuff, I enjoy reading other peoples posts more than creating my own . Thomas, Alberto and I got the engine in a few months ago, all the suspension is on, electrical is working great and the paint is complete! Andy stopped by this Saturday and helped (did all the work) buff, polish and pink out the paint after I had color sanded it. It looks AMAZING!!! Thanks Andy!
Here some pics, in no particular order: 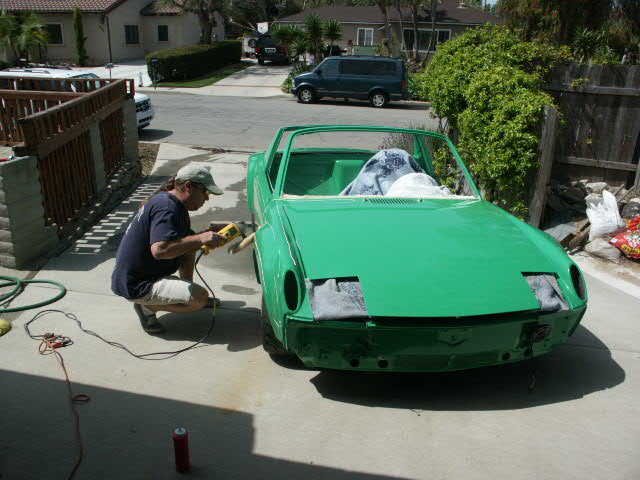
Color Sanded: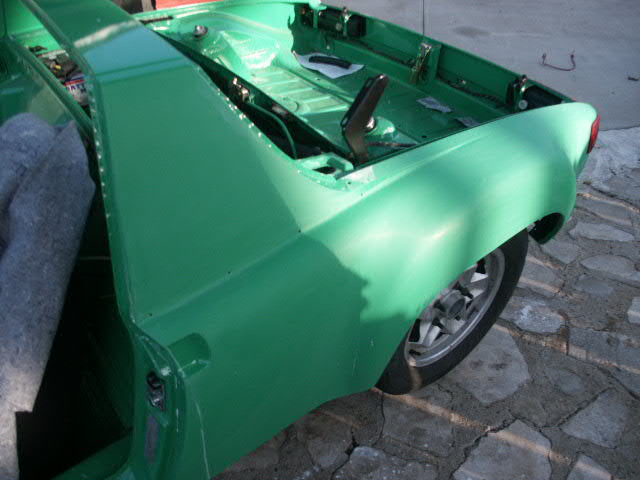
Posted by: proto31 Apr 5 2010, 04:12 PM
Engine installed: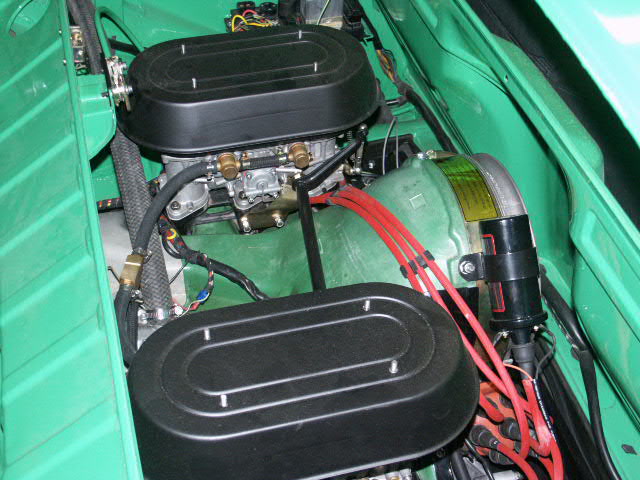
Front S Calipers, Thomas and I each had a set polished and re-anodized, new SS pistons and SS cross-over tubes: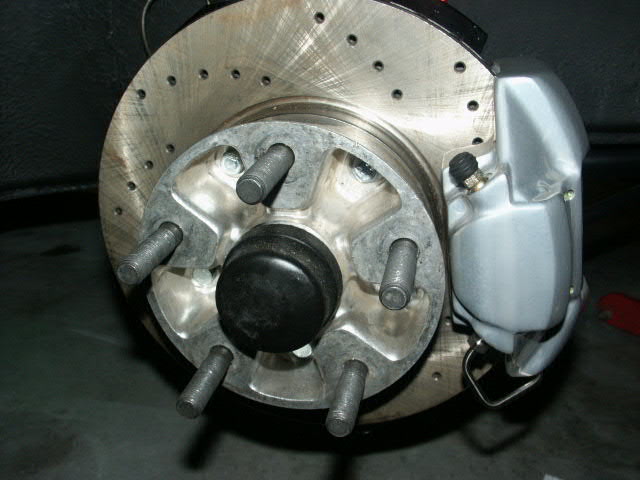
Shot with Thomas created sway bar arm (red anodized):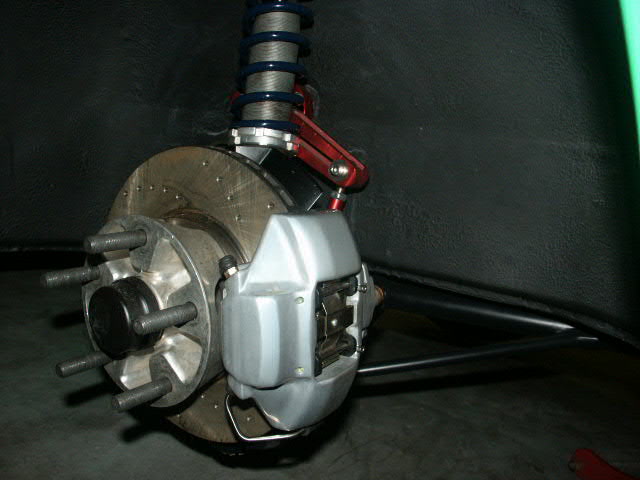
Rebuilt CV drive shafts: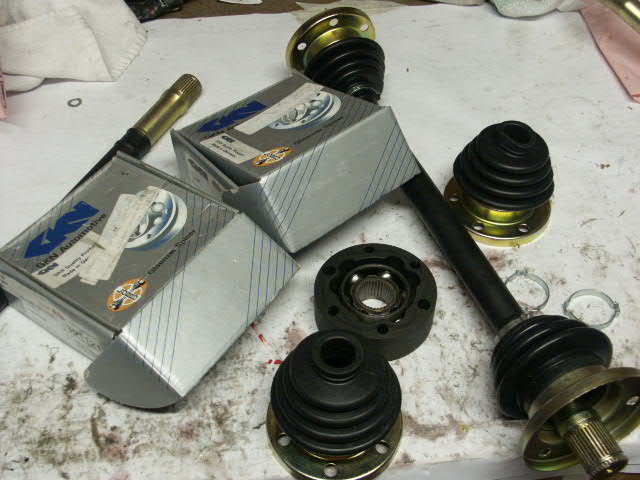
Posted by: proto31 Apr 5 2010, 04:28 PM
Thomas' sway bar arms, pre-annodizing. These mount onto a hollow 23mm Tarret bar:
Underside, new 19 mm MC, rebuilt steering rack and aluminum cross member: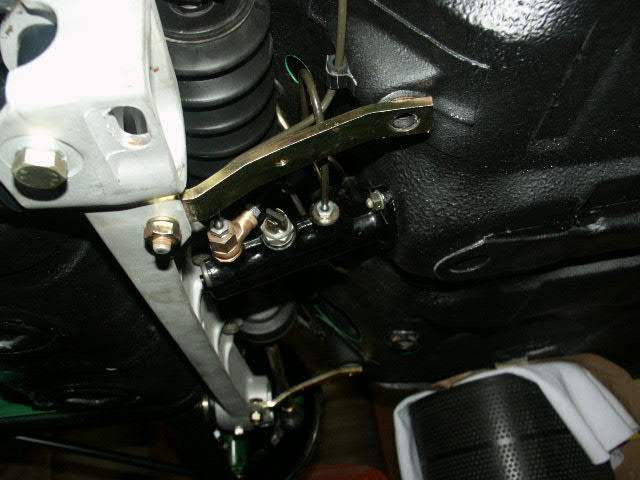
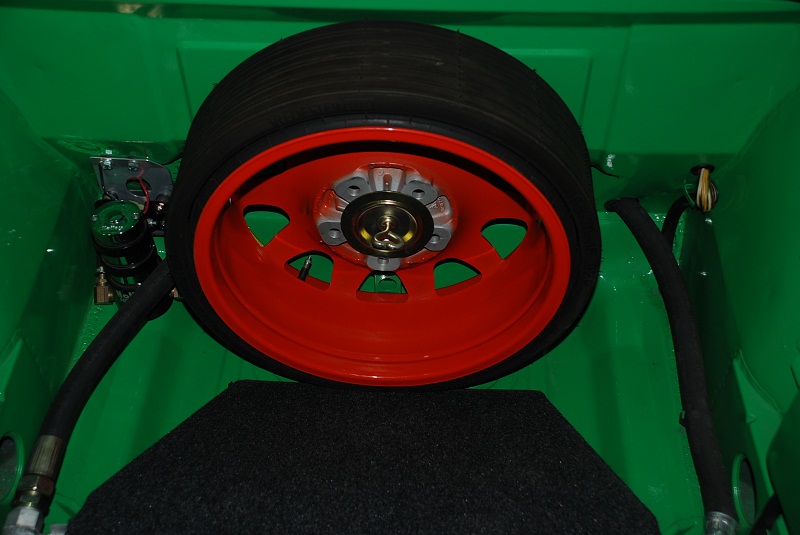
I'll be running 15 x 8 inch Fuchs all around, I had these stripped, then put them on a lathe to polish them and then had them anodized with a clear finish in a way that replicates the RSR finish pretty closely. I will paint the centers, you'll have to wait until the 25th to see what color. My plan is to drive this thing up to Ron's swap meet on the 25. Here's a pic after the anodizing: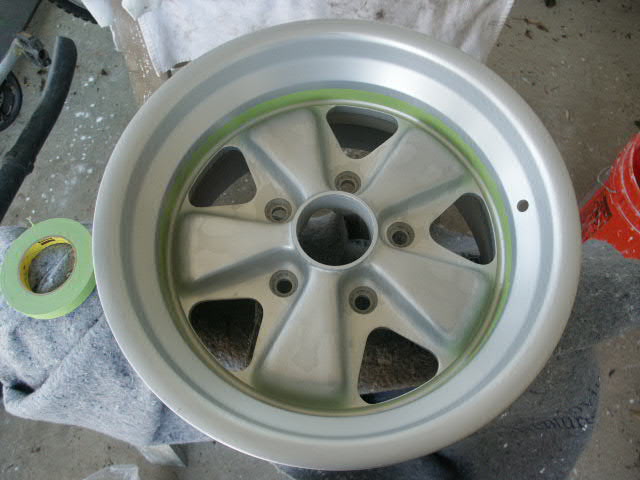
Posted by: AgPete139 Nov 9 2010, 03:20 PM
Any updates?
Posted by: proto31 Feb 27 2011, 11:51 PM
Any updates?
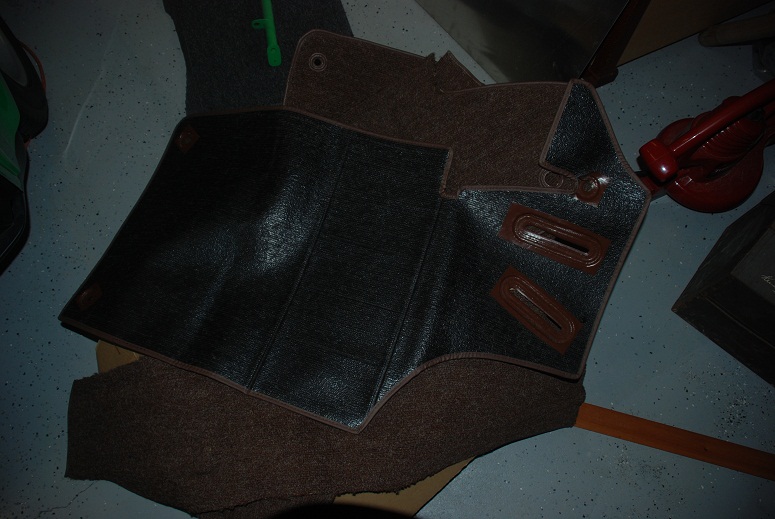
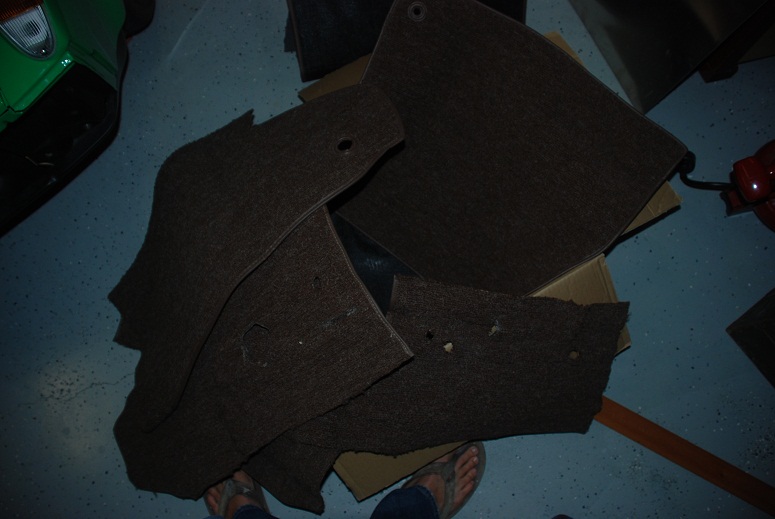
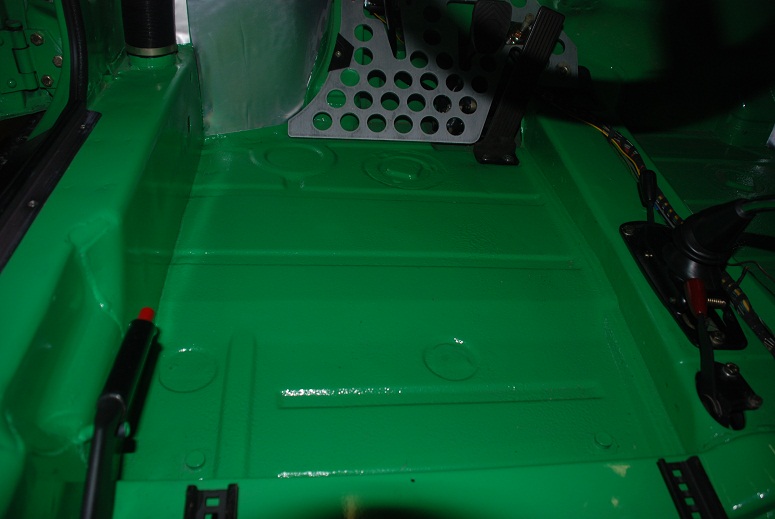
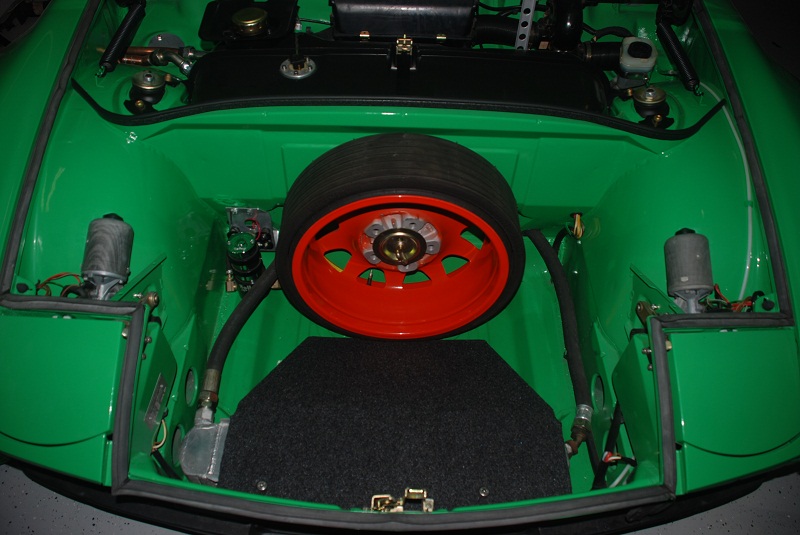
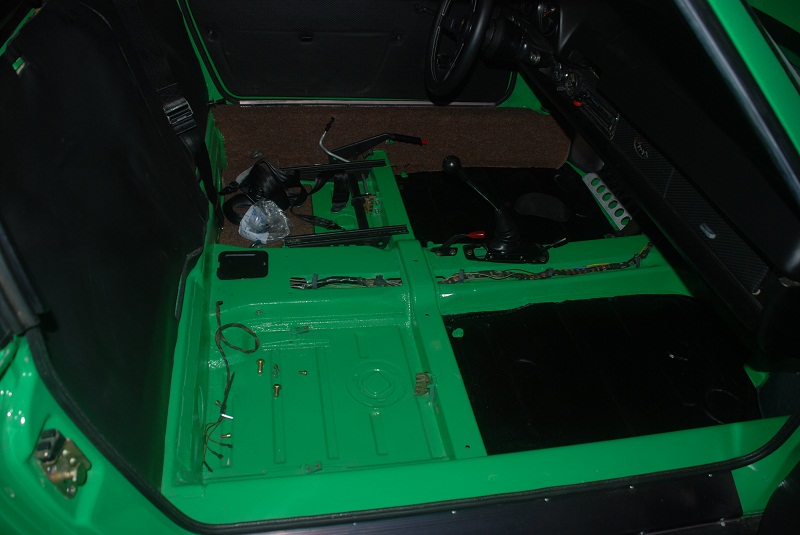
A few updates, I've already put 2,400 miles on the car, it's a blast to drive. I recently picked up a factory NOS brown carpet set that I will be installing in the car, the original carpet was brown, I'm going to change the door panels and re-do the seats. I also decided to put some of the factory style sound deadening tar on the floor boards, really cool stuff. You cut out a template, and form it into place with a heat gun. Here's some pics:
Attached image(s)
Posted by: proto31 Feb 27 2011, 11:54 PM
The floorboards: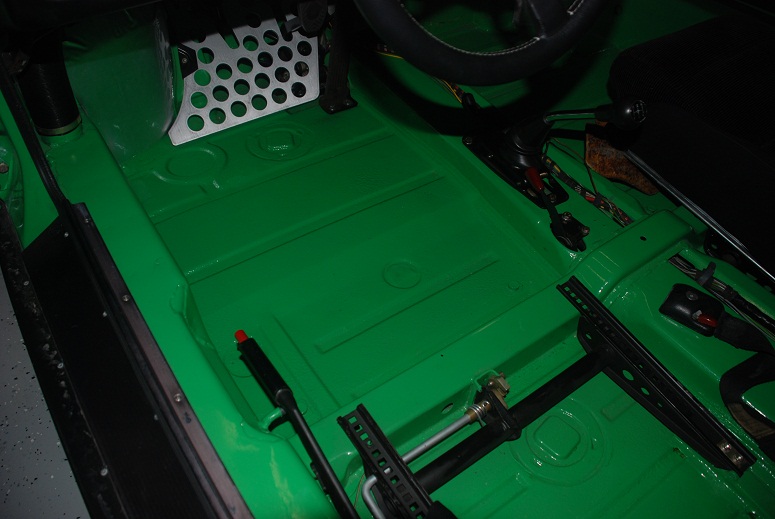

Posted by: proto31 Feb 27 2011, 11:56 PM
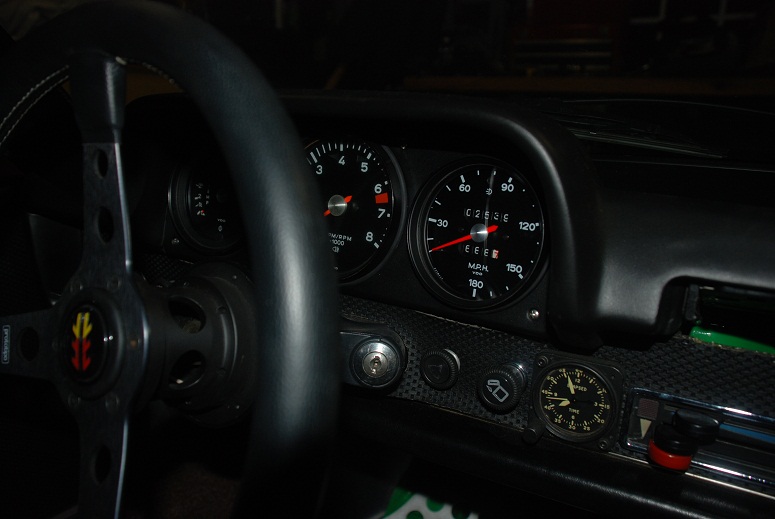
wheels and gauges...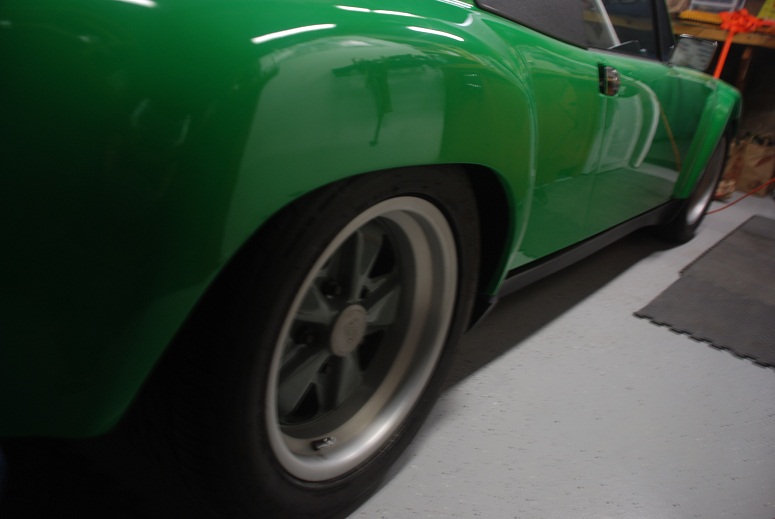
Posted by: AZ914 Feb 28 2011, 07:53 AM


Posted by: Root_Werks Feb 28 2011, 12:04 PM
Man that looks great!
Posted by: proto31 Feb 28 2011, 04:53 PM
Thanks! It's been a lot of fun so far. Any ideas on door panel and seat colors/fabric? I've got that NOS brown carpet set and am going to have the door panels and Scheel seats re-upholstered. Before the brown, I was going to do the Scheel seats in black german vinyl sides with houndstooth centers. Now I need to do the door panels brown and think I'll probably have to go brown with the seats as well, any thoughts? Anyone have any pics of nice brown interiors?
Thanks,
Dan
Posted by: Ferg Feb 28 2011, 05:23 PM
I vote for brown/brown hounds tooth, or brown with a tartan center.
Check out www.autobahninteriors.com for a bunch of pics...
Ferg
Posted by: MDG Feb 28 2011, 05:47 PM
I vote for brown/brown hounds tooth
Ferg
+1
Would look amazing with the green and give it a major period feel. I believe T.C. is doing the black houndstooth in his and the seats he had done are beautiful.
Posted by: proto31 Mar 4 2011, 11:22 PM
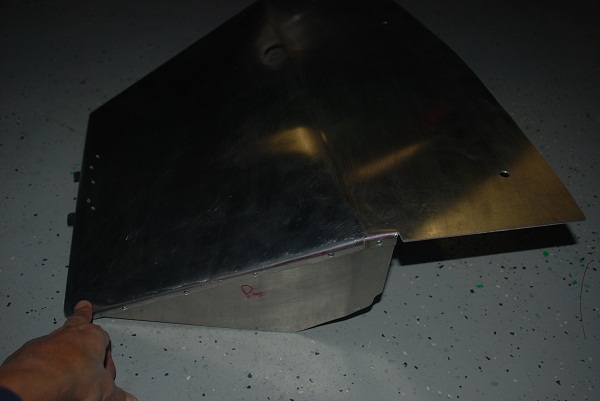
I made a shroud for the front oil cooler, I've been meaning to do this for some time. I took some 1/16 aluminum and formed it, riveting the side panels on. Then covered it in perloin. Also removed both seats, they'll be on their way to the upholstery shop on Monday. Last thing I completed this week was the harness bar, I ended up welding some 1/8 steel tabs on so that I can connect the harness to the bar without having to drill holes in the firewall.
Posted by: proto31 Mar 4 2011, 11:25 PM
Some more: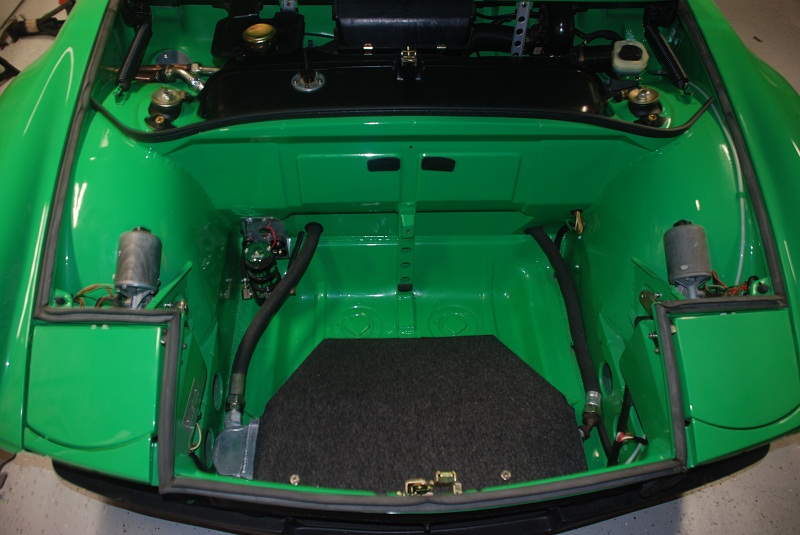
Posted by: speed metal army Mar 4 2011, 11:56 PM
Kickass.  Ive decided to stash $1000 bux every month,for when you get bored of this thing.Dibs!
I love it.
Posted by: proto31 Mar 6 2011, 12:14 AM
Thanks man, I've had a lot of fun building it so far...
Posted by: proto31 Mar 7 2011, 05:02 PM
Dropped the seats, door panels and center armrest off at the upholstery shop today, they now sit at the same shop that did Andy's (Socal Andy) seats. I'm going with Cork (original Porsche color) and brown hounds tooth (they had some really nice, tightly woven stuff). It's going to be a lot of brown, but I think it will work. It's going to be tight for Route 66, may just have the seats back then, we'll see. Now I'm working on fabricating some stainless steel brackets for my 6" Marchal fog lights. Turning out pretty good so far, welding stainless is a little different than standard steel. I'll post some pics in a little while.
Posted by: Ferg Mar 7 2011, 05:13 PM
Dropped the seats, door panels and center armrest off at the upholstery shop today, they now sit at the same shop that did Andy's (Socal Andy) seats. I'm going with Cork (original Porsche color) and brown hounds tooth (they had some really nice, tightly woven stuff). It's going to be a lot of brown, but I think it will work. It's going to be tight for Route 66, may just have the seats back then, we'll see. Now I'm working on fabricating some stainless steel brackets for my 6" Marchal fog lights. Turning out pretty good so far, welding stainless is a little different than standard steel. I'll post some pics in a little while.
I've got Cork in my 75 Carrera
Posted by: Eric_Shea Mar 7 2011, 05:16 PM
He just sold it to me.

Posted by: Ferg Mar 7 2011, 05:28 PM
He just sold it to me.
Get in line...

Posted by: MDG Mar 7 2011, 06:55 PM
I'm going with Cork (original Porsche color) and brown hounds tooth
That is going to look spectacular!
Posted by: proto31 Mar 7 2011, 11:45 PM
I found some really nice (as close to NOS as you can get) sun visors at the German swap meet this weekend:
The NOS Marchal fog lights/driving lights, I also picked up some covers for them at the lit show over the weekend: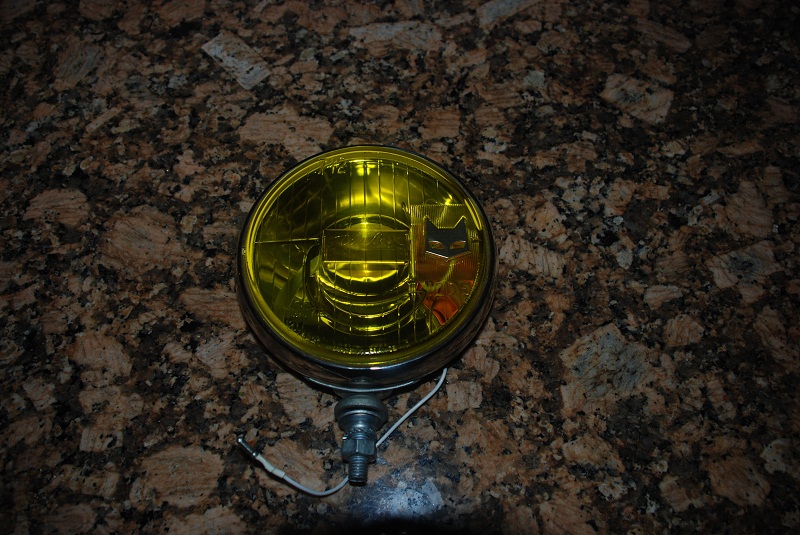
Posted by: proto31 Mar 7 2011, 11:48 PM
Some more: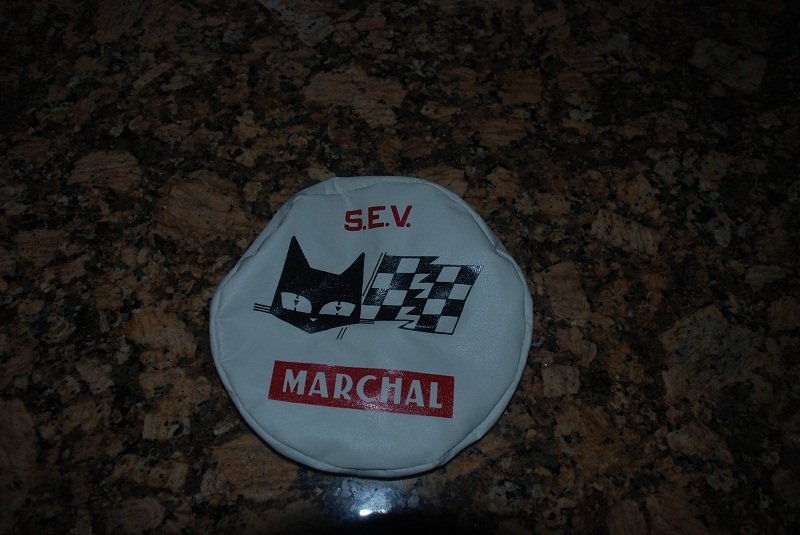
Installed without bumper, stainless brackets go through the stock fog light grills: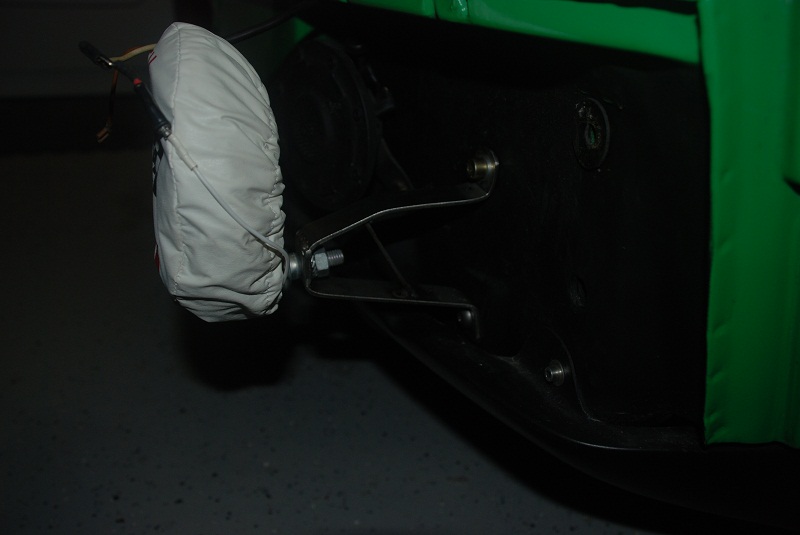
Posted by: proto31 Mar 20 2011, 09:02 PM
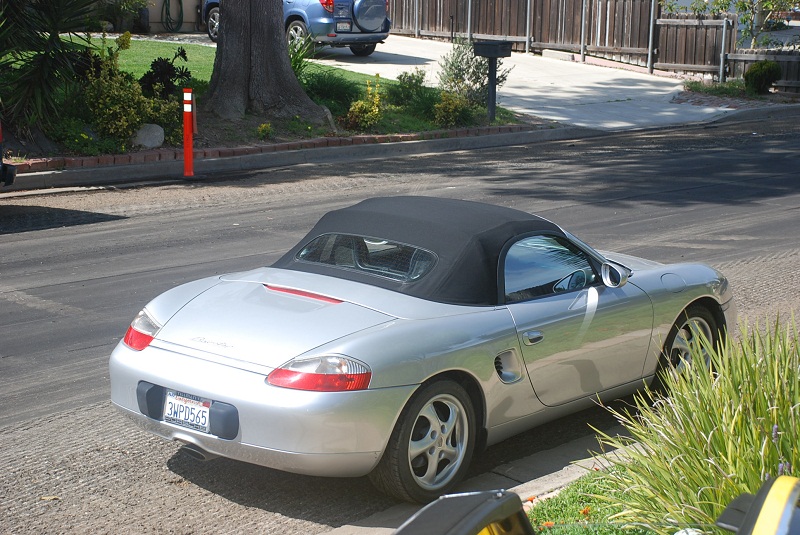
Some updates, Socal Andy came down and polished my conversion, Thomas' new (new to him) boxster, my boxster and his 914, a fun day. Some pics: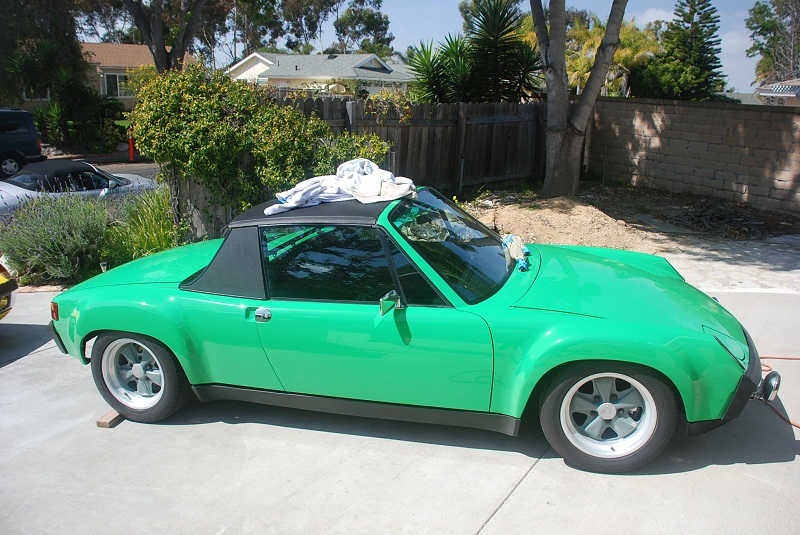
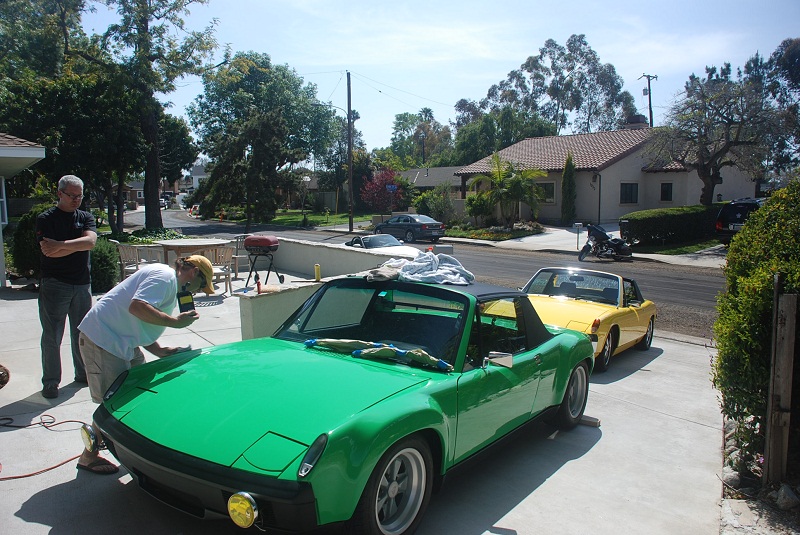
Posted by: proto31 Mar 20 2011, 09:04 PM
Thomas' car, a really nice 97' with a GT3 front bumper, he's taking it back to Germany with him. If you look carefully, you should be able to see 4 Porsches in the first pic, my neighbors thought I was running a chop shop in my garage for stolen cars, pretty funny.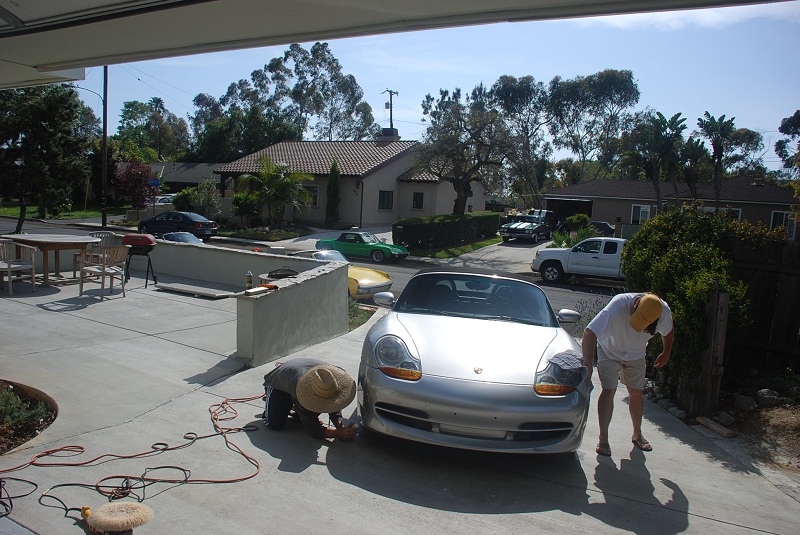
Posted by: proto31 Mar 20 2011, 09:08 PM
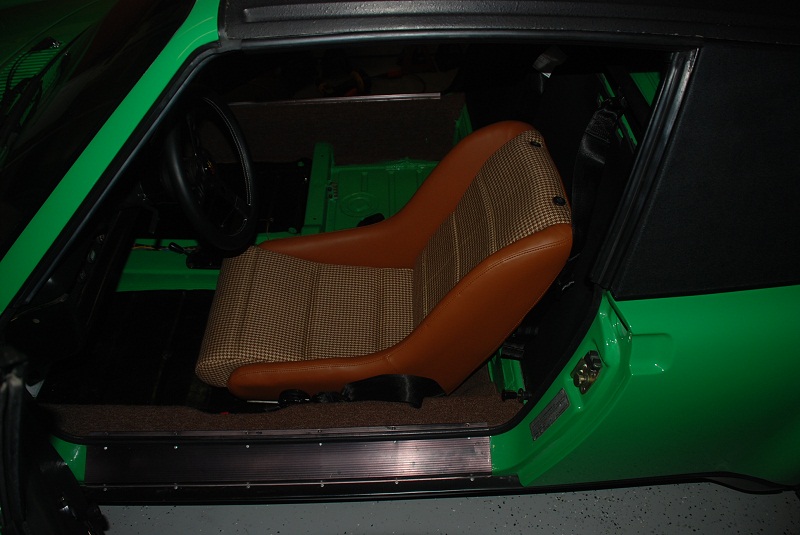
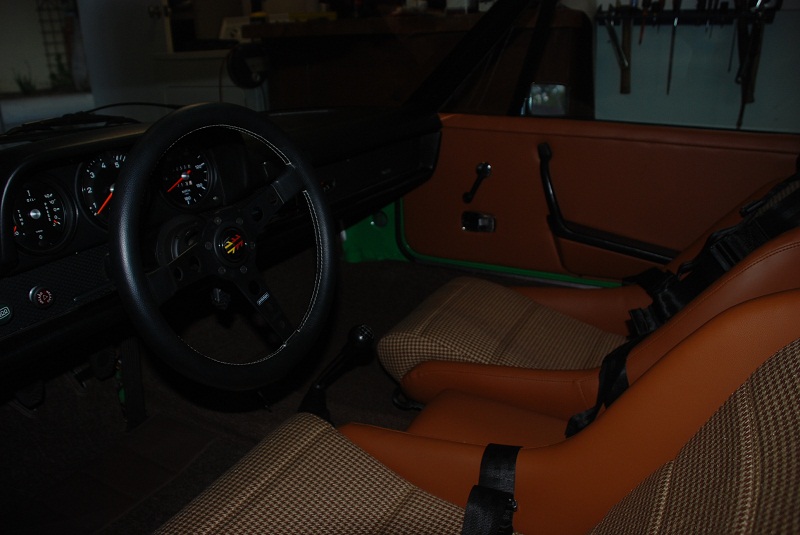
Received all the interior pieces, seats and door panels turned out great, I like the color a lot. Really looks sharp in the daylight: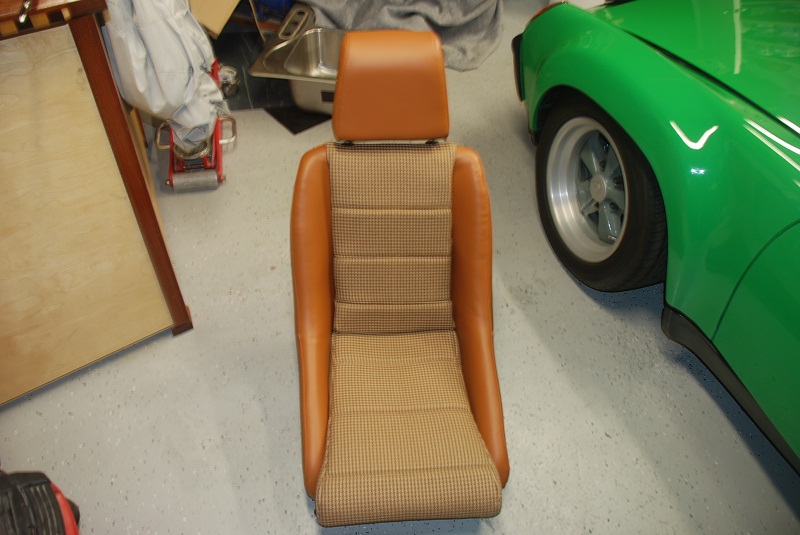
Installed the vinyl strips that lay on the cross bars: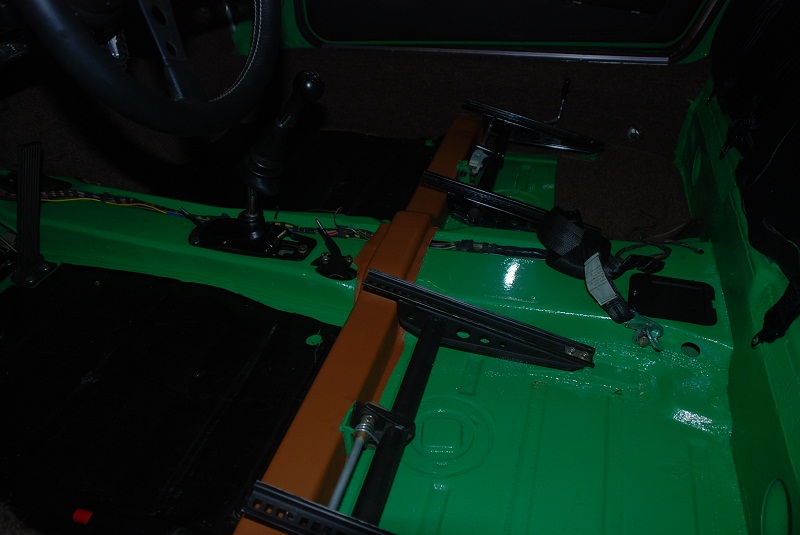
Posted by: dw914er Mar 20 2011, 09:10 PM
wow!!!!!!!!!!!!
that car looks stunning. The green and that fuchs finish goes great together.
Posted by: proto31 Mar 20 2011, 09:14 PM
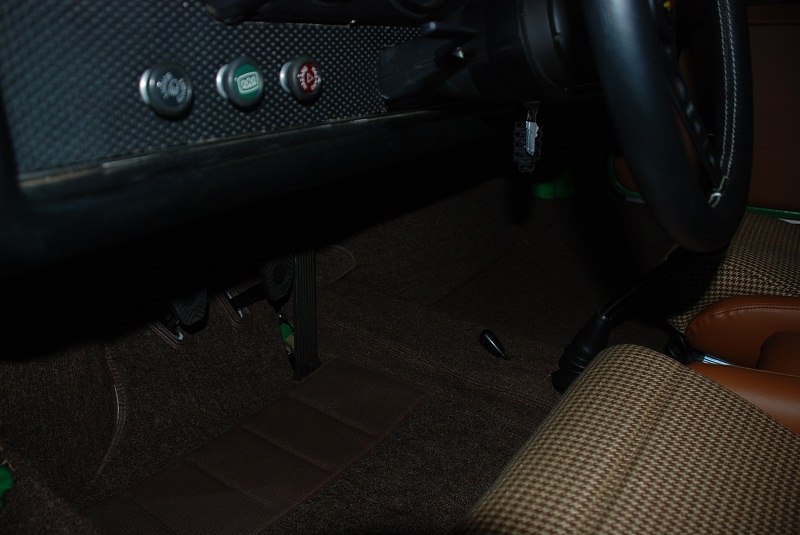
Installed all the carpet, had to remove the steering column so that I didn't have to cut a slit in the carpet set, PITA 
Passenger door before new panel :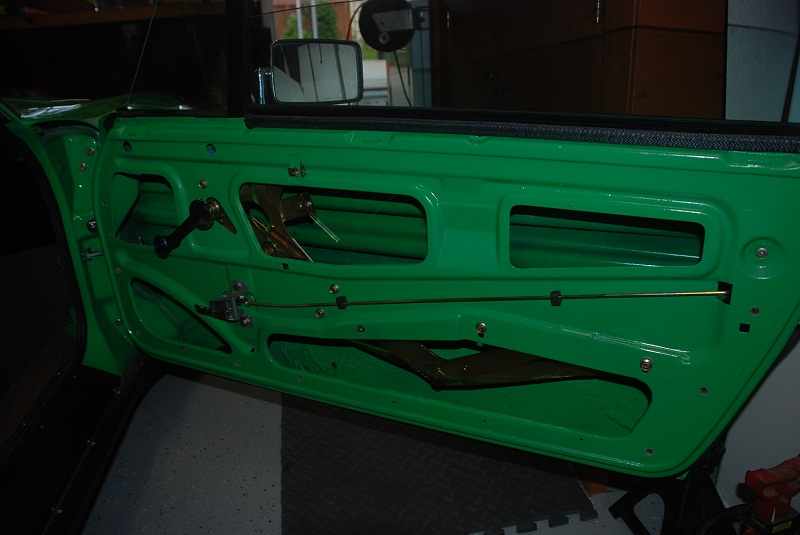
and after: 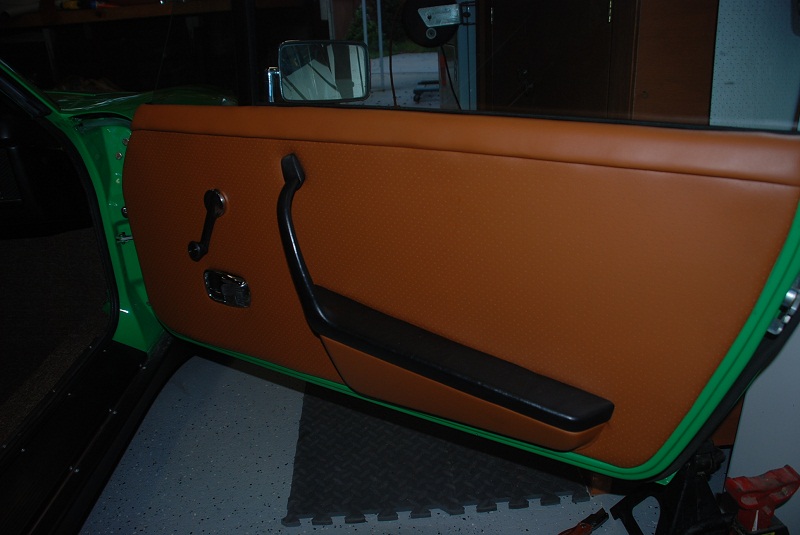
Posted by: proto31 Mar 20 2011, 09:17 PM
Thanks for the comments!
Here's the interior after I finished this weekend, still need speaker grills (although I won't be installing a radio):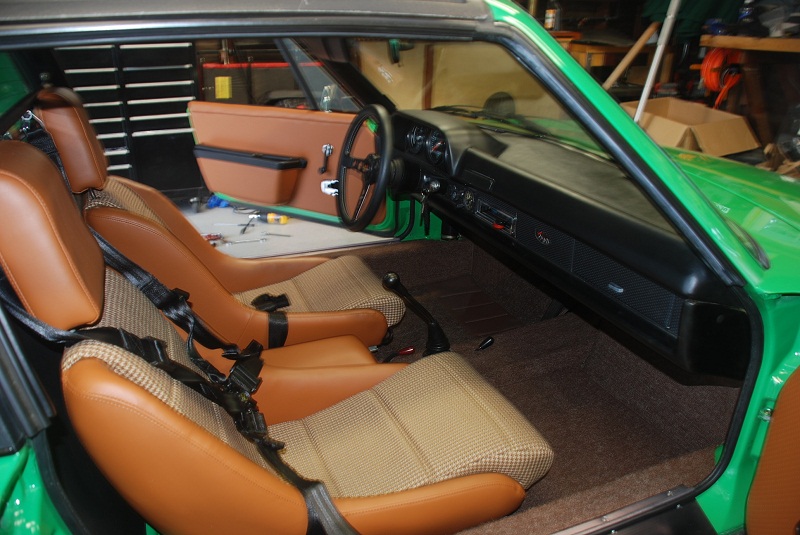
Posted by: Lou W Mar 20 2011, 09:51 PM
Absolutley Stunning.
Posted by: Gint Mar 21 2011, 05:41 AM
I hope you make it. I'd like to see that car in person. Very nice!
Posted by: Ferg Mar 21 2011, 08:16 AM
Wow
Posted by: Eric_Shea Mar 21 2011, 08:48 AM
 Isn't this car already done?
I thought we saw it last May at WCR in Tahoe... 
Posted by: proto31 Mar 21 2011, 09:08 AM
Isn't this car already done? I thought we saw it last May at WCR in Tahoe...
I got it running about a week before WCR last year but have since been finishing it up. The car has been running since then, just finishing up interior, adding heat, and a few other things.
Posted by: Eric_Shea Mar 21 2011, 09:54 AM
Got it. 
I was beginning to think I was a clairvoyant.
Beautiful car.
Posted by: 9146FAN Mar 23 2011, 05:03 PM
Amazing build. Your interior looks great too! We'll have to go for a cruise (if I ever get my machine on the road).
Congratulations!!
Posted by: abnrdo Apr 12 2011, 09:54 AM
Gorgeous car!! Great attention to detail. So much so that I must know how you ran your oil cooler lines. I notice they disappear under the gas tank. How do they transition to the back of the car? Are they in the tunnel?
Thanks,
Jim
Posted by: proto31 Apr 12 2011, 10:59 AM
Gorgeous car!! Great attention to detail. So much so that I must know how you ran your oil cooler lines. I notice they disappear under the gas tank. How do they transition to the back of the car? Are they in the tunnel?
Thanks,
Jim
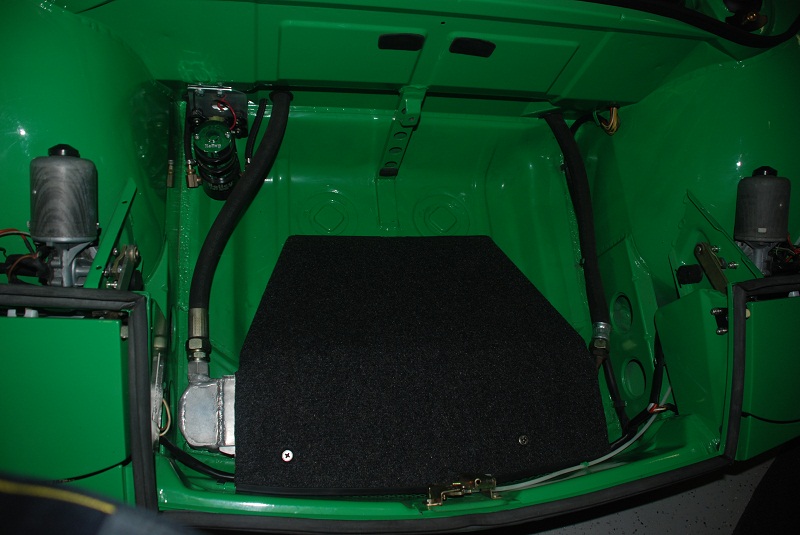
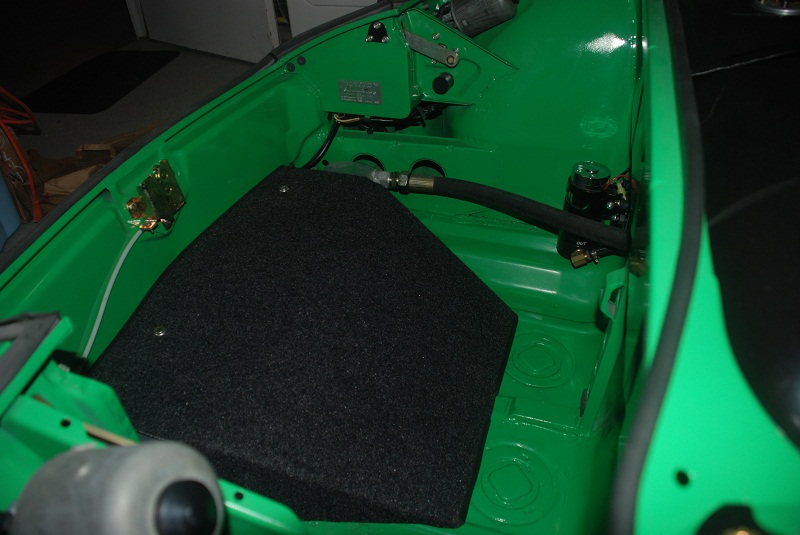
Jim, I'll have to take some pics of my oil lines and upload for you. I ran the oil lines down the passenger side inner wheel well, then behind the rocker panels (same as original GTs), they then come out the rear where my thermostat is installed. I had to cut four holes, two in the bulkhead that separates the gas tank from the front trunk and two in the passenger side wheel well. Seems to work really well. I'll try to get some pics uploaded tonight.
Dan
Posted by: MoveQik Apr 12 2011, 12:49 PM
Dan, after seeing your car in person, I can't believe that paint job was done in a garage. Wow.
Posted by: proto31 Apr 12 2011, 12:59 PM
Dan, after seeing your car in person, I can't believe that paint job was done in a garage. Wow.
Thanks, I was surprised too
Those new HPLV guns are awesome (coming from a guy who never sprayed a car with the old low pressure guns). Dan
Posted by: proto31 Apr 12 2011, 10:09 PM
Gorgeous car!! Great attention to detail. So much so that I must know how you ran your oil cooler lines. I notice they disappear under the gas tank. How do they transition to the back of the car? Are they in the tunnel?
Thanks,
Jim
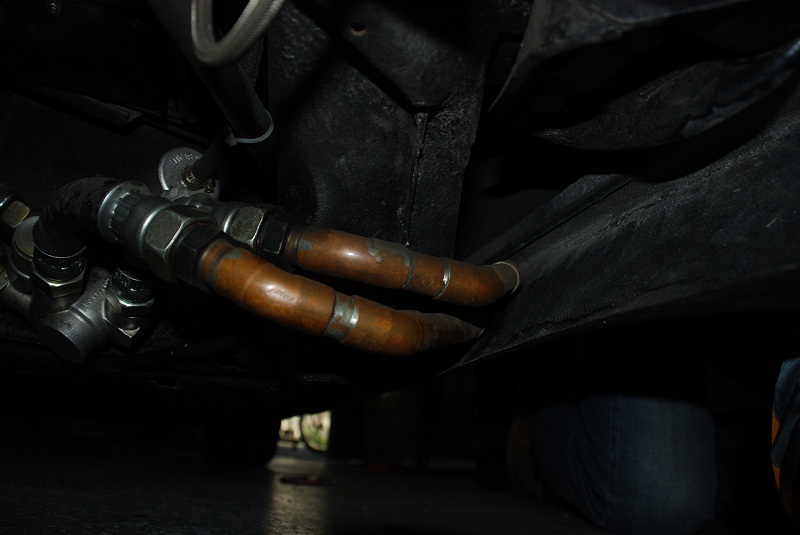
Jim, I took some pics, here you go:
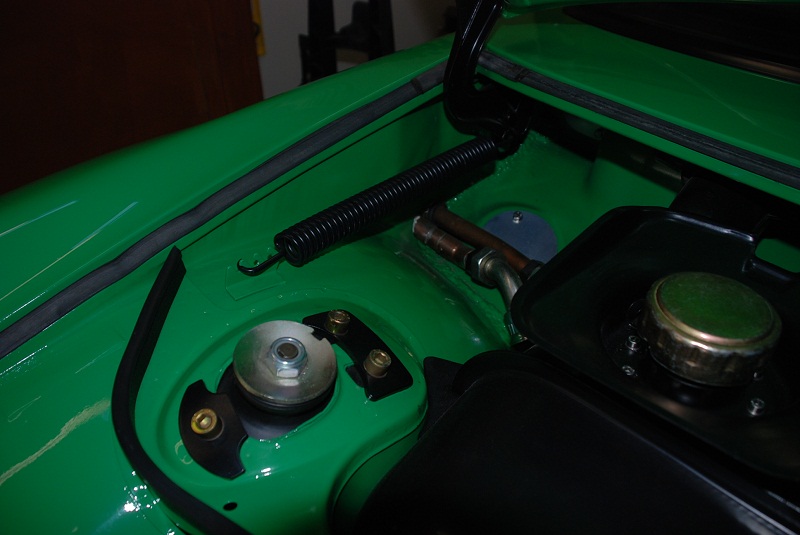
Front two holes in bulkhead. The oil lines easily run under the tank and up the side, there is a pretty good gap between the tank that the chasis near the corner of the tank
Area where lines enter outer front wheel well:
This pic isn't all that great but if you look close you can see the lines running up against the wheel well, there are no clearance issues here as long as you keep the lines tight up against the wheel well:
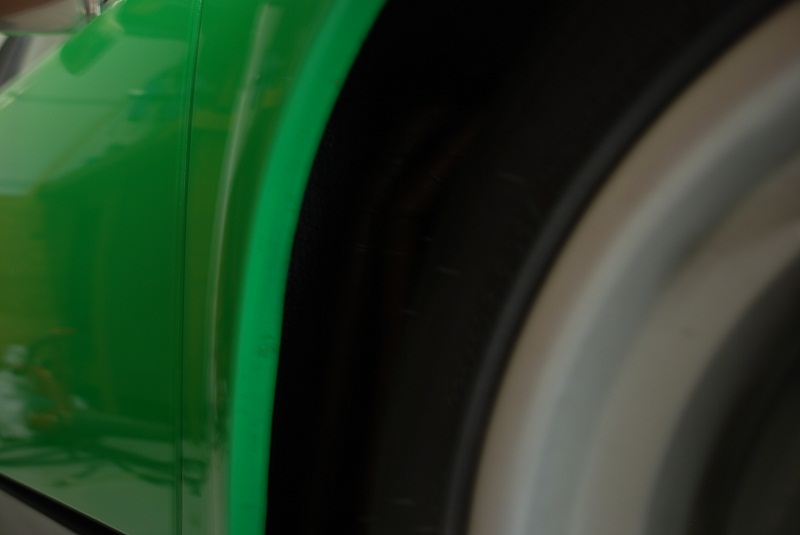
This pic shows the oil lines coming out of the space between the longs and the rocker panels. Although they look low here, they are actually 3/4 higher than the lowest point of the car on that side (wouldn't want to have these bust if you bottom out the car):
Posted by: abnrdo Apr 12 2011, 11:50 PM
 Did you run copper lines along the rocker panel? Beautiful work! I would love to see your work in person some day. I live in the Kansas City MO area and I am just getting started on my project.
Thanks for the photos!!
-Jim
Posted by: malaga_red75 Aug 4 2011, 04:24 PM
I thought I would bring this thread back because my parents and my sister just saw your car in Irvine.
I am about to paint my subi conversion the same color and when my parents saw it they were stunned with the beauty of this car. They said it was simply "stunning.' They couldn't stop sending me pictures of it, haha.
My dad actually left a note on your windshield I believe (pretending it was from me). I would love to see your car in person some time! I will have to make a trip down there or maybe at next years WCR!!
Love the build! Andyrew and I will also be painting my car in his garage.
Looks great!
-Peter
Powered by Invision Power Board (http://www.invisionboard.com)
© Invision Power Services (http://www.invisionpower.com)