Printable Version of Topic
Click here to view this topic in its original format
914World.com _ 914World Garage _ Green Hornet Progress Thread
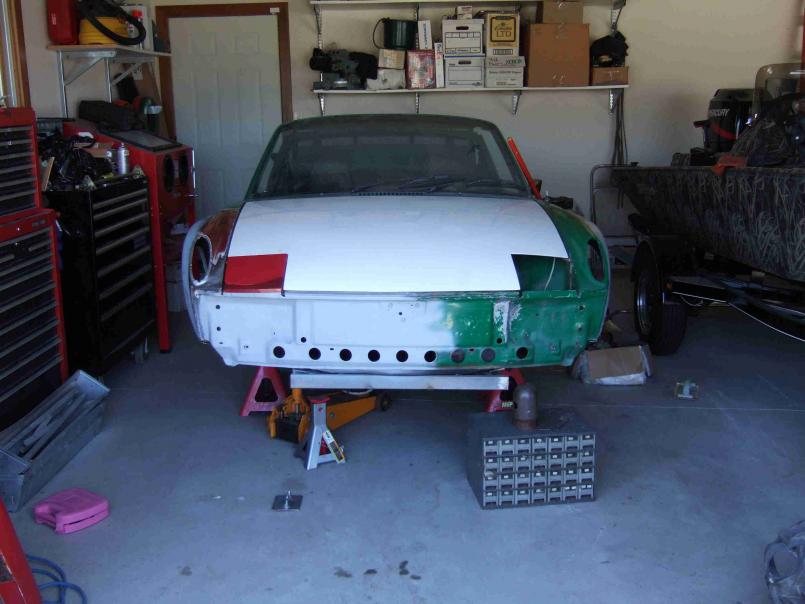
Posted by: jmill Sep 15 2008, 09:28 PM
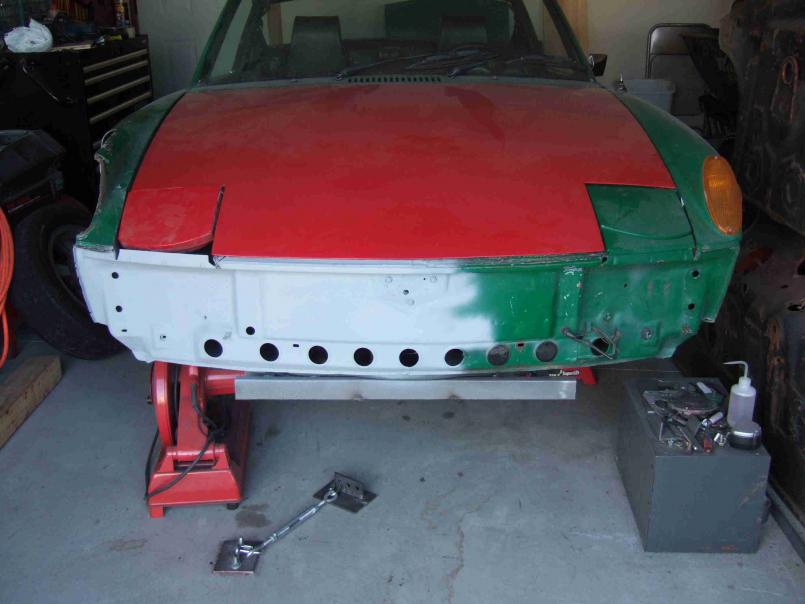
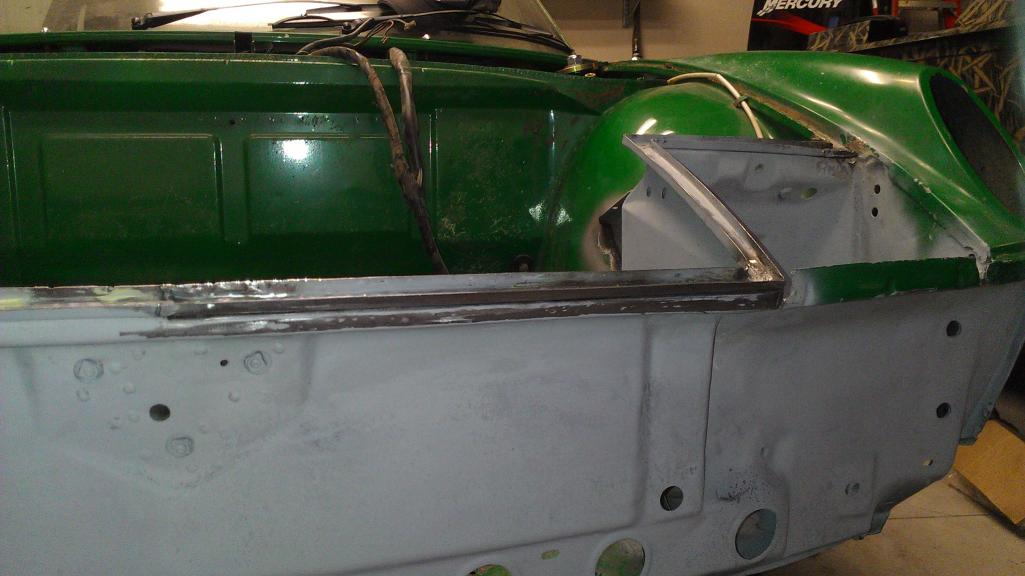
This is my new pride and joy. Well, it's not very new but I had to have it once I saw it. I first saw it on Craigs List down in Az. It was sold before I could even reach for the phone. I figured it was long gone. As luck would have it Budman decided to flip it and this baby now sits in my garage. It needs some serious love, but what 914 doesn't.
Attached image(s)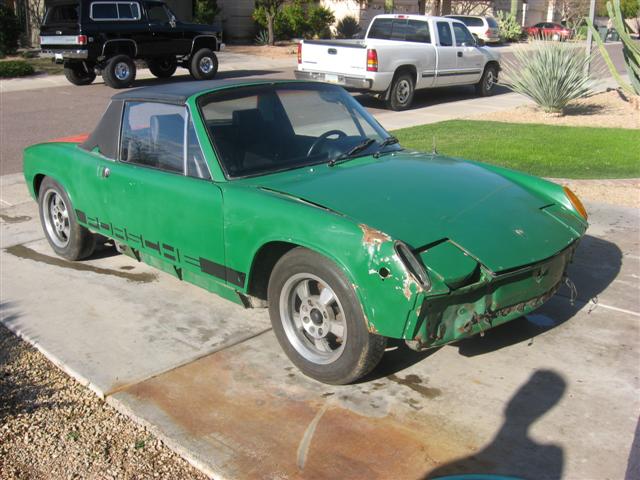
Posted by: jmill Sep 15 2008, 09:38 PM
I'm pealing apart that bent passenger front corner. It's tweaked pretty good but the damage doesn't go that far back. 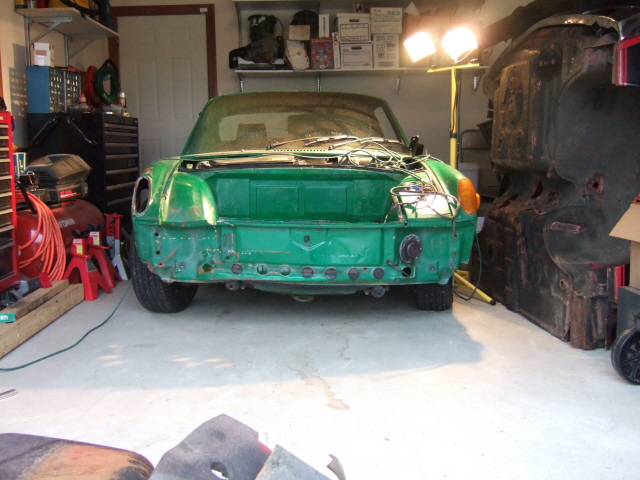
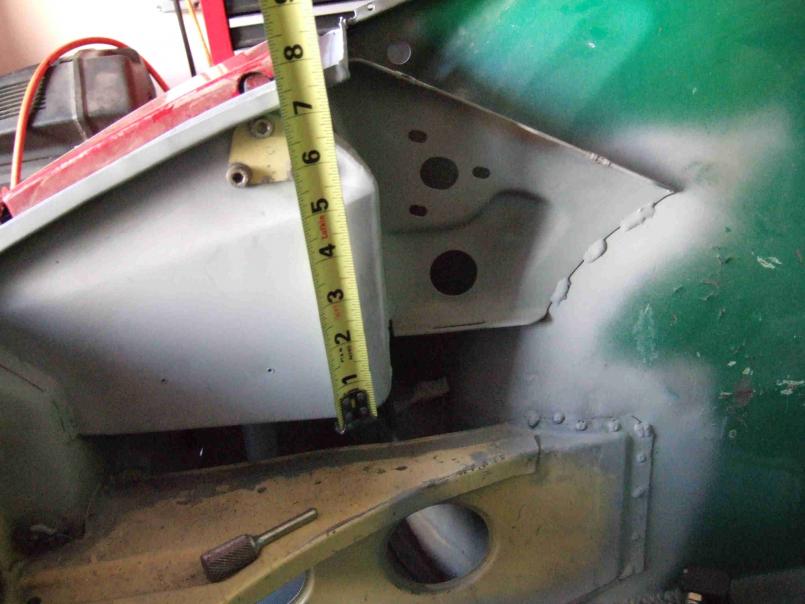
Posted by: jmill Sep 15 2008, 09:42 PM
As you can see from the picture above the front A arm mount is bent up about 1 1/2". Here's what it looks like from the inside after I pealed some stuff apart.
Attached thumbnail(s)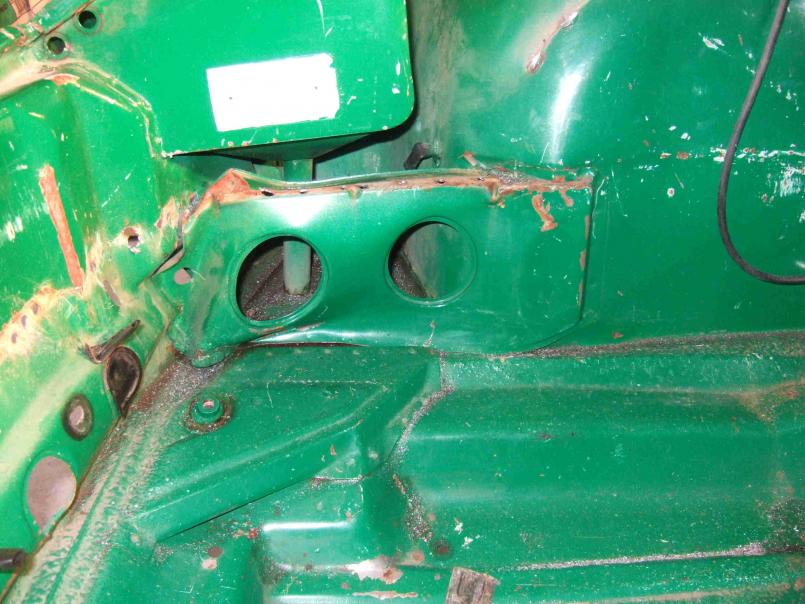
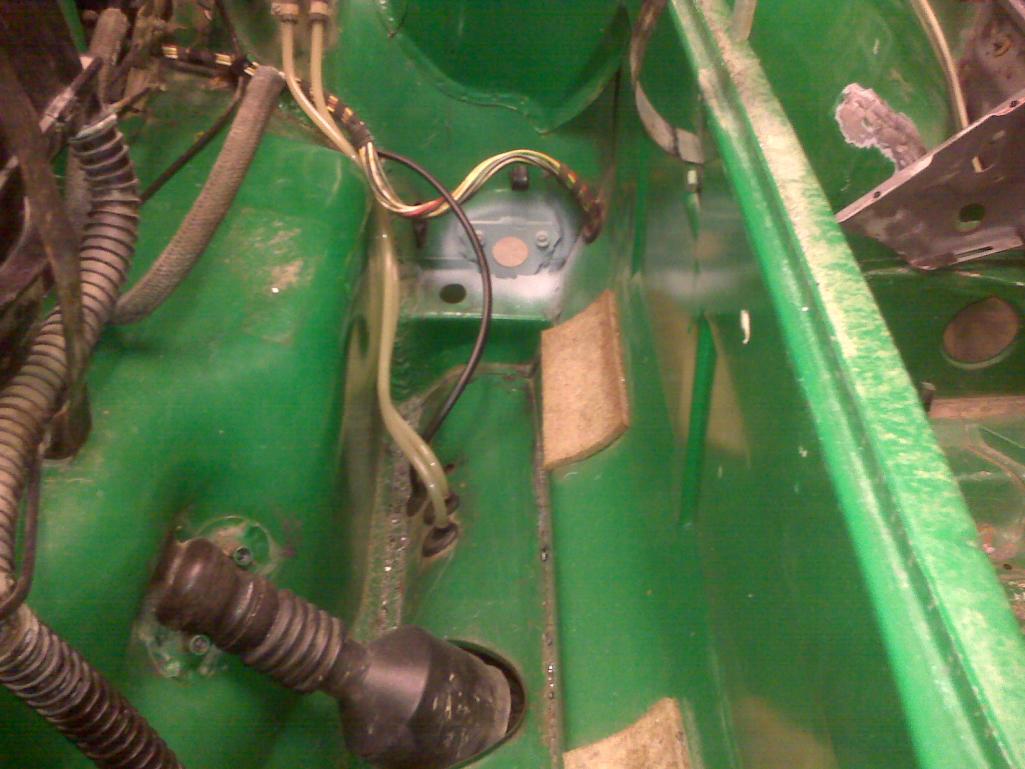
Posted by: jmill Sep 15 2008, 09:45 PM
Now it looks much better with most of the bent stuff removed.
Attached thumbnail(s)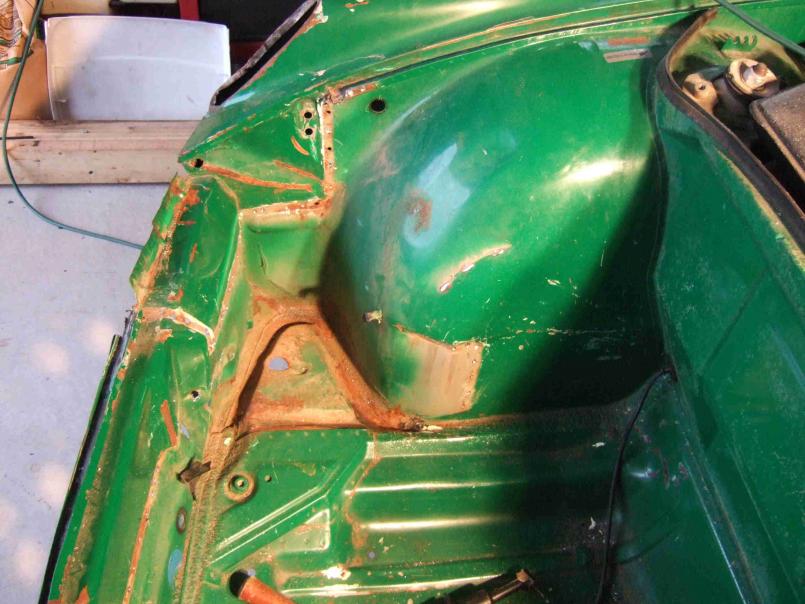
Posted by: jmill Sep 15 2008, 10:00 PM
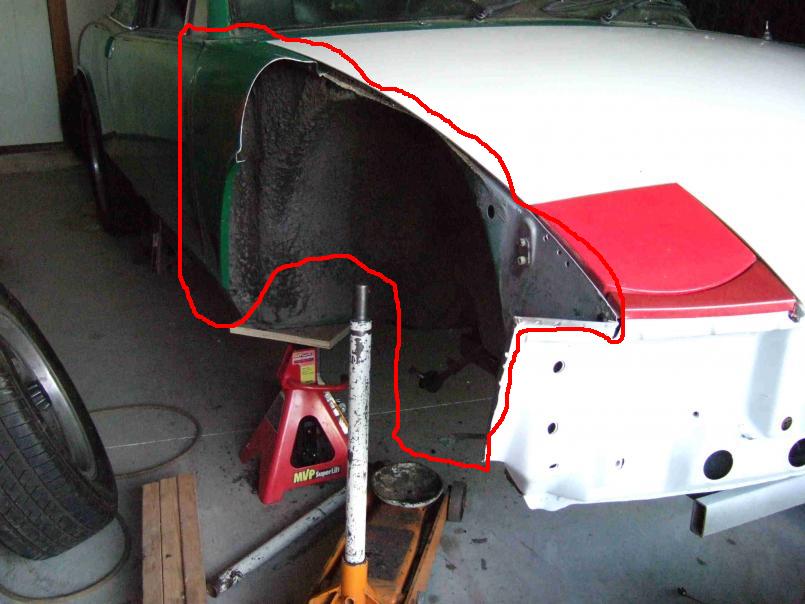
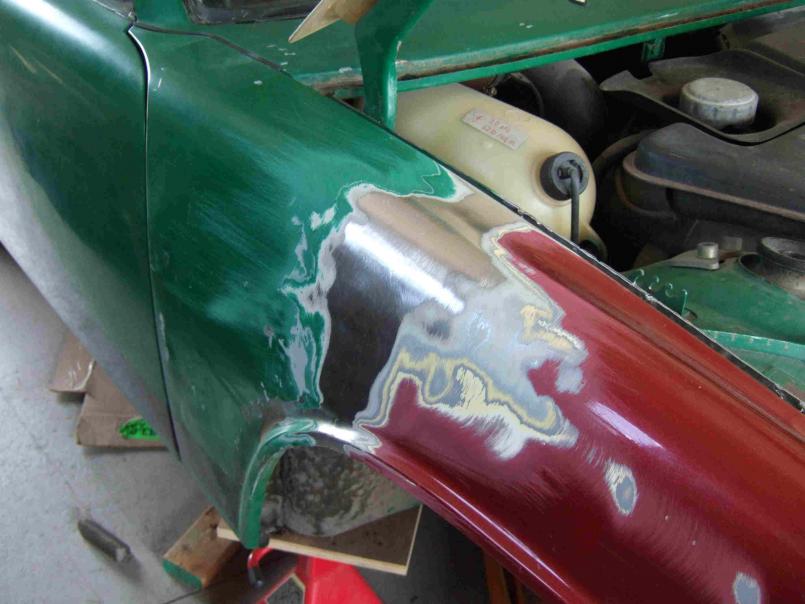
At first I figured I'd be cutting and pasting in a new inner fender. When it's all apart I can see there actually isn't any major damage to it. A dent here or there but all the damage was to the headlight bucket and the front A arm mount. You can see in the picture how it's tweaked up a bit.
Attached thumbnail(s)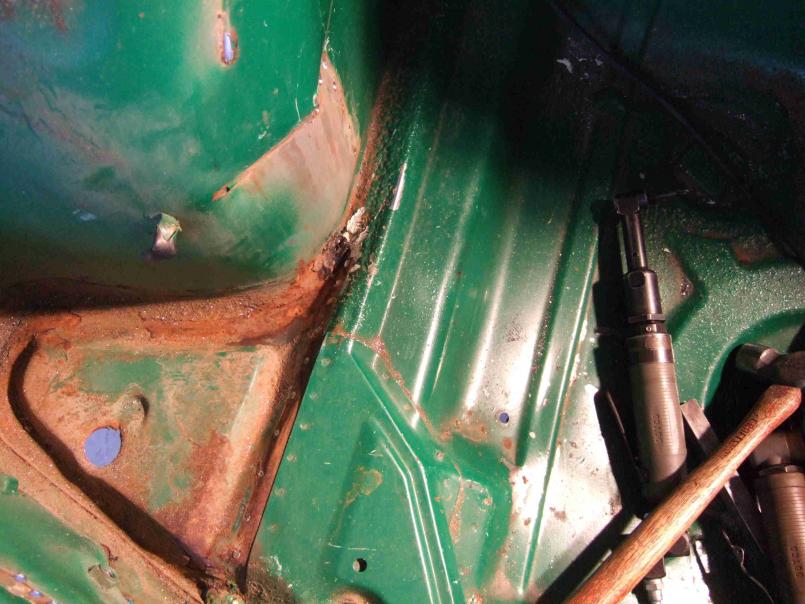
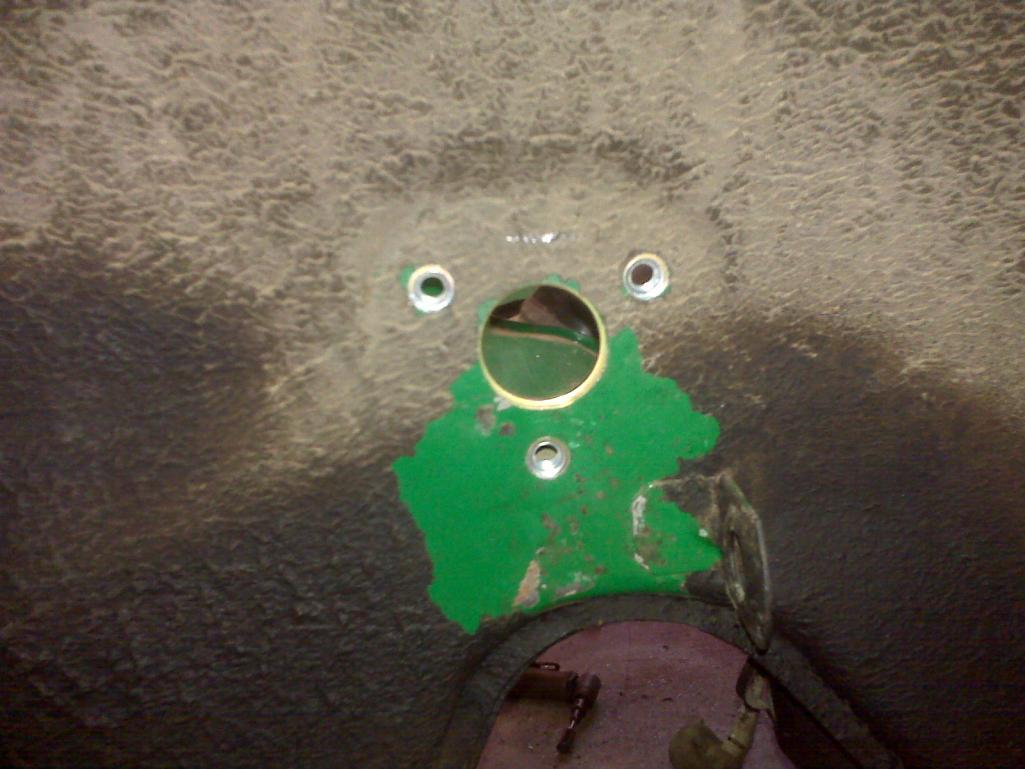
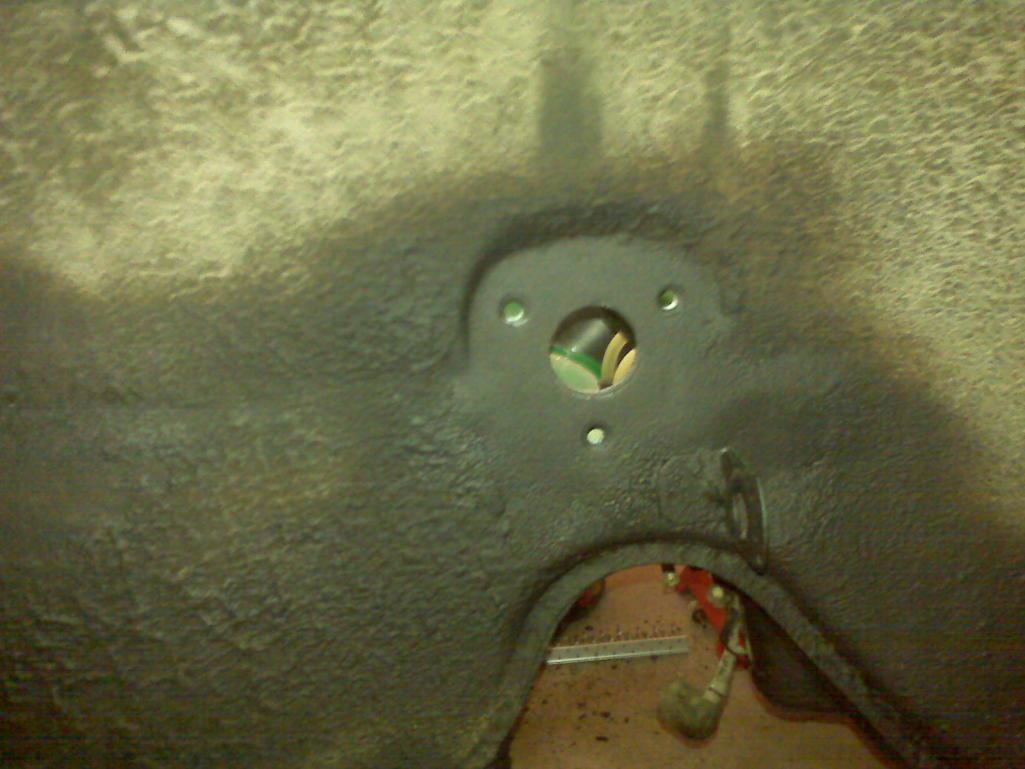
Posted by: jmill Sep 15 2008, 10:08 PM
Here's a little better picture of the damaged area.
Attached thumbnail(s)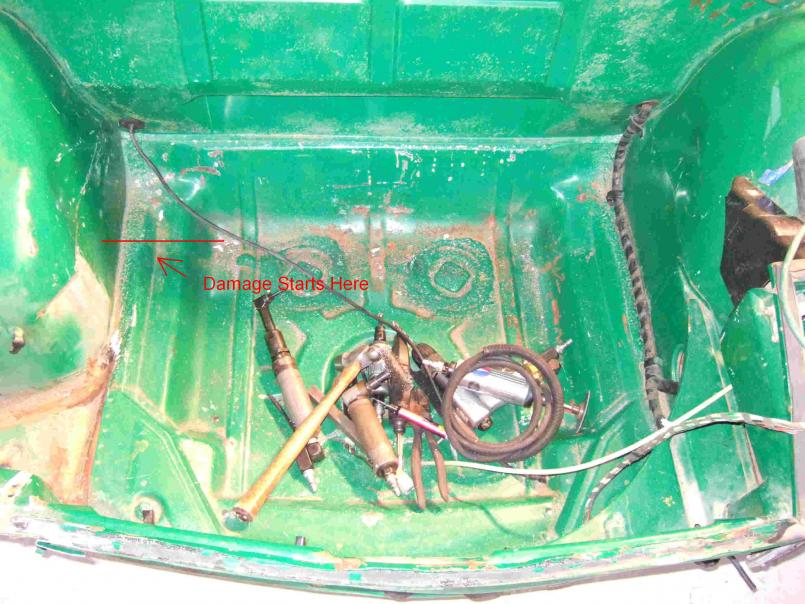
Posted by: jmill Sep 15 2008, 10:18 PM
Once I get it up on the stands I can get a lot deeper into it. I plan to make a jig from the complete front clip I have. That way I can be sure I get it back together straight. I also have a fairly clean passenger front corner to get the needed parts.
Attached thumbnail(s)
Posted by: jmill Sep 15 2008, 10:27 PM
Any of you 914 body repair experts feel free to pipe in with some advice. The plan right now is to fab up a long piece of steel with the passenger suspension mounting points incorporated. When I get everything loosened up I was going to tweak it back into place, bolt in the jig and then weld everything up. Any other ideas?
Posted by: jmill Sep 18 2008, 09:25 PM
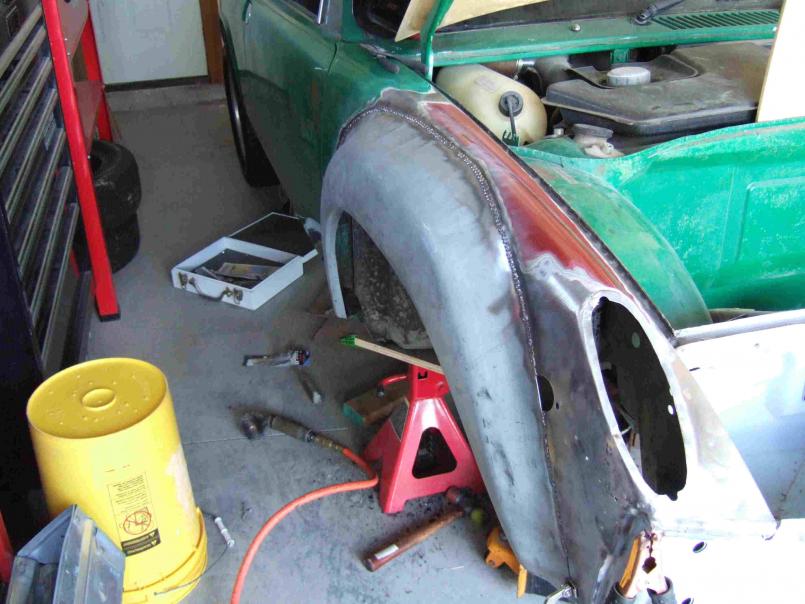
I was hoping an expert would step up. I'm still wondering if I should cut and paste or bend and massage. I suppose I'll bend and massage first. If that doesn't work out I can always cut and paste. I got a little more work done today. This weekend I'm hoping to have the jig fabbed up and I'll start to put it back together.
Attached thumbnail(s)
Posted by: jmill Sep 18 2008, 09:28 PM
What the heck, another picture.
Attached thumbnail(s)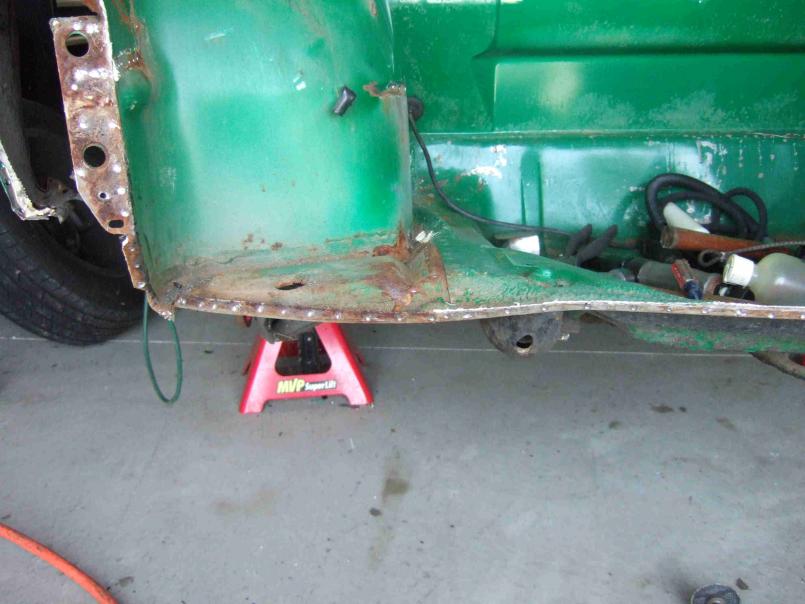
Posted by: 74914LE Sep 18 2008, 11:10 PM
My advice, for the $.02 it is worth, would be to do a "cut-n-past" as you call it.
Recently, I had a similar issue, and rather than spend the time and agony trying
to straighen and pray that everything lined up, I just put a whole new front finder/front panel section on the car. I took the finder and finder well off the doner
car in one piece, with the cut along the floor section. This way, I was able to keep
the complete headlight bucket in place. Could not be more pleased with the end
result. Everything lined up perfect. Based on the front clips you have in the picture, if I were you, I would use as much of those in complete sections as possible. Just depends on how much time you have to put into getting it correct. Good luck.
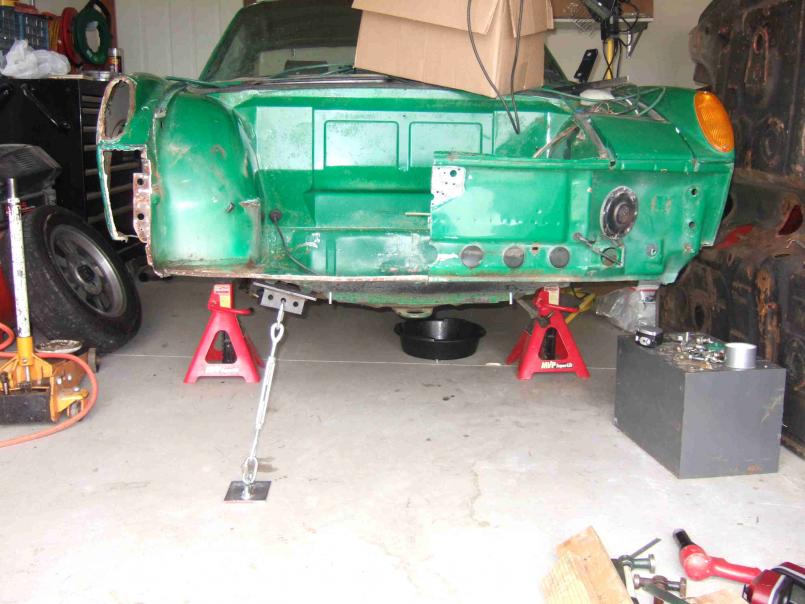
Posted by: jmill Sep 25 2008, 05:35 PM
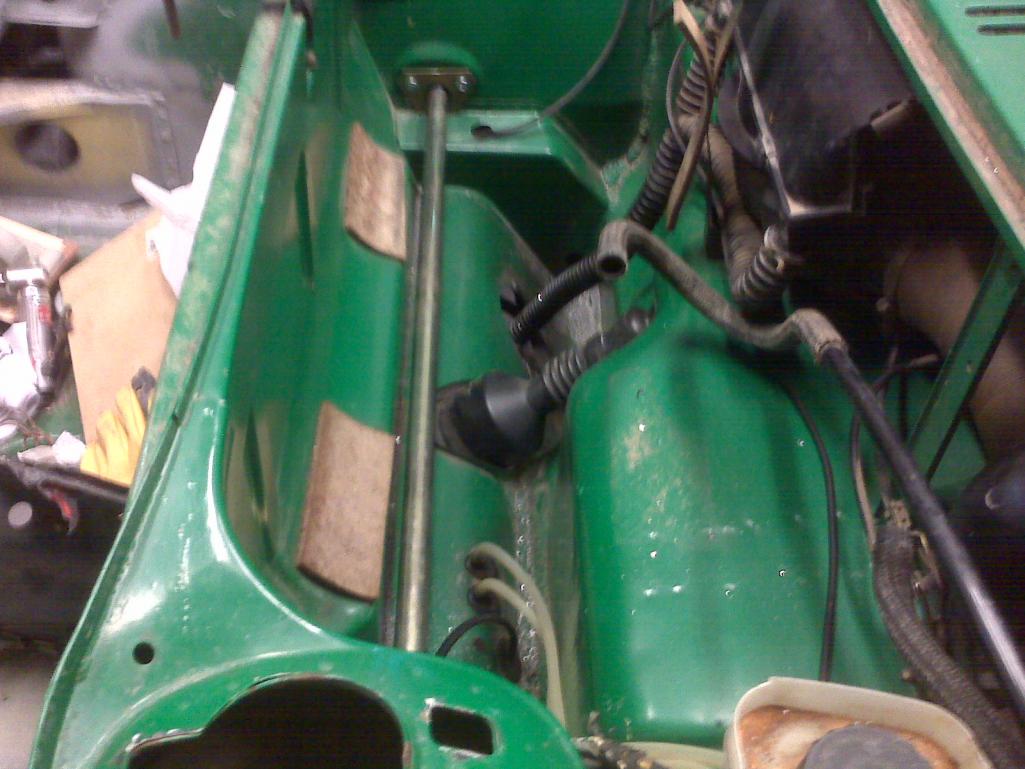
Finally got some time to work on it today. I finished up fabbing the jig and pulled the front suspension off the car.
Attached thumbnail(s)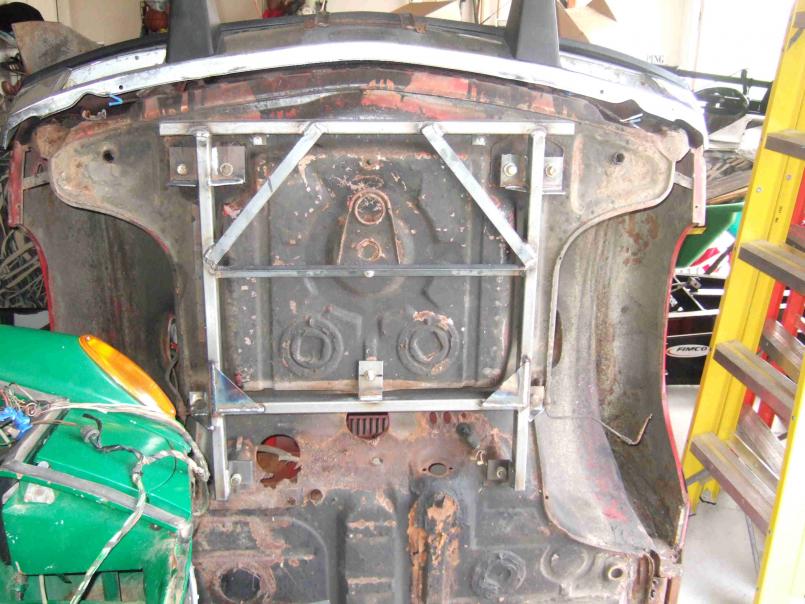
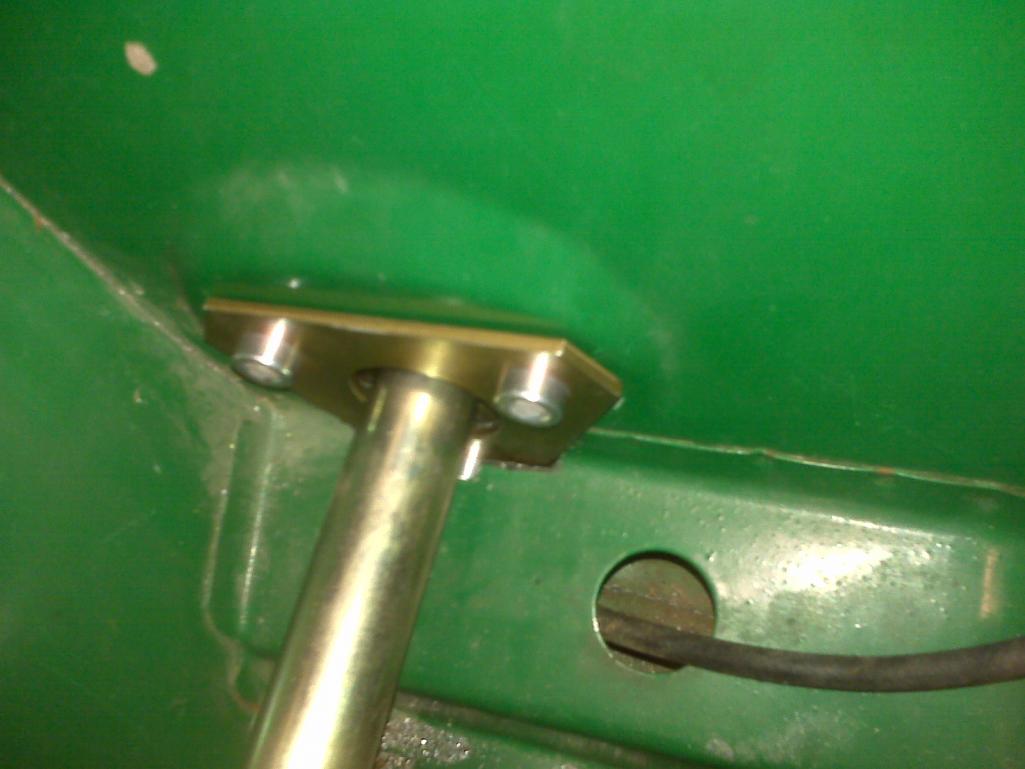
Posted by: jmill Sep 25 2008, 05:39 PM
Here's the jig bolted up to the green car. As you can see there is some major gappage on the passenger side.
Attached thumbnail(s)
Posted by: Root_Werks Sep 25 2008, 05:39 PM
I like the jig! Looks like you have plenty of donor parts to do things right.
Posted by: jmill Sep 25 2008, 05:44 PM
I wish that the passenger side was the only problem. Unfortunately, the drivers front A-arm mount was pushed over a bit. It looks like I dig in this one a little deeper to straighten it out. 
Attached thumbnail(s)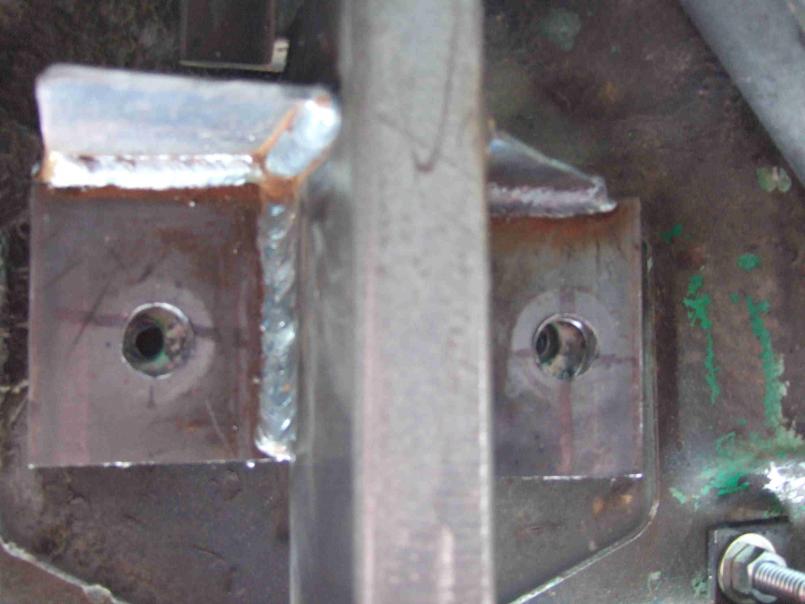
Posted by: FourBlades Sep 25 2008, 06:12 PM
I have a spare driver's side front suspension mount set, both
the front and rear mounts. They look in fine shape. You can have
them for free if you need them.
There is actually a picture of them at the end of my "starting a 1973
restoration" thread.
John
Posted by: jmill Sep 25 2008, 08:13 PM
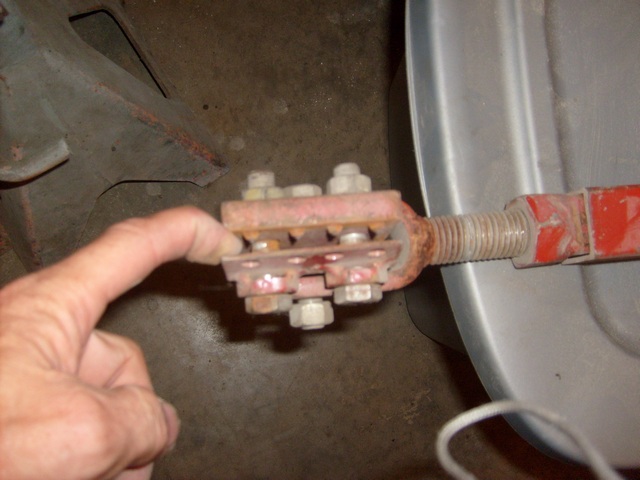
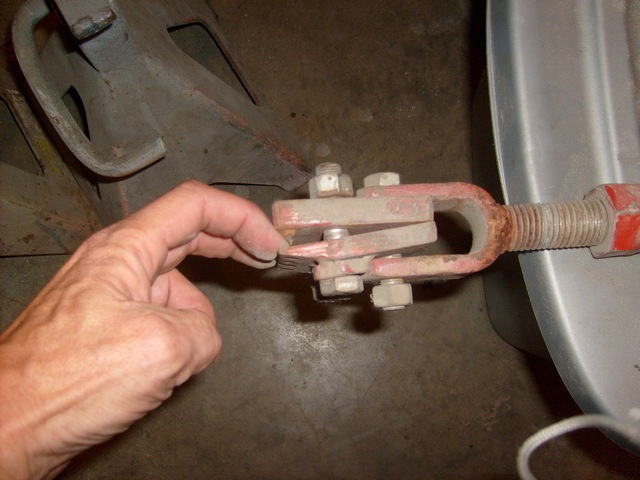
Thanks for the offer John. My mounts are actually in great shape. Unfortunately, the front is about 3/16 too far to the left. It looks like when it was hit, the floor of the front trunk was moved over a bit. I'll have to drill out the spotwelds of the floor and then line it up to the jig. Then I'll weld it back up straight. I'm thankful that the rear mounts of the front suspension are straight. The jig lined up perfect to them. If they were jazzed up I'd be looking for a bench. Without 2 good reference points my jig is useless.
Thanks for the comments on the jig. I measured up all the mounting holes and they all line up square. I didn't spend much time making it fancy. It's kinda ugly looking but it works. It got me back into the swing of welding too. It's been awhile.
Posted by: Richard Casto Sep 26 2008, 08:02 AM
Looks like you are doing a good job. Nice welds on the jig by the way. 
Posted by: rick 918-S Sep 26 2008, 09:32 AM
You should have done your pulls before removing the front panel. Even with the damage as it was, the connecting panels would help bring the remote damage that traveled around the box back in line. Think about the uni-body as a box shaped bird cage. If you pull on one corner the other corner move. If you cut the bird cage and repete the pull only the section your working moves. Not the worse think in your case as the damage looks minor. It just makes it a little harder to get both right and left pick up points to move as one and not spread apart from one an other. Make a cross bar to maintain the space between your front right and left suspension pick up points. Bolt it in when you pull the chassis.
You need a way to do a down pull. You could drill some holes in your concrete floor and install 1/2 anchor bolts. Then make a bolt on bracket for the pickup points. Then attach chains to the bolts and brackets in a circle shape. This is called a Vector pull. Build a spreader like a turn buckle (or if you have a port-o-power use that) and install it between the looped chain. Then use the turn buckle to take the slack out of the chain. you will likely need 4 bolts in your floor. This will hold the chassis to the floor. Use the same method on the high corner only use the turn buckle to spread the chain til the corner starts coming down. Use a wood block and a BFH to relieve the stress. You will probably notice you will need to add stands to stop the chassis from doing what you don't want it to do. You may also notice once the right corner starts coming down the left corn may start to move over.
Nice fixture BTW. Stay at it. You'll get it. I've done lots and lots of uni-body repairs. I even had a Cellette. You just have to think about how to reverse the impact. And don't go crazy with a BFH  Light hits. use Wood blocking to span a larger area when using the BFH.
Posted by: jmill Sep 26 2008, 11:06 AM
Thanks for the tips Rick. I was hoping an experienced body work type guy would pipe in. I don't have much unibody experience. I used to work on cars and trucks of the 40's and 50's. A big hammer and torch was about all I needed. I should have tried the jig before I pealed stuff apart. I think your right in thinking that the drivers side mount will slide into place when I pull down the passenger corner. I'll rig up a way to do the pull this weekend.
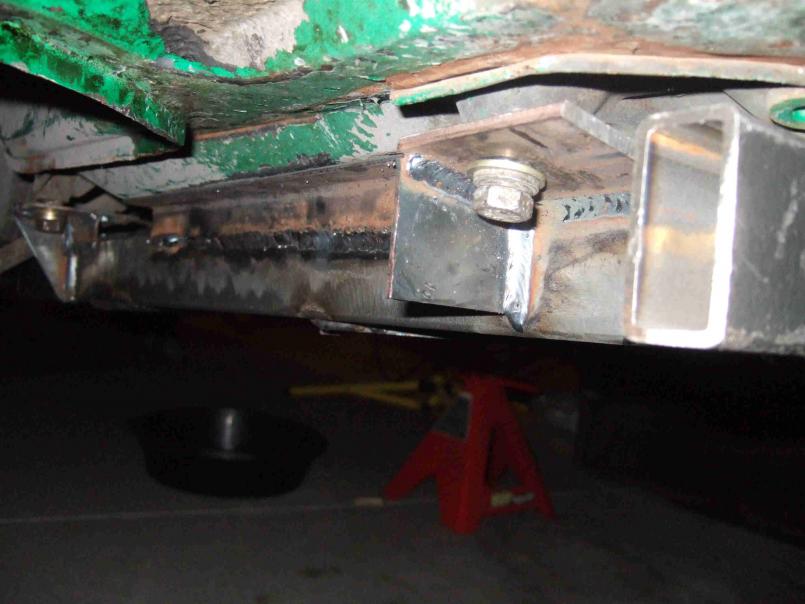
Posted by: jmill Sep 28 2008, 06:04 PM
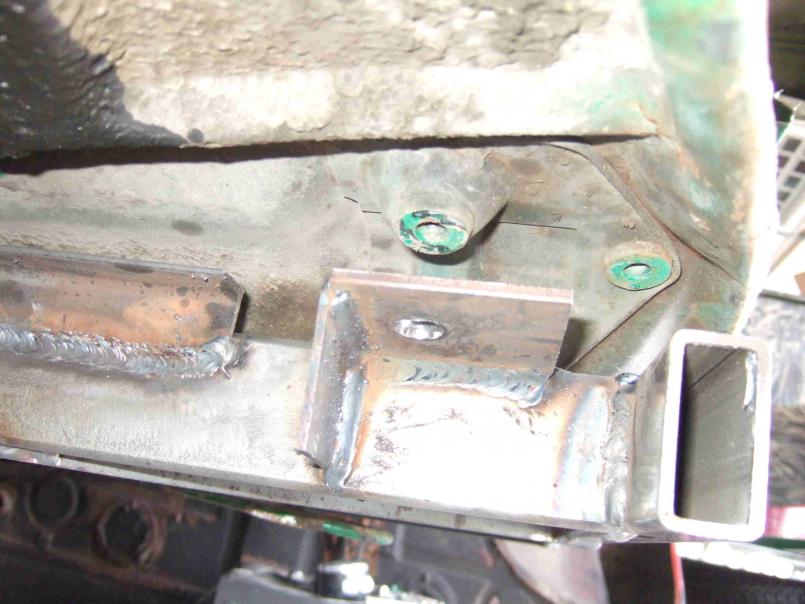
Your my hero Rick. I took your advice and rigged up a way to pull the suspension mount down. It still needs to go a bit lower but it's working out great. Here's some pictures of the plates I made up to make the pulls.
Attached thumbnail(s)
Posted by: jmill Sep 28 2008, 06:08 PM
Here's a before picture.
Attached thumbnail(s)
Posted by: jmill Sep 28 2008, 06:09 PM
Here's an after.
Attached thumbnail(s)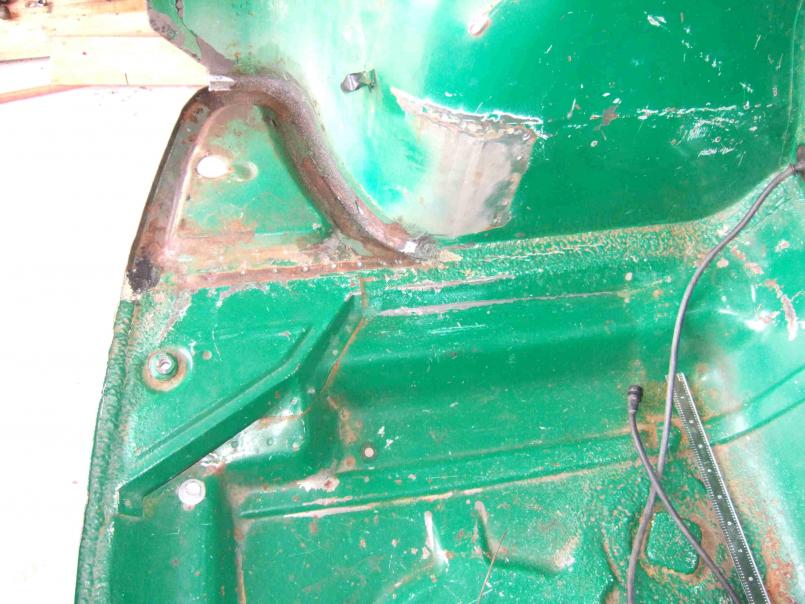
Posted by: rick 918-S Sep 29 2008, 12:02 AM
Nice work. Leave the pressure on it and use a block of wood and a BFH and carefully tap on the points that showed stress. Don't over do it. It will help relieve reverse the damage.
Posted by: jmill Oct 1 2008, 10:42 PM
With some good advice and a BFH I finally got the front end straight. The driver side front mount slid right into place when the passenger side was where it needed to be. I'm going to leave the fixture bolted up while I replace the fender, headlight bucket and the front panel. That way it will all stay straight.
Attached thumbnail(s)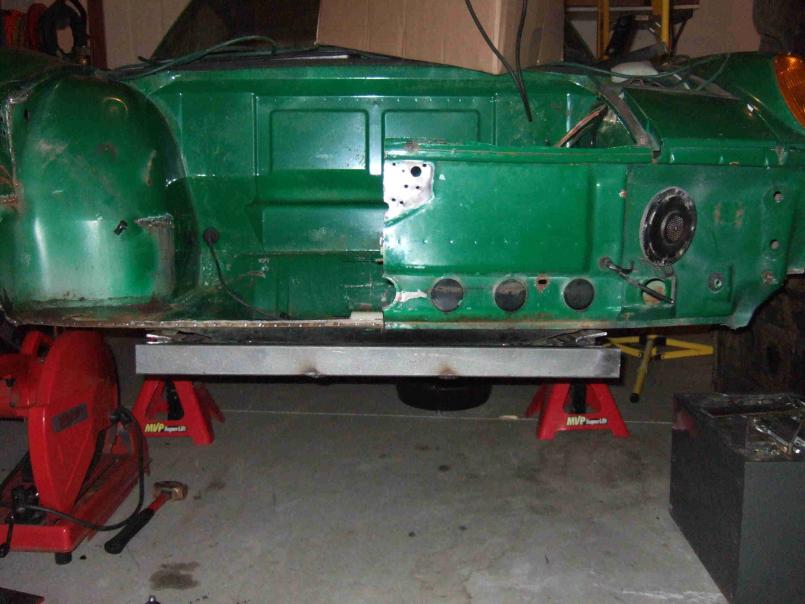
Posted by: jmill Oct 1 2008, 10:55 PM
The front trunk floor needed some work too. I got that real close. It still needs a little love with a hammer and dolly block but it's almost there.
Attached thumbnail(s)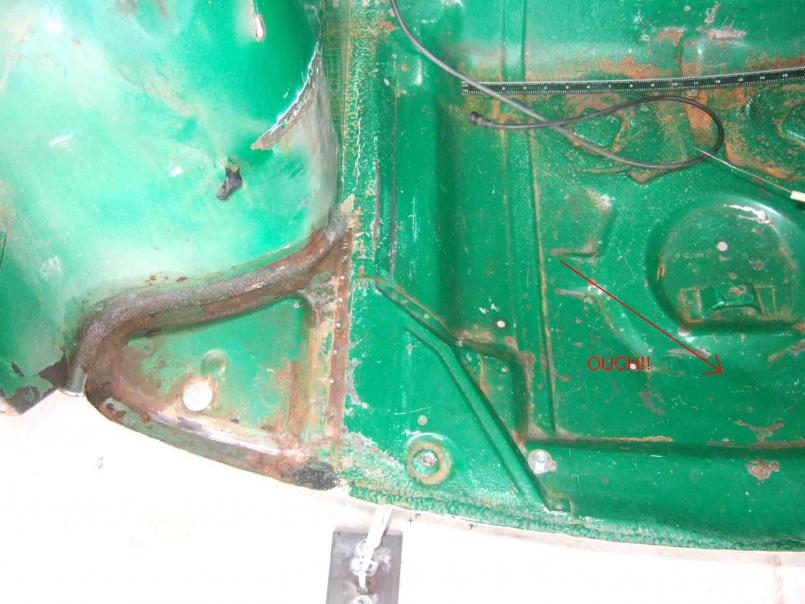
Posted by: jmill Oct 1 2008, 10:55 PM
Here's the after pic.
Attached thumbnail(s)
Posted by: rick 918-S Oct 2 2008, 08:16 AM
Nice work. I'm sure you noticed you needed to over pull some because of spring back. Another one saved! 
Posted by: jmill Oct 10 2008, 09:58 PM
For the last week I haven't seen much progress. I was busy taking apart my donor front quarter for parts. I wish they were in better shape but they'll work. I'll have to do some rust repair and fill some holes. In this picture I installed the headlight bucket and tacked on the front panel. As I stepped back to admire my work I just about freaked. It looked like the passenger side was still tweaked. Here's a pic.
Attached thumbnail(s)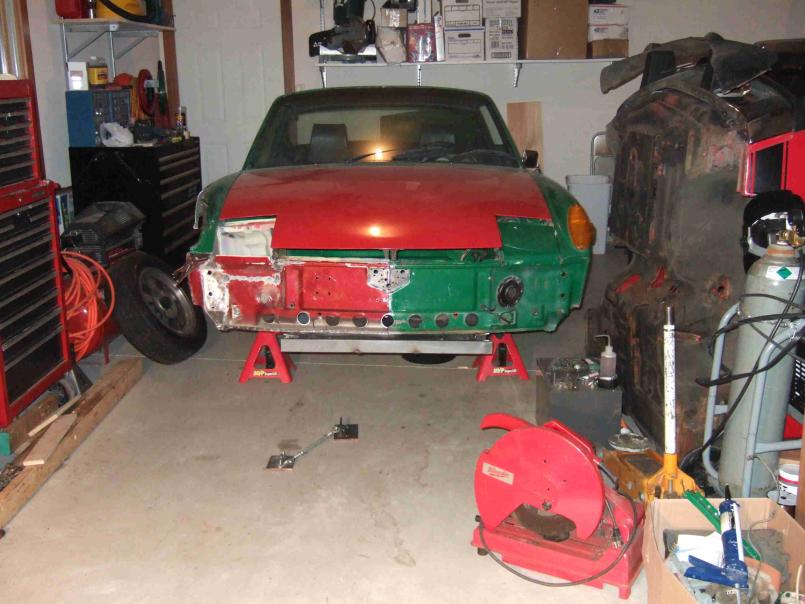
Posted by: jmill Oct 10 2008, 10:01 PM
My wife then reminded me that the garage floor is sloped towards the drain. There was some hope for me yet. I broke out my level and crossed my fingers as I jacked up the driver side.
Attached thumbnail(s)
Posted by: jmill Oct 10 2008, 10:05 PM
Thankfully it all worked out. My sloped floor almost gave me a heart attack. With the car level it's all good. 
Here's a shot of the headlight bucket. I'll cut out the rusted stuff and replace it.
Attached thumbnail(s)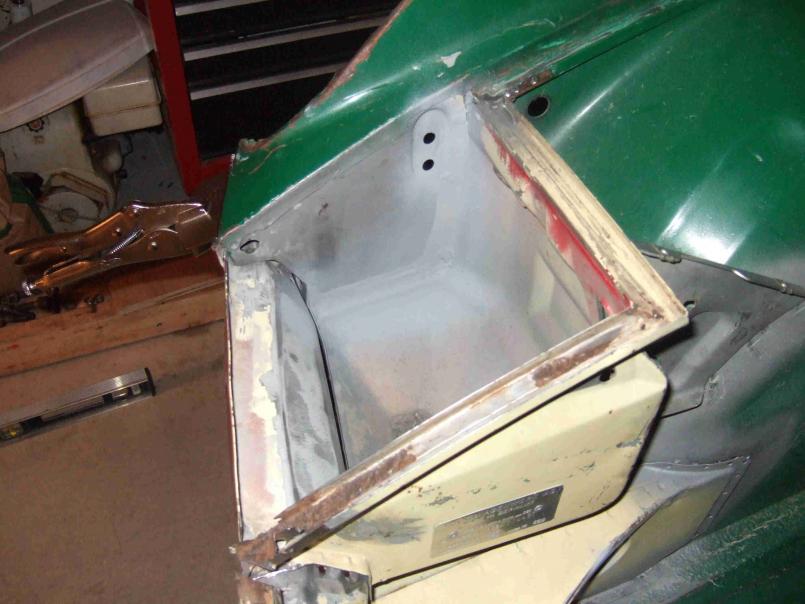
Posted by: jsayre914 Oct 10 2008, 10:45 PM
very nice job ![]()
Posted by: jmill Oct 11 2008, 08:14 PM
Thanks Joseph. I got a little more done today. I'm finding out that the drivers side had some prior damage too. Now that I've got the passenger side lined up nice I'm not liking how the drivers side fits.
Attached thumbnail(s)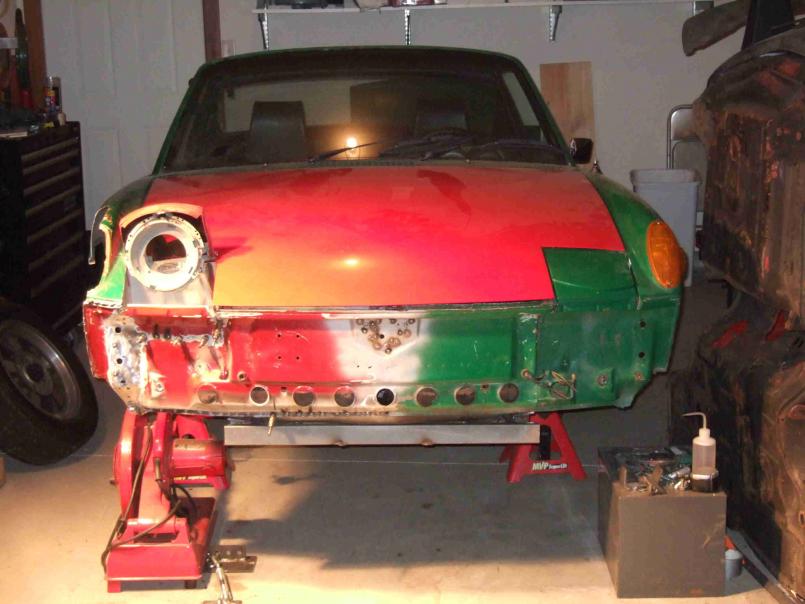
Posted by: jmill Oct 11 2008, 08:19 PM
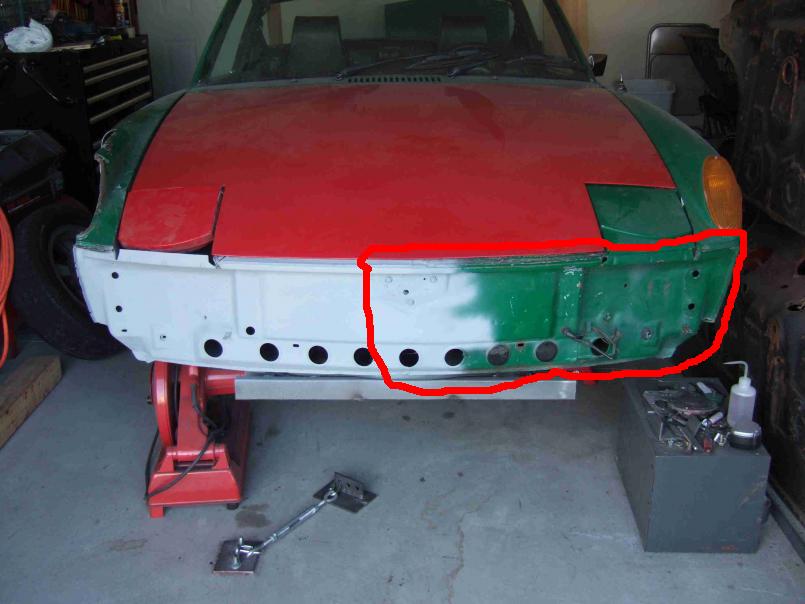
You can see it alot better in this picture. The front panel must have been hit and pushed down on the drivers side. Looks like I'm in need of a drivers side front panel. Does anyone sell replacement panels for the front?
Attached thumbnail(s)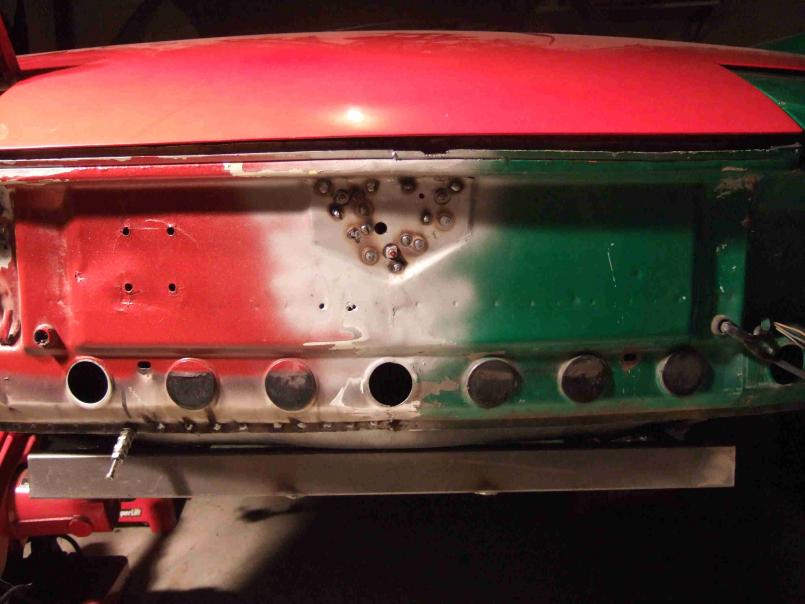
Posted by: jmill Oct 12 2008, 05:15 PM
A couple more pics of what I got done today.
Attached thumbnail(s)
Posted by: jmill Jul 6 2009, 10:28 PM
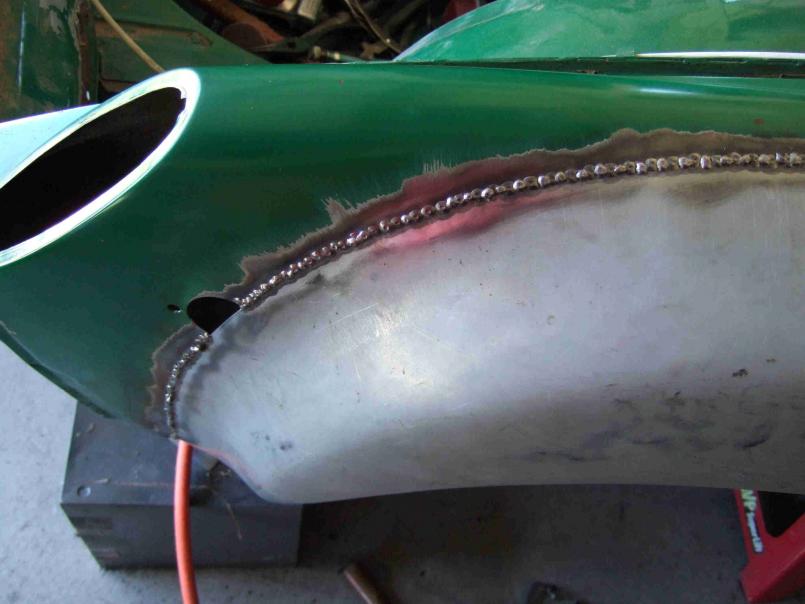
The winter was way too long. I got back to work on the 914. I didn't like how the headlight bucket sat up about 3/16 high on the passenger side. I also didn't like the rust in the hood seal area. I found out that the inner fender was still a bit tweaked. I installed the bucket to the inner fender first and got what you see in the picture above. I drilled that out. Pieced together another bucket with good parts and started over. This time I started with the front panel and then worked the inner fender to match the bucket. I much happier with the result.
I also installed my new Getty FG hood. It's sweet. At first I thought it was too flimsy. After opening and closing it about 150 times I found out it'll hold up quite well.
Attached thumbnail(s)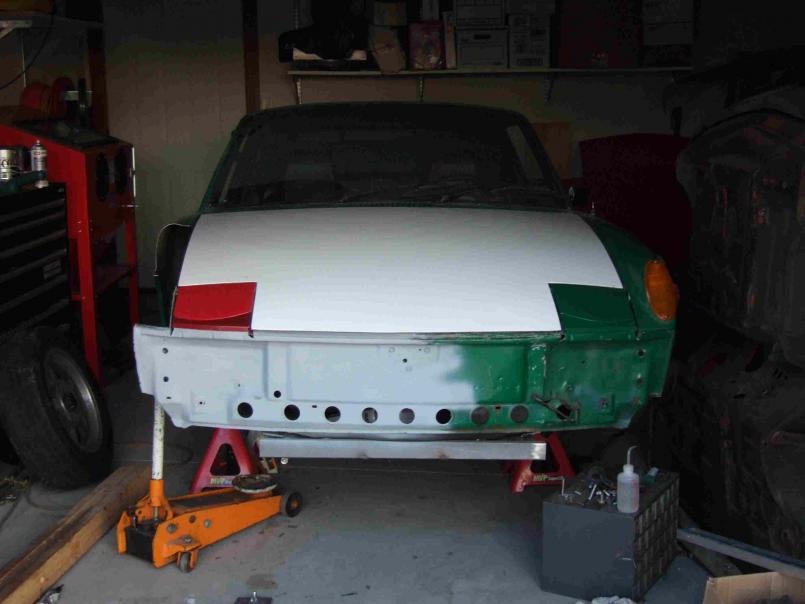

Posted by: jmill Jul 6 2009, 10:34 PM
After I got the passenger side squared away I need to clean up the drivers side. It was hit and pulled out at some time in its life. Someone also installed the wrong bucket. You can see how the drivers side bucket is an inch shorter.
Attached thumbnail(s)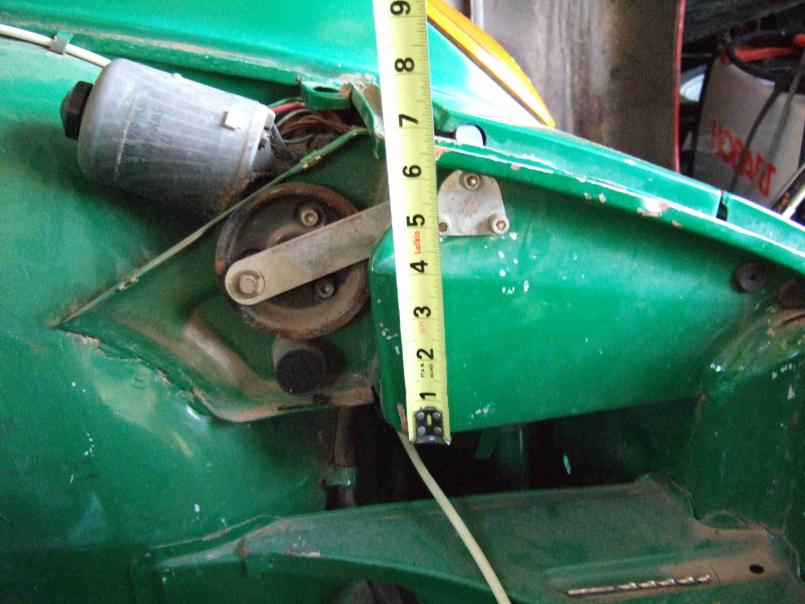
Posted by: jmill Jul 6 2009, 10:37 PM
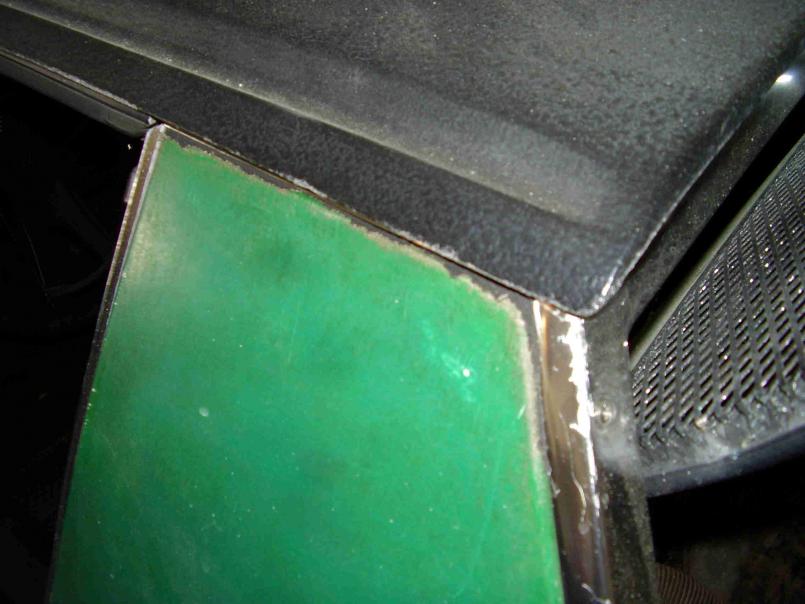
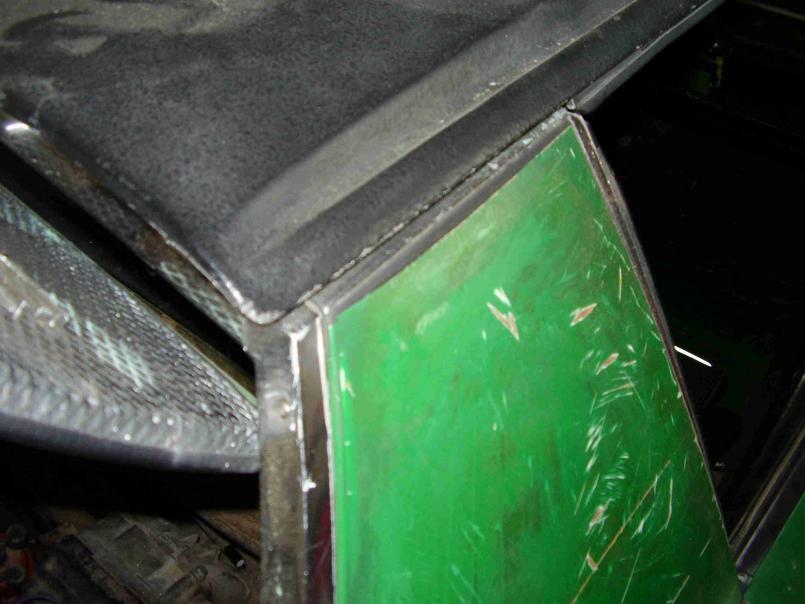
I also started removing the fender. I was bummed that the replacement I have has some bondo around the blinker. I don't know yet if I'll fix that one or try and find a cleaner one.
Attached thumbnail(s)
Posted by: jmill Jul 6 2009, 10:42 PM
Check out the nasty hood lines around the drivers side vs the cleaned up passenger side. I have some work to do there.
Attached thumbnail(s)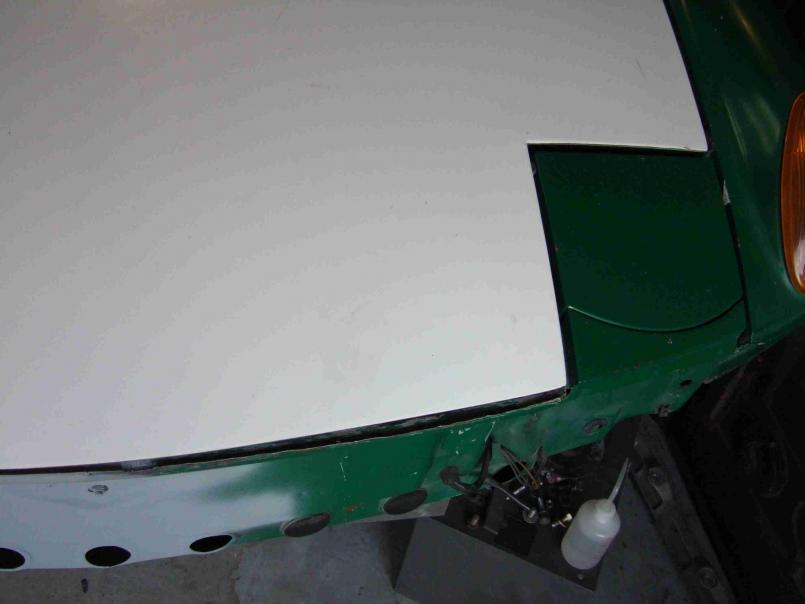

Posted by: jmill Aug 25 2009, 09:41 PM
Budman these are the parts I'm looking for.
Attached image(s)
Posted by: rick 918-S Aug 26 2009, 07:36 AM
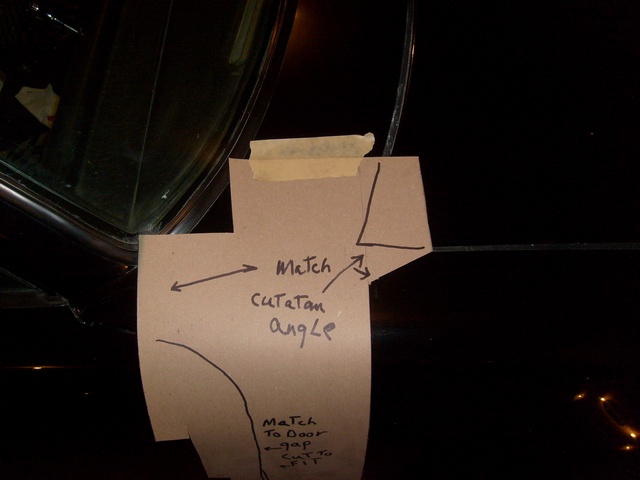
Maybe one of the west coast guys has a complete good fender. The problem with parts from up here in the rust belt is that the fenders all rust at the lowest point next to the door and up next to the plastic seam strip at the cowl line. It's hard to get a part you dont end up repairing. Then there's a wad of seam sealer packed up inside the fender to the cowl. Even harder to separate the fender from the cowl without damaging your donor part. If yours is good at the door and cowl line you should try to find a way to section it.
I fully understand the thought process with regard to changing the whole piece. Specially with the inner wheel house concern. I think your thinking by splicing the fender in the middle of the wheel opening it's possible to end up with a crooked or miss matched wheel opening. Your right, but if you made a card board templet for the cut line and matched the vertical cut from a donor car to your car you would still be good.
I will take a photo of my idea for you and post it here later today.
Posted by: rick 918-S Aug 26 2009, 08:05 AM
OK, I ran out really fast and did this quick. I think there are photos here on the world site of a fender section McMark did this way. As I recall it turned out nice and helps avoid a fit problem when you've had a damaged wheel house.
First find a print shop that makes those big desk top calendars we all used to have until we plopped a lap top on it and decided we didn't need it any more. They will have tag board. (the card board backing for the calendars) This is the best stuff for making patterns.
I didn't fully trim the piece and match it as I suggested but you get the idea. Take good measurements and be sure to take your time when cutting and trimming.
Attached image(s)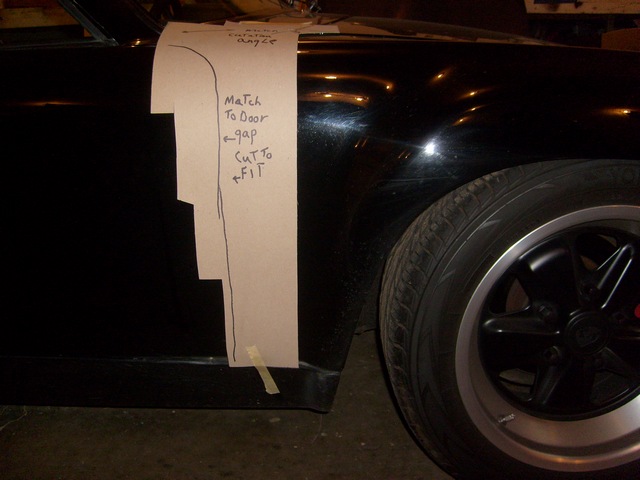
Posted by: jmill Aug 26 2009, 09:16 AM
Thanks for the input Rick. Budman (Chris) is out in Az and seems to trip over good cars every other week. He's got one now that I'm trying to get the parts off of. I threw the pics of what I needed up here cause it was easy and I'm lazy.
I like your template idea. My problem is that the fender is wavy between that inner support bulkhead type deal behind the tire and the door pillar. The door pillar was even moved a bit. The bottom is right but when that front corner came up it pushed the top of the window and door pillar down. I don't know if your picking up what I'm trying to say. In short it changed the angle at the bottom of the door pillar where it meets the long. The passenger door closes ok but you can tell it's not quite right. The striker lifts the door up a pinch where it needs to be when it closes.
My plan was to remove the fender and then straighten the pillar out by gently lifting the bottom corner of the door to fix the angle. I suppose I can still do that but not cut the entire fender out. I was thinking that straightening the wavy fender by the door would be a pain with little working room to swing the hammer. From what your saying it's a pain to weld in a complete fender.
Posted by: rick 918-S Aug 26 2009, 10:01 AM
Oh, I get it. I was thinking you were just working the inner panel at the gas tank bulkhead not back as far as the cowl pillar. That's a tougher pull. We need a Cellette bench up here in this area of the country with the 914 fixtures. Post a picture of the cowl damage if you can.
Someplace here on the site I think we have chassis measurements. I've never had good luck with the search function but try it.
How does the drivers door fit? If that fits and works properly, take measurements and use it to gauge what is going on with the passenger side.
How does the targa top fit? Is it pushed back on the passenger side?
Posted by: rick 918-S Aug 26 2009, 10:24 AM
I thought I had a better photo of this tool but you need one of these. On a 914 you can pull or spread the cowl by cranking this puller/spreader in or out.
This is my M3 I bought wrecked during repairs.
Here is a photo of the door gap and wrinkled panel over the wheel. The gap at the top of the door was over an inch wide. 
Here it is after I pulled it and worked out the wrinkle in the quarter panel. Most guys would have thrown the panel away but BMW's have serial numbers on all the body panels and I wanted to retain the original sheet metal.

If you can't find a tool to borrow locally let me know.
Posted by: jmill Aug 26 2009, 11:30 AM

How does the drivers door fit? If that fits and works properly, take measurements and use it to gauge what is going on with the passenger side.
How does the targa top fit? Is it pushed back on the passenger side?
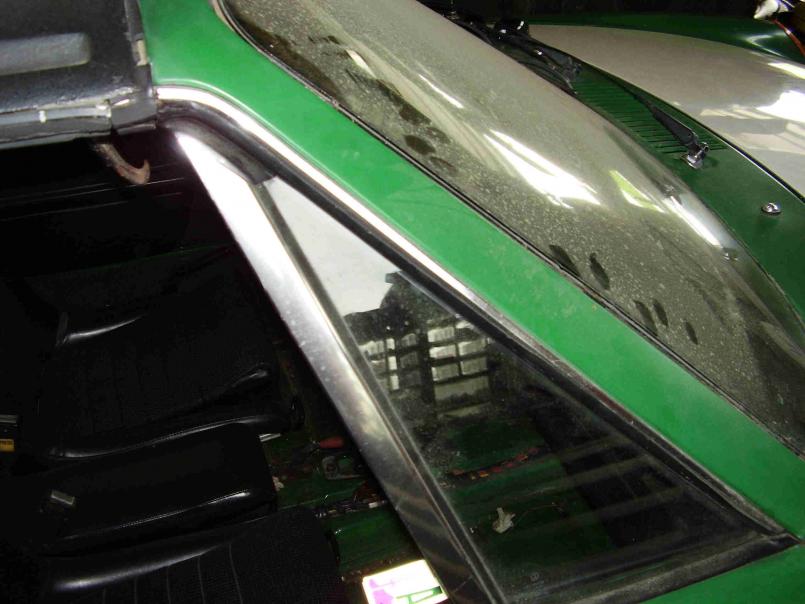
Drivers door is perfect and closes smooth as butter. Targa top is cockeyed a bit because the window pillar is jazzed. Passenger door closes and gaps are fine but you can tell that the striker has to lift the door up a pinch to fit right. I want it to close as smooth as the drivers side. I'll post pics tonight. The cowl looks fine too. IIRC the front fender to door gap isn't bad either. The only hint that it isn't right is the targa top fit and when you close the door it needs a little extra on it to latch.
Do you have anymore pictures of that tool? That looks like just what I need. I can fab up something to work similar if I can see what it looks like.
Posted by: type11969 Aug 26 2009, 02:33 PM
Jmill -
Any interest in loaning or selling that front suspension mount jig you made? Looks great! My 914 was hit in the driver's side front fender at some point and the mounts are definitely tweaked. I have a whole donor floor section with the mounts, but I think I can use the existing passenger side mounts as a starting point. Your jig would make it possible, I don't have a good car to build one off of. Let me know, no rush.
Thanks,
Chris
Posted by: rick 918-S Aug 26 2009, 05:13 PM
How does the drivers door fit? If that fits and works properly, take measurements and use it to gauge what is going on with the passenger side.
How does the targa top fit? Is it pushed back on the passenger side?
Drivers door is perfect and closes smooth as butter. Targa top is cockeyed a bit because the window pillar is jazzed. Passenger door closes and gaps are fine but you can tell that the striker has to lift the door up a pinch to fit right. I want it to close as smooth as the drivers side. I'll post pics tonight. The cowl looks fine too. IIRC the front fender to door gap isn't bad either. The only hint that it isn't right is the targa top fit and when you close the door it needs a little extra on it to latch.
Do you have anymore pictures of that tool? That looks like just what I need. I can fab up something to work similar if I can see what it looks like.
Yep, just what I thought. I'll get a photo of my spreader. Yes, you can make one with all thread and a piece of tubing. Mine has right and left hand threads so both ends retract or expand But you can get by with one end moving.
Don't move the windsheild post. The cowl is tipped back slightly. Push the cowl back with a spreader. Put the tool at the base of the door latch pillar and extend it to the top of the cowl in line with the dash. This will in turn lift the back of the door and move the top of the windsheild pillar out slightly.
Again, move a little, check it, move a little, check it.
Just for grins, remove the weather seal on the body of both right and left sides. Take a measurement from the base of the pinch weld flange at the latch post to the pinch weld flange next to the upper dash on both the right and left sides. I bet there's 3mm difference. This will continue on up to the top of the windsheild frame. (three thicknesses of a dime) The could show 5mm (five thicknesses of a dime) difference if you go from the lower latch pillar to the top of the winsheild frame.
Posted by: jmill Aug 26 2009, 05:28 PM
I took a bunch of pics and really looked at the door. I closed it really slow looking it all over. It seems like the door pillar is fine but the window post is bent down. When I close the door the wing window post of the door hits the window post which pushes the door down and then the striker has to lift it back up. Here's some pics.
Attached thumbnail(s)

Posted by: jmill Aug 26 2009, 05:37 PM
More pics.
Attached thumbnail(s)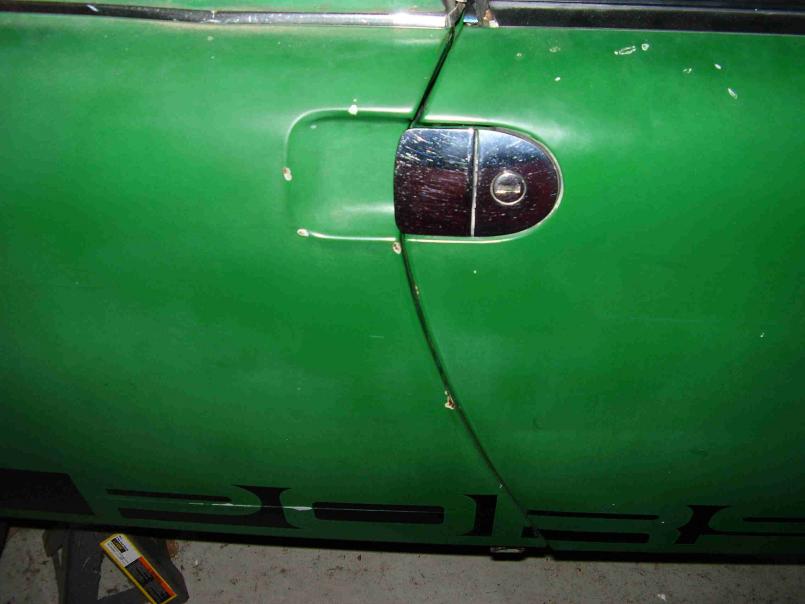
Posted by: rick 918-S Aug 26 2009, 05:38 PM
Yes your vent window will press against the windsheild post because as the door lifts up to meet the striker the hinge point acts like a tetter totter. If you move the top of the cowl forward the windsheid frame will go with it. The back of the door will raise to line up with the striker and the door will no longer tetter totter the vent glass into the windsheild frame seal.
Do this. Go out to the garage. Remove the targa top. Measure the distance from the right side of the top of the windsheild frame back to the targa bar latch. Then check the left side the same. Oh and do this with the doors open. Then do it with the doors closed.
Then report.
Posted by: jmill Aug 26 2009, 05:47 PM
Any interest in loaning or selling that front suspension mount jig you made?
I need to make a better one. There are a few holes on it that I can barely get a bolt in because I welded the frame too close to the holes. I had to open up a few holes in it too. Your second in line. Another member here expressed some interest a while back. If he doesn't want it you can have it for the price of shipping. I need to hang onto it until I get the car all pieced back together though.
Posted by: type11969 Aug 26 2009, 05:50 PM
Any interest in loaning or selling that front suspension mount jig you made?
I need to make a better one. There are a few holes on it that I can barely get a bolt in because I welded the frame too close to the holes. I had to open up a few holes in it too. Your second in line. Another member here expressed some interest a while back. If he doesn't want it you can have it for the price of shipping. I need to hang onto it until I get the car all pieced back together though.
Sounds great to me, like I said, no rush, I have a lot of work still left to do before I even get to the front.
Posted by: jmill Aug 26 2009, 06:34 PM
Do this. Go out to the garage. Remove the targa top. Measure the distance from the right side of the top of the windsheild frame back to the targa bar latch. Then check the left side the same. Oh and do this with the doors open. Then do it with the doors closed.
Then report.
Drivers side = 24 7/8 - open or closed
Passenger side = 24 11/16 open and 24 3/4 closed
Posted by: rick 918-S Aug 26 2009, 07:28 PM
Do this. Go out to the garage. Remove the targa top. Measure the distance from the right side of the top of the windsheild frame back to the targa bar latch. Then check the left side the same. Oh and do this with the doors open. Then do it with the doors closed.
Then report.
Drivers side = 24 7/8 - open or closed
Passenger side = 24 11/16 open and 24 3/4 closed
I'm correct but I was 1mm short. You have a 6mm difference from your right side to your left.
Now, do this: Remove the pinch weld mounted seal in the right and left door jamb.
Then find a place on both latch pillars (right and left) that are the same approximately at the height of the belt line. With the doors open, measure from the latch pillar on both sides from the pinch weld flange to the same place at the base (bottom corner) of both "A" pillars to the edge of the pinch weld flange.
I'm betting you get the same measurement.
Posted by: jmill Aug 26 2009, 07:59 PM
Yup, same measurement.
Posted by: r_towle Aug 26 2009, 08:52 PM
Im late to the show.
Did you hit something?
If not, remove the window, corner window, chrome piece etc etc.
THEN close the door.
The chrome upright is extremely adjustable.
Rich
Posted by: jmill Aug 26 2009, 08:58 PM
I didn't hit anything. An owner before me ricocheted it off a wall. It's slow going but it's coming together.
Posted by: r_towle Aug 26 2009, 09:04 PM
Remove the window.
Set the door perfect.
Then put the window back in.
One trick is to tip the chrome upright away from the centerline of the car. Everything still works fine and that is why it is adjustable.
Rich
Posted by: rick 918-S Aug 26 2009, 09:21 PM
No don't remove the window. The window fit the opening before the accident. Adjust the cowl like I told you and the door will self correct. As you move the cowl back the door will close on the striker without lifting and the window won't be forced into the windsheild pillar.
It will do no good to adjust the door or window until you have corrected the chassis. Then you can fine tune the opening by moving the door slightly or the window slightly.
Your chassis is 6mm off. Correct that first.
You will know your doing good if the door stops raising up when you hit the striker and the measurement at the top of the windsheild stays the same with the door open or closed like the driver side.
Posted by: rick 918-S Aug 26 2009, 09:32 PM
Yup, same measurement.
Ok that confirms the cowl is leaning back on the passenger side. (and the car is not sagging at the jack point closing the gap at the top of the targa bar to the windsheild)
One more check you can do is to measure both sides from the bottom of the latch pillar pinch weld to the arch at the top of the cowl. (curved area at the base of the windsheild) use the pinch weld flange and find a place on both sides that are the same. You should see the passenger side will be shorter by about 4mm. (6mm at the top of the windsheild)
Posted by: jmill Aug 26 2009, 09:49 PM
This one isn't sagging. The longs are perfect. Original paint and no rust. That's the entire reason I bought it. It was bent but damn near rust free.
I'll get some more measurements tomorrow to see how much I need to move it. If you can get a pic of that tool I'd appreciate it.
Posted by: rick 918-S Aug 26 2009, 11:58 PM
Here you go. It's hard to see but the jaws have teeth that bit into the pinch weld flange.The threaded section is right and left hand thread so when you rotate the square tube it extends or retracts.
If you want I can put it in a card board tube and ship it to you. It's kind of heavy and shipping could be expensive.
Attached image(s)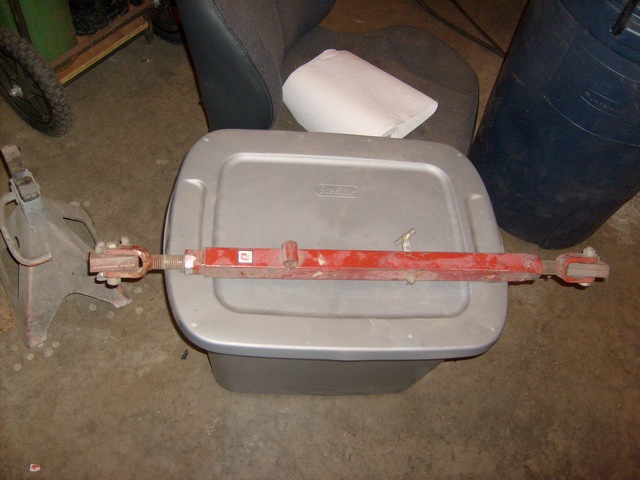
Posted by: jmill Aug 27 2009, 08:02 AM
Thanks for the pictures. No need to ship it. I'll make one. After shipping costs from and then back to you I bet I can buy the stuff to make it. Plus I'll have a cool new tool. You can never have enough of those. Mine will only adjust on one side but it'll still work. Thanks.
Posted by: jmill Dec 20 2009, 09:35 PM
I haven't done a damn thing in months. Winter sucks.
Posted by: rick 918-S Apr 8 2010, 07:14 AM
John! your next post will be your 914th post!  You want me to come over this weekend or next? We can tweek that door opening.
Posted by: rick 918-S Apr 8 2010, 01:53 PM

![]()
Posted by: jmill Apr 18 2010, 07:48 PM
There was an Alien sighting in Racine Wisconsin this weekend. Here we see a picture of the Creator in his natural environment.
Attached thumbnail(s)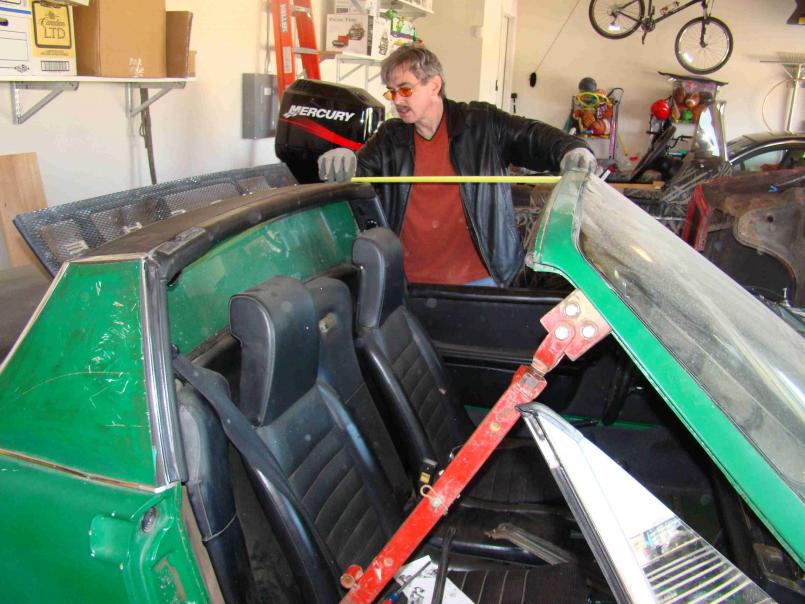
Posted by: jmill Apr 18 2010, 07:50 PM
Here's another of picture of "measure 6 times and tweak once."
Attached thumbnail(s)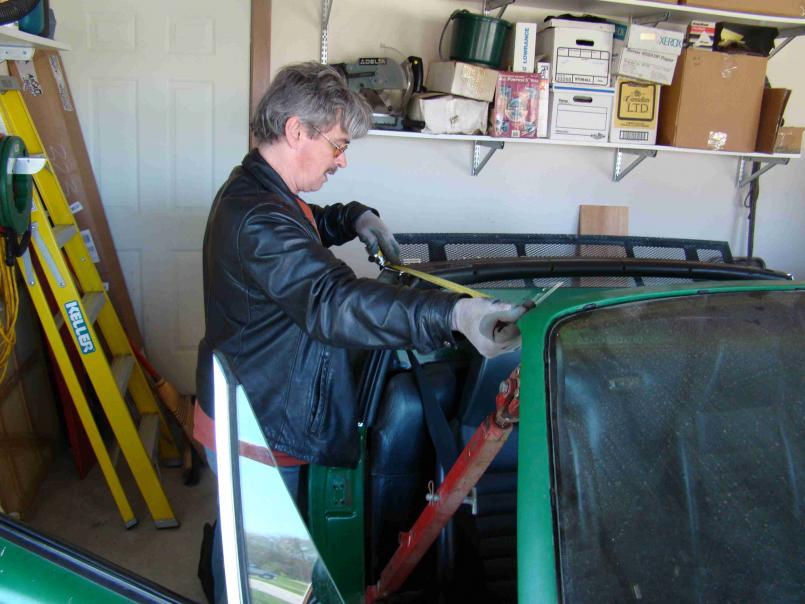
Posted by: jmill Apr 18 2010, 07:57 PM
When Rick was through the door closed like butter. We ended up swapping out the door latch with one of my spares. I found out that was half my problem. Here's a picture of me relaxing while Rick does the work. This was the first time I let someone else touch one of my project cars. I usually do all the wrenching. This one was beyond me. One false move and it would be tweaked the wrong way. I kept one hand in my pocket and the other on the coffee cup. Rick knows what he's doing. I just tried to stay out of the way.
Attached thumbnail(s)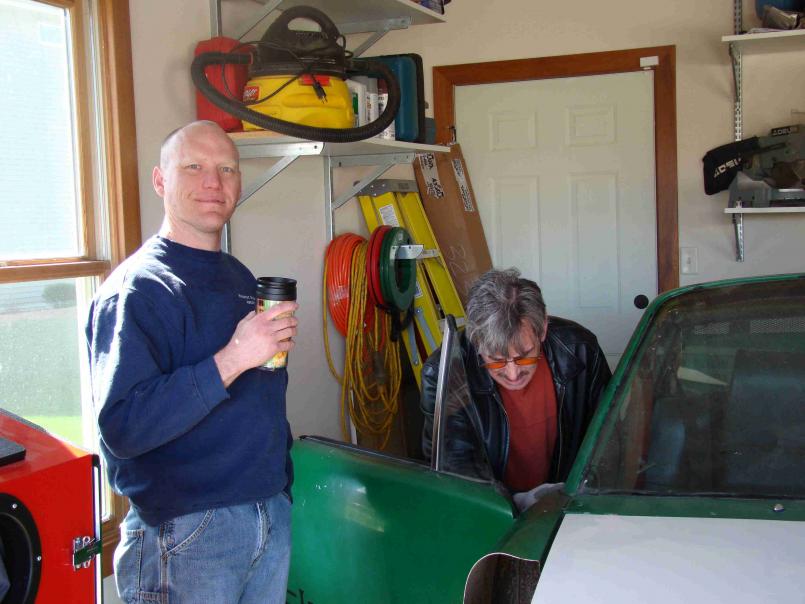
Posted by: jmill Apr 18 2010, 08:08 PM
Hopefully that engine didn't puke all over the inside of your car. Rick's the only guy I know who hauls around greasy parts in a 5 series BMW. 
Rick, the wife says the next time you and Sandy are in town we need to go out for dinner. She was bummed I didn't tell her you guys stayed in Racine Saturday night. There's a nice Italian place downtown. She doesn't need to be asked twice if she wants to go there.
She did make me go inside about an hour after you left. She was tired of me opening and closing the door. It just closes so nice now. 
BTW - this was post # 928.
Posted by: rick 918-S Apr 18 2010, 08:52 PM
Hi John! 928th  Hey, I had a great time today. I wished I could have stayed longer. We were just getting to the funs stuff!
For all,
I want to let you in on our fun. I was very interesting in the 914 John purchased from Budman. I was seriously thinking of purchasing the car at the same time John was. I have followed his repair progress with interest wondering how nice (solid) the car is.
Well John had an engine I was interested in and he needed a fender and a tail light panel I have as spare parts. This was all the prodding I needed to make plans to see the car.
Sandy and I rolled into town last night and while she slept at the hotel (her weekend thing  ) I hopped in my Touring with parts loaded and made it over to John's house bright and early.
Let me tell you. His car is one solid example of a 914! John has made some great progress on his journey to put this car back on the road where it belongs.
As a bonus I got to help repair a tight door opening that was kind of halting progress. I'm sure we will see many more posts over the next year with landmark progress being made.
I scored a great core engine for Sandy's car. John also gave me a chrome front bumper. So, 7 of 9 will be getting an upgrade to Chrome!
Thanks John! Maybe we can do it again sometime this year!
BTW: This isn't the first time I've hauled an engine in my BMW.... 
Posted by: rick 918-S Apr 19 2010, 07:07 PM
There was an Alien sighting in Racine Wisconsin this weekend. Here we see a picture of the Creator in his natural environment.
Just had to show off my cool spreader.

Posted by: jmill Jun 3 2010, 08:25 PM
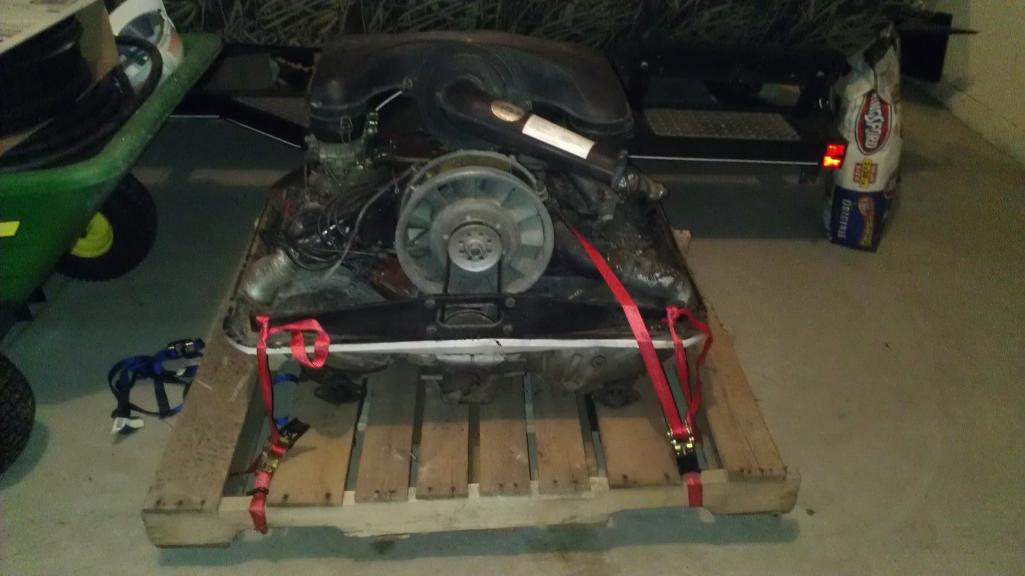
Look what showed up today. Thanks Jason. It was packed bullet proof. The carbs didn't come with it but I had to toss them on as soon as I cracked the crate open. It seems the 2.4 conversion is going to be a reality. All I need now is a shroud, fan, alt, dizzy, linkage, oil tank, oil lines, motor mount and exhaust. Oh, and then about 8k to rebuilt the engine to S spec. 
I'm thinking of keeping it a T for awhile to cut those costs way down. Let me know if anyone is giving away a set of 2.2S pistons. 
Attached thumbnail(s)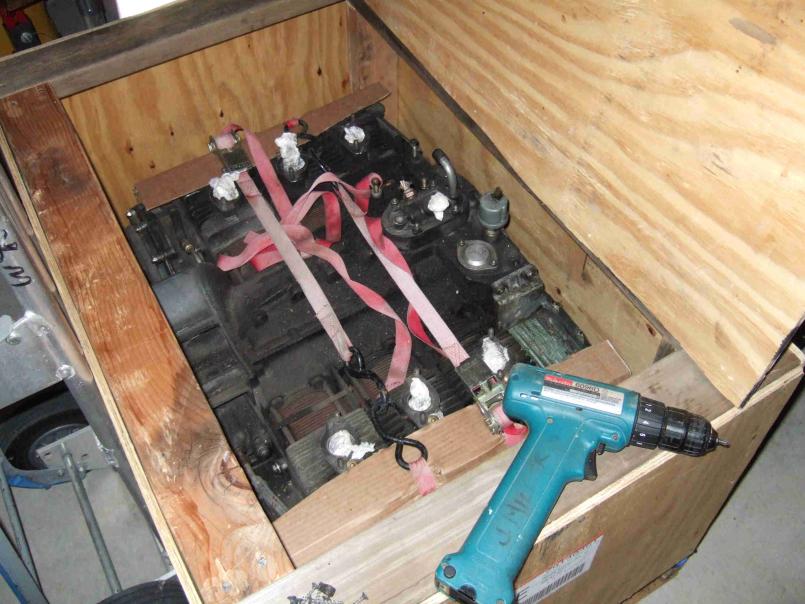
Posted by: jmill Jun 3 2010, 08:27 PM
sf
Attached thumbnail(s)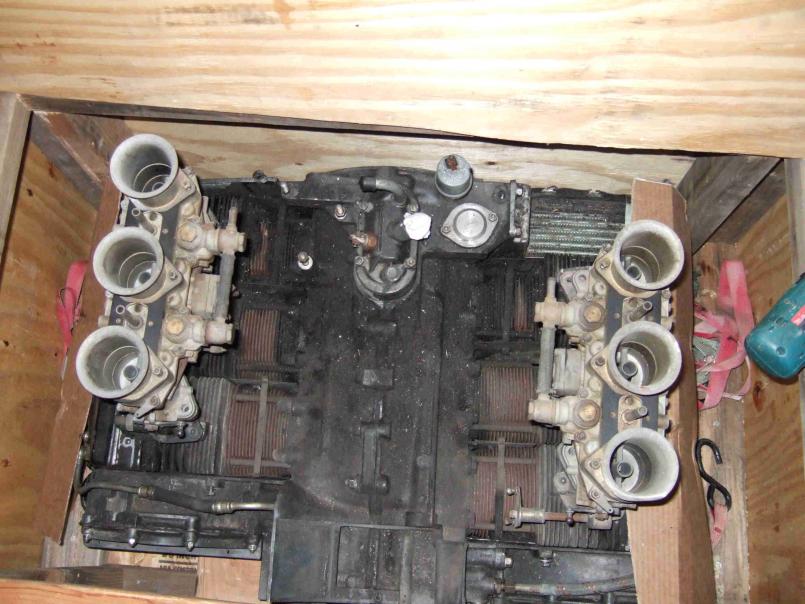
Posted by: effutuo101 Jun 3 2010, 10:02 PM
Nice! keep up the good work! I am looking foward to seeing this back on the road.
Posted by: jasons Jun 3 2010, 10:19 PM
Look what showed up today. Thanks Jason. It was packed bullet proof.
Good. I was wondering if you got it yet. Do you know what day it arrived in Milwaukee? Forward Air worked out great.
Posted by: rick 918-S Jun 3 2010, 10:46 PM
That's going to work out really good!
Posted by: carr914 Jun 4 2010, 06:51 AM
Bruce Lee, Guy Williams & I approve 
T.C.
Posted by: jmill Jun 4 2010, 07:39 AM
Good. I was wondering if you got it yet. Do you know what day it arrived in Milwaukee? Forward Air worked out great.
I showed up on the 2nd. I couldn't pick it up then because I had to coach soccer practice after work. Forward air did work out great. Your crate didn't even have a scratch on it. But the way you built it there was no way the motor would have been damaged anyhow. Their hub is only a few blocks from my work. I showed them my drivers license and they loaded the crate into the back of my pickup after I signed for it.
I'm stoked. I just need time now. With all the sports my kids are into I can't catch a free moment.
Posted by: rick 918-S Jun 6 2010, 08:47 AM
Good. I was wondering if you got it yet. Do you know what day it arrived in Milwaukee? Forward Air worked out great.
I showed up on the 2nd. I couldn't pick it up then because I had to coach soccer practice after work. Forward air did work out great. Your crate didn't even have a scratch on it. But the way you built it there was no way the motor would have been damaged anyhow. Their hub is only a few blocks from my work. I showed them my drivers license and they loaded the crate into the back of my pickup after I signed for it.
I'm stoked. I just need time now. With all the sports my kids are into I can't catch a free moment.
Ya, but those soccer games are a hoot! I remember my kids playing. They would stand on the field and chat right in the middle of the game.... Drove the parents nuts.
Any work on that fender yet?
Posted by: jmill Jun 7 2010, 07:56 PM
Haven't touched the fender. Just have time for late night parts searches. The wife has a long list of "honey do's." As soon as I get through a few of them I can work on the car. The fender is on the top of the list.
Posted by: jmill Jul 17 2010, 08:42 PM
The fender is finally going on. I had to take 4 days of vacation to get one day in the garage. It's funny how you plan to do all kinds of stuff on vacation and then life gets in the way. Some lady backed into the wifes BMW. There went one day chasing estimates and playing phone tag with insurance agents.
Anyhow, it's going on nice. Unfortunately the only rust free fender I had was dented up. After grinding off 1/2" of bondo and some work with a dolly block and hammer it looks pretty good. I'll have to bribe Rick to help me with the body work. I can weld and grind but I can't do bondo. It takes me like 5 coats to get things decent.
Attached thumbnail(s)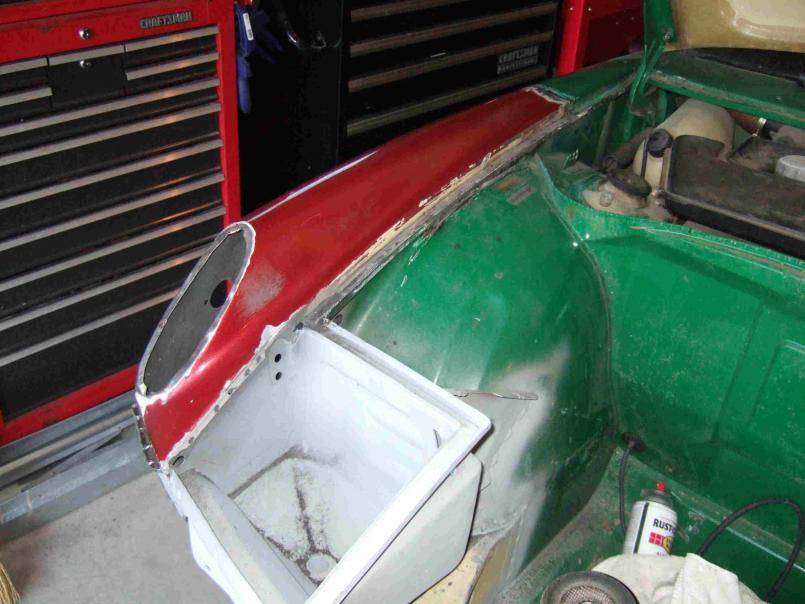
Posted by: jmill Jul 17 2010, 08:44 PM
one more.
Attached thumbnail(s)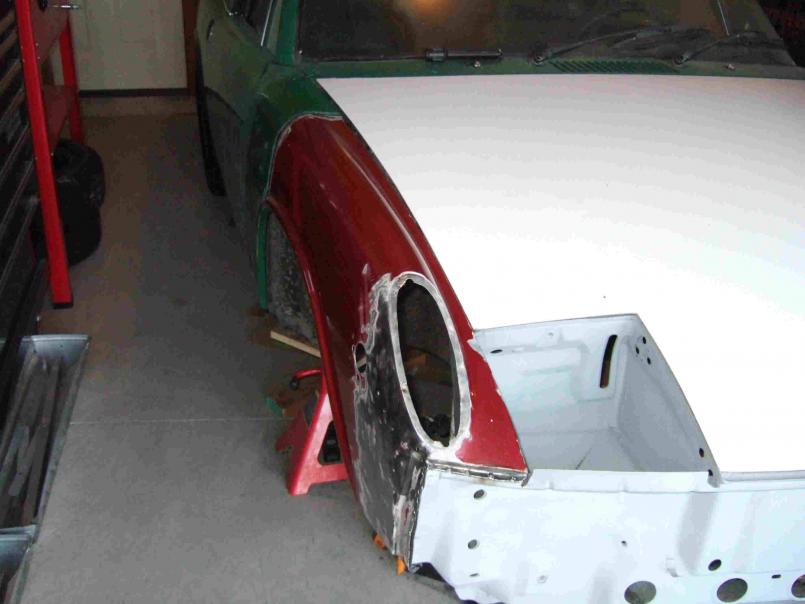
Posted by: rick 918-S Jul 17 2010, 09:09 PM
I could end up working over in Milwaukee later in the summer. The fender is looking good!
Posted by: jmill Jul 18 2010, 05:10 PM
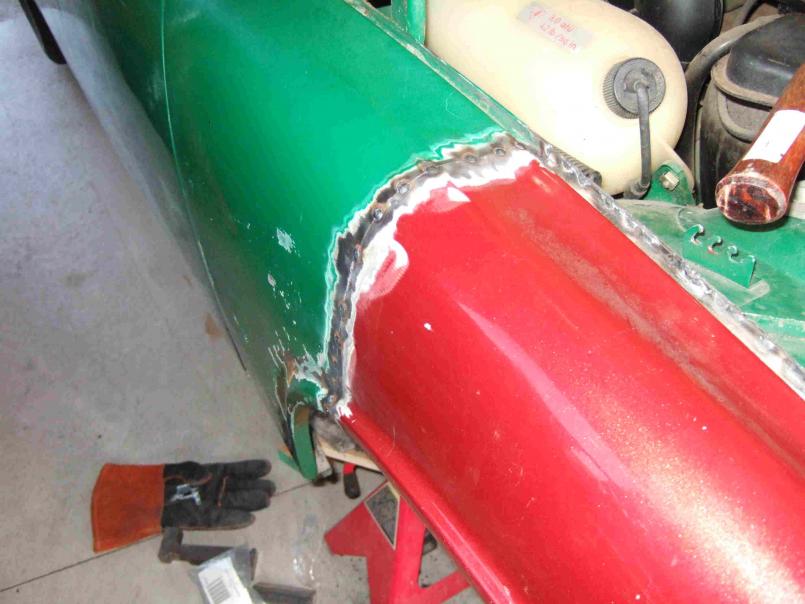
Completed butt weld and then blended smooth.
Attached thumbnail(s)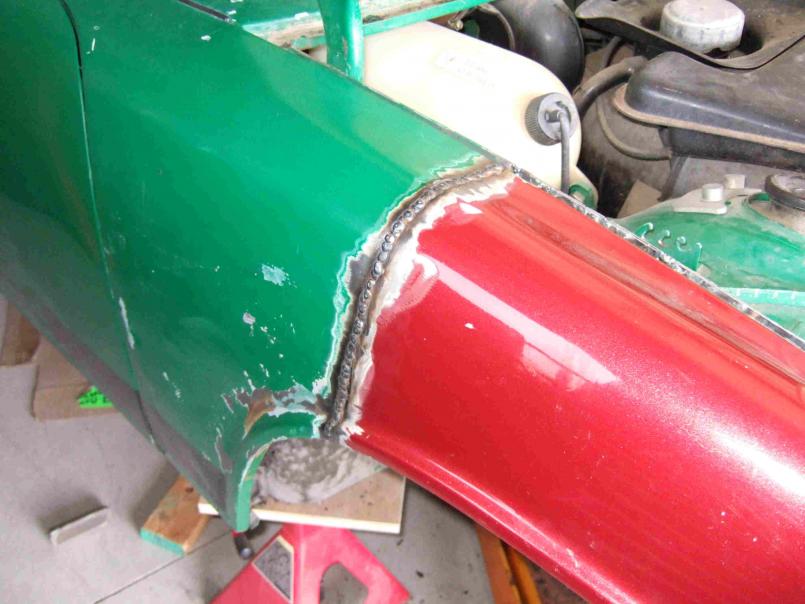
Posted by: jmill Jul 18 2010, 05:12 PM
All that work just to chop it out of there and add a flare. 
Attached thumbnail(s)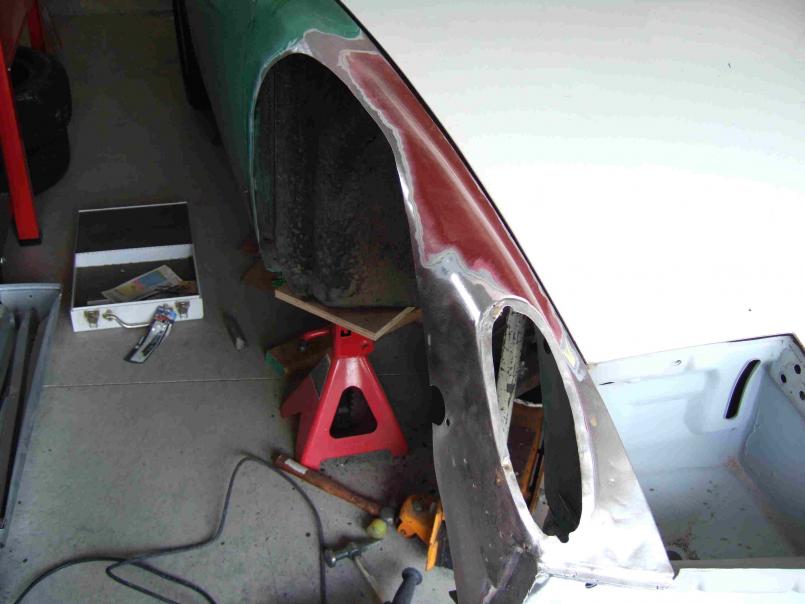
Posted by: jmill Jul 18 2010, 05:16 PM
From the backside. You can see the waves in the AA steel flare. It aint perfect but it beats glass.
Attached thumbnail(s)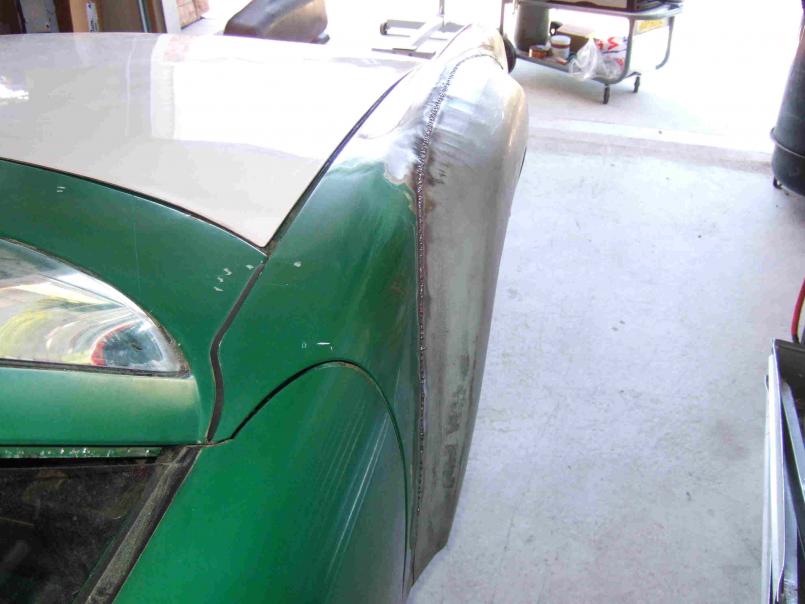
Posted by: rick 918-S Jul 18 2010, 06:42 PM
That butt welded seam came out so nice I bet you hated to have to cut it out! Get a body file from Eastwood or the Snap On, Mac, or your local tool guy. You should be able to file some of those wrinkles or waves out closer than they are.
Posted by: jmill Jul 18 2010, 07:00 PM
That butt welded seam came out so nice I bet you hated to have to cut it out!
Your not joking. I had to do so serious soul searching on that one. I sat in the garage for a 1/2 hour trying to figure out if I really wanted to do the flares. I came up with the fact that it was a bent up 1.7 destined to be cut up for parts. I saved it from that fate. The fact that this one is going to be on the road is a bonus. I went with the flares.
I tried to weld the flares on as careful as I butt welded the stock fender. I bought those Intergrips from Eastwood. I don't like them. The gap was too big and they didn't line up the panels flush. I tossed them over my shoulder. Any place that the two panels lined up perfect I spot welded. I then used deep throat vice grips, a dolly block and a hammer to line up the rest of the seam. I'm hoping when I grind off the weld it'll look as nice as the stock fender.
I can't see how guys weld flares on in a day. It took me several hours just to get one lined up right and tacked. I guess it gets easier with practice.
Posted by: budman5201 Jul 18 2010, 07:40 PM
Looking Great man, keep up the good work!
Posted by: Drums66 Jul 19 2010, 12:34 PM
..You're doing a great job!(man,I sure miss kato-bLee)
Posted by: jmill Jul 25 2010, 02:29 PM
Drivers side flare going on.
Attached thumbnail(s)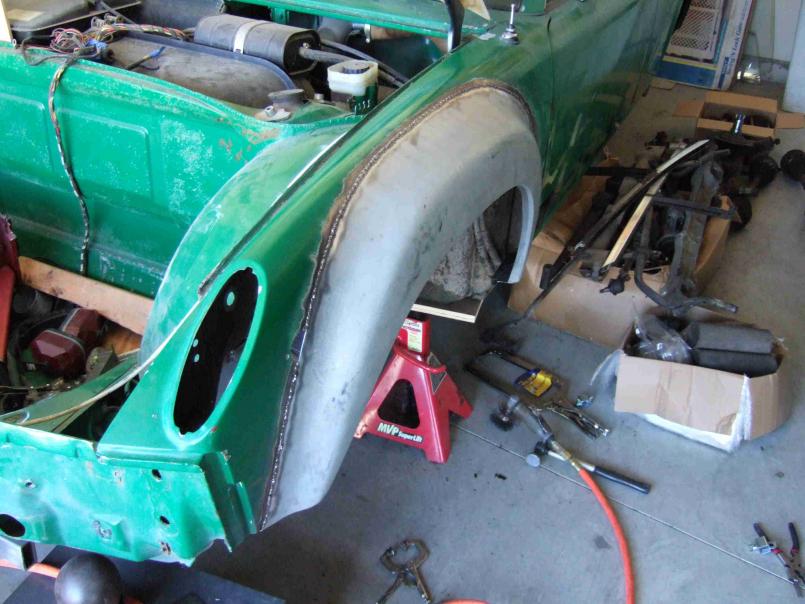
Posted by: jmill Jul 25 2010, 02:32 PM
Going to need some more sanding disks and that body file. Does the body file remove material? I remember seeing a disk that heated up the metal and then you quenched it to shrink out the high spots.
Attached thumbnail(s)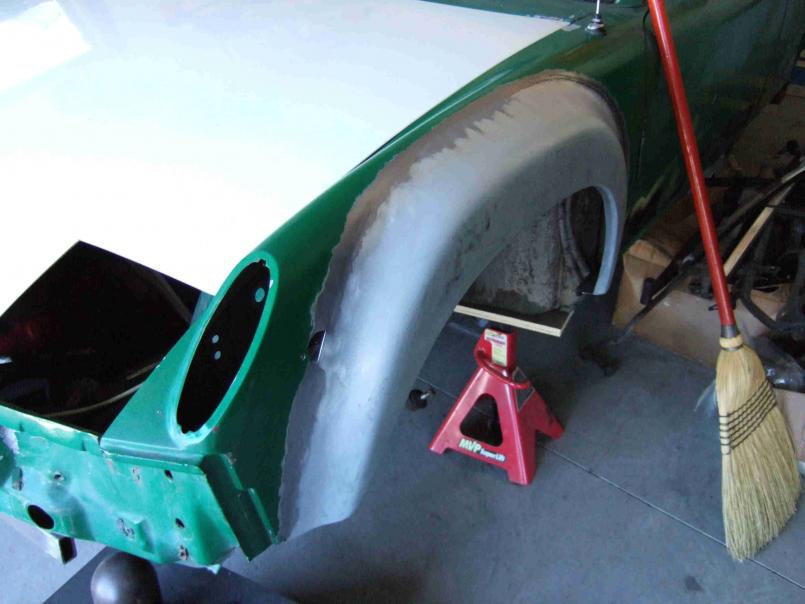
Posted by: jmill Jul 25 2010, 02:40 PM
Looking Great man, keep up the good work!
..You're doing a great job!(man,I sure miss kato-bLee)
Thanks guys, I'm trying. I'm not real happy with the flare symetry out of the box. They're close but not quite there. The drivers side rocker is also 3/4" shorter in the front. All you need to do is stand them next to one another and it's easy to see. QC isn't what it used to be.
Posted by: jmill Jul 25 2010, 02:56 PM
Anybody use one of these and will it work on the waves?
Attached thumbnail(s)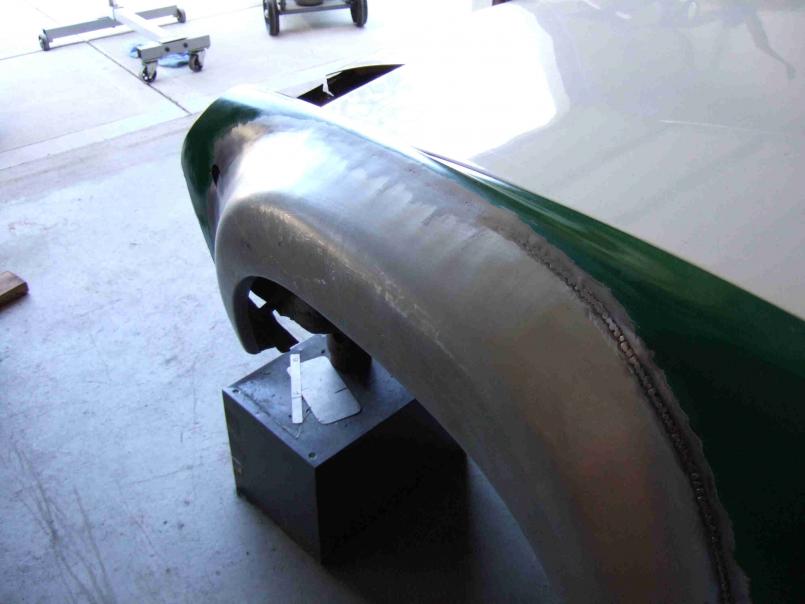
Attached image(s)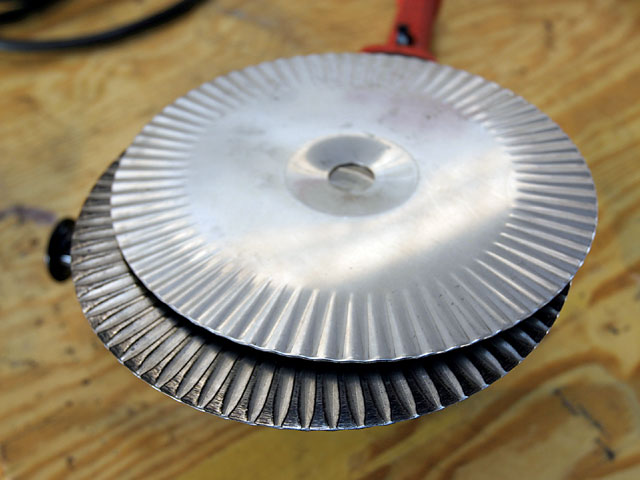
Posted by: faux916 Jul 25 2010, 03:15 PM
Looking Great man, keep up the good work!
..You're doing a great job!(man,I sure miss kato-bLee)
Thanks guys, I'm trying. I'm not real happy with the flare symetry out of the box. They're close but not quite there. The drivers side rocker is also 3/4" shorter in the front. All you need to do is stand them next to one another and it's easy to see. QC isn't what it used to be.
Very nice work...The rockers are different sizes because the factory originals where aswell. Dont know why but they where.

Posted by: jmill Jul 25 2010, 07:16 PM
Very nice work...The rockers are different sizes because the factory originals where aswell. Dont know why but they where.
I've heard that. I'd be fine with that if I picked up an original M471 GT.
At least I have an excuse if things don't turn out symetrical. I'll just say it came like that from the factory.

Posted by: rick 918-S Jul 25 2010, 07:27 PM
I've never used a shrinking disc. I've always wanted to try one.... just never bought one. and yes. The body file will remove material. Best to do some blocking before you start filing. if the waves are too high you could end up with a hole...Eeeek!
Posted by: strawman Jul 25 2010, 10:56 PM
Anybody use one of these and will it work on the waves?
Yes, I've used one (though mine is smooth, not "corrugated" like the ones in the photo). It works pretty slick, though I'd advise you to go slowly. Don't try to work too large an area -- on my AA flares, I tried to hammer/dolly the waves as best as I could and then used the shrinking disk to isolate each wave separately. Fortunately, I got to practice on the 1969 Opel GT we're entering into the 24 Hours of Lemons on August 7 & 8 at Thunderhill... better that heap than my flared teener project!
Keep the photos coming!
Posted by: bobhasissues Jul 26 2010, 07:31 AM
What are you using to grind down your welds?
They look great.
I've been using an abrasive wheel followed by a flapper disc, but it takes me forever to get the welds cleaned up.
Posted by: jmill Jul 26 2010, 02:51 PM
What are you using to grind down your welds?
They look great.
I've been using an abrasive wheel followed by a flapper disc, but it takes me forever to get the welds cleaned up.
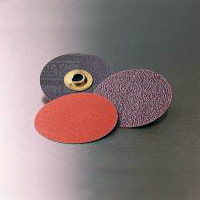
I use a 4 1/2" grinder with 60 grit to knock down the high stuff. I then use a 3" 3M 80 grit sanding disk on a high speed grinder. To finish it off I use one of those abrasive sponge pads on my drill motor.
Attached image(s)
Posted by: jmill Nov 10 2011, 06:33 PM
I've finally got lights in my garage. That and the slacker thread gave me some motivation to start working on the car again. Unfortunately, I'm just in time to have winter freeze me out of there again.
Posted by: jmill Nov 10 2011, 06:35 PM
I'm installing a 22mm bar that came out of a car I cut up.
Attached thumbnail(s)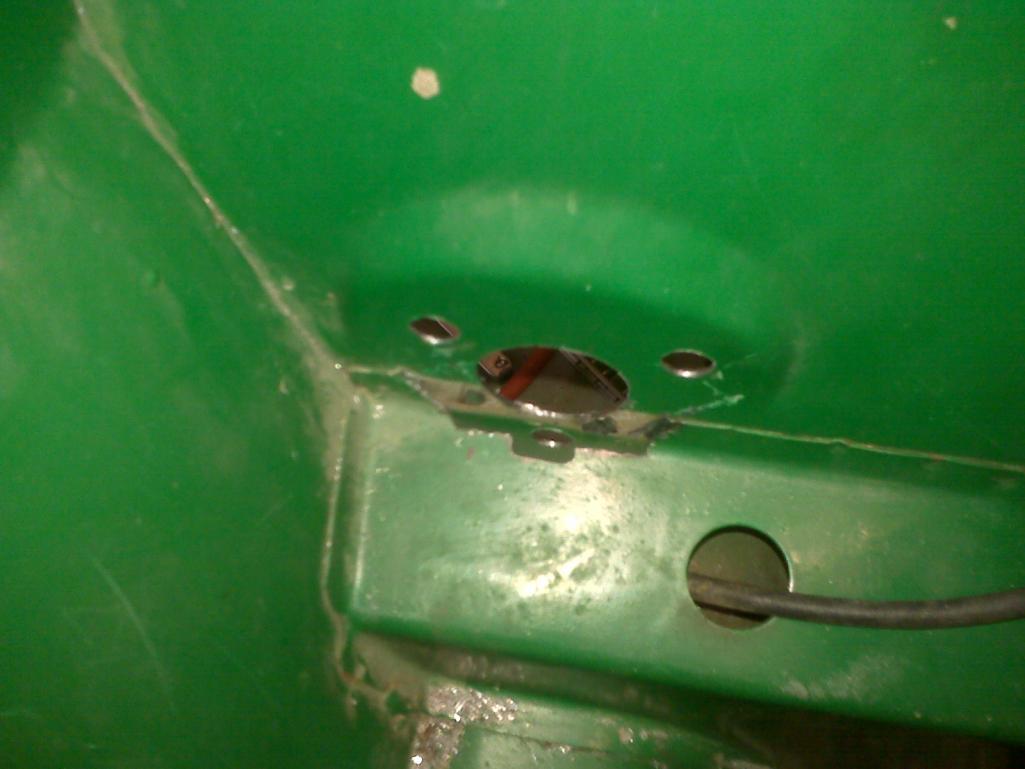
Posted by: jmill Nov 10 2011, 06:41 PM
I still need to weld the plates in and replace the bushings. Eric, GPR and Pelican didn't have them. The operator at Pelican gave me a number to call to get them from the manufacturer. They're about $5 a piece. Unfortunately after shipping it was like $22 bucks. 
Posted by: jmill Nov 12 2011, 07:18 PM
Welded in and waiting on bushings..
Attached thumbnail(s)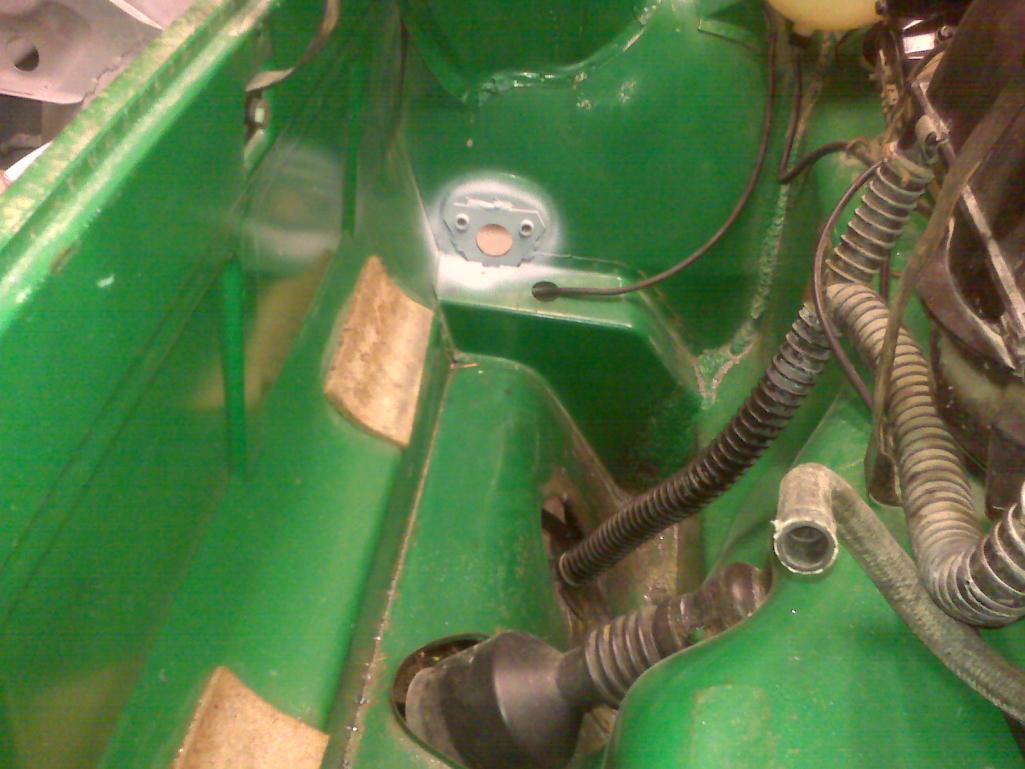
Posted by: jmill Nov 13 2011, 09:33 PM
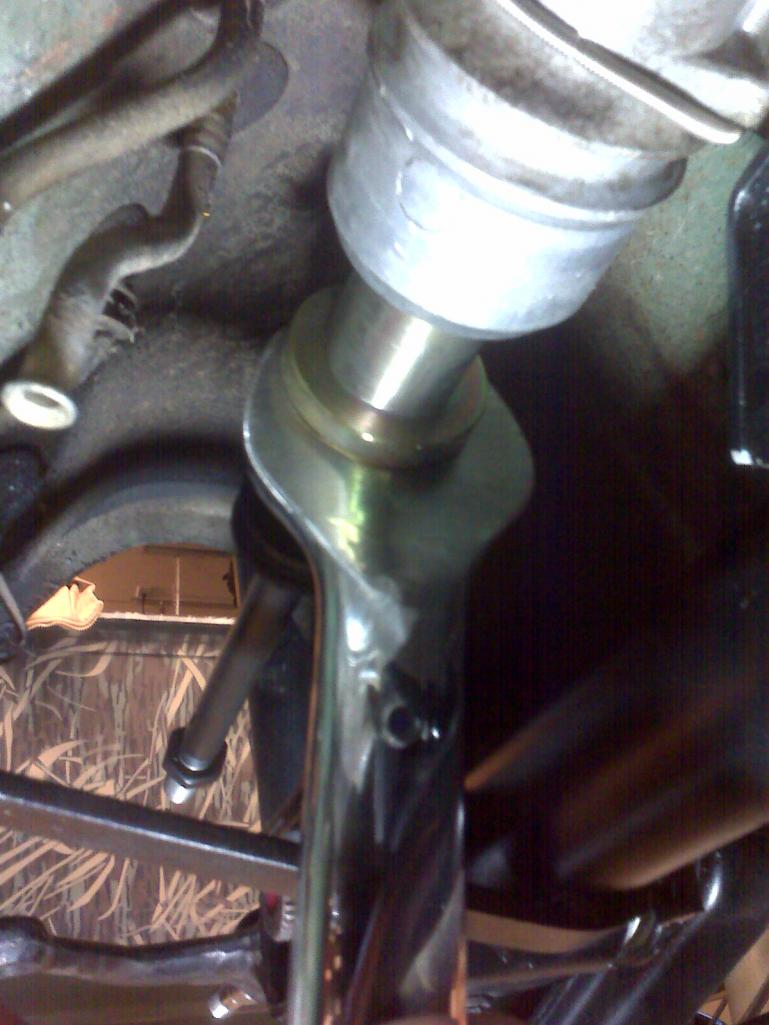
Front suspension bits coming together.
Attached thumbnail(s)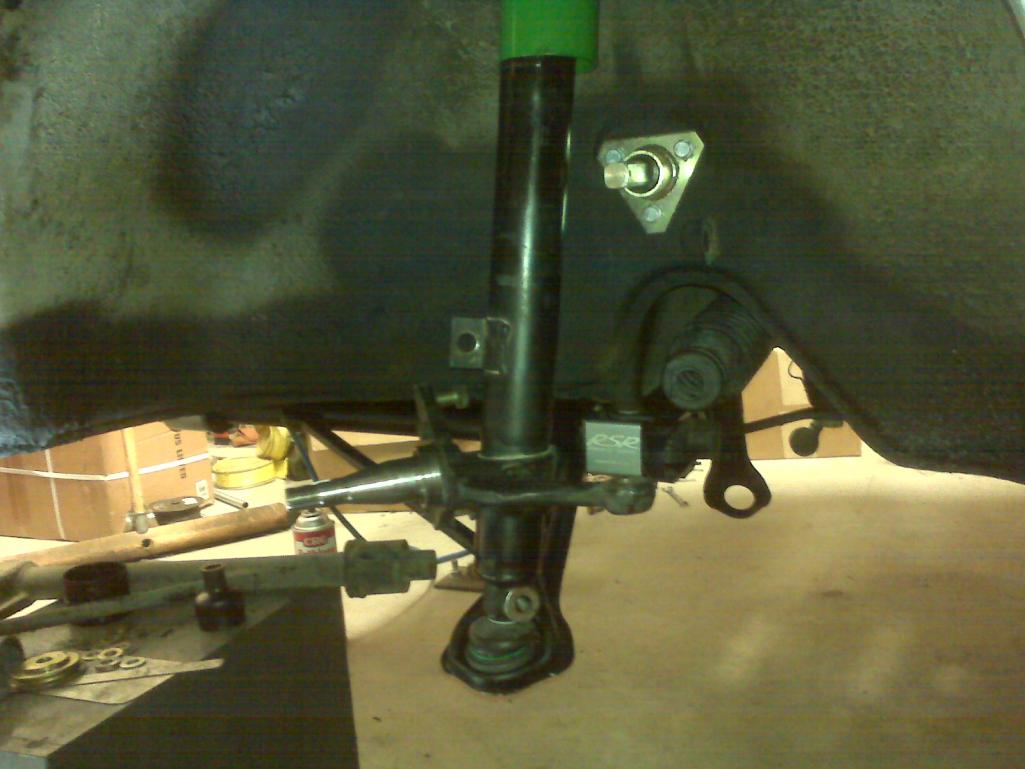
Posted by: nsr-jamie Nov 13 2011, 09:48 PM
Cool, glad to see work has started again on this project. Hope you get lots of work done before winter sets in.
Posted by: jmill Nov 13 2011, 09:58 PM
Thanks Jamie. I'm vowing to brave the cold until my parts stash runs out. I bought a bunch of stuff from Eric that has been sitting in boxes for months. Paint will have to wait until it warms up though. I debated waiting to bolt stuff on until I painted it but figured I'd be more motivated if I saw some progress. Worse case is I take stuff back apart or just tape and mask the shiney bits.
Posted by: jmill Nov 16 2011, 07:00 PM
Installing turbo tie rods. Couldn't find the universal inner tie rod tool at any flaps. I ended up buying a cheap 1 1/4" wrench and grinding it thinner.
Attached thumbnail(s)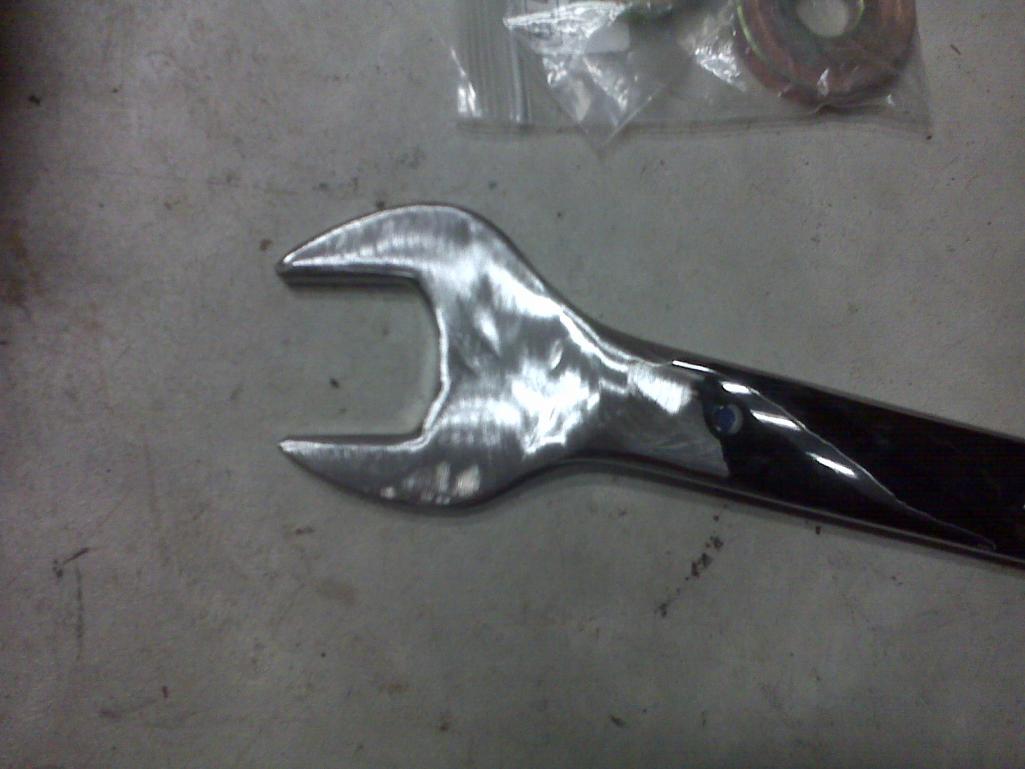
Posted by: 3d914 Dec 4 2011, 11:40 AM
Great thread John. You're making good progress even though you started back in 08 like me. I find it's always an exercise in focus.
Keep it up.
Posted by: sean_v8_914 Dec 4 2011, 12:08 PM
great work!!!
did you use the shrinking disc on wrinkled flare ?
Posted by: jmill Dec 5 2011, 05:01 PM
Thanks guys. I wish it was just focus holding me back. It's mostly the lack of spare cash and time. I haven't tried the disk yet. I plan to after a bunch of practice.
I haven't touched it in a few weeks. Its pheasant and deer season now.
Attached thumbnail(s)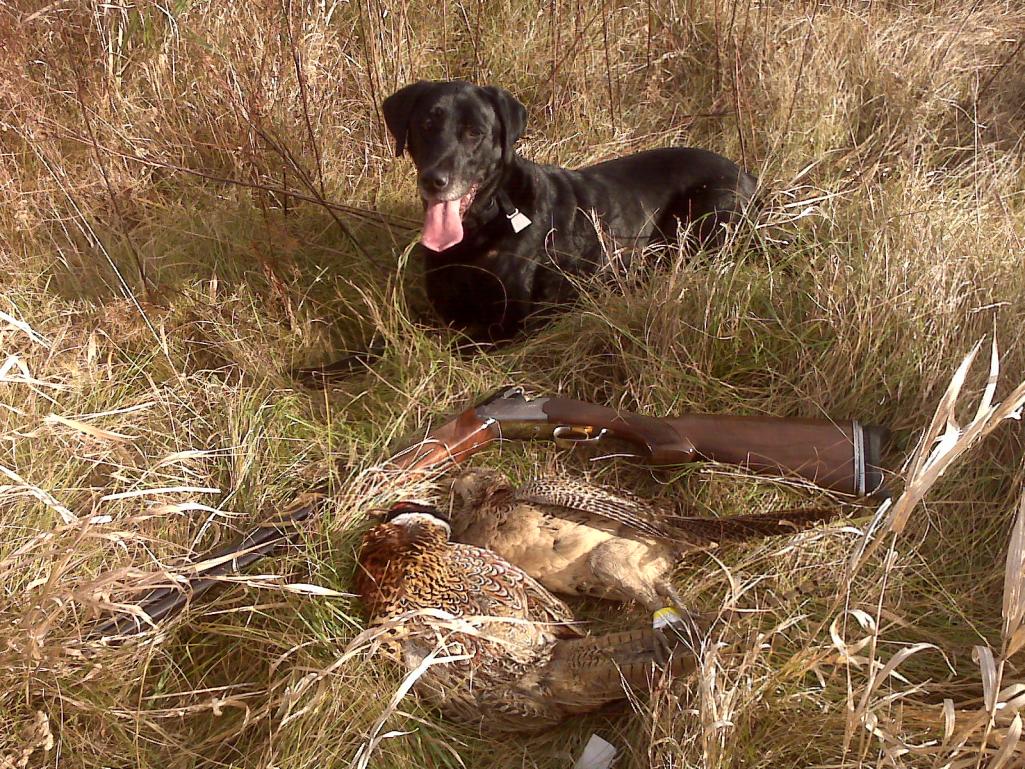
Posted by: jm993rs Feb 16 2012, 06:06 AM
more intestersted thread !!!!
good good job !!!!!

Posted by: jmill Mar 6 2012, 01:02 PM
Winter froze me out of the garage but I'm starting to get some more parts together. Eric hooked me up with a set of rebuilt S calipers and I picked up a Bosch dizzy for my 2.4 off of ebay.
Any recommendations for a place to send the dizzy for a rebuild?
Attached image(s)
Posted by: arkitect Mar 7 2012, 10:34 PM
That butt welded seam came out so nice I bet you hated to have to cut it out!
Your not joking. I had to do so serious soul searching on that one. I sat in the garage for a 1/2 hour trying to figure out if I really wanted to do the flares. I came up with the fact that it was a bent up 1.7 destined to be cut up for parts. I saved it from that fate. The fact that this one is going to be on the road is a bonus. I went with the flares.
I tried to weld the flares on as careful as I butt welded the stock fender. I bought those Intergrips from Eastwood. I don't like them. The gap was too big and they didn't line up the panels flush. I tossed them over my shoulder. Any place that the two panels lined up perfect I spot welded. I then used deep throat vice grips, a dolly block and a hammer to line up the rest of the seam. I'm hoping when I grind off the weld it'll look as nice as the stock fender.
I can't see how guys weld flares on in a day. It took me several hours just to get one lined up right and tacked. I guess it gets easier with practice.
I am surprised that the intergrips didn't work out. Have not tried them, but looks like it would even the metal out well for a good butt weld.
It must have been pretty difficult to cut out that fender after all that work.
Dave
Posted by: jmill Mar 8 2012, 03:14 PM
I am surprised that the intergrips didn't work out. Have not tried them, but looks like it would even the metal out well for a good butt weld.
It must have been pretty difficult to cut out that fender after all that work.
Dave
The intergrips hold the material straight directly under the clamp. The problem is you can't weld there. I found it better to use deep vice grips and spot right next to the jaws. Vice grips hold the material much tighter. The little wing nut on the intergrip cant apply the same clamping force.
Posted by: jmill Mar 30 2012, 05:29 PM
Finallly have two headlight buckets in. I also repaired the front driver side panel and hood seal area. Once I finish up the front flare install I'll paint the front of the car.
Attached thumbnail(s)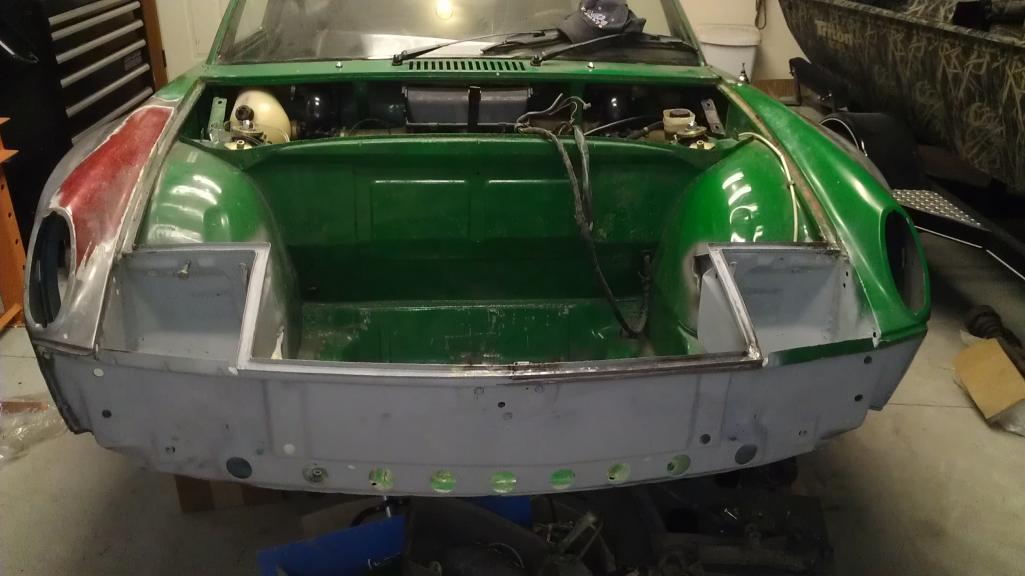
Posted by: rick 918-S Mar 30 2012, 07:17 PM
Progress!
Posted by: jmill Apr 2 2012, 09:13 PM
Saw a 2.2T on Pelican and decided to buy it. It arrived today. I needed a bunch of stuff for my 2.4 . This fit the bill and the price was right.
Attached thumbnail(s)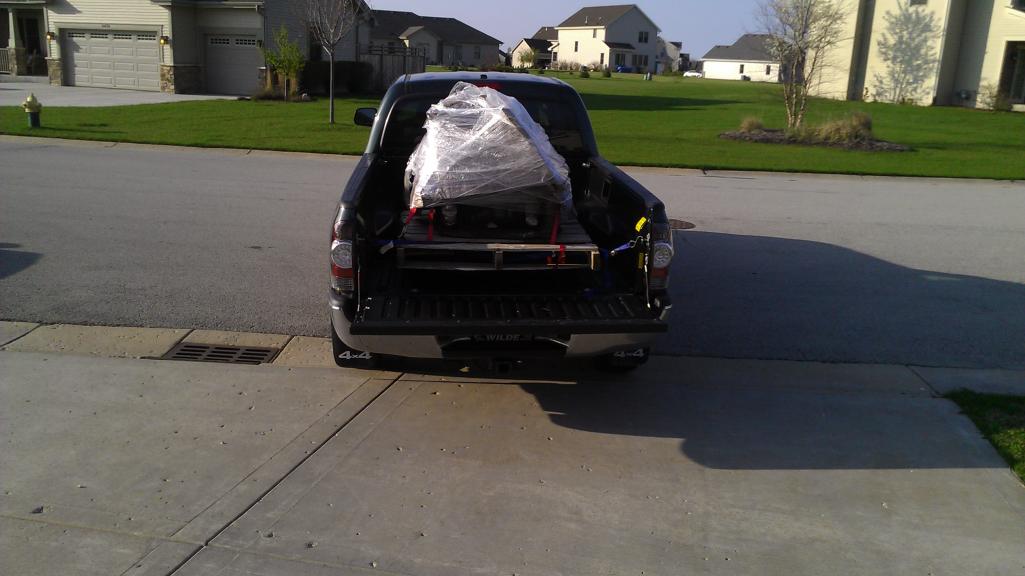
Posted by: rick 918-S Apr 2 2012, 09:28 PM
That's golden! Love the small 6.
Posted by: effutuo101 Apr 3 2012, 08:58 AM
Love that motor! so much fun!
Posted by: jcambo7 Apr 3 2012, 09:07 AM
I have a 2.2 in mine and love it! It's a blast to drive.
Posted by: jmill Apr 3 2012, 02:38 PM
Love that motor! so much fun!
I have a 2.2 in mine and love it! It's a blast to drive.
Are you guys running the T,E or S?
Posted by: stuttgart46 Apr 3 2012, 03:00 PM
I love the 2.4 with E cams and S crank. Very fun to drive on the street without the temperment of the S cams, IMHO
Posted by: jmill Apr 3 2012, 03:50 PM
I love the 2.4 with E cams and S crank. Very fun to drive on the street without the temperment of the S cams, IMHO
The S & E cranks are counter weighted on the 2.2 unlike the T but I believe you mean S pistons and cylinders.
Posted by: jcambo7 Apr 3 2012, 03:59 PM
This is how my engine was built by Jeff(sixnotfour)
2.2L E cam motor. S spec: Heads, intake, pistons, & Zenith carbs.
Posted by: Eric_Shea Apr 3 2012, 04:16 PM
Gonna be a smoke'n car John!
Posted by: jmill Apr 3 2012, 06:36 PM
Gonna be a smoke'n car John!
Thanks Eric. Hopefully it gets done in my lifetime.
This is how my engine was built by Jeff(sixnotfour)
2.2L E cam motor. S spec: Heads, intake, pistons, & Zenith carbs.
That's a nice engine. My plan is 2.2 S pistons, S heads, 2.4 CW crank, Solex cams and Weber carbs. Unfortunately, I don't have the cash for the p&c's at the moment so I'll do a rebuild on the T motor while I save up for parts. If I use my 2.4 CW crank straight out of the shoot I won't have to split the case to change to the S p&c's.
Posted by: jcambo7 Apr 4 2012, 09:25 AM
This is how my engine was built by Jeff(sixnotfour)
2.2L E cam motor. S spec: Heads, intake, pistons, & Zenith carbs.
That's a nice engine. My plan is 2.2 S pistons, S heads, 2.4 CW crank, Solex cams and Weber carbs. Unfortunately, I don't have the cash for the p&c's at the moment so I'll do a rebuild on the T motor while I save up for parts. If I use my 2.4 CW crank straight out of the shoot I won't have to split the case to change to the S p&c's.
Thanks! Sounds like you're going to be building a great engine too! I would to eventually upgrade to Webers but as long as my Zenith's keep working and I can find parts for them than their is no reason to change. That is why I PM'ed you about the Zenith's on the engine you bought. It's been hard enough for me to find some one with one part and even harder to find them complete.
Posted by: seanery May 27 2012, 07:29 PM
I'm liking your work and this thread!
Posted by: jmill May 27 2012, 08:56 PM
I'm liking your work and this thread!
Thanks. I needed that to help get me motivated again.
I haven't had much time to work on it lately. Spring soccer season has me in a holding pattern. I did buy paint and almost finished up the passenger side flare. Not a whole lot of visual progress, though. I'm hoping to get the bodywork and paint done before winter sets in.
Posted by: rick 918-S Jul 3 2013, 02:53 PM
Time for a little ![]() Slacker!
Slacker! 
Posted by: jmill Jun 23 2014, 05:00 PM
I had planned on painting the car before I put it together. Plans change. I need to get this thing rolling. After 2 years without progress I need some motivation. Driving it down the road is what I need.
Cleaned up the 911 hubs with oven cleaner. Didn't get them perfect but close enough for the girls I run with. Installed new bearings. What a total PITA. Even after baking hubs at 250 and using a 20 ton press they were difficult. Not looking forward to doing that again. Installed new rotors and S calipers (thanks Eric). A day or two more on the front's and I'll move to the rear.
Attached thumbnail(s)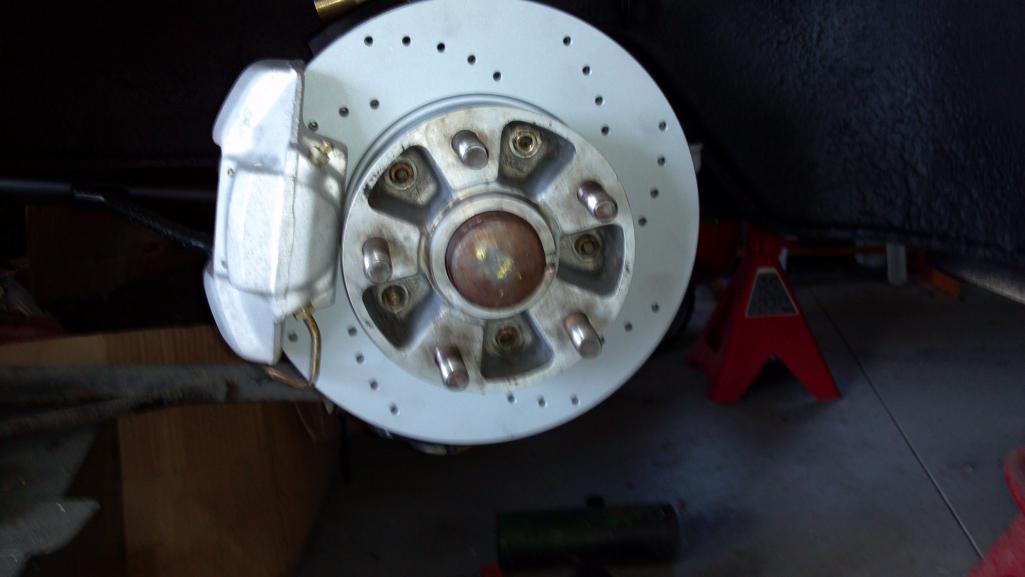
Posted by: rick 918-S Jun 23 2014, 05:03 PM
I saw you front hub post but the wifi where I'm staying went down so I couldn't comment.  Keep after it!
Posted by: rick 918-S Dec 20 2015, 04:51 PM
I couldn't help but bump this thread. Life has a way of taking over project time. You have a great start on nice car John. Pick a small project and your one step closer. 
Posted by: jmill Dec 20 2015, 08:29 PM
Thanks for the bump Rick. This project has been stalled long enough. I was looking it over last week and started to get the itch to work on it again. Next thing you know I was logged onto the World. I then found Ben just down the road from me looking to make everything I need to finish it. I also just happened to have parts that he needs for his project. Sometimes timing is everything.
Posted by: lonewolfe Dec 22 2015, 01:23 AM
Great work and an awesome thread!
Posted by: Dion Dec 27 2015, 04:54 PM
Just read your thread John. Awesome work! Keep at it.
Posted by: jmill Dec 27 2015, 07:42 PM
Great work and an awesome thread!
Just read your thread John. Awesome work! Keep at it.
Thanks guys, I'm trying. Unfortunately, my weekends are booked for a bit. I made the mistake of buying a bunch of Christmas presents I need to install or build. So it's an alarm and stereo install for my sons car and making bedroom furniture for my daughter. When do kids usually move out?
Posted by: rick 918-S Dec 27 2015, 08:49 PM
Great work and an awesome thread!
Just read your thread John. Awesome work! Keep at it.
Thanks guys, I'm trying. Unfortunately, my weekends are booked for a bit. I made the mistake of buying a bunch of Christmas presents I need to install or build. So it's an alarm and stereo install for my sons car and making bedroom furniture for my daughter. When do kids usually move out?
They don't. Well sometimes they do. But sometimes they come back.
Posted by: rick 918-S Mar 20 2016, 09:45 PM
![]()

Posted by: 3d914 Feb 7 2017, 01:44 PM
Thanks guys, I'm trying. Unfortunately, my weekends are booked for a bit. I made the mistake of buying a bunch of Christmas presents I need to install or build. So it's an alarm and stereo install for my sons car and making bedroom furniture for my daughter. When do kids usually move out?
Ditto, they don't! It's either getting tougher for them - or we're just getting softer.
John, when we gonna see those new 17" wheels/tires on? Keep at it.
Posted by: jmill Feb 8 2017, 09:26 AM
Ditto, they don't! It's either getting tougher for them - or we're just getting softer.
John, when we gonna see those new 17" wheels/tires on? Keep at it.
Thanks for the bump Gerard. It seems my fun money takes a hit every time I turn around. Ben (mb911) keeps me motivated and has talked me off the ledge a few times. I'm hoping to have it on the wheels by the end of March. It may only be there for a picture or I may cruise it with the 1.7 for a bit. Then it will go back on jack stands for the 6 install.
Keeping my fingers crossed that the fun money holds out long enough.

Powered by Invision Power Board (http://www.invisionboard.com)
© Invision Power Services (http://www.invisionpower.com)